• Skip to primary navigation
  • Skip to main content
  • Skip to primary sidebar
  • Halloween
  • Recipes
  • Free Tutorials
  • Cake Classes
  • Cake Commissions
  • About Liz

Sugar Geek Show logo

menu icon
go to homepage
  • Halloween
  • Recipes
  • Free Tutorials
  • Cake Classes
  • Cake Commissions
  • About Liz
subscribe
search icon
Homepage link
  • Halloween
  • Recipes
  • Free Tutorials
  • Cake Classes
  • Cake Commissions
  • About Liz
×
Home

Blog

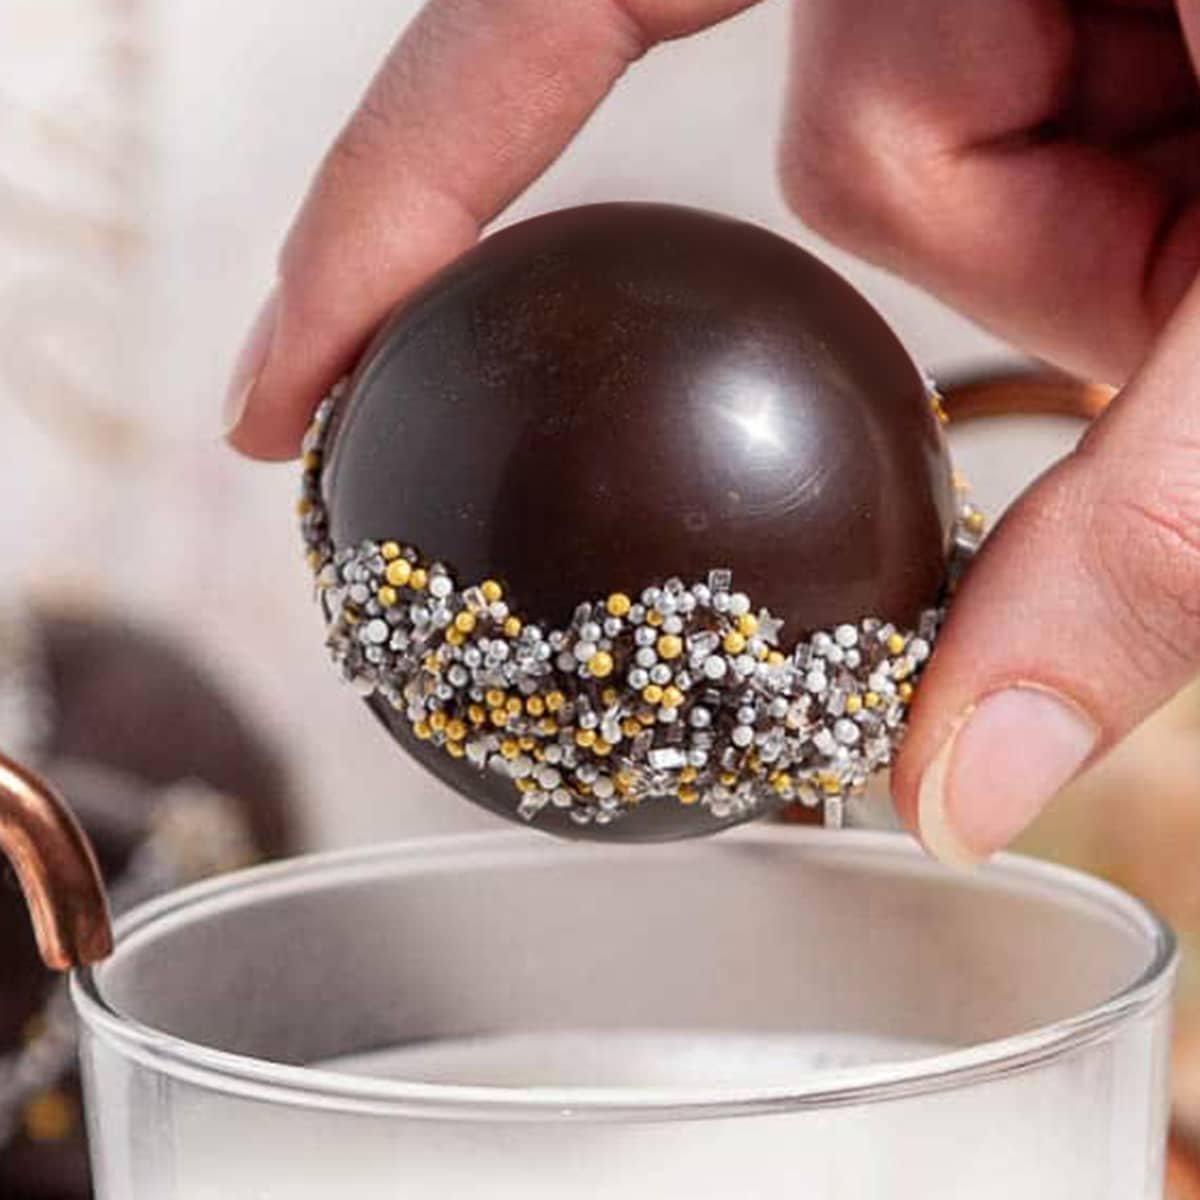
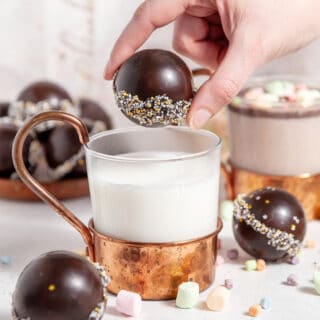
close up of hot chocolate bomb between fingers

October 30, 2020 Candy

Shiny Hot Chocolate Bombs With Marshmallows

Hot chocolate bombs are chocolate spheres filled with hot chocolate mix and lots of marshmallows! Pour steaming hot milk over the top and watch the chocolate melt away and release those marshmallows into your milk. So much fun and makes a great gift!
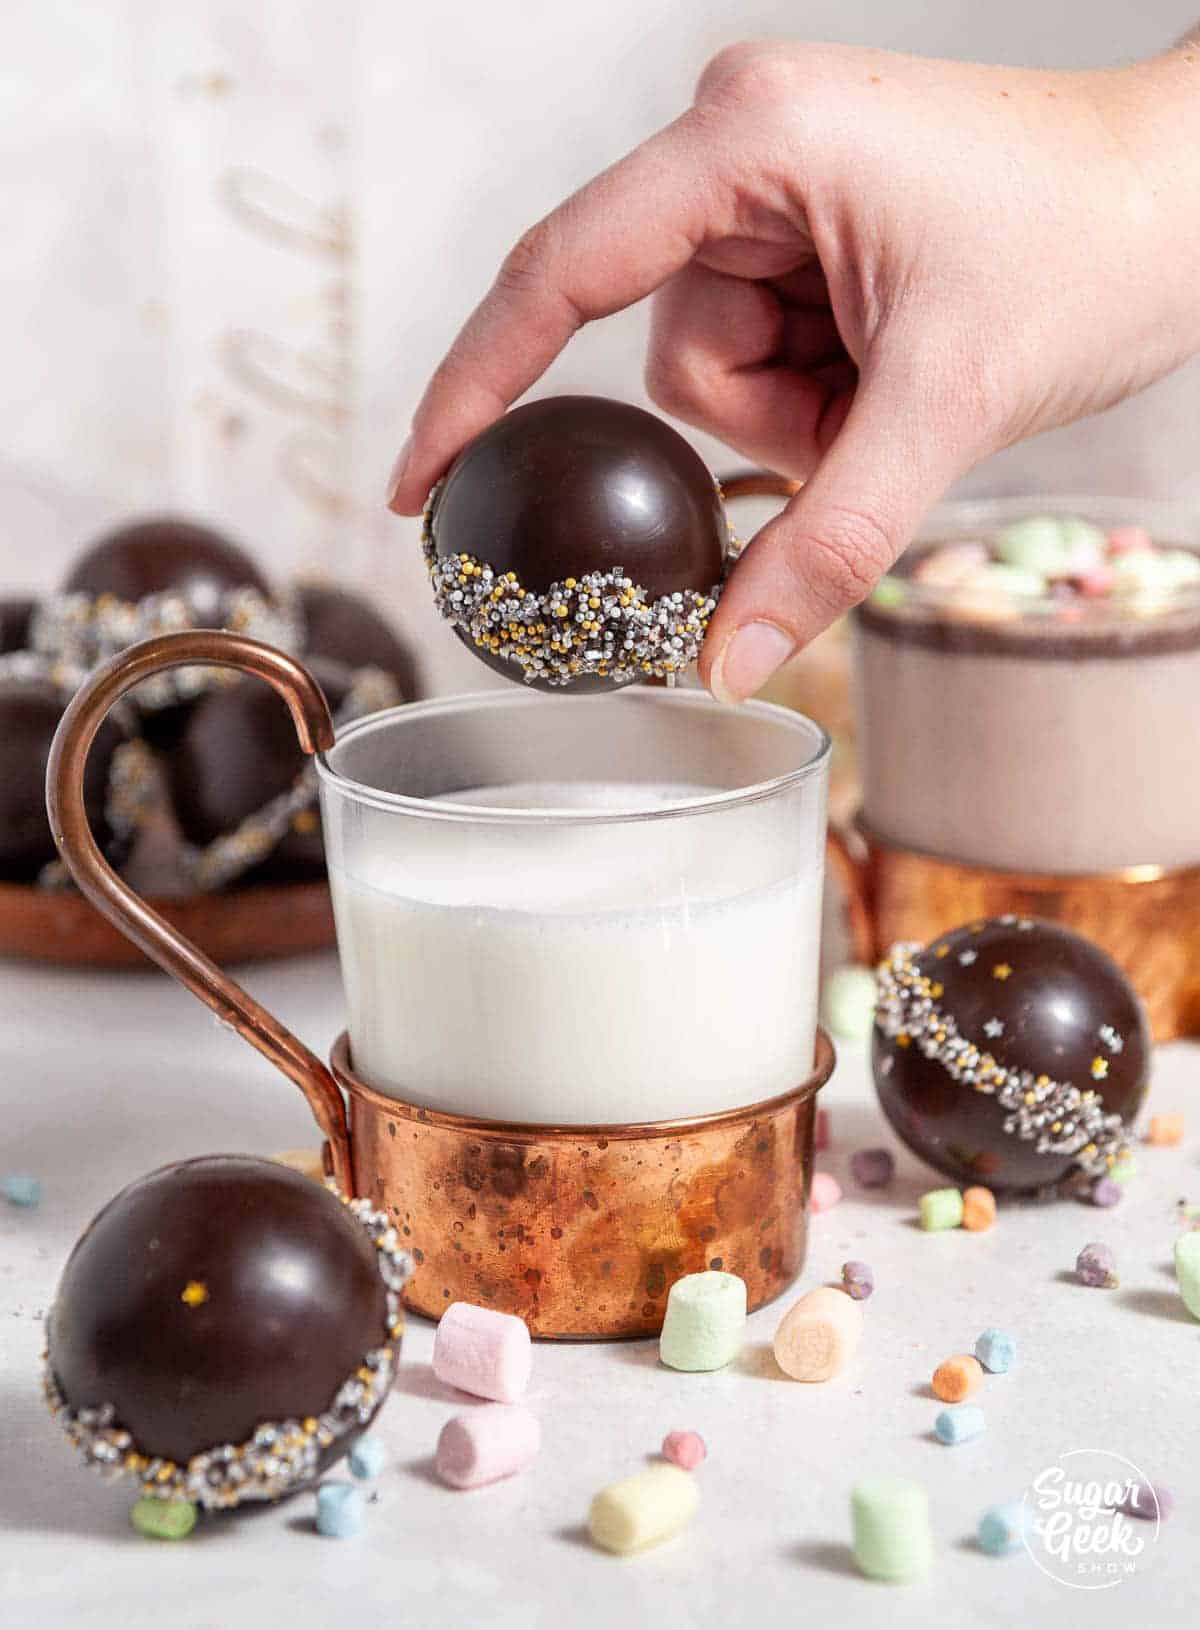
I created this recipe back in 2019 when hot chocolate bombs were just beginning to be a thing. Originally posted by Eric Torres Garcia, who now has a cocoa bomb company! The idea went mega viral and soon everyone wanted to make cocoa bombs.

I noticed a lot of people making them were using low-quality chocolate or fake chocolate to make their bombs and having lots of problems. This recipe shows you how to make the most perfect hot chocolate bombs from high-quality, tempered chocolate that actually tastes delicious!

What's In This Blog Post

  • Ingredients and tools needed
  • How to make hot chocolate bombs
    • Temper your chocolate
    • Make the hot chocolate bomb shells
    • Assemble the hot chocolate bombs
  • How to use hot chocolate bombs
  • Hot chocolate bomb flavor variations
  • Frequently Asked Questions
  • More Chocolate Recipes

Ingredients and tools needed

Making hot cocoa bombs isn't too complicated, but there are a few tools and ingredients to make hot chocolate bombs you need to have on hand.
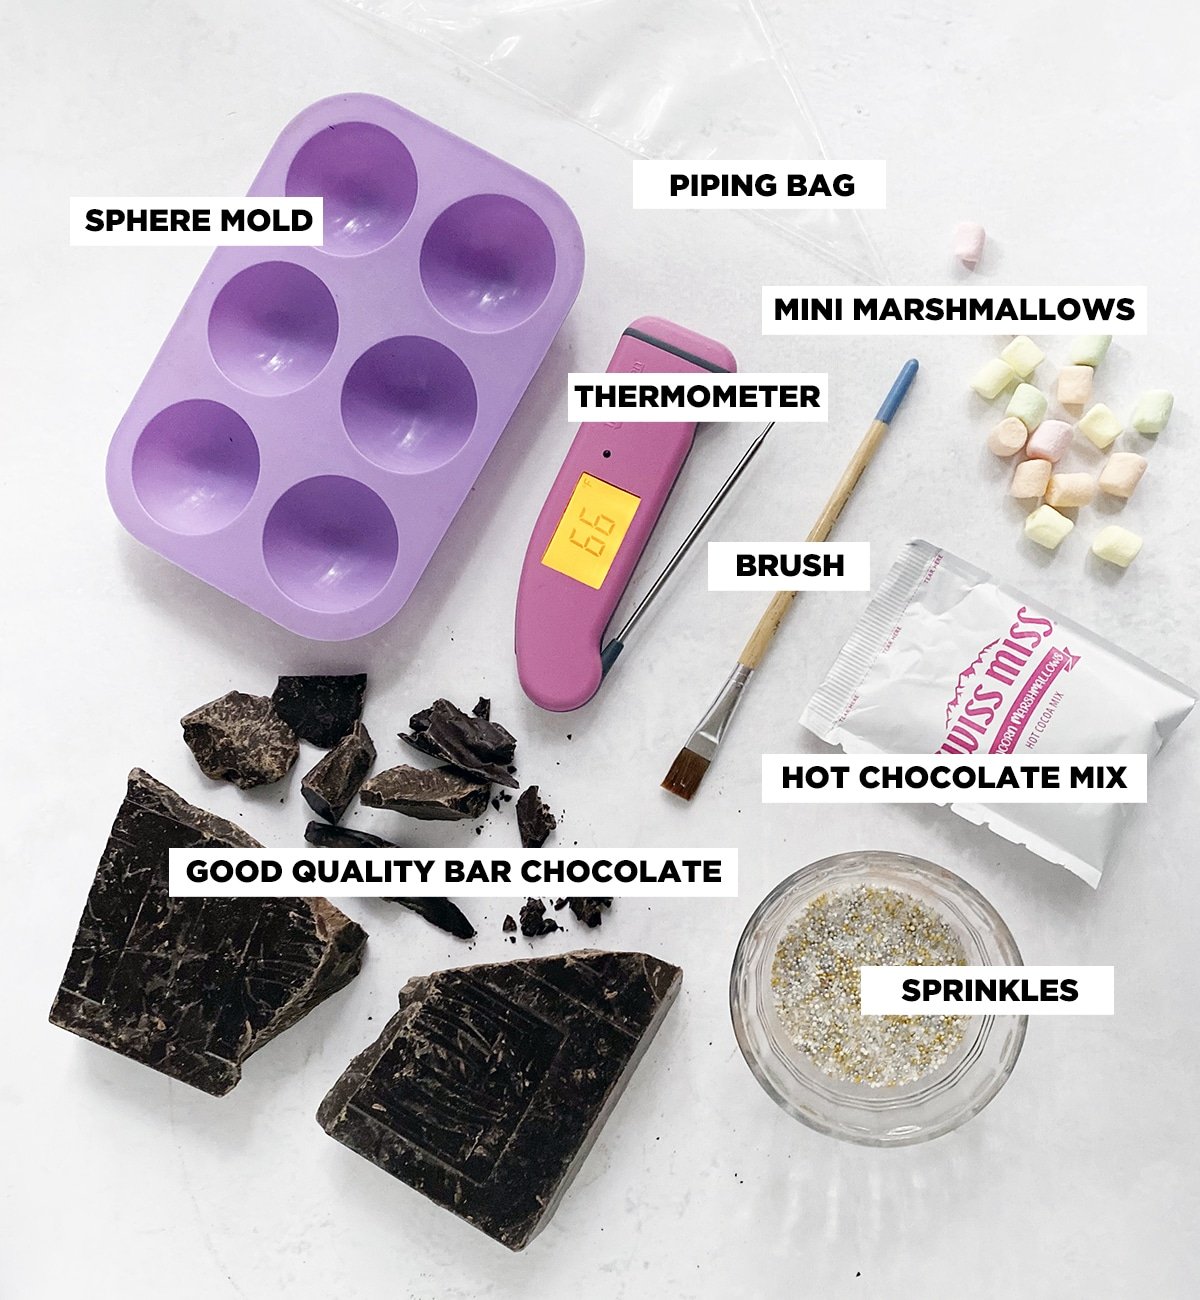
hot chocolate bomb ingredients
  1. Good quality chocolate. I like to use Callebaut, but any chocolate will work. Just remember, the better it tastes, the better hot chocolate bomb it will make!
  2. A thermometer to keep track of the temperature of your chocolate. Absolutely a must. Don't even attempt this without one. You can buy food thermometers at the grocery store in the kitchen supplies aisle. I'm using an infrared thermometer because it's a little bit easier to keep clean.
  3. Silicone sphere mold to make your bombs. This is the easiest mold to use if you're not familiar with tempering chocolate. I will also show you how to use acrylic sphere molds in the recipe card below for you overachievers out there.
  4. Bench scraper if you are using an acrylic mold. You don't need one for silicone molds.
  5. Spoon for smoothing the chocolate.
  6. Piping bag for sealing together the spheres.
  7. Parchment paper if you're using an acrylic mold.
  8. Hot chocolate mix of your choice. You can use any kind you like but we stick to the classic Swiss Miss flavor.
  9. Mini marshmallows of your choice. I like these mini marshmallows because you can fit a bunch in one bomb making them more dramatic!
  10. Sprinkles to decorate the outside if you want. I like these sprinkles from wilton because they have a nice variety.
  11. Hot Chocolate Bomb Labels These were made by my friend and they are so cute!

How to make hot chocolate bombs

Here's a rundown on how to make hot chocolate bombs! This is such a fun thing to do with a group or with your family. The first thing we will need to do is temper our chocolate.

Tempering just means we are melting the chocolate at a controlled temperature so that it sets up again. If you've ever melted chocolate and it never set, or it grew weird white spots, you understand why tempering is important.

Don't worry, we're doing this the easy way in the microwave, and it only takes 5 minutes! If you don't have a microwave or if you prefer, you can use the seeding method.

Temper your chocolate

If you're not comfortable with tempering chocolate, you can use merkens compound chocolate. It does not require melting but it doesn't taste as good as real chocolate and it doesn't melt as well sometimes.
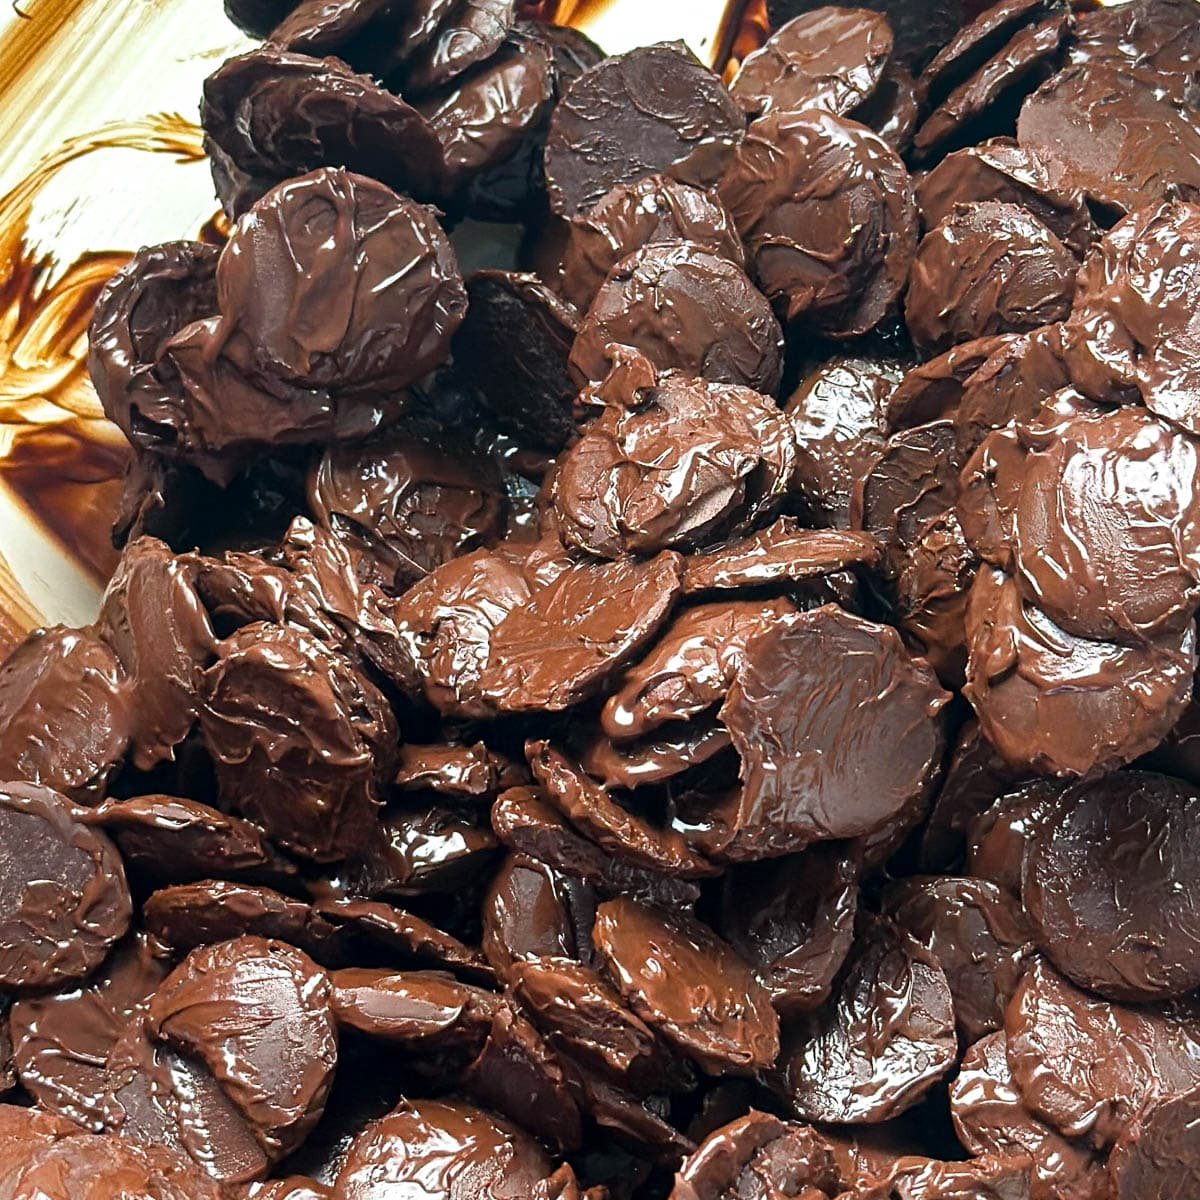
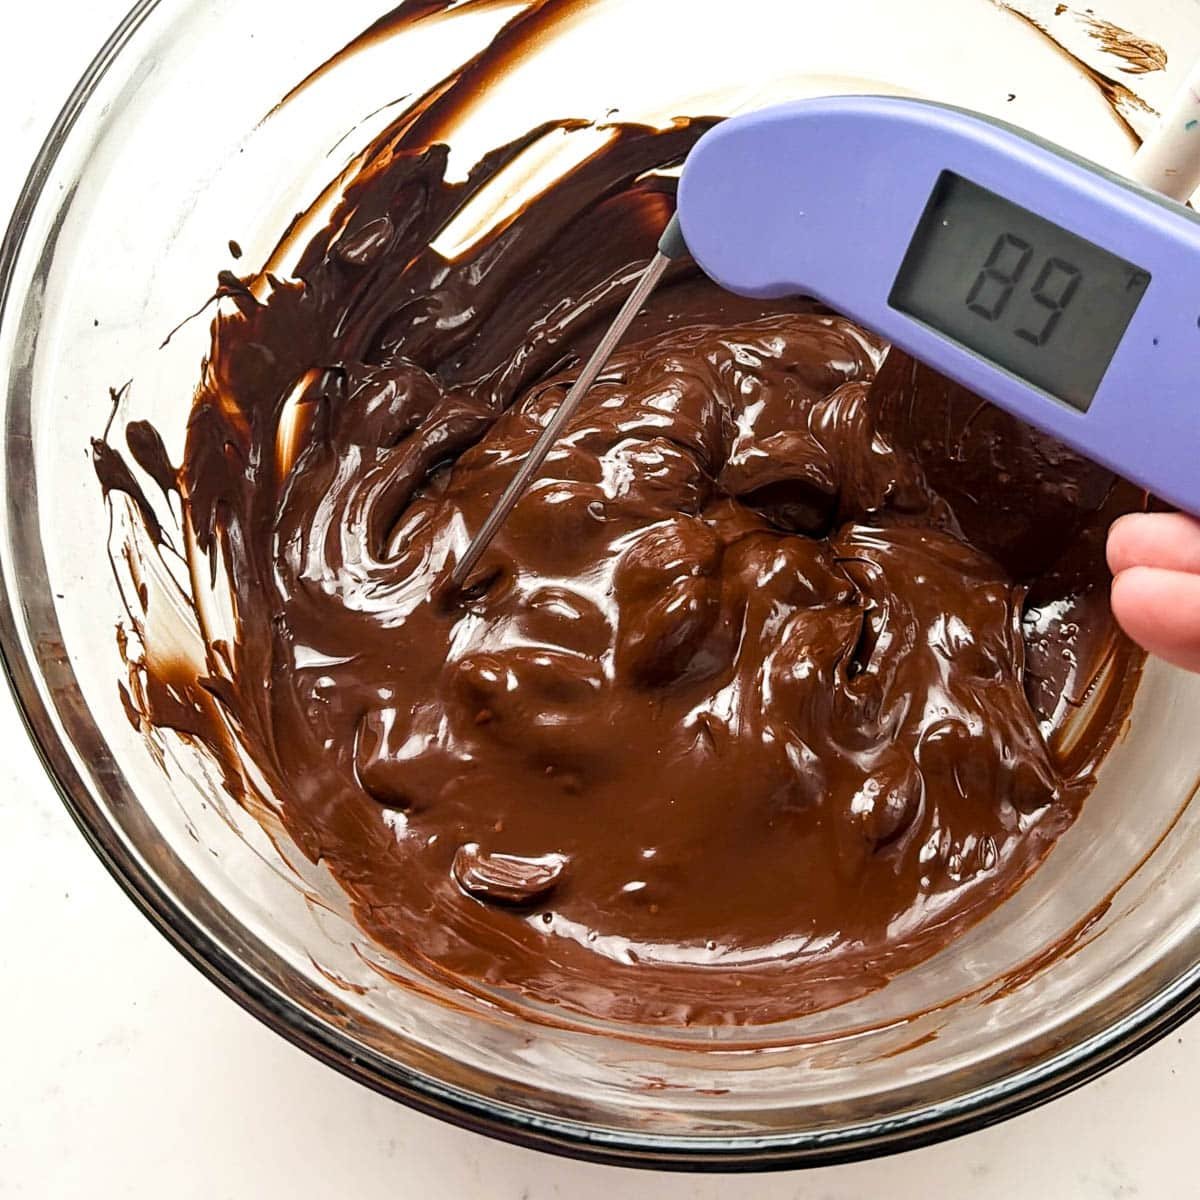
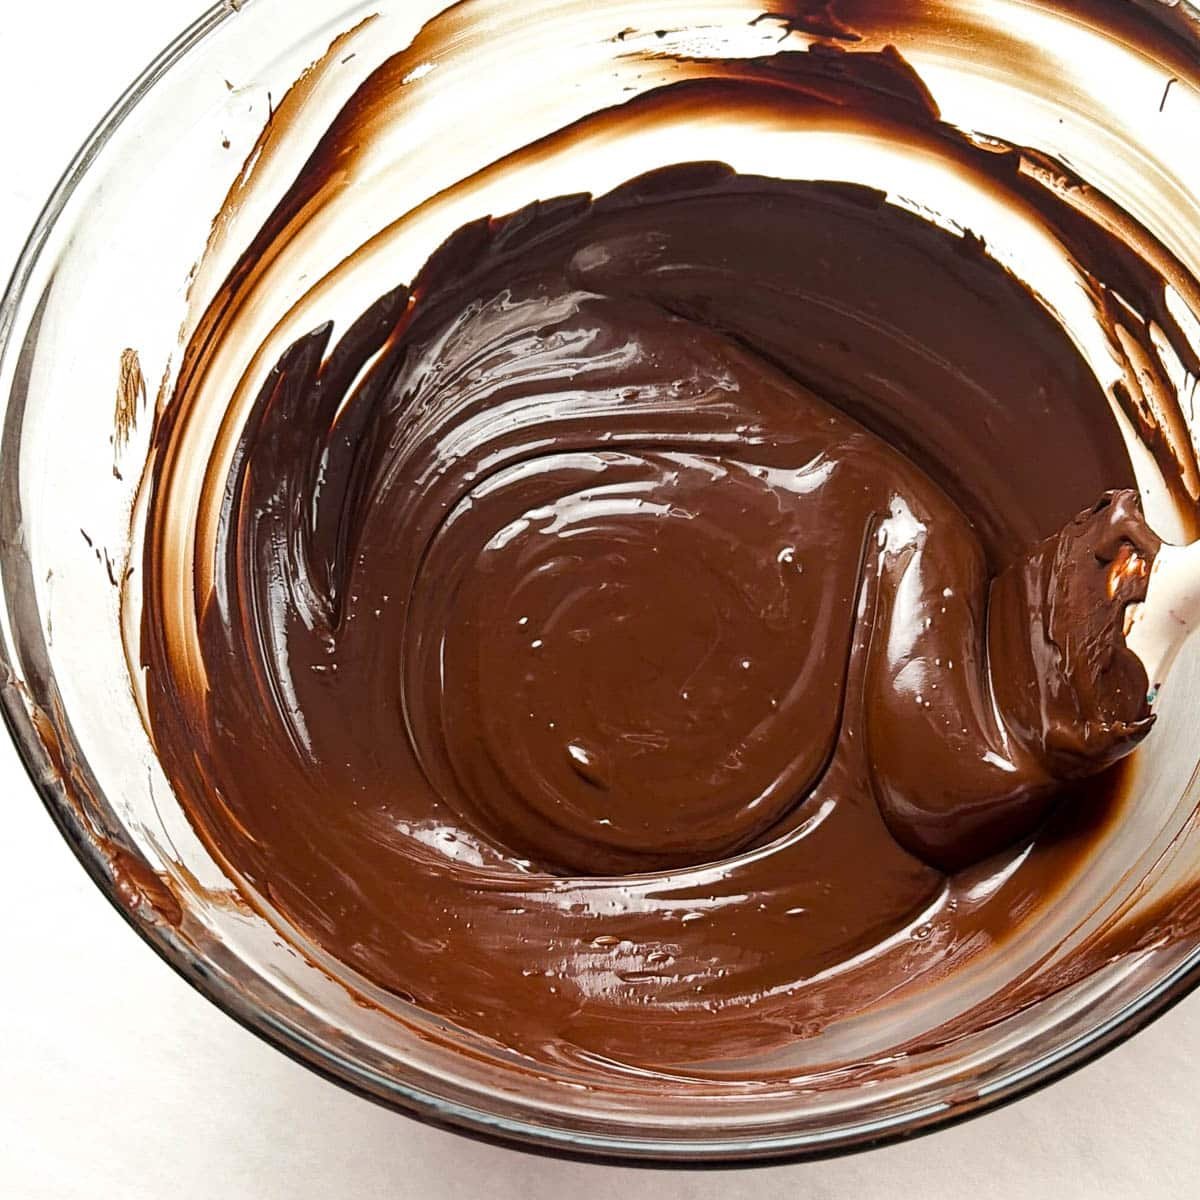
  1. Melt chocolate at 50% power in short 15-second bursts, stirring after each burst until about 75% melted. The point here is not to overheat, but to keep the temperature of the chocolate as low as possible. Your chocolate should be less than 90ºF.
  2. If your chocolate gets to hot, chop up some of your chocolate into small pieces and add it to your hot chocolate in small amounts to cool down your chocolate.
  3. Keep stirring without heating. The residual heat from the bowl will melt the rest of the chocolate.
  4. At 90ºF, you should only have tiny unmelted pieces of chocolate in the bowl. Keep stirring.
  5. If needed, return the bowl back to the microwave for another 10 seconds and keep stirring until everything is melted.
  6. This process ensures a shiny finish and firm snap, which makes the best hot chocolate bombs!

Make the hot chocolate bomb shells

I recommend making all your shells first. Your chocolate will begin to cool and set up, so working fast is best. If your chocolate does set up, you can re-melt it in 5-second intervals and stir to get it melted again.
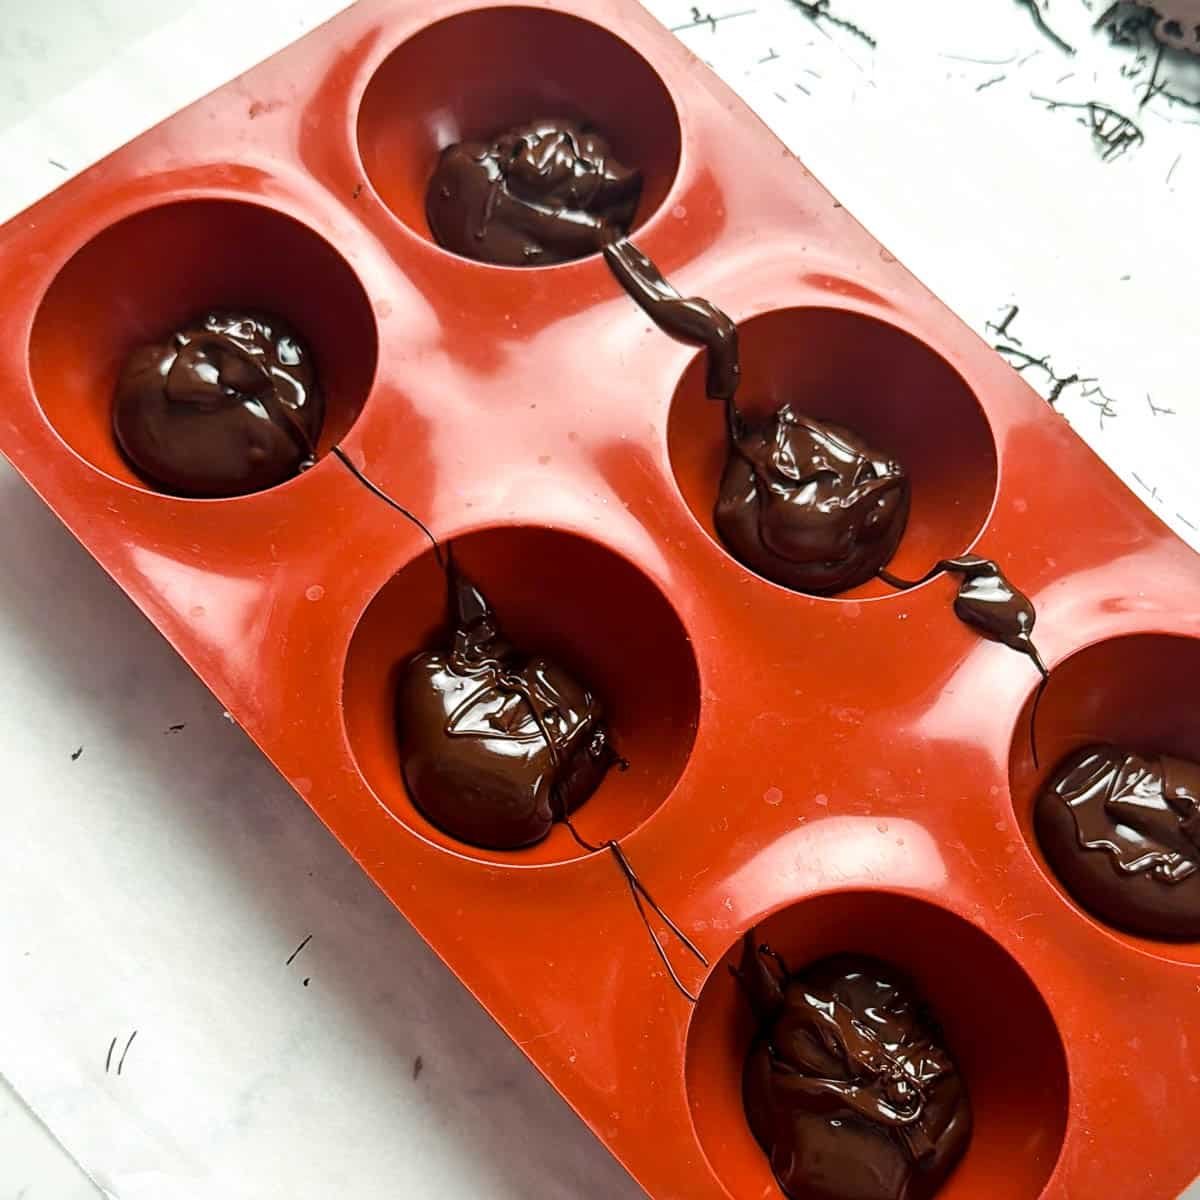
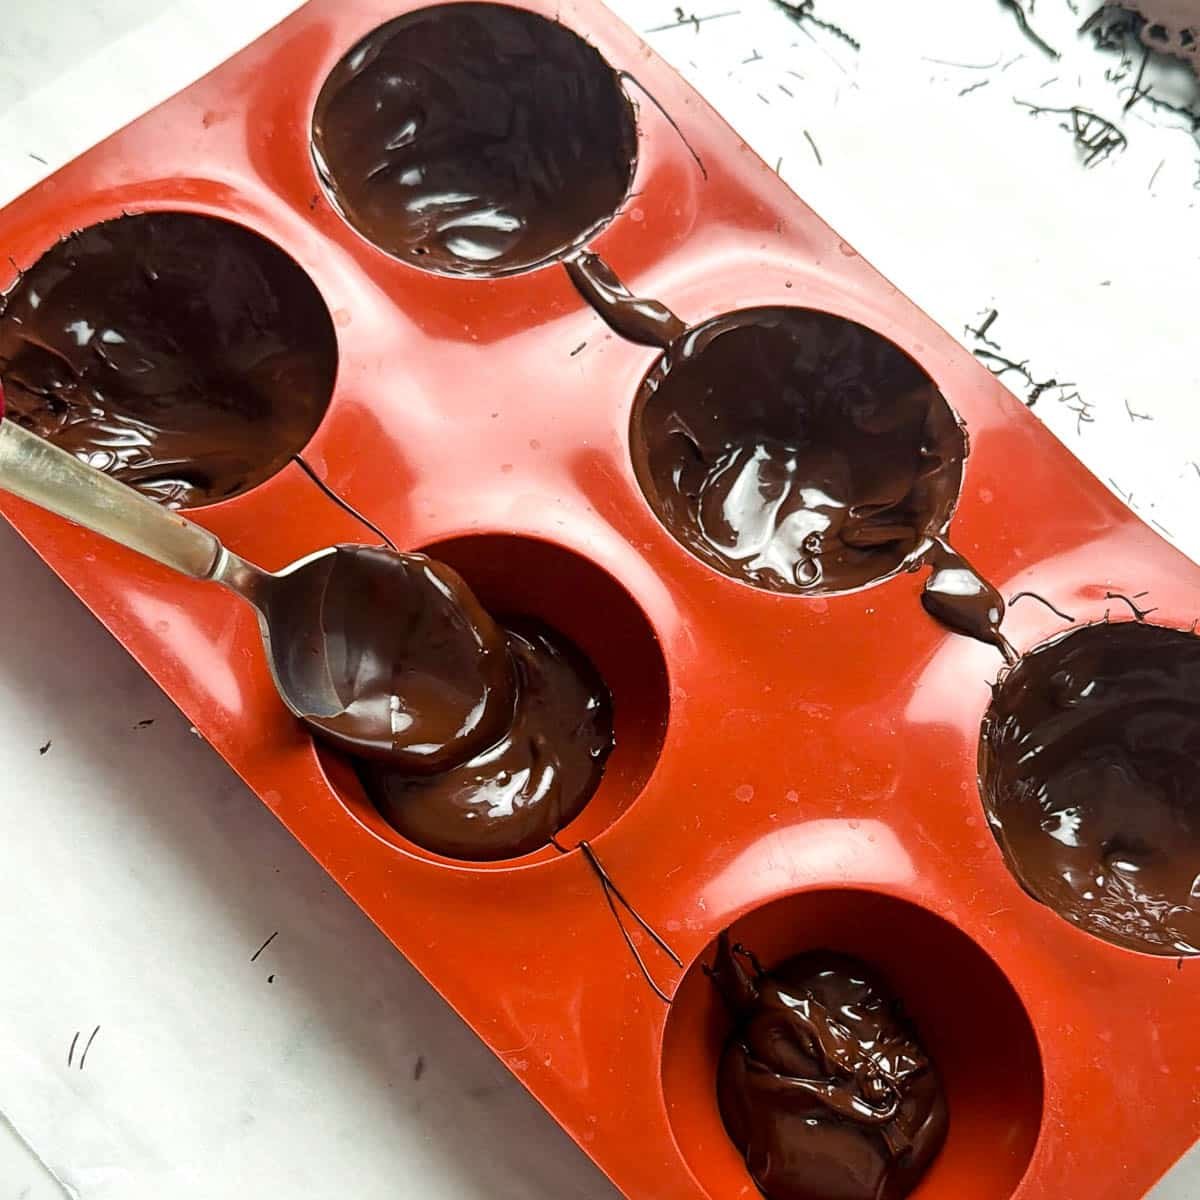
  1. Fill your mold halfway with the melted chocolate. Use a spoon to gently coat the mold in chocolate, all the way up to the edges.
  2. Flip the mold upside down to empty out the excess chocolate onto the parchment paper. You can reuse this chocolate later!
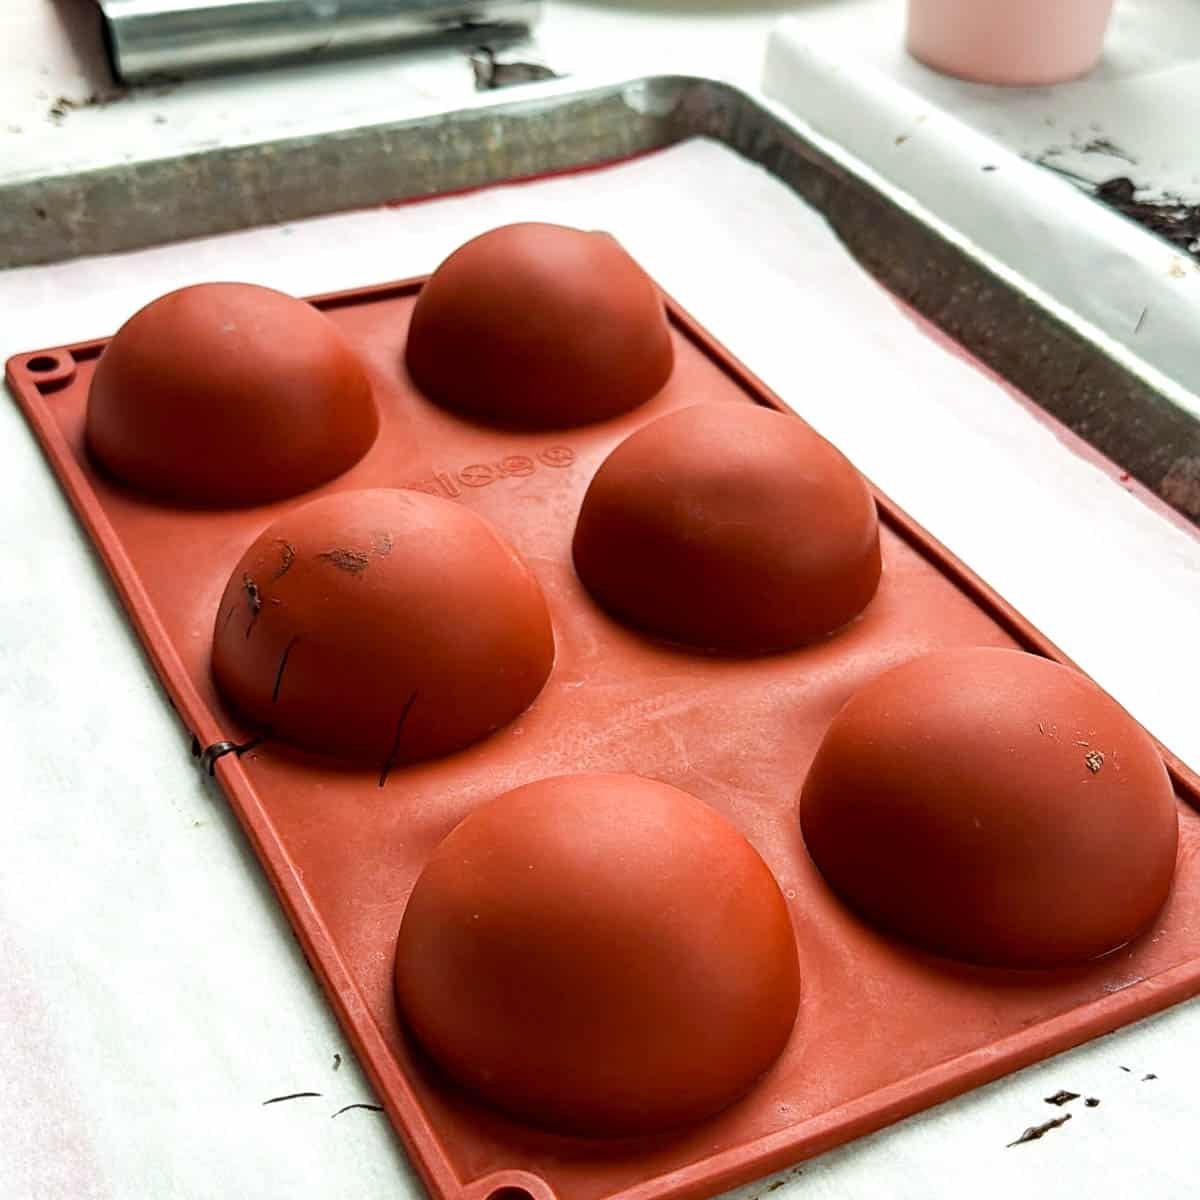
  3. Place the mold upside down on parchment paper to set up. Setting up should only take 5-10 minutes. You can place them in the fridge to speed up the process but its not necessary.
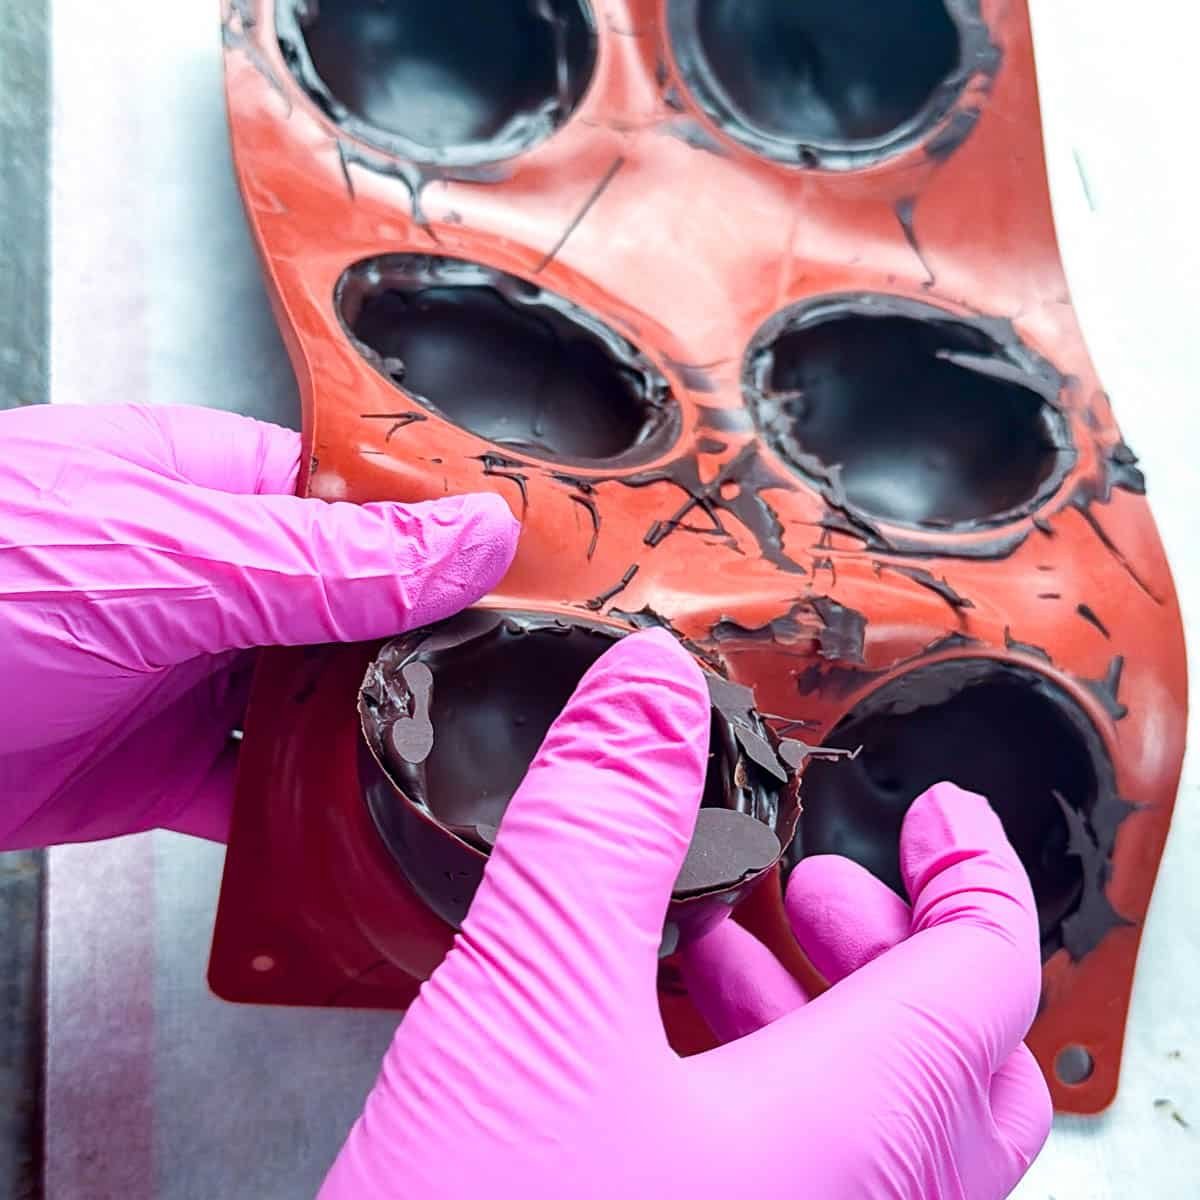
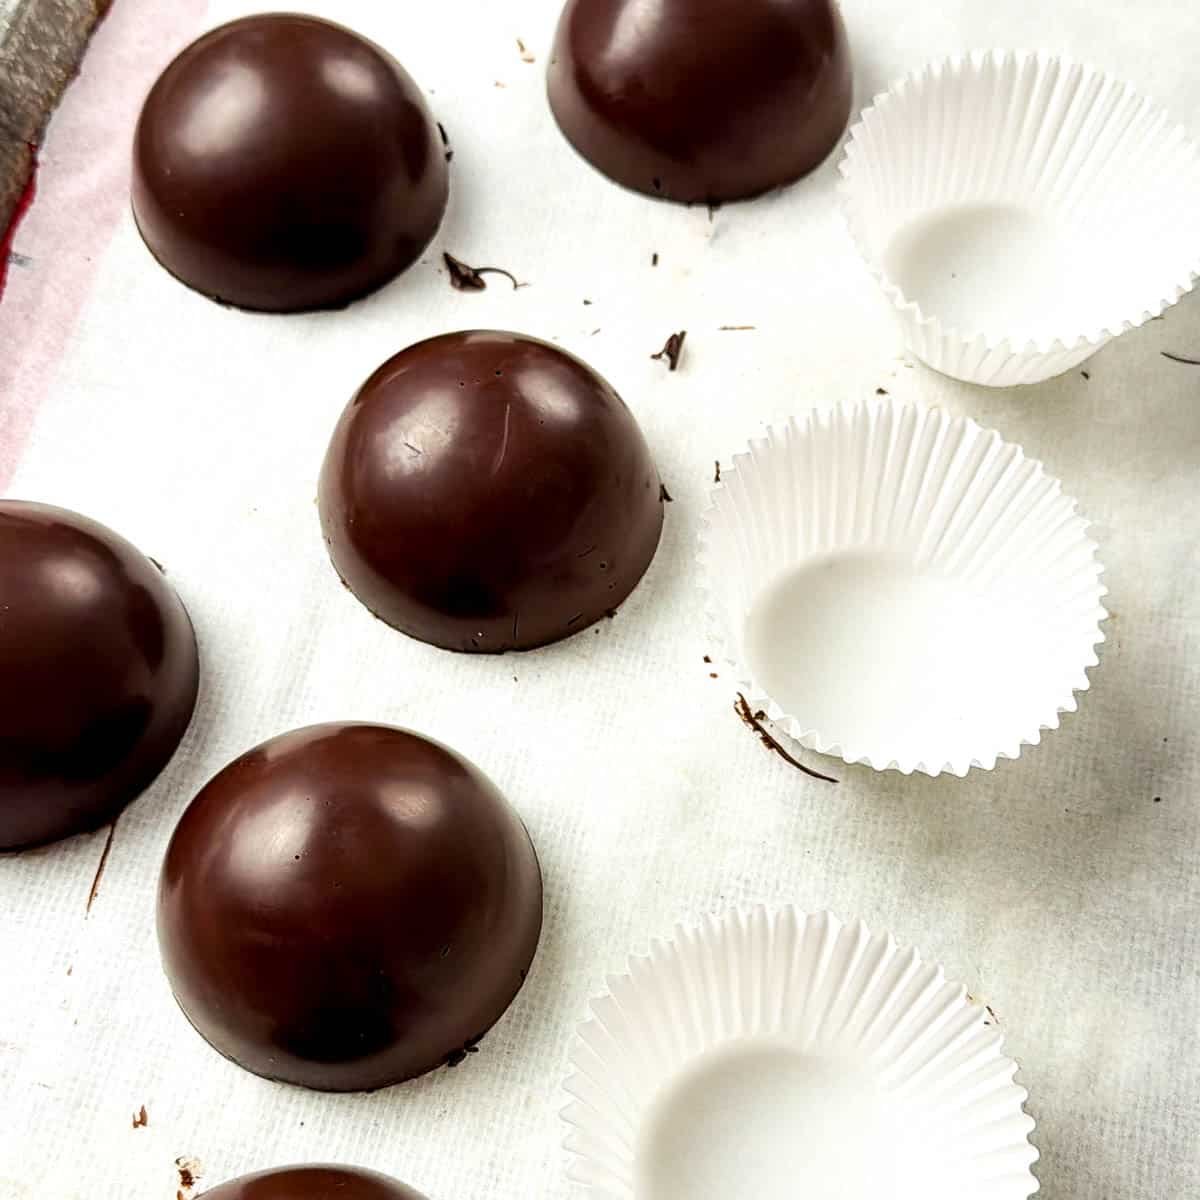
  4. Remove the shells by pressing gently from the bottom and remove the shells from the molds, and set aside for assembly.

Assemble the hot chocolate bombs

Assembly goes fast! Have all your shells, sprinkles, and cocoa mix ready to go. Put some chocolate in a piping bag and set it in a drinking glass that has been warmed for 1 minute in hot water or the microwave to help keep the chocolate melted. It's also a great way to keep your countertop mess-free.

I also use a hot ceramic plate (heated in the microwave) to melt my spheres to get them flat and to secure them together. You could also use a skillet warmed for only a few seconds. You don't want to burn the chocolate.
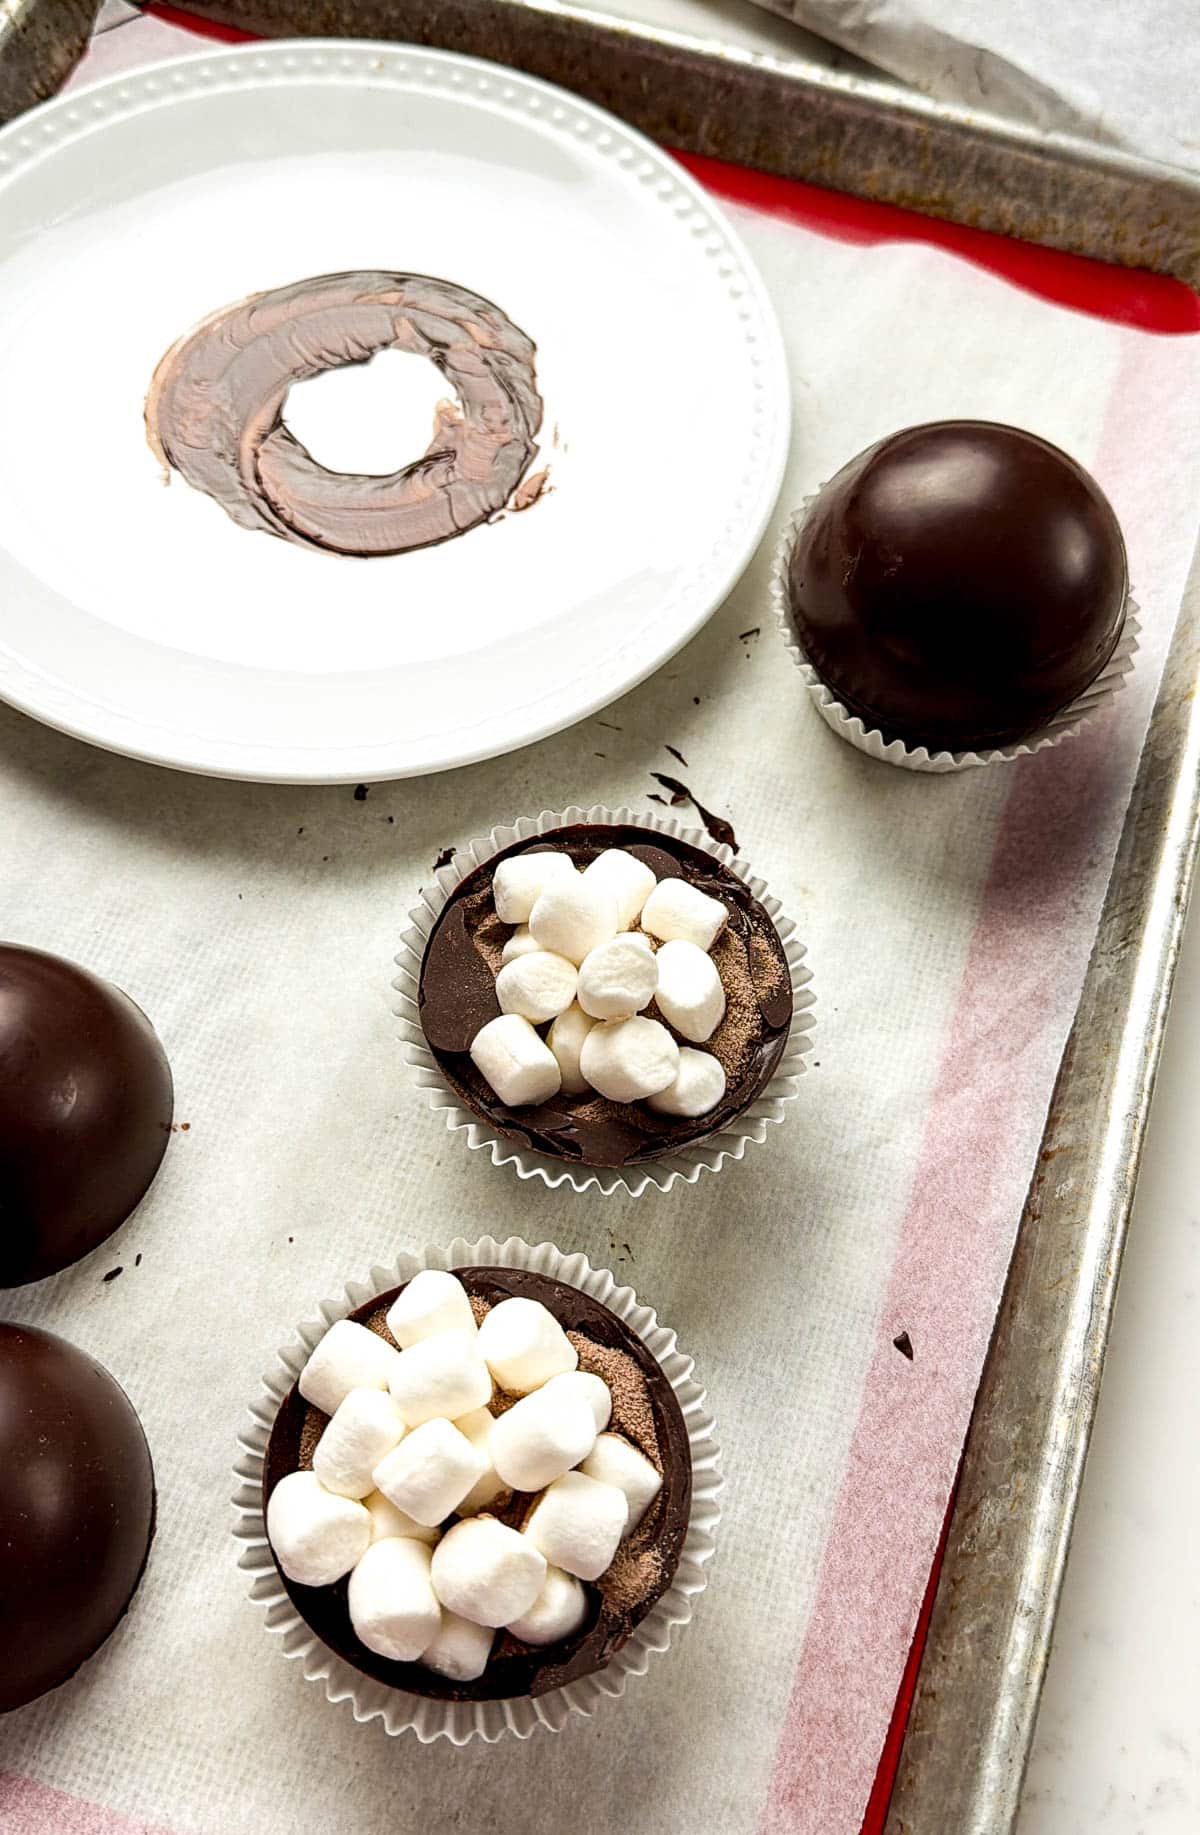
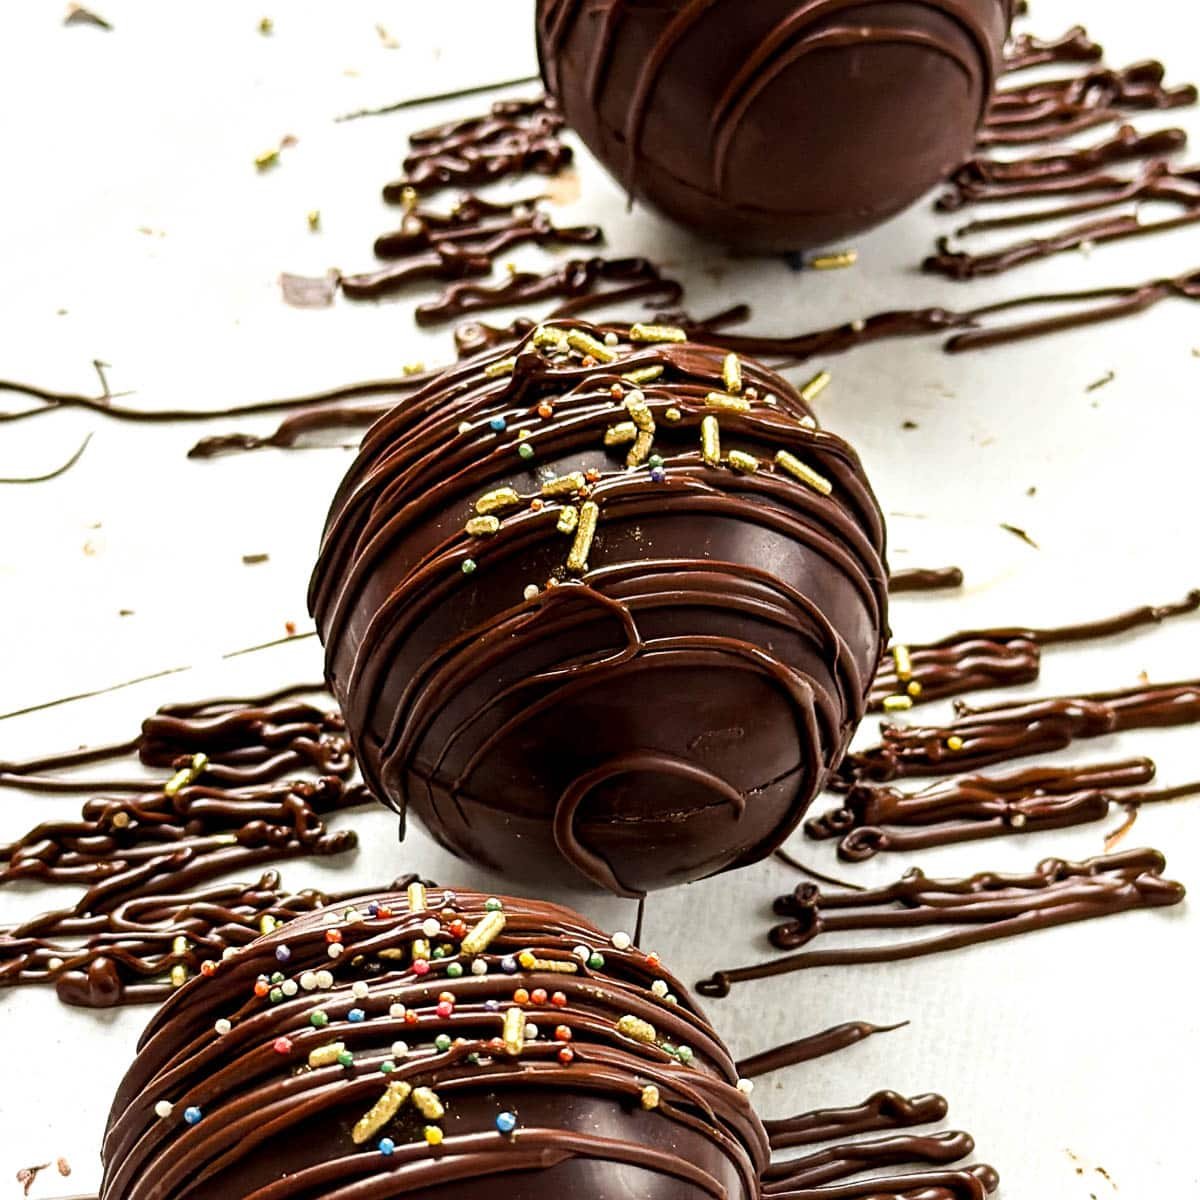
  1. Warm a ceramic plate in the microwave for a minute or two until it's quite warm. Use this place to slightly melt the shells to clean up the edges and make sure they are flat.
  2. Place some parchment paper over your work surface to catch excess chocolate during drizzling.
  3. The easiest way to assemble is to place the first shell of the mold into an empty cupcake liner. This holds it in place while you fill.
  4. Fill the shell with hot cocoa mix and sprinkles!
  5. Make sure your plate is hot again.
  6. Warm the top shell edge slightly and place it on top of the filled shell.
  7. Hold for 10 seconds to seal and set it aside.
  8. Now it's time to decorate! You can decorate any way you like, but I enjoy doing a simple drizzle of chocolate and adding some sprinkles on top! You may need to rewarm the chocolate for 10 seconds to make it smooth again. I use a piping bag to pipe over the bombs, then immediately add the sprinkles.
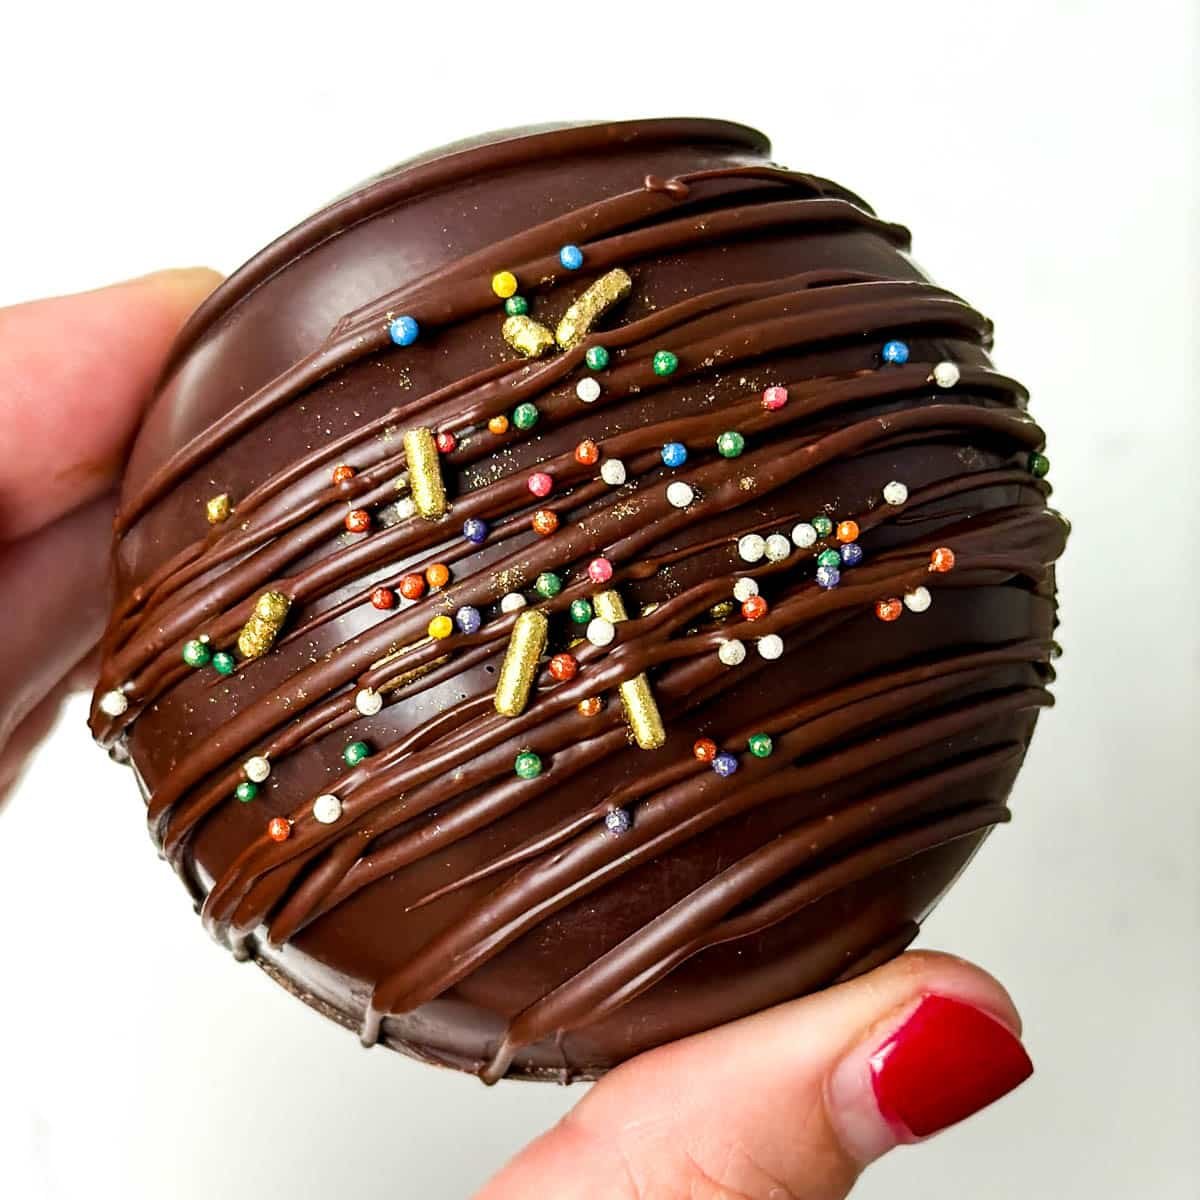
close up of hot chocolate bomb

How to use hot chocolate bombs

I tested these hot chocolate bombs out in various amounts of milk and found that 14 ounces was about perfect. I heat my milk until it's steaming (not boiling). Place the hot chocolate bomb in the bottom of the mug and pour the hot milk on top. The hot cream opens up the bomb, and all the marshmallows escape! So fun!
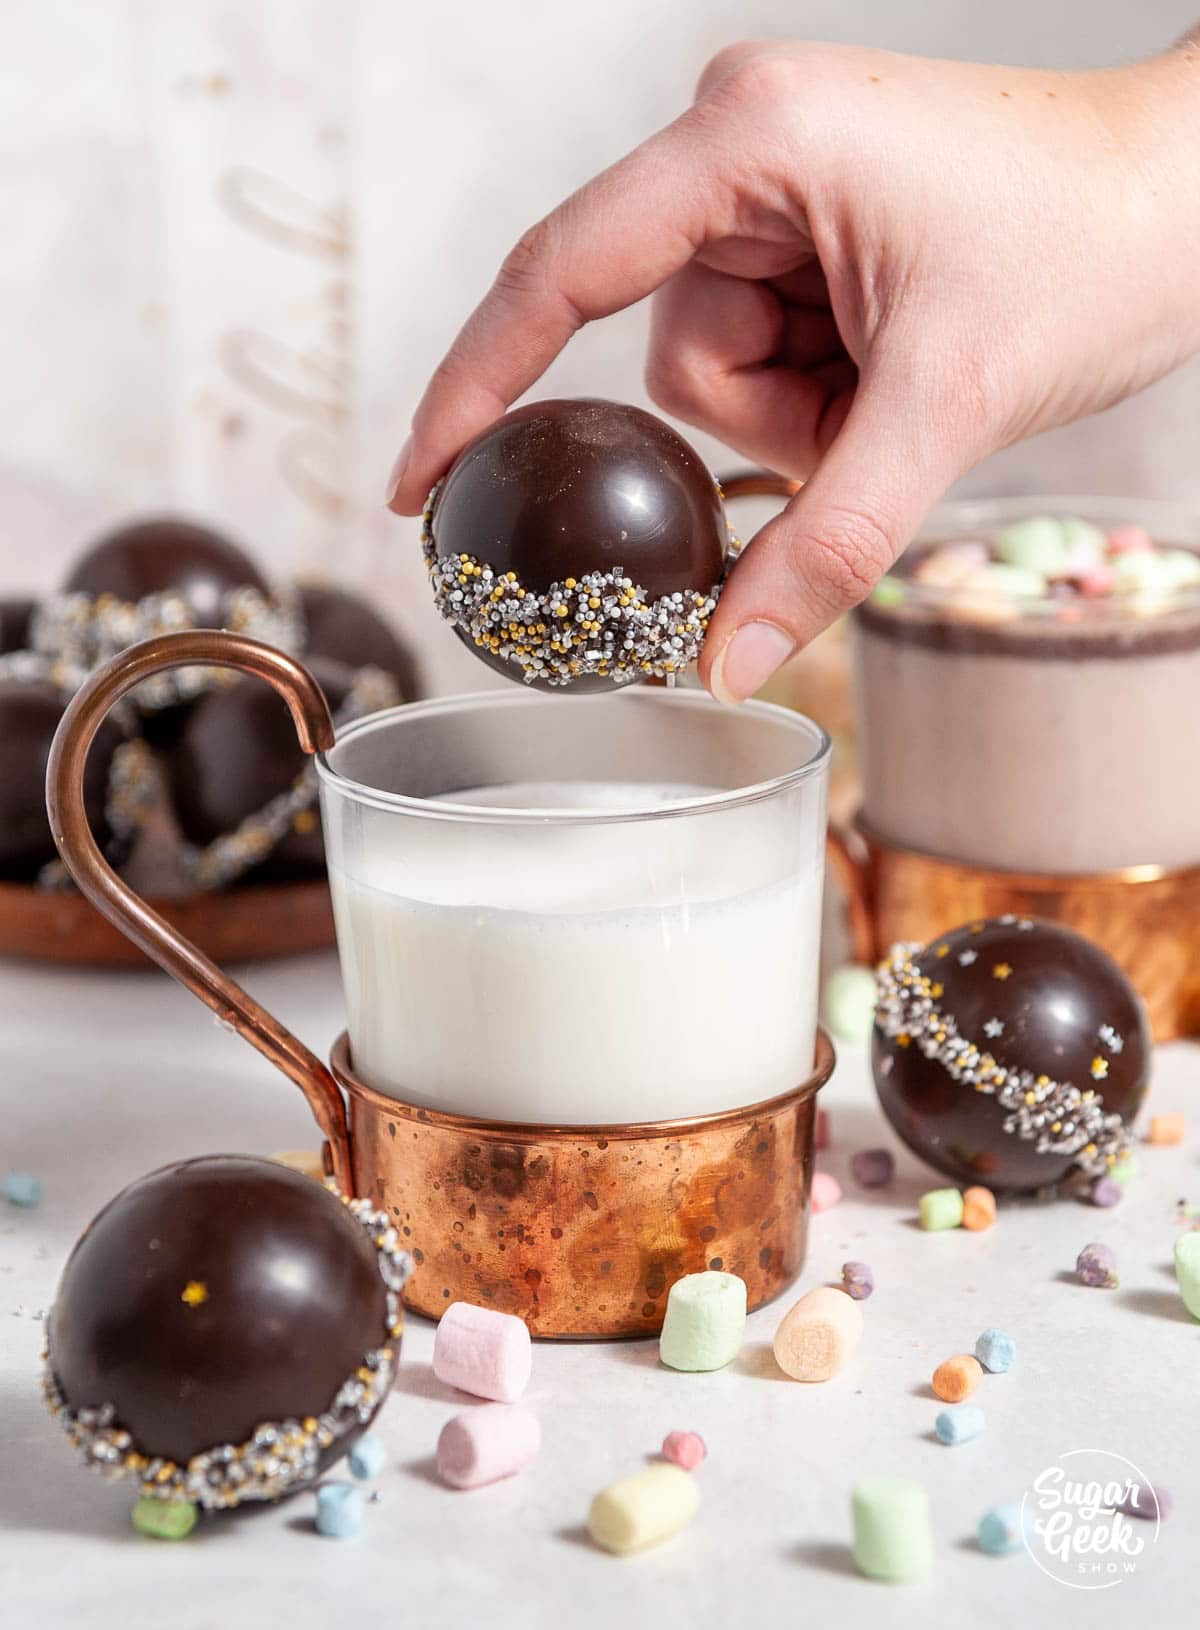
Hot chocolate cocoa bomb dropped into hot milk in copper mug

Use a spoon to stir so that the cocoa and chocolate melt into the hot milk.
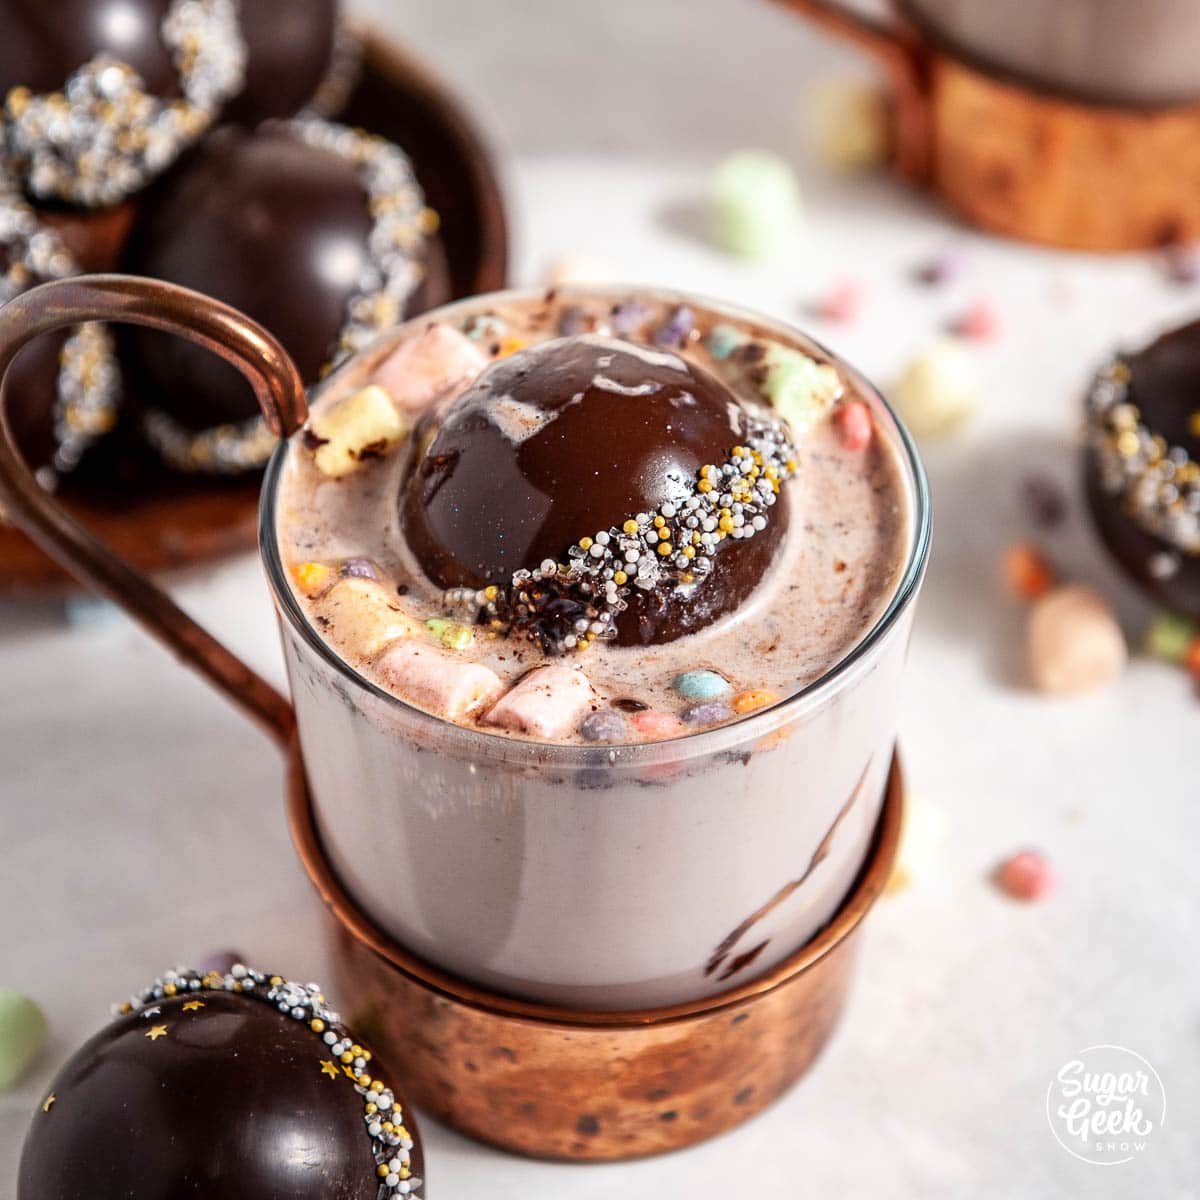
Hot chocolate cocoa bomb with hot milk in a copper mug

Hot chocolate bombs make a great gift! Wrap them in a plastic bag with a fun tie and some instructions for use. Put it in a mug and give them as gifts for the Holidays! Nothing says I love you like hot chocolate!

Hot chocolate bomb flavor variations

Hot chocolate bomb variations go beyond classic cocoa. Here are some other flavor variations to consider. Using flavored chocolate and switching up your sprinkles for crushed candies can change the flavor.

  • Peppermint Mocha - add crushed candy canes with the marshmallows inside and to the drizzle on the outside.
  • Salted Caramel - Use caramel-flavored hot chocolate mix on the inside and crunched up caramel bits on the outside. I like this caramel flavored mix from Swiss Miss.
  • Cookies & Cream - Make your hot chocolate bomb shells using white chocolate and mix in crunched up oreo cookies.
  • S'mores - Just add a few crunched up graham crackers to the drizzle and torch a few marshmallows, and voila! S'mores hot chocolate bombs!
  • Mocha - Add a scoop of instant espresso mix into your hot chocolate bombs for an extra caffeine boost!

Frequently Asked Questions

Can you ship hot chocolate bombs?

Yes, you can ship these. Package them in tins inside the cupcake liners and place shredded paper around them to keep them from breaking.

Can you grate the chocolate instead of shaving it?

Yes, you can. The reason we chop the chocolate is just so that it melts at a lower temperature.

Can I temper in a melting pot?

A melting pot has a pretty high temperature but you can definitely use the pot to melt the chocolate and then use chopped chocolate to seed it and get it tempered again. Just pay attention to your temperatures.

How long do hot chocolate bombs last?

There isnt anything in hot chocolate bombs that will spoil. They will last as long as the ingredients used last. Check expiration dates for more information.

What kind of chocolate can you use for hot chocolate bombs?

You can use real chocolate (contains cocoa butter) or compound chocolate (like candy melts) and get good results. The main difference is that real chocolate will taste better and melt better in hot milk. Compound chocolate does not require tempering but does not taste as good and tends to not melt as well.

More Chocolate Recipes

How to temper chocolate three ways

Chocolate caramel candies

6 Tempered chocolate techniques

Recipe
Print Recipe
4.99 from 310 votes

Hot Chocolate Bombs

How to make beautiful, shiny and professional looking hot chocolate bombs! How to easily temper chocolate and simple decorating!
Prep Time10 minutes mins
Cook Time5 minutes mins
Cooling10 minutes mins
Total Time25 minutes mins
Course: Dessert
Cuisine: American
Servings: 6 spheres
Calories: 87kcal
Author: Liz Marek

Equipment

  • Thermometer
  • 2 ½" Sphere Mold (silicone or acrylic)

Ingredients

  • 24 ounces semi-sweet couverture chocolate I prefer Callebaut, you can also use any high quality bar chocolate. You can use candy melts, if you're using a silicone mold but they don't taste as good.
  • 1 cup mini marshmallows
  • 6 Tablespoons hot chocolate mix
US Customary - Metric

Instructions

For Silicone Molds

  • Place the chocolate into a bowl and heat for 30 seconds (my microwave is 1000 watts)
  • Stir the chocolate, moving the chocolate that is on the outside, towards the center.
  • Heat again for 15 seconds and stir again.
  • Repeat this process until the chocolate is ALMOST melted but not fully melted. Never heating for longer than 15 seconds and never going above 90F. If you go above 90º you will have to temper your chocolate by seeding (see my blog post for more info)
  • Stir until fully melted.
  • Fill your molds halfway with chocolate and use a spoon to smooth the chocolate up to the edges, taking care to make sure the walls are evenly coated.
  • Turn the mold over and shake out the excess chocolate.
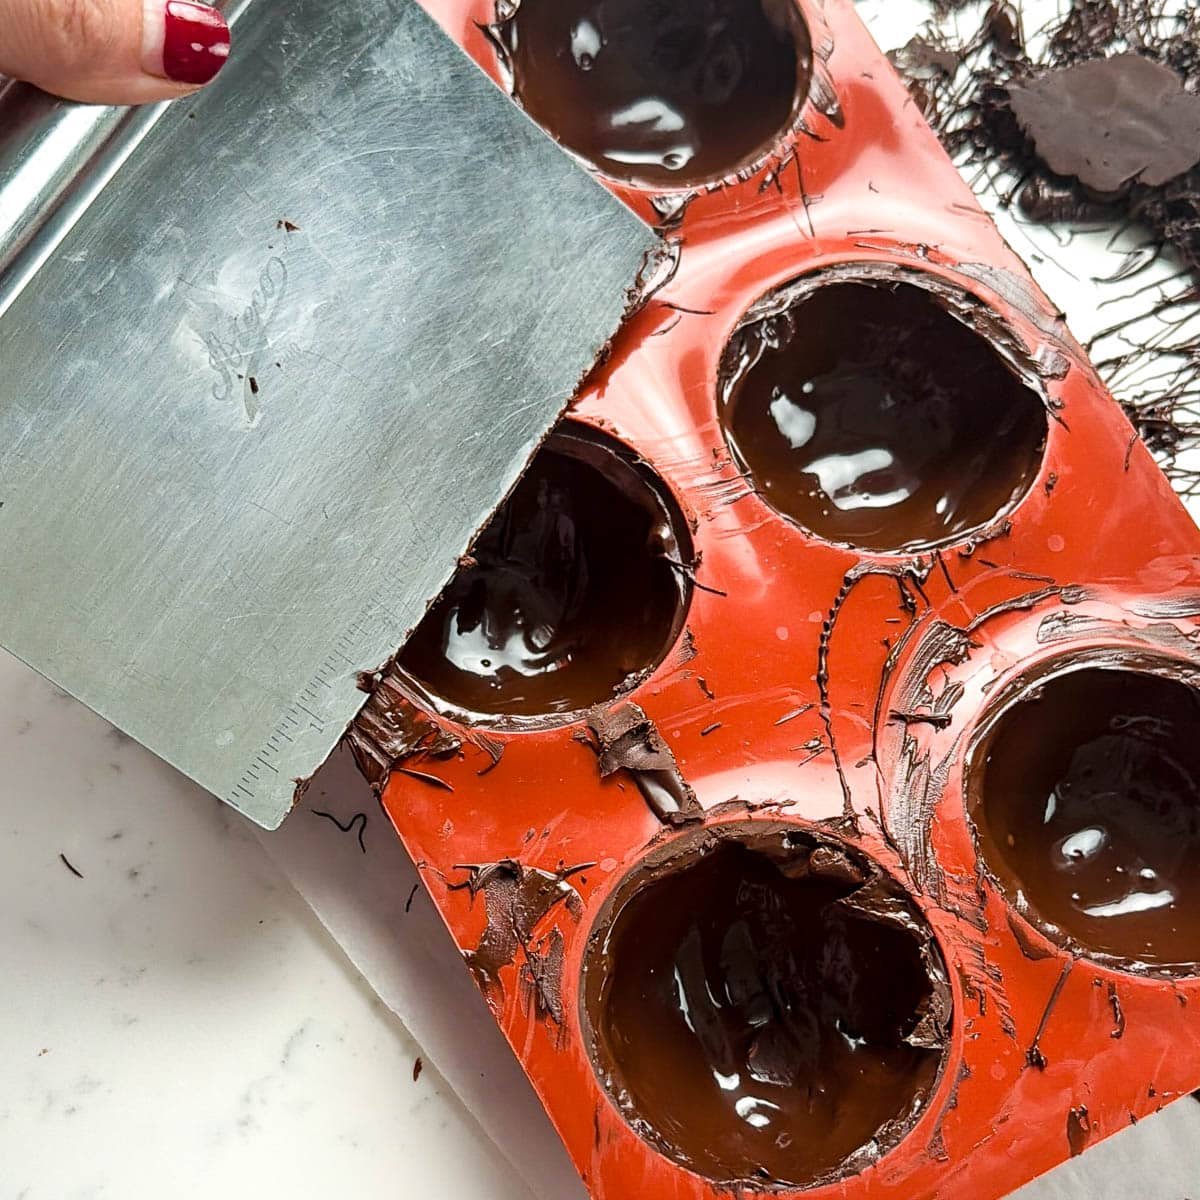
  • Use a bench scraper to scrape off the excess chocolate.
  • Turn the mold upside down onto the parchment paper and allow them to set up in the fridge for 10 minutes.
  • Carefully remove the chocolate shells from the mold by gently pushing up from the bottom until the shell releases.
  • Heat a ceramic plate and use it to smooth out the edges of the chocolate shells.
  • Place the shells in cupcake liners for stability. Fill the shells with hot cocoa mix and marshmallows.
  • If needed, warm the edge of the top shell once again on the plate and place it on top of the filled shell. Hold for 10 seconds to seal.
  • Fill your piping bag with about ¼ cup of the leftover melted chocolate. Snip the tip off and drizzle chocolate over the hot chococlate bombs. Immediately top with some sprinkles.

For Acrylic Molds

  • Chop your chocolate finely with a sharp chefs knife
  • Add your chocolate to a bowl and microwave for 30 seconds (my microwave is 1000 watts)
  • Stir the chocolate, moving the chocolate that is on the outside, towards the center.
  • Heat again for 15 seconds and stir again.
  • Repeat this process until the chocolate is ALMOST melted but not fully melted. Never heating for longer than 15 seconds and never going above 90F. If you go above 90º you will have to temper your chocolate by seeding (see my blog post for more info)
  • Polish your mold with a paper towel to remove and residue from the inside to prevent the chocolate from sticking.
  • Warm the acrylic mold slightly with a hair dryer or heat gun so it doesnt feel cold but not hot either.
  • Pour the chocolate (at 90ºF) into the molds and tap on the table a few times to remove bubbles.
  • Dump the chocolate back into the bowl, use the edge of your bench scraper to tap out as much of the chocolate as possible. You don't want the chocolates to be too thick.
  • Scrape off the excess chocolate from the top of the mold back into the bowl.
  • Turn the mold upside down onto some parchment paper to let the chocolate drain further and almost completely set. About 5 minutes. The chocolate should lift away from the parchment paper easily but still be soft.
  • Scrape off the excess chocolate again and then place the mold into the freezer for 5 minutes.
  • The freezer will cause the chocolate to contract and pull away from the mold. If it's not tempered, it will not contract and there will be no way to get the chocolate out. You can tell if your chocolate is tempered because if you look under the mold, it wont be stuck to the molds anymore. If you have a couple spots where it still is, it will be ok and still release with no problem.
  • Quickly turn your mold over onto the table to release the chocolate from the mold. Now they are ready to assemble.
  • Add 1 Tablespoon of hot chocolate mix to half the sphere and some marshmallows.
  • Pipe some melted chocolate onto the top of the sphere at attach the top piece of the sphere. Pressing gently but firmly.
  • Use a gloved hand to wipe away the excess chocolate for a clean look or roll in some sprinkles to finish decorating them!
Video

Notes

Ingredient notes: Stick with semi-sweet couverture chocolate or another high-quality bar chocolate for the best flavor and shine. Skip chocolate chips, they contain stabilizers that keep them from tempering properly. If tempering feels like too much, compound chocolate like Merkens works in a silicone mold without any tempering. It just won't taste or melt quite as well. Use a simple kitchen thermometer or an infrared thermometer to track your chocolate's temperature throughout. This step isn't optional.
Pan options: This recipe uses a sphere mold rather than a pan, so pan size doesn't really apply here. Silicone molds are the easiest choice if you're newer to tempering. They just take a bit longer to set. Acrylic molds are more advanced and let you turn out more bombs at once. See the two instruction sets above for both methods.
Make-ahead and storage: Nothing in these bombs spoils quickly. They're shelf-stable as long as your chocolate, hot chocolate mix, and marshmallows are within their own expiration dates. Store finished bombs in an airtight container at room temperature, away from direct sunlight or heat. Most people get several weeks to a couple of months of good shine and snap before the chocolate starts to dull, though this depends on your kitchen conditions and hasn't been tested to an exact date in-house.
Substitutions: Real chocolate (with cocoa butter) needs tempering but tastes and melts better. Compound chocolate, like candy melts or Merkens, skips tempering but doesn't taste or melt quite as well. It's the easier trade-off if you're short on time or new to tempering.
Critical do-nots: Don't let your chocolate go above 90º F. If it does, you'll need to re-temper it by seeding with more chopped chocolate rather than just cooling it back down. Don't skip leveling the shell edges on the warm plate before sealing. Mismatched seams are hard to fix after the fact. Don't add your sprinkles after the drizzle has set. They need wet chocolate to stick.

Nutrition

Serving: 1bomb | Calories: 87kcal | Carbohydrates: 18g | Protein: 1g | Fat: 2g | Saturated Fat: 2g | Sodium: 134mg | Fiber: 1g | Sugar: 14g | Calcium: 15mg | Iron: 1mg

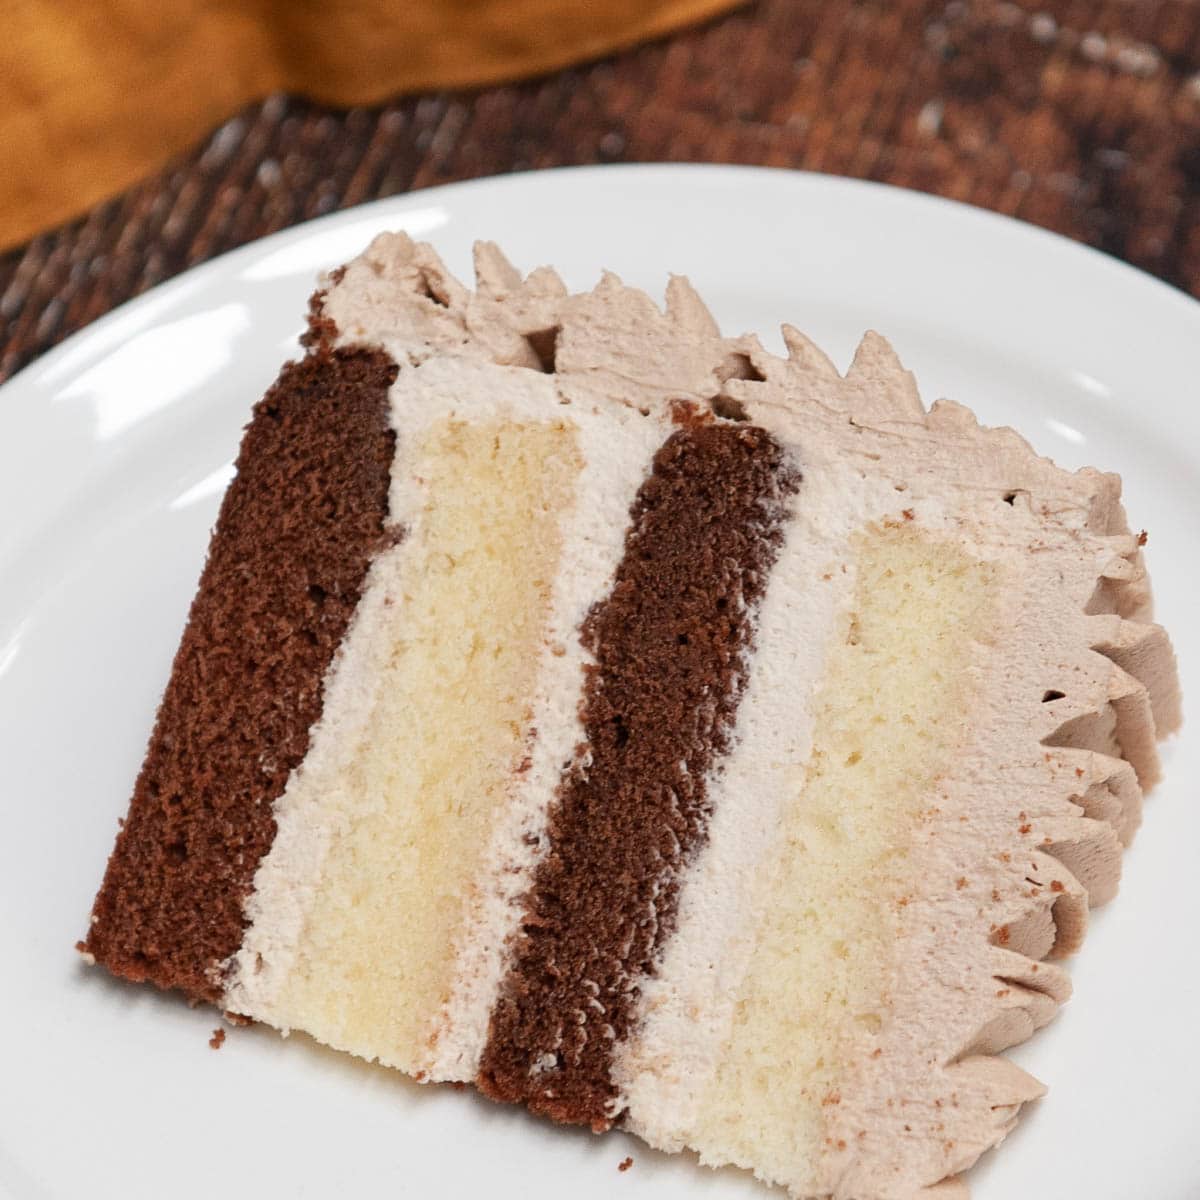
chocolate and vanilla cake slice with chocolate whipped cream on a white plate

October 19, 2020 Cake

First Birthday Smash Cake Tutorial

A smash cake is a small cake that is decorated simply to be smashed by a toddler, typically on their first birthday! You don't need to be a professional cake decorator to make a cute smash cake! All you need is some cake, whipped cream and about 60 minutes! You can do this! 

smash cake with chocolate whipped cream

Tools & Supplies

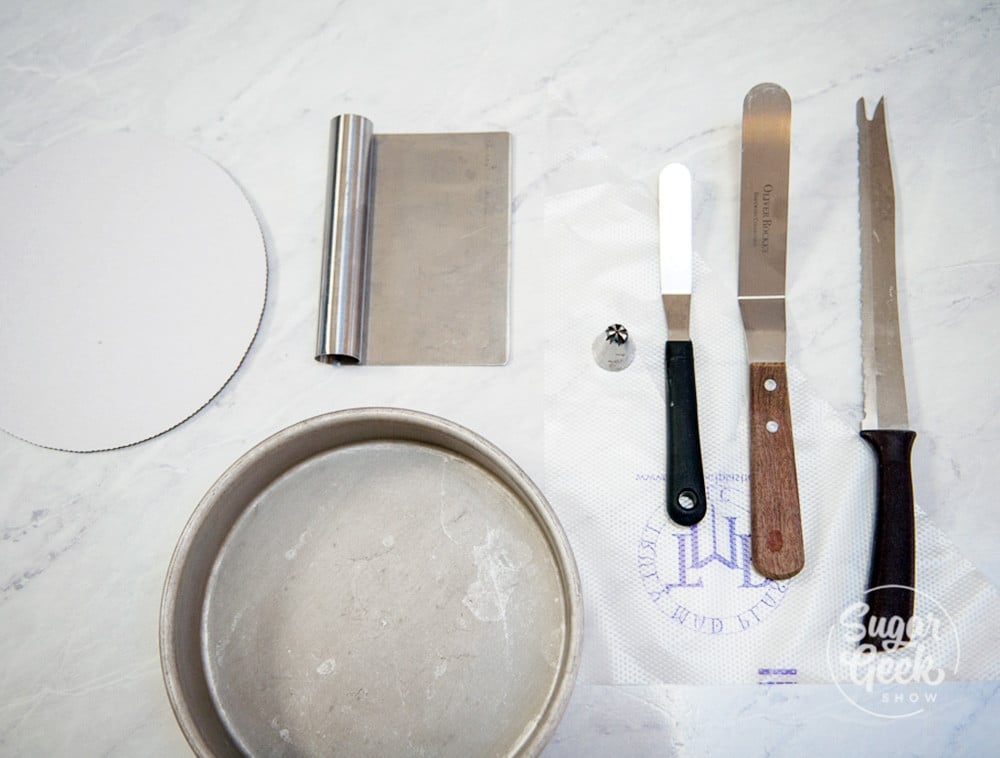
To make your smash cake all you need are a couple of small cake pans, I'm using two 6"x 2" Fat Daddio pans. A 6" round cake board or flat platter to build your cake on, a spatula or spoon for spreading the frosting, and something to pipe with if you want a design.

cake decorating tools

I'm using a 1M piping tip and a disposable piping bag. A turntable will make it a little easier to smooth the frosting but it's not 100% necessary! I also have a bench scraper that I got from the dollar store which is really great for smoothing out the sides of the cake for the crumb coat. 

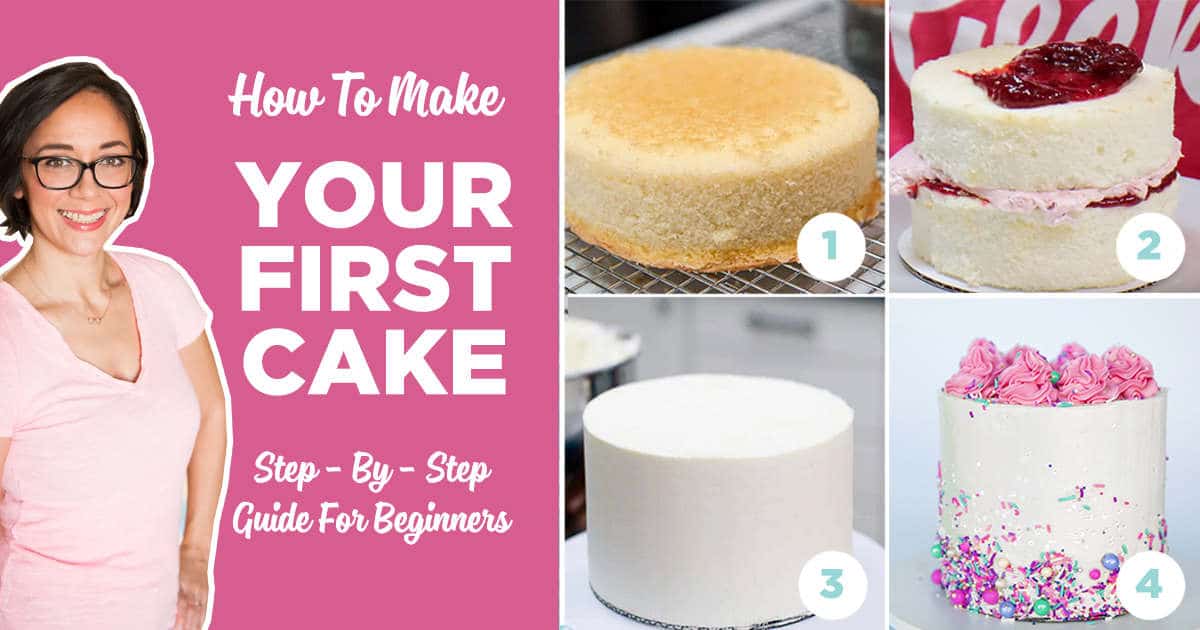
If you want to learn more about how to decorate your very first cake, I have a free tutorial for beginners here. 

Click on this image to go to the how to decorate your first cake tutorial

You can get cake pans and all your supplies at most grocery stores in the baking aisle or at craft stores like Michaels or Joann Fabric in the cake decorating aisle. 

Ingredients

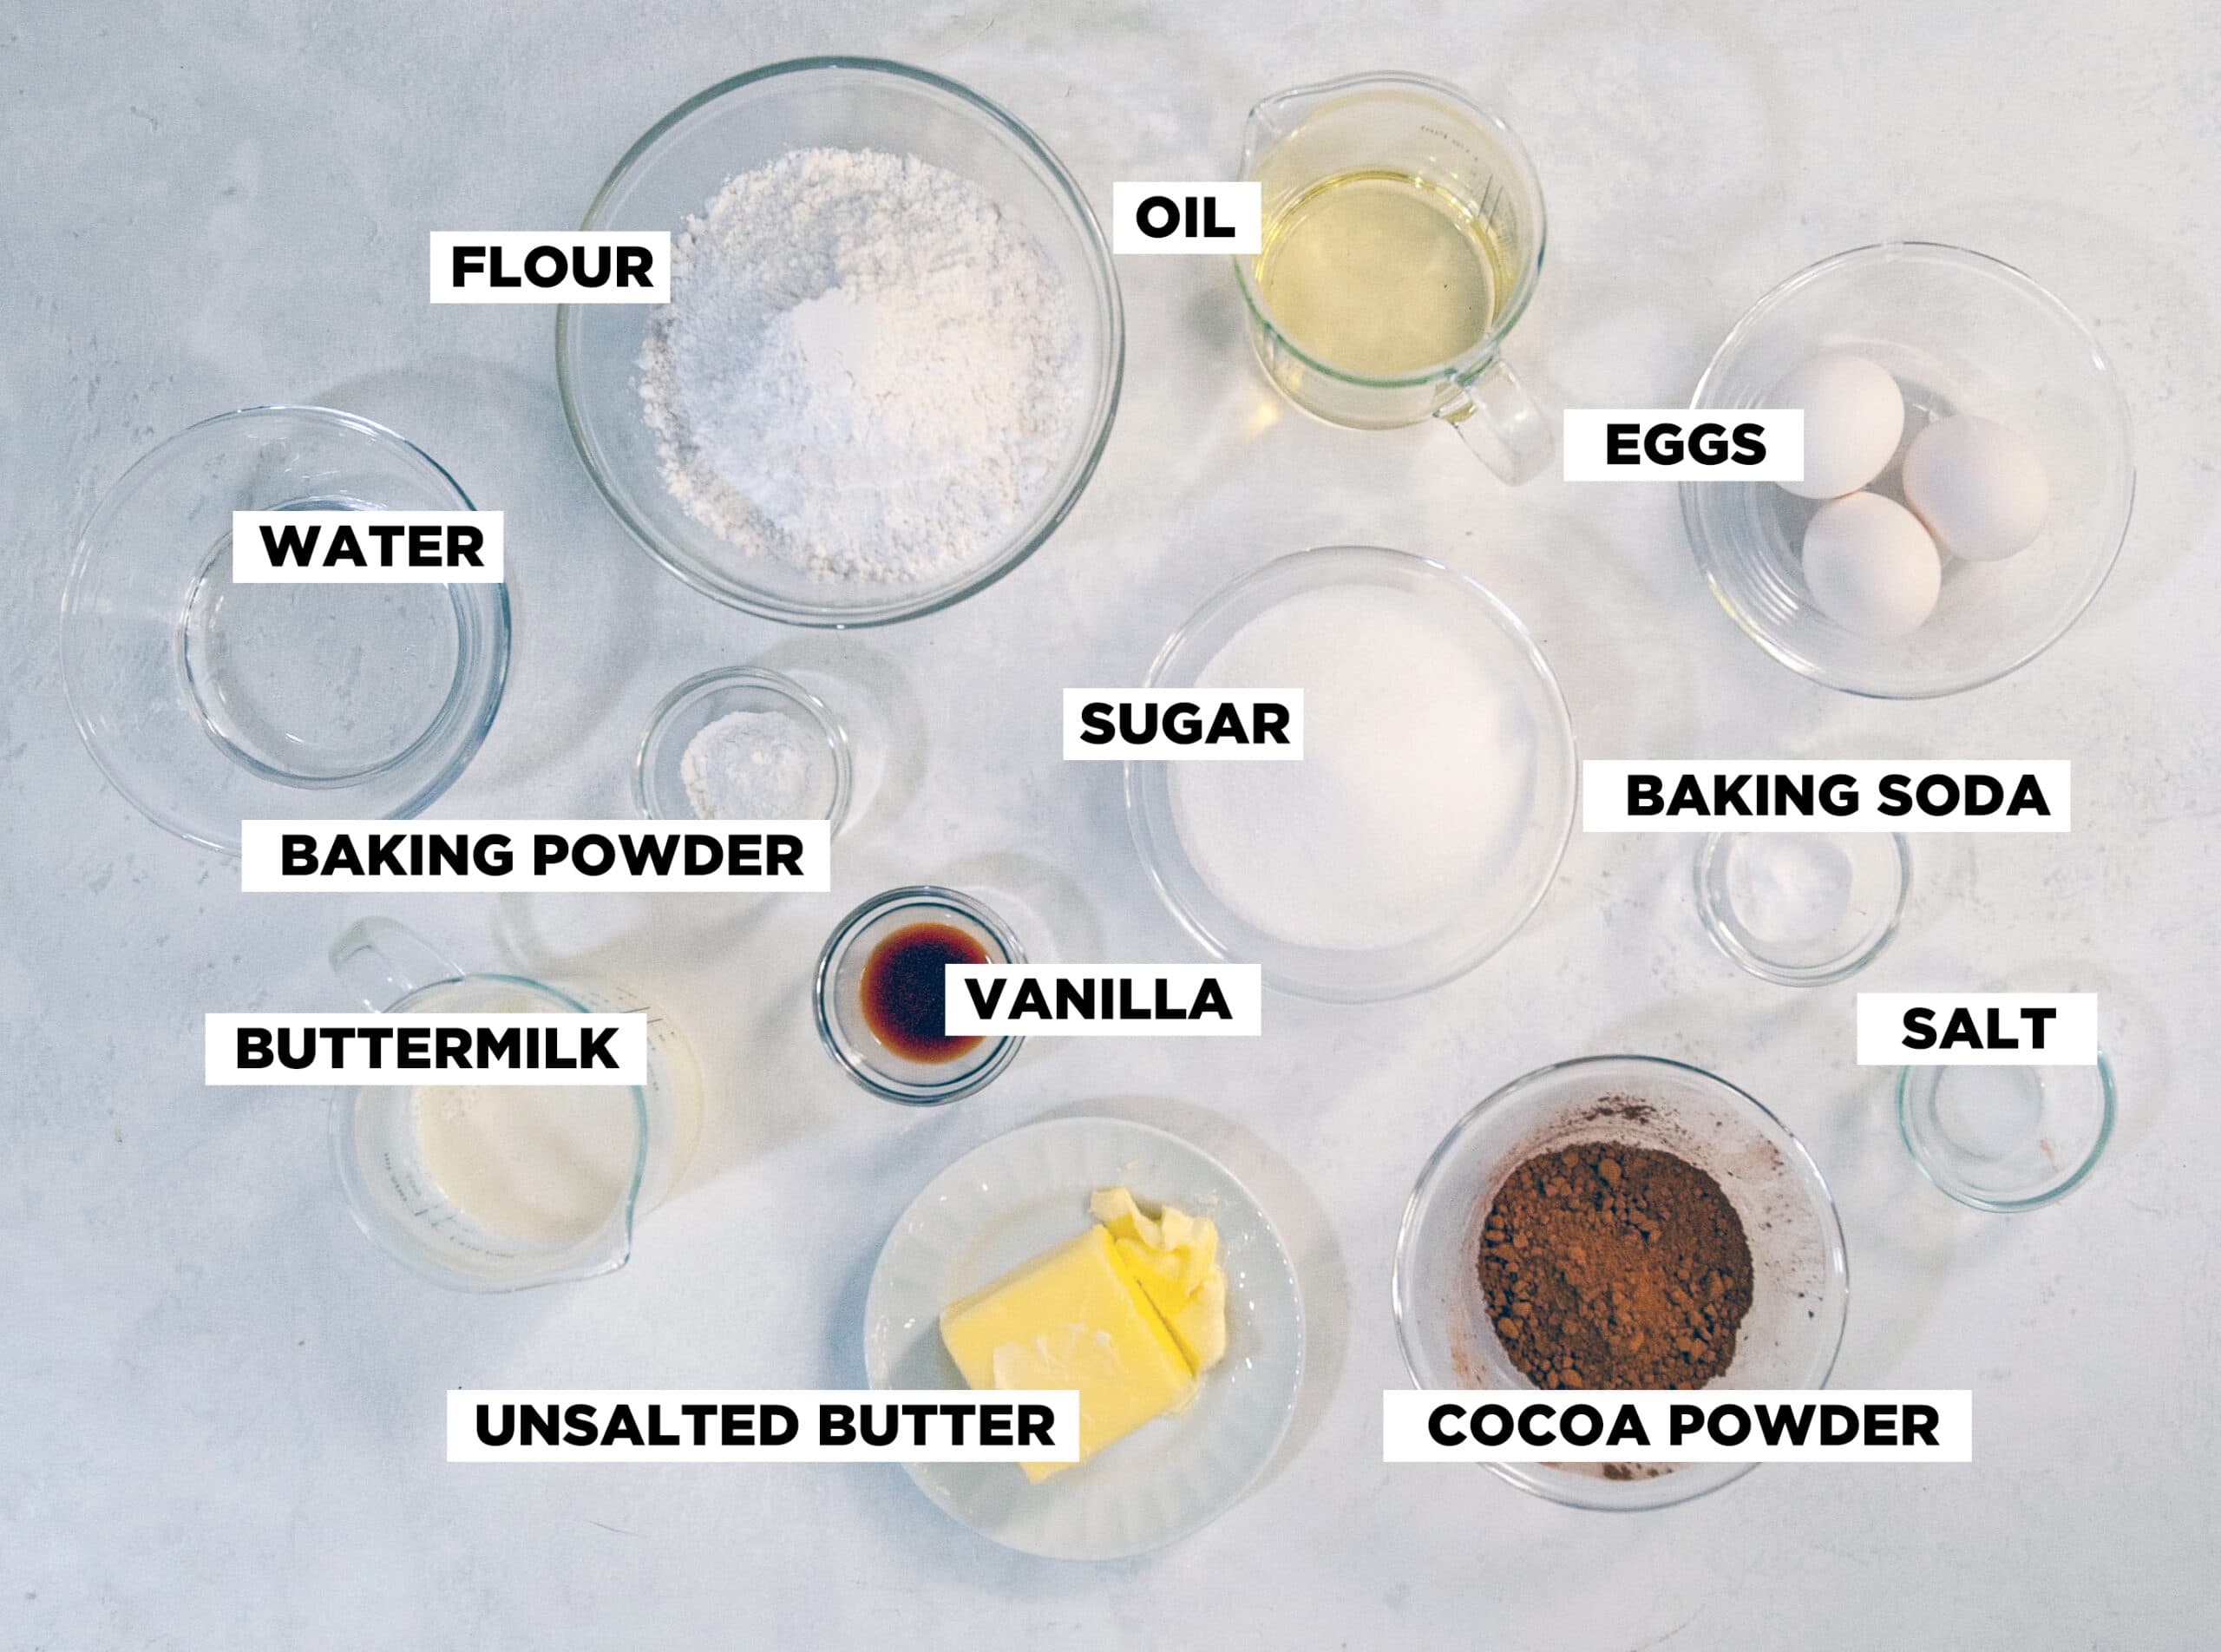
smash cake ingredients

You should have almost everything you need already in your cabinet except the following. 

Buttermilk: Makes the cake extra tender. No buttermilk? You can make your own substitution here. 

Unsalted butter: Salted butter contains too much salt and will make your cake salty so bakers usually use unsalted butter and add in the amount of salt that is necessary. 

Oetker Whipped Cream Stabilizer: Helps the whipped cream keep it's shape in warm weather but it's not required. You can see all my other ways to stabilize whipped cream on this post. 

Chocolate Syrup: I wanted to flavor my whipped cream so it tasted like chocolate milk but that's optional! 

What flavor should a smash cake be?

chocolate and vanilla cake slice with chocolate whipped cream on a white plate

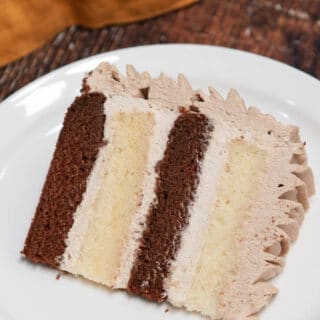
Smash cakes can be any flavor you want but typically, toddlers are not used to foods that have really intense flavors so most parents opt for simple flavors like vanilla or chocolate. In this recipe, I will show you how to make a delicious vanilla cake (from scratch) and how to turn half of it into chocolate! 

The reason I decided to make my smash cake half vanilla and half chocolate is because I wasn't sure which flavor my son Ezra would like best, so I decided to give him options! If you want to make your smash cake all vanilla, or all chocolate, that's totally up to you!

What is the best frosting for a smash cake?

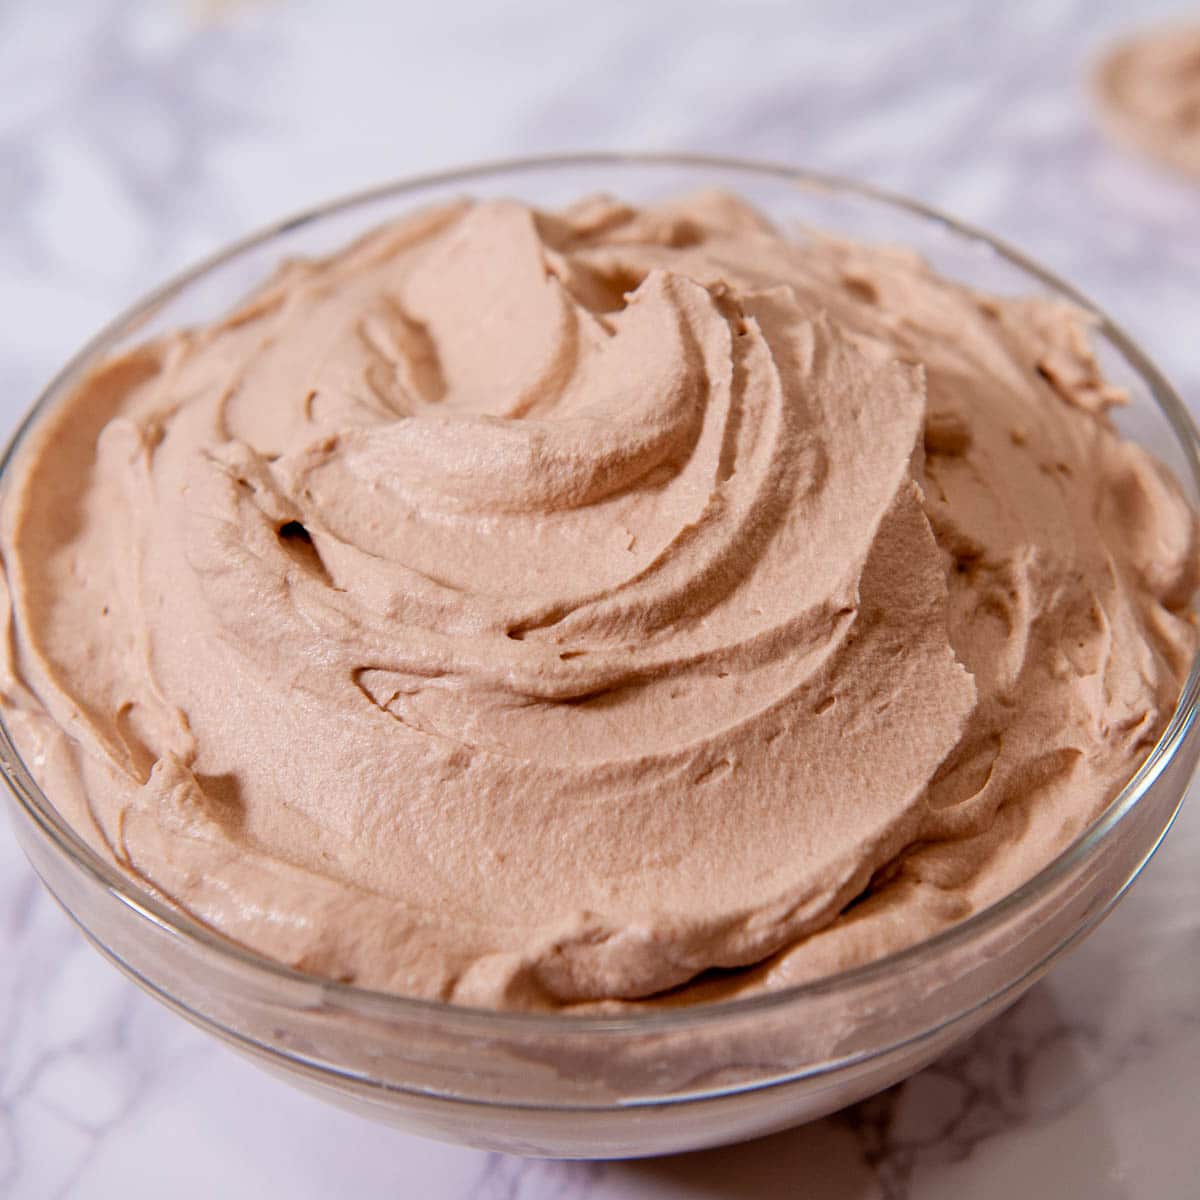
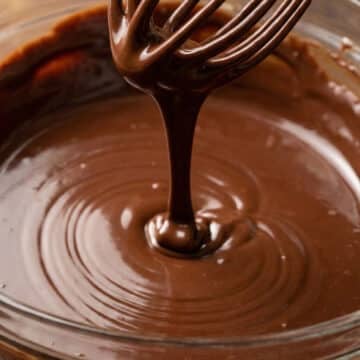
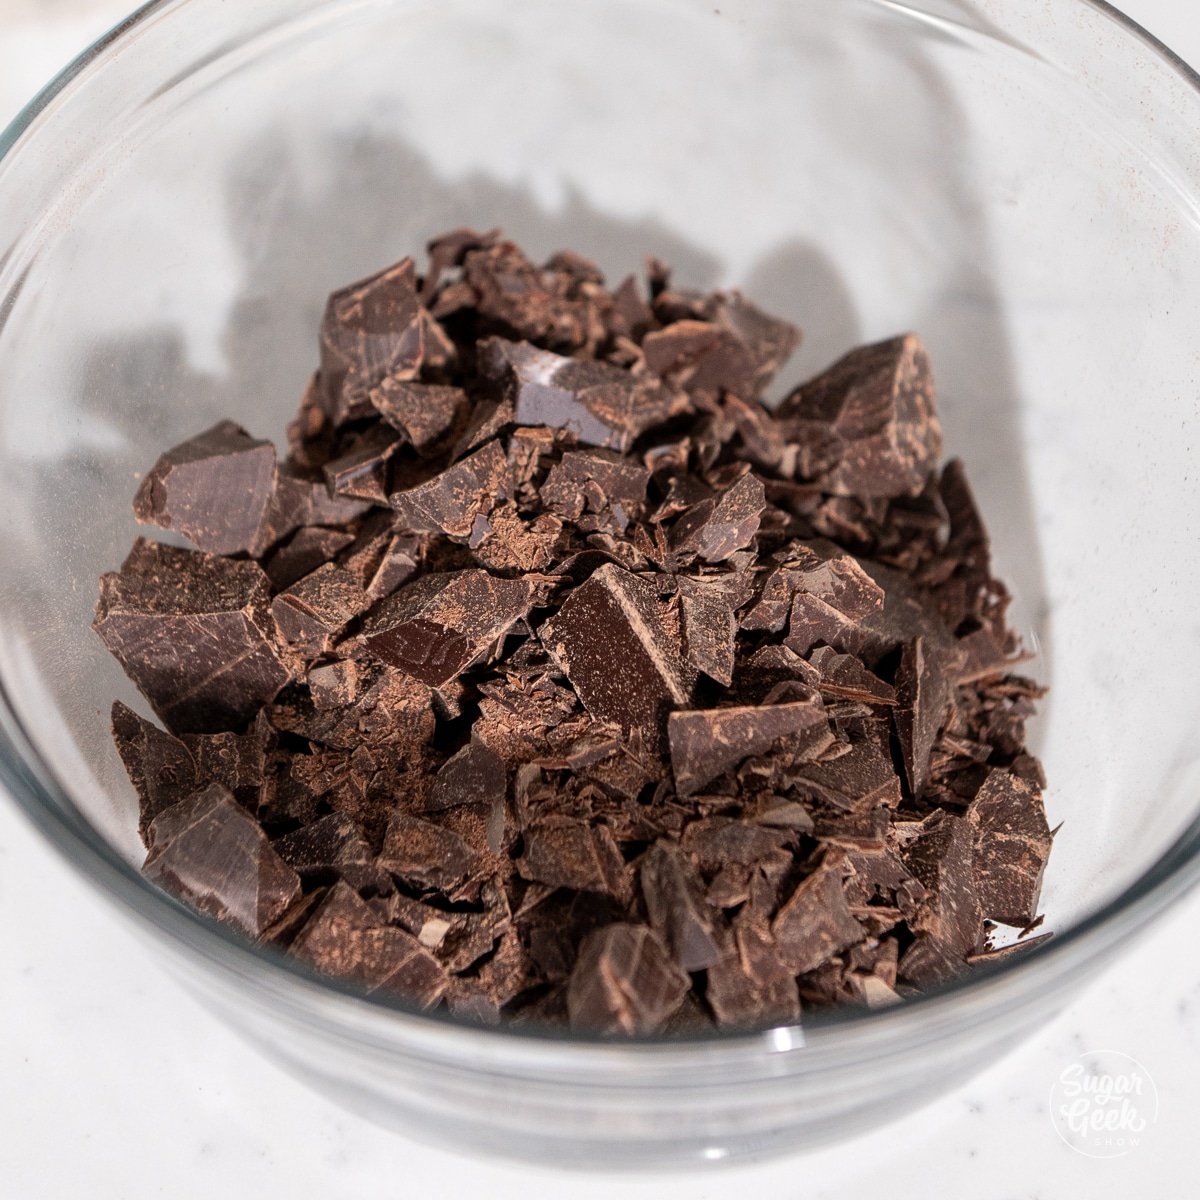
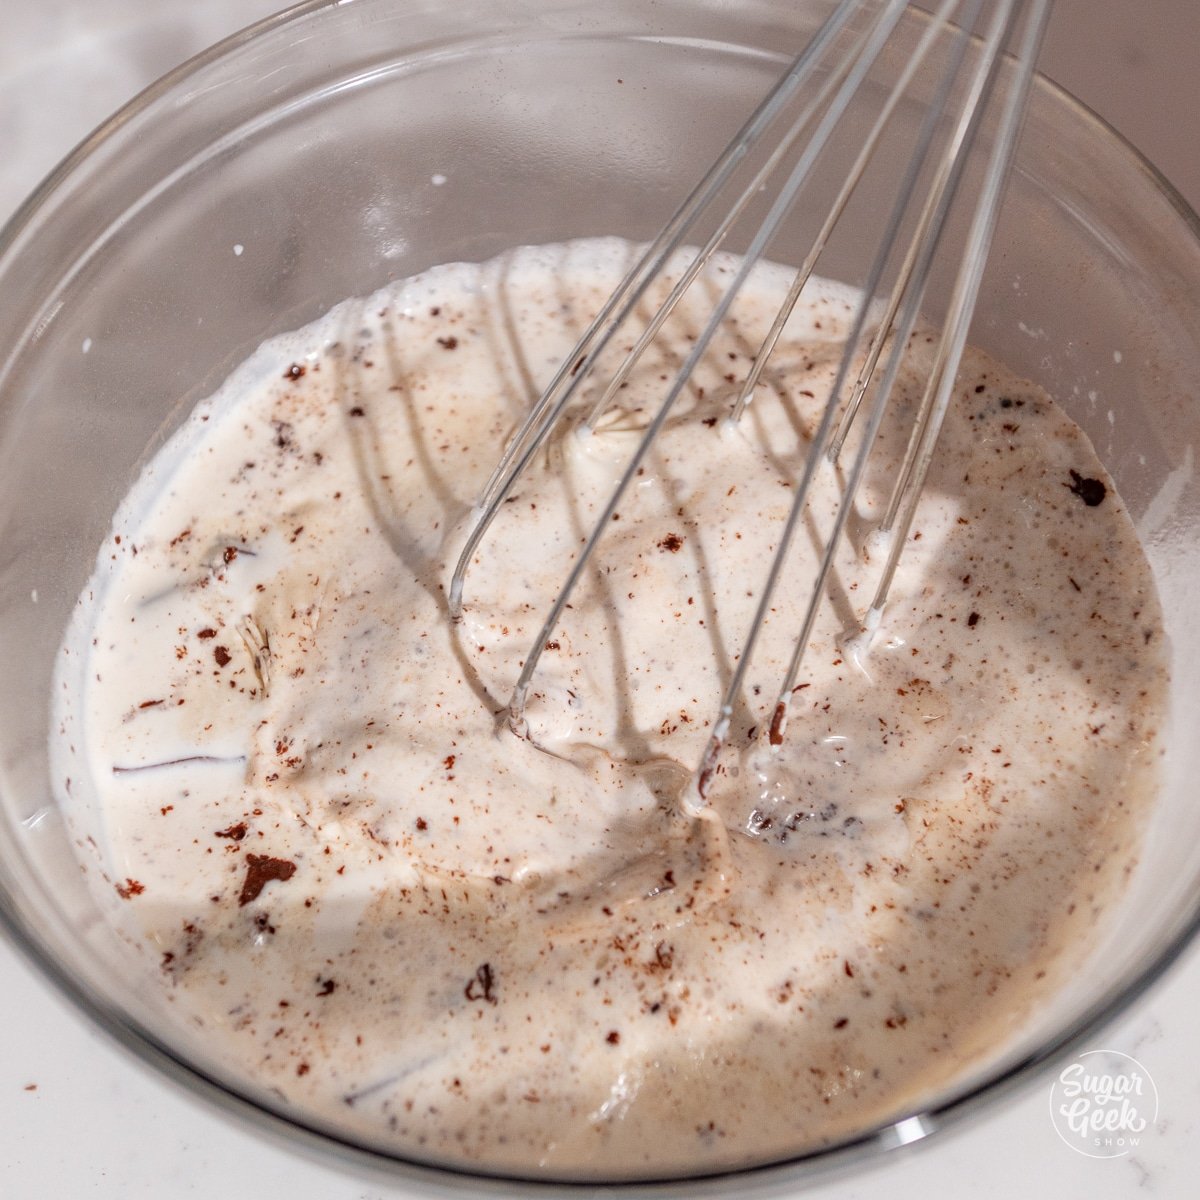
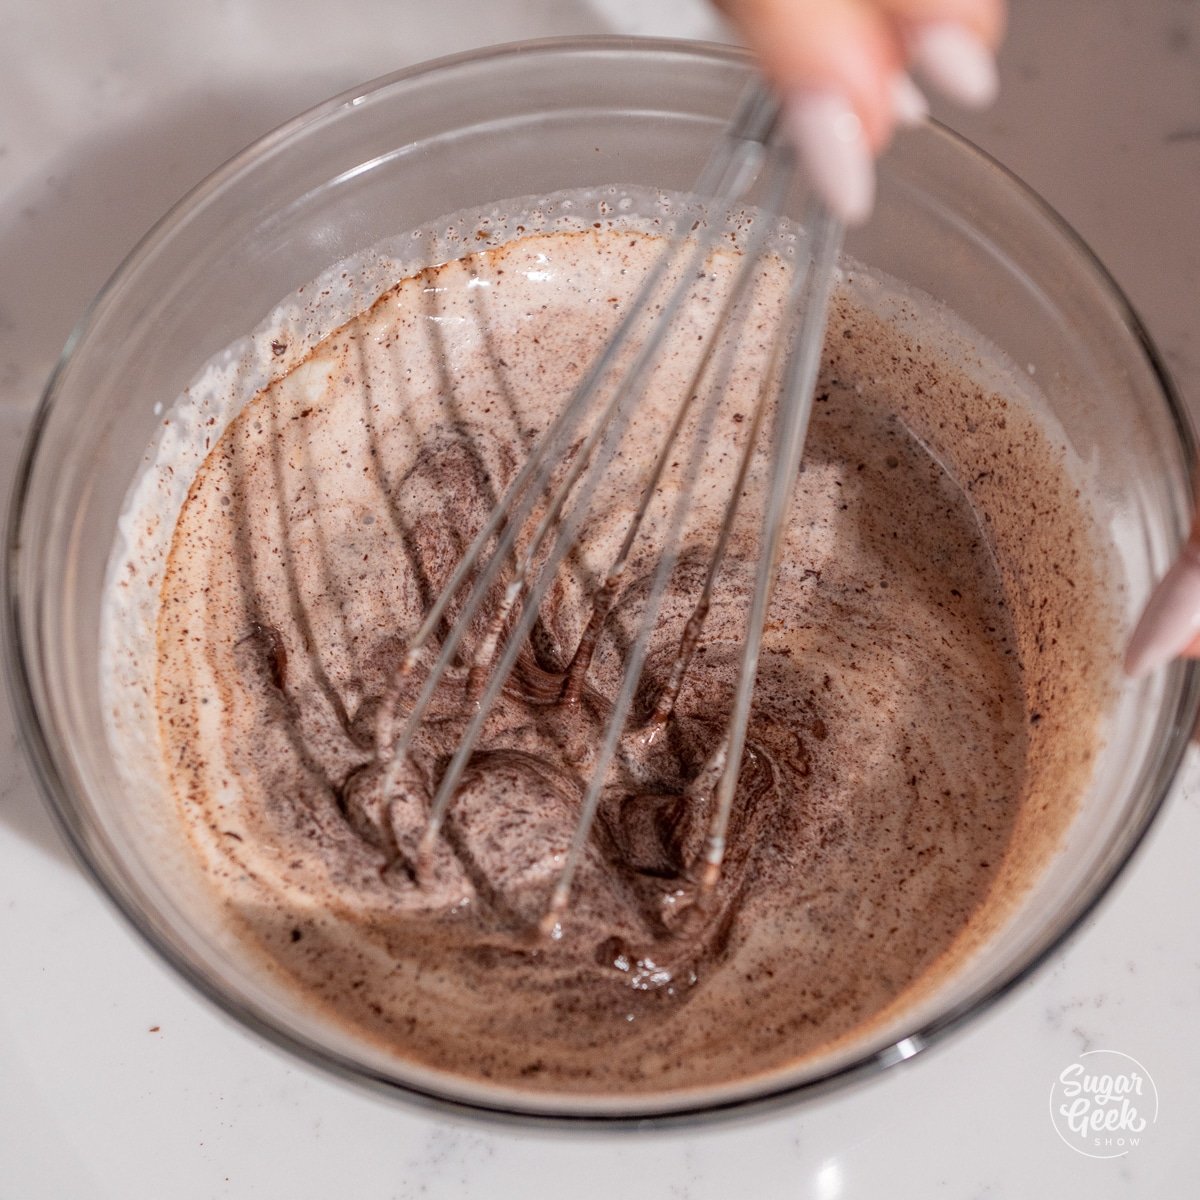
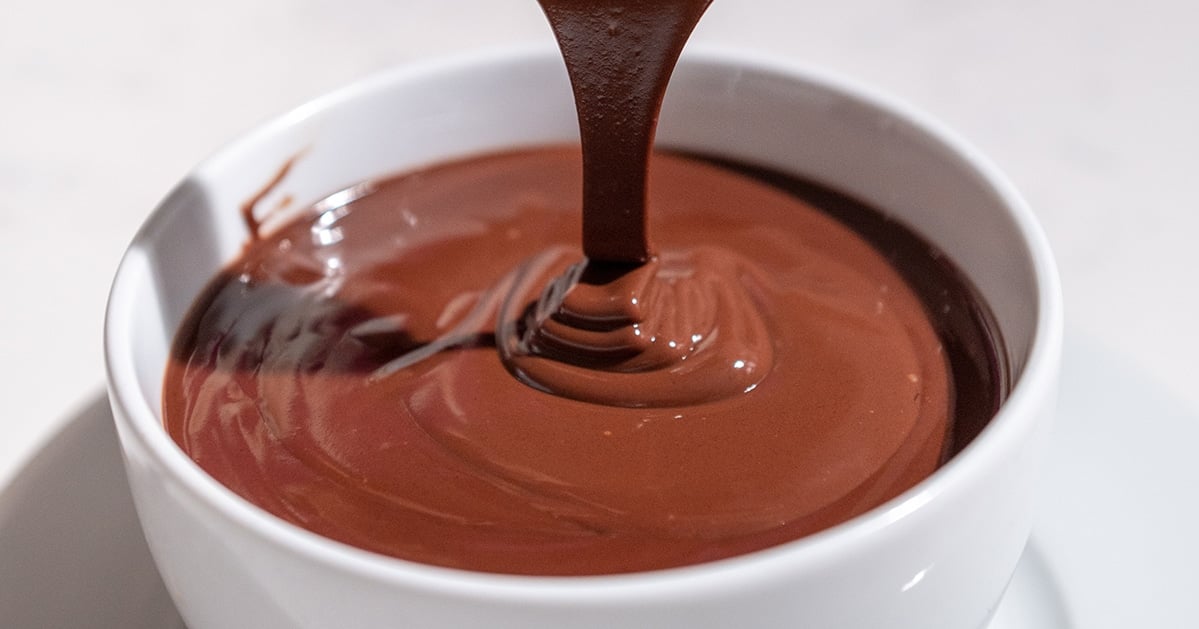
chocolate whipped cream in a glass bowl

There are a lot of types of frosting you can use for your baby's first smash cake, like easy buttercream or chocolate ganache. But I think the BEST frosting to use is some whipped cream that is not too sweet. The reason I like using whipped cream is that the taste is very similar to milk that your baby is already used to drinking. I added a tiny bit of chocolate to my whipped cream but that is completely optional.

And yes, you can color the whipped cream if you want. Just add a drop of liquid food coloring to the whipped cream along with the powdered sugar and vanilla extract. 

The main thing you want to be careful of is over-whipping. Whipped cream goes from liquid to butter in no time so never walk away from it while it's whipping. It's better to under-whip and stop at the point it's just starting to form peaks than to over-whip and end up with butter because you can't fix it after it's been over-whipped. 

How big should a smash cake be?

Typically, a toddler hasn't had much cake (if any) by the time they are one. So a smash cake should not be very big. Some people even just do a little cupcake instead of a smash cake and that's totally fine!

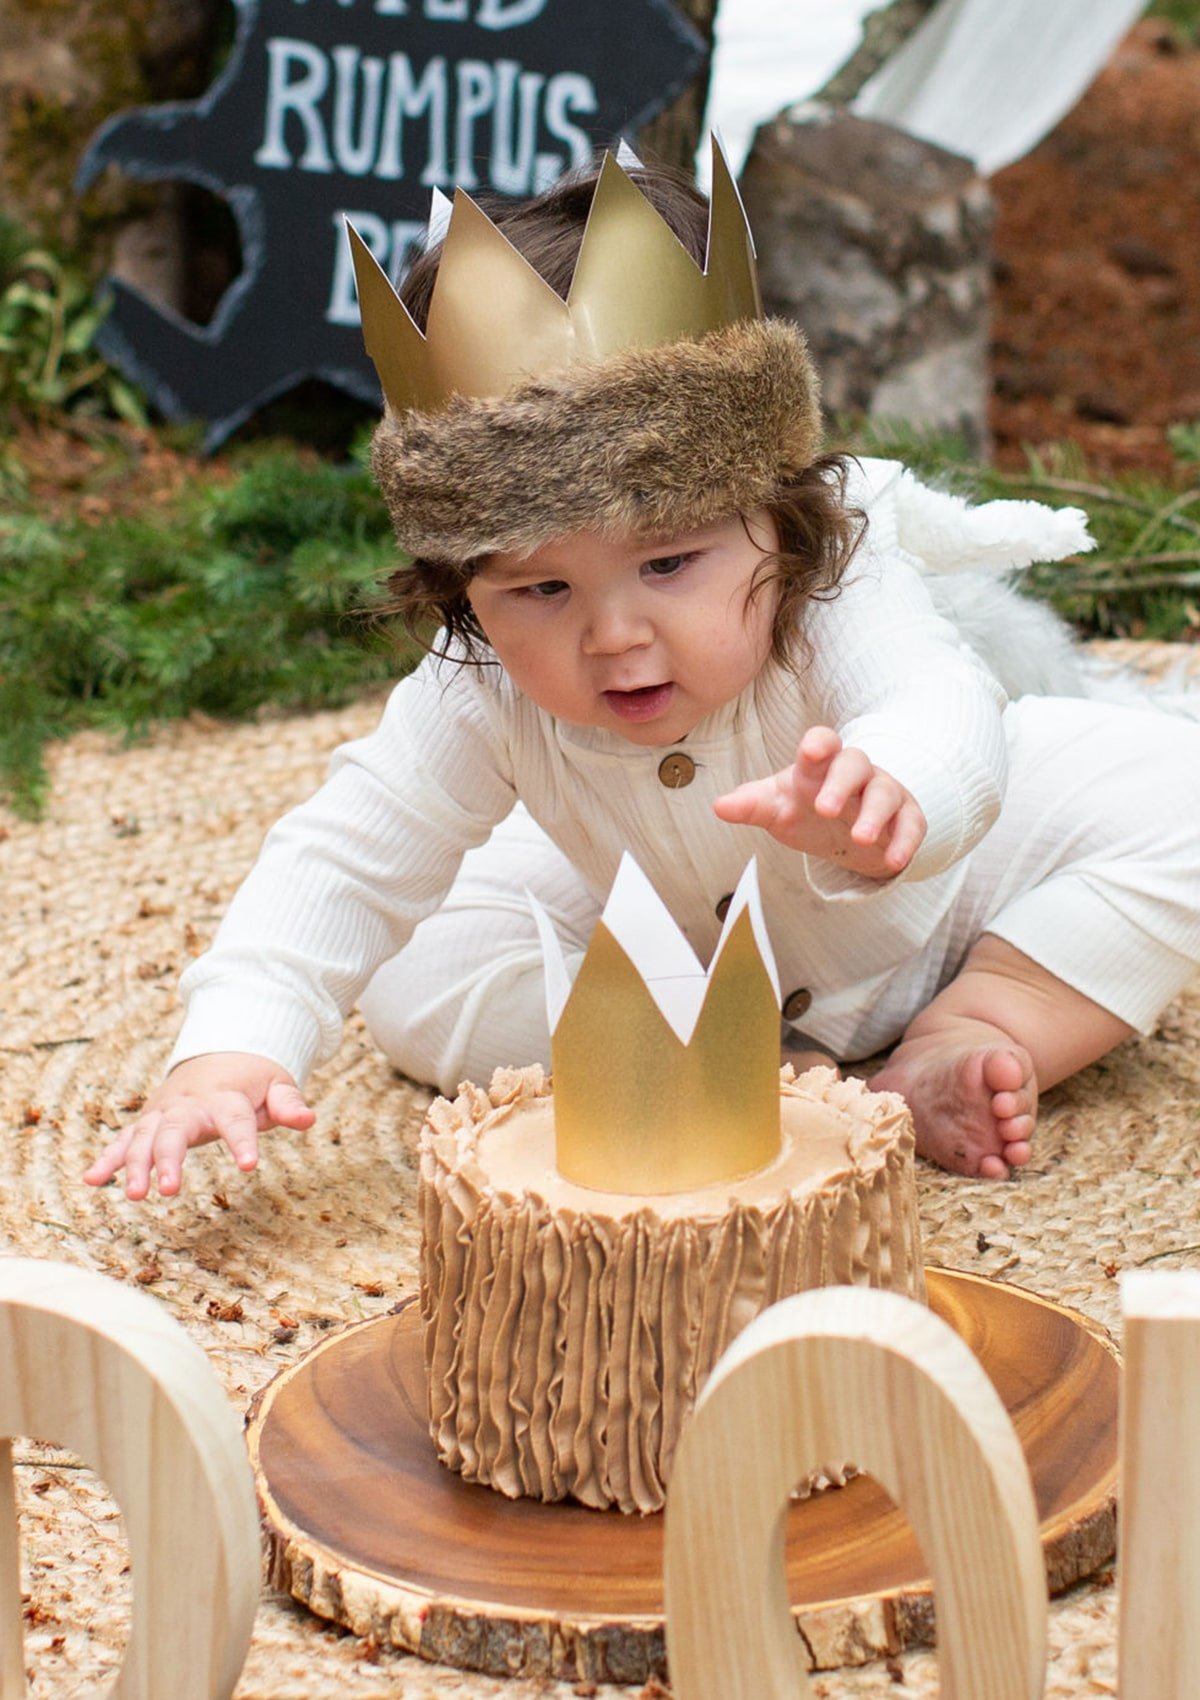
one year old boy with cake and wooden letters in the foreground

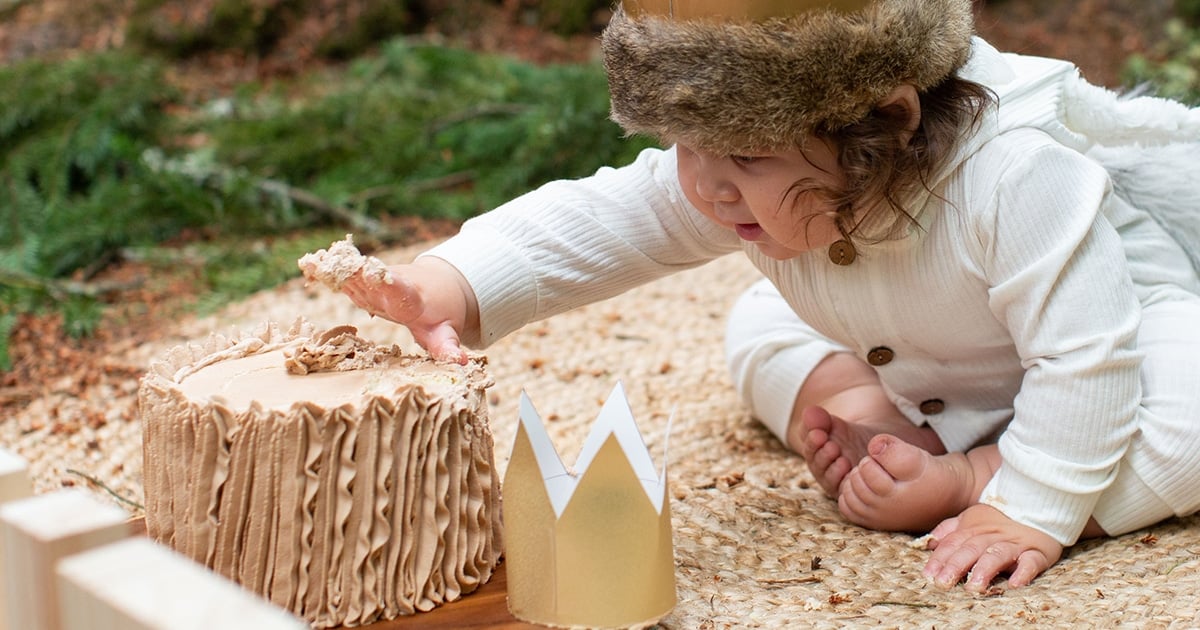
But if you're planning a photo shoot as I did for Ezra's first birthday, you might want to do a 6" cake. It's still very small but big enough that you'll be able to get a few snaps of the destruction before the cake is completely destroyed. 

I actually made two 6" cakes. One for Ezra to smash and one for the family to eat after the smashing. If you want to make two cakes, just double the recipe below by adjusting the "servings" slider on the recipe card to read 24 instead of 12. Then you will have enough batter for two cakes. 

one year old boy reaching towards a smash cake

If you don't want to make the second cake in three 6" pans, you can use two 8" pans. Or you can use the cake batter calculator above the recipe to figure out how much cake batter you would need for pretty much any shaped pan you can think of. 


How to make a smash cake step-by-step

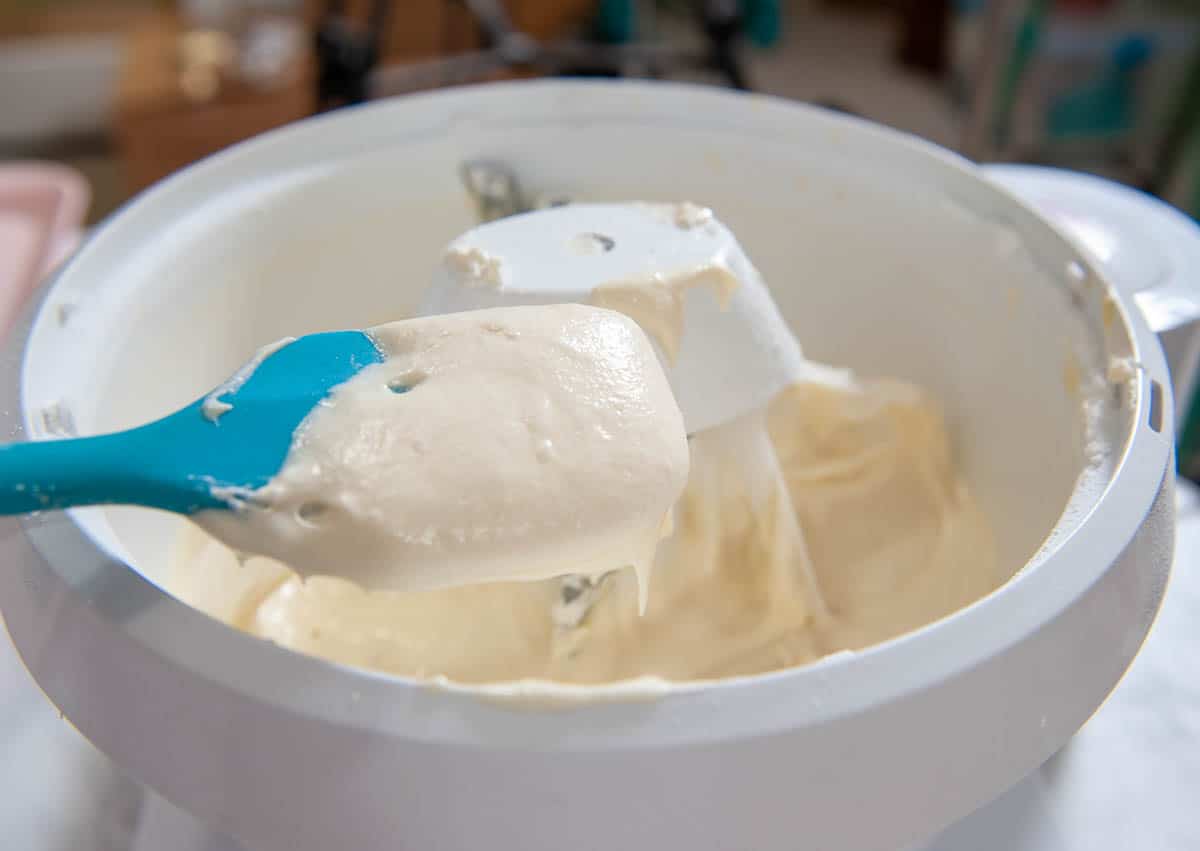
Step 1 - Make the cake batter. I'm using my white velvet buttermilk cake (see the recipe at the bottom of this blog post) but I've adapted it to have a little less sugar and whole eggs instead of egg whites. I love this cake because it's very soft and easy for a toddler to eat. You can also add food coloring to the cake if you want a colorful smash cake, like in my rainbow cake recipe. 

Pro-tip: Make sure your eggs, buttermilk, and butter are all room temperature or even a little warm. Cold ingredients do not mix together well and will ruin your cake. 

buttermilk cake batter on a blue spatula

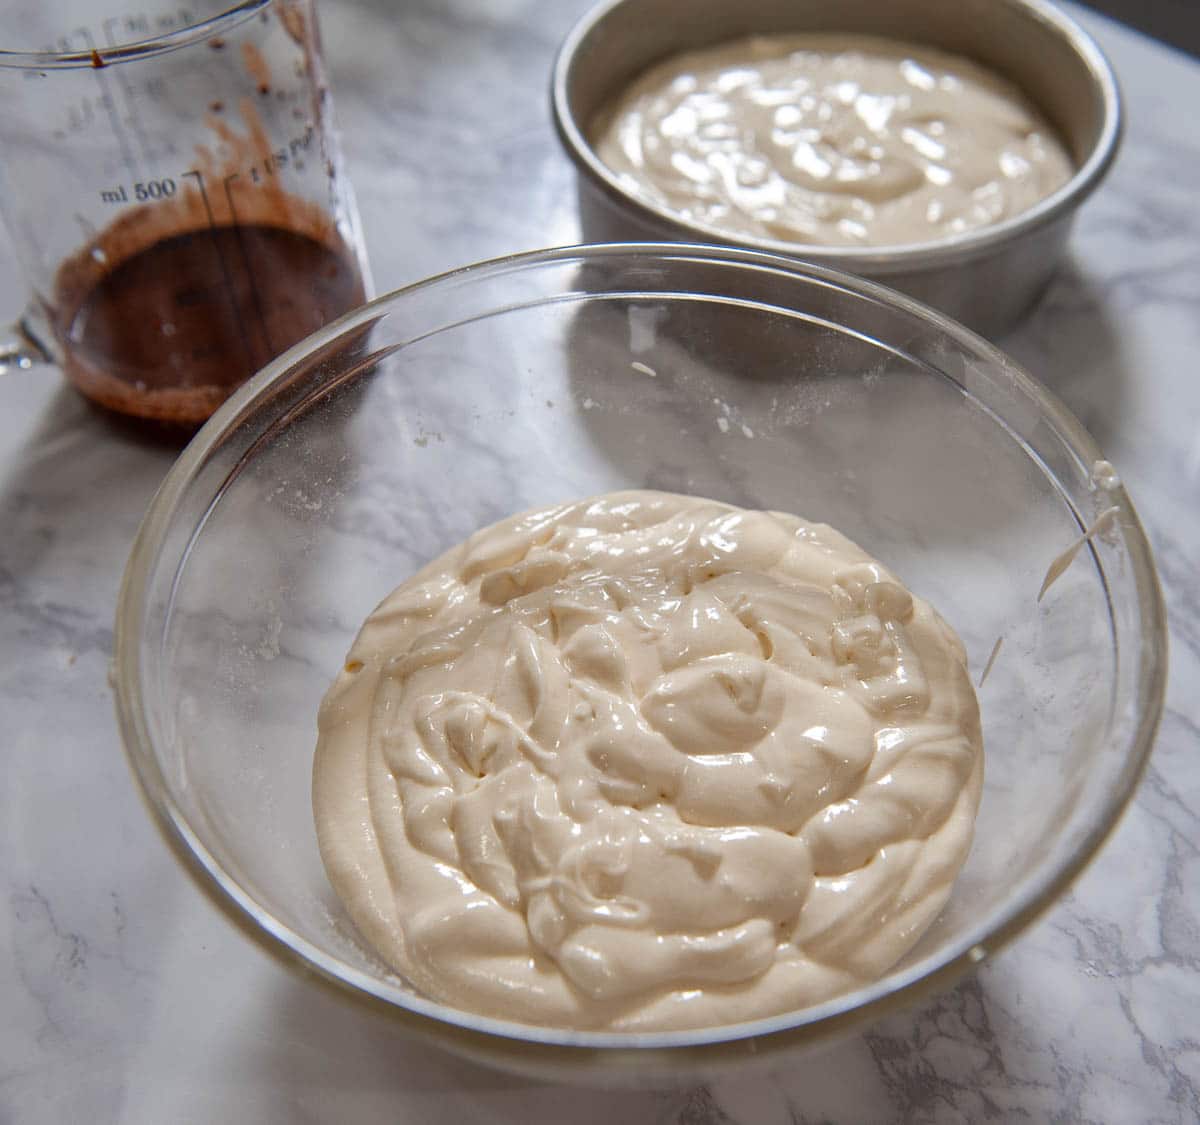
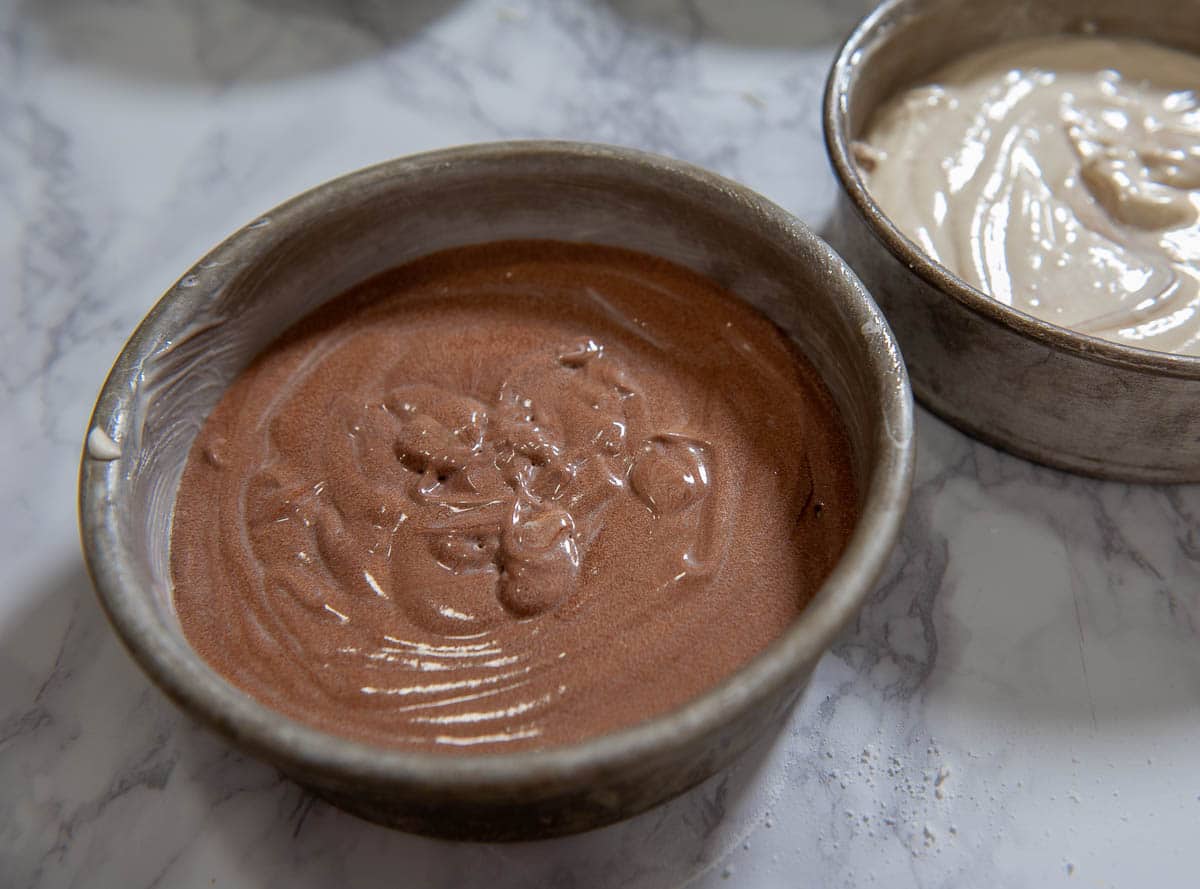
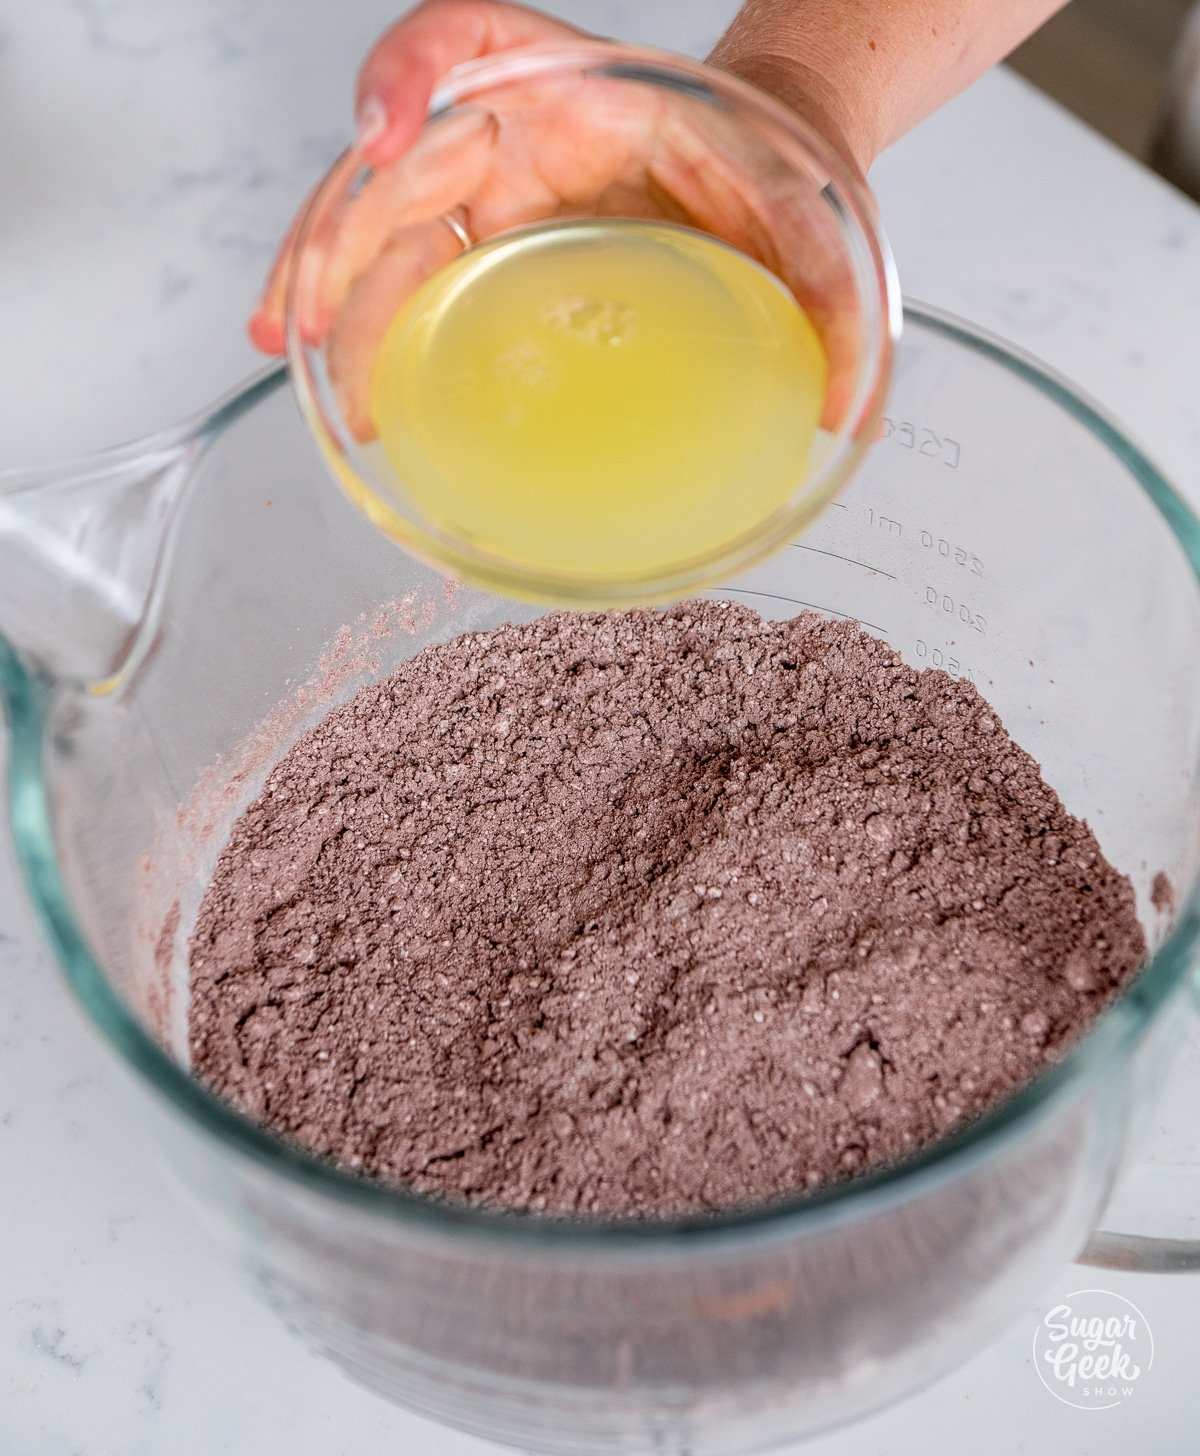
Step 2: Divide the batter in half and add the cocoa powder mixture to half to make it chocolate instead of vanilla. I coat my pans with cake goop but you can use any pan release that you like. Fill your cake pan halfway with batter. 

vanilla cake batter in a clear bowl

Step 3: Bake the cakes. If you only have one pan, you can put the leftover cake batter in the fridge until you're ready to bake it. The cakes are done baking when you can touch the tops of the cakes and the cake springs back. This may take a few minutes more or less than the time listed in the recipe and can vary greatly if you are using a different size pan. 

chocolate cake batter in a cake pan

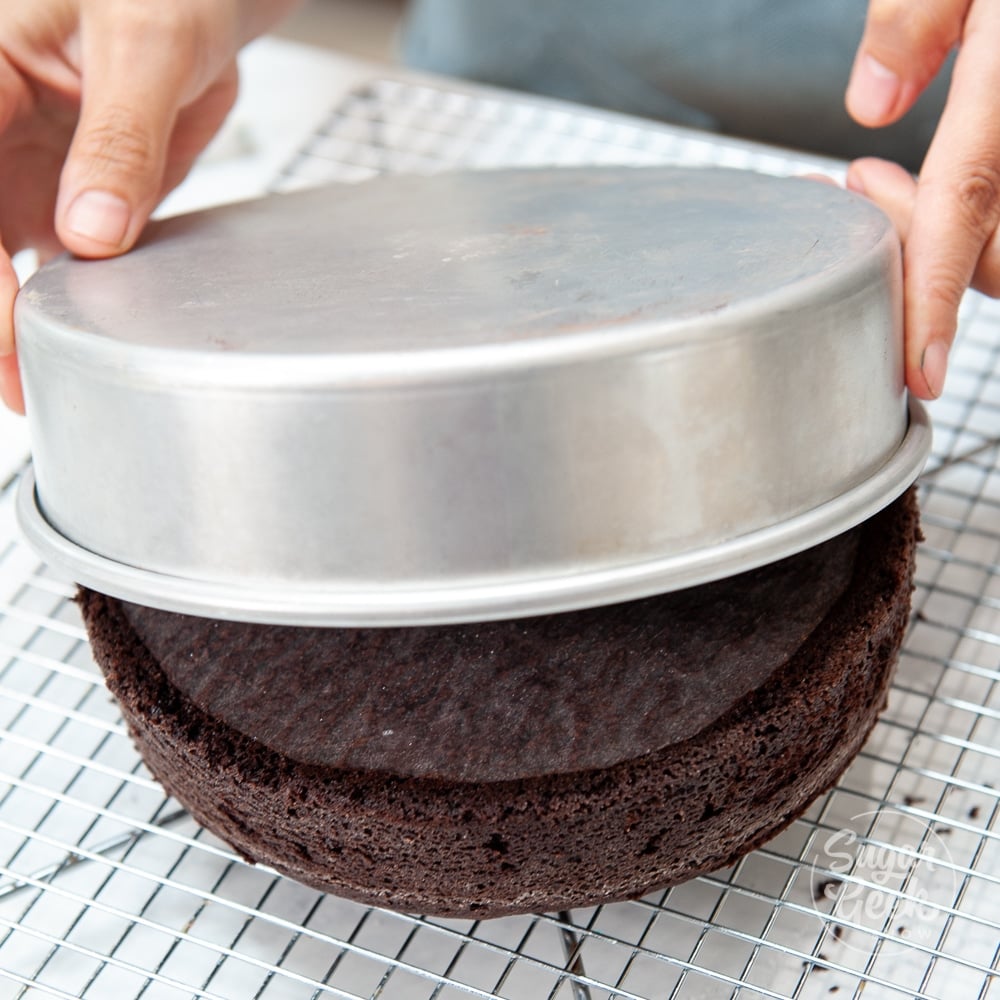
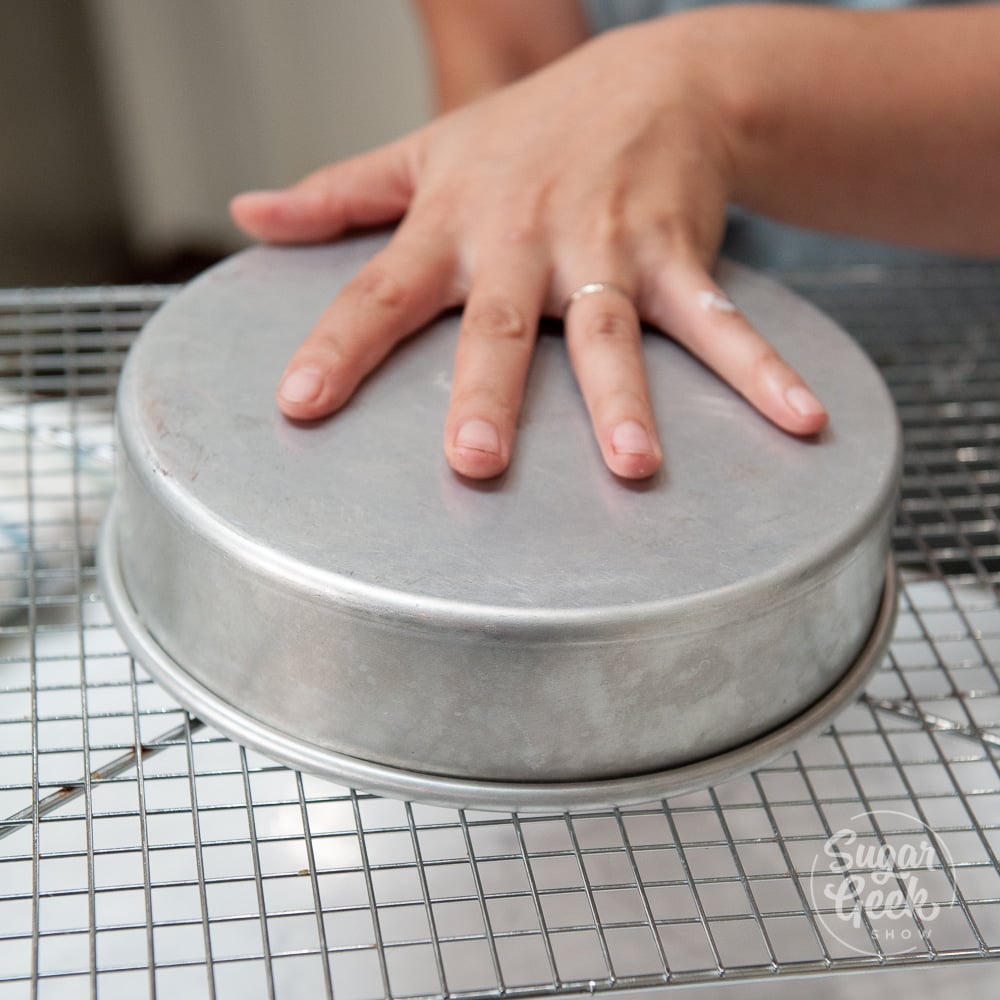
After your cakes are baked, let them cool in the pan until the pan is just barely warm (not cold or they might stick). Invert the cakes onto a cooling rack and let them cool fully before frosting. I put mine into the freezer for about 30 minutes to speed up this process. 

You can also wrap the cakes in plastic wrap and put them in the fridge overnight if you don't plan on decorating the same day as baking. 

chocolate cake coming out of the pan onto a cooling rack

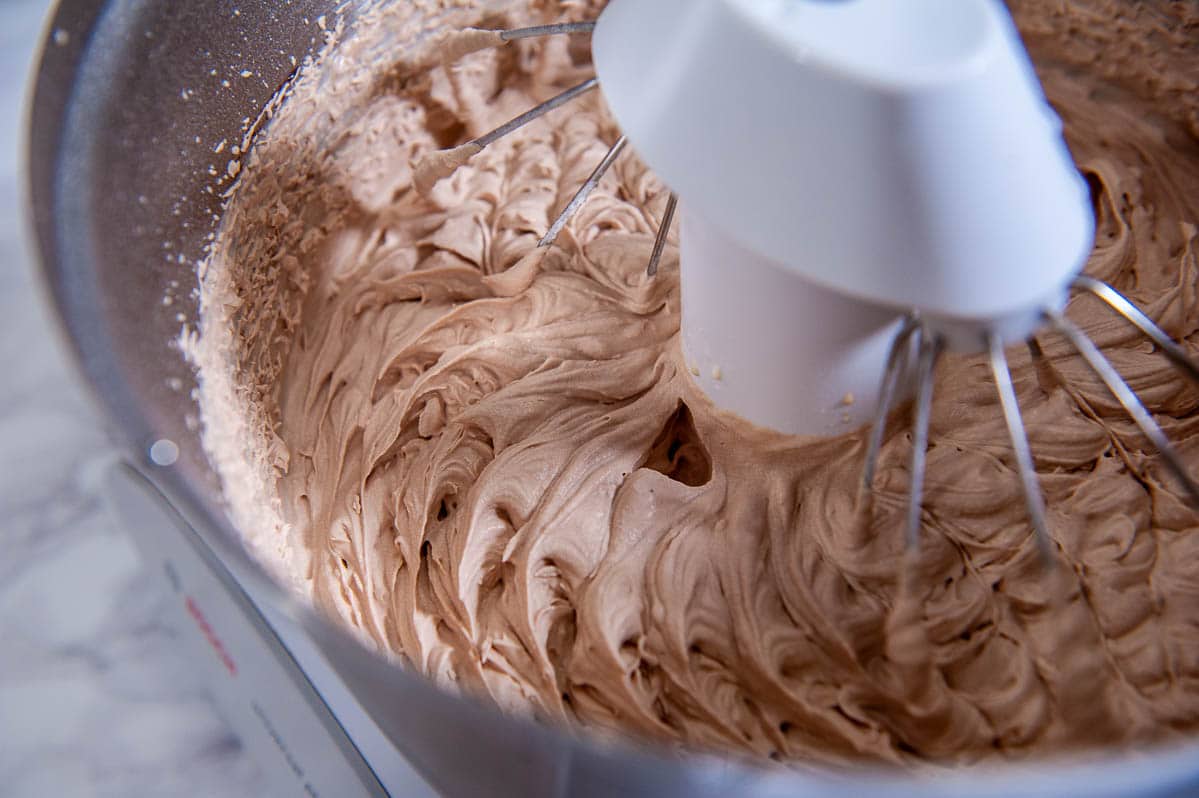
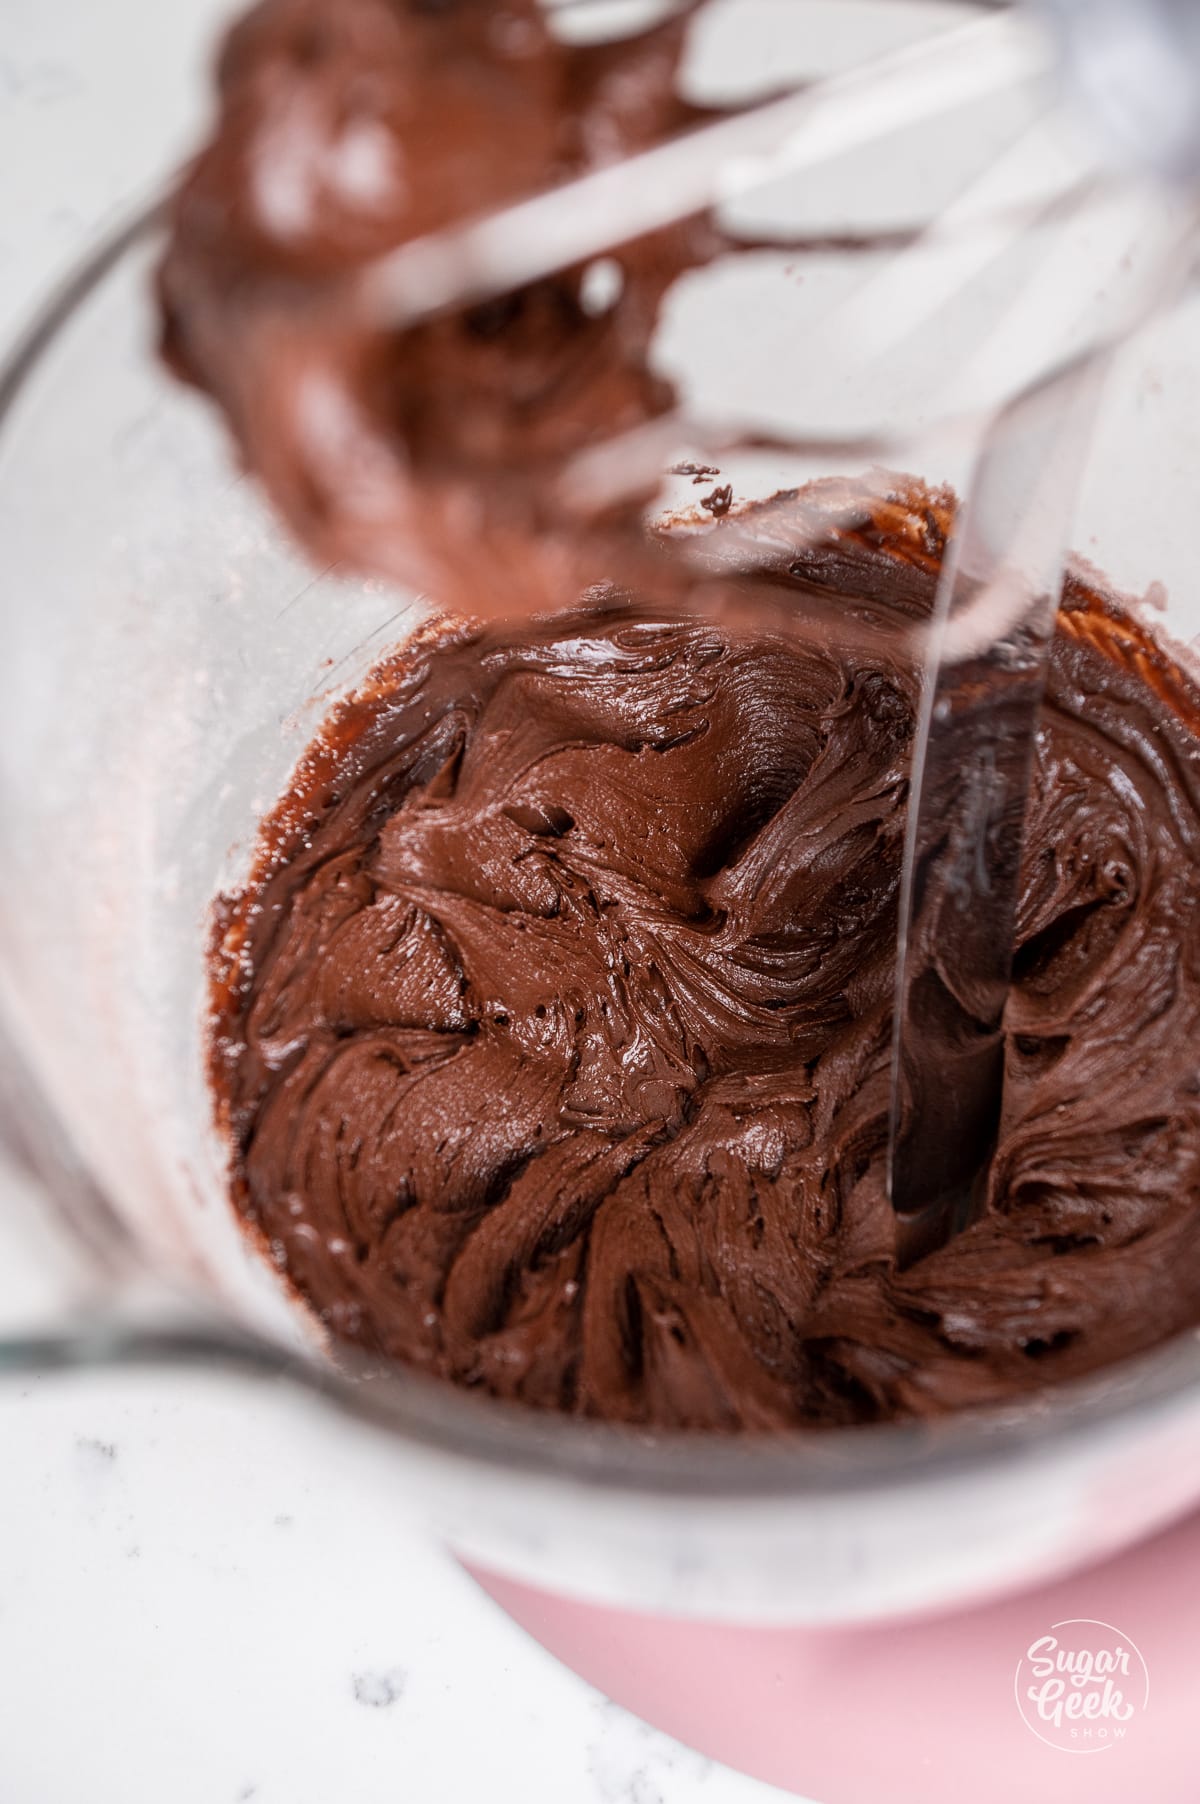
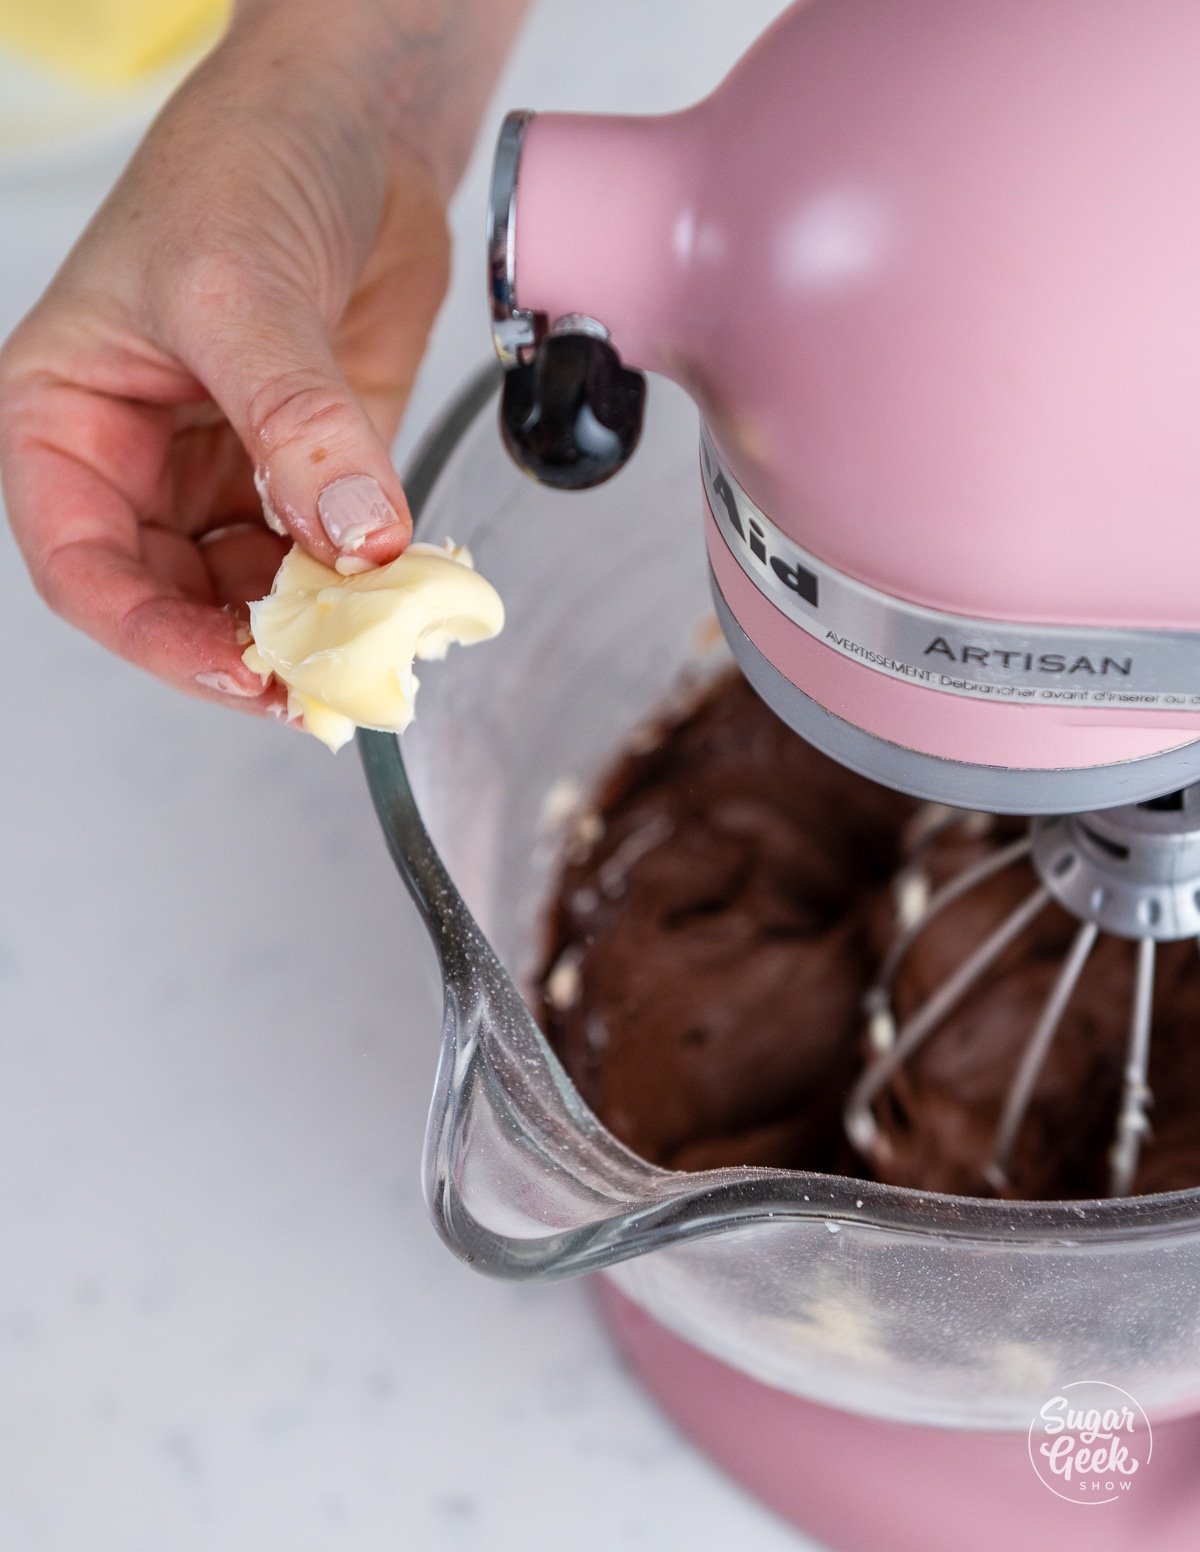
Step 4: Make your whipped cream. I am using my stabilized whipped cream recipe with Oetker stabilizing powder but you can skip the powder if you want. I added a little chocolate syrup to my whipped cream which made it taste like chocolate milk! Soooo tasty! 

Pro-tip: Don't make your whipped cream until you are ready to frost your cake. Once it sets up, it won't be creamy again. 

chocolate whipped cream in a mixing bowl

Make sure you don't over-whip your whipped cream or it will turn to butter and it can't be saved. You want to stop mixing at the point that you see peaks forming but it's not quite stiff yet. 

Step 5: Stack your cakes. If your cakes have a dome, use a serrated knife to remove the dome. Makes a great snack to fuel all this hard work you're doing! 

Cut each layer in half length-wise to make it thinner (optional). This is called torting your cake. Make sure your cakes are cold so they are easy to handle and don't crumble while you're stacking. 

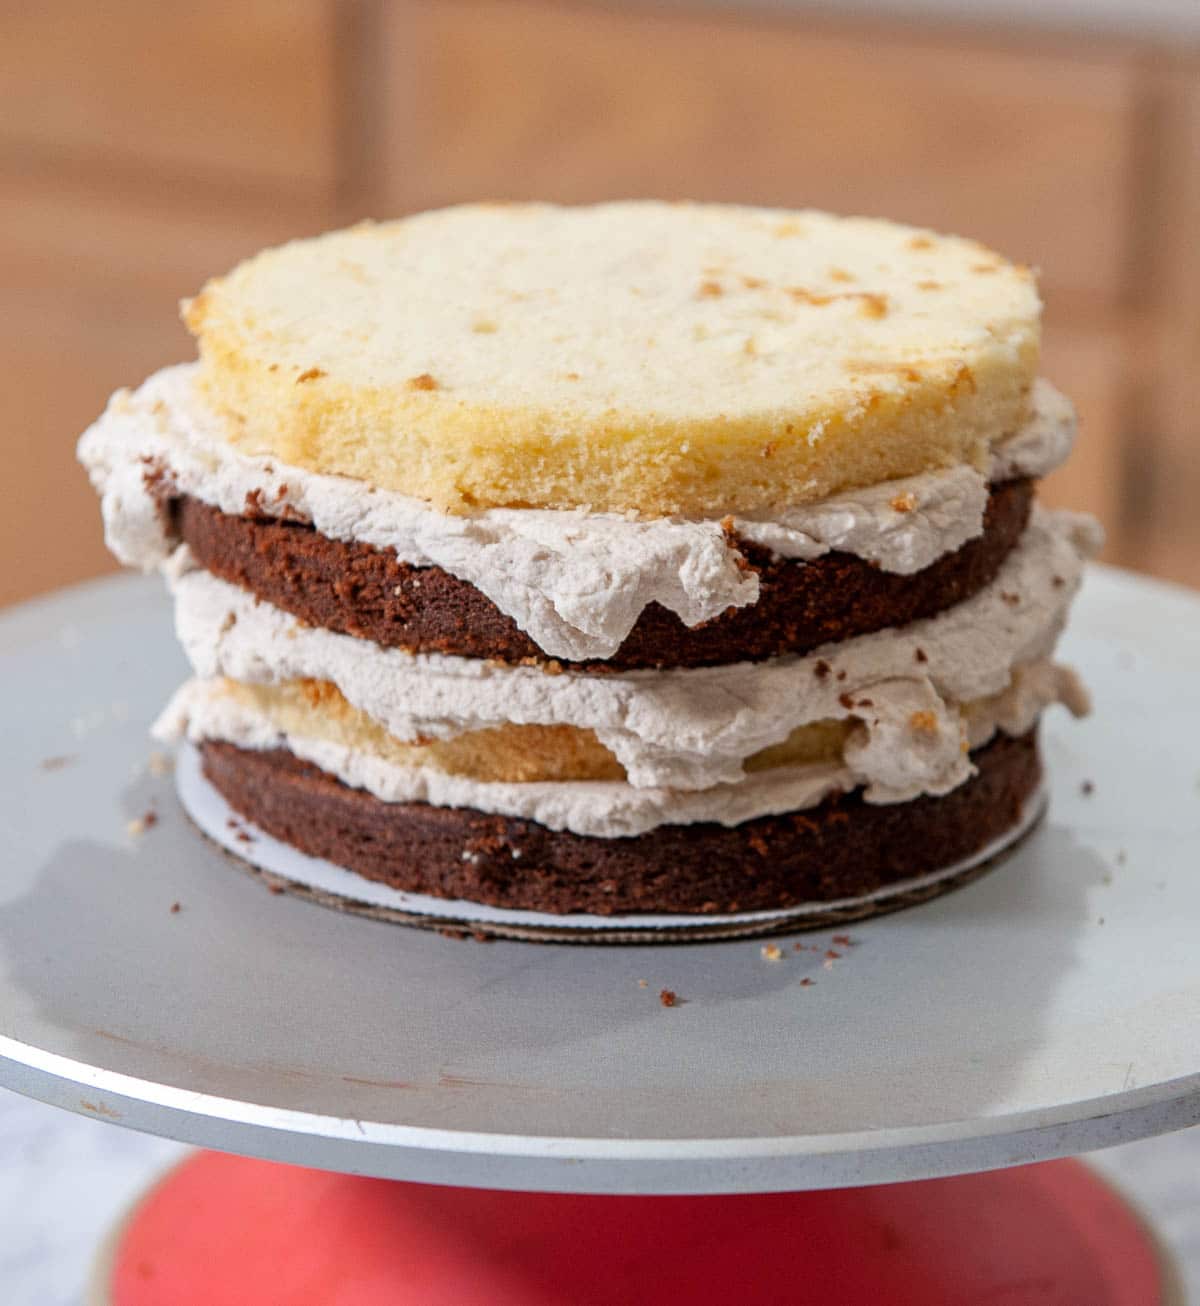
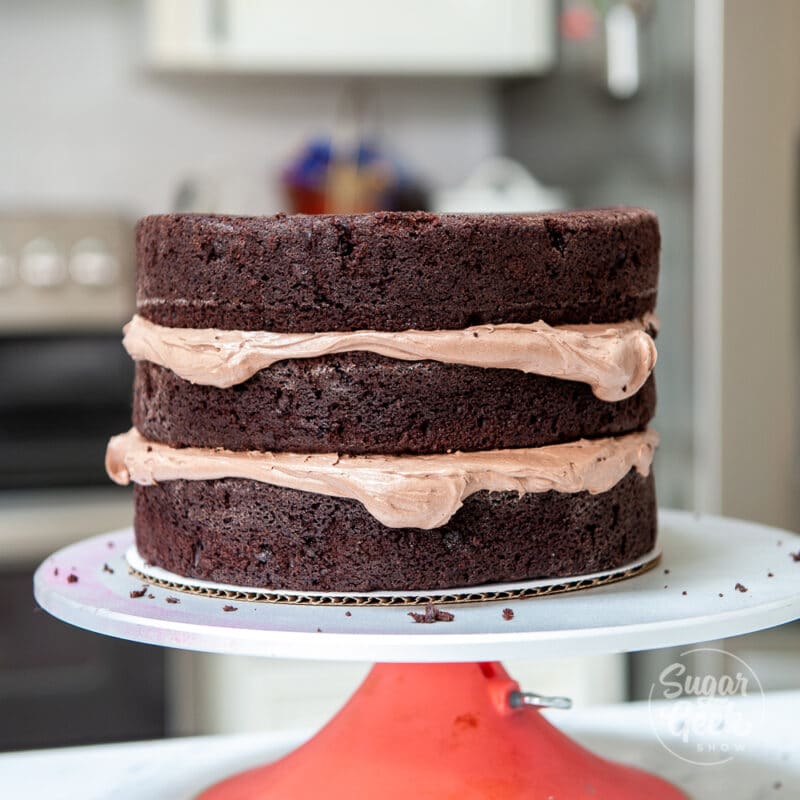
Place your first layer onto the cake board or onto your cake platter. Spread on a layer of your chocolate whipped cream and smooth it with your spatula. Try to keep it as level as you can and about ¼" thick. 

Place the next layer of cake on top and continue this process until you've used all your cake layers. 

chocolate and vanilla cake with whipped cream on a turntable

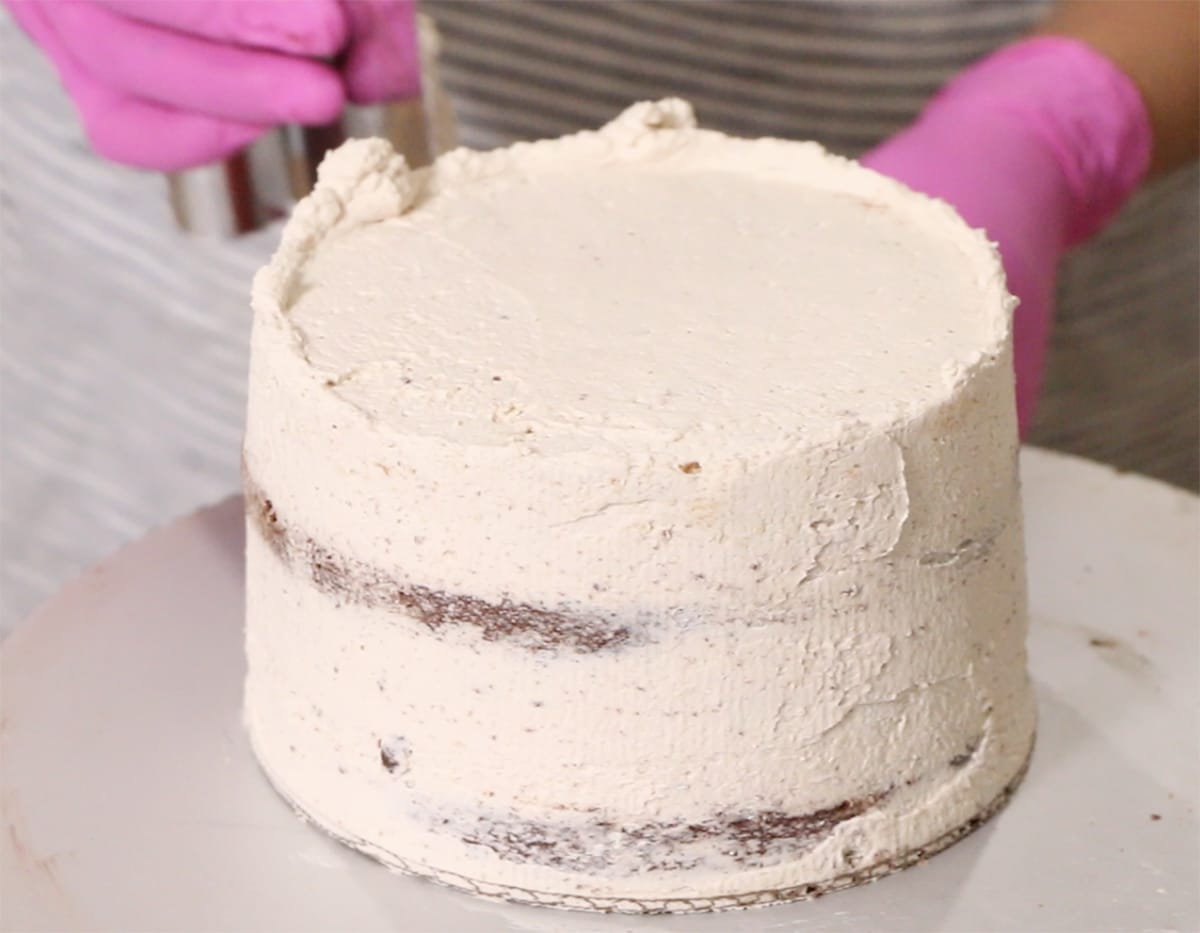
Step 6: Crumb coat. Apply a thin layer of whipped cream over the entire cake to seal in the crumbs. Place the whole cake into the freezer for 15 minutes before moving onto the final step. 

smash cake crumb coat

Step 7: Decorate the cake. 

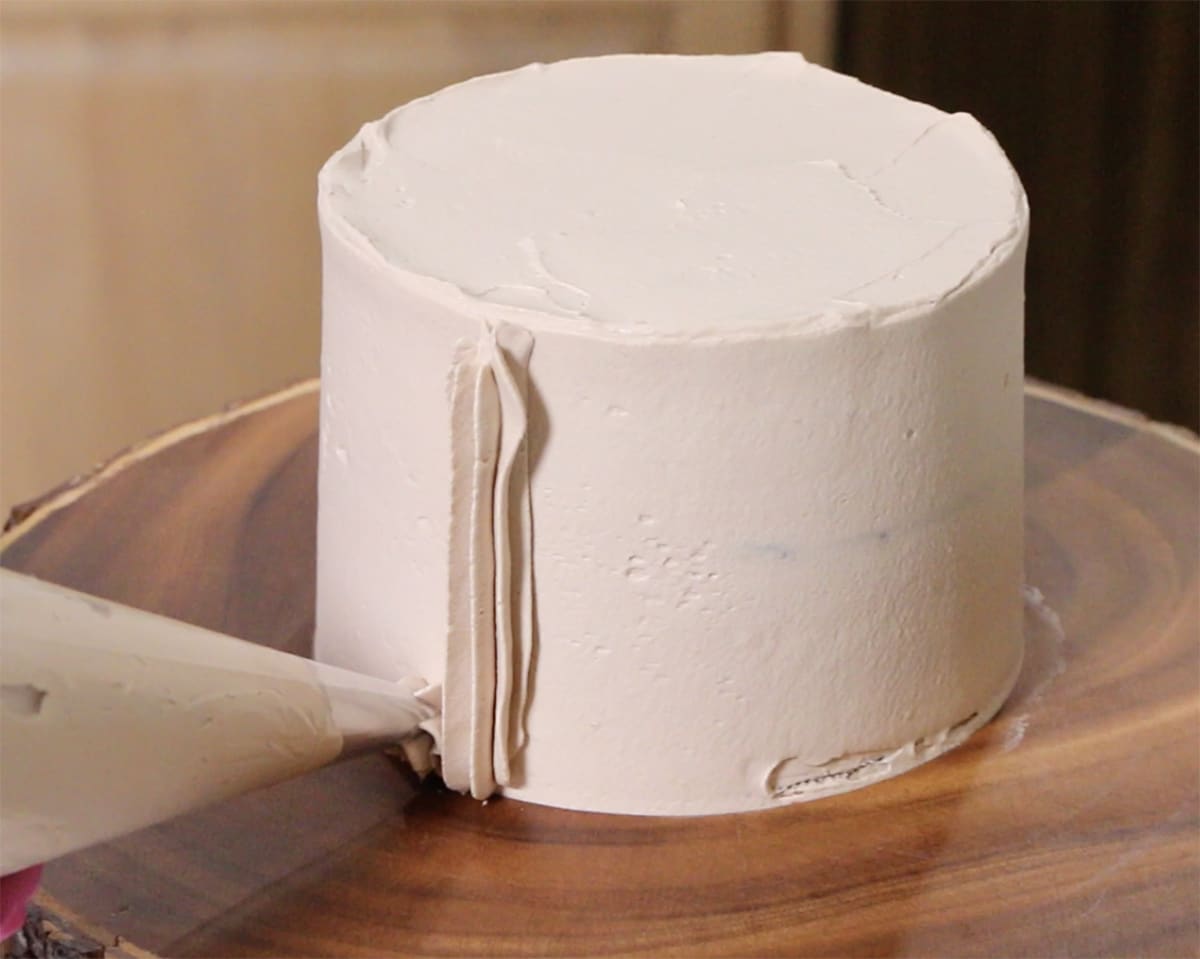
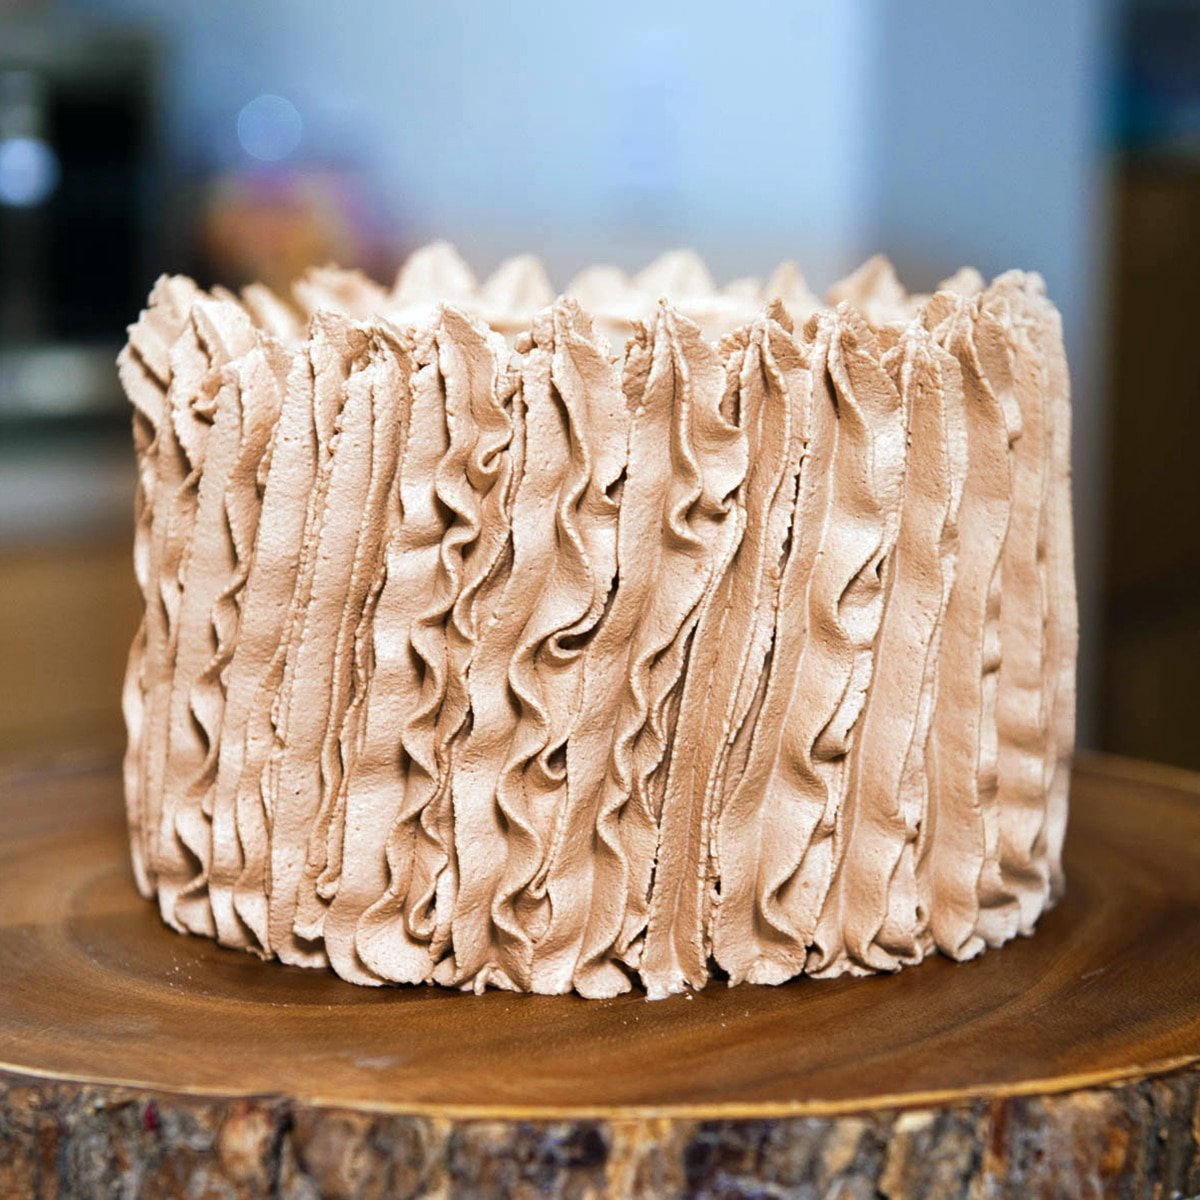
To decorate the smash cake, I decided to use a piping bag and 1M piping tip. Start at the bottom and squeeze while moving upward.

decorating smash cake with piping bag and chocolate whipped cream

Do this all the way around the cake and done! You can also make rosettes or just use your offset spatula to do a rustic finish. It's totally up to you! I purposefully kept this tutorial really simple so that anyone can make a smash cake!

smash cake crown topper

You can get my gold crown printable cake topper template here. Just print the template on gold cardstock and glue the ends together OR you can glue two together to make a crown for a toddler! I added some faux fur to the bottom so it looks more like the crown from Where The Wild Things Are. 

Remember, you should never have fondant or any small objects on a smash cake because they are a choking hazard. 

Tips For Success

  1. A cold cake is a yucky cake. Make sure you take your cake out of the fridge the morning of the smash cake session. At least a few hours in advance to give the cake time to warm up.
  2. Toddlers don't usually know what to do with a cake at first, encourage them to taste by putting their hand in the frosting or give them a little taste of the frosting with your finger to get them started. 
  3. A tired baby plus a smash cake does not go well. When my daughter Avalon turned one, I made the mistake of doing her smash cake at the end of the party when she was exhausted and wanted no part of that cake. Start the party with the smash cake then do a quick wardrobe change afterward and enjoy the party!

where the wild things are smash cake session

Cake Batter and Frosting Calculator

Select an option below to calculate how much batter or frosting you need. Adjust the servings slider on the recipe card to change the amounts the recipe makes.

Choose a pan type

Choose a cake pan size
(based on 2" tall cake pan)

Choose a cake pan size
(based on 2" tall cake pan)

Choose a cake pan size
(based on 2" tall cake pan)

Cupcake Tin Size

Choose number of pans

Cups of Batter Needed

8 cups

Cups of Frosting Needed

5 cups

Note: measurements are estimated based off the vanilla cake recipe using standard US cake pans and sizes. Measurements used are for 2" tall cake pans only. Your results may vary. Do not overfill cake pans above manufacturer's recommended guidelines.


Recipe

chocolate and vanilla cake slice with chocolate whipped cream on a white plate
Print Recipe
5 from 5 votes

Smash Cake Recipe

Layers of moist vanilla and chocolate cake layered with creamy chocolate whipped cream frosting! The best smash cake recipe plus step-by-step tutorial.
Prep Time15 minutes mins
Cook Time7 minutes mins
Total Time22 minutes mins
Course: Dessert
Cuisine: American
Servings: 12 servings
Calories: 340kcal
Author: Liz Marek

Equipment

  • Two 6"x2" cake pans
  • 1M piping tip and piping bag
  • Offset Spatula

Ingredients

Smash Cake

  • 3 ounces hot water
  • 1 ounce cocoa powder
  • 7 ounces Cake Flour
  • 5 ounces granulated sugar
  • ¼ teaspoon salt
  • 2 teaspoon baking powder
  • ¼ teaspoon baking soda
  • 2 large eggs room temperature
  • 2 ounces vegetable oil
  • 5 ounces buttermilk room temperature or slightly warm
  • 3 ounces unsalted butter room temperature
  • 1 teaspoon vanilla

Chocolate Whipped Cream

  • 12 ounces heavy whipping cream cold
  • 2 ounces powdered sugar
  • 1 teaspoon vanilla extract
  • 2 Tablespoons Hershey's chocolate syrup or sifted cocoa powder
  • 1 package Oetkers whipped cream stabilizer
US Customary - Metric

Instructions

Smash Cake Recipe

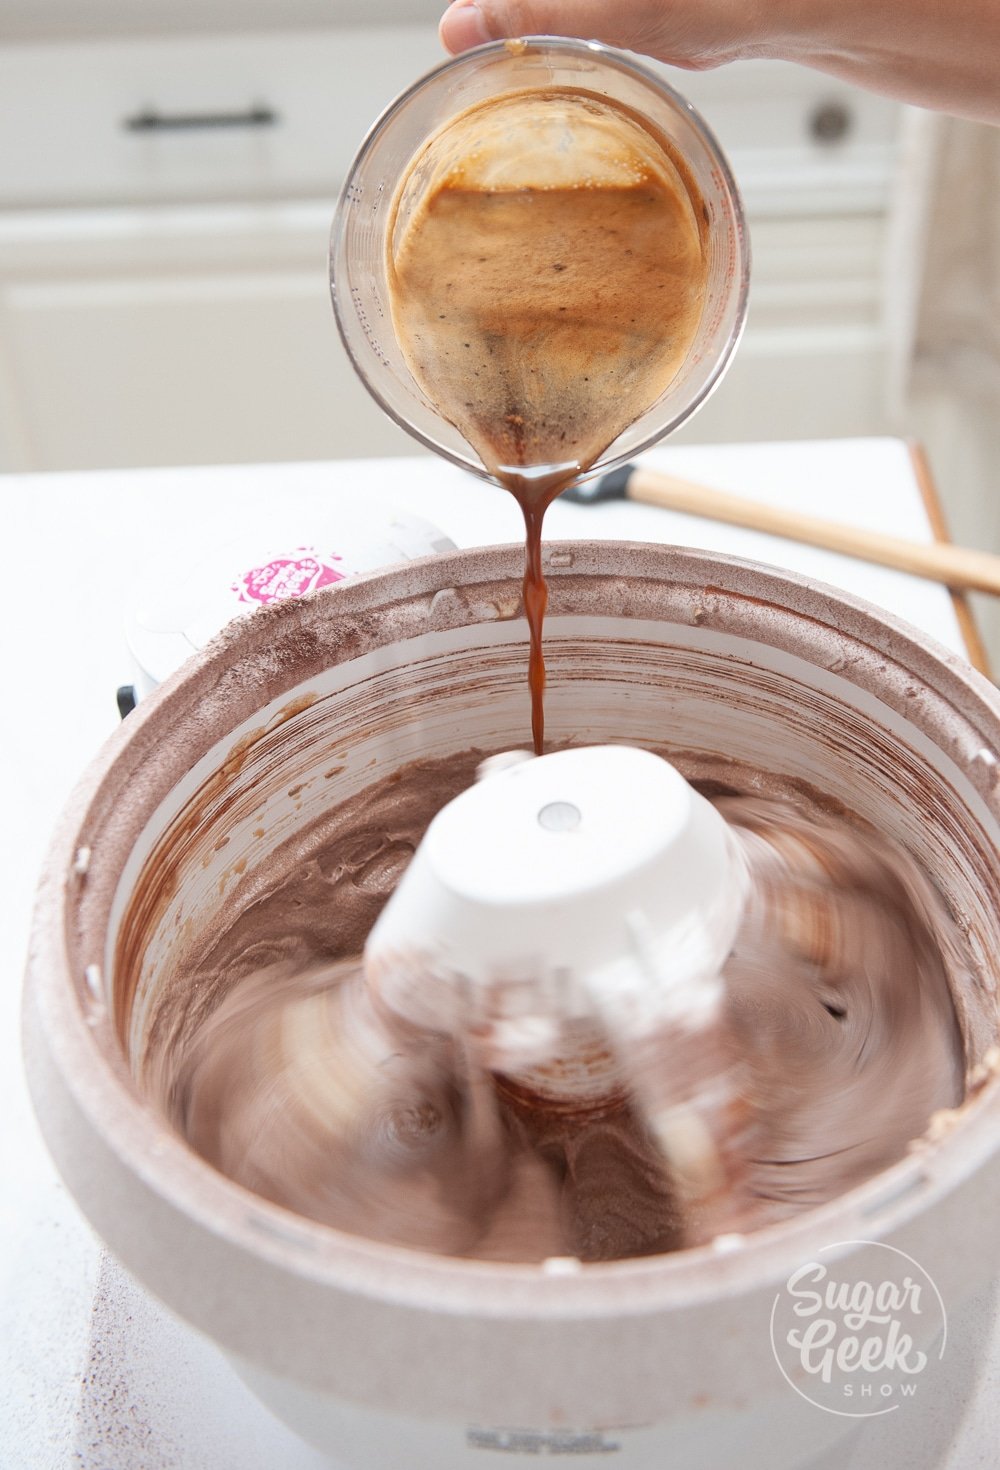
  • Combine the cocoa powder with the hot water and whisk until smooth. Set aside to cool.
  • Combine half the buttermilk with the vegetable oil and set aside.
  • Add the egg and vanilla to the remaining buttermilk and whisk to combine. Set aside.
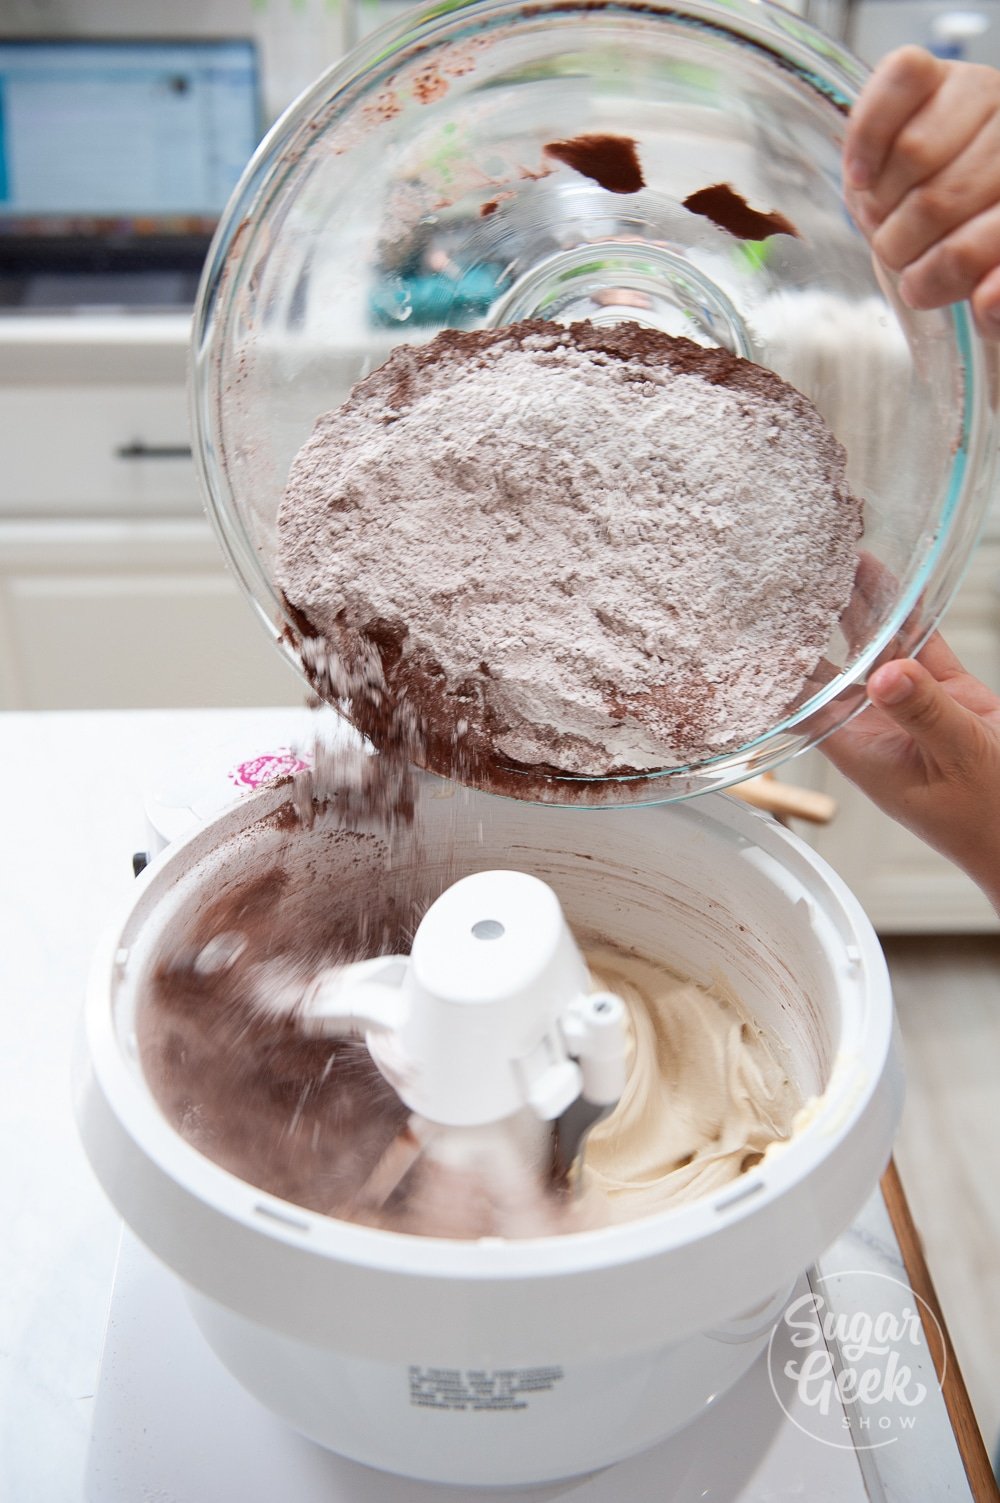
  • Into the bowl of your stand mixer with the paddle attachment attached, add in your flour, sugar, salt, baking powder, and baking soda and mix for 10 seconds to combine.
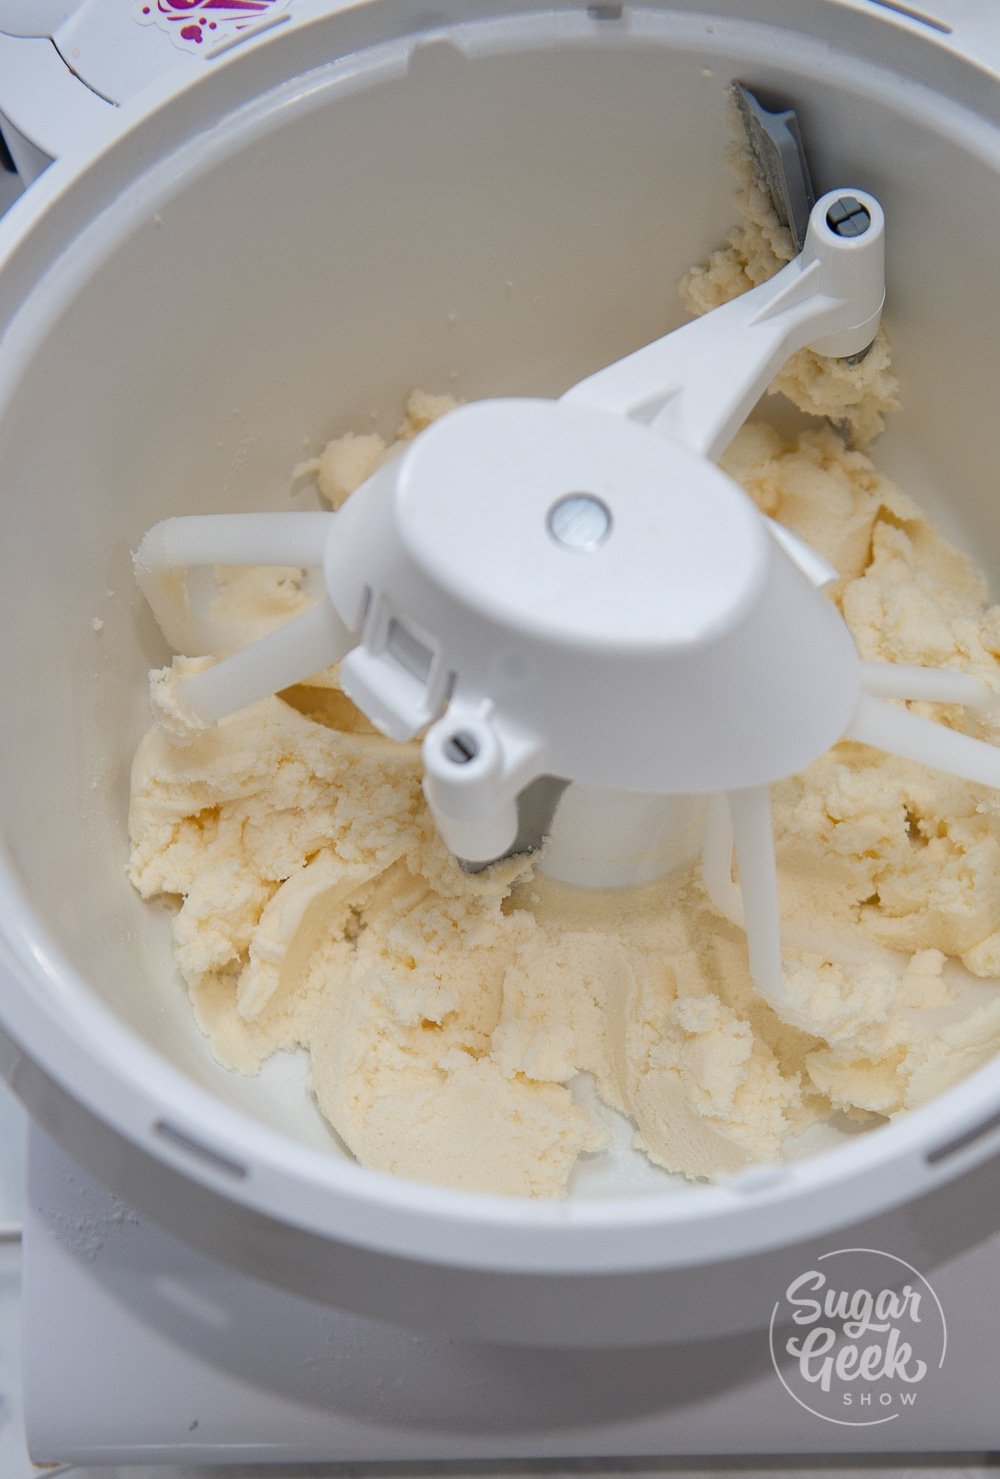
  • While mixing on low, add in your softened butter and mix until the mixture looks like coarse sand.
  • While mixing on low, add in your buttermilk/oil mixture and mix for 2 minutes to develop the cakes structure.
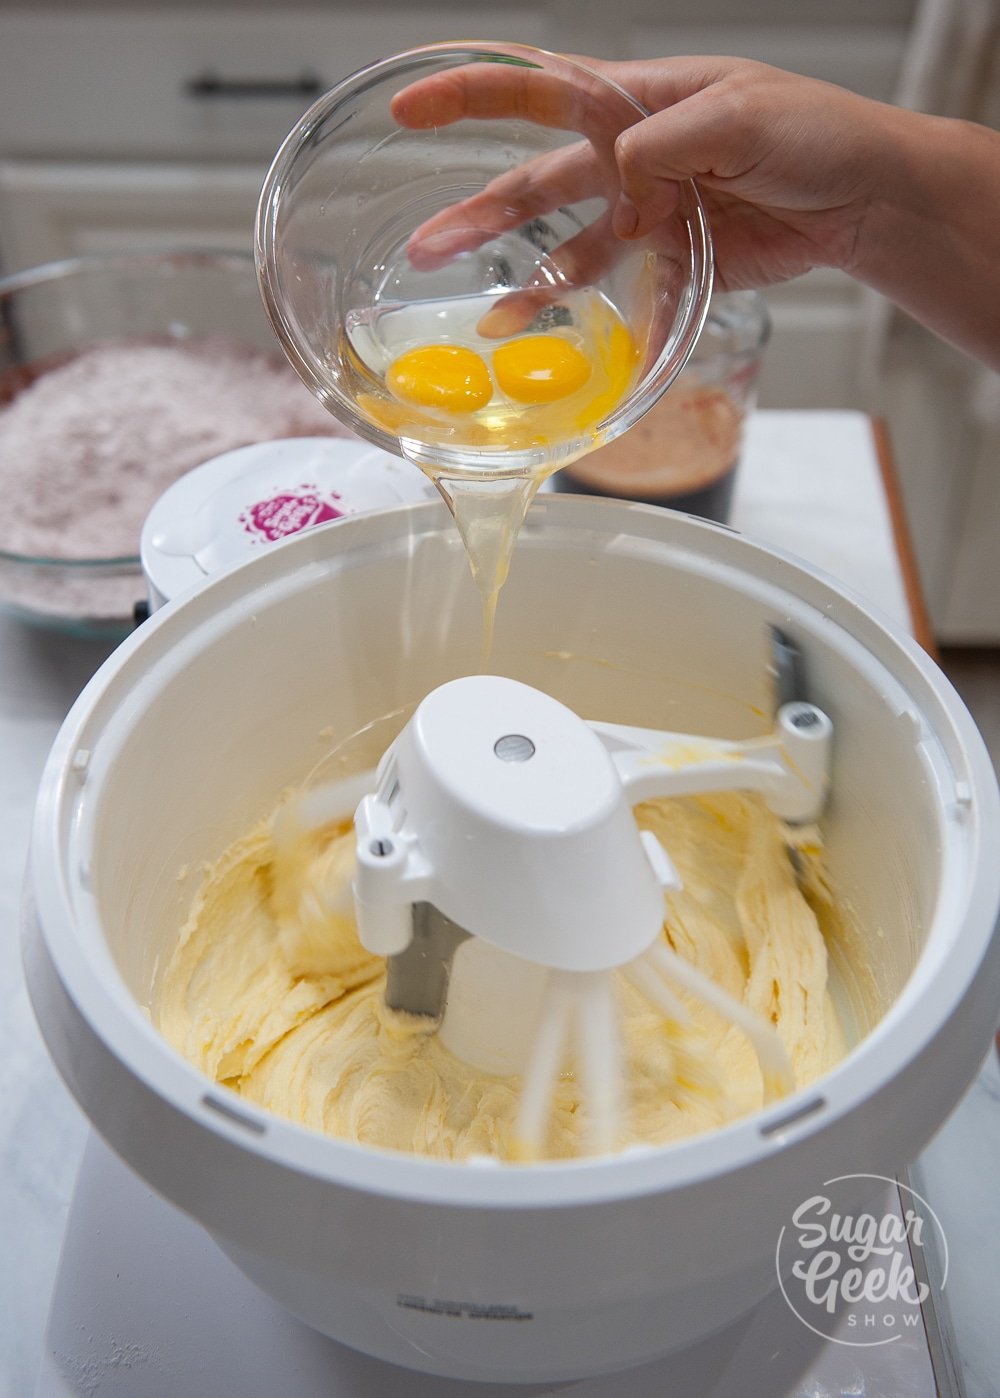
  • Scrape the bowl and then continue mixing on low while slowing drizzling in the buttermilk/egg mixture until cohesive.
  • Divide the cake batter in half and add the chocolate mixture to half the vanilla cake batter and stir to combine.
  • Coat two 6"x2" cake pans with cake goop or another preferred pan release. Fill one pan with the vanilla mixture and the other with the chocolate.
  • Bake your cakes at 350ºF for 25-30 minutes or until the cake bounces back when you touch the top.
  • Let your cakes cool in the pan until they are barely warm to the touch but not cold.
  • invert your cakes onto a cooling rack to cool the rest of the way. I put my cakes in the freezer for 30 minutes (on the cooling rack) so they can cool down further and are easier to handle while stacking the cake. Watch my video above to see how to stack and decorate.

Chocolate Whipped Cream

  • Combine your heavy cream and powdered sugar, vanilla and stabilizer (optional) in the bowl of your stand mixer with the whisk attachment.
  • Mix on medium until you start to see soft peaks form.
  • Add in your chocolate syrup and mix until combined. Do not over mix. Whipped cream should hold it's shape but still be very soft. It will continue to whip and become more stable as you frost the cake.

Video

Notes

  1. Make sure your eggs, buttermilk, and butter are all room temperature before you make your cake or the cake won't combine properly.
  2. Chill your cakes before stacking and frosting 
  3. Don't overwhip your whipped cream so that it stays nice and smooth
  4. You can omit the chocolate if you want your cakes to be vanilla or you can double the chocolate if you want all the cake batter to be chocolate instead of vanilla.
  5. If you’re in the UK search for Shipton mills soft cake and pastry flour or flour that has a protein level of 9% or less. Doing the cornstarch and AP flour trick will not work for this cake, it is formulated specifically with the reverse creaming method to use cake flour.

Nutrition

Serving: 1cup | Calories: 340kcal | Carbohydrates: 32g | Protein: 5g | Fat: 23g | Saturated Fat: 15g | Cholesterol: 86mg | Sodium: 109mg | Potassium: 169mg | Fiber: 1g | Sugar: 17g | Vitamin A: 658IU | Vitamin C: 1mg | Calcium: 73mg | Iron: 1mg

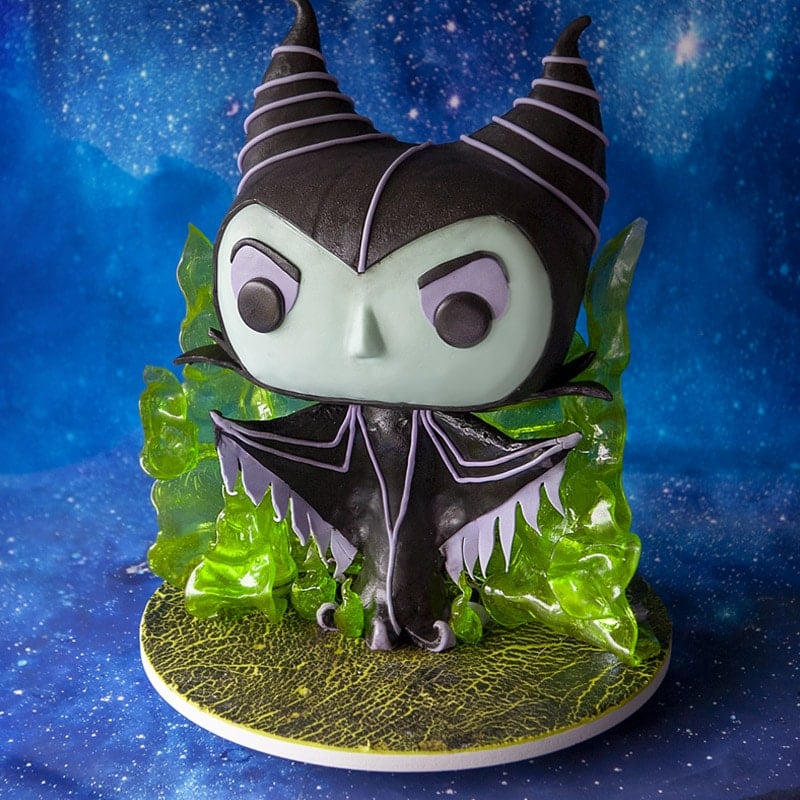
Sculpted cake that looks like a funko pop figurine in the likeness of Maleficent

October 15, 2020 Course Preview

Maleficent Funko Pop Cake Tutorial

Skill level: Intermediate

I had the opportunity to make a birthday cake for my neighbor who is obsessed with Funko Pop figurines, her absolute favorite being Maleficent and I had a blast making this cake for her!

In this tutorial, you'll learn the structure to use when designing a gravity-defying Funko Pop cake, how to create the details and elements, as well as how to make the glowing magical green flames behind Maleficent.

There's a lot to cover in this tutorial, so let's get our tools together and let's get started!

1:38:49 Minutes of Instruction

What You Will Learn

  • How to make gravity-defying Maleficent Funko Pop cake
  • Learn how to create the edible glowing green flames
  • Tips and tricks to add details onto Maleficent

Tutorial Chapters

  1. Scaling the cake 0:40
  2. Making the cake structure 5:47
  3. Black modeling chocolate 9:55
  4. Making the board structure 11:18
  5. Making the wing structure 22:26
  6. Making the body 25:32
  7. Decorating the board 29:22
  8. Continuing the body 35:02
  9. The body details 46:52
  10. Adding the cake head 50:48
  11. Making the horns 55:20
  12. Covering in fondant 59:13
  13. Smoothing the head 1:09:51
  14. Making the eyes 1:12:09
  15. Making horn details 1:17:38
  16. Making the collar 1:20:48
  17. Making isomalt flames 1:23:19
  18. Adding the flames 1:30:40

Downloads

Materials List

Cake Board Template

Sculpted cake that looks like a funko pop figurine in the likeness of Maleficent

October 15, 2020 Paid Video

Maleficent Funko Pop Cake

Skill level: Intermediate

I had the opportunity to make a birthday cake for my neighbor who is obsessed with Funko Pop figurines, her absolute favorite being Maleficent and I had a blast making this cake for her!

In this tutorial, you'll learn the structure to use when designing a gravity-defying Funko Pop cake, how to create the details and elements, as well as how to make the glowing magical green flames behind Maleficent.

There's a lot to cover in this tutorial, so let's get our tools together and let's get started!

1:38:49 Minutes of Instruction

What You Will Learn

  • How to make gravity-defying Maleficent Funko Pop cake
  • Learn how to create the edible glowing green flames
  • Tips and tricks to add details onto Maleficent

Tutorial Chapters

  1. Scaling the cake 0:40
  2. Making the cake structure 5:47
  3. Black modeling chocolate 9:55
  4. Making the board structure 11:18
  5. Making the wing structure 22:26
  6. Making the body 25:32
  7. Decorating the board 29:22
  8. Continuing the body 35:02
  9. The body details 46:52
  10. Adding the cake head 50:48
  11. Making the horns 55:20
  12. Covering in fondant 59:13
  13. Smoothing the head 1:09:51
  14. Making the eyes 1:12:09
  15. Making horn details 1:17:38
  16. Making the collar 1:20:48
  17. Making isomalt flames 1:23:19
  18. Adding the flames 1:30:40

Downloads

Materials List

Cake Board Template

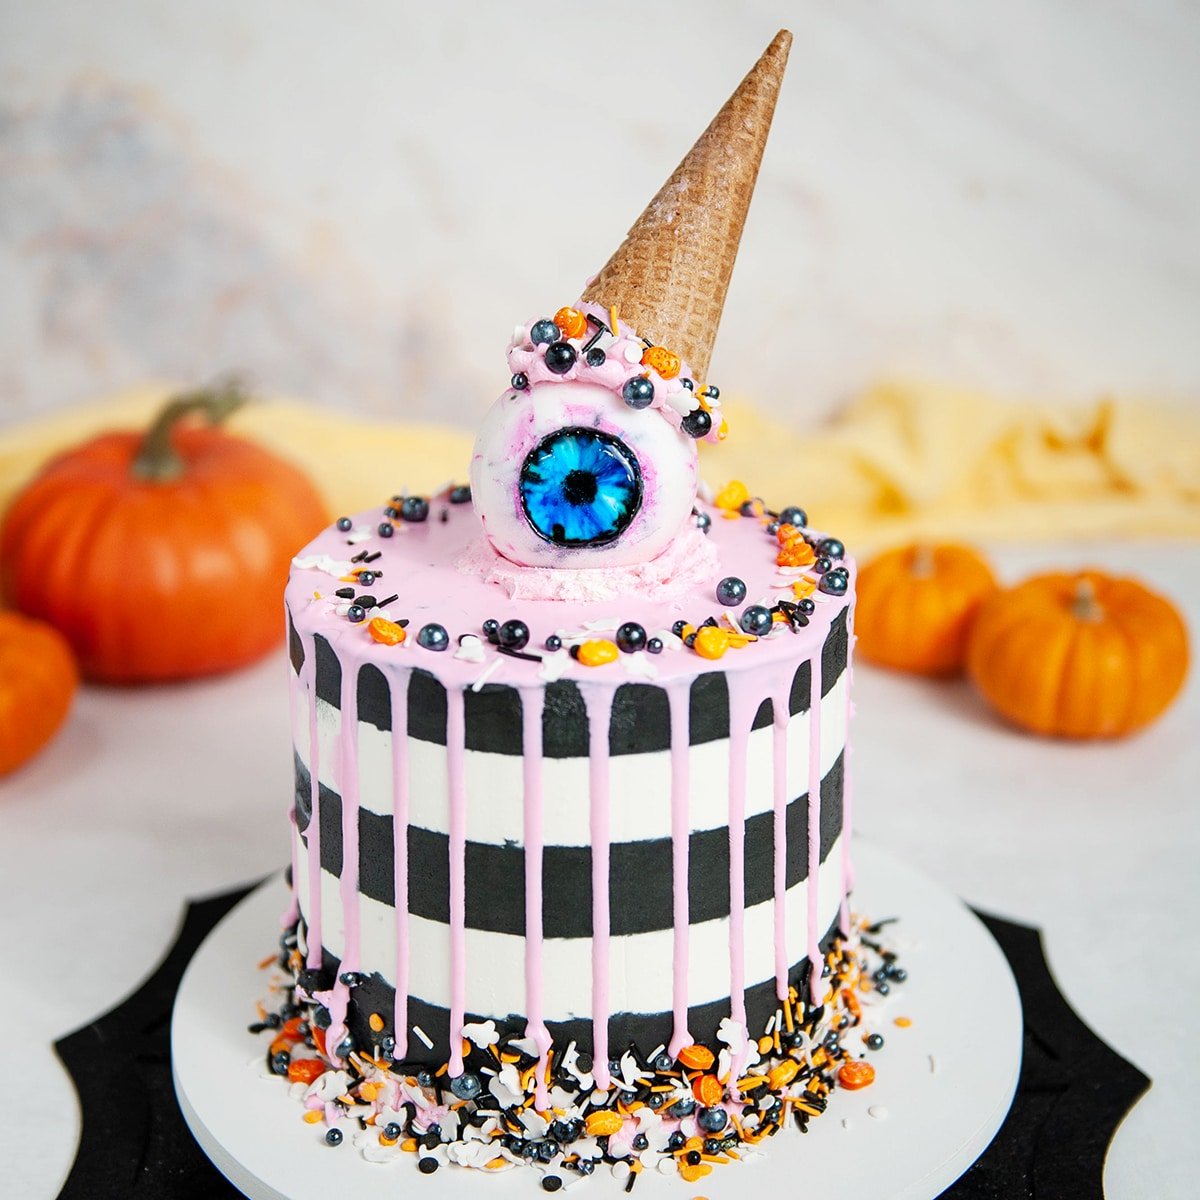
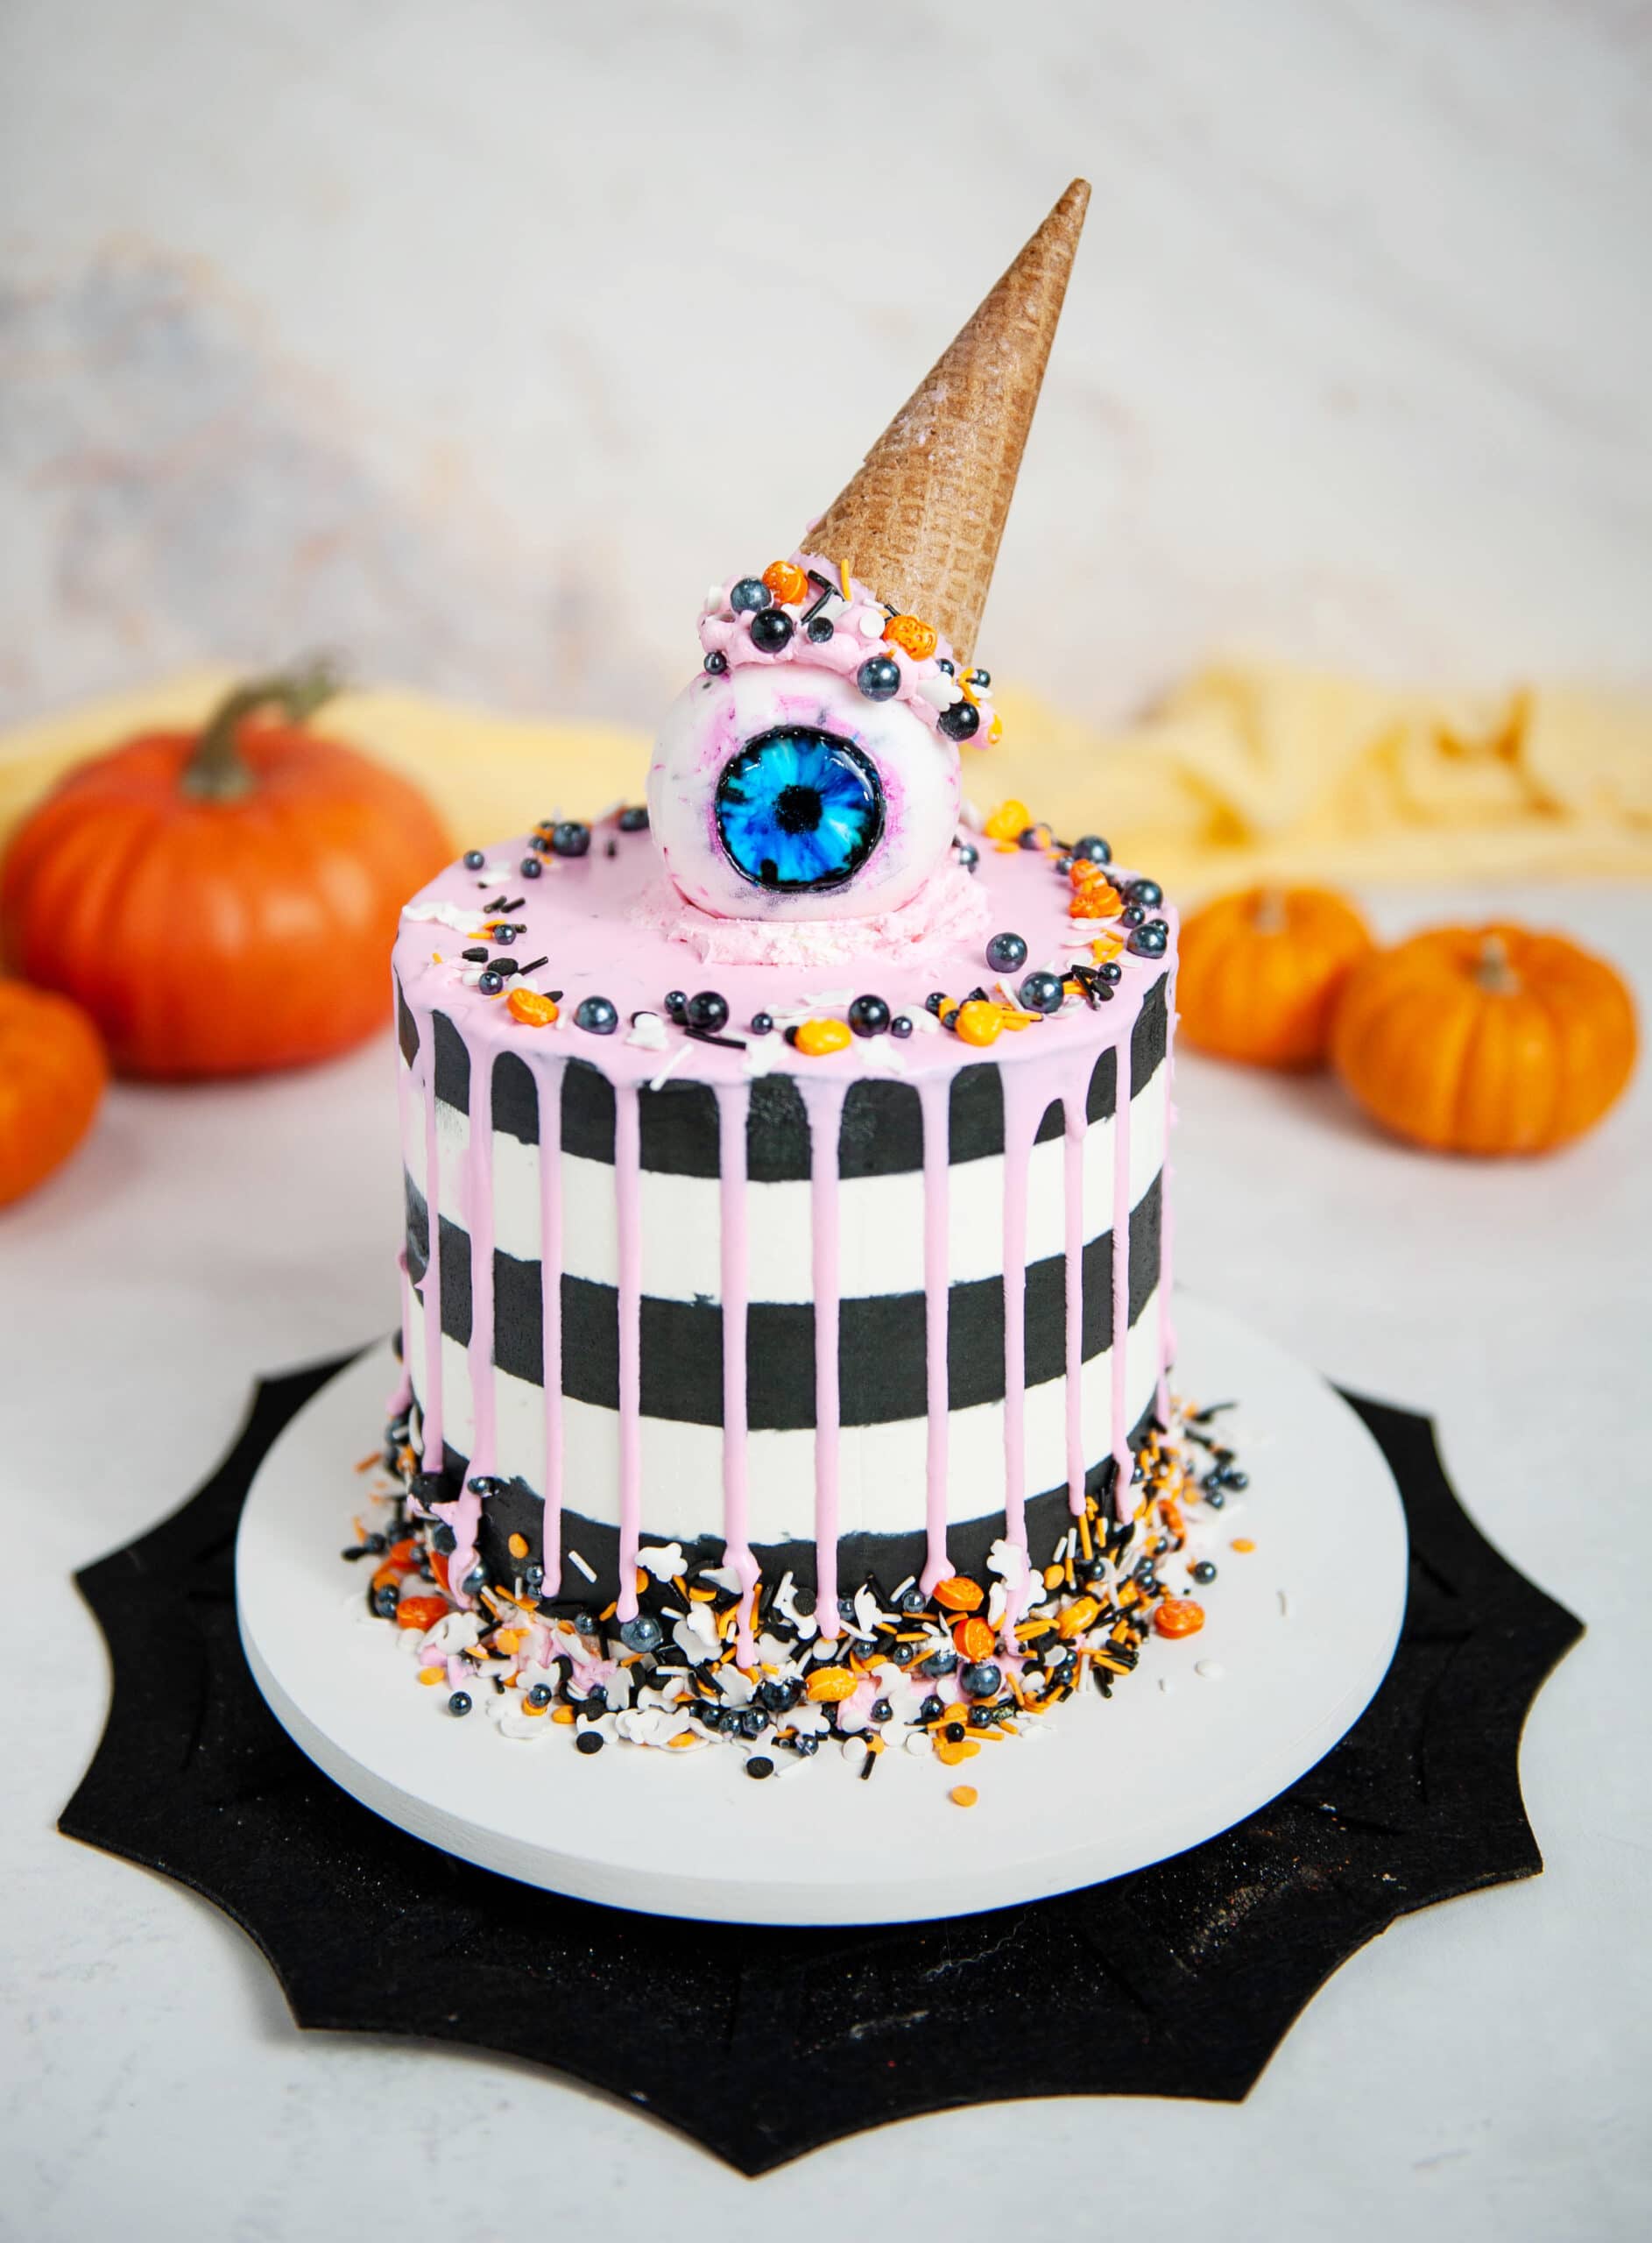
black and white striped cake with pink drip, gummy eyeball with ice cream cone on top

October 13, 2020 Candy

Gummy Eyeball Cake

Happy almost Halloween! I made this fun EYE-scream cake (you see what I did there) just so I could make a giant gummy eyeball! This is an updated recipe and tutorial on how I make my gummy eyeballs! 

black and white striped cake with pink drip, gummy eyeball with ice cream cone on top

Watch the video below to also learn how to make black buttercream, and how to make buttercream stripes. For the cake recipe, I used my pumpkin spice cake recipe! 

Gummy eyeball ingredients

The most important ingredient for making gummy eyeballs is gelatin. I like to use super clear gelatin but knox gelatin will also work. 

super clear gelatin

You can flavor your gummy eyeballs with any kind of extract you like! I like to use fruity flavors like strawberry, orange, apple, raspberry or pineapple. The citric acid makes the gummies a little sour which tastes really yummy. 

If you want your gummy eyeballs to have the texture and shelf life of a real gummy bear, you can use my gummy bear recipe in place of the gummy eyeball recipe. 

You will also need some food coloring. White for coloring the eyeball (or you can use some milk), blue for iris and black for the pupil. I used Americolor food coloring gel. Electric blue and super black. 


Gummy eyeball tools

I use an updated recipe that tastes delicious and is easy to customize to any flavor. I used a sphere mold from the Chicago School of Mold Making for my eyeballs but you can use any sphere mold. I especially love the sphere ice molds because they are inexpensive. 

For painting, I like to use a fine detail brush. That's it!

How to make gummy eyeballs

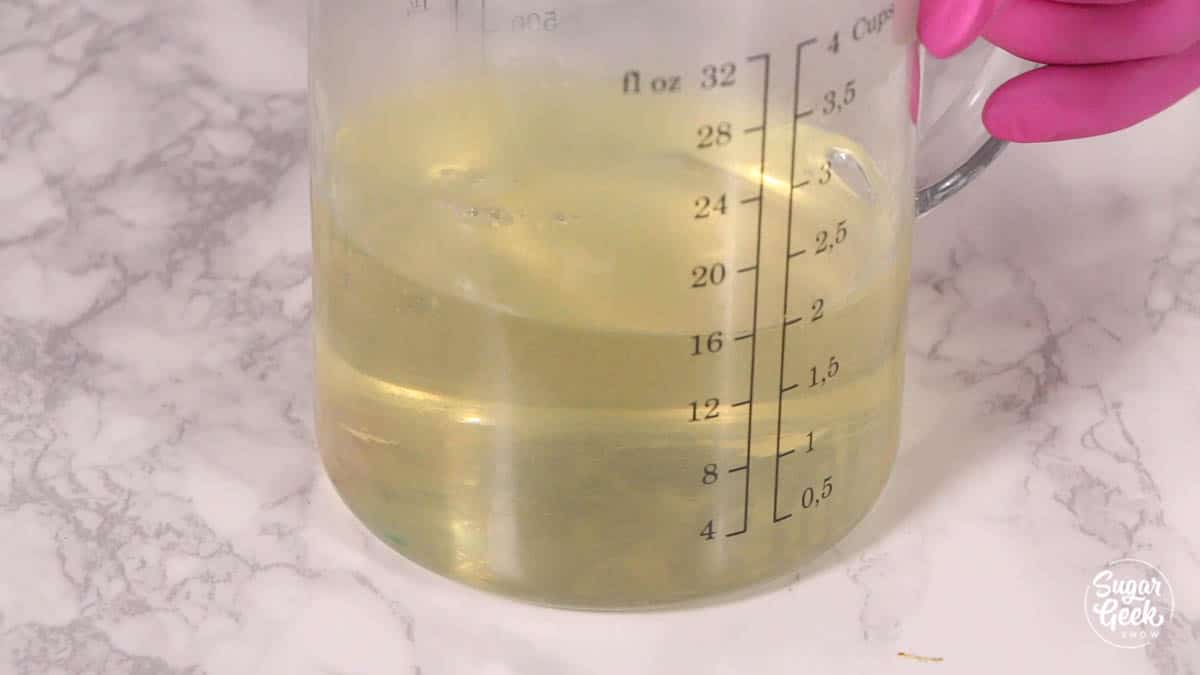
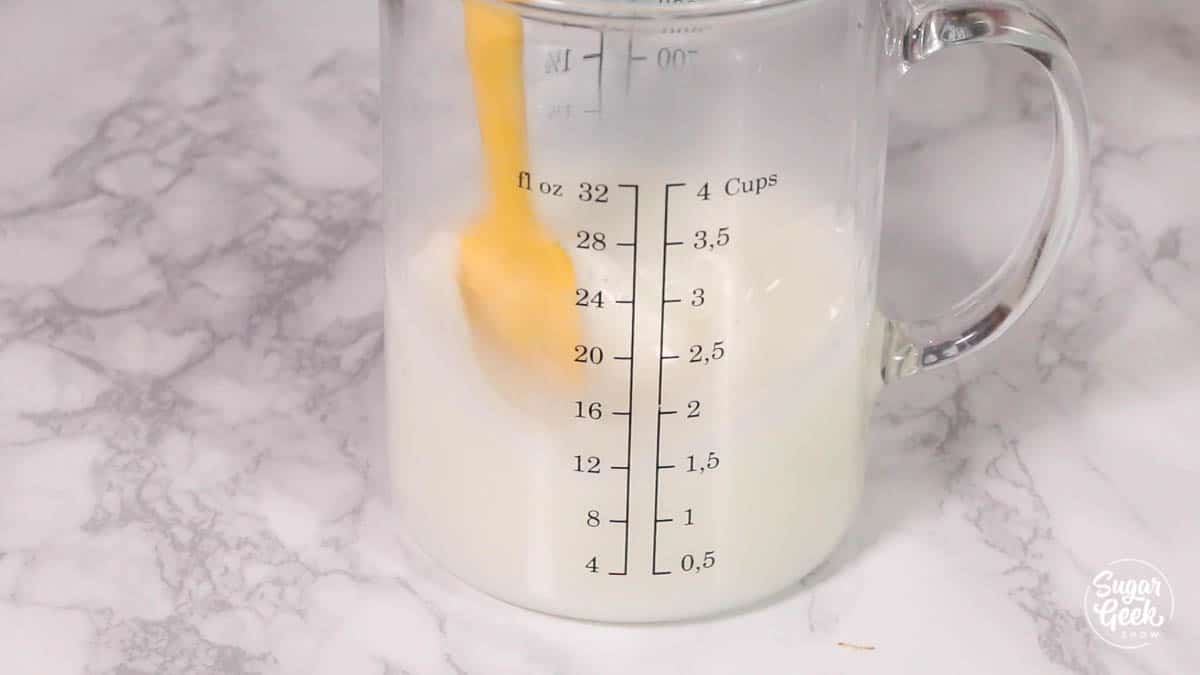
Step 1 - The first thing you need to do is make your gummy eyeball recipe. Reserve about ⅓ of the recipe for the clear iris. Color the rest with a few drops of white food coloring. 

gummy recipe in a clear measuring cup

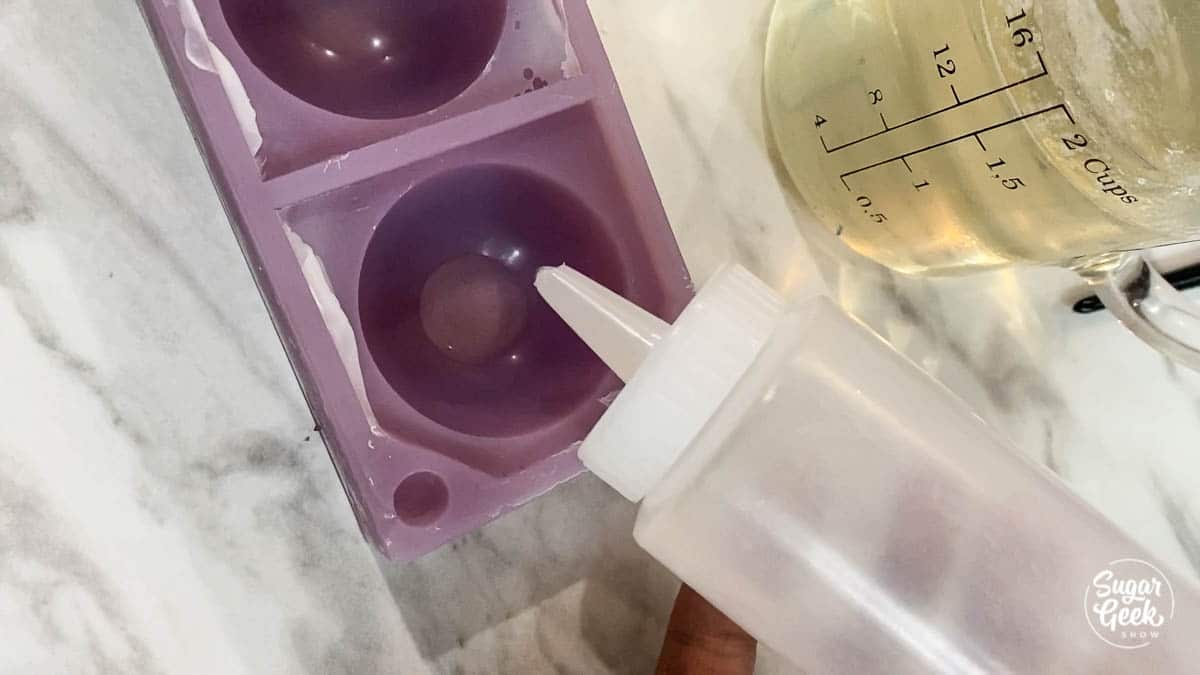
Step 2 - Make the Iris. Make sure the clear gelatin is not too hot for this part. It should be melted but not hot feeling at all (about 90-95ºF is ideal). Place a few drops into the bottom of the mold to make the iris. Depending on the size of the mold it could be the size of a dime or it could be the size of a quarter. It's up to you. You can use a spoon, a squeeze bottle or just carefully pour from your measuring cup. If you mess up just wait for it to set up and peel it back out and try again. 

clear plastic bottle over purple silicone sphere mold

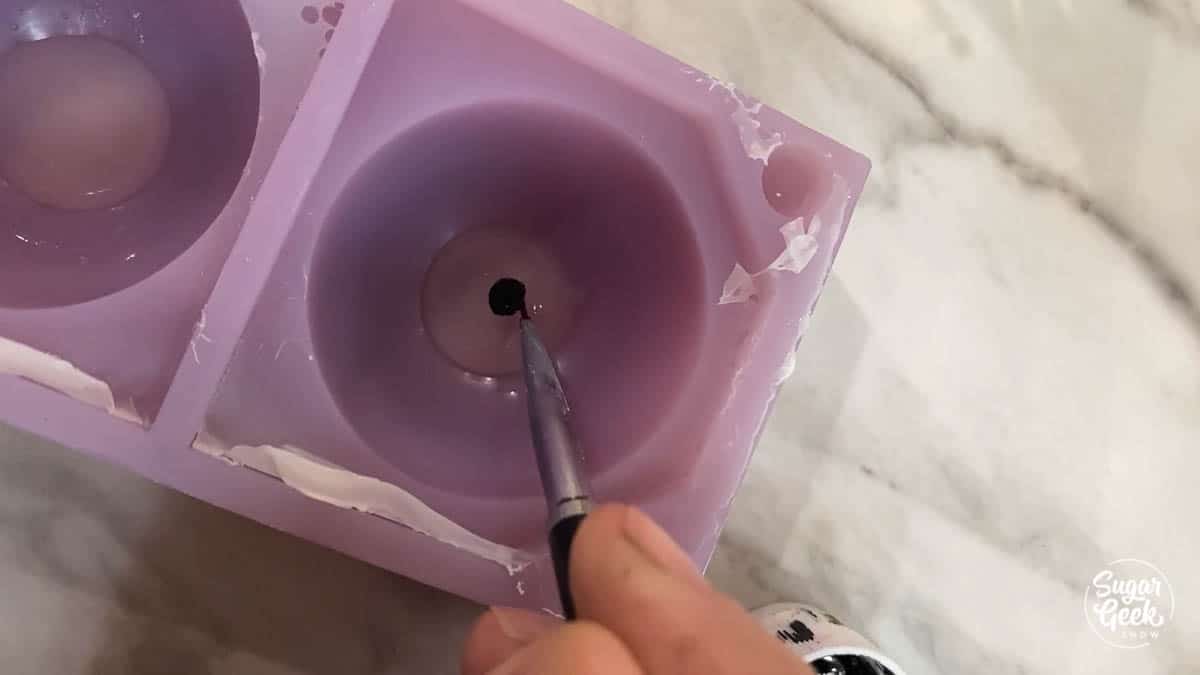
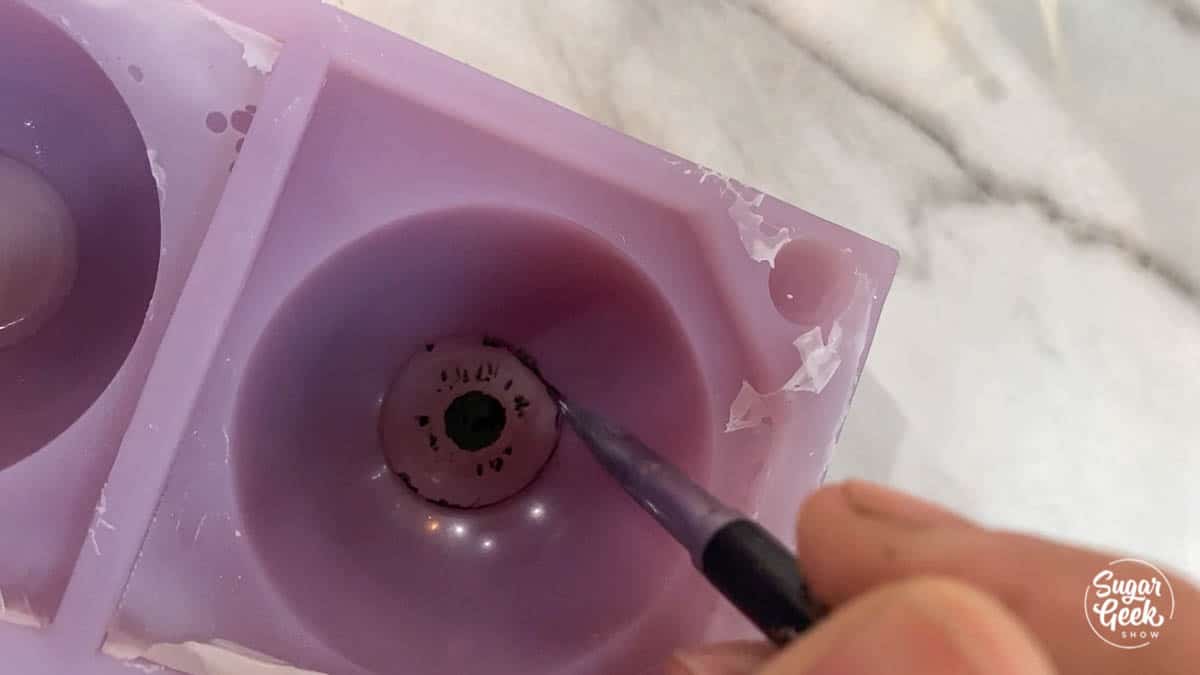
Step 3 - Once the clear gelatin sets up, use your fine-tipped paintbrush to paint in the pupil (black dot in the center). Try to center it the best that you can and paint a simple circle. 

black paintbrush painting a black circle on clear gelatin inside a sphere mold

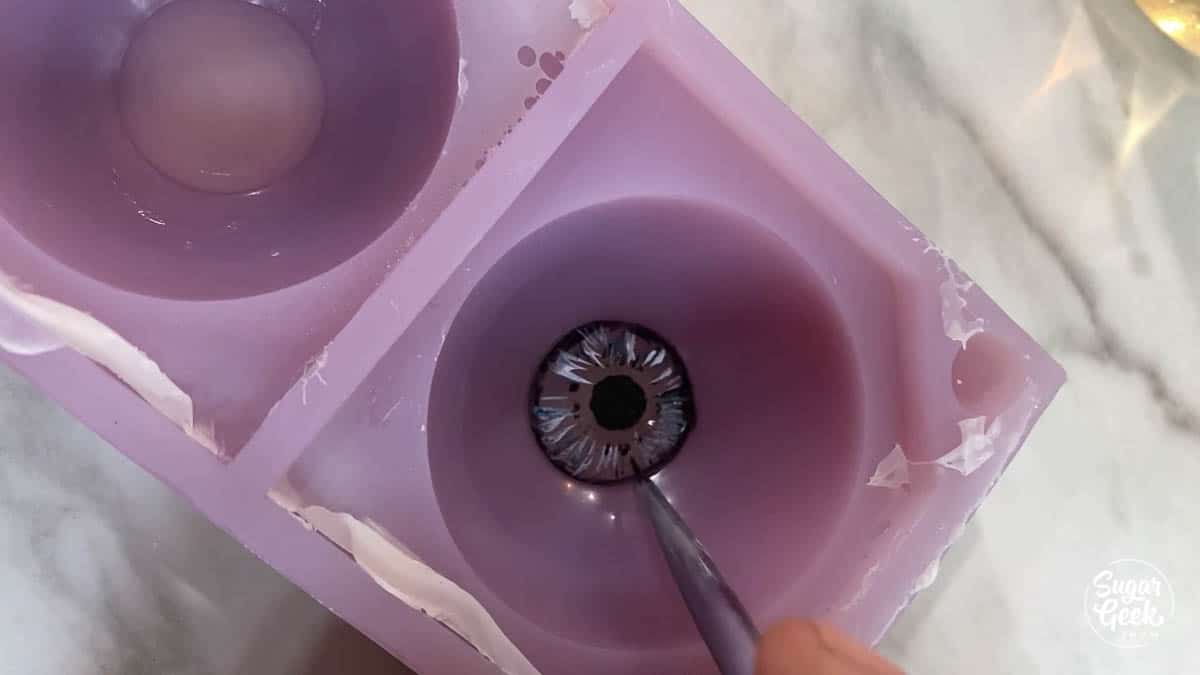
Step 4 - Add a few dots and lines with the black around the iris (colored part of the eye), very lightly. 

painting details onto gelatin in purple sphere mold

Step 5 - Outline the outside of the iris very lightly with more black food coloring. 

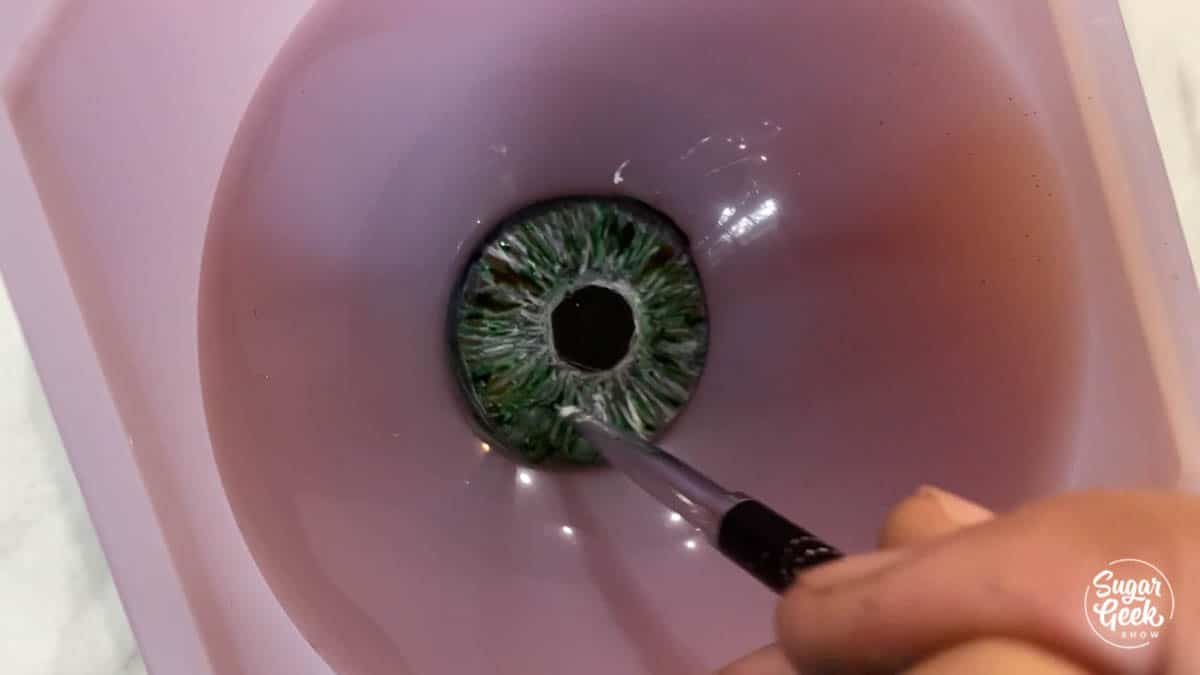
Step 6 - Use a combination of colored food coloring (like blue, brown, green etc) and white food coloring to put in some lines radiating out from the pupil until the clear is completely covered. Try not to mess up your pupil. 

painting details onto gelatin in purple sphere mold

painting details onto gelatin in purple sphere mold

Step 7 - Let the food coloring dry for 20 minutes (or more). If the food coloring is not dry, it can bleed into the white part of your eye. Totally fine for the zombie look but you may not want that so that's how you avoid it. 

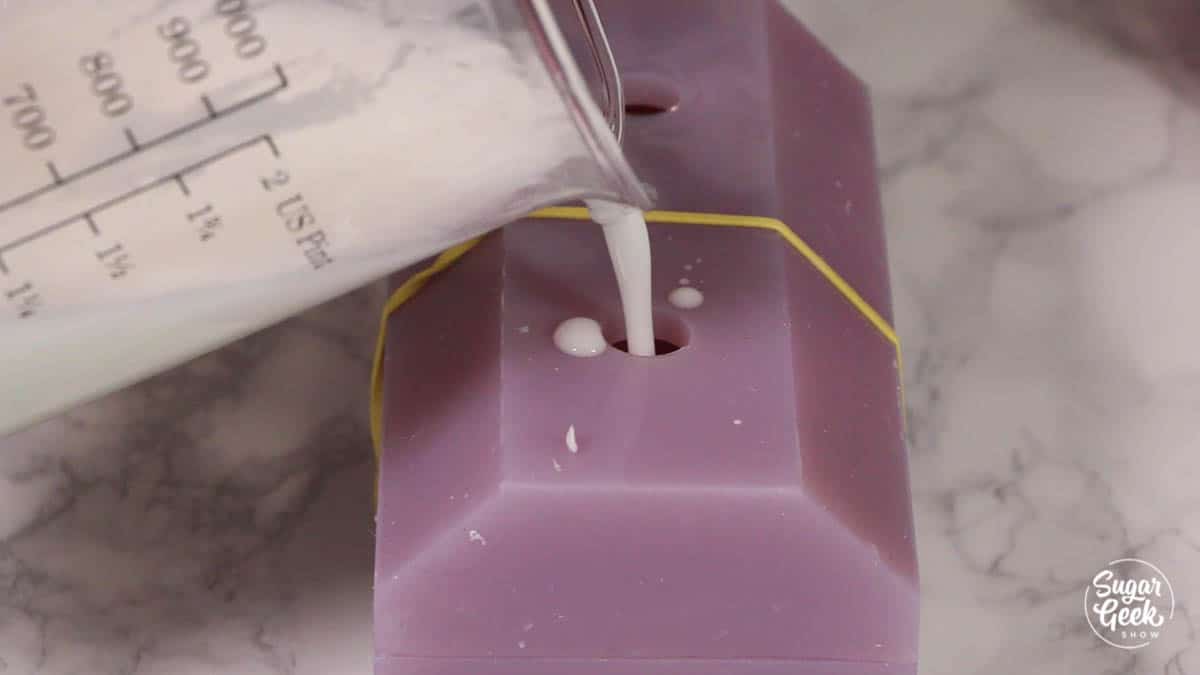
pouring white gelatin into a purple silicone mold

Step 8 - Place the top of your mold on, use rubber bands to make sure it stays sealed

Step 9 - Fill the mold up with white gelatin (cooled to 90-95ºF) and place the molds into the fridge to set up for at least two hours. 

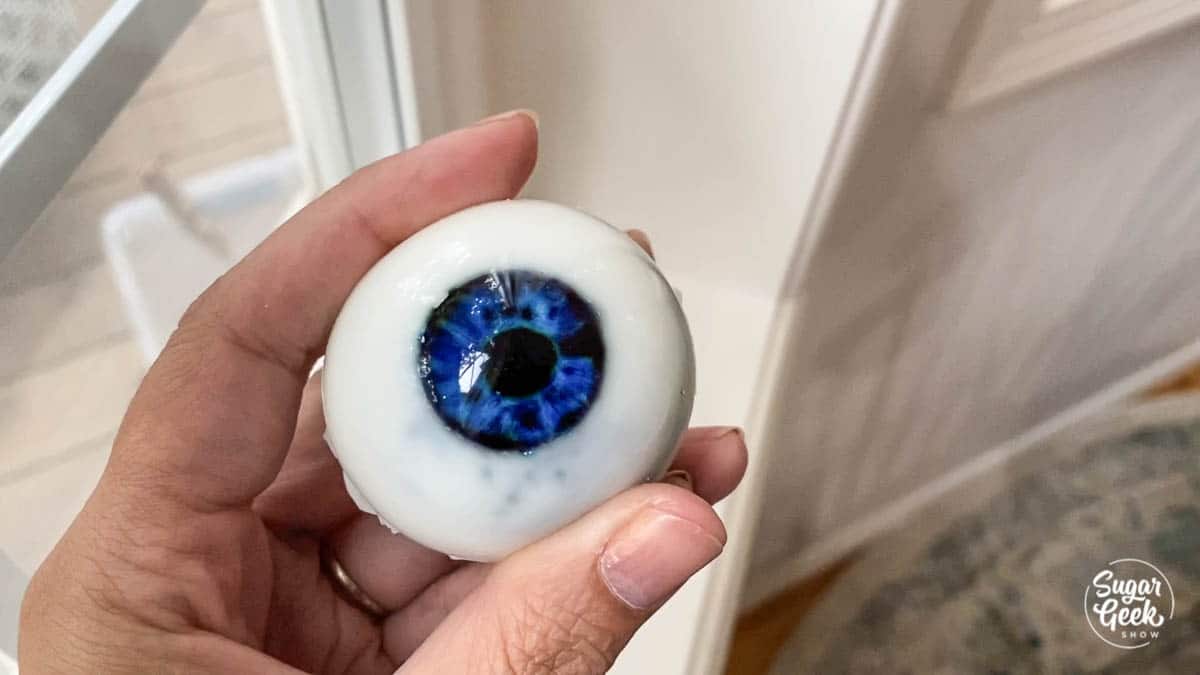
gummy eyeball in hand

Step 10 - Demold and use electric pink food coloring and a fine-tipped paintbrush to add some veins if you want. 

I used these gummy eyeballs to decorate my EYE-scream Halloween cake! Watch the video below to see how I did it. 

How To Make The Gummy Eyeball Cake

Step 1 - Bake your cakes and make your buttercream. I decided to make a pumpkin cake with easy buttercream frosting! Recipe below. 

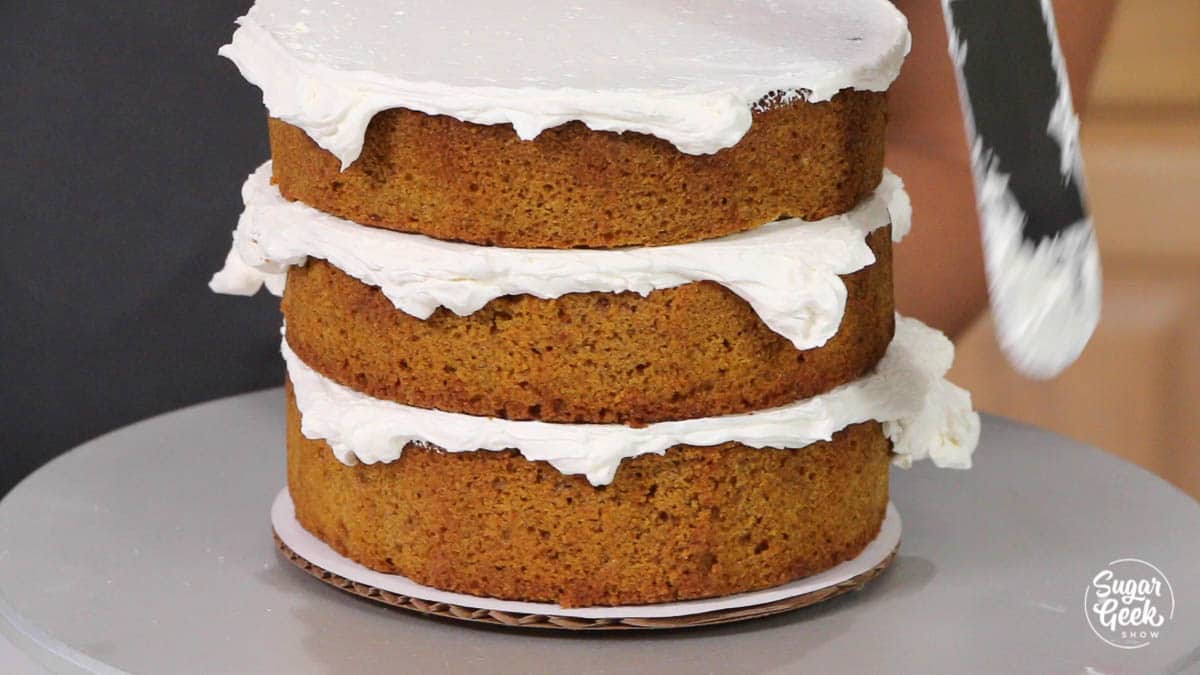
Step 2 - Stack your cakes and crumb coat them. If you need more info on how to frost and fill your cakes step-by-step, check out my How To Make Your First Cake Tutorial. 

pumpkin cake stacked with buttercream

white buttercream on a 6" cake

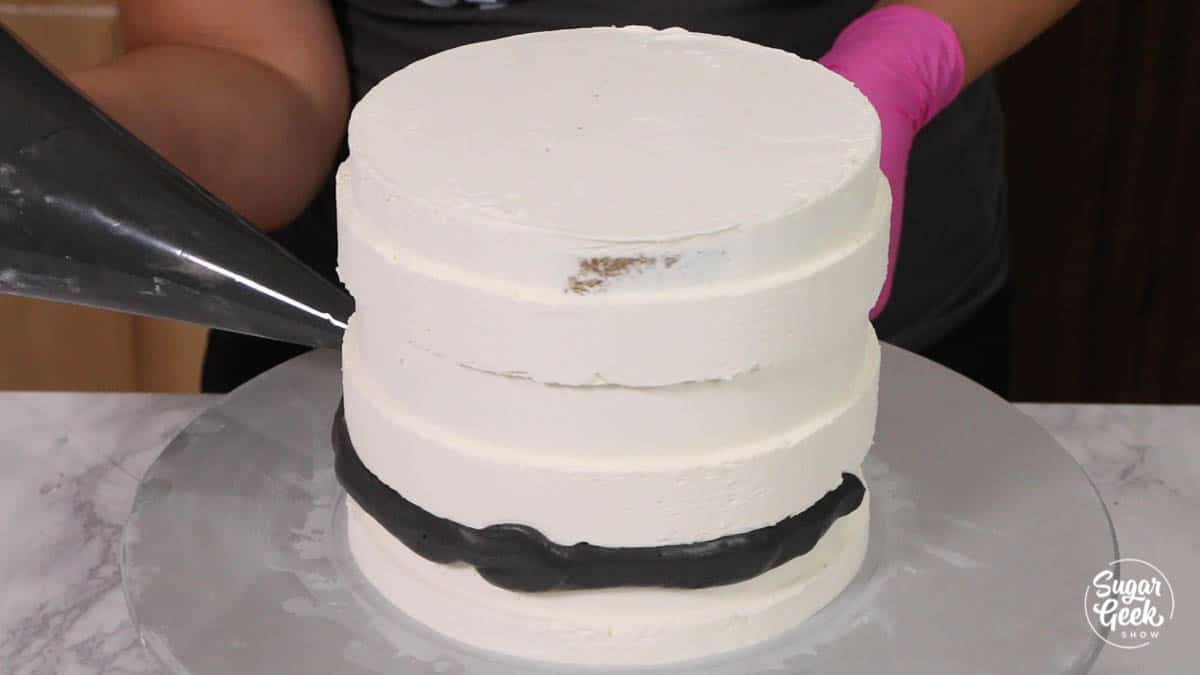
Step 3 - Make your stripes! I am using my beloved bengal cake comb from Ester Cakes. Makes the most beautiful stripes! I also set aside about 2 cups of my easy buttercream and colored it with some ganache and then black food coloring to make it black. Don't add too much food coloring or the buttercream will taste bitter. 

adding black buttercream stripes to white buttercream cake with a piping bag

If you need to know more about using striping cake combs, check out this tutorial from Ester Cakes. 

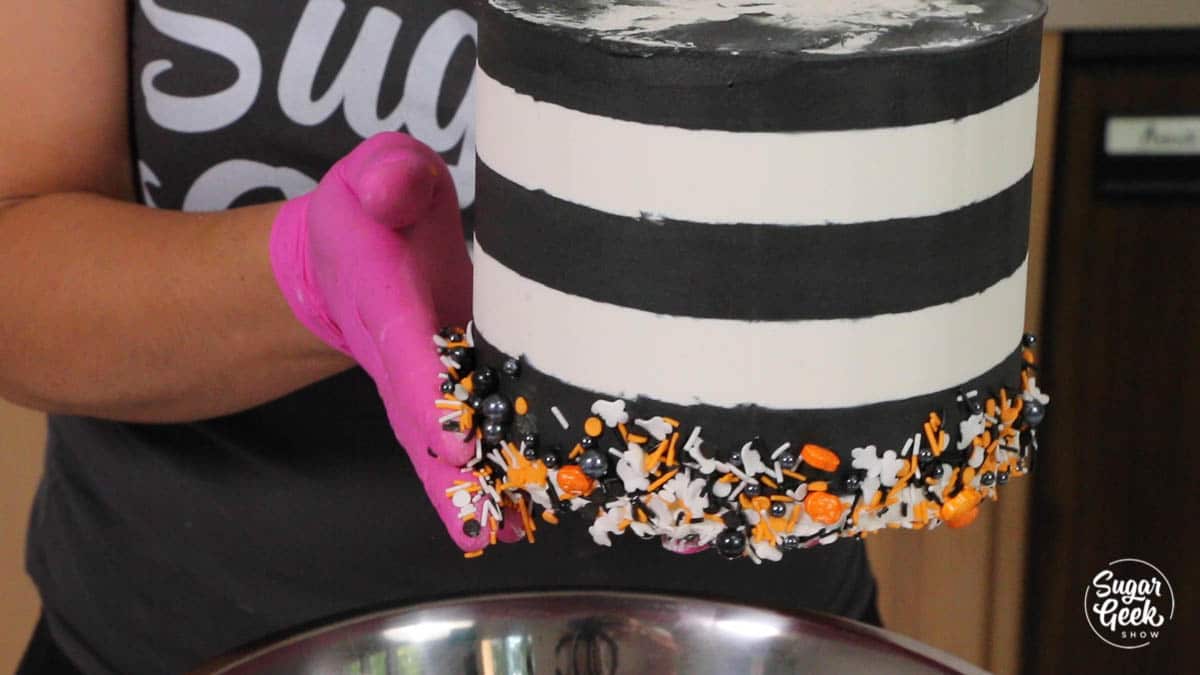
Step 4 - Add sprinkles. I used a fun Halloween sprinkles mix from Joanns but you can obviously use any kind you want. The sprinkles help finish that lower edge. I just hold the chilled cake in one hand, apply sprinkles with the other hand and let the excess fall into a large bowl. Use a funnel or folded piece of paper to get the sprinkles back in the jar. 

black and white striped buttercream cake with halloween sprinkles

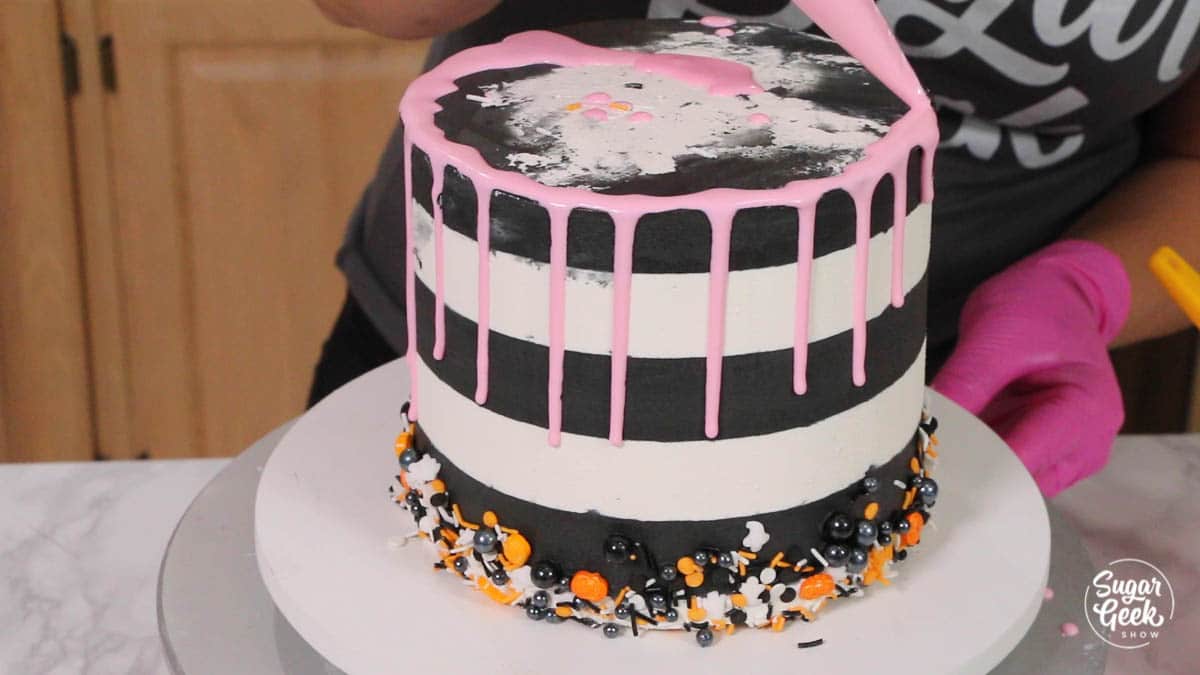
Step 5 - Add the water ganache drip! I love using water ganache for simple and beautiful drips! I was doing this cake live so my water ganache was a bit hot and started to run down the cake. Make sure you let your water ganache cool to 90ºF before adding your drip. 

pink drip being added to black and white buttercream cake with halloween sprinkles

Step 6 - Add your gummy eyeball! I used a little of my easy buttercream and colored it with some electric pink food coloring to get the eyeball to stick to my ganache. I also added some to my ice cream cone with more sprinkles and some water ganache. Stick the cone on top and voila! A super fun Halloween drip cake 😀 

black and white striped cake with pink drip, gummy eyeball with ice cream cone on top

Recipe

black and white striped cake with pink drip, gummy eyeball with ice cream cone on top
Print Recipe
4.67 from 3 votes

Gummy Eyeball Halloween Cake

Get into the Halloween spirit with this fun black and white buttercream cake with water ganache drip and easy gummy eyeball! Full recipe and step by step tutorial.
Prep Time30 minutes mins
Cook Time30 minutes mins
Decorating30 minutes mins
Total Time1 hour hr 30 minutes mins
Course: Dessert
Cuisine: American
Servings: 12 servings
Calories: 1395kcal
Author: Liz Marek

Equipment

  • 2 ½" sphere mold

Ingredients

Gummy Eyeball Recipe

  • 24 ounces cool water
  • 7 ounces granulated sugar
  • 1 Tablespoon white food coloring I use Americolor gel
  • 2 ounces gelatin I use custom collagen brand but KNOX is ok too
  • 1 teaspoon flavor extract I use LorAnn oils pineapple flavor
  • ¼ teaspoon citric acid I use milliard brand
  • Electric pink, electric blue and super black food coloring (for painting the eye) I use Americolor brand

Pumpkin Spice Cake

  • 14 ounces all-purpose flour
  • 2 teaspoons baking soda
  • 1 teaspoon baking powder
  • 2 teaspoons cinnamon
  • 2 teaspoons cloves
  • 2 teaspoons nutmeg
  • ½ teaspoon ginger
  • 1 teaspoon salt
  • 8 large eggs room temperature
  • 12 ounces granulated sugar
  • 3 ounces light brown sugar
  • 12 ounces pumpkin puree not pumpkin pie filling
  • 6 ounces vegetable oil
  • 2 teaspoons vanilla extract
  • 4 ounces buttermilk room temperature
  • 12 ounces unsalted butter melted

Black And White Easy Buttercream Frosting

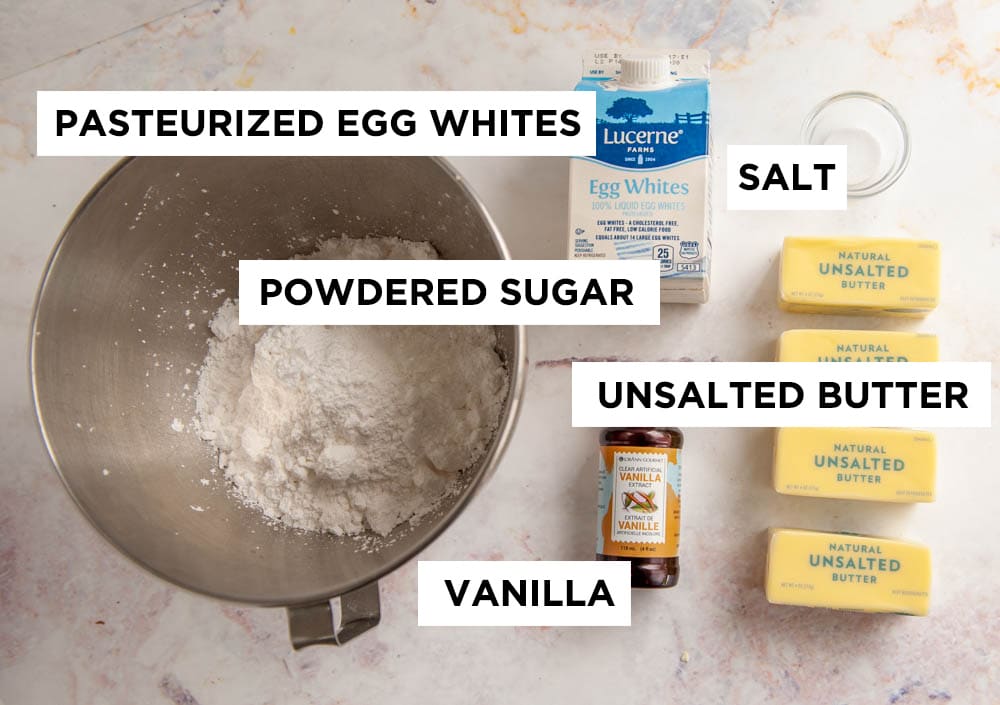
  • 24 ounces unsalted butter softened but not melted
  • 24 ounces powdered sugar sifted
  • 2 teaspoons vanilla extract
  • ½ teaspoon salt
  • 6 ounces pasteurized egg whites
  • 1 Tablespoon black food coloring
  • 4 ounces ganache Or ¼ cup sifted cocoa powder
  • 1 teaspoon white food coloring

Pink Water Ganache

  • 1 ounce water
  • 6 ounces white candy melts
  • 1 drop electric pink food coloring

Decor

  • ¼ cup Halloween sprinkles
  • 1 regular ice cream cone
US Customary - Metric

Instructions

Pumpkin Spice Cake

  • Preheat your oven to 350ºF (177ºC)
    Prepare two 8"x2" cake pans with cake goop or other preferred pan release
  • Combine your flour, baking soda, baking powder, spices and salt in a bowl and whisk together to combine. Set aside. 
  • In the bowl of a stand mixer, add your eggs, sugar, brown sugar and vanilla. Mix on low with the paddle attachment until smooth. You can also do this by hand with a whisk if you don't have a mixer. 
  • Add in your pumpkin puree, oil, melted butter and buttermilk and mix until smooth
  • While mixing on low, add in your flour mixture one cup at a time until all your dry ingredients are incorporated and your batter is smooth. Do not over-mix. 
  • Pour batter into prepared cake pans. Bake the cakes for 40-50 minutes until the center of the cake is set. Let cakes cool ten minutes and turn out onto a cake rack to fully cool before frosting.

Black and White Easy Buttercream

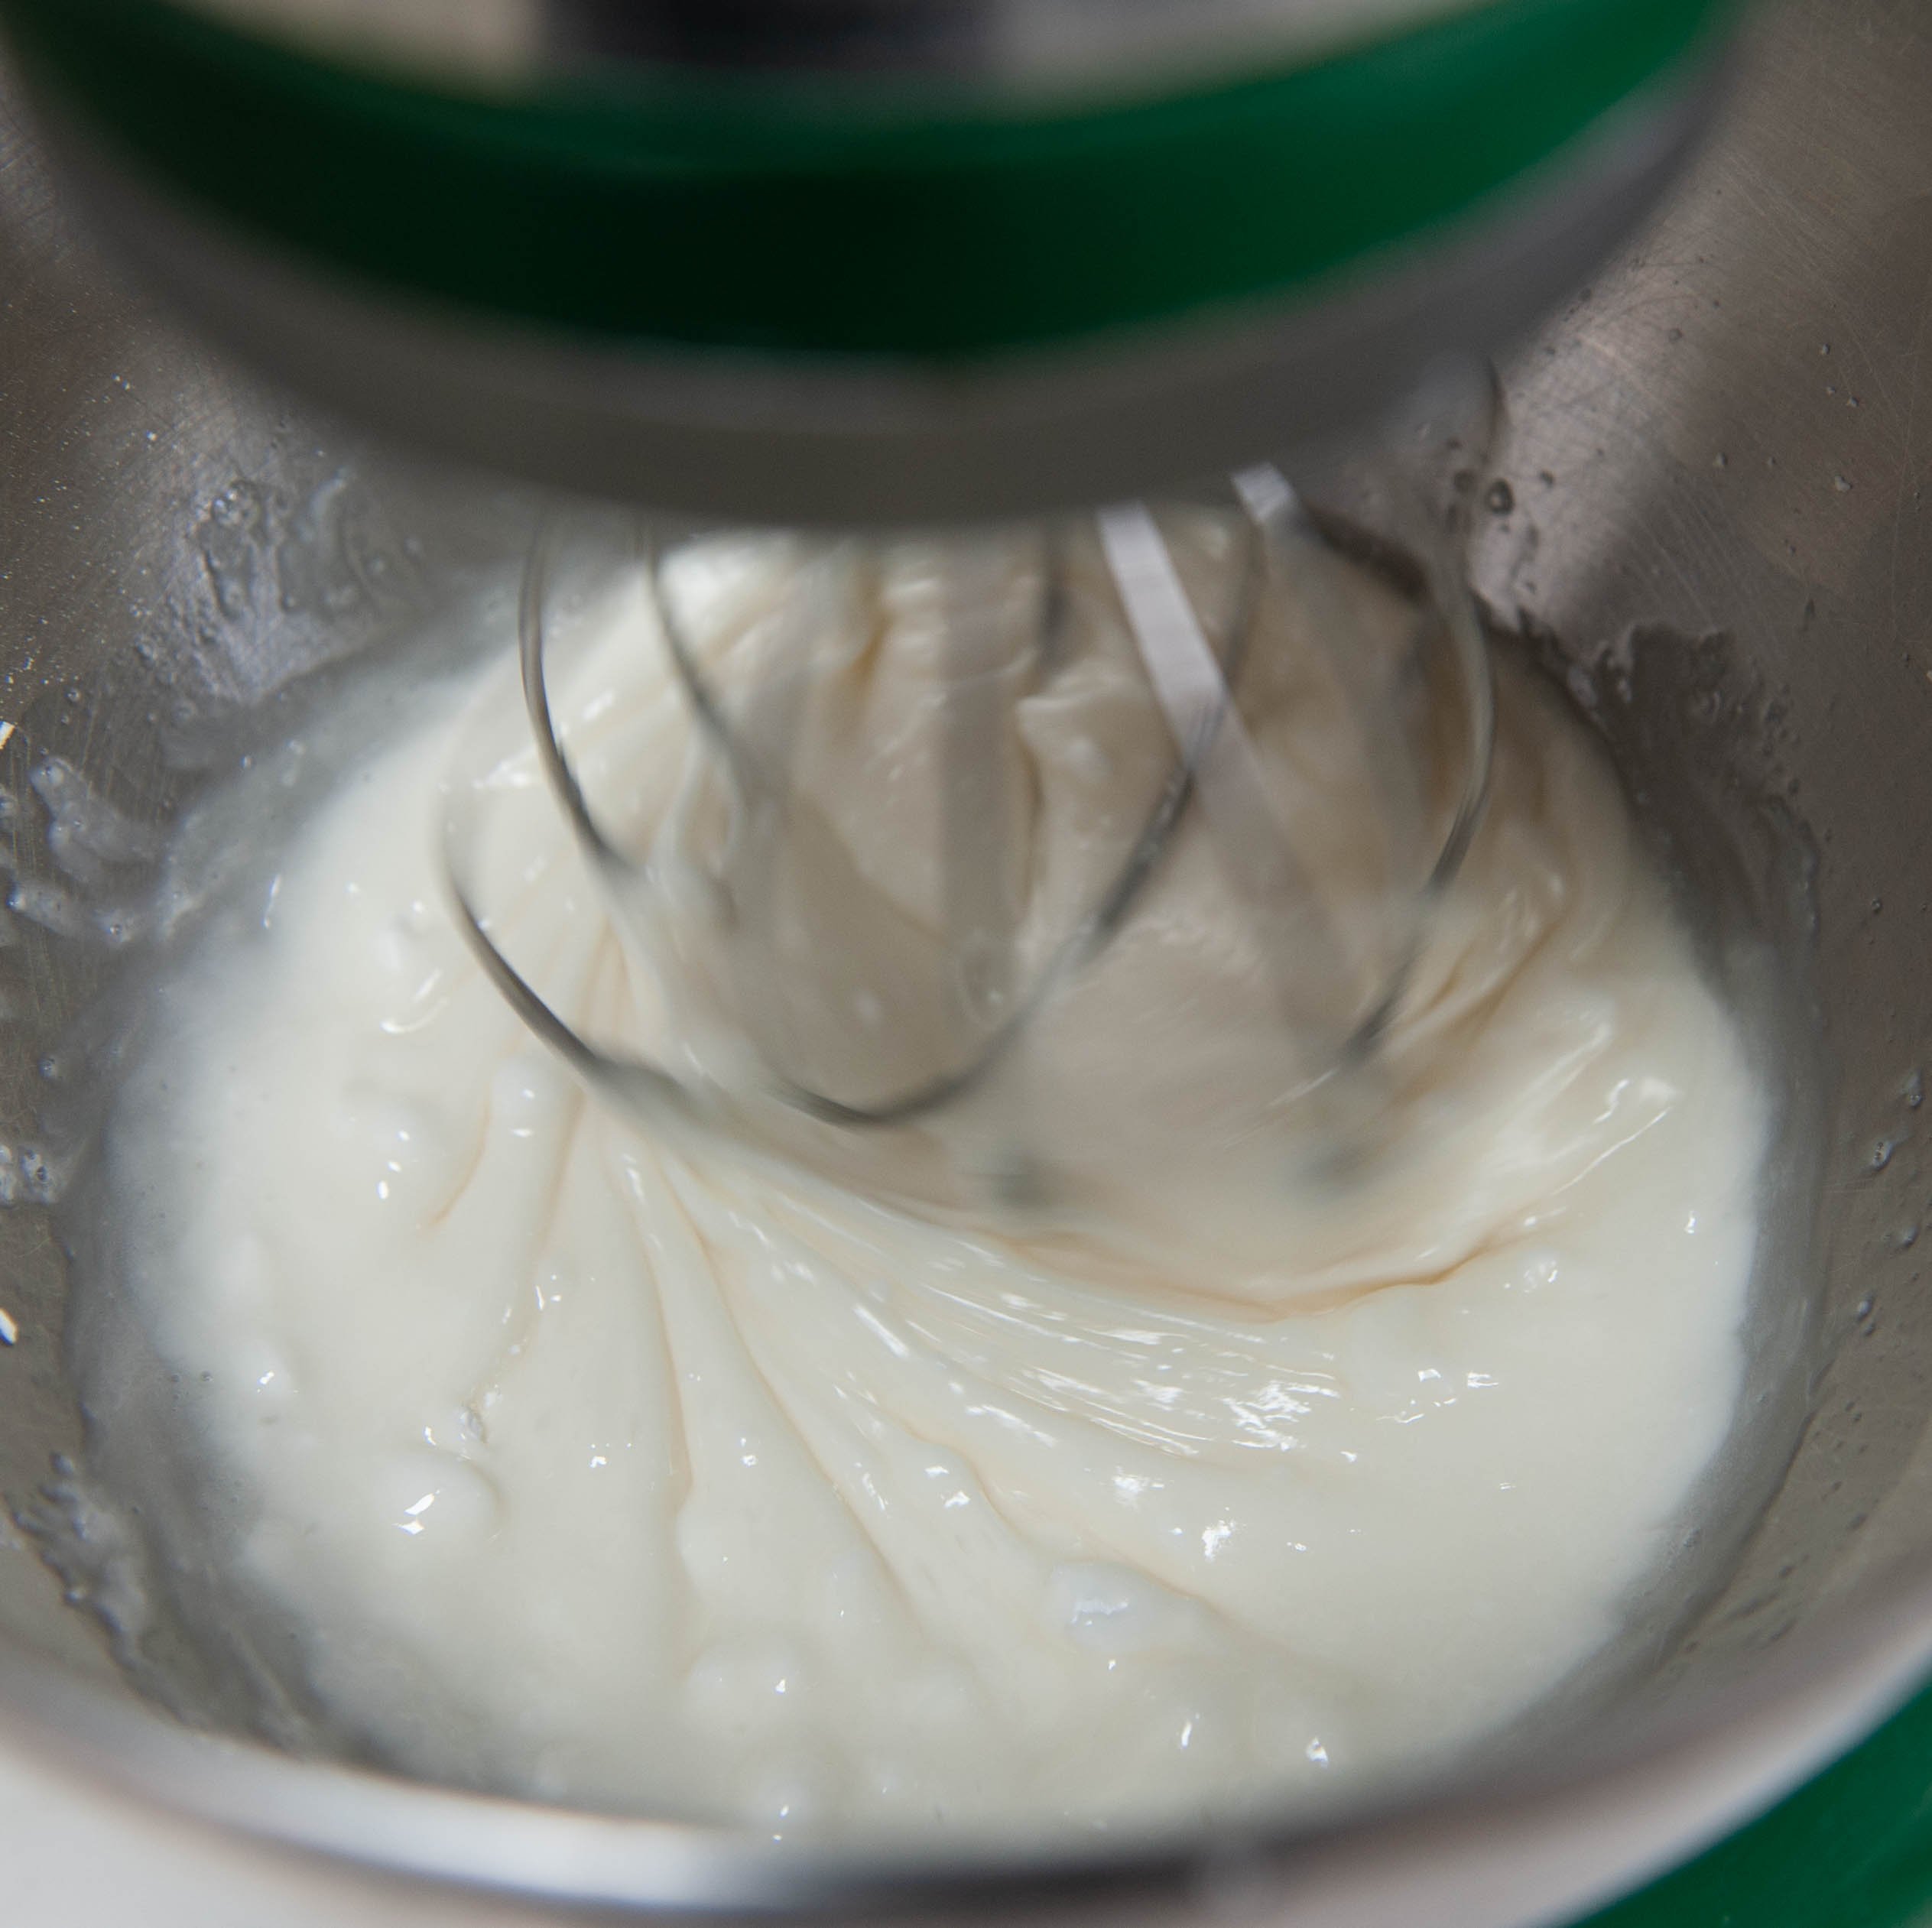
  • Add egg whites and powdered sugar to the bowl of your stand mixer with the whisk attachment. Mix on medium high until smooth.
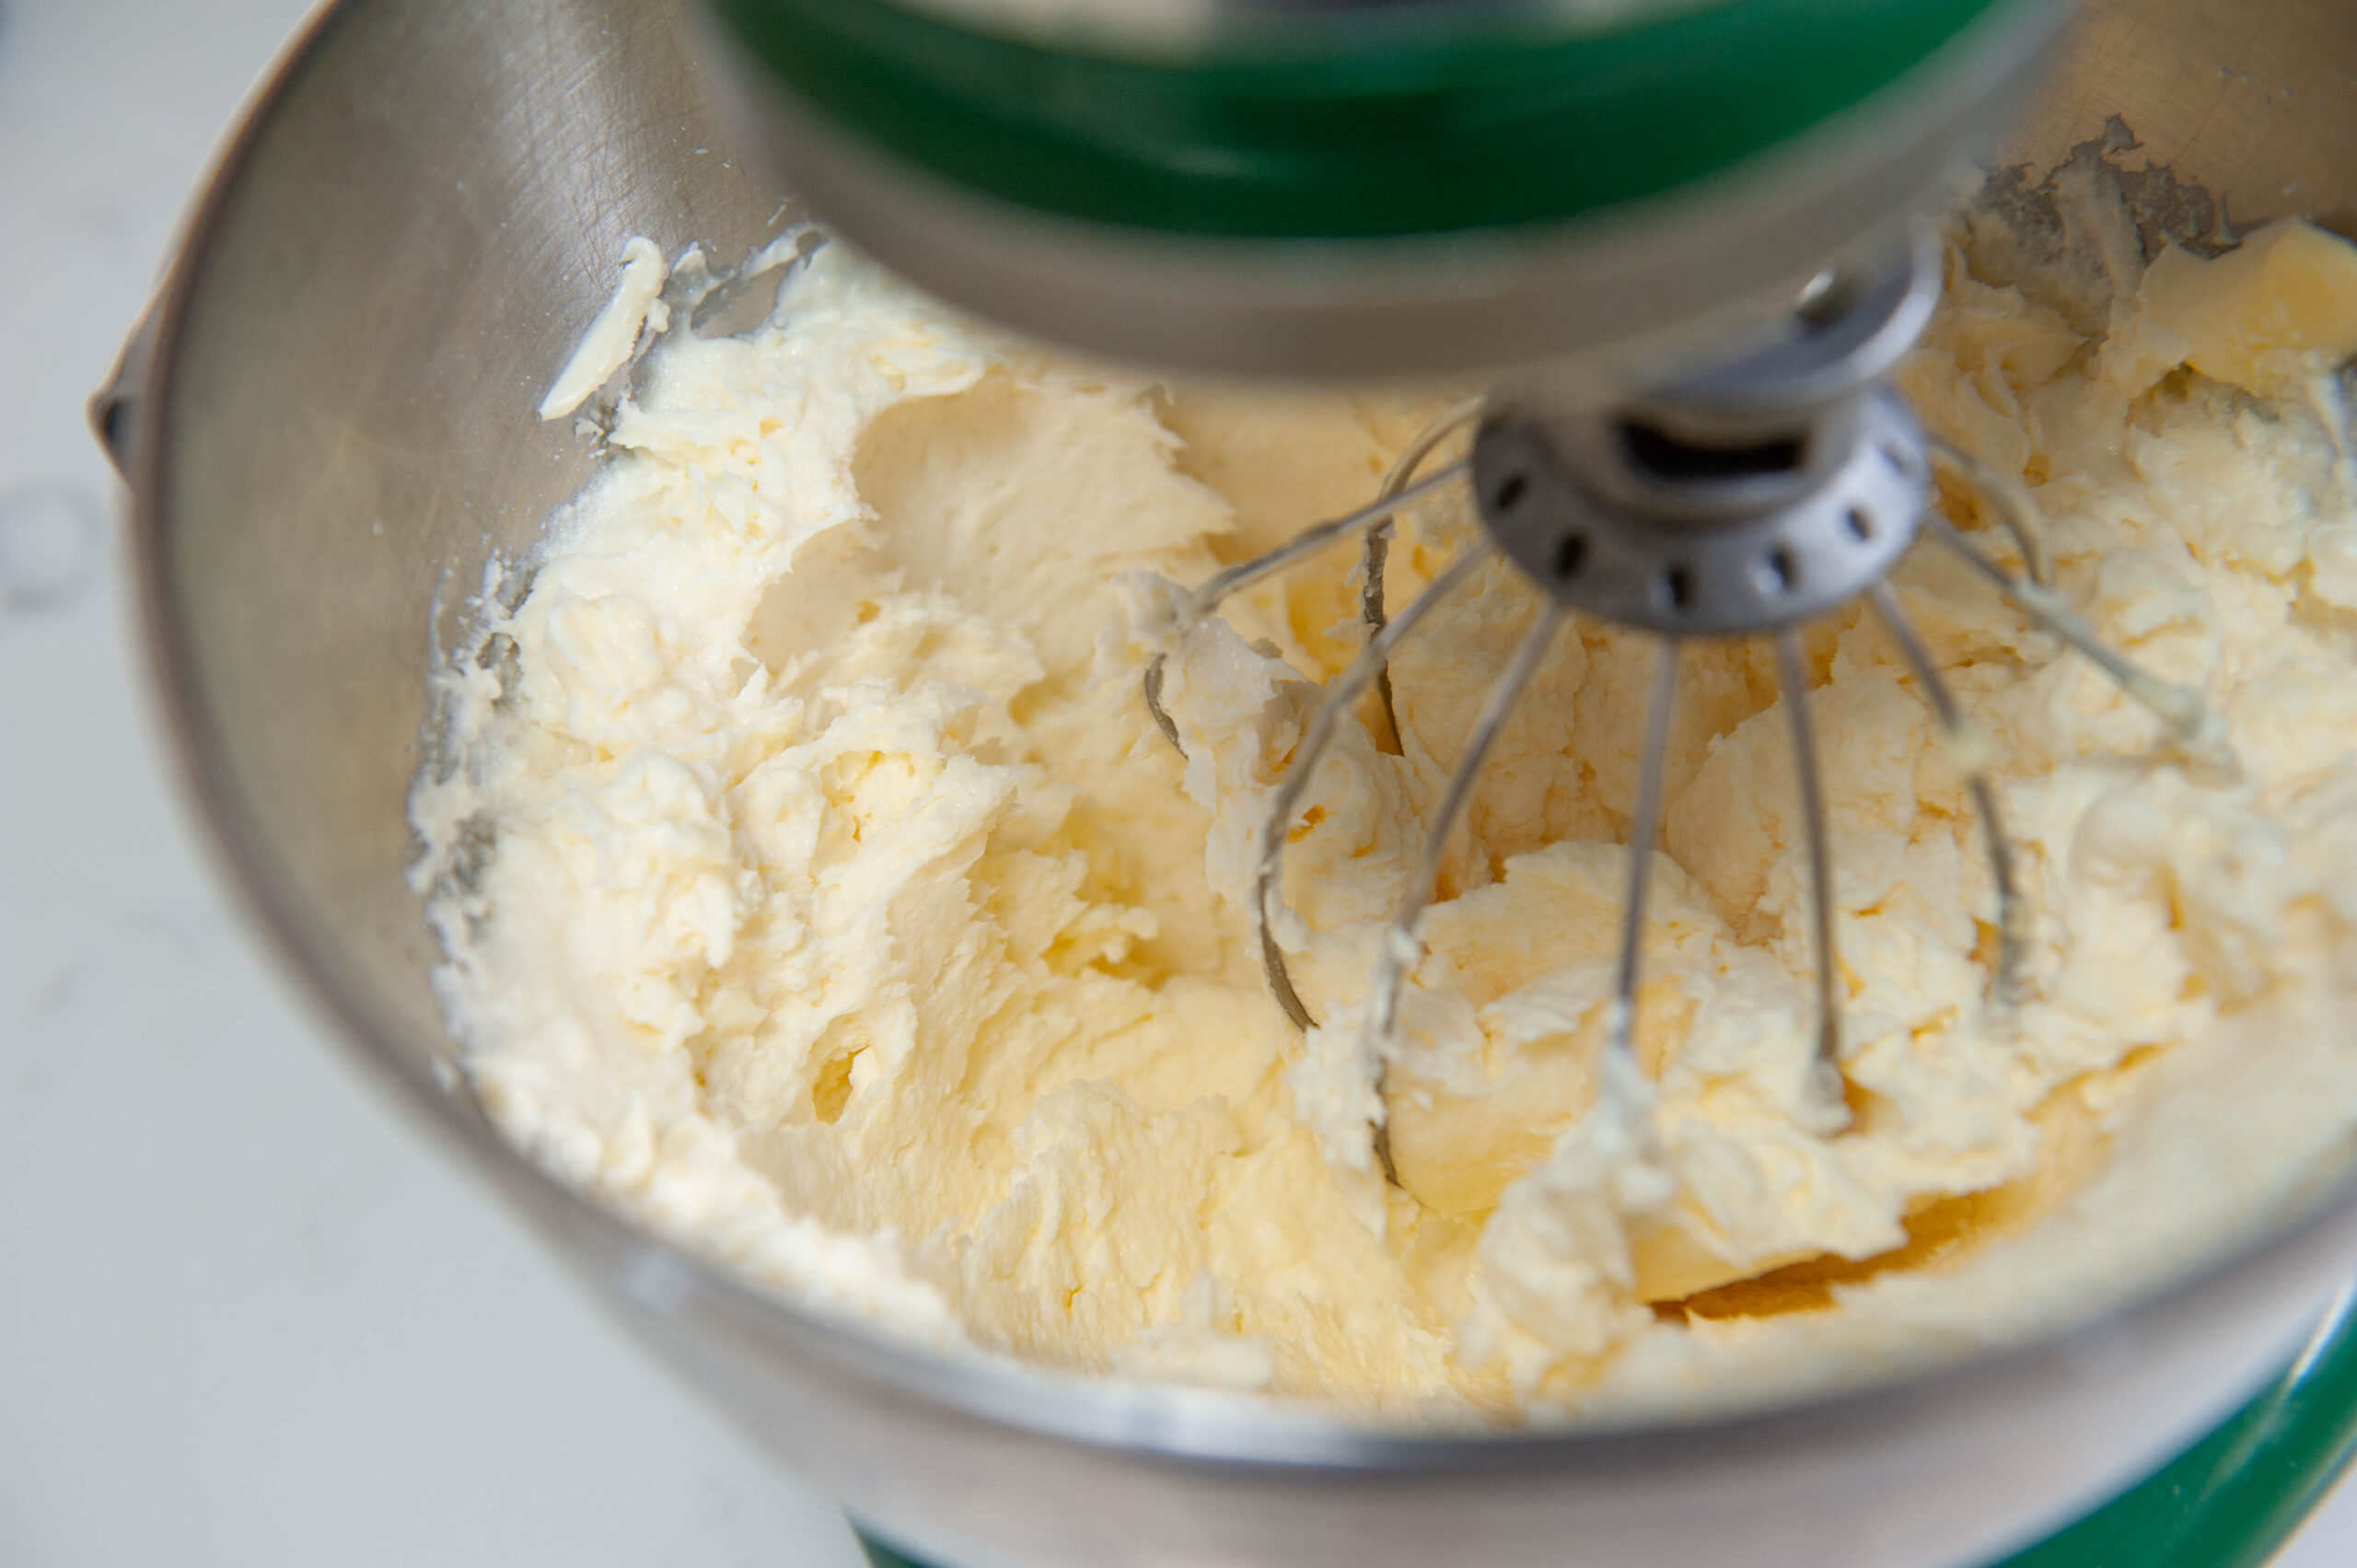
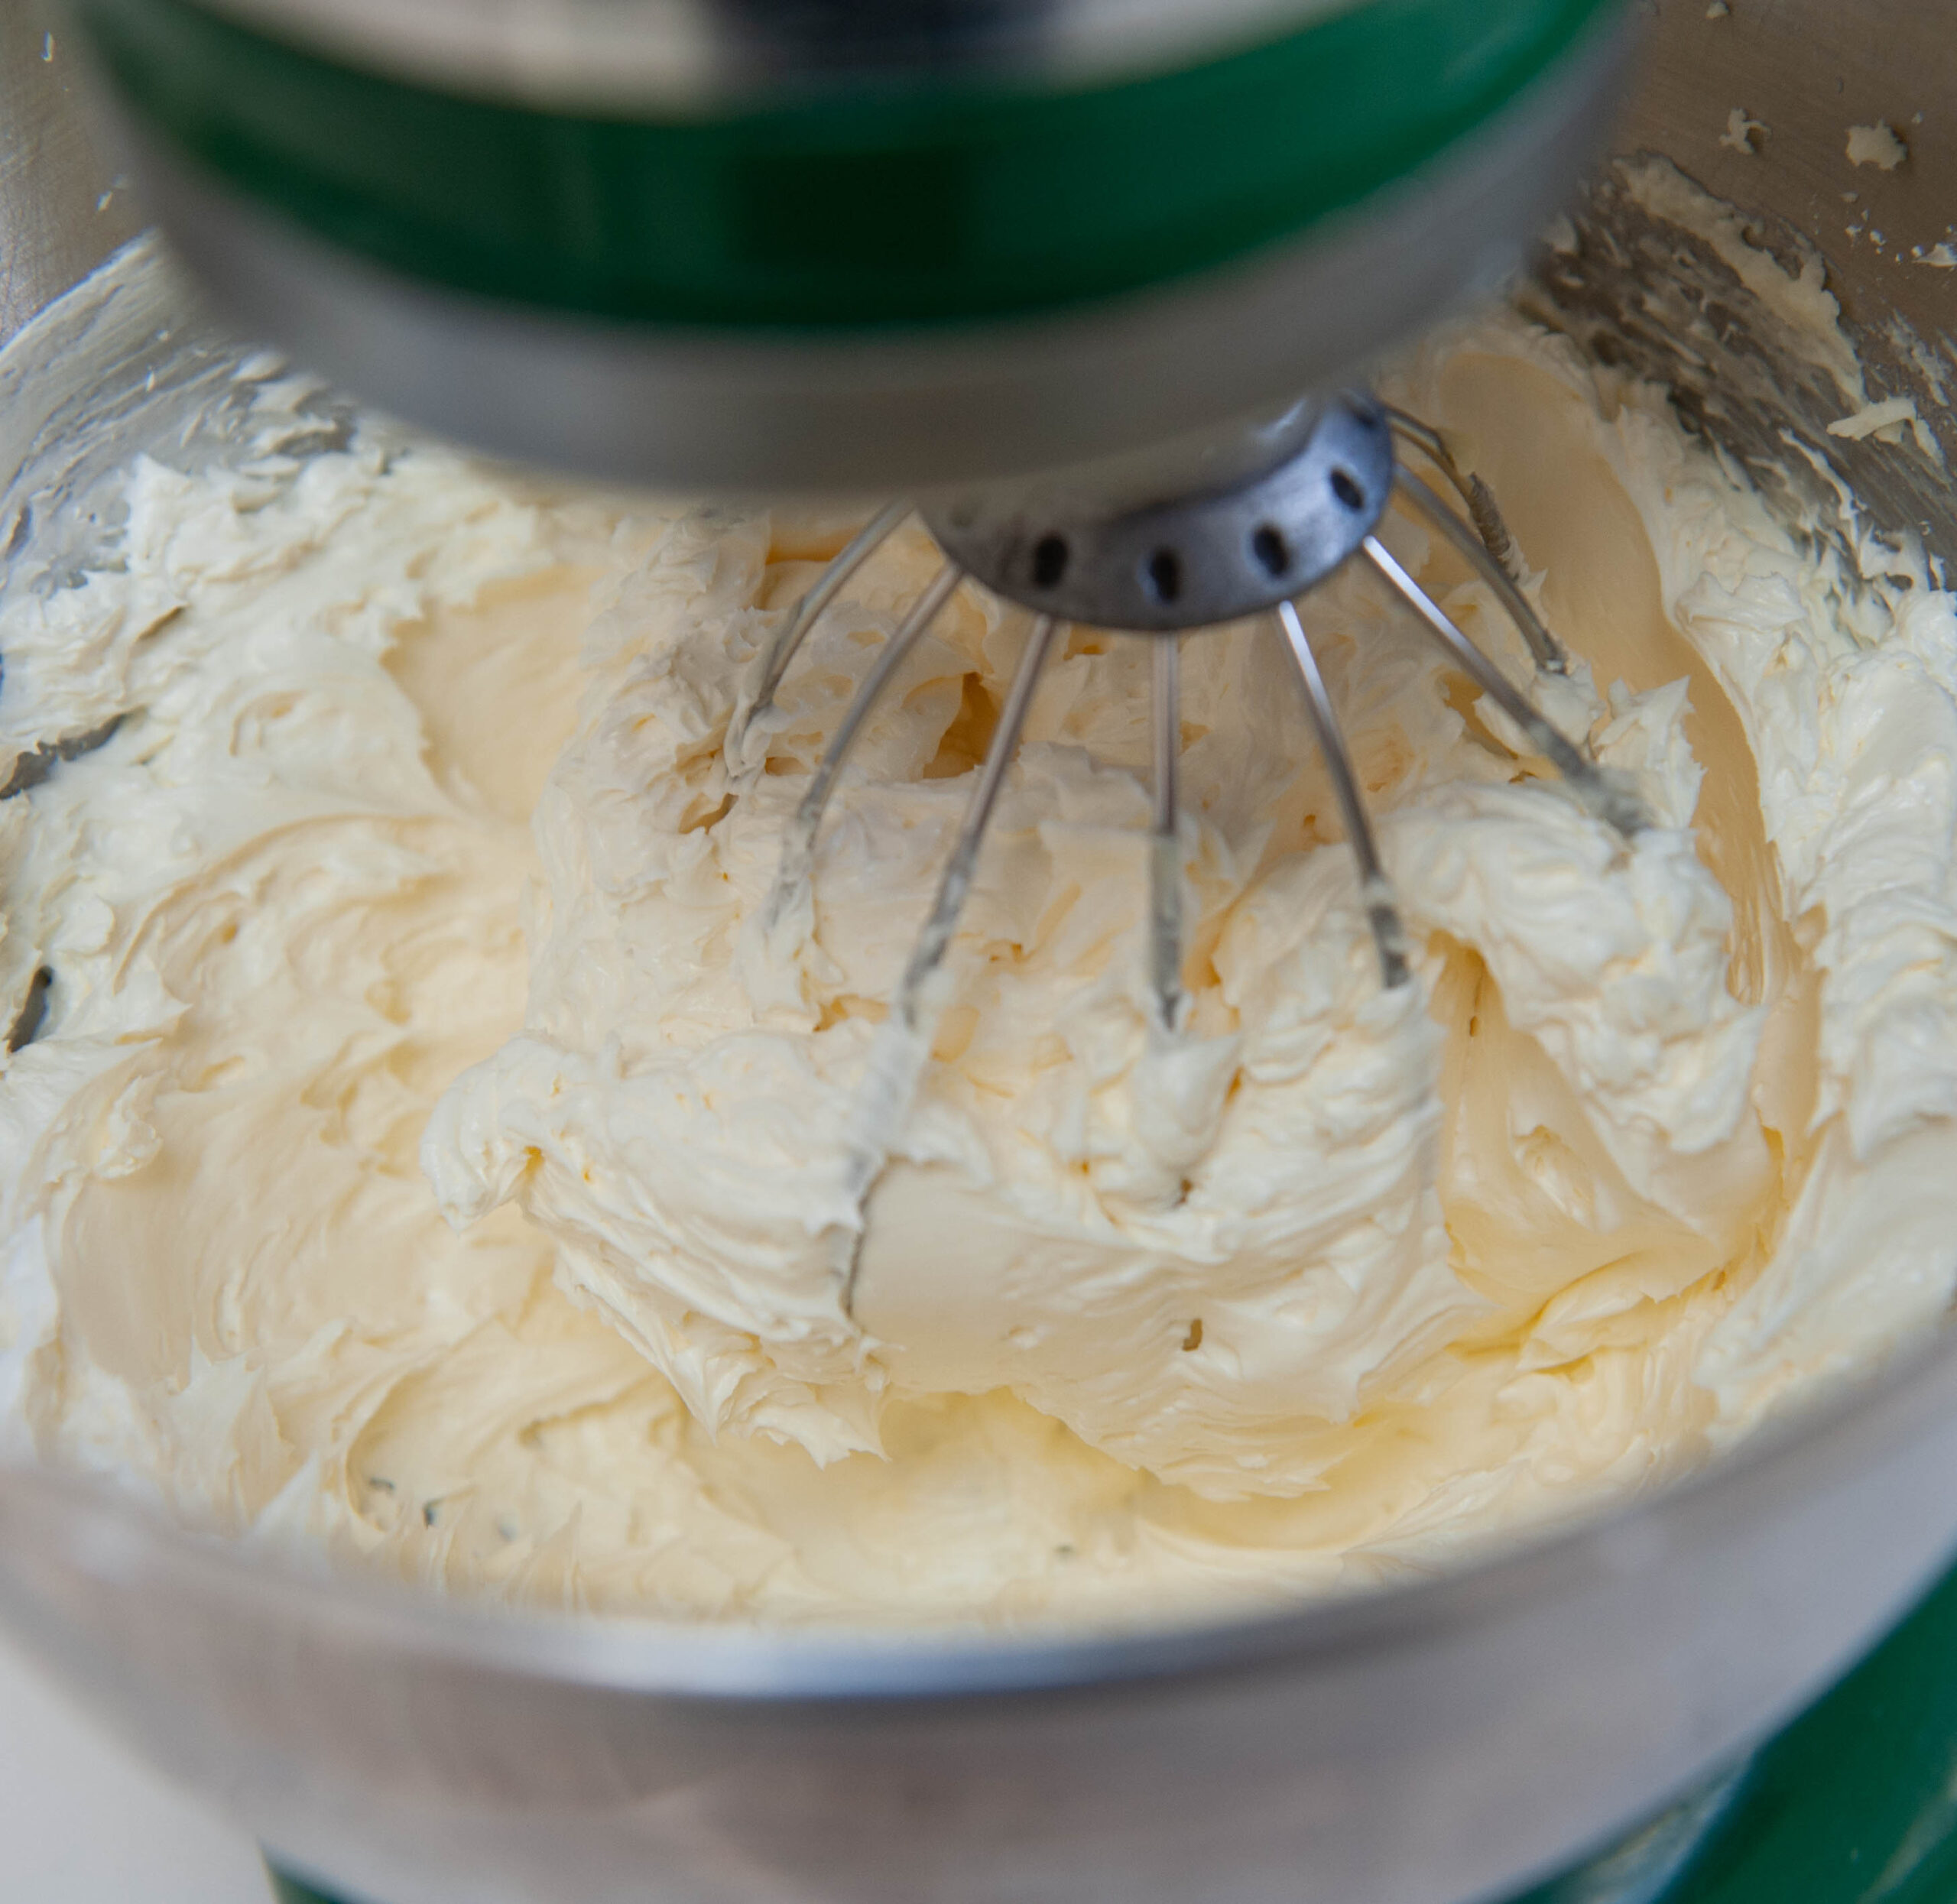
  • Add in your salt, vanilla and butter while mixing on medium. Bumpt the speed up to high and mix until white and fluffy.
  • Divide your buttercream. I set aside about ⅓ for the black.
  • Add about 1 Tablespoon of white food coloring to the white buttercream and mix until white.
  • Add ¼ sifted cocoa powder or cooled ganache to the rest of the buttercream and mix until combined.
  • Remove about ⅓ of the chocolate buttercream and add in 1 tablespoon of black food coloring. Melt in the microwave for about 10-15 seconds until JUST starting to melt but not hot.
  • Mix the melted buttercream into the chocolate buttercream until smooth. It should look dark grey but will get darker over time. Do not add too much black food coloring or it will stain your mouth and taste bitter.

Gummy Eyeball Tutorial

  • Combine the cool water, sugar and gelatin together in a medium-sized saucepan. Let the gelatin absorb for 5 minutes.
  • Turn the heat up to medium-high, stirring occasionally to prevent burning.
  • Once you see steam just begin to rise from the surface, remove the mixture from the heat. DO NOT BOIL! It will weaken the gelatin.
  • Stir in your extract and citric acid.
  • Allow the mixture to cool at room temperature (or you can place it in the fridge to speed things up) until it's just barely warm. Still liquid but not hot!
  • Skim off the foam and discard it. Let cool to 95ºF before making your eyeball. Follow the video above for the full directions on how to make the eyeball.

Water Ganache

  • Combine the water and the chocolate together and microwave for one minute. Stir and then continue microwaving for 15 second increments until the chocolate is melted. Then stir with a spoon until smooth. Let it cool to 90ºF before using it for the drip.

Video

Notes

Use the bengal cake comb for buttercream stripes https://estercakes.com/shop?olsPage=products%2Fbengal-stripe
Remember your black buttercream will darken in color over time so don't be worried if it looks dark grey at first. 
Make sure your gelatin mixture cools to 90ºF before you use it so that the white gelatin doesn't melt the clear gelatin when you pour it into the mold. 
Make sure you let your water ganache drip cool to 90ºF before you drip so it's not too thin. 

Nutrition

Serving: 1serving | Calories: 1395kcal | Carbohydrates: 142g | Protein: 15g | Fat: 88g | Saturated Fat: 57g | Cholesterol: 308mg | Sodium: 589mg | Potassium: 223mg | Fiber: 2g | Sugar: 113g | Vitamin A: 6856IU | Vitamin C: 1mg | Calcium: 96mg | Iron: 3mg
Sourdough Donut recipe

October 5, 2020 Breakfast

Sourdough Discard Donuts

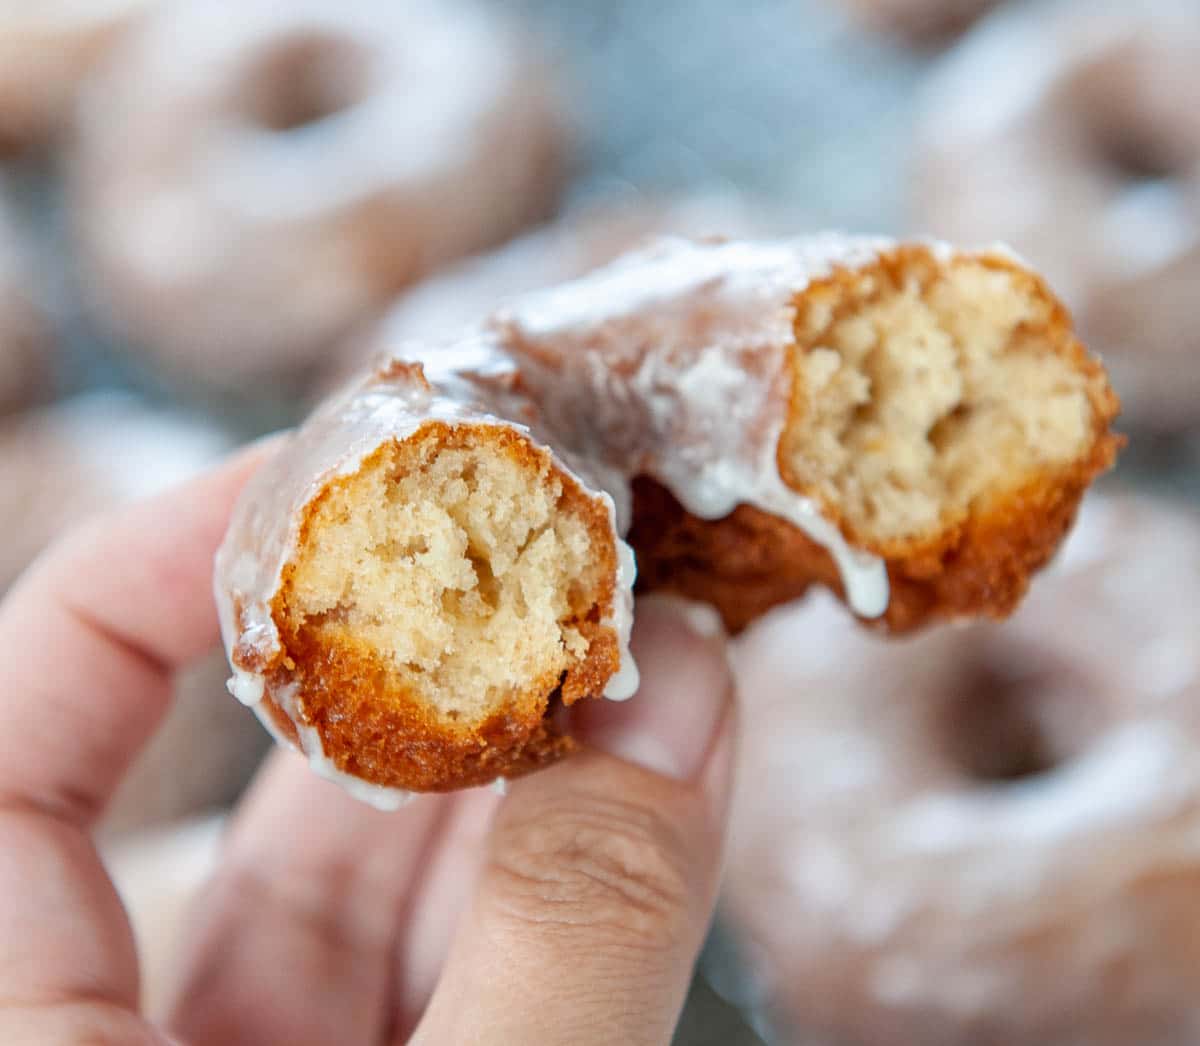
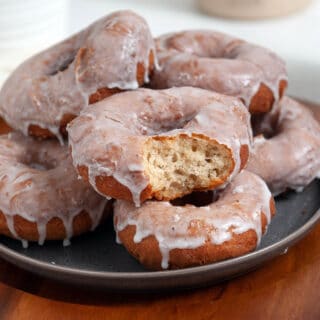
Sourdough discard donuts are the best way to turn a cup of leftover starter discard into a cake-style fried donut with crispy edges, a soft tangy interior, and a sweet vanilla glaze. The discard adds depth of flavor and a faint sourdough tang without making the donuts taste sour. If you love sourdough discard recipes, these belong on your weekend breakfast list right next to my sourdough discard pancakes and sourdough pikelets.

Sourdough Donut recipe

Using sourdough discard in your baked goods can add so much depth of flavor and is a great way to use up that discard. From muffins and quick breads to pikelets and pancakes, it can be used in almost any baked good. Sourdough discard isn't used to give rise to these donuts (the baking powder and baking soda do that), it's just an ingredient that adds flavor and texture.

For a classic version without sourdough, my classic baked donut recipe is the one to try.

Quick Glance at the Recipe: Sourdough Discard Donuts

  • Recipe Name: Sourdough Discard Donuts
  • Why You'll Love It: Crispy outside, soft, tangy interior, classic glazed donut at home. Uses up a cup of starter discard.
  • Time and Difficulty: 15 minutes prep + 25 minutes cook. Beginner-friendly.
  • Main Ingredients: Sourdough discard, butter, sugar, eggs, buttermilk, vanilla, flour, nutmeg, baking powder, baking soda, salt. Lard or oil for frying. Powdered sugar + milk for glaze.
  • Method: Cream butter and sugar. Add eggs, sourdough discard, buttermilk, leaveners, and spices. Sprinkle in flour. Roll, cut, rest, fry at 360 to 375º F. Glaze.
  • Texture and Flavor: Crispy outside, soft cake-donut interior with a subtle tang from the discard. Not too sweet, perfect with a glaze or cinnamon sugar.
  • Quick Tip: Oil temperature is the single most important variable. Below 360º F, and donuts get greasy. Above 375º F, and the outside burns before the inside cooks through. Use a thermometer.
ChatGPT
Google AI
Perplexity
Grok
Add us as a trusted site on Google
[feast_advanced_jump_to]

What Makes This Sourdough Discard Donut Recipe Different

Most sourdough discard recipes are quick breakfasts (pancakes, pikelets, muffins). Donuts are a step up: fried, glazed, special-occasion breakfast that uses your discard for something genuinely worth waking up for.

A few things make this version different from most sourdough donut recipes you'll find:

Real frying science. Oil temperature is the difference between bakery-perfect donuts and greasy disappointments. The 360 to 375º F range isn't a suggestion, it's the entire game.

Cake-style, not yeasted. This is a quick donut leavened by baking powder and baking soda, not the long-rise yeasted version some recipes require. The discard adds flavor, not rise. Done in 40 minutes start to finish.

Buttermilk instead of regular milk. The tang of buttermilk amplifies the sourdough discard flavor. If you don't have any on hand, make a buttermilk substitute with a Tablespoon of vinegar in a cup of milk.

Lard for frying. My preferred frying fat. Dairy-free, gives a crisp outer layer and is minimally processed. Vegetable oil and peanut oil work too, full breakdown below.

I used to use a FryDaddy as a kid, I feel like everyone growing up in the 80s and 90s had one! They're super inexpensive and make a great place to store the leftover oil after frying. Just pop the lid back on and store it away until the next use.

Sourdough Discard Donut Ingredients

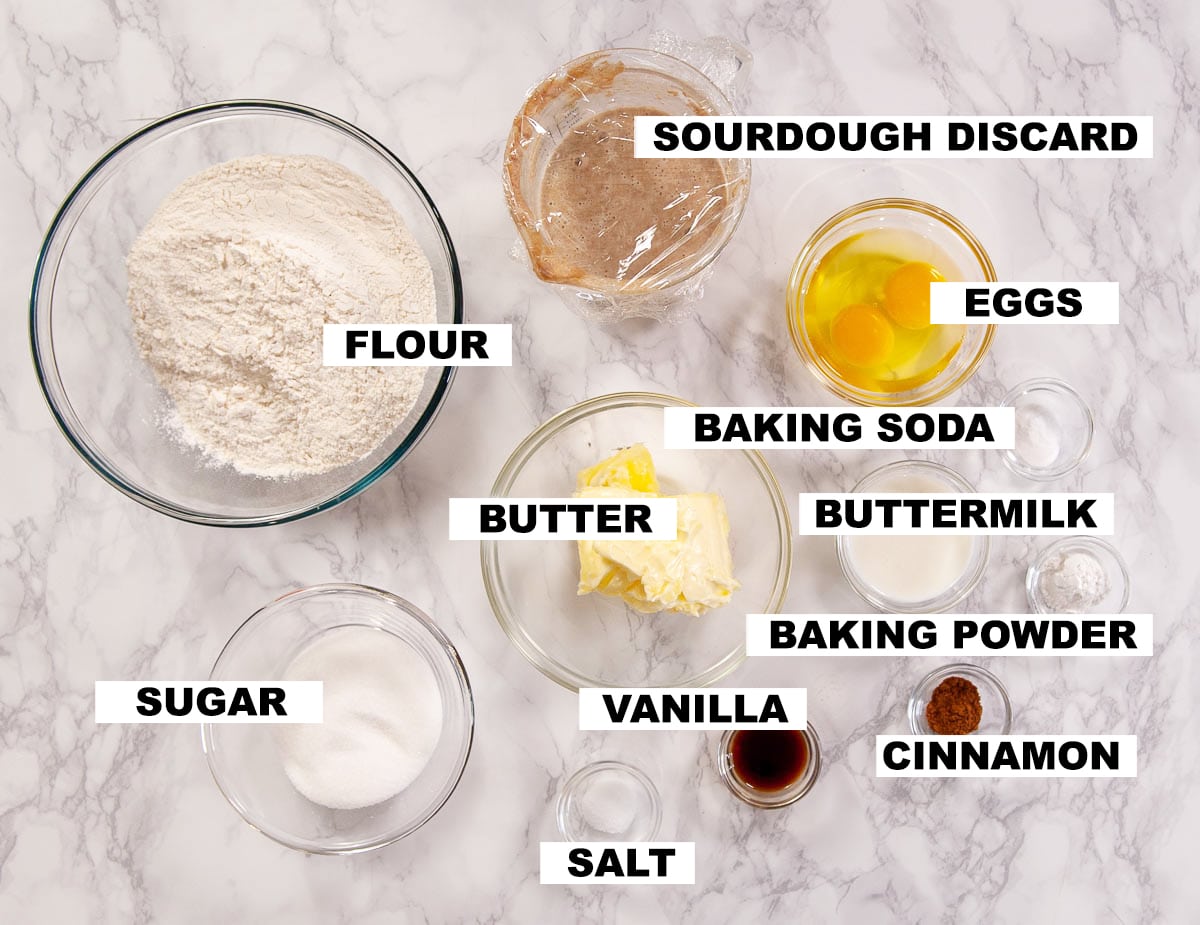
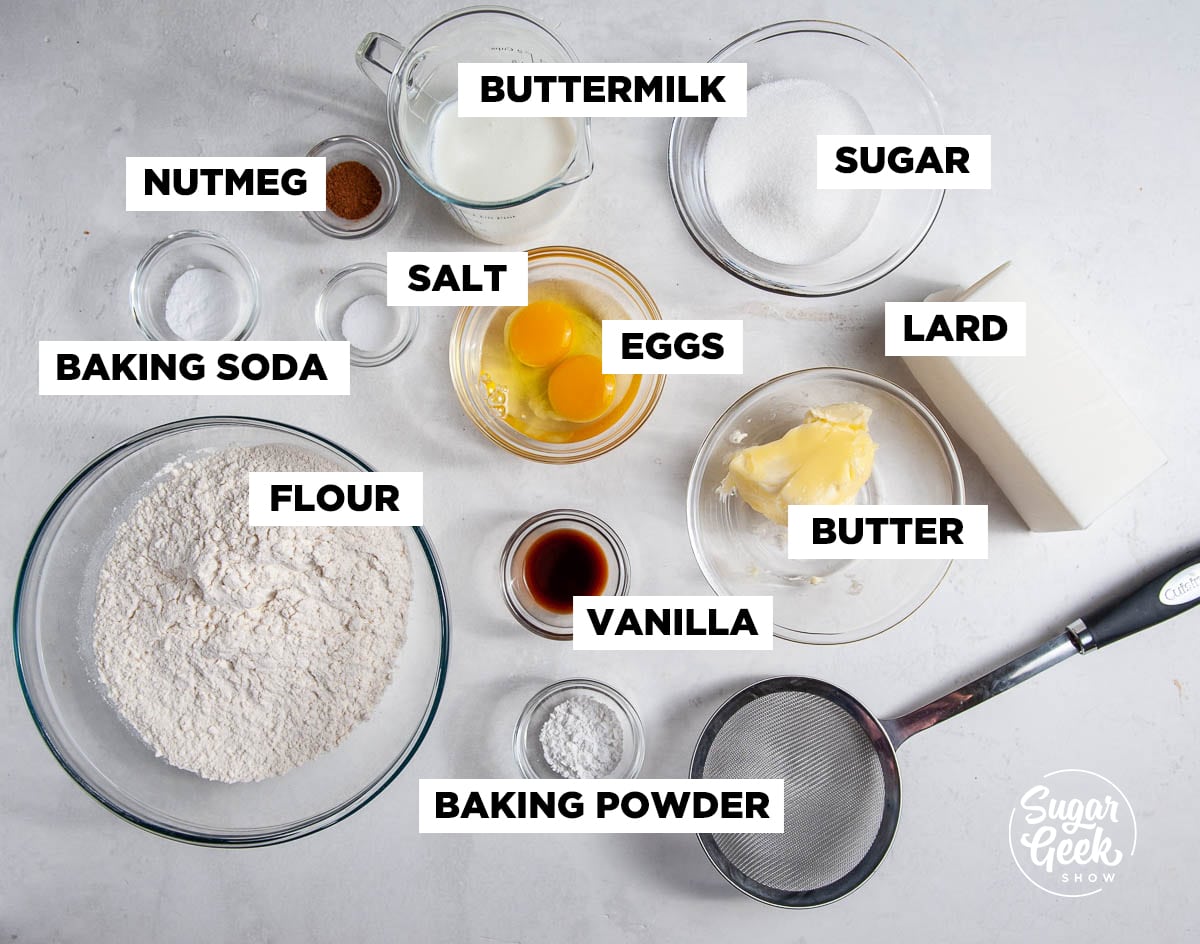
Nothing surprising here for the ingredients, except I like to use buttermilk instead of regular milk. If you don't have any buttermilk on hand, you can make your own buttermilk substitute. I always recommend weighing your ingredients with a digital kitchen scale for the most accurate results.

sourdough donut ingredients
  • Sourdough discard. A full cup (8 oz). Unfed starter from your fridge or counter. The discard adds flavor and a subtle tang. You can adjust the amount slightly and make up the difference with buttermilk if you have more or less on hand.
  • Unsalted butter. Softened to room temperature so it creams properly with the sugar. Cold butter won't whip up fluffy and your donuts will be dense.
  • Granulated sugar. Standard white sugar. Sweetens the dough without making the donut itself dessert-level sweet, which leaves room for the glaze.
  • Eggs. Two large at room temperature. Cold eggs shock the creamed butter and break the emulsion. If you forgot to take them out, drop them in warm tap water for 5 minutes.
  • Buttermilk. Adds tang that complements the sourdough discard. The acid also reacts with the baking soda for extra lift. Whole-milk buttermilk is best.
  • Vanilla extract. Real vanilla, not imitation. Just enough to round out the flavor.
  • All-purpose flour. Standard AP. Don't substitute bread flour (too tough) or cake flour (too tender for frying).
  • Nutmeg. The defining "donut" spice. Freshly grated is best. Don't skip, this is what makes them taste like cake donuts.
  • Baking powder and baking soda. Two leaveners working together. Baking soda reacts with the buttermilk and discard for immediate lift. Baking powder gives a second push during frying.
  • Salt. Balances the sweetness and amplifies the other flavors.
  • Lard (or vegetable oil) for frying. My preferred fat. See the "Best Oil For Frying" section below for the full breakdown of options.
  • Powdered sugar + milk for the glaze. Standard donut glaze. Sift the powdered sugar first to avoid lumps.

Why Oil Temperature Matters (The Science)

Oil temperature separates bakery-perfect donuts from greasy ones. Oil temperature controls everything.

Below 360º F: greasy donuts. When the oil is too cool, the donut sits in it longer, trying to cook through. The longer the contact, the more oil gets absorbed. By the time the inside is cooked, the outside has soaked up oil like a sponge. You get a heavy, oily, sad donut.

360 to 375º F: the sweet spot. Hot enough that the surface of the donut immediately starts crisping and forms a barrier that keeps oil OUT, but not so hot that the outside burns before the inside cooks through. The donut puffs, the crust seals, the inside cooks evenly, you drain on a rack, and almost no oil ends up inside.

Above 375º F: burnt outside, raw inside. Surface browns too fast. By the time the outside looks done, the inside is still raw dough. Pull the donut out and the middle slumps.

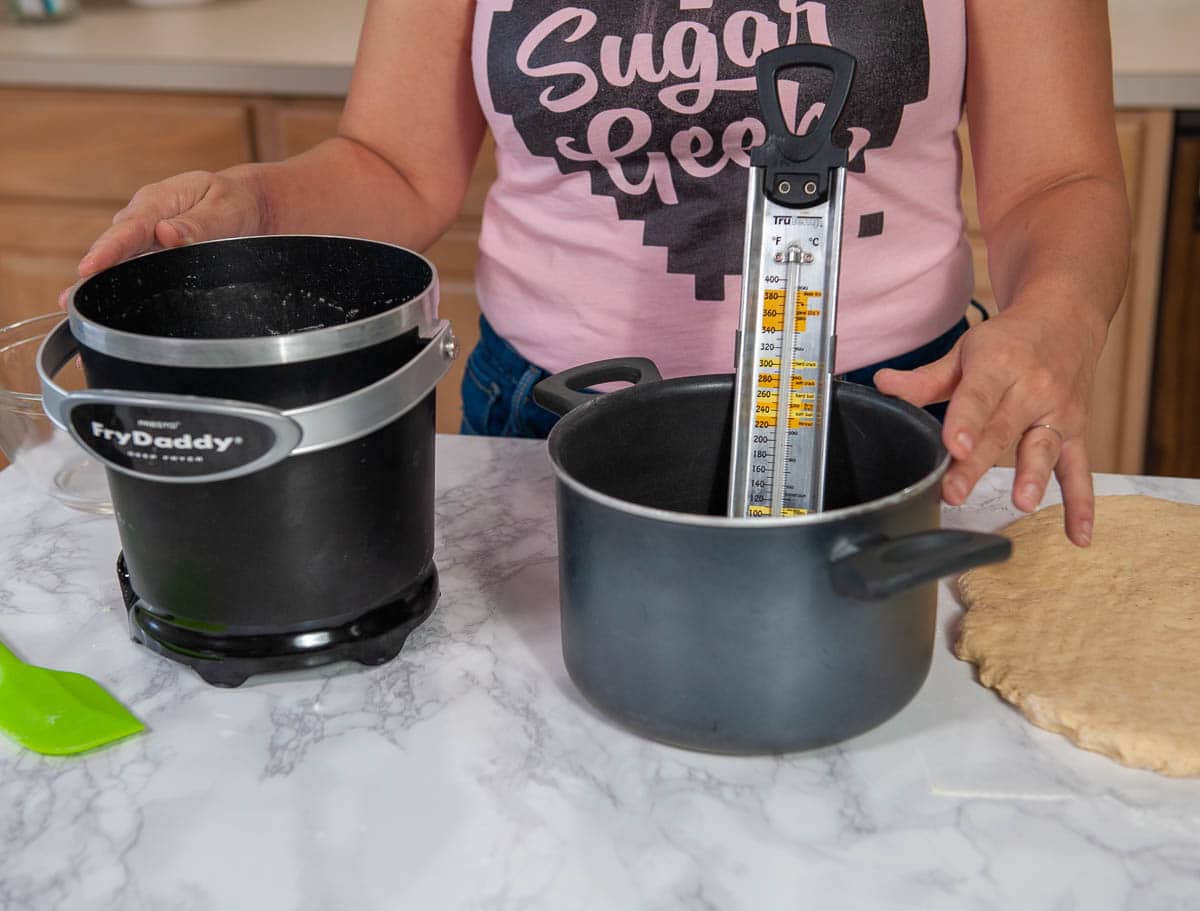
What drops the temperature? Every time you add a donut to the oil, the oil temperature drops by 10 to 30º F, depending on how cold the donut is and how much oil you have. This is why batch size matters. Fry 2 to 3 donuts at a time, max. If you crowd the pot with 6 donuts, the temperature drops below 350º F, and you're back in greasy territory.

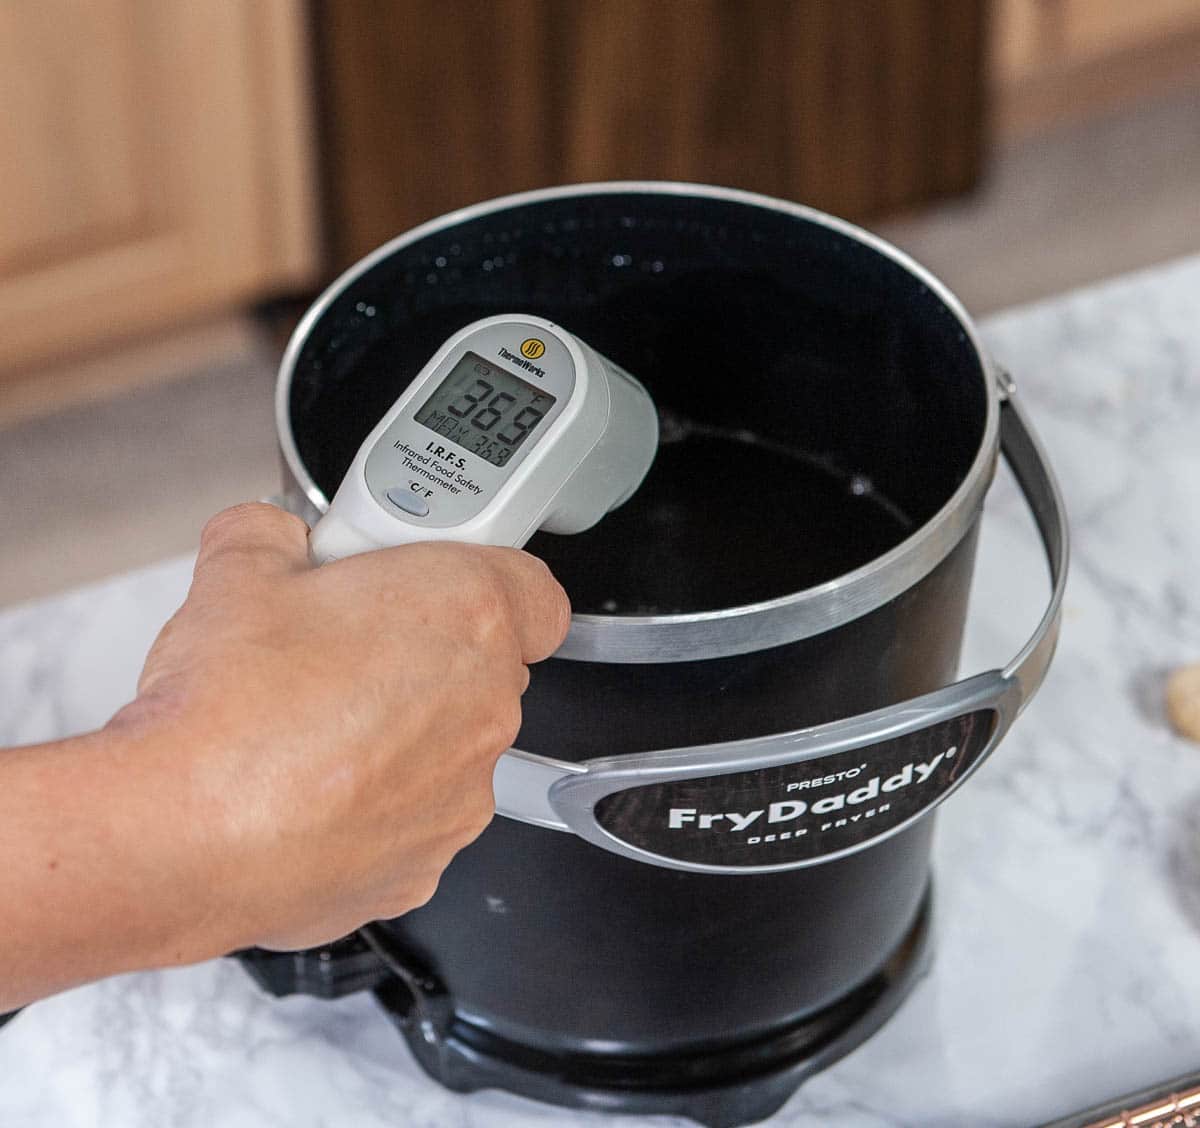
The fix: use a candy thermometer or infrared heat thermometer, check the temperature before every batch, and wait for the oil to recover between rounds. This single habit makes the difference.

Sourdough Discard Donut Recipe Step-By-Step

For exact measurements, see the recipe card below.

Before you start: All refrigerated ingredients (eggs, buttermilk, butter) need to be at room temperature so they combine properly. Set them out an hour ahead, or warm the eggs in warm tap water for 5 minutes and microwave the butter in 10-second bursts until soft.

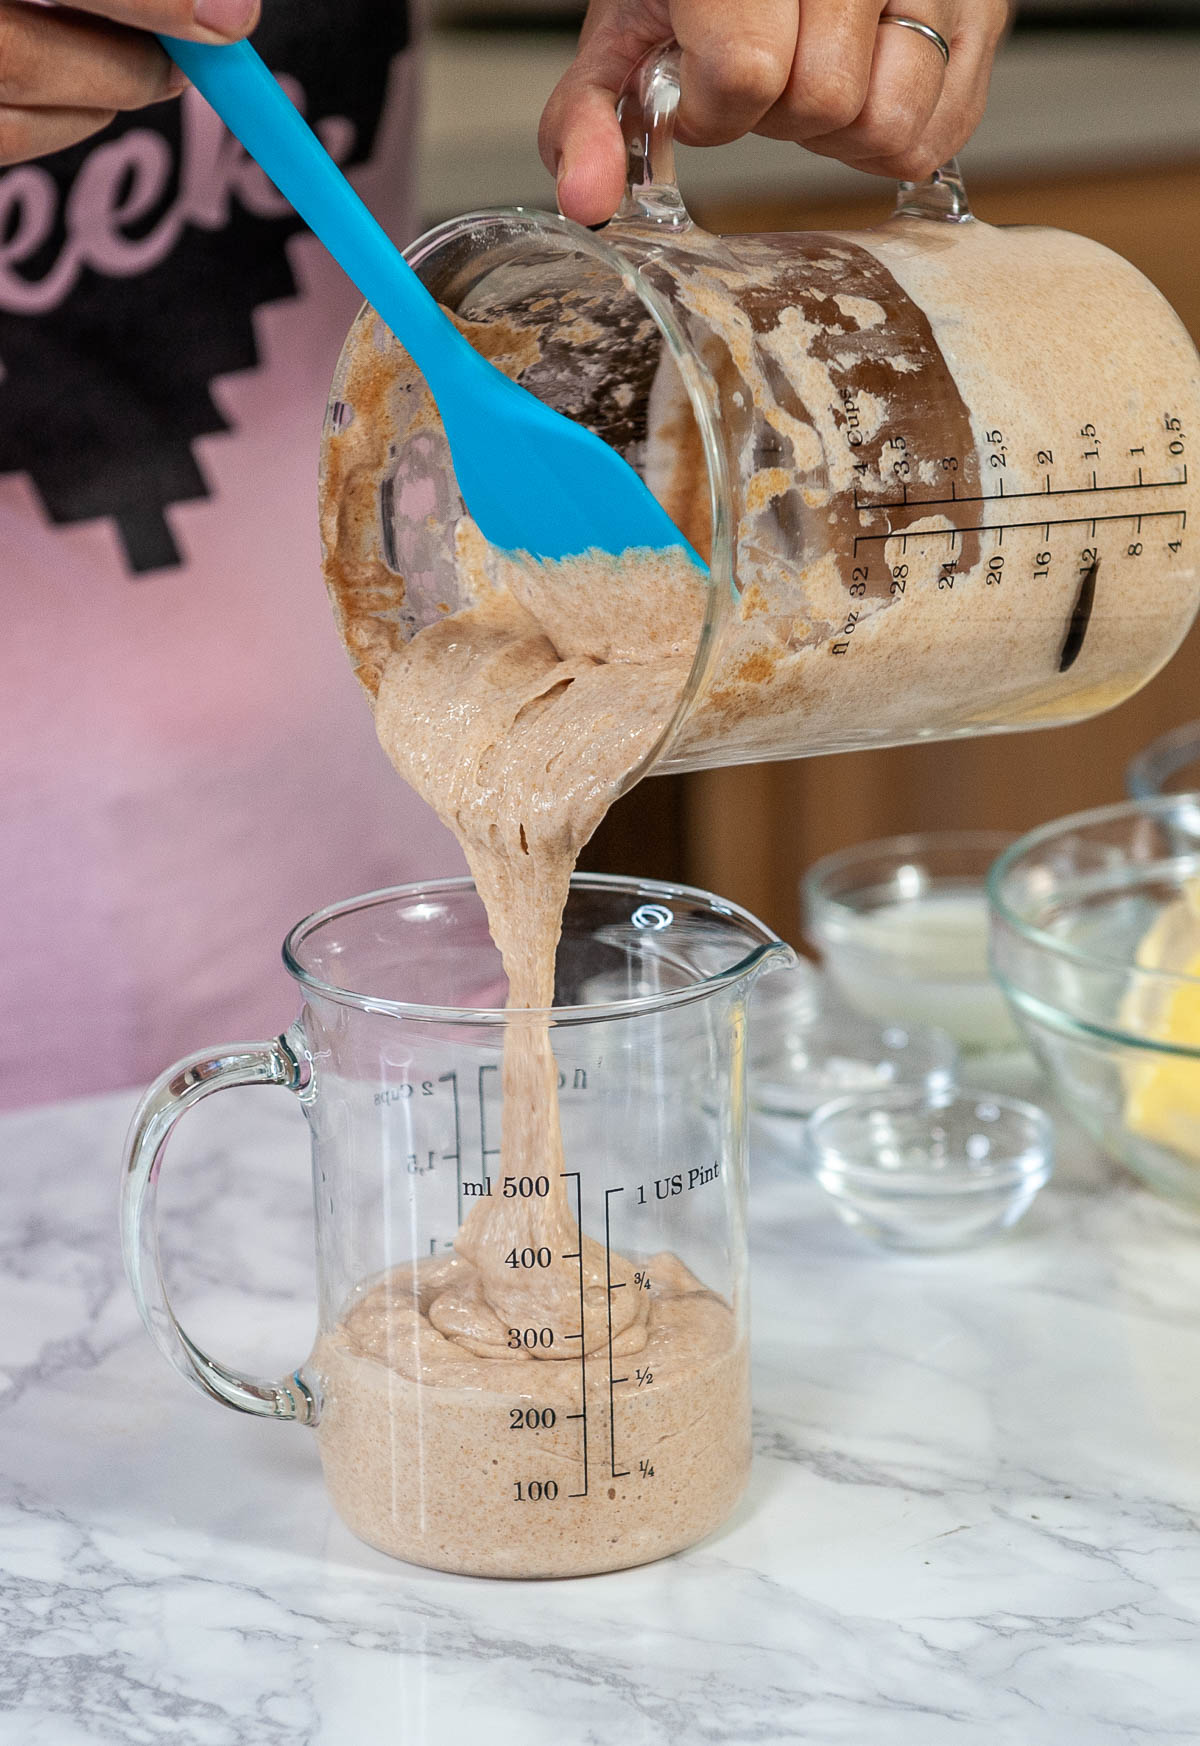
pouring sourdough discard into a measuring cup
  1. Save your sourdough discard in a separate bowl after you feed your starter. You should have about a cup. A little more or less is fine; you can make up the difference with buttermilk.
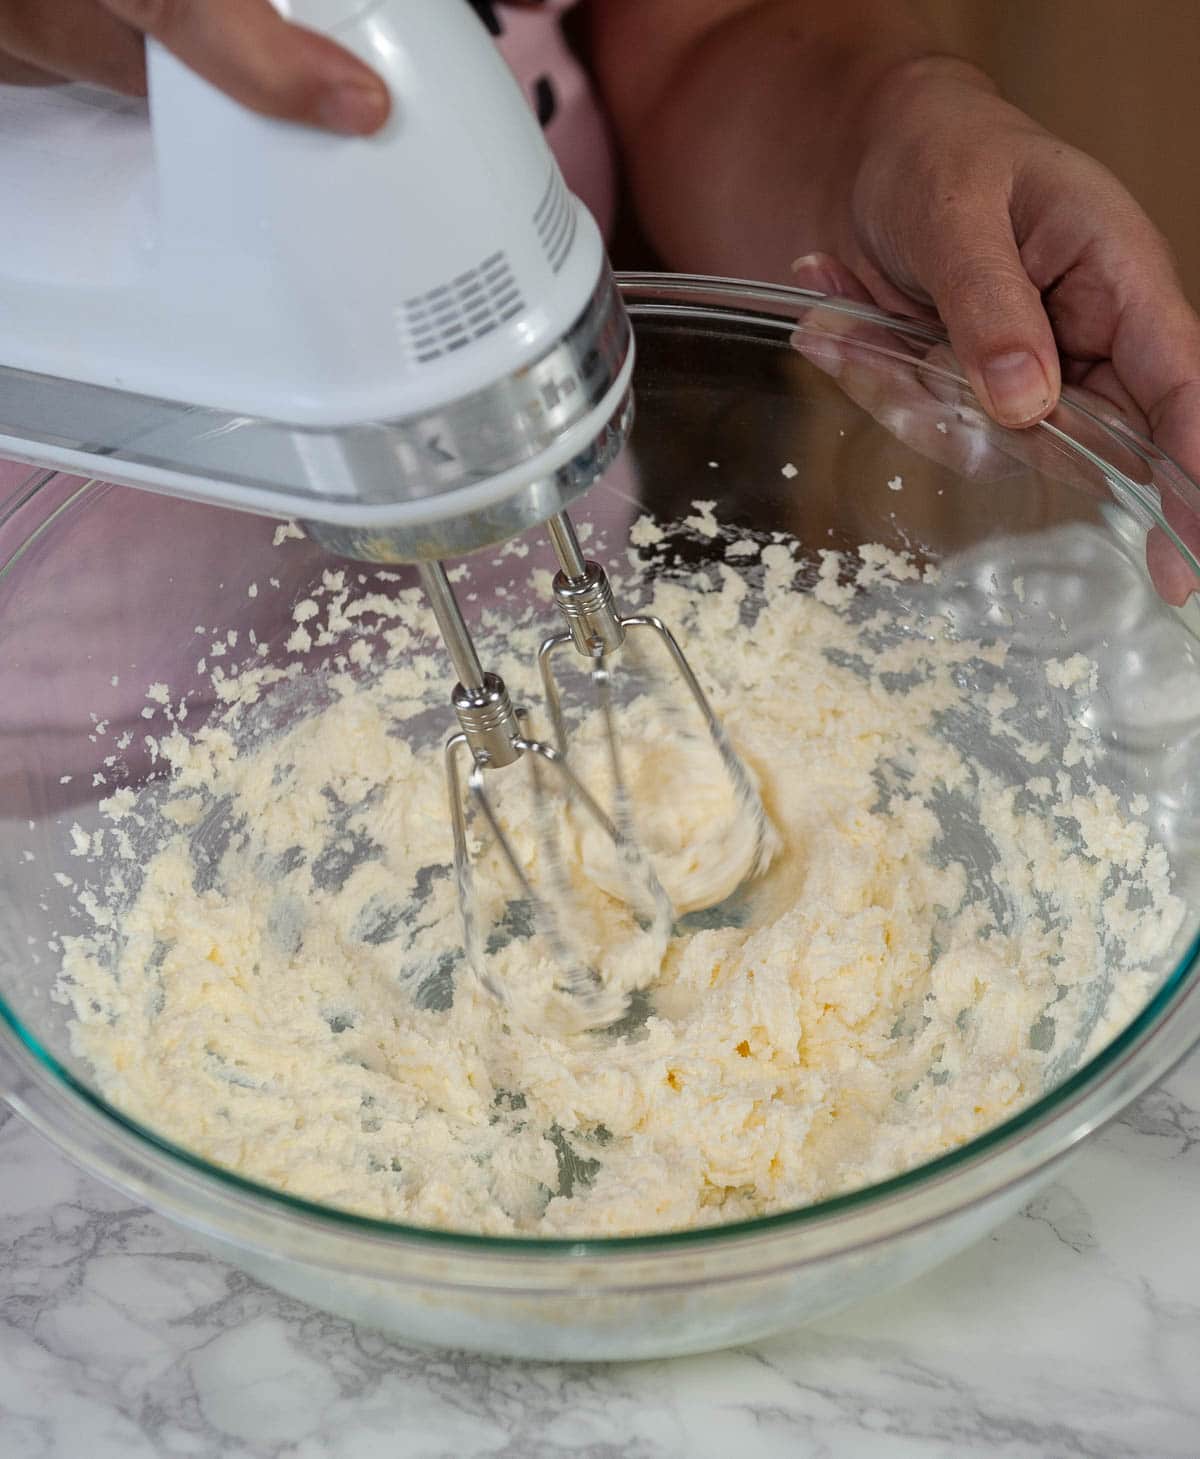
creaming butter and sugar with a hand mixer in a clear bowl
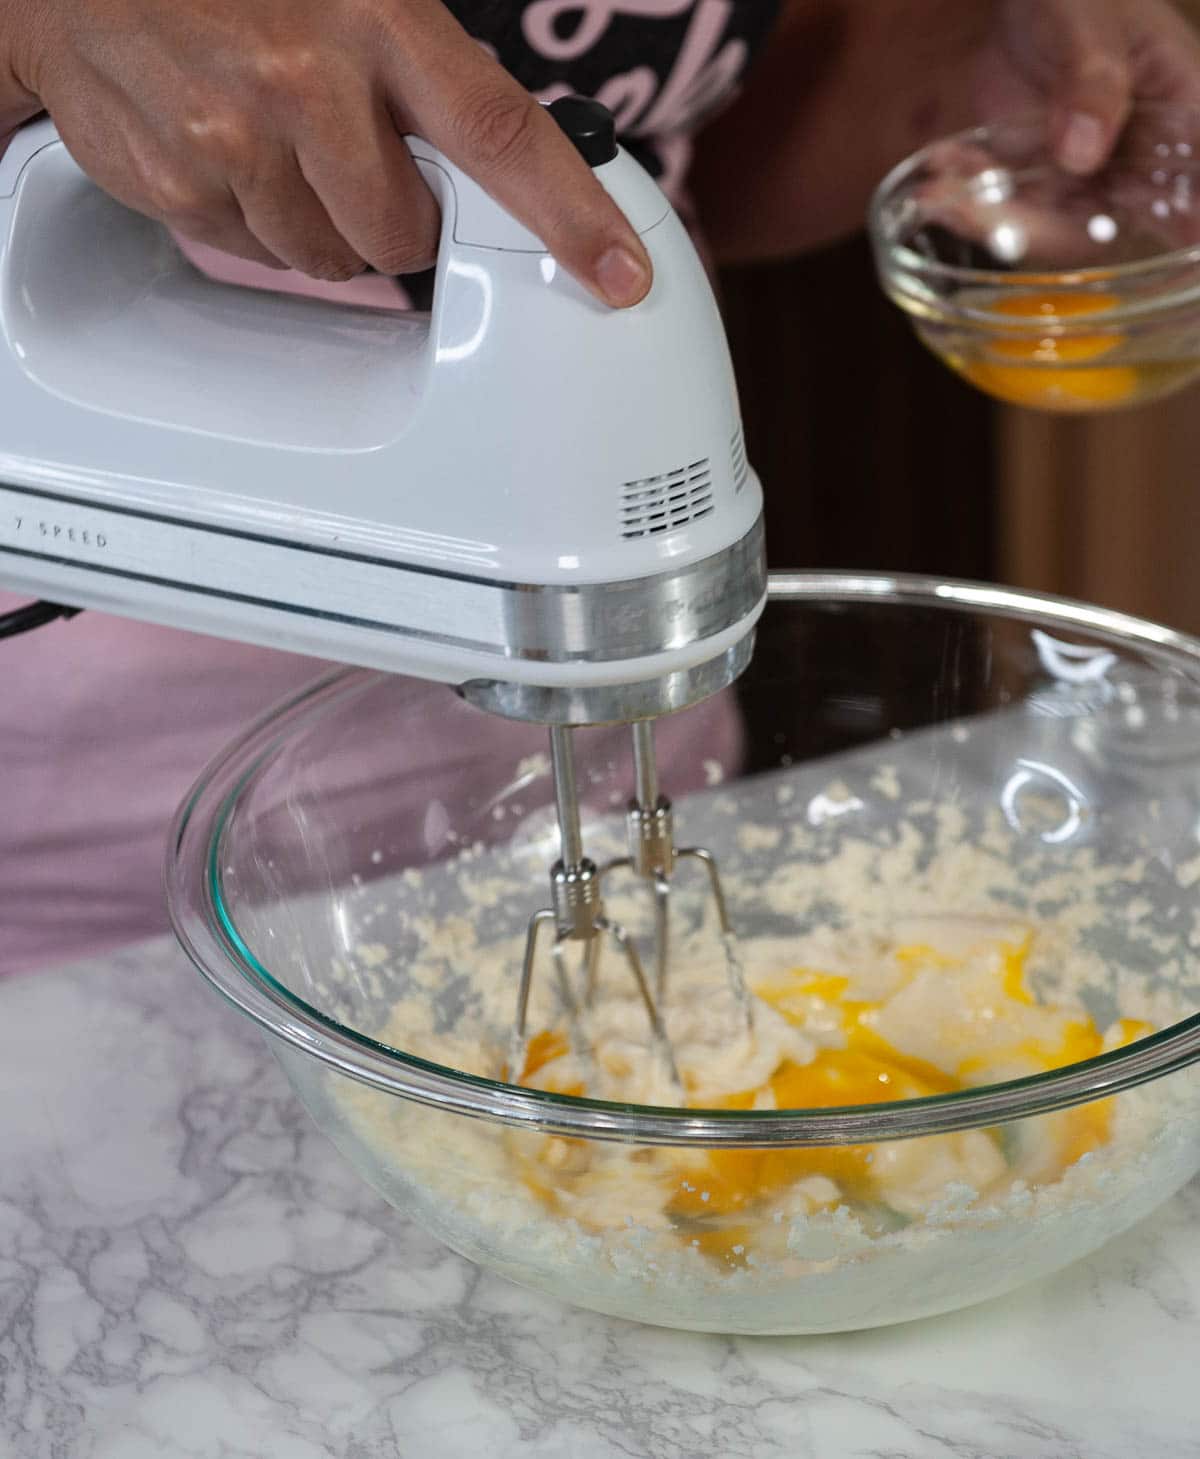
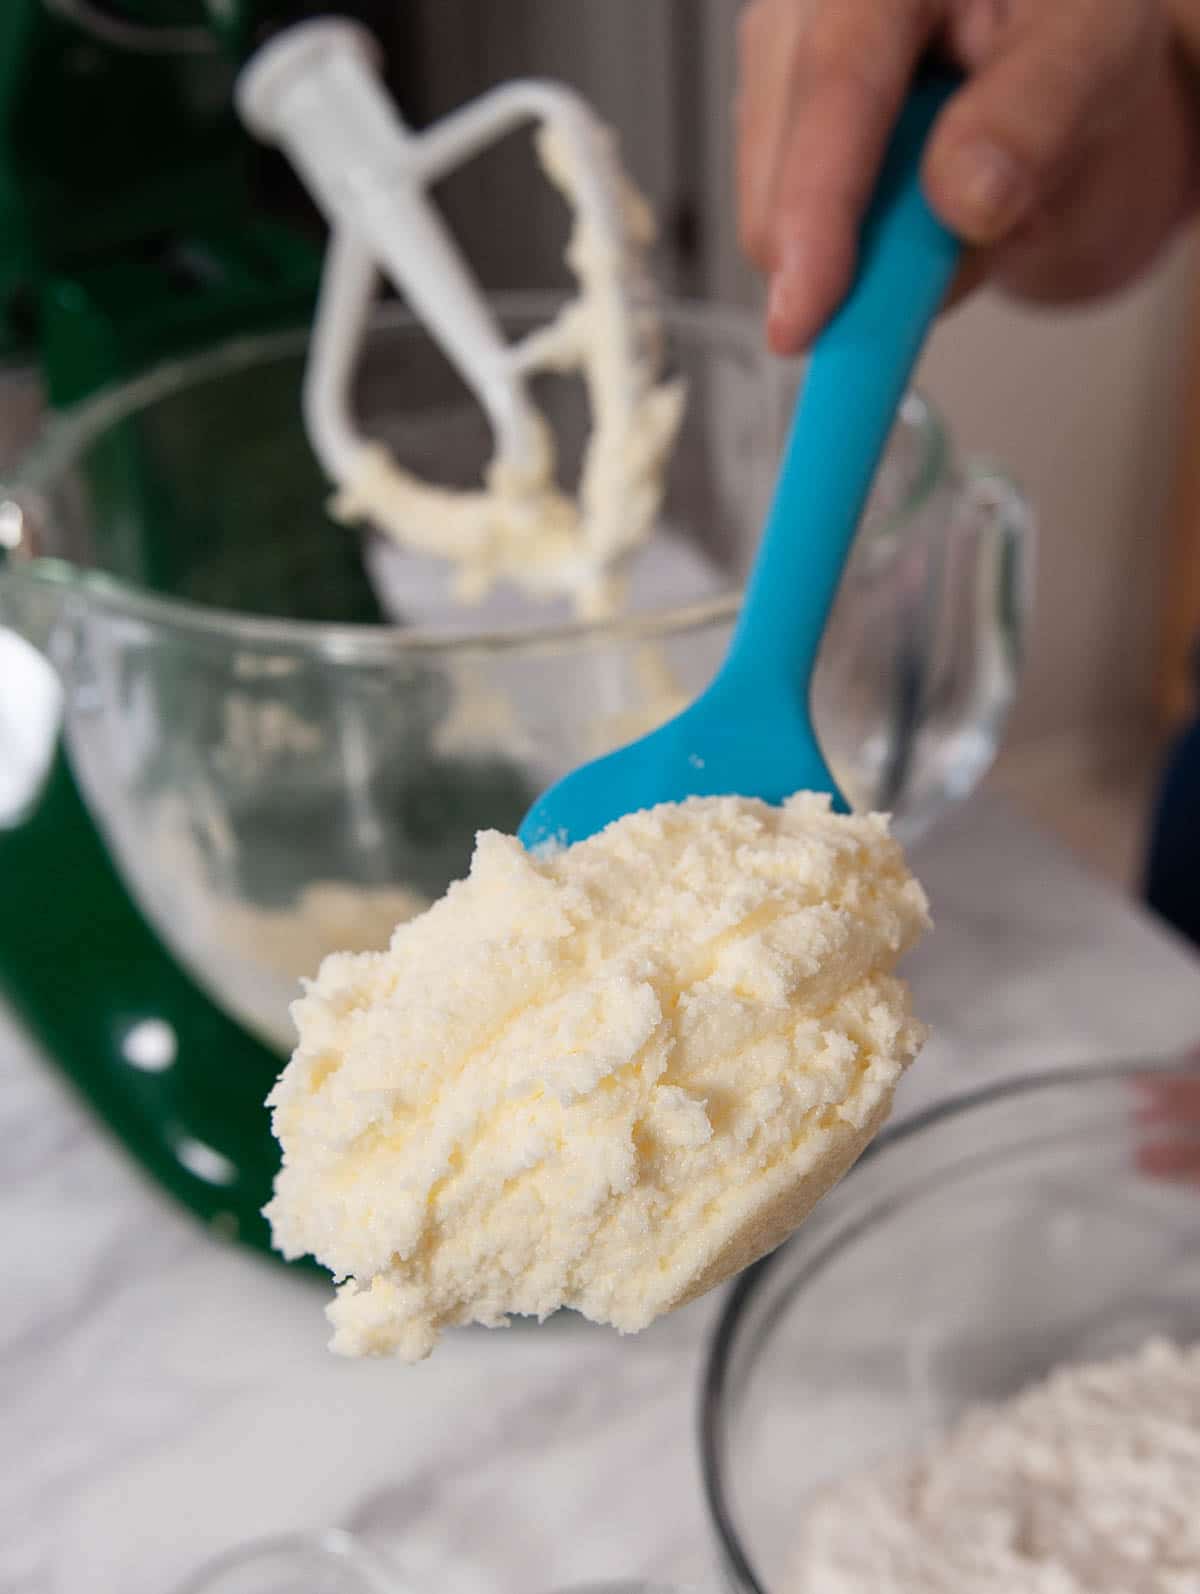
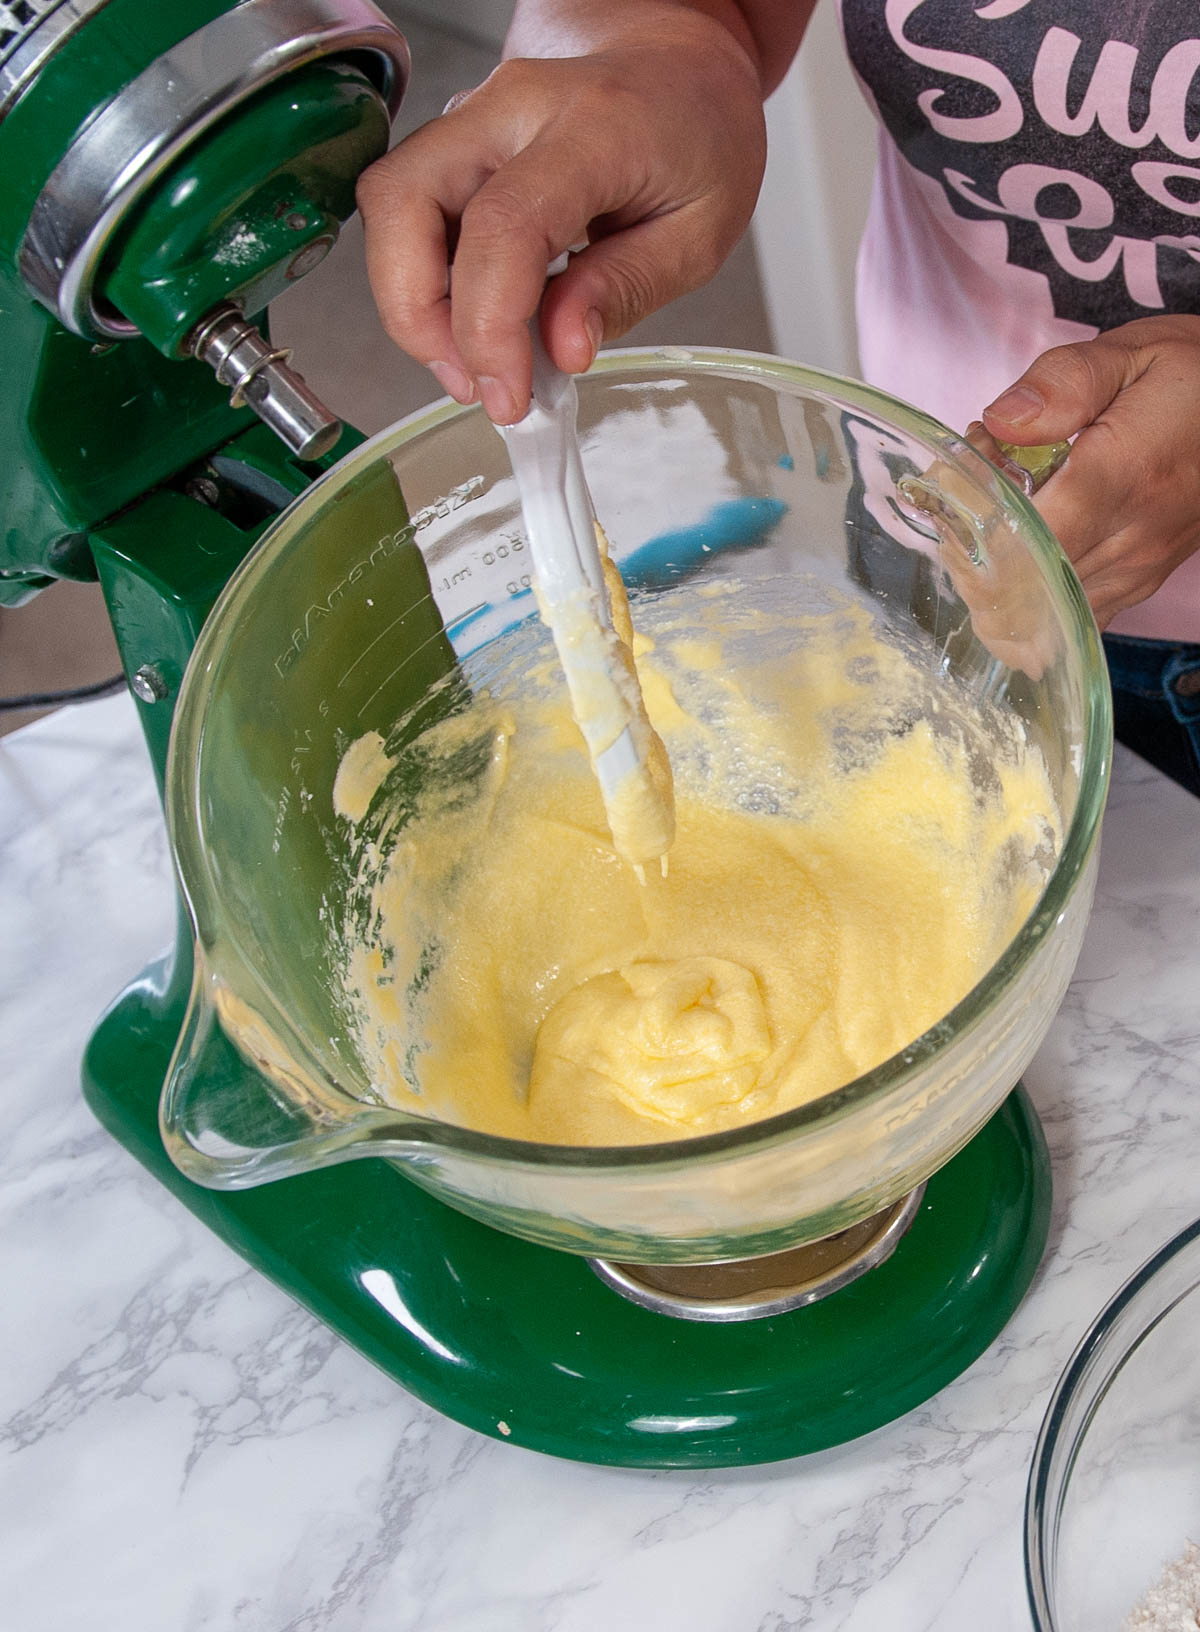
  1. Cream the butter and sugar together in a large bowl on medium-high speed until light and fluffy, about 2 minutes with a hand mixer.
mixing eggs with butter and sugar with a hand mixer in a glass bowl
  1. Add the eggs one at a time on medium speed until combined. If they look broken or curdled, your butter or eggs were too cold.
Mixing sourdough discard into donut batter.
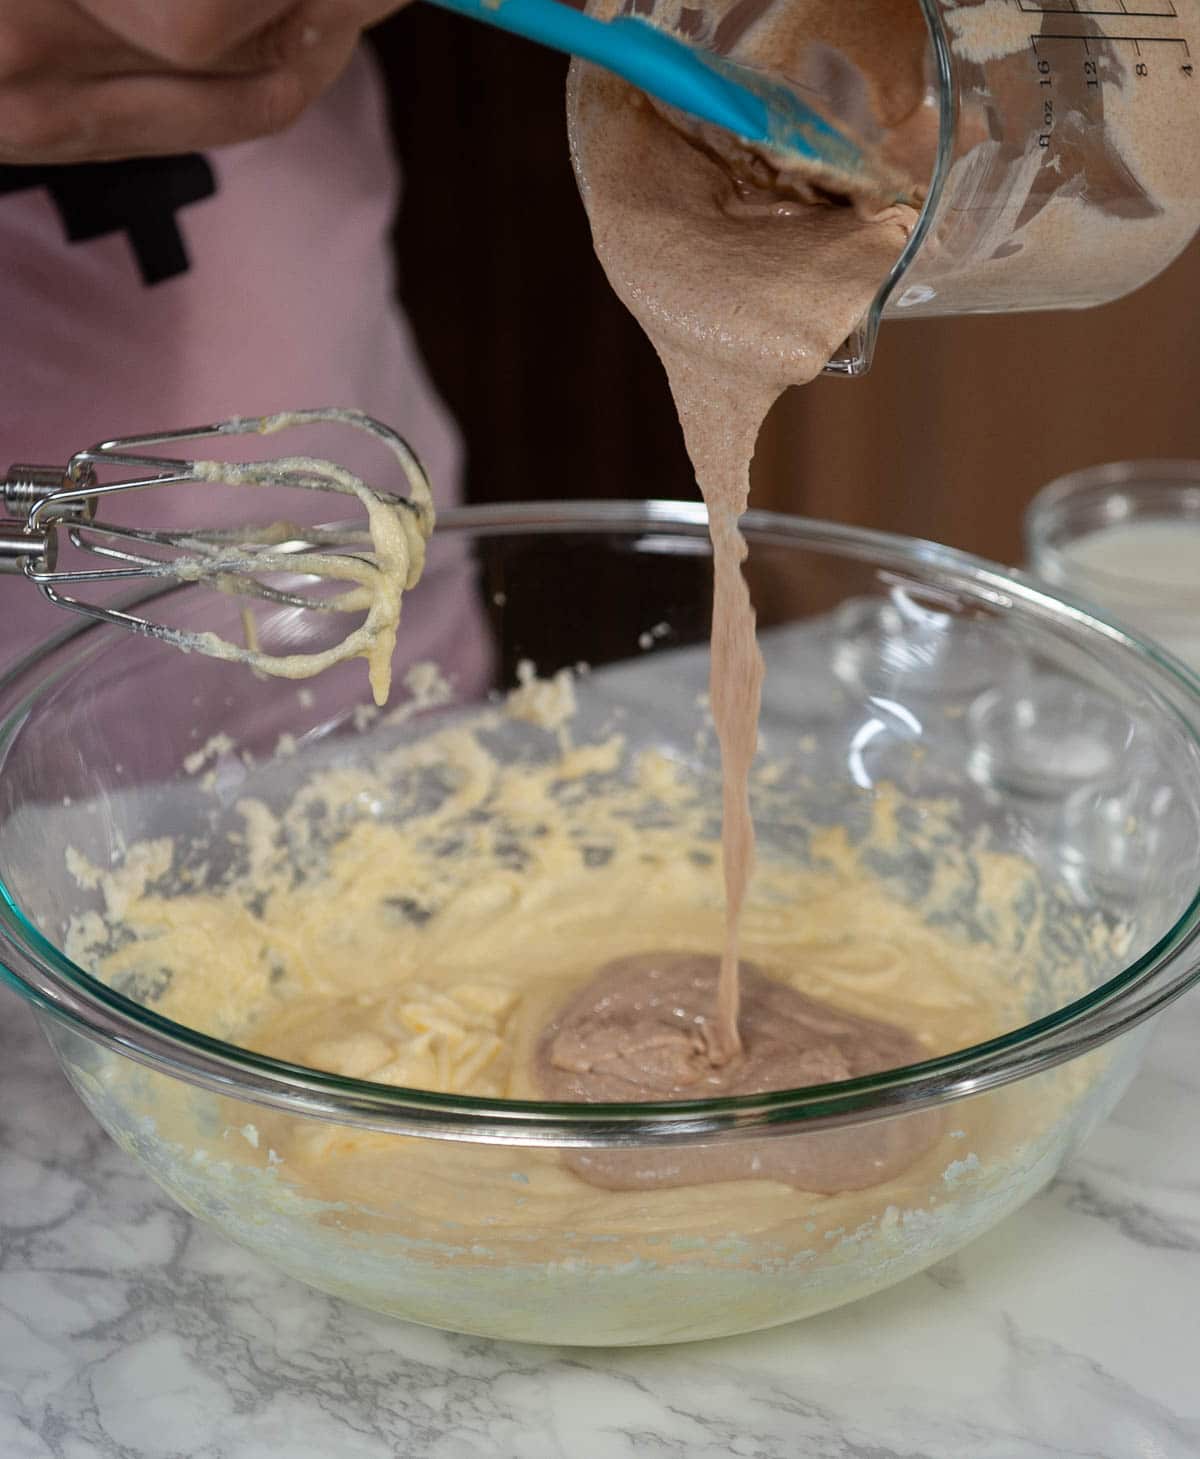
  1. Add the sourdough discard, buttermilk, baking powder, baking soda, salt, vanilla, and nutmeg. Mix on low until just combined.
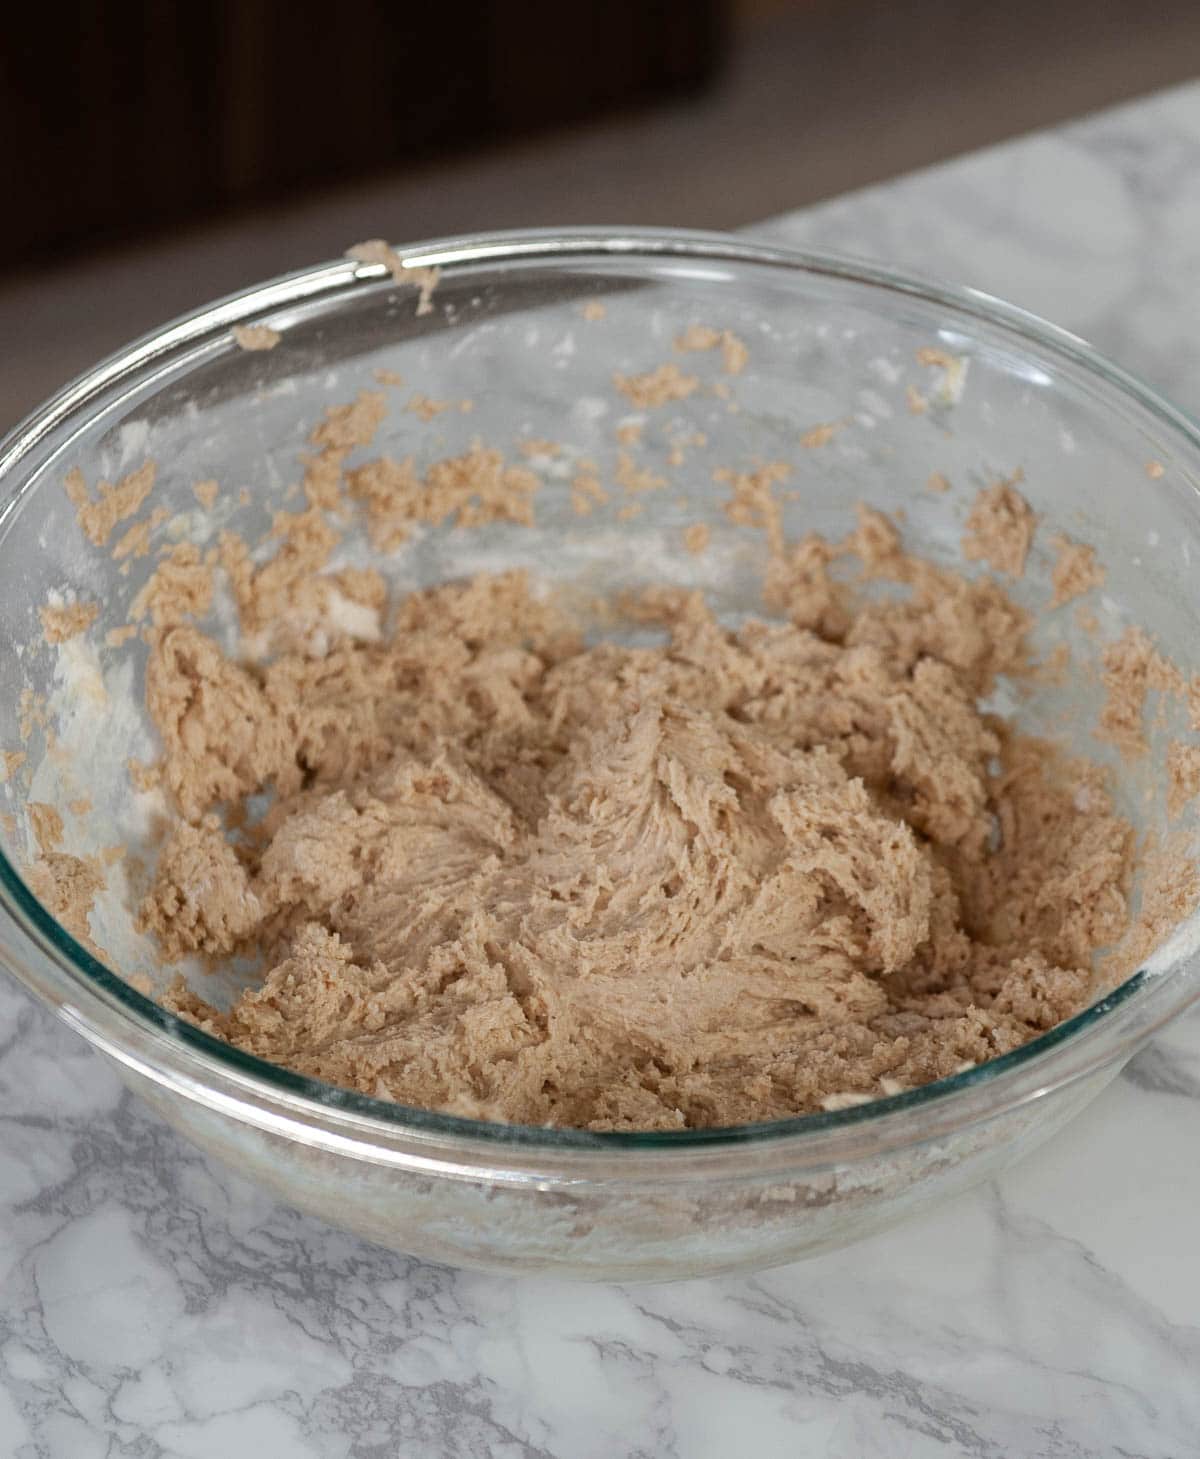
sourdough donut dough in a glass bowl
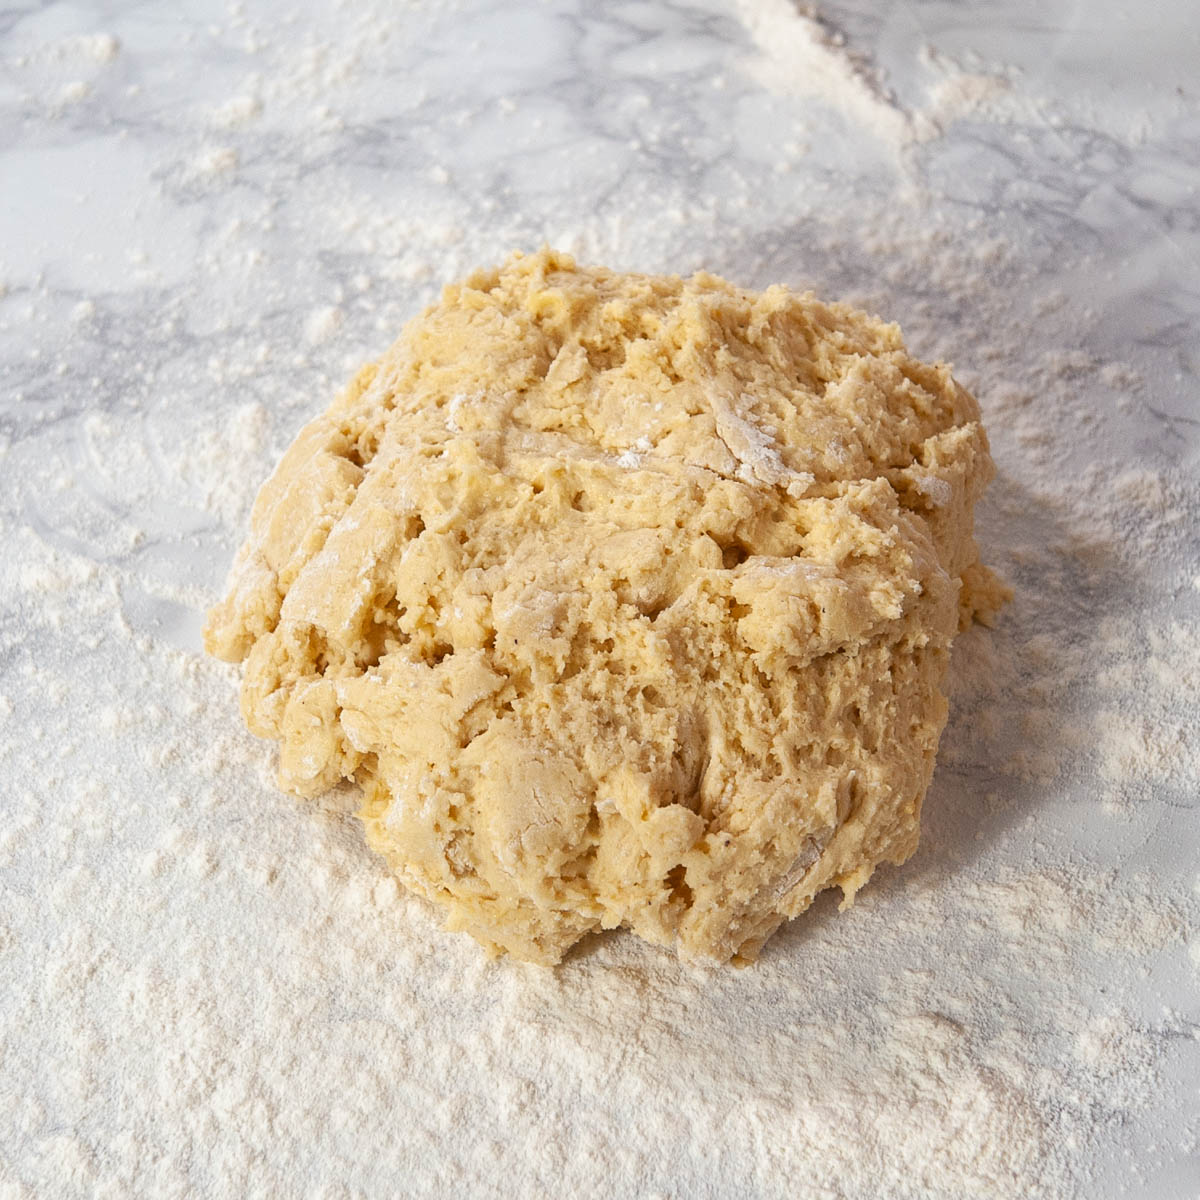
  1. Sprinkle in the flour and combine on low until the dough comes together. It will be sticky.
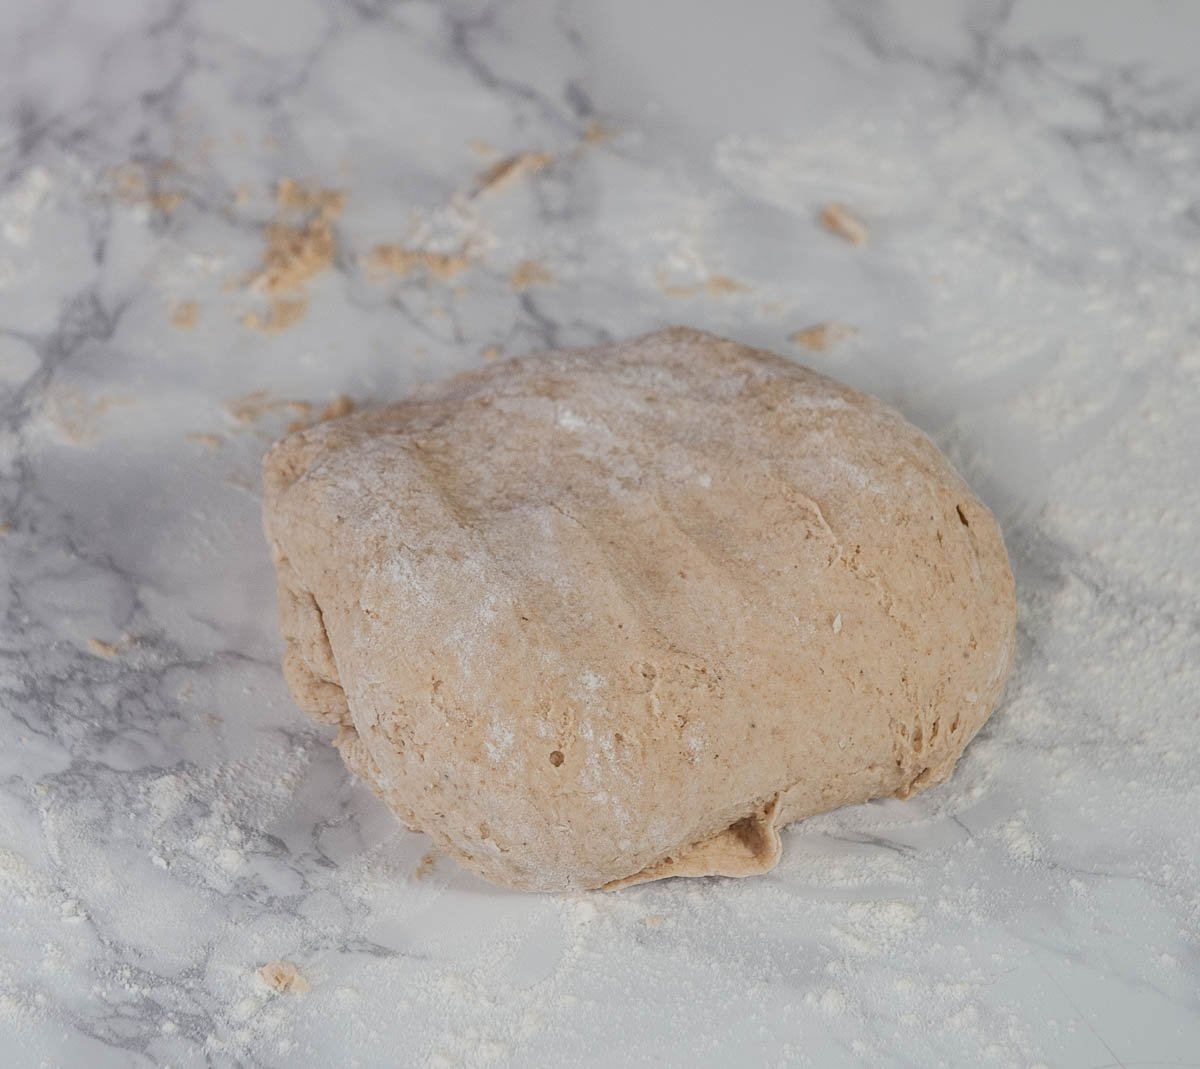
sourdough donut dough on a floured white table
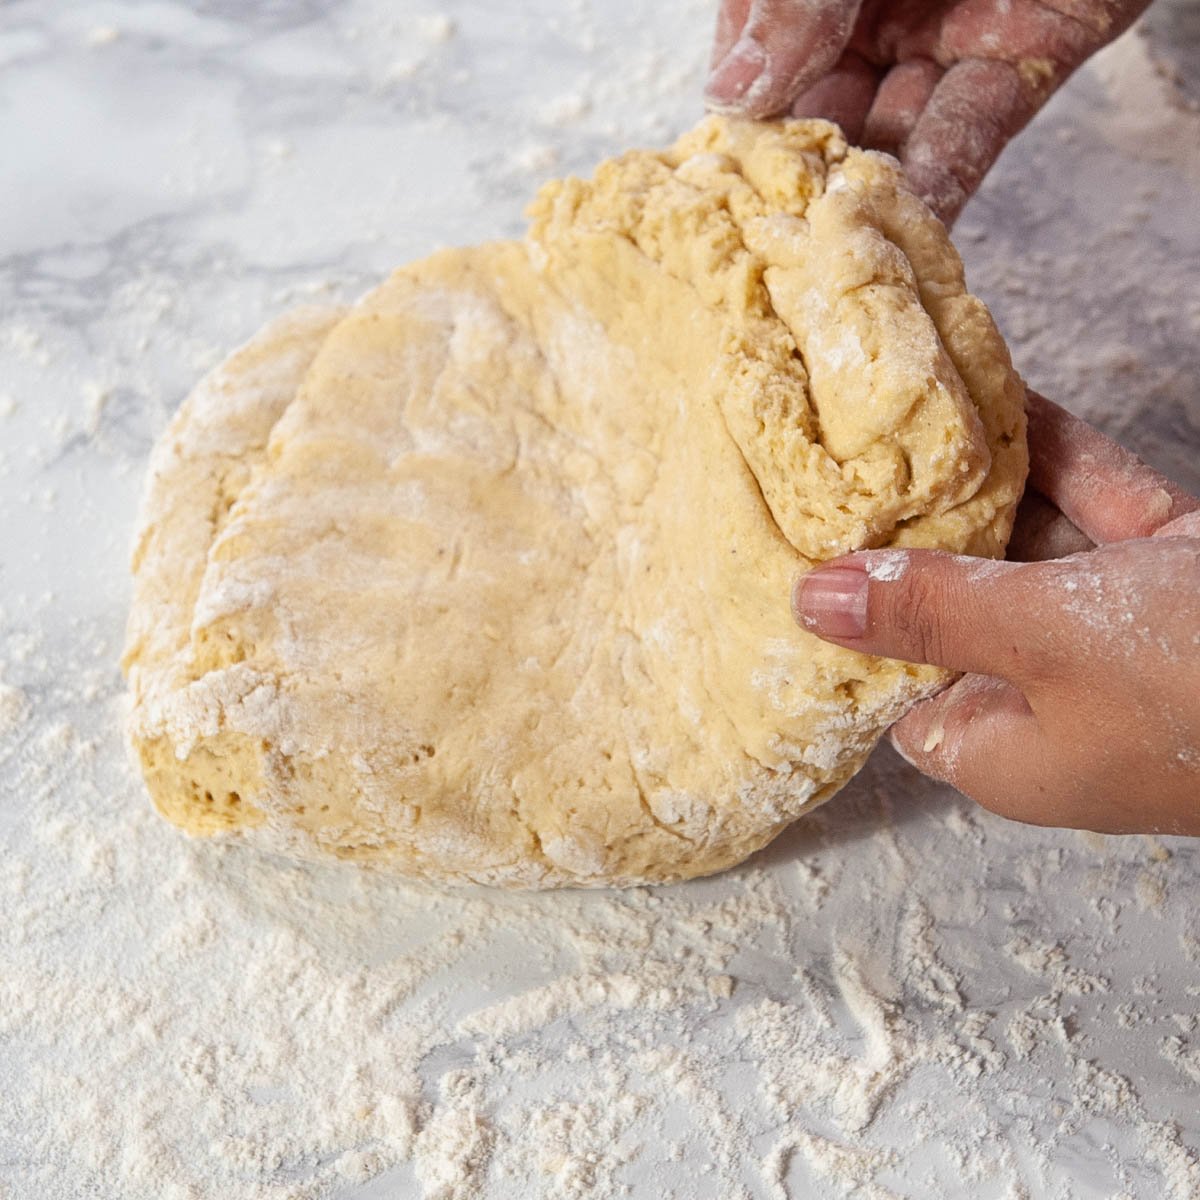
  1. Place the dough on a lightly floured surface. Press it down with your hand to about 1 inch tall. Fold over onto itself 3 to 4 times until it looks smoother. Don't overwork it or the dough will get tough.

PRO TIP: Sticky dough is normal here. Resist the urge to add extra flour; more flour means tougher donuts. A bench scraper helps you handle sticky dough without working extra flour in. Light dustings on your hands and the surface are fine.

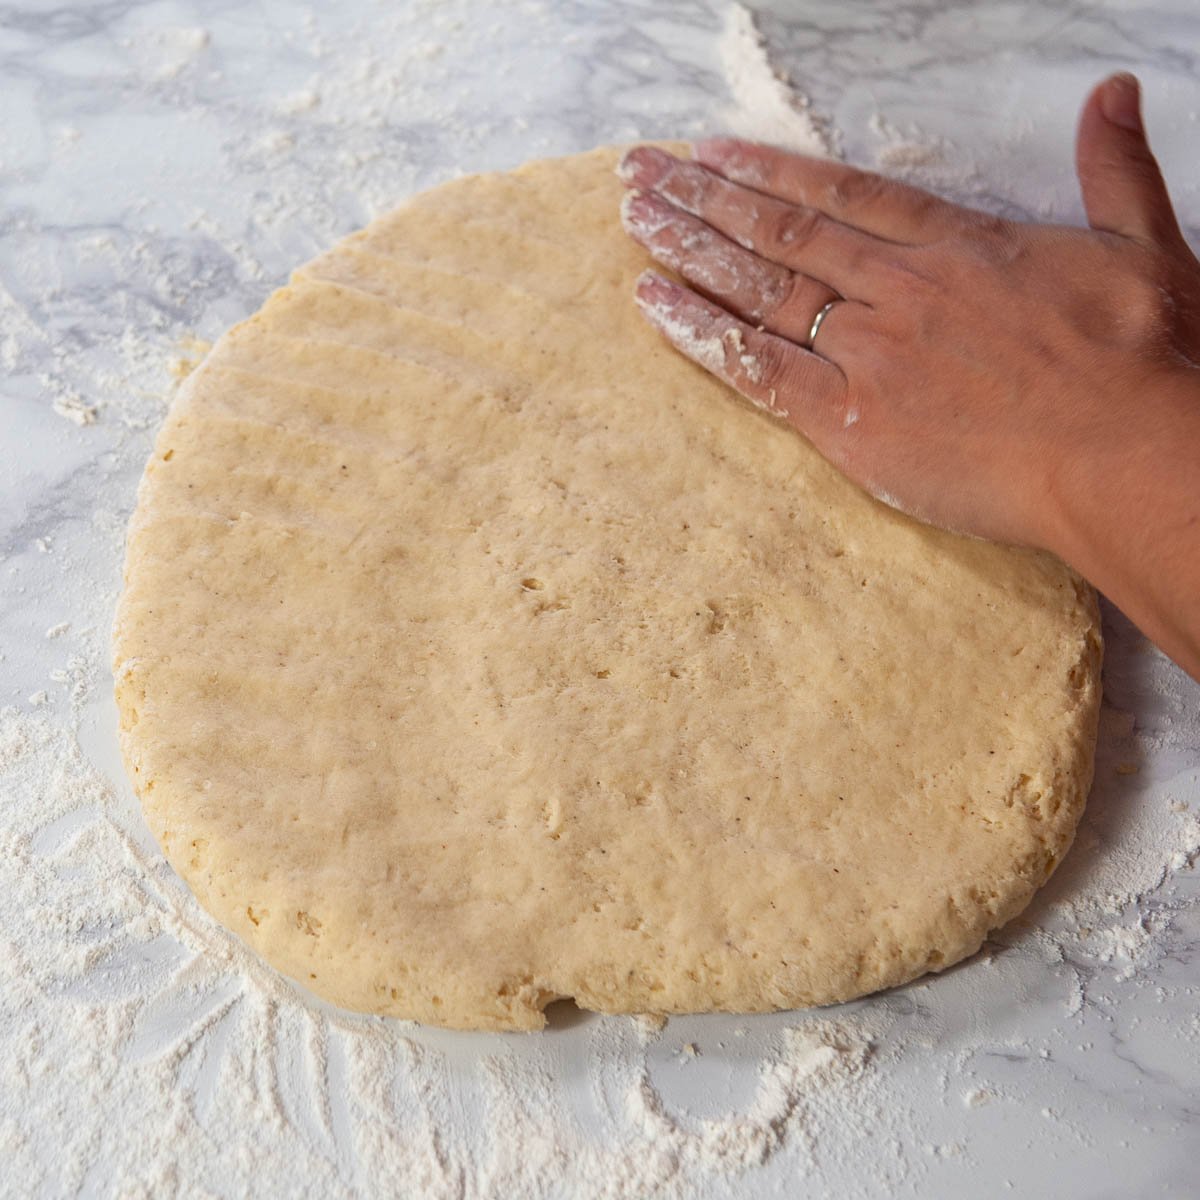
Pressing sourdough discard donut dough onto the countertop.
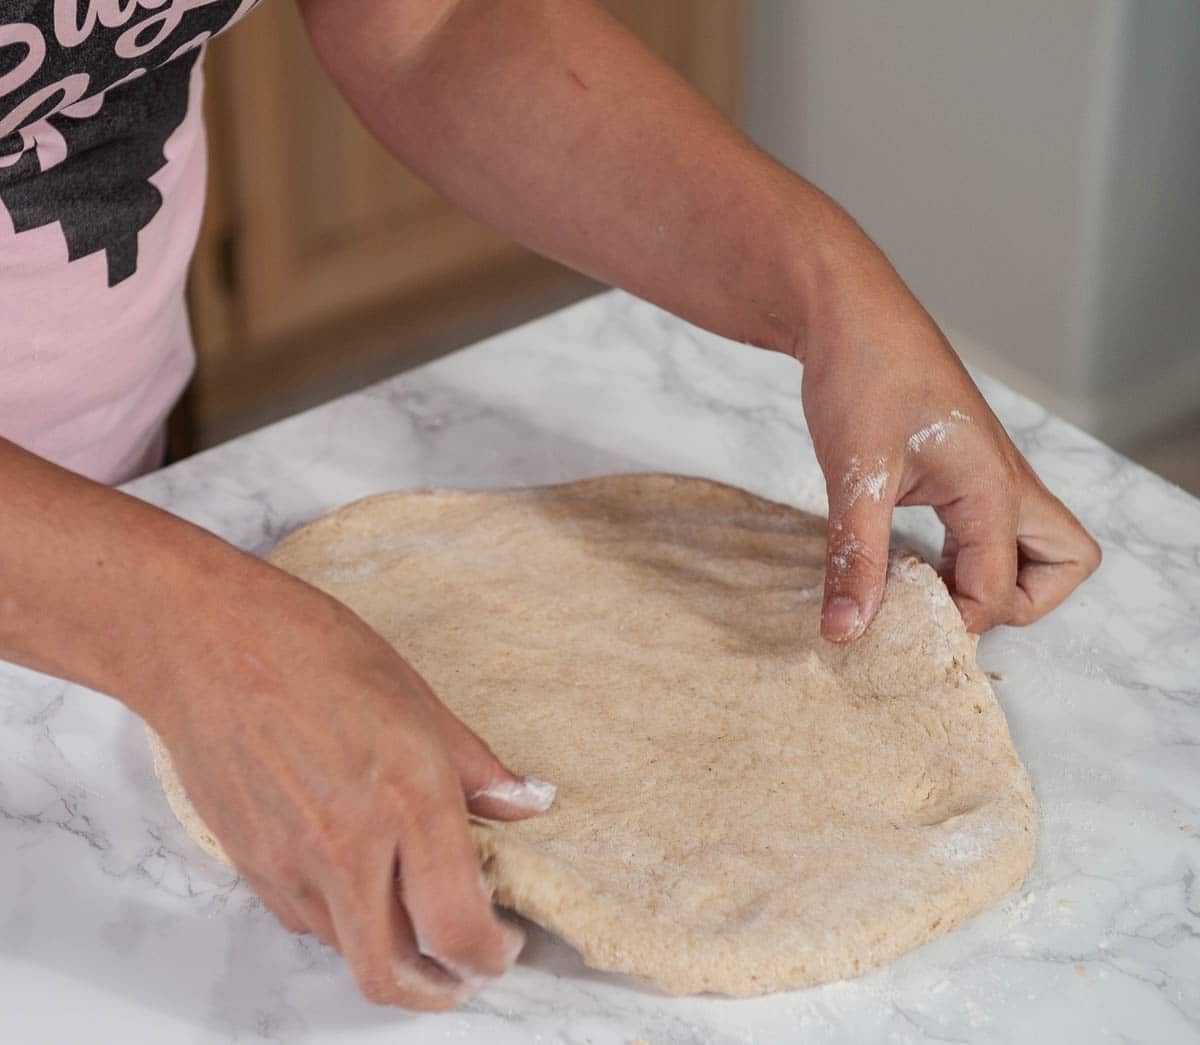
  1. Press the dough to about ½ inch thick and dust with a bit of flour. Let it rest for 5 to 10 minutes. Now is the perfect time to start heating up your oil.
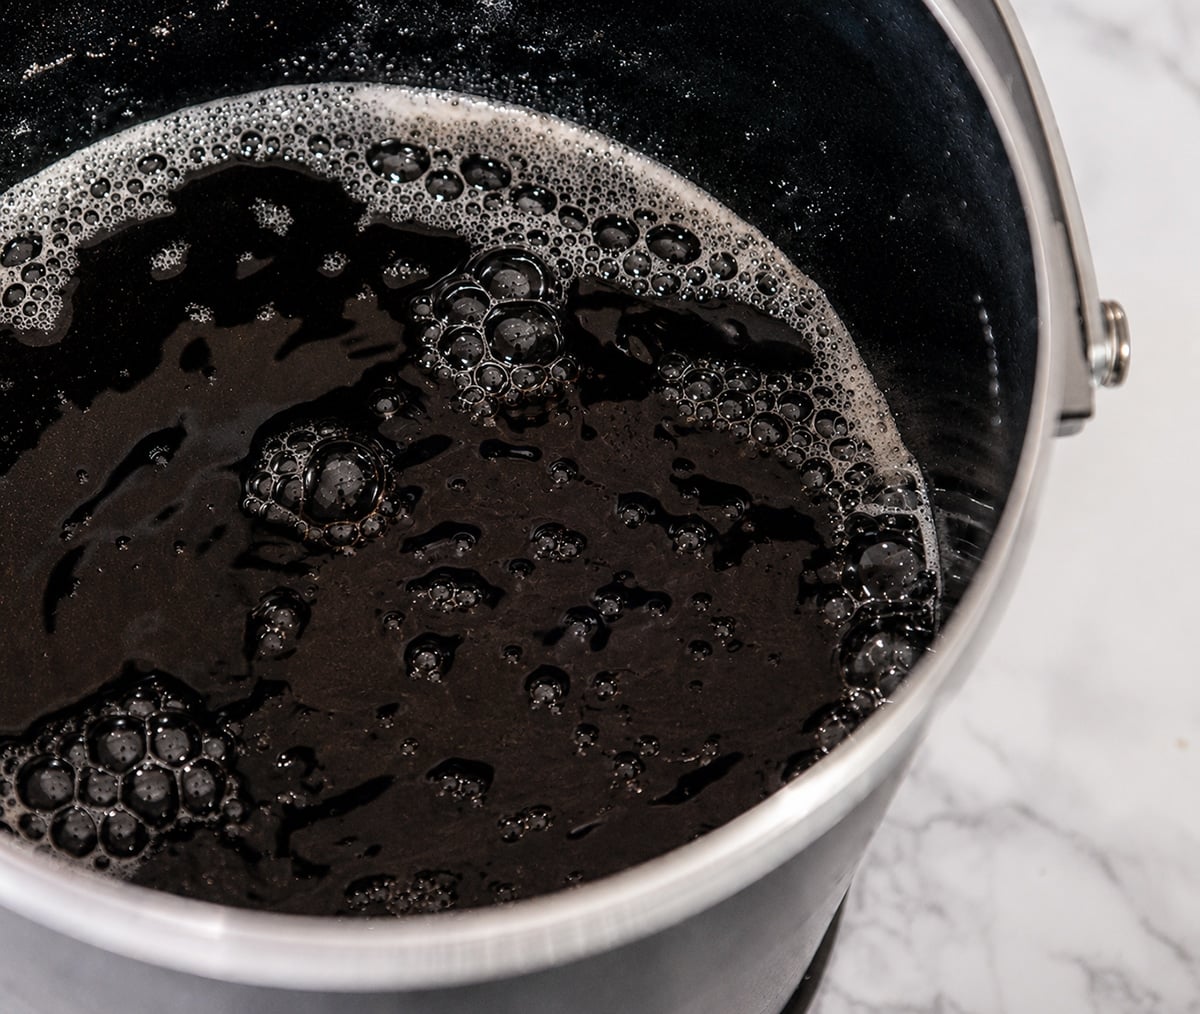
Hot Fry Daddy with oil inside.
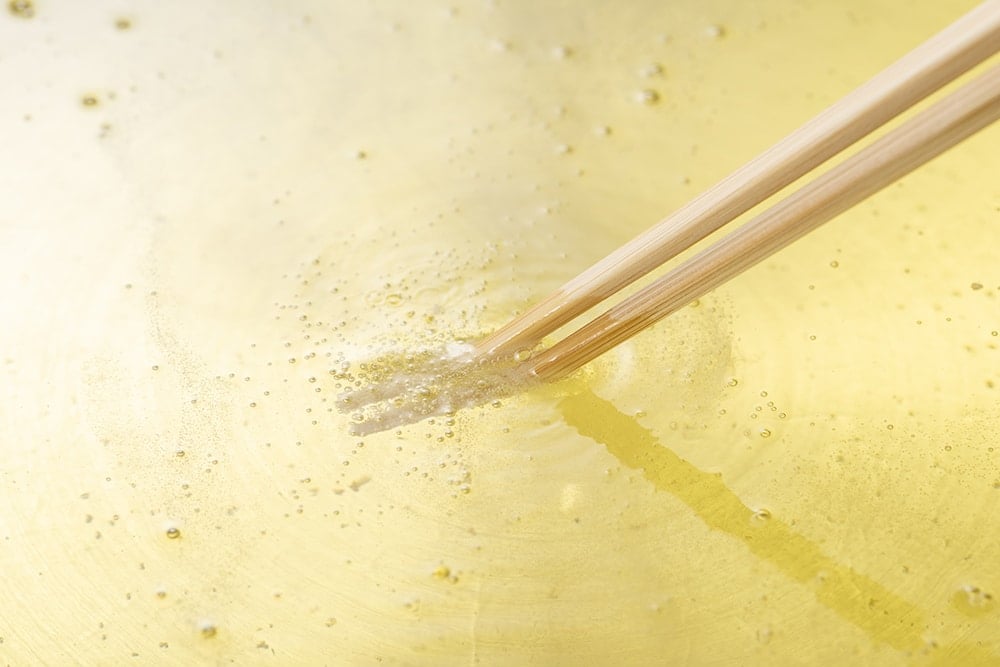
  1. Heat your oil to 360 to 375º F. Use a FryDaddy (regulates temperature automatically), a heavy pot like a Dutch oven, or a deep skillet with 2 inches of oil. This takes about 15 minutes on medium heat.
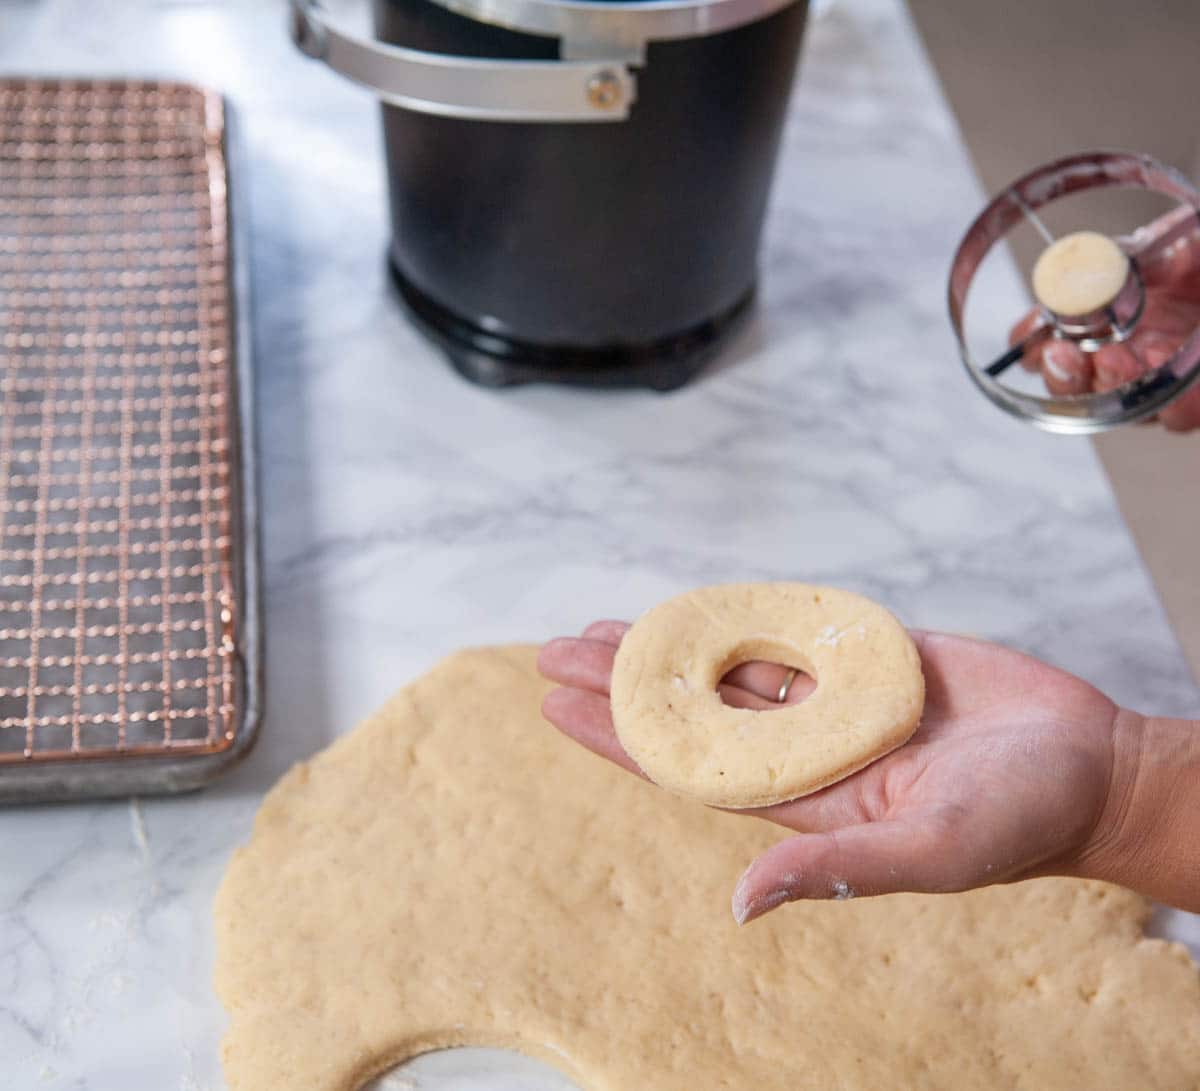
close up of donut cut from dough
  1. Use a donut cutter or a metal ring cutter to cut out the donuts. Try to leave as little space as possible between cuts. Set the holes aside to fry at the end. Press leftover scraps together and continue cutting. You should get 10 to 12 donuts with a 4-inch cutter.
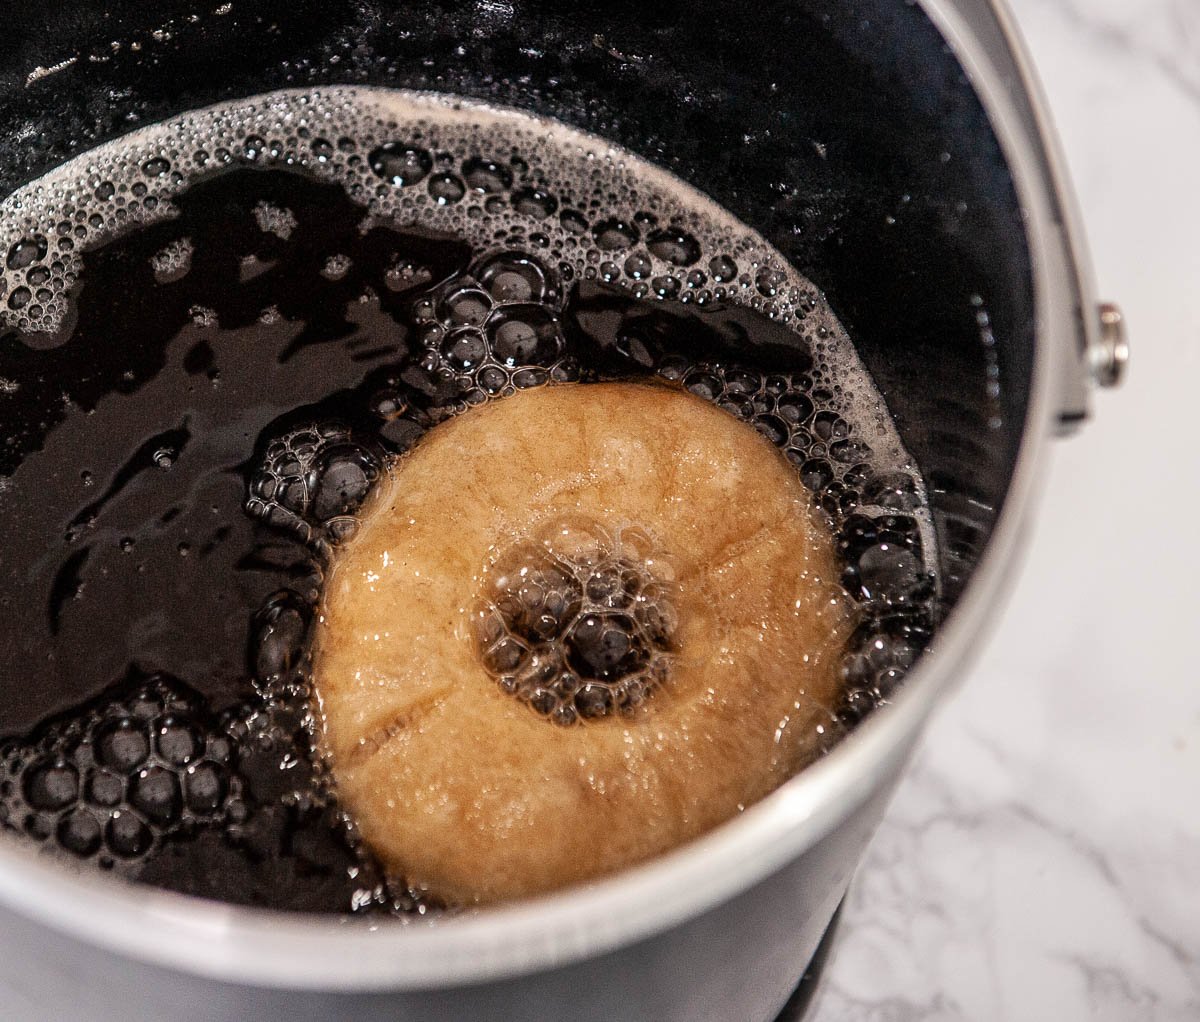
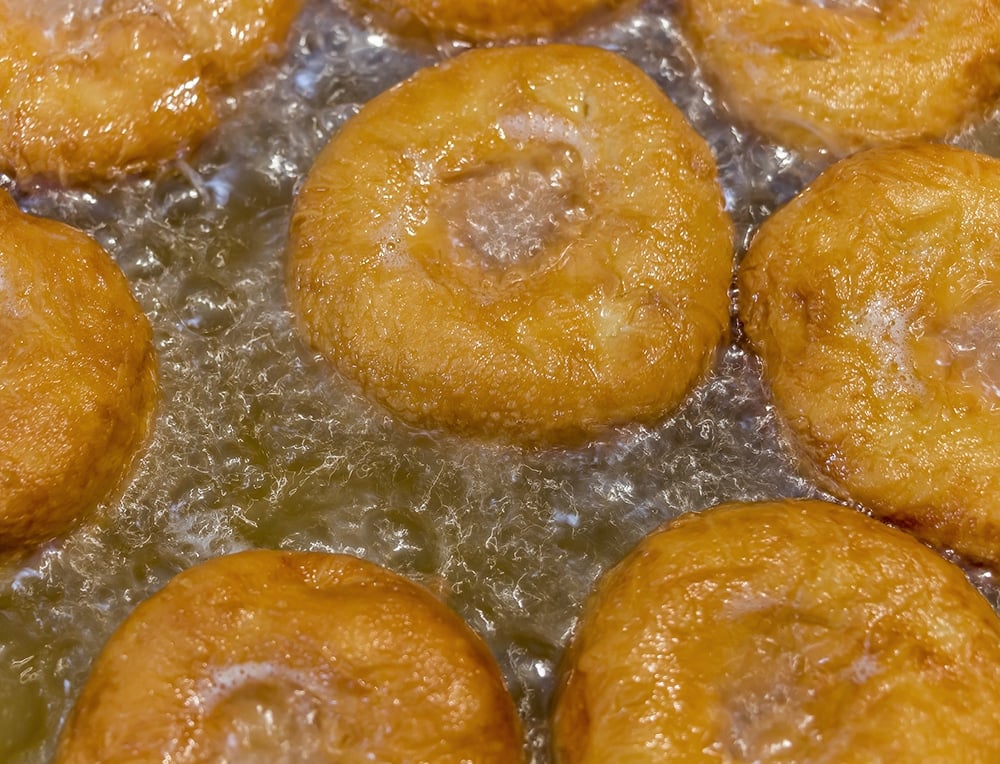
donut frying in a frydaddy
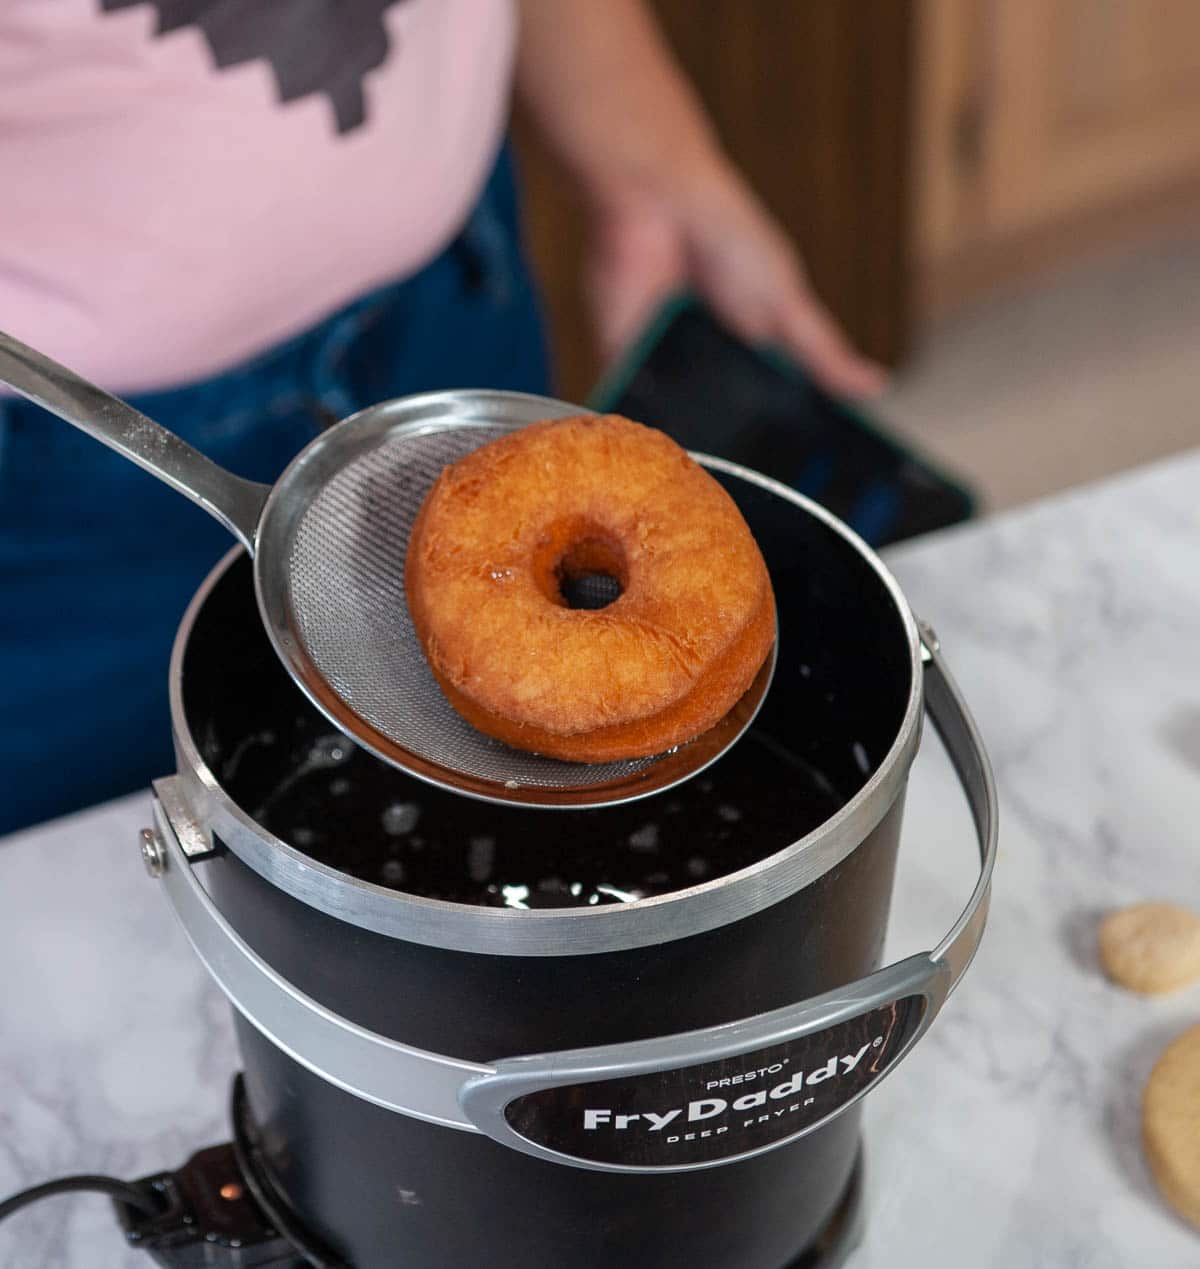
  1. Lower the donuts into the hot oil with a slotted spatula or skimmer. Do NOT drop them; the oil will splash up and burn you. The donut will bubble like crazy at first, then settle down as the crispy outer layer develops.

PRO TIP: Fry 2 to 3 donuts at a time MAXIMUM. Every donut you add drops the oil temperature by 10 to 30º F. Crowd the pot, and the temperature plummets below
350º F, and your donuts will absorb oil. Smaller batches, hotter oil, perfect texture.

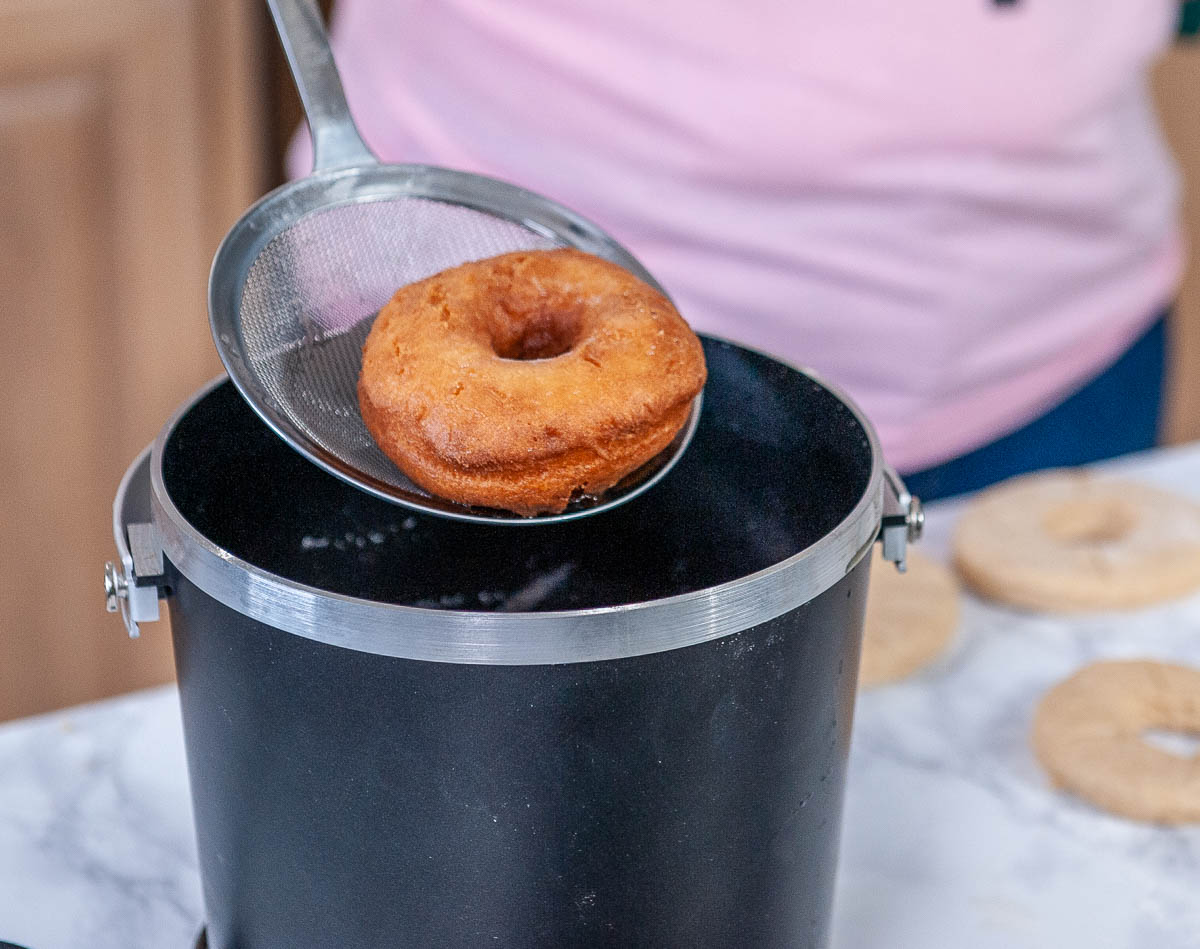
sourdough donut on a skimmer above frydaddy
  1. Fry for 2 minutes on one side, then flip for 1 minute on the second side. The donut should be a deep golden brown, not pale and not burnt.
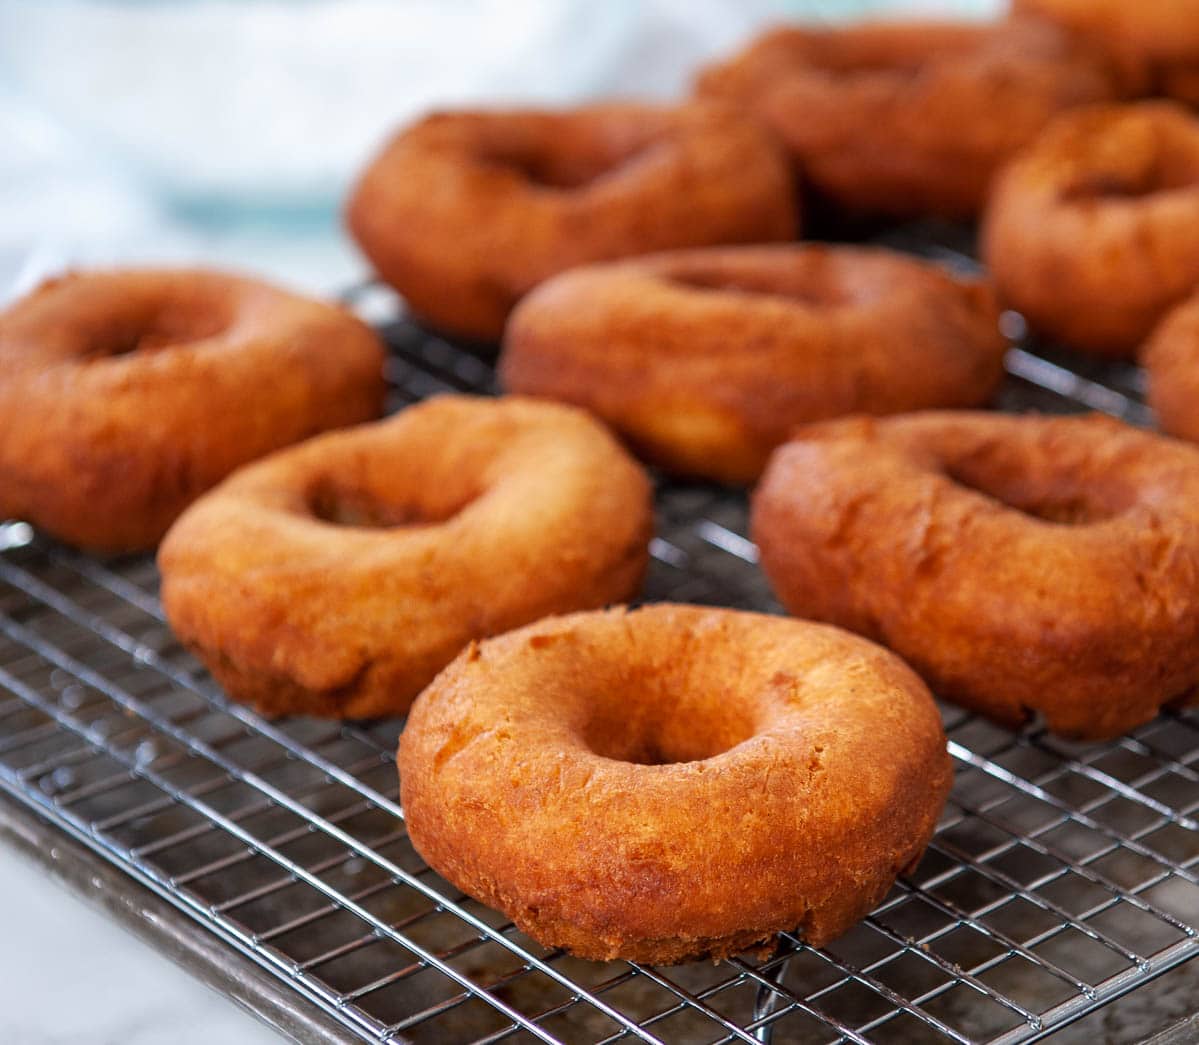
sourdough donuts on a cooling rack over a sheetpan
  1. Transfer to a cooling rack over a sheet pan. A rack lets the excess oil drip away cleanly instead of pooling on a paper towel.

PRO TIP: Let donuts cool for at least 5 minutes before glazing. Hot donuts melt the glaze right off. Warm-but-not-hot is the sweet spot, the glaze sets to a shiny, thin layer instead of running.

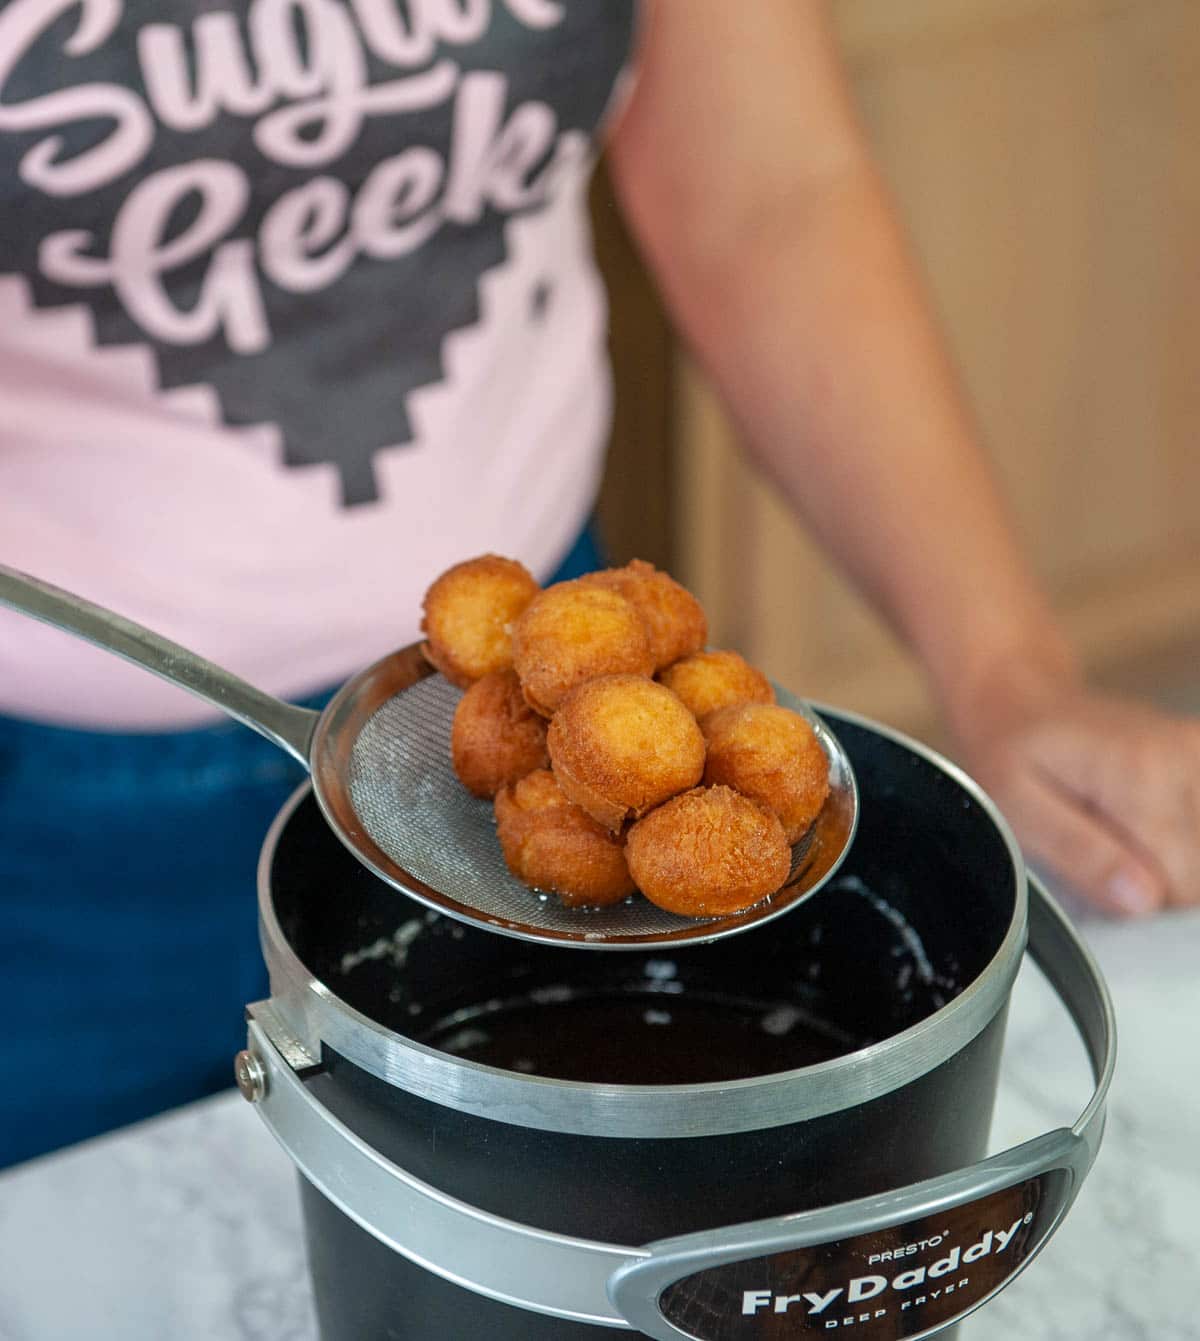
Close up of deep fried donut holes over a fry daddy.
  1. Fry the donut holes at the end for about 1 minute, stirring and pushing them down with your spoon until golden brown.
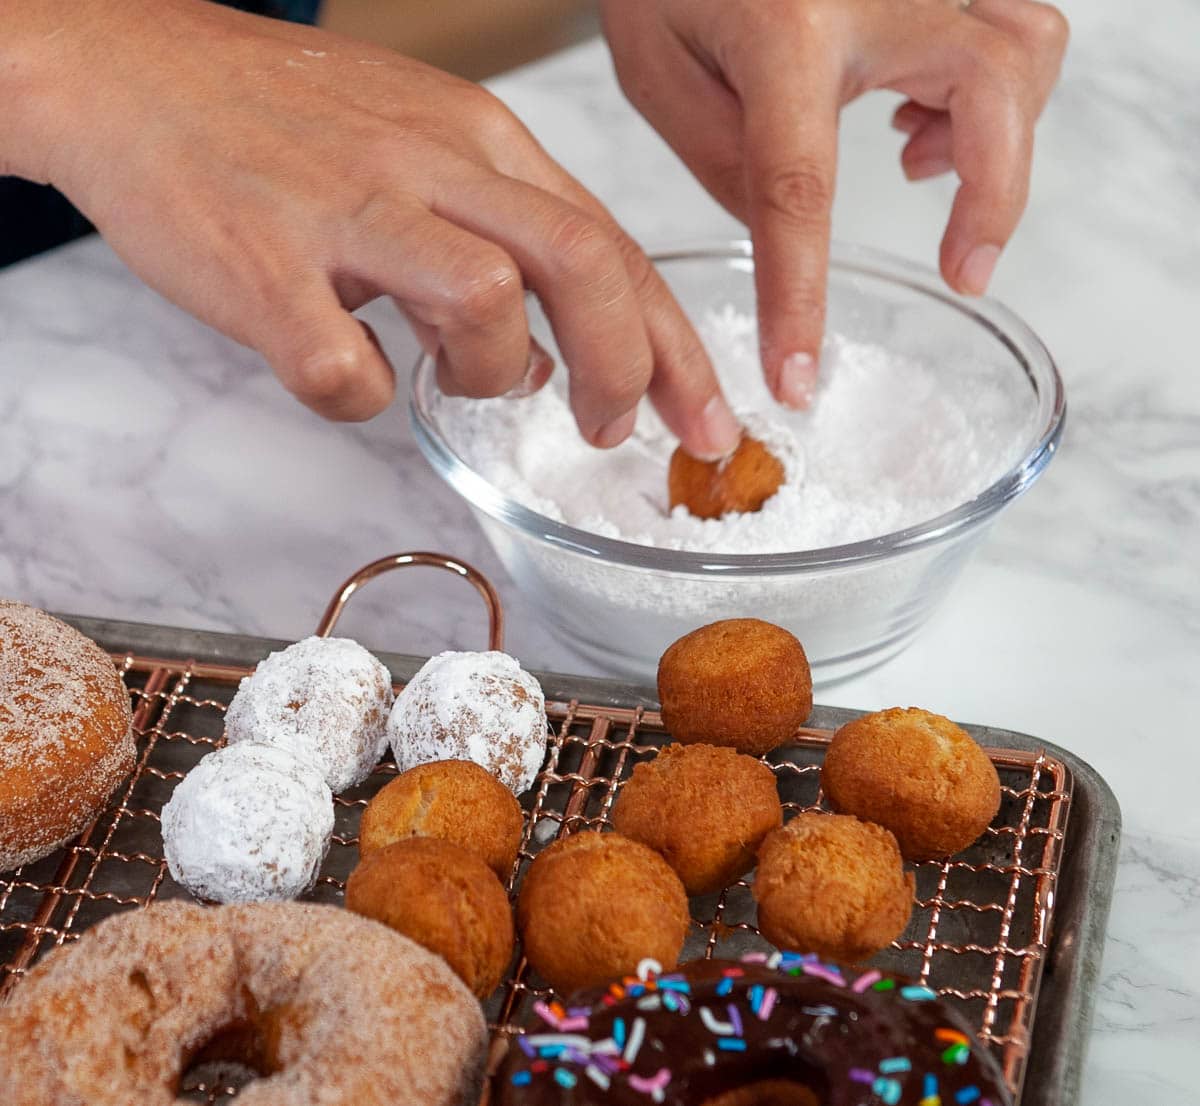
Dusting donut holes in powdered sugar.
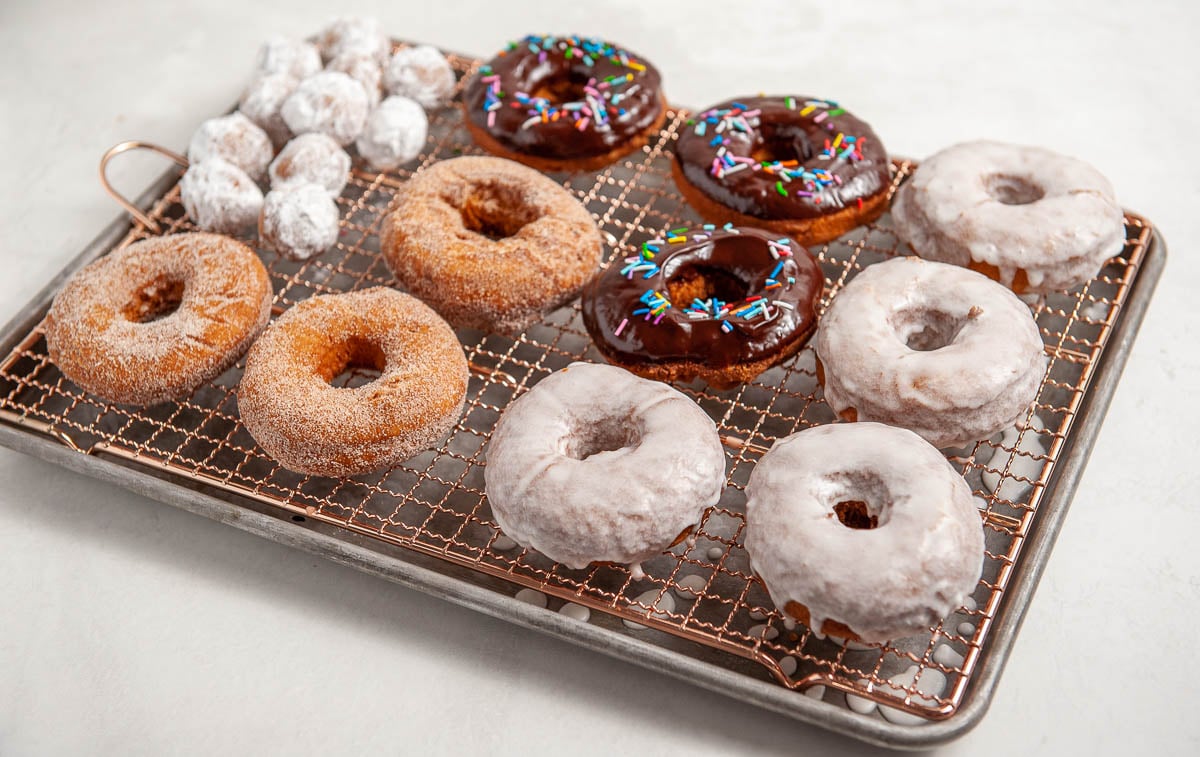
  1. Glaze, dust with powdered sugar, or roll in cinnamon sugar. See the topping options below.

Best Oil, Pot, And Temperature For Frying Donuts

Three equipment / setup decisions that make or break frying.

Best oil

The best oil for deep frying has a high smoke point and a neutral flavor. The three workhorses, ranked by my preference:

Vegetable oil or peanut oil. Lowest saturated fat, but leaves an unpleasant lingering taste on fried foods and in the air. Acceptable substitute if you don't want to keep lard around.

Lard (my preferred). Neutral flavor, dairy-free, creates a very crisp outer layer on the donuts, and minimally processed. See my cake donut recipe for more on lard.

Crisco (vegetable shortening). Neutral flavor but made from soybean oil, fully hydrogenated palm oil, and some additives including trans fats in small amounts.

Best pot

A heavy pot with high sides is the safest setup. A Dutch oven works. A FryDaddy regulates temperature for you and doubles as oil storage between uses. Whatever you use, never fill more than half full of oil. You only need about 2 inches of oil to fry donuts.

Best temperature

Aim for the sweet spot of 360 to 375º F (182 to 190º C). Use a candy thermometer or an infrared heat thermometer. Check every batch before. Wait for the temperature to recover after adding donuts. See the science section above for what happens outside this range.

Donut Topping Options

Sourdough donuts aren't very sweet on their own, so the glaze does the work. Three options:

  • Classic glaze. Combine 1 cup sifted powdered sugar with 2 Tablespoons of milk (or water) and whisk smooth. Dunk the top of each warm donut.
  • Powdered sugar. Roll the warm donut in powdered sugar. Simplest finish.
  • Cinnamon sugar. Combine 1 cup of granulated sugar with 2 teaspoons of cinnamon. Roll while still warm so the sugar sticks.
donuts on a cooling rack on a sheet pan

Glaze variations (start with the classic glaze and add):

  • Vanilla glaze. Add ½ teaspoon vanilla extract.
  • Cinnamon glaze. Add 1 teaspoon of cinnamon.
  • Maple glaze. Replace the milk with maple syrup.
  • Lemon glaze. Replace the milk with fresh lemon juice + 1 teaspoon lemon zest.
  • Orange glaze. Replace the milk with fresh orange juice + 1 teaspoon orange zest.
  • Chai glaze. Add 1 teaspoon of chai spice mix (cinnamon, cardamom, ginger, cloves, black pepper).
  • Chocolate glaze. Replace 2 Tablespoons of the powdered sugar with cocoa powder.

Common Sourdough Discard Donut Problems To Avoid

  • Donuts are greasy and oily. Oil temperature was too low. The donut sat in cool oil too long and absorbed it. Use a thermometer. Wait for oil to recover between batches.
  • Donuts are burnt outside and raw inside. Oil temperature was too high. Drop the heat. The sweet spot is 360 to 375º F, not "as hot as possible."
  • Donuts are dense and don't puff. Either the dough was overworked (added too much flour during shaping, or kneaded too long) or your leaveners are old. Check the dates on your baking soda and baking powder. They die after about 6 months opened.
  • Dough is too sticky to roll. Normal. Don't add a ton of extra flour, which makes tough donuts. Use a bench scraper to handle, dust your hands and surface lightly, and chill the dough 10 minutes if it's really unmanageable.
  • Dough is too dry and cracking when rolled. Too much flour worked in during shaping. A little water on your hands and gentle re-pressing usually fixes it.
  • Glaze cracks or breaks off after a few hours. Glaze was too thick or applied to hot donuts. Aim for the consistency of warm honey, and let donuts cool to warm-but-not-hot before glazing.
  • Donuts are soggy after a day. Storage issue. Open container at room temp (paper bag or partially-vented plastic) keeps them crisper than sealed plastic. Refresh in a 300º F oven for 3 minutes to revive the crisp.

Make This Sourdough Discard Donut Recipe Your Own

  • Donut holes. When you cut the donuts, save the centers. Fry them at the end of your batch for about 1 minute, stirring and pushing them down with your spoon. Yields about 12 holes per recipe.
  • Mini donuts. Use a 2 inch ring cutter instead of 4 inch. Fry for 1 minute per side. Doubles your yield to 24 mini donuts, perfect for a brunch board.
  • Active starter swap (for true sourdough donuts). Use 1 cup of active, recently-fed sourdough starter instead of discard. Donuts will have a touch more rise (the active yeast adds extra lift on top of the leaveners) and a milder tang. Same method, same fry time. The "discard version" is the everyday default because it uses up what would otherwise be waste.
  • Cinnamon-sugar coated. Skip the glaze entirely. Toss the warm donuts in a mixture of 1 cup sugar + 2 teaspoons cinnamon. Classic apple-cider-donut style without the apple cider.
  • Filled donuts. Cut the dough into rounds (no holes), fry, cool, then use a piping tip to inject pastry cream, jam, or lemon curd. Roll the outside in powdered sugar.
  • Why I don't have a baked version. I tested baking and air-frying this recipe during development. The texture came out dry and hard, nothing like a real cake donut. The structure relies on the quick hit of hot oil to puff and crisp the outside. For a baked cake donut, you need a recipe formulated for the oven, like my classic baked donut recipe.

Make-Ahead, Storage, And Refresh

Cake donuts are best the day they're made, but they store fine for a few days with the right setup.

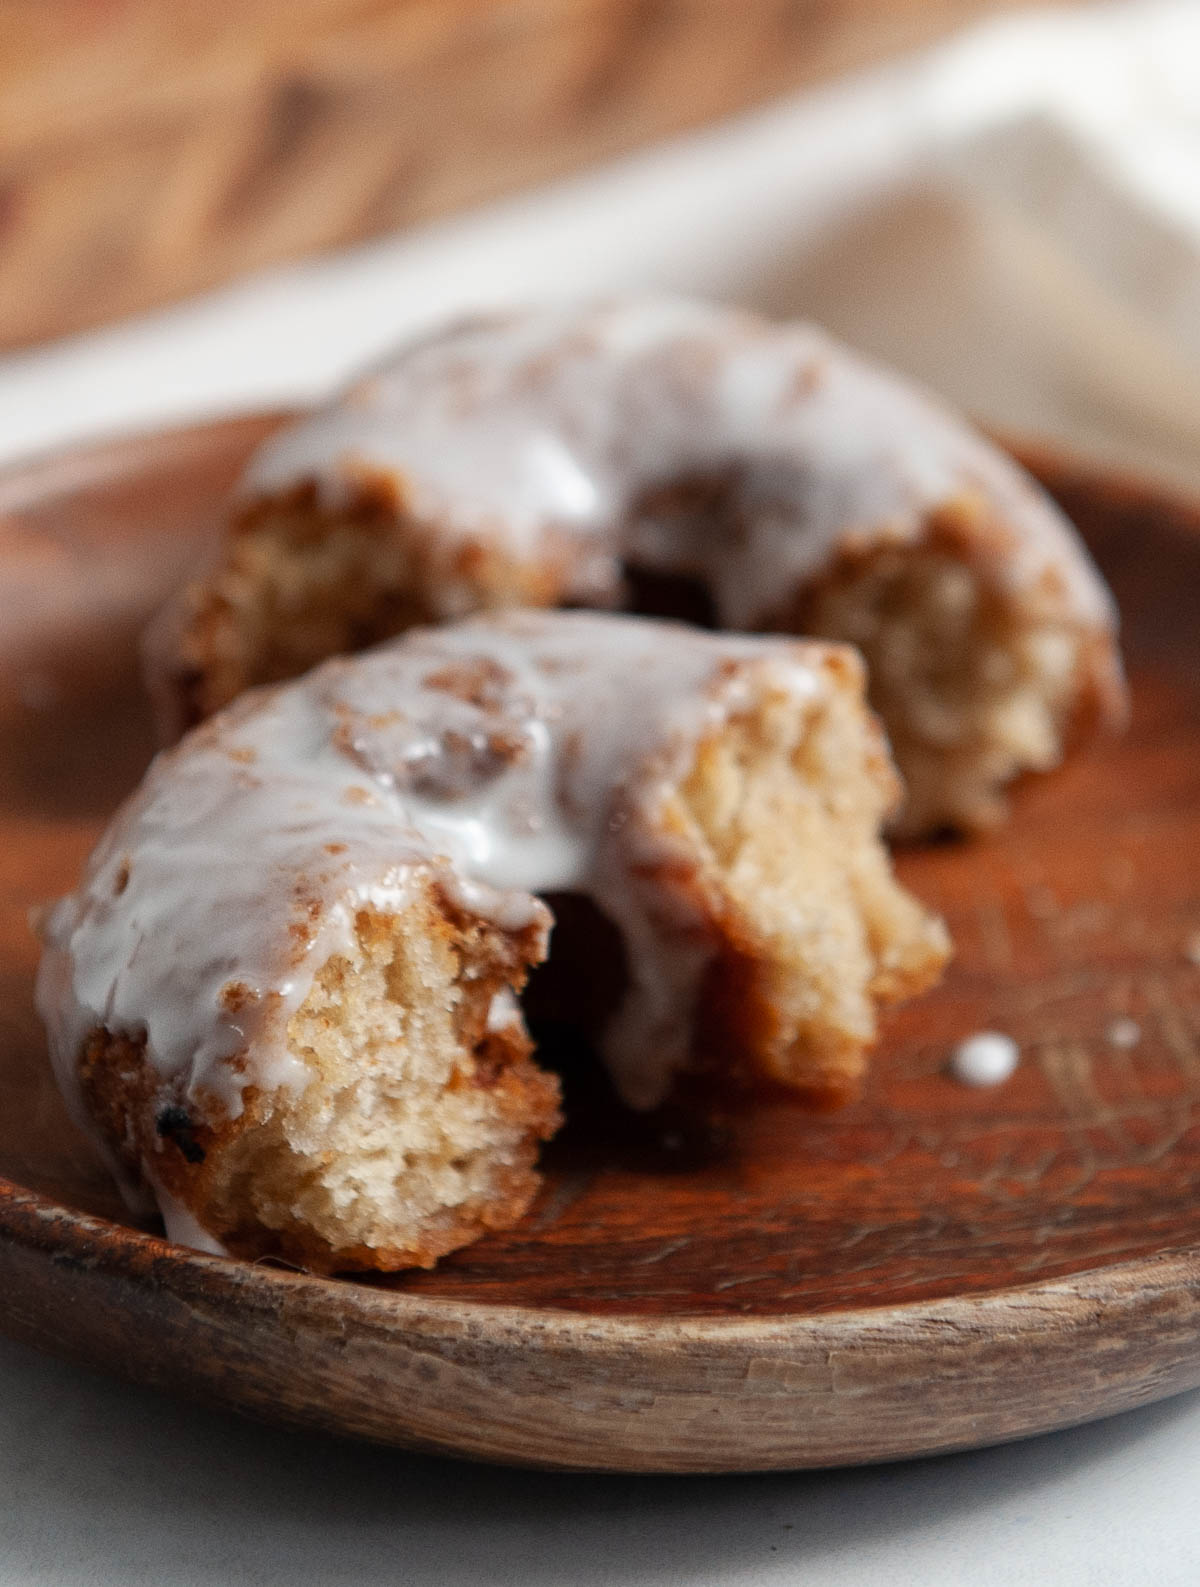
closeup of sourdough donut cut in half
  • Cooked donuts at room temperature. Paper bag or partially-vented plastic, up to 3 days. The crispy outer layer softens after 24 hours.
  • Cooked donuts in the freezer. Flash-freeze unglazed donuts in a single layer for 1 hour, then bag. Up to 2 months. Thaw at room temperature for 1 hour, then refresh and glaze.
  • Refresh stale donuts. 300º F oven for 3 minutes brings back most of the crisp. Glaze AFTER refreshing.
  • Sourdough discard. Cover and refrigerate up to 1 week before using for this recipe.

Final Thoughts

Cake donuts are the kind of weekend project that makes the kitchen feel like a real bakery. Hot oil, cinnamon sugar in the air, a rack of glazed donuts cooling next to the stove. The sourdough discard adds depth of flavor and gives you a real reason to keep that starter alive even on weeks when you don't bake bread. EASY!

If you love these and want the cluster, see my sourdough discard pancakes for the weekday breakfast version, sourdough pikelets for the savory-friendly small bite, and sourdough discard crackers for the snack version.

If donuts feel like too much frying for a slow weekend, my sourdough discard cinnamon roll recipe is the oven-baked alternative that uses a full cup of discard with cream cheese frosting.

Sourdough Discard Donut FAQs

Can I bake these donuts instead of frying?

No. I tested baking and air-frying this exact dough during development, and the texture came out dry and hard. The structure depends on hot oil for the puff and crisp. For a true baked cake donut, use my classic baked donut recipe instead.

How long do sourdough donuts last?

Up to 3 days in a paper bag or partially-vented container at room temperature. The crispy outer layer softens after 24 hours, but a 300º F oven for 3 minutes brings it back.

What's the best oil temperature for frying donuts?

360 to 375º F. Below that and donuts get greasy. Above that, and the outside burns before the inside cooks through. Use a thermometer.

Can I use an active fed starter instead of a discard?

Yes. 1:1 swap. Donuts will rise slightly more (the active yeast adds extra lift) and have a milder sourdough tang. Same method, same fry time.

What's the best oil to use for frying?

Lard is my top pick. Dairy-free, crisp outer layer, minimally processed. Vegetable oil and peanut oil work, but leave a stronger lingering smell. Crisco works but has trans fats.

More Sourdough Discard Recipes To Try

If you love these donuts, here's the rest of the sourdough cluster on SGS to make use of your discard.

  • Sourdough English Muffins
  • Sourdough Rolls
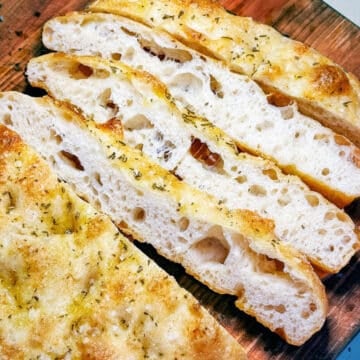
  • close up of sliced sourdough focaccia
    Easy Sourdough Focaccia Recipe
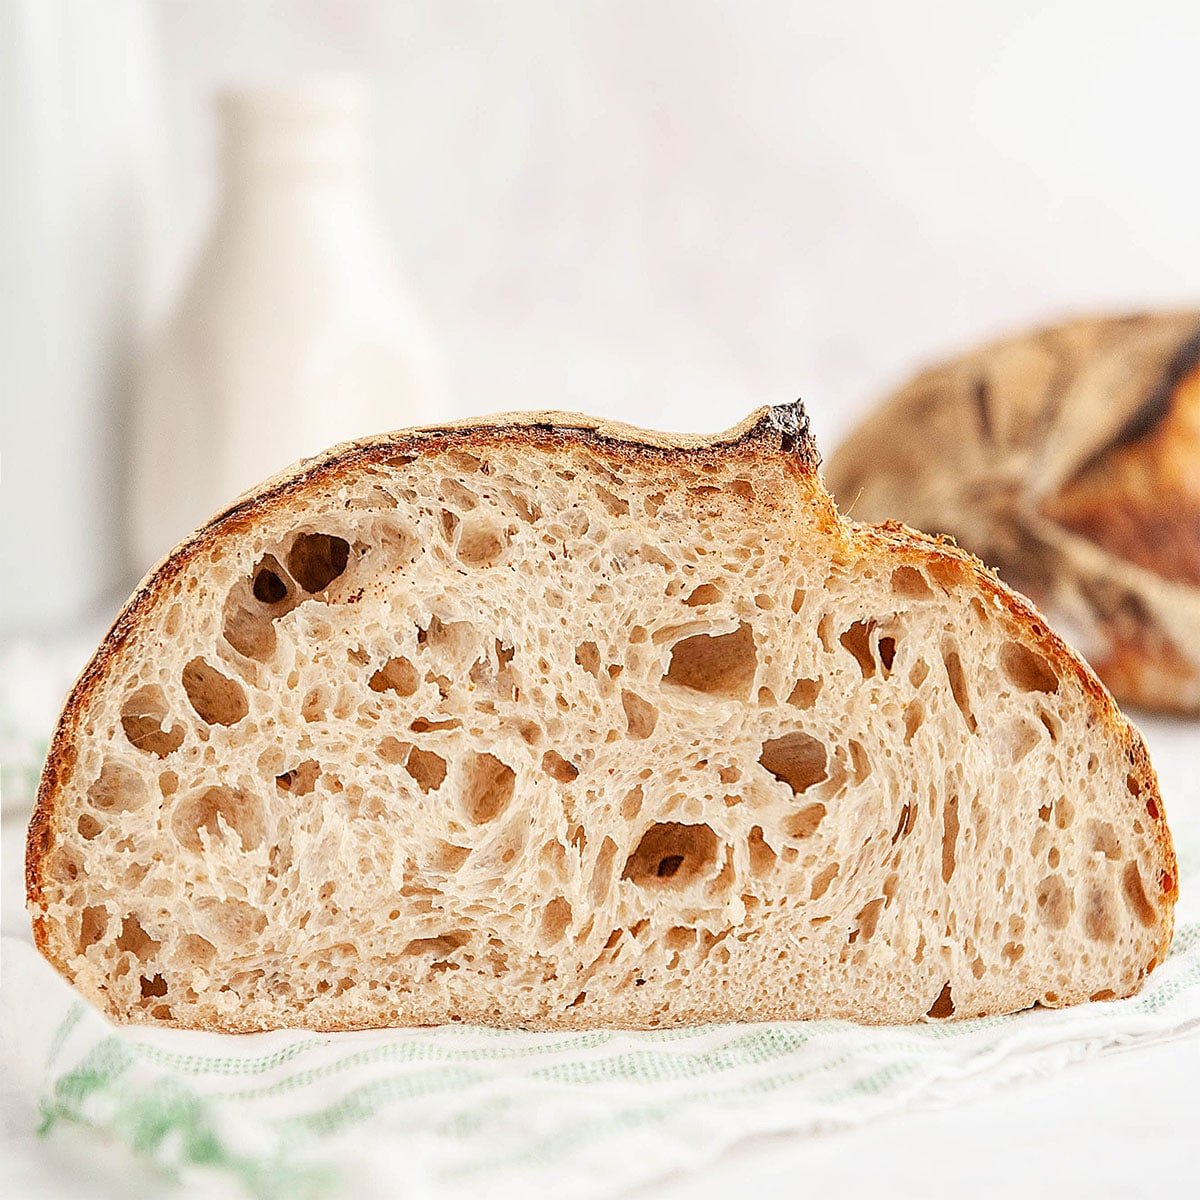
  • sourdough bread cut open to show crumb
    Beginners Sourdough Bread Recipe Step-By-Step

Leave Me A Review
⭐️⭐️⭐️⭐️⭐️

If you tried this Sourdough Discard Donut Recipe or any other recipe on my blog, please leave a 🌟 star rating and let me know how it goes in the comments. I love hearing from you!

Recipe

Sourdough Donut recipe
Print Recipe
5 from 4 votes

Sourdough Discard Donuts

Fried sourdough discard donuts with a vanilla glaze. Crispy outside, soft tangy interior, 40 minutes start to finish. Uses a cup of starter discard.
Prep Time15 minutes mins
Cook Time25 minutes mins
Total Time40 minutes mins
Course: Dessert
Cuisine: American
Servings: 12 donuts
Calories: 315kcal
Author: Liz Marek

Equipment

  • Frydaddy (or heavy pot like a dutch oven)
  • Skimmer or slotted spoon
  • Cooling rack

Ingredients

  • 4 ounces unsalted butter softened to room temperature
  • 4 ounces granulated sugar
  • 2 large eggs room temperature
  • 8 ounces sourdough starter discard
  • 2 ounces buttermilk room temperature
  • 2 teaspoons vanilla
  • 13 ounces All-Purpose flour
  • ½ teaspoon nutmeg
  • 2 teaspoons baking powder
  • ¼ teaspoon baking soda
  • ½ teaspoon salt
  • 32 ounces lard (or vegetable oil, canola oil, peanut oil or shortening) for frying

Glaze

  • 6 ounces powdered sugar
  • 2 Tablespoons milk or water
US Customary - Metric

Instructions

  • Before you begin: All refrigerated ingredients (eggs, buttermilk, butter) need to be at room temperature so they combine properly. Set them out an hour ahead, or warm the eggs in warm tap water for 5 minutes and microwave the butter in 10-second bursts until soft.

The donut dough

  • After you feed your sourdough starter, save the discard in a separate bowl. You should have about 1 cup. A little more or less is fine, you can make up the difference with buttermilk.
  • In a large bowl, cream the butter and sugar together on medium-high speed until light and fluffy, about 2 minutes.
  • Add the eggs one at a time on medium speed until combined. Make sure they are room temp or even a little warm so they incorporate properly.
  • Add the sourdough discard, buttermilk, baking powder, baking soda, salt, vanilla, and nutmeg. Mix on low until just combined.
  • Sprinkle in the flour and combine on low until the dough comes together. It will be sticky, that's normal.

Cutting and frying the donuts

  • Place the dough on a lightly floured surface. Press it down with your hand to about 1 inch tall. Fold over onto itself 3 to 4 times until smoother. Don't overwork it.
  • Press the dough to about ½ inch thick and dust with a bit of flour. Let it rest 5 to 10 minutes. Start heating your oil to 360 to 375º F.
  • Use a 4 inch donut cutter or metal ring cutter to cut out the donuts. Set the centers aside to fry as donut holes. Press leftover scraps together and continue cutting. You should get 10 to 12 donuts.
  • Lower the donuts into the hot oil with a slotted spatula. Fry 2 to 3 at a time maximum (more drops the oil temperature). Fry 2 minutes on one side, flip, fry 1 minute on the second side.
  • Transfer to a cooling rack over a sheet pan. Fry the donut holes at the end for about 1 minute, stirring with your spoon until golden brown.

The glaze

  • Whisk the powdered sugar and milk together until smooth. Add more milk for a thinner glaze, more powdered sugar for thicker. Dunk the top of each warm (not hot) donut into the glaze, or drizzle on top.
  • Let the glaze set for 5 minutes before serving.

Video

Notes

Ingredient notes:
  • If you don't have buttermilk, make a buttermilk substitute with 1 Tablespoon of vinegar in 1 cup of milk, sat 5 minutes.
  • Lard is my preferred frying fat for the crisp outer layer. Vegetable oil and peanut oil work as alternatives.
  • Sourdough discard can be a little more or a little less than 1 cup. Make up the difference with extra buttermilk.
Frying tips:
  • Oil temperature is the single most important variable. 360 to 375º F is the sweet spot.
  • Fry 2 to 3 donuts at a time MAX. Crowding drops the oil temperature and makes greasy donuts.
  • Use a thermometer. Check before every batch. Wait for the temperature to recover between rounds.
Make-ahead and storage:
  • Cooked donuts in a paper bag or vented plastic at room temperature, up to 3 days.
  • Cooked unglazed donuts in the freezer, up to 2 months. Thaw, refresh in a 300º F oven for 3 minutes, then glaze.
  • Sourdough discard in the fridge, up to 1 week before using.
Variations:
  • Mini donuts: use a 2 inch cutter, fry 1 minute per side, yields about 24.
  • Active starter swap: 1:1 with discard, slightly more rise and milder tang.
  • Cinnamon-sugar coated: skip the glaze, toss warm donuts in 1 cup sugar + 2 teaspoons cinnamon.
  • Filled donuts: cut rounds (no holes), fry, cool, inject pastry cream or jam.
Critical do-nots:
  • Don't bake this dough. Tested it, came out dry and hard. Use my classic baked donut recipe instead.
  • Don't drop donuts into hot oil. Lower with a slotted spatula. Splashed oil burns.
  • Don't fry more than 2 or 3 donuts at once. Drops the oil temp and ruins the texture.
  • Don't glaze hot donuts. The glaze melts off. Wait until warm but not hot.

Nutrition

Serving: 1donut | Calories: 315kcal | Carbohydrates: 52g | Protein: 7g | Fat: 10g | Saturated Fat: 5g | Polyunsaturated Fat: 1g | Monounsaturated Fat: 2g | Trans Fat: 0.3g | Cholesterol: 52mg | Sodium: 153mg | Potassium: 287mg | Fiber: 4g | Sugar: 24g | Vitamin A: 4087IU | Vitamin C: 27mg | Calcium: 225mg | Iron: 2mg
halloween-themed cakesicles that look like tombstones, zombies, skulls and hands

October 1, 2020 Course Preview

Halloween Cakesicles Tutorial

Skill level: Intermediate

Guest instructor Johany Torres Maya of Jo's Cake Shop joins us today for Spooky-fun Halloween dessert. In this tutorial, you will learn how to create 6 different Halloween-themed cakesicle treats. These desserts are a fun and trendy take on classic cake pops. Jo's shows how to avoid cracking, how to de-mold cakesicles, which molds are her preferred picks, how to get a professional shine and how to color and decorate cakesicles in a variety of ways.

1:20:15 Minutes of Instruction

What You Will Learn

  • How to create 6 different Halloween-themed cakesicles
  • Learn Jo's preferred chocolate, cake and molds for making super shiny cakesicles
  • How to fix cracks and problems that can happen when de-molding

Tutorial Chapters

  1. Preparing the fillings 0:32
  2. Preparing the chocolate 4:14
  3. Filling molds with chocolate 5:40
  4. Filling the molds with cake 13:18
  5. De-molding the cakesicles 20:14
  6. The Skull cakesicle 22:51
  7. The Zombie Hazard cakesicle 32:02
  8. The Boarded Window cakesicle 38:46
  9. Making zombie hands 42:36
  10. The Tombstone cakesicle 47:25
  11. Making the bats 50:31
  12. Coloring the chocolate black 53:44
  13. The Zombie Hands cakesicle 58:44
  14. Dusting the skulls 1:04:44
  15. The Cartoon Zombie cakesicle 1:05:46
  16. Making the brain 1:14:04
  17. Coloring the zombie 1:16:24
  18. Making the ears 1:18:27

Downloads

Materials List

halloween-themed cakesicles that look like tombstones, zombies, skulls and hands

October 1, 2020 Paid Video

Halloween Cakesicles

Skill level: Intermediate

Guest instructor Johany Torres Maya of Jo's Cake Shop joins us today for Spooky-fun Halloween dessert. In this tutorial, you will learn how to create 6 different Halloween-themed cakesicle treats. These desserts are a fun and trendy take on classic cake pops. Jo's shows how to avoid cracking, how to de-mold cakesicles, which molds are her preferred picks, how to get a professional shine and how to color and decorate cakesicles in a variety of ways.

1:20:15 Minutes of Instruction

What You Will Learn

  • How to create 6 different Halloween-themed cakesicles
  • Learn Jo's preferred chocolate, cake and molds for making super shiny cakesicles
  • How to fix cracks and problems that can happen when de-molding

Tutorial Chapters

  1. Preparing the fillings 0:32
  2. Preparing the chocolate 4:14
  3. Filling molds with chocolate 5:40
  4. Filling the molds with cake 13:18
  5. De-molding the cakesicles 20:14
  6. The Skull cakesicle 22:51
  7. The Zombie Hazard cakesicle 32:02
  8. The Boarded Window cakesicle 38:46
  9. Making zombie hands 42:36
  10. The Tombstone cakesicle 47:25
  11. Making the bats 50:31
  12. Coloring the chocolate black 53:44
  13. The Zombie Hands cakesicle 58:44
  14. Dusting the skulls 1:04:44
  15. The Cartoon Zombie cakesicle 1:05:46
  16. Making the brain 1:14:04
  17. Coloring the zombie 1:16:24
  18. Making the ears 1:18:27

Downloads

Materials List

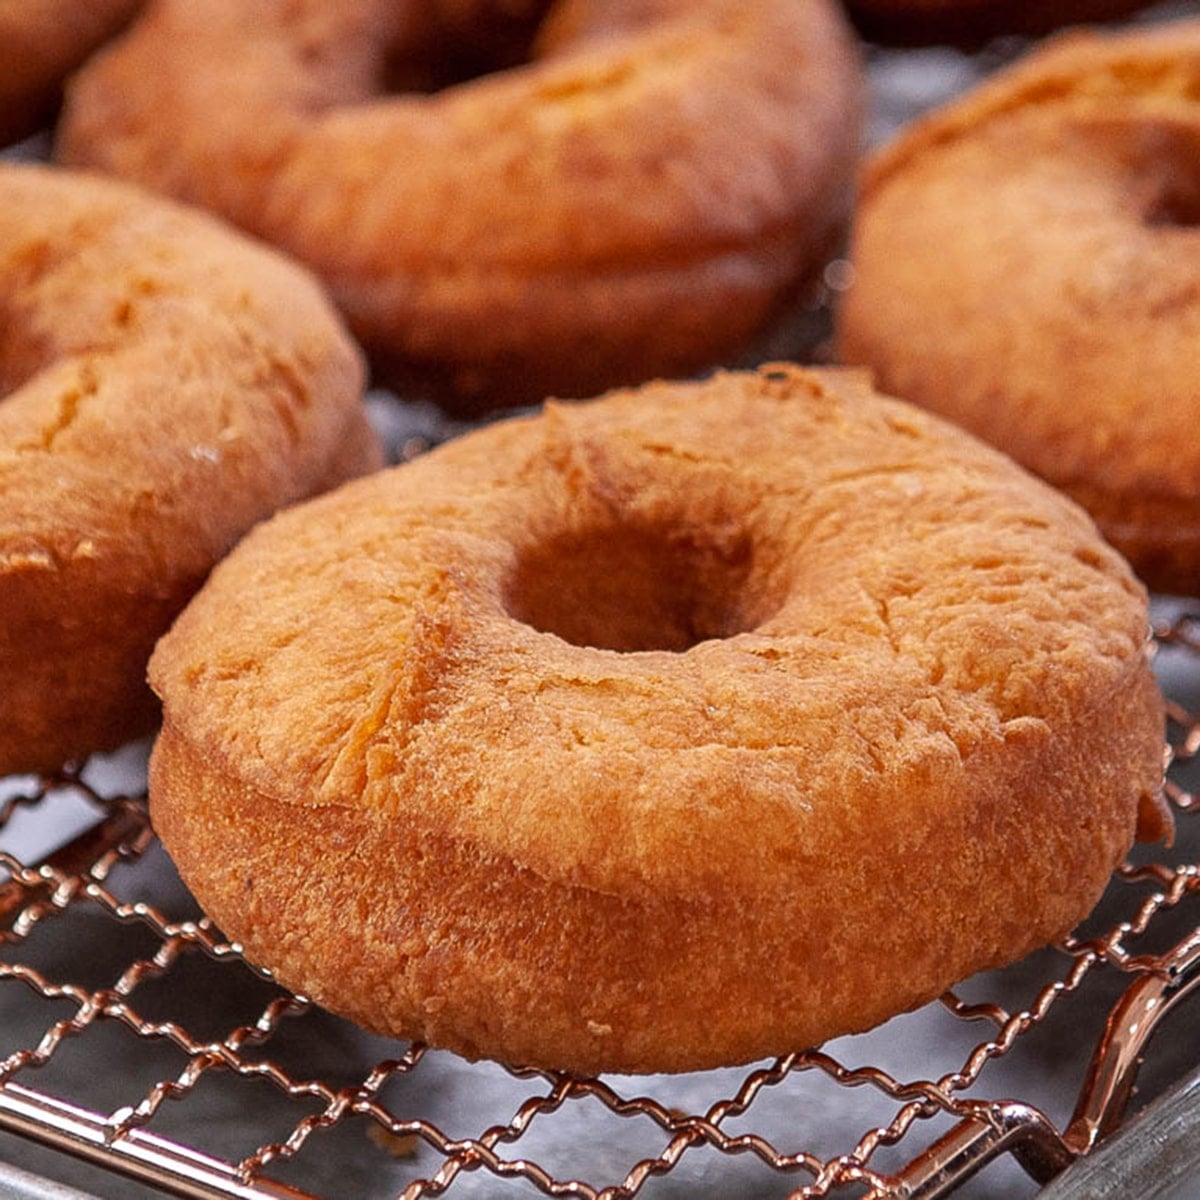
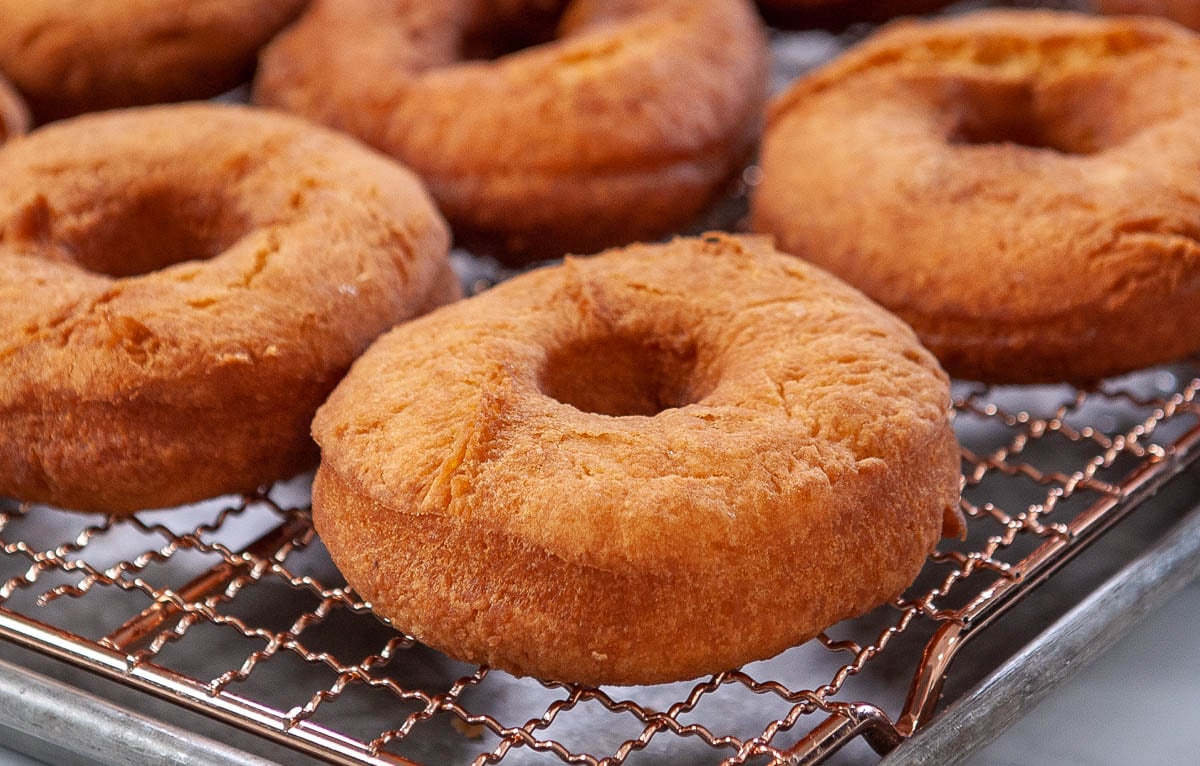
close up of fried cake donut on a cooling rack

September 28, 2020 Breakfast

Cake Donut Recipe

I absolutely love this classic cake donut recipe. I grew up making cake donuts with my sisters and it brings back fond memories. You may be intimidated by making donuts from scratch but don't be! The dough is incredibly easy to mix and frying is a breeze as long as you have a thermometer or something like a fry daddy. These cake donuts are INCREDIBLY soft on the inside and crispy on the outside. Finish them off with a simple glaze, powdered sugar, chocolate glaze or cinnamon sugar.

If you want a no-fry option, my baked donut recipe uses the same great flavor with less mess.

Let's make some cake donuts together!

close up of fried cake donut on a cooling rack

What's the difference between a cake donut and a yeast donut?

A cake donut is made from a sweet dough that is leavened with baking powder and a yeast donut is a sweet dough that is made with yeast. The dough is rolled out and then cut with a donut cutter or circular cutter and then fried. Some cake donuts are made with a very loose batter that is then extruded into hot oil to cook or piped into a donut pan and baked. 

Cake donuts are a bit denser than yeast donuts and have the texture of a slice of cake. Yeast donuts tend to be fluffier and lighter than cake donuts but can be greasier (think Krispy Kreme donuts). 

closeup of a glazed cake donut broken in half on a wooden plate

Cake Donut Ingredients

cake donut ingredients separated into bowls

Making cake donuts is very similar to making a cake (not a big surprise there) but the batter is a bit thicker than a typical cake batter. A classic cake donut recipe MUST have nutmeg! Trust me, I forgot the nutmeg the first time around and they didn't taste right at all. Nutmeg is key. 

I like to use buttermilk in my cake donuts because it makes the donuts super tender and adds flavor. If you don't have buttermilk you can make a buttermilk substitute or you can use regular milk and leave out the baking soda. 

You might also be curious about the lard in this recipe so keep reading on to learn about the different types of oil to use. 

close up of donut on a slotted spoon over a fry daddy

Because these donuts are fried, these cake donuts have a super crisp, delicate outer layer and an incredibly soft and delicate center. So drool-worthy. You will need a large stockpot for frying, a slotted spoon or spatula for lifting the donuts, and a cooling rack with a sheet pan for draining the donuts after cooking. 

What kind of oil is best for frying cake donuts?

The best oil to use for deep frying is one that has a high smoke point and a neutral flavor. In my research I found the best oils to use are peanut oil or vegetable oil, vegetable shortening, or lard. Here are the pros and cons of each. 

Vegetable oil - least amount of saturated fat, leaves an unpleasant taste on fried foods and in the air

Crisco (vegetable shortening) - Neutral flavor but is made of soybean oil, fully hydrogenated palm oil, and other additives including trans fats in small amounts. 

Lard - Neutral flavor, dairy-free, higher in saturated fat than Crisco. 

Even though lard has been demonized as "unhealthy" due to high amounts of saturated fat, the facts are, butter has 15% more saturated fat than lard. Unlike butter, lard fully drains away from baked goods leaving no water or dairy product behind, resulting in the crispiest baked goodies you've ever had. There's a reason that lard was so popular in baking before marketing made Crisco seem like a healthier alternative. 

By no means should lard be considered healthy but using it to bake special treats now and then is perfectly ok and in my opinion a better alternative than using highly processed, hydrogenated oil that isn't even from vegetables. 

What pot is best for frying cake donuts?

fry daddy and pot with thermometer

The best pot is the one you have but ideally, a heavy pot with high sides and is going to work best and reduce the risk of burns from splatter. Never fill your pot more than half full of oil. You really only need about 2" of oil to fry cake donuts. 

I use a fry daddy because they are super inexpensive and make a great place to store the leftover oil after frying. Just pop the lid back on and store it away until the next use. 

What temperature is best for frying cake donuts?

close up of infrared gun in front of fry daddy

You will need 4 cups of oil to fry your donuts. Set your heat to medium and let the oil get hot for 5-10 minutes. I usually start heating my oil after my dough is resting and ready to cut.

Donuts of all kinds fry best at a temperature between 360ºF-375ºF (182ºC-190ºC). You can save yourself a lot of headaches by using a candy thermometer or infrared heat thermometer to measure the temperature of your oil. 

If you don't have a thermometer, you can test your oil by dipping the handle of a wooden spoon or wooden chopstick into the oil. If it starts bubbling right away, it's ready. If it bubbles very violently or you see smoke, your oil is too hot. If it doesn't bubble at all, it's too cold.

wooden chopsticks in hot oil

If your oil is too hot, your donut will get very very dark on the outside, and remain raw in the center. If your oil is too cold, your donuts will absorb a ton of oil before it develops that outer crispy layer. That crispy layer is vital to stopping more oil from absorbing into the donut so proper temperature is key to a perfect cake donut. 

Remember, the oil temp will drop a few degrees every time you add donuts so don't overcrowd the pot. 2-3 donuts at a time max for a large stockpot or fry daddy. 

Cake donut recipe step-by-step

Make sure your eggs, milk, and butter are all room temperature so that the ingredients combine together well. If your eggs or milk are too cold, they will not mix with the eggs and your donuts won't rise properly. 

Step 1 - Cream the butter and the sugar together on medium-high speed until light and fluffy. About 2 minutes. 

close up of butter and sugar creamed on a blue spatula

Step 2 - While mixing on low, add in the eggs and mix on medium speed until combined. 

close up of eggs, sugar and butter mixture

Step 3 - While mixing on low, add in the milk, vanilla, flour, baking powder, baking soda, nutmeg, and salt. Mix until the dough just comes together. It will be sticky. 

cake donut dough on a floured countertop

Step 4 - Place the dough onto a lightly floured surface. Press it down with your hand to about 1" tall. Fold the dough over onto itself 3-4 times until it looks a bit smoother but don't overwork it or the dough will get tough. 

folding donut dough

Step 5 - Press the dough down to about ½" thick and dust with a bit of flour. Let it rest for 5-10 minutes. Now is the perfect time to start heating up your oil. Set your temperature to medium if you don't have a fry daddy. 

pressing donut dough flat

Step 6 - Use a donut cutter or metal ring cutter to cut out the donuts. (You can also use a cup or a can if you don't have a metal cutter.) Try to leave as little space as possible between the donuts. Set the holes aside to fry at the end. Press the leftover scraps together and continue cutting donuts. You should get 10-12 donuts with a 4" cutter. More if you're using a smaller cutter. 

close up of donut cut from dough

Why do donuts have holes?

It's important to poke out a hole in the center of a donut to ensure even cooking. If you were to fry a donut without taking out the center, the middle of the donut would be raw because the oil wouldn't be able to penetrate all the way to the center. To avoid it becoming gooey and raw, holes are cut out to promote even frying. 

Step 7 - Use a slotted spatula or skimmer to lower the donut into the hot oil. Do not drop the dough or it could splash up on you and burn you. The doughnut will start bubbling a ton at first then settle down as a crispy outer layer develops.

close up of donut on a slotted spoon over a fry daddy

Step 8 - Fry the donut for 2 minutes on one side then flip over and fry for another 1 minute. Remove the donut from the oil with the slotted spoon and transfer to a cooling rack over a sheet pan. Fry your donut holes at the end for about 1 minute, stirring and pushing them down with your spoon until golden brown on the outsides. 

close up of fried cake donuts on a cooling rack

Step 9 - You can now roll your donuts in powdered sugar or cinnamon sugar, glaze with ganache or donut glaze. See the recipes below. 

donuts on a cooling rack on a sheet pan

Donut Toppings

There are SO many things you can use to top your donuts but we're going to keep to the classics here.

Powdered sugar - You can simply roll your donuts in powdered sugar for truly the simplest way to finish your donuts off. Pros: adds just the right amount of sweet and is super easy. Cons: messy and eventually melts with humidity over the course of a day.

donut holes covered in powdered sugar on a cooling rack

Cinnamon sugar - Combine 1 cup sugar with 2 teaspoons cinnamon and roll your donuts in the mixture. Pros: Adds the perfect amount of sweetness plus added flavor from the cinnamon. Cons: can be messy looking. 

donut being held above a glass bowl of cinnamon sugar

Glaze - Simply combine 1 cup sifted powdered sugar with 2 Tablespoons of milk and whisk until smooth. Pros: Looks beautiful, tastes amazing, sets hard. Cons: A lot of glaze runs off the donuts and is kind of a waste. 

close up of glazed donut broken in half on a cooling rack

Ganache glaze - Melt together ½ cup of good quality chocolate, 2 Tablespoons heavy cream, 2 Tablespoons butter, and 2 teaspoons corn syrup in the microwave for 30 seconds and whisk until smooth.  Pros: Looks absolutely stunning and tastes delicious. Looks amazing with sprinkles. The chocolate sets up but not super hard. Cons: The chocolate can overpower the taste of the donuts. A few more steps to make the glaze. 

chocolate glazed donut

Recipe

close up of fried cake donut on a cooling rack
Print Recipe
4.78 from 72 votes

Classic Cake Donut Recipe

A classic fried cake donut recipe that makes the most delicious old fashioned donuts ever! Light and crispy on the outside, tender, moist, and cakey on the inside.
Prep Time10 minutes mins
Cook Time20 minutes mins
Total Time30 minutes mins
Course: Breakfast
Cuisine: American
Servings: 12 donuts
Calories: 342kcal
Author: Liz Marek

Equipment

  • FryDaddy Deep fryer or heavy pot with thermometer
  • Slotted spoon or spatula
  • Sheet pan with cooling rack

Ingredients

Cake Donut Recipe

  • 4 ounces unsalted butter softened but not melted
  • 5 ounces granulated sugar
  • 2 large eggs room temperature
  • 6 ounces buttermilk room temperature
  • 2 teaspoons vanilla extract
  • 15 ounces All-Purpose flour
  • 2 teaspoons baking powder
  • 1 teaspoon baking soda
  • ½ teaspoon nutmeg
  • ½ teaspoon salt
  • 32 ounces lard or oil for frying (4 cups)

Classic Donut Glaze Recipe

  • 5 ounces powdered sugar
  • 2 Tablespoons milk or water

Chocolate Donut Glaze

  • 4 ounces chocolate chips
  • 2 Tablespoons butter
  • 1 Tablespoon corn syrup or glucose/honey
  • 2 Tablespoons heavy cream

Cinnamon Sugar

  • 1 cup granulated sugar
  • 2 Tablespoons cinnamon
US Customary - Metric

Instructions

For The Donuts

  • In the bowl of your stand mixer with the paddle or the whisk attachment, cream the softened butter and the sugar on medium high speed until the mixture is light in color and fluffy.
  • While mixing on low, add in one egg, let it mix in and then add in the second egg and mix on medium speed until everything is smooth and combined
  • Add in the buttermilk and the vanilla and mix until combined
  • While mixing on low, add in the flour, salt, baking powder, baking soda, and nutmeg and mix until the dough is combined. Do not over-mix. The dough will be sticky.
  • Lightly flour your work surface and transfer the sticky dough to the floured surface.
  • Press the dough down lightly until its about 1" thick.
  • Fold the dough over onto itself 3-4 times until the dough is smooth.
  • Flatten the dough down to about ½" or use a rolling pin. Let the dough rest for 5-10 minutes while your oil is heating up.
  • Turn on your FryDaddy or begin heating your oil to 360ºF-375ºF (182ºC -190ºC). Set up a draining station for the donuts by placing a cooling rack over a sheet pan to catch the oil.
  • Use a donut cutter or ring cutter to cut out the donuts. You can press together the scraps and roll them out again to get as many donuts as you can. Just keep in mind the more you work the dough, the tougher the donuts will get.
  • Add the donut to the hot oil using your slotted spoon to lower it gently. Fry the donut for 2 minutes then flip it over and fry it for 1 more minute.
  • Fry your donut holes for about 1 minute, stirring and pushing them down with your spoon until golden brown on the outsides. 
  • Transfer the dough to a cooling rack over a sheet pan to let the oil drain away from the donut
  • Once your donuts are cooked you can roll them in powdered sugar, cinnamon sugar, glaze them with donut glaze or chocolate glaze!
  • Store donuts in a paper bag at room temperature for up to two days. They are best eaten fresh! Do not refrigerate.

Classic Donut Glaze Recipe

  • Sift the powdered sugar into a bowl and add the milk (or water). Whisk together to combine, add more powdered sugar to make it thicker or more milk to make it thinner.

Chocolate Donut Glaze

  • In a medium sized bowl, add the heavy cream, butter and corn syrup to the chocolate chips. Microwave for 30 seconds and stir together until the chocolate is melted. Microwave for another 15 seconds if needed.

Video

Notes

Common mistakes when making cake donuts

1. Using the wrong pot
Donuts expand much more than you think while frying, so you want to be sure to use a big enough (and tall enough) pot. To avoid a crazy messy kitchen. I like to use a really tall pot or a fry daddy that could hold at least double the oil that I need.
2. Overmixing/undermixing
Cake donuts only need to be mixed until combined, while yeast donuts require much more mixing. Make sure to follow the directions carefully to avoid having a really tough cake donut. 
3. Use a thermometer 
A good thermometer is easy to find at most grocery stores or online and is only about $10-15. Seriously, if you're going to make donuts it's best to just buy one. There are other tricks out there about how to test your oil, but if you're putting the effort in to make donuts you don't want them to be under/over fried. Make sure to continue to test the temperature of your oil before putting in new donuts, as the degree can fluctuate easily. 
4. Frying at too low or high of a temperature
The temperature you fry your donuts at is very important. Fry too low and it will take too long for the donuts to cook, letting the oil seep into the dough and making for soggy donuts. Fry too high and it could burn the sides of the donuts too quickly, resulting in an undercooked center. 
5. Draining your donuts incorrectly
A common misconception is that donuts should be drained directly on paper towels. I recently learned that it's actually best to drain them on a wire rack with a sheet pan underneath to catch the oil. This keeps the donuts from sitting in their own oil on the paper towels, making them extra crispy! 

Nutrition

Serving: 1donut | Calories: 342kcal | Carbohydrates: 53g | Protein: 5g | Fat: 12g | Saturated Fat: 7g | Cholesterol: 62mg | Sodium: 237mg | Potassium: 139mg | Fiber: 1g | Sugar: 26g | Vitamin A: 400IU | Calcium: 62mg | Iron: 2mg
 
Magnolia flower and pot made out of sugar with branches

September 15, 2020 Course Preview

Sugar Magnolia Cake Topper Tutorial

Skill level: Intermediate

Guest instructor Sidney Galpern of Simi Cakes joins us today for an amazing sugar magnolia isomalt cake topper. Sidney's wealth of knowledge and expertise with isomalt shows in this tutorial! Sidney walks us through every step of the process, with many tips and tricks to keep your pieces from breaking, how to support and work with the medium to create stunning results.

Sidney shows how versatile isomalt can be, creating a magnolia, the flower pot and several branches. This piece can be used as a stand-alone project or used as a cake topper to either a wedding cake as the focal point or a special occasion. Let's get our tools together, and let's get started!

1:43:58 Minutes of Instruction

What You Will Learn

  • How to make a beautiful magnolia cake topper out of isomalt sugar
  • Learn Sidney's tips and tricks for working with isomalt
  • How to create the flower pot and branches out of isomalt
  • Learn how to properly paint the piece and seal it

Tutorial Chapters

  1. Preparing isomalt 0:47
  2. Covering the base in fondant 4:05
  3. Making the base pieces 10:10
  4. Assembling the tree base 24:54
  5. Pulling isomalt 31:48
  6. Making the branches 38:18
  7. Attaching tree to base 46:56
  8. Making rocks 48:29
  9. Assembling the base 50:12
  10. Making the magnolia center 52:05
  11. Making the petals 1:02:55
  12. Assembling the magnolia 1:17:21
  13. Painting the center 1:28:36
  14. Airbrushing the sculpture 1:35:22
  15. Attaching the magnolia 1:38:36
  16. Glazing the piece 1:41:34

Downloads

Materials List

Magnolia flower and pot made out of sugar with branches

September 15, 2020 Paid Video

Sugar Magnolia Cake Topper

Skill level: Intermediate

Guest instructor Sidney Galpern of Simi Cakes joins us today for an amazing sugar magnolia isomalt cake topper. Sidney's wealth of knowledge and expertise with isomalt shows in this tutorial! Sidney walks us through every step of the process, with many tips and tricks to keep your pieces from breaking, how to support and work with the medium to create stunning results.

Sidney shows how versatile isomalt can be, creating a magnolia, the flower pot and several branches. This piece can be used as a stand-alone project or used as a cake topper to either a wedding cake as the focal point or a special occasion. Let's get our tools together, and let's get started!

1:43:58 Minutes of Instruction

What You Will Learn

  • How to make a beautiful magnolia cake topper out of isomalt sugar
  • Learn Sidney's tips and tricks for working with isomalt
  • How to create the flower pot and branches out of isomalt
  • Learn how to properly paint the piece and seal it

Tutorial Chapters

  1. Preparing isomalt 0:47
  2. Covering the base in fondant 4:05
  3. Making the base pieces 10:10
  4. Assembling the tree base 24:54
  5. Pulling isomalt 31:48
  6. Making the branches 38:18
  7. Attaching tree to base 46:56
  8. Making rocks 48:29
  9. Assembling the base 50:12
  10. Making the magnolia center 52:05
  11. Making the petals 1:02:55
  12. Assembling the magnolia 1:17:21
  13. Painting the center 1:28:36
  14. Airbrushing the sculpture 1:35:22
  15. Attaching the magnolia 1:38:36
  16. Glazing the piece 1:41:34

Downloads

Materials List

girl holding celeste sugar cookie

September 9, 2020 Events

Animal Crossing Birthday Party

**This post contains some affiliate links which means I might make a few pennies if you click on the link but it's no extra cost to you. 

Why did I throw my five-year-old an Animal Crossing Birthday Party? Like a lot of people stuck at home in 2020, I downloaded the popular Nintendo Switch game, Animal Crossing to help pass the time. I had no idea how completely and utterly addicted I would become. The best part? The game is simple enough that my five-year-old daughter, Avalon could play it with me. 

child sitting behind a table filled with animal crossing desserts

Avalon has always been REALLY into bugs, fish, and dinosaurs. So when she saw me hunting for fossils, fishing for sharks, and catching bugs, it wasn't long before she was asking me to play too. 

I wasn't sure if the game mechanics would be too complicated for her since she had never used a video game controller before but to my surprise, she caught on really quickly. 

little girl holding a celeste sugar cookie

For months, we played the game together while the world around us came to a stand-still. When we began self-quarantining in March, I thought for SURE everything would be over by August. I had originally planned a birthday party at the near-by skate park that was going to be Ninja Turtle themed. Nope. I was wrong. Things had not calmed down by August and all the parks were still closed. So I had to re-think her party location and the theme. 

I asked Avalon if she would like an Animal Crossing New Horizons birthday party and she immediately screamed YES! I only had about ten days to plan everything so I began planning the most epic Animal Crossing Birthday party ever!

Deciding On A Location

four kids sitting on a picnic bench with birthday decorations under a tree

Since I knew the parks where all closed and indoors wouldn't really match the aesthetic of Animal Crossing, I decided to have the party at my Dad's house (where my Sister also lives). Guest would include my sister and her four kids who had also been home since March so I felt like this was a safe decision. 

My Dad's yard is full of beautiful grass, trees, and pretty bushes so it was the perfect backdrop for an Animal Crossing party. 

Animal Crossing Birthday Cake Ideas

animal crossing cake surrounded by party decorations

The first thing I do when I plan any party is to start with the cake. The cake is typically the centerpiece for the whole dessert table so it sets the stage for the party. 

I'm a cake decorator so of course, my Animal Crossing birthday cake is completely over-the-top but that doesn't mean you have to go crazy too. Check out my online tutorial if you want to learn how I made this epic Animal Crossing birthday cake complete with jelly ocean and modeling chocolate fish. 

animal crossing cake with jelly ocean and paper sign topper

The little Animal Crossing house I could have made myself but I decided to buy this 3D printed version so that she could keep it and use it for decoration in her room. 

3D printed animal crossing house

The cake topper I ordered from The Paper Sign Maker on Instagram. She did such a good job and incorporated all her favorite fish, colors and even shipped it so it arrived in time!

Here is a cute Animal Crossing cake design I found that is super adorable and very simple. You could make this yourself (check out my First Cake Tutorial if you're a beginner) or have a local cake designer make you one. 

I love this simple Animal Crossing cake by The Robyns Nest and she even has a tutorial on her YouTube channel!

close up of animal crossing cake

Avalon's favorite thing from Animal Crossing is the Sunfish so that was really prominent on the cake. I also included a ton of other fish and sharks all around the island. The cakes is all chocolate cake with vanilla buttercream and strawberry jelly for the water. 

girl holding a slice of jelly cake with modeling chocolate sunfish inside

Or I have this simple Animal Crossing birthday cake design on my YouTube channel which features the modeling chocolate and wafer paper palm tree and a simple jelly island design. 

jelly island magic cake with edible palm tree

Animal Crossing Dessert Table Ideas

animal crossing cake surrounded by party decorations

Once you have the cake design down, now it's time to start planning the table design. 

Sometimes I use printed backdrops for the background when the parties are indoors but I knew that this time I would be outside in my Dad's backyard so I wouldn't need a backdrop. I still wanted some kind of decor to bring it all together though so I decided to put some faux flowers in some cheap pots to mimic the flowers from Animal Crossing. 

I used a bag of decorative marble rocks to fill the pots so the flowers would not tip over. 

Some other decorative elements I decided to include were some toy bugs and nets to "catch them".

Prizes for the kids hidden in white cardboard boxes and balloons tied to them to mimic the floating presents in the game. I even found some kid-friendly slingshots to hit the balloons and "win" the prizes. 

This cute bell bag was made using some yellow felt, a glue gun, and a red ribbon. I simply drew the star on with a brown marker and filled it up with gold chocolate coins. Luckily I can buy them in bulk from Winco. 

DIY felt bell bag with chocolate coins

I also found this cool jar with a cork that looks a lot like the DIY bottles you find on the beach in Animal Crossing. I printed this design (you can get it for free here) onto cardstock and cut it out and put it in the jar. Super cute. Later I used it as decoration in her room. 

Animal Crossing Themed Desserts

Even though this cake was PLENTY to serve to 5 kids, I couldn't help myself. I also made some "fossil" cupcakes complete with a little plastic shovel. These cupcakes were just my easy chocolate cake topped with green easy buttercream.

To make the grass, I pipe the star outline first, then added more buttercream around it and smoothed it flat with a small spatula. Then I added three little flower sprinkles I got from Michaels in the cake decorating aisle. Add in the little shovel and it's done! 

animal crossing fossil cupcakes with plastic shovels

Probably the most elaborate dessert I made were these chocolate star fragments. I know they don't look elaborate but I ended up making custom silicone molds just to make these. I had a friend 3D print some fragments first then had a silicone mold made from SimiCakes. I just used yellow candy melts from Michaels and pink flash dust from Never Forgotten Designs. 

To make the star fragments, pour your melted chocolate into the molds and give them several taps to make sure all the air bubbles are out. Put them into the freezer for about 30 minutes so let the chocolate set. Then carefully remove the star fragments from the mold. 

Rub some oil on the chocolate and then dust with the flash dust for some shine. 

chocolate star fragments

Even though I loved making the Animal crossing birthday cake, I am not really a cookie maker. So I ordered these adorable animal crossing themed sugar cookies from Jam Cakes here in Portland. She even shipped them to me! 

animal crossing sugar cookies on a white plate

I got these super cute macarons from Mama's Artisan Sweets made to look like the Fossils from Animal Crossing and they turned out soooo cute. Plus they were really tasty! 

animal crossing fossil macarons

For the drinks, I used this big plastic dispenser and filled it with ginger ale and fresh-cut fruit. Another nod to an in-game item, the fruit infused water dispenser. 

sliced oranges and strawberries in a clear drink despenser

Animal Crossing Decorations

What would a completely over-the-top Animal Crossing birthday party be without decorations! Even though the party is outside where nature is the main decor, I couldn't resist adding a few more things. 

The main decor was inspired by this TikTok I saw where this girl hand-painted all these characters from the game to display at her boyfriend's party. I didn't have the time to paint them so instead, I used my graphic design skills to turn some characters from the game into huge cutouts that could be displayed around the yard like they were actual villagers attending the party. 

animal crossing cardboard cutout characters

I used a local large format printer who was able to get them to me super fast. Then I applied the characters to sheets of cardboard that I bought from Uline.com. Then my husband and I spent two days cutting them all out with an x-acto blade. 

Get my free Animal Crossing Villager printables and DIY cards.

[optin-monster slug="haekkszadbo0u8i477oy"] 

I attached a triangular piece of cardboard to the back to hold them up but in hindsight, I should have also added some kind of weight as well so the wind did not blow them over. Because that definitely happened. A lot. 

The villagers looked so cute around the yard though! Avalon's favorite villager is Del. He turned out so cute. 

two girls standing in front of a tan a-frame tent with isabelle and tom nook on the sides

Originally I had wanted to make a cute little play tent to use as decoration but I couldn't find the right supplies. I ended up buying this A-frame style tent and the kids got to camp in it together for the night! It was Avalon's first time camping outside like that and I worried she wouldn't sleep well but she slept just fine thankfully!

Dan (my husband) decided to take on the task of making a mailbox out of posterboard so that Avalon's friends could mail her cards. She loved opening all the cards from friends near and far. It was a really fun way to involve friends who could not be there. Darn you 2020!

animal crossing mailbox

We used this paper mailbox template but modified the flag to look more like the one from the game. I used a 6" cake board and a piece of cardboard for the handle with a cake pop stick inside to make it rigid. 

Party Games

I found this fun magnetic fishing game on Amazon and couldn't resist it. Since a lot of Avalon's cousins are younger, this was the perfect game for everyone to play. Everyone had one minute to catch as many fish as they could, whoever caught the most fish wins! 

kids fishing with toy fishing poles in a kiddie pool

We also had the kids take turns using the slingshots to hit the prize balloons. This was a fun way to give little presents to the kiddos and it kept them busy for quite a while. The pellets were made of this soft paper so even if you got hit with one, it didn't hurt at all. 

What Animal Crossing party would be complete without some bug hunting! My sister and I hid a bunch of toy bugs all around the yard and the kids had to find as many as they could in three minutes. So cute! It was like an Easter egg hunt but with bugs lol. 

The kids had such a great time at this party! Even though it was a ton of work, it really was worth it to see how much fun everyone had. 

Check out this video I made showing all the little details from Avalons Animal Crossing Birthday party. 

 
Island made out of cake with cute house, palm tree, cake topper and jelly ocean surrounding island

September 1, 2020 Course Preview

Animal Crossing Birthday Cake Tutorial

Skill level: Intermediate

For Avalon's birthday this year, we went full Animal Crossing! Avalon loves Animal Crossing so much that we just had to have an Animal Crossing-themed cake, complete with fun stylized island floating in an ocean of jelly goodness.

This cake was so much fun to make, adding all the fishies and island details. I'm really happy with out it turns out and I'm so excited to show you the step-by-step process to create this for your next fun island party!

Please Note: The house is a 3D-printed object, not part of the tutorial but available for purchase from a 3rd-party Etsy creator.

2:02:11 Minutes of Instruction

What You Will Learn

  • How to make a beautiful Animal Crossing-themed cake
  • Learn how to create floating edible fish in a delicious jelly ocean
  • How to create an island oasis with an edible waterfall, foliage and a palm tree

Tutorial Chapters

  1. Sculpting and frosting the cakes 0:49
  2. Making the fish 6:48
  3. Making a shark 10:02
  4. Dusting the fish 19:43
  5. Making a sunfish 28:45
  6. Making the tree leaves 36:10
  7. Stacking the cakes 40:50
  8. Making the jelly 47:51
  9. Making the cake collar 51:18
  10. Making ocean decorations 58:14
  11. Finishing the fish 1:03:50
  12. Pouring the jelly 1:06:22
  13. Painting foam 1:13:20
  14. De-molding the cake 1:16:01
  15. Decorating the top tier 1:19:38
  16. Decorating the lower tier 1:31:30
  17. Making the waterfall 1:35:56
  18. Making the palm tree 1:48:22
  19. Dusting the palm tree 1:55:18
  20. Adding final details 1:58:56

Downloads

Materials List

Island made out of cake with cute house, palm tree, cake topper and jelly ocean surrounding island

September 1, 2020 Paid Video

Animal Crossing Birthday Cake

Skill level: Intermediate

For Avalon's birthday this year, we went full Animal Crossing! Avalon loves Animal Crossing so much that we just had to have an Animal Crossing-themed cake, complete with fun stylized island floating in an ocean of jelly goodness.

This cake was so much fun to make, adding all the fishies and island details. I'm really happy with out it turns out and I'm so excited to show you the step-by-step process to create this for your next fun island party!

Please Note: The house is a 3D-printed object, not part of the tutorial but available for purchase from a 3rd-party Etsy creator.

2:02:11 Minutes of Instruction

What You Will Learn

  • How to make a beautiful Animal Crossing-themed cake
  • Learn how to create floating edible fish in a delicous jelly ocean
  • How to create an island oasis with an edible waterfall, foliage and a palm tree

Tutorial Chapters

  1. Sculpting and frosting the cakes 0:49
  2. Making the fish 6:48
  3. Making a shark 10:02
  4. Dusting the fish 19:43
  5. Making a sunfish 28:45
  6. Making the tree leaves 36:10
  7. Stacking the cakes 40:50
  8. Making the jelly 47:51
  9. Making the cake collar 51:18
  10. Making ocean decorations 58:14
  11. Finishing the fish 1:03:50
  12. Pouring the jelly 1:06:22
  13. Painting foam 1:13:20
  14. De-molding the cake 1:16:01
  15. Decorating the top tier 1:19:38
  16. Decorating the lower tier 1:31:30
  17. Making the waterfall 1:35:56
  18. Making the palm tree 1:48:22
  19. Dusting the palm tree 1:55:18
  20. Adding final details 1:58:56

Downloads

Materials List

hand pies on a cooling rack on white background with blueberries and fresh fruit in the background

August 21, 2020 4th of July

Hand Pies

Homemade hand pies with a sweet or savory filling, wrapped in a buttery, flaky crust. Bake them, deep fry them or even use the air fryer with no leaking! Fill them with your favorite flavors like apple filling, peach filling, lemon curd, and blueberry filling. Everything you love about a pie in the palm of your hand. 

hand pies on a cooling rack on white background with blueberries and fresh fruit in the background

A hand pie is basically a miniature pie that fits in your hand. It can be sweet or savory and is made by placing a small amount of filling onto a circular (or rectangular) piece of pie dough, folding the dough over and sealing it shut before baking. You'll be shocked how much easier they are to make than an actual pie. 

Hand pies make great desserts for parties and weddings because there's no need to cut a pie and serve it. Simply set them out and the guests can serve themselves! 

franz hand pies

Does anybody else remember these hand pies? The grocery store was always a magical place for me when I was a child. The bakery would always give me a "free sample" and if I was really good, my dad would buy me one of those $1 hand pies.

I used to LOVE these! We very rarely got any kind of treats or sweets growing up so this was a major big deal if you ever got one of these.

I decided to show Avalon what she was missing so I picked her up one while I was out (and one for myself of course). 

Sadly the hand pie was not as I remembered. The crust was stale and bland and the filling was very goopy and not very flavorful. 

Why are childhood treats never as good as we remember them? 

So of course, I had to try and remake them for myself but this time, extra delicious and with multiple fillings! 

hand pies on a cooling rack shot overhead with a white backdrop and fresh fruit surrounding the edges

glazing hand pies with simple glaze

HAND PIE INGREDIENTS

There are endless options for making hand pies as far as flavors go, depending on the season. Most of the ingredients you will need are pretty standard like flour, salt, sugar, eggs, water, and butter. 

hand pie ingredients in clear bowls on white background shot from above

For the filling, the ingredients will vary. One ingredient you might need to purchase ahead of time is ClearGel (similar to cornstarch but stays really shiny) or you can use cornstarch if that's all you have.

PÁTE BRISÉE (MEALY PIE DOUGH) STEP-BY-STEP

Pâte Brisée is a French version of classic pie dough. It's great for hand pies because it repels liquid while baking, making sure your hand pies don't get soggy.

Step 1 – Place flour, salt, and cold butter pieces into the bowl of your stand mixer and blend on low until mixture resembles coarse sand.

close up of hand pie dough in a mixer with sandy texture

Step 2 – Add in your egg and just enough cold water to bring the mixture together.

close up of mealy pie dough on plastic wrap

Step 3 – Press into a disk and wrap with plastic wrap. Chill for one hour minimum. Don't skip the chilling, or your pie crust will melt in the oven. 

mealy pie dough wrapped in plastic wrap to rest

HOMEMADE HAND PIES STEP-BY-STEP

Step 1 – Preheat your oven to 400ºF and line 2 large sheet pans with parchment paper. The parchment paper will save you from a messy clean-up if one of your hand-pies bursts during baking which can happen!

Step 2 – Take out the chilled pie dough and place it on a flat surface dusted with flour. Let your dough warm up for a bit (around 20-40 minutes) until you can roll it out without it cracking. You don't want it TOO warm though or it will stick to your rolling pin. Take out your filling(s) and let it come to room temperature.

Step 3 –Roll out your cold pie dough to ⅛" thick and cut into 6" circles. I also made some with a 5" cutter so the pies were a little smaller and better if you don't want such huge servings.

circles of hand pie dough on a white surface

Pro Tip: When rolling out cold pie dough, start in the center and work your way out, making tiny little rolls and rotating frequently until it becomes easier to roll. Go slow and be patient!

Step 4 – Add 3 Tablespoon of filling (don't overfill or they will burst while baking) 5" circles only need 1 Tablespoon of filling. If you're using curd, you can add a tiny bit more.

hand pie filling on circles of hand pie crust

Step 5 – Brush the edges with egg wash, fold and crimp edges firmly to seal shut with a fork.

Step 6 – With a small sharp knife, cut 3 slits into the top, center of the pie. Be careful to not cut all the way through to the bottom, but really make sure the slits are open. Air will release through these vents while baking and keep your filling from blowing out. 

close up of hand pies on a blue baking sheet with parchment paper

WHAT'S THE BEST WAY TO BAKE HAND PIES?

Baking, air-frying, or deep-frying? Which way is the best way to bake those tasty hand pies? I wanted to find out so I tested out each way of baking.

First up, baked hand-pies! 

Step 1 –Place pies on the baking sheet and refrigerate for 20 minutes. 

Step 2 – Bake for 20-25 minutes. They should be golden brown on the tops and bottoms and the filling will just be starting to bubble.

Step 3 –Let your hand pies cool for 10 minutes. While your hand pies are cooling, make your glaze. Just whisk the powdered sugar and lemon juice together until smooth.

Step 4 -Drizzle the glaze on top or use a pastry brush to apply the thin glaze over the hand pies and enjoy!
 
 
These hand pies taste best the day they are baked but will last for three days in an airtight container in the fridge or frozen for up to 2 months. You can make the hand pies, freeze them, and then bake them when you need to!

DEEP FRIED HAND PIES

Most hand pies are baked but you can (and should) try making fried hand pies! The crust bubbles up beautifully and is EXTRA crispy when you fry your hand pies. 

Step 1 - Prepare your hand pies as usual but instead of cutting 3 slits with a knife, use a fork to dock 3 holes on the top, and then place them in the fridge to chill for at least one hour.

Step 2 - Heat up 4 inches of neutral oil (like vegetable shortening or canola oil) in a deep pot (like a dutch oven) to 375ºF. Use a thermometer to keep an eye on the temp. Make sure you place the pot at the back of the stove, especially if you have kids. Hot oil is very dangerous and so are splashes. 

close up of a hand pie on a blue spatula above hot oil in a white pot

Step 3 - Place 2-3 hand pies in the hot oil and fry 3-4 minutes until golden brown. 

Step 4 - Drain on a paper towel, cool for 10 mins then dust in powdered sugar or cover in sugar glaze before serving. They are best when eaten the same day. 

Deep-fried hand pies taste the MOST like the store-bought versions but I wasn't a huge fan of the deep-fried version compared to the air fried. 

deep fried hand pies

AIR FRIED HAND PIES

If you happen to have an air fryer, you can fry your hand pies that way. This is actually my favorite way to make hand pies. The air fryer makes the dough SUPER light and crisp without the added oil from deep frying. 

Step 1 - Prepare your hand pies as usual and chill for one hour. 

Step 2 - Brush the surface with egg wash and sprinkle on some sanding sugar for color and flavor (optional). 

Step 3 - Set your temperature to 400ºF on your air fryer.

Step 4 - Place your hand pies inside the air fryer basket and fry for 13-15 minutes or until golden brown.

air fryer hand pies

WHAT KIND OF CRUST IS BEST FOR HAND PIES?

A hand pie is a tiny version of a full-sized pie so we want to use a similar pie crust. I'm using Pâte Brisée which is a very simple, not-too-sweet but delicious crust.

It's very similar to pie dough but the texture is finer and stronger than traditional pie dough. Perfect for making hand pies. Pâte Brisée is also perfect for savory hand pies since it doesn't contain any sugar. 

Pate Brisee hand pie dough cut into circles

HOW DO I STOP MY PIES FROM LEAKING?

There are three reasons why your hand-pie might be leaking. Follow these steps to make sure your hand-pies don't burst. 

  1. Don't Overfill - You might think you want to fill that hand pie to the max but filling expands while baking so if your hand pie is too full, the filling will expand and then leak out of your crust. 
  2. Seal The Edges - Make sure you really seal those edges. Dampen the crust with a little egg wash and then press together with a fork. Make sure there isn't any filling on the edge of the dough or it will break the seal and cause the hand pie to leak. 
  3. Vent - Don't forget to give your pies some vents for steam to escape during baking, otherwise, the pressure can build up and cause your hand pie to leak everywhere. 
  4. Cracking - Cracks can also cause your pies to burst while baking. Smooth them out to prevent your filling from seeping out. 

venting hand pies to prevent leaking


hand pie with a leak

WHAT KIND OF FILLING IS GOOD FOR HAND PIES?

Apple and blueberry are the most popular fillings for hand pies but you can use pretty much any type of filling you like including cherry filling, lemon curd, chocolate pastry cream, strawberry filling or peach filling.

hand pie filling on circles of hand pie crust

If you don't want to make a bunch of homemade fillings, you can buy pre-made pie filling at the grocery store and I won't judge you one bit. 

For savory hand pies, you can try chicken pot pie filling, creamy mushrooms, and beef, or even ham and cheese for a breakfast hand pie. 

I'm not convinced there's any meal that could not be transformed into a hand pie. 

Peach Filling
Blueberry Filling
Cherry Filling
Lemon Curd

Strawberry Reduction
Berry Filling

Recipe

hand pies on a cooling rack on white background with blueberries and fresh fruit in the background
Print Recipe
4.81 from 46 votes

Hand Pies Recipe

The best hand pies with endless flavor options. Bake, deep-fry or air fry! Sweet or savory. This one recipe is all you need. Apple, blueberry, lemon, peach, or cherry. The filling options are endless. Follow my tips for troubleshooting common problems and avoiding leaks and cracks.
Prep Time5 minutes mins
Cook Time20 minutes mins
chilling1 hour hr
Course: Dessert
Cuisine: American
Servings: 8 servings
Calories: 274kcal
Author: Liz Marek

Equipment

  • Stand mixer with paddle attachment

Ingredients

For the hand pie dough

  • 12 ounces all-purpose flour
  • ¼ teaspoon salt
  • 6 ounces cold unsalted butter cut into cubes or grated
  • 1 large egg
  • 1 ounce ice cold water

Fruit filling

  • 16 ounces fresh or frozen fruit (apples, peaches, blueberries, strawberries etc)
  • 2 Tablespoons lemon juice you can use more or less to your taste
  • 6 ounces water or juice that complements the flavor of the fruit
  • 1 ounce unsalted butter
  • 2 ounces sugar white or brown
  • ¼ teaspoon salt
  • 1 ounce ClearGel or ½ ounce cornstarch
  • 1 ounce water

Glaze

  • 4 ounces powdered sugar
  • 1 Tablespoon lemon juice
US Customary - Metric

Instructions

For the hand pie dough

  • Place flour, salt, and cold butter pieces into the bowl of your stand mixer and blend on low until mixture resembles coarse sand.
  • Add in your egg and just enough water to bring the mixture together
  • Press into a disk and wrap with plastic wrap. Chill for one hour.

For the fruit filling

  • Prepare your fresh fruit by chopping into small cubes (if needed) or use frozen fruit. No need to defrost.
  • Place your fruit and butter in a large saucepan over medium-high heat until the butter is melted and bubbling.
  • Add in your water (or juice), sugar, lemon juice, and salt and mix until combined. Bring to a simmer.
  • Combine your ClearGel with your water and whisk to make a slurry. Pour into your simmering mixture and mix for 1-2 minutes to cook the gel. If you're using cornstarch, you only need to cook until it's clear.
  • Remove from the heat and let the mixture cool.

How to make hand pies

  • Preheat your oven to 400ºF and line a large sheet pan with parchment paper
  • Let your dough stand at room temperature for 15 minutes to let it soften a bit
  • Dust your surface with flour. Begin by pressing your dough with your rolling pin to start flattening it.
  • Roll your dough out to ⅛ thick or about the thickness of a cake board. Thinner than you think. Thinner dough results in a crisper, crunchier crust for your hand pies.
  • Cut your dough into 6" circles. I used a 6" cake board as a template or you can use a 5" circle cutter if you want smaller hand pies.
  • Fill your 6" hand pie with 3 tablespoons of fruit filling (5" circles take 1 heaping Tablespoon). Do not overfill.
  • Brush the outside edge with egg wash (one egg whisked with 1 tablespoon of cold water)
  • Fold the hand pie over and crimp with a fork to seal well
  • Use a knife or fork to make some vents on top
  • Brush the hand pies with more egg wash and place them onto a sheet pan lined with parchment paper. Chill for 20 minutes.
  • Bake for 20-25 minutes. They should be golden brown and the filling will just be starting to bubble.
  • Let your hand pies cool for 10 minutes.
  • While your hand pies are cooling, make your glaze. Just whisk the powdered sugar and lemon juice together until smooth.
  • Use a pastry brush to brush the thin glaze over the hand pies and enjoy!
  • These hand pies taste best the day they are baked but will last for three days in an airtight container in the fridge or frozen for up to 2 months.

Video

Notes

For fruit filling, feel free to adjust spices and flavorings to suit your tastes. For apple I like to add a little cinnamon. 
Air Fryer Instructions
  1. Prepare your hand pies as usual and chill 20 minutes
  2. Brush the surface with egg wash and sprinkle on some sanding sugar for color and flavor (optional). 
  3. Set your temperature to 400ºF on your air fryer
  4. Place your hand pies inside the air fryer basket and fry for 13-15 minutes until golden brown and filling just begins to bubble
Deep fried hand pies instructions
  1. Prepare your hand pies as usual but do not cut large slits for vents, use a fork for small vents so the filling doesn't leak out. Then place them in the fridge to chill for at least one hour. 
  2. Heat up 4 inches of neutral oil (like vegetable shortening or canola oil) in a deep pot (like a dutch oven) to 375ºF. Use a thermometer to keep an eye on the temp. Make sure you place the pot at the back of the stove, especially if you have kids. Hot oil is very dangerous and so are splashes. 
  3. Place 2-3 hand pies in the hot oil and fry 3-4 minutes until golden brown. 
  4. Drain on a paper towel and then dust in powdered sugar or cover in sugar glaze before serving. They are best when eaten the same day. 

Nutrition

Serving: 1serving | Calories: 274kcal | Carbohydrates: 54g | Protein: 5g | Fat: 4g | Saturated Fat: 2g | Cholesterol: 34mg | Sodium: 158mg | Potassium: 55mg | Fiber: 1g | Sugar: 21g | Vitamin A: 127IU | Vitamin C: 2mg | Calcium: 10mg | Iron: 2mg

 
Stacked cake with airbrushed clouds and anime portrait painted with cocoa butter

August 14, 2020 Course Preview

Anime Cocoa Butter Portrait Cake Tutorial

Skill level: Intermediate

I got the opportunity to create a beautiful birthday cake for a girl who is really into Anime, specifically Sword Art Online. I knew this would be the perfect time to try out cocoa butter for painting portraits, and the results were amazing!

Cocoa butter painting creates beautiful, oil painting-like finishes on cakes. In this tutorial, you'll learn how to prep your cocoa butter for painting, what brands work best, how to paint portraits and realistic clouds.

54:17 Minutes of Instruction

What You Will Learn

  • How to hand-paint character portraits in manga/anime style using cocoa butter
  • Learn how to create and attach wafer paper flowers
  • How to paint clouds and airbrush a seamless color gradient

Tutorial Chapters

  1. Covering the cakes in fondant 0:36
  2. Stacking the cakes 10:09
  3. Wafer paper flowers 13:43
  4. Making the portrait stencil 16:17
  5. Airbrushing the cake 18:58
  6. Painting the faces 22:49
  7. Painting the hair 40:03
  8. Painting the clothes 46:59
  9. Painting clouds 48:55
  10. Adding the flowers 53:07

Downloads

Materials List

Stencil Template

Portrait Reference

Stacked cake with airbrushed clouds and anime portrait painted with cocoa butter

August 14, 2020 Paid Video

Anime Cocoa Butter Portraits Cake

Skill level: Intermediate

I got the opportunity to create a beautiful birthday cake for a girl who is really into Anime, specifically Sword Art Online. I knew this would be the perfect time to try out cocoa butter for painting portraits, and the results were amazing!

Cocoa butter painting creates beautiful, oil painting-like finishes on cakes. In this tutorial, you'll learn how to prep your cocoa butter for painting, what brands work best, how to paint portraits and realistic clouds.

54:17 Minutes of Instruction

What You Will Learn

  • How to hand-paint character portraits in manga/anime style using cocoa butter
  • Learn how to create and attach wafer paper flowers
  • How to paint clouds and airbrush a seamless color gradient

Tutorial Chapters

  1. Covering the cakes in fondant 0:36
  2. Stacking the cakes 10:09
  3. Wafer paper flowers 13:43
  4. Making the portrait stencil 16:17
  5. Airbrushing the cake 18:58
  6. Painting the faces 22:49
  7. Painting the hair 40:03
  8. Painting the clothes 46:59
  9. Painting clouds 48:55
  10. Adding the flowers 53:07

Downloads

Materials List

Stencil Template

Portrait Reference

jelly island magic cake with edible palm tree

August 11, 2020 Blog

Jelly Island Cake

You may have seen these amazing jelly island cakes (sometimes called magic cakes) trending on Instagram. I am obsessed with them! I love the use of gelatin as water. The first time I used gelatin as water was in my shark cake tutorial. Since then, I've also made a mermaid cake and an Animal Crossing cake using gelatin for the water. 
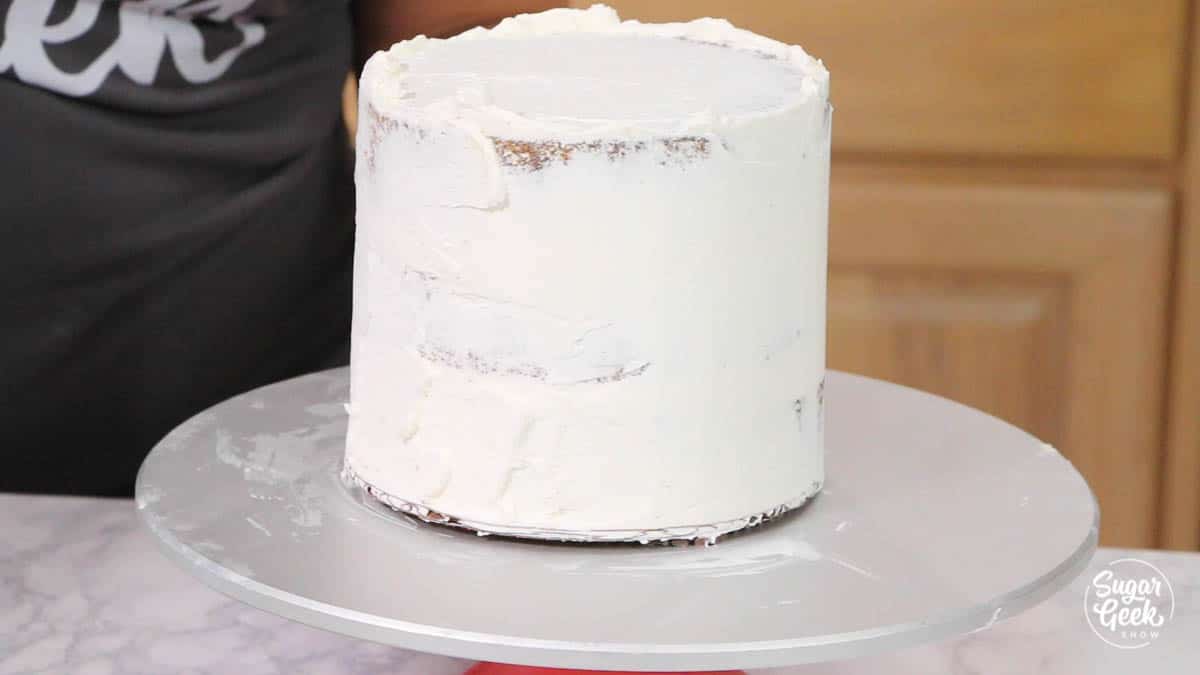
jelly island magic cake with edible palm tree

One question I get a lot (A LOT!) is how does the gelatin taste?

I know there are a lot of tutorials out there on YouTube on how to make the basic jelly island cake but the recipe for the gelatin is lacking in my opinion. Water plus gelatin is not going to taste very good!

For my shark cake, I used regular blue Jell-O with a little extra added gelatin to make it really firm. That worked really well and tastes really good but you can't make it very thick or the blue becomes too dark. 

This shark cake looks like it's about to swim right up to you and take a bite! Featuring a gravity-defying structure, flexible edible seaweed and Jell-O water. Sculpt a 3D shark out of cake, learn to paint details and make sugar eyes! All your guests will be wondering how this is really a cake!

For my mermaid cake, I used 7-up as the liquid and added in some gelatin to make it set. I did add a little electric blue food coloring and a tiny bit of that blue Jell-O to make it the right color. The taste was pretty good, very mild lemon-lime flavor but I wasn't fully satisfied with the taste just yet. 

Finally, when I was making Avalons Animal Crossing birthday cake, I made a recipe I was really really happy with! I started with regular water, added some sugar, and then some strawberry extract for flavor. Isn't that what Jell-O is basically made of? Sugar water, flavoring, and gelatin right? I also added a tiny bit of citric acid (basically powdered lemon) to give the Jelly that tart flavor that you associate with candy. 

Oh my gosh it tasted so good! I even surprised myself a little I admit. 

The best part about making the jelly from scratch to make your jelly island cakes is that you can control the color. If you want your jelly to all have the same color, you can add a drop or two of some blue food coloring or you can use some blue Jell-O like I did. I just really like the color! 

If you want your Jell-O to have a gradient, you can divide your jelly into three containers and color one dark blue, one medium and one light. Then layer them up, letting them chill until JUST barely set before adding the next layer of jelly. 

Ingredients for making a jelly island cake

NOTE: This cake takes about three days to make so plan ahead! 

Day 1: Bake cakes and make your ganache
Day 2: Stack your cakes, carve, and make your jelly water. Chill overnight to set the jelly.
Day 3: Unmold the cake, finish the cake with graham crackers and decorations. Enjoy! 

2 - 6" round cakes (any flavor you want)

16 ounces (2 cups) chocolate ganache or easy buttercream

40 oz cool water

14 ounces (4 cups sugar)

100 grams clear gelatin (or knox)

20 grams blue Jell-O (or 1-2 drops liquid blue food coloring)

3 teaspoon strawberry extract (or any flavor you want really!)

2 teaspoon citric acid (you can find this in the canning section of the grocery store!)

2-3 Tablespoons Crushed graham crackers for sand

Modeling chocolate palm tree (tutorial is from my animal crossing cake)

White food coloring for waves 

Cake acetate

Clear packing tape

Cake ring or springform pan


How to make jelly for a jelly cake

Step 1 - Make your ganache. I'm using the 1:1 ratio. Heat 8 ounces of heavy whipping cream until it's steaming (not boiling) then poured it over semi-sweet chocolate. Let it sit for 5 minutes then whisk until it's smooth. Cover with plastic wrap and let it cool overnight at room temperature. 

ganache

Step 2 - Bake your cakes. I'm using my applesauce spice cake recipe but you can use any flavor you want. You don't need a lot of cake, two 6" rounds will be plenty. Use the cake calculator above the cake recipe card to adjust the recipe to make two 6" rounds. 

Step 3 - Stack your cakes together with your cooled ganache. Carve the sides down so the cake is slightly rounded on top. You can use the cut-off pieces to make some cake pop dough and build up the island a bit more. Just add a little ganache to the cake pieces and smoosh them together until it forms a dough. Place the dough on top and smooth it with your spatula. 

two cakes carved into a dome with some ganache on top

Cover the whole cake with a layer of ganache and place it into the fridge to chill. 

Step 4 - Make your jelly for the jelly island cake. This part is really easy. Just combine your cool water, gelatin, sugar and blue Jell-O in a large saucepan. Let the gelatin absorb for 5 minutes before you start heating it. This makes the gelatin stronger.

*NOTE: these photos are of a 6x batch that I used for my animal crossing cake, your amounts will be much smaller for single jelly cake. 

jelly island ingredients in a large saucepan shot from above

Turn your heat up to medium-high and stir occasionally to keep the mixture from burning. DO NOT BOIL! Remove the mixture from the heat once you start to see steam rising from the gelatin mixture. Boiling will weaken the gelatin. 

jelly island mixture in a large silver stock pot

Remove the mixture from the heat, add in the extract and the citric acid. Stir to combine and then place it into the fridge for about 30 to 60 minutes. I put mine into a new bowl so it cooled faster. 

Once the jelly is slightly cooled, you can skim the foam off the top and the leftover jelly will be nice and clear!

skimming the foam off the cooled gelatin shot from above

You don't want the mixture to solidify though! Keep your eye on it. You just want it to be cool but not solid. If you forget about it and it gets solid, pop it into the microwave for a few seconds to melt it again. 

Step 5 - Paint the ganache with a little white food coloring. I just used a brush and roughly brushed over the surface. You don't want to completely cover the ganache, just create a little texture and visual interest. 

Step 6 - Make the island. Place your cooled cake onto a cake board or even a cheesecake springform pan will work for this. Place a cake ring (if you have a springform pan you won't need a cake ring) around the cake. Line the cake ring with some cake acetate and tape the seam. 

cake ring with a layer of acetate inside

Seal the bottom of the cake ring with some clear tape to keep the jelly from leaking out. 

I also pipe a small amount of ganache around the inside of the ring for extra insurance and smooth it down with my finger. I also pipe ganache around the base of the cake so nothing leaks into the cake. 

close up of ganache piped on the inside of the cake ring and acetate

Put the cake back into the fridge for 20 minutes to give the ganache time to set up or until your jelly has cooled down enough to use. The jelly should be about 90ºF or just barely warm to the touch. Be patient! If the jelly is too hot it will melt your ganache and make a big mess. 

Step 7 - Pour the cooled jelly into your ring. I start with just ¼" and stop just to make sure I don't have any leaks. Allow the jelly to harden up before pouring the rest in. This should only take about 5 minutes. 

close up of jelly poured into the cake ring

Once the thin layer of jelly is firm, go ahead and pour in the rest of the jelly to the top of the ring. 

jelly being poured into the cake ring

If you have any major bubbles you can pop them with a paintbrush

Once you have poured the jelly into the ring, the jelly island cake now needs to be refrigerated overnight. 

Step 8 - De-molding the jelly island cake! Remove the tape from the cake ring and slide it off the cake. Carefully remove the acetate from the jelly and reveal your beautiful cake! 

close up of jelly cake

Step 9 - Cover the top of the jelly with plastic wrap to protect it. Add your crushed graham crackers to the top of the island to look like sand. If you have made the chocolate palm tree, you can add that now too. 

adding graham crackers to the top of the jelly cake

Step 10 - Adding waves. Now you can add some white food coloring to the edges of the jelly to make it look like waves. I just used a paintbrush! 

jelly cake shot from above

I also added a modeling chocolate palm tree that I had leftover from my Animal Crossing Birthday Cake (tutorial coming soon). It's just modeling chocolate over a cake pop stick and wafer paper leaves that are brushed with a gelatin mixture to make them flexible. I dusted the palm tree with brown petal dust from the sugar art. 

close up of modeling chocolate palm tree with wafer paper leaves

Your jelly island is now complete! This will actually be ok at room temperature and the cake tastes better when it's not cold. I suggest taking the jelly island cake out of the fridge the morning of the party and allowing it to warm up before serving it! 

slice of jelly cake on a white plate with full cake in the background

Yes this jelly island cake actually tastes good! The strawberry flavor tastes really amazing and my daughter Avalon absolutely loves it. She says it tastes like blueberries but I think that's because she sees the blue and it plays tricks on her tastebuds haha!

Have you made a jelly island cake? Let me know in the comments!

Want More Delicious Recipes?

Beer Gummy Recipe
Real Gummy Bear Recipe
Rose Wine Gummy Recipe

Recipe

jelly island magic cake with edible palm tree
Print Recipe
4.93 from 14 votes

Jelly Island Recipe

How to make a trendy jelly island cake that actually tastes good! All the tools and materials needed plus tips and tricks for a cute little jelly island cake!
Prep Time5 minutes mins
Cook Time5 minutes mins
Cooling2 days d
Total Time2 days d 10 minutes mins
Course: Dessert
Cuisine: American
Servings: 5 servings
Calories: 385kcal
Author: Liz Marek

Equipment

  • Cake ring or springform pan
  • Cake acetate

Ingredients

  • 40 ounces cool water 5 cups
  • 14 ounces sugar 2 cups
  • 4 ounces gelatin ¾ cup - I use custom collagen brand but KNOX is ok too
  • 4 teaspoons blue Jell-O or a tiny drop liquid blue food coloring
  • 3 teaspoons strawberry extract or any flavor you want!
  • 2 teaspoons citric acid
US Customary - Metric

Instructions

For the cake

  • Bake your 6" round cakes and prepare your ganache. Make sure both are cool before you frost your cakes.
  • Add some ganache between the two layers and smooth with the spatula. Use a knife to shape the cake into a rounded island shape. Mix the cutoffs with a little ganache to make cake pop dough and build up the top of the island.
  • Frost the entire cake in ganache and put it in the fridge to chill until the ganache is hard.
  • Brush the surface of the ganache with a little white food coloring to give it dimension.
  • Place the cake onto a cake board (or the bottom of your springform pan). Attach with some ganache.
  • Place the ring around the cake and add the acetate. Tape down the seam so jelly doesn't leak out.
  • Seal around the cake ring with tape (make sure you don't have any holes!) and pipe a small line of ganache around the inside of the acetate for extra insurance. Also make sure the cake board (if you have one) is totally covered in ganache and the cake is completely sealed to the cake board or pan so jelly doesn't leak inside.
  • Refrigerate the cake until its firm or your jelly has cooled down to 90ºF

For the jelly water

  • Combine the cool water, sugar, Jell-0 and gelatin together in a medium-sized saucepan. Let the gelatin absorb for 5 minutes.
  • Turn the heat up to medium-high, stirring occasionally to prevent burning.
  • Once you see steam just begin to rise from the surface, remove the mixture from the heat. DO NOT BOIL! It will weaken the gelatin.
  • Stir in your extract and citric acid.
  • Allow the mixture to cool at room temperature (or you can place it in the fridge to speed things up) until it's just barely warm. Still liquid but not hot!
  • Skim off the foam and discard it.
  • Pour the gelatin into your prepared cake ring. Refrigerate overnight.
  • Remove the ring and remove the acetate. Cover the jelly with plastic wrap and add crushed graham crackers to the ganache to make sand. Use white food coloring to paint waves around the edges of the jelly. Add decorations if you like!

Video

Notes

Tips for success!
Make sure you cover the whole cake in ganache to keep the jelly from leaking into the cake
Cool your jelly to 90ºF before pouring it! Be patient!
Pipe a dam of ganache on the inside of the cake ring to prevent the jelly from leaking out
Tape the cake ring down really well
Freeze the cake with cake ring for 10 minutes before pouring in the jelly to make it set faster
Only pour in ¼" of jelly to begin with to seal the seam at the bottom of the cake and prevent leaks
 

Nutrition

Serving: 1serving | Calories: 385kcal | Carbohydrates: 80g | Protein: 17g | Fat: 1g | Saturated Fat: 1g | Sodium: 51mg | Sugar: 79g | Calcium: 18mg | Iron: 1mg


Coconut Pecan Filling Recipe

August 4, 2020 Blog

Coconut Pecan Filling Recipe

Coconut pecan filling made from scratch is the traditional filling for German chocolate cake and is a delicious tasty treat. This is very similar to pastry cream, vanilla pudding or even dulce de leche. It's basically a sweetened cream thickened by egg yolks. It's very easy to make, tastes so much better than the canned stuff and comes together in only 20 minutes.


Learn how to make this delicious and decadent coconut pecan filling that pairs perfectly with german chocolate cake. This is one of the first fillings I ever learned to make from scratch. My Dad's favorite cake was German Chocolate Cake. Every year for his birthday, my sisters and I would bake up a nice Box Cake and slather on some of that pecan canned frosting. My dad loved it. I loved it too until I made it from scratch. OMG I can never go back. Sorry Dad.

Cake Batter and Frosting Calculator

Select an option below to calculate how much batter or frosting you need. Adjust the servings slider on the recipe card to change the amounts the recipe makes.

Choose a pan type

Choose a cake pan size
(based on 2" tall cake pan)

Choose a cake pan size
(based on 2" tall cake pan)

Choose a cake pan size
(based on 2" tall cake pan)

Cupcake Tin Size

Choose number of pans

Cups of Batter Needed

8 cups

Cups of Frosting Needed

5 cups

Note: measurements are estimated based off the vanilla cake recipe using standard US cake pans and sizes. Measurements used are for 2" tall cake pans only. Your results may vary. Do not overfill cake pans above manufacturer's recommended guidelines.


COCONUT PECAN FILLING INGREDIENTS

COCONUT PECAN FILLING VIDEO

mediavine: <div class="mv-video-target mv-video-id-mzwxsx5hjymgg4l7b6w0" data-video-id="mzwxsx5hjymgg4l7b6w0" data-volume="70" data-ratio="16:9" ></div>

Vimeo: <iframe src="https://player.vimeo.com/video/382083515" width="640" height="360" frameborder="0" allow="autoplay; fullscreen" allowfullscreen></iframe>

COCONUT PECAN FILLING STEP-BY-STEP

Step 1 – In a medium sauce pan, combine evaporated milk, egg yolks and vanilla extract. Cook over medium high for about 1 minute and whisk constantly, do not walk away or it could burn.

Step 2 – Add sugar, salt and butter to the pan. Whisk constantly and cook for about 12 minutes until thick. Once it starts bubbling, turn the heat down to medium. 

Make sure to get to the bottom of the pan while whisking so the eggs don't curdle or stick to the pan. 

Step 3 – Chop the pecans if they're not already small, you want to have small pieces that are easier to bite. 

Step 4 – Once thick, remove from the heat and add sweetened flaked coconut and chopped pecans. Stir to combine. 

Step 5 – Transfer to a heat proof bowl and allow to cool before using. This is a classic, perfect filling for German chocolate cake, but honestly I could just eat this with a spoon! Try it with my death by chocolate cake, coconut cake or vanilla cake. 

RELATED RECIPES


This recipe below is different from the video recipe. You use evaporated milk, egg yolks, vanilla extract, white sugar, salt, butter, pecans and sweetened flaked coconut. This is the recipe on the inside of the Baker's chocolate bar. 

Recipe

Coconut pecan cake filling recipe
Print Recipe
5 from 3 votes

German Chocolate Cake Filling

Delicious german chocolate cake filling recipe from scratch! Easier than you think and OH-so-delicious!
Prep Time10 minutes mins
Cook Time20 minutes mins
Total Time30 minutes mins
Course: Dessert
Cuisine: American
Servings: 4 cups
Calories: 1805kcal
Author: Liz Marek

Ingredients

  • 12 oz whole milk
  • 4 oz half and half or cream
  • 6 egg yolks
  • 8 oz butter 2 sticks
  • 12 oz brown sugar
  • 2 teaspoon vanilla extract
  • 7 oz toasted pecans chopped
  • 8 oz toasted shredded coconut
US Customary - Metric

Instructions

  • In a medium sauce pan, combine milk, cream sugar, butter, egg yolks and vanilla. 
  • Cook on medium while whisking constantly until thickened and golden brown
  • Fold in toasted coconut and pecans to combine
  • Let cool to room temperature before using as a filling
  • Store leftovers in the fridge for up to one week or freeze for 6 months

Notes

Store in an air-tight container in the fridge for up to 7 days or freeze up to 6 months.

Nutrition

Calories: 1805kcal | Carbohydrates: 138g | Protein: 16g | Fat: 139g | Saturated Fat: 75g | Cholesterol: 464mg | Sodium: 538mg | Potassium: 843mg | Fiber: 13g | Sugar: 117g | Vitamin A: 2420IU | Vitamin C: 1.4mg | Calcium: 315mg | Iron: 4.6mg

Birthday cake colored with red and blue edible airbrush color with sculpted Rey and Kylo Ren cake toppers holding lightsabers

August 1, 2020 Paid Video

Dark Side vs Light Side Cake

Skill level: Advanced

Elizabeth Marek breaks down how to create this stunning Star Wars cake, featuring not one but two sculpted cake toppers of Rey and Kylo Ren from the new trilogy. In this tutorial, you will learn how to sculpt the features of the face using Saracino Pasta Model, how to create the bodies, arms, and hands, how to sculpt lightsabers and clothing details, and how to create the red and blue lightning effect on the cake itself.

There's a lot to cover in this tutorial (nearly 3 hours of step-by-step instructions) so let's get our tools together and let's get started!

2:47:57 Minutes of Instruction

What You Will Learn

  • How to sculpt two cake topper figures following realistic anatomy
  • Learn how to create heads, arms, bodies, hands, and clothing
  • How to create a stunning lightning bolt finish using airbrush colors

Tutorial Chapters

  1. Making Rey's Face 0:49
  2. Shaping the nose 8:38
  3. Shaping the lips 17:15
  4. Shaping the eyes 22:24
  5. Coloring Rey's face 37:09
  6. Making Rey's Body 48:18
  7. Covering the body in paste 57:25
  8. Making Kylo Ren's body 1:06:49
  9. Covering in modeling chocolate 1:10:31
  10. Adding Rey's head 1:13:21
  11. Making Rey's ears 1:15:11
  12. Sculpting Rey's arms 1:16:15
  13. Sculpting Rey's body 1:21:36
  14. Making Rey's lightsaber 1:29:58
  15. Making Rey's hands 1:34:07
  16. Making Rey's clothing 1:40:23
  17. Making Rey's hair 1:55:08
  18. Kylo Ren's head 2:00:29
  19. Kylo Ren's body 2:07:29
  20. Kylo Ren's saber 2:23:27
  21. Kylo Ren's cloak 2:26:28
  22. Covering in fondant 2:31:39
  23. Making lightning 2:36:25
  24. Airbrushing the cake 2:41:06
  25. Adding the toppers 2:44:32
  26. Final details 2:46:54

Downloads

Materials List

Face Proportions Reference

Face Reference 01

Face Reference 02

Face Reference 03

Birthday cake colored with red and blue edible airbrush color with sculpted Rey and Kylo Ren cake toppers holding lightsabers

August 1, 2020 Course Preview

Dark Side vs Light Side Cake Tutorial

Skill level: Advanced

Elizabeth Marek breaks down how to create this stunning Star Wars cake, featuring not one but two sculpted cake toppers of Rey and Kylo Ren from the new trilogy. In this tutorial, you will learn how to sculpt the features of the face using Saracino Pasta Model, how to create the bodies, arms, and hands, how to sculpt lightsabers and clothing details, and how to create the red and blue lightning effect on the cake itself.

There's a lot to cover in this tutorial (nearly 3 hours of step-by-step instructions) so let's get our tools together and let's get started!

2:47:57 Minutes of Instruction

What You Will Learn

  • How to sculpt two cake topper figures following realistic anatomy
  • Learn how to create heads, arms, bodies, hands, and clothing
  • How to create a stunning lightning bolt finish using airbrush colors

Tutorial Chapters

  1. Making Rey's Face 0:49
  2. Shaping the nose 8:38
  3. Shaping the lips 17:15
  4. Shaping the eyes 22:24
  5. Coloring Rey's face 37:09
  6. Making Rey's Body 48:18
  7. Covering the body in paste 57:25
  8. Making Kylo Ren's body 1:06:49
  9. Covering in modeling chocolate 1:10:31
  10. Adding Rey's head 1:13:21
  11. Making Rey's ears 1:15:11
  12. Sculpting Rey's arms 1:16:15
  13. Sculpting Rey's body 1:21:36
  14. Making Rey's lightsaber 1:29:58
  15. Making Rey's hands 1:34:07
  16. Making Rey's clothing 1:40:23
  17. Making Rey's hair 1:55:08
  18. Kylo Ren's head 2:00:29
  19. Kylo Ren's body 2:07:29
  20. Kylo Ren's saber 2:23:27
  21. Kylo Ren's cloak 2:26:28
  22. Covering in fondant 2:31:39
  23. Making lightning 2:36:25
  24. Airbrushing the cake 2:41:06
  25. Adding the toppers 2:44:32
  26. Final details 2:46:54

Downloads

Materials List

Face Proportions Reference

Face Reference 01

Face Reference 02

Face Reference 03

slice of fresh strawberry cake on a white plate with strawberries behind it

July 30, 2020 4th of July

Fresh Strawberry Cake

This is the best fresh strawberry cake recipe made with real strawberries (no Jell-O, no boxed mix, no fake flavors). The secret is a slow-simmered strawberry reduction that goes into both the cake batter and the strawberry buttercream, giving you intense fresh strawberry flavor in every bite.

slice of fresh strawberry cake on a white plate with strawberries behind it

I worked harder on this recipe than almost anything else on Sugar Geek Show. It took me dozens of failed bakes to figure out that strawberries have to be concentrated before they go into the cake, not added fresh, and that the color needs protection to survive the oven. If you love my vanilla cake recipe, this is the strawberry sister of that cake, soft, tender, real pink, and tasting like actual strawberries instead of artificial flavor. The reduction adds a little time, but I promise the result is worth every minute.

Quick Glance: Strawberry Cake Recipe

  • Recipe Name: Strawberry Cake Recipe
  • Why You'll Love It: Real strawberry flavor, beautiful pink color, moist, tender crumb. No artificial flavors or Jell-O needed.
  • Time and Difficulty: 20 minutes prep + 50 minutes total (reduction adds 40 to 60 minutes the day before). Intermediate.
  • Main Ingredients: Fresh or frozen strawberries, all-purpose flour, butter, egg whites, milk, strawberry emulsion, lemon, and pink food coloring.
  • Method: Make a strawberry reduction by simmering pureed strawberries with sugar and lemon until thick. Use part of the reduction in the cake batter and part in the buttercream. Bake, cool, fill, and frost.
  • Texture and Flavor: Moist, tender, soft pink crumb with bright, real-strawberry flavor and a creamy strawberry buttercream.
  • Quick Tip: Add a drop of pink food coloring to keep the strawberry pink color from baking out into a muted gray.
ChatGPT
Google AI
Perplexity
Grok
Add us as a trusted site on Google
[feast_advanced_jump_to]

Why This Is The BEST Strawberry Cake Recipe

This is one of my all-time favorite cake recipes, and also one of the hardest I've ever developed. So many failed attempts before I landed on this version.

I tried adding chopped fresh strawberries to my vanilla cake recipe, and the cake turned out wet, dense, and brown, and most of the strawberry flavor was gone. Next, I tried the recipe everyone says works, the one with strawberry Jell-O. Let me tell you, that was the weirdest-tasting cake I've ever made. I don't know how anyone can call that flavor strawberry. If you like it, more power to you, but it wasn't what I was after.

bad strawberry cake
fresh strawberry cake recipe
soggy strawberry cake
Four different strawberry cake layers wrapped in plastic wrap and numbered 1-4.

I also tried grinding up freeze-dried strawberries and adding them to the dry ingredients (that version still lives on the site if you want the comparison). It turned out better, but I still wanted a way to use real, fresh strawberries. After dozens of test bakes, I finally nailed it using two things: a slow-simmered strawberry reduction and a high-quality strawberry emulsion.

Real strawberry flavor in every bite. Vivid pink color that does not bake out gray. A crumb tender enough to fork through but sturdy enough to stack, fill, and even tier.crumb tender enough to fork through but sturdy enough to stack, fill, and even tier.

The Science: Why Strawberry Cake Is So Hard To Get Right

Strawberries fight you in three ways at once when you try to bake with them. Understanding why helps everything in this recipe make sense.

They are 90% water. A cup of fresh strawberry puree is mostly liquid, and liquid in a cake batter destroys structure. This is why reducing matters. You are not just concentrating flavor, you are removing water so the cake can still rise.

Their color is pH-sensitive. Strawberries get their red color from anthocyanin, the same pigment in red cabbage and blueberries. Anthocyanin is unstable when the pH climbs above about 4.0. Strawberries sit around 3.0 to 3.5 naturally, which is why a fresh berry is bright red. The moment you add baking soda (which is alkaline, around pH 9) the pH of your batter climbs and your strawberries shift toward gray-purple. This is the reason most homemade strawberry cakes look muted. Lemon juice and zest in the reduction (and a minimal amount of baking soda in the cake) keep the pH low enough to protect the color. This is also why buttermilk-based strawberry cakes hold their color better than milk-based ones, the acid helps.

Their flavor is delicate. Strawberry is a soft, floral flavor that bakes out fast. Reducing concentrates the flavor compounds before they get diluted into a cake batter, and the LorAnn emulsion adds a backup layer of strawberry punch so nothing fades in the oven.

Once you understand the three things working against you, the recipe is just engineering around them.

Strawberry Cake Ingredients

This is the best strawberry cake recipe you'll ever make, and it may seem intimidating, but I promise it's worth it. There are three components: the strawberry reduction (made first, ideally the day before), the strawberry cake layers, and the strawberry buttercream. I always recommend weighing your ingredients with a digital kitchen scale for the most accurate results.e BEST strawberry cake recipe you'll ever make, and it may seem intimidating, but I promise it's worth it. There are three components: the strawberry reduction (made first, ideally the day before), the strawberry cake layers, and the strawberry buttercream. Here's why each ingredient matters.

  • Fresh or frozen strawberries. The base of the strawberry reduction. Frozen are often better because they're picked at peak ripeness. Thaw them before blending. Out-of-season fresh strawberries can be flat-tasting and watery, and a flat-tasting reduction can't be fixed downstream.
  • Granulated sugar. Used in the reduction and the cake. In the reduction, a small amount intensifies strawberry flavor and helps thicken. In the cake, it's the main sweetener and creates structure when creamed with butter.
  • Lemon juice and zest. Used in the reduction and the cake. The acid keeps the pH low so strawberries hold their bright red color instead of turning gray-purple. Zest adds aromatic brightness.
  • Salt. Used in the reduction, cake, and buttercream. Balances sweetness and intensifies the other flavors.
  • Unsalted butter. Used in the cake and the buttercream. Use good-quality butter like Kerrygold, or make your own French butter. Cheaper butter has more water and can affect how the cake bakes and how the buttercream sets.
  • Egg whites. Used in the cake and the buttercream. Important: the buttercream MUST use pasteurized egg whites (boxed cartons from the dairy aisle) because they aren't cooked in the recipe. The cake can use either separated fresh egg whites or boxed whites. Don't use whole eggs; the yolks tint the cake peach-orange instead of pink.
  • Whole milk. Used in the cake only. Lower-fat milk works but the cake won't be as rich. You can swap in buttermilk for extra tang and a small bonus to color stability (the acid helps), see my buttermilk substitute post if you don't have buttermilk on hand.
  • Vegetable or canola oil. Used in the cake only. Keeps the cake moist for days. Any neutral oil works (grapeseed, sunflower). Avoid olive oil because the flavor comes through. LorAnn Strawberry Emulsion (or strawberry extract). Used in the cake only. The emulsion is much more concentrated than regular extract and adds real strawberry depth without artificial sweetness. I get mine from Michaels in the cake decorating aisle. Regular extract works in a pinch.
  • Vanilla extract. Used in the cake and the buttercream. Rounds out the flavor and balances the strawberry.
  • Americolor electric pink food coloring. Used in the cake only. Even with lemon juice protecting the natural color, strawberry pink dulls during baking. A few drops keeps it vivid. This isn't optional if you want a vibrant pink cake. (See the color match section below for specific shades.)
  • All-purpose flour. Used in the cake only. Cake flour is too tender to hold up to all the moisture from the reduction. If you only have cake flour, my cake flour substitute post explains the AP swap (or you can use a 1:1 swap, just expect a slightly more delicate crumb).
  • Baking powder and baking soda. Used in the cake only. I keep the baking soda lean on purpose to protect the pH and the color, baking powder does most of the lift.
  • Powdered sugar. Used in the buttercream only. Sweetens and gives body.
  • Strawberry reduction. Made in step 1 of the recipe. Used in the cake batter, the buttercream, and as a thin filling between cake layers for extra flavor.

Strawberry Reduction Yield Math (Save Yourself Frustration)

Nobody publishes this clearly, so here it is. Plan your reduction backward from how much you need.

You start withYou get (puree)After reduction
1 pound fresh strawberries (about 3 cups whole)About 1 ¼ cups pureeAbout ½ cup reduced
1 ½ pounds fresh strawberriesAbout 2 cups pureeAbout ¾ cup reduced
2 pounds fresh strawberriesAbout 2 ½ cups pureeAbout 1 cup reduced

This recipe needs about ¾ cup of reduction total (½ cup for the cake, ¼ cup for the buttercream, plus a little for between the layers if you want it). Start with 1 ½ to 2 pounds of strawberries.

Strawberry Cake Step-By-Step

Before you start mixing: butter, egg whites, milk, and the strawberry reduction all need to be at room temperature. Grease two 8-inch cake pans with cake goop and preheat the oven to 350º F. Weigh your ingredients; converting to cups is the most common reason this cake fails.

Close up of strawberry reduction in a container with a spoon.
  1. Make the strawberry reduction (one day ahead). Blend thawed strawberries until smooth, then simmer with sugar, lemon juice, and lemon zest in a saucepan over medium-low heat for 40 to 60 minutes until thick like tomato sauce. Cool completely. This is the secret to real strawberry flavor in both the cake and the buttercream, and doing it the day before saves time on bake day.
Strawberry cake liquid ingredients in a measuring cup.
  1. Whisk the wet ingredients together. In one bowl, whisk the milk, oil, strawberry reduction, strawberry emulsion, vanilla extract, lemon juice, lemon zest, and pink food coloring together.

PRO TIP: If your reduction won't thicken after 60 minutes, your strawberries were either extra watery (very ripe, frozen, or out of season) or the heat is too low. Bump the heat to medium and stir more often. As a last resort, whisk in 1 teaspoon of cornstarch with 1 Tablespoon of cold water to make a slurry, and simmer for 5 more minutes. Don't add jam or pectin; both throw off the flavor.

flour in a sifter over a bowl
  1. Whisk the dry ingredients together. In a second bowl, whisk the flour, baking powder, baking soda, and salt. Setting these up separately keeps the batter from getting overworked later.
Creamed butter in the bowl of a mixer.
  1. Cream the butter and sugar. Beat the butter in a stand mixer with the paddle attachment until smooth and shiny, then add the sugar gradually and beat until the mixture is fluffy and almost white.
Creamed butter and sugar in the bowl of a mixer.
  1. Add the egg whites one at a time, beating briefly between each. The mixture should look cohesive; if it looks curdled, your ingredients were too cold.
Pink cake batter in the bowl of a mixer
  1. Alternate dry and wet. On low speed, add about a third of the dry, then about a third of the wet, mixing just until almost combined. Repeat twice more. Stop, scrape the bowl thoroughly, and mix briefly to combine. The finished batter should look like ice cream.

PRO TIP: Cold ingredients are the number one cause of curdled batter. Curdled batter will separate when it's baking and cause a gummy wet layer on the bottom of your cake layer.

Pink cake batter in a cake pan.
  1. Split the batter evenly between the prepared pans, then bake until the centers feel firm and a toothpick comes out clean.
Two strawberry cake layers on a cooling rack.
  1. Cool the cake in the pans on a wire rack for 10 minutes, then turn out onto the rack to cool completely. I put mine in the freezer for about an hour to firm up before stacking and frosting.
strawberry buttercream recipe
  1. Make the strawberry buttercream. Whip the pasteurized egg whites and powdered sugar in a stand mixer until fluffy, then add softened butter in chunks and whip until light and white. Add the leftover strawberry reduction along with vanilla and salt, and continue whipping until smooth and silky. The reduction is what gives this buttercream its real strawberry flavor (no extract needed).
Strawberry cake with fresh strawberries on top on a marble cake board.
  1. Assemble and decorate. Layer the chilled cakes with strawberry buttercream and a thin spread of extra strawberry reduction between each layer for maximum flavor. Crumb coat, chill, then frost the outside. If you're new to layer cakes, my cake decorating tutorial for beginners walks through every step from leveling layers to a clean buttercream finish.

PRO TIP: Refer to the recipe card below for a complete ingredients list of all the strawberry components and watch the video for more information on assembling the cake.


Cake Batter and Frosting Calculator

Select an option below to calculate how much batter or frosting you need. Adjust the servings slider on the recipe card to change the amounts the recipe makes.

Choose a pan type

Choose a cake pan size
(based on 2" tall cake pan)

Choose a cake pan size
(based on 2" tall cake pan)

Choose a cake pan size
(based on 2" tall cake pan)

Cupcake Tin Size

Choose number of pans

Cups of Batter Needed

8 cups

Cups of Frosting Needed

5 cups

Note: measurements are estimated based off the vanilla cake recipe using standard US cake pans and sizes. Measurements used are for 2" tall cake pans only. Your results may vary. Do not overfill cake pans above manufacturer's recommended guidelines.

Pan Conversions and Bake Times

The recipe as written makes two 8-inch round layers (about 8 cups of batter). Here is how it scales to other formats.

  • Two 9-inch rounds: same batter amount, bake 22 to 25 minutes at 350º F. The layers will be a little thinner.
  • Three 6-inch rounds: same batter amount, bake 25 to 28 minutes at 350º F. Wrap pans with damp cake strips for flat tops.
  • 9x13 sheet cake: pour the full batter into one greased 9x13 pan, bake 35 to 40 minutes at 350º F. Toothpick test starting at 35.
  • Cupcakes: fill liners ⅔ full, bake 18 to 22 minutes at 350º F. Yields 28 to 30 cupcakes.
  • Mini cupcakes: fill liners ⅔ full, bake 11 to 13 minutes at 350º F. Yields about 60.
  • Bundt pan (10-cup): pour the full batter in, bake 50 to 60 minutes at 325º F. Lower temp prevents a dark crust.

Common Strawberry Cake Problems To Avoid

  • Under-reducing the strawberries. Strawberries are 90% water, and the reduction needs to simmer slowly until it's thick like tomato sauce (40 to 60 minutes). If you stop early, too much water will go into the batter, and the cake will be dense and wet.
  • Substituting jam, Jell-O, or extract for the reduction. Jam has pectin and too much sugar, Jell-O is artificial flavor, and extract alone isn't concentrated enough. Real strawberry reduction is what makes this cake taste like strawberries. (If you absolutely cannot make a reduction, see the strawberry jam shortcut in the Make This Recipe Your Own section below.)
  • Measuring by cups instead of weight. A cup of flour can vary by up to 50% depending on how you scoop, which is enough to ruin the recipe. Use a kitchen scale for this and every other recipe on the site.
  • Wet streak or dense bottom layer. This shows up specifically with strawberry cake because the pink color hides under-baked centers, you cannot eyeball doneness the way you can with vanilla. If you pull the cake when the top looks set but the toothpick still has wet crumbs, the heavy reduction sinks and you get a gummy band at the bottom. Always toothpick-test in the center, and don't trust the visual cue.
  • Curdled buttercream when you add the reduction. Three causes: reduction too cold (butter seizes), reduction too warm (butter melts), or reduction was not reduced enough (residual water breaks the fat emulsion). Pull the reduction out of the fridge 30 minutes ahead, make sure it's the texture of tomato paste (not tomato sauce), and add it after the buttercream is fully emulsified, not before.

Strawberry Reduction vs Freeze-Dried Powder vs Maceration

Three different ways to get strawberries into a cake, and people argue about all three. Here is the honest verdict from the kitchen.

.Strawberry ReductionFreeze-Dried PowderMaceration
Flavor intensityStrongest, fresh, brightConcentrated but slightly drier / candy-likeMildest, most fresh-fruit
ColorPinkish red, bakes out without helpVivid pink, bakes out without helpPink only while fresh, dulls fast
Crumb impactAdds moisture, tender crumbNo moisture, very tender crumbAdds liquid, can make crumb soggy
Buttercream stabilityExcellent if reduced enoughExcellent, no liquid addedPoor, weeps moisture into butter
Color stability over 24 hoursHolds well in the fridge if the cake is wrappedHolds best of the threeDulls overnight
EffortHigh, 40 to 60 minutes simmerLow, just grindLowest, slice and sit
CostLowHigh, freeze-dried strawberries are priceyLowest
Best useCake batter AND buttercreamButtercream stabilizer, decoratingBetween-layer filling, fresh-eating

My verdict: Reduction wins for this recipe because it does double duty in the cake and the buttercream, and the moisture works WITH the AP flour structure. Freeze-dried powder is what I use in my older freeze-dried strawberry cake and it's excellent if you want a cake that holds up under fondant or carving. Maceration is what you want between layers of a strawberry shortcake style cake (see my strawberry shortcake layer cake for that approach).

If you only ever make this one strawberry cake, use the reduction. If you bake strawberry cakes often, learn all three and pick by use case.

How To Get The Right Shade Of Pink

The strawberry reduction tints the cake a soft pastel pink, but bakers who are color-matching for gender reveals, baby showers, weddings, or dress codes need more control. Here is the Americolor cheat sheet I use.

  • Soft blush pink: 2 drops Soft Pink + 1 drop Ivory in the batter, leave the buttercream pale.
  • Barbie / hot pink: 4 to 6 drops Electric Pink in the batter, 2 drops in the buttercream.
  • Coral pink: 3 drops Electric Pink + 1 drop Tulip Red in the batter.
  • Muted vintage pink: 2 drops Electric Pink + 1 drop Ivory + a tiny tip-of-a-toothpick of Brown to mute.
  • Pastel baby pink: 1 drop Soft Pink only in the batter. This is the closest to "natural strawberry color."

Mix the color into the wet ingredients before you fold them into the batter, that way the color disperses evenly. Always start with fewer drops than you think you need. You can always add more, you can't pull it back out.

Will My Strawberry Cake Still Be Pink Tomorrow?

This is the question every event baker asks and nobody answers. The short version: yes, but only if you store it right.

  • Day of bake, freshly frosted: Pink is at its brightest. Best color all week.
  • Day 1, refrigerated and wrapped: Cake holds about 90% of its color. No visible fade.
  • Day 2, refrigerated and wrapped: Slight fade in the cake (maybe 5 to 10%), buttercream still vivid.
  • Day 3, refrigerated and wrapped: Noticeable fade in the cake to a more muted pink. Buttercream still good.
  • Day 4+: Cake reads more peachy than pink. Eat it but plate it with fresh berries to distract the eye.

What kills the color faster than time: light exposure (keep it covered), oxygen (wrap tightly), and freezing. A frozen-then-thawed strawberry cake comes out noticeably more muted than one that was refrigerated. For a wedding or photo-driven event, bake the cake one day ahead, not three.

Stacking or Tiering This Strawberry Cake

Most strawberry cake recipes are written for two-layer home cakes and the recipe falls apart when you try to use it for a wedding or tiered birthday cake. This one is built to handle the stress, but you have to chill it correctly.

  • Crumb coat and chill firm. Once the cake is filled and crumb-coated, refrigerate for at least 2 hours before the final coat. The strawberry buttercream needs to be cold enough to take the weight without dimpling.
  • Use the right supports. For a tiered cake, dowel each tier with bubble tea straws or wood dowels spaced about 6-inch evenly inside the perimeter of the next tier up. My cake stacking with straws tutorial walks through this step by step. For very tall stacks, run a central sharpened dowel through the whole stack down to the cake board.
  • Thin the reduction filling. When tiering, do not pile the reduction between layers. A thin schmear (about ¼ cup spread over an 8-inch layer) is enough. Too much reduction and the layer can slide under weight.
  • Use a sturdy cake board. Each tier sits on its own cake board, the bottom tier on a thicker cake drum for extra support.
  • Stack on site if possible. Strawberry cake is more fragile than vanilla because the reduction adds moisture. If you have to transport stacked, transport chilled and assemble at the venue.
  • Refrigerate, don't freeze, before serving. A frozen-then-thawed strawberry cake will weep moisture into the buttercream. Refrigerate up to 48 hours, then let the cake come to room temperature before serving.

For inspiration, my strawberry fault line cake tutorial uses this base recipe in a tiered design.

Hot Weather, Humidity, And Transport

Strawberry cake is summer-coded. Most people are making it for outdoor parties in June, July, and August, which means humidity, heat, and a transport leg.

  • Buttercream sweating in humidity: Sugar is a humectant, it pulls moisture out of the air. In high humidity (over 60%) your cake will look like it's sweating when you bring it out of the fridge. Move it from the fridge into a sealed cake box before it warms up, and let it come to room temp inside the box. Any condensation forms on the box, not on your cake. If you display the cake at an outdoor event, run a fan nearby (not pointed at the cake, just keeping the air moving) and keep it out of direct sunlight.
  • Heat: Above 80º F, buttercream starts softening. If your event is hot, swap up to 25% of the buttercream butter for high-ratio shortening for hot weather stability. The flavor takes a small hit but the cake stays standing.
  • Transport: Always transport chilled. Use a non-slip mat under the cake box in the car. Floor of the back seat (the coolest spot) is better than the trunk. Run the air conditioning the whole drive.
  • Color migration in humidity: The biggest unique-to-strawberry-cake risk. If condensation forms on the buttercream and runs, the pink can streak. The cake box trick above prevents this.

Make-Ahead and Storage

This is the section nobody writes for strawberry cake, and event bakers need it most.

  • Strawberry reduction: Refrigerate up to 1 week in an airtight container. Freezes beautifully for up to 3 months, thaw overnight in the fridge.
  • Unfrosted cake layers: Cool completely, wrap tightly in plastic. Room temperature 1 day, fridge 3 days, freezer 2 to 3 months. Thaw wrapped at room temp before frosting.
  • Strawberry buttercream: Refrigerate up to 1 week in an airtight container. Re-whip on medium until smooth before using. Freezes for up to 3 months, always re-whip after thawing. (If it looks broken when you re-whip, see the rescue technique in the FAQs below.)
  • Frosted whole cake, refrigerator: Wrap loosely in plastic or store in a cake box, 4 to 5 days. The reduction filling can weep slightly after day 3, so plan to serve sooner if possible.
  • Frosted whole cake, freezer: Flash freeze unwrapped for 1 hour, then double-wrap in plastic and a layer of foil. Up to 1 month. Thaw overnight in the fridge inside the wrapping. Expect a slight color fade and a touch of moisture release in the buttercream after thawing.
  • Sliced leftovers: Press a piece of plastic wrap directly against the cut edge to keep the crumb from drying out. Fridge 4 days.

Make This Recipe Your Own

Once you have the base recipe down, this batter is the launchpad for a whole family of strawberry cakes.

  • Strawberry-lemon cake: Add 2 teaspoons of lemon zest to the batter and use my lemon cake syrup brushed on the layers. Pairs with the strawberry buttercream beautifully.
  • Strawberry-basil cake: Steep 6 fresh basil leaves in the warm milk for 15 minutes before adding to the batter. Strain. Surprising in the best way.
  • Strawberry-rose cake (wedding cake variation): Add ½ teaspoon rose water to the buttercream. Tastes like a Parisian patisserie.
  • Strawberry-white chocolate cake: Use my white chocolate buttercream instead of strawberry, with a strawberry reduction filling between layers.
  • Strawberry-champagne cake: Replace ¼ cup of the milk with champagne or sparkling rosé in the batter. Inspired by my pink champagne cake.
  • Strawberry-pistachio cake: Pair this cake batter with the pistachio frosting from my pistachio cake with raspberry filling.
  • Strawberry shortcake style: Skip the reduction filling between layers and use macerated fresh strawberries plus whipped cream, the inverse of this recipe is my strawberry shortcake layer cake.
  • Strawberry jam shortcut (if you cannot make a reduction): Sub ⅓ cup of good-quality strawberry jam (not jelly, not preserves) for the reduction in the cake and ¼ cup of jam for the reduction in the buttercream. Reduce the sugar in the cake by ⅓ cup because jam is already sweet. The flavor is a step down from reduction but it gets you to a real-strawberry cake in a hurry.
  • Cream cheese frosting alternative: If you prefer the tang of cream cheese, beat 8 oz of cream cheese into the buttercream after the butter is incorporated. Or just use my classic cream cheese frosting with ¼ cup of reduction folded in at the end.

Final Thoughts

I worked harder on this recipe than almost anything else on Sugar Geek Show, and the failures along the way were genuinely demoralizing. Watching cake after cake come out gray, dense, weirdly artificial, or bland nearly made me give up. The breakthrough was understanding that strawberries had to be concentrated before they went into the cake, not added fresh, and that the color needed protection (the lemon and pink food coloring) to survive the oven.

Once it clicked, this became one of the most-requested cakes I bake. The flavor is what fresh strawberry cake is supposed to taste like, and the color makes it feel like a celebration on the plate. It's perfect for Mother's Day, birthdays, baby showers, gender reveals, or just any time strawberries are in season and you want to do them justice.

If it's your first time, give yourself two days. Make the reduction the day before. The whole thing comes together more easily when nothing is rushed.

Strawberry Cake FAQs

Do I need to strain the seeds out of the strawberry reduction?

No. The seeds disappear into the cake during baking and you will not feel them in the buttercream either. Straining is extra work for no payoff.

How many people does this strawberry cake serve?

The two 8-inch layers slice cleanly into 16 generous wedding-style slices or 24 thinner dessert-table portions. If you are running a buffet with other desserts, plan on the 24-portion count. If the cake is the main event (birthday, anniversary, baby shower with no other dessert), plan on the 16-slice count and consider doubling the recipe for any group over 12.

Can I double this recipe for a larger crowd?

Yes, with one caveat. Double every cake and buttercream ingredient, but make the strawberry reduction in two separate batches rather than one big one. A doubled puree is too deep in the saucepan to reduce evenly, and you will end up with scorched bottom layers and watery top layers. Two pots side by side or two back-to-back batches both work. The doubled batter fits two 10-inch rounds, three 8-inch rounds, or a 12x18 half-sheet pan.

My buttercream broke when I first added the reduction. Can I save it?

Yes, almost always. The fix is heat. Scoop out about ¼ cup of the broken buttercream into a small bowl and warm it gently with a kitchen torch or 5-second microwave bursts until it is nearly melted but not hot. Whip it back into the rest of the buttercream on medium speed. The warm portion melts the cold lumps and re-emulsifies the fat. If it still looks broken after 2 minutes, your reduction was probably under-reduced (too watery). Whip in a Tablespoon of softened butter at a time until it pulls back together.

How do I keep fresh strawberries from weeping water onto my frosting if I garnish the top with them?

Slice and hull your berries, then pat the cut surfaces dry with paper towels. Let the sliced berries rest uncovered in the fridge for 30 minutes to let the surfaces dry further. Place them on the cake within 2 hours of serving. For longer holding (event cakes that sit out for hours), brush each berry with a thin coat of strained warmed apricot jam, the jam seals the cut surface and stops the bleed. Avoid placing strawberries on the cake more than 4 hours before serving, they will eventually release moisture no matter what you do.

More Strawberry Recipes To Try

  • close up of strawberry topping with a wooden spoon
    10 Minute Strawberry Topping
  • Strawberry Crunch Cake
  • close up of panna cotta with strawberry gelee
    Panna Cotta with Strawberry Gelée
  • strawberry cinnamon rolls
    Strawberry Cinnamon Rolls

Watch: How To Decorate A Cake Step-by-Step

Before you start decorating, watch the video below where I show you every step of decorating a cake from start to finish. Seeing the process in action makes it much easier to follow along

- Liz Marek.

Start Learning Now
smiling woman holding a decorated cake in her hands

Recipe

slice of fresh strawberry cake on a white plate with strawberries behind it
Print Recipe
4.89 from 1373 votes

Strawberry Cake

A scratch fresh strawberry cake made with real strawberries (no Jell-O, no boxed mix), built on a slow-simmered strawberry reduction that flavors both the cake and the buttercream.
Prep Time20 minutes mins
Cook Time50 minutes mins
Strawberry Reduction40 minutes mins
Total Time1 hour hr 50 minutes mins
Course: Dessert
Cuisine: American
Servings: 24 servings
Calories: 427kcal
Author: Liz Marek

Equipment

  • 2 8" cake pans

Ingredients

Strawberry Reduction

  • 32 ounces fresh or frozen strawberries thawed
  • 4 ounces sugar optional
  • 1 teaspoon lemon juice
  • ½ teaspoon lemon zest
  • 1 pinch salt

Fresh Strawberry Cake Ingredients

  • 8 ounces unsalted butter room temperature
  • 10 ounces granulated sugar
  • 6 ounces egg whites room temperature
  • 4 ounces milk room temperature, whole milk is best
  • 6 ounces strawberry reduction room temperature
  • 2 ounces vegetable or canola oil
  • 1 teaspoon lemon juice fresh
  • ½ teaspoon lemon zest
  • 1 ½ teaspoon strawberry emulsion or extract, I use LorAnn oils bakery emulsion
  • 1 teaspoon vanilla extract
  • ½ teaspoon Pink food color I use Americolor electric pink gel
  • 14 ounces all purpose flour
  • 1 ½ teaspoons baking powder
  • 1 teaspoon baking soda
  • ½ teaspoon salt

Easy Strawberry Buttercream Frosting

  • 4 ounces pasteurized egg whites
  • 16 ounces powdered sugar
  • 16 ounces unsalted butter room temperature
  • ½ teaspoon salt
  • 1 teaspoon vanilla extract
  • 4 ounces strawberry reduction room temperature
US Customary - Metric

Instructions

  • Before you begin: Make the strawberry reduction the day before so it has time to cool completely. On bake day, set butter, egg whites, milk, and reduction out at room temperature for at least 1 hour before mixing. Grease two 8" cake pans with cake goop and preheat the oven to 350º F.

Strawberry Reduction Instructions

  • I recommend making this reduction the day before you're ready to make your cake. Place your thawed or fresh strawberries into the blender and blend until smooth.
  • Place the strawberry puree, sugar, lemon zest, and lemon juice into a medium saucepan and bring it to a boil.
  • Once bubbling, reduce heat to medium-low and slowly reduce the puree until you have two cups of liquid and the mixture is very thick like tomato sauce. This can take between 40 to 60 minutes. Occasionally stir the mixture to prevent burning. You will use some of the reduction for the cake batter, some for the frosting, and the rest for filling between the cake layers for extra moisture.

Strawberry Cake Instructions

  • In a medium bowl, whisk together the milk, oil, strawberry reduction, strawberry emulsion, vanilla extract, lemon zest, lemon juice, and pink food coloring. In a separate bowl, whisk together the flour, baking powder, baking soda, and salt.
  • Add room temperature butter to your stand mixer with the paddle attachment and beat at medium speed until smooth and shiny, about 30 seconds.
  • Gradually sprinkle in the sugar, beat until the mixture is fluffy and almost white, about 3 to 5 minutes.
  • Add the egg whites one at a time, beating 15 seconds in between. Your mixture should look cohesive at this point. If it looks curdled and broken, your butter or egg whites were too cold.
  • In a separate medium bowl, whisk together the milk, oil, strawberry reduction, strawberry emulsion, vanilla extract, lemon zest, lemon juice, and pink food coloring.
  • In a separate medium bowl, whisk together the flour, baking powder, baking soda and salt.
  • Mix on low speed and add about a third of the dry ingredients to the batter, followed immediately by about a third of the milk mixture, mixing until ingredients are almost incorporated. Repeat the process 2 more times. When the batter appears blended, stop the mixer and scrape the sides of the bowl with a rubber spatula. If it looks like ice cream, you did it right.
  • Divide the batter evenly between the prepared pans. Bake at 350º F until the cakes feel firm in the center and a toothpick comes out clean or with just a few crumbs, about 30 to 35 minutes.
  • Place pans on a wire rack and let cool for 10 minutes. Flip the cakes onto the racks and cool completely. Wrap each layer in plastic wrap and refrigerate or freeze before assembling.
  • Divide the batter evenly between the prepared pans.

Buttercream Instructions

  • Place pasteurized egg whites and powdered sugar in the bowl of your stand mixer. Attach the whisk and combine ingredients on low, then whip on high for 5 minutes.
  • Add the softened butter in chunks and whip on high for 8 to 10 minutes until very white, light, and shiny. It may look curdled and yellow at first, this is normal. Keep whipping.
  • Add the strawberry reduction, vanilla extract, and salt and continue whipping until incorporated. Optional: switch to the paddle attachment and mix on low for 15 to 20 minutes to make the buttercream very smooth and remove air bubbles.

Assembly

  • Layer the chilled cakes with strawberry buttercream and a thin spread of extra strawberry reduction between each layer. Crumb coat the cake, chill, then apply the final coat of buttercream and decorate as desired.

Video

Notes

Ingredient notes:
  1. All ingredients (egg whites, milk, butter, reduction) should be at room temperature, not cold or hot.
  2. Use a kitchen scale for accurate weight measurements. Converting this recipe to cups can lead to failure.
  3. Americolor electric pink is what keeps the cake from turning gray during baking. It looks like cheating but it isn't optional if you want a vivid pink color.
  4. Use only egg whites. Whole eggs tint the cake peach.
  5. LorAnn's strawberry bakery emulsion is more concentrated than regular extract. If you can plan ahead and order it, you'll get better strawberry flavor. Regular extract works in a pinch.
Reduction notes:
  1. Goal: get as much liquid out as possible without burning the strawberries. The mixture should look like thick tomato sauce and have reduced by about half.
  2. Use some for the cake batter, some for the frosting, and the rest between the cake layers for extra flavor.
  3. Leftover reduction stores in the fridge for up to a week or in the freezer for 6 months.
Strawberry buttercream notes:
  1. Whip the buttercream until light and very white before adding the reduction. If it still tastes like butter, keep whipping until it tastes like sweet ice cream.
  2. If the buttercream looks curdled after adding the reduction, it's too cold. Microwave ½ cup of buttercream for 10 to 15 seconds until just barely melted, then pour it back into the mixer while it's running. It will come together creamy.
Pan options:
  1. Two 8-inch cake pans is the recommended size.
  2. Two 9-inch pans work but you'll have leftover batter; bake the extra as cupcakes.
  3. Three 8-inch pans for a taller cake; reduce baking time to 25 to 28 minutes per pan.
  4. Cupcakes: line a cupcake pan, fill liners ⅔ full, bake at 350º F for 18 to 20 minutes. Yields about 24.
  5. Half sheet pan (12x18): triple the recipe.
Make-ahead and storage:
  1. Strawberry reduction: fridge up to a week, freezer up to 6 months.
  2. Baked cake layers: wrap tightly in plastic, refrigerate up to 5 days or freeze up to a week before assembling.
  3. Frosted, assembled cake: refrigerate covered up to 3 days. Bring to room temperature before serving.
Critical do-nots:
  1. Don't substitute cake flour for all-purpose. The cake will be too soft and may sink.
  2. Don't use whole eggs. The yolks tint the cake peach instead of pink.
  3. Don't skip the pink food coloring. The cake will bake out gray.
  4. Don't substitute jam, preserves, or strawberry Jell-O for the reduction.
  5. Don't add fresh chopped strawberries to the batter. The water content ruins the cake's structure.
  6. Don't use cold ingredients. Everything must be room temperature.

Nutrition

Serving: 1serving | Calories: 427kcal | Carbohydrates: 52g | Protein: 4g | Fat: 24g | Saturated Fat: 15g | Polyunsaturated Fat: 1g | Monounsaturated Fat: 6g | Trans Fat: 1g | Cholesterol: 62mg | Sodium: 172mg | Potassium: 147mg | Fiber: 1g | Sugar: 38g | Vitamin A: 763IU | Vitamin C: 30mg | Calcium: 35mg | Iron: 1mg
close up of peach filling in a small glass jar

July 28, 2020 Filling

Peach Filling

Easy, homemade peach pie filling that comes together in just 10 minutes. Use fresh, frozen, or canned peaches and cook them ahead of time to avoid soggy crusts and uncooked filling. Use it for pies, hand pies, or on top of cheesecakes! You don't need to buy those super-sweet canned peaches ever again. 

close up of peach filling in a small glass jar

One of my favorite fruits is peaches. When I was growing up we had one singular peach tree in our backyard, and we were NEVER allowed to pick those fruits. We rarely got more than a dozen peaches, but every now and then, we'd get more, and my sisters and I MIGHT be lucky enough to get one.

In my mind, a sun-ripened peach is nature's ultimate candy. Now that I'm an adult with adult money, I love to visit local farms and pick as many peaches as I can, and freeze them so I can make my own peach filling so I can enjoy fresh peaches any time of the year.

What's In This Blog Post

  • Ingredients needed
  • How to make the peach filling
  • How to store peach filling
  • What peaches are best?

Ingredients needed

You can use any kind of peaches you want, fresh, frozen, or even canned (just drain the liquid and use it for the water measurement). I'm using ClearGel as the thickening agent because it stays very clear, is super shiny, and freezes well. You can also use cornstarch! Jump to recipe below for all of the steps!

peach filling ingredients

Peaches - You can use fresh or frozen peaches to make your own filling. Ideally, fresh, in-season peaches are best. If you can visit a local farm and get some, even better. Make sure you're getting peaches that are no-cling so the pit is easily removed. Avoid out-of-season, grocery store peaches. They taste like nothing. If it's off-season, get frozen peaches, which are picked at the peak of freshness and flash frozen.

ClearJel is used in this recipe because I prefer how the finished filling looks. It's clear and glossy. You can use cornstarch, but the finished product will be cloudy.

How to make the peach filling

Step 1 - Peel, core, and chop the peaches into small, ½" cubes or thin slices, depending on what you're using the filling for. I like small pieces for things like hand pies and larger pieces for peach pie or for use as a topping. Make sure you remove the skins, or they will taste chewy and not have a great texture. You can also use frozen peaches, which makes this even easier! 

bowl of frozen peaches in clear glass bowl

Step 2 - Add your sliced peaches to a large saucepan over medium heat. Add water, sugar, cinnamon, salt, and brown sugar.

Step 3 - Cook the mixture until the peaches are as soft as you like them. Fresh peaches will take the longest to cook.

peach filling in a stainless steel pan

Step 4 - Combine your ClearGel (or cornstarch) with the cool water and whisk together to make a slurry.

Pro-tip - ClearGel is not as strong as cornstarch. For every 1 ounce (28 g) of ClearGel, use ½ ounce of cornstarch.

adding cornstarch slurry to peach filling

Step 6 - Pour the slurry into your hot peach mixture and cook until the peach filling is nice and thick and turns clear. 3-5 minutes. Cook for one more minute to make sure the ClearGel is thoroughly cooked.

peach pie filling in a glass jar

Pro-tip - Cornstarch doesn't like acid, so it's best to add the lemon after your cornstarch has cooked out a bit. 

Step 7 - Remove the mixture from the heat and add in your lemon juice and vanilla extract. Stir to combine.

How to store peach filling

Now you can pour the hot filling into jars and store your peach filling! Check out this blog post on canning peach pie filling for more detailed info. Storing in the fridge will work, but I prefer to let the filling cool down and freeze peach pie filling. The peach filling is good in the fridge for up to a week or 6 months in the freezer. 

This peach filling can be used in pies, on top of cheesecakes, in between cake layers, or even served warm on top of vanilla ice cream with a little bit of sugar-cinnamon mixture. Make sure your filling is room temperature or cooler before using it as a cake filling so it doesn't melt your frosting.

What peaches are best?

Did you know there are more than 300 varieties of peaches? They're classified into 3 categories: freestone, clingstone, and semi-freestone. All are determined by how the flesh clings to the peach.

Freestone peaches are best for baking because they're usually larger and less juicy than clingstone peaches. If you have to pit a ton of fruit, you'll be thankful that the pits come out easily. 

I actually prefer to use local Oregon frozen peaches. The skin is removed, the pits are removed, and they are already sliced and picked at the peak of freshness! So, unless you happen to visit the farmers' market and score a big bushel of fresh, juicy peaches, frozen is the most reliable. 

You can also use canned peaches! If you go this route, you won't need to cook them very much because they are already cooked. Opt for peaches in juice instead of syrup to avoid the filling getting too sickly sweet. 

More Delicious Recipes To Try

finished raspberry filling in a mason jar.
raspberry filling
closeup of blueberry filling in a glass jar with a spoon and blueberries in the background
blueberry filling
close up of finished cherry filling
cherry filling
close up of six hand pies on a cooling rack
hand pies
close up of a slice of pie with lattice crust top on a white plate
pie crust recipe
close up of mini apple pie
mini apple pie recipe

Recipe

peach pie filling in a glass jar
Print Recipe
4.82 from 11 votes

Peach Filling

How to make your own homemade peach filling using fresh, frozen, or canned peaches! This peach filling is great for pie, hand pies, cake filling, or fruit topping! Takes less than 10 minutes to make.
Cook Time30 minutes mins
Cooling Time25 minutes mins
Total Time55 minutes mins
Course: Dessert
Cuisine: American
Servings: 4 cups
Calories: 264kcal
Author: Liz Marek

Ingredients

  • 32 ounces peaches fresh or frozen, peeled and sliced
  • 8 ounces water or peach juice
  • 6 ounces white sugar
  • 2 ounces brown sugar
  • ⅛ teaspoon cinnamon
  • ¼ teaspoon salt
  • 2 ounces ClearJel or 1.5 ounces cornstarch
  • 2 ounces cool water
  • 2 Tablespoons lemon juice
  • 1 teaspoon clear vanilla extract
US Customary - Metric

Instructions

  • Peel, core, and chop the peaches into small, ½" cubes or thin slices depending on what you're using the filling for. I like small pieces for things like hand pies and larger pieces for peach pie or for use as a topping. Make sure you remove the skins or they will taste chewy and not have a great texture. You can also use frozen peaches which makes this even easier! 
  • Add your sliced peaches to a large saucepan over medium heat. Add water, sugar, cinnamon, salt, and brown sugar.
  • Cook the mixture until the peaches are as soft as you like them. Fresh peaches will take the longest to cook.
  • Combine your ClearGel (or cornstarch) with the cool water and whisk together to make a slurry
  • Pour the slurry into your hot peach mixture and cook until the peach filling is nice and thick and turns clear. 3-5 minutes. Cook for one more minute to make sure the ClearGel is thoroughly cooked.
  • Remove the mixture from the heat and add in your lemon juice and vanilla extract. Stir to combine.
  • Now you can pour the hot filling into jars and can store your peach filling! Check out this blog post on canning peach pie filling for more detailed info. Storing in the fridge will work, but I prefer to let the filling cool down and freeze peach pie filling. The filling is good in the fridge for up to a week or 6 months in the freezer.

Video

Notes

You can use fresh, frozen, or canned peaches. Just make sure the skins are removed. 
ClearGel is not as strong as cornstarch. For every one ounce of ClearGel, use .75 ounces of cornstarch. 
ClearGel is shinier and holds up better to high heat and freezing without breaking down. 

Nutrition

Serving: 1cup | Calories: 264kcal | Carbohydrates: 68g | Protein: 1g | Fat: 1g | Saturated Fat: 1g | Sodium: 153mg | Potassium: 234mg | Fiber: 2g | Sugar: 66g | Vitamin A: 370IU | Vitamin C: 10mg | Calcium: 19mg | Iron: 1mg
 

July 20, 2020 Blog

Pancake Art Recipe And Tutorial

I love making pancake art! Such a fun way for the whole family to get creative with their pancakes. You don't need a lot of fancy tools to make pancake art, just some pancake mix, water, food coloring, and a squeeze bottle or piping bag! Keep reading to learn how to get the right pancake batter consistency, how to add colors, and how to avoid burning those edible works of art!

pancake art on white plates on a white table

I was inspired to make these Dr. Seuss themed pancakes for Ezra's 10-month photoshoot! Only two more months of this madness AND we are about to move into a new house (yay!) with a new studio so this might be the last Ezra photo in this house *sniffle* kinda bittersweet. I am excited to be moving into a bigger space for our growing family and business!

baby boy on red blanket with pancake art and dr seuss books surrounding him

Pancake Art Ingredients

As I said, the ingredients to make pancake art are super simple. Your favorite pancake mix, water, and some food coloring. I am using gel food coloring from Americolor which is more vibrant and concentrated than traditional liquid food coloring from the grocery store. You can get gel food coloring from craft stores, cake decorating stores or online. 

pancake art ingredients

Pancake Art Equipment

The most important thing to have equipment-wise is some squeeze bottles. I got mine at Michaels for $2 each. If you don't have squeeze bottles you can use a piping bag with a piping tip or even just a cut hole. Don't cut the hole too big or it will be hard to control the flow of the pancake batter. 

I'm also using a pancake griddle because I wanted to make some really big pancakes but you can use any non-stick pan you have.

different colored pancake batter in squeeze bottles in front of a griddle

Pancake Art Step By Step

Step 1 - How to make the pancake batter the right consistency

Making your pancake batter is really easy. I just measured out about three cups of pancake batter and added roughly 2 ½ - 3 cups of water to the mix (Yes I used cups instead of a scale for once haha). You want the consistency to be like runny ketchup. Mix the batter with a hand-held blender or whisk until no lumps remain. Lumps will clog the squeeze bottle. 

pancake batter consistency for pancake art

Step 2 - Pancake batter color

The colors you want to use for your pancake batter are up to you. I am going with a Dr. Seuss theme for my pancakes so I used the books as inspiration for my colors. These are the colors I used. 

  • Black - ½ cup pancake batter + ½ teaspoon black food gel coloring
  • White - ½ cup pancake batter + ½ teaspoon white gel food coloring
  • Red - ¼ cup pancake batter + 2 drops electric pink food coloring and 3 drops red food coloring
  • Orange - ¼ cup pancake batter + 2 drops electric yellow food coloring and 2 drops orange food coloring
  • Lime green - ¼ cup pancake batter + 2  drops electric yellow food coloring and 2 drops mint green food coloring
  • Blue - ¼ cup pancake batter + 3 drops electric blue food coloring

Pro-tip - don't be tempted to add too much food coloring or your batter could end up tasting bitter

To mix your colors, just add the pancake batter to your squeeze bottle, then add in the food coloring and mix with a knife or a chopstick until you don't see any swirls of uncolored batter. 

coloring pancake batter green

Step 3 - Heating your griddle or pan

Turn your griddle onto the lowest setting. This was 200ºF on mine. If you're using a pan then just set the temperature to low and let it heat up for 5 minutes. 

Step 4 - Drawing the outline

Begin drawing your design. I just used my book as a reference. If you're not artistic then try to keep to simple shapes before you move onto complicated things. Don't squeeze the bottle too hard because the batter is so thin, it comes out really easily. Have fun with it!

drawing the black outline for pancake art

Step 5 - Color in the lines

You might notice the black lines are starting to cook and dry out, that's ok! Go ahead and add in your other colors according to your reference photo. Remember the colors you put down first will be visible when you flip the pancake over. If you are writing words, remember you will have to write them backward to be readable after you flip!

filling in the black lines with colored pancake batter

Step 6 - Patience

Turn your heat up to 250ºF on your griddle or to medium-low on your stovetop. You will start to see bubbles starting to form on the surface of your pancake and it will start to look dull around the edges. Do not flip your pancake until you don't see any shiny areas and the entire surface looks dull. You should be able to slip your spatula under the pancake and it easily moves around on the surface of the pan. 

cooking pancake art on a griddle

Pro-tip - Don't be tempted to turn up the heat! You could burn or discolor your pancake. Low and slow is best. Mine take about 3-4 minutes to cook. 

Step 7 - Flip

Once your pancake is ready to flip, slip that spatula under the pancake, count to three, and flip! Make sure the whole family has gathered around for the big reveal because that is the best part when your artwork is finally revealed!

pancake art

Step 8 - Enjoy!

These may be art but they are still delicious pancakes and taste delicious with lots of butter and syrup! Yum!
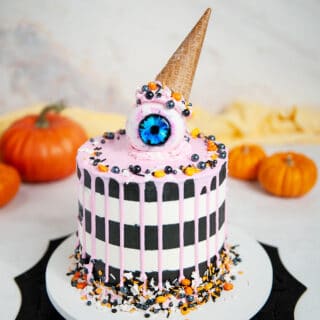
half eaten pancake art

Check out these recipes!
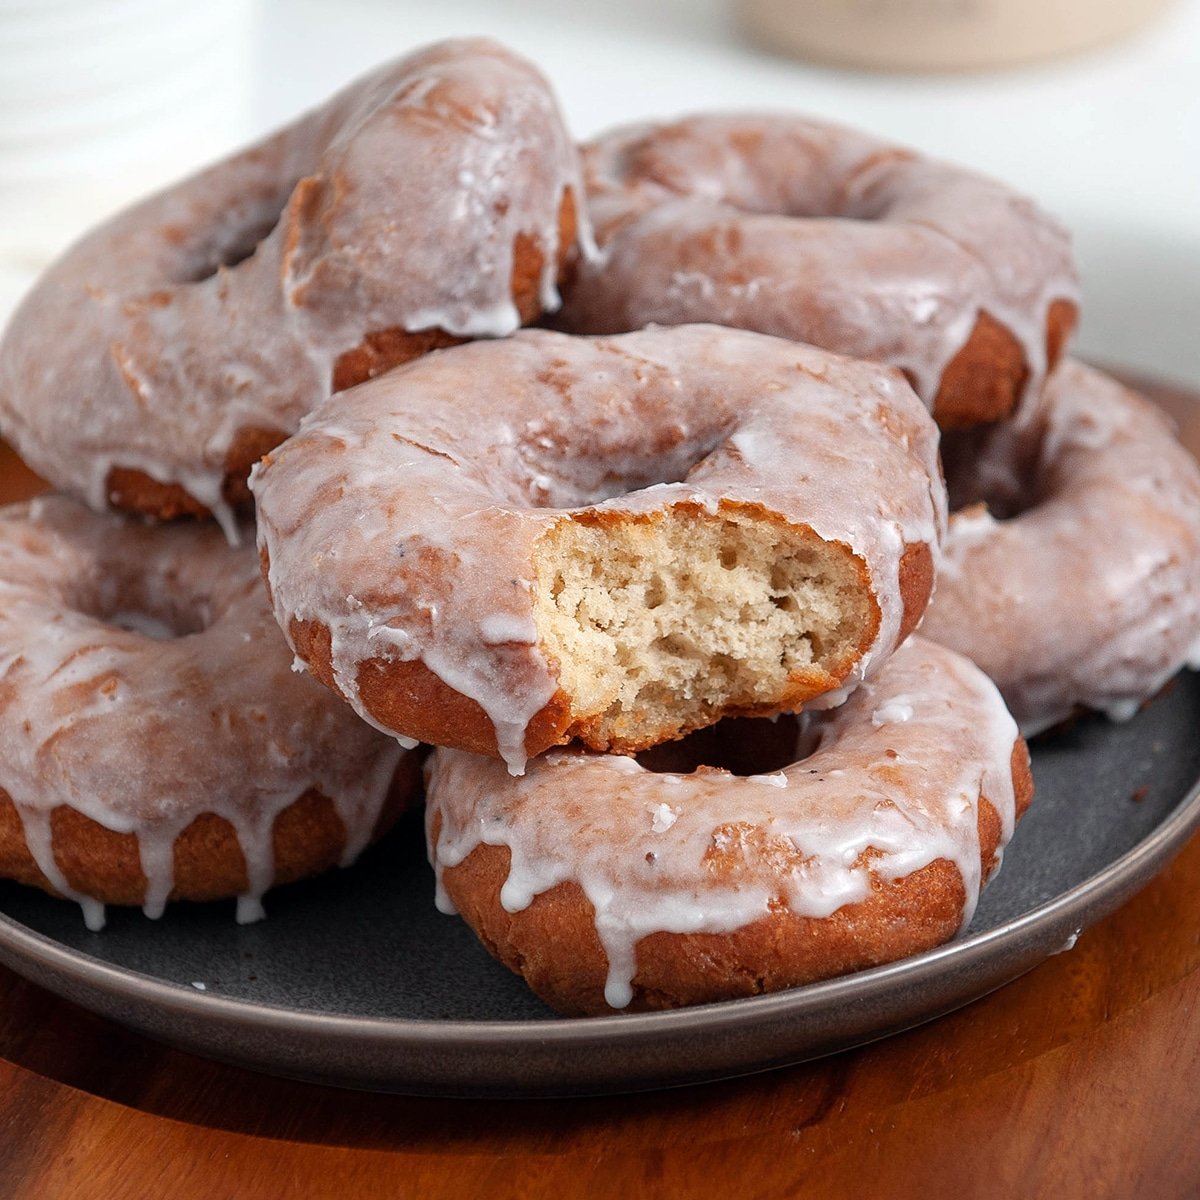
Brown Butter Buttermilk Pancakes
Sourdough Discard Pancakes 
Patterned Roll Cake
Pancake Cake Tutorial 

Recipe

Print Recipe
4.88 from 8 votes

Pancake Art Recipe and Tutorial

How to make your own pancake art using pancake mix, food coloring and squeeze bottles! How to get the right consistency, coloring and nail that flip!
Prep Time5 minutes mins
Cook Time5 minutes mins
Total Time10 minutes mins
Course: Breakfast
Cuisine: American
Servings: 3 cups
Calories: 283kcal
Author: Liz Marek

Equipment

  • Griddle or non-stick pan
  • One squeeze bottle per color or piping bag
  • Butter knife or chopstick for stirring

Ingredients

  • 3 cups pancake batter mix any brand
  • 2 ½ cups water Add more or less to make the runny ketchup consistency

Instructions

  • Add your water to your pancake mix and mix with a handheld mixer to remove the lumps. Add more water if needed until you reach the runny ketchup consistency
  • Add your pancake batter to your squeeze bottles using a measuring cup
  • Add food coloring (see blog posts for exact colors and amounts) and stir with a knife until no streaks of batter remain
  • Heat your griddle to 200ºF (lowest setting) for 10 minutes or set your non-stick pan onto your stovetop and set the temperature to low
  • Draw the outline of your design using a reference photo with the black squeeze bottle
  • Fill in the outline with the colors of your choice
  • Add an outline of color around the pancake if desired (see video)
  • Turn the temperature up to 250ºF and continue cooking until the surface of the pancake looks dry and you can slide a spatula under the pancake without it sticking
  • Flip your pancake over and cook for one more minute then serve!

Video

Nutrition

Serving: 1cups | Calories: 283kcal | Carbohydrates: 38g | Protein: 10g | Fat: 10g | Saturated Fat: 3g | Cholesterol: 92mg | Sodium: 666mg | Potassium: 259mg | Fiber: 2g | Vitamin A: 325IU | Vitamin C: 1mg | Calcium: 285mg | Iron: 2mg


Sculpted cake that looks like realistic beer mug and steak

July 15, 2020 Course Preview

Realistic Beer and Steak Cake Tutorial

Skill level: Intermediate

Guest instructor Shannon Patrick Mayes of The Sweet Spot is back for a backyard BBQ manly cake that's sure to impress. In this tutorial, you will learn how to create a realistic beer mug cake, a sculpted steak that looks just like the real thing and tons of lifelike details and tricks to add realism to your cake projects.

1:26:22 Minutes of Instruction

What You Will Learn

  • How to make a realistic beer mug and steak out of cake
  • Learn to create details like the butter pat, T-Bone and Beer mug handle out of edible materials
  • Shannon's tips and tricks to save time and make your work stand out

Tutorial Chapters

  1. The stone slab 0:49
  2. Carving the steak 4:11
  3. Covering in buttercream 6:31
  4. Covering in fondant 8:22
  5. Creating the texture 10:56
  6. Coloring the steak 22:41
  7. Finishing the steak 31:08
  8. Painting the beer cake 35:13
  9. The isomalt base 41:24
  10. The isomalt handle 42:59
  11. The beer gummy 1:03:05
  12. Making foam and butter 1:13:38
  13. Making Parsley 1:17:43
  14. Adding label and handle 1:21:28

Downloads

Materials List

Steak Reference Cutout Template

Beer Mug Handle Template

Beer Label Template

Sculpted cake that looks like realistic beer mug and steak

July 15, 2020 Paid Video

Realistic Beer and Steak Cake

Skill level: Intermediate

Guest instructor Shannon Patrick Mayes of The Sweet Spot is back for a backyard BBQ manly cake that's sure to impress. In this tutorial, you will learn how to create a realistic beer mug cake, a sculpted steak that looks just like the real thing and tons of lifelike details and tricks to add realism to your cake projects.

1:26:22 Minutes of Instruction

What You Will Learn

  • How to make a realistic beer mug and steak out of cake
  • Learn to create details like the butter pat, T-Bone and Beer mug handle out of edible materials
  • Shannon's tips and tricks to save time and make your work stand out

Tutorial Chapters

  1. The stone slab 0:49
  2. Carving the steak 4:11
  3. Covering in buttercream 6:31
  4. Covering in fondant 8:22
  5. Creating the texture 10:56
  6. Coloring the steak 22:41
  7. Finishing the steak 31:08
  8. Painting the beer cake 35:13
  9. The isomalt base 41:24
  10. The isomalt handle 42:59
  11. The beer gummy 1:03:05
  12. Making foam and butter 1:13:38
  13. Making Parsley 1:17:43
  14. Adding label and handle 1:21:28

Downloads

Materials List

Steak Reference Cutout Template

Beer Mug Handle Template

Beer Label Template

Piping easy buttercream rosettes onto a cake using a 1M star piping tip

July 5, 2020 Frosting and Icing

Easy Buttercream Frosting

Easy buttercream is one of the most useful frosting recipes every cake decorator should know. This frosting is smooth, creamy, stable enough for piping, and not nearly as sweet as traditional American buttercream. If you've struggled with overly sugary frosting in the past, this easy buttercream recipe gives you a much more balanced flavor while still being incredibly simple to make.

Quick Glance: Easy Buttercream

  • Recipe Name: Easy Buttercream
  • Why You'll Love It: Smooth, creamy, not too sweet, and easy to make with no heating required
  • Time and Difficulty: 10 minutes • Beginner
  • Main Ingredients: Pasteurized egg whites, powdered sugar, unsalted butter, vanilla extract, salt
  • Method: Whip pasteurized egg whites with powdered sugar, then add softened butter and whip until light and fluffy
  • Texture and Flavor: Silky, creamy, stable buttercream with a light texture similar to Swiss meringue buttercream, but easier!
  • Quick Tip: If your buttercream looks curdled after adding the butter, keep mixing. It will come together.
ChatGPT
Google AI
Perplexity
Grok
Add us as a trusted site on Google
[feast_advanced_jump_to]

Why This is My Go-To Recipe

The secret to this easy buttercream is using pasteurized egg whites and powdered sugar as the base, then whipping in butter to create a silky frosting that has a texture very similar to Swiss meringue buttercream but without heating the egg whites. It pipes beautifully, spreads easily, and works perfectly for cakes, vanilla cupcakes, and even under fondant covered cakes.

This frosting is my go-to for my easy chocolate cake recipe - simple, reliable, and always a crowd-pleaser.

When I first started decorating cakes professionally, I used the traditional super-sweet American buttercream that most beginner decorators learn first. It was easy to make, but I always felt like it tasted way too sugary and heavy on my cakes. Plus, it was really hard to get smooth!

I came across this buttercream recipe from Lauren Kitchens, and it revolutionized how I make buttercream. I realized there was a way to get the smooth, silky texture of Swiss meringue buttercream without having to cook egg whites or deal with a complicated meringue process. Start with pasteurized egg whites, which are already (pre-cooked), add in the sugar, butter, salt, and vanilla, and boom! Done!
I tweaked the original recipe because I thought it was too buttery, but that's where this easy buttercream recipe came from. It's become my go-to frosting for cakes because it's simple, pipes buttercream flowers, cupcake flower bouquets, rosettes, and vintage piping beautifully.

This is the frosting I use on my homemade white cake, it pipes beautifully and is less sweet than a standard American buttercream.

Easy Buttercream Ingredients

This easy buttercream frosting uses just a few ingredients, but each one plays an important role in creating the smooth, creamy texture. Always make sure your cold ingredients, like the egg whites and butter, are at room temperature.

easy buttercream ingredients

Pasteurized Egg Whites create the base for this easy buttercream. When whipped together with powdered sugar, they form a light and stable mixture that helps give the buttercream its silky texture. You can find pasteurized egg whites in the refrigerated section with the eggs.

Powdered Sugar is used in this recipe for sweetness and structure. Make sure you are using powdered sugar from cane sugar, not from beets. Beet sugar can sometimes end up tasting gritty.

Unsalted Butter is needed for this recipe. If you only have salted butter, you can still use that, but I would use half butter and half vegetable shortening so your buttercream doesn't end up being too salty. You can also replace the butter with any type of vegan butter that you like.

Vanilla Extract adds classic buttercream flavor and rounds out the sweetness of the powdered sugar. You can pretty much use any kind of extract flavor you like instead of vanilla. Just keep in mind some extracts like almond or peppermint are stronger than vanilla, so decrease or increase amounts as needed. My favorite vanilla is Nielsen Massey.

Salt balances the sweetness and enhances the overall flavor without making the frosting taste salty.

How to Make Easy Buttercream Step-By-Step

whipped egg whites and sugar
  1. Combine pasteurized egg whites and powdered sugar in the bowl of a stand mixer fitted with the whisk attachment. Whip the mixture on medium speed until it becomes thick and glossy.

    This creates the base for the easy buttercream.
stand mixer whisking easy buttercream
  1. Begin adding softened butter one piece at a time while mixing on medium speed.

    At first, the mixture may look curdled or separated. This is completely normal.
easy buttercream in a stand mixer with whisk attachment
  1. Mix in the vanilla extract and salt. Then whip on high until light, fluffy, and no longer tastes like butter.
bowl of easy buttercream in stand mixer with a paddle attachment
  1. Optional: Switch to the paddle attachment. Mix the easy buttercream on low for several minutes to remove air bubbles and achieve the smoothest possible texture.

Frosting Calculator

This recipe makes about 6 cups of frosting, which is enough to fill, frost, and pipe a 3-layer 8-inch cake with a little extra for decorating. If you're working with a different pan size or need more (or less), use the calculator below to figure out how much frosting you need, then adjust the servings slider on the recipe card to scale the recipe up or down.

Cake Batter and Frosting Calculator

Select an option below to calculate how much batter or frosting you need. Adjust the servings slider on the recipe card to change the amounts the recipe makes.

Choose a pan type

Choose a cake pan size
(based on 2" tall cake pan)

Choose a cake pan size
(based on 2" tall cake pan)

Choose a cake pan size
(based on 2" tall cake pan)

Cupcake Tin Size

Choose number of pans

Cups of Batter Needed

8 cups

Cups of Frosting Needed

5 cups

Note: measurements are estimated based off the vanilla cake recipe using standard US cake pans and sizes. Measurements used are for 2" tall cake pans only. Your results may vary. Do not overfill cake pans above manufacturer's recommended guidelines.

BONUS TIP:
If your buttercream looks curdled and is sticking to the sides of the bowl after adding the butter and whipping, don't panic. Remove 1 cup of the frosting and heat it in the microwave until just melted but not hot. Mix it back into the frosting. The extra warmth helps the buttercream become smooth.

Common Problems & How To Fix Them

Buttercream looks curdled: This usually happens right after adding the butter. Keep mixing, and the frosting will smooth out. If it's taking a long time, the butter or the egg whites could have been too cold. Remove 1 cup of the buttercream, melt it, and mix it back in.

Buttercream is too soft: Chill the buttercream for 10-15 minutes in the fridge. Mix before using to make it smooth.

Buttercream is too stiff: Remove 1 cup of the buttercream, melt it, and mix it back in, or you can use a heat gun or blow torch on the metal mixing bowl while mixing on low to warm the buttercream up slightly.

easy buttercream frosting piped into swirls on a pink cake with sprinkles on top

How Stable is Easy Buttercream Frosting?

Easy buttercream frosting will not crust, but is stable enough to pipe buttercream decorations and will last at room temperature for 2 days.

It is ok at temperatures up to 85ºF  but will melt in direct sunlight in about 20 minutes, so keep it in the shade! You can replace half the butter with shortening to make it more stable in high temperatures.

Easy buttercream is not as stable as American or Italian buttercream, but it is more stable than cream cheese frosting or whipped cream.

You can also make a white chocolate buttercream frosting by adding melted white chocolate to the buttercream frosting. This makes a SUPER stable buttercream frosting that is a combination of buttercream and white chocolate ganache.

Final Thoughts

Easy buttercream is one of the best frosting recipes to learn if you decorate cakes regularly. It has a silky texture similar to Swiss meringue buttercream but skips the complicated steps, making it perfect for beginner cake decorators.

Once you master this easy buttercream recipe, you'll have a reliable frosting that works for cakes, cupcakes, and piping decorations. Pairs perfectly with my easy drip cake recipe

  • closeup of vanilla cake with vanilla buttercream slice on a white plate
    Vanilla Cake Recipe
  • close up of ganache drizzling into a bowl
    The Best Chocolate Ganache Recipe
  • Vanilla cupcakes on a white stands decorated with white buttercream and pink sprinkles.
    Moist Vanilla Cupcake Recipe
  • Easy chocolate cake recipe slice on a white plate with cake in the background.
    Easy Chocolate Cake Recipe

Easy Buttercream FAQs

What is easy buttercream?


Easy buttercream is a frosting made from pasteurized egg whites, powdered sugar, butter, vanilla, and salt that creates a smooth buttercream similar to Swiss meringue buttercream but without cooking the egg whites.

Is easy buttercream less sweet than other types of buttercream?

Yes. Easy buttercream tastes less sweet than traditional American buttercream because the egg whites and butter balance the powdered sugar.

Can easy buttercream be used for piping?

Yes. Easy buttercream is excellent for piping decorations like rosettes, borders, and flowers.

Are pasteurized egg whites safe to eat?

Yes! Pasteurized egg whites are heat-treated (like milk), so they are safe to eat. They usually come in a box carton in the egg aisle. If you don't have pasteurized egg whites, then you can use my SMBC recipe instead. Note: undercooked egg whites are not recommended for pregnant women, just to be on the safe side.

Can I make this easy buttercream with less sugar?

This recipe is not very sweet, especially if you're used to American buttercream. You can add more powdered sugar if you want it to be sweeter, but you cannot reduce the sugar, or the buttercream will be too soft.

Why is my easy buttercream splitting?

The buttercream splits because it's too cold. Take out 1 cup of the buttercream and melt it in the microwave until it's just melted, and then whip it back in. That little bit of warm butter helps it all come together again.

Why is my easy buttercream frosting so soft?

Buttercream is soft or firm depending on how warm it is. If it's too soft, it could be that your butter was too soft when you added it in, or the mixer warmed it up. Put the buttercream in the fridge for 20 minutes, then whip it again, and it should firm back up.

Is this buttercream good under fondant?

Yes. Easy buttercream is stable enough to use under fondant when properly chilled.

Watch: How To Decorate A Cake Step-by-Step

Before you start decorating, watch the video below where I show you every step of decorating a cake from start to finish. Seeing the process in action makes it much easier to follow along

- Liz Marek.

Start Learning Now
smiling woman holding a decorated cake in her hands

Recipe

close up of easy buttercream rosettes
Print Recipe
4.91 from 614 votes

Easy Buttercream Frosting

Delicious, rich and easy buttercream frosting recipe that anyone can make. This is not a crusting buttercream. It is meringue based so it has a slight shine and chills nicely in the fridge. Takes 10 minutes to make and is fool-proof! Light, fluffy and not too sweet. 
Prep Time5 minutes mins
mixing time20 minutes mins
Total Time25 minutes mins
Course: Dessert
Cuisine: American
Servings: 6 cups
Calories: 849kcal
Author: Liz Marek

Ingredients

  • 6 oz pasteurized egg whites room temperature
  • 24 oz powdered sugar sifted if not from a bag
  • 24 oz unsalted butter room temperature. You can use salted butter but it will affect the taste and you need to leave out additional salt
  • 2 teaspoon vanilla extract
  • ½ teaspoon salt
  • 1 TINY drop purple food coloring (optional) for whiter frosting
US Customary - Metric

Instructions

  • Place egg whites and powdered sugar in a stand mixer bowl. Attach the whisk and combine ingredients on low and then whip on high for 1 minute to dissolve the powdered sugar 
  • Add in your salt and vanilla extract
  • Add in your butter in chunks and whip with the whisk attachment to combine. It will look curdled at first. This is normal. It will also look pretty yellow. Keep whipping. 
  • If your buttercream looks curdled, remove about ⅓ cup of buttercream and melt it in the microwave for 10-15 seconds until JUST barely melted. Pour it back into the whipping buttercream to bring it all together.
  • (Optional) Add your drop of purple food coloring. Whip on high with the whisk attachment for 8-10 minutes until it's very white, light and shiny. Taste the buttercream, if it tastes like sweet ice cream then it's ready!
  • Switch to a paddle attachment and mix on low for 15-20 minutes to make the buttercream very smooth and remove air bubbles. This isn't required but if you want really creamy frosting, you don't want to skip it. 

Video

Notes

• Use pasteurized egg whites. Carton egg whites work best for this easy buttercream recipe because they are already pasteurized and safe to use without cooking.
• Butter temperature matters. The butter should be soft enough to press with your finger but not melted. If the butter is too cold, the buttercream may look curdled while mixing.
• If the buttercream looks curdled, keep mixing. This is normal while the butter emulsifies with the egg whites and powdered sugar. After a few minutes of mixing it will become smooth and fluffy.
• Too soft? Chill it. If your easy buttercream feels too soft for piping, refrigerate it for 10–15 minutes and mix again before using.
• Too stiff? Add a small splash of cream. If the frosting becomes too thick, mix in a teaspoon of cream or milk until the texture softens.
• Great for piping and fondant cakes. This easy buttercream is stable enough for decorating cakes, piping rosettes, and covering cakes before applying fondant.
• Storage: Buttercream can be stored in the refrigerator for up to one week. Bring it back to room temperature and re-whip before using.
• Freezing: This buttercream freezes well for up to three months. Thaw in the refrigerator overnight and whip again before using.

Nutrition

Serving: 2oz | Calories: 849kcal | Carbohydrates: 75g | Protein: 2g | Fat: 61g | Saturated Fat: 38g | Cholesterol: 162mg | Sodium: 240mg | Potassium: 18mg | Sugar: 74g | Vitamin A: 2055IU | Calcium: 18mg | Iron: 0.4mg

closeup of pasteurized egg

July 5, 2020 Blog

How To Pasteurize Eggs

Sometimes a recipe calls for uncooked egg whites like my easy buttercream or royal icing. You may want to pasteurize (heat treat) your uncooked eggs before using them to reduce the chances of food-borne illness.

closeup of pasteurized eggs in a carton

WHAT ARE PASTEURIZED EGG WHITES?

Pasteurizing is the process of gentle heating to kill food born illnesses and make a product safe to drink or eat. Many things are pasteurized, such as orange juice, milk, and wine. Pasteurized egg whites are safe for anyone to eat. 

You can purchase pasteurized egg whites in most grocery stores. Pasteurized egg whites come in a carton, usually in the same area where you would buy regular eggs. The word "pasteurized" is one the box but sometimes can be very small and hard to locate. Don't worry, if the egg whites are in a box then it can be safely assumed they are already pasteurized. 

Buying eggs that are pasteurized (in the US) is more expensive than purchasing regular eggs so it can be more cost-effective and convenient to pasteurize your own eggs at home. 

pasteurized egg whites on wooden table wit blurry kitchen in background

HOW TO PASTEURIZE EGGS

If you can't find pasteurized egg whites then you can pasteurize them yourself! Chefs pasteurize their own eggs all the time in restaurants. To pasteurize an egg, the yolk must reach an internal temperature of 138ºF. Don't worry, an egg will scramble at a mich higher temperature so you're not going to cook your eggs as long as you watch the temperature carefully. 

The pasteurized eggs will still have the consistency of raw eggs and can be stored in the refrigerator after pasteurization. They can be used just like any egg so if you need just the whites, you can separate the egg yolks from the whites and have pasteurized egg whites. 

STEP 1 - Place the eggs you want to pasteurize into a medium-sized saucepan in an even layer. Cover with water so that there is 1" of water above the eggs. Then remove your eggs. You don't want them in there until your water is at the right temp.

STEP 2 - Heat the water to 140ºF using a thermometer to monitor the temperature. Any warmer than 142ºF and you're going to cook your eggs. 

Pro-tip - If you have a Sous Vide, this process is incredibly easy because the sous vide will keep the water at the exact temperature you need. To pasteurize eggs using a Sous Vide, set the temperature to 135ºF and allow them to pasteurize for 75 minutes. This lower temperature keeps the protein of the egg white more intact and the longer pasteurization time further reduces the risk of pathogens. 

STEP 3 - Place your (room temperature) eggs in the water. Heat the eggs for 3 ½ minutes. Make sure the temperature of the water never goes above 142ºF or you will cook your eggs. 

NOTE: These times and temperatures are based on the recommendations of International Egg Pasteurization Manual. 

closeup of pasteurized egg on a spoon with eggs in water in the background

STEP 4 - Transfer your pasteurized eggs into a bowl of cold water to stop the heating process. Then store them in the fridge to use later! That's it!

rinsing pasteurized eggs in cold water

If you are pasteurizing extra-large eggs from your own chickens then heat them for 5 minutes instead of 3. 

NOTE: It is recommended that pregnant women do not eat under-cooked eggs. You can read more about egg safety here. 

The risk of getting salmonella from a raw egg is about 1 in 20,000. 

This is not a 100% guaranteed way of removing all risks of pathogens, but if done properly it does reduce the risks greatly.

Related Recipes

Easy Buttercream Frosting

Recipe

closeup of pasteurized egg
Print Recipe
5 from 39 votes

How To Pasteurize Eggs

How to pasteurize your own eggs at home to reduce the risk of food-borne pathogens. Pasteurizing eggs is super easy and only takes 3 minutes! Pasteurized eggs can be used just like regular eggs.
Prep Time5 minutes mins
Cook Time3 minutes mins
cooling5 minutes mins
Total Time13 minutes mins
Course: Side Dish
Cuisine: American
Servings: 6 eggs
Calories: 72kcal
Author: Liz Marek

Equipment

  • Medium Size Saucepan
  • Kitchen Thermometer (or sous vide)

Ingredients

  • 6 large eggs room temperature
  • 6 cups water or enough to cover the eggs in the pot
US Customary - Metric

Instructions

  • Place your eggs into the saucepan (you can use as many as you want as long as they are in one layer and not stacked up)
  • Add enough water to cover your eggs by 1". REMOVE YOUR EGGS BEFORE HEATING THE WATER.
  • Place your thermometer into the water and begin heating the water to 140ºF. Adjust the heat as necessary to ensure the water does not get hotter than 142ºF.
  • Add your eggs back to the water and continue watching the temperature to make sure the heat is not rising or falling.
  • After three minutes, remove the eggs from the water with a spoon and transfer them to a bowl of cold water. Let them cool for 5 minutes.
  • Dry your eggs and use them right away or store them in the fridge like you would any other egg.

Notes

Temperature is everything: Do not let the water exceed 142º F. Above this point, the egg white begins to set. Keep cold water nearby to add a small splash if the temperature climbs.
Ice bath is essential: It stops carryover cooking and rapidly pulls the eggs out of the bacterial danger zone.
Mark the eggs: Pasteurized eggs look identical to unpasteurized ones. Always mark them before storing.
Storage: Refrigerator, in the shell, up to 4 weeks from purchase date. Once cracked, use within 2 days.
Optional sous vide method: Set sous vide to 135º F (57.2º C). Submerge whole eggs in shell (no vacuum seal needed) for 75 minutes. Transfer to ice bath for 20 to 30 minutes. Mark and refrigerate.
Recommended uses: Cookie royal icing, Swiss meringue buttercream, French meringue, tiramisu, mousse, homemade mayonnaise, Caesar dressing, hollandaise, and cocktails calling for raw egg white.

Nutrition

Serving: 1egg | Calories: 72kcal | Carbohydrates: 1g | Protein: 6g | Fat: 5g | Saturated Fat: 2g | Cholesterol: 186mg | Sodium: 83mg | Potassium: 69mg | Sugar: 1g | Vitamin A: 270IU | Calcium: 35mg | Iron: 1mg

Cake with Mermaid cake topper and clear ocean coral reef gelatin

July 1, 2020 Course Preview

Gelatin Cake with Mermaid Topper

Skill level: Intermediate

Look at this cake, isn't it neat? Today, we're learning how to create a mermaid-themed gelatin cake, with a cake in the center and beautiful edible coral elements.

You will also learn how to sculpt a mermaid figure using Saracino pasta model, an amazing medium which is similar to modeling chocolate, but doesn't melt in your hands quite like modeling chocolate does.

We cover all the tips and tricks needed to create realistic coral edible elements without having them melt in the gelatin, and how to properly seal the cake island so that the gelatin doesn't soak into it.

We've got a lot to cover today, so let's get our tools together and let's get started!

1:28:11 Minutes of Instruction

What You Will Learn

  • How to create an under the sea coral reef gelatin cake
  • Learn how to make a whimsical mermaid cake topper
  • How to create realistic edible foam

Tutorial Chapters

  1. The mermaid body 0:38
  2. The mermaid head 10:24
  3. The mermaid eyes 19:42
  4. Island decorations 24:14
  5. Coloring the shells 27:30
  6. Making the cake 38:08
  7. Decorating the island 43:04
  8. Painting makeup 45:36
  9. Adding the head 48:29
  10. Making the tail 49:17
  11. Making the arms 58:14
  12. Making the hair and details 1:01:44
  13. Making the ring 1:08:57
  14. Making the gelatin 1:14:32
  15. Pouring the gelatin 1:17:31
  16. Making the foam 1:21:56
  17. Taking off the mold 1:25:17

Downloads

Materials List

Cake with Mermaid cake topper and clear ocean coral reef gelatin

July 1, 2020 Paid Video

Gelatin Cake with Mermaid Topper

Skill level: Intermediate

Look at this cake, isn't it neat? Today, we're learning how to create a mermaid-themed gelatin cake, with a cake in the center and beautiful edible coral elements.

You will also learn how to sculpt a mermaid figure using Saracino pasta model, an amazing medium which is similar to modeling chocolate, but doesn't melt in your hands quite like modeling chocolate does.

We cover all the tips and tricks needed to create realistic coral edible elements without having them melt in the gelatin, and how to properly seal the cake island so that the gelatin doesn't soak into it.

We've got a lot to cover today, so let's get our tools together and let's get started!

1:28:11 Minutes of Instruction

What You Will Learn

  • How to create an under the sea coral reef gelatin cake
  • Learn how to make a whimsical mermaid cake topper
  • How to create realistic edible foam

Tutorial Chapters

  1. The mermaid body 0:38
  2. The mermaid head 10:24
  3. The mermaid eyes 19:42
  4. Island decorations 24:14
  5. Coloring the shells 27:30
  6. Making the cake 38:08
  7. Decorating the island 43:04
  8. Painting makeup 45:36
  9. Adding the head 48:29
  10. Making the tail 49:17
  11. Making the arms 58:14
  12. Making the hair and details 1:01:44
  13. Making the ring 1:08:57
  14. Making the gelatin 1:14:32
  15. Pouring the gelatin 1:17:31
  16. Making the foam 1:21:56
  17. Taking off the mold 1:25:17

Downloads

Materials List

stabilized whipped cream

June 23, 2020 4th of July

Stabilized Whipped Cream Frosting

Stabilized whipped cream frosting is lightly sweetened, fluffy, and pipe-able, holding firm peaks for days without weeping or losing shape. It comes together in just 5 minutes and works as a lighter, less sweet alternative to buttercream for frosting cakes, cupcakes, pies, and tarts. It's also what I pipe onto my mini pavlovas with berry chantilly cream and any other dessert that's begging for a fresh whipped finish.

whipped cream piped between two round pieces of chocolate cake on a white plate

Quick Glance: Stabilized Whipped Cream Frosting

  • Recipe Name: Stabilized Whipped Cream Frosting
  • Why You'll Love It: Pipes and frosts as cleanly as buttercream but tastes lighter and less sweet. Holds firm peaks for up to three days without sweating, melting, or losing shape.
  • Time and Difficulty: 5 minutes total. Beginner-friendly.
  • Main Ingredients: Heavy whipping cream, powdered sugar, gelatin, water, vanilla.
  • Method: Bloom and melt gelatin in water and cream, whip cold heavy cream with powdered sugar to soft peaks, drizzle in melted gelatin, and whip to firm peaks.
  • Texture and Flavor: Light, creamy, and silky with a clean vanilla flavor. Holds firm peaks without turning into butter.
  • Quick Tip: Add a touch of cream to the water when you bloom the gelatin so it whips into the cream without clumping.
ChatGPT
Google AI
Perplexity
Grok
Add us as a trusted site on Google
[feast_advanced_jump_to]

Why This Stabilized Whipped Cream Frosting Recipe Works

Regular whipped cream is kind of a mess. It weeps, it melts, and it loses its shape within an hour, which is why you can't just dollop it onto a cake and call it frosting. So I went down a rabbit hole testing every stabilizer I'd ever heard of side by side. Gelatin, instant pudding mix, cornstarch, cream of tartar, powdered milk. I made all five, piped identical rosettes onto the same cake, and watched what happened over three days.

Gelatin won by a mile, and it's not even close. Cream of tartar softened by the next morning. Powdered milk held shape but couldn't pipe a clean detail. Cornstarch left this faint grittiness that I hated. Pudding mix is honestly fine and tastes great folded into fillings, but it's not as smooth as gelatin for a really clean piped border.

The gelatin version holds firm peaks for THREE DAYS in the fridge. It doesn't sweat. It doesn't melt unless your kitchen is over 90°F or the cake sits out for more than two hours. We literally used this exact recipe in pastry school for the fruit tarts on the dessert menu because they'd still look perfect the next day for service. Now it's what I reach for any time buttercream feels too heavy or too sweet. Pumpkin pies, fresh fruit tarts, ice cream cakes, fruit-forward layer cakes, and cupcakes that need to look photo-ready hours after you frost them (try it on my vanilla cupcake recipe). Think of it as the lighter, fresher cousin of my easy buttercream frosting.

Two things matter more than the ingredients: technique and temperature. The gelatin HAS to be bloomed properly. Sprinkle it over cold water with a teaspoon of cream stirred in (the cream is what keeps the gelatin from clumping when it meets the rest of the whipping cream later) and let it sit for 5 minutes. After it blooms, melt it in the microwave for 5 seconds (yes, just 5) until it's smooth and pourable (it won't look clear because of the cream), then drizzle it into the cream on low speed once you're at soft peaks. Add it too soon and the cream isn't ready. Add it too late and the gelatin sets in chunks. The window is small but it's not hard once you've done it once.

Then there's the temperature thing. EVERYTHING has to be cold. The bowl, the whisk attachment, the cream itself. Cold cream whips up to about double its volume because the fat globules can hold onto air. Warm cream just stays loose and never gets there, no matter how long you let the mixer run. Pop your bowl in the freezer for 10 minutes if you forgot to chill it.

Once the gelatin is in and the cream is at firm peaks, the frosting pipes through any tip you'd use for buttercream (1M, French star, plain round) and holds clean borders, rosettes, ruffles, and writing as long as the cake lives. Frosted cakes hold up to three days in the fridge but only two hours at room temp because of the dairy. Make sure your cake is cold or at room temperature when you frost (not warm out of the oven), or the cream melts right off. If you're new to layer cakes, my cake decorating tutorial for beginners walks through how to crumb-coat and finish a clean buttercream-free cake.

Stabilized Whipped Cream Frosting Ingredients

The base recipe is short. The variations at the bottom of the post use different stabilizers, but everything else stays the same.

Stabilized whipped cream ingredients in bowls on a countertop.
  • Heavy whipping cream. Has to be cold and has to be at least 35 percent fat (look for "heavy whipping cream" or "heavy cream" on the label). Lower-fat cream like "whipping cream" or half-and-half won't hold air the same way and won't pipe properly. It's also added to the cold water at the bloom step. This small amount of cream is what keeps the gelatin from clumping when it later hits the cold whipping cream.
  • Powdered sugar. Sweetens and adds body. The cornstarch in powdered sugar also gives a small bonus stabilizing effect. Don't substitute granulated sugar; the texture will be gritty.
  • Unflavored gelatin. I use Knox brand, which comes in small packets. One packet equals about 2 teaspoons. The recipe only needs 1 teaspoon. Sheet gelatin also works if you're used to it; use one and a half sheets for the same strength.
  • Cold water. For blooming the gelatin. Cold (not warm) water lets the gelatin absorb evenly without clumping.
  • Vanilla extract. Use real vanilla extract or vanilla bean paste. Imitation vanilla tastes flat in something this delicate.

How To Make Stabilized Whipped Cream Frosting Step-By-Step

Refer to the recipe card for exact weights and timing plus my video tutorial and other ways to stabilize whipped cream.

Gelatin mixed with water and cream in a small glass bowl.
  1. Bloom the gelatin. In a small bowl, mix the cold water with 1 teaspoon of heavy cream, then sprinkle the gelatin over the top and let it sit for 5 minutes. The granules will absorb the liquid and turn into a soft gel. The teaspoon of cream is what keeps the gelatin from clumping when it later hits the cold whipping cream. Skipping the bloom altogether will give you grainy lumps in the finished cream.
  1. Melt the gelatin. Microwave the bloomed gelatin for 5 seconds. It melts almost instantly. If you still see granules, microwave another 3 seconds. Don't overheat. It won't look clear because of the added cream, but it should be smooth, pourable, and free of any unmelted granules.
  1. Whip the cream to soft peaks. In a cold mixing bowl, whip the 12 oz of heavy cream on medium until foamy. Add the powdered sugar and vanilla and continue whipping until you see soft lines forming. Stop here. Don't whip past soft peaks yet.
  1. Drizzle in the gelatin. With the mixer running on low, slowly drizzle the gelatin mixture into the cream.

PRO TIP: Watch the video in the recipe card below to see how to avoid over-whipping your stabilized whipped cream frosting.

  1. Continue whipping on medium until the peaks are firm enough to hold their shape but the cream is still smooth. Don't over-mix! This happens fast once the gelatin goes in. Don't walk away.
  1. Use immediately. Once the gelatin is in, the cream sets within minutes. Pipe it onto your cake or dessert right away, like the top of my pink velvet cake or fresh fruit tarts. Once piped and chilled, it holds for up to three days in the fridge or up to two hours at room temperature.

Cake Batter and Frosting Calculator

This recipe makes approximately 3 cups of stabilized whipped cream frosting, which is enough to cover a 2-layer 8" or 9" cake or generously frost 12 cupcakes.

Cake Batter and Frosting Calculator

Select an option below to calculate how much batter or frosting you need. Adjust the servings slider on the recipe card to change the amounts the recipe makes.

Choose a pan type

Choose a cake pan size
(based on 2" tall cake pan)

Choose a cake pan size
(based on 2" tall cake pan)

Choose a cake pan size
(based on 2" tall cake pan)

Cupcake Tin Size

Choose number of pans

Cups of Batter Needed

8 cups

Cups of Frosting Needed

5 cups

Note: measurements are estimated based off the vanilla cake recipe using standard US cake pans and sizes. Measurements used are for 2" tall cake pans only. Your results may vary. Do not overfill cake pans above manufacturer's recommended guidelines.

Other Ways To Stabilize Whipped Cream

If you don't have gelatin or just want to try something different, here are four other methods. Each works, with slightly different texture and flavor results.

Container of cornstarch on a white countertop.

Cornstarch

The most pantry-friendly option. Cornstarch thickens the cream just enough to hold shape, but the texture can be slightly gritty if you're not careful with the amount.

  • 1 cup heavy whipping cream
  • 1 tablespoon powdered sugar
  • 1 teaspoon cornstarch
  • 1 teaspoon vanilla extract

Whip the cream to soft peaks, then add the cornstarch with the sugar and vanilla and continue whipping to firm peaks. This works well as a topping for layered desserts like trifles or my chocolate mousse where the texture isn't as noticeable.

Container of cream of tartar on a white countertop.

Cream of Tartar

A cleaner taste than cornstarch and won't leave any grit. Less stabilizing power than gelatin, so this works best for short-term use (a few hours, not days).

  • 1 cup heavy whipping cream
  • 1 tablespoon powdered sugar
  • ¼ teaspoon cream of tartar
  • 1 teaspoon vanilla extract

Combine the sugar and cream of tartar. Whip the cream to soft peaks, then add the sugar mixture and vanilla. Continue whipping to firm peaks.

Box of jello pudding mix on a white countertop.

Instant Pudding Mix

Adds the most flavor of the alternatives. The vanilla pudding mix adds a creamy depth that pairs beautifully with fruit. Slightly less smooth than gelatin but much easier.

  • 1 cup heavy whipping cream
  • 1 tablespoon powdered sugar
  • 1 teaspoon vanilla extract
  • 1 tablespoon instant vanilla pudding mix

Whip the cream to soft peaks, then add the pudding mix, sugar, and vanilla. Continue whipping to firm peaks but stop before it gets crumbly. Fold a cup of this into pastry cream for a diplomat cream that's perfect for my cream tart recipe.

Package of milk powder on a white countertop.

Powdered Milk

A surprisingly effective shortcut if you have powdered milk on hand. Adds body without changing the flavor or texture noticeably.

  • 1 cup heavy whipping cream
  • 2 teaspoons powdered milk
  • 1 tablespoon powdered sugar
  • 1 teaspoon vanilla extract

Whisk the powdered milk into the cream before whipping. Whip to soft peaks, add the sugar and vanilla, then continue to firm peaks. Works beautifully as a topping or filling for my strawberry shortcake layer cake.

Common Stabilized Whipped Cream Problems To Avoid

  • Trying to re-whip leftover whipped cream. Once the gelatin sets, you can't reheat or re-whip the cream. Use it within the first hour or two of making it for piping; after that the texture is fixed.
  • Using room-temperature cream or a warm bowl. Cream needs to be cold (straight from the fridge) and ideally the bowl and whisk attachment should be cold too. Warm cream won't whip to full volume because the fat globules can't trap air properly.
  • Skipping the bloom step. Sprinkle the gelatin over the cold water (mixed with a teaspoon of cream) and wait 5 minutes before melting. Skipping the bloom gives you grainy lumps throughout the finished whipped cream.
  • Overheating the gelatin. 5 seconds in the microwave is usually enough; never go past 10. Overheated gelatin loses its setting power and the cream won't hold its shape.
  • Adding gelatin to cream that's already at firm peaks. The window for adding the gelatin is at soft peaks, just as lines start forming. Adding it too late traps lumps of gelatin in already-set cream.
  • Over-whipping after the gelatin goes in. This is the fastest way to ruin the cream. Once gelatin is in, watch the bowl constantly. Whipping past firm peaks turns the cream into butter in seconds.
  • Using low-fat cream. Heavy whipping cream needs to be at least 35 percent fat. "Whipping cream" or half-and-half doesn't have enough fat to hold air or set properly.

Final Thoughts

This is one of the most useful recipes I've ever published. I use it every time I want a lighter alternative to buttercream, every time I'm topping a fruit tart, and every time I need a frosting that won't sweat in summer weather. It's what I reach for on top of pink velvet cakes, inside the layers of fruit-forward birthday cakes, and as a finishing layer on classic French pastries like my mille feuille or strawberry shortcake. The gelatin method is what gets used the most in my kitchen, but the pudding-mix and powdered-milk shortcuts have saved me more than once when I didn't have gelatin on hand.

The biggest thing I want to leave you with: pay attention during the last 30 seconds of mixing. The window between "perfect firm peaks" and "you just made butter" is shorter than people expect, especially after the gelatin goes in. If you're new to whipped cream, finish the last few seconds by hand with a whisk. You'll feel exactly when it's ready.

Stabilized Whipped Cream Frosting FAQs

Can you frost a cake with whipped cream frosting?

Yes, and stabilized whipped cream (sometimes called stable whipped cream) is the right choice when you do. Regular whipped cream weeps water and loses its shape within an hour, but stabilized whipped cream holds firm peaks for up to three days in the fridge. It's a lighter, less sweet alternative to buttercream and pairs especially well with fruit-forward cakes, naked cake styles, and even classic pastries like cream puffs.

How long does stabilized whipped cream frosting last?

In the fridge, up to three days once piped onto a cake or dessert. At room temperature, no more than two hours because of the dairy. The whipped cream itself stays piped and pretty for the full three days; the limiting factor is food safety, not texture.

Can I color stabilized whipped cream?

Yes. Add a few drops of gel food coloring along with the powdered sugar and vanilla in step 4 (before the gelatin goes in). Whip to combine evenly, then proceed with the gelatin step. Avoid liquid food coloring because the extra water can throw off the texture.

Can I add chocolate or fruit flavors to stabilized whipped cream frosting?

Yes. For chocolate, add 2 tablespoons of cocoa powder along with the powdered sugar (no need to adjust anything else). For fruit, fold a small amount (¼ cup or less) of strawberry reduction, lemon curd, or fruit puree into the finished whipped cream right before serving. Larger amounts of fruit puree can destabilize the cream, so start small and add more if it holds.

Can I make stabilized whipped cream ahead of time?

The cream itself sets quickly after the gelatin goes in, so it's not great for making the bowl ahead and using later. But once it's piped onto a cake or dessert, it holds for up to three days refrigerated. The trick is to mix and pipe in one session, then chill the finished dessert.

What's the best stabilizer to use for whipped cream?

Gelatin is the most reliable stabilizer for whipped cream because it holds firm peaks the longest and gives the smoothest piped texture. Instant pudding mix adds the most flavor and works beautifully for fillings. Cornstarch is the most pantry-friendly option. Cream of tartar works well for short-term use. Powdered milk is the most subtle stabilizer of the bunch. For a fancy piped frosting, use gelatin; for folding into a filling or tart, pudding mix is excellent.

Can I make stabilized whipped cream by hand?

Yes. Use a whisk and a chilled bowl. It takes longer (about 10 minutes of consistent whisking) and you'll need to keep your wrist loose, but the result is identical. Some bakers actually prefer hand-whipping because it's harder to over-whip.

More Whipped Recipes To Try

  • whipped ganache
    Whipped Ganache Recipe
  • slice of angel food cake with strawberries on top
    Angel Food Cake Recipe
  • slice of flourless chocolate cake on a plate with raspberries on top
    Flourless Chocolate Cake Recipe
  • closeup of strawberry shortcake slice on a white plate
    Strawberry Shortcake Cake

Leave Me A Review
⭐️⭐️⭐️⭐️⭐️

If you tried this Stabilized Whipped Cream Frosting or any other recipe on my blog, please leave a 🌟 star rating and let me know how it goes in the comments. I love hearing from you!

Recipe

whipped cream piped between two round pieces of chocolate cake on a white plate
Print Recipe
4.88 from 142 votes

Stabilized whipped cream frosting

How to make the best stabilized whipped cream using a small amount of gelatin. Holds its shape for days, pipes beautifully, and tastes like fresh whipped cream (not the stuff in a tub). See the blog post above for four other ways to stabilize whipped cream without gelatin.
Prep Time5 minutes mins
Cook Time1 minute min
Total Time6 minutes mins
Course: Dessert
Cuisine: American
Servings: 3 cups
Calories: 473kcal
Author: Liz Marek

Equipment

  • Stand mixer with whisk attachment

Ingredients

Stabilized Whipped Cream

  • 12 oz heavy whipping cream cold
  • 2 ounces powdered sugar
  • 1 teaspoon vanilla
  • 1 ½ tablespoon cold water
  • 1 teaspoon heavy whipping cream
  • 1 teaspoon gelatin I use KNOX brand
US Customary - Metric

Instructions

  • Bloom the gelatin. In a small bowl, mix the 1½ tablespoons of cold water with 1 teaspoon of heavy cream. Sprinkle the gelatin over the top and let bloom for 5 minutes.
  • Melt the gelatin. Microwave the bloomed gelatin for 5 seconds. If granules remain, microwave another 3 seconds. It won't look clear because of the added cream, but it should be smooth, pourable, and free of granules.
  • Whip the cream to soft peaks. In a cold mixing bowl, whip the 12 oz of cold heavy cream on medium speed for about 15 seconds, until foamy. Add the powdered sugar and vanilla and continue whipping on medium until you reach very soft peaks (the cream barely holds its shape).
  • Drizzle in the gelatin. With the mixer running on low, drizzle in the gelatin mixture. Continue whipping on medium until the peaks are firm and hold their shape. Don't over-mix; firm peaks come quickly once the gelatin is in.
  • Use immediately. Pipe it onto your cake or dessert right away. Once piped and chilled, it holds for up to three days in the fridge or up to two hours at room temperature.

Video

Notes

  1. Whipped cream whips better if your bowl, whisk attachment, and cream are all cold. Pop the bowl in the freezer for 10 minutes if needed.
  2. Don't over-mix once the gelatin goes in. The window between firm peaks and butter is short. Finishing by hand with a whisk gives you the most control.
  3. Use immediately after the gelatin is added. The cream sets within minutes and can't be re-whipped or made ahead.
  4. Once piped onto a cake or dessert, holds for up to 3 days refrigerated or 2 hours at room temperature (under 90°F).
  5. You can stabilize whipped cream by hand with a whisk if you don't have a stand mixer. Takes about 10 minutes of consistent whisking.
Critical do-nots
  1. Don't use low-fat cream. Heavy whipping cream needs to be at least 35 percent fat.
  2. Don't skip blooming the gelatin. Pour the gelatin onto cold water first, wait 5 minutes, then melt.
  3. Don't add gelatin to cream that's already at firm peaks. The window is at soft peaks, just as lines form.
  4. Don't try to re-whip or save leftover stabilized whipped cream. Use it within the hour.

Nutrition

Serving: 1oz | Calories: 473kcal | Carbohydrates: 22g | Protein: 4g | Fat: 42g | Saturated Fat: 26g | Polyunsaturated Fat: 2g | Monounsaturated Fat: 10g | Cholesterol: 130mg | Sodium: 35mg | Potassium: 112mg | Sugar: 22g | Vitamin A: 1691IU | Vitamin C: 1mg | Calcium: 77mg | Iron: 0.1mg


slice of chocolate cake on grey plate with cake in background

June 15, 2020 Cake

Death By Chocolate Cake

The death by chocolate cake is the perfect cake for the ultimate chocolate lover. This features three layers of ultra decadent, moist cake with big chocolate chunks. Then it's slathered with light and fluffy easy chocolate buttercream and a chocolate ganache drip. It's chocolate heaven (Get it? Because you died haha) in every bite! 

slice of chocolate cake on grey plate with cake in background

I have made SO MANY chocolate cake recipes over the years and I always think one thing. This doesn't taste enough like CHOCOLATE! To me a mega chocolate cake should be ultra-moist, overloaded with chocolate, and on the verge of being fudgy like a brownie.

This recipe is the result of years of recipe testing. Is it the easiest chocolate cake recipe? No! But it's definitely worth it!

This cake gets its amazing texture and a big flavor boost from dark, flavorful Guinness stout beer, Dutch-processed cocoa powder, espresso powder, big chocolate chunks, and even a little mayonnaise! This is hands down the MOST amazing chocolate cake I've ever personally tasted. It's so moist I'd almost say it's on the verge of being too moist. Is that a thing? It's so full of chocolate flavor it's practically fudge.

When I first made this cake, halfway through, I thought, "There is no way I'm making this cake again, it's taking way too long!" But then... I tasted it. And I died. I died a delicious chocolate death, and then I was reincarnated, thankfully so I could go in for a second bite. 

What's in this blog post

  • Ingredients Needed
  • How to make death by chocolate cake
  • How to make the chocolate buttercream
  • How to make the ganache drip
  • How to decorate your cake
  • FAQ
  • Related Recipes
 

Ingredients Needed

Before you start this recipe, I highly suggest you go through the ingredients to make sure you have everything on hand. There are some ingredients you might not have ready in your pantry.

death by chocolate cake ingredients

I frequently get asked about substitutions so I will list them here after the ingredient description. 

Dark Beer - No this will not make your cake alcoholic. The alcohol cooks out but the fizzy nature of the beer and its deep dark flavor adds a TON of flavor to the chocolate. You can replace the beer with room-temperature coffee or water. If you use coffee, leave out the espresso powder. I prefer using Guinness beer because it already kinda tastes like chocolate!

Espresso powder - Again, the espresso powder will not make your cake taste like coffee; it just boosts the flavor of the chocolate, and it's amazing! If you don't have espresso powder, you can also use an instant coffee mix. If you can't find either or you don't want to use it, just leave it ou,t but trust me, the cake will not be as good without it!

Dutch-process cocoa powder - Natural cocoa powder, like Hershey's, is alkaline, meaning it needs something like baking soda to make the cake rise. Baking soda can leave an aftertaste in your cake if you use too much. By using the dutch process cocoa powder, we can use baking powder to make our cake rise, plus a little baking soda for flavor. If all you have is Hershey's, replace half the baking powder with baking soda. 

Mayonnaise - I know it might sound odd to be adding mayo to your chocolate cake, but trust me if you want moist, mayo is the way to go! Mayonnaise is made from eggs and oil. Eggs and oil = moisture! If you don't want to use mayonnaise or you don't have any, you can replace it with oil, but only use half as much as the mayo by weight, or your cake will be too oily. 

How to make death by chocolate cake

BEFORE YOU START - Bring your butter, Guinness, eggs, and mayonnaise to room temperature and prepare the rest of your ingredients. Check out my blog post on room temperature ingredient hacks for more info. 

For best results, use a food scale to weigh your ingredients. Converting this recipe to cups could lead to failure. Read my blog post on how to use a scale for more information.

Pro-tip - If you're in the UK search for Shipton mills soft cake and pastry flour or flour that has a protein level of 9% or less. 

Step 1- Preheat your oven to 335º F/168º C. Prepare your cake pans with cake goop or another preferred pan release. I used three 8" round cake pans but you can adapt this recipe to any size pan by using my cake batter calculator right above the recipe card at the bottom of this blog post. Optional: Line the bottom of the pan with parchment paper to prevent sticking from the chocolate chips.

Step 2 - In a large measuring cup, combine the beer, espresso powder, and vanilla. Whisk it all together. All of these ingredients will ENHANCE the flavor of the chocolate, but you won't even taste them. Set the mixture aside.

pouring dark beer into a measuring cup

Step 3 - In a large bowl, sift together the cake flour, cocoa powder, salt, baking powder, and baking soda. Sifting ensures you don't have any lumps of cocoa powder in your finished cake.

sifting death by chocolate cake ingredients

Step 4 - Place the softened butter in the bowl of a stand mixer with the paddle attachment attached. Cream the butter on medium until smooth and shiny. This takes about 30 seconds.

Step 5 - With the mixer on low, gradually sprinkle in the sugar. Mix on medium-high until the mixture is fluffy and almost white. About 3-5 minutes. This aeration of the butter and sugar is KEY to a fluffy cake.

adding sugar to creamed butter
creamed butter and sugar

Step 6 - Reduce the speed back to low. Add your room temperature eggs one at a time. Adding in cold eggs will seize the butter and cause your batter to separate. Letting the egg incorporate fully before adding in the next egg to avoid breaking your batter. By adding the eggs in slowly, you create a perfect emulsion, ensuring your cake bakes up tall and evenly.

adding egg to butter and sugar mixture

Step 8 - Next add in your room temperature mayonnaise and mix until combined.

Pro-tip - If your batter is broken (curdled looking) your cake will not rise properly and you will get an un-cooked gummy layer at the bottom of your cake. So it's very important to make sure your eggs, mayo, beer and butter are all room temperature or even a tad warm so they mix together properly. 

Step 9 - With the mixer on low, add in ⅓ of your dry ingredients and mix until almost combined. Add in ⅓ of your liquid ingredients. Scrape the bowl. Repeat the process two more times until everything is combined.  adding dry ingredients to cake batter

adding liquids to cake batter
finished death by chocolate cake batter

Step 10 - Mix in your chocolate chips or chopped chocolate at the end. These chocolate chunks take the death by chocolate cake over the top and make it ultra chocolate-y (is that a word?) 

Pro-tip -Using finely chopped chocolate or mini chocolate chips is best, regular chocolate chips are too big and will sink to the bottom of the pan.

adding chocolate chips to cake batter

Step 11 - Divide your cake batter into your prepared pans (I like using homemade pan release, cake goop). I'm using three 8"x2" cake pans and I used a scale to make sure each pan had the same amount of batter in them so I get even layers. Totally optional haha!

Step 12 - Bake at 335º F/168º C for 40-45 minutes (baking times will vary depending on the size of the pan you use) until a toothpick comes out cleanly but with a few sticky crumbs. Don't overbake. 

Step 13 - Let your cakes cool in the pan for 10-15 minutes. Flip the pans out onto a wire rack and cool fully.

Pro-tip - To easily remove cakes from the pan, place the cooling rack on top of the barely warm cake pan. Hold the cake pan and the cooling rack together with your hands, one on top, one on the bottom. Flip the cake pan and the cooling rack over and set them both down so the cake pan is now on top of the cooling rack. Lift the pan off. 

chocolate cake coming out of the pan onto a cooling rack

Step 13 - To cool completely, gently wrap the cakes in plastic wrap and chill until they are firm enough to handle. You can flash chill them in the freezer for an hour if you need to cool them quickly. 

How to make the chocolate buttercream

I love pairing this cake with easy chocolate buttercream. This buttercream tastes like melted chocolate ice cream! SO good! If you want even MORE chocolate flavor, you can also use chocolate ganache.

hand adding pasteurized egg whites to cocoa powder and powdered sugar in a bowl.
photo of mixed egg whites, cocoa powder and powdered sugar.
hand adding chunks of softened butter to the stand mixer.
hand adding vanilla to the stand mixer.
chocolate buttercream mixing in a stand mixer.
  1. Add the pasteurized egg whites and powdered sugar into the bowl of your stand mixer. Mix on low for 30 seconds to combine.
  2. Add in your sifted cocoa powder, salt, and vanilla extract. Then bump the speed up to high. 
  3. Start adding in your softened butter in small-ish chunks. About the size of a large marshmallow until you have added it all. 
  4. Continue letting your buttercream whip on high until it is light and creamy and tastes like chocolate ice cream. This can take 10-15 minutes or more depending on the strength of your mixer or if your butter is cold. If it still tastes like butter, keep whipping!

Pro-tip - If your butter is not mixing in, it might be too cold. Take out 1 cup of your buttercream mixture and microwave it for 15 - 30 seconds until its JUST melted. Not hot! Pour the mixture back into your mixing buttercream and it will help it come together.  

How to make the ganache drip

A ganache drip is just regular ganache with a little more cream, so it drips down your cake perfectly. Super easy to make. The secret is to let it cool a bit before dripping.

chopped dark chocolate in a glass bowl
whisk pushing down chocolate under cream
whisk bringing together chocolate and cream in a bowl
piping bag of ganache creating a drip on the sides and top of a cake
  1. Microwave your chocolate in a heat safe bowl for 30 seconds to warm it up
  2. Heat your heavy cream until it just begins to simmer. Do not boil your cream or it will cause your drip to split.
  3. Pour the hot cream over your chocolate and allow it to sit for 5 minutes.
  4. Whisk until the ganache is nice and smooth.
  5. Place your ganache into a piping bag or drip using a spoon.
  6. I usually make my drip right before I start frosting my cake. By the time I have done the crumb coat and the final coat of buttercream, the drip is ready to use. 

How to decorate your cake

For more information on how to make your first cake step by step, check out my how to make your first cake tutorial. 

how to make a cake tutorial
  1. After your cakes have cooled and chilled so they are easier to handle, cut off the domes with a serrated knife to level them. 
  2. Place your first layer of cake on your cake board or on top of your cake platter and fill it with chocolate frosting. I like to go for about ¼" of buttercream. Try and keep the frosting level with an offset spatula. Repeat with the next layer. 
  3. Cover the entire cake in a thin coat of buttercream. This is called the crumb coat and will lock in those crumbs! Then freeze the cake for 20-30 minutes to set the buttercream. 
  4. Apply the final layer of buttercream and smooth with a bench scraper or your offset spatula. Level off the top with your offset spatula. 
  5. Send the cake back to the fridge for 15 minutes before you do the drip. 
  6. Place your cooled ganache into a piping bag and snip off the tip. Don't make the hole too big. Drip one drip on the side of the chilled cake to make sure it doesn't drip too far. If it does, it might be too hot and need to cool before you do the drip. 
  7. I used my leftover buttercream and ganache to make some swirls for the top of the cake with another piping bag and a 1M piping tip.
layers of chocolate cake and buttercream
chocolate cake on turntable with thin layer of chocolate buttercream
bench scraper smoothing the side of the chocolate cake
chocolate cake with offset spatula
slice of chocolate cake on a grey plate

Just look at that gorgeous chocolate dessert! If you're going to experience death by chocolate, this is the way to do it! Even though the drip and the swirls are super simple, they look truly gorgeous!

Pro-Tip - I always keep my frosted cakes in the fridge. The frosting acts as a barrier and keeps the cake fresh but NEVER serve a cold cake. Cold cakes taste very dry because the butter is cold. Always take your cakes out of the fridge a few hours before you serve them. I've even gone as far as microwaving my cake slice for 10 seconds if it's too cold. 

FAQ

Do I have to use cake flour?

For this recipe yes. Cake flour is a low-protein flour that results in less gluten development during the reverse creaming stage. You cannot do the flour/cornstarch trick or the cake will get over-mixed and taste like cornbread. If you only have all-purpose flour, try my easy chocolate cake recipe.

Can I leave out the mayonnaise?

I promise your cake will NOT taste like mayo! It adds a lot of moisture to the chocolate cake for that yummy stick to your fork texture. You can also use plain Greek yogurt or sour cream, but the flavor won't be the same. 

What can I substitute for beer?

You can use water or coffee. The Guinness intensifies that rich chocolate flavor, it doesn't make the cake taste like beer and all the alcohol cooks out. 

What is espresso powder?

Espresso powder is commonly used in baking to bring out the chocolate flavor. It is made from coffee beans that have been brewed, dried, and ground into a fine powder. It's much more concentrated than instant coffee but won't add any coffee flavor to your cake. 

You can make your own espresso powder, or substitute it with dark roast instant coffee. It won't bring the same rich, roasted flavor, but it will do the trick if you're stuck. 

What is the difference between Dutched and regular cocoa powder?

Dutch-processed cocoa powder and natural cocoa powder are not the same. Dutch-processed is treated with an alkali to neutralize its acidity, making it have a stronger flavor and a darker, almost black color. If you can't find Dutched, you can use regular cocoa powder instead.

Related Recipes

Doctored Chocolate Box Cake Mix

Triple chocolate cake recipe

Chocolate Irish cream cake

Easy chocolate cake

Chocolate Swiss meringue buttercream


Cake Batter and Frosting Calculator

Select an option below to calculate how much batter or frosting you need. Adjust the servings slider on the recipe card to change the amounts the recipe makes.

Choose a pan type

Choose a cake pan size
(based on 2" tall cake pan)

Choose a cake pan size
(based on 2" tall cake pan)

Choose a cake pan size
(based on 2" tall cake pan)

Cupcake Tin Size

Choose number of pans

Cups of Batter Needed

8 cups

Cups of Frosting Needed

5 cups

Note: measurements are estimated based off the vanilla cake recipe using standard US cake pans and sizes. Measurements used are for 2" tall cake pans only. Your results may vary. Do not overfill cake pans above manufacturer's recommended guidelines.

Recipe

slice of chocolate cake on a grey plate
Print Recipe
4.91 from 109 votes

Death By Chocolate Cake

Death by chocolate cake is a chocolate lovers dream! This cake gets its intense chocolate flavor from Guinness beer, mayonnaise, espresso powder and mini chocolate chips. Paired with easy chocolate buttercream and a rich ganache drip, you might be dead but you'll be happy! This chocolate cake isn't for the faint of heart!
Prep Time20 minutes mins
Cook Time40 minutes mins
Total Time1 hour hr
Course: Dessert
Cuisine: American
Servings: 8 cups
Calories: 1881kcal
Author: Liz Marek

Ingredients

Death By Chocolate Cake

  • 14 ounces Stout Beer Like Guinness (Room Temperature)
  • 1 ½ Tablespoon Espresso Powder
  • 2 teaspoon Real Vanilla
  • 14 ounces Cake Flour
  • 1 Tablespoon Baking powder
  • 2 teaspoons Baking soda
  • 1 ½ teaspoons Salt
  • 6 ounces Dutched Cocoa Powder
  • 10 ounces Unsalted Butter Room Temperature
  • 16 ounces Granulated Sugar
  • 4 Large Eggs Room Temperature
  • 6 ounces Mayonnaise Room Temperature
  • 6 ounes Mini chocolate chips

Easy Chocolate Buttercream

  • 4 ounces pasteurized egg whites
  • 16 ounces powdered sugar
  • 16 ounces unsalted butter softened to room temperature
  • 2 ounces cocoa powder sifted
  • 1 Tablespoon vanilla extract
  • 1 teaspoon salt

Ganache Drip

  • 8 oz Semi-Sweet Chocolate
  • 4 oz Heavy Whipping Cream
US Customary - Metric

Instructions

Death By Chocolate Cake

  • NOTE: It is SUPER IMPORTANT that all the room temperature ingredients listed above are room temperature and not cold so that the ingredients mix and incorporate correctly. 
  • Heat oven to 335º F/168º C. Prepare cake pans with cake goop or another preferred pan release. I used three 8"x2" round cake pans. Use the cake batter calculator above this recipe card to adjust the recipe to your size cake pan. Optional: Line the bottom of the pan with parchment paper to prevent sticking from the chocolate chips.
  • In a large measuring cup combine the beer, espresso powder and vanilla. Whisk together and set aside. 
  • In a large bowl, sift together the flour, cocoa powder, salt, baking powder and baking soda and set aside. 
  • Place the softened butter in the bowl of a stand mixer with the paddle attachment. Cream until smooth and shiny. With the mixer on low, gradually sprinkle in the sugar. Mix on medium high until mixture is fluffy and almost white. About 3-5 minutes. 
  • Reduce the speed back to low. Add your (ROOM TEMP) eggs one at a time. Let the egg incorporate fully before adding in the next egg to avoid breaking your batter. Add in your mayo and mix until combined. 
  • With the mixer on low, add in ⅓ of your dry ingredients and mix until almost combined. Add in ⅓ of your liquid ingredients. Repeat the process two more times until everything is combined. 
  • Fold in the mini chocolate chips and divide the cake batter into your cake pans. Bake for 40 - 45 minutes until a toothpick comes out cleanly but with a few sticky crumbs. Don't over bake. 
  • Let your cakes cool in the pan for 10-15 minutes before turning out onto a cooling rack. Let fully cool then gently wrap in plastic wrap and chill until the cakes are firm enough to handle. You can flash chill in the freezer if you need to cool them quickly. 

Easy Chocolate Buttercream

  • Sift together the powdered sugar and cocoa powder to remove any clumps.
  • Place pasteurized egg whites, powdered sugar and cocoa powder in the bowl of your stand mixer.
  • Attach the whisk, combine ingredients on low and then whip on high for 5 minutes.
  • Add in your softened butter in chunks. Add in vanilla and salt. Whisk on high until light and fluffy.
  • Optional: Switch to a paddle attachment and mix on low for 15-20 minutes to make the buttercream very smooth and remove air bubbles.

Ganache Drip

  • Microwave your chocolate for 30 seconds to get it warm
  • Heat cream on the stove over medium heat just until it starts to simmer. Do not boil. chilled cake. 
  • Pour over chocolate and let sit for 5 minutes. Whisk until smooth. If you have lumps, place the bowl into a microwave for 30 seconds and whisk. Let the ganache cool to about 90º (barely warm to the touch). Place the ganache into a piping bag and drizzle over the top of your frosted and chilled cake.

Video

Notes

1. Bring all your ingredients to room temperature or even a little warm (eggs, beer, mayo, butter, etc) to ensure your batter does not break or curdle. 
2. Use a scale to weigh your ingredients (including liquids) unless otherwise instructed (Tablespoons, teaspoons, pinch etc). Metric measurements are available in the recipe card. Scaled ingredients are much more accurate than using cups and help ensure the success of your recipe. 
3. Practice Mise en Place (everything in it's place). Measure out your ingredients ahead of time and have them ready before you start mixing to reduce the chances of accidentally leaving something out.
4. Chill your cakes before frosting and filling. You can cover a frosted and chilled cake in fondant if you wish. This cake is also great for stacking. I always keep my cakes chilled in the refrigerator before delivery for easy transporting. Learn more about decorating your first cake. 
5. If the recipe calls for specific ingredients like cake flour, replacing it with all-purpose flour and cornstarch is not recommended unless specified in the recipe that it’s ok. Substituting ingredients may cause this recipe to fail. 
All purpose flour is a plain flour with no rising agents. It has a protein level of 10%-12%
Cake flour is a soft, low protein flour of 9% or less. 
Cake flour sources: UK - Shipton Mills Cake & Pastry Flour
6. I always keep my frosted cakes in the fridge. The frosting acts as a barrier and keeps the cake fresh but NEVER serve a cold cake. Cold cakes taste very dry because the butter is cold. Always take your cakes out of the fridge a few hours before you serve them. I've even gone as far as microwaving my cake slice for 10 seconds if it's too cold. 
7. You can replace the Guinness in this recipe with another type of stout beer or room temperature water or coffee, but it will not have the same taste. 
8. You can replace the mayo in this recipe with room temperature greek yogurt or sour cream, but it will not have the same taste. 

Nutrition

Serving: 8ounces | Calories: 1881kcal | Carbohydrates: 199g | Protein: 20g | Fat: 119g | Saturated Fat: 66g | Cholesterol: 324mg | Sodium: 1282mg | Potassium: 806mg | Fiber: 13g | Sugar: 137g | Vitamin A: 2845IU | Vitamin C: 1mg | Calcium: 161mg | Iron: 7mg
Cake sculpted into the shape of Animal Crossing character Celeste standing on a green grass cake board with isomalt star shapes

June 15, 2020 Course Preview

Celeste Cake Tutorial

Skill level: Intermediate

In this tutorial, you will learn how to create a sculpted Owl cake based upon the beloved character Celeste from the popular Animal Crossing franchise. You will learn how to use reference to scale up a cake to any size, how to design the grass cake board, the belly pattern and the cartoony facial features.

While I was making this cake, it was extremely hot in my studio and I had to fix some problems due to heat, so BONUS: you will also see how to fix fondant cracks, what to do when elements break or heavy elements start to tear and pull on your cake.

3:00:14 Minutes of Instruction

What You Will Learn

  • How to create a stylized sculpted owl cake
  • Learn how to create cartoony facial features
  • How to create an Animal Crossing grass base
  • Learn how to create shinny star fragments

Animal Crossing Celeste Cake with green grass cake board and isomalt star fragments

Tutorial Chapters

  1. Measurements of the cake 0:44
  2. Making the structure 15:02
  3. Making the base layer 20:08
  4. Attaching the base 24:45
  5. Coloring fondant 29:32
  6. Covering the board in fondant 38:36
  7. Making the feet 54:45
  8. Making the toenails 1:05:29
  9. Supporting the wings 1:07:32
  10. Preparing the base layer 1:11:52
  11. Stacking the cake 1:13:56
  12. Carving the cake 1:19:08
  13. Sculpting the cake 1:21:18
  14. Frosting the cake 1:25:06
  15. Making isomalt stars 1:27:27
  16. Covering the cake in fondant 1:35:34
  17. Finishing the isomalt stars 1:44:24
  18. Preparing the checkerboard fondant 1:50:39
  19. Decorating the belly 1:56:48
  20. Making the face and eyes 2:07:31
  21. Making the eyebrows and beak 2:12:34
  22. Making the bow 2:29:33
  23. Making the wings 2:35:14
  24. Making the tail 2:44:56
  25. Attaching the bow 2:49:52
  26. Final details 2:57:53

Downloads

Materials List

Wing Template

Celeste Face Template

Star Fragment Mold Template

Celeste Reference

Cake sculpted into the shape of Animal Crossing character Celeste standing on a green grass cake board with isomalt star shapes

June 15, 2020 Paid Video

Celeste Cake

Skill level: Intermediate

In this tutorial, you will learn how to create a sculpted Owl cake based upon the beloved character Celeste from the popular Animal Crossing franchise. You will learn how to use reference to scale up a cake to any size, how to design the grass cake board, the belly pattern and the cartoony facial features.

While I was making this cake, it was extremely hot in my studio and I had to fix some problems due to heat, so BONUS: you will also see how to fix fondant cracks, what to do when elements break or heavy elements start to tear and pull on your cake.

3:00:14 Minutes of Instruction

What You Will Learn

  • How to create a stylized sculpted owl cake
  • Learn how to create cartoony facial features
  • How to create an Animal Crossing grass base
  • Learn how to create shinny star fragments

Tutorial Chapters

  1. Measurements of the cake 0:44
  2. Making the structure 15:02
  3. Making the base layer 20:08
  4. Attaching the base 24:45
  5. Coloring fondant 29:32
  6. Covering the board in fondant 38:36
  7. Making the feet 54:45
  8. Making the toenails 1:05:29
  9. Supporting the wings 1:07:32
  10. Preparing the base layer 1:11:52
  11. Stacking the cake 1:13:56
  12. Carving the cake 1:19:08
  13. Sculpting the cake 1:21:18
  14. Frosting the cake 1:25:06
  15. Making isomalt stars 1:27:27
  16. Covering the cake in fondant 1:35:34
  17. Finishing the isomalt stars 1:44:24
  18. Preparing the checkerboard fondant 1:50:39
  19. Decorating the belly 1:56:48
  20. Making the face and eyes 2:07:31
  21. Making the eyebrows and beak 2:12:34
  22. Making the bow 2:29:33
  23. Making the wings 2:35:14
  24. Making the tail 2:44:56
  25. Attaching the bow 2:49:52
  26. Final details 2:57:53

Downloads

Materials List

Wing Template

Celeste Face Template

Star Fragment Mold Template

Celeste Reference

fruit tart on white background with berries surrounding

June 5, 2020 4th of July

Fresh Fruit Tart Recipe

A fresh fruit tart is a summertime staple! I love this buttery shortcrust filled with sweet and creamy vanilla custard and topped with lots of fresh berries! Follow my tips for keeping your berries fresher longer, how to keep the crust nice and crisp, and how to make an easy glaze using jam!

fruit tart on white background with berries surrounding

Fruit Tart Ingredients

There are a lot of ingredients in this photo because we're making tart dough, pastry cream, and topping it with fresh berries and glaze. Don't be intimidated though, all these ingredients are very common in most household kitchens. Make sure your butter is room temperature. Soft enough to leave an indent with your finger but not melted. Your eggs should also be warm. I place mine (while still in the shell) into a bowl of warm water for 5 minutes.

fruit tart ingredients

Note: This recipe makes enough dough for 2 tarts (maybe even three depending on the size of your pan). Theoretically, you could cut this recipe in half by whisking the whole egg and cutting it in half but it's really easy to just freeze the extra dough to use for later!

How to Make a Fresh Fruit Tart

Making The Tart Dough Step-By-Step

Step 1 - Add the softened butter into the bowl of your stand mixer with the paddle attachment. Mix on medium speed for about 30 seconds until it's smooth.

pate sucre ingredients in the bowl of a mixer

Step 2 - Add in your sifted powdered sugar, salt, and mix until smooth.

Step 3 - Add in the vanilla and the egg and mix until combined.

Step 5 - Gradually add your flour and mix until everything starts to come together and a dough forms.

tart dough in a mixing bowl

Step 6 - Divide the dough into 2 pieces, wrap in plastic wrap and flatten into disks. Refrigerate for a minimum of 1 hour before using your dough. If you skip this step, your crust will melt in the oven.

tart dough on plastic wrap

Pastry Cream Step-By-Step

This pastry cream recipe is a baking staple. It's basically vanilla pudding (if you're in the USA) or a custard. It's super versatile and can even be made dairy-free by replacing milk with coconut milk and butter with vegan butter!

Pro Tip: Use real vanilla bean or vanilla bean paste to take your cream up a notch. Vanilla extract will work fine, but I love seeing all the little black specks in my dessert. Plus the star flavor is vanilla, so why not?! 1 vanilla bean pod = 1 tablespoon vanilla.

Step 1 - Bring milk and first quantity of sugar (5 oz) to a simmer over medium-high heat. Whisking constantly to avoid burning.

whisking pastry cream ingredients in stainless steel pot with blue whisk

Step 2 - In a separate, large heatproof bowl, combine the eggs, cornstarch, vanilla extract, and the second quantity of sugar (4 oz), whisk to combine.

pastry cream ingredients in a clear glass bowl

Step 3 - Once the milk is simmering, turn off the heat and add ¼ of your hot milk mixture to the egg mixture VERY slowly while whisking constantly. This is going to temper (slowly heat) your egg yolk mixture and avoid curdled scrambled eggs. Whisk until smooth.

Adding hot milk mixture slowly to cold egg mixture with measuring cup and blue whisk

Step 4 - Turn the heat back on (medium) and slowly add the mixture to the rest of the milk in your saucepan, whisking constantly. Bring it to a simmer.

closeup of thickened pastry cream in metal pot with blue whisk

Step 5 - Once your mixture starts bubbling, continue whisking for 1 minute to ensure the mixture is cooked and properly thickened.

Step 6 - Pour your mixture into a heatproof container. Divide your softened butter into cubes and place them on top of the pastry cream, allowing them to melt. Do not cover.

pastry cream in clear bowl with melted butter on top

Step 7 - Allow your pastry cream to cool at room temperature until just warm to the touch. This will take a few hours. You will know it's ready to stir when the bowl feels barely warm and the edges of the butter are starting to turn solid in color.

Step 8 - Stir in your butter with a whisk. Don't be worried if it looks curdled at first, this is normal. Just keep whisking until smooth.

Bowl of pastry cream mixed with butter

smooth pastry cream in a glass bowl with white spoon

Pro Tip - Use an immersion blender to make your pastry cream super smooth and creamy

Step 9 - Cover the pastry cream with plastic wrap so that it's touching the surface of the pastry cream to avoid a skin forming. Let it cool fully before using it in a tart shell.

Fruit Tart Assembly Step-By-Step

Step 1 - Take your tart dough out of the refrigerator about 30-60 minutes before rolling it out. It should be slightly flexible but still firm.

tart dough on plastic wrap on a white background

Step 2 - Lightly flour your surface and rolling pin and roll it out to ⅛ inch thick. Don't make it too thick! Use a ruler to check the thickness. Rotate frequently and pinch together any cracks when rolling.

tart dough rolled out on a white background with wooden rolling pin

Step 3 - Roll the dough up onto your rolling pin and lay it into the tart shell. I prefer a tart pan with a removable bottom. That way you can see the beautiful edges of the tart after baking. The removable bottom also makes it easy to take the crust out of the tin. You can make a tart in a regular pie pan, you just won't be able to remove it from the pan.

Step 4 - Carefully lift the dough up on the sides and press it into the pan. Use your fingers to press the dough into the ridges on the side. Don't press too hard that you press through the dough. Make sure you get into the bottom corners!

tart dough in a tart pan

Step 5 - Roll your rolling pin flush across the top of the tart shell to remove the excess dough. Squish together the leftovers and save them to make another tart!

Tart dough in a meal tin with a rolling pin on top

Step 6 - Freeze the tart shell for 20 minutes. Do NOT skip this step!

Step 7 - Press a layer of tin foil into the tart shell, all the way into the corners and fill with pie weights. Also, do this if you're using a regular pie pan instead of a tart shell.

tart pan with tinfoil inside and pie weights

Step 8 - Place on top of a baking sheet and blind bake in the oven for 30 minutes. Rotate after 15 minutes to promote even browning. After 30 minutes, lift out the weights and bake for another 10 minutes. The edges will be golden brown and will start to pull away from the edges of the pan.

pate sucre in tart pan after blind baking

Step 9 - Place the whole tart and pan into the fridge to cool down.

Fresh Fruit Tart Assembly  Step-By-Step

Step 1 - Wash all of your fruit and dry fully. Check out my berry wash recipe to learn how to make your fruit last up to 3 weeks in the fridge!

mixed berries in white colander

Step 2 - Prepare your strawberries and kiwi fruit and cut in ⅛ inch thick slices. You do not need to cut berries because they will get mangled looking.

cut kiwi and strawberries on wooden cutting board

Pro Tip: You want to use the sharpest knife possible when cutting fruits and vegetables. The sharper the knife, the easier it is to cut and the less likely you'll be to push too hard or slip and injure yourself. 

Step 3 - Gently lift your cooled tart out of the tart pan. Transfer to a plate or keep it on the bottom pan.

Pro Tip -  Dab a bit of melted chocolate on the plate to glue the tart shell to the plate and keep it from sliding around

Step 4 - Optional: Melt down some chocolate and brush a thin layer onto the inside of the tart shell. This is a trick I learned while working at a Safeway bakery and will keep the crust from getting soggy. Refrigerate for 5-10 minutes to set the chocolate.

melted chocolate brushed onto a tart shell

Step 5 - Add in the pastry cream and use a spatula to smooth it out. Fill the tart with pastry cream.

filling a tart shell with pastry cream and white spoon

Step 6 - Decorate the tart with your fruit! I like to go from the outside-in and have contrasting colors when I layer my fruit.

fresh fruit tart

Step 7 - Mix the apricot preserves and water and then microwave until melted (about 10 seconds). Glaze the cut strawberries and kiwi with the mixture. This will keep your fruit from drying out and looking very shiny! You can also thin piping gel or corn syrup with water and use it as a glaze.

Step 8 - Refrigerate until serving. I left mine in the fridge overnight and ate this the next day for my husband, Dan's birthday!

slice of fresh fruit tart

The pastry cream sets up overnight so that you can cut through it but is still soft and creamy. The chocolate keeps the crust super crisp and actually tastes amazing with the fresh fruit.

FAQ

Can I Use Granulated Sugar Instead Of Powdered Sugar

Granulated sugar tends to aerate the butter and make the dough fluffy which is not what we want. The air pockets expand and cause the dough to shrivel and shrink during baking

CAN I DO THIS WITHOUT A STAND MIXER?

You can definitely make tart dough without a stand mixer. You can use a hand-held mixer or you can even just mix with a fork by hand.

RELATED RECIPES:

Red Wine Poached Pear Frangipane Tart

Lemon Curd

Fresh Strawberry Cake

Cream Tart Recipe

Hand Pies

Recipe

fruit tart on white background with berries surrounding
Print Recipe
5 from 12 votes

Fresh Fruit Tart Recipe

Luscious, seasonal berries and other fruits piled high on top of silky smooth pastry cream and a delightfully buttery and crispy sweet tart crust. Sealing the crust with a layer of chocolate and the cut fruit with a glaze keeps this tart fresh for days. The perfect garden party or summer BBQ show stopper!
Prep Time20 minutes mins
Cook Time40 minutes mins
Cooling4 hours hrs
Total Time5 hours hrs
Course: Dessert
Cuisine: French
Servings: 12 servings
Calories: 537kcal
Author: Liz Marek

Equipment

  • Rolling Pin
  • Stand mixer with the paddle attachment
  • 9 ½" Tart pan with a removable bottom. (You can also use a pie pan.)
  • Pie weights for blind baking (Or dried beans, rice, etc.)
  • pastry brush
  • Knife

Ingredients

Pâte sucrée (tart dough recipe)

  • 4 ounces powdered sugar
  • 8 ounces unsalted butter room temperature
  • ½ teaspoon salt
  • 1 teaspoon vanilla extract
  • 12 ounces all purpose flour
  • 1 large egg room temperature

Pastry Cream

  • 32 ounces whole milk substitute: almond, soy, coconut milk etc.
  • 5 ounces sugar
  • 1 Tablespoon vanilla extract use vanilla bean paste or 1 vanilla bean pod if desired
  • 3 ounces cornstarch
  • 4 ounces sugar
  • 4 egg yolks
  • 1 large egg
  • 4 ounces unsalted butter softened

Fresh Fruit Tart

  • ¼ cup semi-sweet chocolate optional for keeping the crust from getting soggy.
  • 2 cups mixed berries of your choice
  • 2 Tablespoons apricot preserves for glazing any kind of jam will work.
  • 1 Tablespoon water
US Customary - Metric

Instructions

Pâte sucrée (tart dough recipe)

  • Add the butter into the bowl of your stand mixer with the paddle attachment. Mix on medium speed for about 30 seconds.
  • Place a colander over the bowl of your stand mixer and sift in your powdered sugar. This is not required, but if your powdered sugar has lumps in it, it will show up in your crust.
  • Add in the salt. Mix on low until everything is combined.
  • Add in the vanilla and the egg and mix until combined.
  • Then gradually add your flour and mix until everything starts to come together and a dough forms.
  • Divide the dough into 2 pieces. (This is enough for 2 tarts.) Wrap dough in plastic wrap and flatten into 2 disks. Refrigerate for minimum of 1 hour before using. If you skip this step, your crust will melt in the oven.

Pastry Cream

  • Bring milk and first quantity of sugar (5 oz) to a simmer over medium high heat. Whisking constantly to avoid burning.
  • In a separate, large heat proof bowl, combine the eggs, cornstarch, vanilla extract, and the second quantity of sugar (4 oz), whisk to combine.
  • Once the milk is simmering, turn off the heat and add ¼ of your hot milk mixture to the egg mixture VERY slowly while whisking constantly. This is going to temper your egg yolk mixture and avoid curdled scrambled eggs. Whisk until smooth.
  • Turn the heat back on (medium) and slowly add the mixture to the rest of the milk in your saucepan, whisking constantly. Bring to a simmer.
  • Once your mixture starts bubbling, continue whisking for 1 minute to ensure the mixture is cooked and properly thickened.
  • Pour your mixture into a heatproof container. Divide your softened butter into cubes and place them on top of the pastry cream, allowing them to melt. Do not cover.
  • Allow your pastry cream to cool at room temperature until just warm to the touch. This will take a few hours.
  • Stir in your butter with a whisk. Don't be worried if it looks curdled at first, this is normal. Just keep whisking until smooth.
  • Optional: Blend pastry cream with an emersion blender to make it extra smooth.
  • Cover with plastic wrap so that it's touching the surface of the pastry cream to avoid a skin forming. Chill before using. Can be kept in the refrigerator for 2-3 days.

The Tart Shell

  • Take your tart dough out of the refrigerator about 30 minutes before rolling it out. It should be slightly flexible but still firm.
  • Lightly flour your surface and rolling pin and roll it out to ⅛ inch thick. Don't make it too thick! Use a ruler to check the thickness. Rotate frequently and pinch together any cracks when rolling.
  • Roll the dough up onto your rolling pin and lay it into the tart shell.
  • Carefully lift the dough up on the sides and press it into the pan. Use your fingers to press the dough into the ridges on the side. Don't press too hard that you press through the dough. Make sure you get into the bottom corners!
  • Roll your rolling pin flush across the top of the tart shell to remove the excess dough. (Squish together the leftovers and save them to make another tart!)
  • Freeze the tart shell for 20 minutes. Do NOT skip this step!
  • Preheat your oven to 350ºF
  • Press a layer of tin foil into the tart shell, all the way into the corners and fill with pie weights. (Also do this if you're using a regular pie pan instead of a tart shell.)
  • Place on top of a baking sheet and blind bake in the oven for 30 minutes. Rotate after 15 minutes to promote even browning. After 30 minutes, lift out the weights and bake for another 10 minutes. The edges will be golden brown and will start to pull away from the edges of the pan.
  • Place the whole tart and pan into the fridge to cool down.

Assembling The Fruit Tart

  • Wash all your fruit and dry fully.
  • Cut off the tops of your strawberries and slice ⅛ inch thick.
  • Cut the ends of the kiwi off and use a sharp paring knife to cut off the skin. Slice ⅛ inch thick.
  • Gently lift your cooled tart out of the tart pan. Transfer to a plate or keep it on the bottom pan. (Tip: dab a bit of chocolate to the plate to keep the tart from sliding around.)
  • Optional: Melt down the chocolate and brush a thin layer onto inside of the tart shell. (This will keep the crust from getting soggy.)
  • Refrigerate for 5-10 minutes to set the chocolate.
  • Add in the pastry cream and use a spatula to smooth it out. Fill the tart ¾ full with cream.
  • Add the fruit to decorate however you like! See my pictures above for ideas.
  • Mix the apricot preserves and water, microwave until melted. Glaze the cut fruit (strawberries and kiwi) with the mixture.
  • Serve immediately or refrigerate overnight. Lasts 1-2 days in the refrigerator.

Video

Notes

Chocolate- melt low and slow. In a glass bowl, microwave for 30 seconds, stir, 15 seconds, stir, and continue until the chocolate is almost fully melted. Do not burn!
You CANNOT half or quarter the tart dough or pastry cream recipes because they each have 1 whole egg as a required ingredient. 

Nutrition

Serving: 1serving | Calories: 537kcal | Carbohydrates: 65g | Protein: 7g | Fat: 28g | Saturated Fat: 17g | Cholesterol: 103mg | Sodium: 147mg | Potassium: 167mg | Fiber: 1g | Sugar: 36g | Vitamin A: 881IU | Calcium: 103mg | Iron: 2mg
 
close up of baked tart shell

June 4, 2020 Pies And Tarts

Pâte sucrée (Tart Dough Recipe)

Pâte sucrée is a sweet shortcrust pastry dough that is buttery, flaky, and only takes 15 minutes to make. It's even easier to make than pie dough and is basically a giant shortbread cookie.

Fill it with silky pastry cream to make a fresh fruit tart or with frangipane to make a red wine poached pear tart. This recipe is incredibly tender and makes a delicious crunch when you cut it with a fork.

What's In This Blog Post

  • Ingredients Needed
  • PÂTE SUCRÉE STEP-BY-STEP
  • MAKING A TART SHELL
  • FAQ
  • More Recipes You'll Love

Ingredients Needed

pate sucre ingredients

Pro Tip - Make sure your butter is room temperature. Room temperature butter is when it's soft enough to leave an indent with your finger, but it still holds its shape and is not melted all over the plate. I make my butter room temperature by microwaving it for 10-second increments until it's the right consistency.  

PÂTE SUCRÉE STEP-BY-STEP

close up of soft butter
pate sucre ingredients in the bowl of a mixer
tart dough in a mixing bowl
tart dough on plastic wrap
  1. Add the room temperature butter into the bowl of your stand mixer with the paddle attachment. Mix on medium speed for about 30 seconds until its smooth.
  2. Add in the vanilla and the egg to the butter and mix until combined. 
  3. Add your sifted powdered sugar and salt to the butter mixture.
  4. While mixing on low, gradually add your flour and mix until everything starts to come together and a dough forms.
  5. Divide the dough into 2 pieces, wrap in plastic wrap, and flatten into disks. Refrigerate for a minimum of 1 hour before using your dough. If you skip this step, your crust will melt in the oven. 

MAKING A TART SHELL

tart dough rolled out on a white background with wooden rolling pin
top view of tart dough in tart pan with trimmings surrounding it
tart pan on blue sheet pan
baked empty tart crust
tart dough
  1. Preheat your oven to 375ºF. Take your tart dough out of the refrigerator about 30 minutes before rolling it out. It should be slightly flexible but still firm. 
  2. Lightly flour your surface and rolling pin and roll the dough out to ⅛ inch thick. The type of rolling pin you use does not matter as long as it's flat. Begin by evenly rolling out your dough and moving it on the floured surface frequently to prevent sticking. Rotate frequently, add flour to keep from sticking, and press any cracks together. Don't worry about too many cracks!

    Pro-Tip: If your dough keeps cracking, it could be too cold. Let it rest for 10 minutes and try rolling again.
  3. Roll the dough up onto your rolling pin and lay it into the pan. I prefer a 91/2" tart pan with a removable bottom. That way, you can see the beautiful edges of the tart after baking. The removable bottom also makes it easy to take the crust out of the tin. 
  4. Carefully lift the dough up on the sides and press it into the pan. Use your fingers to press the dough into the ridges on the side. Don't press too hard so that you press through the dough. Make sure you get into the bottom corners!
  5. Roll your rolling pin flush across the top of the tart shell to remove the excess dough. Or you can use a paring knife to cut off the excess evenly. Squish together the leftovers and save them to make another tart.
  6. Freeze the tart shell for 20 minutes. Do NOT skip this step!
  7. Press a layer of tin foil into the tart shell, all the way into the corners, and fill (to the top) with pie weights. These are the pie weights I use, but you can use dry beans or rice instead.  These weights will stop the dough from puffing up while baking. 
  8. Place on top of a baking sheet and bake in the oven for 15 minutes. Rotate to promote even browning and bake another 15 minutes.

    ProTip: When you make a fresh fruit tart that is not baked, you have to bake your tart shell on its own first and let it cool before filling it. This is called blind baking or pre-baking.
  9. After 30 minutes of baking, check to see if the foil is releasing from the dough by pulling back gently. If it's sticking, then the tart needs to be baked for longer. Check every 2 minutes until the foil is able to release from the side of the tart without sticking. Take the tart out of the oven and let it cool for 5 minutes.
  10. Gently lift the foil to remove the pie weights. Then return the tart shell back to the oven and bake for another 10 minutes or until the edges begin to turn golden brown and the sides of the shell start to pull away from the edges of the pan.
  11. Place the whole tart and pan into the fridge to cool down until its totally cool.
  12. Once the tart is cool, you can remove the outer ring by gently lifting up from the bottom of the tin. You can serve your tart on the base or you can gently remove it from the base by separating it with a paring knife. There is a risk of breakage when you do this though, so I tend not to risk it and just serve it on the base.

    Pro Tip - Brush the surface of the tart shell with some melted chocolate (optional) to keep the fillings from making the crust soggy (you can skip this step if you don't like chocolate but then you should fill your tart no more than 4 hours before serving). 
  13. Add in your favorite fillings like pastry cream, lemon curd or frangipane and decorate with fruit like strawberries, kiwi fruit, or get fancy with some red wine poached pears.
fresh fruit tart

FAQ

Can I substitute granulated sugar?

Granulated sugar tends to aerate the butter and make the dough fluffy which is not what we want. The air pockets expand and cause the dough to shrivel and shrink during baking. 

Can I make tart dough without a stand mixer?

You can definitely make tart dough without a stand mixer. You can use a hand-held mixer or you can even just mix with a fork by hand.  

How to store leftover tart dough

Leftover dough can be kept in the fridge for a week or frozen for up to 6 months. If you have the freezer space, it's actually really great to make your tart shell ahead of time (inside the pan), wrap it in plastic wrap, and put it in the freezer until you need to bake it. A great time-saving tip for those last-minute desserts. 

Can I make mini tarts with this recipe?

Yes definitely! To blind bake mini tarts using mini tart pans, poke a few holes in the bottom of the tart dough with a fork and then freeze the dough for 20 minutes. Bake the mini tarts for 10-15 minutes until the edges begin to turn golden, then let them cool fully before filling. No need to use foil or pie weights.

More Recipes You'll Love

close up of a slice of lemon tart with creme fraiche and a raspberry on a white plate
lemon tart
apple tart
cream tart
cream tart
joconde
joconde
pastry cream in clear glass bowl on white background
pastry cream
close up of a slice of berry chantilly cake
berry chantilly cake

Recipe

baked empty tart crust
Print Recipe
5 from 5 votes

Pâte sucrée (tart dough recipe)

Pâte sucrée is a sweet shortcrust that is often used to make fruit tarts. It is buttery, flaky and oh-so-easy to make. This recipe makes enough dough for TWO 8" round tarts. Freeze leftover dough. 
Prep Time10 minutes mins
Cook Time25 minutes mins
chill1 hour hr
Total Time35 minutes mins
Course: Dessert
Cuisine: French
Servings: 2 9 ½" tarts
Calories: 443kcal
Author: Liz Marek

Equipment

  • Stand mixer with paddle attachment
  • Tart pan with removable bottom (or a regular pie pan)
  • Tin foil
  • Pie weights (or dry beans/rice)
  • Rolling Pin

Ingredients

Pâte sucrée ingredients

  • 8 oz room temperature butter
  • 4 oz powdered sugar
  • ½ teaspoon salt
  • 1 teaspoon vanilla extract
  • 1 large egg
  • 12 oz all purpose flour
US Customary - Metric

Instructions

How to make Pâte sucrée

  • Add the butter into the bowl of your stand mixer with the paddle attachment. Mix on medium speed for about 30 seconds until smooth and creamy.
  • Add in your sifted powdered sugar and salt and mix until combined and smooth.
  • Add in the vanilla and the egg and mix until combined.
  • Gradually add your flour while mixing on low until everything starts to come together and a dough forms.
  • Divide the dough into 2 pieces, wrap in plastic wrap and flatten into disks. Refrigerate for minimum of 1 hour before using your dough. If you skip this step, your crust will melt in the oven. 
  • Leftover tart dough can be refrigerated for up to a week or frozen for 6 months.
  • To bake your tart, bring the dough out of the fridge or freezer for 30-60 minutes or until it's flexible enough to bend without cracking
  • Preheat your oven to 350ºF
  • Roll your tart dough out to ⅛" thick using a rolling pin and a flour dusted surface
  • Roll the dough up onto your rolling pin and unroll it into your tart pan
  • Carefully push the dough against the sides and corners of the tart pan
  • Then use your rolling pin to roll across the top of the dough to trim off the excess
  • Freeze your tart for 30 minutes
  • Place some tinfoil into the tart pan and fill it with some pie weights (or you can use dried beans or rice instead). Place the tart pan on a larger cookie sheet to easily lift and move it in the oven.
  • Bake your tart for 30 minutes, rotate the pan halfway through baking to promote even browning
  • Remove the foil and pie weights and bake for another 10 minutes to evenly brown the tart
  • Let the tart cool completely before filling it with things like pastry cream, lemon curd or ganache!

Video

Notes

  • Make sure your butter is room temperature. Room temperature butter is when it's soft enough to leave an indent with your finger but it still holds its shape and is not melted all over the plate. I make my butter room temperature by microwaving it for 10-second increments until its the right consistency.  
  • Cold eggs must be room temperature to combine with the butter properly. Place cold eggs (while still in the shell) into warm water for 5 minutes to bring them to room temperature. 
  • If your dough keeps cracking, it could be too cold. Let it rest for 10 minutes and try rolling again.
  • When you make a fresh fruit tart that is not baked, you have to bake your tart shell on its own first and let it cool before filling it. This is called blind baking or pre-baking.
  • Brush the surface of the tart shell with some melted chocolate (optional) to keep the fillings from making the crust soggy (you can skip this step if you don't like chocolate but then you should fill your tart no more than 4 hours before serving). 

Nutrition

Calories: 443kcal | Carbohydrates: 93g | Protein: 10g | Fat: 2g | Cholesterol: 52mg | Sodium: 313mg | Potassium: 110mg | Fiber: 2g | Sugar: 28g | Vitamin A: 75IU | Calcium: 21mg | Iron: 4.2mg


pastry cream in a tart shell

June 3, 2020 Blog

Homemade Pastry Cream Recipe

This pastry cream recipe makes a rich, vanilla-flavored custard that is thick enough to pipe, use as a filling for cakes, tarts, or for your favorite pastries.

pastry cream in a tart shell

I love this recipe and have been using it for years. Every since I attended the Oregon Culinary Institute back in 2010 and learned how to make this staple in a pastry chefs kitchen, I've really understood why it's pretty amazing.

It's perfect for filling a Boston cream pie, using as the base of your fruit tart, filling donuts, making crème chantilly for cream puffs, Napoleans, and more!

Ingredients Needed

Pastry cream is basically vanilla-flavored milk and sugar thickened eggs and cornstarch (similar to ice cream but not frozen). 

pastry cream ingredients

Pastry Cream Recipe Step-By-Step

  1. Bring milk and first quantity of sugar to a simmer over medium-high heat. Whisking constantly to avoid burning.whisking pastry cream ingredients in stainless steel pot with blue whisk
  2. In a separate, large heatproof bowl, combine the eggs, cornstarch, vanilla extract, and the second quantity of sugar and set it aside. pastry cream ingredients in a clear glass bowl
  3. Once the milk is simmering, turn off the heat and add ¼ of your hot milk mixture to the egg mixture VERY slowly while whisking constantly. This is going to temper (slowly heat) your egg yolk mixture and avoid curdled scrambled eggs. Whisk until smooth.

    Pro Tip: The key to a perfect pastry cream recipe is to temper the eggs. This means to heat them a little bit at a time so you don't shock (aka cook) them. If you just dump all the hot milk into the eggs right away you'll cook them and end up with egg lumps in your pastry cream. Adding hot milk mixture slowly to cold egg mixture with measuring cup and blue whisk
  4. Turn the heat back on (medium) and slowly add the mixture to the rest of the milk in your saucepan, whisking constantly. Bring to a simmer.adding tempered egg mixture to stainless steel pan with blue whisk
  5. Once your mixture starts bubbling, continue whisking for 1 minute to ensure the mixture is cooked and properly thickened.closeup of thickened pastry cream in metal pot with blue whisk
  6. Pour your mixture into a heatproof container. Divide the softened butter into cubes and place them on top of the pastry cream, allowing them to melt. Do not cover the bowl.pastry cream in clear bowl with melted butter on topStep 7 - Allow your pastry cream to cool at room temperature until just warm to the touch and the butter begins to harden around the edges. This will take a few hours. Do not refrigerate. 
  7. Allow your pastry cream to cool at room temperature until just warm to the touch and the butter begins to harden around the edges. This will take a few hours. Do not refrigerate. cooled pastry cream in a clear glass bowl
  8. Stir in your butter with a whisk. Don't be worried if it looks curdled at first, this is normal. Just keep whisking until smooth.closeup of thickened pastry cream in metal pot with blue whisk
  9. Cover the pastry cream with plastic wrap so that it's touching the surface of the pastry cream to avoid a skin from forming. Chill before using. Can be kept in the refrigerator for 2-3 days. You cannot freeze pastry cream.pastry cream in a square glass container with plastic wrap on top

FAQ

What is pastry cream?

This pastry cream recipe is very similar to my coconut custard recipe, although custards are typically poured into a dish while still hot and then served warm, while pastry cream is almost always served cold but the two are pretty interchangeable.

Pastry cream is also similar to vanilla pudding, except that vanilla pudding usually does not have eggs and is only thickened by cornstarch, very similar to a custard. 

Bavarian cream is similar to pastry cream except that it is thickened by gelatin instead of cornstarch. 

So why all the names for basically the same thing? It all depends on how you use it. So don't get hung up on the name.

How do you store pastry cream

Pastry cream should be stored in the refrigerator for up to 3 days and used as quickly as possible. It can be used in fresh fruit tarts or cakes has a shelf life of no more than 2 days.
Before refrigerating, make sure to wrap it well with plastic wrap and press the plastic up against the top of the cream. This will prevent it from getting dried-out skin on the top. 

Why is my pastry cream runny?

Egg yolks contain a protein called amylase that will actually break down and get watery if it's not cooked all the way. This pastry cream is thickened by cooking the egg yolks and corn starch within the liquid.
So make sure you cook it for long enough after it starts bubbling

More tasty recipes

photo of cream puffs filled with whipped cream
boton cream pie on a white plate
mini pavlova decorated with Chantilly cream and topped with fresh berries
cream tart in the shape of a heart topped with fresh flowers, fruit and macarons
close up picture of mille-feuille
baked empty tart crust
creamy coconut custard made from coconut milk

Why did my pastry cream separate?

Pastry cream separates when the liquid in the cream separates from the solids because it wasn't cooked long enough. This is a pretty common problem and can be easily solved.
 
When you bring your mixture to a simmer for the second time, make sure to cook it for another minute, or long enough so all the cornstarch cooks and the pastry cream feels thickened. 

Why is my pastry cream lumpy?

Two things can cause lumpy pastry cream. One, you could have over-heated the pastry cream while cooking, which causes lumps. You can get rid of these lumps by using an immersion blender.
 
Or two, you added the cream too fast to your eggs and accidentally cooked the eggs a little. You can get these cooked egg-lumps out by pushing your pastry cream through a strainer or by using an immersion blender. 

How can I make this dairy-free?

You can make this pastry cream dairy-free by substituting the milk for any other type of milk like almond or soy. You can also leave out the butter or use vegan butter. 

Want more creamy desserts? Check these out!

Coconut Custard
Cream Tart 
Fresh Fruit Tart
Homemade Lemon Curd

Recipe

pastry cream in a tart shell
Print Recipe
4.86 from 14 votes

Homemade Pastry Cream Recipe

Pastry cream is a vanilla custard that is used in all types of desserts and cake fillings. Super versatile and can be made dairy free!
Prep Time5 minutes mins
Cook Time10 minutes mins
cooling12 hours hrs
Total Time12 hours hrs 15 minutes mins
Course: Dessert
Cuisine: French
Servings: 26 ounces
Calories: 57kcal
Author: Liz Marek

Ingredients

  • 16 oz milk may sub: almond, soy, coconut etc
  • 2 oz sugar
  • 1 teaspoon vanilla extract
  • 1 ½ oz cornstarch
  • 2 oz sugar
  • 2 large egg yolks
  • 1 large egg
  • 2 oz unsalted butter
US Customary - Metric

Instructions

Pastry Cream Recipe Instructions

  • Bring milk and first quantity of sugar to a simmer over medium high heat. Whisking constantly to avoid burning.
  • Combine the eggs, cornstarch, and second quantity of sugar in a heat proof bowl and whisk to combine
  • Add ¼ of your hot milk mixture to the egg mixture VERY slowly while whisking constantly to temper your egg yolk mixture. Whisk until smooth.
  • Slowly add the rest of the milk, whisking constantly. Return mixture to the saucepan and bring to a simmer.
  • Once your mixture starts bubbling, reduce the heat to medium and continue whisking for 2-3 minutes to ensure the mixture is cooked and properly thickened.
  • Pour your mixture into a heatproof container and place your butter cubes on top, allowing them to melt. Do not cover.
  • Allow your pastry cream to cool until just warm to the touch. Stir in your butter and then add in your vanilla extra.
  • Cover with plastic wrap so that it's touching the surface of the pastry cream to avoid a skin forming. Can be kept in the refrigerator for 2-3 days.

Video

Notes

  • Pro Tip: The key to a perfect pastry cream recipe is to temper the eggs. This means to heat them a little bit at a time so you don't shock (aka cook) them. If you just dump all the hot milk into the eggs right away you'll cook them and end up with egg lumps in your pastry cream. 
  • If your pastry cream is lumpy, don't worry! Try pushing your pastry cream through a strainer or using an immersion blender.
  • You can make this pastry cream dairy-free by substituting the milk for any other type of milk like almond or soy. You can also leave out the butter. 
  • Pastry cream lasts up to 3 days in the refrigerator and has a shelf life of no more than 2 days. Before refrigerating, wrap with plastic wrap and press the plastic up against the pastry cream to prevent it from getting a skin.

Nutrition

Serving: 4ounces | Calories: 57kcal | Carbohydrates: 7g | Protein: 1g | Fat: 3g | Saturated Fat: 2g | Polyunsaturated Fat: 0.2g | Monounsaturated Fat: 1g | Trans Fat: 0.1g | Cholesterol: 28mg | Sodium: 10mg | Potassium: 31mg | Fiber: 0.01g | Sugar: 5g | Vitamin A: 112IU | Calcium: 25mg | Iron: 0.1mg


Cake sculpted into the shape of a goldfish with edible coral and a shiny isomalt cake board

June 1, 2020 Course Preview

Sakura Goldfish Cake Tutorial

Skill level: Intermediate

This tutorial goes under the sea with a beautiful ocean-themed design. Learn how to make a Sakura goldfish cake, featuring a gravity-defying cake structure, edible coral elements, sculpted fish fins that hold their shape, edible shiny fish eyes and a hand-painted pattern, along with a watery reflective cake board.

There's a lot to cover in this tutorial, so let's get our tools together and let's get started!

1:19:46 Minutes of Instruction

What You Will Learn

  • How to make a realisticly sculpted goldfish cake
  • Learn how to create edible fish fins that flow and hold their shape
  • How to make a shiny reflective cake board that looks like water
  • Learn how to make realistic coral and edible fish eye elements

Tutorial Chapters

  1. Making the base 0:39
  2. Creating the structure 8:16
  3. Making the coral structure 16:53
  4. Adding and sculpting cake 22:14
  5. Shaping the cake 25:17
  6. Frosting the cake 30:38
  7. Making rice paper sails 32:06
  8. Adding the fins and tail 40:57
  9. Adding fondant 43:22
  10. Shaping the fish 47:31
  11. Dusting the fish 49:26
  12. Finishing adding fins 51:38
  13. Making the coral 53:18
  14. The eyes 58:30
  15. Painting the fish white 1:00:36
  16. Decorating the board 1:12:33
  17. Painting the fish orange 1:15:51

Downloads

Materials List

Fish Board Template

Sakura Goldfish Reference

Cake sculpted into the shape of a goldfish with edible coral and a shiny isomalt cake board

June 1, 2020 Paid Video

Sakura Goldfish Cake

Skill level: Intermediate

This tutorial goes under the sea with a beautiful ocean-themed design. Learn how to make a Sakura goldfish cake, featuring a gravity-defying cake structure, edible coral elements, sculpted fish fins that hold their shape, edible shiny fish eyes and a hand-painted pattern, along with a watery reflective cake board.

There's a lot to cover in this tutorial, so let's get our tools together and let's get started!

1:19:46 Minutes of Instruction

What You Will Learn

  • How to make a realisticly sculpted goldfish cake
  • Learn how to create edible fish fins that flow and hold their shape
  • How to make a shiny reflective cake board that looks like water
  • Learn how to make realistic coral and edible fish eye elements

Tutorial Chapters

  1. Making the base 0:39
  2. Creating the structure 8:16
  3. Making the coral structure 16:53
  4. Adding and sculpting cake 22:14
  5. Shaping the cake 25:17
  6. Frosting the cake 30:38
  7. Making rice paper sails 32:06
  8. Adding the fins and tail 40:57
  9. Adding fondant 43:22
  10. Shaping the fish 47:31
  11. Dusting the fish 49:26
  12. Finishing adding fins 51:38
  13. Making the coral 53:18
  14. The eyes 58:30
  15. Painting the fish white 1:00:36
  16. Decorating the board 1:12:33
  17. Painting the fish orange 1:15:51

Downloads

Materials List

Fish Board Template

Sakura Goldfish Reference

berry wash featured image

May 19, 2020 Culinary Techniques

How To Make Strawberries Last Longer

Use this berry wash recipe to get rid of nasty mold spores and make your strawberries last longer!

berry wash featured

Have you ever wondered why your strawberries (or any berry for that matter) do not last long in the fridge? The problem is mold spores found on all berries!

Whether you are preparing a berry Chantilly cake, or something as elaborate as my "Fresh Strawberry Cake with Strawberry Buttercream Made from Fresh Strawberries" recipe, these steps will allow you to prepare and store your berries so that they will last longer and allow you more time to use them in-between your favorite recipes. 

Berries are a household staple, but unfortunately, they have a bad reputation. More often than not, you will buy a carton of berries at the grocery store, and then only a few days later they have already begun to rot from mold spores.

All berries have mold spores already on them. It's just part of being a berry. But that doesn't mean you can't do something about it!

closeup of strawberry with mold With these steps below, you will be able to increase the life of your berries so they last for days longer! 
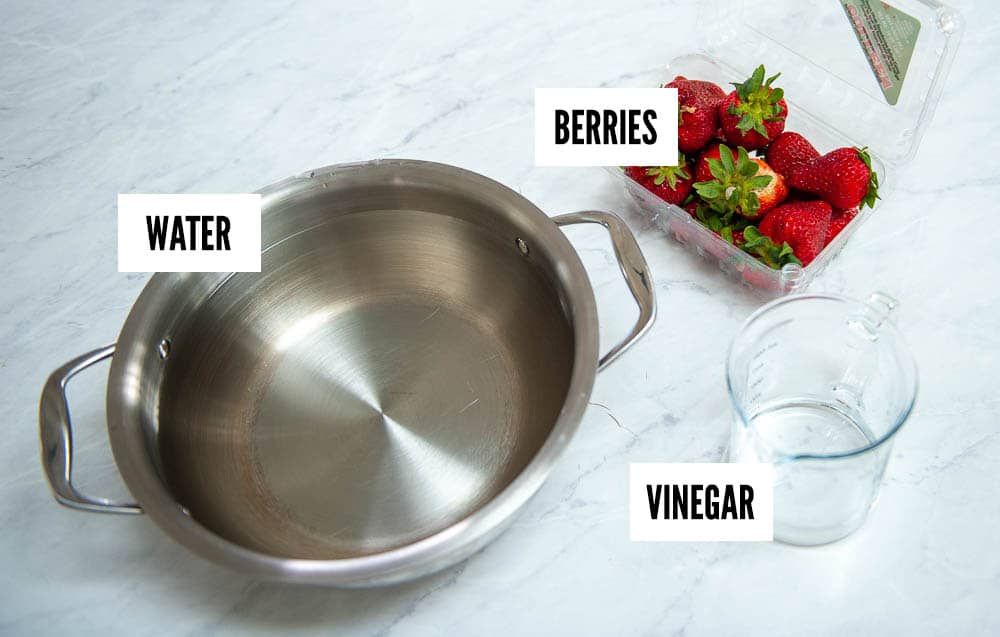
What's In This Blog Post

  • Strawberry Wash Ingredients
  • How Long Do Berries Usually Last?
  • How To Make A Berry Wash Solution Step-By-Step
  • Additional Tips to Make Your Strawberries Last Longer

Strawberry Wash Ingredients

ingredients for berry wash
  • Large Container
  • Paper Towels
  • Colander
  • White Vinegar
  • Fresh Berries

How Long Do Berries Usually Last?

Berries generally last anywhere from 3 to 7 seven days once they are picked and stored. It is best to refrigerate your Berries, and in doing so, you will extend their freshness. Berries left at room temperature will continue to decay faster unless they are placed in a cool, dry temperature-controlled environment. 

fresh strawberries in hands

When it is possible, it is best to shop for berries both when they are in season as well as from local farmers. When you shop locally, you are not only supporting smaller businesses and helping your community, but you are also buying fresher berries that have spent less time off of the vine. 

How To Make A Berry Wash Solution Step-By-Step

Just because strawberries tend to have a shorter shelf life does not mean you should feel discouraged from buying them. There are a number of very simple and effective steps that you can take when you are buying and storing your strawberries at home that will give your strawberries the best chance at a longer-than-average lifespan. 

  1. In a large stockpot or bowl, combine 1 gallon of cool water with ½ cup of white vinegar (you can use less water and vinegar for fewer berries)berries in mixture of water and vinegar in metal pot
  2. Soak the berries in this vinegar-water wash for about 10 minutes. I gently stir mine with my hand to make sure all the berries are getting some vinegar love.
  3. Drain the berries in a colander in the sink and give a quick rinse. Rinsing isn't really necessary since the small amount of vinegar will not affect the taste but I do it anyway.strawberries rinsed in water in white colander
  4. Transfer berries to paper towels and let them air dry until they are completely dry.drying berries on paper towel
  5. Store the dry berries with a dry paper towel in a glass or plastic container without a lid to promote airflow in the fridge for up to three weeks! You can re-use the container the berries came in, just make sure you wash it first!

These berries are two weeks old and are a bit shrunken, but still no mold!

strawberries in plastic container

The vinegar in this strawberry wash kills mold spores that make your strawberries go bad so that they will last much longer, up to three weeks in the refrigerator! 

Additional Tips to Make Your Strawberries Last Longer

molding blackberries in plastic container
  • Squished, moldy, or bruised berries should not be stored away because the mold will spread to the other berries.
  • Moisture is detrimental to berries, which is why you must keep them dry to ensure freshness and longevity.
  • Keeping your berries dry and refrigerated will slow down the molding and decaying process. 
  • Occasionally, check up on your stored strawberries. If any berries that are stored have begun molding or show signs of going bad, remove them from the bunch and return the rest of the berries back to storage.
mixed berries in white colander

Bonus Tip!

Even if your strawberries are not molding, they might start to shrivel up from losing moisture in the fridge. You can bring them back to life and plump them up a bit by soaking old berries in ice water for 20 minutes!

strawberries in ice water

I mean.. they aren't good as new but they look pretty good!

close up of washed strawberries

If you enjoyed this tutorial on how to make your strawberries last longer, feel free to use your fresh strawberries to recreate some of our favorite strawberry recipes:

  • The Best Strawberry Shortcake Recipe
  • Strawberry Cinnamon Rolls with Cream Cheese Frosting
  • Berry Filling Recipe
  • Strawberry Cake Mix Recipe

Recipe

berry wash featured image
Print Recipe
4.79 from 19 votes

How to make strawberries last longer

How to wash your sberries so that they last for up to three weeks longer! Ony takes 15 minutes!
Prep Time5 minutes mins
soaking10 minutes mins
Total Time15 minutes mins
Course: Dessert
Cuisine: American
Servings: 2 lb
Calories: 10kcal
Author: Liz Marek

Equipment

  • strainer

Ingredients

  • 32 ounces fresh berries
  • 1 gallon cold water
  • 4 ounces white vinegar
US Customary - Metric

Instructions

  • Combine the water and vinegar in a large stock pot or bowl
  • Add your berries and let them soak for 10 minutes
  • Lightly rinse the berries with fresh water and place them onto some paper towels to dry
  • Store your berries in the fridge and enjoy them for up to three weeks!

Video

Notes

  1. You can reduce or increase the amount of water and vinegar for the number of berries that you have. For instance, if you only need to wash a pint of strawberries you can use 4 cups of cold water and 2 Tablespoons of vinegar to wash the berries. 
  2. Make sure the berries are dry before you store them to prevent them from getting soggy
  3. Choose berries that don't have any signs of mold or bruising for maximum freshness and longevity 
  4. Occasionally check the berries for any bad ones and immediately remove them 
  5. Freshen up old berries by soaking them in ice water for 20 minutes

Nutrition

Serving: 4ounces | Calories: 10kcal | Carbohydrates: 1g | Sodium: 96mg | Sugar: 1g | Calcium: 57mg
« Previous Page
Next Page »

Primary Sidebar

Hi, I'm Liz! I'm a cake artist and recipe developer, and I won Netflix's Is It Cake? Holiday 2 with a hyperrealistic Santa. I write foolproof recipes that explain why things work, not just how.

I also teach full-length cake tutorials, including sculpted cakes, at Sugar Geek University.

More about me →

Our Cake Greatest Hits

Check out our best cake recipes

Celebrate Halloween 🎃

  • black and white striped cake with pink drip, gummy eyeball with ice cream cone on top
    Gummy Eyeball Cake
    Cook Time1 Hours 30 Minutes
  • close up of a slice of black velvet cake
    Black Velvet Cake
    Cook Time50 Minutes
  • monster mash cheesecake brownies cut into squares on a white background. Sprinkles, pumpkins and plates around the brownies
    Monster Mash Cheesecake Brownies
  • close up of candy apples
    The Best Candy Apple Recipe
  • pumpkin pie recipe
    Pumpkin Pie Recipe
    Cook Time2 Hours
  • close up of pumpkin cheesecake bars on a plate
    Pumpkin Cheesecake Bars
    Cook Time4 Hours

Popular Recipes

  • close up of ganache drizzling into a bowl
    The Best Chocolate Ganache Recipe
    Cook Time20 Minutes
  • Piping easy buttercream rosettes onto a cake using a 1M star piping tip
    Easy Buttercream Frosting
    Cook Time25 Minutes
  • close up slice of marble cake
    Moist and Fluffy Marble Cake Recipe
    Cook Time40 Minutes
  • Slice of red velvet cake with cream cheese frosting on a white plate.
    Red Velvet Cake Recipe
    Cook Time1 Hours 40 Minutes

Footer

↑ back to top

About

  • Privacy Policy
  • Terms of Service

Newsletter

  • Sign Up! for emails and updates

Contact

  • Contact
  • About Us

Copyright © 2024 Sugar Geek Show, Inc. All Rights Reserved.

Rate This Recipe

Your vote:


A rating is required
A name is required
An email is required