







These mini apple pies are just as full of spiced apple flavor as a full-size pie. Everyone gets their own without cutting a single slice. All you need is pie crust, apples, and a couple of muffin tins to turn my apple pie recipe into minis perfect for the holidays.
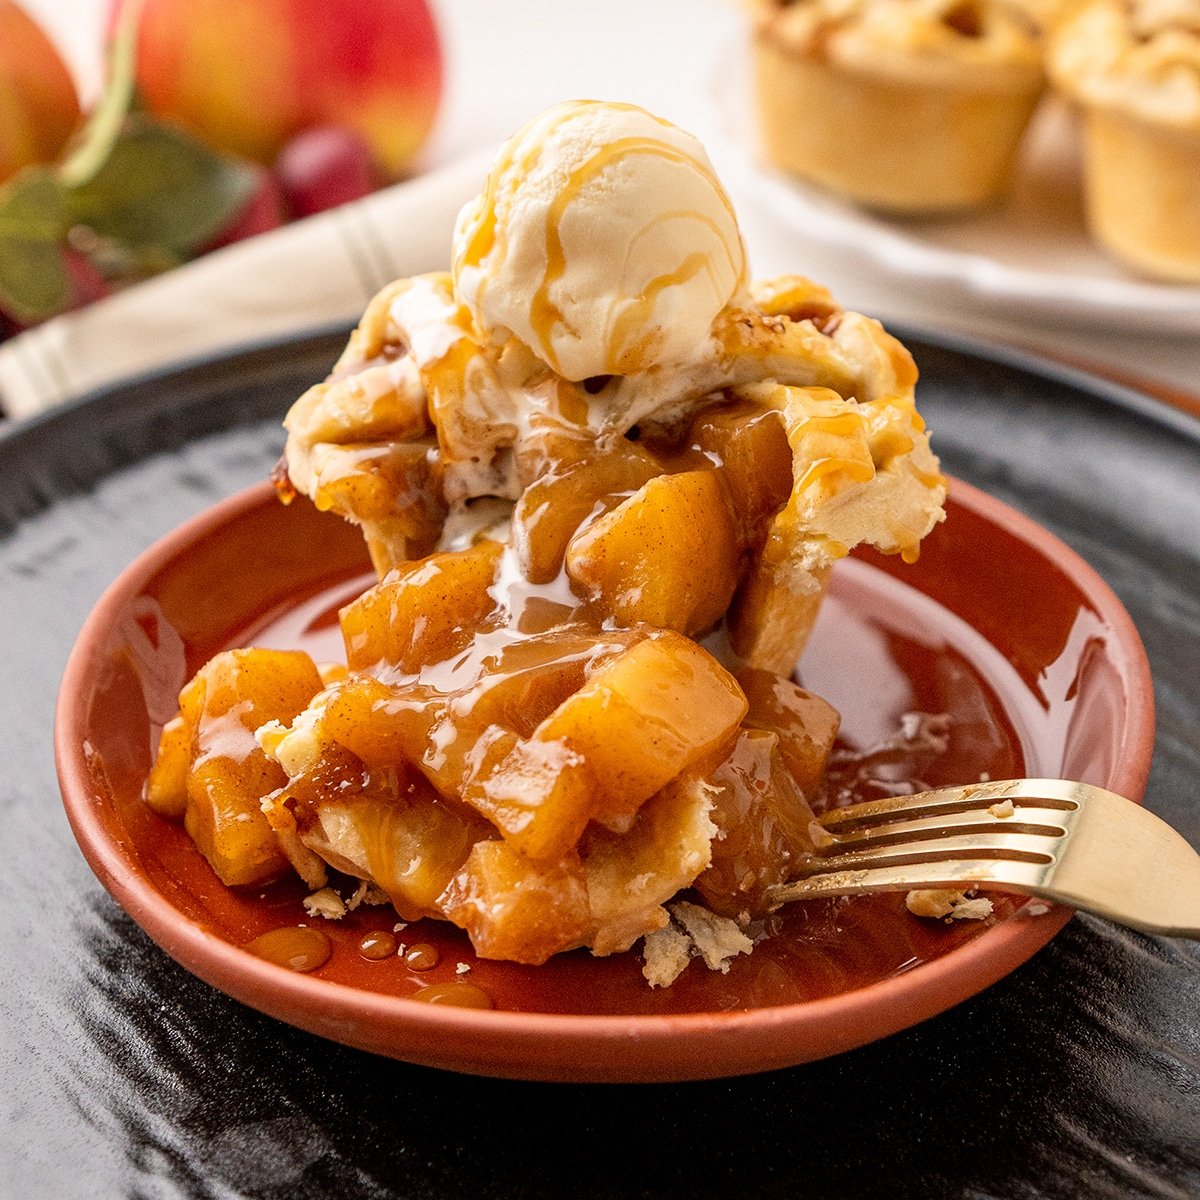
I originally made these mini pies for a friend's daughter's bridal shower, because everyone gets their own little pie and nobody has to slice anything. I use the same mealy pie dough I always reach for, since it stays sturdy and crisp under a juicy filling. From bake time to shaping those mini pie crusts, I'm walking you through all my tips and tricks below.
Quick Glance at the Recipe: Mini Apple Pies
- Recipe Name: Mini Apple Pies
- Why You'll Love It: Individually portioned so nobody has to share, a thick spiced filling that's never watery, and a sturdy crust that won't turn soggy under all that filling
- Time and Difficulty: About 1 hour prep plus chilling and freezer time, 20 to 25 minutes bake, moderate difficulty
- Main Ingredients: Pie dough (flour, butter, eggs), apples, brown sugar, cinnamon, cornstarch
- Method: Homemade pie dough shaped in a muffin tin, filled with a cooked and thickened apple filling, topped with a lattice crust, and baked until golden
- Texture and Flavor: Sturdy, buttery crust with tender spiced apples in a thick, caramel-like filling, not watery
- Quick Tip: Cut your apples into ¼ inch cubes so the filling settles into the small crusts without leaving gaps
Jump to:
- Quick Glance at the Recipe: Mini Apple Pies
- What Makes These Mini Apple Pies So Good⭐⭐⭐⭐⭐
- Mini Apple Pies Ingredients
- How to Make Mini Apple Pies Step-By-Step
- Common Mini Apple Pie Problems to Avoid
- Final Thoughts
- Make This Recipe Your Own
- Mini Apple Pies FAQs
- More Pie And Tart Recipes To Try
- Ready To Master Cake Decorating?
- Leave Me A Review⭐️⭐️⭐️⭐️⭐️
- Recipe
What Makes These Mini Apple Pies So Good
⭐⭐⭐⭐⭐
The filling uses the same cook-it-down-first approach I love in my caramel apple pie, with a couple of extra tricks just for minis.
- The filling is never watery. It gets cooked and thickened on the stovetop first, so you get a thick spiced sauce.
- The crust stays sturdy. Mealy pie dough holds its shape in the muffin tin and doesn't go soggy under the filling.
- Two topping options. A full woven lattice, or a quick crumble or leaf shortcut if you're short on time.
- Everyone gets their own. There's no slicing and nobody has to share.
Mini Apple Pies Ingredients
This recipe is mostly pantry staples: a buttery mealy pie dough and a thick, cooked apple pie filling. No fancy equipment required beyond a muffin tin and a round cutter. I always recommend weighing your ingredients with a digital kitchen scale for the most accurate results, and this matters even more since this is a doubled batch of my usual mealy dough recipe.

- All-purpose flour - The base of the mealy pie dough. No need for cake flour here, all-purpose gives the crust enough structure to hold its shape in a muffin tin.
- Salt - Used in both the dough and the filling, it balances the sweetness and brings out the apple flavor.
- Unsalted butter - Grated cold into the flour so it blends in evenly for a sturdy, crisp crust, and melted into the apple filling for richness. Keeping it cold is what keeps the dough tender instead of tough.
- Eggs - They help the dough come together, and one more gets whisked with water for the egg wash that gives the crust its golden shine.
- Ice water - Added slowly to bring the dough together without warming up the butter.
- Apples - The star of the filling. Tart apples that hold their shape hold up best, I love Granny Smith, Jonagold, Honeycrisp, Braeburn, Mutsu, pink lady, or gala. Granny Smiths are my favorite for homemade caramel apples too, since their tartness cuts through all that sweet caramel.
- Lemon juice - Brightens the filling and keeps the apples from browning while you prep the rest of the ingredients.
- Brown sugar - Sweetens the filling and adds a hint of caramel flavor as it cooks down with the apples.
- Cinnamon and cloves - The warm spices that make this taste like fall.
- Apple juice - Used twice, most of it to help soften the apples as they cook and a little more to make the cornstarch slurry that thickens the filling.
- Vanilla extract and almond extract - Vanilla extract rounds out the filling, and a touch of almond extract, totally optional, adds a subtle bakery-style depth.
- Honey - A small addition that deepens the filling's flavor.
- Cornstarch - Thickens the filling into a spiced caramel sauce instead of a watery mess, this is what keeps your pies from turning into apple soup. Substitute ClearJel 1:1 for a clear, glossy finish.
How to Make Mini Apple Pies Step-By-Step
Preheat your oven to 400º F before you start assembling your pies. Not before you make the dough, that needs plenty of time to chill first.
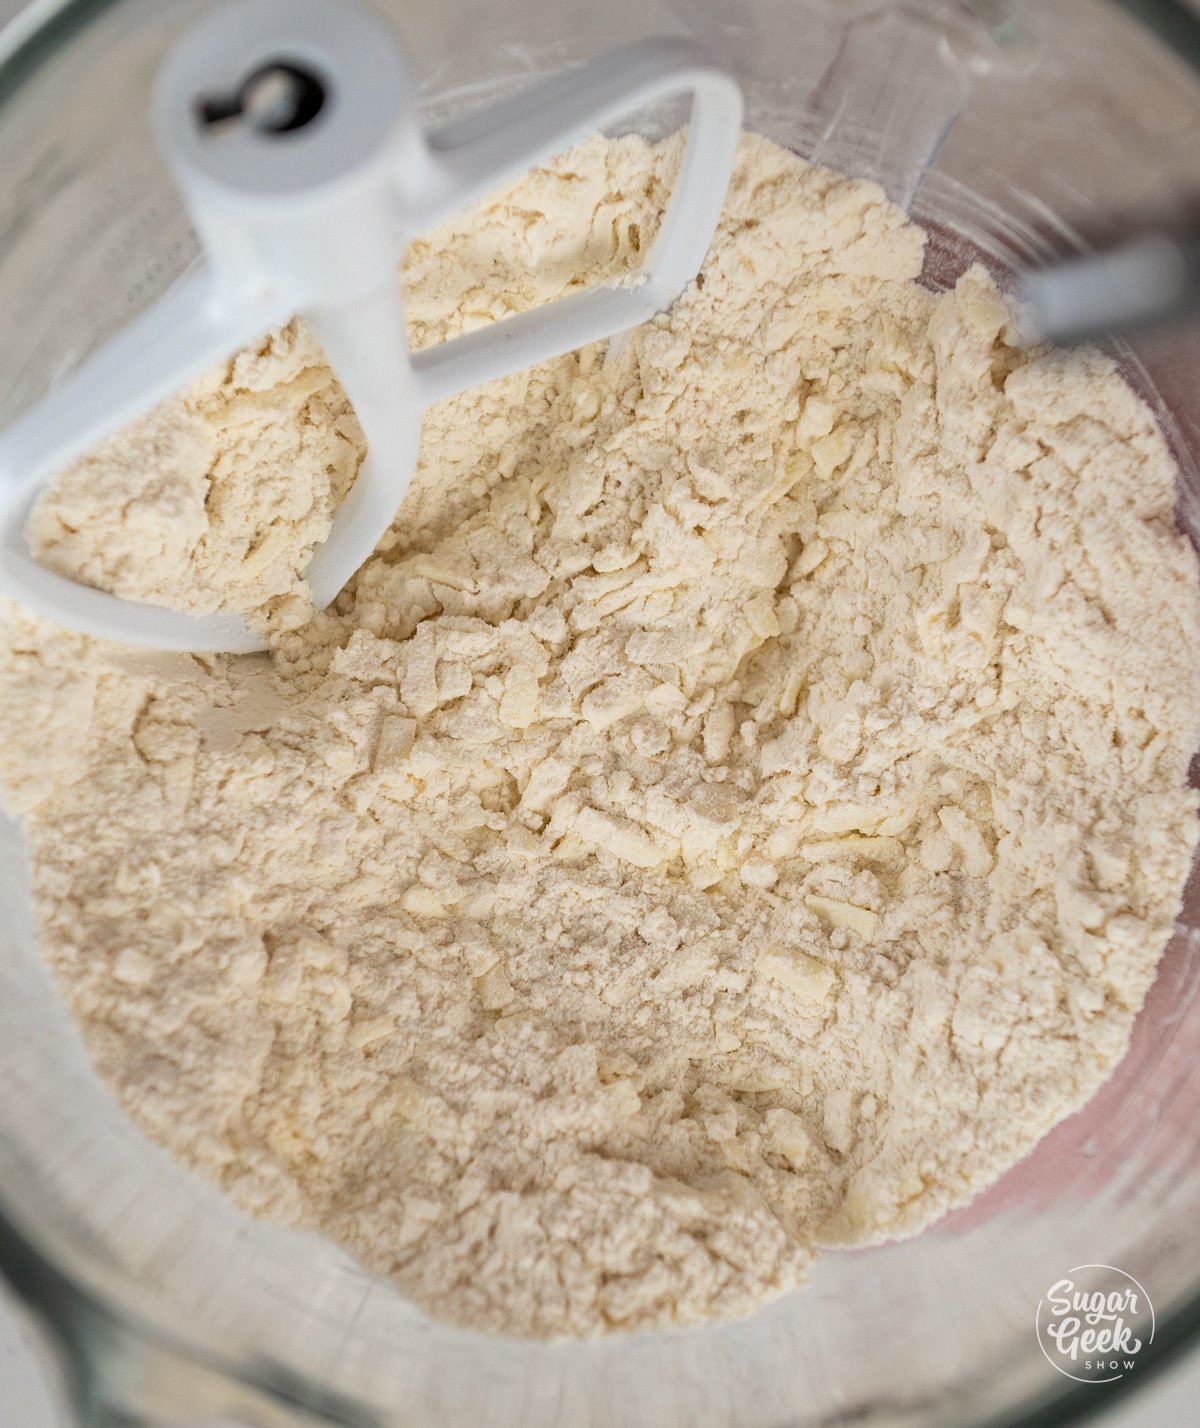
- Make the dough. Combine the flour and salt in the bowl of your stand mixer fitted with the paddle attachment, then grate your cold butter directly into the flour and mix on low until it looks sandy.
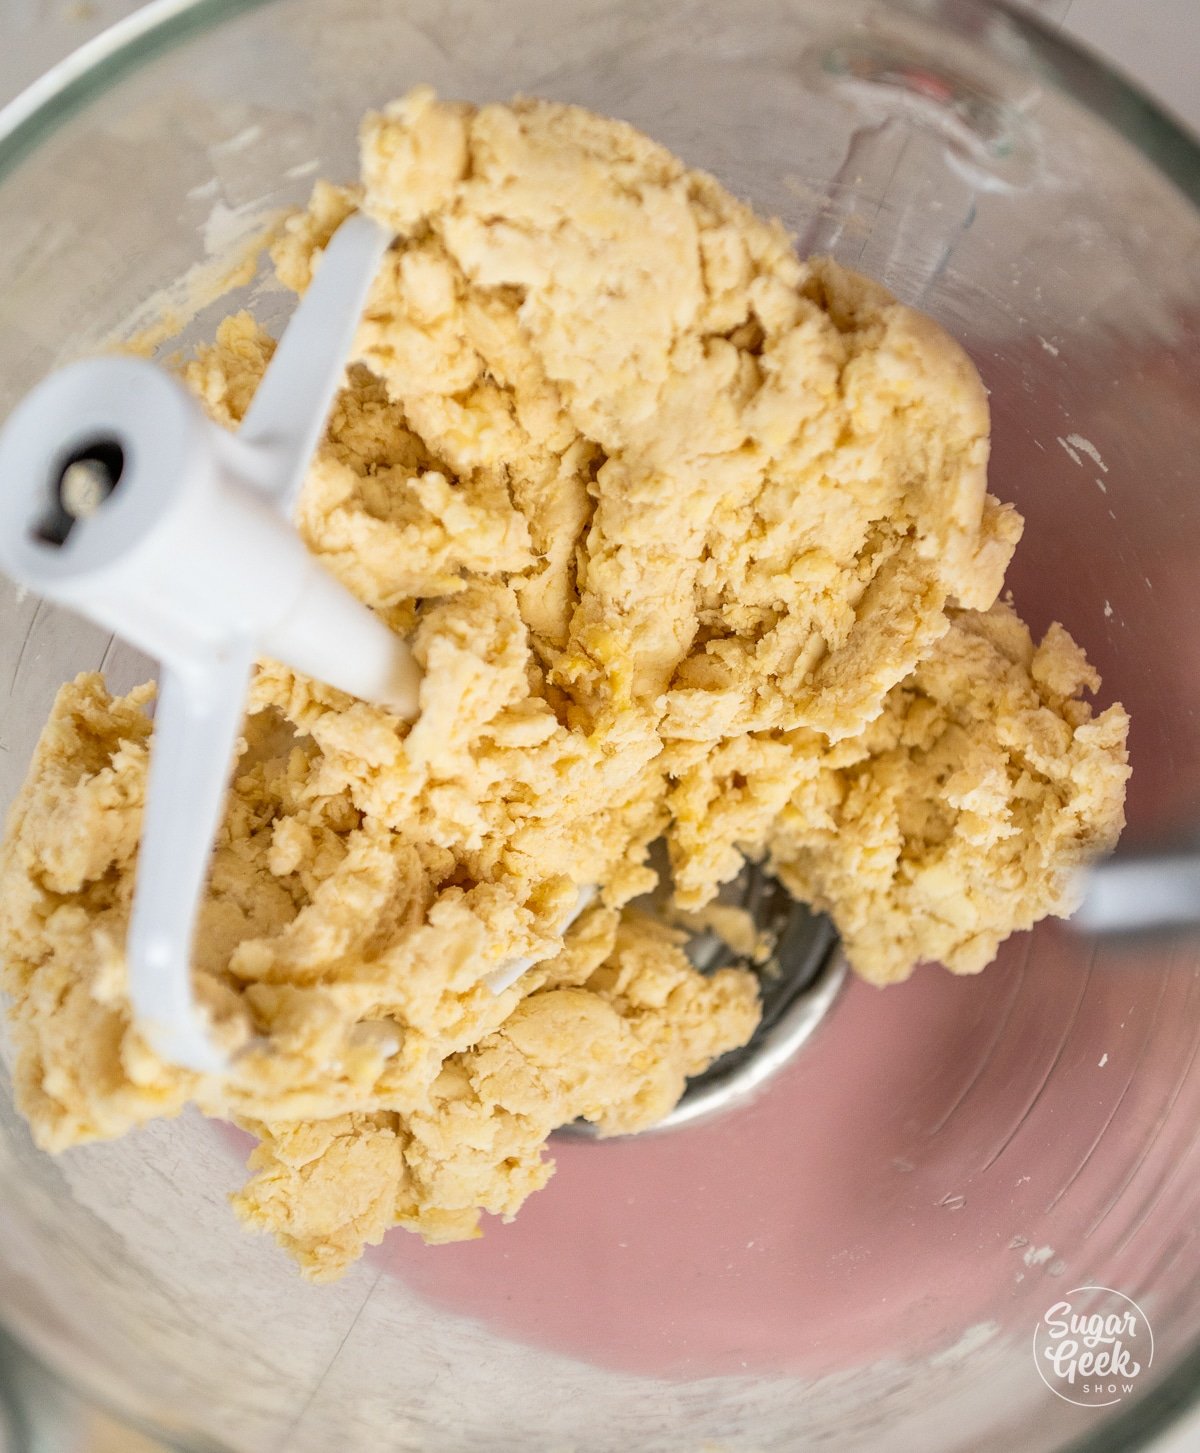
- Bring the dough together. Add the eggs and slowly stream in the ice water while the mixer runs on low, mixing just until the dough comes together into a ball. If it's still dry, add water a drizzle at a time.
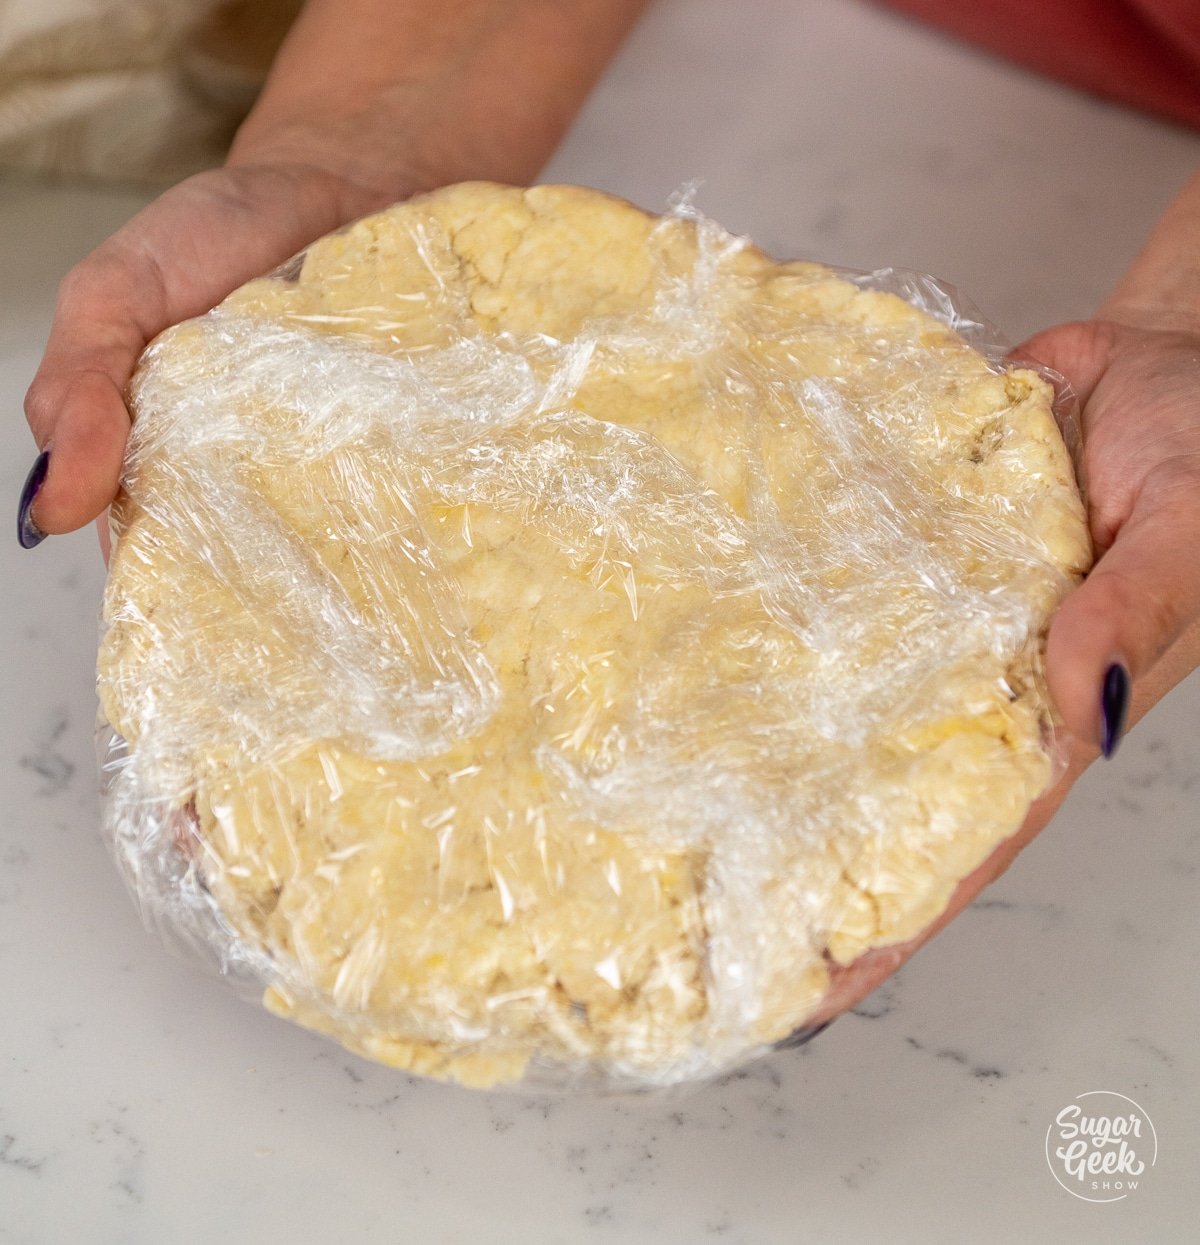
- Chill the dough. Flatten the dough into a disc, wrap it in plastic, and refrigerate for at least 20 minutes (you can do this a day ahead). Pull it out 20 minutes before you need to roll it so it's pliable.
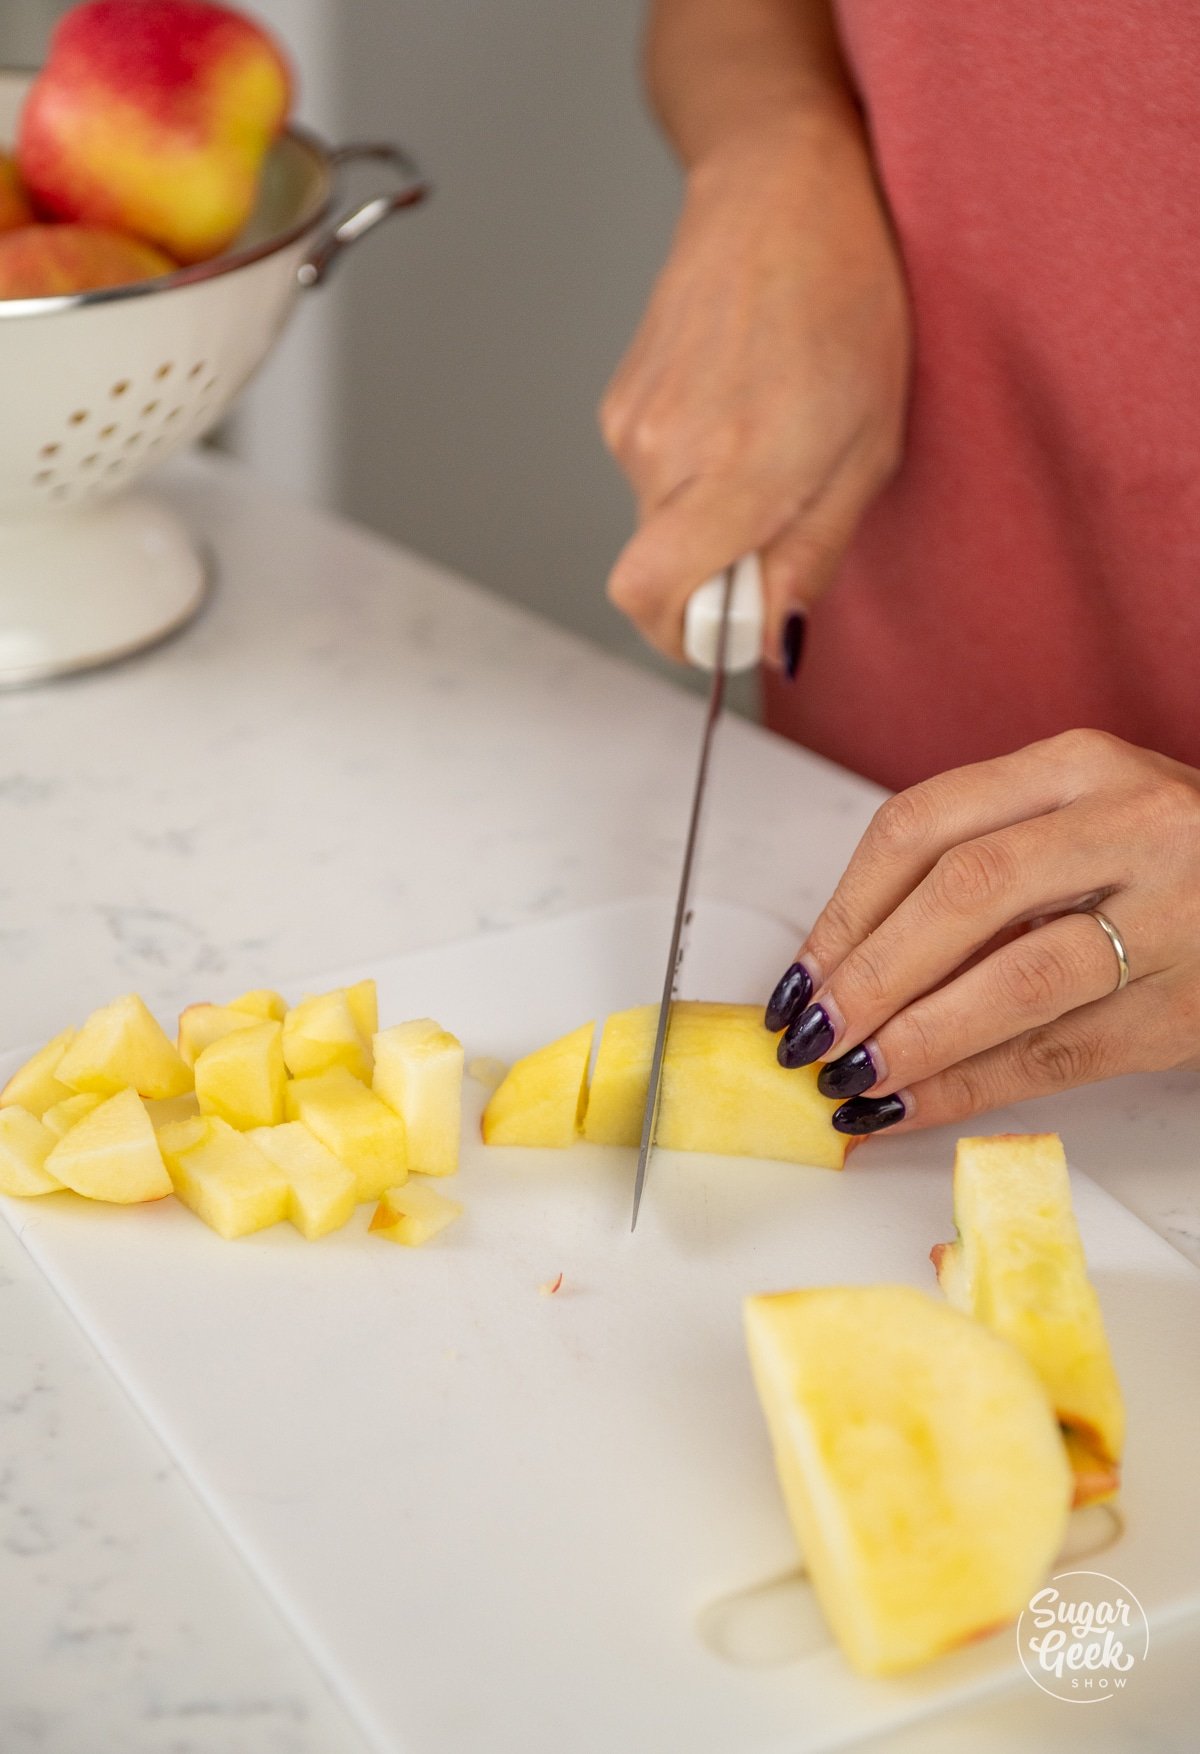
- Prep your apples. Peel, core, and cube your apples into ¼" pieces. Mini pies need mini pieces of apple so the filling can fall into the small spaces in the crust.

- Start the filling. Combine your cubed apples and butter in a large saucepan over medium heat until warmed through.
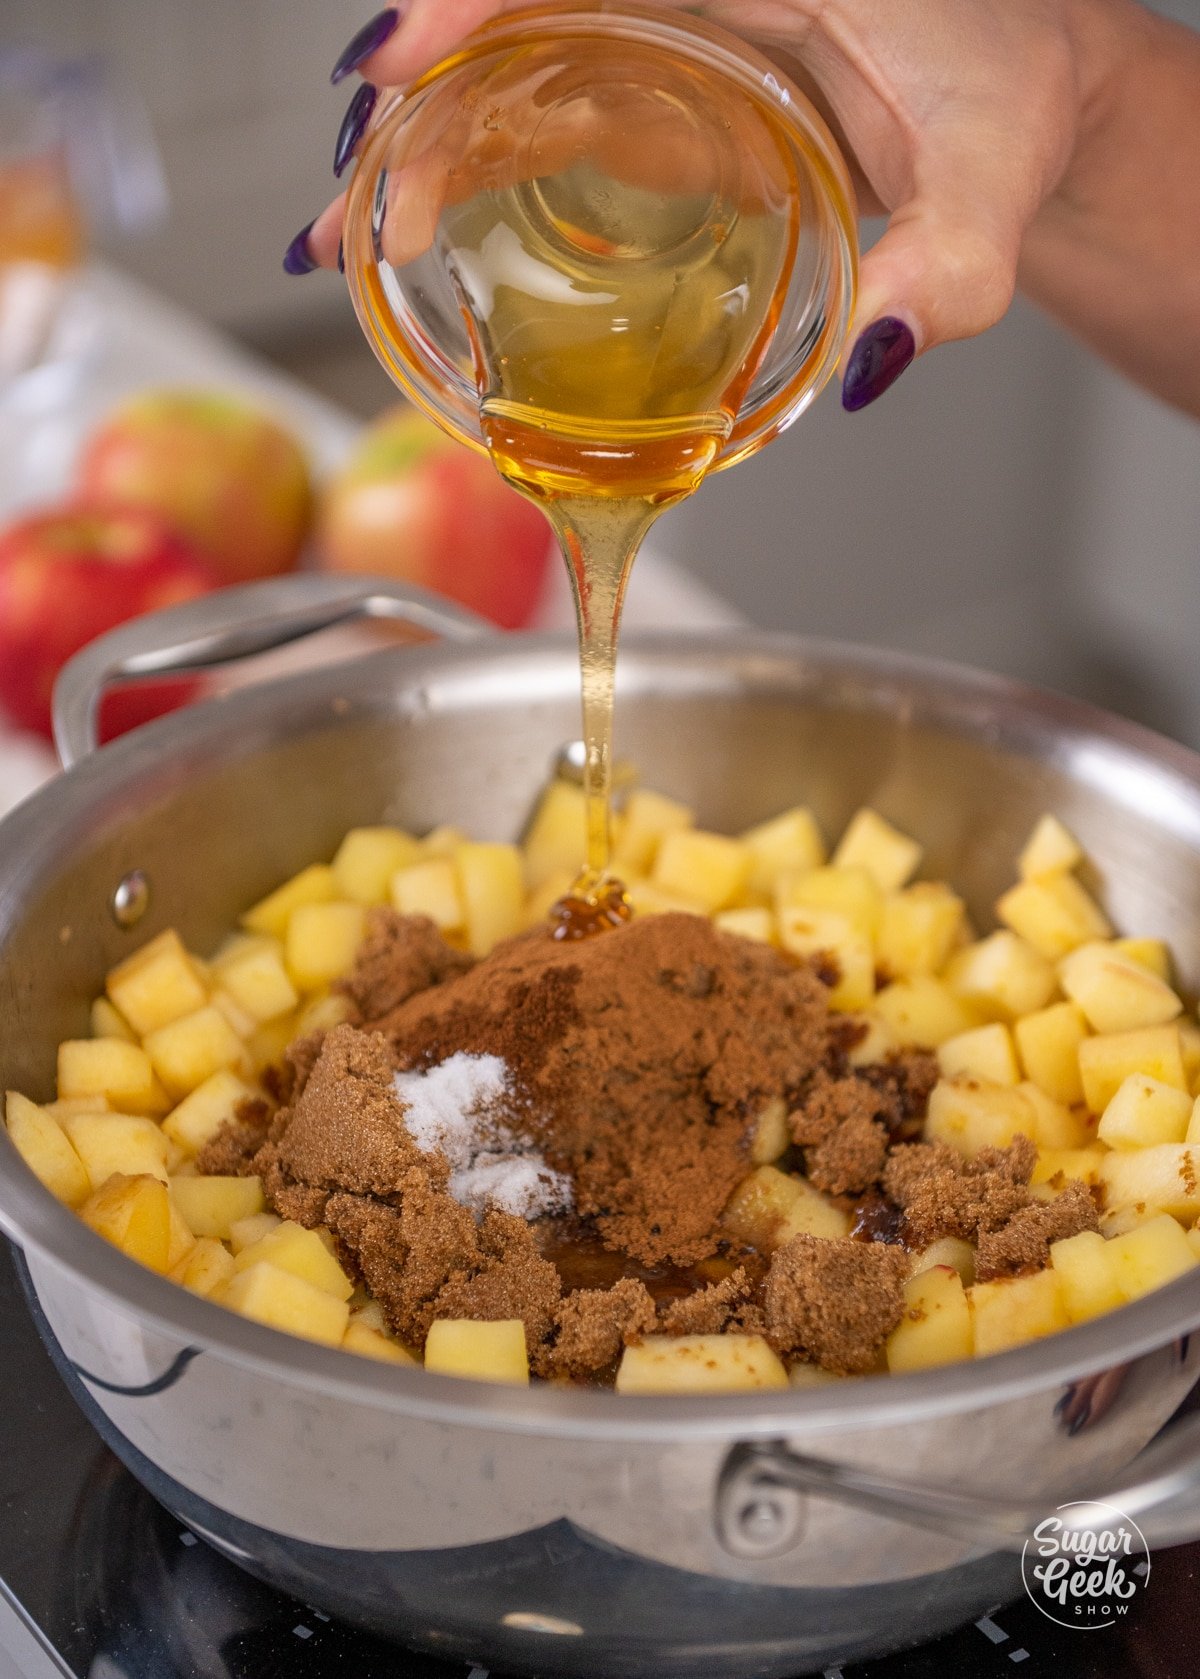
- Season the filling. Add the lemon juice, brown sugar, cinnamon, cloves, salt, the larger amount of apple juice, extracts, and honey, then sauté until the apples are soft but still a little firm in the middle.
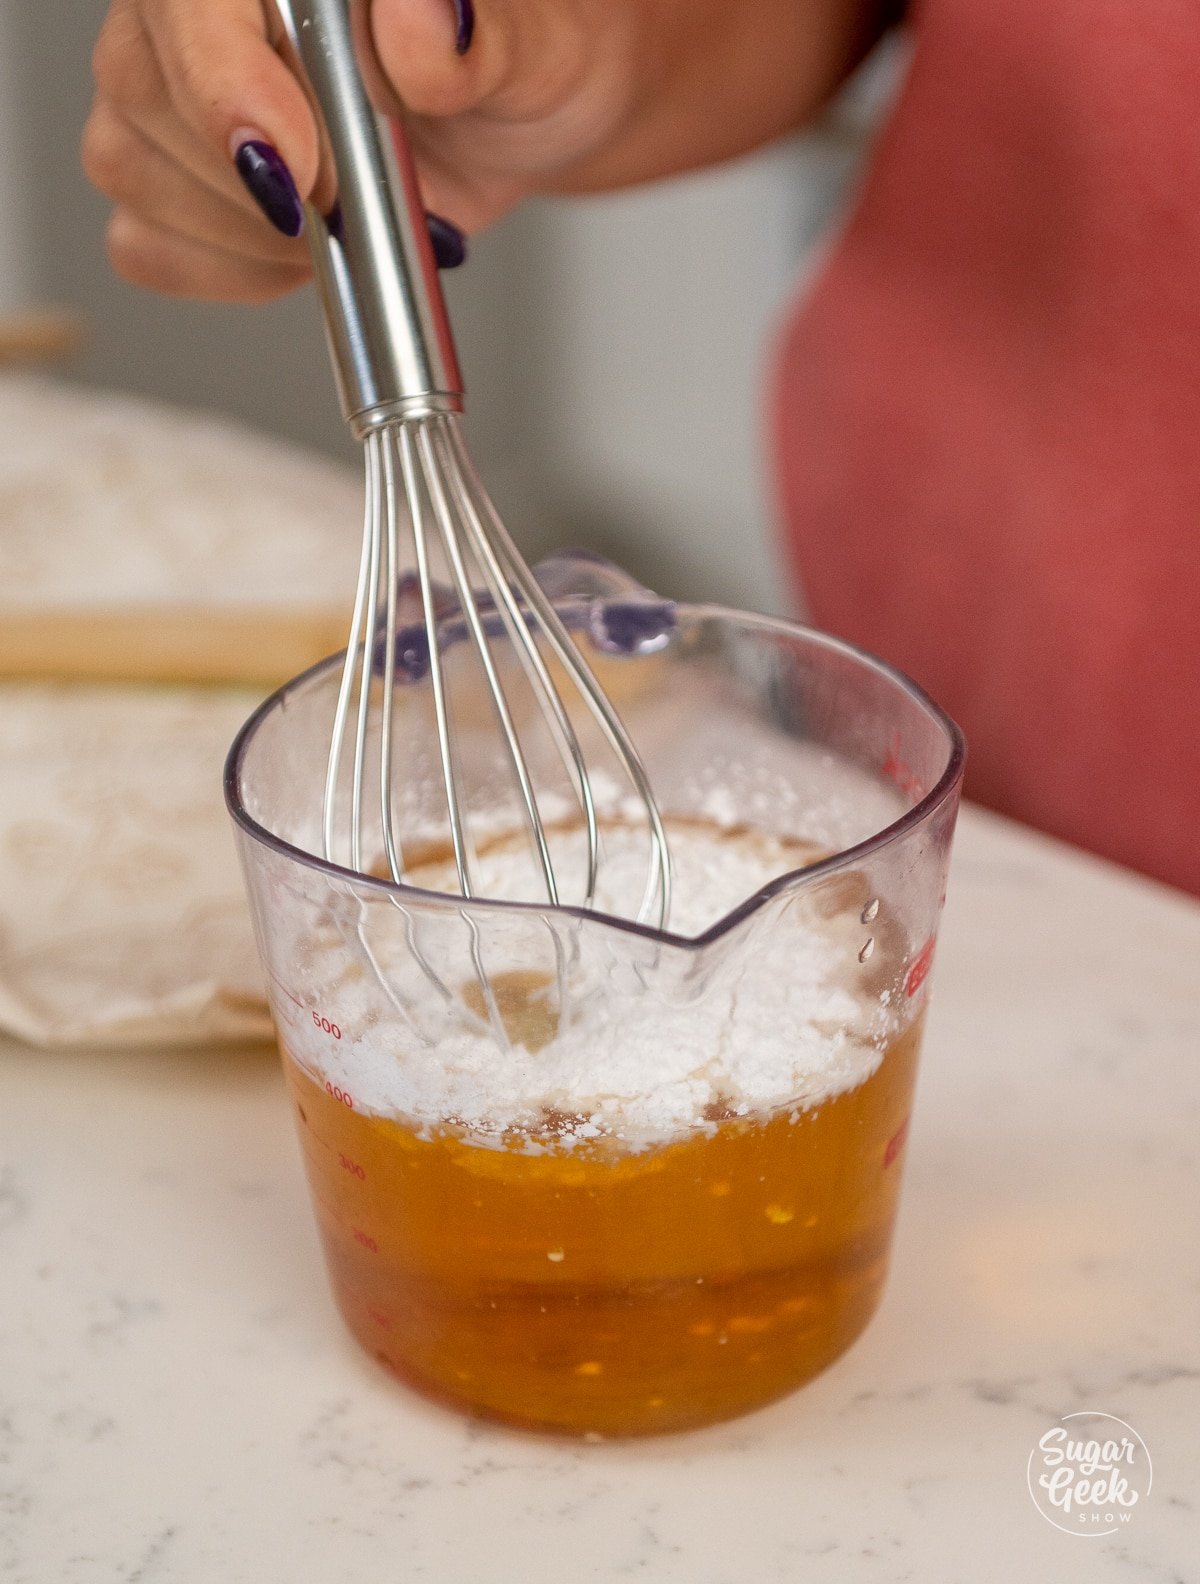
- Thicken the filling. Whisk the cornstarch into the remaining apple juice to make a slurry, stir it into the filling, and cook for 2 to 3 minutes until thickened into a spiced caramel sauce.
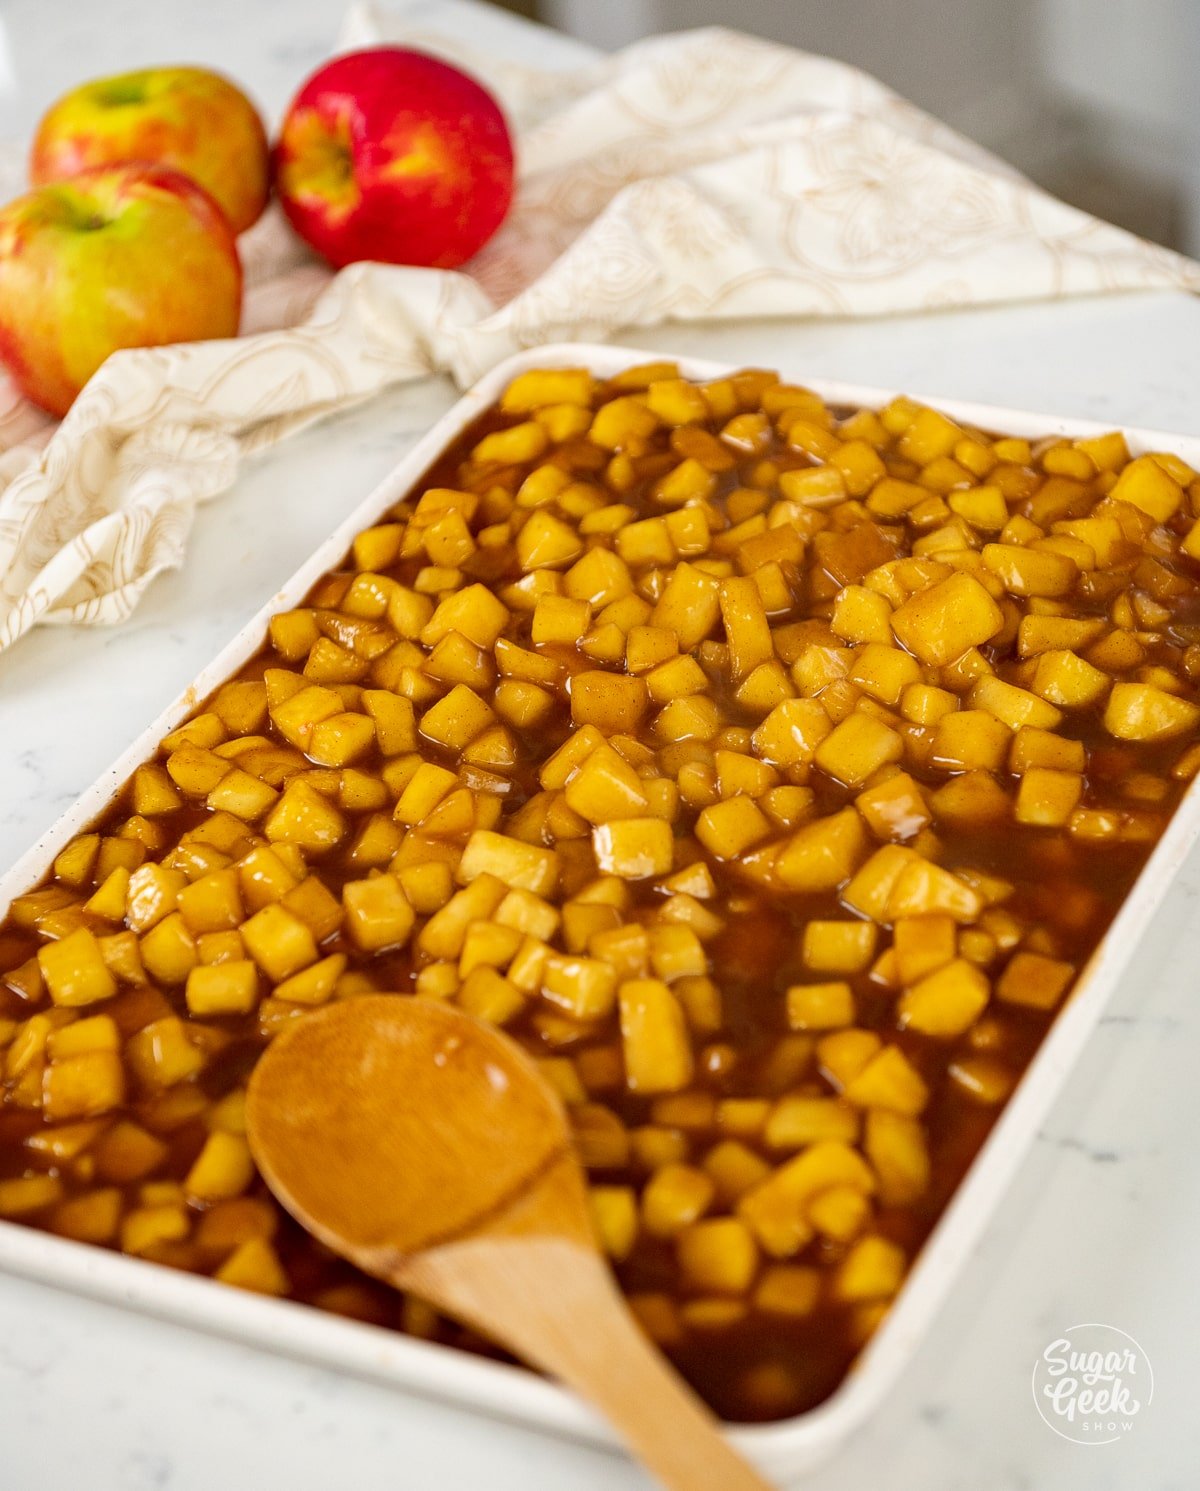
- Cool the filling. Pull it off the heat and let it cool completely before you use it, spreading it on a sheet pan speeds this up if you're short on time.

- Roll and cut the dough. Roll the chilled dough to ⅛ inch thick and cut 12 circles with a 6 inch round cutter. Re-roll the scraps, chill, and reuse them for the lattice later.
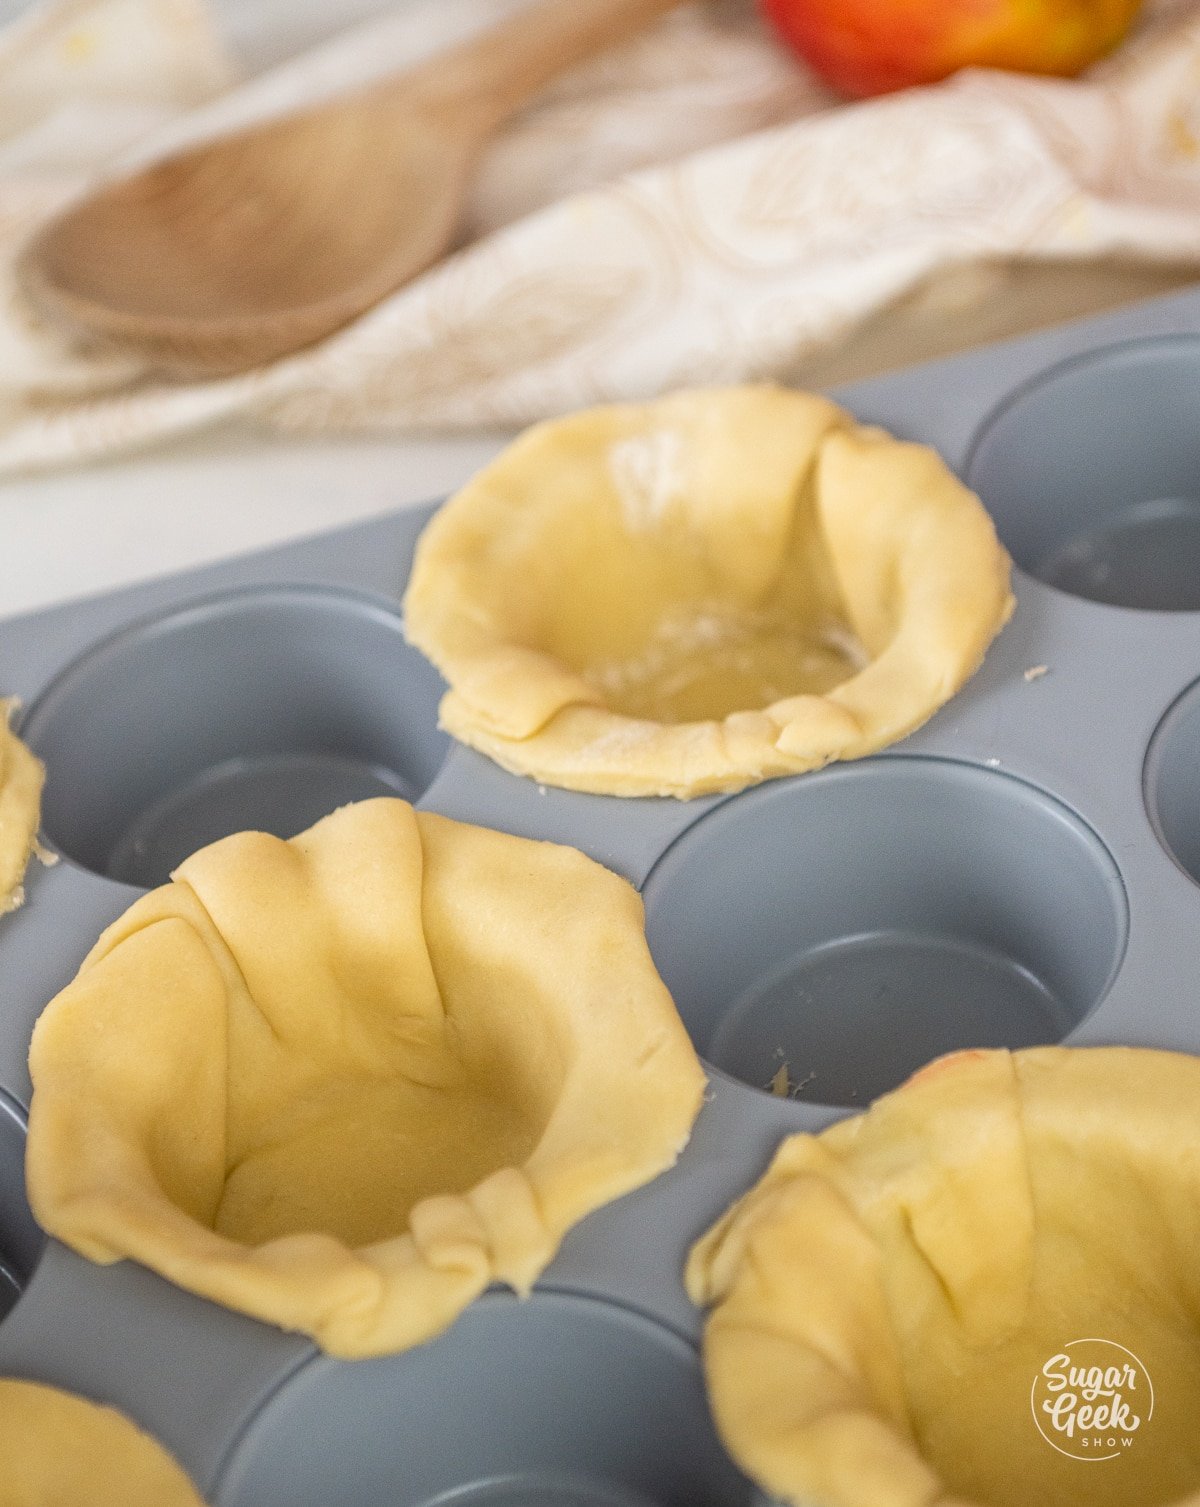
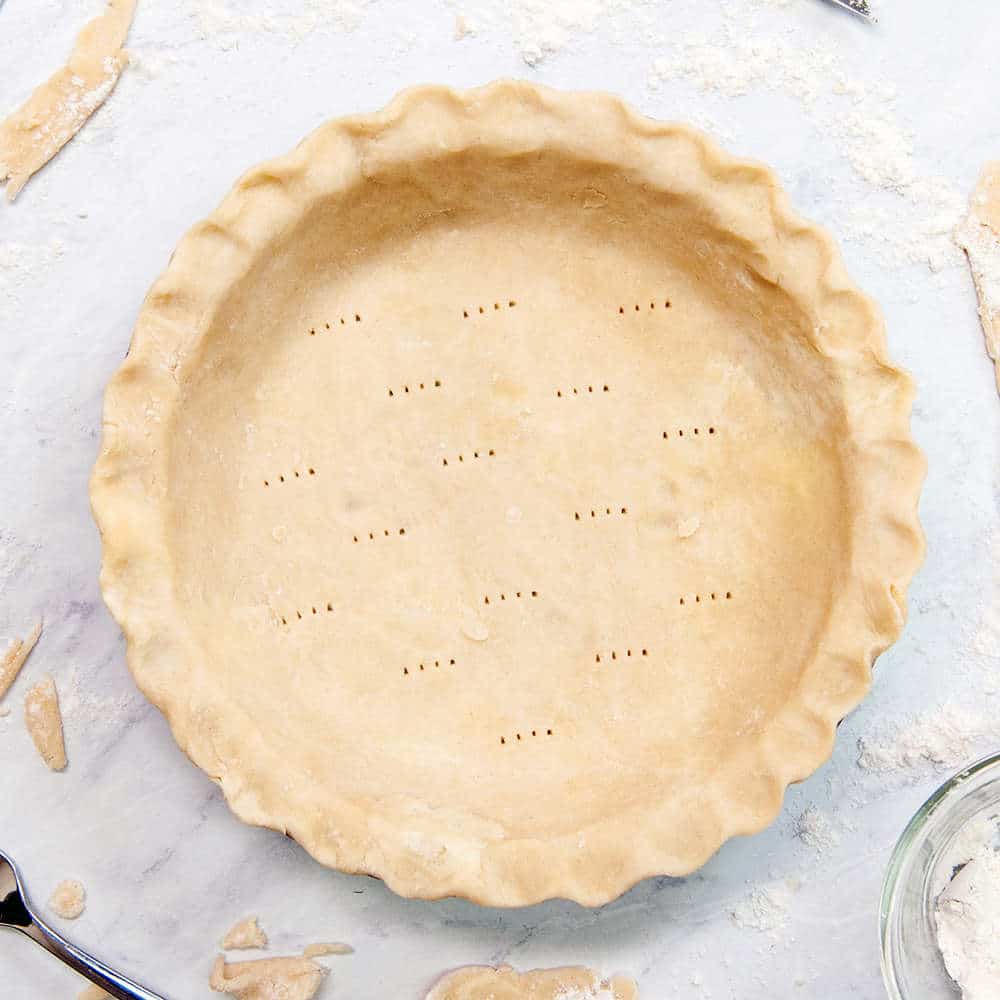
- Line and freeze the shells. Press a dough circle into every other cavity of 2 muffin tins so the pies don't touch, smoothing the sides and rolling under the top edge to form a lip, then lightly dock the bottom of each shell with a fork to prevent bubbles. Freeze the lined muffin tins for 20 minutes.
PRO TIP: Don't skip the freezer step! It's the single biggest reason mini pie crusts hold their shape instead of shrinking and slumping down the sides of the tin once they hit a hot oven.
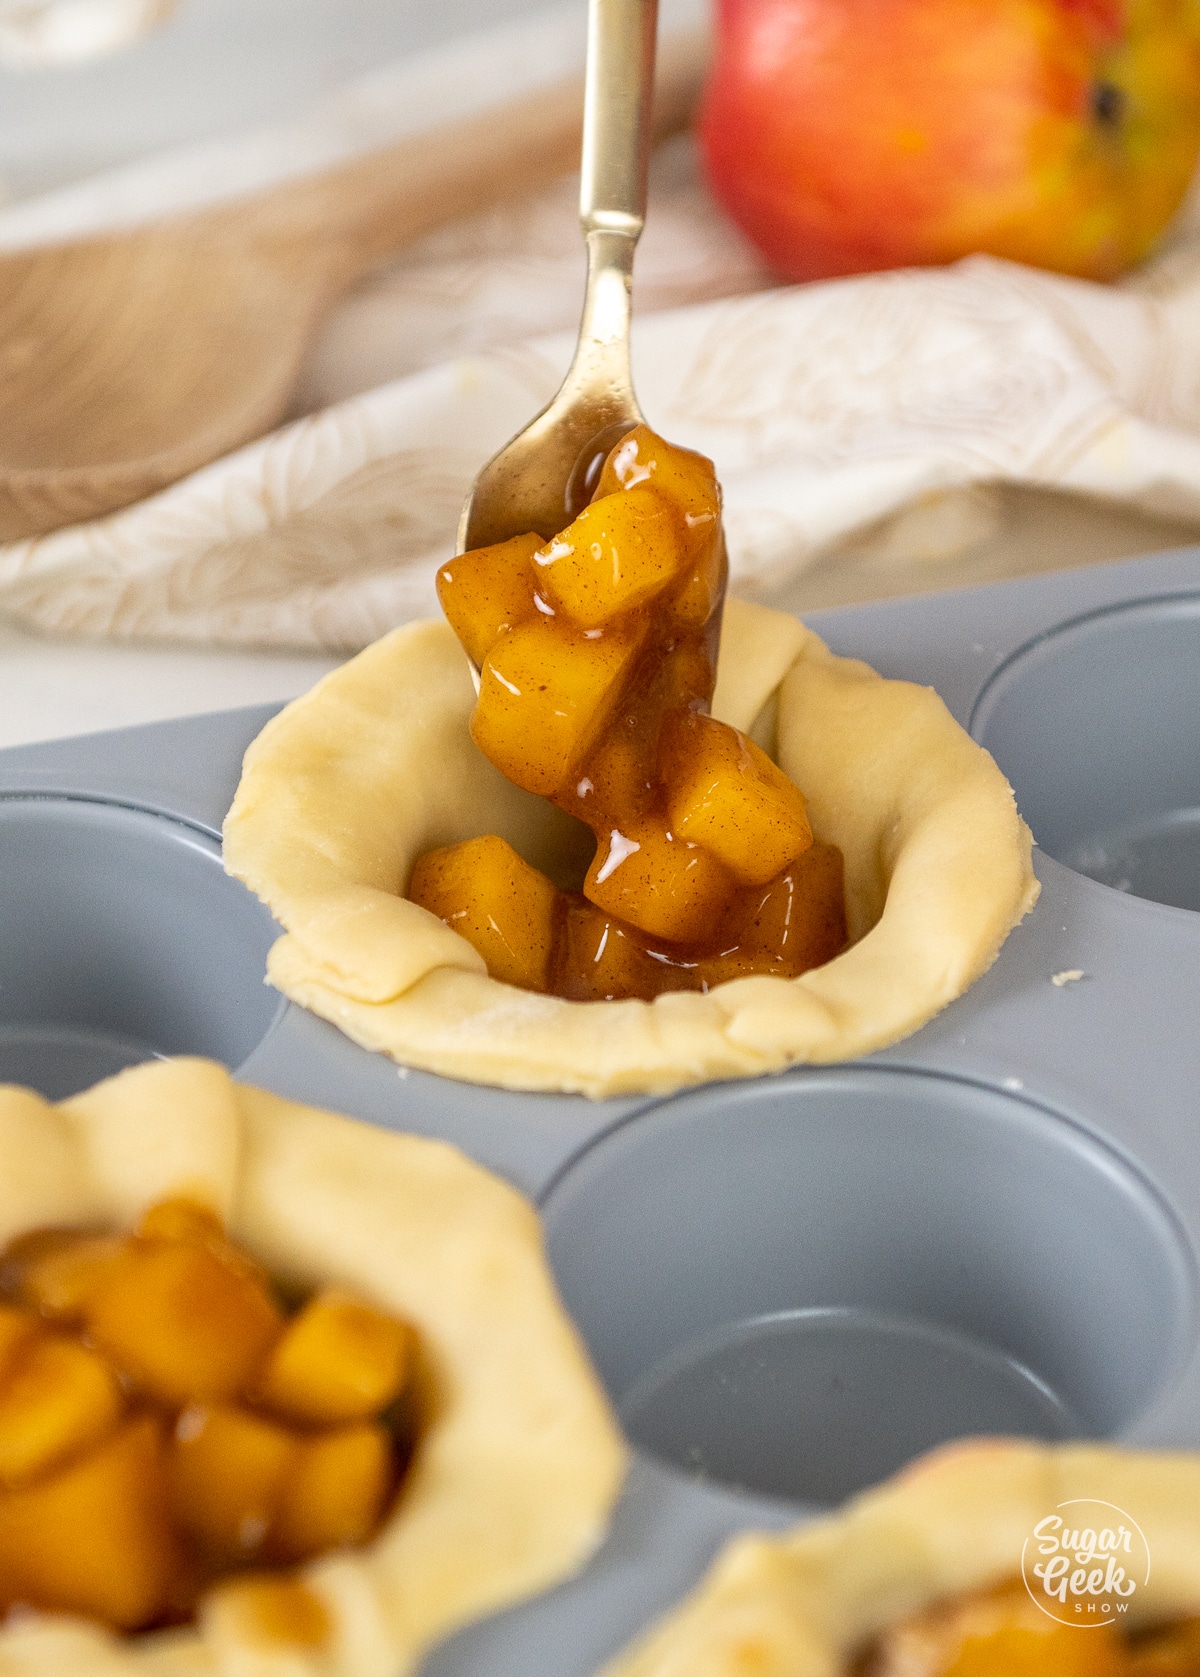
- Fill the shells. Fill each shell with the cooled filling right up to the top of the crust. Under-filled pies can collapse a bit once the apples cook down.
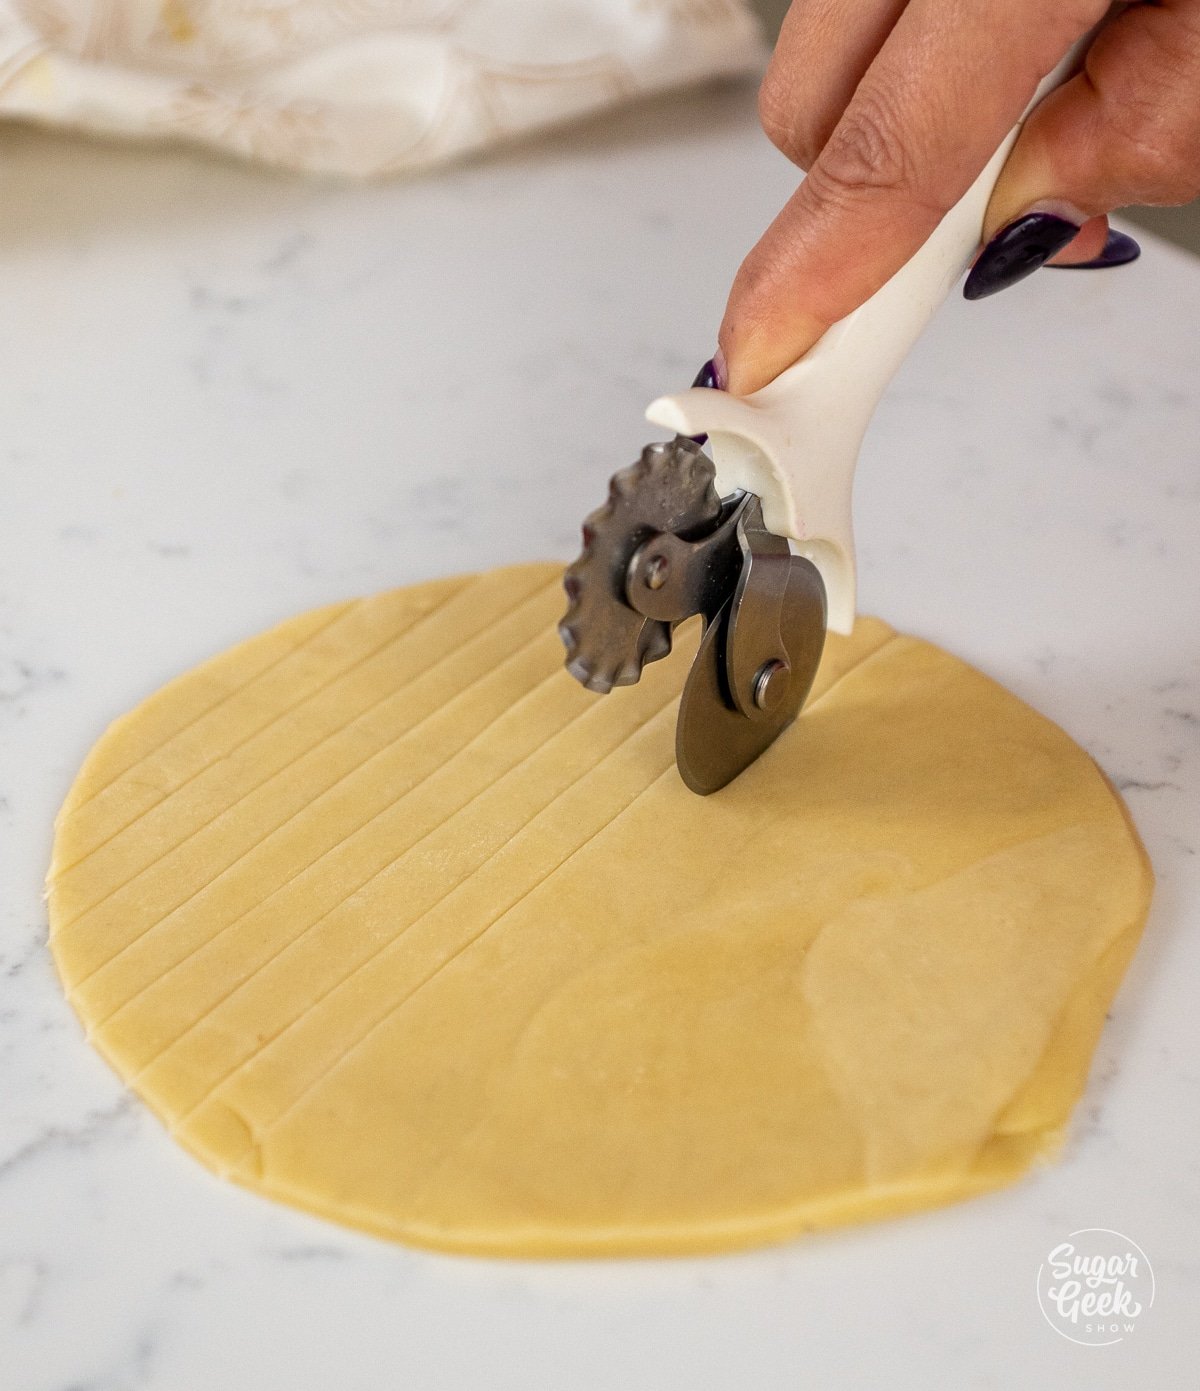
- Cut the lattice strips. Roll out your leftover dough to ⅛ inch thick and cut out ¼ inch strips of dough. I like using a dual-head pastry cutter.

- Lay the lattice. Place the strips on top of your filled pie crusts. You can weave them or just crisscross them for the sake of time, they'll look cute either way!
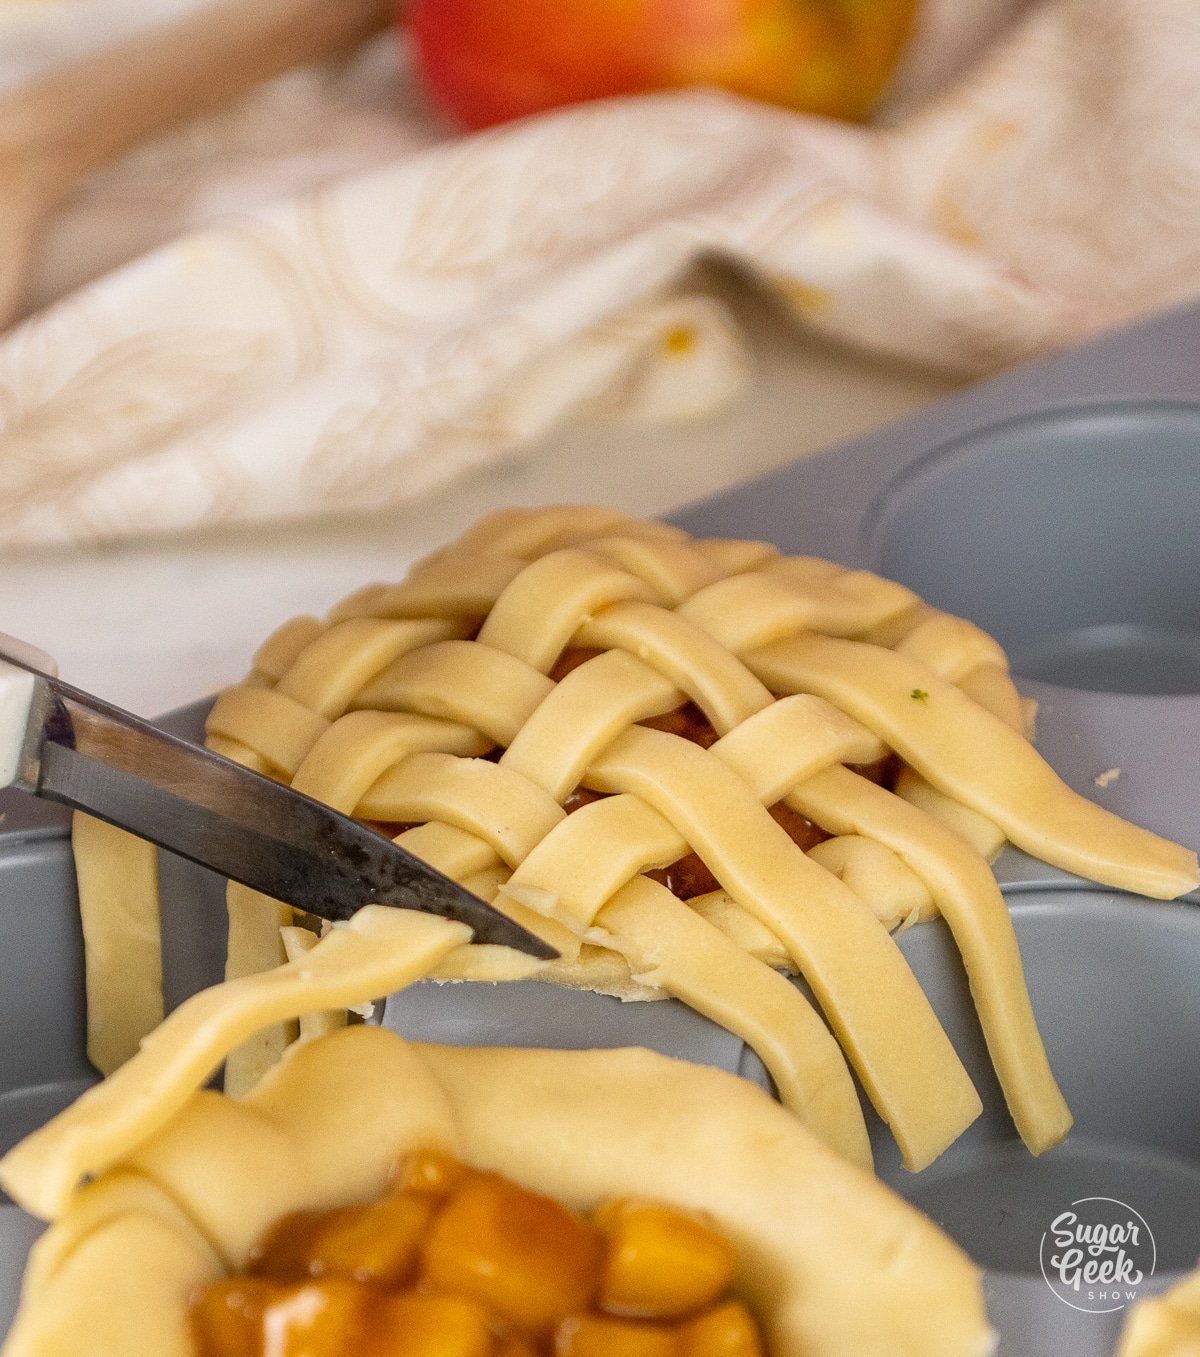
- Finish the lattice. Press the lattice top dough onto the bottom dough and trim off the excess to create a clean, round top. Flute the edges with your fingers or use a fork to seal them, this gives your mini apple pies that real pie look.
PRO TIP: If you want to skip the top crust entirely, toss some crumbled leftover dough with a little brown sugar and scatter it over the filling instead, or cut out a little leaf shape and set one on top of each pie. Both look super cute and take way less time than weaving a lattice.

- Add the egg wash. Brush the tops with egg wash and sprinkle with coarse sanding sugar if you'd like.

- Bake, cool, and serve. Bake at 400º F for 20 to 25 minutes, until deep golden brown. Let the pies cool in the tin on a wire rack for about 30 minutes before carefully removing them. Serve warm or store for later. See the Notes below for exact timing.
Common Mini Apple Pie Problems to Avoid
- Sunken pies. Under-filling the shells is the usual cause. The apples cook down a little more in the oven, so fill each shell right to the top of the crust.
- Soggy bottom crust. Filling that goes in warm, or filling that hasn't been thickened enough, is the usual culprit. Let your filling cool completely before you fill the shells. And don't skip cooking the cornstarch slurry in until it's fully thickened.
- Overflowing filling. Fill your shells right up to the top of the crust, but resist the urge to mound it higher. Overfilled pies bubble over as they bake. Anything that spills onto the tin can glue the pie in place once it cools.
Final Thoughts
These have become one of my favorite recipes for holiday tables. They look impressive, but they're simple enough to make ahead of time. Watching that golden lattice bake up over each little pie never gets old. Trust me on these minis! Everyone loves getting their own pie. There's no slicing, no sharing, and no fighting over who gets the last slice.
If you have extra apples, my homemade candy apples are another fun fall treat.
Make This Recipe Your Own
- Mini pie tins. Swap the muffin tin for mini aluminum pie tins. They conduct heat a little differently, so start checking for doneness a few minutes early.
- Store-bought crust. Store-bought pie crust is a great shortcut if you're making a big batch for a party.
- Skip the lattice. My apple galette uses this same filling technique in an even more laid-back, no-lattice format.
Mini Apple Pies FAQs
How long do you bake mini apple pies?
Bake mini apple pies at 400º F for 20 to 25 minutes, until the crust is a deep golden brown. Most people underbake their pies, so don't be afraid to let them go the full time.
Can you make mini apple pies ahead of time?
Yes, in a few different ways. You can make the dough up to a day ahead and keep it refrigerated, or freeze it. The filling can also be made a day ahead and refrigerated until you're ready to assemble. You can also bake the pies completely, cool them fully, and freeze them in an airtight container for up to 2 months, then thaw and warm them in a low oven before serving.
Can I use this pie crust for other kinds of mini pies?
Yes, this mealy pie dough is a great all-purpose crust for other mini pie fillings too, like pumpkin pie or cherry pie made with my homemade cherry filling. Just keep an eye on your bake time since a different filling may need more or less time in the oven.
Do I need to grease the muffin tin?
No, you do not need to grease the muffin tins. Let the pies cool in the tin for about 30 minutes, then carefully remove them.
More Pie And Tart Recipes To Try


Ready To Master Cake Decorating?
Join Sugar Geek University and learn professional techniques through detailed cake decorating courses, tutorials, and real kitchen demonstrations by
award-winning cake decorator, Liz Marek.

Leave Me A Review
⭐️⭐️⭐️⭐️⭐️
If you tried these Mini Apple Pies or any other recipe on my blog, please leave a 🌟 star rating and let me know how it goes in the comments. I love hearing from you!
Recipe
Equipment
- 1 Stand mixer with the paddle attachment optional
- 2 Muffin tins
Ingredients
Mealy Pie Dough
- 24 ounces all-purpose flour (5 ¼ cups)
- ½ teaspoon salt
- 12 ounces unsalted butter grated, and cold (1 ½ cups)
- 2 large eggs cold
- 4 ounces ice water (½ cup)
Apple Pie Filling
- 2 pounds apples about 6 medium-sized, diced in ¼ inch cubes
- 1 ounce unsalted butter (2 Tablespoons)
- 1 Tablespoon lemon juice
- 4 ounces brown sugar (½ cup)
- 2 teaspoons cinnamon
- ¼ teaspoon cloves
- ¼ teaspoon salt
- 12 ounces apple juice (1 ½ cups)
- 1 Tablespoon vanilla extract
- 1 teaspoon almond extract optional
- 1 Tablespoon honey
- 1 ounce cornstarch (2 Tbsp)
- 2 ounces apple juice (¼ cup)
Egg Wash
- 1 large egg
- 1 Tablespoon water
Instructions
Pie Crust for Mini Pies
- Combine the flour and salt in the bowl of your stand mixer with the paddle attachment (you can also use a large bowl and a pastry cutter or whisk).
- Grate your cold butter directly into the flour mixture.
- Mix on low until the flour and butter resemble a sandy mixture.
- Add the eggs and slowly pour in the cold water while the mixer is on, mixing on low until the dough begins to form a ball. If it's still dry, add drizzles of cold water until it comes together.
- Remove the dough from the bowl and place it onto a piece of plastic wrap.
- Flatten the dough to about 1 inch thick. Wrap the plastic wrap over the dough and refrigerate for 20 minutes (you can also do this the day before).
- Remove the dough from the fridge 20 minutes before you need to use it so it's more pliable and easier to roll out.
Apple Pie Filling
- Peel, core, and cube your apples into ¼" pieces. Mini pies need mini pieces of apple so the filling can fall into the small spaces in the crust.
- Combine your apples and butter in a large saucepan over medium heat until the apples are warmed through.
- Add the lemon juice, brown sugar, cinnamon, cloves, salt, the larger measurement of apple juice, extracts, and honey.
- Sauté the apple mixture on medium heat until the apples are soft but still a little firm in the middle (al dente).
- Combine the cornstarch with the smaller measurement of apple juice in a measuring cup to make a slurry.
- Add the slurry to the apple filling and continue cooking and stirring for 2 to 3 minutes until thickened.
- Let the filling cool fully before you fill your pie crusts.
Assembling the Mini Apple Pies
- Preheat your oven to 400º F.
- Roll your pie dough to ⅛ inch thick on a lightly floured surface.
- Use a 6 inch cookie cutter to cut 12 circles, you'll use 2 muffin tins, alternating spots so the pies don't touch. Re-roll the scraps, flatten, and chill again for the lattice.
- Place a round of dough in each muffin tin cavity, gently forming it to the shape of the tin and pressing it snugly against the bottom edge. Smooth out the sides so the dough has a uniform width, then gently roll under the top edge to make the edge crust.
- Lightly dock the bottom of each mini pie shell to help prevent big bubbles from forming as it bakes.
- Place the pans in the freezer for 20 minutes. This step is very important to keep your mini pies from shrinking during baking.
- Fill your pie shells with the filling to the top of the crust (don't overfill, but under-filling can cause them to collapse a bit once the apples cook down).
Making a Lattice Crust
- Roll out your leftover dough to ⅛ inch thick and cut into ¼ inch strips.
- Place the strips over your filled pie crusts. Weave them or just crisscross them for the sake of time, they'll look cute either way.
- Press the lattice strips onto the bottom dough and trim off the excess to create a clean, round top. Flute the edges with your fingers or use a fork to seal them.Pro-tip: If you want to skip the top crust, you can just add some crumbled leftover dough with a little brown sugar over the top of the pies, or make a little leaf shape and place one on top of each pie. Both look super cute!
Baking the Mini Apple Pies
- Brush the crust with egg wash (one egg whisked with 1 Tablespoon of water) using a pastry brush. Sprinkle with coarse sanding sugar if you'd like.
- Bake the pies at 400º F for 20 to 25 minutes, until the crust is a deep golden brown. Most people underbake their pies, don't be afraid to let them go the full time.
- Place the muffin tin on a cooling rack and let the pies come to room temperature for about 30 minutes.
- Remove the pies carefully from the muffin tin and serve. To store, keep them in an airtight container or wrapped in plastic wrap in the muffin tin to hold their shape. They'll keep at room temperature for a day or in the fridge for up to 4 days.

Crystal says
How far in advance can you make the dough?
Liz Marek says
You can make the dough up to a day ahead and keep it in the fridge, or freeze it rolled into a disc. If you have more questions, come ask me in the Sugar Geeks community: https://community.raptive.com/sugargeeks
Teresa says
These look so good! I've to make them!! Love your recipes! On the cups of flour it says 5 1/, the bottom number is missing. Just wondering what the number is.
Thank you.
Hugs,
Teresa
Liz Marek says
Thanks, Teresa! It's 5 1/4 cups (24 ounces), and the recipe card shows it correctly now.