

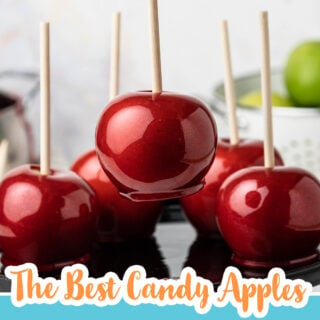
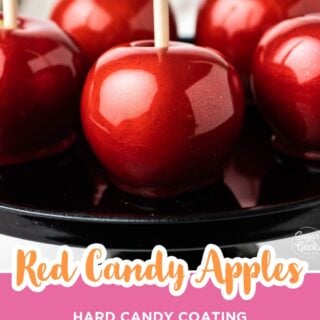

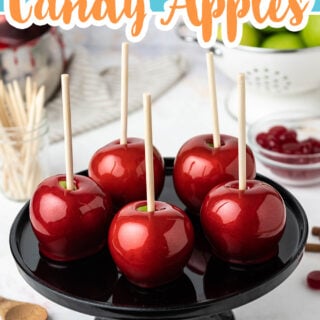

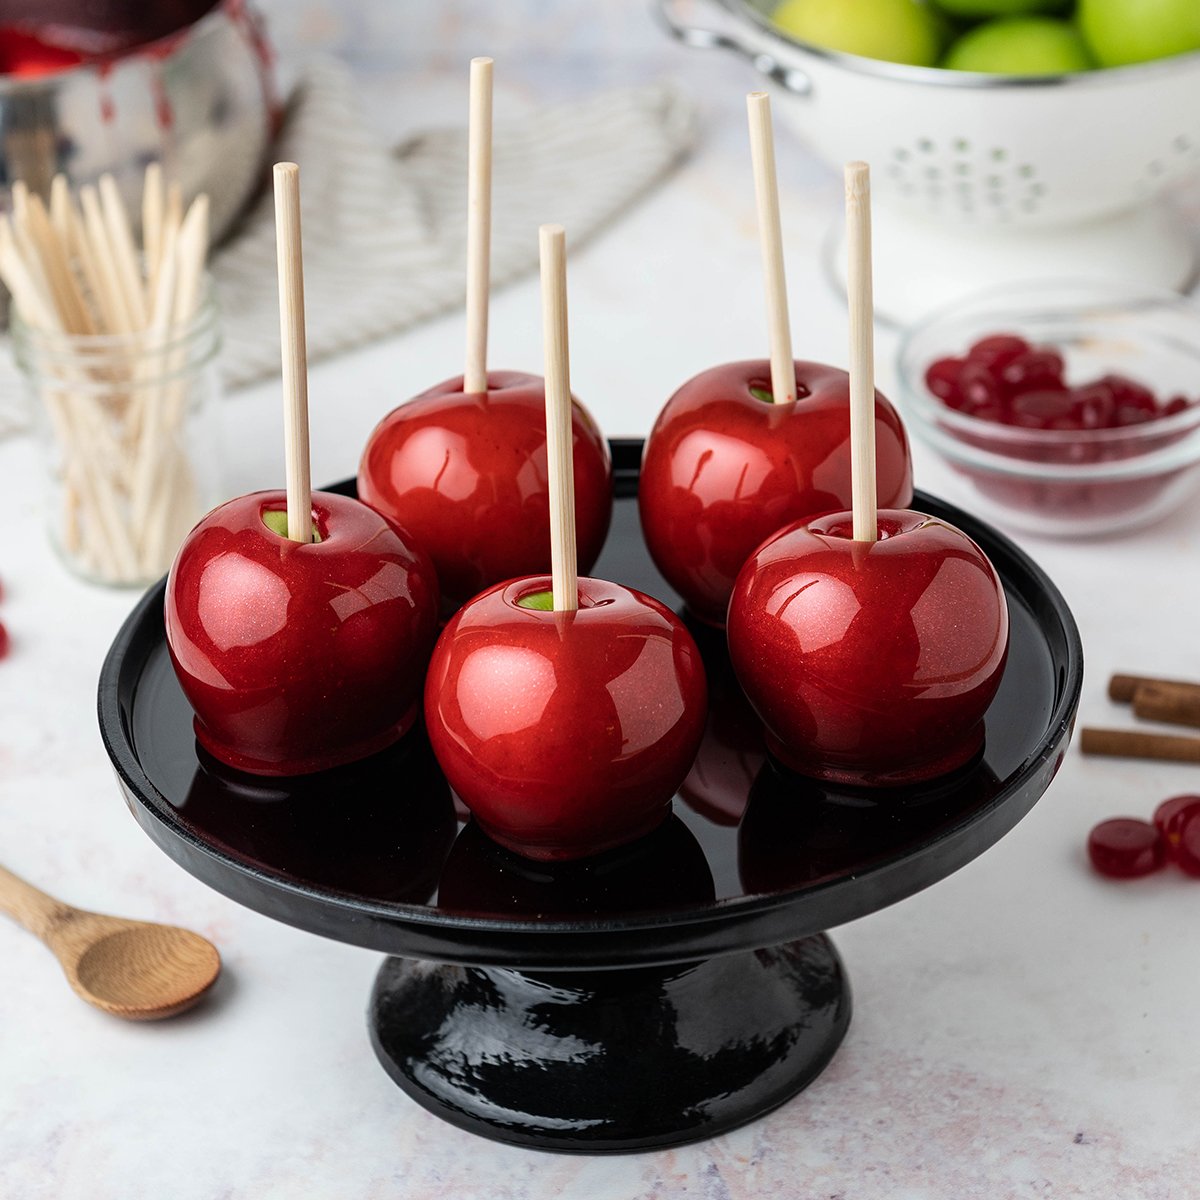
This candy apple recipe makes perfectly shiny, bubble-free ruby-red candy apples with a glassy hard crack shell and deep cinnamon flavor. The secret is a two-day method: chill your apples overnight, dip them cold, and you get that smooth fairground finish every single time. If you love my homemade caramel apples, this is the same idea with a hard candy shell instead of soft caramel.
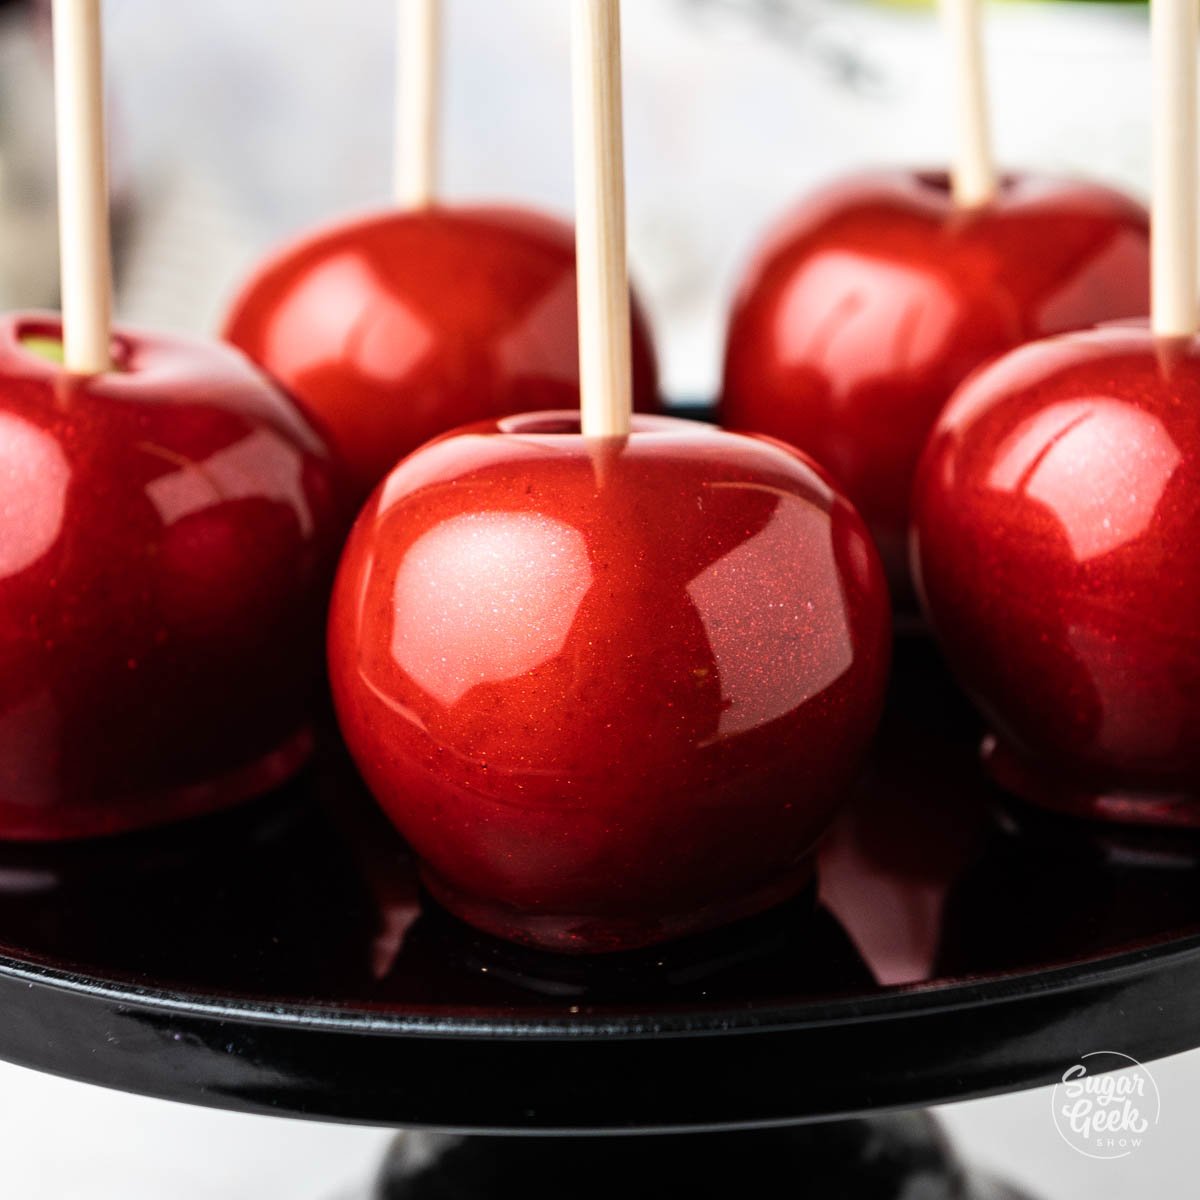
The single biggest swap I made compared to most candy apple recipes online is using cinnamon hard candy melted directly into the sugar syrup instead of cinnamon extract. I could not find cinnamon extract anywhere when I first developed this recipe (maybe there was a shortage?), and the cinnamon candy version turned out so much better that I never went back. It dissolves cleanly into the syrup, gives you a deep red color, and that perfect cinnamon punch in just one step. If you've tried my kohakutou crystal gummy candy, this is the same boil-sugar-to-hard-crack technique, just shaped around a fresh apple with a fall color palette.
Quick Glance at the Recipe: Candy Apples
- Recipe Name: The Best Candy Apple Recipe
- Why You'll Love It: Glassy ruby-red shell with no bubbles, deep cinnamon flavor, and a clean candy crack in every bite, ready in about 45 minutes of active work.
- Time and Difficulty: Easy with patience. 10 minutes prep, 30 minutes cook, 10 minutes cool. Best spread across 2 days so your apples can chill overnight.
- Main Ingredients: Granny Smith apples, granulated sugar, water, corn syrup, cinnamon hard candy, red food coloring.
- Method: Wash and chill apples overnight, boil sugar with water and corn syrup to the hard crack stage (300º F) with cinnamon candy stirred in, cool slightly to 280º F, then dip cold apples one at a time and let them set on a silicone mat.
- Texture and Flavor: Thin, glassy, deep red candy shell that cracks cleanly into a tart-sweet Granny Smith. With a cinnamon-hot finish.
- Quick Tip: Wash and chill your apples the night before. Cold, dry apples are the single biggest factor in a smooth, bubble-free shell. Skip this step and you will get bubbles no matter how perfect your sugar work is.
Jump to:
- Quick Glance at the Recipe: Candy Apples
- What Makes This Candy Apple Recipe So Good⭐⭐⭐⭐⭐
- The Best Apples For Candy Apples
- Candy Apple Ingredients
- How To Make Candy Apples Step-By-Step
- Common Candy Apple Problems To Avoid
- Make This Candy Apple Recipe Your Own
- Final Thoughts
- Candy Apple Recipe FAQs
- More Fall And Halloween Recipes To Try
- Leave Me A Review⭐️⭐️⭐️⭐️⭐️
- Recipe
What Makes This Candy Apple Recipe So Good
⭐⭐⭐⭐⭐
Most candy apple recipes online fall into one of two camps: either they tell you to melt 100 unwrapped cinnamon imperials (nightmare), or they tell you to use cinnamon extract (fine, but I could never find it). Mine uses cinnamon hard candy melted directly into the sugar syrup, which gives you the same deep cinnamon punch with a fraction of the work and a cleaner, clearer shell. The bigger move is the two-day method, which gets your apples cold, dry, and wax-free before they ever touch the candy. A cold, dry apple is the difference between a glass-smooth shell and a bumpy mess, no matter how perfect your sugar work is.
- Cinnamon hard candy instead of extract or imperials. One 8-ounce bag of cinnamon hard candy goes straight into the syrup and dissolves into the candy shell as it cooks. You get a clean ruby color and full cinnamon flavor without unwrapping a hundred individual candies or hunting down a bottle of extract.
- Two-day method for a bubble-free shell. Day one, scrub the wax off the apples in very hot water and chill them uncovered overnight. Day two, cook the candy. Cold, dry apples cause the molten sugar to set the second it hits the surface, which is what gives you a thin, glassy shell with no bubbles. Skip the overnight chill and you will get bubbles every time.
- Lid on for the first 5 minutes of boil. Cover the pan once the syrup starts to bubble and let it steam for 5 minutes. The condensation washes any stray sugar crystals back down into the pan, which keeps the whole batch from crystallizing into a grainy mess at the hard crack stage.
- Dip at 280º F, not 300º F. Pull the pan off the heat at 300º F and let the bubbling settle until the thermometer reads about 280º F before you start dipping. Dipping at full hard crack traps active bubbles in the shell. A slightly cooler pour gives you the clearest, glassiest finish.
The Best Apples For Candy Apples
You can use any apple for candy apples, but I think Granny Smith tastes the best. They are tart and not too sweet, which goes perfectly with the sweet cinnamon candy coating. Small apples work best because they coat evenly and are easier to eat.
Candy Apple Ingredients
This is a pantry-friendly candy recipe with one specialty ingredient (cinnamon hard candy). The rest is sugar, water, corn syrup, food coloring, and fresh apples. I always recommend weighing your ingredients with a digital kitchen scale for the most accurate results, because sugar work is unforgiving and a heavy hand on the volume scoop can throw off your hard crack timing.
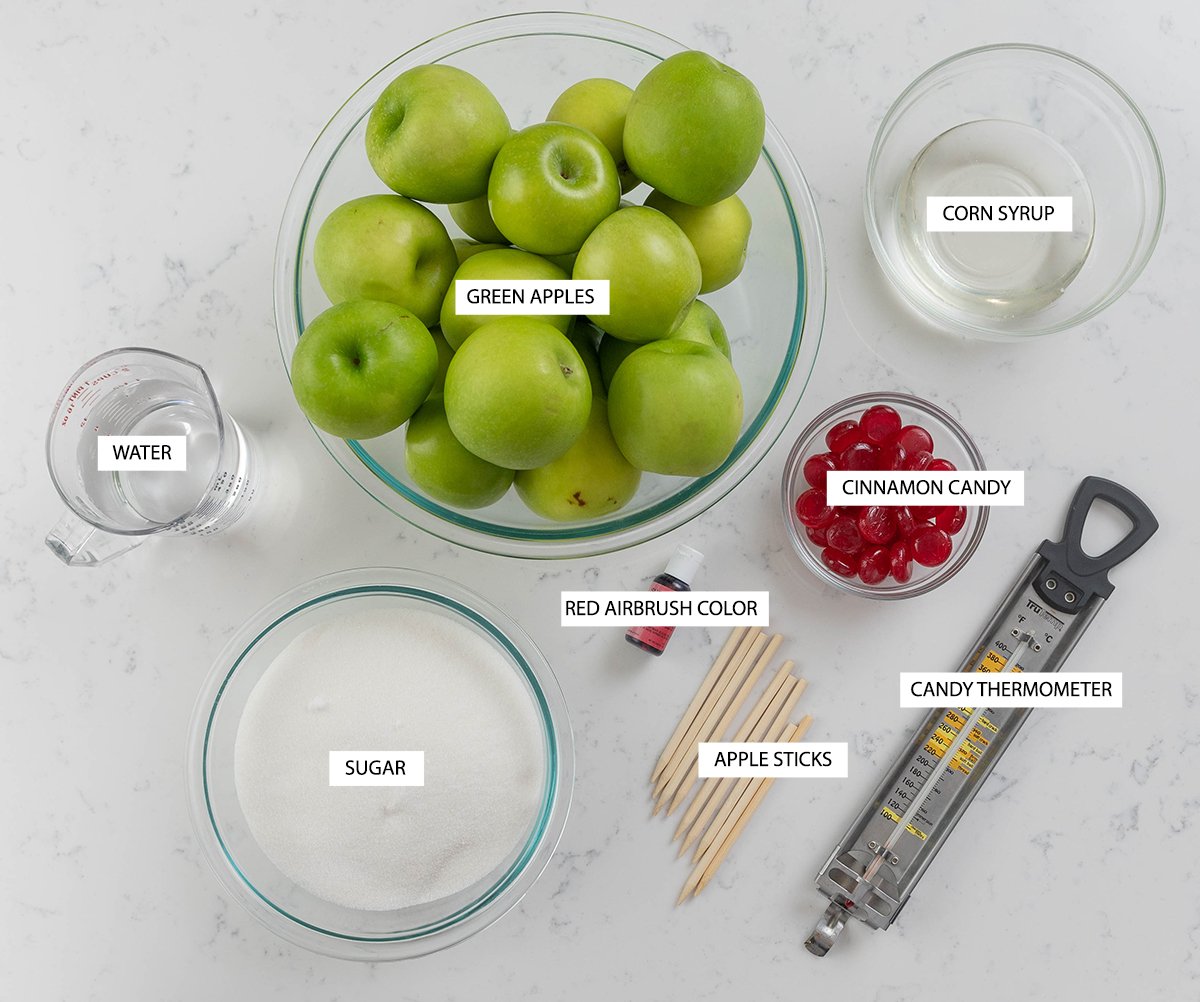
- Granny Smith apples. Tart, firm, and not too sweet, which is exactly what you want under a heavy candy shell. Small to medium apples work best because they coat evenly and are easier to eat. You can use any apple, but I think Granny Smith tastes the best.
- Granulated sugar. Standard white sugar is the body of the candy shell. Do not use raw, brown, or turbinado here. Those have molasses or larger crystals that prevent the shell from going clear.
- Water. Plain tap water dissolves the sugar at the start and evaporates as the candy cooks toward 300º F. This is why the temperature stalls around 250º F for a few minutes: the water is still leaving the pot.
- Light corn syrup. Corn syrup keeps the shell from crystallizing and gives it that signature glassy shine. If you do not have it, glucose syrup works at a 1:1 swap, or substitute an equal weight of additional granulated sugar (the shell will be slightly cloudier).
- Cinnamon hard candy. Cinnamon hard candy melted into the syrup gives the shell its red color and deep cinnamon flavor. No cinnamon candy? Use ¼ teaspoon cinnamon extract added off heat, or 1 teaspoon ground cinnamon (expect visible specks in the shell). Nutmeg, clove, or pumpkin spice are fun fall swaps if you want to lean into the season.
- Red food coloring. Cinnamon candy alone gives you a soft red. Add a little liquid or gel food coloring at the end of the cook for a deep ruby color. Gel will give a more intense color than liquid. Add it off heat at the very end so the color does not cook out.
- Edible glitter or flash dust. Optional, but it photographs beautifully. A little stirred in off heat gives the shell a subtle sparkle. Available at craft stores like Michaels or Joann Fabrics.
How To Make Candy Apples Step-By-Step
Plan for a two-day process. The night before, scrub the apples really well in hot water with a paper towel, or dunk them in steaming hot (not boiling) water for 1 minute, to remove the food-grade wax (this is the single biggest factor in a bubble-free shell), pat them completely dry, and chill them uncovered on a paper-towel-lined tray overnight. The day of, gather every pre-measured ingredient and piece of equipment before you turn on the stove, because once the sugar starts cooking, it moves fast. Remove the stems and push a wooden stick straight down into each apple, then return the prepped apples to the fridge. Lay a silicone mat or oiled foil on a baking sheet for the dipped apples. Keep a bowl of ice water within reach in case of a sugar burn and wear nitrile gloves for protection. Refer to the recipe card for exact weights and timing.
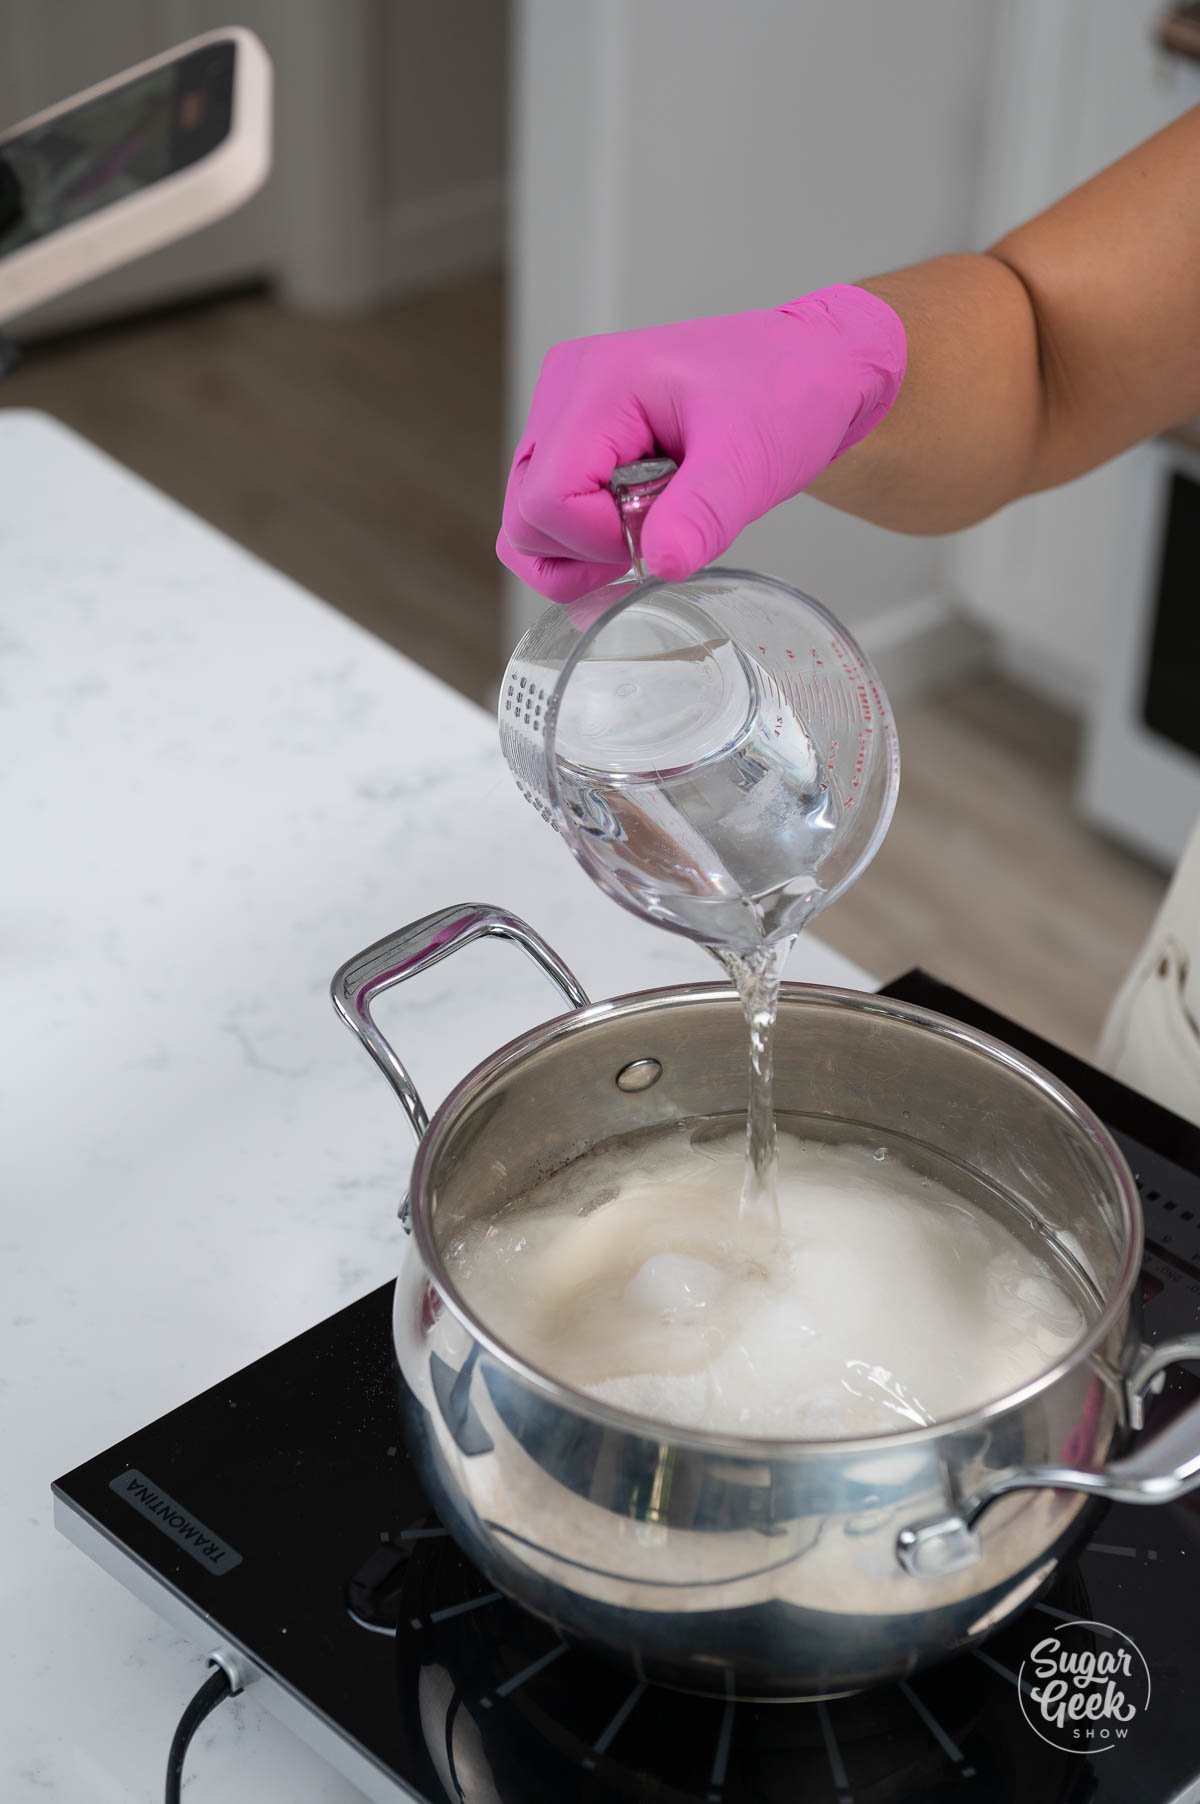
- Combine sugar, water, and corn syrup. In a heavy-bottomed saucepan, stir together the sugar, water, and corn syrup gently with a wooden spoon to combine. Avoid splashing syrup up the sides of the pan.
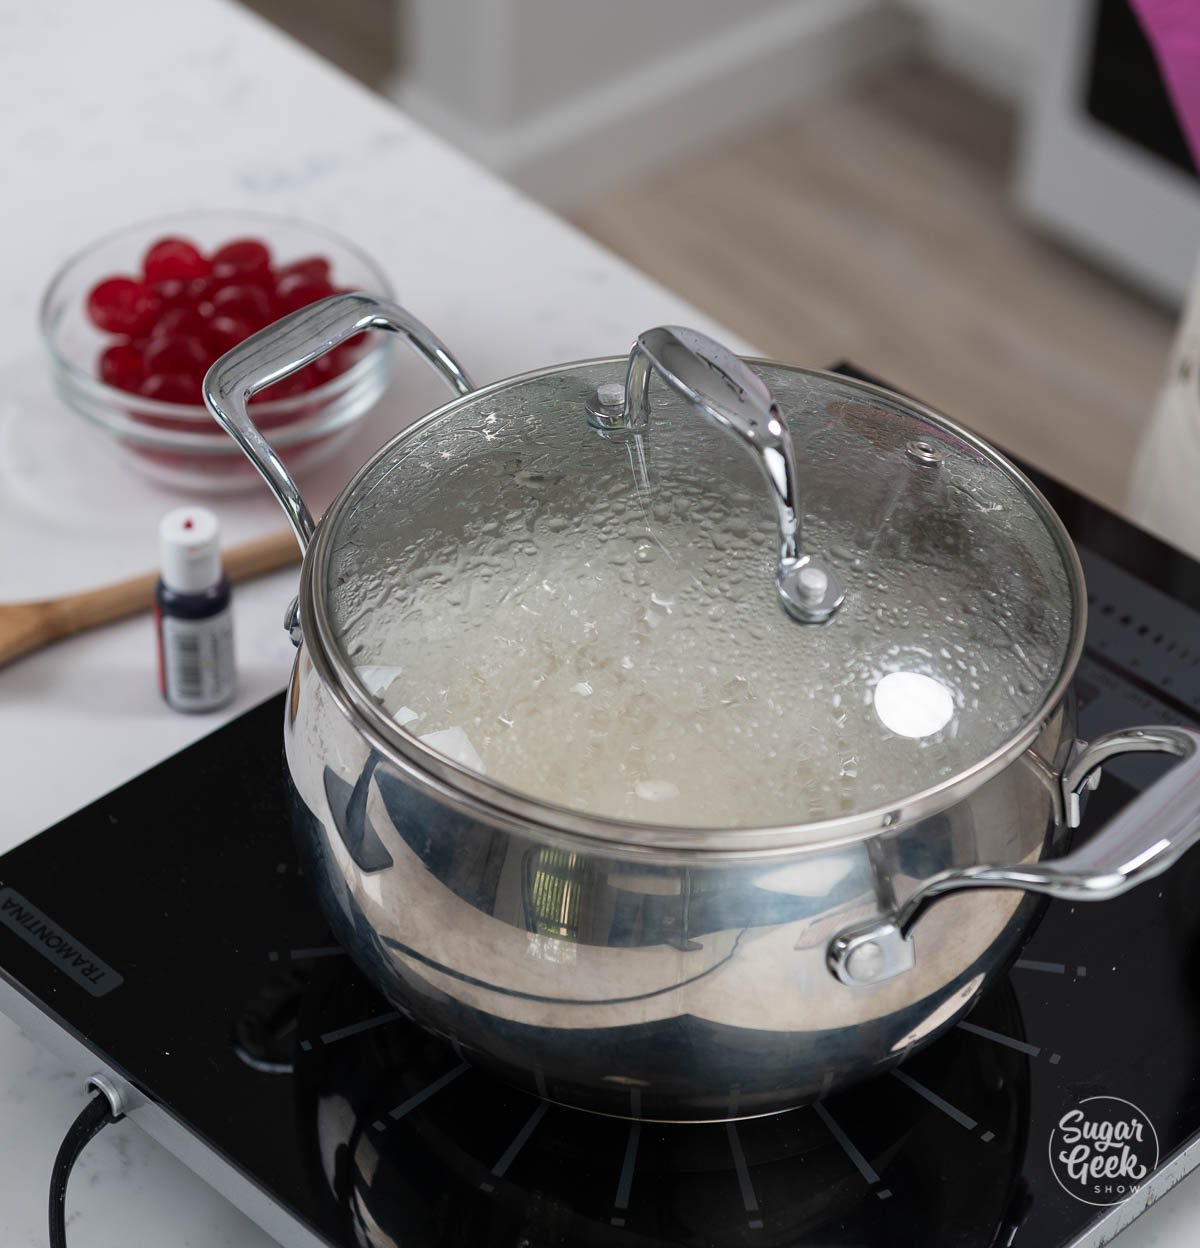
- Boil with the lid on for 5 minutes. Bring the mixture to a boil over medium-high heat, then cover with a lid for 5 minutes. The trapped steam washes any stray sugar crystals from the sides back into the syrup, which is what keeps the whole batch from crystallizing later.
PRO TIP: No lid that fits your saucepan? Once the boil starts, use a clean wet pastry brush to wash down the sides of the pan with water every minute for the first 5 minutes. Same idea, just manual.
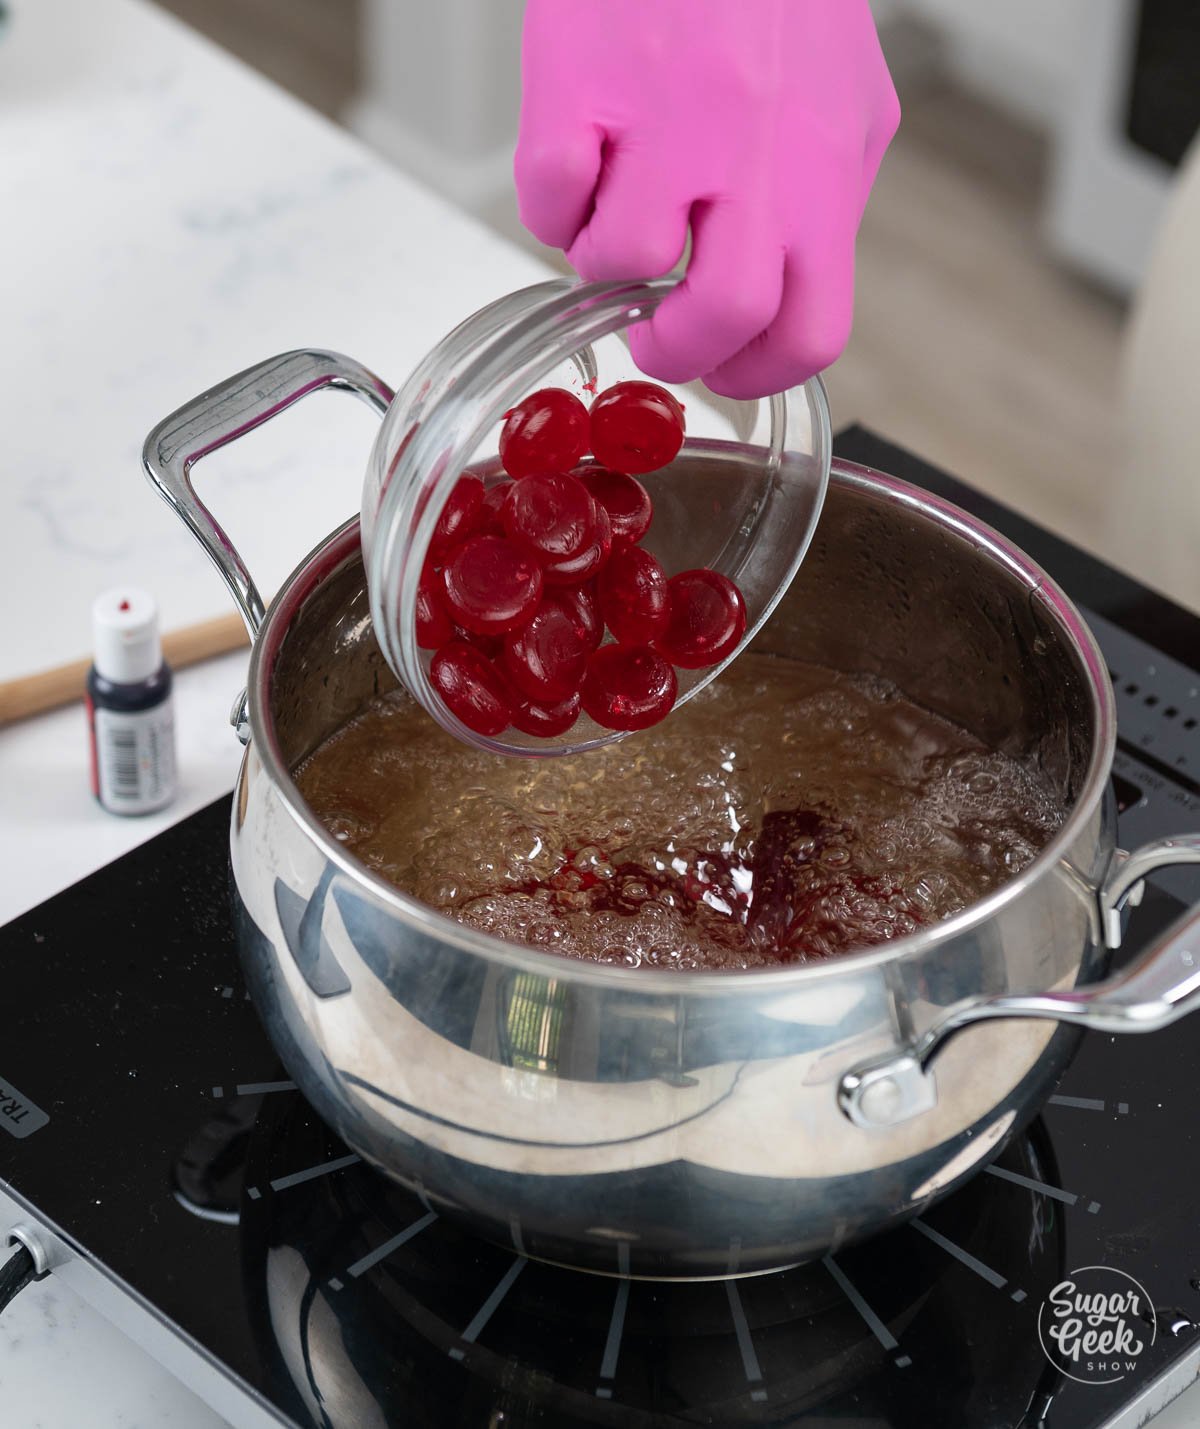
- Add the cinnamon candy and thermometer. Remove the lid, drop in the cinnamon hard candy, and clip your candy thermometer to the side of the pan. Do not stir from this point forward. Stirring is what triggers crystallization.
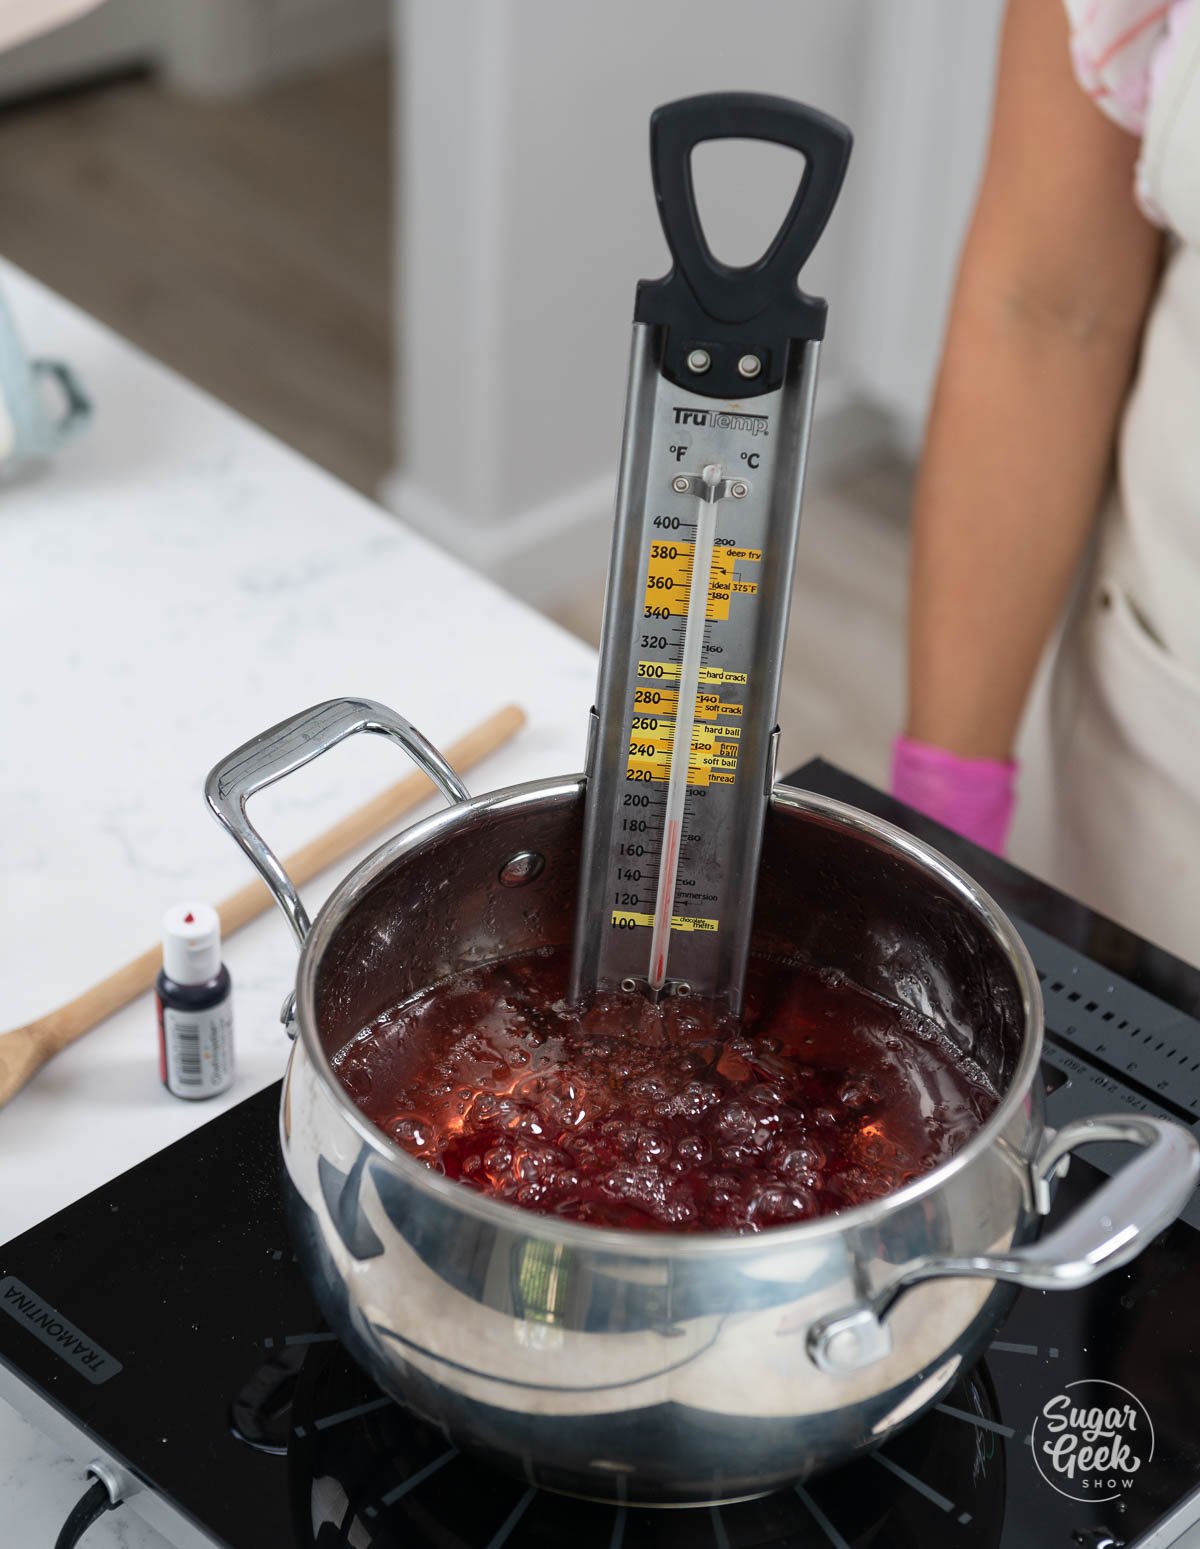
- Cook to 300º F. Over medium heat, hold a steady simmer and let the candy climb to 300º F (the hard crack stage). It will hang around 250º F for several minutes while the water finishes evaporating, then climb fast. Total cook time is around 25 to 30 minutes. Watch the thermometer constantly toward the end.
PRO TIP: Push the apple sticks all the way down to about half an inch from the bottom of the apple. A shallow stick will pull out when you lift the dipped apple, and molten candy plus a bare apple stuck to your hand is exactly the kind of burn you want to avoid.
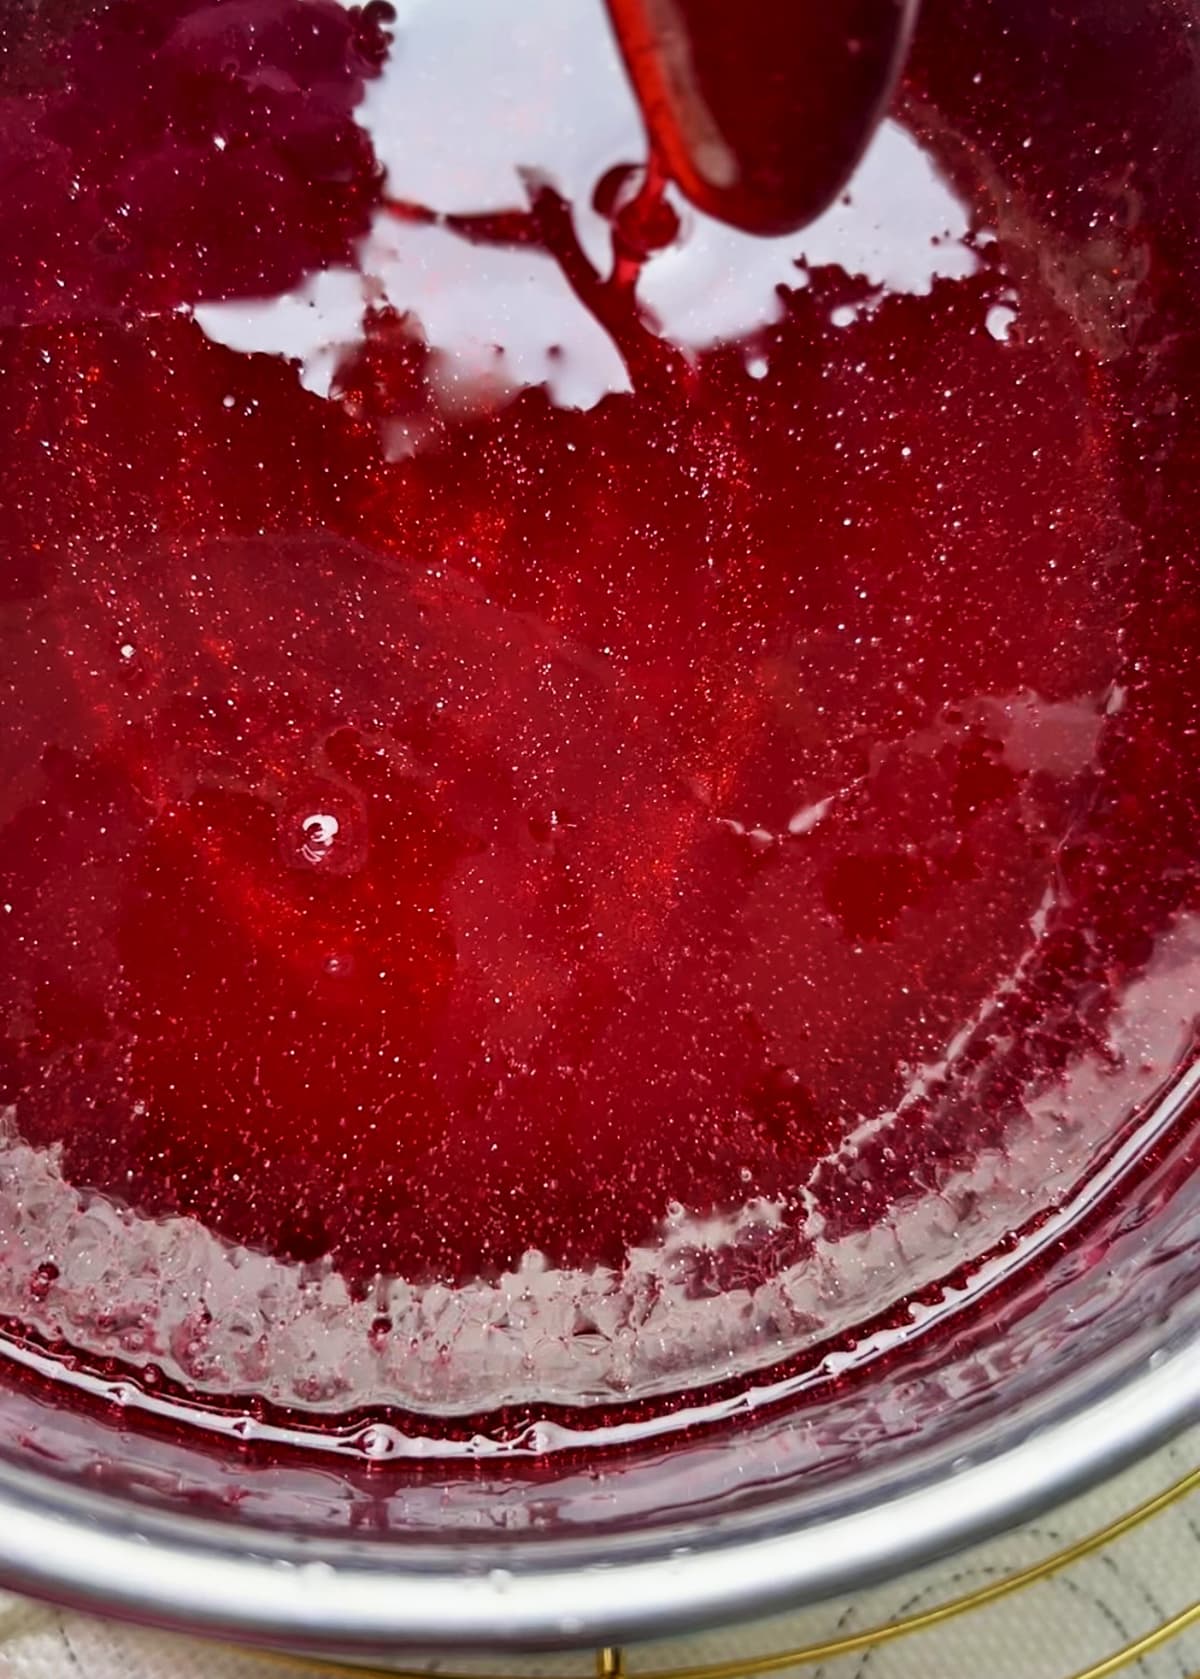
- Add color and glitter off heat. Once the candy hits 300º F, pull the pan off the heat. Add the food coloring and edible glitter and swirl the pan gently to combine. Do not stir vigorously.
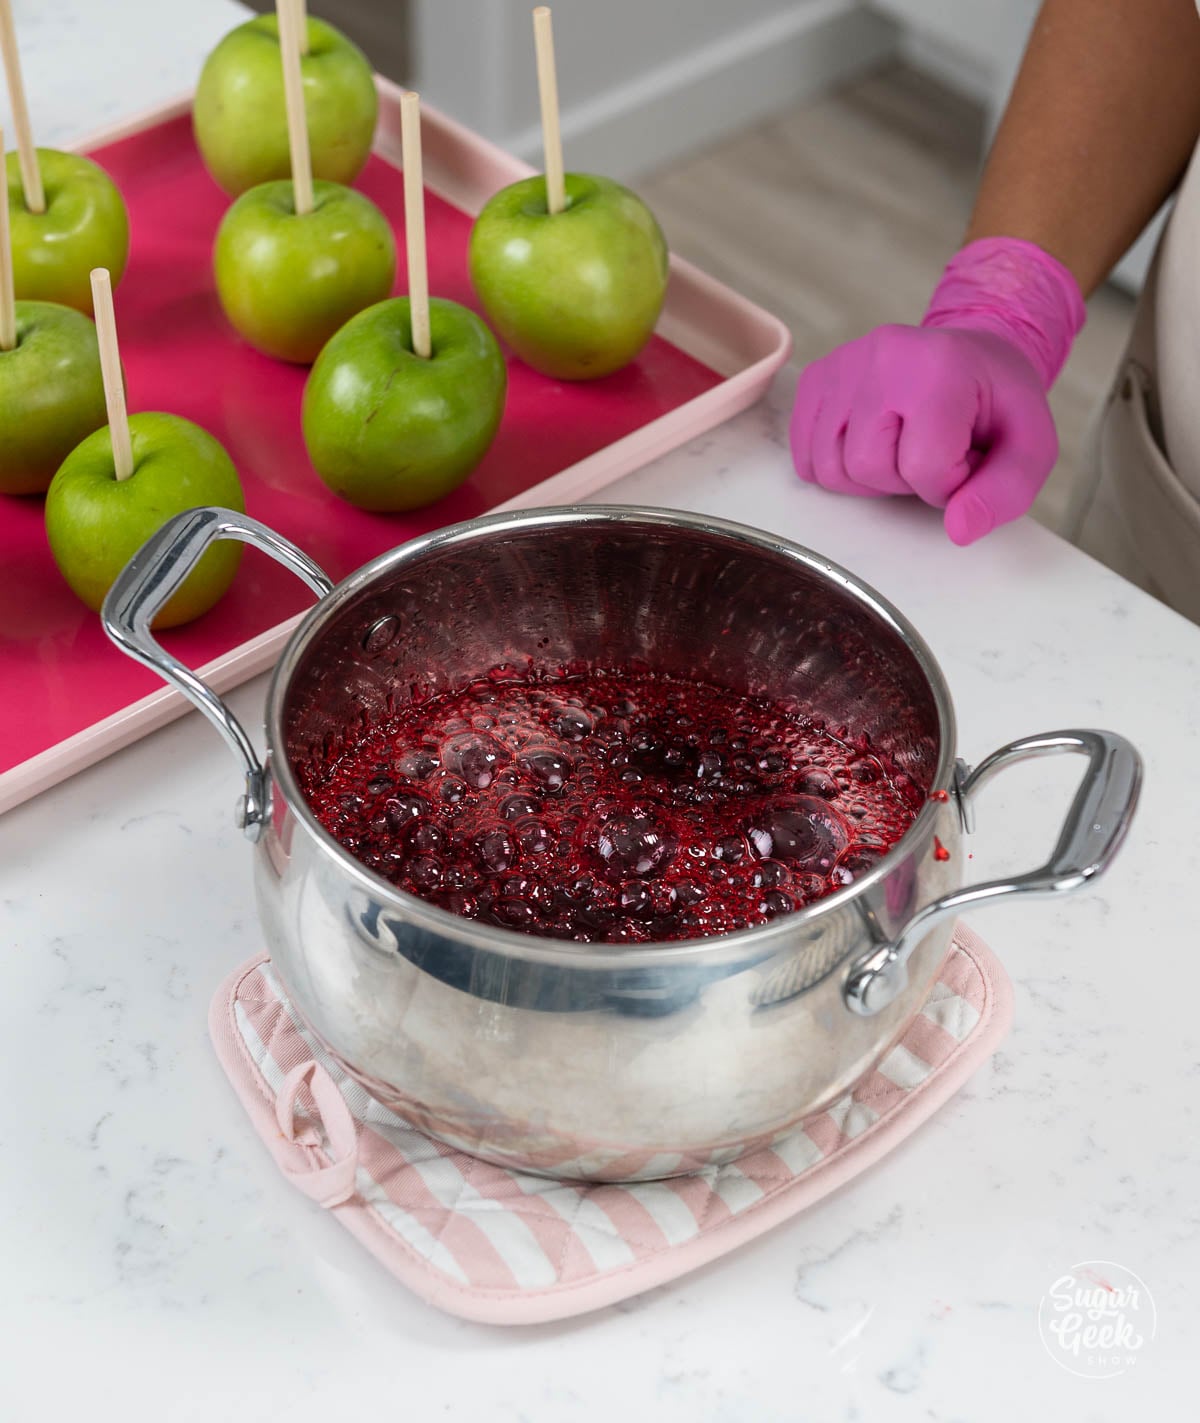
- Cool to 280º F before dipping. Let the candy sit for a minute or two until the bubbling calms down and the thermometer reads about 280º F. Dipping at full 300º F traps active bubbles in the shell.
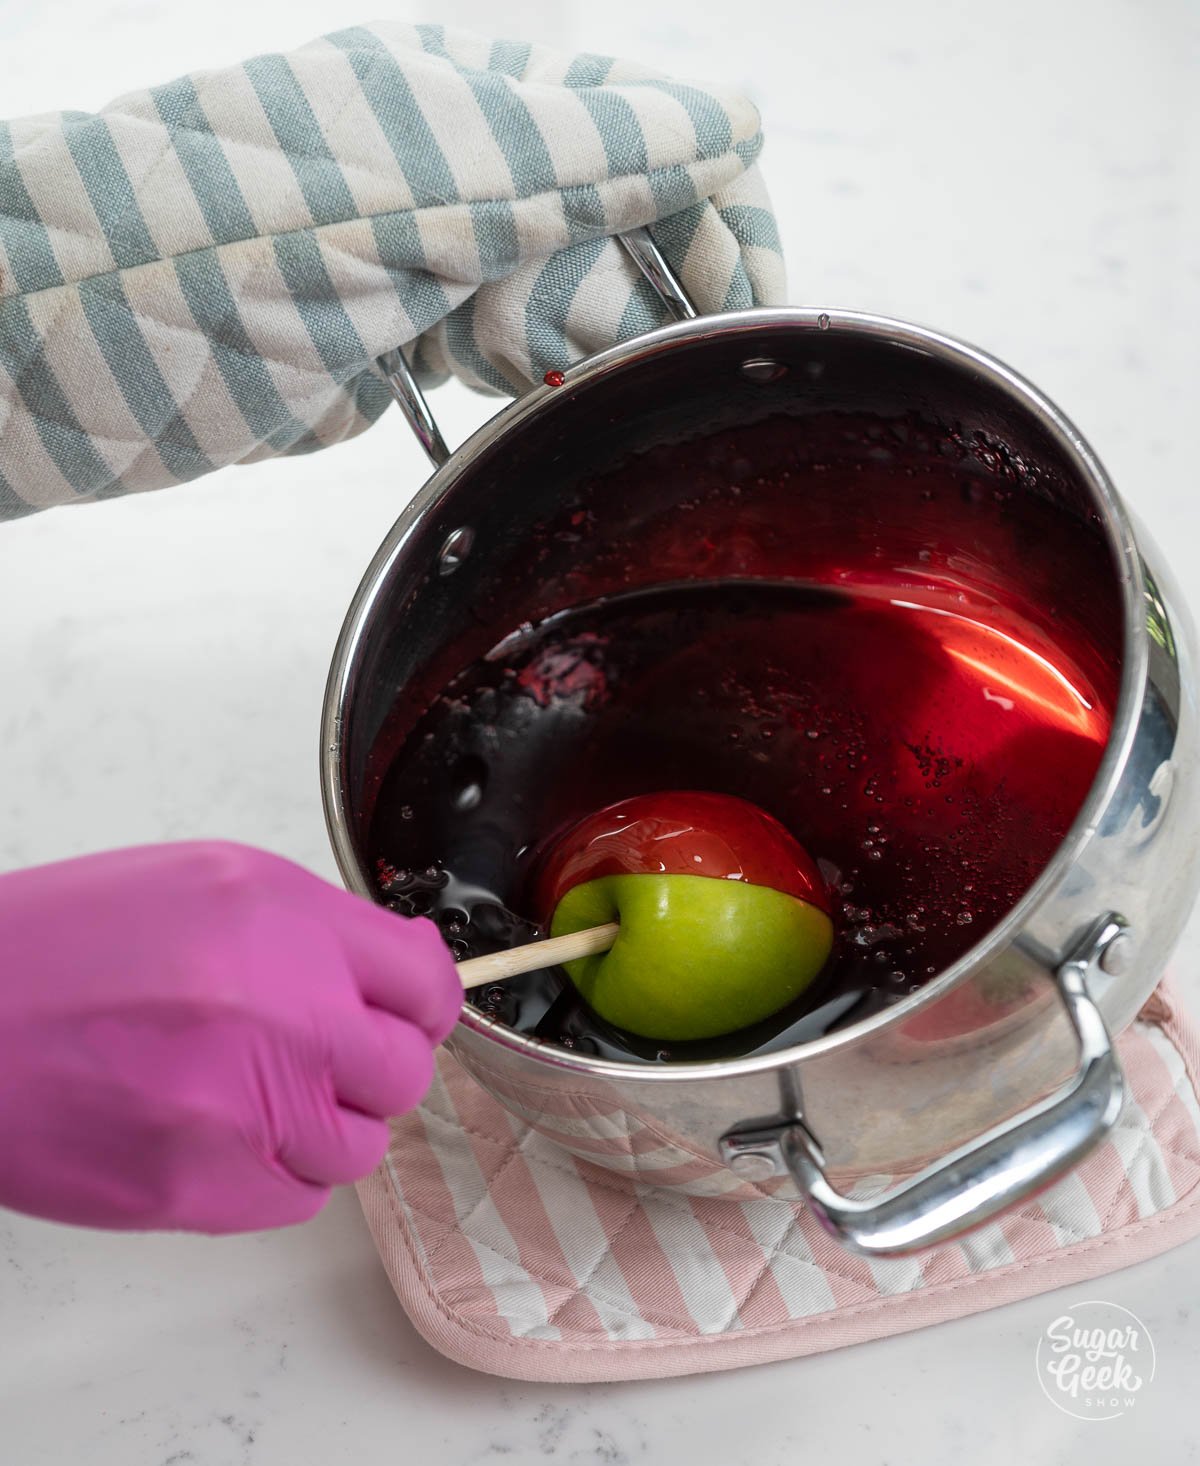
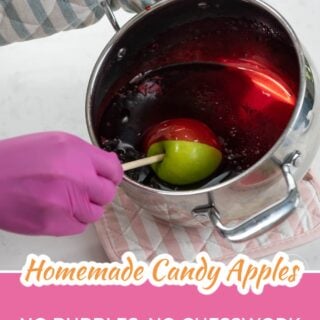
- Tilt and roll to dip. Pull cold apples from the fridge one at a time. Tilt the saucepan and roll each apple in the hot candy, dipping deep enough to coat almost down to the core. Lift, let the excess drip off the bottom for a few seconds, and place stick-side-up on the silicone mat.
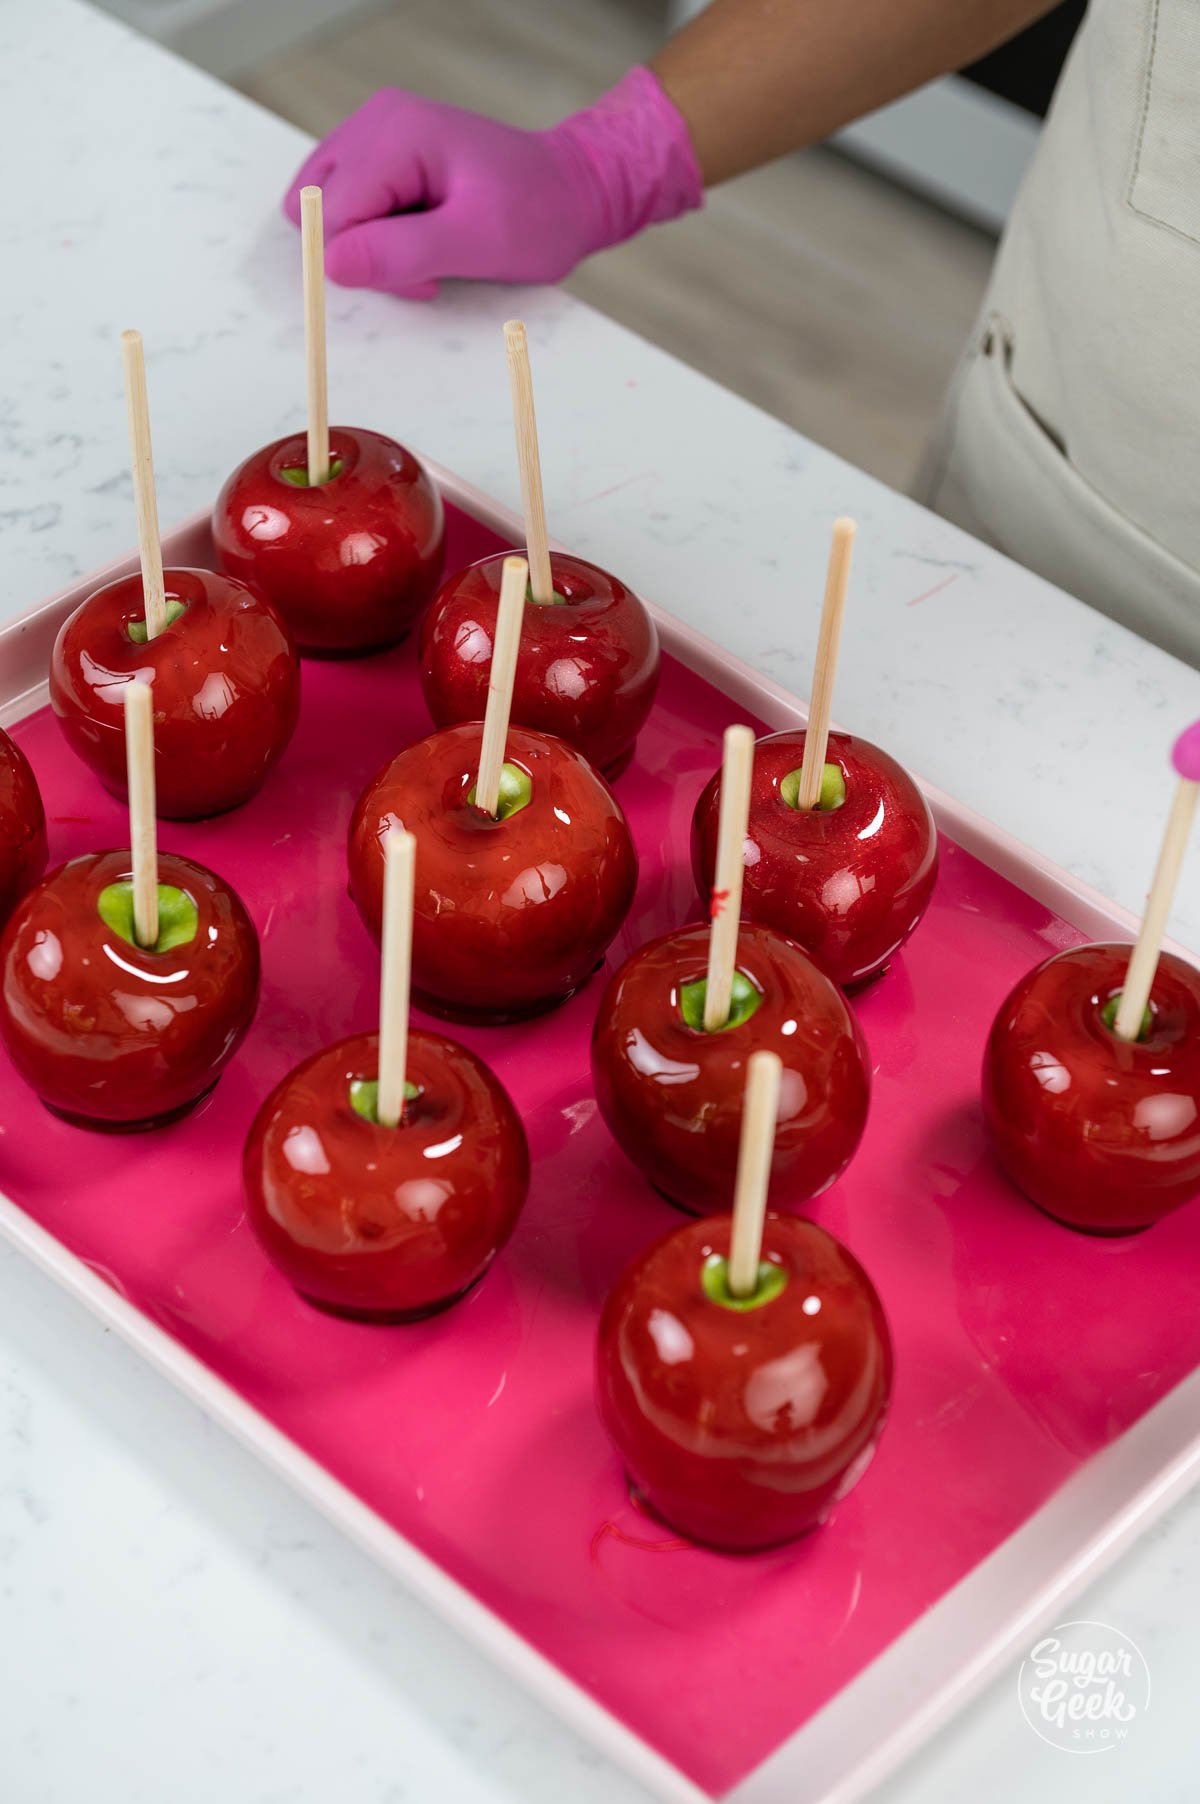
- Set and serve. Let the candy apples set on the mat at room temperature for 10 to 15 minutes until the shell is fully hard. If your candy thickens in the pan before you finish dipping, return it to low heat for a minute or two to liquify it again. Pour any leftover candy into silicone molds for hard candies or lollipops. The candy is very hard, so I always slice my candy apples to eat them instead of biting into them.
PRO TIP: Quick is the keyword on the dip. A fast roll through the hot candy gives you a thin, glassy shell. Holding the apple in the candy too long builds up a thick, uneven coat that will crack and slide off when bitten.
Common Candy Apple Problems To Avoid
- The shell is full of bubbles. Either the apples were not cold and dry, or you dipped at 300º F before the active bubbling calmed down. Fix: wash and chill your apples overnight, and let the candy drop to 280º F before you dip.
- The candy slides off the apple. The shell did not coat enough of the apple, or the apple was wet. Dip deep enough to coat almost down to the core, and make sure the apples are bone-dry before they go into the pot.
- The candy crystallized into a grainy mess. You stirred after the boil started, or sugar crystals from the sides of the pan dropped back into the syrup. Once the boil begins, do not stir. Use the 5-minute lid trick, or a wet pastry brush, to wash down the sides.
- The candy is sticky and never fully hardens. You did not cook the sugar to 300º F. Hard crack is non-negotiable for candy apples. Trust the thermometer, not the timer. Always use a candy thermometer for hot sugar.
- The shell cracks off the apple when you bite it. The coat was too thick, or the apple skin was too smooth (wax not fully removed). A thin, even coat sticks better than a thick one. Always remove the wax with the hot water scrub on day one.
- The candy hardens in the pan before I finish dipping. Drop the pan back onto low heat for one to two minutes to liquify, then keep dipping. As long as it stays under 320º F it will not burn.
Make This Candy Apple Recipe Your Own
Once you have the basic technique down, candy apples are incredibly easy to customize. Here are a few directions worth trying:
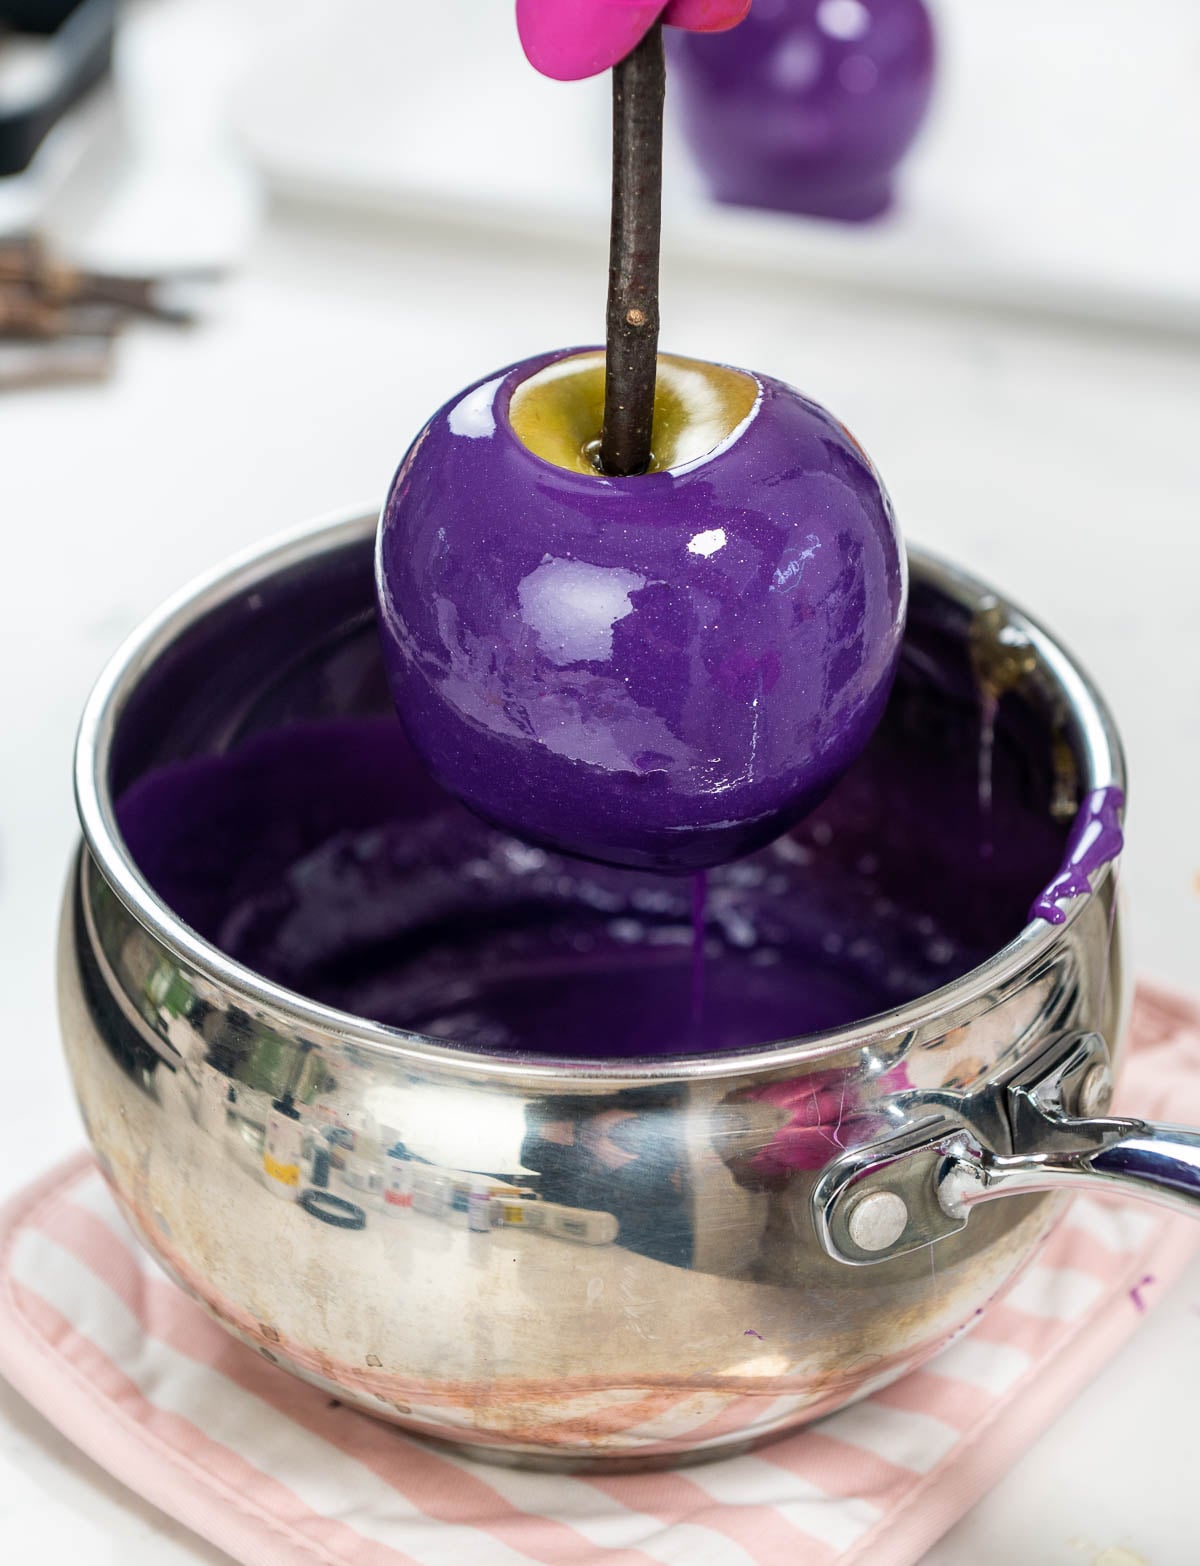
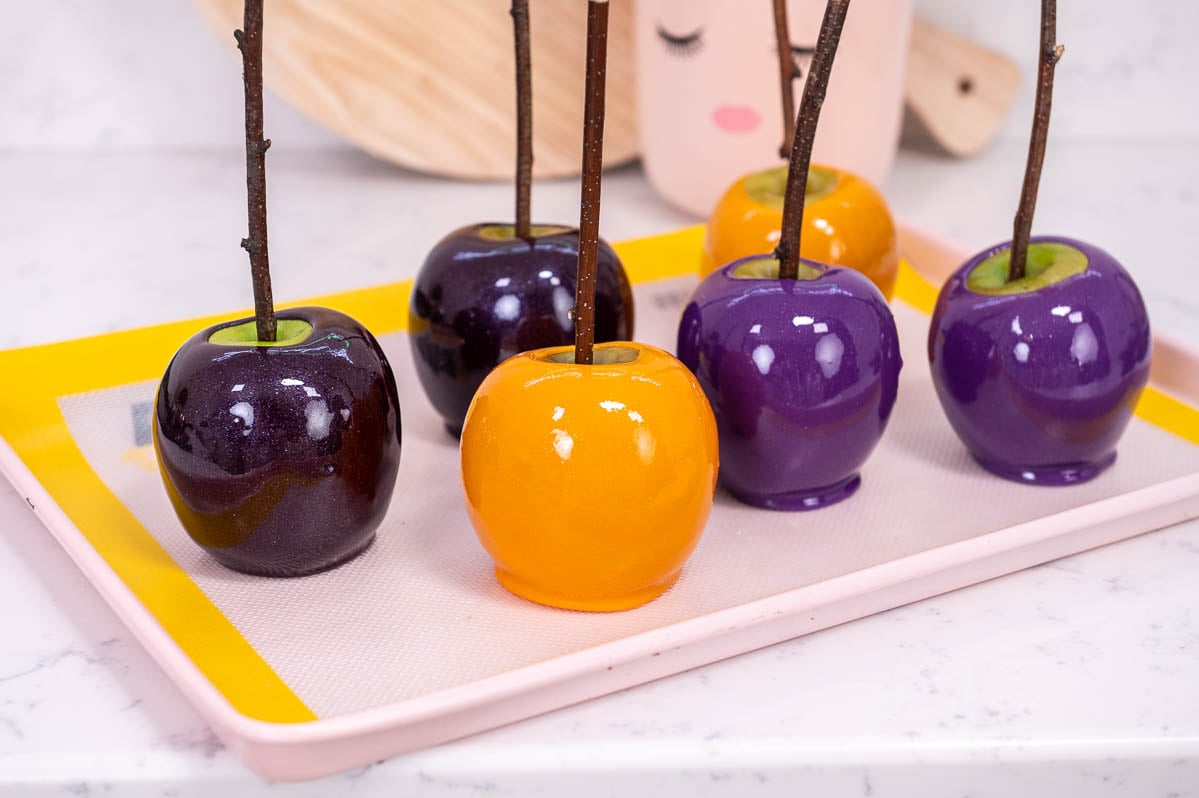
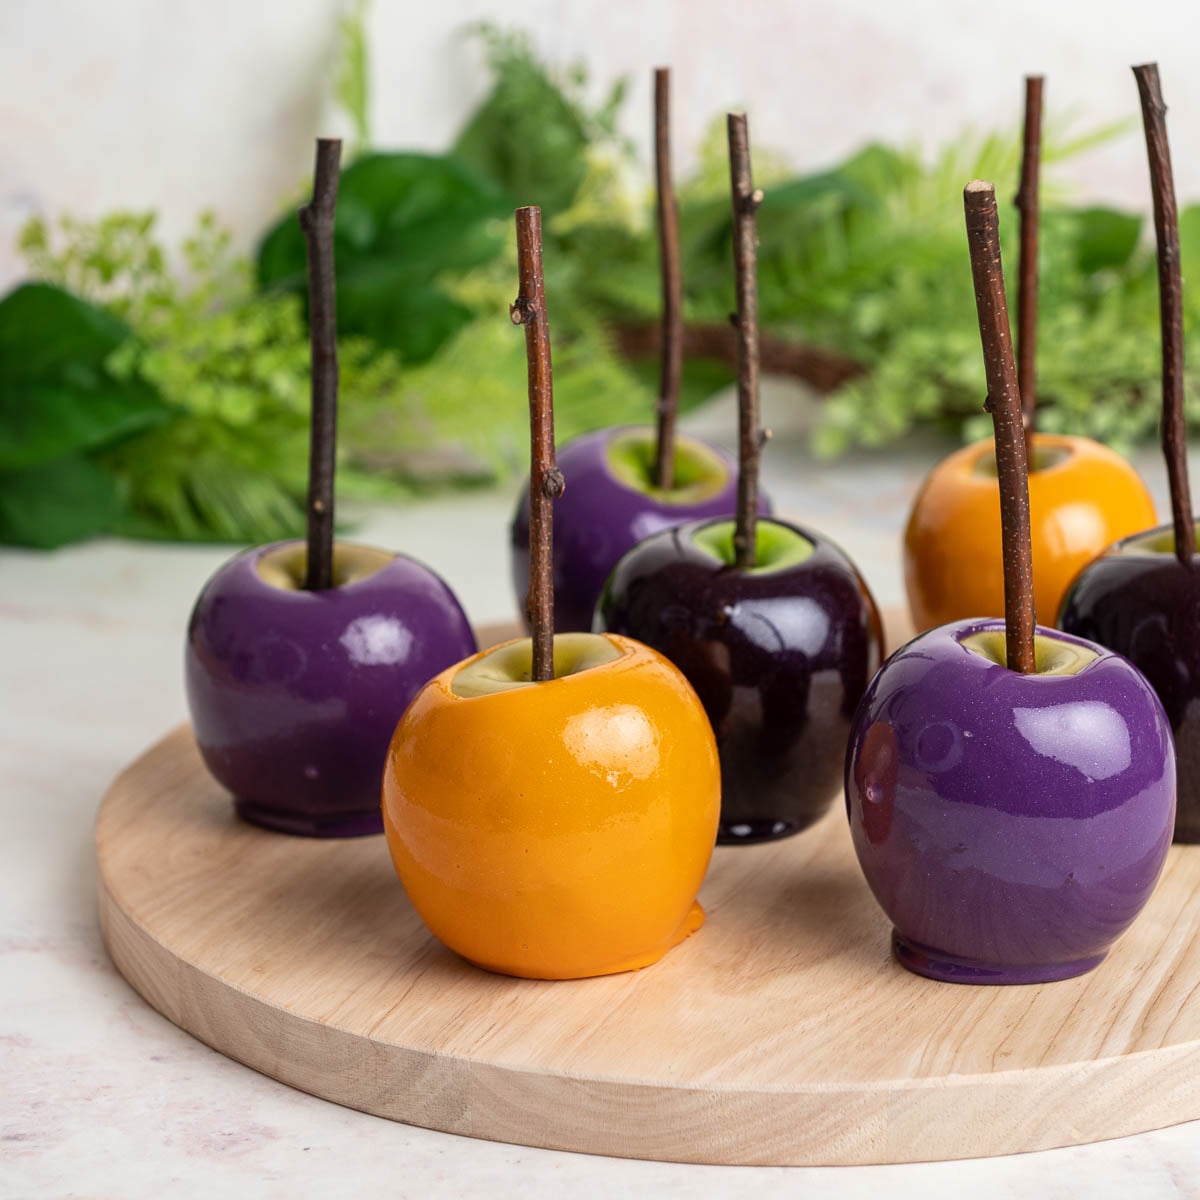
- Change the color. Red is classic, but you can make candy apples in literally any color using gel food coloring. Black is stunning for Halloween. Orange is perfect for fall festivals. Purple, green, and white all work beautifully. Use gel coloring rather than liquid for saturated, deep color. Start with a few drops added off heat at the very end, then swirl to see the intensity before adding more.
- Change the flavor. Cinnamon is the classic, but the hard candy trick works with any flavored hard candy you can find. Watermelon, green apple, or cherry hard candies all melt in cleanly. LorAnn flavoring oils (strawberry, cotton candy, bubble gum) are another option: add a few drops off heat at the end, they are concentrated so go easy.
- Add decorations. For sprinkles or edible glitter, let the freshly dipped apple drip for about 5 seconds to let the excess fall off, then immediately roll the bottom half in a shallow bowl of sprinkles, crushed candy, or coarse sugar before placing it on the mat to set. You have about 10 seconds before the shell firms up, so move fast. Demerara sugar rolled onto the base gives a beautiful sparkly crunch that photographs really well.
- Make them for a party. Wrap each candy apple in a cellophane bag once the shell is set. Tie with a ribbon in your party color. They make gorgeous favors and table centerpieces, and the hard shell means no sticky mess if someone sets one down.
Final Thoughts
Candy apples are one of those recipes that feel intimidating before you make them and obvious after. The only real variables are cold, dry apples and a thermometer that goes to 300º F, and once you have both, the technique is the same every time. This is hands down my favorite homemade dessert for the fall season. Pair them with my homemade caramel apples for a candy apple bar at your next fall party, or set them out at a Halloween potluck alongside pumpkin pie and easy pumpkin shaped bread for a full fall spread. The shell will not last forever (sugar attracts moisture), so eat them the same day for the best crack.
Candy Apple Recipe FAQs
How long does it take for candy apples to harden?
When your sugar is cooked to 300º F, the candy should harden fully within 10 to 15 minutes and be ready to eat.
Why are my candy apples sticky?
Sticky candy apples almost always mean the sugar did not cook all the way to 300º F. If your thermometer was off or you pulled the pan early, the shell will stay tacky no matter how long it sits. Sugar also pulls moisture from humid air, so even a properly cooked shell will get sticky over time.
How do you prevent bubbles in candy apples?
Three things create bubbles: wax on the apple skin, water on the apple, and dipping while the candy is still actively bubbling at 300º F. Wash the wax off your apples, dry them completely, and chill them overnight. Then let the candy cool to 280º F before you dip.
How do you store candy apples and how long do they last?
Candy apples are best the day they are made. Once the shell is fully set, wrap each apple in a cellophane treat bag and keep them at room temperature for up to 24 hours. Do not refrigerate them uncovered, because refrigeration causes condensation, which makes the shell sticky. Do not freeze them.
How do you eat a candy apple?
The candy is very hard, and although you could bite into it, it's much easier to slice the apple first and then enjoy it.
More Fall And Halloween Recipes To Try
Leave Me A Review
⭐️⭐️⭐️⭐️⭐️
If you tried this Candy Apple Recipe or any other recipe on my blog, please leave a 🌟 star rating and let me know how it goes in the comments. I love hearing from you!
Recipe
Equipment
- heavy bottom saucepan
- Candy Thermometer
- silicone mat
- clean pastry brush
- Apple skewers
- nitrile gloves (optional for precaution while dipping)
Ingredients
- 8-10 small granny smith apples
- 30 ounces granulated sugar
- 12 ounces water
- 6 ounces corn syrup
- ¼ teaspoon food coloring, optional
- 8 ounces cinnamon hard candy
- ¼ teaspoon flash dust optional
Instructions
- The night before, scrub the apples really well in hot water with a paper towel, or dunk them in steaming hot (not boiling) water for 1 minute, to remove the wax, dry them well, and chill them uncovered on a paper-towel-lined tray overnight. The day of, line a sheet pan with a silicone mat (or oiled foil), keep a bowl of ice water within arm's reach for sugar safety, and put on nitrile gloves. Insert wooden sticks into the chilled apples right before you start cooking and return the prepped apples to the fridge.
- Combine sugar, water, and corn syrup. Add the sugar, water, and corn syrup to a heavy-bottomed saucepan. Stir gently with a wooden spoon to combine. Do not splash syrup up the sides of the pan.
- Boil with the lid on for 5 minutes. Bring the mixture to a boil over medium-high heat, then cover with a lid for 5 minutes. The trapped steam washes stray sugar crystals back into the syrup so the batch will not crystallize at the hard crack stage. If your saucepan does not have a lid, use a clean wet pastry brush to wash down the sides with water every minute during this phase.
- Add the cinnamon candy and thermometer. Remove the lid, drop in the 8 ounces of cinnamon hard candy, and clip a candy thermometer to the side of the pan. Do not stir from this point forward.
- Cook to 300º F. Over medium heat, hold a steady simmer and let the candy climb to 300º F (hard crack). The thermometer will hang around 250º F for several minutes while the water evaporates, then it will climb fast. Total cook is around 25 to 30 minutes.
- Add color and glitter off heat. Once the candy hits 300º F, pull the pan off the heat. Add the food coloring and edible glitter and swirl gently to combine.
- Cool to 280º F before dipping. Let the candy sit until the active bubbling settles and the thermometer reads 280º F.
- Tilt and roll to dip. Pull cold apples from the fridge one at a time. Tilt the saucepan, roll the apple in the hot candy, dip deep enough to coat almost to the core, and let the excess drip off before placing stick-up on the silicone mat
- Set and serve. Let the candy apples set at room temperature for 10 to 15 minutes until the shell is fully hard. If the candy thickens before you finish dipping, return it to low heat for a minute or two to liquify. Pour any leftover candy into silicone molds for hard candies. The candy is very hard, so slice the candy apples to eat them instead of biting into them.
Video
Notes
- Ingredient notes: You can use any apple, but Granny Smith tastes the best. They are tart and firm. Cinnamon hard candy is the cleanest flavor route. Use ¼ teaspoon cinnamon extract off heat as a swap, or 1 teaspoon ground cinnamon if that is all you have (expect visible specks in the shell).
- Equipment notes: A candy thermometer is non-negotiable. Hard crack at 300º F is the line between a glassy shell and a sticky shell. Always use a candy thermometer for hot sugar.
- Make-ahead and storage: Best the day they are made. The shell stays glassy for about 24 hours at room temperature. Wrap each apple individually in a cellophane bag once the shell is fully set. Do not refrigerate uncovered (condensation makes them sticky), and do not freeze (the shell will crack).
- Sugar safety: Hot sugar burns are severe. Keep a bowl of ice water within arm's reach the entire time you are cooking. If you get sugar on your skin, immediately remove the glove or dip the area in ice water to harden the sugar before pulling it off.
- Critical do-nots: Do not stir after the boil starts. Do not dip wet or warm apples. Do not dip at 300º F (wait for 280º F). Do not skip the wax removal step. Do not refrigerate the finished apples uncovered.

will says
my name is will, my co-worker and i won our company apple bake off contest! we have apple trees around the property and we used your recipe to win at our annual football kickoff! we won a WA state shaped cutting board!! we love you liz thank you for the recipe you are the best!!
Liz Marek says
Congratulations, Will! I love that you used your own apples.
Heather says
This was an easy recipe and the first 3 apples were perfect. The next two were thicker and had bubbles. Then when I heated the sugar up just a tiny bit it crystallized. I was thinking the corn syrup would prevent that. My apples were cold so maybe that made the difference?
Liz Marek says
Cold apples are actually what you want! Crystallizing usually happens from stirring after the boil starts, or sugar crystals on the sides of the pan falling back in. If you have more questions, come ask me in the Sugar Geeks community: https://community.raptive.com/sugargeeks
Jennette McNeil says
What model of pot and induction cooker do you use for the candy apples. My first time trying to make them
Liz Marek says
I use a heavy bottomed stainless steel pot and a portable induction burner, but neither is necessary equipment to make candy apples!
Laurie says
Do you have to do anything with the silicone molds before putting the leftover candy?
Liz Marek says
No prep needed. Just make sure your silicone molds are clean and completely dry. If you have more questions, come ask me in the Sugar Geeks community: https://community.raptive.com/sugargeeks