
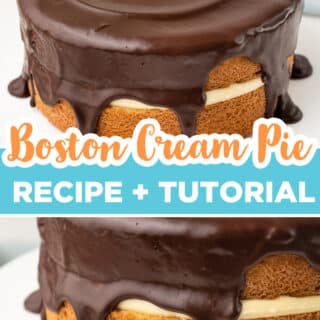
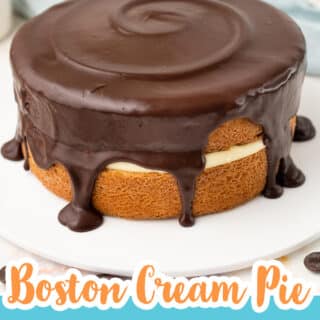
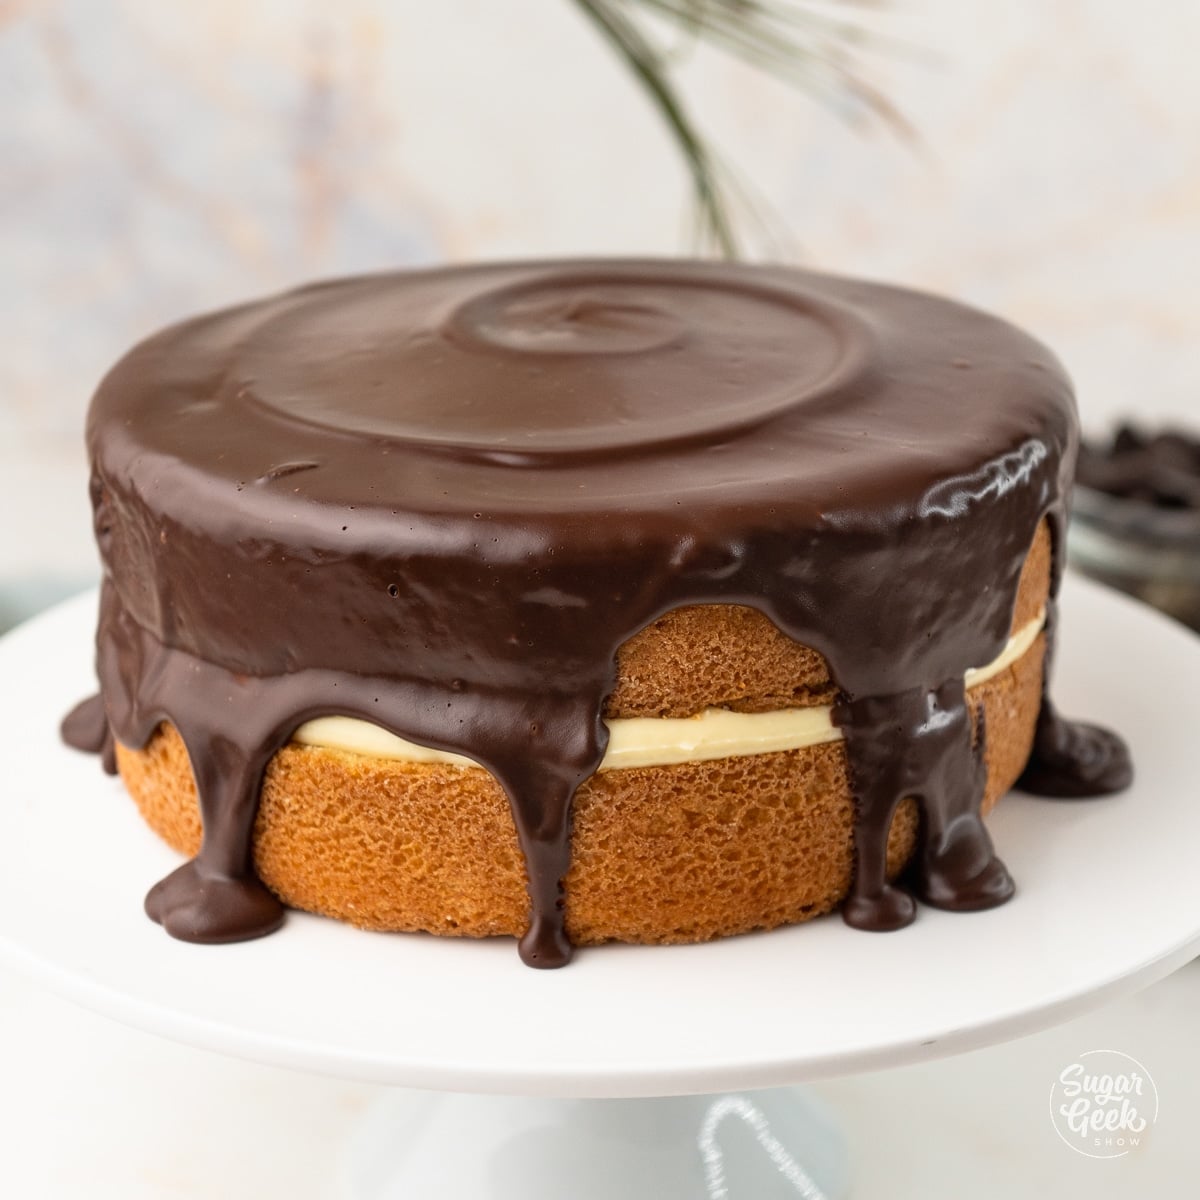
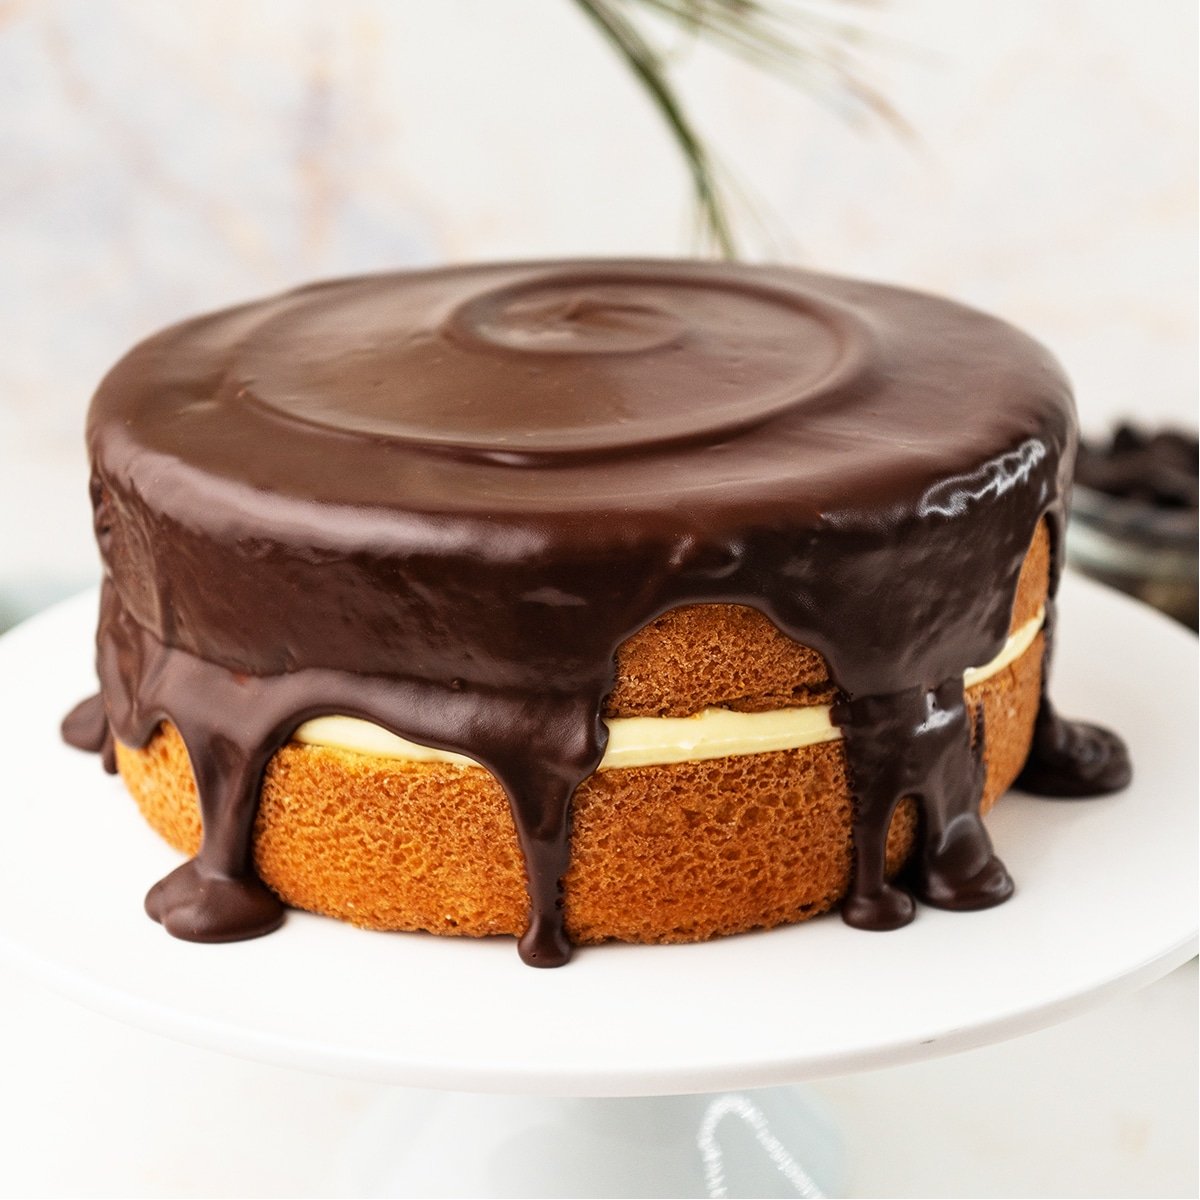
This classic Boston cream pie is two layers of fluffy, moist yellow cake stuffed with thick vanilla pastry cream and crowned with a glossy chocolate ganache that drips down the sides. The name is a bluff (it is not a pie, it is a cake), but the flavor is the real deal. If you love my chocolate drip cake finish, this is the dessert that puts the same shiny pour over a soft homemade cake.
I had a Boston Cream Donut before I ever had a slice of actual Boston Cream Pie, and the first time I made this recipe I realized the donut is just the cake stuffed into a fried shell. Same pastry cream, same chocolate top, same comfort. If you love my pastry cream filling work in cream puffs and éclairs, you already know the technique. The hard part with BCP is patience: the assembled cake needs at least 6 hours in the fridge to set, so plan ahead or turn the batter into Boston cream cupcakes (my personal favorite) and have dessert in an hour.
Quick Glance at the Recipe: Boston Cream Pie
- Recipe Name: Boston Cream Pie
- Why You'll Love It: Cake-meets-donut comfort dessert with three textures in one slice: tender yellow cake, silky vanilla pastry cream, glossy chocolate ganache. Looks like a fancy patisserie cake but uses pantry staples.
- Time and Difficulty: Intermediate. About 20 minutes of active prep, 40 minutes of baking, and a 6-hour chill before the ganache. Plan a full day or split it across two.
- Main Ingredients: Yellow cake (cake flour, butter, eggs, milk, oil), pastry cream (whole milk, eggs, sugar, cornstarch, butter, vanilla), and chocolate ganache (semi-sweet chocolate + heavy cream).
- Method: Cook pastry cream and chill, bake two yellow cake layers and chill, stack with pastry cream inside an acetate-lined ring, chill overnight, pour ganache over the top, slice.
- Texture and Flavor: Pillowy yellow cake, cool silky vanilla custard, shiny chocolate top. Sweet but balanced, the kind of slice that disappears off the plate.
- Quick Tip: Make the pastry cream the day before so it has time to set firm. Warm pastry cream will sag between your cake layers and ruin the clean slice.
Jump to:
- Quick Glance at the Recipe: Boston Cream Pie
- Boston Cream Pie Ingredients
- What Is Boston Cream Pie?
- What Makes This Boston Cream Pie So Good
- How to Make Boston Cream Pie Step-By-Step
- Cake Batter, Pastry Cream, and Ganache Calculator
- Cake Batter and Frosting Calculator
- Cups of Batter Needed
- Cups of Frosting Needed
- Pan size swaps
- Common Boston Cream Pie Problems To Avoid
- Boston Cream Cupcakes (no chill needed)
- Boston Cream Pie FAQs
- More Cake Recipes To Try
- Watch: How To Decorate A Cake Step-by-Step
- Recipe
Boston Cream Pie Ingredients
Most of this you probably already have in your pantry. I always recommend weighing your ingredients with a digital kitchen scale for the most accurate results, especially with the yellow cake. The pastry cream and ganache use whole milk, fresh eggs, and good chocolate, so do not skimp on any of those.
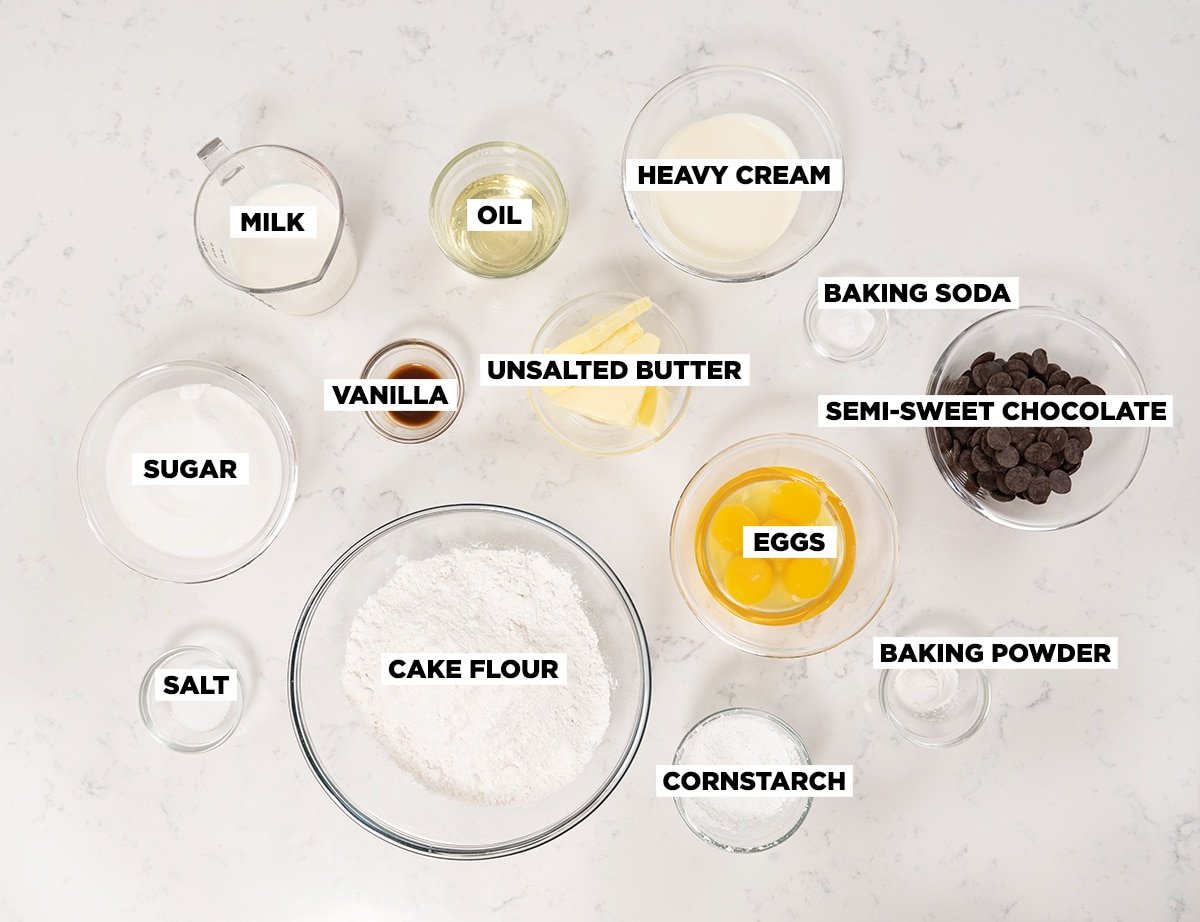
- Whole milk. Base of the pastry cream and an ingredient in the yellow cake. The fat in whole milk gives the cream richness and helps it set firm. You can substitute almond, soy, oat, or coconut milk in the pastry cream and the cake will work too, but the texture is best with whole dairy.
- Eggs and egg yolks. Yolks plus a whole egg make the pastry cream rich and the yellow cake yellow. If you pulled out the yolks of a yellow cake recipe, you would end up with a plain vanilla cake; pull the yolks AND use only whites, you have a white cake. The yolks here matter.
- Granulated sugar. Sweetens the pastry cream and the cake. Adding sugar to the milk as it heats helps prevent scorching on the bottom of the pot.
- Cornstarch. Thickener for the pastry cream. Cornstarch gives a cleaner, less starchy mouthfeel than flour and sets firm enough to slice between cake layers. Do not swap it for flour.
- Unsalted butter. Finishes the pastry cream (whisked in at the end for shine) and is the main fat in the yellow cake. I like Plugra (European butter, 82% fat) for the pastry cream because it makes the cream extra silky. Any unsalted butter works in the cake.
- Vanilla extract. Pastry cream and yellow cake both call for it. Use pure vanilla extract, paste, or scraped beans if you have them. I like Nielsen-Massey vanilla bean paste when I want the strongest hit of vanilla.
- Cake flour. Lower protein than all-purpose flour, which means less gluten development and a more tender, fluffy crumb. Do not fall for the "just add cornstarch to AP flour" workaround for this cake; the texture comes out closer to cornbread because AP has too much protein. If you do need a swap, my cake flour substitute is what I use. In the UK look for Shipton Mill soft cake and pastry flour, or any flour with 9% protein or less.
- Baking powder and baking soda. Both are leaveners. The combination gives the cake lift without making it taste like soda.
- Vegetable oil. A small amount alongside the butter keeps the yellow cake moist for days. Canola oil works the same way.
- Semi-sweet chocolate. For the ganache. Use good chocolate. I like Guittard, Cacao Barry, or Ghirardelli chips because they do not need chopping. If you want the ganache darker, swap in bittersweet.
- Heavy whipping cream. The other half of the ganache. If you are out of heavy cream, try my water ganache recipe, which works really well for a drip on a chilled cake.
- Salt. Wakes everything up in the cake batter.
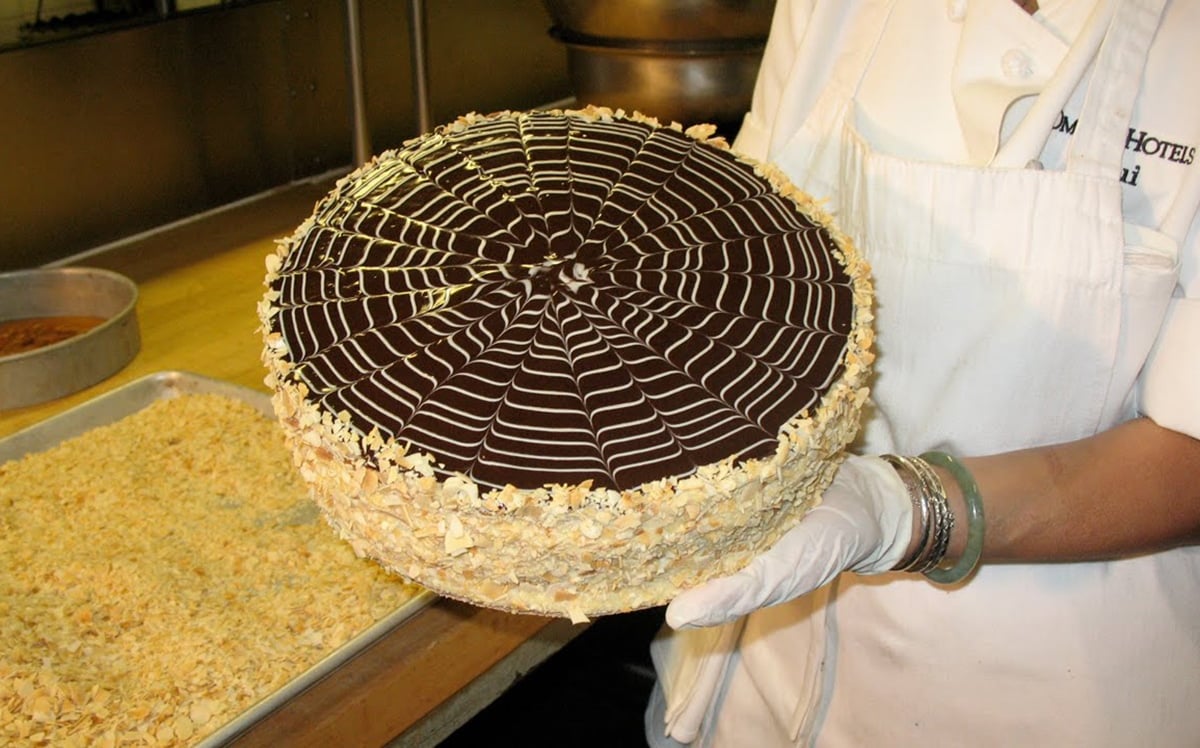
What Is Boston Cream Pie?
Boston Cream Pie is two layers of yellow cake sandwiched with vanilla pastry cream and finished with a chocolate ganache or chocolate glaze on top. The dessert was created in 1856 at the Parker House Hotel in Boston (now the Omni Parker House) by French chef Augustine François Anezin, who served it as "Parker House Chocolate Cream Pie." It only got the "Boston Cream Pie" name when Betty Crocker put a recipe for it in her cookbook in 1950, and it has been Massachusetts's official state dessert since 1996.
So why is a cake called a pie? Because in colonial America, the words "cake" and "pie" were used pretty interchangeably, and the early versions of this dessert were baked in pie tins (most home kitchens had pie tins; fewer had layer cake pans). The name stuck even after pie tins stopped being the default vessel.
What Makes This Boston Cream Pie So Good
This recipe gives you a real boston cream pie experience without making you babysit a finicky French sponge or a stovetop custard that breaks on you. Here is what wins:
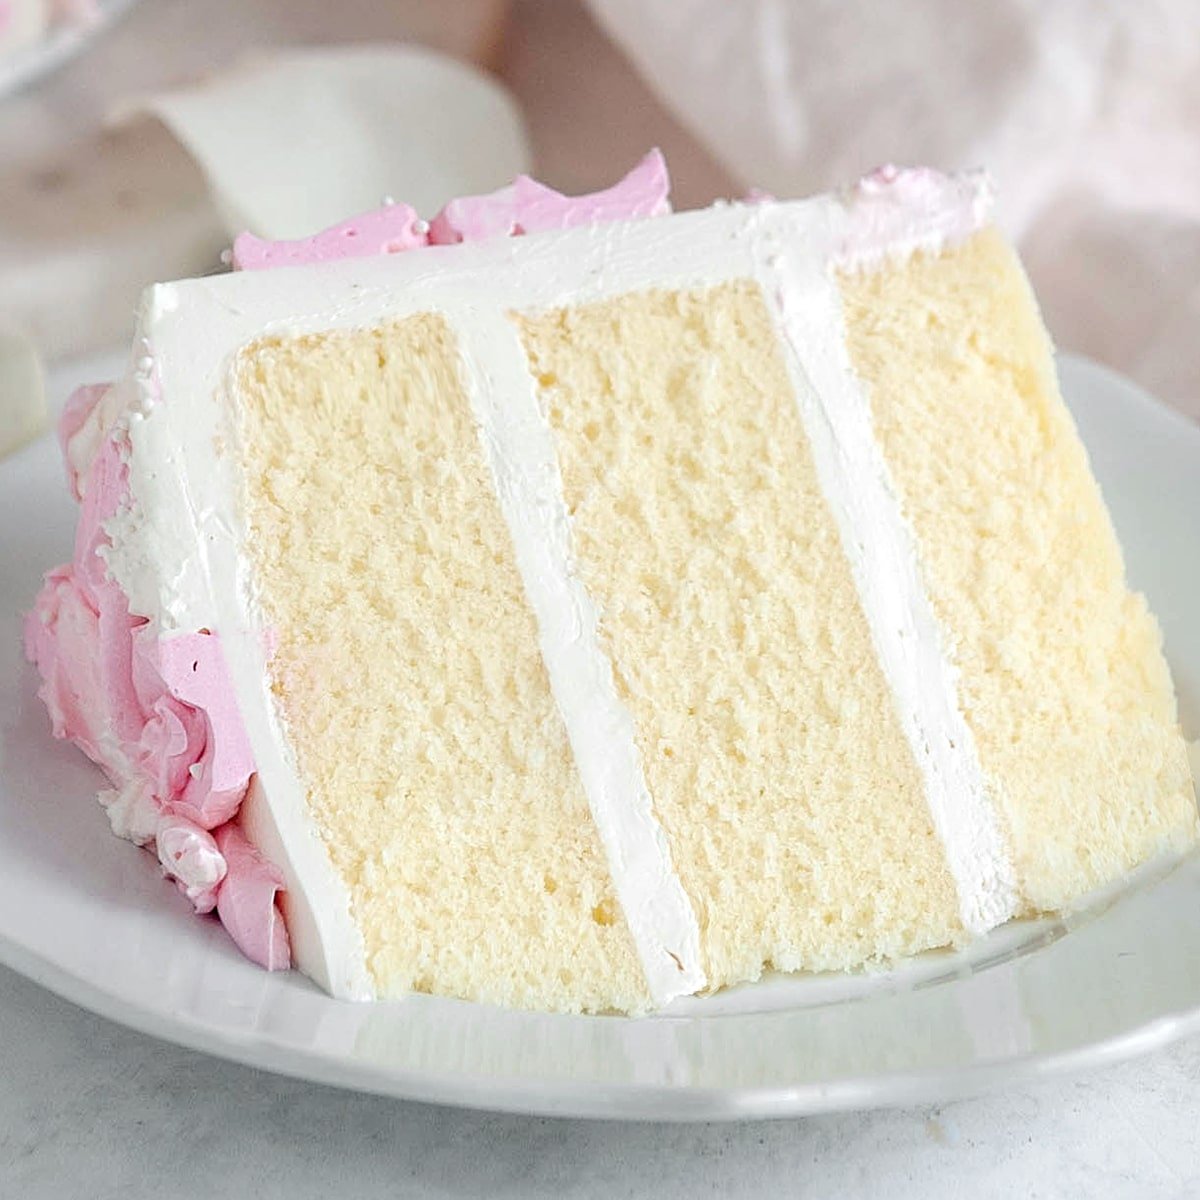
- The yellow cake is a real layer cake, not a sponge. Plenty of recipes use a sponge cake or chiffon base, and the slice falls apart the moment a fork goes in. This one uses cake flour, butter, oil, and extra yolks (more on those in a minute) so the texture is moist, sliceable, and stands up to the weight of the pastry cream without going soggy by day two.
- Real pastry cream, not pudding mix. Stovetop crème pâtissière is the kind of filling that bakeries put inside éclairs and tarts. It is thicker, richer, and tastes a hundred times better than anything from a box. The cornstarch makes it sliceable; the butter at the end makes it silky.
- Acetate ring assembly = clean slice. This is the part most home recipes skip. Stacking the cake inside an acetate-lined ring forces the pastry cream to set in a clean disc between the layers instead of squishing out the sides. The slice the next day looks like a patisserie display.
- Chocolate ganache, not glaze. Half of the BCP recipes online use a powdered-sugar-and-water glaze. Ganache is two ingredients (chocolate + heavy cream), tastes like real chocolate, and gives that shiny mirror finish that makes the cake look like dessert from a real bakery. Same technique as my chocolate ganache recipe.
- Scales to cupcakes in 20 minutes. Same batter, same pastry cream, same ganache. You can also turn this into 24 Boston cream cupcakes if you do not want to wait 6 hours for the assembled cake to set. Details below.
How to Make Boston Cream Pie Step-By-Step
Before you start: this is a three-component recipe (pastry cream, yellow cake, ganache + assembly) and the pastry cream and cake both need to chill before you put the cake together. The smart play is to make the pastry cream first thing in the morning (or the night before), bake the cake while the pastry cream chills, stack and chill overnight, and pour the ganache the day you are serving. Pull all your dairy and eggs to room temperature before you start the cake, and preheat your oven to 350º F.
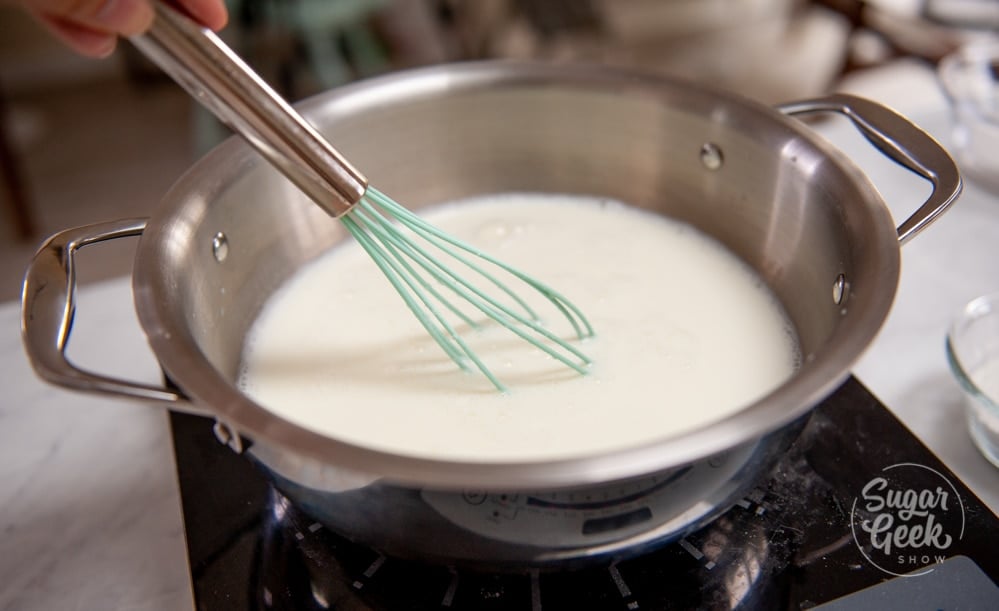
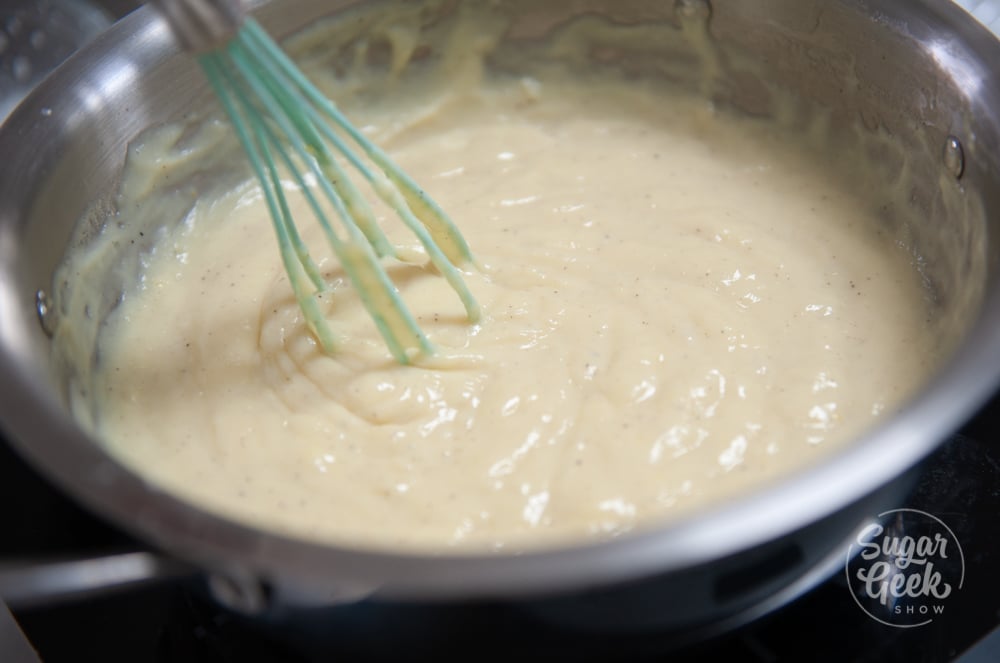
- Cook the pastry cream. Whisk the yolks, the whole egg, sugar, and cornstarch in a bowl until smooth. Bring the milk and vanilla to a simmer in a saucepan over medium heat.
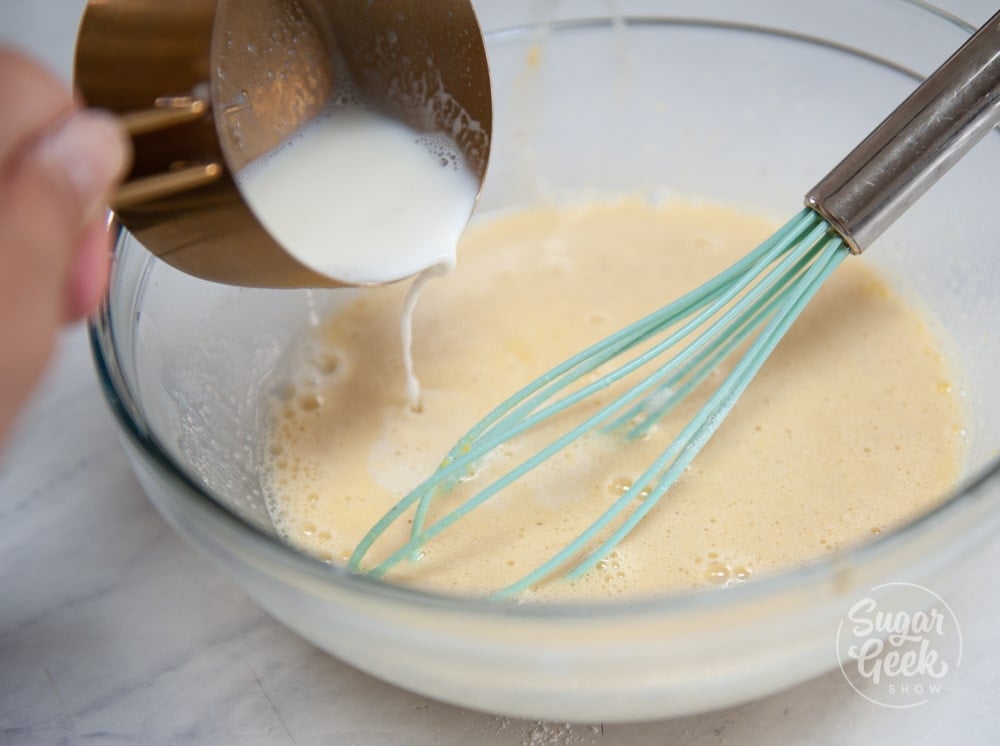
- Temper the eggs by streaming in about a third of the hot milk while whisking. Then pour the whole thing back into the pot and whisk constantly over medium heat until thick and bubbling for a full minute. Strain into a bowl, whisk in the butter, press plastic wrap onto the surface, and chill in the fridge.
PRO TIP: Pour the hot milk into the eggs in a thin, slow stream while whisking aggressively. A fast pour or a paused whisk equals scrambled eggs. If you do get lumps, strain through a fine-mesh sieve while the cream is still warm so the cornstarch network does not break down and turn the cream loose.
- Then pour the whole thing back into the pot and whisk constantly over medium heat until thick and bubbling for a full minute. Strain into a bowl, whisk in the butter, press plastic wrap onto the surface, and chill in the fridge.
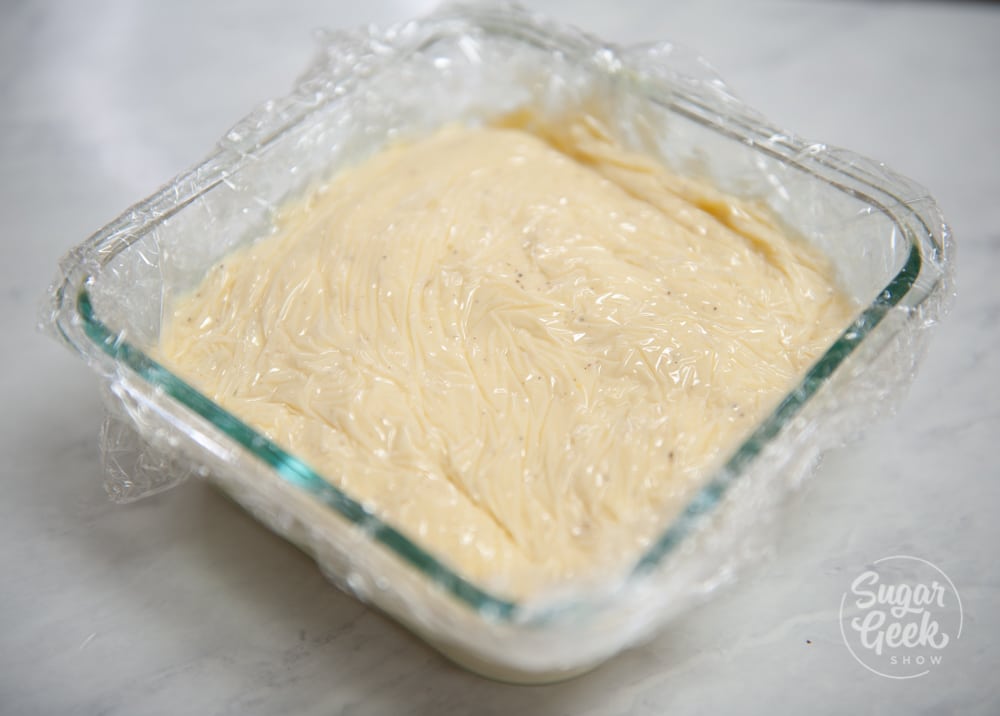
- Strain into a bowl, whisk in the butter, press plastic wrap onto the surface, and chill in the fridge.
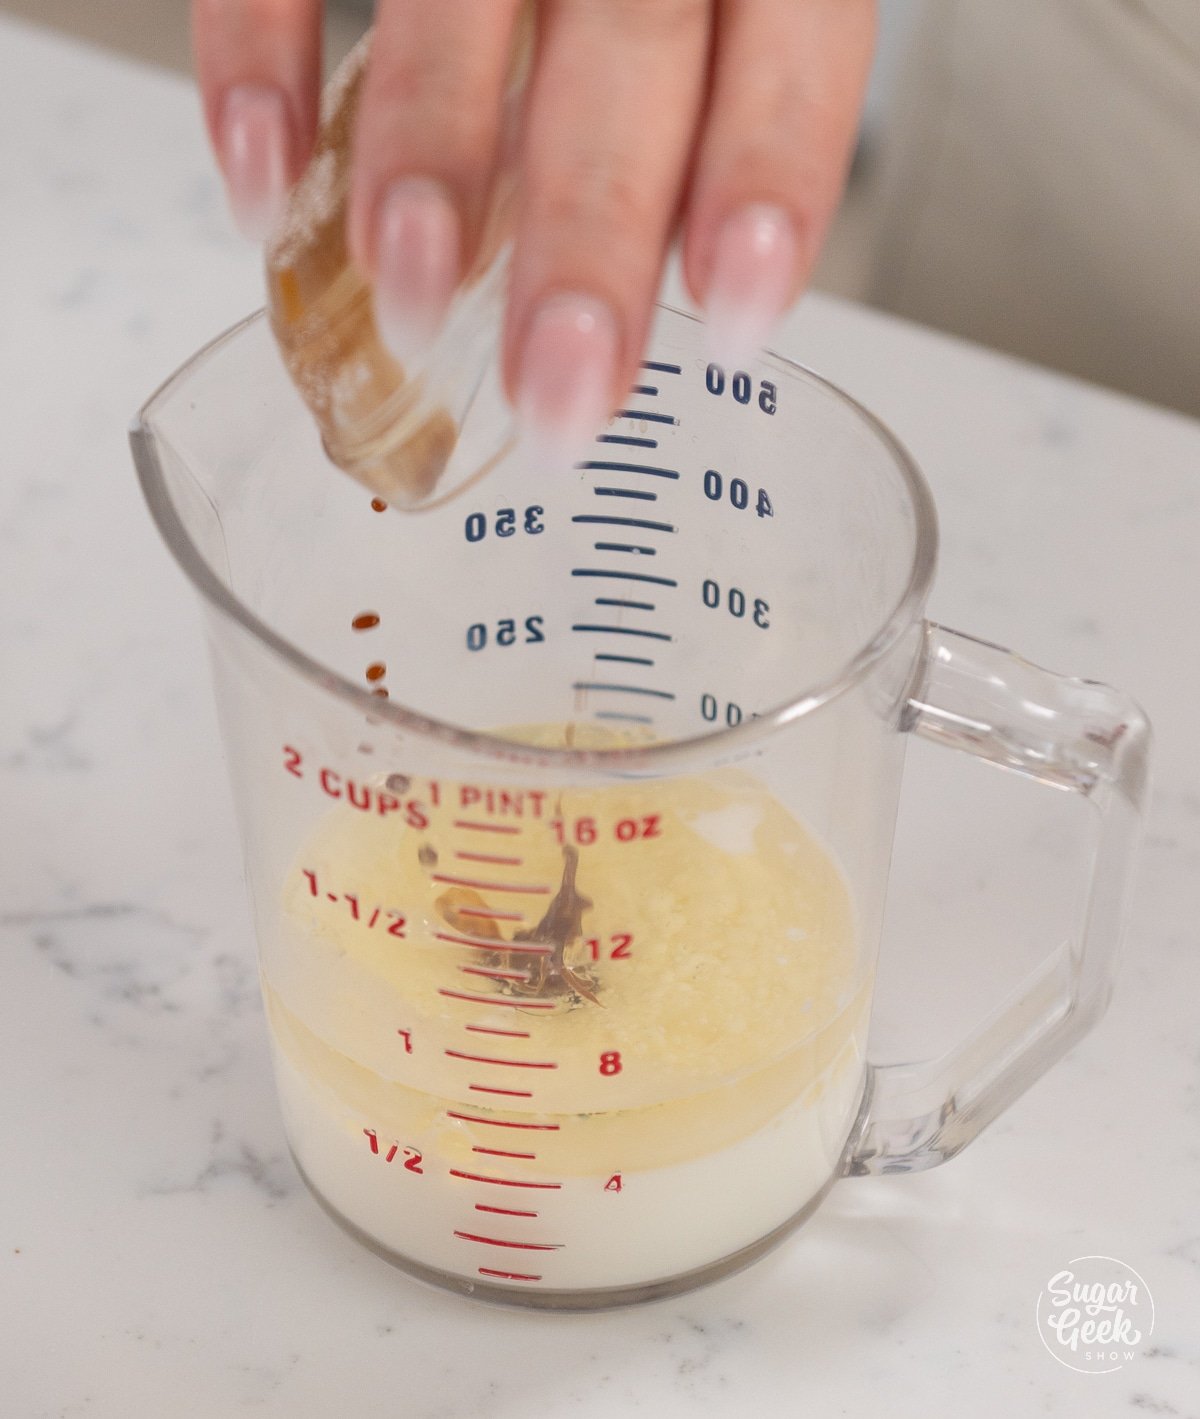
- Mix, bake, and chill the yellow cake. Prep two 8-inch cake pans with cake goop. In a small bowl, combine half the milk, vanilla, and oil; in another bowl, whisk the eggs, yolks, and the rest of the milk.
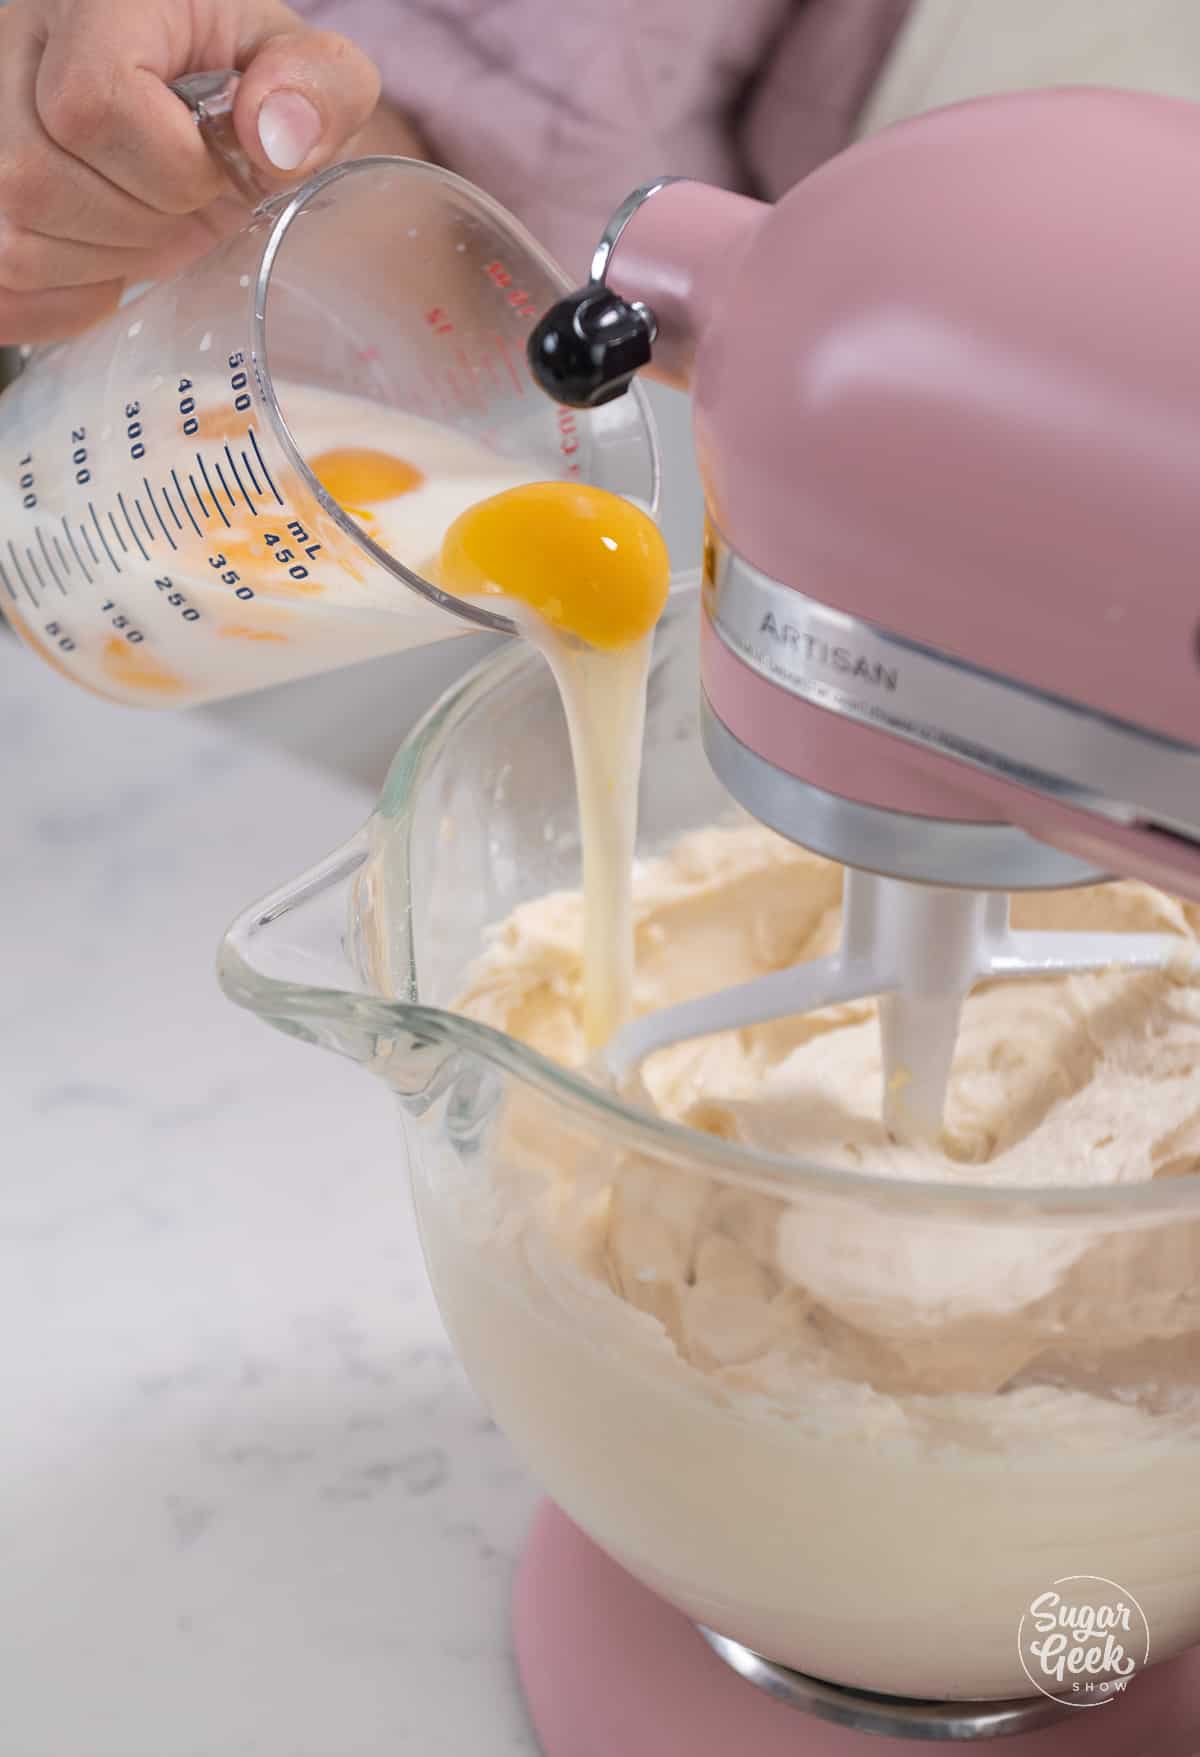
- In the bowl of your KitchenAid stand mixer with the paddle, combine cake flour, sugar, baking powder, baking soda, salt, and butter on low until the mixture looks like coarse sand.
Stream in the oil mixture, bump speed to medium, and mix for a full 2 minutes (set a timer; this is what builds the structure). Add the egg mixture in a slow stream on low until homogeneous.
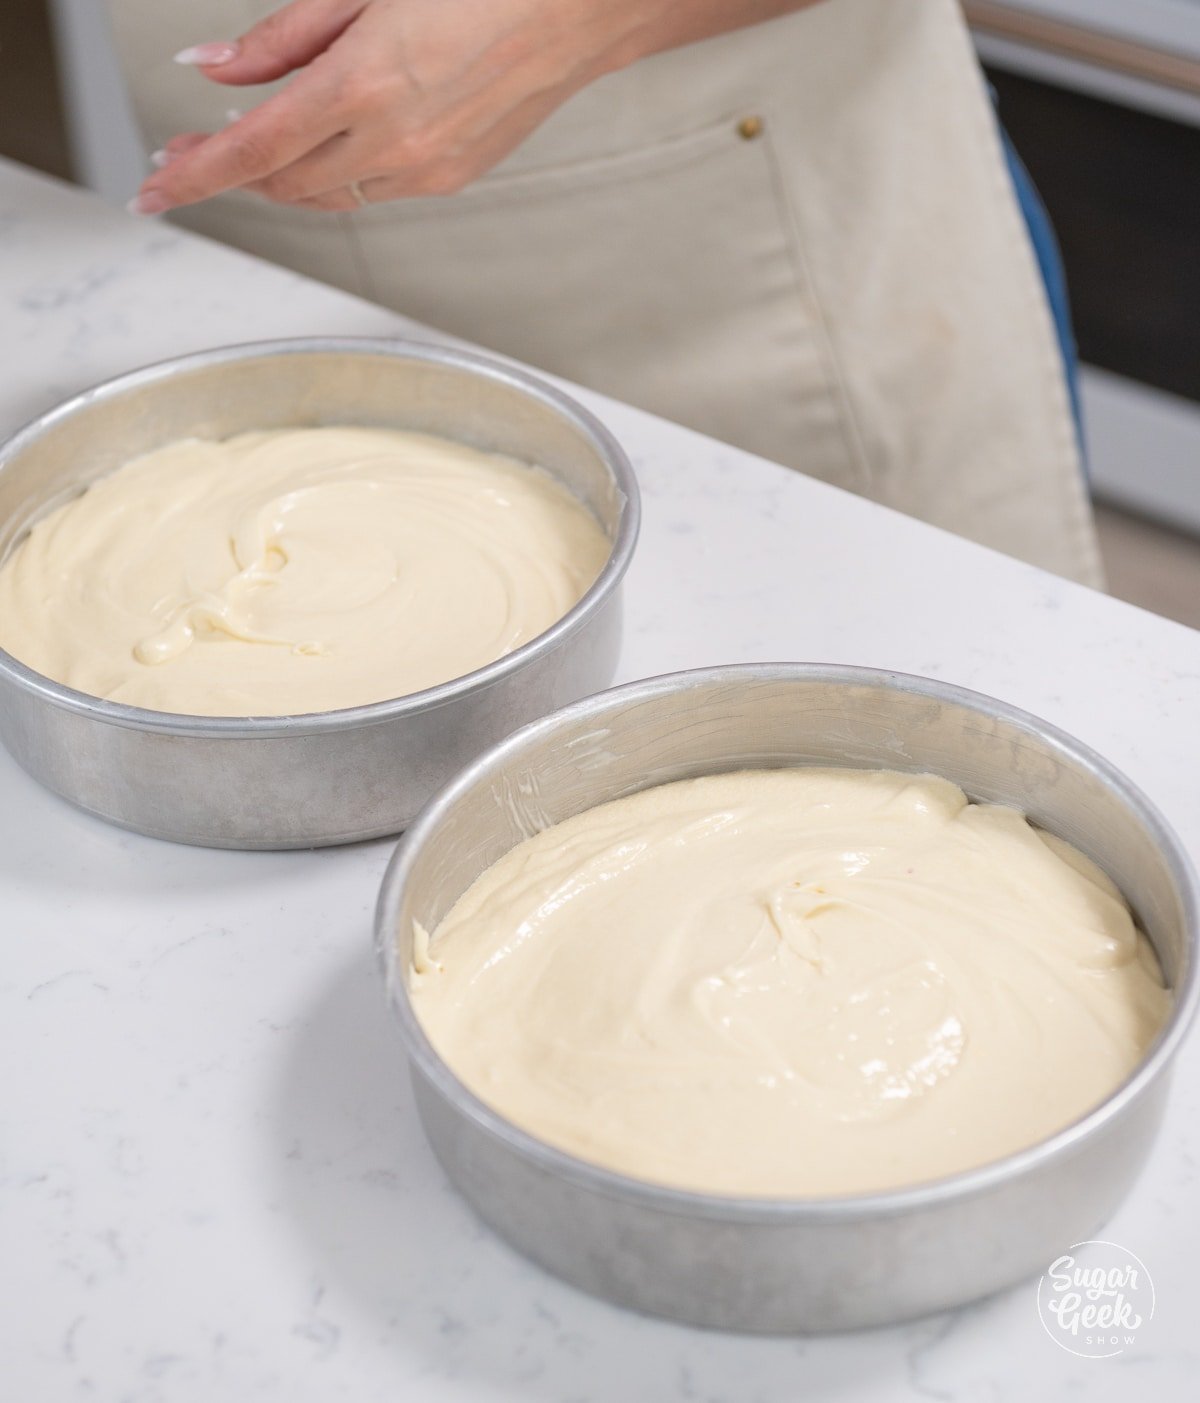
- Divide between the pans, bake 30 to 35 minutes.
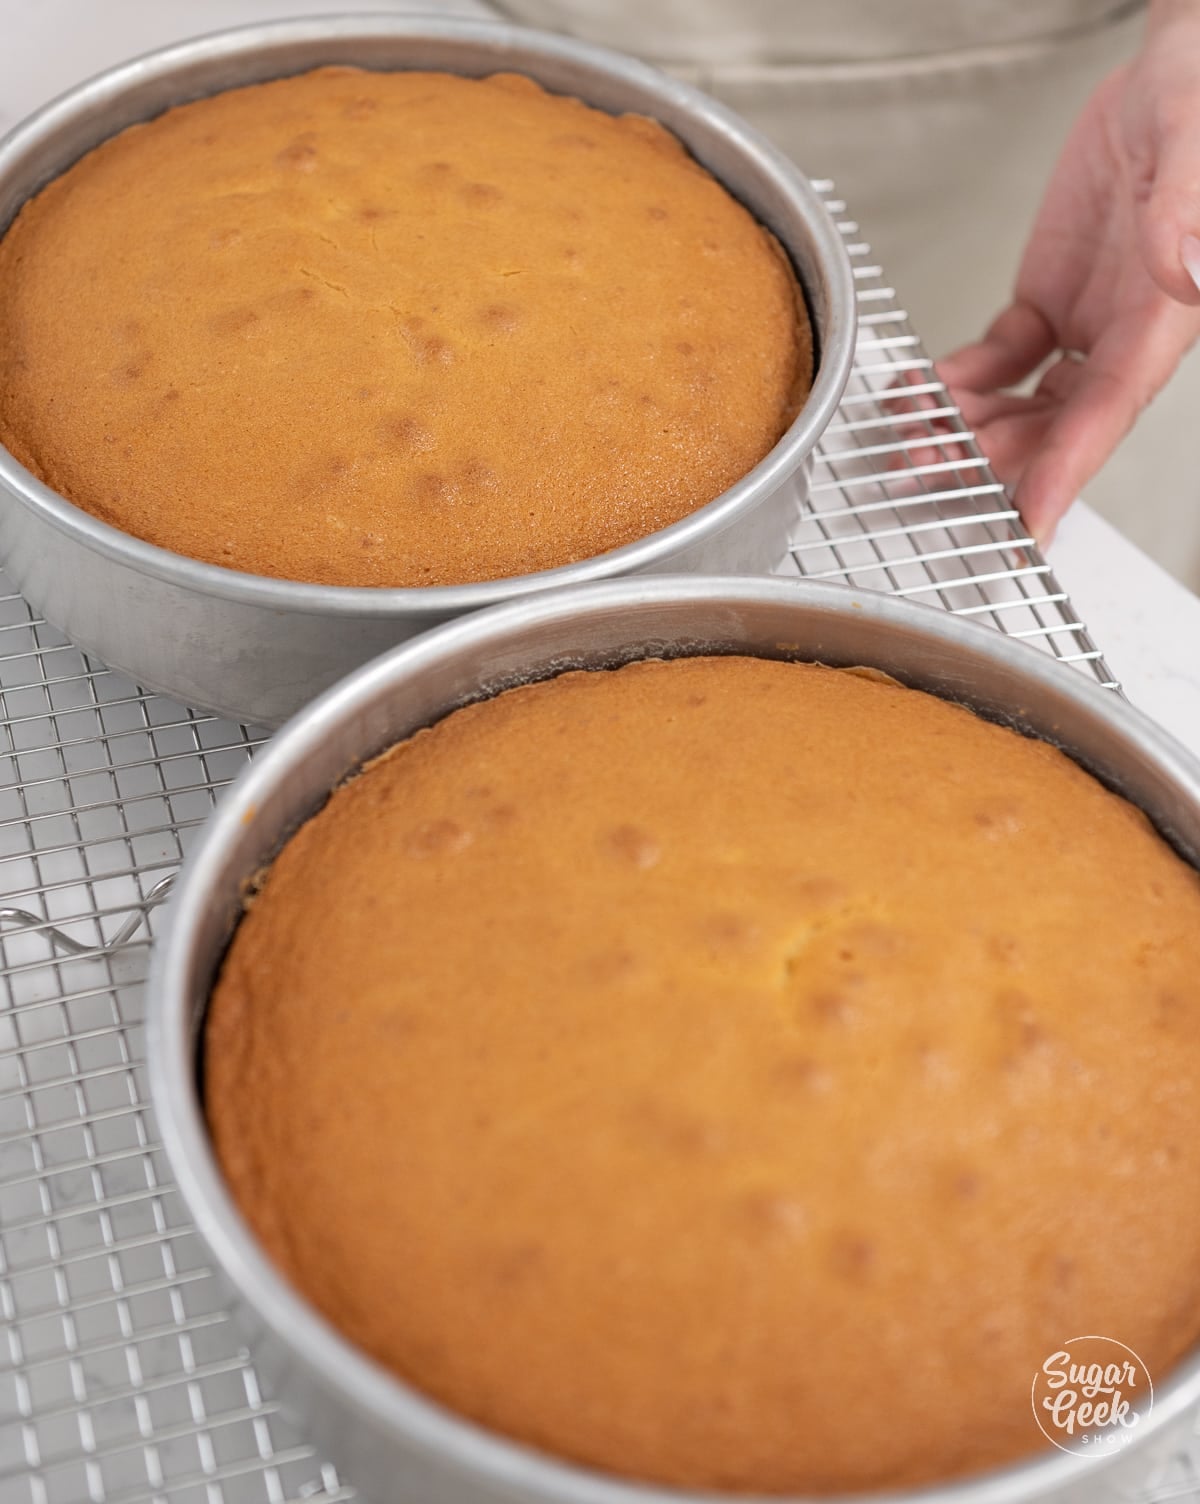
- Cool 10 minutes in the pans, then flip out and either flash-freeze for an hour or wrap warm in plastic and freeze overnight.
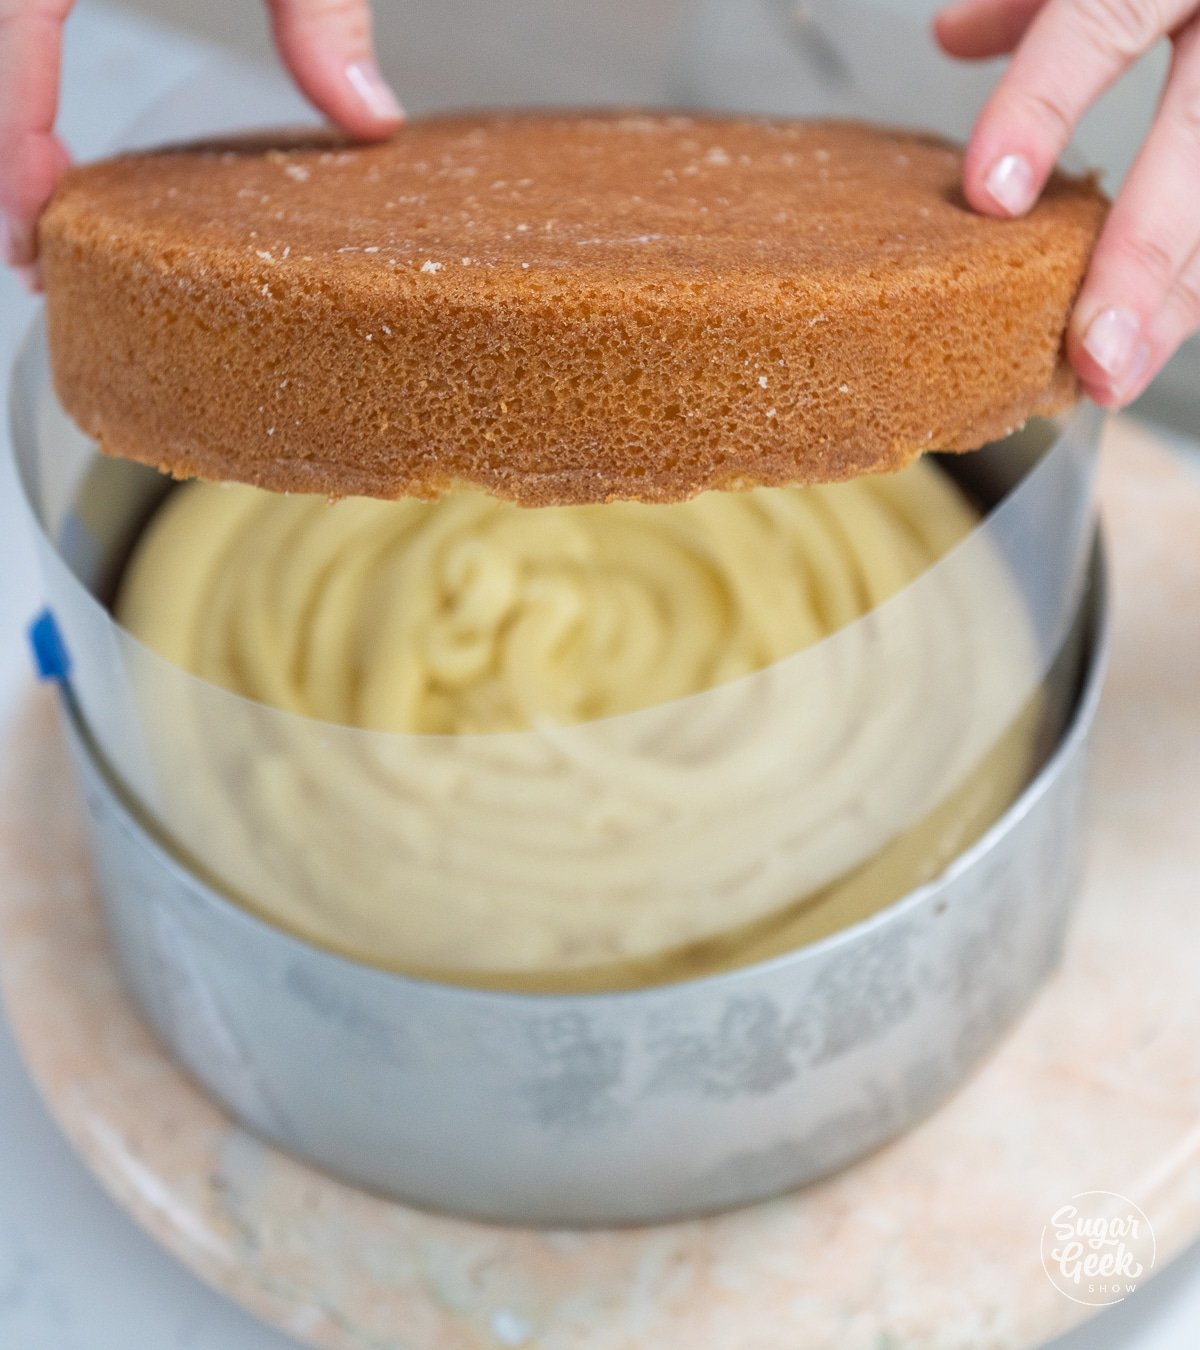
- Assemble inside an acetate ring. Set an 8-inch cake board inside an 8-inch cake ring lined with acetate that stretches about 6 inches above the ring. Trim the cake domes flat, place the first layer at the bottom of the ring, pipe all the chilled pastry cream on top in an even half-inch-thick layer, set the second cake on top, cover with plastic wrap, and chill in the fridge for at least 6 hours (overnight is better).

- Make the ganache and pour. Pour the chocolate chips into a glass bowl, microwave the heavy cream until steaming, pour the cream over the chocolate, wait 5 minutes, then whisk smooth. Let the ganache cool until it is around 92 to 95º F (warm to the touch, not hot). Unmold the cake, peel the acetate, pour the ganache over the top, and nudge it toward the edges so it drips down in clean ribbons. Smooth the top with an offset
PRO TIP: Pouring ganache that is too hot onto a cold cake makes a thin, runny coat that pools at the base. Ganache around 92 to 95º F is thick enough to cling to the chilled cake and form actual drips. If yours is too hot, give it 5 more minutes; if it has firmed up, microwave in 10-second bursts.
Cake Batter, Pastry Cream, and Ganache Calculator
This recipe makes approximately 6 cups of yellow cake batter (enough for two 8-inch layers, two 9-inch layers, three 6-inch layers, or about 24 standard cupcakes), about 2.5 cups of pastry cream filling, and about 1 cup of chocolate ganache for the top. Adjust the servings slider on the recipe card if you need to scale up or down.
Cake Batter and Frosting Calculator
Select an option below to calculate how much batter or frosting you need. Adjust the servings slider on the recipe card to change the amounts the recipe makes.
Choose a pan type
Choose a cake pan size
(based on 2" tall cake pan)
Choose a cake pan size
(based on 2" tall cake pan)
Cupcake Tin Size
Choose number of pans
Cups of Batter Needed
8 cups
Cups of Frosting Needed
5 cups
Note: measurements are estimated based off the vanilla cake recipe using standard US cake pans and sizes. Measurements used are for 2" tall cake pans only. Your results may vary. Do not overfill cake pans above manufacturer's recommended guidelines.
Pan size swaps
| Pan | Batter | Bake time at 350º F |
|---|---|---|
| Two 8-inch rounds (standard) | Full batch | 30 to 35 minutes |
| Three 6-inch rounds | Full batch | 28 to 32 minutes |
| Two 9-inch rounds | Full batch (thinner layers) | 22 to 26 minutes |
| 9x13 sheet pan | Full batch | 25 to 30 minutes (slice and layer like a trifle) |
| 24 standard cupcakes | Full batch | 15 to 20 minutes |
| 12 jumbo cupcakes | Full batch (fill ½ full) | 20 to 25 minutes |
A toothpick in the center should come out with a few moist crumbs, not wet batter. Check on the early end of the range and add 2 to 3 minute increments until set.
Common Boston Cream Pie Problems To Avoid
- Pastry cream is too thin to slice. You pulled the cream off the heat before it really cooked the cornstarch. Once the mixture starts bubbling, keep whisking for a full minute. Less than that leaves a starchy taste AND a cream that loosens up overnight in the fridge.
- Pastry cream weeps under the cake top after chilling. Your cream cooled with a skin on top, or it was strained too late and lost its structure. Press plastic wrap directly on the surface of the cream while it cools, and strain it while warm if you need to. Cornstarch sets the cream into a smooth disc only if the starch network stays intact.
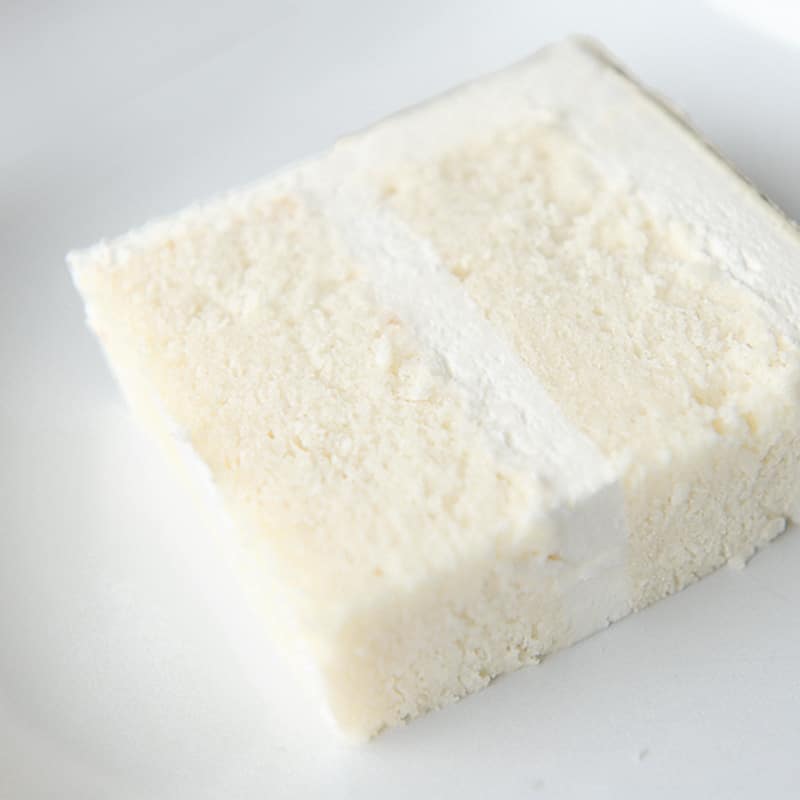
- The slice smears when you cut it. You skipped the acetate ring or did not chill long enough. The 6-hour chill is what lets the pastry cream firm into a clean half-inch layer between the cake. Under 4 hours and the cream is still pourable.
- Ganache drips run all the way to the bottom and pool. Your ganache was too hot when you poured. Wait until it cools to 92 to 95º F (warm but not hot to the touch). Onto a fridge-cold cake, ganache at that temp grabs and stops.
- Cake comes out dense or sunken in the middle. Cold eggs or cold milk fought the butter and broke the emulsion. Pull your dairy and eggs to room temp before mixing. The 2-minute medium-speed mix after the oil goes in is also doing the structural work; do not skip it.
- Slice gets soggy by day three. This is a moisture-heavy cake by design, and the pastry cream will start to migrate into the crumb after about 48 hours in the fridge. Eat within 2 to 3 days for the cleanest texture.
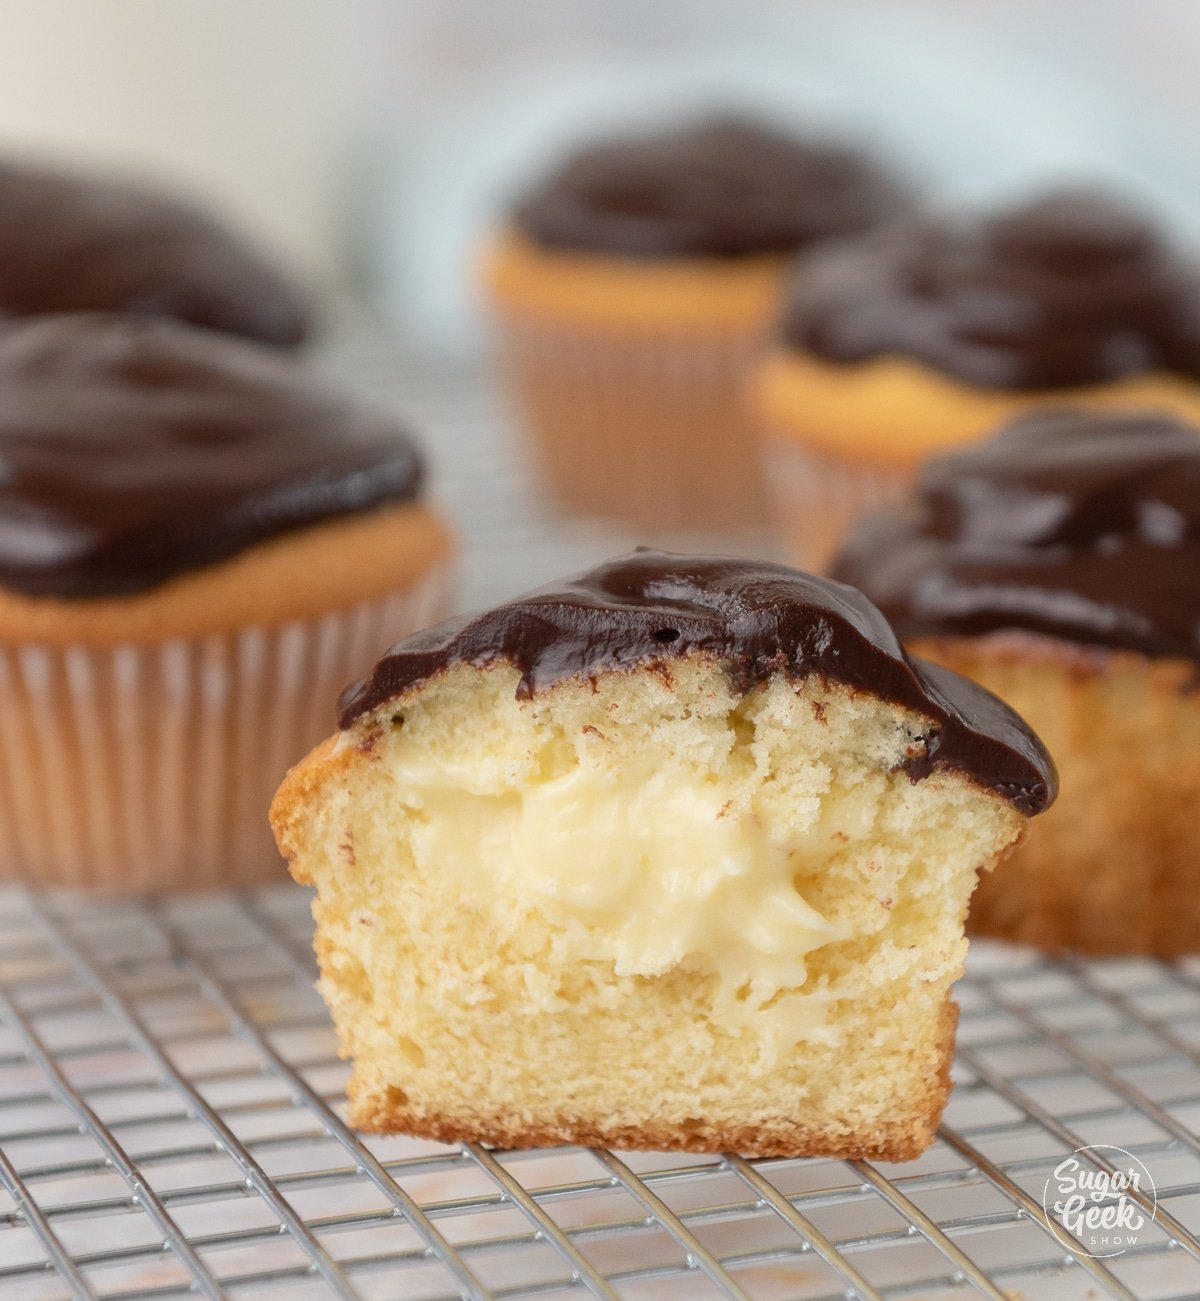
Boston Cream Cupcakes (no chill needed)
I almost like Boston cream pie cupcakes better because of how cute they are and how much faster they are to build. Divide the yellow cake batter into 24 cupcake liners, bake at 350º F for 15 to 20 minutes, cool fully, then carve a small core out of the top of each cupcake (the slit method works best, just cut a 1-inch deep slit, push it open with a small spoon, and pipe in the pastry cream). Replace the top, drizzle a spoonful of ganache over each, and serve. No acetate ring, no 6-hour chill, all the flavor.
Boston Cream Pie FAQs
There is no real difference. "Boston cream cake" is the more honest name (because it really is a cake), but "Boston cream pie" is the original name from the 1850s and has stuck around because of tradition. They use the same components: yellow cake, vanilla pastry cream filling, and chocolate ganache or glaze on top.
Yes. The pastry cream filling is dairy-based and needs to stay cold. Cover the assembled cake loosely with plastic wrap and refrigerate the whole time. Pull it out about 20 minutes before serving so the cake softens up and the ganache loses its fridge edge.
The cake layers freeze great on their own (wrapped warm in plastic and stored up to 3 months). The assembled cake does not freeze well because the cornstarch in the pastry cream takes on a grainy, watery texture when it thaws. If you want to get ahead, freeze the layers, hold the pastry cream up to 2 days in the fridge, and assemble the day before serving.
About 3 days. The slice tastes best in the first 24 hours, gets a little soft and integrated on day two (still delicious), and starts to feel soggy around day three as the pastry cream migrates into the cake.
You can, but the slice will be messier because the pastry cream will spread under the weight of the top layer. If you do not have the gear, I really recommend doing the cupcake version (no ring needed) or just embracing the rustic naked-cake look and accepting that the slice will smear a little.
More Cake Recipes To Try

Watch: How To Decorate A Cake Step-by-Step
Before you start decorating, watch the video below where I show you every step of decorating a cake from start to finish. Seeing the process in action makes it much easier to follow along
- Liz Marek.
Recipe
Equipment
- 1 Stand mixer or electric mixer
- 2 8" cake pans
- 1 8" cake ring or pan
- 1 Acetate roll or sheets
- 1 Wire rack
- 1 Seive or immersion blender optional
Ingredients
Pastry Cream
- 16 ounces whole milk
- 2.5 ounces granulated sugar
- 1 ounce cornstarch
- 1.5 teaspoons vanilla extract
- 3 large egg yolks
- 1 large egg
- 2 teaspoons vanilla extract
- 2 ounces unsalted butter
Yellow Cake
- 14 ounces cake flour
- 12 ounces granulated sugar
- 2 teaspoons baking powder
- 1 teaspoon baking soda
- 1 teaspoon salt
- 6 ounces unsalted butter room temperature
- 2 large eggs room temperature
- 3 large egg yolks room temperature
- 8 ounces whole milk room temperature
- 2 ounces vegetable oil
- 1 Tablespoon vanilla extract
Chocolate Ganache
- 4 ounces semi-sweet chocolate
- 4 ounces heavy whipping cream
Instructions
- Before you begin: Pull all the dairy and eggs for the yellow cake to room temperature. Preheat the oven to 350º F. Prep two 8-inch cake pans with cake goop or your preferred pan release. Have an 8-inch cake ring, an 8-inch cake board, and acetate ready for assembly.
Making the Pastry Cream
- In a medium bowl, whisk together the sugar, cornstarch, egg yolks, and whole egg until smooth.
- In a medium saucepan, combine the milk and vanilla. Bring to a simmer over medium heat.
- Temper the eggs by streaming about ⅓ of the hot milk into the egg mixture while whisking constantly.
- Pour the entire mixture back into the saucepan and cook over medium heat, whisking constantly, until thick and bubbling for a full minute.
- Strain the cream through a sieve into a large bowl while it is still warm (or use an immersion blender for the same result). Whisk in the butter until smooth.
- Press plastic wrap directly onto the surface of the cream and refrigerate until completely cold (at least 2 hours, overnight is better).
Making the Yellow Cake
- In a small bowl, combine half the milk (about 5 ounces), the vanilla, and the oil. Set aside.
- In a separate bowl, whisk together the eggs, yolks, and the remaining 3 ounces of milk. Set aside.
- In the bowl of a stand mixer with the paddle attachment, combine the cake flour, sugar, baking powder, baking soda, salt, and butter. Mix on low until the mixture resembles coarse sand.
- With the mixer on low, stream in the oil mixture. Bump the speed to medium (speed 4 on a KitchenAid) and mix for a full 2 minutes. Set a timer; this step builds the cake's structure.
- Stream in the egg mixture on low and mix until just homogeneous. Scrape the bowl.
- Divide the batter evenly between the two prepared cake pans (weighing the batter gets you even layers).
- Bake for 30 to 35 minutes, or until a toothpick inserted in the center comes out with a few moist crumbs.
- Cool the cakes in the pans for 10 minutes, then flip them onto a wire rack. Flash freeze for an hour for same-day decorating, or wrap warm in plastic and freeze overnight.
Assembling the Boston Cream Pie
- Line an 8-inch cake ring with acetate (about 6 inches taller than the ring) on top of an 8-inch cake board.
- Trim the cake domes flat so the layers stack evenly.
- Place the first cake layer at the bottom of the ring.
- Pipe the chilled pastry cream over the first layer in an even ½-inch-thick disc.
- Set the second cake layer on top.
- Cover the cake loosely with plastic wrap and refrigerate at least 6 hours, preferably overnight.
Making Chocolate Ganache
- Place the chocolate in a heatproof bowl that pours easily. Microwave the cream in a separate bowl for about 1 minute, until steaming.
- Pour the hot cream over the chocolate and let it sit for 5 minutes.
- Whisk together until the ganache is smooth and shiny.
- Let the ganache cool to about 92 to 95º F (warm to the touch, not hot).
- Remove the metal ring and peel the acetate from the assembled cake.
- Pour the ganache over the top of the cake, nudging it toward the edges so it drips down the sides.
- Smooth the top with an offset spatula and refrigerate until the ganache sets.
- Slice with a clean, warm knife (run it under hot water and wipe between cuts).
Video
Notes
- Cornstarch (not flour) is what gives the pastry cream its sliceable set. Do not substitute.
- Whole milk gives the richest pastry cream and the best yellow cake texture, but almond, soy, oat, or coconut milk will work in a pinch.
- For the ganache, I like Guittard, Cacao Barry, or Ghirardelli chips because the chips do not need chopping. Bittersweet chocolate works for a darker top.
- Two 8-inch rounds: bake 30 to 35 minutes (standard)
- Three 6-inch rounds: bake 28 to 32 minutes
- Two 9-inch rounds (thinner layers): bake 22 to 26 minutes
- 9x13 sheet pan: bake 25 to 30 minutes; slice and layer
- 24 standard cupcakes: bake 15 to 20 minutes
- 12 jumbo cupcakes: fill liners halfway, bake 20 to 25 minutes
- Cake layers: bake, wrap warm in plastic, freeze up to 3 months
- Pastry cream: cook, press wrap on the surface, refrigerate up to 2 days (do not freeze, the cornstarch breaks down)
- Ganache: make day of assembly for the best shine
- Assembled cake: refrigerate up to 3 days; do not freeze
- Cupcake version: refrigerate filled cupcakes up to 3 days
- Heavy cream out for the ganache? Use the water ganache recipe instead.
- Cake flour out? Use the cake flour substitute (AP flour + cornstarch).
- Dairy-free pastry cream: full-fat coconut milk works best for richness.
- Do not pour ganache that is hot (the drips will run to the floor); wait for it to cool to 92 to 95º F.
- Do not skip the 6-hour chill before pouring ganache; the pastry cream needs that time to set.
- Do not freeze the assembled cake; the pastry cream goes grainy and weepy on thaw.

Leave a Reply