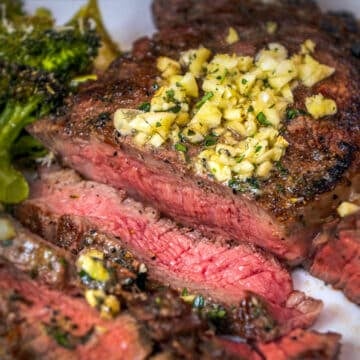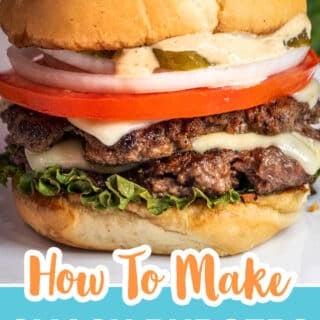

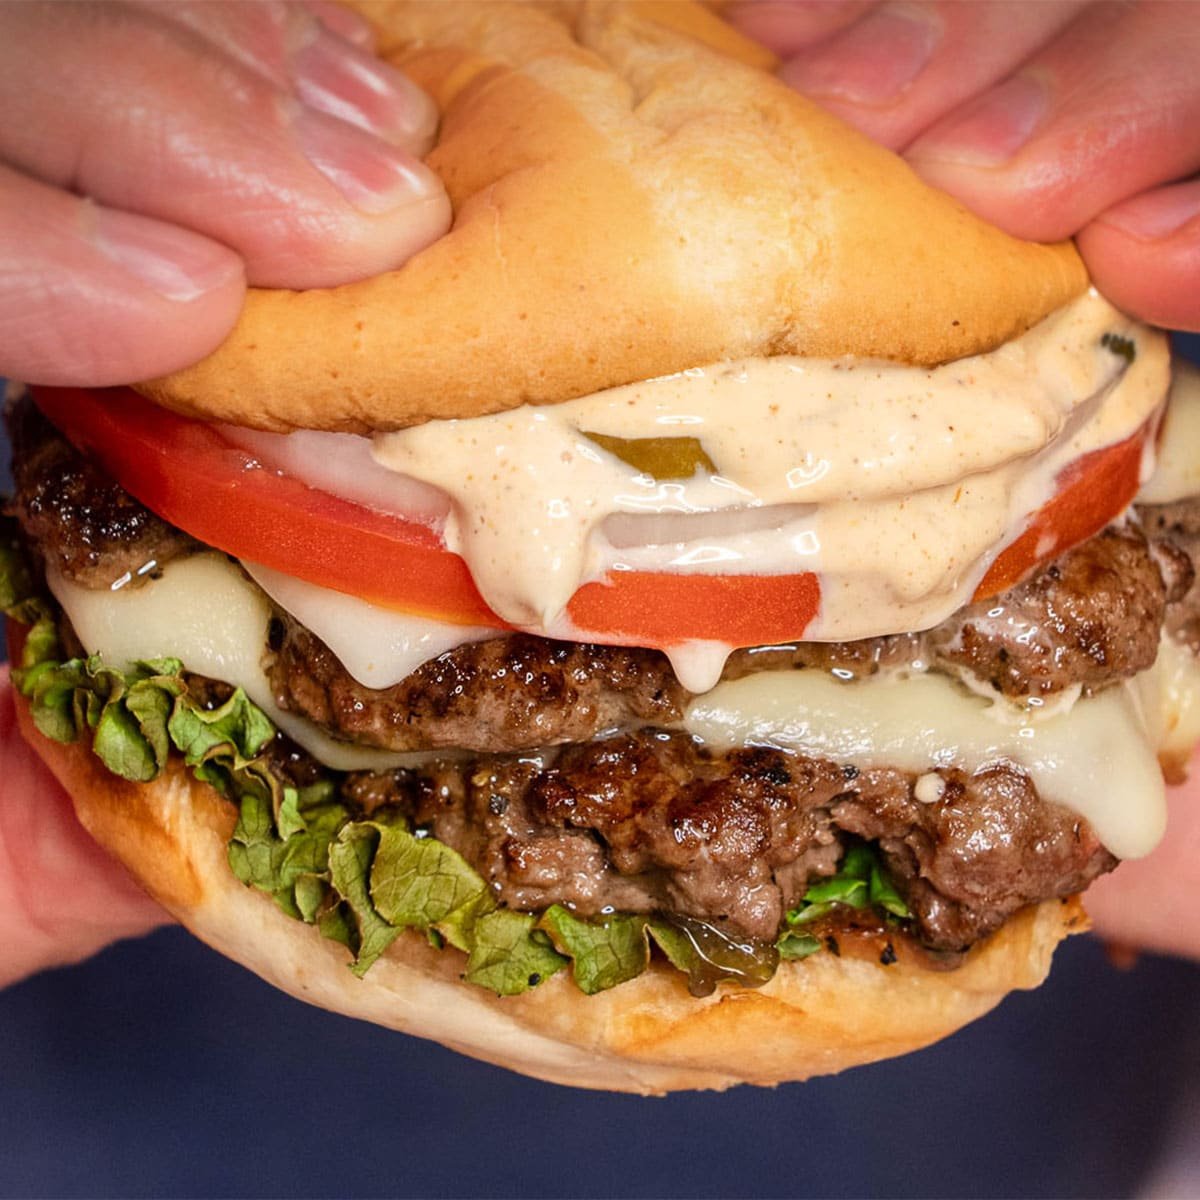
If you love Shake Shack, you'll love this Smash Burgers Recipe! They're my go-to way to make burgers at home. There's nothing better than a burger with perfectly crispy edges and a juicy center. I love stacking two or three thin patties with a slice of American cheese in between and piling on fresh toppings. And don't forget the burger burger sauce!

Shake Shack has been one of my favorite restaurants since I tried it for the first time back in 2016 while filming Halloween Wars. Every day after filming, my team and I would head out for an OG smash burger after an exhausting day of filming. I've been obsessed ever since!
I've tested this smash burger recipe over and over to get as close as possible to the burgers I remember. Even though we have a Shake Shack here in town now that opened a couple years ago, I still love making them at home for my family. I often pair this smash burger with my cucumber tomato onion salad. This one and my Instant Pot pot roast are the two recipes Gage requests the most - both are easy, deeply flavorful, and never last long at the table. dd this line: For the ultimate burger experience, try making your own brioche buns using my brioche bread recipe shaped into rolls.
What's In This Blog Post?
Ingredients Needed
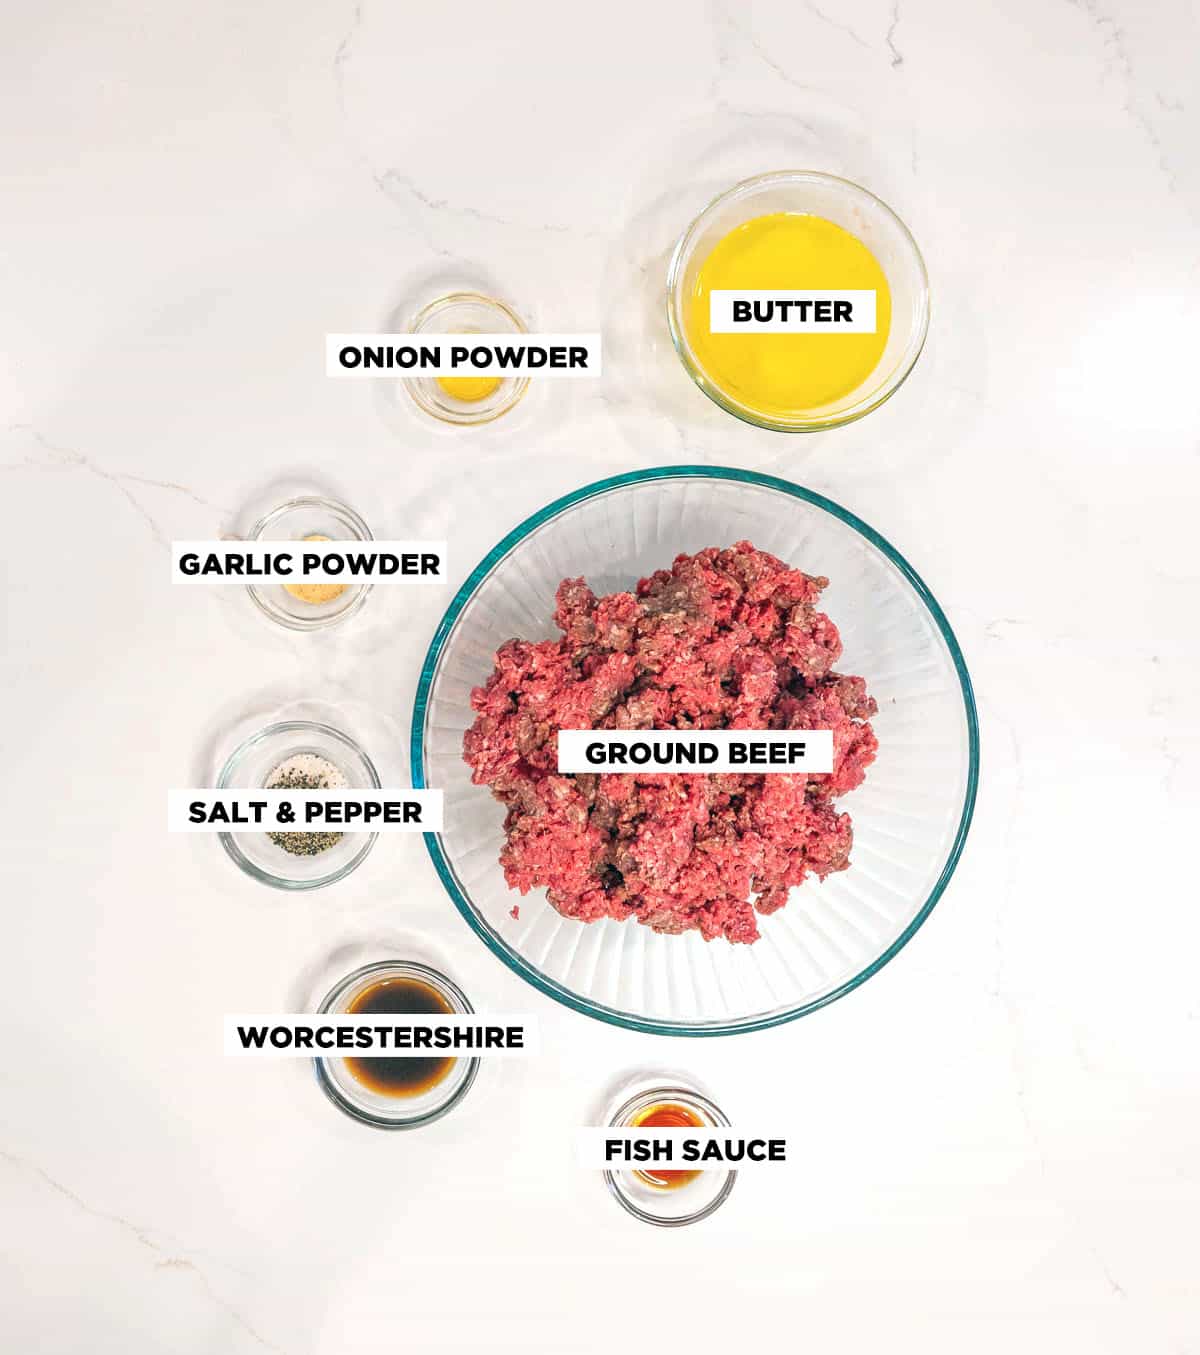
- Ground Beef - Use high-quality ground chuck with at least 80/20 fat content for the juiciest burgers. The extra fat helps create that crispy, flavorful crust when you smash the patties on a hot griddle.
- Melted Butter - A little melted butter mixed into the beef adds richness and helps the patties brown beautifully. It's an easy way to boost flavor without making the burgers greasy.
- Seasoning - A simple blend of salt, pepper, garlic powder, and onion powder is all you need to bring out the flavor in your Smash Burgers.
- Worcestershire Sauce - This adds a subtle savory depth (hello, umami!) that makes the burgers taste like they came straight off a restaurant griddle. Just a dash goes a long way.
- Fish Sauce - It might sound weird, but fish sauce enhances the meaty flavor of the beef without making it taste fishy. Use just a few drops for a secret boost of umami goodness.
- Liquid Smoke - Just a few dashes add a subtle smoky flavor. A little goes a long way, so use it sparingly!
Equipment Needed
Cast Iron Skillet or Flat-Top Griddle - A hot griddle or cast iron skillet gives each ball of ground beef the perfect browning reaction, creating a crispy crust and maximizing surface area for flavor.
Burger Press - Handy if you want evenly smashed patties every time, but a second spatula or heavy metal tool works in a pinch.
Tips and Tricks for Success
- Use cold beef: Keep your beef cold until it hits the griddle-this helps the fat stay solid so your burgers sear instead of steam.
- Preheat the griddle: A super-hot cast iron skillet or griddle is key for getting that signature crispy crust. Wait until it's almost smoking before adding the beef.
- Don't overwork the meat: Gently form loose balls of beef instead of tightly packed ones-this keeps the texture tender once smashed.
- Smash once and hold: Press the beef firmly down for about 10-15 seconds, then stop. Smashing just once helps lock in those caramelized edges without squeezing out the juices.
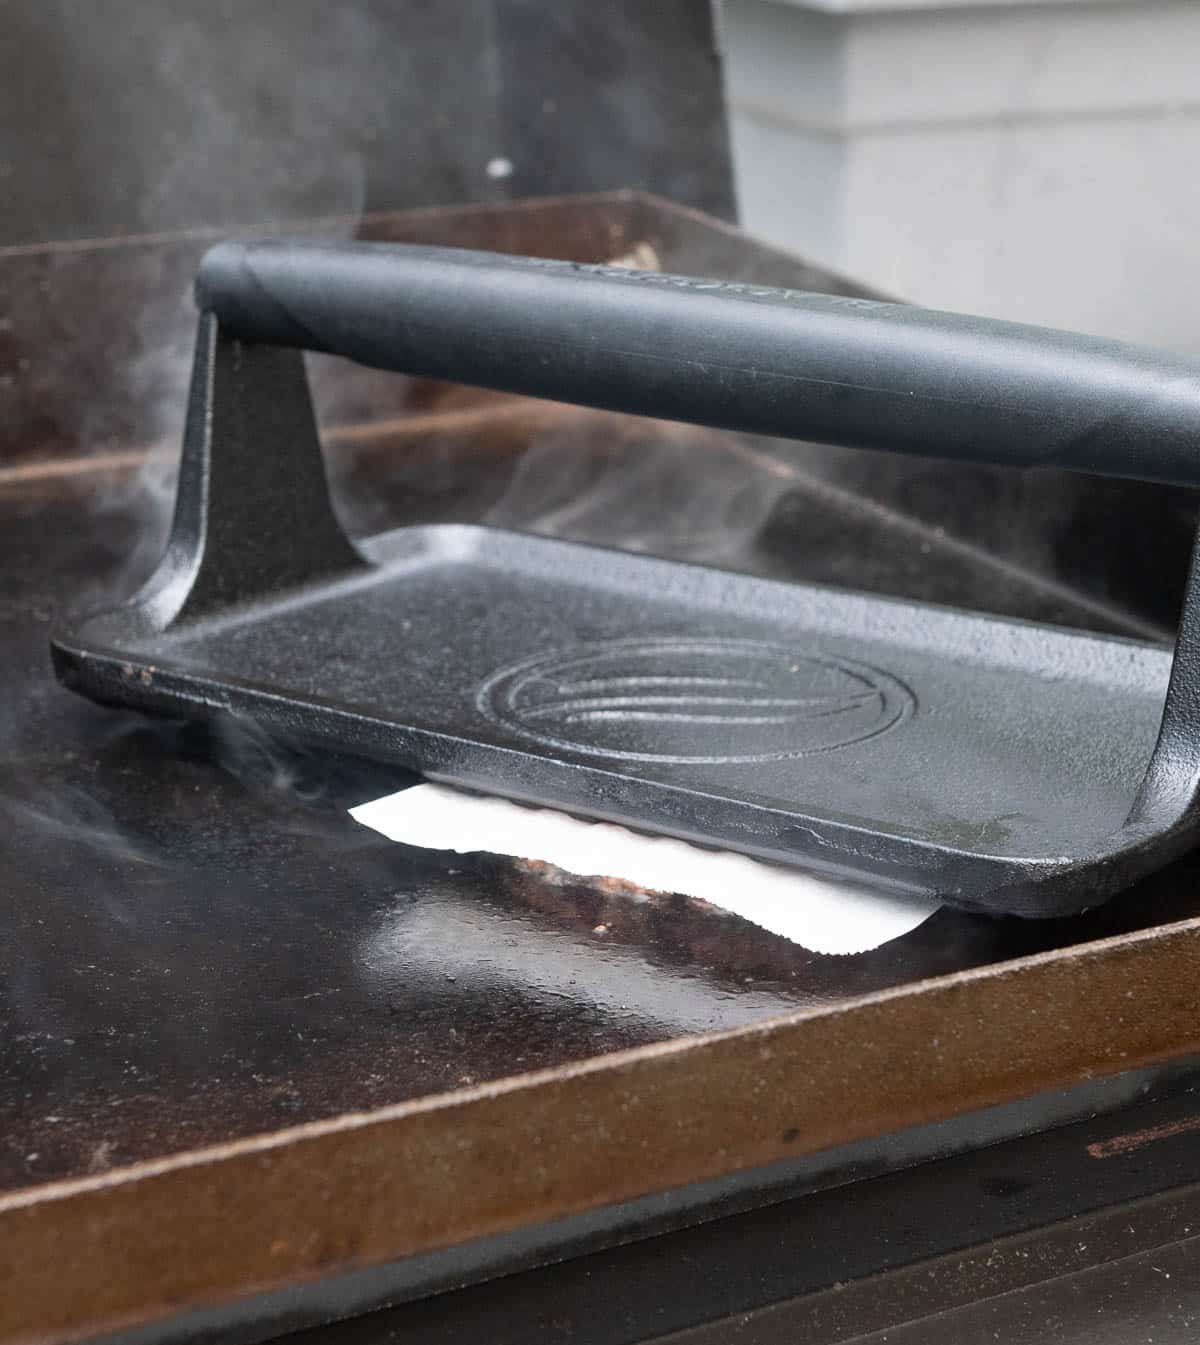
- Use parchment paper: Place a small square of parchment between the spatula and beef to prevent sticking while smashing.
- Melt the cheese on the pan: Add cheese right after flipping and cover the burgers briefly with a lid or foil to help it melt perfectly.
- Toast the buns: Don't skip this step! A lightly toasted bun adds texture and helps keep everything from getting soggy.
How to Make Smash Burgers
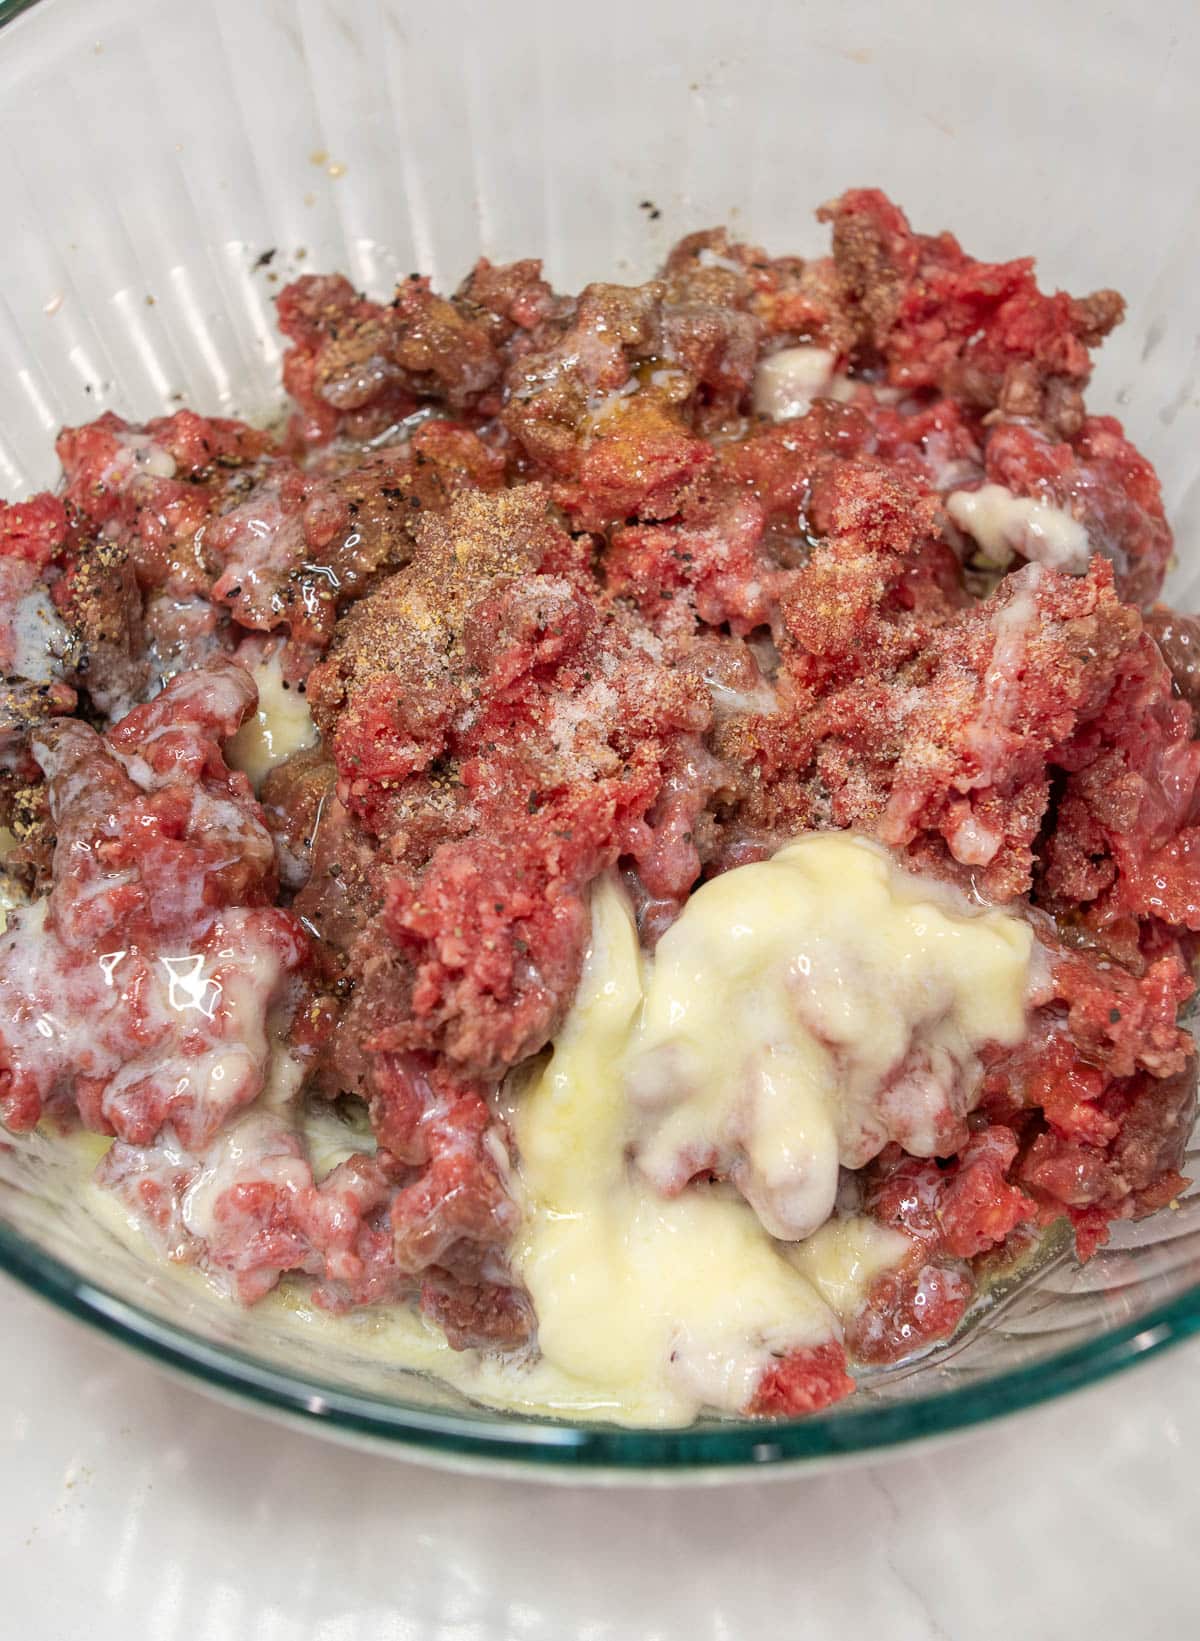

- Mix all the ingredients except the ground beef together in a small bowl .
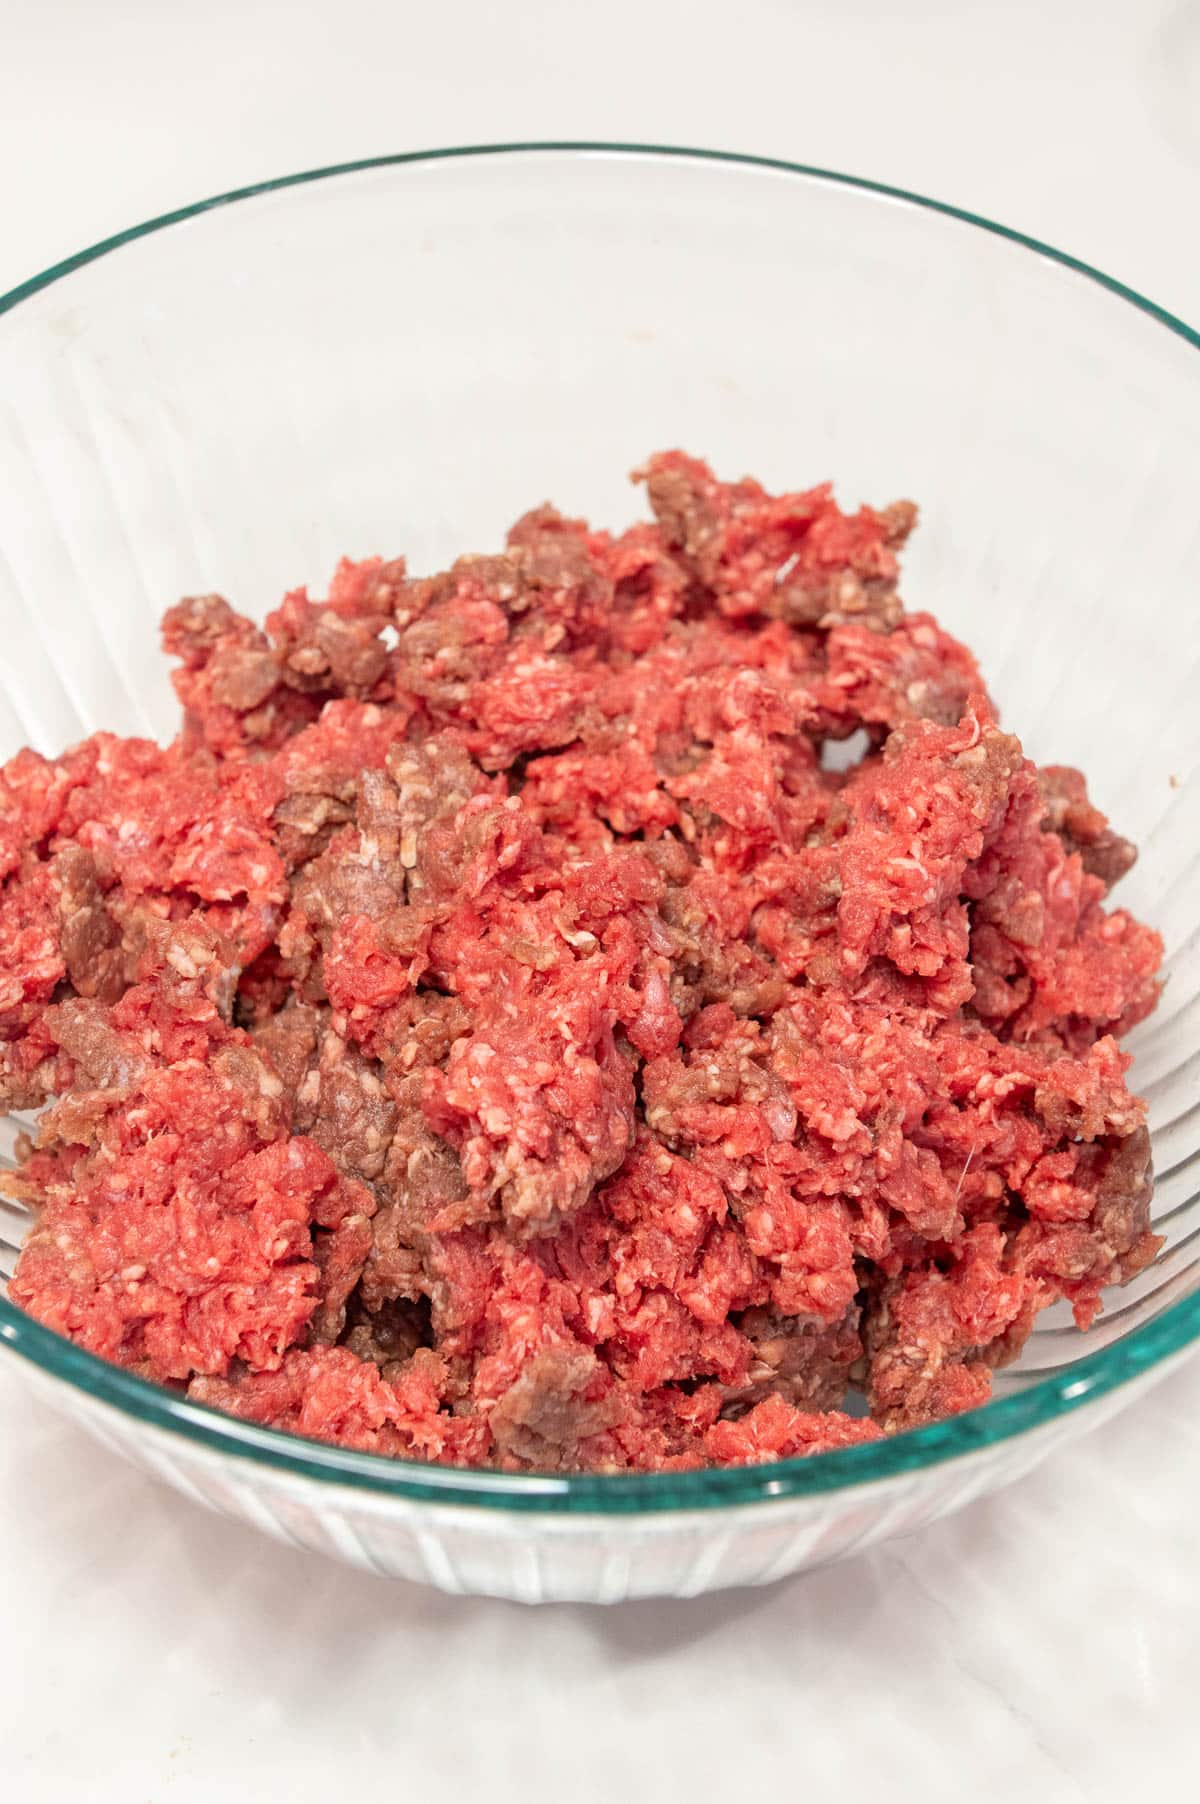
- Place the beef into a bowl and break it up gently with a spoon or your hands.
- Pour the ingredients on top and mix together very gently until combined.
- Once it's thoroughly mixed, scoop into 3 to 4-ounce sized balls and gently press together.
- Cover the burger balls with plastic wrap and refrigerate for a minimum of a half hour. You want the meat to be super cold and butter to re-solidify. You could also place them into your freezer for about 15 minutes.
- When ready to cook, heat a large cast iron skillet or hot griddle like a Blackstone over high heat until SUPER HOT and is smoking. Drop a tiny sprinkle of water to test it, if it immediately sizzles and bounces around and disappears, it's ready. No need to add oil, there's plenty of fat in the burger.
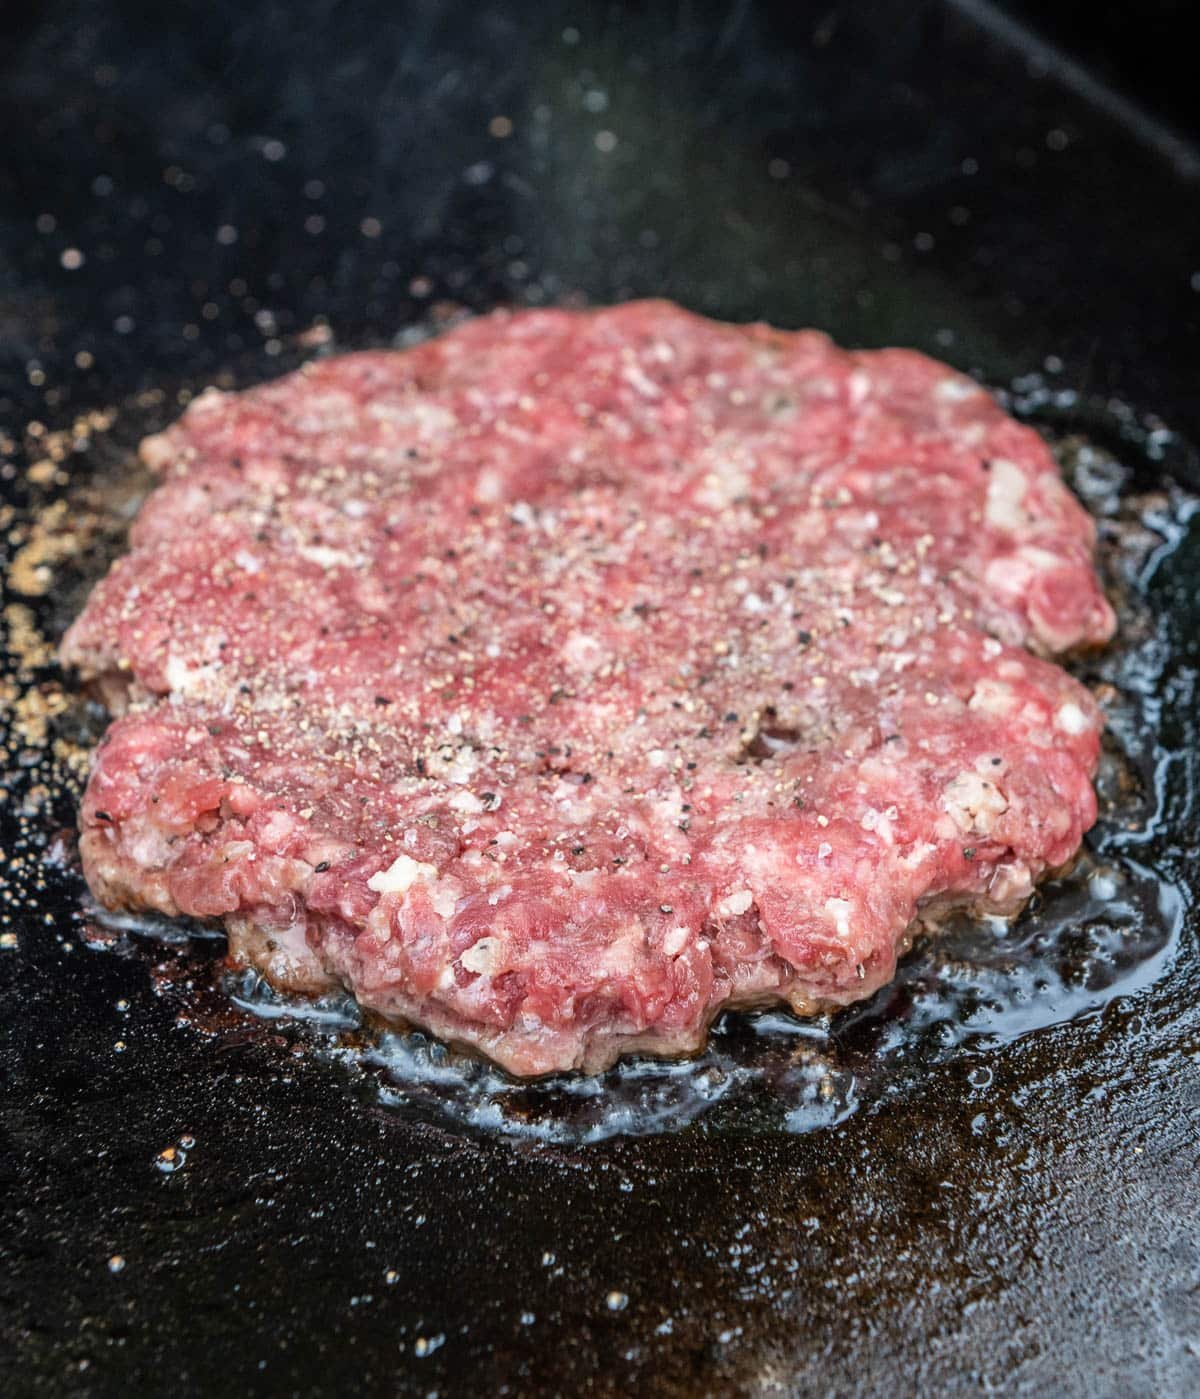
- Remove your burgers from the fridge or freezer and sprinkle them with kosher salt and pepper. Or, you could season them after they're smashed, it's up to you.
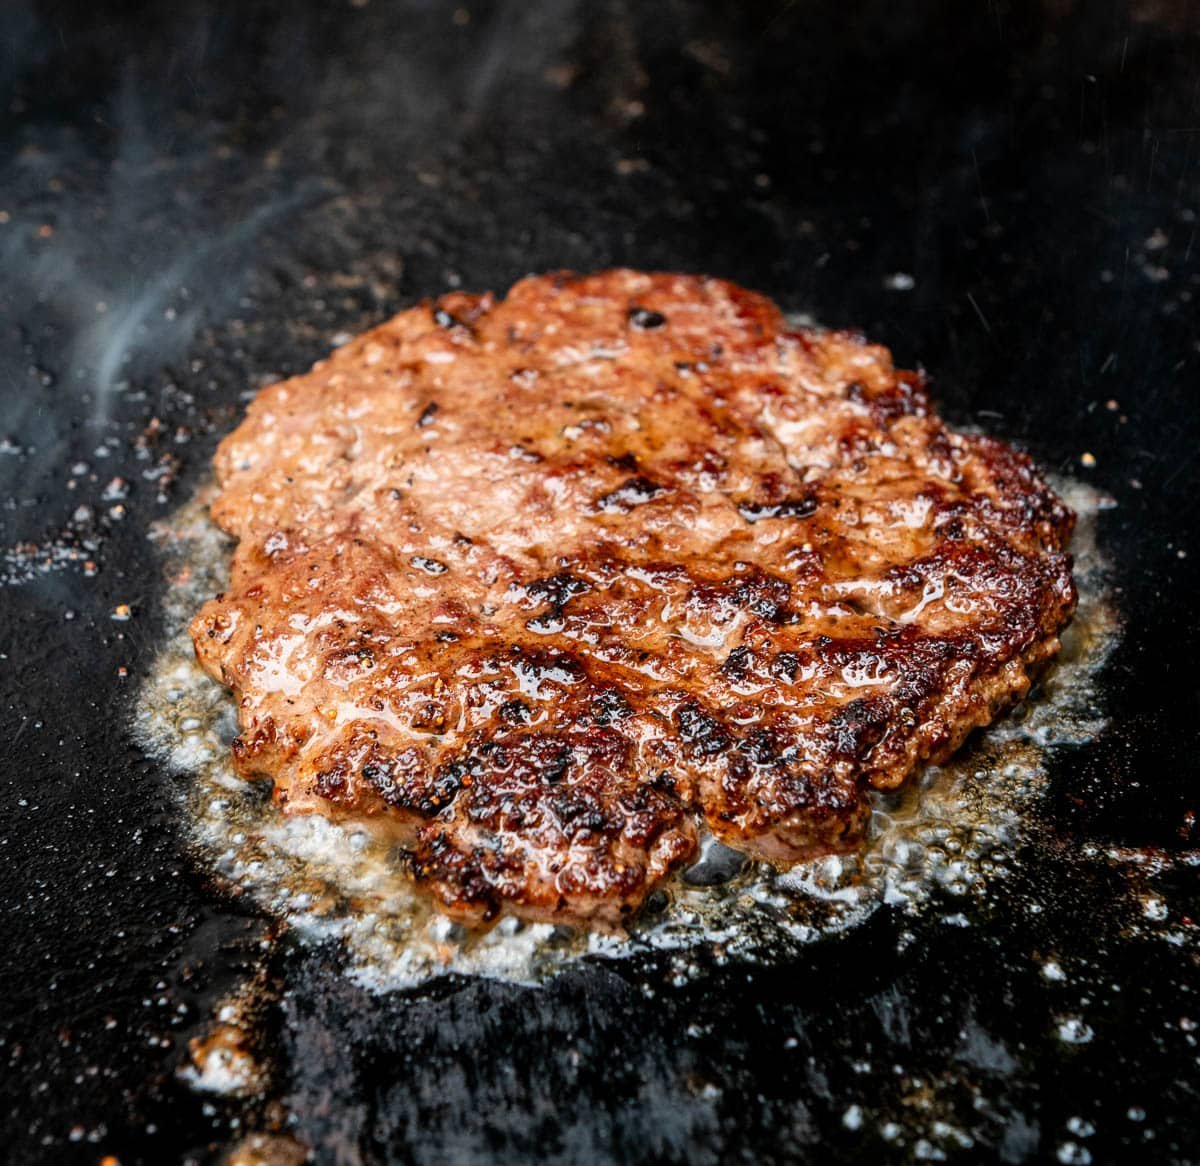
- Place 2 to 3 balls of meat in the searing hot skillet. After 30 seconds of searing, it's time to smash. Place a piece of parchment over the meat and smash them with a sturdy spatula or burger-smash tool. You want to smash them all the way down until they can't be smashed anymore for that perfectly thin patty. The parchment allows for easier removal and ensures the spatula/smasher doesn't stick to the meat. Leave them alone and let them cook for about 2 to 4 minutes, or until the edges are brown and the centers are barely pink.
- Using a thin but sturdy metal spatula to scrape the patties up and flip them over. Immediately place a slice of cheese on top of each patty and let them cook for about a 1-2 minutes longer, depending on how thin they are. When the cheese melts, they're ready - immediately transfer to your prepared buns.
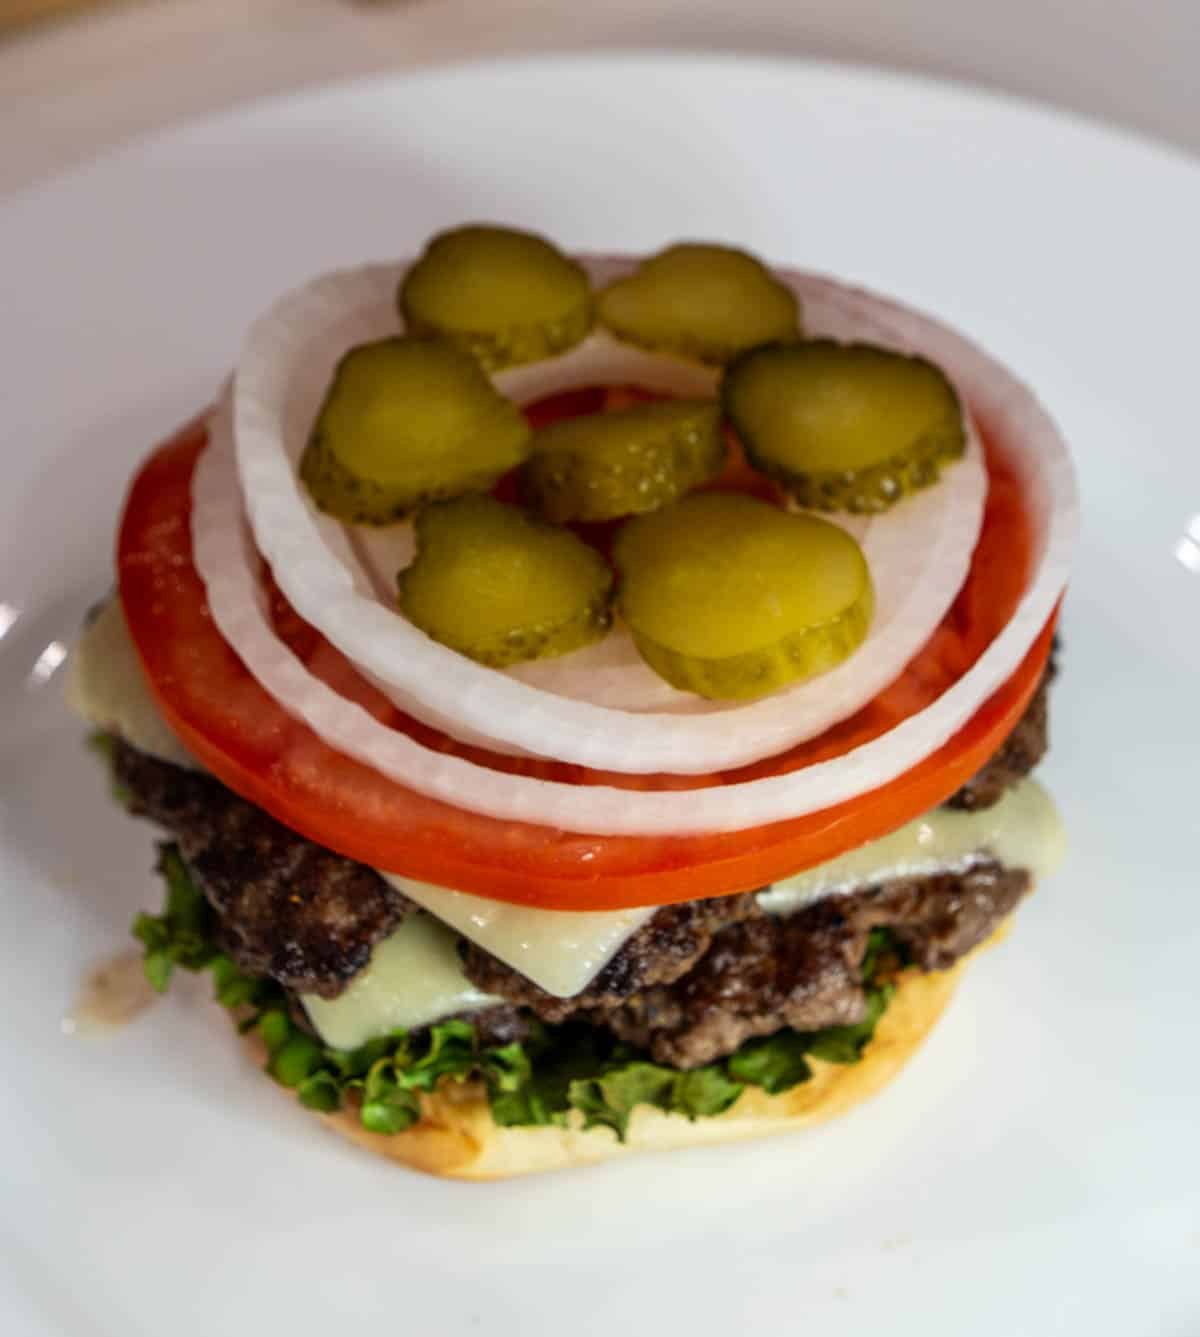
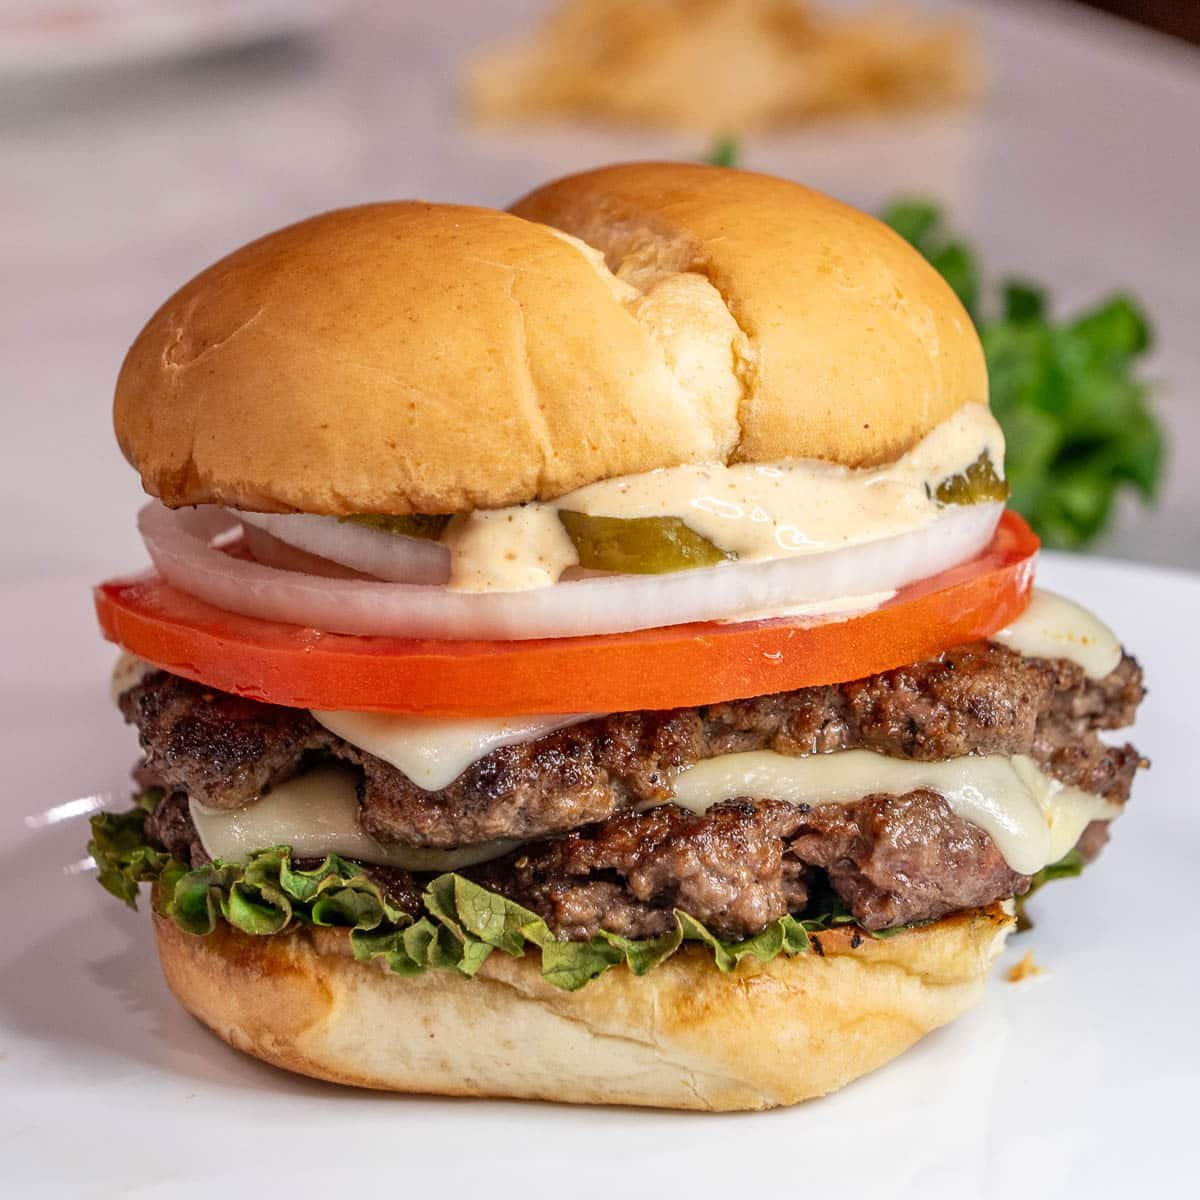
- Build your burger with the toppings of your choice. Tomato, lettuce, pickle, burger sauce, and red onion are my go-to toppings.
Frequently Asked Questions
Aim for an 80/20 blend (80% lean, 20% fat). That extra fat helps render flavor and moisture, giving you a juicy burger and great crust. Go too lean, and the burger can turn dry.
It's tough. Because thin patties cook fast at medium-high heat. If you want some pink, don't smash as aggressively and reduce cook time, but you'll sacrifice some of the classic crust.
Very hot. You want the surface to be nearly smoking. That intense heat gives you that crispy seared exterior during the quick cooking.
You can, but pre-formed hamburger patties are often overworked and compacted, which reduces the surface area needed for a good smash burger. For best results, start with loosely packed balls and then smash.
Store cooked patties in an airtight container in the refrigerator for up to 3 days. Reheat them in a hot skillet for about a minute on each side to bring back that crispy edge.
Absolutely! For uncooked patties, shape them into balls, place them on a baking sheet, and freeze until solid. Then transfer them to a freezer bag or airtight container for up to 3 months. Cook straight from frozen-no need to thaw first!
Yes! You can form the burger balls up to 24 hours in advance. Keep them covered in the fridge until you're ready to cook. This actually helps the flavors meld and ensures the butter solidifies again for maximum juiciness.
Recipe
Equipment
- 1 flat-top griddle
- 1 burger press
Ingredients
- 16 ounces ground chuck 80/20
- 2 ounces butter (½ stick) melted
- 1 tablespoon Worcestershire sauce
- ½ tablespoon fish sauce
- ½ teaspoon garlic powder
- ½ teaspoon onion powder
- 1-2 dashes liquid smoke
- salt and pepper to taste
Instructions
- Mix all the ingredients except the ground beef together in a small bowl .
- Place the beef into a bowl and break it up gently with a spoon or your hands.
- Pour the ingredients on top and mix together very gently until combined.
- Once it's thoroughly mixed, scoop into 3 to 4-ounce sized balls and gently press together.
- Cover the burger balls with plastic wrap and refrigerate for a minimum of a half hour. You want the meat to be super cold and butter to re-solidify. You could also place them into your freezer for about 15 minutes.
- When ready to cook, heat a large cast iron skillet or hot griddle like a Blackstone over high heat until SUPER HOT and is smoking. Drop a tiny sprinkle of water to test it, if it immediately sizzles and bounces around and disappears, it's ready. No need to add oil, there's plenty of fat in the burger.
- Remove your burgers from the fridge or freezer and sprinkle them with salt and pepper. Or, you could season them after they're smashed, it's up to you.
- Place 2 to 3 balls of meat in the searing hot skillet. After 30 seconds of searing, it's time to smash. Place a piece of parchment over the meat and smash them all the way down until they can't be smashed anymore, with a large heavy spatula or burger-smash tool. The parchment allows for easier removal and ensures the spatula/smasher doesn't stick to the meat. Leave them alone and let them cook for about 2 to 4 minutes, or until the edges are brown and the centers are barely pink.
- Using a thin but sturdy metal spatula to scrape the patties up and flip them over. Immediately place a slice of cheese on top of each patty and let them cook for about a 1-2 minutes longer, depending on how thin they are. When the cheese melts, they're ready - immediately transfer to your prepared buns.
- Build your burger with the toppings of your choice. Tomato, lettuce, pickle, burger sauce, and red onion are my go-to toppings.
Notes
- Make-Ahead Instructions: You can form the burger balls up to 24 hours in advance. Keep them covered in the fridge until you're ready to cook. This actually helps the flavors meld and ensures the butter solidifies again for maximum juiciness.
- Storage Instructions: Store cooked patties in an airtight container in the refrigerator for up to 3 days. Reheat them in a hot skillet for about a minute on each side to bring back that crispy edge.
- Freezing Instructions: For uncooked patties, shape them into balls, place them on a baking sheet, and freeze until solid. Then transfer them to a freezer bag or airtight container for up to 3 months. Cook straight from frozen-no need to thaw first.