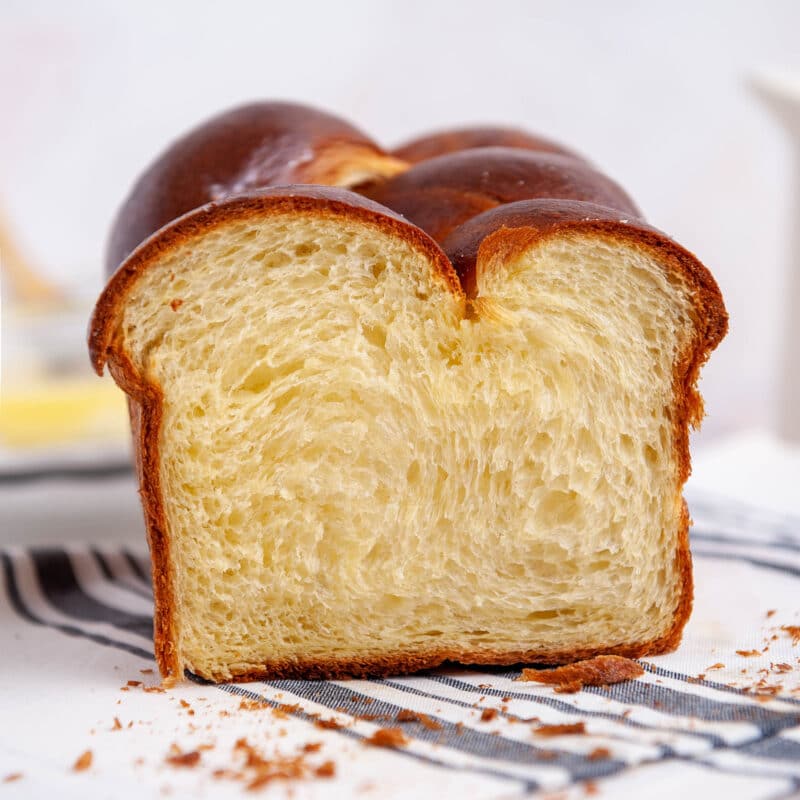
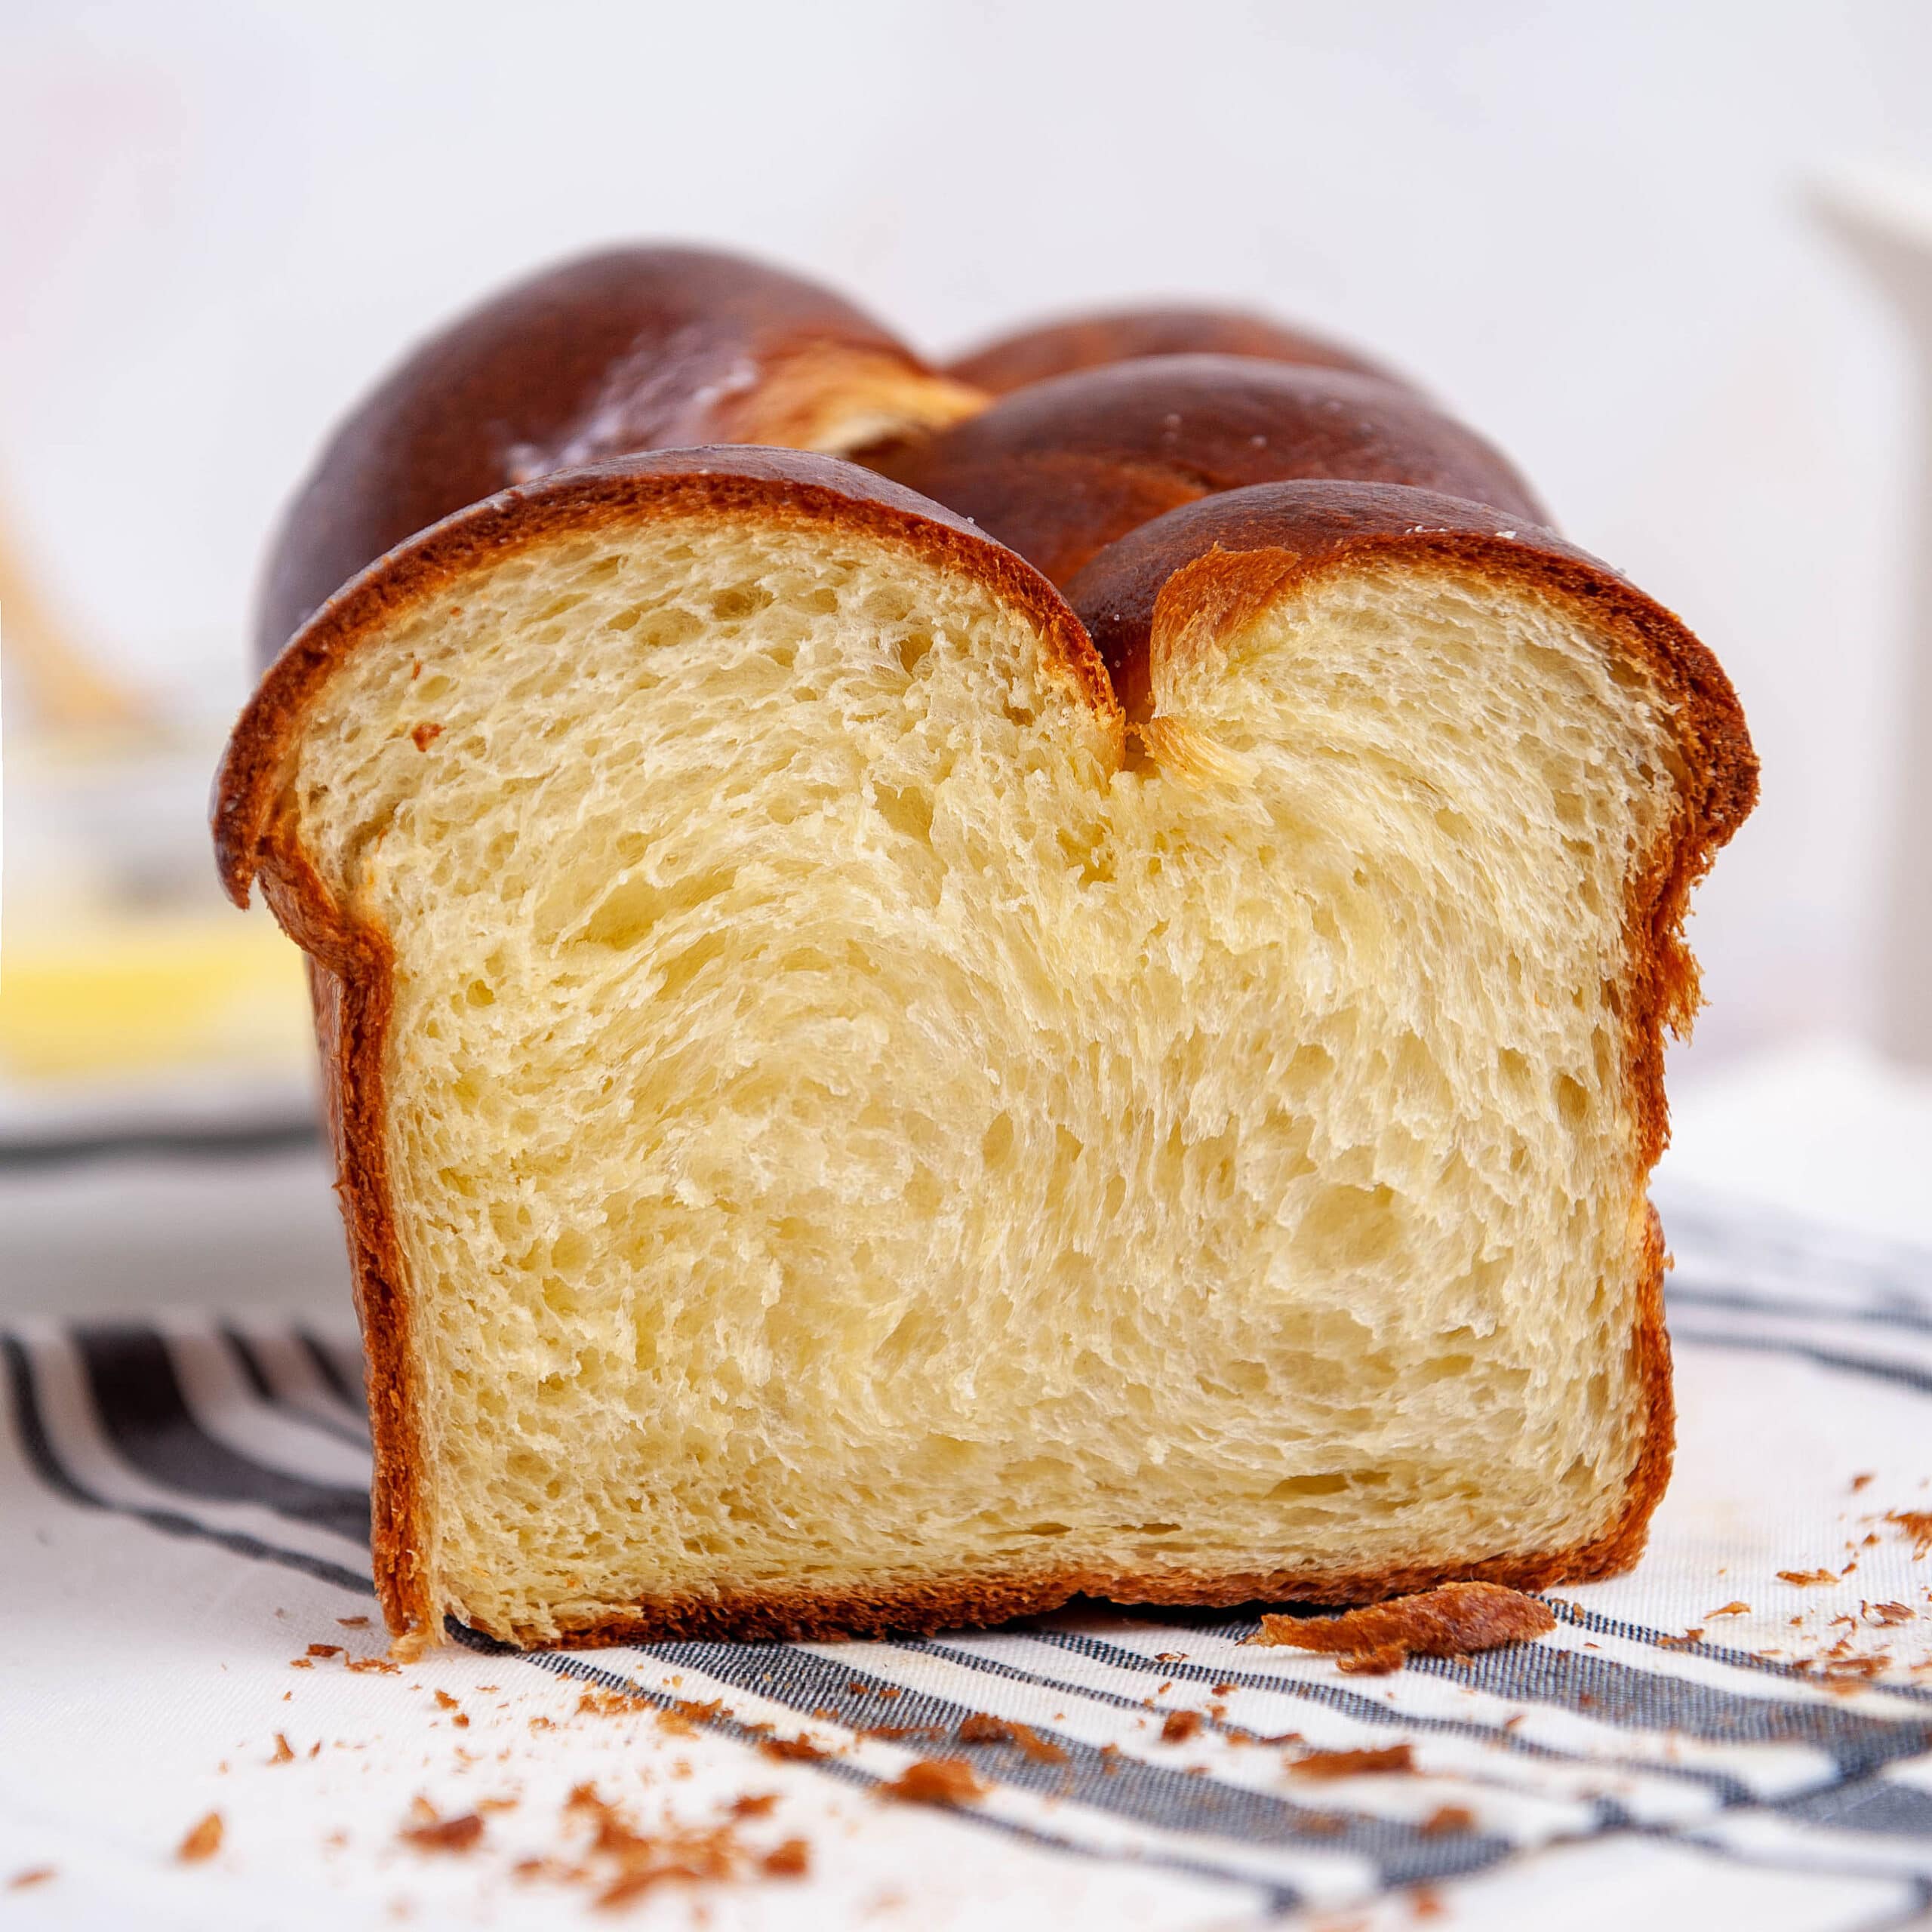
Brioche bread is very soft, moist, and buttery bread that is often braided and baked as a loaf or shaped into dinner rolls or even hamburger buns. Brioche bread tastes just like a croissant but so much easier to make! Prep this dough a day ahead and bake it fresh the next morning.
What's in this blog post
What makes this brioche recipe great
This brioche recipe is adapted from a recipe from my pastry school days at Oregon Culinary Institute and is a bit more challenging than my fast bread recipe but not as challenging as making homemade sourdough. It is one of my favorite bread recipes!
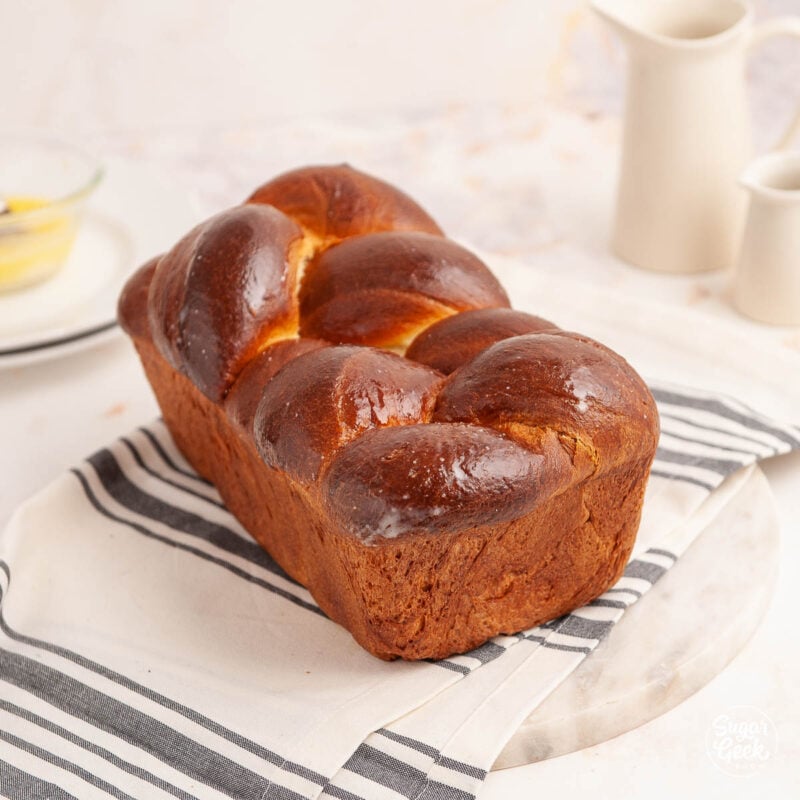
The main thing you need to know about making brioche is that the dough is very soft and needs time to rest in the fridge so that the flour has time to absorb the liquids. Overnight is best but you can get away with a two-hour rest if you want to bake the same day.
In this recipe, I will teach you how to mix the brioche dough properly, how to retard (rest) the dough in the fridge, how to shape the dough, and how to bake it.
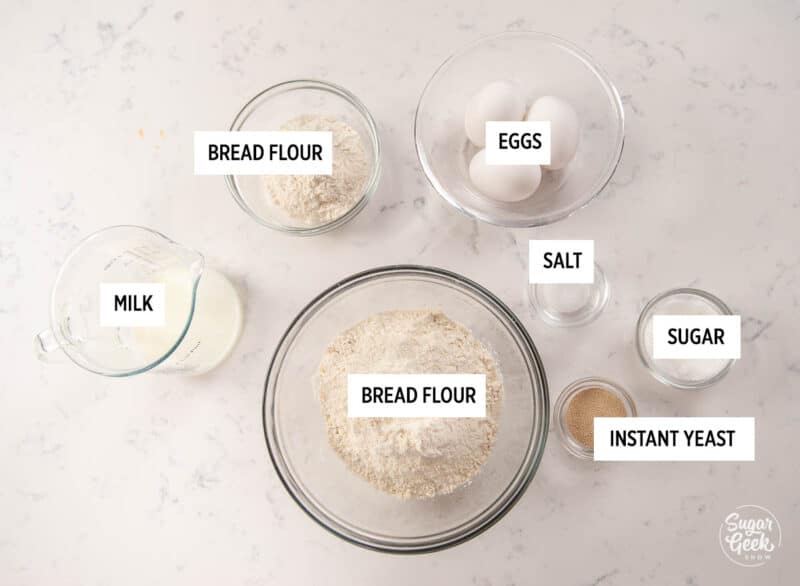
Ingredients
How to make brioche bread step-by-step
- Heat your milk to 100ºF-110ºF using a microwave or the stove
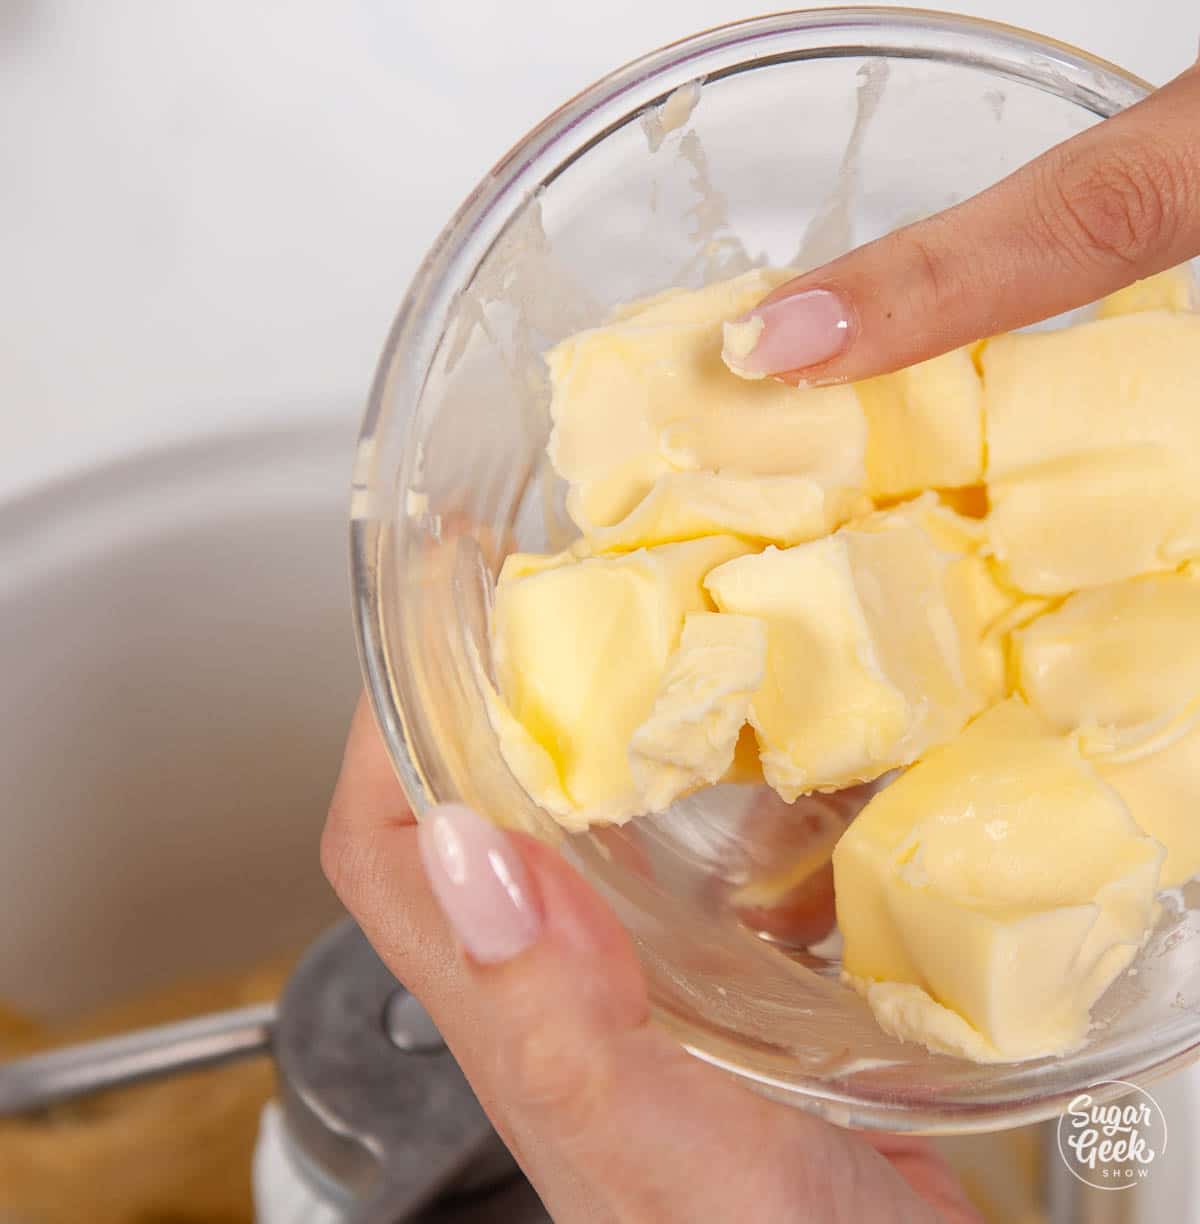
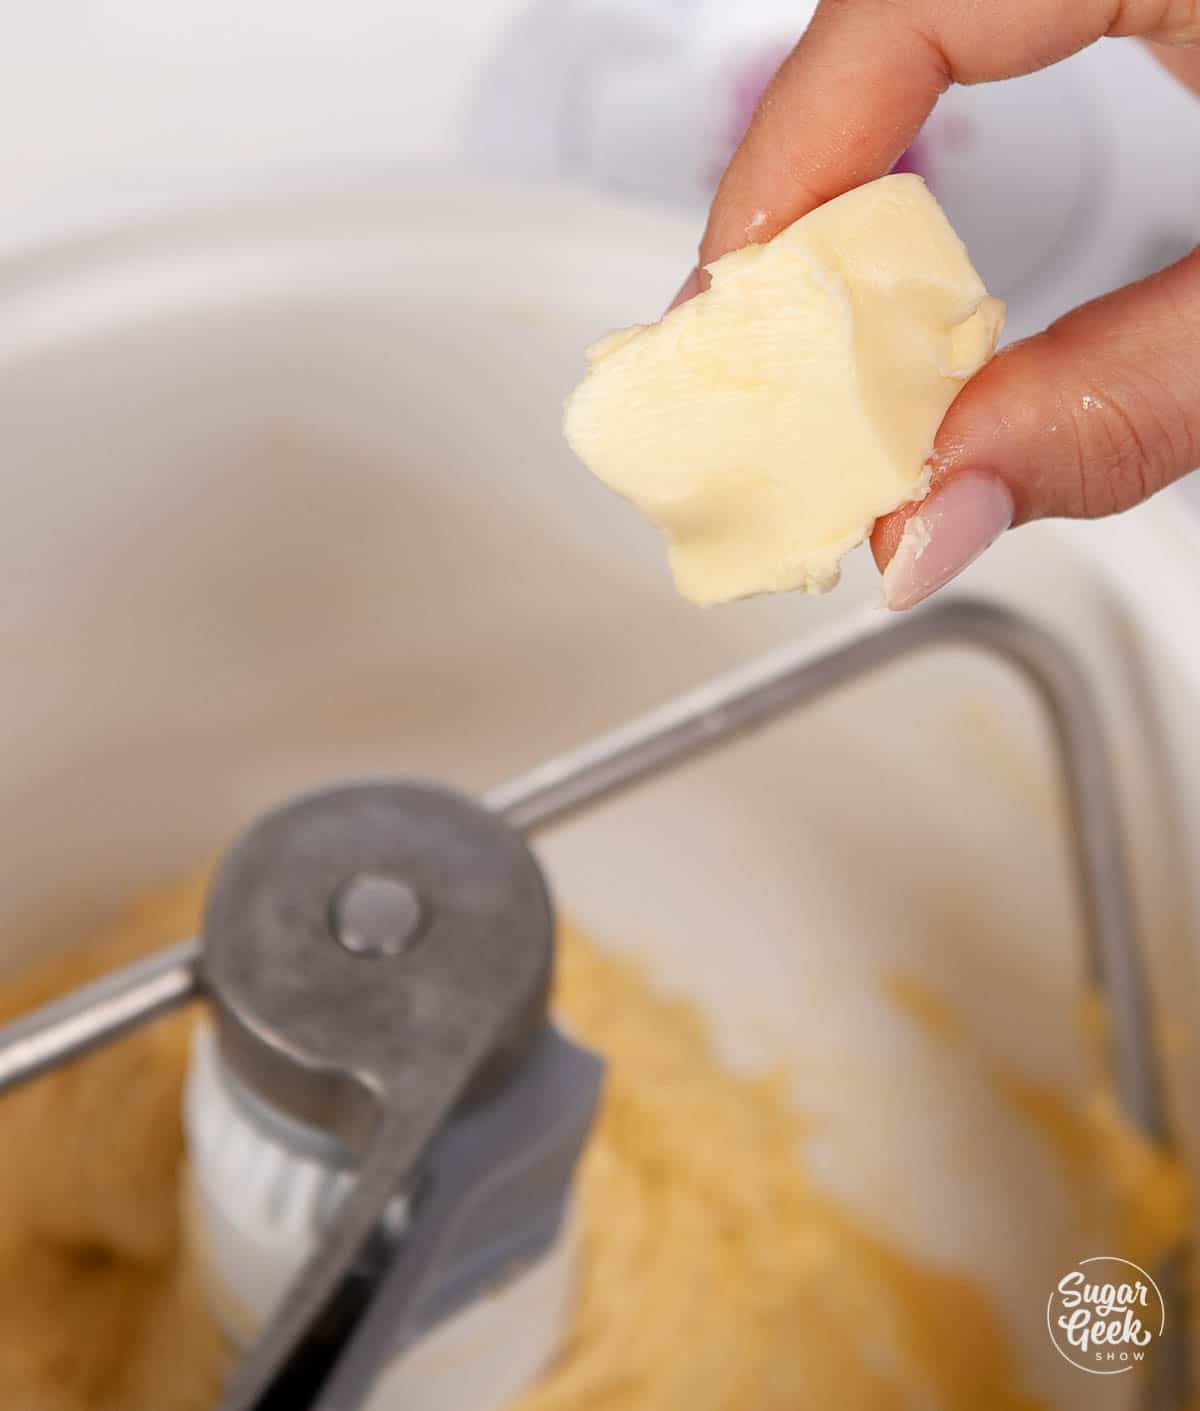
- Bring your eggs and butter to room temperature. I like to put the eggs in a bowl of warm water for 10 minutes and microwave the butter in 15-second increments until I can press my finger into the butter easily but it's still holding its shape and isn't melted.
- Add your instant yeast and bread flour and mix until just combined.
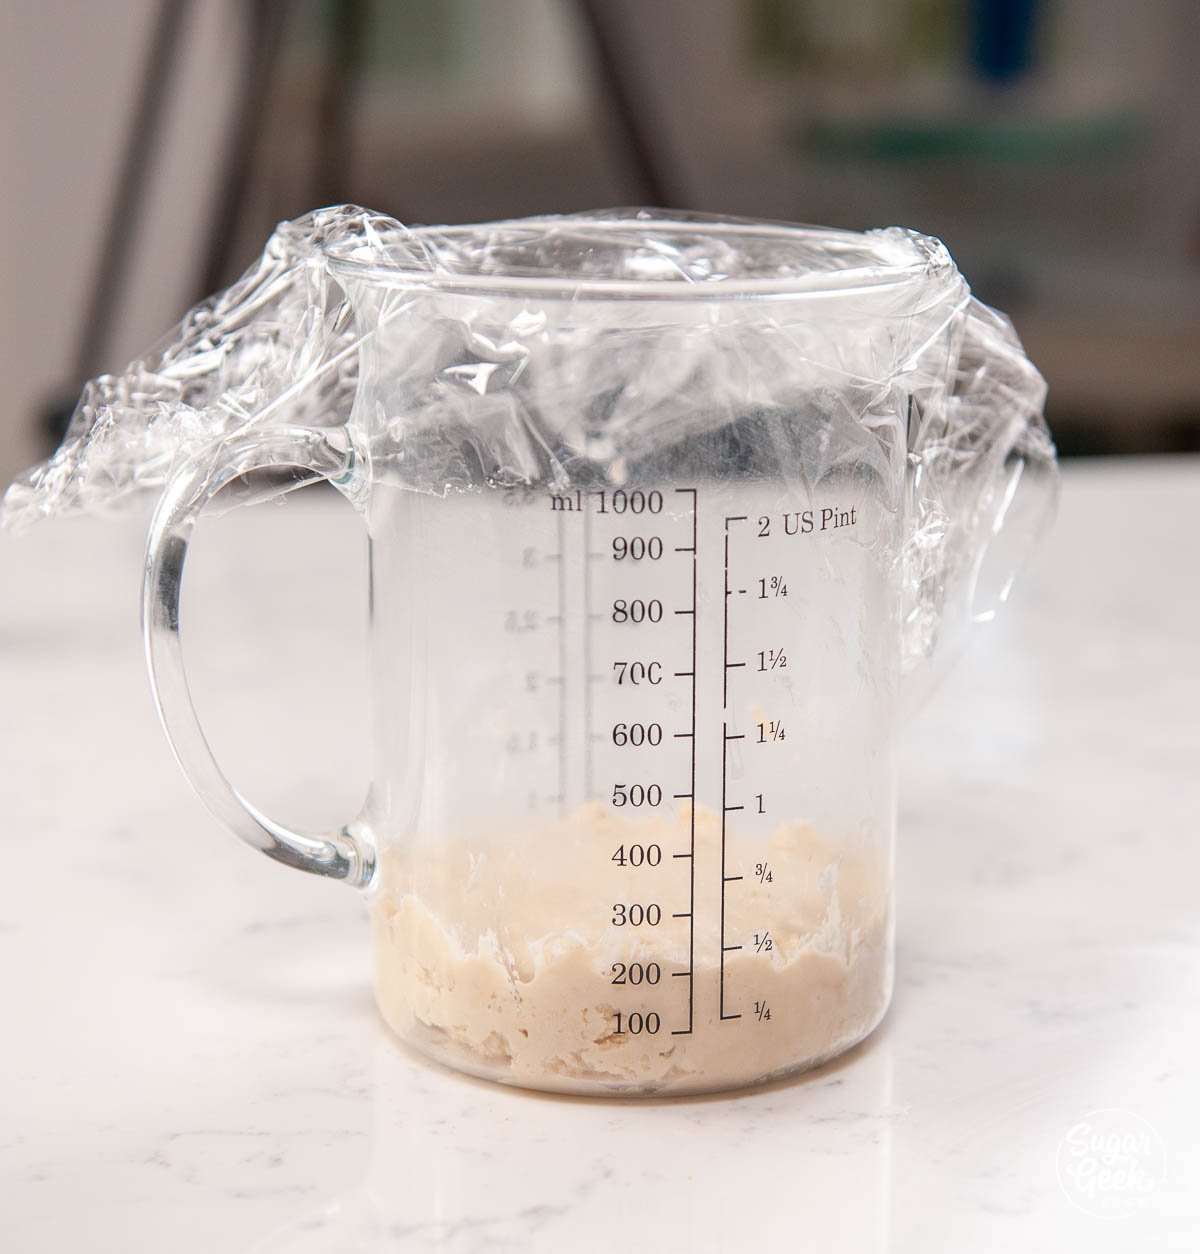
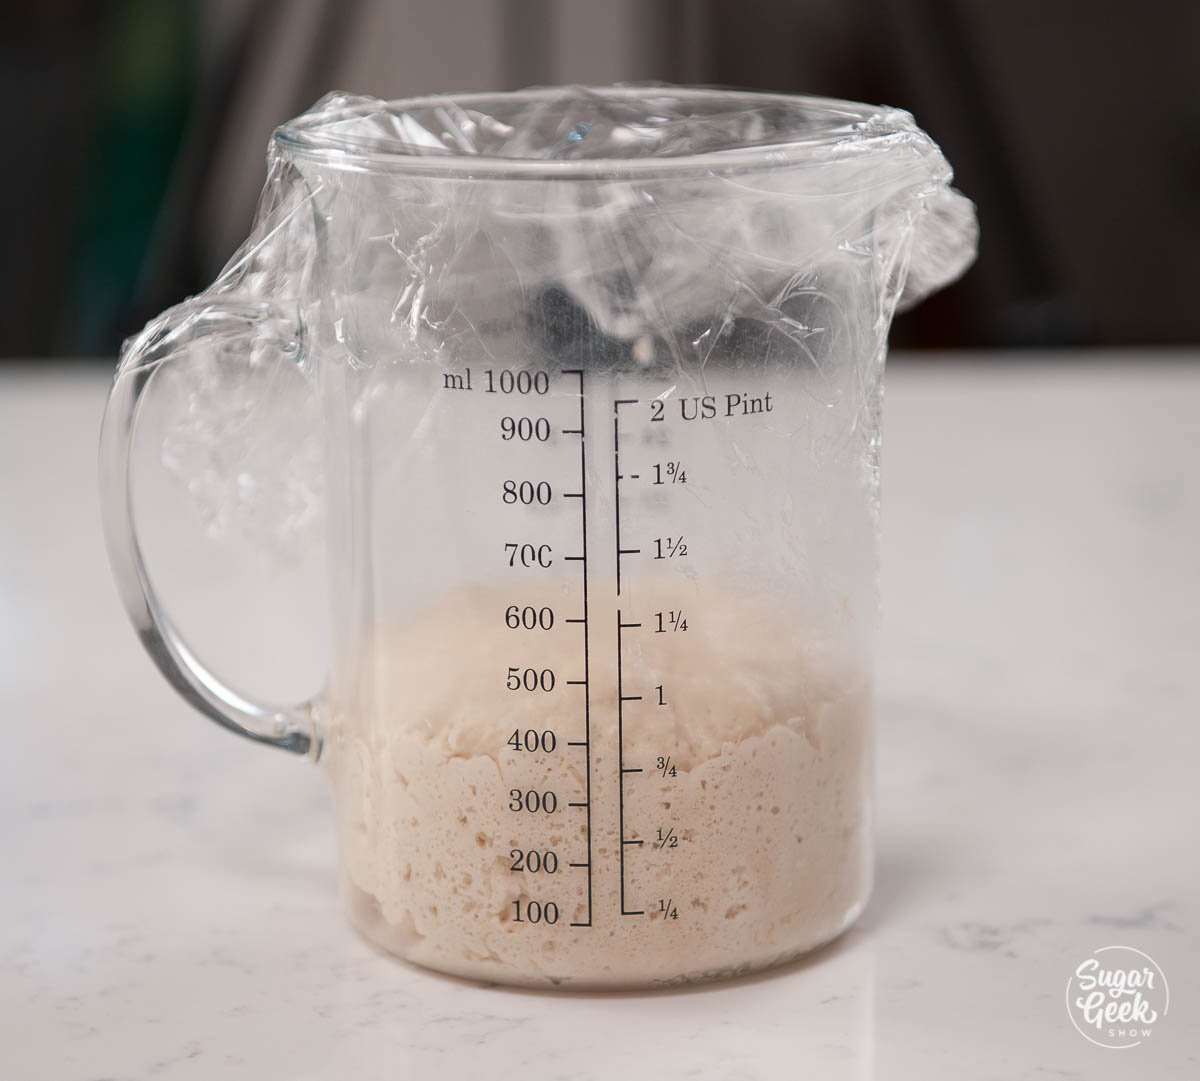
- Cover the container and set it aside in a warm environment (roughly 75ºF) until it doubles in size (about 30 minutes). This gives the yeast a head start on growing.
- Add your yeast mixture to the bowl of your stand mixer with the paddle attachment attached.
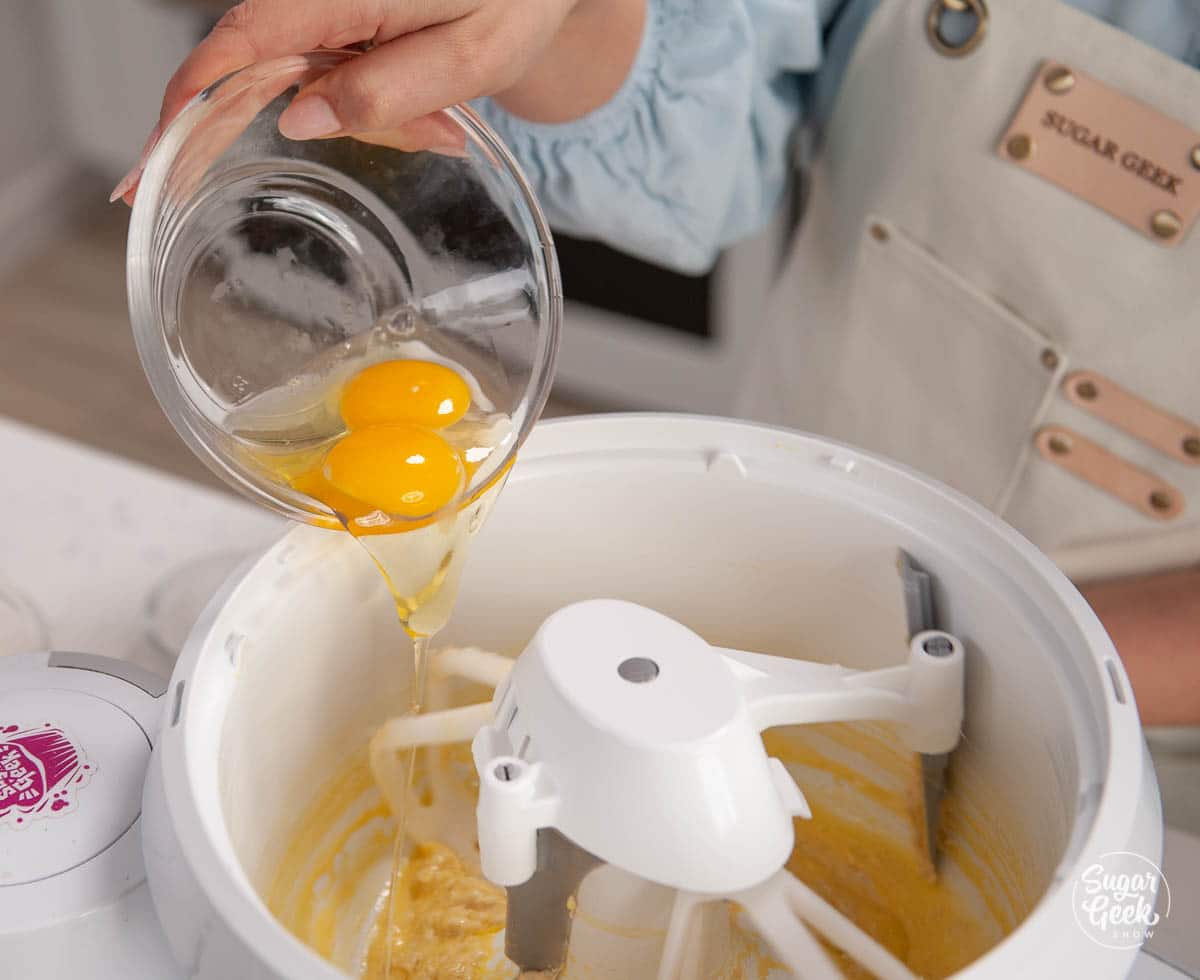
- While mixing on low, add in the room temperature eggs one at a time, letting them incorporate before adding in the next.
- Continue mixing on low and add in the bread flour, sugar, and then salt. Mix for five minutes.
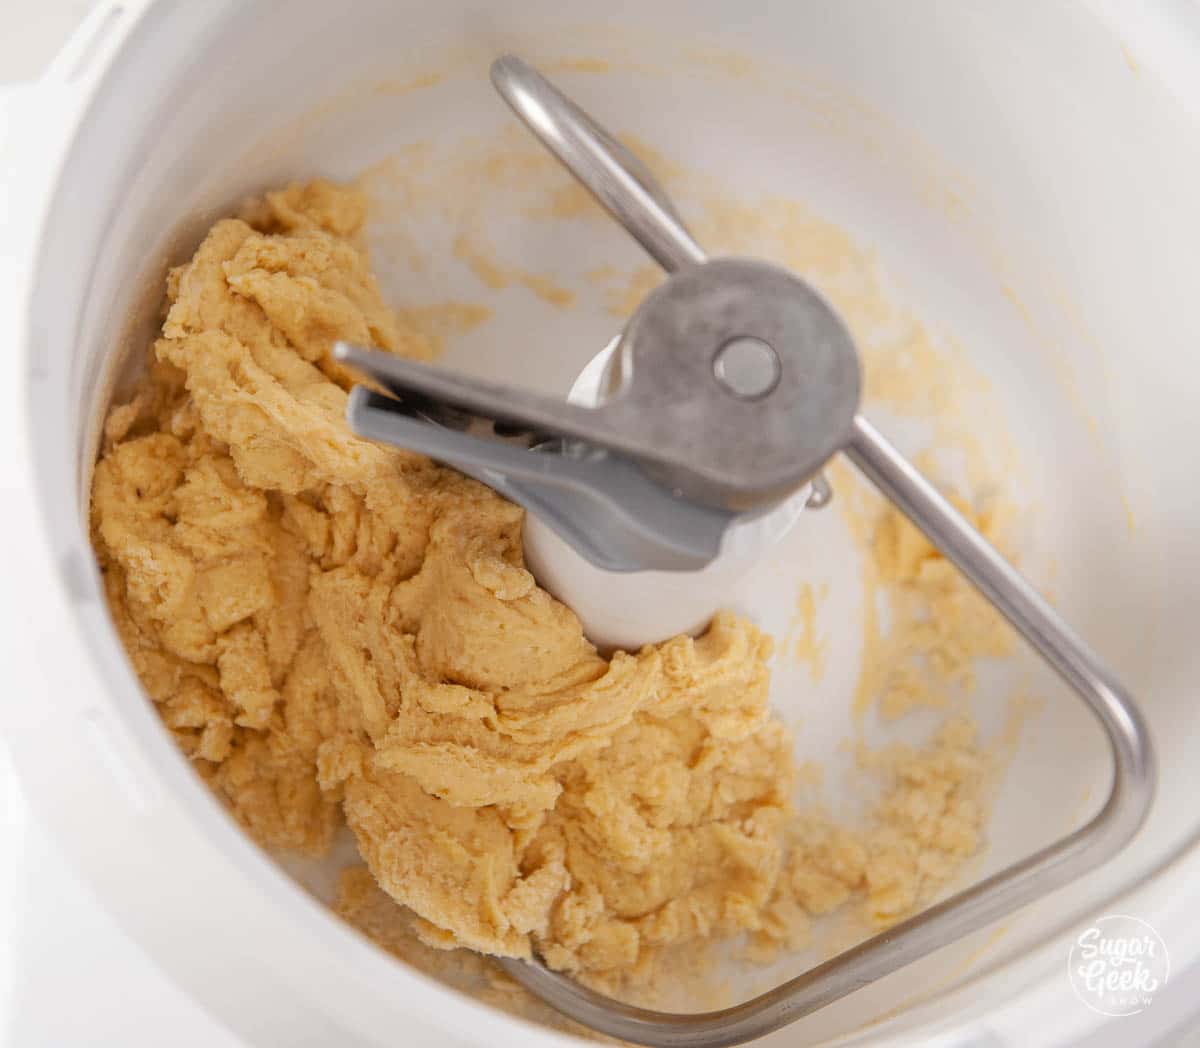
- Add the softened butter one chunk at a time, letting each piece incorporate before adding the next. The dough will be very sticky after adding in the butter. Be sure to scrape the bowl as needed to make sure the dough is mixing correctly.
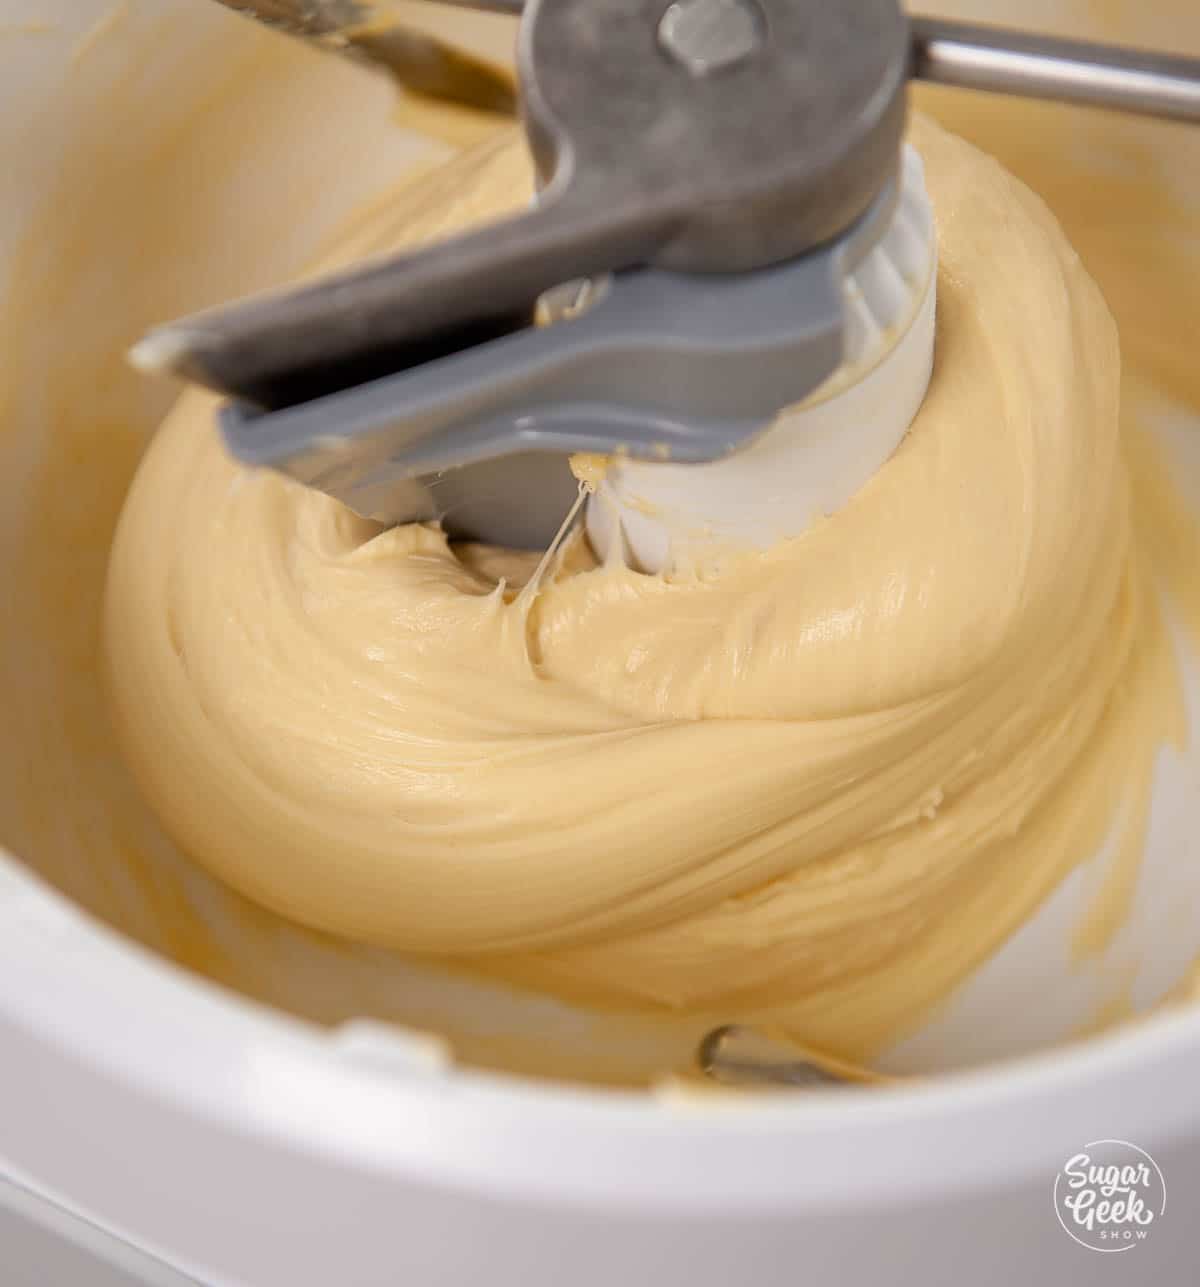
- Switch to the dough hook and let your dough mix on medium until a smooth dough forms that pulls away from the sides of the bowl. This can take anywhere from 10 minutes to 20 minutes depending on the mixer, the flour you're using and even the humidity in the air so be patient. It will be a very loose and sticky dough.
- Perform the windowpane test to make sure your dough is done mixing and has developed enough gluten.
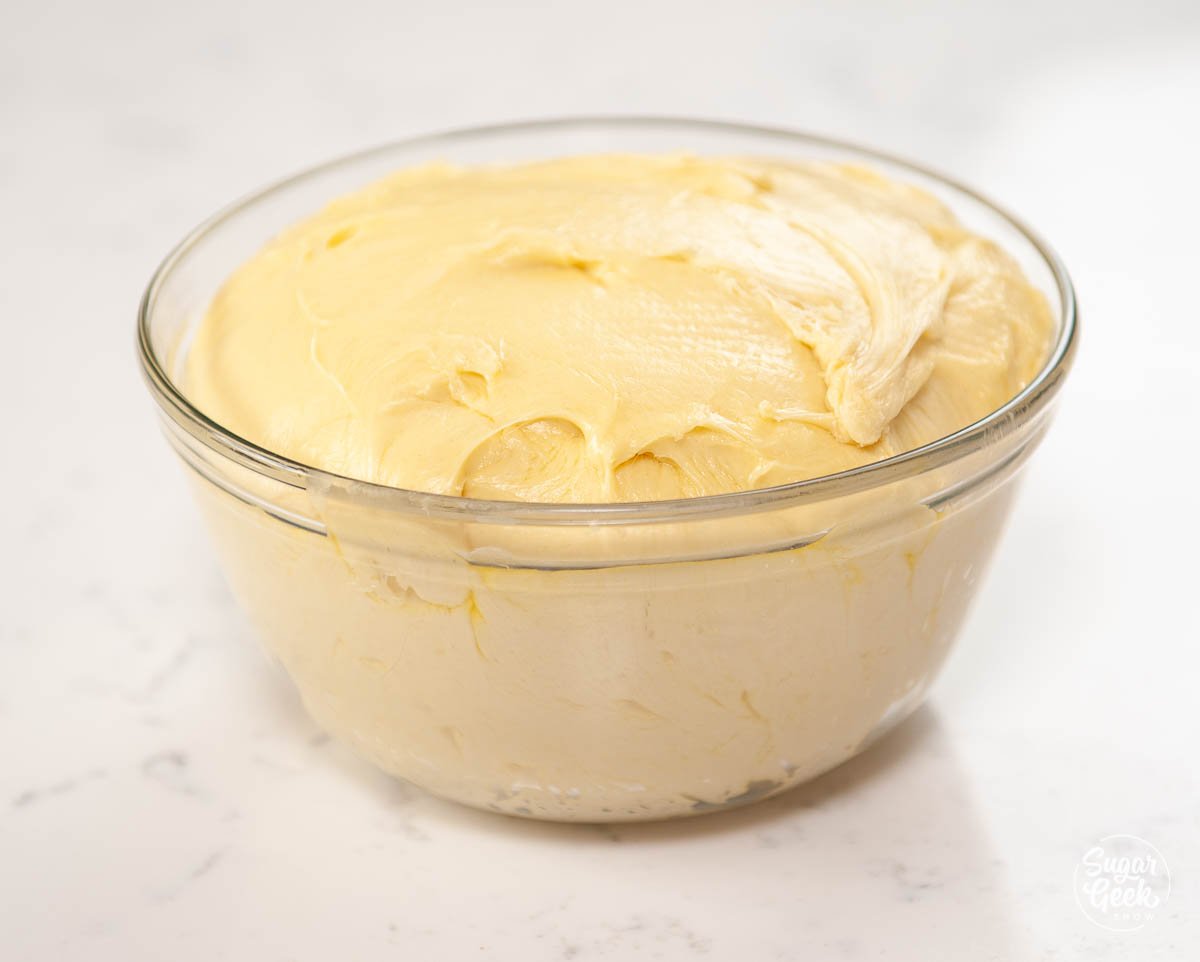
- Form it into a smooth ball by gently folding the edges of the dough to the center with a bowl scraper.
- Place the brioche dough into a buttered bowl, edges down, cover with a towel, and let it rise in a warm spot for 60 minutes.
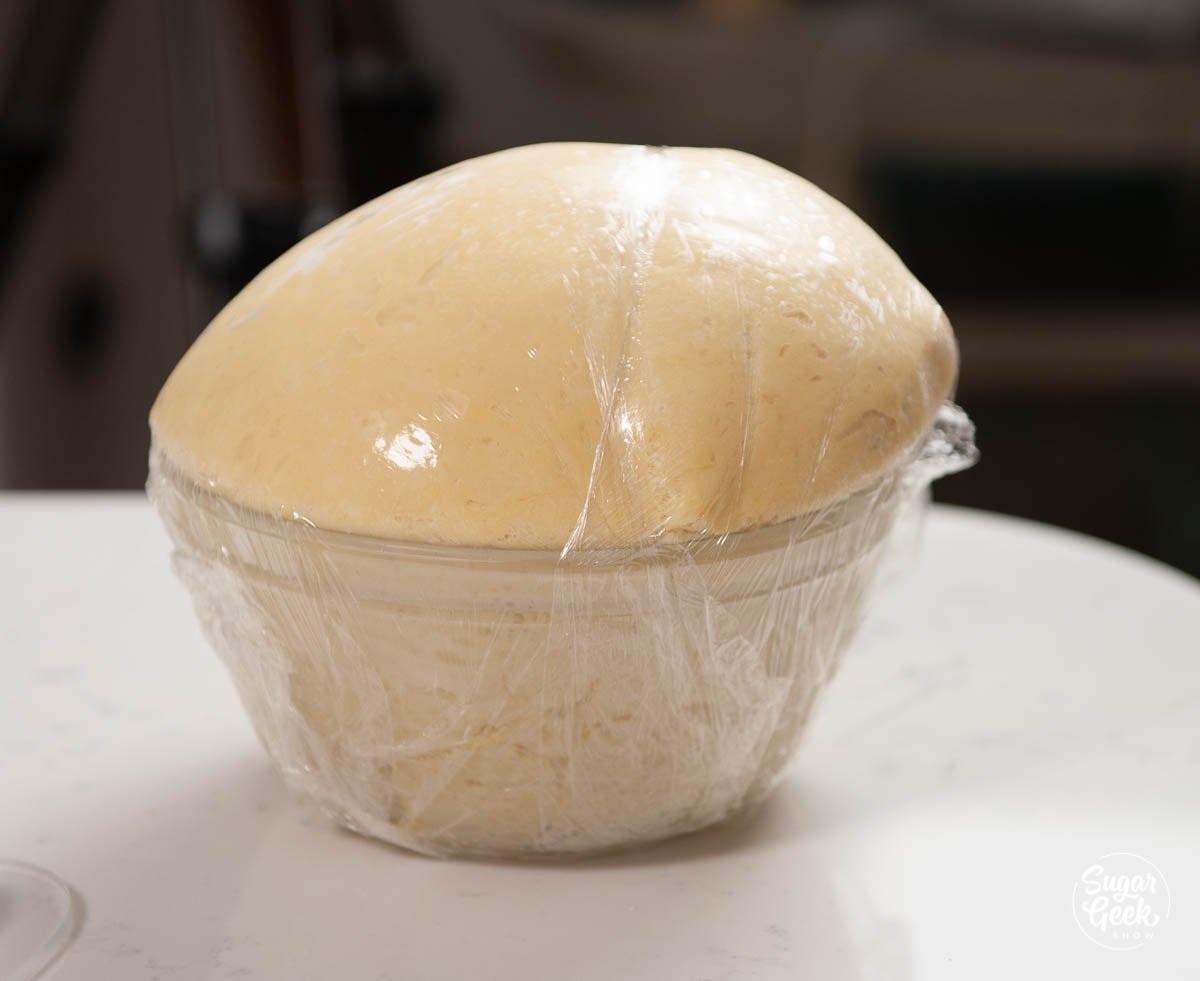
- After it rises, cover the dough in plastic wrap and refrigerate the dough for two hours or overnight.
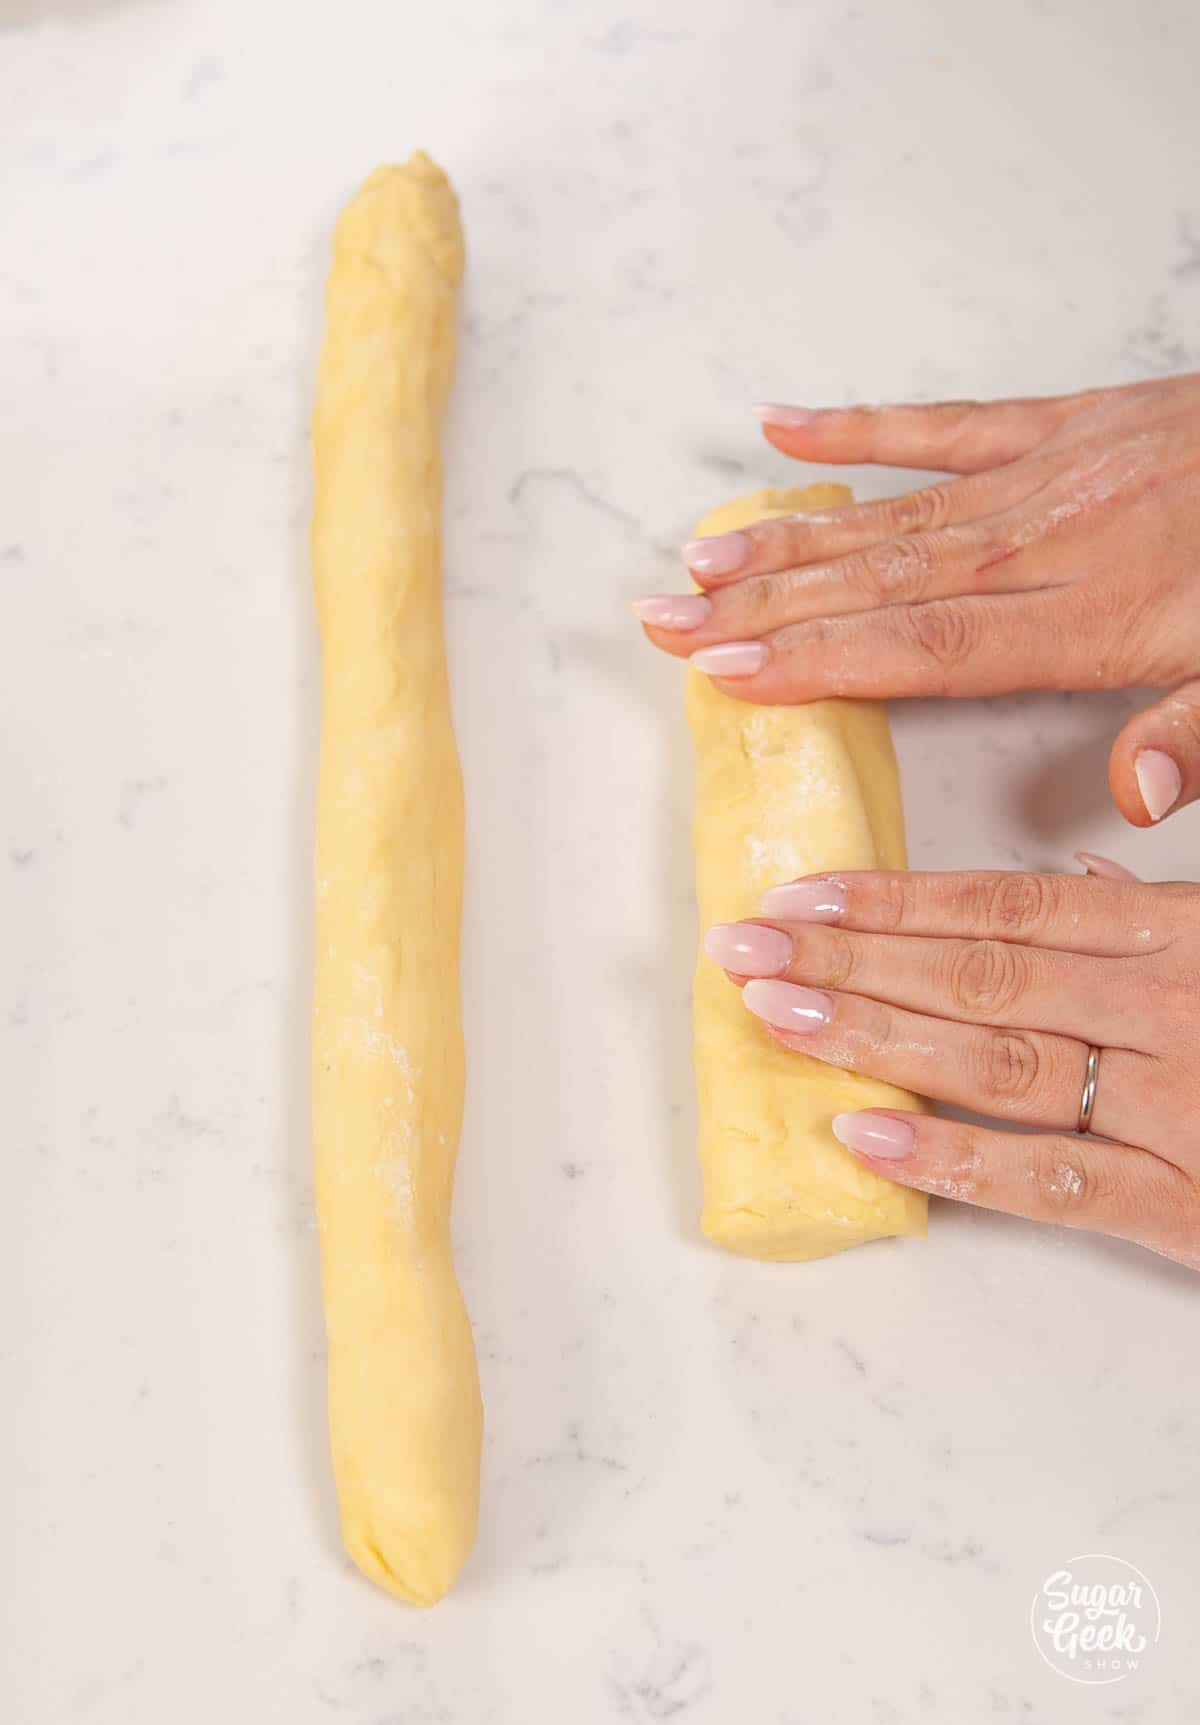
- Once the dough is chilled, you can form it into three equal pieces. Roll the pieces out into long strands that are about 1 ½ times as long as your pan.
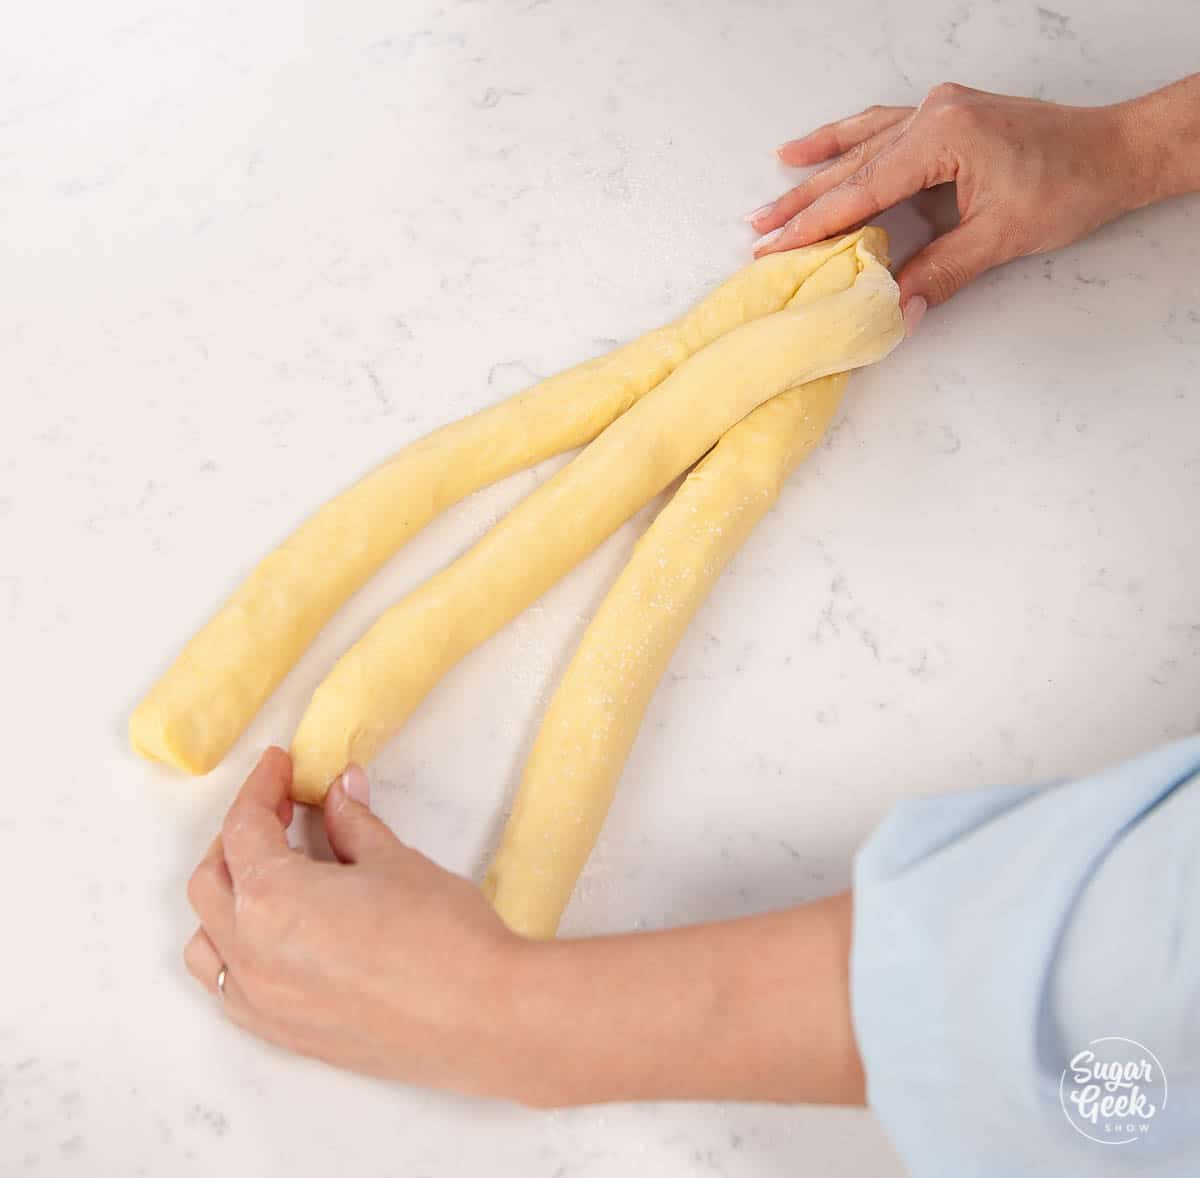
- Braid the three pieces together and pinch the ends together.
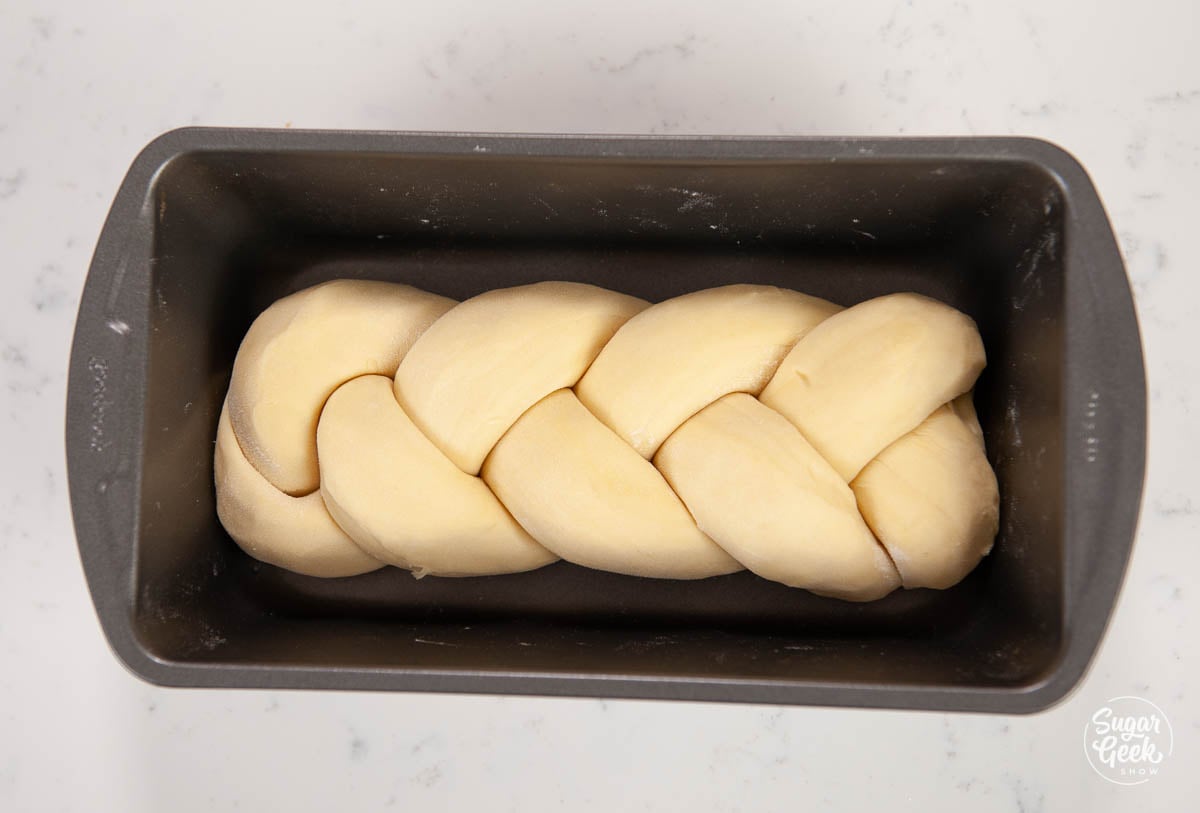
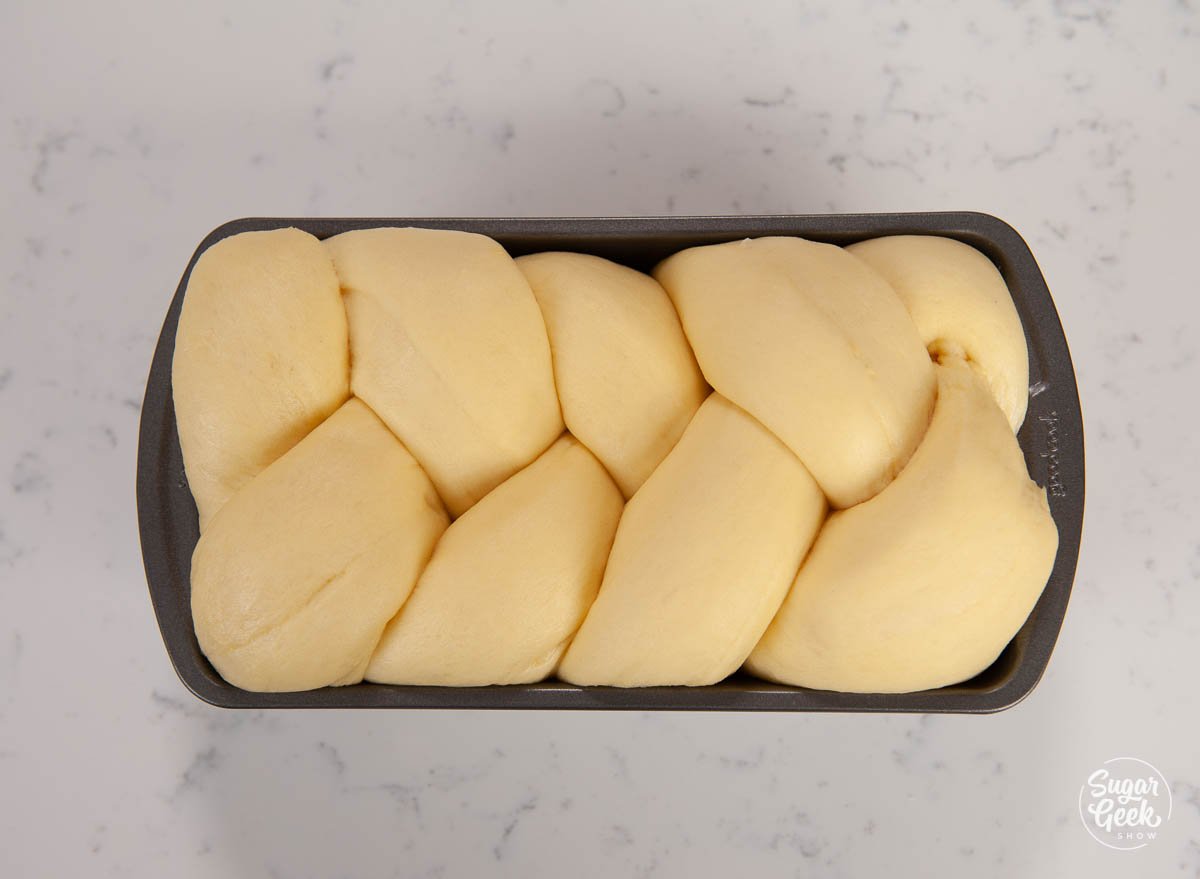
- Tuck the ends underneath and transfer the dough to a 5"x 9" ungreased non-stick bread pan. If you use any other non-stick pan, grease the pan first. You can also bake the loaf directly on a sheet pan with some parchment paper, in cupcake pans to make little braided rolls, or even a cake pan.
- Cover the dough to prevent it from drying out and let the dough rise until it doubles in size at 75º-90ºF. This should only take 30 minutes to an hour depending on how warm the environment is. You will know the dough is ready if you gently poke it with your finger and it makes an indent that either stays or only bounces back halfway. If it bounces back immediately then it needs more time to rise.
- Preheat your oven to 375ºF and place the oven rack in the lower half. If your bread is too close to the top of the oven it will get too brown.
- Brush the surface of the loaf with egg wash (one egg whisked together with 1 Tablespoon water) so that it is nice and shiny when it comes out of the oven.
- Bake the brioche until it's golden brown and the internal temperature reads between 190ºF-200ºF. Between 30-45 minutes, start checking the internal temp at 30 minutes.
- Remove the bread from the pan and transfer it to a cooling rack. Enjoy your brioche when it's still a little warm! So good!
What is brioche bread?
Brioche bread is what we call a "rich dough" and is in the same family of viennoiseries (roughly translated as things from Vienna). Viennoiseries are pastries such as croissants and Danish and contain more eggs, butter, sugar, and milk than your typical bread recipes.
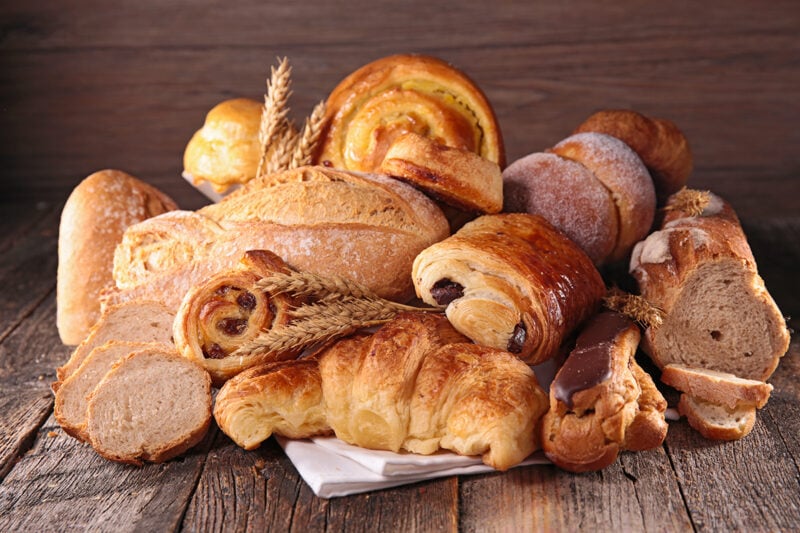
These extra ingredients not only give the bread a ton of flavor but also keeps the bread fresher for longer. You can make brioche savory by mixing in more salt, herbs, cheese, garlic, or even meat. Or you can make sweet bread by adding more sugar, mixing in dried fruits, nuts berries, honey, and spices.
The downside is that all those extra ingredients can get in the way of the rising process (yeast likes to eat flour and sugar, not so much butter and eggs) so to combat that, we mix up a sponge first to get that yeast happy and growing, then we mix in the rest of the ingredients.
To combat this problem, we leave the brioche to retard overnight in the fridge to develop the flavor, let the dough rest and give the yeast time to work.
This is not 100% necessary but it will make your brioche bread much tastier and the dough easier to handle! This is especially great if you want to make your brioche a day ahead and have it ready to bake the next day. Just bring the brioche to room temperature an hour or two before baking, let it rise in a warm spot until it doubles, and then bake it.
Fresh brioche is LIFE-CHANGING. Just trust me.
Understanding how yeast dough works
The basics of making a yeast-risen dough are all the same but different recipes may have slightly varied steps.
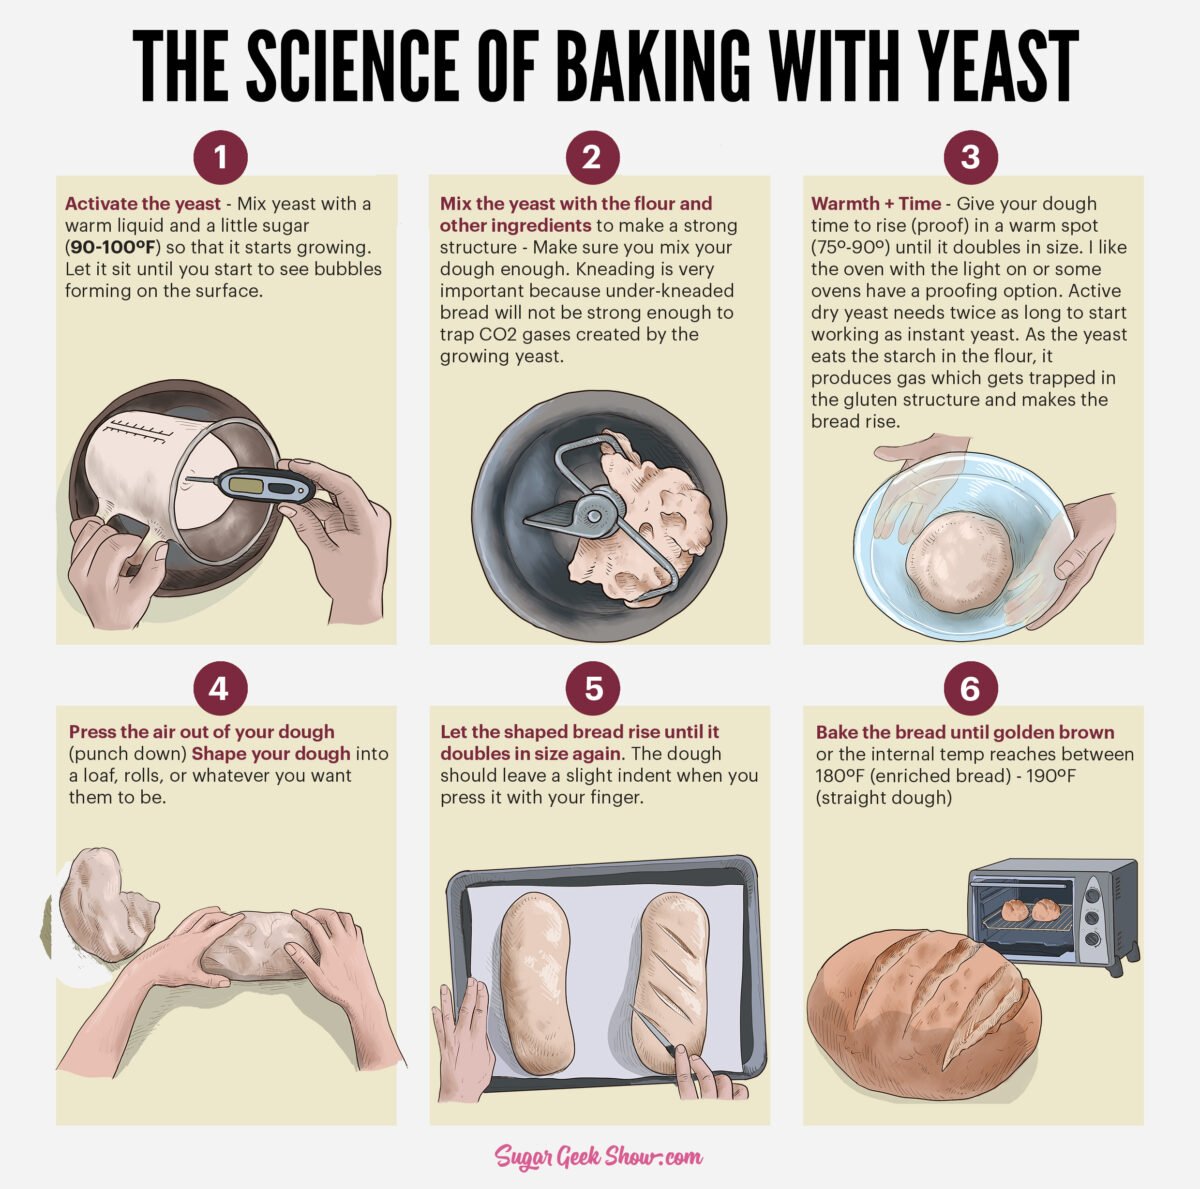
- Activate the yeast - Mix yeast with a warm liquid (90-100ºF) so that it starts growing.
- Develop a strong gluten structure - Make sure you mix your dough enough. It should look like a smooth ball and pass the windowpane test. Kneading is very important because under-kneaded bread will not be strong enough to trap CO2 gases created by the growing yeas and therefore will not rise.
- Warmth + Time - Give your dough time to rise (proof) in a warm spot (80º-90º) until it doubles in size. I like the oven with the light on or some ovens have a proofing option. If you're using instant yeast, the rising will happen a lot faster if you are using regular active yeast it will take longer. Cold environments will also stunt your yeast and your dough will take a lot longer to rise.
- Shape your dough into a loaf, rolls, or whatever you want them to be. This is the point where you can put your dough in the fridge until you're ready to bake it. You can do this with any dough, not just brioche.
- Let it rise until it doubles in size again and then bake!
When you add yeast to the flour and add in warmth and a little bit of moisture, the yeast begins to eat the starch in the flour. As it eats the sugar, it produces CO2 (yes, bread is made of tiny yeast farts). Then that CO2 gets trapped in the gluten we developed during the mixing stage and expands, giving rise to your bread. If you're missing one of these steps, your bread won't turn out.
Other ways to shape brioche
Brioche Rolls - Divide the dough into 3 oz pieces. Tuck the edges of the dough underneath and shape until smooth. Place on a sheet pan with about 1" in between the rolls. Let them proof until doubled in size. Brush with egg wash and then bake for 20-25 minutes or until golden brown and the internal temperature reads 180º-190ºF
Brioche à Tête - Divide the dough into 3 oz pieces. Roll the dough into a smooth ball. Use the side of your palm to form a little ball at the top called the "hat". Pick the dough up by the hat and place it into the greased fluted brioche tin. Tuck the dough under the hat with floured fingers. Proof until doubled. Brush with egg wash and bake for 15-20 minutes or until the internal temperature reads 180º-190ºF
Braided Brioche Ring - Perfect for a larger gathering or Holiday! Double the recipe and prepare as above. Braid the loaf into a long braid and then attach the ends together to form a ring. Place into a greased cake pan or on a sheet pan lined with parchment paper. Proof until doubled. Brush with egg wash. Bake for 25-30 minutes or until the internal temperature reads 180º-190ºF.
Brioche Pull-A-Part Bread - Divide the dough into 8 equal-sized pieces. You can do a tablespoon at a time, or even larger. Roll the pieces into a smooth ball on a floured surface. Place the dough balls into a loaf pan alternating one on top of the other in a zig-zag pattern. Proof until doubled. Brush with egg wash. Bake for 25-30 minutes or until the internal temperature reads 180º-190ºF.
How to store leftover brioche
You can store brioche in plastic wrap at room temperature for 24 hours or you can freeze it! Freezing actually locks in moisture and keeps your bread fresh. When you're ready to eat your brioche, just bring it back to room temperature and refresh it in the oven for a few minutes until it's warm (about 5 minutes).
What can you make with leftover brioche?
- Brioche French Toast
- Brioche Croutons
- Ham & Cheese Bake
- Brioche Bread Pudding
FAQ
Yes you can, the brioche will just take longer to rise. Twice as long as the time listed is a general rule of thumb.
Yes, you can but your brioche may not rise as much. Bread flour contains more gluten (12% protein) than all-purpose flour (10% protein) which makes a stronger network of gluten. More gluten traps more gas from the yeast which makes a fluffier and chewier bread.
Yes, you can but your bread might taste too salty. The reason why bakers typically use unsalted butter in recipes is so that they can control how salty the final product is.
You can make any bread by hand. After all, that's what the professionals did before mixers were invented right?
But be prepared to be kneading for a long time to get the proper gluten development. If you're not used to making bread by hand it can be very tiring. Maybe knead with a buddy and take turns! Then you can say you got a good workout before you enjoy your bread.
This dough is very sticky so it might be hard for you to tell if it's mixed enough. Try to remember that when we are mixing our dough, we are developing a strong gluten network. Under-mixed dough has a rough texture.
When your dough looks smooth, it's done mixing.
If your dough is too sticky and hard to handle, put it in the freezer for 30 minutes to firm up the dough before shaping. This may add some extra time to your final proofing because the dough is colder which stops the yeast from growing.
If you accidentally over-proof your bread to the point that it is collapsing don't worry, just take the dough out of the pan, re-knead it until it's smooth and shape it back into a braided loaf. Proof it until it doubles in size, egg wash, and bake!
Related Recipes
Recipe
Equipment
- 5"x9" non-stick bread pan
Ingredients
Sponge
- 2 ounces milk 80º-90ºF
- 10 grams instant yeast or active dry yeast but increase proofing time to double
- 2 ounces bread flour or all-purpose flour if you don't have bread flour
Dough
- 3 large eggs room temperature
- 8 ounces bread flour or all-purpose flour if you don't have bread flour
- 26 grams sugar you can increase this up to 100 grams for a sweeter brioche
- 3 grams salt
- 7 ounces unsalted butter softened but not melted cut into 1" cubes
Instructions
- Bring your eggs and butter to room temperature. I like to put the eggs in a bowl of warm water for 10 minutes and microwave the butter in 15-second increments until I can press my finger into the butter easily but it's still holding its shape and isn't melted.
For the sponge
- Heat your milk to 100ºF-110ºF using a microwave or the stove
- Add your instant yeast and bread flour and mix until just combined.
- Cover the container and set it aside in a warm environment (roughly 75ºF) until it doubles in size (about 30 minutes). This gives the yeast a head start on growing.
For the dough
- Add your yeast mixture to the bowl of your stand mixer with the paddle attachment attached.
- While mixing on low, add in the room temperature eggs one at a time, letting them incorporate before adding in the next.
- Continue mixing on low and add in the bread flour, sugar, and then salt. Mix for five minutes.
- Add the softened butter one chunk at a time, letting each piece incorporate before adding the next. The dough will be very sticky after adding in the butter. Be sure to scrape the bowl as needed to make sure the dough is mixing correctly.
- Switch to the dough hook and let your dough mix on medium until a smooth dough forms that pulls away from the sides of the bowl. This can take anywhere from 10 minutes to 20 minutes depending on the mixer, the flour you're using and even the humidity in the air so be patient. It will be a very loose and sticky dough.
- Form it into a smooth ball by gently folding the edges of the dough to the center with a bowl scraper.
- Place the brioche dough into a buttered bowl, edges down, cover with a towel and let it rise in a warm spot for 60 minutes.
- Cover the dough with plastic wrap and refrigerate the dough for two hours or overnight. The longer your dough chills, the easier it will be to handle and the more the flavor will develop. You can chill it up to 48 hours before shaping.
Baking the brioche
- Once the dough is chilled, you can form it into three equal pieces. Roll the pieces out into long strands that are about 1 ½ times as long as your pan.
- Braid the three pieces together and pinch the ends together.
- Tuck the ends underneath and transfer the dough to a 5"x9" ungreased non-stick bread pan. If you use any other non-stick pan, grease the pan first. You can also bake the loaf directly on a sheet pan with some parchment paper, in cupcake pans to make little braided rolls, or even a cake pan.
- Cover the dough to prevent it from drying out and let the dough rise until it doubles in size at 75º-90ºF. This should only take 30 minutes to an hour depending on how warm the environment is. You will know the dough is ready if you gently poke it with your finger and it makes an indent that either stays or only bounces back halfway. If it bounces back immediately then it needs more time to rise.
- Preheat your oven to 375ºF and place the oven rack in the lower half. If your bread is too close to the top of the oven it will get too brown.
- Brush the surface of the loaf with egg wash (one egg whisked together with 1 Tablespoon water) so that it is nice and shiny when it comes out of the oven.
- Bake the brioche until it's golden brown and the internal temperature reads between 180ºF-190ºF. Between 30-45 minutes, start checking the internal temp at 30 minutes.
- Remove the bread from the pan and transfer it to a cooling rack. Enjoy your brioche when it's still a little warm! So good!
Video
Notes
- Make sure your yeast is fresh. If it doesn't double after 45 minutes you might need some fresher yeast.
- Brioche is a very sticky/wet dough. Make sure you mix it for 15-20 minutes to develop the gluten properly
- You only need to chill your brioche dough for 2 hours before you shape it but you can keep it in the fridge for up to 48 hours before you bake it.
- You can bake brioche in so many different types of pans. If it's not non-stick, make sure you grease it first.
- Brush your brioche before you bake it with egg wash for a golden, shiny finish.





Tracie says
It was soooo good! Totally tasted like a buttery croissant.
Angie Phillips says
I was so excited to see you put out a recipe for brioche bread! It’s something I’ve been wanting to make for a long time, but was too intimidated by it. I made it the dough last night and just baked it this morning. It was AMAZING!! Of course, all of your recipes are. I have had more success with your recipes than any others I have tried. You make me feel like I can do anything! Thank you so much for making me a better baker!!
Elizabeth Marek says
Yay!! I'm so glad you liked the recipe! I love brioche bread and have been meaning to make the recipe for years and finally did it!
Abbey W says
the bread was so good! thank you!!!