




This beginners sourdough bread recipe is the one I wish I had when I first started, plain language, a forgiving 80% hydration dough, and a Dutch oven bake that gives you a tall, open crumb on your very first loaf. If you don't have one yet, my sourdough starter guide walks you through making one from scratch in 7 days, or grab some active starter from a friend and bake tomorrow.
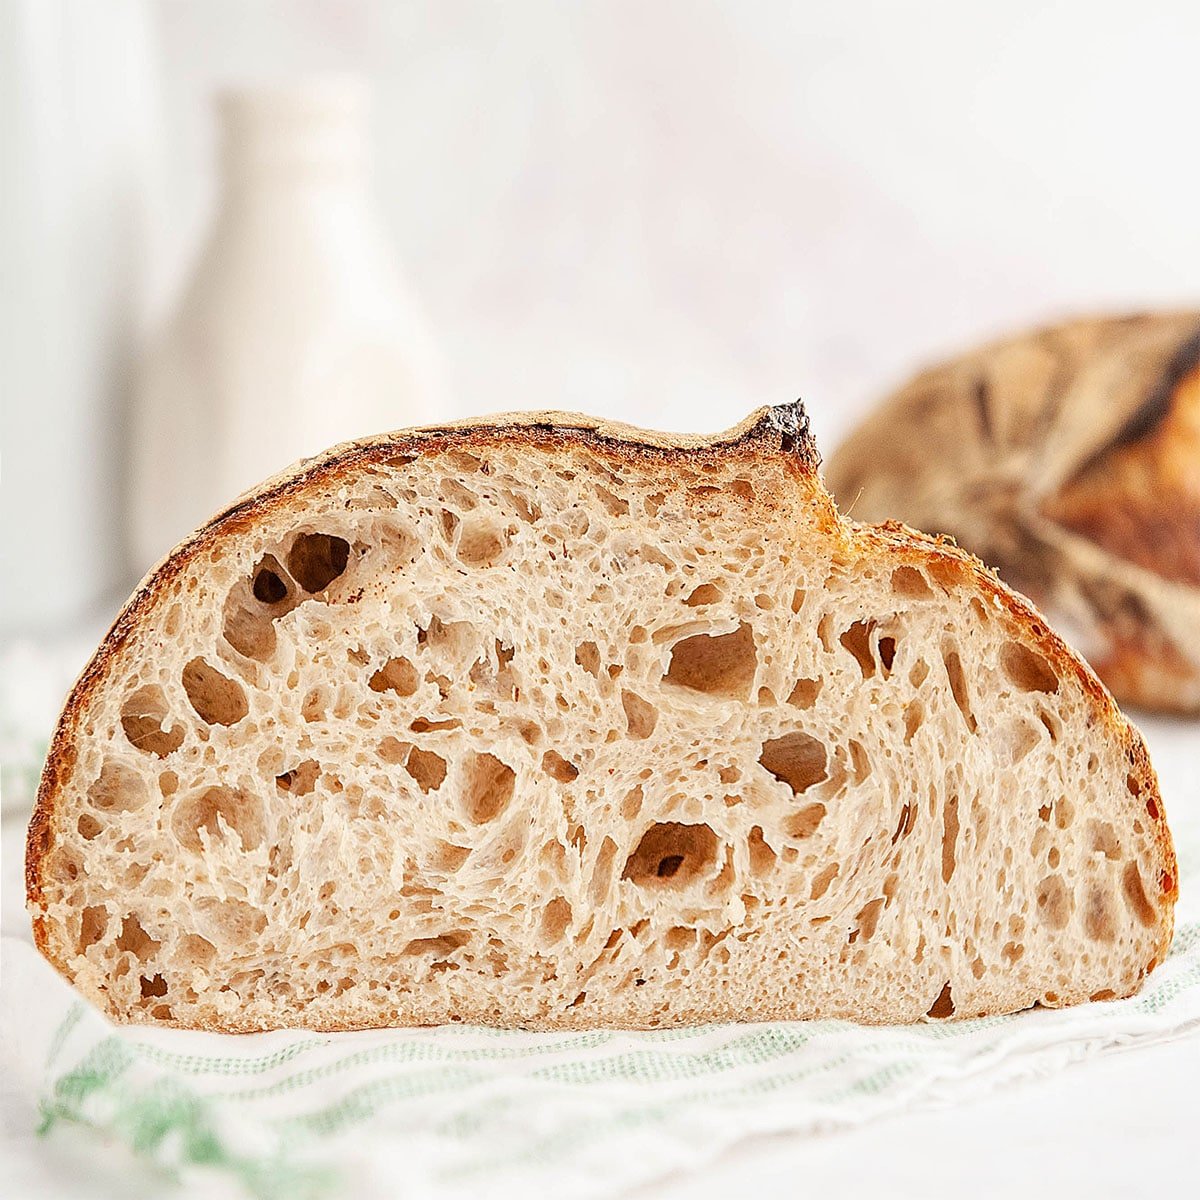
A few months ago I knew nothing about making sourdough. I only knew that I liked to eat it and that I wanted to make it from home. At first, I was horribly overwhelmed by words like "hydration" and "levain." I got a migraine the first day I tried to make sense of a recipe. But like most things, once I actually MADE the sourdough bread, I found the steps to be pretty simple and pretty flexible. The first time I ate a slice of sourdough that I had made from scratch, I almost cried. I haven't bought store bread since. If you've been intimidated by sourdough, this is the recipe that gets you across the finish line
Quick Glance at the Recipe: Beginners Sourdough Bread
- Recipe Name: Beginners Sourdough Bread
- Why You'll Love It: Open crumb, tall loaf, crackly crust, no fancy equipment beyond a Dutch oven and a razor blade. Built for the first-time sourdough baker.
- Time and Difficulty: Easy but slow. About 30 minutes of active work spread across two days, with stretch-and-folds in 60-minute windows on Day 1 and a 12+ hour cold proof overnight. Total time: about 25 hours from levain to slice.
- Main Ingredients: Bread flour, all-purpose flour, whole wheat flour, water, active sourdough starter (levain), salt. Five ingredients.
- Method: Build a levain Day 1 morning, autolyse the flour and water while it rises, mix in the levain and salt, do 3 to 4 stretch-and-folds an hour apart, bulk ferment until doubled, shape and cold-proof overnight in the fridge, bake the next morning straight from the fridge in a preheated Dutch oven.
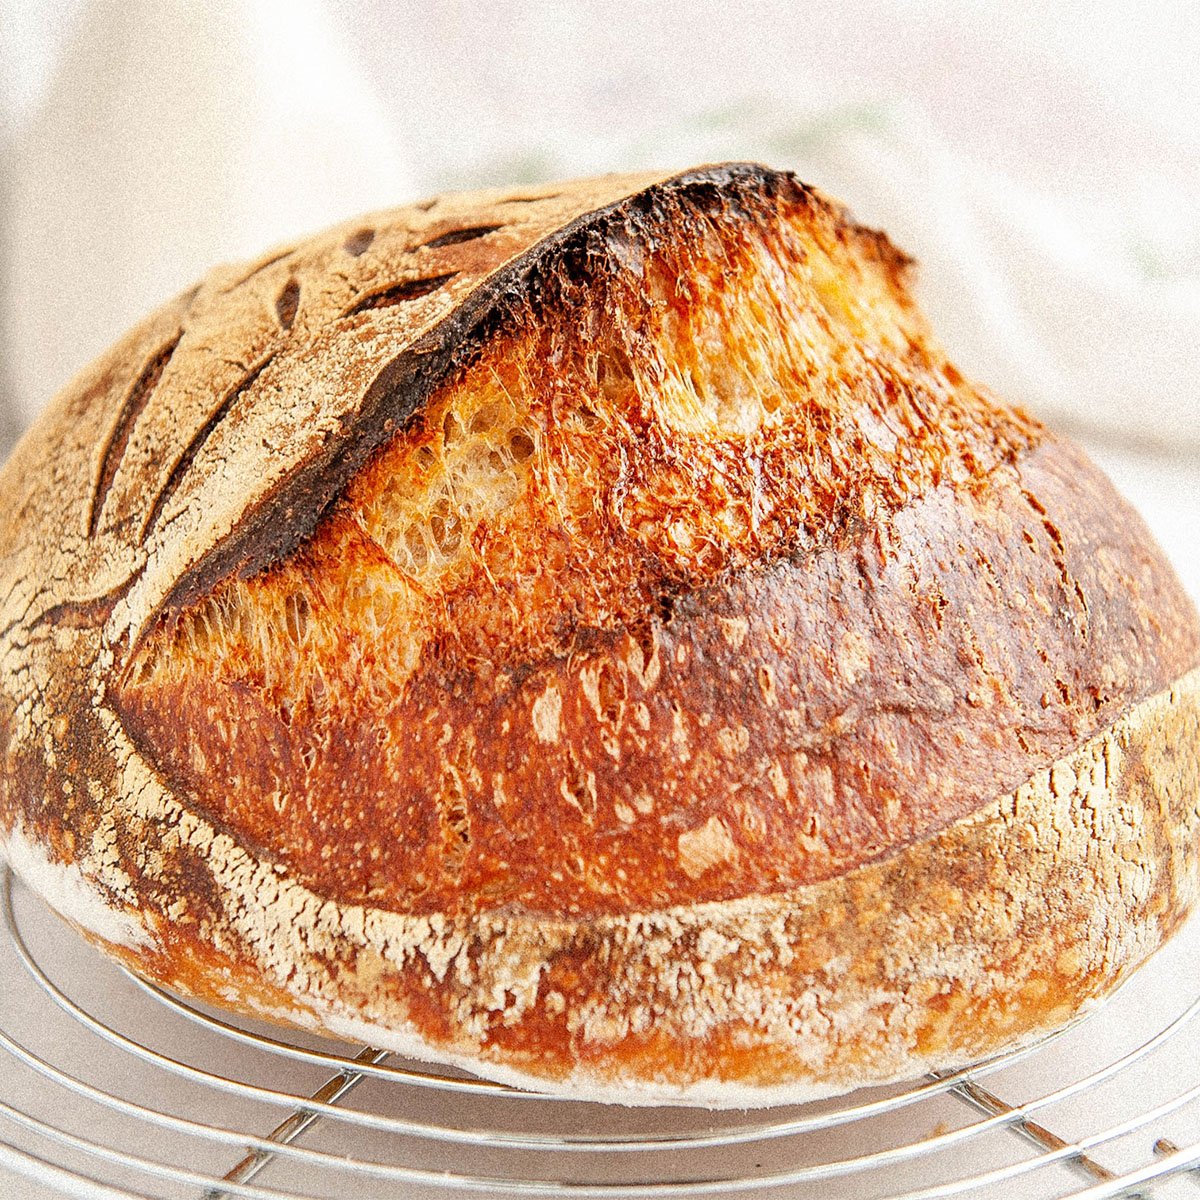
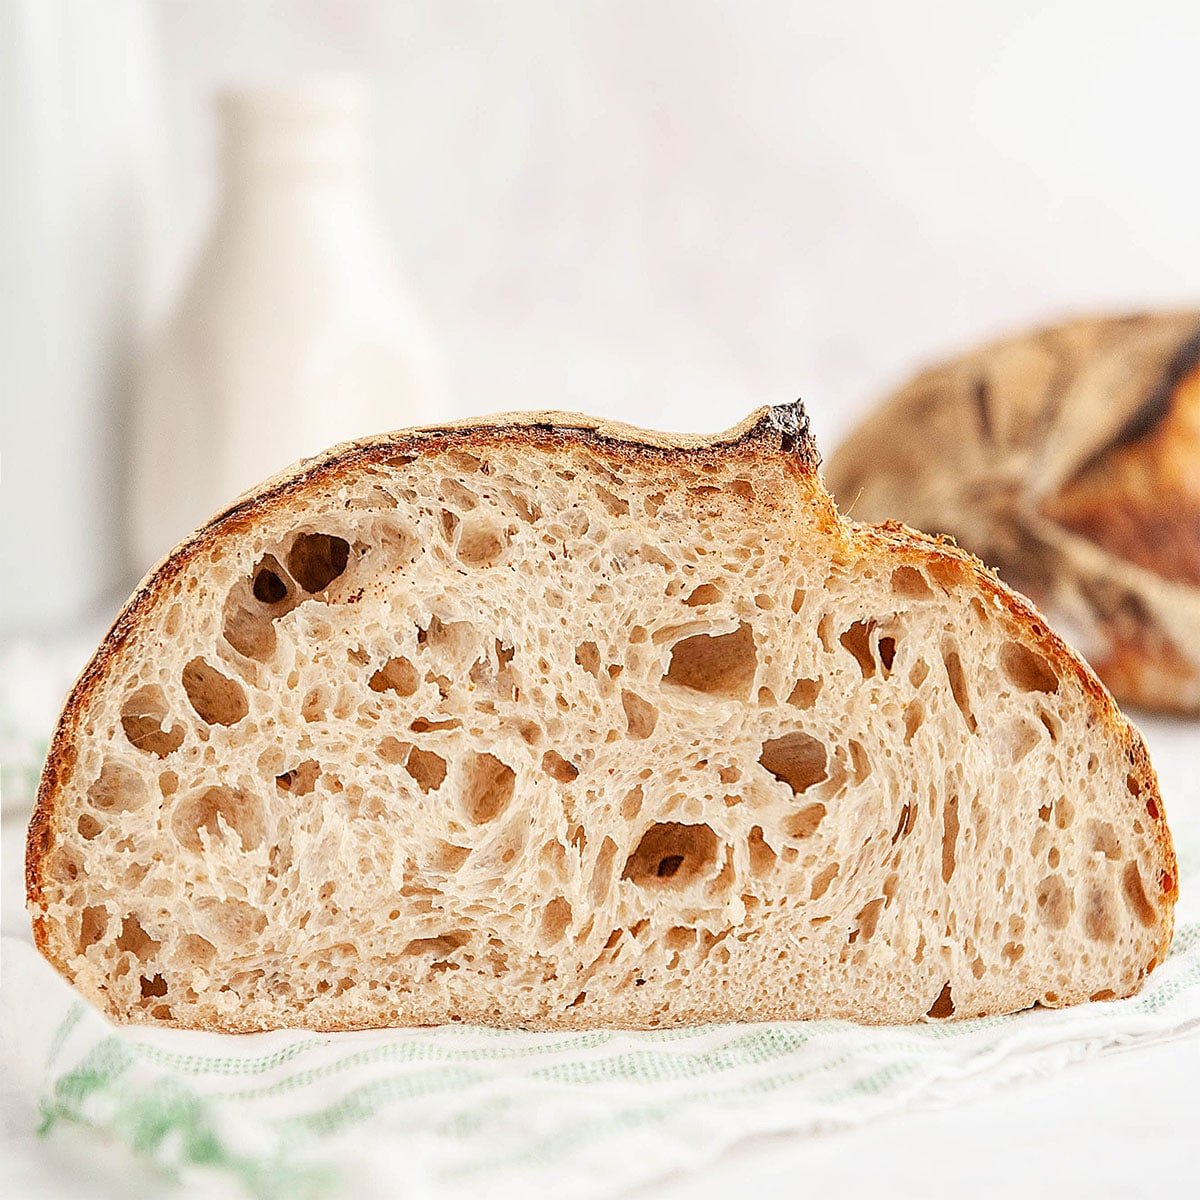
- Texture and Flavor: Crackly amber crust, tender open crumb with irregular holes, mild tang. The longer the cold proof, the sourer the bread.
- Quick Tip: Use your levain at peak rise (when it has doubled and is just about to fall). Past peak and the dough won't rise; before peak and it's underpowered. Pay attention to the levain, the rest is just patience.
Jump to:
- Quick Glance at the Recipe: Beginners Sourdough Bread
- What Is Sourdough Bread?
- What Makes This Beginner's Sourdough Bread So Good
- Beginners Sourdough Bread Ingredients
- Before You Begin
- How To Make Beginners Sourdough Bread Step-By-Step
- Reading Your Dough: When Is Bulk Ferment Actually Done?
- Bulk Ferment Temperature-to-Time Matrix
- Common Sourdough Bread Problems To Avoid
- Crumb Diagnosis: What Your Slice Tells You
- Overproofed Bulk Rescue
- Final Thoughts
- Beginners Sourdough Bread FAQs
- More Sourdough Recipes To Try
- Leave Me A Review⭐️⭐️⭐️⭐️⭐️
- Recipe
What Is Sourdough Bread?
Sourdough is bread that gets its rise from a fermented mixture of flour and water (the starter or levain), instead of from commercial baker's yeast. The wild yeast and bacteria in a sourdough culture produce gas more slowly than packaged yeast, which gives sourdough its characteristic tang, its longer rise times, and the chewy, open crumb you can't get from a same-day loaf.
A few terms worth knowing before you start:
- Sourdough starter. A live culture of flour, water, wild yeast, and lactic acid bacteria, kept alive with regular feedings. See my sourdough starter guide for how to build one.
- Levain. A portion of starter mixed with fresh flour and water and used at peak rise. Technically a starter IS a levain, but in this recipe "levain" means the offshoot you build the morning of bake day.
- Peak. The highest point a levain reaches before it starts to fall back. This is when it's strongest.
- Autolyse. A 30-minute rest where flour and water sit together before salt or levain joins. The flour fully hydrates, which makes the dough easier to stretch later.
- Hydration. The ratio of water to flour. This recipe is about 80% hydration (400g water for 500g flour), which is high for a beginner loaf but makes the stretch-and-fold method work better.
- Bulk ferment. The first long rise, where the dough roughly doubles in size and the yeast does its main work.
- Stretch and fold. How we build gluten in a high-hydration dough without kneading. For the full technique tutorial, see my stretch and fold sourdough guide with the exact 4-set, 30-minute-interval method.
- Cold ferment / cold proof / retard. Overnight rest in the fridge after shaping. Develops flavor and makes the dough easier to score in the morning.
- Scoring. Cutting the loaf with a blade right before baking so it can expand in a controlled way (and so you get that beautiful ear).
What Makes This Beginner's Sourdough Bread So Good
There are dozens of beginner sourdough recipes online and most of them assume you already know something. This one assumes you don't, and the technique choices reflect that:
- 80% hydration, on purpose. Most beginner recipes go 65 to 70% to make the dough easier to shape, but lower hydration makes stretch-and-folds harder and the crumb tighter. The 80% here is a little wet but it forgives mistakes (a wet dough recovers from a missed fold; a dry dough doesn't).
- A blend of three flours. Bread flour for chew, all-purpose for tenderness, and whole wheat for flavor and fermentation activity. You can play with the ratios, but starting with this blend gives you a flavorful first loaf without sourcing specialty flour.
- Levain on the morning of bake day. Many recipes have you build the levain the night before. Doing it the morning of means you can watch it peak in real time, learn what an active starter looks like, and time your bake more reliably.
- A book fold + cinnamon roll shape. The two-step shaping move builds tension on the surface of the loaf so it rises tall instead of spreading flat. This is what separates a "blob" loaf from a "bakery" loaf.
- Cold proof straight from the fridge into the Dutch oven. No tempering, no second room-temp rise. Cold dough scores cleaner and the temperature shock when it hits the hot Dutch oven creates massive oven spring.
Beginners Sourdough Bread Ingredients
Five ingredients, all flour and water. I always recommend weighing your ingredients with a digital kitchen scale for the most accurate results, especially with sourdough where small ratio changes matter.
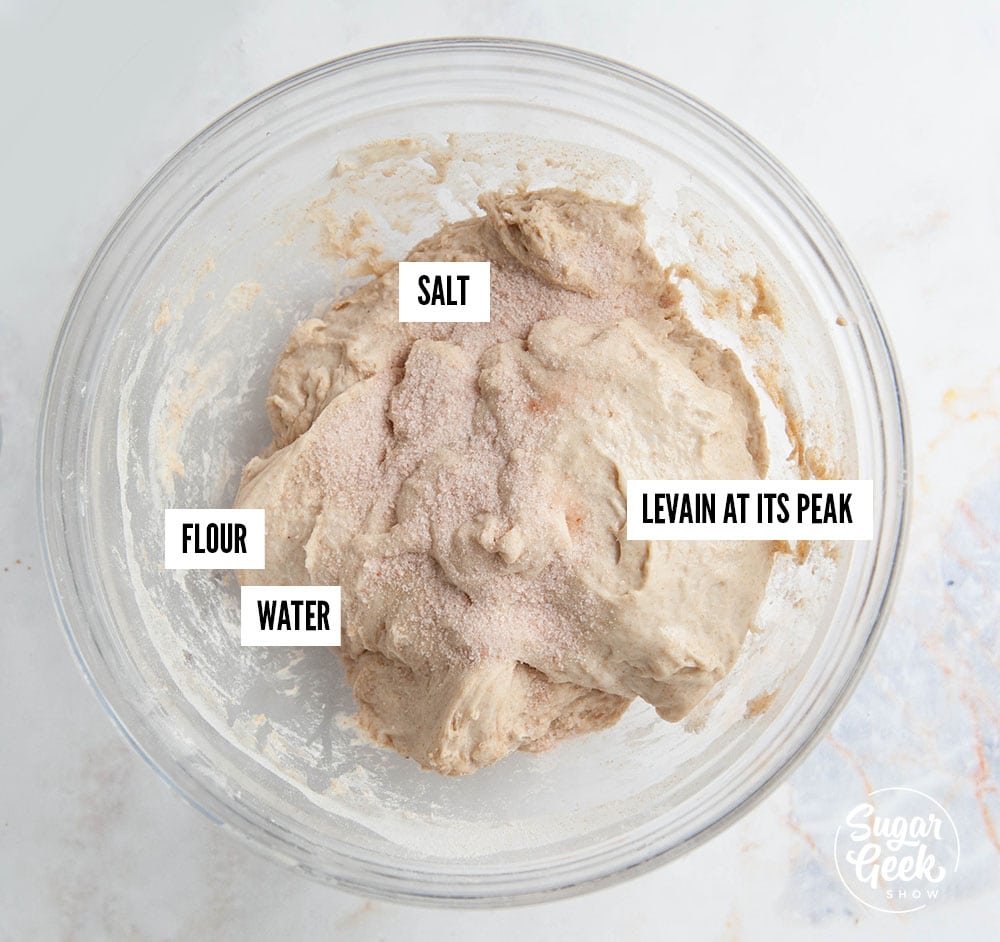
- Mature sourdough starter. Has to be at least 7 days old, doubling in size within 4 to 5 hours of a feed, and active. See my sourdough starter guide for how to build one from scratch.
- Bread flour. Higher protein (about 12 to 13%) than all-purpose. The extra protein builds the gluten network that traps gas and gives you the chewy crumb. I use organic bread flour from King Arthur.
- All-purpose flour. Lower protein than bread flour, adds tenderness to the crumb. You can swap this for more bread flour if you want a chewier loaf.
- Whole wheat flour. Adds flavor, fiber, and feeds the wild yeast more aggressively (whole wheat has more natural yeast on it than refined flour). Spelt or rye works too.
- Water. Any kind, doesn't have to be warm for the dough itself, but warm filtered water (around 90º F) is best for building the levain.
- Salt. I use pink Himalayan sea salt because I like the flavor, but any fine sea salt works. Salt slows the yeast and tightens the gluten, both good things.
Before You Begin
Sourdough is a technique recipe more than an ingredient recipe. Get these set up before you start:
- An active starter. Feed your starter the night before and again the morning you build the levain. If it doubles within 4 hours of a feed, it's strong enough. If it takes longer than 6 hours, give it a few more days of feedings before attempting a loaf.
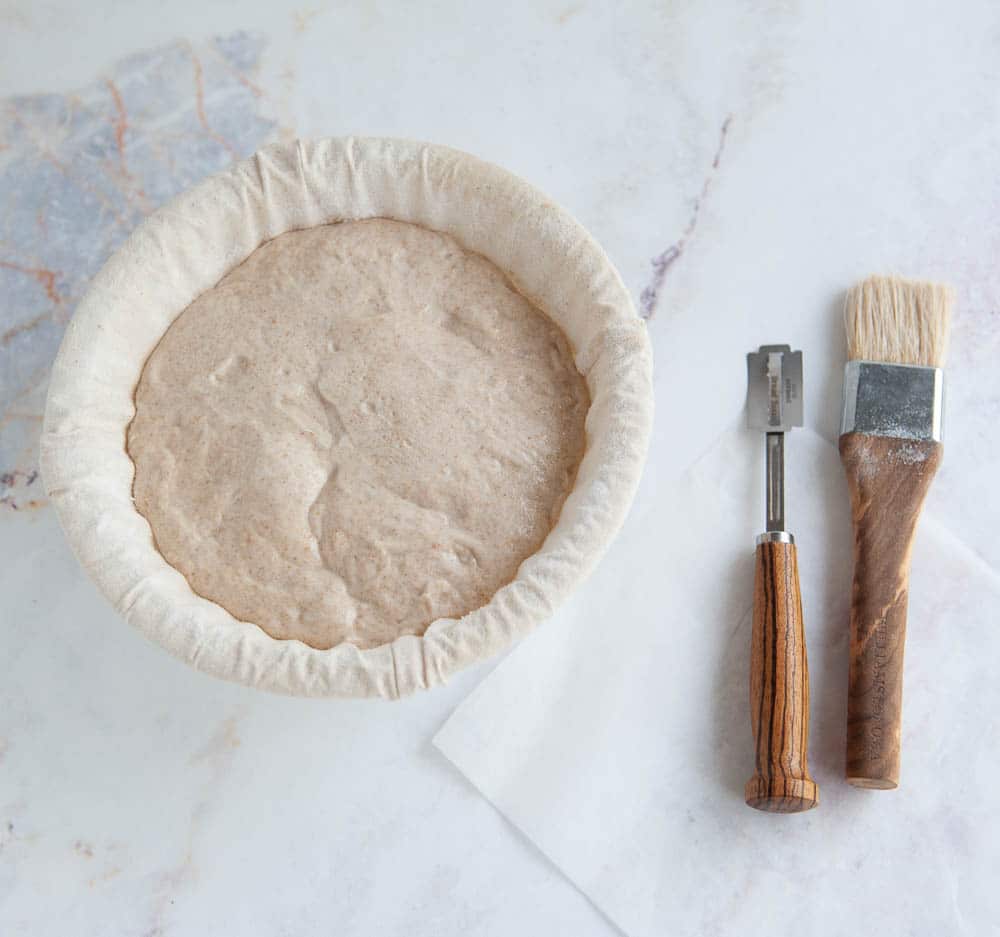
- A Dutch oven (or a workaround). A 4 to 6 quart cast iron Dutch oven is the gold standard because it traps steam around the loaf for the first half of the bake, which is what gives you the tall rise and crisp crust. No Dutch oven? See the Notes section for alternatives.
- A lame, sharp paring knife, or razor blade. For scoring. The blade has to be sharp; dull blades drag the dough.
- A banneton or a bowl + flour-dusted tea towel. Either works for the cold-proof. The point is to hold the shaped loaf so it doesn't spread.
- Parchment paper. Cut a 10x10 inch square. This is what you'll use to lower the loaf into the screaming-hot Dutch oven without burning yourself.
- Time and a quiet weekend. This is a two-day bake. Day 1 has 4 to 6 hours of active windows (mostly waiting between folds). Day 2 is 90 minutes from oven preheat to a cooled slice.
If your sourdough starter won't rise reliably before this bake, my troubleshooting guide covers the 5 most common fixes.
If you want a softer, not-too-tangy daily bread for lunches and toast, my sourdough sandwich loaf bakes in a standard loaf pan with the same starter you built here, no scoring or Dutch oven needed.
Once you've mastered a boule, my homemade sourdough english muffins are the next direction to take your starter, no scoring, no Dutch oven, the whole bake happens on the stovetop.
How To Make Beginners Sourdough Bread Step-By-Step
Before you start, preheat your kitchen if it's under 72º F (oven light on with the door cracked makes a great proofing box). Most of this recipe is waiting; you just need to be home for the hourly fold windows on Day 1 and the bake window on Day 2.
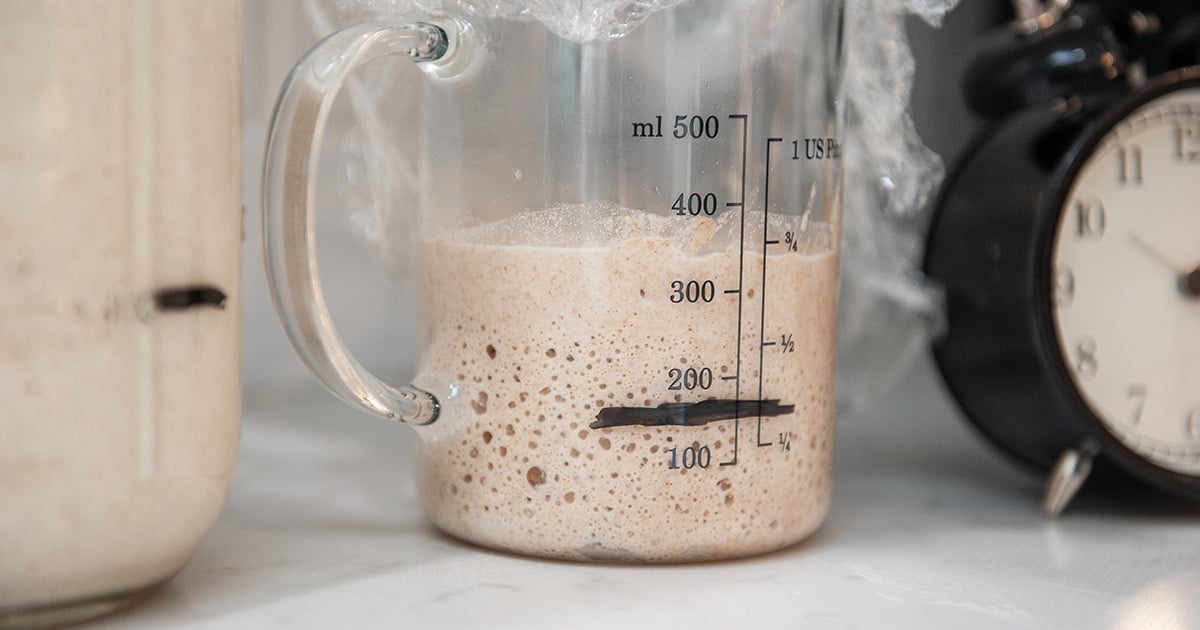
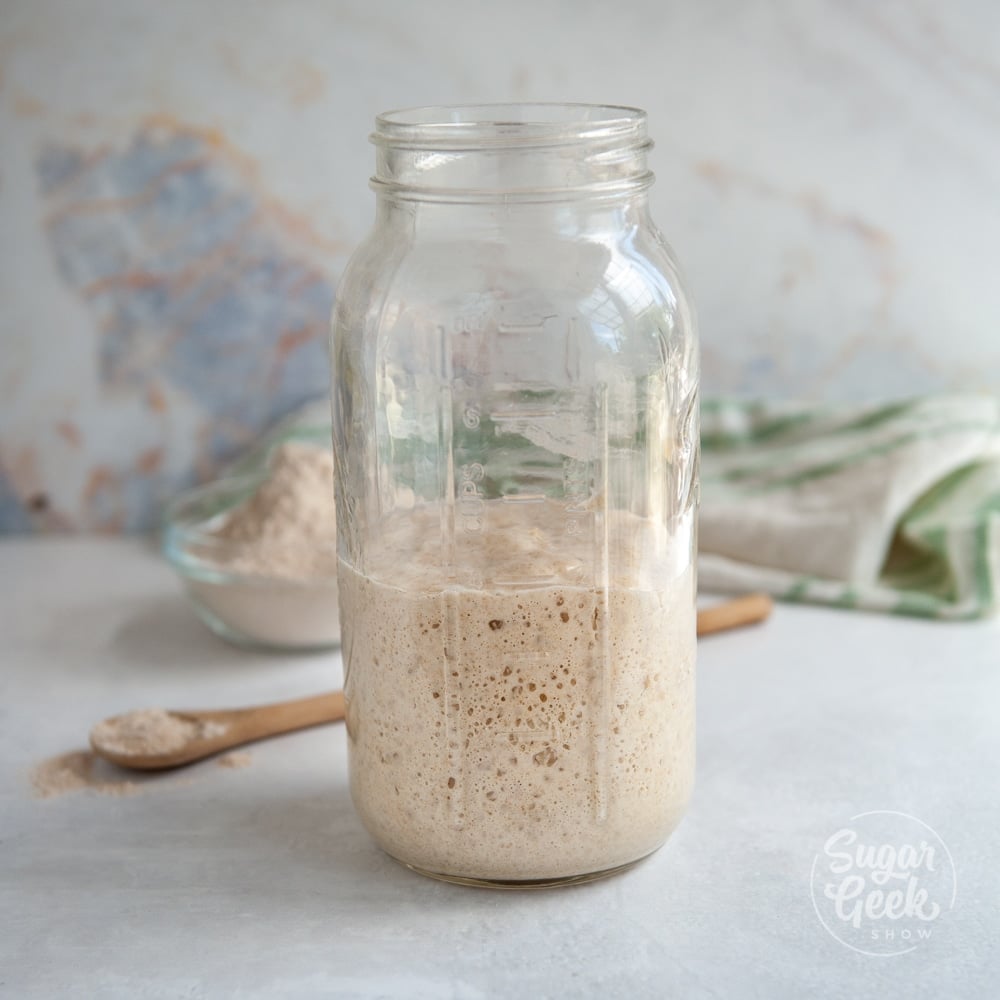
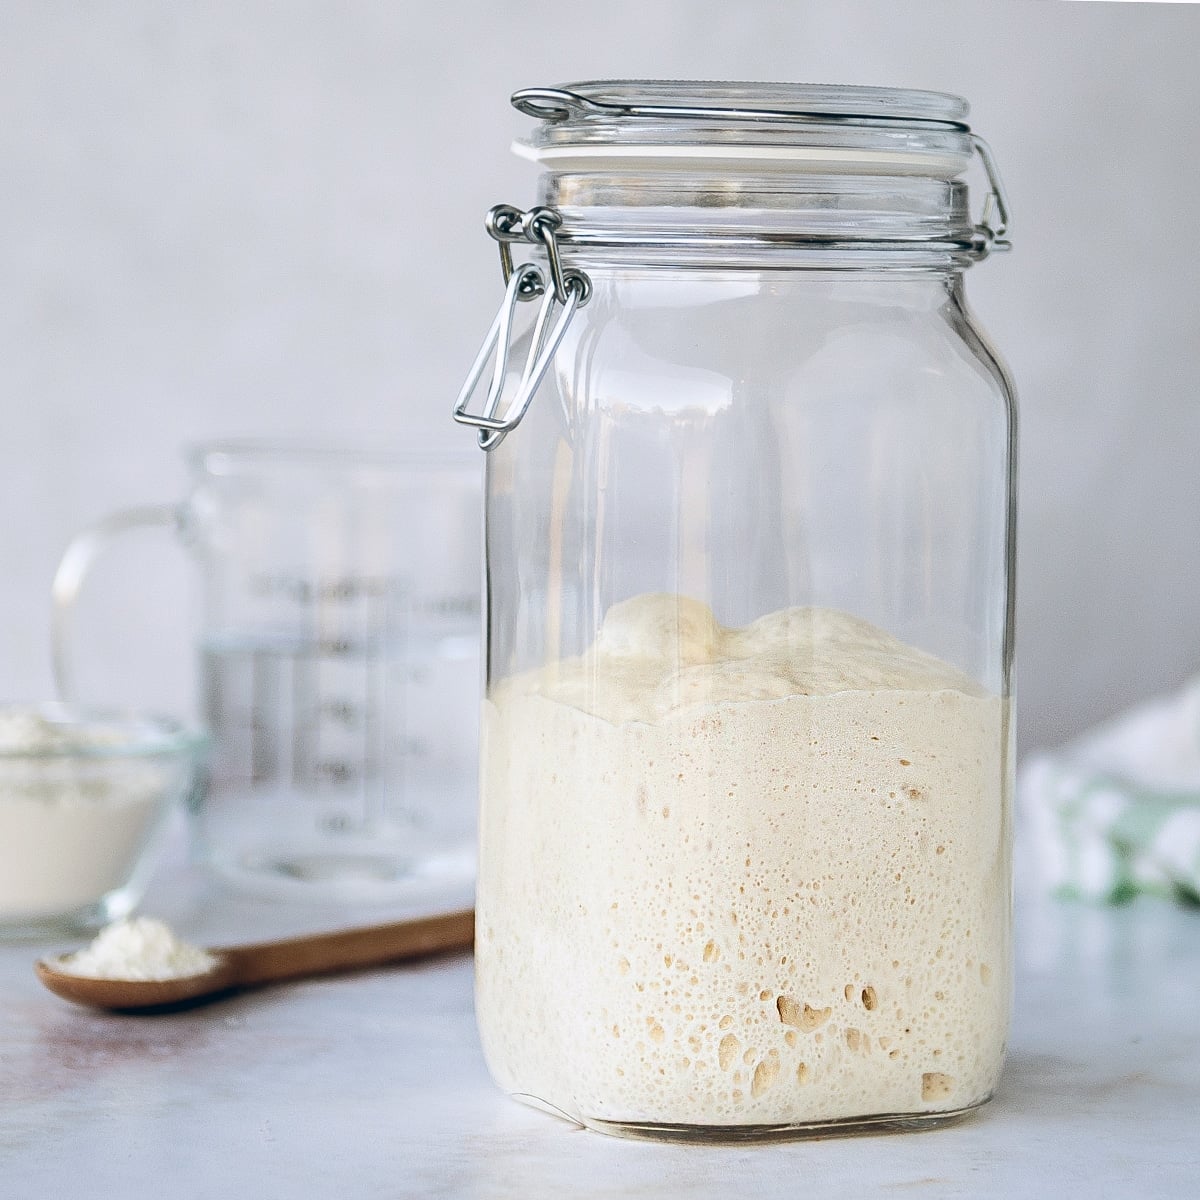
- Day 1: Build the levain in the morning. Combine 50g of your unfed starter with 50g whole wheat flour and 50g warm (90º F) water in a jar. Mark the level with tape. Set in a warm spot (72 to 95º F) until doubled in size, usually 3 to 5 hours.
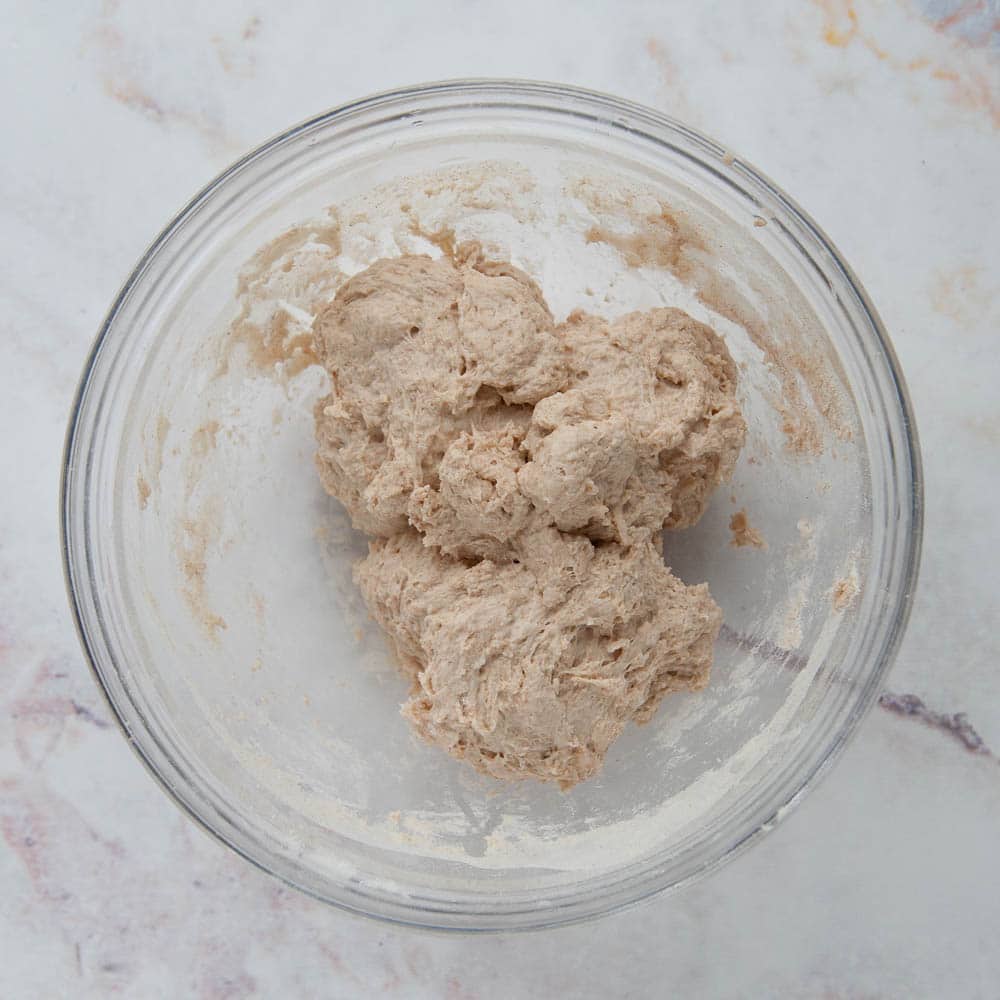
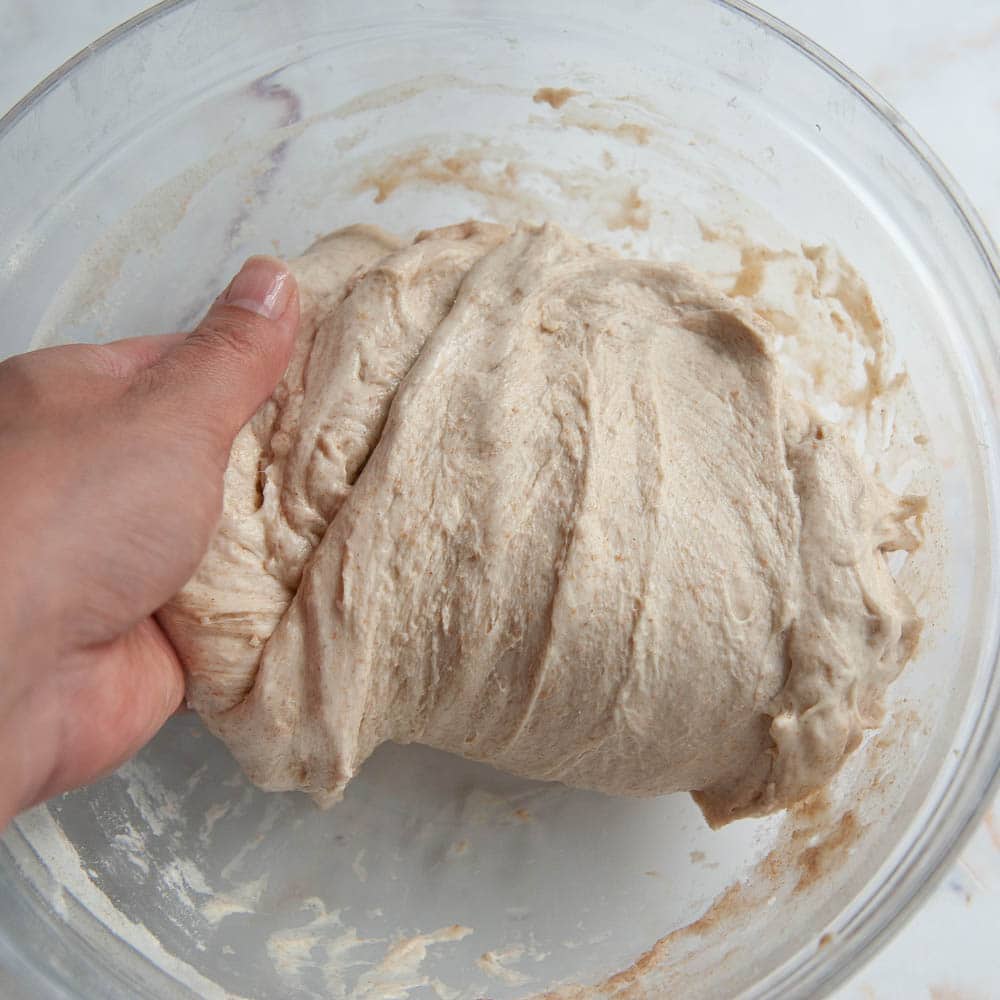
- Autolyse while the levain rises. Combine 300g bread flour, 100g AP flour, 100g whole wheat flour, and 400g water in a large bowl. Mix with your hands until no dry flour remains. Cover and let it sit for the next few hours while the levain peaks.
PRO TIP: Pop the levain in the oven with the oven light on and the door cracked. The light bulb keeps the cavity at a steady 80 to 85º F, perfect for a fast peak. If your kitchen is cold, this is the move.
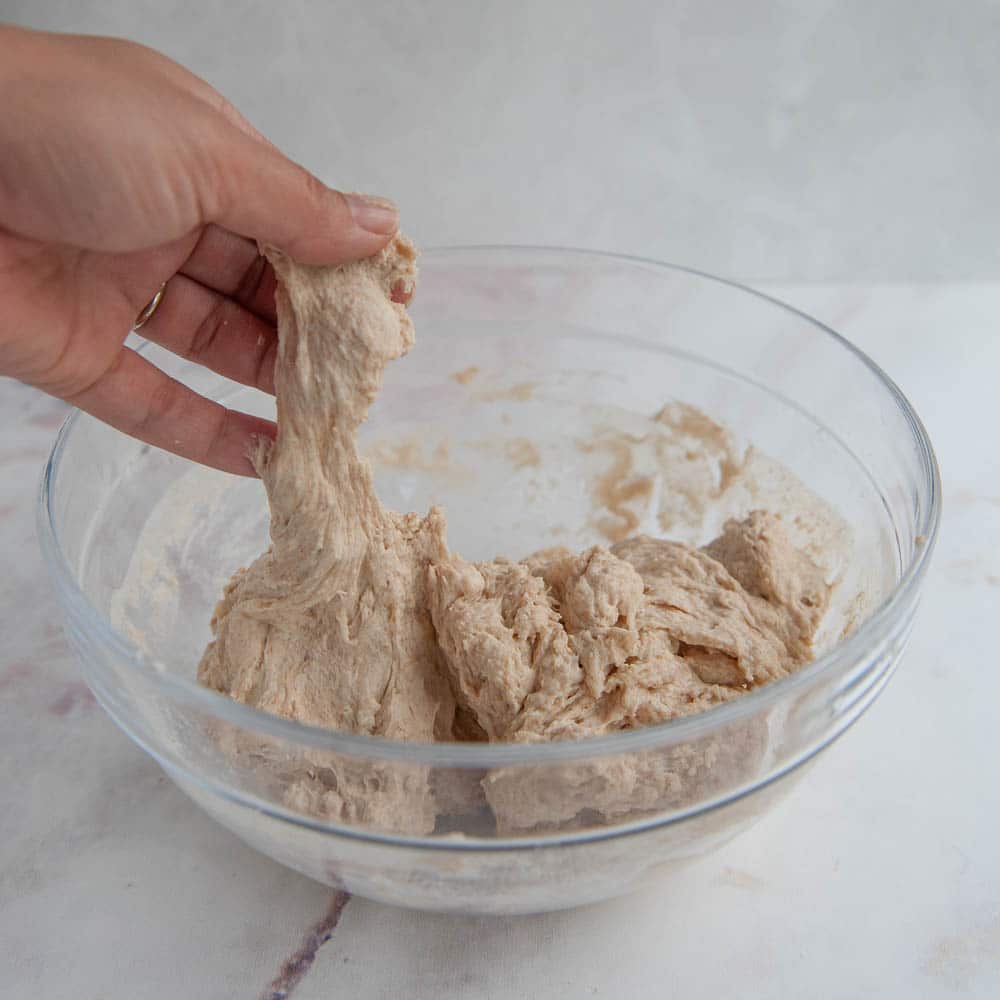
- Mix the dough. When the levain has doubled and floats in water (the float test), scoop 140g into the autolyse bowl. Add 11g salt. Squish, fold, and squeeze with wet hands until the levain and salt are fully incorporated. Cover and rest 30 minutes.
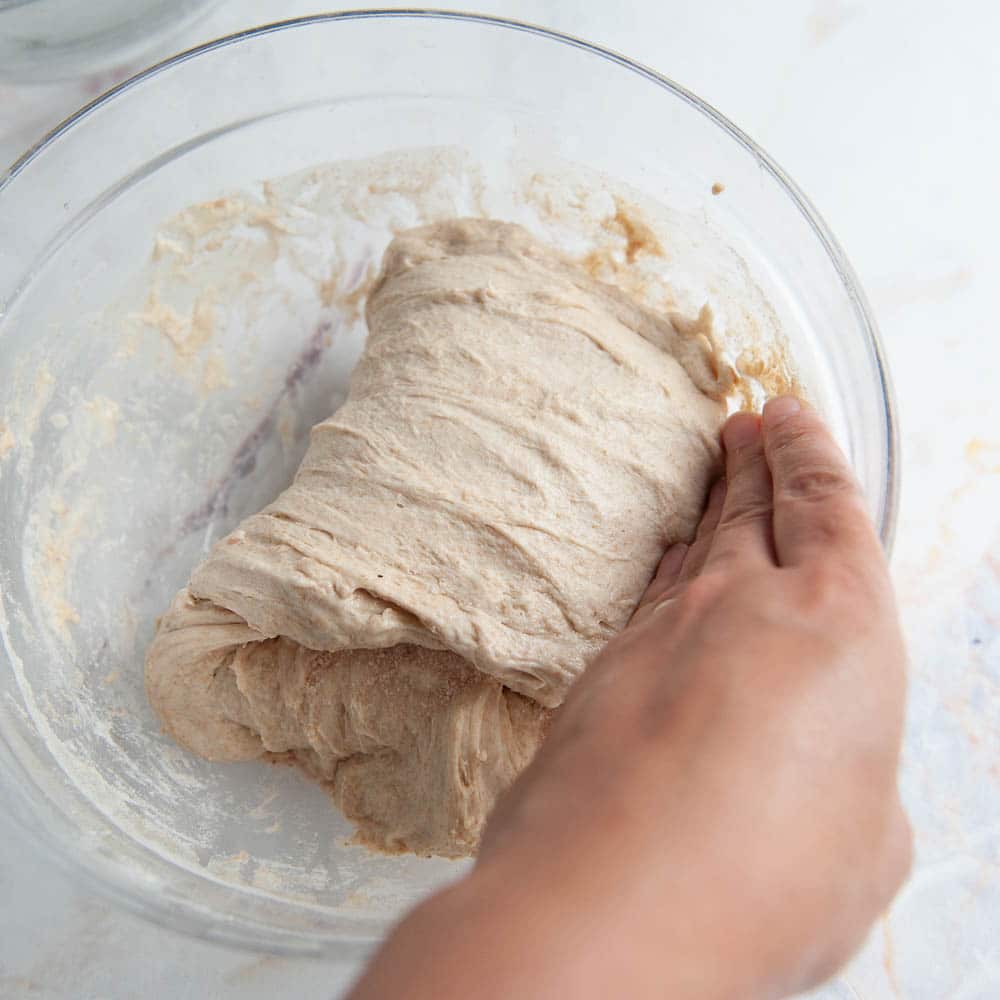
- Stretch and fold, 3 to 4 rounds. Every 60 minutes, wet your hands, pull one side of the dough up until it almost tears, and fold it over the top. Rotate the bowl 45° and repeat on all four sides (that's one round). Cover and wait 60 minutes between rounds. The dough should get smoother and stronger with each round.
PRO TIP: Wet hands every time you touch the dough. This is the single biggest tip for a sticky 80% hydration dough. Dry hands = the dough rips off and sticks to you = frustration.
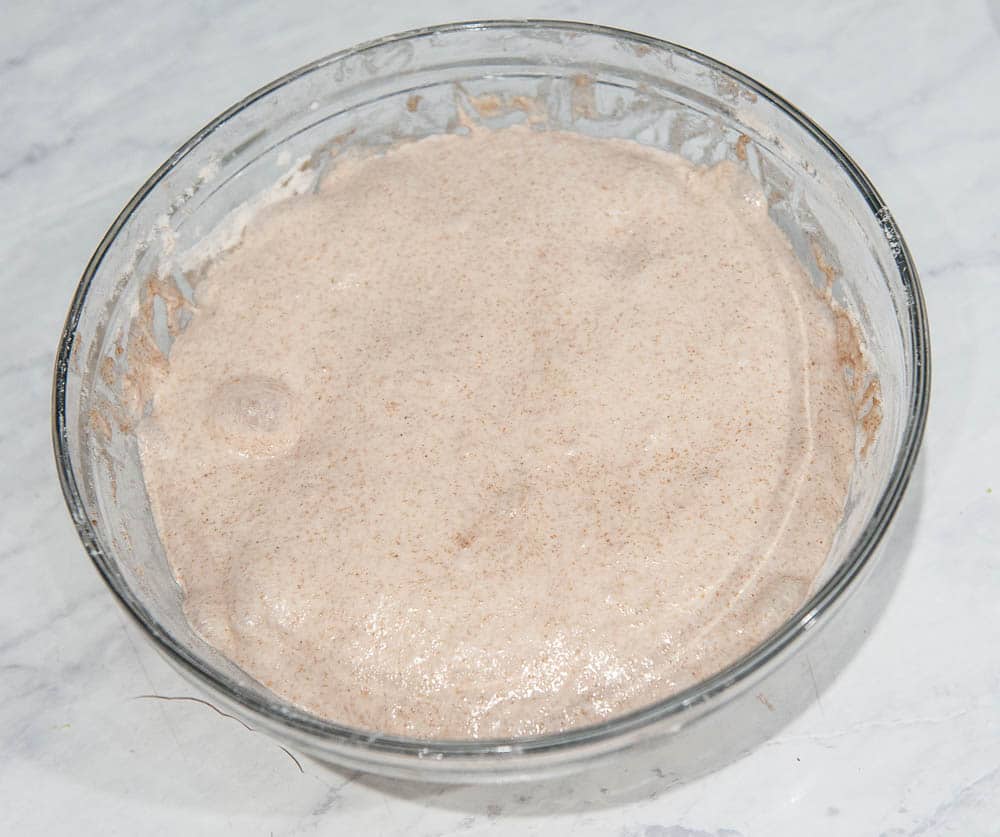
- Bulk ferment until doubled. After your last fold, cover the dough and let it rise until it has clearly doubled in size, looks jiggly, and has bubbles forming on top. This usually takes 1 to 2 more hours in a warm room, longer in a cool one. See the "Reading Your Dough" section below for how to tell when it's actually done.
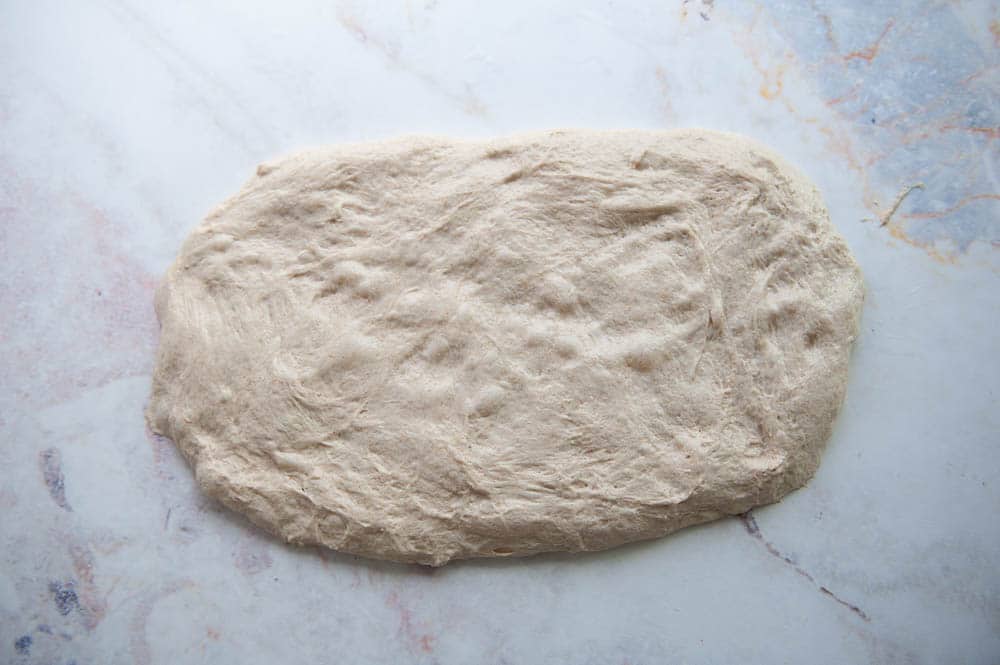
- Shape with a book fold + cinnamon roll. Wet the counter, tip the dough out, pop any big bubbles. Stretch into a rectangle the size of a sheet of paper.
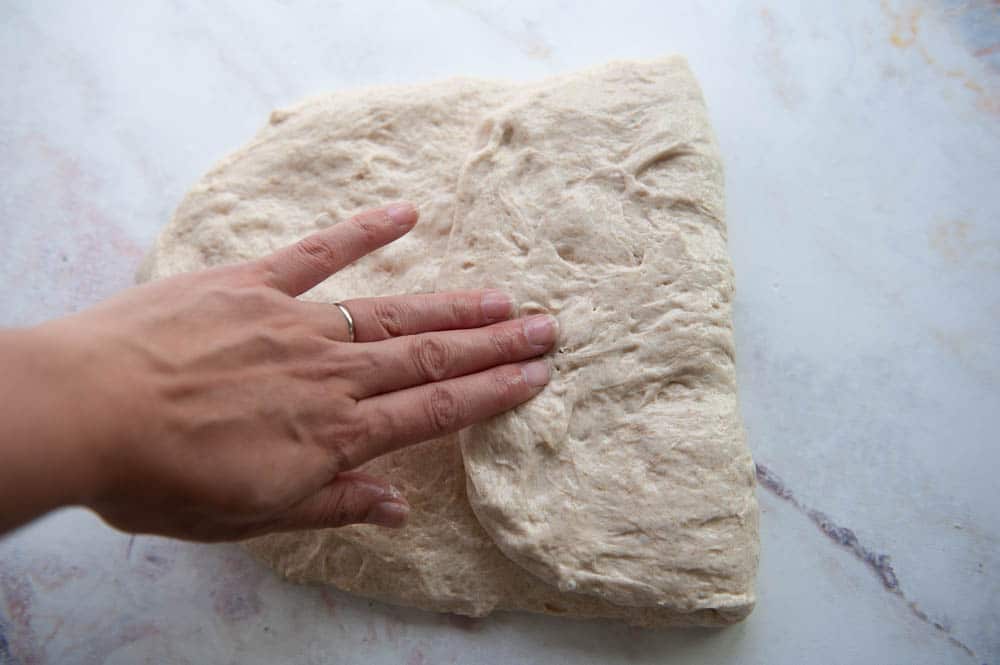
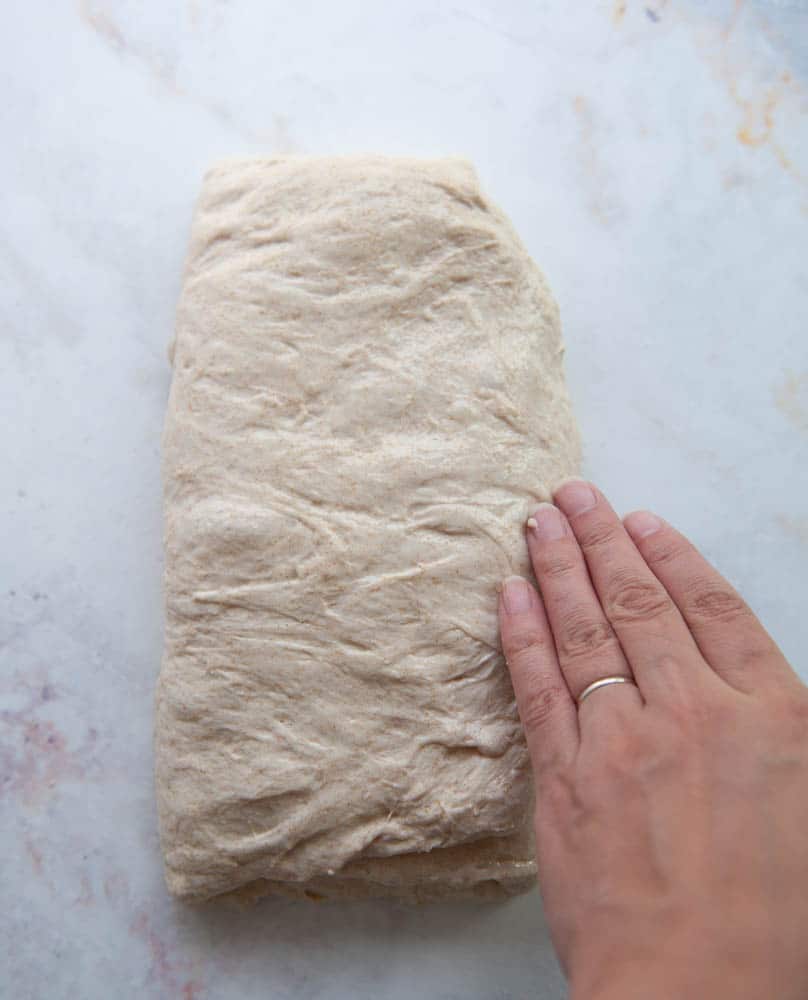
- Fold the right side to the center, then the left side over the top (book fold).
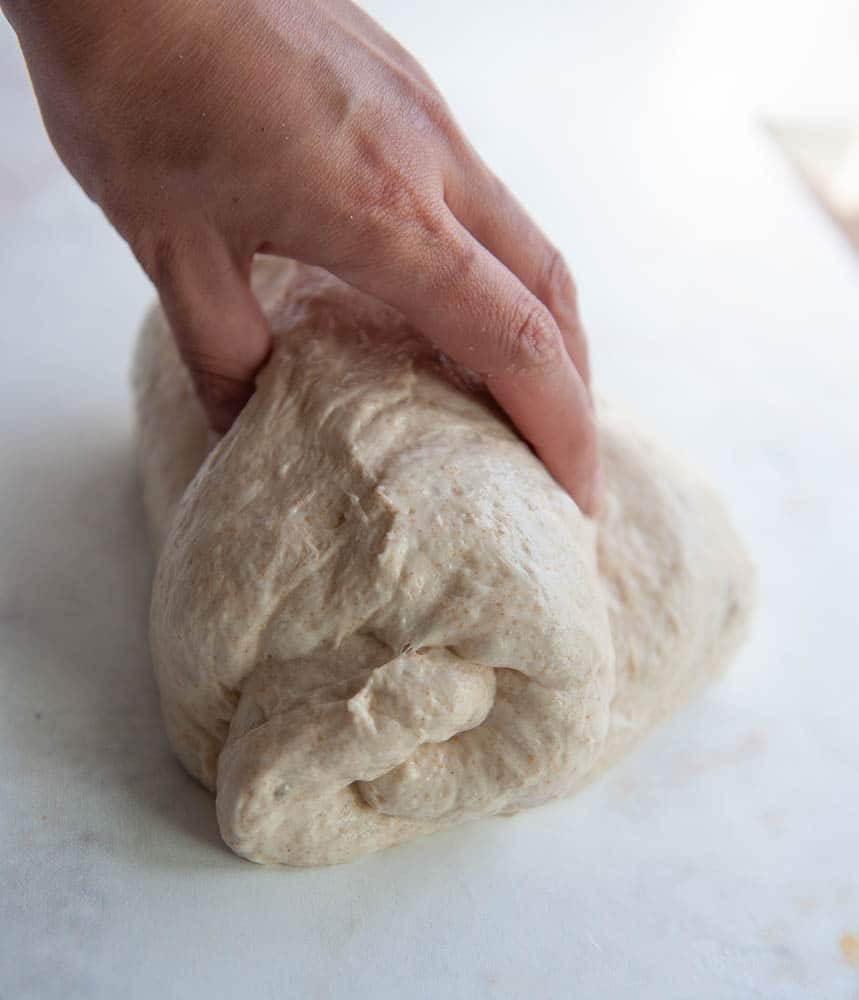
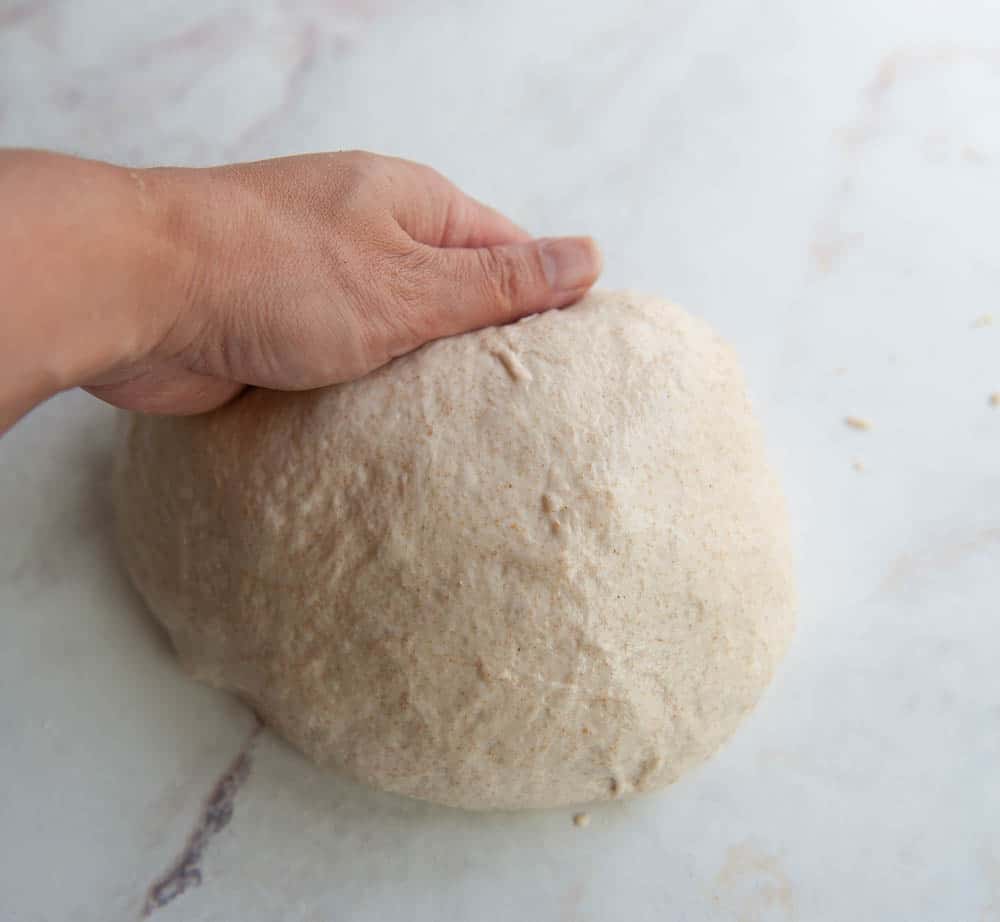
- Rotate 45° and roll up like a cinnamon roll, seam side down. Pinch the seams closed.
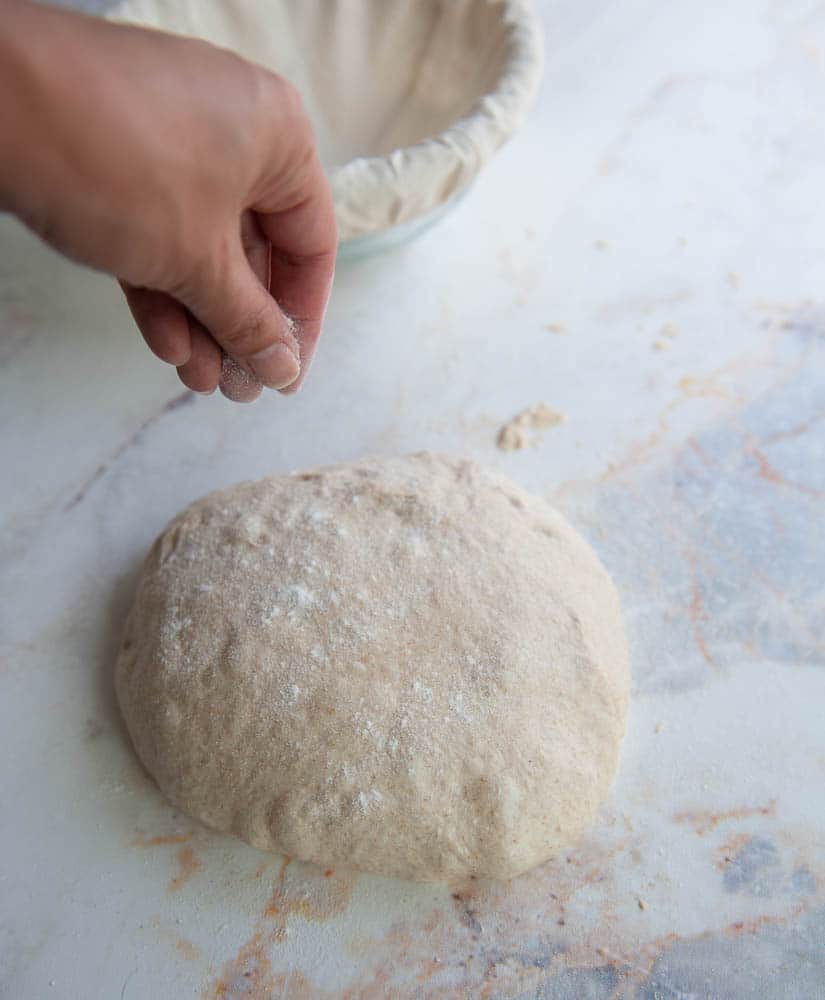
- Bench rest 15 minutes, then final shape. Cover with the bowl and let the dough relax for 15 minutes. Flip seam-side-up, gather all the edges into the center and pinch them tight, then lift the shaped loaf into a floured banneton (or a flour-dusted tea towel in a bowl).
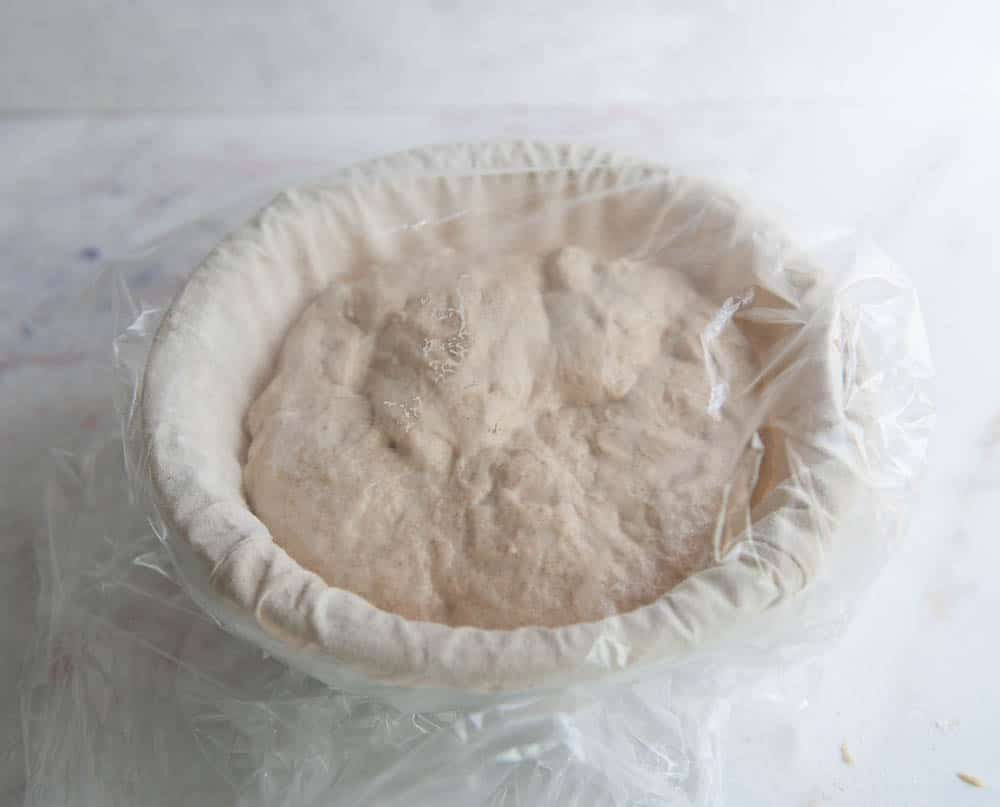
- Cold proof overnight. Slide the banneton into a plastic bag (or cover loosely) and put it in the fridge for 12 to 24 hours. The dough won't rise much in the cold but the flavor develops dramatically. The longer the cold proof, the more sour the bread.
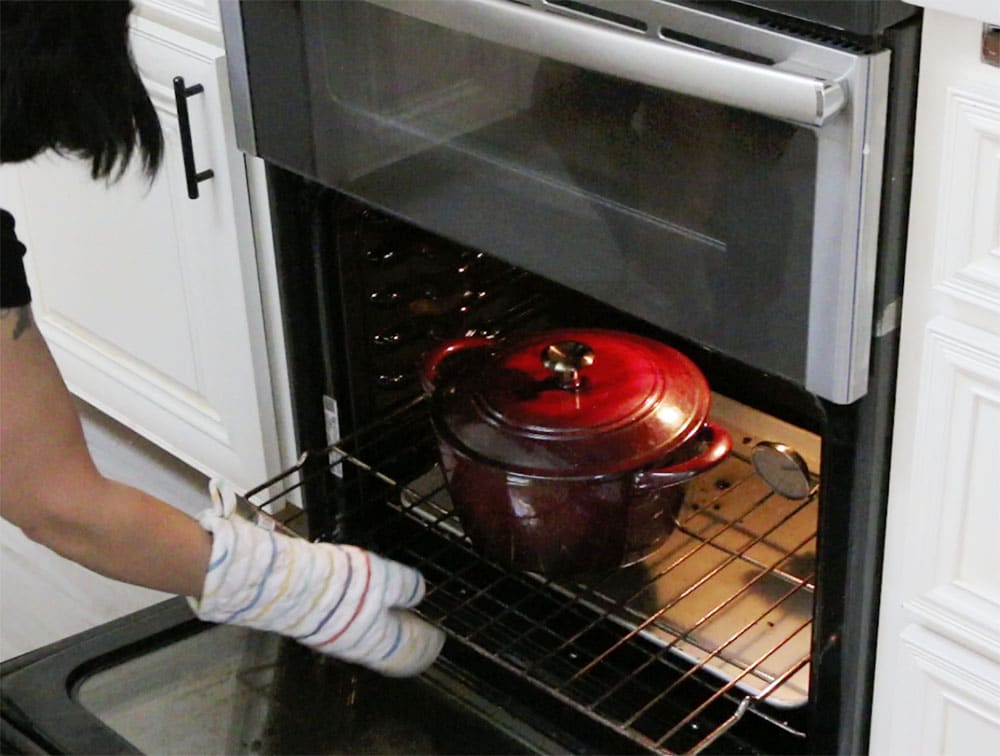
- Day 2: Preheat the oven and Dutch oven to 500º F. Put the Dutch oven (with the lid) on the middle rack and a sheet pan on the bottom rack (the sheet pan acts as a heat shield so the bottom doesn't burn). Preheat at least 30 minutes.
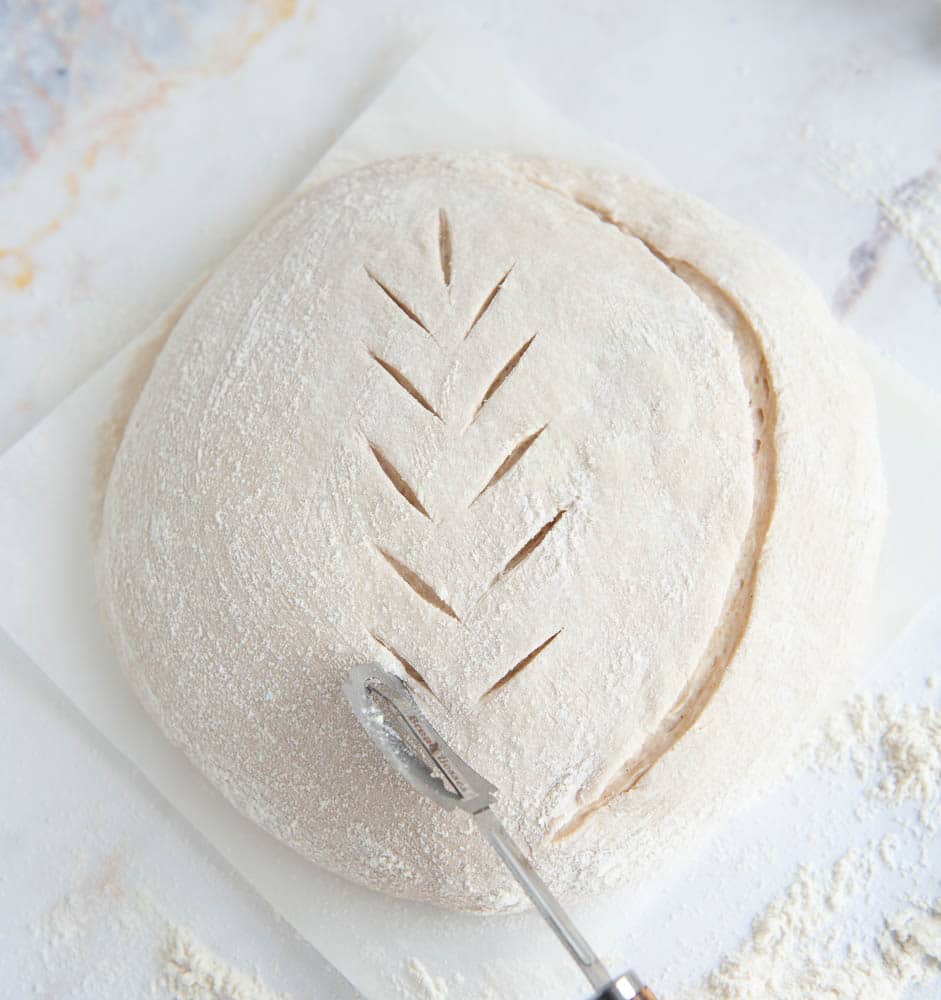
- Score the cold dough. Cut a 10x10-inch parchment square. Pull the banneton out of the fridge, lay the parchment on top, flip the basket over, and gently lift the basket off. Brush off excess flour. Use a lame or sharp blade to cut a deep "C" on one side, ¼ to ½ inch deep. Add decorative shallow scoring on the other side if you want.
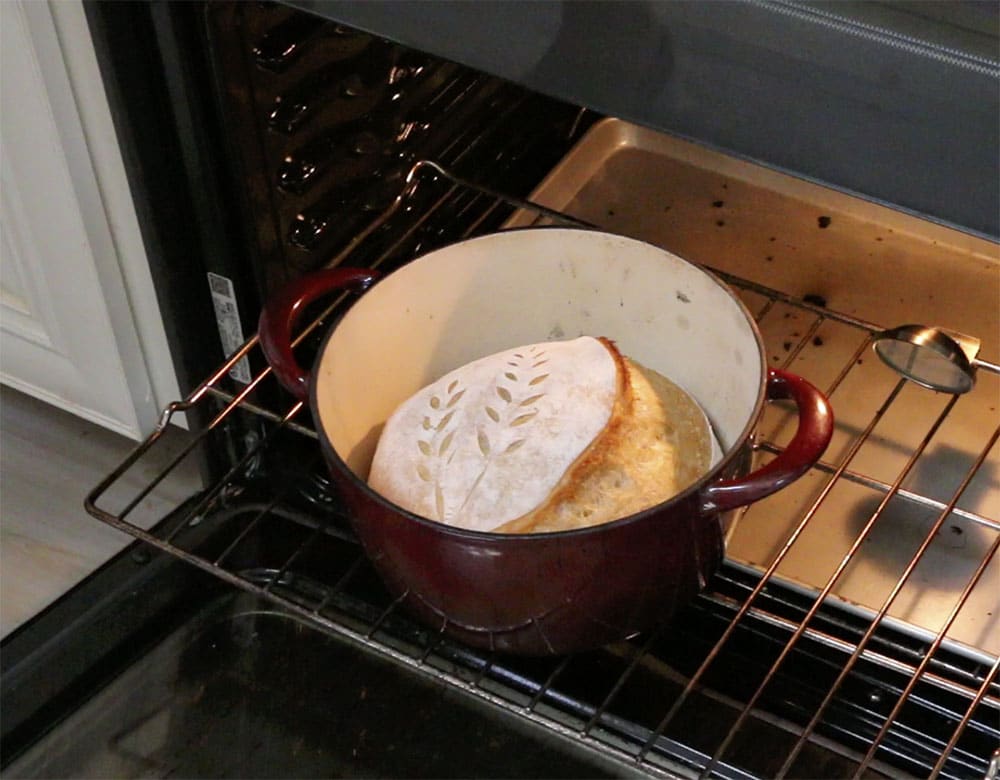
- Bake covered, then uncovered. Lift the parchment by the corners and lower the loaf into the hot Dutch oven. Put the lid on, reduce oven to 450º F, bake 30 to 40 minutes covered. Remove the lid and bake another 20 to 25 minutes uncovered until the crust is deep amber and the internal temperature reads 205 to 210º F on an instant-read thermometer.
- Cool fully before slicing. Lift the loaf onto a wire rack. Wait at least 1 hour (2 is better) before cutting. Sourdough finishes baking as it cools; cutting hot gives you a gummy interior even on a perfectly baked loaf.
Mix-ins
Add these at the salt-mixing stage (step 3 of the recipe) so they get folded in evenly:
- 100g crumbled aged cheddar + 1 teaspoon dried rosemary
- 1 cup chopped Kalamata olives + 1 teaspoon lemon zest
- 100g toasted walnuts + 50g dried cranberries
- 2 teaspoon everything bagel seasoning + 2 tablespoon toasted sesame seeds
Scaling
This recipe makes one 8-serving loaf. To make two loaves, double everything and divide the dough after the bulk ferment for the shaping step. A standard 4 to 6 quart Dutch oven holds one loaf comfortably; you'll need two Dutch ovens or two bake sessions for a double batch.
Reading Your Dough: When Is Bulk Ferment Actually Done?
This is the part 95% of beginner failures come from. The recipe says "bulk ferment until doubled," but "doubled" is harder to see than you think. Here's what to actually look for:
- The volume test. The dough should be visibly bigger, ideally 1.5x to 2x its starting size. Mark the starting level on the side of the bowl with a piece of tape so you can compare.
- The dome test. A finished bulk ferment domes upward. Underproofed dough is flat across the top; overproofed dough is concave (sunken in the middle).
- The bubble test. Look at the surface. You should see at least a few small bubbles popping through. No bubbles = underproofed. A surface full of huge bubbles = overproofed.
- The jiggle test. Tip the bowl side to side gently. Ready dough wobbles like a thick jello; underproofed dough barely moves; overproofed dough sloshes loosely.
- The poke test. Wet your finger and poke the dough about ½ inch deep. The dimple should spring back slowly (5 to 10 seconds), not snap back instantly (underproofed) and not stay sunken (overproofed).
- The pull-away test. Look at the edges of the dough where it meets the bowl. Ready dough has started to pull slightly away from the sides; underproofed dough is still smushed against the wall.
When in doubt, slightly underproof rather than overproof. You'll get more oven spring on an underproofed loaf than on an overproofed one. An overproofed bulk is much harder to recover from (see the Rescue section below).
Bulk Ferment Temperature-to-Time Matrix
Sourdough rises at the speed of your kitchen. Here are realistic windows from "dough finished mixing" to "ready to shape":
| Kitchen / Dough Temp | Bulk Ferment Time |
|---|---|
| 65º F (cool kitchen, winter) | 8 to 12 hours |
| 70º F (average kitchen) | 6 to 8 hours |
| 75º F (proofing box / oven with light on) | 4 to 6 hours |
| 80º F (warm summer kitchen) | 3 to 5 hours |
| 85º F (proofing box on high) | 2 to 4 hours |
Use these as starting estimates only. Watch the dough, not the clock. The volume and dome tests above always beat the timer. If your kitchen swings 10° during the day (heating cycles, sunny afternoons), the dough is responding to that.
PRO TIP: get the timing right when feeding your sourdough starter, then use the discard to make delicious sourdough pancakes or pikelets! A great way to start the morning and minimize food waste.
Common Sourdough Bread Problems To Avoid
- Bread is flat and didn't rise. Underdeveloped starter, underproofed bulk ferment, or weak gluten from skipping folds. Verify your starter doubles in 4 hours, do all 3 to 4 stretch-and-folds, and let the bulk go until the dough has actually doubled.
- Crumb is dense and gummy. Either underbaked (pull the internal temp test, should be 205 to 210º F) or sliced too hot (wait at least 1 hour to cool). Underbaked is the more common one.
- No oven spring, loaf came out short and dense. Overproofed bulk ferment, weak scoring, or you didn't preheat the Dutch oven long enough. The dough needs the temperature shock against the screaming-hot pot to get the oven spring.
- Crust burned, inside underdone. Oven too hot, or the Dutch oven was on a low rack. Move the Dutch oven to the middle rack and add a sheet pan below as a heat shield.
- Loaf spread flat after coming out of the banneton. Underproofed (gluten not developed) or weak final shape. Pinch the seam tight and use the book-fold + cinnamon-roll combo to build surface tension.
- Sour flavor too weak. Short cold proof. Stretch the cold proof to 36 to 48 hours for a more sour loaf. Whole wheat in the blend also intensifies the tang.
- Score didn't open, loaf burst from the side. Score was too shallow, or scored at the wrong angle. Cut at a 45° angle and at least ¼ inch deep for the main expansion score.
Crumb Diagnosis: What Your Slice Tells You
Cut the cooled loaf open and look at the crumb. The pattern of holes tells you exactly what went wrong (or right):
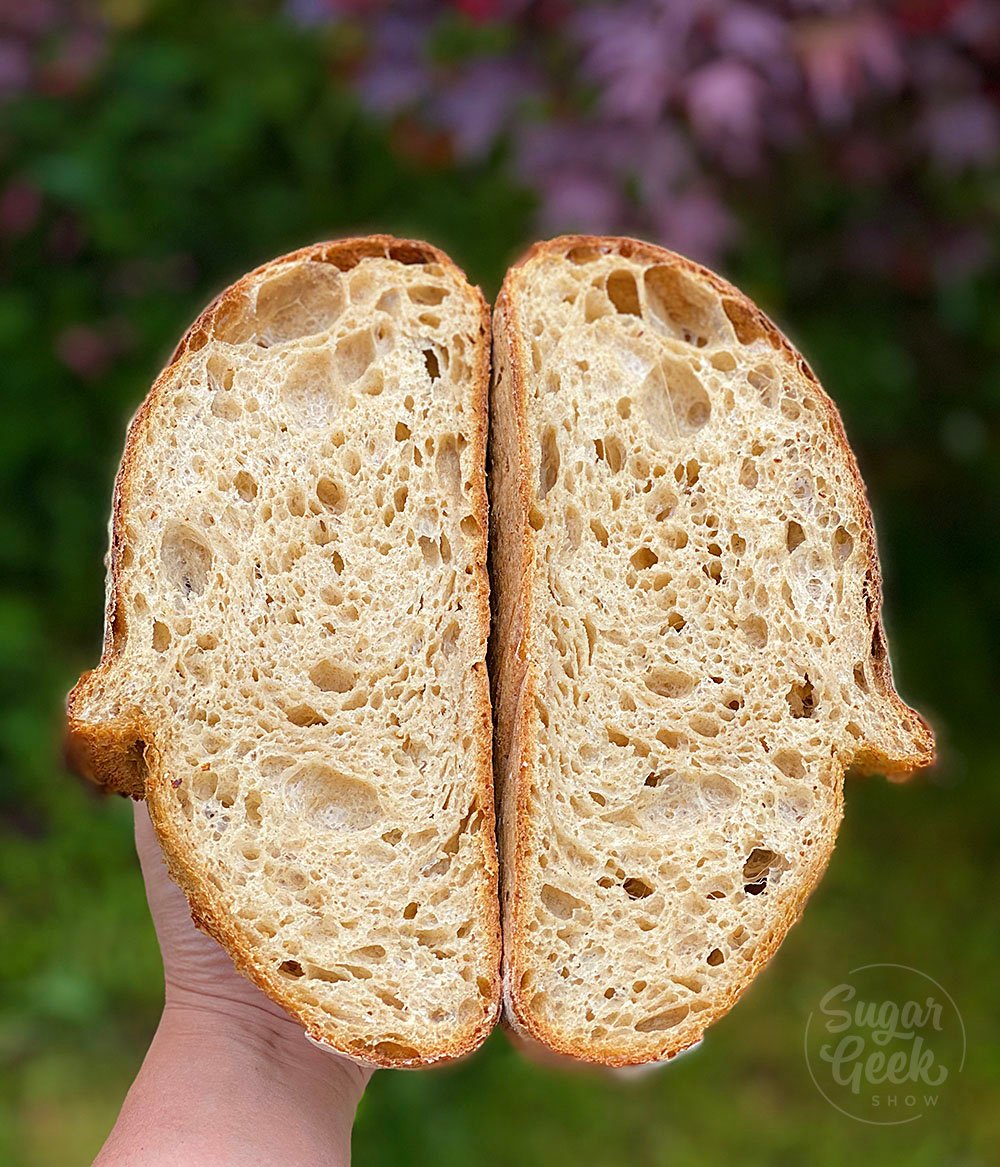
- Tight, even crumb with very small holes. Underproofed. The yeast didn't have enough time to produce gas. Next time, let the bulk ferment go longer.
- Uneven crumb with a few giant holes near the top and dense bottom. Overproofed or under-shaped. The gluten gave out, and the gas migrated. Reduce bulk ferment time or improve your shaping with a tighter cinnamon-roll roll.
- Wet, gummy streak through the middle. Underbaked OR sliced too hot. Bake to 205 to 210º F internal and cool 1 to 2 hours before slicing.
- Beautiful open crumb with irregular holes throughout. You nailed it. The dough was properly proofed, well-shaped, and baked to temperature.
- Crumb is dry and crumbly. Overbaked (took too long uncovered) or the hydration was too low. Reduce uncovered bake time by 5 minutes next round.
- Loaf is dense but flavor is sour and great. Starter was active but the dough underproofed. The flavor came through but the rise didn't happen.
Overproofed Bulk Rescue
If you walk into the kitchen and find your bulk ferment has clearly gone past doubled (the dough is sloshing, bubbly all over, and concave on top), you have three options:
- Save it as focaccia. Pour the over-fermented dough into an oiled 9x13 pan, dimple it, drizzle with olive oil and flaky salt, let rest 30 minutes, bake at 450º F for 20 minutes. Focaccia is the perfect rescue because it doesn't need oven spring or scoring. (You already know this technique from my lemon blueberry sourdough focaccia.)
- Bake it flat as a "rustic" loaf. Shape gently (don't expect oven spring), cold-proof for only 2 to 3 hours instead of overnight, then bake. You'll get a denser loaf but still slicable.
- Restart. If the dough has gone really far past (smells acidic and tears like wet tissue), the gluten has degraded and there's no real saving it. Restart and let it be a learning moment.
Final Thoughts
The first time I ate sourdough bread I had made from scratch, I almost cried. There is something about pulling a tall, crackly-crusted loaf out of a Dutch oven that you mixed by hand the day before that hits different than any other baking project. We haven't bought store-bought bread since. Sourdough takes time, but almost none of that time is active work. The dough does the work; you just need to be home to check on it.
If your first loaf isn't perfect, that's normal. Keep notes (the one time you don't keep notes will absolutely be the best loaf you ever baked, and you won't know why). Each loaf teaches you something the recipe can't.
If shaping and scoring a boule still feels intimidating, my beginner sourdough focaccia skips both steps and bakes in a sheet pan with the same starter you built here.
Beginners Sourdough Bread FAQs
The dough should have doubled in size, dome upward, and pass the poke test (a wet finger pressed ½ inch deep leaves a dimple that springs back slowly, in 5 to 10 seconds). After the cold proof, the dough barely rises in the fridge, so all the proofing needs to happen during the bulk ferment before it goes in. Don't bake based on the clock; bake based on what the dough is doing.
The most common cause is a starter that isn't strong enough yet. Your starter should double within 4 hours of a feed before it's ready to bake with. Other causes: a kitchen below 70º F (slows the ferment dramatically), an under-developed dough from skipped folds, or a bulk ferment that ended too early.
Yes. The Dutch oven traps steam around the loaf, which is what creates the crackly crust and tall rise. Two alternatives: bake in a loaf pan with another loaf pan inverted over it as a lid for the first 30 minutes; or bake on a sheet pan with a metal bowl inverted over the loaf for the first 18 minutes, then remove the bowl. A cast iron skillet with another skillet on top also works.
The cold proof is the main lever for sourness. A 12-hour cold proof gives you a mild loaf; 24 hours is medium; 36 to 48 hours is sharply tangy. Whole wheat or rye in the flour blend also intensifies the sour notes because they ferment more aggressively. Using your levain just past peak (instead of at peak) gives more sourness too.
Cut side down on a wooden board at room temperature, the loaf stays fresh for 2 to 3 days. After that, slice it and freeze the slices for toast (up to 3 months). Don't refrigerate sourdough; the cold dries it out faster than room temperature does. To revive a stale loaf, spritz the crust with water and bake at 350º F for 5 to 7 minutes to bring back the crackle.
More Sourdough Recipes To Try
Leave Me A Review
⭐️⭐️⭐️⭐️⭐️
If you tried this Beginners Sourdough Recipe or any other recipe on my blog, please leave a 🌟 star rating and let me know how it goes in the comments. I love hearing from you!
Recipe
Equipment
- Banneton or medium bowl with tea towel
- Lame or sharp razor blade
- Dutch oven or cookie sheet with roasting lid
Ingredients
Levain
- 50 grams mature unfed starter
- 50 grams whole wheat flour or any unbleached flour
- 50 grams filtered or bottled water 90ºF
Sourdough Ingredients
- 300 grams bread flour
- 100 grams all purpose flour or more bread flour
- 100 grams whole wheat flour spelt or rye is great too
- 400 grams water any kind, doesn't have to be warm
- 11 grams salt
Instructions
Day 1
- In the morning, combine 50g of your unfed starter with the whole wheat flour and warm water in a clear container with straight sides and mix until no dry flour remains. This is your levain. Mark the height with a piece of tape or erasable marker.
- Place the levain into a warm area like the oven with the light on and the door cracked, on top of the fridge. A warm area is between 72ºF-95ºF. Starter will die if the temp rises above 130ºF
- Let your levain rise until it has reached its peak (the highest point in its rise before it starts to fall again). I track this by checking my levain hourly. If your levain doubles in size within 5 hours you can use it to make bread. If it doesn't your starter isn't strong enough yet or your room is too cold.
- While the levain is rising, make the autolyse (mixture of flour and water before adding the levain).
- Once your levain has peaked, add 140 grams to the autolyse. This is pretty much the whole container minus whatever is stuck to the sides. Also add in the salt and then mix it all together with your wet hands. Pinch, fold, push with your fingers until it's all cohesive and evenly mixed. Cover it with plastic wrap and let it rest for 30 minutes.
- Begin your first stretch and fold. With a wet hand, lift one side of the dough and pull it to the point of resistence but don't tear it. Fold it over the top of the dough. Rotate the bowl 45º and repeat the stretch and then fold the dough over. Do this for a total of 4 times. Cover the dough with plastic wrap and let it rest for 60 minutes in a warm area.
- After 60 minutes, begin your second stretch and fold. The same process as the first stretch and fold. Cover and rest 60 minutes in a warm area.
- After another 60 minutes, begin your third stretch and fold. Same process. Rest for 60 minutes. If the dough still feels really loose then you may want to do a fourth stretch and fold.
- After your stretch and folds are complete, cover your dough and let it rise for 1-2 hours until it has doubled in size. This can take even longer than 2 hours if your room is cold or your starter is weak so don't rush it and just wait until the dough is ready.
- Once your dough has doubled you can shape it. Take your wet hand and get the countertop a little wet. This prevents sticking. Gently pour the risen dough onto the counter and stretch it out into a rectangle horizontally in front of you, about the size of a sheet of paper. Pop any big bubbles just as you would if you were making regular bread. Big bubbles make problems in the bread later.
- Fold the right side of the dough over itself so that the right edge lines up with the center of the dough. Now take the left side of the dough and fold it over the top. This is called a simple book fold and helps distribute the bubbles more evenly in your final loaf so all your bubbles aren't on the top or bottom.
- Now roll the dough up like a cinnamon roll. Nice and tight. This helps make that gluten even stronger so our bread can rise in the oven. Make sure the seam is on the bottom. Cover the dough with the bowl and let it rest for 15 minutes.
- While the dough is resting, prepare your banneton. Dust on some flour generously. You can also use a bowl with a tea towel and it works just as well.
- Turn your dough over so the seam is facing up. Gather all the edges together and lift the dough like a bag and plop it into your floured banneton. Pinch together any loose edges.
- Place the whole basket into a plastic bag to keep it from drying out and put it into the fridge overnight. The dough will not rise or do much of anything in the fridge. It's like a pause button for sourdough so make sure all your shaping and rising is done before going into the fridge.
Day 2
- In the morning, preheat your oven to 500ºF with the dutch oven inside for 30 minutes. Place a sheet pan at the bottom of the oven to prevent your dough from getting too dark inside the dutch oven.
- Cut a piece of parchment paper about 10"x10" and place it on top of the dough. Turn the banneton upside down and gently remove the dough from the basket.
- Use your lame or razorblade to cut a big "c" into the side of the dough about ¼" to ½" deep. Don't be afraid to score! This allows the bread to rise nice and tall and you want tall bread right? You can also add in decorative scoring like wheat on the side if you desire.
- Lift the dough by grabbing the two corners of the parchment paper and place it into the hot dutch oven. Be quick but careful to avoid the sides of the dutch oven. We don't want any burns!
- Place the lid on top of the dutch oven and shut the door. Reduce the temperature to 450ºF and bake covered for 30-40 minutes.
- Remove the lid and bake for another 20-25 minutes depending on the color that you want!
- After baking, remove the bread from the hot dutch oven and place it on a cooling rack to cool for ONE HOUR. Don't cut it too soon or the inside will be gummy.
- Enjoy that bread! You worked hard for it!
Video
Notes
- Remember, making sourdough takes time but not a lot of work. Only a few minutes here and there. Use your timer to remind you when its time to do a step.
- If your levain rises within 5 hours, it's strong enough to make bread
- Always use wet hands when handling the dough to prevent sticking
- Use stretch and folds, book folds and the cinnamon roll fold to create strength in your dough which helps it to rise taller and have an even, open crumb.
- Make sure your dough has doubled in size before you put it in the fridge. It won't rise at all in the fridge and we will bake it straight from the fridge in the morning.
- Don't be afraid to score deeply! this helps the bread rise. ¼"-½" deep with a lame or sharp knife.
- Store leftover bread (if you have any) in a plastic bag to keep it moist. Toast it in the oven or in a toaster oven to bring back that crispness to the crust!




Tammy Heppner says
Thank you so much for your sourdough starter workbook. I just started my starter two days ago and following your instructions helps me to be more confident! I look forward to when I actually get to make sourdough bread!!
Michelle says
Thank you for your great step by step instructions! I baked off my first loaf and it came out great! After that, I realized I had a busy week coming up. I wouldn’t be able to keep up with the daily maintenance, so I put it in the refrigerator for a week. What should I do to get my starter ready to bake again?
Sugar Geek Show says
You can just feed it again on the same feeding schedule. Discard half, and feed it as normal and keep on the same schedule as you did before. Once you start feeding it again, it will come back to life after a few days. Hope this helps! I've left my starter in the fridge for like a year and it's come back to life before, so no need to worry 🙂
Kimberly L Lowry says
Hi Liz, I really love this recipe, and am sending a thank you for your step by step instructions. During this pandemic lock-down, un-lock-down, lock-down-again, time I wait for my job to come back, when the restaurant I work for re-opens (hope is in my heart), and I have time to do a lot of things around the house. Plus, due to staying isolated I cook and bake more, at home, than ever. My kitchen skills are in good shape, as 30 years of cooking, and baking a bit, in the food industry helps keep them strong. Though I can bake massive amounts of sweets I had never tried sourdough bread. Your recipe, and its understanding tips have worked well for me. Changes I made, or had to make due to lack of some ingredients are: got starter from the prime baker of the restaurant, fed and kept alive and healthy; at first only had all purpose flour and high gluten/bread flour in my kitchen; have no dutch oven; had no scale at home; knew nothing of chemistry of bread baking -- and so I tried the recipe by improvising a bit. The first loaf turned out alright. Its rise was higher than later loaves, perhaps due to the improvised amounts of weight of flours vs. cups of flours, or water amounts used. But as the months have gone by I got a scale, wheat flours (some special flours ordered from a well known bakery in my town) and am practicing more. I took your advice and reduced the grams of water when, after purchase of the scale, the dough was incredibly wet and hard to handle no matter how long I let it do its thing. All in all your recipe and advice has taught me a great deal about baking, chemistry and all that may come with patience. Thank you!
Alisha says
Hi Liz,
Thank you for getting back with me. I actually just scratched the dough because it would not hold any shape whatsoever and we just spread out on the counter! Today’s a new day and my third times a charm! Fingers crossed
Alisha says
Thank you Liz for responding. It was still so wet this afternoon and it would not hold shape at all. I went ahead and started over and this batch is looking much better. I am so excited!!! Third times a charm..... I hope
Alisha says
Hi Liz,
I was so excited to come across your step by step instructional video and recipe. Everything was going great until the fold steps. My dough is so so wet. It will not hold a shape at all. It just spreads. I have been working on this for over 13 hours from start point. I have now put in fridge since it’s so late. It did take about 5-51/2 hours for levain to double in size. Any suggestions? Any thoughts on why my dough needed up so so wet? Thank you so much.
Elizabeth Marek says
The dough is very wet and that is normal, if its your first time making sourdough you may just not be used to the consistency
Bec says
Thank you for yet another awesome tutorial! Just made my first sourdough and was a little disheartened when my family ate half the loaf (in under 30 mins) before I had time to marvel at my handy work 😂
Guess I’ll have to make another one tomorrow!
debbie says
Hi Liz - And UGH! I am so frustrated and have sourdough bread remorse 🙁
I have tried to make this loaf twice now and both failed in the same step. All was according to plan and I began my folding and turning regimen. The dough was loose but I kept going. Even after 5 times of turning/resting the dough was too loose to shape. Same thing happened both attempts. The only thing that seems reasonable to me is that there is not enough flour (I do use a scale and followed your recipe). Could you please give your thoughts. Thank you! I appreciate your feedback!
Elizabeth Marek says
If you are having too many problems with the wet dough, you can reduce the liquid by two ounces to make a slightly stiffer dough.
Susan says
Hi Liz,
I come from a hot and humid country. I have tried to make it but had to throw it out as it was wet and sticky after the 4th stretch and fold.Please advise me.
Thanks,
Elizabeth Marek says
Wet and sticky is completely normal. Please refer to the video for instructions.
Deize says
Hi,
This is my second attempt to make a sourdough, actually 3rd but the first one I throw out as I thought the dough was far too wet, so it does not count, the second one came out the same but my husband told me to carry on with the process and bake to see the end results.... it was not holding shape and I could not score properly but I baked and it came out awesome (for the first making/baking attempt), my husband had half of it within 2 hours.
So today I have decided to try it again but only half of the recipe so I can have a better feel of the whole process.
I used the portions help on the recipe to find the different amounts but one thing that has not changed is the amount of starter I have to add to the dough once is ready to mix it all. The whole recipe asks for 140gr out of the 150gr levain but for half of it, I can’t find... so for 75gr of leaving how much should I mix to the dough once ready to go?
Thank you for the recipe and steps, it really helps!
Elizabeth Marek says
If you were halving the recipe then you would add in half the levain but this recipe makes one loaf so if you halve it you won't have enough to make one loaf...
Christine says
Hi! I really appreciate the step by step instruction and the detail you’ve given here. I’m in the middle of trying this for the first time and I’m wondering if it’s necessary to consider altitude with this recipe? I’m at a high altitude (about ~3500ft) and I’m wondering if this makes a difference? Thanks!
Elizabeth Marek says
Hmmm good question. I haven't read anything about altitude for sourdough, it might rise up better than other places so that's actually a good thing!
Ashley says
Thank you for this easy to follow recipe!! I do have one question. I did 4 stretch and folds as recommended and then ended up putting the dough in the fridge because it was late. Before moving on to the next step, how long should I set the dough out on the counter?
Elizabeth Marek says
Until it doubles in size, then it needs to be refrigerated for one hour before baking so it's easier to score/place into the dutch oven.
Jose Santiago says
Thanks have a good night. From Puerto Rico.