
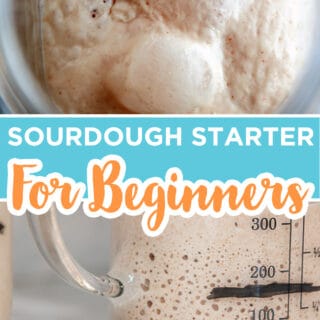

Making your own sourdough starter is one of the most satisfying kitchen projects you'll ever do. In 5 to 7 days, with nothing but flour, water, and a little patience, you'll have an active starter that can rise a loaf of bread, turn into sourdough discard pancakes, sourdough discard donuts, sourdough discard blueberry muffins, sourdough discard crackers, pikelets, and a dozen other baked goods. This is the complete beginner's guide based on months of pandemic-era testing and years of teaching home bakers what actually works.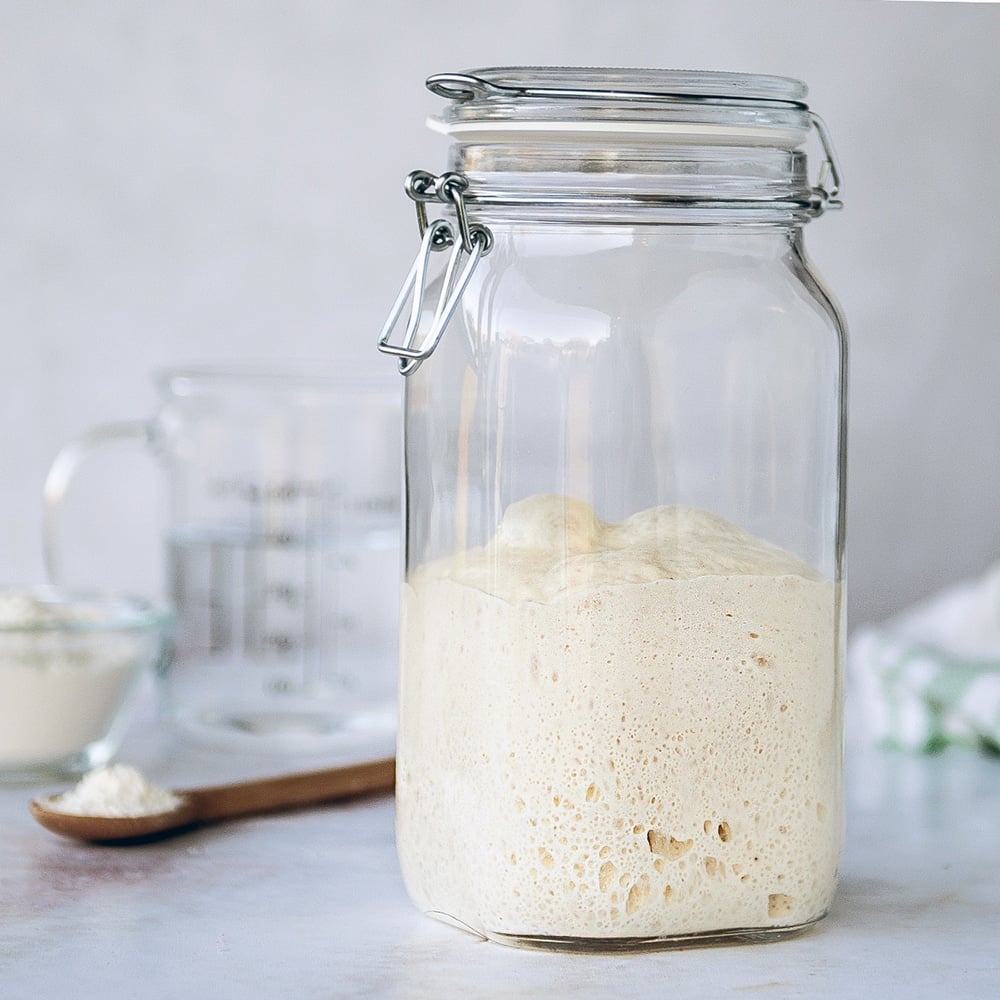
Quick Glance at the Recipe: How To Make A Sourdough Starter
- Recipe Name: How To Make Sourdough Starter
- Why You'll Love It: A single living ingredient that powers dozens of recipes. Free, endless yeast. Lasts a lifetime if you feed it.
- Time and Difficulty: 5 minutes of active work per day for 5 to 7 days. Beginner-friendly with patience.
- Main Ingredients: Whole wheat flour (Day 1-4), unbleached bread flour or all-purpose (Day 5+), filtered or bottled water at 90º F, time, warmth.
- Method: Combine flour and water. Wait 24 hours. Discard half, feed flour and water. Repeat daily. Switch to twice daily on Day 5. Test for peak by Day 7.
- Texture and Flavor: Bubbly, doubled in size at peak, smells sweet and tangy when mature.
- Quick Tip: Temperature is everything. 80º F to 90º F is the sweet spot. Below 70º F, your starter will move at a glacial pace. Use a warm spot (top of the fridge, oven with the light on, near a heating vent).
Jump to:
- Quick Glance at the Recipe: How To Make A Sourdough Starter
- What Makes This Sourdough Starter Guide Different
- What Is Sourdough Starter?
- How A Sourdough Starter Actually Works (The Microbiology)
- Sourdough Starter Ingredients
- Equipment You Actually Need (And What You Don't)
- How To Make Sourdough Starter Step-By-Step
- Want this whole timeline on paper?
- How To Tell When Your Starter Is Ready (The Peak Test)
- The peak test:
- How To Feed Your Sourdough Starter (Ongoing Maintenance)
- How To Store Your Sourdough Starter
- Common Sourdough Starter Problems To Avoid
- Make Your Sourdough Starter Routine Your Own
- Final Thoughts
- Two FREE Workbooks To Go With This Guide
- How To Use Your Sourdough Starter
- Sourdough Starter FAQs
- Leave Me A Review⭐️⭐️⭐️⭐️⭐️
- Recipe
Before you scroll, grab my FREE Sourdough Starter Workbook. It's a printable 7-day journal with each day on its own page, observation prompts so you know what to look for, feeding amounts, and two bonus recipes (sourdough pikelets to use your first discard, and a levain recipe for when you're ready to bake). No email required. It's the same workbook I used myself when I was learning, and it turns this post into a project you can actually do without scrolling back here every morning.
This guide is going to be simple. I'm not going to give you the history of sourdough or any extra information you don't need to get started. When I was learning, I was overwhelmed with information and felt like sourdough was going to be too complicated. It is not. It takes time and patience, but you've got this.
If you don't want to make your own starter, you can always ask for some from a friend who already bakes. Most sourdough starter "parents" are happy to share. But making your own teaches you a lot about what starter actually needs to thrive, and that knowledge pays off every time you bake.
Once your starter is doubling reliably in 4 to 6 hours, my soft sourdough sandwich bread or my sourdough english muffins are a fantastic next bake.
Check out my complete guide to sourdough discard recipes, which walks you through storage, freezing, the visual aging timeline, and a 5-day rotation calendar so you never throw a spoonful out.
What Makes This Sourdough Starter Guide Different
I spent months during the pandemic researching sourdough, testing methods, failing at bread, throwing out starters, and starting over. This guide is the distilled version of what actually works, with the marketing and over-engineering removed.
- A two-stage flour method, not just one flour. Most guides tell you to use one flour the whole time. I use whole wheat for Days 1 to 4 (more wild yeast on the bran for a jumpstart), then switch to unbleached AP or bread flour from Day 5 (slower for the yeast to process, so they don't get too hungry too fast as they grow stronger). The two-stage approach gives you a more reliable starter in less time.
- The peak-marking technique. A dry-erase marker on your jar tracks the rise so you can see exactly when your starter peaks. This single trick eliminates 90% of "is my starter ready" anxiety.
- A real day-by-day timeline. Not "1 to 2 weeks." Specific milestones for what Day 1 looks like vs Day 3 vs Day 5 vs Day 7, including what each day SHOULD smell like and what to do if it doesn't match.
- Real troubleshooting from real failures. That photo down below of my first sourdough loaf (the one that looks like a hockey puck) is real. I include the troubleshooting section that would have saved me weeks of wasted flour.
- A complete cluster of recipes for your discard. No more guilt about throwing flour in the trash. I link to every discard recipe on Sugar Geek Show, so you have something to do with the half you discard from Day 5 onward.
- My honest take on contrarian advice. When I think the internet is wrong (looking at you, "rye flour is better for starters"), I tested it myself and say so. You get my actual results, not regurgitated conventional wisdom.
What Is Sourdough Starter?
Sourdough starter is natural yeast (already living in your flour), combined with water and given time and warmth to multiply. The flour is the food. The water is the environment. The yeast is what does the rising.
Making a starter takes about 5 to 7 days because the wild yeast needs time to eat, multiply, and become strong enough to lift a loaf of bread.
To make the yeast stronger, we feed it. Yeast eats the starch in the flour and produces carbon dioxide gas. That gas gets trapped in the gluten of dough and is what makes bread rise.
If your yeast is weak, not enough gas is produced, and your bread will not rise. That's the whole game.
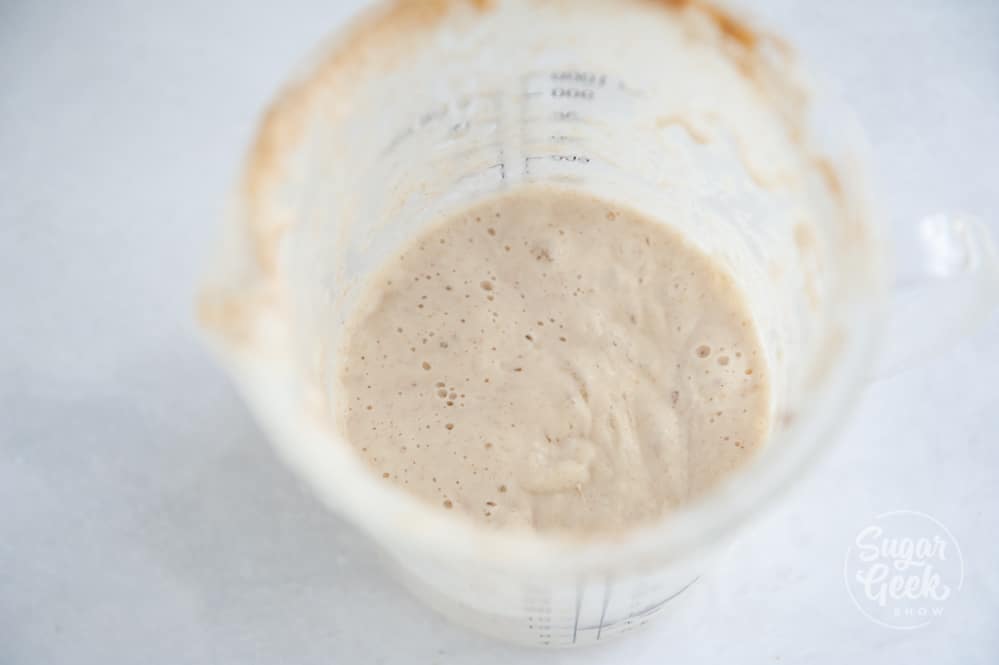
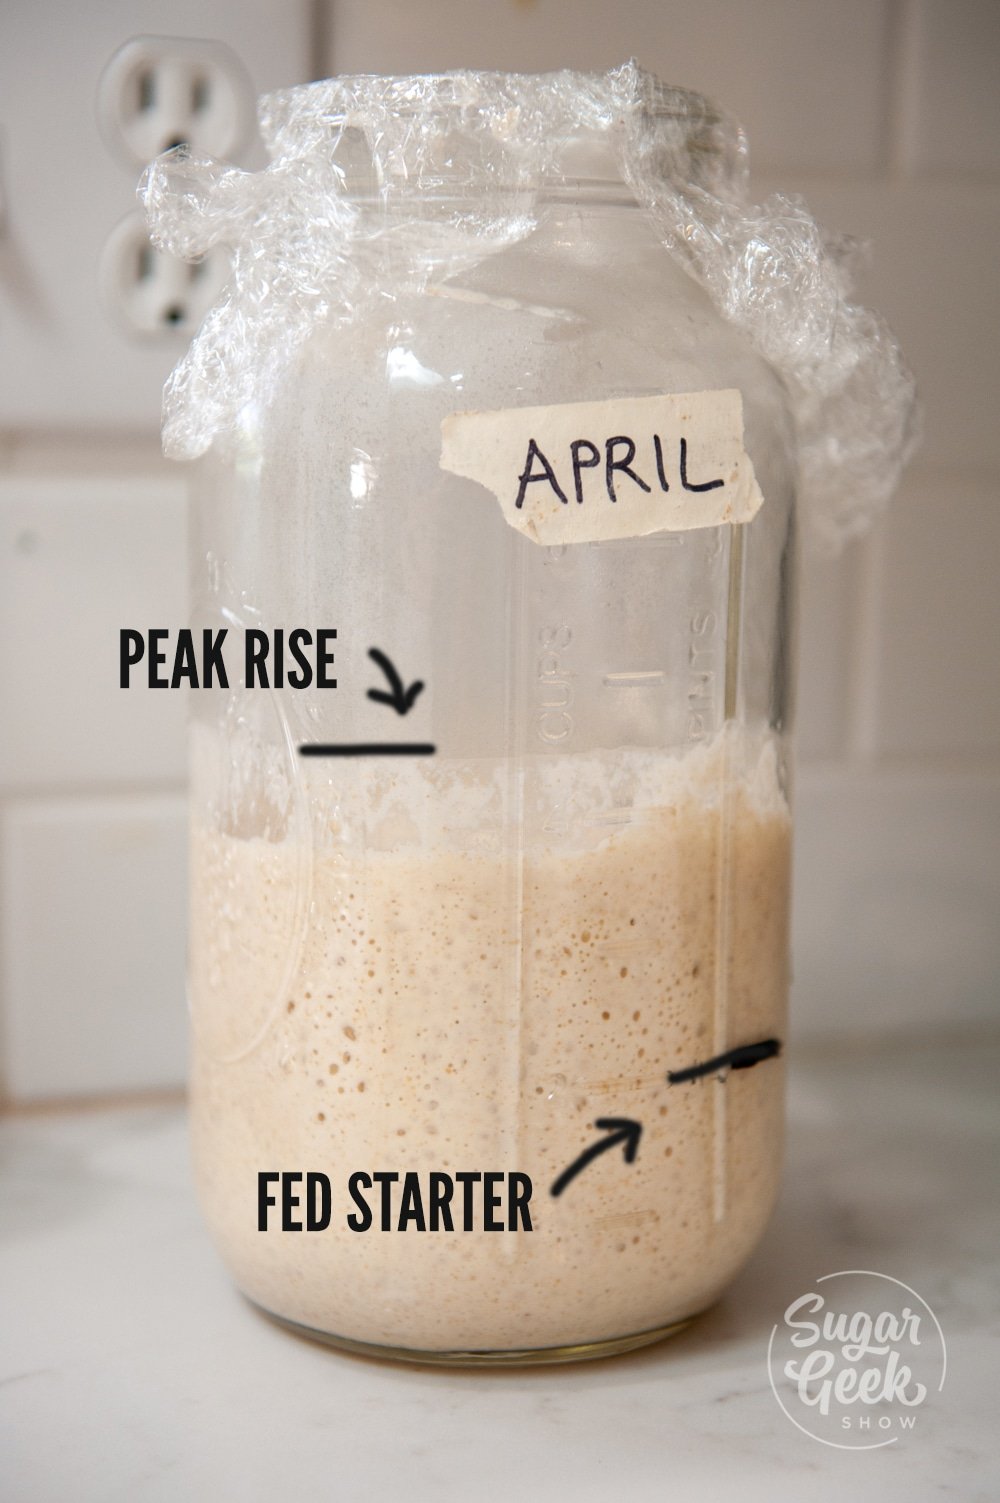
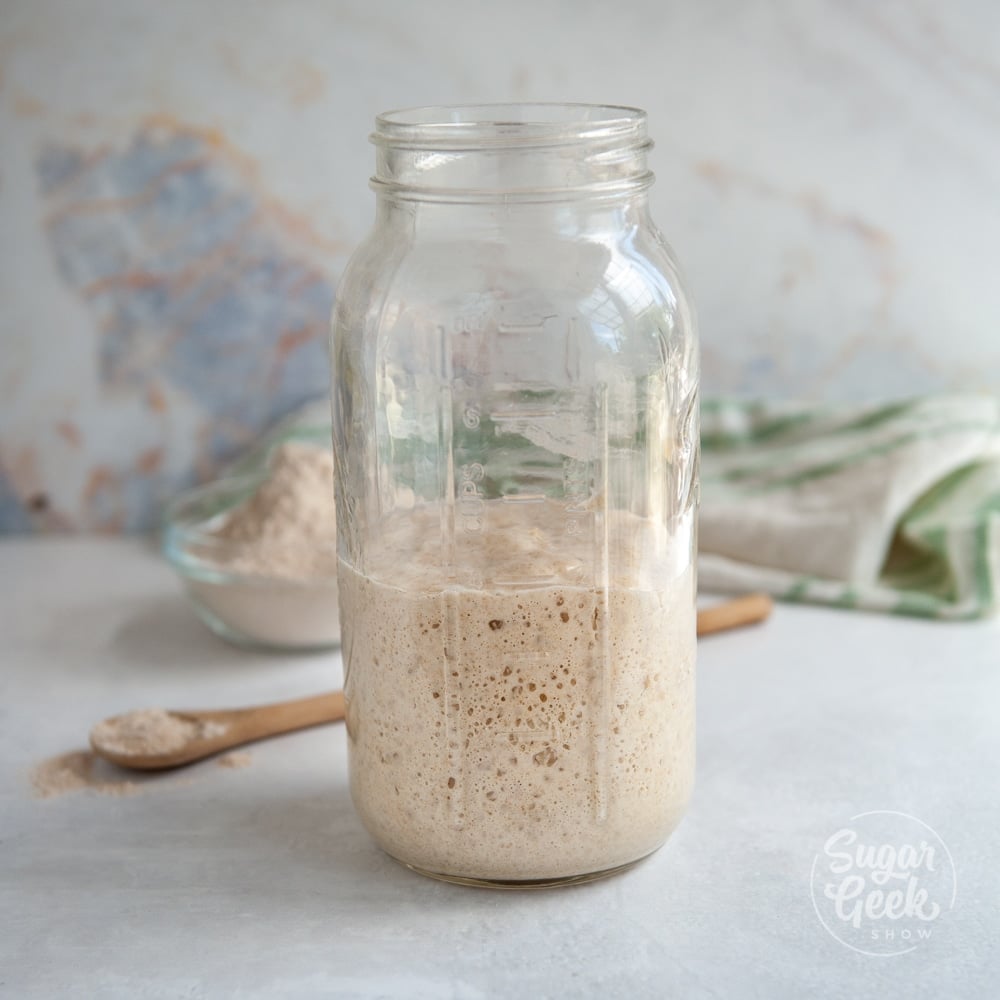
Feeding sourdough starter is the daily ritual of adding fresh flour and water. As the yeast eats, the starter bubbles and rises in the jar. At some point, it reaches its highest point ("the peak") and then begins to fall as the yeast runs out of food.
When your starter is at its peak, it's the most active and strongest it will ever be. That's when you use it for bread.
A lot of people try to rush this process. Try to understand that growing yeast takes time, just like growing a garden. If you plant a pumpkin seed and try to make pumpkin pie from a tiny sprout, it's not going to do much for you. Give the starter time.
Once your starter is established, you can keep it on the counter and feed daily if you bake a few times a week. If you bake less often, store it in the fridge and feed weekly. If kept properly, your sourdough starter will last you a lifetime.
For the full breakdown on ratios, schedules, and reading the peak, see my guide on how to feed a sourdough starter.
How A Sourdough Starter Actually Works (The Microbiology)
This is the part most starter guides skip, and it's the difference between blindly following steps and actually understanding why your starter does what it does.
What's actually in the jar. Sourdough starter is a colony of wild yeast (mostly Saccharomyces cerevisiae plus a few other strains like Kazachstania) AND lactobacillus bacteria. Both live naturally on flour. The yeast eats the starch and produces carbon dioxide gas (that's the rise) plus a little alcohol (that's the hooch, more on that later). The lactobacillus produces lactic acid and acetic acid (that's the tangy flavor).
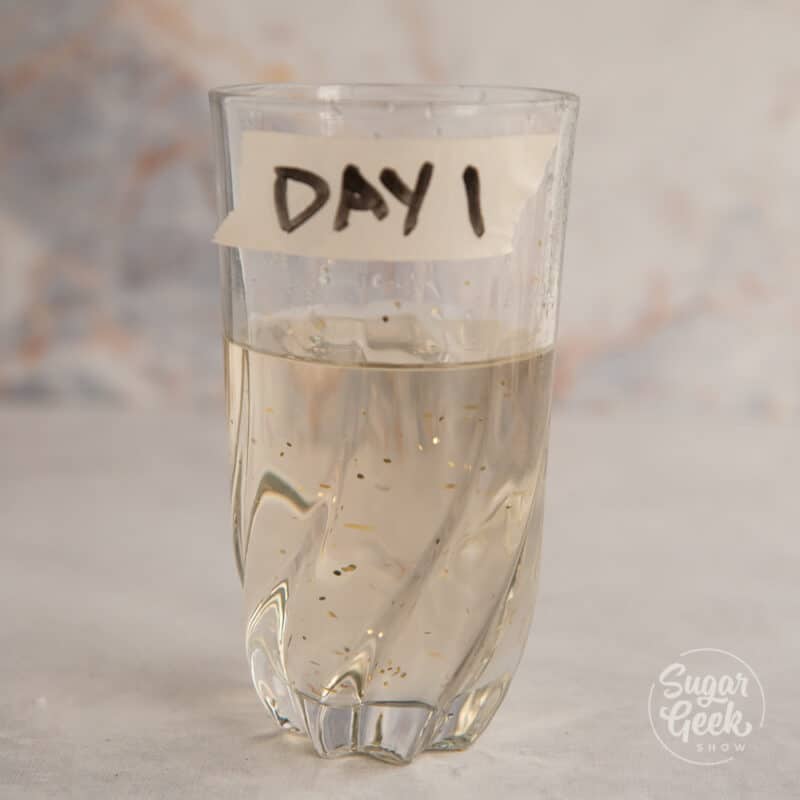
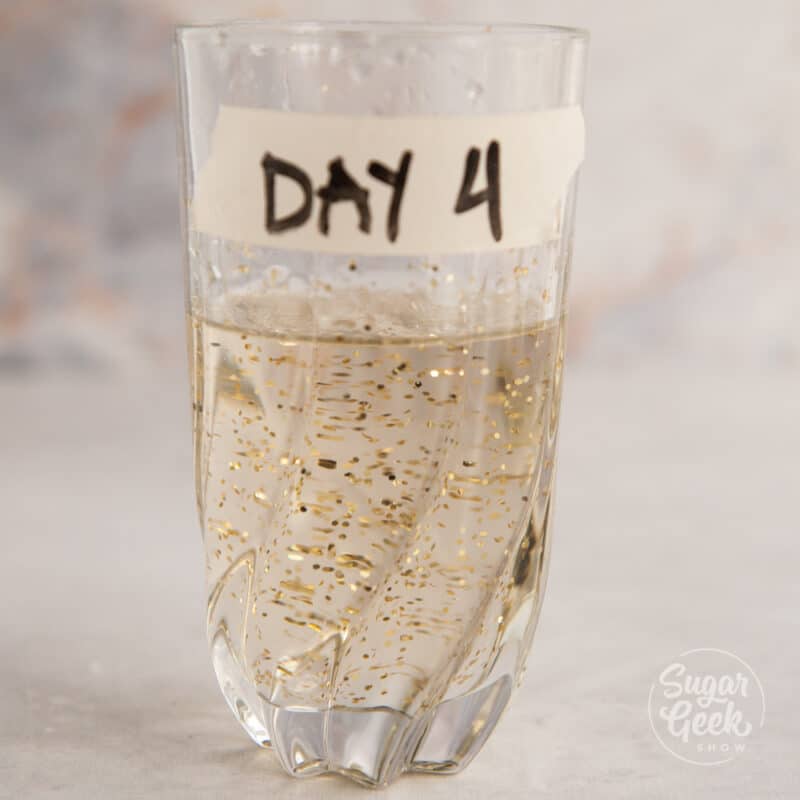
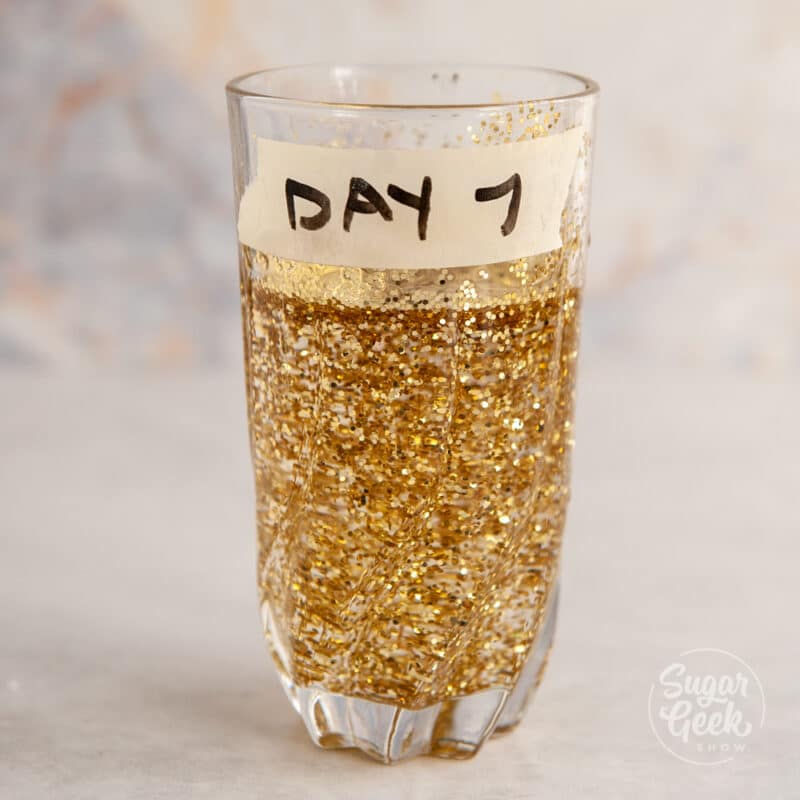
Day 1. Imagine a jar of water with a few specks of glitter. The glitter represents how much yeast is naturally in your flour on Day 1. Not much. As you feed flour and water over the next 5 days, the glitter (yeast) multiplies and starts to dominate the jar. Other organisms (bad bacteria, opportunistic molds) get out-competed because the environment becomes too acidic for them. By Day 5 or so, you've created an environment where ONLY sourdough yeast and bacteria can thrive.
Days 1 to 4. Wild yeast and bacteria live mostly on the bran and germ of the wheat kernel. White flour has had the bran sifted out. Whole wheat flour has it all, which means more yeast per gram. Starting with whole wheat is like seeding a garden with a hundred plants instead of three.
Day 5 onward. Once your yeast colony is established, it needs FOOD more than it needs starter culture. White flour has more available starch (less fiber competing for water), so the yeast can eat more efficiently. Switching helps the starter slow down a touch so it doesn't get too hungry between feedings.
Why temperature matters mathematically. Yeast metabolism roughly doubles for every 18º F you raise the temperature. Starter at 70º F moves at half the speed of starter at 88º F. That's why a "5 to 7 days" timeline is really "5 days at 85º F" or "10 days at 68º F."
Why hooch forms. Hooch is the grayish liquid you'll sometimes see on top of (or below) your starter. It's alcohol that the yeast produces as a byproduct of fermentation. Hooch isn't bad. It means your yeast has eaten all the available food and is hungry. Stir it back in or pour it off and feed.
Why the smell changes from "wet socks" to "fresh tangy bread." In the first 3 to 4 days, the jar has a mix of yeasts AND opportunistic bacteria, some of which produce sulfur compounds (the gross smell). As the lactobacillus dominates, the pH drops, sulfur producers die off, and what's left smells like clean fermented dough. The smell shift is your single best diagnostic that the right organisms have won.
Sourdough Starter Ingredients
You only need four things: flour, water, time, and warmth. The first two go in the jar. The other two are just the environment.
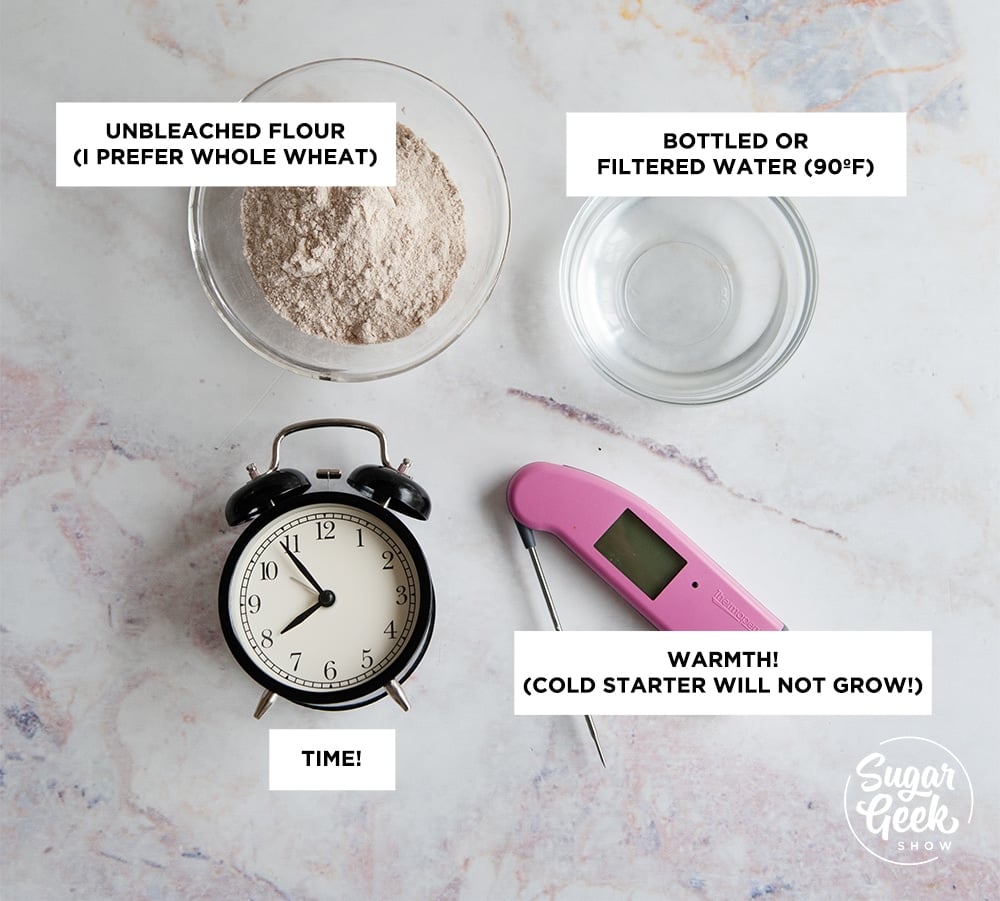
- Whole wheat flour (Day 1 to Day 4). Unbleached whole wheat. This is what kickstarts the wild yeast colony because the bran and germ carry more yeast and lactobacillus than any other flour. Buy a small bag, you only need it for the first 4 days.
- Unbleached bread flour or all-purpose flour (Day 5 onward). Switch from whole wheat once the starter is established. White flour gives the yeast more accessible starch and slows the metabolism slightly so the starter stays balanced between feedings.
- Filtered or bottled water. Tap water is fine for established starters, but for the first week you want water without chlorine. Chlorine kills the yeast you're trying to grow. Any standard water filter (Brita, refrigerator filter) removes enough. Warm the water to 90º F before adding it to your starter, this speeds the yeast metabolism right when you need the boost.
- Time. 5 to 7 days of daily feedings. Not really an "ingredient," but it's the thing most people underestimate.
- Warmth. 80º F to 90º F is the sweet spot. Below 70º F, your starter moves at a glacial pace. Above 95º F, the yeast starts to stress. A warm spot in your kitchen (top of the fridge, oven with the light on but oven OFF, near a heating vent) makes a huge difference.
Why The Two-Stage Flour Method Matters (The Science)
I get asked this a lot. Why bother switching flour mid-recipe?
Because the two flours do different jobs at different stages.
Whole wheat flour, used for the first 4 days, brings the wild yeast and lactobacillus colonies to your jar in higher concentrations than any other flour. The bran is full of them. Starting with whole wheat is the fastest path to an active starter.
Unbleached AP or bread flour, used from Day 5 onward, gives the now-established yeast colony a cleaner, more available carbohydrate source. The yeast eats starch more efficiently in white flour because there's less fiber competing for water. This translates to a more stable rise pattern, less aggressive boom-and-crash, and a starter that holds its peak longer.
If you only used one flour the whole time, you'd either get a slow start (with all-purpose) or an overly aggressive starter that goes sour fast (with whole wheat).
The combination is what makes the starter strong without making it frantic. This is one of the things I figured out the hard way after multiple failed attempts during the pandemic.
Equipment You Actually Need (And What You Don't)
You can make a sourdough starter with almost nothing. Here's the actual list, with the optional pro upgrades if you want them.
Required basics:
- A clean 4-cup container with straight sides. I use a 4-cup IKEA measuring cup, and it works perfectly. Straight sides let you see how much the starter rises, and the measurement lines are great visual cues. A large wide-mouth mason jar works too. Whatever you use, make sure it's clean and big enough that the starter won't overflow at its peak.
- A kitchen scale. Sourdough is a recipe where weight matters, especially in the early days when you're calibrating. Eyeballing doesn't work because flour packs differently by humidity.
- A dry erase marker. This is the underrated MVP. Mark the level of your starter right after you feed it. When you come back hours later, you'll see exactly where it peaked and where it fell. This single tool eliminates the "is my starter ready" guesswork.
- Plastic wrap or a clean kitchen towel. Loose cover, not sealed. The starter needs to breathe.
- A wooden spoon (for stirring after Day 1). Sourdough starter is acidic and can corrode metal over time, then leach into your starter. A wooden spoon, silicone spatula, or food-safe plastic spoon is the safe choice. (For Day 1 mixing, I use my clean hand. It's the best tool for making sure there are no flour lumps.)
- A thermometer. Thermoworks is the one I use and trust. Use it to check water temperature when you feed (you want 90º F) and to spot-check your starter's environment.
Don't use:
- Metal containers or metal spoons left in the starter. Sourdough starter is acidic, and prolonged contact with metal can corrode the metal AND leach into your starter. Glass, ceramic, or food-safe plastic containers only. Wooden or silicone utensils for stirring.
Optional pro upgrades:
- A sourdough home. This is a tabletop proofing container with insulated walls that holds your starter at a consistent warm temperature. If your house runs cool, this is the equipment upgrade that makes the biggest difference. I use this one.
- A folding proofer. Similar concept, larger capacity. Holds the starter AND any dough you're proofing at a precise temperature. Worth it if you bake bread frequently. Mine is here.
The pro equipment isn't required for a great starter. I made my first dozen starters without any of it. But once you start baking regularly, controlled temperature is the single best investment.
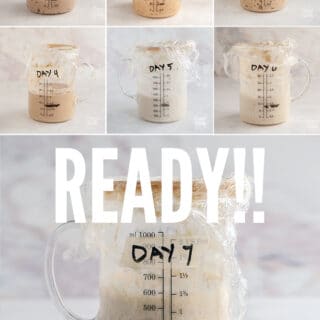
How To Make Sourdough Starter Step-By-Step
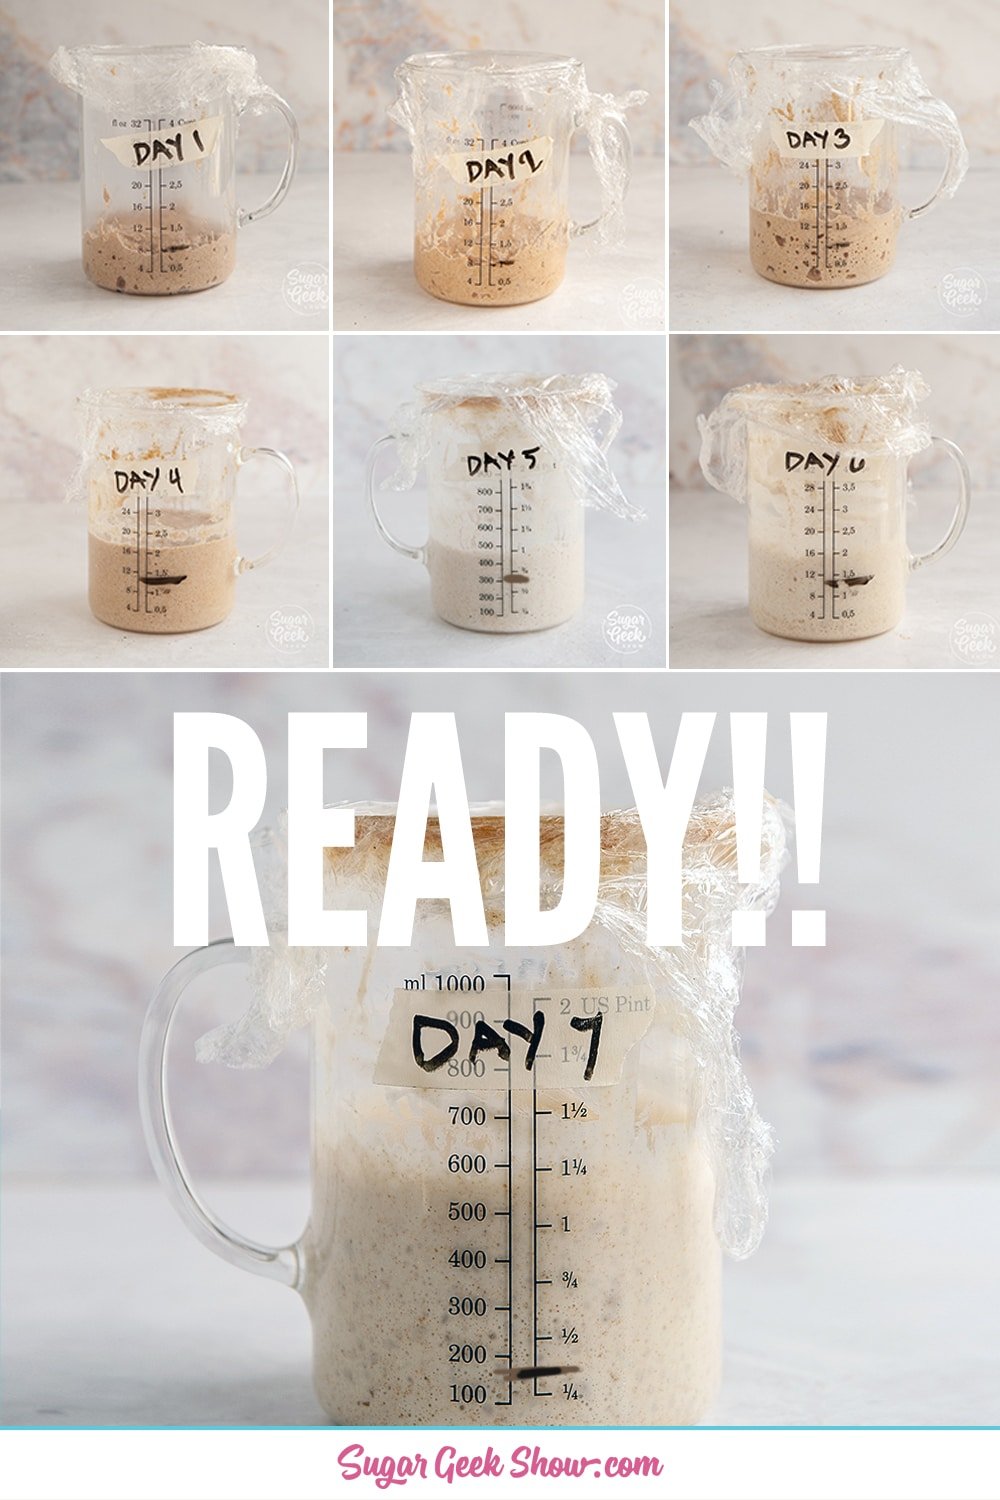
For exact measurements, see the recipe card below. This timeline assumes a room temperature of 80º F to 90º F. If your kitchen is cooler, expect each phase to take 1 to 2 days longer.
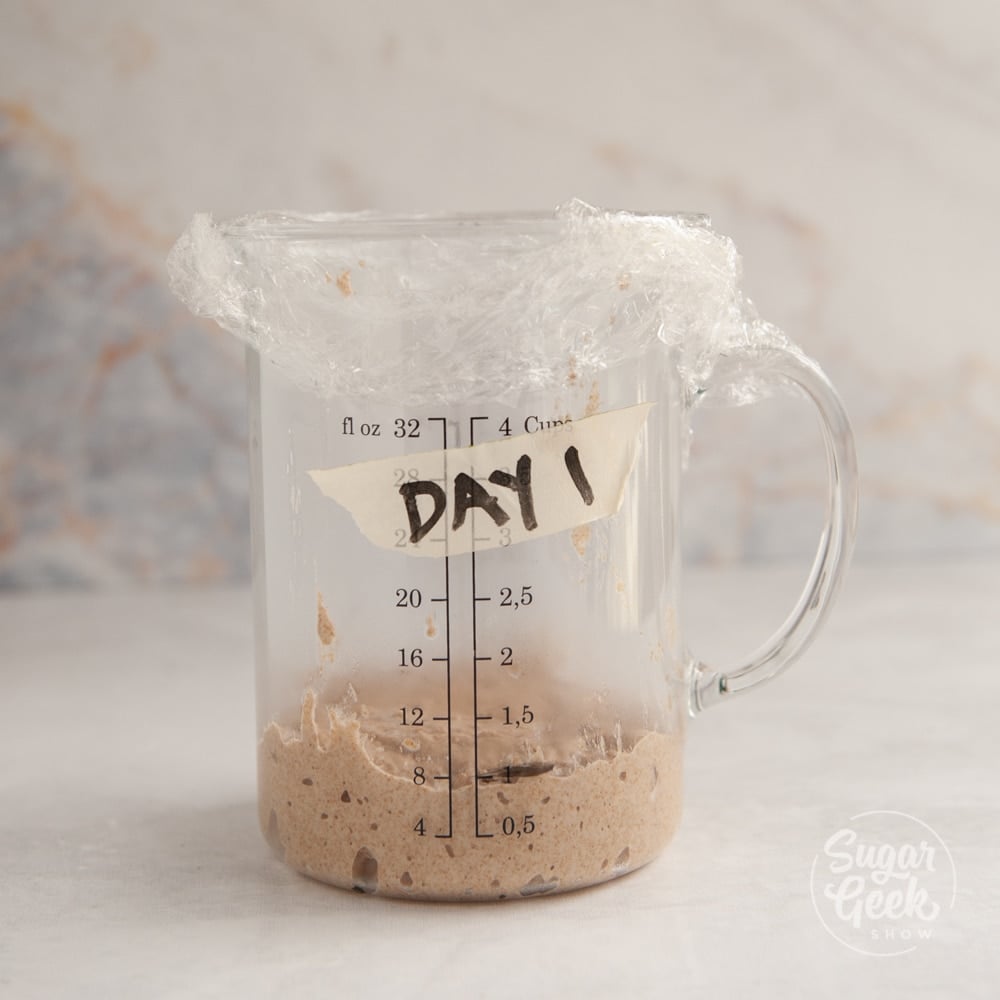
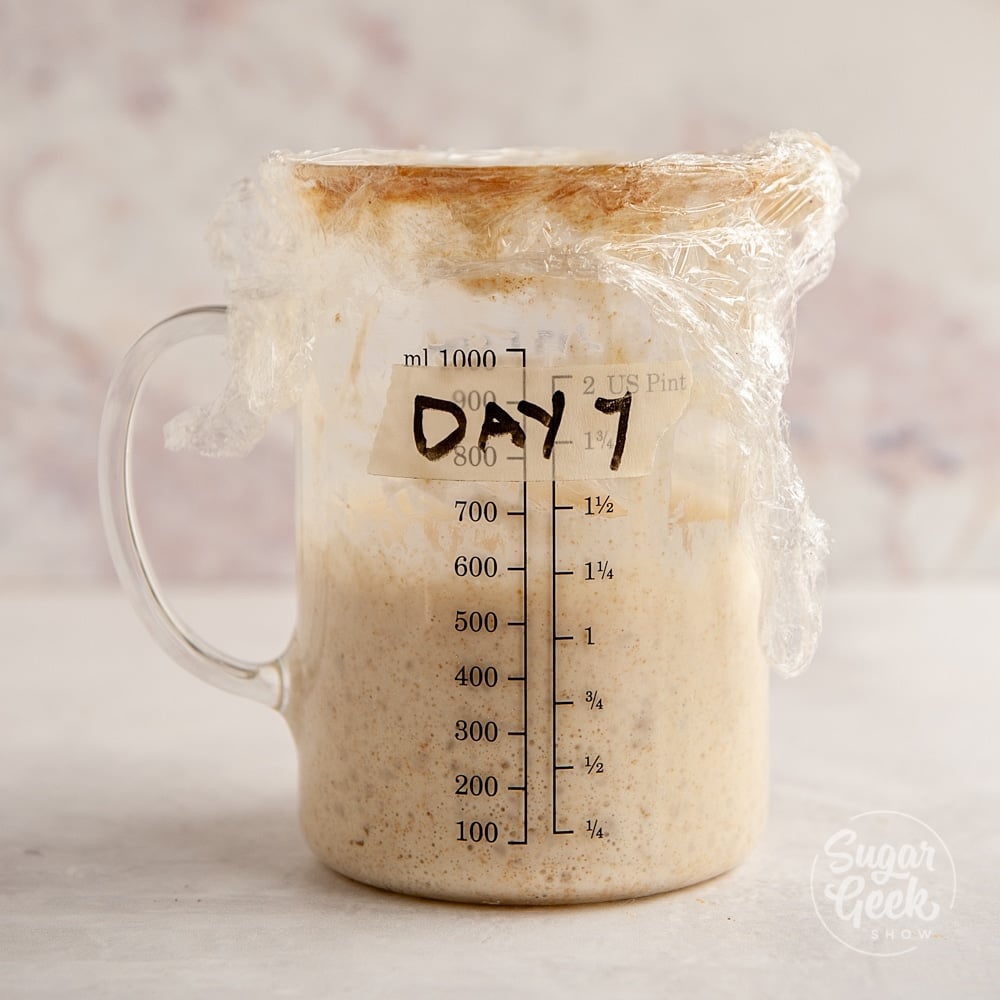
- Day 1 (Morning): Mix and wait
In a clean bowl, combine 150g whole wheat flour with 150g warm (90º F) bottled or filtered water. Mix with your hand. Squish and squeeze until you can't feel any lumps or dry flour. Transfer to your clean 4-cup container and cover loosely with plastic wrap or a kitchen towel. Mark the starter level with your dry erase marker.
What to expect after 24 hours: A few bubbles. A little rise. Probably smells terrible. This is normal. The yeast hasn't won the jar yet.
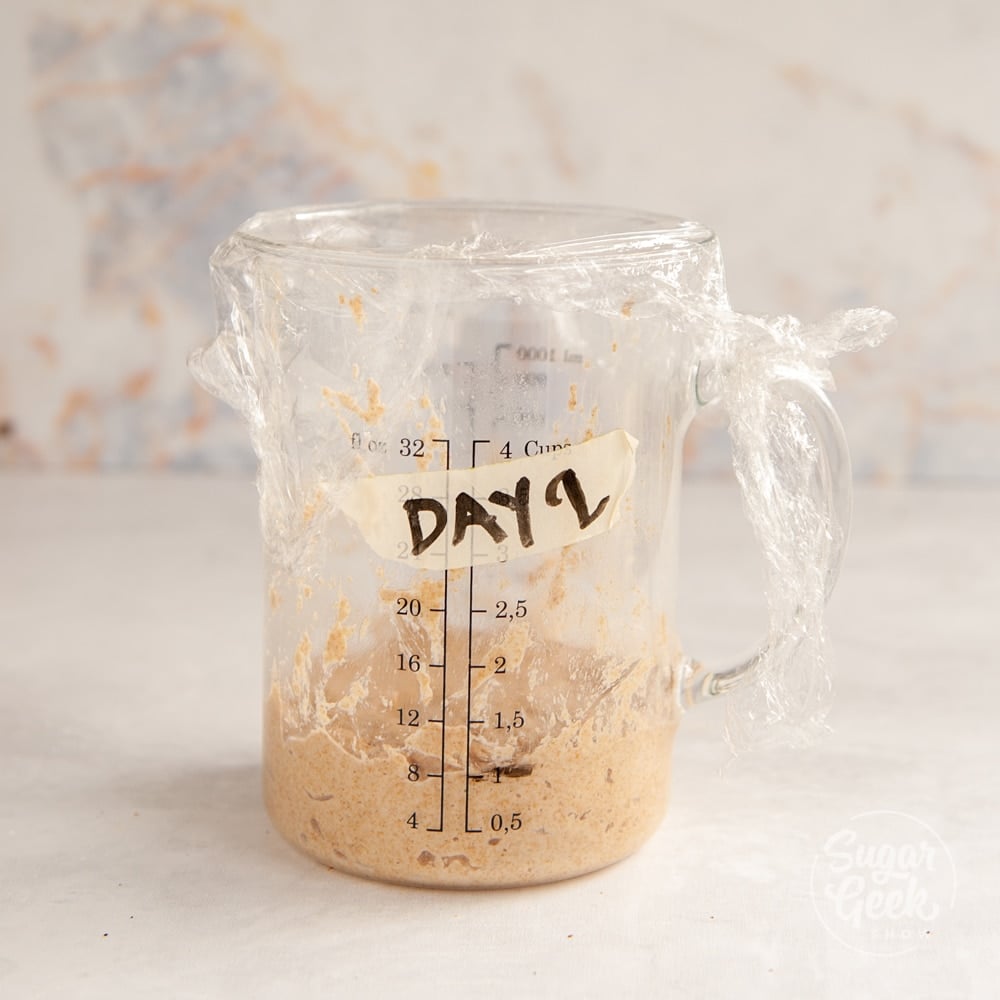
- Day 2 (Morning): First discard, first feed
Stir your starter. Remove half (eyeball it, or use the measurement lines on your jar). Throw the removed half away. There's still too much bad bacteria in the early starter to use the discard for anything yet.
To the remaining ~75g of starter, add 75g whole wheat flour and 75g warm (90º F) water. Stir until no dry flour remains. Cover loosely. Mark the new level.
What to expect after 24 hours: Maybe a few bubbles, maybe no rise yet. Still smells funky. Don't stress.
PRO TIP: 150g flour + 150g water by weight is called 100% hydration. This is the ratio you'll use for the rest of the journey. Mark this ratio in your brain: you'll see it again in bread recipes.
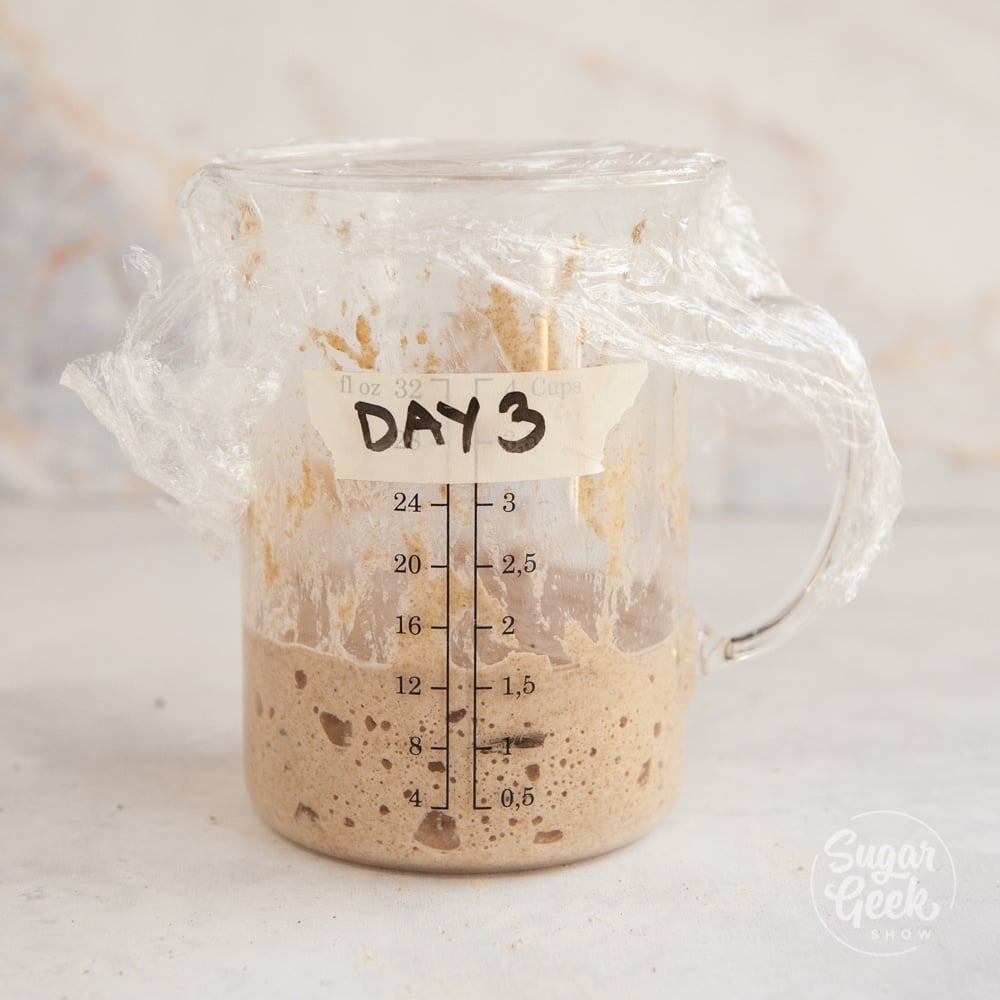
- Day 3: Discard and feed
Same routine. Remove half, throw it away, add 75g whole wheat flour + 75g warm water.
What to expect after 24 hours: You should start seeing real bubbles forming throughout the starter. Maybe a tiny rise. Smells are still pretty funky.
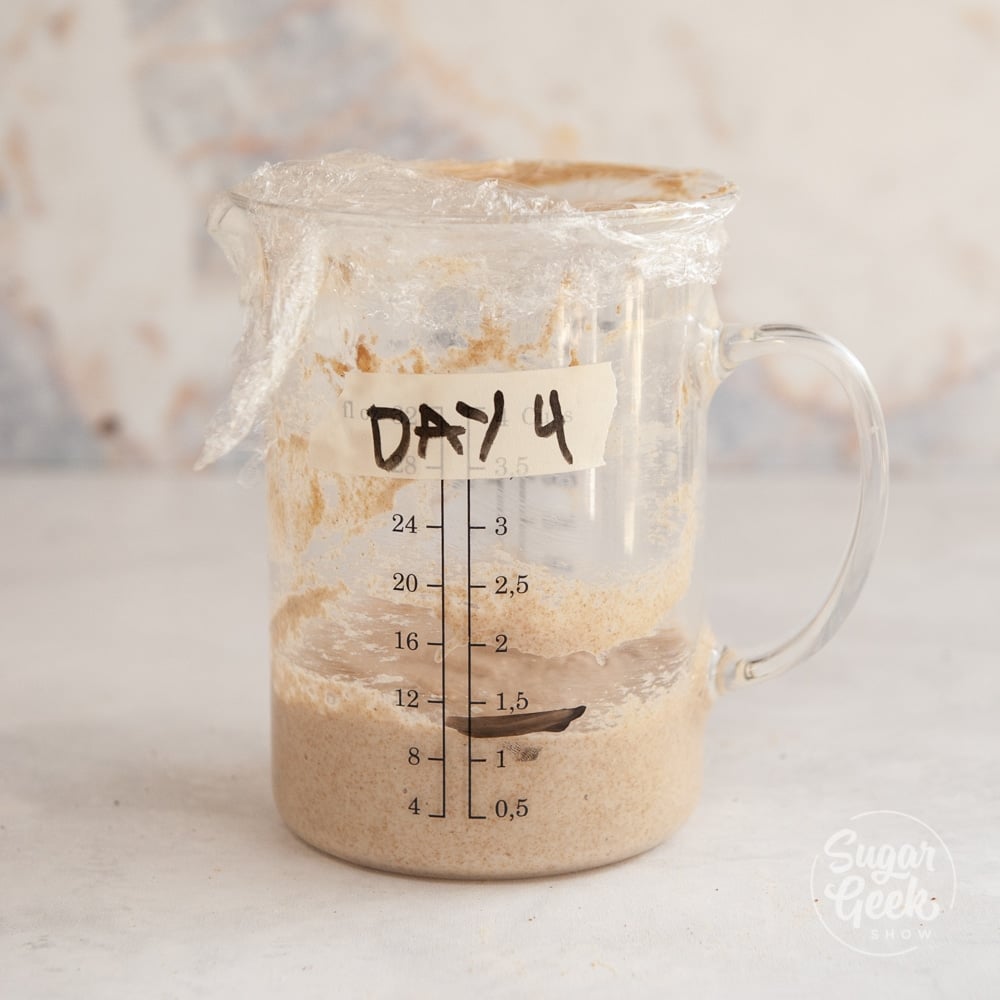
- Day 4: Discard and feed
Same routine. The activity level (bubbles) might appear to decrease. DON'T PANIC. You didn't kill your starter. The microbial population is shifting from "lots of random organisms" to "mostly yeast and lactobacillus." That's the right direction, even if it looks quiet.
What to expect after 24 hours: Less aggressive bubbling than yesterday, but possibly a little more rise. The smell is starting to shift from "wet socks" to "fermented but not nasty."
PRO TIP: If you see liquid on top of the starter, this is hooch. It's alcohol the yeast produces when it's hungry. Stir it back in or pour it off. It's a sign your yeast is active, not a problem.
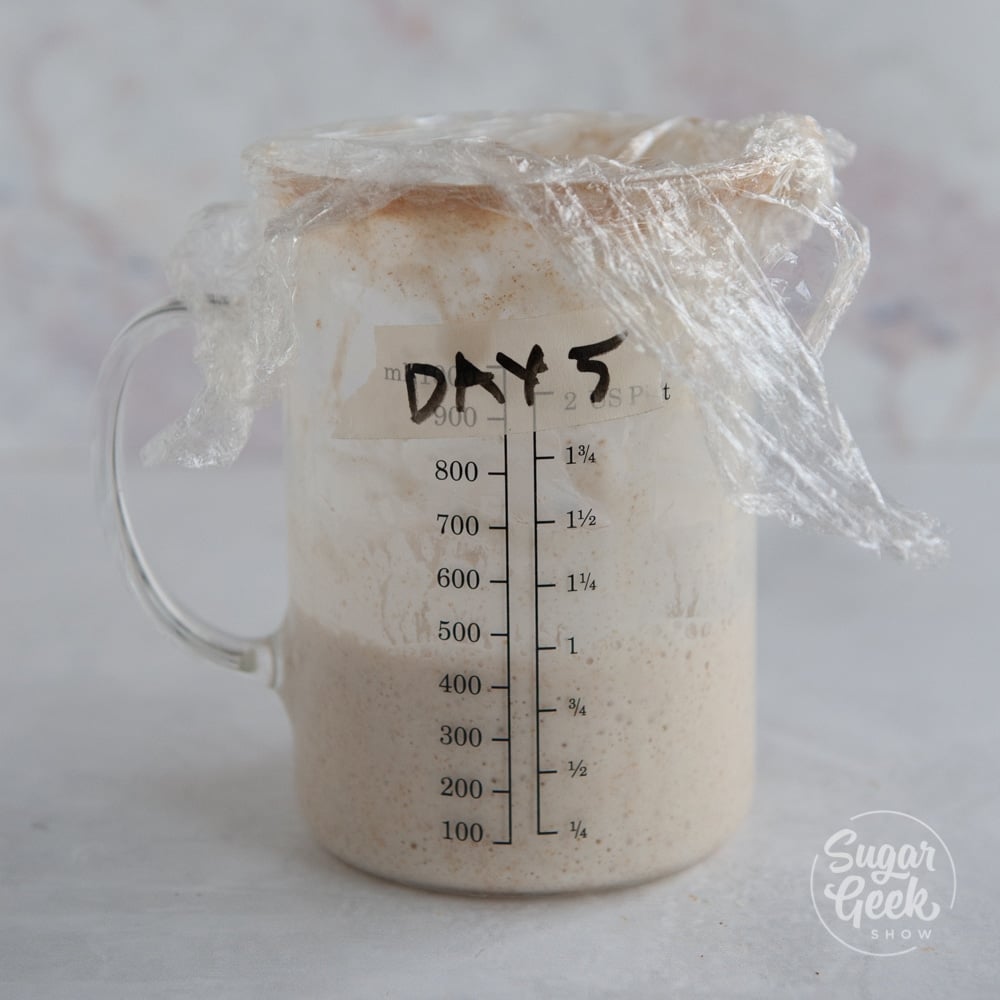
- Day 5: (Morning AND Evening): Switch flour, switch to twice daily
Today is the big switch. Two changes:
Switch from whole wheat to unbleached bread flour or unbleached all-purpose.
Feed twice a day instead of once, roughly every 12 hours.
Why twice a day now? Your yeast colony is established enough that it eats through food faster than it used to. Twice-daily feedings keep the food supply steady so the yeast can really build strength.
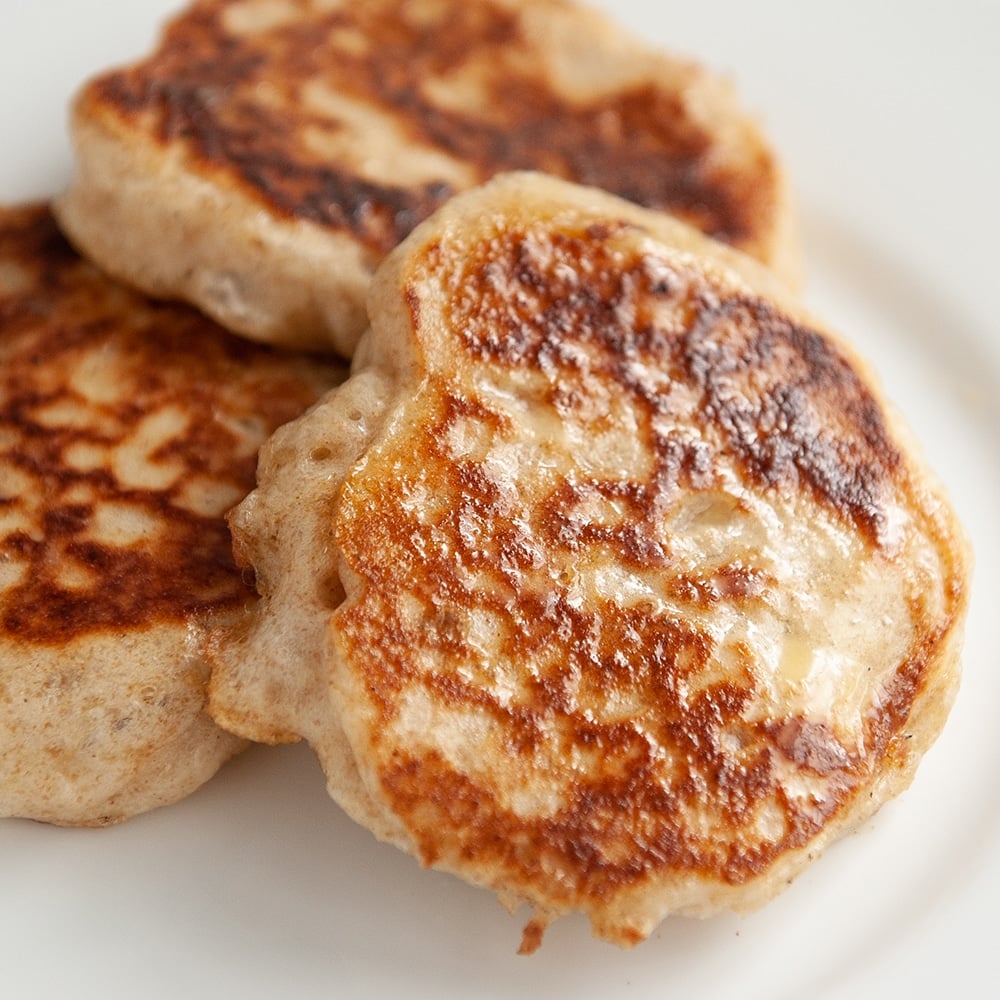
Morning feed: Remove half (now you can save this discard! Use it in pancakes or pikelets or save it for crackers later in the week). Add 75g unbleached bread flour + 75g warm water. Stir, cover, mark.
Evening feed (12 hours later): Same routine.
What to expect after 24 hours: Real rise. The starter might double at some point and start to fall again because it ran out of food. The smell is sweet and tangy now, not funky.
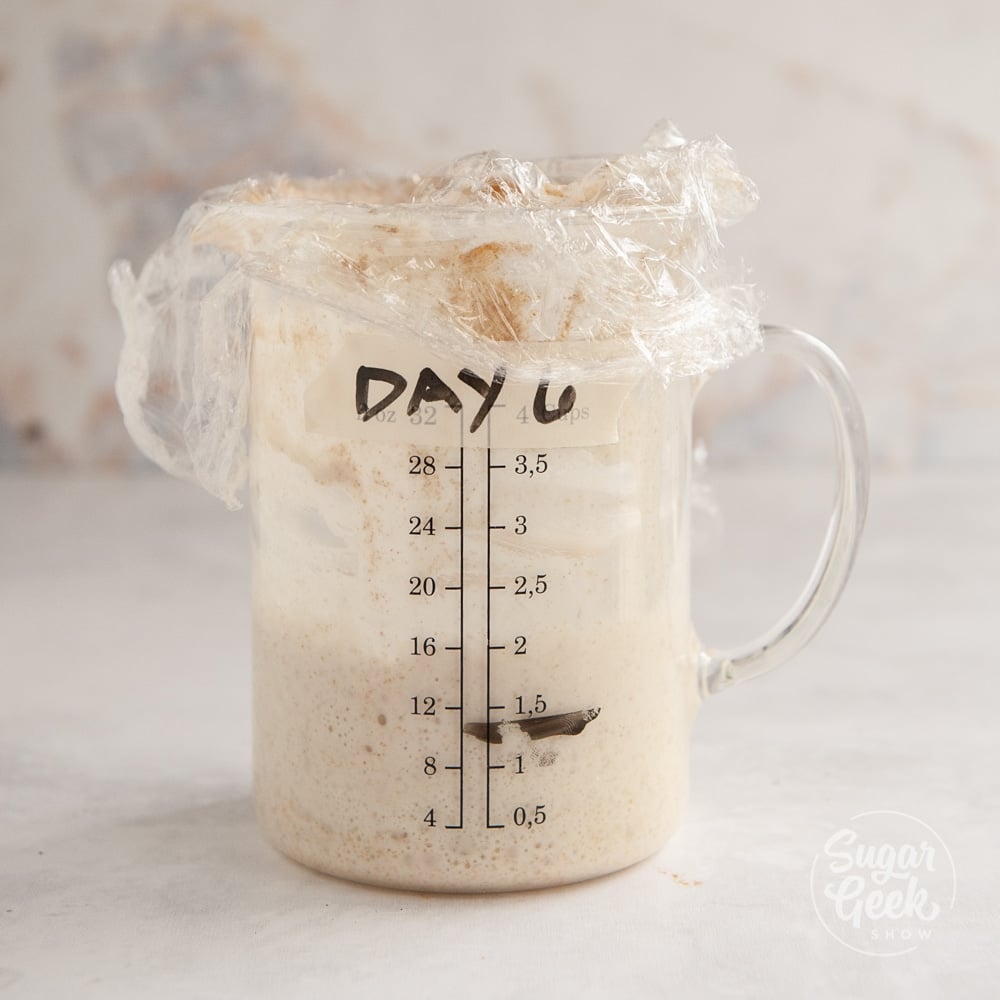
- Day 6: Twice daily feedings, watch for the peak
Same routine as Day 5. Two feedings.
Start checking on your starter EVERY HOUR (or every other hour) after a feeding. You're looking for the moment it reaches its highest point and begins to fall. That's the peak. Mark how many hours after feeding it took to peak. Write it down. You'll need this number.
What to expect after 24 hours: Consistent rise and fall. The starter doubles or triples within a few hours of feeding, holds, then falls back. Smells distinctly sweet and tangy.
- Day 7 (And Onward): Move to once daily, test for readiness
If your starter is doubling reliably within 5 hours of a feeding, you can drop back to once-a-day feedings. If it's not doubling yet, keep up the twice-daily schedule until it does.
Continue feeding 75g unbleached flour + 75g warm water (after removing half). Cover, mark, wait.
Time to test for bread readiness. See the next section.
Want this whole timeline on paper?
If you'd rather print out a day-by-day journal so you can write notes each morning instead of scrolling back through this post, grab my FREE Sourdough Starter Workbook. Each day has its own page with the feeding amounts, observation prompts ("what does it smell like?", "how tall did it rise?"), and two bonus recipes (the pikelets recipe for your Day 5 discard and the levain recipe for the bread readiness test). No email gymnastics, just hit the link and download.
How To Tell When Your Starter Is Ready (The Peak Test)
You can't go by Day 7 alone. Some starters are ready on Day 5, some need Day 10. The test is the test, not the calendar.
The peak test:
- After a feeding, mark the level of your starter on the jar with the dry erase marker.
- Every hour, check the starter and mark the new level.
- You're looking for the starter to double in size within 5 hours AND clearly fall back down within 12.
- If it doubles in 5 hours, you have an active starter ready for bread.
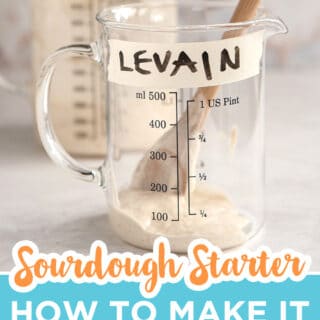
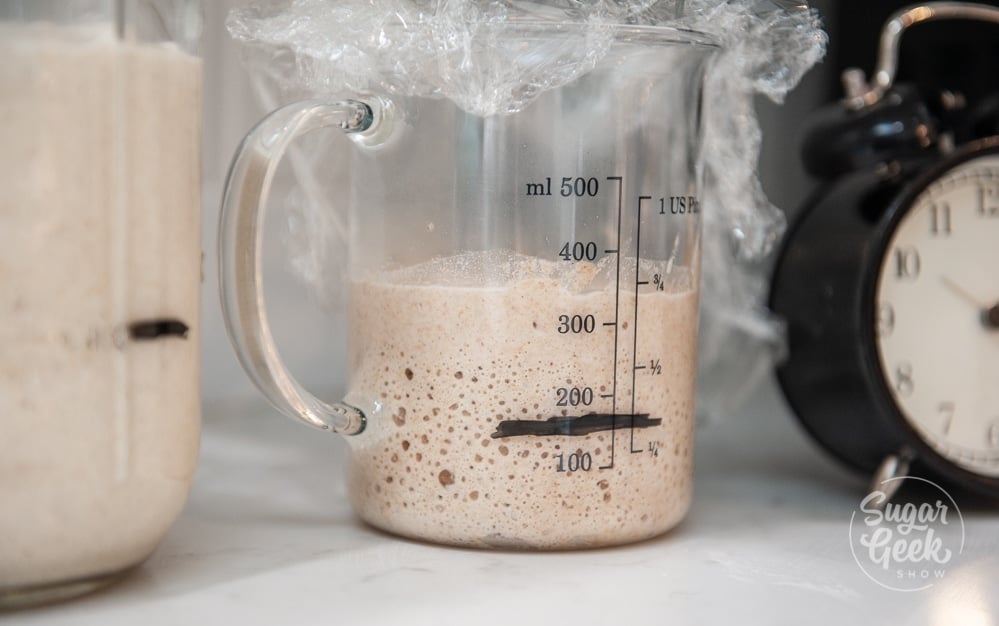
The levain test (more precise):
A levain is a small mini-starter you make to test the strength of your main starter before committing it to a bread recipe.
- Combine 50g of unfed sourdough starter + 50g warm (90º F) filtered water + 50g whole wheat flour in a clean small jar.
- Mark the level.
- Watch over the next 5 hours.
- If the levain doubles within 5 hours, you have an active starter. Mine usually triples in 3 hours when it's at full strength.
If neither test doubles within 5 hours, continue the twice-daily feedings for a few more days. Some starters take a while.
PRO TIP: Track the time-to-peak after every feeding. Over a few weeks, you'll learn that YOUR starter doubles in (for example) 3.5 hours at your kitchen temp. That number lets you plan your bread baking precisely.
How To Feed Your Sourdough Starter (Ongoing Maintenance)
Once your starter is established, feeding is simple. The variables are how OFTEN and how MUCH.
The standard ratio: 1:1:1 by weight. 75g starter + 75g flour + 75g water. This is the all-purpose ratio. Use it unless you have a reason not to.
1:2:2 for slower fermentation. If you want a slower peak (or your kitchen is very warm), feed your starter twice as much flour and water as the starter weight. Example: 50g starter + 100g flour + 100g water. The extra food extends the time-to-peak.
1:5:5 for very slow fermentation. Useful for refrigerator storage or for someone who can only feed once every 3 to 4 days. 25g starter + 125g flour + 125g water.
Counter feeding (active baker, baking 2 to 3 times a week): Feed once per day at the same time each day. I feed mine around 9 AM because that fits my routine. Pick whatever time works for yours, just be consistent.
Fridge feeding (occasional baker, baking once a week or less): Feed once a week. Take the starter out, discard half, feed, let it sit on the counter for an hour or two until you see bubbles starting, then put it back in the fridge.
Mild vs sour flavor preference. Use your starter at its PEAK for a milder, sweeter flavor (good for sandwich bread, pancakes, dinner rolls). Use your starter AFTER it has peaked and started to fall for a more pronounced sour flavor (good for traditional sourdough loaves, rye breads). The longer you wait after peak, the more sour the starter gets.
For high-volume baking: Just scale the feeding up. If you need a larger starter for a big bread bake, feed it 200g flour + 200g water + 100g starter the day before you bake. By the time it peaks, you'll have ~500g of ready-to-use starter.
Once your starter is doubling in 4 to 6 hours, the easiest first bake is my sourdough focaccia, it forgives bad timing in a way that a traditional loaf just does not.
How To Store Your Sourdough Starter
Counter storage (active bakers)
If you're baking 2 to 3 times a week, keep your starter on the counter and feed once daily. The starter stays in peak shape for whenever you need it.
Refrigerator storage (occasional bakers)
If you're baking once a week or less, refrigerate your starter and feed once weekly. The cold slows the yeast metabolism dramatically. The starter goes dormant. It doesn't die, it just sleeps.
To use after fridge storage:
- Take the starter out 2 days before you plan to bake.
- Feed twice a day (morning and evening) for 2 days.
- By the third morning, it should be doubling within 5 hours of a feed. Now it's ready.
Vacation storage (1 to 3 weeks)
When I go on vacation, I just leave my starter in the fridge. The yeast goes into a dormant stage and eats at a much slower rate. You may see some gray liquid on the top (hooch, the alcohol byproduct of yeast eating). That's normal and doesn't mean anything is wrong.
When I get back, I just resume feeding as usual. It might take a few days of feedings to bounce back to doubling as fast as it used to, but the starter is alive and well.
No need to over-engineer the vacation protocol with elaborate feeding schedules or dehydration. Just put it in the fridge.
Long-term storage (months to indefinitely)
If you want to preserve a starter for months or longer (or send some to a friend), dehydrate it.
- Spread the starter thin on a piece of plastic wrap or parchment paper.
- Let it air-dry until completely crisp (24 to 48 hours depending on humidity).
- Crumble into flakes and store in a labeled zip-top bag in the freezer.
- To revive: rehydrate by adding equal weight of warm water to the dried flakes. Let sit 30 minutes. Then begin feeding flour + water in 12-hour intervals until the starter is bubbling and lively again (usually 3 to 5 days).
A dehydrated starter can sit in the freezer for years and come back.
Sourdough discard recipes are your best friend during the first week, when you're discarding flour every day. From Day 5 onward, save your discard in a separate container in the fridge and use it within a week. Discard gets more sour the longer it sits, so use it sooner for milder flavor.
Once your starter is active and doubling within 4 hours, it's ready for sweet bakes like my lemon blueberry sourdough focaccia with jammy blueberry filling and a buttery crumble top.
For weekend bakes when you want to use a serious amount of discard, my discard cinnamon rolls take a full cup at a time and use the heavy cream pour for that ooey gooey middle.
Common Sourdough Starter Problems To Avoid
Almost every "is my starter dead" question has a simple answer. Here are the most common issues I see, in the order they usually come up.
- The starter isn't rising after 7 days. Most common cause: temperature. Below 70º F, your starter moves at half speed. Move it to a warmer spot (top of the fridge, oven with the light on, near a heating vent) and give it another 3 to 5 days. Second cause: chlorinated tap water. Switch to filtered or bottled. Third cause: bleached flour. Bleach kills the yeast you're trying to grow. Use unbleached only.
- My starter doubled on Day 2 or 3, then went quiet. This is normal and expected. The Day 2-3 "false rise" is usually opportunistic bacteria producing gas, not real sourdough yeast. The activity dies off as the real yeast takes over. Keep feeding and it will come back stronger by Day 5 to 7.
- Starter smells like nail polish or paint thinner. Your starter is starving. The alcohol smell is concentrated hooch. Discard most of it, feed with extra flour (try a 1:2:2 ratio), and the smell should resolve in a feed or two.
- Starter smells like really sharp vinegar. Acetic acid is dominating, which happens when the starter goes too long between feedings. Feed more often (twice daily for a few days), and the lactic acid balance will return.
- My starter has a gray liquid on top (hooch). Totally normal. It's alcohol produced by the yeast. Stir it back in (mild flavor) or pour it off (slightly less sour flavor). Then feed as usual.
- Starter has pink, orange, or fuzzy patches. This is mold or contamination. Throw the starter out completely, wash the jar in hot soapy water (or run it through the dishwasher), and start over. This is the only situation where you actually need to start over.
- Kahm yeast vs mold. Kahm yeast is a thin, white-to-cream colored film on the surface of the starter. It's harmless but tastes off. Skim it off the top, give the starter a fresh feed, and it'll be fine. Mold is fuzzy, colored (green, pink, black, orange), and grows in patches. If it's fuzzy or colored, it's mold. Throw the starter out.
- The starter is overflowing the jar. Your starter is doing great, but your jar is too small. Move to a bigger container, or just feed less aggressively (try 1:2:2 instead of 1:1:1).
- The starter looks dead after weeks in the fridge. Probably isn't. Take it out, discard most of it, and start feeding twice daily. Most established starters bounce back within 3 to 5 days, even after a month of neglect.
- Bread isn't rising even though my starter is bubbly. Bubbles aren't the same as strength. Run the levain test (50g starter + 50g warm water + 50g whole wheat flour) and confirm it doubles within 5 hours. If not, your starter isn't strong enough yet. Keep feeding twice daily.
- My starter smells like cheese. A sharp, cheesy smell is a sign of strong lactobacillus activity. Some starters develop this naturally, and it's not a problem. Bread made from cheesy-smelling starter still tastes like normal sourdough.
If you're working through any of these problems, my dedicated sourdough starter not rising guide walks you through the 5 most common causes and exact fixes for each.
Make Your Sourdough Starter Routine Your Own
There's more than one way to do this. Here are the variations worth knowing.
- Rye starter (my honest take). A lot of people online claim rye flour makes a stronger, more active starter than whole wheat. I tested it. I did NOT notice a meaningful difference. Whole wheat works just as well for the home baker. If rye is what you have, use it. If you have a choice, whole wheat is just as good (and cheaper).
- All-purpose only starter. If you can't get whole wheat, you can start with all-purpose flour. It just takes 2 to 3 extra days because the yeast population on AP is lower. Add a Tablespoon of rye or whole wheat to your Day 1 feed if you have ANY of either lying around, even a little helps.
- Spelt or einkorn starter. Both work. Treat them like whole wheat for the first 4 days, then switch to unbleached AP from Day 5. The flavor will be slightly nuttier.
- Smaller maintenance starter. If counter space is tight, you can keep your starter as small as 30g. Feed 30g starter + 30g flour + 30g water. Plenty for most home baking.
- Larger maintenance starter. For high-volume bakers, scale up to 200g or 500g maintenance size. Same ratios.
- Buying a starter (the shortcut). You can buy an established starter online or get some from a friend. This saves you the 5 to 7 days of buildup. Both work. I still recommend making your own at least once because the process teaches you what an active starter looks, smells, and feels like, which makes troubleshooting any starter easier later.
Final Thoughts
A sourdough starter is the lowest-effort, highest-payoff thing you can have in your kitchen. Five minutes a day for one week, and you have access to a living ingredient that powers dozens of recipes for the rest of your life.
The hardest part is the patience. The second-hardest part is trusting that the starter knows what it's doing, even when nothing seems to be happening. By Day 4, you'll be convinced you killed it. By Day 7, you'll be marveling at how something that started as flour and water can lift bread.
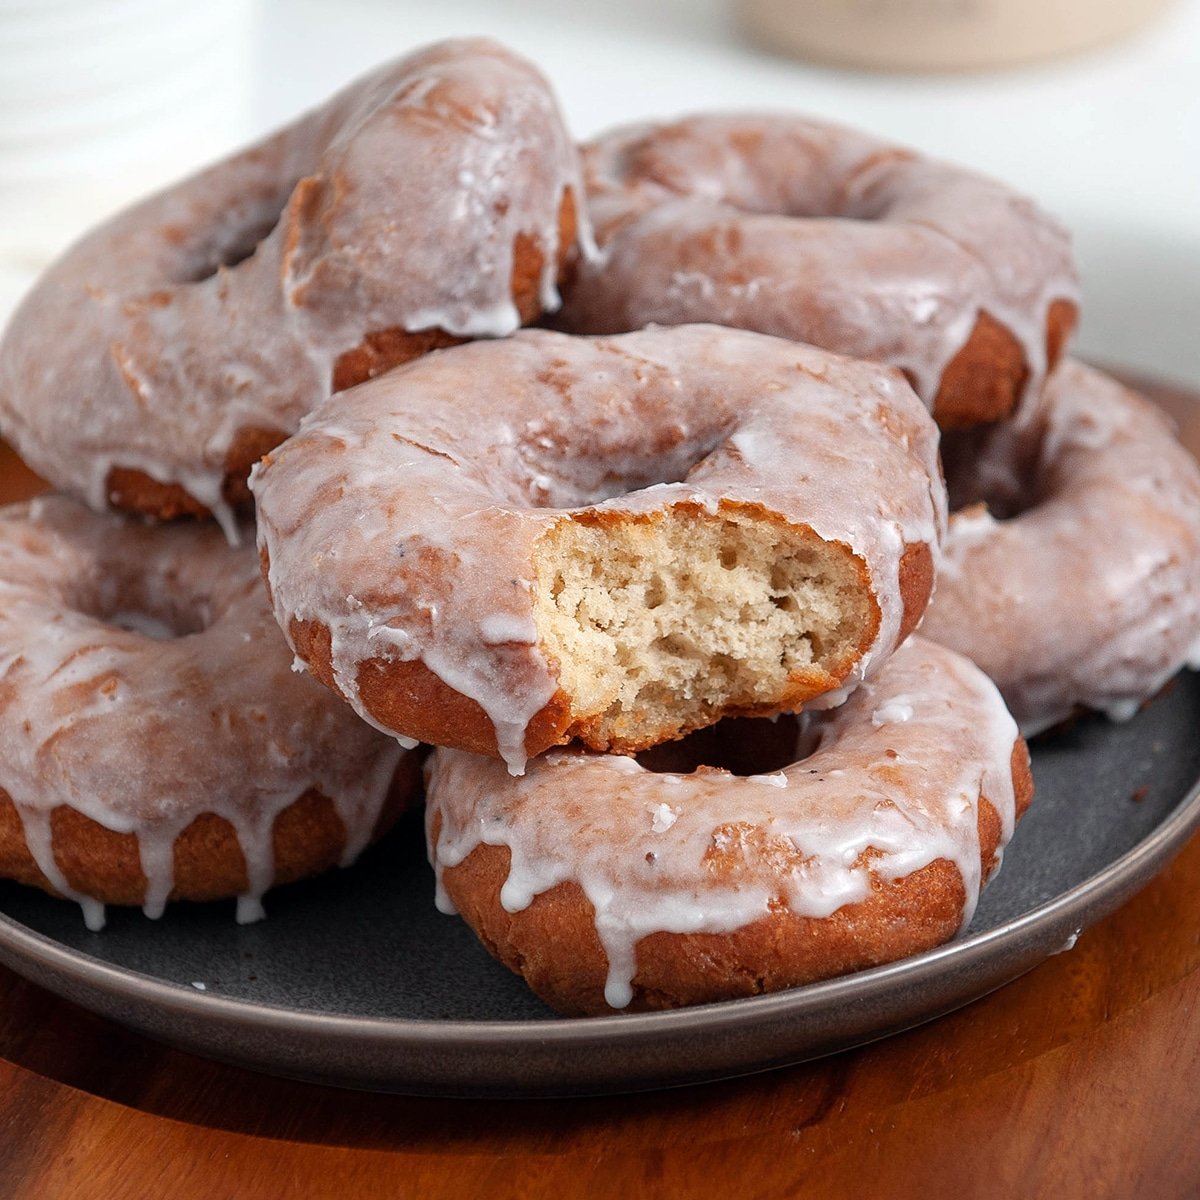
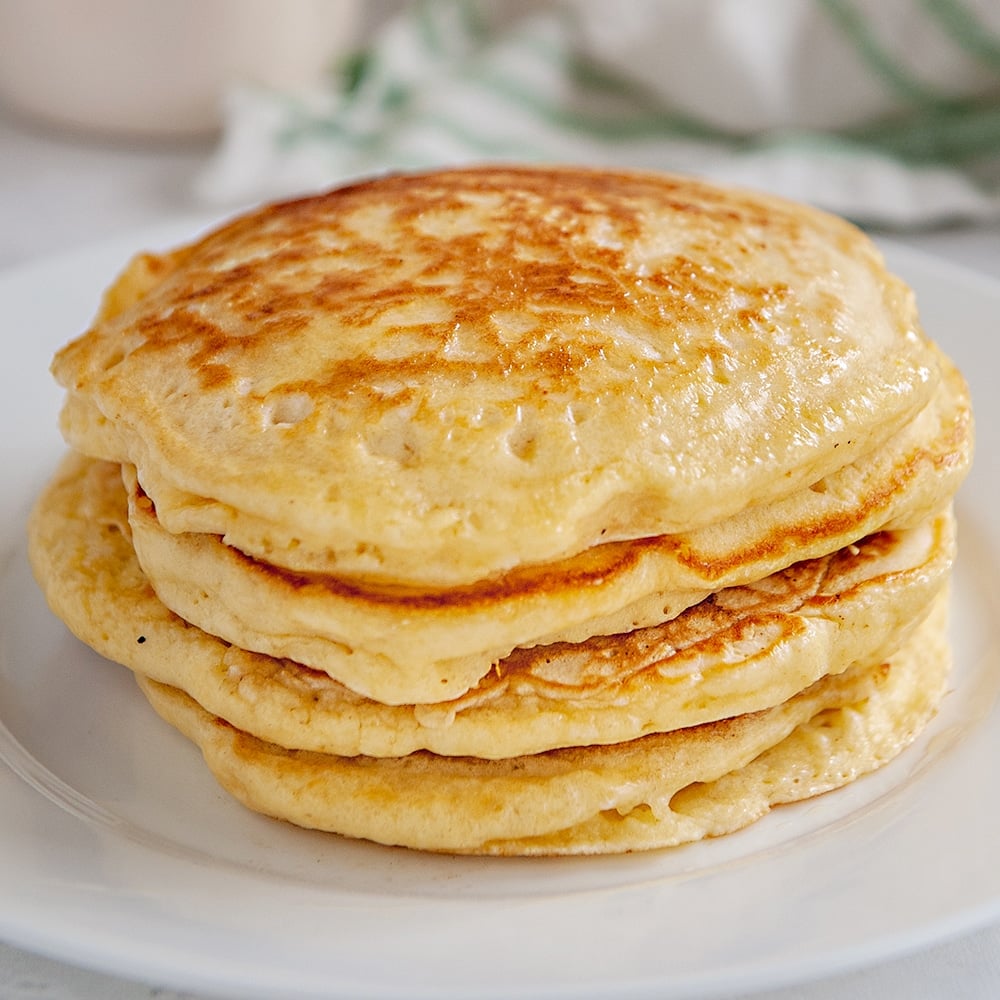
Once your starter is going, the cluster opens up. Sourdough discard pancakes for the weekday breakfast. Donuts for the weekend. Blueberry muffins for breakfast meal prep. Crackers for snacking. Pikelets for a 5-minute small bite. And bread for everything in between. EASY!
Below is my own first sourdough loaf, lovingly photographed for posterity.
WHOMP WHOMP.
If your first loaf comes out like mine, please take a picture and send it to me. We all started there. Just keep feeding, wait until your levain doubles in 5 hours, and try again. Sourdough rewards patience.
Two FREE Workbooks To Go With This Guide
If you want printable companions to this post:
Sourdough Starter Workbook (FREE). A printable day-by-day journal with feeding amounts, observation prompts, the pikelets discard recipe for Day 5, and a levain recipe for testing bread readiness. Use it as your daily companion for the 7-day starter build.
Sourdough Bread Workbook (FREE). The natural next step once your starter is active. A complete same-day workflow from 10 AM levain through next-morning bake, with step-by-step timestamps (10 AM make levain, 10 AM autolyse, 2 PM make dough, three stretch-and-folds, bulk ferment, shape, overnight cold ferment, dutch oven bake at 500º F then 450º F). Includes a one-page cheat sheet you can print and tape to your fridge for bake days.
Both downloads are free, no email required. Bake with both side-by-side.
How To Use Your Sourdough Starter
Here's where the whole project pays off. Once your starter is active, you have access to a huge cluster of recipes.
Active starter recipes (use at peak, when fully doubled):


Sourdough discard recipes (use the half you'd otherwise throw away):


Sourdough Starter FAQs
5 to 7 days at 80º F to 90º F kitchen temperature. Cooler kitchens add 2 to 5 days. The calendar is a guideline; the test is whether your starter doubles in size within 5 hours of a feeding.
Most common cause: temperature too low. Move to a warmer spot (top of fridge, oven with light on). Second cause: chlorinated tap water (switch to filtered). Third cause: bleached flour (switch to unbleached). Give the starter another 3 to 5 days after correcting any of these.
Day 1-2: like wet, funky socks (lots of competing bacteria). Day 3-4: less funky, maybe a hint of beer or alcohol. Day 5-7: sweet and tangy, like fermented bread. A mature starter smells appetizing, not gross.
Probably not. The only things that kill starter are temperatures above 138º F (which only happens if you put it in a hot oven) or visible colored fuzzy mold (throw it out and start over). Everything else can be fixed by feeding.
For an established starter, yes (as long as your tap isn't heavily chlorinated). For the first 7 days, use filtered or bottled water. Chlorine kills wild yeast in the early stages when the colony is fragile.
Counter storage: once a day. Fridge storage: once a week. Active building phase (Day 5-7): twice a day. Long-term fridge storage (multiple weeks): no need to feed during, just feed twice a day for 2 to 3 days before baking to revive.
Run the levain test. Combine 50g of unfed starter + 50g warm water + 50g whole wheat flour. If it doubles within 5 hours, you have an active starter ready for bread. If it doesn't double, keep feeding the main starter twice daily for a few more days.
Yes, but I tested it during my pandemic research and didn't notice a meaningful difference. Whole wheat works just as well. Rye is fine if it's what you have.
Active starter is the portion of starter that has recently been fed and is at or near its peak (fully doubled, full of bubbles). You use active starter to RISE bread, where you need the live yeast doing the work. Discard is the portion you remove before feeding (the older, more sour part). You use discard in recipes where the rising is done by chemical leaveners (baking powder, baking soda), like pancakes or crackers, and the discard's job is flavor and tenderness.
Yes. You can maintain a starter at 30g (30g starter + 30g flour + 30g water daily). It's enough to keep the yeast colony alive, just not enough to bake a loaf of bread. Build it up the day before you bake.
Just leave it in the fridge. The yeast goes dormant. You may see some hooch (gray liquid) on top when you get back, which is normal. Feed as usual when you return. May take a few days to bounce back to doubling as fast as before.
Leave Me A Review
⭐️⭐️⭐️⭐️⭐️
If you tried this Sourdough Starter Recipe or any other recipe on my blog, please leave a 🌟 star rating and let me know how it goes in the comments. I love hearing from you!
Recipe
Equipment
- 4 Cup clean jar or container with straight sides
Ingredients
- 150 grams Whole Wheat Flour (about one cup) plus more for feeding
- 150 grams Bottled or Filtered Water 90ºF (about ¾ cup) plus more for feeding
Instructions
Sourdough Starter Schedule
- Before you start. Use unbleached flour only. Bleach kills wild yeast. Use filtered or bottled water for the first 7 days (chlorine kills yeast). Warm your water to 90º F to give the yeast a boost. Find a warm spot in your kitchen (80º F to 90º F) for the jar.
- Day 1 (morning). Combine 150g whole wheat flour and 150g warm (90º F) water in a bowl. Mix by hand until no dry flour remains. Transfer to a clean 4-cup jar with straight sides. Cover loosely with plastic wrap or a towel. Mark the level with a dry erase marker.
- Day 2 (same time of day). Stir the starter. Remove half and discard (it's not safe to eat yet). Add 75g whole wheat flour + 75g warm water to the remaining ~75g of starter. Stir until no dry flour remains. Cover, mark the new level.
- Day 3. Same routine. Remove half, discard, feed with 75g whole wheat + 75g warm water. Stir, cover, mark.
- Day 4. Same routine. Activity may appear to slow down. Don't panic, the microbial population is shifting. Keep going.
- Day 5 (morning). Switch to unbleached bread flour or all-purpose flour. Remove half (now you can save it as discard for recipes). Add 75g unbleached flour + 75g warm water. Stir, cover, mark. Twelve hours later, repeat the feeding.
- Day 6. Continue twice-daily feedings with unbleached flour. Start checking every hour to find the peak. Note how many hours after feeding the starter peaks.
- Day 7+. If your starter is doubling within 5 hours of a feeding, drop back to once-a-day feedings. If not, continue twice daily for a few more days. Run the levain test (50g starter + 50g warm water + 50g whole wheat flour, watch for doubling in 5 hours) to confirm bread readiness.Add 75g unbleached bread flour and 75g warm (90F) filtered water. Stir until no dry flour remains. Cover loosely with plastic wrap and place in a warm area (on top of the fridge is common). Repeat this 12 hours later in the night.
- Maintenance. Once established, feed once daily on the counter (if baking 2-3x per week) or once weekly in the fridge (if baking less often).
Video
Notes
- Use unbleached flour only. Bleach kills wild yeast.
- Whole wheat for Days 1 to 4 (more wild yeast and lactobacillus on the bran).
- Unbleached bread flour or all-purpose for Day 5 onward (slower for the yeast to process, more stable starter).
- Rye flour works too but in my testing didn't perform better than whole wheat.
- Filtered or bottled water for the first 7 days. Chlorine kills wild yeast.
- Warm to 90º F to boost yeast activity. Microwave briefly and check with a thermometer.
- After Day 7, you can use tap water if your tap isn't heavily chlorinated.
- 80º F to 90º F is the sweet spot for environment temperature.
- Below 70º F, your starter will move at half speed. Find a warmer spot.
- Above 95º F, the yeast starts to stress. Move to a cooler spot.
- A sourdough home or folding proofer gives you precise temperature control if you bake often.
- Counter (active baker): feed once daily.
- Fridge (occasional baker): feed once weekly. Take out 2 days before baking and feed twice daily to revive.
- Vacation (1 to 3 weeks): just leave in the fridge. Hooch on top is normal. Feed as usual when you return.
- Long-term (months): dehydrate on plastic wrap, crumble, freeze in a zip-top bag.
- The peak test: starter doubles in size within 5 hours of feeding.
- The levain test: 50g starter + 50g warm water + 50g whole wheat flour doubles in 5 hours.
- If neither doubles in 5 hours, keep feeding twice daily for a few more days.
- Don't use bleached flour. Kills the yeast.
- Don't use unfiltered tap water for the first 7 days. Chlorine kills the yeast.
- Don't use a metal container. Acid corrodes metal.
- Don't seal the jar airtight. The starter needs to breathe.
- Don't try to bake bread before the levain test passes. Your loaf will be a hockey puck.


Tabia says
Appreciate your thorough work. Question: do you know if alternative flours can be used to make a starter e.g. spelt or kamut? Or if this starter can be used to make breads from alternative grain?
Elizabeth Marek says
I haven't tried making starter with other grains so I can't say for sure. I do know that rye makes a very strong starter.
Britt J says
This may sound like a silly questions but for measuring the water, do I weigh the water on the kitchen scale just like I weigh the flour? I was planning to put a measure cup on my scale, press the tare button to zero it out and then pour in my bottled water until the scale reads 150g. Is this correct or am I missing something?
Elizabeth Marek says
Yes that is correct, I weigh everything
Jacqueline Ruiz says
How much starter I need to bake a loaf?
Elizabeth Marek says
Follow my sourdough bread recipe 🙂
Sahana says
Hi Liz, I started making this sourdough starter and left it near my stove for the first day the next day it doubled. On day two after I fed it it rose and then when I came back the next day it had fallen a little bit. Is the the starter rising on the first day normal, and does my starter falling mean I should start feeding it AP flour twice day. Please let me know.
Elizabeth Marek says
Rising and falling on the first day is just normal activity from the yeast/bacteria. Its not a traditional rise you get from just the yeast so you might notice less activity over the next few days as the yeast and bacteria fight it out. Just continue to follow the steps for each day 🙂
Kelsie says
Hi Liz! I am sitting on the evening of day 7 of my starter now, but not seeing any further progress.
My starter had its best day on Day 3 where it doubled in size. However, since then it wasn’t rising much. I moved to a warmer location for the last couple of days and the rise had upped a little bit now where near double or triple. The temp of the starter is happily sitting at 68 degrees Farenheight. So I don’t think it is too cold.
Not only is it not doubling in size it is also not leaving a line at a peak rise and falling, its just rising and sitting there, not dropping down at all.
And lastly every time I smell it it smells of alcohol (nail varnish remover)
Because it’s day 7, I was planning on feeding it twice today. But should I revert to just once a day for the next few days now and see what happens? I’m just not getting the height i need!
Elizabeth Marek says
68º is very cold. It needs an environment that is warmer.
Eva R says
Hi Liz,
I love ALL your recipes and tutorials. In fact I bought a Bosch mixer 3 weeks ago because of your YouTube demonstration. My question is, what if we want to increase the amount of sourdough in preparation for using in recipes. Do we keep doubling the feeding weights to match the quantity in the jar or just feed the same amount but not throw away anything.
Elizabeth Marek says
You can def increase or decrease the starter amounts or levain amounts to make as much sourdough as you need. Bakeries have HUGE containers of starter 🙂
Stacey V says
Hi Liz! This is such a great tutorial! My husband and I were just talking about trying a sourdough starter and your instructions were perfectly on point, as always! I just adore you and you keep teaching me so much! My question is, during the upkeep phase, if keeping in the fridge and you feed once a week, do you feed it 2x, every 12 hours that day or just once? Thank you so much!
Elizabeth Marek says
Thank you so much stacey!
swati bhuwalka says
i have started with my sourdough starter, and i got a good response on the first 24 hours, some bubbles could be seen. on day 2, hope to successfully grow it
Elizabeth Marek says
Hey Swati, those first bubbles are not from yeast, it's from other kinds of stuff inside the flour reacting so don't be alarmed when it slows down for a few days. Just keep going and you will see more activity later 😀 Remember, yeast doesn't die unless you bake it or you see mold 🙂
S M R says
Hey Liz, I didn't actually try your recipe - I am already parent to an established sourdough baby. The 5 stars are for your ultra-detailed, excellent instructions - it absolutely guarantees success. When I started out years ago with sourdough, I was totally overwhelmed by the internet's fussy, inaccessible tsunami of information. It is very intimidating to a novice.
Thank you for taking the time to give home bakers a clear, easy-to-understand method of starting and maintaining their sourdough. Your site is always a source of practical, real-world useful information.
To everybody reading this recipe and review: Don't be scared. Do what Liz says, and there shall be amazing bread in your future! Stay safe, happy baking xoxo
Elizabeth Marek says
Thank you so much! Your words mean so much <3
Leslie Horman says
Yes!!! I’m on day six of growing my sourdough starter, and it has been so easy! For convenience, I just copied the instructions to my notes app on my phone so I could highlight and rearrange the information. It has been so helpful and easy to follow! I made your discard pancakes yesterday, and they were delicious! 🤤 My daughter loved them!
Elizabeth Marek says
Great idea!
Leidy Q. says
I will make this today! Cant wait!!!
Rae says
Hi! I absolutely LOVE all your recipes. Just last week I tried your focaccia recipe and it was a big hit!! Just wondering if the line on your container is where it started or...? Also, can we use a mason jar to make the starter? And my whole wheat flour has small flakes in it (not sure if this is normal, so should I just sift it out, or is this an important part in developing the yeast?). Sorry for all the questions... this is my first attempt at making a sourdough starter. Thank you so much, and keep up the awesome in-detail videos and recipes!!
Elizabeth Marek says
All good questions! Yes the line on my jar is where my starter starts after I feed it so I can keep track of it's growth. Some people use a rubberband. I use an dry erase marker. Whole wheat flour with flakes is great! The yeast will love it 😀
Stefanie says
In your tips you say “Once your starter is established, you can keep it in the fridge for a month without feeding. Revive by feeding as we did on day 5 of our initial starter with twice a day feedings for two days until it's bubbling and happy again.”
Do you need to feed and discard? Or just feed?
Elizabeth Marek says
Feed and discard just as we did on day 5 🙂 Always discard or you will end up with a LOT of starter 😀
Melissa Adams says
Where do I find your 7 day sourdough starter pdf? Thank you.
Elizabeth Marek says
Just scroll through the blog post, you will see it 🙂