
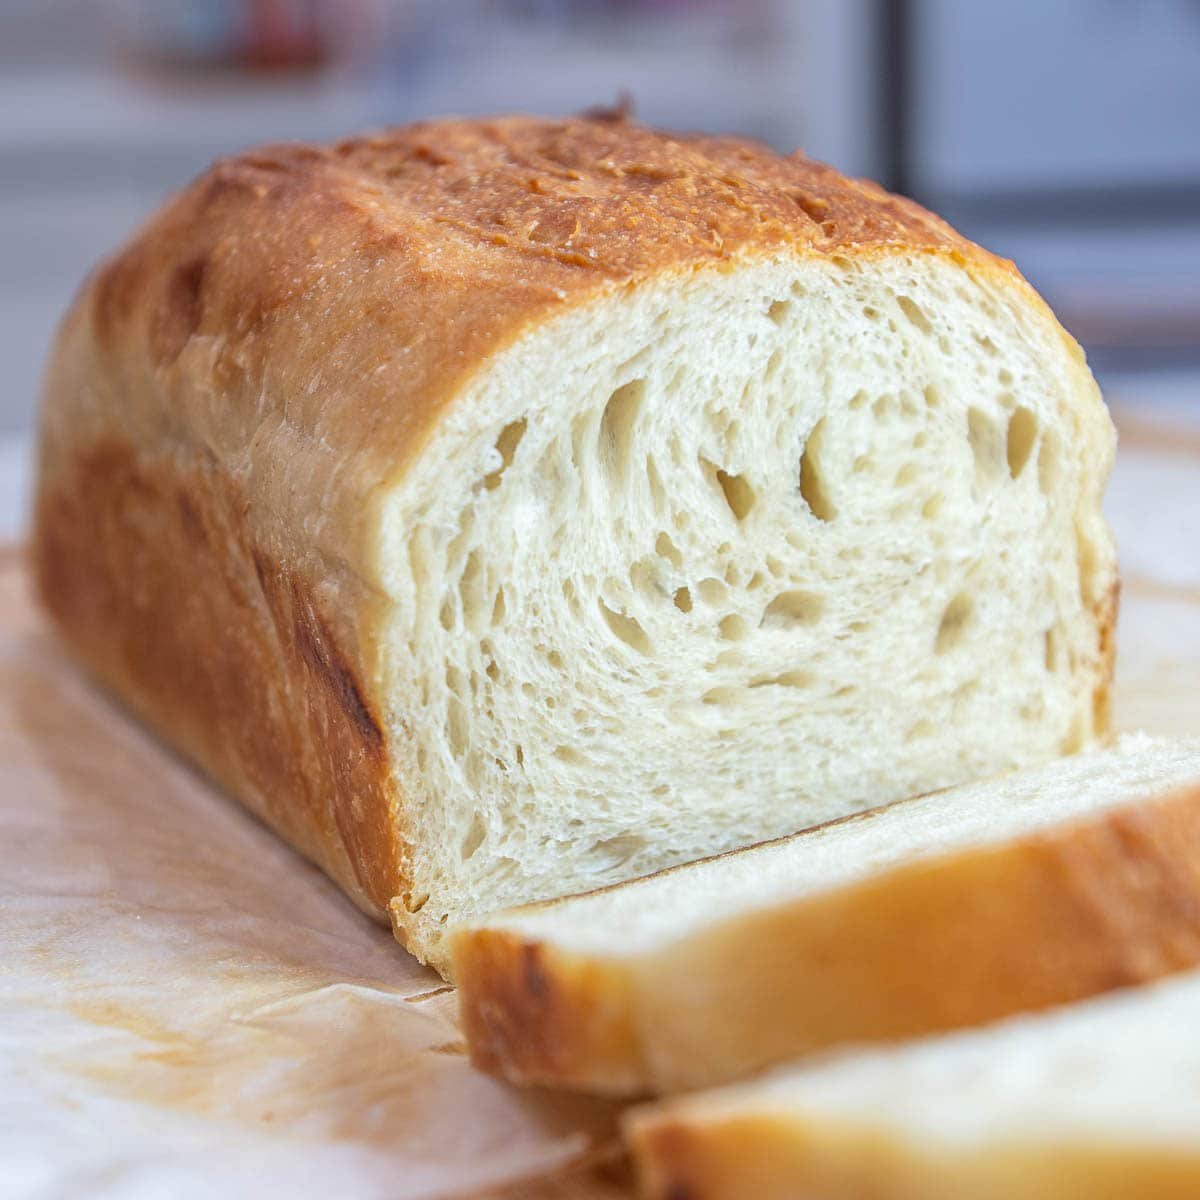
This sourdough sandwich bread is the soft, sliceable, not-too-tangy loaf I bake every week for school lunches and weekend grilled cheeses. Six ingredients, no Dutch oven, no shaping a boule, just a stand loaf pan and a long fermentation. If you can pull off my easy sourdough focaccia recipe, this is the next loaf to tackle.
I've made a lot of sourdough recipes over the years, but this sandwich loaf might just be my favorite. The touch of avocado oil and honey in the dough is what keeps it soft and tender, making it perfect for everything from French toast to a basic PB&J. My kids inhale it for school lunches, and I love it toasted with avocado or melted into a grilled cheese. If you also want a smaller, pull-apart version of this same dough, my soft sourdough rolls bake from almost the exact recipe, just divided into 16 individual rolls.
Quick Glance at the Recipe: Soft Sourdough Sandwich Bread
- Recipe Name: Soft Sourdough Sandwich Bread
- Why You'll Love It: Soft, not-too-tangy, slices clean for sandwiches and toast. No Dutch oven, no boule shaping, just a loaf pan.
- Time and Difficulty: 1 hour 30 min hands-on, 10 hours rise, 45 min bake. Beginner-to-intermediate sourdough.
- Main Ingredients: Active sourdough starter, bread flour, water, honey, avocado oil, salt.
- Method: Mix, 4 sets of stretch and folds, bulk rise 4 to 8 hours, shape into a loaf pan, second rise 2 hours, bake at 400º F then 375º F.
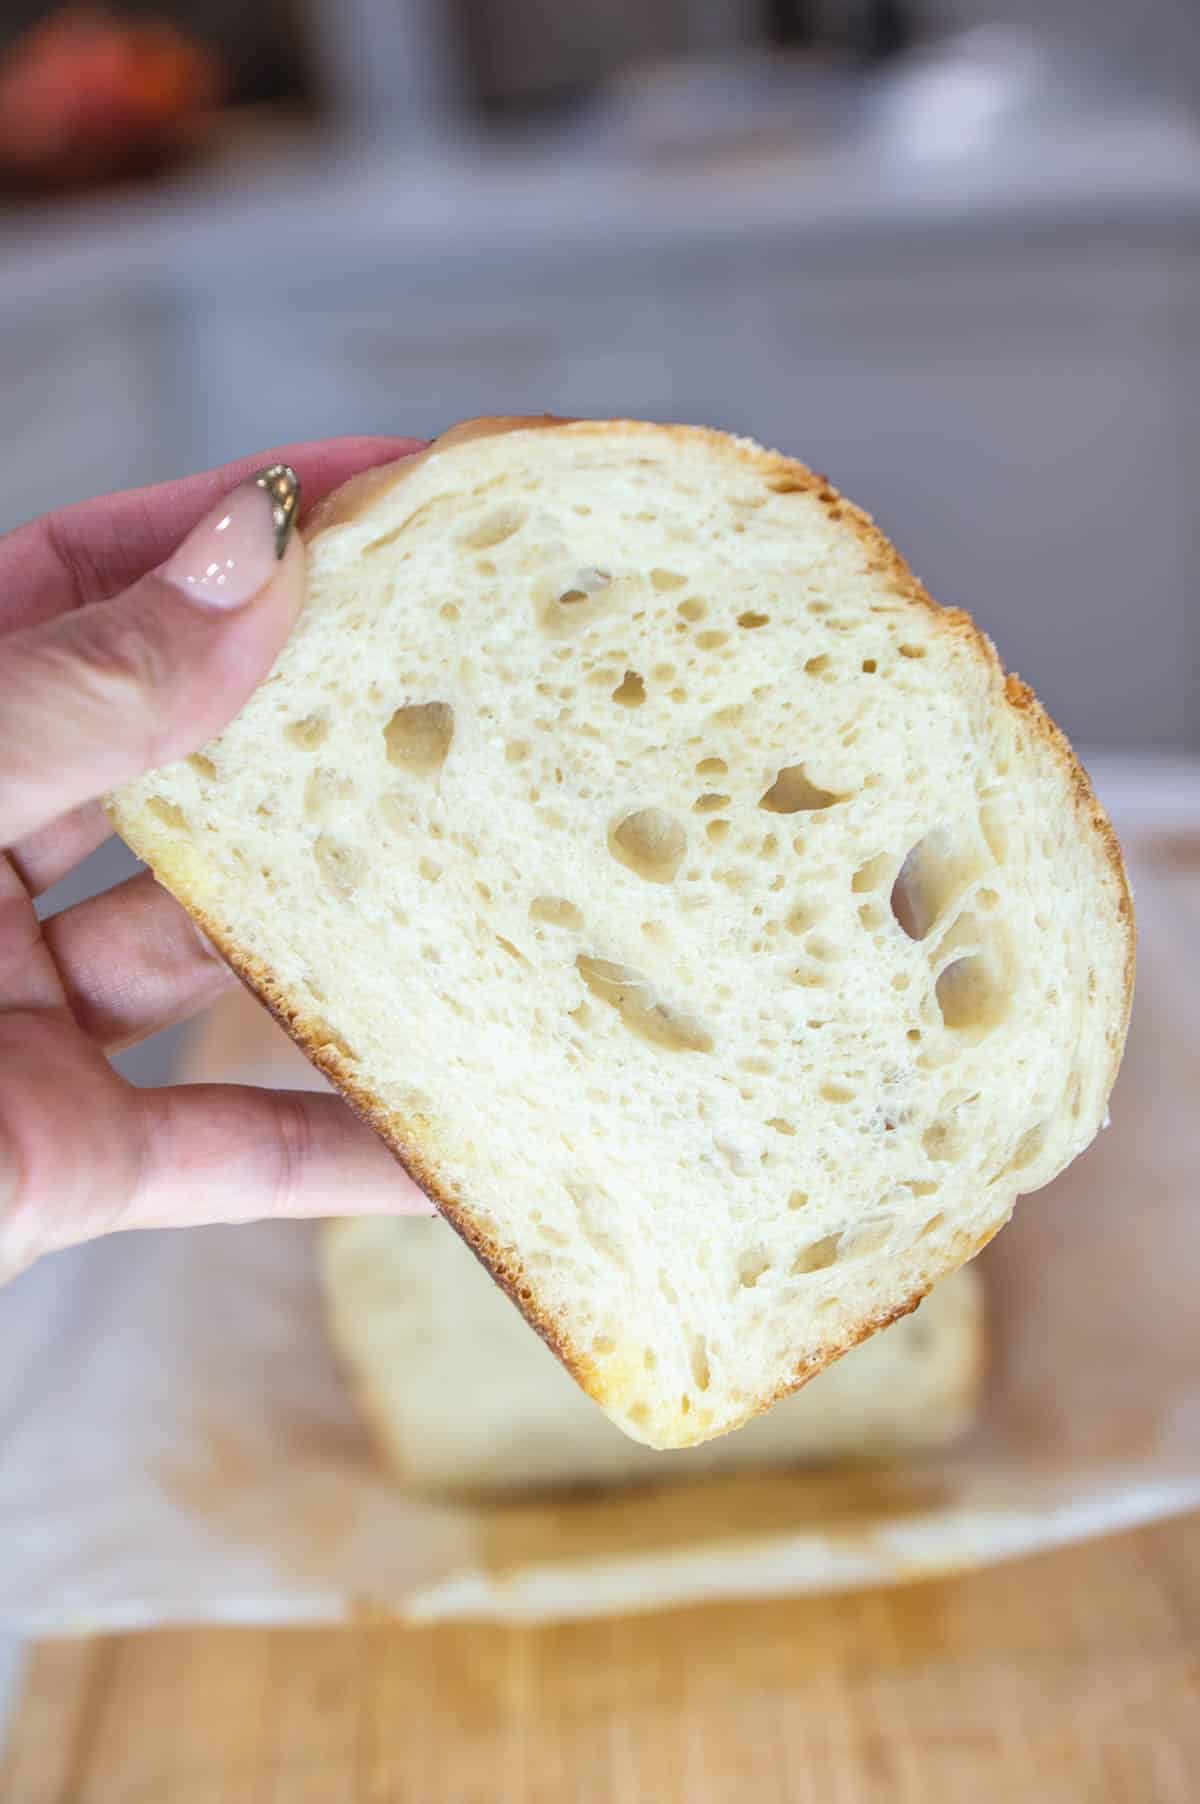
- Texture and Flavor: Soft, tender crumb, gentle tang, golden honey-browned crust. Holds a sandwich without flaking apart.
- Quick Tip: Pull your loaf at an internal temp of 198 to 205º F. Sandwich bread tastes best at the low end of that range; it stays softer than artisan loaves that hit 205 to 210.
Jump to:
- Quick Glance at the Recipe: Soft Sourdough Sandwich Bread
- What Makes This Sourdough Sandwich Bread So Good
- Sourdough Sandwich Bread Ingredients
- Equipment Needed
- How To Make Sourdough Sandwich Bread Step-By-Step
- How To Make A Warm Sourdough Environment
- Common Sourdough Sandwich Bread Problems To Avoid
- Final Thoughts
- Make This Sourdough Sandwich Bread Your Own
- Sourdough Sandwich Bread FAQs
- Leave Me A Review⭐️⭐️⭐️⭐️⭐️
- Recipe
What Makes This Sourdough Sandwich Bread So Good
If you love sourdough but you want a daily loaf that doesn't taste like a sharp artisan boule, this is the recipe. Here is why:
- Not too tangy. A shorter overnight bulk and the touch of honey keep the sourness gentle so it works for kids, for sandwiches, for French toast. If you want big artisan tang, my beginner sourdough bread is where to go.
- Soft, sliceable, sandwich-ready. The avocado oil, honey, and brushed melted butter work together to give you a pillowy, tender crumb that holds up to a thick smear of peanut butter, a slice of tomato, or a grilled cheese without crumbling.
- No Dutch oven, no boule shaping. A standard 9x5 loaf pan is all you need. No scoring, no preheating cast iron, no steam tricks.
- Fits a working week. Mix at night, bulk overnight, shape and bake in the morning. Or split the timeline with a cold proof in the fridge for two days of flexibility.
- One dough, three formats. The exact same dough makes sourdough rolls and a half-batch sandwich loaf if you want both on the same dinner table.
Sourdough Sandwich Bread Ingredients
Six pantry staples. The only one that needs effort is an active, bubbly starter, everything else you probably already have. I always recommend weighing your ingredients on a digital kitchen scale for sourdough, eyeballed flour is the #1 reason beginner loaves come out dense.
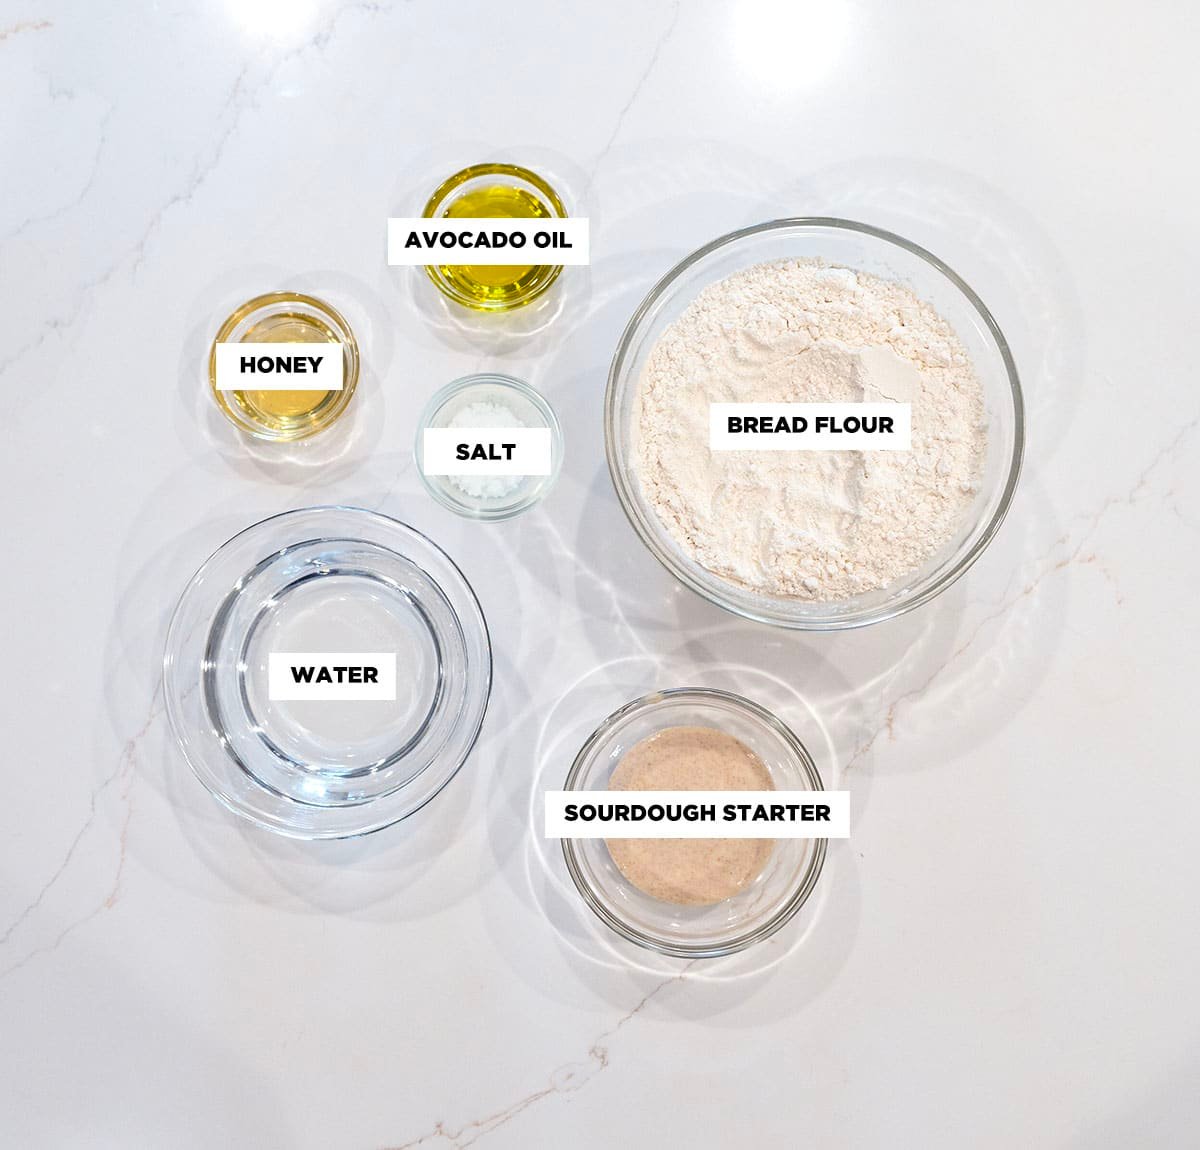
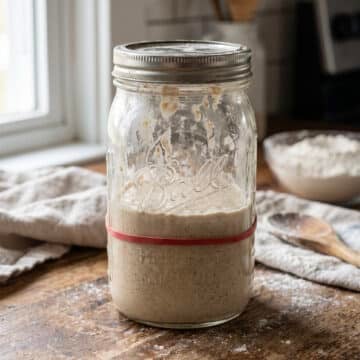
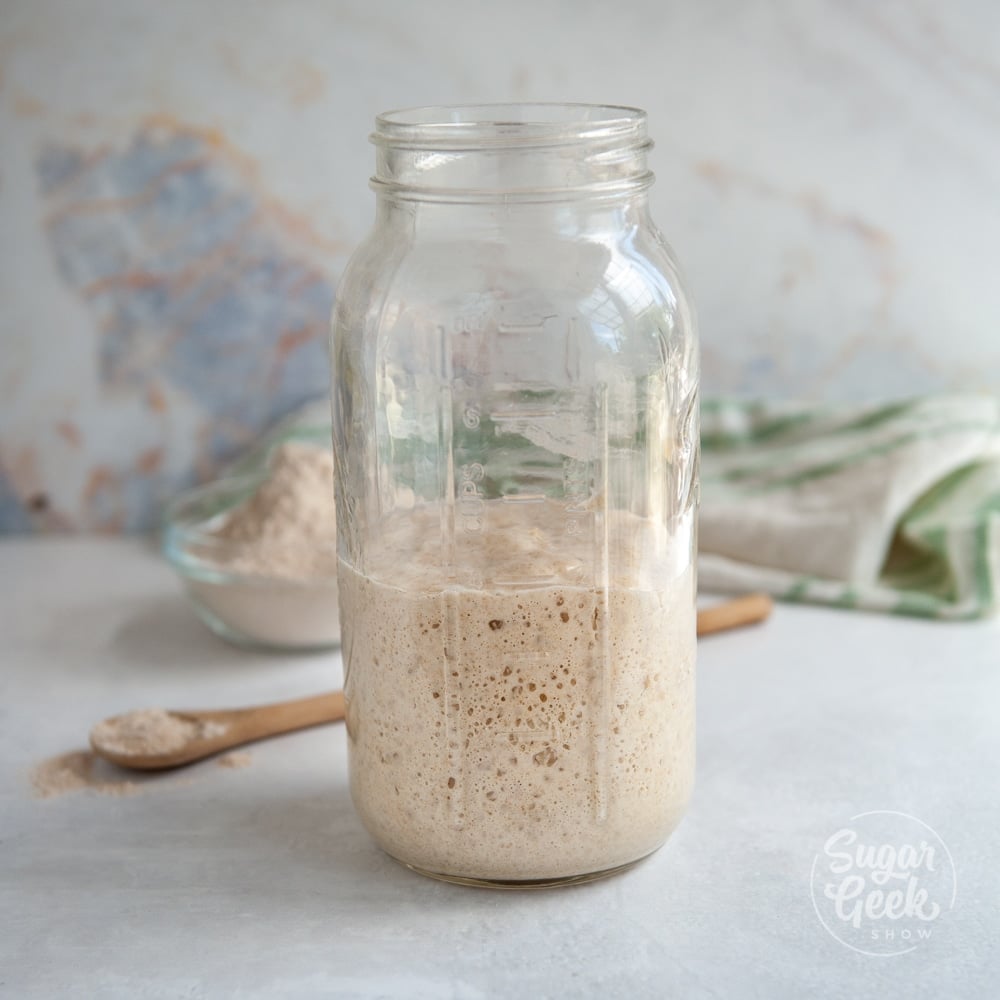
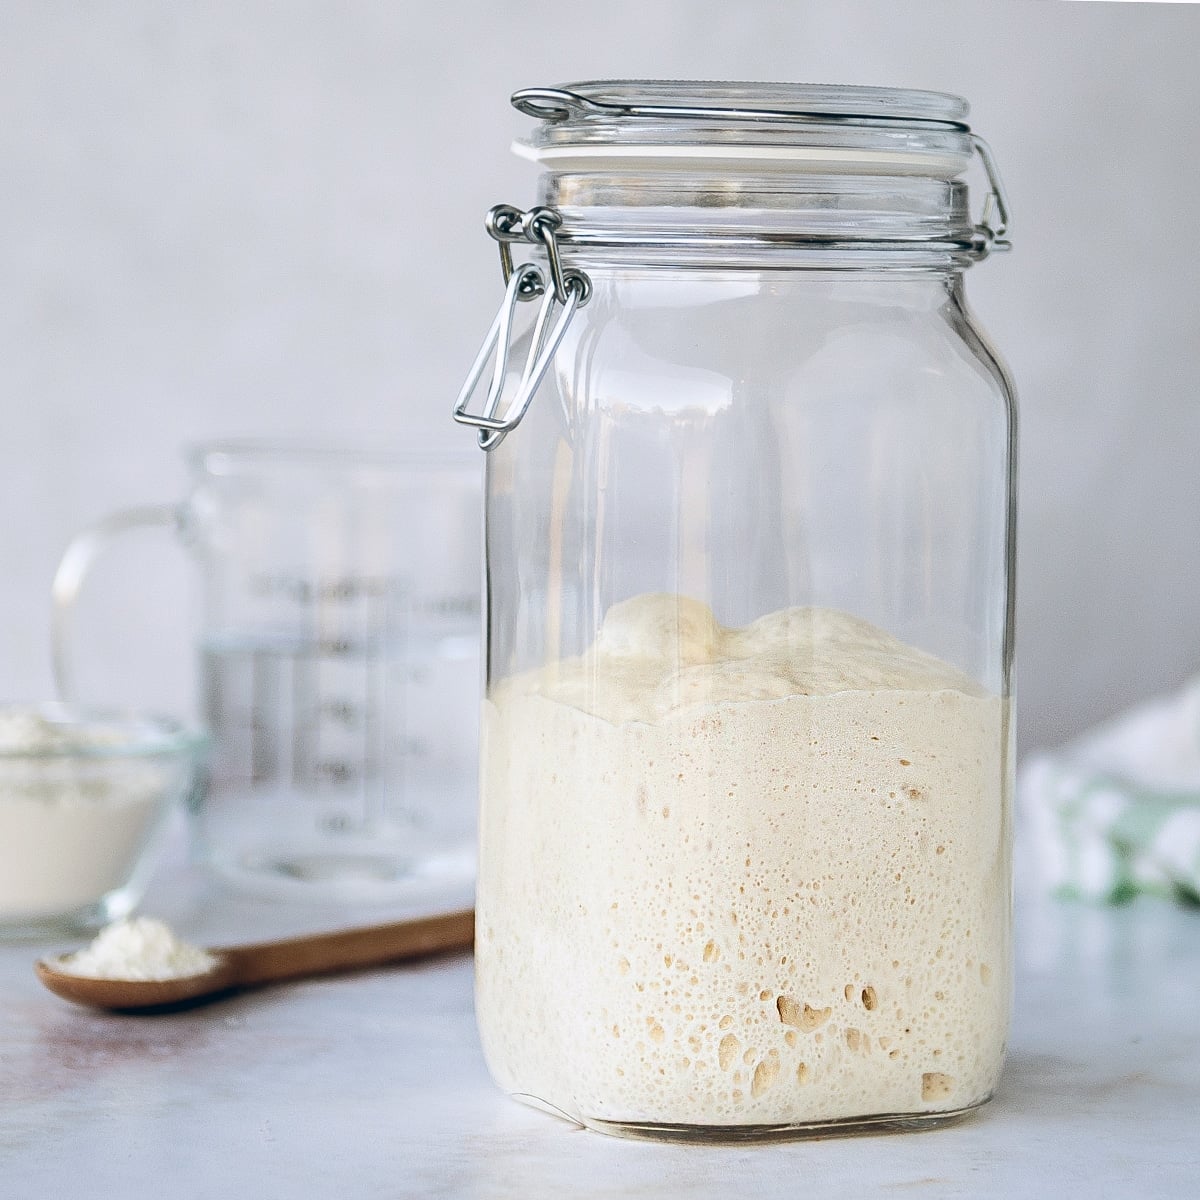
- Active sourdough starter, the loaf rises only as well as your starter. Use a starter that's bubbly and at least doubled in the last 4 to 6 hours of feeding. If yours has been napping in the fridge, give it 2 to 3 daily feedings before you mix. No starter yet? Start with my sourdough starter for beginners guide.
- Warm water, around 95º F (just barely warm to the touch). Anything hotter than about 115º F will kill the wild yeast in your starter. You can swap in warm milk for an even softer, richer crumb.
- Avocado oil adds moisture without a strong flavor. Olive oil, canola oil, or melted unsalted butter all work as 1:1 swaps.
- Honey adds gentle sweetness AND helps the crust brown to a deep golden color (it's not just for sweetness, the sugars caramelize beautifully). Maple syrup, agave, or granulated sugar all work as swaps.
- Bread flour (unbleached), the higher protein gives you that chewy, sliceable structure. You can replace up to half with whole wheat or all-purpose flour for a different texture; see Make This Recipe Your Own below.
- Salt enhances flavor and keeps the fermentation from running away. Kosher or sea salt is what I use. A pinch of flaky salt on top of the loaf before baking is a great optional finish.
If your starter is stalled before you start this bake, see my sourdough starter troubleshooting guide for the 5 most common rising problems and the exact fixes.
Equipment Needed
Food Scale - A food scale ensures accuracy when measuring ingredients, which is especially important for baking. It helps you achieve the right dough consistency and balance between flour, water, and starter every time.
Digital Thermometer - Use a digital thermometer to check the internal temperature of your rolls after baking. They're perfectly done when they reach 205°F, ensuring a soft, fluffy interior without being underbaked.
Sourdough Essentials - If you're new to sourdough baking, check out my Beginners Sourdough Bread Recipe. The essential tools you will need are a dough scraper, proofing basket, dough whisk, and Weck jars for storing your starter. Not sure how to keep your sourdough starter fed between bakes? My feeding guide walks through the counter and fridge schedules.
How To Make Sourdough Sandwich Bread Step-By-Step
Before you begin, make sure your starter is active and bubbly (it should at least double within 4 to 6 hours of feeding). Lightly grease a 9x5 loaf pan. Plan backward from when you want to bake. This is roughly a 12-hour process from first mix to oven, so most people mix in the morning and bake that night, or mix at night and bake the next morning.

- In a large mixing bowl, combine the active sourdough starter, warm water, avocado oil, and honey. Whisk until smooth. Add the bread flour and salt and mix until a shaggy dough forms. Cover and let it rest for 1 hour.

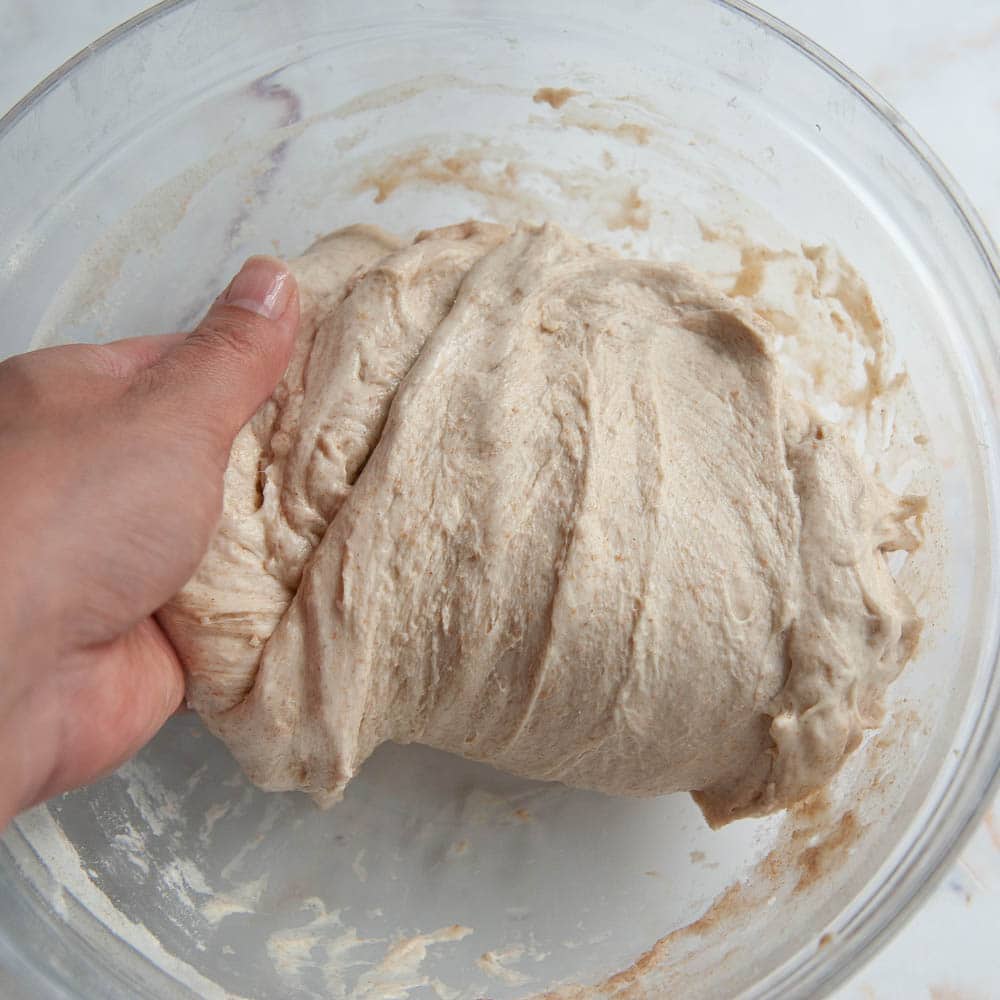
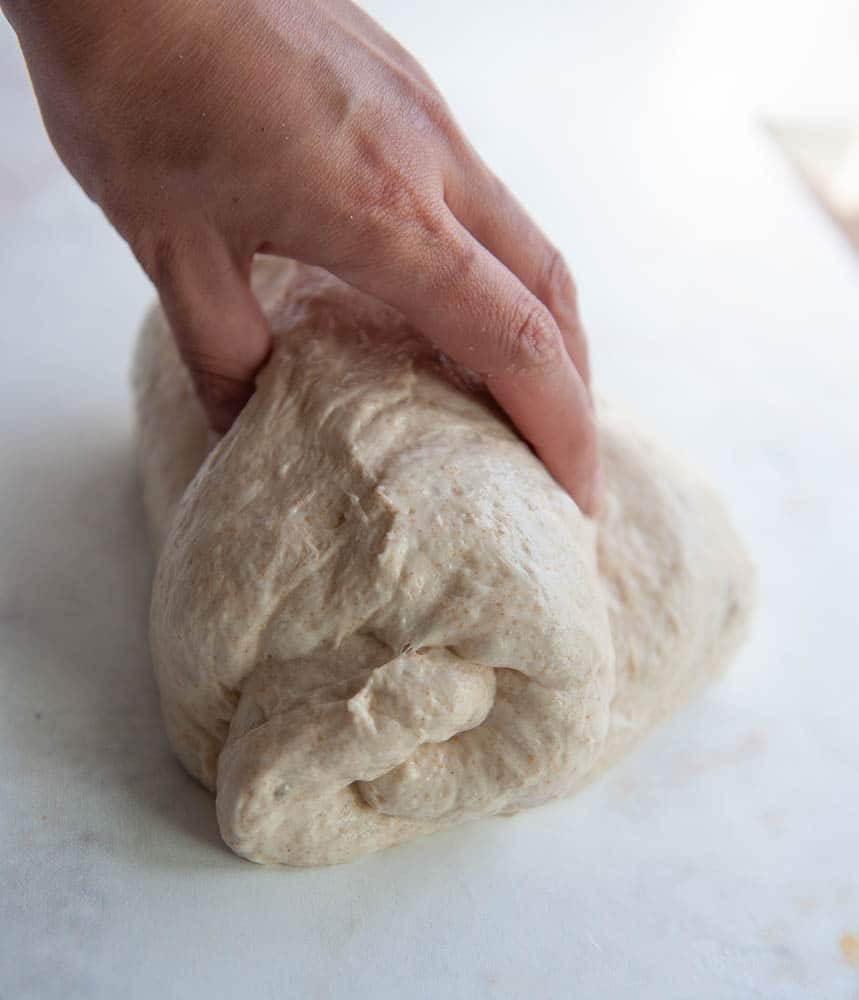
- Perform 4 sets of stretch-and-folds, 30 minutes apart. To do one set, grab one edge of the dough with wet hands, stretch it up, and fold it over onto the middle of the dough. Rotate the bowl 90 degrees and repeat on all four sides. Cover the bowl between sets. If you're new to the technique, my how to stretch and fold tutorial walks through 4 sets, 30 minutes apart, with the tight-dough finish signal.
PRO TIP: Stretch-and-folds replace kneading for high-hydration doughs like this one. Each set builds the gluten network a little more without working the dough into a tight ball. By the end of the fourth set, the dough should feel smooth, taut, and noticeably stronger than when you started.
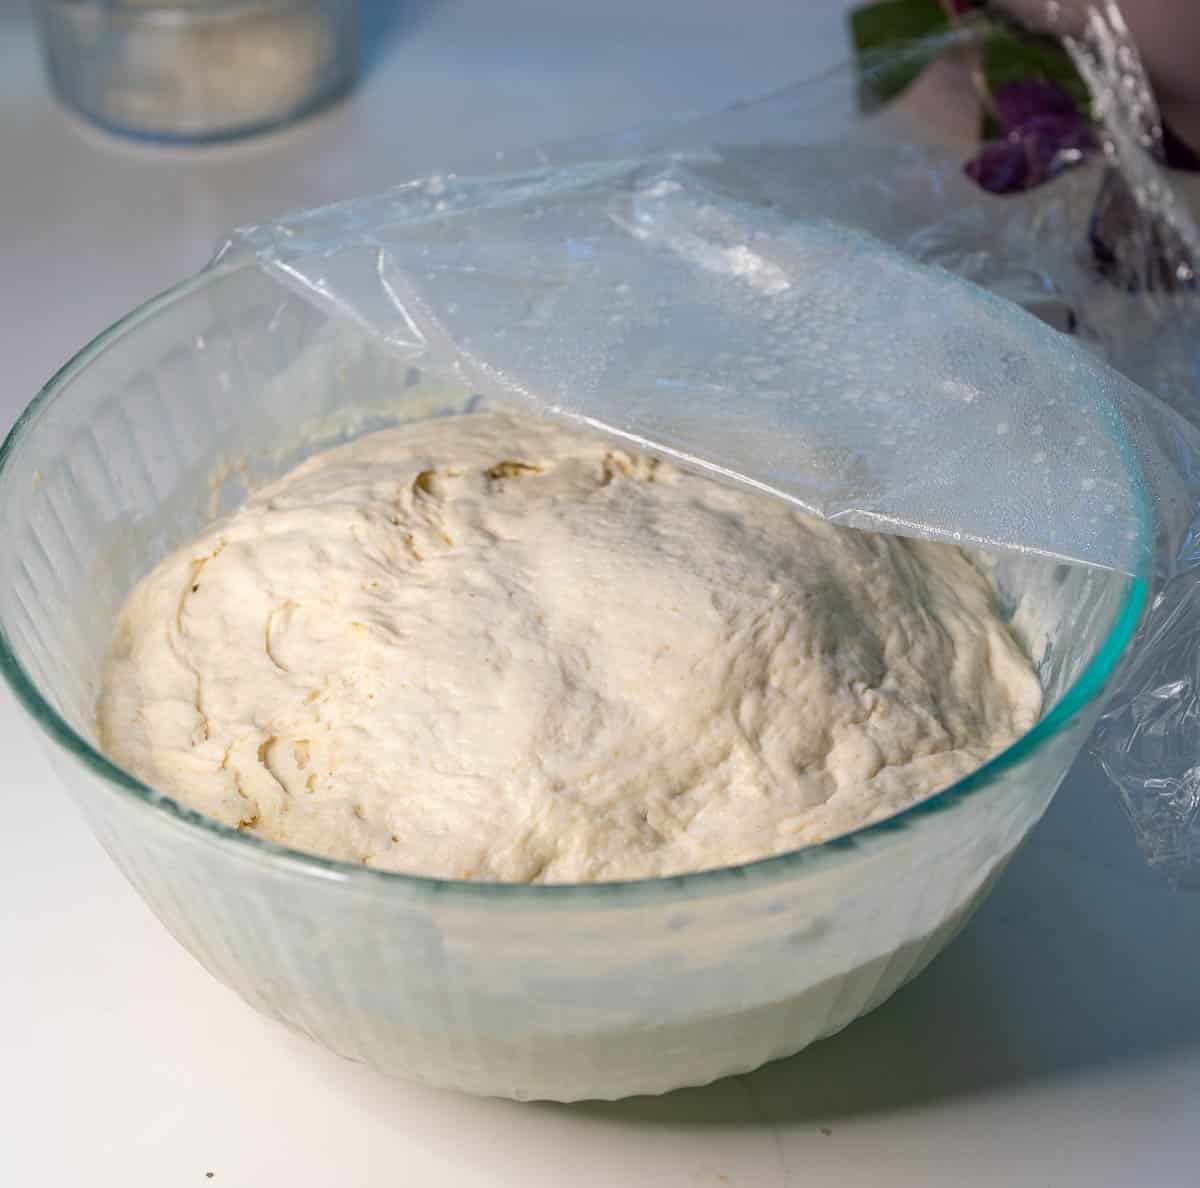
- After the last fold, cover the bowl and let it bulk ferment for 4 to 8 hours at room temperature, until the dough has roughly doubled and looks bubbly and airy. Warm kitchen = closer to 4 hours. Cool kitchen = closer to 8 or even longer.
- Place the dough onto a lightly floured surface. Flatten it down, then shape it into a tight log roughly the length of your loaf pan and place it seam-side down into the greased pan. The dough should reach about halfway up the rim.
PRO TIP: For a softer crust and bigger oven spring, use a second loaf pan as a LID. Spritz the top of the scored dough with water, invert a second matching loaf pan (or a sheet of greased foil) over the top, and bake covered for the first 30 minutes. The trapped steam acts just like a Dutch oven would. This soft sourdough crust hack is the trick @musclemommasourdough has gone viral with on TikTok, and it gives you a noticeably pillowy crust.
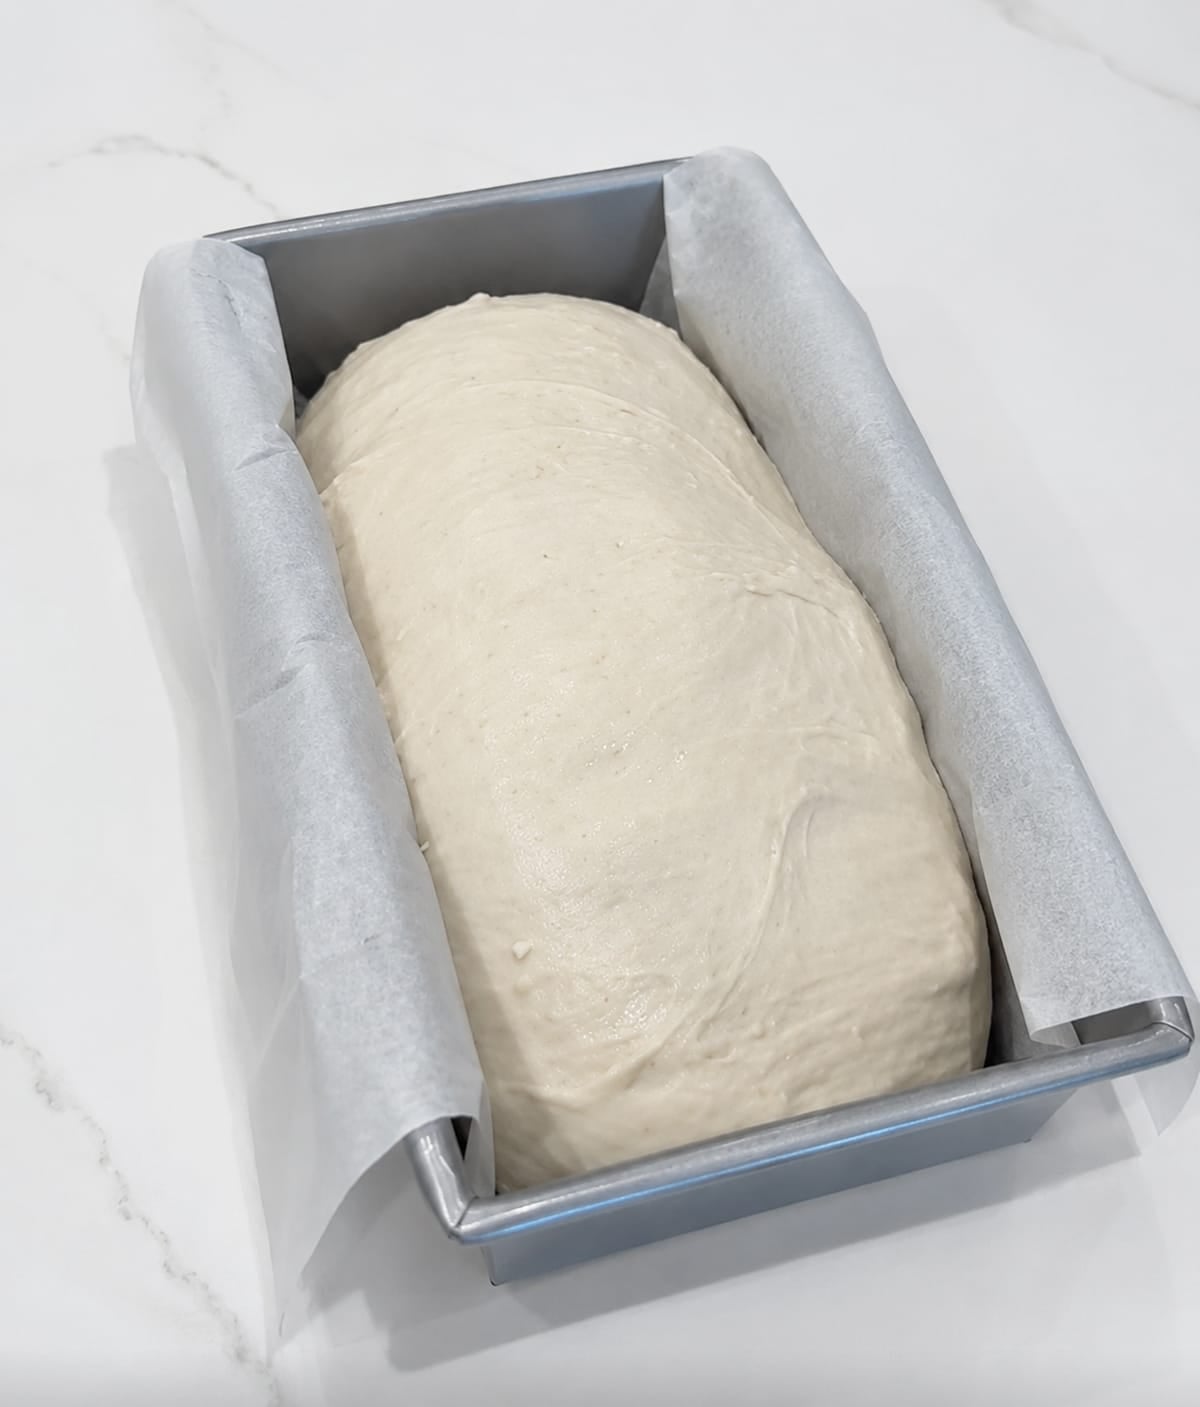
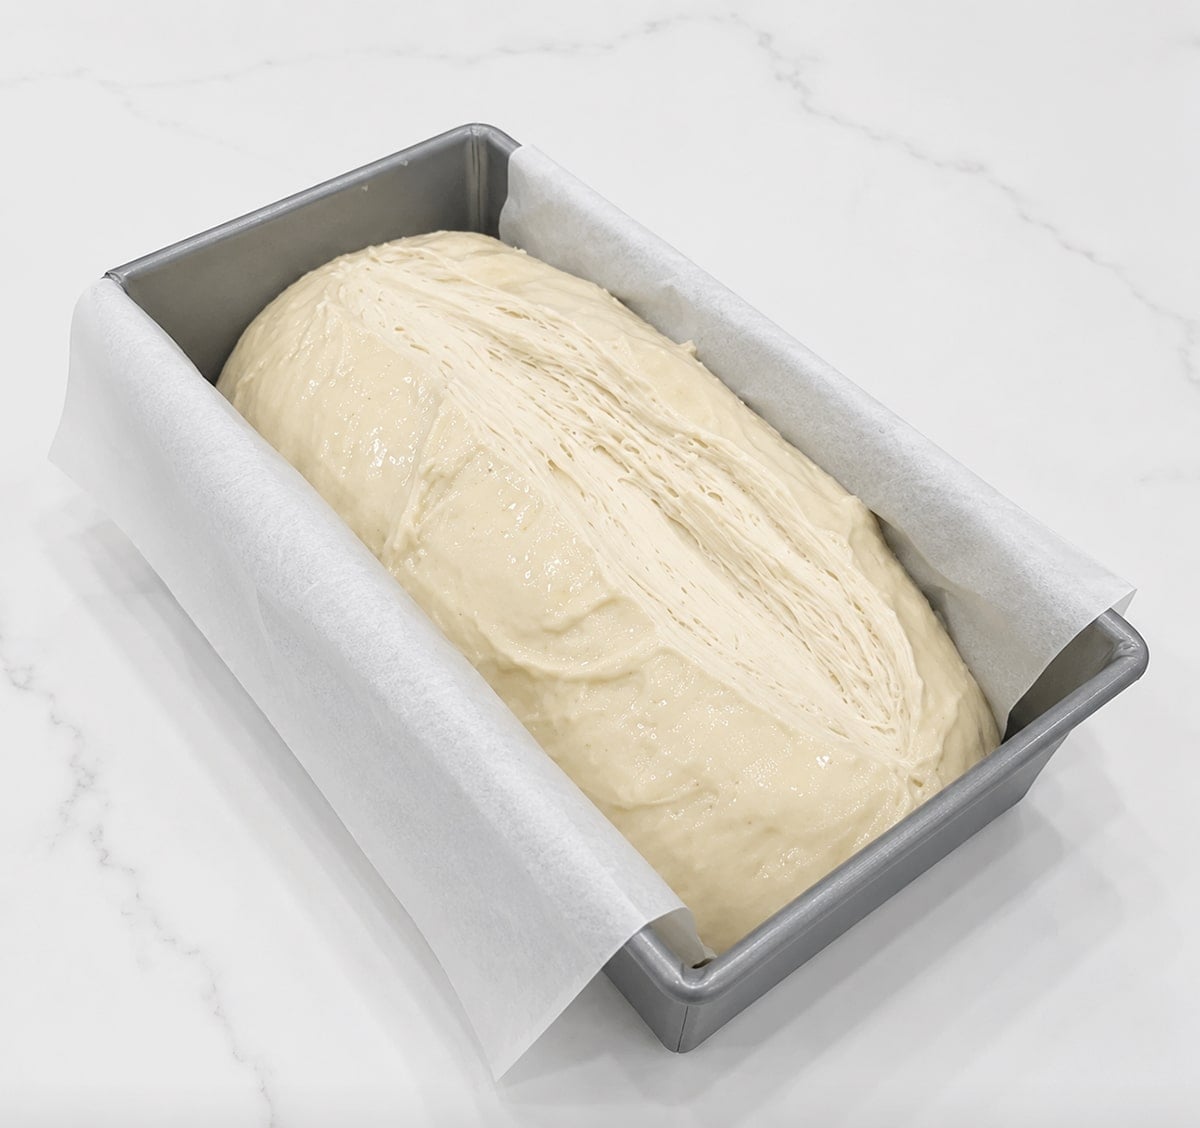
- Cover loosely and let it second-rise for about 2 hours at room temperature, until the dough is puffy and just cresting over the top of the pan. It should look jiggly when you lightly tap it. Don't skip this second rise; this is where you avoid a gummy crumb.
- Preheat your oven to 400º F. Score the top of the loaf with a sharp knife or razor (one long shallow slash down the length is perfect for a sandwich loaf).
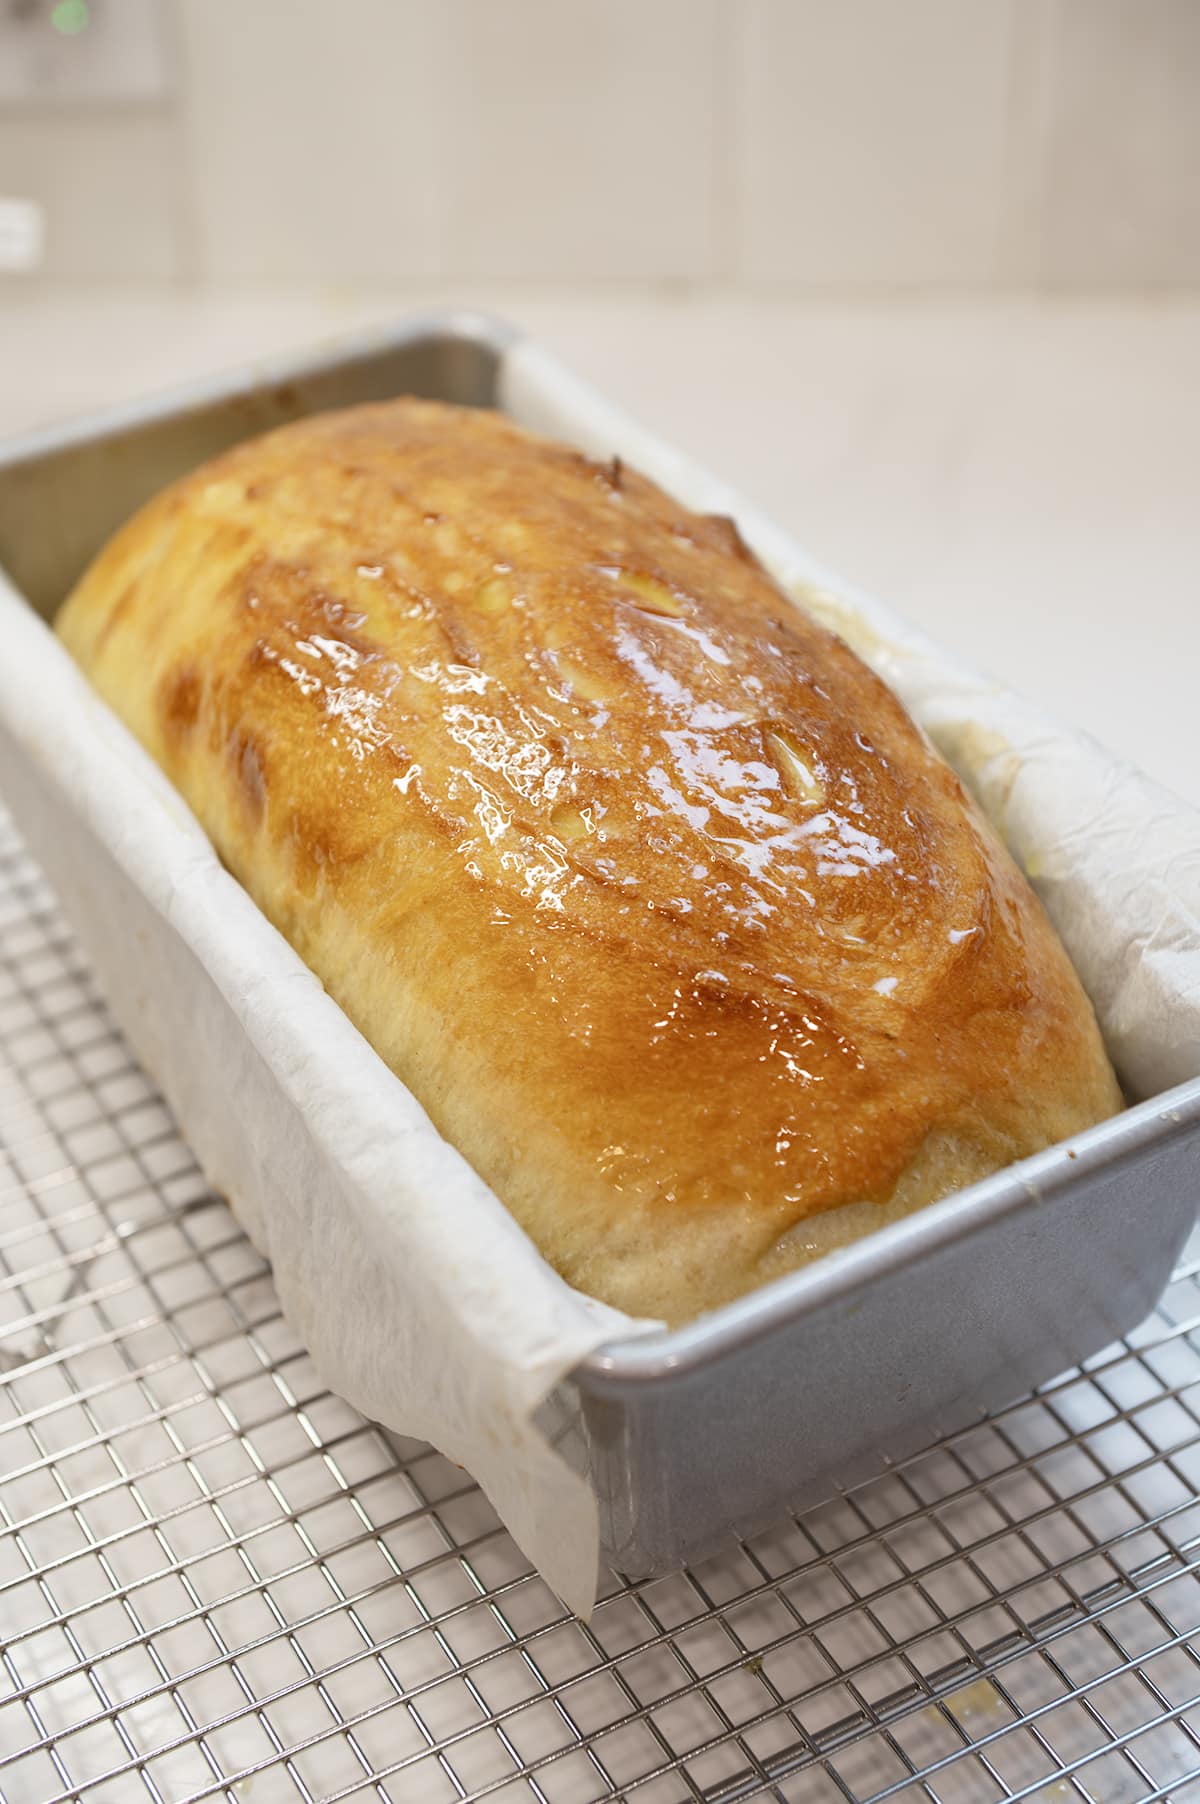
- Bake for 30 minutes at 400º F, then reduce the oven to 375º F and bake for another 15 minutes, until the crust is deeply golden brown.
- Brush the surface with melted butter. This is the key to a soft crust.
Remove the loaf from the pan immediately onto a wire rack. Let it cool COMPLETELY before slicing (at least 1 to 2 hours).
Cutting too early releases the steam and the crumb collapses into a gummy mess.
PRO TIP: For an even softer crumb (advanced move): make a quick tangzhong by whisking 25 g of the bread flour with 125 g of the water in a small pot. Cook over medium heat, whisking constantly, until it thickens into a pudding (about 3 minutes, you'll feel the resistance change). Let it cool, then mix it into the dough at the same time as the rest of the water and flour. This pre-gelatinized starch holds extra moisture in the baked loaf and gives you Japanese milk-bread softness without changing the recipe ratios. Refer to the recipe card below for the precise quantities and timing of the base recipe.
How To Make A Warm Sourdough Environment
Sourdough is run by temperature. If your kitchen is below 68º F, your bulk rise can take twice as long. Here are the two easiest tricks I use:
- Oven with the light on. Place the covered dough inside your oven (turned OFF) with just the oven light on. The light alone holds the inside around 75 to 85º F, which is ideal for fermentation.
- Microwave proofing box. Boil a cup of water in the microwave for 2 to 3 minutes, push the mug to the corner, place the covered dough next to it, and close the door. The residual steam and heat make a warm humid box that's perfect for proofing.
If you bake a lot of sourdough, a Brod and Taylor Sourdough Proofer holds a perfect temperature without any of these tricks. I use mine year-round.
Common Sourdough Sandwich Bread Problems To Avoid
- Gummy or doughy crumb. Almost always under-fermentation or slicing the loaf before it's cooled. Pull at 198 to 205º F internal, then let it cool a full 1 to 2 hours before cutting. The crumb continues to set as it cools.
- Dense, didn't rise. Your starter wasn't active enough, or the room was too cold during bulk. Give your starter 2 to 3 daily feedings before mixing, and warm up your proofing spot (see above).
- Loaf collapsed in the oven. Over-proofed. The dough went past peak before it hit the heat. Next time, end the second rise when the dough just crests the rim of the pan, not when it has ballooned a full inch above.
- Tough, hard crust. Baked too long, or oven runs hot. Pull at the lower end of the temp range (198 to 200º F internal) and tent with foil for the last 10 minutes if the top is browning faster than the inside is cooking.
- Crumb full of big random holes (tunnels). Shaping was too loose, or the dough wasn't degassed enough when you tucked it into the pan. Shape into a tight log and seal the seam well before second rise.
- Loaf is short and squatty. Your dough didn't quite double during bulk, OR your pan is too big. Try a 9x5 if you used larger, or split into two 8x4 pans for taller slices.
Final Thoughts
If you've been intimidated by sourdough, this is the recipe to teach you that you can absolutely do this. There's no shaping a boule, no scoring a fancy ear, no juggling a Dutch oven. You mix, you fold a few times, you stick it in a loaf pan, and you bake. It is the most work-parent-friendly sourdough recipe I make.
The other reason I love this one: the dough is the same base as my sourdough rolls, so once you've nailed it you can pivot to dinner rolls without learning a whole new recipe. Make a half-batch sandwich loaf and a half-batch of rolls for the same family dinner and feel like a sourdough wizard.
If you want another everyday sourdough that lives in the breakfast rotation, my soft sourdough english muffins use the same overnight ferment rhythm as this loaf, just cooked low and slow in a covered skillet for that signature nooks-and-crannies texture.
Make This Sourdough Sandwich Bread Your Own
- Whole wheat blend. Swap up to half the bread flour (250 g) for whole wheat. The crumb gets nuttier and a little denser. Don't go past 50% or the loaf turns into a brick.
- Second pan as a lid (the TikTok hack). Spritz the scored dough with water, then invert a second matching loaf pan (or greased foil) on top before baking. Bake covered at 400º F for the first 30 minutes, then uncover and reduce to 375º F for the final 15 minutes. The trapped steam mimics a Dutch oven and gives you a softer crust with bigger oven spring.
- Garlic and herb sandwich loaf. Fold in 1 Tablespoon of dried Italian herbs and 1 teaspoon of garlic powder during the second stretch-and-fold. Brush the top with melted garlic butter when it comes out of the oven.
- Cinnamon raisin. Sprinkle ¼ cup of raisins and 1 Tablespoon of cinnamon sugar over the dough as you shape, then roll into a log. Don't mix the cinnamon into the dough itself, cinnamon slows yeast activity and you'll get a flat loaf.
- Use sourdough discard. You can swap discard 1:1 for active starter, but expect a longer bulk rise (8 to 12 hours instead of 4 to 8) and a slightly less dramatic rise overall. If you have a lot of discard kicking around, my sourdough discard pancakes and sourdough discard crackers burn through it fast.
- Cold retard for flavor. After the bulk rise, instead of shaping right away, transfer the bowl to the fridge for 8 to 24 hours. Pull it out, let it warm at room temperature for 1 hour, then shape and finish as normal. The cold retard builds a deeper tang without bumping the loaf into "too sour" territory.
Sourdough Sandwich Bread FAQs
Two main culprits: the loaf was under-fermented during bulk, or you sliced into it before it cooled. Pull at an internal temp of 198 to 205º F, then wait a full 1 to 2 hours before cutting. The crumb sets as it cools, and slicing too early traps the steam inside.
Yes. After the bulk rise, shape the dough into the loaf pan, cover, and refrigerate overnight (up to 24 hours). In the morning, pull the pan out and let the dough come to room temperature for 1 to 2 hours until it crests the pan, then bake as normal.
Yes, but bread flour gives a stronger structure and a more chewy texture. Using all-purpose flour will make the loaf slightly softer and lighter.
Nope. The stretch-and-fold method does all the gluten development by hand. A stand mixer with a dough hook makes things faster if you have one, but plenty of beginners make this loaf with nothing but a bowl and a spoon.
Yes, that's exactly the dough behind my soft sourdough rolls recipe. Divide the dough into 16 equal pieces, shape into rolls, and bake at 375º F for 25 to 28 minutes.
Leave Me A Review
⭐️⭐️⭐️⭐️⭐️
If you tried this Sourdough Sandwich Bread or any other recipe on my blog, please leave a 🌟 star rating and let me know how it goes in the comments. I love hearing from you!
Recipe
Equipment
- 1 Thermometer
- 1 Food Scale
Ingredients
- 150 grams active sourdough starter
- 325 grams warm water
- 20 grams avocado oil
- 30 grams honey
- 500 grams bread flour unbleached
- 20 grams salt
Instructions
- Before you begin: Confirm your starter is active and bubbly, it should at least double within 4 to 6 hours of its last feeding. Grease a 9x5 loaf pan. Plan backwards from when you want to bake, this is roughly a 12 hour process from first mix to oven.
- In a large mixing bowl, combine the active sourdough starter, warm water, avocado oil, and honey. Whisk until smooth. Add the bread flour and salt and mix until a shaggy dough forms. Cover and rest 1 hour.
- Perform 4 sets of stretch-and-folds, 30 minutes apart. With wet hands, grab one edge of the dough, stretch it up, fold over the center, rotate 90 degrees and repeat on all four sides.
- Cover and let bulk ferment 4 to 8 hours at room temperature (68 to 80º F), until the dough has roughly doubled and looks bubbly and airy. Warmer room = faster ferment.
- Lightly flour your work surface. Shape the dough into a tight log the length of the loaf pan and place seam-side down into the greased pan. The dough should reach halfway up the rim.
- Cover loosely and second-rise 2 hours at room temperature, until the dough is puffy and just crests the top of the pan.
- Preheat your oven to 400º F. Score the top of the loaf with one long shallow slash down the length.
- Bake 30 minutes at 400º F, then reduce to 375º F and bake another 15 minutes, until the crust is deeply golden brown.
- Check the internal temperature with a thermometer. Pull at 198 to 205º F. Lower end of that range = softer crumb, upper end = firmer toast.
- Remove the loaf from the pan immediately onto a wire rack. Cool completely (at least 1 to 2 hours) before slicing.
Video
Notes
- Don't slice into the loaf while it's still hot, the crumb will go gummy.
- Don't skip the second rise, this is where you avoid a dense bottom.
- Don't mix cinnamon directly into the dough (it slows yeast and you'll get a flat loaf). Sprinkle it during shaping instead.