
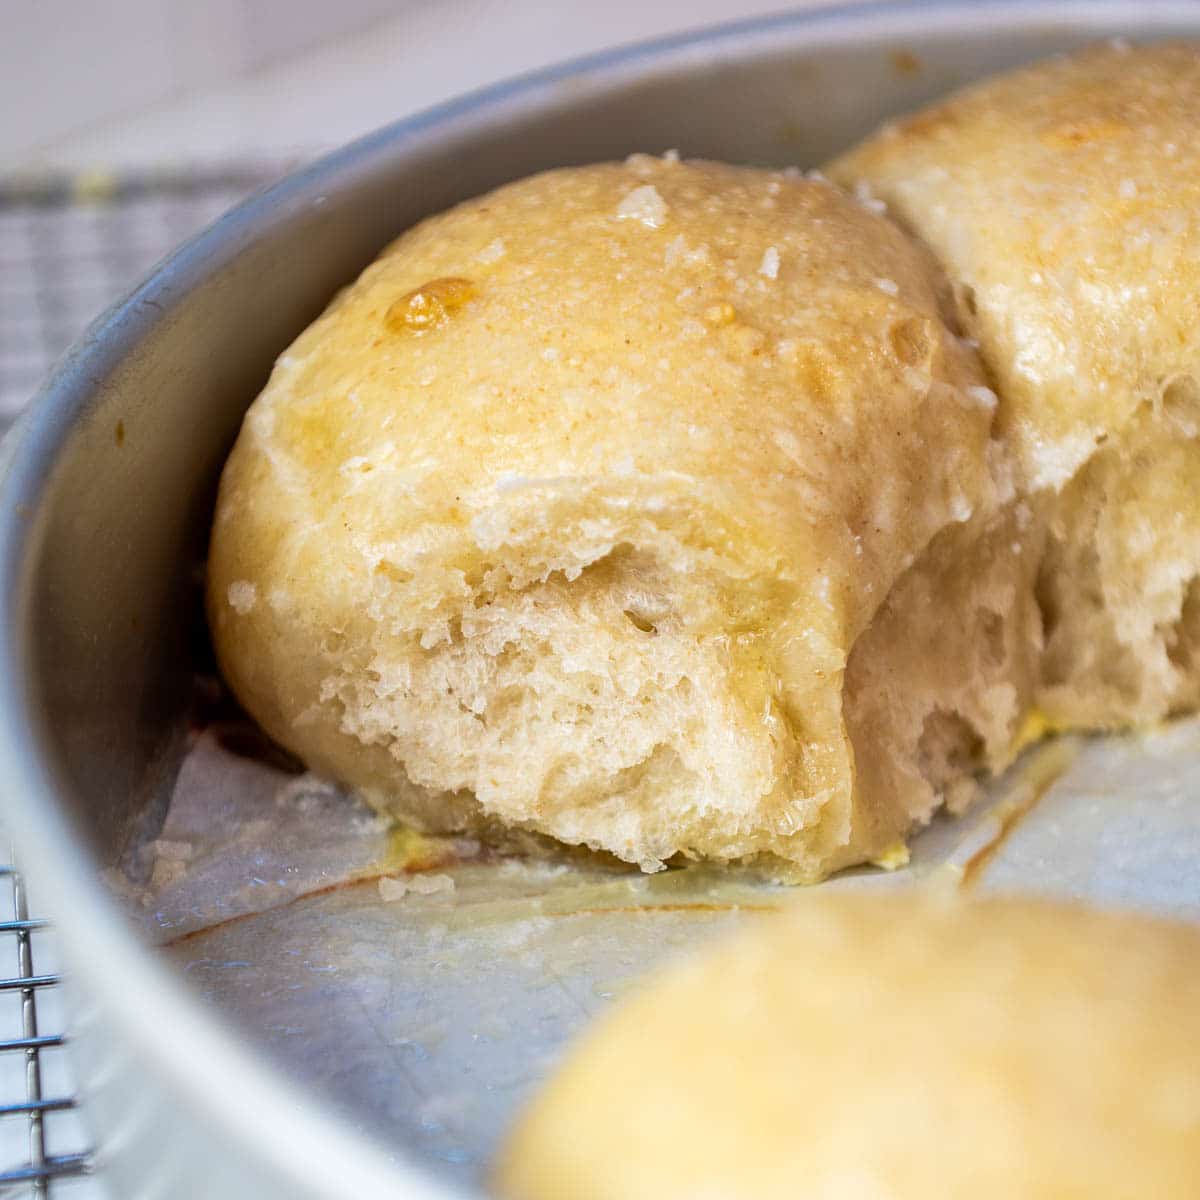
These sourdough rolls are soft, pillowy, slightly tangy, and built to stay fresh for days thanks to the honey + oil combo in the dough. Pull them apart at dinner, smear with butter, watch them disappear. If you love sourdough recipes but the hard crust isn't for everyone in your house, this is the recipe that wins them over. Pairs perfectly with my sourdough sandwich bread (use half the dough for one, half for the other) and the rest of my sourdough cluster.
This is hands-down my favorite way to use my sourdough starter. Don't get me wrong, I love a rustic crusty sourdough loaf as much as anyone, but my kids aren't always fans of the hard crust. That's what led me to develop these sourdough rolls, and honestly I think I love them even more than the traditional version. The little bit of oil and honey in the dough keep them soft and fluffy for days, and the crust bakes up thin and tender instead of crunchy.
Quick Glance at the Recipe: Sourdough Rolls
- Recipe Name: Sourdough Rolls
- Why You'll Love It: Soft, pillowy, pull-apart rolls with a faint sourdough tang. Stay fresh for days thanks to the honey + oil combo. The same dough makes either 16 rolls or 8 rolls + a sandwich loaf.
- Time and Difficulty: 12 hours total (90 min active + 10 hours rising + 45 min bake). Beginner-friendly. No stand mixer required.
- Main Ingredients: Active sourdough starter, warm water, avocado oil, honey, unbleached bread flour, salt.
- Method: Mix wet + dry, 4 stretch-and-folds 30 minutes apart, bulk ferment 4 to 8 hours, divide, shape, second rise 2 hours, bake at 400º F then 375º F.
- Texture and Flavor: Soft and pull-apart, lightly tangy, faintly sweet, with a thin, tender crust. Holds up to butter, gravy, soup, and sandwiches.
- Quick Tip: Bake in a glass dish if you want maximum softness. Glass bakes more gently than metal and gives you pillowier sides. The 205º F internal temp target is what gives you the fully baked but still tender crumb.
Jump to:
- Quick Glance at the Recipe: Sourdough Rolls
- What Makes These Sourdough Rolls Different
- Sourdough Roll Ingredients
- Why These Rolls Stay Soft For Days (The Science)
- Sourdough Roll Recipe Step-By-Step
- Your Complete Warm Sourdough Environment Guide
- Sample Hour-By-Hour Baking Schedule
- Glass vs Metal Pan (What Each Gives You)
- Make-Ahead, Storage, And Reheat
- Common Sourdough Roll Problems To Avoid
- Make This Sourdough Roll Recipe Your Own
- What To Serve With Sourdough Rolls
- Final Thoughts
- Frequently Asked Questions
- More Sourdough Recipes To Try
- Leave Me A Review⭐️⭐️⭐️⭐️⭐️
- Recipe
What Makes These Sourdough Rolls Different
Most sourdough roll recipes online use butter + milk + sugar and call it a day. This recipe is different in three specific ways.
- Honey + oil instead of butter + sugar. Honey is hygroscopic (more on that in the science section below), which means it pulls moisture from the air and holds it in the crumb. Oil coats the gluten strands so they don't bond into a tight chewy network. The combination is what keeps these rolls soft for 2 to 3 days at room temperature, longer than butter-based recipes.
- Higher internal bake temp (205º F vs the standard 190º F). Most recipes pull rolls at 190º F internal. I bake mine to 205º F because I want the crumb fully set without it going gummy on day 2. The extra browning is a feature. The 205º F target gives you the fully developed crumb of artisan bread but in pull-apart roll form.
- Sandwich bread version. Same dough, two options: turn the whole batch into 16 rolls, OR turn half into 8 rolls and half into a sourdough sandwich bread loaf.
- Plus the 8-method warm environment guide. Eight specific warming methods for helping sourdough rise because your sourdough is completely controlled by temperature, and 70% of "my dough didn't rise" problems are temperature problems. See the dedicated section below.
Sourdough Roll Ingredients
Six ingredients. That's the whole list. I always recommend weighing your ingredients with a digital kitchen scale for the most accurate results.
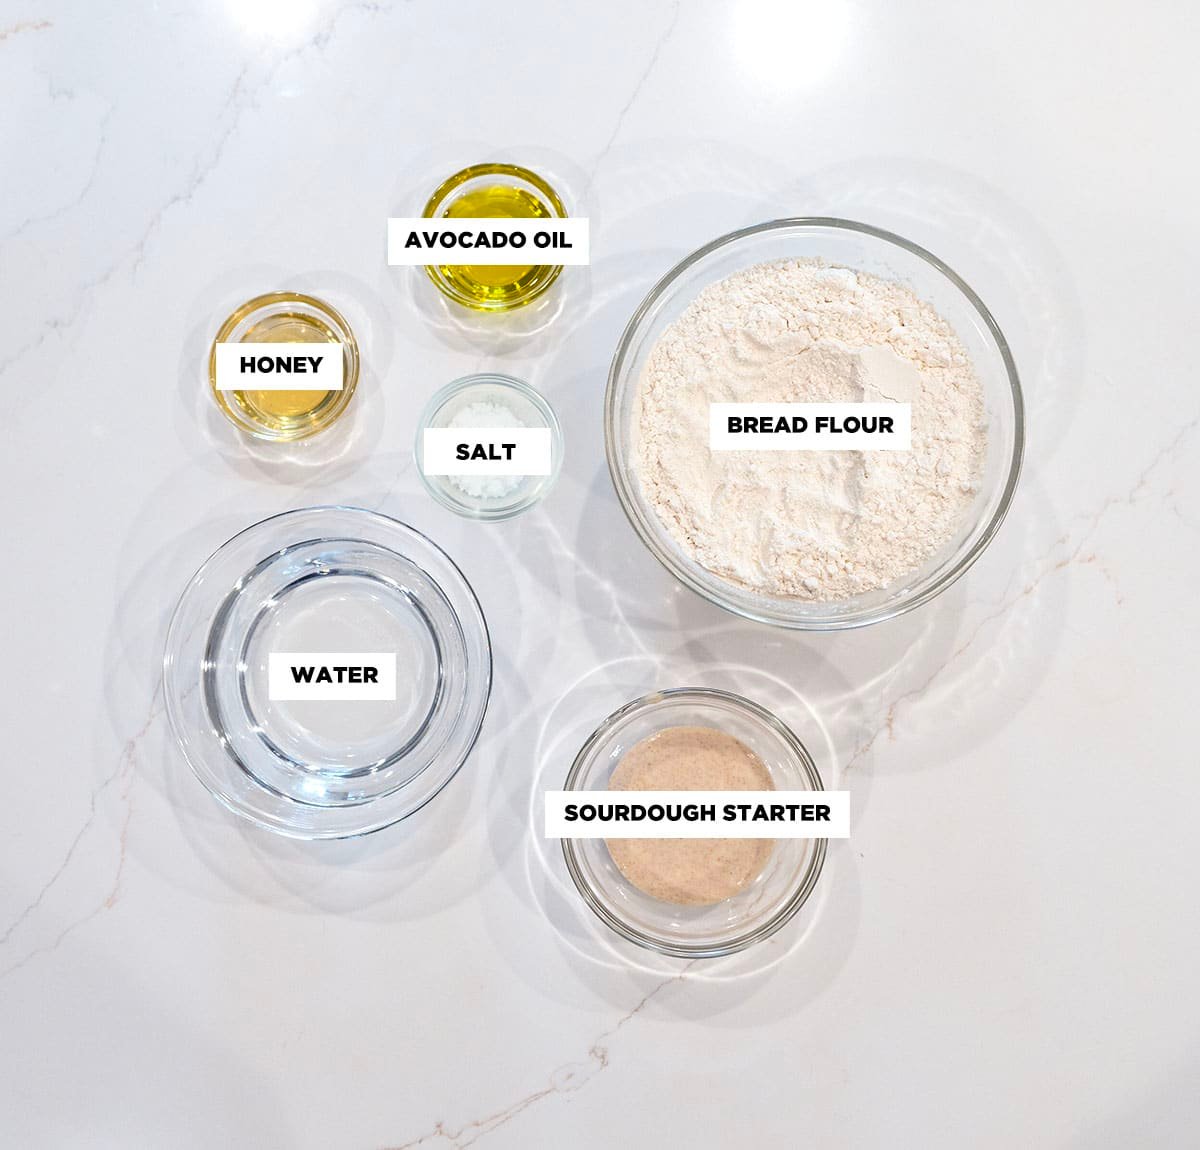
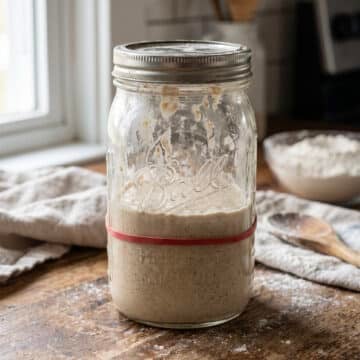
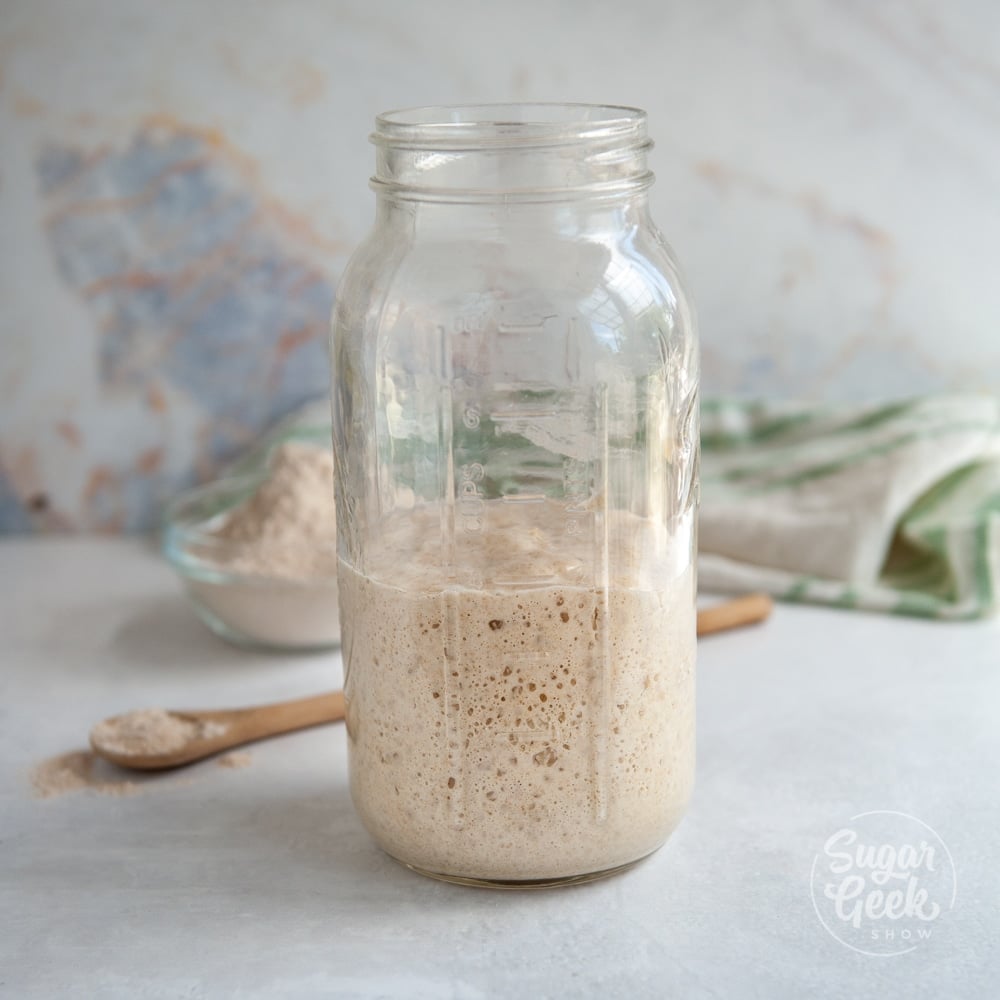
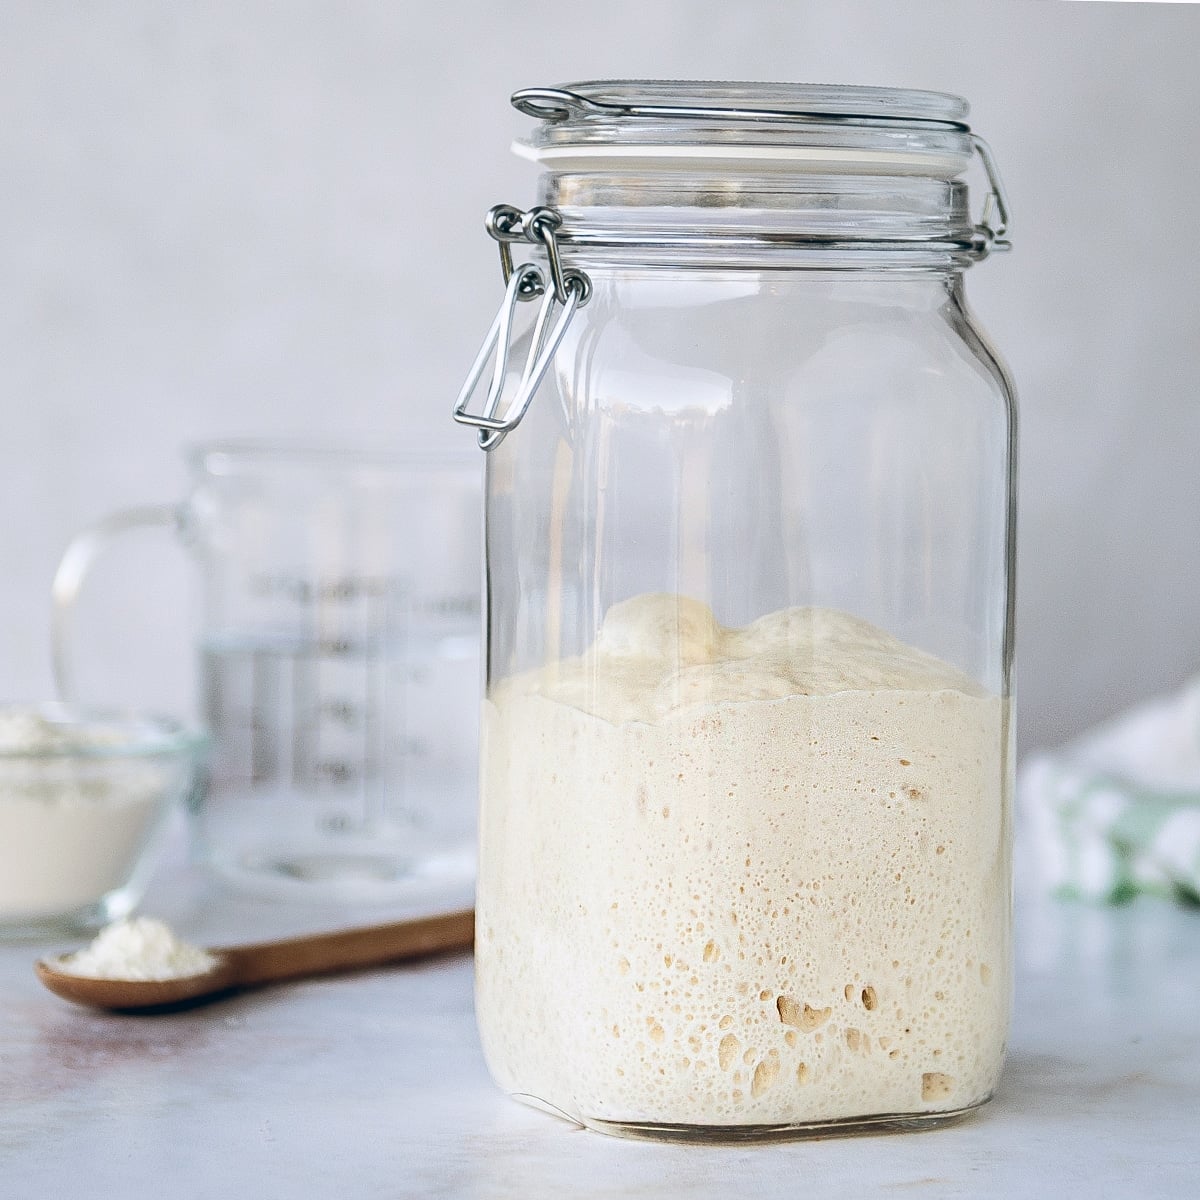
- Active sourdough starter. Must be active (recently fed, bubbly, doubled within 5 hours of feeding), NOT discard. This recipe relies on the wild yeast in the active starter to lift the dough. If your starter isn't strong enough yet, see my sourdough starter guide for the levain test. Here's how to get a recently fed sourdough starter bubbly and at its peak before you mix the dough.
- Warm water. Lukewarm (around 80º F to 90º F). This is the optimal temperature for yeast to grow. Too hot kills the yeast. Cold water slows the bulk ferment dramatically.
- Avocado oil. Neutral flavor, high smoke point, coats the gluten strands to keep the crumb tender. Olive oil, canola oil, vegetable oil, or melted butter all work as 1:1 replacement. I prefer avocado for the clean flavor.
- Honey. Subtle sweetness that helps the crust brown and holds moisture in the crumb for days. Maple syrup, agave, or granulated sugar all work as 1:1 swap, but honey gives the longest shelf life.
- Unbleached bread flour. Bread flour has more protein than all-purpose, which means more gluten development, which means a structure that holds up to the long fermentation process. You can substitute up to half with whole wheat flour for a nuttier flavor and slightly denser crumb. All-purpose works in a pinch, but the rolls will be slightly less chewy.
- Salt. Strengthens the gluten network and brings the flavor forward. Use a fine sea salt or kosher salt. Add a sprinkle of flaky salt on top of the rolls after the butter brush for the bakery look.
Why These Rolls Stay Soft For Days (The Science)
Three things in this recipe work together to give you rolls that are still soft on day 3.
Honey is hygroscopic. That word means "attracts and holds water." Honey pulls moisture from the air and locks it into the crumb of your bread. A roll baked with honey will retain moisture noticeably longer than one baked with granulated sugar (which is not hygroscopic). This is the same reason a honey cake stays moist for a week while a regular cake dries out in 3 days.
Oil coats gluten strands. Gluten is a protein network that forms when flour is hydrated and kneaded. Without anything to interfere, gluten strands bond tightly into a chewy, dense network. Oil physically coats each strand, preventing some of those bonds from forming. Less bonding = more tender crumb. Butter (which is only 80% fat and 16% water) does this less effectively than pure oil. That's why this recipe uses both oil AND a brush of butter on top, the oil for crumb tenderness, the butter for color and flavor on the crust.
Bread flour's protein creates structure without chewiness, at the right hydration. Bread flour is about 12 to 13% protein vs 10 to 11% for all-purpose. More protein means more gluten potential, which means more structure to trap gas. But protein only makes things tough when the dough is under-hydrated. At 65% hydration (this recipe), the bread flour develops enough structure to lift soft, pillowy rolls without crossing into chewy territory.
Why 205º F internal temp matters. Most recipes pull rolls at 190º F. I bake to 205º F because at 190º F, the crumb is barely set and can turn gummy as it cools, especially in humid weather. At 205º F the crumb is fully gelatinized (starch fully absorbed water and stabilized into structure) but the crust is still tender because of the lower bake temperature after the initial 400º F. The result: rolls that don't turn gummy on day 2.
The combination of these four factors (honey + oil + bread flour + internal temp) is the engineering behind soft rolls that stay soft.
Optional pro upgrades (worth it if you bake sourdough often):
- Brod and Taylor Folding Proofer. Holds the dough at a consistent warm temperature regardless of your kitchen. This is the single best investment if your house runs cool.
- Sourdough Home. Smaller temperature-controlled box for just the starter. Pairs with the proofer for the bake day.
Sourdough Roll Recipe Step-By-Step
For exact measurements, see the recipe card below. This timeline assumes a 70º F to 78º F kitchen. Colder kitchens need more time. See the Warm Sourdough Environment Guide below for getting a consistent rise speed. Watch the video in the recipe card for a visual of how to do a stretch and fold. For the full stretch and fold technique breakdown, see my tutorial with photos and the tight-dough finish signal.
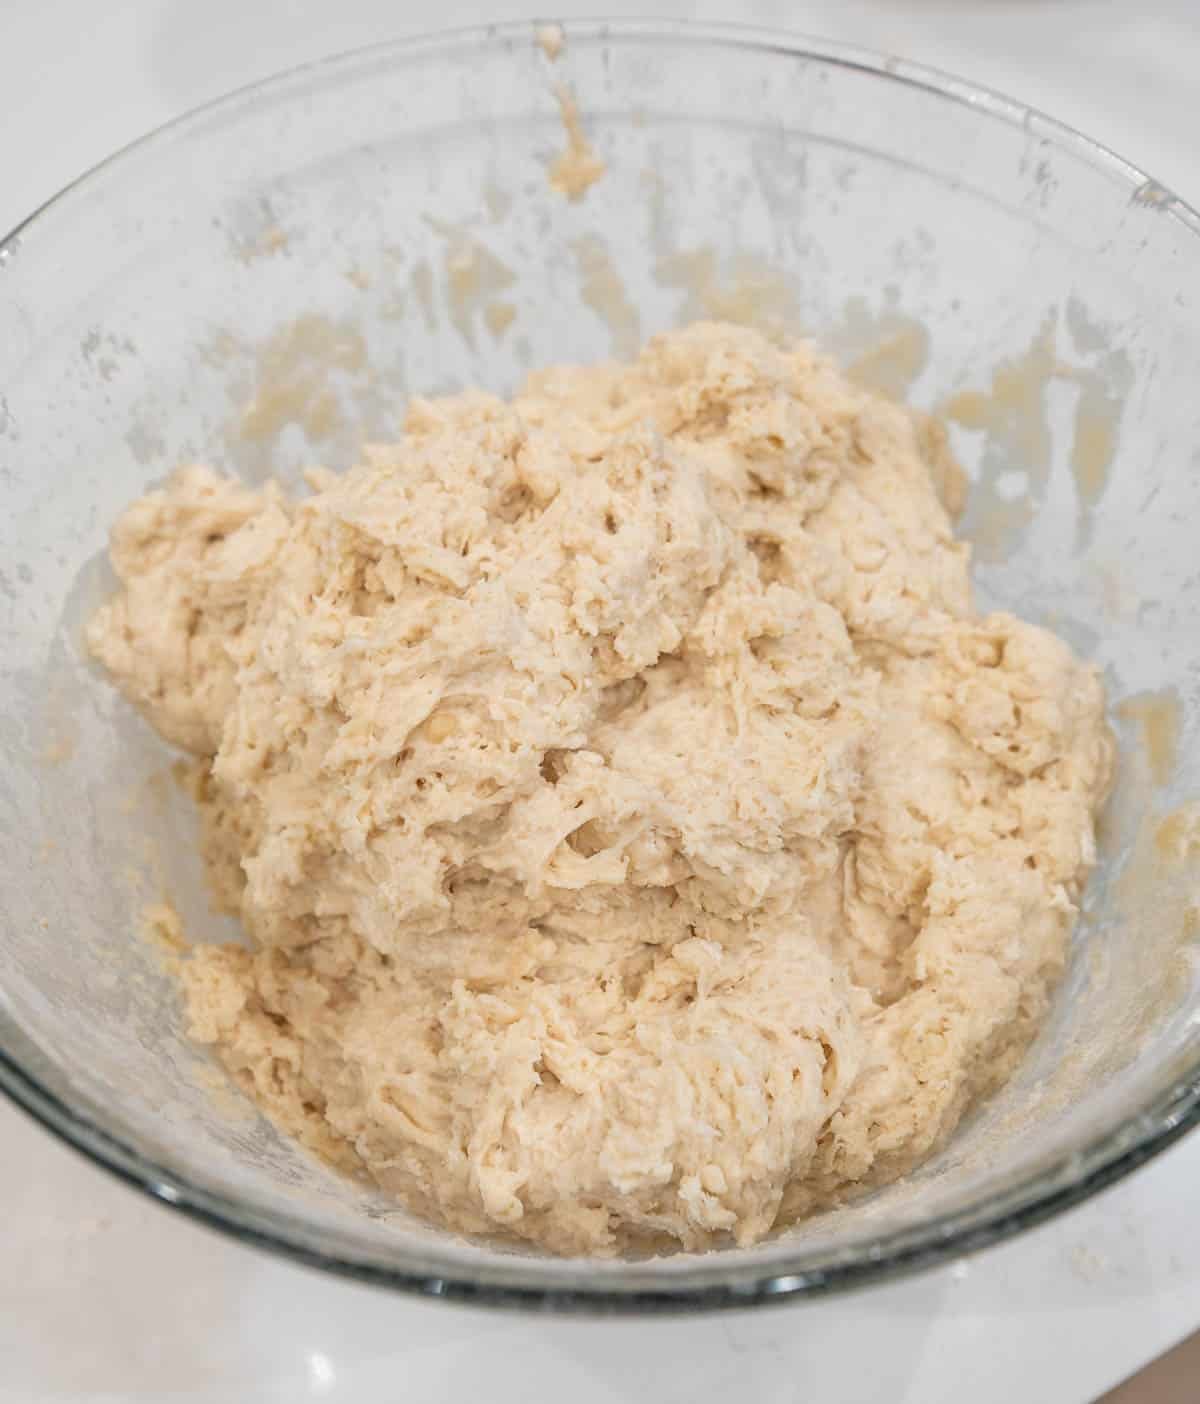
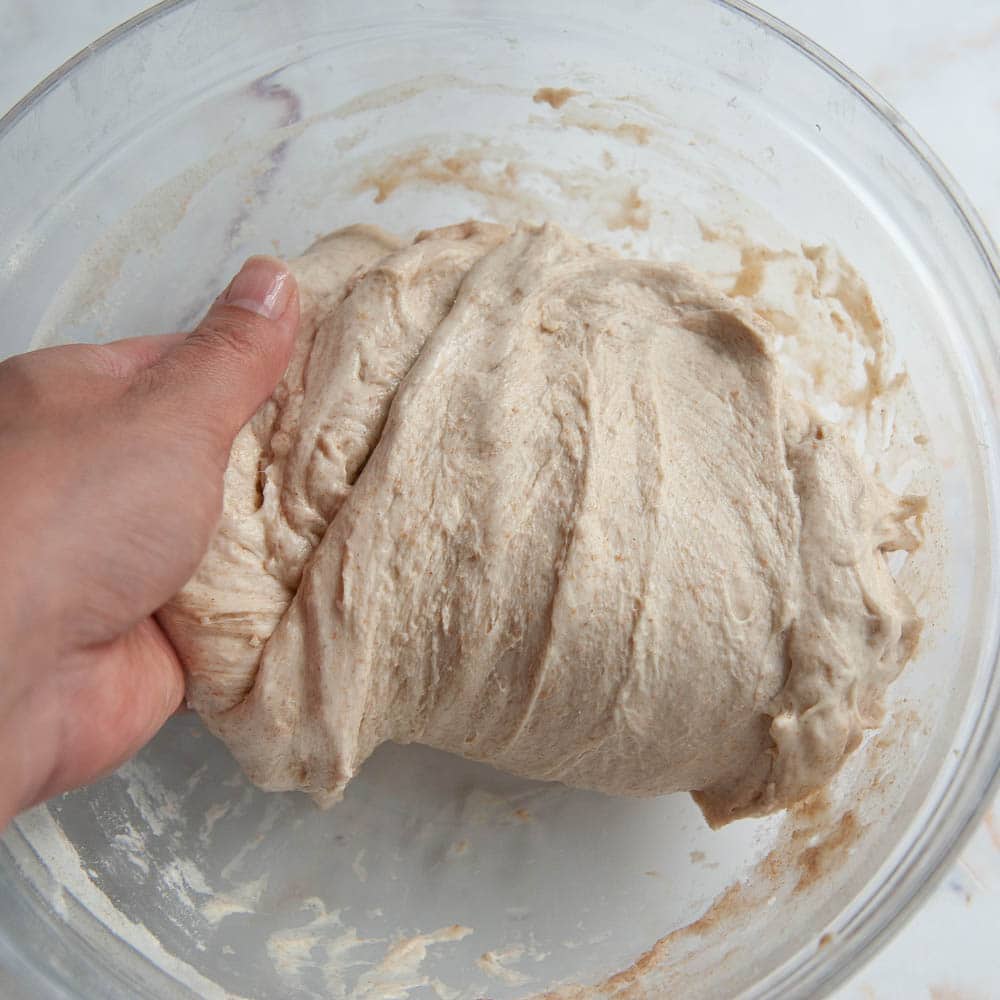
- Mix the dough. In a large bowl, combine active sourdough starter , warm water, avocado oil and honey. Whisk until smooth. Add in the bread flour salt. Mix with a wooden spoon or your hand until no dry flour remains. The dough will be shaggy and sticky. Cover and rest 1 hour.
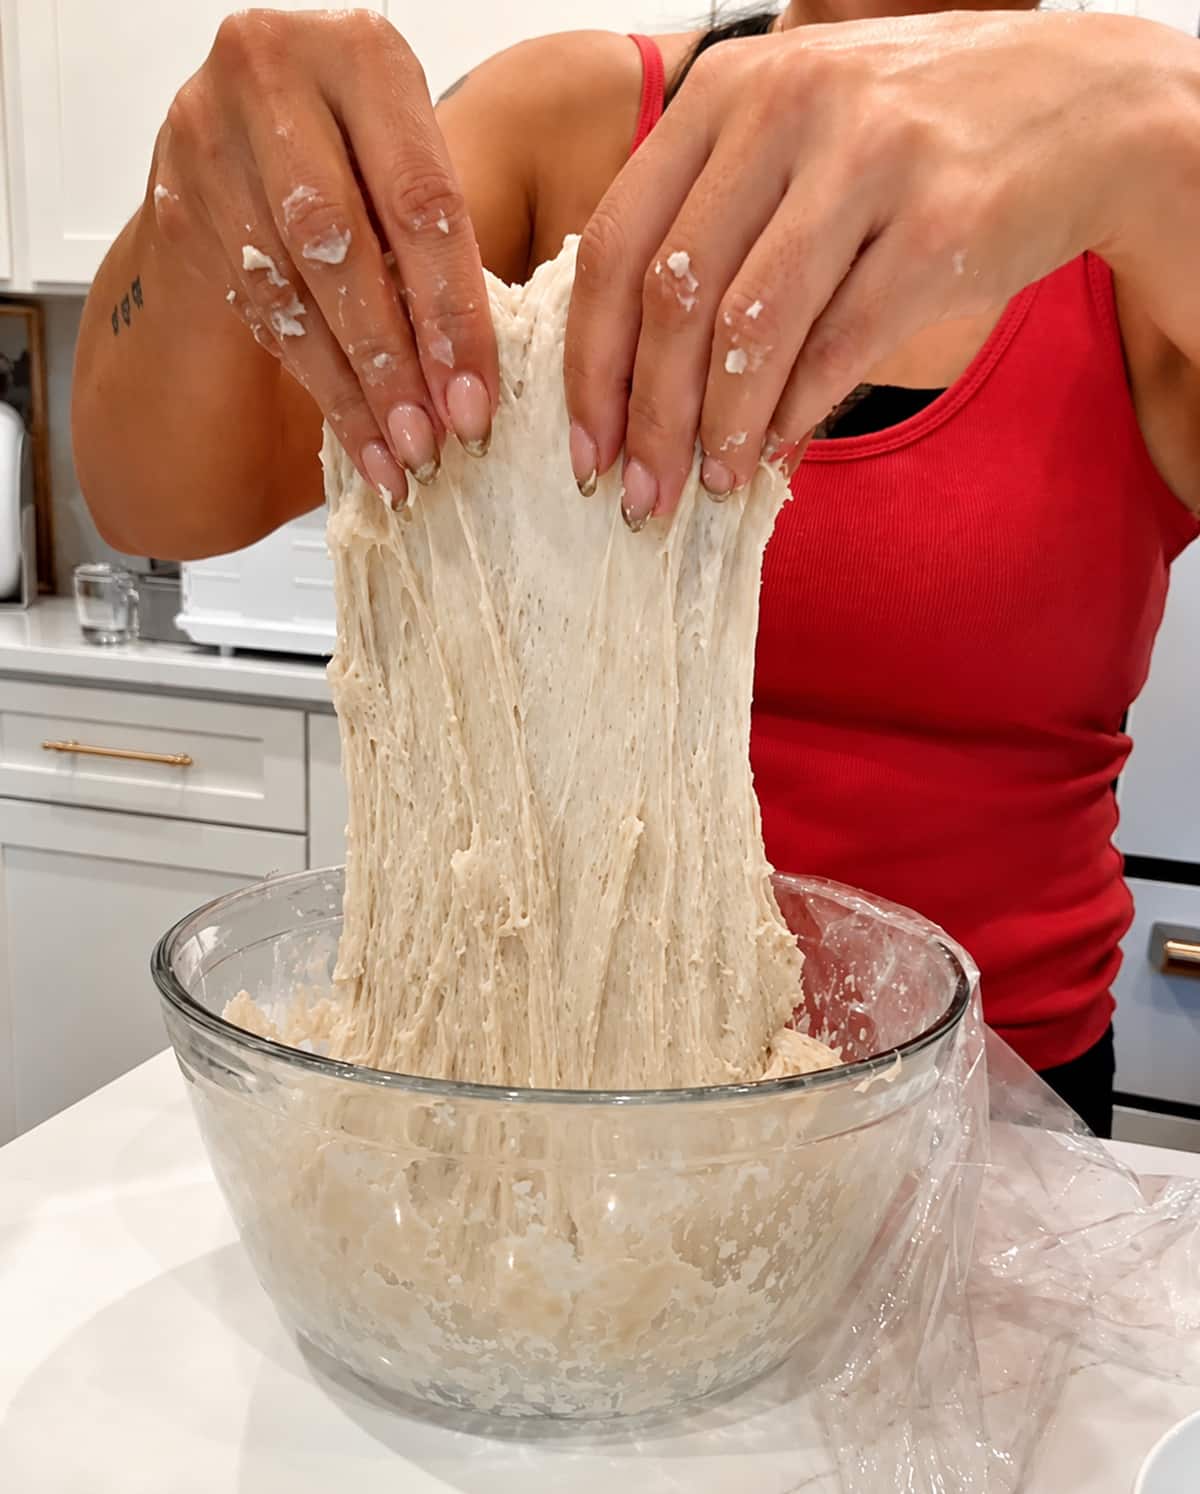
- Stretch and fold #1. With wet hands, lift one side of the dough and stretch it up, then fold it over to the center. Rotate the bowl a quarter turn and repeat. Do this 4 times total (one stretch + fold per side). Cover.

- Stretch and fold #2. 30 minutes later, same thing. 4 stretches.
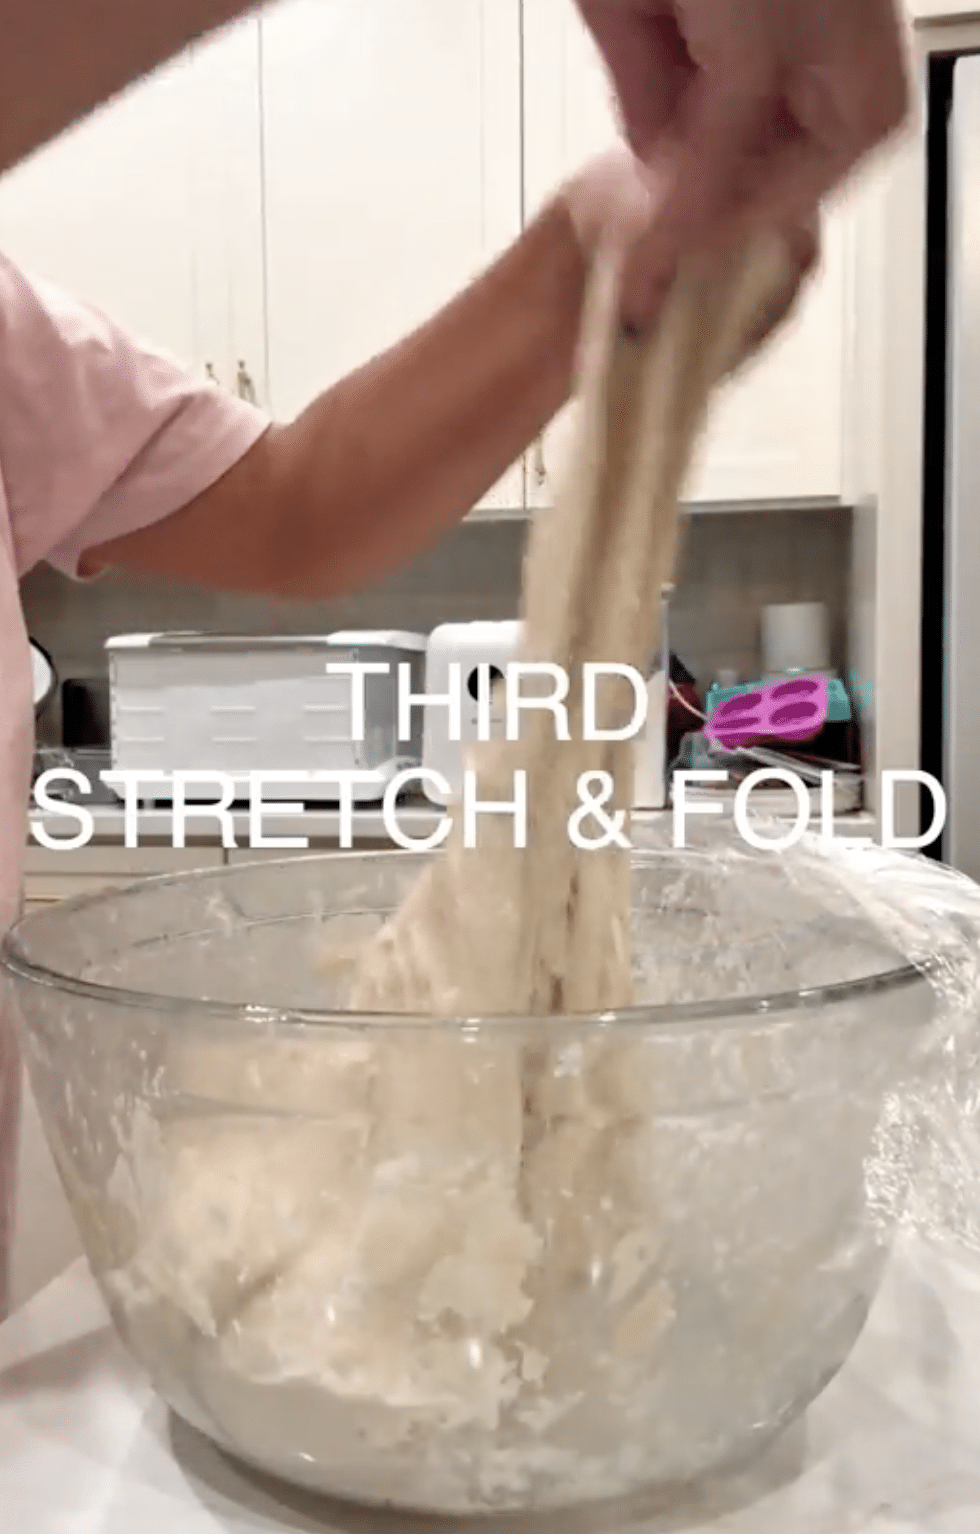
- Stretch and fold #3. 30 minutes later, same thing. The dough should be noticeably smoother and stretchier now.
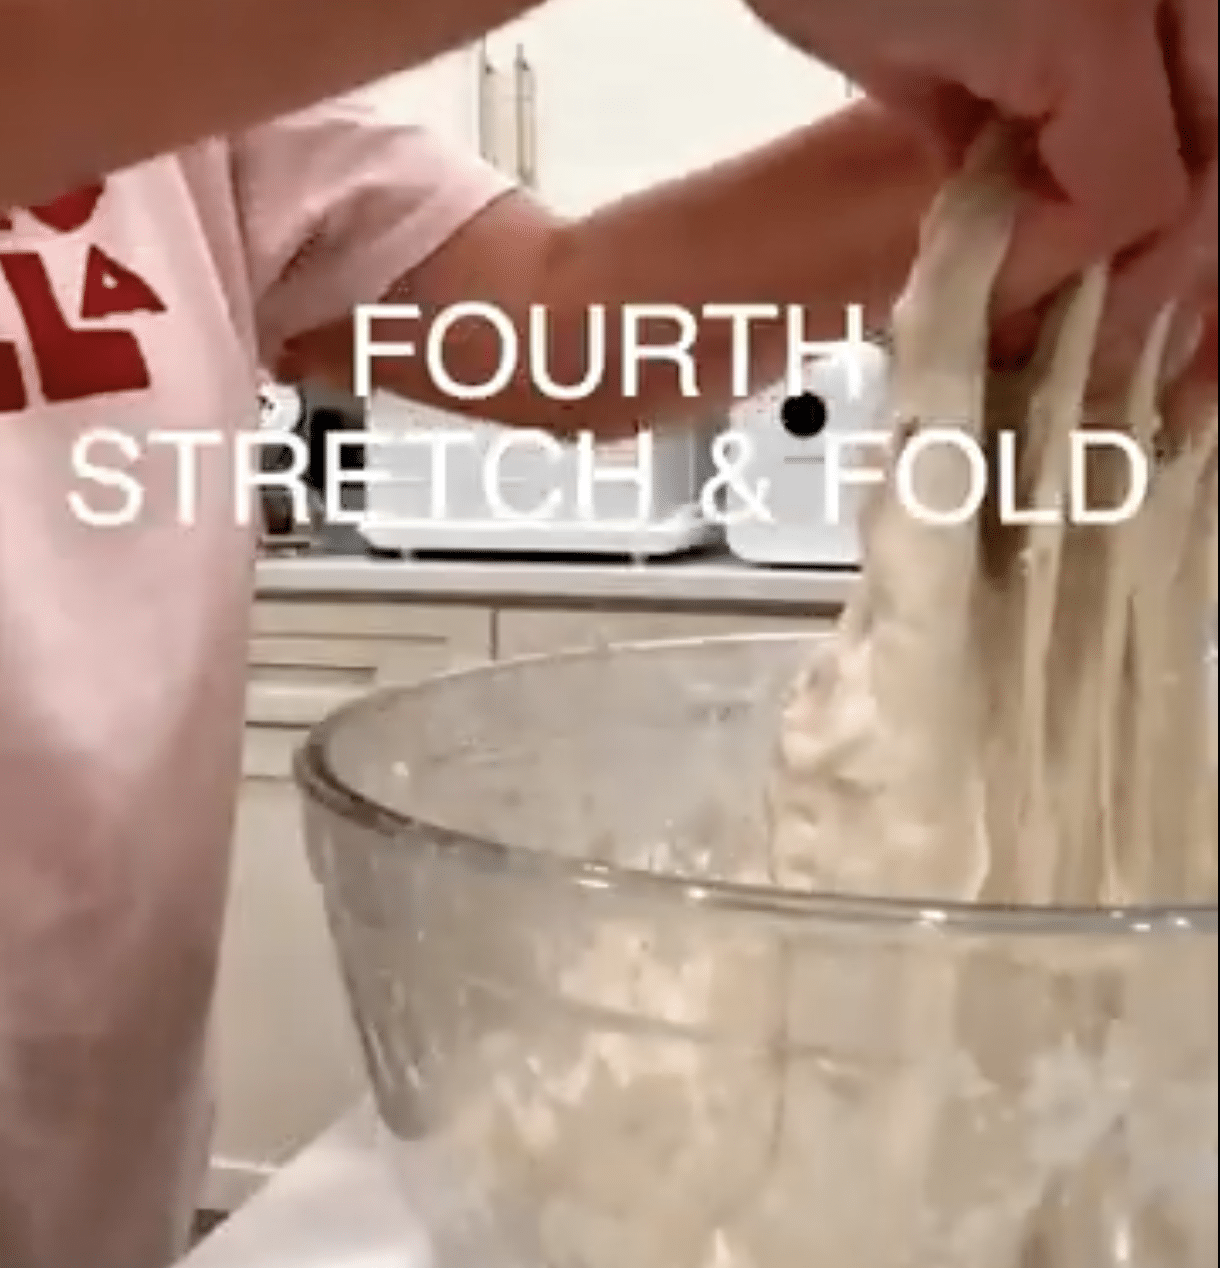
- Stretch and fold #4. 30 minutes later, the final set. The dough should pull into a smooth ball with surface tension. This is when you know the gluten is developed.
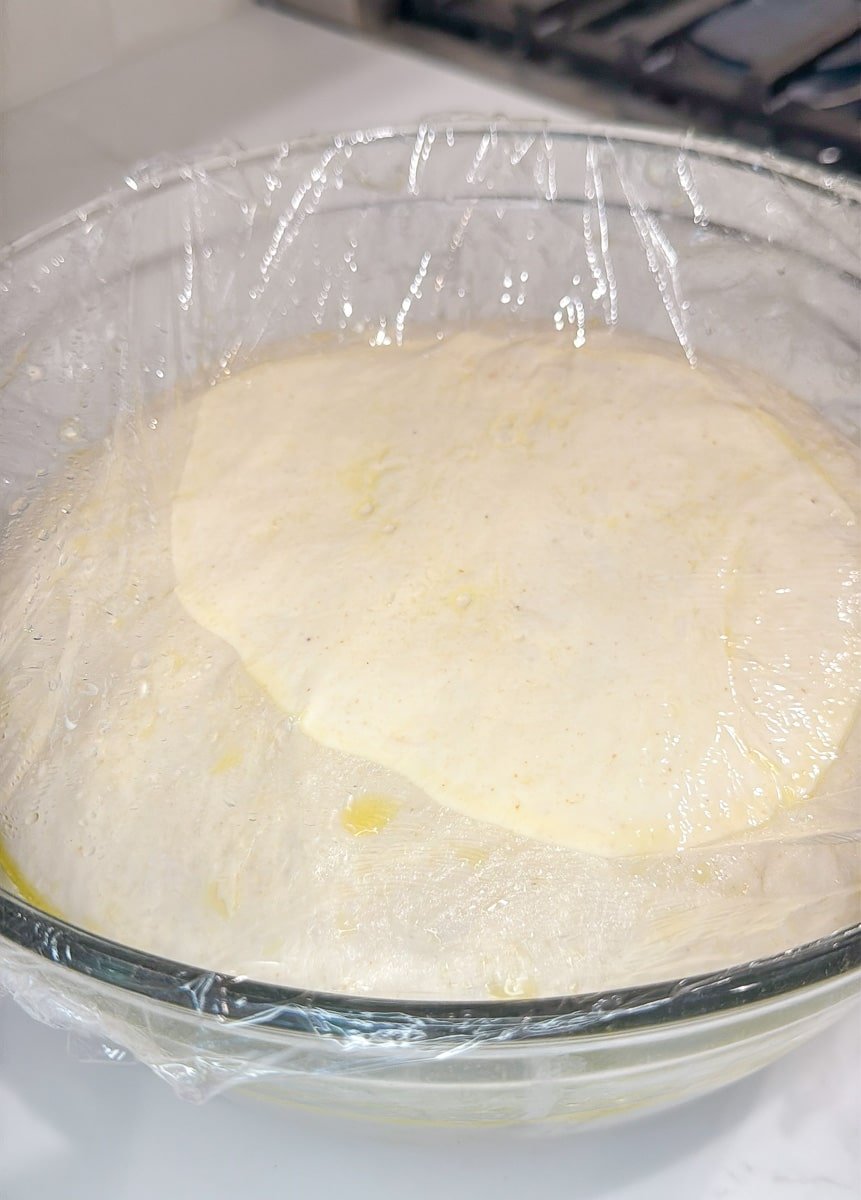
- Bulk ferment. Cover and let rise at warm room temperature (75º F to 80º F ideal) for 4 to 8 hours, OR refrigerate overnight (8 to 12 hours) for a slower, more flavorful ferment. The dough is ready when it has roughly doubled, looks puffy with bubbles on the surface, and feels airy. Don't go by clock time, go by look.
PRO TIP: Sourdough rises faster in warm kitchens and slower in cold ones. A 75º F kitchen takes about 4 to 6 hours. A 68º F kitchen takes 8 to 10 hours. Use the Warm Sourdough Environment Guide below to speed things up if needed.
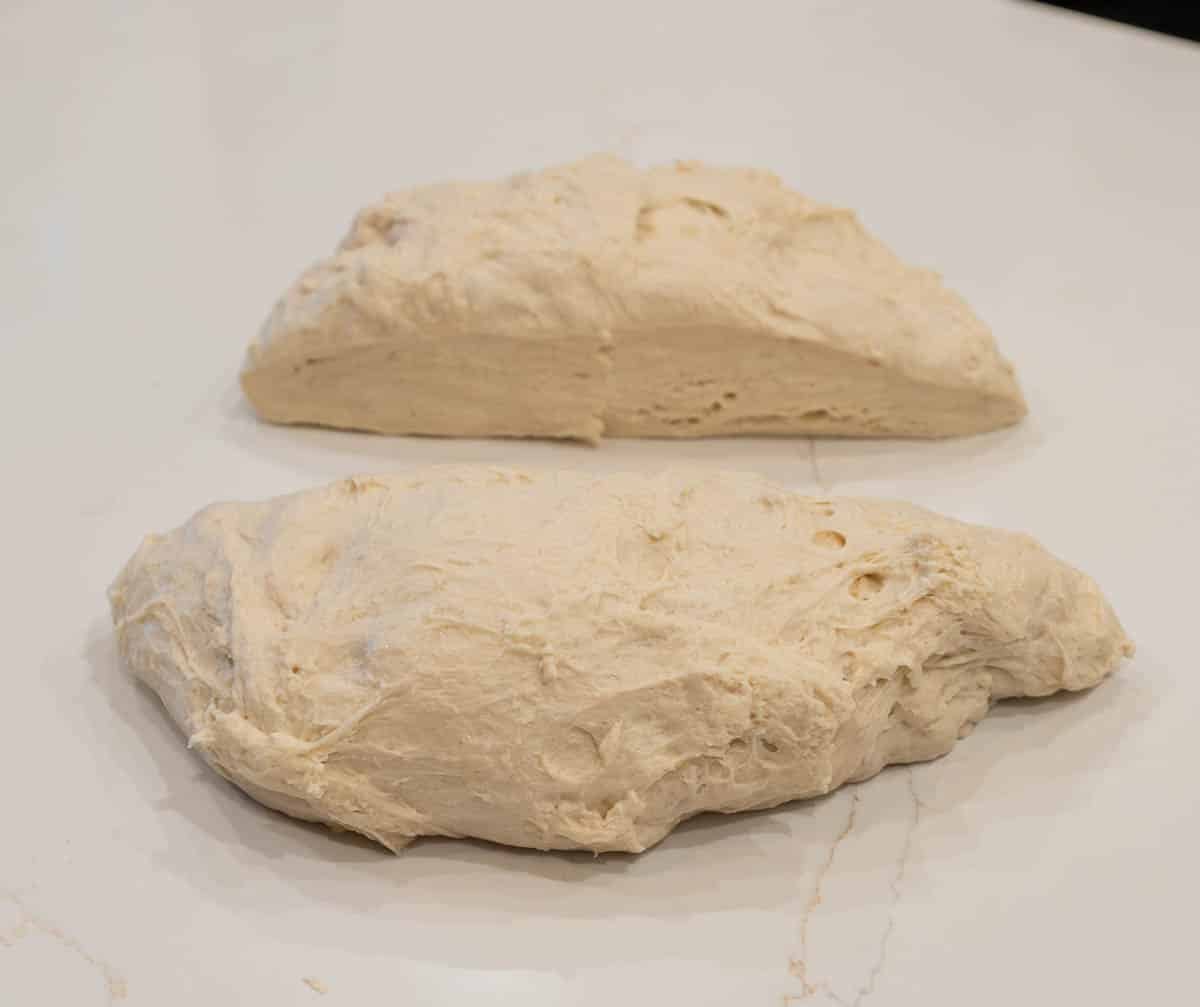
- Decide your yield. Now's the choose-your-own-adventure moment. ALL the dough = 16 rolls. HALF the dough = 8 rolls. The other half = use for a sourdough sandwich bread loaf, or shape into a small batch of 8 mini rolls (about 60g each), or save for cinnamon roll experiments.
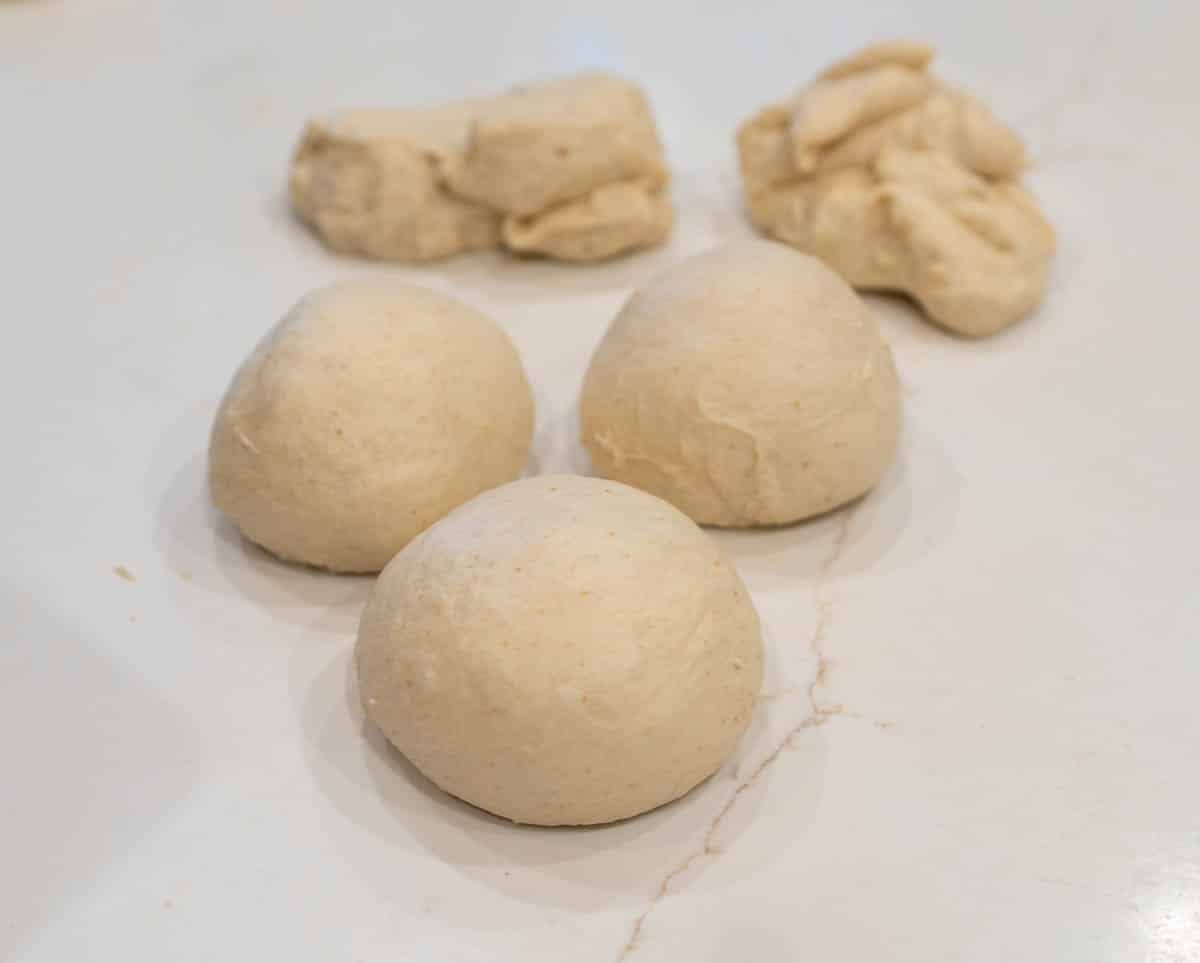
- Portion and shape. Turn the dough onto a lightly floured surface. Use a bench scraper to divide. For 16 rolls, weigh out 16 portions of about 65g each. For 8 rolls, weigh out 8 portions of about 130g each. To shape: cup your hand over a piece of dough and roll it in tight little circles on the counter to build surface tension. The roll should feel like a smooth, taut ball.
PRO TIP: If the dough sticks to the counter and won't roll smoothly, your counter has too much flour. The dough needs a tiny bit of grip on the counter to develop surface tension. Wipe off the excess flour and try again.
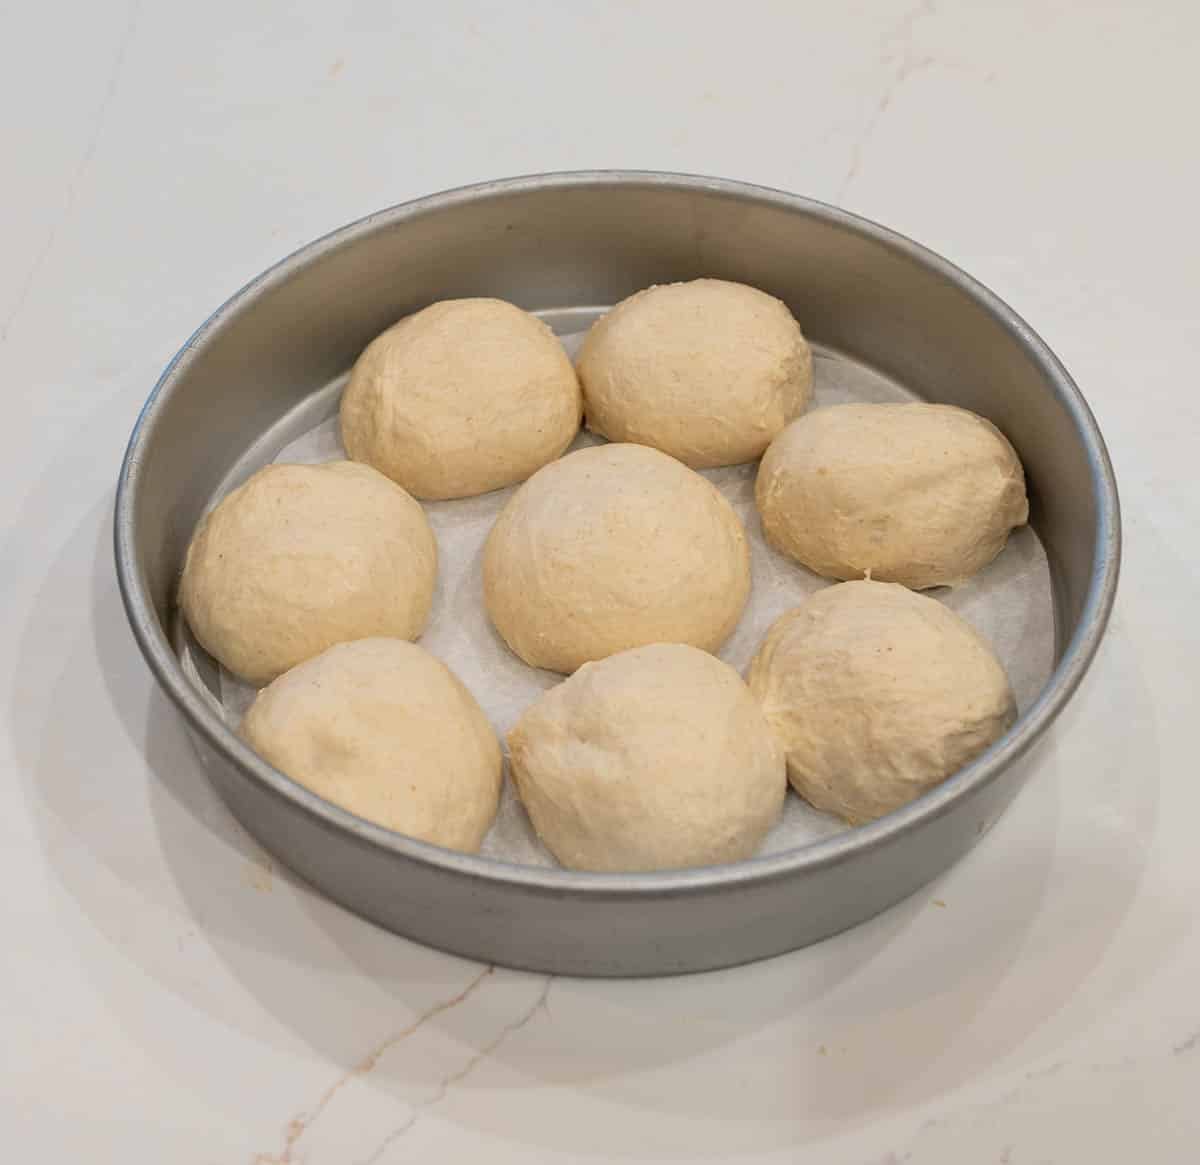
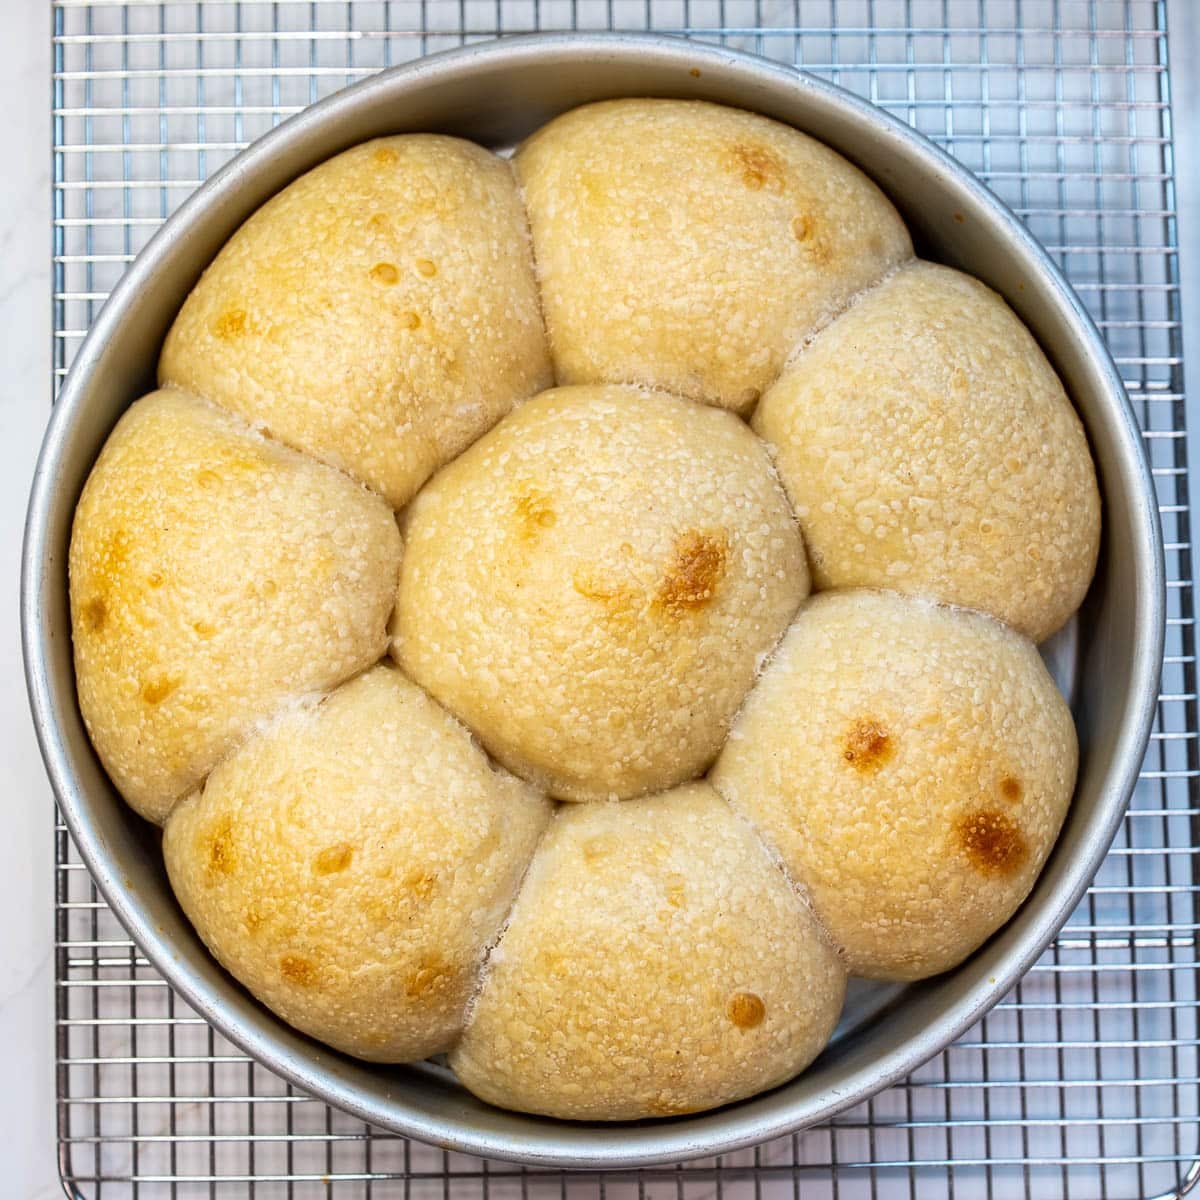
- Place in pan. Arrange the shaped rolls in a parchment-lined pan. They should be close together but not touching yet, they'll expand to fill the gaps during the second rise. For 16 rolls, a 9x13 dish works perfectly. For 8 rolls, an 8" or 9" round dish.
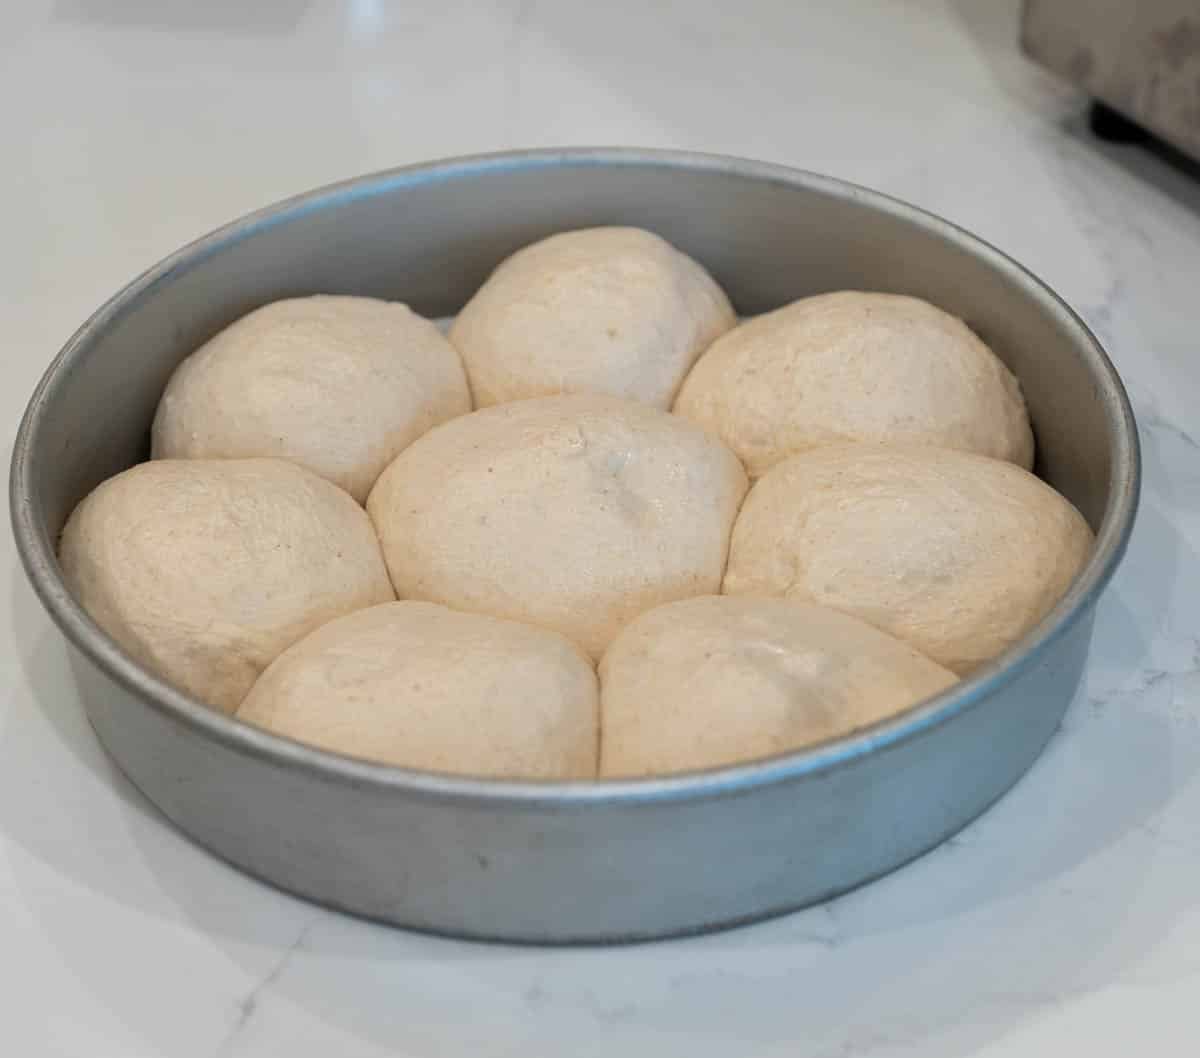
- Second rise (proof). Cover loosely and let rise for about 2 hours, or until the rolls look puffy and touch one another. This is what gives you the soft pillowy interior. Don't skip or rush. PRO TIP: The second rise is shorter than the bulk ferment because the dough is already populated with active yeast. Watch for the rolls to look slightly puffed and just touching their neighbors. That's the signal.
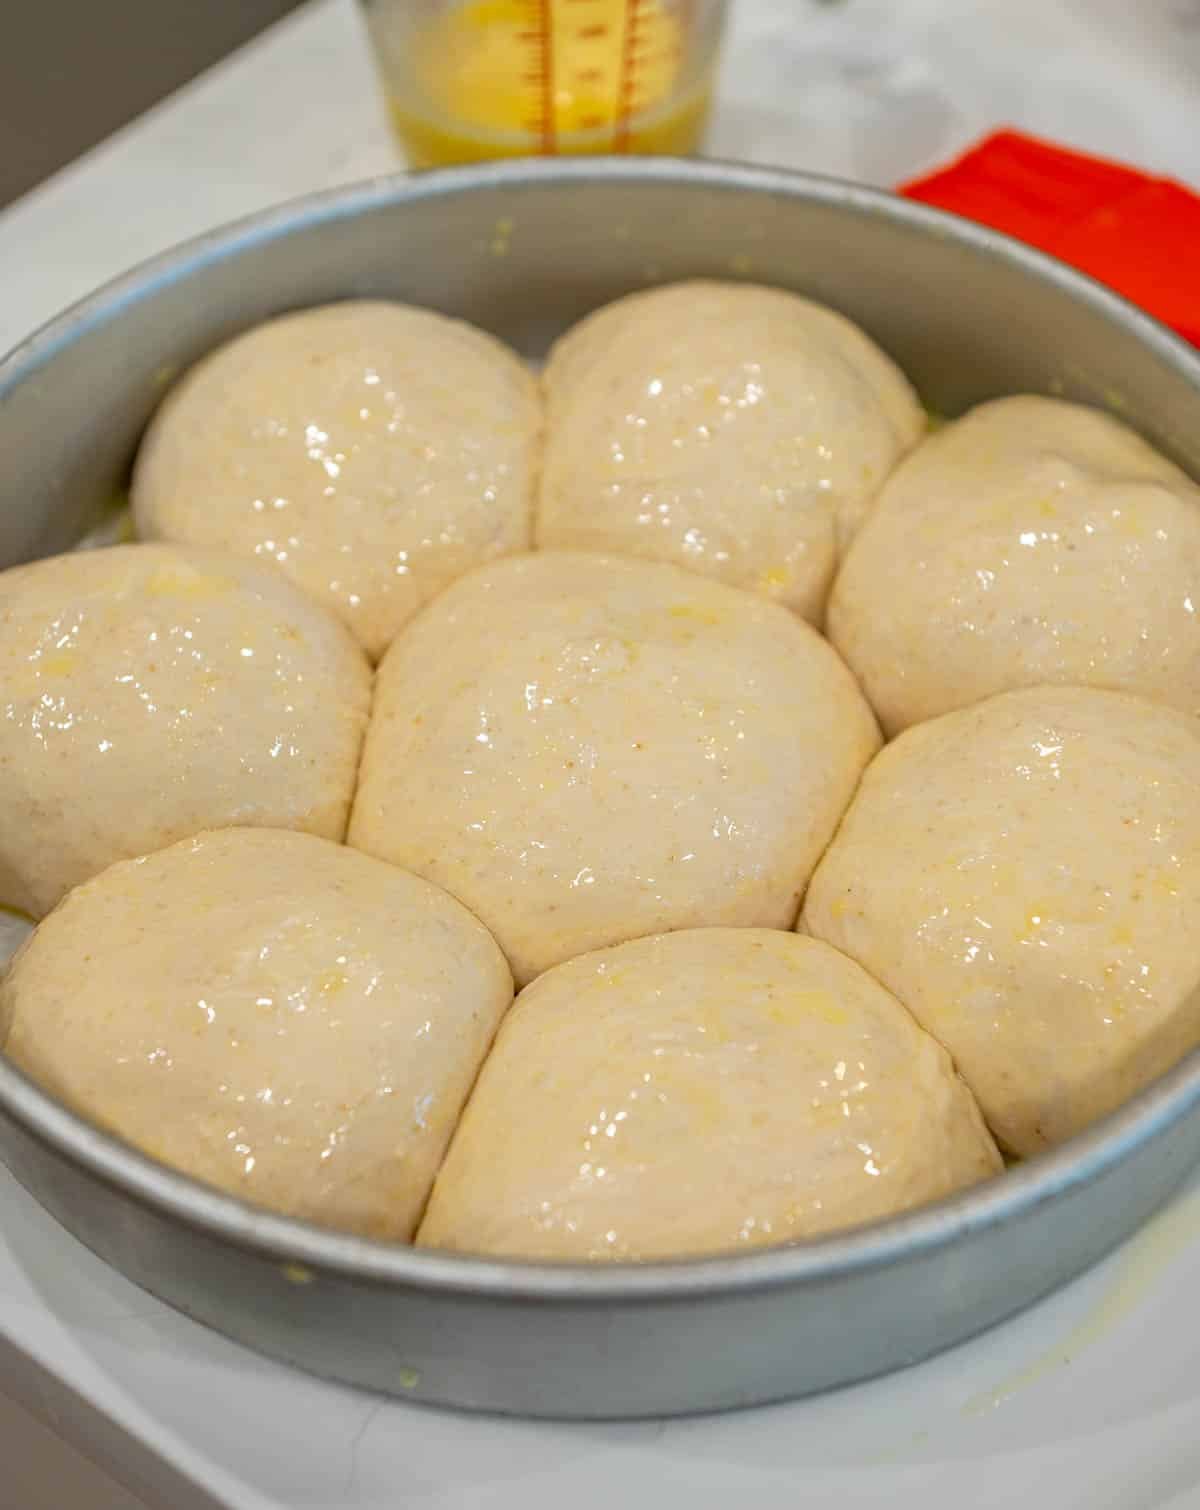
- Heat oven. While the rolls are finishing their second rise, heat the oven to 400º F. Brush the tops of the rolls with egg wash.
- Bake high, then drop. Bake at 400º F for 15 minutes (this gives you the initial color and oven spring), then drop the temperature to 375º F and bake another 25 to 30 minutes. Check the internal temperature of the center roll, it should read 205º F when fully done. The crust should be deep golden brown.
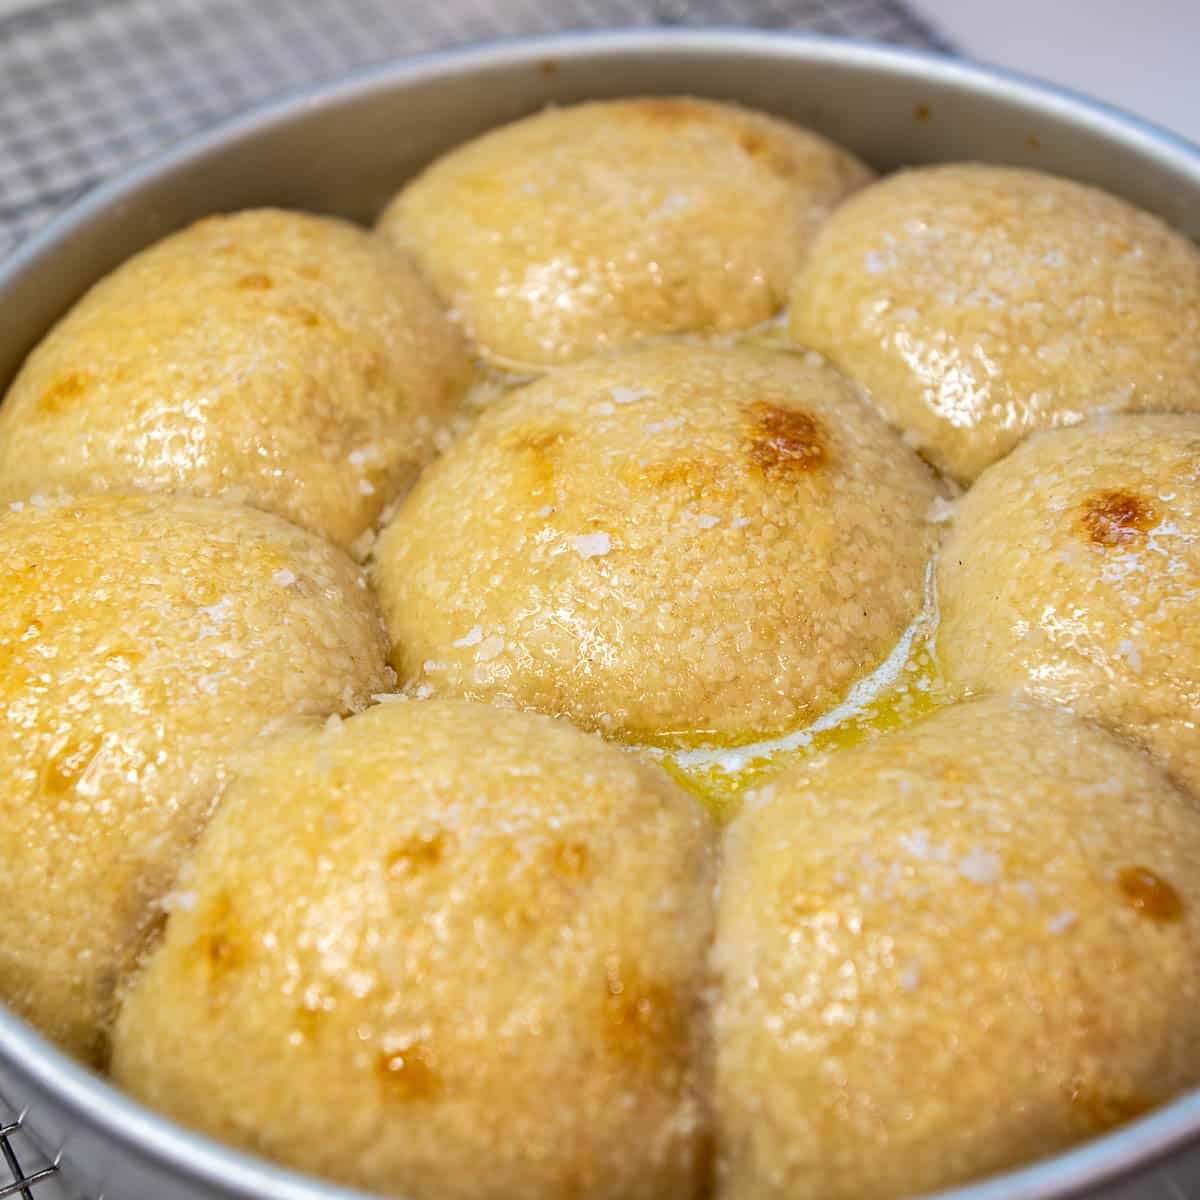
- Brush with melted butter, cool slightly, serve. As soon as the rolls come out of the oven, brush with a light coat of melted butter and sprinkle with flaky salt. Let cool in the pan for 10 minutes before serving (the crumb finishes setting during this rest). Pull apart and slather with more butter.
Your Complete Warm Sourdough Environment Guide
Sourdough is completely controlled by temperature. If your house is cold, the dough takes much longer to rise. Go by visual cues, not just time. Here are eight ways to keep your dough warm enough for consistent rise speed.
I personally use my Brod and Taylor Folding Proofer so I can get my sourdough to rise at a perfect temperature no matter what's happening with the heat in my house. But if you don't have a proofer, any of these methods will work.
1. Oven with the light on. Place your covered dough inside the oven (turned OFF) and switch on the oven light. The light alone usually keeps the inside around 75º F to 85º F, which is ideal for fermentation. Just don't forget the dough is in there before you preheat to bake something else.
2. Microwave-proofing box. Boil a cup of water in the microwave for 2 to 3 minutes, then push the cup to the corner. Place your covered dough inside and close the door. The residual steam and heat create a warm, humid environment. Reheat the water every few hours if needed.
3. On top of a warm appliance. Set the dough on top of something that gives off gentle heat:
- A refrigerator (often slightly warm on top from the compressor)
- A cable box, router, or dehydrator
- A turned-off but still-warm oven or stovetop
4. Heating pad or electric blanket. Place a folded towel or baking sheet between the heating pad and your bowl to avoid overheating. Set it on the lowest setting and monitor with a thermometer.
5. Warm water bath. Place the bowl or proofing container in a larger bowl of warm water (around 80º F). This gently warms the dough from underneath. Refresh the water if it cools.
6. DIY cooler proofing box. If you don't have a proofer, build one. A small insulated cooler + a mug of hot water inside + your covered dough next to the mug. Close the lid. Refresh the hot water every couple hours.
7. Sunlit spot or near a window. A sunny windowsill can give a nice boost during the day. Make sure direct sunlight doesn't dry the surface of your dough (cover with damp towel) and watch that the spot doesn't get too hot (above 90º F stresses the yeast).
8. Inside the oven with a bowl of hot water. Place your dough on the top rack and a bowl of boiling water on the lower rack. Close the oven door. This creates a warm, steamy chamber, excellent for both bulk ferment AND the final proof of shaped rolls.
The right method depends on your kitchen. Below 65º F, you almost have to use one of these. 70º F to 75º F kitchens can manage without help if you're patient. Above 78º F, your dough will fly along on its own.
Sample Hour-By-Hour Baking Schedule
If you want rolls on the dinner table at 6 PM, here's the timeline. Adjust based on your kitchen temperature.
| Time | Step |
|---|---|
| Night before, 9 PM | Feed your sourdough starter. Should peak by 8 to 10 AM. |
| 8 AM | Confirm starter has doubled. Mix the dough. |
| 9 AM | Stretch and fold #1. |
| 9:30 AM | Stretch and fold #2. |
| 10 AM | Stretch and fold #3. |
| 10:30 AM | Stretch and fold #4. Start bulk ferment. |
| 10:30 AM to 2:30 PM (or longer) | Bulk ferment. Check at 4 hours. If kitchen is cool, may take 8 hours. |
| 2:30 PM | Divide and shape rolls. Place in pan. |
| 2:30 to 4:30 PM | Second rise (about 2 hours). |
| 4:15 PM | Preheat oven to 400º F. Brush rolls with butter. |
| 4:30 PM | Bake at 400º F for 15 minutes. |
| 4:45 PM | Drop oven to 375º F. Continue baking until 205º F internal (25 to 30 more minutes). |
| 5:15 PM | Out of oven. Brush with butter, sprinkle flaky salt. Rest 10 minutes. |
| 5:25 PM | Serve. |
If your kitchen is cooler, push the start time earlier. The overnight cold ferment option lets you split the work across two days: mix and stretch-fold in the evening, refrigerate overnight, shape and bake in the morning.
Glass vs Metal Pan (What Each Gives You)
Most recipes don't tell you that the pan you bake in changes the texture of the final rolls. Here's the difference.
Glass pan (Pyrex, ceramic baking dish): Bakes more gently than metal because glass conducts heat slower. The bottom of the rolls stays softer and less browned. Best choice if you want maximum pillowy texture all the way around.
Metal pan (aluminum, dark coated): Conducts heat fast. The bottom of the rolls gets a deeper crust. Best choice if you want a slightly crispier base for sturdier sandwich-style rolls.
Cast iron skillet: Like metal but more dramatic. The bottom crust comes out almost like a fried base. Best if you like contrast between top and bottom.
My default is a glass 9x13 dish for soft dinner rolls. I switch to cast iron when I want sturdier rolls for pulled pork sandwiches.
Make-Ahead, Storage, And Reheat
These rolls are best the day they're baked, but they store well with the right setup.
Overnight cold ferment (recommended for advance planning)
After the bulk ferment (step 6), instead of dividing and shaping, cover the bowl and refrigerate up to 36 hours. The cold slows the yeast dramatically without stopping it. The next morning (or up to a day later): take the dough out, let it warm up on the counter for 30 minutes, then divide, shape, second rise, and bake as usual. The overnight cold ferment also develops a deeper, slightly tangier flavor.
Freeze before baking (for "fresh rolls on demand")
After shaping the rolls and placing them in the pan, cover and freeze the whole pan for up to 1 month. When you want to bake: take the pan out 4 to 5 hours before you want to eat, let it thaw and do its second rise on the counter (covered), then bake as usual. This is the best way to have homemade rolls on a busy day with no day-of work.
Storage of baked rolls
- Room temperature: Store cooled rolls in a sealed container or bread bag at room temperature for up to 3 days. Don't refrigerate (refrigeration stales bread faster).
- Freezer: Wrap cooled rolls in foil, then a freezer bag, for up to 3 months. Thaw at room temperature for 1 hour before reheating.
Reheat protocol
Heat the oven to 350º F. Wrap the rolls in foil (this keeps moisture in). Bake for 15 to 20 minutes (from room temp) or 25 to 30 minutes (from frozen). The foil tent is the key. Naked reheat dries them out. The result tastes almost as good as day-of.
For a single roll, the microwave works in a pinch: wrap in a slightly damp paper towel and microwave 15 to 20 seconds.
Common Sourdough Roll Problems To Avoid
- Rolls didn't rise. Most common cause: starter wasn't active enough. Active starter doubles within 5 hours of feeding. Run the levain test before mixing the dough. Second cause: kitchen too cold. Use the warm environment guide above.
- Rolls are dense and heavy. Bulk ferment was too short. The dough should noticeably double, look puffy, and feel airy before you divide. If it's only slightly bigger, give it more time.
- Rolls have a gummy interior. Underbaked. Check the internal temperature with a thermometer. 205º F is the target. The visual "golden brown" alone isn't enough.
- Rolls burnt on top before cooking through. Oven runs hot. Use an oven thermometer to check actual temperature. You can also tent the pan with foil after the first 20 minutes if browning is happening too fast.
- Rolls stuck together (couldn't pull apart cleanly). Second rise went too long. The dough overflowed its space and over-merged. Pull them apart with a serrated knife after baking, or just embrace the connected look.
- Rolls are dry on day 2. Storage issue. Sealed container or bread bag, away from heat. Avoid refrigerating. Refresh with the foil reheat method.
- Dough was too sticky to shape. Either the bulk ferment over-fermented (gluten started to break down) or you didn't develop enough gluten in the stretch-and-folds. Sticky dough that's springy is fine. Sticky dough that's soup is overfermented, start over.
- Crust is too dark. Drop the oven to 375º F earlier (after 12 minutes instead of 15), or tent with foil for the last 10 minutes.
- Crust is too pale. Bake longer to hit the 205º F internal target. The butter brush before AND after baking is what gives the golden color.
Make This Sourdough Roll Recipe Your Own
The base recipe is a launchpad. Same dough, different finishes.
- Cheese rolls. Add ¼ cup shredded sharp cheddar to each roll during shaping. Tuck the cheese into the center as you pinch the roll closed. The cheese melts into pockets during baking.
- Garlic herb rolls. Mix 2 Tablespoons of finely chopped fresh rosemary or thyme + 2 cloves of minced garlic into the dough during the final stretch and fold. Brush the baked rolls with garlic butter (melted butter + minced garlic + salt) instead of plain butter.
- Cinnamon-sugar pull-apart rolls (sweet variation). Skip the final salt on top. After shaping, dip each roll in melted butter, then roll in a mixture of ½ cup sugar + 2 teaspoons cinnamon. Place in the pan and bake as usual. Cinnamon roll energy without the heavy frosting.
- Slider rolls (smaller). Divide the dough into 24 portions of about 45g each instead of 16. Reduce the bake time by about 8 minutes. Perfect size for mini sandwiches, holiday slider buffets, or kid lunches.
- Whole wheat swap. Replace up to 250g (half) of the bread flour with whole wheat flour. The rolls will be denser, nuttier, and need slightly more water (add 10g if the dough looks dry). 100% whole wheat will give you pucks, don't go all the way.
- Sandwich loaf instead of rolls. Use half (or all) the dough to shape into a sandwich bread loaf in a 9x5 loaf pan. Same second rise, same bake (35 to 45 minutes at 375º F to 205º F internal). See my sourdough sandwich bread post for the full method.
- Half rolls, half sandwich loaf. This is my actual default for everyday baking. 8 rolls in a 9" pan + one small sandwich loaf in a 9x5 pan. One dough, two breads, a week of bread.
- Pull-apart Parker House style. After shaping, dip each roll in melted butter and fold in half before placing in the pan. Bake as usual. The fold lets them pull apart along the seam.
- Olive oil instead of avocado oil. 1:1 swap. Slightly more Mediterranean flavor. Pairs well with the garlic herb variation.
What To Serve With Sourdough Rolls
These rolls do a lot of heavy lifting on a dinner table. Some pairings:
- Holiday dinners. Thanksgiving feast (gravy, cranberry sauce), Christmas dinner, Easter ham
- Soup night. Tomato soup, French onion, chicken noodle, chili
- Pulled pork or sloppy joe sliders. Use the slider variation
- Roast chicken or crispy baked chicken thighs. Dunk in the pan drippings
- Breakfast. Split, toast, top with butter and honey or use for an egg sandwich
- Just butter. Soft butter, flaky salt, end of conversation
Final Thoughts
These are the rolls that taught my kids to love sourdough. The tang is there but it's gentle. The crust is golden but not crunchy. The crumb stays pillowy for days because of the honey + oil chemistry, not because of any special technique. The recipe is forgiving, the timeline is flexible, and the flex between "all rolls" and "rolls plus a sandwich loaf" means one batch of dough actually feeds a week of meals.
If you've been intimidated by sourdough bread, start here. The skills you build making these rolls (mixing, stretch and fold, bulk ferment, shaping, second rise) are the same skills you need for sourdough sandwich bread, sourdough focaccia, and traditional sourdough bread. Everything else in the cluster is a variation of what you just learned. EASY!
Frequently Asked Questions
Yes. Honey adds a subtle sweetness and helps with browning, but you can substitute maple syrup, agave, or even granulated sugar.
Yes! Cool completely, then wrap in aluminum foil and store in an airtight container or freezer bag for up to 3 months. Reheat in the oven for a few minutes before serving.
Absolutely! Herbs, garlic, and cheese can be folded into the dough during the stretch-and-fold process for extra flavor.
Yes! All-purpose flour will make the rolls slightly softer and lighter, while bread flour adds more chewiness and structure.
Yes! After the first proof, cover the bowl and refrigerate the dough overnight. Shape and bake the next morning or the following day after a short warm-up.
No, you don't need a stand mixer or dough hook attachment for this recipe. Everything can be done by hand-just a bowl, dough scraper, and a little patience. The stretch-and-fold method develops gluten naturally without kneading at medium speed.
No, you'll need an active sourdough starter or active starter that's bubbly and recently fed. Sourdough discard doesn't have enough rising power for a good lift, though you can use it in sourdough discard recipes like crackers or pancakes.
Yes! You can bake them in a baking dish, baking tray, or cast iron skillet. Just make sure to line with parchment paper or lightly grease the pan to prevent sticking.
More Sourdough Recipes To Try


Leave Me A Review
⭐️⭐️⭐️⭐️⭐️
If you tried this Sourdough Roll Recipe or any other recipe on my blog, please leave a 🌟 star rating and let me know how it goes in the comments. I love hearing from you!
Recipe
Equipment
- 1 Thermometer
- 1 Food Scale
Ingredients
- 150 grams active sourdough starter
- 325 grams warm water
- 20 grams avocado oil
- 30 grams honey
- 500 grams bread flour unbleached
- 20 grams salt
- 30 grams butter melted
- 1 large egg for the egg wash
- 1 Tablespoon water for the egg wash
Instructions
- In a large mixing bowl, whisk together the active sourdough starter, warm water, avocado oil, and honey until smooth. Add the bread flour and salt. Mix by hand until no dry flour remains. Cover and rest 1 hour.
- Perform 4 sets of stretch-and-folds, 30 minutes apart. The dough should be smooth and stretchy by the end.
- Cover and bulk ferment 4 to 8 hours at warm room temperature (75º F to 80º F), or refrigerate overnight (8 to 12 hours) for a slower, deeper-flavored ferment. The dough is ready when it has roughly doubled and looks puffy with bubbles on top.
- Turn the dough onto a lightly floured surface. For 16 rolls, divide into 16 equal portions of about 65g each. For 8 rolls (plus a sandwich loaf with the other half), divide that half into 8 portions of about 130g each.
- Shape each portion into a smooth ball by cupping your hand over it and rolling in tight circles on the counter to build surface tension.
- Arrange the shaped rolls in a parchment-lined 9x13 dish (glass for softest) or two 8" round pans. The rolls should be close together but not touching yet.
- Cover and let second rise for about 2 hours at warm room temperature, until the rolls look puffy and just begin to touch one another.
- Heat the oven to 400º F. Brush the tops of the rolls with melted butter.
- Bake at 400º F for 15 minutes (for initial color and oven spring), then reduce the temperature to 375º F and bake another 25 to 30 minutes, until the internal temperature of the center roll reads 205º F. The crust should be deep golden brown.
- As soon as the rolls come out, brush with another light coat of melted butter and sprinkle with flaky salt. Let cool in the pan 10 minutes before serving.
Video
Notes
- Starter must be active (recently fed, bubbly, doubled in 5 hours). Discard won't work for this recipe.
- Avocado oil is my preferred oil but olive, canola, vegetable, or melted butter all swap 1:1.
- Honey is hygroscopic and is the secret to rolls that stay soft for days. Maple syrup or agave swap 1:1 but reduce shelf life slightly.
- Bread flour gives the best chew. AP works but the rolls will be slightly less structured.
- The 4 stretch-and-folds (30 min apart) replace kneading. They develop gluten without a stand mixer.
- Bulk ferment time depends on kitchen temp. 75º F = 4-6 hours. 68º F = 8-10 hours. Use visual cues (doubled, puffy, bubbly) not just time.
- The 205º F internal temp target is what prevents day-2 gumminess. Don't skip the thermometer.
- Glass pan = softest rolls. Metal pan = crustier base. Pick by preference.
- Overnight cold ferment: After bulk ferment, refrigerate up to 36 hours. Warm on counter 30 min before shaping.
- Freeze before baking: Shape rolls in the pan, cover, freeze up to 1 month. Thaw on counter 4-5 hours, let do second rise, bake.
- Room temperature storage: Sealed container or bread bag, up to 3 days. Don't refrigerate.
- Frozen baked rolls: Wrap in foil + freezer bag, up to 3 months. Thaw at room temperature.
- Reheat: Wrap in foil, 350º F oven for 15-20 minutes (room temp) or 25-30 min (frozen). The foil is essential. Naked reheat dries them out.
- Cheese rolls: + ¼ cup shredded cheddar per roll, tucked into the shape.
- Garlic herb: + 2 Tablespoons fresh rosemary + 2 cloves garlic in the final fold, garlic butter brush after.
- Cinnamon sugar pull-apart: dip shaped rolls in butter then cinnamon sugar before placing in pan.
- Slider rolls: divide into 24 portions of ~45g, reduce bake time by ~8 minutes.
- Whole wheat: swap up to 250g of bread flour for whole wheat, add 10g water.
- Sandwich loaf flex: half the dough → 8 rolls, other half → small sandwich loaf in 9x5 pan.
- Don't use discard. The rolls won't rise.
- Don't skip the second rise. Dense, gummy rolls.
- Don't pull at 190º F internal. Day-2 gumminess.
- Don't refrigerate baked rolls. Stales faster than room temp.
- Don't reheat without foil. Dries them out.