
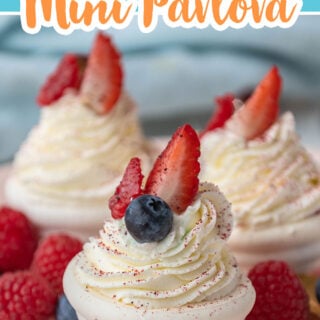
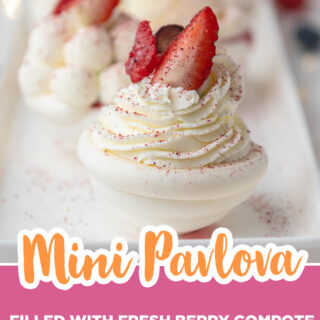
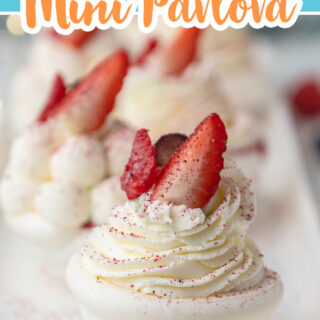

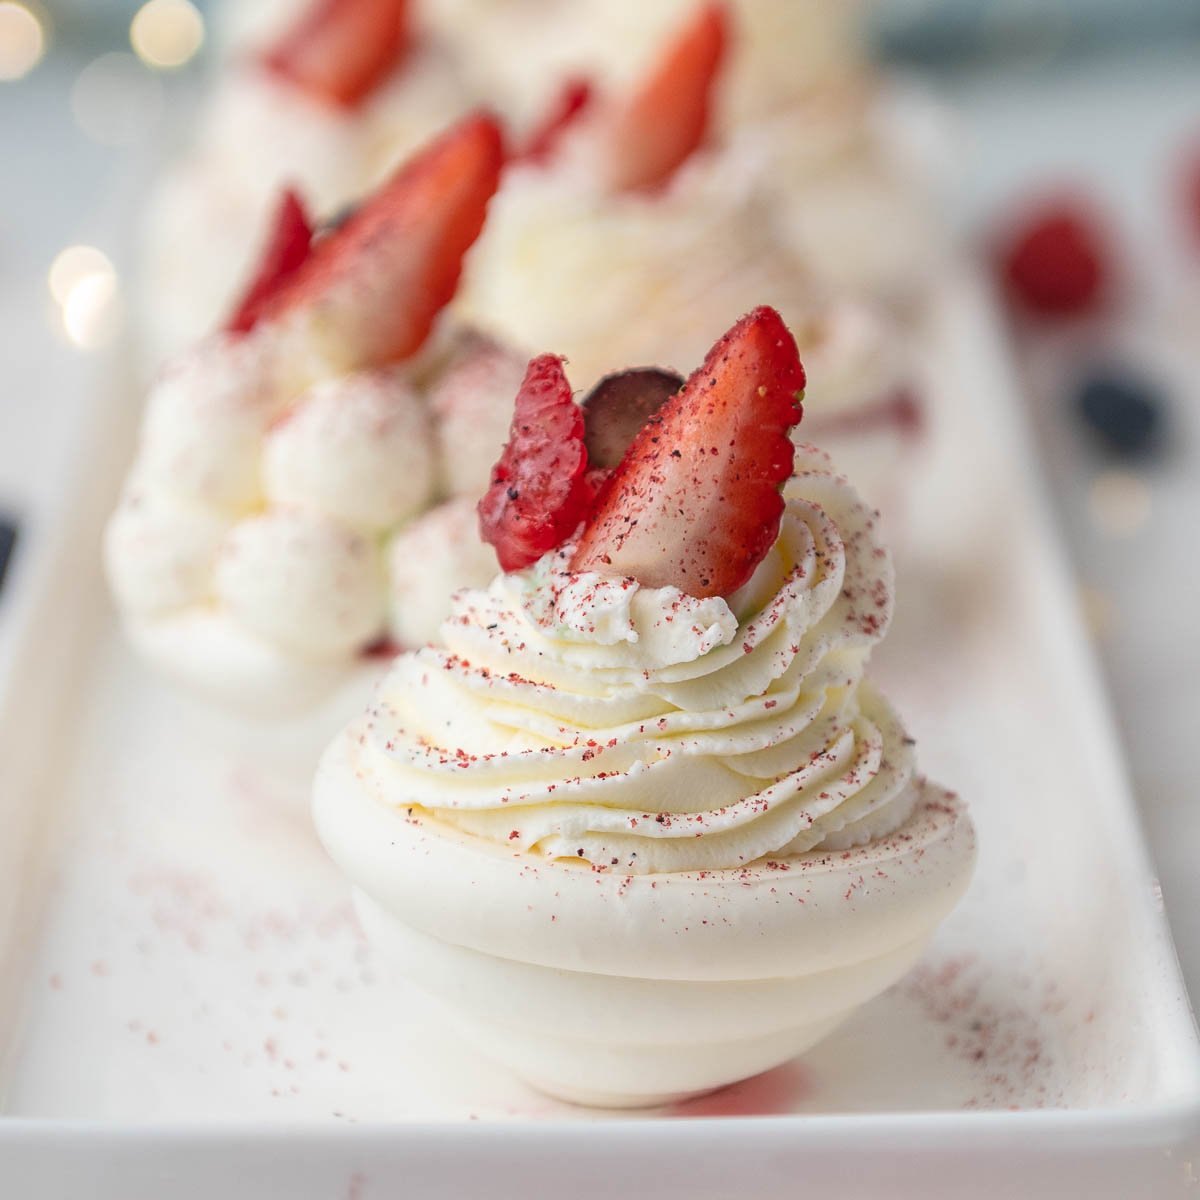
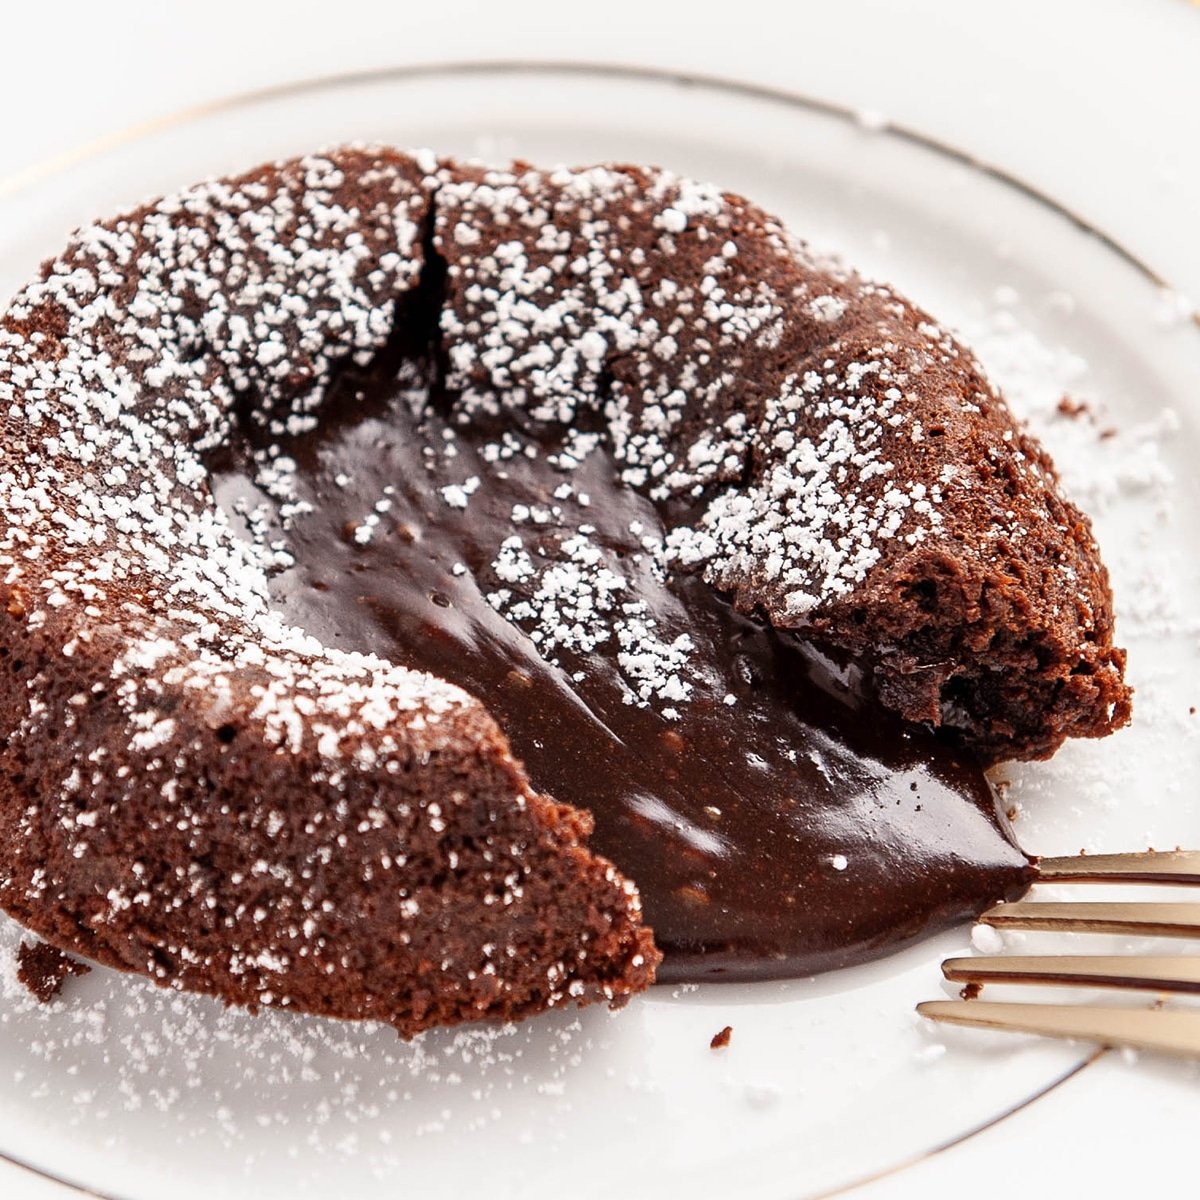
Mini pavlova is crisp on the outside and marshmallowy soft on the inside. Filled with delicious, fresh berry compote and Chantilly cream, they make the perfect dessert for special occasions! Mini pavlova is ideal for spring and summer family gatherings or even a small wedding because they are elegant and the flavor is the perfect combination of crunchy, sweet, and chewy!
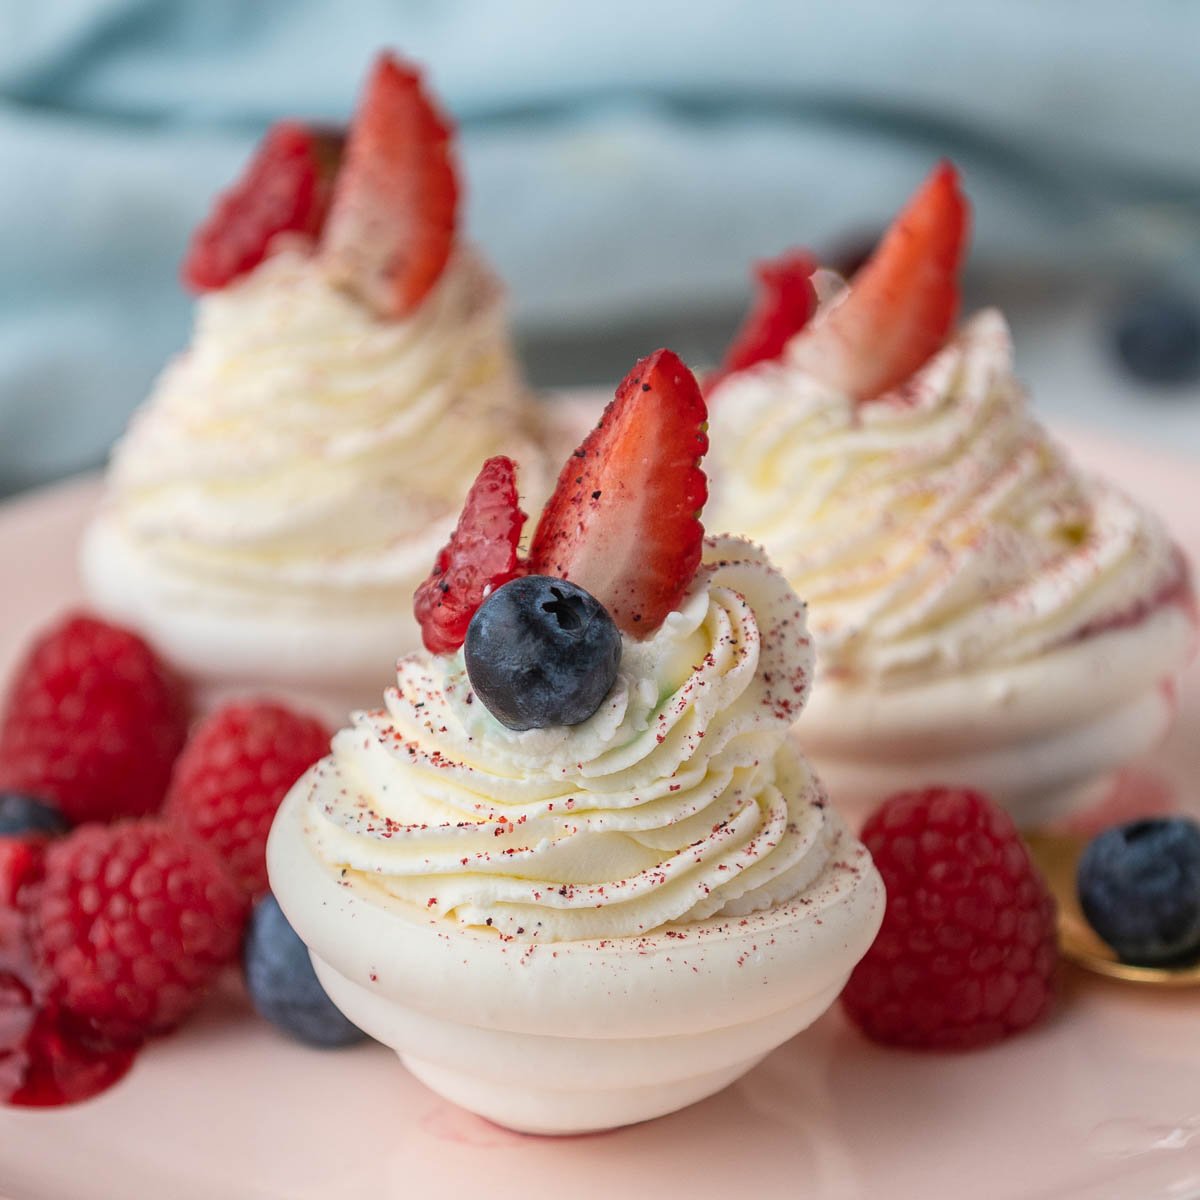
Fresh, bright, and sweet, every bite of this mini pavlova tastes like spring! This mini pavlova recipe is great for family gatherings like Mother's Day, baby showers, and bridal showers. Decorate your mini pavlova with Chantilly cream and fresh berries, and you will have elegant, bite-sized treats at your fingertips!
This step-by-step recipe from Chef Christophe Rull can make up to 18 individual mini pavlovas, or if you prefer, one or two larger pavlovas that can be cut and served in portions.
What's In This Blog Post
Mini Pavlova Ingredients
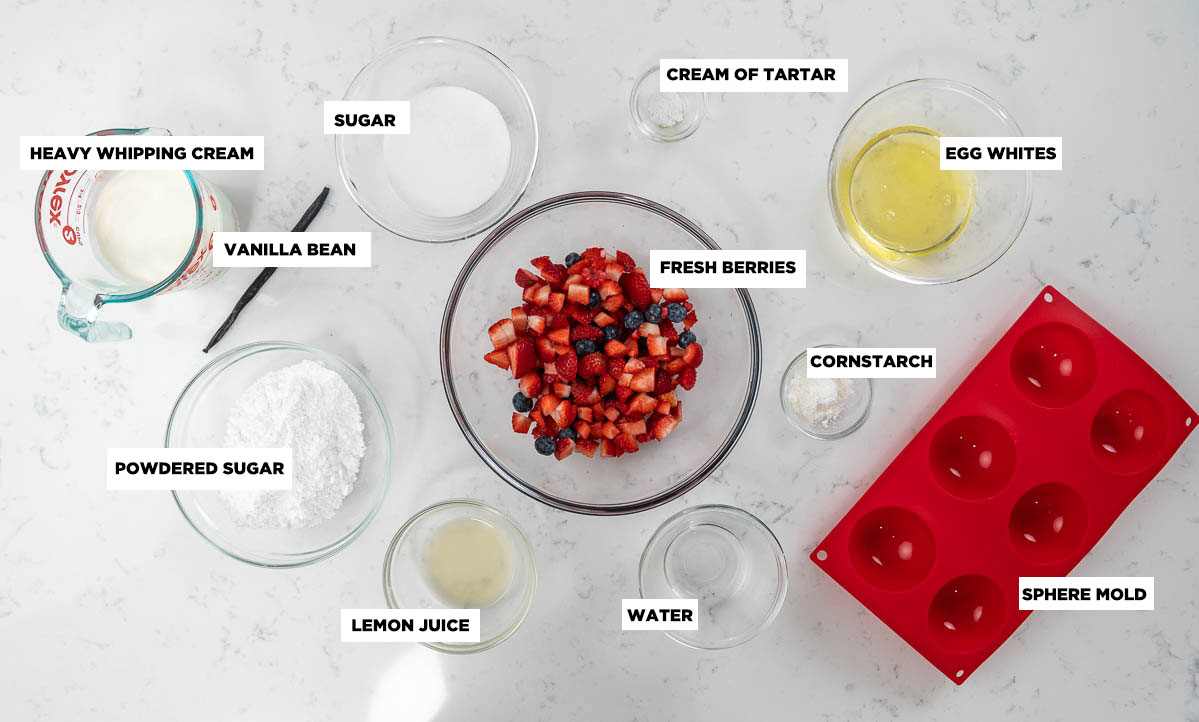
Egg whites: The key ingredient of this pavlova is room temperature egg whites. Be sure to give your eggs enough time to warm up before you begin the recipe. This will help ensure your meringue whips up nicely.
Cream of tartar: You technically don't need cream of tartar. But, if you use cream of tartar, it will help stabilize the egg whites so they don't collapse and will help the egg whites stay extra white.
Fresh berries: You can use frozen berries to prepare this mixed berry compote. However, fresh berries are preferred for this recipe because they will hold their shape better. If you have trouble keeping berries fresh for more than a couple of days, learn how to make them last longer using berry wash.
Adapt the fruit compote to whichever variation of fruits you prefer! You could do all one fruit, or you could opt for other kinds of fruits to use in this recipe like peach filling or cherry filling. If you're feeling creative you could even make your own compote using fruits like nectarines, kiwi, pineapple, passionfruit, cherries, and more!
How to Make Mini Pavlova
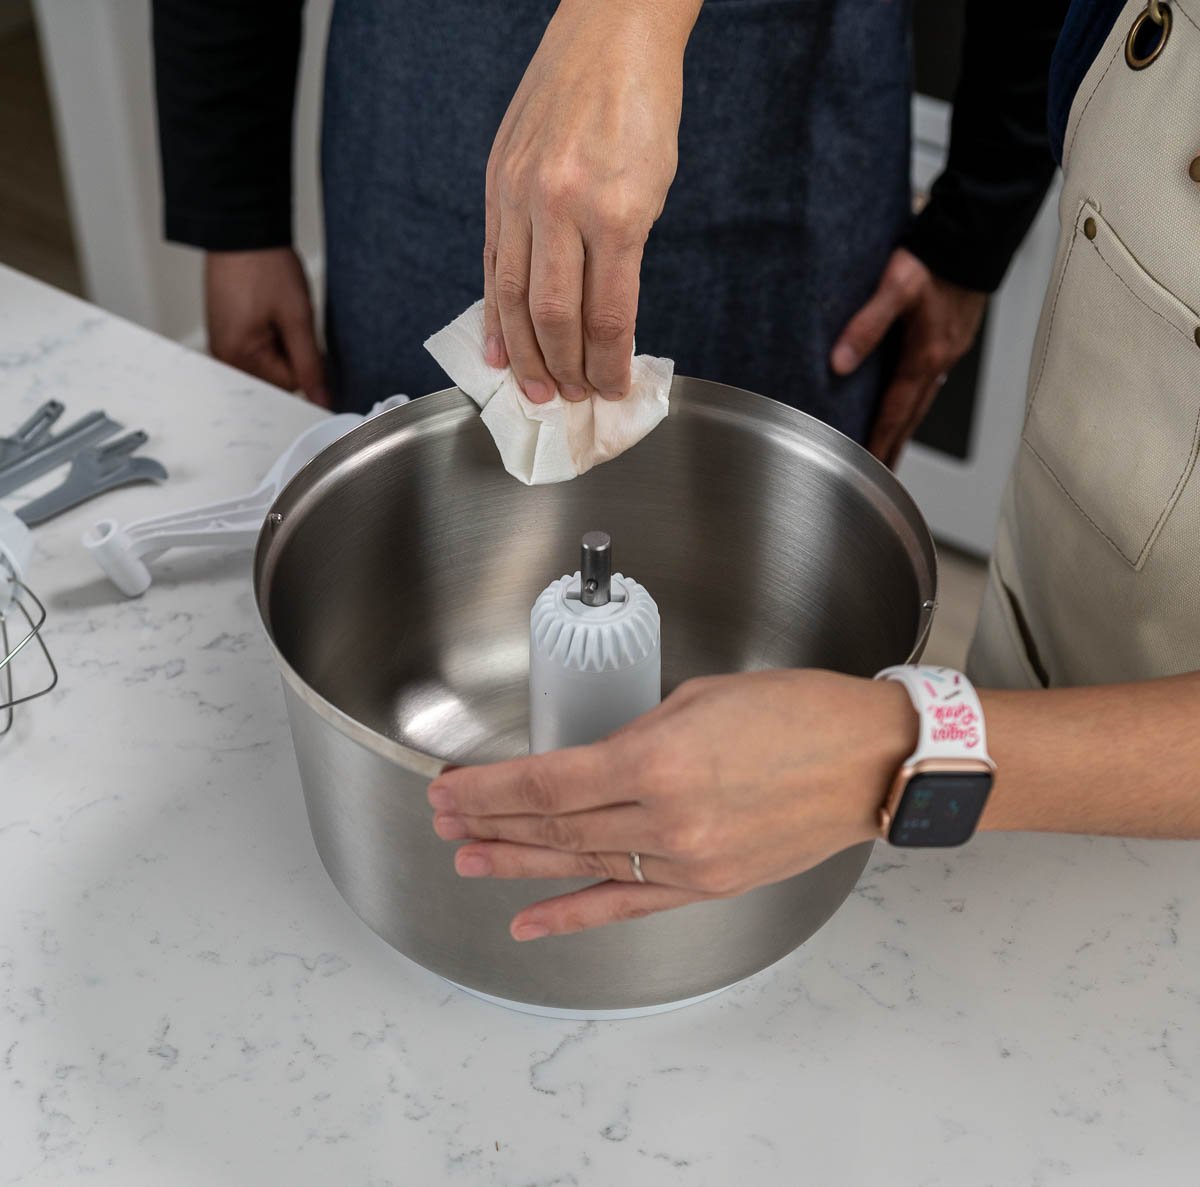
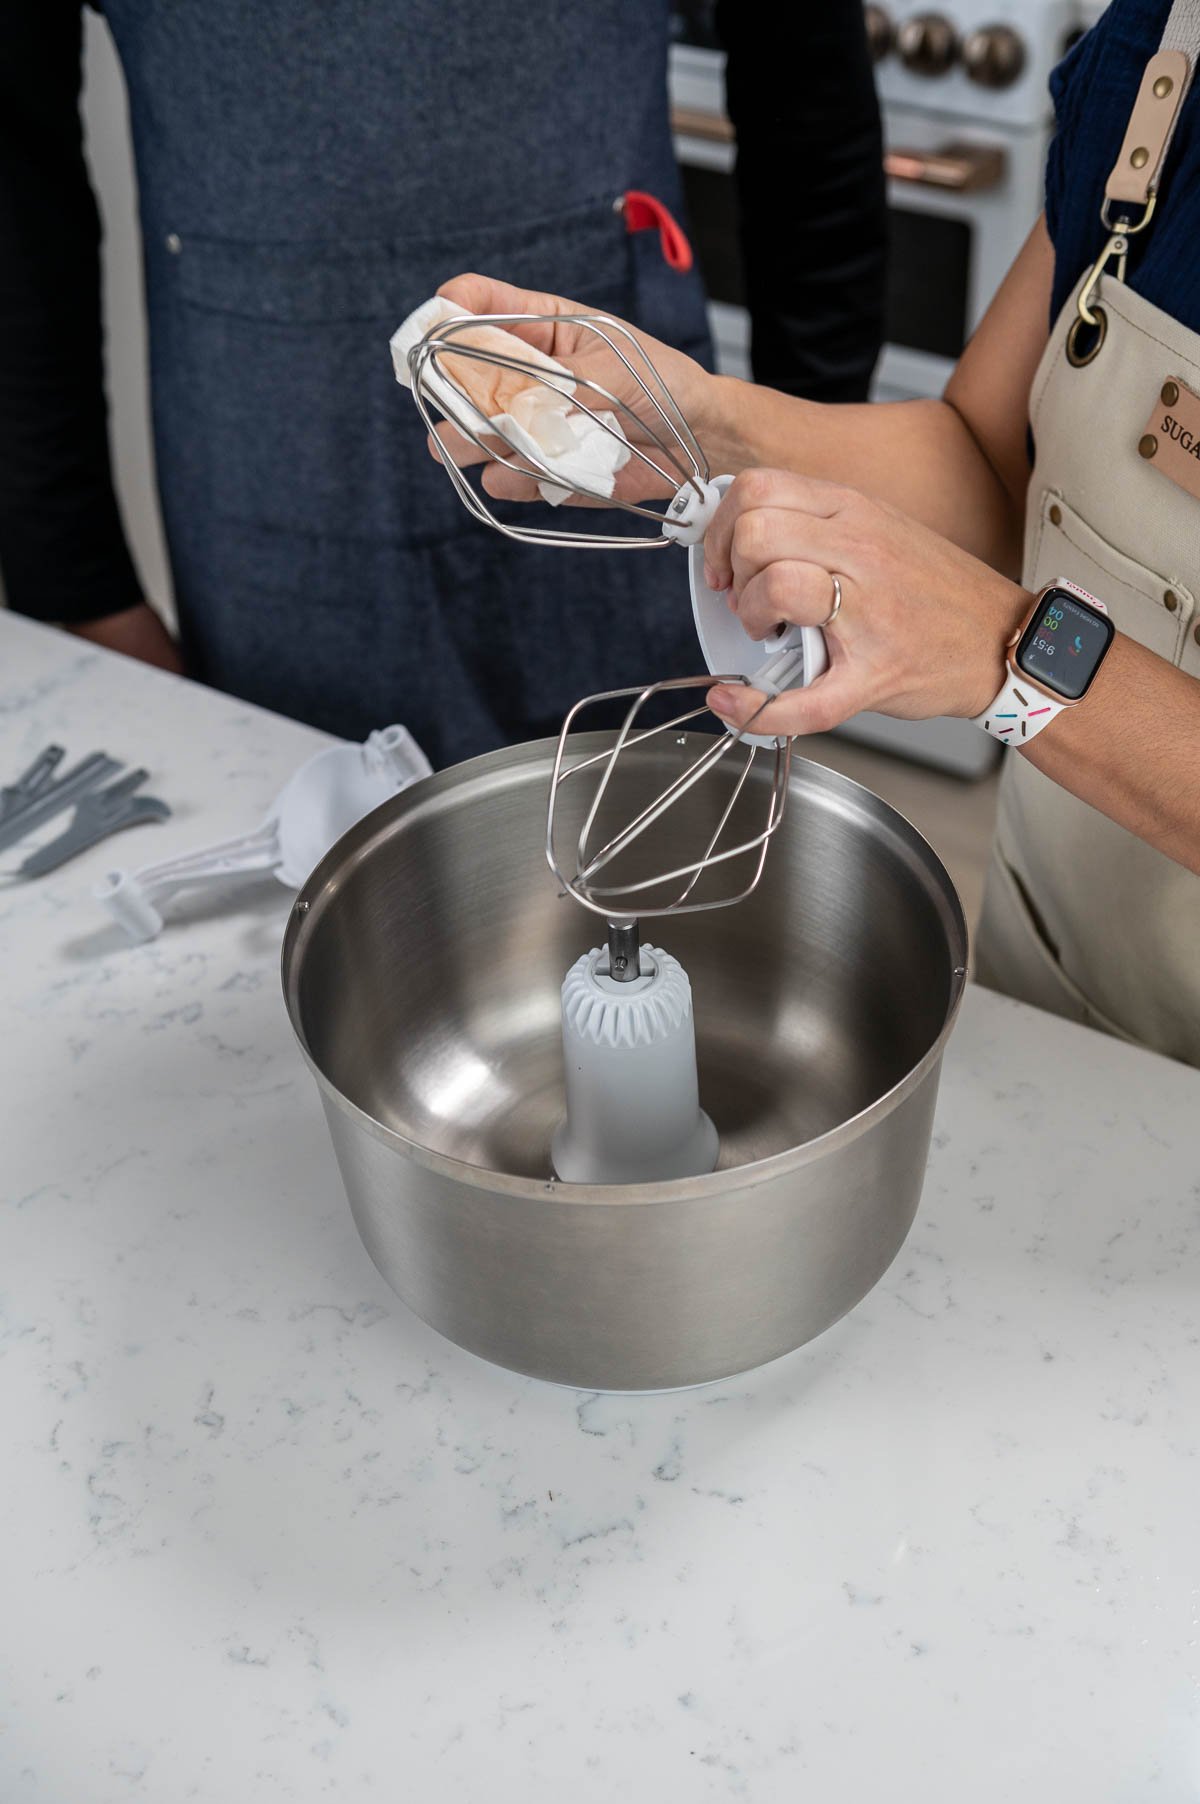
- Preheat your oven to 200°F (93°C). Before you begin making the pavlova, ensure that your mixing bowl is entirely clean and fully dry. Even a little bit of water, oil, or grease could throw off your entire recipe! Then, wipe down your clean mixing bowl and your attachments with vinegar!


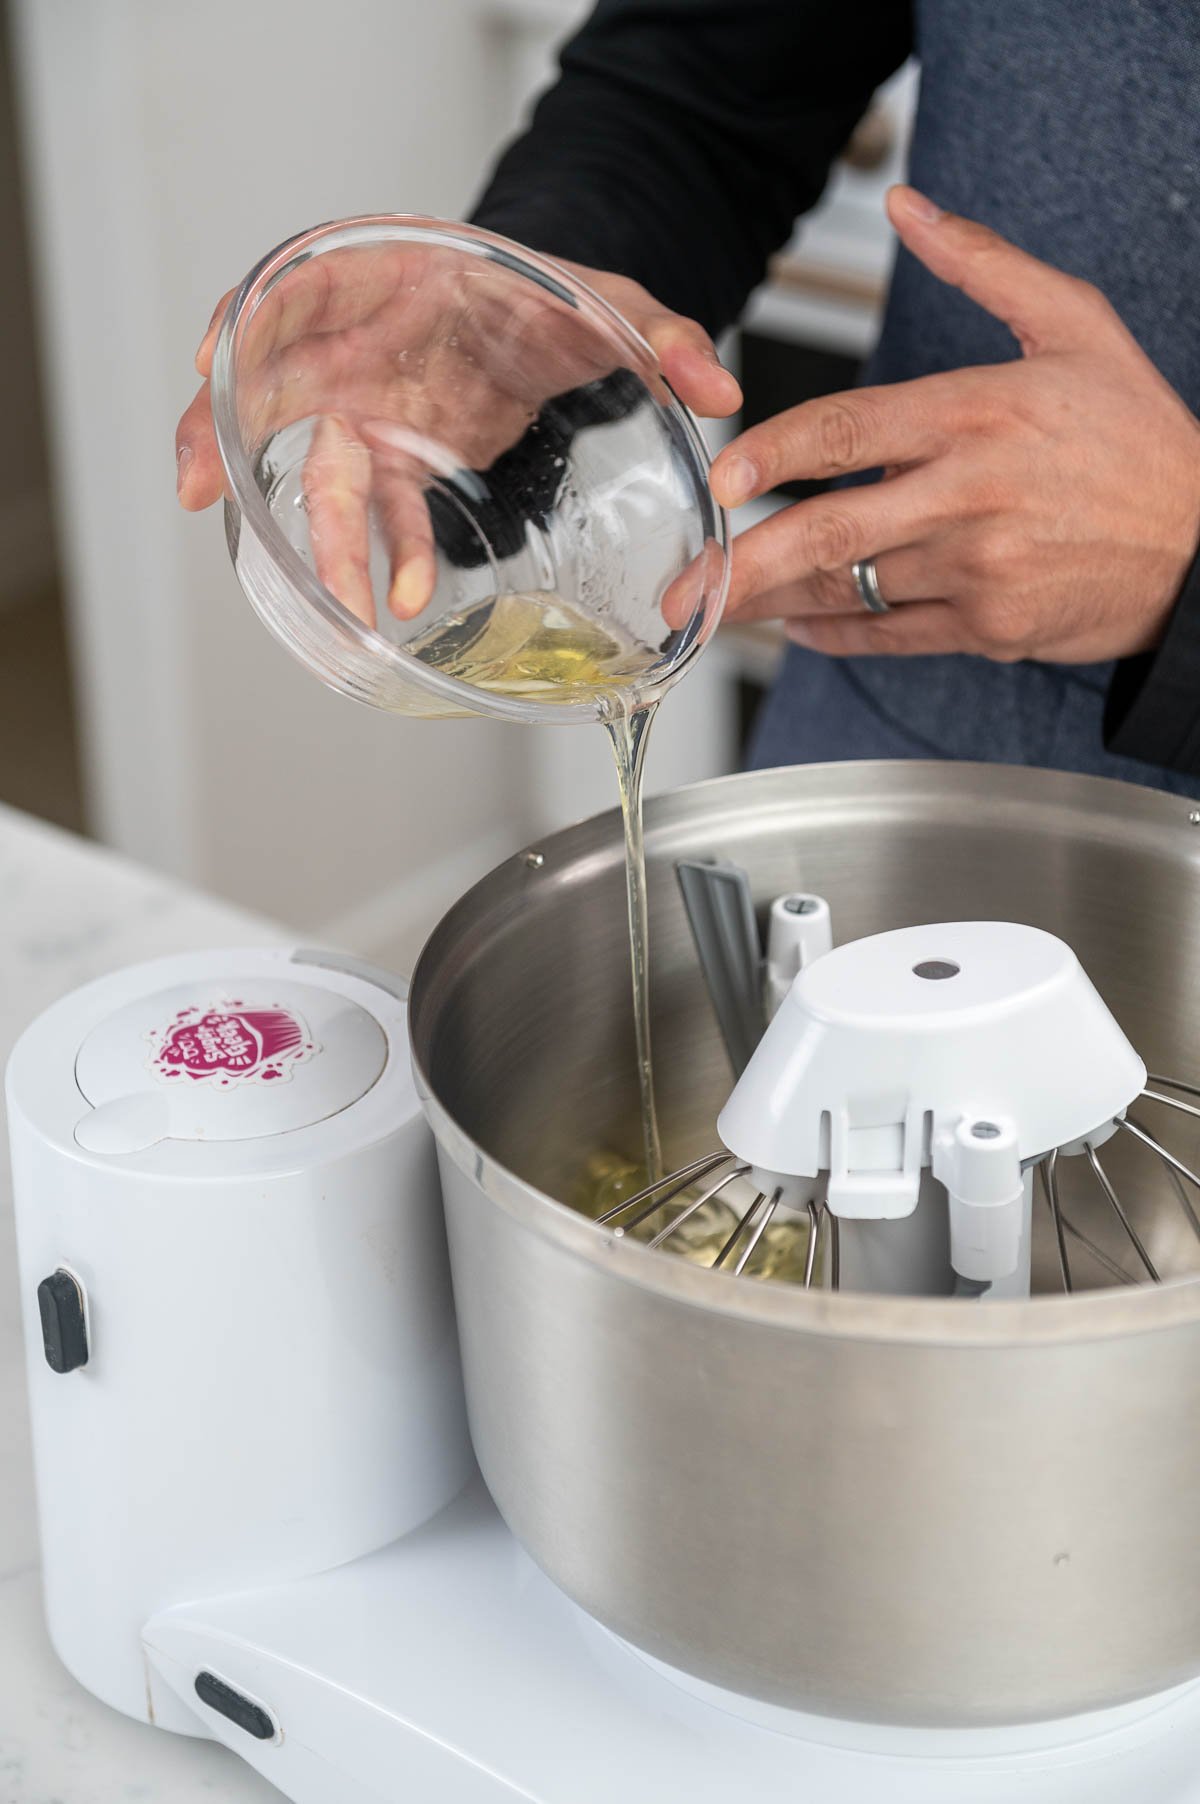
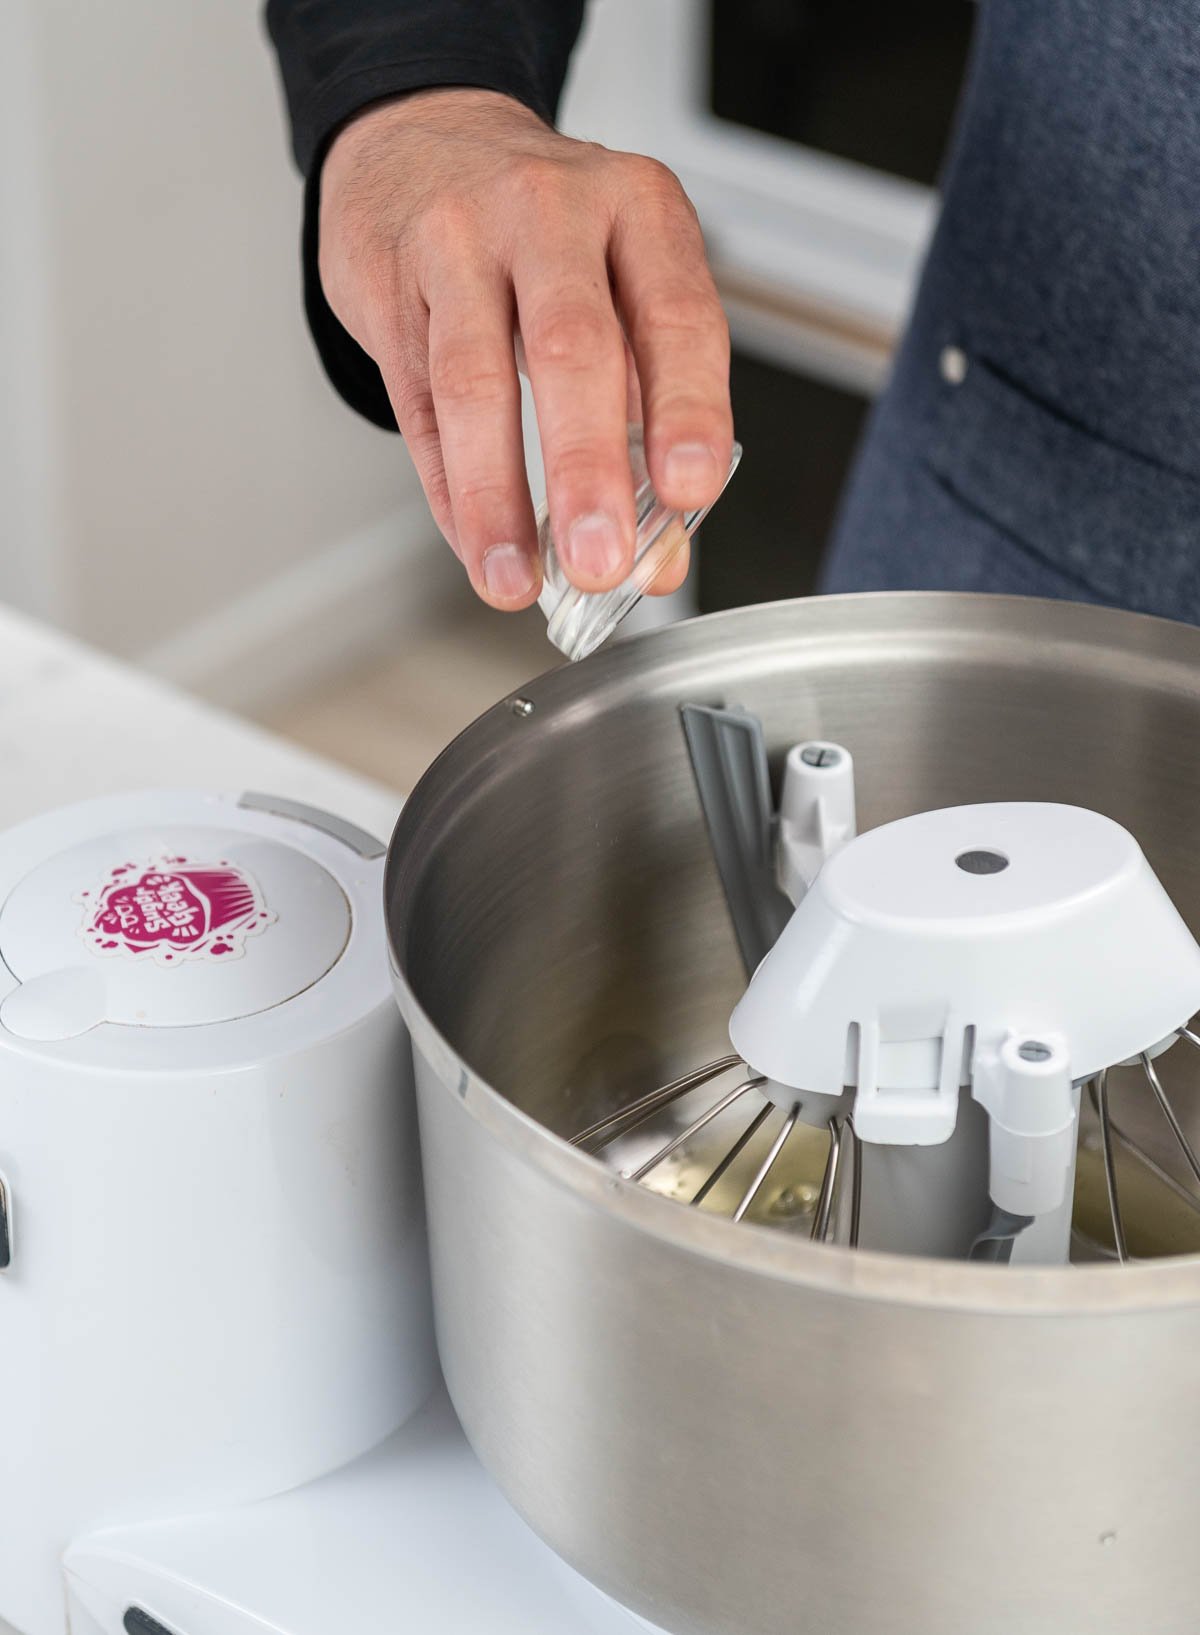
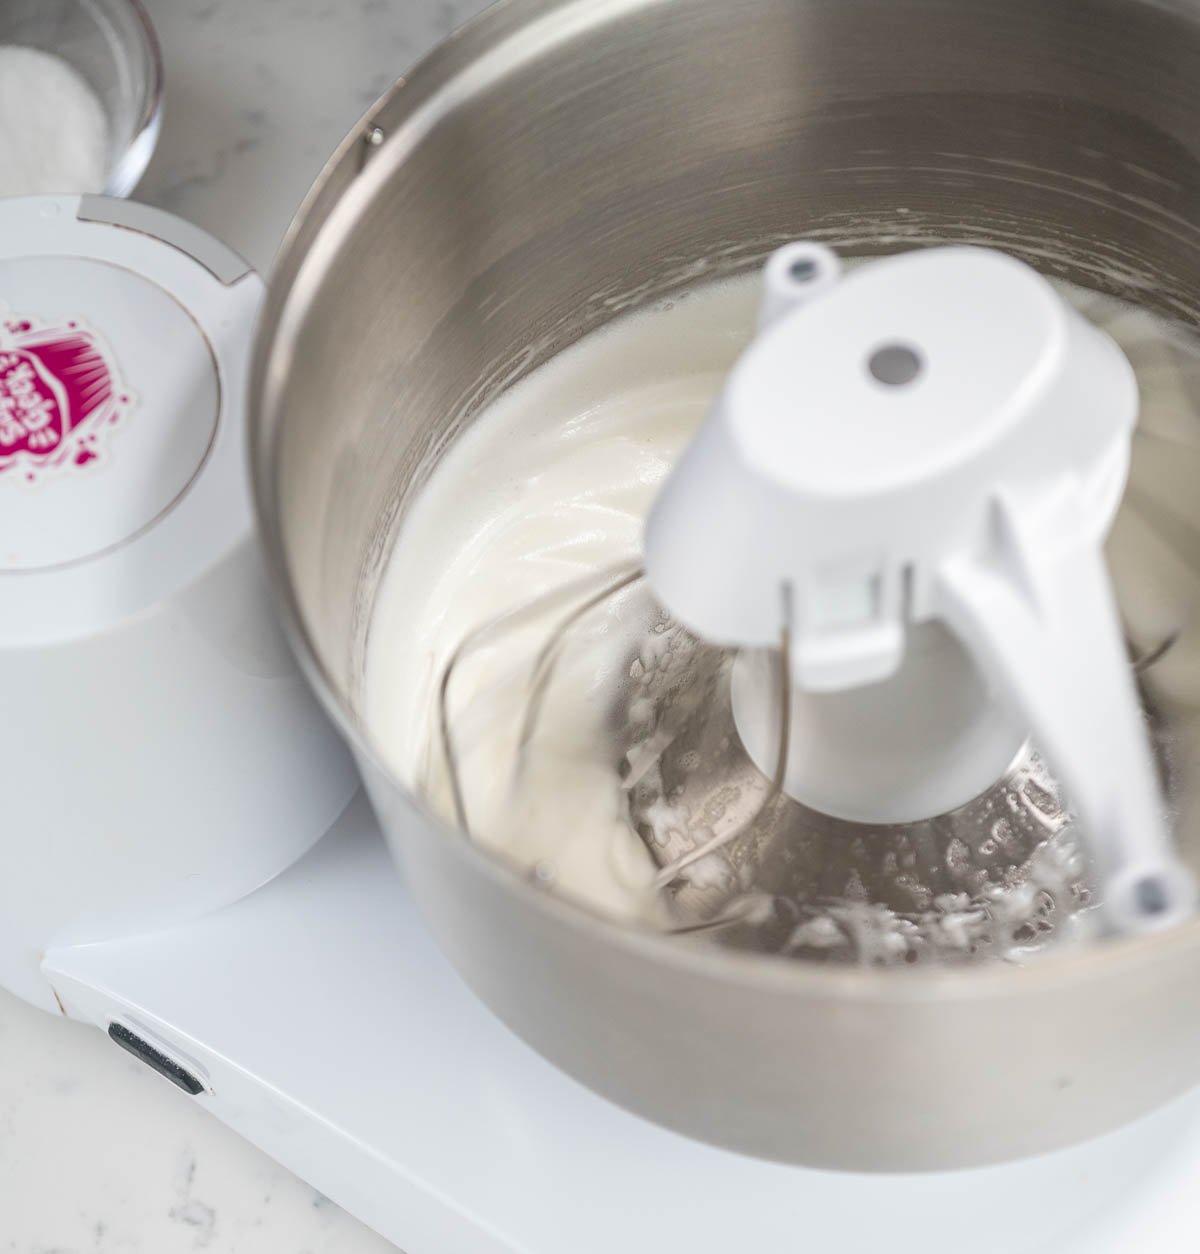
- First, using your stand mixer, whip the room temperature egg whites and cream of tartar on medium speed to a soft peak in a clean and dry mixing bowl.


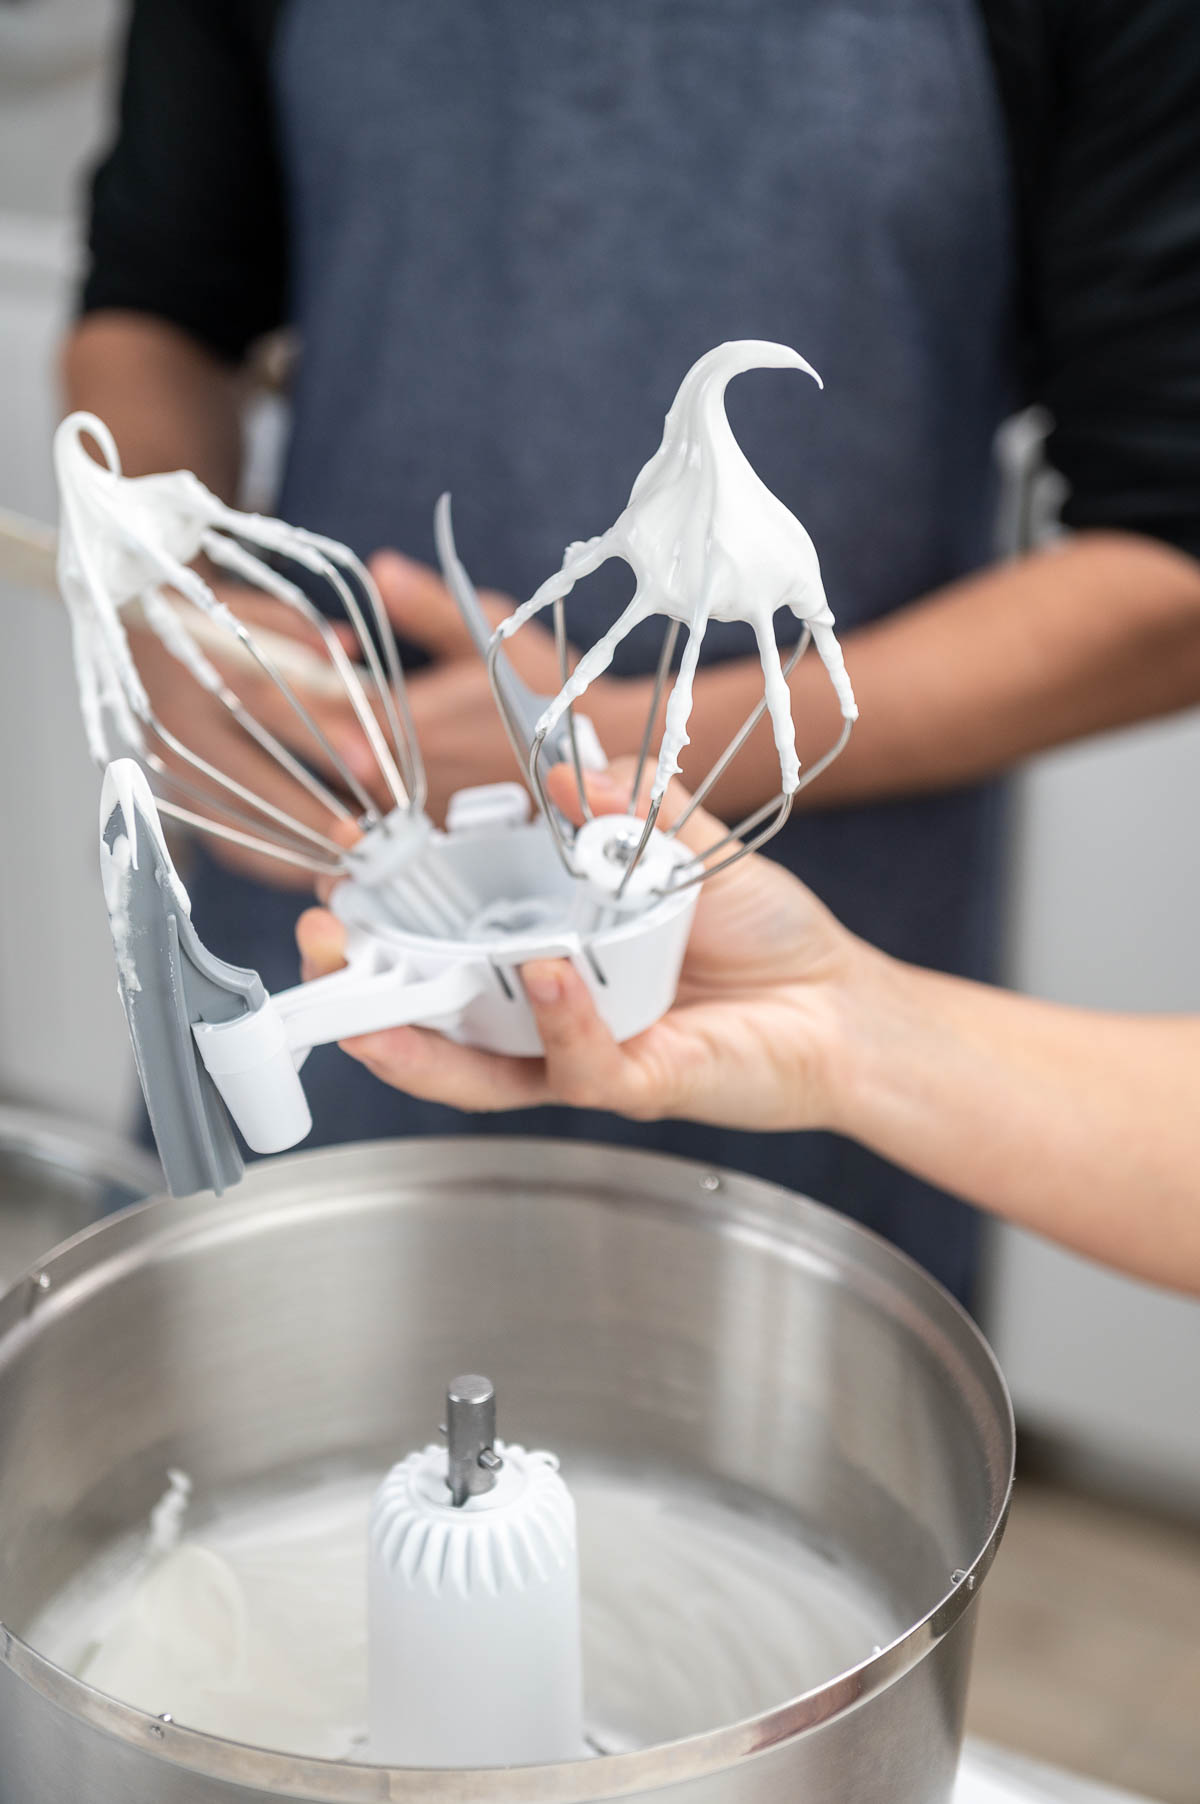
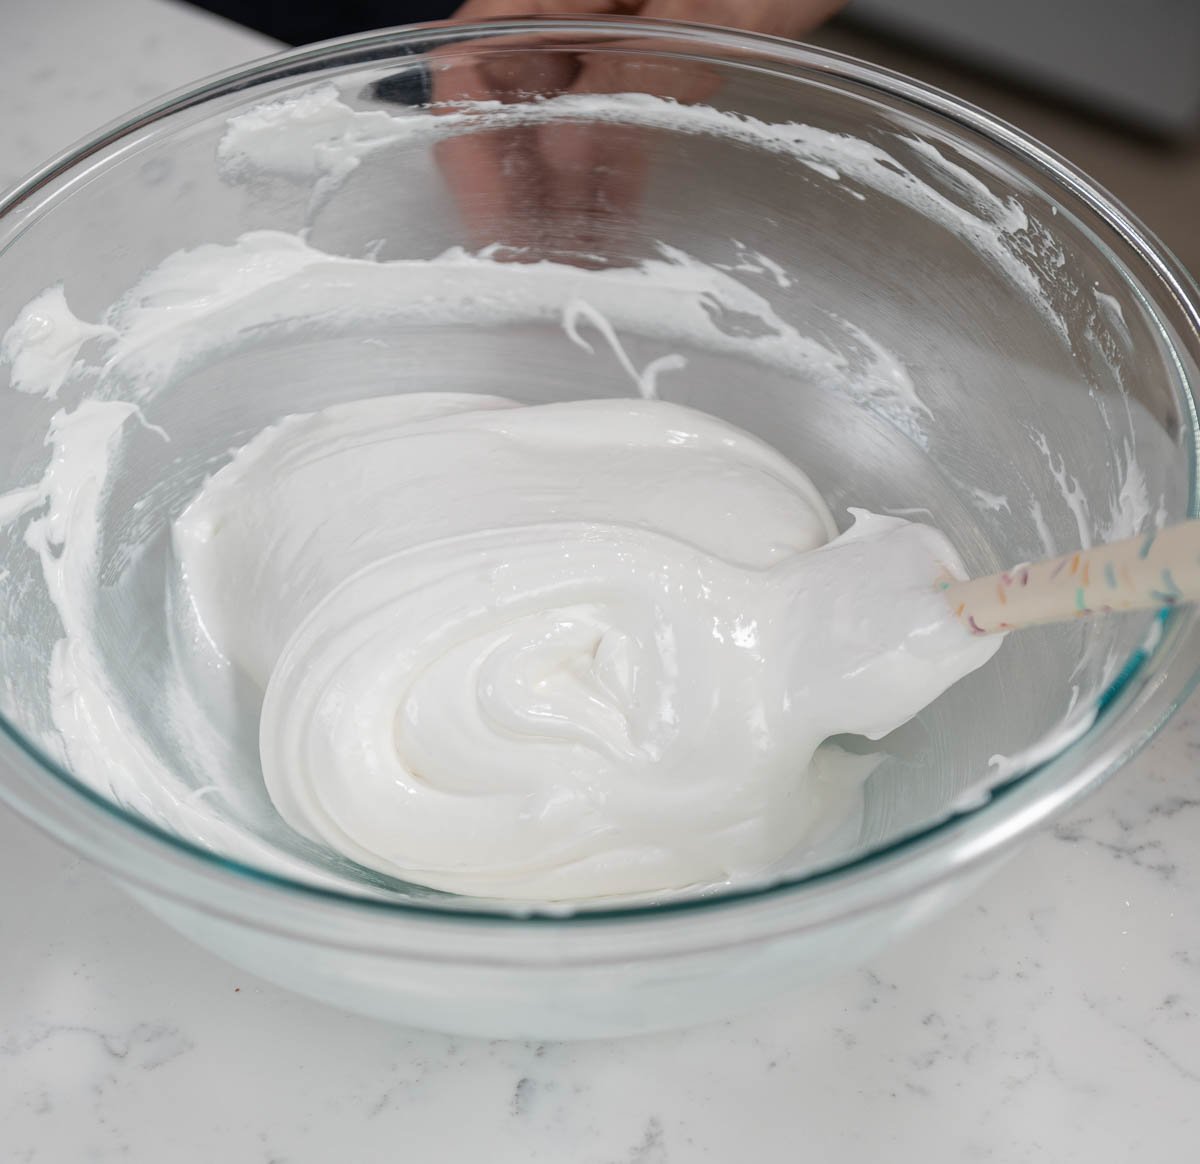
- Then, while it is mixing, slowly add your granulated sugar. Continue to mix until you reach stiff peaks.
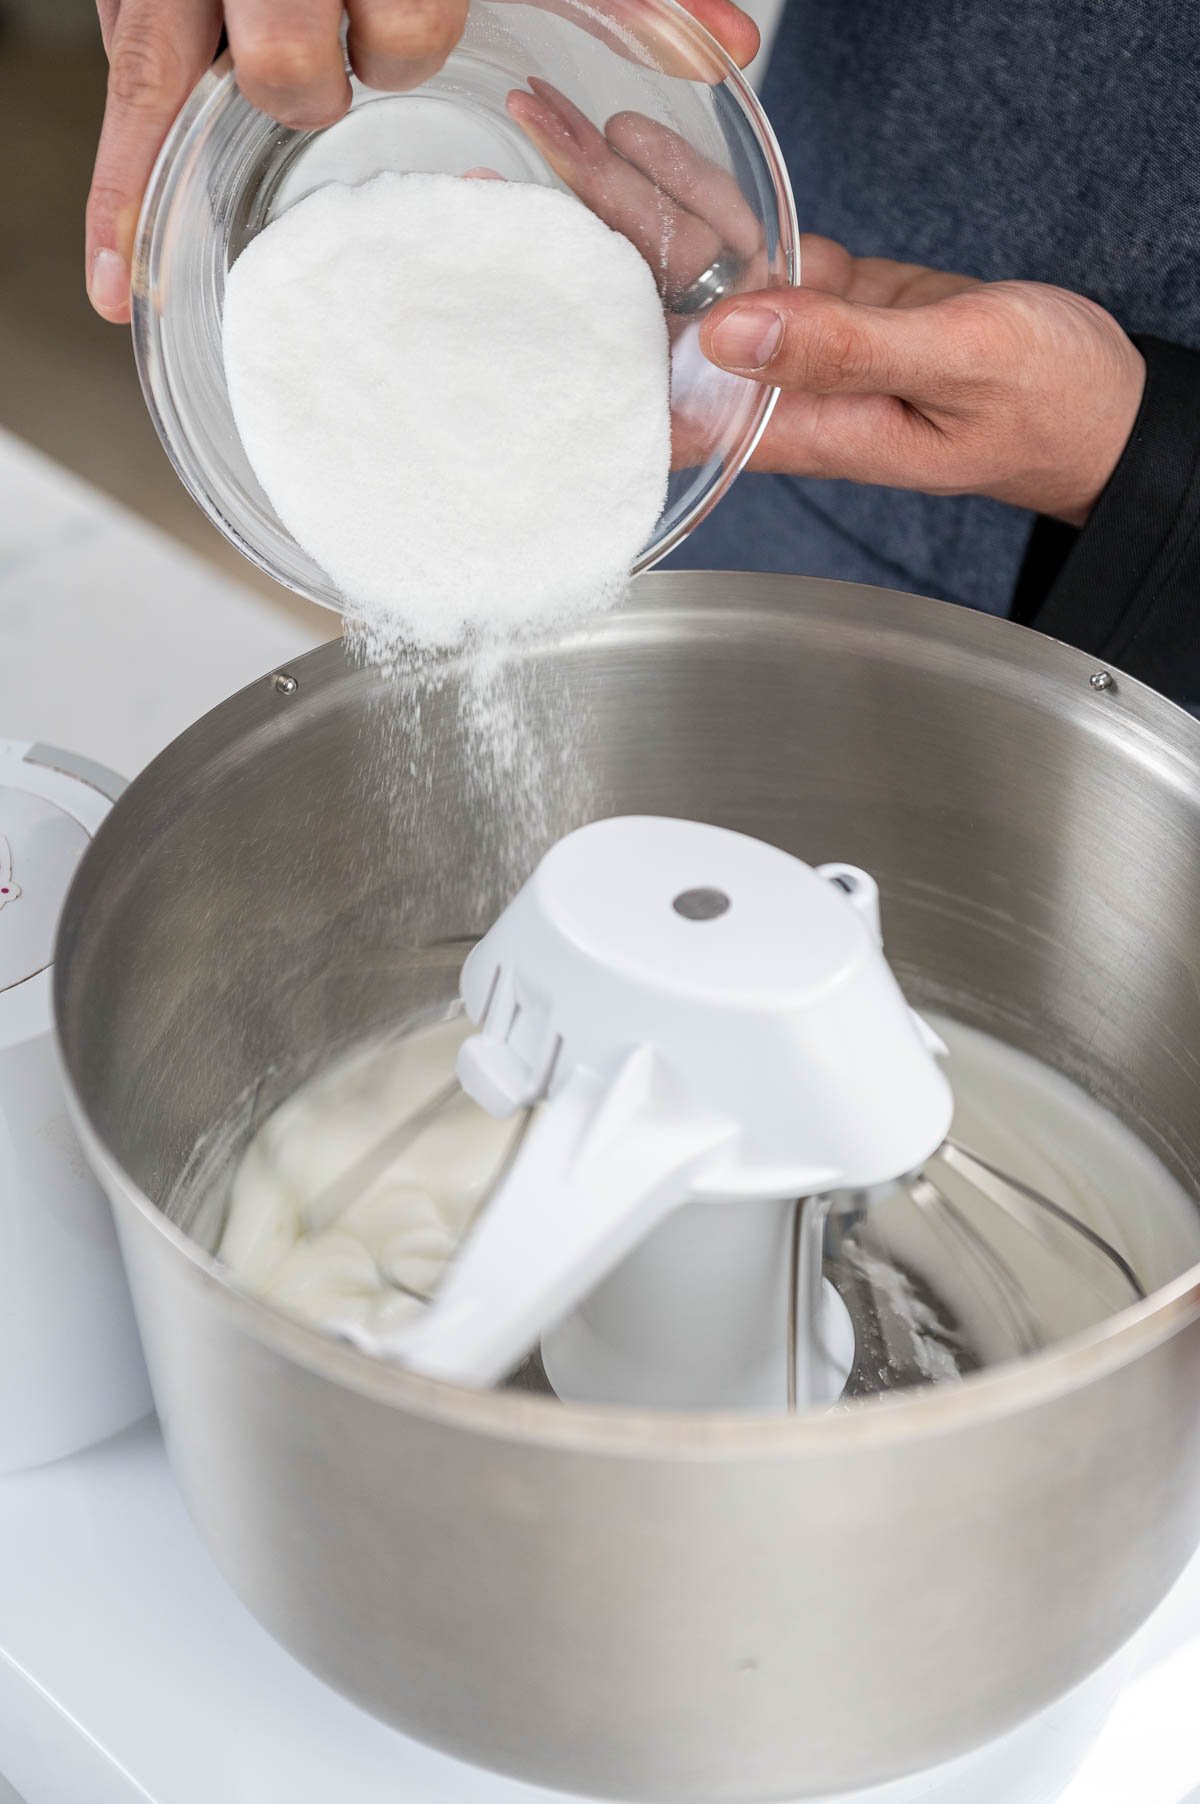
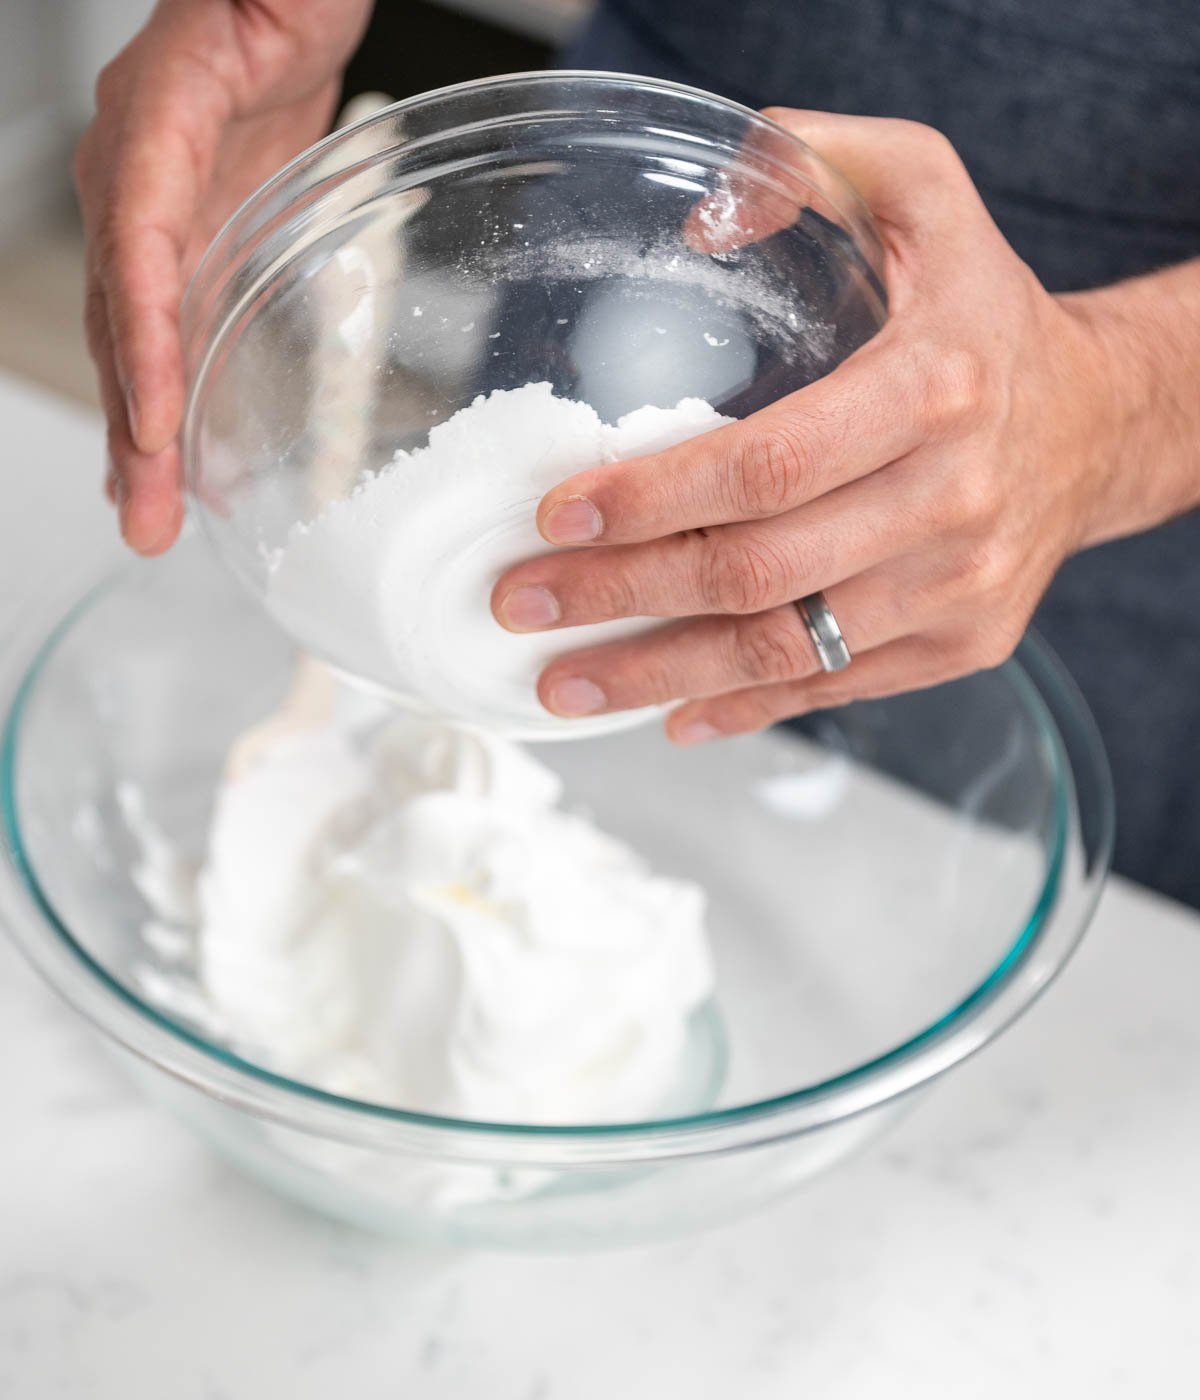
- Next, sift the powdered sugar over the stiff peaks. Gently fold the powdered sugar into the egg whites. Be careful not to deflate the meringue too much.


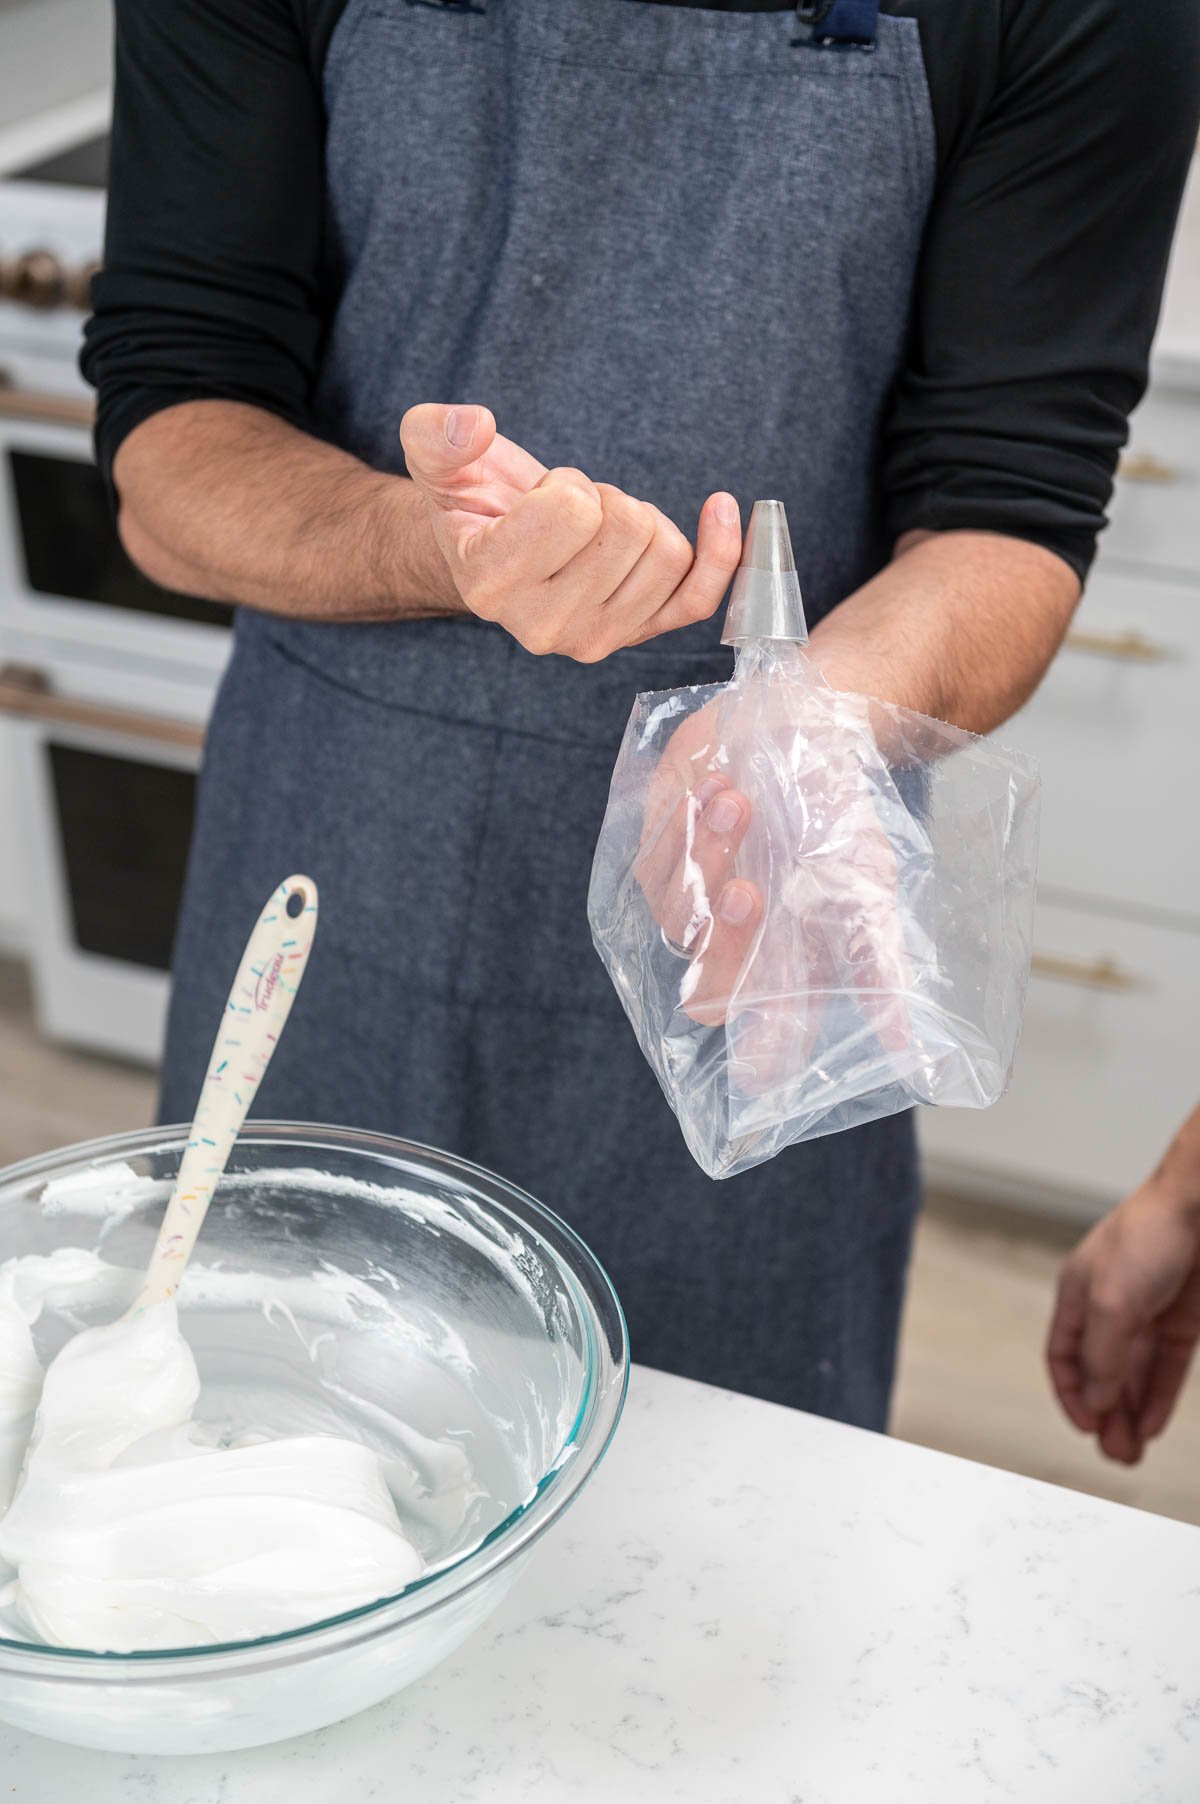
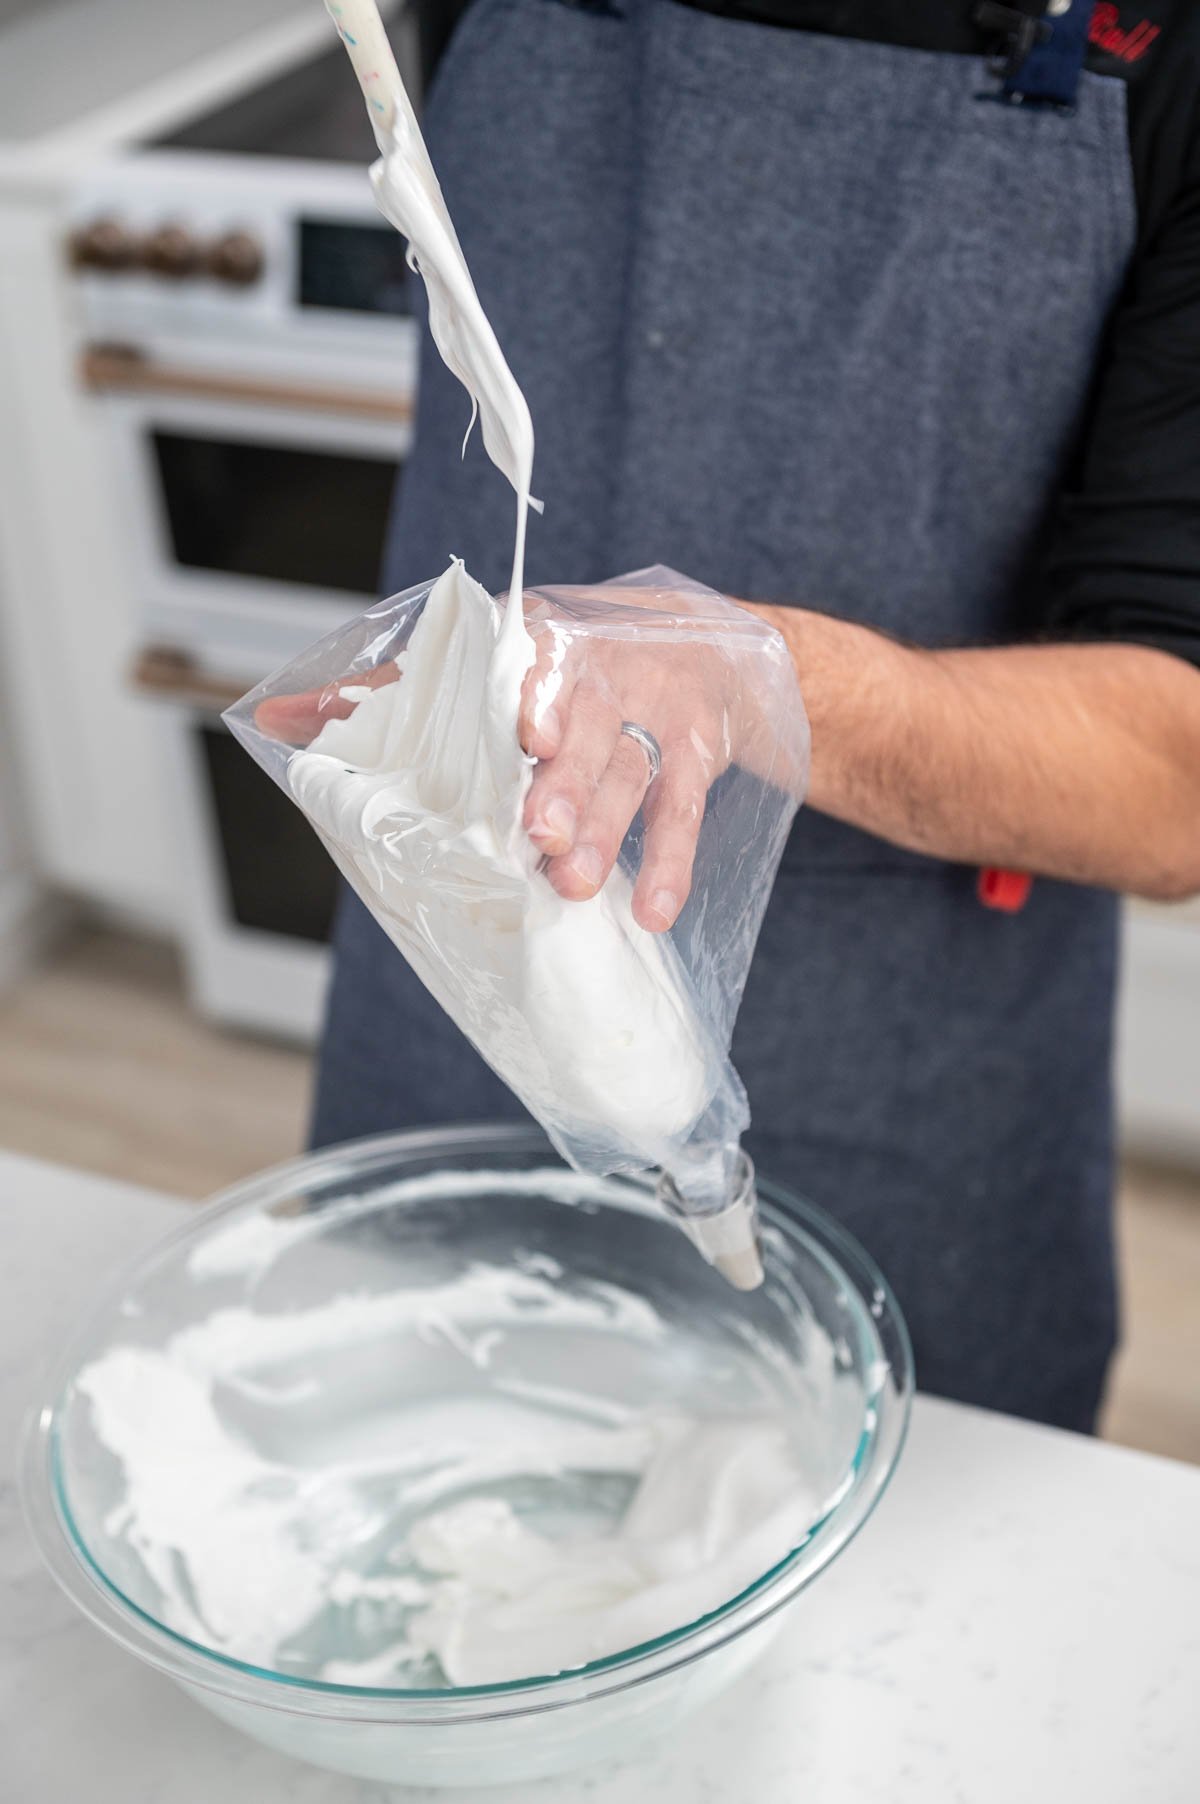
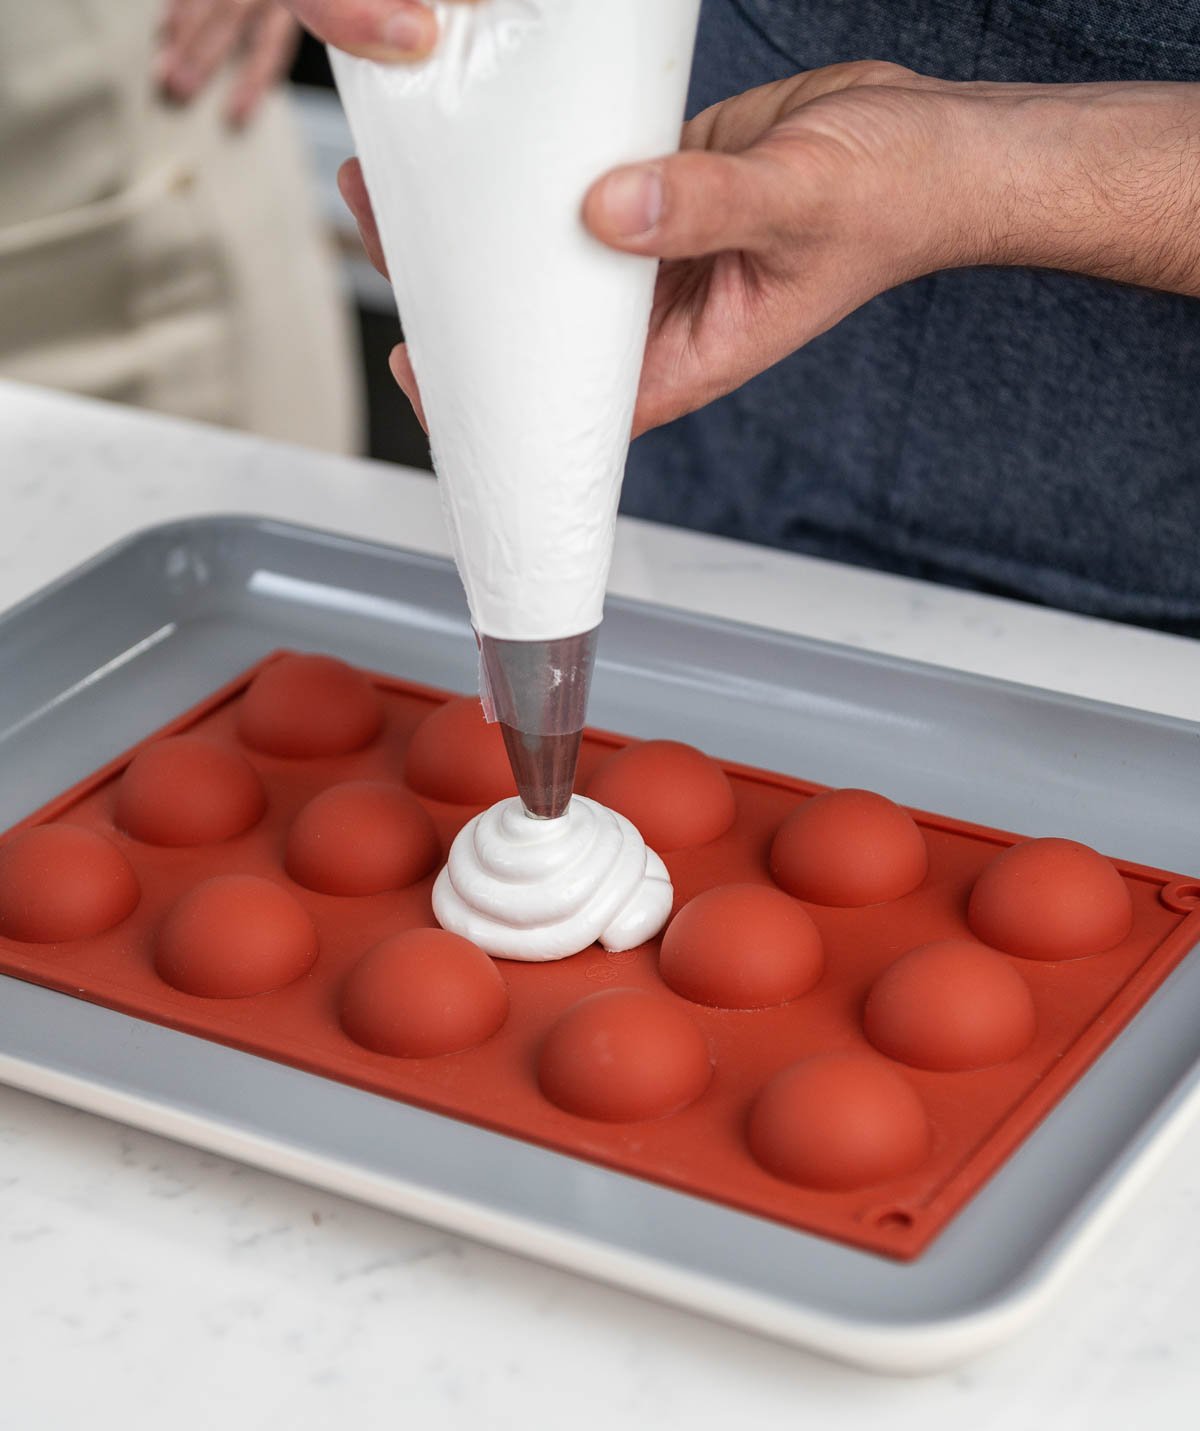
- Prepare a piping bag with plain tip #804. Fill the piping bag with meringue.
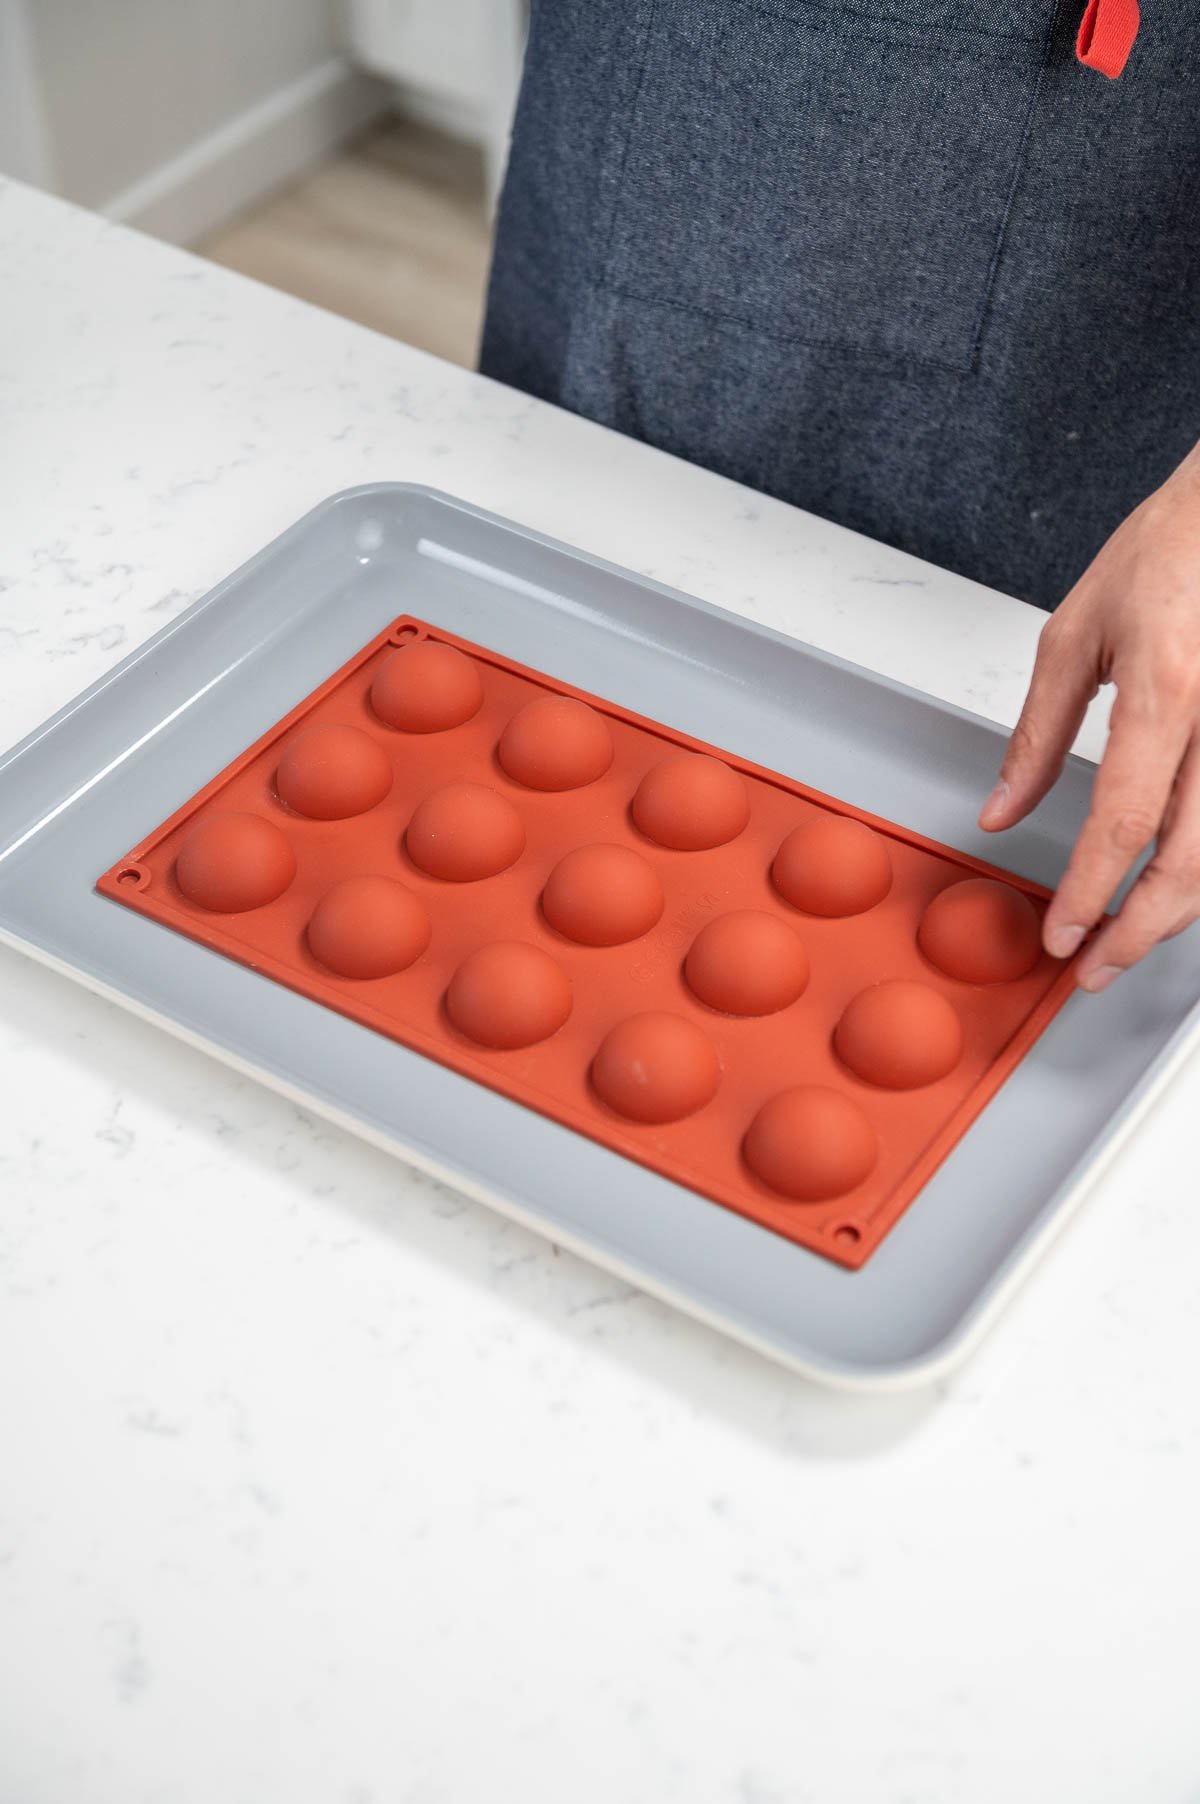
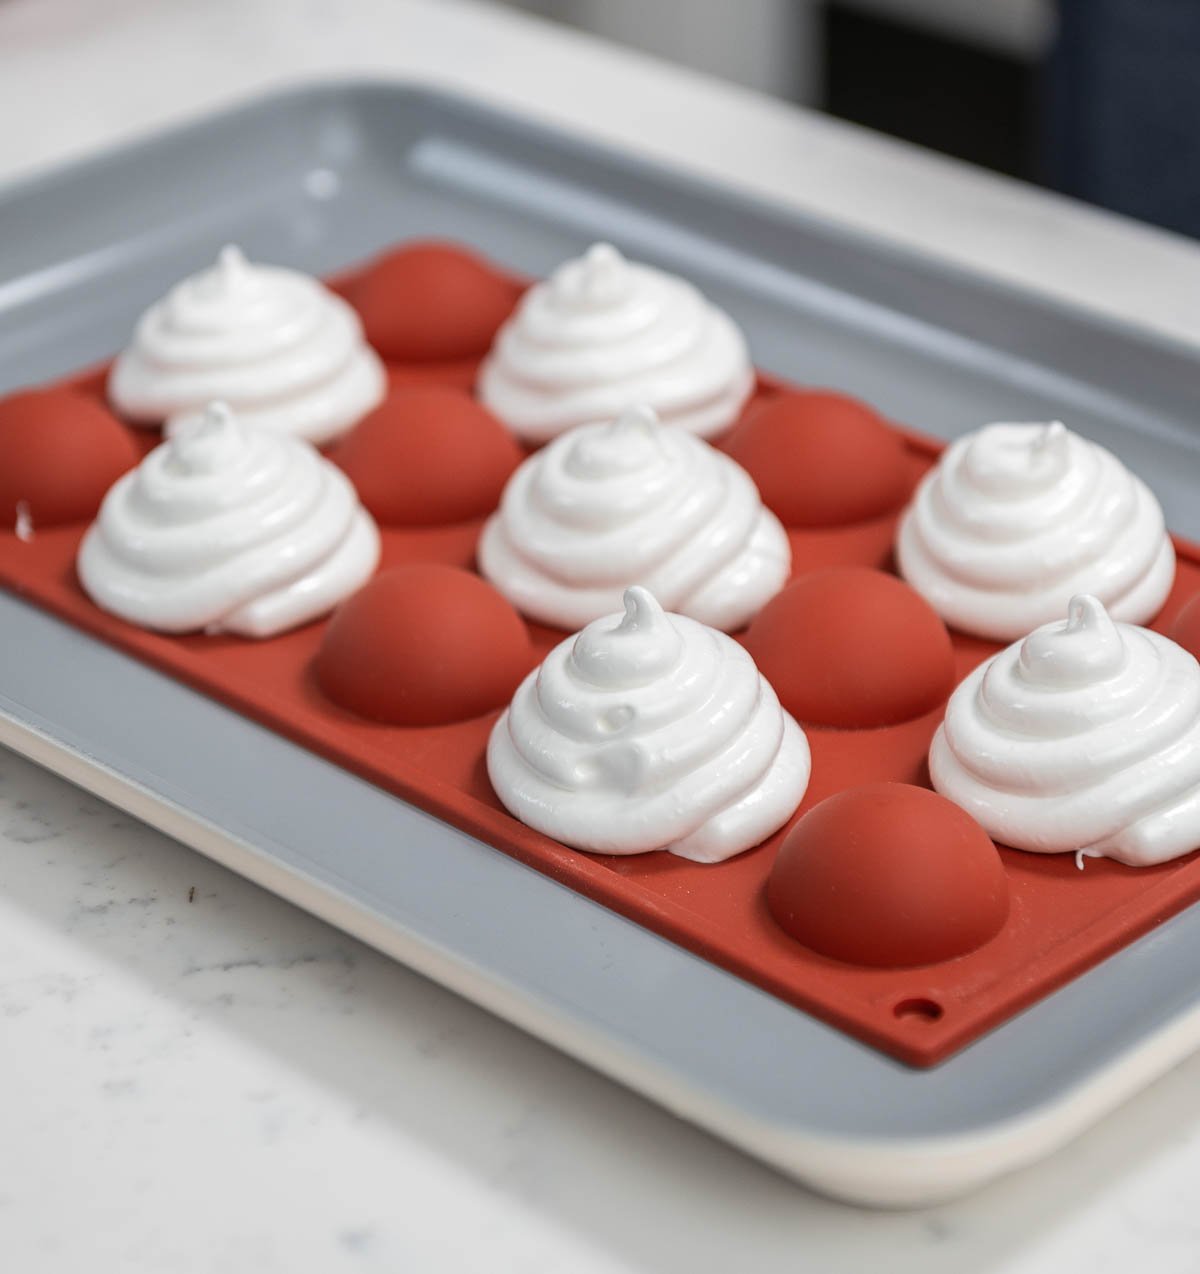
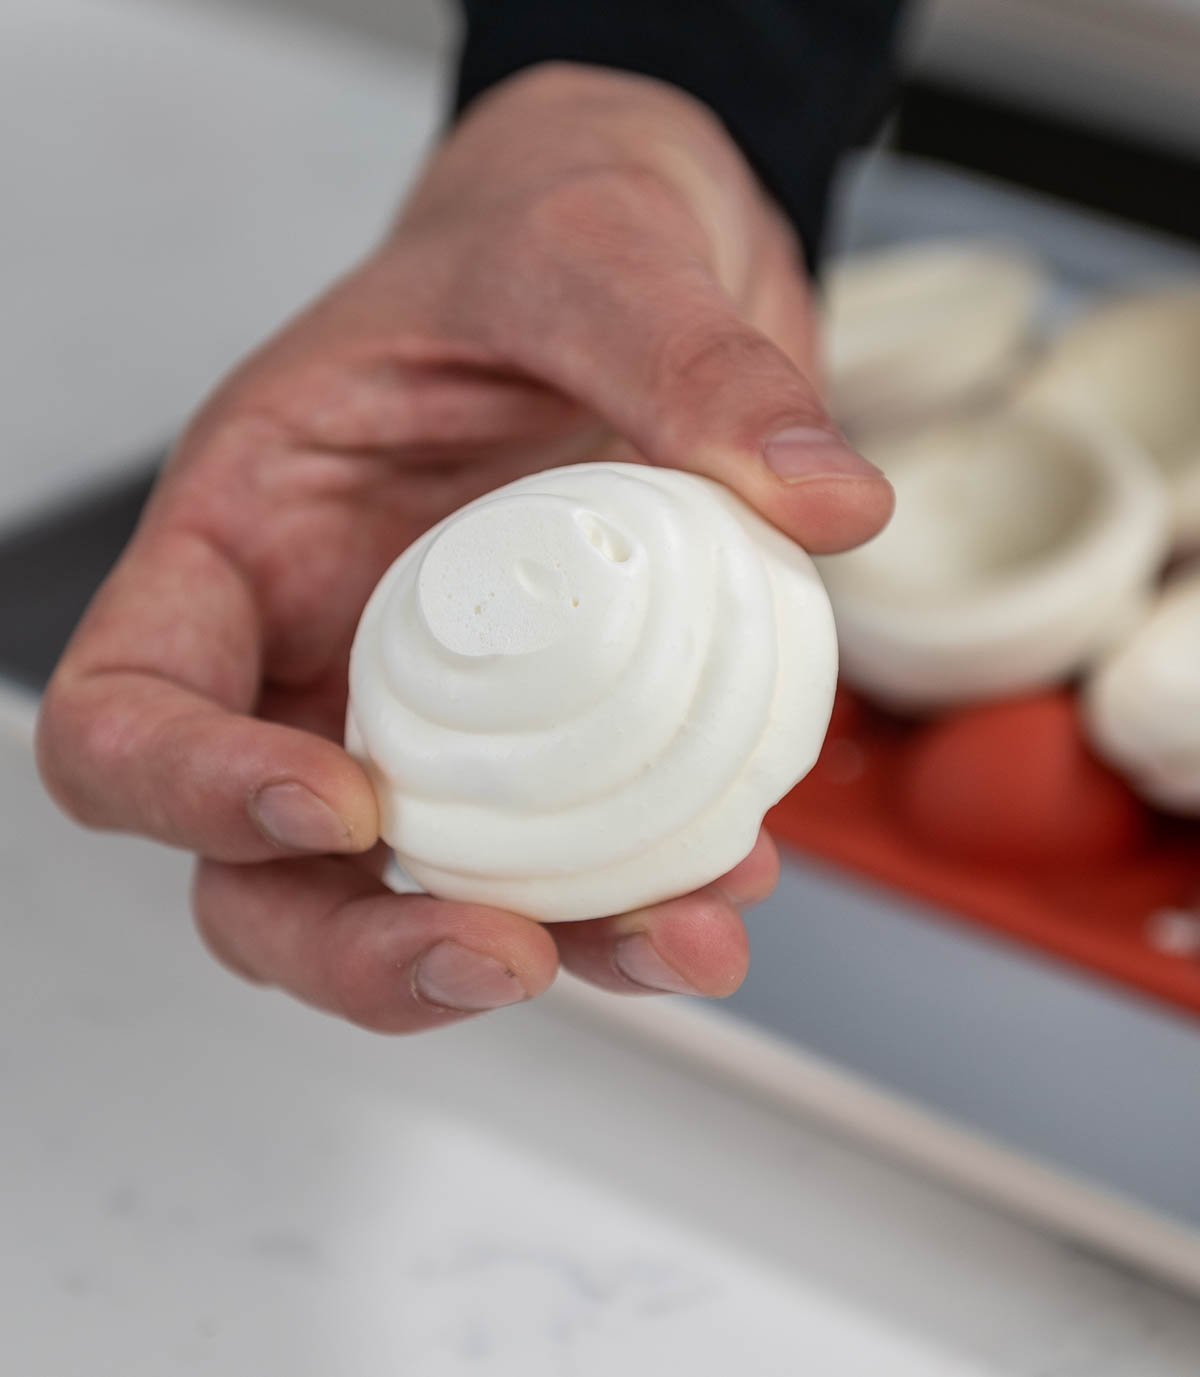
- Then, on the backside of the silicone sphere mold, pipe the meringue around the sphere. Make sure there are no spaces or gaps in the meringue.


- Bake the meringue for 6-8 hours until it is firm and crunchy.
- Next, let the meringue cool completely.
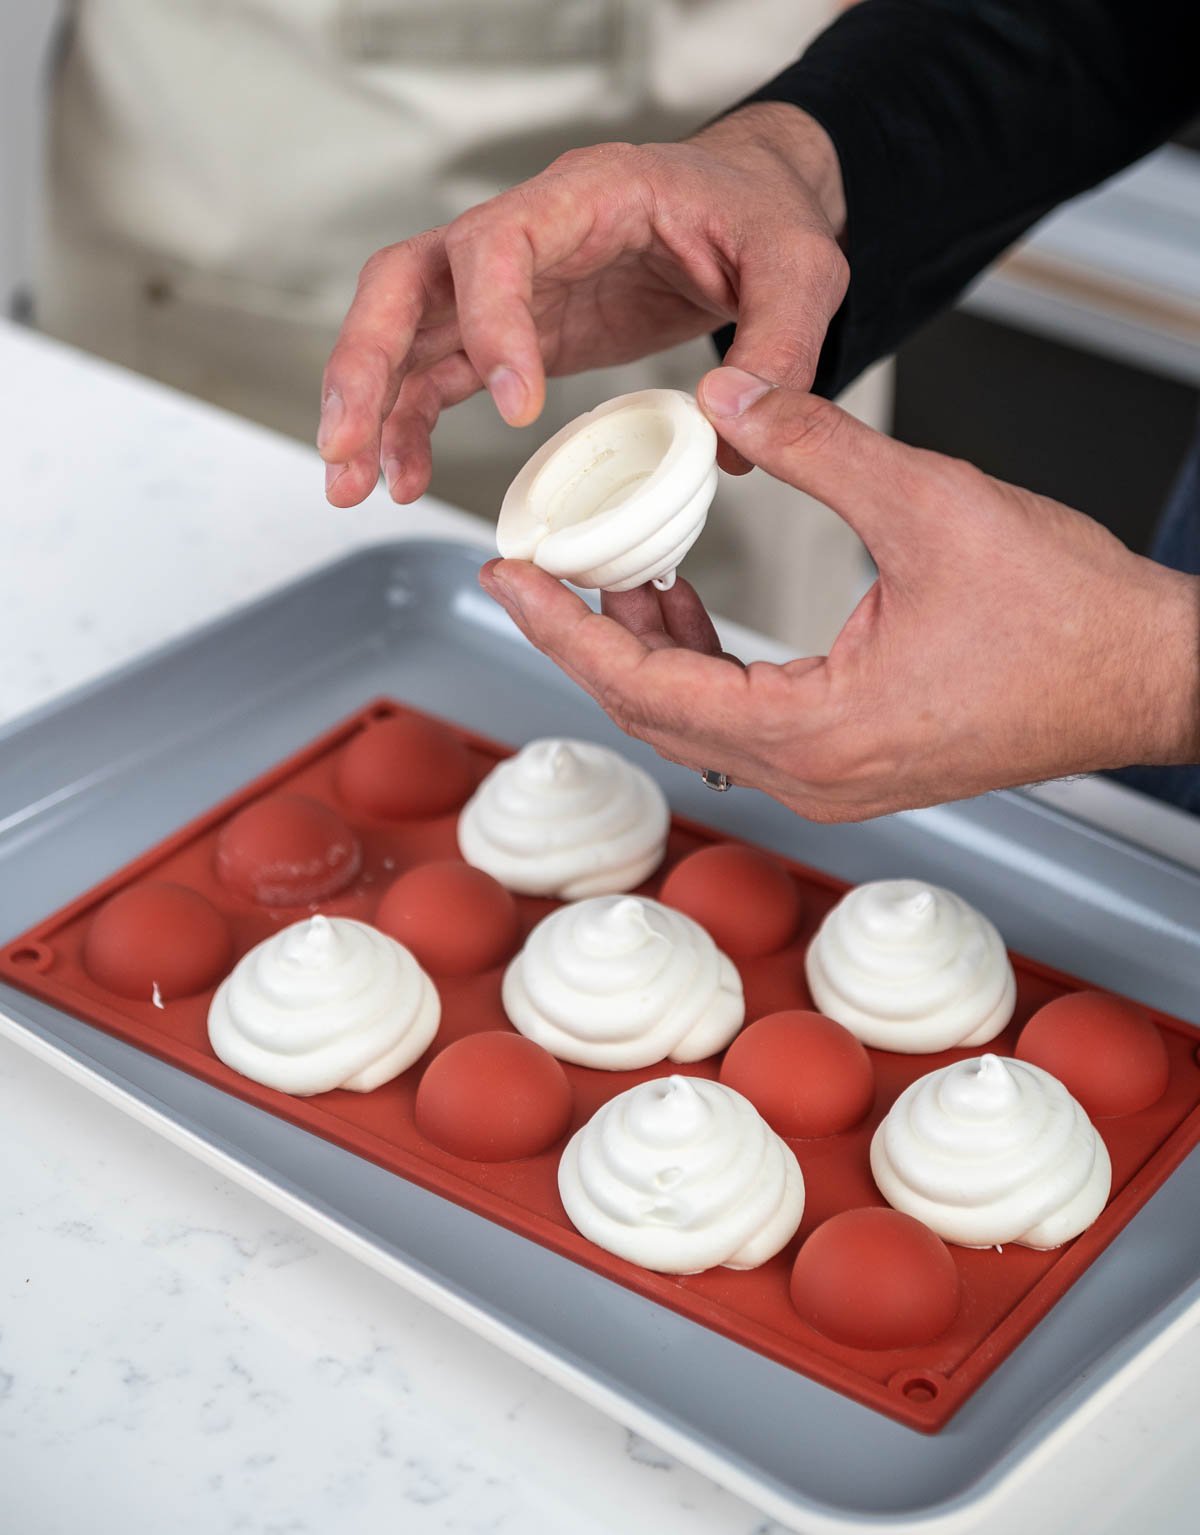
- Then, after the meringue is completely cooled, gently peel the silicone mold away while being careful to not to break the shell.

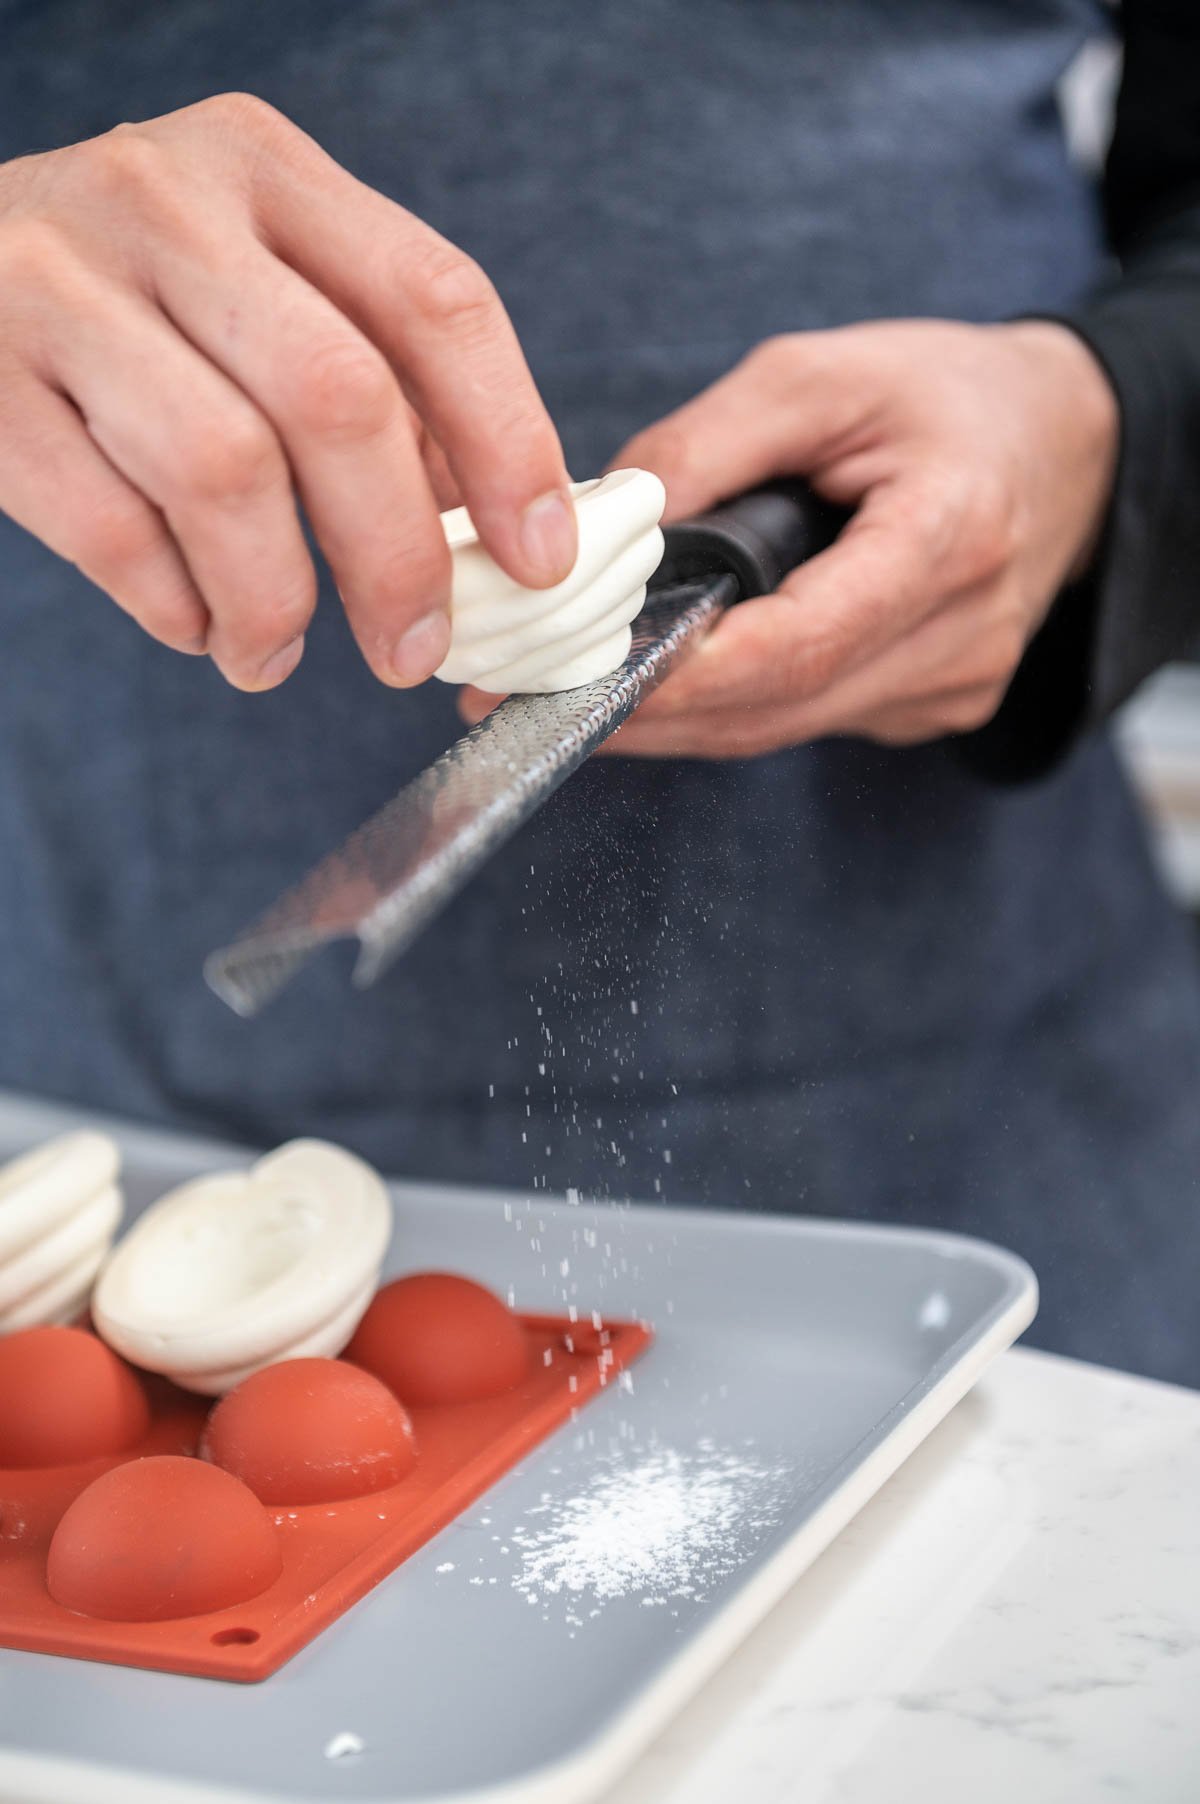
- Finally, when you are ready to assemble the pavlova, carefully scrape the point off of the bottom using a microplane so it will sit level on the plate.


Preparing the Mixed Berry Compote
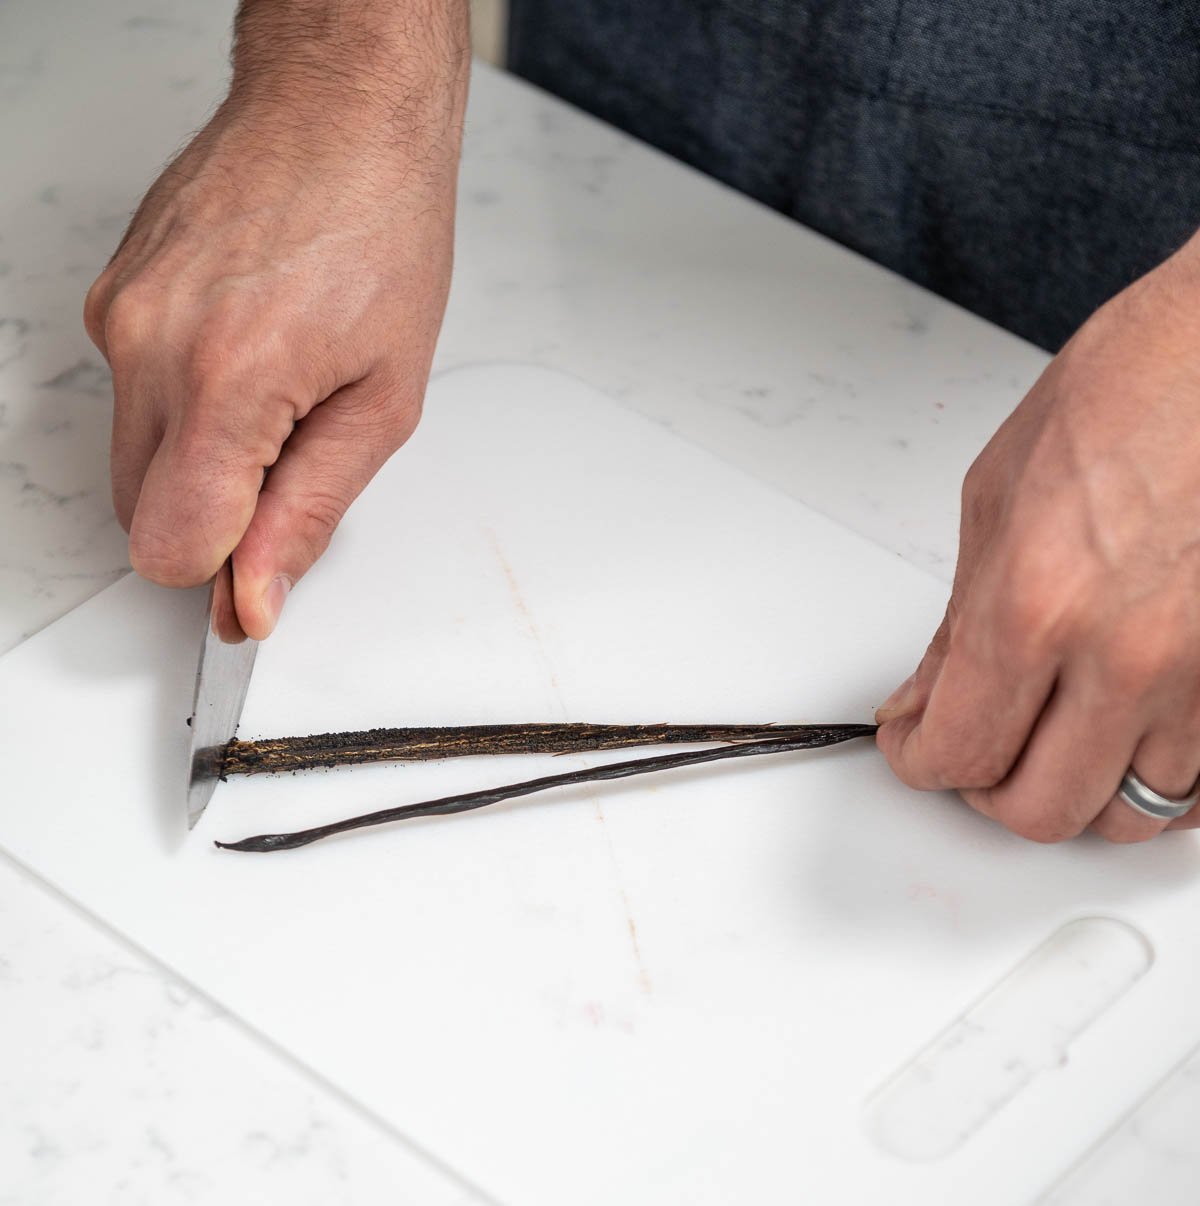
- First, use a paring knife to split and scrape the vanilla bean. Put the split vanilla bean into a heavy bottom saucepan.

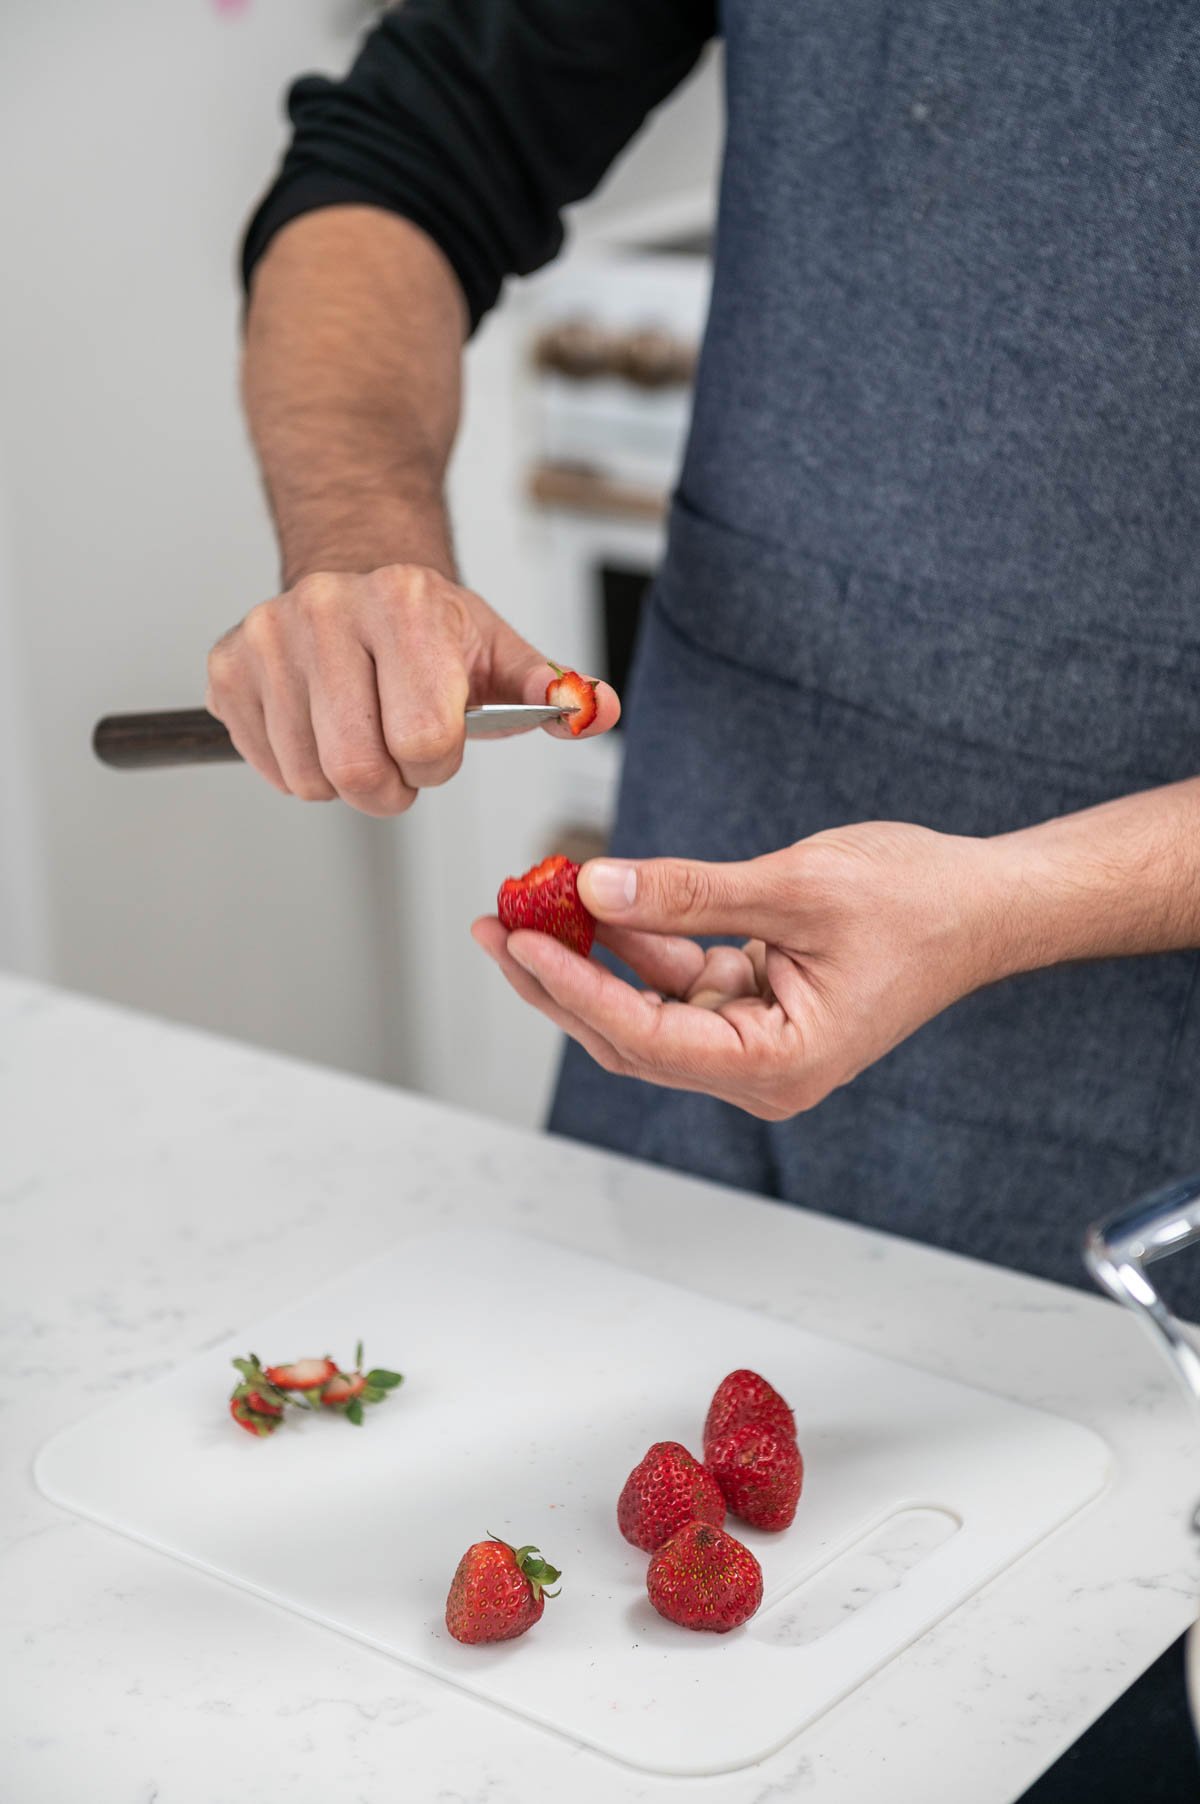
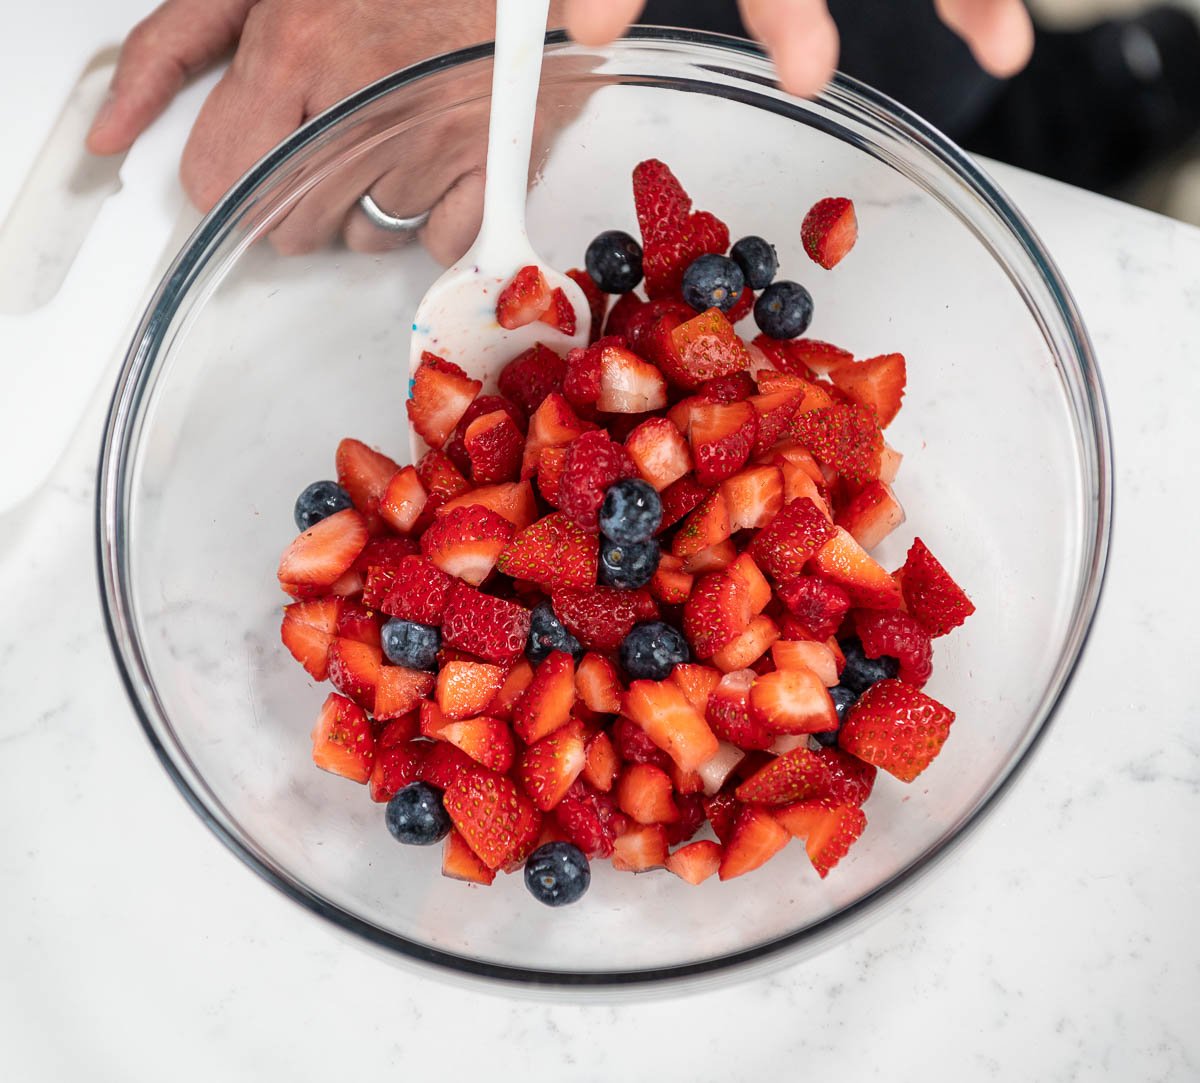
- Now you will prepare your mixed berries. Dice the strawberries into quarters, cut the raspberries in half, and leave the blueberries whole. PRO TIP: Fresh berries will keep their shape better, but frozen berries will work as well.

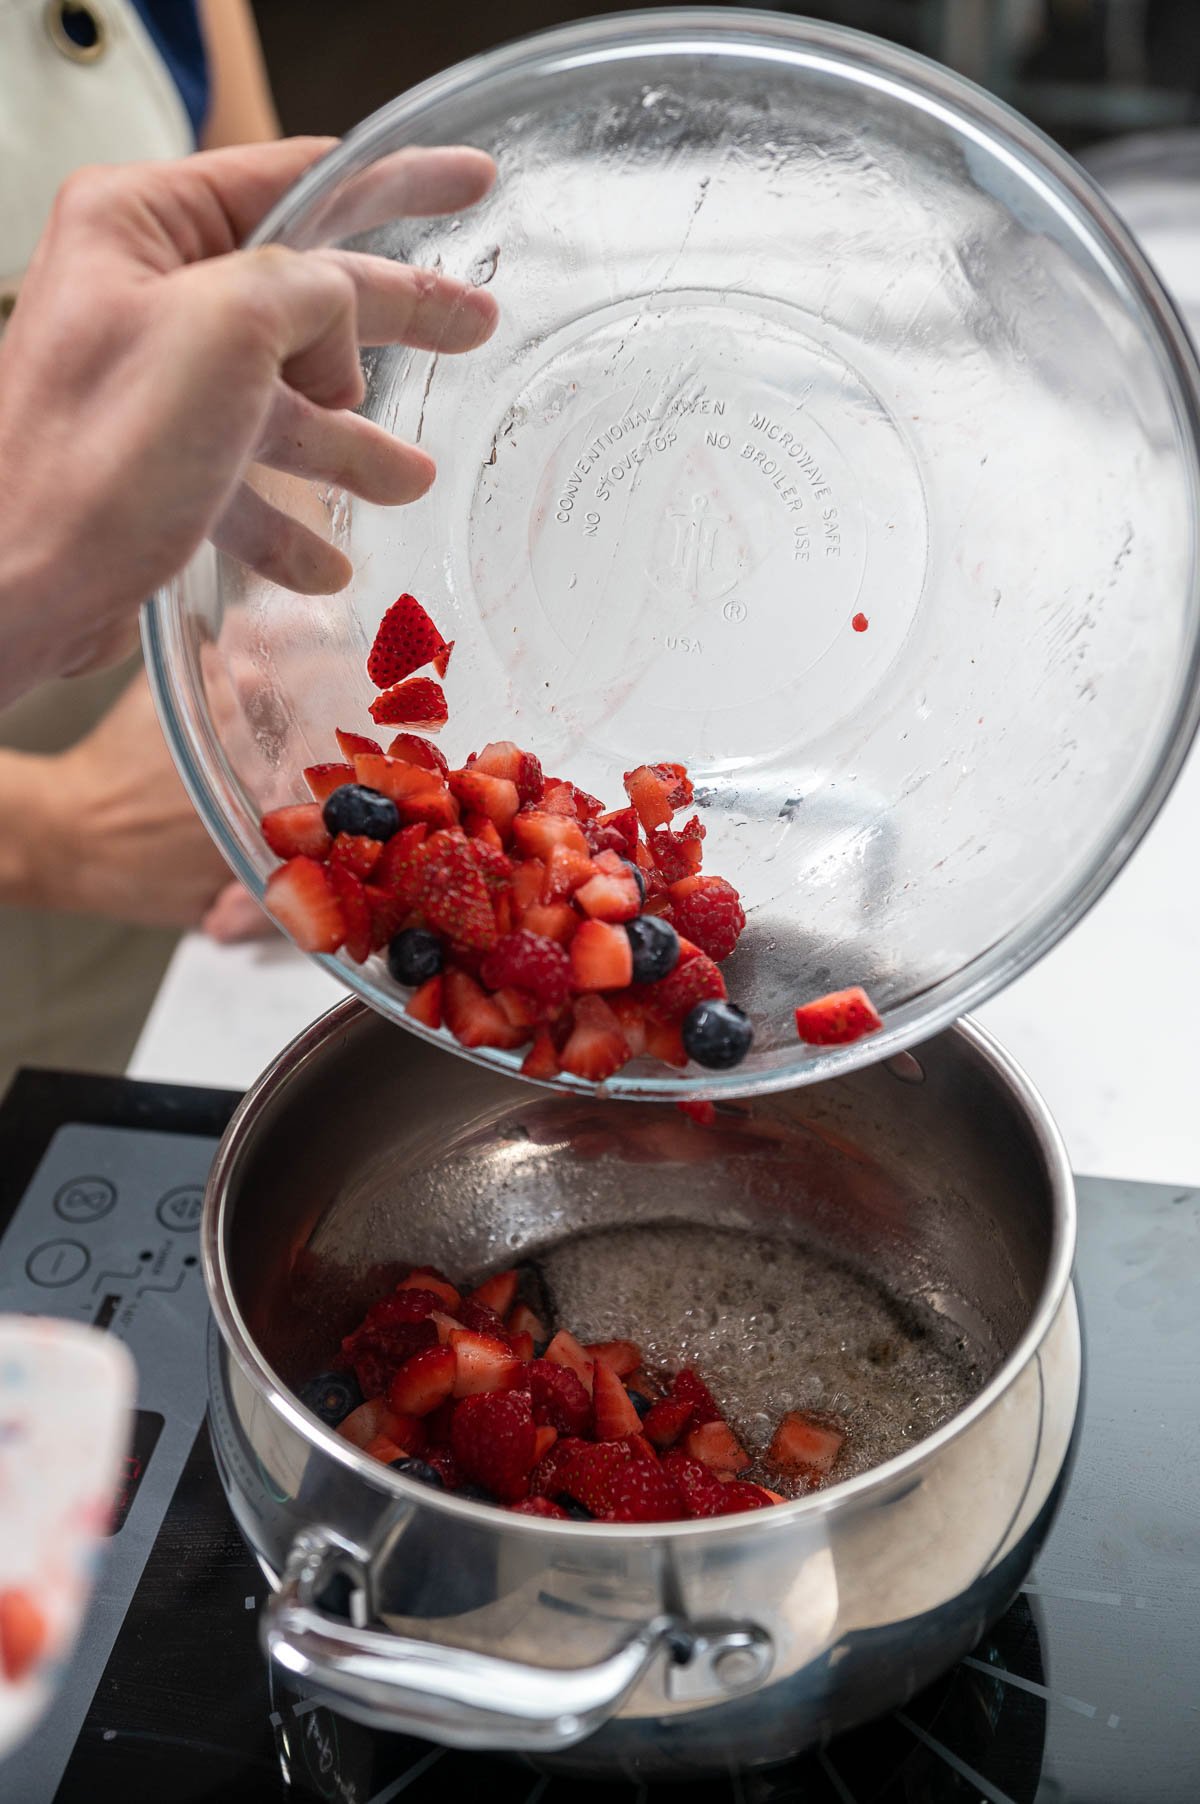
- Add the prepared mixed berries into the heavy bottom saucepan along with the vanilla bean.
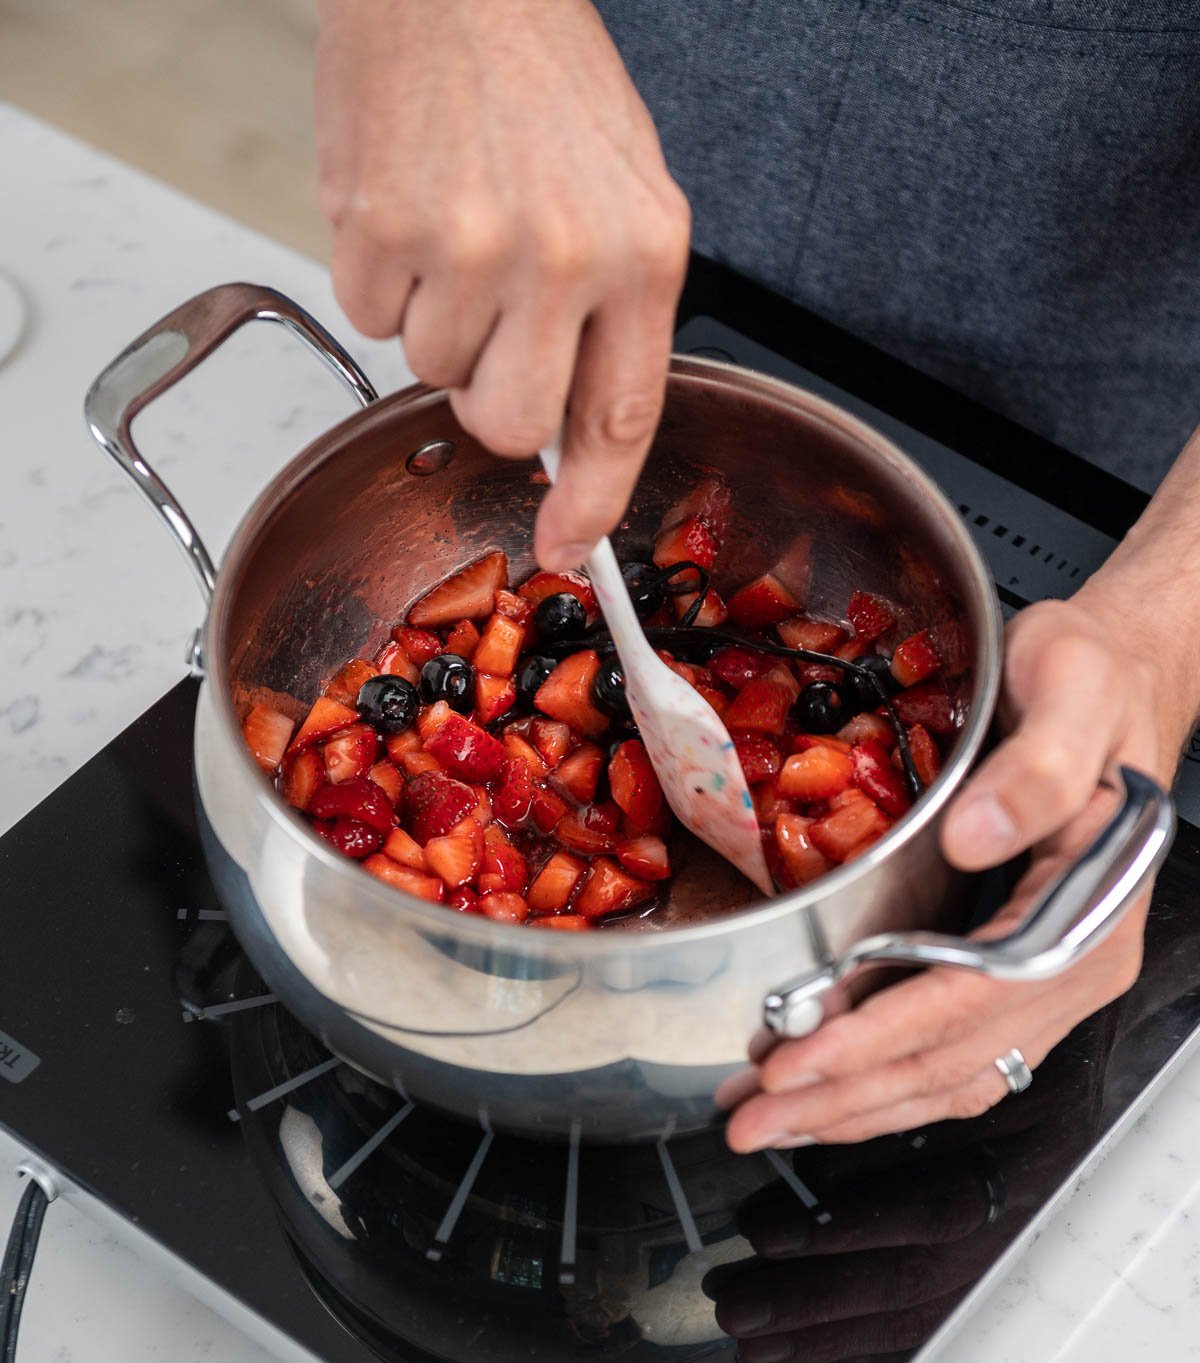
- Then, add in the sugar and the lemon juice and stir everything to combine.

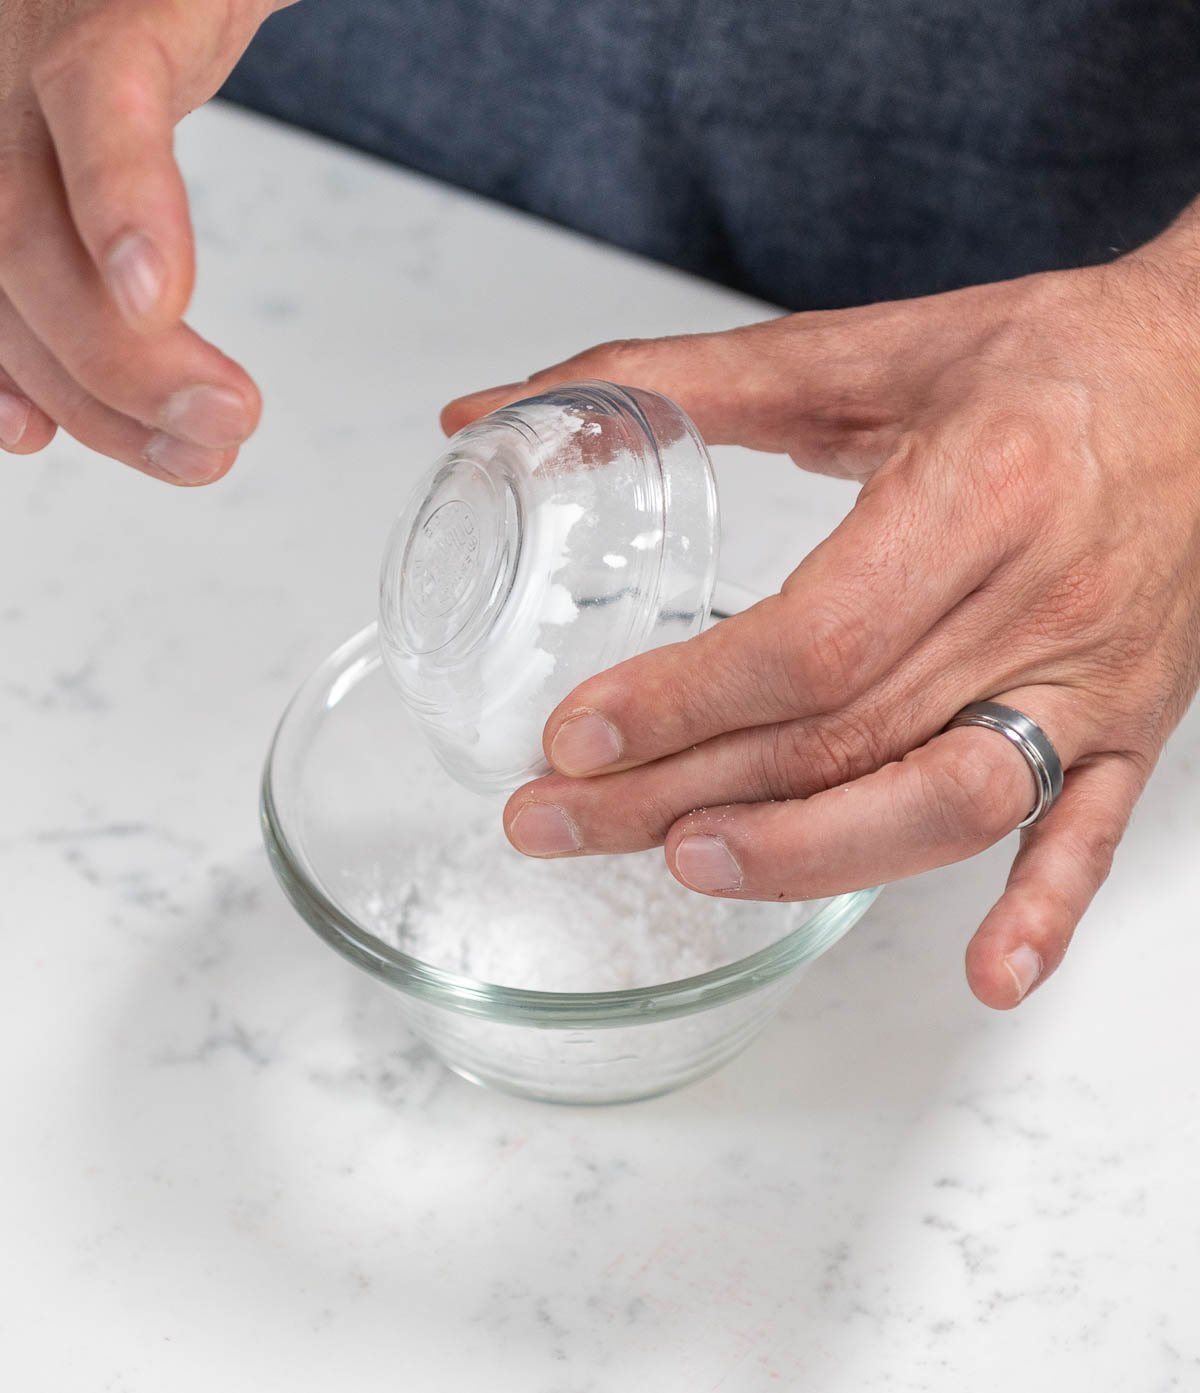
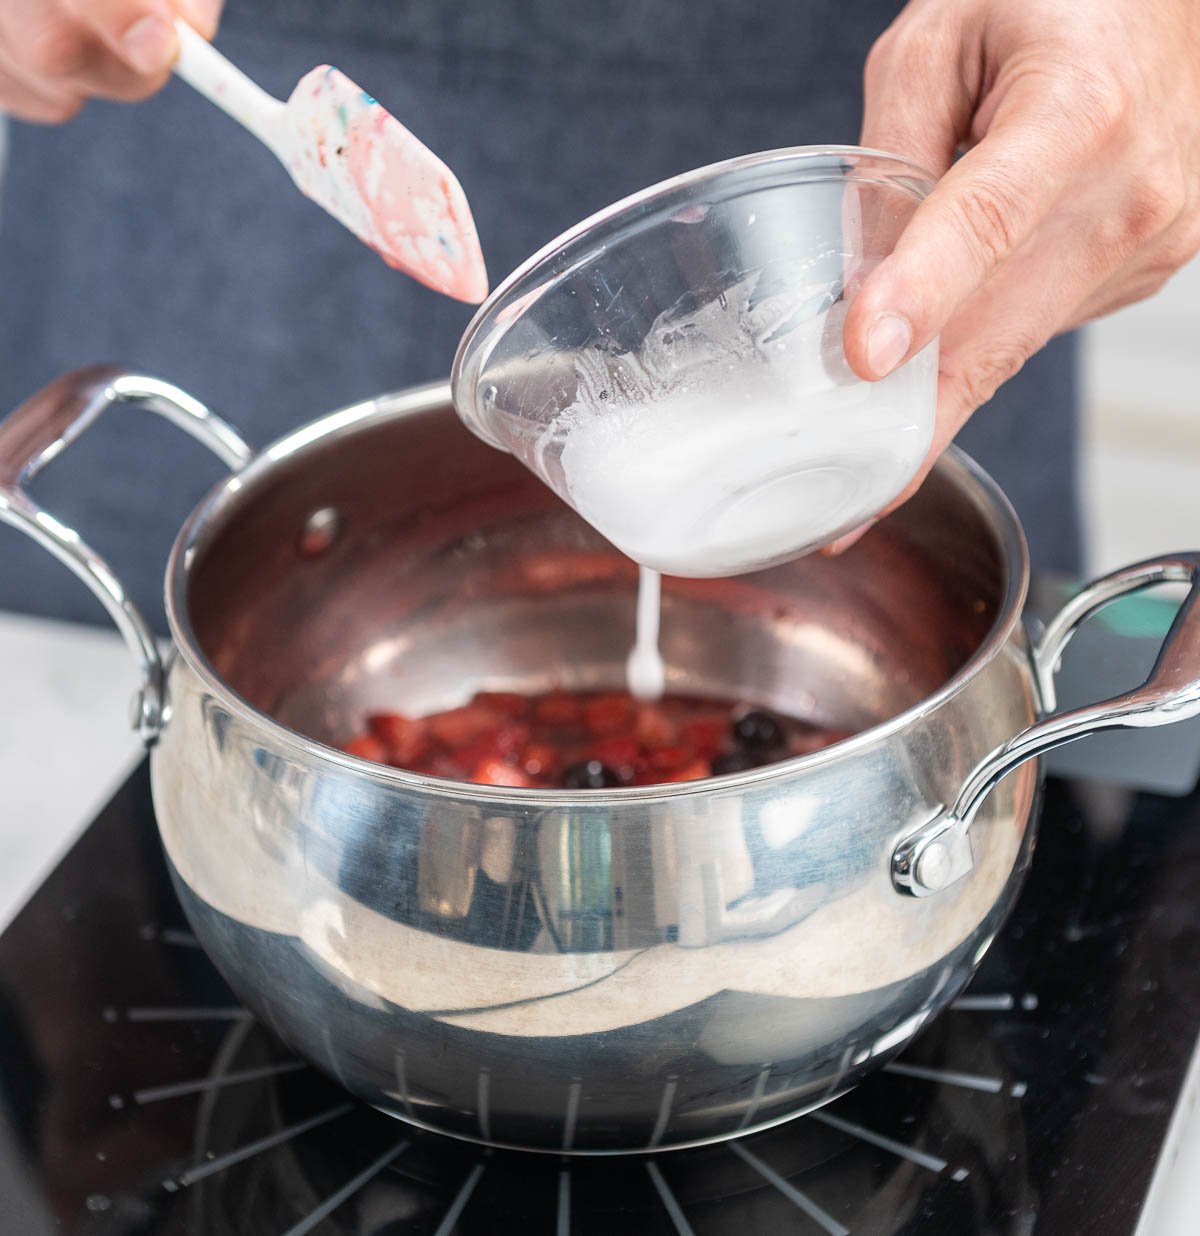
- Next, in a separate mixing bowl, combine the cornstarch and water. Mix until it is smooth.

- Add the cornstarch mix to the berries in the saucepot and mix to combine.

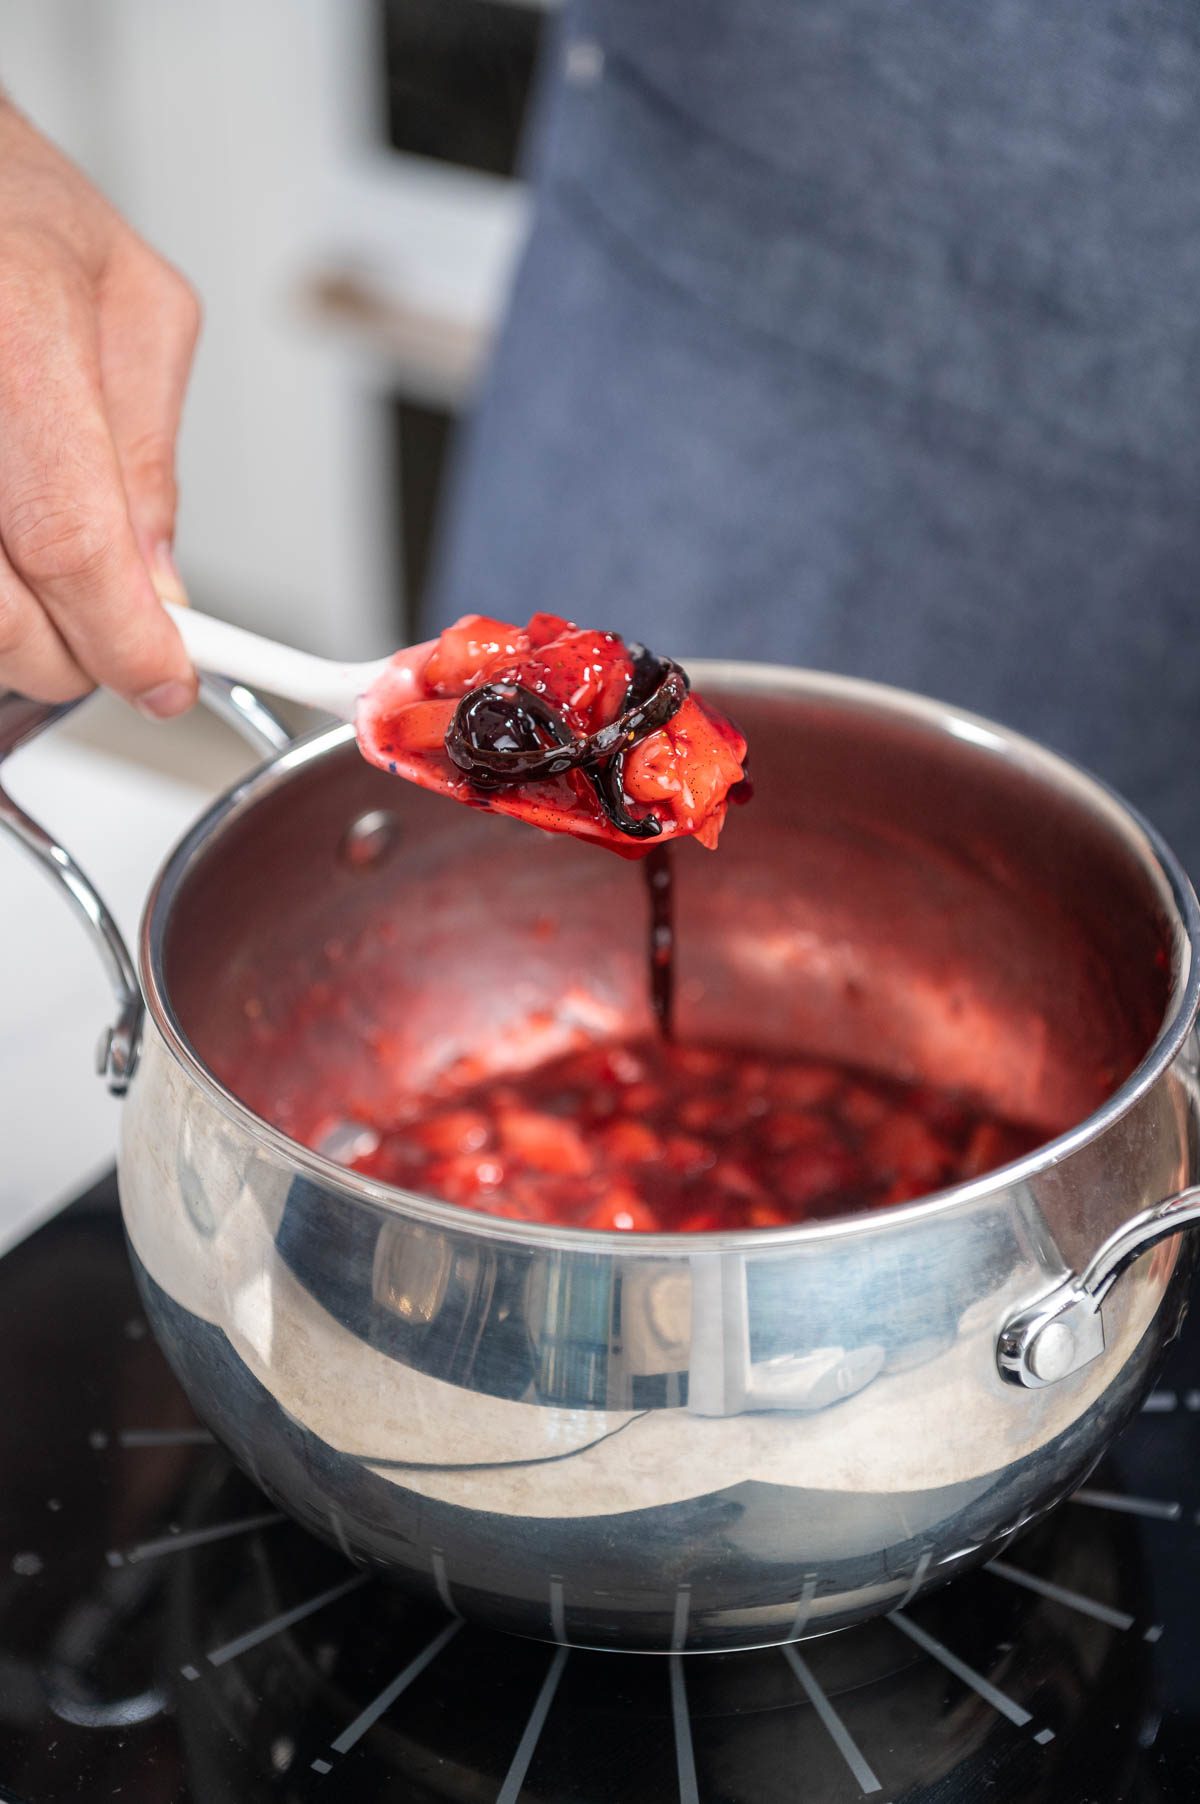
- Cook the berries over medium to low heat and continue to stir gently. Be careful not to scald the berries with high heat. The berries will begin to soften and release juices over medium to low heat.
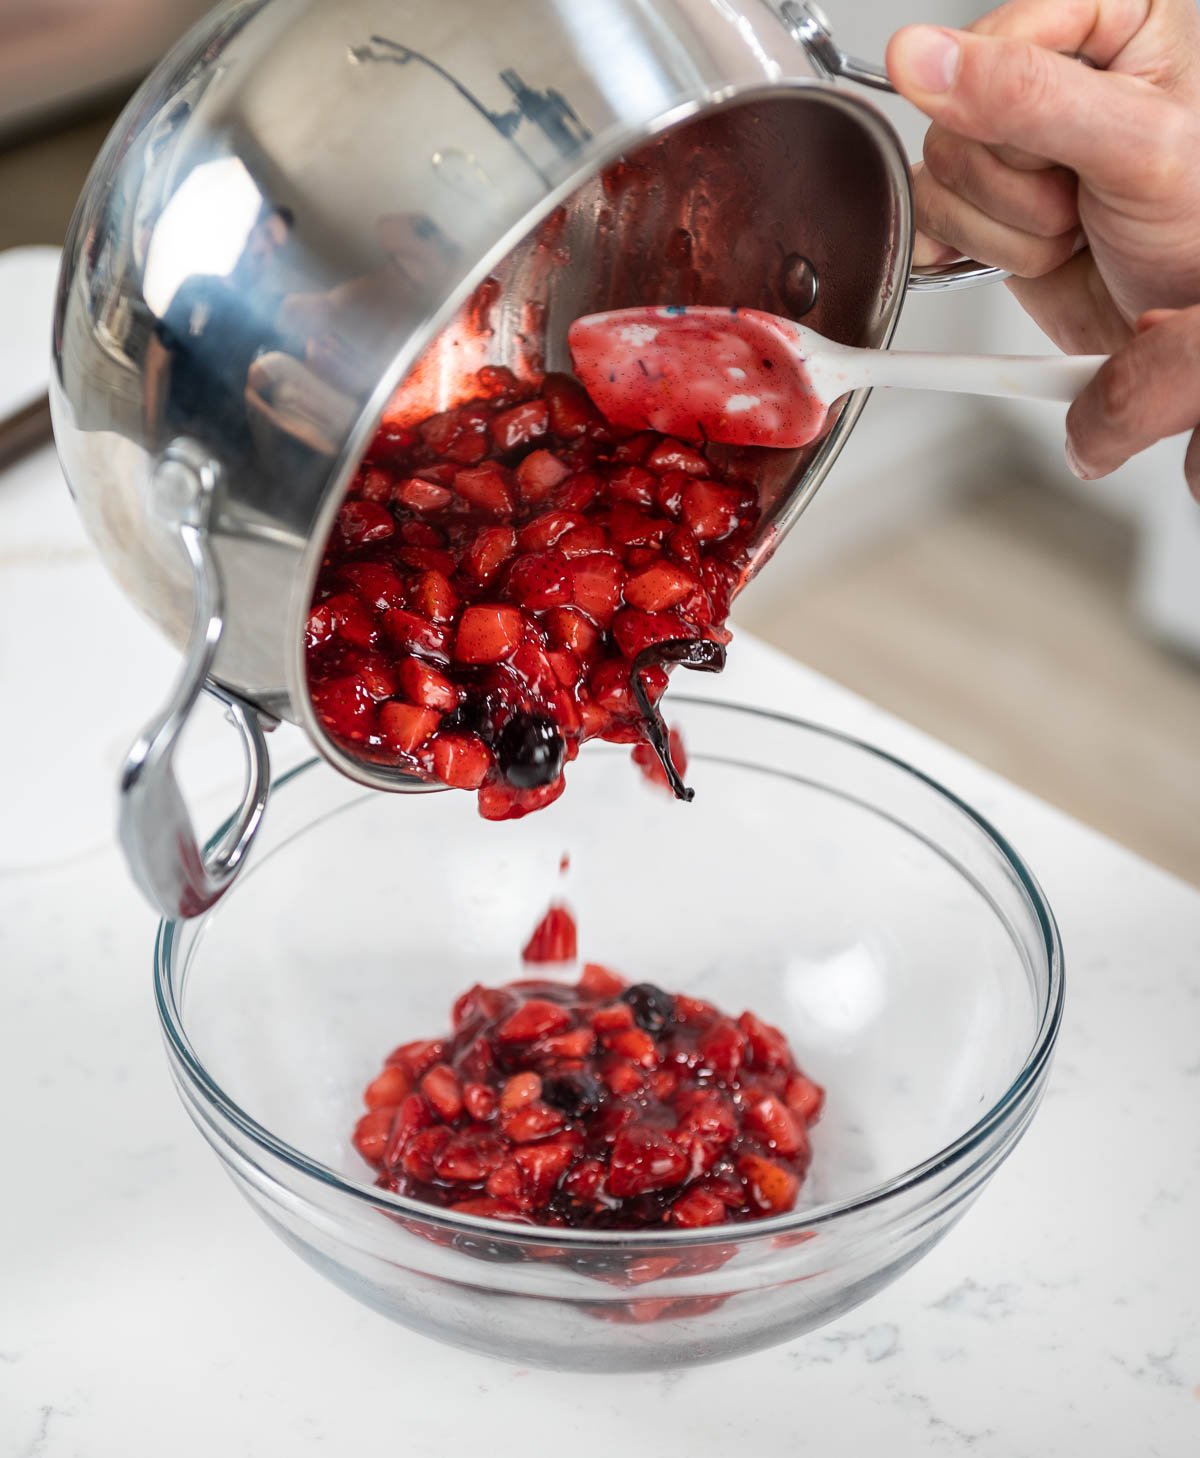
- When the berry juice mixture begins to boil, remove the saucepan from the heat and transfer the berry compote to another bowl to cool down.

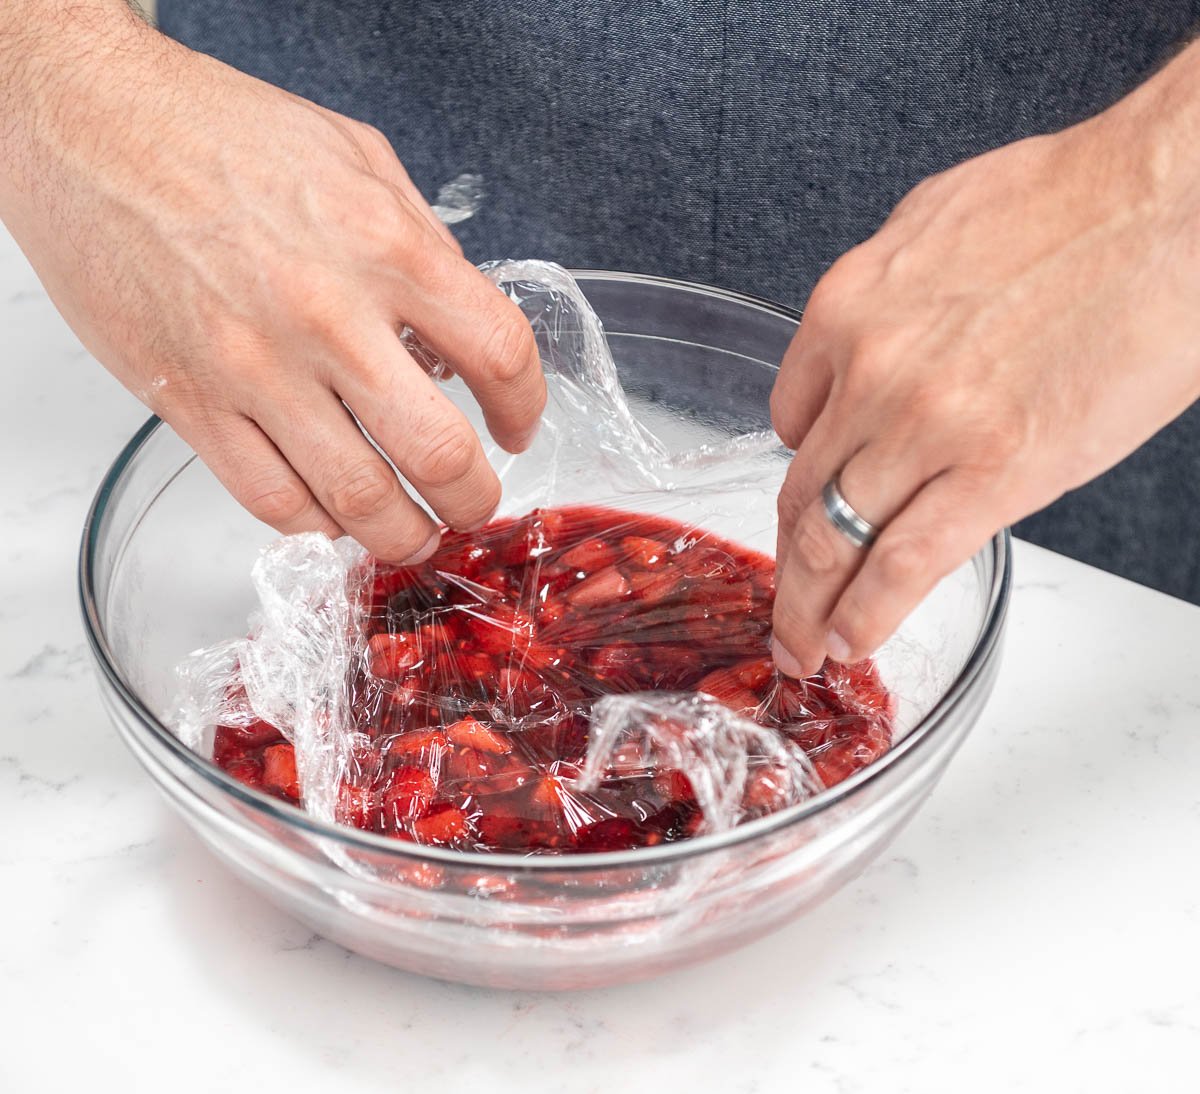
- Cover the berry compote with plastic wrap. Do this by pressing the plastic wrap right up against the surface of the berries. This step will prevent a layer of skin from forming over the berries mixture.

- Then, once the berries are covered in plastic wrap, place the bowl in the refrigerator until it is completely cool.
- Finally, when you are ready to assemble the pavlova, you can remove the vanilla bean pod from the berry compote.
Making the Vanilla Chantilly Cream
- Start with a clean mixing bowl. Use your stand mixer to whip cream, the seeds of 1 vanilla pod, and powdered sugar on medium speed until it reaches a stiff peak (but is still smooth in texture).
- Then, fill a large pastry bag fitted with your desired tip, and set it aside to pipe the cream on the pavlovas.
Assembling the Mini Pavlova
- First, place the mini pavlova hollow side up while making sure it stands balanced. If it won't stay up on its own or is unbalanced, use a microplane to even it out by gently scraping the bottom to a flat surface.
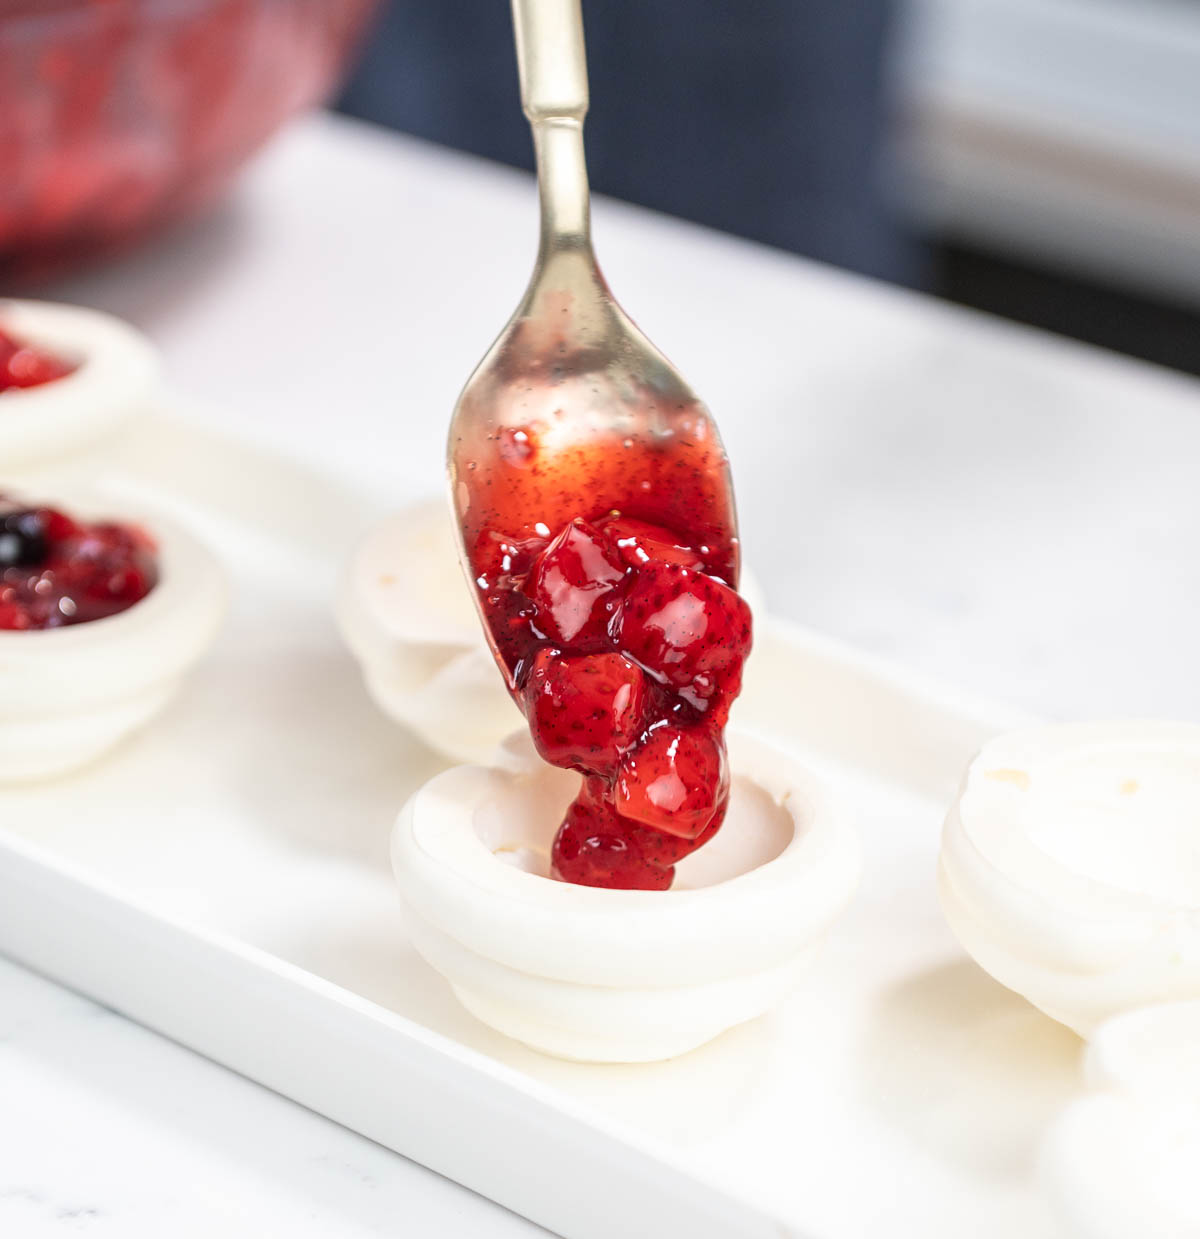
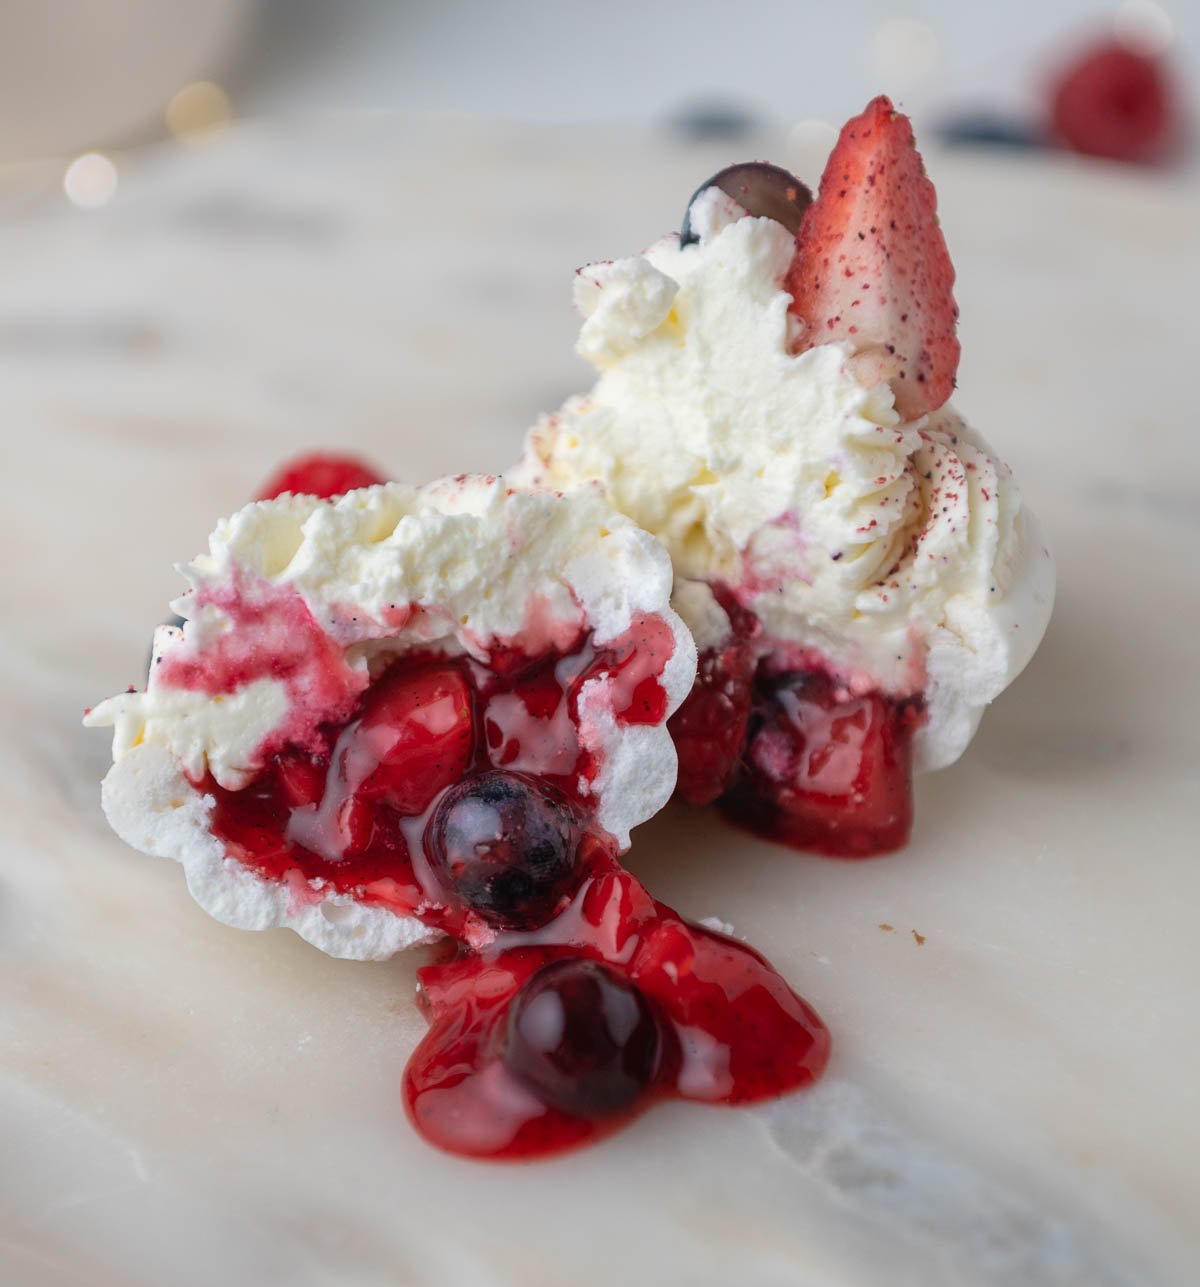
- Then, scoop about 1 tablespoon of berry compote into the pavlova.

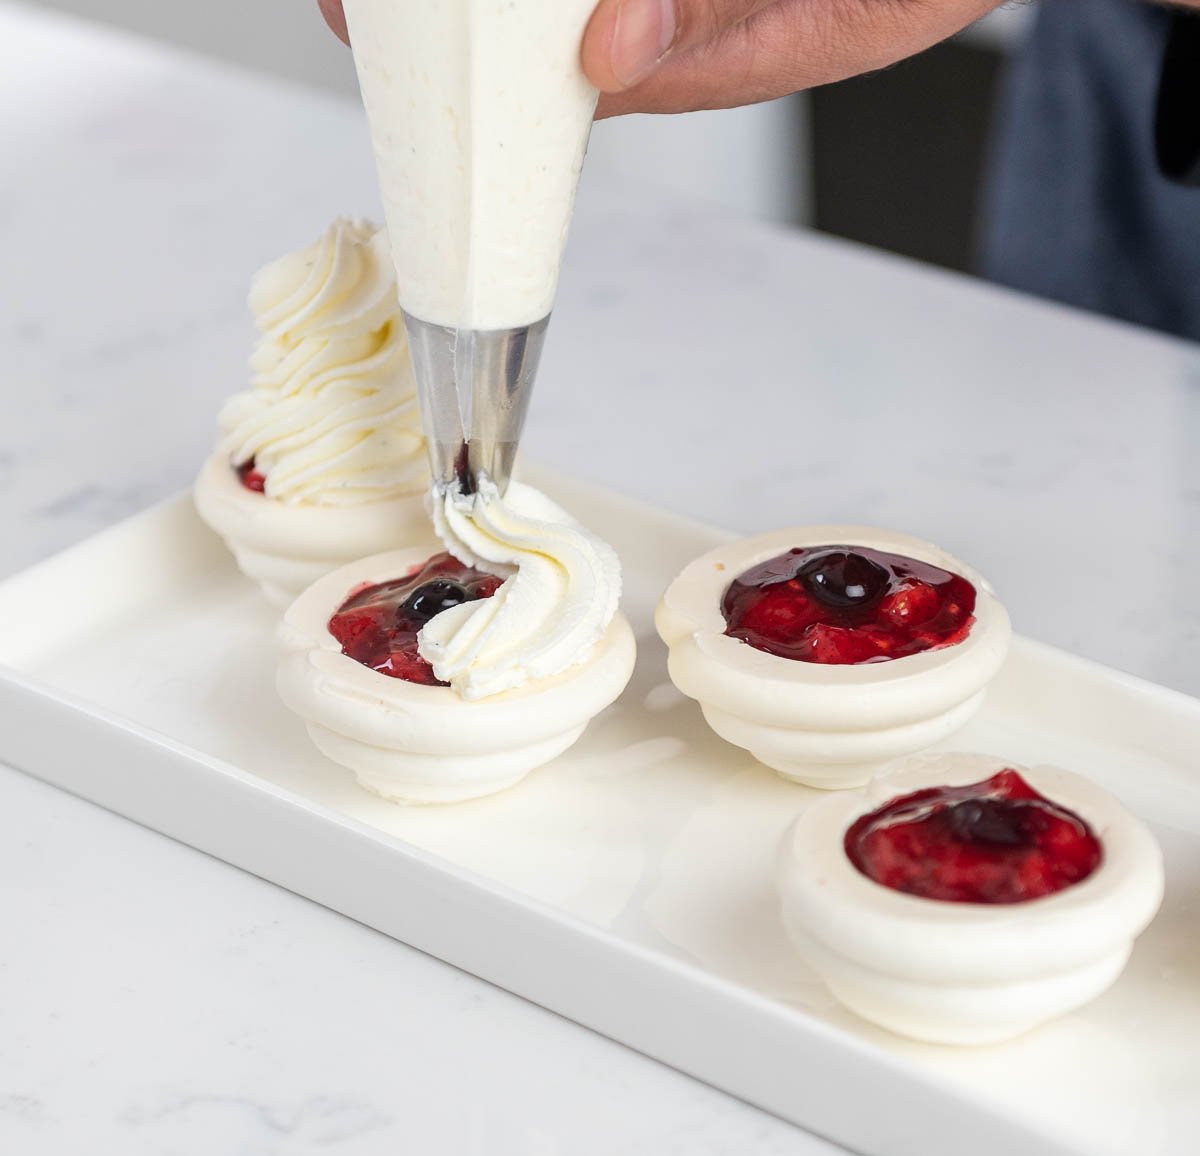
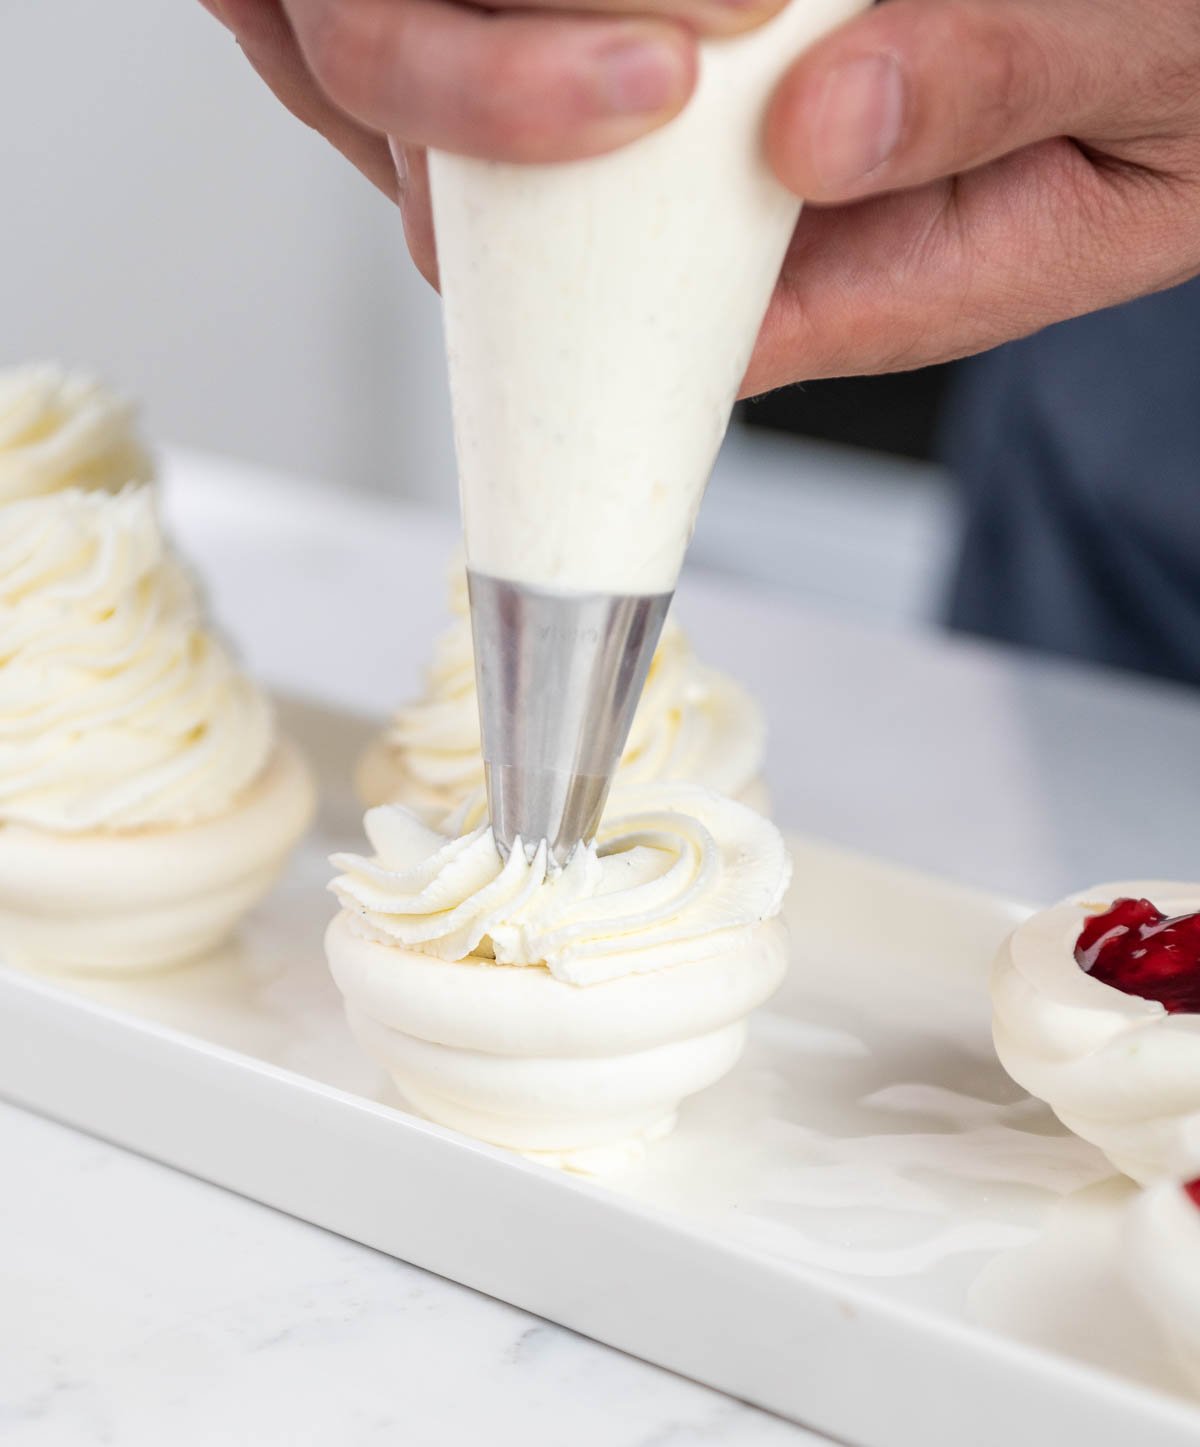
- Next, pipe a dollop of Chantilly cream on top of the berry compote making sure to fully cover the filling so that it does not leak out.


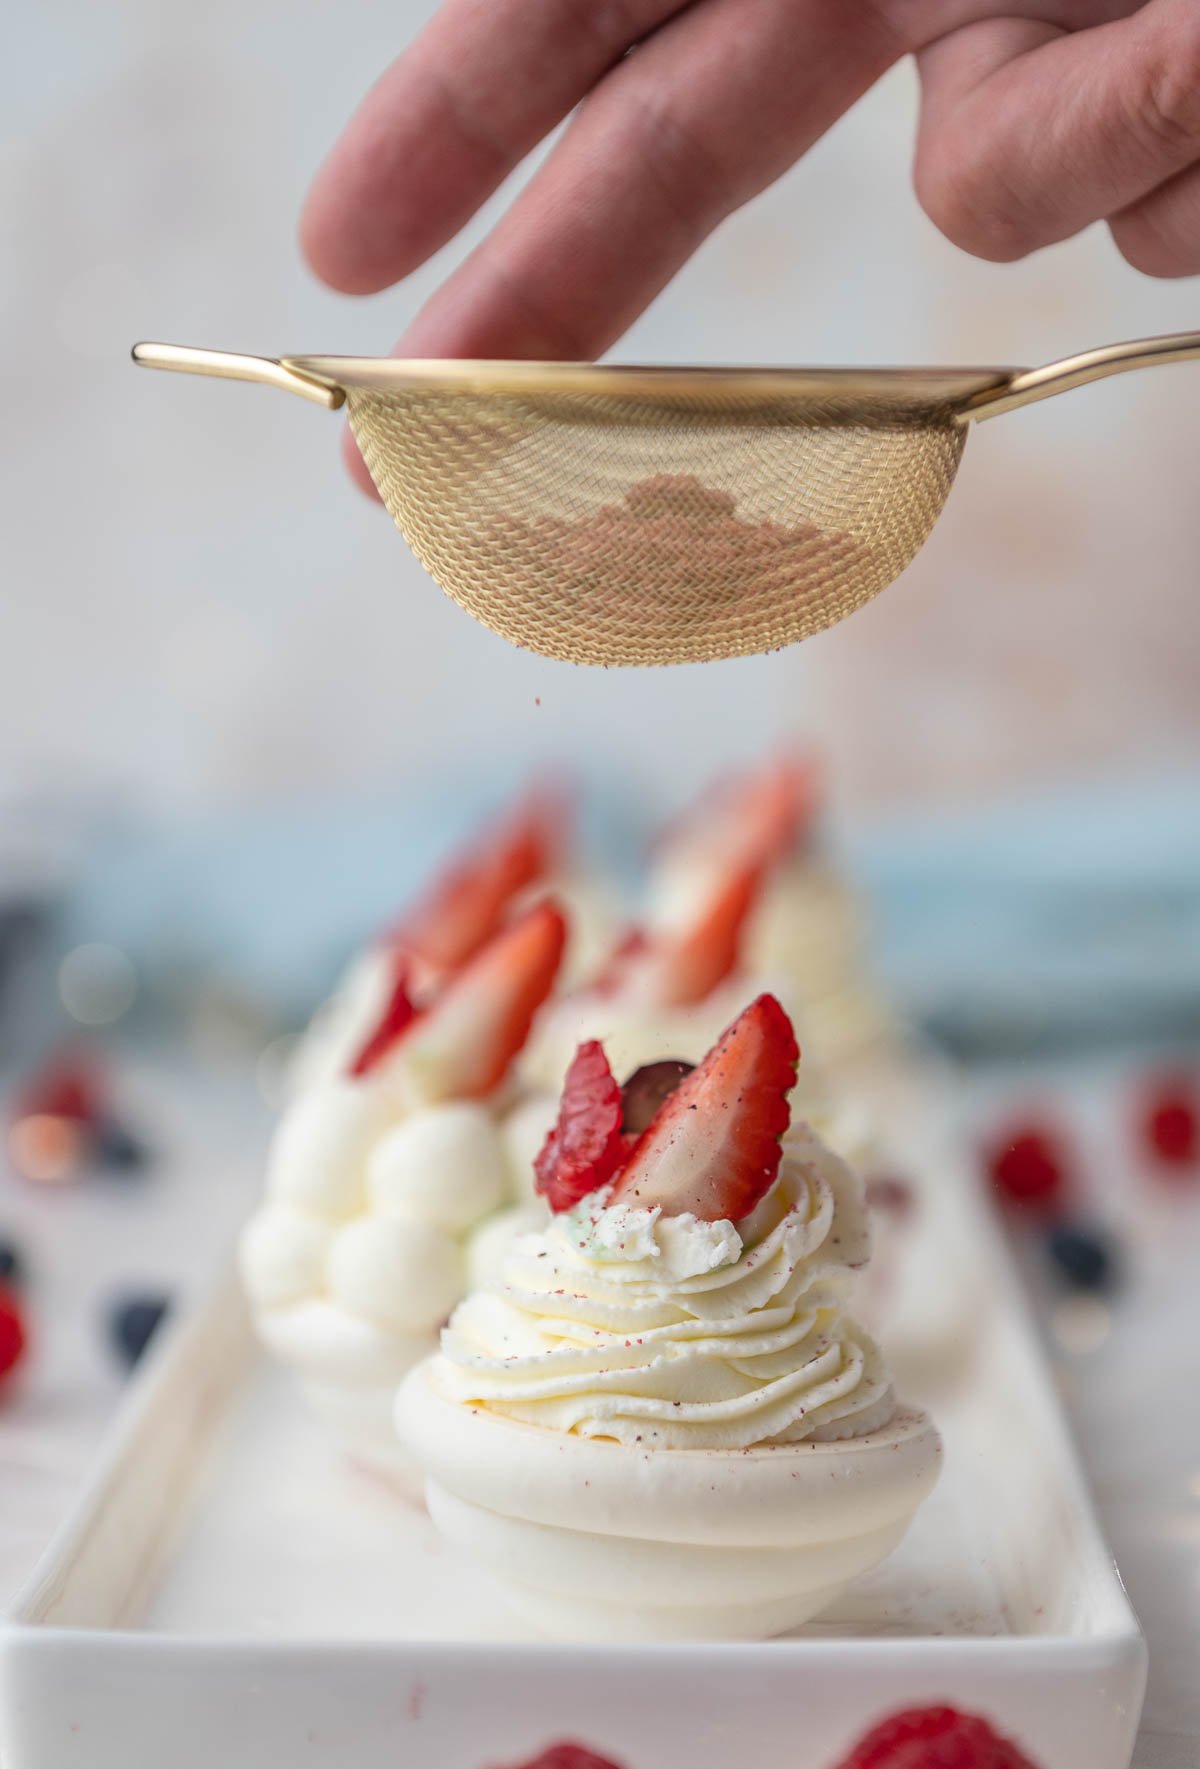
- Finally, garnish the mini pavlova with fresh fruit, mint, or any other topping of your choice. Chef Christophe used dehydrated berries to grate directly on top of the finished pavlova.


FAQ
Pavlova is a meringue-based dessert that is topped with whipped cream and fresh fruit.
The biggest difference between meringue and pavlova is that a pavlova recipe has cornstarch. Cornstarch is a softening agent that keeps the center softer than the crisp, outer shell.
Both desserts are made from egg whites and equally delicious, but they taste quite different! Meringue is dry and crispy throughout. Pavlova is white, crisp, and glossy on the outside, and slightly chewy on the inside.
Yes! Switch out the heavy whipping cream for coconut milk to make it dairy-free. PRO TIP: Take your can of coconut milk and leave it in the refrigerator overnight. Meanwhile, this will allow the liquid and the fat to separate. Then, when you're ready to make your Chantilly cream, strain the liquid out and then use the remaining coconut fat to whip it into a dairy-free whipped cream!
Besides strawberries, blueberries, and raspberries, you can use any fruit variation you like to make your compote! A few ideas include nectarines, kiwi, pineapple, passionfruit, peach filling, or cherry filling!
Pipe larger discs of meringue on a piece of parchment paper, or on the back of a larger sphere mold using a larger piping tip (this method will create a hollow inside to fill inside).
Yes, you can make pavlova a day in advance and store them in an airtight container. Then, fill them with berry compote and top them with Chantilly cream when you are ready to serve them.
Cooked pavlova is pale white with slight browning on the peaks.
Pavlova tastes chewy when it was not properly cooled and dried out. You can avoid an unpleasant, chewy texture by allowing the pavlova to cool in the oven for as long as possible. In order to get that desirable, extra crispy outer layer, you need to allow the pavlova to properly set while it cools and dries.
Yes! The best way to ensure your pavlova is entirely cooled is by leaving it untouched in the oven overnight (or at least several hours later).
Your pavlova may turn brown if your oven is too hot or has hot spots. You can fix this by cooking them at a slightly lower temperature for a little bit longer.
Not enough air was incorporated into the egg white mixture. While making pavlova, once you add sugar to the egg whites, the mixture will appear flat or deflated. The good news is that this is totally normal! And nothing is "wrong" with your pavlova as this is to be expected.
Extra Tips for Making Pavlova
- First, before you begin making pavlova, ensure that your mixing bowl is entirely clean and fully dry. Even a little bit of water, oil, or grease could throw off your entire recipe! For example, just a streak of grease in your bowl could prevent you from whisking your egg whites into frothy peaks.
- Wipe down your clean mixing bowl and your attachments with vinegar! Why? Because you want to make sure there isn't any butter residue on any of your attachments. In the long run, this will help ensure your meringue will whip up beautifully.
- Definitely be sure to fully wash and thoroughly hand dry your bowl before you begin.
- Avoid baking pavlova if the weather is especially humid. We want to create an ideal environment for our pavlova to dry thoroughly. If you have a portable space heater, you can place that in your kitchen to remove excess humidity from the air and help the pavlova dry out.
- While a KitchenAid Stand Mixer is a great investment if you are baking regularly, you do not need one for this recipe. However, you do need a handheld electric beater if you don't have a stand mixer.
What is the Origin of Pavlova?
Pavlova gets its name from a Russian ballerina named Anna Pavlova who was a superstar in the early 20th century.
Anna Pavlova was a ballerina who was internationally known for her beauty and grace on the stage. Some people enjoyed her work so much so they decided to name a dessert after her!
Originating in Australia, the Davis Gelatine Corporation developed an early version of the pavlova that looks and tastes nothing like the pavlova we know and love! In fact, their version of pavlova was a dessert with multiple layers of gelatine and one layer of milk.
The more accurate and modern version of pavlova that you and I know was re-introduced in the 1950s in New Zealand and became a well-loved, holiday dessert around the 1980s. Fun fact: the pavlova recipe steadily became more popular as the cost of eggs went down!
More Recipes You'll Love
How to make fresh berries last longer
Recipe
Equipment
- piping bag and plain tip #804
- Silicone sphere molds 2"
- microplane
Ingredients
Pavlova
- 100 grams egg whites room temperature
- 100 grams granulated sugar
- 100 grams powdered sugar
- 1 Pinch cream of tartar
Mixed Berry Compote
- 80 grams sugar
- 30 grams lemon juice
- 1 vanilla bean (scraped)
- 240 grams fresh strawberries (leaves removed)
- 36 grams fresh blueberries
- 40 grams fresh raspberries
- 15 grams water
- 10 grams cornstarch
Vanilla Chantilly
- 300 grams heavy whipping cream
- 30 grams powdered sugar
- 1 vanilla bean (seeds scraped)
Instructions
Making the Pavlova
- Preheat your oven to 200°F (93°C). Before you begin making pavlova, ensure that your mixing bowl is entirely clean and fully dry. Even a little bit of water, oil, or grease could throw off your entire recipe! Then, wipe down your clean mixing bowl and your attachments with vinegar!
- First, using your stand mixer, whip the room temperature egg whites and cream of tartar on medium speed to a soft peak in a clean and dry mixing bowl.
- Then, while it is mixing, slowly add your granulated sugar. Continue to mix until you reach stiff peaks.
- Next, sift the powdered sugar over the stiff peaks. Gently fold the powdered sugar into the egg whites. Be careful not to deflate the meringue too much.
- Prepare a piping bag with plain tip #804. Fill the piping bag with meringue.
- Then, on the backside of the silicone sphere mold, pipe the meringue around the sphere. Make sure there are no spaces or gaps in the meringue.
- Bake the meringue for 6-8 hours until it is firm and crunchy.
- Next, let the meringue cool completely.
- Then, after the meringue is completely cooled, gently peel the silicone mold away while being careful to not to break the shell.
- Finally, when you are ready to assemble the pavlova, carefully scrape the point off of the bottom using a microplane so it will sit level on the plate.
Preparing the Mixed Berry Compote
- First, use a paring knife to split and scrape the vanilla bean. Put the split vanilla bean into a heavy bottom saucepan.
- Now you will prepare your mixed berries. Dice the strawberries into quarters, cut the raspberries in half, and leave the blueberries whole. PRO TIP: Fresh berries will keep their shape better, but frozen berries will work as well.
- Add the prepared mixed berries into the heavy bottom saucepan along with the vanilla bean.
- Then, add in the sugar and the lemon juice and stir everything to combine.
- Next, in a separate mixing bowl, combine the corn starch and water. Mix until it is smooth.
- Add the cornstarch mix to the berries in the saucepot and mix to combine.
- Cook the berries over medium to low heat and continue to stir gently. Be careful not to scald the berries with high heat. The berries will begin to soften and release juices over medium to low heat.
- When the berry juice mixture begins to boil, remove the saucepan from the heat and transfer the berry compote to another bowl to cool down.
- Cover the berry compote with plastic wrap. Do this by pressing the plastic wrap right up against the surface of the berries. This step will prevent a layer of skin from forming over the berries mixture.
- Then, once the berries are covered in plastic wrap, place the bowl in the refrigerator until it is completely cool.
- Finally, when you are ready to assemble the pavlova, you can remove the vanilla bean pod from the berry compote.
Making the Vanilla Chantilly Cream
- Start with a clean mixing bowl. Use your stand mixer to whip cream, the seeds of 1 vanilla pod, and powdered sugar on medium speed until it reaches a stiff peak (but is still smooth in texture).
- Then, fill a large pastry bag fitted with your desired tip, and set it aside to pipe the cream on the pavlovas.
Assembling the Pavlova
- First, place the mini pavlova hollow side up while making sure it stands balanced. If it won't stay up on its own or is unbalanced, use a microplane to even it out by gently scraping the bottom to a flat surface.
- Then, scoop about 1 tablespoon of berry compote into the pavlova.
- Next, pipe a dollop of Chantilly cream on top of the berry compote making sure to fully cover the filling so that it does not leak out.
- Finally, garnish the mini pavlova with fresh fruit, mint, or any other topping of your choice. Chef Christophe used dehydrated berries to grate directly on top of the finished pavlova.
Video
Notes
- Bring your egg whites to room temperature (or even a little warm) before beginning to make your pavlova.
- Practice Mise en Place (everything in its place). Measure out your ingredients ahead of time and have them ready before you start mixing to reduce the chances of accidentally leaving something out.
- Avoid baking pavlova if the weather is especially humid. We want to create an ideal environment for our pavlova to dry thoroughly. If you have a portable space heater, you can place that in your kitchen to remove excess humidity from the air and help the pavlova dry out.
- First, before you begin making pavlova, ensure that your mixing bowl is entirely clean and fully dry. Even a little bit of water, oil, or grease could throw off your entire recipe! For example, just a streak of grease in your bowl could prevent you from whisking your egg whites into frothy peaks.
- Unsure if your pavlova is done? Carefully pick up one of the pavlovas to make sure that it comes off of the parchment paper clean. If you can pick it up and there isn't any residue, it is done.
Leave a Reply