• Skip to primary navigation
  • Skip to main content
  • Skip to primary sidebar
  • Halloween
  • Recipes
  • Free Tutorials
  • Cake Classes
  • Cake Commissions
  • About Liz

Sugar Geek Show logo

menu icon
go to homepage
  • Halloween
  • Recipes
  • Free Tutorials
  • Cake Classes
  • Cake Commissions
  • About Liz
subscribe
search icon
Homepage link
  • Halloween
  • Recipes
  • Free Tutorials
  • Cake Classes
  • Cake Commissions
  • About Liz
×
Home

Blog

Conversation Heart Cake Tutorial

February 1, 2020 Paid Video

Conversation Heart Cake

Skill level: Intermediate

Learn how to make this gravity defying conversation heart cake. In this tutorial we'll be focusing on building a matte board cake structure, isomalt board, paneling with modeling chocolate and using sugar press stamps for lettering. The perfect cake for Valentine's Day!

55:38 Minutes of Instruction

What You Will Learn

  • How to make a gravity-defying heart-shaped cake
  • Learn how to support cake from the bottom to the top
  • How to color and smooth modeling chocolate to the outside
  • Learn how to create letters and words that look just like a conversation heart candy
  • How to make a beautiful cake board with conversation hearts inside of it
Tutorial Chapters

  1. Cutting Threaded Rod 0:35
  2. Making the heart structure 8:42
  3. Assembling the structure 18:14
  4. Decorating the board 19:15
  5. Stacking the cake 26:13
  6. Crumb Coating 36:01
  7. Coloring the Modeling Chocolate 37:14
  8. Covering in Buttercream 38:31
  9. Covering in Modeling Chocolate 42:01
  10. Adding the letters 51:10
  11. Painting the words 53:43

Downloads

Materials List

Conversation Heart Cake Tutorial

February 1, 2020 Course Preview

Conversation Heart Cake Tutorial

Skill level: Intermediate

Learn how to make this gravity defying conversation heart cake. In this tutorial we'll be focusing on building a matte board cake structure, isomalt board, paneling with modeling chocolate and using sugar press stamps for lettering. The perfect cake for Valentine's Day!

55:38 Minutes of Instruction

What You Will Learn

  • How to make a gravity-defying heart-shaped cake
  • Learn how to support cake from the bottom to the top
  • How to color and smooth modeling chocolate to the outside
  • Learn how to create letters and words that look just like a conversation heart candy
  • How to make a beautiful cake board with conversation hearts inside of it
Tutorial Chapters

  1. Cutting Threaded Rod 0:35
  2. Making the heart structure 8:42
  3. Assembling the structure 18:14
  4. Decorating the board 19:15
  5. Stacking the cake 26:13
  6. Crumb Coating 36:01
  7. Coloring the Modeling Chocolate 37:14
  8. Covering in Buttercream 38:31
  9. Covering in Modeling Chocolate 42:01
  10. Adding the letters 51:10
  11. Painting the words 53:43

Downloads

Materials List

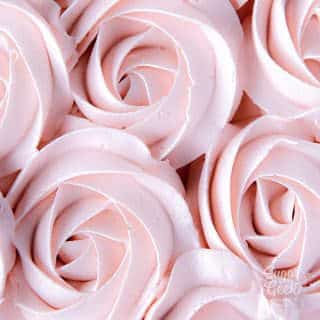
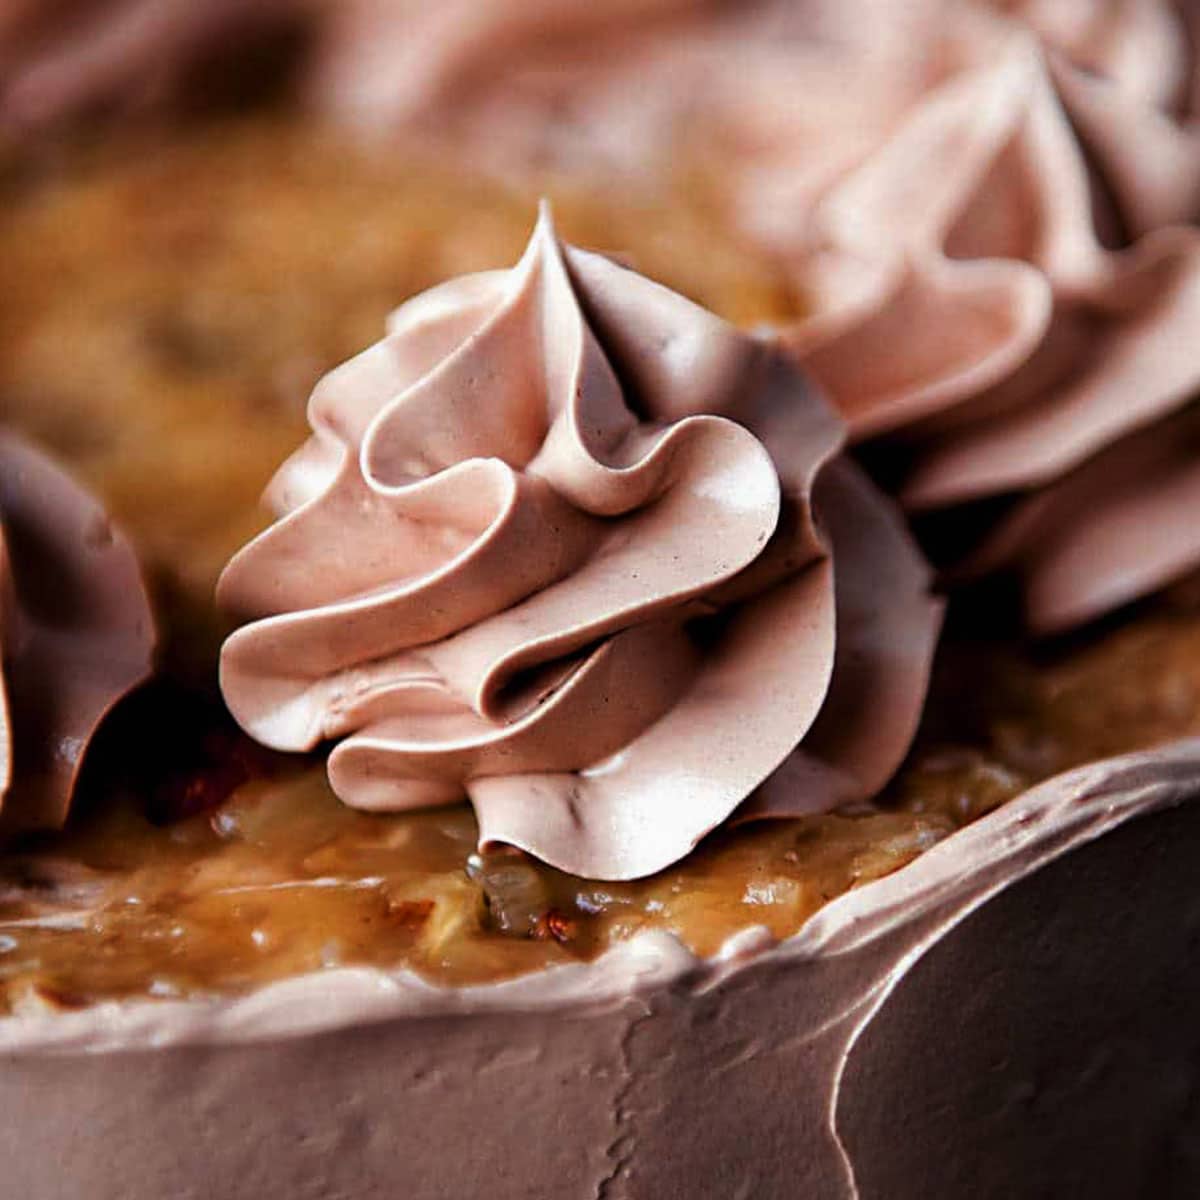
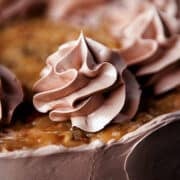
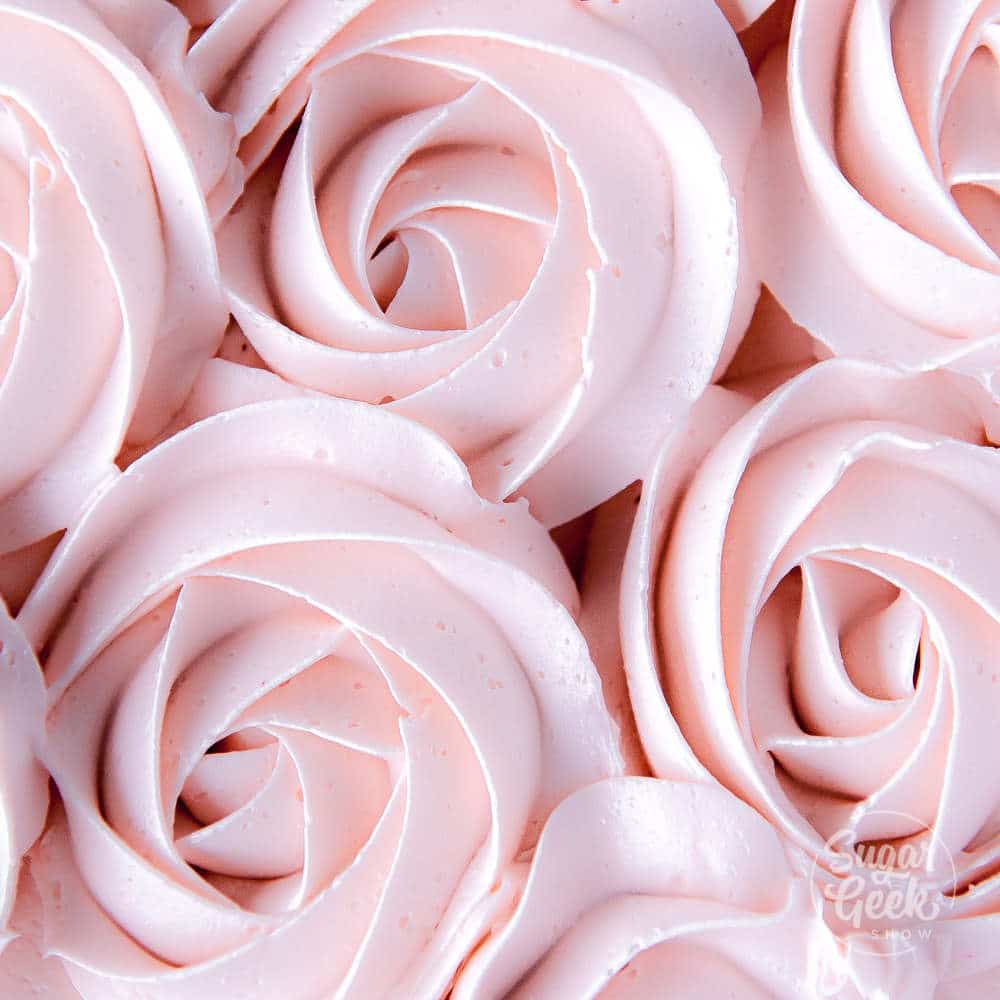
Close up of pink Italian meringue buttercream piped into rosettes.

January 30, 2020 Frosting and Icing

Italian Meringue Buttercream

Italian meringue buttercream is the gold standard of professional frostings: silky smooth, barely sweet, and stable enough to hold up in warm climates where American buttercream falls apart. It is the frosting I reach for on every wedding cake and tiered cake because nothing else comes close to that light, creamy finish without the sugar overload.

Close up of pink Italian meringue buttercream piped into rosettes.

Quick Glance: Italian Meringue Buttercream

  • Recipe Name: Italian Meringue Buttercream
  • Why You'll Love It: The most stable and least sweet buttercream you can make - silky smooth, heat-resistant, and perfect for professional cakes and warm climates
  • Time and Difficulty: 40 minutes / Intermediate
  • Main Ingredients: Egg whites, granulated sugar, water, unsalted butter, vanilla
  • Method: Hot sugar syrup streamed into whipped egg whites, finished with butter
  • Texture and Flavor: Light, silky, and creamy with a delicate sweetness and rich buttery finish
  • Quick Tip: The meringue must be completely cool before you add the butter. If it's too warm, the butter will melt, and the whole thing will look soupy
ChatGPT
Google AI
Perplexity
Grok
Add us as a trusted site on Google
[feast_advanced_jump_to]

Why This Recipe Works

Italian meringue buttercream is more stable than other meringue-based buttercreams like Swiss-meringue buttercream because of what happens to the egg whites when the hot syrup hits them. Sugar cooked to 240°F has lost most of its moisture through evaporation, concentrating the sugar to a very high level. When that hot syrup streams into whipping egg whites, two things happen simultaneously: the heat partially pasteurizes the egg whites, and the concentrated sugar bonds into the protein foam, creating a structure that is far more rigid and heat-resistant than what you get from Swiss meringue buttercream, which only heats egg whites to around 160°F.

The reason Italian meringue buttercream is also the least sweet is that the sugar is dissolved into the egg white foam rather than sitting in a base of powdered sugar. There's no confectioners' sugar in this recipe at all, which means no starchy aftertaste and no grittiness.

When you whip butter into the cooled meringue, the fat droplets from the butter become physically trapped within the protein network of the meringue foam, creating a true emulsion. This is why the buttercream can be rewhipped after refrigerating or freezing. The protein structure rebuilds as it returns to temperature.

Italian Meringue Buttercream Ingredients

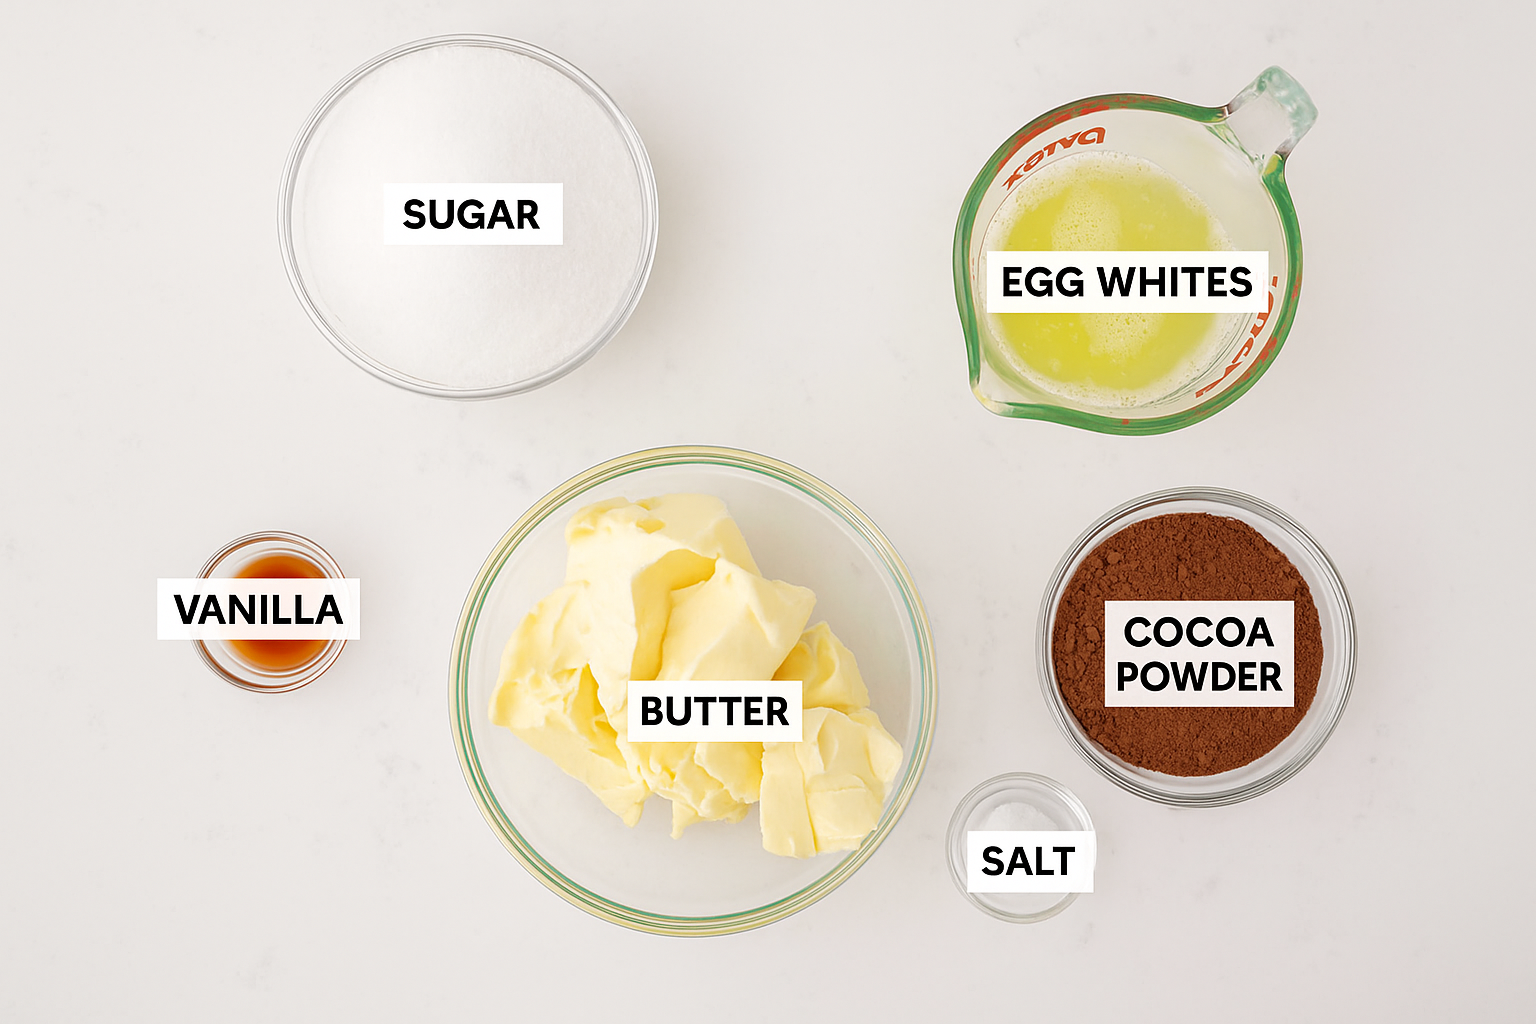
You only need six ingredients to make Italian meringue buttercream, but the quality and temperature of each one matters. Here's what you need and why it works.

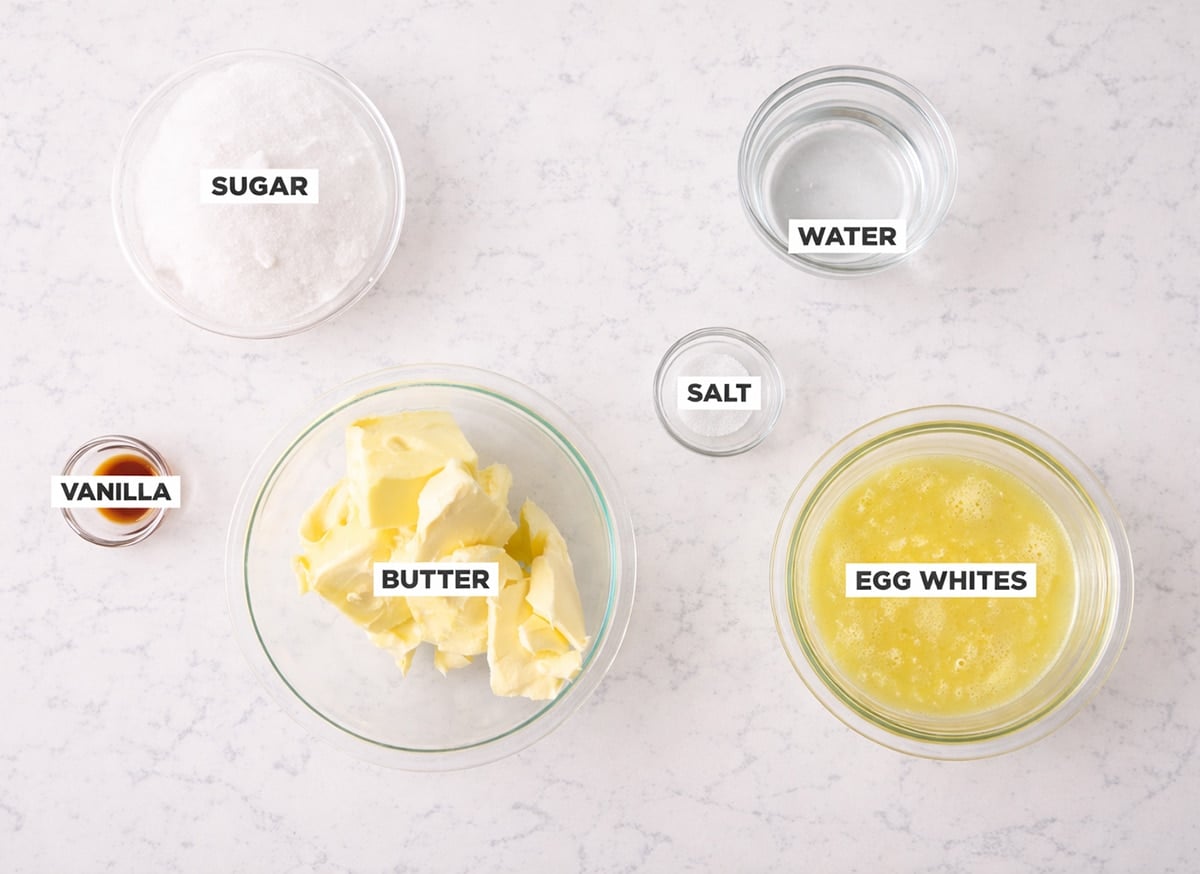
Italian meringue buttercream ingredients in bowls on a white countertop.

Fresh egg whites provide the foam structure that makes Italian meringue buttercream so stable. Fresh egg whites are strongly preferred over pasteurized carton egg whites because the heat treatment used to pasteurize them can partially damage the proteins, making them harder to whip to stiff peaks. If carton egg whites are all you have, make sure they are at room temperature and be prepared to whip them significantly longer than usual.

Granulated sugar is cooked with water to create the hot syrup that stabilizes the meringue. The sugar must reach exactly 240°F (soft ball stage) so that enough moisture has evaporated and the sugar concentration is high enough to set the foam properly. Under-cooking the syrup results in a soft, unstable buttercream that won't hold its shape. Do not substitute powdered sugar here since the recipe depends on the syrup-making process.

Water is combined with the sugar to help it dissolve and cook evenly into a syrup. It fully evaporates during the cooking process and is not present in the finished buttercream.

Unsalted butter is whipped into the cooled meringue to create the final buttercream. It must be softened to room temperature, not melted, and not cold. Softened butter has the right fat crystal structure to emulsify smoothly into the meringue. Unsalted butter is used so the salt level in the recipe can be controlled precisely. For a more stable buttercream in very high heat environments, you can substitute up to half the butter with solid vegetable shortening, which has a higher melting point than dairy butter.

Salt enhances and balances the flavor of the buttercream. Without it, the buttercream can taste flat and one-dimensional. Use a small amount since it should not be detectable as saltiness, only as depth of flavor.

Vanilla extract is the primary flavoring in this recipe. Use a high-quality pure vanilla extract or vanilla bean paste for the best flavor. You can substitute any flavoring you prefer, including almond extract, lemon emulsion, freeze-dried fruit powder, or espresso powder.

How To Make Italian Meringue Buttercream Step-by-Step

Before you start, make sure your butter is fully softened and your equipment is completely grease-free. Those two things alone will determine whether your buttercream comes together perfectly or gives you trouble.

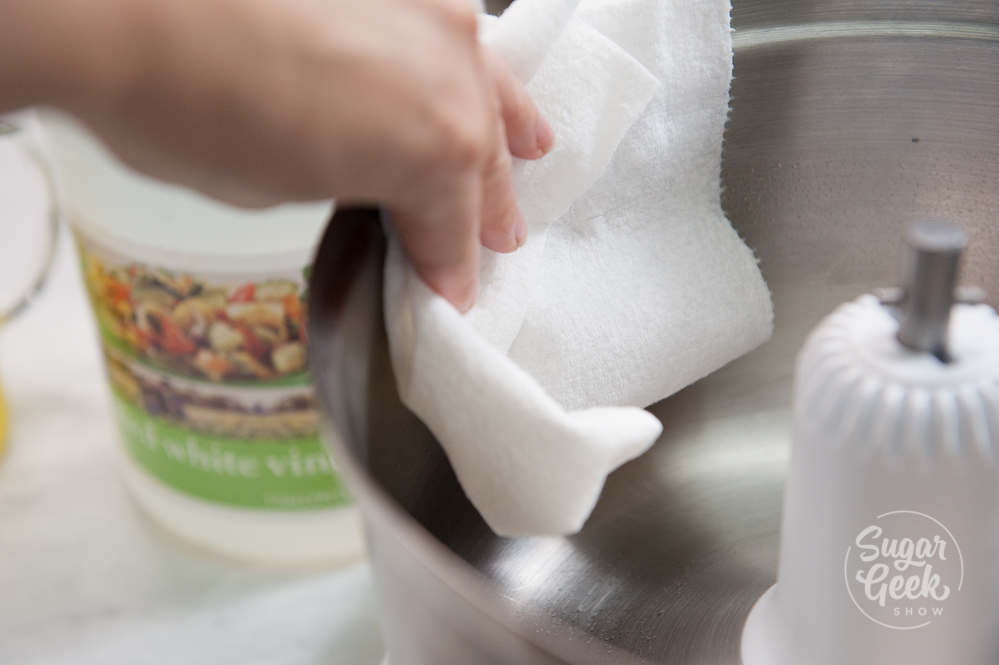
Hand wiping down a metal bowl with a paper towel.
  1. Wipe down the bowl of your stand mixer and whisk attachment thoroughly with lemon juice or white vinegar and a clean paper towel. Any trace of grease or fat will prevent your egg whites from whipping up properly. The bowl should feel completely clean and slightly tacky.
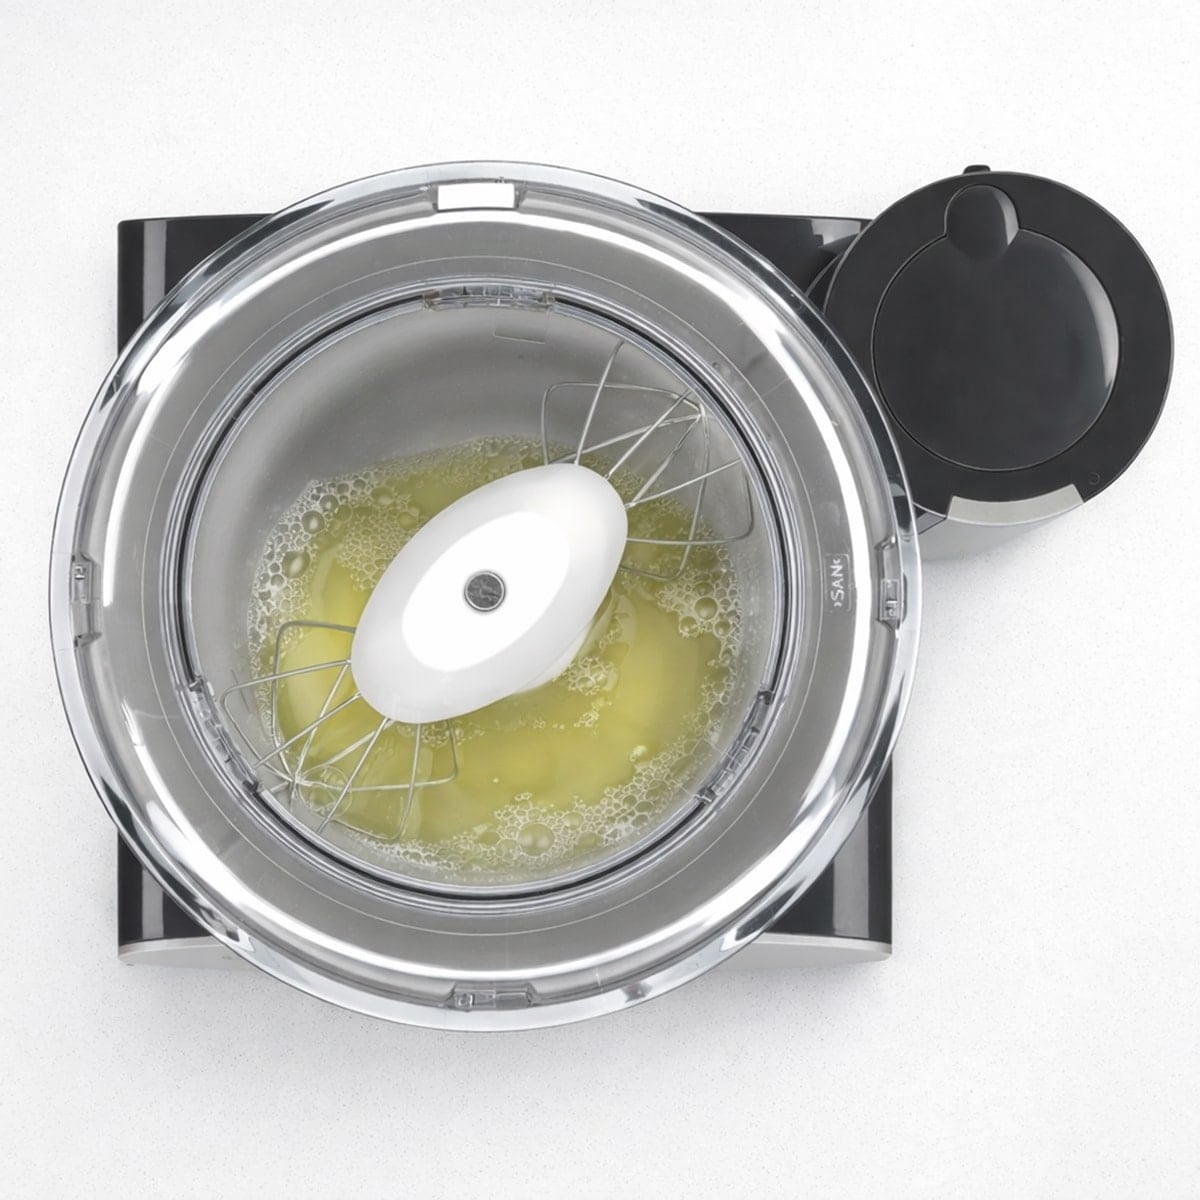
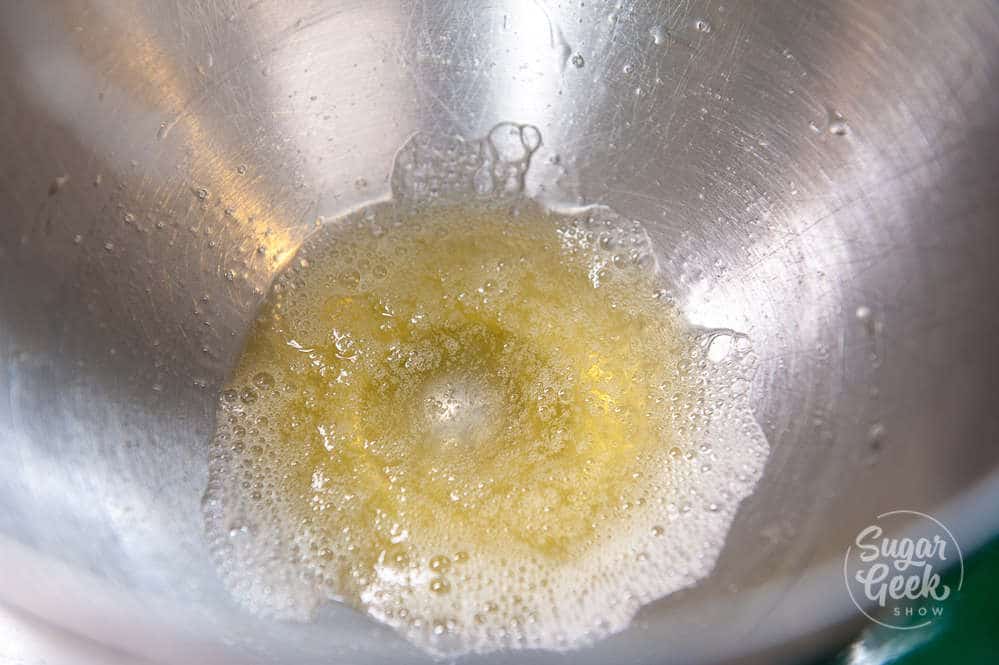
Egg whites in the bowl of a mixer with the whisk attachments attached.
  1. Add your egg whites to the bowl of your stand mixer with the whisk attachment. Do not start whipping yet.
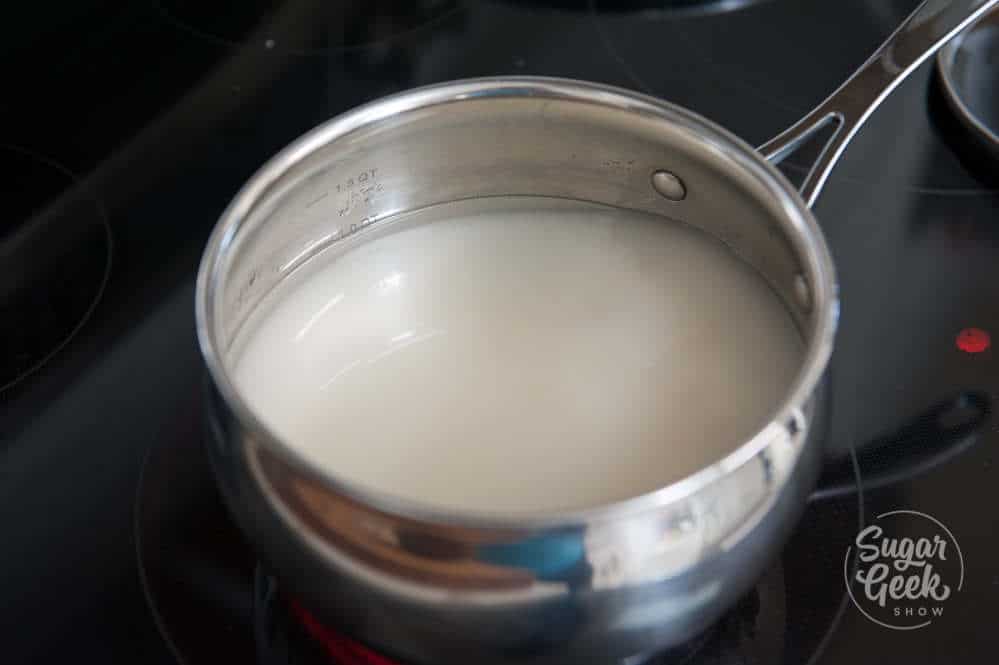
Close up of metal saucepan with water and sugar on a stovetop.
  1. Combine the sugar and water in a medium saucepan and stir just until the water has distributed evenly through the sugar. Place the lid on the pan and bring to a boil over medium-high heat.
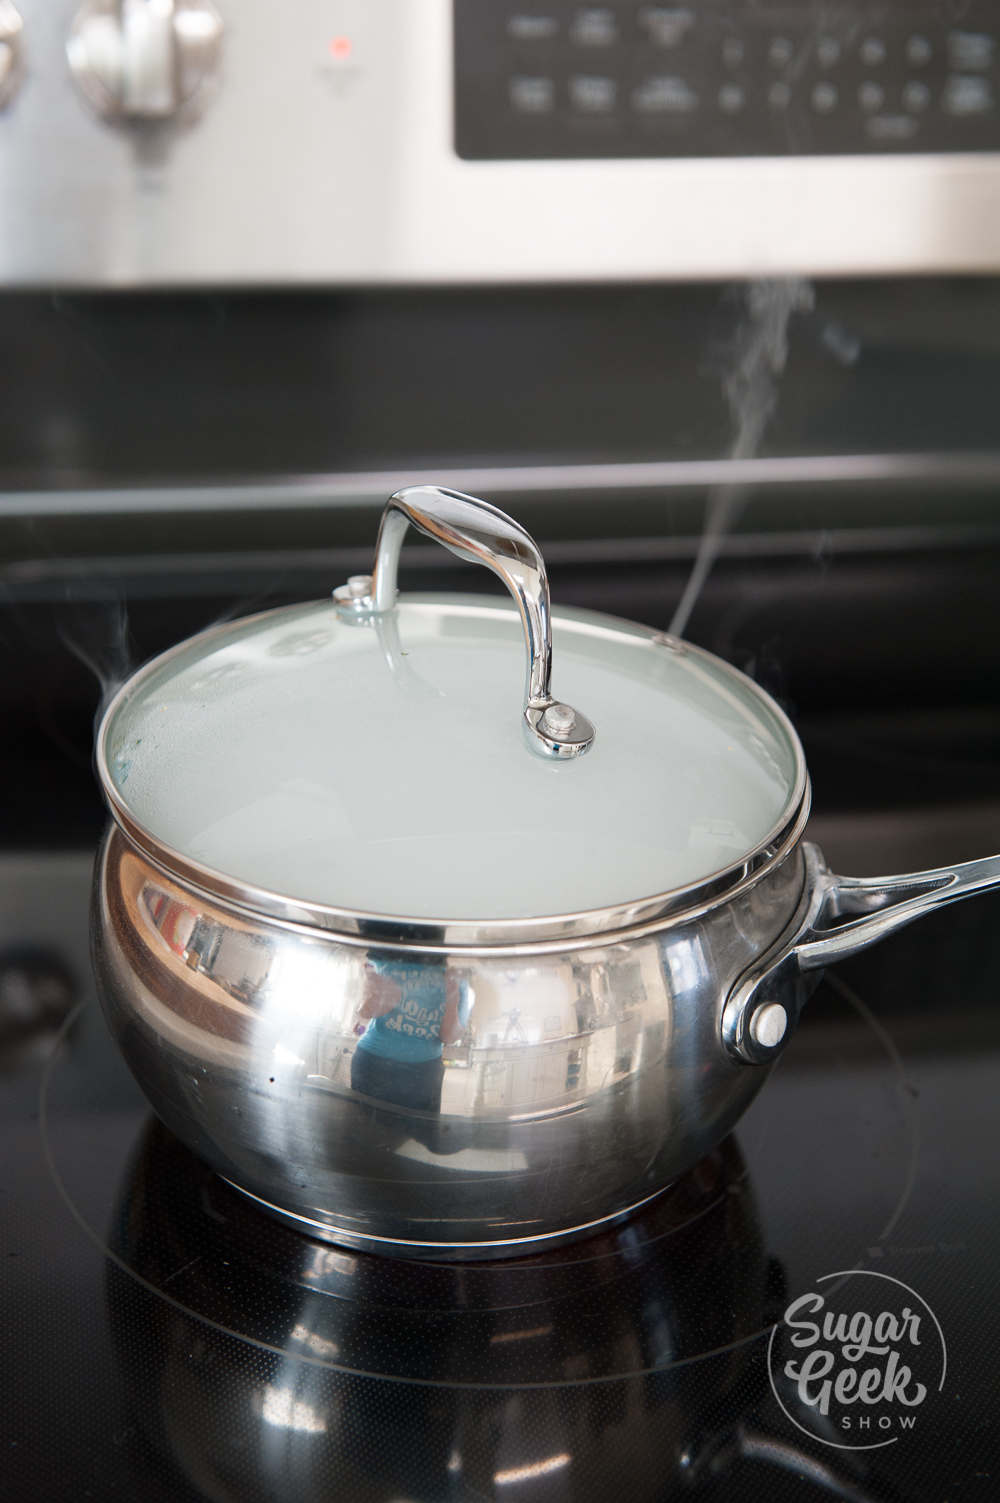
Metal saucepan with the lid on a black stovetop.
  1. Keep the lid on for 3 to 4 minutes after it reaches a boil. The steam trapped inside will wash any sugar crystals off the sides of the pan, which prevents the syrup from crystallizing and turning grainy later.
Candy thermometer inserted into a metal pot of boiling sugar.
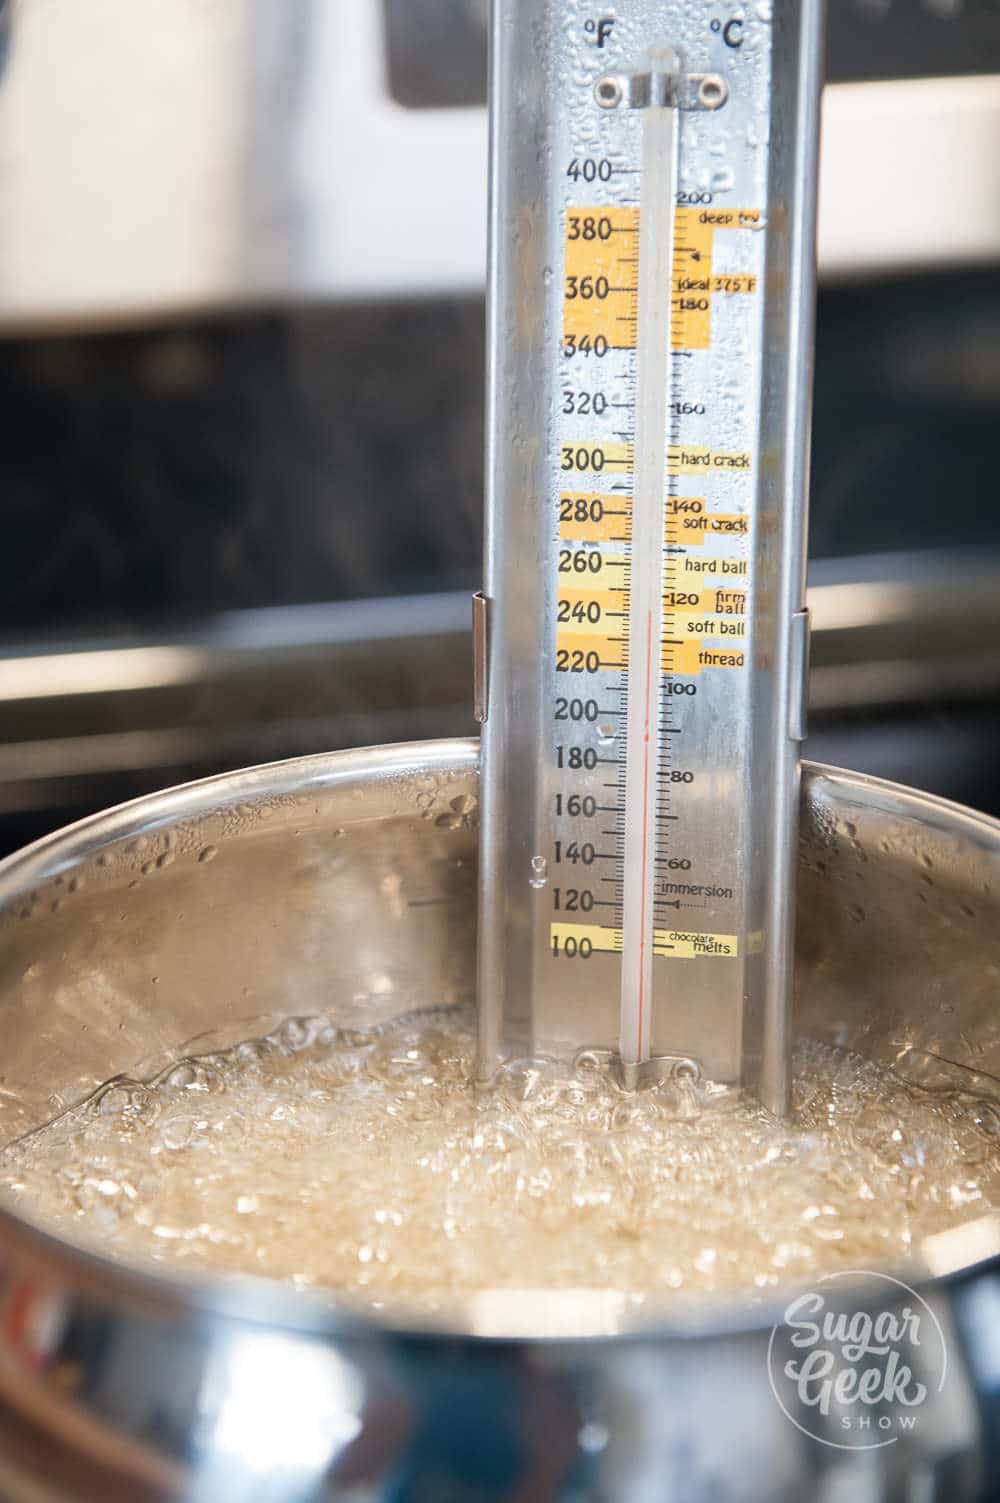
  1. Remove the lid and carefully insert your candy thermometer. Continue cooking over medium-high heat without stirring until the thermometer reads 235°F. The syrup will be clear and bubbling steadily.
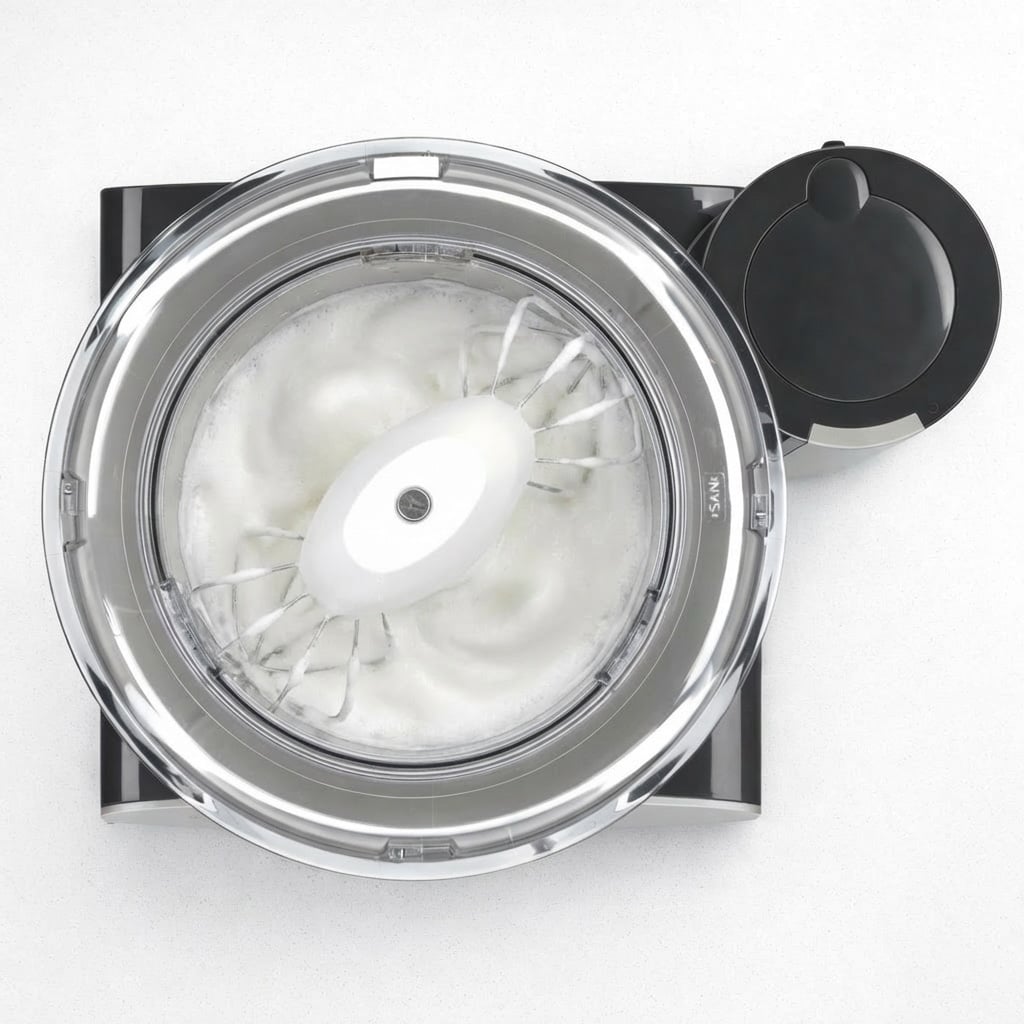
Mixer with egg whites whipped to soft peaks on a white countertop.
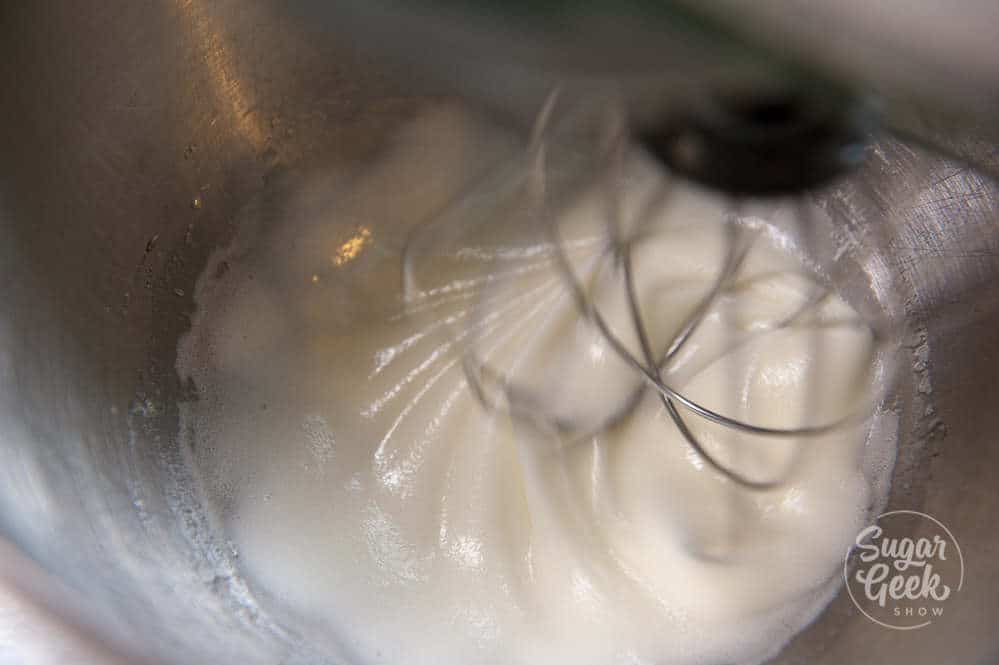
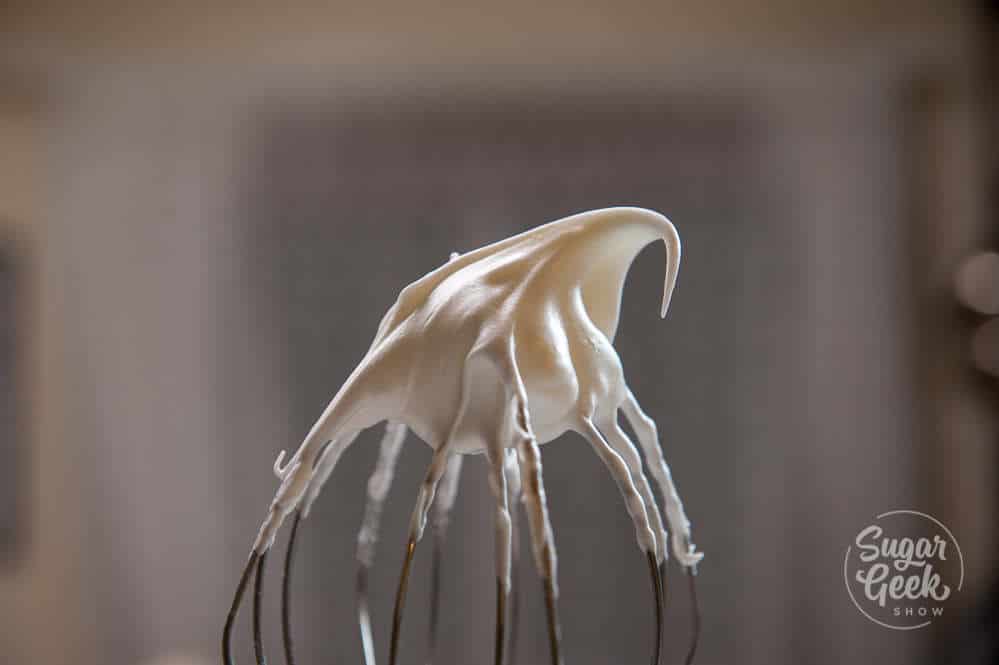
  1. When the syrup hits 235°F, turn your stand mixer on high and begin whipping your egg whites with the salt to soft peaks. You want them to reach soft peaks at the same time the syrup reaches 240°F, so the timing works out almost perfectly if you start at 235°F. Soft peaks means the whites are foamy and bright white but the tip curls over gently when you lift the whisk.
Metal saucepan pouring hot sugar into a mixer whipping egg whites.
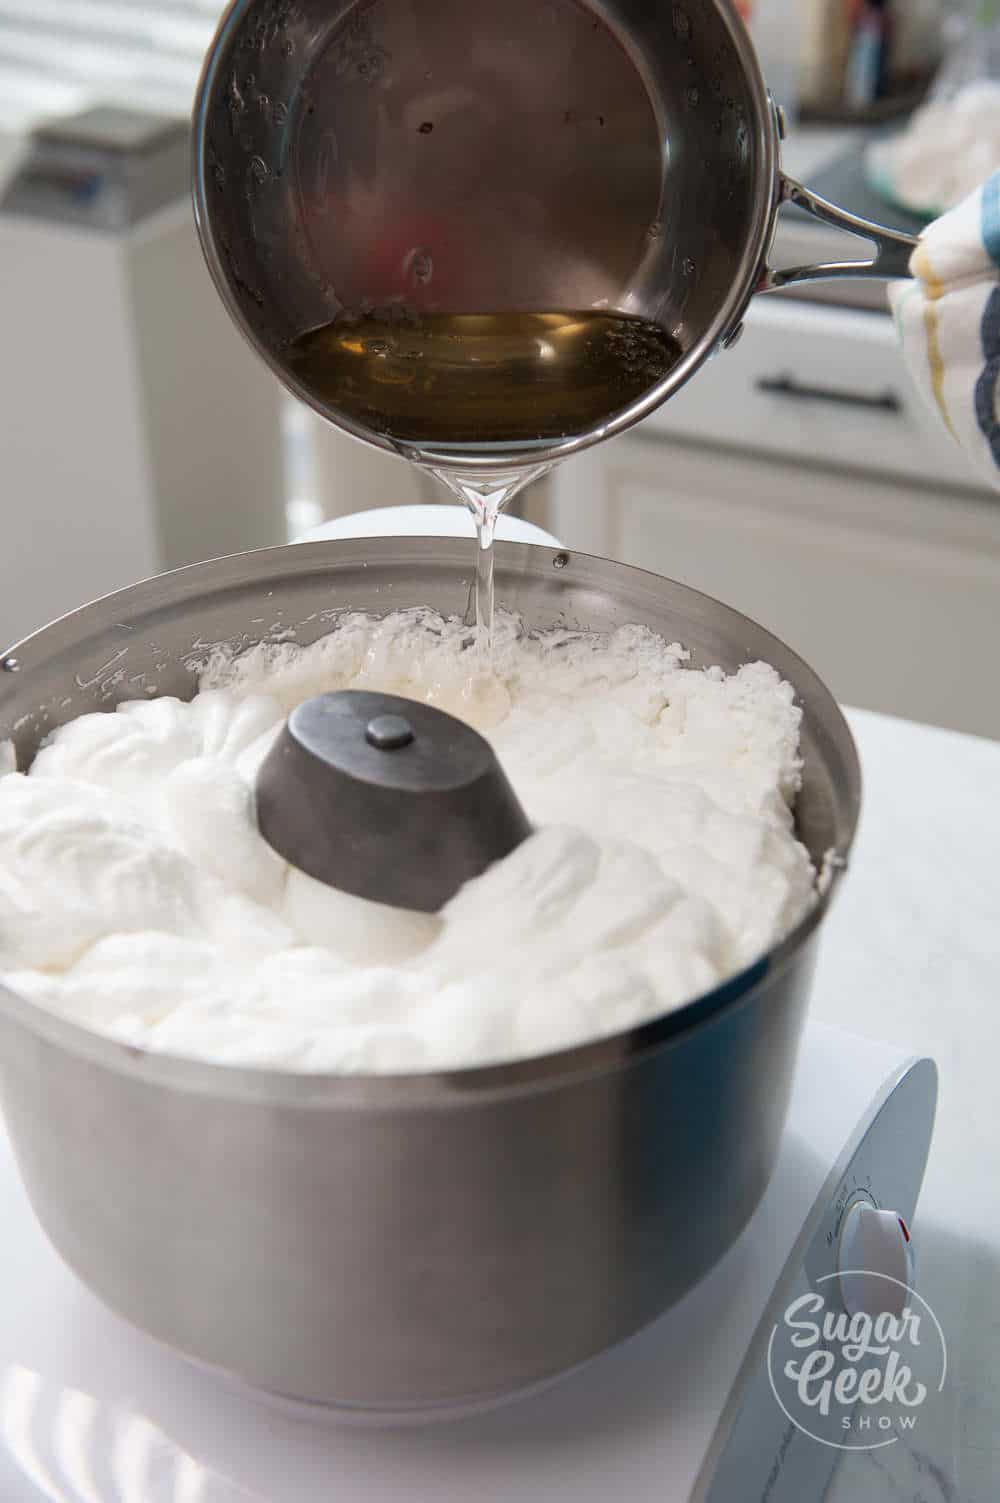
  1. When the syrup reaches 240°F, reduce the mixer to low speed. With the mixer running, slowly pour the hot syrup in a thin, steady stream down the side of the bowl between the whisk and the bowl wall. Pouring it directly onto the whisk will cause it to splatter and harden on the sides of the bowl. The mixture will immediately increase in volume and turn glossy white.
Metal mixer whipping Italian meringue with ice and towels wrapped around the base.
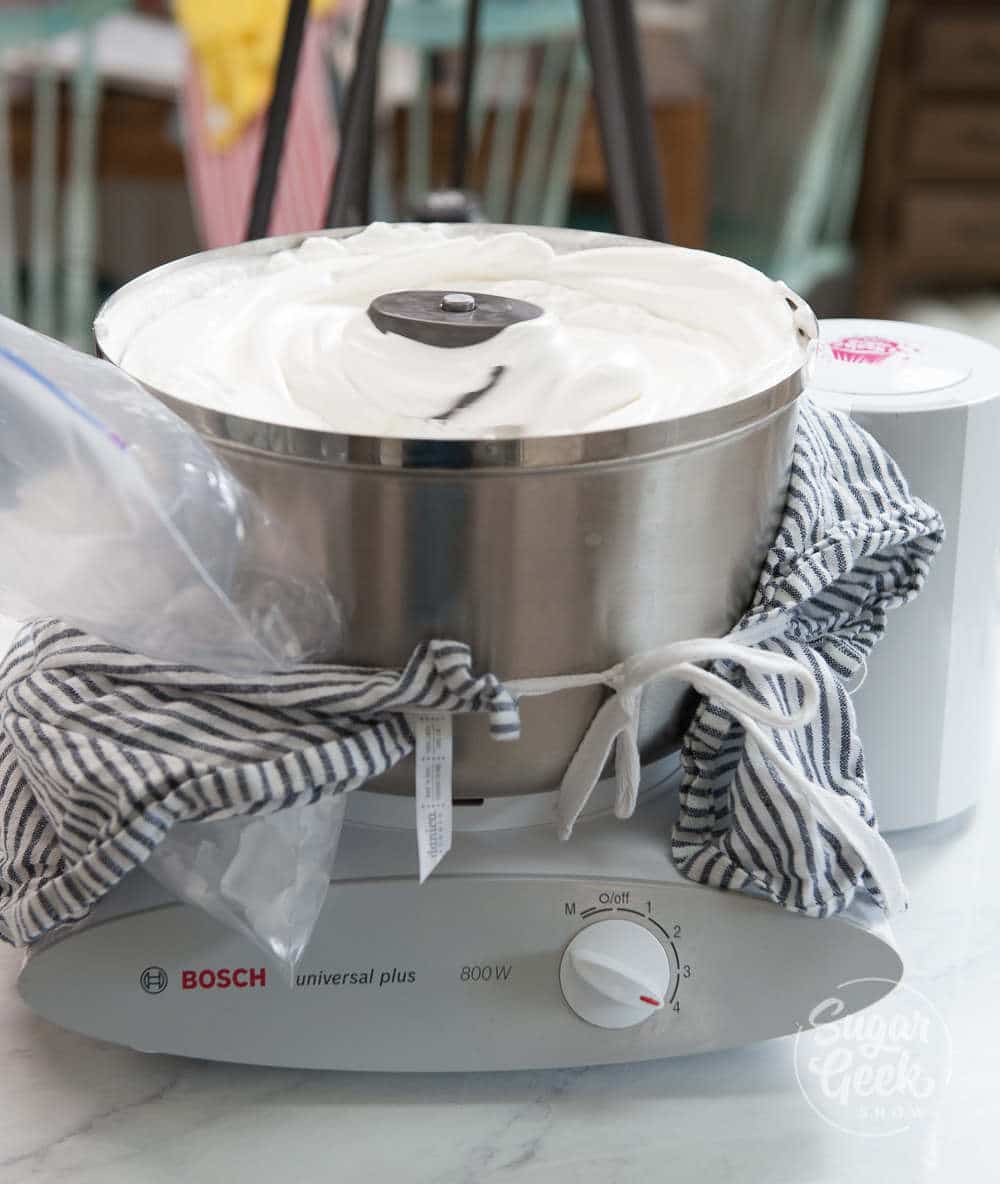
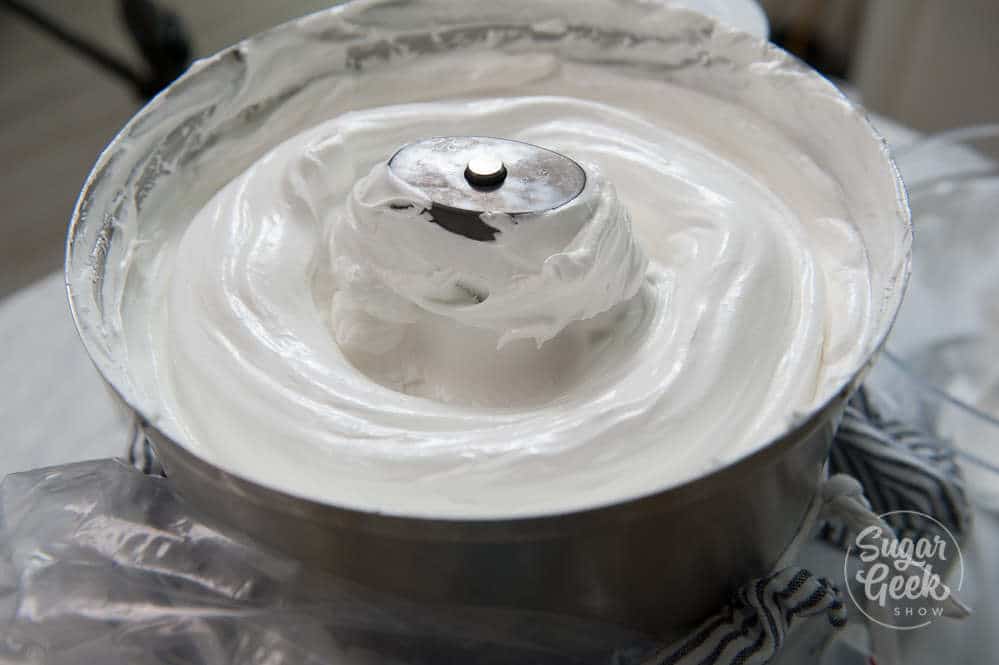
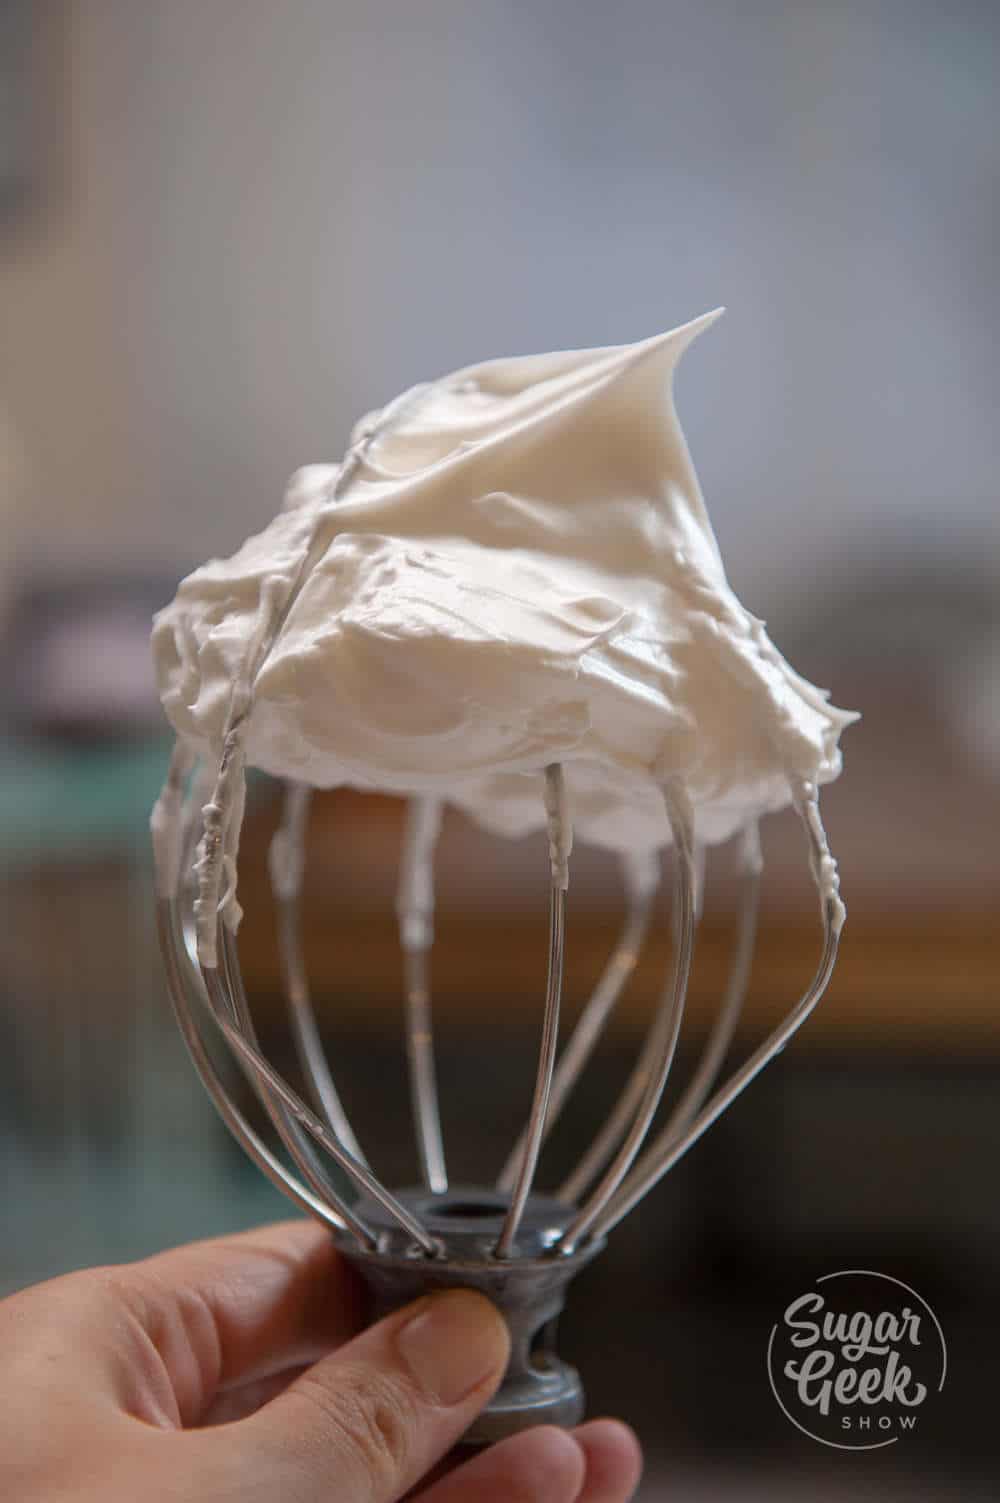
  1. Increase the mixer speed back to high and whip to very stiff, glossy peaks. To cool the meringue down faster, wrap an ice pack or bag of frozen vegetables against the outside of the bowl with a kitchen towel. The meringue needs to reach room temperature. You should be able to hold your hand against the side of the bowl comfortably with no warmth. This usually takes 10 to 15 minutes of whipping.
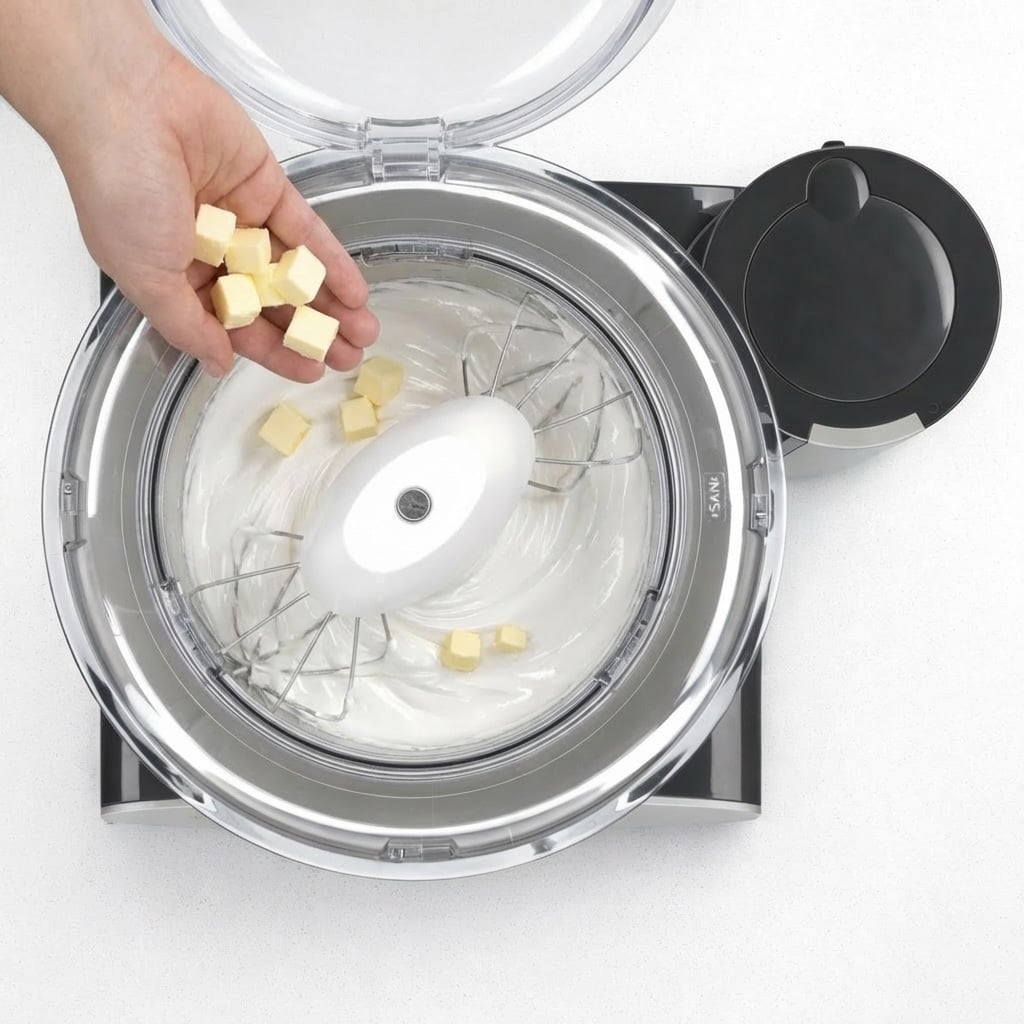
  1. Once the meringue is completely cool, reduce to medium speed and begin adding the softened butter two tablespoons at a time, waiting a few seconds between additions. The mixture may look curdled and soupy at this stage. This is completely normal. Keep whipping and it will come together.
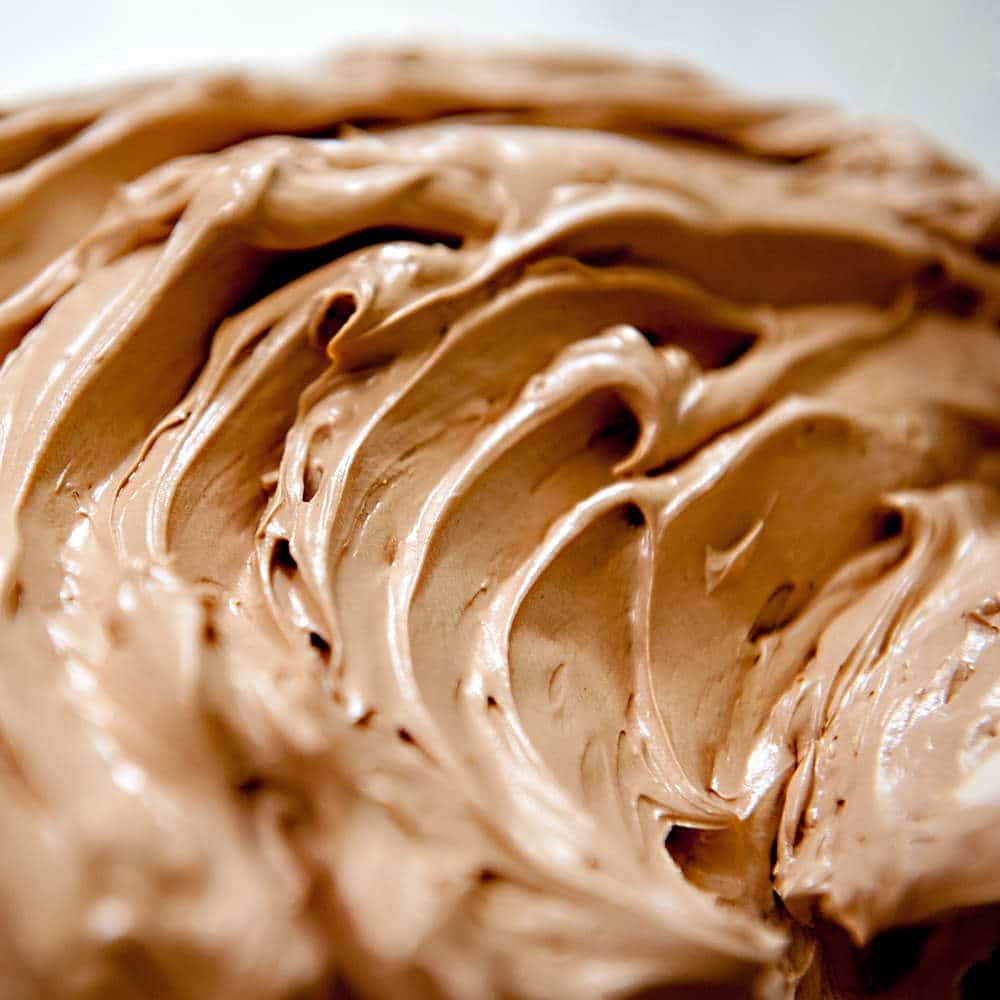
Close up of iItalian meringue buttercream in a metal mixer.
  1. Once all the butter is incorporated, add the vanilla and increase to high speed. Whip for 10-15 more minutes until the buttercream is light, fluffy, and completely smooth with no trace of a buttery taste. It should hold a stiff peak and have a silky sheen.

    Add food coloring now if desired, mixing on low until fully incorporated.

Batter & Frosting Calculator

Cake Batter and Frosting Calculator

Select an option below to calculate how much batter or frosting you need. Adjust the servings slider on the recipe card to change the amounts the recipe makes.

Choose a pan type

Choose a cake pan size
(based on 2" tall cake pan)

Choose a cake pan size
(based on 2" tall cake pan)

Choose a cake pan size
(based on 2" tall cake pan)

Cupcake Tin Size

Choose number of pans

Cups of Batter Needed

8 cups

Cups of Frosting Needed

5 cups

Note: measurements are estimated based off the vanilla cake recipe using standard US cake pans and sizes. Measurements used are for 2" tall cake pans only. Your results may vary. Do not overfill cake pans above manufacturer's recommended guidelines.

This recipe makes 8 cups of frosting, enough to frost and fill a two-layer 8-inch cake or frost about 24 cupcakes. Store leftovers in an airtight container in the fridge for up to 2 weeks or freeze for up to 6 months. Bring to room temperature and rewhip before using.

If you love a buttercream that pipes cleanly, holds its shape, and doesn't taste like a bag of powdered sugar, this is your recipe. Try it on my vanilla cake for a combination that's been a reader favorite for years.

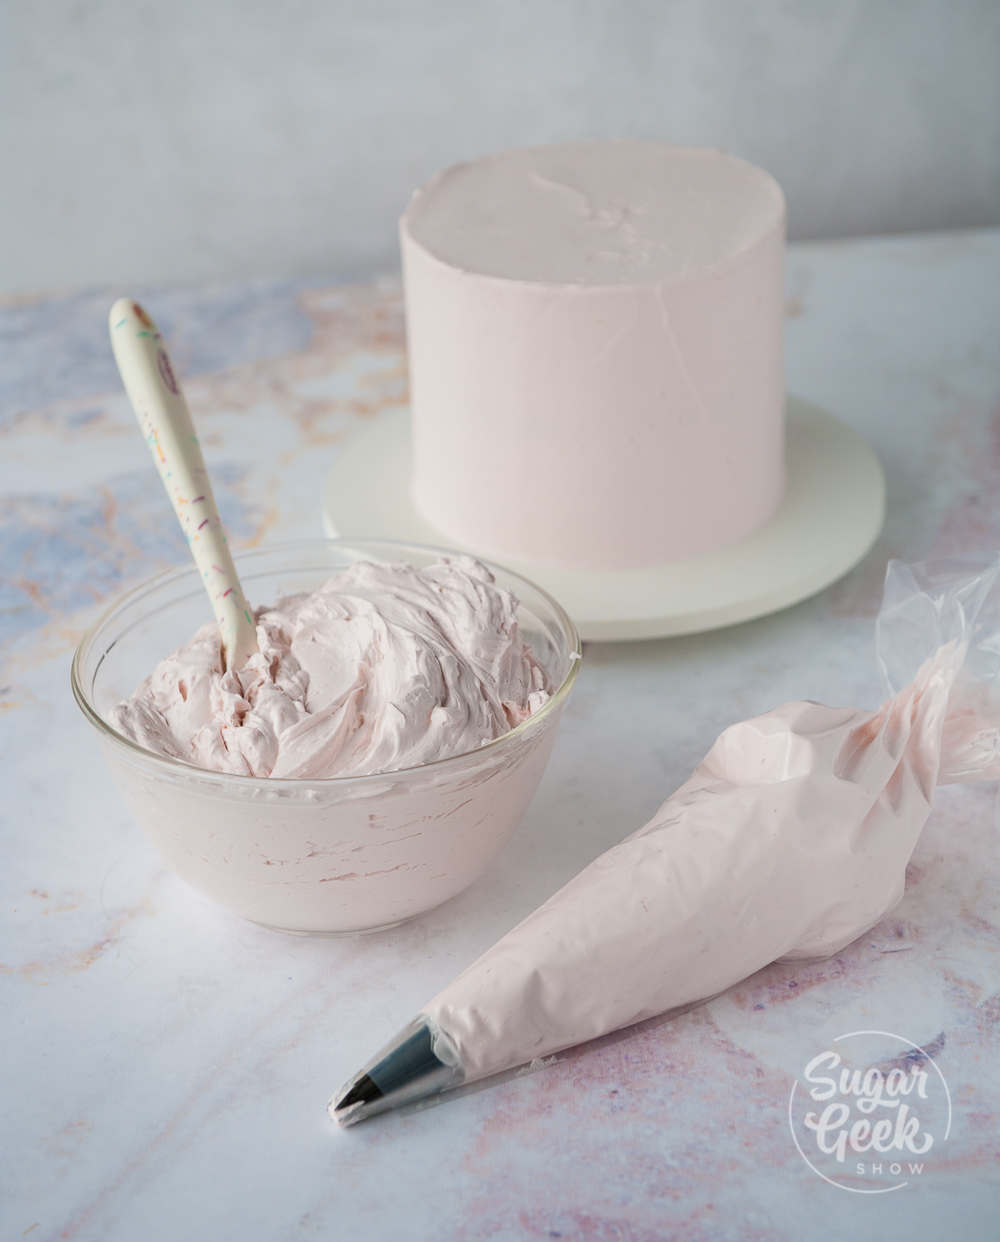
italian meringue buttercream in a bowl, piping bag and frosted no a cake

Common Mistakes To Avoid

Starting with any grease in the bowl. Fat is meringue's worst enemy. Even a small amount of grease from butter, oil, or an unwashed bowl will prevent the egg whites from whipping at all. Always wipe down your bowl and whisk with lemon juice or vinegar before starting.

Adding the butter when the meringue is still warm. This is the most common reason Italian meringue buttercream fails. If the meringue is even slightly warm when the butter goes in, the butter melts rather than emulsifies and you end up with a soupy, broken mess. Be patient. The meringue must be fully at room temperature before you add a single piece of butter.

Under-cooking the sugar syrup. If your syrup doesn't reach 240°F, the sugar concentration won't be high enough to stabilize the foam. The resulting buttercream will be soft, unstable, and prone to weeping. Always use a reliable candy thermometer and confirm the temperature before pouring.

Panicking when it looks curdled. Almost everyone's Italian meringue buttercream goes through a broken, soupy, or curdled-looking stage when the butter first goes in. This is not a failure. Keep whipping on medium-high and the emulsion will come together within a few minutes and the texture will turn silky and smooth.

Using butter that is too cold or too warm. Cold butter breaks into chunks that don't incorporate smoothly. Melted butter causes the buttercream to collapse. Butter should be softened to the point where it holds its shape but gives easily when you press your finger into it, similar to the texture of soft clay.

Italian Meringue FAQs

What is the difference between Italian meringue buttercream and Swiss meringue buttercream?

Both are made with egg whites and butter, but the process is different. Swiss meringue buttercream heats the egg whites and sugar together over a double boiler to about 160°F before whipping, while Italian meringue buttercream uses a hot sugar syrup cooked to 240°F that streams directly into the egg whites as they whip. The higher temperature of Italian meringue buttercream creates a more stable foam structure and a more heat-resistant final buttercream. Italian meringue buttercream is generally considered the more advanced and more stable of the two.

Why does Italian meringue buttercream look curdled?

The curdled appearance happens when the butter is slightly cooler or warmer than the meringue and the fat and water temporarily separate before fully emulsifying. Keep whipping at medium-high speed and it will come back together into a smooth, silky texture within a few minutes. If it looks soupy rather than curdled, the meringue was still too warm when the butter went in. Refrigerate the bowl for 10 to 15 minutes and rewhip.

Can you color Italian meringue buttercream?

Yes. Add gel food coloring in the final step after all the butter and flavoring are fully incorporated. Use gel or paste colors rather than liquid food coloring, as liquid can thin the buttercream slightly. Add a small amount at a time and mix on low until you reach your desired shade. Colors will deepen slightly as the buttercream sits.

How long does Italian meringue buttercream last?

Italian meringue buttercream keeps at room temperature for 2 to 3 days, in the refrigerator for up to 2 weeks, and in the freezer for up to 6 months. Before using refrigerated or frozen buttercream, bring it fully to room temperature and rewhip in your stand mixer until it returns to its original light, smooth consistency. It may look broken at first but keep whipping and it will come back together.

Can you use pasteurized egg whites from a carton?

Fresh egg whites give the most reliable results. The heat treatment used to pasteurize carton egg whites can damage the proteins, making them harder to whip to stiff peaks. If fresh eggs are not available, carton egg whites can work. Make sure they are fully at room temperature and be prepared to whip them longer than you would fresh whites. Results can vary by brand.

How do you make Italian meringue buttercream more stable for hot weather?

Replace up to half the butter in the recipe with solid white vegetable shortening. Shortening has a significantly higher melting point than butter, which gives the buttercream more resistance to heat and humidity. The texture will be slightly less silky and the flavor less rich than all-butter, but the stability improvement in warm climates is significant.

Can you flavor Italian meringue buttercream with something other than vanilla?

Yes. Italian meringue buttercream takes on added flavors very well. Popular options include almond extract, lemon or orange emulsion, espresso powder dissolved in a teaspoon of hot water, melted and cooled chocolate, fresh fruit puree, or freeze-dried fruit ground into a powder. Add your flavoring in the final mixing step in place of or in addition to the vanilla.

More Frosting Recipes To Try

  • close up of a red velvet cupcake with cream cheese frosting piped on top surrounded by other cupcakes
    Easy Cream Cheese Frosting
  • chocolate fudge frosting on a cupcake
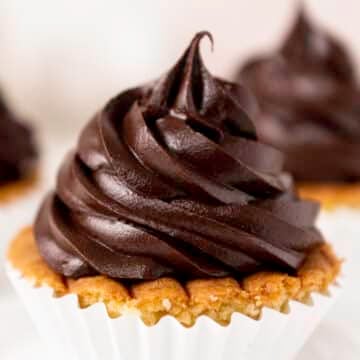
    Chocolate Fudge Frosting
  • Piping squiggle of chocolate buttercream
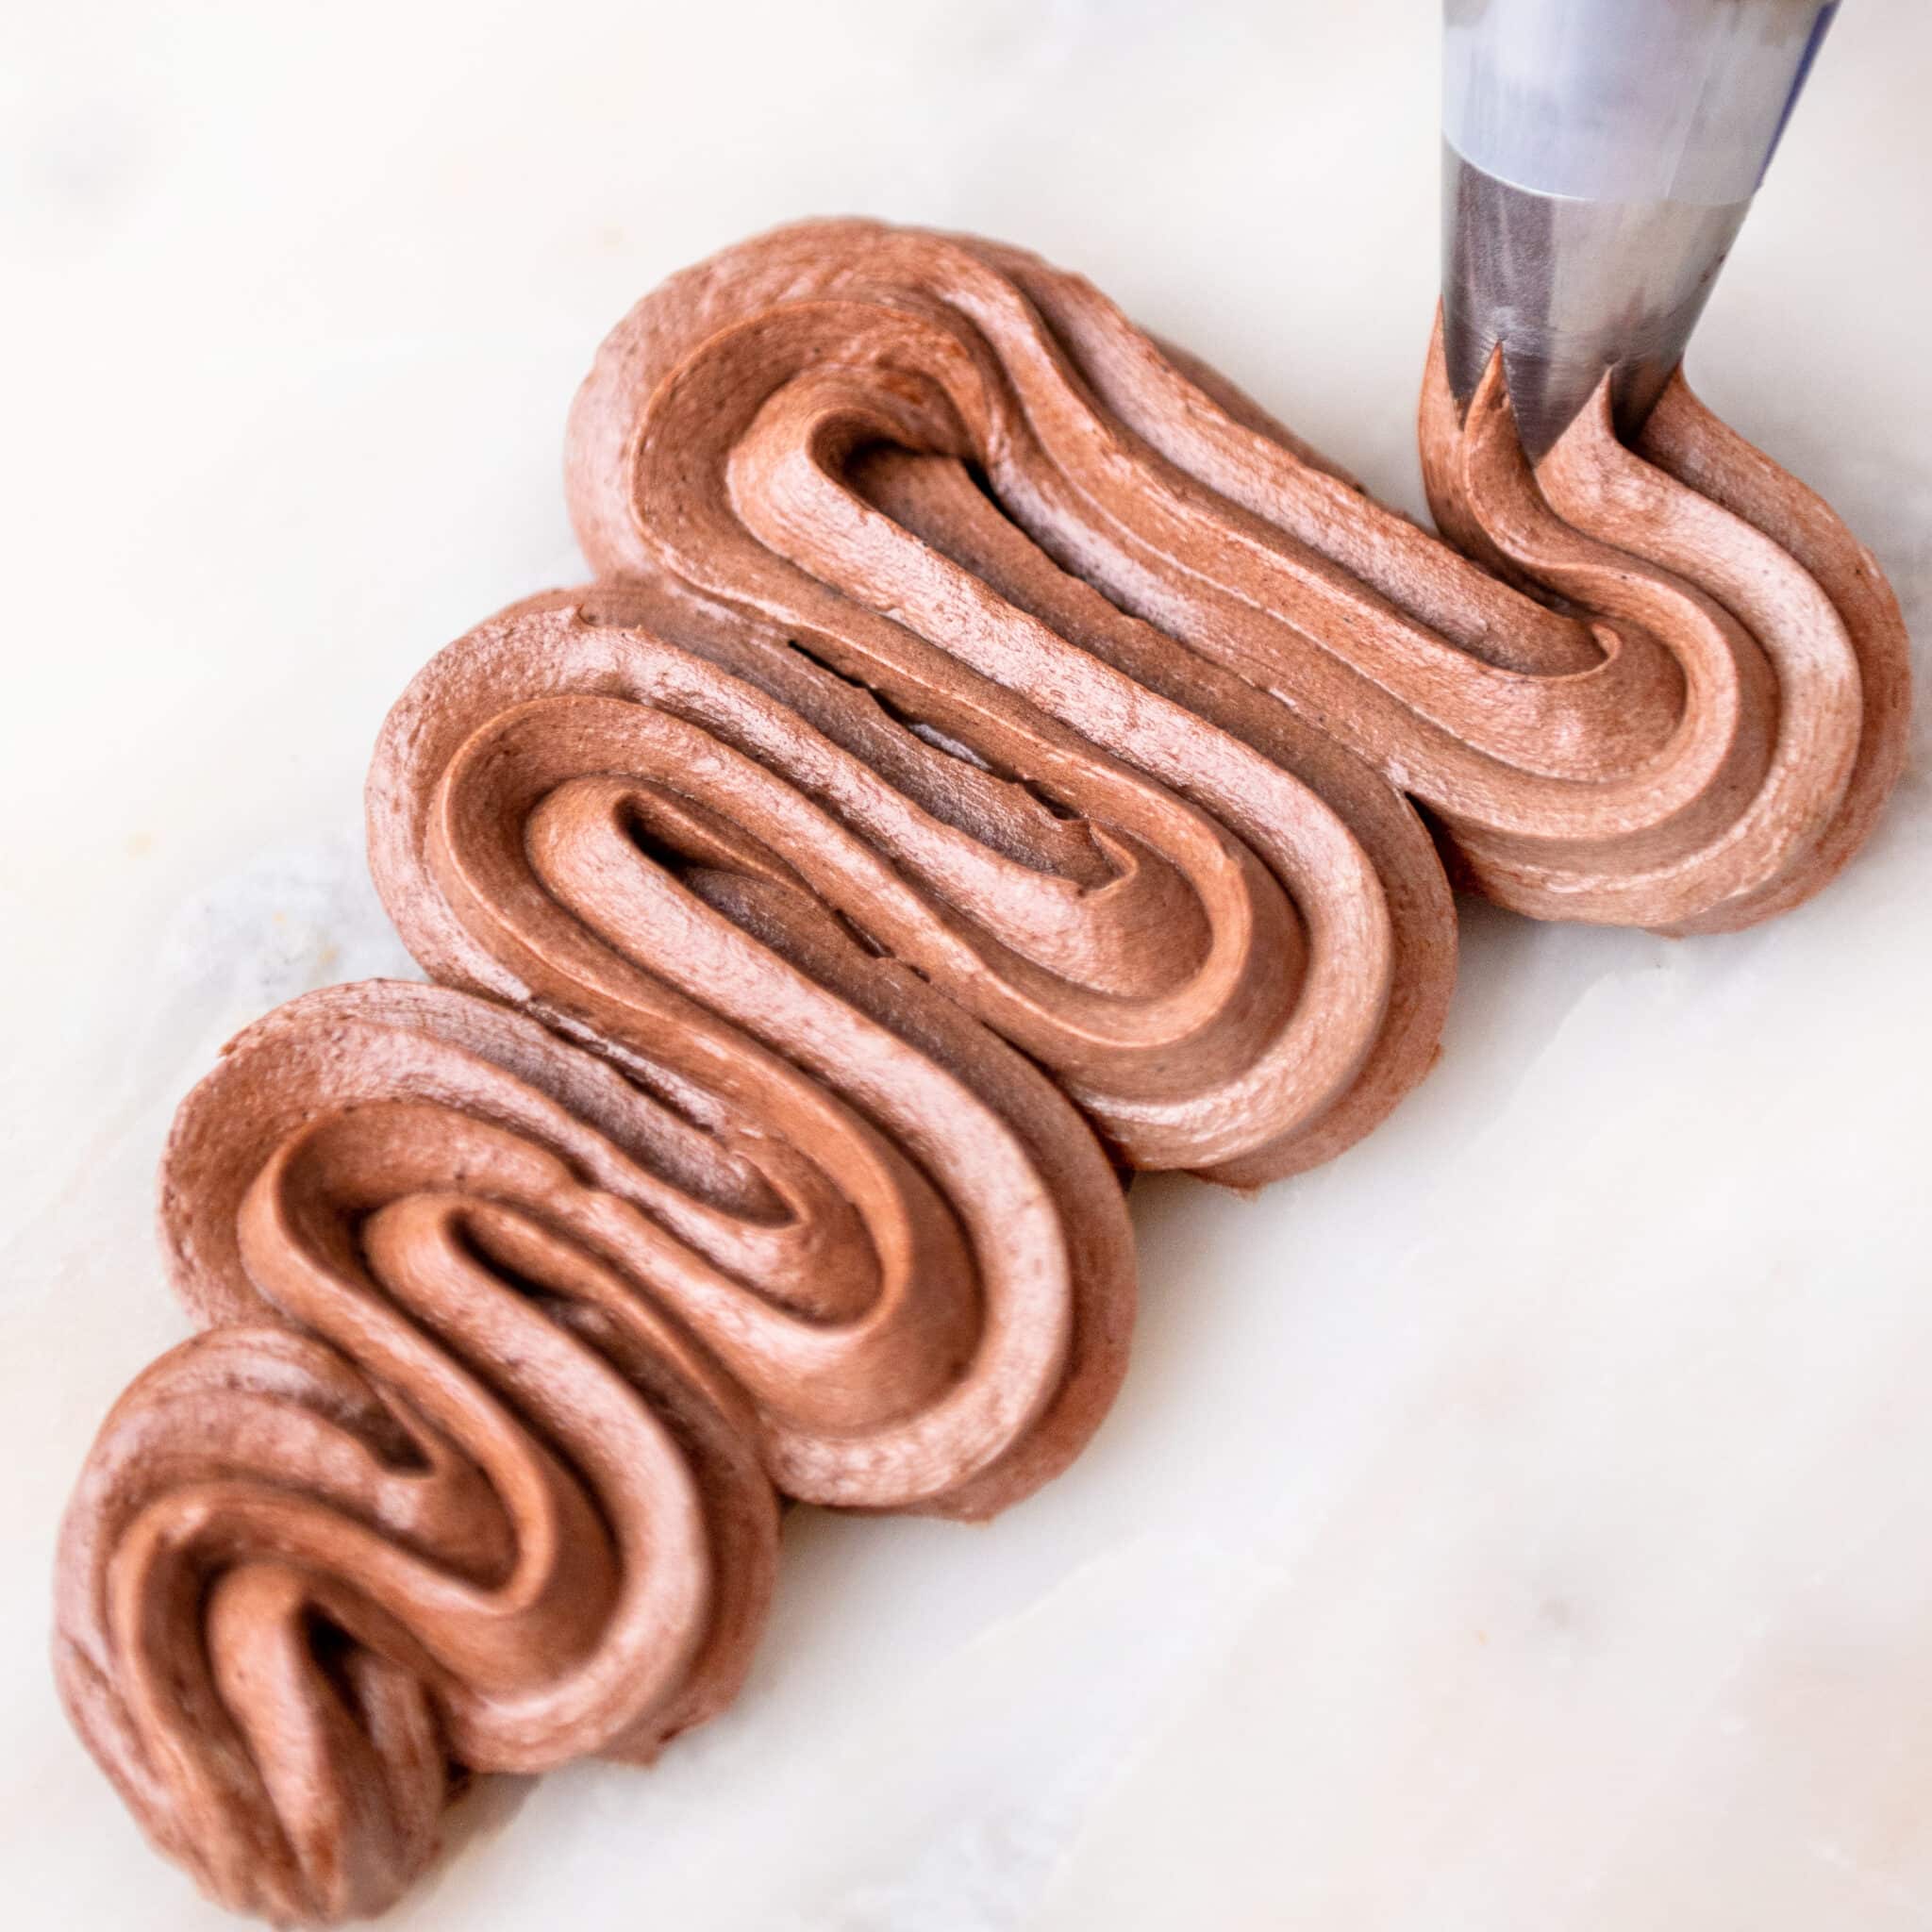
    The BEST Chocolate Buttercream Frosting
  • Piping easy buttercream rosettes onto a cake using a 1M star piping tip
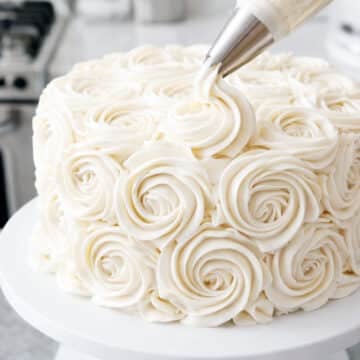
    Easy Buttercream Frosting

Watch: How To Decorate A Cake Step-by-Step

Before you start decorating, watch the video below where I show you every step of decorating a cake from start to finish. Seeing the process in action makes it much easier to follow along

- Liz Marek.

Start Learning Now
smiling woman holding a decorated cake in her hands

Recipe

Close up of pink Italian meringue buttercream piped into rosettes.
Print Recipe
4.91 from 213 votes

Italian Meringue Buttercream

Silky smooth Italian buttercream is the most stable of all the buttercreams and is not very sweet. It is made by pouring hot sugar syrup into whipping egg whites and then finished with butter, salt and flavoring.
Prep Time15 minutes mins
Cook Time10 minutes mins
cooling15 minutes mins
Total Time40 minutes mins
Course: Dessert
Cuisine: Italian
Servings: 8 cups
Calories: 846kcal
Author: Liz Marek

Equipment

  • Stand mixer with the whisk attachment
  • Candy Thermometer

Ingredients

  • 16 ounces granulated sugar
  • 8 ounces water
  • ¼ teaspoon salt
  • 8 ounces egg whites (about 8 large egg whites separated from the yolk)
  • 24 ounces unsalted butter softened
  • 2 teaspoon vanilla extract
US Customary - Metric

Instructions

  • On the stovetop, mix together the water and sugar, cover with a lid and bring to a boil on medium-high heat.
  • Keep the lid on the pot for 3-4 minutes while the mixture simmers to ensure all the sugar granules are dissolved, otherwise, your sugar can get gritty and crystalize. DO NOT MIX.
  • Remove the lid, insert the candy thermometer carefully and continue cooking on medium-high until the syrup reaches 240° F.
  • When the sugar solution is at about 235° F, begin whipping the egg whites on high speed. Add the salt to the egg whites.
  • When the egg whites reach soft peaks, pour the sugar solution in a steady stream on to the whipping whites while mixing on low speed.
  • Continue whipping the egg/sugar mixture until it reaches stiff peaks. I wrapped an apron around my bowl with an ice pack to help the meringue cool down faster. You can also cool the meringue by scooping it out of the bowl and placing it into the fridge for 15 minutes.
  • Once the meringue is cooled, whip in soft butter and vanilla until the buttercream is light and fluffy and no longer has a butter taste. This can take from 10-15 minutes. If it looks curdled and watery just keep whipping. It will come together I promise.

Video

Notes

  • Make sure your sugar syrup reaches exactly 240°F. Under-cooking it will result in a soft, unstable buttercream that won't hold its shape.
  • Keep the lid on the pot for the first few minutes to prevent sugar crystals from forming on the sides of the pan.
  • Begin whipping your egg whites when the syrup hits 235°F so they reach soft peaks right as the syrup is ready.
  • The meringue must be completely cool to room temperature before adding butter or the buttercream will become soupy.
  • Use softened but not melted butter. It should hold its shape but give easily when pressed.
  • If the buttercream looks curdled or soupy, keep whipping. It will come together.
  • To store, refrigerate for up to 2 weeks or freeze for up to 6 months. Bring to room temperature and rewhip before using.
  • For extra stability in warm climates, replace up to half the butter with solid vegetable shortening.

Nutrition

Serving: 2ounces | Calories: 846kcal | Carbohydrates: 57g | Protein: 4g | Fat: 69g | Saturated Fat: 44g | Polyunsaturated Fat: 3g | Monounsaturated Fat: 18g | Trans Fat: 3g | Cholesterol: 183mg | Sodium: 131mg | Potassium: 69mg | Sugar: 57g | Vitamin A: 2125IU | Calcium: 24mg | Iron: 0.1mg
{ "@context": "https://schema.org", "@type": "WebPage", "@id": "https://sugargeekshow.com/italian-meringue-buttercream/", "name": "Italian Meringue Buttercream", "about": [ {"@type": "Thing", "name": "Meringue", "sameAs": "https://en.wikipedia.org/wiki/Meringue"}, {"@type": "Thing", "name": "Buttercream", "sameAs": "https://en.wikipedia.org/wiki/Buttercream"}, {"@type": "Thing", "name": "Egg white", "sameAs": "https://en.wikipedia.org/wiki/Egg_white"}, {"@type": "Thing", "name": "Sugar syrup", "sameAs": "https://en.wikipedia.org/wiki/Simple_syrup"}, {"@type": "Thing", "name": "Butter", "sameAs": "https://en.wikipedia.org/wiki/Butter"}, {"@type": "Thing", "name": "Vanilla extract", "sameAs": "https://en.wikipedia.org/wiki/Vanilla_extract"}, {"@type": "Thing", "name": "Emulsion", "sameAs": "https://en.wikipedia.org/wiki/Emulsion"}, {"@type": "Thing", "name": "Cake decorating", "sameAs": "https://en.wikipedia.org/wiki/Cake_decorating"}, {"@type": "Thing", "name": "Confectionery", "sameAs": "https://en.wikipedia.org/wiki/Confectionery"}, {"@type": "Thing", "name": "Vegetable shortening", "sameAs": "https://en.wikipedia.org/wiki/Shortening"} ] }

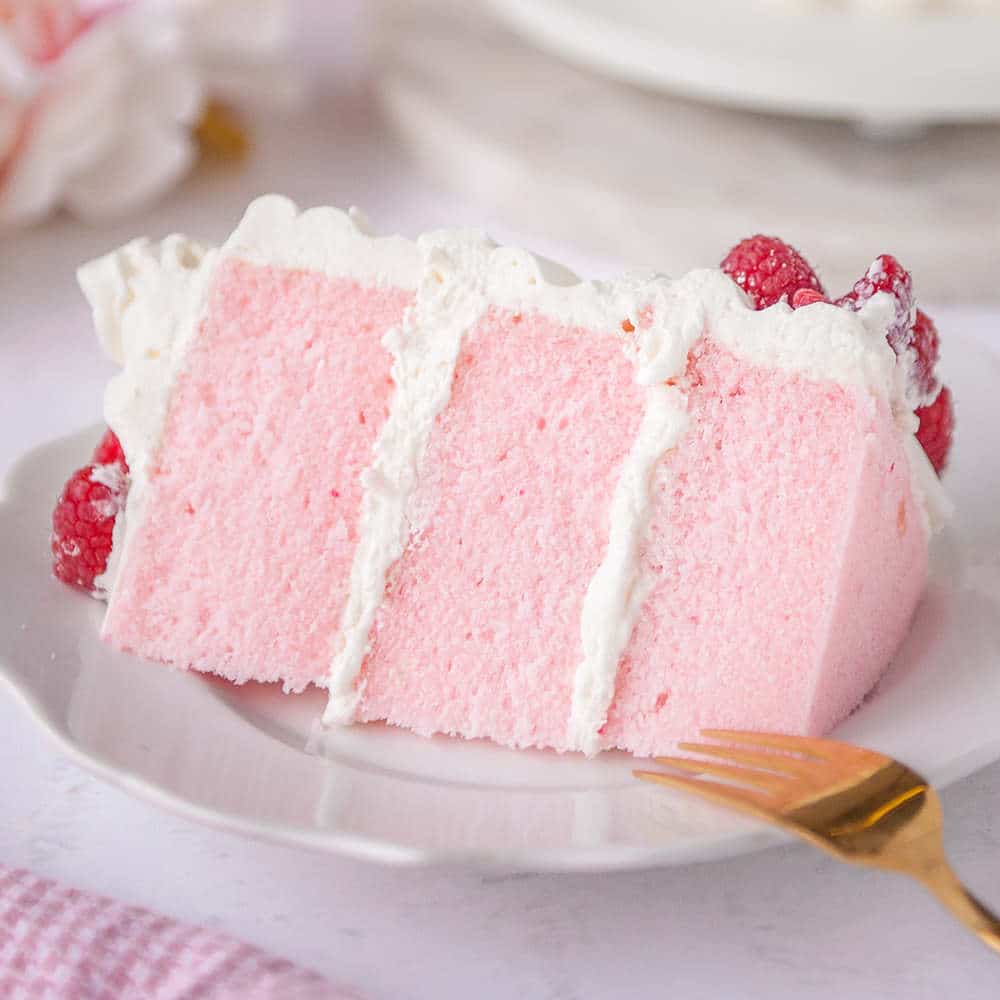
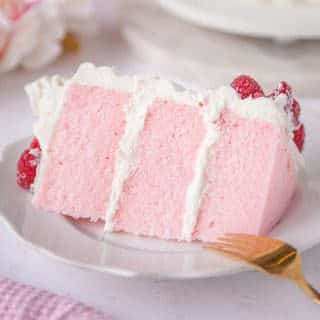
slice of pink velvet cake with whipped cream frosting and fresh raspberries on a white plate

January 28, 2020 Cake

Pink Velvet Cake

Homemade Pink velvet cake covered in a thick layer of stabilized whipped cream and fresh raspberries. If you loved my white velvet buttermilk cake and my red velvet cake, this is the cake for you. This pretty pink cake is perfect for Valentine's Day. 

slice of pink velvet cake with whipped cream frosting and fresh raspberries on a white plate

What does pink velvet cake taste like?

Pink velvet cake is a vanilla-flavored cake. The pink color comes from just a touch of pink food coloring although you could use natural colorings like strawberry or raspberry emulsion to get that pretty pink color without any artificial colors. 

I like to use a liquid pink food coloring instead of a gel because it mixes into the milk/egg mixture better than a gel which can leave behind a few specks. If all you have is gel food coloring then mix it with a teaspoon of warm water and stir well before adding it into your cake batter. 

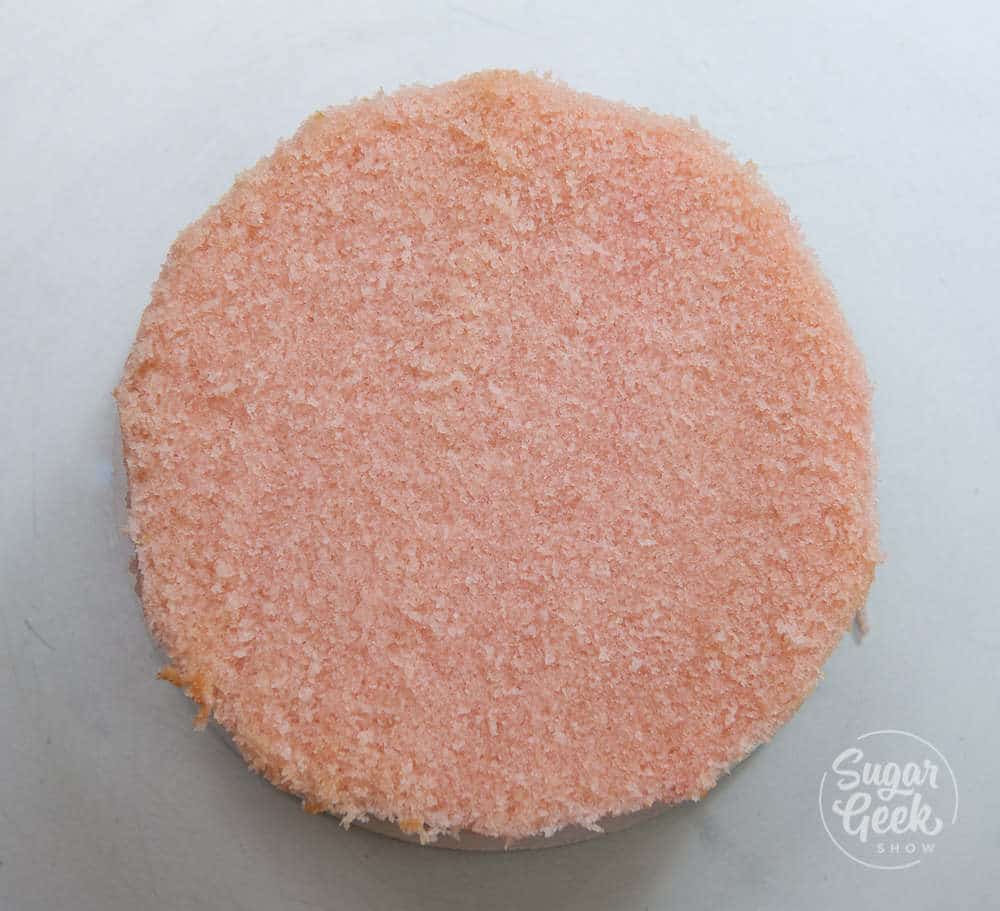
pink velvet cake layer showing the crumb

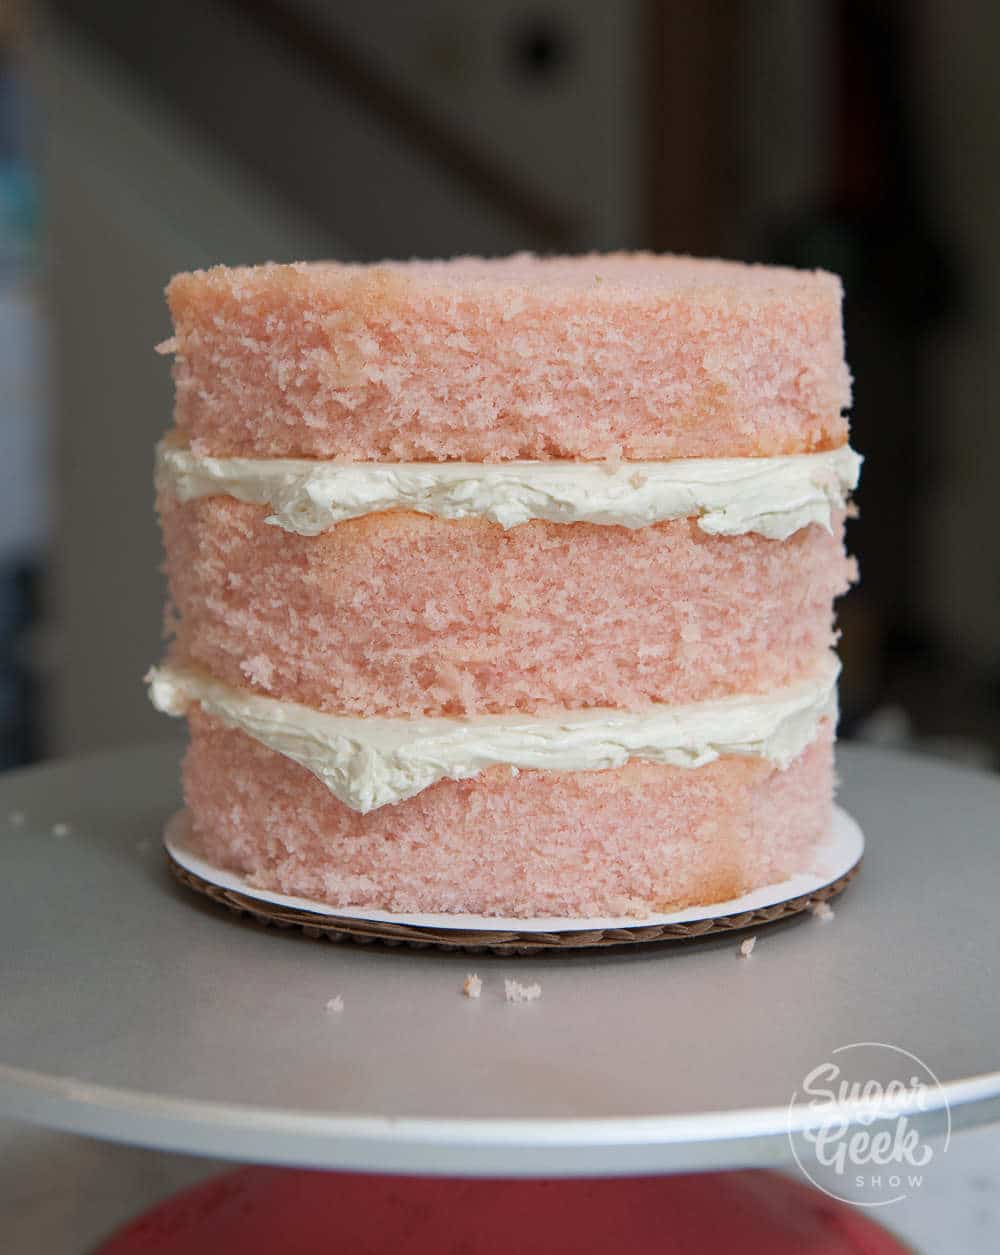
three layers of pink velvet cake with whipped cream in between the layers

How do you make a pink velvet layer cake?

Making a layer cake doesn't have to be hard. Follow these simple steps to making a beautiful pink velvet layer cake. 

  1. Bake your pink velvet cake layers and let them cool
  2. Trim off the dome and the brown sides of the cake if you want your cake slice to be really pretty
  3. Make your stabilized whipped cream
  4. Place your first layer of cake onto your cake board or plate
  5. Use an offset spatula to spread a layer of whipped cream on top of the cake then place your second layer of cake on top of the whipped cream. Repeat with the final layer of cake. 
  6. Spread a thin layer of whipped cream all over your cake and then put the whole cake into the freezer for 10 minutes
  7. Spread a final layer of whipped cream on top of the cake
  8. Use a bench scraper to make the sides straight and an offset spatula to make the top flat
  9. Optional: use a cake comb to make the sides more interesting
  10. Finish the cake design with some swirls of whipped cream on top using a 1M piping tip and finish with some fresh raspberries. 
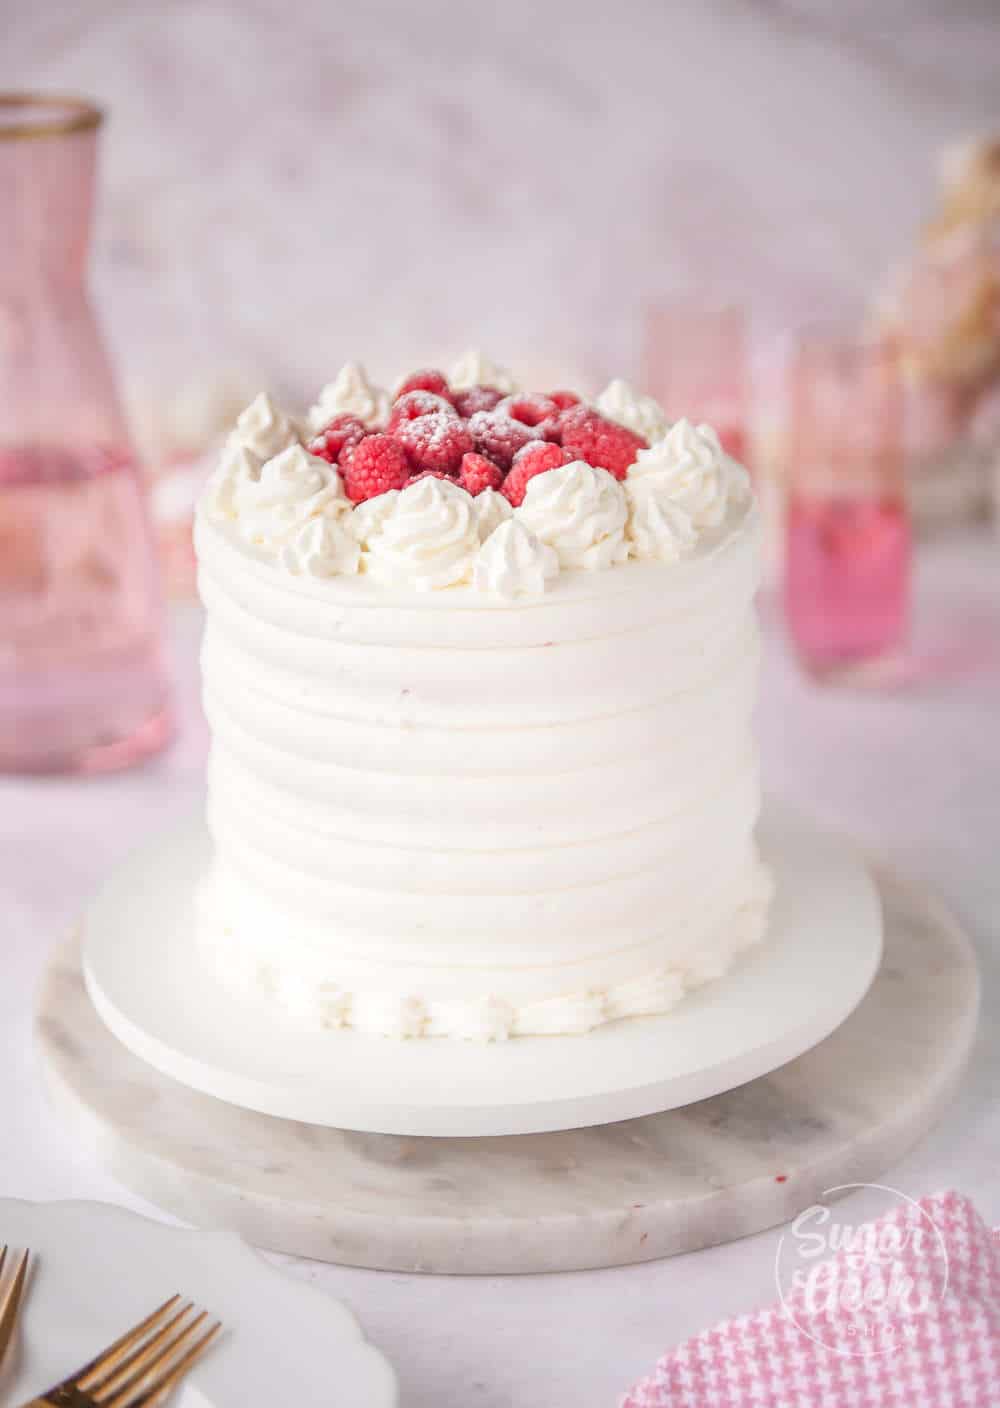
pink velvet cake frosted in stabilized whipped cream with fresh raspberries on top

If you want to learn more about the basics of stacking and frosting a cake you can check out this tutorial on making your first cake. 

how to make a cake tutorial

What makes a cake velvet cake?

A lot of people ask what makes a cake a velvet cake. The answer is in the texture of the cake. Velvet cakes make use of buttermilk and sometimes vinegar that reacts with baking soda to create a delicious velvet-textured cake. 

Buttermilk is one of those magical ingredients that really adds tenderness to baked goods. It also leaves behind a slightly tangy flavor that cuts down on the sweetness of a cake. 

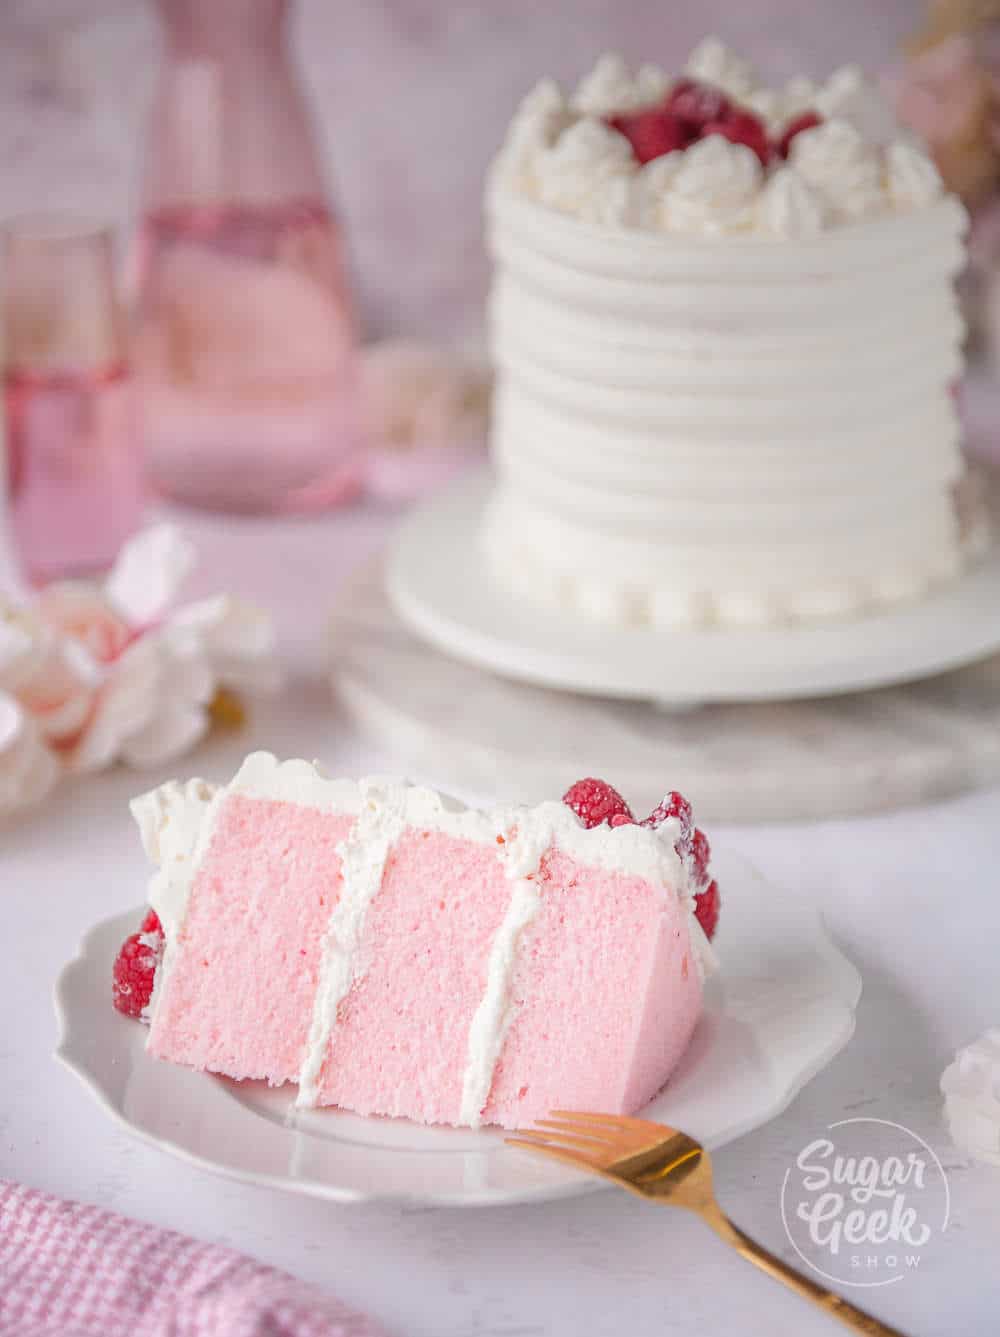
slice of pink velvet cake on a white plate in front of pink velvet layer cake in the background

What makes velvet cake so moist?

Velvet cakes are super moist because of the buttermilk and the oil. No need for simple syrup, these cakes stay moist for days. 

Don't have buttermilk? It's ok! You can substitute buttermilk for 10 ounces of milk with 2 Tablespoons of white vinegar or lemon juice added. Stir and let sit for 5 minutes then add it to your recipe. 

Pink velvet cake with stabilized whipped cream should be stored in the refrigerator because of the dairy in the whipped cream but cold cake doesn't taste so great. I take my cake out of the fridge for about an hour or two before it will be served to give the cake a chance to warm up. 

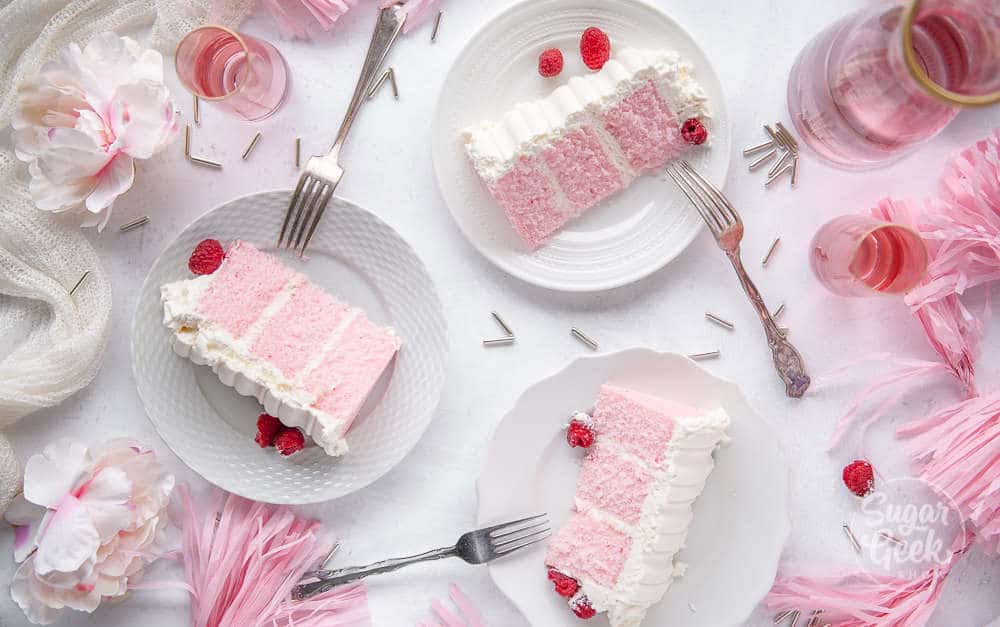
three slices of pink velvet cake on white plates shot overhead

Other velvet cake recipes you might enjoy

Black Velvet Cake
Authentic Red Velvet Cake With Cream Cheese Frosting
White Velvet Cake With Ermine Frosting
Green Velvet Cake

Cake Batter and Frosting Calculator

Select an option below to calculate how much batter or frosting you need. Adjust the servings slider on the recipe card to change the amounts the recipe makes.

Choose a pan type

Choose a cake pan size
(based on 2" tall cake pan)

Choose a cake pan size
(based on 2" tall cake pan)

Choose a cake pan size
(based on 2" tall cake pan)

Cupcake Tin Size

Choose number of pans

Cups of Batter Needed

8 cups

Cups of Frosting Needed

5 cups

Note: measurements are estimated based off the vanilla cake recipe using standard US cake pans and sizes. Measurements used are for 2" tall cake pans only. Your results may vary. Do not overfill cake pans above manufacturer's recommended guidelines.

Recipe

slice of pink velvet cake with whipped cream frosting and fresh raspberries on a white plate
Print Recipe
4.90 from 141 votes

Pink velvet buttermilk cake recipe

Homemade pink velvet cake gets its flavor and velvety texture from buttermilk. The stabilized whipped cream and fresh raspberries add a touch of sweetness. A moist, tender cake that is great for any special occasion. This recipe makes three 6"x2" tall cakes.
Prep Time10 minutes mins
Cook Time40 minutes mins
Total Time40 minutes mins
Course: Dessert
Cuisine: American
Servings: 8 cups
Calories: 656kcal
Author: Liz Marek

Equipment

  • Stand Mixer
  • Whisk Attachment
  • Paddle Attachment

Ingredients

Pink Velvet Cake Ingredients

  • 13 oz cake flour
  • 12 oz granulated sugar
  • 1 teaspoon salt
  • 1 tablespoon baking powder
  • ½ teaspoon baking soda
  • 5 oz egg whites room temperature
  • 4 oz vegetable oil
  • 10 oz buttermilk room temperature or slightly warm
  • 6 oz butter unsalted and softened
  • 2 teaspoon vanilla
  • 2 drops electric pink food coloring

Stabilized Whipped Cream

  • 24 ounces Heavy whipping cream
  • 4 ounces powdered sugar
  • 2 teaspoons powdered gelatin
  • 1 Tablespoon cold water
  • 1 teaspoon vanilla extract
  • 1 teaspoon heavy whipping cream
  • 1 cup fresh raspberries (optional) garnish
US Customary - Metric

Instructions

  • NOTE: It is SUPER IMPORTANT that all the room temperature ingredients listed above are room temperature and measured by weight so that the ingredients mix and incorporate correctly.
    Heat oven to 335º F/168º C — 350º F/177º C. I tend to use lower setting to prevent my cakes from getting too dark on the outside before the inside is done baking.
  • Prepare two three 6"x2" cake pans with cake goop or another preferred pan spray. Fill your pans about ¾ of the way full of batter. 
  • Combine flour, sugar, baking powder, baking soda and salt in the bowl of a stand mixer with the paddle attachment. Mix 10 seconds to combine. 
  • Combine ½ cup of the milk and the oil together and set aside. 
  • Combine the remaining milk, egg whites, pink food coloring and vanilla together, whisk to break up the eggs and set aside. 
  • Add your softened butter to the dry ingredients and mix on low until mixture resembles a coarse sand (about 30 seconds). Add in your milk/oil mixture and let mix until dry ingredients are moistened and then bump up to med (setting 4 on my kitchenaid) and let mix for 2 minutes to develop the cakes structure. If you don't let your cake mix on this step your cake could collapse. 
  • Scrape your bowl and then reduce speed to low. Add in your egg white mixture in three batches, letting the batter mix for 15 seconds between additions. 
  • Scrape down the sides again to make sure everything has incorporated then pour into prepared pans.
    Bake 35-40 minutes until a toothpick inserted into the center comes out cleanly but the cake has not begun to shrink yet from the sides of the pan. 
    IMMEDIATELY TAP PAN FIRMLY on countertop once to release the steam from the cake. This stops the cake from shrinking. 
  • Let cakes cool for 10 minutes inside the pan before flipping them out. The cake will shrink a bit and that is normal. Flip onto a cooling rack and let cool fully. I chill my cakes before handling or you can wrap them in plastic wrap and freeze them to trap moisture in the cake. Thaw on the countertop while still wrapped before frosting. 

Stabilized Whipped Cream

  • Sprinkle your gelatin over the water and let bloom for 5 minutes. 
  • Melt gelatin for 5 seconds in the microwave. If not fully melted do another 3 seconds. You can tell gelatin is melted when there are no granules of unmelted gelatin visible.
    After dissolving your gelatin, add in 1 teaspoon of heavy cream and mix. If your gelatin is too cold, heat again until it's melted (5 seconds).
  • In a cold mixing bowl, whip your heavy cream to soft peaks
  • Add in your powdered sugar and vanilla and mix until combined
  • Turn your mixer down to low and drizzle in your gelatin and mix until whipped cream forms stiff peaks. Do not over-mix or your whipped cream will turn into butter.

Video

Notes

IMPORTANT: Make sure all your ingredients are at room temp and you're using a scale to measure. Substituting ingredients may cause this recipe to fail. (see notes at the bottom of the recipe)
Important Things To Note Before You Start
1. Bring all your ingredients to room temperature or even a little warm (eggs, buttermilk, butter, etc) to ensure your batter does not break or curdle. 
2. Use a scale to weigh your ingredients (including liquids) unless otherwise instructed (Tablespoons, teaspoons, pinch etc). Metric measurements are available in the recipe card. Scaled ingredients are much more accurate than using cups and help ensure the success of your recipe. 
3. Practice Mise en Place (everything in it's place). Measure out your ingredients ahead of time and have them ready before you start mixing to reduce the chances of accidentally leaving something out.
4. Chill your cakes before frosting and filling. You can cover a frosted and chilled cake in fondant if you wish. This cake is also great for stacking. I always keep my cakes chilled in the refrigerator before delivery for easy transporting. 
5. If the recipe calls for specific ingredients like cake flour, replacing it with all purpose flour and cornstarch is not recommended unless specified in the recipe that it’s ok. Substituting ingredients may cause this recipe to fail. 

Nutrition

Serving: 1serving | Calories: 656kcal | Carbohydrates: 62g | Protein: 7g | Fat: 43g | Saturated Fat: 29g | Cholesterol: 111mg | Sodium: 410mg | Potassium: 226mg | Fiber: 1g | Sugar: 39g | Vitamin A: 1233IU | Vitamin C: 1mg | Calcium: 115mg | Iron: 1mg


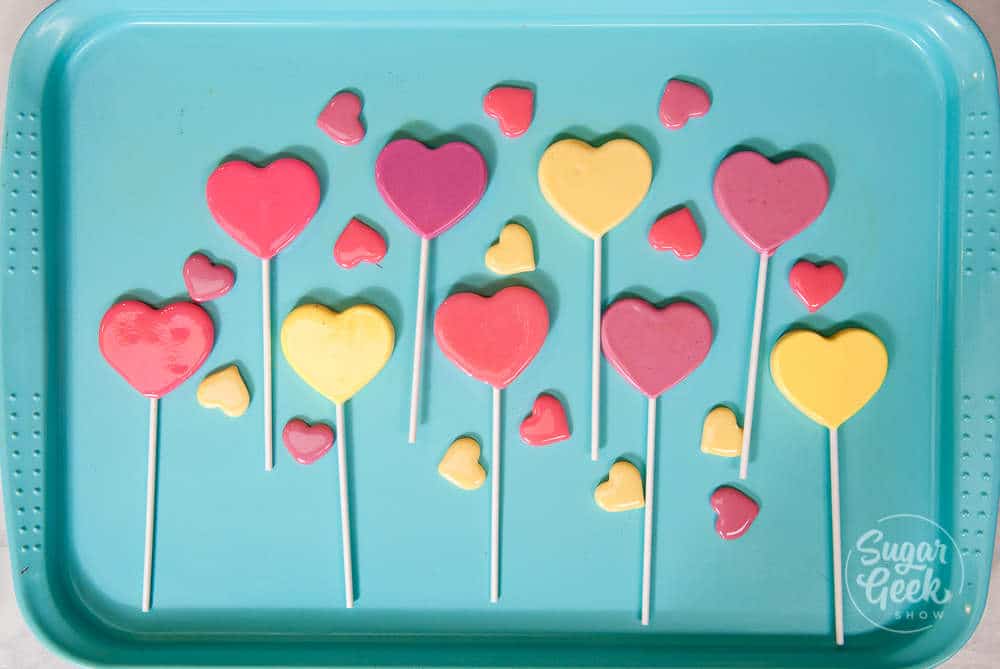
heart lollipops on a blue background

January 24, 2020 Blog

Heart Lollipops

I love the holidays! It's the perfect excuse to make a treat like these heart lollipops! Every year for Valentine's Day, I make a tutorial for my YouTube channel. I've made countless mirror glaze cakes, marbled cookies, giant Hershey kisses cakes, golden drip cakes, cream tarts, and 24-layer chocolate cakes. 

heart lollipop recipe

Be sure to check out my marbled lollipop cake and meringue pop cake if you want more lollipop projects!

This year I was inspired by a candy that I don't usually like to eat but is a Valentine's day icon. The conversation heart! 

Funny enough, I bought a bag of these to use as a color reference and Avalon wanted to try one. I thought for sure she wouldn't like them but she really did! Must be a kid thing. I'm pretty sure I loved them when I was a kid too. 

heart lollipops

What ingredients do you need to make homemade heart lollipops 

The ingredients for making your own heart lollipops are actually very simple. 

Granulated Sugar - the main ingredient in lollipops is sugar of course!
Corn Syrup - Also a type of sugar, but it helps keep the lollipops from crystallizing
Distilled Water - Important for keeping your lollipop mixture from turning yellow. I got a gallon for $1 at my grocery store. 
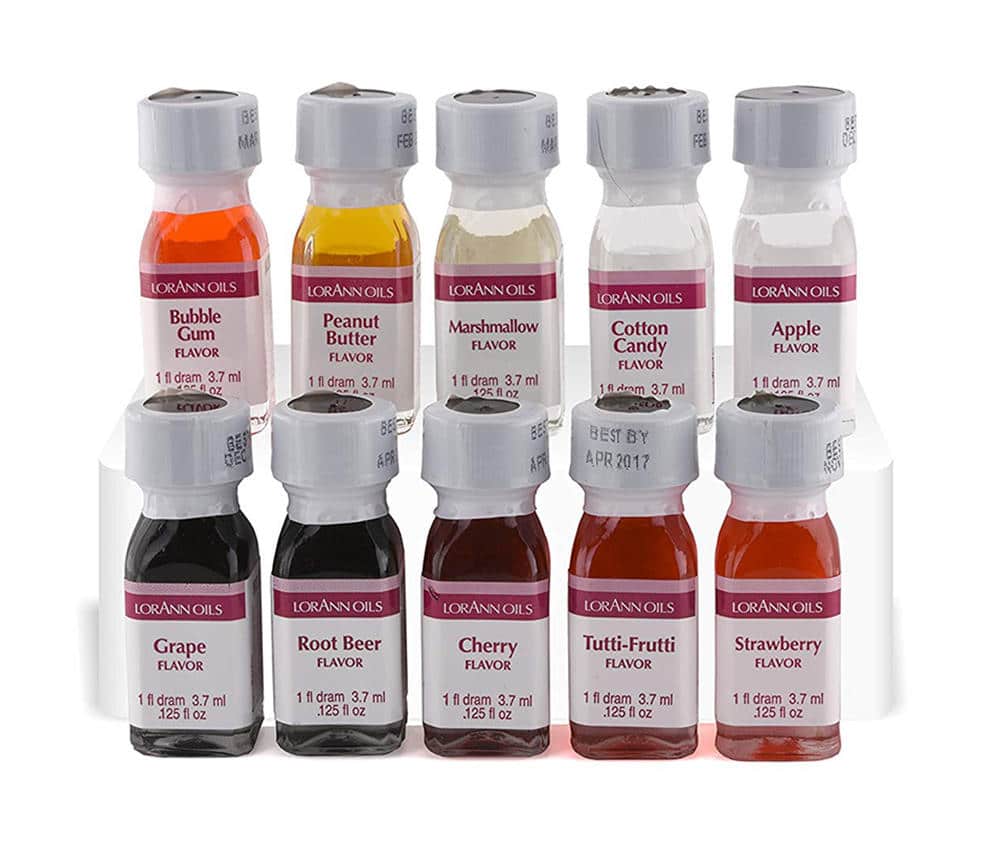
Candy Flavoring - Very important unless you want your lollipops to just taste like straight sugar. 
Liquid Food coloring - I find that regular liquid food coloring works best (not gel) 
White Food Coloring - A drop of white food coloring makes the lollipops opaque. Leave this part out if you want them to be clear. 
Citric Acid - Adds a bit of tartness to your candy. Totally optional. 

candy flavoring

What Equipment And Tools Do You Need To Make Heart Lollipops?

To make candy, we're going to need a few supplies. You can purchase these online or in the candy decorating aisle at stores like Michaels or Joanns.   

  • Stainless steel pot with a heavy bottom to evenly distribute heat
  • Candy thermometer 
  • Lollipop sticks
  • Silicone Heart Mold
  • Culinary torch
  • Silicone gloves for protecting your hands
  • Large bowl filled with ice and water
  • Three silicone bowls for mixing

How do you make the lollipop candy?

Making the heart lollipop candy is super simple. Most of the time is spent waiting for the sugar to reach the correct temperature. 

making homemade lollipops

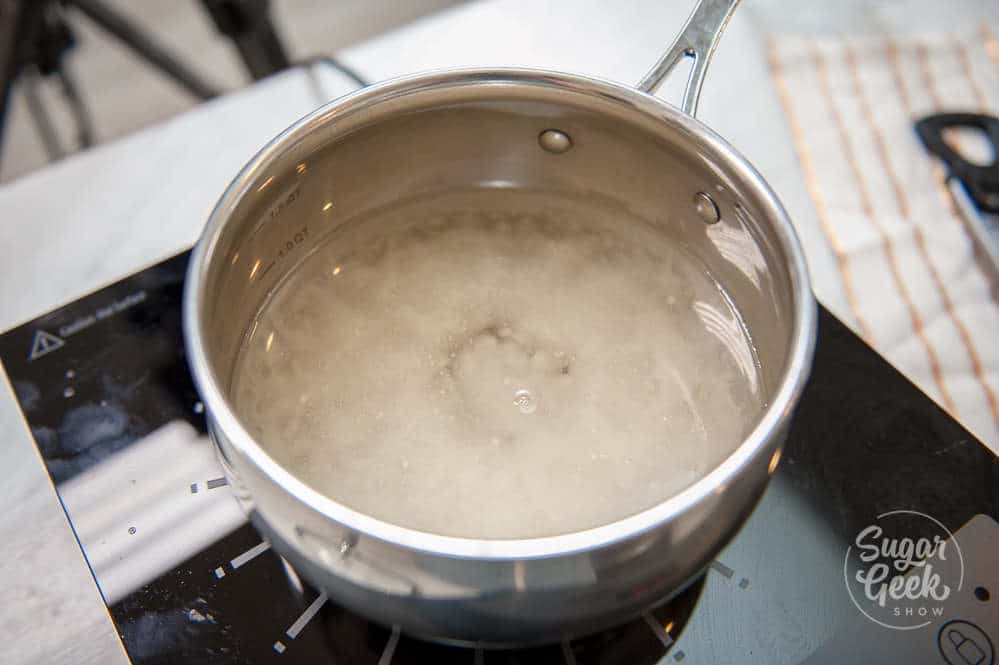
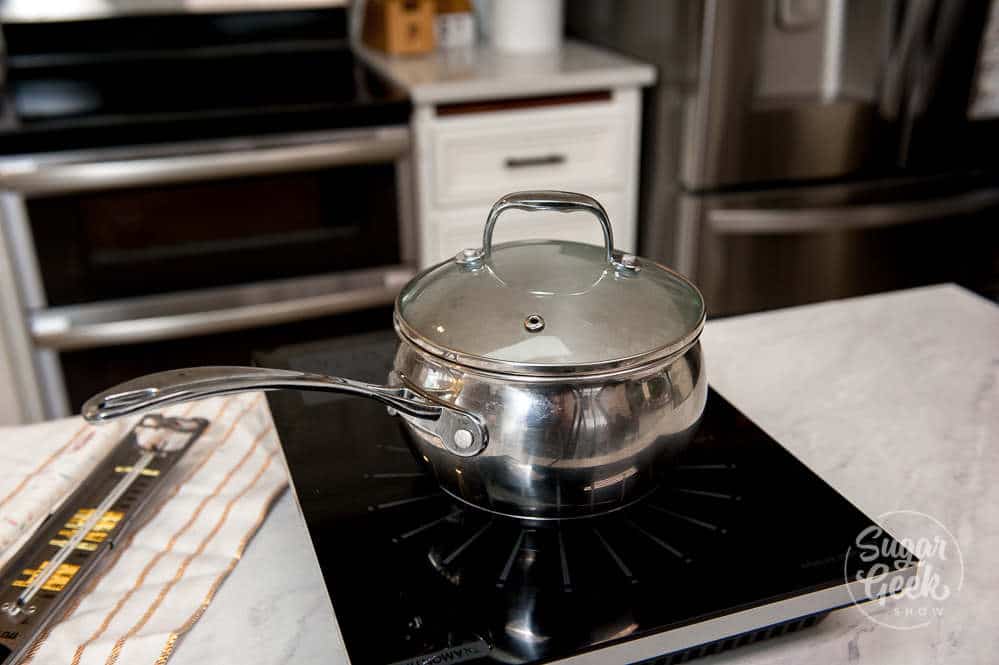
Place your sugar, water and corn syrup into a medium-sized saucepan. Cover it with a lid and bring to a boil over medium-high heat. Leave the lid on for 5 minutes to ensure all the sugar granules dissolve then remove the lid. Do not stir your mixture at all, this can cause crystallization. 

lollipop candy covered with lid to prevent crystallization

Reduce the heat to medium and insert your candy thermometer to the side of your saucepan. Continue to let the lollipop mixture cook (without stirring) until the thermometer reaches 300ºF which is the hard crack stage. 

Immediately take your saucepan off the heat and immerse the bottom of the pan into the bowl of ice water to stop the cooking process. Stir in your citric acid if desired. Your lollipop candy is now ready to be flavored and colored!

How to make the heart lollipops

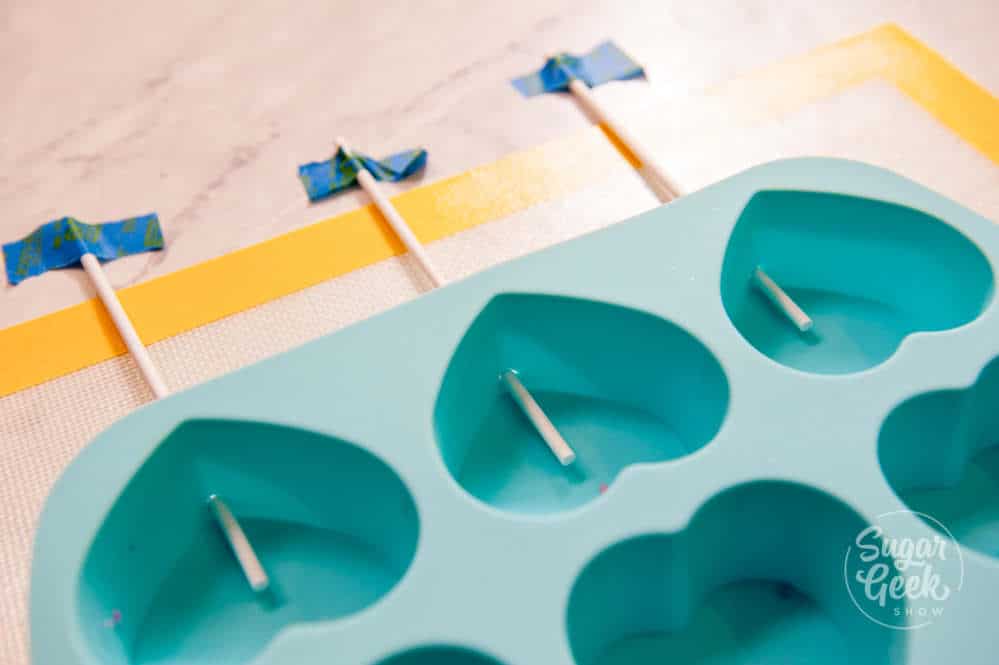
Use an x-acto blade to poke a small X into the base of each heart, about ⅛" from the bottom to make room for the lollipop stick. Insert a lollipop stick into each hole and push the stick into the mold about halfway. Make sure the lollipop stick is not touching the bottom of the mold so the candy can reach all sides. I taped down the sticks to make sure they stayed straight. 

preparing the lollipop mold

Divide your candy into three silicone containers. Add in a drop of white food coloring and regular liquid food coloring and then one dropper full (about ¼ teaspoon) of flavoring into the bowl and then stir with a lollipop stick. 

If your sugar get's too cold, just put it in the microwave for 10 seconds to warm it up again. Make sure you wear your gloves to avoid getting any sugar burns. 

Pour your sugar into the prepared mold just until the top of the stick is covered. 

lollipop mold filled with homemade lollipop candy

Let the heart lollipops cool down completely before unmolding them. I used my creme brulee torch to make the backside of the heart shiny. 

Immediately place the heart lollipops into wrappers to keep them from getting sticky or use them as cake toppers! They will get a little sticky and this is normal. 

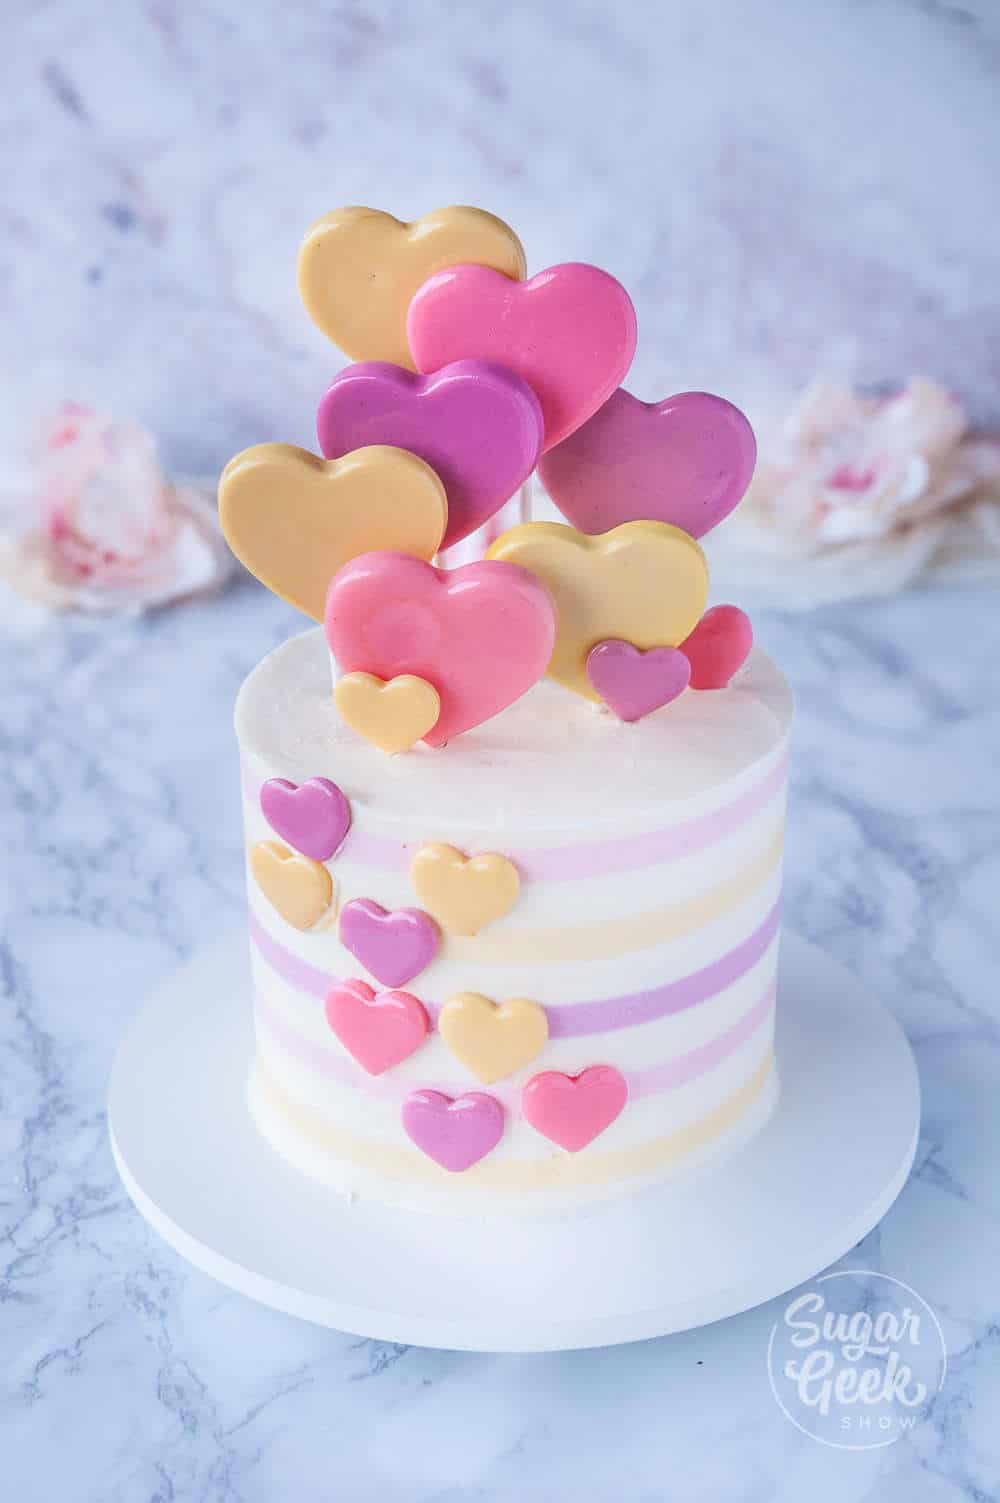
heart lollipop cake

I also used the leftover lollipop sugar to make these little candy hearts! 

homemade candy hearts

Recipe

heart lollipops
Print Recipe
5 from 5 votes

Heart lollipop recipe

Homemade heart lollipops are fun and easy to make. The flavors and colors can be easily customized. The perfect homemade treat!
Prep Time5 minutes mins
Cook Time30 minutes mins
cooling15 minutes mins
Total Time35 minutes mins
Course: Dessert
Cuisine: American
Servings: 12 lollipops
Calories: 214kcal
Author: Liz Marek

Equipment

  • Candy Thermometer
  • Kitchen Torch (optional)
  • Silicone Heart Mold

Ingredients

Lollipop Recipe

  • 16 oz granulated sugar
  • 10 oz corn syrup
  • 4 oz distilled water (or bottled)
  • 1 ½ teaspoon candy flavoring
  • white food coloring
  • liquid food coloring (optional)
  • 1 teaspoon citric acid
US Customary - Metric

Instructions

  • Prepare your lollipop mold by poking a small x in the base of the heart mold (see blog post for photo example) and inserting lollipop sticks.
  • Combine sugar, corn syrup and water in a heavy-bottomed, stainless steel pot over med-high heat. Bring to a boil
  • Cover the mixture with the lid and let condensation build for 5 minutes (this helps to wash the sugar off the sides of the pan). Remove lid and reduce heat to medium. 
  • Insert candy thermometer and let mixture cook (do not stir) until it reaches 300ºF.
  • Remove mixture from heat and stir in citric acid
  • Divide the mixture into three silicone bowls and add ½ teaspoon of flavoring to each bowl and then the desired amount of food coloring. I did one drop each of white and liquid food coloring per bowl. Stir until combined.
  • If your sugar gets too hard, microwave it to soften for about 10 seconds. Then pour into your prepared lollipop molds and let harden before removing them.
  • Torch the backside of the lollipops with a creme brulee torch to make them shiny then wrap in lollipop packaging or use as a cake topper. Lollipops will be sticky.

Video

Nutrition

Serving: 1lollipop | Calories: 214kcal | Carbohydrates: 56g | Fat: 1g | Sodium: 15mg | Sugar: 56g | Calcium: 3mg | Iron: 1mg

overhead shot of homemade gummy bears

January 23, 2020 Candy

Gummy Bear Recipe

This gummy bear recipe has the perfect chew and tastes just like real gummy bears. This recipe has been updated (12/05/2025) so it no longer includes sorbitol, making it even easier to make! The original recipe can still be found in the notes section of the recipe card.

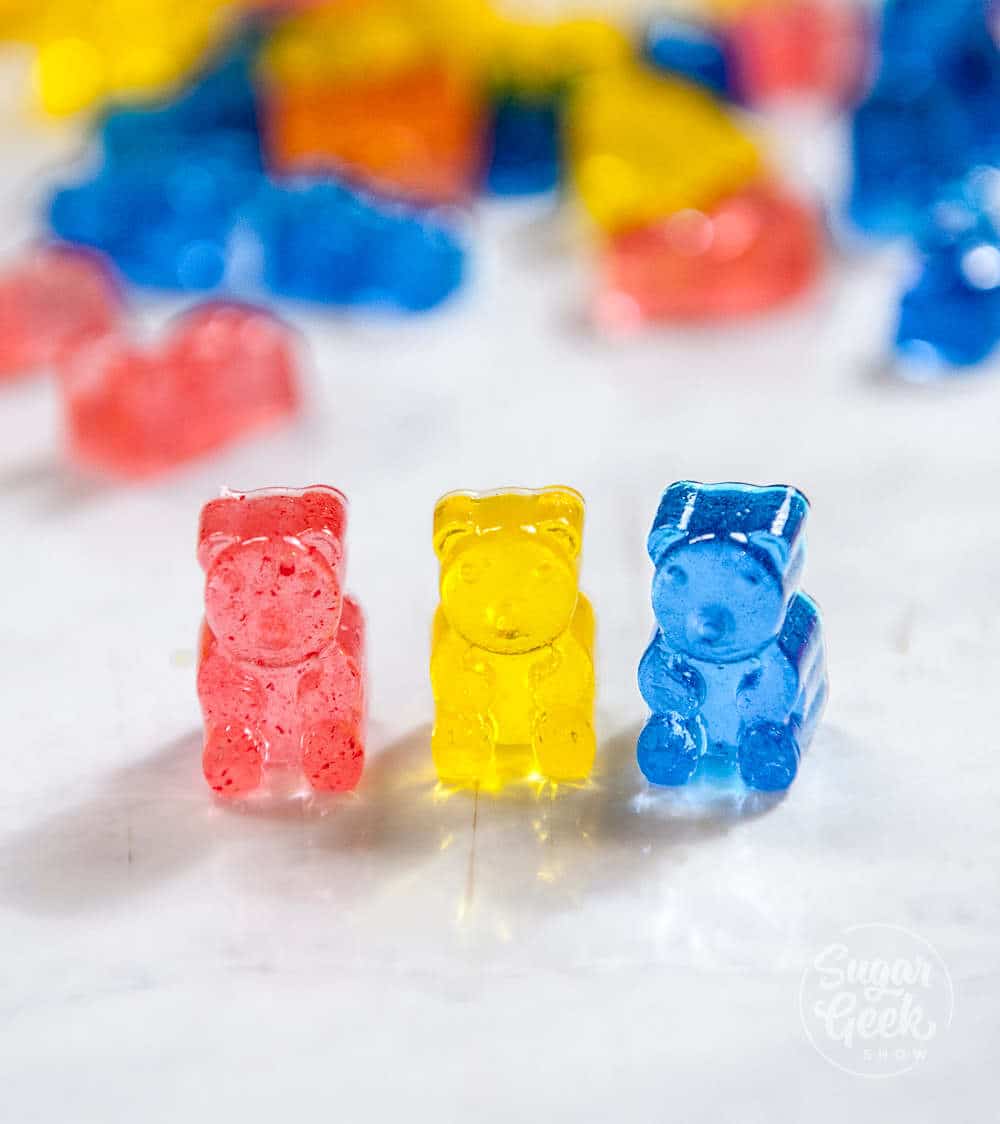
overhead shot of homemade gummy bears

The best part is, these do not need to be refrigerated. Just like real gummy bears, you can put these in a bag and eat them at any time.

There are some special ingredients in this recipe that you will probably have to buy ahead of time, though so be sure to check out the shopping list before you start.

If you want to take your homemade candy to the next level, try making kohakutou crystal gummy candy that looks just like precious gemstones.

What's In This Blog Post

  • Gummy Bear Ingredients
  • What tools do you need for this gummy bear recipe?
  • Gummy Bear Instructions
  • Making the gummy bears
  • FAQ
  • Other Gummy Recipes You Might Like

Gummy Bear Ingredients

Before you get started, get your ingredients together. You will probably need to order some of these online, but shipping is fast and easy!

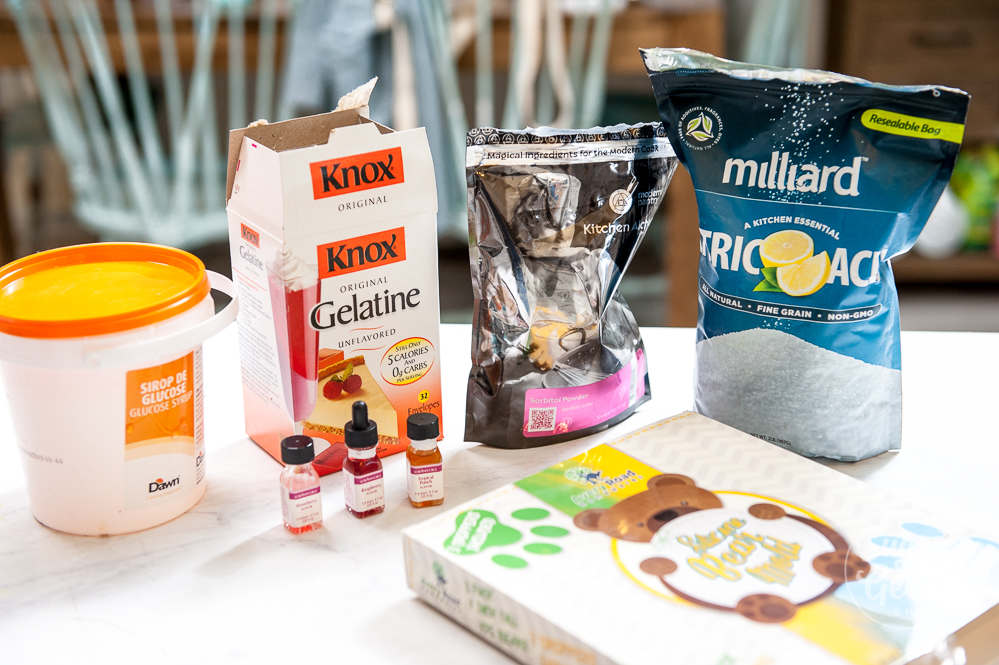
gummy bear recipe ingredients

Granulated Sugar - The main sweetener in this recipe, which you probably already have
Water or flavored liquid like juice - I like to use water and then use candy flavorings and food coloring for my gummy bears, but you can use fruit juice and leave out the granulated sugar for a healthier option.
Glucose - Gives the gummy bears that chewy texture and keeps them nice and soft. You can also replace glucose with corn syrup, golden syrup, or honey for a more natural option.
Gelatin - Helps set the gummy bears and gives them a nice chew. You can replace gelatin with agar agar if you would like a vegetarian option, but be sure to follow the substitution suggestions on the box.
Citric Acid - This is actually really easy to find in grocery stores with the canning supplies. Citric acid is the sour taste from citrus fruits and gives gummy bears that tart flavor.
Candy Flavoring - I'm using Lorran oils candy flavoring, which can be found at stores that sell candy-making supplies like Michaels or Joann's. If you're using juice, you can leave this part out.

What tools do you need for this gummy bear recipe?

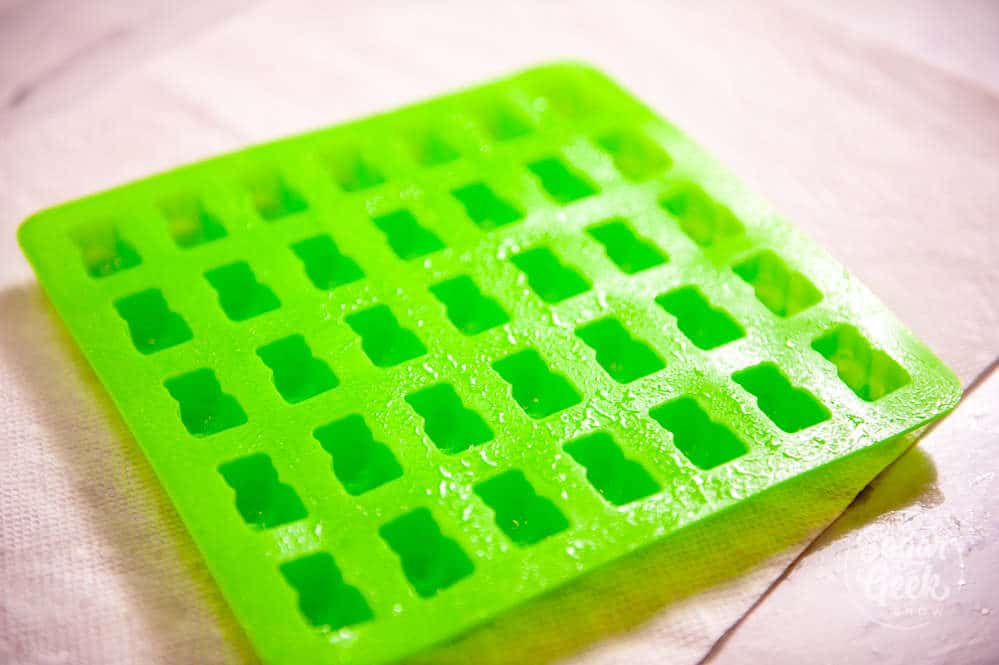
It's pretty hard to make gummy bears without a gummy bear mold! I got this one off of Amazon, and it came with three droppers as well. A great deal!

gummy bear mold

It's also a good idea to have a scale for measuring your ingredients. Using cups is not super accurate so your results may not turn out the same if you try to convert. Read my blog post on how to use a kitchen scale for baking.

The only other tools you will need are a medium-sized saucepan and some food coloring if you want to color your gummy bears.

Gummy Bear Instructions

Making the actual gummy bear recipe is super simple.

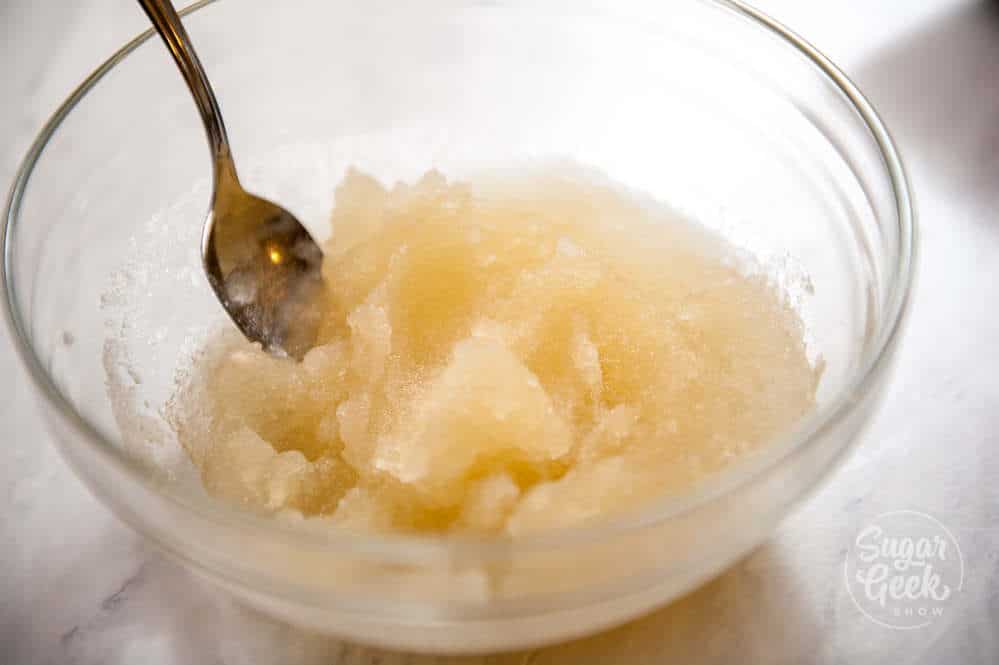
  1. Pour your gelatin into your water or juice and stir to combine. Let the gelatin absorb the liquid for 5 minutes.gelatin and water mixture
  2. Combine together your sugar and water in your saucepan and bring it to a boil until it reaches 240ºF.
  3. Then add in your gelatin mixture and stir until it's all melted.
  4. Remove the pot from the heat and stir in your corn syrup and the citric acid.
  5. Let your mixture sit for 5-10 minutes so the foam can rise to the surface.
  6. Scoop off your foam. If you don't scoop off the foam, it won't go away later. I just use a spoon.
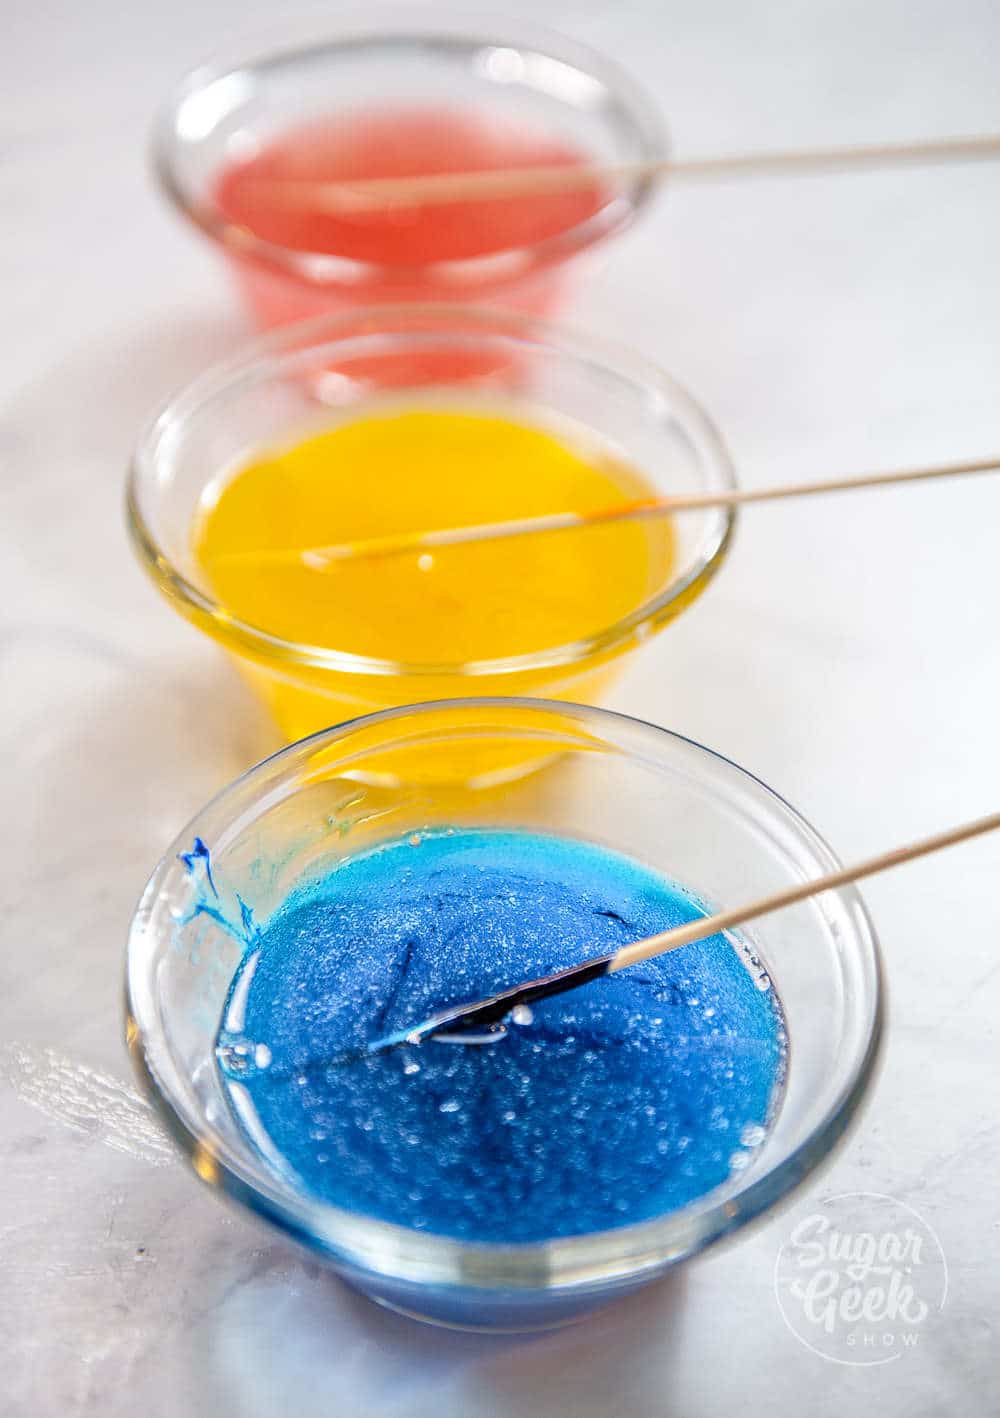
  7. Divide your gummy bear mixture into three bowls. I poured mine through a strainer to remove any lumps of sugar or gelatin left behind. gummy bear mixture divided into three bowls with coloring and flavoring added
  8. Next, add in your candy flavoring. I chose raspberry, strawberry, and tropical punch. My bottles came with a dropper, so I used about two full droppers per bowl. I guess about ½ teaspoon of flavoring.
  9. Then I added a drop of food coloring. Pink for the. strawberry, blue for the raspberry, and yellow for the tropical punch.

Making the gummy bears

I sprayed my mold with some grapeseed oil first so that the gummies come out nice and shiny, and it prevents sticking. Spray the molds, then turn them upside down on some paper towels to drain the excess oil.

gummy bear recipe

All that's left to do is use the dropper tool to fill our mold. You should have just enough gummy bear mixture to fill all three of your molds to the top.

Put your molds into the fridge for 6-24 hours before unmolding them!

FAQ

Can you make these gummy bears with alcohol?

You can make these gummy bears grown-up gummies by substituting the water for wine or vodka! Makes a great gift or treat for a party!

Other Gummy Recipes You Might Like


Wine Gummy Recipe
Beer Gummy Recipe
Homemade Jell-O Recipe

Recipe

gummy bear recipe
Print Recipe
4.86 from 308 votes

Gummy Bear Recipe

This gummy bear recipe makes shelf-stable gummy bears that taste just like the real thing! Switch up the flavors and colors and make them unique
Prep Time10 minutes mins
Cook Time5 minutes mins
cooling6 hours hrs
Course: Dessert
Cuisine: American
Servings: 105 gummy bears
Calories: 173kcal
Author: Liz Marek

Equipment

  • Food Scale
  • Gummy Bear Molds

Ingredients

  • 225 grams juice or water
  • 50 grams KNOX gelatin about 6 packets
  • 160 grams sugar
  • 60 grams water
  • 200 grams corn syrup glucose, honey or golden syrup can be subbed
  • 10 grams citric acid leave out if you're using alcohol
  • ¼ teaspoon candy flavoring I used raspberry, strawberry and tropical punch
US Customary - Metric

Instructions

  • Combine gelatin, and juice (or water) in a heatproof container. Stir gently to combine. Let sit for 5 minutes to give your gelatin time to bloom.
  • Combine the sugar and the water in a large saucepan and bring to a boil. Once the steam begins to disappear and the mixture begins to look thick and bubbly (around 240ºF) turn off the heat.
  • Add in the gelatin mixture in chunks, the corn syrup, citric acid and the candy flavoring.
  • Mix until everything is melted.
  • Let the mixture sit for 10 minutes and allow the mixture to clear and foam to collect at the top. After 10 minutes the foam should be able to be easily scooped off the surface with a spoon.
  • Transfer the mixture to a squeeze bottle and pipe into molds.
  • Let your gummy bears chill in the fridge for 6 hours until the bears are set but 24 hours is best. Once they are set they can be stored at room temperature.

Video

Notes

If your gummy mixture gets too thick, you can reheat it in 10-second increments to get it fluid again.
### **Original gummy bear recipe with sorbitol Formula**
* 8 ounces granulated sugar
* 3 tablespoons sorbitol
* 8 ounces corn syrup (glucose, honey, or golden syrup can be substituted)
* 6 ounces cool water (fruit juice, wine, or vodka can be substituted)
* 44 grams KNOX gelatin (about 6 packets)
* 2 teaspoons citric acid (leave out if using alcohol)
* 1 ½ teaspoons candy flavoring (raspberry, strawberry, tropical punch, etc.)
**Instructions**
1. Combine the gelatin and water (or flavored liquid) in a heatproof container. Stir gently to combine. Let sit for 5 minutes to allow the gelatin to bloom.
2. In a medium saucepan, combine the corn syrup, sugar, and sorbitol. Stir gently to combine, then bring to a simmer over medium–high heat.
3. Once simmering, wash down the sides of the pan with water using a clean pastry brush to dissolve any stray grains of sugar.
4. Remove the mixture from the heat. Add the citric acid and stir in the bloomed gelatin mixture with a spatula until the gelatin is fully melted.
5. Let the mixture sit for 10 minutes to allow it to clarify and for any foam to rise. After 10 minutes, skim the foam off the surface with a spoon.
6. Strain the liquid and divide it into bowls as needed. Add food coloring and candy flavoring to each portion. (Example: pink, blue, yellow.)
7. Lightly oil your gummy molds and wipe out the excess. Pour the mixture into the prepared molds.
8. Chill the molds in the refrigerator for **6 hours minimum**, or ideally **24 hours** for best texture. Once set, the gummies can be stored at room temperature.
--

Nutrition

Serving: 20gummy bears | Calories: 173kcal | Carbohydrates: 45g | Protein: 0.002g | Fat: 0.1g | Polyunsaturated Fat: 0.001g | Sodium: 2mg | Potassium: 3mg | Fiber: 0.004g | Sugar: 45g | Vitamin A: 0.02IU | Vitamin C: 0.02mg | Calcium: 1mg | Iron: 0.02mg
 
chocolate swiss meringue piped onto a cake

January 22, 2020 Blog

Chocolate Swiss Meringue Buttercream

Chocolate Swiss meringue buttercream (SMBC) is my favorite of all the buttercreams and fairly easy to make. It's incredibly silky smooth and tastes like chocolate ice cream!

chocolate swiss meringue piped onto a cake

Swiss meringue buttercream is made by dissolving sugar in egg whites at a very low heat. Then you whip them up into a thick meringue, let it cool, and then whip in some soft butter, salt, and vanilla extract.

You can change the flavor of Swiss meringue by adding in chocolate, different flavors of fruit puree, or just switching out the extracts.

If you don't want to bother with dissolving the sugar, you can always use my easy buttercream recipe which is a great shortcut that results in a smooth buttercream that is SUPER similar to traditional Swiss meringue buttercream but not quite as stable as Italian buttercream.

What's in this blog post

  • Ingredients
  • How to make the frosting
  • FAQ
  • Other recipes you might like

Ingredients

chocolate swiss meringue buttercream ingredients

Fresh egg whites are the base for a successful Swiss meringue buttercream. Fresh egg whites have a stronger protien structure than pastuerized egg whites so they are preferred. Just make sure you don't get any bits of egg yolk in the buttercream or that can cause your meringue to deflate.

Make sure your butter has been softened to room temperature (about 72ºF) so it whips in with the meringue without curdling. 

You can use melted chocolate or cocoa powder to make chocolate Swiss meringue buttercream. Melted chocolate will make a slightly stronger buttercream.

How to make the frosting

  1. Fill a medium-sized saucepan with about two inches of water and bring it to a simmer.
  2. Place your metal or glass mixing bowl on top of the simmering pot of water.
  3. The bottom of the bowl should not touch the water. Watch out for escaping steam, it can make the bowl hot to the touch.
  4. Place your egg whites and sugar in the bowl and whisk them together. Occasionally whisk the mixture to keep the outer edge of the egg whites from curdling and cooking. 
  5. Once the sugar is dissolved (feel with your fingers) you can remove the bowl from the pot of water.
  6. Place the mixing bowl onto the stand mixer and mix the egg whites into a very stiff meringue. This can take 5-10 minutes. Don't worry, you can't really over-do this part.
  7. The meringue tips should stand straight up to make stiff peaks and feel very dense when the meringue is whipped properly. 
  8. Place a bag of ice next to the bowl as you're mixing to cool the meringue down.
  9. Once your meringue has cooled, whip in your softened butter, cooled melted chocolate, vanilla, and salt. Make sure you whip until your buttercream no longer has any taste of butter. It should be very light and creamy and dissolve in your mouth. 
  10. After your buttercream has whipped, I like to switch to the paddle attachment and mix on low for 10 minutes to remove any excess air bubbles. 
chocolate swiss meringue buttercream

FAQ

Why won't my meringue whip up

Egg whites could have been too old or you got some grease in the mixture. Clean all your utensils again and use fresh egg whites. 

Why does my buttercream look curdled

When fat (butter) tries to mix with water (egg whites) it has to be the same temperature. If your buttercream is curdled, chances are your butter was too cold. Either torch the side of the bowl with a creme brulee torch while mixing on low until it comes together or remove ¼ cup of the mixture, melt it in the microwave and pour it back in to bring it all together. 

My buttercream is too soft

If your buttercream is too soft and seems soupy, it might be too warm. Put the whole bowl into the fridge for 20 minutes then try whipping again. 

The buttercream tastes gritty

You may not have dissolved your sugar all the way which can cause the meringue to crystalize. There isn't anything you can do to fix the grain other than starting over. 

My buttercream tastes like pure butter

It is very common for people to under whip the buttercream. If you taste butter, continue whipping. Incorporating air is what makes the buttercream taste so amazing. 

How do you store chocolate swiss meringue buttercream?

Chocolate swiss meringue buttercream can be kept at room temperature for 48 hours although I personally refrigerate after 24 hours if I don't need it. It can be kept in the fridge for 2 weeks or you can freeze it for 2 months or more. 
Always re-mix your buttercream before using it to make it creamy again. If it's cold, bring it to room temperature first, then whip until it's creamy and smooth. 

Other recipes you might like

Ermine Frosting
Cream Cheese Frosting
American Buttercream 
Swiss Meringue Buttercream

Cake Batter and Frosting Calculator

Select an option below to calculate how much batter or frosting you need. Adjust the servings slider on the recipe card to change the amounts the recipe makes.

Choose a pan type

Choose a cake pan size
(based on 2" tall cake pan)

Choose a cake pan size
(based on 2" tall cake pan)

Choose a cake pan size
(based on 2" tall cake pan)

Cupcake Tin Size

Choose number of pans

Cups of Batter Needed

8 cups

Cups of Frosting Needed

5 cups

Note: measurements are estimated based off the vanilla cake recipe using standard US cake pans and sizes. Measurements used are for 2" tall cake pans only. Your results may vary. Do not overfill cake pans above manufacturer's recommended guidelines.

Recipe

chocolate swiss meringue piped onto a cake
Print Recipe
4.91 from 962 votes

Chocolate Swiss Meringue Buttercream

Silky smooth, chocolate swiss meringue buttercream is light, creamy and melts in your mouth.
Prep Time20 minutes mins
Cook Time5 minutes mins
cooling10 minutes mins
Course: Dessert
Cuisine: American
Servings: 48 ounces
Calories: 118kcal
Author: Liz Marek

Equipment

  • Stand Mixer

Ingredients

Chocolate Swiss Meringue Buttercream

  • 8 ounces fresh egg whites
  • 16 ounces granulated sugar
  • 24 ounces unsalted butter softened
  • 4 ounces Chocolate (or cocoa powder) melted and cooled to 90º
  • ½ teaspoon salt
  • 2 teaspoons vanilla extract
US Customary - Metric

Instructions

  • Melt your chocolate in a heatproof bowl in 15 seconds until just melted. Do not overheat. Cool to 90ºF
  • Bring 2" of water to a boil in a medium saucepan then reduce heat until it's just simmering. Place your metal or glass mixing bowl on top. The bowl should not be touching the water.
  • Place egg whites and sugar in the bowl and whisk occasionally to dissolve the sugar and keep the egg whites from cooking. Once the mixture reaches 110ºF or you can no longer feel any granules of sugar in between your fingers, it's ready
  • Place the bowl on your stand mixer and whip on high until you reach VERY stiff peaks. The tips should stand straight up when you touch them and the meringue should feel very thick and dense.
  • Place a large bag of ice under the bowl as you're mixing to cool the meringue down.
  • Reduce the speed to low. Slowly add in your butter in small chunks, then your salt, melted and cooled chocolate and vanilla extract.
  • Increase the speed back to high and whip until the color is light and fluffy. Give it a taste, if it still tastes buttery, keep whisking.
  • Reduce the speed to low again and then drizzle in your cooled chocolate and vanilla and mix until smooth.

Video

Notes

Make sure you use fresh egg whites with no trace of egg yolk in them for the best results.
If you use melted chocolate, make sure it is cooled before adding it to the buttercream.
 

Nutrition

Serving: 2ounces | Calories: 118kcal | Carbohydrates: 11g | Protein: 1g | Fat: 8g | Saturated Fat: 5g | Cholesterol: 20mg | Sodium: 30mg | Potassium: 9mg | Fiber: 1g | Sugar: 10g | Vitamin A: 257IU | Calcium: 3mg | Iron: 1mg


strawberry cinnamon rolls

January 17, 2020 Blog

Strawberry Cinnamon Rolls

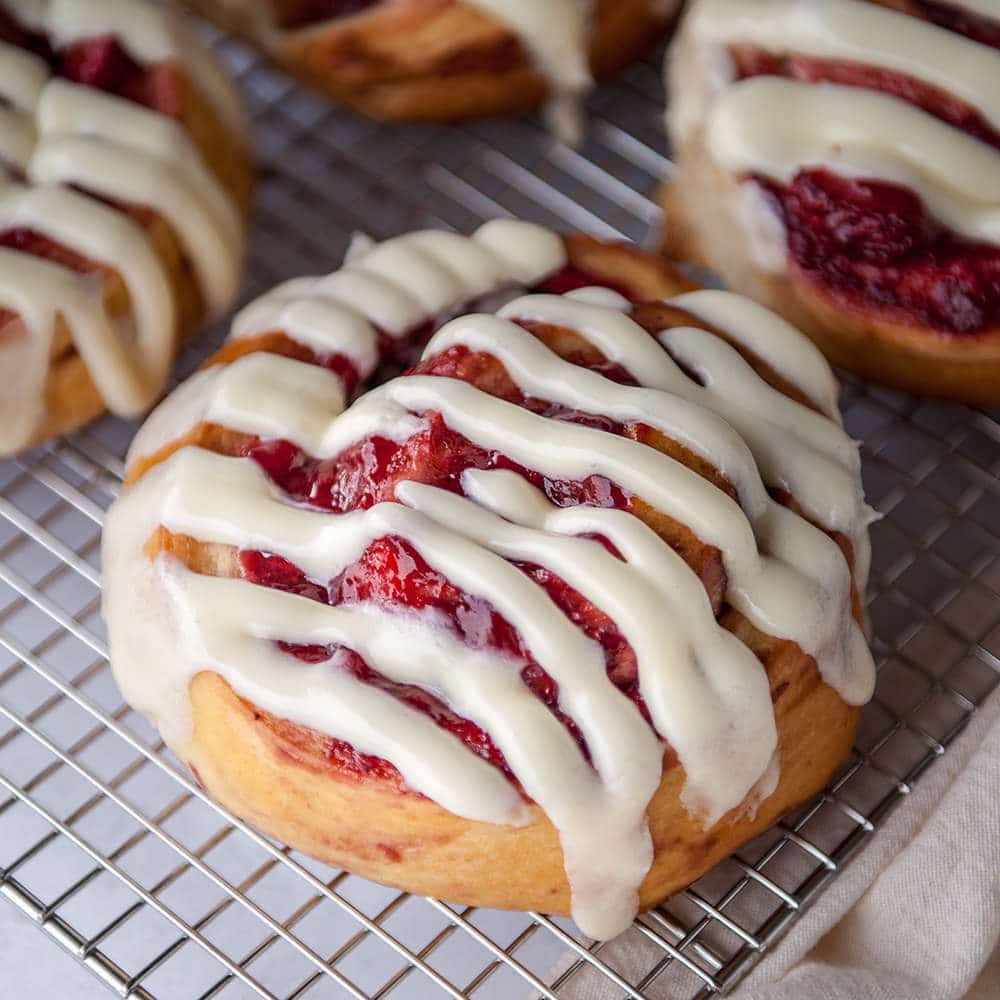
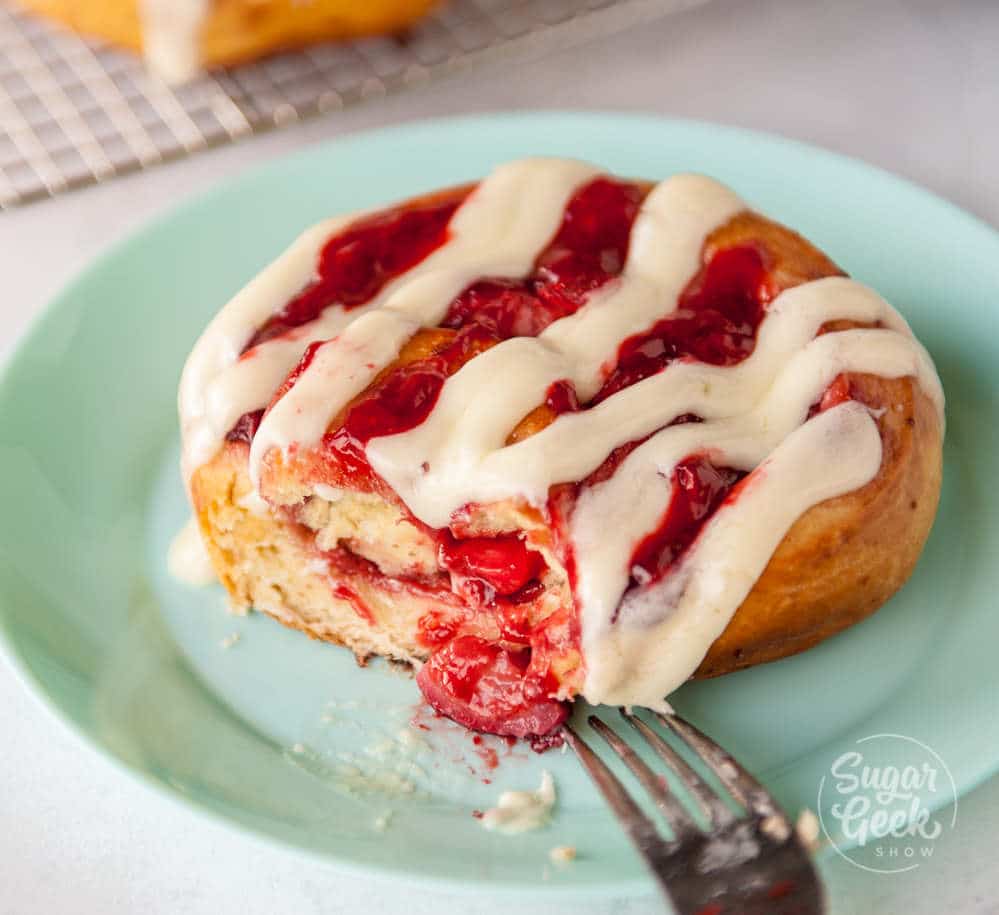
These strawberry cinnamon rolls are filled with thick strawberry reduction and fresh strawberries. Roll them up, cut them, and let them rise overnight. Bake them fresh in the morning and glaze with lemon cream cheese frosting while still warm for the most amazing strawberry cinnamon rolls ever!

strawberry cinnamon rolls

How to make a strawberry reduction for strawberry cinnamon rolls

Strawberry cinnamon rolls start off with strawberry reduction. I add a little bit more sugar to this recipe because the cinnamon rolls are not very sweet so you need that added sugar. 

Drizzle these with my cream cheese frosting without powdered sugar instead of a standard glaze. It melts into the warm rolls and tastes incredible.

fresh strawberries in strawberry cake

Unless strawberries are in season, I will use frozen strawberries which are always in season. 

Combine your sugar and strawberries (frozen or thawed, it doesn't matter) in a medium saucepan and bring to a simmer. Stir occasionally to prevent burning. 

Once the strawberries are defrosted you can use an immersion blender to break down the berries a bit but they will break down on their own as the mixture cooks. 

 Let the strawberry reduction reduce for 5-10 minutes then add in your ClearJel slurry (or you can use cornstarch). Put the strawberry reduction into the fridge to cool overnight. 

strawberry reduction

How to make the strawberry cinnamon roll dough

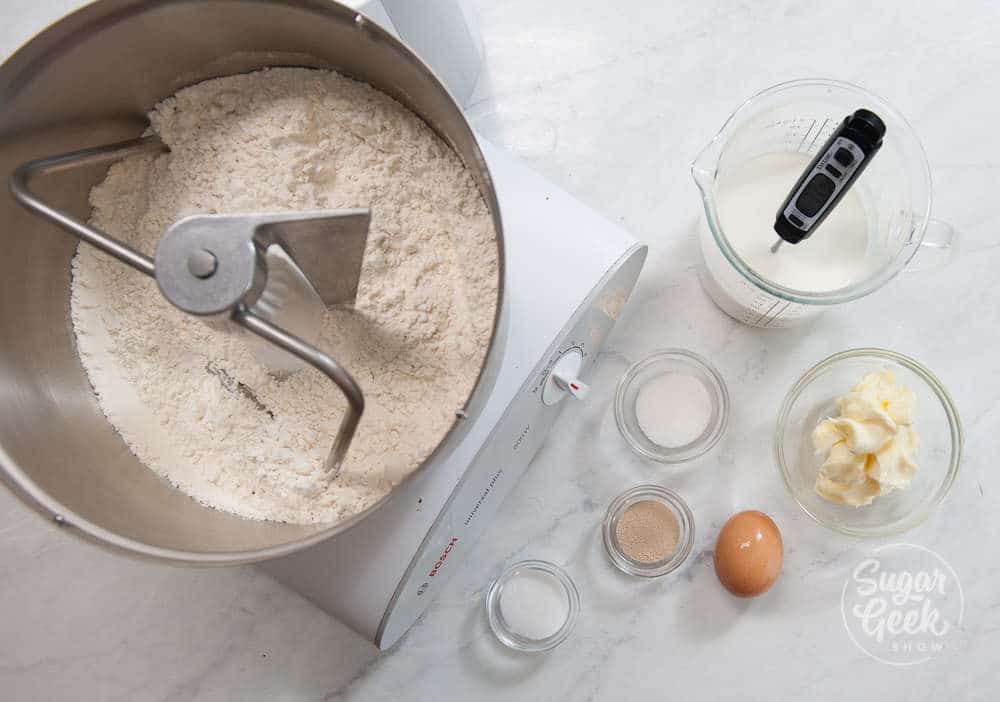
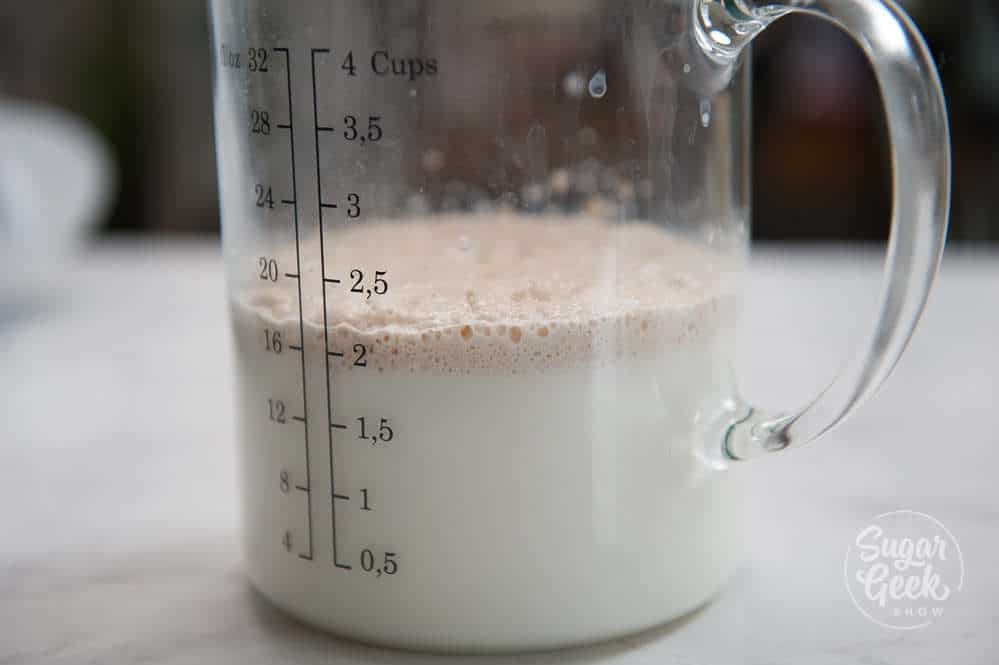
Make your sweet dough by combining the warmed milk (110ºF), one Tablespoon of sugar and yeast in a measuring cup or bowl and let it sit until it's foamy. 

Combine the yeast mixture with the flour in the bowl of your stand mixer with the dough attachment and mix until just combined. Then add in the rest of your ingredients. 

You can do this by hand as well, you'll just have to use some elbow grease. 

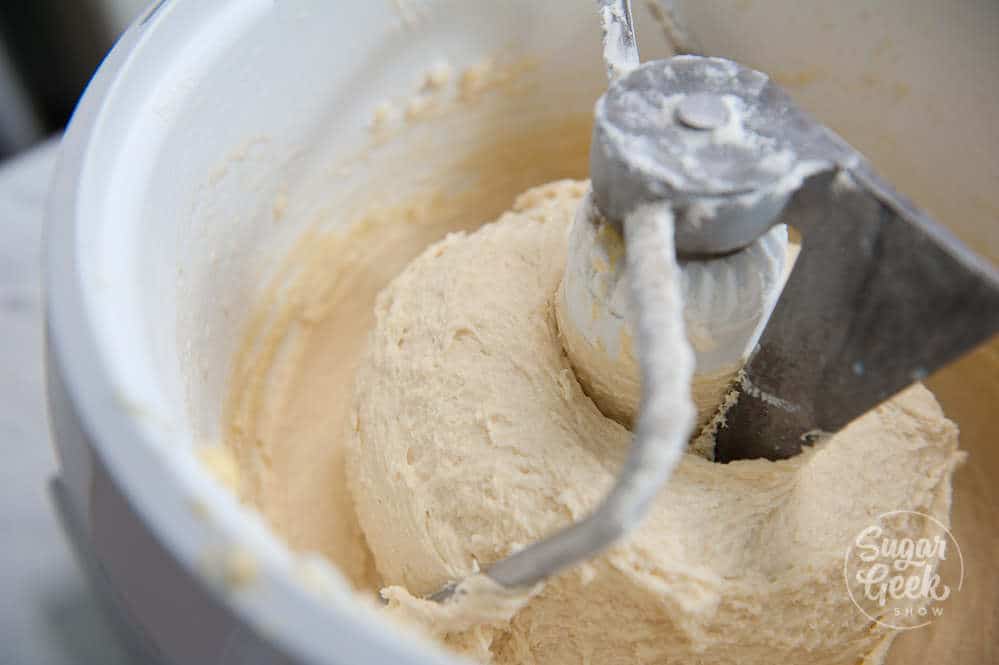
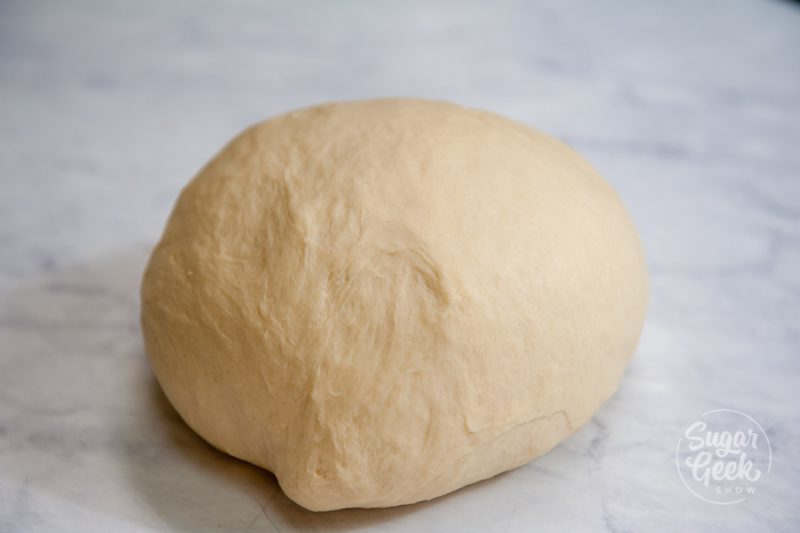
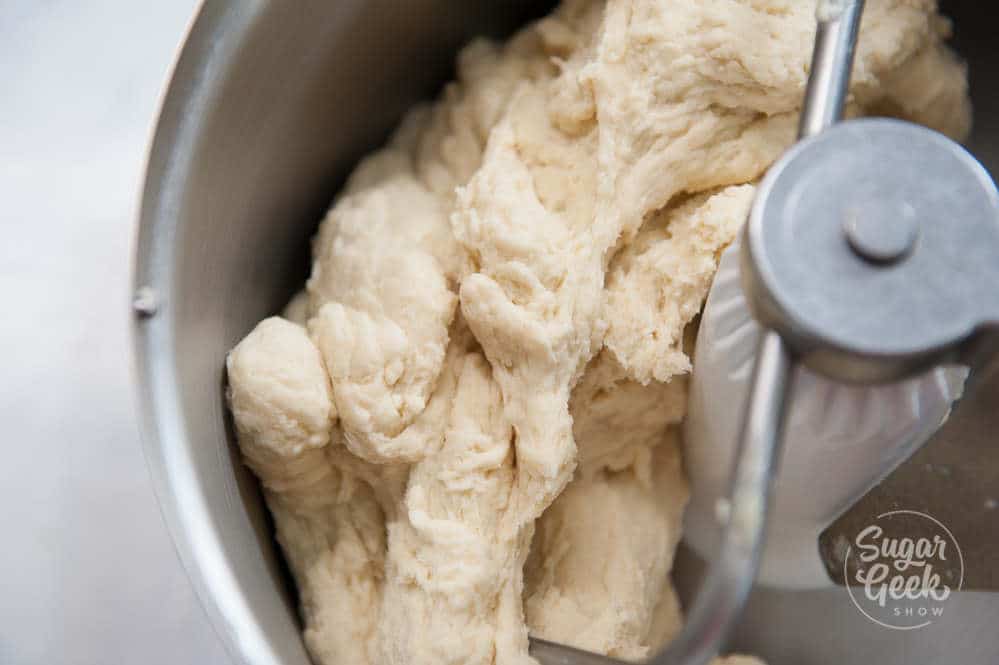
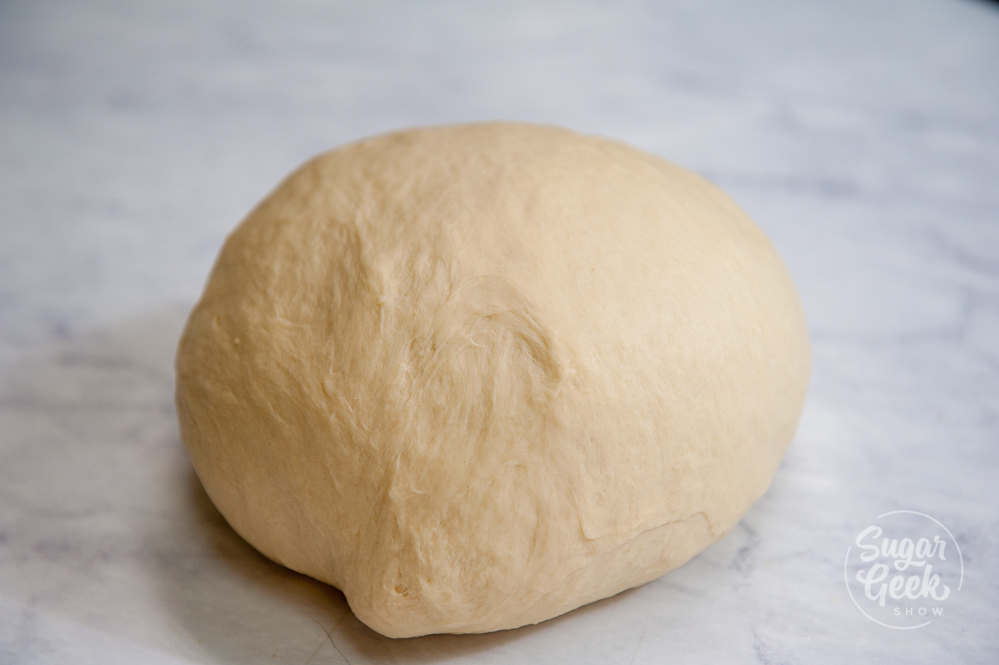
Let the dough mix on low for a few minutes and then bump the speed up to medium. You want to let the dough mix until it all starts clinging to the dough hook and bounces back when you press it with your finger. 

sweet dough
Combine flour and yeast mixture and combine, Then add in sugar, eggs, salt and butter

If the dough is too wet and isn't clinging to the dough hook you can add in ¼ cup of flour to make it stiffer. If the dough is too dry, add 1 Tablespoon of water. 

You can also test the dough by doing the window test. Take a small piece of the dough and stretch it between your fingers. If you can make the dough super thin until you can almost see through it, enough gluten has developed and the dough is ready. 

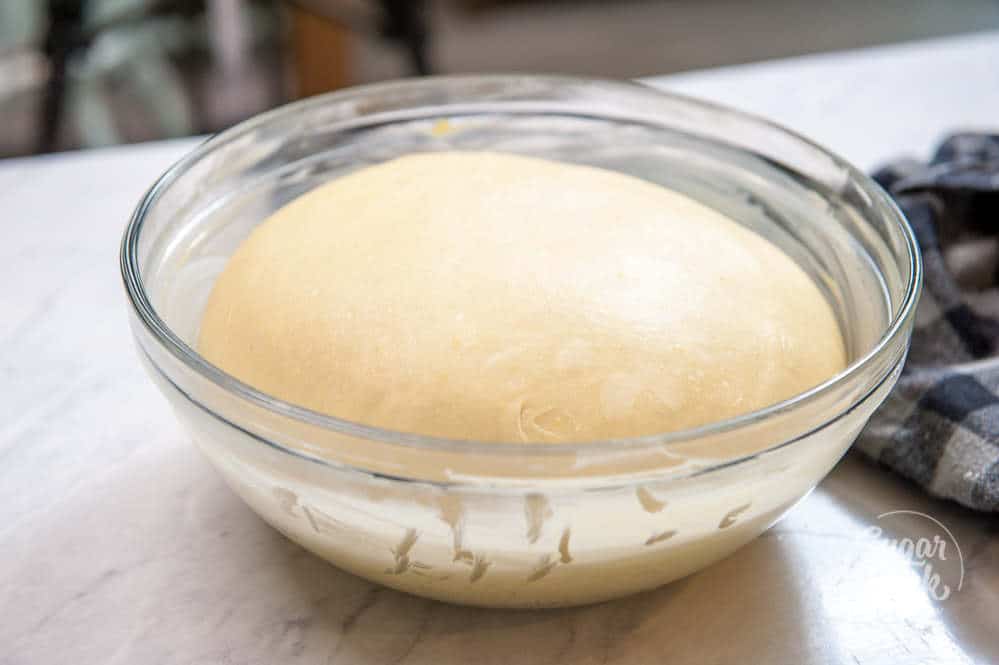
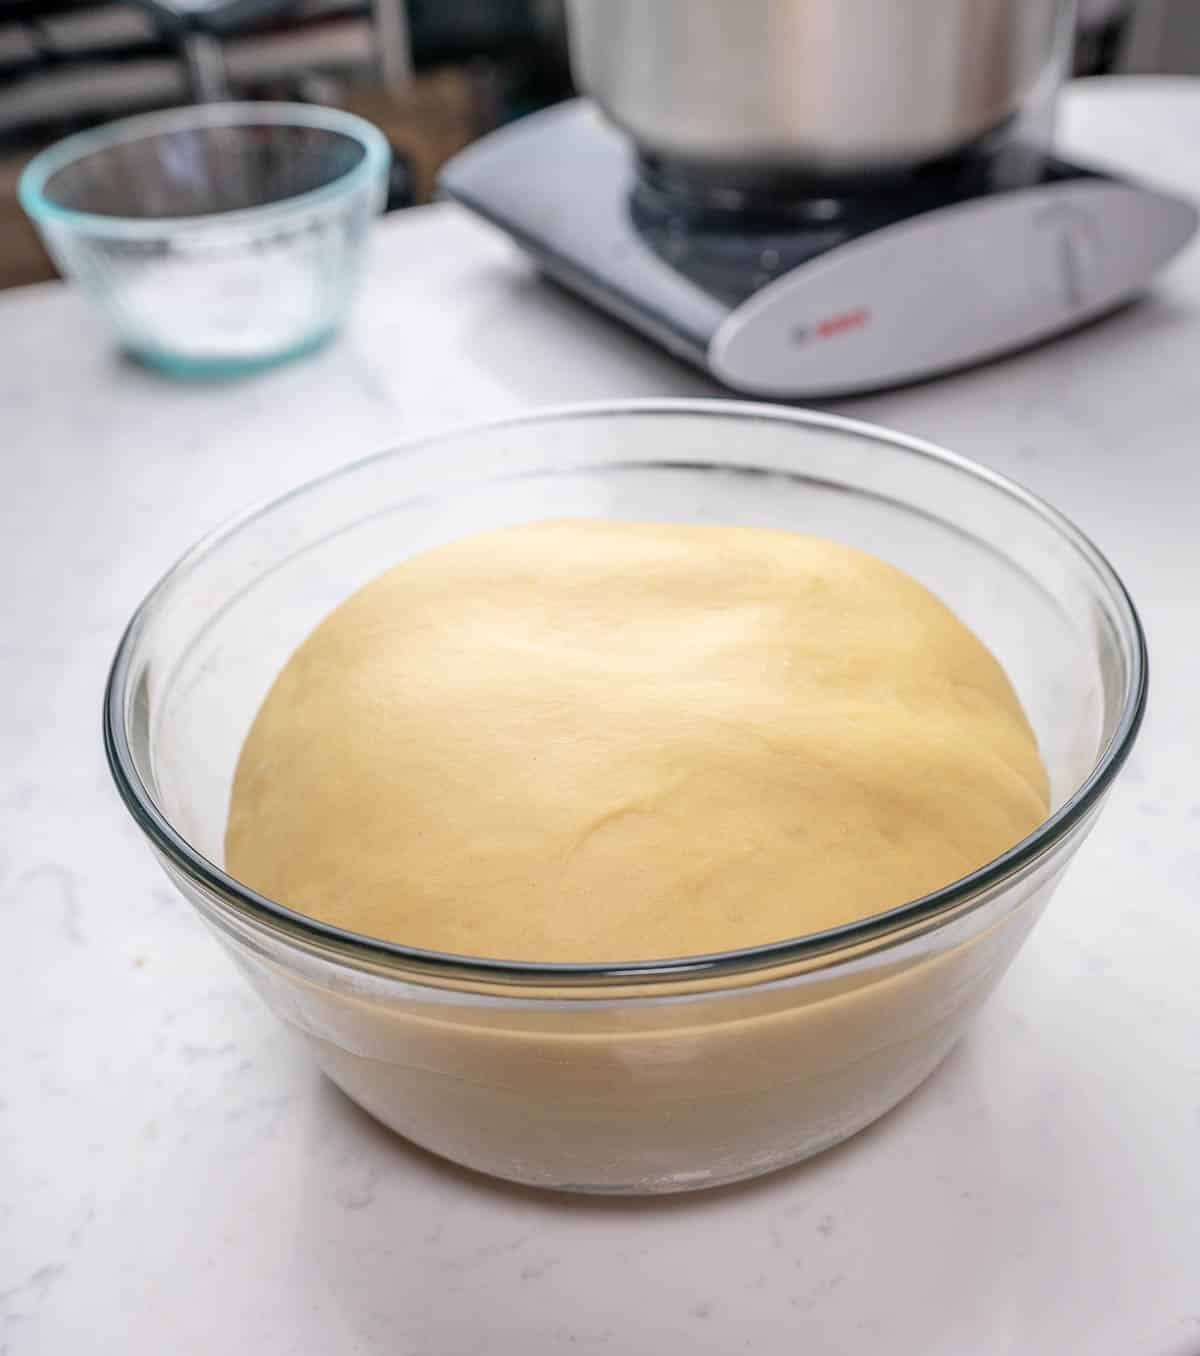
closeup of sweet dough rising in a bowl

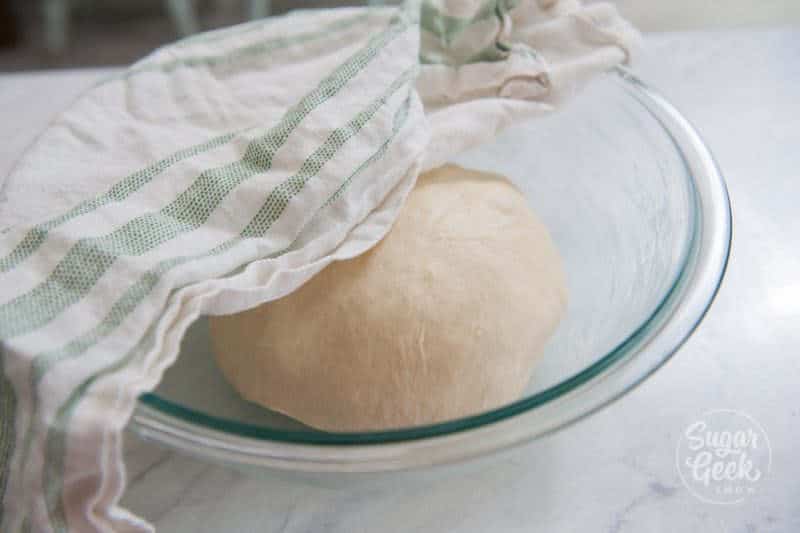
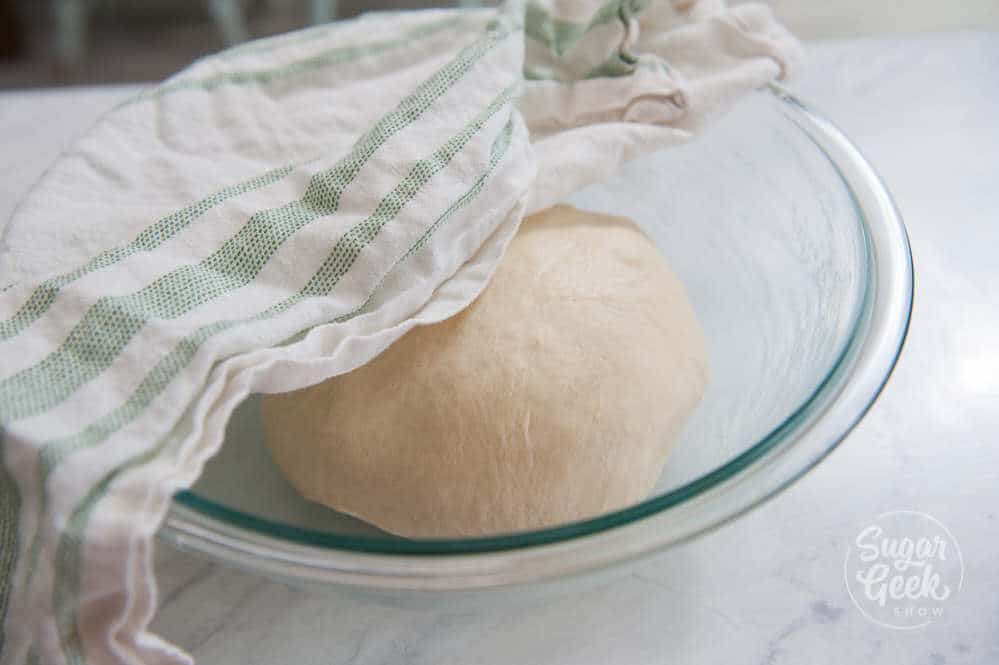
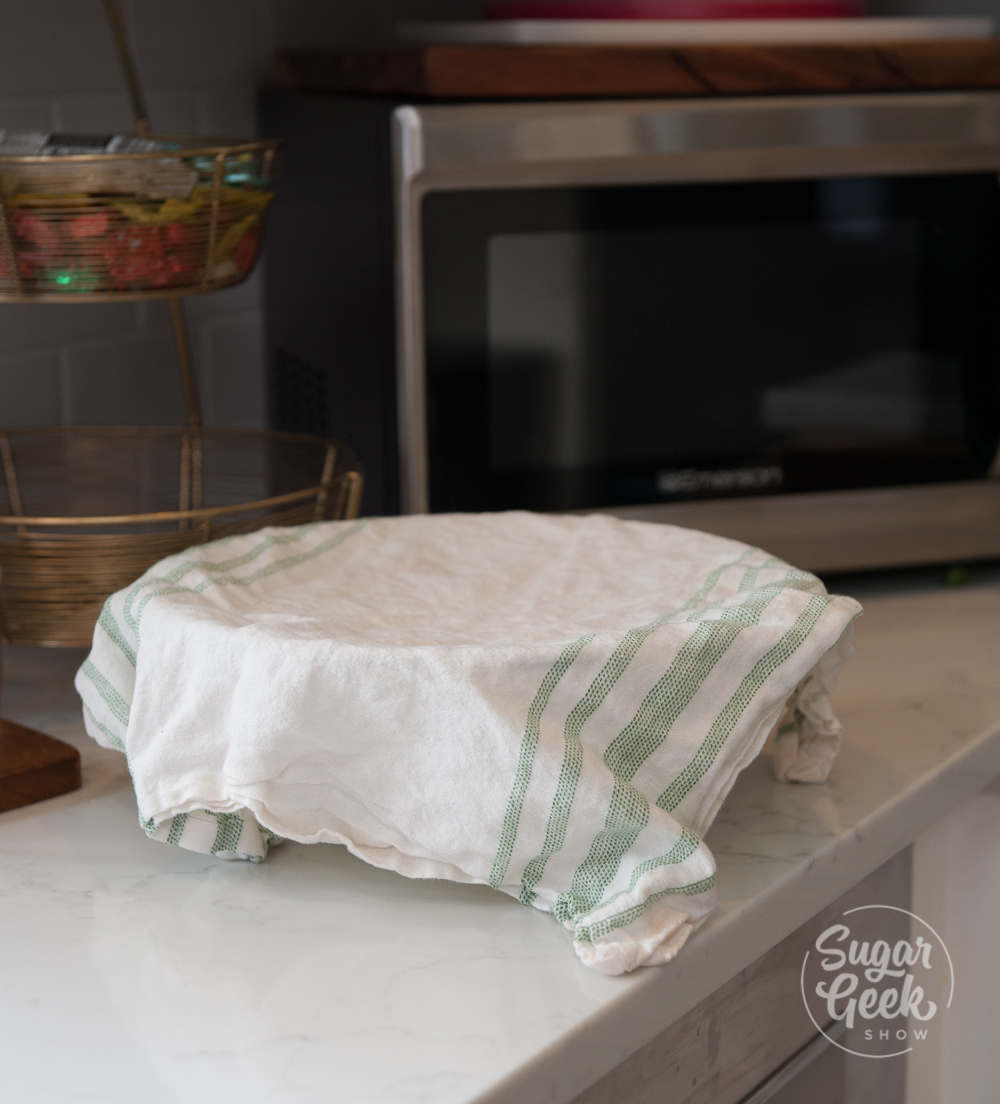
Place the dough into a buttered bowl, cover it with a towel to keep it moist and place it in a warm area to rise for 90 minutes. I turn my oven on to 170ºF, open the door and place the bowl on the oven door because my kitchen is usually too cold. Dough likes to rise around 90ºF. 

How to assemble strawberry cinnamon rolls

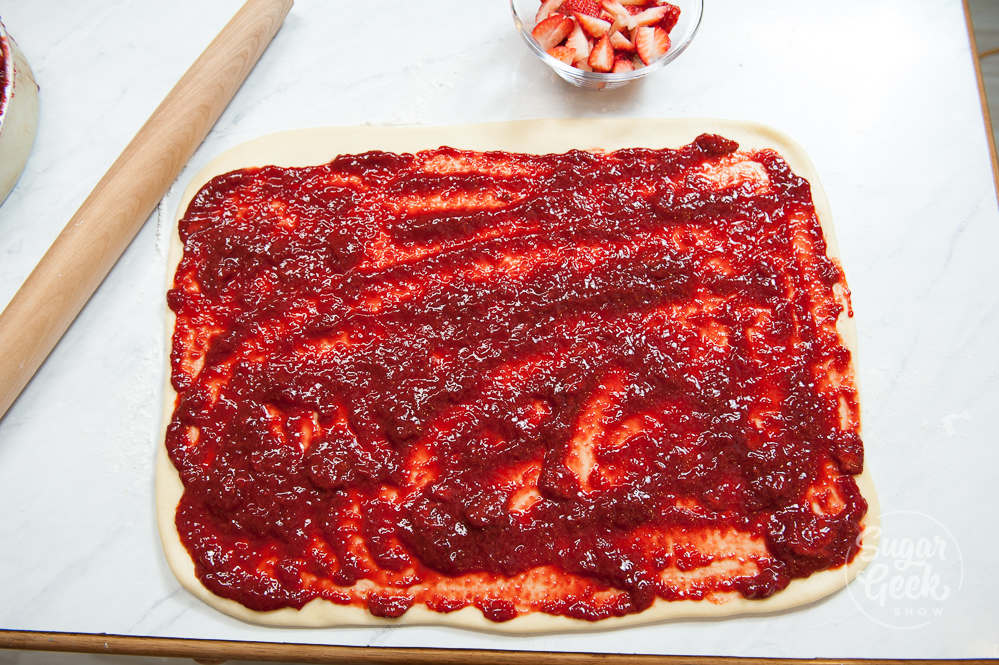
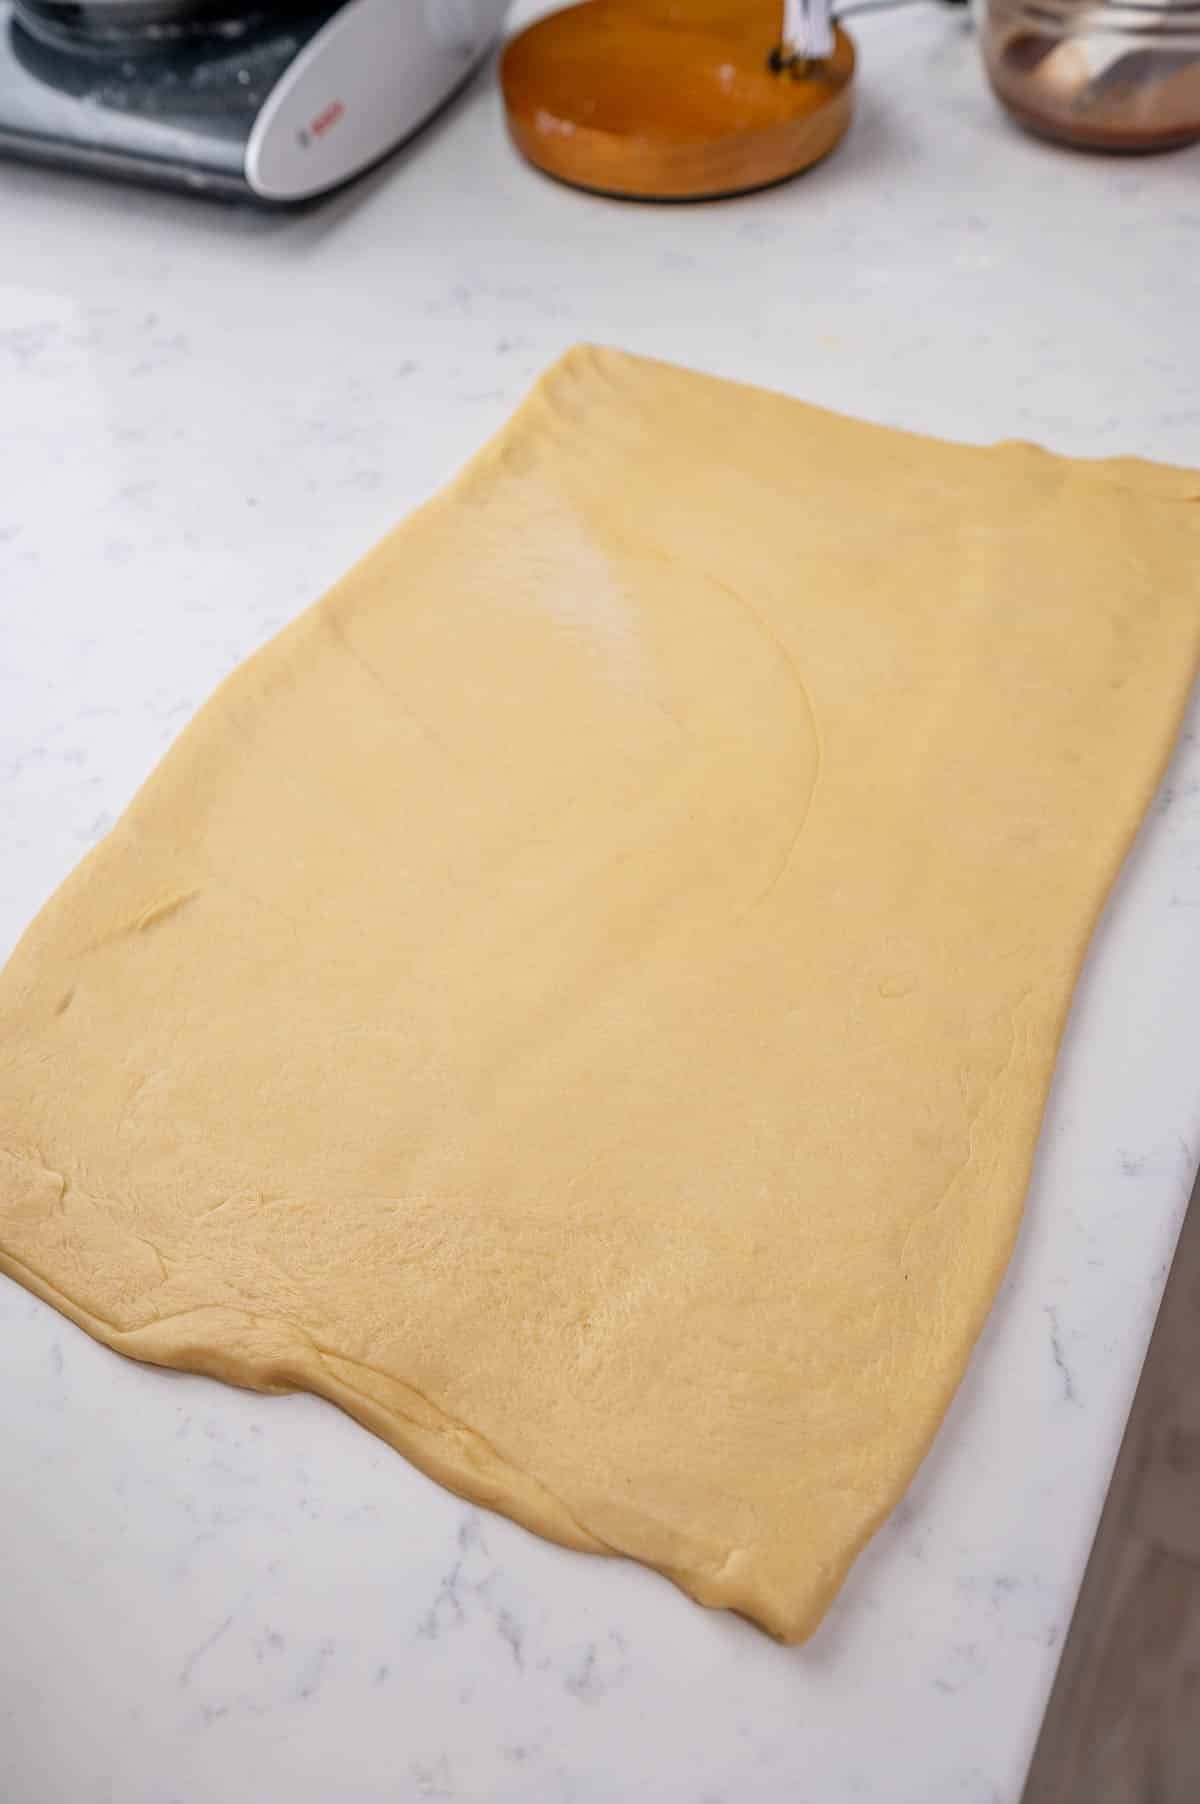
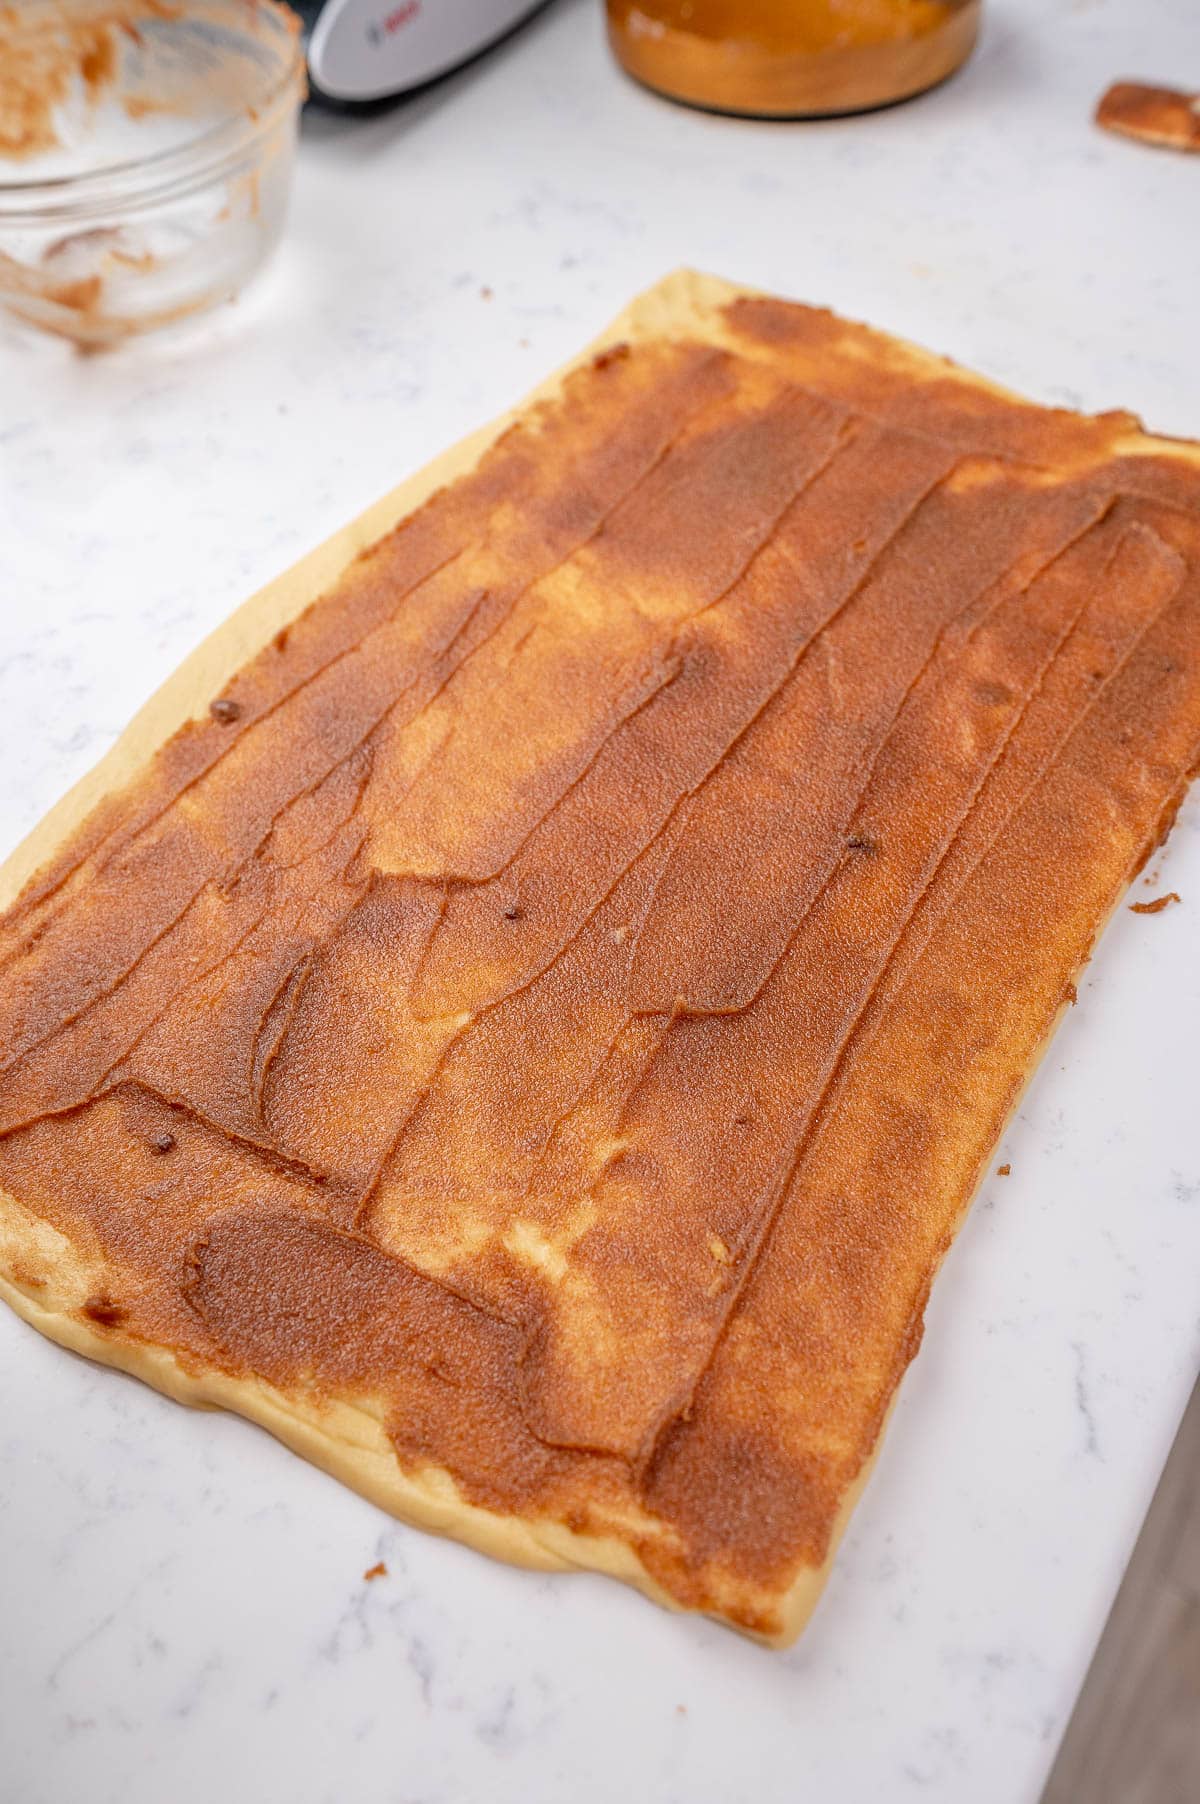
Roll your dough out into a rectangle. You want the thickness of the dough to be about ¼". Spread a thin layer of strawberry reduction all over the top of the dough, avoid the back ½" so you can seal the rolls. 

Sprinkle some freshly chopped strawberries over the top of the reduction (optional). 

strawberry cinnamon rolls assembly

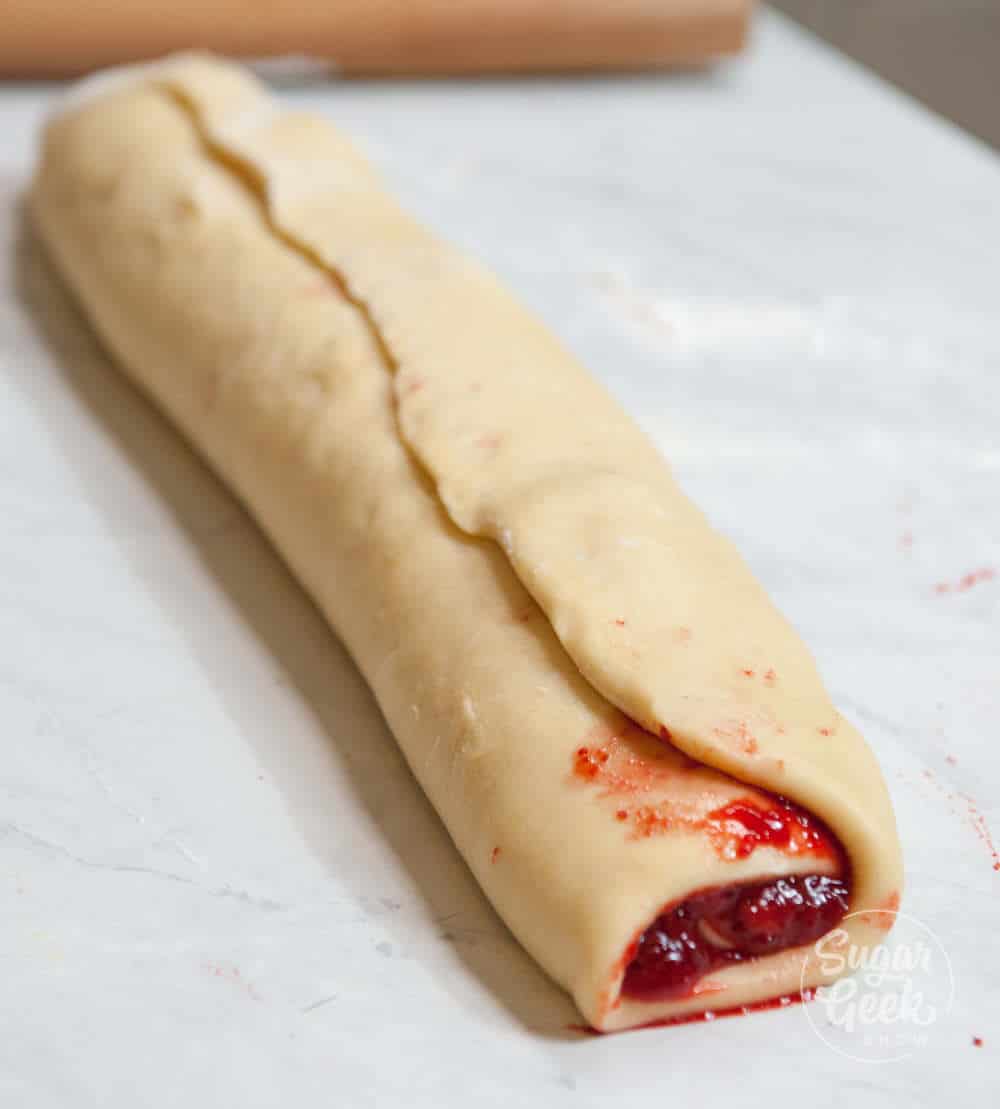
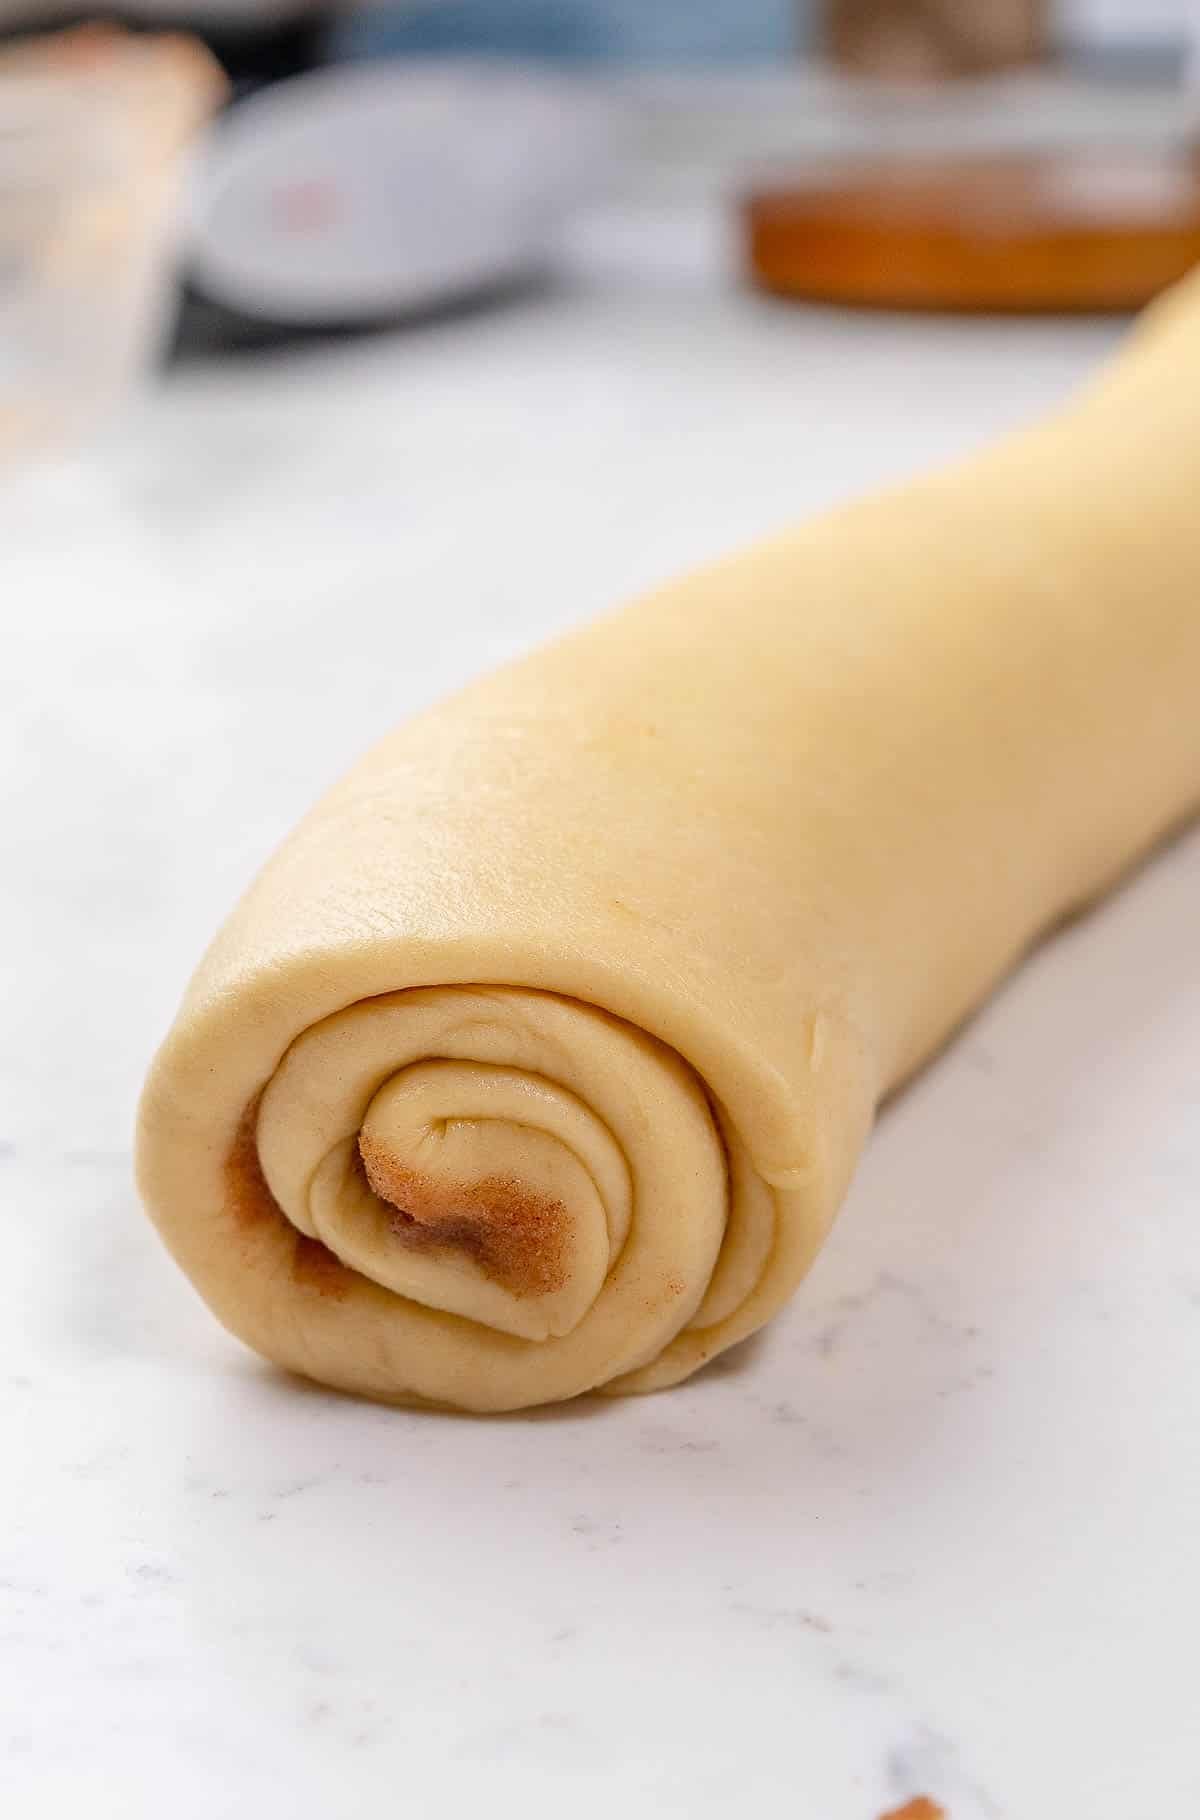
Then roll up your dough into a nice tight spiral. I admit some of my strawberry filling oozed out a bit and it was kind of a messy process. I just spooned the leftovers back into the rolls. I had a little leftover reduction that I used to fill in some gaps after the rolls were done baking.

strawberry cinnamon roll log

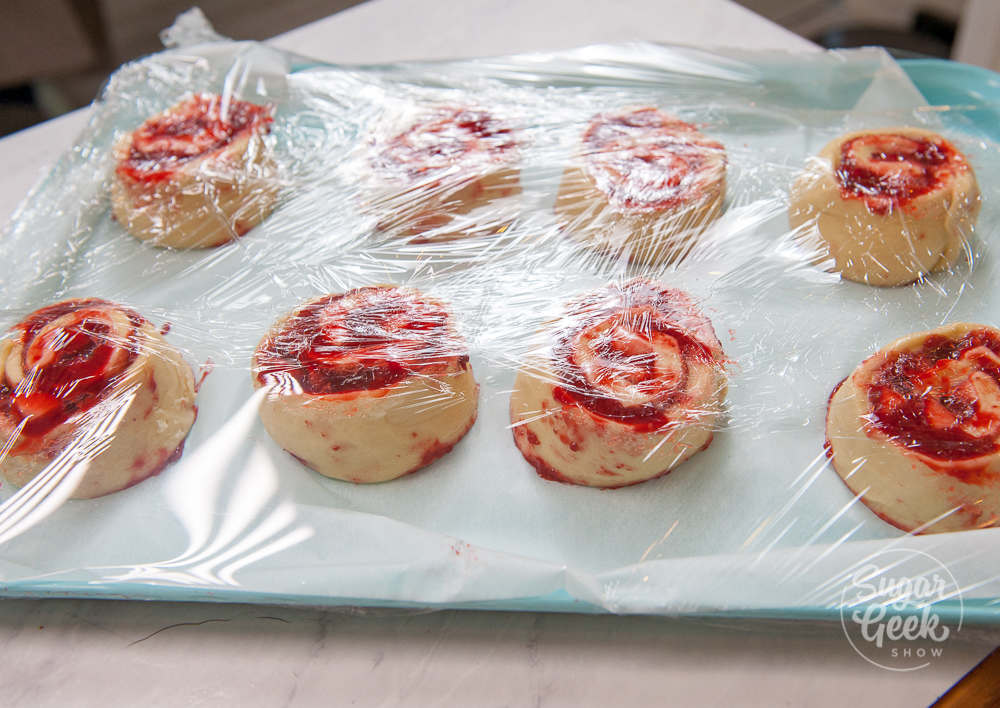
Cut the spiral into 8-10 equal-sized rolls. Arrange these onto a large baking sheet lined with parchment paper. Cover the rolls with plastic wrap, make sure the edges are pulled tight against the metal to prevent air from getting in. 

Place the pan of rolls into the fridge overnight. 

strawberry cinnamon rolls wrapped in plastic wrap

Bring the rolls out of the fridge about two hours before you want to bake them and let them warm up and double in size. 

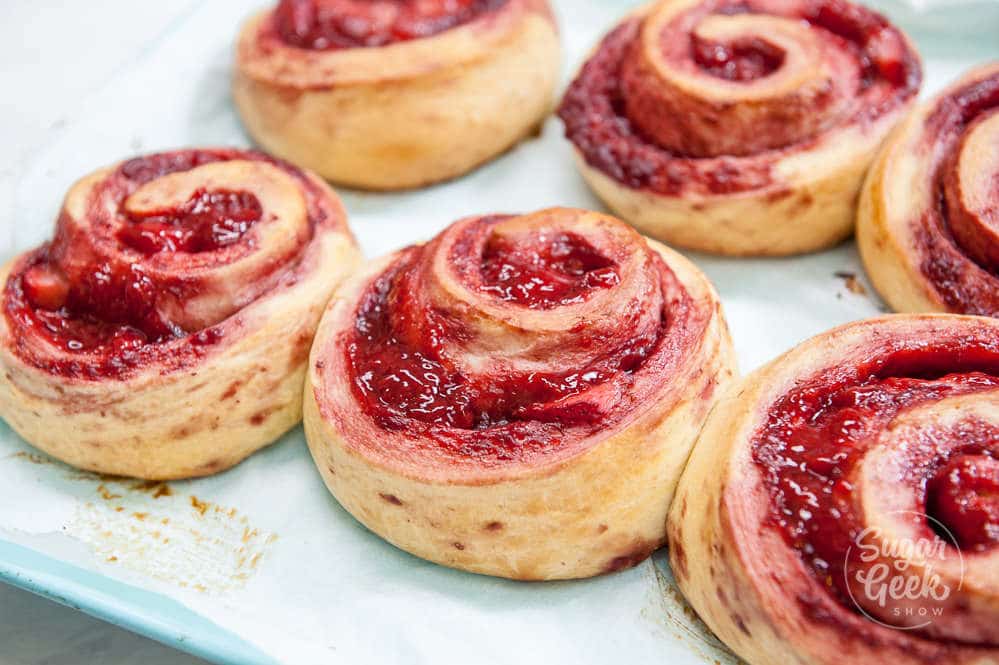
Brush the rolls with some egg wash and then bake the rolls in the oven at 350ºF for about 30 minutes or until the internal temperature reads 180º-200ºF. 

baked strawberry cinnamon rolls

How to make cream cheese frosting for strawberry cinnamon rolls

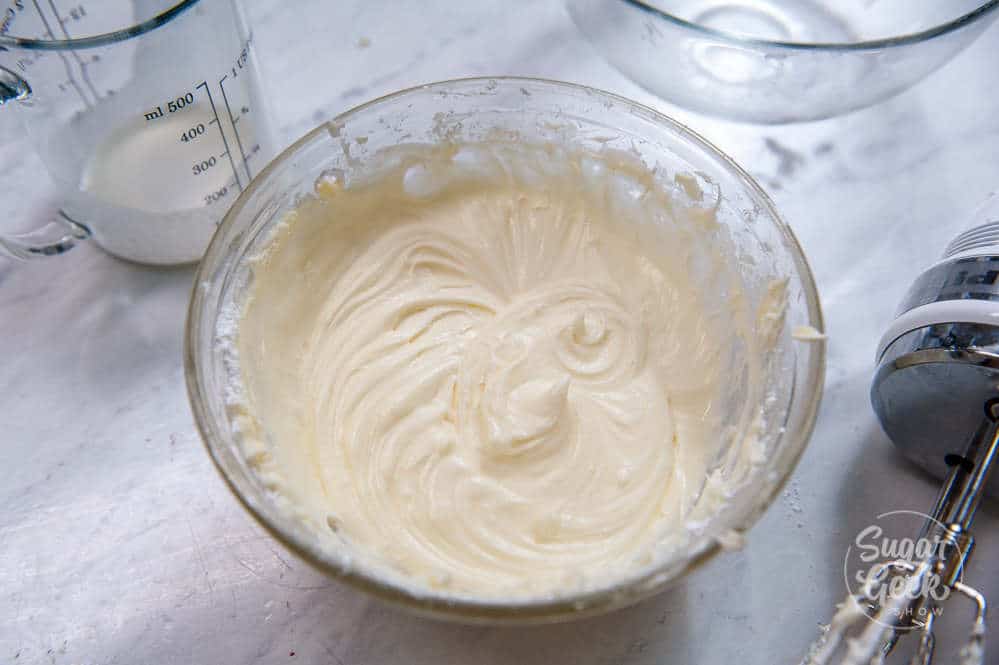
Making the cream cheese frosting is super easy. Just cream your cream cheese until it's nice and smooth so you don't have any lumps. I find a hand mixer works best. Then add in your softened butter and sifted powdered sugar. 

Then add in your heavy cream, salt and lemon extract. You can add more or less cream depending on how thick or thin you want your frosting. I like mine pretty thin. 

cream cheese frosting

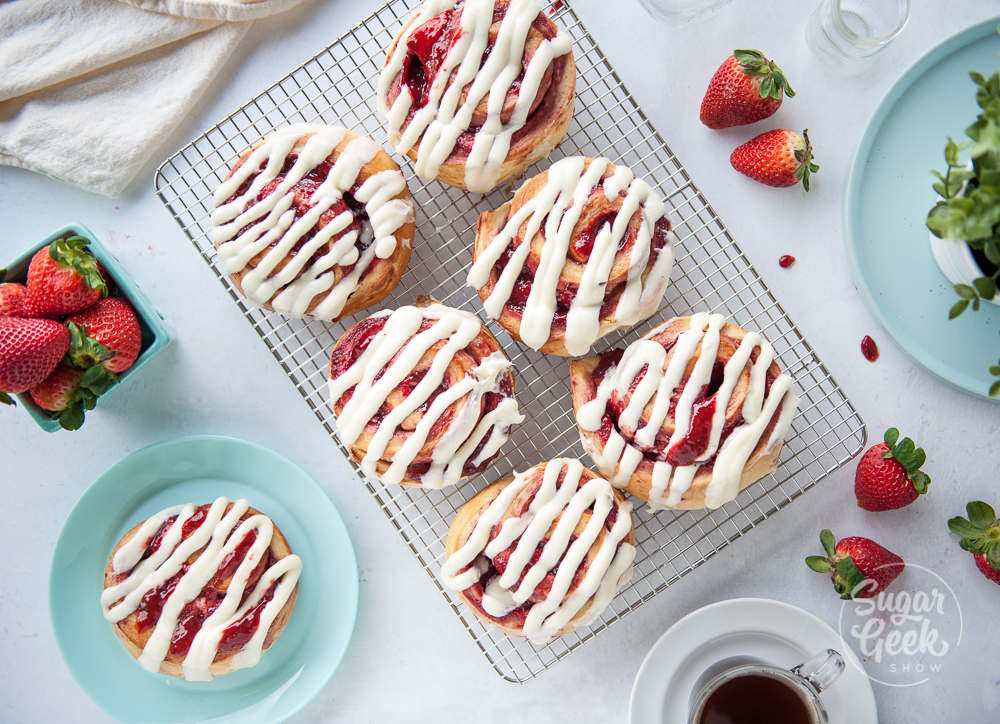
Drizzle the frosting over the top of your warm rolls with a piping bag or a spoon and serve! 

These strawberry cinnamon rolls with cream cheese frosting make the most amazing weekend brunch. The rolls are HUGE, like the size of my hand. If you want smaller rolls then you can cut your spiral into 12 slices instead of 8. 

strawberry cinnamon rolls with cream cheese frosting

I made these strawberry cinnamon rolls as part of my son's four-month photoshoot which you can see here. 

strawberry cream cheese cinnamon rolls

Recipe

strawberry cinnamon rolls
Print Recipe
4.80 from 5 votes

Strawberry Cinnamon Rolls With Cream Cheese Frosting

Soft and fluffy strawberry cinnamon rolls fresh from the oven and frosted with lemon cream cheese frosting. The perfect brunch!
Prep Time20 minutes mins
Cook Time25 minutes mins
Proofing2 hours hrs 30 minutes mins
Course: Dessert
Cuisine: American
Servings: 8 Rolls
Calories: 655kcal
Author: Liz Marek

Equipment

  • Stand mixer with dough hook
  • One sheet pan (13"x18") or similar sized pan
  • Parchment Paper

Ingredients

Cinnamon Roll Dough

  • 4 ounces milk 110ºF
  • 5 grams dried instant yeast
  • 14 ounces all-purpose flour or bread flour
  • 4 ounces butter softened
  • 2 ounces sugar
  • ½ teaspoon salt
  • 2 large eggs room temperature

Strawberry Reduction

  • 16 ounces fresh or frozen strawberries
  • 6 ounces granulated sugar
  • 2 teaspoons lemon juice
  • 2 teaspoons lemon zest
  • 4 Tablespoons ClearJel or 2 Tablespoons cornstarch
  • 2 ounces water
  • 1 cup fresh strawberries chopped

Cream cheese frosting

  • 4 ounces cream cheese softened
  • 4 ounces unsalted butter softened
  • 3 ounces powdered sugar
  • ¼ teaspoon salt
  • 2 ounces heavy whipping cream or less if you like a thicker consistency
  • 1 teaspoon vanilla extract
US Customary - Metric

Instructions

  • Warm milk to 110ºF. Add in 1 Tablespoon of your sugar and then the yeast and whisk to combine. Set aside for 5 minutes or until foamy.
  • Place flour in the mixing bowl with the yeast/milk mixture and stir until combined
  • Add in your eggs one at a time, letting each combine before you add the next
  • Add in sugar, butter and salt and mix on low until combined
  • Let mix on low for 5-10 minutes until the dough pulls away from the sides of the bowl and bounces back when you touch it. You can also do the window test (see blog post for example)
  • Shape the dough into a smooth ball and then place it into a greased bowl. Cover with a tea towel and let rise for 90 minutes in a warm place
    ***How to proof**(Pre-heat oven to 170ºF, leave the oven door OPEN and place a bowl of warm water in the back of the oven. Then place your covered bowl of dough onto the open oven door. Proof until double in size.)

For the strawberry filling

  • Combine strawberries and sugar in a medium saucepan and bring to a simmer
  • Crush berries with a spoon or immersion blender as the mixture cooks for 5-10 minutes on medium heat.
  • Combine ClearJel with lemon juice, zest, and water to make a slurry and add it to your simmering strawberries. Mix until thickened and then let cool.

To make the rolls

  • Line a 13"x18" sheet pan with parchment paper (or similar sized pan)
  • Once your dough has proofed, roll out the dough 10" wide, ¼" thick. It doesn't matter how long. Spread the strawberry filling over the surface evenly, all the way to the edges, except keep one edge without filling so you can seal it.
  • Sprinkle freshly chopped strawberries over the filling
  • Roll up the dough length-wise. Make sure the first roll is very tight so you get a nice spiral, then continue pushing the dough until you reach the edge. Brush a little water or egg wash along the bare edge so it seals the loose edge of the dough.
  • Cut the roll into 8-10 equal slices and arrange on your parchment covered pan
  • Cover loosely with a tea towel and let proof to double (about 90 minutes) then bake (or cover tightly with plastic wrap and put in the fridge if you want to bake them the next day. Let come to room temperature and proof to double before baking. This can take 1.5-2 hours depending on how warm your kitchen is)
  • Bake at 350ºF for 25-30 minutes or until golden brown depending on the size of your rolls. (Internal temperature reaches 200ºF)

For the cream cheese frosting

  • Cream the cream cheese with a hand mixer until smooth. Then add in the softened butter and cream until smooth.
  • Add in the powdered sugar, salt, vanilla and cream until smooth and the desired consistency. Drizzle over warm rolls. Add more cream for thinner frosting.

Video

Nutrition

Serving: 1roll | Calories: 655kcal | Carbohydrates: 83g | Protein: 9g | Fat: 33g | Saturated Fat: 20g | Cholesterol: 140mg | Sodium: 470mg | Potassium: 203mg | Fiber: 3g | Sugar: 43g | Vitamin A: 1109IU | Vitamin C: 34mg | Calcium: 66mg | Iron: 3mg


Baby Yoda Cake Step-by-Step Online Course

January 15, 2020 Course Preview

Baby Yoda Star Wars Cake Tutorial

This is the absolute best baby Yoda tutorial! Complete with templates and full step-by-step instructions. Edible sugar eyes, modeling chocolate body, fondant clothes, and gummy soup!

Skill level: Intermediate

Learn how to make the baby Yoda Star Wars cake from instructor Elizabeth Marek. You will learn how to create a sculpted baby master from rice cereal treats or from similarly sized cake rounds.


Elizabeth shows how to make step-by-step edible eyeballs, how to sculpt the face and measure the proportions of the face. Techniques on realistic skin tones, adding shadow and depth are covered, as well as how to make the clothing and textures.

1:32:29 Minutes of Instruction

What You Will Learn

  • How to make a baby Yoda Star Wars sculpted cake (or keepsake version with rice cereal treats inside)
  • Learn how to make realistic large edible eyes
  • How to make a cake version or a 'keepsake' version
  • Learn how to make a simple cake structure and make it food-safe
  • How to scale reference photos

Tutorial Chapters

  1. Preparing the cakes 0:46
  2. Making the eyes 1:18
  3. Making the structure 4:42
  4. Stacking and carving the cake 7:05
  5. The arms structure 16:36
  6. Adding the head and eyes 19:52
  7. Adding the cheeks and mouth 29:00
  8. Smoothing 47:26
  9. Adding the ears 50:17
  10. Building up the back of the head 57:48
  11. Covering in fondant 1:00:51
  12. Making the arms 1:06:31
  13. Making the collar 1:09:50
  14. Making the cup 1:15:26
  15. Making hands 1:21:07
  16. Filling the cup 1:31:09


Downloads

Materials List

Eyeball Template

Scale Reference 01

Scale Reference 02

Baby Yoda Cake Step-by-Step Online Course

January 15, 2020 Paid Video

Baby Master Cake

Skill level: Intermediate

Learn how to make the baby master cake from instructor Elizabeth Marek. You will learn how to create a sculpted baby master from rice cereal treats or from similarly sized cake rounds.

Elizabeth shows how to make step-by-step edible eyeballs, how to sculpt the face and measure the proportions of the face. Techniques on realistic skin tones, adding shadow and depth are covered, as well as how to make the clothing and textures.

1:32:29 Minutes of Instruction

What You Will Learn

  • How to make a baby alien sculpted cake (or keepsake version with rice cereal treats inside)
  • Learn how to make realistic large edible eyes
  • How to make a cake version or a 'keepsake' version
  • Learn how to make a simple cake structure and make it food-safe
  • How to scale reference photos

Tutorial Chapters

  1. Preparing the cakes 0:46
  2. Making the eyes 1:18
  3. Making the structure 4:42
  4. Stacking and carving the cake 7:05
  5. The arms structure 16:36
  6. Adding the head and eyes 19:52
  7. Adding the cheeks and mouth 29:00
  8. Smoothing 47:26
  9. Adding the ears 50:17
  10. Building up the back of the head 57:48
  11. Covering in fondant 1:00:51
  12. Making the arms 1:06:31
  13. Making the collar 1:09:50
  14. Making the cup 1:15:26
  15. Making hands 1:21:07
  16. Filling the cup 1:31:09

Downloads

Materials List

Eyeball Template

Scale Reference 01

Scale Reference 02

January 7, 2020 Course Preview

Koala Cake Tutorial

Koala cake tutorial to help raise awareness for the Australian bush fires help and rescue

koala cake tutorial

Hey sugar geeks! I wanted to make this video to help bring awareness to the horrible fires going on in Australia right now. I know sometimes it can feel like there isn't anything we can do to help when we are far away but every little bit helps.

Check out the links below to support the efforts to putting out fires and helping save the Koalas and other wildlife.

You can help the devastated animal population by giving to wildlife rescue and treatment groups like
*fact sources CNN

WIRES
Port Macquarie Koala Hospital 
Currumbin Wildlife Hospital
Australian Red Cross 

Materials and supplies

Tree trunk - Three 6" round cakes
Koala Body - Four 6" round cakes
Koala head - Two 6" round cakes
Four lbs chocolate
Two batches easy buttercream
Two batches rice cereal treats for sculpting 
10 lbs fondant
½" sheet cake boards avare cake board 
¼" pvc pipe
¼" adaptors (one male adaptor, two 45º, one "T")
⅛" armature wire
18 guage floral wire
tylose powder
Green food coloring
Edible water colors or airbrush colors 
brown airbrush color
edible glitter
black fondant
2 ounces white chocolate
Clear isomalt
Black isomalt 
PME clear glaze spray

Tools
Pvc cutters
Modeling tools
x-acto blade
creme brulee torch
2" silicone sphere molds for eyes
1" cabachon mold
paint brushes
airbrush
aluminum foil tape 

January 7, 2020 Blog

Koala Cake Tutorial

Koala cake tutorial to help raise awareness for the Australian bush fires help and rescue

koala cake tutorial

Hey sugar geeks! I wanted to make this video to help bring awareness to the horrible fires going on in Australia right now. I know sometimes it can feel like there isn't anything we can do to help when we are far away but every little bit helps.

Check out the links below to support the efforts to putting out fires and helping save the Koalas and other wildlife.

You can help the devastated animal population by giving to wildlife rescue and treatment groups like
*fact sources CNN

WIRES
Port Macquarie Koala Hospital 
Currumbin Wildlife Hospital
Australian Red Cross 

Materials and supplies

Tree trunk - Three 6" round cakes
Koala Body - Four 6" round cakes
Koala head - Two 6" round cakes
Four lbs chocolate
Two batches easy buttercream
Two batches rice cereal treats for sculpting 
10 lbs fondant
½" sheet cake boards avare cake board 
¼" pvc pipe
¼" adaptors (one male adaptor, two 45º, one "T")
⅛" armature wire
18 guage floral wire
tylose powder
Green food coloring
Edible water colors or airbrush colors 
brown airbrush color
edible glitter
black fondant
2 ounces white chocolate
Clear isomalt
Black isomalt 
PME clear glaze spray

Tools
Pvc cutters
Modeling tools
x-acto blade
creme brulee torch
2" silicone sphere molds for eyes
1" cabachon mold
paint brushes
airbrush
aluminum foil tape 

close up of cinnamon rolls with cream cheese frosting

January 2, 2020 Bread

Soft Cinnamon Rolls Recipe

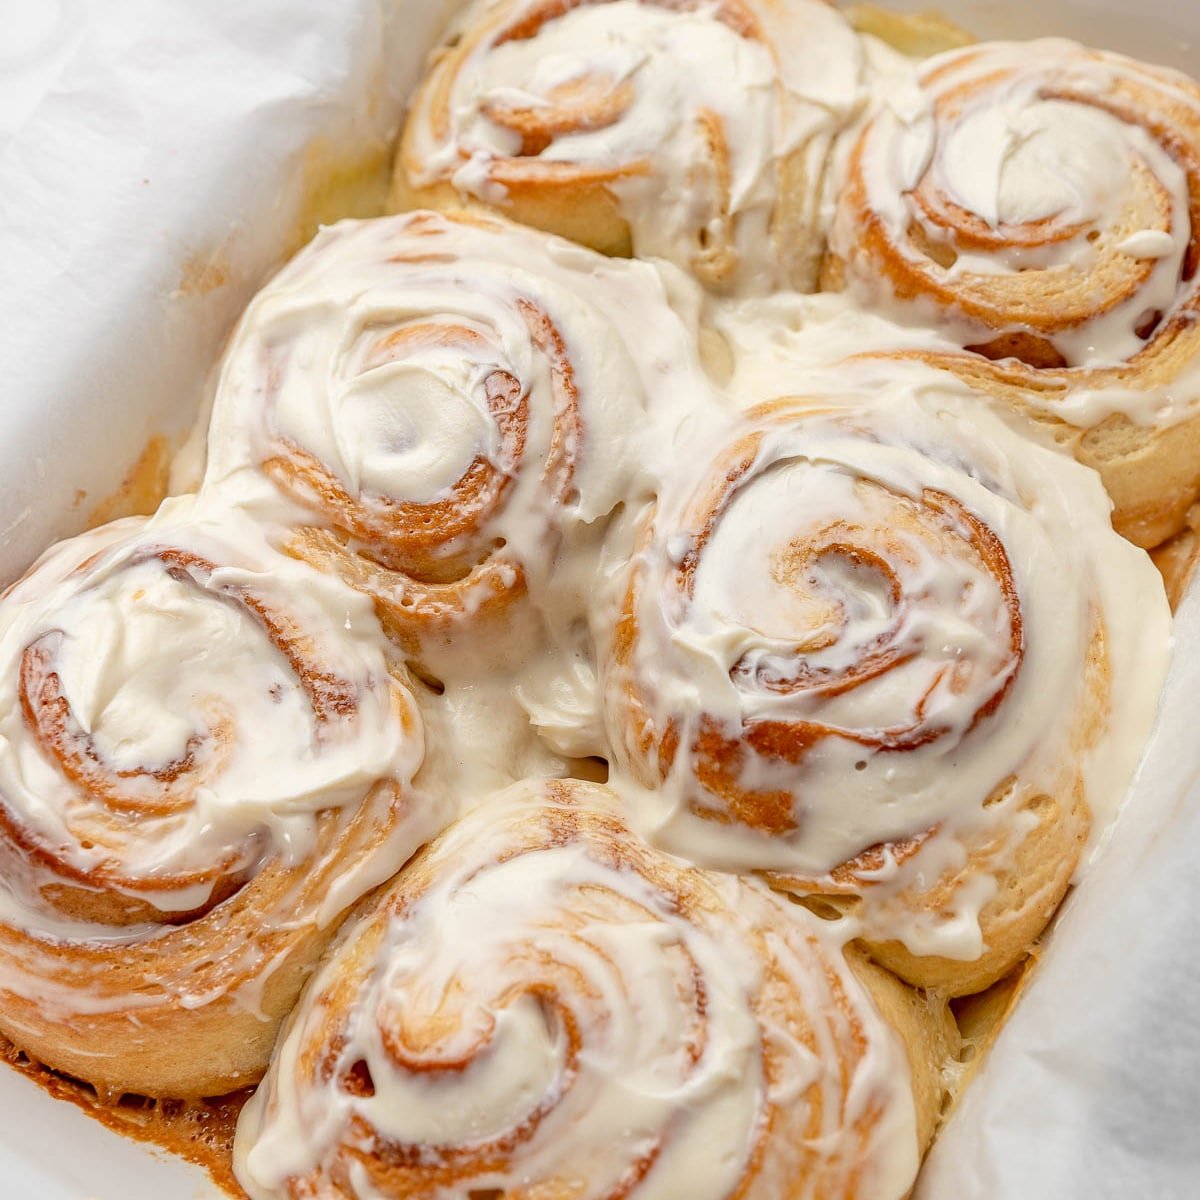
This soft cinnamon rolls recipe makes super fat and fluffy cinnamon rolls that are incredibly moist and SLATHERED in a delicious cream cheese frosting. When I say this makes the best cinnamon rolls you've ever tasted I mean it! If you have a sourdough starter, try my sourdough discard cinnamon rolls for an even more tender version with a creamy tang from a full cup of discard.

Because we are using instant yeast, this cinnamon roll recipe is actually incredibly easy. Most of the time is spent just letting the dough mix or rise. Just place all the ingredients in the mixer and let it go!

The secret ingredient to making these super soft and moist is adding heavy cream to the cinnamon roll dough right before baking. The cream gets absorbed and results in ultra ooey gooey cinnamon rolls!

You can make these cinnamon rolls in one day or put them in the fridge and bake them the next morning. Just let the rolls rise in a warm place until they double in size and then bake!

If you enjoy working with yeast dough, you have to try my easy homemade bagel recipe next, or for another soft, buttery bread worth waking up for, make my panettone recipe for Christmas morning.

What's In This Blog Post

  • Cinnamon Roll Ingredients
  • Making The Dough
  • How To Make Cinnamon Roll Frosting
  • More Recipes You'll Love
  • FAQ & TIPS

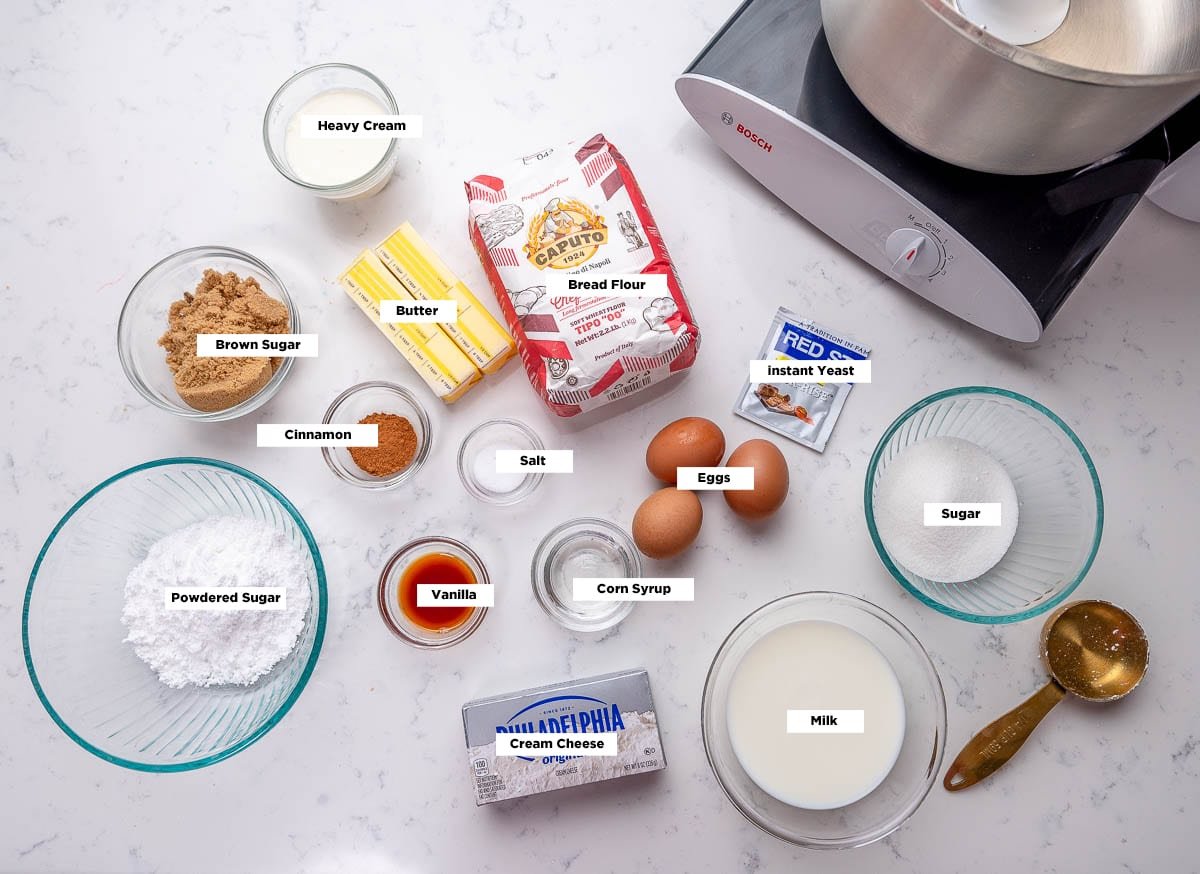
Cinnamon Roll Ingredients

Bread Flour - The secret to a super fluffy and soft cinnamon roll is bread flour. I actually LOVE caputo bread flour. I started using it after a trip to Italy where I noticed the baked goods don't upset my stomach as much. Obviously any type of bread flour will work and if you don't have bread flour, you can use all purpose flour. Your rolls will still be yummy! 

Instant Yeast - Honestly I don't know why anyone uses active dry yeast anymore. With instant yeast you just add it to your ingredients and mix! No dissolving in warm milk necessary. If all you have is active dry yeast then just add it to your warm milk first with a Tablespoon of sugar and let it activate until it starts to foam before adding your yeast mixture to your other ingredients.

Corn Syrup - I know corn syrup gets a bad rap but hear me out. Corn syrup is an invert sugar which means it ATTRACTS moisture and keeps baked goods softer for longer. If you don't want to use corn syrup you can also use honey or maple syrup which does that same thing and adds a nice flavor.

Heavy Cream - If you want the best gooey homemade cinnamon rolls, don't skip this step!

Making The Dough

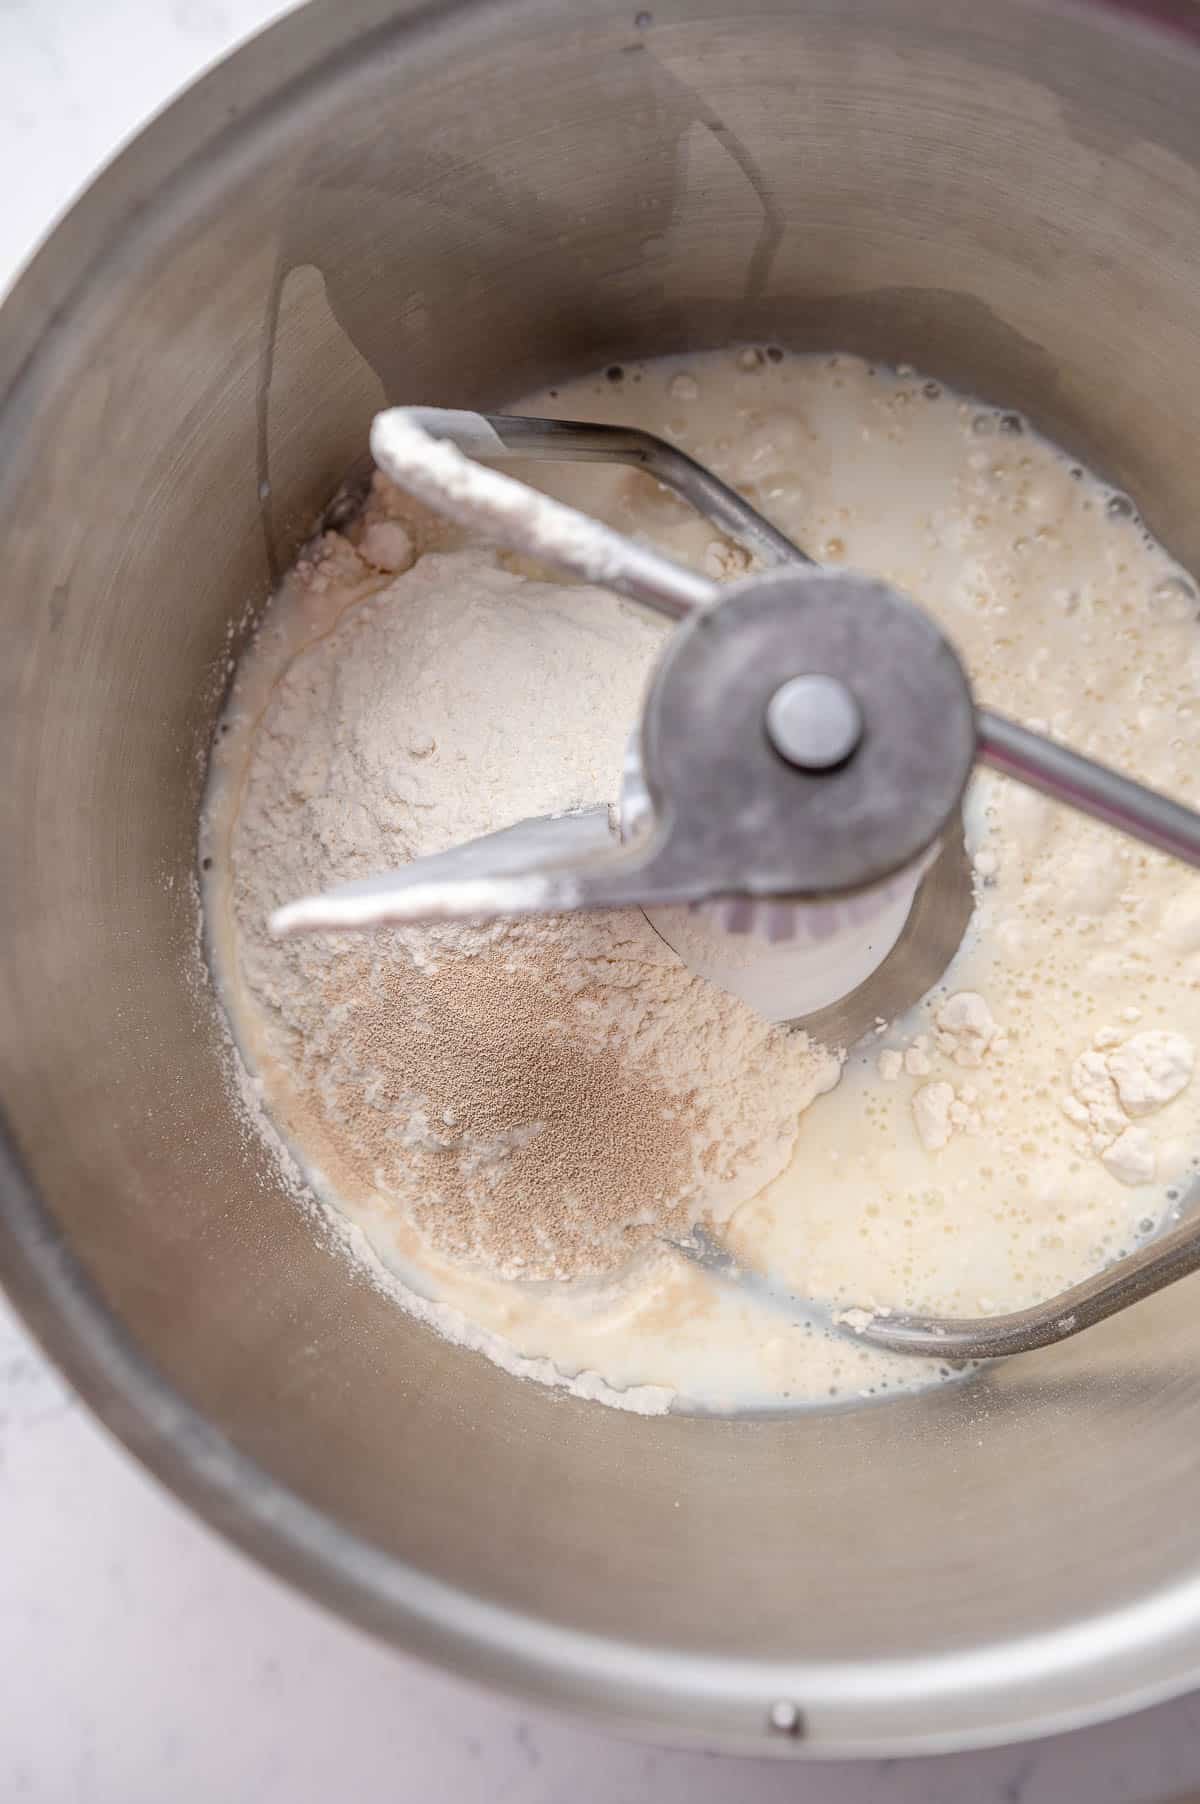
  1. Add your warm milk, sugar, instant yeast, and half the flour to the bowl of your stand mixer with the dough hook attached.
  2. Mix until combined.close up of cinnamon rolls in a mixing bowl shot from above
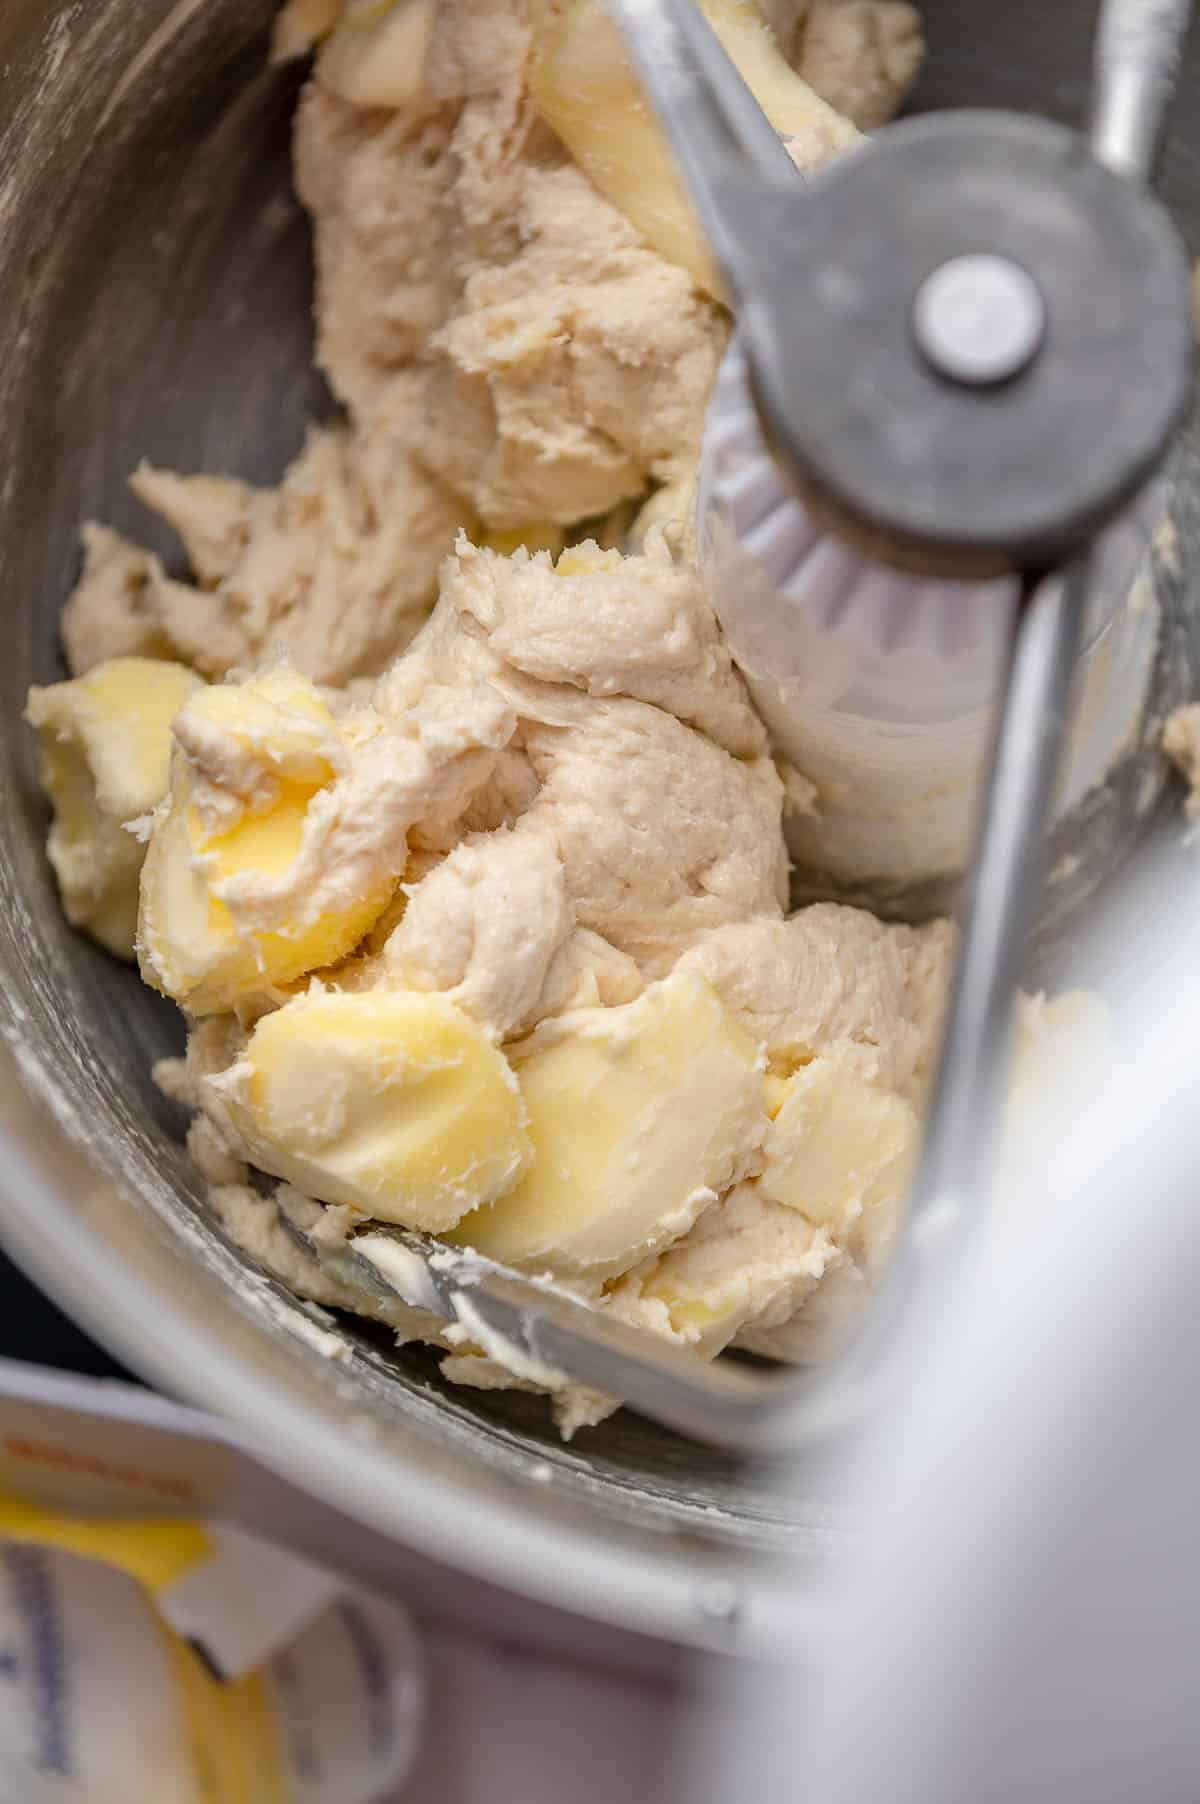
  3. Add in the room temperature butter, eggs, salt, and the rest of the flour and mix on low until combined.cinnamon roll recipe ingredients in the bowl of a mixer
  4. Increase the speed to medium. Continue mixing for 10-20 minutes or until the dough begins to clean the sides of the bowl and forms a smooth ball. This is a very soft dough, so don't be worried if it seems like it is a sticky mess at first.shot of cinnamon roll dough in a mixing bowl shot from aboveshot of cinnamon roll dough in a mixing bowl shot from above
  5. Perform the windowpane test to make sure your dough is done mixing. If it's still sticky just keep mixing.
  6. Place your dough into a lightly greased bowl. Cover it and place it into a warm spot to rise for 90 minutes or until the dough has doubled in size. If your area is cold it will take longer to double. It's more important that you pay attention to the dough and its size than listed rise time. This is called the first rise and allows the yeast to start working as well as gluten structure to develop and is a key part of getting the best homemade cinnamon rolls.sweet dough in a glass bowl
  7. Roll the dough out on a lightly floured surface into a large rectangle with a rolling pin that is roughly 18" wide and 8" tall.cinnamon roll dough rolled out into a rectangle
  8. Mix together the cinnamon, sugar, and melted butter until smooth to make the cinnamon mixture.
  9. Spread the mixture onto your cinnamon roll dough in an even layer. Leave about 1" without any filling on one side.cinnamon roll dough with cinnmon sugar mixture spread on top
  10. Roll the dough up into a spiral. Seal the edge with a little water so that it doesn't pull away from the roll while baking.close up of cinnamon roll dough rolled up into a spiral
  11. The easiest way to cut your cinnamon rolls is to use some unflavored dental floss. Cut the rolls into 12 equal pieces. Slide the dental floss under the roll, crossing the floss over itself and then cutting through the dough. Using dental floss avoids your cinnamon rolls from getting squished and mishappen. *I used a ruler to measure my rolls out into equal sized slices of 1.5" each.close up of cinnamon rolls being cut with dental floss
  12. Place your rolls into your pan. Place them into a warm spot for 90 minutes or until they have doubled in size again. If you want to bake your cinnamon buns the next morning then now is the time to put them in the fridge. Just cover them with plastic wrap first so they don't dry out.close up of sliced cinnamon rolls in a pan
  13. Preheat your oven to 350ºF.
  14. After your cinnamon rolls have doubled in size, pour the heavy cream into the bottom of the pan.close up of cinnamon rolls in cream in a pan
  15. Bake your rolls for 25-30 minutes. If you want to be technical about it, the internal temperature of the rolls should be about 195º-200ºF when they are fully baked. Don't just go by looks because the dough could be lightly brown on top and raw in the center.close up of baked cinnamon rolls in a white pan
  16. One the rolls are done baking, remove them from the oven. Place them onto a cooling rack while you make the cinnamon roll frosting.

If you loved working with enriched dough here, my brioche bread recipe is the next step and makes the most incredible French toast with any leftovers.

How To Make Cinnamon Roll Frosting

This cream cheese frosting is softer than a traditional cream cheese. The frosting and less sweet but you can use the regular cream cheese frosting if you like a sweeter frosting.

  1. In a medium bowl, cream your room temperature cream cheese until its smooth and lump free. Then add in your softened butter and cream until smooth.
  2. Add in the sugar, salt, and vanilla and continue mixing until smooth.close up of cream cheese frosting
  3. Spread the cream cheese frosting over the warm cinnamon rolls and enjoy!cinnamon rolls slathered in cream cheese frostingclose up of cinnamon roll on a white plate

More Recipes You'll Love

baked strawberry cinnamon rolls
Strawberry Cinnamon Rolls
Sticky Buns Recipe
sweet dough recipe
Master Sweet Dough Recipe
two loaves of homemade bread on cooling a rack on a white background

FAQ & TIPS

Can you make cinnamon rolls ahead of time?

If you don't have the time to let your homemade cinnamon rolls rise or you want to make them ahead of time, cover the rolls tightly with plastic wrap and place them in the fridge. The rolls will continue to rise in the fridge but very slowly. 
Take the rolls out of the fridge about 2 hours before you want to bake them, letting them proof until they double in size before baking. 
Finish them off with your cream cheese frosting and enjoy your delicious homemade cinnamon rolls! 

How do you store leftover cinnamon rolls?

Cover leftover frosted or unfrosted rolls tightly and store at room temperature for up to 2 days or in the refrigerator for up to 5 days

Can I use active dry yeast instead of instant yeast?

Yes you can. Just place the yeast into your warm milk with a Tablespoon of sugar and wait for it to start foaming before you add it to the rest of your cinnamon roll dough.

Recipe

homemade cinnamon roll recipe
Print Recipe
4.97 from 26 votes

Homemade Cinnamon Rolls Recipe

The softest fluffiest homemade cinnamon rolls recipe ever! Baked in heavy cream for the ultimate ooey gooey cinnamon buns slathered in a soft cream cheese frosting.
Prep Time20 minutes mins
Cook Time25 minutes mins
Proofing2 hours hrs 30 minutes mins
Course: Dessert
Cuisine: American
Servings: 12 Rolls
Calories: 476kcal
Author: Liz Marek

Equipment

  • One sheet pan (13"x18") or similar sized pan
  • Piping bag for frosting
  • Digital Kitchen Scale
  • Food thermometer optional

Ingredients

Cinnamon Roll Dough

  • 8 ounces milk 90ºF
  • 10 grams dried instant yeast
  • 28 ounces bread flour or all purpose flour
  • 8 ounces butter softened
  • 4 ounces sugar
  • 1 teaspoon salt
  • 3 large eggs room temperature
  • 1 ounce corn syrup optional
  • 8 ounces heavy cream (for soaking the rolls)

Cinnamon Filling

  • 8 ounces unsalted butter softened to almost melted
  • 8 ounces brown sugar
  • 2 Tablespoons cinnamon

Cream Cheese Frosting

  • 8 ounces cream cheese softened
  • 4 ounces unsalted butter softened
  • 4 ounces powdered sugar
  • ½ teaspoon salt
  • 1 Tablespoon heavy whipping cream or less if you like a thicker consistency
  • 1 Tablespoon vanilla extract
US Customary - Metric

Instructions

For the dough

  • Place the warm milk, yeast, and half the flour into the bowl of your stand mixer with the dough hook attached and mix until combined.
  • Add in the softened butter, sugar, salt, eggs, and the rest of the flour and mix until combined.
  • Add the corn syrup (if using) and mix until fully combined.
  • Increase the speed to medium. Continue mixing for 10 to 20 minutes or until the dough begins to clean the sides of the bowl and forms a smooth ball. This is a very soft dough, so do not be worried if it seems like a sticky mess at first. Just keep mixing.
  • Pull off a small piece of dough and gently stretch it between your fingers. It should stretch thin enough to be nearly translucent without tearing. If it tears or still feels sticky, keep mixing.
  • Shape the dough into a smooth ball and then place it into a greased bowl. Cover with a tea towel and let rise for 90 minutes in a warm place. To create a reliably warm proofing environment, preheat your oven to 170º F for 5 minutes, then turn it off. Place a bowl of warm water in the back of the oven, put the covered dough inside, and shut the door.

For the cinnamon sugar filling

  • Mix together the cinnamon, sugar, and melted butter until smooth to make the cinnamon mixture.

To make the rolls

  • Line a 13"x18" sheet pan with parchment paper (or similar sized pan)
  • Once your dough has proofed, roll the dough out on a lightly floured surface into a large rectangle with a rolling pin that is roughly 18 inches wide and 8 inches tall. If the dough keeps springing back, cover it and let it rest for 5 minutes. Resting relaxes the gluten and makes rolling much easier.
  • Spread the cinnamon filling mixture onto your cinnamon roll dough in an even layer. Leave about 1 inch without any filling on one side. This bare edge will help the log seal when you roll it.
  • Roll up the dough length-wise. Make sure the first roll is very tight so you get a nice spiral, then continue pushing the dough until you reach the edge. Brush a little water or egg wash along the bare edge so it seals the loose end of the dough.
  • The easiest way to cut your cinnamon rolls is to use some unflavored dental floss. Cut the rolls into 12 equal pieces. Slide the dental floss under the roll, crossing the floss over itself and then cutting through the dough. Using dental floss avoids your cinnamon rolls from getting squished.
  • Place the cinnamon rolls into your pan lined with parchment paper, equally spaced apart. Cover loosely with a tea towel and place in a warm spot to rise until the rolls have doubled in size, about 90 minutes. For the overnight method, cover tightly and refrigerate instead of doing the second proof at room temperature.
  • Before baking, pour your cream over the cinnamon rolls. This will make them extra soft and gooey after baking!
  • Bake your rolls at 350ºF for 25 to 30 minutes. Once the rolls are done baking, remove them from the oven. Place them onto a cooling rack while you make the cinnamon roll frosting.

For the cream cheese frosting

  • In a medium bowl, cream your room-temperature cream cheese until it is smooth and lump free. Then add in your softened butter and cream until smooth.
  • Add in the powdered sugar, salt, vanilla, and milk, and mix until smooth and fully combined.
  • Spoon the finished frosting into a large piping bag fitted with a round tip, or simply snip a small opening at the corner of a zip-top bag. This makes it easy to pipe the frosting evenly between and over all the rolls without dragging through the soft tops with a spatula.
  • Pipe the cream cheese frosting over the warm cinnamon rolls in a back-and-forth motion, covering each roll from edge to edge. The frosting will melt slightly into the warm layers and create that irresistible gooey bakery finish.

Video

Notes

Bread flour vs. all-purpose: Bread flour gives the best rise and layer definition. All-purpose works but produces a slightly softer, more delicate roll.
Overnight method: After cutting and placing in the pan, cover tightly and refrigerate overnight. In the morning, rest at room temperature 30 to 45 minutes, then bake as directed.
Cutting without squishing: Use unflavored dental floss or a pizza cutter for the cleanest cuts.
Freeze unbaked rolls: Let shaped rolls proof until almost doubled, wrap tightly, freeze up to 3 months. Thaw in the fridge overnight, then rest at room temperature 1 to 2 hours before baking.
Freeze baked rolls (unfrosted): Bake until pale (about 20 minutes), cool completely, wrap individually, freeze up to 2 months. Thaw at room temperature, reheat at 325º F for 10 to 12 minutes, then frost warm.
Reheating: Single rolls: microwave 20 to 30 seconds. Full pan: cover with foil, bake at 325º F for 10 to 15 minutes. Add a splash of heavy cream to the pan before reheating for extra moisture.
Storage: Covered at room temperature up to 2 days. Refrigerator up to 5 days. Always bring to room temperature or reheat before serving.

Nutrition

Serving: 1roll | Calories: 476kcal | Carbohydrates: 48g | Protein: 6g | Fat: 30g | Saturated Fat: 18g | Cholesterol: 114mg | Sodium: 266mg | Potassium: 81mg | Fiber: 1g | Sugar: 22g | Vitamin A: 971IU | Calcium: 48mg | Iron: 2mg

sweet dough recipe

January 1, 2020 Bread

Master Sweet Dough Recipe

This master sweet dough recipe is all you need to make tons of different desserts like cinnamon rolls, sticky buns, homemade panettone, and strawberry cinnamon rolls.

sweet dough recipe

I like to divide my sweet dough recipe in half and make two different things. This is great for the holidays because you can prep a lot of dough and then make multiple desserts. For an even richer enriched dough experience, try my brioche bread recipe, which uses a sponge method for an incredibly soft, buttery loaf.

What's In This Blog Post

  • Master Sweet Dough Ingredients
  • What is sweet dough?
  • How to make the sweet dough
  • How do you know when the sweet dough is kneaded enough?
  • How do you know your sweet dough has proofed long enough?
  • FAQ

Master Sweet Dough Ingredients

sweet dough ingredients
Gather your ingredients. Bring the eggs and butter to room temperature or slightly warmer

Instant dried yeast is the best kind of yeast to use for sweet dough because it rises quickly.

Bread flour is the best for making this type of dough because it has a high enough percentage of gluten to make the perfect chewy dough.

Sugar is used in this recipe to make it sweet. You can replace the sugar with brown sugar or any type of sugar replacement such as lakanto monkfruit sugar to make this bread sugar free.

What is sweet dough?

Sweet dough is an enriched dough which means it has things like eggs, butter and sugar added. These ingredients make the dough very soft and moist! It also means that it can take longer to rise. So plan ahead so you have enough time. 

closeup of sweet dough rising in a bowl

How to make the sweet dough

Mixing bread is not difficult but the added butter and eggs can get in the way of the yeast consuming the flour, resulting in a very slow rise. Follow these steps to ensure your sweet dough rises as quick as possible. 

You can also substitute active dry yeast for instant yeast which rises much faster. Follow the directions on the package for substitutions. 

  1. Warm your milk to 110ºF and combine with 1 Tablespoon sugar and your yeast to activate your yeast
  2. Put your flour in the mixing bowl with the milk/yeast mixture and stir until combined with the dough hook
  3. Add in your eggs one at a time, then the sugar, salt and butter and mix until combined
  4. Mix on medium speed for 5-10 minutes until the dough pulls away from the side of the bowl and the dough bounces back when you touch it. 
  5. Proof in a warm area for 90 minutes or until dough doubles in size
  6. Shape dough according to the recipe you are following
  7. Proof for another 60 minutes or cover with plastic wrap and place in the fridge overnight until you need to bake the bread. 
closeup of yeast foaming in milk
sweet dough
place dough in a greased bowl and cover with a tea towel
photo of cinnamon roll dough proofing in a bowl

How do you know when the sweet dough is kneaded enough?

The dough needs time to develop the gluten. But how can you tell when it'd developed? You can do a few tests along the way. 

When your ingredients first start mixing, notice the texture of the dough is rough and tearing a lot. It might be sticking to the sides of the bowl too. 

After a few minutes, the dough will clean the sides of the bowl. Touch the dough, does it feel really soft. When you press your finger into it, does it make an indent that does not spring back? If you pick the dough up does it ooze between your fingers? This means there isn't enough gluten yet. Keep mixing on medium speed. 

You can also take a small piece of dough and stretch it between your fingers to make a "window". If you can make the dough very thin, almost to the point you can see through it (like a window) then you know enough gluten has been developed and you can now place your dough into the bowl to rise. 

the window test to see if enough gluten has developed in dough

***optional warm oven technique** I pre-heat my oven to 170ºF for five minutes then TURN THE OVEN OFF. It should be barely warm inside. Place a bowl of warm water in the back of the oven and your covered bowl of dough into the oven and shut the door. This creates a nice warm/moist environment for the dough to rise. But don't forget about it and turn on your oven! High heat will kill your yeast. 

How do you know your sweet dough has proofed long enough?

Press two fingers down into the top of the dough to make a hole. Does the dough bounce back right away or does it slowly move? If it's moving slowly but mostly holds its shape then you're good to go.

If it's been 90 minutes and your dough has not doubled in size it could be for a couple of reasons. Your yeast is not active anymore. You'll have to toss the dough and try again with fresh yeast. Your kitchen could be too cold in which case you need to turn up the heat or try my warm oven technique I mention above.  

homemade dinner rolls on a blue sheet pan rising
Cover and let your bread proof (rise) until it's doubled in size or when you poke one side with your finger, it leaves an indentation

FAQ

What is sweet dough?

Sweet dough is an enriched dough which means it has things like eggs, butter and sugar added. These ingredients make the dough very soft and moist! It also means that it can take longer to rise. So plan ahead so you have enough time. 

Can you make sweet dough by hand?

You can definitely make sweet dough by hand, it just takes some elbow grease. After your ingredients are combined, take the dough to the workbench and knead with your hands until a smooth elastic ball forms. Kneading dough by hand takes about 15 minutes. 

Can you over-knead dough?

Yes, you can definitely over-knead the sweet dough using a mixer. If your dough becomes so tight that it starts tearing and feels very stiff and hard, it's probably over-mixed. There isn't much you can do to fix this. The bread will probably taste fine. Just not rise quite as much. 

Does sweet dough take a long time to make?

I almost always make my sweet dough recipe the day before I want to bake up my dessert. By the time I make the dough, proof it, and shape it into the dessert I want, the day is half gone.
After you shape the dough you can cover it with plastic wrap and place it into the fridge. The cold will slow down the second proof. Take the sweet dough out of the fridge about 1 hour before you need to bake or until it's doubled in size. Then bake according to the recipe! 

More Sweet Recipes

Cinnamon Rolls
Sticky Buns
Fast Bread Recipe

Recipe

sweet dough recipe
Print Recipe
4.82 from 58 votes

Master Sweet Dough Recipe

Use this master sweet dough recipe to make all kinds of different desserts like cinnamon rolls, sticky buns, doughnuts and more!
Prep Time20 minutes mins
Cook Time25 minutes mins
Proofing2 hours hrs 30 minutes mins
Course: Dessert
Cuisine: American
Servings: 50 ounces
Calories: 101kcal
Author: Liz Marek

Equipment

  • Stand mixer with dough hook
  • Digital Kitchen Scale
  • Instant Read Thermometer

Ingredients

  • 8 ounces milk 110ºF
  • 10 grams dried instant yeast (3 teaspoons)
  • 25 ounces all-purpose flour or bread flour
  • 8 ounces butter softened
  • 4 ounces sugar
  • 1 teaspoon salt
  • 3 large eggs room temperature
US Customary - Metric

Instructions

Before you Begin

  • Bring eggs and butter to room temperature before starting. Cold butter and eggs will break the dough emulsion and significantly slow gluten development. Warm the eggs in a bowl of warm water for 5 minutes if needed.

Sweet Dough

  • Warm milk to 110º F. Stir in 1 tablespoon of the measured sugar and the yeast. Set aside for 5 minutes until slightly foamy. If nothing happens, the yeast is dead; start over with fresh yeast.
  • Add flour to stand mixer bowl, then add the milk and yeast mixture. Mix on low with the dough hook to combine.
  • With mixer on low, add the remaining sugar, eggs, softened butter, and salt. Mix until combined. The dough will look rough and lumpy at this stage. This is normal.
  • Increase to medium speed and knead for 8 to 12 minutes until the dough cleans the sides of the bowl, feels smooth and elastic, and passes the windowpane test (stretch a small piece thin enough to be nearly translucent without tearing).
  • Shape dough into a smooth ball and place in a lightly greased bowl. Cover with a clean towel. Let rise in a warm spot for 90 minutes or until doubled in size.
    ***Optional:
    (I pre-heat my oven to 170ºF for five minutes then TURN THE OVEN OFF. It should be barely warm inside. Place a bowl of warm water in the back of the oven and your covered bowl of dough into the oven and shut the door)
  • Poke test: press two fingers into the dough. If it springs back slowly and mostly holds shape, it's ready.
  • Shape the dough according to your chosen recipe. Proof for another 60 minutes, or cover and refrigerate overnight for next-morning baking.

Video

Notes

Bread machine method: Add all ingredients in the order recommended by your bread machine manufacturer. Run the dough cycle. Remove, shape, proof, and bake as normal.
All-purpose flour substitute: Works 1:1 but produces a slightly softer, less chewy result.
Overnight make-ahead: After the first proof, punch down, wrap tightly in plastic, and refrigerate up to 2 days. Or shape, place in the baking pan, cover, and refrigerate overnight. Let come to room temperature 30 to 45 minutes before baking.
Plain dinner roll baking guidance: Divide into 16 equal balls (about 3 oz each), proof in a greased 9x13-inch pan for 45 to 60 minutes, brush with egg wash or melted butter, bake at 350º F for 20 to 25 minutes until golden. Internal temperature should reach 190º F.
Donut frying guidance: Fry cut, proofed donuts in 350º F oil for 1 to 2 minutes per side until deep golden.
Kolache baking guidance: 375º F for 15 to 18 minutes with filling pressed into center indentations before baking.
Freezing: Freeze shaped (but unproofed) dough on a sheet pan, then transfer to a freezer bag. Freeze up to 2 months. Thaw overnight in the fridge, come to room temperature 1 hour, then bake.

Nutrition

Serving: 4ounces | Calories: 101kcal | Carbohydrates: 13g | Protein: 2g | Fat: 4g | Saturated Fat: 3g | Cholesterol: 23mg | Sodium: 86mg | Potassium: 27mg | Fiber: 1g | Sugar: 3g | Vitamin A: 139IU | Calcium: 10mg | Iron: 1mg
 
Bulbasaur Cake Tutorial

January 1, 2020 Paid Video

Bulbasaur Cake

Skill level: Intermediate

Hi there Sugar Geeks! Our latest online course features one of my favorite Pokemon, Bulbasaur! In this tutorial, you will learn all the in's and out's of how to make this amazing sculpted cake, including how to properly make a structure for a cake like this, how to do the tricky mouth shape, finishing the cake board, creating the eyes, nose and ears and the bulb-shaped cake on top.

There's tons of templates and a full materials list included with the course, and over an hour and a half of video breaking down this cake step-by-step.

1:39:31 Minutes of Instruction

What You Will Learn

  • How to make a Bulbasaur Pokemon sculpted cake
  • Learn how to create a cartoony open mouth in cake
  • How to measure the check your work when making this cake
  • A simple technique to finish your board using fondant
  • How to fix fondant seams or cracks

Tutorial Chapters

  1. Making the structure 0:35
  2. Adding the feet 6:46
  3. Making rice cereal treats 10:02
  4. Rice cereal legs 13:21
  5. Carving the legs 18:37
  6. Stacking the cakes 24:26
  7. Carving the body 27:48
  8. Shaping the head 36:45
  9. Crumb coating the body 38:48
  10. Making the bulb 41:15
  11. Crumb coating the bulb 45:58
  12. Frosting the bulb 47:01
  13. Frosting the body 50:36
  14. Coloring the fondant 54:24
  15. Covering the bulb in fondant 59:35
  16. Covering the body in fondant 1:03:05
  17. Preparing the cake board 1:12:46
  18. Making the eyes and nose 1:16:01
  19. Painting the eyes 1:20:29
  20. Making the ears 1:22:48
  21. Making the tongue 1:25:42
  22. Adding the bulb 1:27:18
  23. Fixing the front leg 1:31:27
  24. Inserting a wooden dowel 1:33:18
  25. Painting the spots 1:34:43
  26. Adding toenails and teeth 1:37:31
  27. Airbrushing water 1:38:27

Downloads

Materials List

Bulbasaur Front Template 01

Bulbasaur Front Template 02

Bulbasaur Side Template 01

Bulbasaur Side Template 02

Bulbasaur Side Template 03

Bulbasaur Back Template 01

Bulbasaur Back Template 02

Bulbasaur Bottom Template 01

Bulbasaur Bottom Template 02

Bulbasaur Board Template 01

Bulbasaur Board Template 02

Bulbasaur Middle Board Template 01

Bulbasaur Middle Board Template 02

Bulbasaur Cake Tutorial

January 1, 2020 Course Preview

Bulbasaur Cake Tutorial

Skill level: Intermediate

Hi there Sugar Geeks! Our latest online course features one of my favorite Pokemon, Bulbasaur! In this tutorial, you will learn all the in's and out's of how to make this amazing sculpted cake, including how to properly make a structure for a cake like this, how to do the tricky mouth shape, finishing the cake board, creating the eyes, nose and ears and the bulb-shaped cake on top.

There's tons of templates and a full materials list included with the course, and over an hour and a half of video breaking down this cake step-by-step.

1:39:31 Minutes of Instruction

What You Will Learn

  • How to make a Bulbasaur Pokemon sculpted cake
  • Learn how to create a cartoony open mouth in cake
  • How to measure the check your work when making this cake
  • A simple technique to finish your board using fondant
  • How to fix fondant seams or cracks

Tutorial Chapters

  1. Making the structure 0:35
  2. Adding the feet 6:46
  3. Making rice cereal treats 10:02
  4. Rice cereal legs 13:21
  5. Carving the legs 18:37
  6. Stacking the cakes 24:26
  7. Carving the body 27:48
  8. Shaping the head 36:45
  9. Crumb coating the body 38:48
  10. Making the bulb 41:15
  11. Crumb coating the bulb 45:58
  12. Frosting the bulb 47:01
  13. Frosting the body 50:36
  14. Coloring the fondant 54:24
  15. Covering the bulb in fondant 59:35
  16. Covering the body in fondant 1:03:05
  17. Preparing the cake board 1:12:46
  18. Making the eyes and nose 1:16:01
  19. Painting the eyes 1:20:29
  20. Making the ears 1:22:48
  21. Making the tongue 1:25:42
  22. Adding the bulb 1:27:18
  23. Fixing the front leg 1:31:27
  24. Inserting a wooden dowel 1:33:18
  25. Painting the spots 1:34:43
  26. Adding toenails and teeth 1:37:31
  27. Airbrushing water 1:38:27

Downloads

Materials List

Bulbasaur Front Template 01

Bulbasaur Front Template 02

Bulbasaur Side Template 01

Bulbasaur Side Template 02

Bulbasaur Side Template 03

Bulbasaur Back Template 01

Bulbasaur Back Template 02

Bulbasaur Bottom Template 01

Bulbasaur Bottom Template 02

Bulbasaur Board Template 01

Bulbasaur Board Template 02

Bulbasaur Middle Board Template 01

Bulbasaur Middle Board Template 02

pie crust tutorial

December 29, 2019 Blog

Everything Pie Crust Recipe

You can use this ONE pie crust recipe for any type of pie, whether it's a double crust, single crust, berry pie, pumpkin, or lemon meringue. This pie crust does it all! The secret is frozen, grated butter, and lard! Don't believe me? Just ask your grandma what she used for the best pie crusts. Trust me!

Depending on the pie I'm making, I might use a mealy pie dough for liquid fillings like my pumpkin pie, so the bottom crust doesn't get soggy. Sometimes I'll use my all-butter flaky pie crust for a crust that you bake ahead of time and then fill like my chocolate haupia pie, or for a double-crust pie like my apple pie.

With this pie crust, you only have to use ONE.

What's In This Blog Post

  • Pie Crust Ingredients
  • How To Make Pie Dough
  • How To Roll Out Pie Crust
  • Tips For The Best Pie Crust
  • How do you prevent the pie crust from getting too brown?

Pie Crust Ingredients

All you need for the best pie crust of your life is butter, lard, ice water, salt, and flour.

Lard - This is what everyone used for the flakiest pie crusts and biscuits back in the day until vegetable shortening came along. Some people argue that seed oils found vegetable shortening are even worse for you than the fat in lard and I might be one of them. Also, the taste, totally incomparable! Just like my donut recipe, I think lard tastes the best!

Frozen butter - Grating frozen butter into your pie crust allows you to work your butter in faster without it getting too melty. The butter adds flavor, and the moisture in the butter turns into steam, creating gorgeous layers in the pie crust without adding too much water.

Ice cold water - Helps keep everything cold. Cold pie dough is happy pie dough. The warmer your pie dough gets, the stickier it gets and the harder it is to handle. Most problems with rolling out pie crust come from it being too warm.

How To Make Pie Dough

  1. Grate your cold butter and place it into the freezer until you need it.
  2. Add your flour and salt into a medium-sized bowl.
  3. Add in the lard and work it into the flour with your hands, pastry cutter, knives or two forks to make a crumbly mixture.
  4. Add in your grated butter and toss the mixture to coat the butter evenly with the flour/lard mixture.
  5. Add in your ice-cold water in thirds, tossing lightly with your hands to moisten the mixture evenly until the dough begins to stick together. You may not need all the water.
  6. Press the dough into two disks that are about 1" thick.
  7. Wrap them in plastic wrap and refrigerate them for about 2 hours or up to 48 hours to allow the water to absorb into the flour.

How To Roll Out Pie Crust

  1. Starting with your first disk. Allow it to sit at room temp for 10-15 minutes to begin warm up but you don't want it soft.
  2. Dust your work surface with a little flour. Not too much.
  3. Begin by pressing firmly onto the top of the dough evenly with your rolling pin (see video) to begin loosening the dough and making the butter elastic.
  4. Once it starts to move without cracking you can start rolling.
  5. Begin by rolling from the center outwards. Rotate your dough periodically to keep it in a circlular shape. Keep your dough moving after every time you roll to prevent sticking.
  6. Once your have a 12" round circle of dough that is about ⅛" thick you are good to use your pie crust however your pie recipe instructs you to.
lattice pie crust

Brush the surface with more egg wash and some sanding sugar if desired for texture, color, and flavor before baking. 

closeup of apple pie

Tips For The Best Pie Crust

  • Tip #1: Keep your butter COLD. When butter is cold, it doesn't blend in with the flour and when you bake the pie crust, that butter quickly melts, the liquid evaporates, creating steam, which creates flaky layers.
  • Tip #2: Be mindful of your butter-to-flour ratio. ...
  • Tip #3: Mix butter into flour carefully. ...
  • Tip #4: Try European-style butter. ...
  • Tip #5: Add water slowly. ...
  • Tip #6: Use very cold water. ...
  • Tip #7: Chill your dough before rolling it out.

How do you prevent the pie crust from getting too brown?

If your pie crust has not shrunk from the sides of the plate and is getting too brown, you can cover the top of the crust with some aluminum foil or you can move one of your oven racks to the top of the oven and put a sheet pan or piece of aluminum foil on the rack to prevent browning. I prefer to do it this way so that I don't accidentally damage my pie. 

You can also purchase pie crust protectors that sit on top of the pie crust as it bakes to prevent browning. 

So hopefully this has answered a lot of your questions on how to make the perfect pie crust. Get my recipe for mealy dough and flaky pie dough below. 

For more pie recipes, check these out!

Pumpkin Pie Recipe
Haupia Pie Recipe
Apple Pie Recipe

Recipe

pie crust tutorial
Print Recipe
No ratings yet

The Everything Pie Crust

This all-purpose pie crust is the perfect recipe for any type of pie! Double crusts, single, cream fillings, or lemon merinuge. The secret ingredients are shredded frozen butter and LARD! Lard not only tastes delicious but it makes the flakiest, best pies you'll ever have. Don't believe me? Just ask your grandma! You'll never need another pie crust recipe!
Prep Time10 minutes mins
Cook Time50 minutes mins
Refrigeration2 hours hrs
Total Time3 hours hrs
Course: Dessert
Cuisine: American
Servings: 2 crusts
Calories: 1088kcal
Author: Liz Marek

Equipment

  • 9" glass pie plate

Ingredients

  • 3 cups all-purpose flour
  • 1 teaspoon salt
  • 7 Tablespoons unsalted butter frozen and grated
  • 8 Tablespoons lard cold
  • ½ cup ice cold water
US Customary - Metric

Instructions

  • Combine the flour, salt, and cold lard together with your hands or a fork to make a crumbly texture.
  • Add in the frozen shredded butter. Toss lightly to combine and coat the butter with the flour mixture being careful not to warm the butter too much with your hands.
  • Add in the water in thirds. Tossing between each addition until the mixture is moistened and begins to stick together.
  • Press the dough into two equal sized disks about 1" thick.
  • Wrap the dough in plastic wrap and refrigerate it for a minium of two hours and up to two days. Or freeze and use it later!
  • When you're ready to make your pie, remove it from the fridge.
  • Dust the surface of your counter with a little flour.
  • Press down firmly with your rolling pin to begin flattening the pie dough.
  • Roll the dough out to ⅛" thick, moving the dough often and adding more flour as needed. Place into your pie dish as directed in your pie recipe. Chill your dough for 30 minutes before you bake it.

Notes

Brush your pie crust with an egg wash (1 egg plus 1 Tablespoon of water whisked together) to promote browning and a shiny finish.
Add sparkling sugar to the egg washed pie crust before baking for a beautufil finish.
Baking your pie at 425ºF for the first 15 minutes of baking will make your crust bake up super tall and fluffy. 
Reduce the temperature after 15 minutes to 350ºF for the remainder of the baking.
 

Nutrition

Serving: 1crust | Calories: 1088kcal | Carbohydrates: 144g | Protein: 20g | Fat: 47g | Saturated Fat: 29g | Polyunsaturated Fat: 3g | Monounsaturated Fat: 12g | Trans Fat: 2g | Cholesterol: 120mg | Sodium: 1175mg | Potassium: 243mg | Fiber: 6g | Sugar: 1g | Vitamin A: 2077IU | Vitamin C: 5mg | Calcium: 74mg | Iron: 9mg
chocolate haupia pie

December 23, 2019 Pies And Tarts

Chocolate Haupia Pie

Chocolate haupia pie is a no-bake cream pie made with coconut milk. Half of the custard is layered into a flakey pie crust that has been baked and cooled. The remaining custard is mixed with chocolate and poured on top. The pie is chilled and then topped with stabilized whipped cream.

chocolate haupia pie

I decided to re-create this chocolate haupia pie after visiting the famous Ted's bakery in Haleiwa, Hawaii.

What's in this blog post

  • Ingredients
  • How to make the crust
  • How to make the haupia filling
  • How to make the haupia pie

Ingredients

Haupia (how-pee-uh) is just a mixture of coconut milk, sugar, and cornstarch and is often served at Luaus or family gatherings. The texture is a bit firmer than custard and holds its shape well, so you can eat it with your fingers, but it is deliciously smooth and creamy.

haupia on a leaf

The first time I had haupia pie was on our recent trip to Oahu to visit my aunt and cousins I've never met before. My mom passed away when I was 19, so I didn't get a chance to ask her about her family history. It was really awesome to meet my Mother's sister and all her kids and their kids. My uncle served up some delicious burgers, POG, and sweet rolls topped with a sticky-sweet frosting called pani popo.

liz marek with her Hawaiian family

I was also 3 months pregnant with my son so I wanted to EAT ALL THE FOOD.  I asked my followers what places I should visit while I was there and overwhelmingly, Ted's Bakery was high up on the list.

teds bakery pies

I had never had haupia pie, but I had heard of it. I wasn't sure what to expect. I'll never forget sitting on the beach as I took my first bite, and I had a look of shock on my face. Omg it was so good! Creamy, slightly coconut-y, and the crust was melt-in-your mouth delicious.

Before I took my next bite, I knew I wanted to try and re-create it.

How to make the crust

Haupia pie is so super simple to make. It all starts with blind-baking the pie crust. This is necessary since the haupia pie filling is not baked. You can start with my flakey pie crust recipe or use a pre-made crust!

  1. Place the flour and salt into a medium-sized bowl.
  2. Grate your cold butter directly into the flour mixture.
  3. Toss the mixture until the butter is coated with flour.
  4. Add in the water in small amounts and mix with your other hand until the flour is almost all gone.
  5. Press the dough together and wrap in plastic wrap to chill for at least one hour, but overnight is best
  6. Let the chilled dough come to room temperature for 20 minutes
  7. Roll out the dough ⅛" thick and place into your 9" pie plate
  8. Trim off the excess dough but leave ¼" of dough all the way around to account for shrinking
  9. Poke some holes in the bottom of the crust with your fork and flute the edges of the dough with your fingers if desired.
  10. Brush the surface of the dough with egg wash (one egg whisked with 1 tablespoon of water) to promote browning and a shiny crust.
  11. Freeze for 20 minutes.
  12. Place some aluminum foil or parchment paper in the bottom of the pie and fill with pie weights.
  13. Bake in the oven at 350ºF for 15 minutes.
  14. Remove from the oven, carefully lift out the aluminum foil and weights.
  15. Return the crust to the oven and bake for an additional 15 minutes or until a golden brown.
  16. Let cool fully before filling
ingredients of flour, butter and a cheese grater
grating cold butter into the flour mixture helps keep the butter cold while you work
closeup of mealy pie dough in a mixer
mealy pie dough wrapped in plastic wrap to rest
pie dough in a pie pan
pie dough that has been rolled out into a pie plate and edges have been fluted
blind baking pie dough
closeup of flakey pie dough in a pie pan that has been blind baked

How to make the haupia filling

  1. In a medium saucepan combine together the coconut milk, the first quantity of water, the coconut extract, and the sugar over medium-high heat until it begins to simmer.
  2. Combine the second quantity of water and the cornstarch together to make a slurry.
  3. Once the mixture is simmering, reduce the heat to medium-low and add in the cornstarch mixture. Whisk constantly until thickened. About 3 minutes.
  4. Add in your vanilla and stir to combine.
  5. Divide the mixture into two bowls.
  6. Add the chocolate to one of the bowls and whisk it together until the chocolate is fully melted.

How to make the haupia pie

  1. Pour the chocolate mixture into the cooled pie crust *note I accidentally did this backwards on my pie, don't do as I do, do as I say haha
  2. Chill the crust with the chocolate filling for 15 minutes or until it's set.
  3. Pour the remaining coconut mixture on top of the cooled chocolate layer and put it back in the fridge to chill for at least an hour or overnight.
  4. Top with your whipped cream and some shaved chocolate.

Recipe

chocolate haupia pie
Print Recipe
5 from 12 votes

Haupia Pie

Haupia pie is a traditional Hawiian dessert made from thickened coconut milk and chocolate and layered into a pre-baked pie crust and topped with whipped cream.
Prep Time5 minutes mins
Cook Time5 minutes mins
resting time1 hour hr
Total Time1 hour hr 10 minutes mins
Course: Dessert
Cuisine: American
Servings: 8 servings
Calories: 678kcal
Author: Liz Marek

Equipment

  • pie weights

Ingredients

Flakey Pie Dough

  • 10 ounces all-purpose flour
  • ¼ teaspoon salt
  • 8 ounces cold butter grated
  • 2 ounces ice water

Haupia Pie Filling

  • 14 ounces coconut milk one can
  • 8 ounces water or milk
  • 2 teaspoons coconut extract
  • 7 ounces granulated sugar
  • 8 ounces water
  • 2 ounces cornstarch
  • 6 ounces chocolate good quality
  • 1 teaspoon vanilla extract

Whipped cream topping (optional)

  • 12 ounces heavy cream
  • 2 ounces powdered sugar
  • 1 teaspoon vanilla extract
  • 2 teaspoons powdered gelatin
  • 3 Tablespoons cold water
  • 1 teaspoon heavy cream
US Customary - Metric

Instructions

  • Preheat the oven to 375ºF

For the flakey dough

  • Place the flour and salt into a medium-sized bowl
  • Grate your cold butter directly into the flour mixture
  • Toss the mixture until the butter is coated with flour
  • Add in the water in small amounts and mix with your other hand until the flour is almost all absorbed.
  • Flatten and wrap in plastic wrap. Let the dough chill for 30 minutes or overnight before using it. Let warm for 20 minutes or until pliable but still firm before rolling out.
  • Roll out dough ⅛" thick and place it into a 9" pie plate. Cut off the excess, leave ¼" of dough all the way around to account for shrinking.
  • Brush the surface of the pie with egg wash (one egg whisked with 1 tablespoon of water) to promote even browning and a shiny crust
  • Poke some holes in the bottom of the dough with a fork.
  • Freeze the pie for 20 minutes
  • Place some foil or parchment paper in the pie pan then fill to the top with pie weights or dried beans. Bake for 15 minutes.
  • Remove the foil carefully. Put the pie back in the oven for 15 minutes or until it's golden brown and has pulled away from the sides of the pie plate.
  • Set aside to cool

For the haupia pie filling

  • in a medium saucepan combine together the coconut milk, first quantity of water, coconut extract and sugar over medium-high heat until it begins to simmer.
  • Combine together the second quantity of water and the cornstarch and whisk to make a slurry
  • Once the mixture is simmering, reduce the heat to medium-low and add in the cornstarch mixture. Whisk constantly until thickened. About 3 minutes. Add in your vanilla and stir to combine.
  • Divide the mixture into two bowls.
  • Add the chocolate to one of the bowls and whisk until the chocolate is fully melted.
  • Pour the chocolate mixture into the cooled pie crust *note I accidentally did this backwards on my pie, don't do as I do, do as I say haha
  • Chill the crust with the chocolate filling for 15 minutes or until set
  • Pour the remaining coconut mixture on top of the cooled chocolate and put it back in the fridge to chill for at least an hour or overnight.

Stabilized whipped cream

  • Sprinkle your gelatin over the water and let bloom for 5 minutes. 
  • Melt gelatin for 5 seconds in the microwave. If not fully melted do another 3 seconds. You can tell gelatin is melted when there are no granules of unmelted gelatin visible.
    After dissolving your gelatin, add in 1 teaspoon of heavy cream and mix. If your gelatin is too cold, heat again until it's melted (5 seconds).
  • In a cold mixing bowl, whip your heavy cream to soft peaks
  • Add in your powdered sugar and vanilla
  • Turn your mixer down to low and drizzle in your gelatin and mix until whipped cream forms stiff peaks. Pipe onto your pie as desired.

Video

Nutrition

Serving: 1serving | Calories: 678kcal | Carbohydrates: 87g | Protein: 9g | Fat: 35g | Saturated Fat: 24g | Cholesterol: 85mg | Sodium: 116mg | Potassium: 258mg | Fiber: 2g | Sugar: 43g | Vitamin A: 673IU | Vitamin C: 1mg | Calcium: 52mg | Iron: 4mg
 

apple pie

December 22, 2019 4th of July

Caramel Apple Pie

This caramel apple pie has tons of tender (never mushy) apples, a thick and creamy salted caramel sauce (not watery), and the flakiest all-butter crust you've ever tasted. Top it with homemade whipped cream and you're suddenly the Holiday hero!

close up of a slice of caramel apple pie on a white plate

This is one of my favorite pies to make. I've slightly tweaked it over the years, making it better and better each time!

What's In This Blog Post

  • Ingredients
  • The best apples for apple pie
  • Tips for a foolproof pie
  • How to make the apple pie filling
  • How to make the pie crust
  • How to make a lattice crust
  • How to assemble your apple pie
  • How do you know when an apple pie is done baking?
  • FAQ

Ingredients

caramel apple pie ingredients

Apples - you will need 32 ounces (2 lbs) of apples, so depending on the variety you purchase, you could use between 6-10 apples. I usually get a few extra to account for the loss of the core and skin (and snacking).

Cornstarch - I'm using cornstarch to thicken my filling, but you can also use clear jel if you want a clearer filling. I prefer how cornstarch stabilizes the pie filling without making it too solid.

Caramel Sauce - I'm using my homemade caramel sauce recipe, but you can absolutely use store-bought to save time.

Spices - This is where you can really make this caramel apple pie your own. Use the spices you like, add more or less!

Honey - I love using honey with apples. Not only does it add an amazing flavor but it also keeps the filling nice and juicy.

Butter - You'll want to use a European-style butter for this all-butter crust. European butter contains more fat and less water, resulting in an ultra-flaky crust with all the flavor you want and none of the toughness that can come from using low-quality butter.

The best apples for apple pie

You can use any kind of apple that you want, but try to choose apples that are good for baking and will hold their shape after baking. At the end of the day, the best apple to use for making apple pie is the one that you have! So if you have an apple tree nearby, use those!

  • Jonagold - Slightly tart, crisp, and holds its shape well after baking.
  • Honeycrisp - Crisp, sweet, holds its shape well after baking.
  • Braeburn - Crisp, sweet, and very juicy. Holds its shape well for baking.
  • Mutsu - Sweet, firm, and great for baking
  • Pink Lady - Sweet, crisp, and firm. Great for baking.

I've tested this recipe with many different types of apples. I live in Oregon, so I have many types of apples to choose from. There used to be an amazing apple festival every year where you would just go and taste apples and rank them. Talk about fun!

Tips for a foolproof pie

  1. Pre-cook your pie filling. This ensures our apples are perfectly cooked, the filling is nice and thick, and our crust doesn't get soggy. If you don't pre-cook your apples, they shrink inside the pie, and then you get that gap between the filling and the top crust. Also, all the water releases from the apples as they cook, resulting in that soggy bottom.
  2. I like to core my apples first, peel off the skin, and then slice them into thin wedges.
  3. It's best to make your filling the same day as your crust and let both chill overnight.

If you love caramel and apples together, you'll also want to try my homemade caramel apples recipe, a fall classic that's a fun family project.

How to make the apple pie filling

Making apple pie filling is really easy to do and will ensure your apple pie isn't a watery mess.

cooked apple pie filling
  1. Peel your apples. Apple's skin doesn't taste good in apple pie.
  2. Core your apples using an apple corer or a knife.
  3. Slice the apples into ½" wedges.
  4. Combine your apples in a large saucepan over medium heat with the butter, and saute until the apples are warm. For extra flavor, you can brown your butter first then add in the apples.
  5. Add in the first quantity of apple juice, sugar, honey, lemon juice, and spices. Continue cooking until the apples are al dente.
  6. Combine your cornstarch with the water to make a slurry. Add it to the mixture and continue cooking until the apple filling has thickened (2-3 more minutes).
  7. Set the apple pie filling aside to cool.

How to make the pie crust

For the pie crust, you want to use two different types of pie crusts. Mealy dough, which is perfect for resisting liquids and baking up nice and crisp in the oven and flakey pie dough which is more tender, puffs up more and looks beautiful for the top crust.

How to make a lattice crust

lattice pie crust

How to assemble your apple pie

Let your chilled mealy pie dough warm at room temperature for 20-30 minutes before you try to roll it out. It should be firm enough that the butter isn't sticky and melted but soft enough that it can be rolled out with a rolling pin.

  1. Place the dough into the pie tin and cut off the excess. Leave about ¼" around the outside edge to account for shrinkage.
  2. Fill the pie crust with your cooled apple filling.
  3. Roll out your flakey pie dough and cut into 1" strips
  4. Brush your egg wash to the outer edge of the pie crust
  5. Assemble your lattice weave and trim off the excess edges to match the bottom crust
  6. Pinch the edges and flute if desired
  7. Brush the surface with more egg wash and sprinkle with sanding sugar for texture and flavor
  8. Chill for 30 minutes in the fridge before baking.
close up of apple pie with lattice

How do you know when an apple pie is done baking?

Move the oven rack to the lowest setting. Place your apple pie into the oven at 425ºF. Bake for 15 minutes then reduce the temperature to 375ºF and bake for another 30-45 minutes until the crust shrinks away from the sides of the pie plate. If you take the pie out before it shrinks from the sides then you can be sure that the very center of the dough of the bottom crust is still going to be raw.

If your crust is browning too much, cover it with tinfoil to protect it from browning although a deep golden brown is preferred for taste and texture. Only cover if you see something turning black.

top view of apple pie

FAQ

How to store apple pie

It's best to let your apple pie cool for about an hour before serving so the crust has time to set and the filling has time to solidify but what's better than warm pie and ice cream? You can also store the pie in the fridge for the next day and then warm it before serving if you want. Store the leftovers in the fridge covered with plastic wrap for up to two days.

Want more apple? Check out these other recipes

Fresh apple cake
Applesauce spice cake
Stabilized whipped cream recipe 
Caramel Sauce Recipe
Shiny Candy Apple Recipe
Apple Cake Recipe

Recipe

close up of a slice of caramel apple pie on a white plate
Print Recipe
5 from 5 votes

Apple Pie Recipe

The best apple pie has tender, never mushy apples and the flakiest all-butter crust you've ever tasted. No soggy bottoms, no cracked crusts. Serve warm with stabilized whipped cream or ice cream.
Prep Time15 minutes mins
Cook Time45 minutes mins
Total Time1 hour hr
Course: Dessert
Cuisine: American
Servings: 8 servings
Calories: 837kcal
Author: Liz Marek

Ingredients

Flakey Pie Dough

  • 10 ounces all-purpose flour
  • ¼ teaspoon salt
  • 8 ounces cold butter grated or cut into small cubes
  • 3 ounces ice water

Mealy Pie Dough

  • 12 ounces all-purpose flour
  • ¼ teaspoon salt
  • 6 ounces cold butter grated
  • 1 large egg cold
  • 1 ounce ice water

Apple Pie Filling

  • 2 lbs apples about 6 medium-sized apples
  • 1 Tablespoon lemon juice
  • 1 ounce unsalted butter
  • 4 ounces brown sugar
  • 2 teaspoons cinnamon
  • ¼ teaspoon cloves
  • ¼ teaspoon salt
  • 12 ounces apple cider or apple juice
  • 1 ounce cornstarch
  • 2 ounces apple cider or apple juice
  • 1 Tablespoon honey
  • 1 Tablespoon vanilla extract
  • 1 teaspoon orange extract optional
US Customary - Metric

Instructions

  • Before you begin: Make both doughs first so they have time to chill, at least 1 hour or overnight for the flaky dough, at least 20 minutes or overnight for the mealy dough. Preheat your oven to 425º F before you're ready to bake.

For the Flaky Dough

  • Place the flour and salt into a medium bowl.
  • Add the grated cold butter and toss lightly with your hands to coat it in the flour.
  • Sprinkle in half the water and use your hand like a claw to start bringing the mixture together. Do NOT knead it.
  • Keep drizzling in water until the flour and butter mixture is mostly stuck together. Press it together, wrap in plastic wrap, and flatten into a disk rather than a ball.
  • Chill for at least 20 minutes (ideally 2 hours or overnight). Let it warm on the counter for 20 minutes, or until pliable but still firm, before rolling out.

For the Mealy Dough

  • Combine the flour and salt in the bowl of a stand mixer fitted with the paddle attachment.
  • Add the cold butter and mix on low until the mixture resembles coarse, mealy sand.
  • Add the egg and water and mix on low until the dough comes together.
  • Flatten and wrap in plastic wrap. Chill for at least 20 minutes (ideally 2 hours or overnight). Let it warm for 20 minutes, or until pliable but still firm, before rolling out.

For the Apple Filling

  • Peel, core, and slice the apples into ½ inch wedges.
  • Place the apples in a large pan over medium heat with the butter. Sauté until warm, about 1 minute.
  • Add the 12 ounces of apple cider, cinnamon, cloves, sugar, honey, salt, and lemon juice, and stir to combine.
  • Cook, stirring occasionally, until the apples have softened but still have a little bit of firmness.
  • Whisk the 2 ounces of apple cider with the cornstarch in a separate cup to make a slurry, then stir it into the apples over medium-high heat.
  • Cook and stir for 2 to 3 minutes, until the mixture bubbles and the cornstarch is fully cooked.
  • Stir in the orange extract and vanilla extract. Remove from the heat and let cool completely.

Pie Assembly

  • Preheat your oven to 425ºF
  • Let the mealy dough and flaky dough warm at room temperature until pliable but still firm.
  • Roll the mealy dough to ⅛ inch thick and fit it into your pie dish. Trim the excess, leaving ¼ inch around the edge to account for shrinkage.
  • Fill the crust with the cooled apple filling.
  • Roll out the flaky dough and cut it into 1 inch strips.
  • Brush the edges of the bottom crust with egg wash (1 egg whisked with 1 Tablespoon of water).
  • Weave the strips over the filling to form a lattice.
  • Pinch the lattice and bottom crust together and flute the edges if desired.
  • Brush the whole surface with egg wash and sprinkle with sanding sugar.
  • Chill the unbaked pie for 30 minutes in the refrigerator before baking.
  • Place the pie on the bottom oven rack. Bake for 15 minutes at 425º F, then reduce the temperature to 350º F and bake for another 35 to 45 minutes, until the crust has shrunk away from the sides of the pie dish.
  • Let cool for 1 hour before serving. Store leftovers in the refrigerator for up to 2 days.

Video

Notes

Ingredient notes: This crust uses two different doughs on purpose, mealy on the bottom to resist the juicy filling, flaky on top for a tender lattice. A European-style butter works well in both doughs if you want extra flavor. 
Pan options: Written for a standard 9-inch pie pan.
Make-ahead and storage: For the pie dough, wrap it tightly in plastic wrap and refrigerate for 2 to 3 days, or place it wrapped in a freezer-safe bag for up to 3 months. If you roll out the dough and fit it into your pie pans first, wrap each one individually in plastic wrap before freezing. They'll keep for up to 3 months, but they hold their best texture within the first 1 to 2 months. For the apple filling, make sure to cool it completely, then refrigerate for 3 to 4 days until you're ready to assemble. You can also freeze fully assembled, unbaked pies for up to 3 months and bake them straight from frozen, adding extra bake time as needed. I recommend a metal pie dish or disposable pie tin for freezing, since a frozen glass dish can crack when it goes straight into a hot oven. Baked pie leftovers keep in the refrigerator for up to 2 days.
Substitutions: The cinnamon and cloves are easy to swap for other warm spices if you prefer, see the Make This Recipe Your Own section above for ideas.
Critical do-nots: Don't skip the chill time on either dough. Don't pull the pie the moment it looks golden, check that the crust has shrunk from the sides of the dish before trusting it's done.

Nutrition

Serving: 1serving | Calories: 837kcal | Carbohydrates: 101g | Protein: 10g | Fat: 45g | Saturated Fat: 28g | Polyunsaturated Fat: 2g | Monounsaturated Fat: 11g | Trans Fat: 2g | Cholesterol: 138mg | Sodium: 556mg | Potassium: 303mg | Fiber: 5g | Sugar: 33g | Vitamin A: 1425IU | Vitamin C: 6mg | Calcium: 57mg | Iron: 4mg
 

closeup of homemade dinner rolls with butter and sea salt

December 18, 2019 Blog

Fast Dinner Rolls

You can make these fast dinner rolls in 60 minutes! They bake up super soft and fluffy and are the perfect side to any meal. To add a sweet bread to your holiday table, try my mini panettone, an Italian Christmas bread baked in individual paper molds for easy gifting.

closeup of homemade dinner rolls with butter and sea salt

It always seems like whenever I want fresh dinner rolls, it's 3 pm and dinner is already on the stove! Maybe it's just me?

I cannot live without this fast dinner roll recipe, and it's very versatile! You can turn them into garlic knots, burger buns, pretty much any last-minute kind of baked bread you might need.

Dinner rolls are a rich yeasted bread similar to sweet dough but with less sugar. This means they have fat (butter and eggs) in them, which keeps them soft and fluffy.

Yeasted bread that does not have butter or eggs is called a lean bread and is chewier and has a crunchy crust. There are tons of bread recipes out there, but this is a great one for beginners or if you've never worked with yeast before and want to learn to make your own homemade bread. 

What's In This Blog Post?

  • Dinner Roll Ingredients
  • What is yeast?
  • What temperature does yeast grow?
  • Terminology and timing
  • How to make easy dinner rolls step-by-step

Dinner Roll Ingredients

ingredients for making homemade dinner rolls

To be clear, when you're making bread the only things you really need are flour, water, salt, and yeast. This bread has added sugar, butter and eggs to make the bread softer, moister and a little bit sweet. 

  • Flour - The main ingredient in bread. When combined with liquid, the gluten in the flour is activated and creates the structure for bread. The more you knead it, the more structure is created which is why kneading is crucial for bread to turn out. You can use bread flour or all-purpose flour. 
  • Milk - Activates the gluten in the flour, activates the yeast and makes the rolls more tender. Warm to 110ºF  
  • Active Dry Yeast - Makes the dough rise and also provides flavor. (You can also use Instant dry yeast, let rise for 30 minutes the first proof then 10 minutes for the second proof after you shape your rolls)
  • Sugar - Feeds the yeast and helps keep the rolls moist and soft.
  • Egg - Provides flavor and structure to the dough and helps keep it soft.
  • Salt - Crucial to good flavor in your bread!
  • Softened Butter - The key ingredient for super-soft, flakey dinner rolls. 

What is yeast?

closeup of yeast foaming in milk

There are different kinds of yeast but just to be clear, we're talking about baking yeast. Yeast is a naturally occurring, living organism that need sugar, warmth, and moisture to grow.

That must sound strange right? Like, what do you mean a LIVING ORGANISM? Basically, yeast is like a bunch of tiny mushrooms. Mushrooms grow best in warm environments with access to food (light) and moisture.

When they have the right conditions, they grow like crazy. Yeast does the same thing. When you give yeast warmth, moisture and food (sugar) it grows like crazy, producing alcohol and carbon dioxide through fermentation. The carbon dioxide get's trapped in the dough and expands during baking which causes the bread to rise. 

Baking yeast comes in three formats, fresh yeast, dried yeast, and instant yeast. Back in the day, I worked at a bread bakery and we made HUGE 50 lb batches of bread using fresh yeast cakes. The cakes are kept in the refrigerator and crumbled over flour, sugar, and water, and very specific temperatures to make the dough. That is the only time I've ever seen it used.

Typically, most people use dried yeast which is in a dormant stage until it is introduced to moisture, warmth, and sugar. Imagine a tiny bag of dried mushroom roots, that's dried yeast. 

What temperature does yeast grow?

Yeast will start growing between 110ºF - 115ºF and rises the best at about 95ºF. If the yeast gets too hot (around 120ºF) it will start dying. Yeast completely dies off at 140ºF. 

homemade dinner rolls on a blue sheet pan rising

Terminology and timing

  1. Proofing Yeast - Mixing the yeast in with the warm milk and sugar get's the yeast growing. This is also a good way to check if your yeast is expired. If it doesn't start bubbling after 5 minutes, toss it out and buy new yeast. 
  2. Kneading Dough - Kneading is very important for making bread. The more you knead the dough, the more structure you create. That structure is needed to trap all the carbon dioxide that the yeast makes in order for the bread to rise. Underkneading your dough can result in a very poor rise and texture. You should knead your dough for about 8-10 minutes either by hand or in your mixer or until the dough has a smooth surface and pulls away from the bowl. 
  3. First Rise - Once you've created the structure for your bread, now it's time to let the yeast do it's thing. Set your dough in a warm place (about 80º) and let the dough rise until it doubles in size. About 90 minutes. (30 minutes for instant yeast)
  4. Shaping Dough - Once your dough has doubled in size, it's time to shape it. Shaping is important so that the surface of your bread is smooth and bakes evenly.
  5. Proofing Dough - Once your dough is shaped, all that's left to do is let your bread rise one more time to develop the final structure and flavor of the bread. About 30 minutes. (10 minutes for instant yeast)
  6. Baking - Times for baking your bread will vary depending on how big the dough is. Rolls bake faster than loaves of bread. Lean bread is done when the internal temperature reaches 190ºF and rich bread is finished at 200ºF. It's better to bake for longer until the bread reaches a nice golden color than to under-bake which can result in a doughy interior. 
closeup of yeast foaming in milk
smooth dinner roll dough
putting bread dough in a lightly greased bowl and covering with a towel to proof
homemade dinner rolls on a blue sheet pan rising

How to make easy dinner rolls step-by-step

Time to make the dinner rolls! The first thing we want to do is make a comfy environment for the yeast to start growing.

  1. Warm your milk in the microwave or on the stovetop until it reaches 109ºF.
  2. Add your sugar to the milk (the food for the yeast) and then add the dried yeast.
  3. Give it a stir and set it aside for about 5 minutes. You should start to see some bubbles growing on the surface, a good sign the yeast has been activated!activated yeast
  4. Add your flour to the mixing bowl with the egg and yeast mixture.
  5. Mix with the dough hook on low speed until everything is blended.
  6. Then add your butter and salt to the bowl.
  7. Continue mixing on low for 10-12 minutes or until the dough ball pulls away from the bowl and is firm and elastic. mixing homemade dinner rolls
  8. Touch the side of the dough ball, does it spring back? It's ready. If it still seems very soft and oozes between your fingers, it hasn't developed enough gluten. Keep mixing until it passes the windowpane test. smooth dinner roll dough
  9. Place the dough into a lightly oiled bowl.
  10. Cover the bowl with a tea towel and set it in a warm place (but not too warm) for 60 minutes or until it doubles in size. Too much warmth will kill the yeast. Too cold and they won't grow quickly. The ideal environment is about 80ºF. If you're at my house, then it's always pretty warm because I get cold!putting bread dough in a lightly greased bowl and covering with a towel to proof

    I know some people who put the bread on the counter next to the oven if it's on or on top of the fridge. My favorite spot is on top of the counter above the running dishwasher. Warm and moist! lol. 

    You can also proof the dough in the oven. Pre-heat the oven to the lowest setting and then turn it off. Place a bowl of hot water in the back corner of the oven then place your covered dough into the oven. You can use a thermometer in the oven to make sure it's not hotter than 100ºF inside. The ideal temperature is about 75ºF - 95ºF
    put dough in a warm area to rise
  11. Once the dough is done rising, you can punch it down. Because it's fun. Not necessary though. Just poke two fingers down into the top of the dough, if the hole stays and the dough does not spring back then the dough has risen enough. If the dough bounces back then it needs more time to rise.
  12. Take the dough out of the bowl and divide it into thirty, 2-ounce pieces of dough. I weigh mine but you can eyeball it too.divide dough into equal pieces
  13. Fold the edges of the dough under itself until all the top of the dough is smooth. Place into the pan in four rows.
  14. Cover with a towel and let them rise for one hour or until doubled in size. If the room is hot they might rise faster. If the room is cold they might take more time. Just keep an eye on them. shape dough into balls with seams on the bottom
  15. If you want to save the rolls for the next day, cover them in plastic wrap and put them in the fridge. The cold air stops them from rising. Bring them out two hours before you need to bake them and give them time to rise before baking. Remember, they are cold so they will take a little longer to rise. 
  16. Once the rolls are nice and puffy (30 minutes for active dry yeast you can bake them! Brush the tops with your egg wash. brush rolls with egg wash before baking
  17. Bake for 25-30 minutes or until nice and golden brown. Don't under-bake them or they will be doughy in the center. Brush them with melted butter and a sprinkle of sea salt and serve warm. Oh my gosh, they are heaven on a plate!sprinkling seasalt onto freshly buttered homemade dinner rolls
homemade dinner roll split open on a floral plate with pat of butter on top


Recipe

closeup of homemade dinner rolls with butter and sea salt
Print Recipe
4.91 from 20 votes

Fast Dinner Rolls

If you've never made homemade dinner rolls, this is the recipe for you. Follow these easy step-by-step instructions on how to knead, shape, proof, and bake the best dinner rolls you've ever had!
Prep Time10 minutes mins
Cook Time25 minutes mins
Rising Time1 hour hr 30 minutes mins
Total Time2 hours hrs 5 minutes mins
Course: Appetizer
Cuisine: American
Servings: 30 Rolls
Calories: 191kcal
Author: Liz Marek

Equipment

  • Stand Mixer
  • dough hook
  • Thermometer

Ingredients

Soft Dinner Rolls

  • 16 ounces whole milk warmed to 109ºF
  • 1 large egg room temperature
  • 1 Tablespoon sugar
  • 10 grams active dry yeast or instant yeast (see notes)
  • 30 ounces Bread flour or all-purpose flour
  • 1 Tablespoon salt
  • 5 ounces butter softened but not melted

Egg Wash

  • 1 large egg
  • 1 Tablespoon water

For the rolls

  • 2 Tablespoons butter melted
  • 1 Tablespoon flakey sea salt
US Customary - Metric

Instructions

Egg Wash Instructions

  • Combine 1 egg with 1 Tablespoon water and whisk until smooth

Dinner Roll Instructions

  • First, warm your milk in the microwave or on the stovetop until it reaches 109ºF.
  • Combine the warm milk with your sugar, and then add the dried yeast.
  • Give it a stir and set it aside for about 5 minutes.
  • Next, in the bowl of your stand mixer, add your flour to the bowl with the egg and your yeast mixture.
  • Mix with the dough hook on low speed (setting 1 on my Bosch Mixer, setting 2 on a KitchenAid) until everything is blended.
  • Then, add your butter and salt to the bowl.
  • Continue mixing on low speed (setting 1 on my Bosch Mixer, setting 2 on a KitchenAid) for 10-12 minutes or until the dough ball pulls away from the bowl and is firm and elastic. Touch the side of the dough ball, does it spring back? It's ready. If it still seems very soft and oozes between your fingers, it has not developed enough gluten. Keep mixing. 
  • Place the dough into a lightly oiled bowl.
  • Cover the bowl with a tea towel and set it in a warm place (but not too warm) for 60 minutes or until it doubles in size. Too much warmth will kill the yeast. And if it's too cold, it won't grow quickly. The ideal environment is about 80ºF.
  • Once the dough is done rising, poke two fingers down into the top of the dough. If the hole stays and the dough does not spring back, then the dough has risen enough. If the dough bounces back, then it needs more time to rise.
  • Take the dough out of the bowl and divide it into thirty, 2-ounce pieces of dough. I weigh mine, but you can eyeball it if you want.
  • Fold the edges of the dough under itself until all the top of the dough is smooth.
  • Place into the pan in four rows.
  • Next, cover them with a towel and let them rise for one hour or until they have doubled in size.
  • Once the rolls are nice and puffy (about 30 minutes).
  • Brush the tops of the dough with your egg wash.
  • Bake them in the oven at 350ºF for 25-30 minutes or until nice and golden brown. Don't under-bake them or they will be doughy in the center.
  • When they're done baking, brush them with melted butter and add a sprinkle of sea salt. Serve warm!

Video

Notes

Important Things To Note Before You Start
  1. Use a scale to weigh your ingredients (including liquids) unless otherwise instructed (Tablespoons, teaspoons, pinch etc). Metric measurements are available in the recipe card. Scaled ingredients are much more accurate than using cups and help ensure the success of your recipe. 
  2. Practice Mise en Place (everything in it's place). Measure out your ingredients ahead of time and have them ready before you start mixing to reduce the chances of accidentally leaving something out.
  3. When proofing the dough, I turn my oven on to 170ºF and open the door. Then, I place my dough on the oven door near the opening of the oven to proof (i.e. not INSIDE of the oven).
  4. You can use Instant yeast, but you will want to let your dough proof for only 30 minutes the first time and then 10 minutes after you shape your rolls before baking.
  5. There is no need to bloom instant yeast in milk. Just add the yeast to the flour, and add the milk mixture to the flour mixture before you mix as directed.

Nutrition

Serving: 1roll | Calories: 191kcal | Carbohydrates: 27g | Protein: 6g | Fat: 6g | Saturated Fat: 4g | Cholesterol: 32mg | Sodium: 349mg | Potassium: 70mg | Fiber: 1g | Sugar: 2g | Vitamin A: 204IU | Calcium: 31mg | Iron: 1mg


chocolate peppermint cookies

December 16, 2019 Blog

Chocolate Peppermint Cookies

Chewy chocolate peppermint with a sweet white chocolate drizzle and crushed peppermint candy

My family loves these chewy chocolate peppermint cookies and so do I! The cookies are soft like a brownie with the chew of a chocolate chip cookie. The drizzle of white chocolate adds some sweetness and the crushed peppermint adds the perfect balance of flavor and texture. 

chocolate peppermint cookies

I originally made these cookies for my son, Ezra's three-month photoshoot. I don't' know why I decided to do this to myself every month but I've committed now so I guess I have to keep going. See my previous photos for October and November.

I admit the best part of this photoshoot was the excuse to gorge myself on yummy cookies for a week!

three month old photoshoot with cookies

These cookies are perfect for making with your kids. My daughter Avalon loves to do the chocolate drizzle and crush the peppermint. 

These cookies stay incredibly soft for days. We keep our in an airtight container on the countertop so anyone can grab them when they have a hankering for a Holiday treat. Perfect for a cookie exchange or to leave for Santa Clause on Christmas eve. 

chocolate peppermint cookies

If you loved my Christmas sugar cookies or my gingerbread men cookies, you'll love these soft and chewy chocolate peppermint cookies. They are a huge hit with friends and family. 

Chocolate peppermint cookie ingredients

Brown Sugar - Adds flavor and a chewy texture to the cookies
Butter - Helps the cookies spread and adds flavor
Eggs - Provides the structure for the cookie and adds moisture
Honey - Keeps the cookies moist for days and adds flavor
Baking Soda -  The main rising agent in these cookies and adds flavor
Baking Powder - Gives more of a cakier texture to the cookies, leave it out if you like your cookies to be flatter
Vanilla - Flavor!
Salt - Brings out the flavor of the chocolate 
Flour - Provides structure to the cookie
Cocoa Powder - I'm using dutched cocoa powder but you can use any kind that you like
White chocolate - A hint of sweetness and holds the peppermint candy on the cookie
Crushed Peppermint - Just the right amount of peppermint crunch to the top of the cookie

How to make chocolate peppermint cookies

These chocolate peppermint cookies come together in a flash. I am using my Bosch universal plus mixer but you can use any mixer you have or even use a whisk if that's all you have. 

Cream together the butter and sugar until light and fluffy, about 2 minutes.

cream the brown sugar and softened butter

Add in your eggs one at a time, letting each mix fully before adding the next. Adding eggs too fast can cause your batter to curdle. Mix on medium until light and fluffy, about 2 minutes. 

add eggs to your cookie batter

Scrape the bowl and then add in your vanilla, flour, cocoa powder, salt, baking powder, baking soda, and honey. Mix on low until combined. 

Chocolate peppermint cookie dough

The dough is fairly thick. Scoop the dough using a #20 cookie scoop or approximately two Tablespoons of dough and roll into a ball. Place the balls about 1" apart on a cookie sheet lined with parchment paper. Flatten the ball with a fork like you're making peanut butter cookies. 

flatten chocolate cookie dough with a fork

Bake in your preheated oven for 8 minutes. These cookies don't spread hardly at all. Let them cool for about 5 minutes before transferring them to a cooling rack. Once they are cool you can decorate them! 

finished chocolate peppermint cookies fresh out of the oven

Crush your peppermint candies inside a sandwich bag with a mallet or hammer. 

crushed peppermint candy in a sandwich bag

Meltdown your white chocolate. I put mine in the microwave for 1 minute, then 15 seconds and then stirred until completely melted. Don't overheat your chocolate or it could burn. 

Place the chocolate into a piping bag or simply use a spoon and drizzle the chocolate over the tops of your cookies. 

drizzle white chocolate over the tops of your cookies

All that's left to do is enjoy! Let me know in the comments if you try these cookies out and what you think of them. To me they are pretty much heaven on a plate!

Need more Christmas cookie ideas? Try these out!

Christmas Cookies
Gingerbread Men Cookies
Glitter Crinkle Cookies

Recipe

chocolate peppermint cookies
Print Recipe
5 from 3 votes

Chewy Chocolate Peppermint Cookies

Chewy chocolate peppermint cookies with a drizzle of sweet white chocolate and topped with crushed peppermint candies. So easy to make and stays moist all week!
Prep Time15 minutes mins
Cook Time8 minutes mins
Course: Dessert
Cuisine: American
Servings: 36 cookies
Calories: 127kcal
Author: Liz Marek

Equipment

  • Mixer
  • #20 cookie scoop
  • Mallet or hammer

Ingredients

  • 6 ounces unsalted butter softened
  • 9 ounces brown sugar
  • 2 large eggs room temperature
  • 2 teaspoons vanilla extract
  • 2 Tablespoons honey
  • 12 ounces all-purpose flour
  • 3 ounces cocoa powder I used cocoa barry extra brute but you can use any kind you have
  • ½ teaspoon salt
  • 1 teaspoon baking soda
  • ½ teaspoon baking powder
  • 2 ounces white chocolate
  • 2 ounces peppermint candy
US Customary - Metric

Instructions

Chocolate Peppermint Cookie Instructions

  • Preheat your oven to 350ºF and line two cookie sheets with parchment paper.
  • In the bowl of your stand mixer, cream together the butter and sugar until it is light and fluffy with the paddle attachment (this takes about 2 minutes).
  • Then, add in your room temperature eggs one at a time allowing each egg to mix fully before adding the next. Adding eggs too fast can cause your batter to curdle.
  • Mix on medium speed (setting 2 on my Bosch Mixer, setting 4 on a KitchenAid) until the mixture is light and fluffy (this takes about 2 minutes). 
  • Scrape the bowl.
  • Next, add in your vanilla, flour, cocoa powder, salt, baking powder, baking soda, and honey.
  • Mix on low speed (setting 1 on my Bosch Mixer, setting 2 on a KitchenAid) until they are all combined and the dough is fairly thick.
  • Scoop the dough using a #20 cookie scoop, or approximately two Tablespoons of dough and roll into a ball.
  • Place the balls about 1″ apart on a cookie sheet lined with parchment paper.
  • Flatten the ball with a fork like you’re making peanut butter cookies. 
  • Bake your cookies in the oven at 350ºF for 8 minutes. These cookies hardly spread at all.
  • Allow the cookies to cool for about 5 minutes before transferring them to a cooling rack.
  • Then, once they are cool you can decorate them! 

Chocolate Peppermint Cookie Decorating Instructions

  • Place the peppermint candies inside of a plastic sandwich bag or freezer bag.
  • Use a hammer or mallet to crush your peppermint candies inside the bag. This will help avoid making a huge mess.
  • Melt down your white chocolate in a microwave-safe bowl in the microwave for 1 minute.
  • Carefully remove the hot bowl and stir the chocolate.
  • Next, put it back in the microwave for another 15 seconds.
  • Stir completely until it is melted. Do not overheat your chocolate or it could burn.  Learn how to temper chocolate with my easy microwave method.
  • Place the chocolate into a piping bag, or simply use a spoon and drizzle the chocolate over the tops of your cookies. 
  • Finally, sprinkle the cookies with the crushed peppermint.

Notes

Important Things To Note Before You Start
  1. Bring all your ingredients to room temperature or even a little warm (eggs, butter, etc) to ensure your cookie dough does not break or curdle. 
  2. Use a scale to weigh your ingredients (including liquids) unless otherwise instructed (Tablespoons, teaspoons, pinch etc). Metric measurements are available in the recipe card. Scaled ingredients are much more accurate than using cups and help ensure the success of your recipe. 
  3. Practice Mise en Place (everything in it’s place). Measure out your ingredients ahead of time and have them ready before you start mixing to reduce the chances of accidentally leaving something out.

Nutrition

Serving: 1cookie | Calories: 127kcal | Carbohydrates: 20g | Protein: 2g | Fat: 5g | Saturated Fat: 3g | Cholesterol: 22mg | Sodium: 87mg | Potassium: 66mg | Fiber: 1g | Sugar: 10g | Vitamin A: 135IU | Calcium: 16mg | Iron: 1mg

Elsa Bust Cake Tutorial

December 15, 2019 Course Preview

Elsa Bust Cake Tutorial

Skill level: Advanced

What better time to make an Ice Queen bust cake than right before Christmas? This Elsa Bust Cake is Liz Marek's latest sculpted cake, featuring stylized facial features, a braided hair demo, how to do edible makeup, and how to sculpt a head from scratch (no molds).

3:09:50 Minutes of Instruction

What You Will Learn

  • How to make a stylized Elsa Ice Queen Bust Cake
  • How to make a cartoony head sculpt without a mold
  • How to plot facial features from reference pictures
  • Liz covers common mistakes made with facial features
  • Ways to check your work as a sculptor
  • How to sculpt a chest using all cake (no rice cereal treats)
  • How to do Elsa's makeup and how to fix mistakes
  • How to create Elsa's braided hair pony tail or how to create her hair down

Tutorial Chapters

  1. Making the head structure 0:37
  2. Modeling chocolate head 4:48
  3. Facial proportions 13:21
  4. Adding the mouth 20:55
  5. Adding the nose 33:28
  6. Making isomalt eyes 36:56
  7. Adding the eyes 44:41
  8. Shaping the face 59:23
  9. Making the ears 1:22:58
  10. Making edible glitter 1:29:33
  11. Making the structure 1:32:50
  12. Carving the cake 1:33:56
  13. Adding the head and arms 1:39:40
  14. Crumb coat 1:45:32
  15. Making the neck 1:47:50
  16. Coloring the fondant 1:48:48
  17. Covering in buttercream 1:50:21
  18. Covering the back in fondant 1:54:09
  19. Finishing making glitter 1:59:26
  20. Covering the front in fondant 2:00:34
  21. Covering the face in fondant 2:03:48
  22. Smoothing 2:09:18
  23. Coloring the dress 2:21:41
  24. Texturing the fondant 2:22:10
  25. Applying the fondant 2:24:06
  26. The dress seam 2:27:26
  27. Eye makeup 2:30:34
  28. Adding eyelashes 2:35:44
  29. Adding blush and eyebrows 2:43:16
  30. Lip color 2:51:04
  31. Adding the hair 2:52:50

Downloads

Materials List

Elsa Face Plane Reference 01

Elsa Face Plane Reference 02

Elsa Face Plane Reference 03

Elsa Makeup Reference

Elsa Dress Reference

Elsa Hair Reference

Elsa Bust Cake Tutorial

December 15, 2019 Paid Video

Elsa Bust Cake

Skill level: Advanced

What better time to make an Ice Queen bust cake than right before Christmas? This Elsa Bust Cake is Liz Marek's latest sculpted cake, featuring stylized facial features, a braided hair demo, how to do edible makeup, and how to sculpt a head from scratch (no molds).

3:09:50 Minutes of Instruction

What You Will Learn

  • How to make a stylized Elsa Ice Queen Bust Cake
  • How to make a cartoony head sculpt without a mold
  • How to plot facial features from reference pictures
  • Liz covers common mistakes made with facial features
  • Ways to check your work as a sculptor
  • How to sculpt a chest using all cake (no rice cereal treats)
  • How to do Elsa's makeup and how to fix mistakes
  • How to create Elsa's braided hair pony tail or how to create her hair down

Tutorial Chapters

  1. Making the head structure 0:37
  2. Modeling chocolate head 4:48
  3. Facial proportions 13:21
  4. Adding the mouth 20:55
  5. Adding the nose 33:28
  6. Making isomalt eyes 36:56
  7. Adding the eyes 44:41
  8. Shaping the face 59:23
  9. Making the ears 1:22:58
  10. Making edible glitter 1:29:33
  11. Making the structure 1:32:50
  12. Carving the cake 1:33:56
  13. Adding the head and arms 1:39:40
  14. Crumb coat 1:45:32
  15. Making the neck 1:47:50
  16. Coloring the fondant 1:48:48
  17. Covering in buttercream 1:50:21
  18. Covering the back in fondant 1:54:09
  19. Finishing making glitter 1:59:26
  20. Covering the front in fondant 2:00:34
  21. Covering the face in fondant 2:03:48
  22. Smoothing 2:09:18
  23. Coloring the dress 2:21:41
  24. Texturing the fondant 2:22:10
  25. Applying the fondant 2:24:06
  26. The dress seam 2:27:26
  27. Eye makeup 2:30:34
  28. Adding eyelashes 2:35:44
  29. Adding blush and eyebrows 2:43:16
  30. Lip color 2:51:04
  31. Adding the hair 2:52:50

Downloads

Materials List

Elsa Face Plane Reference 01

Elsa Face Plane Reference 02

Elsa Face Plane Reference 03

Elsa Makeup Reference

Elsa Dress Reference

Elsa Hair Reference

closeup of chocolate macarons in metal bowl

December 12, 2019 Cookies

Chocolate Macaron Recipe

Chewy chocolate macarons with a crispy outer shell and chocolate ganache filling

Chocolate macarons are such a tasty treat. I love that first bite that cracks through the crisp outer layer before you sink your teeth into that chewy goodness in the middle. These chocolate macarons are based on my super-viral, no-fail French macaron recipe. Follow my tips and tricks in this blog post to make the perfect chocolate macarons. 

closeup of chocolate macarons in metal bowl

Why are chocolate macarons so hard to make?

There are a lot of things that can go wrong with such a simple cookie if you don't know what to look out for. Make sure you follow each step as close as you can to avoid these problems.

I find that a lot of people don't really follow a recipe when they are trying something new. They read the ingredients and tend to skim the instructions (I am totally guilty of this too) but this is not one of those recipes you can get away with doing that. 

close up of three chocolate macarons with ganache filling

Making chocolate macarons is more about the way you make them and less about the actual ingredients. If you want to watch my vanilla macaron video, you can watch it here. 

Chocolate Macaron Ingredients

Almond Flour - Provides structure, flavor and texture to the macarons. I prefer using Bob's Red Mill super fine almond flour or you can make your own.
Powdered Sugar - Gives the cookie a little bit of sweetness 
Cocoa Powder - Can't have chocolate macarons without chocolate!
Aged Egg Whites - Provides structure and texture that is iconic to the French Macaron
Vanilla Extract - Enhances the flavor of the macaron. You can use other flavors too!
Granulated Sugar - Helps the egg whites whip up properly
Salt - Enhances the flavor of the chocolate

Chocolate Macaron Ingredients

Chocolate Macaron Recipe Step By Step

  1. Sift together the powdered sugar, cocoa powder, salt and almond meal. This is important so you can remove any hard lumps that might be in the mixture which will ruin the shiny surface of your cookie later. sifted chocolate macaron ingredients
  2. Place the almond flour mixture into a food processor and pulse 8-10 times to make the mixture finer in texture and to get it mixed together really well. closeup of almond flour and cocoa powder in food processor
  3. Whip your egg whites until frothy with the whisk attachment then slowly add in your granulated sugar while mixing on low. frothy egg whites
  4. Continue mixing until the egg whites become white and you can see some lines being made in the meringue. Add in your cream of tartar. Whipping egg whites
  5. Whip until soft glossy peaks form. Now add in your extract and food coloring if you are coloring your macarons. egg whites at soft peaks
  6. Continue whipping on medium-high until the meringue is at stiff peaks. The meringue will feel dense and will start gathering on the inside of the whisk. meringue at stiff peaks
  7. Add in ⅓ of your almond mixture and fold by taking your spatula and going around the edge of the bowl just under the batter, then cut through the center. Repeat this until you don't see any dry spots. folding almond flour mixture into egg white mixture
  8. Add in the rest of your dry ingredients and continue folding almond flour mixture folded into egg whites
  9. Place your spatula flat on top of the batter and turn the bowl to knock out some of the air from the batter. You want the batter to fall from the spatula like a ribbon and move similar to lava. 
  10. Once your batter falls from the spatula in a ribbon, try and draw a figure 8. If the batter doesn't break, it's ready. You will also notice the edges of the batter begin to turn glossy and the mixture oozes very slowly. The ribbon should dissolve back into the batter after about 20 seconds.chocolate macaron batter at ribbon stage
  11. Place the piping bag into a cup while you pour in the batter. The cup helps hold up the bag so you can scoop every last drop of that batter into the bag. preparing the macaron batter in a piping bag inside a cup
  12. Now you can pipe your macarons onto your parchment paper and bake! I use a #802 round piping tip and a template. Hold your tip straight up in the center of the circle, about ¼" away from the paper and squeeze until the batter fills the circle ¾ of the way then lift straight up quickly to break the batter off. piping chocolate macarons
  13. Lift your tray up about 5 inches and drop onto the table to pop any bubbles that are under the surface of your macaron and the batter should spread to the edge of the circle. popping bubbles in chocolate macaron batter
  14. Let your macaron sit at room temperature until a crust forms over the surface. Depending on your room, it can take from 30 minutes to 2 hours. You should be able to touch the top lightly and it doesn't feel sticky. chocolate macarons that are dry to the touch

Tips for success:

  • Use room temperature egg whites (if you forget to bring them to room temp, put your eggs in a bowl of warm water for 5 minutes)
  • Age your egg whites overnight by putting them in a bowl in the fridge. This allows some of the moisture to evaporate and experts say, produce a stronger meringue. 
  • Sift your ingredients
  • Weigh all your ingredients in grams for the best and most accurate results
  • Make sure you use fresh egg whites that have been aged overnight. 
  • Wipe the inside of your bowl and attachments well to make sure they are grease-free
  • Don't over-whip your egg whites, make sure they are at the firm peak stage but still glossy and moist
  • If your room is very humid, put a space heater next to the macarons to help dry them out

drying macarons on a humid day with a space heater

filling chocolate macarons with chocolate ganache

Troubleshooting macaron problems

Perfecting your macaron recipe will take time. After your first try you might notice some problems. These are the most common and how you can fix them.

under-mixed macarons will have cracked tops
rough macarons
Meringue was under-whipped which creates cracks and a rough texture

  • Over-mixing your batter will produce very flat macarons that will be hollow in the center and won't have any feet
  • Oily blotches on the surface of your macaron is from over-mixing and causing the oil from the almond flour to release into the batter. Try folding more gently.
  • Macarons that have a raised nipple in the center after baking. This is caused by under-mixing and the batter is still too stiff.
  • Under-mixing your batter or not using super fine almond flour will make lumpy/rough textured macarons.
  • Cracked macarons are from not letting them sit at room temp for long enough so they haven't had time to develop a shell or they were not mixed enough.
  • Macarons won't be round when you don't hold your piping tip directly in the center of the template or your parchment isn't flat.
  • Hollow shells can be from not popping the bubbles in the surface of the macarons before baking or from the meringue being under whipped.

chocolate macaron recipe

chocolate macaron with bite taken out of it to show the inside
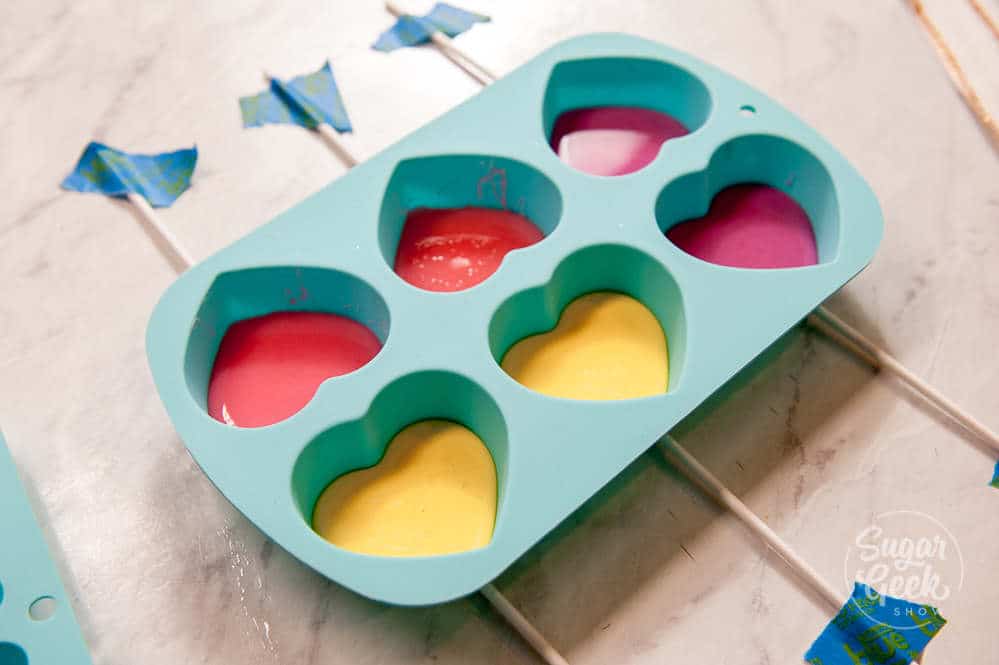
••Download the template to make perfectly-sized macaronsFrench Macaron Template

Want more macarons? Try these recipes!

Strawberry Macaron Recipe
French Macaron Recipe 
Cream Tart 

Recipe

closeup of chocolate macarons in metal bowl
Print Recipe
4.89 from 329 votes

Chocolate Macaron Recipe

How to make crispy, crunchy, chewy chocolate macarons! Delicate little cookies filled with chocolate ganache. Follow this recipe for tips on how to properly fold macaron batter, avoid hollow shells and other problems.
Prep Time20 minutes mins
Cook Time15 minutes mins
resting time20 minutes mins
Total Time1 hour hr 8 minutes mins
Course: Cookies, Dessert
Cuisine: French
Servings: 18 filled cookies
Calories: 81kcal
Author: Liz Marek

Equipment

  • Digital food scale
  • Stand mixer with whisk attachment
  • Sifter or fine mesh sieve
  • Macaron template
  • Parchment Paper
  • Piping Bag
  • 802 Round Piping Tip
  • Food processor

Ingredients

  • 50 grams almond flour
  • 114 grams powdered sugar
  • 7 grams cocoa powder
  • 57 grams egg whites aged overnight in the fridge and brought to room temperature
  • ⅛ teaspoon cream of tartar
  • 28 grams granulated sugar
  • ½ teaspoon vanilla extract
  • 1 pinch salt

Chocolate Ganache

  • 2 ounces heavy cream
  • 2.5 ounces chocolate semisweet, milk or dark
  • ½ teaspoon vanilla
  • ⅛ teaspoon salt
US Customary - Metric

Instructions

Before you Begin

  • Make the chocolate ganache the day before and refrigerate. Age your egg whites the night before by separating them and leaving them loosely covered in the fridge overnight. The day of baking, bring the egg whites to room temperature before starting. Have all ingredients measured, a macaron template under your parchment paper, and your piping bag set up before you start the meringue.

For the Macaron Shells

  • Preheat oven to 320º F. Line a half sheet pan with the macaron template underneath parchment paper.
  • Sift together the almond flour, powdered sugar, cocoa powder, and salt, twice. Discard large almond pieces that don't pass through the sieve.
  • Pulse the sifted mixture in a food processor 8 to 10 times to create a very fine, uniform texture. Set aside.
  • Wipe the stand mixer bowl and whisk with 1 teaspoon of white vinegar to remove any grease. Dry completely.
  • Whip the egg whites on low until frothy. Slowly add the granulated sugar in thirds while mixing on low. Once white and leaving lines, add the cream of tartar and continue whipping on medium to soft glossy peaks. Add vanilla. Increase to medium-high and whip to stiff, glossy peaks.
  • Add ⅓ of the almond mixture to the meringue and fold until no dry spots remain. Add the rest and continue folding until batter reaches ribbon stage: it falls from the spatula like thick lava and a figure eight drawn with the ribbon holds for 10 to 20 seconds before dissolving.
  • Transfer batter to piping bag fitted with a #802 round tip. Hold tip straight up about ¼ inch from the paper. Pipe 1-inch rounds. Drop the pan firmly from 5 inches above the counter 3 to 5 times to release air bubbles. Pop surface bubbles with a toothpick.
  • Let dry at room temperature uncovered until the tops feel completely dry to the touch, 30 minutes to 2 hours.

For the Chocolate Ganache

  • Combine chopped chocolate, heavy cream, vanilla, and salt in a heatproof bowl. Microwave for 1 minute. Let stand 5 minutes without stirring, then whisk until smooth. If not fully melted, microwave another 15 seconds and whisk again.
  • Press plastic wrap directly on the surface. Refrigerate at least 2 hours, ideally overnight. Before using, let sit at room temperature 10 to 15 minutes and whisk until smooth and peanut-butter thick.

To Assemble

  • Pair shells by size. Pipe or spread a generous amount of ganache on the flat side of half the shells. Sandwich with the remaining shells.
  • Place in an airtight container and refrigerate for a minimum of 8 hours, preferably 24 hours to mature.
  • Remove from fridge 15 to 30 minutes before serving.

Video

Notes

Cocoa powder: Use Hershey's Natural Unsweetened or Ghirardelli Unsweetened. Avoid high-fat artisan cocoa powders (more than 1g fat per tablespoon), which can cause wrinkly tops and fragile shells.
Egg white aging: Age overnight in the fridge in a loosely covered bowl. If you forget, warm eggs in a bowl of warm water for 5 minutes. Room temperature is non-negotiable.
Maturing: The 24-hour fridge rest after filling is what transforms the texture from dry and crisp to fudgy and chewy. Do not skip. Bring to room temperature 15 to 30 minutes before serving.
Storage: Refrigerator, airtight container, up to 5 days. Freezer, up to 2 months assembled or up to 6 months for unfilled shells. Thaw in the fridge overnight.
Critical do-nots:
  1. Do not use a plastic bowl for the meringue.
  2. Do not skip wiping the bowl with vinegar.
  3. Do not rush the skin-forming step before baking.
  4. Do not use high-fat artisan cocoa powder.
  5. Do not eat immediately after filling; always mature first.

Nutrition

Serving: 1cookie | Calories: 81kcal | Carbohydrates: 11g | Protein: 1g | Fat: 4g | Saturated Fat: 2g | Cholesterol: 4mg | Sodium: 40mg | Potassium: 29mg | Fiber: 1g | Sugar: 10g | Vitamin A: 46IU | Calcium: 10mg | Iron: 1mg


gingerbread house with a curved roof

December 9, 2019 Blog

Advanced Gingerbread House Techniques

Last year I had so much fun making my classic gingerbread house, this year I wanted to up the anty and try making one with a curved roof. I was inspired by my friend Sonny from Freed's Bakery in Las Vegas. He makes the MOST amazing gingerbread houses (and cakes!). Check them out on Instagram. 

gingerbread house with a curved roof

I asked Sonny how he makes his awesome curved roof gingerbread houses and he showed me his secret! I asked him permission to show you and he agreed. Thanks Sonny!

I'm also going to show you a few other tricks for making some cool gingerbread house effects. 


sonny robinson freeds bakery gingerbread house

Can you eat this gingerbread?

This is a construction-grade gingerbread meaning it's REALLY HARD. It doesn't have any leavening in it so it doesn't puff up or spread. You could definitely eat it but it's very hard and meant to last. Since we aren't eating this gingerbread house then you can replace molasses with karo syrup. It will make the gingerbread lighter in color though. 

What do you need to make this curved roof gingerbread house?

  • Curved roof gingerbread house template
  • Gingerbread dough
  • Stiff royal icing
  • Cookie sheet with parchment paper or a silicone mat
  • #2 piping tip and a piping bag
  • Old round cookie cutter or tin can
  • Food safe baroque scroll mold
  • Foam core and tape
  • X-acto blade
  • Clear isomalt for the windows
  • Assorted candy for decorating
  • Creme brulee torch
  • Isomalt sealer or oil
supplies for making a curved roof gingerbread house

Curved roof gingerbread house timeline

Day 1 - Make your foam core template, bake your gingerbread, pour in isomalt windows, and let the pieces cool overnight. 

Day 2 - Make your stiff royal icing, assemble your gingerbread walls (let dry for an hour), assemble the gingerbread house details and add candy. 

Making the curved roof gingerbread house template

Print out your paper gingerbread house paper template and transfer the walls and roof to your foam core. Cut them out land then cut some shallow lines into the roof about ¼" wide. Don't cut all the way through the foam (see video). 

These shallow cuts allow you to curve the roof. 

Tape together the walls and roof of the foam core and set aside to use later to curve your gingerbread cookie. 

Cut out the rest of your paper gingerbread house templates and set aside to use for your dough. 

curved roof gingerbread house template

Baking the curved roof gingerbread house pieces

Roll your gingerbread out to about ⅛" thick using a rolling pin on top of some parchment paper that is trimmed to the size of your sheet pan. 

Place your parchment paper with dough onto the sheet pan and transfer the whole thing into the freezer for about 20 minutes. Roll out the rest of your dough and place it into another pan with parchment paper and freeze. Freezing just helps you make cleaner cuts. 

Arrange your paper templates onto the frozen dough to make them all fit. Make sure there is about ½" of space in between pieces so they bake evenly. Try to keep big pieces on one pan and smaller pieces on another pan. 

Cut out the pieces (except the piece for the curved porch) and remove the excess dough. Cut out the windows and then set the pieces aside while you make your curved pieces and molded pieces. 

gingerbread house cutouts

Making molded gingerbread house pieces

If you want some decorative scroll pieces on your gingerbread house, you can press gingerbread dough into silicone molds (make sure they are approved for baking to 300ºF and food safe). 

Press the dough into the mold and then freeze it for 20 minutes. Carefully remove the dough from the mold and then place on the pan with the other pieces of gingerbread. 

molded gingerbread

Making Curved Gingerbread Pieces

Roll out some of your leftover gingerbread and trace the shape of the front porch template. 

Using an old curved cookie cutter (or you can cut out a pop can) for the shape. Place the cookie dough over the metal and then freeze for 20 minutes. Place it on the cookie sheet with the other pieces. 

curved gingerbread house roof

Making the curved gingerbread house roof

As soon as the roof is done (about 45 minutes), carefully remove it from the oven and transfer the cookie to the top of the foam core template and allow the cookie to curve. I used some heavy containers to keep the cookie from falling off. 

Let the cookies cool fully before attempting to move them. 

pouring isomalt in gingerbread pieces to make windows

Making the gingerbread house windows

Before you assemble the walls, meltdown some clear isomalt or some hard candies. Last year I used jolly ranchers to create the stained glass window look. 

Place the pieces that need isomalt onto a silicone baking mat. Pour the isomalt into the windows and let it cool fully.

Gently pull the cookies off the mat and then use your creme brulee torch to lightly torch the back of the isomalt to remove the bubbles and texture from the mat.

Seal the isomalt with some isomalt sealer like PME glaze or you can rub some vegetable oil on the isomalt to keep it from crystalizing. 

Assembling the gingerbread house

To avoid gingerbread house catastrophe, you want to assemble the walls first with STIFF royal icing and then let it dry for an hour. This ensures the walls will be strong enough to support the weight of the roof and all the candy you add on top!

Use a Microplane to sand down any pieces of gingerbread that aren't quite straight. 

use a microplane to smooth out gingerbread house walls

Place about ½ cup of your stiff royal icing into a piping bag. Don't overfill it or it will be hard to pipe. 

Glue the front and back pieces of gingerbread to the sides with a generous bead of royal icing. Use something to prop up the sides and keep them in place while it dries.

You can also glue gingerbread together with melted isomalt but I don't recommend that unless you're experienced with using isomalt because the drips can burn. 

assemble gingerbread house with stiff royal icing

I assembled my house on top of a cake board so I could decorate it later and it makes it easy to move it around. Don't glue the house down to the board yet so you can lift it up to put a battery-operated candle inside. 

Once the walls are dry you can add on the roof with some more royal icing. Let the roof dry while you assemble the chimney and the side window. 

building the chimney and gable
decorating the curved roof gingerbread house

Decorating the gingerbread house

Now you can glue the chimney and the gable onto the side of the house. Add your curved front porch to the front of the house and support with some candy canes. Add your shutters to the sides of the windows. 

Pipe on details like the brick texture and the criss-cross pattern on the roof with more royal icing. I used a #2 piping tip. 

Add on any kind of candy you like for details. I used gumdrops, gumballs, and candy canes. 

gingerbread house roof
gingerbread house window

Add some battery operated lights inside the gingerbread house and put it on display! This gingerbread house will not collapse or go bad. It's not great for eating because of how hard the cookie is. If you want to eat gingerbread, I recommend you bake up some of my gingerbread cookies for details around the house and you can eat those. 

gingerbread house with curved roof

Want more Christmas recipes? Check these out!

Giant gingerbread man cookie
No-spread sugar cookie recipe
Glitter crinkle cookies
Classic gingerbread house tutorial
Easy Christmas cookie ideas for kids

Recipe

gingerbread house with a curved roof
Print Recipe
5 from 6 votes

Curved Roof Gingerbread House Recipe

Super strong, great for cutting out intricate templates and does not spread when baking. This recipe is enough to make one gingerbread house using the template included in the blog post
Prep Time15 minutes mins
Cook Time1 hour hr
Chilling20 minutes mins
Total Time1 hour hr 15 minutes mins
Course: Dessert
Cuisine: American
Servings: 1 gingerbread house
Calories: 112kcal
Author: Liz Marek

Equipment

  • Stand Mixer with paddle and whisk attachment
  • #2 piping tip and bag
  • Foam core
  • creme brulee torch

Ingredients

Gingerbread House Recipe

  • 30 oz AP Flour
  • ¾ tsp cinnamon
  • ¼ teaspoon ginger
  • ½ teaspoon nutmeg
  • ¼ teaspoon cloves
  • ¾ teaspoon salt
  • 7 oz vegetable shortening
  • 6 oz granulated sugar
  • 16 oz molasses or karo syrup
  • 1 Large egg
  • 2 ounces clear isomalt for the windows

Stiff Royal Icing Recipe

  • 16 ounces powdered sugar sifted
  • 2 ounces pasteurized egg whites
  • ¼ teaspoon cream of tartar
  • 1 teaspoon vanilla extract
US Customary - Metric

Instructions

For The Gingerbread House

  • Preheat your oven to 300ºF.
    Transfer your wall/roof template to your foam core and assemble (See video for instructions).
  • Sift your dry ingredients together, set aside
  • Microwave vegetable shortening (or melt on stovetop in pot) until liquid but not hot
  • In a stand mixer, whisk shortening, sugar and molasses together. Add the egg and mix until combined
  • Switch to the paddle attachment and add your dry ingredients. Mix on medium/low until a smooth ball starts to form, do not over mix
  • Roll out dough onto parchment paper or a baking mat to ¼" thick. Try to make the dough as even in thickness as possible. 
  • Freeze dough for 20 minutes (optional) 
  • Cut shapes out using your templates. Remove excess dough (can be used to re-roll out and make more pieces)
  • Form the front porch cutout over a cookie cutter cut in half or tin can (see video)
  • Fill your silicone mold with cookie dough and freeze 20 minutes. Remove from mold and place on cookie sheet with the rest of your pieces
  • Bake in an oven set to 300º F for 45 minutes. Remove small pieces and the roof pieces. Bake the walls another 15 minutes or until very firm.
  • Place warm gingerbread roofs on top of your foam core template to form to the curve of the roof. Let cool fully.
  • Once gingerbread is done, remove from the oven and let fully cool before moving. Your gingerbread is now ready to be assembled. 

For The Royal Icing

  • Combine your egg whites, sifted powdered sugar, and cream of tartar in the bowl of your stand mixer with the whisk attached. 
  • Mix on low to get the ingredients combined then bump up to high for 1-2 minutes. Add in your vanilla extract and whip until it's white. No need to mix for longer than 5 minutes. 
  • Place the royal icing into a bowl or container with a lid. Your THICK royal icing is now ready to be thinned down to the consistency you desire. 

Video

Nutrition

Serving: 1oz | Calories: 112kcal | Carbohydrates: 19g | Protein: 1g | Fat: 3g | Cholesterol: 3mg | Sodium: 32mg | Potassium: 129mg | Sugar: 8g | Vitamin A: 5IU | Calcium: 19mg | Iron: 1mg


Christmas Gift Cake Online Course

December 2, 2019 Course Preview

Christmas Present Cake Tutorial

Skill level: Intermediate

Guest Instructor Shannon Patrick Mayes is back for another fun holiday cake project! Learn to create a holiday present cake, complete with a sculpted knitted teddy bear, a lifted box lid (a most-requested technique) edible tissue paper, a gift box ribbon on top, and a festive reindeer snowflake pattern on the gift box.

Shannon packs this tutorial with tons of tips and tricks, so let's get our tools together, and let's get started.

2:04:44 Minutes of Instruction

What You Will Learn

  • How to create a gift box/present cake
  • Learn how to make edible tissue paper and a patterned ribbon
  • How to make a sculpted teddy bear with a knitted pattern

Tutorial Chapters

  1. Prepping 0:49
  2. Sculpting the bear 4:36
  3. Covering in buttercream 11:50
  4. Covering in fondant 16:35
  5. Making the ears 29:05
  6. Making the nose and eyes 35:52
  7. Making the bear bow 38:06
  8. Making the deer stencil 44:21
  9. Airbrushing 53:02
  10. Making the lid 59:38
  11. Adding the cake 1:06:13
  12. Adding the teddy bear 1:11:43
  13. Assembling the box 1:16:52
  14. Making the arms 1:23:38
  15. Attaching the arms 1:27:51
  16. Finishing the eyes 1:29:12
  17. Painting the box 1:33:16
  18. Making tissue paper 1:41:19
  19. Making the box bow 1:51:30
  20. Adding the tissue paper 1:58:47
  21. Adding the box bow 2:00:41

Downloads

Materials List

Stencil Reference

Teddy Bear Reference

Christmas Gift Cake Online Course

December 2, 2019 Paid Video

Christmas Present Cake

Skill level: Intermediate

Guest Instructor Shannon Patrick Mayes is back for another fun holiday cake project! Learn to create a holiday present cake, complete with a sculpted knitted teddy bear, a lifted box lid (a most-requested technique) edible tissue paper, a gift box ribbon on top, and a festive reindeer snowflake pattern on the gift box.

Shannon packs this tutorial with tons of tips and tricks, so let's get our tools together, and let's get started.

2:04:44 Minutes of Instruction

What You Will Learn

  • How to create a gift box/present cake
  • Learn how to make edible tissue paper and a patterned ribbon
  • How to make a sculpted teddy bear with a knitted pattern

Tutorial Chapters

  1. Prepping 0:49
  2. Sculpting the bear 4:36
  3. Covering in buttercream 11:50
  4. Covering in fondant 16:35
  5. Making the ears 29:05
  6. Making the nose and eyes 35:52
  7. Making the bear bow 38:06
  8. Making the deer stencil 44:21
  9. Airbrushing 53:02
  10. Making the lid 59:38
  11. Adding the cake 1:06:13
  12. Adding the teddy bear 1:11:43
  13. Assembling the box 1:16:52
  14. Making the arms 1:23:38
  15. Attaching the arms 1:27:51
  16. Finishing the eyes 1:29:12
  17. Painting the box 1:33:16
  18. Making tissue paper 1:41:19
  19. Making the box bow 1:51:30
  20. Adding the tissue paper 1:58:47
  21. Adding the box bow 2:00:41

Downloads

Materials List

Stencil Reference

Teddy Bear Reference

meringue mushrooms on a buche de noel cake

December 1, 2019 Blog

Meringue Mushrooms

Meringue mushrooms are the perfect holiday treat

Meringue mushrooms are delightfully crisp and light as air. They make the perfect addition to your Buche de Noel cake or for a whimsical woodland party theme. You can make meringue mushrooms days in advance or even freeze them to eat later. 

meringue mushrooms on a buche de noel cake

Ingredients for meringue mushrooms

  • Egg whites - Fresh is best for whipping up a stiff meringue
  • Sugar - Gives the mushrooms their sweetness and volume to the meringue
  • Cream of tartar - Stabilizes the egg whites so the mushrooms are not hollow
  • Vanilla extract & Salt - Flavor! 
  • Cocoa powder - For coloring the mushrooms

meringue mushroom ingredients

How to make your meringue 

Making the meringue is pretty easy. Fill a medium-sized saucepan with about 2 inches of water and bring it to a boil. Place your egg whites and sugar in a heatproof bowl. I use my bowl for my stand mixer.

Occasionally whisk the mixture until you can no longer feel any granules of sugar. Don't forget to whisk or you can accidentally cook your eggwhites. 

Once your sugar is dissolved, transfer the egg white mixture to your stand mixer and whip on high until you achieve firm peaks (about 5 minutes). Then add in your vanilla, salt, and cream of tartar. Then whip for 5 more minutes until you reach STIFF peaks. The meringue should stand straight up and feel very firm! Don't worry about over-mixing. It's practically impossible. 

meringue at stiff peaks

Place your piping tip in the piping bag and snip off the end of the bag. Fill your bag with the meringue. Don't forget to glue your parchment down onto your pan so that it doesn't fly up during baking. 

piping meringue mushrooms

How to make meringue mushrooms

The best thing about making meringue mushrooms is they don't have to be perfect. Thank goodness because when I was making mine, I really messed up my oven temperature.

Even though I had my top oven set to 225ºF (I have a double oven) my bottom oven was set to 400ºF and the heat from the bottom made my top oven hotter. This caused my mushrooms to crack and split BUT I was able to save most of them and the cracks looked pretty natural. 

cracked meringue mushrooms

To pipe the caps, I hold my piping tip straight up and down and squeeze to form a round meringue cookie. There will be a little peak but just smooth that down with a bit of water on your finger. 

piping meringue caps

Then for the stems, I begin squeezing to attach the meringue to the parchment paper the pull up about two inches. Stop squeezing to finish the top of the stem. If they fall over it's ok. You can eat those later, no one will know! The stems do not need to be super tall. 

how to pipe meringue mushrooms

Then bake your meringues in the oven at 200ºF for about two hours. Then just turn off the oven and let them cool in there overnight. If you live in a humid area they might take longer to bake and you'll want to store them in airtight containers to avoid them getting sticky. 

How to assemble meringue mushrooms

Melt down your chocolate and set it aside. Combine ½ teaspoon of vanilla extrac and ½ teaspoon cocoa powder together to make the speckle paint. You can paint the base of the mushroom caps if you desire to look like lines. 

Make a small hole in the cap of your mushroom cap with a knife or skewer. Dip the tip of the meringue stem into the chocolate and attach the stem to the cap. 

how to assemble meringue mushrooms

All that's left to do is speckle the tops of your mushrooms with a stiff brush. 

how to make speckles on meringue mushrooms

Voila! Your mushrooms are complete! They look so super cute on top of my Buche de Noel cake! This recipe makes a TON of mushrooms so you can use the extras on a separate plate or as decorations on your place settings. 

More holiday recipes you'll love

Buche de Noel Cake

Gingerbread house recipe

Gingerbread cookie recipe

Patterned roll cake recipe

Recipe

meringue mushrooms on a buche de noel cake
Print Recipe
5 from 2 votes

Meringue Mushroom Recipe

Easy crispy crunchy meringue mushrooms are a Christmastime favorite or the perfect treat for a woodland party.
Prep Time10 minutes mins
Cook Time2 hours hrs
cooling1 day d
Total Time2 hours hrs 10 minutes mins
Course: Dessert
Cuisine: American
Servings: 24 mushrooms
Calories: 25kcal
Author: Liz Marek

Equipment

  • 804 Piping Tip
  • Piping Bag

Ingredients

Meringue Mushroom Ingredients

  • 3 egg whites fresh
  • ¼ teaspoon cream of tartar
  • 5 oz sugar
  • ½ teaspoon vanilla or other flavoring
  • 1 pinch salt
  • 1 ounce melted chocolate
US Customary - Metric

Instructions

Meringue mushroom instructions

  • Pre-heat your oven to 225ºF and line a baking sheet with parchment paper
  • Bring 2 inches of water to a simmer in a pot. Place a clean stainless steel mixing bowl over the water. It shouldn't touch the water. 
  • Combine your egg whites and sugar and whisk to combine. Occasionally whisk as it's heating to distribute the heat and dissolve the sugar.  
  • Once your egg whites are at 110ºF (or when you don't feel any grains of sugar between your fingers) you're read to whip
  • Place the bowl on your stand mixer with the whisk attachment. Whisk on med for one minute, add in cream of tartar, salt and flavoring. 
  • Bump up to high and let whip until you reach STIFF peaks. 
  • Now you are ready to pipe your meringue onto a parchment-lined baking sheet into your mushrooms!
    Note: make sure your parchment sits completely flat on your baking sheet by placing dollops of meringue under each corner and pressing it flat against the pan.
  • Place piping tip into a piping bag. Fill your bag with your meringue.
  • To make the caps of the mushrooms, hold your piping bag straight up and down and squeeze to form the mushroom cap and pull up. There will be a little peak and that is okay, we will take care of that in a minute.
  • Once you have formed all your caps, use a tiny bit of water on your finger tip and gently smooth the top of the meringues.
  • For the stems, you hold your piping bag straight up and down again, touch the tip to the parchment, squeeze a bit to attach the meringue to the parchment then slowly move your hand up while squeezing. The base should be a bit thicker than the top. Make your stems about 2" tall.
  • Bake for about 2 hours, then turn off the oven but do not take them out. Let them sit in the oven until they are completely cold. I leave mine in overnight. 
  • Meringue mushrooms can be stored in a ziplock bag unrefrigerated for up to two weeks. 

Nutrition

Serving: 3cookie | Calories: 25kcal | Carbohydrates: 6g | Protein: 1g | Fat: 1g | Sodium: 8mg | Potassium: 11mg | Sugar: 6g

close up of buche de noel cake

December 1, 2019 Recipe

Buche de Noel

Buche de Noel Cake (Yule Log Cake) is a classic Christmas Dessert

A Buche de Noel cake (or yule log cake) is commonly made from a yellow sponge cake and filled with chocolate buttercream. The outside is typically frosted with chocolate ganache and given a texture that resembles bark. It is often dusted with powdered sugar to resemble snow and sometimes has other decorations made from marzipan or meringue mushrooms.

close up of buche de noel cake

To make a Buche de Noel, you will need to make:

  1. Vanilla sponge roll cake
  2. Chocolate buttercream filling
  3. Soft Chocolate Ganache Frosting
  4. Meringue mushrooms (optional)

Read on to learn more about the Yule log cake, the perfect recipe and step-by-step instructions on how to make your own beautiful Bûche de Noël Christmas centerpiece. Full video tutorial in the recipe card at the bottom of this blog post.

The history of the Buche de Noel (as far as we know)

A yule log (not the cake) is a log that is burned in your fireplace during a winter festival. It was originally a Nordic tradition. Yule is the name of the old Winter Solstice festivals in Scandinavia and other parts of northern Europe, such as Germany. The log (sometimes an entire tree) would be carefully chosen and then brought into the house to be lit on one end, the rest extending into the house. A little of the log would be burned each day, extending through the 12 days of Christmas.

yule log in fireplace

This sounds to me a lot like bringing a Christmas tree into the house. I'm glad we just put lights on our tree now and don't light it on fire. I'll stick to baking my yule log.

Depending on the region, various ingredients (such as salt or whine) were sprinkled on top of the log before burning to bring good luck or to ensure a good harvest for the following year. The ashes from the yule log where used in remedies and good luck potions.

family decorating a christmas tree in dimly lit room

But what does this have to do with a yule log cake? Well, little by little, the celebration of burning an entire tree in your living room died out. Maybe too many house fires? Eventually, people were just putting a single log into their fireplace to represent the yule log.

Sometimes there was no fireplace at all and a log was placed on the table as a centerpiece. It only makes sense that eventually someone decided a cake log would be much better than a real log. Obviously this dessert trend took off and became a very popular dessert all over the world.

buche de noel cake

In France, the buche de Noel was made from a flourless sponge cake, filled with chocolate whipped cream and then rolled into a log shape. It was then dusted with confectioners sugar to resemble snow on the log. We usually refer to bûche de Noël as a Yule log cake in America.

What day should you start baking your Buche de Noel?

Let's talk about the process of making this cake. Plan on doing some things the day before decorating to make your life easier.

Day 1:

  • Make ganache and let it sit at room temperature
  • Make roll cake sponge, fill with buttercream and chill overnight
  • Make meringue mushrooms

close up of ganache
make soft chocolate ganache frosting
Roll sponge cake and chill
Make meringue mushrooms

Day 2:

  • Assemble your Buche de Noel cake and chill at least one hour before serving.
  • Dust with powdered sugar right before serving.

How to make the sponge

Making a roll cake sponge is not overly complicated but there are some things you will want to keep in mind for success.

heat eggs and sugar over simmering water until sugar is dissolved
Combine together the eggs and sugar over a pot of simmering water
ribbon stage batter
Whip eggs to the ribbon stage
fold in sifted dry ingredients in three parts
how to make a roll cake
spread onto a sheet pan lined with parchment paper all the way to the edges
Bake for 8 minutes until just set
loosen sponge from pan with a sharp knife
loosen cake from the edge of the pan with a knife
Flip the cake onto a cooling rack and peel off the parchment paper. Place a tea towel on top of the cake
Flip the cake back over. Dust with powdered sugar
roll up the sponge with a tea towel while it's still warm to prevent cracking
Roll sponge up tightly inside tea towel and let cool

  1. Make sure you whip your egg/sugar mixture to the ribbon stage. The ribbon stage is when the batter triples in size and sits on top of itself when you drizzle it in ribbons from the whisk.
  2. Sift the flour onto the egg mixture. Fold in your flour gently or you risk losing all the air in your sponge cake.
  3. Spread the batter all the way to the edge of your pan lined with parchment paper. No need to grease the pan.
  4. Don't overbake your cake or your edges will be dry and crack when you try to roll it up.
  5. Roll your cake length-wise so it's longer so that you have enough to cut off the end and it won't be too short.
  6. Roll your cake right out of the oven with a tea towel. When the cake is warm it helps the cake retain it's round shape as it cools, reducing the chances of cracking later.
  7. Let your cake chill overnight before slicing for prettier slices.

How to assemble a Buche de Noel

Once your sponge cake has cooled for at least an hour. You can carefully unroll it and fill the inside with a layer of chocolate buttercream, chocolate ganache.

Sponge cake is not super moist so if you want it moister, brush the surface with simple syrup first and use a filling like chocolate honey mousse or whipped cream. Add cocoa powder to the whipped cream to make it chocolate. Then roll the cake back up nice and tight so there are no gaps in the filling.

Roll up sponge lengthwise
Roll up sponge lengthwise 

Place the cake into the freezer for about an hour or into the fridge overnight to chill the filling.

Cut the ends of the roll cake off to reveal the swirl of filling. Then cut off one more piece of the roll cake at a slight angle and place on the side of the roll to represent a branch.

buche de noel cake

Frost the outside of the Buche de Noel with chocolate ganache. Decorate the outside with some of your meringue mushrooms, fresh cranberries and sprigs of rosemary. Dust the whole thing lightly with some powdered sugar to look like snow.

Chill before serving. The Buche de Noel cake lasts for three days in the fridge.

More Christmas Recipes to love

Gingerbread house recipe

Gingerbread cookie recipe

Patterned roll cake recipe

Recipe

close up of buche de noel cake
Print Recipe
5 from 6 votes

Buche de Noel Cake (Yule Log Cake)

A Buche de Noel is a light and airy sponge cake filled with chocolate buttercream and frosted with ganache to resemble a yule log.
Prep Time10 minutes mins
Cook Time8 minutes mins
1 hour hr
Course: Dessert
Cuisine: French
Servings: 18 servings
Calories: 388kcal
Author: Liz Marek

Equipment

  • stand mixer with metal bowl and the whisk attachment
  • ½ sheet pan (13"x18")
  • Parchment Paper
  • tea towel
  • medium sauce pan
  • Piping Bag
  • #2A piping tip

Ingredients

Meringue Mushrooms

  • 3 large egg whites about 3 ounces
  • ¼ teaspoon cream of tartar
  • 5 ounces granulated sugar
  • ½ teaspoon vanilla extract
  • 1 pinch salt

Mushroom Speckles

  • ½ teaspoon vanilla extract
  • ½ teaspoon cocoa powder

Roll Cake Ingredients

  • 8 large eggs
  • 8 ounces sugar
  • 8 ounces cake flour or all purpose flour
  • ½ teaspoon salt
  • 2 teaspoon vanilla extract

Buttercream filling

  • 4 ounces pasteurized egg whites
  • 8 ounces powdered sugar
  • 8 ounces unsalted butter
  • 1 teaspoon vanilla extract
  • ¼ teaspoon salt
  • 1 ounce cocoa powder

Ganache Frosting

  • 16 ounces semi-sweet chocolate good quality
  • 14 ounces heavy whipping cream
  • 1 teaspoon vanilla extract
  • ½ teaspoon salt
US Customary - Metric

Instructions

Buche de Noel Sponge Cake Batter Instructions

  • Preheat your oven to 400ºF (204ºC) with the oven rack in the center.
  • Line a sheet pan (13×18″) with parchment paper.
  • Next, fill a saucepan with 2-3″ of water and bring it to a boil over medium-high heat until boiling.
  • Then, reduce the heat to medium or until the water is simmering.
  • In the bowl of your stand mixer, place the eggs, granulated sugar, and salt and blend together with a whisk.
  • Next, place the bowl with the mixture on top of your simmering water. Do NOT let the bottom of the bowl hit the water.
  • Using your whisk, stir the egg mixture slowly until the sugar granules dissolve (about 110ºF or 43ºC).
  • Then, remove it from heat.
  • Attach your bowl to your stand mixer with the whisk attachment.
  • Add in your vanilla and whisk on high for 5-7 minutes until you reach the ribbon stage (see notes below). The mixture should triple in volume and lighten in color.
  • Sift in ⅓ of your flour mixture and fold (see notes) the flour in gently without damaging the structure of your egg mixture. Repeat two more times with the flour until just combined.
  • Spread the cake batter evenly into your parchment-lined sheet pan, and then spread it with an offset spatula or knife all the way to the edges of the pan. Do not grease your pan.
  • Bake the cake at 400ºF (204ºC) for 8 minutes.
  • Then, remove the cake from the oven and place it onto a cooling rack.
  • Immediately use a paring knife to carefully cut the edge of the sponge away from the sides of the pan.
  • Dust the surface of the cake with powdered sugar.
  • Next, place another piece of parchment on top of the cake, and then another cooling rack, and flip over to release the cake from the pan.
  • Remove the parchment paper carefully, and dust the surface with more powdered sugar.
  • Place a tea towel over the top of the cake and carefully roll into a spiral going lengthwise.
  • Finally, place it into the fridge to cool for one hour before filling it with your frosting. For more tips and tricks on making roll cakes, be sure to read my roll cake tutorial blog post.

Chocolate Buttercream Frosting Instructions

  • Start by sifting your powdered sugar and cocoa powder into the bowl of your stand mixer to remove any lumps. The cocoa powder especially loves to clump up and make these ugly specks in the finished buttercream.
  • Now, add in your pasteurized egg whites (yes, they need to be pasteurized). If you cannot get any pasteurized egg whites, you can make my chocolate Swiss meringue buttercream instead.
  • Mix everything together on low speed with the whisk attachment to combine it.
  • Then, mix on medium speed (setting 2 on my Bosch Mixer, setting 4 on a KitchenAid) for 3-5 minutes to help the powdered sugar and cocoa powder dissolve properly.
  • Next, add room temperature butter and mix it for 5-10 minutes on high speed.
  • Next, you want to turn up the speed to high and begin whipping in air! I whip mine for 5-10 minutes. Once it no longer tastes buttery, it’s done.
  • Switch to the paddle attachment and mix it on low speed for 10-15 minutes. This is totally optional but will help to remove excess air bubbles and make the buttercream really smooth.
  • Finally, you will switch to the paddle attachment and mix it on low speed for 10-15 minutes (totally optional) to remove excess air bubbles and make the buttercream really smooth. 

Ganache Frosting Instructions

  • Measure out your chocolate and chop it finely if it’s in big pieces so that it melts evenly.
  • Heat your cream on the stovetop until steam just begins to rise from the surface. Whisk occasionally to prevent burning. Do not walk away or your cream could boil over. 
  • Pour your hot cream over the chocolate and push the chocolate down so it’s all under the surface of the cream. Let the chocolate and cream sit for 5 minutes. 
  • Whisk the cream and chocolate together until it’s smooth. Start with small circles in the center until the chocolate and cream start creating an emulsion.
  • If you have lumps or un-melted chocolate, you can use an immersion blender to make your ganache super creamy and lump-free. 

Meringue Mushroom Instructions

  • First, preheat your oven to 225ºF (107ºC) and line a baking sheet with parchment paper.
  • Bring 2 inches of water to a simmer in a pot.
  • Place a clean stainless steel mixing bowl over the water. It should not touch the water. 
  • Combine your egg whites and sugar and whisk to combine. Occasionally whisk as it’s heating to distribute the heat and dissolve the sugar. 
  • Once your egg whites are at 110ºF (43ºC) (or when you don’t feel any grains of sugar between your fingers) you’re ready to whip.
  • Place the bowl on your stand mixer with the whisk attachment.
  • Whisk on medium speed (setting 2 on my Bosch Mixer, setting 4 on a KitchenAid) for one minute.
  • Then, add in the cream of tartar, salt, and flavoring. 
  • Next, bump the speed up to high and let it whip until you reach STIFF peaks. 
  • With a round piping tip, place your meringue into a piping bag and snip off the tip.
  • Pipe your stems and caps (see the video in the recipe card for more tips on these).
  • Bake them for 60 minutes, and then turn off the oven (but do not take out the cookies).
  • Let them sit in the oven until they are completely cold. I like to leave mine in overnight.
  • Poke a hole in the base of the mushroom and add a tiny bit of ganache or melted chocolate in the hole.
  • Then, place the cap on the stem.
  • Next, combine cocoa powder and vanilla.
  • Splatter the tops of the mushrooms with a stiff paintbrush.

Buche de Noel Cake Assembly Instructions

  • Once your sponge cake has cooled for at least an hour, you can carefully unroll it and then fill the inside with a layer of chocolate buttercream.
  • Then, roll the cake back up nice and tight lengthwise so there are no gaps in the filling.
  • Place the cake into the freezer for about an hour or into the fridge overnight to chill the filling.
  • Cut the ends of the roll cake off to reveal the swirl of filling.
  • Then, cut off one more piece of the roll cake at a slight angle and place it on the side of the roll to represent a branch.
  • Frost the outside of the Buche de Noel with chocolate ganache.
  • Decorate the outside with some of your meringue mushrooms, fresh cranberries, and sprigs of rosemary.
  • Dust the whole cake lightly with some powdered sugar to look like freshly-fallen snow.
  • Finally, chill before serving.

Video

Notes

The ribbon stage is when your egg mixture triples in volume, lightens in color and when spooned onto itself, it forms ribbons of batter that stay on the surface before slowly dissolving back into itself. 
Fold the batter by running the spatula around the outside edge of the batter and the bowl and then gently lift the batter onto itself. This allows the batter to mix without damaging the delicate structure. 
Important Things To Note Before You Start
  1. Use a scale to weigh your ingredients (including liquids) unless otherwise instructed (Tablespoons, teaspoons, pinch etc). Metric measurements are available in the recipe card. Scaled ingredients are much more accurate than using cups and help ensure the success of your recipe. 
  2. Practice Mise en Place (everything in it’s place). Measure out your ingredients ahead of time and have them ready before you start mixing to reduce the chances of accidentally leaving something out.

Nutrition

Serving: 1serving | Calories: 388kcal | Carbohydrates: 44g | Protein: 7g | Fat: 20g | Saturated Fat: 11g | Cholesterol: 125mg | Sodium: 188mg | Potassium: 223mg | Fiber: 2g | Sugar: 30g | Vitamin A: 473IU | Vitamin C: 1mg | Calcium: 46mg | Iron: 2mg

mealy pie dough recipe

November 26, 2019 Blog

Mealy Pie Dough (Pâte Brisée)

Mealy pie dough (pâte brisée) is the best all-butter pie dough for using on the bottom of pies to avoid that soggy bottom (no one likes a soggy bottom) or for making the perfect hand pies. 

mealy pie dough recipe

This dough is similar to making shortbread. The butter coats the flour and just melts in your mouth when you bite into it. Make a big batch ahead of time, portion and freeze for when you need it! Don't buy frozen pie crusts every again.  

Mealy Dough VS Flaky Dough?

Mealy pie dough is best for using for pies that have a liquid or custard filling like pumpkin, or apple pie filling because it won't get soggy. The pieces of fat in the flour are very small, making the fat distribution denser which repels liquids.

The pie crust bakes up very crisp so you don't get that soggy layer under your filling. Nothing worse than biting into some pumpkin pie and the bottom is all gummy. Yuck. 

pumpkin pie slice with stabilized whipped cream on top

Mealy pie dough is also the perfect pie dough for hand pies because it's very sturdy and easy to work with but still very tender and crisp when you eat it. 

You can use flaky pie dough for a bottom crust but flaky is suited for pies that have cooked fillings like mousse, no-bake cream pies, or pies with pre-cooked fillings to avoid that soggy bottom crust. 

How To Make Mealy Pie Dough Step By Step

Pro-tip - The best way to make mealy pie dough is to use a stand mixer or food processor. This works the cold butter into the flour and makes the mixture mealy without needing to use your hands. If you use your hands, the butter can melt pretty fast and your crust will get tough. 

Step 1 - Combine the flour, salt, and butter together in the bowl of your stand mixer with the paddle attachment. Mix until the mixture resembles coarse crumbs (a mealy texture).

closeup of mealy pie dough in a mixer

Step 2 - Add in your egg and cold water and mix until the flour is moistened. That's it! 

mealy pie dough pressed into a disk on plastic wrap

Step 3 - Remove your dough from the bowl and press it into a flattened disk. This will make it easier to roll out later. Wrap it in plastic wrap and place it into the fridge to rest for a minimum of 20 minutes but overnight is best. This resting allows the flour time to absorb the water and for gluten to develop which makes the crust easier to roll out. 

How To Use Mealy Pie Dough

Once your mealy pie dough has rested it's time to roll it out! Take your dough out of the fridge and let it warm up a bit. It might take 20 minutes or more. You want the pie dough to be pliable enough to roll out but still firm. 

You can test the dough to see if it's ready by bending it. If it bends without cracking then it's ready to roll out. 
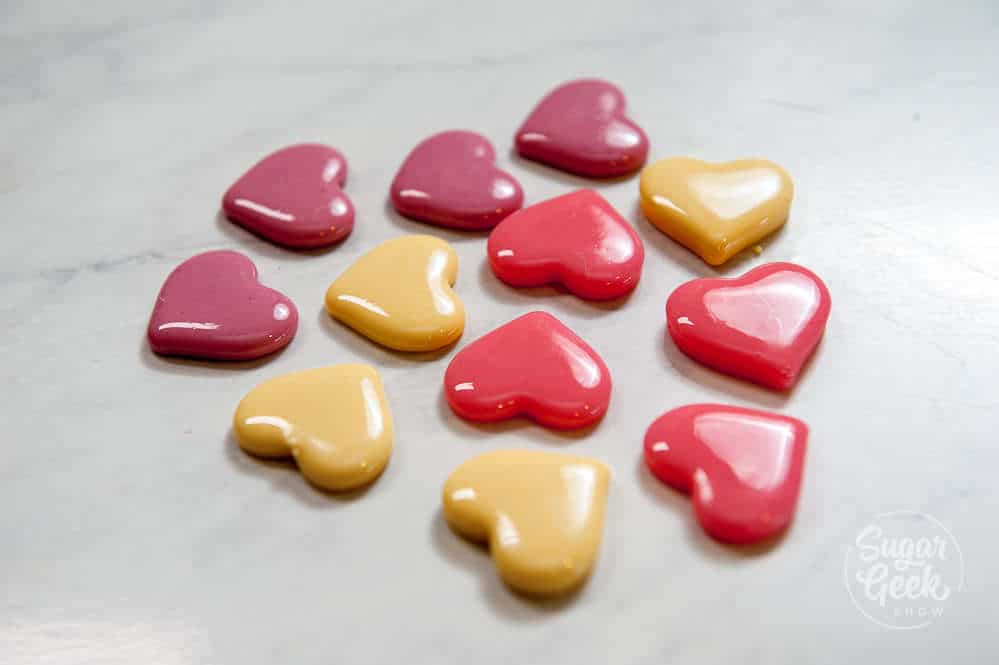
To roll the dough, begin by pressing down a few times with your rolling pin to thin the dough out. Then, working from the center, begin rolling the dough out into a large circle. 

To transfer the dough to your pie plate you can simply lift the dough up with your hands and transfer it to the pie plate. Or you can dust the surface with flour and roll it up onto your rolling pin and unroll it into your pie plate. 

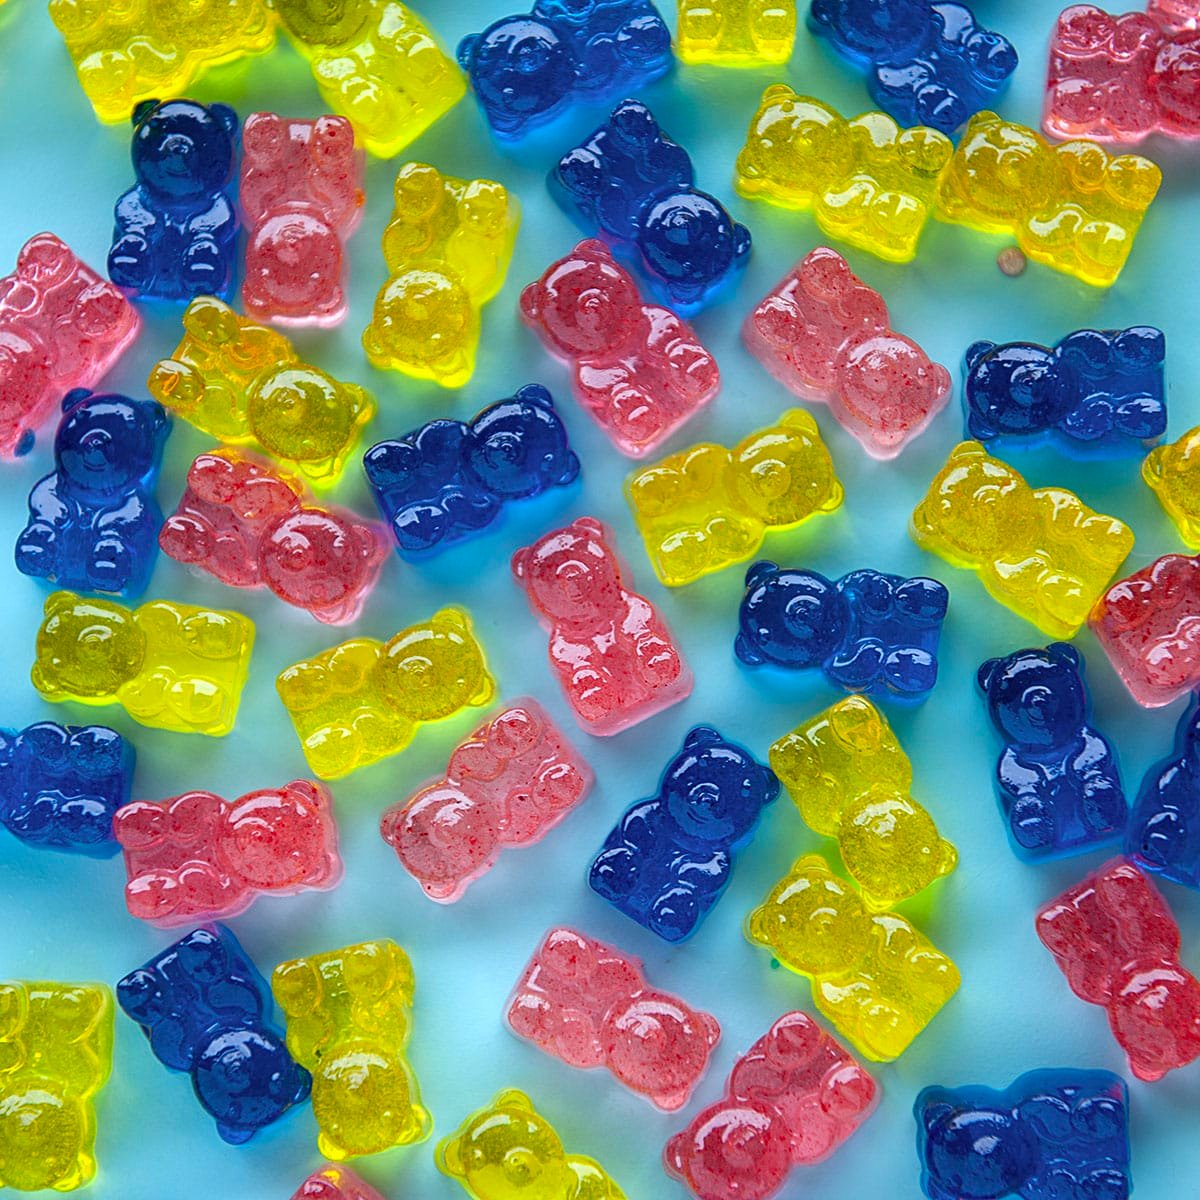
mealy pie dough in a pie plate shot from above

Trim off the excess dough, flute the edges.

hand fluting edges of pie dough

Depending on the type of pie you are making, you can bake the crust, par-bake it or fill it with pie filling and apply a flaky pie crust for the top of the pie. 

Remember to always freeze your pie dough for 15-20 minutes before baking to prevent shrinking! 

You can freeze any leftover dough to use for another pie!

How To Bake A Single Crust Pie With A Liquid Filling

Mealy pie dough is perfect for baking pies with a very liquid filling like pumpkin pie or other custard pies. This is how you prep your mealy pie dough for a single-crust pie with a liquid filling. 

  1. Make your filling and let it cool (this is a good thing to do the day before you make your pie).
  2. Make your mealy pie dough and let it chill for one hour or overnight (you can make it the same time as your filling).
  3. When you're ready to bake, let your dough warm up at room temperature just until it's pliable and able to be rolled out without cracking.
  4. Roll out your dough to ⅛″ thick and place it into your pie pan. Press it gently into the bottom of the pan.
  5. Trim off the excess dough but leave about ¼″ excess dough all the way around to account for shrinking.
  6. Pinch the edges to make them decorative or use a fork to make decorations.
  7. Freeze the pie dough for 20 minutes (or more). 
  8. Brush the pie dough with egg wash to promote a shiny and brown crust (optional). 
  9. Fill your pie crust with the pie filling and bake until the pie crust pulls away from the edges of the pan and is golden brown. Trust me, do not take the pie out of the oven until it shrinks or the center of your crust will be doughy. 
close-up of pumpkin pie on black plate with whip cream dollops on top

Double-Crust Pie With Mealy Dough And Flaky Dough

For the cherry version, pour my homemade cherry pie filling into the bottom crust (fully cooled, please) before sealing the top crust on. The mealy bottom keeps the filling juices from soaking through, and the flaky top gives you the classic golden crust.

  1. Prep your mealy pie dough as instructed above and trim off the extra crust (leaving that ¼" of extra dough all the way around.
  2. Fill your pie crust with your cooled filling. Do not over-fill or it will spill out of your pie. 
  3. Brush the outside edges of your mealy pie dough with egg wash. This is the glue that holds the two pie crusts together. 
  4. Depending on the pie you are making, you can now create a lattice top like I make with my apple pie or you can create a single crust. If making a single crust, don't forget to cut a few vents in the top to allow for air to escape. 
  5. Press the two crusts together and then cut off the excess dough. Don't forget to leave that ¼" of dough all the way around to allow for shrinking during baking. 
  6. Flute the edge or press it together with a fork. 
  7. Brush the entire surface of your pie crust with egg wash to make it nice and shiny. If you skip this step, your crust will have a hard time browning and will look very dull. 
  8. FREEZE your pie for 30 minutes to set the dough. While your pie is freezing, you can preheat your oven. Move your oven rack to the lowest place in the oven. 
  9. Bake your pie until the edges begin to pull away from the sides of the pie pan indicating the center of your crust has baked. If the pie edges start to brown before your pie has baked, you can cover them with foil or a pie crust protector. 
close-up of apple pie with lattice crust and whipped cream dollop on a blue plate

How To Prep Pie Crusts And Freeze Them

Do you want to prep a lot of pie crusts to use for the future? Mealy pie dough is perfect for freezing.

After your pie dough has rested, you can roll it out and put it into your pie plate. Trim off the excess and flute the edges. Don't forget to leave about ¼" of extra dough all the way around the edge of the pie plate to avoid it shrinking too much. 

pie dough that has been rolled out into a pie plate and edges have been fluted

Then you can freeze the whole thing to use later (instead of buying a pre-made frozen crust) or you can freeze it for 20 minutes and then bake it up. Freezing the dough also helps keep it from shrinking. 

You can stack multiple pies by place a square of parchment or plastic wrap in between each pie. Use disposable pie tins for easy baking. 

Need more pie? Check out these other recipes

Flaky pie crust recipe

Pumpkin Pie Recipe

Apple Pie Recipe

Chocolate Coconut Haupia Pie

Recipe

mealy pie dough recipe
Print Recipe
4.44 from 23 votes

Mealy Pie Dough Recipe (Pate Brise)

The right pie crust for the job. Mealy pie dough is the perfect pie dough for pies with a liquid filling. This dense, buttery crust repels water and stays nice and crispy! Say no to soggy bottom pies!
Prep Time5 minutes mins
Chilling Time2 hours hrs
Total Time2 hours hrs 5 minutes mins
Course: Dessert
Cuisine: American
Servings: 1 crust
Calories: 2530kcal
Author: Liz Marek

Ingredients

Mealy Pie Dough

  • 12 ounces all-purpose flour
  • 6 ounces cold butter grated
  • ¼ teaspoon salt
  • 1 large egg cold
  • 1 ounce ice water
US Customary - Metric

Instructions

  • Before you begin: Make sure your butter is cold and grated, and keep your ice water close by.
  • Combine the flour and salt in the bowl of your stand mixer with the paddle attachment.
  • Add the cold butter and mix on low until the mixture resembles coarse, mealy sand.
  • Add the egg and water and mix on low until the dough sticks together.
  • Flatten the dough into a disk and wrap it tightly in plastic wrap. Chill in the refrigerator for at least 20 minutes (2 hours is ideal) before rolling it out. Store in the refrigerator for 2 to 3 days, or in the freezer for up to 3 months.

Notes

Ingredient notes: Use a stand mixer or food processor to make this dough. It works the cold butter into the flour without needing your hands, keeping the butter cold and the crust tender. Mixing by hand risks melting the butter too fast, which makes the crust tough.
Pan options: This recipe makes the dough only, rolling and shaping happen once you're ready to use it. The same batch works for a standard pie plate, hand pies, or, doubled, mini pies. See "Make This Recipe Your Own" above for how to roll, shape, and bake it for each.
Make-ahead and storage: Wrap the dough tightly in plastic wrap and refrigerate for at least 20 minutes (2 hours is ideal) before using it. It keeps in the refrigerator for 2 to 3 days. To freeze the raw dough, place the wrapped disk in an airtight freezer bag and freeze for up to 3 months, then thaw it overnight in the refrigerator before rolling it out. You can also roll and shape it into a pie pan first and freeze the whole unbaked crust instead, wrapped tightly in plastic wrap and placed in a freezer bag to prevent freezer burn. A shaped, frozen crust gives the best texture within 1 to 2 months, though it holds up to 3 months.
Critical do-nots: Don't let the butter warm up while mixing. If it starts to soften, the crust turns out tough instead of tender, so work quickly and keep everything cold. Don't skip the chill time, at least 20 minutes is the minimum, the dough needs that rest to hold together without cracking once you roll it out. Wrap the dough tightly in plastic wrap before it goes in the fridge or freezer, an exposed edge dries out and cracks.
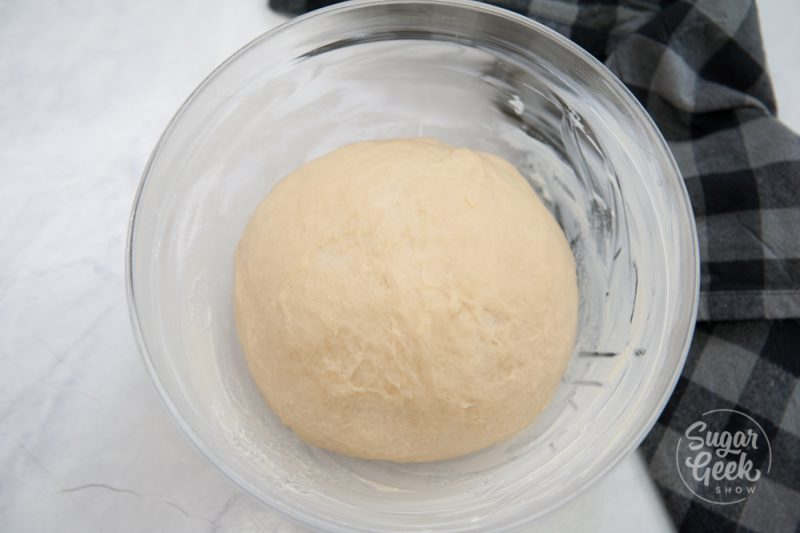
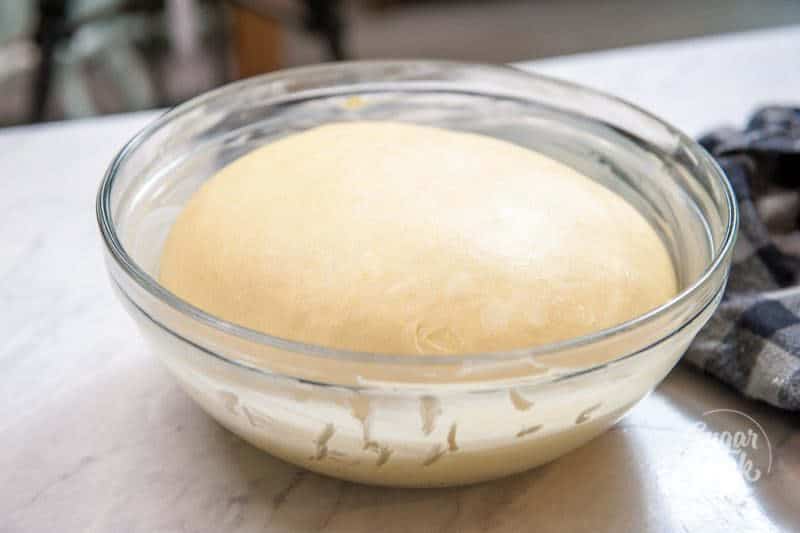
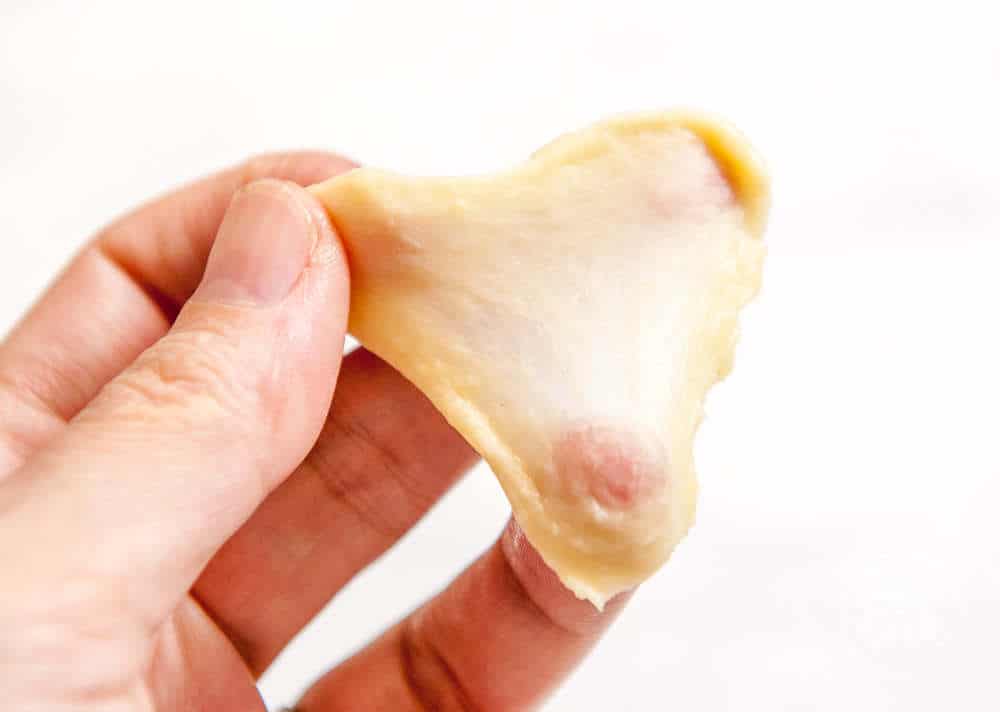
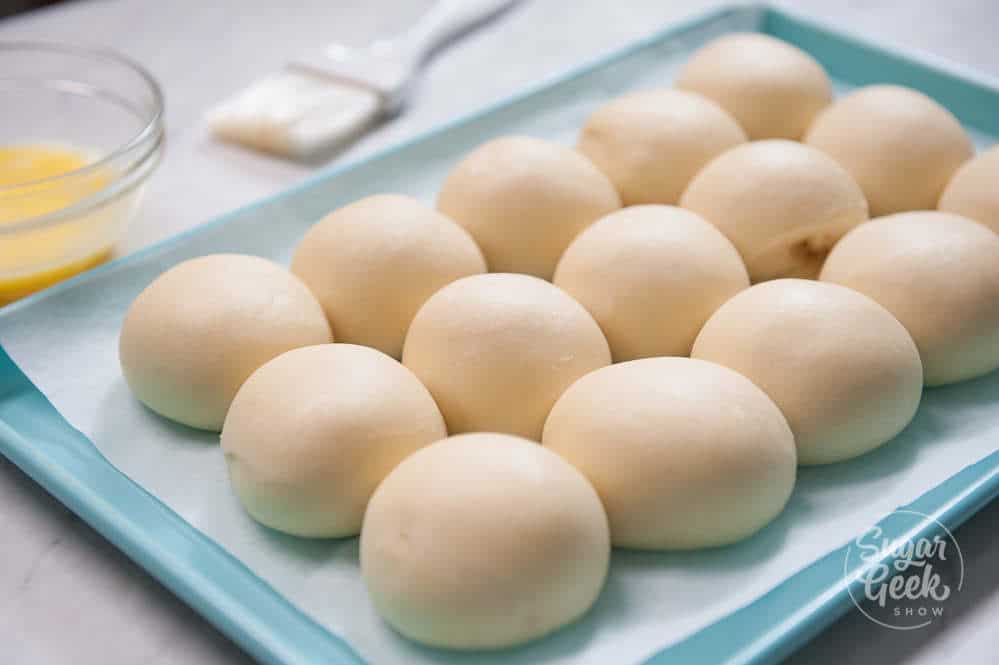
Nutrition

Serving: 1crust | Calories: 2530kcal | Carbohydrates: 260g | Protein: 42g | Fat: 146g | Saturated Fat: 90g | Polyunsaturated Fat: 8g | Monounsaturated Fat: 38g | Trans Fat: 6g | Cholesterol: 552mg | Sodium: 1754mg | Potassium: 474mg | Fiber: 10g | Sugar: 2g | Vitamin A: 4520IU | Calcium: 122mg | Iron: 16mg


patterned roll cake

November 24, 2019 Blog

Pattern Roll Cake Recipe

How to make a decorative pattern roll cake dessert  

Make beautiful designs on the outside of your pattern roll cake! Such a fun and easy way to get creative without all the fuss of a layer cake.

patterned roll cake

What is a pattern roll cake?

A pattern roll cake is achieved by piping a colorful batter onto a parchment-lined sheet pan, freezing it and then layering on your roll cake batter. 

After you peel off the parchment paper, the pattern is revealed! All that's left to do is roll up the sponge with a tasty filling and you've got a fun and easy decorated cake!

You can do any kind of pattern you want by changing the colors and the design of the batter. You can even use stencils or templates. 

For this recipe, I decided to do something super simple without any templates so you can see how easy it really is. 

How to make the roll cake pattern 

The pattern batter is super simple to prepare. Just mix it all together with a hand mixer or even a whisk until cohesive. Add in some food coloring and put it all into a piping bag. 

roll cake pattern batter being prepared in a bowl

You can also divide the batter up and make multiple colors if you want to get fancy. I used a couple of drops of electric blue food coloring in mine for my snowflakes. 

I used a #2 piping tip for making my snowflakes and I'm using a 10"x15" cookie sheet lined with parchment paper (not wax paper). To make a snowflake start by piping a big +. Then pipe a small x over the top. Make a v on the ends of the big lines and voila! Snowflake. 

how to make a pattern on a roll cake

Then just pop the whole thing into the freezer for 20 minutes. While it's freezing, go ahead and make your roll cake sponge. 

How to make a roll cake sponge

Making the roll cake sponge requires a simmering pot of water and a heatproof bowl. I use the stainless steel bowl of my kitchenaid mixer because it makes it easy. Combine the eggs and sugar in the bowl and place over the simmering water. The bowl shouldn't be touching the water. 

The idea is to heat the mixture for just long enough that the sugar dissolves. Whisk occasionally so the eggs don't cook. Once the sugar has dissolved, it's ready to whip up. I usually just feel the egg whites with my fingers to see if it's dissolved. 

gather your ingredients
Gather your ingredients for your roll cake
heat eggs and sugar over simmering water until sugar is dissolved
Combine together the eggs and sugar over a pot of simmering water
how to make a roll cake
Heat until sugar dissolves and no longer feels grainy

Whip the batter on high until the batter has tripled in volume and you get to the ribbon stage. The ribbon stage is when you drizzle the batter back onto itself and the batter forms "ribbons" that lay on top of the surface for a while before dissolving back into itself. 

ribbon stage batter

Once your egg reaches the ribbon stage, you want to fold your flour into the egg GENTLY so you don't deflate. I sift my flour onto the egg mixture then gently fold to incorporate. 

how to fold sponge batter

Slowly run your spatula around the outside edge of the batter, moving along the side of the bowl then towards the bottom of the bowl. Lift the batter up gently and fold it over onto itself. Repeat. If you mix too aggressively, your batter will deflate and it won't rise later. 

Once your sponge is mixed you can spread it out onto your baking sheet with the frozen snowflake batter. Make sure you push the batter all the way to the edges. Do not grease your pan. 

how to make a roll cake pattern

Then place the whole thing in your preheated oven for 8 minutes. This cake bakes very quickly so make sure you have everything ready to go as soon as it comes out.

What you need to roll your cake

  • Two cooling racks
  • Powdered sugar and a sifter
  • A tea towel or other thin towel
  • Small sharp knife 

loosen sponge from pan with a sharp knife

Once the sponge is done, you need to run a knife around the outside edge to loosen it from the pan. 

Flip onto a cooling rack, remove the parchment, dust with powdered sugar. Spread the tea towel on top, then place the other cooling rack over the towel. Flip the whole thing back over again so the tea towel is on the bottom.

remove parchment paper from the patterned roll

roll up the sponge with a tea towel while it's still warm to prevent cracking

Tightly roll up the cake while it's still warm. This is vital to avoiding those nasty cracks when you roll it up again with filling. Let it cool a few hours or even overnight. 

When you're ready to fill your cake, gently unroll it. Spread a thin layer of buttercream inside. You can also use stabilized whipped cream, ganache, fruit puree or even curd. 

roll cake after being rolled with a teat towel remembers it's shape better

Then roll it back up! I put mine back in the fridge to chill before serving to give the filling a chance to set up. The slices look better. 

pattern roll cake

Want more? Check out these recipes!

Vanilla Roll Cake with Strawberry Cream

Almond Joconde Cake 

Foolproof French macaron recipe


Recipe

patterned roll cake
Print Recipe
4.92 from 24 votes

Pattern Roll Cake Recipe

A pattern roll cake is made by piping a pattern onto the parchment paper before baking the sponge cake and then rolling it. Such an easy and fun way to make a decorated cake!
Prep Time10 minutes mins
Cook Time8 minutes mins
1 hour hr
Course: Dessert
Cuisine: French
Servings: 12 servings
Calories: 194kcal
Author: Liz Marek

Equipment

  • stand mixer with metal bowl and the whisk attachment
  • 10"x15" pan
  • Parchment Paper
  • tea towel
  • medium sauce pan
  • Piping Bag
  • #2 piping tip and bag

Ingredients

Pattern Batter

  • 1 ounce powdered sugar
  • 1 ounce butter softened
  • 1 ounce pastuerized egg whites
  • 1 ounce all-purpose flour
  • 2 drops food coloring I used americolor electric blue

Roll Cake Ingredients

  • 6 large eggs
  • 6 ounces sugar
  • 6 ounces cake flour or all purpose flour
  • ¼ teaspoon salt
  • 1 teaspoon vanilla extract

Stabilized whipped cream

  • 10 ounces heavy whipping cream
  • 2 Tablespoons powdered sugar
  • 2 teaspoons powdered gelatin
  • 2 ounces cold water
  • 2 teaspoons vanilla extract
  • 2 teaspoon heavy whipping cream

Instructions

  • Preheat your oven to 400ºF with the oven rack in the center. Line a ¼" sheet pan (9x13") with parchment paper.

Roll Cake Pattern

  • Cream together butter, flour, sugar and egg whites with a whisk attachment until smooth. Add in your food coloring and mix until cohesive in color.
  • Place batter into a piping bag or plastic baggie and snip off the tip. Pipe your pattern onto the parchment paper and then freeze while you prepare your roll batter (about 20 minutes)

Roll Cake Batter

  • Fill your saucepan with 2-3" water and bring to a boil over medium high heat until boiling then reduce heat to medium or until water is simmering
  • Place eggs, sugar and salt into the mixing bowl and blend together with a whisk
  • Place the bowl with mixture on top of your simmering water. Using your whisk, stir the egg mixture slowly until the sugar granules dissolve (about 110ºF) Remove from the heat.
  • Attach your bowl to your stand mixer with the whisk attachment. Add in your vanilla and whisk on high for 2-3 minutes until you reach the ribbon stage (see notes). The mixture should triple in volume and lighten in color.
  • Sift in ⅓ of your flour mixture and fold (see notes) the flour in gently without damaging the structure of your egg mixture. Repeat two more times with the flour until just combined.
  • Spread batter evenly into your prepared sheet pan and spread with an offset spatula or knife all the way to the edges of the pan. Do not grease your pan.
  • Bake for 8 minutes and then remove from the oven and place onto a cooling rack
  • Immediately use a paring knife to carefully cut the edge of the sponge away from the sides of the pan. Dust the surface with powdered sugar. Place another piece of parchment on top of the cake, then another cooling rack and flip over to release the cake from the pan.
  • Remove the parchment paper carefully and dust the surface with more powdered sugar.
  • Place a tea towel over the top of the cake and carefully roll into a spiral. Place into the fridge to cool for one hour before filling with frosting.

Stabilized Whipped Cream

  • Sprinkle your gelatin over the water and let bloom for 5 minutes. 
  • Melt gelatin for 5 seconds in the microwave. If not fully melted do another 3 seconds. You can tell gelatin is melted when there are no granules of unmelted gelatin visible. Add in 1 teaspoon of cream and stir to combine
  • In a cold mixing bowl, whip your heavy cream to soft peaks. Add in your powdered sugar and vanilla.
  • Turn your mixer down to low and drizzle in your gelatin and mix until whipped cream forms firm peaks (but not curdled)

Roll Cake Assembly

  • Carefully unroll your cooled sponge. It may crack a little towards the very center of the spiral and that is normal.
  • Spread a thin layer of your whipped cream and layer chopped fresh fruits like strawberries or blackberries or even mix together if desired.
  • Carefully roll your cake back up. Cut the ends of the roll cake off so they look nice and clean and then transfer to a platter.
  • Dust the surface of the roll cake with more powdered sugar, swirls of whipped cream and more fresh berries.
  • Serve chilled. It will last for three days covered in the fridge.

Video

Notes

The ribbon stage is when your egg mixture triples in volume, lightens in color and when spooned onto itself, it forms ribbons of batter that stay on the surface before slowly dissolving back into itself. 
Fold the batter by running the spatula around the outside edge of the batter and the bowl and then gently lift the batter onto itself. This allows the batter to mix without damaging the delicate structure. 

Nutrition

Serving: 1serving | Calories: 194kcal | Carbohydrates: 31g | Protein: 6g | Fat: 5g | Saturated Fat: 2g | Cholesterol: 111mg | Sodium: 115mg | Potassium: 67mg | Fiber: 1g | Sugar: 17g | Vitamin A: 212IU | Calcium: 18mg | Iron: 1mg


close up of vanilla roll cake with strawberry filling

November 22, 2019 Blog

The Best Swiss Roll Cake

How to make a light and fluffy Swiss vanilla roll cake filled with strawberry whipped cream and rolled into a gorgeous spiral! Learn how to get the perfect spiral without cracking. 

close up of vanilla roll cake with strawberry filling

What is a roll cake?

You may have guessed, a roll cake is a cake that is rolled. A roll cake is often called a swiss roll or a jelly roll. It's a type of sponge cake that is filled with whipped cream, jam or frosting and then rolled into a spiral before serving. 

A roll cake is similar to a roulade but a roulade can be filled with other things besides sweet fillings and can even be savory. 

vanilla roll cake with strawberry filling

Swiss roll cakes are also a type of roll cake but to me, a swiss roll cake is a chocolate sponge with a cream filling and then covered in chocolate. I used to eat those Little Debbie swiss roll cakes back in High School. Sooo good!

Ingredients

This Swiss roll only has 5 ingredients that you probably already have in your pantry, eggs, granulated sugar, flour, salt, and vanilla. I prefer to use cake flour because it makes for a more tender cake, but you can use all-purpose flour if that's all you have.

The strawberry whipped cream filling has a few more ingredients, I like to stabilize my whipped cream so that it doesn't ooze out the sides of the cake. I stabilize whipped cream with gelatin, but I have 5 other methods like cream of tartar or cornstarch if you don't like to use gelatin. Mix in some strawberry puree made from fresh or frozen strawberries and you have a delicious filling! You can always fill your cake with easy vanilla buttercream, cream cheese frosting, or Swiss meringue buttercream.

How to make a roll cake sponge

Making the roll cake sponge requires a simmering pot of water and a heatproof bowl. I use the stainless steel bowl of my kitchenaid mixer because it makes it easy. Combine the eggs and sugar in the bowl and place over the simmering water. The bowl shouldn't be touching the water. 

The idea is to heat the mixture for just long enough that the sugar dissolves. Whisk occasionally so the egg yolks don't cook. Once the sugar has dissolved, it's ready to whip up. I usually just feel the egg whites with my fingers to see if it's dissolved. 

gather your ingredients
heat eggs and sugar over simmering water until sugar is dissolved
how to make a roll cake

Tips for making a roll cake

Making the sponge cake isn't too complicated but you definitely need to make sure you whip it enough. The egg mixture should triple in volume and reach the ribbon stage. We whip all the air into the cake instead of using a raising agent like baking powder.

  1. Whip to ribbon stage - The ribbon stage is when you drizzle the batter back onto itself and the batter forms "ribbons" that lay on top of the surface for a while before dissolving back into itself. 
  2. Fold gently - Once your egg reaches the ribbon stage, you want to fold your flour into the egg GENTLY so you don't deflate. I sift my flour onto the egg mixture then gently fold to incorporate. 
  3. Spread it out - Spread your batter onto a parchment-lined baking sheet and go allllll the way to the edges. Do not grease the pan. The ungreased pan helps the sponge cake rise.
ribbon stage batter
how to fold sponge batter
how to make a roll cake
roll up the sponge with a tea towel while it's still warm to prevent cracking
  1. Don't over bake it - This sponge bakes incredibly fast. It only takes 8 minutes to set and then it's done. Don't bake too long or the edges get too brown and will crack during rolling. 
  2. Work fast - Once the sponge is done, you need to run a knife around the outside edge to loosen it from the pan. Dust the surface with powdered sugar, flip onto a cooling rack, remove the parchment, dust again with powdered sugar and then roll up with a tea towel all before it cools down. This is vital to avoiding those nasty cracks when you roll it up again with filling. 
  3. Let it cool - Let your roll cake cool down before you unroll and fill with filling. You'll notice the sponge has a memory now and will easily roll back up without cracking. 
  4. Frost and chill - Now you can frost your roll cake or just dust it with powdered sugar but you want to let it chill for a few hours before serving so that the roll cake holds it's shape when you cut it. 
strawberry whipped cream in vanilla swiss roll
vanilla roll cake with strawberry filling

This vanilla roll cake tastes fantastic with the strawberry whipped cream but you can also fill it with straight strawberry puree, strawberry buttercream, chocolate ganache or any filling you like! Get creative! 

Recipe

close up of vanilla roll cake with strawberry filling
Print Recipe
4.96 from 22 votes

The Best Swiss Roll Cake

The best roll rake recipe made for making jelly roll cakes. Light and fluffy but flexible enough to roll without cracking.
Prep Time20 minutes mins
Cook Time8 minutes mins
1 hour hr
Course: Dessert
Cuisine: French
Servings: 12 servings
Calories: 148kcal
Author: Liz Marek

Equipment

  • stand mixer with metal bowl and the whisk attachment
  • 13"x18" sheet pan
  • Parchment Paper
  • tea towel
  • medium sauce pan

Ingredients

Roll Cake Ingredients

  • 6 large eggs
  • 6 ounces sugar
  • 6 ounces cake flour or all purpose flour
  • ¼ teaspoon salt
  • 1 teaspoon vanilla extract

Strawberry Whipped Cream Filling

  • 16 ounces heavy whipping cream
  • 4 ounces strawberry puree or chopped strawberries (drained)
  • 2 Tablespoons powdered sugar
  • 2 teaspoons powdered gelatin
  • 5 Tablespoons cold water
  • 1 Tablespoon heavy cream
  • 1 teaspoon vanilla extract
US Customary - Metric

Instructions

  • Preheat your oven to 400ºF with the oven rack in the center. Line a sheet pan (13x18") with parchment paper.
  • Fill your saucepan with 2-3" water and bring to a boil over medium high heat until boiling then reduce heat to medium or until water is simmering
  • Place eggs, sugar and salt into the mixing bowl and blend together with a whisk
  • Place the bowl with mixture on top of your simmering water. Using your whisk, stir the egg mixture slowly until the sugar granules dissolve (about 110ºF) Remove from the heat.
  • Attach your bowl to your stand mixer with the whisk attachment. Add in your vanilla and whisk on high for 5-7 minutes until you reach the ribbon stage (see notes). The mixture should triple in volume and lighten in color.
  • Sift in ⅓ of your flour mixture and fold (see notes) the flour in gently without damaging the structure of your egg mixture. Repeat two more times with the flour until just combined.
  • Spread batter evenly into your prepared sheet pan and spread with an offset spatula or knife all the way to the edges of the pan. Do not grease your pan.
  • Bake for 8 minutes and then remove from the oven and place onto a cooling rack
  • Immediately use a paring knife to carefully cut the edge of the sponge away from the sides of the pan. Dust the surface with powdered sugar. Place another piece of parchment on top of the cake, then another cooling rack and flip over to release the cake from the pan.
  • Remove the parchment paper carefully and dust the surface with more powdered sugar.
  • Place a tea towel over the top of the cake and carefully roll into a spiral. Place into the fridge to cool for one hour before filling with frosting.

Stabilized Whipped Cream

  • Sprinkle your gelatin over the water and let bloom for 5 minutes. 
  • Melt gelatin for 5 seconds in the microwave. If not fully melted do another 3 seconds. You can tell gelatin is melted when there are no granules of unmelted gelatin visible. Add in 1 Tablespoon of cream and stir to combine
  • In a cold mixing bowl, whip your heavy cream to soft peaks. Add in your powdered sugar and vanilla.
  • Turn your mixer down to low and drizzle in your gelatin (or another stabilizer) and mix until whipped cream forms firm stiff peaks (but not curdled.)
  • Fold in cold strawberry puree or freshly chopped and drained strawberries

Roll Cake Assembly

  • Carefully unroll your cooled sponge. It may crack a little towards the very center of the spiral and that is normal.
  • Spread a thin layer of your whipped cream mixture over the sponge
  • Carefully roll your cake back up. Cut the ends of the roll cake off so they look nice and clean and then transfer to a platter.
  • Dust the surface of the roll cake with more powdered sugar, swirls of whipped cream and more fresh berries.
  • Serve chilled. It will last for three days covered in the fridge.

Notes

The ribbon stage is when your egg mixture triples in volume, lightens in color and when spooned onto itself, it forms ribbons of batter that stay on the surface before slowly dissolving back into itself. 
Fold the batter by running the spatula around the outside edge of the batter and the bowl and then gently lift the batter onto itself. This allows the batter to mix without damaging the delicate structure. 

Nutrition

Serving: 1serving | Calories: 148kcal | Carbohydrates: 25g | Protein: 5g | Fat: 3g | Saturated Fat: 1g | Cholesterol: 105mg | Sodium: 89mg | Potassium: 53mg | Fiber: 1g | Sugar: 14g | Vitamin A: 153IU | Calcium: 18mg | Iron: 1mg
 

red wine pear frangipane tart

November 17, 2019 Blog

Red Wine Poached Pear Frangipane Tart

Classic frangipane tart layered with mulled wine poached pears and glazed with red wine caramel sauce.

This frangipane tart is a classic dessert but get's an updated look from the red wine poached pears. These poached pears get their deep red hue from being mulled in red wine and spices which imparts not only a glorious color but an aromatic and rich flavor to the otherwise tasteless pears. The pears are then sliced thinly and arranged on top of the sweet almond cream (frangipane) inside a tart shell (pate sucre) and glazed with the reduced poaching liquid, resulting in a stunner of a dessert!

pear frangipane tart

This tart may seem complicated (it does have a lot of steps) but I promise those steps are incredibly easy to do. I'm here to walk you through it. I'll teach you how to make each element, how far in advance to prepare it and how to assemble the whole thing together. You won't believe how beautiful this tart looks after you're done. You got this! 

What exactly is frangipane?

Frangipane is a filling made by mixing the almond paste with milk, sugar, flour, eggs, and butter and is often used in tarts, cakes and other types of pastries. So basically any type of tart that has frangipane in it is a frangipane tart but the traditional fruit to use is the pear. 

Frangipane has a very light and velvety texture. Even though it has sugar in it, it's not very sweet. The almond flavor is very light and is pretty much the perfect accent to other flavors like cherries, apples, plums, apricots or berries.

closeup slice of wine poached frangipane tart with whipped cream and drizzle of red wine sauce

I first learned about frangipane back in pastry school (surprise surprise). Our chef would often make us lunch and one day he took some leftover tart dough, filled it with some frangipane filling and topped it with fresh cherries.

I was BLOWN AWAY at how delicious that tart was. The combination of fruit and almond was incredible and not something my American palette was used to. Unlike almond extract, fresh almonds taste amazing and go so well with so many things! It's so underrated. I have been in love with frangipane filling ever since. 

making a wine poached pear frangipane tart

What ingredients do you need to make a pear frangipane tart?

Ok so before you start this epic journey to making your first frangipane tart, you need to gather your ingredients. There are quite a few steps to making a pear frangipane tart including making your tart shell, poaching your pears and making your frangipane filling. But don't worry, each of these steps is pretty simple, and I'm going to walk you through them. 

  • Pears - Choose pears that can withstand baking and still hold their shape. Bosc, Anjou or Asian pears are good choices. Choose pears that are ripe but still firm and don't have any bruises. 
  • Wine - Any red wine will do. The rule is if you'd drink it then it's a good choice to cook with but I wouldn't recommend buying anything too expensive. The wine I bought was a cabernet sauvignon and was $10 and it tasted great. If you need help choosing a wine, ask someone in the wine section to recommend something for cooking. 
  • Spices - We're going to need some spices to mull our pears in and give them flavor. I'm using cinnamon sticks, star anise, and cloves. I prefer whole spices so I can strain them out later. You can change the spices to your liking. 
  • Citrus - I'm adding in some orange peel to add a citrus flavor to my poaching liquid but you can switch that out for lemon, blood orange or any other type of fruit. 
  • Almond Paste - I made my own almond paste from blanched and slivered almonds but you can buy pre-made almond paste if you don't want to make your own. If you make your own almond paste you will need a strong food processor to grind the almonds.

pears in poaching liquid with orange peel, star anise and cinnamon sticks

What kind of equipment do you need to make a pear frangipane tart? 

We don't need a lot of fancy equipment to make our tart but these are a couple of things that you will need for the best results. 

  • Tart tin with a removable bottom - A metal tart tin will give you the best results for an evenly browned tart dough and the removable bottom will allow you to easily take the tart out of the pan.pate sucre in tart pan after blind baking
  • Food processor - Only needed if you intend to grind your own almonds for the almond paste. 
  • Pie weights - Needed to blind bake the tart dough. You can also use dried beans. 
  • Saucepan - Ideally you should be using a saucepan that is big enough to barely fit the pears in so that you don't have to use too much wine. My saucepan had enough room for four pears but I only needed 3 for my tart. 

How do you make a pear frangipane tart?

This process isn't complicated but there are some things you need to do ahead of time to make things easier on yourself so really this is a two-day project. I've broken down the steps of making this tart for you as follows. 

Day 1 

  1. Prepare the tart dough and place it into the fridge to chill overnight. 
  2. Poach the pears in the red wine and then store them in the fridge overnight which allows the color of the pears to deepen in color. If you don't want to poach in the wine you can poach pears in water or juice.
  3. Make your almond paste and let it rest in the fridge overnight. 

how to make pate sucree tart dough
Pate Sucre - Tart Dough
cooling poached pears in hot red wine poaching liquid to deepen the color
Red Wine Poached Pears
almond paste recipe
Almond Paste

Day 2 

  1. Blind bake your tart in the tart tin with aluminum foil and pie weights and let it cool.
  2. Remove your pears from the poaching liquid and set them on paper towels to dry before slicing. 
  3. Reduce the poaching liquid to make your red wine dessert sauce.
  4. Make your frangipane filling. 
  5. Assemble your tart and bake.
  6. Glaze with the red wine dessert sauce and serve chilled with fresh whipped cream or ice cream. 

tart dough in tart pan with ingredients around it
tart dough in tart pan
press in aluminum foil over the tart dough
tart pan with tinfoil inside and pie weights
pate sucre in tart pan after blind baking
Bake for 15 minutes, remove foil then bake for 10 more minutes
Slice dried pears length-wise ¼" thick
frangipane filling
Prepare your frangipane filling
Fill cooled tart shell with frangipane filling
Arrange pears onto frangipane filling. Sprinkle sliced almonds around the outside edge. Bake

How can you tell if a frangipane tart is done?

It can be tough to know when a frangipane tart is fully baked. A 9" tart will need to be baked for about 40 minutes to give the frangipane enough time to fully bake. That might seem like a long time but it really is needed. Even though we are blind baking our tart, we will need to bake it even further to avoid a soggy, doughy bottom to our tart. 

You will know the tart is baked when the frangipane filling puffs up in the center of the tart and starts to envelop the fruit. If you touch it with your finger, it will feel set. 

If you feel like the top of your tart is browning too much you can place a sheet pan on the top rack of the oven above your tart to deflect some of the heat from browning the crust too much. I have also used a pie crust shield to avoid browning the top too much. 

red wine poached pear frangipane tart

Storing a Frangipane tart

Frangipane filling comes together quickly and stores extremely well. Make it several days in advance and store it in the refrigerator until you’re ready to use it. It also freezes well, just be sure to allow it to thaw completely before using. 

A pear frangipane tart can be stored in the refrigerator for up to three days but I doubt it will last that long. We devoured ours in one sitting. 

Hungry for more? Check out these recipes

Cream Tart 

Foolproof French macaron recipe

Mirror glaze cake recipe

Homemade almond paste

Recipe

pear frangipane tart
Print Recipe
4.82 from 11 votes

Red Wine Pear Frangipane Tart

This red wine pear frangipane tart is the perfect holiday dessert. Light and creamy frangipane filling layered with gorgeous red wine poached pears baked in a buttery sweet tart crust. Drizzle with red wine caramel sauce.
Prep Time20 minutes mins
Cook Time40 minutes mins
resting1 day d
Course: Dessert
Cuisine: French
Servings: 12 servings
Calories: 560kcal
Author: Liz Marek

Equipment

  • Stand Mixer
  • 9 ½ inch tart pan

Ingredients

Poached Pears

  • 5 ounces sugar
  • 16 ounces red wine Cabernet or Merlot
  • 8 ounces orange juice
  • 1 large orange peel
  • 10 whole cloves
  • 1 stick cinnamon
  • 2 teaspoons vanilla extract
  • 4 medium bosc pears or another pear good for baking

Pate Sucre (sweet tart dough)

  • 4 ounces powdered sugar
  • 8 ounces unsalted butter room temperature
  • 12 ounces all-purpose flour
  • 1 teaspoon vanilla extract
  • ½ teaspoon salt
  • 1 large egg room temperature

Frangipane Filling

  • 6 ounces almond paste
  • 4 ounces butter softened
  • 2 whole eggs
  • 1 ounce sugar
  • 1 ounce cake flour sifted
  • ¼ teaspoon salt
US Customary - Metric

Instructions

For The Wine Poached Pears

  • Place sugar, wine, orange juice, vanilla, and spices into your saucepan and bring to a simmer
  • Peel your pears and place them into the poaching liquid. Make sure they are covered. If they aren't, add more wine or juice until they are covered.
  • Let your pears cook in the poaching liquid for 15 minutes. Occasionally turning them to make sure they are cooking on all sides evenly.
  • Transfer the pears and liquid to a container with a lid (making sure pears are covered) and allow them to cool overnight. The pears will deepen in color overnight.

For the Tart Dough

  • Blend butter, salt and sugar in the bowl of a stand mixer with the paddle attachment until combined
  • Add in your egg and vanilla. Add in flour slowly and mix on low until a dough forms
  • Place dough onto plastic wrap and flatten into a disk. Chill 24 hours before use

For the Frangipane FIlling

  • Use paddle attachment on low speed to blend together almond paste and sugar.
  • Add softened butter and blend in completely.
  • Add eggs two at a time, then flour.

Tart Assembly

  • Take your tart dough out of the fridge about 20 minutes before you roll it out.
  • Roll your tart dough to about ⅛" thick and press into a tart pan. Do not grease the pan. Push the dough into the ridges of the tart pan and down into the corners evenly.
  • Cut off the excess dough and freeze the tart for 20 minutes.
  • Place some aluminum foil into the tart carefully and press down into the corners. Fill with pie weights or dry beans. Bake in your preheated oven for 15 minutes.
  • Remove the pie weights by carefully lifting out the aluminum foil and bake for 10 more minutes. Let tart cool completely.
  • Fill your tart with your frangipane filling and smooth so it's flat before adding your sliced pears.
  • Slice your poached pears length-wise and arrange onto the frangipane filling
  • Sprinkle some sliced almonds along the outside if desired
  • Bake the tart at 350 for 40 minutes or until the frangipane filling begins to puff and surround the fruit in the center of the tart. Use a crust cover for the first 20 minutes, then remove.
  • Reduce your poaching liquid until it is thick (It should reduce to about ⅓ it's original volume). It will get thicker as it cools.
  • Serve your tart slightly warm or cold with ice cream and the reduced poaching liquid.

Video

Notes

Important Things To Note Before You Start
1. Bring your butter and eggs to room temperature before you begin.
2. Use a scale to weigh your ingredients (including liquids) unless otherwise instructed (Tablespoons, teaspoons, pinch etc). Metric measurements are available in the recipe card. Scaled ingredients are much more accurate than using cups and help ensure the success of your recipe. 
3. Practice Mise en Place (everything in it's place). Measure out your ingredients ahead of time and have them ready before you start mixing to reduce the chances of accidentally leaving something out.
4. You can use All Purpose Flour instead of Cake Flour, if preferred. 
5. The tart is not very sweet, so I highly recommend reducing the poaching liquid to drizzle over the tart for added sweetness!

Nutrition

Serving: 1serving | Calories: 560kcal | Carbohydrates: 67g | Protein: 6g | Fat: 28g | Saturated Fat: 15g | Cholesterol: 79mg | Sodium: 229mg | Potassium: 249mg | Fiber: 4g | Sugar: 36g | Vitamin A: 791IU | Vitamin C: 13mg | Calcium: 58mg | Iron: 2mg


Wedding Cake Spacers Tutorial

November 15, 2019 Course Preview

Wedding Cake Spacers Tutorial

Skill level: Intermediate

This wedding cake with fresh flower spacers has been a highly requested tutorial for years and I've finally got it finished. In this tutorial you'll learn how to make a structurally sound wedding cake with fresh flowers in between the cake tiers, marble fondant techniques and golden scrollwork detailing.

42:25 Minutes of Instruction

What You Will Learn

  • How to add styrofoam spacers between cake tiers for adding flowers
  • Learn how to arrange fresh flowers on a wedding cake
  • How to make a simple, clean wedding cake design using scroll molds

Tutorial Chapters

  1. Covering in fondant 0:39
  2. Assembling the structure 2:54
  3. The 12" tier 5:04
  4. The 10" and 8" tiers 9:50
  5. The 6" and 4" tiers 12:09
  6. Making side decorations 14:22
  7. Recap 23:52
  8. Preparing the flowers 25:36
  9. Arranging the flowers 33:08
  10. Stacking the cakes 37:55

Downloads

Materials List

Wedding Cake Spacers Tutorial

November 15, 2019 Paid Video

Wedding Cake Spacers

Skill level: Intermediate

This wedding cake with fresh flower spacers has been a highly requested tutorial for years and I've finally got it finished. In this tutorial you'll learn how to make a structurally sound wedding cake with fresh flowers in between the cake tiers, marble fondant techniques and golden scrollwork detailing.

42:25 Minutes of Instruction

What You Will Learn

  • How to add styrofoam spacers between cake tiers for adding flowers
  • Learn how to arrange fresh flowers on a wedding cake
  • How to make a simple, clean wedding cake design using scroll molds

Tutorial Chapters

  1. Covering in fondant 0:39
  2. Assembling the structure 2:54
  3. The 12" tier 5:04
  4. The 10" and 8" tiers 9:50
  5. The 6" and 4" tiers 12:09
  6. Making side decorations 14:22
  7. Recap 23:52
  8. Preparing the flowers 25:36
  9. Arranging the flowers 33:08
  10. Stacking the cakes 37:55

Downloads

Materials List

poached pears in red wine sauce

November 9, 2019 Blog

Red Wine Poached Pears

Poached pears in red wine is a great way to bring out the natural sweetness of pears while adding an extra dimension of flavor with the red wine and spices. 

poached pears in red wine sauce
 

The Poire à la Beaujolaise or pear in wine is a traditional dessert of the wine-growing region of Beaujolais, and belonging to the cuisine of Burgundy and Lyon. Poached pears in red wine are not very sweet. Best served chilled or slightly warm with ice cream, whipped cream, whipped mascarpone and reduced red wine sauce made from the leftover poaching liquid which is quite sweet. 

The ingredients you'll need to make poached pears in wine 

  • Red wine - Any red wine that you would drink like cabernet sauvignon or merlot that's not too expensive
  • Spices - Cinnamon sticks, anise pods, whole cloves, and an orange rind add a delicious aroma and depth of flavor to the pears. You can use other spices that you like in addition to or in place of like ginger or cardamom. 
  • Orange juice - adds some sweetness and citrus notes. You can replace it with other types of juices like apple or pomegranate. 
  • Sugar - Adds sweetness and to the pears. It can be left out or replaced with other sweeteners like honey or brown sugar. 
pears in poaching liquid with orange peel, star anise and cinnamon sticks

What are the best pears for poaching?

When you're poaching pears in red wine, you're basically cooking them. So you want to choose pears that will hold their shape well even after being cooked. I like using Bosc pears because they are readily available at my grocery store and have a nice firm but sweet taste. 

You can also use Anjou pears or Asian pears. Avoid using Bartlett pears because they literally turn to mush when baked. 

You also want to avoid pears that are too ripe. I made that mistake and ended up losing two pears because they were too soft. You want the flesh to still feel firm and smooth with no blemishes or bruises. 

peeling pears for poaching

What is the best wine for poaching pears?

I like using either a cabernet sauvignon or merlot. Choose a wine that isn't too expensive but not too cheap. Basically, if you would drink it, it will be good for poaching. If you don't drink wine or don't know what to choose, ask someone at the deli counter to recommend a wine for you. 

We're also adding spices and citrus to our wine so the flavor will be enhanced and if you choose to reduce the wine (which I highly recommend) into a dessert sauce, the flavor will be even more intense.

Adjusting flavors of the spices and poaching liquid

The spices and fruit that we are using can easily be switched out for other spices. I really like how the orange and the wine pair together and reduces down so well. Consider using cherries, berries or apple juice to switch up the flavors. 

I prefer to add in my spices whole so they infuse the liquid but are easy to strain out later when it's time to reduce the liquid. 

poached pears in red wine on a plate with spices

What kind of saucepan should be used for poaching pears in wine?

Use the smallest saucepan you have on hand that will still fit your pears and liquid and have some space at the top to prevent boiling over. My saucepan was a little big so I had to add in more wine to make sure my pears were still covered. 

I only needed three pears for my tart but I could have just poached one extra so I had less space in my saucepan. 

In the end, I just had extra sauce to reduce and enjoy on my ice cream and I'm not mad about that one bit. 

Tips for making the best poached pears in red wine sauce

  1. Use pears that are ripe but still firm 
  2. Get your liquids simmering with your spices before you peel the pears to prevent browning. 
  3. If you're going to be eating these poached pears in wine as a dessert, you want to cook them for 20-25 minutes or until they are fork-tender. Depending on how ripe they are, you may need to adjust this timing. 
  4. If you're going to use these poached pears to later bake in a tart like my red wine frangipane pear tart then you want to slightly undercook them. I cooked mine for about 15 minutes. 
  5. Let the pears cool in the poaching liquid and then store them in the poaching liquid overnight. This helps the pears get that really beautiful deep red color on the outside. 
  6. Reduce your leftover poaching liquid to make a red wine dessert sauce to serve with the pears
cooling poached pears in hot red wine poaching liquid to deepen the color

Are pears poached in red wine alcoholic?

Because the liquid is heated for so long, all the alcohol evaporates out of the wine. So if your kiddo wants to partake, it's totally ok. 

Try these other recipes!

Homemade Apple filling 

Moist Vanilla Bundt Cake 

Dried Pineapple Flowers

Recipe

poached pears in red wine sauce
Print Recipe
5 from 2 votes

Poached Pears In Red Wine Sauce

Poached pears in red wine are sweetly spiced and deliciously tender. Best served with ice cream and a red wine dessert sauce made with the leftover poaching liquid
Prep Time5 minutes mins
Cook Time20 minutes mins
Colling1 day d
Course: Dessert
Cuisine: French
Servings: 4 pears
Calories: 318kcal
Author: Liz Marek

Equipment

  • medium saucepan

Ingredients

  • ½

    cup sugar
  • 1 large piece of orange peel
  • 10 whole cloves
  • 1 stick cinnamon
  • 2 cups red wine I prefer Cabernet Sauvignon or Merlot
  • 1 cup orange juice
  • 2 teaspoons vanilla extract
  • 3 to 6 medium bosc pears

Instructions

  • Place sugar, wine, orange juice, vanilla, and spices into your saucepan and bring to a simmer
  • Peel your pears and place them into the poaching liquid. Make sure they are covered. If they aren't, add more wine or juice until they are covered.
  • Let your pears cook in the poaching liquid for 20 minutes. Occasionally turning them to make sure they are cooking on all sides evenly.
  • Remove the saucepan from the heat and allow the pears to cool in the poaching liquid
  • Transfer the pears and liquid to a container with a lid (making sure pears are covered) and allow them to cool overnight. The pears will deepen in color overnight.
  • Before serving the pears, remove them from the liquid and set aside.
  • Strain your poaching liquid and return to the heat. Simmer over medium heat to reduce to a thick syrup (reduce by about ⅓). Allow to cool.
  • Serve poached pears with ice cream, whipped cream or whipped mascarpone cheese and a generous drizzle of your cooled syrup.

Video

Nutrition

Serving: 1pear | Calories: 318kcal | Carbohydrates: 58g | Protein: 1g | Fat: 1g | Saturated Fat: 1g | Sodium: 14mg | Potassium: 457mg | Fiber: 6g | Sugar: 44g | Vitamin A: 157IU | Vitamin C: 37mg | Calcium: 53mg | Iron: 1mg
 

Giant Apple Pie Cake Online Course

November 1, 2019 Course Preview

Giant Apple Pie Cake Tutorial

Skill level: Intermediate

It's been a while since I made a realistic food cake and what better time than Thanksgiving to bring a delicious Apple Pie cake to the table?

In this tutorial, you will learn how to create a realistic pie cake, complete with apple pie filling, an edible pie dish, pie crust and latticing. Let's get our tools together, and let's get started!

51:11 Minutes of Instruction

What You Will Learn

  • How to make a cake that looks like a realistic pie
  • Learn how to make an edible pie dish with scalloped edges
  • Why you would use modeling chocolate vs fondant

Tutorial Chapters

  1. Carving the cakes 1:22
  2. Frosting the cake 5:46
  3. Making modeling chocolate 7:01
  4. Final coat of frosting 12:26
  5. Making the pie dish 18:07
  6. Making the lip 27:29
  7. Adding the border 30:25
  8. Smoothing the pie dish 34:57
  9. Glazing the pie dish 35:52
  10. Making the crust edge 38:46
  11. Adding the crust edge 40:21
  12. Adding apple filling 42:40
  13. Making the lattice 43:14
  14. Detailing the lattice 47:07

Downloads

Materials List

Giant Apple Pie Cake Online Course

November 1, 2019 Paid Video

Giant Apple Pie Cake

Skill level: Intermediate

It's been a while since I made a realistic food cake and what better time than Thanksgiving to bring a delicious Apple Pie cake to the table?

In this tutorial, you will learn how to create a realistic pie cake, complete with apple pie filling, an edible pie dish, pie crust and latticing. Let's get our tools together, and let's get started!

51:11 Minutes of Instruction

What You Will Learn

  • How to make a cake that looks like a realistic pie
  • Learn how to make an edible pie dish with scalloped edges
  • Why you would use modeling chocolate vs fondant

Tutorial Chapters

  1. Carving the cakes 1:22
  2. Frosting the cake 5:46
  3. Making modeling chocolate 7:01
  4. Final coat of frosting 12:26
  5. Making the pie dish 18:07
  6. Making the lip 27:29
  7. Adding the border 30:25
  8. Smoothing the pie dish 34:57
  9. Glazing the pie dish 35:52
  10. Making the crust edge 38:46
  11. Adding the crust edge 40:21
  12. Adding apple filling 42:40
  13. Making the lattice 43:14
  14. Detailing the lattice 47:07

Downloads

Materials List

almond paste recipe

October 30, 2019 Blog

Almond Paste Recipe

The best almond paste recipe made with sugar, water, butter and a little corn syrup tastes amazing and is more cost-effective than store-bought 

Make your own homemade almond paste and never buy from the store again! It tastes better and can be made in 10 minutes flat. Almond paste is commonly used in pastries like frangipane tarts, bearclaws and toscaner squares. 

almond paste recipe

Almond paste can be very expensive to buy. It's about $10 for 2 ounces in the grocery store. Obviously, if you buy it in bulk, it's less expensive but unless you're baking with almond paste a lot, it might not be worth it.  To save the most money, I used slivered blanched almonds that I bought in the bulk section of winco which cost less than $6 for a whole pound. 

raw slivered almonds

Why should you make your own almond paste?

Luckily, you can make your own almond paste pretty easily. The only thing you really need is a powerful food processor to get that finely ground texture. If you don't have a strong food processor, you can start with almond flour instead of blanched almonds but it won't be quite as cost-effective.  

The best part about making your own almond paste is that the texture of your pastries will be lighter and more delicious. And you don't have to worry about storing leftovers because you can make exactly the amount of almond paste that you need for your recipe. 

making almond paste in a 6 cup food processor

Making your own almond paste goes pretty quickly. Just pulse your almonds until they are nice and fine (or use almond flour) and then add in your hot sugar mixture. Blend until smooth! It's very sticky at first so let it cool then knead in the butter which smoothes it out. 

What's the difference between almond paste and marzipan?

Almond paste that has been ground superfine is also referred to as marzipan and can be molded and colored to make beautiful edible decorations like these pretty fruits. Marzipan is also used to cover cakes and cookies. Marzipan usually has more sugar than almond paste and is most commonly used in the UK. 

marzipan fruits
watermelons, kiwis and marzipan persimmons for sale in a candy store

How long does this almond paste recipe last?

You can keep the leftover almond paste in the fridge for quite a long time, at least 3 months. Or you can freeze it for a year. It does dry out if you don't wrap it well though so I usually wrap it in plastic wrap then place in an airtight container. 

To use the almond paste, cut off the amount you need and let it come to room temperature before incorporating it into your recipes. 

Want more almond recipes? Check these out!

Marzipan Recipe

Almond Sable Recipe

Fool-proof French Macaron Recipe

Joconde Recipe

Recipe

almond paste recipe
Print Recipe
4.91 from 11 votes

Almond Paste Recipe

Almond paste made with sugar, water, corn syrup and butter. Almond paste is used in many pastry recipes like frangipane tarts, bear claws and as a filling.
Prep Time15 minutes mins
Cook Time5 minutes mins
Course: Dessert
Cuisine: French
Servings: 2 cups
Calories: 500kcal
Author: Liz Marek
Cost: $7

Equipment

  • 6 cup Food Processor

Ingredients

  • 14 ounces slivered blanched almonds or almond flour
  • 8 ounces granulated sugar
  • 3 ounces water
  • 4 ounces corn syrup or honey
  • 2 ounces butter softened

Instructions

  • Place slivered almonds into the food processor and pulse until almonds are finely ground
  • Place water, sugar and corn syrup into a saucepan and bring to a boil
  • While mixing on low, drizzle in hot syrup
  • blend until smooth then let cool
  • Knead in butter and wrap tightly to store in the fridge for up to one month or freeze for 6 months. Bring to room temperature before using.

Video

Nutrition

Serving: 4g | Calories: 500kcal | Carbohydrates: 101g | Protein: 22g | Fat: 54g | Saturated Fat: 4g | Sodium: 36mg | Potassium: 600mg | Fiber: 10g | Sugar: 75g | Calcium: 225mg | Iron: 7mg


closeup of fresh apple cake recipe with brown butter buttercream on grey plate

October 29, 2019 Blog

Fresh Apple Cake Recipe

The best fresh apple cake recipe with brown butter cream cheese frosting and a salted caramel drip

This fresh apple cake recipe is perfectly spiced with chunks of real apple in each layer. Frosted with brown butter cream cheese frosting and a rich salted caramel drip. The perfect cake for fall. 

closeup of fresh apple cake recipe with brown butter buttercream on grey plate

What are the best apples to use in an apple cake recipe?

You want to use apples that will hold their shape while baking. I cut my apples into small pieces so that they bake evenly with the cake batter. 

The best apples to use for baking
  • Jonagold - Slightly tart, crisp, not too sweet and holds it's shape well after baking.
  • Honeycrisp - Crisp, sweet, holds it's shape well after baking. 
  • Braeburn - Crisp, sweet and very juicy. Holds its shape well for baking. 
  • Mutsu - Sweet, firm and great for baking
  • Pink Lady - Sweet, crisp and firm. Great for baking. 
  • Granny Smith - A tart apple that holds its shape during baking. Not very sweet. 
  • Cortland - Not too sweet, slightly tart. Softer than other apples but still holds its shape. 

What is the best way to cut apples for a cake?

The star of this cake is the fresh apple chunks inside, so you want them to be visible, but not giant pockets of squishy apple inside your cake. I go for pieces about ¼ inch square. This is a little bit smaller than you'd make for apple pie.

how to cut apples

Tip: Chop your apples first so you don't have to mess with them when you're making your cake batter. 

After peeling your apples you'll want to core them. Use this fancy apple corer or a good old fashioned knife!

Place your apple facing down on a cutting board. Press your apple corer firmly into the center of the apple and pull out the core. That's it! (Just be careful of your fingers.)

If you're using a paring  knife, you can also just cut a square around the core to get it out. Just try to waste as little as possible!

how to core an apple with a knife

How to make a fresh apple layer cake

Apple cake is very moist and delicate. I like to work with chilled cake layers so they are easier to handle.

  1. Place your first layer of cake onto a cake cardboard or onto a cake plate.
  2. Spread a layer of frosting evenly onto the cake with an offset spatula. Try to keep the frosting an even thickness. 
  3. Place your second cake layer on top of the frosting and repeat the process. 
  4. Spread a thin layer of frosting all over the whole cake. This is called the crumb coat. Place the cake into the fridge to chill until the frosting hardens. About 20 minutes. 
  5. Frost the cake with more buttercream. I made my frosting nice and smooth but you could do a rustic finish if you like. 
  6. Drizzle your salted caramel over the top of the cake with a spoon.
  7. Finish the cake with some piped rosettes of buttercream and some fresh apple slices soaked in water and lemon juice to prevent browning. I used a 1M piping tip. 

fresh apple cake recipe

If you want to learn more about how to stack and fill a layer cake for the ultimate beginner, check out my how to decorate your first cake tutorial. 

how to make a cake tutorial

How long will an apple cake keep?

Apple cake is very moist and can be stored in an airtight container in a cool place for 2 to 3 days, or in the fridge for up to 5 days. In warm climates, it is better to store apple cake in the fridge to prevent molding. If refrigerated, take the apple cake out of the fridge 1-2 hours before eating so that it's at room temperature. A cold cake can taste dry. 

fresh apple cake slice on green plate

What frosting and fillings go well with apple cake?

Apple cake is basically a spice cake but with chunks of apples in it. Think warm fall flavors. I frosted this cake with Brown Butter Cream Cheese Frosting but regular cream cheese frosting or classic easy buttercream with a couple of teaspoons of cinnamon added would taste amazing as well! 

If you wanted even more apple flavor, you could put apple filling inside the cake as well! Apple heaven! Just remember to pipe a dam of buttercream around the cake perimeter to keep the filling from oozing out.

buttercream dam

I topped this fresh apple cake with a drizzle of salted caramel sauce. If you love that apple and caramel combo, my caramel apples from scratch are a fun fall project too. What goes better with apples than caramel? 

What kind of spices goes well in apple cake?

The great part about this cake is that you mix it up and use your favorite spices! Allspice, cinnamon, nutmeg, ginger, and cloves are great spices to use. If you want to use more or less of a certain spice you can adjust it to your taste. 

Can this be made into cupcakes?

To make this apple cake recipe into cupcakes, reduce the applesauce to 4 ounces and omit the oil. I fill my cupcake liners about ⅔ of the way full with the cake batter then put in two pieces of apple. Bake at 350ºF for 20-25 minutes until the center of the cupcake is set. Let cool and frost as desired. 

Easy apple cake

Do you want a delicious apple cake without all the fuss of layers? Try coating your apples in cinnamon in sugar and 2 Tablespoons of melted butter. Spread them evenly in the bottom of a 10" cake pan. Pour the apple cake batter over the top and bake for 35-40 minutes until the sides of cake start to pull away from the pan.

Let the cake cool 15 minutes then flip out onto a cake plate. You have yourself a yummy upside-down apple cake! Drizzle on some caramel or dust with powdered sugar and enjoy!

Looking for other fall cakes? Try these!

Applesauce Spice Cake

Pumpkin Spice Cake

Brown Butter Cake

Carrot Cake with Pineapple

Cake Batter and Frosting Calculator

Select an option below to calculate how much batter or frosting you need. Adjust the servings slider on the recipe card to change the amounts the recipe makes.

Choose a pan type

Choose a cake pan size
(based on 2" tall cake pan)

Choose a cake pan size
(based on 2" tall cake pan)

Choose a cake pan size
(based on 2" tall cake pan)

Cupcake Tin Size

Choose number of pans

Cups of Batter Needed

8 cups

Cups of Frosting Needed

5 cups

Note: measurements are estimated based off the vanilla cake recipe using standard US cake pans and sizes. Measurements used are for 2" tall cake pans only. Your results may vary. Do not overfill cake pans above manufacturer's recommended guidelines.

Recipe

closeup of fresh apple cake recipe with brown butter buttercream on grey plate
Print Recipe
4.88 from 33 votes

Fresh Apple Cake

Perfectly spiced cake with chunks of fresh apple. Frosted with brown butter cream cheese frosting and a drizzle of caramel sauce! This recipe makes enough batter for three 8″×2″ cake rounds.
Prep Time30 minutes mins
Cook Time35 minutes mins
Chill Time1 hour hr
Total Time2 hours hrs 5 minutes mins
Course: Dessert
Cuisine: American
Servings: 24 servings
Calories: 425kcal
Author: Liz Marek

Equipment

  • apple corer
  • Electric Stand Mixer
  • Three 8″×2″ Cake Pans

Ingredients

Apple Cake Recipe

  • ½ lemon lemon juice squeezed over chopped apples to prevent browning
  • 3 or 4 medium honeycrisp apples chopped in ¼ inch pieces
  • 2 medium apples (optional) cut in wedges for decoration
  • 10 ounces cake flour
  • 1 teaspoon baking soda
  • ½ teaspoon salt
  • ¼ teaspoon ground ginger
  • ¼ teaspoon ground nutmeg
  • 1 ½ teaspoons ground cinnamon
  • ⅛ teaspoon ground cloves
  • 4 ounces unsalted butter room temperature
  • 10 ounces granulated sugar
  • 3 ounces vegetable oil
  • 1 whole egg room temperature
  • 1 teaspoon vanilla extract
  • 8 ounces applesauce unsweetened

Brown Butter Cream Cheese Frosting

  • 8 ounces browned butter room temperature
  • 8 ounces unsalted butter room temperature
  • 8 ounces cream cheese softened
  • 2 teaspoons vanilla extract
  • ¼ teaspoon salt
  • 20 ounces powdered sugar

Caramel Sauce Drip

  • 7 ounces granulated sugar
  • 2 ounces water
  • 3 ounces unsalted butter
  • 4 ounces heavy cream
  • ¼ teaspoon salt

Instructions

Apple Cake

  • Preheat your oven to 350º F (177º C). Make sure your butter, egg, and cream cheese are fully at room temperature before you start.
  • Peel the apples and core them using an apple corer or a knife.
  • Cut the apples into ¼ inch pieces and place into a bowl. Squeeze ½ a lemon over the apples to prevent browning. Set aside.
  • Sift together the flour, baking soda, salt, ginger, nutmeg, cinnamon, and cloves. Set aside.
  • Add the butter to a stand mixer with the paddle attachment and cream until smooth.
  • Add the sugar and oil to the butter and cream on medium until the mixture is white and fluffy.
  • Add the egg and vanilla to the butter mixture and mix until combined.
  • While mixing on medium, add the dry ingredients in thirds and mix until combined.
  • Fold in the applesauce and chopped apples until combined.
  • Grease three 8 inch pans with cake goop or another type of pan release. Divide the batter evenly between the pans.
  • Bake at 350º F for 30 minutes, or until a toothpick comes out clean. The layers will be thin.
  • Let the cake rest in the pan until it's cool enough to touch, then flip out onto a wire rack. Cool completely before stacking (wrap in plastic wrap and place in the fridge or freezer to speed up the cooling process).

Brown Butter Frosting

  • Place the softened butter in the bowl of a stand mixer with the whisk attachment and mix until smooth.
  • Add the cream cheese and mix until smooth.
  • Add the browned butter and mix until smooth and creamy.
  • Add the powdered sugar one cup at a time while mixing on low until fully incorporated. Do not overmix.
  • Add the salt and vanilla and mix until combined.

Caramel Drip

  • Place the sugar and water in a medium-sized pot. Cover with the lid and bring to a boil on medium-high heat.
  • Remove the lid and place a candy thermometer in the pot. Continue cooking until the thermometer reads 350º F (hard crack stage) or the sugar is a deep golden brown color. Do not stir.
  • Remove from heat and slowly whisk in the butter. Be careful, it will bubble up.
  • Whisk in the cream and salt.
  • Let the caramel cool completely before using it for the drip.

Assembly

  • Place the first cake layer onto a cake cardboard or a cake plate.
  • Spread a layer of frosting evenly onto the cake with an offset spatula, keeping the thickness even. For added apple flavor, pipe a dam of frosting around the perimeter instead and fill the center with apple filling.
  • Place the second cake layer on top of the frosting and repeat. Add the third layer and repeat once more.
  • Spread a thin crumb coat of frosting over the whole cake. Chill in the fridge until the frosting hardens, about 20 minutes.
  • Frost the cake with the remaining frosting, smooth or rustic finish. Drizzle the caramel over the top with a spoon, then finish with piped rosettes and apple slices soaked in lemon water.

Video

Notes

Ingredient notes: Bring your butter, egg, and cream cheese fully to room temperature before you start, this recipe doesn't hold together well with cold ingredients. Weigh your ingredients (including liquids) with a kitchen scale for the most accurate results, it makes a real difference in a batter carrying this much fruit.
Pan options: This recipe makes three 8" layers as written. For loaf pans, expect a longer bake time than the 30 minutes listed, keep an eye on it and test with a toothpick. For four 6" layers, use the same temperature, but check a few minutes early since it may run faster or slower depending on your oven. To make cupcakes, reduce the applesauce to 4 ounces and omit the oil, fill liners about ⅔ full, then add two pieces of apple to each before baking at 350º F for 20 to 25 minutes, until the center is set. I don't recommend converting this exact recipe to a bundt pan, if you want a bundt version, start from my vanilla cake recipe instead and add chopped apples and the spice blend from this recipe.
Make-ahead and storage: Apple cake is very moist and keeps in an airtight container at room temperature for 2 to 3 days, or in the fridge for up to 5 days. In warm climates, store it in the fridge to prevent molding, then let it sit out for 1 to 2 hours before serving so it's not cold when you eat it. Baked, unfrosted layers also freeze well, see the FAQs above for details. The caramel sauce keeps refrigerated indefinitely, so there's no need to freeze it separately.
Substitutions: All-purpose flour can replace cake flour in a pinch (see the cake flour substitute link above for the exact swap), though it hasn't been tested in this specific recipe and the crumb will likely be a little less tender.
Critical do-nots: Don't overmix once the flour goes in, it toughens the crumb. Don't skip chilling the frosted cake for 15 to 20 minutes before adding the caramel drip, or the drip won't hold its shape. Don't rush room temperature ingredients, this batter needs that structure to hold onto all the chopped apple.

Nutrition

Serving: 1serving | Calories: 425kcal | Carbohydrates: 54g | Protein: 2g | Fat: 23g | Saturated Fat: 15g | Cholesterol: 55mg | Sodium: 178mg | Potassium: 38mg | Fiber: 1g | Sugar: 44g | Vitamin A: 642IU | Vitamin C: 1mg | Calcium: 20mg | Iron: 1mg


« Previous Page
Next Page »

Primary Sidebar

Hi, I'm Liz! I'm a cake artist and recipe developer, and I won Netflix's Is It Cake? Holiday 2 with a hyperrealistic Santa. I write foolproof recipes that explain why things work, not just how.

I also teach full-length cake tutorials, including sculpted cakes, at Sugar Geek University.

More about me →

Our Cake Greatest Hits

Check out our best cake recipes

Celebrate Halloween 🎃

  • black and white striped cake with pink drip, gummy eyeball with ice cream cone on top
    Gummy Eyeball Cake
    Cook Time1 Hours 30 Minutes
  • close up of a slice of black velvet cake
    Black Velvet Cake
    Cook Time50 Minutes
  • monster mash cheesecake brownies cut into squares on a white background. Sprinkles, pumpkins and plates around the brownies
    Monster Mash Cheesecake Brownies
  • close up of candy apples
    The Best Candy Apple Recipe
  • pumpkin pie recipe
    Pumpkin Pie Recipe
    Cook Time2 Hours
  • close up of pumpkin cheesecake bars on a plate
    Pumpkin Cheesecake Bars
    Cook Time4 Hours

Popular Recipes

  • close up of ganache drizzling into a bowl
    The Best Chocolate Ganache Recipe
    Cook Time20 Minutes
  • Piping easy buttercream rosettes onto a cake using a 1M star piping tip
    Easy Buttercream Frosting
    Cook Time25 Minutes
  • close up slice of marble cake
    Moist and Fluffy Marble Cake Recipe
    Cook Time40 Minutes
  • Slice of red velvet cake with cream cheese frosting on a white plate.
    Red Velvet Cake Recipe
    Cook Time1 Hours 40 Minutes

Footer

↑ back to top

About

  • Privacy Policy
  • Terms of Service

Newsletter

  • Sign Up! for emails and updates

Contact

  • Contact
  • About Us

Copyright © 2024 Sugar Geek Show, Inc. All Rights Reserved.

Rate This Recipe

Your vote:


A rating is required
A name is required
An email is required