

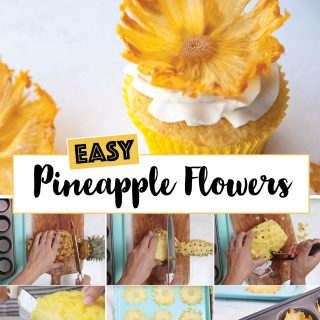
How to make beautiful dried pineapple flowers
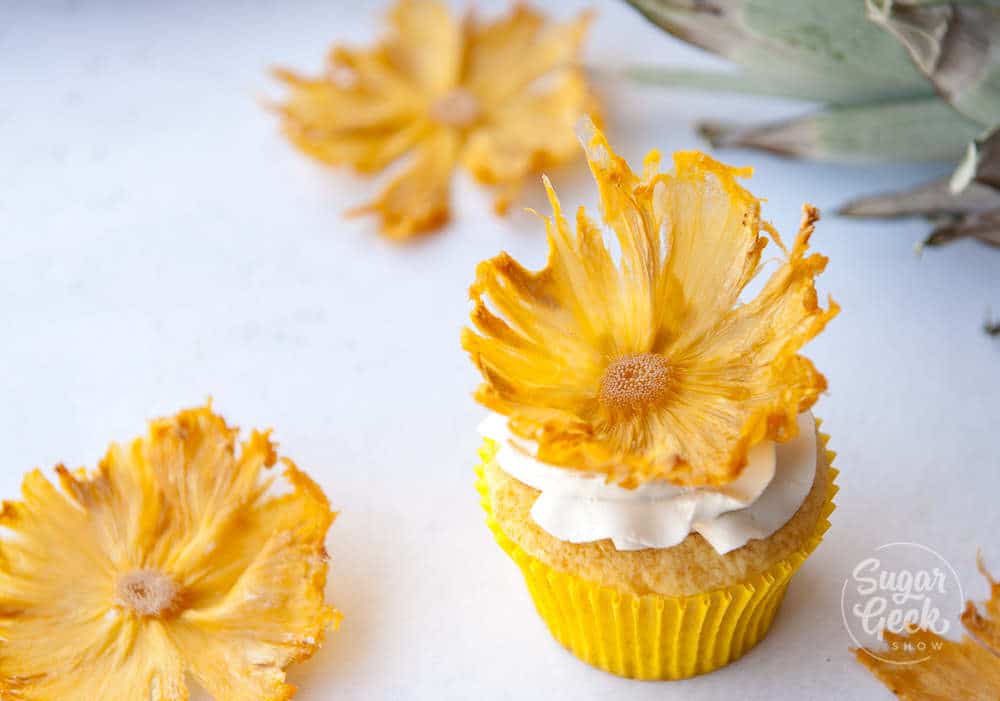
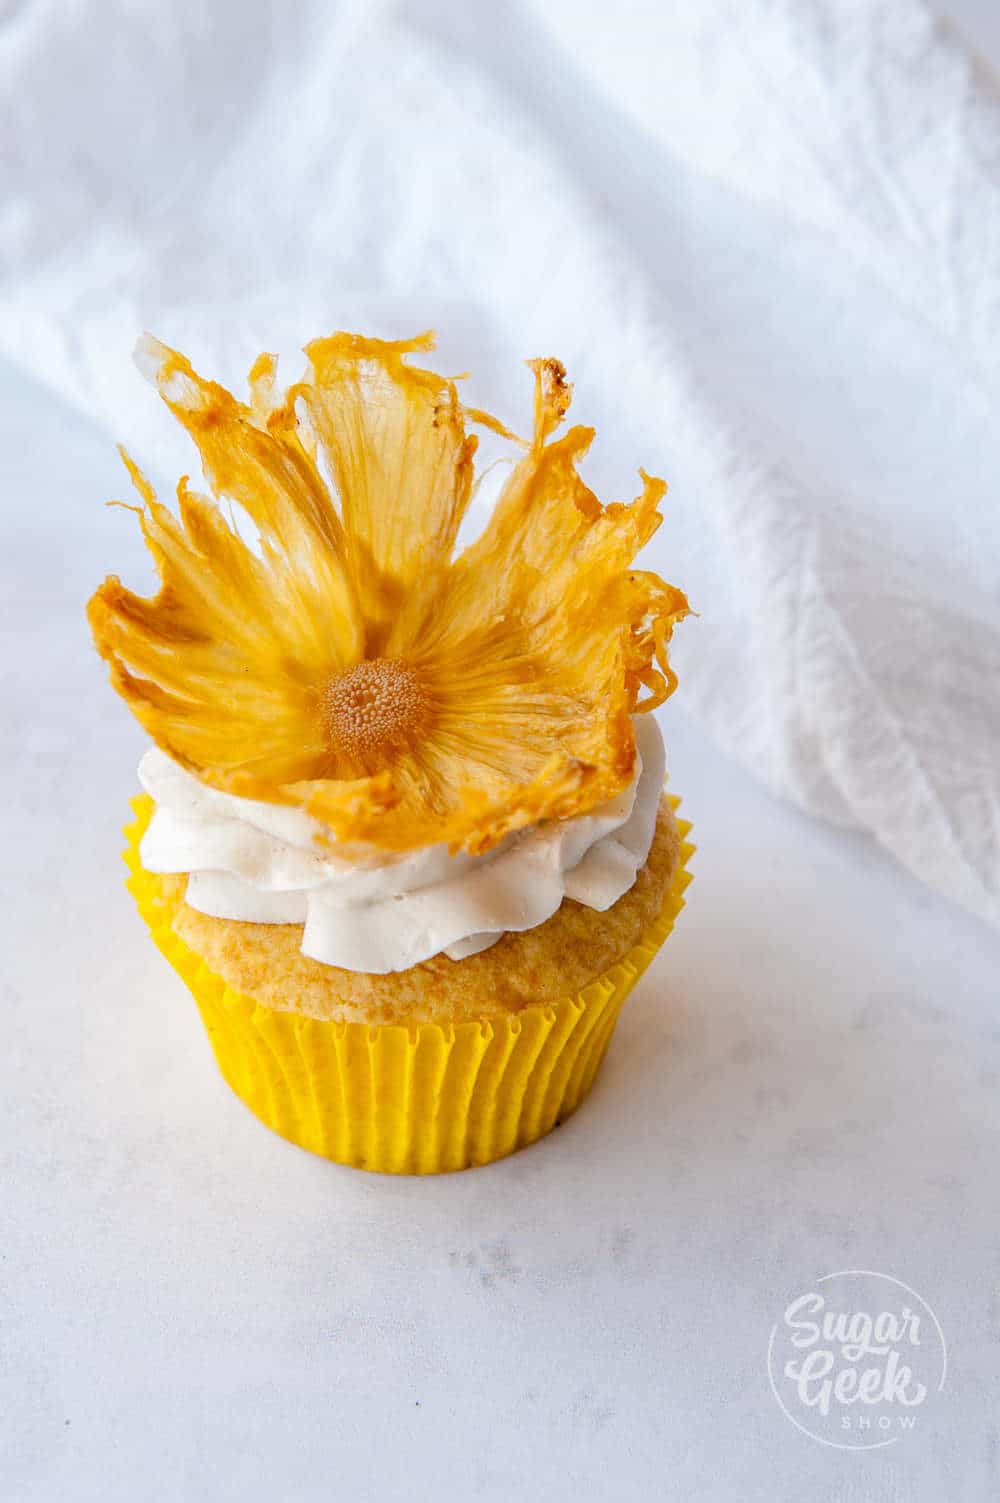
Can you believe this beautiful flower is made from a sliced pineapple? I'll be honest, I was skeptical about this technique at first! But it's actually really simple, and they turned out super cute!
These dried pineapple flowers are chewy, sweet, and delicious, and were the perfect cupcake decorations for my daughter, Avalon's Moana-themed birthday party.
When I was growing up we dried fruit a lot. My dad grew up on a farm in New Zealand so canning, freezing and drying food was a common practice around our home. My favorite dried fruit were apples. Always so much sweeter and softer than the store-bought kind.
My dad had a huge wooden dehydrator that he built himself and every year we would collect as much fruit as we could, spread it out on the mesh trays and dry fruit. For weeks you could smell that sweet fruity aroma wafting from our house all the way down the road.
I haven't dried much fruit as a baker but as my daughter gets older, I've been moving more into things she wants to not only make but eat. So elaborate cakes sometimes get put by the wayside to make room for homemade gummies, chocolate chip muffins, and sugar cookies.
With her Moana themed birthday coming up, I couldn't resist making some cute dried pineapple flower cupcakes for her party!
Are pineapple flowers easy to make?

In the end, these were very simple to make and are totally WORTH IT! The most tedious part was just removing the "eyes" from the pineapple.
It also took me a little while to get the hang of slicing the pineapple super thin. I made it harder on myself and was using a very ripe pineapple, so it was very juicy and soft. I'd recommend using a less-ripe pineapple if you want crisper flowers. Since we are dehydrating the flowers, we don't need a super-ripe pineapple.
Don't worry, thoroughly enjoyed eating the pineapple flower rejects! You could also dry the weird-looking pieces and use them as a healthy snack. Yum!
Tips for making great dried pineapple flowers
- Choose a pineapple that isn't too ripe. A less ripe pineapple will hold their shape better when trimming them and slicing.
- Don't take out the core. Don't use a pineapple corer to remove the outer skin because you need the center intact to make those beautiful pineapple flowers.
- Don't worry about ragged edges. If your slices end up looking a little ragged, it just adds to the overall ruffly look of the flower.
How to make dried pineapple flowers
- Preheat the oven to 200ºF
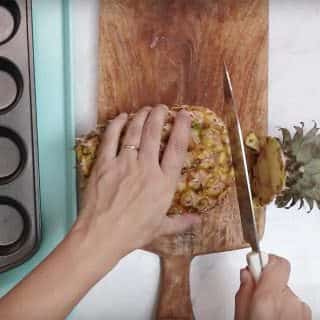
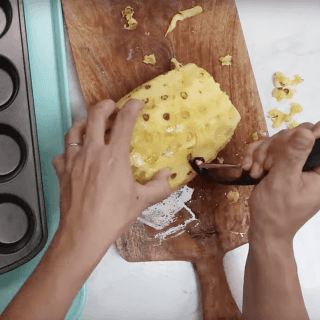
- Cut the top and bottom off of your pineapple with a sharp knife
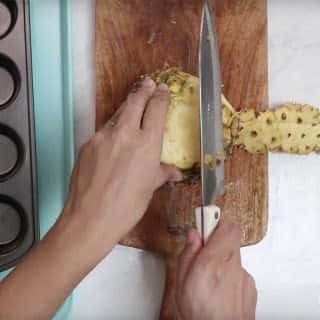
- Trim off the outer skin
- Use a potato peeler to remove the little eyes all around the pineapple. This took me about 15 minutes.
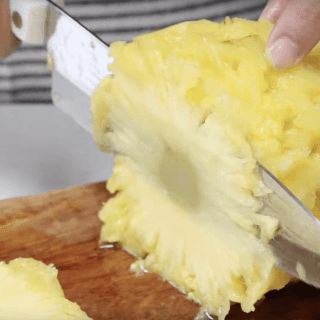
- Slice your pineapple very thinly and place the slices onto some paper towels to remove excess moisture.
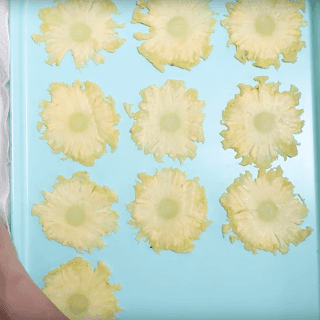
- Place the pineapple slices onto a cookie sheet lined with a silicone baking mat to prevent sticking
- Bake for 90 minutes (more if they still aren't browning around the edges or looking dry). Flip them over after 60 minutes so promote even drying.
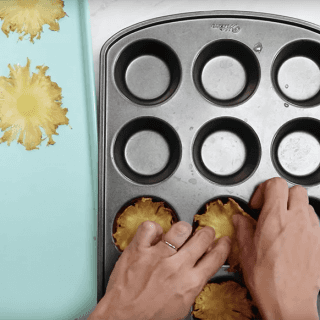
- Once dry, remove them from the cookie sheet and place them into a cupcake tin to dry overnight at room temperature.
Where did pineapple flowers originate?
Southern bakers have used pineapple flowers as a popular decoration for hummingbird cake. Hummingbird cake is much like carrot cake but without the carrots. It's really delicious paired with cream cheese frosting.
You can use pineapple flowers to decorate cakes, cupcakes and other desserts! They look so pretty!
How long do pineapple flowers last?
Pineapple flowers can become floppy and soft if you leave them out for too long. Store them in an airtight container at room temperature for up to three days but really, they last quite a while.

Equipment
- Chef's knife
- Potato peeler
- Paper towels
- Baking sheet
- Cupcake Tin
- Silicone baking mat
Ingredients
- 1 medium pineapple not too ripe
Instructions
- Preheat your oven to 225 degrees F.
- Using a sharp chef's knife, cut off the top and bottom of the pineapple.
- Place the pineapple upright, and cut off the rind in strips, working your way around the pineapple.
- With the sharp end of a potato peeler, remove the eyes of the pineapple, saving as much flesh as you can.
- With the pineapple on its side, cut thin slices. The thinner you can get, the more delicate your flowers will be.
- Place the pineapple slices on paper towels and pat dry to remove excess moisture.
- Place the pineapple slices onto a baking sheet lined with a silicone mat and bake for 90 minutes, or until browned on the edges.
- While the slices are still warm and pliable, remove the pineapple flowers from the baking sheet and place them into a cupcake tin to cool completely.
- Let cool overnight on the countertop for best results.
- Store in an airtight container on the countertop up to 3 days.


Tammy says
Thank you so much for this fabulous recipe and tutorial. I made a gluten-free hummingbird cake for a Humane Society fundraiser and this was perfect for the top! They worked beautifully. I actually ended up using one of those little gadgets to use to get the stems out of strawberries to get the eyes out of the pineapple and it was way faster! And on my second batch I found that with the colder pineapple it was easier to slice... I also used three size of muffin cups so that I could have multi-layer flowers.... these are genius. Thank you so much!
Terry Hodges says
After reading so many recipes on how to make pineapple flowers, I think this recipe looks like the simplest and clearest one to follow. I clearly understand it is going to take time and patience, so I know I must do this at least 2 days in advance of making my cake. Thank you!
cakes&bakes says
Good informative article
Marsha says
These are so cute and delicious! My 10 year old daughter and I made them and it was such a fun activity to do together. Turned out great!!