• Skip to primary navigation
  • Skip to main content
  • Skip to primary sidebar
  • Halloween
  • Recipes
  • Free Tutorials
  • Cake Classes
  • Cake Commissions
  • About Liz

Sugar Geek Show logo

menu icon
go to homepage
  • Halloween
  • Recipes
  • Free Tutorials
  • Cake Classes
  • Cake Commissions
  • About Liz
subscribe
search icon
Homepage link
  • Halloween
  • Recipes
  • Free Tutorials
  • Cake Classes
  • Cake Commissions
  • About Liz
×
Home

Blog

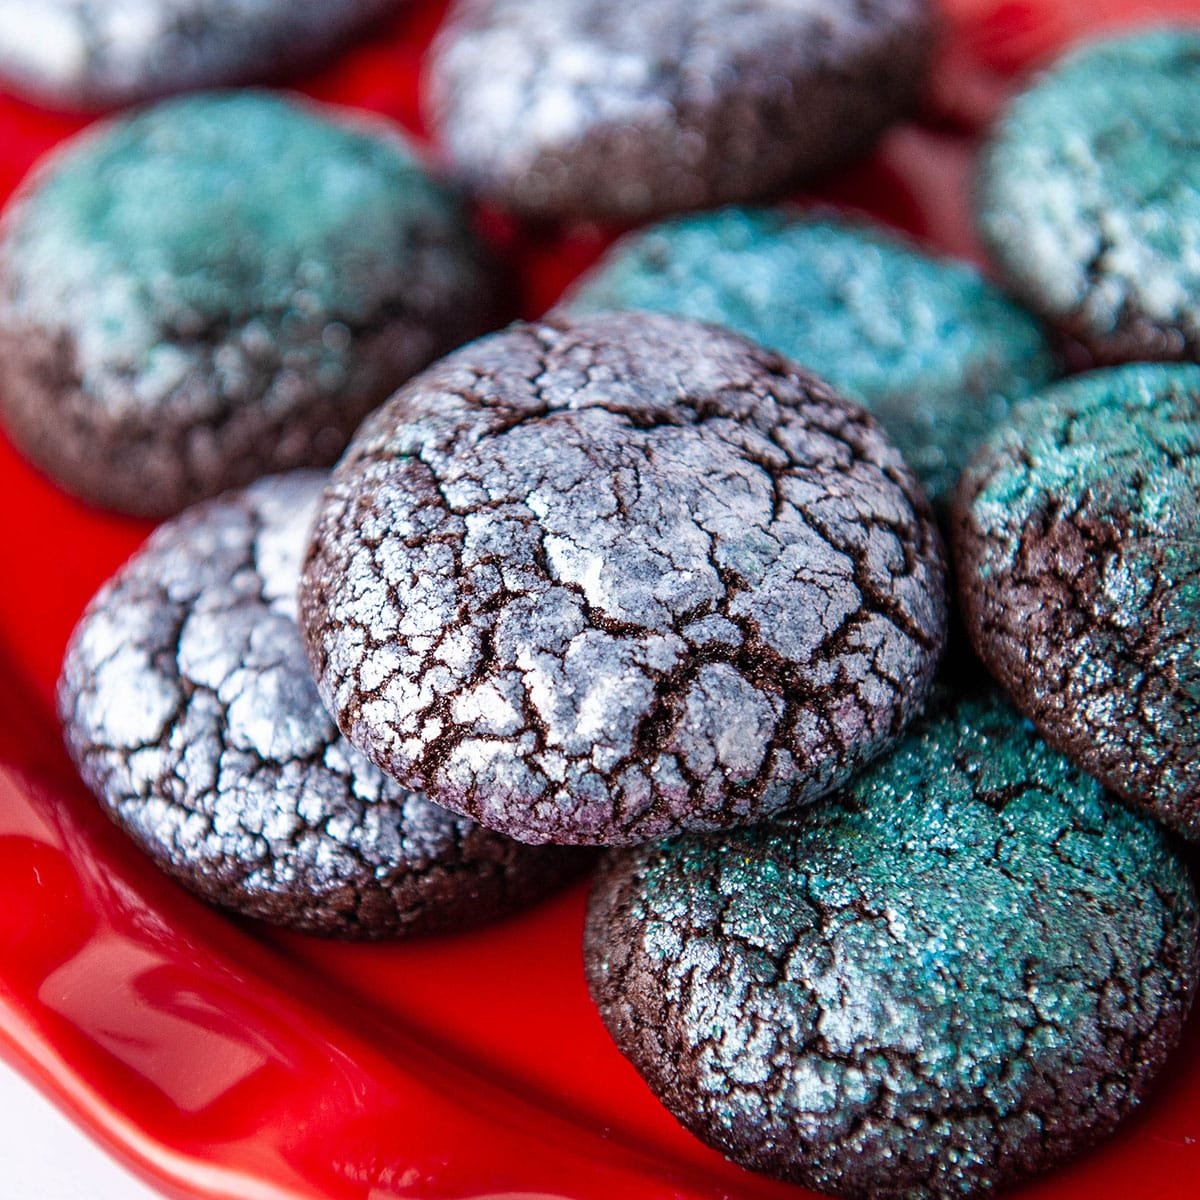
close up of glitter crinkle cookies on a red platter

October 28, 2019 Cookies

Glitter Crinkle Cookies

These glittery crinkle cookies are so beautiful, but could not be easier to make. The fudgy chocolate cookie batter comes together in a few minutes, then all you have to do is roll it in glitter and bake for ten minutes! These make fantastic gifts for your holiday cookie exchange, just like my gingerbread cookies or easy Christmas cookies. 
close up of glitter crinkle cookies on a red platter

What makes these glitter crinkle cookies better than regular crinkle cookies?

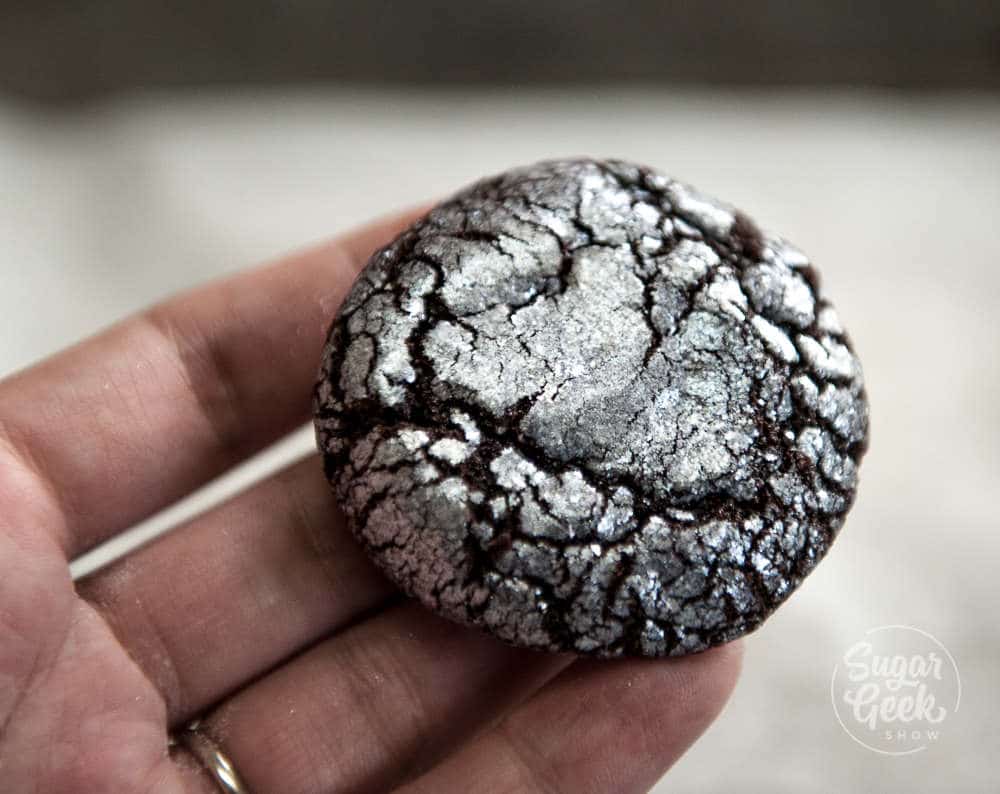
I love making classic chocolate crinkle cookies, but what I don't love is that the powdered sugar rubs off! Those beautiful crinkles soon disappear because powdered sugar dissolves from the moisture in the cookie. It also gets everywhere! Forget about putting those powdered sugar crinkle cookies in a gift box!

So I mostly avoided making them until one day... I had a random thought. What if I replaced powdered sugar with edible glitter? Would that work? Would it taste good? Would the glitter lose its shine after baking? I had to know!

My brain is a funny thing. I don't know why I think of these crazy ideas, but once they start, I can't stop thinking about them until I try them out. 
glitter crinkle cookie

What's the best edible glitter to use?

Before we get into the making of these glitter crinkle cookies, it's important to note we are using EDIBLE glitter. Not disco dust, not non-toxic glitter but real edible glitter. I really like flash dust from Never Forgotten Designs. The glitter is very shiny, doesn't dissolve in liquid or melt in the oven and it's really edible and FDA approved. They have tons of colors available!

Or you can make your own edible glitter. It's not as fine and sparkly but it's easy to make. 
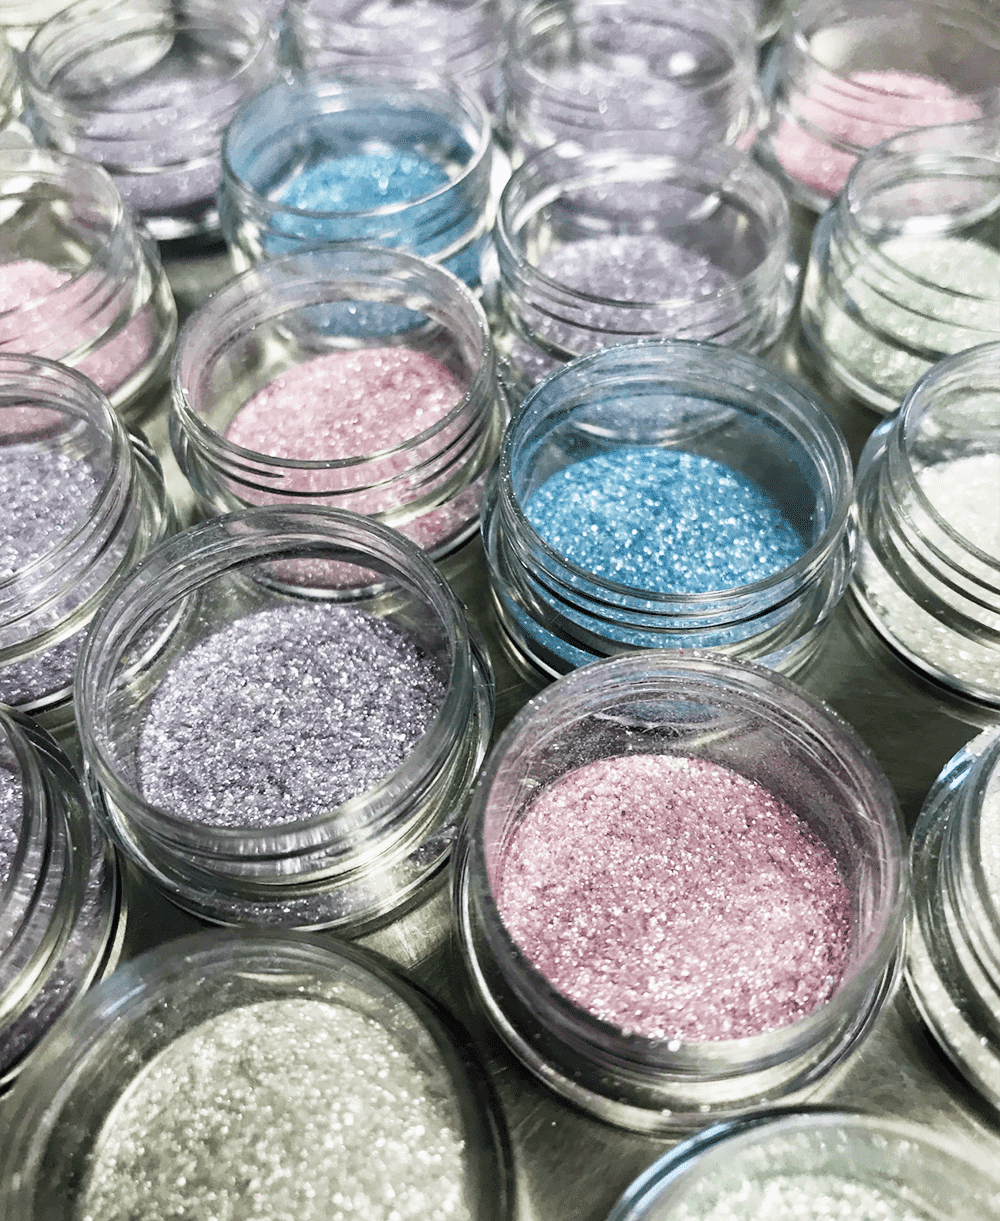
edible glitter flash dust


How to make glitter crinkle cookies

These glitter crinkle cookies are just like any other chocolate crinkle cookie on the inside. They are moist, fudgy and chewy and taste much like a brownie. The mixing method is easy. Just cream together your cocoa powder, brown sugar and oil until smooth. 

Then add in your eggs one at a time, letting them combine fully before adding the next egg. 

Then add in your flour, baking powder, and salt and mix until just barely combined. If you have some bits of flour left in there it's no big deal. Better to not over-mix.

The dough is really sticky and that is normal. I used a #20 cookie scoop to portion out my dough and placed them on a cookie sheet lined with parchment paper. 
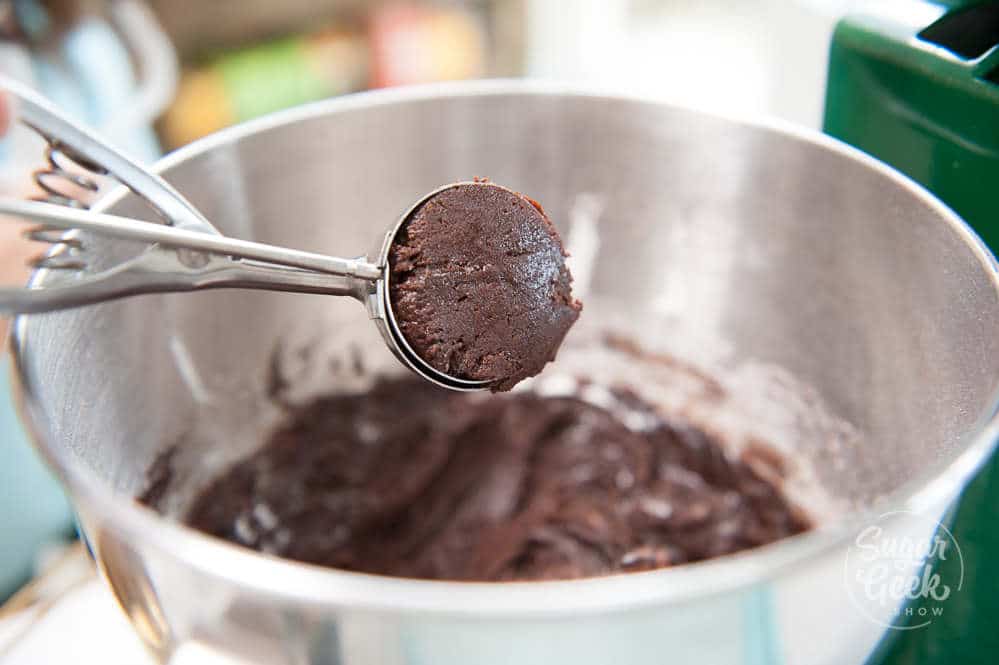
closeup of cookie scoop with chocolate cookie dough

Then I let my cookies chill in the fridge for about an hour. This just gives the flavors a chance to meld and develop but it's not really necessary. You can just scoop, roll and bake. 
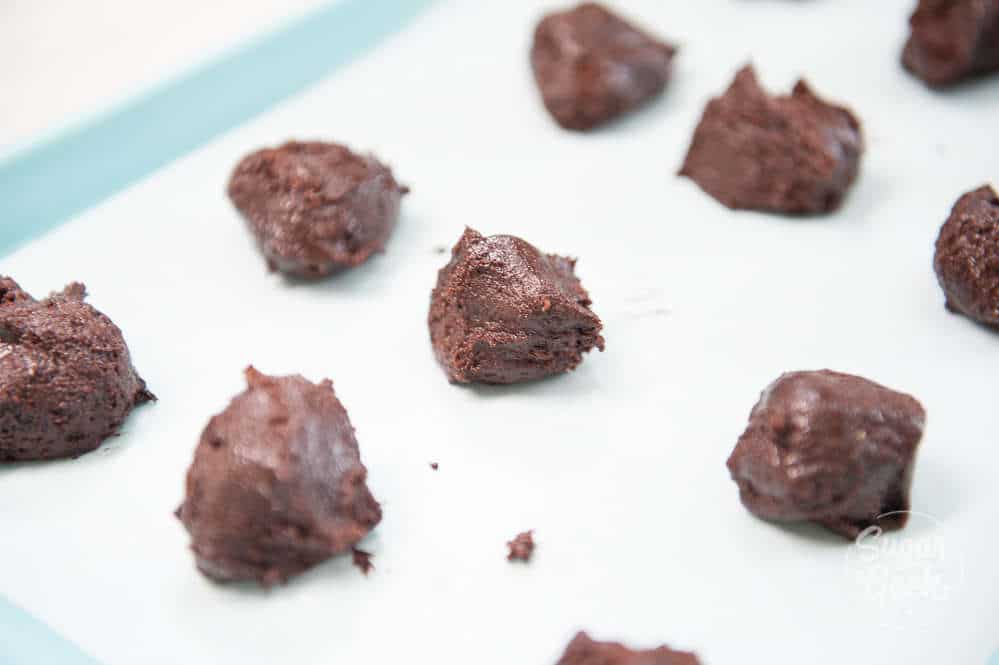
chocolate crinkle cookie dough on a parchment paper lined cookie sheet

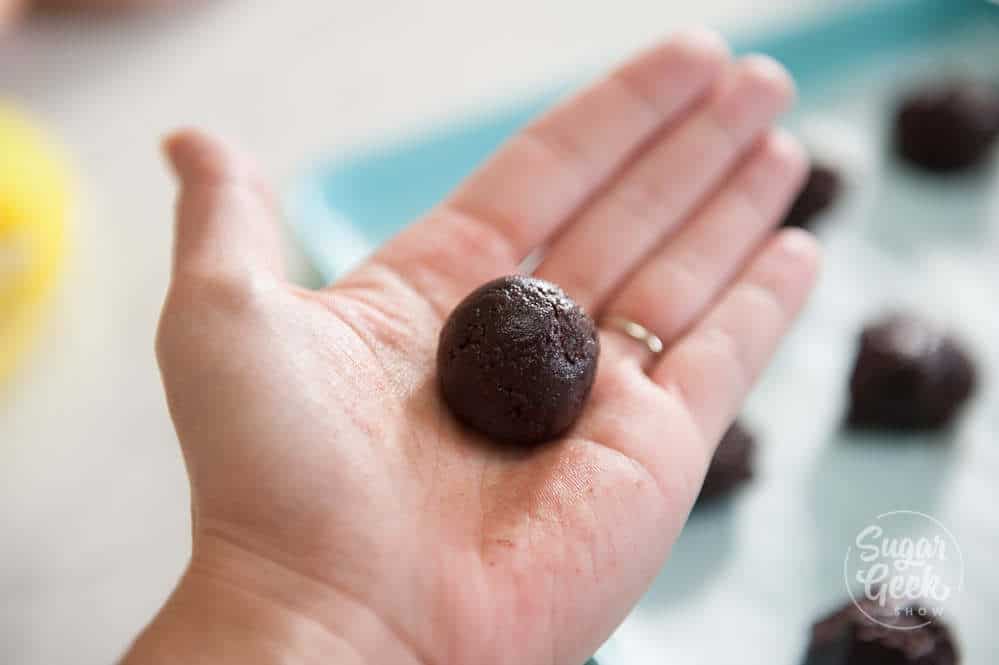
chocolate crinkle cookie dough rolled into a ball

After chilling, I roll the dough into balls then roll half the ball in edible glitter. I only do the top half because no one is going to see the bottom and I don't want to waste that pretty glitter. 
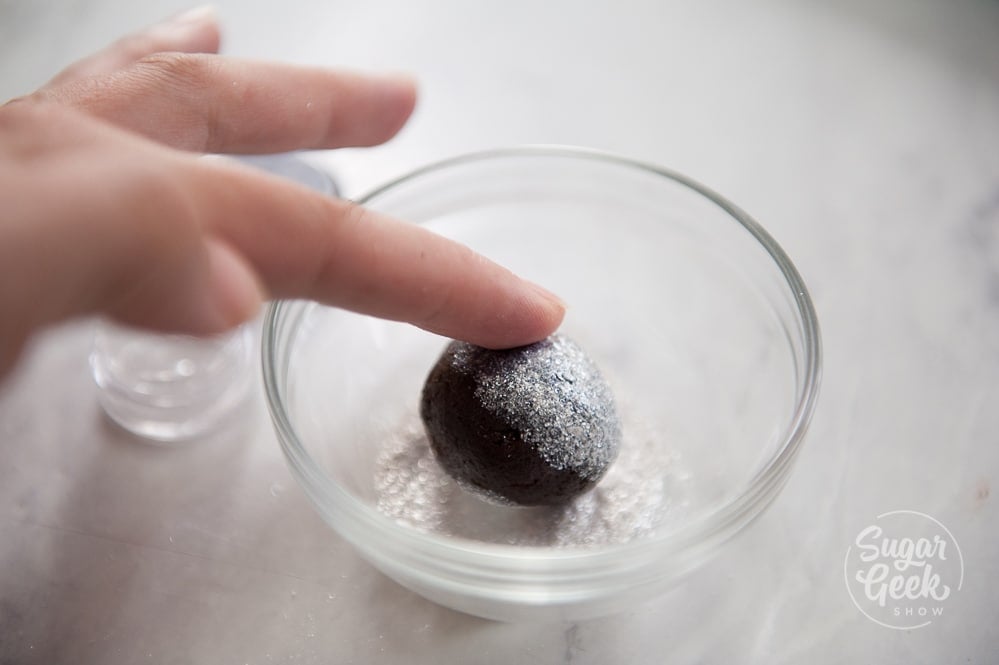
chocolate crinkle cookie dough rolled in edible glitter

Then into an oven preheated to 350ºF oven for 10 minutes. They will be super soft but will harden as they cool. 

These glitter crinkle cookies look SO pretty and sparkly! I can't wait to give these out for the holidays in a pretty little box. The best part is they actually taste amazing too. 
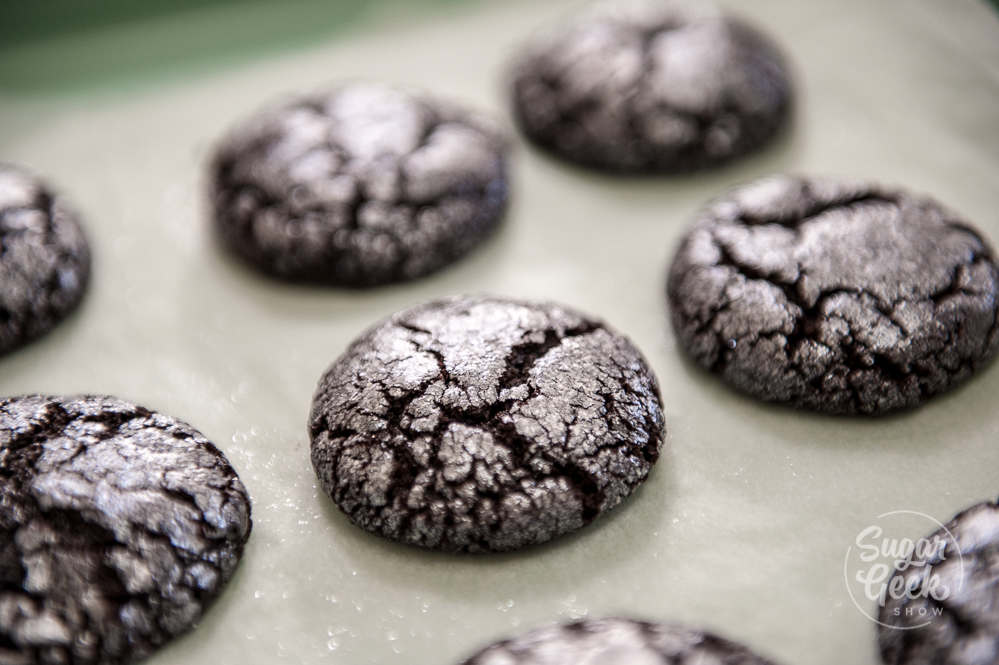
glitter chocolate crinkle cookies on a cookie sheet

Recipe

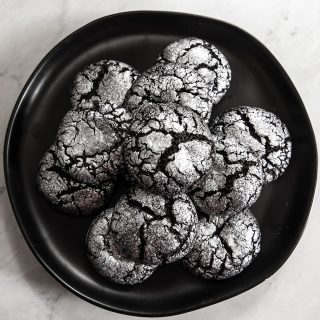
black plate with silver chocolate crinkle cookies
Print Recipe
5 from 2 votes

Glitter Chocolate Crinkle Cookies

These glitter chocolate crinkle cookies bake up in 10 minutes. They are moist, fudgy and have deliciously crisp on the outside.
Prep Time10 minutes mins
Cook Time10 minutes mins
Course: Dessert
Cuisine: American
Servings: 24 cookies
Calories: 87kcal
Author: Liz Marek

Equipment

  • #18 cookie scoop

Ingredients

Glitter Chocolate Crinkle Cookies Ingredients

  • 2 ounces dutched cocoa powder (½ cup) Hersheys is ok too
  • 7 ounces brown sugar 1 cup
  • 2 ounces vegetable oil ¼ cup
  • 2 large eggs
  • 2 teaspoons vanilla extract
  • 5 ounces All-Purpose Flour 1 cup
  • 1 teaspoon baking powder
  • ½ teaspoon salt
  • 2 teaspoons edible glitter

Instructions

Instructions

  • In a medium sized bowl, cream together your cocoa powder, sugar and vegetable oil until smooth
  • Add in your vanilla, and eggs one at a time, letting them combine fully before adding the next
  • Add the flour, baking powder and salt and mix until just combined. Scrape the bowl to ensure everything is mixed evenly.
  • Cover the dough with plastic wrap and chill for at least an hour to let the flavors develop or you can bake right away if you're impatient.
  • Scoop the dough onto a parchment paper-lined cookie sheet with a cookie scoop or a tablespoon. Dough will be sticky. (If your dough seems too soft and is unworkable, slowly work in up to 2 tablespoons of flour until desired consistency.)
  • When you're ready to bake, preheat your oven to 350ºF
  • Roll the dough into balls and then cover half with edible glitter.
  • Bake your cookies for 10 minutes. They will be soft when they first come out of the oven but will harden as they cool.

Video

Nutrition
Serving: 1g | Calories: 87kcal | Carbohydrates: 14g | Protein: 2g | Fat: 3g | Saturated Fat: 2g | Cholesterol: 18mg | Sodium: 58mg | Potassium: 77mg | Fiber: 1g | Sugar: 8g | Vitamin A: 26IU | Calcium: 21mg | Iron: 1mg


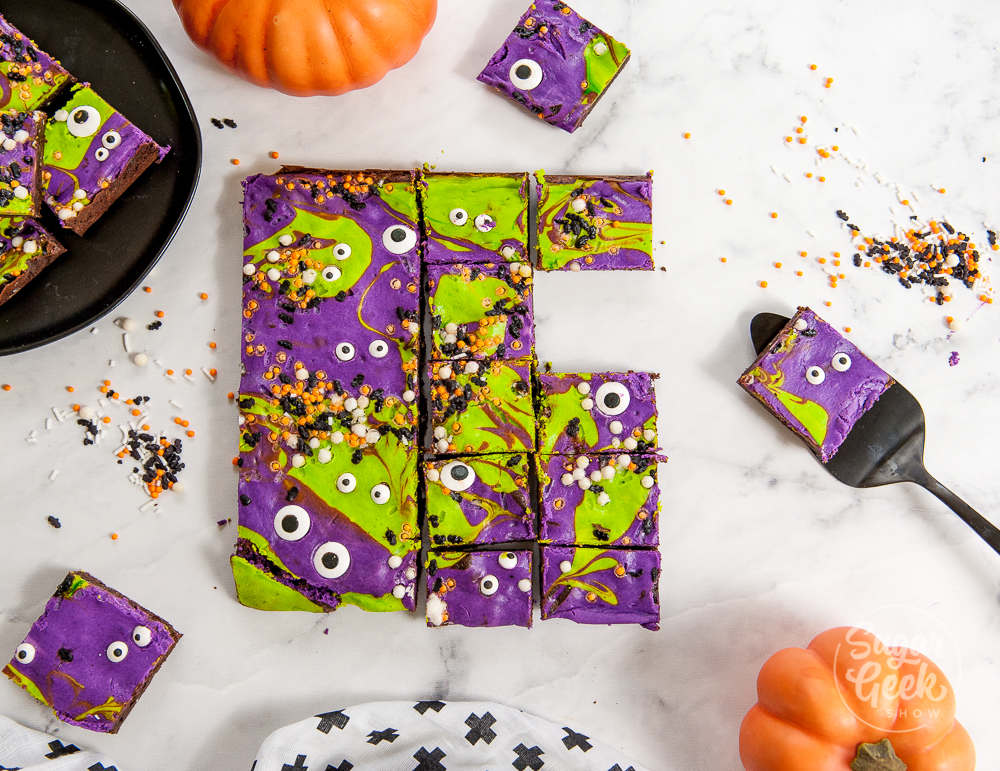
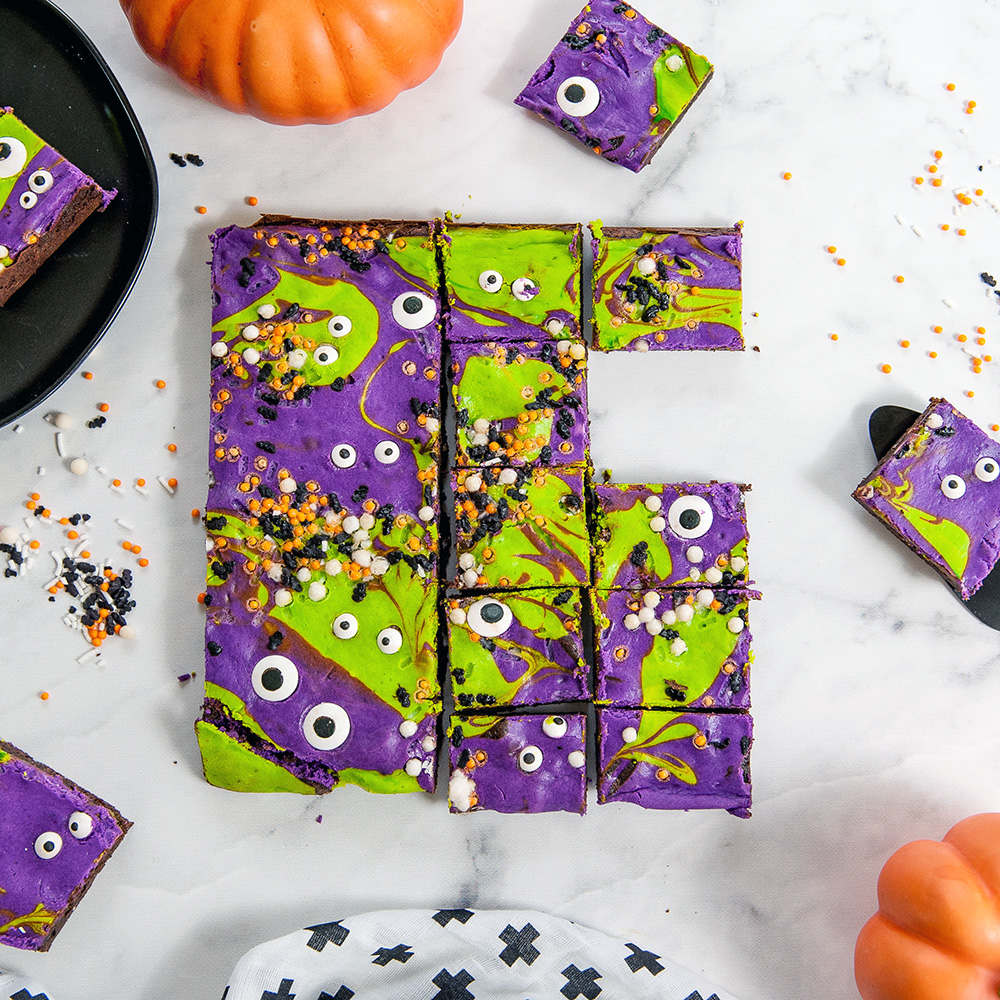
monster mash cheesecake brownies cut into squares on a white background. Sprinkles, pumpkins and plates around the brownies

October 15, 2019 Blog

Monster Mash Cheesecake Brownies

Monster Mash Halloween Cheesecake Brownies

I made these monster mash cheesecake brownies for my son's one-month-old Instagram photo (yes I am that extra). My family completely loved these brownies and devoured them! The fudgy brownie layer is balanced perfectly with that yummy cream cheese. The fact that they look like funny monsters with eyes is just a bonus. 

monster mash cheesecake brownies cut into squares on a white background. Sprinkles, pumpkins and plates around the brownies

This recipe is based on a recipe I found on pinterest. The photo was really cute but was based on box mix brownies and canned frosting. I have nothing against boxed but I prefer the taste of my homemade fudgy brownies. So I adapted my recipe to include a cream cheese layer and voila! Monster mash cheesecake brownies! So cute, colorful, and perfect for Halloween. 

monster mash cheesecake brownies

How to make monster mash cheesecake brownies

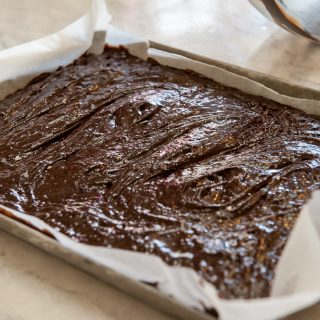
Making these monster mash cheesecake brownies is really simple. Just mix up your brownie batter and pour into a 9"x13" pan lined with parchment paper. Spread the batter out because it is kind of thick. 

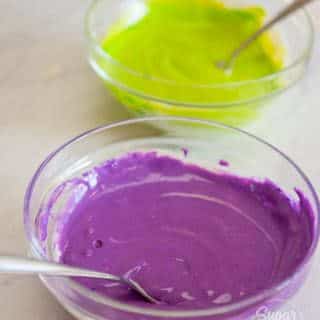
Then make your cream cheese topping, divide it into two bowls and color it with food coloring. I used about ¼ of a teaspoon of yellow and green for one bowl and ¼ of a teaspoon of pink and purple for the other bowl. Using yellow with the green makes the green more intense and vibrant looking. Same thing for using pink in the purple. If you don't build your colors, they can look a little flat. 

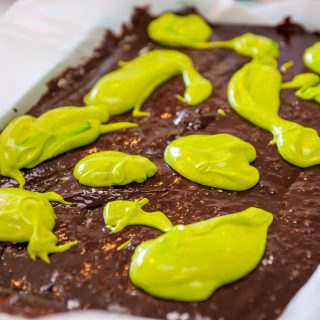
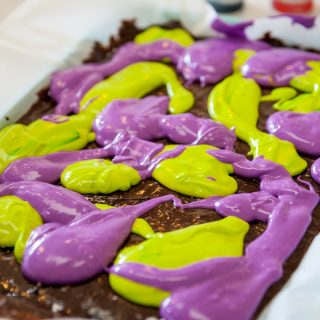
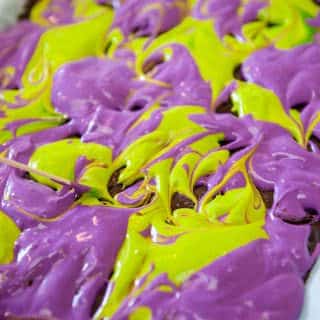
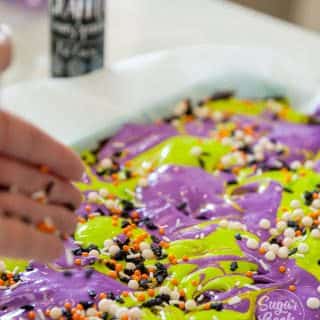
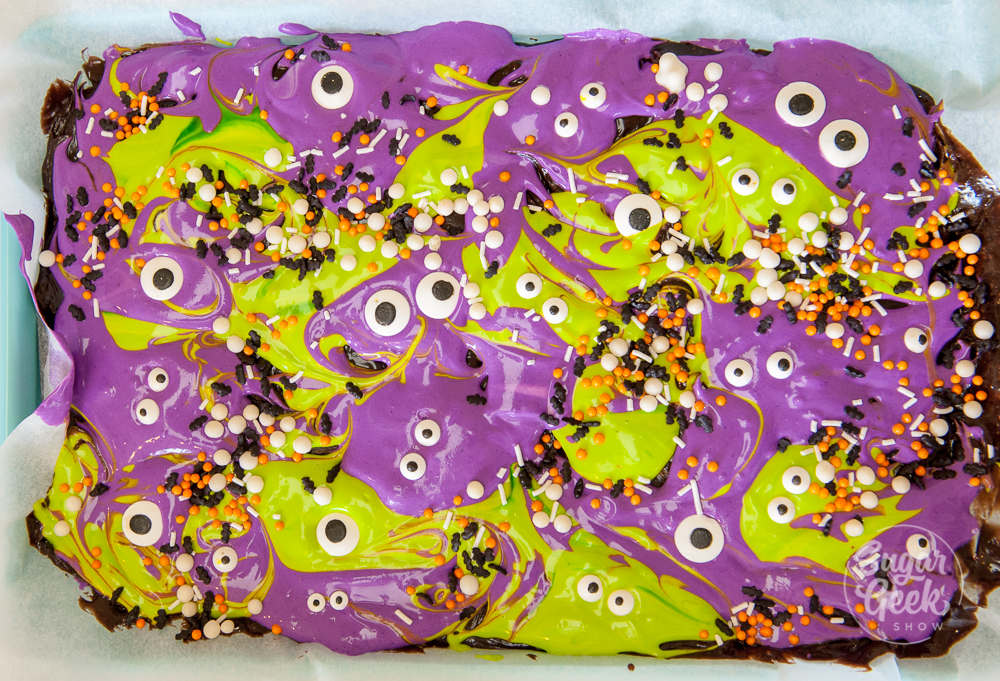
Then, spoon your cream cheese topping on top of the brownie batter randomly. Swirl the colors together slightly with a toothpick. 

I also added some Halloween sprinkles from in2Food to add some more texture and color to the cheesecake brownies. 

spread brownie batter onto parchment lined pan
color cheesecake batter
dollop on green cheesecake batter
Then dollop on purple cheesecake batter
Marble slightly with a toothpick
Add some Halloween sprinkles
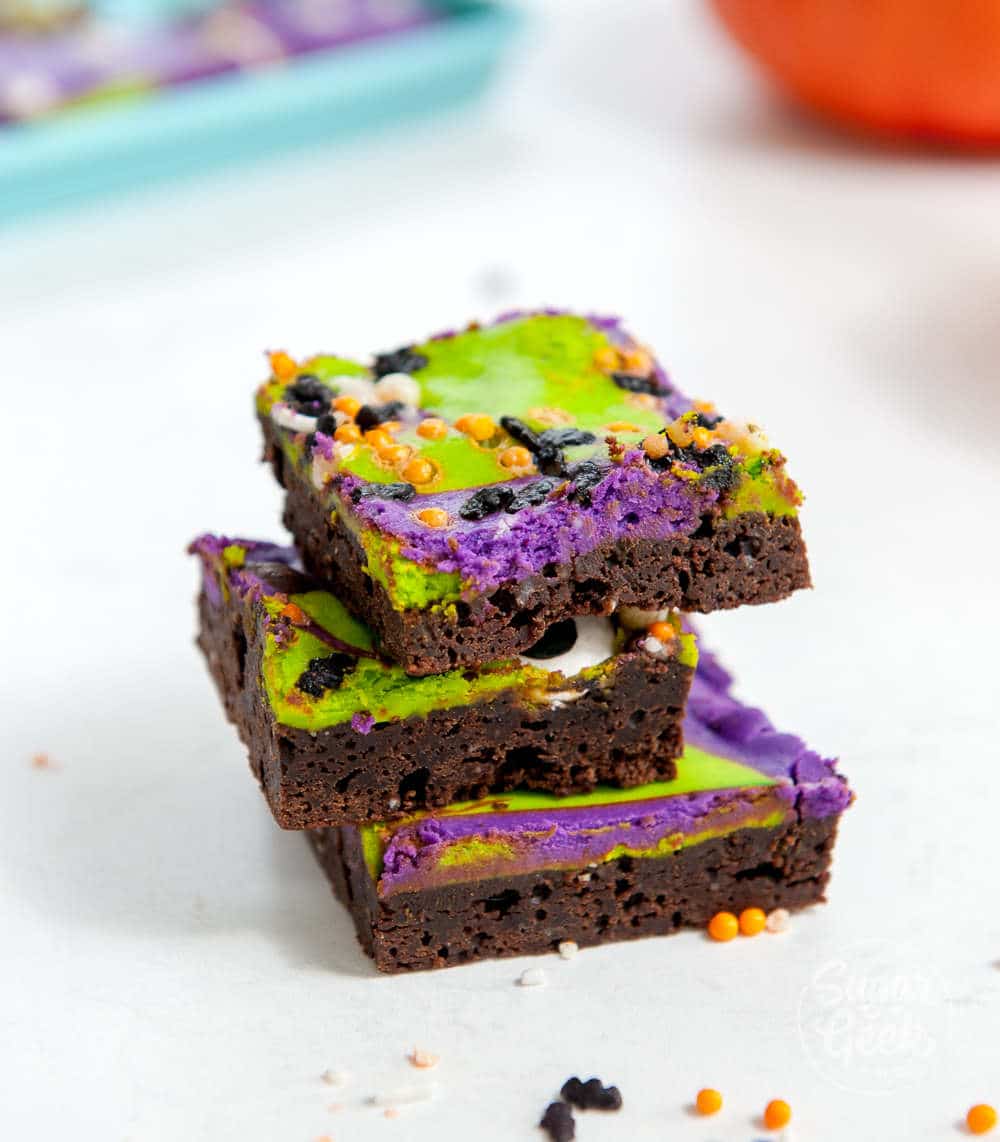
monster mash cheesecake brownies
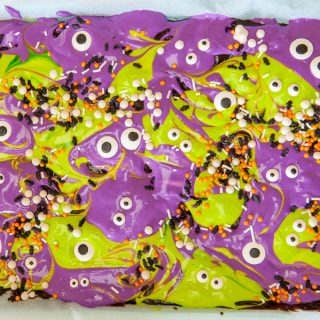
Bake, let cool, then add monster eyeball sprinkles
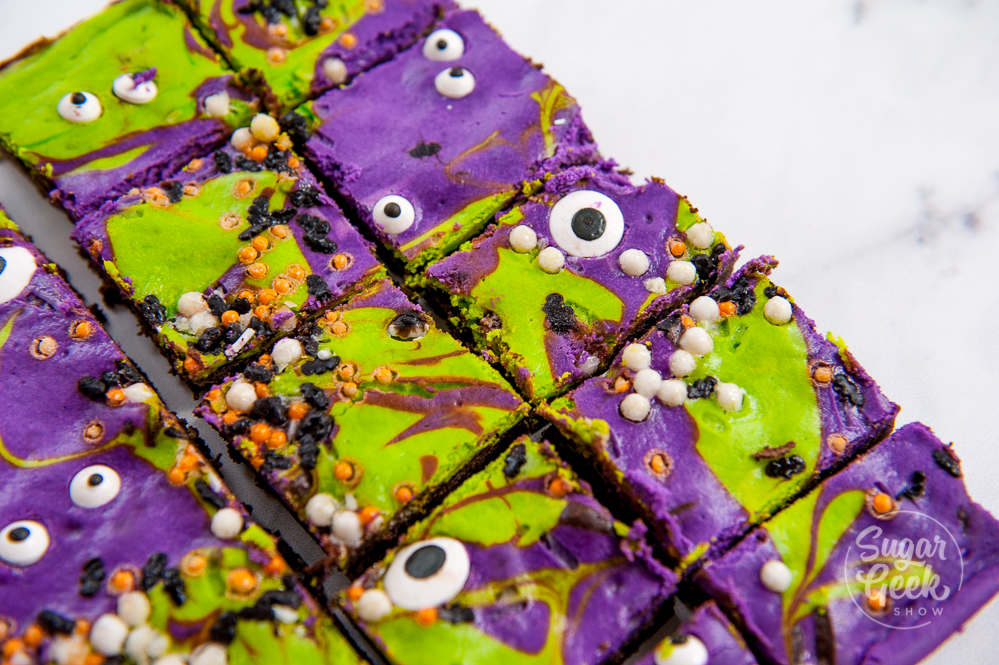
monster mash cheesecake brownies cut into squares on a white background. Sprinkles, pumpkins and plates around the brownies
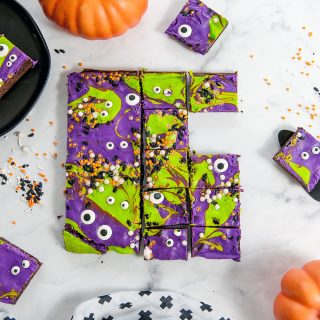
Cool before cutting into squares

The first time I baked these, I also added eyeball sprinkles but found that they kind of melted during the baking process. The second time I made these I added the eyeballs after the cheesecake brownies where done baking and that worked a lot better. 

Just don't cover the cheesecake brownies in plastic wrap when you put them in the refrigerator because the condensation causes the eyeballs to run. 

monster mash cheesecake brownies
Bake, let cool, then add monster eyeball sprinkles

How to know when the cheesecake brownies are done baking

You want to take these brownies out of the oven when a toothpick inserted into the center of the brownie comes out with a few sticky crumbs. If you wait until the toothpick comes out clean, they will be over-baked. Brownies continue baking for about 10 minutes after you take them out of the oven. 

If you bake your cheesecake brownies in a dark metal pan, they will bake much faster so keep an eye on them and check them for doneness about 10 minutes earlier. 

Don't put your pan too close to the top of the oven or your cheesecake topping could brown and look discolored. 

After your cheesecake brownies have cooled, you can lift them out of the pan by the parchment paper which makes them a lot easier to cut into squares. I got about 20 squares from one pan. 

monster mash cheesecake brownies

monster mash cheesecake brownies

I love how fun and colorful these monster mash cheesecake brownies are! You can totally switch up the colors and sprinkles for other holidays as well!

Other recipes you might love

Easy fudgy homemade brownies
Spider egg cake tutorial 
Death by chocolate cake


Recipe

monster mash cheesecake brownies cut into squares on a white background. Sprinkles, pumpkins and plates around the brownies
Print Recipe
5 from 7 votes

Monster Mash Cheesecake Brownies

Brownies with a creamy cheesecake layer on top. The fudgy brownie layer is balanced perfectly with that yummy cream cheese. The fact that they look like funny monsters with eyes is just a bonus. 
Prep Time10 minutes mins
Cook Time20 minutes mins
Course: Dessert
Cuisine: American
Servings: 20 servings
Calories: 322kcal
Author: Liz Marek

Equipment

  • 9"x13" Pan

Ingredients

Brownies

  • 8 ounces unsalted butter
  • 4 ounces chocolate dark, semi-sweet or milk
  • 4 large eggs
  • 6 ounces sugar
  • 4 ounces brown sugar
  • 2 ounces cocoa powder
  • 5 ounces AP flour or cake flour for a more tender brownie
  • 2 teaspoons vanilla extract
  • ½ teaspoon salt

Cream Cheese Topping

  • 16 ounces cream cheese softened
  • 4 ounces sugar
  • 2 large eggs room temperature
  • ½ teaspoon vanilla extract

Instructions

Cheesecake Topping Instructions

  • Place cream cheese into the bowl of a stand mixer with the paddle attachment and cream until smooth.
  • Add in your sugar and cream until smooth.
  • While mixing on low, add in the vanilla and then your eggs one at a time, letting each one incorporate fully before adding the next. Scrape the bowl. Cream until smooth (2-3 minutes)
  • Divide the cream cheese mixture into two bowls. Color one with the yellow and green food coloring and the other bowl with the pink and purple. Set aside.

Brownie Instructions

  • Preheat your oven to 350ºF. Line a ¼ sheet pan with parchment paper so there is 1" of overhang on all sides.
  • Melt your butter and chocolate together in a heatproof bowl over simmering water or in the microwave. Let cool until it no longer feels hot to the touch.
  • Whisk together your sugar, salt, vanilla and eggs in a bowl until just combined.
  • Sift together the flour and cocoa powder to remove lumps and then set aside.
  • Add your melted chocolate mixture to the egg mixture and whisk until just combined.
  • Add your chocolate egg mixture to the flour mixture and stir gently until just combined and no flour lumps are visible.
  • Pour your batter into the parchment-lined pan.
  • Spoon alternating dollops of the colored cream cheese batter on top of the brownies and swirl the colors together.
  • Add some sprinkles if desired
  • Place the pan in the center of the oven and bake until a toothpick comes out from the center with a few sticky moist crumbs. About 35 minutes.
  • Remove the pan from the oven and place onto a cooling rack. Place eyeball sprinkles on top of cream cheese layer
  • Let cool slightly before slicing and serving. Do not cover or the black pupils on the eyeballs will run.

Video

Nutrition
Serving: 1g | Calories: 322kcal | Carbohydrates: 31g | Protein: 5g | Fat: 21g | Saturated Fat: 12g | Cholesterol: 113mg | Sodium: 218mg | Potassium: 132mg | Fiber: 1g | Sugar: 23g | Vitamin A: 680IU | Calcium: 45mg | Iron: 1mg

Three squares of brownies stacked on top of each other on a white background.

October 15, 2019 Blog

The Best Fudgy Homemade Brownies

Easy fudgy homemade brownies with a crispy crackly top

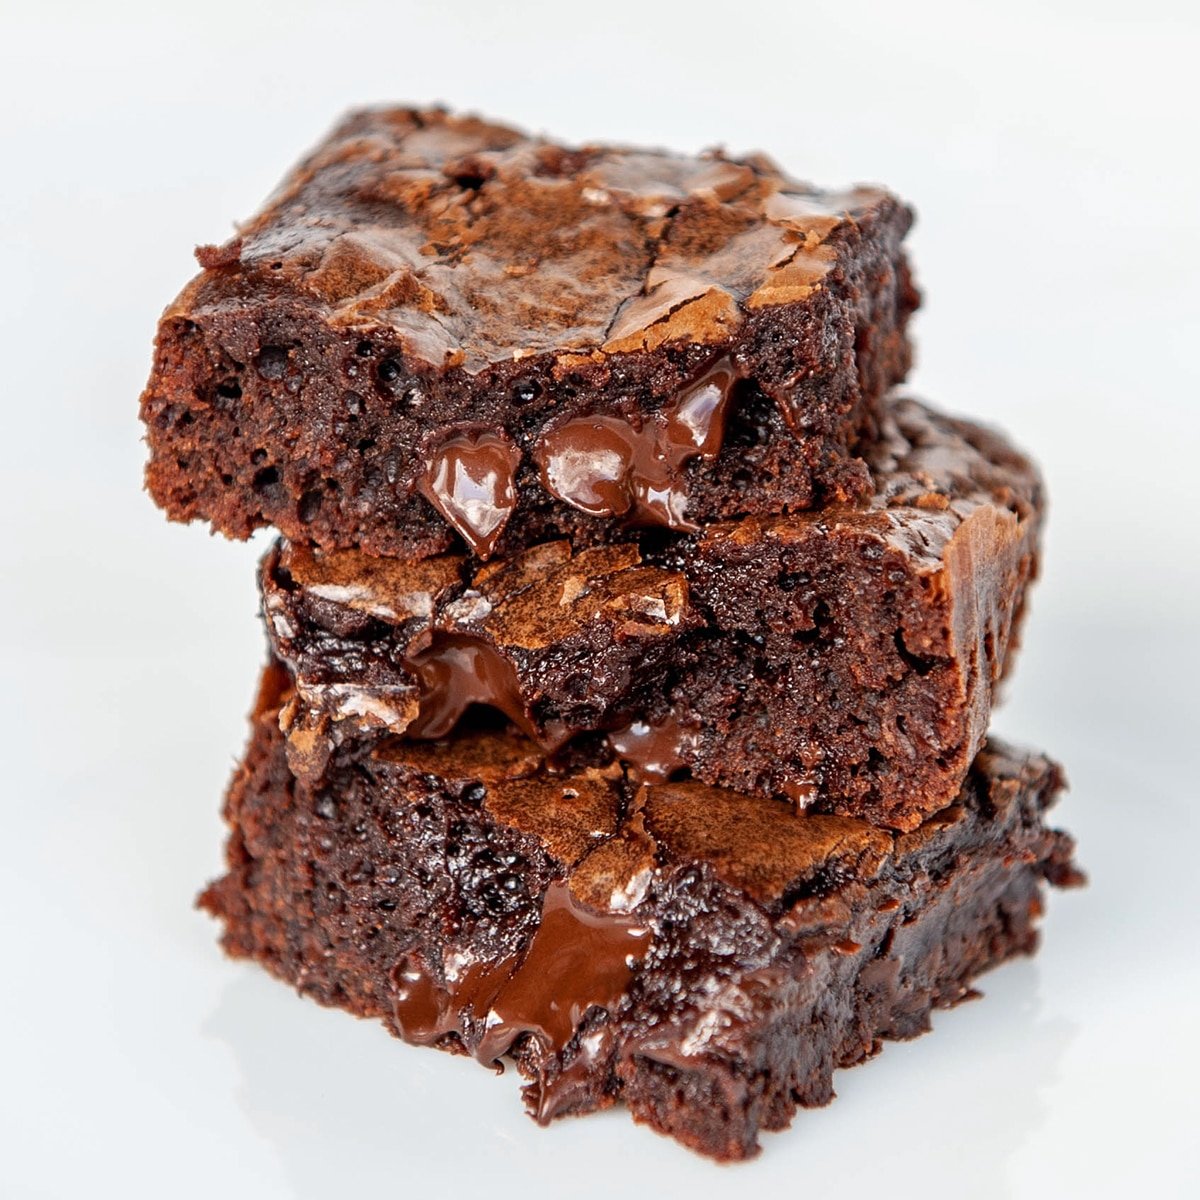
These homemade fudgy brownies have it all. They are moist, chocolatey, a little chewy, and have the perfect crinkly top. Read on to learn the secrets to the best brownies ever! No mixer required!

close up of brownies

I have been perfecting this homemade brownie recipe for years... every time I make them I tweak them and this last batch was SO GOOD I had to update my recipe. The good news is that they are even easier and I discovered a foolproof way to get that crackly crust every single time. 

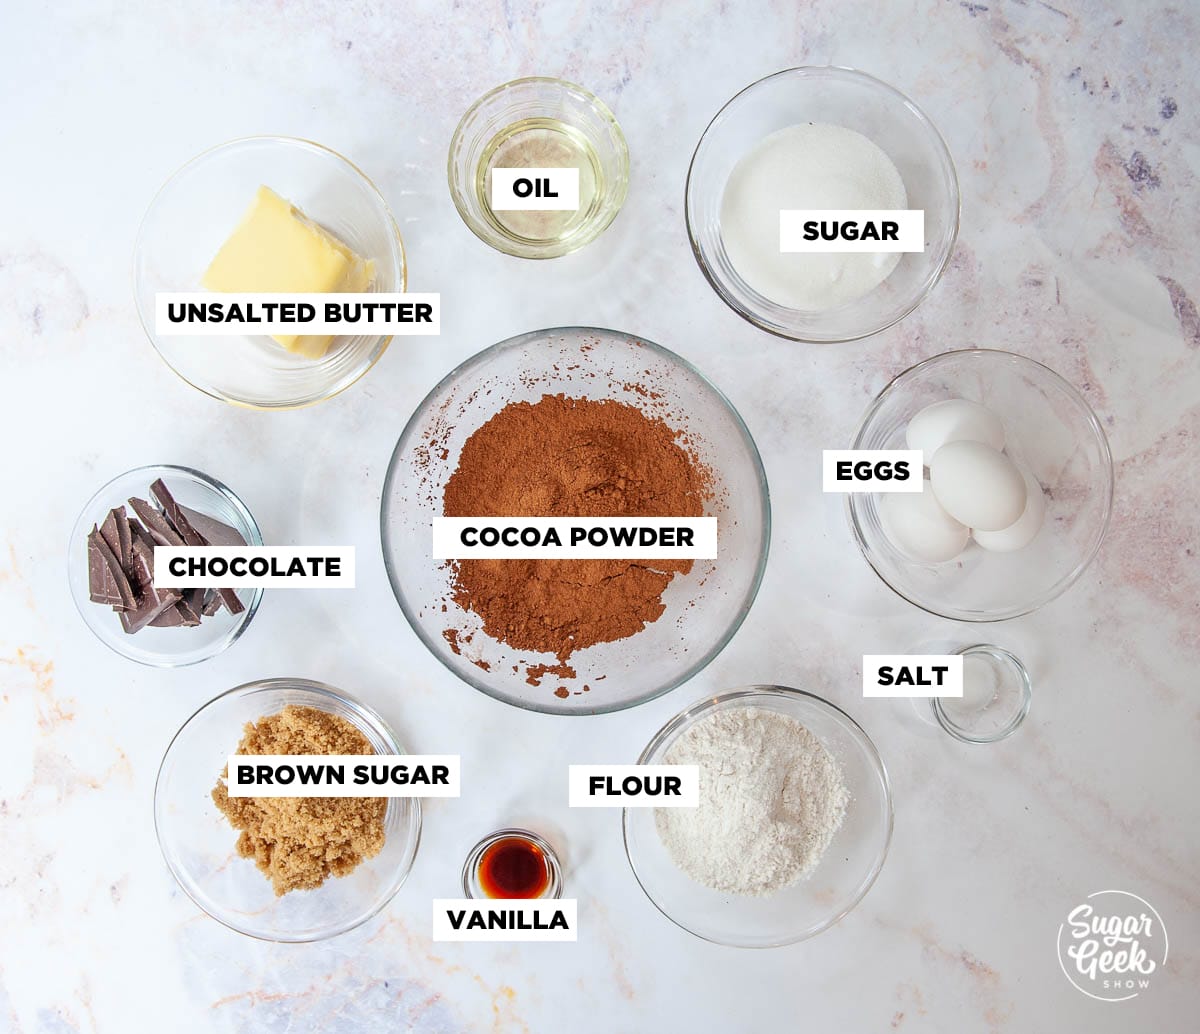
Fudgy homemade brownies ingredients

overhead shot of brownie ingredients

There are about a billion different brownie recipes out there. The reason is that even though there isn't much to making brownies technically, changing just one of the ingredients can totally change the flavor and texture of the brownies. 

Butter & Oil - Hot butter and a little oil not only rehydrates the cocoa powder but also keeps your brownies from tasting dry.

Chocolate - I like the rich flavor of dark chocolate in my brownies but you can use semi-sweet or milk chocolate. Dark chocolate has very little sugar in it while milk chocolate has more sugar in it. You may want to adjust the amount of sugar in your recipe depending on the chocolate you use. 

White Sugar & Brown Sugar - Sugar adds moisture and sweetness to your brownies. I like to use a little brown sugar as well which adds a nice flavor and a little bit of chew to my brownies. 

Eggs - Eggs add moisture and structure to your brownies. The more you whisk eggs, the more air that is incorporated into your brownies. I whisk my eggs and sugar until they are smooth and combined then add in the hot butter/chocolate.

Cocoa Powder - I prefer to use dutched cocoa powder which lends a really rich and mellow flavor to these fudgy brownies but you can use any kind of cocoa powder that you like such as Hershey's. Since there isn't any baking powder or baking soda in this recipe, it doesn't matter what kind of cocoa powder you use. 

Flour - This recipe uses regular all-purpose flour but you can also use cake flour for a more tender brownie. The trick is to fold in your flower gently so you don't make your brownies tough and dry.

Mix-ins - You can add in all kinds of extra ingredients to your brownies to make them your own. Candied pecans, chocolate chunks, caramel, cream cheese or candies. The list goes on and on. The best thing about making brownies is making them exactly the way you want them! 

How do you make homemade brownies fudgy?

overhead shot of fudgy brownies

The easiest way to make a fudgy brownie is not to over-bake your brownies. Brownies will get much firmer as they cool down so most people over-bake them and then end up with dry brownies. 

Brownies should be bake to the point where the center is set (not jiggly) but still soft. In a 10"x13" pan, that was exactly 19 minutes but the type of pan you use and your oven may give you different results. 

How To Make Fudgy Brownies Step By Step

Preheat your oven to 350ºF and move the rack to the center of the oven.

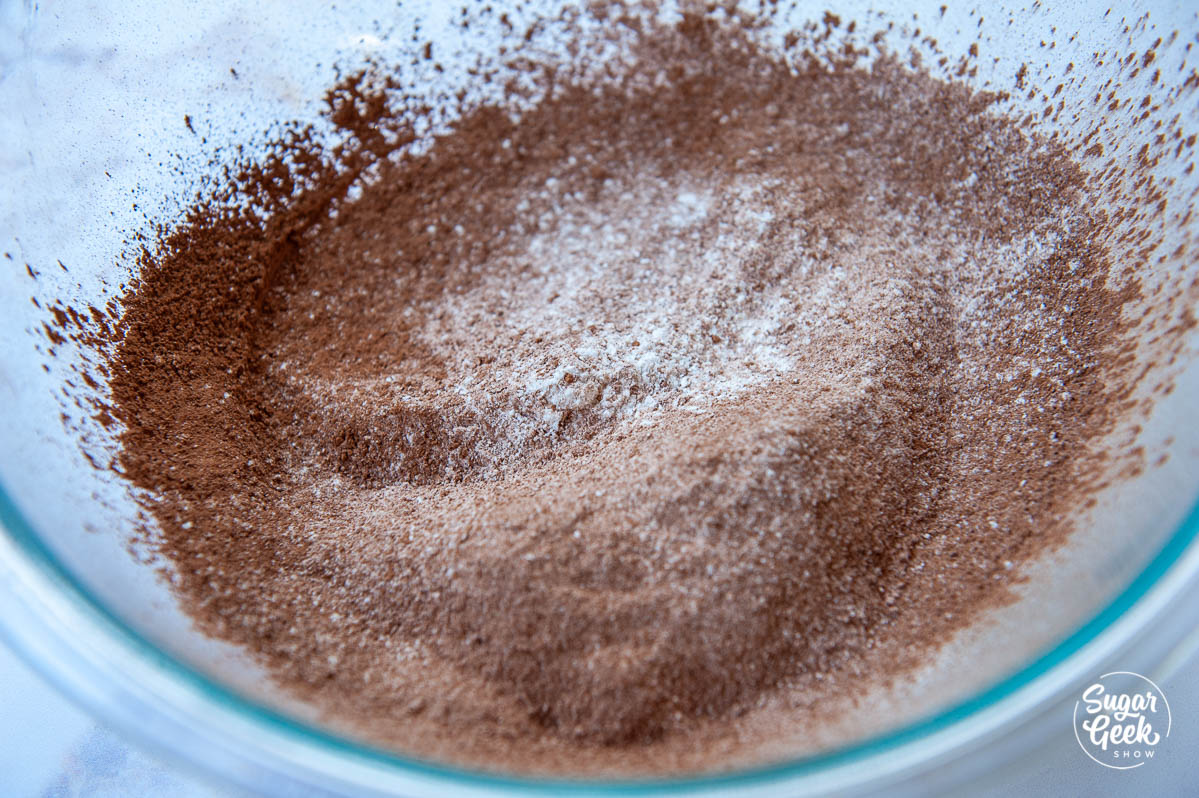
Step 1 - Sift your flour and cocoa powder together to remove any lumps. Set it aside. 

sifted flour and cocoa powder in a bowl

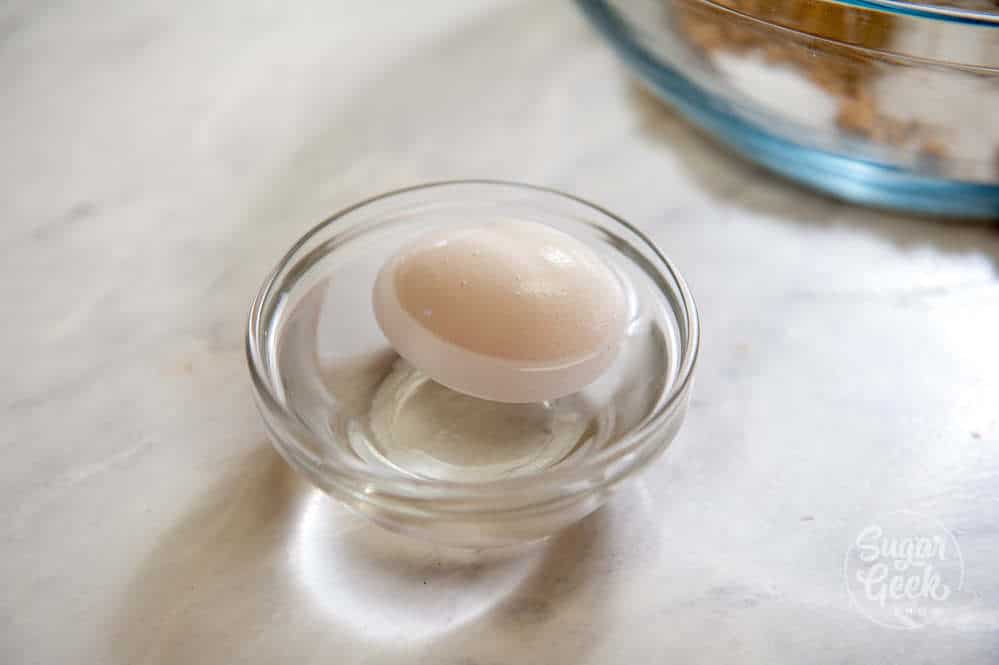
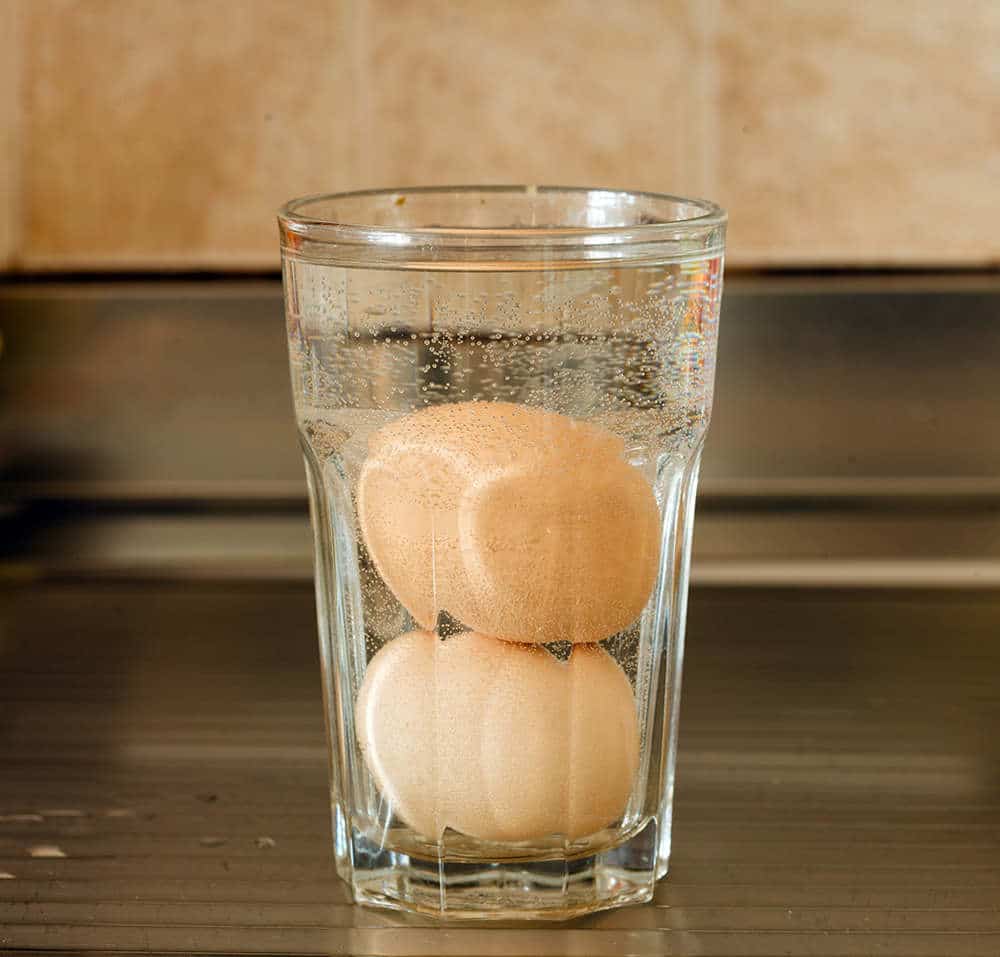
Step 2 - Make sure your eggs are not too cold. I put mine in a bowl of hot water for 5 minutes to warm them up. Cold eggs will cool the butter down too fast and your sugar will not dissolve.

egg in a clear bowl of hot water on white background

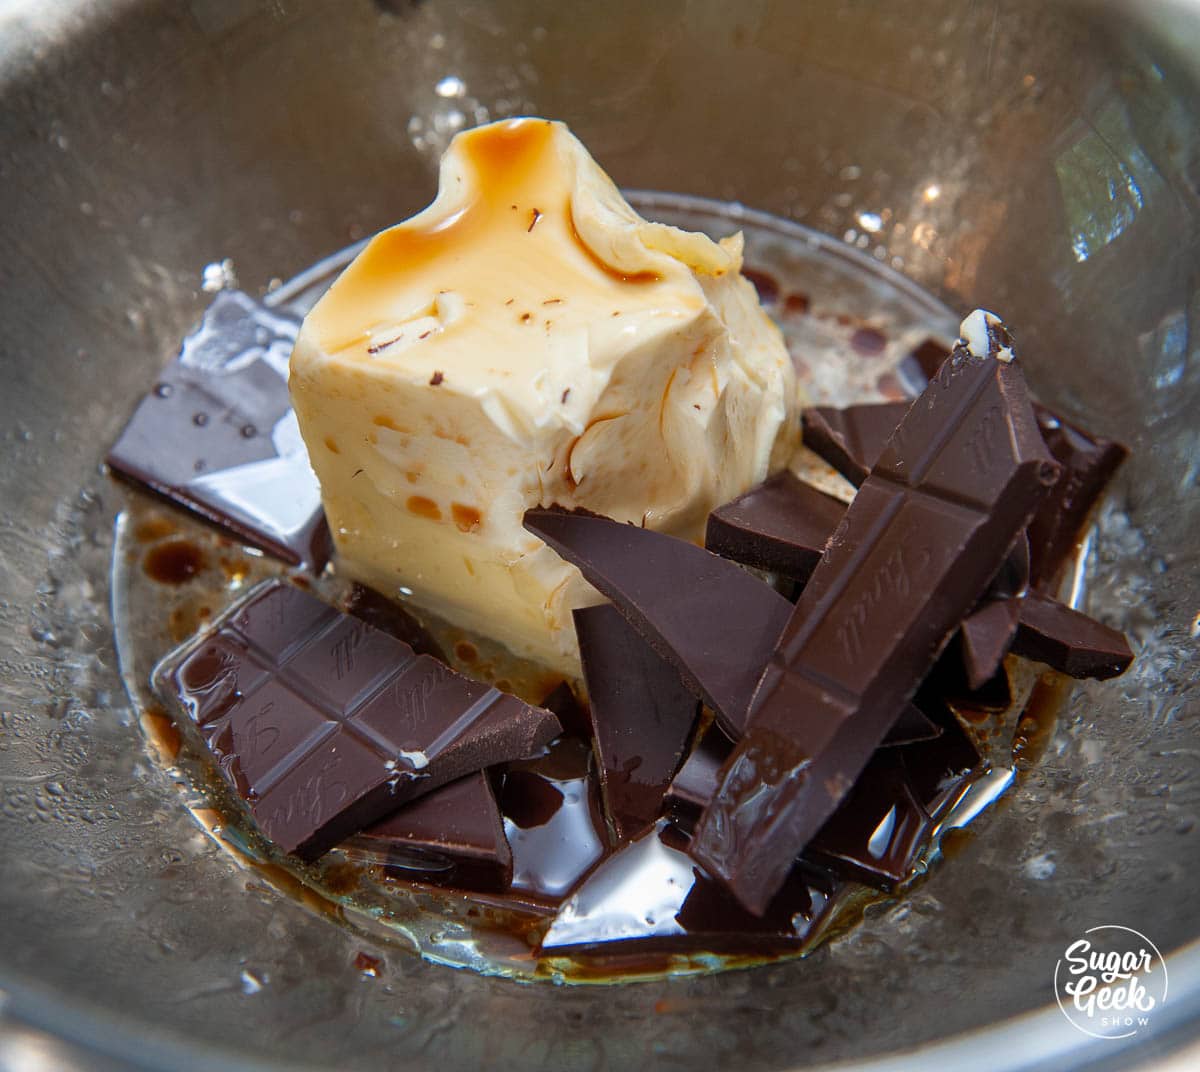
Step 3 - Melt your butter, oil, and chocolate over a pot of simmering water. Whisk occasionally until the chocolate is melted. 

butter, oil and chocolate on a bain marie

melted butter, oil and chocolate on a bain marie

Step 4 - Whisk the eggs, white sugar, brown sugar, salt, and vanilla together either in a stand mixer or by hand until the mixture is thick and glossy. About four minutes on medium high. 

eggs, sugar, vanilla and salt whisked together

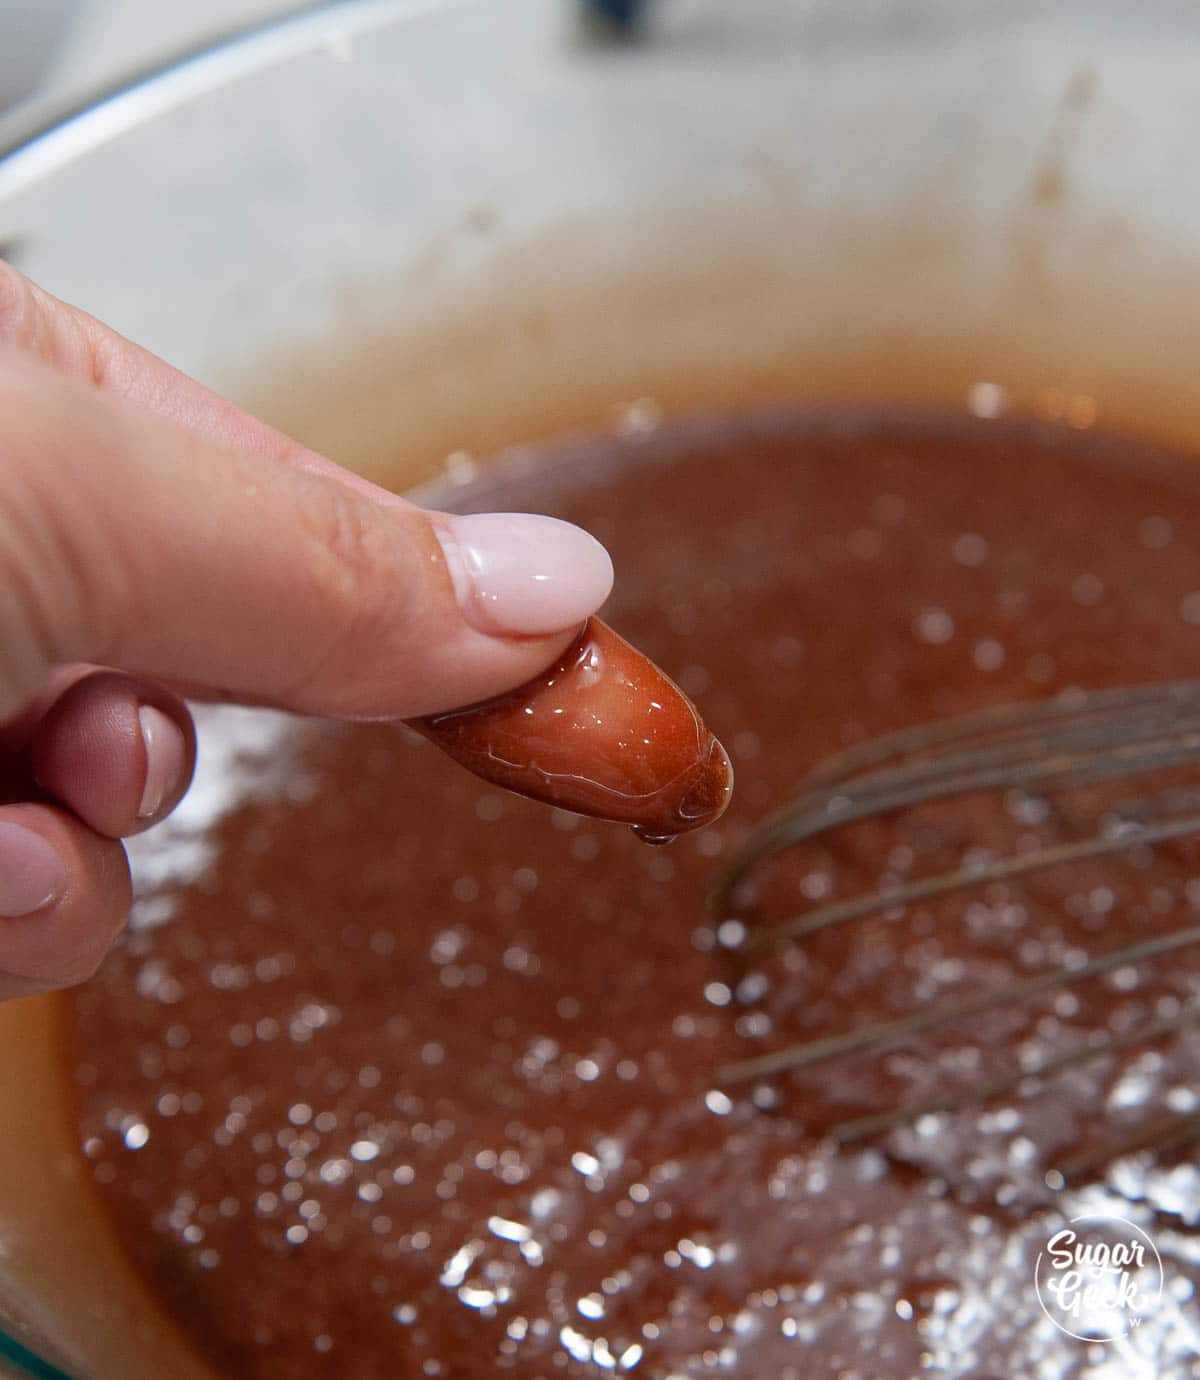
Step 5 - Add the hot butter/chocolate mixture to the egg mixture and whisk it until you cannot feel any granules of sugar between your fingers. If your mixture is too cold, you can return the bowl back to your pot of simmering water and whisk it for another minute or so until you can't feel any grains of sugar. 

close up of fingers touching brownie batter

Pro-Tip: Mixing your hot butter/chocolate mixture with the egg mixture until the grains of sugar dissolve is the secret to getting a very shiny, crackled crust on your fudgy brownies. 

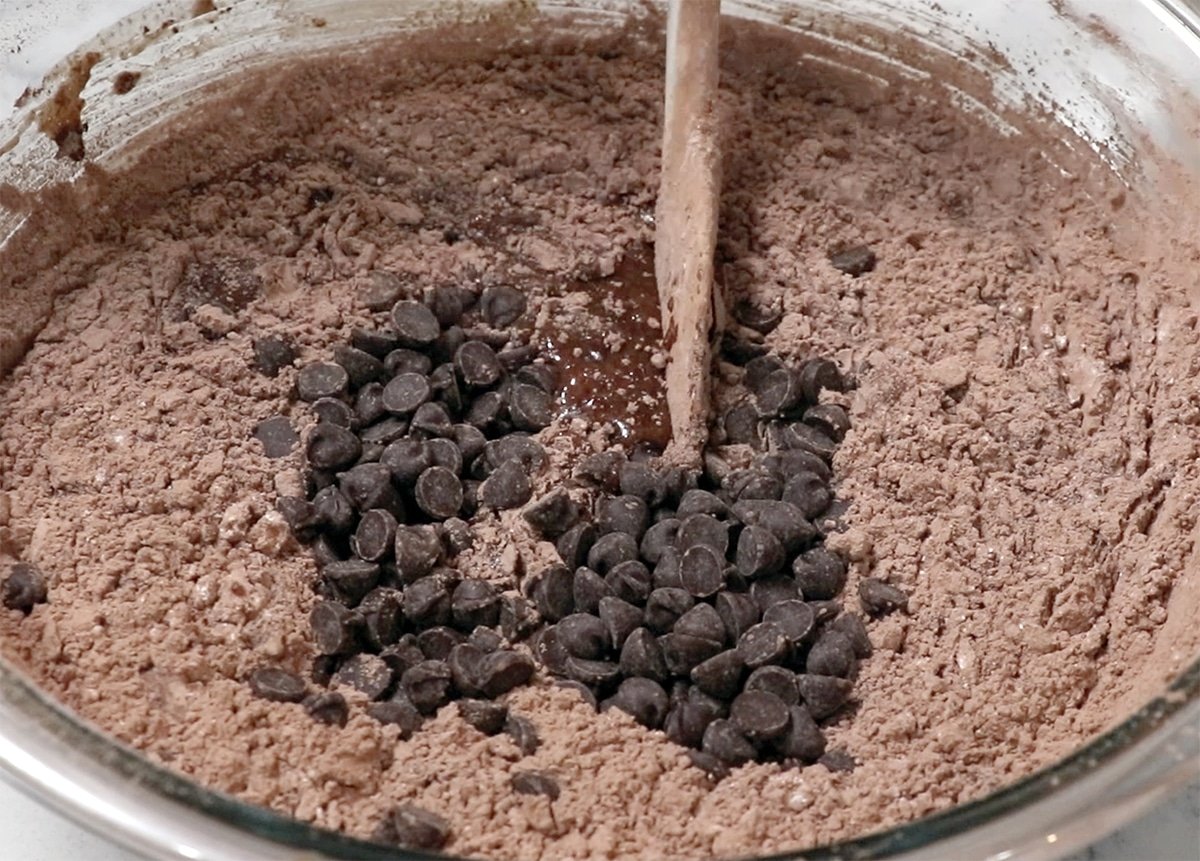
Step 6 - Fold in your flour mixture gently and add in your chocolate chips (or chopped nuts or m&ms if you want.) Or leave them plain!

close up of homemade brownie ingredients in a bowl

Step 7 - Line a 10"x13" pan with some parchment paper. I cut the corners of the parchment and folded them over so that the sides lay flat. The parchment paper makes it easier to lift the brownies out later. 

overhead shot of 10"x13" cake pan lined with parchment paper

Step 8 - Bake your brownies at 350ºF for 18-20 minutes or until they are just set. Don't over-bake them because they will continue to bake in the pan when you take them out. 

closeup of brownie batter in a cake pan

Step 9 - Allow your brownies to cool until the pan is barely warm before lifting out the brownies. Cut them with a ceramic or plastic knife to reduce sticking. 

fudgy homemade brownies on parchment paper

What kind of pan should you use to make brownies?

You can use any pan you want to make brownies but keep in mind that different pans bake differently so adjust accordingly.

Light Colored Metal Pans - This is the type of pan that I use. They are lightweight and distribute heat pretty evenly. 

Dark Colored Metal Pans - Dark metal pans get a lot hotter and will bake your brownies faster. Don't put the pan too close to the bottom of the oven and check for doneness sooner (10 minutes early) so they don't accidentally burn. 

Glass and Ceramic Pans - Brownies baked in glass or ceramic pans tend to take longer to bake so you might have to leave them in the oven longer. 

How do you know when homemade brownies are done?

I used to over-bake my brownies every time, which is probably part of why they were dry. I thought the right way to check brownies for doneness was to stick a toothpick in the middle and when the toothpick came out clean, they were done. WRONG!

I've learned that homemade brownies actually continue baking quite a bit even after they come out of the oven. So if you wait until the toothpick comes out clean, it's already too late. 

You want to remove brownies from the oven when the toothpick still has some very moist sticky crumbs stuck to the toothpick but not liquid. 

I always line my pans with parchment paper rather than using a baking spray or cake goop because it makes it a lot easier to remove them from the pan after they cool. 

How do you get brownies with a crackly top?

The last batch of brownies I made had a top like this. Very dry and not very pretty looking. 

dry looking brownies

I did a lot of testing and discovered the secrets to getting a really shiny, crackled crust on brownies.

  1. Make sure your butter/chocolate mixture is hot and your eggs are room temperature.
  2. Make sure you are mixing your batter for 1 minute after adding the chocolate mixture to the egg mixture or until the sugar dissolves. Rub the brownie batter between your fingers, if you can feel granules of sugar, it needs to be whisked more. If the mixture is no longer warm, return the bowl to your pot of simmering water and whisk until you cannot feel the granules of sugar between your fingers. 
  3. Using white granulated sugar in your brownie recipe
  4. Melted chocolate in your brownie recipe

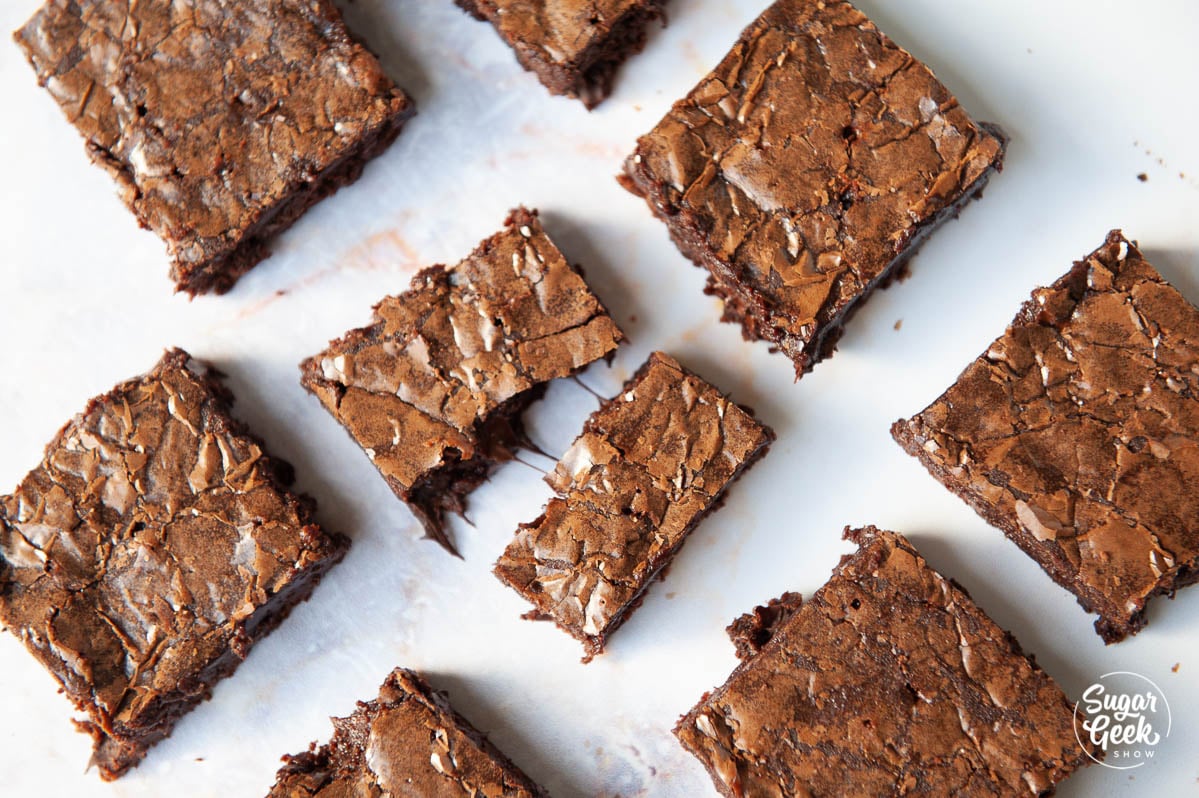
And this is what they should look like! Wow! What a difference!

close up of brownies crackled crust


More chocolate craving recipes you'll love
Death By Chocolate Cake
Chocolate Ganache Frosting
Easy Chocolate Cake 
Chocolate Irish Cream Cake

Recipe

Three squares of brownies stacked on top of each other on a white background.
Print Recipe
4.99 from 61 votes

The Best Homemade Fudgy Brownies

These homemade fudgy brownies have it all. They are moist, chocolatey, a little chewy, and have the perfect crinkly top. Read on to learn the secrets to the best brownies ever! No mixer required!
Prep Time10 minutes mins
Cook Time20 minutes mins
Course: Dessert
Cuisine: American
Servings: 18 servings
Calories: 214kcal
Author: Liz Marek

Equipment

  • 9"x13" Pan

Ingredients

  • 8 ounces unsalted butter 1 cup
  • 2 ounces canola oil ¼ cup
  • 5 ounces chocolate dark, semi-sweet or milk (I used a bar of chocolate or about 1 cup chocolate chips)
  • 5 large eggs
  • 12 ounces granulated sugar 1 ½ cup
  • 4 ounces light brown sugar ½ cup packed
  • 3 ounces cocoa powder sifted (⅔ cup)
  • 5 ounces AP flour or cake flour for a more tender brownie (1 cup sifted)
  • 2 teaspoons vanilla extract
  • ½ teaspoon salt
  • 6 ounces chocolate chips 1 cup
US Customary - Metric

Instructions

Fudgy Brownie Instructions

  • Preheat your oven to 350ºF. Line a 9"x13" ¼ sheet pan with parchment paper so there is 1" of overhang on all sides.
  • Sift together the flour, cocoa powder, and salt to remove lumps and then set aside.
  • Melt your butter, oil, and chocolate together in a heatproof bowl over simmering water. Whisk occasionally until the butter is melted then remove from the heat.
  • In a large heatproof bowl, whisk together your white sugar, brown sugar, vanilla, and room temperature eggs in a bowl until thick and glossy or whip on your stand mixer for about 4 minutes on medium-high.
  • Add your hot melted chocolate mixture to the egg/sugar mixture and whisk for one minute or until the sugar is dissolved. Rub the mixture between your fingers, if you can still feel granules then keep whisking.
    If your mixture is no longer warm, you can return the bowl to your pot of simmering water and whisk for another minute until the granules are dissolved. This is what makes the crackly crust.
  • Add in the flour mixture and chocolate chips to the egg mixture and fold gently until just combined. Don't over-mix it.
  • Pour your batter into the parchment-lined pan. Place the pan in the center of the oven and bake for 18-20 minutes or until a toothpick comes out from the center with a few sticky moist crumbs.
  • Let your brownies cool until the pan is barely warm before removing the parchment paper and slicing the brownies.

Video

Notes

I'm using a 9"x13" (¼ sheet) pan with parchment paper (not wax paper)
Make sure you mix your chocolate/egg mixture until you don't feel any granules of sugar anymore or your brownies will be dull looking on top and not crackled. 
This recipe makes 18 brownies that are 2"x3" in size
The best way to cut brownies is to use a plastic or ceramic knife, no sticking! 
Store leftover brownies in an airtight container or ziplock bag at room temperature to keep them soft and moist. 

Nutrition

Serving: 1g | Calories: 214kcal | Carbohydrates: 25g | Protein: 3g | Fat: 13g | Saturated Fat: 8g | Cholesterol: 67mg | Sodium: 137mg | Potassium: 93mg | Fiber: 1g | Sugar: 17g | Vitamin A: 345IU | Calcium: 20mg | Iron: 1mg

 
Barnacle Zombie Cake Tutorial

October 15, 2019 Course Preview

Barnacle Zombie Cake Tutorial

Skill level: Intermediate

It's finally here! Liz Marek's award-winning Barnacle Zombie which placed 1st at the 2018 Atlanta Cake Show. Many have been asking for a step-by-step tutorial of this sculpted cake featuring an all-cake body, realistic seaweed, aged skin and barnacle textures, and an awesome bog water cake board.

In this tutorial, you will learn how to sculpt a body from all cake, how to create the features of the zombie head, including the edible brain, how to get dynamic curves in your cake sculptures, and how to use a Cake Safe to transport a sculpted cake to a cake show.

1:27:47 Minutes of Instruction

What You Will Learn

  • How to sculpt a realistic zombie with an all-cake body
  • Learn how to make a sculpted figure look dynamic
  • How to create layered colors and a cohesive design
  • Learn how to make barnacle details and realistic seaweed
  • How to use a Cake Safe to transport a cake to a cake show

Tutorial Chapters

  1. Building the structure 0:44
  2. The skull 2:45
  3. Building the jaw 4:41
  4. The body structure 11:00
  5. Adding the cake 13:44
  6. Sculpting the cake 18:04
  7. Sculpting 3D elements 20:32
  8. Covering in ganache 27:18
  9. The teeth 29:49
  10. The eyes 33:02
  11. Creating wrinkles 34:56
  12. Creating the forehead 40:36
  13. The jaw 42:35
  14. Covering in fondant 43:18
  15. Defining the bones 46:22
  16. Torching the fondant 49:44
  17. Adding torn fondant 51:45
  18. The ears 55:07
  19. The mouth 58:30
  20. The brain 59:57
  21. Making seaweed 1:00:44
  22. Making arm bones 1:02:24
  23. Making arm muscles 1:04:21
  24. Making skin texture 1:07:22
  25. Airbrushing 1:09:00
  26. Painting 1:12:25
  27. Royal icing barnacles 1:14:47
  28. Chocolate barnacles 1:16:52
  29. Coloring the barnacles 1:19:56
  30. Using the Cake Safe 1:22:43
  31. Finishing the cake 1:25:34

Downloads

Materials List

Zombie Reference 01

Zombie Reference 02

Barnacle Zombie Cake Tutorial

October 15, 2019 Paid Video

Barnacle Zombie Cake

Skill level: Intermediate

It's finally here! Liz Marek's award-winning Barnacle Zombie which placed 1st at the 2018 Atlanta Cake Show. Many have been asking for a step-by-step tutorial of this sculpted cake featuring an all-cake body, realistic seaweed, aged skin and barnacle textures, and an awesome bog water cake board.

In this tutorial, you will learn how to sculpt a body from all cake, how to create the features of the zombie head, including the edible brain, how to get dynamic curves in your cake sculptures, and how to use a Cake Safe to transport a sculpted cake to a cake show.

1:27:47 Minutes of Instruction

What You Will Learn

  • How to sculpt a realistic zombie with an all-cake body
  • Learn how to make a sculpted figure look dynamic
  • How to create layered colors and a cohesive design
  • Learn how to make barnacle details and realistic seaweed
  • How to use a Cake Safe to transport a cake to a cake show

Tutorial Chapters

  1. Building the structure 0:44
  2. The skull 2:45
  3. Building the jaw 4:41
  4. The body structure 11:00
  5. Adding the cake 13:44
  6. Sculpting the cake 18:04
  7. Sculpting 3D elements 20:32
  8. Covering in ganache 27:18
  9. The teeth 29:49
  10. The eyes 33:02
  11. Creating wrinkles 34:56
  12. Creating the forehead 40:36
  13. The jaw 42:35
  14. Covering in fondant 43:18
  15. Defining the bones 46:22
  16. Torching the fondant 49:44
  17. Adding torn fondant 51:45
  18. The ears 55:07
  19. The mouth 58:30
  20. The brain 59:57
  21. Making seaweed 1:00:44
  22. Making arm bones 1:02:24
  23. Making arm muscles 1:04:21
  24. Making skin texture 1:07:22
  25. Airbrushing 1:09:00
  26. Painting 1:12:25
  27. Royal icing barnacles 1:14:47
  28. Chocolate barnacles 1:16:52
  29. Coloring the barnacles 1:19:56
  30. Using the Cake Safe 1:22:43
  31. Finishing the cake 1:25:34

Downloads

Materials List

Zombie Reference 01

Zombie Reference 02

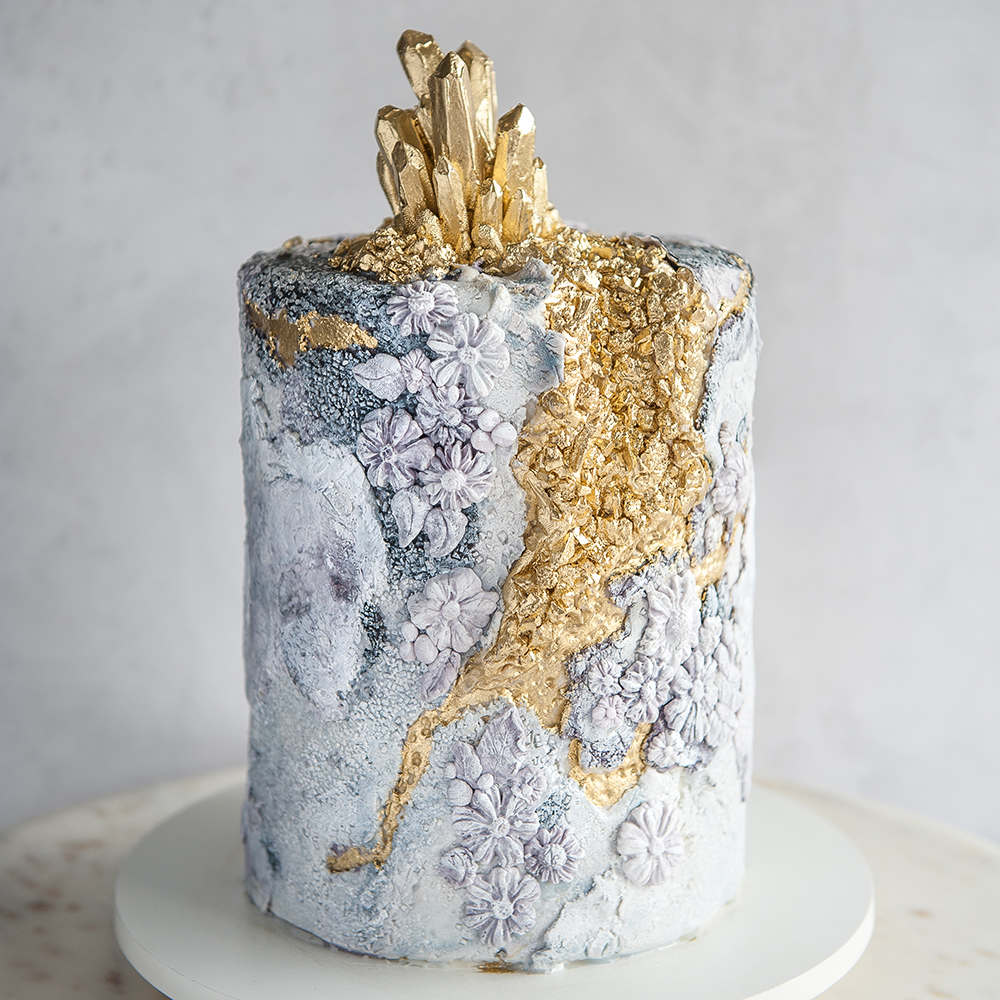
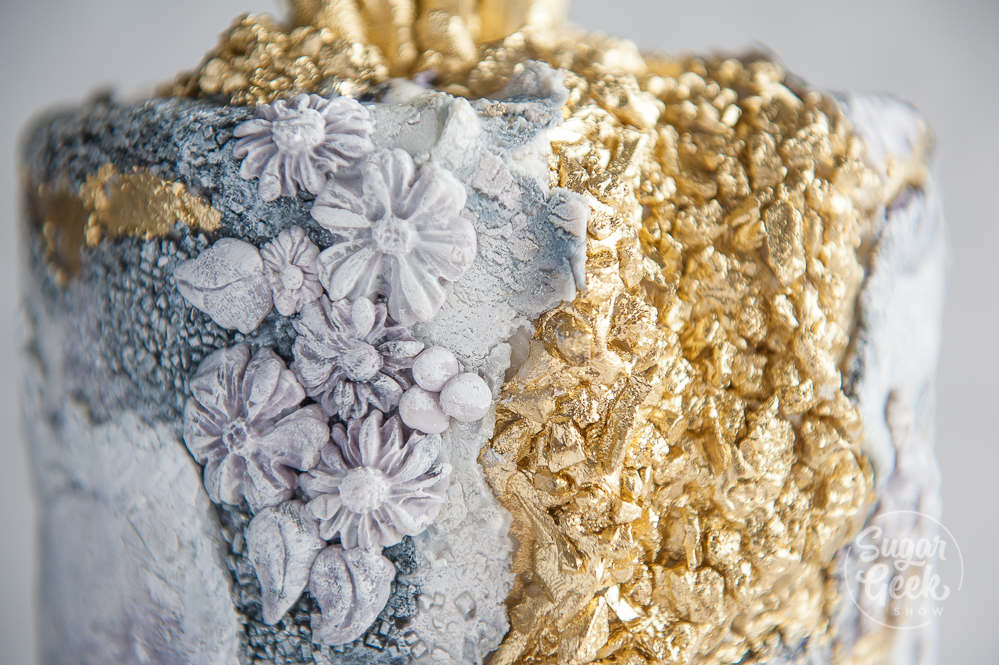
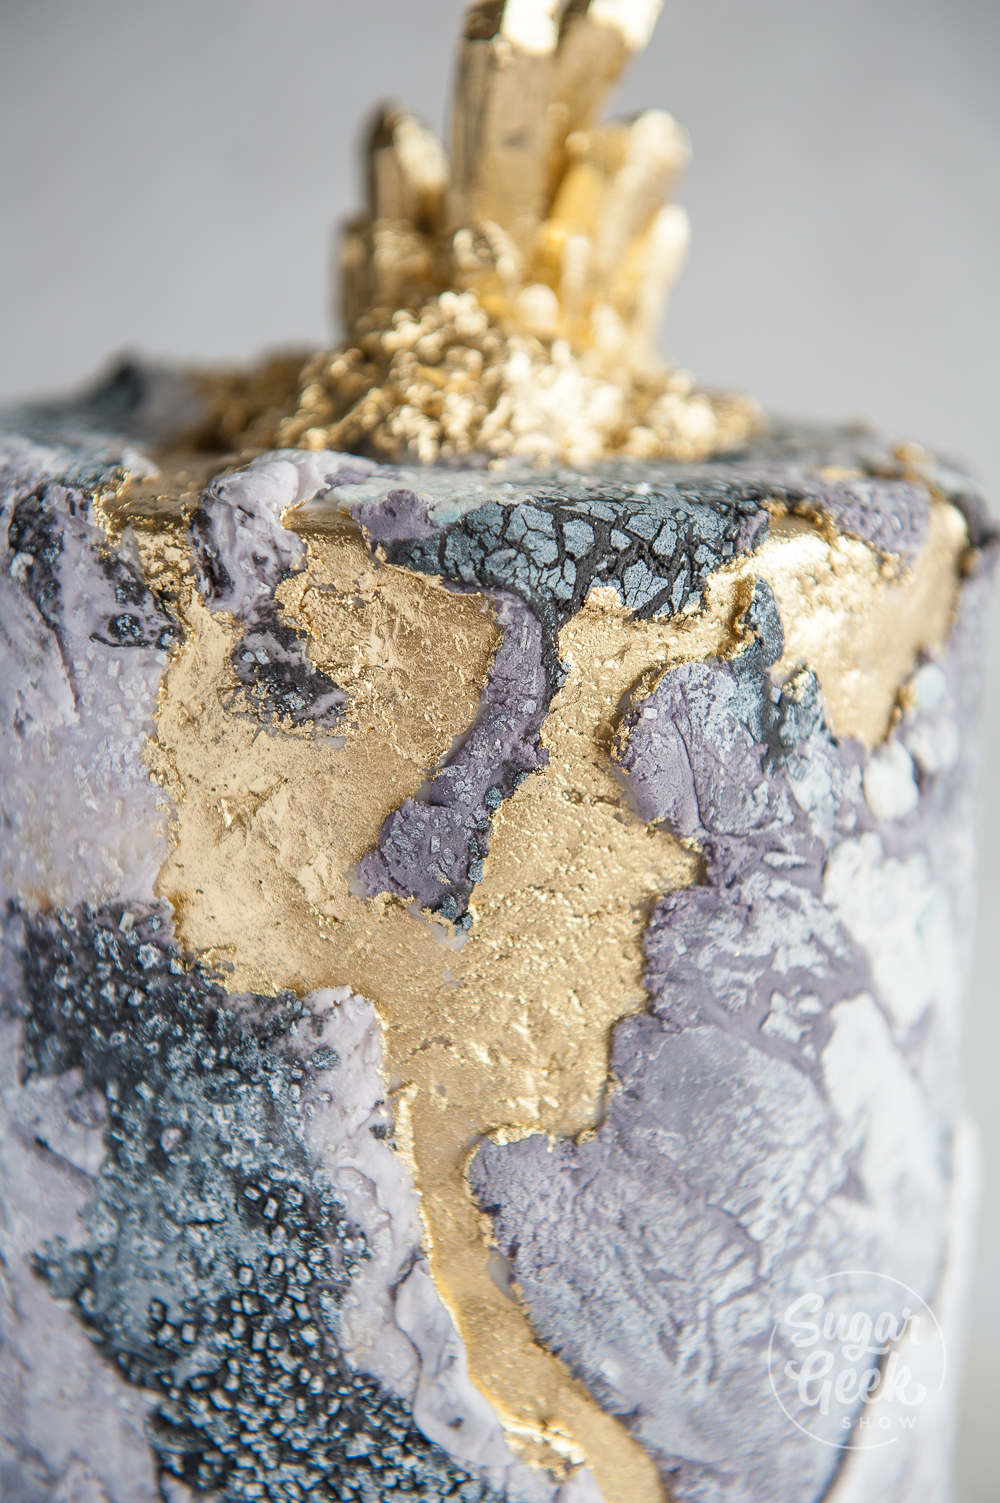
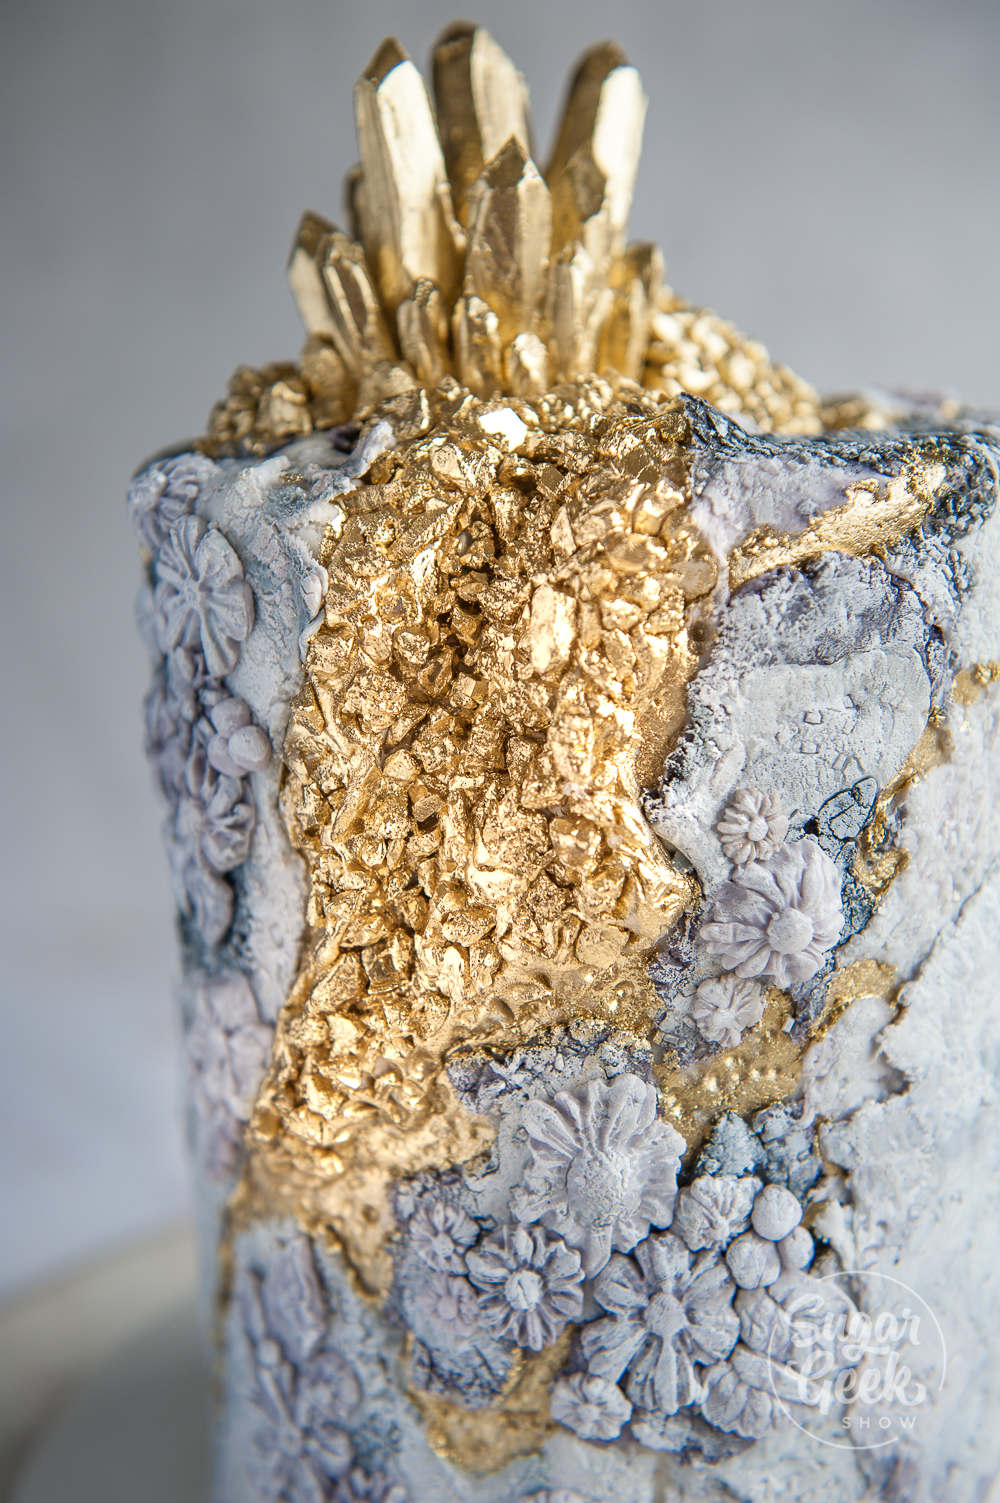
fondant stone texture on cake with gold geode

October 14, 2019 Blog

Fondant Stone Texture Cake Tutorial

Fondant stone texture on a cake with a gold geode crystal

Making a  fondant stone texture on a cake is one of my favorite techniques because there's not really a wrong way to do it. Re-creating natural textures is super fun and easier than you think. This fondant stone texture was inspired by the work of Jasmine Rae Cakes who is pretty much the master of stone textures. I love the addition of the small flowers that she uses a lot in her work. It definitely softens the look of the stone texture. 

fondant stone texture on cake with gold geode

I am creating this stone texture with fondant but you can also make a stone texture with ganache or buttercream. My friend Christine Leaming has an awesome tutorial for making a marble buttercream texture on cakes.

Lately, cakes that resemble stone or concrete have really been taking off in popularity. I've made so many cakes that resemble rock and stone that I'm starting to think that stone texture on cakes is the new rustic birch cake. I'm 100% ok with that. 

What tools do you need to make a fondant stone texture cake

Making the fondant stone texture is really easy. Like for real. This is what you need to make a stone textured fondant cake. 

  1. 6" cake, frosted with buttercream and chilled until firm (watch my how to make your first cake tutorial)
  2. White, black and grey fondant
  3. Some old dried fondant (I left some grey in an open zip-lock bag for two days)
  4. Sanding sugar
  5. Culinary torch
  6. White food coloring
  7. Gold dust (I use TMP super gold which is non-toxic or you can use edible artist decorative paints which is edible but not quite as shiny)
  8. Rock candy
  9. Geode crystal mold (optional)
  10. Isomalt or lollipop sugar (about 6 ounces)
  11. Small flower mold
  12. Aluminum foil

close up of stone texture cake with gold

How to make the gold geode

The first thing we want to do is make the gold geode. I used to cut out a wedge of cake, add on some buttercream and then painstakingly add rock candy one by one! Such a mess! Now I just roll out a piece of fondant, push the rock candy into the surface and then apply that whole chunk to the area where I cut out the cake. 

gold geode made with rock candy

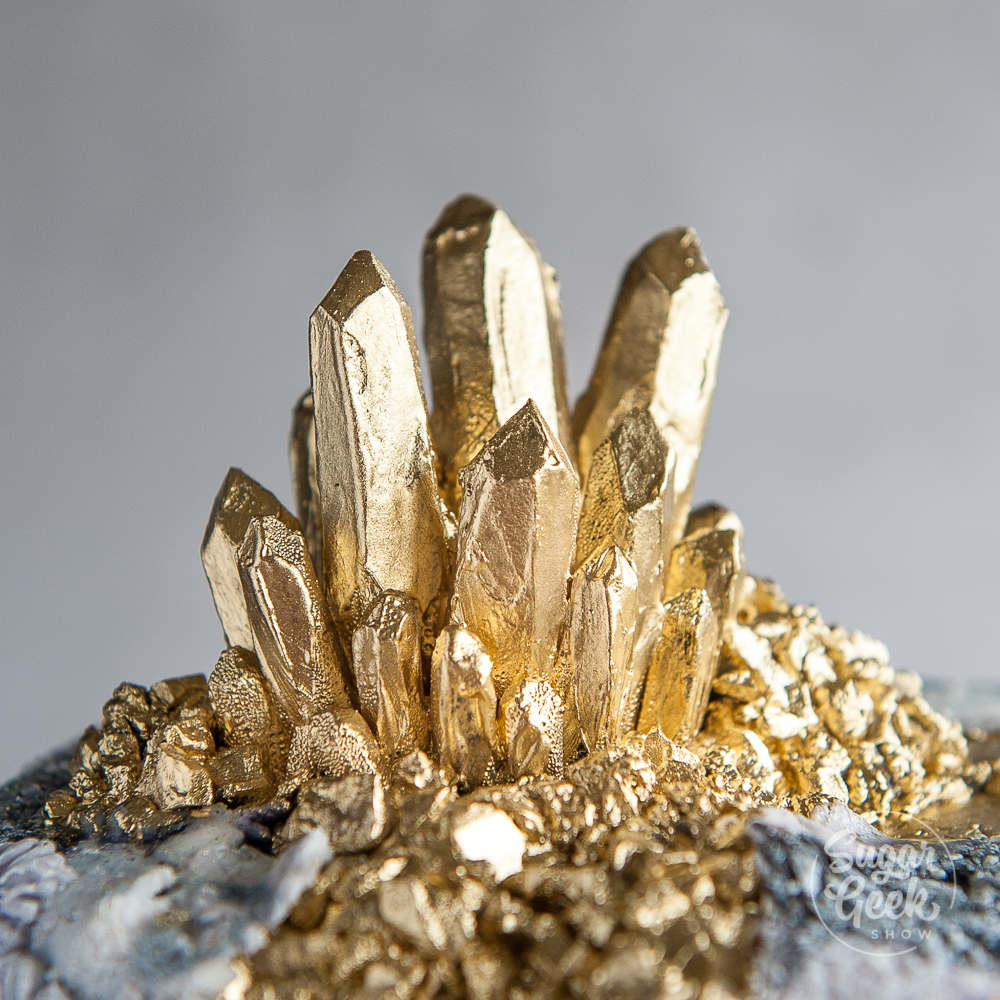
For the gold crystal on top of the cake, I poured some extra isomalt that I had leftover into my large crystal mold. This mold is kind of expensive because it's so big but there are two other sizes (medium and small) that would work just as well!

Let your sugar crystal cool completely before taking it out of the mold.

How to make the fondant stone texture

I'm adding some fondant to my chilled cake in pieces. Almost like we are paneling because you want to leave some of those raw and torn edges visible. Don't worry about any tearing or holes, those actually make the cake look better. Check out the full video tutorial below for a demonstration. 

  1. So to make the stone texture, all you have to do is kind of marble together some white, grey and a TINY bit of black with your dried out fondant. I rolled mine out to about ⅛" thick to start with. 
  2. Then add some sanding sugar on top and push that into the surface of the fondant with your rolling pin. 
  3. Next, you'll want to torch the surface of the fondant a bit so that you get a nice crackle texture when you roll it out more. 
  4. Lightly brush the surface of the fondant with some white food coloring.
  5. Let it dry for a bit then roll out the fondant to 1/16" thick. 
  6. Attach the fondant to the cake (spray the buttercream with water if it's not sticking) Don't be afraid to let some natural tears and gaps happen.
  7. Use some of your leftover fondant to make some flowers with your mold. Cluster them on top of the fondant with a little water anywhere you think looks nice. Finish by lightly brushing with some white food coloring.

Finishing the fondant stone texture cake

The last thing was placed the large sugar crystal mold on top of the cake. This kind of finishes the look of the cake and makes a nice focal point. I mixed some of my gold dust with some everclear until it's about the consistency of chocolate milk. Thick but not... too thick? you want it to cover the sugar evenly. 

gold sugar crystal

Then paint over the rest of rock candy geode and any of the areas where there are gaps in the fondant. This gives the illusion that there are veins of gold running through the stone. 

gold painted on buttercream in between fondant pieces on a stone texture cake

And that's it! That's how you make fondant stone texture on a cake. Obviously you can switch up this design and do a lot of creative things with that stone texture. If you use this tutorial, please tag me @sugargeekshow so I can see them! I love to see what you creative people can do!

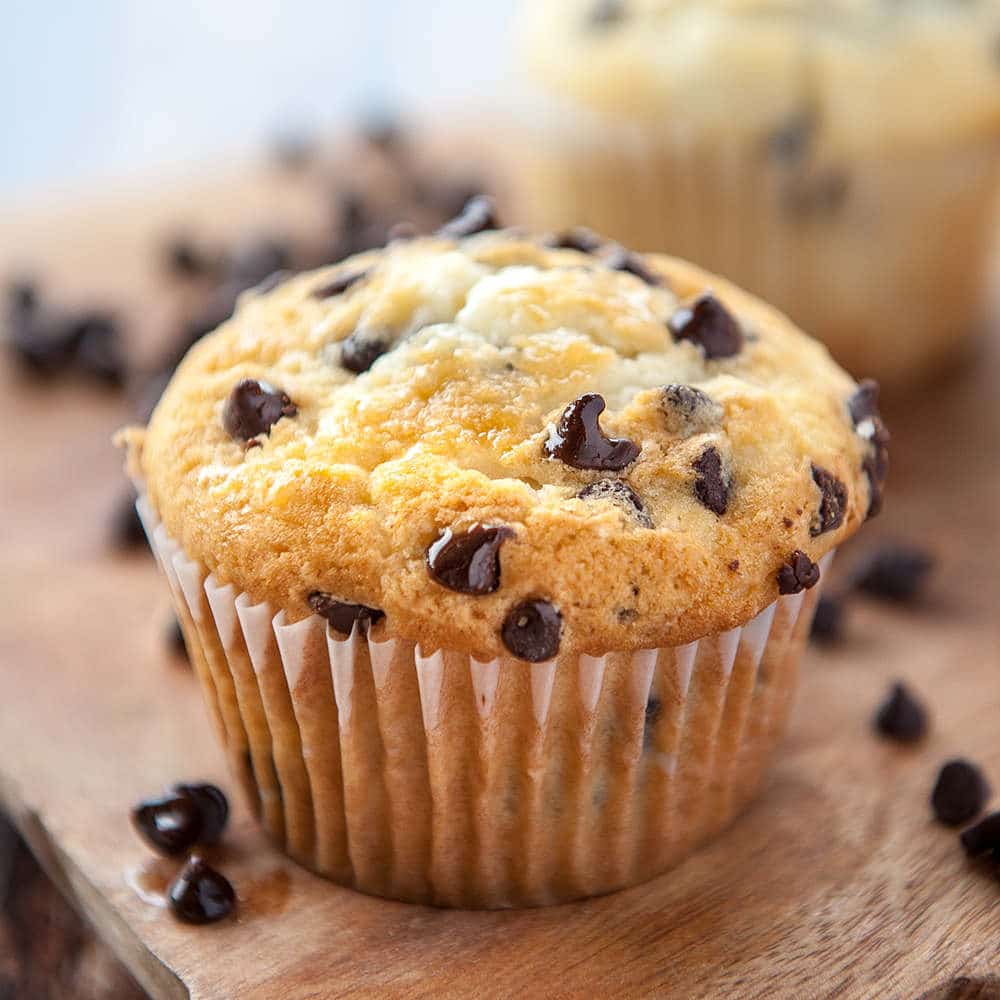
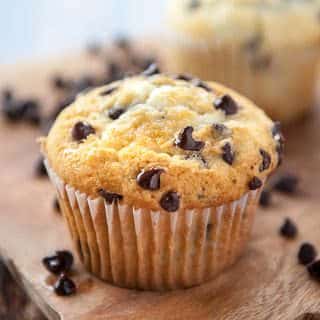
close up of moist chocolate chip muffin on wooden cutting board with blurry chocolate chip muffin in the background and loose chocolate chips all around the muffin

October 13, 2019 Quick Breads

Moist Chocolate Chip Muffins

These chocolate chip muffins are my favorite make-ahead breakfast goodie. Yes, I eat chocolate for breakfast, doesn't everyone? They bake up big, tall and fluffy and stay so moist for days. After baking, I store them in an airtight container on my countertop to enjoy all week. I swear they get even better after the second day! 

close up of moist chocolate chip muffin on wooden cutting board with blurry chocolate chip muffin in the background and loose chocolate chips all around the muffin

These delicious muffins are based on my basic muffin recipe that I develop pretty much all my muffin recipes from. They are buttery and super fluffy. I tend to bake mine in a regular-sized cupcake tin but if you want those big bakery-style jumbo-sized chocolate chip muffins, you'll want to use a jumbo-sized pan and paper liners. 

This recipe makes 12 regular sized muffins or 6 jumbo-sized muffins. 

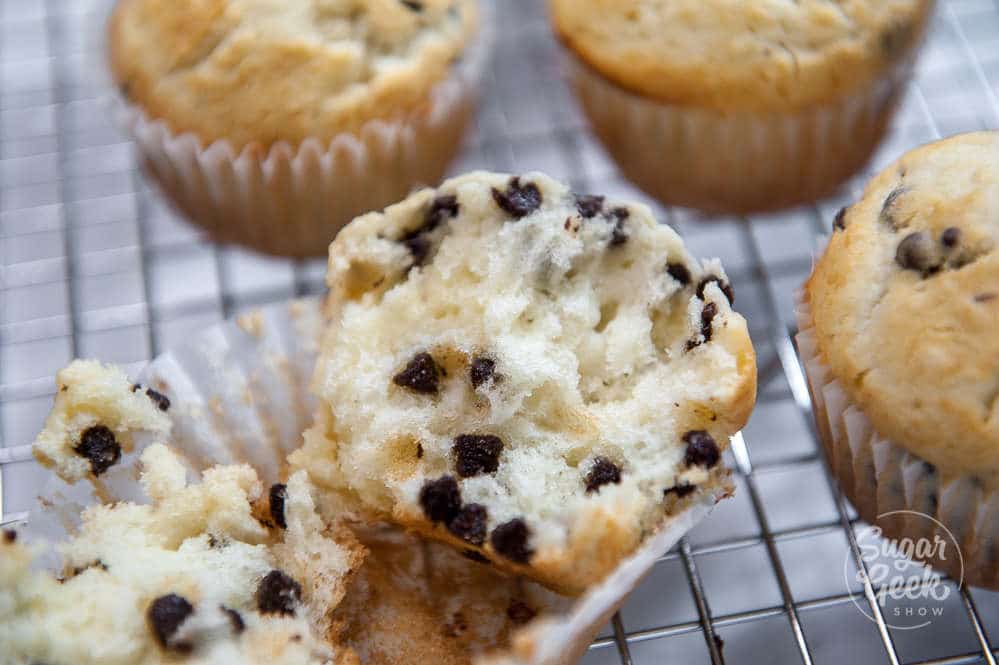
moist chocolate chip muffins cut in half

Ingredients for chocolate chip muffins

Cake Flour - Now I can hear you groaning already. Cake flour in my muffins too? The reason I use cake flour is that they make the muffins extra tender and moist. In this particular case, you can substitute cake flour for all-purpose flour (plain flour) if that is all you have but the muffins will be a bit firmer. 

Baking Powder and Baking Soda - The secret to super fluffy muffins is a lot of baking powder! I also use baking soda because of the added acidity from the buttermilk. If you're at a high-altitude, make sure you adjust your baking powder ratios. 

Buttermilk - Speaking of buttermilk, I love using buttermilk in my muffins to add a touch of tang and a lot of tenderness! That buttermilk is key to a moist and tender muffin. If you don't have any buttermilk, you can substitute 8 ounces of milk plus one Tablespoon of white vinegar. 

Eggs - Provide structure and moisture to the muffin recipe. Make sure you're using large eggs. 

Sugar - Sugar makes these muffins deliciously sweet and also keeps them moist. 

Vanilla - I flavor my muffins with vanilla but feel free to switch out the extract for another flavor you like but keep in mind that other extracts might be stronger than vanilla and therefore you will need to add less extract. 

Sanding Sugar - The secret to keeping muffins nice and moist! Sanding sugar! Sugar attracts moisture from the air and draws it into baked goods. That's why you often see sanding sugar on top of baked goods. It keeps them from drying out! I don't have photos of sanding sugar on these muffins because I was out at the time but trust me, it's awesome! You can see how I use the sanding sugar on my blueberry muffin recipe 

Mini Chocolate Chips - I prefer using mini chocolate chips over full-sized chocolate chips because they don't sink to the bottom of the muffin when baking. 

bakery style muffins on cooling rack

How do you make muffins fluffy?

The secret to these super fluffy muffins is lots of leavening (baking powder and baking soda). I know this recipe probably has a lot more than you are used to in a recipe. But you need a lot to get those big muffin tops.

The second way to get fluffy muffins is a hot oven. You want to have your oven at 400ºF so that the top of the muffin browns quickly and locks in that air so that the muffin doesn't collapse.

Have you ever baked a cake and had a huge dome on top of the cake that cracked and got too brown? Chances are the cake was too close to the top of the oven and the oven was too hot. Bad for cakes, great for muffins. 

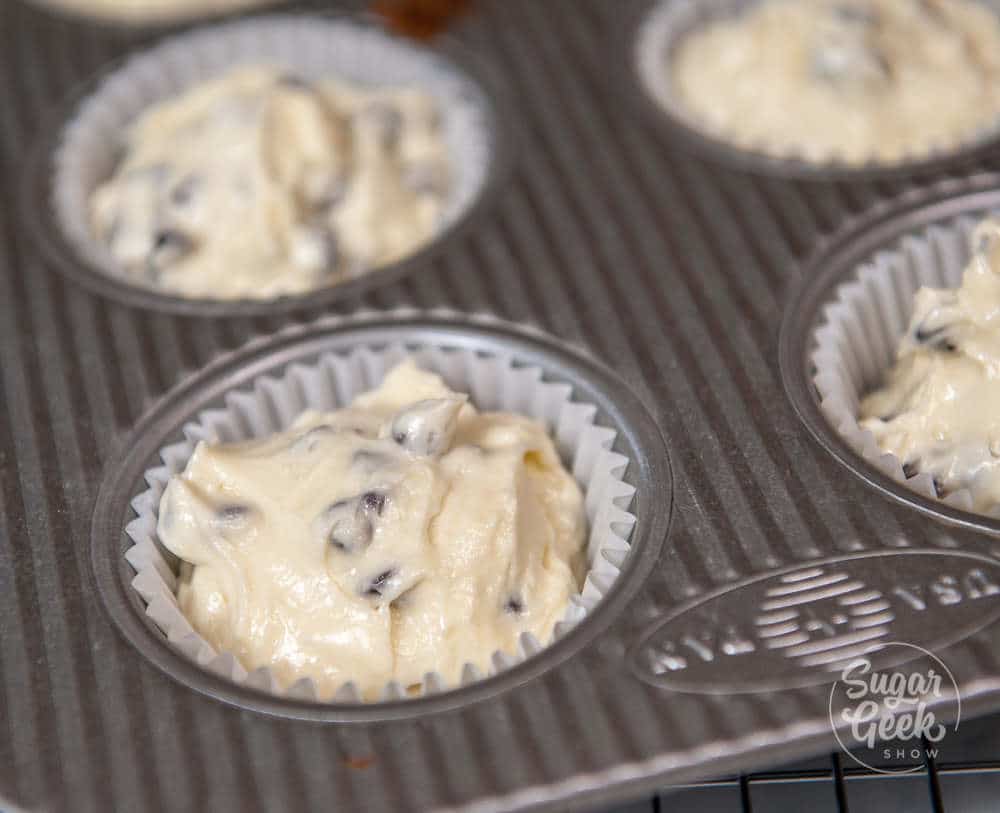
Make sure you fill your muffin liners ALL THE WAY TO THE TOP. I know it doesn't make sense but you want those muffins to have a great big muffin top right? So fill them all the way to the top for best results. 

chocolate chip muffin batter in muffin tin with muffin liners, filled all the way to the top

How do you make muffins moist? 

I hate dry baked goods with a passion so when I'm testing a new recipe, what I'm usually testing for is how moist it is. To make muffins moist you definitely want to use buttermilk if you can. The acidity in buttermilk breaks down gluten and keeps the muffins from getting too tough during mixing. 

If you don't have buttermilk you can substitute one cup of milk plus one Tablespoon of vinegar or one cup of sour cream or greek yogurt. 

Another way you can add moisture to your muffins is to replace half of the sugar with brown sugar. Brown sugar has molasses in it and molasses attracts moisture. The molasses will add a little bit of a flavor to your muffins that is quite lovely in chocolate chip muffins and will make them taste similar to chocolate chip cookies. 

Sanding sugar is another bakery secret for keeping muffins moist. The sugar attracts moisture from the air and locks it inside the muffins. I have a big bottle that I keep on hand for my muffins. 

moist chocolate chip muffins split open on a cooling rack

How do you make muffins tender?

Make sure you don't over-mix your muffin batter. The more you mix, the more gluten that develops and the tougher your muffins will become. The best way to avoid over-mixing your muffin batter is to sift together your flour, baking powder, baking soda, and salt in a big bowl. 

In a separate bowl, cream your softened butter and sugar together until it's light and fluffy with the whisk attachment of your stand mixer or hand mixer. Then add in your eggs and vanilla and continue to whisk until light in color. Make sure your eggs are room temperature, otherwise they could make the butter to cold and cause your batter to curdle. 

Lastly, add your flour mixture and buttermilk in thirds. Start with your flour and mix until almost combined, then add buttermilk. You can do this by hand with a spatula and fold gently to avoid over-mixing. Repeat the process two more times until just combined then fold in your chocolate chips. 

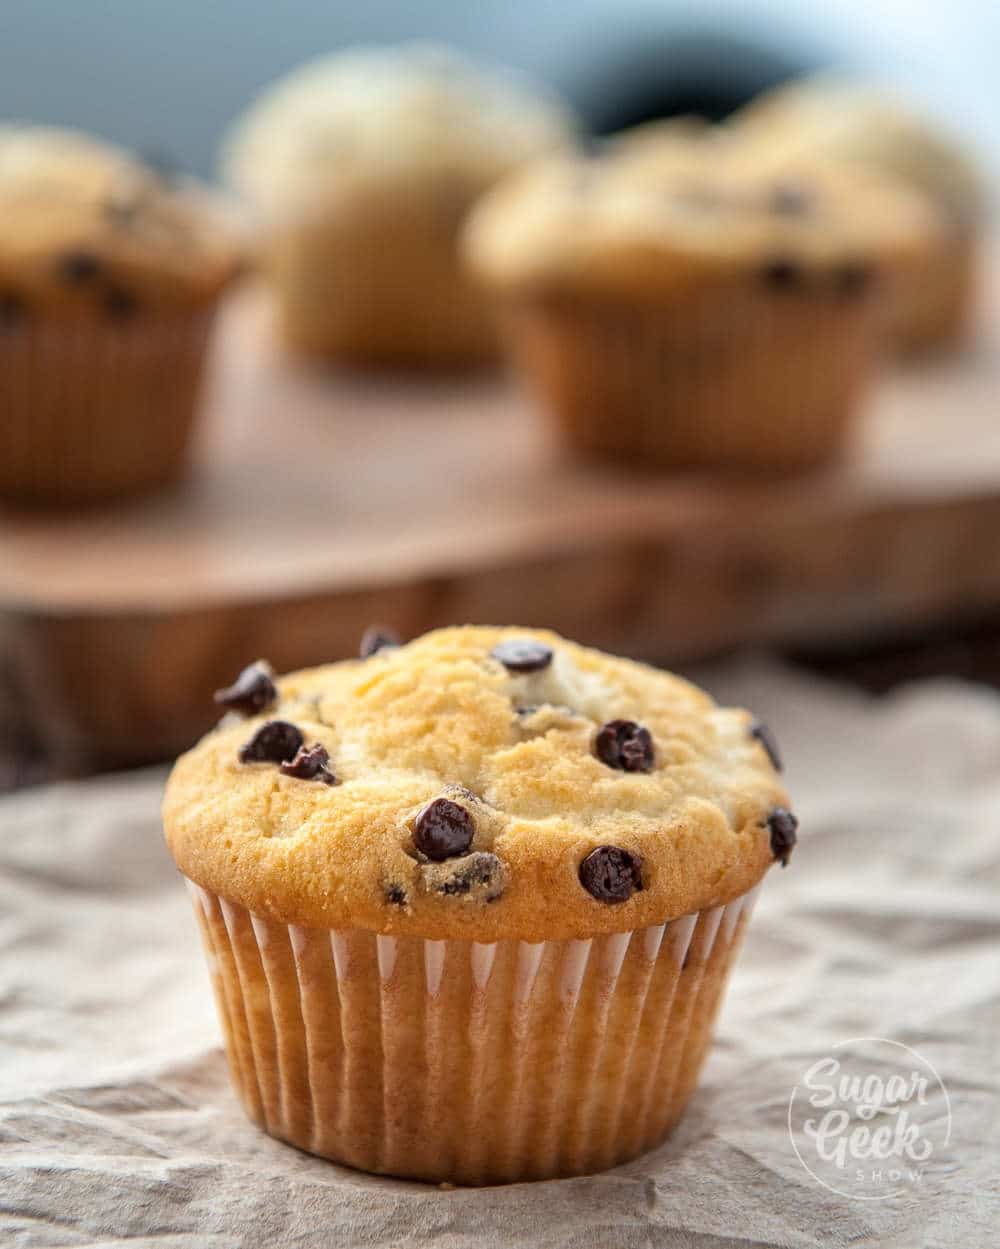
moist chocolate chip muffin


Recipe

close up of moist chocolate chip muffin on wooden cutting board with blurry chocolate chip muffin in the background and loose chocolate chips all around the muffin
Print Recipe
4.96 from 24 votes

Moist Chocolate Chip Muffin Recipe

Moist and fluffy bakery-style chocolate chip muffins can be made in a flash and enjoyed all week long without drying out.
Prep Time10 minutes mins
Cook Time20 minutes mins
Course: Breakfast
Cuisine: American
Servings: 12 muffins
Calories: 310kcal
Author: Liz Marek

Equipment

  • Mixer (stand or handheld)

Ingredients

  • 4 ounces unsalted butter (½ cup) softened
  • 3 ounces granulated sugar (½ cup)
  • 1.5 ounces brown sugar (¼ cup)
  • 2 large eggs room temperature
  • 2 teaspoons vanilla extract
  • 10 ounces cake flour (2 cups)
  • 3 teaspoons baking powder
  • 1 teaspoon baking soda
  • ½ teaspoon salt
  • 8 ounces buttermilk (1 cup) room temperature
  • 7 ounces mini chocolate chips
  • 3 Tablespoons sanding sugar (optional for sprinkling on top)
US Customary - Metric

Instructions

  • IMPORTANT: Make sure all your ingredients are at room temp (see notes at the bottom of the recipe) 
  • Preheat your oven to 400ºF - Line a muffin tin with paper liners.
  • Sift together your flour, baking powder and salt. Set aside.
  • Cream together your butter and sugar in a medium bowl with your mixer until light and fluffy
  • Add in your egg and vanilla. Continue creaming until pale in color
  • While mixing on low, add in ⅓ of your flour mixture, then ⅓ of your buttermilk. Repeat two more times until just combined. Do not overmix.
  • Fold in the mini chocolate chips
  • Fill your liners all the way to the top with muffin batter. Top with more chips if desired and sparkling sugar.
  • Bake for 15-20 minutes or until edges begin to slightly brown and a wooden skewer comes out cleanly when inserted into the center of the muffin.
  • Let your muffins cool in the pan for 10 minutes then move them to a cooling rack to cool the rest of the way.

Notes

Ingredient notes
  • Cake flour is the key to the tender crumb. If substituting, use 9 ounces all-purpose flour plus 1 ounce cornstarch sifted together. The muffins will be slightly firmer.
  • Real buttermilk is best. Substitutes: 8 ounces whole milk plus 1 tablespoon white vinegar (let stand 5 minutes), or 1 cup full-fat sour cream or Greek yogurt as a straight swap.
  • Mini chocolate chips suspend evenly. Regular-size chips will sink. If using regular, toss in a teaspoon of flour before folding in.
  • High altitude: reduce baking powder by about 25 percent and increase buttermilk by 1 to 2 tablespoons.
Pan options
  • Jumbo muffin pan: 6 muffins, bake at 400º F for 25 to 28 minutes.
  • Mini muffin pan: 24 muffins, bake at 400º F for 10 to 12 minutes.
Make-ahead and storage
  • Room temperature: airtight container, 3 to 4 days. Flavor improves on day two. A paper towel placed inside the container absorbs excess moisture and keeps the domes from getting sticky. This slows staling because muffins lose moisture faster than cake due to their lower fat-to-flour ratio.
  • Freezer: zip-top bag, up to 3 months. Thaw at room temp or microwave 20 to 30 seconds.
Serving ideas
  • Warmed for 10 seconds in the microwave with a smear of softened butter.
  • Split, toasted, and topped with a drizzle of honey.
  • Crumbled over Greek yogurt with fresh berries for a quick parfait.
Critical do-nots
  1. Do not underfill the liners. Tall bakery domes need batter all the way to the top.
  2. Do not overmix once the flour goes in. Stop the second the streaks disappear.
  3. Do not open the oven door during the first 10 minutes. The dome will collapse.
  4. Do not use regular-size chocolate chips. They sink. Use mini chips tossed in flour.

Nutrition

Serving: 1g | Calories: 310kcal | Carbohydrates: 42g | Protein: 5g | Fat: 13g | Saturated Fat: 8g | Cholesterol: 60mg | Sodium: 235mg | Potassium: 163mg | Fiber: 1g | Sugar: 23g | Vitamin A: 355IU | Vitamin C: 1mg | Calcium: 95mg | Iron: 1mg
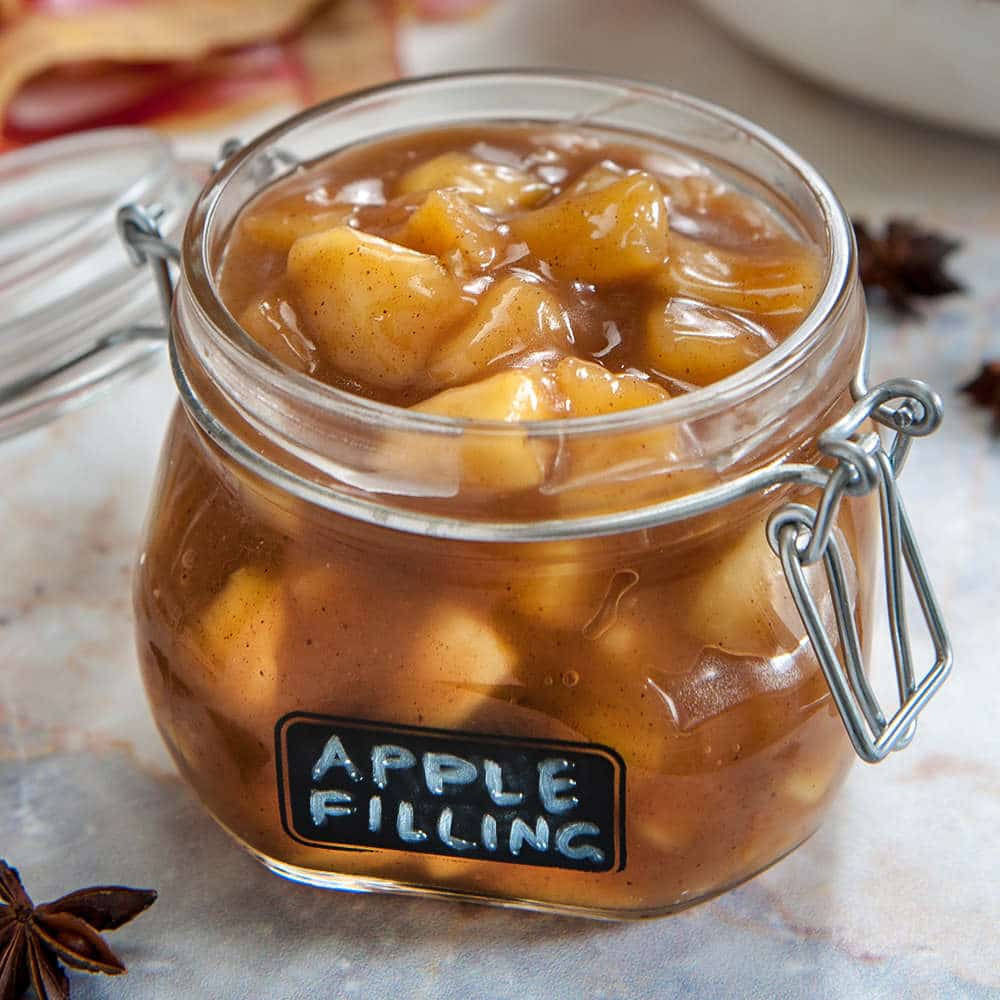
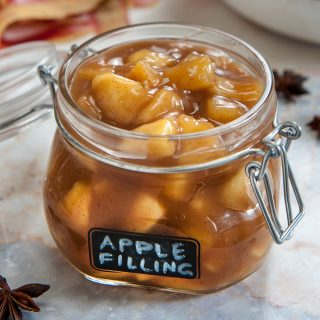
apple filling in glass jar with lid and black label on front that says apple filling

October 10, 2019 Blog

Apple Filling

Homemade apple filling is so easy to make and tastes so much better than canned. 

Apple filling is so much more than a pie filling. You can use it as a topping for cheesecakes, for apple danish, for filling a cake and yes, for apple pie. I love to make a big batch of this in the fall and can or freeze it so I have apple filling all year long. All you need are some apples and 20 minutes! 

apple filling in glass jar with lid and black label on front that says apple filling

What's In This Blog Post?

  • Homemade apple filling is so easy to make and tastes so much better than canned. 
  • What are the best apples to use for filling?
  • Tips for cutting apples?
  • How do you make the best tasting apple filling?
  • What is the best way to thicken apple filling?
  • How long does apple filling last?
  • What can I use apple filling for?

What are the best apples to use for filling?

Every year, we go to the Portland Apple Festival and taste dozen of apples. It's literally one of my favorite fall traditions. A very close second to Halloween. I love picking out the perfect apples to use for our annual applesauce and apple filling canning weekend!

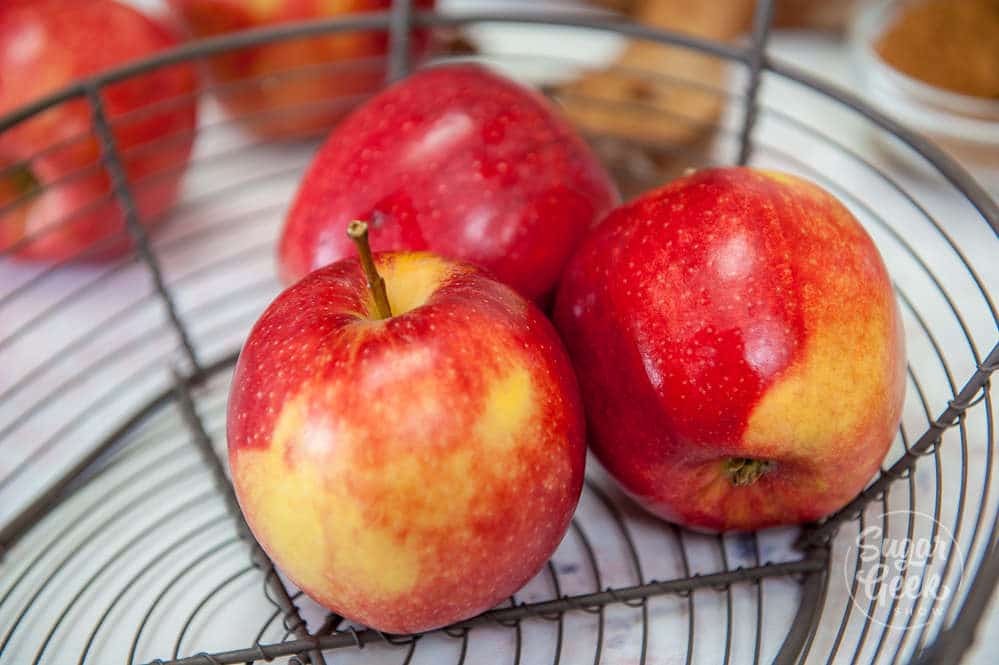
I use Jonagold apples for this apple pie filling because they stay firm after being cooked and they have a tart flavor that works well with the sweetness of the brown sugar. You can use other apple varieties for this recipe. 

How do you know what apples are best to use for apple filling? If the apple is good for making pie, it's great for filling. You want an apple that is going to hold it's shape when cooked and not turn to mush. 

Great apples to use for apple filling
  • Jonagold - Slightly tart, crisp and holds it's shape well after baking.
  • Honeycrisp - Crisp, sweet, holds it's shape well after baking. 
  • Braeburn - Crisp, sweet and very juicy. Holds it's shape well for baking. 
  • Mutsu - Sweet, firm and great for baking
  • Pink Lady - Sweet, crisp and firm. Great for baking. 
 

jonagold apples for apple filling

Tips for cutting apples?

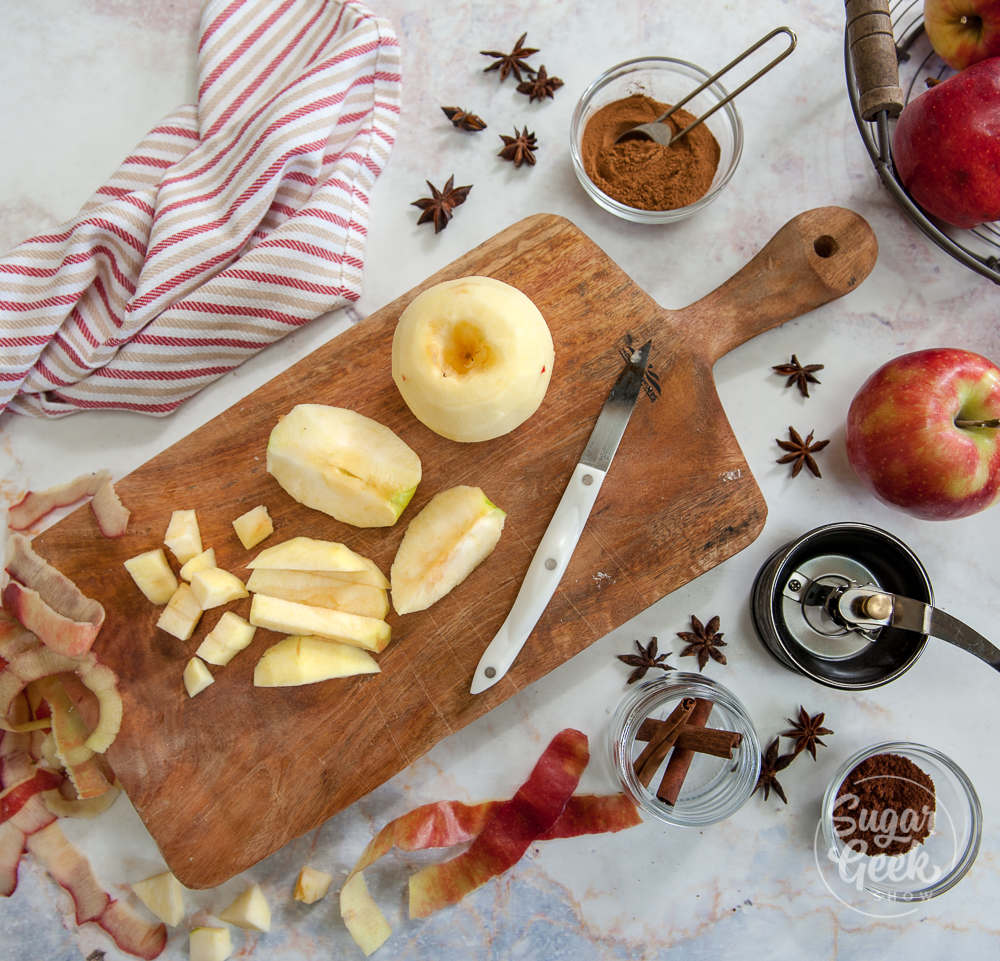
When prepping your apples to become filling, there are a few things to keep in mind. 

  1. Peel your apples - apple skins can taste really chewy in the filling
  2. Use an apple corer - for years I cored my apples with a paring knife. This year I got an apple corer and it made life so much easier! Worth it! 
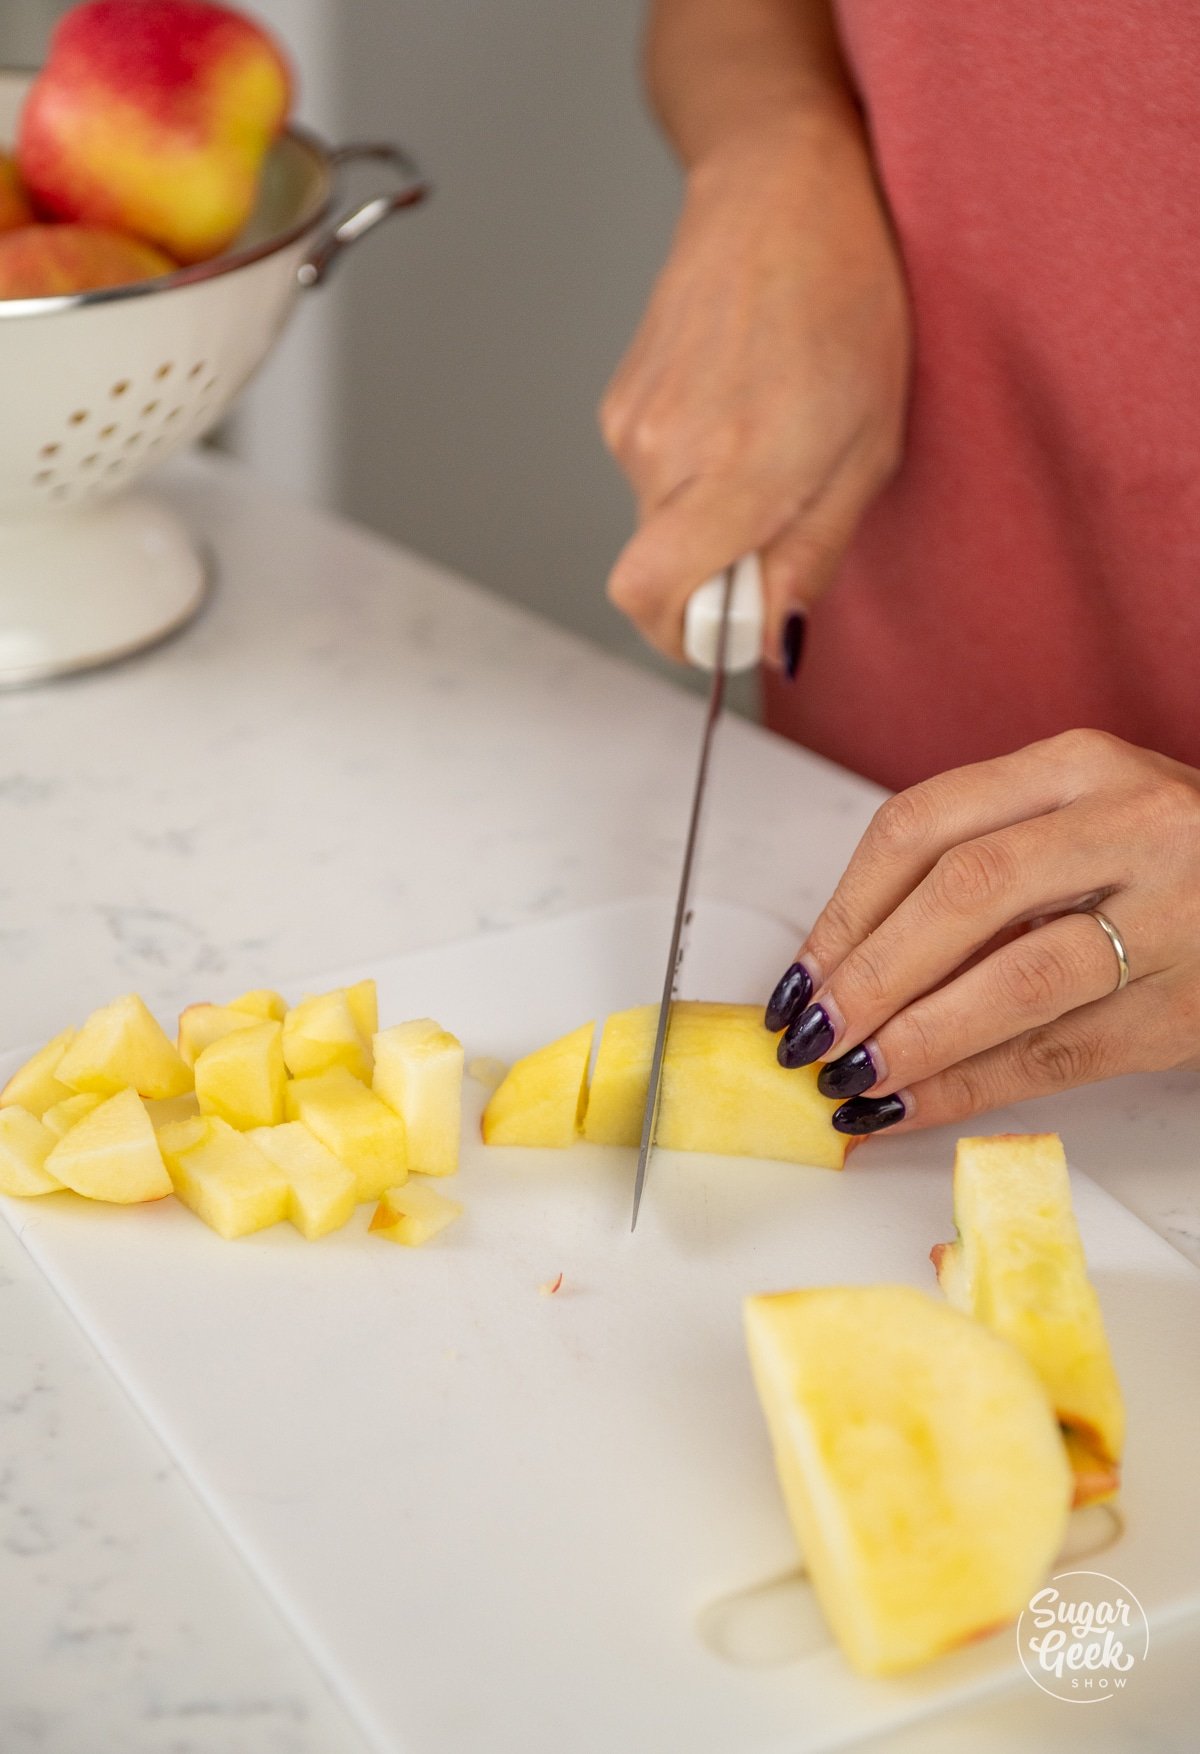
  3. Cut your apples into even-sized pieces - apple pieces that are all the same size will cook more evenly
prepping apples to make apple filling. Cut up apples on wooden cutting board with knife surrounded by spices and apple peels

If you cut your apples into wedges, they will cook unevenly. The ends will become very soft and mushy and the centers will stay hard. Large apple wedges are also hard to use for anything other than pie filling because of their large size. 

Thin slices may look nice but they can break down really easily. Then your filling looks a little messy. They can also be hard to use in other recipes besides pie. 

The best way to cut your apples is in small cubes. Not only is it the easiest way to cut the apples but the size allows the apples to cook evenly and is the easiest to use in a variety of recipes. 

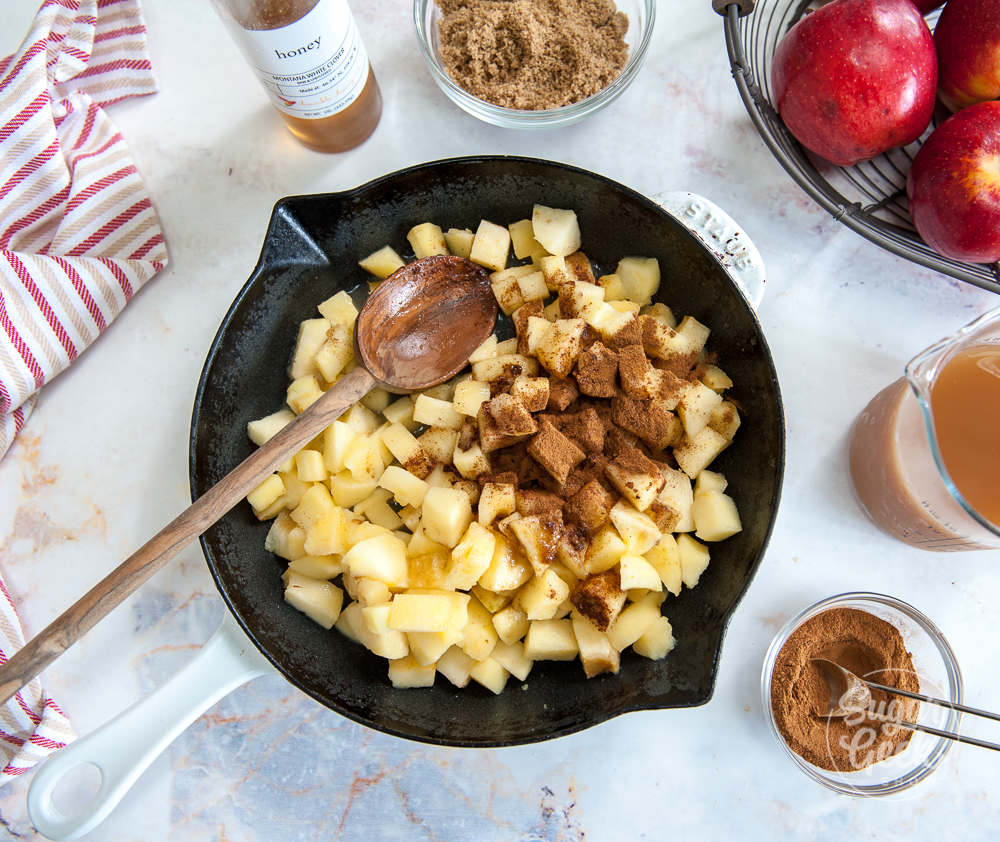
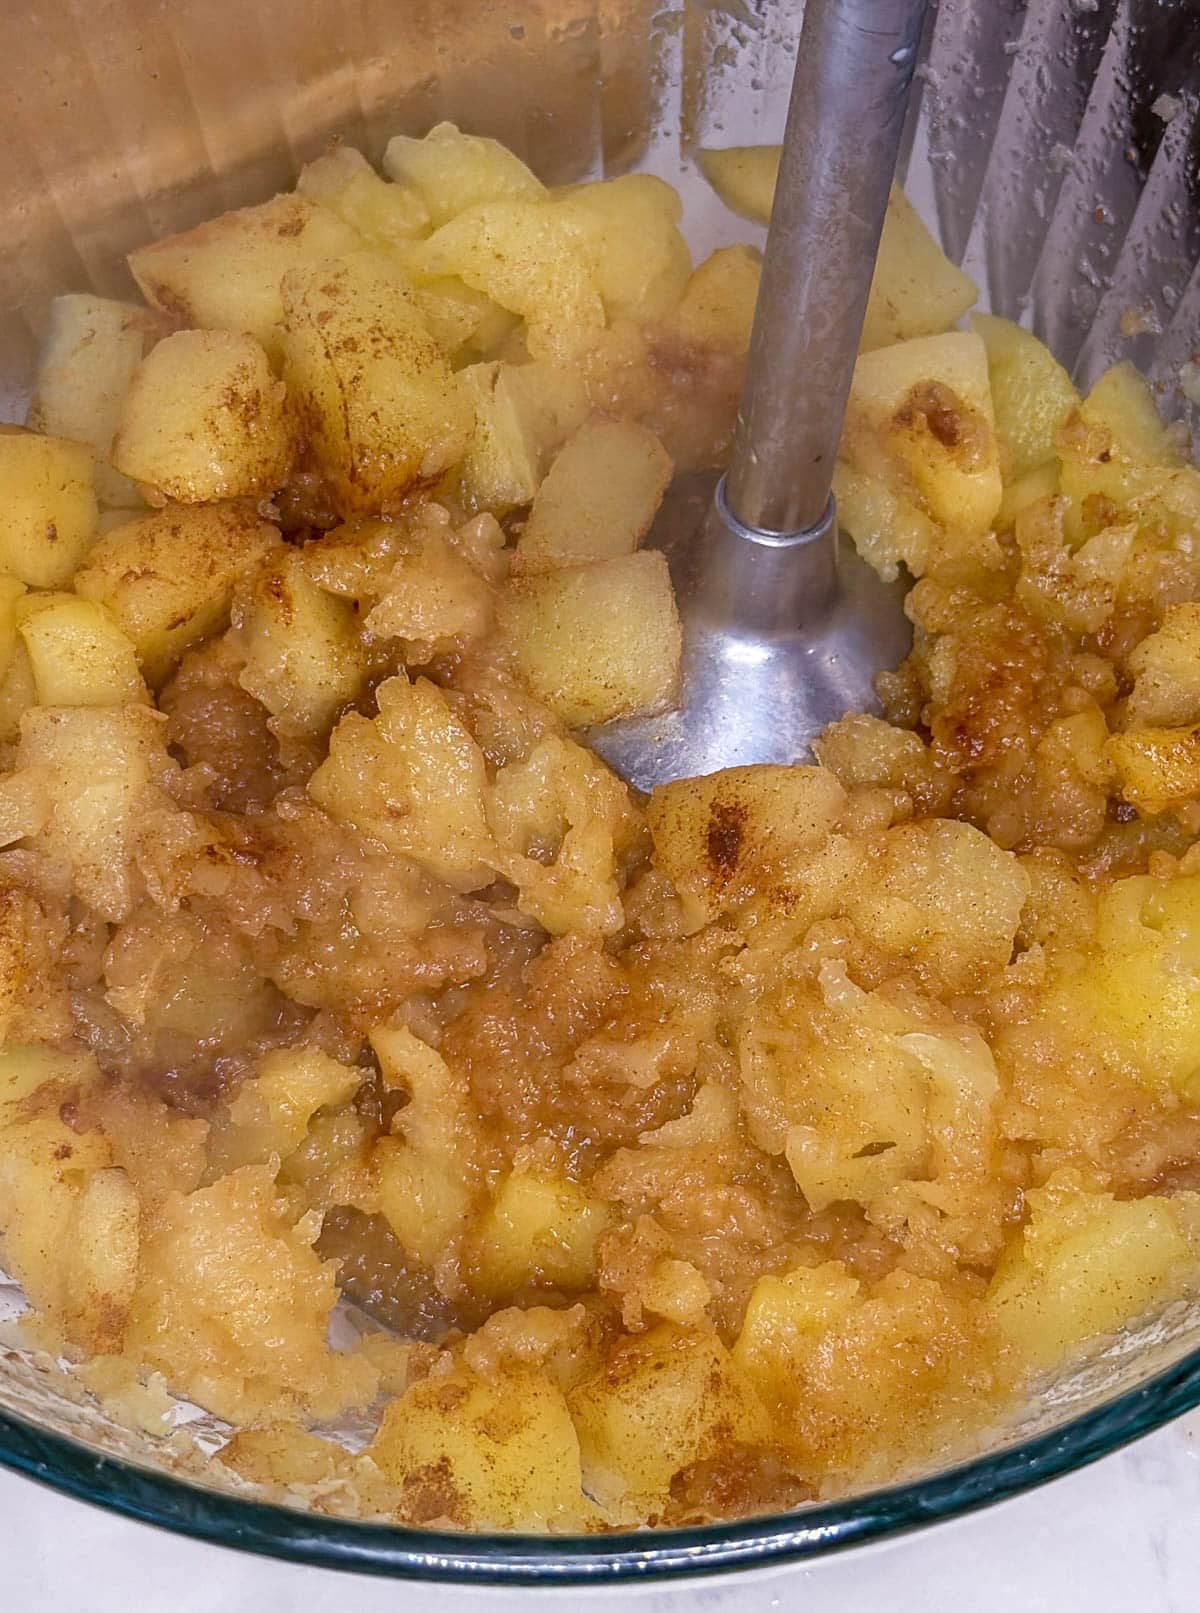
adding spices to cubed apples to make apple filling

How do you make the best tasting apple filling?

  1. Customize the taste - Adjust the spices to your liking! That's the BEST reason to make your own apple filling! You can make it exactly the way that you like it. I personally love extra cinnamon and using apple cider instead of water. 
  2. Use the apples you like - Even though I recommend using a tart and firm apple, you can really use whatever you have or apples you really like the taste of. I often have Honeycrisp apples on hand because I love the taste so I use them for my apple recipes. If you have a tree in your backyard and you want to use those, go for it! Free apples are the best apples. 
  3. Undercooked is better than overcooked - Apples taste best when they are still a little firm. Think al dente but for apples. 
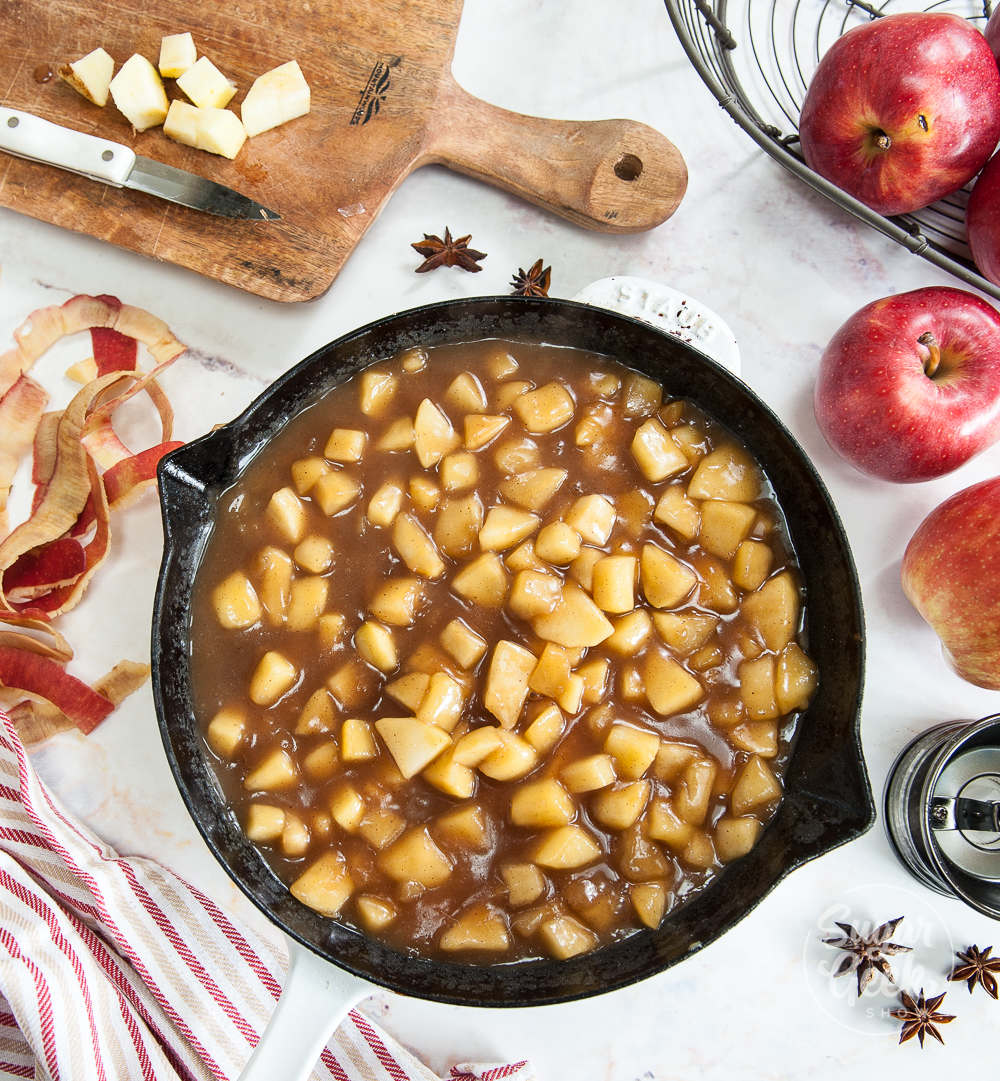
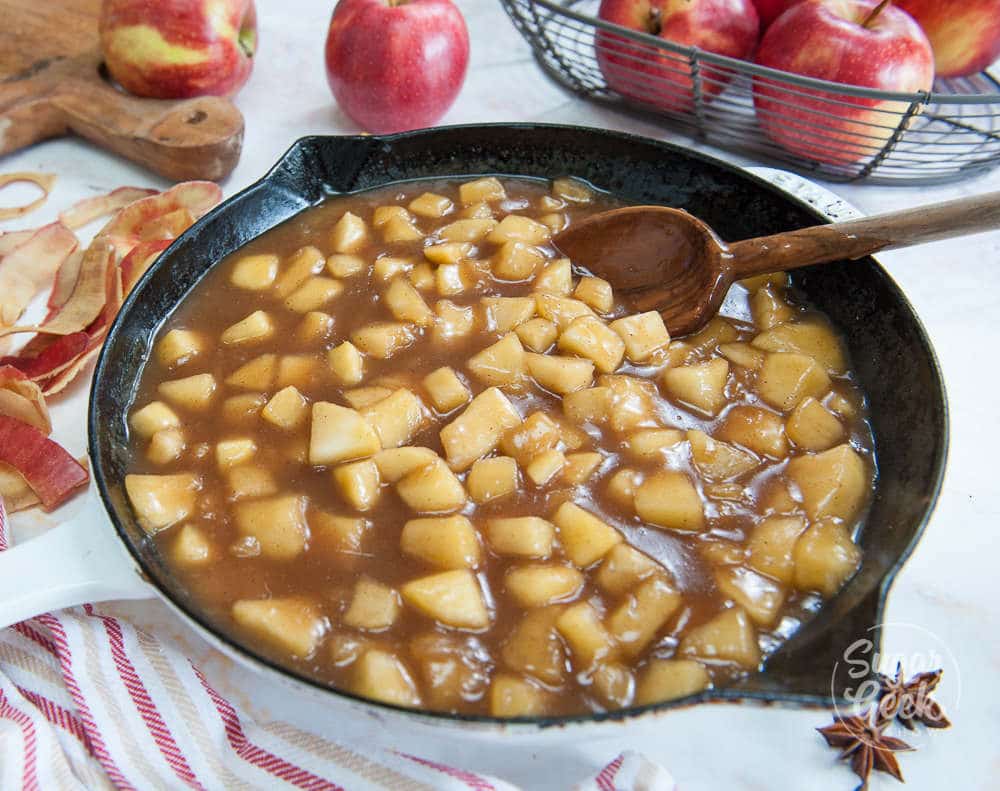
top view of apple filling in a cast iron pan surrounded by apples, spices, apple peels and cut up apples

What is the best way to thicken apple filling?

The most common way to thicken most fillings is to use either cornstarch, flour or tapioca. I prefer cornstarch but you can use other thickeners if you prefer. Here are the benefits and disadvantages of using any of these three thickening agents and how much to use. 

Cornstarch is made of corn and thickens at 212ºF (boiling point).

  1. Advantages - It is nearly translucent when cooked, tasteless and fairly stable.
  2. Disadvantages - it does not play nice with acid (such as lemon juice). If your recipe calls for acid, make sure you thicken the liquid first and then add the acid after it's thickened. The acid will not affect the cornstarch once it has thickened. Cornstarch breaks down after it has been frozen and will not be as thick. It's better to can leftover filling. 

Flour is made of wheat and thickens at 202ºF 

  1. Advantages - Stable filling that does not break down when frozen and is not affected by acid
  2. Disadvantages - Filling thickened with flour is slightly opaque and may have a slight flour aftertaste. 

Tapioca Flour is made from the cassava root and thickens at 212ºF (boiling point).

  1. Advantages - Translucent in color, sweet-tasting and not affected by citrus or freezing.
  2. Disadvantages - It can become hard if over-cooked and may be harder to find in stores in your area. 

How to substitute thickening agents

  • 1 Tablespoon cornstarch = 4 teaspoons tapioca flour
  • 1 Tablespoon cornstarch = 4 Tablespoons flour
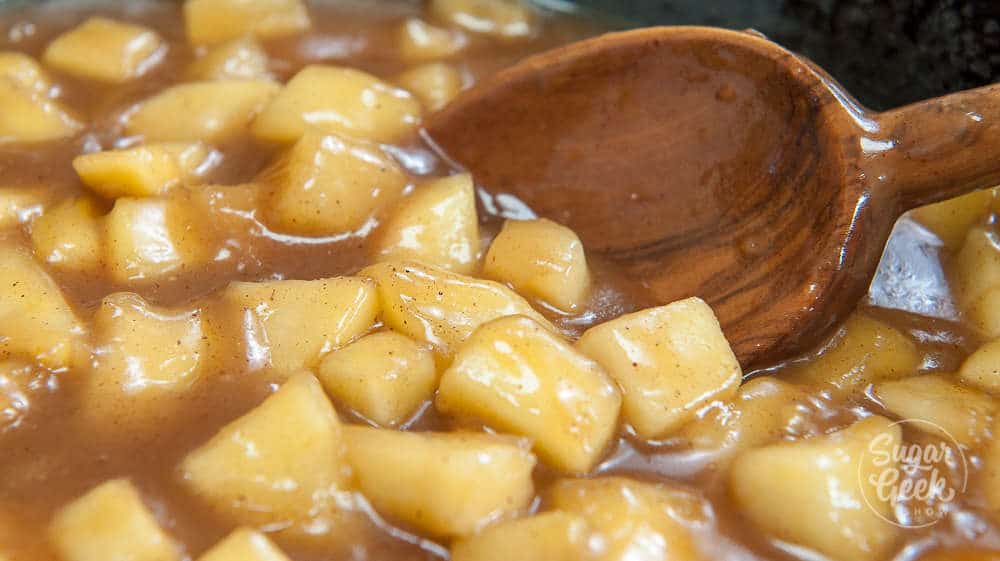
closeup of apple filling

How long does apple filling last?

You can keep apple filling in the refrigerator for about two weeks. If you want to freeze it, use flour or tapioca instead of cornstarch as your thickener so your filling does not degrade when you defrost it. Or you can can your apple filling and have it on hand for years! 

Most cooks recommend substituting 1 tablespoon of cornstarch with 2 tablespoons of tapioca flour.

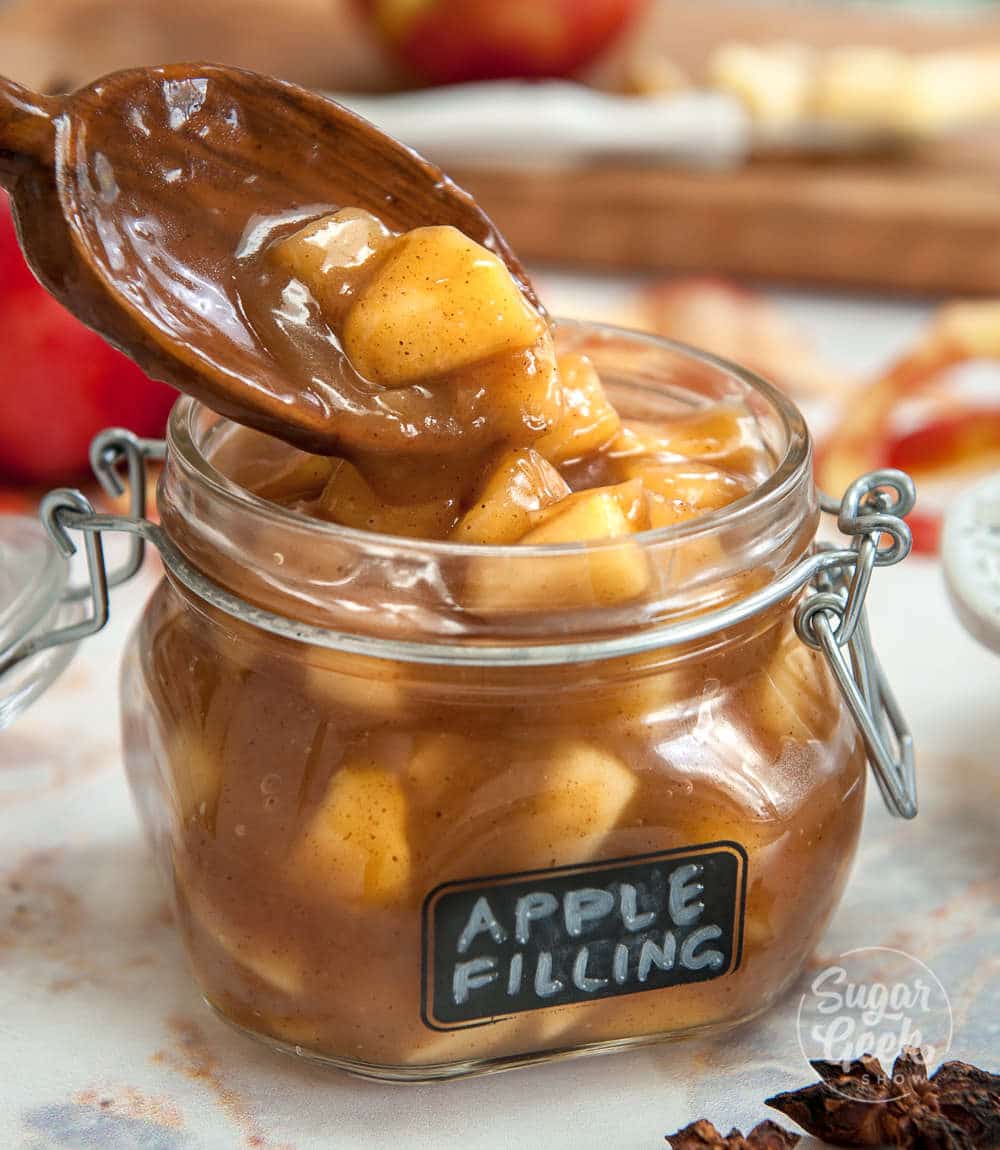
apple filling being spooned into a glass jar with apple filling label

What can I use apple filling for?

There is really no limit to what you can do with this delicious apple filling. Cake filling, apple pie, ice cream topping, you name it! And if you're craving apples and caramel in their simplest form, try my easy caramel apples. I love pairing it with my applesauce spice cake and brown butter cake recipes! 

If you're using it for cake filling, make sure to pipe a buttercream dam around the rim of your cake to keep the filling from spilling out the sides of your cake. Or, you can mix your frosting and filling together to make it that much more stable!

apple filling

More recipes you might love

Applesauce spice cake
Fresh apple cake
Brown butter cream cheese frosting
Shiny candy apple recipe

Recipe

apple filling in glass jar with lid and black label on front that says apple filling
Print Recipe
5 from 8 votes

Apple Filling Recipe

The best apple filling made with fresh apples, apple juice, warm spices, and a touch of honey. Use it in pies, cakes, danishes, or anywhere you want real apple flavor.
Prep Time15 minutes mins
Cook Time10 minutes mins
Total Time25 minutes mins
Course: Dessert
Cuisine: American
Servings: 4 cups
Calories: 370kcal
Author: Liz Marek

Equipment

  • apple corer

Ingredients

Spiced Apple Filling Recipe

  • 2 lbs apples or other starchy apple like granny smith or honeycrisp (about 4 apples)
  • 1 tablespoon lemon juice
  • 1 oz butter
  • 4 oz brown sugar or white sugar is fine
  • 1 teaspoon cinnamon
  • ¼ teaspoon cloves
  • ¼ teaspoon salt
  • 12 oz apple juice or water
  • 1 oz cornstarch
  • 2 oz water
  • 1 tablespoon honey
  • 1 tablespoon vanilla extract
  • 1 teaspoon orange extract
US Customary - Metric

Instructions

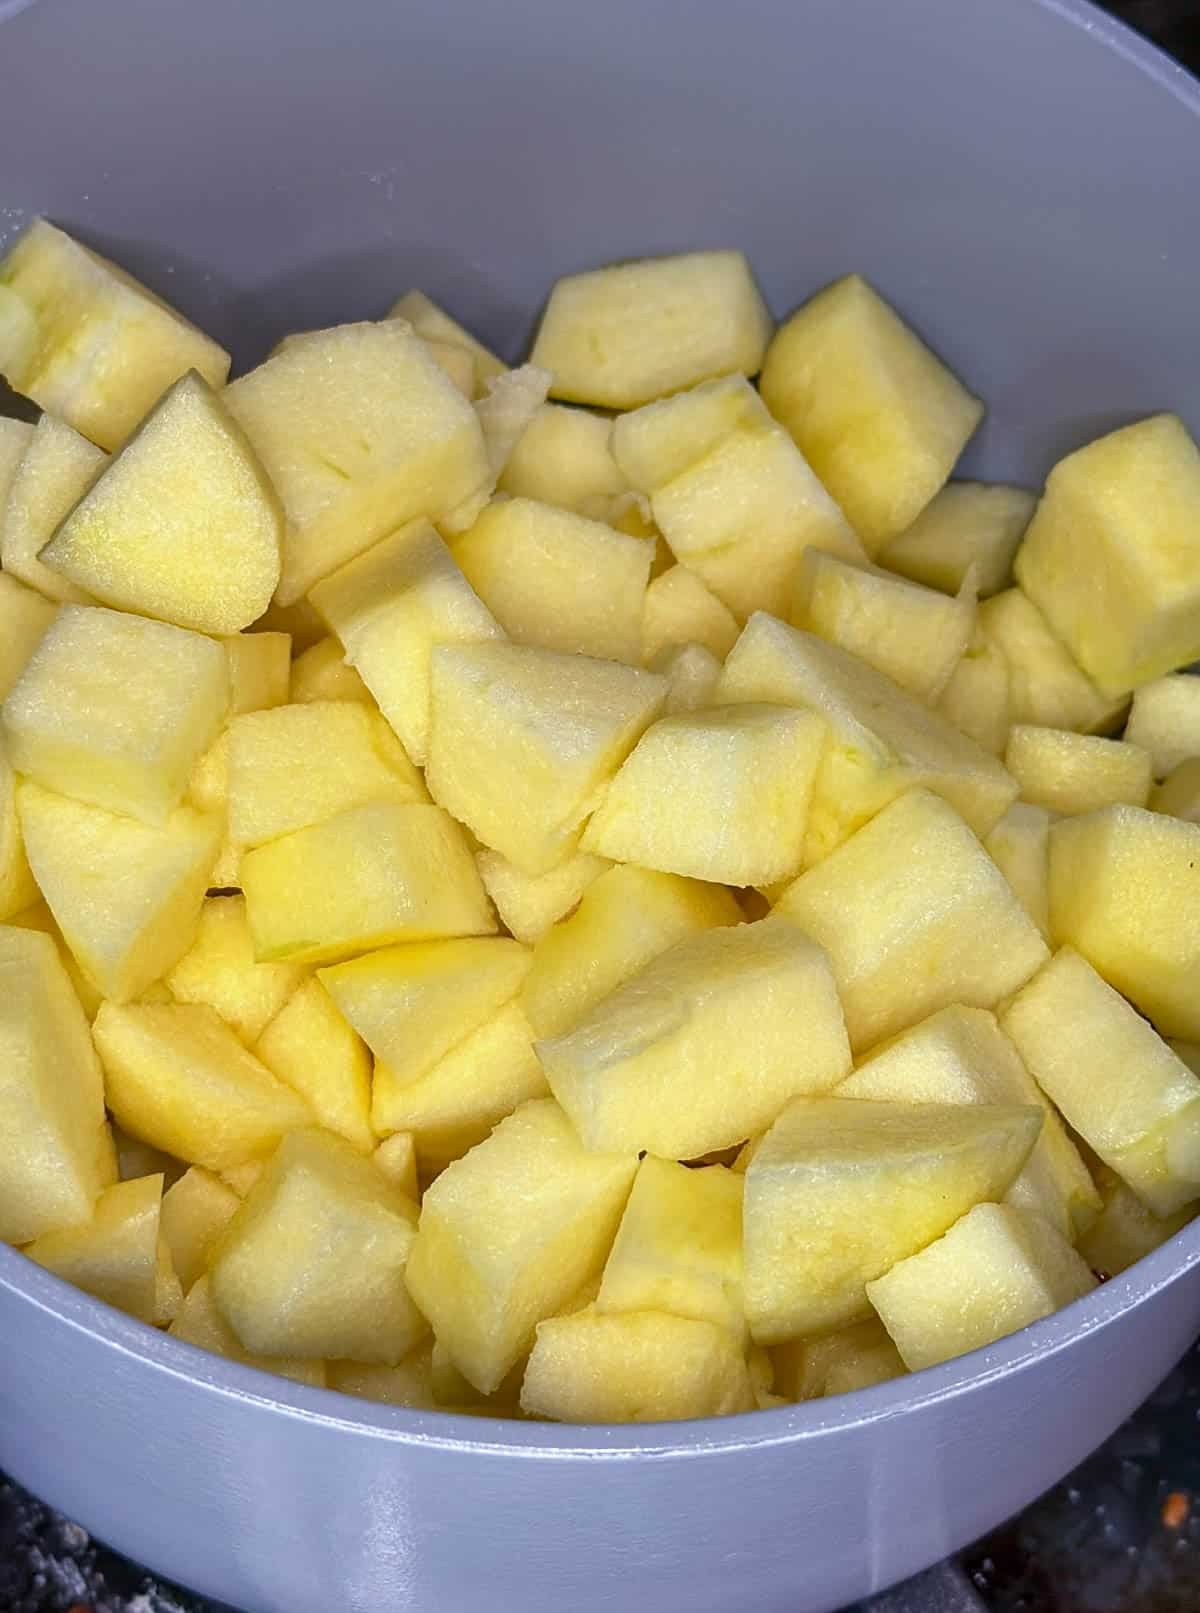
  • Peel, core and chop apples into small, ½" cubes
  • Place the cubed apples in a large pan over medium heat. Add the butter and stir until melted, about 1 minute.
  • Add the apple juice, cinnamon, cloves, salt, and brown sugar. Stir to combine.
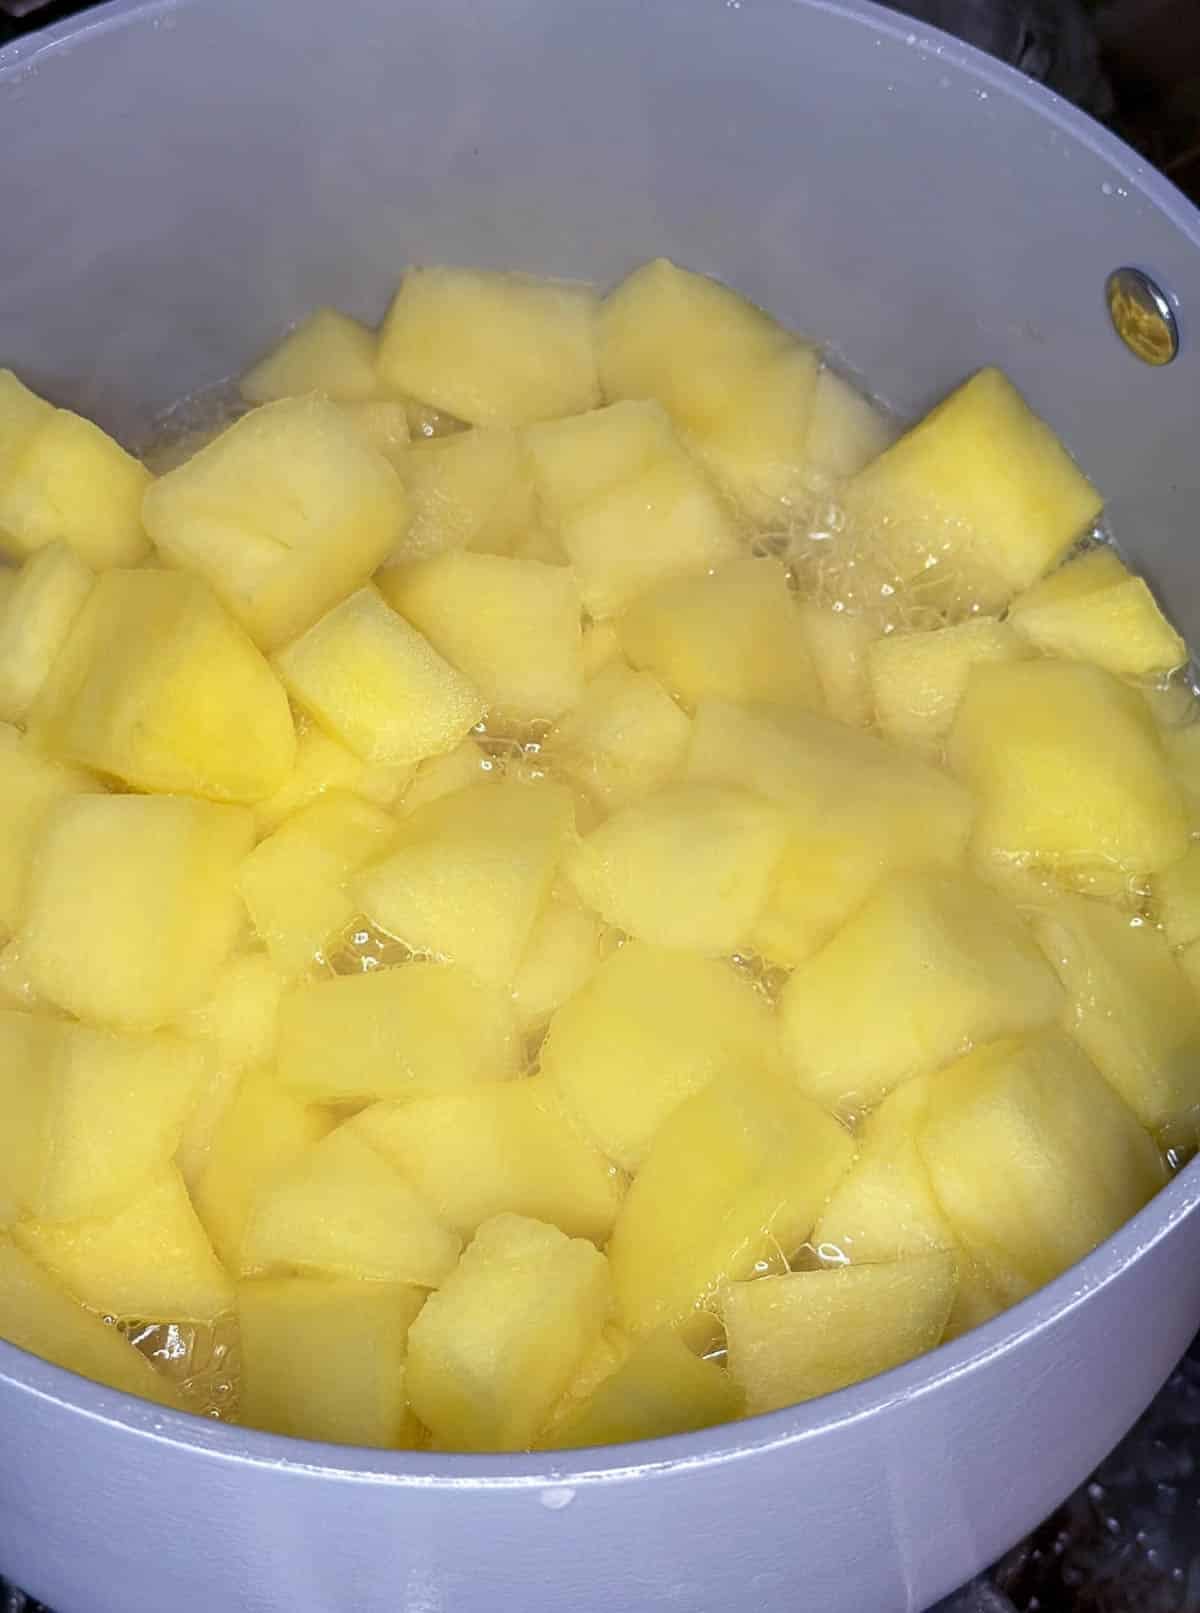
  • Cook, stirring occasionally, until the apples have softened but still have a little firmness. They should not be mushy. If using for pie, pull here; the apples will continue cooking in the oven.
  • Whisk the water and cornstarch together in a separate cup to make a slurry. Add to the apples while gently stirring over medium-high heat.
  • Cook and stir for 2 to 3 minutes until the mixture begins to bubble, to make sure the cornstarch is fully cooked.
  • Remove from the heat. Stir in the orange extract, vanilla, lemon juice, and honey.
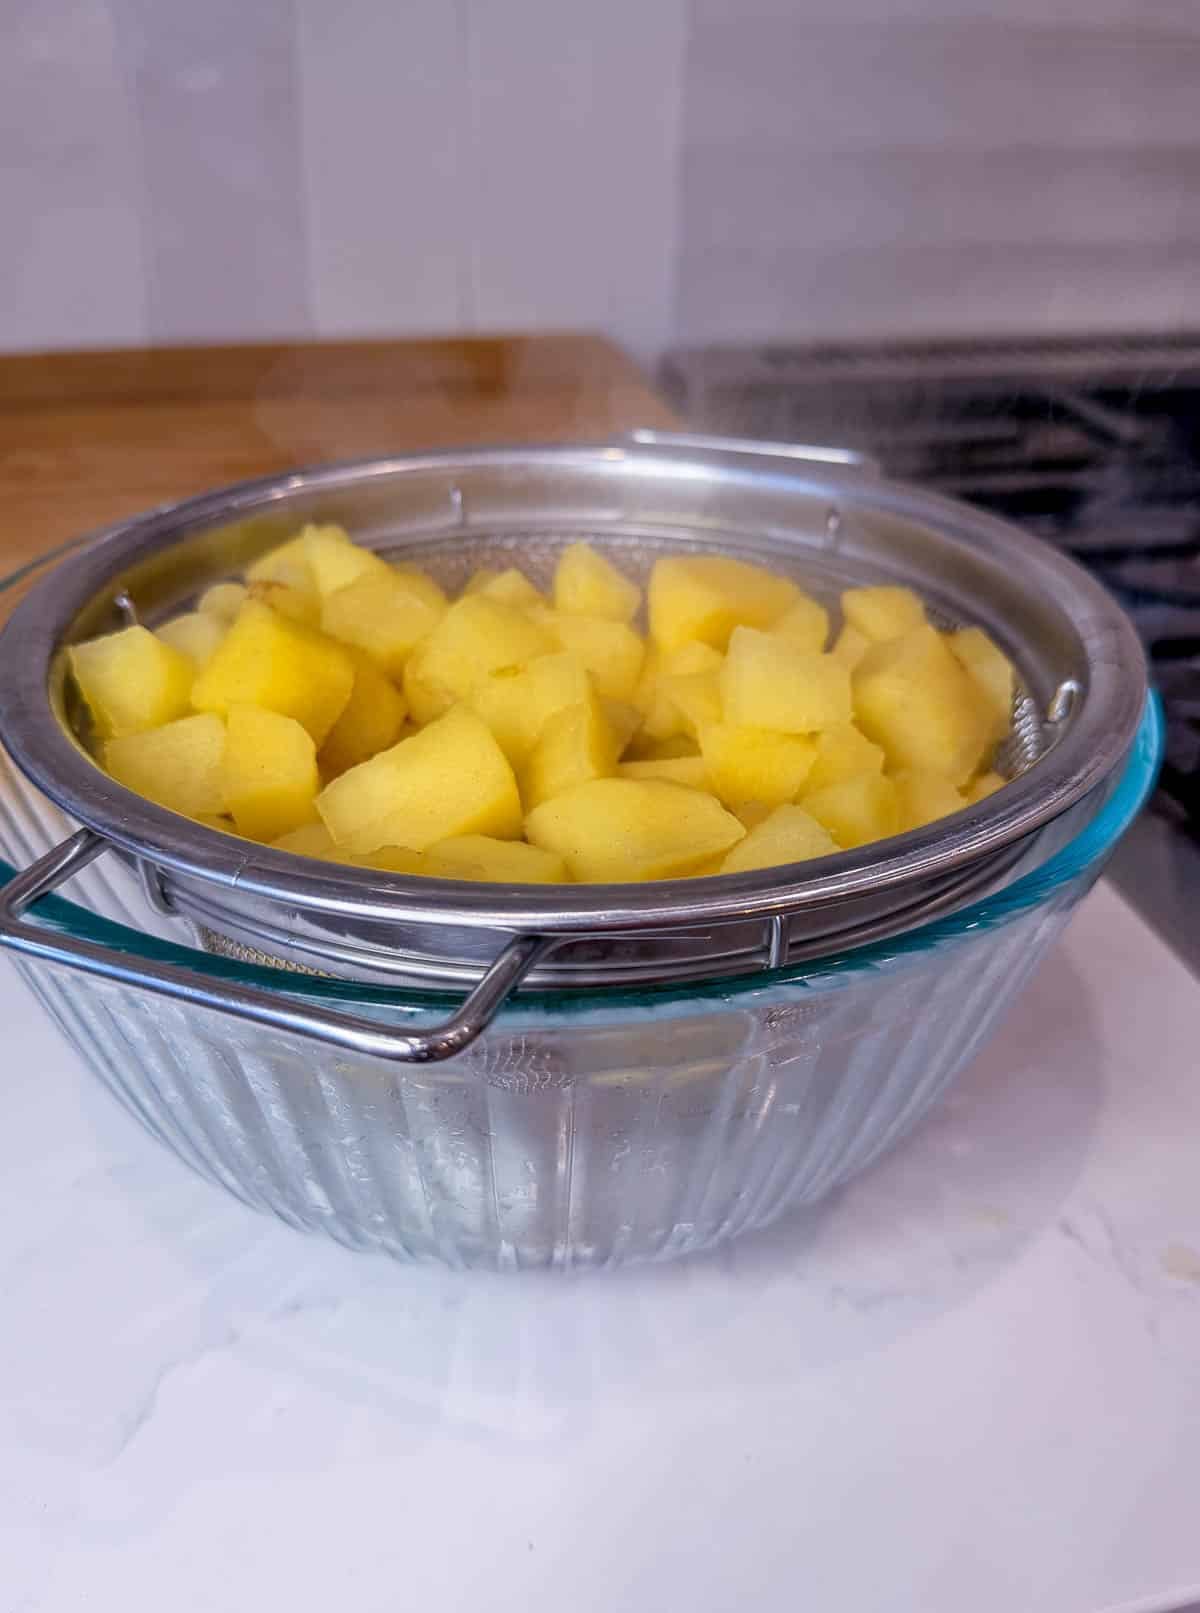
  • Pour into a cake pan or bowl and refrigerate to cool quickly.

Video

Notes

Ingredient notes
  • This recipe originally called for apple cider because it's concentrated in flavor and unsweetened, but so many readers substituted apple cider vinegar by mistake that we want to be extra clear here: use apple juice or unsweetened apple cider (the kind you drink), never apple cider vinegar. If you can find apple cider juice specifically, it tastes even better than plain apple juice.
  • No apple corer? You can core apples by hand with a sharp paring knife.
  • Cinnamon and cloves here essentially make a homemade apple pie spice. A store-bought apple pie spice blend can be swapped in 1:1 if you have one on hand.
Thickener swaps
  • Tapioca flour: use 4 teaspoons for every 1 tablespoon of cornstarch.
  • All-purpose flour: use 4 tablespoons for every 1 tablespoon of cornstarch.
  • If freezing, use flour or tapioca instead of cornstarch, since cornstarch breaks down and turns watery after thawing.
Make-ahead and storage
  • Refrigerator: airtight container, about 2 weeks.
  • Freezer: swap to flour or tapioca thickener first, then freeze up to several months in an airtight container.
  • Canning: standard water-bath canning method, shelf-stable for up to a year.
Use it for
  • Pie filling (pull the apples slightly underdone, they'll finish in the oven)
  • Cake filling (pipe a buttercream dam around the cake layer first to keep it from spilling)
  • Cheesecake topping
  • Spooned over ice cream, yogurt, or oatmeal.

Nutrition

Serving: 1cup | Calories: 370kcal | Carbohydrates: 81g | Protein: 1g | Fat: 6g | Saturated Fat: 4g | Cholesterol: 15mg | Sodium: 212mg | Potassium: 366mg | Fiber: 6g | Sugar: 64g | Vitamin A: 300IU | Vitamin C: 13mg | Calcium: 49mg | Iron: 1mg
 

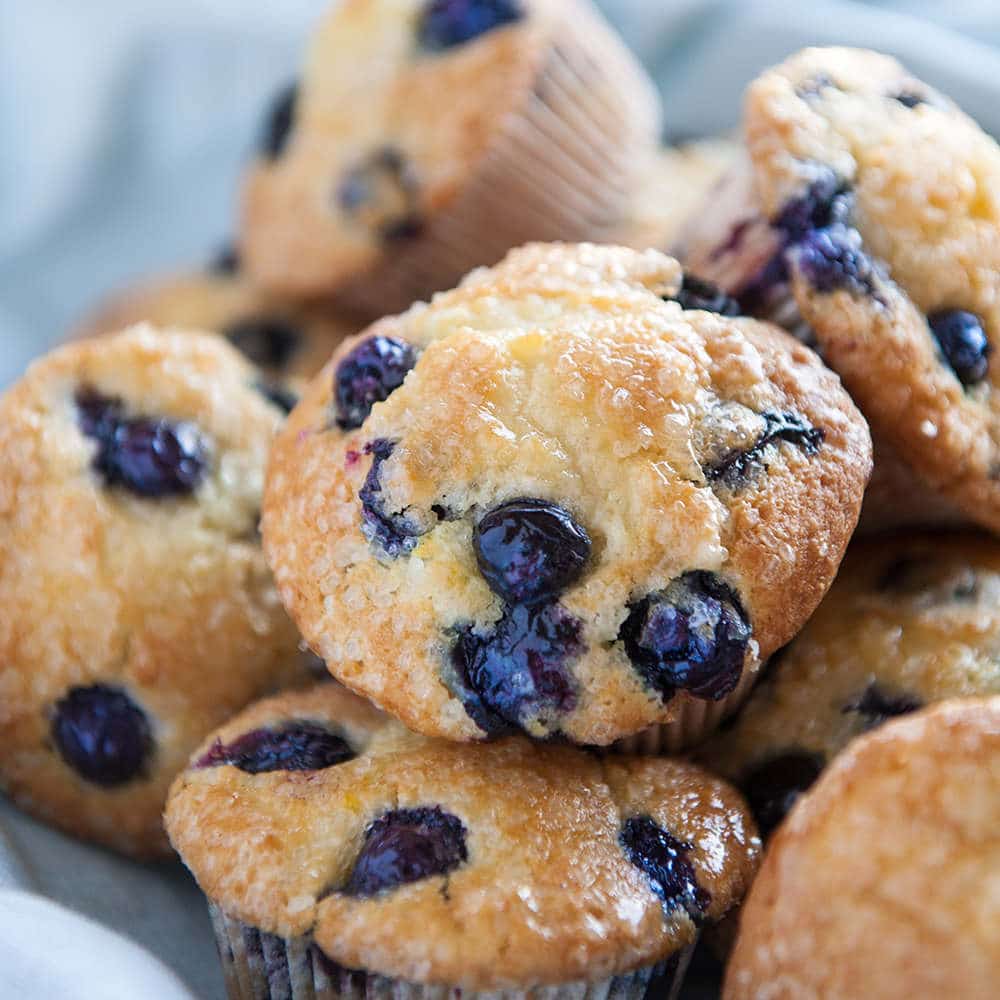
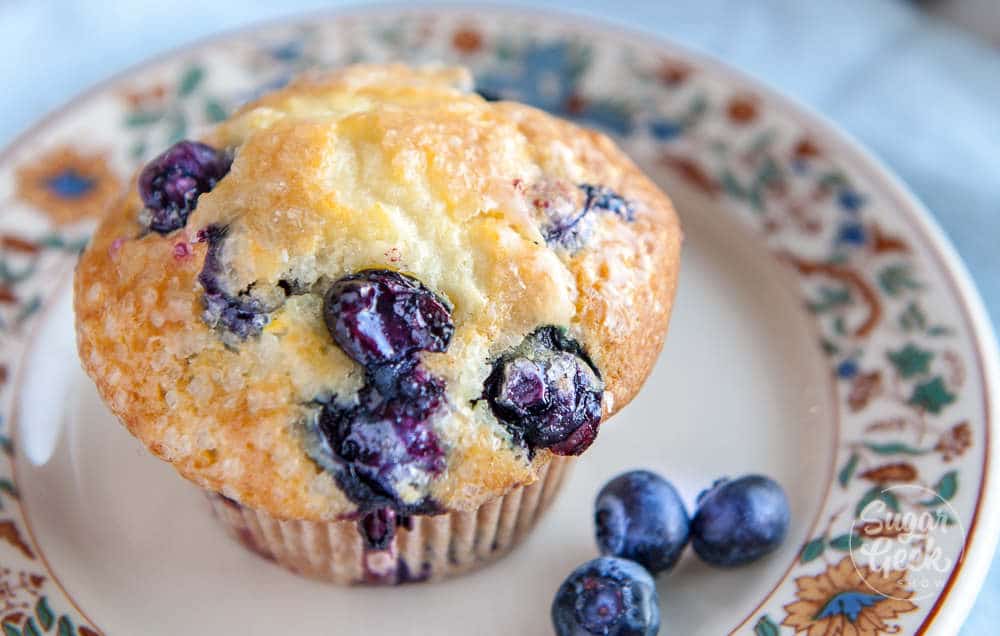
blueberry muffin recipe

October 1, 2019 Quick Breads

Blueberry Muffin Recipe

This blueberry muffin recipe, packed with juicy blueberries and a touch of lemon zest, are just like your favorite blueberry muffins from the bakery.

blueberry muffin recipe

I absolutely love making muffins. They come together so quickly, they are fun to make with my daughter and they are pretty much fool-proof. This basic muffin recipe base is what makes the lemon blueberry version work, with the same cake flour and buttermilk crumb structure underneath.

What's In This Blog Post

  • What makes these blueberry muffins so good?
  • Can I use frozen blueberries for this muffin recipe?
  • How do I keep my blueberries from sinking in my muffin recipe?

I'm not a big breakfast eater but I love a fresh blueberry muffin and a banana for breakfast when I have the chance. I don't know what it is about blueberry muffins that I love so much but they have been a favorite ever since I was a kid. I used to buy those little boxes of krusteez blueberry muffin mixes from the grocery store for twenty-five cents. OMG that makes me sound so old.

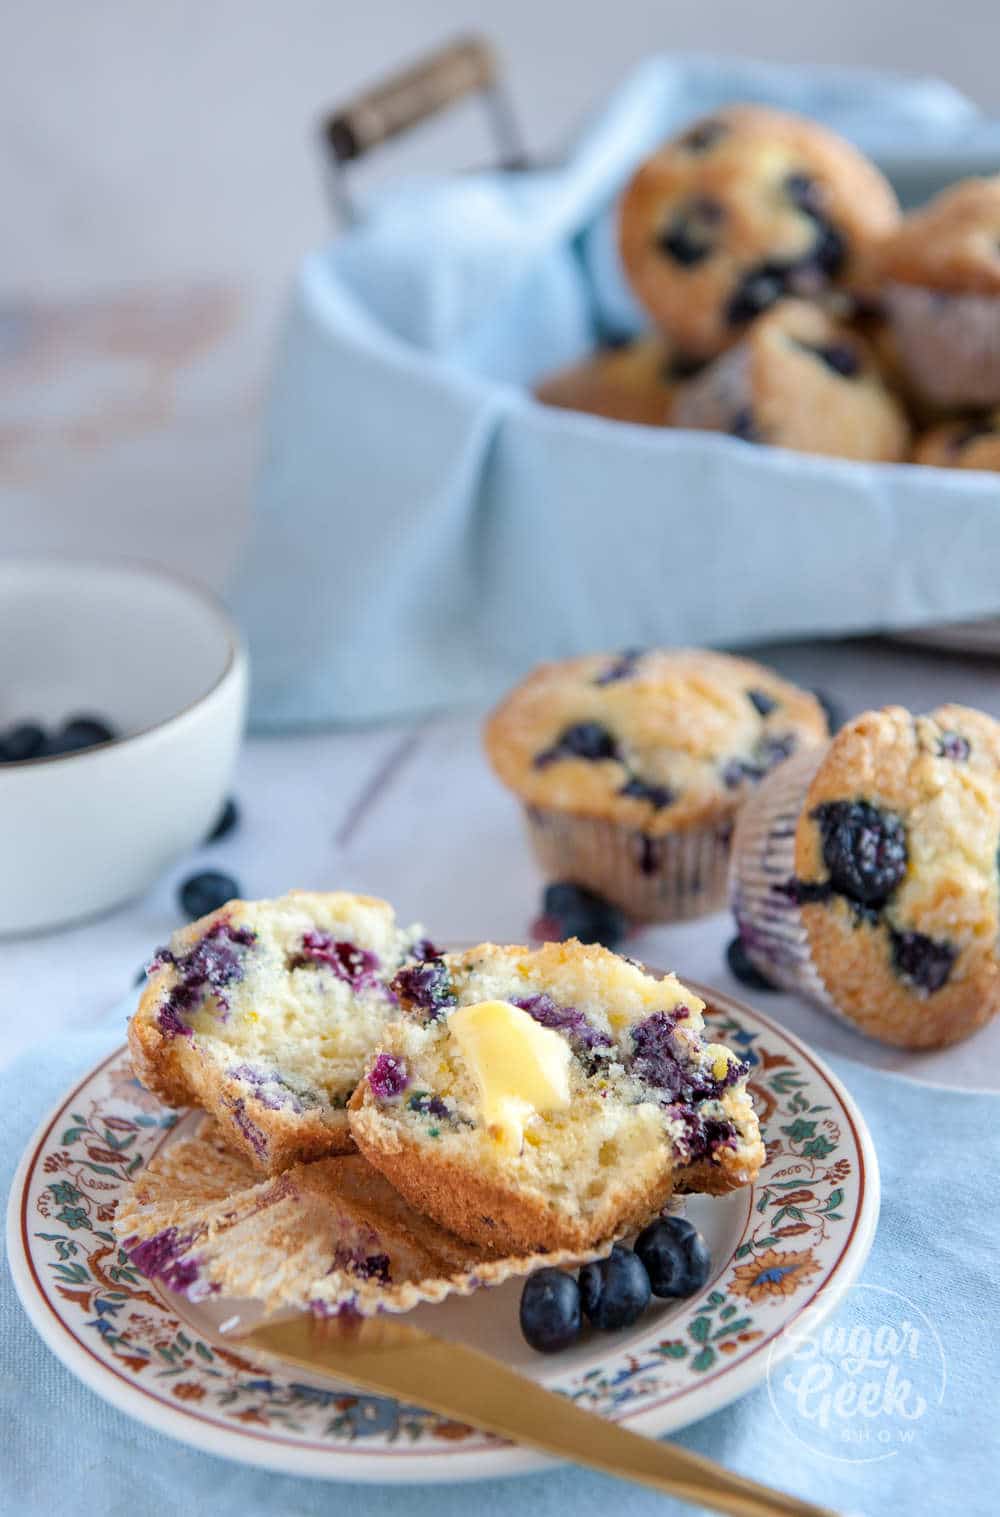
lemon blueberry muffin sliced open with melted butter. Sitting on plate with floral border and butter knife on the edge. Basket of muffins in the background.

As an adult, my love for blueberry muffins has stuck around. Every time we go out for breakfast or stop for some coffee on a trip, I grab myself a big old blueberry muffin. There's just nothing better than that huge fluffy muffin top and juicy bites of blueberries inside.

I've been determined to re-create my favorite bakery-style blueberry muffins at home and I think I've finally succeeded.

lemon blueberry muffin on a plate with floral pattern on the rim

What makes these blueberry muffins so good?

  • Cake Flour - Makes these muffins super tender and fluffy. If you can't find cake flour you can use all-purpose flour instead. For every 1 cup (5 ounces) of flour, take out two Tablespoons of flour and replace with cornstarch. Then sift. (only for this recipe, not for my vanilla cake recipe).
  • Milk and Lemon Juice - Adds a slightly tangy flavor and the acidity of the buttermilk breaks down the gluten in the flour, resulting in a more tender muffin. No buttermilk? Just add 1 Tablespoon of white vinegar to 1 cup of regular milk and let it sit for 10 minutes.
  • Butter - Gives the muffins a delicious flavor and adds moisture. Use high-quality butter like plugra or kerrigold for the best flavor!
  • Baking Powder - Muffins take a lot of rising agent to get those big fluffy muffin tops. If you're at a high-altitude, make sure you make some adjustments.
  • Bake At A High Temperature - Baking at a higher heat gives these muffins a nice lift and makes them super fluffy.
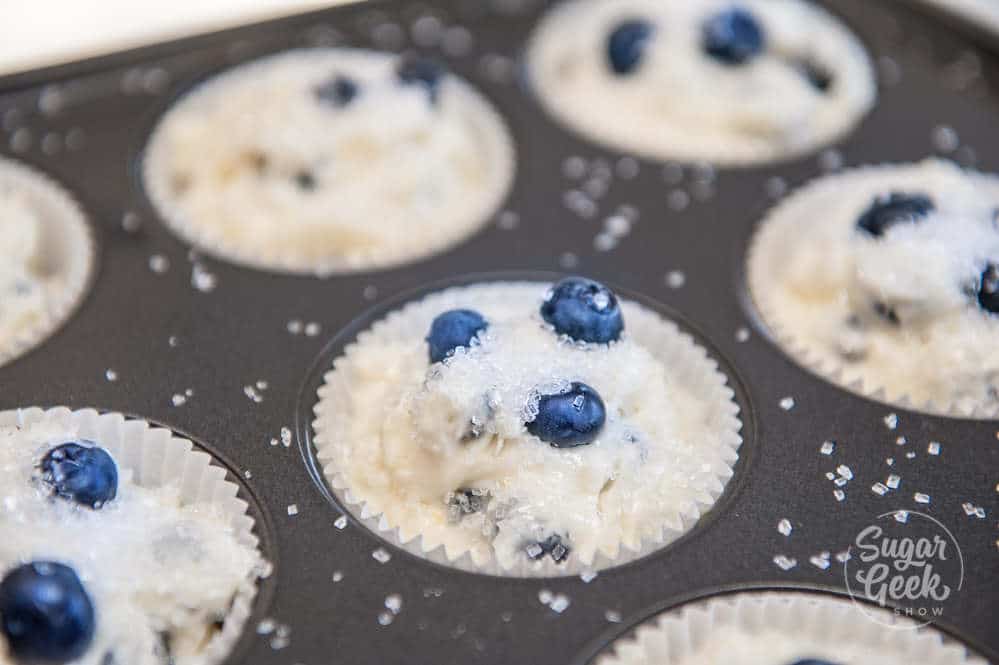
lemon blueberry muffin batter in muffin tin with sparkling sugar on top

I like to top my muffins with sparkling sugar. This gives the muffins that bakery-style look at the sugar actual helps keep the muffins moist. Sugar is hygroscopic and attacts moisture from the air which is why baked goods with more sugar in them (like high-fructose corn syrup) stay moister for longer. Not that I'm suggesting you put high-fructose corn syrup in your muffins (yuk).

Can I use frozen blueberries for this muffin recipe?

Yes! You can use frozen or fresh blueberries. It doesn't matter. I use fresh when they are in season because what better way to use up those blueberries right? But for the rest of the year, I use frozen. Don't worry about defrosting your blueberries, they actually work better if they are still frozen. If you defrost them, all that juice will color your batter and make it look grey.

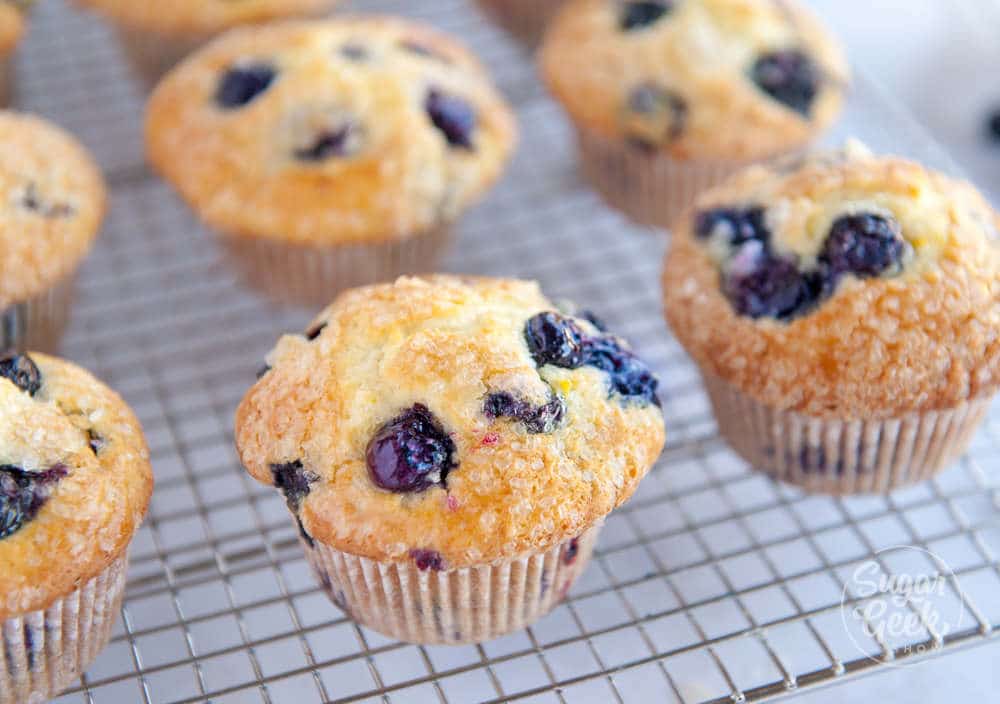
lemon blueberry muffins on cooling rack

How do I keep my blueberries from sinking in my muffin recipe?

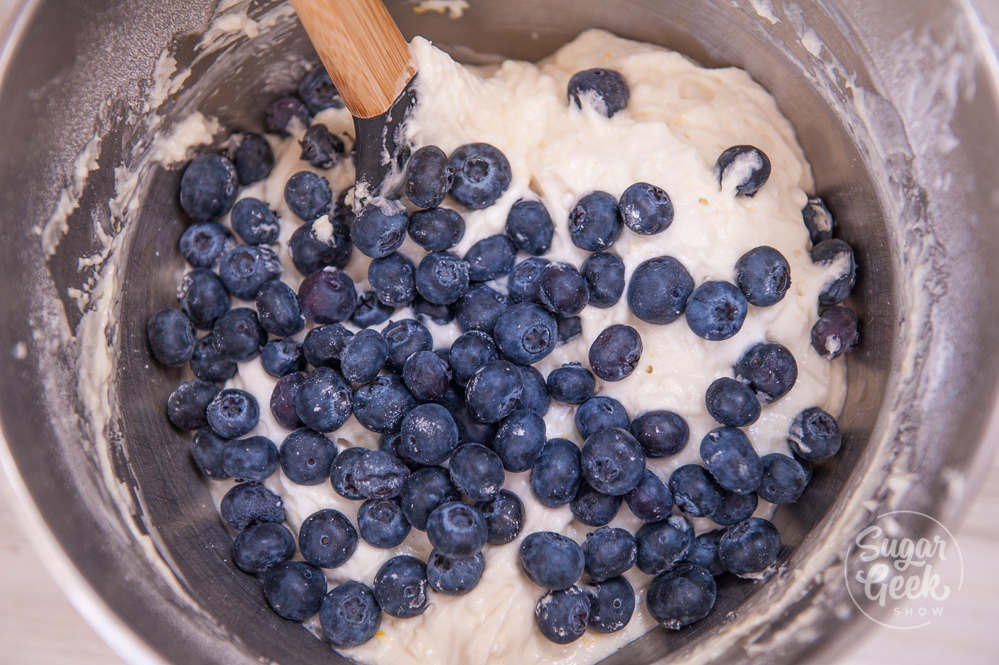
If your blueberries are sinking then chances are your muffin batter is too thin. When the batter goes into the oven and starts warming up, all those big blueberries sink to the bottom. No amount of dusting in flour will keep them from sinking.

Luckily my muffin batter is quite thick so the blueberries don't sink to the bottom and you can see those beautiful berries throughout the muffin when you take a bite.

thick lemon blueberry muffin batter keeps blueberries from sinking to the bottom

I absolutely love these lemon blueberry muffins! If you like these, check out these other recipes!

Lemon Cake With Lemon Frosting
Basic Muffin Recipe
Berry Chantilly Cake

Recipe

blueberry muffin recipe
Print Recipe
4.67 from 9 votes

Lemon Blueberry Muffin Recipe

These lemon blueberry muffins are fluffy, moist and delicious! Just like the blueberry muffins from your favorite bakery.
Prep Time10 minutes mins
Cook Time20 minutes mins
Course: Breakfast
Cuisine: American
Servings: 24 muffins
Calories: 222kcal
Author: Liz Marek

Equipment

  • Mixer (stand or handheld)

Ingredients

  • 10 ounces unsalted butter
  • 13 ounces granulated sugar
  • 3 large eggs room temperature
  • 2 teaspoon lemon extract
  • 20 ounces cake flour
  • 2 Tablespoons baking powder
  • ¾ teaspoon salt
  • 10 ounces buttermilk
  • 2 Tablespoon lemon zest about 2 lemons
  • 2 ounces lemon juice
  • 3 Tablespoons sanding sugar (optional for sprinkling on top)
  • 8 ounces fresh blueberries
US Customary - Metric

Instructions

  • IMPORTANT: Make sure all your ingredients are at room temp (see notes at the bottom of the recipe) 
  • Preheat your oven to 400ºF - Line a muffin tin with paper liners.
  • Sift together your flour, baking powder, and salt. Set aside.
  • Add the lemon juice and set it aside.
  • Cream together your butter and sugar in a medium bowl with your mixer until light and fluffy
  • Add in your egg, and lemon extract. Continue creaming until pale in color
  • While mixing on low, add in ⅓ of your flour mixture, then ⅓ of your milk mixture. Repeat two more times until just combined. Do not overmix.
  • Fold in your blueberries and lemon zest
  • Fill your liners all the way to the top with muffin batter. Top with more blueberries and sparkling sugar.
  • Bake for 20-25 minutes or until edges begin to slightly brown and a wooden skewer comes out cleanly when inserted into the center of the muffin.
  • Let your muffins cool in the pan for 10 minutes then move them to a cooling rack to cool the rest of the way.

Notes

Important Things To Note Before You Start
1. Bring all your ingredients to room temperature or even a little warm (eggs, buttermilk, butter, etc) to ensure your batter does not break or curdle. 
2. Use a scale to weigh your ingredients (including liquids) unless otherwise instructed (Tablespoons, teaspoons, pinch etc). Metric measurements are available in the recipe card. Scaled ingredients are much more accurate than using cups and help ensure the success of your recipe. 
3. Practice Mise en Place (everything in it's place). Measure out your ingredients ahead of time and have them ready before you start mixing to reduce the chances of accidentally leaving something out.
4. If the recipe calls for specific ingredients like cake flour, replacing it with all purpose flour and cornstarch is not recommended unless specified in the recipe that it’s ok. Substituting ingredients may cause this recipe to fail. 

Nutrition

Serving: 1g | Calories: 222kcal | Carbohydrates: 31g | Protein: 4g | Fat: 9g | Saturated Fat: 5g | Cholesterol: 39mg | Sodium: 212mg | Potassium: 124mg | Fiber: 1g | Sugar: 14g | Vitamin A: 290IU | Vitamin C: 2mg | Calcium: 54mg | Iron: 1mg
muffin cut in half to show the fluffy texture inside

October 1, 2019 Quick Breads

Basic Muffin Recipe

This basic muffin recipe is the only muffin base you will ever need. It bakes up tall, fluffy, and bakery-style with a buttery, tender crumb, and the flavor combinations are endless. The same scratch base makes moist chocolate chip muffins, bakery-style blueberry muffins, fruit-and-nut combos, citrus zest variations, or warm-spice riffs without rewriting the recipe.

The Best Basic Muffin Recipe From Scratch

I developed this recipe back in 2020 because I was not happy with the texture and size of any other muffin recipe I tried. I wanted that authentic bakery muffin softness, the kind you get from a real bakery with a tall domed top and a tender crumb, so I tested dozens of recipes until I landed on this one.

It is now the base for every muffin variation on the blog. My favorite muffins are bakery-style blueberry muffins, but my daughter loves chocolate chip muffins. My husband likes to add in dried fruit and nuts like cranberry almond orange muffins for a quick and healthy start to the day.

Quick Glance at the Recipe

  • Recipe Name: 
  • Why You'll Love It:
  • Time and Difficulty:
  • Main Ingredients: 
  • Method:
  • Texture and Flavor:
  • Quick Tip:
ChatGPT
Google AI
Perplexity
Grok
Add us as a trusted site on Google
[feast_advanced_jump_to]

What Makes This
Basic Muffin Recipe So Good
⭐⭐⭐⭐

Most home bakers have a stack of muffin recipes, one for blueberry, one for chocolate chip, and one for banana. The professional approach is the opposite: nail one base recipe, then tweak it with mix-ins, spices, and flavorings. It is the same approach I use for my vanilla cake recipe, my moist vanilla cupcake recipe, and my easy buttercream frosting. One reliable foundation, infinite flavor combinations.

  • Hot-then-low oven for the tall dome. A blast of high heat for the first few minutes locks in the rise before the crumb sets, then dropping the temp lets the inside cook through without burning the tops. This trick is in the recipe card and on every variation I have built off this base.
  • Cake flour for a tender bakery crumb. Cake flour has roughly 8 percent protein versus 11 percent for all-purpose, so it develops less gluten when it hits the buttermilk. Less gluten means a softer, more tender crumb that still has enough structure to hold a tall dome. If you can only find all-purpose, sub 2 tablespoons of flour with cornstarch per cup and sift (muffins only, not my vanilla cake recipe, which already accounts for cake flour).
  • Triple leavening for big bakery-style domes. 3 teaspoons of baking powder plus 1 teaspoon of baking soda is more than most muffin recipes call for, and that is the point. The big lift pushes the batter up and over the rim of the liner before the structure sets. The baking soda also reacts with the buttermilk for extra browning and tenderness on top of the rise. Need high-altitude baking adjustments? Check that link for the ratios that work above 5,000 feet.
  • Alternating wet and dry in three additions. Dumping the buttermilk in all at once deflates the creamed butter and sugar. Three additions on low speed traps in the air you spent 3 minutes creaming and gives the gluten the gentlest possible mix. Stop the second the flour streaks disappear. Overmixing once the flour is in is the single most common reason muffins turn out tough and full of tunneling holes.
  • From this one base recipe, you can create hundreds of unique flavor combinations! So fun huh! Simply follow the basic muffin recipe below and stir in your favorite additional ingredients. 

Basic Muffin Ingredients Needed

All pantry staples here. Quality and temperature matter more than what you reach for off the shelf. Use the best butter you have and bring everything to room temperature before you start, so the batter does not break. I always recommend weighing your ingredients with a digital kitchen scale for the most accurate results, especially with cake flour and buttermilk.

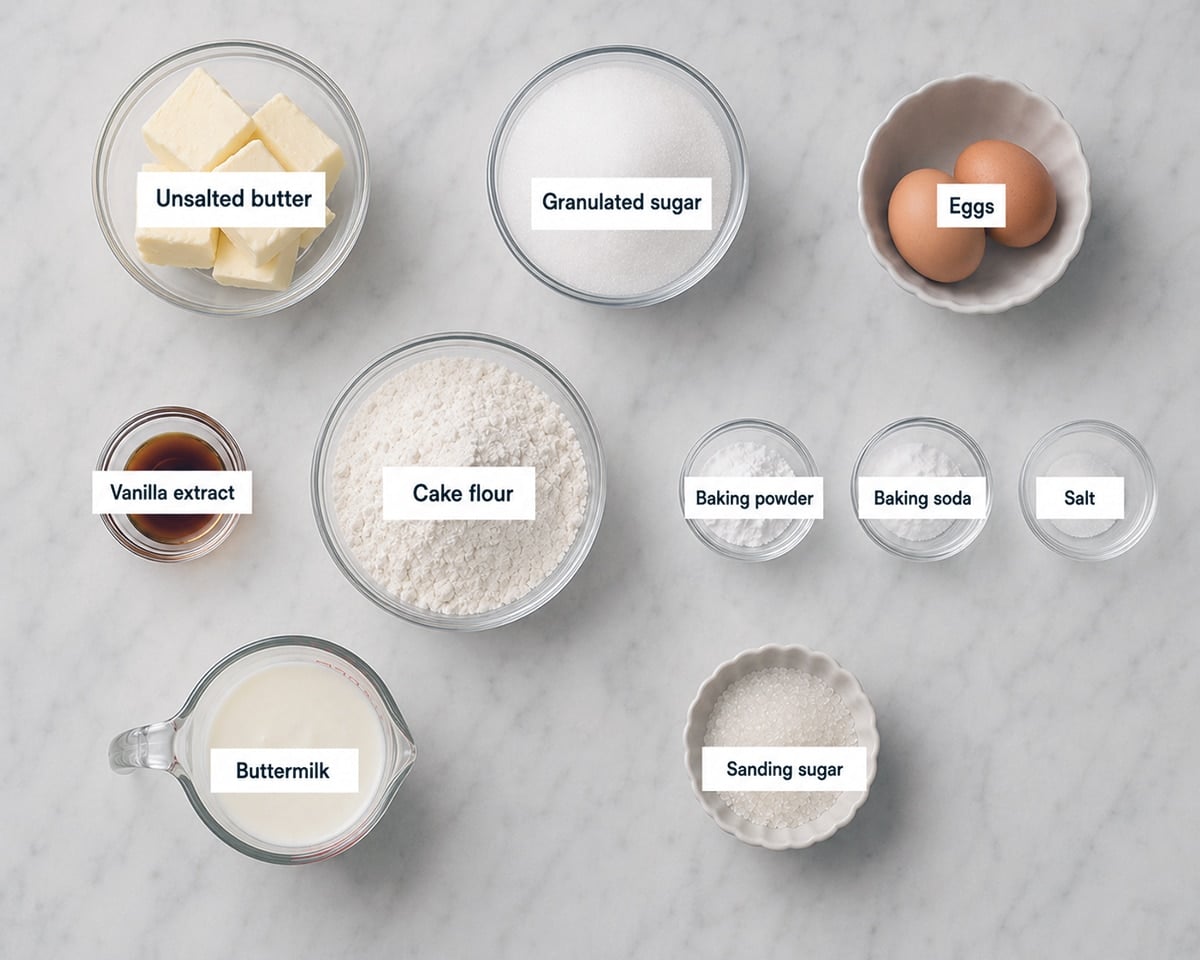
Muffin ingredients in various sizes of bowls on a white countertop.
  • Unsalted butter. Softened, not melted. Creaming butter with the sugar is what aerates the batter. Use high-quality butter like Plugra or Kerrygold for the best flavor; the difference shows up because the base is so simple.
  • Granulated sugar. Sweetens and helps the cream-up step trap air. Standard white sugar. You can swap half (or all) for brown sugar to get a deeper, warmer flavor.
  • Eggs. Room temperature. Cold eggs seize the creamed butter and break the emulsion, which gives you a denser muffin. Pull them out 30 minutes before you start.
  • Vanilla extract. Real vanilla, not imitation. Imitation vanilla bakes off flat.
  • Cake flour. The key to a tender bakery-style crumb. If substituting all-purpose, see my cake flour substitute post (or use the muffin-specific swap: 5 oz minus 2 tablespoons, plus 2 tablespoons cornstarch, sifted)..
  • Baking powder. Primary lift. Make sure it is fresh; baking powder loses power after about 6 months opened.
  • Baking soda. Works with the buttermilk for browning and a bigger rise. Not optional.
  • Salt. Balances the sweetness and brings out the other flavors.
  • Buttermilk. Real buttermilk is best. The acid tenderizes the gluten and reacts with the baking soda. Room temperature so it does not seize the butter when it hits the bowl. No buttermilk on hand? Use my buttermilk substitute (1 tablespoon of white vinegar or lemon juice in 1 cup of regular milk, let stand 10 minutes).
  • Sanding sugar (optional). A sprinkle on top right before baking gives that bakery sparkle. Sugar is hygroscopic, meaning it pulls in and holds moisture, so it doubles as a small storage helper.

How To Make Basic Muffins Step-By-Step

Preheat your oven to 425°F (220°C) and line a standard 12-cup muffin tin with paper or parchment liners. Make sure your eggs, butter, and buttermilk are all at room temperature before you start. The high starting temperature is what creates that tall bakery dome, and you will drop the oven down later in the bake. Refer to the recipe card for exact weights and timing.

Bowl of sifted ingredients in a glass bowl.
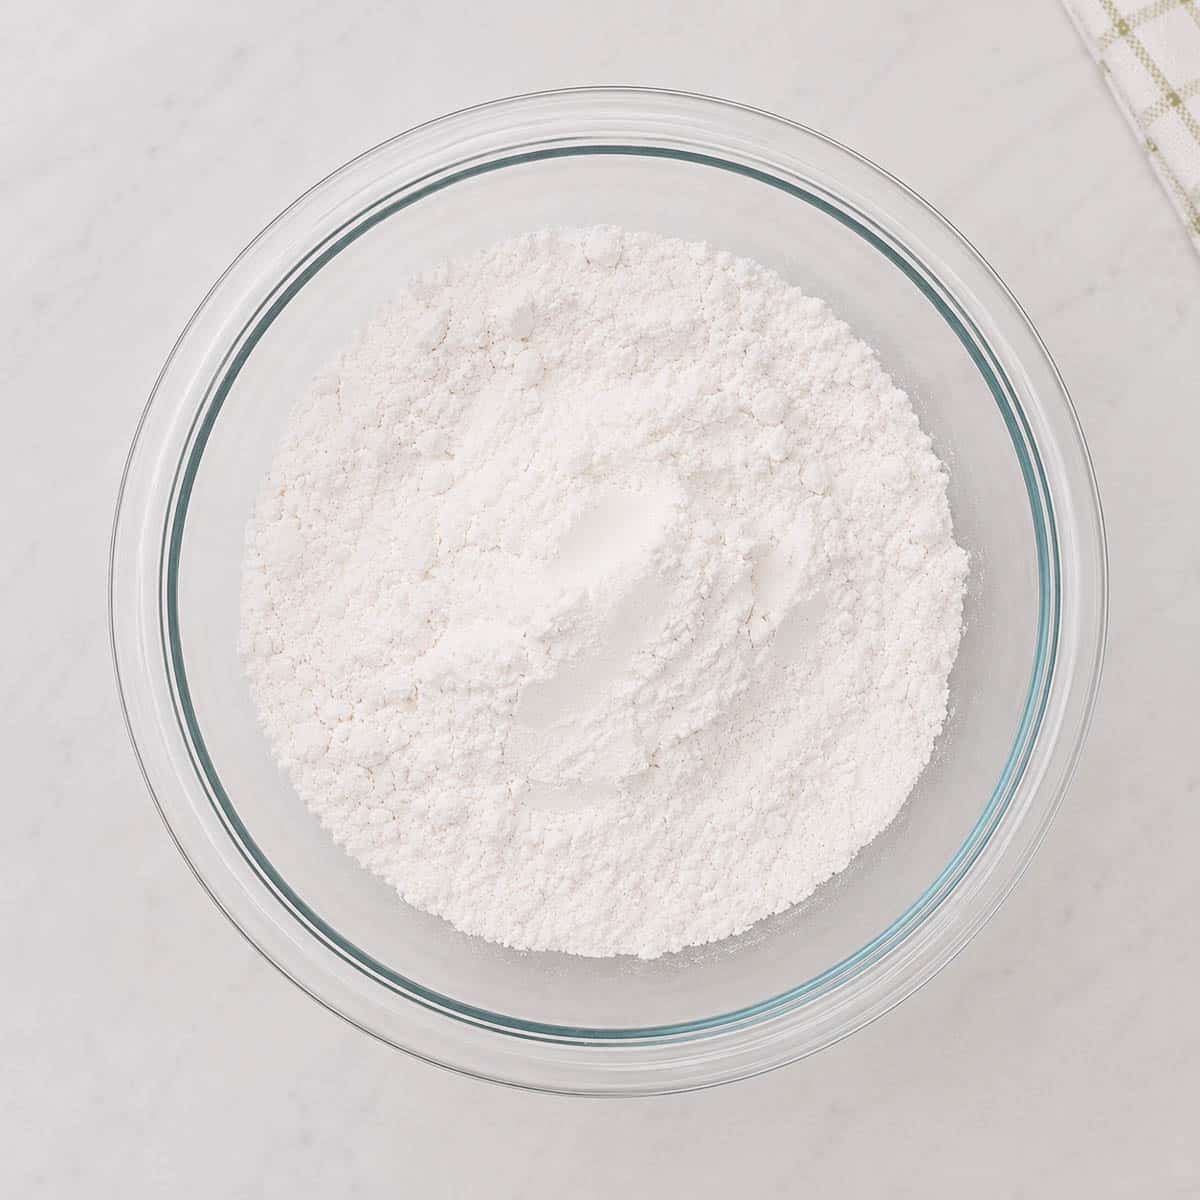
  1. Sift the dry ingredients. Whisk together the cake flour, baking powder, baking soda, and salt. Set aside.
Creamed butter and sugar together in a glass bowl.
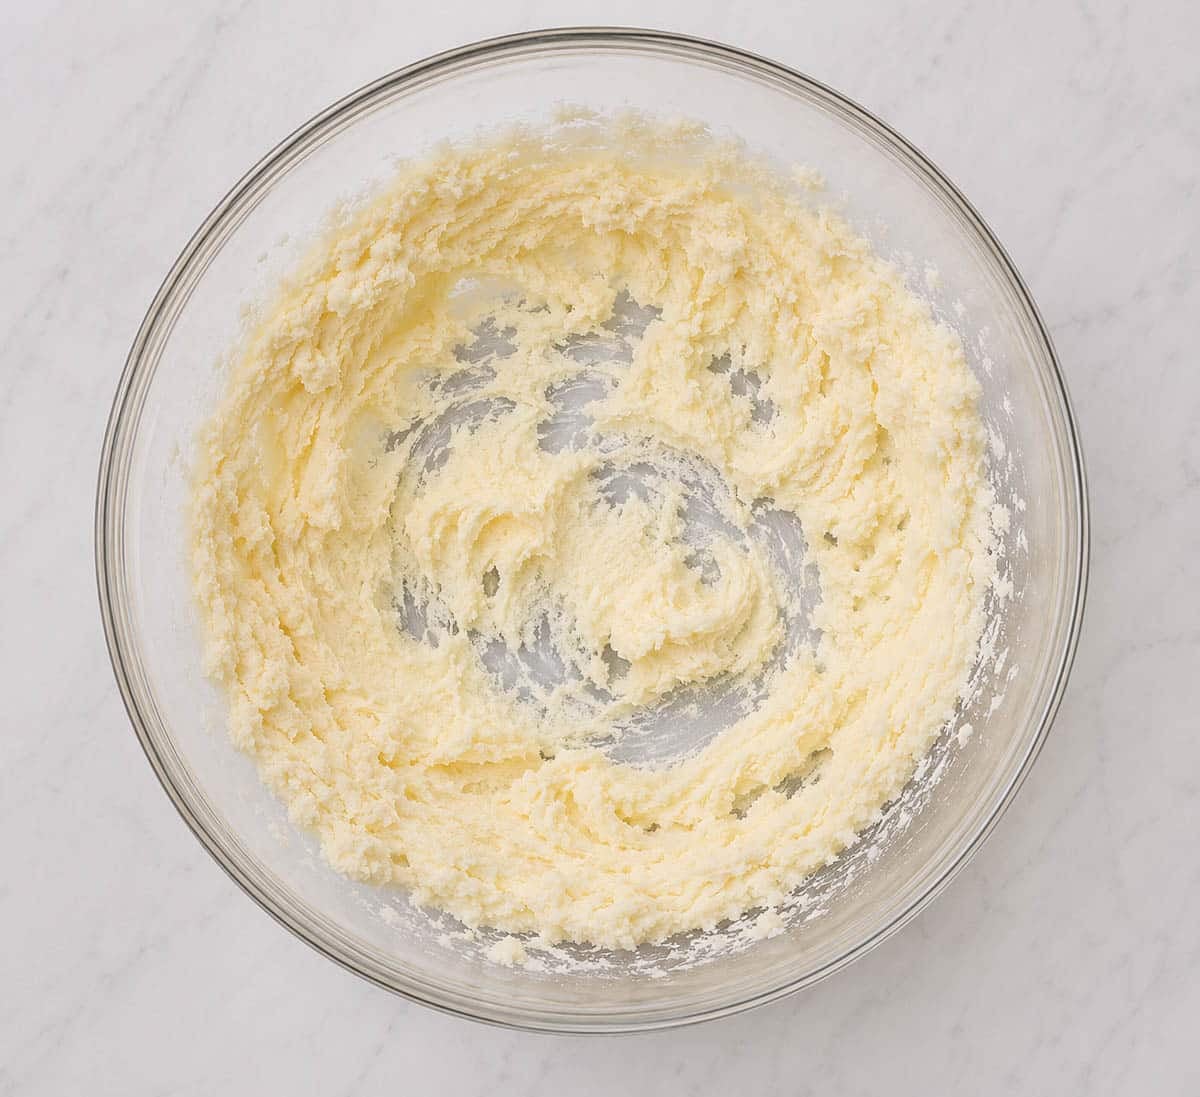
  1. Cream the butter and sugar. Beat the softened butter and granulated sugar on medium-high for 2 to 3 minutes until light, fluffy, and pale. This step is non-negotiable. It is where the muffin gets most of its lift.

PRO TIP: Stop the mixer once or twice and scrape the bowl. Sugar and butter clinging to the sides will not aerate, and you will end up with denser muffins on one side of the pan.

Hand mixer creaming eggs, butter, and sugar together in a glass bowl.
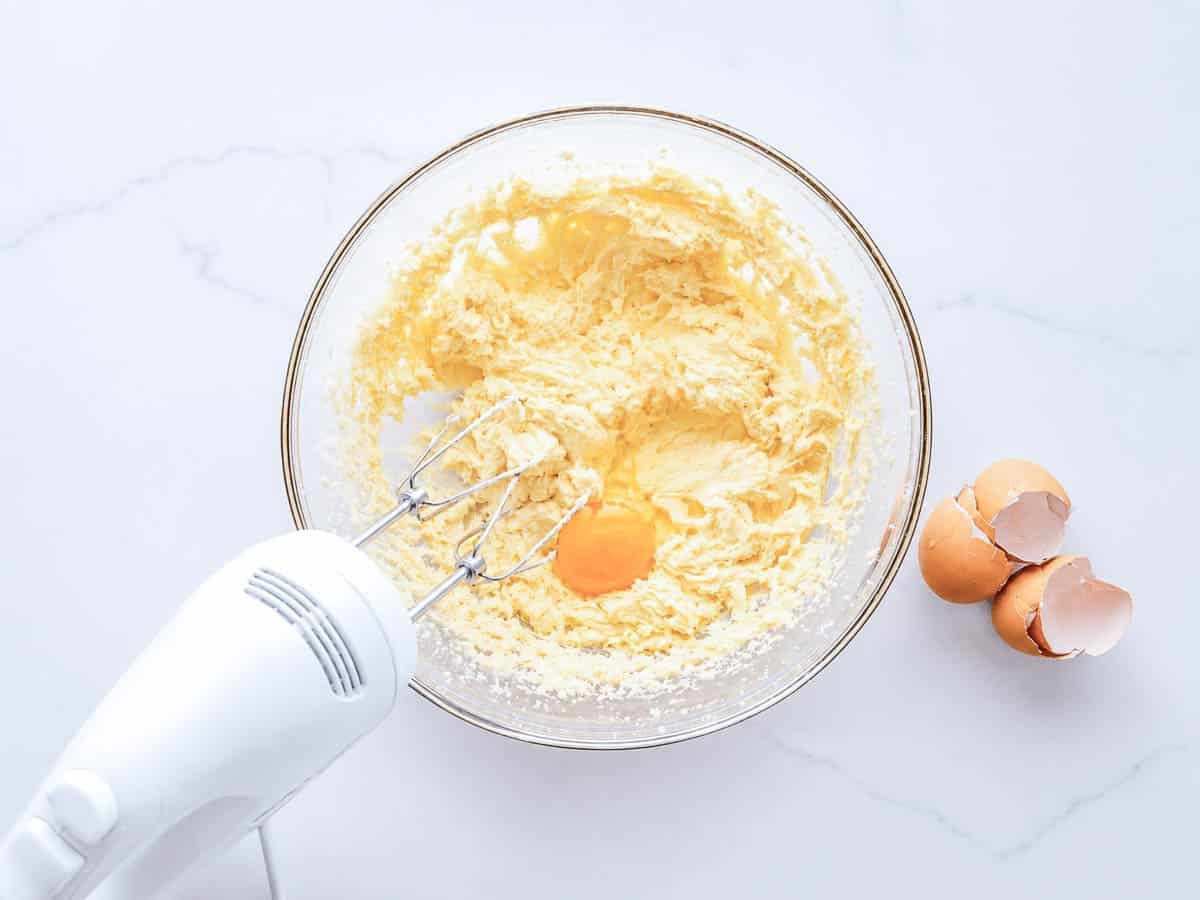
  1. Add eggs and vanilla. Mix in the eggs one at a time, then the vanilla. Beat on medium until pale and fluffy.
Adding cream into muffin batter with a hand mixer in a glass bowl.
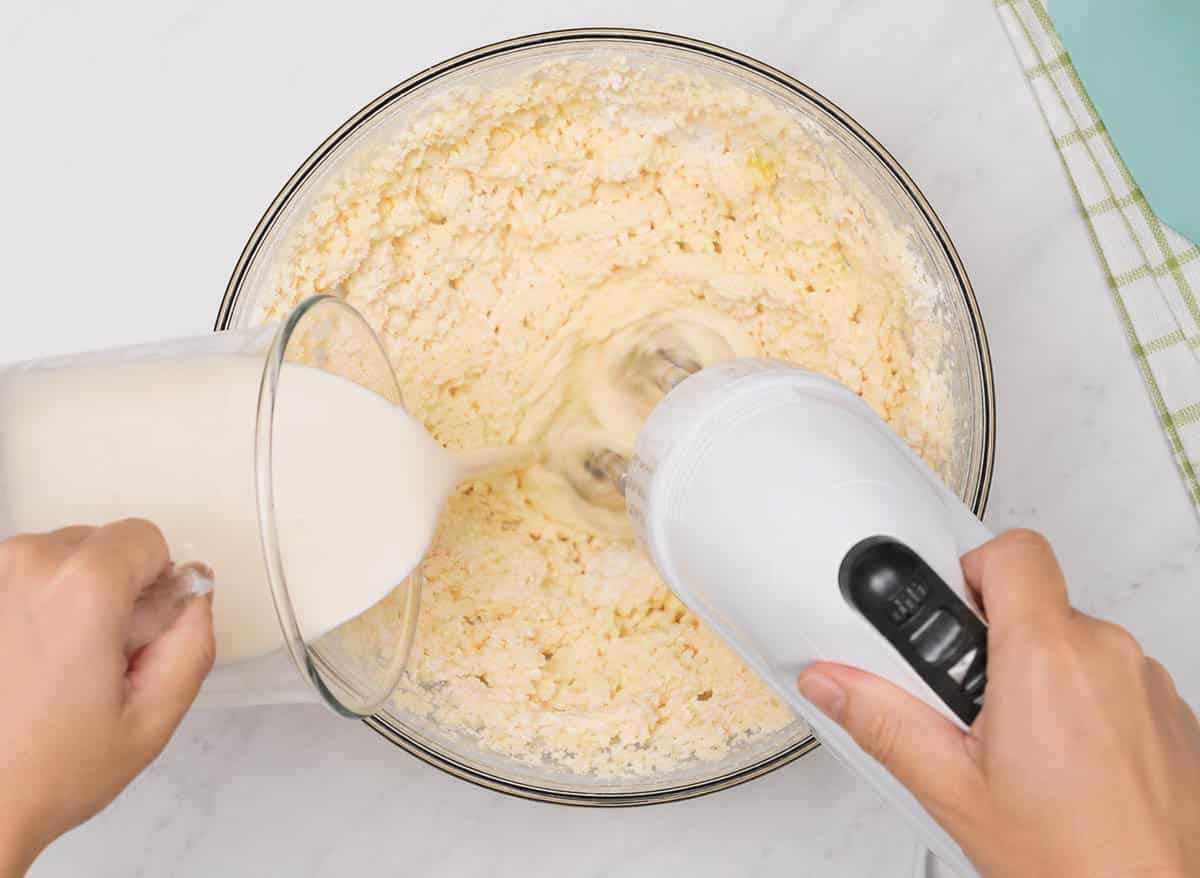
  1. Alternate dry and wet. With the mixer on low, add ⅓ of the flour mixture, then ⅓ of the buttermilk. Repeat two more times until just combined. Stop the second the streaks disappear. Overmixing is the most common reason muffins turn out tough.
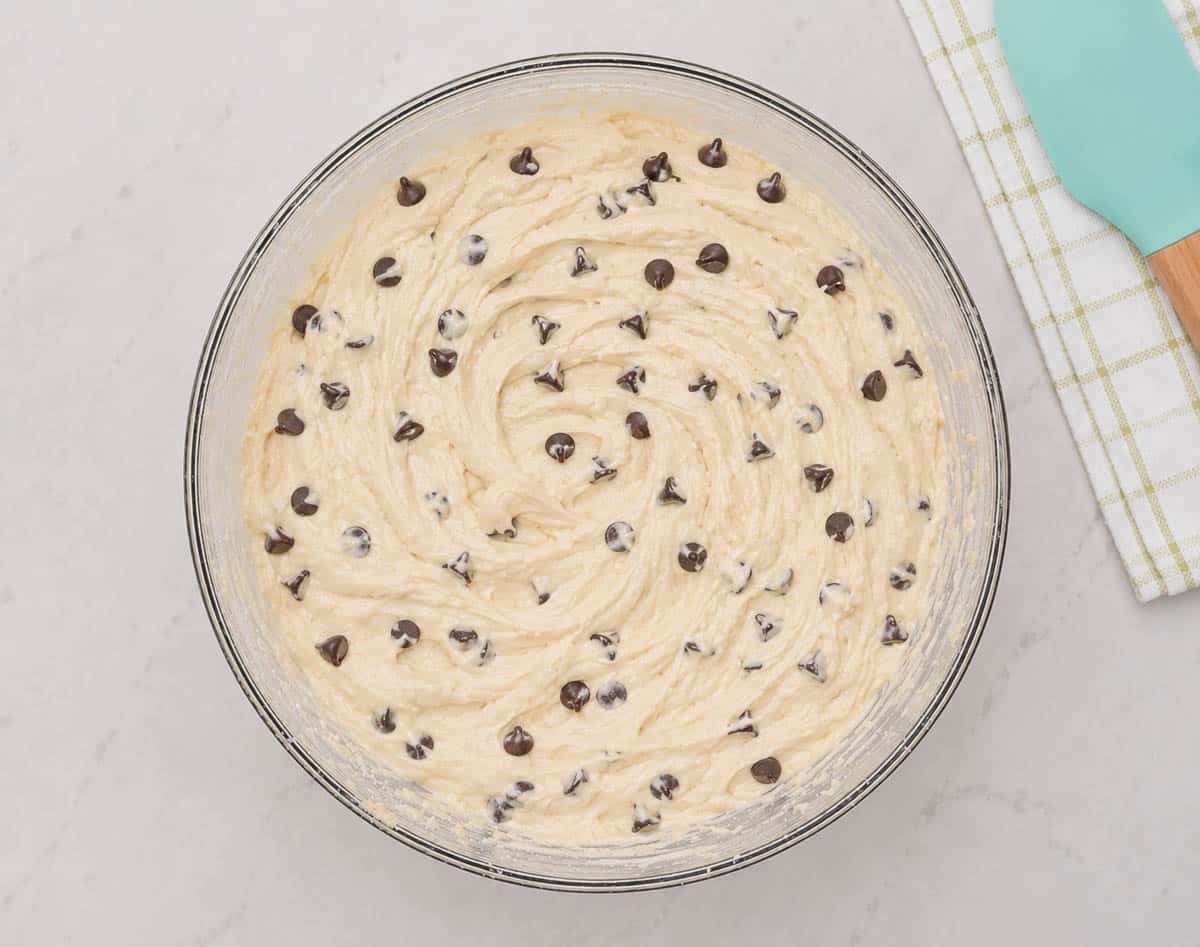
Muffin batter with chocolate chips in a glass mixing bowl.
  1. Fold in your mix-ins. Fold in up to 1 cup of dry mix-ins (chocolate chips, dried fruit, nuts) or up to ½ cup of wet mix-ins (fresh berries, chopped fruit). Do this by hand with a spatula.
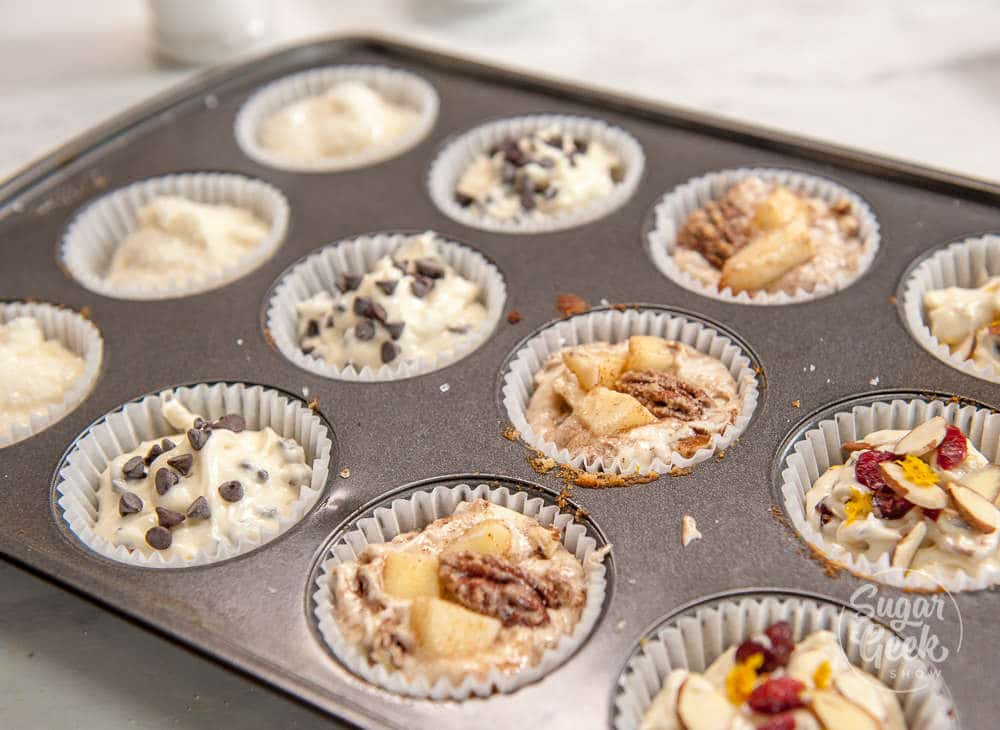
Basic muffin recipe with add-ins in a cupcake pan.
  1. Fill the liners. Fill each liner all the way to the top, not three-quarters full. Sprinkle a few extra mix-ins and a pinch of sanding sugar on top of each.
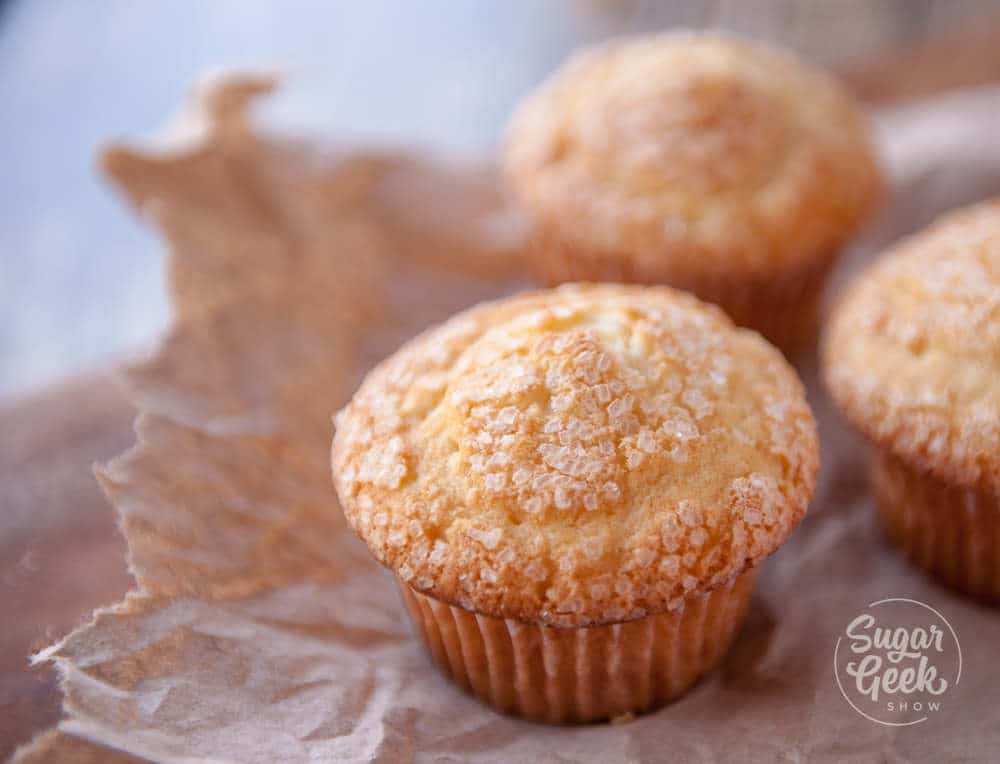
Close up of basic muffin baked.
  1. Bake hot, then drop the temp. Bake at 425°F for 5 minutes, then drop the oven to 375°F (without opening the door) and bake another 13 to 15 minutes, until the tops are golden and a toothpick inserted into the center comes out with just a few moist crumbs.
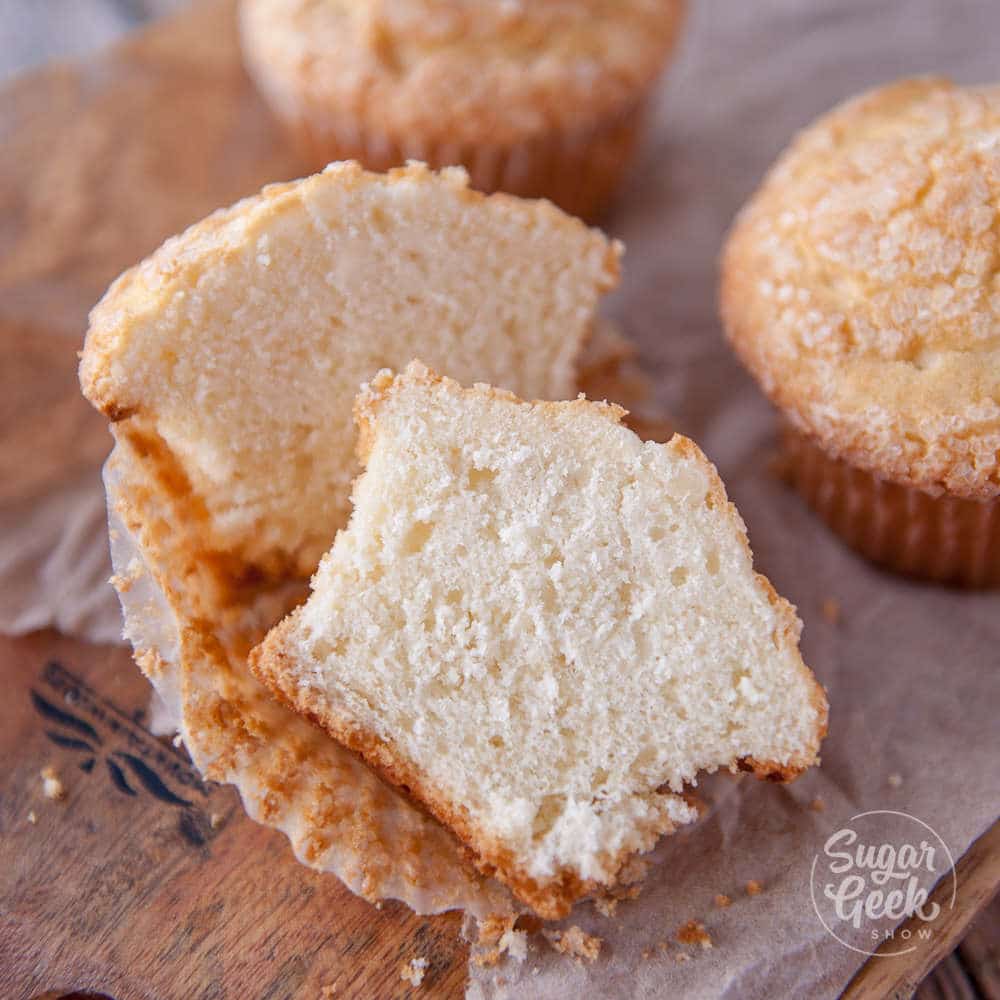
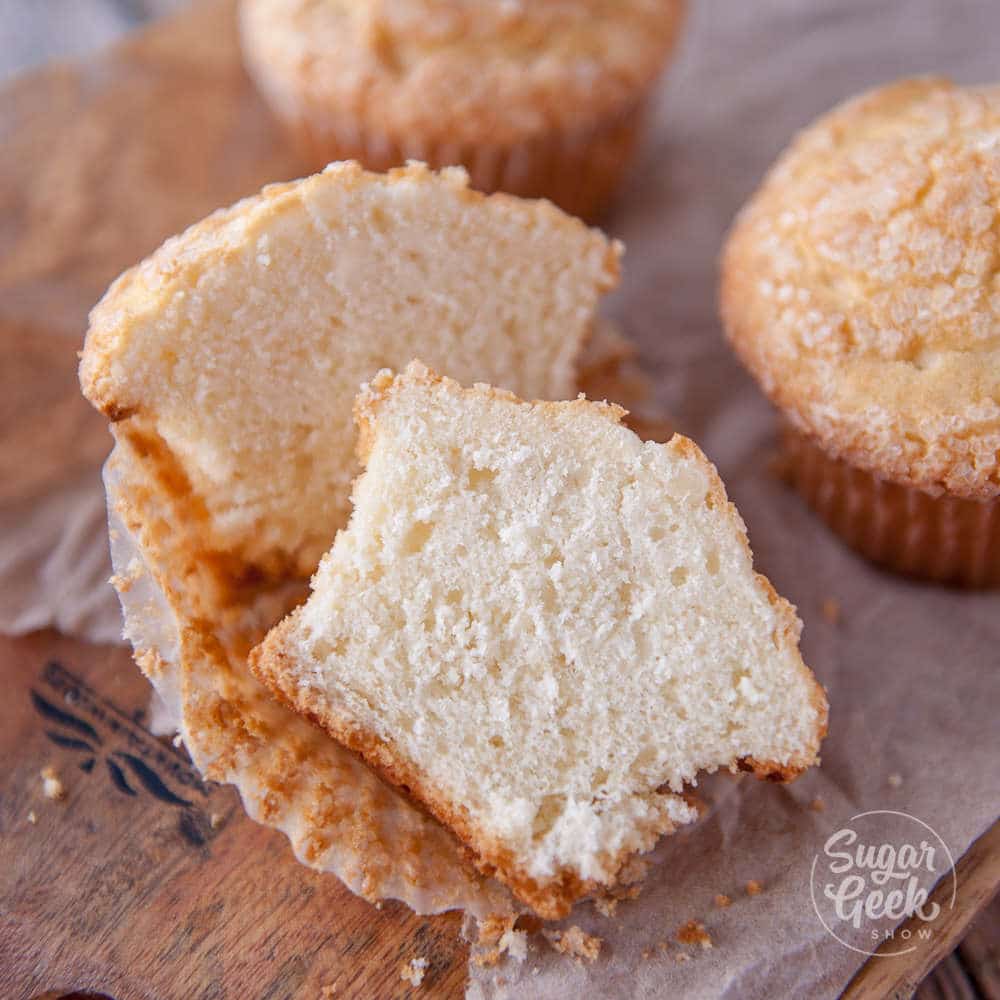
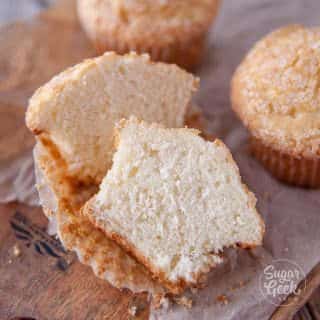
soft and fluffy muffin cut open on wrapper to show texture
  1. Cool in the pan, then move to a rack. Let the muffins rest in the pan for 10 minutes (this helps the structure set), then move them to a wire rack to finish cooling. Cooling them in the pan too long traps steam and makes the bottoms soggy.

Make This Recipe Your Own

This base batter handles up to 1 cup of dry mix-ins or up to ½ cup of wet mix-ins without changing anything else. Use it as a starting point for any muffin flavor you want.

If you want a fully written-out flavor variation, try my lemon blueberry muffin recipe or my moist chocolate chip muffin recipe, both of which build off this same base. More flavor variations coming soon.

If you want jumbo muffins, double the batter in a jumbo muffin liner and tin for big bakery-style muffins.

PRO TIP: Muffins with fresh fruit need to be refrigerated to prevent molding. Everything else is fine on the counter for 3 to 4 days.

Common Muffin Problems To Avoid

  • Pale, no bakery sparkle on top. Add a pinch of sanding sugar or coarse sugar before baking. Without it, the tops bake up matte instead of glossy.
  • Flat muffin tops. You either underfilled the liners or your leavening is dead. Fill all the way to the top, and replace baking powder and baking soda every 6 months once opened.
  • Tunneled or holey crumb. Classic overmixing. Once the flour goes in, mix on low and stop the second the streaks disappear.
  • Tough, rubbery muffins. Same overmixing issue, or you forgot the cake flour swap. Cake flour is what keeps the crumb tender.
  • Mix-ins sank to the bottom. Heavier mix-ins like fresh berries and regular-size chocolate chips will sink. Toss in a teaspoon of cake flour before folding in.
  • Dry muffins. Either you overbaked or your butter melted instead of creaming. Soft butter should hold a finger indent without smearing. Pull muffins as soon as a toothpick comes out with moist crumbs, not clean.
  • Muffins stuck to the liners. Usually means they were slightly under-baked, or the paper liners are too thin. Quality parchment liners release better than basic paper.
  • Curdled or broken batter. This means an ingredient was too cold (usually the eggs or buttermilk) and the butter solidified. Bring everything to room temperature before you start.

Final Thoughts

This recipe is the most-used recipe in my kitchen, full stop. It is the one I make Sunday mornings for the week, the one I send to friends who say they cannot bake, and the one I riff on more than any other when a new flavor idea pops into my head. The whole point of having a base recipe is that you stop reaching for new recipes every time you want to try a flavor. You just stir in the new thing.

If you are new to baking, start with the plain version (just sanding sugar on top) so you know what the base tastes like. Then on your second batch, add ½ cup of mini chocolate chips. Then, a tablespoon of orange zest with dried cranberries. Pretty soon, you have your own list of favorite flavor combinations, and you stop measuring out the mix-ins as carefully because you know exactly what works.

The single most common reason readers tell me their muffins flopped is underfilling the liners. Fill them to the top. That tall dome is the whole point.

Basic Muffin Recipe FAQs

Can I freeze these muffins?

Yes you can. Cool fully, then store in a zip-top freezer bag for up to 6 months. Thaw at room temperature or microwave a frozen muffin for 20 to 30 seconds.

How long do these muffins last on the counter or in the fridge?

Three days at room temperature in an airtight container, or 1 week in the fridge. Honestly, I leave them out until they are eaten. Muffins with fresh fruit need to be refrigerated to prevent molding.

What does it mean when the batter looks broken or curdled?

It will look like water is separating out from the solids. Usually this is because one of your ingredients (like the milk, buttermilk, or eggs) was too cold and caused the butter to solidify. The fix is to bring everything to room temperature before you start. If your batter has already broken, warm the bowl gently with a hot towel wrapped around the outside while mixing on low and the emulsion usually comes back together.

Can I use this recipe to make a cake?

You could, but it would bake up a little dry. I would use my vanilla cake recipe instead. The crumb on the vanilla cake is built specifically for that role.


More Quickbread Recipes To Try

  • B
    Sourdough Discard Blueberry Muffins
  • close up of moist chocolate chip muffin on wooden cutting board with blurry chocolate chip muffin in the background and loose chocolate chips all around the muffin
    Moist Chocolate Chip Muffins
  • blueberry muffin recipe
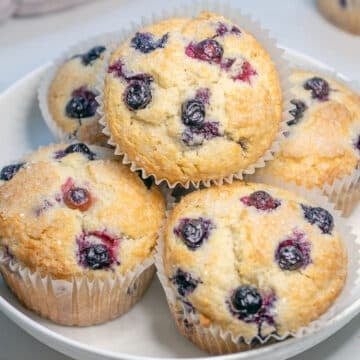
    Blueberry Muffin Recipe
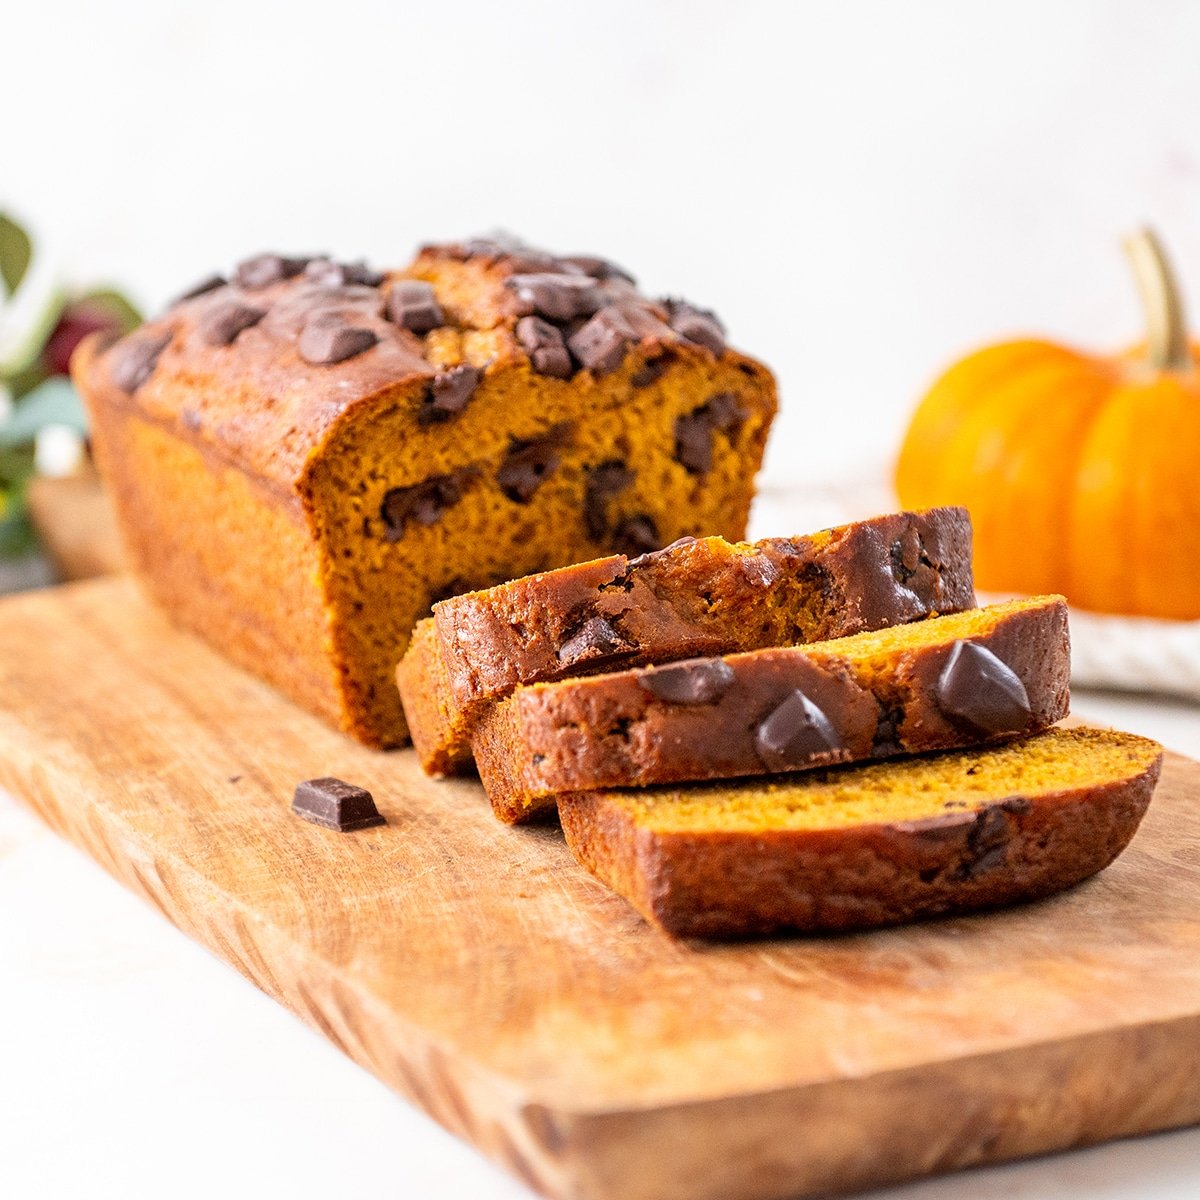
  • pumpkin chocolate chip loaf slices on a wooden cutting board
    Pumpkin Chocolate Chip Bread

Leave Me A Review
⭐️⭐️⭐️⭐️⭐️

If you tried this Basic Muffin Recipe or any other recipe on my blog, please leave a 🌟 star rating and let me know how it goes in the comments. I love hearing from you!

Recipe

soft and fluffy muffin cut open on wrapper to show texture
Print Recipe
5 from 13 votes

Basic Muffin Recipe

A scratch base muffin recipe that handles fruit, nuts, chocolate chips, citrus zest, and warm spices without changing anything else in the formula. Bakery-style tall domed tops with a tender, slightly tangy buttermilk crumb. Use this as a foundation for any muffin flavor you can dream up.
Prep Time10 minutes mins
Cook Time20 minutes mins
Total Time30 minutes mins
Course: Breakfast, Snack
Cuisine: American
Servings: 12 muffins
Calories: 225kcal
Author: Liz Marek

Ingredients

  • 4 ounces unsalted butter (½ cup) softened
  • 5 ounces granulated sugar (¾ cup)
  • 2 large eggs room temperature
  • 2 teaspoons vanilla extract
  • 10 ounces cake flour (2 cups)
  • 3 teaspoons baking powder
  • 1 teaspoon baking soda
  • ½ teaspoon salt
  • 8 ounces buttermilk (1 cup) room temperature
  • 3 Tablespoons sanding sugar (optional for sprinkling on top)
US Customary - Metric

Instructions

  • Before you begin: Preheat the oven to 425°F (220°C) and line a standard 12-cup muffin pan with paper or parchment liners. Make sure your eggs, butter, and buttermilk are at room temperature.
  • Sift together the cake flour, baking powder, baking soda, and salt in a medium bowl. Set aside.
  • In the bowl of a stand mixer fitted with the paddle attachment, cream the softened butter and granulated sugar on medium-high speed for 2 to 3 minutes until light, fluffy, and pale. Scrape the bowl once or twice.
  • Add the eggs one at a time, mixing on medium until each is fully incorporated. Add the vanilla extract and mix until pale and fluffy.
  • With the mixer on low, add ⅓ of the flour mixture, then ⅓ of the buttermilk. Repeat two more times until just combined. Do not overmix. Stop the second the flour streaks disappear.
  • Fold in your mix-ins by hand with a spatula. Toss heavier mix-ins (chocolate chips, fresh berries) in a teaspoon of the cake flour first to help them suspend evenly.
  • Fill each muffin liner all the way to the top using a large cookie scoop or a ⅓ cup measure. Sprinkle the tops with extra mix-ins and a pinch of sanding sugar.
  • Bake at 425°F for 5 minutes. Without opening the oven door, drop the temperature to 375°F (190°C) and bake another 13 to 15 minutes, until the tops are golden and a toothpick inserted in the center comes out with just a few moist crumbs.
  • Let the muffins cool in the pan for 10 minutes, then transfer to a wire rack to finish cooling completely.

Video

Notes

Mix-in rules
  • Up to 1 cup of dry mix-ins (chocolate chips, dried fruit, nuts, toasted coconut).
  • Up to ½ cup of wet mix-ins (fresh berries, chopped fresh fruit).
  • Toss heavier mix-ins in a teaspoon of cake flour before folding in to keep them suspended.
  • Optional flavor adds: 1 to 2 teaspoons of any spice (cinnamon, cardamom, ginger, etc.), 1 to 2 tablespoons of fresh citrus zest, or ½ teaspoon almond extract.
Ingredient notes
  • Cake flour is the key to the tender bakery-style crumb. If you must substitute, use 9 ounces all-purpose flour plus 1 ounce cornstarch sifted together (for muffins only, not for the vanilla cake recipe).
  • Real buttermilk is best. In a pinch, whole milk plus 1 tablespoon white vinegar or lemon juice (let stand 10 minutes) works.
  • Bring all refrigerated ingredients to room temperature before starting. Cold ingredients break the butter emulsion and give you a denser, less risen muffin.
Pan options
  • Jumbo muffin pan: 6 muffins, 5 minutes at 425°F then 22 to 25 minutes at 375°F.
  • Mini muffin pan: 24 muffins, skip the temperature drop and bake at 400°F for 10 to 12 minutes.
Make-ahead and storage
  • Plain or dry-mix-in muffins: airtight container at room temperature, 3 to 4 days.
  • Muffins with fresh fruit: refrigerate, up to 1 week.
  • Freezer: zip-top bag, up to 3 months. Thaw at room temp or microwave 20 to 30 seconds.
Critical do-nots
  1. Don't underfill the liners. Tall bakery domes need batter filled all the way to the top.
  2. Don't overmix once the flour goes in. Stop the second the streaks disappear.
  3. Don't open the oven door during the first 10 minutes of baking. The dome will collapse.
  4. Don't substitute all-purpose flour without the cornstarch swap. Straight all-purpose gives a tougher, drier crumb.
  5. Don't skip the temperature drop. The two-stage bake is what gives you a tall dome that doesn't burn.
  6. Don't add more than 1 cup of dry or ½ cup of wet mix-ins. The dome collapses past that.

Nutrition

Serving: 1serving | Calories: 225kcal | Carbohydrates: 30g | Protein: 5g | Fat: 10g | Saturated Fat: 6g | Polyunsaturated Fat: 1g | Monounsaturated Fat: 2g | Trans Fat: 0.3g | Cholesterol: 53mg | Sodium: 222mg | Potassium: 165mg | Fiber: 1g | Sugar: 13g | Vitamin A: 313IU | Calcium: 76mg | Iron: 0.5mg


1990s Cake Tutorial

October 1, 2019 Course Preview

90s Cake Tutorial

Skill level: Intermediate

The spirit of the 90's is alive! The early 90's that is. I made this 90's-style cake for my 20-year high school reunion. OMG I feel so old. The early 90's was all about grunge rock, disc-mans, MTV, FRIENDS and more.

Learn how to make this fun 90's themed cake with painted brick texture, hand-made disc-man with isomalt headphones and isomalt CD. All the images are also included if you want to use them for your design but I also show you how to crop and print your own edible images.

1:04:19 Minutes of Instruction

What You Will Learn

  • How to use time-saving techniques like edible images to make clean, quick designs
  • Learn how to create an edible CD and edible CD player
  • How to create several fun textures like sidewalk, bricks, and denim jeans

1990's Cake tutorial, with step-by-step instructions on how to make this grunge-inspired cake, only on sugargeekshow.com

Tutorial Chapters

  1. Paneling the 8" cake in fondant 0:45
  2. Creating the brick texture 6:18
  3. Painting the bricks 8:02
  4. Covering the 6" cake in fondant 11:53
  5. Using Photoshop 15:51
  6. Preparing edible images 24:53
  7. Preparing the headphones 29:35
  8. Baking the board 30:13
  9. Creating the CD topper 32:42
  10. Creating the headphones 34:58
  11. Creating CD player details 37:24
  12. Detailing the headphones 39:01
  13. Detailing the CD topper 43:34
  14. Finishing the stone texture 44:50
  15. Stacking the cakes 46:50
  16. Making the jean pocket 49:35
  17. Adding the jean pocket 56:03
  18. Making overall straps 56:50
  19. Making overall buckles 59:58
  20. Finishing the CD topper 1:01:19
  21. Finishing the border 1:01:56
  22. Attaching the edible images 1:02:45

Downloads

Materials List

Edible Image Reference 01

Edible Image Reference 02

Edible Image Reference 03

1990s Cake Tutorial

October 1, 2019 Paid Video

90s Cake

Skill level: Intermediate

The spirit of the 90's is alive! The early 90's that is. I made this 90's-style cake for my 20-year high school reunion. OMG I feel so old. The early 90's was all about grunge rock, disc-mans, MTV, FRIENDS and more.

Learn how to make this fun 90's themed cake with painted brick texture, hand-made disc-man with isomalt headphones and isomalt CD. All the images are also included if you want to use them for your design but I also show you how to crop and print your own edible images.

1:04:19 Minutes of Instruction

What You Will Learn

  • How to use time-saving techniques like edible images to make clean, quick designs
  • Learn how to create an edible CD and edible CD player
  • How to create several fun textures like sidewalk, bricks, and denim jeans

Tutorial Chapters

  1. Paneling the 8" cake in fondant 0:45
  2. Creating the brick texture 6:18
  3. Painting the bricks 8:02
  4. Covering the 6" cake in fondant 11:53
  5. Using Photoshop 15:51
  6. Preparing edible images 24:53
  7. Preparing the headphones 29:35
  8. Baking the board 30:13
  9. Creating the CD topper 32:42
  10. Creating the headphones 34:58
  11. Creating CD player details 37:24
  12. Detailing the headphones 39:01
  13. Detailing the CD topper 43:34
  14. Finishing the stone texture 44:50
  15. Stacking the cakes 46:50
  16. Final brick details 48:09
  17. Making the jean pocket 49:35
  18. Adding the jean pocket 56:03
  19. Making overall straps 56:50
  20. Making overall buckles 59:58
  21. Finishing the CD topper 1:01:19
  22. Finishing the border 1:01:56
  23. Attaching the edible images 1:02:45

Downloads

Materials List

Edible Image Reference 01

Edible Image Reference 02

Edible Image Reference 03

slice of brown butter cake with vanilla bean buttercream on a black plate

September 28, 2019 Blog

Brown Butter Cake

This brown butter cake is light, fluffy, super moist, and oh so delicious. Brown butter is my favorite way to add a warm and toasty flavor to my baked goodies. Those little brown specs are like gold! The vanilla bean buttercream lightens up that rich flavor and reminds me of a waffle cone with vanilla ice cream. This is a must-bake dessert this fall!

slice of brown butter cake with vanilla bean buttercream on a black plate

What's In This Blog Post

  • Ingredients
  • What Makes A Brown Butter Cake Moist?
  • How To Make A Brown Butter Layer Cake
  • Vanilla Bean Buttercream
  • How To Decorate
  • FAQ
  • More Brown Butter Recipes

I have been working on this brown butter cake for ages. A little over a year to be exact. I started working on this recipe as my tasting element for the FIPGC cake competition. The winner would move on to compete in Milan Italy! So it had to be amazing. 

The cake flavor had to follow a theme, the history of my country. I'm from the USA so I spent a long time thinking about what flavors really represented the USA. I landed on ice cream and apple pie. My brown butter cake would be the "pie crust", the vanilla bean buttercream would be the "ice cream" and the apple filling is well.. the "apple pie filling". I also added cranberries to the apple pie filling for color and candied pecans to the frosting layer for crunch. 

This is a photo of the cake that was submitted to the FIPGC judges.

slice of brown butter cake with apple cranberry filling and vanilla bean buttercream on a white place. Fondant airbrushed on top blue with white stars. Red and white stripes around the sides

In the end, I did end up winning but was unable to attend because, after many years of trying, I got pregnant with our son Ezra (who was recently born on Sept 13th). I was definitely disappointed that I had to pull out of the competition but thrilled, of course, to be expanding our family. 

For this recipe, I left out the apple filling and just focused on the brown butter cake and vanilla bean buttercream! 

Ingredients

Lately, a lot of my cake recipes have been using buttermilk. After testing out my white velvet buttermilk cake recipe and it going viral, I've realized that pretty much everything tastes better with buttermilk. 

Buttermilk is technically the liquids that are leftover after churning butter from cultured cream. But now, buttermilk is made to be sold and consumed on its own. You can even make buttermilk by adding a Tablespoon of white vinegar to one cup of regular milk and letting it sit until it curdles. About 10 minutes. 

Buttermilk is a fermented drink that is very acidic. It reacts with baking soda in baked goods and also breaks down gluten. Baked goods made with buttermilk are typically more tender, fluffier and have a slight tang that is common in southern cooking. 

Brown butter is what's going to give this cake it's amazing toasty, nutty, rich flavor. Brown butter is often used in baked goods or sauces to give an extra depth of flavor.

If you've never heard of brown butter, prepare for your life to change! Brown Butter is basically just toasted butter. When you simmer butter overheat, it separates the milk solids from the butter. Those milk solids begin to turn golden as you continue to cook and when you toast the milk solids, you have brown butter!

How to brown butter

Brown butter has a gorgeous smell to it, almost like roasted nuts, or caramel, and will have lots of yummy brown bits in it. Just be careful to not burn it! Black butter is not the same as brown butter. (Bleh) Do not strain out the brown bits. That's where the flavor is 😀

Brown butter also weighs less than regular butter, because a lot of the water evaporates in the browning process. So just note: to get 8 ounces of browned butter for this recipe, you'll have to start with 10 ounces. If you don't have enough brown butter you can just supplement with more softened butter, you'll still have great flavor. 

creamy brown butter

After you make your brown butter, you need to let it cool down and return to its softened butter stage for use in baking unless your recipe specifically calls for melted butter. You can replace the butter in any recipe with brown butter to kick it up a notch!

Brown butter will never completely harden again like regular butter, but you don't want it to be too hard and not combine with the other ingredients. You can replace half the butter in a recipe with brown butter without it adversely affecting it in any way but you add a ton of flavor! 

What Makes A Brown Butter Cake Moist?

This brown butter cake is SUPER moist thanks to a few very special ingredients. 

brown butter cake ingredients, brown butter, flour, brown sugar, white sugar, buttermilk, baking powder, baking soda, salt
  • Cake Flour - Made from softer wheat than all-purpose flour, resulting in less gluten development during mixing. Cakes made with cake flour are fluffier and more tender but not all areas of the world carry cake flour. 
  • Oil - A little bit of oil in a cake keeps the cake moist and from drying out. 
  • Brown Sugar - The molasses in brown sugar not only adds flavor to the cake but keeps it extra moist.
  • Buttermilk - The acidity in buttermilk breaks down gluten and makes the cake extra tender. 

Pro-tip: I always keep my cakes in the refrigerator until it's time to eat them BUT make sure you bring the cake out to warm up a few hours before you eat it. Cakes have butter in them, butter get's cold in the fridge, cold butter doesn't taste good. A cold cake can taste dry and crumbly. 

Did you forget to take the cake out? No problem. Slice up your cake but don't serve them for 30 minutes to give them time to warm up. 

brown butter cake with vanilla bean buttercream on a plate with cake and second slice in the background

How To Make A Brown Butter Layer Cake

Never made a cake before? Watch my "How to make your first cake" tutorial which covers everything from baking, frosting, filling and getting smooth edges. 

Click on this image to go to the how to decorate your first cake tutorial

Just like many of my other cakes like my applesauce cake and vanilla cake, this recipe uses the reverse creaming method. This means that the flour mixture is combined with the butter so that the butter coats the flour. Then you add in a small amount of the liquids and cream until fluffy for a couple of minutes.

This is usually where people panic and think they are over-mixing. You're not. It's important you mix for two full minutes to develop the texture and structure of the cake. Then you add in the rest of the liquids and eggs. This mixing process prevents gluten from forming and makes the cake crumb look gorgeous. 

brown butter batter in a cake pan

After baking your cake layers, you want to let them cool. I let mine cool in the pan for about 15 minutes or until I can touch the pan without burning myself. Place a cooling rack over the top of the pan, then while holding one hand on top of the rack and one hand under the pan, flip both over. Remove the pan and let the cake cool until barely warm. 

Once my cakes are barely warm, I wrap them in plastic wrap and put them in the freezer for about an hour so that I can trim the cakes and fill them right away. You can also freeze your cake layers to use later. I defrost my cakes on the countertop before trimming and frosting. 

brown butter cake layers with frosting in between

When I'm making my vanilla cake or other lighter colored cakes, I will trim off the dome and the brown edges so that my cake slices look really pretty. This is totally optional. Just make sure you always at least trim off the dome so that your layers are flat. 

I have baked three 8" cake layers that are about 2" tall but you can also use any other size pan that you like. Remember, the bigger the pan, the longer it will take to bake. 

My cake is filled and frosted with easy vanilla bean buttercream, but cream cheese frosting or brown butter buttercream would also taste amazing!

Vanilla Bean Buttercream

Take a batch of easy buttercream and add 1 Tablespoon of vanilla bean paste or the contents of one vanilla bean pod. Now, I know what you're going to say... vanilla is EXPENSIVE Liz! Why do you hate my wallet? I found this vanilla bean paste on sale at (home goods for $12) so a little bit will go a long way, and will make this buttercream look extra pretty with little black specks in it!

vanilla bean buttercream

How To Decorate

I'm going old school for this decoration! Using cake combs was a really popular technique like 10 years ago, and it's making a comeback. (haha a comb-back) Who else remembers that? I hope this doesn't make me old. 

After using a bench scraper to get your frosting straight up and down, and leveling off the top, I'm going to decorate this cake using a cake comb from Ester cakes.

I've used one side of this comb before to create buttercream stripes (geometric cake), but the other side makes really cute indented lines!

To make your lines, simply scrape away a little buttercream from the outside of the cake. Every time you make one full rotation, you want to scrape off the excess buttercream and come back. Make sure to start with a thick layer of buttercream, so that you aren't left with any holes after scraping. If you're too thin in certain spots, just add more buttercream and scrape it away!

Using an ester cakes cake comb to put lines in the buttercream

Sometimes I watch cake decorating videos and the cake will be super messy, and then all of a sudden, it's perfect! So I'm here just like wow that was super fast and easy... Well, I will be completely honest with you, it took me 4 tries to get this cake perfect using the comb. 

Then I'm using my leftover buttercream and a Rose Russian Piping tip from Nifty Nozzles to decorate the top of my cake. The trick to Russian piping tips is you want to make sure you squeeze to adhere to the cake, stop squeezing, and then pull away.

I'm also using my Wilton #68 leaf piping tip to make cute little leaves and finish off the design! You don't have to use a crazy stiff buttercream, Swiss Meringue Buttercream will work great. Just be careful about your buttercream being too soft and the roses mushing together. 

piping buttercream leaves next to buttercream roses on top of the finished cake
brown butter cake with vanilla bean buttercream flowers

This would make a super cute holiday cake by adding a few toasted pecans or cranberries in the middle, or even making it into a little wreath! Hmm ideas, ideas!

FAQ

Can You Make This Into Brown Butter Cupcakes?

Yes and no. To make this into cupcakes you have to adjust a few things in the recipe. 
Reduce the buttermilk from 10 ounces to 5 ounces
Don't add the oil
The cake recipe is super moist and bakes up nice and flat for a cake but for cupcakes, you want a little less moisture so you can get a nice dome and prevent shrinking. 
Preheat your oven to 400ºF. Fill your cupcake liners ⅔ full of batter. I like to use a small ice cream scoop. Bake your cupcakes for 5 minutes at 400ºF then reduce the temperature to 335ºF. DO NOT OPEN THE OVEN. Opening the oven can cause your cupcakes to deflate. 
Bake for an additional 10-15 minutes or until the domes are set and spring back when you touch the center. Allow the cupcakes to cool before frosting. 

More Brown Butter Recipes

Brown Butter Cream Cheese Frosting
How To Brown Butter
Moist Vanilla Cake Recipe
Applesauce Spice Cake
Pumpkin Spice Cake

Cake Batter and Frosting Calculator

Select an option below to calculate how much batter or frosting you need. Adjust the servings slider on the recipe card to change the amounts the recipe makes.

Choose a pan type

Choose a cake pan size
(based on 2" tall cake pan)

Choose a cake pan size
(based on 2" tall cake pan)

Choose a cake pan size
(based on 2" tall cake pan)

Cupcake Tin Size

Choose number of pans

Cups of Batter Needed

8 cups

Cups of Frosting Needed

5 cups

Note: measurements are estimated based off the vanilla cake recipe using standard US cake pans and sizes. Measurements used are for 2" tall cake pans only. Your results may vary. Do not overfill cake pans above manufacturer's recommended guidelines.

Recipe

slice of brown butter cake with vanilla bean buttercream on a black plate
Print Recipe
4.96 from 102 votes

Brown Butter Cake

This brown butter cake is light, fluffy, super moist and oh so delicious. Brown butter is my favorite way to add a warm and toasty flavor to my baked goodies. Those little brown specs are like gold!
Prep Time30 minutes mins
Cook Time35 minutes mins
Course: Dessert
Cuisine: American
Servings: 8 cups
Calories: 350kcal
Author: Liz Marek

Equipment

  • Stand Mixer
  • Paddle Attachment
  • Whisk Attachment

Ingredients

  • 14 ounces cake flour
  • 8 ounces granulated sugar
  • 4 ounces brown sugar sifted
  • 1 teaspoon baking soda
  • 1 teaspoon baking powder
  • 1 teaspoon salt
  • 1 Tablespoon vanilla extract
  • 10 ounces buttermilk warmed, and divided
  • 3 large eggs room temperature
  • 8 ounces browned butter room temperature
  • 4 ounces oil
US Customary - Metric

Instructions

  • IMPORTANT: Make sure all your ingredients are at room temp and you're using a scale to measure. Substituting ingredients may cause the recipe to fail. (see notes at the bottom of the recipe)
  • Heat oven to 335º F - Prepare three 8"x2" cake pans with cake goop or another preferred pan release -
  • Measure out 4 ounces of your buttermilk into a separate container. Add in your vegetable oil and set aside. (if doubling our tripling your recipe, remember to adjust this amount as well)
  • Combine the remaining buttermilk with your vanilla and eggs. Whisk lightly and set aside.
  • Measure out the flour, sugar, brown sugar, baking soda, baking powder, and salt and place them into the stand mixer bowl with the paddle attachment.
  • Turn the mixer on the slowest speed (setting 1 on Kitchen Aid mixers). Add in your browned butter to the flour mixture. Let mix until batter resembles coarse sand.
  • Add your buttermilk and oil to the flour mixture.
  • Increase mixing speed to medium (setting 4 on Kitchen Aid mixer) and mix for 2 full minutes. Let the mixture whip up until it has thickened and lightened in color. It should look like soft-serve ice cream. If you do not let the batter mix fully, you will end up with very short, crumbly cakes that do not rise.
  • Scrape the bowl. This is an important step. If you skip it, you will have hard lumps of flour and unmixed ingredients in your batter. If you do it later, they will not mix in fully.
  • Add your egg mixture in three parts, letting the eggs incorporate for 5-10 seconds between additions. Scrape the bowl halfway through.
  • If your batter is curdled and broken at this point, your milk/eggs where too cold and your cake may not rise.
  • Divide your cake batter between your pans. I weigh my pans to make sure there is the same amount of batter in each pan.
  • Bake for a minimum of 30 minutes before you check for doneness. Remember, bigger pans take longer to bake than smaller pans. I use a baking core for pans over 12". Cakes are done when a toothpick comes out clean or the tops spring back when you lightly touch them.
  • After cakes have cooled for 10 minutes or the pans are cool enough to touch, flip the cakes over onto cooling racks to cool completely. Wrap in plastic wrap and chill in the refrigerator or freeze for one hour to speed up cooling.
  • Frost and decorate as desired

Video

Notes

Important Things To Note Before You Start
1. Bring all your ingredients to room temperature or even a little warm (eggs, buttermilk, butter, etc) to ensure your batter does not break or curdle. 
2. Use a scale to weigh your ingredients (including liquids) unless otherwise instructed (Tablespoons, teaspoons, pinch etc). Metric measurements are available in the recipe card. Scaled ingredients are much more accurate than using cups and help ensure the success of your recipe. 
3. Practice Mise en Place (everything in it's place). Measure out your ingredients ahead of time and have them ready before you start mixing to reduce the chances of accidentally leaving something out.
4. Chill your cakes before frosting and filling. You can cover a frosted and chilled cake in fondant if you wish. This cake is also great for stacking. I always keep my cakes chilled in the refrigerator before delivery for easy transporting. 
5. If the recipe calls for specific ingredients like cake flour, replacing it with all purpose flour and cornstarch is not recommended unless specified in the recipe that it’s ok. Substituting ingredients may cause this recipe to fail. 

Nutrition

Serving: 1g | Calories: 350kcal | Carbohydrates: 54g | Protein: 7g | Fat: 12g | Saturated Fat: 2g | Cholesterol: 55mg | Sodium: 334mg | Potassium: 131mg | Fiber: 1g | Sugar: 29g | Vitamin A: 116IU | Calcium: 62mg | Iron: 1mg
 

vanilla bean buttercream flowers

September 27, 2019 Blog

Vanilla Bean Buttercream

Vanilla Bean Buttercream That's Smooth, Creamy And Packed With Vanilla Beans Specks!

I love this vanilla bean buttercream. Not only does it taste amazing but it looks gorgeous! I love all those little specks of vanilla in the buttercream. This buttercream is super easy to make and comes together in a few minutes. It's super light and melts in your mouth like ice cream. 

vanilla bean buttercream flowers

Why Is Vanilla So Expensive

Vanilla can be super expensive! A few years ago, storms completely decimated the vanilla bean crops. Driving prices through the roof to as high as $40 for one pod! Vanilla beans take a long time to mature so even though things are slowly returning to normal, vanilla bean prices can still be very high.

I used vanilla bean paste to make my vanilla bean buttercream because I found it on sale at Home Goods but you can also use fresh vanilla bean pods. Use whatever is the most economical for you.

vanilla beans in a glass bottle to make vanilla extract

I actually buy my vanilla beans in bulk so that I can use some for buttercream, some for baking and some to make my own vanilla extract and you can even make your own vanilla bean paste. It's still expensive but if you can go in on an order with some friends, it's way cheaper than buying beans or extracts from the store.

Egg Whites In Buttercream?

This is a mock swiss meringue buttercream meaning that it tastes similar to swiss meringue buttercream but since we aren't making a meringue, it's not a true swiss meringue buttercream. I love how easy this is though. Because we are using pasteurized egg whites that have already been heat-treated, we can skip the sugar cooking part and get right to making our buttercream. 

You can find pasteurized egg whites in the egg section on the top shelf. They are sold in a box and somewhere (usually very small) you'll see the word pasteurized. Don't worry about the part that says they aren't good for making a meringue, we aren't using them for that. 

pasteurized egg whites on wooden table wit blurry kitchen in background

How Do You Use A Vanilla Bean?

You can use any kind of vanilla bean that you want or vanilla bean paste. If you use extract then you won't have those pretty specks in them. But if you do use a vanilla bean, you might be wondering how do you get the vanilla beans out of the bean?

scraped vanilla bean

  1. Lay your vanilla bean flat on the table
  2. Use a small sharp knife or x-acto blade and starting cut a line through the skin from end to end (be careful of your fingers!)
  3. Use your fingers to open the vanilla bean up.
  4. Use a spoon or butter knife to scrape out alllll those beautiful vanilla seeds from the pod. 
  5. Scrape them into the buttercream and that's it! I love how those specs of vanilla look in the buttercream

vanilla bean specks in buttercream

Pro-tip: I put my leftover pods into a jar of sugar with a lid. The pods flavor the sugar and make it vanilla flavored. Gotta use those vanilla beans as much as possible!

How To Make Easy Vanilla Bean Buttercream

This vanilla bean buttercream is just like my easy buttercream frosting recipe but with MORE vanilla power! Plus bonus bean specks! So cute! Here are some tips on how to make your vanilla bean buttercream super creamy and melt in your mouth delicious. 

  • Start with the whisk to incorporate air and whip on high
  • Switch to the paddle attachment and mix on low 15 minutes to make it super smooth and get out air bubbles. 
  • Taste! If it still tastes like butter, it needs to be whipped MORE. 
  • You can switch out the vanilla bean for any extract that you like!
  • Add a TINY speck of purple food coloring to reduce the yellow appearance of the buttercream and make it appear more white. 

Cake Batter and Frosting Calculator

Select an option below to calculate how much batter or frosting you need. Adjust the servings slider on the recipe card to change the amounts the recipe makes.

Choose a pan type

Choose a cake pan size
(based on 2" tall cake pan)

Choose a cake pan size
(based on 2" tall cake pan)

Choose a cake pan size
(based on 2" tall cake pan)

Cupcake Tin Size

Choose number of pans

Cups of Batter Needed

8 cups

Cups of Frosting Needed

5 cups

Note: measurements are estimated based off the vanilla cake recipe using standard US cake pans and sizes. Measurements used are for 2" tall cake pans only. Your results may vary. Do not overfill cake pans above manufacturer's recommended guidelines.


Recipe

vanilla bean buttercream flowers
Print Recipe
5 from 23 votes

Easy Vanilla Bean Buttercream Frosting

Delicious, rich and easy vanilla bean buttercream frosting recipe that anyone can make. This is not a crusting buttercream. It has a slight shine and chills nicely in the fridge. Takes 10 minutes to make and is fool-proof! Light, fluffy and not too sweet. 
Prep Time5 minutes mins
mixing time20 minutes mins
Total Time10 minutes mins
Course: Dessert
Cuisine: American
Servings: 8 cups
Calories: 849kcal
Author: Liz Marek

Equipment

  • Stand Mixer
  • Whisk Attachment
  • Paddle Attachment

Ingredients

  • 24 oz unsalted butter room temperature. You can use salted butter but it will affect the taste and you need to leave out additional salt
  • 24 oz powdered sugar sifted if not from a bag
  • 1 whole vanilla bean or 1 tablespoon vanilla bean paste
  • ½ teaspoon salt
  • 6 oz pasteurized egg whites
  • 1 TINY drop purple food coloring (optional) for whiter frosting
US Customary - Metric

Instructions

  • Place egg whites and powdered sugar in a stand mixer bowl. Attach the whisk and combine ingredients on low and then whip on high for 5 minutes 
  • Add in your butter in chunks and whip with the whisk attachment to combine. It will look curdled at first. This is normal. It will also look pretty yellow. Keep whipping. 
  • Let whip on high for 8-10 minutes until it's very white, light and shiny. 
  • Add in your vanilla and salt
  • Switch to a paddle attachment and mix on low for 15-20 minutes to make the buttercream very smooth and remove air bubbles. This isn't required but if you want really creamy frosting, you don't want to skip it. 

Video

Nutrition
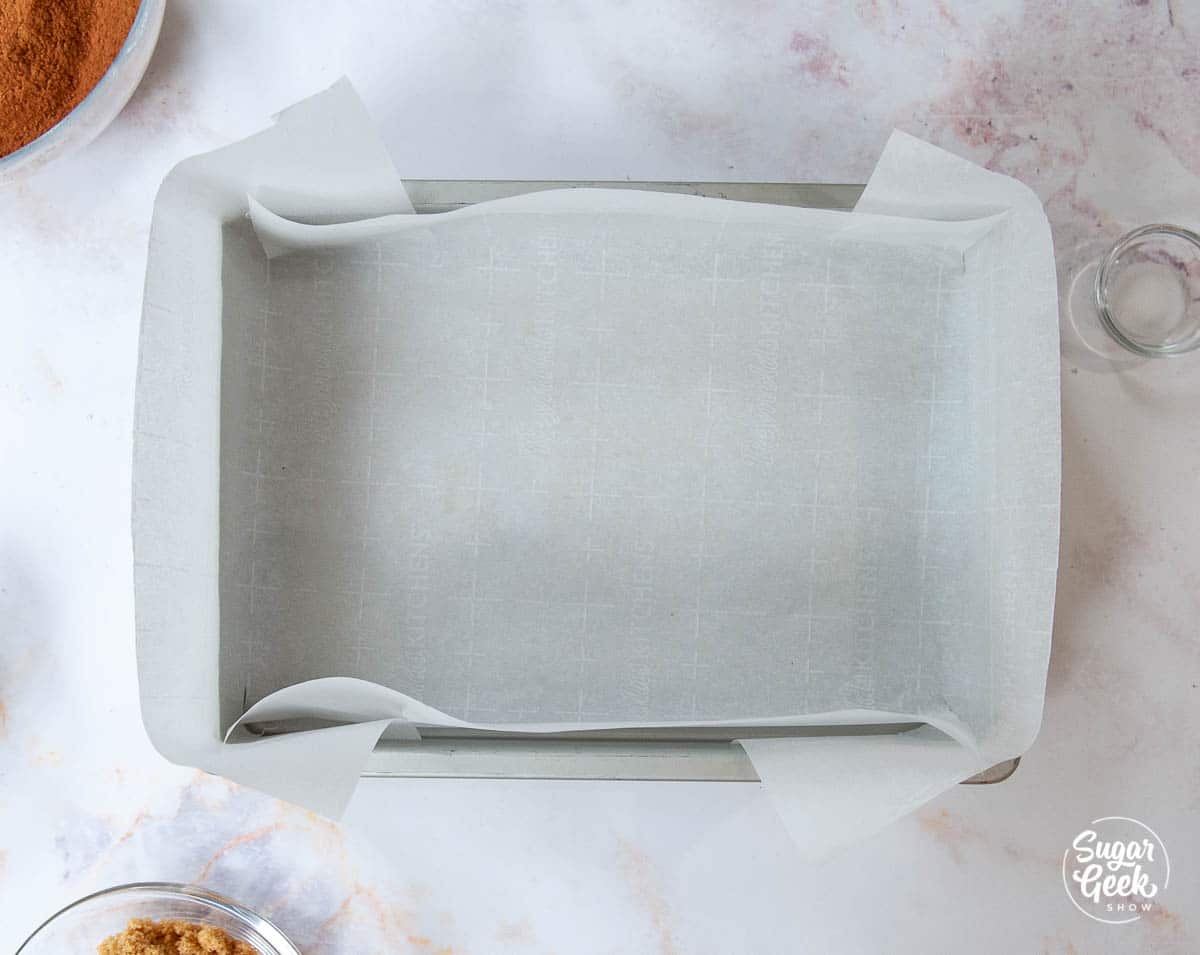
Serving: 2g | Calories: 849kcal | Carbohydrates: 75g | Protein: 2g | Fat: 61g | Saturated Fat: 38g | Cholesterol: 162mg | Sodium: 240mg | Potassium: 18mg | Sugar: 74g | Vitamin A: 2055IU | Calcium: 18mg | Iron: 0.4mg

dried pineapple flower on vanilla cupcake

September 25, 2019 Blog

Dried Pineapple Flowers

How to make beautiful dried pineapple flowers

Can you believe this beautiful flower is made from a sliced pineapple? I'll be honest, I was skeptical about this technique at first! But it's actually really simple, and they turned out super cute!

These dried pineapple flowers are chewy, sweet, and delicious, and were the perfect cupcake decorations for my daughter, Avalon's Moana-themed birthday party.

dried pineapple flowers on vanilla cupcake with yellow wrapper and white buttercream frosting

When I was growing up we dried fruit a lot. My dad grew up on a farm in New Zealand so canning, freezing and drying food was a common practice around our home. My favorite dried fruit were apples. Always so much sweeter and softer than the store-bought kind.

My dad had a huge wooden dehydrator that he built himself and every year we would collect as much fruit as we could, spread it out on the mesh trays and dry fruit. For weeks you could smell that sweet fruity aroma wafting from our house all the way down the road.

I haven't dried much fruit as a baker but as my daughter gets older, I've been moving more into things she wants to not only make but eat. So elaborate cakes sometimes get put by the wayside to make room for homemade gummies, chocolate chip muffins, and sugar cookies.

With her Moana themed birthday coming up, I couldn't resist making some cute dried pineapple flower cupcakes for her party!

Are pineapple flowers easy to make?

dried pineapple flowers on cupcake on wooden plate

In the end, these were very simple to make and are totally WORTH IT! The most tedious part was just removing the "eyes" from the pineapple.

It also took me a little while to get the hang of slicing the pineapple super thin. I made it harder on myself and was using a very ripe pineapple, so it was very juicy and soft. I'd recommend using a less-ripe pineapple if you want crisper flowers. Since we are dehydrating the flowers, we don't need a super-ripe pineapple.

Don't worry, thoroughly enjoyed eating the pineapple flower rejects! You could also dry the weird-looking pieces and use them as a healthy snack. Yum!

Tips for making great dried pineapple flowers

  • Choose a pineapple that isn't too ripe. A less ripe pineapple will hold their shape better when trimming them and slicing.
  • Don't take out the core. Don't use a pineapple corer to remove the outer skin because you need the center intact to make those beautiful pineapple flowers.
  • Don't worry about ragged edges. If your slices end up looking a little ragged, it just adds to the overall ruffly look of the flower.

How to make dried pineapple flowers

  1. Preheat the oven to 200ºF
  2. Cut the top and bottom off of your pineapple with a sharp knife
  3. Trim off the outer skin
  4. Use a potato peeler to remove the little eyes all around the pineapple. This took me about 15 minutes.
  5. Slice your pineapple very thinly and place the slices onto some paper towels to remove excess moisture.
  6. Place the pineapple slices onto a cookie sheet lined with a silicone baking mat to prevent sticking
  7. Bake for 90 minutes (more if they still aren't browning around the edges or looking dry). Flip them over after 60 minutes so promote even drying.
  8. Once dry, remove them from the cookie sheet and place them into a cupcake tin to dry overnight at room temperature.

cut off the top and bottom of the pineapple with a sharp knife
Trim off the outside skin of the pineapple with a sharp knife
Use a potato peeler to dig out all the eyes of the pineapple
Lay the pineapple on it's side and cut very thin slices with a sharp knife
Dry the pinepple slices on paper towels then transfer to a cookie sheet. Bake 90 minutes at 200ºF
Place warm slices into a cupcake tin until cool and the pineapple slices can hold their shape

Where did pineapple flowers originate?

Southern bakers have used pineapple flowers as a popular decoration for hummingbird cake. Hummingbird cake is much like carrot cake but without the carrots. It's really delicious paired with cream cheese frosting.

You can use pineapple flowers to decorate cakes, cupcakes and other desserts! They look so pretty!

dried pineapple flower on cupcake

How long do pineapple flowers last?

Pineapple flowers can become floppy and soft if you leave them out for too long. Store them in an airtight container at room temperature for up to three days but really, they last quite a while.

Recipe

dried pineapple flower on vanilla cupcake
Print Recipe
5 from 2 votes

How To Make Dried Pineapple Flowers

Dried pineapple flowers are so easy to make! Just peel and slice a fresh pineapple, dry the slices in the oven and shape in a cupcake tin. You will love how amazing these pineapple flowers look on cakes, cupcakes and desserts!
Prep Time20 minutes mins
Cook Time1 hour hr 30 minutes mins
Drying3 hours hrs
Course: Dessert
Cuisine: American
Servings: 24 flowers
Author: Liz Marek

Equipment

  • Chef's knife
  • Potato peeler
  • Paper towels
  • Baking sheet
  • Cupcake Tin
  • Silicone baking mat

Ingredients

  • 1 medium pineapple not too ripe

Instructions

  • Preheat your oven to 225 degrees F.
  • Using a sharp chef's knife, cut off the top and bottom of the pineapple.
  • Place the pineapple upright, and cut off the rind in strips, working your way around the pineapple.
  • With the sharp end of a potato peeler, remove the eyes of the pineapple, saving as much flesh as you can.
  • With the pineapple on its side, cut thin slices. The thinner you can get, the more delicate your flowers will be.
  • Place the pineapple slices on paper towels and pat dry to remove excess moisture.
  • Place the pineapple slices onto a baking sheet lined with a silicone mat and bake for 90 minutes, or until browned on the edges.
  • While the slices are still warm and pliable, remove the pineapple flowers from the baking sheet and place them into a cupcake tin to cool completely.
  • Let cool overnight on the countertop for best results.
  • Store in an airtight container on the countertop up to 3 days.

Video

Nutrition
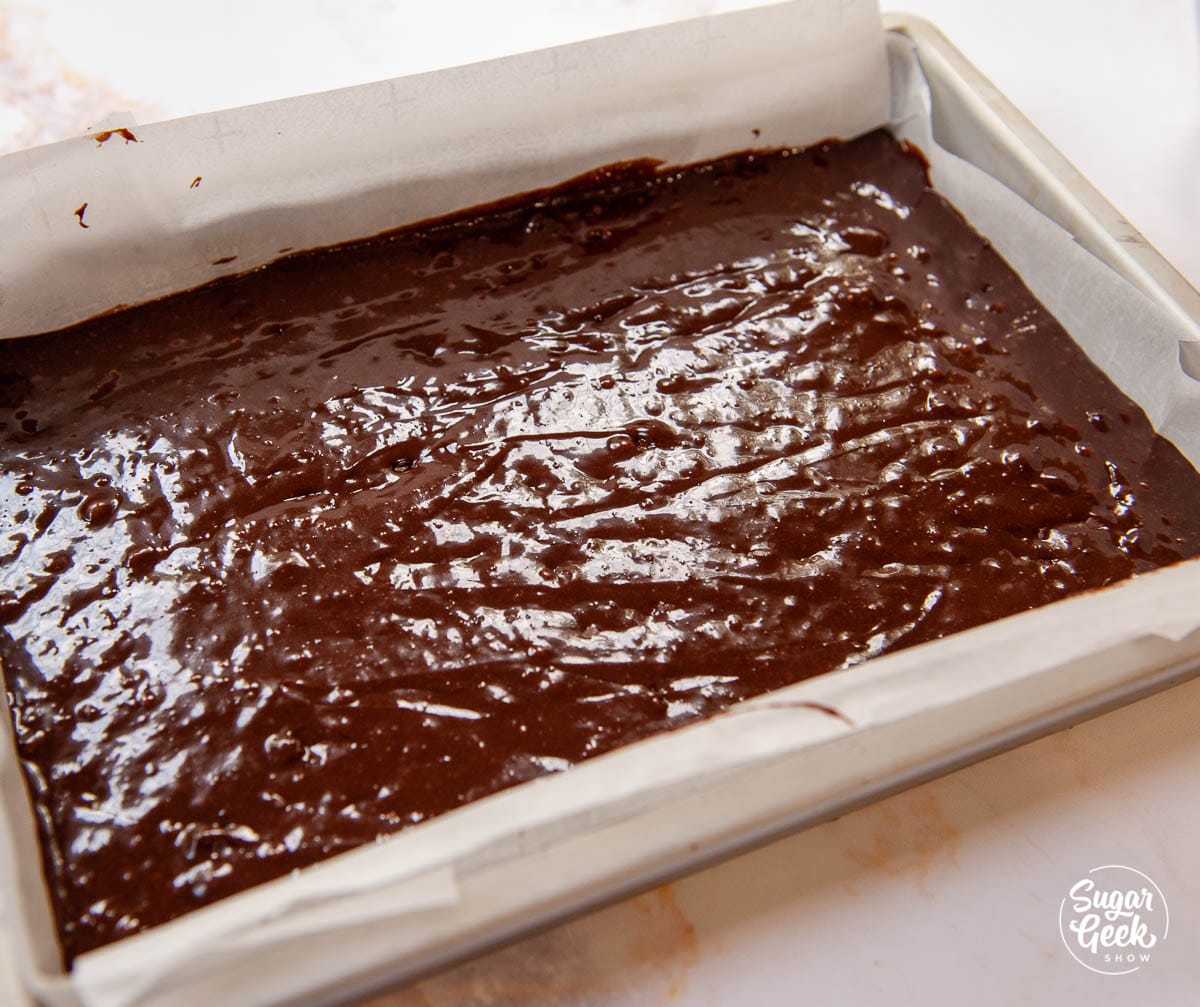
Serving: 1g

Smiling woman holding a piping bag over a three tier square wedding cake.

September 23, 2019 Free Tutorials

How To Make A Square Wedding Cake

This is everything I wish I had known about how to make square a wedding cake when I made my first one in 2009. I'm re-making that exact disaster start to finish using my white cake recipe layered, stacked, and covered in fondant.

Quick Glance: How to Make a Square Wedding Cake

  • Tutorial Name: How to Make a Square Wedding Cake
  • Why You'll Love It: A complete week-long roadmap for making a 3-tier square wedding cake that has sharp corners, doesn't crack, and doesn't collapse on delivery
  • Time and Difficulty: 4 days from prep to delivery • Advanced
  • Main Materials: White cake, easy buttercream, fondant, square cake pans, square acrylic disks, milkshake straws, cake board
  • Method: Bake midweek, fill and crumb-coat, frost square tiers using acrylics for sharp corners, cover in fondant using the panel method, decorate the day before, deliver chilled
  • Visual Style: Classic, white-on-white tiered square wedding cake with buttercream flowers
  • Quick Tip: Always chill your square cakes before stacking. A warm cake will collapse under the weight of the tiers above it (don't ask me how I know).
[feast_advanced_jump_to]

My First Wedding Cake Disaster

I was actually proud of this cake when I made it. It was the first wedding cake I ever made back in 2009. The cake was a 12 inch, 10 inch, and 8 inch tiered design. The 12 inch cracked because I didn't level the layers, so I baked a new one. Then I proceeded to stack the new cake warm. You can imagine what happened next. Yep, it cracked again.

Then Dan drove this unchilled wedding cake for two hours to an outdoor beach wedding. Bumps and turns and car vibrations led to that bottom tier turning into a warm crumbly mess. Needless to say, this cake did not do so well. The things I wish I knew when I was a beginner.

I had no idea about how to stack and frost a cake, how to get sharp corners, how to chill my cakes, or how to cover square cakes in fondant. The worst part was that I knew it looked bad but I didn't know how to fix it.

If you struggle with any of those things, this post is for you. Recently, I posted a picture of this first wedding cake on social media to show that everyone starts somewhere. People joked that I should remake it, so I took the challenge.

Back then there was no social media for me to learn from, only books. Books that would say "stack your layers, frost, and make it smooth." I had no idea what that meant or why my cakes didn't match the photos in the books. But that didn't stop me.

Three tier white wedding cake with crooked sides and corners. Bad piping and ugly fondant flowers

Wedding Cake Timeline

When I'm baking wedding cakes for a Saturday delivery, I start baking on Wednesday and have everything crumb-coated and frosted by Thursday so all of Friday is decorating time. I always try to have my cakes fully decorated the day before delivery so if I run into problems, I have time to fix them.

Here is my standard timeline for a Saturday wedding:

  • Tuesday - Review the cake design, make a shopping list, and order anything online I'll need.
  • Wednesday - Grocery shop for supplies. Make the buttercream and fondant ahead.
  • Thursday - Bake the cake layers, chill in the freezer, fill them, and apply the crumb coat. Rest in the refrigerator overnight.
  • Friday - Apply the final coat of buttercream and chill. Make buttercream flowers and freeze them. Cover in fondant, assemble, and decorate the cake.
  • Saturday - Deliver the cake.

If your wedding is on a different day, just shift the timeline back by a few days.

What You Need To Make A Wedding Cake

Here's what I used to make this wedding cake. If you're working from your own design, you may need different sized boards, colors, or amounts of frosting and fondant.

Edible Materials

I covered my cakes in fondant using the paneling method, but you can also use the one-piece method.

  • White cake layers, baked, chilled, and wrapped (I made two double batches of my white cake recipe to get two 10 inch, two 8 inch, and two 6 inch square layers, all 2 inches tall)
  • 10 lbs of white fondant (I made two batches of my LMF Marshmallow Fondant; you can also use any store-bought fondant. I prefer Renshaw Americas brand.)
  • Easy buttercream frosting (I made two double batches)

I applied my frozen buttercream flowers to the cake with a dab of buttercream. I tried to create the same flow of flowers down the corners of the cake. Alternating the dark flowers with lighter flowers.

Once my cake is completed, I put the whole thing back in the fridge to stay chilled. Try a gold drip cake finish for a modern wedding look

Recommended Tools

buttercream flower tools
  • I used acrylic disks to get my cakes really square, but they're optional. You can also try frosting with the upside-down method, which I used for years. It takes a little longer but works just as well.
  • Fondant smoothers
  • 10 inch, 8 inch, and 6 inch square cake pans, 2 inches tall (I have Magic Line pans)
  • Parchment paper
  • 10 inch, 8 inch, and 6 inch square acrylic disks (optional)
  • Brand new razor blade
  • Square cake cardboards (if using acrylics, cut your boards to be 9.5 x 9.5 inches, 7.5 x 7.5 inches, and 5.5 x 5.5 inches)
  • Large serrated knife
  • Offset spatula
  • Bench scraper
  • Thick plastic milkshake straws
  • 12 inch wooden cake board or cake drum (I like Cakeboards Avare. Don't use flimsy cardboard for a 3-tier cake or it could crack and collapse)
  • Piping tips for buttercream flowers - #4 round, #366 small leaf tip, #104 petal tip
  • Flower nail
  • Turntable
  • Turntable extender (optional but makes it easier to frost large layers)

How To Make A Square Wedding Cake Step-By-Step

For exact technique, watch the video tutorial above. Here's the high-level flow:

Square cakes prepped and ready for decorating.
  1. Bake the cake layers. Use my white cake recipe (or WASC if you prefer a doctored mix) baked in good-quality square pans. Cool, wrap, and chill or flash freeze the layers so they're firm before you start working with them.
Square cake frosted in buttercream.
  1. Fill and crumb coat each tier. Trim the brown edges, tort the layers, stack with buttercream filling, and apply a thin crumb coat to seal in crumbs. Chill until firm.
square buttercream cake
  1. Frost the final coat. Apply a smooth final layer of buttercream to each chilled tier. Use square acrylics for sharp corners or the upside-down method. Chill again.
Finished fondant paneled cake
  1. Cover each tier in fondant (optional). Roll out conditioned fondant and either panel each tier or cover in one piece. Smooth with fondant smoothers, then chill.
stacking a square wedding cake with milkshake straws
  1. Stack the tiers. Insert milkshake straw supports into the bottom and middle tiers, lift each tier into place with an offset spatula, fill gaps with buttercream, and run a center dowel through the whole cake for stability.
Woman decorating a three tier square wedding cake.
  1. Decorate. Pipe details and apply pre-made buttercream flowers (made ahead and frozen) according to your design. For a modern look, try a gold drip finish instead. Chill until delivery.
Three tier square white buttercream cake with purple buttercream flowers
  1. Deliver chilled. Transport the cake on a flat, level surface in an air-conditioned vehicle. Aim for 1 to 2 hours before the ceremony so the cake has time to come up to temperature without sagging in the heat.

If you're a beginner, watch my how to decorate your first cake tutorial first to nail the foundational frosting and stacking techniques. For round wedding cakes, see my marbled wedding cake tutorial.

Slice of vanilla cake with buttercream and purple buttercream flowers on a white plate

Common Wedding Cake Problems To Avoid

No sketch or plan before you start. Wedding cakes are too complicated to wing it. Sketch the design, list every decoration, and make sure the design is buildable in advance.

Stacking warm cakes. This was my first-cake mistake. Warm cakes collapse under the weight of the tiers above. Always chill or freeze your layers before frosting and stacking.

Skipping the dowel through the center. Without a center dowel, a cake can lean or topple in transit. The 30 seconds it takes to insert one is worth it.

Cardboard or supports that are too flimsy. Use sturdy cake boards under each tier and a wooden cake drum at the base. A 3-tier cake is heavy and flimsy supports will collapse.

Cake sweating after taking out of the fridge. Don't touch it. Let the surface dry naturally with a fan blowing across it. Touching wet fondant smudges the surface.

Delivering an unchilled cake. Warm cakes shift, slide, and crack on the road. A well-chilled cake holds up to vibration and looks crisp on arrival.

Driving the cake on your lap. Almost guaranteed disaster. The cake should be on a flat, level surface in the car with the AC blasting.

Final Thoughts

Making a wedding cake is not as simple as some articles make it sound. When I was first learning, every tutorial I read made it seem easy. When problems came up, I realized I didn't have all the information I needed for success. Tiered and structured cakes get their own lessons in my online cake decorating classes.

I hope this long post didn't discourage you. As you can see, I was no expert when I tried my first cake, but you get better with practice. Anyone can make a beautiful wedding cake. The biggest thing is to give yourself time, plan ahead, and trust the process. The first cake will not be perfect, but it'll be way better than my 2009 disaster, I promise you that.

Square Wedding Cake FAQs

How far in advance can I make a wedding cake?

You can bake the cake layers up to a month in advance and freeze them, wrapped tightly in plastic. The buttercream and fondant can be made up to a week in advance and refrigerated. The decorated, fully assembled cake should be made the day before delivery, kept refrigerated, and delivered chilled.

How much wedding cake do I need to feed my guests?

Plan on one slice per guest. A 6-inch tier serves about 12, an 8-inch tier serves about 24, a 10-inch tier serves about 38, and a 12-inch tier serves about 56. A standard 3-tier wedding cake (6, 8, and 10 inch) feeds about 75 people.

Can I make a wedding cake without fondant?

Yes, you can decorate a wedding cake entirely with buttercream. A buttercream-only wedding cake is simpler but less stable in warm environments. For outdoor weddings or hot climates, fondant gives you a sturdier shell that holds up better.

Can I deliver a wedding cake assembled, or should I stack on site?

For 3 tiers or fewer, I assemble at home and deliver fully stacked. For 4 or more tiers, stack on site to reduce the chance of a delivery disaster. Either way, the bottom tier should always be on a sturdy cake drum and there should be a center dowel running through all the tiers if you assemble in advance.

How do I keep buttercream flowers from melting on a hot wedding day?

Keep the buttercream flowers frozen until the moment you apply them, and keep the cake refrigerated until delivery. Once the cake is at the venue, place it in the coolest spot possible and out of direct sunlight. If the venue is over 80°F, switch to fondant or gum paste flowers, which won't melt.

Can I use box mix for a wedding cake?

Box mix is generally too light and fluffy to hold up to stacking, but if you want to use it, modify it with the WASC method (white almond sour cream cake), which adds butter and density and makes the box mix sturdy enough for tiered cakes.

What's the safest way to transport a wedding cake?

Transport the cake well-chilled, on a flat level surface (the floor of an SUV or truck bed works), in a cold air-conditioned vehicle. A cake safe with a central dowel is the safest option. Never hold a cake on your lap or in someone's hands during transport.

More Cake Tutorials To Try

  • close up of a white cake with gold drip and pink piped borders on a blue plate
    How To Decorate A Cake (Beginners Guide)
  • how to panel a square cake in fondant
    How To Panel A Square Cake
  • How to get perfect square cakes using acrylics
    Square cake with acrylics tutorial
  • Marbled fondant tutorial

Ready To Master Cake Decorating?

Join Sugar Geek University and learn professional techniques through detailed cake decorating courses, tutorials, and real kitchen demonstrations by
award-winning cake decorator, Liz Marek.

Start Learning Now
Te Fiti Cake Tutorial

September 15, 2019 Course Preview

Te Fiti Cake Tutorial

Skill level: Intermediate

You guys have been asking for an all cake bust tutorial so here it is! This Tefit cake is made out of all cake!

Learn how to sculpt the body and head out of all cake, how to add realistic features, and a gravity defying hand, gumpaste flowers and the mossy texture of Te Fiti. You'll also learn how to make some really cool isomalt effects like the glowing heart of Te Fiti and the isomalt water board.

1:55:38 Minutes of Instruction

What You Will Learn

  • How to plan out cake tiers in a sculpted cake and estimate how many cake servings you will get from this sculpted cake
  • Tons of tips and tricks on sculpting Te Fiti from all cake (no rice cereal treats)
  • Learn to make a hibiscus flower and stephanotis with gumpaste
  • How to hand-paint the isomalt eyes
  • Learn how to cover a cake board with isomalt

Te Fifi Cake Online Course Tutorial with step-by-step instructions on how to make a sculpted cake that looks like Te Fiti!

Tutorial Chapters

  1. Te Fiti template 0:36
  2. Building the structure 5:15
  3. Sculpting the cakes 10:20
  4. Making the neck and face 20:44
  5. Making the hair 26:06
  6. Shaping the arms and bust 27:23
  7. Ganaching the cake 30:58
  8. Making Stephanotis 32:58
  9. Making a hibiscus 38:39
  10. Hibiscus center 46:26
  11. Dusting the hibiscus 49:25
  12. Assembling the hibiscus 58:00
  13. Creating the face 1:01:08
  14. Making isomalt eyes 1:12:10
  15. Painting the eyes 1:15:17
  16. Covering the front in fondant 1:19:49
  17. Shaping the face 1:21:41
  18. Covering the back in fondant 1:28:07
  19. Making the arm 1:31:12
  20. Covering the arm 1:34:57
  21. Adding Moana 1:38:58
  22. Airbrushing and painting 1:40:11
  23. Isomalt board 1:43:57
  24. Piping vines and leaves 1:47:18
  25. Finishing the board 1:50:13
  26. Adding the flowers 1:54:28

Downloads

Materials List

Cake Structure Template

Hibiscus Flower Reference

Te Fiti Face Reference

Te Fiti Cake Tutorial

September 15, 2019 Paid Video

Te Fiti Cake

Skill level: Intermediate

You guys have been asking for an all cake bust tutorial so here it is! This Tefit cake is made out of all cake!

Learn how to sculpt the body and head out of all cake, how to add realistic features, and a gravity defying hand, gumpaste flowers and the mossy texture of Te Fiti. You'll also learn how to make some really cool isomalt effects like the glowing heart of Te Fiti and the isomalt water board.

1:55:38 Minutes of Instruction

What You Will Learn

  • How to plan out cake tiers in a sculpted cake and estimate how many cake servings you will get from this sculpted cake
  • Tons of tips and tricks on sculpting Te Fiti from all cake (no rice cereal treats)
  • Learn to make a hibiscus flower and stephanotis with gumpaste
  • How to hand-paint the isomalt eyes
  • Learn how to cover a cake board with isomalt

Tutorial Chapters

  1. Te Fiti template 0:36
  2. Building the structure 5:15
  3. Sculpting the cakes 10:20
  4. Making the neck and face 20:44
  5. Making the hair 26:06
  6. Shaping the arms and bust 27:23
  7. Ganaching the cake 30:58
  8. Making Stephanotis 32:58
  9. Making a hibiscus 38:39
  10. Hibiscus center 46:26
  11. Dusting the hibiscus 49:25
  12. Assembling the hibiscus 58:00
  13. Creating the face 1:01:08
  14. Making isomalt eyes 1:12:10
  15. Painting the eyes 1:15:17
  16. Covering the front in fondant 1:19:49
  17. Shaping the face 1:21:41
  18. Covering the back in fondant 1:28:07
  19. Making the arm 1:31:12
  20. Covering the arm 1:34:57
  21. Adding Moana 1:38:58
  22. Airbrushing and painting 1:40:11
  23. Isomalt board 1:43:57
  24. Piping vines and leaves 1:47:18
  25. Finishing the board 1:50:13
  26. Adding the flowers 1:54:28

Downloads

Materials List

Cake Structure Template

Hibiscus Flower Reference

Te Fiti Face Reference

September 8, 2019 Blog

Bosch Mixer Review

The Bosch Universal Plus Mixer - Pros and Cons

You may have noticed a new mixer in my kitchen in a lot of my latest recipe videos like my fresh strawberry cake recipe and applesauce spice cake. I've been testing out a new mixer called the Bosch Universal Plus. What drew me to this mixer was its unique open-top design, large capacity, and powerful motor. I had also heard that Bosch mixers were really good mixers. Did the Bosch live up to expectations? Read on to see what I loved about the Bosch and what I didn't love.

bosch mixer review

Why did I get a new mixer?

Everyone by now has probably seen my green Kitchenaid, Oscar. He's been with me since the beginning and is very near and dear to my heart. I originally purchased him for $50 on craigslist over 10 years ago! I couldn't afford a brand new mixer at the time. He's really held up well considering how much I've used him for!

I developed my first vanilla cake recipe in Oscar, published my first book Artisan Cake Company's Visual Guide To Cake Decorating using Oscar and even invented my now-famous LMF marshmallow fondant recipe in that little green mixer. I even taught my daughter how to bake on this little mixer. He's been a real champ for sure!

4 year old girl baking sugar cookies

He has some problems though, he's prone to wobbling when I mix on high and has even fallen off the countertop a couple of times! I call this the mixer dance ha! The metal rod that hinges the head of the mixer constantly wiggles it's way out and I have a special hammer I use to knock it back in.

But mostly I just don't love stopping to scrape the mixing bowl and I have a hard time getting my ingredients in the bowl without making a huge mess.

I did get a big 6 qt lift style Kitchenaid a few years back for Christmas (bless Dan's heart) but it made such a loud screeching noise when it was on high, I couldn't stand it. I gave it away.

How did I hear about this Bosch mixer?

The first time I saw a Bosch mixer, it was in one of iambaker's cake videos. I was amazed that I could see INSIDE her bowl during the video! But I had no idea what mixer it was. The next time I saw a Bosch mixer, it was at the Everything Food Conference. Bosch was a vendor and I finally got to see one of these mixers up close and personal.

bosch universal plus mixer black

After watching a demo and hearing about all the perks of the mixer (large bowl, powerful motor, removable lid etc) I knew I wanted to try one out! Luckily, I was enrolled in Foodie Bootcamp that year and got to make a great connection with a Bosch representative. They sent me a mixer to try out and give an honest review.

What's it like using a Bosch Mixer?

I admit I was overwhelmed with all the new attachments, bowl design, and scrapers. It's a little strange to go from one type of mixer that you know inside and out and learn a new one. I started out with recipes like my easy buttercream and WASC recipe since I wasn't sure if the new mixer would need me to make adjustments to mixing times.

bosch mixer review

I was genuinely shocked at how much I loved the Bosch mixer right off the bat. Not only is the motor powerful but it doesn't even bog down when you have the bowl FULL of buttercream or cake batter. The double mixing action makes scraping completely unnecessary. Buttercream comes together and is light and fluffy in about half the time as my other mixer.

What do I love and not love about the Bosch mixer?

bosch universal plus bakers pack

What I Love:

  • Capacity! 6.5 quarts, it just holds. SO. MUCH!
  • Efficient mixing, double paddles/whisks, scraper attachments. Automatically scrapes for you! (note: carefully put the scraper attachment on as I demonstrate in the video, I've broken one before from just pulling it off and on!)
  • The mixer is super powerful and you don't have to turn it up high to get the results you are needing.
  • No more mixer dance! The mixer has handy dandy suction cups on the bottom that keep the mixer in place.
  • It comes with a splash guard/top to prevent huge messes which I tend to make often.
  • The dual mixer really folds the batter as it's mixing so it is extremely efficient and really incorporates all the ingredients really well. It makes the batter consistent all the way through.
  • Sound difference. It's so quiet compared to my 6-quart kitchen aid.
  • Easy clean-up. I just give the attachments a quick soap up and spray them down with hot water then leave them to air dry.
  • The price! Compared to a 6qt Kitchenaid, the price of this Bosch with all the attachments is a really good deal!
  • Compact design. Because the mixer is not as tall as my Kitchenaid, I can easily store it in my lower cabinet when I'm not using it and it's not as heavy.

What I Don't Love As Much: 

  • The splash guard can get in the way sometimes if I have it on and need to add in more ingredients as it's mixing.
  • I wish the bowl had a handle so I could pour the batter into cake pans a bit easier.
  • I don't love that the mixing accessories and attachments are plastic, so you do need to be a bit more cautious when you are assembling and disassembling the components.
  • A metal bowl would be fantastic so I could make Italian meringue buttercream.

Bosch Mixer Bakers Pack

Main features of the Bosch Universal Plus Mixer Bakers Pack

*Note: The Bakers Pack is no longer available at this time, but you can buy all of the attachments and the Bosch Universal Plus mixer separately using my affiliate link.

For you technical people out there, I've broken down the main features of the Bosch Mixer Universal Plus with the bonus attachments.

  • Metal Whip Drive
  • (2) Cookie Paddle Attachments
  • (2) Cake Paddle Attachments
  • Bowl Scraper (compatible with all attachments)
  • Sturdy 6.5 quart Mixing Bowl
  • Dough Hook
  • (2) Wire Whips
  • Splash Cover and Removeable Lid

Technical Features of the Bosch Universal Plus Mixer:

  • 6.5 quarts
  • Powerful 800 Watt Motor
  • 4 speeds & Pulse/Momentary Switch
  • Belt drive transmission
  • Overload and restart motor protection
  • 4 suction cup feet keep machine securely in place
  • Bowls and most accessories are dishwasher safe
  • Removable drive shaft for easy cleaning
  • 3-year warranty on motor and transmission
  • 1-year warranty on attachments and other parts
  • Dozens of attachments and accessories available
  • Ergonomic, unique, modern design.
  • The motor is located beneath the bowl- making it more compact and lightweight.

Total Cost: $455 

Standard Kitchenaid Features of the 600 Pro Series Lift-Bowl 6 qt Mixer From Kitchenaid

What I don't love about my KitchenAid is even though there are 10 speeds, the motor bogs down when the bowl is full. The head gets in the way of adding ingredients. My mixer wobbles when it's on high speed and overheats. I have to stop the mixer and scrape the bowl to make sure everything is incorporating and this often leads to spilling or getting my hand dunked in the cake batter. The spiral dough hook (pictured below) is absolutely useless for making bread or fondant. The dough just sticks to it and spins in a circle.

Kitchenaid 600 series

These are the standard attachments that the Pro 600 Series 6 qt Kitchenaid Bowl- Lift mixer comes with

  • 6 qt Stainless Steel Bowl
  • Coated Flat Beater
  • Coated Powerknead
  • Spiral Dough Hook
  • Wire Whip
  • Pouring Shield

Extra items like artisan dough hook and bowl scraper are extra (about $45)

Technical Features

  • Bowl lift design
  • 10 speeds
  • 1-year warranty
  • 575-watt motor
  • Direct-drive transmission
  • All-metal body

Total Cost: $499 ($544 with additional attachments)

Final thoughts

I'm genuinely thrilled with this mixer. Does that mean you NEED to have it too? Not necessarily. You might be in the $50 second-hand mixer stage of your baking career and that's OK! I get it! It's taken me 12 years to finally find the perfect mixer for me!

I hope you found this mixer review helpful. This is my honest and true advice and review. I was not paid to write this review but I was given a free mixer to try (full transparency). I only recommend products and tools that I genuinely like. If you end up trying out this mixer, I'd love to hear your thoughts too!

Enjoy this video I made testing out the mixer capacity and features!

how to panel a square cake in fondant

September 2, 2019 Blog

How To Panel A Square Cake

Panel A Square Cake In Fondant And Keep Those Sharp Edges And Corners

Have you ever spent forever getting the perfect buttercream edges on your square cake only to cover it in fondant and lose all that hard work? Sometimes a soft corner on a square cake is just fine but if you're making buildings or just need SUPER sharp edges, maybe you should try paneling! 

how to panel a square cake in fondant

Paneling is also a great way to cover your cake in fondant without the stress of the fondant tearing on the corners. Some beginners prefer paneling over covering with one piece of fondant. You can also panel with modeling chocolate! Yum! 

What is paneling?

Paneling is simply covering your frosted cake and chilled cake in multiple pieces of fondant or modeling chocolate instead of one. You can also panel round cakes in fondant. I also like to panel double barrel cakes that are super tall. 

How do you panel a square cake in fondant?

What You Need

  • Square cake frosted and chilled until the buttercream (or ganache) is very hard
  • Fondant or modeling chocolate 
  • Brand new razor blade or x-acto blade
  • Rolling pin
  • Fondant smoother
  • Cake cardboards 
  • Ruler
  • X-acto blade
  • Parchment Paper
  • Turntable 

Step 1

First, we need to roll out our fondant to about ⅛" thick. Try to keep your fondant in the shape of a square. I am paneling an 8" square cake. We're going to panel the top of the cake first to reduce the visible seams from the front of the cake. Trim your fondant into a square about 9"x9" so you have a little excess to work with. Place the fondant in the freezer for about 10-15 minutes.

square buttercream cake

Step 2

Roll out another piece of fondant in the same way. I measured my cake and it's about 5" tall and 8" wide so I cut my fondant to be 6" tall and 9" wide. Make sure the bottom is trimmed nice and straight so that it lines up with the bottom of the cake easily. Place the fondant onto a cake board and into the freezer. Make three more of these panels for the other sides of the cake until you have a total of four fondant panels. 

Step 3

Take your top panel out of the freezer and lay it on top of the cake. It should be very firm and not bend. Work quickly because the cold fondant can start to sweat. Make sure your room is as cold as possible when doing this technique to reduce sweating. 

Place a piece of parchment paper on top of the cake and then a cardboard round. Flip the whole cake over so that you can trim the fondant to the exact size of the cake (see video for demonstration). Don't worry, flipping a chilled cake does not harm it in any way. I have flipped cakes up to 16" in size. After that, they get a little too heavy to flip. 

After trimming away the excess fondant, flip the cake back over. 

Step 4

Take your next fondant panel and place it against the side of the cake. Use your fondant smoother to press the fondant to the buttercream and make a good connection. If you are using American buttercream or ganache, you may need to mist the surface with water before attaching the fondant to get it to stick. 

how to panel a square cake

Now use your sharp razor blade to trim the excess fondant off. The trick is to keep the blade flat against the side of the fondant as a guide as you cut. 

how to panel a square cake

Step 5

After trimming your fondant, you may notice a gap between the side panel and top panel. To close this gap, use your fondant smoothers to push the two edges together. If your fondant is getting too sweaty, you can dust it with a cornstarch poof to help soak up some of the moisture. 

how to reduce the gap between fondant panels with fondant smoothers

Repeat this process with the remaining three panels and you're done! 

Paneling a square cake this way is a bit more time-consuming than covering a square cake in one piece of fondant but it does result in super sharp and clean corners so the extra time is worth it. 

how to panel a square cake

Visual learner? Watch my video tutorial on how to panel a square cake using fondant


Realistic Gumpaste Rose Tutorial

September 1, 2019 Course Preview

Realistic Gumpaste Rose Tutorial

Skill level: Intermediate

Guest instructor Arati Mirji joins us to teach a stunning course on how to create a realistic gumpaste rose. Arati breaks down how to make realistic roses that are so realistic, it's hard to believe they aren't real!

Learn Arati's step-by-step process, including what type of gumpaste she uses, her tricks and techniques for making the petals and coloring the rose.

1:24:51 Minutes of Instruction

What You Will Learn

  • How to create a realistic and flexible gumpaste rose
  • Learn how to create the rose center and petals
  • How to create the leaves and calyx
  • Arati's tips and tricks to get a beautiful realistic gumpaste flower

Realistic Gumpaste Rose Tutorial

Tutorial Chapters

  1. Variances of Gumpaste 0:27
  2. Unique qualities of Gumpaste 1:36
  3. Coloring the Gumpaste 4:16
  4. Preparing the paste 5:40
  5. Covering the center 16:49
  6. Assembling the petals 19:10
  7. Making 2nd set of petals 30:32
  8. Assembling 2nd set of petals 35:10
  9. Making 3rd set of petals 40:30
  10. Shaping 3rd set of petals 43:40
  11. Assembling 3rd set of petals 46:02
  12. Making 4th set of petals 50:32
  13. Shaping 4th set of petals 53:42
  14. Making the calyx 59:32
  15. Attaching the calyx 1:03:20
  16. Shaping the calyx 1:05:25
  17. Coloring the cream flower 1:06:22
  18. Making the leaves 1:13:40
  19. Coloring the leaves 1:17:26
  20. Assembling the leaves 1:21:28
  21. Attaching the leaves 1:23:43

Downloads

Materials List

Realistic Gumpaste Rose Tutorial

September 1, 2019 Paid Video

Realistic Gumpaste Rose Tutorial

Skill level: Intermediate

Guest instructor Arati Mirji joins us to teach a stunning course on how to create a realistic gumpaste rose. Arati breaks down how to make realistic roses that are so realistic, it's hard to believe they aren't real!

Learn Arati's step-by-step process, including what type of gumpaste she uses, her tricks and techniques for making the petals and coloring the rose.

1:24:51 Minutes of Instruction

What You Will Learn

  • How to create a realistic and flexible gumpaste rose
  • Learn how to create the rose center and petals
  • How to create the leaves and calyx
  • Arati's tips and tricks to get a beautiful realistic gumpaste flower

Tutorial Chapters

  1. Variances of Gumpaste 0:27
  2. Unique qualities of Gumpaste 1:36
  3. Coloring the Gumpaste 4:16
  4. Preparing the paste 5:40
  5. Covering the center 16:49
  6. Assembling the petals 19:10
  7. Making 2nd set of petals 30:32
  8. Assembling 2nd set of petals 35:10
  9. Making 3rd set of petals 40:30
  10. Shaping 3rd set of petals 43:40
  11. Assembling 3rd set of petals 46:02
  12. Making 4th set of petals 50:32
  13. Shaping 4th set of petals 53:42
  14. Making the calyx 59:32
  15. Attaching the calyx 1:03:20
  16. Shaping the calyx 1:05:25
  17. Coloring the cream flower 1:06:22
  18. Making the leaves 1:13:40
  19. Coloring the leaves 1:17:26
  20. Assembling the leaves 1:21:28
  21. Attaching the leaves 1:23:43

Downloads

Materials List

Room temperature ingredients make a huge difference in your recipes. Learn how I warm up my cold ingredients from eggs to cream cheese, quickly and easily.

August 31, 2019 Blog

Room Temperature Ingredients Hacks

Room Temperature Ingredients Equal Recipe Success

Taking the time to bring ingredients to room temperature (about 70ºF) can feel annoying and often times even I forget. You might be tempted to just skip this step but trust me, recipe success depends on room temperature ingredients. These are my tips for quickly bringing ingredients to room temperature quickly. 

room temperature ingredients

Do I really need room temperature ingredients?

If you've made any of my recipes (or most recipes in general) you may have read that you need room temperature ingredients. Usually, things like eggs, butter, and milk but can also include ingredients like sour cream, egg whites or mayonnaise. 

The reason behind all this warming of ingredients? Creating an Emulsion. When you combine two or more ingredients that don't normally mix together (like oil and water) and getting them to stay mixed, you've created an emulsion. 

cake batter is an example of an emulsion

Mayonnaise is a great example of a simple emulsion. If you just mixed egg yolks and oil together with a fork, the oil would separate from the eggs. But if the oil is added slowly while continuously whisking, the oil and egg yolk becomes a new mixture and it will not separate. This is the emulsion. 

What happens when you don't have room temperature ingredients?

When ingredients are different temperatures, they do not like to mix. Bringing ingredients to the same temperature helps them to combine together. The reason recipes often say "room temperature" is because most ingredients in a recipe are room temperature already unless they have been refrigerated. 

If you don't bring ingredients to room temperature, you end up with cold chunks of butter in your frosting, uneven baking, flat cakes, and curdled buttercream. 

If you've ever tried to combine cold fruit reduction or curd with buttercream you may notice the two do not mix well and it appears curdled. 

curdled strawberry buttercream

But if you warm the fruit up a little and then mix it with the buttercream, suddenly it all comes together.

strawberry buttercream

When all the ingredients in your recipe are the same temperature they come out better. Cake batters are smoother and ingredients and air are distributed evenly. Cakes and cupcakes rise better and have a better texture. 

Sometimes in my Cake Newbs baking group, someone will post a photo of a cake with an oily, wet layer at the bottom and ask what went wrong. 99% of the time the reason is that one of their ingredients were not room temperature. Usually the eggs. This causes the batter to curdle and split during baking. The oil settles at the bottom, the cake has a coarse texture and doesn't rise very well. 

cake baked with ingredients that where not room temperature

How do you bring ingredients to room temperature?

Usually, you would bring anything cold to room temperature a few hours before you need to use them. Depending on how hot or cold your room is, this could take quite a while. I don't know about you but I very rarely think about bringing ingredients to room temperature until it's too late.

Don't worry, you can still warm up your ingredients really quickly using some simple methods. 

How to bring butter to room temperature

Butter is a very common (and delicious) ingredient in most baked goods. Depending on what you're making, it's usually at room temperature. The reason? Well, it's really hard to get butter to combine with anything when it's cold and hard as a rock. 

cold butter

Butter is one of the most common oil-based ingredients that we use in recipes to create all kinds of emulsions. Here are some of the most common. 

  • Creaming butter with sugar to trap air and develop a cake structure
  • Creaming butter with cream cheese and powdered sugar to create cream cheese frosting
  • Whipping butter with egg whites and powdered sugar to make easy buttercream

If you're thinking ahead, you can take your butter out of the fridge and leave it on the countertop overnight to allow it to come to room temperature. 

You can also cut your cold butter up into cubes and leave it at room temperature and it will soften in about 30 minutes on its own. In a hurry? Fill a glass bowl with hot water for 5 minutes, then drain the water and dry the bowl. Place the bowl over the butter and it will be room temperature in a few minutes. 

Short on time and lazy? (That's me). I put my butter in the microwave while it's still wrapped in paper. I buy my butter in the big 1 pound blocks so I start with 30 seconds then rotate the butter and reduce my power to 50% and continue heating in 10 second increments until it's softened. 

For smaller cubes of butter, you'd use less time. Butter is properly softened when you can impress your finger into the surface and it leaves an indent but the overall cube holds its shape.

room temperature butter

The risk with microwaving is that you can easily over-heat it and melt your butter. Melted butter has the same problems as cold butter and does not combine well with other ingredients so be careful. 

How to bring cream cheese to room temperature

Have you ever read a recipe that said to use room temperature cream cheese and you thought nah... I don't really need to. So you just put the cold cream cheese in the bowl with the butter and thought if you just mixed it long enough it would all work out only to discover lumps of cream cheese that would NEVER mix in? 

Yea.. me either *cough*

So yea if you want to bring your cream cheese to room temperature just cut it into cubes and put it on a warm plate or on the oven while it's preheating. It only takes about 15 minutes to warm up. 

cream cheese frosting ingredients. Cream cheese, butter, powdered sugar, extract

How to bring eggs to room temperature

Cold eggs can ruin a buttercream or cake batter really quickly. When you add cold eggs into softened butter, they can cause the butter to harden in chunks and ruin your emulsion. Cold eggs also do not whip up very well so if you're trying to make a meringue or trap a lot of air, bring your eggs to room temperature first. 

For eggs in the shell, I place them into a bowl of warm water for 5-10 minutes. Usually for as long as it takes me to scale out my other ingredients for the recipe. 

For egg whites, I measure them out in a measuring cup and then place the measuring cup into a bowl of warm water. 

place cold eggs in a glass of warm water for 10 minutes to warm them up

How to bring milk to room temperature

This one is super simple. I just microwave it after I measure it out in my glass measuring cup. Usually, 30 seconds is enough for about 8 ounces of milk. If you have a super-powerful microwave go for less time or reduce the power. 

Other ingredients like sour cream, mayonnaise, and fruit curd

Usually, you don't need a lot of these ingredients in recipes so you can get away with taking them out about an hour before you need them and they will warm up pretty quickly.

If you're short on time, measure out what you need and place into a warmed bowl (warm with hot water for 5 minutes then dry). 

warm cold fruit by placing in a warm dry bowl

What about hot ingredients like ganache, freshly made curd, and custard?

Sometimes room temperature means cooling the ingredients instead of warming. For instance, in my chocolate cake recipe, you have to add boiling water to cocoa powder and then let it cool. This can take an annoyingly long time to cool. Same thing with chocolate ganache if you want to use it as a frosting. 

The best way to cool down hot mixtures it to pour them into a large, cold pan. I like to use large cake pans. This spreads the mixture out so it has more surface area exposed to the air and allows the heat to disperse quickly. 

You can also put the mixture in the fridge to speed things up but be careful or you might have the opposite problem on your hands. 

cooling ganache in a cake pan


unsweetened applesauce recipe

August 26, 2019 Blog

Homemade Unsweetened Applesauce Recipe

Homemade unsweetened applesauce tastes nothing like the stuff that comes out of a jar, and once you make it yourself, you will never go back. I grew up making this exact recipe from apples in our backyard, and fresh, in-season apples cooked down with nothing but cinnamon is something store-bought simply cannot replicate. Use it for snacking, bake it into my applesauce spice cake, or stock your freezer for the whole year.

Unsweetened homemade applesauce in a clear jar on a plaid napkin.

Quick Glance: Homemade Unsweetened Applesauce Recipe

  • Recipe Name: Homemade Unsweetened Applesauce Recipe
  • Why You'll Love It: This is the simplest recipe on the blog and one of the most rewarding. Fresh in-season apples, one pot, and 30 minutes is all you need for applesauce that tastes as if it came from a farmstand.
  • Time and Difficulty: 15 minutes prep + 15 minutes cook | Easy
  • Main Ingredients: Apples, apple juice or water, cinnamon
  • Method: Stovetop simmer, blend, or mill to desired consistency
  • Texture and Flavor: Silky smooth or slightly chunky, depending on your preference. Naturally sweet from ripe apples with warm cinnamon flavor throughout.
  • Quick Tip: Use a mix of sweet and tart apple varieties for the best depth of flavor. Fuji and Golden Delicious is a great combination.
ChatGPT
Google AI
Perplexity
Grok
Add us as a trusted site on Google
[feast_advanced_jump_to]

Why This Recipe Works

The reason homemade applesauce tastes so much better than store-bought comes down to two things: apple variety and ripeness.

Store-bought applesauce is typically made from a single variety of apple selected for yield and shelf life, not flavor. When you make it at home, you can choose apples that are at peak ripeness and combine varieties to build a more complex flavor. A mix of sweet and tart apples gives you natural depth without needing to add sugar. When apples are truly ripe and in season, their natural sugar content is high enough that no sweetener is necessary at all. Those same ripe apples are also what make my fresh apple cake and apple filling taste so good.

Cooking the apples in just enough liquid to barely cover them is intentional. Too much liquid dilutes the apple flavor. The goal is to steam them tender, not boil them into submission. Once the apples are fork-tender, you drain off the liquid entirely, which concentrates the apple flavor in the final sauce.

Blending method matters too. A food mill gives you the smoothest, most velvety result and removes skins and seeds automatically, which is why you do not need to peel or core the apples if you have one. An immersion blender gives you more control over texture, from slightly chunky to completely smooth, depending on how long you blend.

Homemade Applesauce Ingredients

This recipe uses just a handful of ingredients. The apples do all the work.

Applesauce ingredients in clear bowls on a white countertop.

Apples are the entire recipe. Use 4 to 5 medium apples, peeled, cored, and sliced. A mix of sweet and tart varieties gives the best flavor. See the apple guide above for recommendations.

Apple juice or water adds just a small amount of liquid to create steam and prevent the apples from scorching on the bottom of the pot. You do not need much at all. Too much will dilute the apple flavor significantly.

Cinnamon is the only spice required for a classic applesauce. It deepens the apple flavor and adds warmth. Start with 1 teaspoon and adjust after tasting.

Optional add-ins: Nutmeg and cloves add a spiced depth similar to what you would find in my perfect apple pie. Lemon juice brightens the flavor and helps preserve color. Brown sugar or honey can be added if you prefer a sweeter sauce, but taste your applesauce first. Ripe in-season apples rarely need it.

The Best Apples For Applesauce

The best applesauce starts with the best apples, and the best apples are the ones that are in season and as fresh as possible. If you have an apple tree in your yard, use those. If not, a local farmers market or orchard will give you far better flavor than grocery store apples at a lower price. The same in-season apples that make the best applesauce are also perfect for my apple turnover recipe and mini apple pies.

For the best flavor, use a combination of sweet and tart varieties. Here are some excellent options and their seasons:

Jonagold (sweet, September to November), McIntosh (sweet and spicy, September to October), Granny Smith (sweet and tart, September to October), Fuji (sweet, October to November), Honeycrisp (sweet and tart, August to October), Gala (sweet, August to September), Golden Delicious (sweet, September to October).

Fuji and Golden Delicious together make an especially good combination for a naturally sweet, balanced applesauce. If you want something with a little more personality, adding a Granny Smith to the mix gives it a pleasant tartness.

Apples are generally in season from late July through early November depending on the variety. In-season apples are sweet enough that you will not need to add any sugar at all.

Homemade Applesauce Step-By-Step

Three apples in a wire basket.
  1. Wash your apples in hot water to remove any dirt or wax from the outside of the apples.
Smiling little girl peeling apples with an apple peeler.
  1. Peel and core your apples. Remove the skin with a vegetable peeler and apple corer or use an apple peeler as I do.
Hands dicing apples into ¼" pieces.
  1. Cut the apples into uniform cubes.
Cubed apples in a white and grey saucepan.
  1. Cook the apples. Place your apples in a large pot and add in your apple juice or water. Bring to a boil over high heat.
Cubed apples simmering in a grey and white saucepan.
  1. Simmer until tender. Reduce your heat to medium and let your apples simmer until they are fork-tender and you can crush them easily with the flat side of a fork, about 15 minutes. The kitchen will smell incredible at this point.
Cooked apples in a strainer over a glass bowl.
  1. Strain. Drain your apples and discard the liquid.
Immersion blender blending apples with cinnamon in a clear bowl.
  1. Blend. Add in your spices and anything else you want. Use an immersion blender or regular blender to blend your apples to your desired consistency. For silky smooth applesauce, blend longer. For chunky, pulse a few times and stop.
unsweetened applesauce recipe
  1. Cool before storing. Let your applesauce cool completely before refrigerating, freezing, or canning.

Common Mistakes To Avoid

Using out-of-season apples. Grocery store apples are often months old and lack the natural sweetness of fresh, in-season fruit. If your applesauce tastes flat or needs a lot of added sugar, the apples are likely the culprit. The same principle applies any time you are cooking with apples, including my caramel apple recipe.

Adding too much liquid. The liquid is only there to create steam and prevent scorching. Too much water or juice will dilute the apple flavor significantly.

Not tasting before adding sugar. Ripe in-season apples are naturally sweet enough that many batches need no sweetener at all. Always taste before adding sugar or honey.

Blending while hot. If you are using a regular countertop blender, let the apples cool slightly before blending. Hot liquid in a blender can create pressure and cause the lid to blow off. An immersion blender directly in the pot is safer and easier.

Forgetting to strain. The water or apple juice is just for steaming the apples and if you leave it in, it will just make the applesauce too loose and liquid-y.

Homemade Applesauce FAQs

What is the best apple for homemade applesauce?

A combination of sweet and tart apples gives the best flavor. Fuji and Golden Delicious together make a wonderfully balanced unsweetened applesauce. For more tartness, add a Granny Smith. For more complexity, McIntosh and Honeycrisp are excellent choices.

Do I need to add sugar to homemade applesauce?

Not if your apples are ripe and in season. Ripe apples have enough natural sugar to make a delicious unsweetened applesauce without any added sweetener. If your apples are out of season or underripe, a tablespoon or two of honey or brown sugar can help balance the flavor.

Do I need to peel the apples?

It depends on your equipment. If you have a food mill, you do not need to peel or core the apples at all. The mill separates the skins and seeds automatically. If you are using a blender or immersion blender, peeling is recommended for a smoother texture, though leaving the skins on adds nutrients and creates a slightly chunkier sauce.

How long does homemade applesauce last?

In the refrigerator, homemade applesauce lasts up to two weeks in an airtight container. In the freezer, it keeps well for up to two months in freezer bags. Properly canned applesauce can last up to one year stored in a cool, dark place.

Can I make this in a slow cooker?

Yes. Place your apples in a slow cooker with a small amount of water or apple juice, add your cinnamon, and cook on low for 6 to 8 hours or high for 3 to 4 hours until the apples are completely soft. Then blend to your desired consistency.

Can I use applesauce in baking?

Absolutely. Unsweetened applesauce is a popular substitute for oil or butter in baked goods and adds natural moisture and sweetness.

What spices can I add to applesauce?

Cinnamon is the classic choice. Nutmeg and cloves add a warmer, spicier depth similar to apple pie spice. Cardamom and ginger are less traditional but delicious. Start with small amounts and taste as you go since spices are easy to over-add.

More Apple Recipes

  • Apple Turnover Recipe
  • apple pie
    Caramel Apple Pie
  • apple filling in glass jar with lid and black label on front that says apple filling
    Apple Filling
  • closeup of fresh apple cake recipe with brown butter buttercream on grey plate
    Fresh Apple Cake Recipe

Leave Me A Review
⭐️⭐️⭐️⭐️⭐️

If you tried this Homemade Unsweetened Applesauce Recipe on my blog, please leave a 🌟 star rating and let me know how it goes in the comments. I love hearing from you!

Recipe

unsweetened applesauce recipe
Print Recipe
5 from 13 votes

Homemade Unsweetened Applesauce

How to make a simple and delicious homemade applesauce with no added sugar! Perfect for after school snacks or for baking.
Prep Time15 minutes mins
Cook Time15 minutes mins
Total Time30 minutes mins
Course: Dessert
Cuisine: American
Servings: 2 cups
Calories: 461kcal
Author: Liz Marek

Equipment

  • 1 Immersion blender or a regular stand blender

Ingredients

Unsweetened Applesauce Recipe

  • 32 ounces Apples 4-5 Medium Apples - peeled, cored and sliced
  • 4 ounces Apple Juice or water
  • 1 teaspoon Cinnamon

Optional (add as many or as little as you like)

  • ¼ teaspoon Nutmeg
  • ⅛ teaspoon Cloves
  • 1 Tablespoon Lemon Juice
  • 2 ounces Brown Sugar
  • 2 ounces Honey
US Customary - Metric

Instructions

Unsweetened Applesauce Instructions

  • Wash your apples in hot water to remove any dirt or wax from the outside of the apples.
  • Peel the skin off your apples and remove the core with an apple corer or use a knife to remove the core (see blog post for more info) If you are using a food mill you don't need to peel or core your apples.
  • Cut the apples into uniform cubes
  • Place your apples in a large pot and add in your apple juice or water. Bring to a boil over high heat.
  • Reduce your heat to medium and let your apples simmer until they are fork-tender or you can crush them easily with the flat side of the fork (about 15 minutes)
  • Strain your apples and discard the liquid.
  • Add in your cinnamon and stir. Use an immersion blender or blender to blend your apples to your desired consistency.
  • Taste your applesauce. If you would like it sweeter or spicier you can add in honey, sugar or other spices that you like.
  • Once you've added everything in, let your applesauce cool before refrigerating, freezing or canning.

Video

Notes

Use a mix of sweet and tart apples for the best flavor. Fuji and Golden Delicious make a great combination. Granny Smith adds tartness if you prefer a more balanced sauce.
If you have a food mill, you do not need to peel or core your apples. The mill removes the skins and seeds automatically.
In-season apples are naturally sweet enough that you will not need to add any sugar. Always taste before adding sweetener.
To freeze, let the applesauce cool completely, pour into quart-sized freezer bags, label with the date, and freeze for up to two months.
To can, add 1 tablespoon of lemon juice per 3 pounds of apples for the proper acidity level. Follow your canner's instructions for processing time based on your altitude.
This applesauce works great as a substitute for oil or butter in baked goods like muffins, quick breads, and spice cakes.


Nutrition

Serving: 4g | Calories: 461kcal | Carbohydrates: 122g | Protein: 1g | Fat: 1g | Saturated Fat: 1g | Sodium: 16mg | Potassium: 580mg | Fiber: 11g | Sugar: 104g | Vitamin A: 245IU | Vitamin C: 24mg | Calcium: 61mg | Iron: 1mg
{ "@context": "https://schema.org", "@type": "WebPage", "name": "Homemade Unsweetened Applesauce Recipe", "url": "https://sugargeekshow.com/recipe/homemade-unsweetened-applesauce-recipe/", "description": "How to make simple homemade unsweetened applesauce from scratch using fresh in-season apples, with tips for freezing, canning, and using it in baked goods.", "about": [ { "@type": "Thing", "name": "Applesauce", "sameAs": "https://en.wikipedia.org/wiki/Applesauce" }, { "@type": "Thing", "name": "Apple", "sameAs": "https://en.wikipedia.org/wiki/Apple" }, { "@type": "Thing", "name": "Canning", "sameAs": "https://en.wikipedia.org/wiki/Canning" }, { "@type": "Thing", "name": "Food preservation", "sameAs": "https://en.wikipedia.org/wiki/Food_preservation" }, { "@type": "Thing", "name": "Cinnamon", "sameAs": "https://en.wikipedia.org/wiki/Cinnamon" }, { "@type": "Thing", "name": "Food mill", "sameAs": "https://en.wikipedia.org/wiki/Food_mill" }, { "@type": "Thing", "name": "Compote", "sameAs": "https://en.wikipedia.org/wiki/Compote" }, { "@type": "Thing", "name": "American cuisine", "sameAs": "https://en.wikipedia.org/wiki/American_cuisine" }, { "@type": "Thing", "name": "Fuji apple", "sameAs": "https://en.wikipedia.org/wiki/Fuji_(apple)" }, { "@type": "Thing", "name": "Granny Smith", "sameAs": "https://en.wikipedia.org/wiki/Granny_Smith" } ] }

Pastel colored buttercream flowers on a white cake.

August 19, 2019 Free Tutorials

Easy Buttercream Flowers

Easy buttercream flowers are the perfect beginner piping project, and the results look so professional that no one will believe you made them with one tip and a flower nail. The freeze-ahead method takes all the pressure off because you can make a whole batch days in advance and simply place them on your cake when you're ready. If you've never decorated a cake before, my how to make a cake tutorial walks through the whole process from baking to finishing. If piping is your thing, there is a lot more of it in my cake decorating classes.

Quick Glance: Easy Buttercream Flowers

  • Recipe Name: Easy Buttercream Flowers
  • Why You'll Love It: A beginner-friendly piping project that looks bakery-quality with just one tip and a flower nail.
  • Time and Difficulty: Easy. About 30 minutes to pipe a full batch, plus freezing time.
  • Main Ingredients: Easy Buttercream Frosting
  • Method: Pipe 5-petal flowers with a 104-petal tip on a flower nail, freeze on parchment squares, then place on your cake.
  • Texture and Flavor: Silky buttercream that holds crisp petal shape.
  • Quick Tip: Practice 10 to 15 flowers first before keeping any. Your technique improves quickly once you get the feel for the squeeze.
ChatGPT
Google AI
Perplexity
Grok
Add us as a trusted site on Google
[feast_advanced_jump_to]

Buttercream flowers are one of those decorating techniques that look intimidating but are actually really approachable once you know the one or two tricks that make them work. These 5-petal flowers are my go-to beginner project because they only require one piping tip, a flower nail, and a little practice. Once you get the motion down, you can pipe an entire bouquet in about 20 minutes.

They're especially perfect for Mother's Day cakes, bridal showers, and birthdays. For a smaller-scale project, try my Cupcake Bouquet With Buttercream Flowers or top a Vintage Cake with these flowers for a stunning finished look.

What Makes These Buttercream Flowers So Easy

The reason these flowers are so beginner-friendly comes down to three things: the tip, the technique, and the freeze step.

The 104 petal tip does almost all of the work for you. The wide side of the tip creates the ruffled outer edge of the petal while the narrow side tapers it to a clean point in the center. Holding the tip correctly is really the only skill to master, and once you've piped 5 or 10 petals, your hand learns the angle automatically.

The 5-petal "U" shape is the simplest flower you can pipe. Each petal is just a small "U" that starts and stops at the center of the nail. You rotate the nail between petals, so the flower stays aligned without you having to think about it. If you can draw a letter U, you can pipe this flower.

The freezing step is what makes buttercream flowers stress-free. Instead of trying to pipe directly onto your finished cake (where every mistake is permanent), you pipe onto parchment squares, freeze them solid, and then simply peel and place them on the cake when you're ready. You can batch-make them days or even weeks in advance.

Ingredients Needed

The secret to beautiful buttercream flowers isn't complicated. It comes down to the right buttercream consistency and gel (not liquid) food coloring. Here's what you'll need and why each one matters.

Easy Buttercream Frosting. This is my go-to buttercream for piping flowers because the pasteurized egg whites give it a silky, smooth texture that creates soft petal edges. It's slightly less stable in heat than American buttercream but the results look more polished. If you're piping in a warm kitchen or for an outdoor event, replace half the butter in the recipe with vegetable shortening to make the flowers sturdier.

Other buttercream options. Any buttercream that holds a peak will pipe flowers. My American Buttercream is stiffer and more heat-stable, but the petals will have slightly jagged edges because of the extra powdered sugar. Swiss Meringue Buttercream and Italian Meringue Buttercream both pipe beautifully with smooth finishes. For dairy-free, try vegan butter or Crisco in the easy buttercream recipe.

Gel Food Coloring. Use gel food coloring, not liquid. Liquid food coloring thins your buttercream and can cause it to break. Gel gives you saturated color without changing the consistency. I used electric pink and regal purple from Americolor for the flowers pictured here.

Parchment Paper Squares. Cut 3-inch by 3-inch squares of parchment paper for piping your flowers on. You can also use foil if you don't have parchment. The squares make it easy to lift each flower off the nail and transfer it to the freezer without smushing the petals.

Equipment Needed

  • Flower nail. A small rotating disc on a metal handle. You pipe the flower directly onto the nail, rotating between petals. You cannot pipe these flowers without one.
  • Wilton 104 piping tip. The workhorse petal tip for 5-petal flowers. The round end faces up toward the center of the flower when you pipe.
  • Wilton #3 round tip (optional). For piping a small dot in the center of each flower.
  • Wilton #352 leaf tip (optional). For piping leaves if you want to add greenery.
  • Piping bags. Large enough to hold about 1 cup of buttercream comfortably. One bag per color.
  • Coupler (optional). Lets you swap between different tips on the same bag. Useful if you're using multiple tips.
  • Cookie sheet or flat pan. For transferring the parchment squares with flowers to the freezer.
  • Freezer space. You'll need a flat area in your freezer to hold the cookie sheet of flowers.

Tips For Success

Run your buttercream through an immersion blender or paddle-mix it on low for 10 to 15 minutes before piping. This eliminates air bubbles that would otherwise create gaps in your petals.

Practice 10 to 15 flowers before you keep any. Scrape them back into the bowl. Your technique improves quickly once your hand learns the motion.

Hold the flower nail in your non-dominant hand and rotate it between petals. Don't try to move the piping bag around the nail, that's much harder.

Keep the wide (round) end of the 104 tip pointing up, toward the center of the flower. The narrow end faces out.

Apply consistent pressure. Uneven squeezing gives you lumpy, uneven petals.

Work with room temperature buttercream. Cold buttercream breaks and tears at the edges. Warm buttercream slumps.

Freeze the flowers before placing them on your cake. Frozen flowers are much easier to handle without damaging the petals.

How To Make Easy Buttercream Flowers Step-By-Step

  1. Cut your parchment paper into 3-inch squares. Aim for 20 to 30 squares to give yourself room to practice and produce a full batch.
  1. Tint your buttercream in your chosen colors. Use gel food coloring and start with a small amount, you can always add more.
  1. Fit your piping bag with the 104 tip. If using a coupler, place the large part of the coupler inside the bag first, then attach the 104 tip from the outside and secure it with the coupler ring.
Piping bags with piping tips on a white countertop.
  1. Fill the bag about halfway with buttercream. Twist the top closed and squeeze the buttercream down toward the tip to eliminate air pockets.
Hand holding a flower nail with a square piece of parchment paper on top.
  1. Place a small dot of buttercream on the center of your flower nail. Press a parchment square onto it. The buttercream acts as glue to hold the parchment in place while you pipe.
  1. Pipe the first petal by squeezing while moving the tip in a small "U" shape. Start at the center, move out about half an inch, curve around, and come back to the center. Release pressure before lifting the tip.
Piping delicate lavendar buttercream petals.
  1. Rotate the flower nail about a fifth of a turn and pipe the second petal the same way, starting and ending at the center. Each petal should just slightly overlap the previous one where they meet in the middle.
Buttercream flower on a parchment square on a buttercream nail held by a hand.
  1. Continue rotating and piping until you have 5 petals. The finished flower should look like a simple daisy or buttercup.
Buttercream flowers on parchment squares on a blue sheetpan.
  1. Carefully lift the parchment square off the nail (use a small offset spatula or knife if needed) and place it on a cookie sheet.

    Repeat until you have as many flowers as you need, plus a few extras for breakage.
Pastel colored buttercream flowers on a white cake.
  1. Switch out your tip to the small round and pipe a dot in the center for a more finished look. Or you can do this after you attach them to the cake.
  2. Place the cookie sheet in the freezer until the flowers are firm.

PRO TIP: Vary the size of your flower with different-sized tips for a more natural look.

How To Place Buttercream Flowers On Your Cake

  • Take the cookie sheet out of the freezer just before you're ready to decorate. Flowers should be completely solid and cold.
  • Peel the parchment square off the back of each flower. If it sticks, let the flower warm for 10 seconds, then try again.
  • Use a small offset spatula or your fingers to pick up each flower and gently press it onto your frosted cake. The cold flower will adhere to the buttercream on the cake and soften into place.
  • Arrange the flowers as a cluster, in a cascade down the side, or as a border around the top. Fill gaps with leaves piped with the #352 tip if desired.
  • Let the cake come to room temperature in the fridge or at room temperature for 20 minutes before serving so the flowers soften to match the cake.

Common Buttercream Flower Mistakes

  • Using liquid food coloring instead of gel. It thins the buttercream and can cause it to break or run.
  • Piping with cold buttercream. It tears and gives you jagged petal edges.
  • Piping with overwhipped or air-bubble-filled buttercream. The petals will have holes and gaps.
  • Holding the tip at the wrong angle. The wide end should point toward the center of the flower, not out.
  • Squeezing unevenly. Inconsistent pressure creates lumpy petals.
  • Skipping practice flowers. Your first 5 to 10 flowers will look rough. Don't keep them, scrape them back into the bowl and try again.
  • Trying to place flowers on the cake while they're still soft. They'll smush or lose their shape. Always freeze first.
  • Overfilling your piping bag. A too-full bag is hard to control.

Buttercream Flower FAQs

What buttercream is best for piping flowers?

My Easy Buttercream is my go-to because it pipes cleanly with smooth petal edges. American Buttercream is stiffer and more heat-stable but the petals will be slightly jagged. Swiss and Italian Meringue Buttercream both pipe beautifully too. Choose based on your kitchen temperature and how much sweetness you like.

How long do buttercream flowers last in the freezer?

Frozen buttercream flowers keep for at least a month in an airtight container. Some bakers keep them longer, but I find a month is the sweet spot for best texture and color.

Can I make buttercream flowers ahead of time?

Yes, that's one of the best things about this technique. Pipe, freeze, and store them days or weeks before you need them. Place them on the cake the day of decorating.

What if I don't have pasteurized egg whites?

Use American buttercream or Swiss meringue buttercream instead. American buttercream uses only butter and powdered sugar, and Swiss meringue cooks the egg whites to a safe temperature. Both are great for flowers.

Can I use a different piping tip?

The Wilton 104 is the classic choice for 5-petal flowers, but you can experiment. A 103 will give you smaller petals, a 125 will give you larger ones. For different flower shapes, try a 2D or 1M (rosettes), a 352 (leaves), or a 225 (drop flowers).

Why do my flowers keep breaking when I lift them off the nail?

The parchment square needs to be fully underneath the flower before you lift. Use a small offset spatula to slide under the parchment if it's sticking. If the flower itself is breaking, your buttercream may be too cold or too firm, let it warm slightly.

Can I pipe buttercream flowers directly onto a cake?

You can, but it's much harder because any mistakes are permanent. The freeze-and-place method is more forgiving for beginners. Once you're comfortable with the technique, you can pipe directly on a cake for a seamless look.

Can I make these flowers dairy-free?

Yes. Use vegan butter (Earth Balance works well) or Crisco in place of the regular butter. The texture will be slightly different but the flowers will still pipe and hold their shape.

More Buttercream Tutorials To Try

  • vintage cake with fresh flowers
    Vintage Cake With Buttercream Piping
  • cupcake bouquet
    How To Make A Cupcake Bouquet With Buttercream Flowers
  • italian meringue buttercream
    Cake Decorating Basics: Airless Space Buttercream
  • buttercream flowers cake tutorial with guest instructor danette short
    Buttercream Flowers

Watch: How To Decorate A Cake Step-by-Step

Before you start decorating, watch the video below where I show you every step of decorating a cake from start to finish. Seeing the process in action makes it much easier to follow along

- Liz Marek.

Start Learning Now
smiling woman holding a decorated cake in her hands

Recipe

Pastel colored buttercream flowers on a white cake.
Print Recipe
4.67 from 6 votes

Easy Buttercream Flowers

Delicious, rich and easy buttercream frosting recipe that anyone can make. This is not a crusting buttercream. It has a slight shine and chills nicely in the fridge. Takes 10 minutes to make and is fool-proof! Light, fluffy and not too sweet. Perfect for piping buttercream flowers
Prep Time5 minutes mins
mixing time20 minutes mins
Total Time25 minutes mins
Course: Dessert
Cuisine: American
Servings: 6 cups
Calories: 849kcal
Author: Liz Marek

Equipment

  • Stand Mixer

Ingredients

  • 3 cups Easy Buttercream My easy buttercream recipe halved
  • ¼ teaspoon Food Coloring any color
  • 30 3 inch Parchment Squares
  • 4 small Piping Bags one for each color
  • 1 medium Flower Nail
  • 1 #104 Piping Tip
  • 1 #3 Piping Tip optional for piping dots
  • 1 large Cookie Sheet
  • 4 small Couplers optional

Instructions

  • Cut 20 to 30 parchment paper squares, each about 3 inches by 3 inches.
  • Tint the buttercream in your chosen colors using gel food coloring.
  • Fit a piping bag with the 104 petal tip (use a coupler if you want to swap tips later). Fill the bag about halfway with buttercream and squeeze out any air pockets.
  • Place a small dot of buttercream on the center of the flower nail. Press a parchment square onto the buttercream to secure it.
  • Hold the 104 tip at a slight angle with the wide end toward the center of the nail and the narrow end facing out. The tip should just barely touch the parchment.
  • Pipe the first petal in a small "U" shape, starting and ending at the center. The petal should be about the size of an almond.
  • Rotate the flower nail a fifth of a turn and pipe the second petal the same way.
  • Continue rotating and piping until you have 5 petals, each slightly overlapping the previous one at the center.
  • Optional: switch to the #3 round tip and pipe a small dot in the center of the flower. Or you can do this when the flowers are on the cake.
  • Carefully lift the parchment square off the nail and place it on a cookie sheet.
  • Repeat until you have all the flowers you need, plus a few extras.
  • Place the cookie sheet in the freezer for at least 30 minutes, or until the flowers are fully solid.
  • To use, peel the parchment off each frozen flower and press gently onto your frosted cake. Let the cake rest at room temperature for 20 minutes before serving so the flowers soften.

Video

Notes

Buttercream choice
  1. Easy Buttercream gives the smoothest petal edges. Replace half the butter with vegetable shortening for hot climates.
  2. American Buttercream is stiffer and more heat-stable but petal edges will be slightly jagged.
  3. Swiss or Italian Meringue Buttercream both pipe beautifully.
  4. For dairy-free, use vegan butter or Crisco in place of regular butter.
Storage
  1. Frozen flowers keep for at least 1 month in an airtight container in the freezer.
  2. Place flowers on the cake the same day you plan to serve it for best results.
  3. Let the decorated cake come to room temperature for 15 to 20 minutes before serving so the flowers soften to match the cake.
Troubleshooting
  1. Flowers breaking when lifting: make sure the parchment square is fully underneath the flower before lifting. Let the flower warm for 10 seconds if it's stuck.
  2. Jagged petal edges: your buttercream is too cold or too firm. Let it come to room temperature or add a splash of cream and re-whip.
  3. Slumping petals: your buttercream is too warm. Chill it for 10 minutes and try again.
  4. Holes or gaps in petals: air bubbles in the buttercream. Run it through an immersion blender or paddle-mix on low for 10 to 15 minutes before piping.
Critical do-nots
  1. Do not use liquid food coloring. It thins the buttercream and can cause it to break.
  2. Do not try to place soft flowers on a cake. Always freeze until solid first.
  3. Do not skip practice flowers. Your first 5 to 10 will look rough and that's normal.
  4. Do not overfill your piping bag. It becomes hard to control.

Nutrition

Serving: 2g | Calories: 849kcal | Carbohydrates: 75g | Protein: 2g | Fat: 61g | Saturated Fat: 38g | Cholesterol: 162mg | Sodium: 240mg | Potassium: 18mg | Sugar: 74g | Vitamin A: 2055IU | Calcium: 18mg | Iron: 0.4mg
bear baby shower

August 15, 2019 Events

Bear Baby Shower

Co-ed bear baby shower at the lake with friends and family makes for a relaxing celebration

I wasn't planning on having a bear baby shower but after our summer trip to Yellowstone, I became officially smitten by adventure, the outdoors and cute little bears! 

Want to learn how to make this bear baby shower cake? It's an online course on our cake decorating school, Sugar Geek Show! 

bear baby shower

This is our second kiddo but since we have had to do IVF for both of our kids, there is quite a big gap in between them. Our daughter Avalon just turned 5 on August 7th and Ezra is set to arrive mid-September. 

I loved our family baby shower outfits! Papa bear and mama bear hats and sister bear shirt for Avalon! We also have a baby bear onesie for when Ezra arrives. 

The official theme of the shower was 'adventure awaits' and we had a lot of fun ideas pinned to our pinterest board for bear baby shower ideas. 

mama bear, papa bear and sister bear baby shower outfit for co-ed baby shower

I remember for Avalon's baby shower we went ALL OUT! Elaborate mermaid-themed decorations, dessert tables and even a bartender lol! It was definitely EXTRA and I also remember it was exhausting. I wanted to do things a bit different this time around. 

I had this vision for Ezra's baby shower that was more like a BBQ. Bring the guys and the kids. Make it a family affair. Let's cook up some good food and then spend the day swimming at the lake! I still opened presents at the end but it wasn't as big of a deal as just spending the day with friends and family!

grilling burgers at co-ed baby shower at the lake

Dan was put in charge of burger duty! We ordered salt and pepper burgers from Whole Foods (my favorite) and made a burger bar. We also served up some Texas-style potato salad, baked beans and fresh watermelon! Super refreshing since it was nearly 90ºF that day.

Grilled burger, potato salad and baked bean casserole on a black plate

I also found a great deal on these outdoor camping sets on Amazon that looked so super cute on the tables. We gave them away to guests as a souvenir at the end of the party. 

blue camping plates for outdoor baby shower at the lake

placecard at outdoor baby shower

I loved having the shower at Sain Creek, Henry Hagg Lake. The space was well-shaded, near to a kid-friendly beach and had plenty of tables for a big group.

The only thing I wish I would have done was mail out a map with the invitations for our guests. Several people got lost on the way out to the lake and there was no cell reception! Oops!

adventure awaits bear baby shower invitation

The great thing about having the bear baby shower at the lake was minimal decorating! But you know I had to go all out with the cake table. The cake design was heavily inspired by our recent trip to Yellowstone National Park where we saw tons of beautiful trees, gorgeous night skies and plenty of bears! 

bear baby shower cake and dessert table

My friend Sara Weber from Sara's Sweets in Austin, Texas flew in just for this shower! She always makes the most amazing cookies for all of Avalon's birthday parties but I asked her to not worry about making cookies since she was coming to the shower. 

Of course, she ignored me and proceeded to make the most amazing cookies for the shower! I love how she hand-painted EZRA. She didn't even know what the final cake design was. I just said trees and bears haha! I think she nailed it!

 The best part of these cookies aside from them looking amazing is that they tasted spectacular! Not one cookie was left after the shower and everyone commented on how delicious they were!

adventure awaits cookies

My friend Tonya also set up this super cute trail mix bar which the kids REALLY appreciated after a long day of swimming! The funniest part was the chocolate chips ended up melting in the hot sun so the kids started dipping everything in the chocolate. 

trail mix bar

It's been a while since I made a cake for myself! I decided to make my white buttermilk cake filled with a strawberry reduction and strawberry buttercream!

white velvet buttermilk cake with strawberry filling

I frosted the outside with easy buttercream and then a layer of white chocolate ganache to keep it from melting on the super hot day. The cake was totally fine because it was in the shade. 

bear baby shower at the lake

This day was super special to me because I was able to spend it with so many people who have stuck by us and supported us through the years of IVF talk and all the emotional ups and downs that come with it.  

It was also really nice to have a baby shower that was fun for everyone, even the kiddos. 

little boy wearing life jacket and hat at the lake

My baby sister is also expecting! So it was extra special getting to be pregnant together and getting this great bump shot of our bellies at the shower. 

sisters with pregnant bellies


Rustic Bear Baby Shower Cake Online Course

August 15, 2019 Course Preview

Bear Baby Shower Cake Tutorial

Skill level: Intermediate

I went all out making this rustic bear baby shower cake for my soon-to-be son, Ezra Marek! This design was inspired by the Pacific Northwest, my home turf which I love, and a much-requested cake technique, creating an empty theater cake design.

In this course, you will learn how to create this stunning showpiece step-by-step, along with several tips, tricks and techniques to add to your arsenal.

2:05:17 Minutes of Instruction

What You Will Learn

  • How to create an empty theater cake tier and properly secure it
  • Learn how to create a bear family cake topper, and a stylized moon cake topper
  • How to create a stone texture square cake tier
  • How to pipe realistic tree leaves

Rustic Bears Baby Shower Cake Online Course With Step-by-Step Instructions on how to Make This Stunning Cake

Tutorial Chapters

  1. Carving 0:39
  2. Covering the inside 9:00
  3. Airbrushing 16:47
  4. Covering the outside 19:35
  5. Making stars 24:54
  6. Attaching stars 26:54
  7. Making trees 30:39
  8. Coloring Royal Icing 38:53
  9. Piping leaves 40:44
  10. Making the branches 48:45
  11. The moon structure 50:50
  12. Adding modeling chocolate 53:54
  13. Sculpting the bear bodies 57:43
  14. Sculpting the bear head 1:04:21
  15. Making the stump 1:20:21
  16. Adding color 1:29:12
  17. Adding branches 1:30:45
  18. Dusting 1:33:42
  19. Attaching the bears 1:37:45
  20. Detailing the moon 1:42:42
  21. Making strawberry buttercream 1:46:45
  22. Stacking the cakes 1:47:51
  23. Softening ganache 1:49:35
  24. Ganaching the cake 1:51:15
  25. Adding texture 1:54:41
  26. Adding color 2:00:32
  27. Assembling the cake 2:04:06

Downloads

Materials List

Rustic Bear Baby Shower Cake Online Course

August 15, 2019 Paid Video

Bear Baby Shower Cake

Skill level: Intermediate

I went all out making this rustic bear baby shower cake for my soon-to-be son, Ezra Marek! This design was inspired by the Pacific Northwest, my home turf which I love, and a much-requested cake technique, creating an empty theater cake design.

In this course, you will learn how to create this stunning showpiece step-by-step, along with several tips, tricks and techniques to add to your arsenal.

2:05:17 Minutes of Instruction

What You Will Learn

  • How to create an empty theater cake tier and properly secure it
  • Learn how to create a bear family cake topper, and a stylized moon cake topper
  • How to create a stone texture square cake tier
  • How to pipe realistic tree leaves

Tutorial Chapters

  1. Carving 0:39
  2. Covering the inside 9:00
  3. Airbrushing 16:47
  4. Covering the outside 19:35
  5. Making stars 24:54
  6. Attaching stars 26:54
  7. Making trees 30:39
  8. Coloring Royal Icing 38:53
  9. Piping leaves 40:44
  10. Making the branches 48:45
  11. The moon structure 50:50
  12. Adding modeling chocolate 53:54
  13. Sculpting the bear bodies 57:43
  14. Sculpting the bear head 1:04:21
  15. Making the stump 1:20:21
  16. Adding color 1:29:12
  17. Adding branches 1:30:45
  18. Dusting 1:33:42
  19. Attaching the bears 1:37:45
  20. Detailing the moon 1:42:42
  21. Making strawberry buttercream 1:46:45
  22. Stacking the cakes 1:47:51
  23. Softening ganache 1:49:35
  24. Ganaching the cake 1:51:15
  25. Adding texture 1:54:41
  26. Adding color 2:00:32
  27. Assembling the cake 2:04:06

Downloads

Materials List

slice of applesauce cake with cream cheese frosting on black plate

August 13, 2019 Blog

Applesauce Spice Cake Recipe

A moist applesauce cake recipe spiced with cloves, nutmeg, cinnamon and frosted with tangy cream cheese frosting

This applesauce cake recipe blew me away! Each bite was spiced apple heaven. Combined with cream cheese frosting, and topped with a homemade caramel drip, I didn't want to stop eating!

This is the first cake recipe I've ever made with so little eggs! I had heard that applesauce makes a good egg replacer but I was skeptical. I'm happy to report this cake is very moist, has excellent texture and flavor! This cake recipe uses only one egg and less oil than other recipes so it's a healthier option if you're trying to cut down on fat. 

slice of applesauce cake with cream cheese frosting on black plate

Does applesauce cake taste like apples?

When I was first testing out a good applesauce cake recipe, I was confused about whether or not applesauce cake should taste like apples.

The funny thing is, I don't think you can even tell there are apples in this cake. The cake mostly tastes like spice cake but moister. That's from the applesauce! So don't expect this applesauce cake recipe to taste like apples, it just tastes like warm, cozy spice cake! Which isn't a bad thing! 

applesauce cake recipe

Why use applesauce in baking?

Applesauce can be added to your cake as a 1:1 replacement for oil or melted butter. This reduces the total amount of fat and calories in your recipe if you want a healthier version of your cake without losing moisture.

You can also replace some of your eggs using applesauce. Use a quarter cup of unsweetened applesauce in place of one egg. I actually reduced the number of eggs in this recipe because of the added applesauce. 

how to make homemade applesauce

Can you use store-bought applesauce or should I make it fresh?

You can use either homemade unsweetened applesauce or store-bought applesauce. Sugar-free is preferred so that you can control the sweetness of your cake. If you are interested in learning how to make your own applesauce, it's super easy! 

When I was growing up, we made applesauce every year and canned it. I recently asked my Dad for the same equipment we used when I was a kid to make applesauce. It was this crazy contraption that clamped to the table. We'd spend the day picking apples, chopping them and cooking them before pouring them into the machine that would separate skins and seeds from the soft apple filling. 

Then we'd can the applesauce so we'd have it all year long. I remember many a pork chop being served with that homemade applesauce. 

How to use applesauce in your cake recipes

How to make an applesauce layer cake

Never made a cake before? Watch my "How to make your first cake" tutorial which covers everything from baking, frosting, filling and getting smooth edges. 

Applesauce cake frosted with cream cheese frosting and a caramel sauce drip

After baking your cake layers, you want to let them cool. I let mine cool in the pan for about 15 minutes then I flip them out onto a cooling rack to cool further. 

Once my cakes are barely warm, I wrap them in plastic wrap and put them in the freezer for about an hour so that I can trim the cakes and fill them right away. 

When I'm making my vanilla cake or other lighter colored cakes, I will trim off the dome and the brown edges but obviously, for this kind of cake, you don't have to do that. Just trim off the dome to make your layers flat before filling them with your frosting. 

frosting an applesauce cake

My cake is filled and frosted with cream cheese frosting but brown butter buttercream would also taste amazing!

crumb coat applesauce cake

I decided to just go super simple with the cake design and just do a nice smooth layer of cream cheese frosting and do a caramel sauce drip. 

I had some leftover caramel in my fridge so I just warmed it up a bit (not hot!) and put it into a plastic bottle to pipe my drips. 

Then I topped the cake with some super simple dollops of buttercream using a Wilton tip #32 but you can use whatever tip you like!

applesauce cake with cream cheese frosting and caramel drip

This applesauce cake was a HUGE hit in our house! Every last bite was devoured! The cake is moist and perfectly balanced by the tang of the cream cheese frosting!

Can you use this applesauce cake recipe for stacked cakes?

You can definitely use this applesauce cake recipe for stacked cakes. It has a nice firm crumb that is strong enough to hold up under buttercream and fondant. 

I love how fine and tender the crumb was! Tell me this doesn't make your mouth water!

applesauce cake with cream cheese frosting

Can you make this into applesauce cupcakes?

You can convert this recipe into applesauce cupcakes by leaving out the oil. Preheat your oven to 400ºF. Fill your cupcake liners ⅔ of the way full. I like to use a small ice cream scoop. Bake your cupcakes for 5 minutes at 400ºF then reduce the temperature to 350ºF. DO NOT OPEN THE OVEN. Opening the oven can cause your cupcakes to deflate. 

Bake for an additional 10-15 minutes or until the domes are set. Allow the cupcakes to cool before frosting. 

Want more delicious fall flavors? Check these out!

Pumpkin Spice Cake With Cream Cheese Frosting

Pineapple Carrot Cake  With Cream Cheese Frosting

Applesauce Spice Cake

Cake Batter and Frosting Calculator

Select an option below to calculate how much batter or frosting you need. Adjust the servings slider on the recipe card to change the amounts the recipe makes.

Choose a pan type

Choose a cake pan size
(based on 2" tall cake pan)

Choose a cake pan size
(based on 2" tall cake pan)

Choose a cake pan size
(based on 2" tall cake pan)

Cupcake Tin Size

Choose number of pans

Cups of Batter Needed

8 cups

Cups of Frosting Needed

5 cups

Note: measurements are estimated based off the vanilla cake recipe using standard US cake pans and sizes. Measurements used are for 2" tall cake pans only. Your results may vary. Do not overfill cake pans above manufacturer's recommended guidelines.

Recipe

slice of applesauce cake with cream cheese frosting on black plate
Print Recipe
4.91 from 30 votes

Applesauce Cake Recipe

A delicious spice cake made with applesauce so it's super moist! Frosted with cream cheese frosting! This recipe makes enough batter for three 6"x2" cake rounds or two 8"x2" cake rounds.
Prep Time15 minutes mins
Cook Time35 minutes mins
Chill Time1 hour hr
Total Time1 hour hr 50 minutes mins
Course: Dessert
Cuisine: American
Servings: 24 servings
Calories: 463kcal
Author: Liz Marek

Equipment

  • Stand Mixer
  • #32 Wilton Piping Tip
  • Piping Bag or Bottle

Ingredients

Applesauce Cake Ingredients

  • 4 oz unsalted butter softened
  • 10 oz granulated sugar
  • 3 oz oil
  • 1 large egg room temperature
  • 10 oz cake flour
  • 1 teaspoon baking soda
  • ⅛ teaspoon cloves
  • ¼ teaspoon nutmeg
  • ¼ teaspoon ground ginger
  • 1 ½ teaspoon cinnamon
  • ½ teaspoon salt
  • 12 oz applesauce unsweetened
  • 1 teaspoon vanilla

Cream Cheese Frosting

  • 16 oz cream cheese softened
  • 8 oz unsalted butter softened
  • 1 teaspoon orange extract
  • ½ teaspoon salt
  • 36 oz powdered sugar
US Customary - Metric

Instructions

Before you Begin

  • Preheat your oven to 350º F and prepare your cake pans with cake goop or your preferred pan release. Have your butter, egg, and cream cheese at room temperature before starting.

Applesauce Cake Instructions

  • Sift together the flour, baking soda, spices, and salt.
  • In the bowl of a stand mixer, cream the butter until smooth with the whisk attachment.
  • Sprinkle in the sugar and whip on high until white and fluffy, 2 to 3 minutes. Add the oil and whip another minute.
  • Switch to the paddle attachment. Add the egg and vanilla and mix until combined.
  • Add the flour mixture and mix until just incorporated. Do not overmix.
  • Add the applesauce and mix until fully combined.
  • Divide the batter evenly between the prepared pans. Smooth the tops with a rubber spatula.
  • Bake until the cakes feel firm in the center and a toothpick comes out clean or with just a few crumbs, 25 to 35 minutes.

Cream Cheese Frosting Instructions

  • Place the softened butter in the bowl of a stand mixer fitted with the whisk attachment and cream on low until smooth.
  • Add the softened cream cheese in small chunks and blend on low until smooth and combined.
  • Add the orange extract and salt. Add the sifted powdered sugar one cup at a time and mix until combined.

Video

Notes

Ingredient notes: Use unsweetened applesauce so you control the sweetness of the finished cake. If your applesauce is chunky, blend it smooth first for the most even crumb.
Pan options: This recipe makes enough batter for three 6″×2″ rounds or two 8″×2″ rounds. For a 9×13 pan or a bundt pan, see the FAQs above, both have been tested successfully by readers, keep an eye on bake time since it will run differently than layer pans. To convert this into cupcakes, leave out the oil, fill liners two-thirds full, bake at 400º F for 5 minutes, then reduce the temperature to 350º F without opening the oven door (opening it can cause the cupcakes to deflate), and bake for an additional 10 to 15 minutes or until the domes are set.
Make-ahead and storage: Bake and cool the layers, then wrap tightly and freeze for up to 2 months before filling and frosting, this is the technique I use every time since chilled layers trim and fill much more cleanly. Once frosted, store the cake covered in the refrigerator for up to 4 days.
Substitutions: All-purpose flour can replace cake flour in a pinch (see the cake flour substitute link above for the exact swap), though the crumb will be slightly less tender. Brown butter cream cheese frosting or easy buttercream frosting both work in place of the cream cheese frosting if you want a different finish.
Critical do-nots: Don't overmix once the flour goes in, it toughens the crumb. Don't skip chilling the frosted cake for 15 to 20 minutes before adding the caramel drip, or the drip won't hold its shape.

Nutrition

Serving: 1serving | Calories: 463kcal | Carbohydrates: 66g | Protein: 3g | Fat: 22g | Saturated Fat: 11g | Polyunsaturated Fat: 2g | Monounsaturated Fat: 7g | Trans Fat: 0.5g | Cholesterol: 57mg | Sodium: 208mg | Potassium: 56mg | Fiber: 1g | Sugar: 56g | Vitamin A: 624IU | Vitamin C: 0.1mg | Calcium: 27mg | Iron: 0.2mg

brown butter frosting on a cupcake

August 13, 2019 Blog

Brown Butter Cream Cheese Frosting

Brown butter cream cheese frosting has a fragrant and nutty flavor that is also sweet and creamy

Brown butter frosting made with cream cheese has a nutty and rich flavor with a touch of tanginess. The perfect frosting for fall!

I love pairing this frosting with my applesauce spice cake or my carrot cake! So good!

brown butter frosting on a cupcake

I've been on a huge brown butter kick lately! I make it in huge batches so that I can use it in everything! I just love the depth of flavor that brown butter adds to recipes. From frosting to cakes, brown butter is the bomb!

brown butter in clear jar

After I brown my butter, I let it sit at room temperature overnight so that it solidifies again. This is because my recipes typically call for softened butter. Brown butter never gets REALLY firm so it works out well for recipes. 

solid brown butter

Make sure you stir the brown butter up so that you get all those little brown bits worked into the recipe. That is where all the flavor is!

Tips for making brown butter frosting

  • Brown your butter ahead of time and let it solidify overnight at room temperature or put it in a shallow dish and into the fridge for about 15 minutes or until it starts to firm up. 
  • Use a hand mixer or whisk to cream the brown butter and the regular butter together first, then add in the softened cream cheese to prevent your frosting from breaking. 
  • Add in your powdered sugar 1 cup at a time and then stop mixing as soon as it's all incorporated. Add more sugar for a stiffer buttercream. 

brown butter frosting in a clear bowl

Can you use brown butter in place of butter for all frosting recipes?

It just depends. I have replaced some or all of the butter in a recipe with brown butter and had success. I have found that brown butter is a tad softer than regular softened butter. Play around with the ratios and see what works for you.

I loved putting brown butter in my easy buttercream frosting

Try pairing this frosting with

Applesauce Spice Cake
Carrot Cake
Pumpkin Spice Cake

Cake Batter and Frosting Calculator

Select an option below to calculate how much batter or frosting you need. Adjust the servings slider on the recipe card to change the amounts the recipe makes.

Choose a pan type

Choose a cake pan size
(based on 2" tall cake pan)

Choose a cake pan size
(based on 2" tall cake pan)

Choose a cake pan size
(based on 2" tall cake pan)

Cupcake Tin Size

Choose number of pans

Cups of Batter Needed

8 cups

Cups of Frosting Needed

5 cups

Note: measurements are estimated based off the vanilla cake recipe using standard US cake pans and sizes. Measurements used are for 2" tall cake pans only. Your results may vary. Do not overfill cake pans above manufacturer's recommended guidelines.


Recipe

brown butter frosting on a cupcake
Print Recipe
5 from 27 votes

Brown Butter Frosting

Brown butter frosting made with cream cheese has a nutty and rich flavor with a touch of tanginess. The perfect frosting for fall!
Prep Time5 minutes mins
Cook Time5 minutes mins
Course: Dessert
Cuisine: American
Servings: 6 cups
Calories: 772kcal
Author: Liz Marek

Equipment

  • Handheld or stand mixer
  • Whisk Attachment

Ingredients

Brown Butter Buttercream

  • 8 oz browned butter room temperature
  • 8 oz unsalted butter room temperature
  • 8 oz cream cheese room temperature
  • 2 teaspoon vanilla extract
  • ¼ teaspoon salt
  • 20 oz powdered sugar add more for a stiffer buttercream
US Customary - Metric

Instructions

Brown Butter Buttercream Instructions

  • Place softened butter in the bowl of your stand mixer with the whisk attachment and mix until smooth.
  • Add in your cream cheese and mix until smooth
  • Add in your browned butter and mix until smooth and creamy
  • Add in your powdered sugar one cup at a time while mixing on low until all the powdered sugar is added. Do not over-mix.
  • Add in your salt and vanilla until combined.

Video

Nutrition
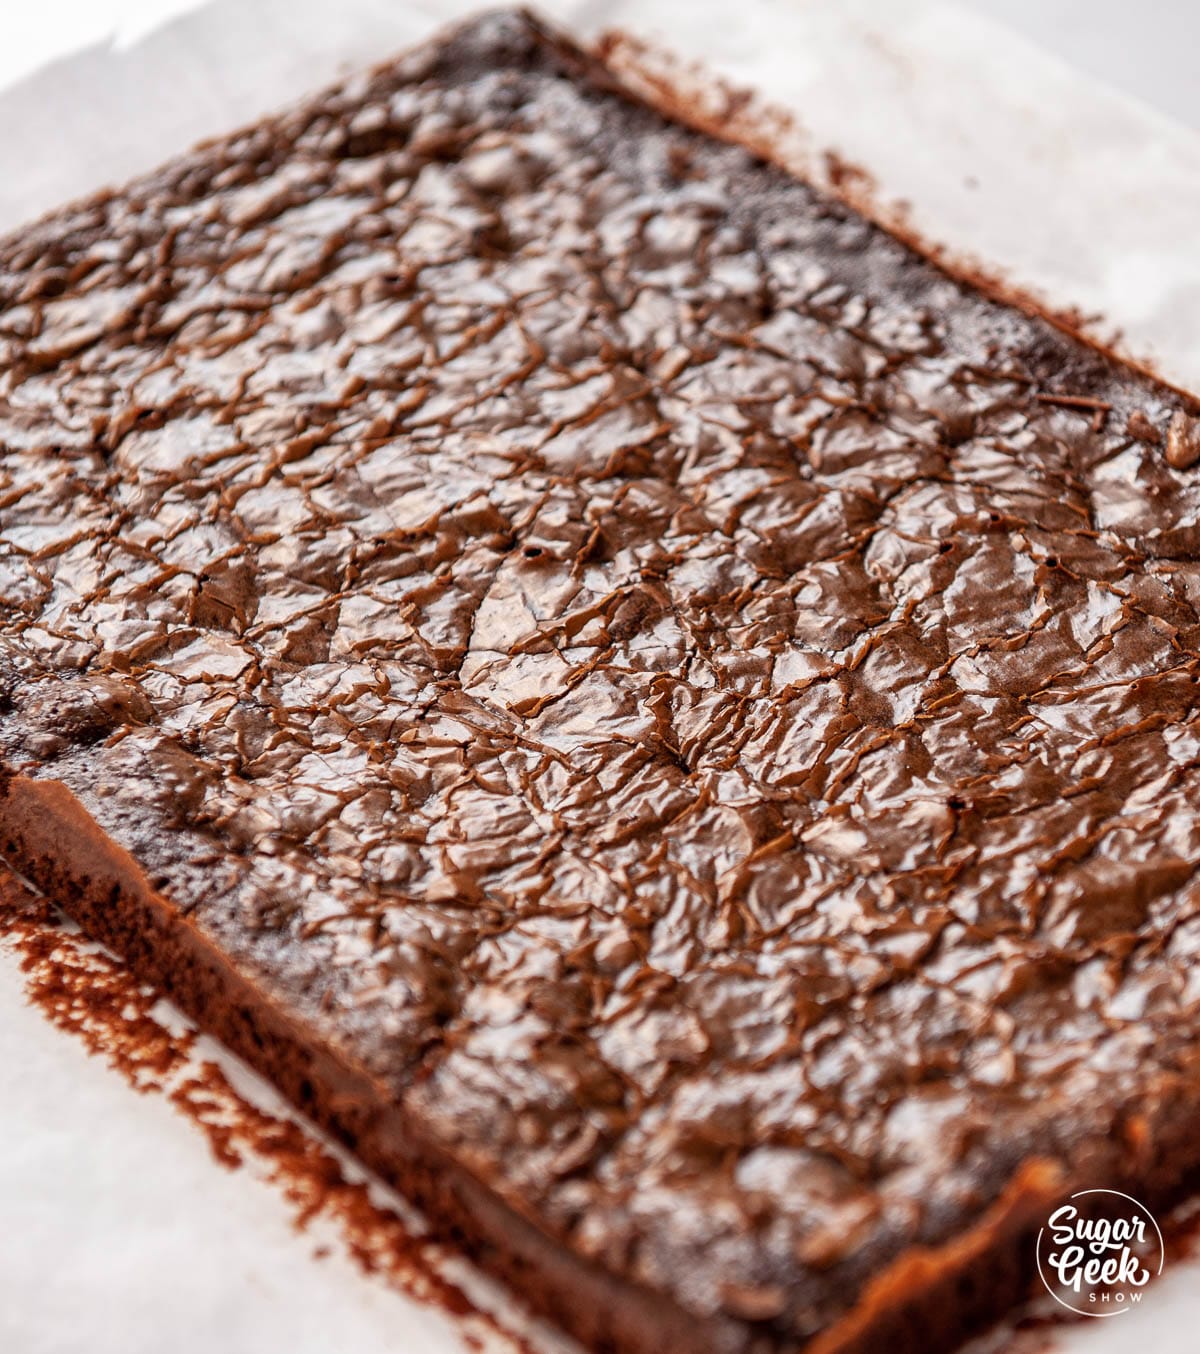
Serving: 1g | Calories: 772kcal | Carbohydrates: 96g | Protein: 3g | Fat: 44g | Saturated Fat: 27g | Cholesterol: 123mg | Sodium: 224mg | Potassium: 61mg | Sugar: 94g | Vitamin A: 1452IU | Calcium: 46mg | Iron: 1mg

How to get perfect square cakes using acrylics

August 6, 2019 Blog

Square cake with acrylics tutorial

How to make a square cake with acrylics

Get a perfectly square cake with acrylics in half the time. I'm using my white cake recipe and easy buttercream but this process also works great with chocolate ganache or white chocolate ganache. 

how to get sharp edges on cakes with acrylics

What are square acrylics?

Acrylics for cake decorating are basically square (or round) pieces of plastic that allow you to create perfectly smooth icing on your cakes. You'll have the exact same amount of icing all the way around your cake, and extremely sharp edges. Acrylics are food-safe, durable and clear. 

It's a little bit more prep work to use acrylics than the upside-down technique, but it makes the process of getting super sharp corners that much easier and saves a lot of time. 

tools for making square cakes using acrylics

Tools you will need to make a square cake with acrylics

  • Two acrylic discs in whatever cake sizes you are making. For a 6" square cake, I use 6" acrylics because my cakes tend to shrink a bit and I trim them. 
  • One square cake cardboard. I trim mine down from a quarter sheet board but you can purchase square cake boards.
  • Painters tape (or any tape will do, I like painters tape because it releases easily)
  • Parchment Paper
  • 2 bench scrapers taller than your finished cake tier
  • Turntable
  • Offset spatula

I have already pre-baked my two square cakes, let them cool and trimmed off the brown edges (optional) and cut them in half length-wise.

I am frosting with my easy buttercream recipe. If you want to learn more about making a cake from start to finish, check out my how to make your first cake tutorial. 

Where can you buy square acrylics?

Cake Safe has great acrylics for square and round cakes as well as a lot of info on how to use their products. They are made of high-quality ¼" acrylic. 

How to use square acrylics

Lots of people have complained about acrylics sticking to their cakes. It's very important to understand that the acrylics are meant to be a guide for your scrapers but they need to be properly prepped first.

Prep square acrylics with parchment paper to prevent buttercream from sticking

I wrap mine with parchment paper so that they don't stick, other people just cut a piece of parchment to the same size as the acrylic.

  1. Cut a square piece of parchment that is 2" bigger than the square acrylic. Cut the corners off of the parchment, fold the sides onto your acrylic, and tape it down. Make sure your parchment is flat and tight with no wrinkles.
  2. Your cake board should be a little smaller than the acrylic so that the buttercream covers the cake board. For a 6" cake, my boards are 5 ¾" square.
  3. Place your first acrylic tape side down onto the turntable with a non-skid underneath. 
  4. Put a little bit of frosting on the acrylic then put your cake board on top of the acrylic and center it. *NOTE* you can also crumb coat your square cake on the cake board FIRST then place it onto the acrylic. 
  5. Then place your first cake layer on the cake board and put an even layer of frosting. You can use a piping tip if you're not comfortable with putting ¼ inch buttercream right on there. Just make sure your buttercream layers are even and flat. 
  6. Continue layering cakes and buttercream.
  7. Place a thick layer of frosting on your second acrylic and place that on top of your cake. Push down to make a good connection. Use a level to make sure the acrylic is level on top of the cake. 
  8. Use your bench scrapers to make sure the top acrylic lines up with the bottom acrylic. 
  9. Fill in the sides with more buttercream and chill until firm. About 20 minutes. 

Use bench scrapers to make sure acrylics are lined up

How to get sharp edges using square acrylics

Once your cake is chilled, now it's time to refine those corners!

Use your offset spatula to add more buttercream to the corners. Use the bench scraper to sharpen the corners. I start at the corner and pull towards the center of the cake. Do not go all the way past the second corner or you will ruin it. 

how to get sharp edges on cakes with acrylics

Repeat this process until your corners are pretty sharp. Chill for another 15 minutes. 

To get those REALLY sharp corners, I do a final pass with one more coat of buttercream and this time I warm up my metal bench scraper in hot water, then I dry it off. This warm bench scraper gets the corners really sharp and also get's rid of any bubbles on the surface of the buttercream. 

Chill one more time in the freezer for 10 minutes. 

How to remove square acrylics without them sticking to the buttercream

Now that our cake is chilled, we can remove the acrylics. The first thing I do is flip my whole cake over so that the cake board is facing the top. Don't worry, this won't hurt the cake. It's nice and chilled. 

Flip the cake over so the cake board is facing up. Remove the tape, the acrylic and the parchment paper

Remove the tape carefully, unfold the parchment paper and remove the acrylic. Carefully peel away the parchment paper. 

Place a cake board on top and flip the cake back over so the cake board is on the bottom. 

place a cake board on your cake layer to flip it over

Repeat the process for the top acrylic. Fill in any wrinkles with more buttercream and smooth out your edges. 

flip the cake back over and remove the tape, acrylic and parchment paper from the chilled cake

I was amazed at how sharp these corners got! All I had to do was touch up the top with a little buttercream to fill in a few wrinkles. I used a long bench scraper to smooth out that edge again. 

Keep the cake chilled until you need it. 

square buttercream cake frosted with buttercream using acrylics


Can you make bigger square cakes with acrylics?

Yes, you sure can! I have used acrylics for cakes up to 12" but I don't often make really large cakes. You can also use ganache instead of buttercream for a very firm outside layer on your square cakes. Ganache is easier to cover in fondant without getting soft corners and holds up against humidity better. 

Recipe

How to get perfect square cakes using acrylics
Print Recipe
5 from 1 vote

Square Cake With Acrylics Tutorial

How to get sharp edges with buttercream or ganache using square acrylics
Prep Time10 minutes mins
Cook Time30 minutes mins
Chilling45 minutes mins
Course: Dessert
Cuisine: American
Servings: 1 cake
Author: Liz Marek

Equipment

  • Square Acrylics
  • Parchment Paper
  • Tape
  • Two Bench Scrapers
  • Level
  • Square Cake Board
  • Offset Spatula

Ingredients

Square Cake Edible Materials

  • 2 6" White Cakes Chilled and trimmed
  • 6 cups Easy Buttercream Or ganache

Instructions

How to use square cake acrylics

  • Cut a square piece of parchment that is 2″ bigger than the square acrylic. Cut the corners off of the parchment, fold the sides onto your acrylic, and tape it down. Make sure your parchment is flat and tight with no wrinkles.
  • Cut a square cake board. Your cake board should be a little smaller than the acrylic so that the buttercream covers the cake board. For a 6″ cake, my boards are 5 ¾″ square.
  • Place your first acrylic tape side down onto the turntable with a non-skid underneath. 
  • Put a little bit of frosting on the acrylic then put your cake board on top of the acrylic and center it.
    *NOTE* you can also crumb coat your square cake on the cake board FIRST then place it onto the acrylic. 
  • Then place your first cake layer on the cake board and put an even layer of frosting. You can use a piping tip if you’re not comfortable with putting ¼ inch buttercream right on there. Just make sure your buttercream layers are even and flat. 
    Continue layering cakes and buttercream.
  • Place a thick layer of frosting on your second acrylic and place that on top of your cake. Push down to make a good connection. Use a level to make sure the acrylic is level on top of the cake. 
  • Use your bench scrapers to make sure the top acrylic lines up with the bottom acrylic. 
  • Fill in the sides with more buttercream and chill until firm. About 20 minutes. 
  • Use your offset spatula to add more buttercream to the corners. Use the bench scraper to sharpen the corners. I start at the corner and pull towards the center of the cake. Do not go all the way past the second corner or you will ruin it. 
  • Repeat this process until your corners are pretty sharp. Chill for another 15 minutes. 
  • To get those REALLY sharp corners, I do a final pass with one more coat of buttercream and this time I warm up my metal bench scraper in hot water, then I dry it off. This warm bench scraper gets the corners really sharp and also get’s rid of any bubbles on the surface of the buttercream. Chill one more time for 10 minutes.
  • Now that our cake is chilled, we can remove the acrylics. The first thing I do is flip my whole cake over so that the cake board is facing the top. Don’t worry, this won’t hurt the cake. It’s nice and chilled. 
  • Remove the tape carefully, unfold the parchment paper and remove the acrylic. Carefully peel away the parchment paper. 
  • Place a cake board on top and flip the cake back over so the cake board is on the bottom.
  • Repeat the process for the top acrylic. Fill in any wrinkles with more buttercream and smooth out your edges. 

Video

high altitude baking hacks. Baker stands at the top of a mountain holding a giant frosted cake with sprinkles

August 4, 2019 Blog

High Altitude Baking Hacks

Adjustments for high altitude baking

If you're going to be doing some high altitude baking (over 3,500 ft above sea level) then you might need to make some adjustments to your favorite recipes. Especially cakes like my vanilla cake recipe. These are my tips for baking at high altitudes with success.

high altitude baking hacks

Why do things bake differently at high altitude?

Basically, there is less air pressure at higher elevations. I remember when we took our road trip to Yellowstone National Park. The elevation was around 6,000 ft. I was having a very hard time catching my breath just going up the stairs! That's because I'm from the valley, so I'm just not used to high elevation.

When you bake at a higher elevation, your cakes tend to rise more, overflow the pan or collapse in the middle.

vanilla cake recipe

How do I adjust my recipes for high altitude baking?

When making adjustments to a recipe, it's important to take notes. Something that works for one recipe, might not work for the other.

Here are a few ways you can adjust your recipes for high altitude baking. 

  1. Bake at a higher temperature. Raise your oven temperature 25ºF from what the recipe calls for. This helps the product to set quickly and reduce the chances of the cake or other baked good from raising too much. Remember, baking at higher temps mean the product is done sooner! Don't let it burn!
  2. Reduce baking powder by ⅛-1/2 of a tsp. You don't need as much leavening to get your baked goods to raise so you can reduce the baking powder a little bit so the product doesn't rise as much.
  3. Reduce the sugar by 2 Tablespoons per cup of sugar. Too much sugar makes the structure weak and can cause collapse.
  4. Increase the liquid by 2 Tablespoons per cup of liquid. Liquids evaporate quicker at higher altitudes, so you'll need to up the liquids to account for that evaporation.
  5. Don't over-mix your eggs. Normally you want to REALLY make sure you're putting a lot of air into your egg whites for a french macaron recipe or when you're creaming your butter/sugar and adding in egg whites but hold back a few seconds at higher elevations. This reduces the amount of air you're incorporating into the batter.
  6. Add more flour. At 3,500 feet, add 1 Tablespoon of flour to your recipe. For every additional 1,500 feet, add another Tablespoon. More flour helps to stabilize the structure of the product.

For example, my muffin recipe uses 3 teaspoons of baking powder plus 1 teaspoon of baking soda, both of which need adjusting at altitude (see ratios above).

Hopefully, these tips will help you troubleshoot your problems when baking at high altitudes. Leave me a comment if you have a question!

easy strawberry cake made with box mix

August 3, 2019 Blog

Strawberry Cake Mix Recipe

A strawberry cake mix recipe that makes box mix taste almost as good as homemade! 

The best strawberry cake mix recipe! I'm obsessed with a good strawberry cake from scratch but sometimes I just don't have a lot of time and need a good strawberry cake recipe FAST! This is my go-to strawberry cake mix recipe with lemon easy buttercream! 

Slice of strawberry cake with lemon buttercream on a blue plate

What's the best strawberry cake mix?

I personally prefer Duncan Hines box mixes. I think they taste the best and are very moist. Their strawberry box mix is already super tasty but I add in a few ingredients to make it taste even better. 

how to make strawberry cake mix taste like scratch

Adding these ingredients to your strawberry box mix will make the cake a little denser and better for stacking. You can even cover this cake in fondant or stack multiple tiers for a birthday or wedding cake. Just make sure you chill your cakes first to harden the butter that's inside the cake before you try to stack the cake layers. 

For more information on learning to make your first cake, check out my how to make your first cake tutorial. 

Can you add fresh fruit to box mix?

I have experimented a few times with adding fresh fruit to box mix and it generally works really well. Strawberries work best if you use a reduced puree or fruit preserves so that you aren't adding too much liquid into the cake recipe. 

I tried adding chopped strawberries one time and it turned out ok but the strawberries got a little soggy inside the cake and turned grey around the edges. 

Adding strawberry puree to the box mix results in beautiful pink layers!

easy strawberry cake recipe

How do you make a strawberry layer cake?

After you mix up your cake batter, divide it into three 8" cake pans. If you only have one pan, you can bake one at a time and leave the leftover batter in the fridge until you need it. 

how to make easy strawberry cake from a cake mix

Let your cake layers cool for 10 minutes in the pan then turn them out onto a cooling rack to cool the rest of the way. You can speed this process up by putting the rack plus the cakes in the freezer for about an hour. Then they will be ready to frost. 

I decided to frost my strawberry cakes with lemon buttercream! But any kind of buttercream would work like cream cheese frosting, stabilized whipped cream or fresh strawberry buttercream. 

how to make lemon buttercream

To make my easy buttercream into lemon buttercream, I just added in some fresh lemon curd, lemon extract and lemon zest, then mixed it all together. You can leave the lemon curd out if you don't have any but it is pretty yummy and easy to make! 

Fill your chilled layers of cake with the lemon buttercream. I shoot for about ¼" of buttercream between my cake layers. Repeat with all the cake layers then cover the entire cake with a thin coat of buttercream. This is called the crumb coat and seals in all the cake crumbs. 

how to frost a strawberry layer cake

Put the cake into the fridge for 20 minutes to firm up the crumb coat. Then you can put your final layer of buttercream on the cake and decorate it any way you like! I decorated mine with sweetapolita sprinkles. This is the "Twinkle" sprinkle medley! One of my favorites!

strawberry cake frosted with lemon buttercream and decorated with sweetapolita twinkle medley sprinkles

I love how easy this strawberry cake mix recipe is! I hope you love it too! Happy baking!

Cake Batter and Frosting Calculator

Select an option below to calculate how much batter or frosting you need. Adjust the servings slider on the recipe card to change the amounts the recipe makes.

Choose a pan type

Choose a cake pan size
(based on 2" tall cake pan)

Choose a cake pan size
(based on 2" tall cake pan)

Choose a cake pan size
(based on 2" tall cake pan)

Cupcake Tin Size

Choose number of pans

Cups of Batter Needed

8 cups

Cups of Frosting Needed

5 cups

Note: measurements are estimated based off the vanilla cake recipe using standard US cake pans and sizes. Measurements used are for 2" tall cake pans only. Your results may vary. Do not overfill cake pans above manufacturer's recommended guidelines.

Recipe

easy strawberry cake made with box mix
Print Recipe
4.88 from 272 votes

Doctored Strawberry Cake Mix Recipe

An easy strawberry cake mix recipe that tastes almost as good as scratch! The perfect recipe for when you want a delicious strawberry cake but you're short on time. Frosted with a yummy lemon buttercream!
Prep Time10 minutes mins
Cook Time30 minutes mins
Total Time40 minutes mins
Course: Dessert
Cuisine: American
Servings: 24 servings
Calories: 505kcal
Author: Liz Marek

Ingredients

Strawberry Cake Mix Recipe

  • 1 box strawberry cake mix or white if you can't find strawberry
  • 1 cup AP flour
  • 1 cup granulated sugar
  • ¼ teaspoon salt
  • 1 cup sour cream room temp
  • ½ cup melted butter
  • ½ cup milk
  • ¾ cup strawberry puree
  • 3 eggs
  • 1 teaspoon strawberry emulsion or extract
  • ½ teaspoon lemon extract

Lemon Easy Buttercream Frosting

  • ¾ cup pasteurized egg whites
  • 5 cups powdered sugar
  • 3 cups unsalted butter softened to room temperature
  • ½ teaspoon salt
  • 2 teaspoon lemon extract
  • ¼ cup lemon curd optional
  • 1 tablespoon lemon zest
US Customary - Metric

Instructions

Strawberry Box Mix Cake Ingredients

  • The instructions for this cake are super easy. Basically, put it all into a bowl and mix it for 2 minutes! Voila! Cake batter is ready. 
  • Pour batter into three 8" cake pans prepared with cake goop or your preferred pan release. Bake at 350ºF  for 25-35 minutes or until a toothpick inserted comes out clean

Easy Buttercream Frosting

  • Place pasteurized egg whites and powdered sugar in the bowl of a stand mixer with the whisk attachment. Mix on low until combined and then bump up to high and whip for 3 minutes. It will look like royal icing, not meringue.
  • Add in your salt then your butter in small pieces while mixing on low until combined, then bump up to high. Whip until light, white and fluffy and it doesn't taste like butter anymore. This can take 10-15 minutes.
  • Switch to the paddle attachment and mix on low for 15 minutes to smooth buttercream and reduce bubbles (optional)
  • Mix in your lemon curd, lemon zest and extract until combined.
  • Frost and decorate your cake as desired

Video

Notes

Tools & Materials List
Tools Recommended *note: this list contains affiliate links which do not cost you anything but I may make a few bucks off the sale*
  • Three 6" cake pans 
  • Bench Scraper
  • Offset spatula
  • 6" cake board
  • Turntable 
  • Piping bag
  • Piping tip
Materials Needed
  • Three 6" cakes - baked and cooled
  • Easy Buttercream (one batch)
  • Food coloring
  • Sprinkles
  • Strawberry filling (optional)

Nutrition

Serving: 1g | Calories: 505kcal | Carbohydrates: 55g | Protein: 3g | Fat: 31g | Saturated Fat: 19g | Cholesterol: 97mg | Sodium: 270mg | Potassium: 51mg | Fiber: 1g | Sugar: 44g | Vitamin A: 986IU | Vitamin C: 5mg | Calcium: 63mg | Iron: 1mg


Floral Cascade Sugar Flower Online Course

August 1, 2019 Course Preview

Floral Cascade Sugar Flower Arrangement

Skill level: Intermediate

Guest instructor Ashley Barbey is back with another stunning sugar flower tutorial. In this tutorial, Ashley breaks down how to make hydrangea flowers, realistic poppy flowers, vines leaves and strawberries.

Ashley also breaks down how to make traditional and modern floral cascades on a cake, offering tons of tips and tricks to help you better arrange flowers and floral sprays on your future projects.

2:16:28 Minutes of Instruction

What You Will Learn

  • How to make sugar flower hydrangeas, poppies, poppy buds and strawberries
  • Learn to create realistic flowers, buds and berries
  • How to make a garden wall texture on a tiered cake
  • Ashley's tips and tricks on how to create amazing floral cascades in a traditional and modern way

Tutorial Chapters

  1. Hydrangea centers 0:46
  2. Hydrangea flowers 4:44
  3. Dusting hydrangeas 12:43
  4. Assembling hydrangeas 23:09
  5. Making leaves 26:15
  6. Dusting leaves 35:14
  7. Compiling vines 38:26
  8. Making Strawberries 44:38
  9. Dusting strawberries 1:01:16
  10. Glazing strawberries 1:05:15
  11. Compiling strawberries 1:07:28
  12. Poppy centers 1:10:15
  13. Poppy flowers 1:23:48
  14. Poppy buds 1:40:06
  15. Texturing the cakes 1:47:14
  16. Sealing the cake 1:50:45
  17. Creating cascades 1:53:19
  18. Placing flowers 2:01:48

Downloads

Materials List

Floral Cascade Sugar Flower Online Course

August 1, 2019 Paid Video

Floral Cascade Sugar Flower Arrangement

Skill level: Intermediate

Guest instructor Ashley Barbey is back with another stunning sugar flower tutorial. In this tutorial, Ashley breaks down how to make hydrangea flowers, realistic poppy flowers, vines leaves and strawberries.

Ashley also breaks down how to make traditional and modern floral cascades on a cake, offering tons of tips and tricks to help you better arrange flowers and floral sprays on your future projects.

2:16:28 Minutes of Instruction

What You Will Learn

  • How to make sugar flower hydrangeas, poppies, poppy buds and strawberries
  • Learn to create realistic flowers, buds and berries
  • How to make a garden wall texture on a tiered cake
  • Ashley's tips and tricks on how to create amazing floral cascades in a traditional and modern way

Tutorial Chapters

  1. Hydrangea centers 0:46
  2. Hydrangea flowers 4:44
  3. Dusting hydrangeas 12:43
  4. Assembling hydrangeas 23:09
  5. Making leaves 26:15
  6. Dusting leaves 35:14
  7. Compiling vines 38:26
  8. Making Strawberries 44:38
  9. Dusting strawberries 1:01:16
  10. Glazing strawberries 1:05:15
  11. Compiling strawberries 1:07:28
  12. Poppy centers 1:10:15
  13. Poppy flowers 1:23:48
  14. Poppy buds 1:40:06
  15. Texturing the cakes 1:47:14
  16. Sealing the cake 1:50:45
  17. Creating cascades 1:53:19
  18. Placing flowers 2:01:48

Downloads

Materials List

berry Chantilly cake

July 28, 2019 4th of July

Berry Chantilly Cake

This berry chantilly cake recipe is made with moist vanilla cake, fresh fruit, and layered with a luscious chantilly cream frosting made of lightly sweetened whipped cream and mascarpone filling. It's inspired by the famous Whole Foods chantilly cake. This cake is not too sweet and is the perfect refreshing dessert for weddings, birthdays, bridal showers, or any special occasion that needs a dessert everyone will love.

Slice of berry chantilly cake on a white plate with a gold fork.

Quick Glance at the Recipe

  • Recipe Name: Berry Chantilly Cake
  • Why You'll Love It: Light, not too sweet, packed with fresh berries, and perfect for special occasions. Even better than the original Whole Foods Cake.
  • Time and Difficulty: Intermediate | About 2 hours total (plus chilling)
  • Main Ingredients: Vanilla cake, mascarpone, cream cheese, heavy cream, fresh berries
  • Method: Layered cake with cooked berry filling and whipped mascarpone frosting
  • Texture and Flavor: Soft, fluffy, creamy, slightly tangy, and fresh
  • Quick Tip: Chill your cake layers before frosting for clean, stable layers
ChatGPT
Google AI
Perplexity
Grok
Add us as a trusted site on Google
[feast_advanced_jump_to]

The first time I tasted a berry chantilly cake, it was from Whole Foods Market, which has actually trademarked the name "berry chantilly cake" because of its popularity. I can see why. After my first bite, I was hooked. The layer cake is so light. The chantilly cream is not too sweet, and the seasonal berries are so delicious! I had to try recreating it at home.

What Is a Berry Chantilly Cake?

A berry chantilly cake is a layer cake made with tender vanilla cake, fresh berries, and a whipped cream style frosting called chantilly cream. The name comes from Hameau de Chantilly in France, a small settlement near the town of Chantilly where sweetened whipped cream was said to have originated in the 1800s.

Traditional chantilly cream is simply heavy whipping cream, sugar, and vanilla extract. My version adds mascarpone cheese and cream cheese for extra richness, tang, and structure, which is what makes it much more similar to the Whole Foods berry chantilly cake than a classic French chantilly. It's technically a crossover between a chantilly cake and a gentilly cake, because I love the fluffy vanilla layers with berries but I prefer the mascarpone cream cheese frosting over basic whipped cream.

Chantilly cake can mean different things in different places, too. On our last trip to Hawaii, we stopped at the famous Ted's Bakery and had a slice of their legendary chantilly cake. It was a chocolate chiffon cake frosted with a rich caramel-style topping that reminded me of coconut pecan frosting without the coconut or pecans. So depending on where you are, "chantilly cake" can mean very different things. This version, the berry one, is the one most people are searching for.

What Makes This Berry Chantilly Cake So Good

The vanilla cake base uses the reverse creaming method, which is the single biggest reason the texture of this cake is so tender and light. Coating the flour in butter before adding any liquid prevents excess gluten development, which is what gives you that fine, soft, almost velvety crumb that holds up under the weight of the filling and frosting without ever feeling dense.

The chantilly cream is balanced between tang and richness. Cream cheese brings a slight tartness that cuts the sweetness. Mascarpone adds a silky, ultra-creamy mouthfeel that plain whipped cream never achieves. Heavy cream whipped separately and folded in at the end keeps the frosting light and pipeable. Combined, these three dairy ingredients give you a frosting that's rich but not heavy, sweet but not sugary.

The cooked berry filling is key for structure. Raw berries release water over time and turn your cake filling into a soggy mess by day two. Cooking the berries with sugar and a cornstarch slurry gives you a glossy, thick filling that holds its shape between layers and intensifies the berry flavor so every bite tastes like summer.

Finally, this cake is made to be chilled. The frosting firms up beautifully in the fridge, which makes it travel-friendly and easy to slice. A well-chilled berry chantilly cake holds clean lines and gorgeous layer definition, which is exactly what you want for a celebration cake.

Key Ingredients for Berry Chantilly Cake

Let's talk about the ingredients that really matter in this berry chantilly cake recipe and why.

Berry chantilly cake ingredients
  • Cake Flour. Cake flour is the best choice for the most delicate and tender cake crumb. You can substitute by removing 2 tablespoons of all-purpose flour per cup and replacing it with cornstarch, but the texture will be slightly coarser. Cake flour is readily available in most grocery stores and worth picking up for this recipe.
  • Unsalted Butter. Butter adds richness and flavor to the cake. It must be at room temperature, soft enough that your finger leaves a mark without being melted. Cold butter will not mix properly with the dry ingredients in the reverse creaming method.
  • Almond Extract and Vanilla Extract. Both extracts are used in the cake and in the frosting. Almond extract gives this cake its signature wedding-cake style flavor, and it pairs beautifully with berries. If you have an almond allergy or don't love the flavor, you can leave it out and double the vanilla.
  • Cream Cheese. Cream cheese adds the subtle tang that makes this chantilly cream interesting. Cut it into small cubes and soften it at room temperature (or microwave for 15 seconds) before mixing. Cold cream cheese will create lumps in your frosting that are almost impossible to smooth out.
  • Mascarpone Cheese. Similar to cream cheese but less tangy, slightly sweet, and incredibly creamy. Mascarpone is what gives the chantilly cream its signature silky texture. Don't skip it or substitute more cream cheese, the flavor and texture are specifically what make this frosting special.
  • Heavy Whipping Cream. This is the base of the chantilly. Sometimes labeled as whipping cream or double cream. Half-and-half will not whip up because it doesn't have enough fat content. Make sure your cream is cold straight from the fridge for the best whip.
  • Fresh Berries. You'll need berries for the cooked filling as well as for layering between the cake and for the final decoration on top. Strawberries, blueberries, raspberries, and blackberries all work beautifully, use whichever combination looks best at the market. If you're using frozen berries for the filling, defrost and drain them first so the filling doesn't end up too watery.

Tips For Success

  • Measure all ingredients by weight with a kitchen scale. Baking is a science, and weight measurements give you consistent results every time.
  • Do not skip the 2-minute mixing stage during the reverse creaming step. This is what develops the cake's structure.
  • Use three 8-inch cake pans, not two. Two 8-inch pans will overflow. If you only have two pans, use 9-inch pans instead and reduce the bake time slightly. If you use 9" pans, torte the cakes in half before frosting and filling, which will give you four layers instead of three.
  • Whip the heavy cream separately and fold it in at the end. Never whip the whole chantilly frosting together from the start; it will deflate.
  • Chill the cake layers for at least 1 hour before assembling. Firm, cold cake layers are much easier to stack without breaking.
  • Always cool the berry filling completely before using. Warm filling will melt your chantilly cream.

Step-by-Step Instructions for Berry Chantilly Cake

Follow these instructions on how to make all the cake layers, the filling, and the frosting! Measure out all of your ingredients with a kitchen scale ahead of time, making sure they are at room temperature or slightly warm, so they mix together properly.

Make the Vanilla Cake Layers

Start by preheating your oven to 350°F (175°C) and preparing three 8-inch cake pans with cake goop or your preferred pan release.

close up of vanilla cake liquid ingredients in two measuring cups
  1. In a measuring cup, combine 4 ounces of the milk with the vegetable oil. Set aside.
whisking eggs and oil together in a measuring cup.
  1. In a separate bowl, whisk together the remaining 6 ounces of milk, vanilla extract, almond extract, and room-temperature eggs until combined. Set aside.

EXPERT TIP: Weigh the liquids the same way you'd weigh dry ingredients. This makes measuring easier, cleaner, and more efficient.

adding flour to a stand mixer bowl.
  1. In the bowl of a stand mixer fitted with the paddle attachment, combine the cake flour, sugar, baking powder, baking soda, and salt.

    Mix on low for a few seconds to combine.
hand adding chunks of butter into bowl
hand showing the course sand texture after mixing the butter and flour.
  1. With the mixer on the slowest speed, add the softened butter in small pieces and mix until the mixture resembles coarse sand.

EXPERT TIP: The butter should be soft to the point where you can easily press your finger into the butter and leave a mark without it being melted.

hand adding the buttermilk mixture to the mixing bowl.
a spatula showing the texture of the cake batter mixture before adding the eggs and oil.
  1. Add the milk and oil mixture all at once. Increase the mixer speed to medium (speed 4 on a KitchenAid) and mix for 2 full minutes to develop the cake's structure.

    Do not skip this step, and don't worry, you won't overmix the batter.
hand adding the egg and oil mixture to the mixing bowl.
finished cake batter on a spatula.
  1. Reduce speed to low and add the egg and milk mixture in three batches, scraping the bowl between additions. Mix just until combined.
overhead shot of vanilla cake in pans
  1. Divide the batter evenly between the three prepared 8-inch pans. Bake for 25 to 35 minutes, or until a toothpick inserted in the center comes out clean.
stack of vanilla cake layers on a cooling rack
  1. Immediately tap each pan once on the counter to release steam and prevent uneven shrinking.

    Let the cakes cool in the pans for 20 minutes, then turn them out onto a cooling rack. Wrap in plastic wrap and freeze for at least 1 hour before assembly.

Chantilly Cream Instructions

Softened butter, cream cheese, and mascarpone mixed together in a glass bowl.
  1. In a stand mixer with the paddle attachment, cream the softened butter, cream cheese, and mascarpone together until smooth and free of lumps.
Pouring powdered sugar into chantilly cream mixture.
  1. Add the sifted powdered sugar and continue mixing until creamy and fully incorporated.
Whipped cream in a clear mixing bowl with a blue rubber spatula.
  1. In a separate clean bowl with the whisk attachment, whip the heavy cream to soft peaks. Add the vanilla extract and almond extract. Peaks should be firm but not curdled. Watch closely, this happens quickly.
Chantilly cream in a clear glass bowl with a blue rubber spatula.
  1. Gently fold the whipped cream into the cream cheese mixture until just combined.

EXPERT TIP: Do not overmix the frosting after the whipped cream goes in or it will deflate and turn soupy.

Berry Filling

You can use fresh or frozen berries for this filling. If using frozen, defrost and drain them first so the filling doesn't end up watery.

berries and sugar in a pot with sugar
  1. Place the berries and sugar in a medium saucepan over medium heat. Bring to a simmer.
clearjel slurry in a clear bowl
  1. In a small bowl, whisk the cornstarch with the cold water to make a slurry.
closeup of blackberry filling in a clear bowl with a spoon
  1. Pour the slurry into the bubbling berries and add the lemon juice.
Closeup of berry filling in a glass bowl.
  1. Cook for 1 to 2 minutes, stirring, until the mixture is thick and glossy.

    Remove from heat and cool the filling completely before using. Spreading it on a sheet pan speeds up cooling.

Cake Assembly

Berry chantilly cake layers
  1. Trim the tops of the chilled cake layers flat so they stack cleanly.
Hand spreading berry mixture on top of a vanilla cake layer
  1. Place the first cake layer on a cake board or serving plate.

    Spread a thin layer of cooled berry filling on top.
Cake layer with berry filling and chantilly cream dollop on top
  1. Spread a layer of chantilly cream over the berry filling.
Decorating a berry chantilly cake on a cake stand.
  1. Scatter fresh berries on top of the cream.
Stacking chantilly cake layers.
  1. Add the second cake layer and repeat the berry filling, cream, and fresh berry steps.

    Top with the third cake layer.

Cake on a cake pedestal being frosted with an offset spatula.
  1. Apply a layer of chantilly cream to the outside of the cake (crumbcoat) and chill for 15 minutes.
White frosted cake.
  1. Frost the outside of the cake with the remaining chantilly cream. Smooth the sides with a bench scraper.
Close up of berry chantilly cake.
  1. Top the cake with a generous pile of fresh berries.
Chantilly cake slice on a plate with a gold fork.
  1. Chill the assembled cake for at least 30 minutes before slicing. Serve cold or let sit at room temperature for 15 to 20 minutes for the best flavor.

Batter & Frosting Calculator

Cake Batter and Frosting Calculator

Select an option below to calculate how much batter or frosting you need. Adjust the servings slider on the recipe card to change the amounts the recipe makes.

Choose a pan type

Choose a cake pan size
(based on 2" tall cake pan)

Choose a cake pan size
(based on 2" tall cake pan)

Choose a cake pan size
(based on 2" tall cake pan)

Cupcake Tin Size

Choose number of pans

Cups of Batter Needed

8 cups

Cups of Frosting Needed

5 cups

Note: measurements are estimated based off the vanilla cake recipe using standard US cake pans and sizes. Measurements used are for 2" tall cake pans only. Your results may vary. Do not overfill cake pans above manufacturer's recommended guidelines.

This recipe makes three 8-inch cake layers (about 12 cups of cake batter) and enough chantilly cream to fill and frost the finished cake. The assembled cake serves about 12 and must be kept refrigerated. It is best within 24 hours of assembly and will keep in the fridge for up to 3 days.

Common Mistakes to Avoid

Overmixing the frosting after folding in the whipped cream. Once the whipped cream goes into the cream cheese mixture, fold gently just until combined. Continuing to mix past that point deflates the air you whipped into the cream and turns the frosting from fluffy and pipeable to thin and soupy.

Using cold cream cheese or mascarpone. Cold dairy ingredients will not cream smoothly and will leave lumps in your frosting that are nearly impossible to remove. Cut them into small pieces and let them sit at room temperature for at least 30 minutes, or microwave in 10-second bursts until soft.

Overwhipping the heavy cream. Stop whipping the cream as soon as you reach firm peaks. Continuing past that point causes the fat to separate and the cream to turn grainy and curdled. Watch it closely because it happens very quickly.

Skipping the chilling steps. This cake needs cold layers to assemble cleanly and a cold crumbcoat before the final frost. Skipping either step results in shifting layers, sliding frosting, and a messy finish. Build in the time and your cake will look and slice beautifully.

Using underripe or out-of-season berries. Underripe berries are tart, bland, and release too much liquid. Use berries that are at peak ripeness for the best flavor in both the filling and the decoration. If fresh berries are not in season, frozen berries work well for the cooked filling as long as you defrost and drain them first.

Berry Chantilly Cake FAQs

Does berry chantilly cake need to be refrigerated?

Yes, because this berry chantilly cake contains whipped cream and fresh fruit, it must be stored in the refrigerator. It will stay fresh for 1-2 days.

Can I make berry chantilly cake ahead of time?

Yes. You can bake the cake layers ahead and freeze them. Assemble the cake the day before serving for best texture and flavor.

What berries work best in berry chantilly cake?

This usually happens if the cream wasn't whipped enough or if the frosting was overmixed. Make sure to whip to soft peaks and fold gently.

Can I leave out the almond extract?

Yes, you can leave out the almond extract or replace it with more vanilla if you prefer.

Final Thoughts

This berry chantilly cake is one of those desserts that looks like it came from a high-end bakery but is completely achievable at home. Once you make it from scratch, the Whole Foods version will never be the same. Try it for your next birthday, shower, or summer celebration and let me know what you think in the comments below.

More Berry Recipes

  • Blackberry Cake
  • berry cake filling
    Berry Cake Filling
  • Slice of strawberry cheesecake with a chocolate curl on top on a black plate.
    Strawberry Cheesecake Recipe
  • close up of lemon raspberry bars
    Easy Lemon Raspberry Bars

Leave Me A Review
⭐️⭐️⭐️⭐️⭐️

If you tried this Berry Chantilly Cake or any other recipe on my blog, please leave a 🌟 star rating and let me know how it goes in the comments. I love hearing from you!

Recipe

berry Chantilly cake
Print Recipe
4.88 from 636 votes

Berry Chantilly Cake

Berry chantilly cake made with three tender vanilla cake layers, cooked berry filling, fresh berries, and fluffy whipped mascarpone frosting. Perfect for Mother's Day, bridal showers, weddings, and summer celebrations.
Prep Time45 minutes mins
Cook Time30 minutes mins
Refrigeration1 hour hr
Total Time2 hours hrs 15 minutes mins
Course: Dessert
Cuisine: American
Servings: 12 servings
Calories: 1017kcal
Author: Liz Marek

Equipment

  • Stand Mixer
  • Round Piping Tip and Piping Bag

Ingredients

Vanilla Cake Recipe

  • 13 ounces bleached cake flour
  • 13 ounces granulated sugar
  • 3 teaspoon baking powder
  • ¼ teaspoon baking soda
  • ½ teaspoon salt
  • 8 ounces unsalted butter softened
  • 2 teaspoons vanilla extract
  • 1 teaspoon almond extract
  • 10 ounces whole milk room temperature
  • 3 ounces vegetable oil
  • 3 large eggs room temperature

Chantilly Cream Ingredients

  • 16 ounces cream cheese softened
  • 8 ounces unsalted butter softened
  • 8 ounces mascarpone cheese softened
  • 22 ounces powdered sugar sifted
  • 1 teaspoon almond extract
  • 1 Tablespoon vanilla extract
  • 16 ounces heavy whipping cream

Berry Cake Filling

  • 2 cups fresh or frozen berries
  • 2.5 ounces sugar
  • 1 ounces water
  • 1 ounces cornstarch
  • 2 teaspoons lemon juice

Decoration

  • 2 cups fresh berries for decoration
Makes: 8inch0 x 0inch round, 4inch height
US Customary - Metric

Instructions

Vanilla Cake Instructions

  • Note: It's VERY important that your cold ingredients are at room temperature or slightly warmed. See video for tips. 
    Heat oven to 350º F/177º C.
  • Prepare three 8-inch cake pans with cake goop or your preferred pan release.
  • In a measuring cup, combine 4 ounces of the milk with the vegetable oil. Set aside.
  • In a separate bowl, whisk together the remaining 6 ounces of milk, vanilla extract, almond extract, and room-temperature eggs until combined. Set aside.
  • In the bowl of a stand mixer fitted with the paddle attachment, combine the cake flour, sugar, baking powder, baking soda, and salt. Mix on low for a few seconds to combine.
  • With the mixer on the slowest speed, add the softened butter in small pieces and mix until the mixture resembles coarse sand.
  • Add the milk and oil mixture all at once. Increase the mixer speed to medium (speed 4 on a KitchenAid) and mix for 2 full minutes to develop the cake's structure. Do not skip this step.
  • Reduce speed to low and add the egg and milk mixture in three batches, scraping the bowl between additions. Mix just until combined.
  • Divide the batter evenly between the three prepared 8-inch pans. Bake for 25 to 35 minutes, or until a toothpick inserted in the center comes out clean.
  • Immediately tap each pan once on the counter to release steam and prevent uneven shrinking.
  • Let the cakes cool in the pans for 20 minutes, then turn them out onto a cooling rack. Wrap in plastic wrap and freeze for at least 1 hour before assembly.

Chantilly Cream Instructions

  • In a stand mixer with the paddle attachment, cream the softened butter, cream cheese, and mascarpone together until smooth and free of lumps.
  • Add the sifted powdered sugar and continue mixing until creamy and fully incorporated.
  • In a separate clean bowl with the whisk attachment, whip the heavy cream to soft peaks. Add the vanilla extract and almond extract. Peaks should be firm but not curdled. Watch closely, this happens quickly.
  • Gently fold the whipped cream into the cream cheese mixture until just combined. Do not overmix.

Berry Cake Filling

  • Place the berries and sugar in a medium saucepan over medium heat. Bring to a simmer.
  • In a small bowl, whisk the cornstarch with the cold water to make a slurry.
  • Pour the slurry into the bubbling berries and add the lemon juice.
  • Cook for 1 to 2 minutes, stirring, until the mixture is thick and glossy.
  • Remove from heat and cool the filling completely before using. Spreading it on a sheet pan speeds up cooling.

Cake Assembly

  • Trim the tops of the chilled cake layers flat.
  • Place the first cake layer on a cake board or serving plate.
  • Spread cooled berry filling on top of the cake layer.
  • Spread a layer of chantilly cream over the berry filling.
  • Scatter fresh berries on top of the cream.
  • Add the second cake layer and repeat the berry filling, cream, and fresh berry steps.
  • Top with the third cake layer. Apply a thin coat of frosting and freeze for 15 minutes.
  • Frost the outside of the cake with the remaining chantilly cream. Smooth the sides with a bench scraper.
  • Top the cake with a generous pile of fresh berries.
  • Chill the assembled cake for at least 30 minutes before slicing. Serve cold or let sit at room temperature for 15 to 20 minutes for the best flavor.

Video

Notes

Ingredient substitutions
  1. Almond extract can be left out if you have an allergy or don't love the flavor. Substitute with an equal amount of extra vanilla extract.
  2. Frozen berries work for the cooked filling. Defrost and drain them first so the filling doesn't end up watery.
  3. Mascarpone cannot be substituted with more cream cheese. The mascarpone is what gives the chantilly cream its signature silky texture.
  4. Do not use half-and-half in place of heavy whipping cream. It does not have enough fat to whip.
Pan size options
  1. Three 8-inch pans is the recommended size for this recipe.
  2. Two 9-inch pans also work. Reduce bake time by about 5 minutes and check for doneness early.
  3. About 24 cupcakes. Fill liners two-thirds full and bake at 350°F for 18 to 20 minutes, or until the centers spring back when lightly touched.
  4. Do NOT use two 8-inch pans. The batter will overflow.
Make-ahead and storage
  1. Cake layers can be baked and frozen for up to 2 months. Wrap tightly in plastic wrap and thaw on the counter still wrapped before using.
  2. Berry filling can be made 2 to 3 days ahead and refrigerated in an airtight container.
  3. The assembled cake is best within 24 hours of assembly. It will keep refrigerated for up to 3 days.
  4. This cake must stay refrigerated because of the dairy-based frosting.
Serving notes
  1. Let the cake sit at room temperature for 15 to 20 minutes before serving for the best flavor and texture.
  2. For clean slices, run a sharp knife under hot water, wipe it dry, and cut. Wipe the knife between each slice.
High altitude baking
  1. At elevations above 5,000 feet, reduce the baking powder by ¼ teaspoon and increase the oven temperature by 25°F to prevent the cake from collapsing.
Critical do-nots
  1. Do not skip the 2-minute mixing stage during the reverse creaming step. This is what develops the cake structure.
  2. Do not overmix the frosting after folding in the whipped cream. It will deflate and turn runny.
  3. Do not apply warm berry filling to the cake. It will melt the chantilly cream.
  4. Do not use cold cream cheese or mascarpone. They will leave lumps in the frosting.

Nutrition

Serving: 1serving | Calories: 1017kcal | Carbohydrates: 98g | Protein: 8g | Fat: 68g | Saturated Fat: 42g | Polyunsaturated Fat: 3g | Monounsaturated Fat: 15g | Trans Fat: 1g | Cholesterol: 230mg | Sodium: 293mg | Potassium: 292mg | Fiber: 1g | Sugar: 93g | Vitamin A: 2381IU | Vitamin C: 15mg | Calcium: 182mg | Iron: 1mg
berry cake filling

July 24, 2019 Blog

Berry Cake Filling

Berry cake filling that's also great for use in pies, tarts, and other desserts!

This fresh berry cake filling is made with strawberries, raspberries, and blackberries. It's July here and I'm trying to use them all up before the season is over! You can freeze the leftovers to use later and have berry cake filling whenever you need it!

berry cake filling

This berry cake filling tastes amazing in my berry chantilly cake recipe or mix it with easy buttercream and make fresh berry buttercream! 

How to make berry cake filling

You can use frozen berries for this if you don't have fresh berries. Just defrost and puree if them berries are really large (like strawberries). 

mixed berries in white bowls

If you are using fresh berries you can also puree them ahead of time or you can just chop the strawberries into smaller pieces before you cook them. Blackberries and raspberries do not need to be chopped. 

  1. Place berries in a medium saucepan with 5oz of sugar and bring to a simmer. 
  2. Combine the cornstarch with the water to make a slurry. Pour the slurry into the bubbling berries. 
  3. Cook a few minutes until the mixture is thick (1-2 minutes). 
  4. Remove the berries from the heat and stir in the zest of one lemon and your lemon juice. 

cooling berry cake filling

I pour my berry filling into a large cake pan and put it in the fridge so that it cools quickly (if you need to use it right away). Otherwise, you can store this berry cake filling in the fridge for 3 days or freeze for up to 6 months. 

berry cake filling

Berry cake filling is SO versatile and a must for your baking tool belt! You can use any variety and assortment of berries that you like. I used 1 cup each of strawberries, blackberries and raspberries. I used frozen but fresh is awesome too! You can also use other fruits like peaches, kiwis, pineapple etc. You can also increase the thickness of the filling if you like by adding an extra Tablespoon of cornstarch.

berry cake with berry buttercream and fresh berries on top

I used my berry cake filling to make this lemon berry cake! I combined about 1 cup of berry filling with my easy buttercream and whipped it until it was combined. Pro-tip, make sure your berry filling and buttercream are both room temp so they come together easily. 

lemon cake with berry cake filling

Recipe

berry cake filling
Print Recipe
4.95 from 17 votes

Berry Cake Filling

How to make a mixed berry filling from blackberries, strawberries and raspberries. Makes a great cake, pie or dessert filling!
Prep Time5 minutes mins
Cook Time5 minutes mins
cooling time1 hour hr
Course: Dessert
Cuisine: American
Servings: 2 cups
Calories: 330kcal
Author: Liz Marek

Ingredients

Berry Cake Filling

  • 20 ounces fresh or frozen berries about 4 cups
  • 5 oz sugar
  • 2 oz water
  • 1 ½ oz cornstarch
  • 1 zested lemon
  • 1 tablespoon lemon juice

Instructions

Berry Cake Filling Instructions

  • Place the berries in a medium saucepan with 5oz of sugar and bring to a simmer. 
  • Combine the cornstarch with the water to make a slurry. Pour the slurry into the bubbling berries. 
  • Cook a few minutes until the mixture is thick (1-2 minutes). Remove the berries from the heat and stir in the zest of one lemon and your lemon juice. 
  • Cool berry filling before using. Refrigerate for 3 days or freeze for 6 months.

Video

Nutrition
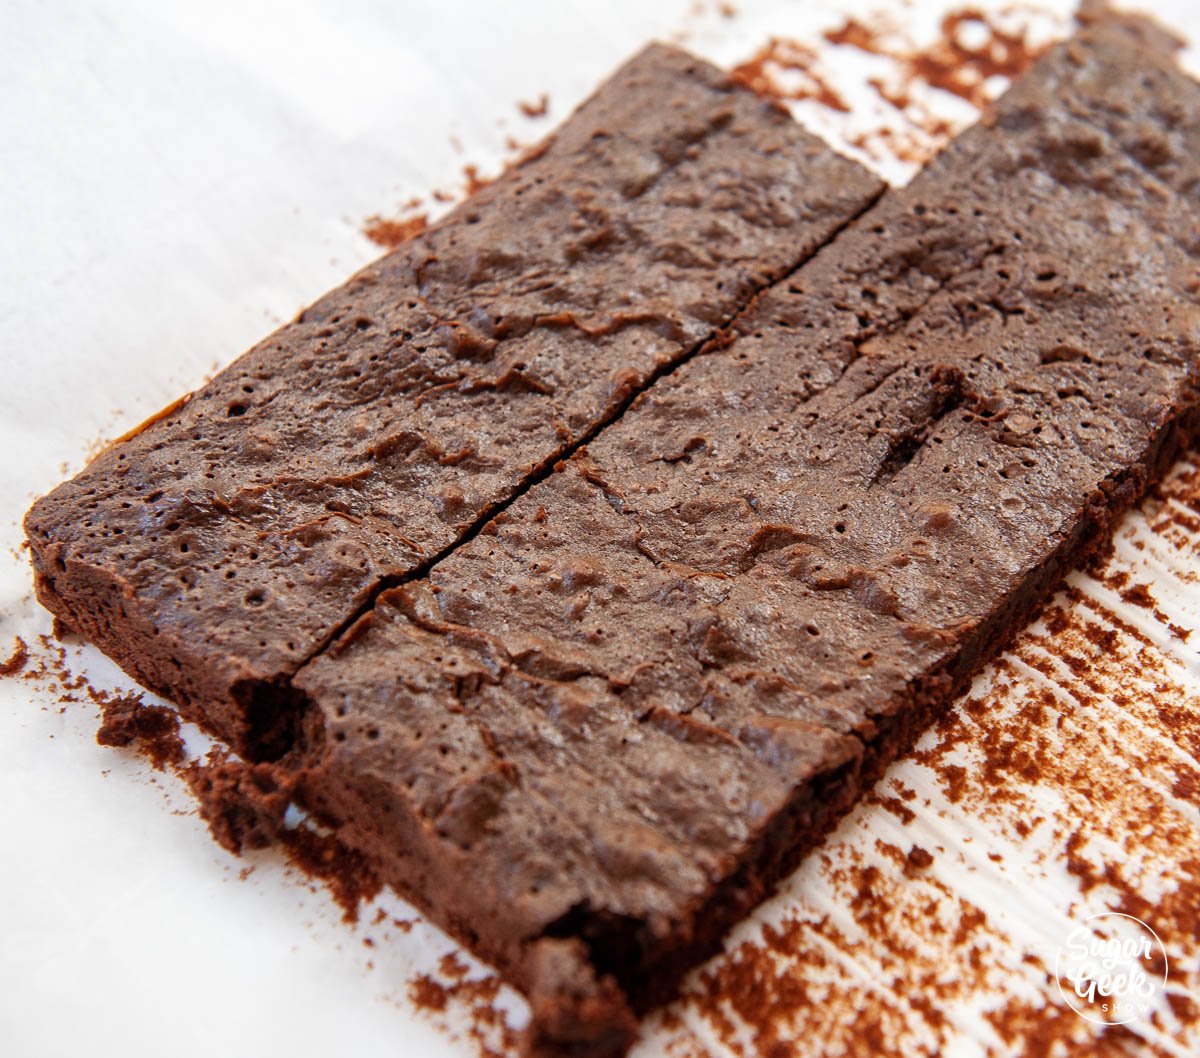
Calories: 330kcal | Carbohydrates: 84g | Protein: 1g | Fat: 1g | Saturated Fat: 1g | Sodium: 3mg | Fiber: 1g | Sugar: 71g | Vitamin C: 2.9mg

berry cake filling is a great way to use up those leftover summer berries! All you need is some berries, sugar, cornstarch and a lemon


Rosé wine fault line cake

July 22, 2019 Blog

Rose Wine Fault Line Cake

Rosé wine fault line cake made with Rosé wine gummy and champagne cake! 

The Rosé wine fault line cake is so fun! I love experimenting with different designs and ideas. Today I made a Rosé fault line cake with two layers of pink champagne cake and one layer of rosé wine gummy! So fun! 

wine gummy fault line cake

I know I know, you must be thinking wow Liz, what were you thinking on this one! 

I get it, this one is a bit crazy but once I had the idea in my mind I couldn't get it out! I had to see if making a Rosé wine fault line cake was possible! 

Fun little tip, you can put gummy next to buttercream and it won't weep or melt. But putting gummy next to fondant doesn't work so well. The water in the gummy makes the fondant melt. 

How to make a Rosé wine fault line cake

To make your Rosé wine fault line cake, start by making your wine gummy recipe. Pour the gummy mixture into a 6" cake pan. I made mine about 3" tall so that you can really see the gummy layer. Let the gummy mixture chill overnight. 

rose wine gummy layer

Once your wine gummy layer is chilled, you can put the pan in a bowl of warm water for about 1 minute. Then turn the pan over onto a plate to release the wine gummy layer from the cake pan mold. 

Optional, make some extra wine gummies to put on top of the cake. I used a cheap wine glass as part of the decoration. 

wine gummy recipe

Next, bake two 7" layers of pink champagne cake and one batch of easy buttercream frosting. I put my cake layers in the freezer for about an hour to chill them quickly. 

pink champagne cake layers

Now comes the weird part. I wasn't sure how stable stacking cake onto gummy would be so I started by putting a layer of frosting down onto the gummy layer then putting my cake on top. Then I put my cake board on top. Then I chilled it for 15 minutes. 

how to make a wine gummy fault line cake

Once my cake was chilled, I flipped the whole thing over and carefully separated the plate from the gummy layer. Then I added more buttercream and my second layer of champagne cake. 

Finishing the wine fault line cake

Once everything was stacked, the cake was easy to finish. I just smoothed out the outer layer of buttercream with my bench scraper and made the top of the cake flat with an offset spatula. 

I placed the wine gummies in a wine glass and arranged them on top of the cake. I anchored the wine glass to the cake with a bit of piped buttercream. 

The main reason I made this cake was that I wanted to see what it looked like with the sun shining from behind! 

wine fault line cake tutorial

This was a really fun fault line cake to make! I admit, slicing it was a bit of a challenge but it was fun to see on the plate! The wine gummy actually did taste really good. This wine fault line cake would make a really fun bridal shower, bachelorette, or 21st birthday cake! 

wine gummy fault line cake

Be sure to watch my full video tutorial on how to make a wine fault line cake! Let me know what you think of this cake in the comments. Would you eat this cake? 


Recipe

rose wine fault line cake tutorial
Print Recipe
5 from 2 votes

Rosé Wine Fault Line Cake Tutorial

Have your wine and eat it too! I couldn't resist making this Rosé wine fault line cake after making my wine gummies! Layers of pink champagne cake, rose wine gummy and easy buttercream frosting!
Prep Time1 hour hr
Cook Time30 minutes mins
chilling1 day d
Total Time1 day d 1 hour hr 30 minutes mins
Course: Dessert
Cuisine: American
Servings: 12 servings
Calories: 1482kcal
Author: Liz Marek

Ingredients

Pink Champagne Cake

  • 12 oz AP Flour
  • 10 oz sugar
  • 8 oz unsalted butter
  • 2 teaspoon baking powder
  • ¼ teaspoon baking soda
  • ½ teaspoon salt
  • 1 teaspoon vanilla extract
  • 1 teaspoon sparkling wine candy flavor (optional) affiliate link: https://a.co/74ZOSgf
  • 4 large eggs room temp
  • 6 oz champagne room temp
  • 2 oz vegetable oil
  • 1-2 drops electric pink food color

Easy Buttercream Frosting

  • 8 oz Pasteurized Egg Whites
  • 32 oz Unsalted Butter
  • 32 oz Powdered Sugar
  • ½ teaspoon salt
  • 1 teaspoon vanilla

Rosé Gummy (enough for the gummy layer plus some for molds)

  • 45 oz Rosé Wine Or any other type of wine
  • 105 grams knox gelatin 15 packets
  • 15 oz sugar or honey
  • 15 oz corn syrup
  • 1 teaspoon citric acid optional - gives the gummies "bite"
US Customary - Metric

Instructions

Champagne Cake Instructions

  • Preheat oven to 350F. Make sure all of your ingredients (champagne, eggs, butter) are at room temperature
  • Place butter in a stand mixer with the paddle attachment and mix on low until smooth and creamy. Sprinkle in sugar and turn up to medium and let mix until very light in color and fluffy (about 8-10 mins)
  • Combine your flour, salt, baking powder and sift. Set aside
  • Combine your champagne, oil, food color and flavorings. Whisk to combine and set aside
  • Once your sugar is ready, add in your eggs ONE AT A TIME. Letting mixture mix for one full minute after each egg is added before adding the next egg. 
  • Add in ⅓ of your flour to your butter/egg mixture and once combined, add in ½ of your liquid, then flour, then liquid, then flour. Let mix just until everything is combined.
  • Divide into two 8" round pans. Bake for 25-30 mins until a toothpick comes out clean. 
  • Let cakes cool in the pan for 15 minutes then flip out onto a cooling rack to cool another 15 minutes or so. Wrap in cling wrap and chill overnight before frosting or place in the freezer for about 1 hour before frosting and decorating your cake

Easy Buttercream Instructions

  • Place egg whites and powdered sugar in the bowl of your stand mixer with the whisk attachment attached and whip on high for 5 minutes
  • Start adding in your butter (softened) in chunks while it's whipping until all the butter is added. Add in your salt and vanilla
  • Continue whipping until buttercream does not appear curdled and is fluffy and white
  • (OPTIONAL) switch to the paddle attachment and mix on low for 10-15 minutes to remove bubbles from the frosting. Frosting will be soft and this is normal.

Wine Gummy Instructions

  • Mix together your wine and sugar in a large measuring cup. Slowly sprinkle in your gelatin 1 teaspoon at a time, mixing in between additions. Don't just dump it all in. Let it bloom for 5 minutes.
  • Melt the gelatin in your microwave for 30 seconds and stir with a spoon (not a whisk). Then 15 second increments until the gelatin is dissolved and isn't grainy anymore.
  • Let the mixture sit for 5 minutes and allow the foam to rise to the surface. Scoop the gelatin off the surface with a spoon.
  • Add in your corn syrup and stir. Add a tiny drop of electric pink to ¼ teaspoon of water and add to the gelatin mixture if the gelatin looks too orange like mine did.
  • Pour the gelatin mixture into a 6"x4" cake pan until it's 3" deep. Use the leftover gelatin to make sphere gummies on top of the cake. Let chill overnight before unmolding.

Video

Nutrition
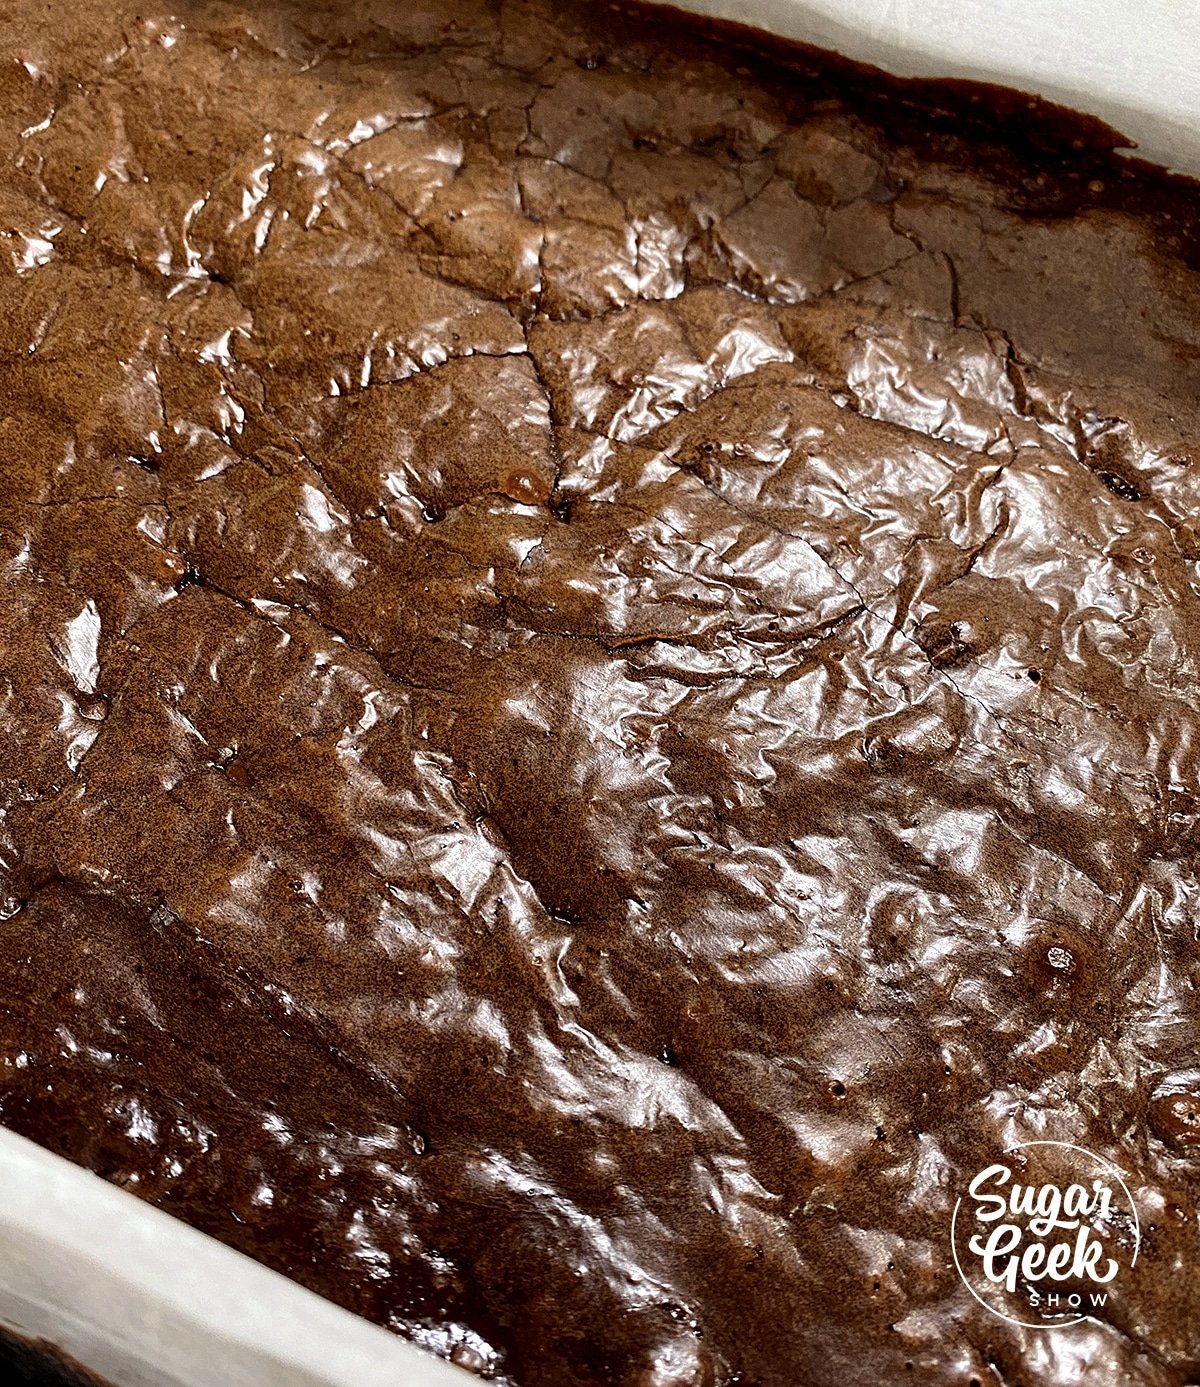
Calories: 1482kcal | Carbohydrates: 184g | Protein: 8g | Fat: 83g | Saturated Fat: 53g | Cholesterol: 258mg | Sodium: 315mg | Potassium: 163mg | Fiber: 1g | Sugar: 160g | Vitamin A: 2605IU | Vitamin C: 0.1mg | Calcium: 77mg | Iron: 2.1mg

rose fault line cake tutorial made with rose wine gummy and pink champagne cake


wine gummy recipe

July 16, 2019 Candy

Wine Gummy Recipe

Delicious wine gummy recipe made with Rosé

A wine gummy recipe made with Rosé! I actually searched for a recipe but couldn't find one that tasted good and like wine! I decided to make my own based on my gummy recipe! I LOVED how they turned out! Talk about a fun treat for a bridal shower! They are so easy to make and you can use your favorite brand of Rosé.

wine gummy recipe

How do you make wine gummies

  1. Mix together your wine of choice, sugar and citric acid (optional) Citric acid gives the gummies that "bite" that is typical of eating a fruity candy.
  2. Slowly sprinkle in your gelatin one teaspoon at a time, mixing in between additions to prevent lumps
  3. Microwave for 30 seconds, stir with a spoon, then 15-second increments until the gelatin is melted and no grains remain. 
  4. Let the mixture sit for minutes, then scoop off the foam with a spoon and discard.
  5. Pour your mixture into molds of your choice and refrigerate. They will be set up after a few hours but taste chewier after two days. 
  6. Make sure you remove the gummies from the mold when they are cold. If you have problems with them coming out cleanly you can freeze them to remove them. 
how to make wine gummies

Can you get drunk off of a wine gummy?

In theory, if you ate a WHOLE lot of wine gummies you could definitely get drunk. You'd probably get sick to your stomach first though because of all the sugar. It is important to know that these wine gummies are made with REAL alcoholic wine so they aren't good for kiddos. 

Think of a Rosé wine gummy as more of a fun treat! Great for a dessert bar, wedding or other festive parties for wine lovers! 

wine gummy recipe

What kind of wine is best for a wine gummy recipe?

So this is a tricky question. It just depends on the wine you like! I used a Rosé from New Seasons because that's what I found that looked good but if there is a brand you prefer, I say use that one! The better the wine, the better the wine gummy will taste!

Still not sure which wine to buy? Check out this list of the best Rosé of 2019 for some suggestions. 

You can also use other types of wine like red wine, white wine, prosecco or champagne! 

rose wine gummy recipe

How do you make wine gummy bears?

I recently read that people were on this crazy waiting list to purchase Rosé gummy bears. They are super cute and imported from Germany. I mean... the Rosé all day train has arrived and the people have demands lol! But you can truly make your own without the wait. 

rose wine gummy bears in a glass bowl

Just pour your gummy mixture into a gummy bear mold. It might be less messy if you use an eye dropper. I liked this gummy bear mold because it's bigger than the standard gummy bear mold. Each bear is about 1" tall. Made of food-safe silicone and comes with droppers! Score!

For a fun non-alcoholic candy project, try this kohakutou recipe that crystallizes into gorgeous gemstone shapes over a couple of days.


Recipe

wine gummy recipe
Print Recipe
4.84 from 12 votes

Wine Gummy Recipe

Make your own delicious Rosé gummy candies! They are super easy to make and the best part is you can use your favorite brand of Rosé!
Prep Time5 minutes mins
Cook Time5 minutes mins
Chill overnight23 hours hrs 20 minutes mins
Total Time10 minutes mins
Course: Dessert
Cuisine: American
Servings: 16 oz
Calories: 58kcal
Author: Liz Marek

Ingredients

Rosé Wine Gummy Ingredients

  • 12 oz Wine You can also use red, white, or champagne
  • 4 packs gelatin (Knox brand)
  • 4 oz sugar or honey
  • 4 oz corn syrup
  • ¼ teaspoon citric acid optional
US Customary - Metric

Instructions

  • Mix together your wine and sugar in a large measuring cup
  • Slowly sprinkle in your gelatin 1 teaspoon at a time, mixing in between additions. Don't just dump it all in. Let it bloom for 5 minutes.
  • Melt the gelatin in your microwave for 30 seconds and stir with a spoon (not a whisk). Then 15 second increments until the gelatin is dissolved and isn't grainy anymore.
  • Let the mixture sit for 5 minutes and allow the foam to rise to the surface. Scoop the gelatin off the surface with a spoon.
  • Add in your corn syrup and stir
  • Add a tiny drop of electric pink to ¼ teaspoon of water and add to the gelatin mixture if the gelatin looks too orange like mine did.
  • Pour gelatin Rosé into molds. I used sphere molds but you could definitely use gummy bear molds if you prefer.
  • Your gummies will be ready in a few hours but they are gummier texture after two days.

Video

Nutrition
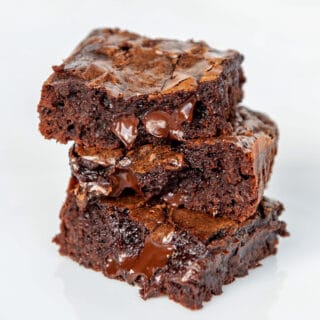
Calories: 58kcal | Carbohydrates: 13g | Protein: 1g | Fat: 1g | Sodium: 6mg | Potassium: 6mg | Sugar: 13g | Calcium: 2mg

Magic: The Gathering Cake Tutorial

July 15, 2019 Course Preview

Magic: The Gathering Cake Tutorial

Skill level: Intermediate

My wonderful husband Dan is really into Magic: The Gathering. So much so, that I decided to make him his very own custom edible Magic card for his birthday. This new online course features making a custom edible playing card, sculpting a magician's hand, making glowing edible colored orbs, and a beautiful golden fault line cake!

40:01 Minutes of Instruction
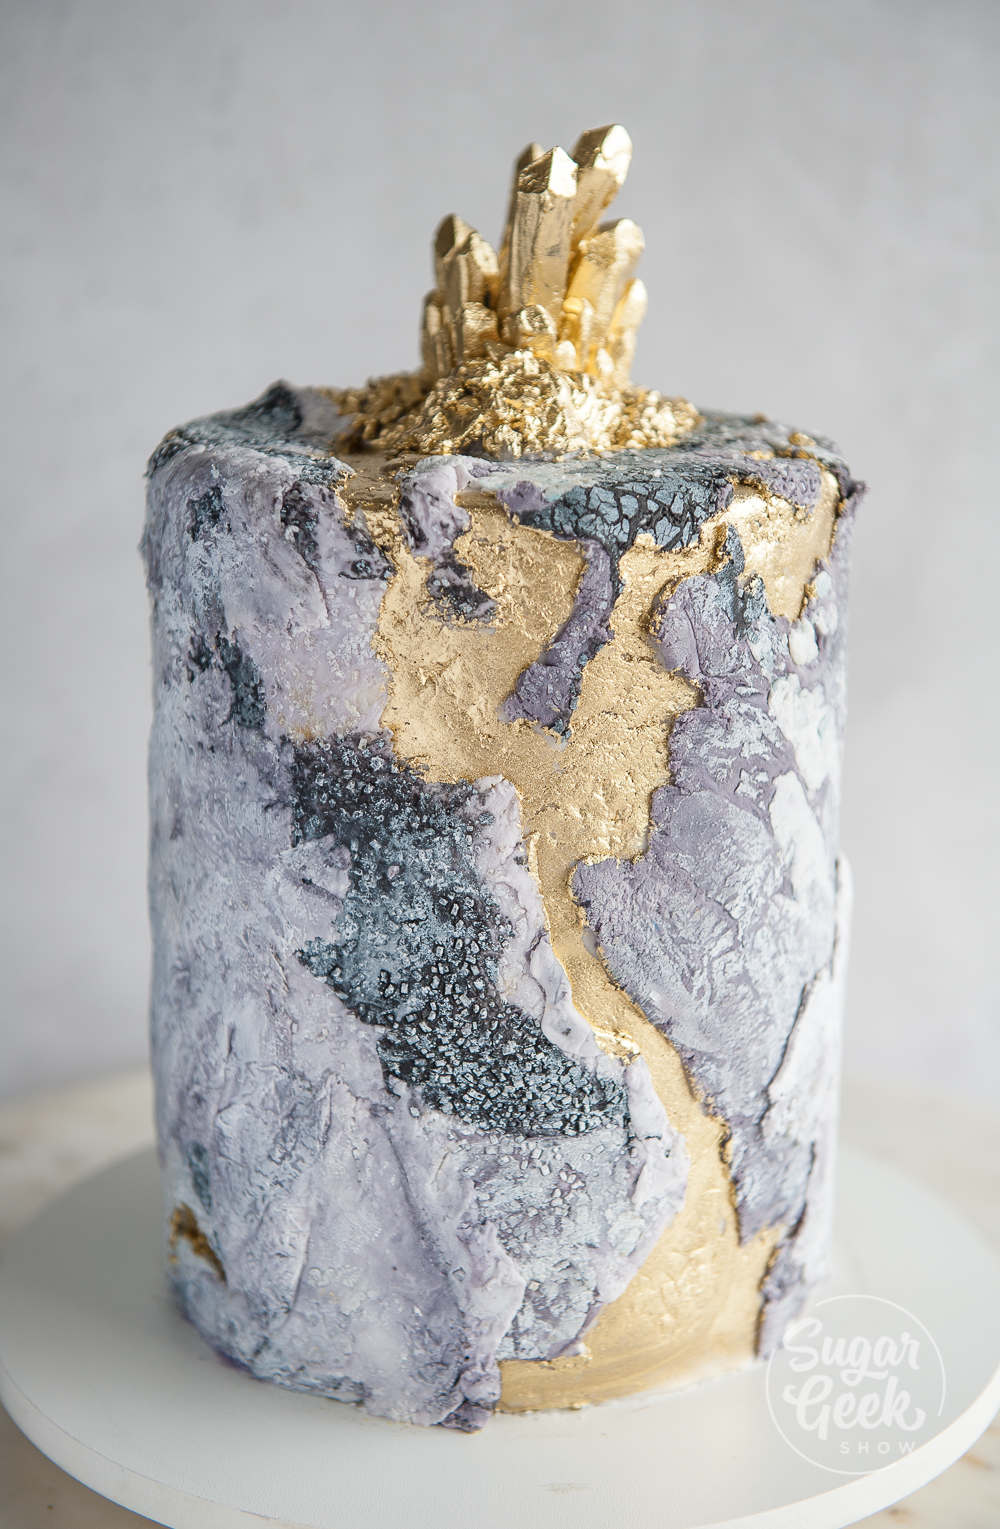
What You Will Learn

  • How to make a custom playing card from edible materials (No Photoshop required)
  • Learn how to sculpt a realistic hand as a cake topper
  • How to make a golden fault-line cake
  • Learn how to make glowing orbs

Tutorial Chapters

  1. Making the cake topper 0:50
  2. Coloring black buttercream 7:27
  3. Making the wrist and palm 10:38
  4. Making the fingers 14:45
  5. Attaching the fingers 17:54
  6. The cuff 24:08
  7. Adding the card 25:19
  8. Painting the cake 27:31
  9. Frosting the cake 29:15
  10. Melting the isomalt 33:01
  11. Coloring the isomalt 33:28
  12. Torching the spheres 35:56
  13. Adding the hand & lights 37:46

Downloads

Materials List

« Previous Page
Next Page »

Primary Sidebar

Hi, I'm Liz! I'm a cake artist and recipe developer, and I won Netflix's Is It Cake? Holiday 2 with a hyperrealistic Santa. I write foolproof recipes that explain why things work, not just how.
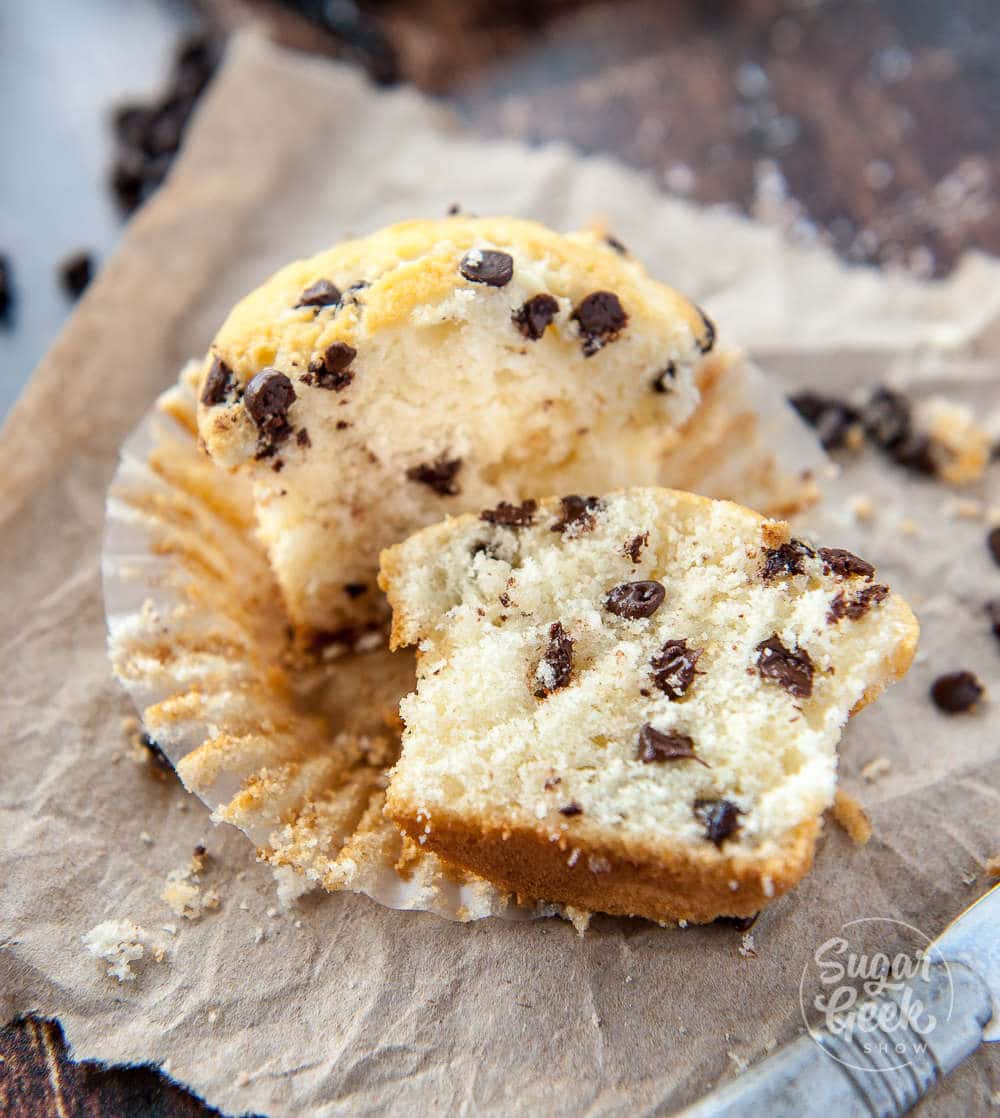
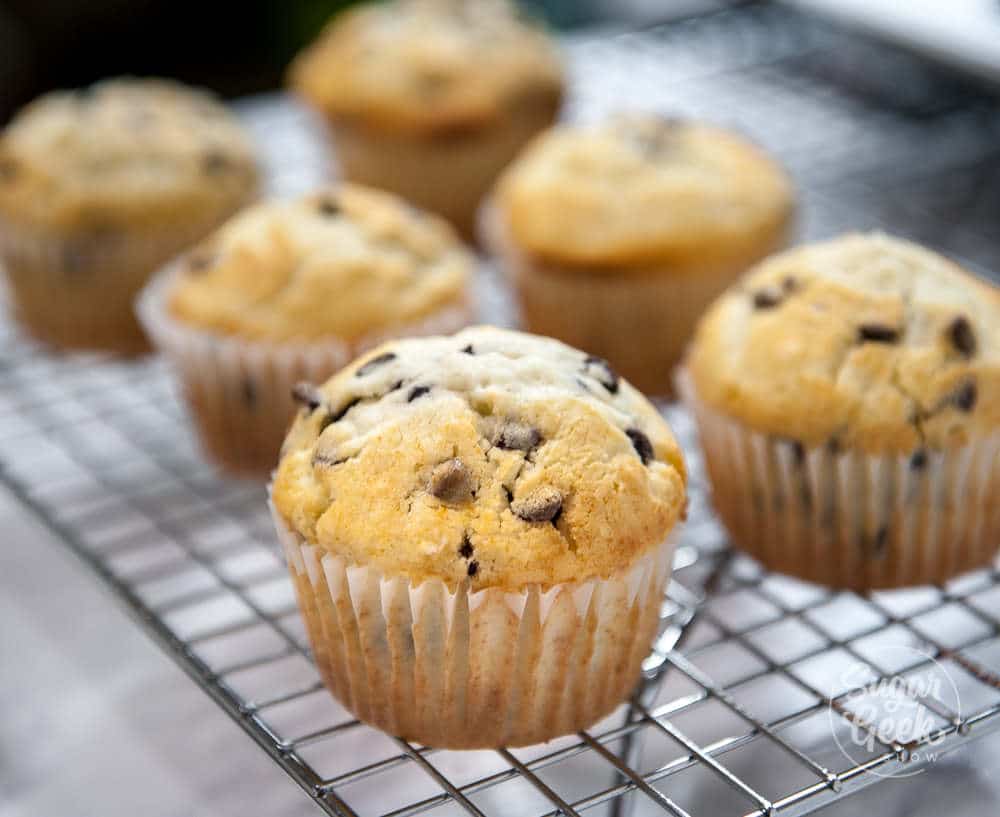
I also teach full-length cake tutorials, including sculpted cakes, at Sugar Geek University.

More about me →

Our Cake Greatest Hits

Check out our best cake recipes

Celebrate Halloween 🎃

  • black and white striped cake with pink drip, gummy eyeball with ice cream cone on top
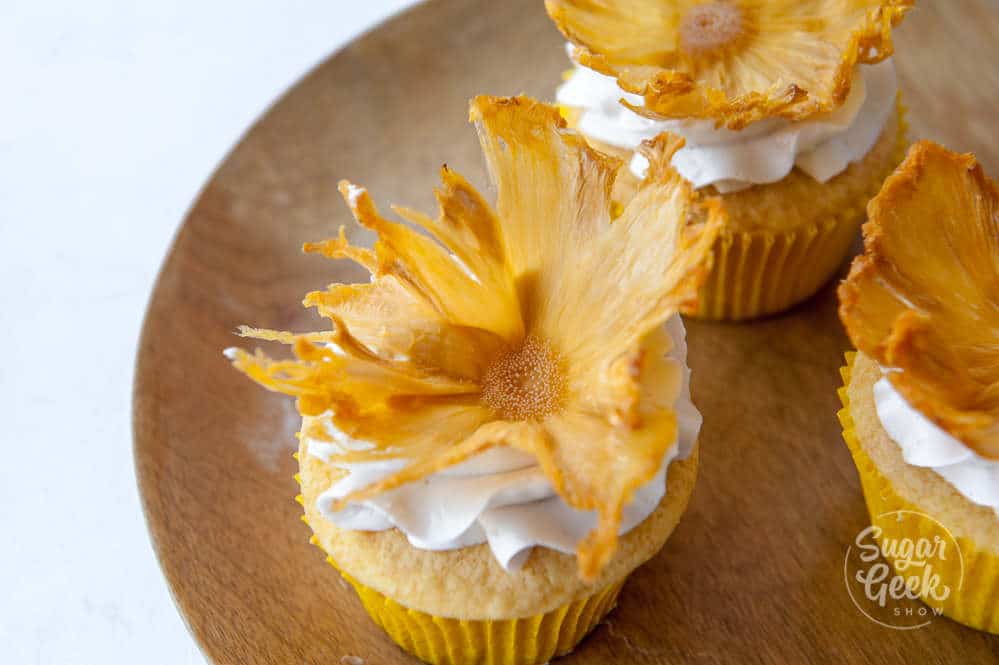
    Gummy Eyeball Cake
    Cook Time1 Hours 30 Minutes
  • close up of a slice of black velvet cake
    Black Velvet Cake
    Cook Time50 Minutes
  • monster mash cheesecake brownies cut into squares on a white background. Sprinkles, pumpkins and plates around the brownies
    Monster Mash Cheesecake Brownies
  • close up of candy apples
    The Best Candy Apple Recipe
  • pumpkin pie recipe
    Pumpkin Pie Recipe
    Cook Time2 Hours
  • close up of pumpkin cheesecake bars on a plate
    Pumpkin Cheesecake Bars
    Cook Time4 Hours

Popular Recipes

  • close up of ganache drizzling into a bowl
    The Best Chocolate Ganache Recipe
    Cook Time20 Minutes
  • Piping easy buttercream rosettes onto a cake using a 1M star piping tip
    Easy Buttercream Frosting
    Cook Time25 Minutes
  • close up slice of marble cake
    Moist and Fluffy Marble Cake Recipe
    Cook Time40 Minutes
  • Slice of red velvet cake with cream cheese frosting on a white plate.
    Red Velvet Cake Recipe
    Cook Time1 Hours 40 Minutes

Footer

↑ back to top

About

  • Privacy Policy
  • Terms of Service

Newsletter

  • Sign Up! for emails and updates
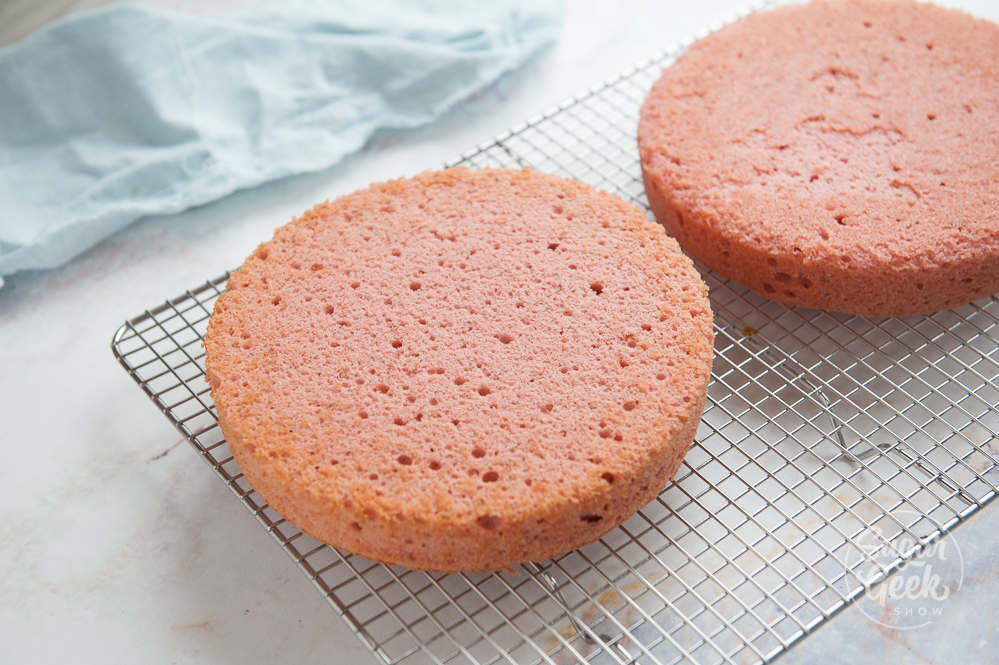
Contact

  • Contact
  • About Us

Copyright © 2024 Sugar Geek Show, Inc. All Rights Reserved.

Rate This Recipe

Your vote:


A rating is required
A name is required
An email is required