• Skip to primary navigation
  • Skip to main content
  • Skip to primary sidebar
  • Halloween
  • Recipes
  • Free Tutorials
  • Cake Classes
  • Cake Commissions
  • About Liz

Sugar Geek Show logo

menu icon
go to homepage
  • Halloween
  • Recipes
  • Free Tutorials
  • Cake Classes
  • Cake Commissions
  • About Liz
subscribe
search icon
Homepage link
  • Halloween
  • Recipes
  • Free Tutorials
  • Cake Classes
  • Cake Commissions
  • About Liz
×
Home

Blog

Magic: The Gathering Cake Tutorial

July 15, 2019 Paid Video

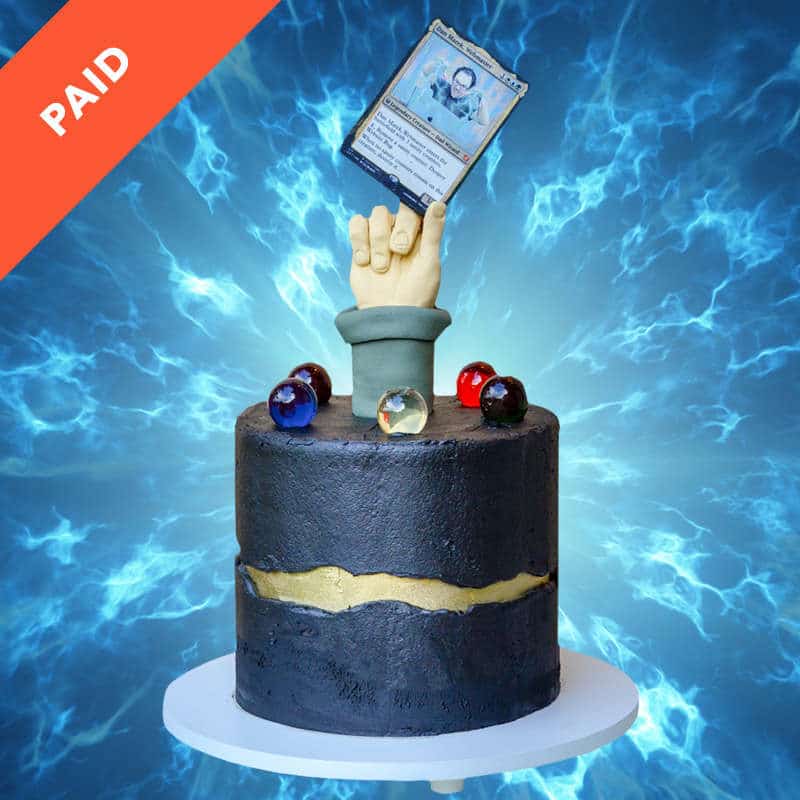
Magic: The Gathering Cake

Skill level: Intermediate

My wonderful husband Dan is really into Magic: The Gathering. So much so, that I decided to make him his very own custom edible Magic card for his birthday. This new online course features making a custom edible playing card, sculpting a magician's hand, making glowing edible colored orbs, and a beautiful golden fault line cake!

40:01 Minutes of Instruction

What You Will Learn

  • How to make a custom playing card from edible materials (No Photoshop required)
  • Learn how to sculpt a realistic hand as a cake topper
  • How to make a golden fault-line cake
  • Learn how to make glowing orbs
Tutorial Chapters

  1. Making the cake topper 0:50
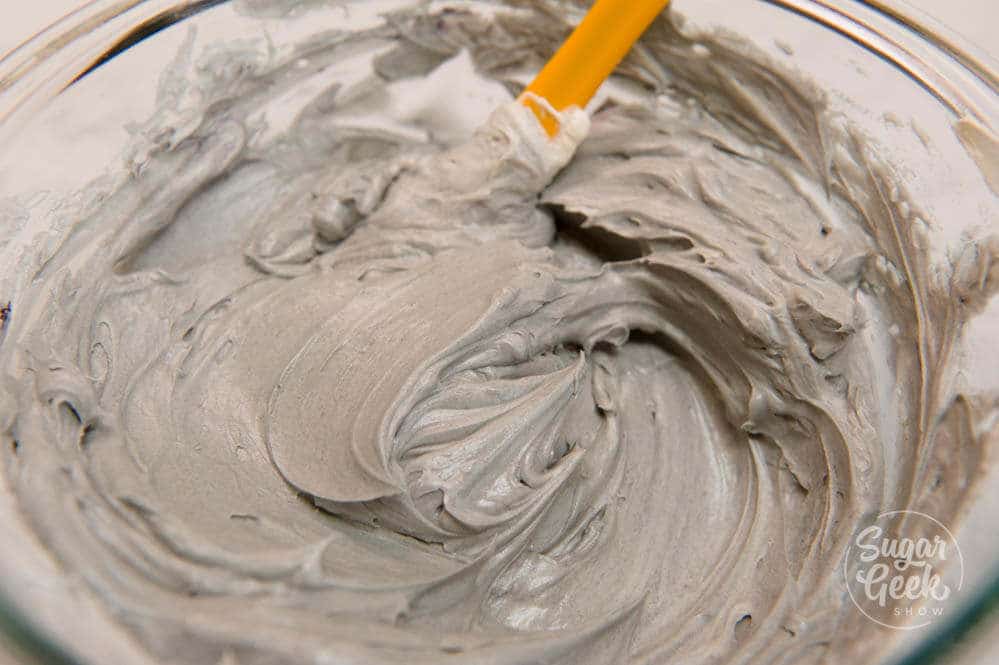
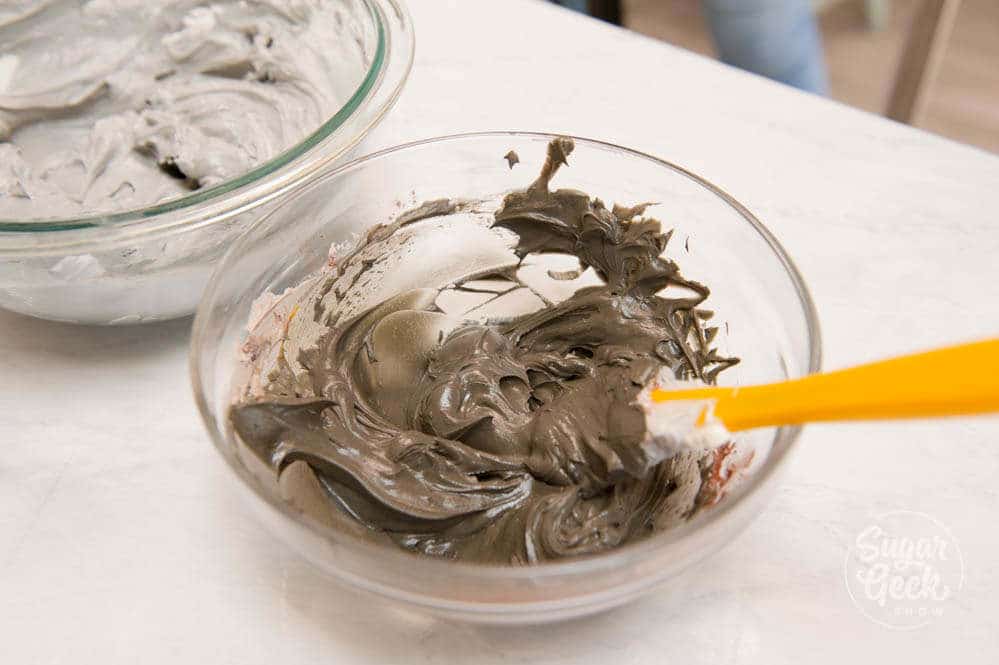
  2. Coloring black buttercream 7:27
  3. Making the wrist and palm 10:38
  4. Making the fingers 14:45
  5. Attaching the fingers 17:54
  6. The cuff 24:08
  7. Adding the card 25:19
  8. Painting the cake 27:31
  9. Frosting the cake 29:15
  10. Melting the isomalt 33:01
  11. Coloring the isomalt 33:28
  12. Torching the spheres 35:56
  13. Adding the hand & lights 37:46

Downloads

Materials List

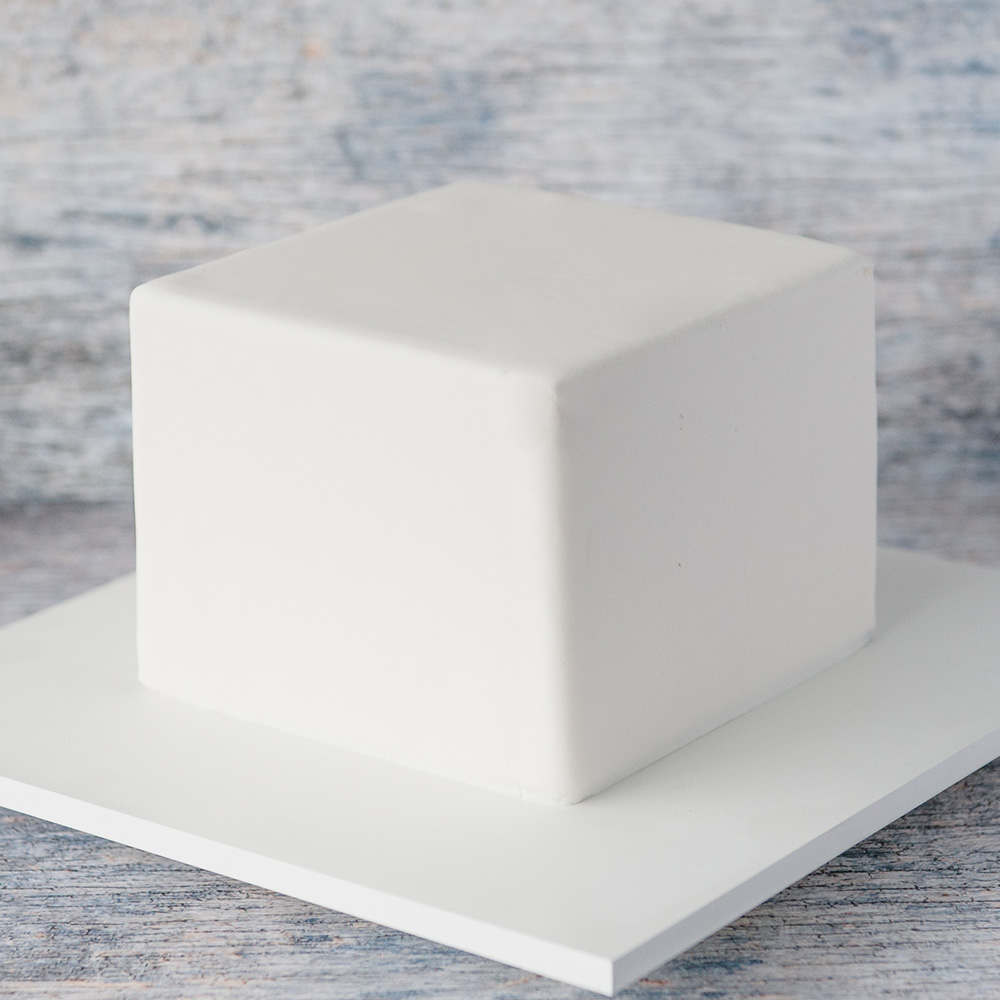
how to cover a square cake in fondant

July 14, 2019 Blog

Square Fondant Cake Tutorial

How to cover a square fondant cake and keep those sharp corners

How to make a flawless square fondant cake! If you've watched my how to cover a square buttercream cake tutorial then you might be wondering how to cover that square cake in fondant! Don't worry, I've got you covered. In this tutorial, I'm going to show you exactly how I cover a square buttercream cake in one piece of fondant while keeping those sharp corners intact. 

how to make a square fondant cake

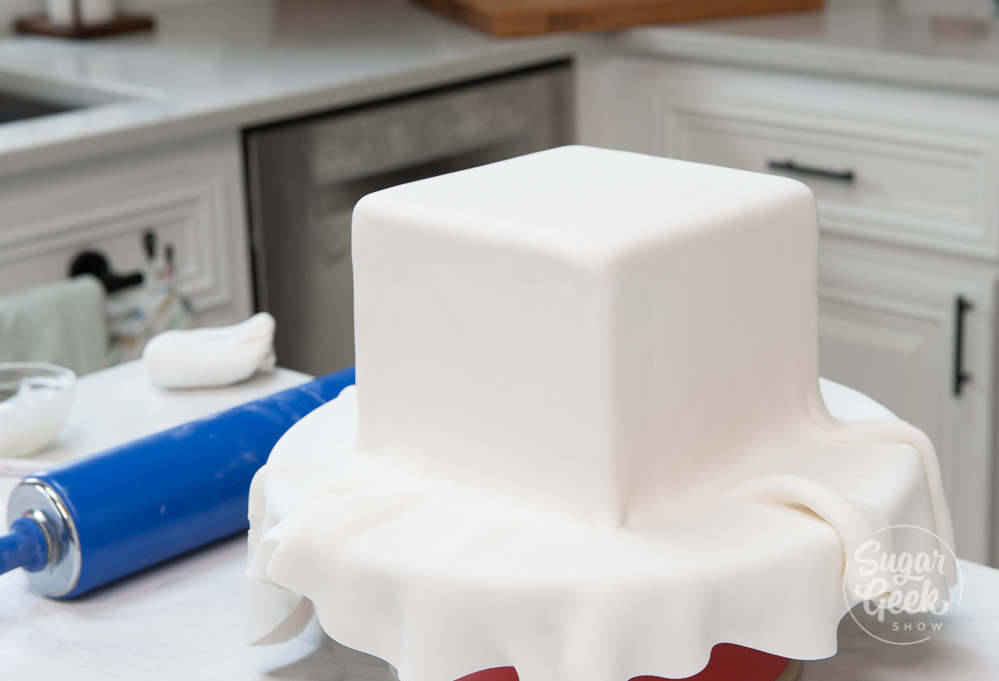
How to cover a square fondant cake

The first thing you need is a nicely chilled square cake. It can be buttercream or ganache but the colder your cake and the colder your room, the better this will go. 

  1. Measure the width of your cake and multiply by three. This will tell you how big your fondant needs to be. 
  2. Roll out your fondant to 1/16" thick. I use a cornstarch poof and a rolling pin. Try to keep your fondant pretty round. 
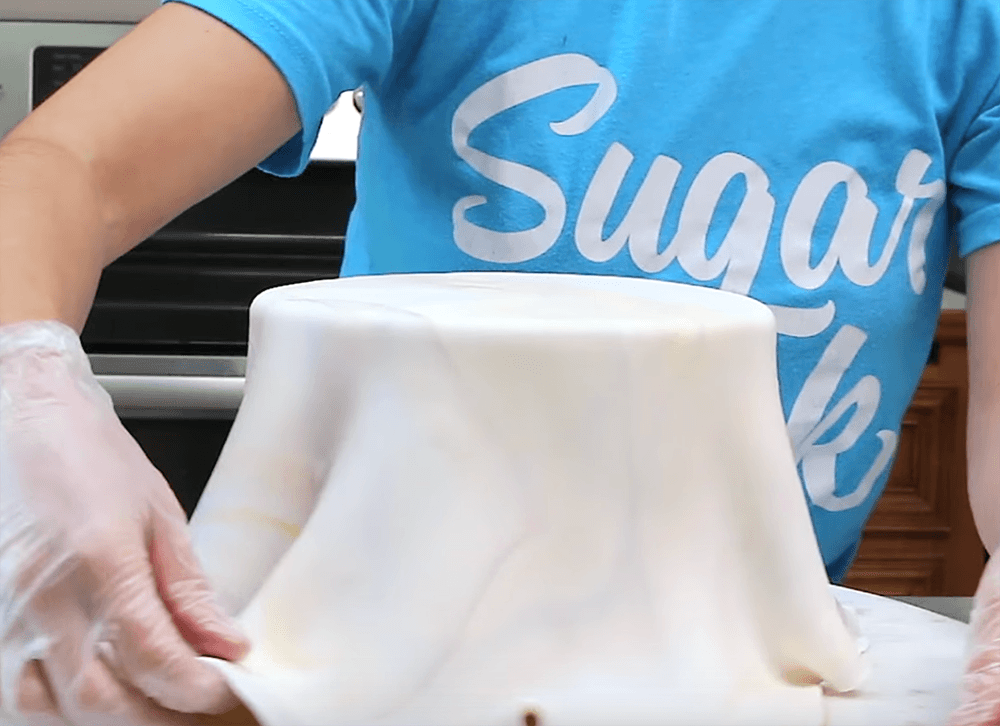
  3. Roll your fondant up onto your rolling pin or a large PVC pipe (washed and dried) and unroll onto the square buttercream cake
  4. Smooth out any bubbles under the top of the fondant
  5. Make sure the fondant is attached all the way around the top edge and the bottom of the fondant is resting on the turntable, not hanging or it can cause the fondant to tear. 
  6. Press the fondant onto the corners first, being careful not to pull or distort the fondant. 
  7. Once all your corners are done, you can press the fondant flat against the sides. 
  8. Trim the excess fondant off, leaving about 1" of fondant all the way around the base. 

How to cover a square cake in fondant

How to get sharp edges on a square fondant cake

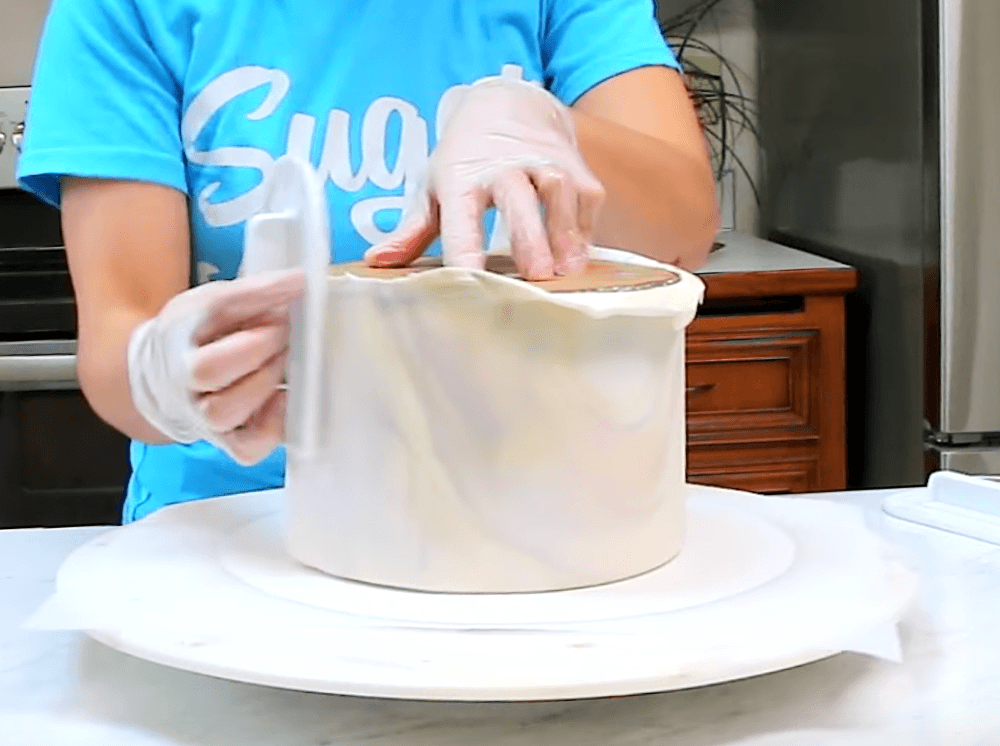
  1. Place a piece of parchment paper on top of the square cake and then a cake board or cutting board depending on how big and heavy your cake is. 
  2. While sandwiching the cake firmly between the bottom cake board and the top, turn the whole cake over carefully. Don't worry, the cake is chilled and this won't hurt the cake. 
  3. Use your fondant smoother to work the sides of the fondant up until the cover the cake board. 
  4. Use your fondant smoother to refine the top edges and corners of the fondant against the cake board and sharpen them. Depending on how sharp you want them, this could take a while. 
  5. Cut the excess fondant off the top edge of the cake and turn the cake back over. 

That's how I get my super sharp edges on a square fondant cake! If you live in a super hot area, it is recommended that you use white chocolate ganache or American buttercream. This is so that your cakes do not get soft while you are covering them. 

Be sure to watch my video on how to cover a cake in fondant. If you have any questions, just let me know in the comments!


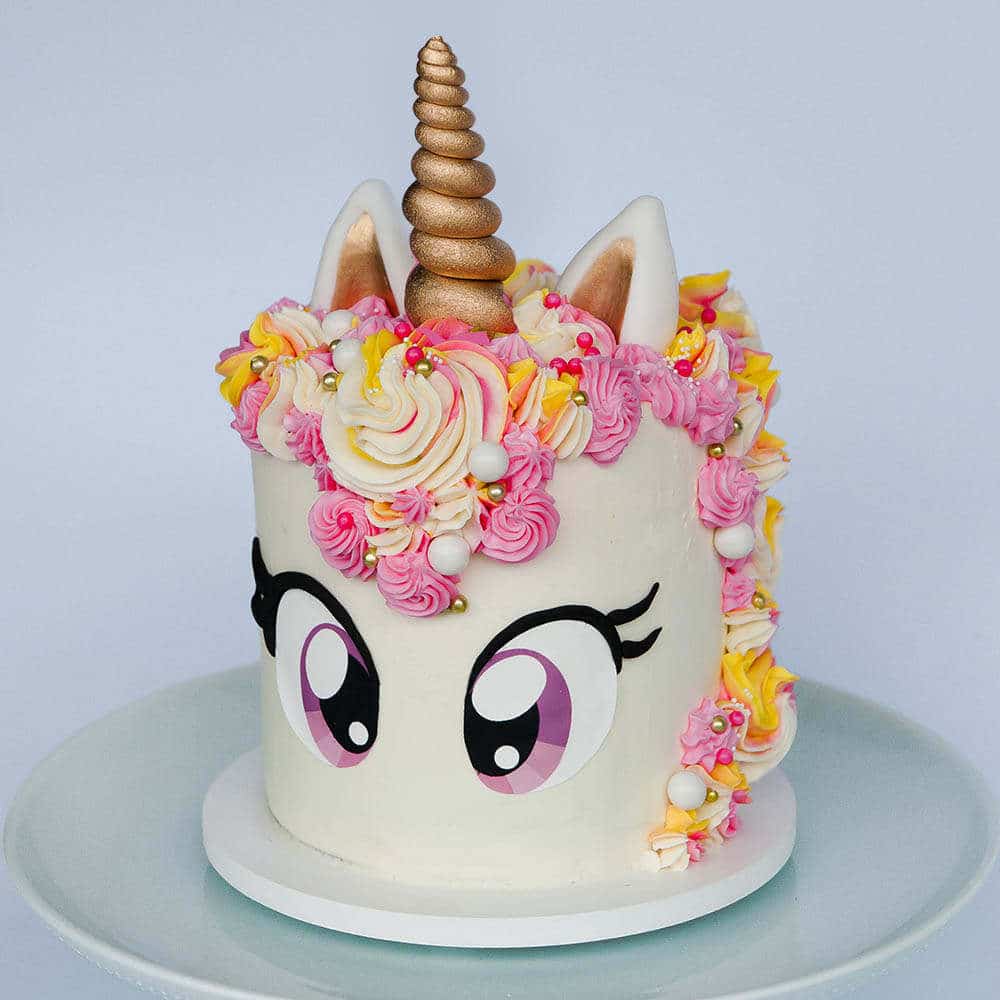
unicorn cake

July 10, 2019 Blog

Unicorn Cake Tutorial

Easy unicorn cake with rainbow hair, golden horn, and easy sparkly eyes

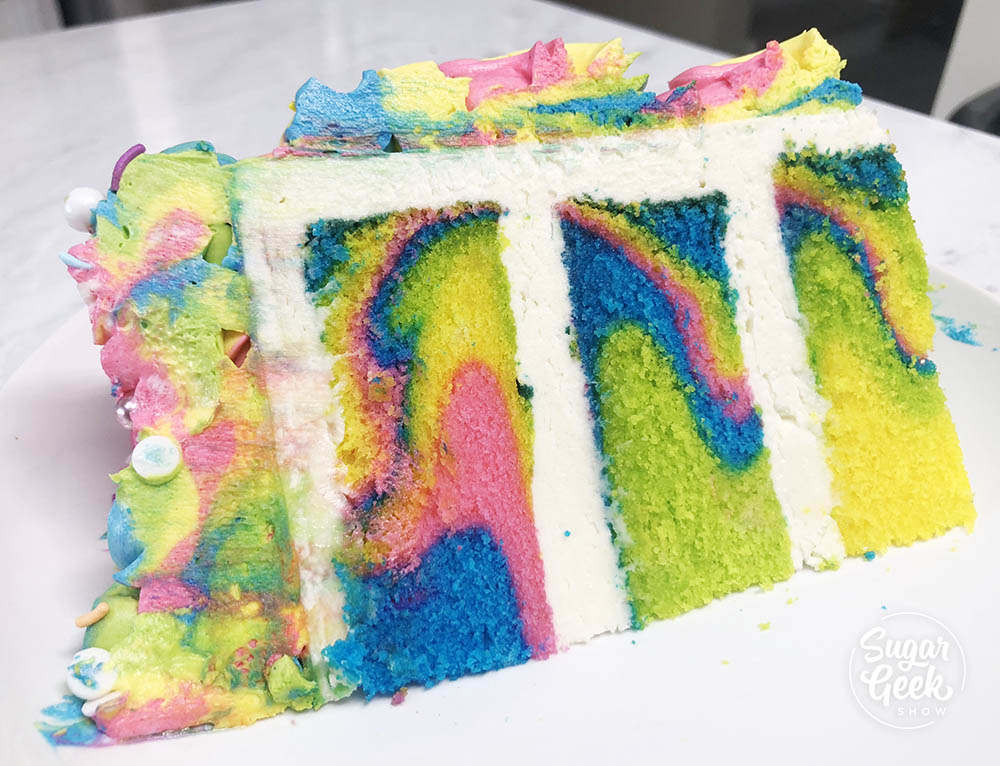
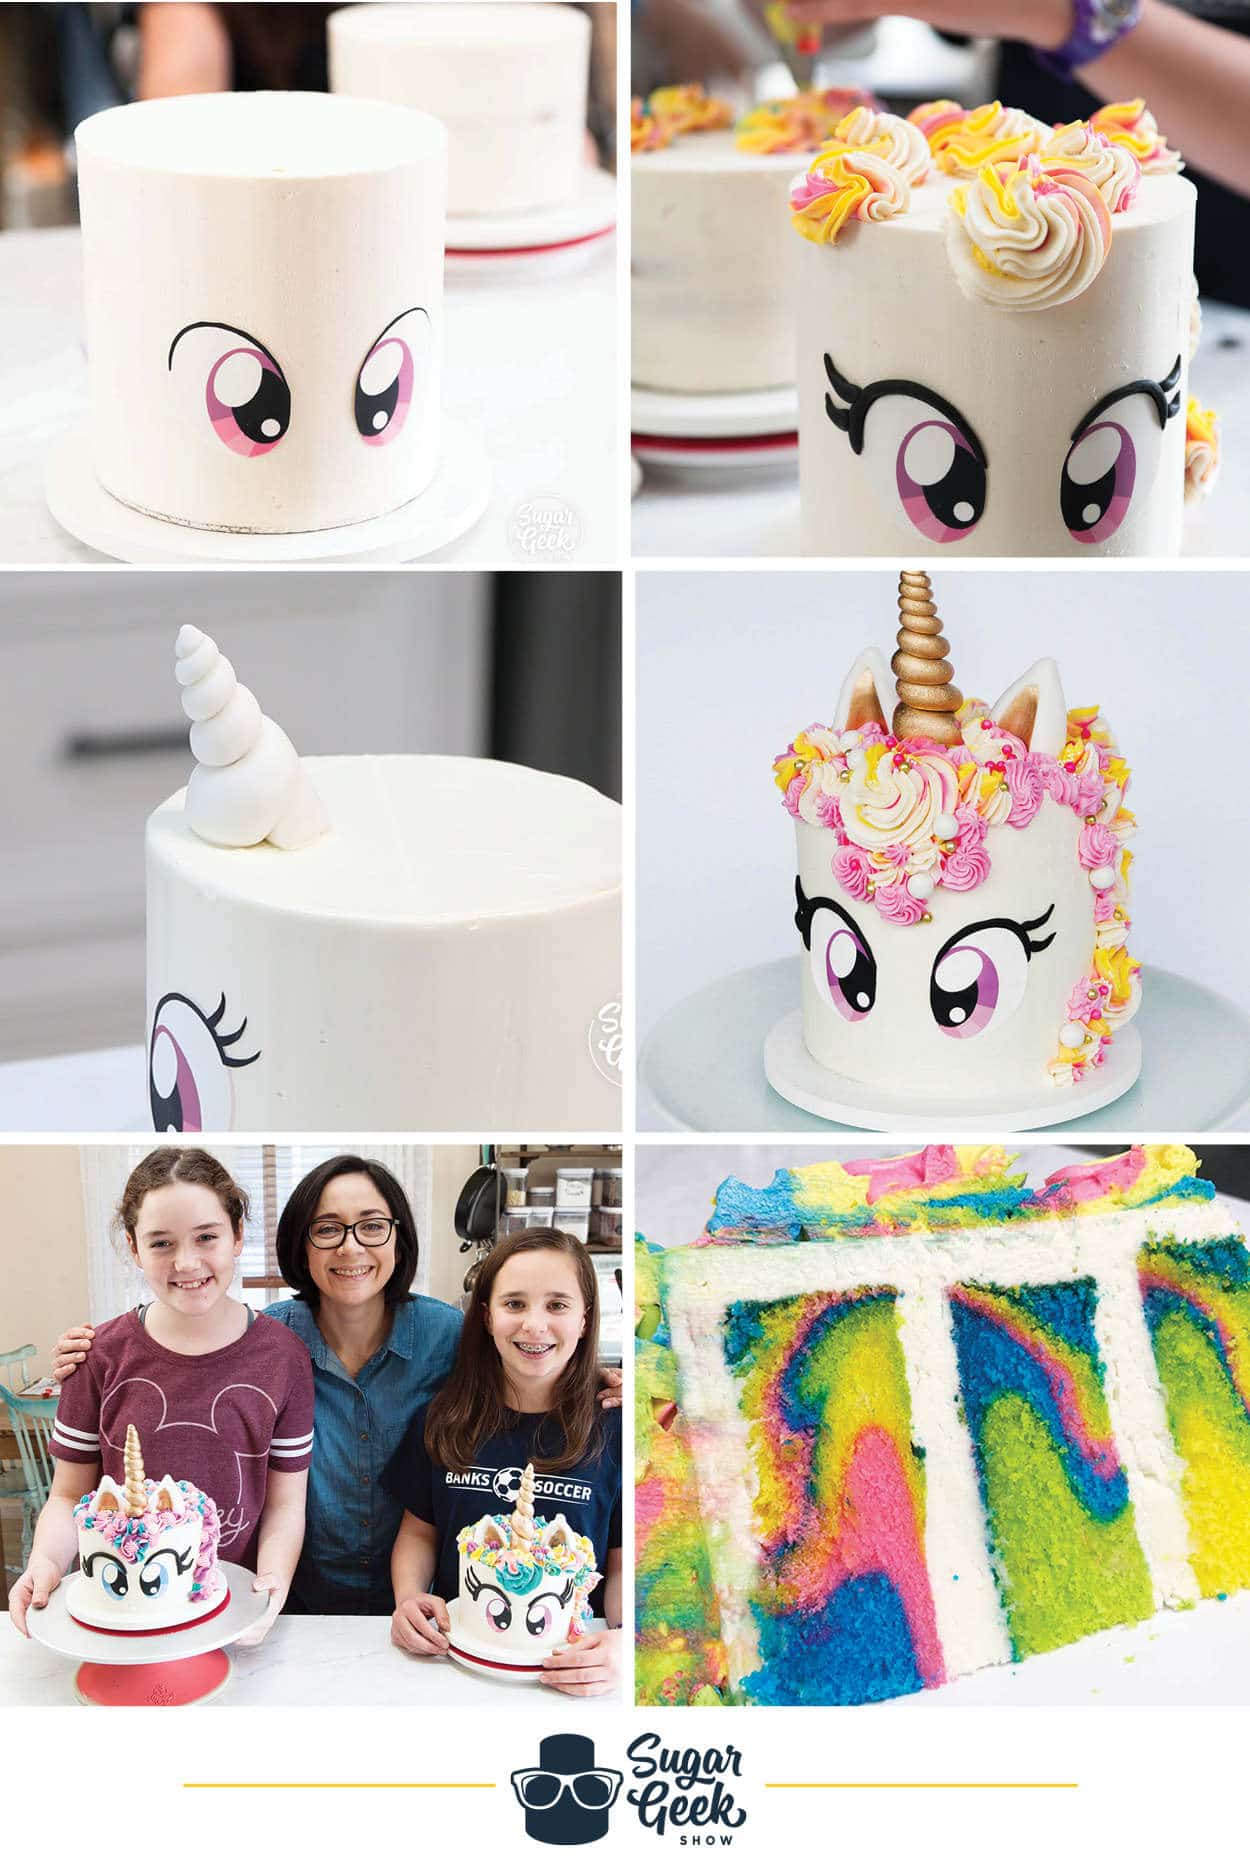
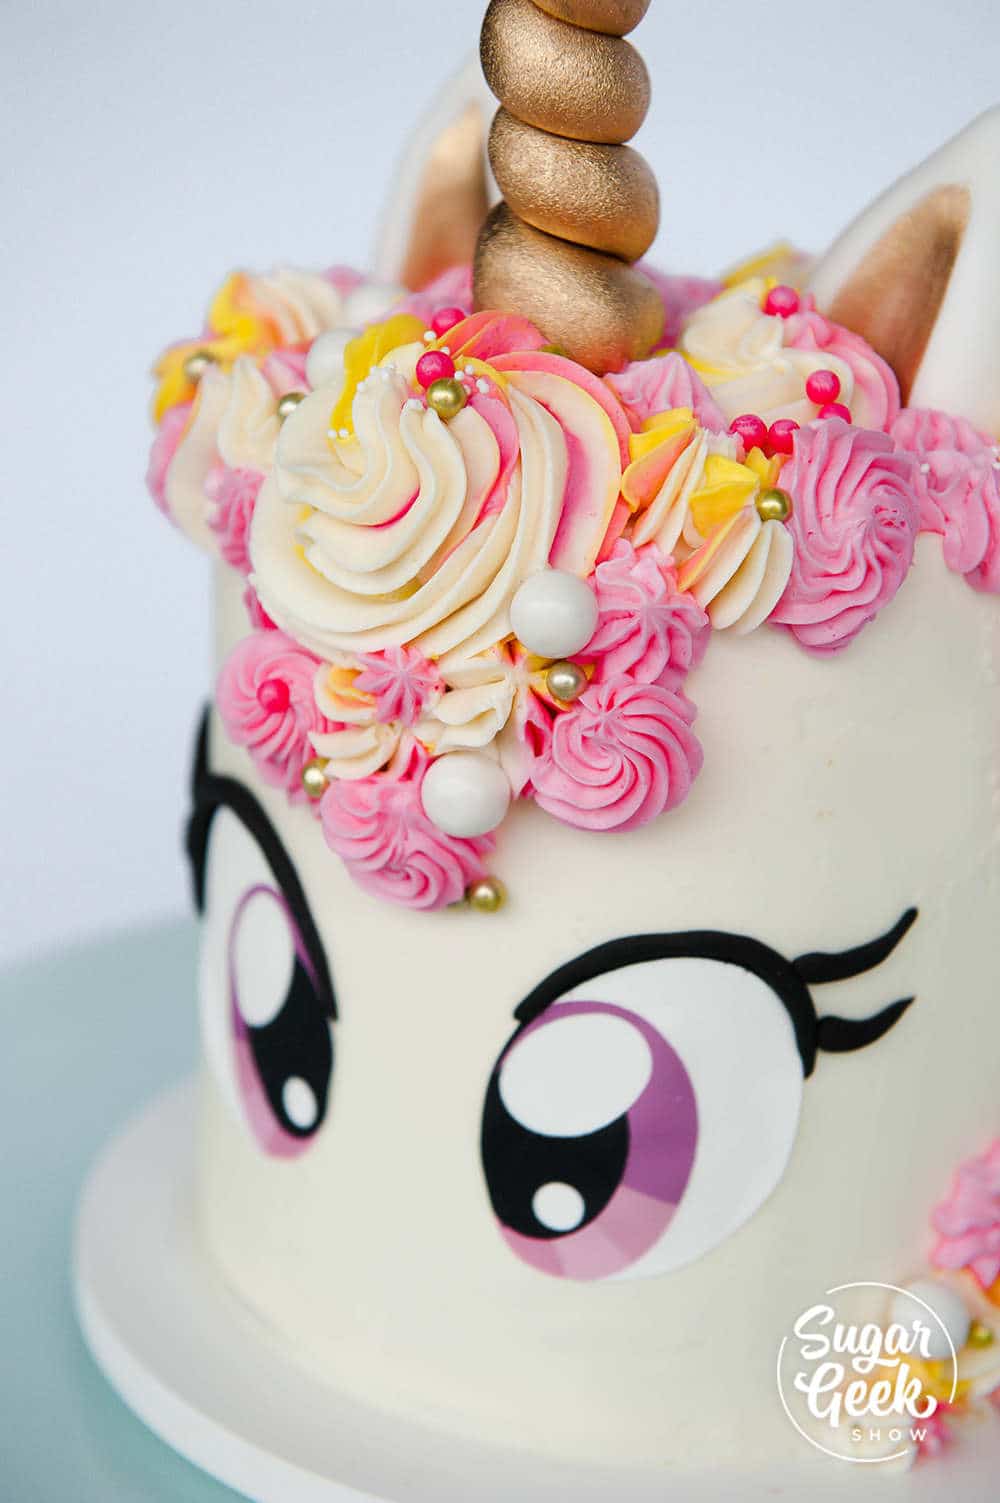
An easy rainbow unicorn cake that's soooo cute! This unicorn cake is rainbow on the inside and outside! I love how pretty the rainbow cake batter turned out using my white velvet buttermilk cake recipe. The rainbow buttercream mane topped with sprinkles and a pretty gold unicorn horn just makes this the cutest rainbow unicorn cake evah!

unicorn cake

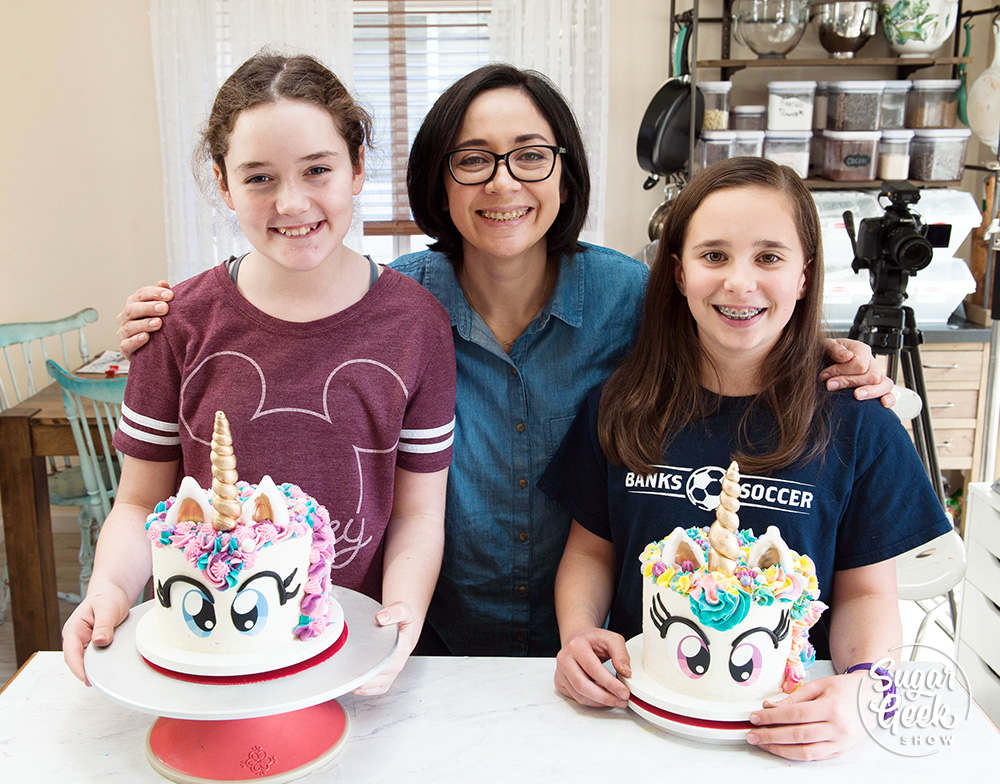
I first created this unicorn cake class for a friends daughter and her bestie. I pre-made the cakes and frosted them so all they had to do was decorate them. I was really impressed with how well the girls did with the piping of the hair! The thing they struggled with the most was rolling out fondant eyelashes lol.

kids unicorn cake class

Rainbow cake recipe

Ok the first step, make the cakes. I whipped up a batch of my white velvet cake for this recipe because it tastes AMAZING but also is a very white cake so it takes the color really well. Other good options are the white cake recipe and WASC cake. Vanilla cake uses egg yolks so the batter tends to make the blue turn green.

rainbow cake recipe

I love how this rainbow cake turned out! It's super fun to make and a great excuse to get colorful!

  1. Divide your cake batter into 4 bowls.
  2. I used Americolor electric food coloring because I love their bright neon colors. I used electric pink, electric blue, electric yellow, and electric green.
  3. Add 1-2 teaspoon of food coloring to each bowl and mix.
  4. Layer your cake batter into three 6" cake pans that are prepared with cake goop (homemade pan release)
  5. I layered my colors in this order, blue, pink, yellow, green (repeat).
  6. Bake in the oven at 335ºF for 30-35 minutes until a toothpick comes out clean.
  7. Immediately tap the cake on the counter to release air pockets and reduce shrinking.
  8. Let cool 10 minutes before removing from the pan by inverting onto a cake rack. Freeze 1 hour before frosting or wrap in plastic wrap and chill overnight.

How to make the unicorn cake

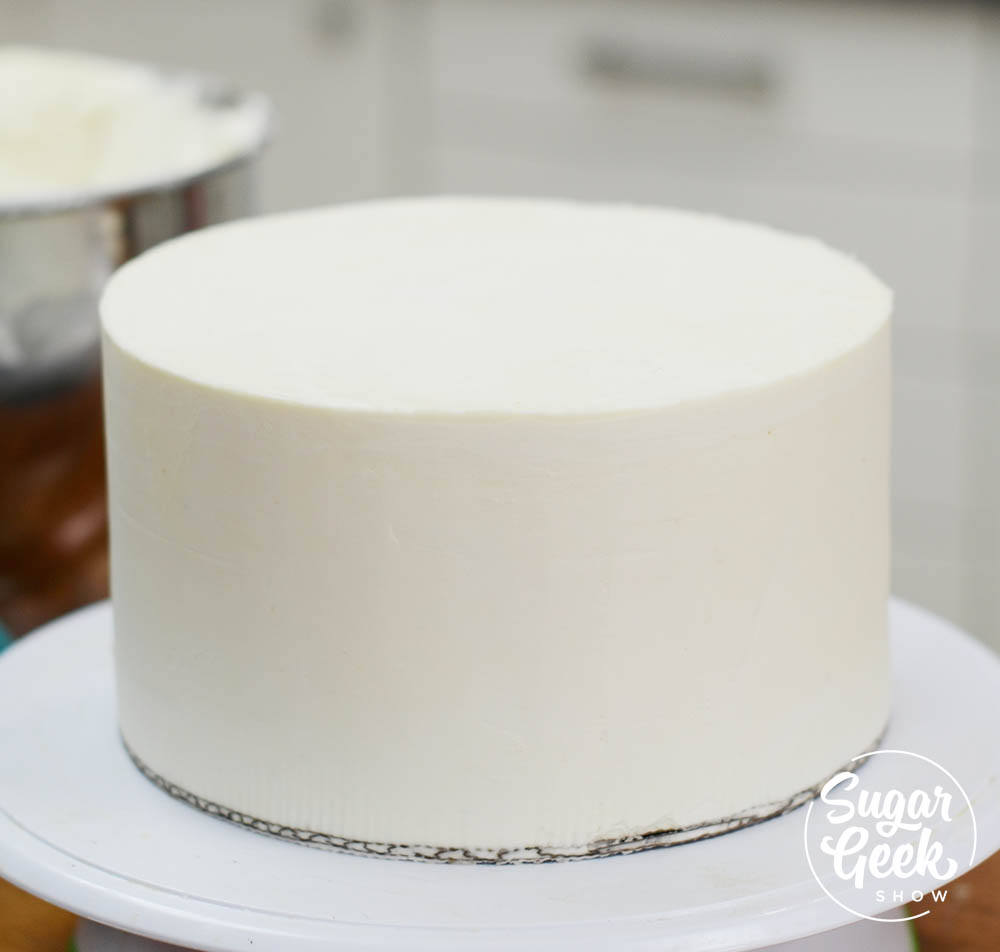
After my cakes are chilled, I stack and fill them with my easy buttercream recipe and smooth out the buttercream with a bench scraper. If you need more info on how to decorate a cake, check out my free tutorial on the basics of how to make your first cake.

how to make a unicorn cake

I don't worry too much about getting the sides perfectly smooth but if you follow the last step in my easy buttercream recipe, you'll have buttercream that is pretty much bubble free.

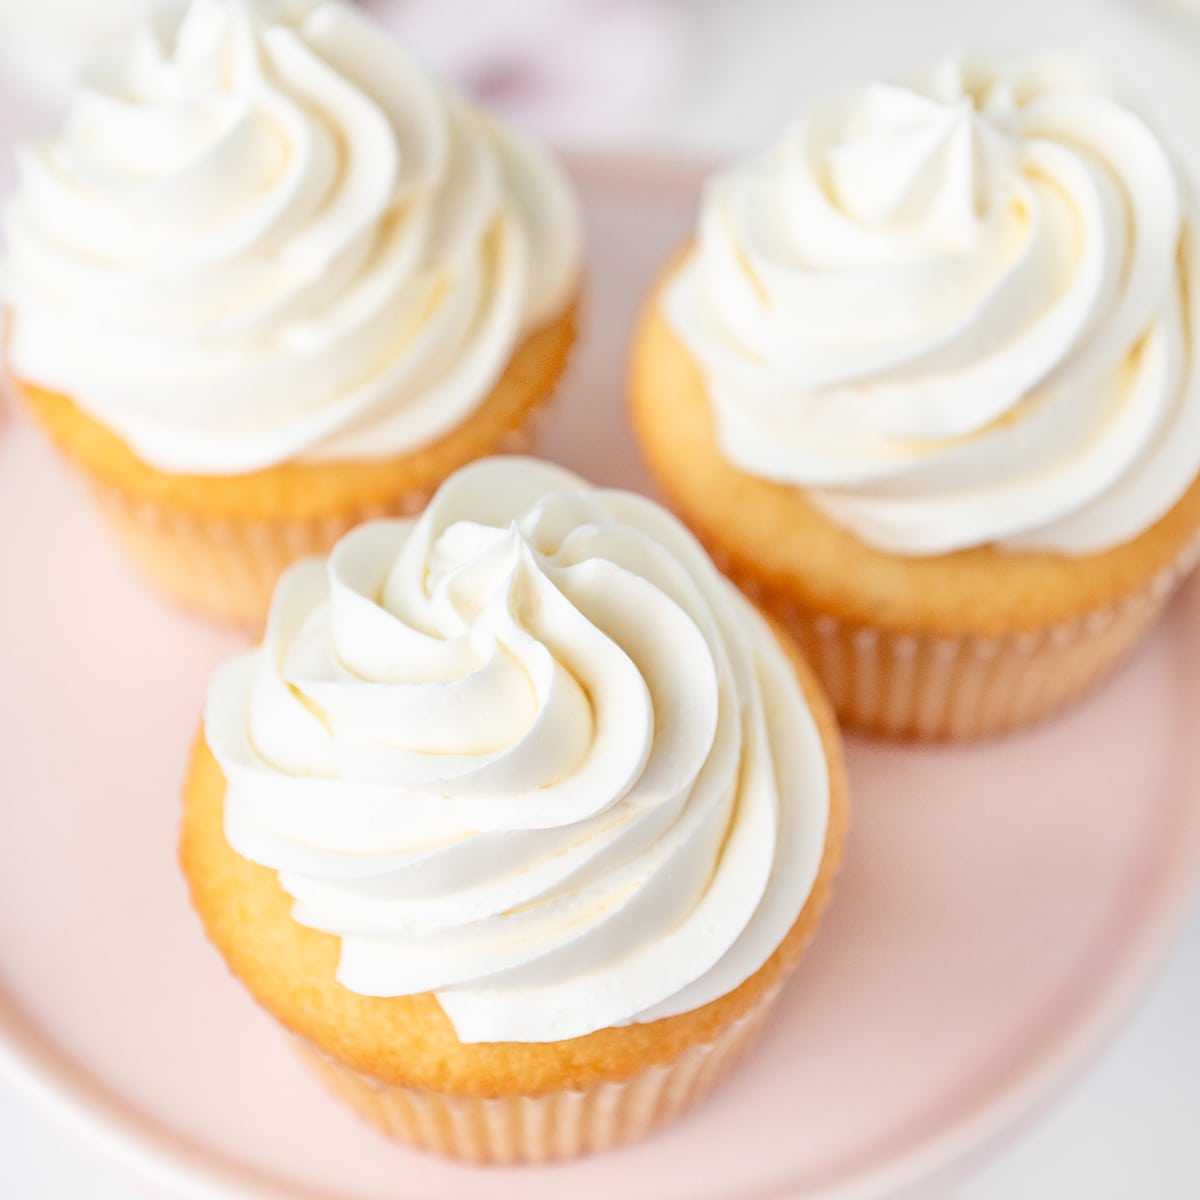
easy buttercream frosting made with pasteurized egg whites, butter and sugar. Not too sweet and very creamy.

How to make the unicorn cake eyes

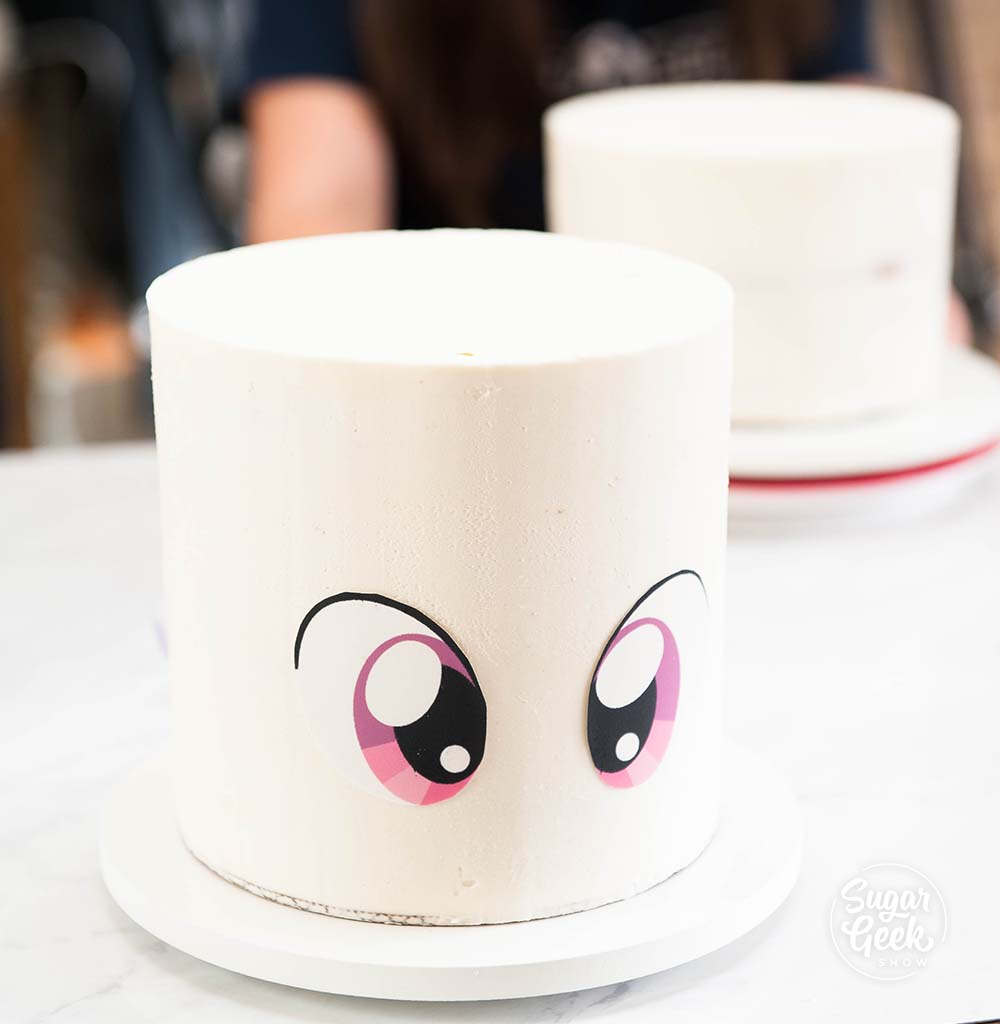
I know most unicorn cakes have eyes that are closed and kind of piped very simply but I wanted to do something a bit different. I'm a big fan of my little pony and anime so I wanted my unicorn to have more expressive eyes.

how to make unicorn cake eyes

I designed these unicorn eyes that you can download and print out using your edible ink printer. I prefer my Canon MG6821 printer, Photofrost edible image sheets and edible ink. It hasn't clogged on me once and I hardly ever print.

Tips for printing edible images

  1. Make sure your print settings are set to BEST QUALITY PHOTO and your paper is set to photo paper. Otherwise, you can get streaking and lines in your paper.
  2. Use fresh edible image paper that is flexible or it can be hard to cut out.
  3. Cut your images using cuticle scissors or an x-acto blade.

Once your eyes are printed and cut out you can just place them onto the cake. I put mine towards the bottom of the cake so they look cute and cartoony. If you put them higher up, you won't have room for the hair. Get your free unicorn eyes here.

[optin-monster slug="neyfb52qlffjjynclird"]

How to make a unicorn cake horn

Now it's time to put on the unicorn horn! I place my cake pop stick on top of the head and roll out some fondant into a snake. One end is much fatter than the other.

Wrap the fondant snake around the cake pop stick so it's nice and snug. Use your hands to fill in any gaps or holes in the fondant. If you don't like how it looks, just pull it off and try again. Don't get discouraged if it takes you a few tries.

how to make a unicorn horn

If you don't want to fuss with fondant, you can use my friend's awesome unicorn horn mold. Fill it with chocolate or isomalt and you'll have a perfect unicorn horn for your cake!

Paint your unicorn horn with a mixture of TMP super gold mixed with a few drops of grain alcohol (I used Everclear) to make a thick paint. TMP is non-toxic. Other good brands of gold are edible artist decorative paints metallics.

How to pipe hair on a unicorn cake

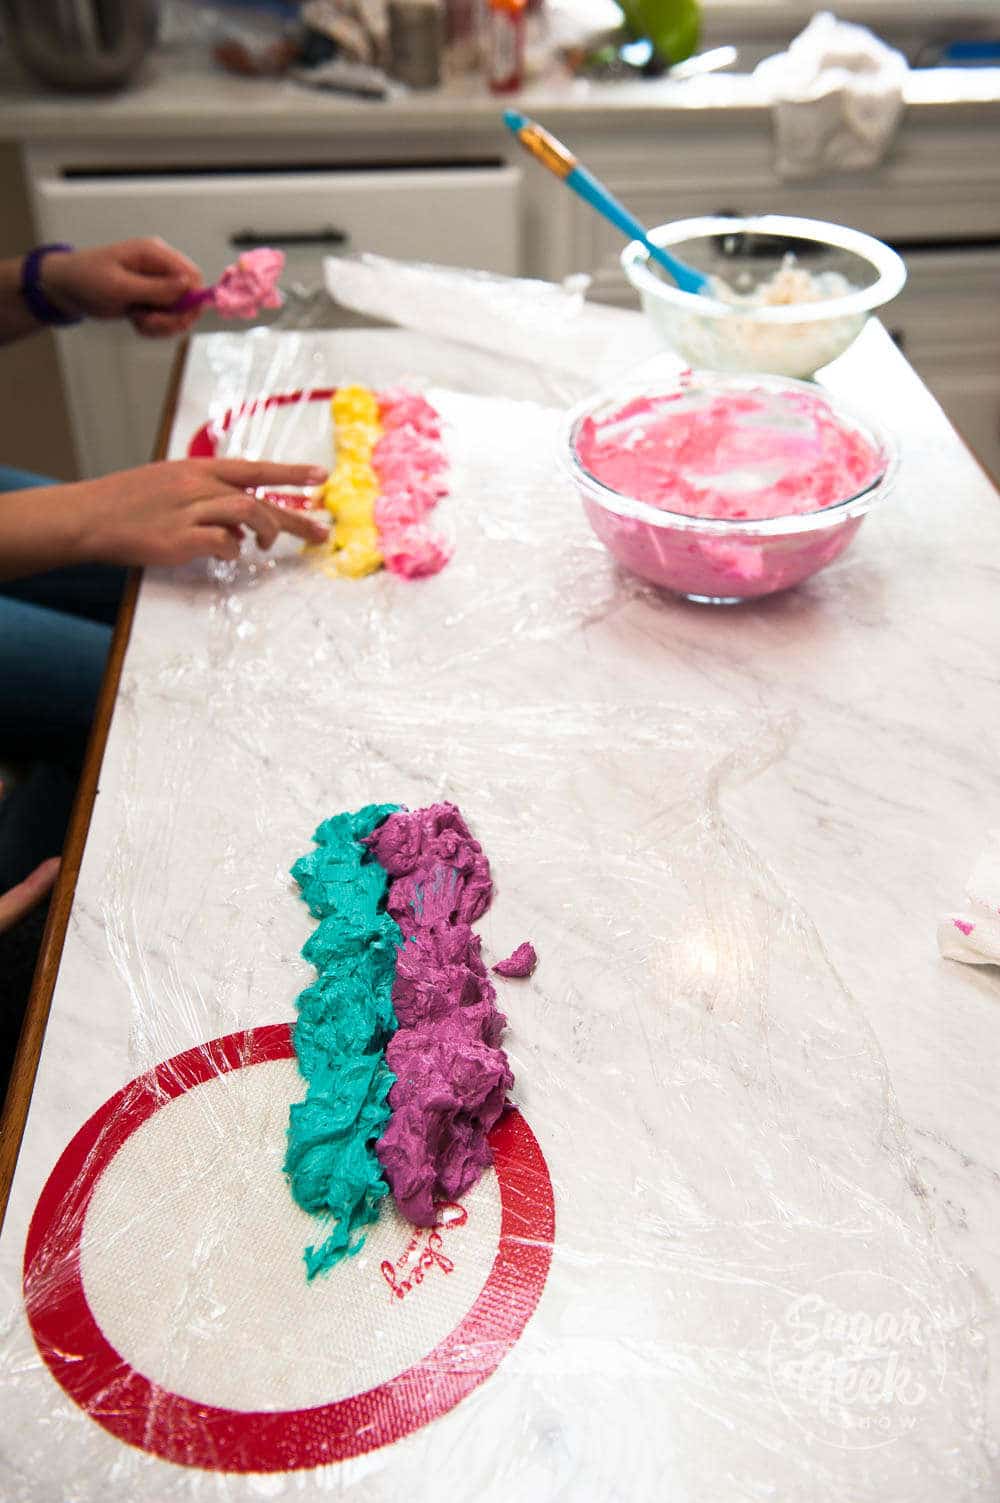
Now the fun part! Making the unicorn mane! I colored about 1 cup of easy buttercream for each color (electric blue, green, yellow and pink). Spread the buttercream onto a piece of plastic wrap (see video) to make a buttercream bullet.

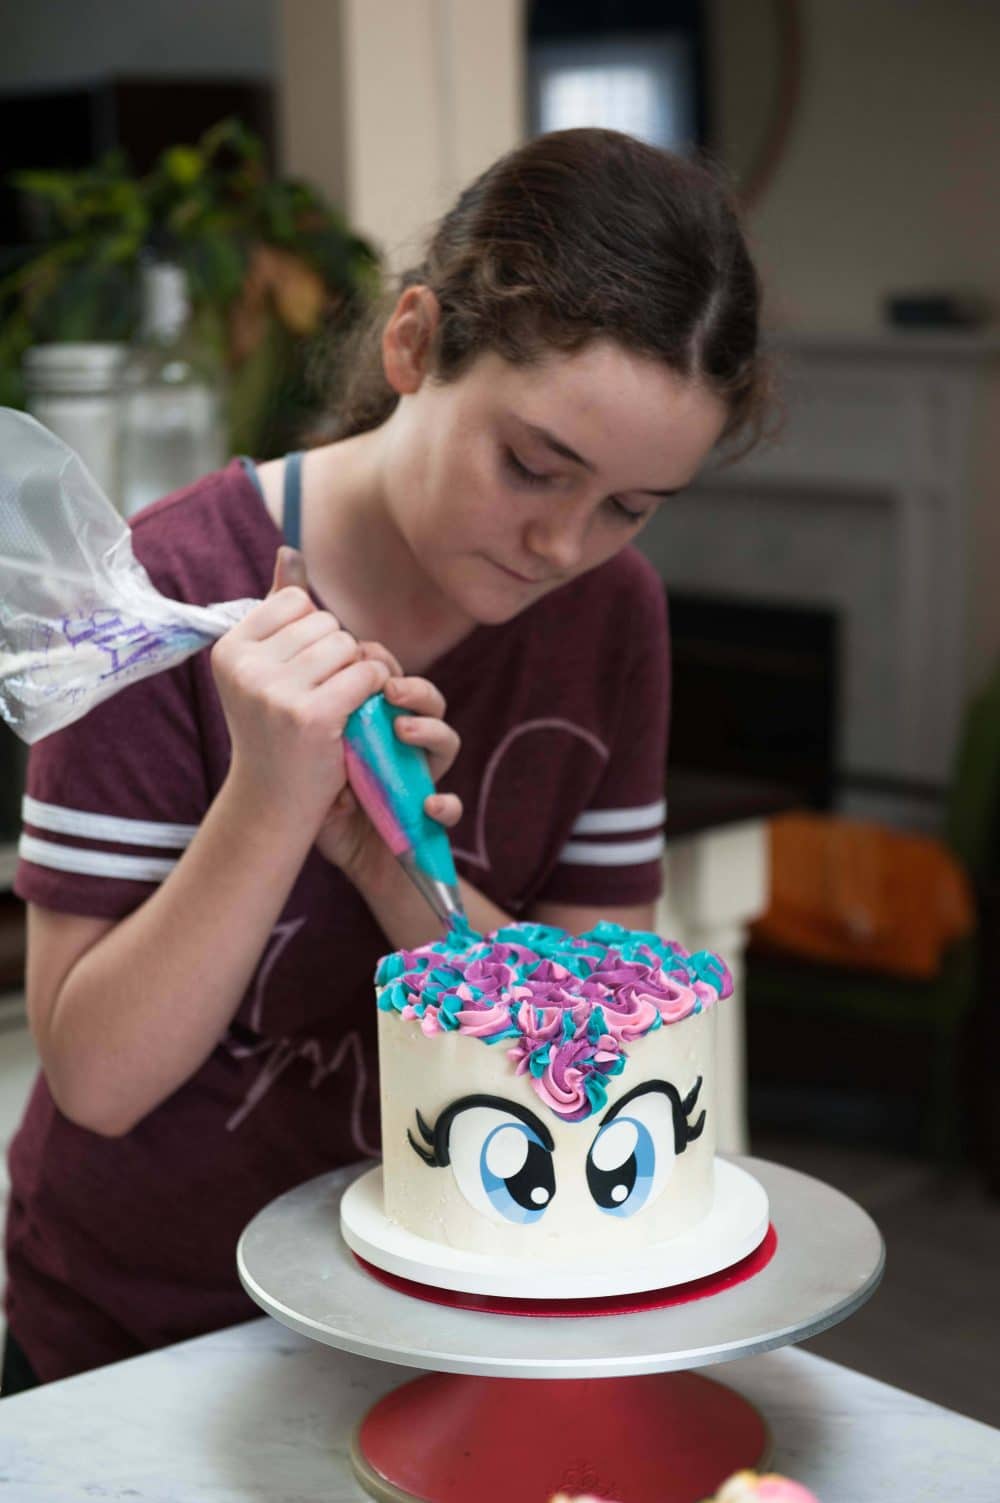
The girls in my class loved deciding what color schemes and piping tips they were going to use to pipe the unicorn hair!

how to pipe unicorn hair with buttercream

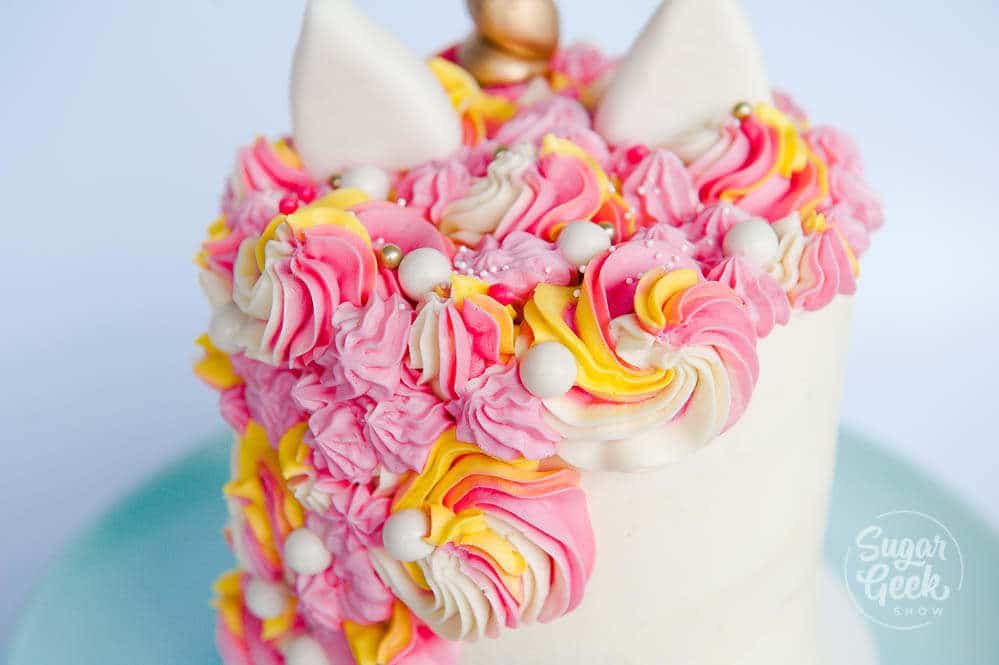
Place the bullet inside a piping bag with a 1M star piping tip and start making some rosettes! You really can't mess this up and it's what gives the unicorn cake it's personality.

how to pipe unicorn cake hair

I followed up the rosettes with a smaller star tip (not sure the size) and some yellow buttercream. Then I added on some sprinkles from Sweetapolita (affiliate link) twinkle mix for some extra magic!

how to make unicorn cake hair

How to make ears for your unicorn cake

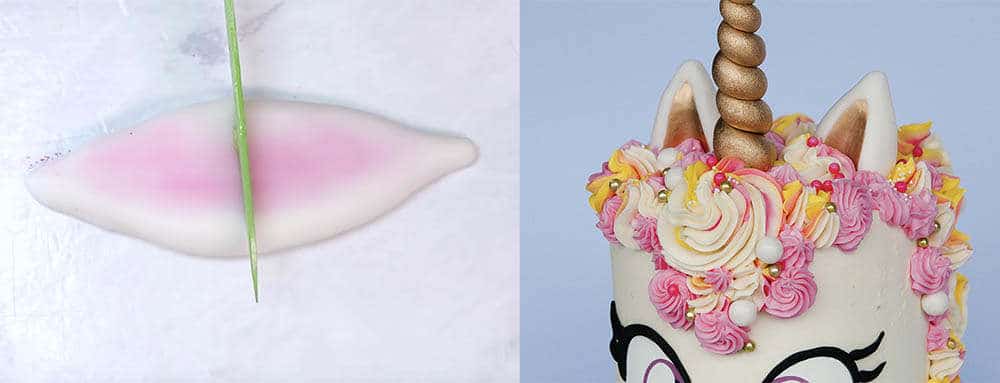
I used fondant to make my unicorn ears. Just roll some fondant into a ball and then flatten slightly to make a leaf shape. Cut in half to make two ears (see video). I hollowed out the center of the ear a tad and dusted the insides with some pink petal dust.

how to make unicorn ears

You can place the ears right on the buttercream and they will stick or you can insert a piece of dried spaghetti and use that to stick into the cake. Don't use toothpicks, they are dangerous and can poke someone's mouth.

easy rainbow unicorn cake

Finishing the unicorn cake

The last thing I did was pipe a small white border around the bottom of the cake with a #4 round piping tip and some white buttercream. You do not need to refrigerate this cake if you are eating it the same day. If you do refrigerate it, make sure you bring it to room temperature a few hours before eating it so the butter has time to soften and become delicious again.

Be sure to watch my video tutorial on how to make a unicorn cake below!

Recipe

how to make a rainbow unicorn cake
Print Recipe
5 from 11 votes

Unicorn Cake Recipe

How to make the rainbow white velvet cake with easy buttercream! This recipe makes three 6"x2" tall cake layers.
Bake at 335F for 30-35 minutes until a toothpick comes out cleanly. 
Prep Time10 minutes mins
Cook Time30 minutes mins
Total Time40 minutes mins
Course: Dessert
Cuisine: American
Servings: 12 servings
Calories: 823kcal
Author: Liz Marek

Ingredients

Rainbow Cake Ingredients

  • 12 oz cake flour
  • 12 oz granulated sugar
  • 1 teaspoon salt
  • 1 tablespoon baking powder
  • ½ teaspoon baking soda
  • 5 oz egg whites room temperature
  • 4 oz vegetable oil
  • 10 oz buttermilk room temperature or slightly warm
  • 6 oz butter unsalted and softened
  • 2 teaspoon vanilla

Easy Buttercream

  • 8 oz pasteurized egg whites
  • 32 oz unsalted butter softened to room temp (not melted)
  • 32 oz powdered sugar sifted
  • 1 tablespoon vanilla extract
  • 1 teaspoon salt

Instructions

White Velvet Cake Instructions

  • NOTE: It is SUPER IMPORTANT that all the room temperature ingredients listed above are room temperature and measured by weight so that the ingredients mix and incorporate correctly.
    Heat oven to 335º F/168º C — 350º F/177º C. I tend to use lower setting to prevent my cakes from getting too dark on the outside before the inside is done baking.
  • Prepare three 6"x2" cake pans with cake goop or preferred pan spray. Fill your pans about ¾ of the way full of batter. You might have a little batter leftover. You can make these into cupcakes!
  • Whisk together the flour, sugar, baking powder, baking soda and salt in the bowl of a stand mixer with the paddle attachment. Mix 10 seconds to combine. 
  • Next, combine ½ cup of the milk and the oil together and set aside. 
  • Combine the remaining milk, egg whites and vanilla together, whisk to break up the eggs and set aside. 
  • Add your softened butter to the dry ingredients and mix on low until mixture resembles a coarse sand (about 30 seconds). Add in your milk/oil mixture and let mix until dry ingredients are moistened and then bump up to med (setting 4 on my kitchenaid) and let mix for 2 minutes to develop the cakes structure. If you don't let your cake mix on this step your cake could collapse. 
  • Scrape your bowl and then reduce speed to low. Add in your egg white mixture in three batches, letting the batter mix for 15 seconds between additions. 
  • Divide cake batter into four bowls. Add 1-2 teaspoon of food coloring to each bowl and stir until just combined.
  • Divide batter into three 6" cake pans prepared with cake goop or another preferred pan release. Bake 30-35 minutes until a toothpick inserted into the center comes out cleanly but the cake has not begun to shrink yet from the sides of the pan. 
  • IMMEDIATELY TAP PAN FIRMLY on countertop once to release the steam from the cake. This stops the cake from shrinking. 
  • Let cakes cool for 10 minutes inside the pan before flipping them out. Flip onto a cooling rack and let cool fully. I chill my cakes in the freezer for one hour before using or you can wrap in plastic wrap and chill in the fridge overnight.

Easy Buttercream Frosting Instructions

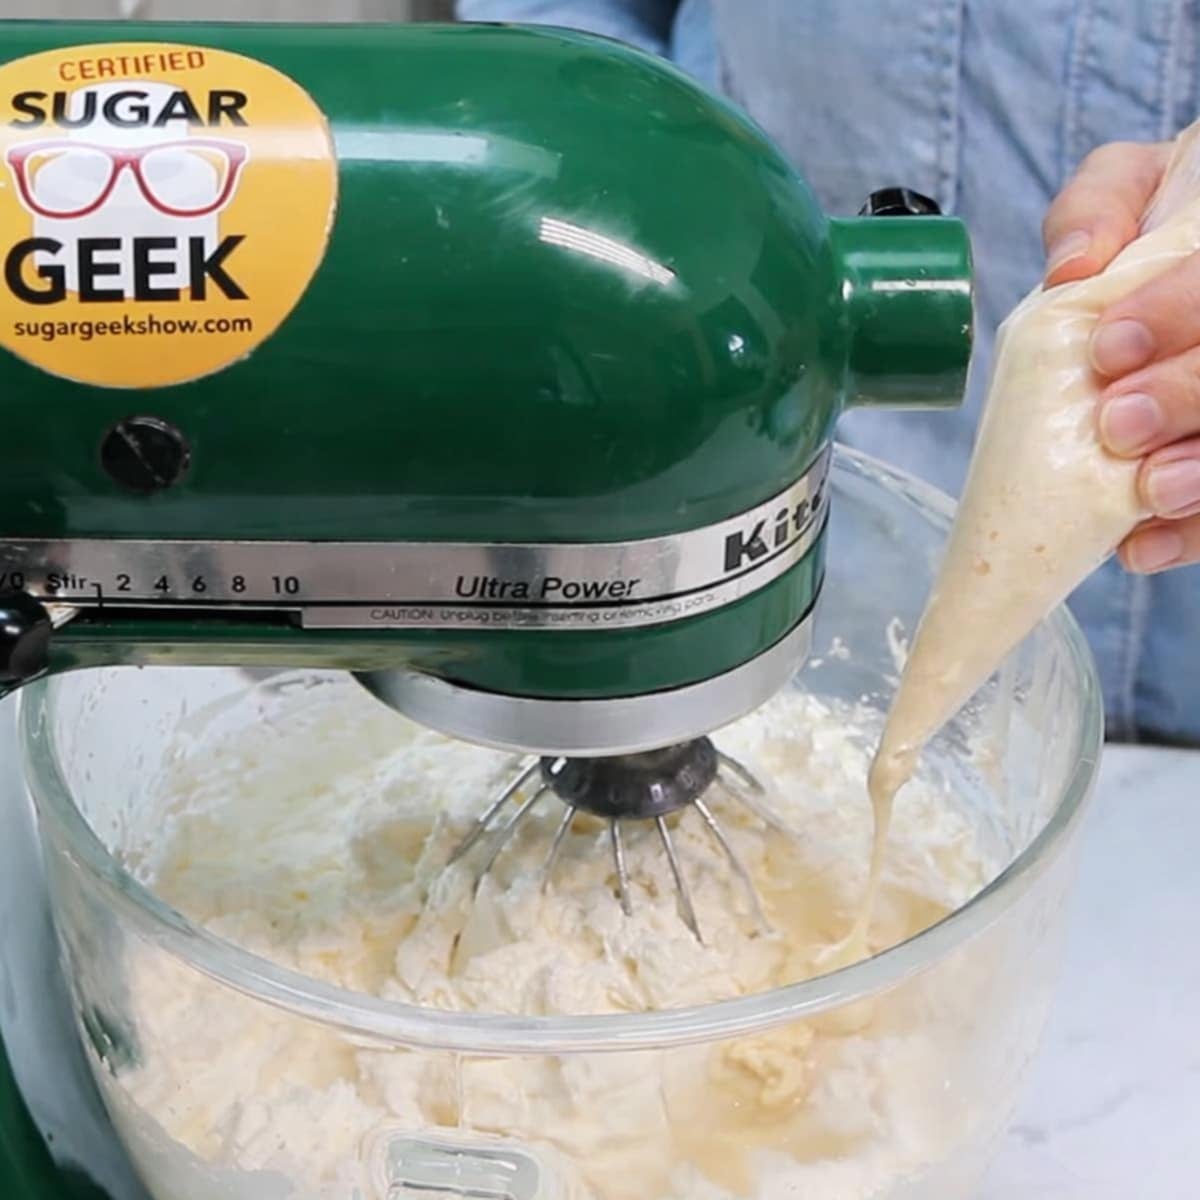
  • Place egg whites and powdered sugar in a stand mixer bowl. Attach the whisk and combine ingredients on low and then whip on high for 5 minutes 
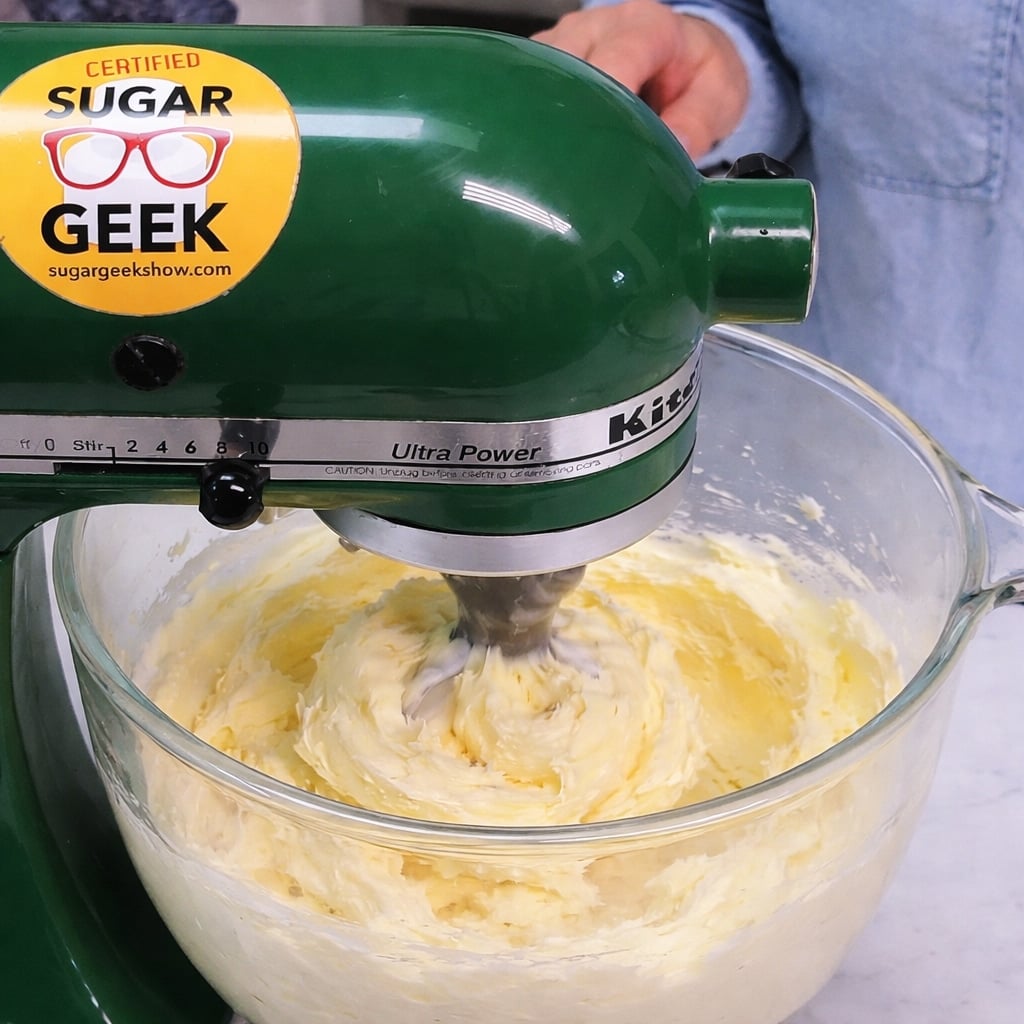
  • Add in your butter in chunks and whip with the whisk attachment to combine. It will look curdled at first. This is normal. It will also look pretty yellow. Keep whipping. 
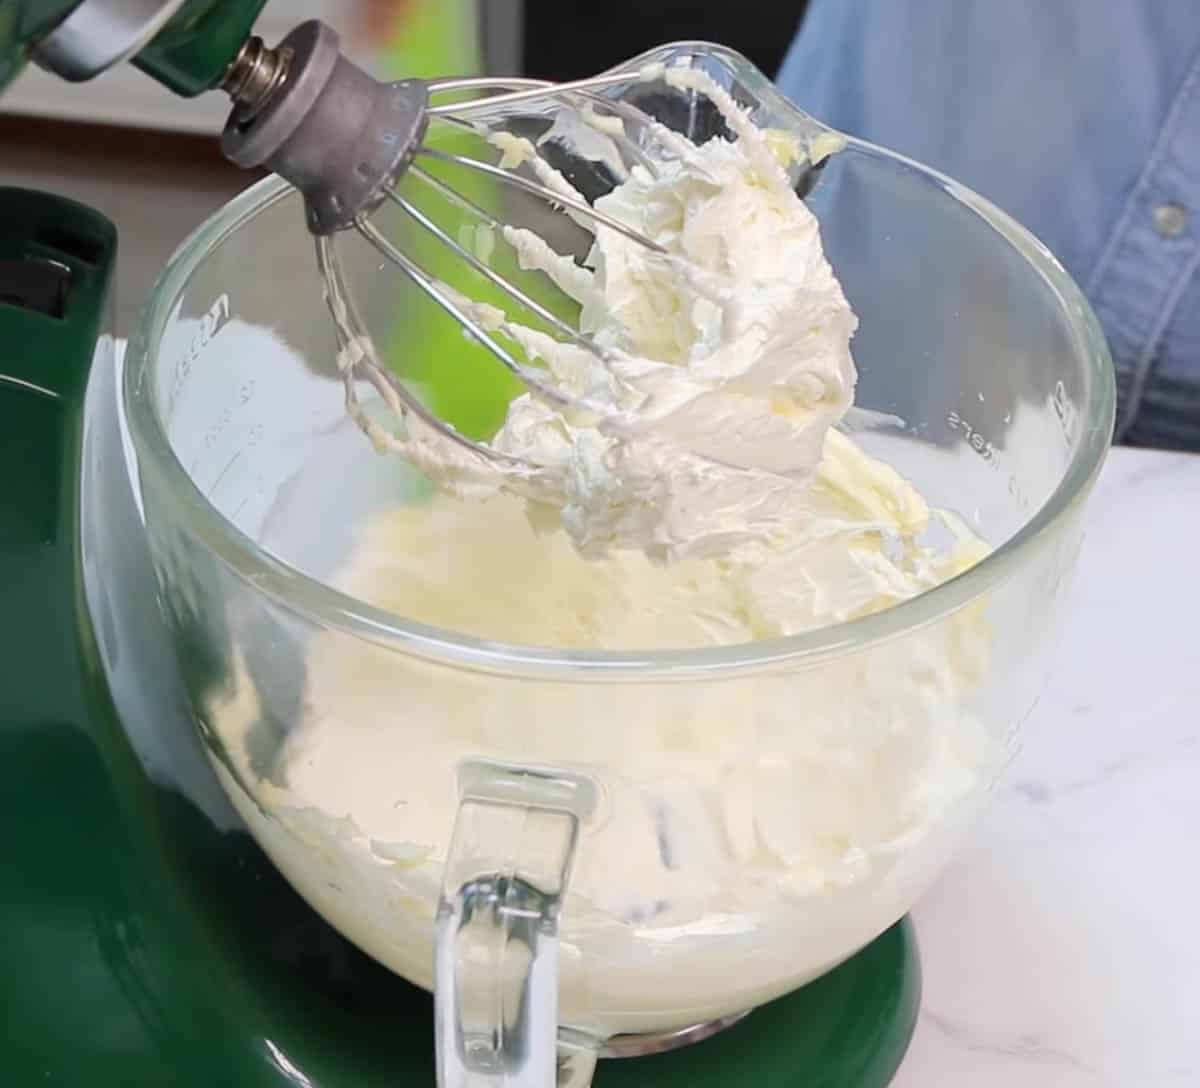
  • Let whip on high for 8-10 minutes until it's very white, light and shiny. 
  • Switch to a paddle attachment and mix on low for 15-20 minutes to make the buttercream very smooth and remove air bubbles. This isn't required but if you want really creamy frosting, you don't want to skip it. You can now color your buttercream as needed.

Video

Nutrition

Calories: 823kcal | Carbohydrates: 131g | Protein: 16g | Fat: 26g | Saturated Fat: 18g | Cholesterol: 43mg | Sodium: 428mg | Potassium: 365mg | Fiber: 3g | Sugar: 53g | Vitamin A: 545IU | Calcium: 175mg | Iron: 3.9mg
how to toast coconut flakes

July 7, 2019 Blog

How to toast coconut flakes

How to toast coconut flakes and bring out that natural, nutty and delicious coconut flavor

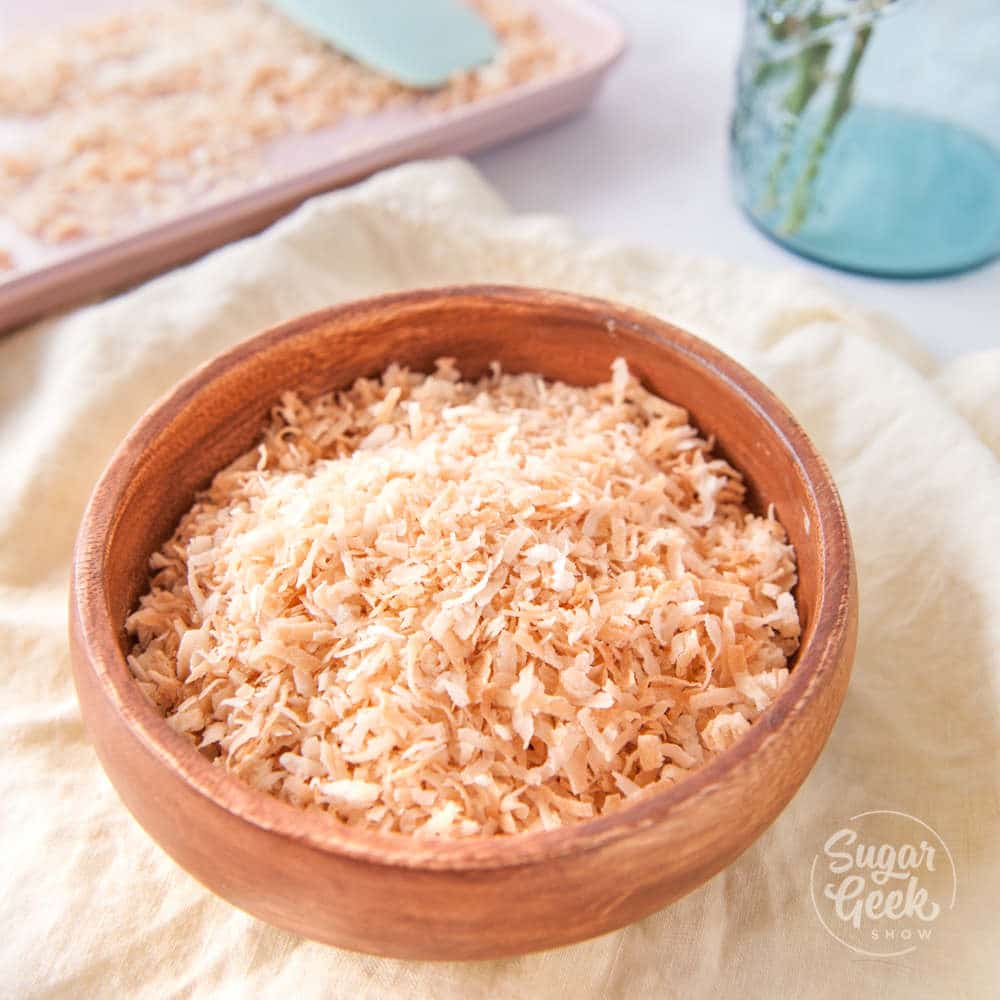
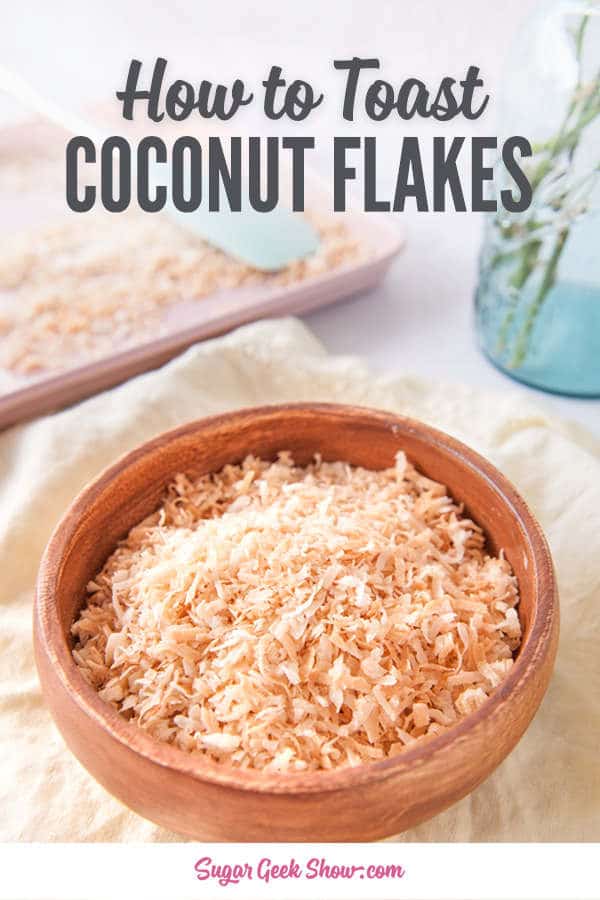
Have you ever wondered how to toast coconut flakes? Toasting coconut is a must around here. To me, raw coconut has an odd, chewy texture that is really not pleasant. But when you toast coconut, it makes the coconut a really yummy crispy texture and brings out the coconut flavor. Similar to when you toast pecans. 

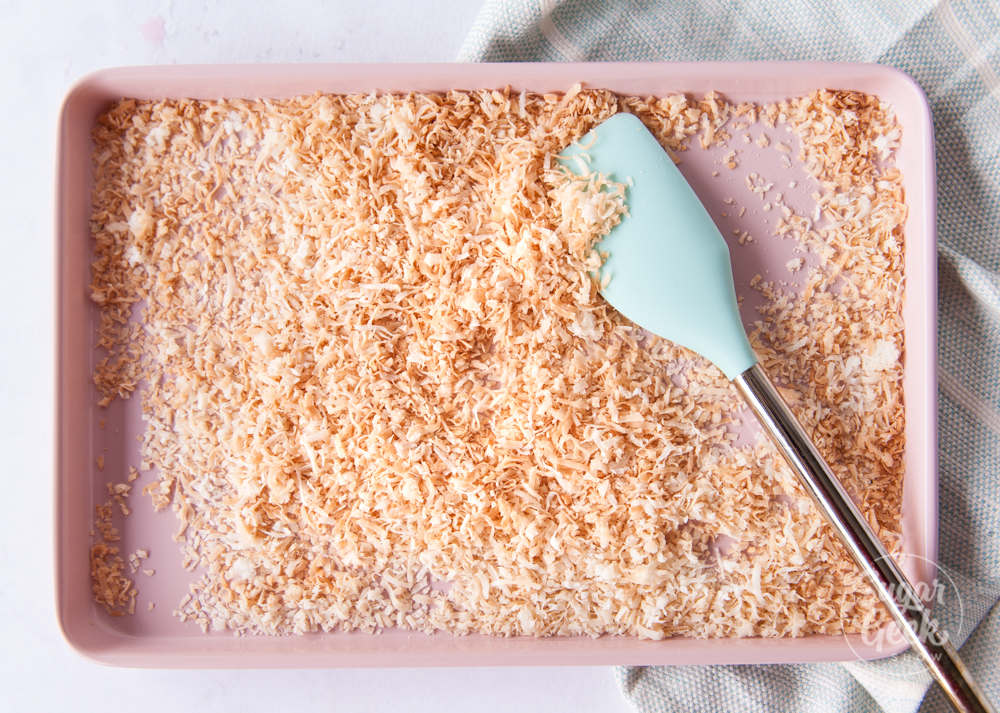
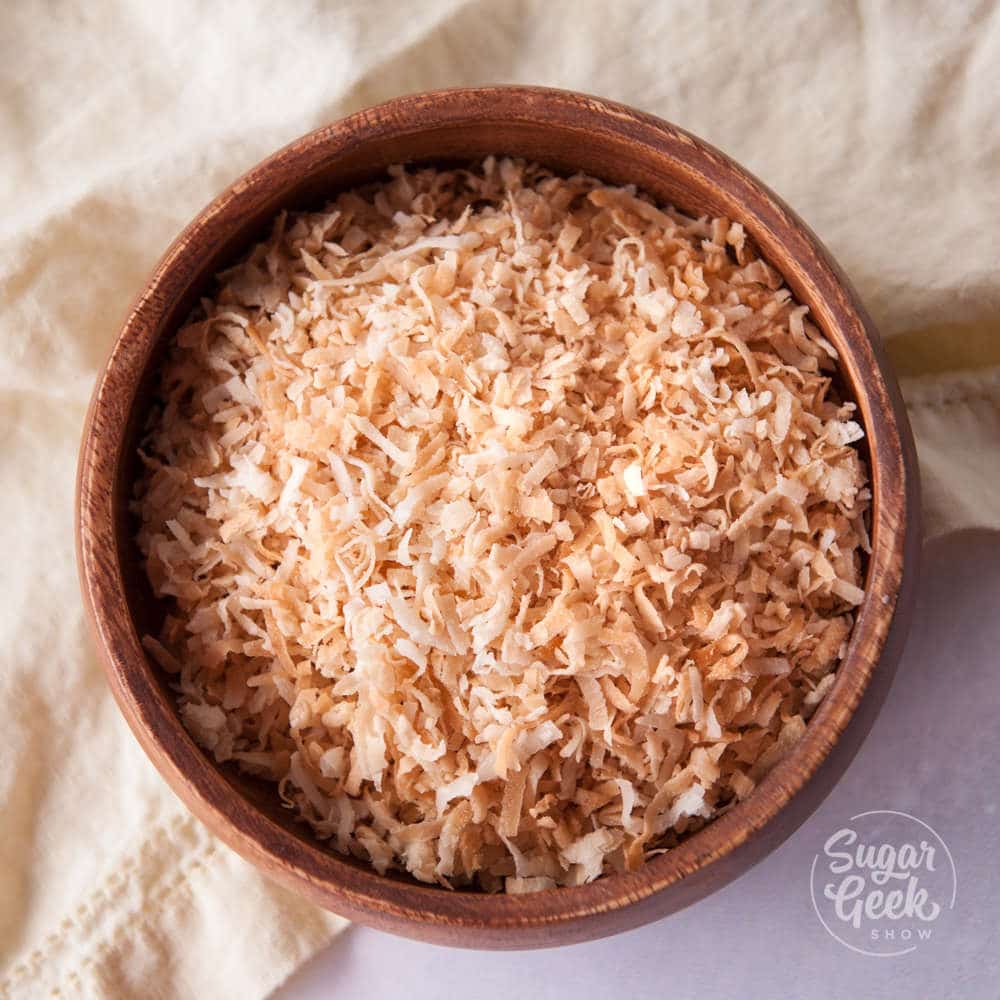
how to toast coconut flakes

Learning how to toast coconut is super simple. This is how I learned in pastry school and I'll never do it any other way. 

If you love coconut as much as I do, try toasting it next time and see if you like it even better! I think you will 😀 I love adding toasted coconut to my coconut cake or for sprinkling on top of my coconut custard. 

How to toast coconut flakes

  1. Preheat your oven to 350ºF
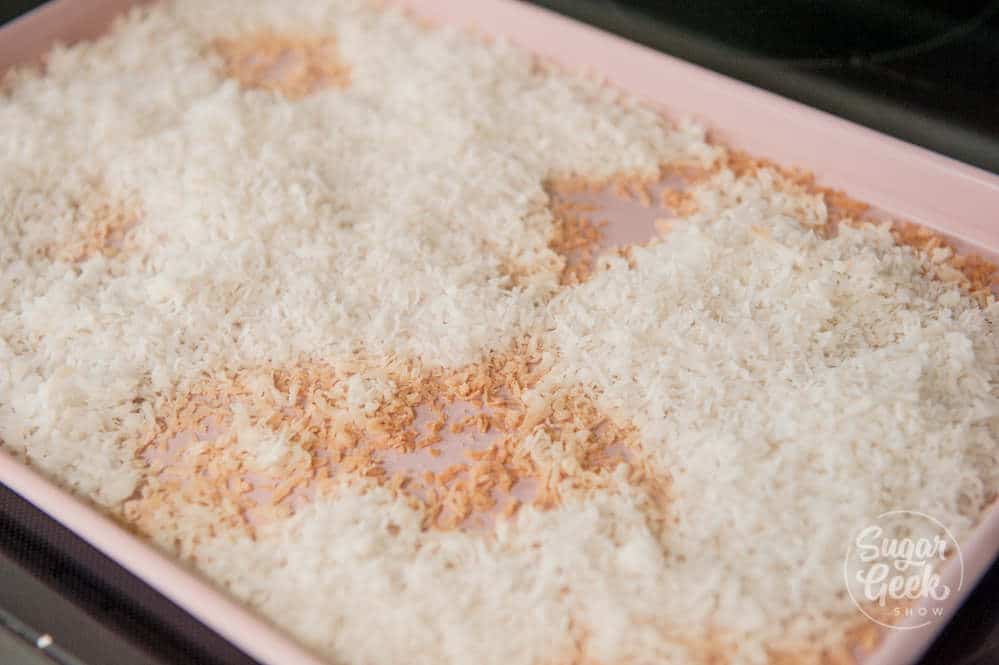
  2. Spread your sweetened coconut flakes onto the sheet pan in as thin and even layer as possible. 
  3. Bake your coconut for 2 minutes. If you don't see some light browning around the edges, go for ONE more minute. 
  4. Give your coconut a stir. 
  5. Bake for 2 more minutes. If your coconut is not golden brown, add 1 more minute. DO NOT FORGET TO SET YOUR TIMER. Ask me how I know lol. 
  6. Once your coconut is golden brown and toasty, you're done! Super fast and the best way to toast coconut flakes and get a nice even golden brown color. 


how to toast coconut flakes

how to toast coconut

How to store toasted coconut flakes

I typically store my coconut flakes in an airtight container in the fridge where it will stay fresh for 2-3 weeks. I usually only toast as much coconut as I need for my recipe. 

how to toast coconut flakes

Sometimes when I am using them in my baking I will even grind them up a bit in my food processor to get more of a fine-textured toasted coconut that still has all the flavor. 

How can you sweeten raw coconut flakes?

how to sweeten raw coconut flakes

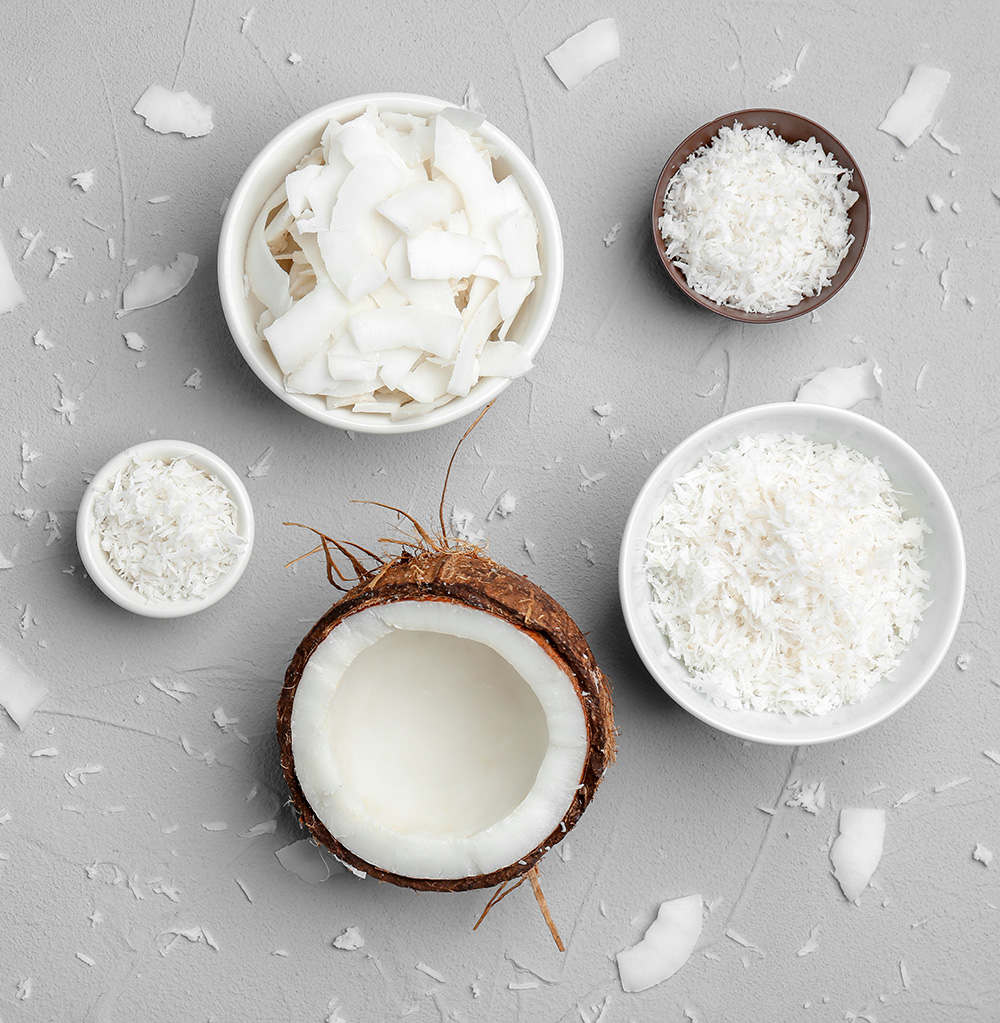
If all you have is raw coconut or you prefer to sweeten your own, you can follow this recipe by 80 Cakes on how to sweeten raw coconut. Basically, you just combine ¼ cup water and 4 teaspoons of sugar in a saucepan and bring to a simmer. Add in 1 cup of raw coconut and stir until the water is absorbed. You can use this coconut right away or lay it out on a paper towel to dry before storing. 

Recipe

how to toast coconut flakes
Print Recipe
5 from 4 votes

How To Toast Coconut Flakes

Tutorial on how to toast coconut flakes in the oven to bring out that natural and nutty flavor that comes from toasting, similar to toasting nuts.
Prep Time1 minute min
Cook Time4 minutes mins
Course: Dessert
Cuisine: American
Servings: 6 oz
Calories: 129kcal
Author: Liz Marek

Ingredients

  • 6 oz sweetened flaked coconut

Instructions

How to toast coconut flakes

  • Preheat your oven to 350ºF
  • Spread coconut flakes onto a sheet pat evenly
  • Bake coconut for 2-3 minutes until edges just begin to turn golden brown
  • Stir coconut and then bake for 1-2 more minutes or until golden brown. Do not walk away or forget to set the timer or the coconut can burn.
  • Store coconut in an airtight container for 2-3 weeks in the fridge or freeze for 6 months.

Video

Nutrition

Calories: 129kcal | Carbohydrates: 15g | Protein: 1g | Fat: 8g | Saturated Fat: 7g | Sodium: 81mg | Potassium: 102mg | Fiber: 3g | Sugar: 10g | Calcium: 3mg | Iron: 0.4mg

how to toast coconut flakes to a perfect golden brown in the oven! This is the EASIEST and fastest way to get perfectly toasted coconut

square buttercream cake

July 7, 2019 Blog

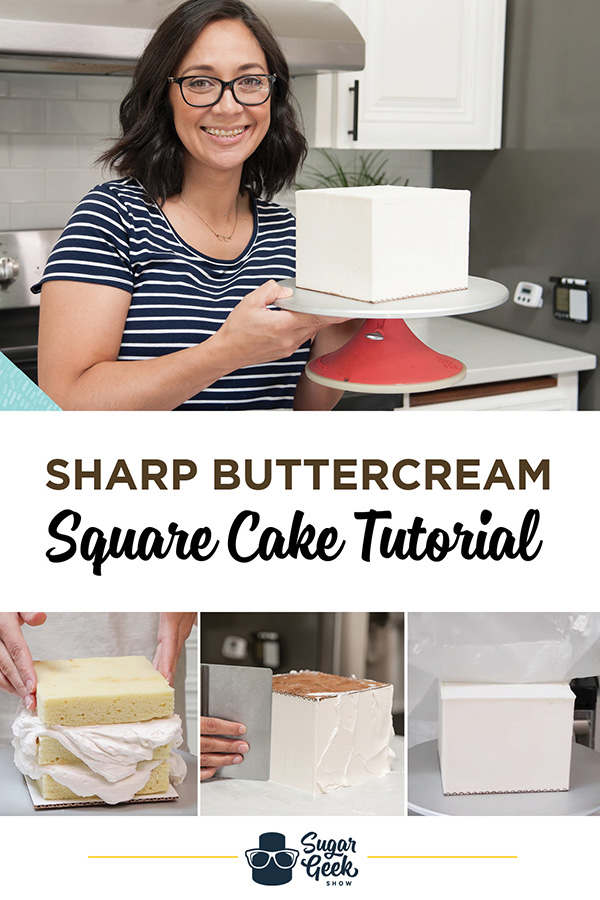
Square Buttercream Cake Tutorial

How to make a square buttercream cake with super sharp edges and buttercream corners that don't sag and stay super sharp!

I'm not going to lie, I hate making square cakes! They are so time-consuming and require so many sharp edges and straight lines. So not my thing! But of course, sometimes the square cake cannot be avoided.

square cake tutorial

This is my system for making square cakes without breaking down into a puddle of tears. 

Straight edges, sharp corners, minimal frustration. 

Tools for making square cakes 

*This post contains affiliate links which means that I may get paid a few pennies with purchase. This does not affect the price for you. 
  1. Bench scraper with a curved handle
  2. Offset spatula
  3. Turntable
  4. Turntable extender (or large cake board. See upside-down technique video)
  5. Vegetable shortening
  6. Parchment paper
  7. Cake board (I'm using ¼ sheet that I will cut down to 6")
  8. x-acto blade
  9. Cake already baked and chilled
  10. Easy buttercream 

I know there might be some people reading this who aren't professional cake decorators, so I'm going to try and break down this info for the true newbie. When I was first starting out cake decorating I found it very frustrating that I couldn't find any info on how to learn new techniques like making a square cake.

Sure, if you've been doing this for years in a bakery, you won't need to do this method. But what if it's your first time? Or what if you're struggling and need a new plan of attack for an upcoming cake. 

How to frost and fill a square cake

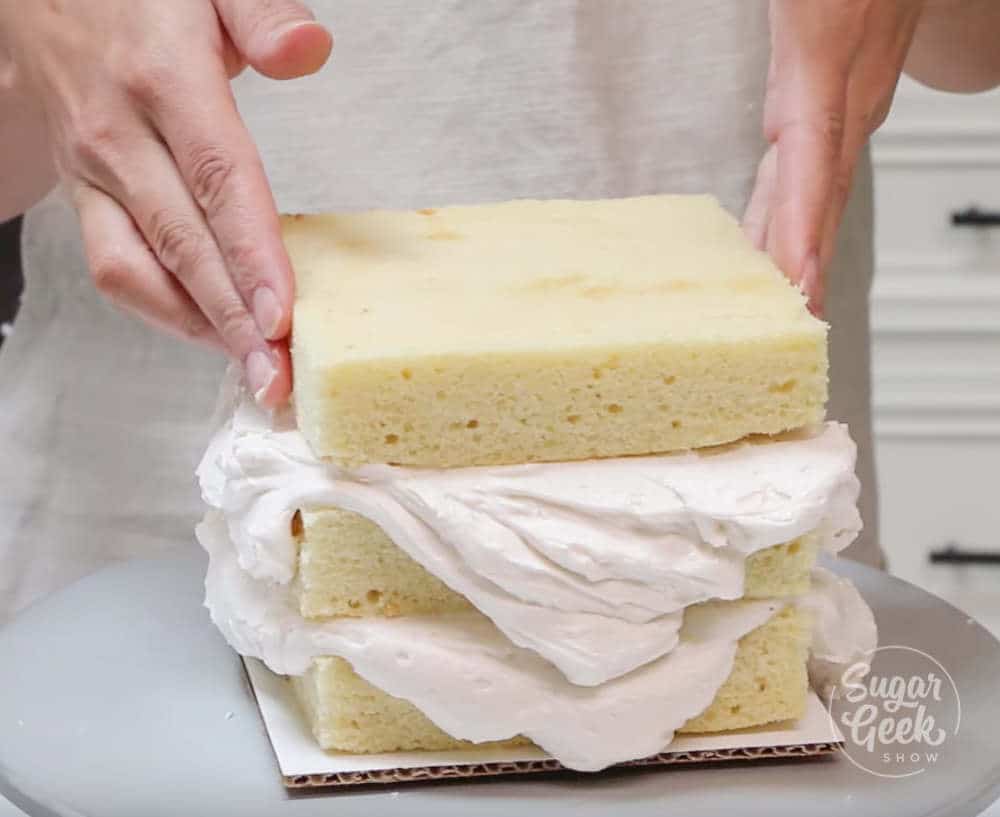
Start by baking your cakes, chilling them and trimming them if desired. Trim your cake board into a 6"x6" square using a ruler and an x-acto blade. Then stack and fill your cakes and crumb coat them.

square cake tutorial - stacking trimmed cakes with buttercream

I like to chill my cakes in the fridge over-night because I usually bake, cool, frost, fill and chill in one day but you can also freeze for an hour or so if you're in a hurry. Do not freeze solid. If you need more info on stacking and filling cakes, check out my beginner video on how to make your first cake. 

Once your square cake is chilled, you can start the process of building up those sharp corners. 

  1. Rub a thin amount of vegetable shortening on the turntable extender mounted on the turntable and place some parchment paper on top.
  2. Spread an even layer of buttercream on top of the parchment paper about ½" thick
  3. Place your chilled cake, upside-down, onto the buttercream. Press to make sure you have a good connection on all sides to the buttercream. 
  4. Optional: Use a level to make sure your cake is level (see video)
  5. Build up the sides of your cake with buttercream
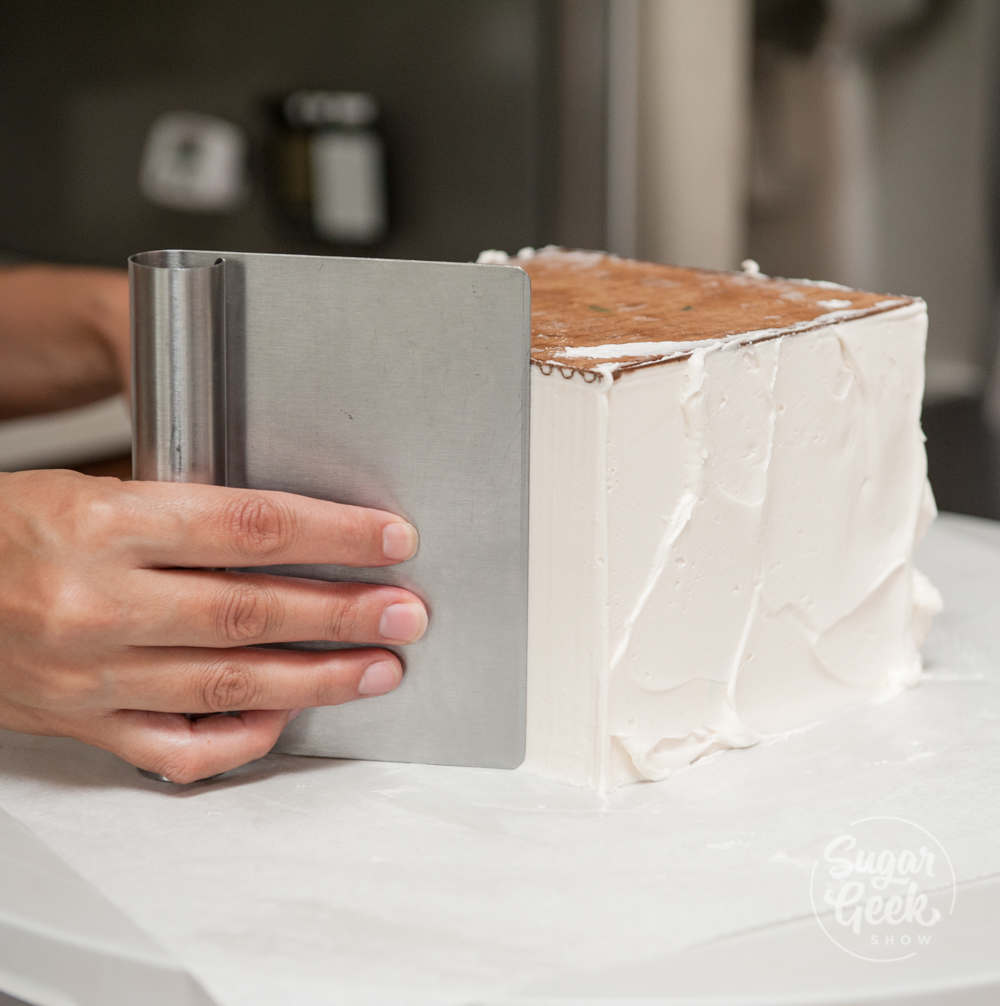
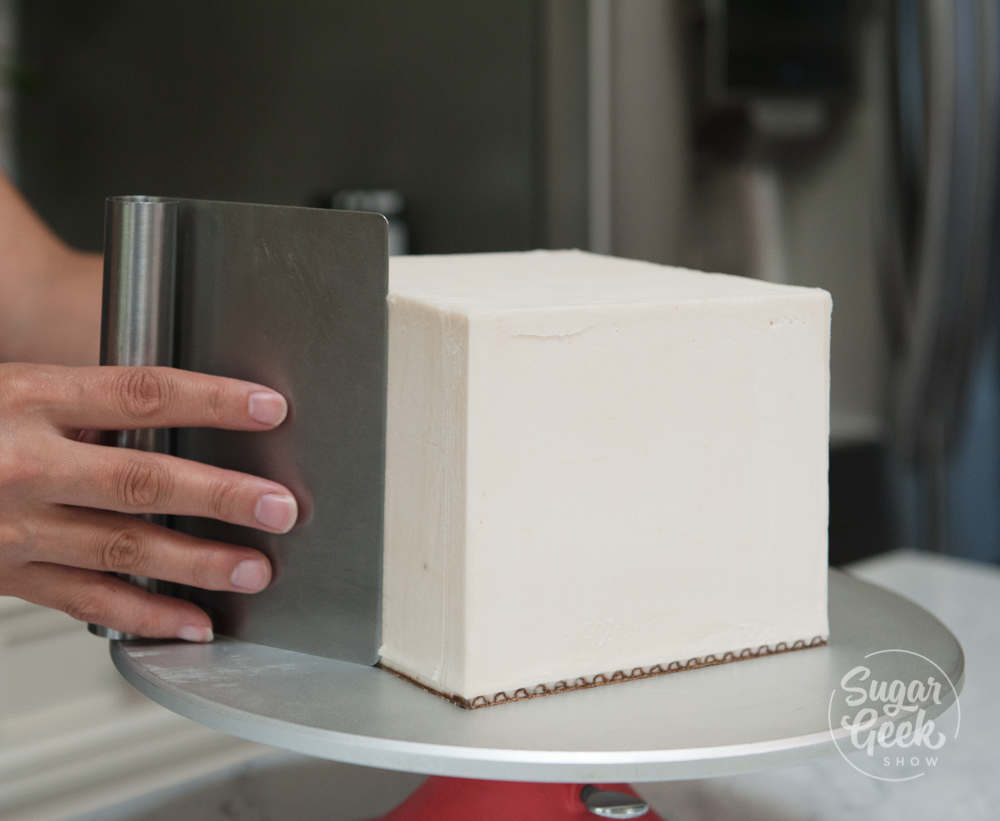
  6. Scrape down the excess with your bench scraper. It's VERY important to keep your bench scraper flat against the turntable to avoid accidentally curving the sides. This is why I prefer the ATECO bench scraper. 
  7. Refine the corners by bringing your bench scraper up to the corner and scraping back towards the middle of the cake. Repeat with each corner. 
  8. Chill the whole cake in the freezer for 15-20 minutes

How to make a square cake using the upside down method

How to get sharp edges on your square cake

  1. After your square cake is chilled, flip it back over. Don't worry, this won't hurt the cake. 
  2. Remove the turntable extender and the parchment paper
  3. Clean up the edges with a warm bench-scraper. I put mine under hot water and then dry it with a towel. This final pass smoothes out any bubbles and cleans up rough edges. 

Clean up the edges of your square cake with a warm spatula

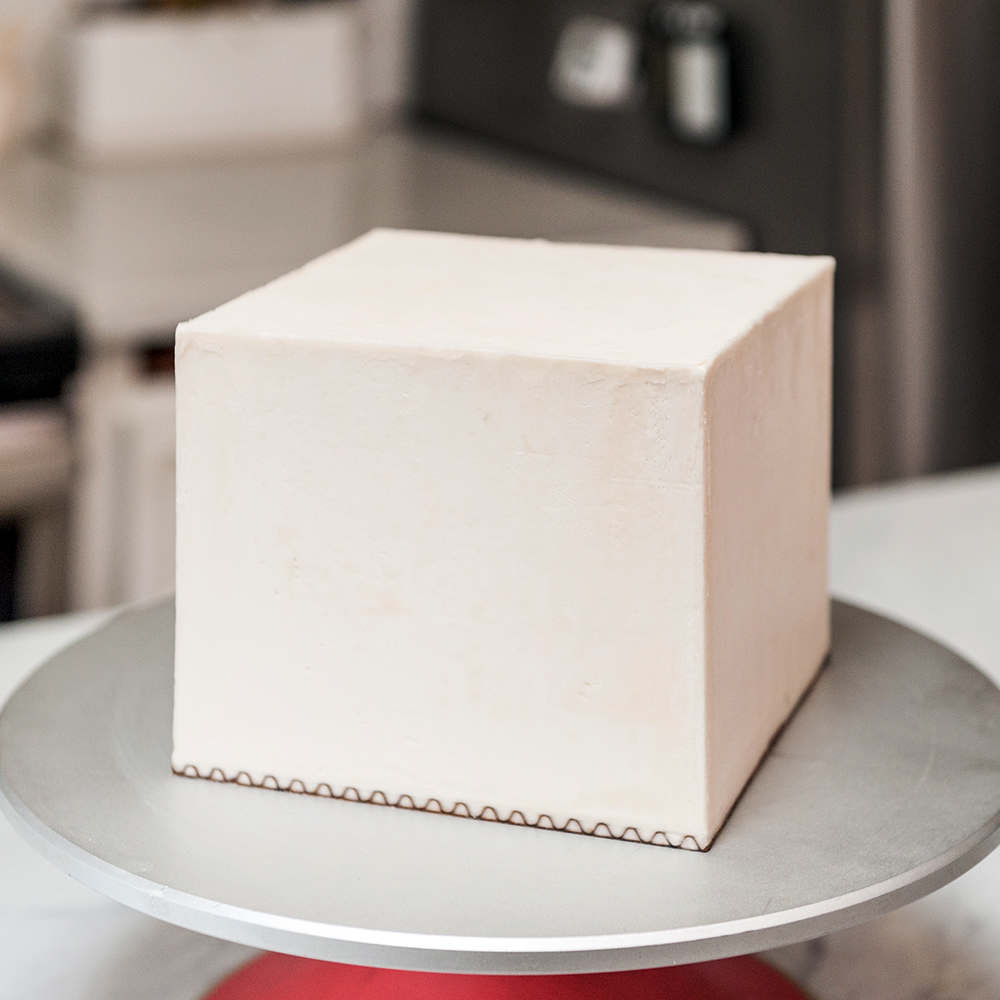
Now your square cake is ready to panel, to cover in fondant or to just decorate!

I'm not going to lie, this process takes time but at least at the end of the process, you have a nice square cake! 

Need more visuals? Watch my video on how to make a square cake with sharp buttercream edges.


How to make a square buttercream cake with sharp edges and corners using the upside-down technique


Solar System Space Cake Tutorial

July 1, 2019 Course Preview

Space Cake Tutorial

Skill level: Intermediate

Cakes.... IN SPACE! This tutorial is all about space, and more specifically, our solar system. This birthday cake was a blast to make, featuring a glowing sun, rotating planets, Saturn's rings, hand-painted Earth and moon, isomalt Neptune and Uranus and a massive galaxy cake. Learn to create this cake step-by-step that is sure to wow the space-loving recipient.

1:30:59 Minutes of Instruction

What You Will Learn

  • How to make a rotating solar system cake
  • Learn how to make planets 3 different ways: chocolate planets, a cake Jupiter, and isomalt Neptune and Uranus
  • How to make Saturn, a ringed planet
  • Learn how to hand paint and add galaxy details

Tutorial Chapters

  1. The spinning boards 0:46
  2. The sun structure 5:00
  3. Painting the board 10:03
  4. Stacking the cake 10:43
  5. Trimming the cake 12:36
  6. Planet overview 14:36
  7. Jupiter's base 16:39
  8. Saturn's isomalt ring 18:37
  9. Saturn's sphere 26:36
  10. Small chocolate spheres 31:28
  11. Uranus 32:42
  12. Neptune 35:39
  13. Mercury and the moon 37:04
  14. Covering the cake board 43:47
  15. Adding Jupiter 47:45
  16. Assembling Saturn 52:22
  17. Assembling small planets 53:24
  18. Adding the cake 56:33
  19. Frosting Jupiter 58:38
  20. Frosting the main cake 1:02:11
  21. Covering with fondant 1:03:05
  22. Adding Saturn 1:04:41
  23. Painting the main cake 1:08:21
  24. Adding Uranus 1:12:05
  25. Adding Neptune 1:15:12
  26. Adding Saturn's ring 1:16:02
  27. Adding small planets 1:17:00
  28. Covering threaded rod 1:20:53
  29. Painting touchups 1:21:38
  30. Painting small planets 1:24:17
  31. Painting the sun 1:27:03
  32. Painting earth 1:28:20

Downloads

Materials List

Solar System Reference Image

Solar System Space Cake Tutorial

June 29, 2019 Paid Video

Space Cake (Solar System)

Skill level: Intermediate

Cakes.... IN SPACE! This tutorial is all about space, and more specifically, our solar system. This birthday cake was a blast to make, featuring a glowing sun, rotating planets, Saturn's rings, hand-painted Earth and moon, isomalt Neptune and Uranus and a massive galaxy cake. Learn to create this cake step-by-step that is sure to wow the space-loving recipient.

1:30:59 Minutes of Instruction

What You Will Learn

  • How to make a rotating solar system cake
  • Learn how to make planets 3 different ways: chocolate planets, a cake Jupiter, and isomalt Neptune and Uranus
  • How to make Saturn, a ringed planet
  • Learn how to hand paint and add galaxy details

Tutorial Chapters

  1. The spinning boards 0:46
  2. The sun structure 5:00
  3. Painting the board 10:03
  4. Stacking the cake 10:43
  5. Trimming the cake 12:36
  6. Planet overview 14:36
  7. Jupiter's base 16:39
  8. Saturn's isomalt ring 18:37
  9. Saturn's sphere 26:36
  10. Small chocolate spheres 31:28
  11. Uranus 32:42
  12. Neptune 35:39
  13. Mercury and the moon 37:04
  14. Covering the cake board 43:47
  15. Adding Jupiter 47:45
  16. Assembling Saturn 52:22
  17. Assembling small planets 53:24
  18. Adding the cake 56:33
  19. Frosting Jupiter 58:38
  20. Frosting the main cake 1:02:11
  21. Covering with fondant 1:03:05
  22. Adding Saturn 1:04:41
  23. Painting the main cake 1:08:21
  24. Adding Uranus 1:12:05
  25. Adding Neptune 1:15:12
  26. Adding Saturn's ring 1:16:02
  27. Adding small planets 1:17:00
  28. Covering threaded rod 1:20:53
  29. Painting touchups 1:21:38
  30. Painting small planets 1:24:17
  31. Painting the sun 1:27:03
  32. Painting earth 1:28:20

Downloads

Materials List

Solar System Reference Image

close up of a chocolate butterfly decoration on a red velvet cupcake

June 26, 2019 Blog

6 Easy Chocolate Decorations

I love making chocolate decorations! Not only are they fun to make but they are so tasty! Chocolate decorations work best if you use tempered chocolate but if you don't want to temper chocolate, you can use chocolate wafers for most projects. If you've been wanting to try your hand at some fun chocolate decorations for your cakes or desserts, you'll want to check these out!

close up of a chocolate butterfly decoration on a red velvet cupcake

* This post contains affiliate links, which means I get paid a few pennies if you buy from my link, but it doesn't cost you anything*

What's in this blog post

  • Ingredients needed
  • What's the difference between real chocolate and compound chocolate?
  • What does tempering mean?
  • How to temper chocolate (the easy way)
  • 1. How To Make Chocolate Sphere Decorations
  • 2. Chocolate Sail
  • 3. Chocolate Cups
  • 4. Chocolate Honeycomb decoration
  • 5. Chocolate Butterfly decorations
  • 6. Drippy Chocolate Dessert Bowl

Ingredients needed

For these chocolate decorations, we will be using tempered dark chocolate at 86ºF, which is the optimal working temperature. I use a chocolate thermometer and a silicone mixing bowl to temper my chocolate in the microwave. Quick and easy for these small projects!

If you don't want to temper chocolate, you can use compound chocolate. I like Guittard brand because it melts well and tastes pretty good. If you want to color your candy melts, you will have to use chocolate food coloring or you can use pre-colored candy melts like the Wilton brand. You can't use regular food coloring to color chocolate.

tempered chocolate with chocolate thermometer

What's the difference between real chocolate and compound chocolate?

Real chocolate has cocoa butter and needs to be tempered before you can use it in molds or for decorations so that it has a beautiful shine and snap when you bite into it.

Compound chocolate (like Wilton candy melts), sometimes referred to as coating chocolate, does not have cocoa butter in it. It typically has a cocoa butter substitute like palm oil or wax and does not need to be tempered but suffers in taste.

The upside of using real chocolate is that the flavor is far superior, the chocolate melts in your mouth, and has a creamy texture, and when it is tempered correctly, it is very strong and has a beautiful shine. Using real chocolate is not as beginner-friendly but learning to temper is not difficult.

The upside of compound chocolate contains other fat substitutes that don't require tempering. It has a much higher melting point, is less expensive, and is more stable in warm environments. The downside is that it doesn't taste as good as real chocolate and does not contract, so you can't use it in some types of chocolate molds. It also does not melt in your mouth and leaves a kind of waxy taste in your mouth. It can be easier to use for beginners.

What does tempering mean?

As soon as you melt chocolate, it loses its temper (crystal structure). The crystal structure is what gives chocolate its shine and snap when you bite into it and makes it strong so it will hold its shape at room temperature.

Tempering chocolate means you are controlling the temperature as you heat and cool to create strong crystals that make the chocolate strong and shiny.

If you don't temper real chocolate, it will be soft, dull, and lose its shape easily.

How to temper chocolate (the easy way)

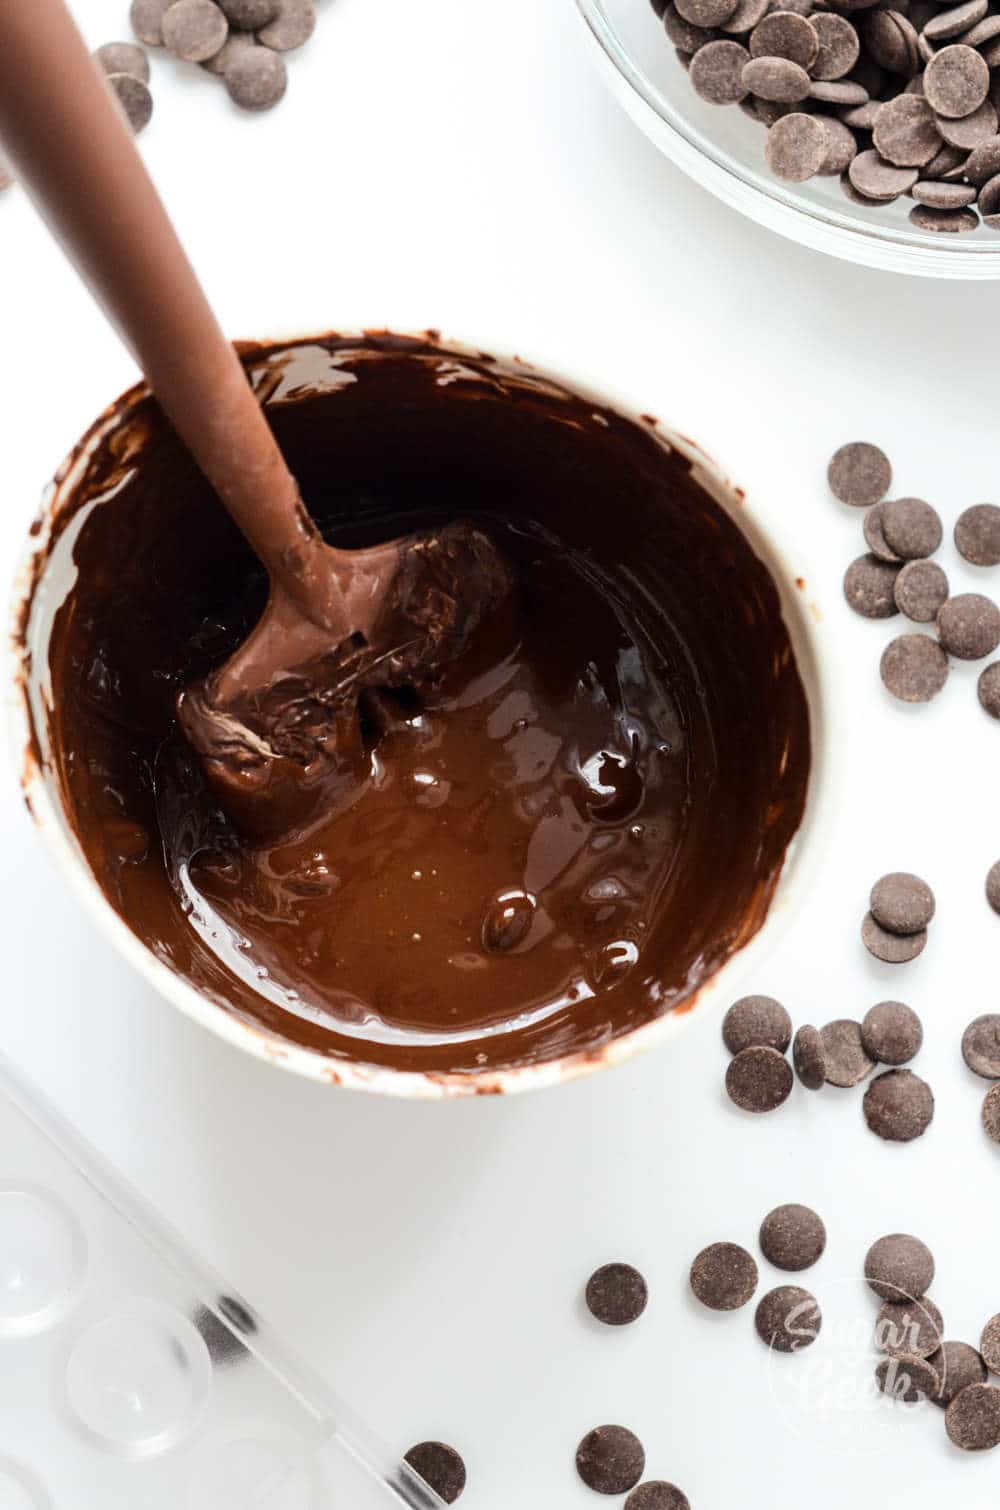
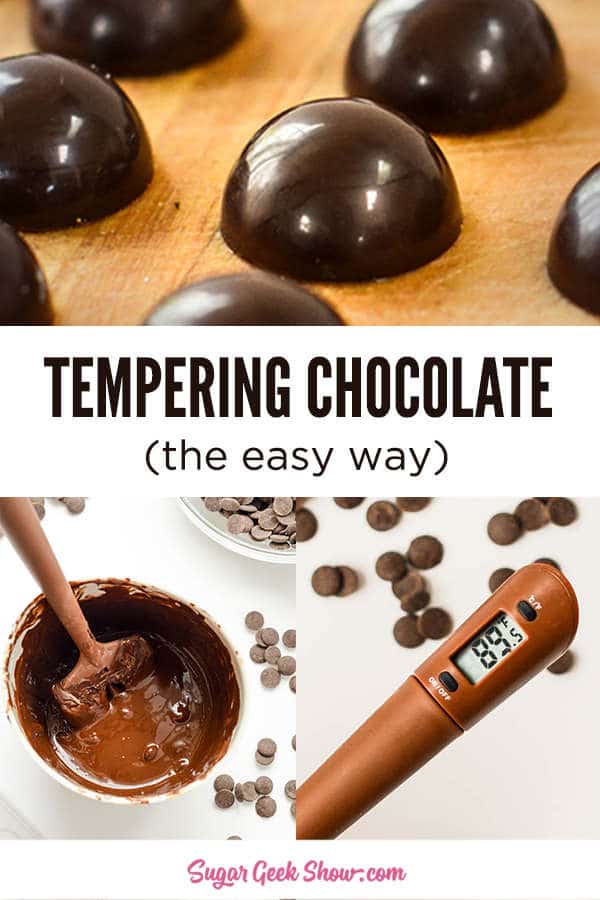
Tempering chocolate in the microwave doesn't require a thermometer, but it can definitely help! The key is LOW AND SLOW heating and constant stirring for perfectly tempered chocolate.

  1. Start with the right size + shape
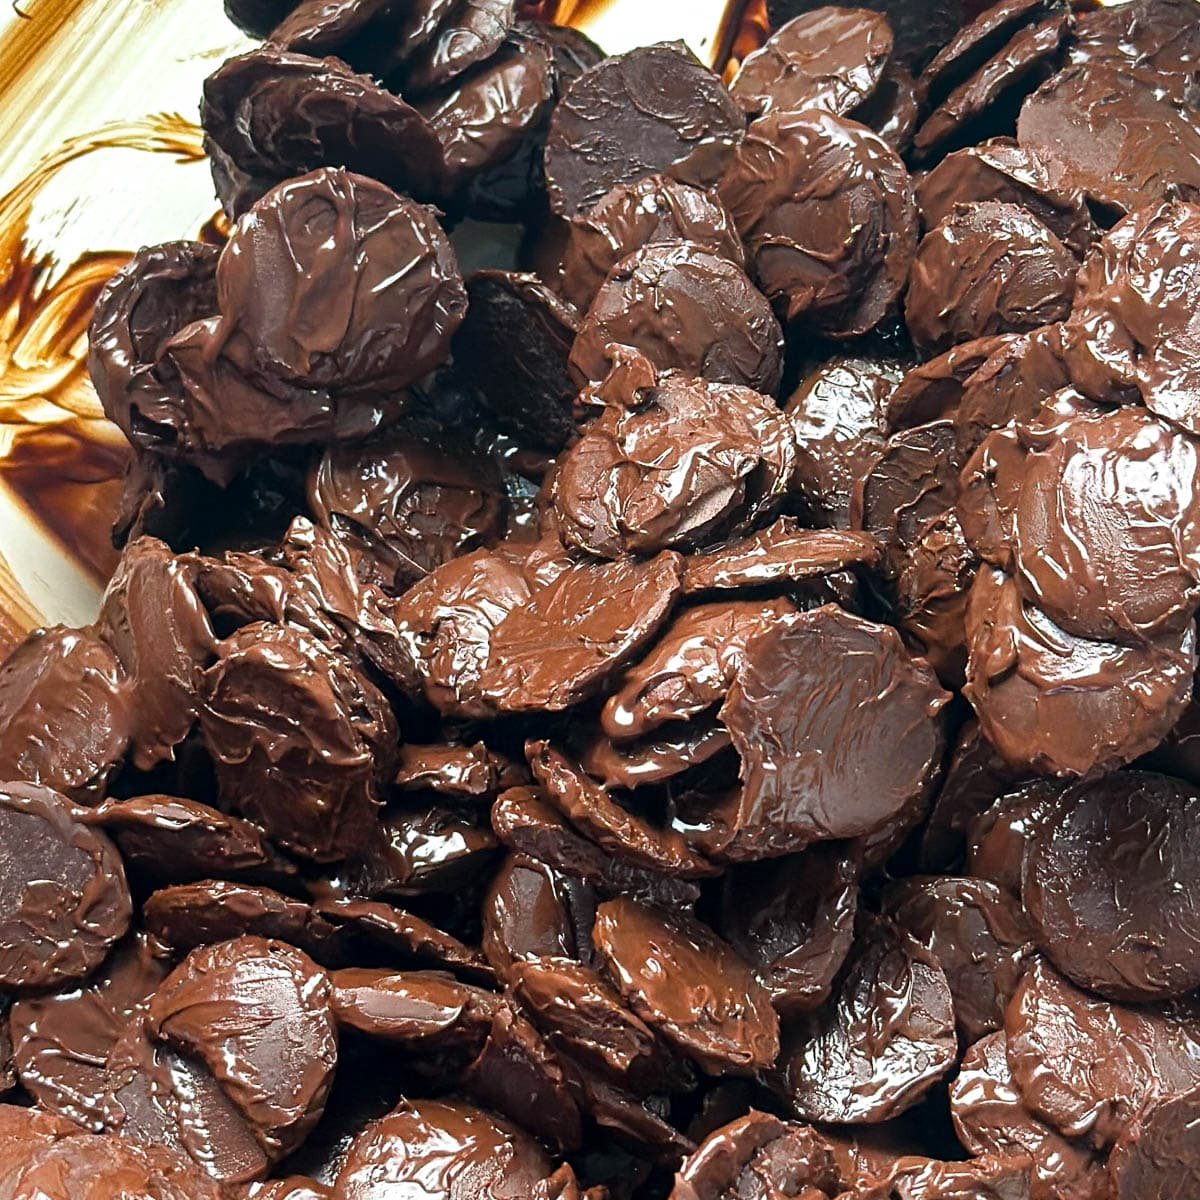
    If you're using a large chocolate bar, chop it into small, even pieces so it melts evenly and doesn't overheat. If you're using chips or callets, give them a rough chop to help them melt more evenly.
  2. Begin heating the chocolate (check below for chocolate-specific temperature limits)
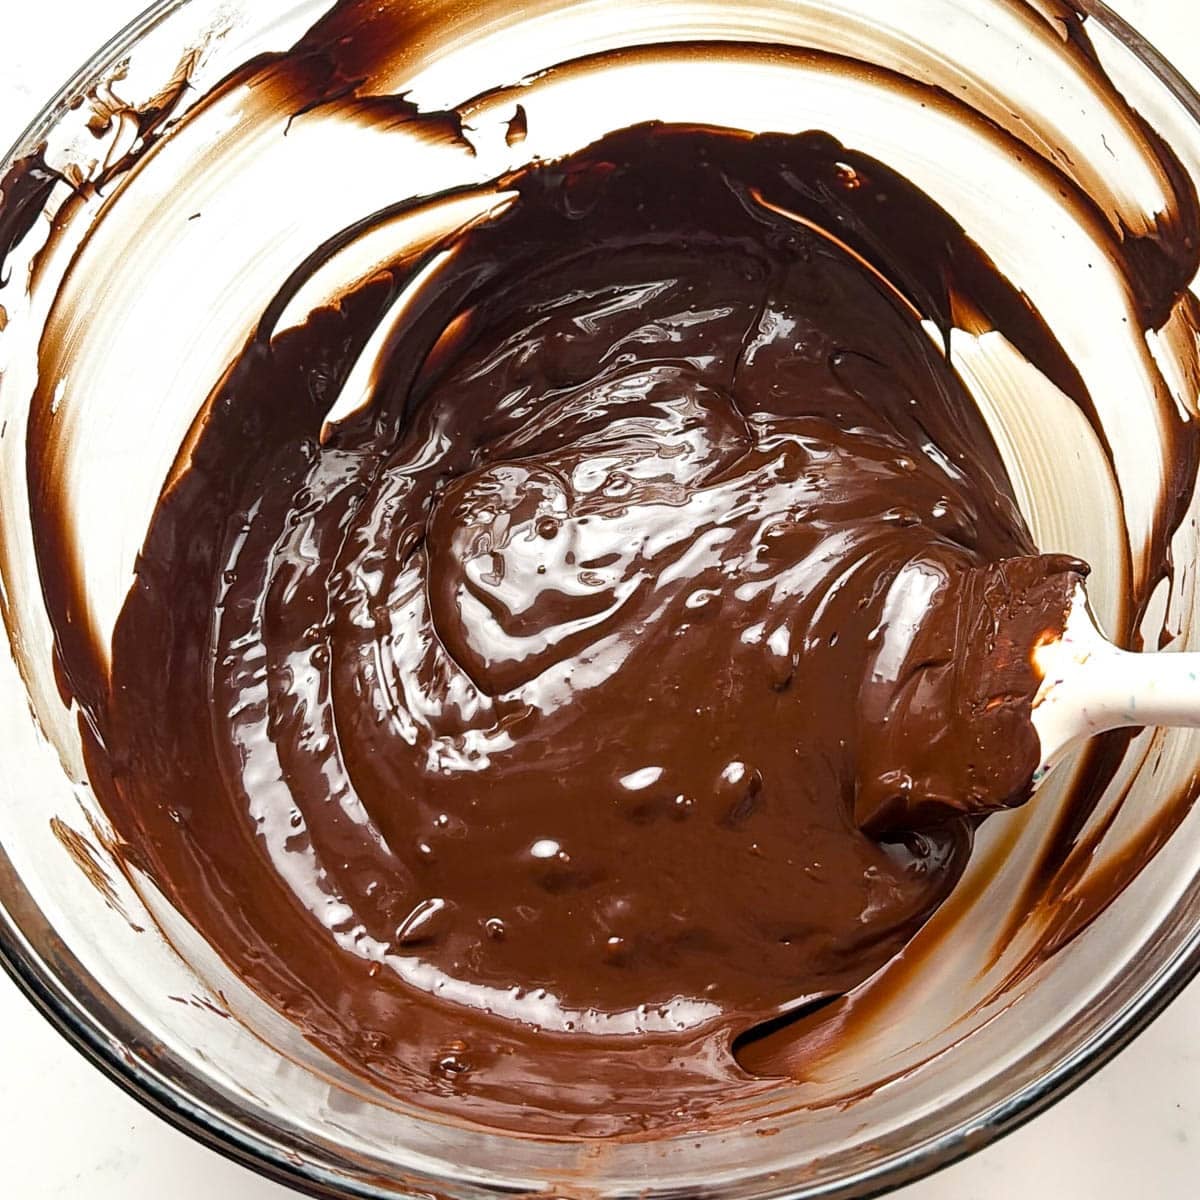
    Place the chocolate in a plastic or silicone bowl. Microwave on high for 30 seconds, then stir well. White chocolate will melt faster than dark chocolate. As long as you melt in very short bursts and stir between every burst, you should be ok and not accidentally overheat your chocolate.
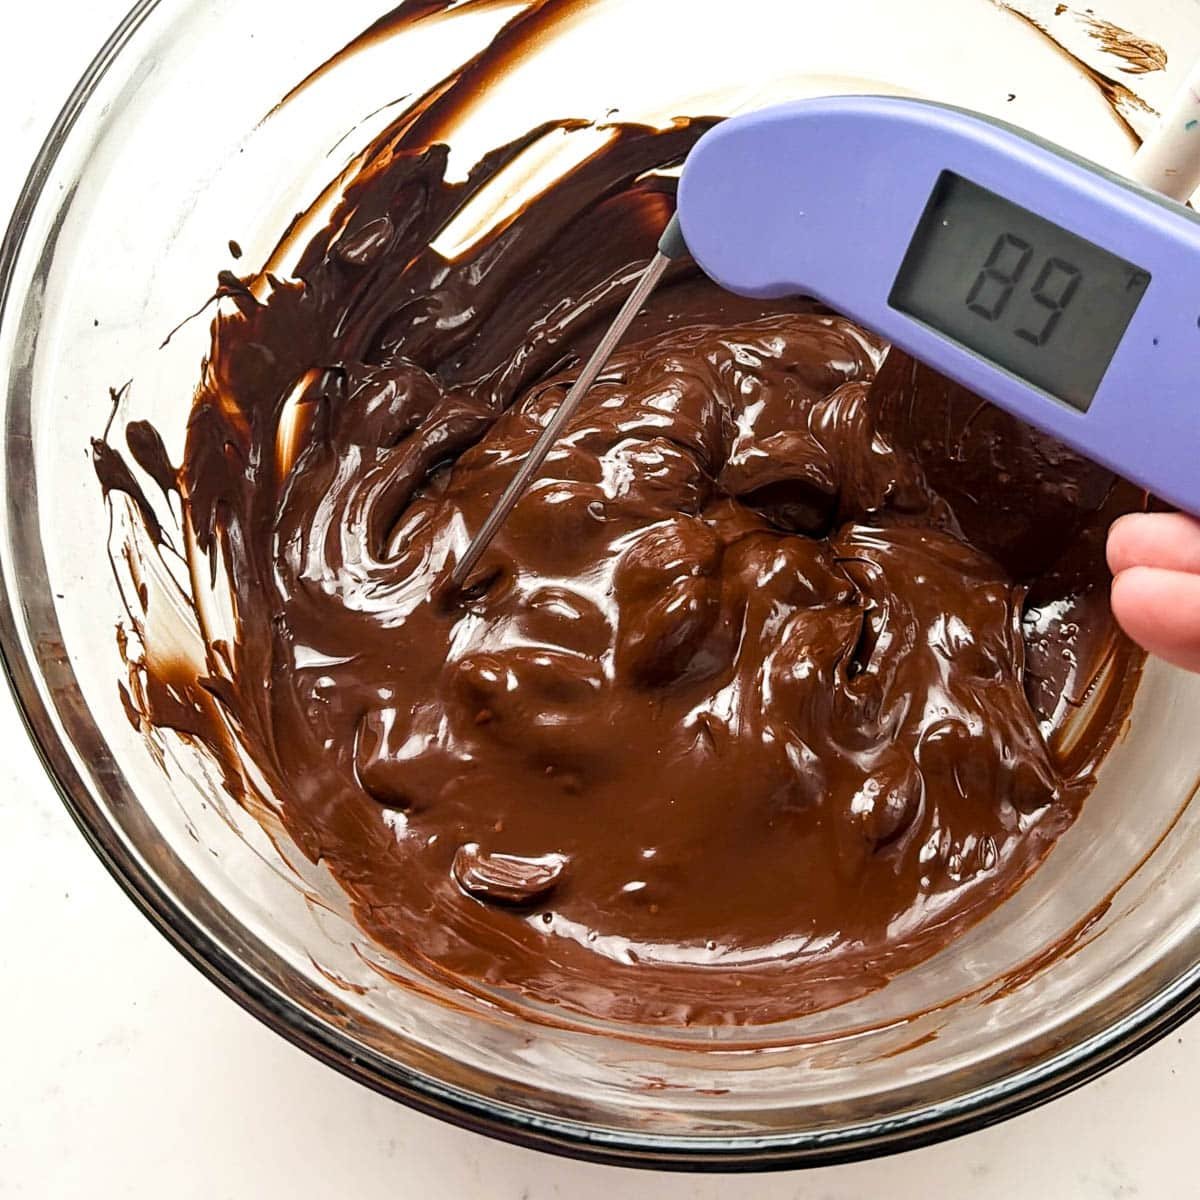
    Check the temperature every time you stir and make sure you do not exceed:
    90°F for dark chocolate
    86°F for milk chocolate

    84°F for white or colored chocolate
  3. Continue heating in short bursts
    Return the bowl to the microwave and heat in the following sequence, stirring well after each interval.
    15 seconds, stir
    10 seconds, stir
    Continue using very short bursts only if needed. Do not rush this step.
  4. Finish melting by stirring, not heating
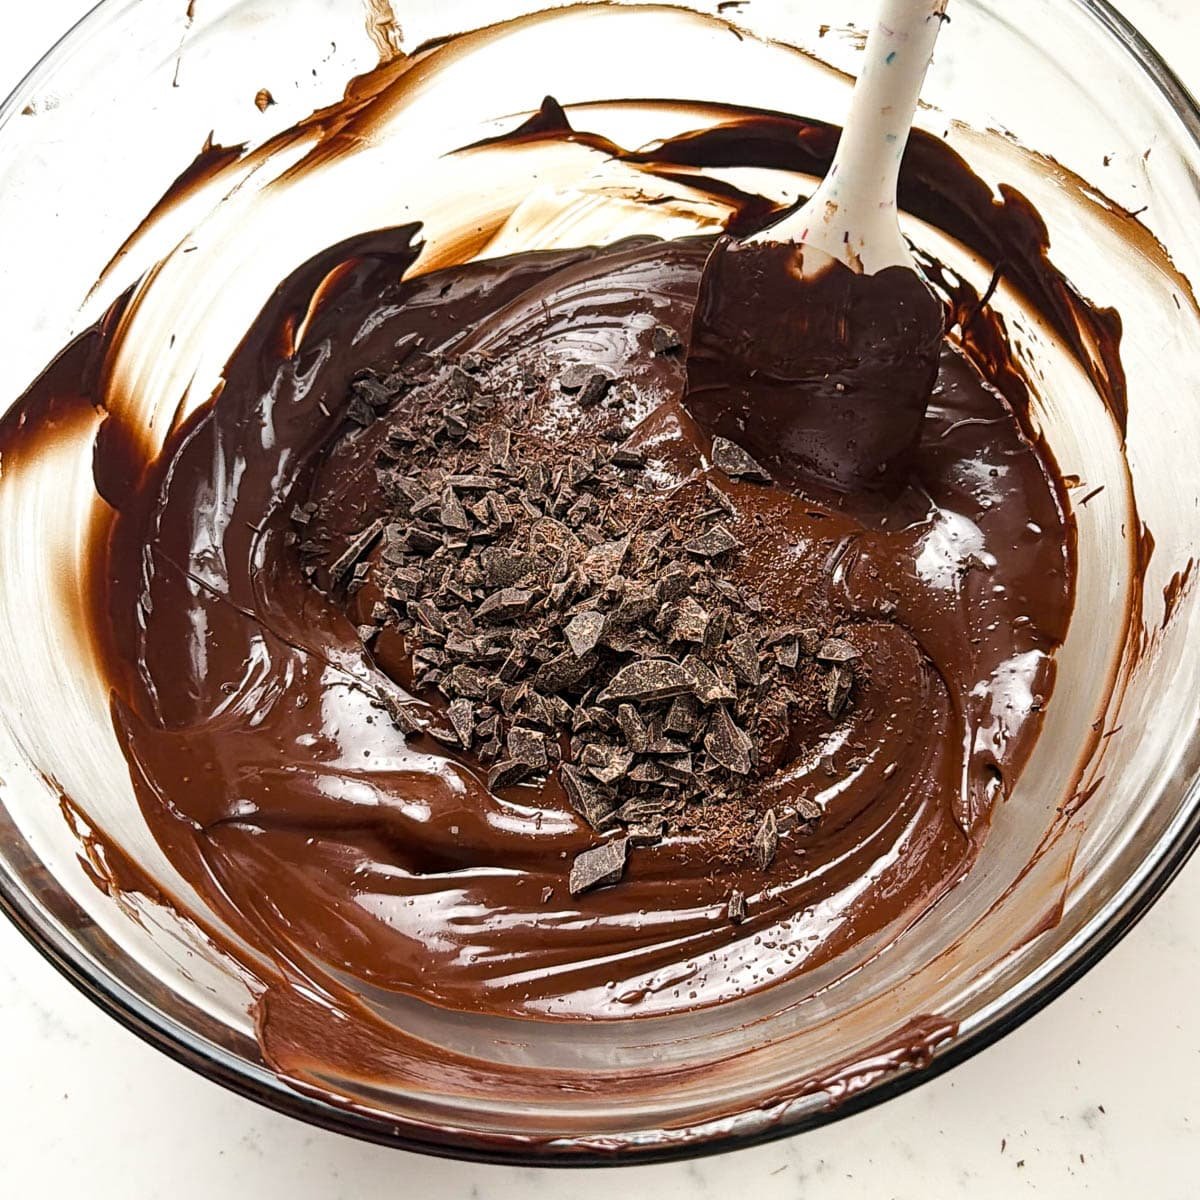
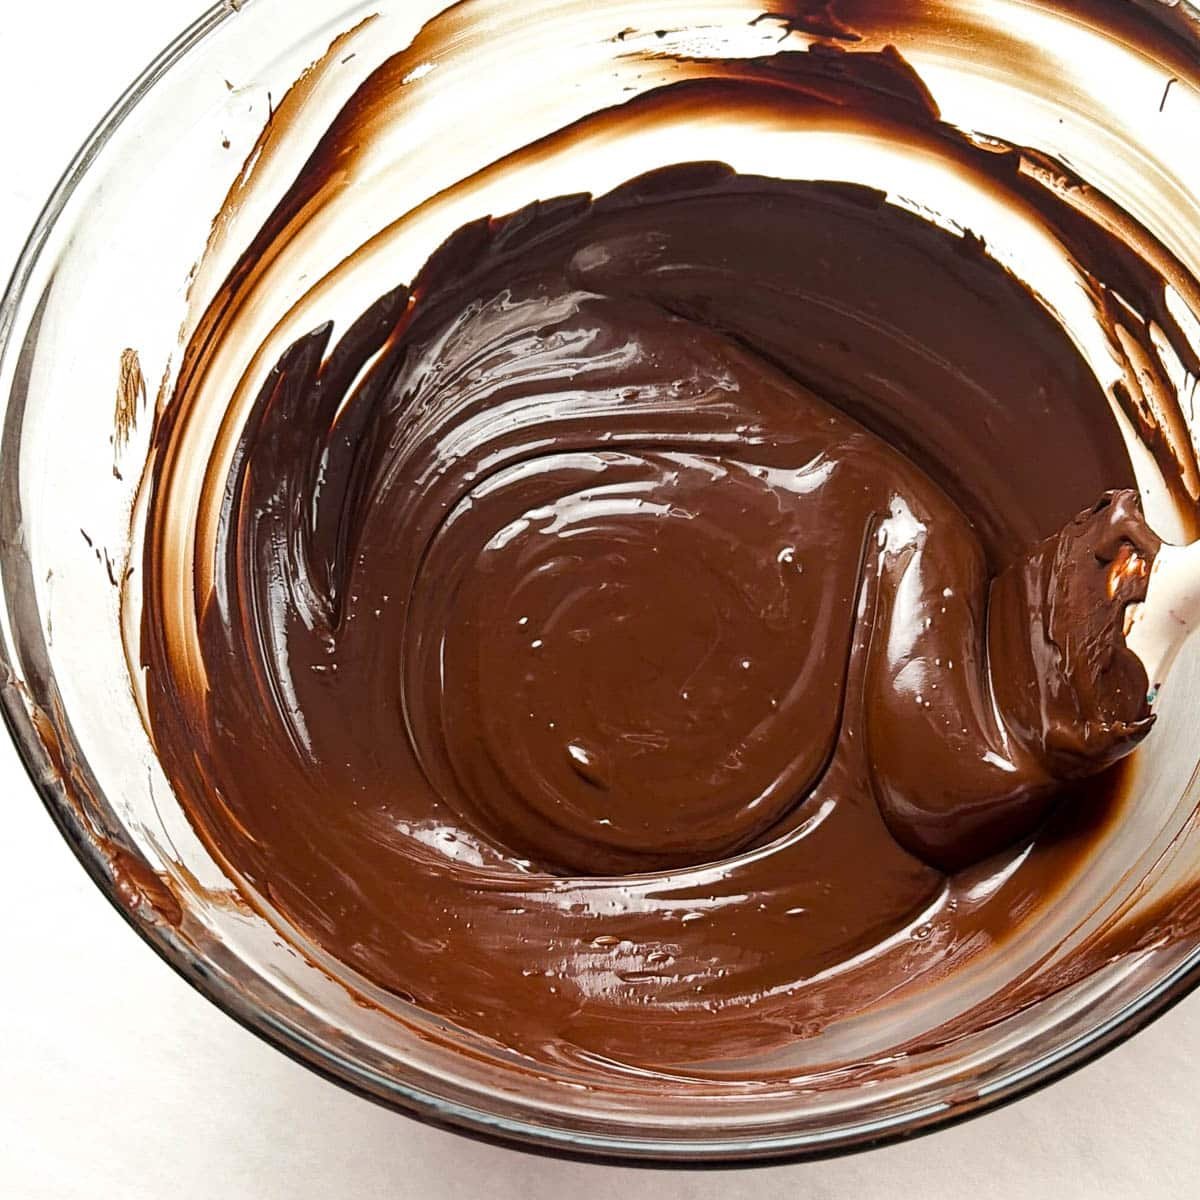
    When the chocolate is 75% melted, stop microwaving. Use residual heat and constant stirring to melt the remaining pieces so you don't overshoot the temperature. The unmelted chocolate will temper the melted chocolate. If you accidentally melted the chocolate too much and you're over the max temperature for your type of chocolate (see above) then add in ¼ cup of finely chopped chocolate at 90º to seed the chocolate.
  5. Use the chocolate immediately
    Once the chocolate is fully melted and still under the correct temperature, it is tempered and ready for molding, dipping, decorating, or drizzling.
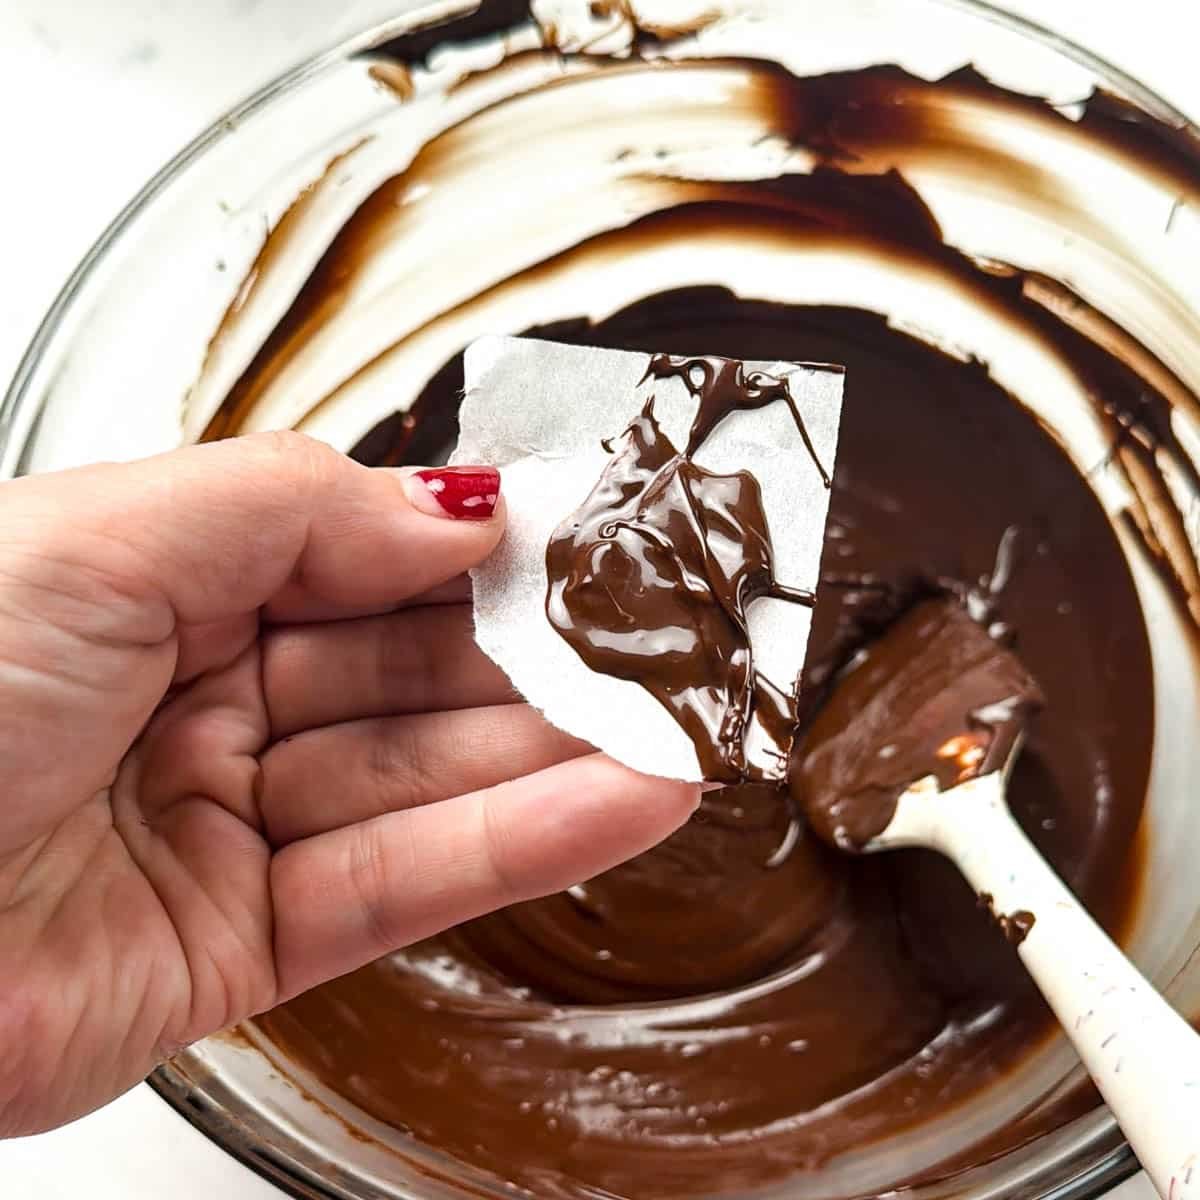
  6. Test the temper
    Spread a small smear of chocolate onto a piece of parchment paper. Place the parchment in the refrigerator for about 5 minutes, or until the chocolate is set. Break the chocolate. Properly tempered chocolate will be shiny and snap cleanly. If it bends, looks dull, or has streaks, it is not in temper.
  7. Re-warm as needed
    Put the bowl back in the microwave and heat in 5-10 second increments if your chocolate starts to get hard to keep it at a working temperature.

1. How To Make Chocolate Sphere Decorations

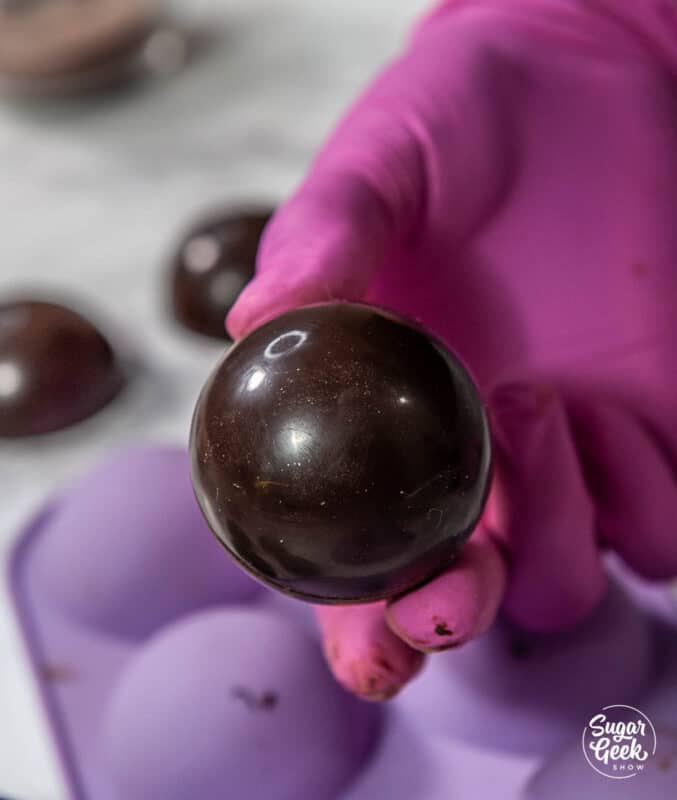
Cakes with chocolate spheres are everywhere right now. From colored swirls resembling planets to shiny metallics atop modern designs. Making a chocolate sphere can be a super impressive topper.

How to make shiny chocolate sphere decorations

To make chocolate spheres, you are going to need some tempered chocolate and a polycarbonate sphere mold or a silicone sphere mold. This is the same technique I use to make my hot chocolate bombs!

If you don't want to bother with tempering chocolate, you can use melting wafers and a silicone sphere mold. The melting wafers won't release from the polycarbonate mold. The reason I like using the polycarbonate mold is that the spheres are very shiny. These are the common tools and materials I use for chocolate spheres.

close up of chocolate spheres
shiny hot chocolate bomb
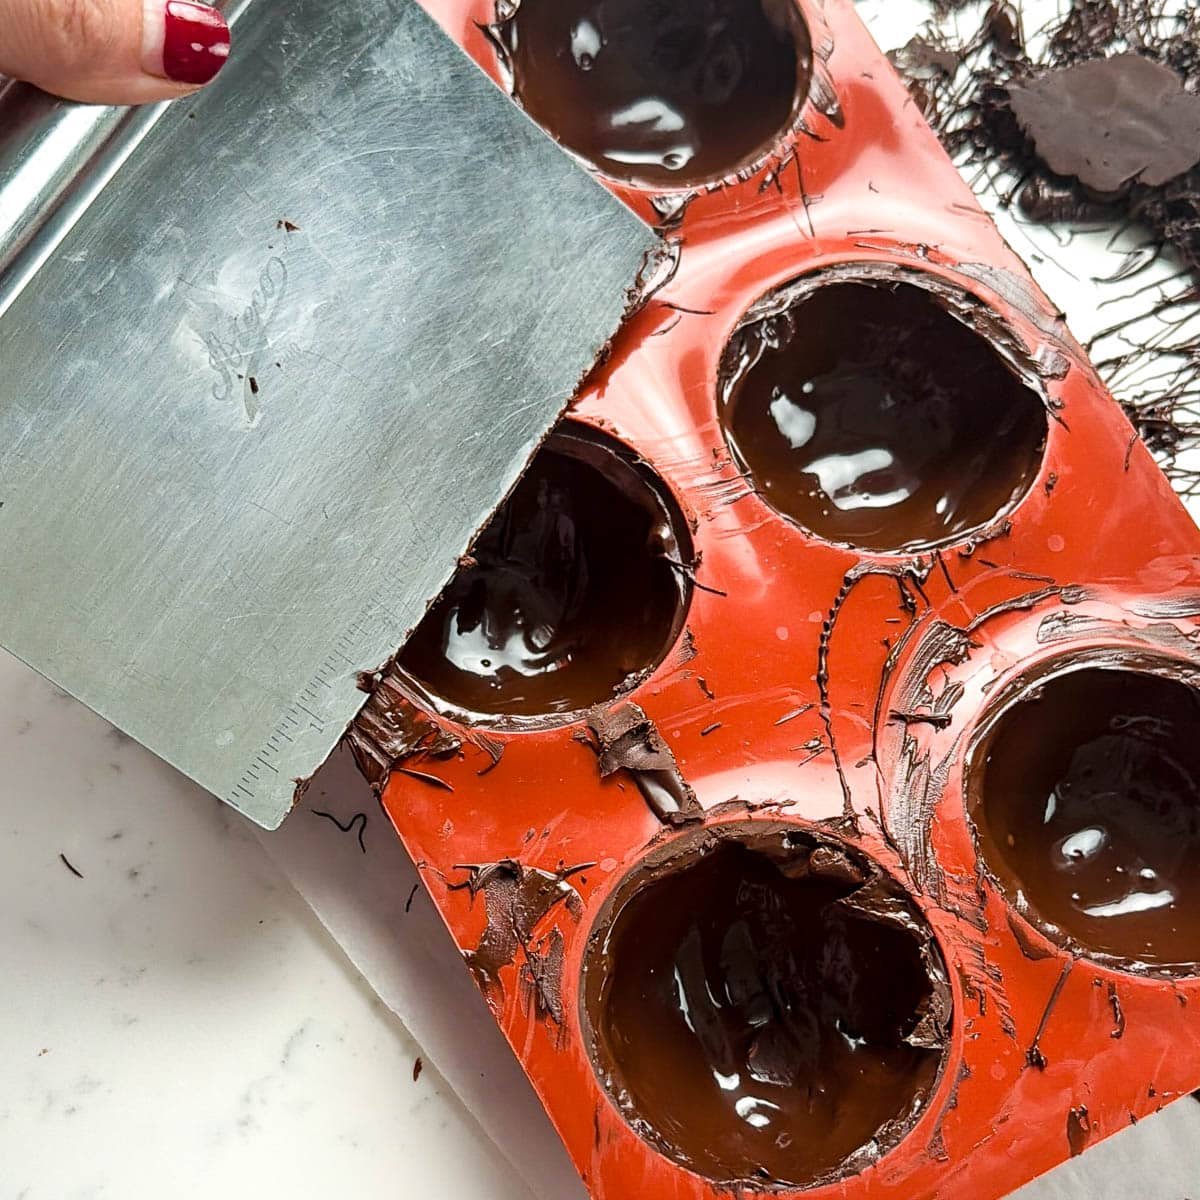
  1. Pour your tempered chocolate into your sphere mold at 86ºF and scrape off the excess chocolate with a bench scraper
  2. Tap the side of the mold to remove any air bubbles.
  3. After 30 seconds, pour the chocolate out of the molds, tapping with your bench scraper to make the shells thin.
  4. Place the mold upside down on a piece of parchment paper for 10-15 minutes until the chocolate is not liquid but not fully set.
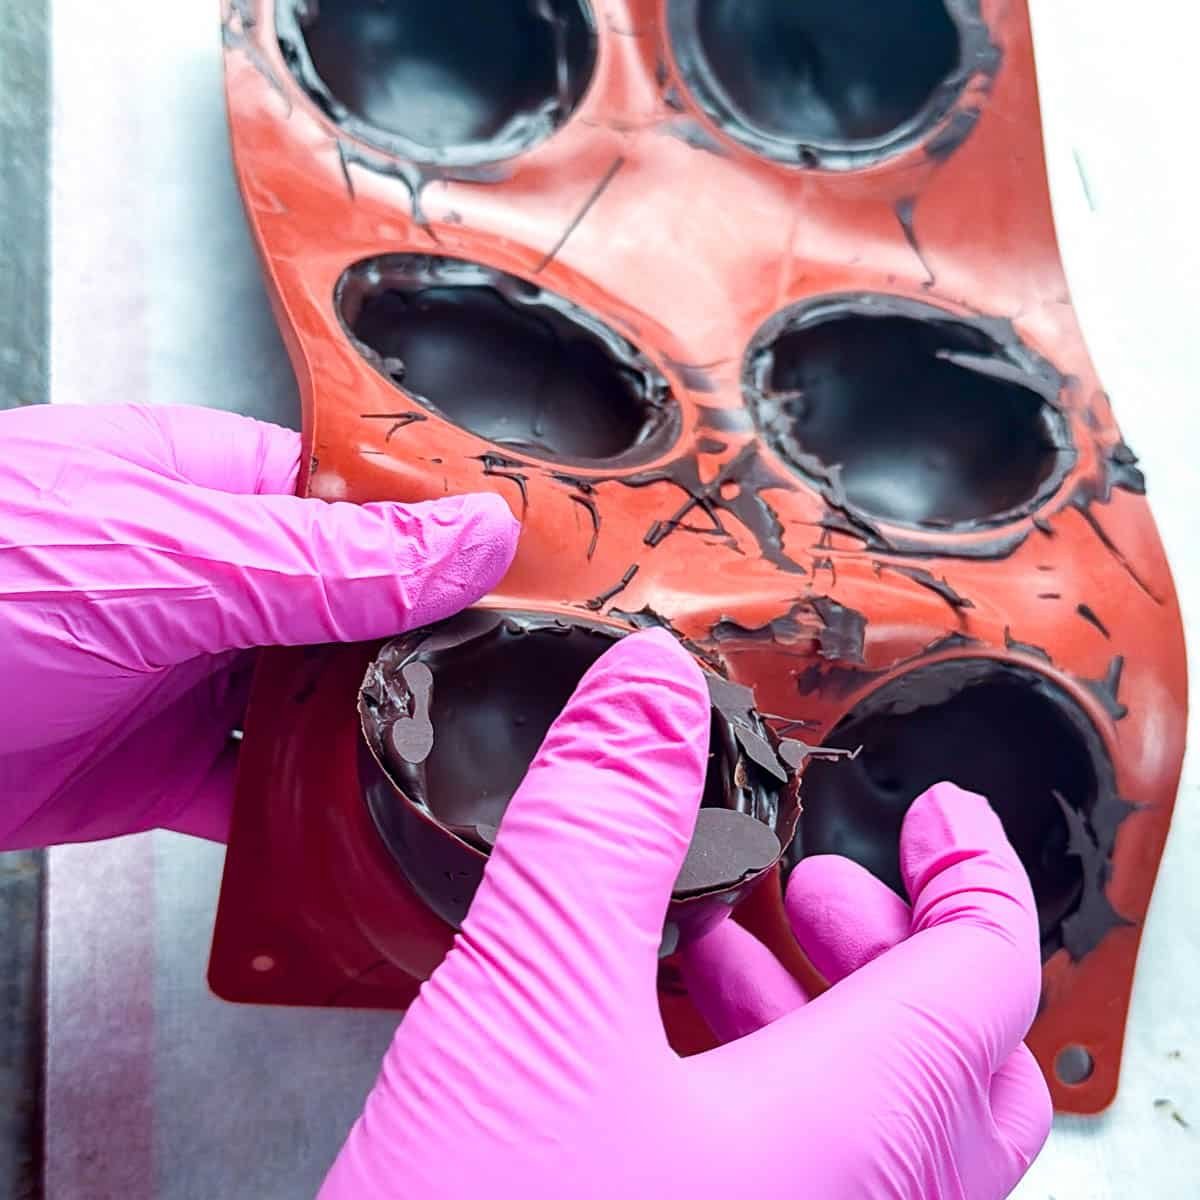
  5. Scrape off the excess chocolate to make a clean edge on the spheres.
  6. Place the chocolates into the fridge for 10 minutes or until the chocolate release from the mold easily. Do not freeze or you can cause condensation stains to appear on the chocolate.
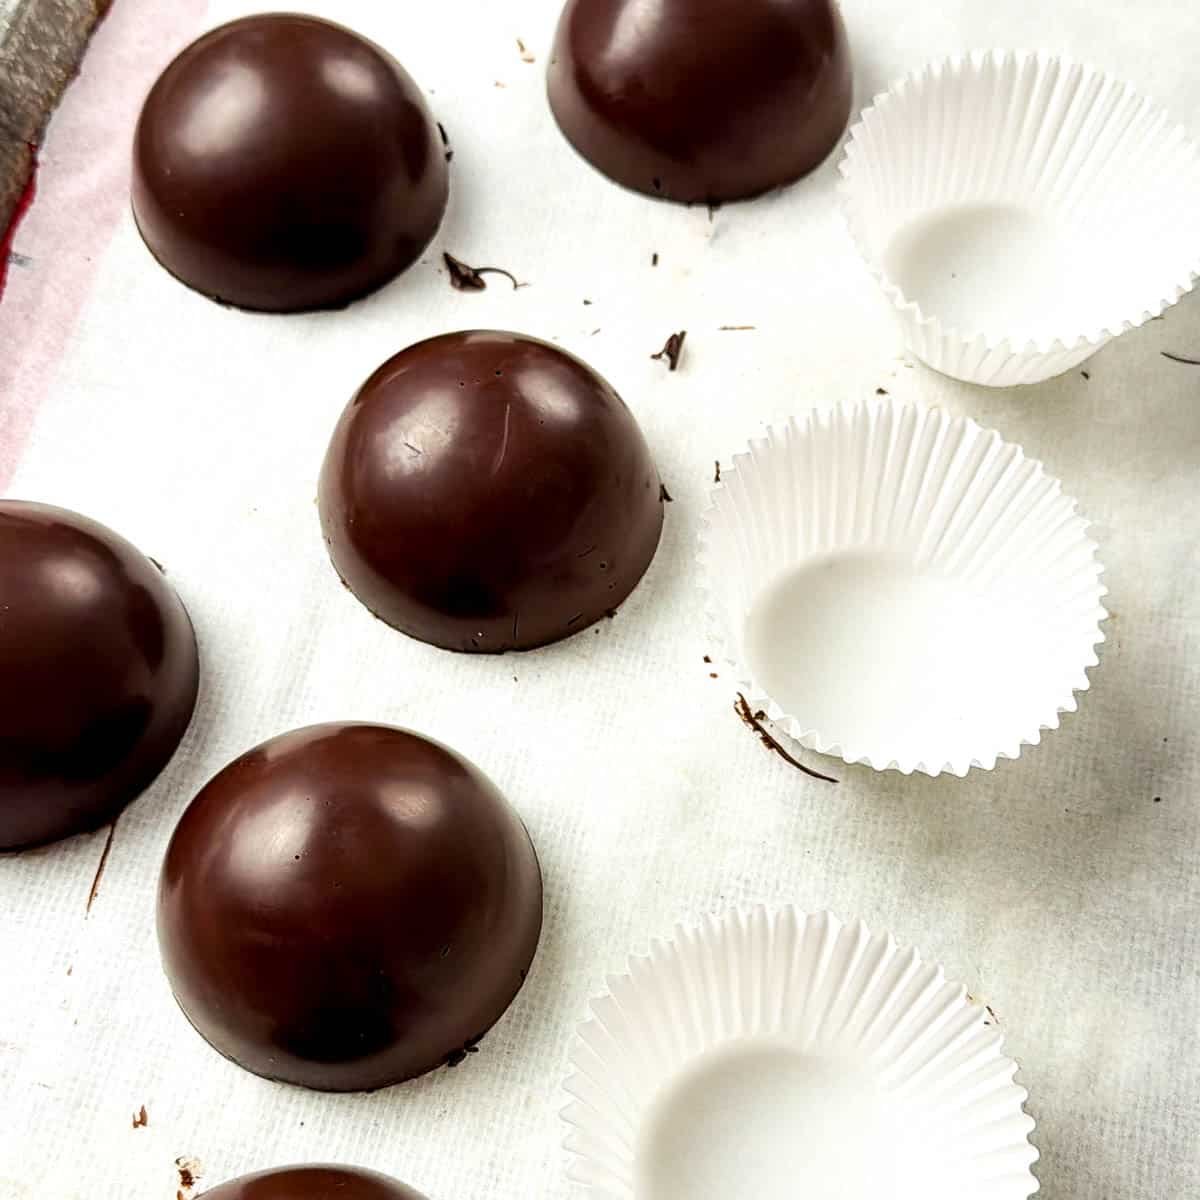
  7. Remove the spheres from the mold.
  8. Melt the edges of each sphere slightly on a hot sheet pan or hot plate and then press together with gloved hands.
  9. Wipe away any excess chocolate and allow to fully set.
  10. You can now paint your spheres or use them as is.

2. Chocolate Sail

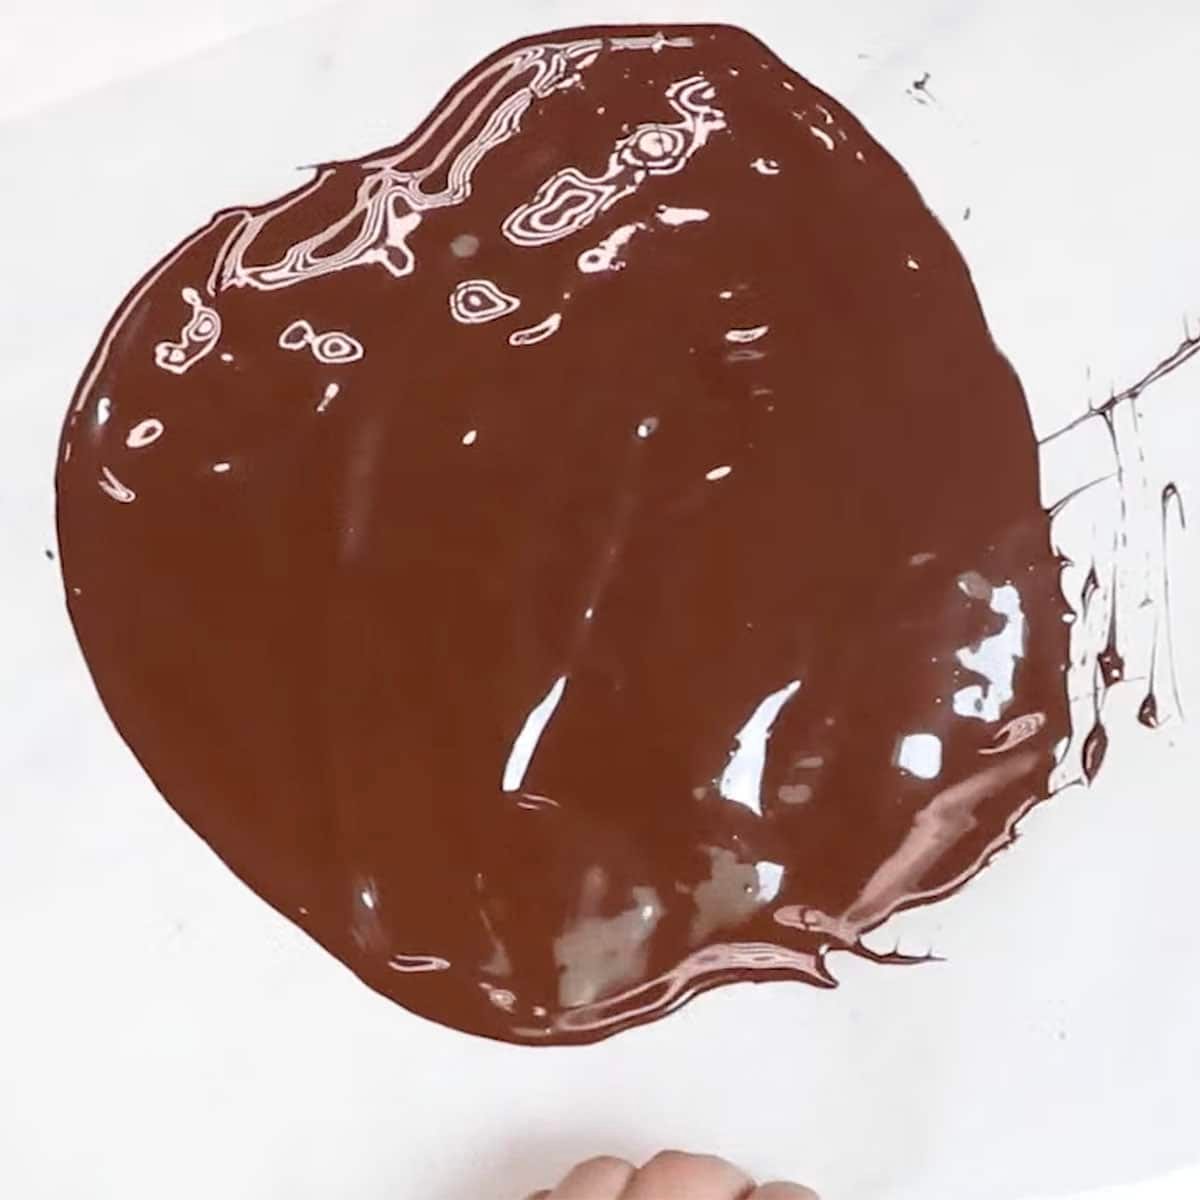
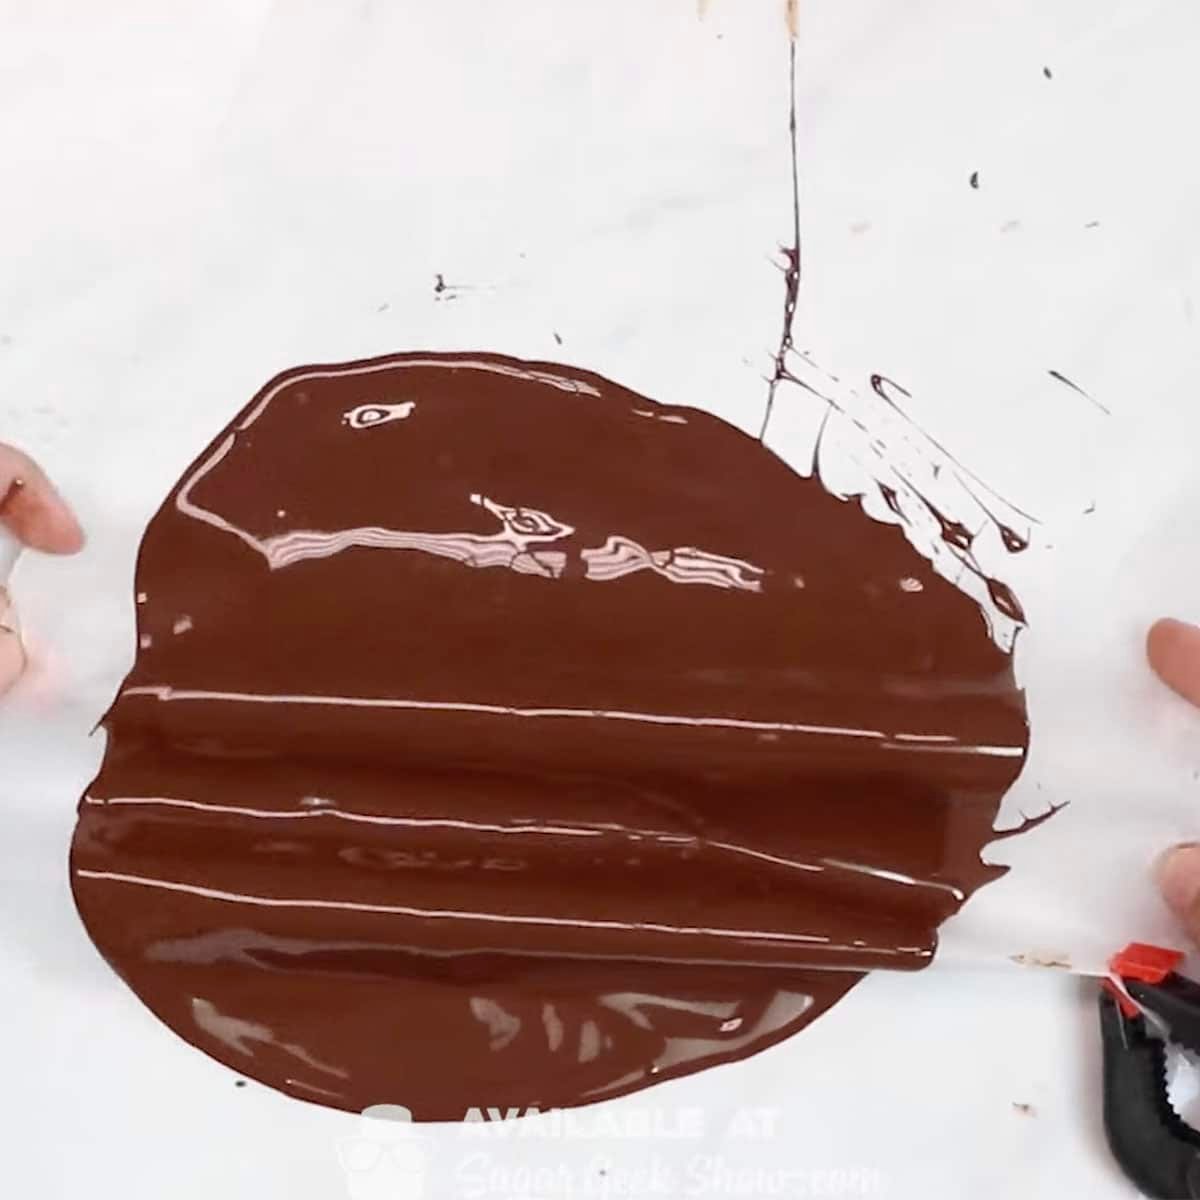
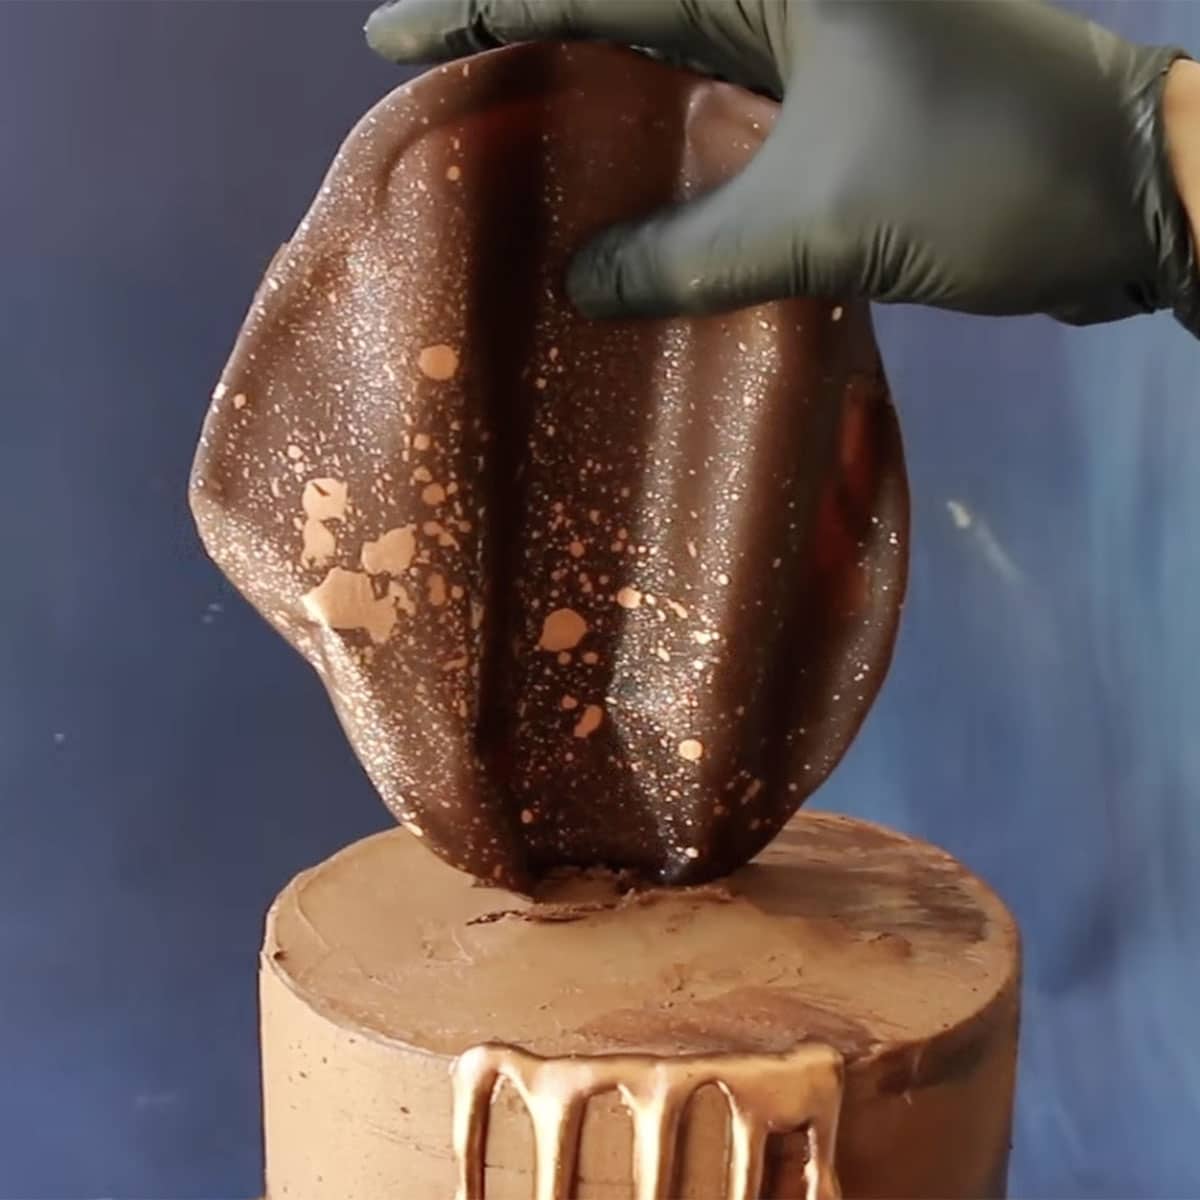
Chocolate sails make a really stunning showpiece at the top of your cakes! All you need is tempered chocolate, a piece of parchment paper, and some clothespins or clips of some sort. This works with tempered chocolate or compound chocolate.

tempered chocolate spread on parchment paper
Screenshot
tempered chocolate being gathered on parchment paper
Screenshot
Screenshot
Screenshot
Screenshot
close up of chocolate sail on top of a cake
Screenshot
  1. Spread a thin layer of tempered chocolate (86ºF) or candy melts onto a piece of parchment paper.
  2. Gather the edges at one side of the parchment paper and clip to secure
  3. Place parchment in the fridge for 10 minutes until set
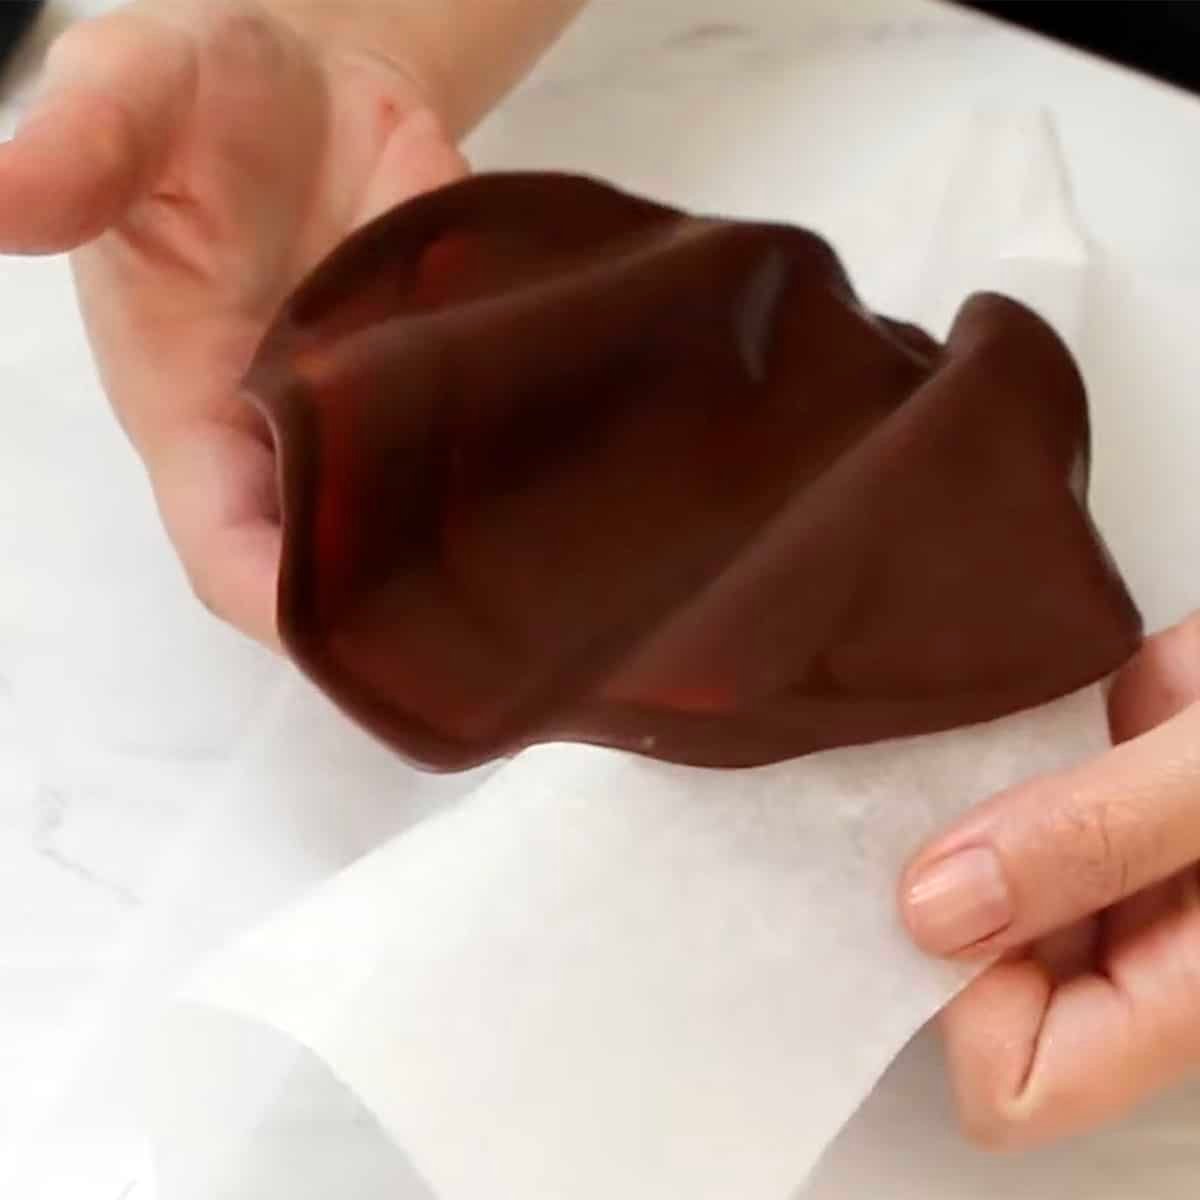
  4. Remove the parchment from the back of the chocolate carefully
  5. Clean up the edges of the chocolate if they are rough with a knife
  6. Now your sail is ready to place on top of your cake!
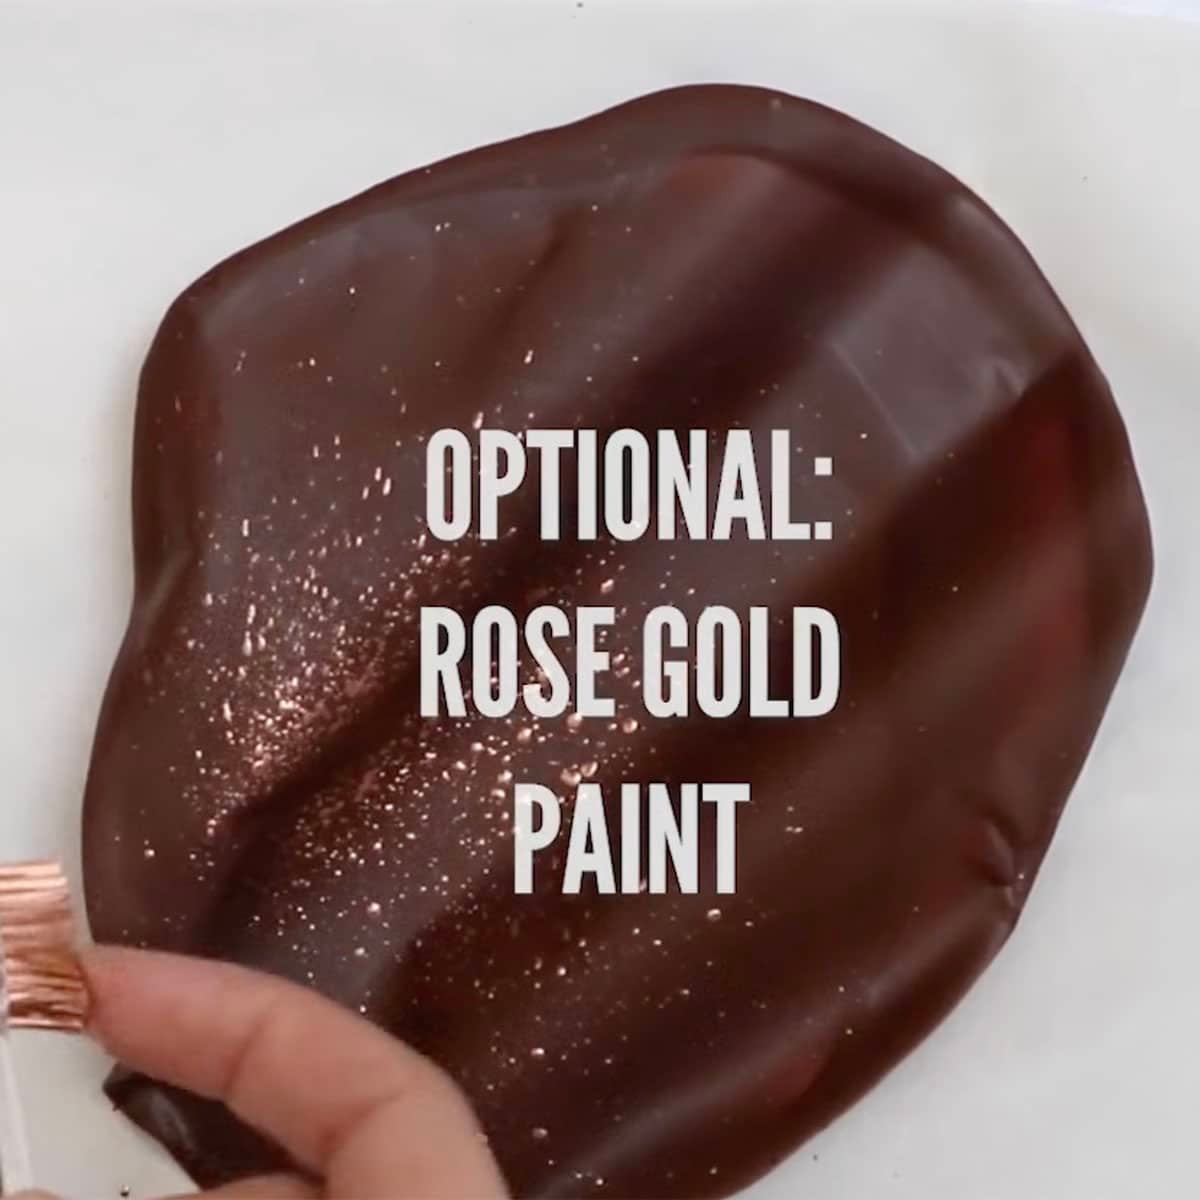
  7. I added some simple metallic splatters to my sail using TMP copper and a bit of Everclear.
  8. Place into the buttercream of your cake.

3. Chocolate Cups

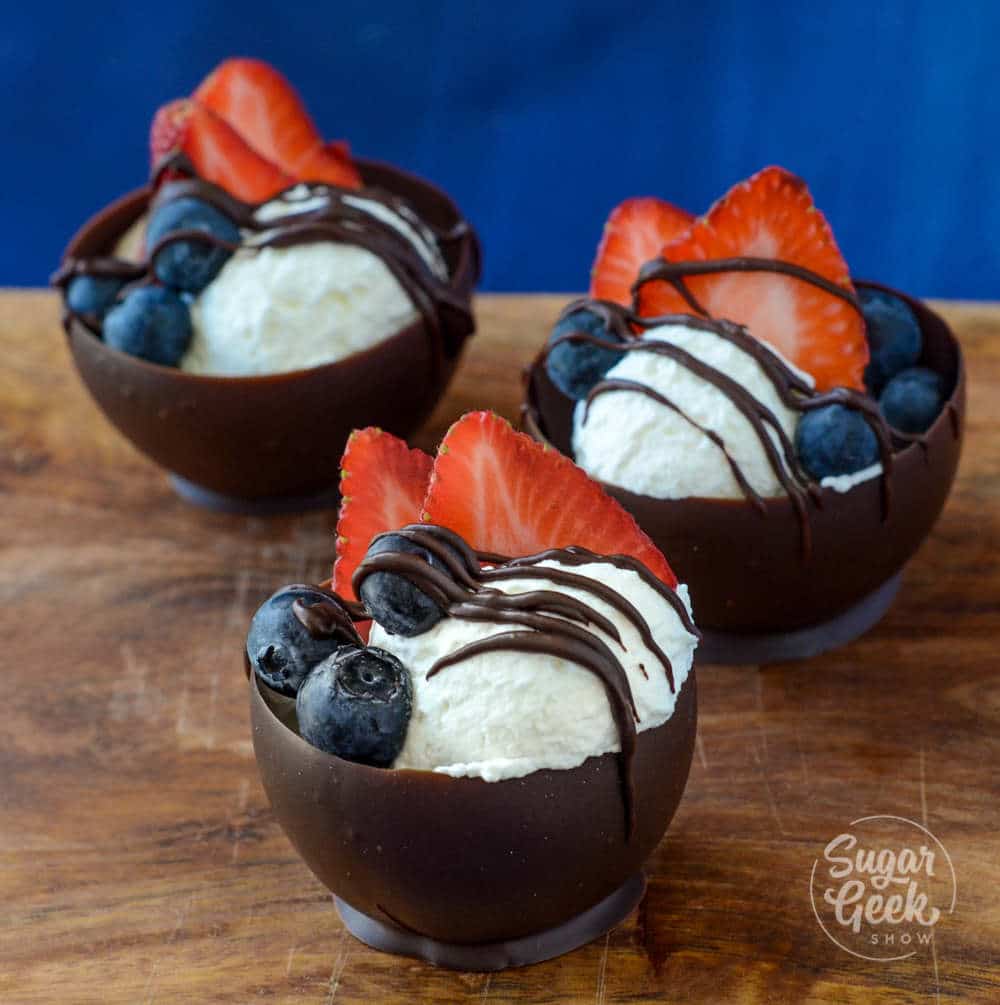
I first learned to make these chocolate cups in pastry school and loved how they turned out! They are a fun way to serve up some chocolate mousse, ice cream or other mini desserts. All you need are some water balloons, parchment paper, and tempered chocolate or candy melts. You don't want to use regular balloons; they are too big, and the chocolate does not release well from them. These small water bomb balloons work really well because they are the perfect shape.

How to make chocolate cup decorations using a water balloon
  1. Blow up your water balloons and tie the ends to secure them.
  2. Place a piece of parchment paper on a cookie sheet to place your cups onto.
  3. Pour your tempered chocolate into a large bowl. The temperature should be 86ºF
  4. Dip your balloon into the chocolate and then onto the parchment paper.
  5. Once you have all your balloons dipped, place the pan into the fridge for 10 minutes or until the chocolate has set.
  6. Pop the balloons with a pin and let the balloon pull away from the chocolate naturally.
  7. Peel off the balloon, and now your cups are ready to fill with delicious treats!

4. Chocolate Honeycomb decoration

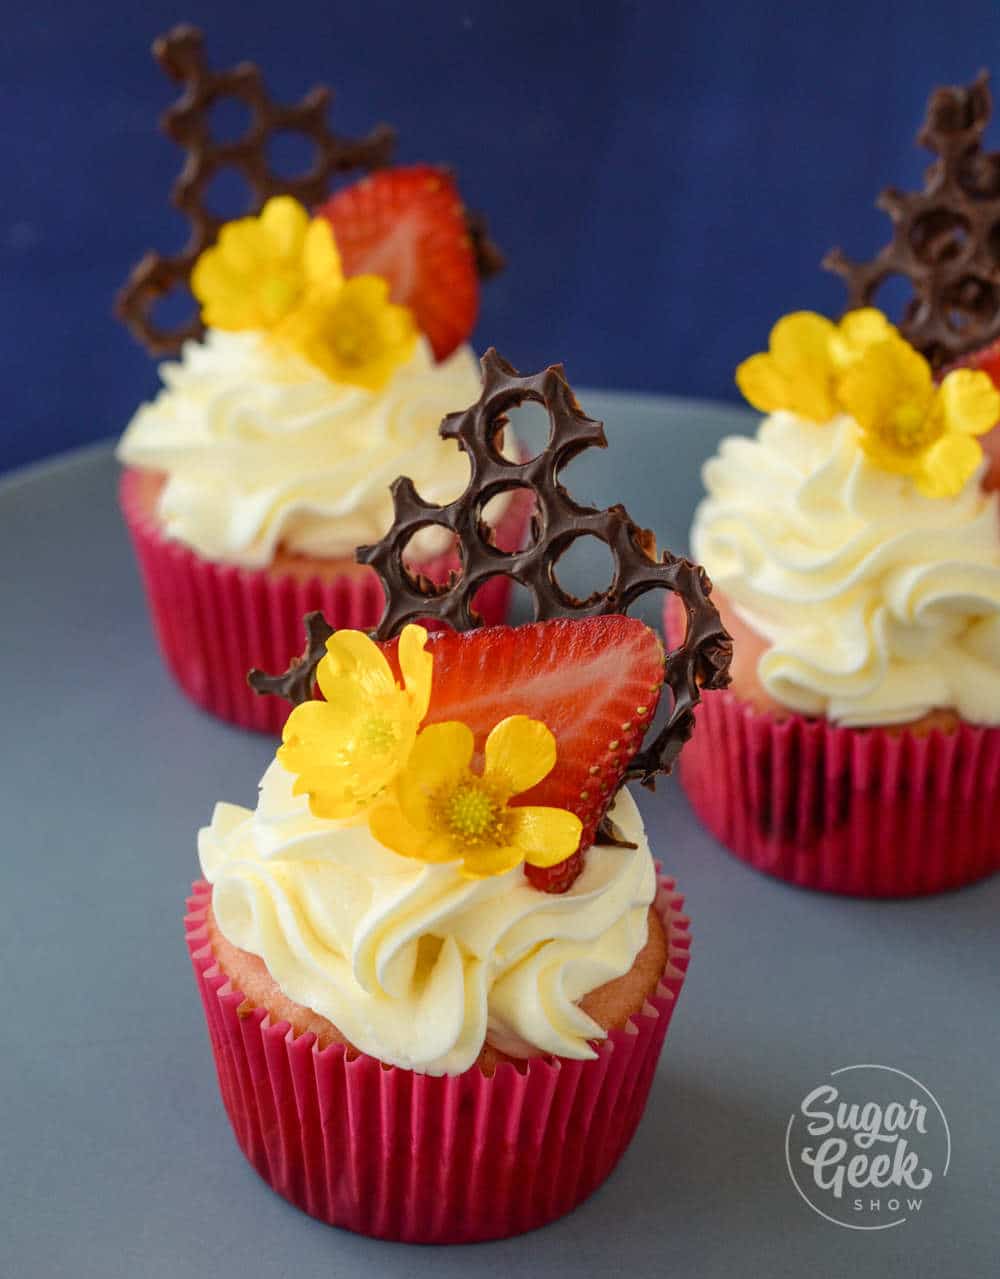
I love how these honeycomb chocolate decorations look on top of cupcakes! All you need is some bubble wrap (washed) and some tempered chocolate or melted candy melts.

How to make chocolate honeycomb decorations
  1. Spread some tempered chocolate (86ºF) or melted candy melts onto your bubble wrap.
  2. Smooth the chocolate out. The thinner you spread it, the more holes that will be visible.
  3. Shake the bubble wrap to make the chocolate settle and smooth out.
  4. Place the bubble wrap into the fridge for 10 minutes until set.
  5. Turn your chocolate upside down and gently pull off the bubble wrap.
  6. Now you can break up your honeycomb into pieces and decorate your desserts!

[optin-monster slug="kggswsvzqcbqjcqfyoir"]

5. Chocolate Butterfly decorations

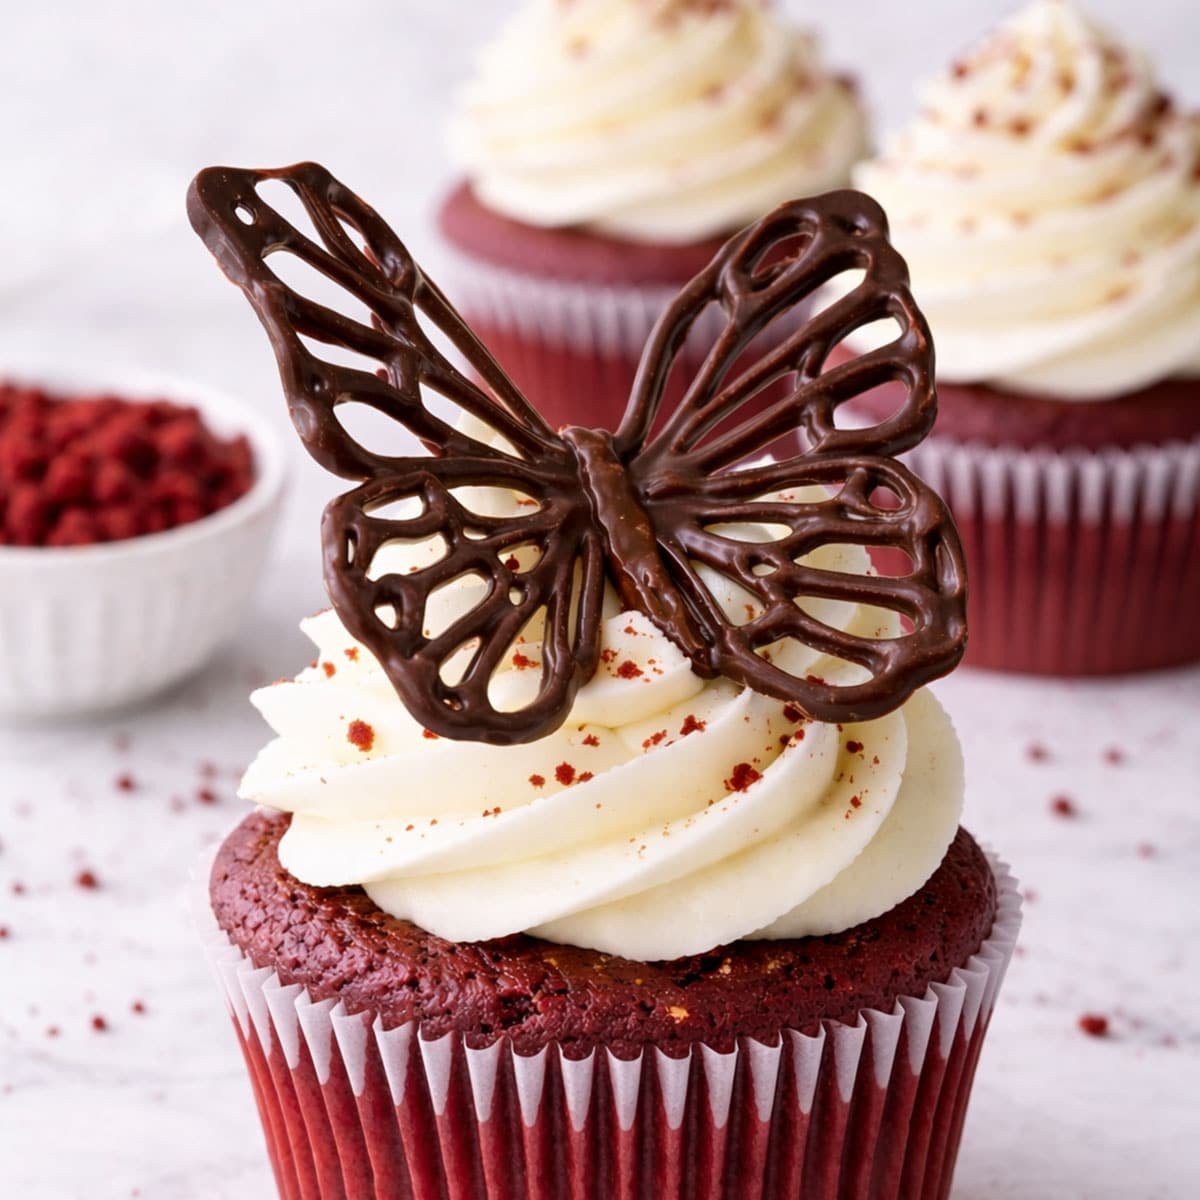
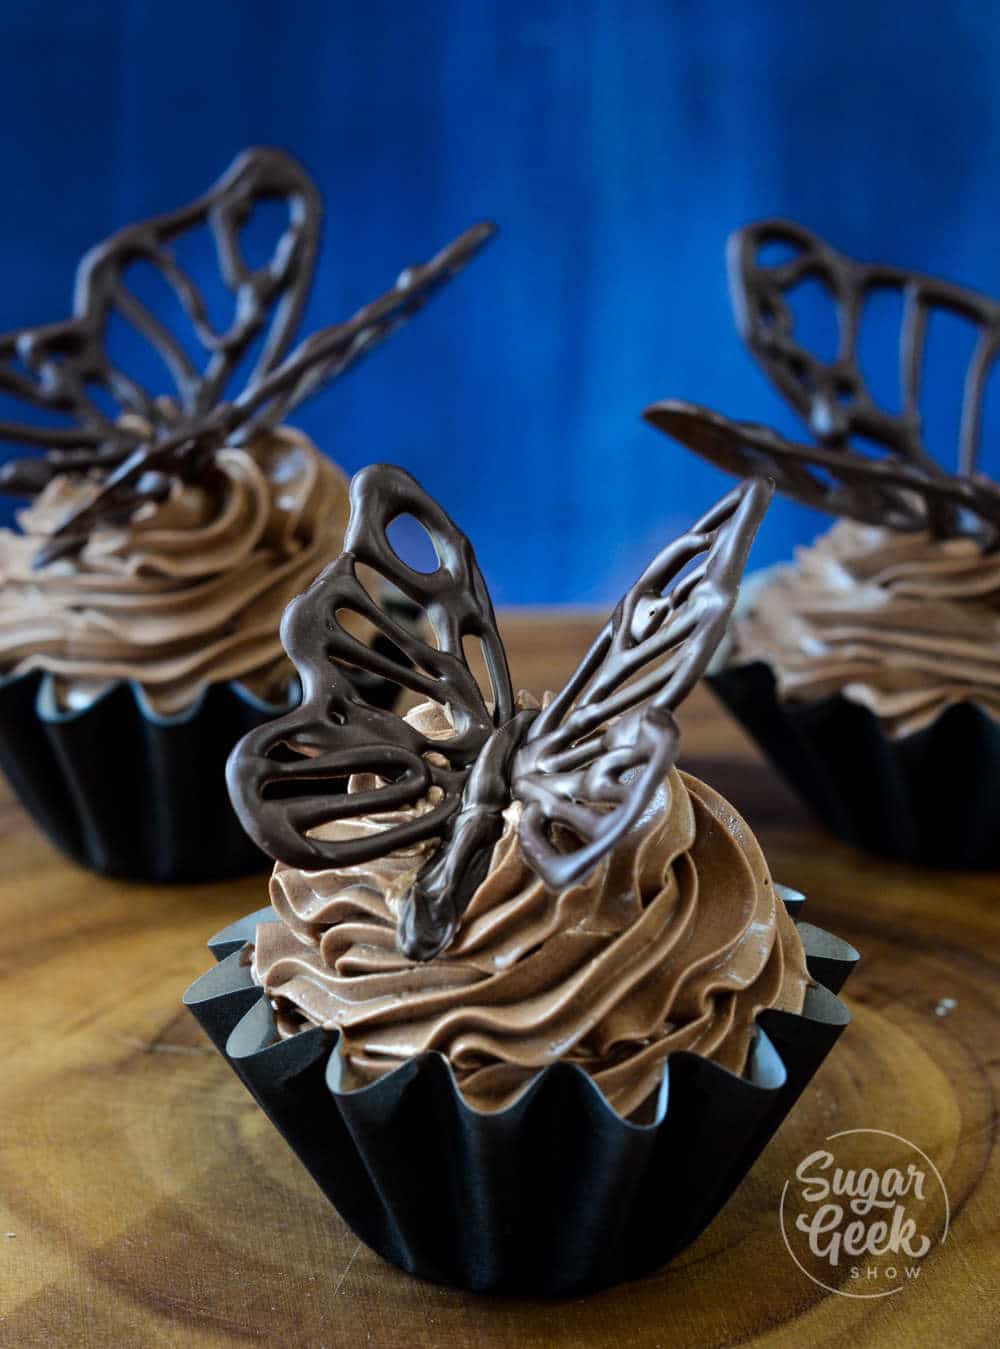
Chocolate butterfly decorations are SO impressive looking on top of your desserts! You can even color the insides with more colored melted chocolate after the outline has set. All you need is my free chocolate butterfly template, some acetate or parchment paper, a piping bag, and a thick book. You can also use this technique with all kinds of decorations. Print out a cool design, put it under your parchment paper, trace, cool, and done!

How to make chocolate butterfly decorations
  1. Place some of your tempered chocolate (86ºF) into a piping bag. Cut the tip of the bag off. Not too big, about the width of a toothpick.
  2. Print out your butterfly template and place your parchment paper or your acetate over the top. I taped mine down onto a cookie sheet keep it from wiggling around and to make it easy to pick up.
  3. Trace the outline of the wings (not the body) with your chocolate.
  4. Place the chocolate in the fridge for 10 minutes to let it set up.
  5. Once your wings are set, carefully remove the wings from the acetate. Fold the acetate in half and place in the middle of a thick book (see video for demo).
  6. Place the wings on either side of the crease and pipe some more chocolate in between the wings to be the body.
  7. Chill once again until the chocolate is set.
  8. Your butterflies are now ready to be placed on cupcakes or a cake!

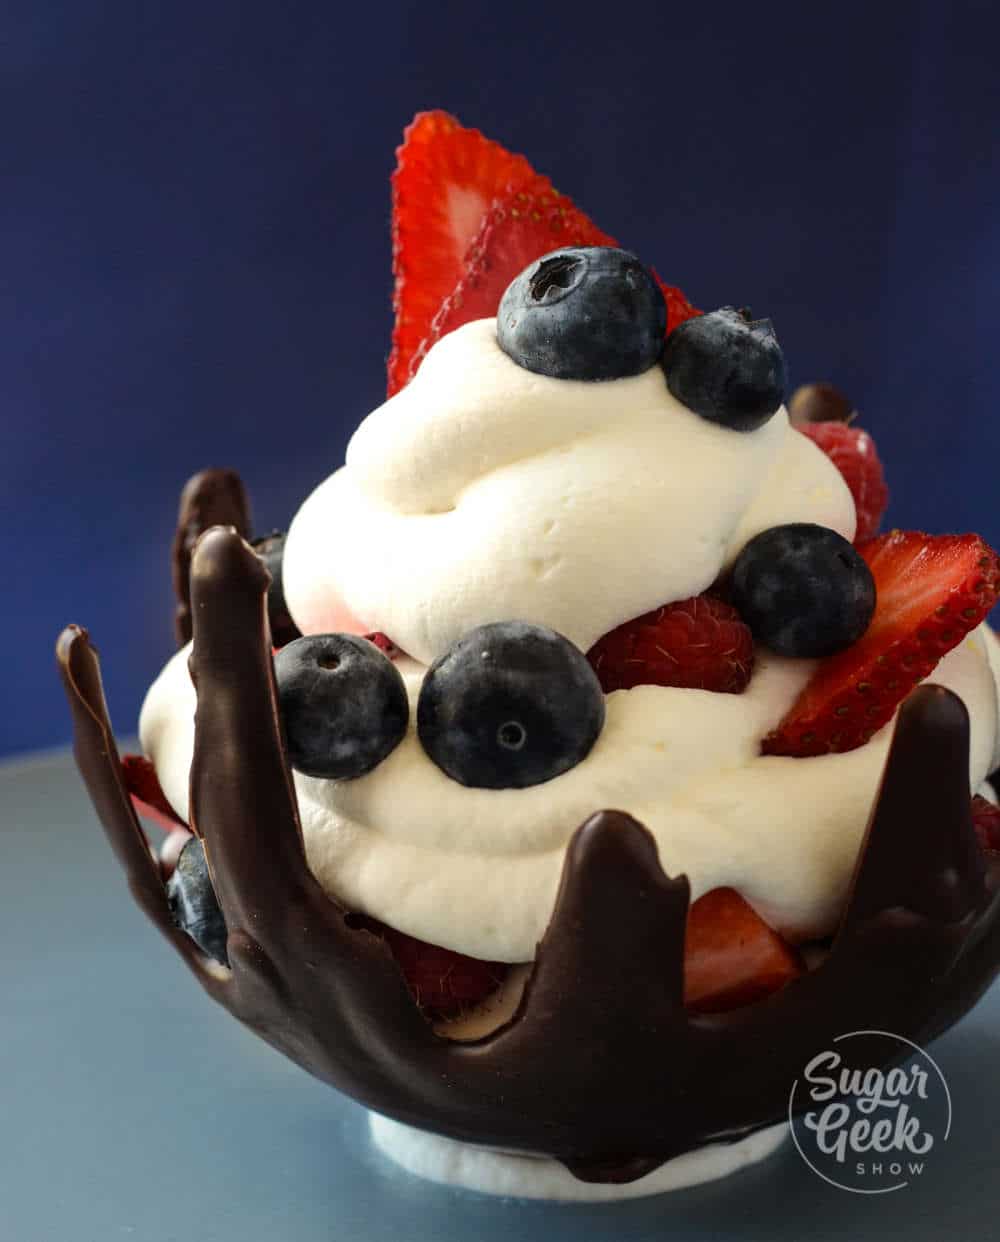
6. Drippy Chocolate Dessert Bowl

This drippy chocolate bowl decoration is a great centerpiece for a dessert table. Fill the inside with heaps of whipped cream and fruit or ice cream and cake! Share the dessert and in the end, you can eat the bowl too!

chocolate bowl
  1. Inflate the small balloon and place it in a bowl or cup upside down to keep it steady.
  2. Place some plastic wrap over the top of the balloon.
  3. Place your tempered chocolate (86ºF) or candy melts into a piping bag and pipe over the top of the plastic wrap.
  4. It's ok to let some of the chocolate drip down the sides.
  5. Place the balloon and the cup into the fridge to set for 10 minutes.
  6. Carefully remove the balloon and plastic wrap from the chocolate.
  7. Your chocolate decoration is now ready to be filled with sweet treats!

I hope you enjoyed learning how to make these chocolate decorations! As always you can ask me questions in the comments if something isn't clear. If you tried this tutorial, let me know!

If you want some more fun chocolate decorations to make, check out this tutorial from Chef Christophe Rull on how to make even 4 easy chocolate decorations!

Recipe

close up of a chocolate butterfly decoration on a red velvet cupcake
Print Recipe
4.94 from 76 votes

How To Temper Chocolate

Easily temper chocolate in the microwave! The easiest way to temper small amounts of chocolate.
Prep Time5 minutes mins
Cook Time5 minutes mins
Course: Dessert
Cuisine: American
Servings: 12 oz
Calories: 144kcal
Author: Liz Marek

Equipment

  • 1 Thermometer

Ingredients

  • 12 oz chocolate
US Customary - Metric

Instructions

Tempering Chocolate Instructions

  • Place your chocolate in a plastic or silicone bowl in the microwave and heat on high for 30 seconds. Then stir
  • Heat again for another 30 seconds, stir, then 15 seconds, stir, then 10 seconds, stir. Make sure your temperature never goes above 90ºF for dark chocolate. 86F for milk chocolate and 84F for white chocolate. DO NOT RUSH THIS
  • If your chocolate is not fully melted then only do another 5 seconds until it is melted
  • Now your chocolate is in temper and ready to use!
  • Check out the video or blog post for ideas on decorating

Video

Notes

To learn more about tempering chocolate, check out Chef Christophe's tutorial on tempering chocolate with cocoa butter and an easy tempering machine. 

Nutrition

Serving: 1ounce | Calories: 144kcal | Carbohydrates: 17g | Protein: 1g | Fat: 10g | Saturated Fat: 6g | Polyunsaturated Fat: 0.3g | Monounsaturated Fat: 3g | Sodium: 5mg | Potassium: 82mg | Fiber: 2g | Sugar: 15g | Calcium: 7mg | Iron: 1mg
Teddy Bear Cake Tutorial

June 17, 2019 Course Preview

Teddy Bear Cake Tutorial

Skill level: Intermediate

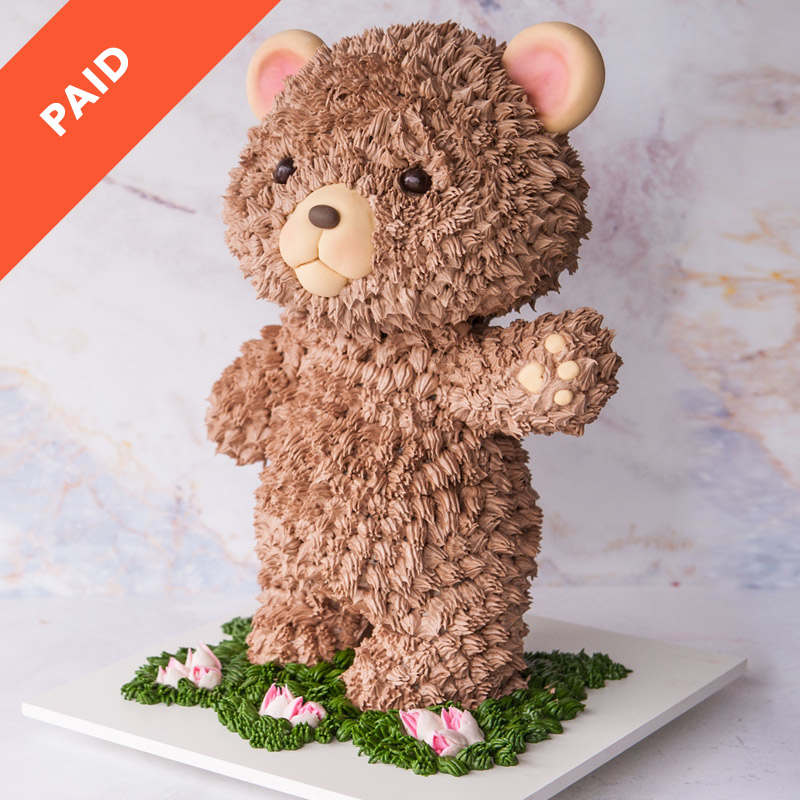
The last of our cake structure basics series, the teddy bear cake is a great example of how to use PVC materials to make a standing figure cake. This cute teddy bear has a furry texture created with buttercream, cake and rice cereal inside along with fondant accents to make an adorable show-stopper for a birthday party, special occasion or baby shower!

1:21:58 Minutes of Instruction

What You Will Learn

  • Learn how to create a textured teddy bear cake out of buttercream
  • How to make a standing animal cake structure
  • Learn how to make a buttercream fur texture
  • Scaling and sculpting

Tutorial Chapters

  1. Tools and materials 0:39
  2. Setting the scale 12:14
  3. Cutting PVC and adjusting 18:47
  4. Assembling 28:17
  5. Adding rice cereal 43:23
  6. The chocolate base of the body48:07
  7. Stacking cake of the body49:04
  8. Trimming cake of the body51:50
  9. The chocolate base 54:36
  10. Stacking cake of the head55:25
  11. Trimming cake of the head56:48
  12. The arms 59:23
  13. The ears 1:04:51
  14. The nose 1:07:51
  15. The fur 1:11:53
  16. Finishing the ears 1:18:01
  17. Finishing the eyes 1:18:41
  18. The tail 1:19:11
  19. The paws 1:19:41
  20. Finishing the board 1:20:08

Downloads

Materials List

Bear Reference Image

Teddy Bear Cake Tutorial

June 15, 2019 Paid Video

Teddy Bear Cake

Skill level: Intermediate

The last of our cake structure basics series, the teddy bear cake is a great example of how to use PVC materials to make a standing figure cake. This cute teddy bear has a furry texture created with buttercream, cake and rice cereal inside along with fondant accents to make an adorable show-stopper for a birthday party, special occasion or baby shower!

1:21:58 Minutes of Instruction

What You Will Learn

  • Learn how to create a textured teddy bear cake out of buttercream
  • How to make a standing animal cake structure
  • Learn how to make a buttercream fur texture
  • Scaling and sculpting

Tutorial Chapters

  1. Tools and materials 0:39
  2. Setting the scale 12:14
  3. Cutting PVC and adjusting 18:47
  4. Assembling 28:17
  5. Adding rice cereal 43:23
  6. The chocolate base of the body48:07
  7. Stacking cake of the body49:04
  8. Trimming cake of the body51:50
  9. The chocolate base 54:36
  10. Stacking cake of the head55:25
  11. Trimming cake of the head56:48
  12. The arms 59:23
  13. The ears 1:04:51
  14. The nose 1:07:51
  15. The fur 1:11:53
  16. Finishing the ears 1:18:01
  17. Finishing the eyes 1:18:41
  18. The tail 1:19:11
  19. The paws 1:19:41
  20. Finishing the board 1:20:08

Downloads

Materials List

Bear Reference Image

strawberry fault line cake

June 11, 2019 Free Tutorials

Strawberry Fault Line Cake Tutorial

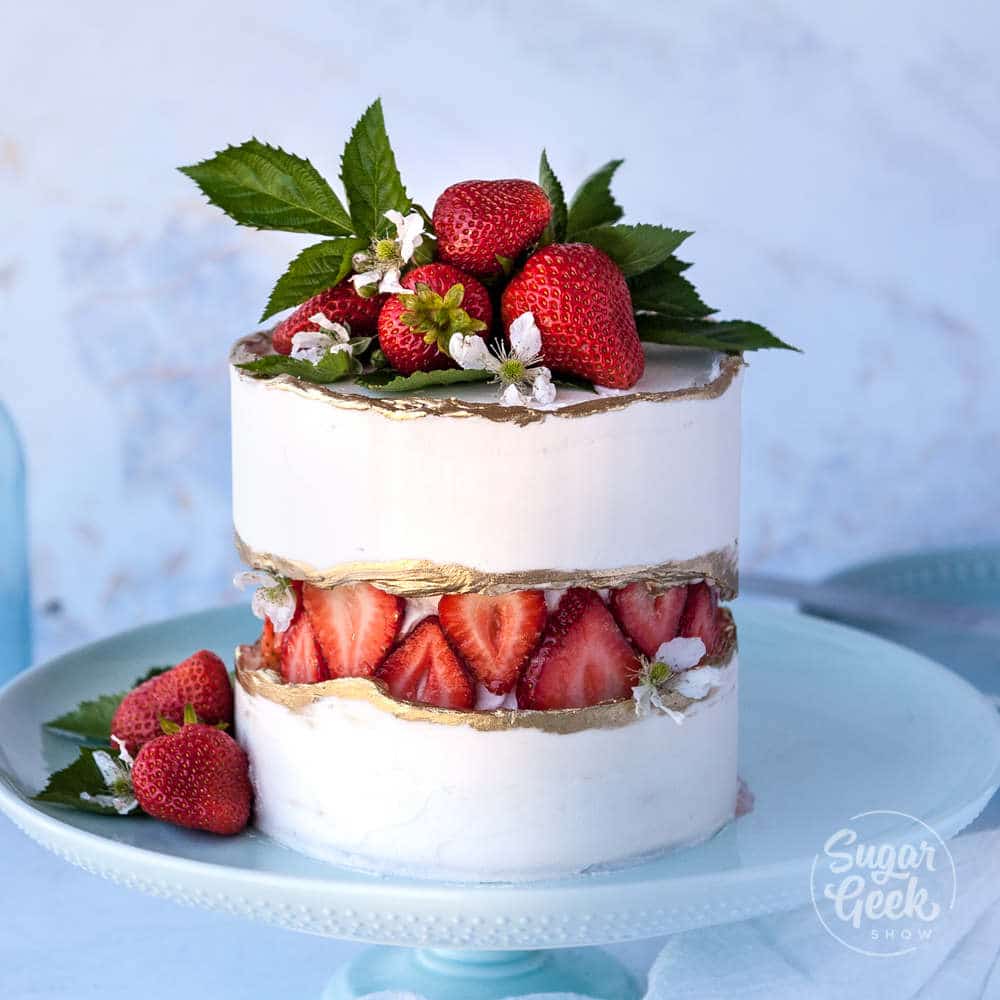
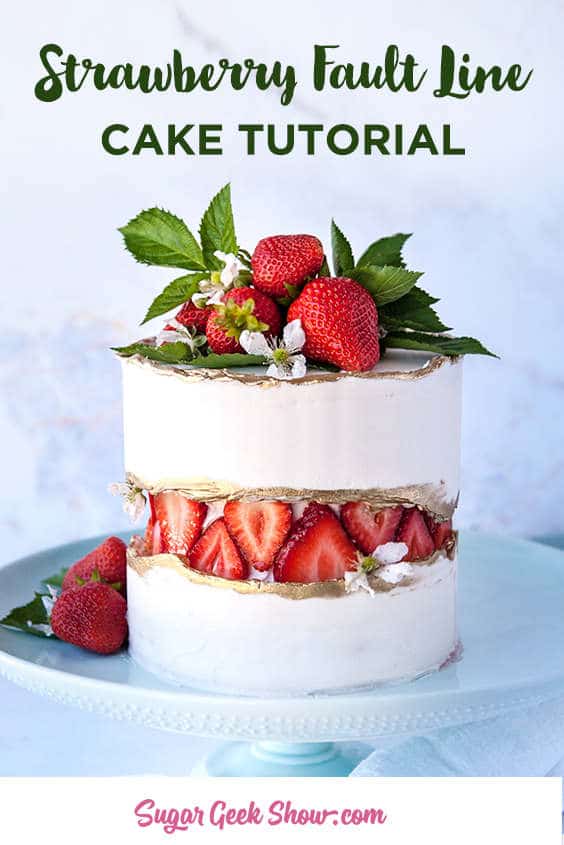
How to make a trendy fault line cake with fresh strawberries and buttercream frosting

Fault line cakes are all the rate right now on social media. There have already been so many creative interpretations of this theme from sprinkles to flowers! One of the best things about this cake trend is that it does allow for so much creativity but the basic steps for creating a fault line cake are the same.

Fault lines, drips and fully sculpted designs are all covered in my online cake decorating classes.strawberry fault line cake

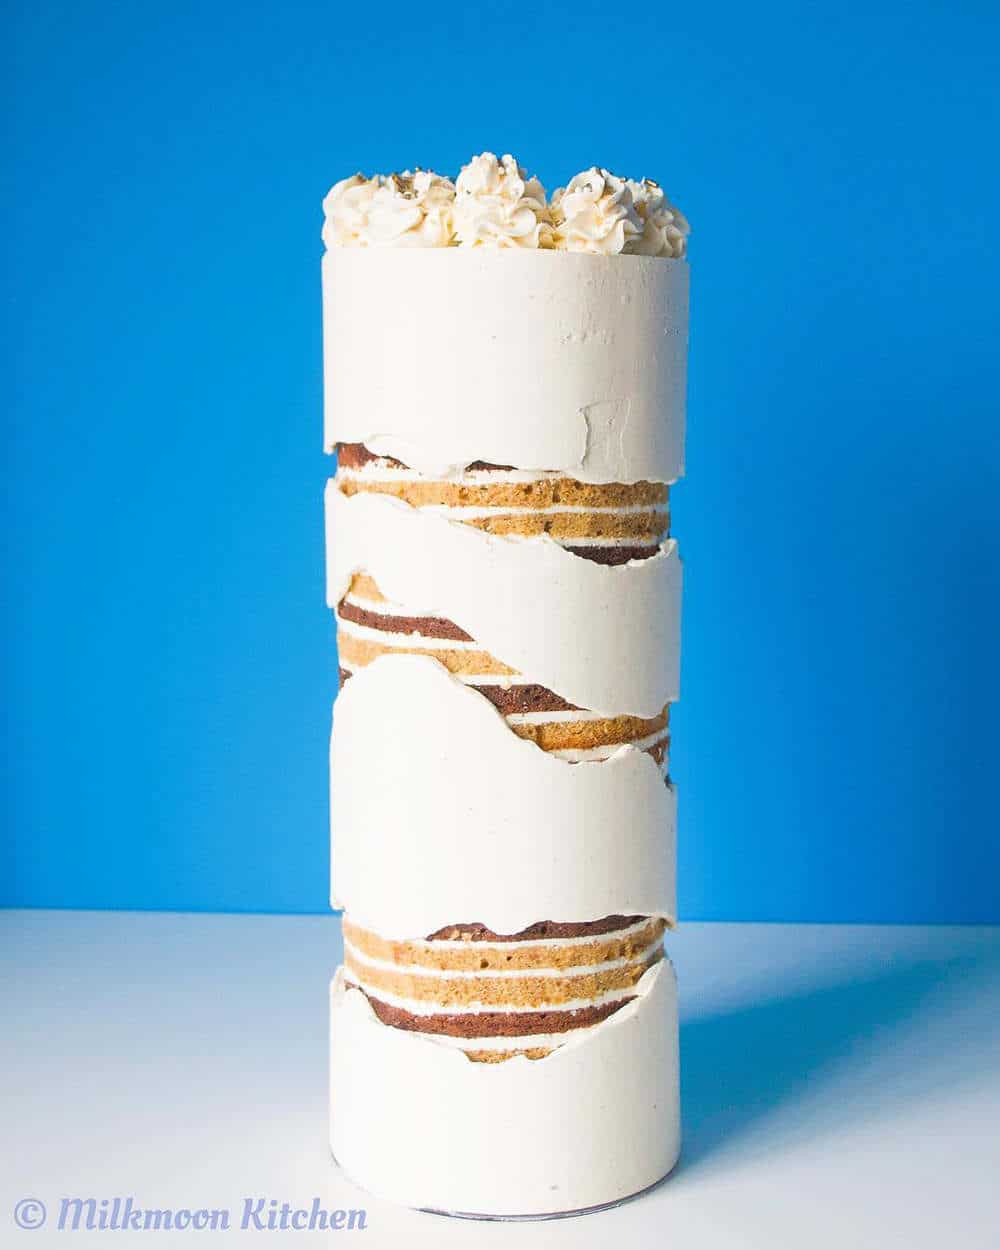
As far as I can tell, this is the earliest version of the fault line cake, created by Milk Moon Kitchen on Instagram. She's been making these beauties since March of 2018.

buttercream fault line cake by milkmoon kitchen

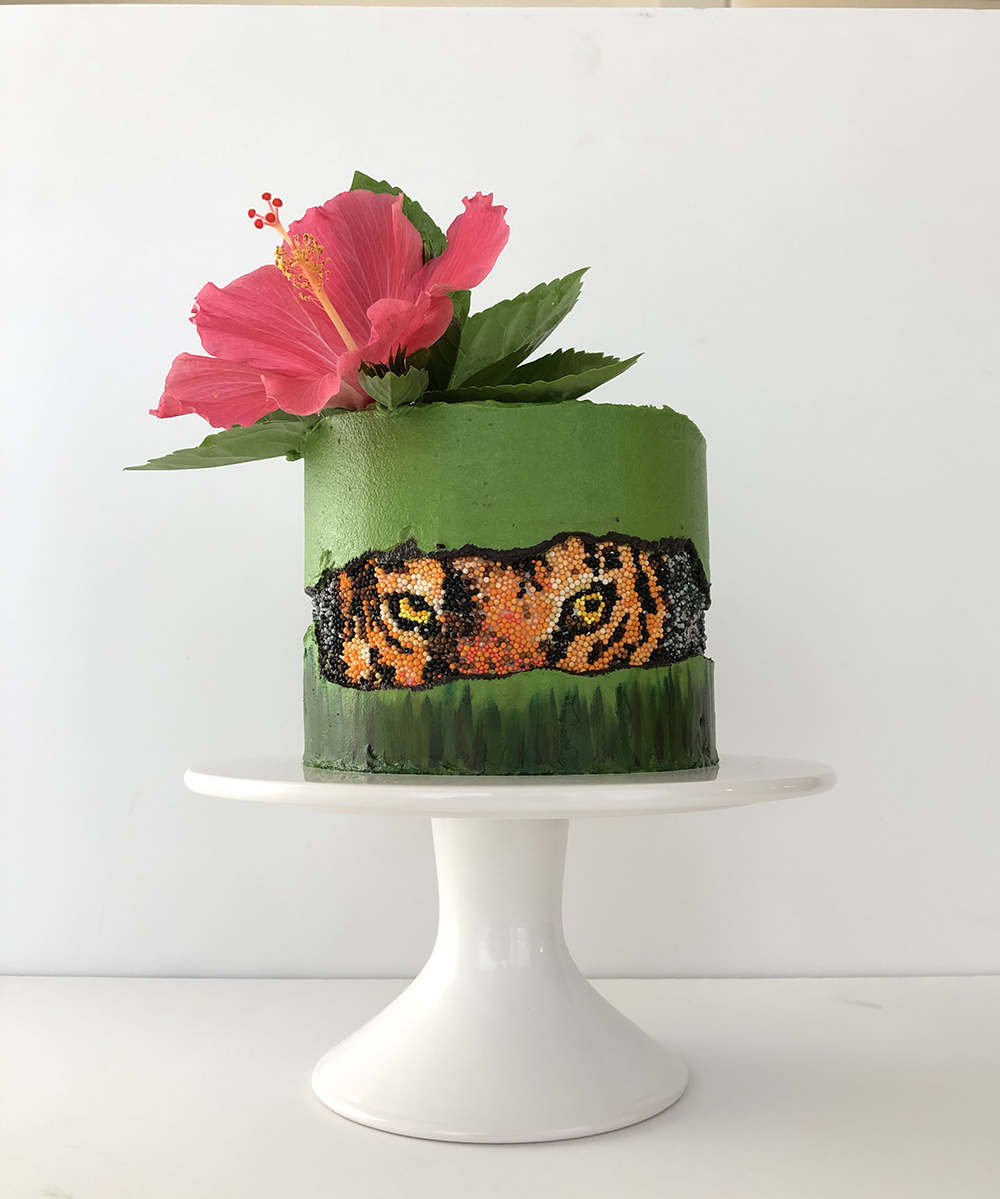
Now, this trend is really taking off and we're seeing all kinds of super creative versions like this amazing tiger sprinkles cake from Susie Makes. She hand-placed each of those sprinkles onto wafer paper brush with piping gel to make the tiger pattern! Then wrapped the paper around the cake before applying the final coat of buttercream. Amazing work!

sprinkles tiger fault line cake

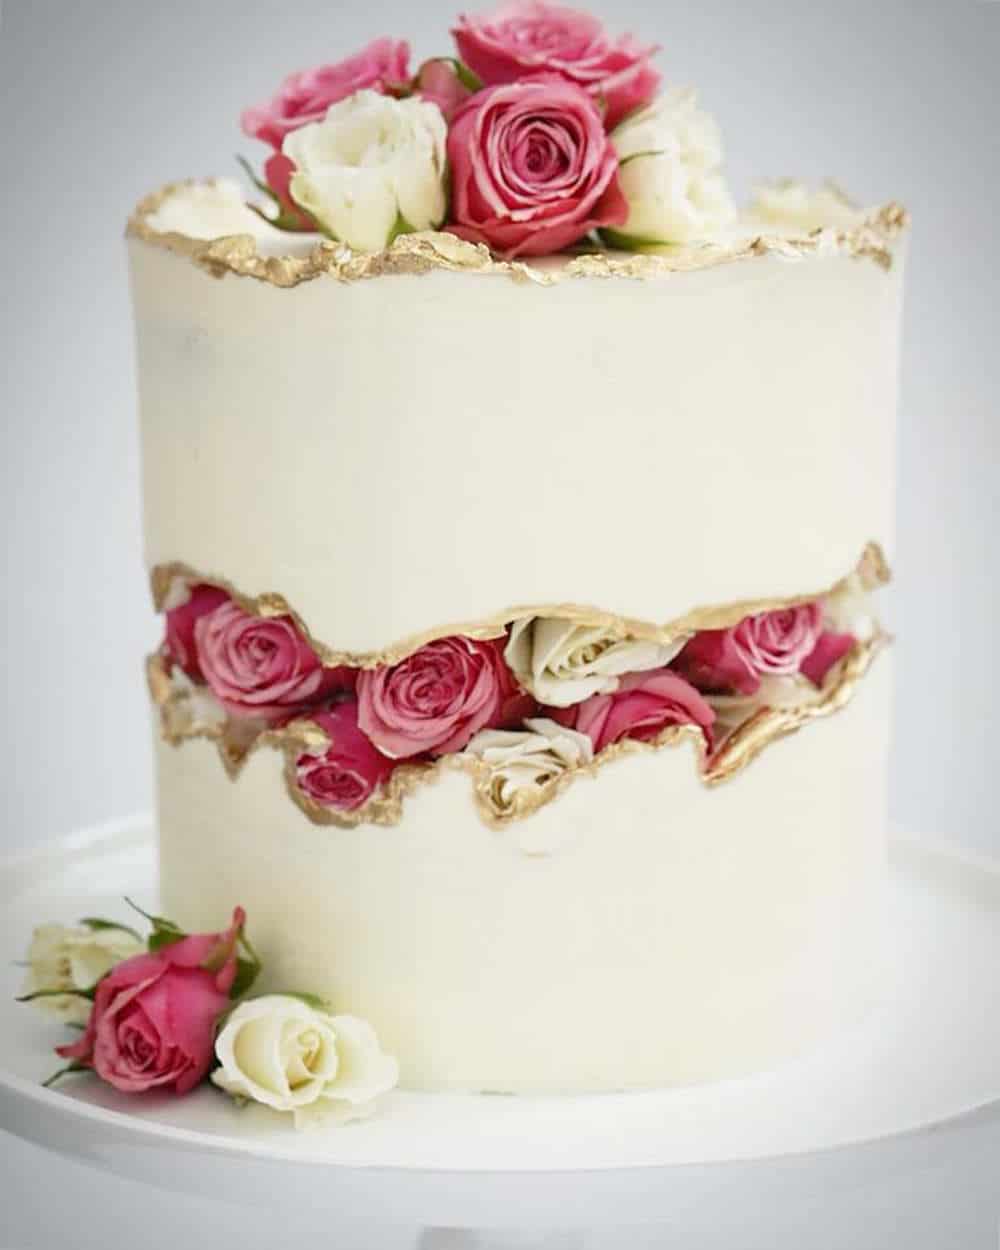
Or this stunning rose fault like cake from Cutely Made. The creator states that this cake was made by placing a 4" styrofoam cake dummy between two 6" cakes. The roses were then pushed into the styrofoam and the buttercream frosted over the top to create the fault line cake. Don't worry, roses are edible and were prepared in a food-safe way.

rose fault line cake

The possibilities really are endless if you think about it!

Today I'm going to show you how to make my version of the fault line cake using fresh strawberries! A total no-brainer for a delicious and beautiful cake for summer.

How to keep berries fresh

Whenever you are using fresh fruit in a cake, you have to take some precautions to make sure that your fruit doesn't mold quickly. I think we've all experienced purchasing a box of fresh fruit from the store that looks great one day and the next it's all moldy.

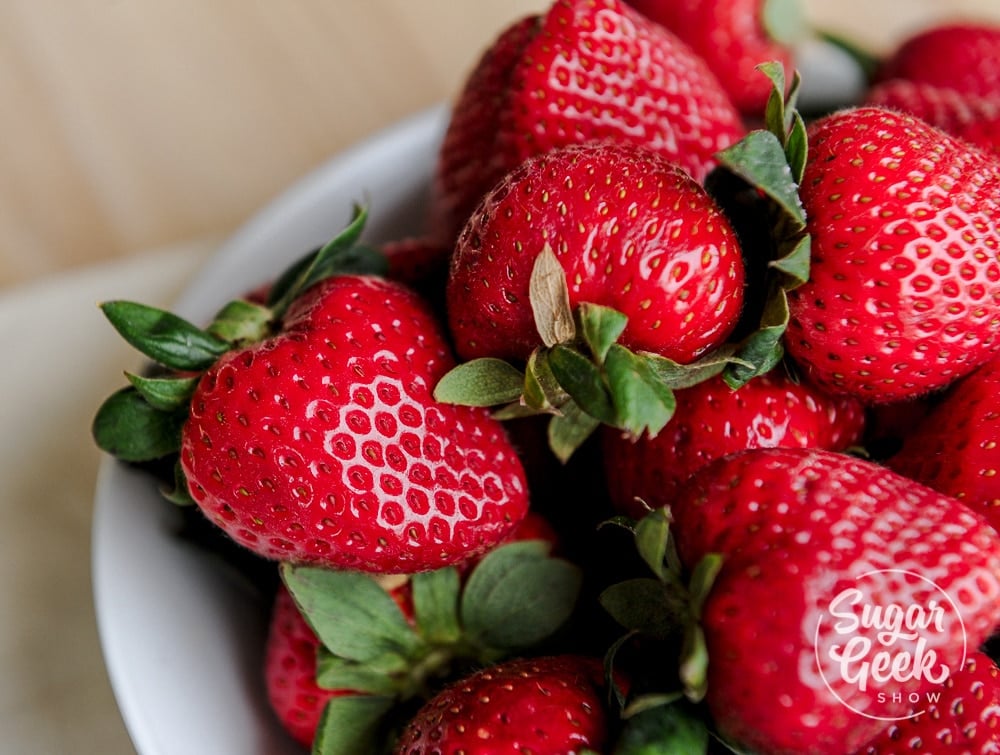
fresh strawberries in strawberry cake

To prevent your fruit from molding in the cake, you're going to give it a little bath. Combine 4 cups of cool water and ½ cup of white vinegar in a large bowl. Add in your fresh fruit and let soak for about 5 minutes. Rinse your berries under cool water in a colander and then lay on a paper towel to dry.

The vinegar bath does not make your berries taste like vinegar so don't worry about that. It will, however, extend the life of your berries and kill off any mold that is lurking around the corner.

How to stack and fill your fault line cake

The first step to making the fault line cake is to prep the cake. I am using my fresh strawberry cake but you could use any cake that you like. I have two 6" cake layers and one 4" cake layer. Each cake layer is 2" tall. My cakes have already been chilled and I have trimmed off the brown edges on the top, sides and bottom. If you want to know more about preparing a cake for decorating, check out my video on how to make your first cake.

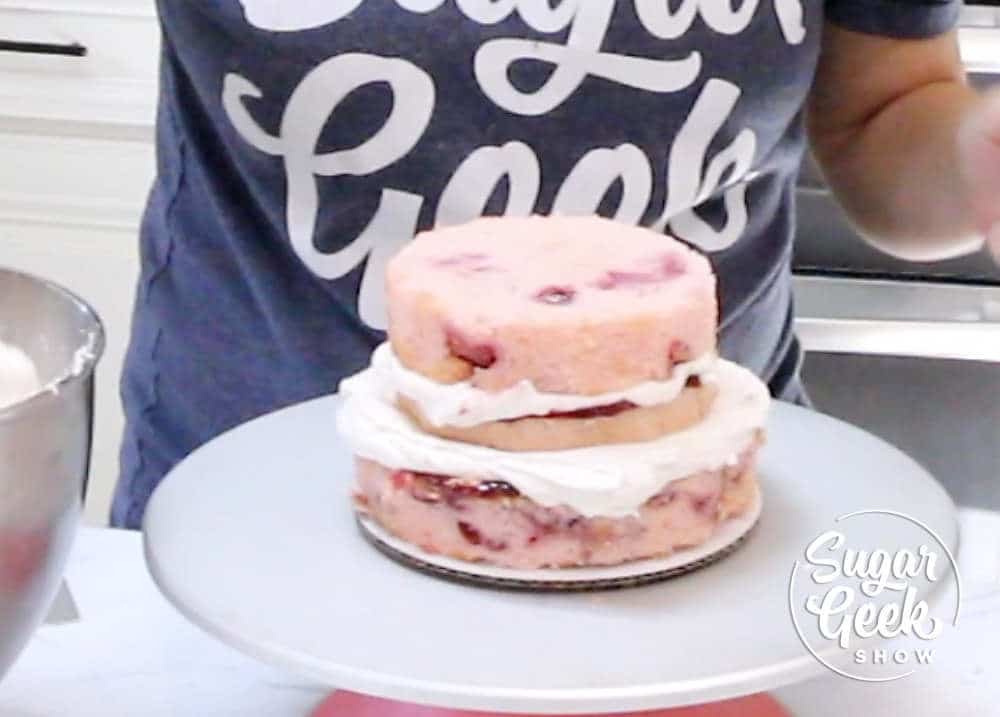
Start by stacking your first 6" cake on a cake board. Add a layer of strawberry puree (if you prefer) then cover with a layer of easy buttercream. I decided to slice my 4" cake layer in half to make it a bit taller. I filled it with buttercream and strawberry puree as well.

strawberry fault line cake tutorial

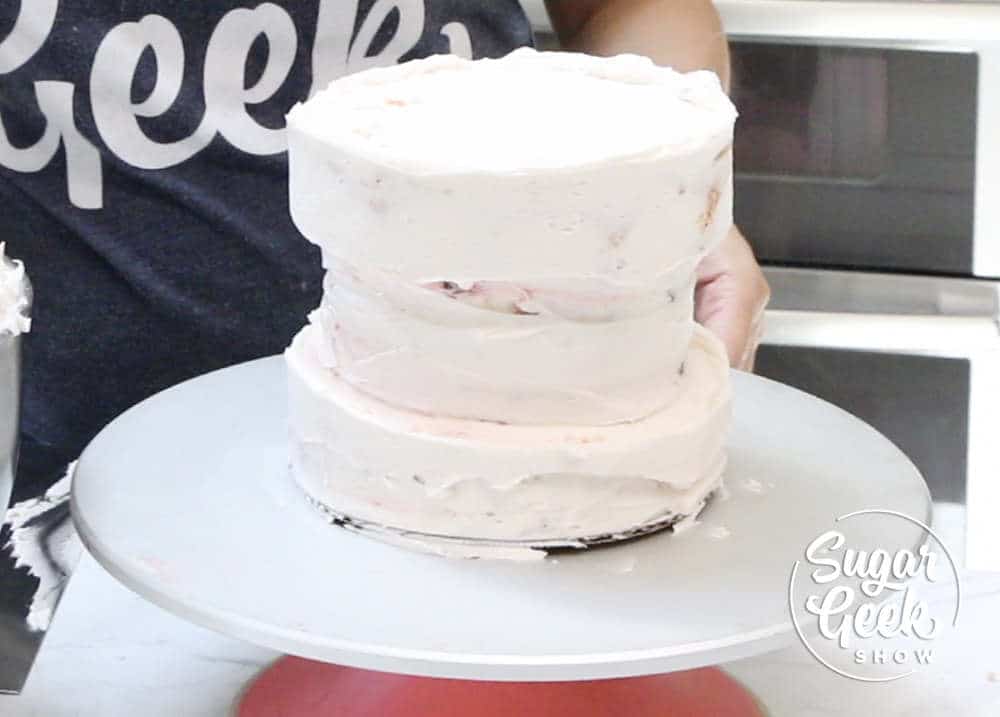
Now let's do a quick crumb coat of buttercream before we move onto the next layer of cake. You can decide to chill the cake at this point if you feel like your cake is too soft and moving around a lot but I went ahead and pushed on to the next step.

Stack the last 6" cake layer on top of the 4" cake layer and crumb coat. Place the whole cake in the freezer for 20 minutes to let the cake firm up.

fault line cake tutorial

While the cake is chilling, slice up some medium sized strawberries. You can also use other types of fruits!

Let's also prepare our fruit glaze. I'm using apricot jam and have watered it down a bit to make it thinner. This is a technique I learned in pastry school to glaze all sliced fruits to keep them from drying out and keep them looking shiny and beautiful!

How to create the fault line look with buttercream

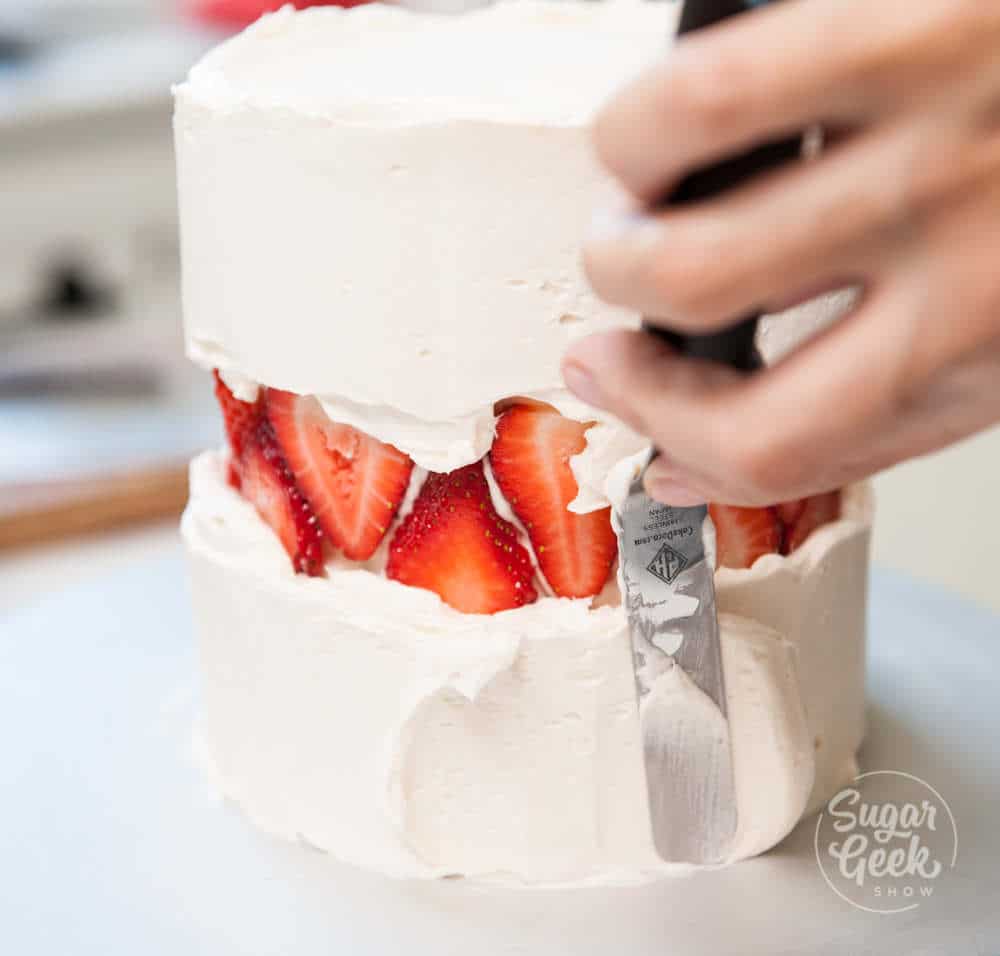
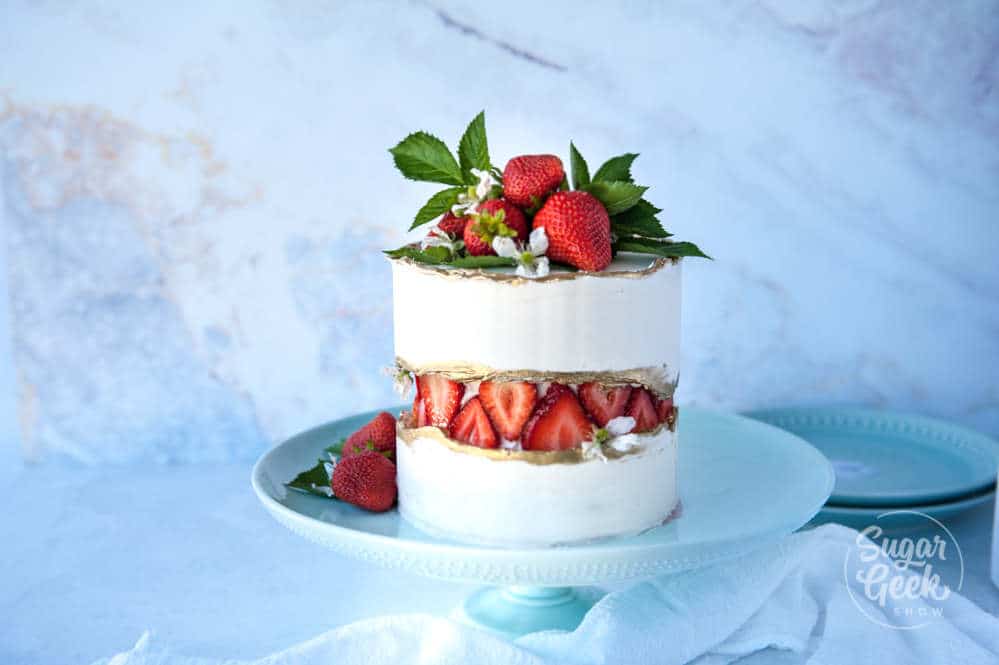
Once the cake is chilled, add another thin layer of buttercream to the center of the cake so you can push in the strawberries easily. Press your strawberries into the soft buttercream. Alternating them so that they fit snugly next to each other.

Now let's start adding our buttercream. Add some to your top layer and smooth it out nice and flat. Then add some buttercream to the sides of the cake but don't cover your strawberries. You want to keep the buttercream nice and thick so you don't scrape into your strawberries.

fault line cake tutorial

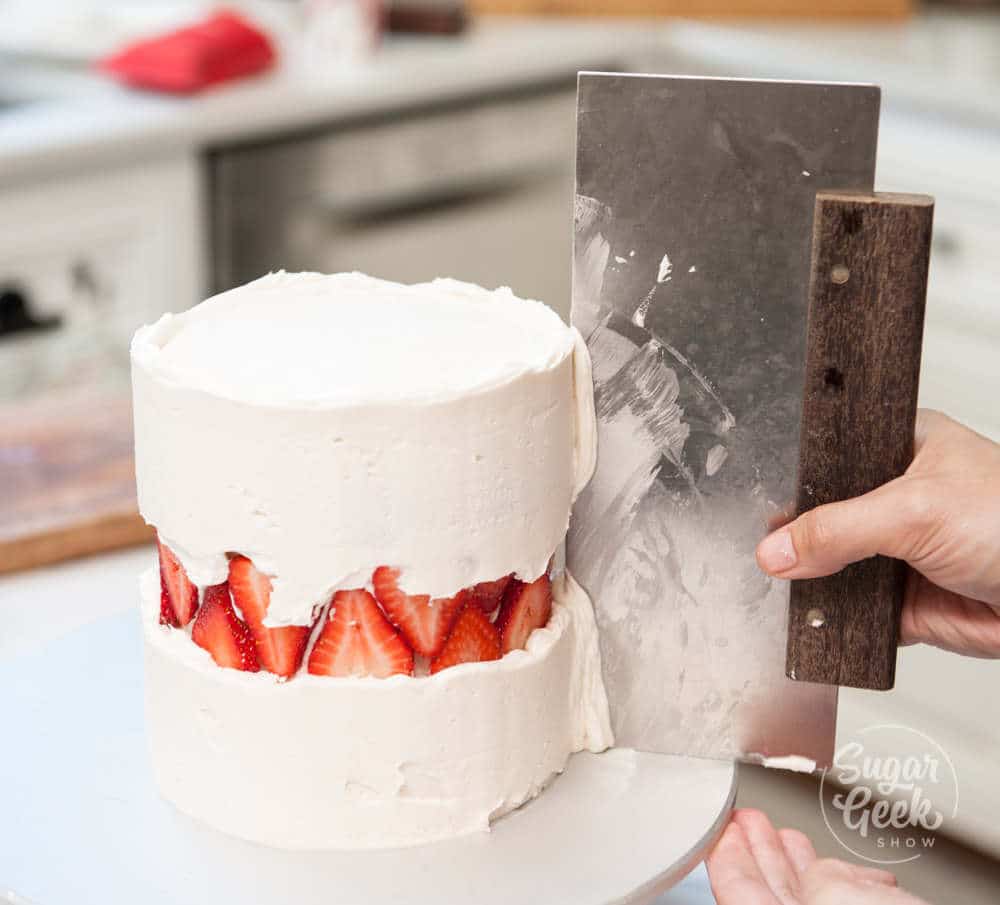
Start smoothing down the sides of the cake with your bench scraper. Fill in any gaps or holes and continue to scrape until nice and smooth.

fault line cake tutorial

Paint the edges of the buttercream with some gold paint if desired. The one I used was the Truly Made Plastics super gold mixed with a little Everclear alcohol. You want the mixture to be a thick liquid for best coverage. One teaspoon of gold dust mixed with a few drops of alcohol until it's just become liquid is good.

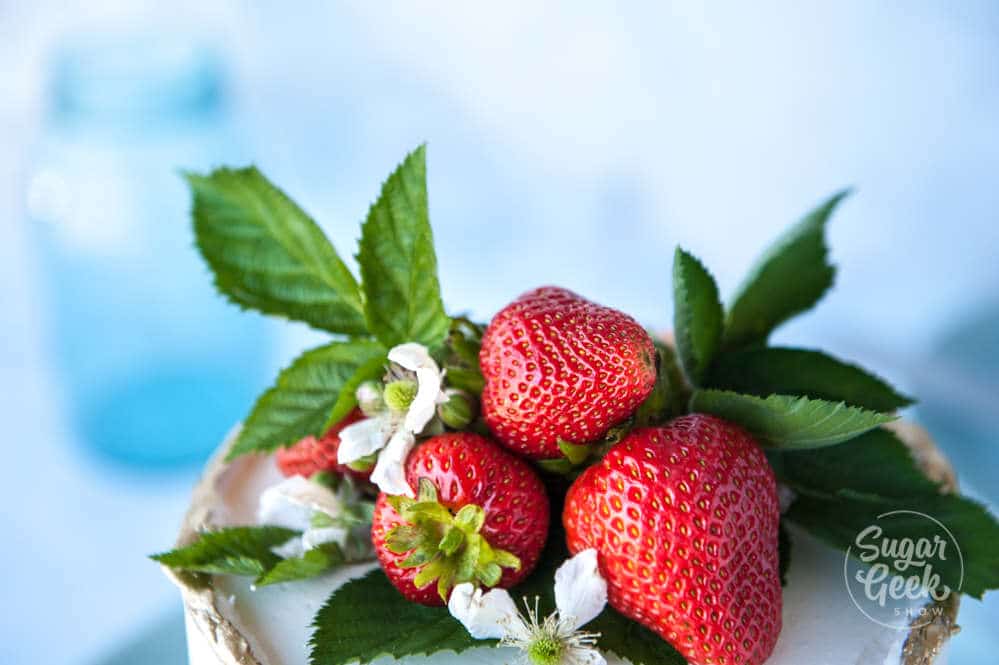
I transferred my chilled cake to a cake stand and then stacked some more fresh berries and leaves on top of the cake along with some blackberry leaves and edible flowers.

fresh strawberries on cake

That's it! You can use these same techniques with other types of berries, sprinkles, candy, whatever you like! The possibilities are endless!

strawberry fault line cake

Watch the full tutorial below on how to make this strawberry fault line cake. If you have any questions just leave them in the comments.

Fault Line Cake Ingredients & Tools

  • Two 6"x2" strawberry cakes, chilled and trimmed
  • One 4"x2" strawberry cake, chilled and trimmed
  • One batch easy buttercream frosting 
  • 6" cake board
  • 2 cups fresh strawberries
  • Few sprigs blackberry leaves and flowers for garnish (optional)
  • Truly Mad Plastics super gold dust
  • Everclear (lemon extract or other grain alcohol will also work)
  • Apricot jam for glazing the berries
  • Offset spatula
  • Bench scraper
  • Turn table 


Recipe

strawberry fault line cake tutorial and recipe! Learn how to make this trendy cake that is taking over social media
Print Recipe
4.88 from 8 votes

Strawberry Fault Line Cake Recipe

Have you tried a fault line cake yet? Learn how to make this trending cake with my fresh strawberry cake, strawberry puree and fresh cut strawberries for the fault line! The coolest thing about this cake trend is that it's so unique and you can really do a lot of different things with the design from sprinkles to cookies! Check out #faultlinecakes on Instagram for even more inspiration!
Prep Time20 minutes mins
Cook Time30 minutes mins
Total Time50 minutes mins
Course: Dessert
Cuisine: American
Servings: 24 servings
Calories: 603kcal
Author: Liz Marek

Equipment

  • Stand mixer or hand mixer
  • Bench scraper
  • Offset Spatula
  • Two 6-inch cake pans and one 4-inch cake pan
  • 6 inch cake board
  • Turn table

Ingredients

Strawberry Cake Ingredients

  • 14 ounces AP flour
  • 10 ounces granulated sugar
  • 1 ½ teaspoons baking powder
  • 1 teaspoon baking soda
  • ½ teaspoon salt
  • 8 ounces unsalted butter room temperature
  • 1 teaspoon vanilla extract
  • ½ teaspoon lemon extract
  • 1 ½ teaspoons strawberry extract
  • zest one lemon
  • 1 Tablespoon fresh lemon juice
  • 6 ounces egg whites room temperature
  • 4 ounces strawberry puree
  • 6 ounces milk room temperature
  • ½ teaspoon electric pink food color

Strawberry Puree

  • 32 ounces fresh or frozen strawberries do not thaw
  • 1 teaspoon lemon zest
  • 1 Tablespoon lemon juice
  • 1 pinch salt
  • 4 ounces sugar (optional)

Easy Buttercream Frosting

  • 8 ounces pasteurized egg whites
  • 32 ounces unsalted butter
  • 32 ounces powdered sugar
  • 1 teaspoon salt
  • 1 teaspoon vanilla extract
US Customary - Metric

Instructions

Cake Instructions

  • NOTE: It is SUPER IMPORTANT that all the room temperature ingredients listed above are room temperature and not cold or hot.
    If your ingredients just came out of the refrigerator or the strawberry puree is too hot, your mixture could curdle during the process of making the cake batter and become ruined.
  • Adjust an oven rack to the middle position and preheat to 350ºF/176ºC.
  • Grease two 6" cake pans and one 4" cake pan with cake goop or other preferred pan release.
  • Add butter to stand mixer and beat at medium-high speed until smooth and shiny, about 30 seconds. Gradually sprinkle in the sugar, beat until mixture is fluffy and almost white, about 3-5 minutes. Add the egg whites approximately two at a time, beating 30 seconds between.
  • Whisk the flour, baking powder, baking soda, salt, and lemon zest in a medium bowl.
  • Combine the strawberry reduction, milk, vanilla extract, lemon extract, strawberry extract and food coloring in a separate medium bowl.
  • With the mixer at the lowest speed, add about a third of the dry ingredients to the batter, followed immediately by about a third of the milk mixture, mix until ingredients are almost incorporated into the batter. Repeat the process 2 more times. When the batter appears blended, stop the mixer and scrape the sides of the bowl with a rubber spatula.
  • Divide the batter evenly between the prepared pans. Smooth the tops with a rubber spatula. Bake cakes until they feel firm in the center and a toothpick comes out clean or with just a few crumbs on it, about 35-40 minutes.
  • Transfer pans to a wire rack and let cool for 10 minutes. Invert cakes onto the rack and pop cakes out of pans. Cool completely before frosting.
Strawberry Puree Instructions

  • Defrost strawberries if frozen or cut up strawberries if whole
    Blend strawberries if you prefer a smoother texture of strawberry puree
    Place into a small sauce pan and bring to a simmer over med heat. Add in sugar if desired.
    Once bubbling, reduce heat to low and let slowly reduce until berries begin to break up and liquid is almost gone. 
    Occasionally stir the mixture to prevent burning. Add in lemon zest and salt. Transfer to another container and let cool before use. 
    Store extra in the freezer for up to 6 months

Buttercream Instructions

  • Place egg whites and powdered sugar in a stand mixer bowl. Attach the whisk and combine ingredients on low and then whip on high for 5 minutes 
    Add in your butter in chunks and whip with the whisk attachment to combine. It will look curdled at first. This is normal. It will also look pretty yellow. Keep whipping.
    Let whip on high for 8-10 minutes until it's very white, light and shiny. 
    Switch to a paddle attachment and mix on low for 15-20 minutes to make the buttercream very smooth and remove air bubbles. This isn't required but if you want really creamy frosting, you don't want to skip it. 

Video

Nutrition

Serving: 1serving | Calories: 603kcal | Carbohydrates: 63g | Protein: 3g | Fat: 39g | Saturated Fat: 24g | Cholesterol: 102mg | Sodium: 222mg | Potassium: 89mg | Fiber: 1g | Sugar: 50g | Vitamin A: 1190IU | Vitamin C: 2.9mg | Calcium: 37mg | Iron: 0.8mg

Have you tried a fault line cake yet? Learn how to make this trending cake with fresh strawberries! The coolest thing about this cake trend is that it's so unique and you can really do a lot of different things with the design from sprinkles to cookies! Check out #faultlinecakes on Instagram for even more inspiration!

chocolate caramel candy

June 3, 2019 Candy

Chocolate Caramel Candy

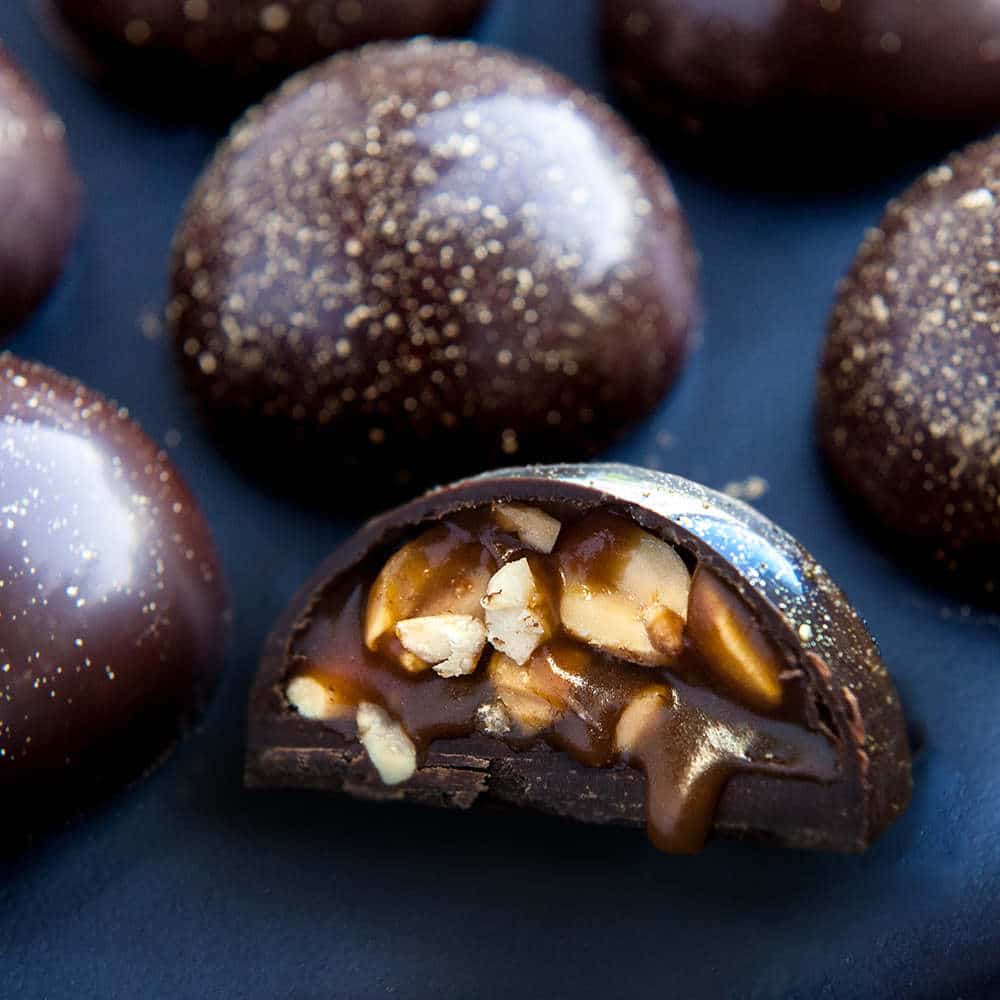
Shiny homemade chocolate caramel candy with sea salt and toasted hazelnuts

Making your own chocolate caramel candy at home is something I have always wanted to do! Now that I have learned how to temper chocolate in the microwave, making molded chocolates and hot chocolate bombs has never been easier! And so impressive looking! 
chocolate caramel candy

**this post contains affiliate links which means I may get a couple of pennies if you purchase from my link but it doesn't cost you anything extra*** 

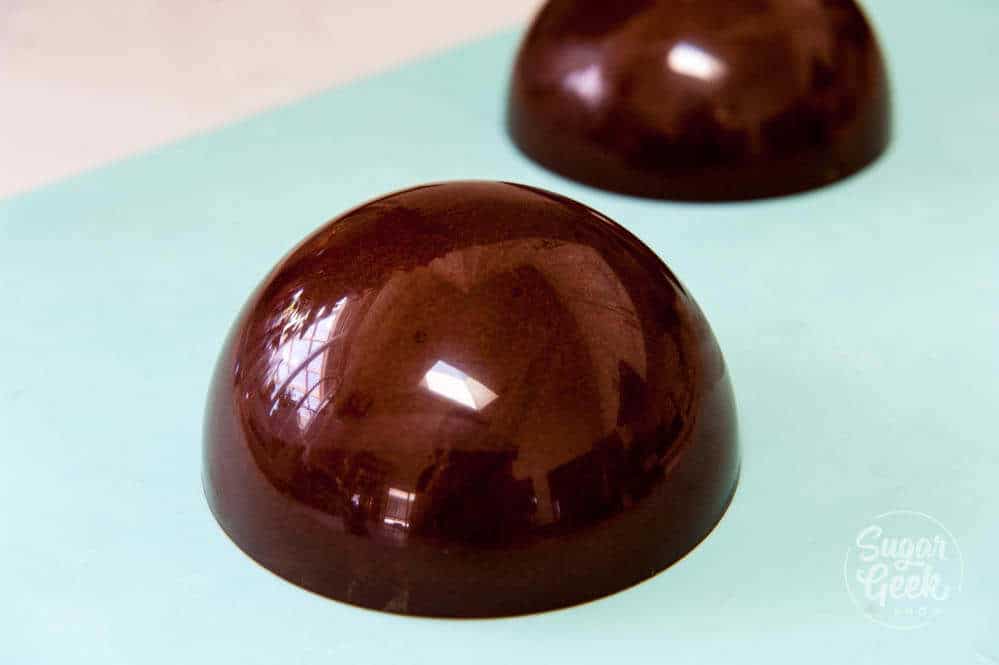
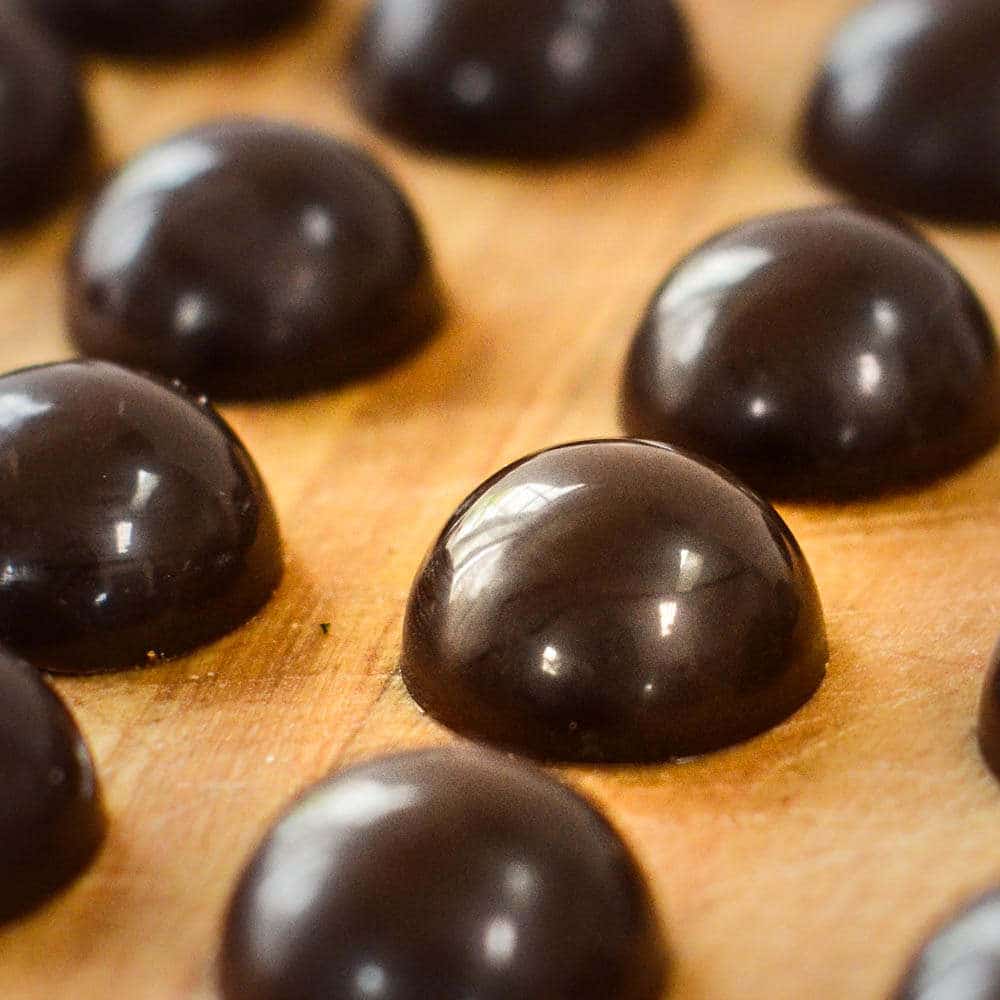
The first time I made molded chocolates was in pastry school. That was also the first time I learned about polycarbonate molds. These are hard acrylic molds that are SUPER shiny on the inside. It's what the professional chocolatiers use to get those gorgeous shiny molded chocolates. 

I decided to go with the 50mm molds because they were gifts but I think in hindsight, they were too big and I should have gone with the 30mm. 

How to make the filling

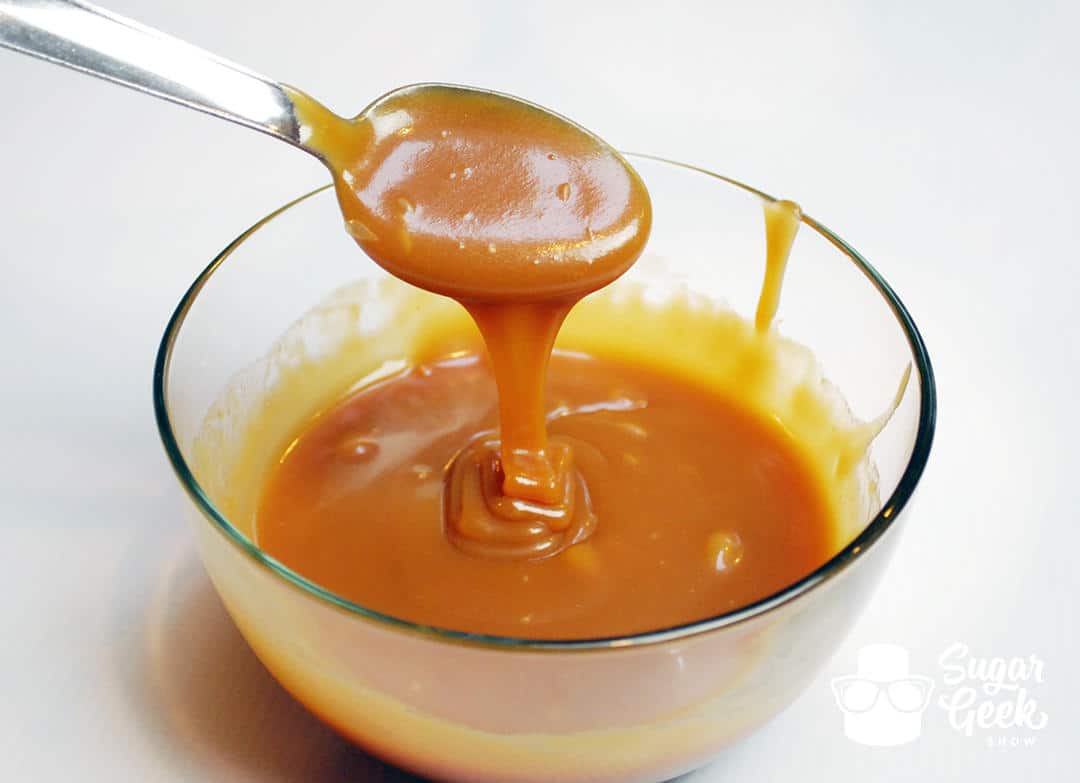
I used my salted caramel filling for this chocolate caramel candy recipe but you could fill these chocolates with SO many different things. Ganache infused with tea or herbs, fruit purees or even peanut butter filling! The possibilities are really endless. The caramel from my caramel apple recipe also makes a great filling for these candies, since it sets up soft and chewy. 

caramel sauce recipe

  1. Bring the sugar and water to a boil on medium high. Cover with a lid for 5 minutes

  2. Remove lid and continue cooking the sugar until thermometer reads 350º (hard crack stage) or it's a deep golden brown color. No need to stir. 

  3. Remove from heat. Start adding your butter in small pieces (it will bubble so be careful) then carefully mix in the cream.

  4. Add in your sea salt and let sit at room temperature overnight or put in the refrigerator to cool. Store leftover caramel in the refrigerator.

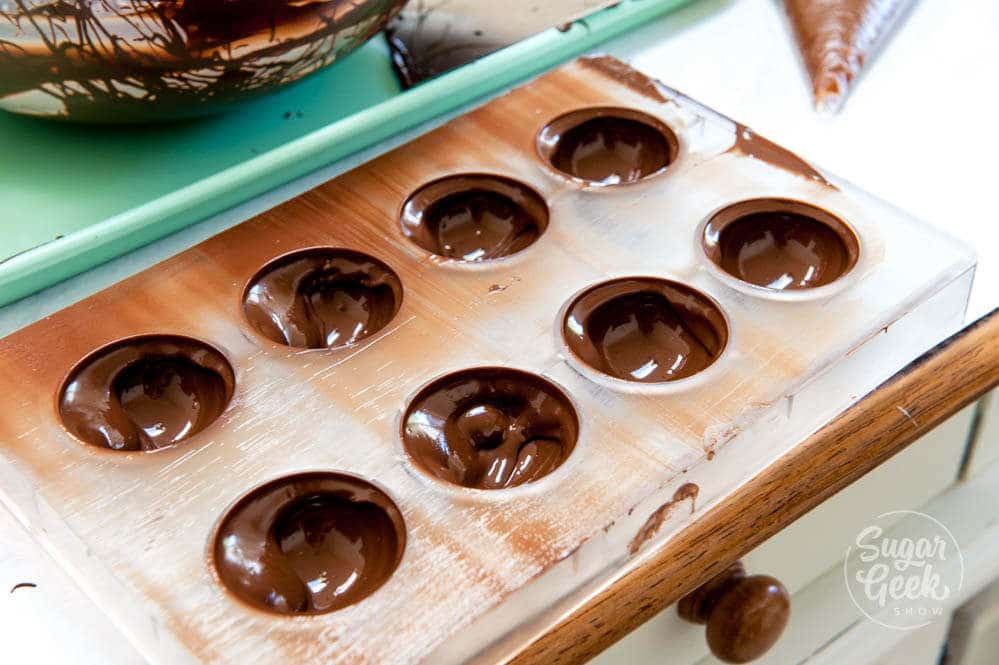
How to make molded chocolate shells

After you have tempered your chocolate, you can now make your chocolate shells. This process is fairly simple but I've broken it down into some simple steps to help clarify everything. You can also watch the video below on how to make these molded chocolate caramel candies below. 

chocolate caramel candy

  1. Make sure molds are super clean and dry. Wipe the insides of each mold thoroughly with a paper towel to remove any residue that might make your chocolates stick. 
  2. Warm your mold slightly with a hair dryer or heat gun so it's not super cold (optional). Should not be hot, about body temperature. 
  3. Pour your tempered chocolate into your mold and tap the edge with a bench scraper to remove any air bubbles. 

tempered chocolate in candy mold

  1. Scrape off the excess chocolate back into the bowl. Let the mold sit for 30-60 seconds. 
  2. Turn your mold upside down over the bowl and pour out the excess chocolate. Tap the edge with your bench scraper to remove the majority of the chocolate. You don't want the shells to be too thick. 
  3. Scrape the back of the mold ONE time to make the edges nice and clean. 
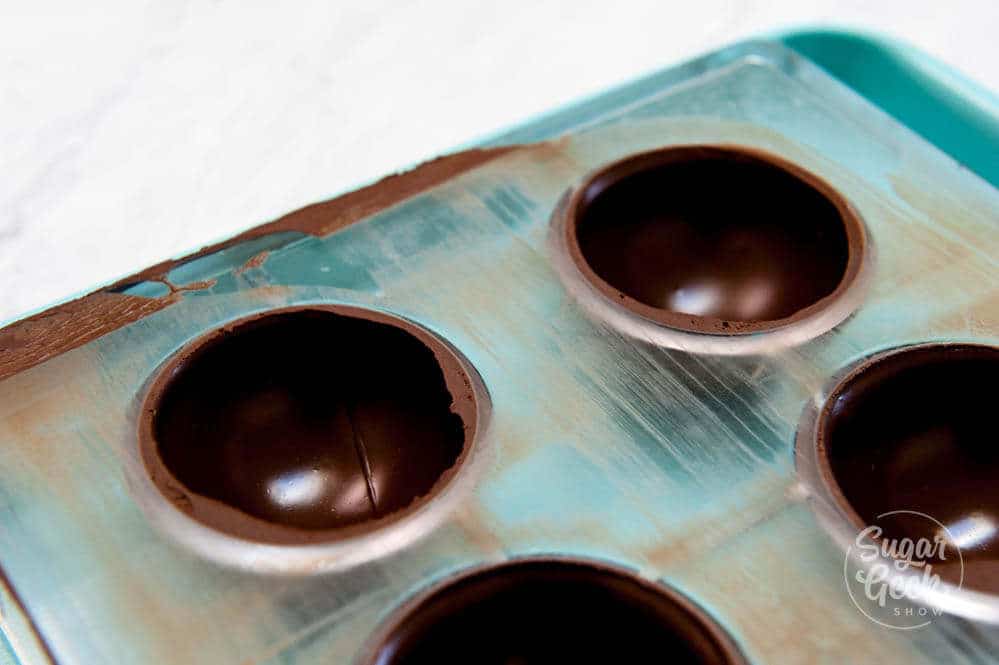
  4. Place the chocolate upside down on a piece of parchment paper and press flat. Leave for 5-10 minutes or until the chocolate is half-set (not liquid but still soft). 
  5. Scrape the back one more time to remove any excess chocolate. 

scrape the chocolate off the back of the mold

  1. Place the mold into the fridge for 10 minutes to set the chocolate. 
  2. At this point, you can check to see that the chocolates are releasing from the mold. If you haven't tempered your chocolate correctly they will have spots that are stuck (see photo below) and they will not release. So if that is the case, you're better off re-tempering your chocolate and trying again so you don't waste your filling. 

chocolates stuck in mold

How to fill your chocolate candy shells

Full disclosure, I did not roast these hazelnuts myself although you totally could. Typically when I roast nuts, I place them on a baking sheet and put them into the oven at 350ºF until they are fragrant. Usually for about 5 minutes. Let them cool before you use them. 

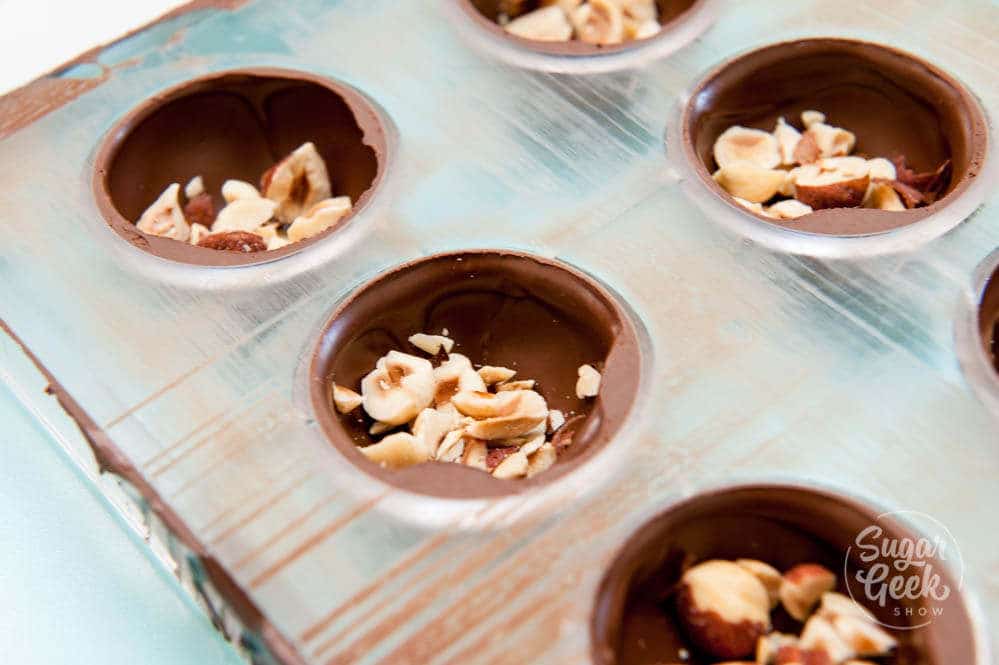
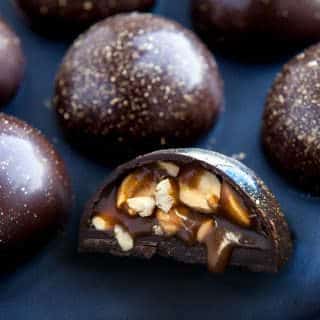
I chopped my hazelnuts roughly and then filled my shell up to about halfway. 

fill chocolate shells with toasted hazelnuts

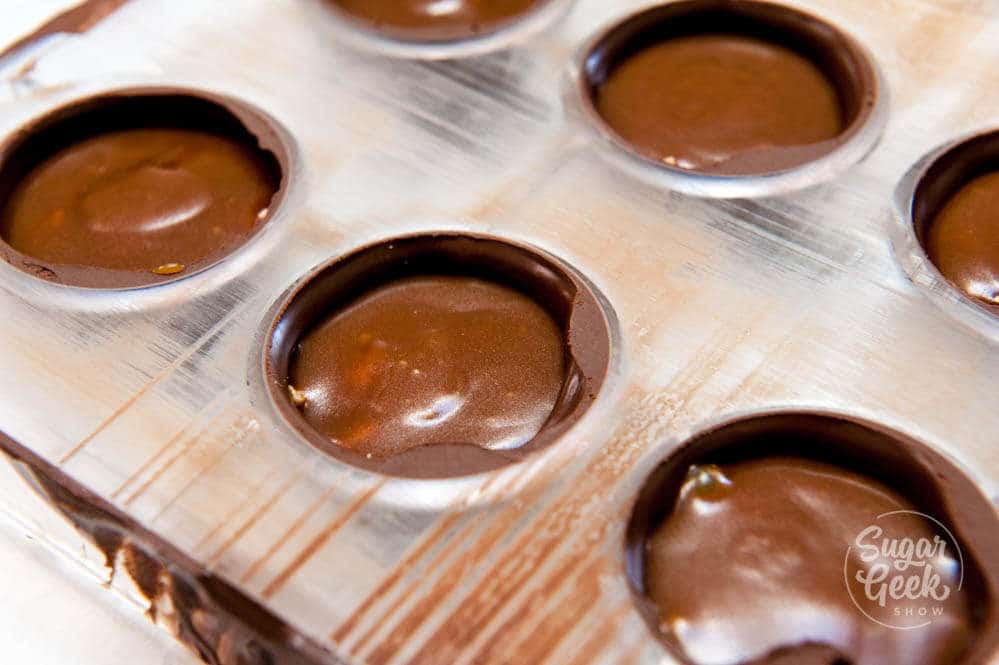
Then I put my cooled caramel into a piping bag and piped the caramel over the nuts. Don't fill the chocolates all the way up or you won't have any room to put the chocolate on the back. 

Tap your molds to make sure the caramel settles down in between the nuts and there aren't any air bubbles trapped in there. 

Pipe caramel onto hazelnuts

Put some of your tempered chocolate into a piping bag and pipe around the outside edge of the chocolate shells, slowly working your way to the center. 

After all your chocolates are covered on the back, give your mold another little tap to get rid of air bubbles and get the chocolate to smooth out. Scrape the back edge one time with your bench scraper to get off the excess chocolate. 

Place back into the fridge for 10 minutes to set the back of the chocolates. 

How to decorate your chocolate caramel candy

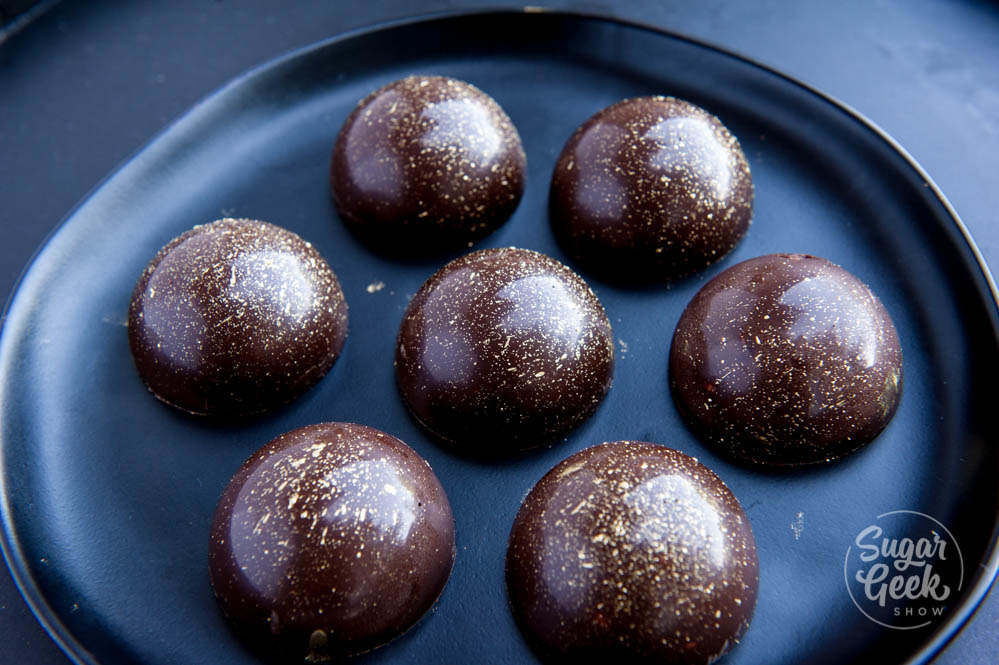
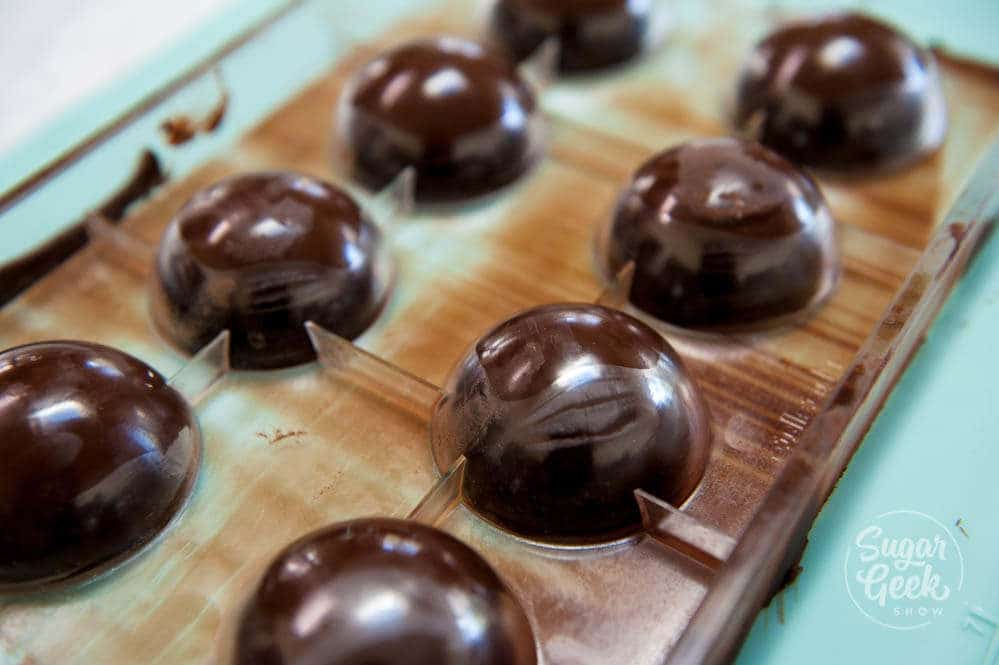
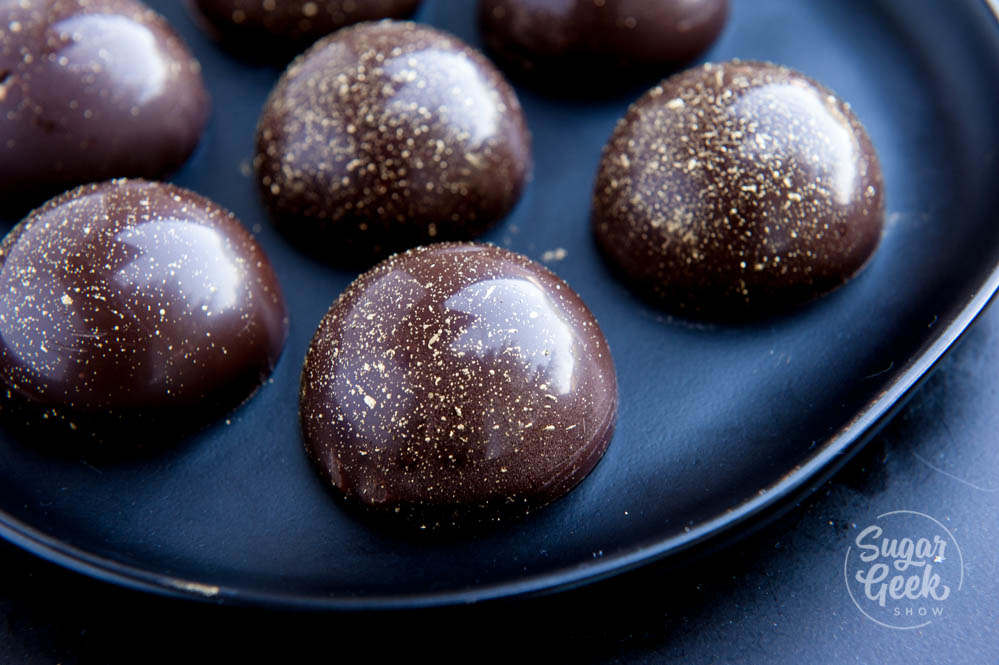
Once your chocolates are set, you can flip them out onto a silicone mat or you can push on the edge and turn them over one by one. I decided to add a pretty gold splatter to my chocolate caramels. 

shiny molded chocolate filled with caramel and hazelnuts

To make the gold splatter, mix 1 teaspoon of gold powder with a couple of drops of alcohol until you get a paint consistency. Use a new toothbrush to splatter the tops of your chocolates with the gold. 

chocolate caramel candy with gold splatter

Now your chocolates are ready to be packaged up and given as gifts or to just enjoy with a big scoop of ice cream or a cold glass of milk! Soo good! 

Recipe

chocolate caramel candy
Print Recipe
5 from 4 votes

Chocolate Caramel Candy

These shiny chocolate caramel candies filled with crunchy toasted hazelnuts and a touch of sea salt are outrageously decadent and beautiful!
Prep Time20 minutes mins
Cook Time15 minutes mins
Course: Dessert
Cuisine: American
Servings: 24 servings
Calories: 72kcal
Author: Liz Marek

Ingredients

  • 12 oz chocolate must contain cocoa butter
US Customary - Metric

Instructions

Tempering Chocolate Instructions

  • Place your chocolate in a plastic or silicone bowl in the microwave and heat on high for 30 seconds. Then stir
  • Heat again for another 30 seconds, stir, then 15 seconds, stir, then 10 seconds, stir. Make sure your temperature never goes above 90ºF for dark chocolate. 86F for milk chocolate and 84F for white chocolate. DO NOT RUSH THIS
  • If your chocolate is not fully melted then only do another 5 seconds until it is melted
  • Now your chocolate is in temper and ready to use!

Caramel Filling

  • Bring sugar and water to a boil on medium high in a medium sized sauce pan. Cover with a lid for 5 minutes
  • Remove lid and continue cooking sugar until thermometer reads 350º (hard crack stage) or it's a deep golden brown color. No need to stir.
  • Remove from heat and add in your butter in small pieces. Be careful, it will bubble up. Slowly whisk in your cream until combined.
  • Add in your sea salt and let set at room temperature overnight or cool in the refrigerator.

Video

Nutrition

Calories: 72kcal | Carbohydrates: 9g | Protein: 1g | Fat: 5g | Saturated Fat: 3g | Sodium: 2mg | Potassium: 41mg | Fiber: 1g | Sugar: 7g | Calcium: 3mg | Iron: 0.4mg


Indian Elephant Showpiece Cake Tutorial

June 1, 2019 Course Preview

Indian Elephant Showpiece Tutorial

Skill level: Advanced

I created this showpiece for the Incredible India Cake Collaboration and I'm so excited to share the process that went into creating this piece with you today.

While this piece isn't made out of cake, you will learn what it takes to create a piece like this, how to plan out the cake structure, carving the shapes, adding the Ganesh cake topper, creating the umbrella and details on the elephant, and the anatomy of the elephant itself.

2:13:12 Minutes of Instruction

What You Will Learn

  • Learn how to create a realistic elephant out of edible materials
  • How to scale a model from a figure and check your work
  • Learn how create Ganesh as a cake topper
  • Liz Marek's tips to getting any model right when using reference
  • Learn how add fringe details, hand-painted designs and details
  • How to create the unique umbrella shape

Tutorial Chapters

  1. Scaling the elephant 0:32
  2. Making the structure 4:38
  3. Covering in rice cereal 14:41
  4. Conditioning the Gumpaste 20:20
  5. Rolling out the Gumpaste 20:47
  6. Trimming the legs 22:19
  7. Rolling out fondant 23:25
  8. Applying gold leaf 26:13
  9. Covering board in fondant 27:53
  10. Pouring the isomalt 30:13
  11. Shaping the rice cereal 37:31
  12. Covering in modeling chocolate 47:20
  13. Sculpting the body 53:07
  14. Sculpting the head 1:00:43
  15. Sculpting the eyes 1:05:43
  16. Creating lines and wrinkles 1:06:48
  17. Making the toe nails 1:16:00
  18. Making the eyelids 1:17:32
  19. Making the tusks 1:19:18
  20. Making the tail 1:20:57
  21. Painting the elephant 1:24:09
  22. Detailing the head 1:28:24
  23. Fondant decorations 1:30:03
  24. Painting the fondant 1:33:31
  25. Painting the umbrella 1:35:10
  26. Making the bling 1:36:46
  27. Making the fringe 1:43:33
  28. Making extra decorations 1:45:27
  29. Making Ganesh body 1:48:52
  30. Making the arms 1:55:00
  31. Making the jewelry 1:57:41
  32. Making the trunk 2:01:10
  33. Making the eyes 2:02:33
  34. Painting flowers 2:07:22
  35. Making anklets 2:07:49
  36. Making accents 2:09:17
  37. Adding the Ganesh 2:11:53

Downloads

Materials List

Elephant Body Template - 2x Scale

Elephant Scale Reference - 2x Scale

Elephant Body Template - 3x Scale

Elephant Scale Reference - 3x Scale

Indian Elephant Reference 01

Indian Elephant Reference 02

Indian Elephant Reference 03

Indian Elephant Showpiece Cake Tutorial

May 31, 2019 Paid Video

Indian Elephant Showpiece

Skill level: Advanced

I created this showpiece for the Incredible India Cake Collaboration and I'm so excited to share the process that went into creating this piece with you today.

While this piece isn't made out of cake, you will learn what it takes to create a piece like this, how to plan out the cake structure, carving the shapes, adding the Ganesh cake topper, creating the umbrella and details on the elephant, and the anatomy of the elephant itself.

2:13:12 Minutes of Instruction

What You Will Learn

  • Learn how to create a realistic elephant out of edible materials
  • How to scale a model from a figure and check your work
  • Learn how create Ganesh as a cake topper
  • Liz Marek's tips to getting any model right when using reference
  • Learn how add fringe details, hand-painted designs and details
  • How to create the unique umbrella shape

Tutorial Chapters

  1. Scaling the elephant 0:32
  2. Making the structure 4:38
  3. Covering in rice cereal 14:41
  4. Conditioning the Gumpaste 20:20
  5. Rolling out the Gumpaste 20:47
  6. Trimming the legs 22:19
  7. Rolling out fondant 23:25
  8. Applying gold leaf 26:13
  9. Covering board in fondant 27:53
  10. Pouring the isomalt 30:13
  11. Shaping the rice cereal 37:31
  12. Covering in modeling chocolate 47:20
  13. Sculpting the body 53:07
  14. Sculpting the head 1:00:43
  15. Sculpting the eyes 1:05:43
  16. Creating lines and wrinkles 1:06:48
  17. Making the toe nails 1:16:00
  18. Making the eyelids 1:17:32
  19. Making the tusks 1:19:18
  20. Making the tail 1:20:57
  21. Painting the elephant 1:24:09
  22. Detailing the head 1:28:24
  23. Fondant decorations 1:30:03
  24. Painting the fondant 1:33:31
  25. Painting the umbrella 1:35:10
  26. Making the bling 1:36:46
  27. Making the fringe 1:43:33
  28. Making extra decorations 1:45:27
  29. Making Ganesh body 1:48:52
  30. Making the arms 1:55:00
  31. Making the jewelry 1:57:41
  32. Making the trunk 2:01:10
  33. Making the eyes 2:02:33
  34. Painting flowers 2:07:22
  35. Making anklets 2:07:49
  36. Making accents 2:09:17
  37. Adding the Ganesh 2:11:53

Downloads

Materials List

Elephant Body Template - 2x Scale

Elephant Scale Reference - 2x Scale

Elephant Body Template - 3x Scale

Elephant Scale Reference - 3x Scale

Indian Elephant Reference 01

Indian Elephant Reference 02

Indian Elephant Reference 03

tempering chocolate tutorial

May 27, 2019 Free Video

How To Temper Chocolate

Tempering chocolate in the microwave is so easy and results in a glossy, shiny tempered chocolate!

Tempering chocolate doesn't have to be hard! I used to temper my chocolate by the seeding method but once I learned how to do it in the microwave, I'll never do it another way again!

tempering chocolate tutorial

What does tempering chocolate mean?

When you temper chocolate, you are heating and cooling the chocolate in a specific way. When you correctly temper, the crystals in the cocoa butter arrange themselves in a specific order when they chocolate cools.  Properly tempered chocolate is shiny, set's firm at room temperature and has a sharp SNAP when you bite into it. 

What happens if I don't temper my chocolate?

When you melt chocolate and the temperature goes above 95ºF, your chocolate will be out of temper. If you try to use this chocolate it will be dull, soft in your hands and will not set. 

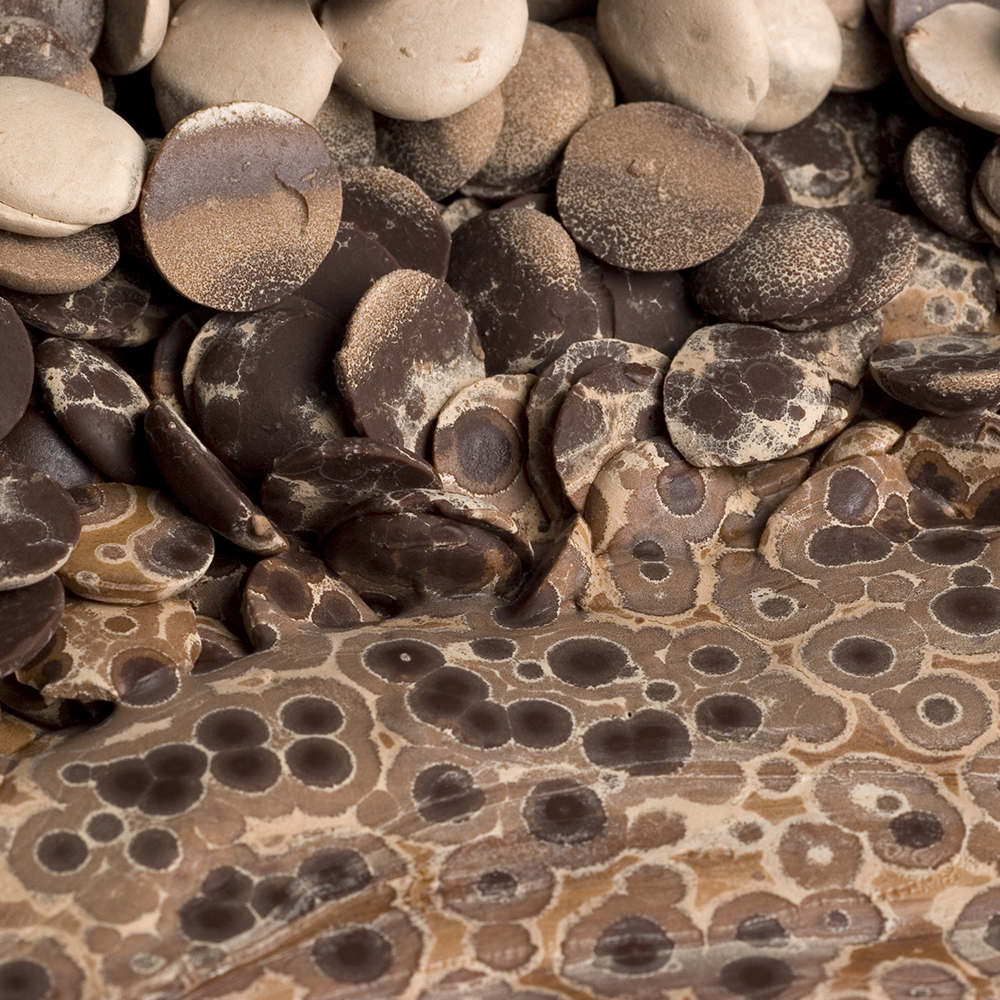
chocolate that has not been tempered and has bloomed

If you're baking, you don't need to worry about tempering chocolate but if you're making candies or dipping strawberries, the chocolate must be tempered. Same thing with making molded chocolates. Chocolate has to be tempered otherwise it will not release from a chocolate mold. 

What tools do I need for tempering chocolate in the microwave?

The great thing about tempering in the microwave is it's extremely simple. You only need a few tools to successfully temper chocolate in the microwave. *this list contains affiliate links*

tools for tempering chocolate

  • Silicone or plastic bowl for melting chocolate in the microwave.
  • Glass or metal bowl for the seeding method
  • Pot for simmering water for seeding method
  • Thermometer spatula 
  • Bench scraper
  • Parchment paper

What kind of chocolate should I use for tempering?

There are two kinds of chocolate. Real chocolate and fake (compound) chocolate. The only way to tell the difference is to read the ingredients. If the ingredients say cocoa butter, then it's real chocolate. You need real chocolate if you're going to temper. 

You can use compound chocolate for flexible silicone or plastic molds or for dipping chocolates but it doesn't have that SNAP that real chocolate has. It also won't release from a polycarbonate mold. 

Compound chocolate also melts at a much higher temperature than real chocolate. Real chocolate melts at body temperature so it dissolves on the tongue when you bite into it. Compound chocolate has to be chewed. 

I like to use Callebaut semi-sweet callets. It's pretty standard chocolate and not too expensive. This is a 54% cocoa solids and 36% cocoa butter. The higher the cocoa solids %, the thicker the chocolate will be. Milk chocolate and white chocolate will also contain sugar and dairy.  

Ok let's get to tempering our chocolate! Choose the method that works best for you but I highly recommend you give tempering chocolate in the microwave a try!

How to temper chocolate in the microwave

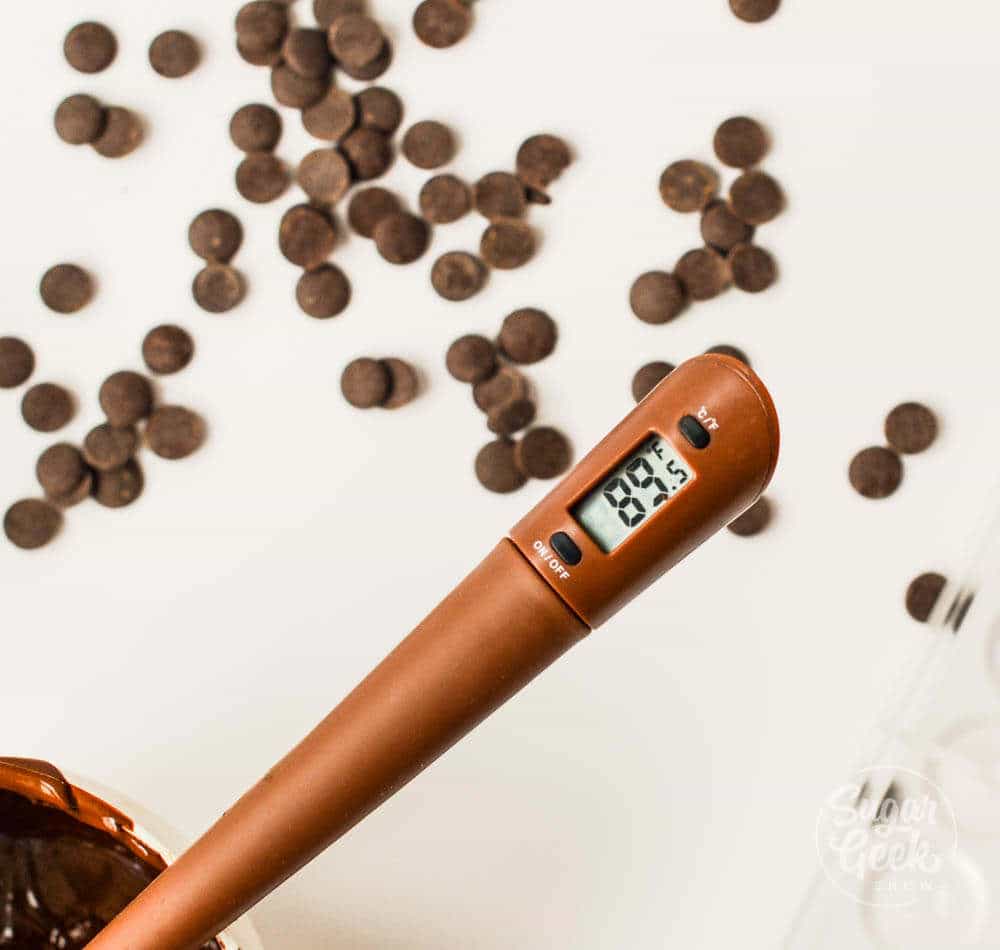
To keep your chocolate in temper you MUST pay attention to the temperature of the chocolate. Semi-sweet chocolate should never go above 88F-90F.  Milk chocolate should never go above 84F-86F. White or colored chocolate should never go above 82F-84F. The chocolate must contain cocoa butter for this to work. 

  1. Place 12 oz of semi-sweet chocolate into your plastic or silicone bowl and microwave for 30 seconds on high, then stir. 
  2. Microwave one more time for 30 seconds, then 15 seconds, then 10 seconds. Stirring in between each heating. DO NOT RUSH THIS!
  3. Always check your thermometer to make sure your temperature is not going above 90ºF. 
  4. Once your chocolate is melted, it's ready to use!

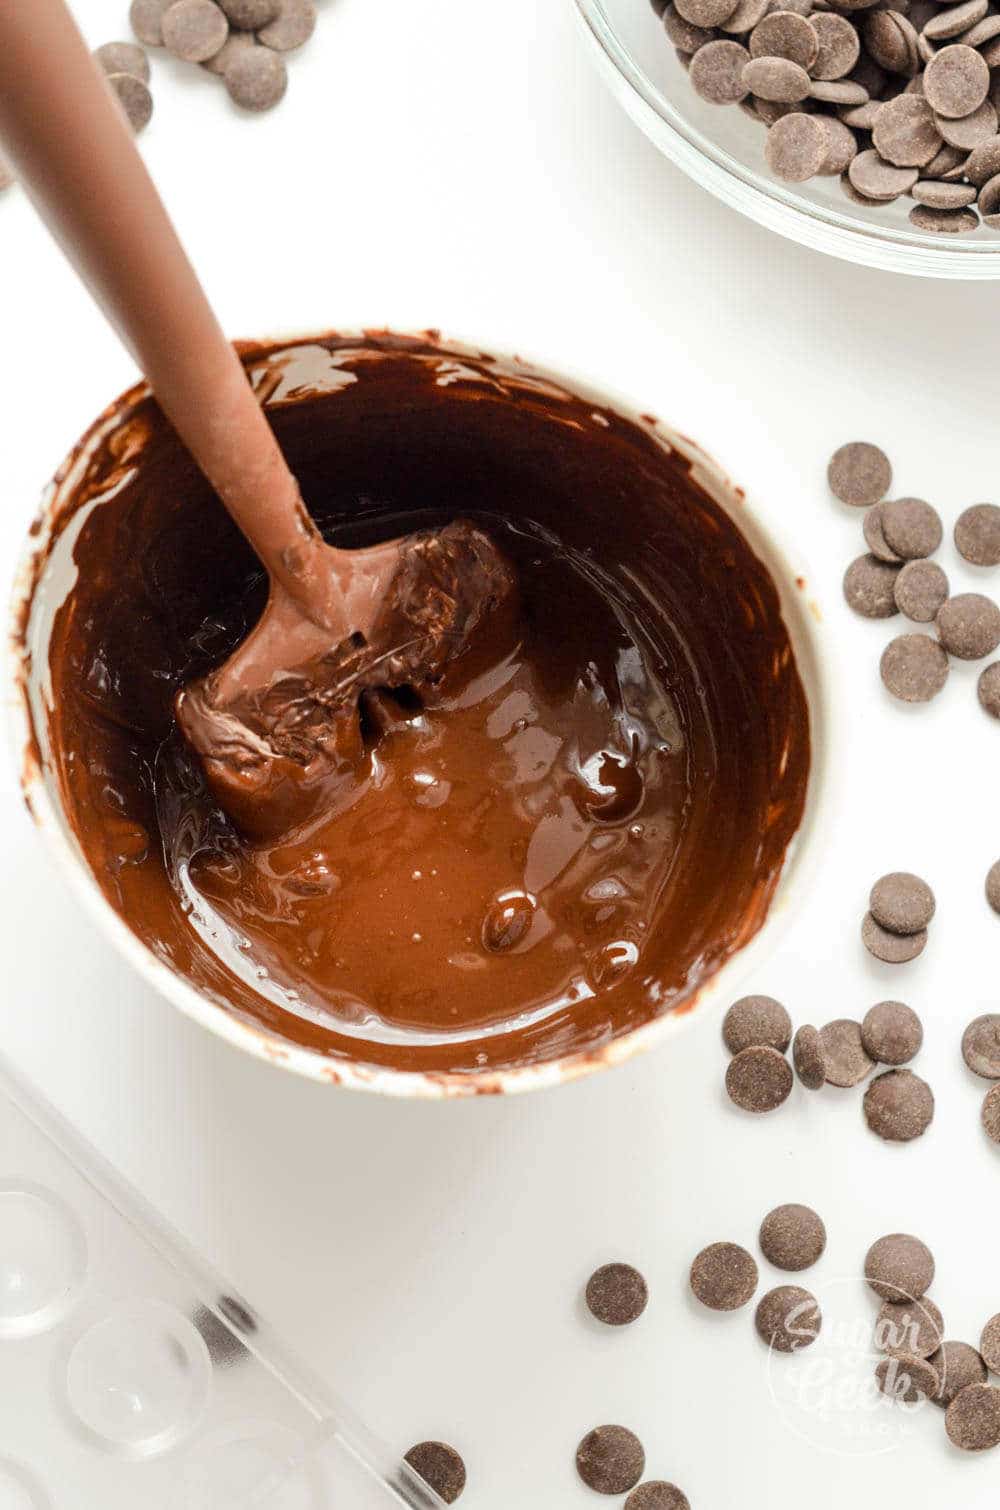
tempering chocolate

The secret to this way of tempering chocolate is controlling the temperature. As long as it doesn't go above the proper temperature then the crystals inside the cocoa butter remain intact and the chocolate stays in temper. This is a great way to temper small amounts of chocolate. 

If you're melting a big chocolate bar, make sure you chop it into small bits before melting to avoid over-heating and accidentally getting your chocolate out of temper. 

What happens if my chocolate gets too hot?

If you do happen to get your chocolate too hot don't worry, you can still temper it using the seeding method. Transfer your chocolate to another bowl and add a little unmelted chocolate to the melted chocolate and stir until it cools to 97ºF.

How to temper chocolate using the seeding method

  1. Melt ⅔ of the chocolate that you need over a double boiler until it reaches 115ºF. Stir constantly to prevent hot spots. Make sure the bowl fits firmly over your simmering water to prevent steam or drops of water from getting in your chocolate
  2. Remove chocolate from the heat. Add ½ of your remaining un-melted chocolate back into the bowl. Stir to melt. This cools down the chocolate. Transfer melted chocolate to another bowl to speed up the cooling process. Continue stirring until the chocolate reaches 100ºF
  3. Finely chop your remaining chocolate. At 96-98ºF, add in your chopped tempered chocolate and stir it into your warm chocolate. 95ºF is were the crystals in the cocoa butter start blooming so adding tempered chocolate in right before you reach this temperature ensures the proper crystals will grow and temper the rest of the untempered chocolate. 
  4. Continue stirring the chocolate every 5 minutes until it cools to 79ºF
  5. Warm chocolate VERY carefully over the double boiler for 5 seconds until chocolate reaches 86ºF-90ºF which is a good working temperature for using in molds or making candies. 

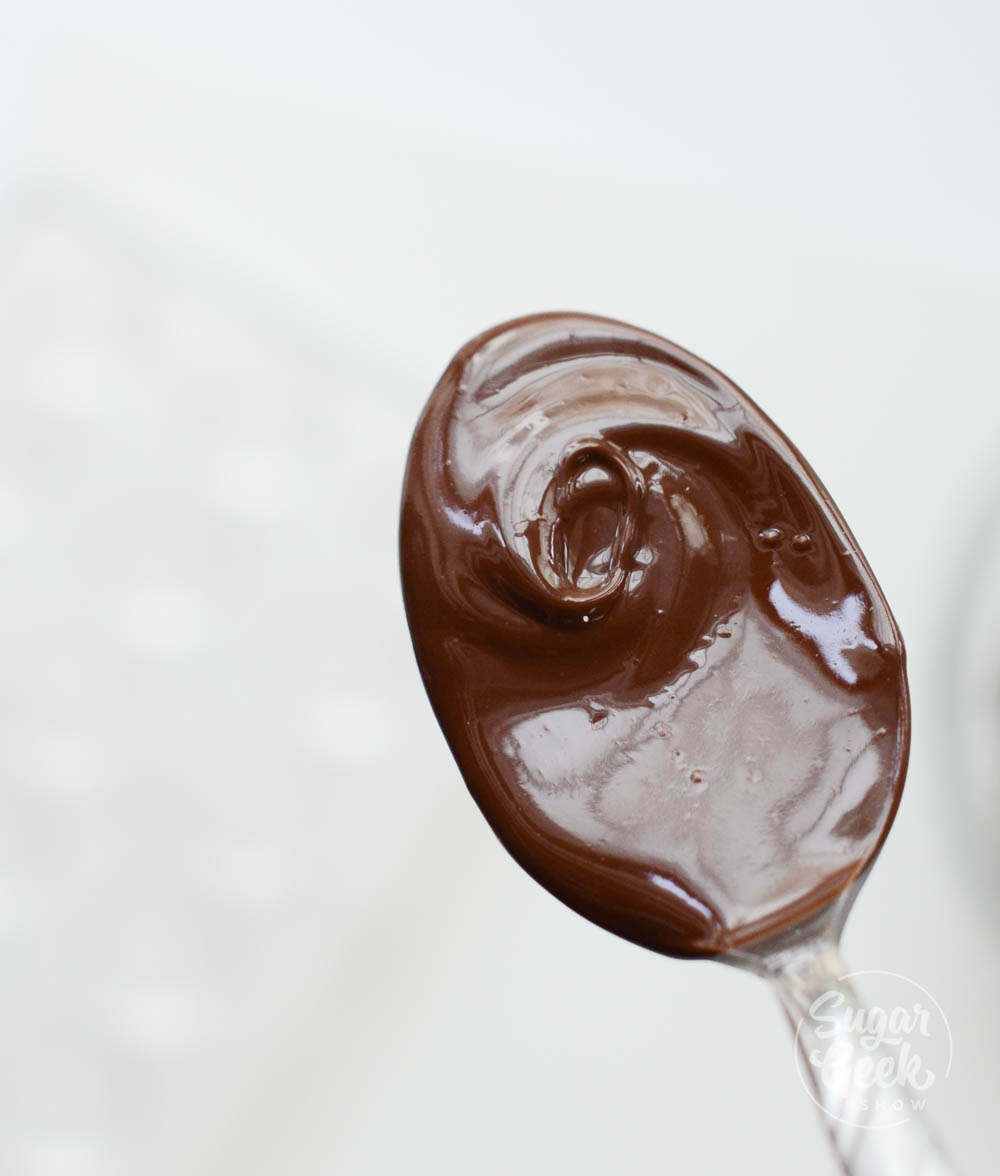
melted chocolate on spoon

How to temper chocolate using cocoa butter beta crystals

Another way to temper chocolate is to use tempered cocoa butter crystals called beta crystals. This is a little bit more expensive but pretty much full-proof when it comes to tempering.

  1. Melt ⅔ of your chocolate until it reaches 115ºF
  2. Add your remaining ⅓ of chocolate back into the melted chocolate to cool it down
  3. At 96ºF, add in 1% beta crystals (45g per 16oz of chocolate) Stir well
  4. Cool chocolate to 79ºF then warm to 86-90ºF for workability

How to use tempered chocolate

Now that your chocolate is tempered you can use it to make chocolate spheres using a chocolate sphere mold, piped chocolate decorations and lots of other fun things! Tempering chocolate is a great skill to have and once you know how you'll be surprised how much more you'll use chocolate in your decorating. 


Recipe

close up of a chocolate butterfly decoration on a red velvet cupcake
Print Recipe
4.94 from 76 votes

How To Temper Chocolate

Easily temper chocolate in the microwave! The easiest way to temper small amounts of chocolate.
Prep Time5 minutes mins
Cook Time5 minutes mins
Course: Dessert
Cuisine: American
Servings: 12 oz
Calories: 144kcal
Author: Liz Marek

Equipment

  • 1 Thermometer

Ingredients

  • 12 oz chocolate
US Customary - Metric

Instructions

Tempering Chocolate Instructions

  • Place your chocolate in a plastic or silicone bowl in the microwave and heat on high for 30 seconds. Then stir
  • Heat again for another 30 seconds, stir, then 15 seconds, stir, then 10 seconds, stir. Make sure your temperature never goes above 90ºF for dark chocolate. 86F for milk chocolate and 84F for white chocolate. DO NOT RUSH THIS
  • If your chocolate is not fully melted then only do another 5 seconds until it is melted
  • Now your chocolate is in temper and ready to use!
  • Check out the video or blog post for ideas on decorating

Video

Notes

To learn more about tempering chocolate, check out Chef Christophe's tutorial on tempering chocolate with cocoa butter and an easy tempering machine. 

Nutrition

Serving: 1ounce | Calories: 144kcal | Carbohydrates: 17g | Protein: 1g | Fat: 10g | Saturated Fat: 6g | Polyunsaturated Fat: 0.3g | Monounsaturated Fat: 3g | Sodium: 5mg | Potassium: 82mg | Fiber: 2g | Sugar: 15g | Calcium: 7mg | Iron: 1mg

tempering chocolate the easy way pin

tempering chocolate tutorial

May 21, 2019 Culinary Techniques

Tempering Chocolate The Easy Way

Tempering chocolate in the microwave is so easy and results in a glossy, shiny tempered chocolate!

Tempering chocolate doesn't have to be hard! I used to temper my chocolate by the seeding method but once I learned how to do it in the microwave, I'll never do it another way again! This is a great way to temper your chocolate for hot chocolate bombs. 

tempering chocolate tutorial

What does tempering chocolate mean?

When you temper chocolate, you are heating and cooling the chocolate in a specific way. When you correctly temper, the crystals in the cocoa butter arrange themselves in a specific order when they chocolate cools.  Properly tempered chocolate is shiny, set's firm at room temperature and has a sharp SNAP when you bite into it. 

What happens if I don't temper my chocolate?

When you melt chocolate and the temperature goes above 95ºF, your chocolate will be out of temper. If you try to use this chocolate it will be dull, soft in your hands and will not set. 

chocolate that has not been tempered and has bloomed

If you're baking, you don't need to worry about tempering chocolate but if you're making candies or dipping strawberries, the chocolate must be tempered. Same thing with making molded chocolates. Chocolate has to be tempered otherwise it will not release from a chocolate mold. 

What tools do I need for tempering chocolate in the microwave?

The great thing about tempering in the microwave is it's extremely simple. You only need a few tools to successfully temper chocolate in the microwave. *this list contains affiliate links*

tools for tempering chocolate

  • Silicone or plastic bowl for melting chocolate in the microwave.
  • Glass or metal bowl for the seeding method
  • Pot for simmering water for seeding method
  • Thermometer spatula 
  • Bench scraper
  • Parchment paper

What kind of chocolate should I use for tempering?

There are two kinds of chocolate. Real chocolate and fake (compound) chocolate. The only way to tell the difference is to read the ingredients. If the ingredients say cocoa butter, then it's real chocolate. You need real chocolate if you're going to temper. 

You can use compound chocolate for flexible silicone or plastic molds or for dipping chocolates but it doesn't have that SNAP that real chocolate has. It also won't release from a polycarbonate mold. 

Compound chocolate also melts at a much higher temperature than real chocolate. Real chocolate melts at body temperature so it dissolves on the tongue when you bite into it. Compound chocolate has to be chewed. 

I like to use Callebaut semi-sweet callets. It's pretty standard chocolate and not too expensive. This is a 54% cocoa solids and 36% cocoa butter. The higher the cocoa solids %, the thicker the chocolate will be. Milk chocolate and white chocolate will also contain sugar and dairy.  

Ok let's get to tempering our chocolate! Choose the method that works best for you but I highly recommend you give tempering chocolate in the microwave a try!

How to temper chocolate in the microwave

To keep your chocolate in temper you MUST pay attention to the temperature of the chocolate. Semi-sweet chocolate should never go above 88F-90F.  Milk chocolate should never go above 84F-86F. White or colored chocolate should never go above 82F-84F. The chocolate must contain cocoa butter for this to work. 

  1. Place 12 oz of semi-sweet chocolate into your plastic or silicone bowl and microwave for 30 seconds on high, then stir. 
  2. Microwave one more time for 30 seconds, then 15 seconds, then 10 seconds. Stirring in between each heating. DO NOT RUSH THIS!
  3. Always check your thermometer to make sure your temperature is not going above 90ºF. 
  4. Once your chocolate is melted, it's ready to use!

tempering chocolate

The secret to this way of tempering chocolate is controlling the temperature. As long as it doesn't go above the proper temperature then the crystals inside the cocoa butter remain intact and the chocolate stays in temper. This is a great way to temper small amounts of chocolate. 

If you're melting a big chocolate bar, make sure you chop it into small bits before melting to avoid over-heating and accidentally getting your chocolate out of temper. 

What happens if my chocolate gets too hot?

If you do happen to get your chocolate too hot don't worry, you can still temper it using the seeding method. Transfer your chocolate to another bowl and add a little unmelted chocolate to the melted chocolate and stir until it cools to 97ºF.

How to temper chocolate using the seeding method

  1. Melt ⅔ of the chocolate that you need over a double boiler until it reaches 115ºF. Stir constantly to prevent hot spots. Make sure the bowl fits firmly over your simmering water to prevent steam or drops of water from getting in your chocolate
  2. Remove chocolate from the heat. Add ½ of your remaining un-melted chocolate back into the bowl. Stir to melt. This cools down the chocolate. Transfer melted chocolate to another bowl to speed up the cooling process. Continue stirring until the chocolate reaches 100ºF
  3. Finely chop your remaining chocolate. At 96-98ºF, add in your chopped tempered chocolate and stir it into your warm chocolate. 95ºF is were the crystals in the cocoa butter start blooming so adding tempered chocolate in right before you reach this temperature ensures the proper crystals will grow and temper the rest of the untempered chocolate. 
  4. Continue stirring the chocolate every 5 minutes until it cools to 79ºF
  5. Warm chocolate VERY carefully over the double boiler for 5 seconds until chocolate reaches 86ºF-90ºF which is a good working temperature for using in molds or making candies. 

melted chocolate on spoon

How to temper chocolate using cocoa butter beta crystals

Another way to temper chocolate is to use tempered cocoa butter crystals called beta crystals. This is a little bit more expensive but pretty much full-proof when it comes to tempering.

  1. Melt ⅔ of your chocolate until it reaches 115ºF
  2. Add your remaining ⅓ of chocolate back into the melted chocolate to cool it down
  3. At 96ºF, add in 1% beta crystals (1 teaspoon per 7 ounces of chocolate) Stir well
  4. Cool chocolate to 79ºF then warm to 86-90ºF for workability

How to use tempered chocolate

Now that your chocolate is tempered you can use it to make chocolate spheres using a chocolate sphere mold, piped chocolate decorations and lots of other fun things! Tempering chocolate is a great skill to have and once you know how you'll be surprised how much more you'll use chocolate in your decorating. 


Recipe

close up of a chocolate butterfly decoration on a red velvet cupcake
Print Recipe
4.94 from 76 votes

How To Temper Chocolate

Easily temper chocolate in the microwave! The easiest way to temper small amounts of chocolate.
Prep Time5 minutes mins
Cook Time5 minutes mins
Course: Dessert
Cuisine: American
Servings: 12 oz
Calories: 144kcal
Author: Liz Marek

Equipment

  • 1 Thermometer

Ingredients

  • 12 oz chocolate
US Customary - Metric

Instructions

Tempering Chocolate Instructions

  • Place your chocolate in a plastic or silicone bowl in the microwave and heat on high for 30 seconds. Then stir
  • Heat again for another 30 seconds, stir, then 15 seconds, stir, then 10 seconds, stir. Make sure your temperature never goes above 90ºF for dark chocolate. 86F for milk chocolate and 84F for white chocolate. DO NOT RUSH THIS
  • If your chocolate is not fully melted then only do another 5 seconds until it is melted
  • Now your chocolate is in temper and ready to use!
  • Check out the video or blog post for ideas on decorating

Video

Notes

To learn more about tempering chocolate, check out Chef Christophe's tutorial on tempering chocolate with cocoa butter and an easy tempering machine. 

Nutrition

Serving: 1ounce | Calories: 144kcal | Carbohydrates: 17g | Protein: 1g | Fat: 10g | Saturated Fat: 6g | Polyunsaturated Fat: 0.3g | Monounsaturated Fat: 3g | Sodium: 5mg | Potassium: 82mg | Fiber: 2g | Sugar: 15g | Calcium: 7mg | Iron: 1mg

tempering chocolate the easy way pin


Floating Bowls Cake Tutorial

May 15, 2019 Paid Video

Gravity-Defying Floating Bowls Cake

Skill level: Intermediate

Have you ever wondered how to make a cake that looks like it's floating in air? This tutorial teaches you how to build the structure, incorporate supports and fun effects that complete this gravity-defying floating bowls cake.

This cake is perfect for the little artist's birthday, and artsy party-goers will be wowed by this incredible creation!

43:04 Minutes of Instruction

What You Will Learn

  • How to make a gravity-defying cake structure
  • Learn how to make bowl-shaped cakes
  • How to create a dripping colorful design of bowls that pour into each other
  • Learn the tips and tricks to covering tricky designs and shapes in fondant

Tutorial Chapters

  1. Pouring chocolate spheres 0:55
  2. Putting together the structure 4:15
  3. Carving the cake 6:36
  4. Attaching the bottom bowl 7:55
  5. Trimming the chocolate 16:04
  6. Assembling the middle bowl 16:26
  7. Trimming the middle bowl 18:01
  8. Frosting the cake 19:15
  9. Making the bowl topper 21:35
  10. Creating the handle 22:19
  11. Covering the bowls in fondant 23:54
  12. Creating the borders 28:10
  13. Covering the topper 30:40
  14. Covering the bottom bowl 31:08
  15. Painting the bowls 34:15
  16. Creating fondant drips 36:50
  17. Creating water ganache 38:09
  18. Attaching the topper 40:15

Downloads

Materials List

Floating Bowls Cake Tutorial

May 15, 2019 Course Preview

Gravity-Defying Floating Bowls Cake Tutorial

Skill level: Intermediate

Have you ever wondered how to make a cake that looks like it's floating in air? This tutorial teaches you how to build the structure, incorporate supports and fun effects that complete this gravity-defying floating bowls cake.

This cake is perfect for the little artist's birthday, and artsy party-goers will be wowed by this incredible creation!

43:04 Minutes of Instruction

What You Will Learn

  • How to make a gravity-defying cake structure
  • Learn how to make bowl-shaped cakes
  • How to create a dripping colorful design of bowls that pour into each other
  • Learn the tips and tricks to covering tricky designs and shapes in fondant

Tutorial Chapters

  1. Pouring chocolate spheres 0:55
  2. Putting together the structure 4:15
  3. Carving the cake 6:36
  4. Attaching the bottom bowl 7:55
  5. Trimming the chocolate 16:04
  6. Assembling the middle bowl 16:26
  7. Trimming the middle bowl 18:01
  8. Frosting the cake 19:15
  9. Making the bowl topper 21:35
  10. Creating the handle 22:19
  11. Covering the bowls in fondant 23:54
  12. Creating the borders 28:10
  13. Covering the topper 30:40
  14. Covering the bottom bowl 31:08
  15. Painting the bowls 34:15
  16. Creating fondant drips 36:50
  17. Creating water ganache 38:09
  18. Attaching the topper 40:15

Downloads

Materials List

meringue pop flowers cake

May 13, 2019 Blog

Meringue Pop Flower Pot Cake Tutorial

Crispy, crunchy flower meringue pops and an adorable flower pot cake with buttercream that looks like concrete!

Making these adorable flower meringue pops using my meringue cookie recipe could not be easier and they taste just like a toasted marshmallow! Triple chocolate cake combined with a simple rustic easy buttercream texture that looks like concrete, this flower pot cake is a real winner! 

meringue pop flower pot cake with buttercream concrete texture

Tips for making meringue pop flowers 

Honestly, the hardest part about this cake is that the flowers take a while to fully bake. We're using my meringue cookie recipe but flowers are a bit larger than a tiny meringue cookie. So you have to leave them in the oven for 2 hours instead of 1 to avoid cracks and a gooey center.

flower meringue pops

After the initial baking, turn off the oven and leave them in there for at least another two hours or better yet, overnight. So if you make them the day ahead (or even two) this cake goes a lot faster. 

I also baked my triple chocolate cakes, cooled them and crumb coated them the day before decorating so that all I had to do was add the "concrete" frosting and the meringue flower pops and the cake was done!

Easy meringue pop recipe

rose meringue pop

Meringue Cookie Ingredients

  • 3 fresh egg whites (3oz)
  • ¼ teaspoon cream of tartar  
  • 5 oz sugar
  • ½ teaspoon vanilla extract   
  • 1 pinch of salt 

Meringue pop instructions

  1. Pre-heat your oven to 225ºF and line a baking sheet with parchment paper

  2. Bring 2 inches of water to a simmer in a pot. Place a clean stainless steel mixing bowl over the water. It shouldn't touch the water. 

  3. Combine your egg whites and sugar and whisk to combine. Occasionally whisk as it's heating to distribute the heat and dissolve the sugar.  

  4. Once your egg whites are at 110ºF (or when you don't feel any grains of sugar between your fingers) you're ready to whip

  5. Place the bowl on your stand mixer with the whisk attachment. Whisk on med for one minute, add in cream of tartar, salt and flavoring. 

  6. Bump up to high and let whip until you reach STIFF peaks. 

  7. Now you are ready to pipe your meringue flowers!

    meringue whipped to stiff peaks

How to make a rose meringue pop 

For the rose, I use a 2F piping tip which also happens to be my favorite piping tip. I colored my meringue with a drop of electric pink food coloring. Place a dollop of the meringue onto the parchment paper to hold down the cake pop stick. Then starting from the center, create a swirl. 

I finished the rose meringue pop with a couple of leaves using my leaf piping tip and some meringue colored with yellow and leaf green food coloring. I thought my leaves were actually a little too big so I recommend using a smaller leaf tip like an Ateco 66. 

How to make hydrangea meringue pops

For the hydrangea meringue pop, I use a small closed star tip. Ateco 846 but any small-medium star tip would work for this. To make the colored meringue I used electric purple for half and royal purple for the other half of the meringue.

hydrangea meringue pop

I placed the meringue into a piping bag with the star tip. Glued down the cake pop stick with a dab of meringue. Then started piping little dollops in a small bunch. The two colors kind of combine as you pipe and make a pretty hydrangea bunch. Finish with a couple of leaves. 

How to make daisy meringue pops

Lastly, I wanted to try my hand at some daisies. I started with a medium round piping tip (Wilton 10) and some white meringue. Glue down your cake pop stick as before with some meringue.

daisy meringue pop

Then starting about 2" away from the cake pop stick, start piping towards the cake pop stick. Continue until you have created all your petals and then finish with a dollop of yellow meringue for the center. 

I also had a little leftover pink and yellow so I marbled them together to make some more rose pops and really like how they turned out! They reminded me of some beautiful painted roses my dad had in his yard. 

rose meringue pop

How to bake meringue pops

Because these cookies are larger than a typical meringue cookie, you want to bake them longer and at a lower temperature than typical meringue cookies. I pre-heat my oven to 200ºF then put my meringue pops in the oven to bake for 2 hours. Then turn off the oven and leave them in there overnight to fully dehydrate. 

A finished meringue pop should be totally crisp inside and not wet or sticky. If they then just increase your baking time for next time. 

flower meringue pops

Store finished meringue pops in an airtight container at room temperature until you need to use them. After a few hours at room temperature, they may become sticky which is normal. 

How to make a concrete buttercream texture

Time to make our concrete buttercream flower pot! I colored (almost) ⅔ of my buttercream a light grey using a drop of Americolor super black food coloring. It was a tad purple so to balance that out, I added a drop of yellow. 

grey buttercream

Save a little of the white for finishing touches. 2-3 tablespoon is plenty. 

Then I colored the ⅓ a dark black. I added about 1 teaspoon of cocoa powder and then two drops of black food coloring. The color was kind of green looking so I added a drop of red to balance out the green. 

dark grey buttercream

Then I added in a few cake crumbles to give the buttercream texture. This is totally optional but I thought the cake crumbs gave the buttercream a more realistic concrete texture. 

Pipe a border of grey on the top of your chilled cake and smooth out the top. Then a layer of gray around the outside and smooth it with a bench scraper. 

Now add a few dollops of the dark buttercream here and there and smooth over ONCE with your bench scraper. Don't be afraid to leave some bumps and pocks. 

concrete textured buttercream

Then add a few dollops of your white and scrape again in the opposite direction. I learned this trick from my friends Queen of Hearts Couture Cakes. Scraping in the opposite direction keeps the colors from blending too much into each other and looking muddy. 

Now all you have to do is add some of your leftover cake crumbs to the top of the cake for the dirt. If you didn't use a chocolate cake, you can use crushed up oreo cookies!

meringue pop cake

Then arrange your cake meringue pop flowers how you like! I love how this fun cake turned out. It made a great Mother's day cake!


Recipe

flower meringue pops cake
Print Recipe
5 from 3 votes

Meringue Pop Flower Pot Cake Recipes

How to make a cake that looks like a rustic flower pot topped with tasty flower meringue pops!
Prep Time1 day d
Cook Time1 day d 30 minutes mins
cooling1 hour hr 30 minutes mins
Total Time1 hour hr 40 minutes mins
Course: Dessert
Cuisine: American
Servings: 24 servings
Calories: 505kcal
Author: Liz Marek

Ingredients

Meringue Cookie Ingredients

  • 3 egg whites fresh
  • ¼ teaspoon cream of tartar
  • 5 oz sugar
  • ½ teaspoon vanilla or other flavoring
  • 1 pinch salt

Triple Chocolate Cake Recipe

  • 2.25 oz Dutched cocoa powder
  • 8 oz water
  • 3 large eggs
  • 2 teaspoon vanilla extract
  • 4 oz mayonaise
  • 14 oz cake flour
  • 15 oz granulated sugar
  • 2 teaspoon baking powder
  • 1 teaspoon baking soda
  • 1 teaspoon salt
  • 6 oz unsalted butter room temperature
  • 8 oz mini chocolate chips or finely chopped chocolate

Easy Buttercream Frosting

  • 4 oz pasteurized egg whites
  • 16 oz powdered sugar
  • 16 oz unsalted butter (room temperature)
  • 2 teaspoon vanilla
  • .5 teaspoon salt
US Customary - Metric

Instructions

Flower Meringue Pop Instructions

  • Pre-heat your oven to 220ºF and line a baking sheet with parchment paper
  • Bring 2 inches of water to a simmer in a pot. Place a clean stainless steel mixing bowl over the water. It shouldn't touch the water. 
  • Combine your egg whites and sugar and whisk to combine. Occasionally whisk as it's heating to distribute the heat and dissolve the sugar.  
  • Once your egg whites are at 110ºF (or when you don't feel any grains of sugar between your fingers) you're read to whip
  • Place the bowl on your stand mixer with the whisk attachment. Whisk on med for one minute, add in cream of tartar, salt and flavoring. 
  • Bump up to high and let whip until you reach STIFF peaks. 
  • Now you are ready to pipe your meringue onto the baking sheet into flowers! (see video for more details on piping)
  • Bake for 2 hours, then turn off the oven but do not take out the cookies. Let them sit in the oven until they are completely cold. I leave mine in overnight. 
  • Cookies can be stored in a ziplock bag unrefrigerated for up to two weeks. 

Triple Chocolate Cake Instructions

  • Note: all ingredients are by weight for accuracy.
    Bring the water to a boil. Add in cocoa powder. Whisk until smooth then add in cold mayonnaise, vanilla and eggs. Whisk to break up the eggs.
  • Place flour, sugar, baking powder, baking soda and salt into a stand mixer bowl and attach the paddle attachment.
  • Turn mixer on low (setting 1 on Kitchen Aid mixers). Add in your room temperature butter in small chunks. Combine on low until you achieve a sandy mixture.
  • Add ½ of your liquid ingredients into your dry ingredients and mix on medium (setting 4 on my kitchenaid) for 2 minutes. If you do not do this step, your cake could collapse.
  • Turn your mixer back down to low and add in the rest of your liquids slowly. Stop once or twice to scrape the bowl as needed.
    Once they are all combined, turn back up to medium for another 30 seconds.
  • Fold in your chocolate chips or chocolate chunks.
    Lightly grease two 8" round cake pans prepared with your choice of pan release. I prefer cake goop. 
  • Divide batter into Three 6" pans or two 8" round pans (2" tall). Bake for 30 minutes at 350ºF depending on how big your pans are. The bigger the pan, the longer it will take for them to bake. 
    When a toothpick comes out of the center with a few sticky crumbs on it, the cake is done.
  • After the cakes have cooled for about 10 minutes, or the pans have cooled to the point they can be touched, flip the cakes over and remove from the pans onto a cooling rack to cool completely. I cover mine in plastic wrap to keep them from drying out why they cool.
    Once the cakes are completely cool you can trim them and frost them.  

Easy Buttercream Frosting

  • Place egg whites and powdered sugar in a stand mixer bowl. Attach the whisk and combine ingredients on low and then whip on high for 5 minutes 
  • Add in your butter in chunks and whip with the whisk attachment to combine. It will look curdled at first. This is normal. It will also look pretty yellow. Keep whipping. 
  • Let whip on high for 8-10 minutes until it's very white, light and shiny. 
  • Switch to a paddle attachment and mix on low for 15-20 minutes to make the buttercream very smooth and remove air bubbles. This isn't required but if you want really creamy frosting, you don't want to skip it. 
  • Now you can add your coloring if desired

Nutrition

Serving: 1serving | Calories: 505kcal | Carbohydrates: 61g | Protein: 4g | Fat: 28g | Saturated Fat: 16g | Cholesterol: 86mg | Sodium: 257mg | Potassium: 86mg | Fiber: 1g | Sugar: 48g | Vitamin A: 710IU | Vitamin C: 0.1mg | Calcium: 42mg | Iron: 0.5mg

Meringue pop flowers on chocolate cake covered in buttercream that looks like a concrete texture


chocolate drip being piped onto a white cake with rainbow sprinkles

May 7, 2019 Frosting and Icing

Chocolate Drip

A chocolate drip is one of the easiest ways to make a cake look polished, elegant, and professionally decorated. If you've ever wondered how to get those smooth chocolate drips down the side of a cake without them running to the bottom or looking too thick, this post will show you exactly how to do it.

In this tutorial, you'll learn how to make chocolate drip with dark chocolate, milk chocolate, or white chocolate, how to adjust the cream ratio for each one, and how to apply it so it looks clean and intentional. This is a beginner-friendly technique, and once you understand the consistency and temperature, it becomes one of the easiest cake decorating tricks to master.

My easy chocolate cake recipe is the perfect base - two layers of fudgy chocolate cake topped with a glossy chocolate drip is hard to beat.

Quick Glance at the Recipe

  • Recipe Name: Chocolate Drip
  • Why You'll Love It: A simple ganache-based drip that works with dark, milk, or white chocolate and makes any cake look instantly more professional.
  • Time and Difficulty: About 10 minutes, beginner-friendly
  • Main Ingredients: Chocolate, heavy cream, optional gel food coloring
  • Method: Heat the cream, pour it over the chocolate, whisk until smooth, then let it cool slightly before dripping onto a chilled cake
  • Texture and Flavor: Smooth, glossy, rich, and soft enough to slice cleanly
  • Quick Tip: Always test one drip first before decorating the whole cake
ChatGPT
Google AI
Perplexity
Grok
Add us as a trusted site on Google

[feast_advanced_jump_to]

When drip cakes first started getting really popular, I noticed a lot of beginner decorators were running into the exact same issue. Their chocolate drip was either way too thin and sliding all the way down the cake, or it was too thick and just sitting on top like a blob. It felt like one of those decorating techniques that looked easy until you actually tried it.

I started teaching this method a lot more because once you understand what makes a chocolate drip work, it becomes incredibly predictable. It's really just about the ratio of chocolate to cream, the temperature of the ganache, and making sure your cake is properly chilled before you start.

I still use this technique all the time when I want a cake to look a little extra special without spending a ton of time decorating. A good chocolate drip can make even a very simple buttercream cake look finished and elegant.

The same chilled-cake pour technique gives my classic boston cream pie its signature glossy ganache top with clean drips down the side.

Ingredients For Chocolate Drip

The great thing about chocolate drip is that it only needs a few ingredients, but each one matters. The exact amount of cream you use will depend on the type of chocolate, which is why understanding the role of each ingredient makes a big difference.

  • Chocolate - Chocolate is the base of the drip and provides the flavor, structure, and shine. You can use dark chocolate, semi-sweet chocolate, milk chocolate, or white chocolate depending on the look and flavor you want. Mini chocolate chips melt easily, but chopped chocolate bars can give you an even smoother finish. You can substitute one kind of chocolate for another, but you'll need to adjust the amount of cream.
  • Heavy cream - Heavy cream loosens the chocolate and turns it into ganache so it can drip smoothly over the edge of the cake. This is what gives the drip its silky texture. Do not substitute milk unless you're prepared for a thinner and less stable result. If you don't have heavy cream, water ganache is another option, especially for white chocolate drips.
  • Gel food coloring - Gel food coloring is optional, but it's great for tinting white chocolate drip. It helps you create colorful drips without changing the consistency too much. I recommend using gel coloring instead of liquid coloring. If you want a brighter white drip, you can also add a small drop of white food coloring.

Chocolate Drip Ratios

Different chocolates need different amounts of cream because they all melt differently.

Chocolate TypeChocolateHeavy Cream
Dark or Semi-Sweet Chocolate6 oz4 oz
Milk Chocolate6 oz3 oz
White Chocolate6 oz2 oz

Dark Or Semi-Sweet Chocolate

Use 6 ounces of dark or semi-sweet chocolate with 4 ounces of heavy cream. This gives you a rich, shiny drip that works beautifully on most cakes.

Milk Chocolate

Use 6 ounces of milk chocolate with 3 ounces of heavy cream. Milk chocolate is softer and sweeter, so it needs a little less cream.

White Chocolate

Use 6 ounces of white chocolate with 2 ounces of heavy cream. White chocolate is much softer than dark chocolate, so using too much cream will make the drip too thin very quickly.

How to Make a Chocolate Drip Step-By-Step

  1. Start by choosing your chocolate type and measuring the correct amount of cream based on the ratio chart above. This part is really important because even a small change in ratio can affect how the drip behaves.

    If you're making a white chocolate drip, this is also a good time to have your gel food coloring ready.
  1. Heat the heavy cream in the microwave for about 1 minute, or until you see steam rising off the top. It should be hot, but not boiling.

    If the cream gets too hot, it can make the ganache separate or become grainy.

BONUS TIP: If you're heating the cream on the stovetop, remove it as soon as it starts to steam. Don't let it boil.

  1. Warm the chocolate for about 30 to 60 seconds in the microwave just until it's slightly warm. You're not trying to melt it all the way. This just helps the cream melt the chocolate more evenly.

    This is especially helpful when using chocolate chips because they tend to hold their shape longer than chopped chocolate bars.
  1. Pour the hot cream over the chocolate and let it sit for 2 to 3 minutes without stirring. This gives the chocolate time to soften before you mix it.

    Be patient here. Letting it sit first will give you a much smoother ganache.
  1. Whisk the chocolate and cream together gently until the ganache is smooth, shiny, and fully combined. If you still see unmelted lumps, microwave the ganache for 20 to 30 seconds and whisk again.
  1. If you're using white chocolate drip and want to color it, add a small amount of gel food coloring after the ganache is smooth and stir until evenly tinted.

    If the drip looks a little transparent, add a tiny bit of white food coloring to make it more opaque.

PRO TIP: Allow your chocolate drip to cool to about 90ºF before applying it to the cake so that the drips don't run all the way down the cake.

How To Create The Perfect Drip Cake

So now we have our ganache made but we're not ready to drip quite yet! If you put the hot ganache on your cake your drips will run all the way to the bottom of the cake or melt your buttercream. 

  1. Before you drip anything, make sure your cake is chilled in the fridge for about 20 minutes. A cold cake helps the ganache set and keeps the drip from sliding too far down the sides.
  1. Transfer the ganache to a piping bag, squeeze bottle, or use a spoon, then do one test drip on the side of the cake. Watch how far it runs.

    If it runs too far, let the ganache cool a little longer. If it barely moves, warm it slightly or add a tiny bit more cream.
  1. Pipe or spoon the ganache around the outside edge of the cake, alternating longer and shorter drips for a natural look. Then spread the remaining ganache across the top of the cake with an offset spatula.

Common Mistakes To Avoid

  • Using ganache that is too hot - This is one of the biggest reasons chocolate drip runs all the way to the bottom of the cake.
  • Skipping the test drip - Testing one drip first can save you from covering the entire cake with the wrong consistency.
  • Not chilling the cake first - A cold cake helps the ganache set quickly and keeps the buttercream from melting.
  • Using the wrong ratio for the type of chocolate - White chocolate, milk chocolate, and dark chocolate all need different amounts of cream.
  • Overmixing the ganache - Too much whisking can add air bubbles and make the ganache less smooth.
  • Boiling the cream - Overheated cream can cause the ganache to become grainy or separate.

Final Thoughts

Chocolate drip is one of those cake decorating techniques that looks fancy but is actually very simple once you understand the basics. If you can measure your ingredients, warm your cream, and test your consistency, you can absolutely make a beautiful drip cake.

The biggest thing to remember is that a perfect chocolate drip comes down to ratio, temperature, and patience. Chill your cake, let the ganache cool slightly, and always test one drip before you commit. Once you do it a couple of times, it becomes second nature.

Chocolate Drip FAQ

Why is my chocolate drip too runny?

Your ganache is probably too warm or has too much cream in it. Let it cool slightly before using it, and make sure you're using the right ratio for the type of chocolate.

Why is my chocolate drip too thick?

It may need a tiny bit more warm cream, or it may have cooled too much before you used it. Add a little warm cream and stir until smooth.

Can I use chocolate chips for chocolate drip?

Yes, chocolate chips work well for chocolate drip, especially mini chocolate chips. Chopped chocolate bars can melt a little more smoothly, but either one works.

Can I color a chocolate drip?

Yes. White chocolate drip is perfect for coloring with gel food coloring. If it looks slightly translucent, add a tiny drop of white food coloring.

Can I make chocolate drip ahead of time?

Yes. You can make ganache ahead and store it in the fridge. Rewarm it gently before using, just until it becomes fluid again.

Why did my ganache turn grainy?

This usually happens when the cream is too hot. Heat it only until steaming and avoid boiling.

More Ways To Get Your Drip On

  • gold drip on a white cake
    Gold Drip Tutorial
  • banana split cake
    Banana Split Drip Cake
  • Heart of Gold Drip Cake
    Heart of Gold Drip Cake
  • water ganache recipe
    Water Ganache Recipe

If you made this recipe or any recipe on Sugar Geek Show, I'd love to hear how it turned out! Leave a rating and comment below - it helps other bakers and it truly makes my day. ⭐⭐⭐⭐⭐


Recipe

chocolate drip being piped onto a white cake with rainbow sprinkles
Print Recipe
4.89 from 34 votes

Chocolate Drip Recipe

How to make perfect chocolate drips whether it's dark, milk or white chocolate. It's all about the right ratio and temperatures. 
Prep Time10 minutes mins
Cook Time30 minutes mins
Total Time40 minutes mins
Course: Dessert
Cuisine: American
Servings: 10 oz
Calories: 388kcal
Author: Liz Marek

Ingredients

Chocolate Drip

  • 6 ounces semi-sweet chocolate or dark chocolate
  • 4 ounces heavy whipping cream

For Milk Chocolate Drip

  • 6 ounces milk chocolate
  • 3 ounces heavy whipping cream

White Chocolate Drip

  • 7 ounces white chocolate
  • 3 ounces heavy whipping cream
US Customary - Metric

Instructions

Chocolate drip recipe

  • Add your cream to a medium sized saucepan over medium heat until it just begins to steam. Do not boil.
  • Place your chocolate into a heat proof bowl
  • Pour the hot cream over chocolate. Make sure the cream is completely covering the chocolate.
  • Let sit 5 minutes then whisk until smooth.
  • Let the chocolate drip cool until slightly warm to the touch before piping onto your CHILLED cake. 

Video

Notes

1. Let the ganache cool before dripping

If the ganache is too hot, the chocolate drip will run all the way down the cake or melt your buttercream. Let it cool until it feels slightly warm but not hot before applying it.

2. Always drip onto a chilled cake

Place your frosted cake in the refrigerator for 20 minutes before applying the drip. A cold cake helps the chocolate set quickly and keeps the drips from running too far.

3. Test one drip first

Before decorating the entire cake, pipe one test drip on the side. If it runs too far, let the ganache cool longer. If it barely moves, warm it slightly or add a tiny bit more cream.

4. Use the correct chocolate ratio

Different chocolates require different amounts of cream.
  • Dark or semi-sweet chocolate: 6 oz chocolate + 4 oz cream
  • Milk chocolate: 6 oz chocolate + 3 oz cream
  • White chocolate: 6 oz chocolate + 2 oz cream

5. Fixing ganache consistency

If your chocolate drip is too thick, add a teaspoon of warm cream and stir until smooth.
If it is too thin, allow it to cool longer before using.

6. Best chocolate to use

Mini chocolate chips melt easily and work well for chocolate drip. Chopped chocolate bars will produce the smoothest and glossiest ganache.

7. Coloring white chocolate drip

White chocolate drip can be colored with gel food coloring. If the drip looks slightly transparent, add a tiny drop of white food coloring to make it more opaque.

Nutrition

Serving: 1oz | Calories: 388kcal | Carbohydrates: 32g | Protein: 4g | Fat: 29g | Saturated Fat: 18g | Polyunsaturated Fat: 1g | Monounsaturated Fat: 8g | Trans Fat: 0.01g | Cholesterol: 37mg | Sodium: 30mg | Potassium: 229mg | Fiber: 2g | Sugar: 28g | Vitamin A: 431IU | Vitamin C: 0.3mg | Calcium: 73mg | Iron: 2mg


Modern Geometric Cake Tutorial

May 1, 2019 Course Preview

Modern Geometric Cake Tutorial

Skill level: Intermediate

Our latest tutorial is designed by none other than Jessica Phan and is a sure-win modern cake design.

Learn how to create a geometric cake with clean buttercream and ganache stripes, a wild geometric frill pattern and an adorable stained-glass bear face cake topper. This cake is perfect for the modern design lover and offers several tips and techniques to achieve different geometric looks.

32:03 Minutes of Instruction

What You Will Learn

  • How to make an intricate modern geometric cake design
  • Learn how to create a stained-glass bear cake topper
  • How to get geometric patterns and shapes on a tier
  • Learn how to get perfect stripes on a cake tier without fondant

Tutorial Chapters

  1. Making the gumpaste triangles 1:01
  2. Prepping the bear topper gumpaste 6:54
  3. Adding triangles to cake 8:12
  4. Coloring the ganache 13:00
  5. Adding stripes to buttercream 13:50
  6. Preparing the ganache tier 16:49
  7. Making the bear cake topper 17:21
  8. Adding the isomalt 23:44
  9. Making the cake topper base 25:46
  10. Measuring & placing supports 28:05
  11. Finishing geometric texture 28:42
  12. Finishing touches 30:41

Downloads

Materials List

Bear Cake Topper Template

Modern Geometric Cake Tutorial

May 1, 2019 Paid Video

Modern Geometric Cake

Skill level: Intermediate

Our latest tutorial is designed by none other than Jessica Phan and is a sure-win modern cake design.

Learn how to create a geometric cake with clean buttercream and ganache stripes, a wild geometric frill pattern and an adorable stained-glass bear face cake topper. This cake is perfect for the modern design lover and offers several tips and techniques to achieve different geometric looks.

32:03 Minutes of Instruction

What You Will Learn

  • How to make an intricate modern geometric cake design
  • Learn how to create a stained-glass bear cake topper
  • How to get geometric patterns and shapes on a tier
  • Learn how to get perfect stripes on a cake tier without fondant

Tutorial Chapters

  1. Making the gumpaste triangles 1:01
  2. Prepping the bear topper gumpaste 6:54
  3. Adding triangles to cake 8:12
  4. Coloring the ganache 13:00
  5. Adding stripes to buttercream 13:50
  6. Preparing the ganache tier 16:49
  7. Making the bear cake topper 17:21
  8. Adding the isomalt 23:44
  9. Making the cake topper base 25:46
  10. Measuring & placing supports 28:05
  11. Finishing geometric texture 28:42
  12. Finishing touches 30:41

Downloads

Materials List

Bear Cake Topper Template

Slice of cake with ermine frosting laying on a cake plate.

April 25, 2019 Blog

Ermine Frosting

Ermine frosting (also called roux frosting or boiled milk frosting) is made by cooking flour and sugar with milk to make a sweet paste. This paste is then whipped into softened butter until light and fluffy. Vanilla and salt is added for flavoring. It's especially good on my easy chocolate cake recipe or red velvet cake.

ermine frosting

Quick Glance: Ermine Frosting

  • Recipe Name: Ermine Frosting
  • Why You'll Love It: Lighter and less sweet than any buttercream you've ever had, with a silky whipped-cream texture that's completely egg-free
  • Time and Difficulty: 40 minutes, including cooling time / Easy
  • Main Ingredients: Flour, granulated sugar, whole milk, unsalted butter, vanilla
  • Method: Cook flour and milk into a thick roux, cool completely, then whip into butter
  • Texture and Flavor: Silky smooth and cloud-like with a delicate vanilla sweetness and absolutely no flour taste
  • Quick Tip: The flour mixture must be completely cold before it goes into the butter. Even slightly warm will melt the butter and the whole frosting will collapse
ChatGPT
Google AI
Perplexity
Grok
Add us as a trusted site on Google
[feast_advanced_jump_to]

This might sound like a bizarre process (it did to me at first) but it's actually a delicious frosting! Ermine frosting reminds me a lot of that frosting that you find in a ding dong or twinkie. Very light and almost like whipped cream. 

This frosting does not have eggs in it so it's a fantastic alternative to Swiss Meringue Buttercream if you want a light frosting but can't have eggs. 

Why This Recipe Works So Well

Ermine frosting is structurally different from every other buttercream, and understanding why helps you make it successfully every time.

Most frostings get their body from powdered sugar, cooked egg whites, or egg yolks. Ermine frosting uses a cooked starch gel instead. When flour and sugar are heated with milk, the starch granules in the flour absorb the liquid and swell through a process called gelatinization, forming a thick, stable paste. When that paste is whipped into softened butter, the starch gel acts as an emulsifier, binding the fat and liquid together into a smooth, cohesive frosting without any powdered sugar at all.

Toasting the flour dry in the pan for a couple of minutes before adding the milk does two things: it removes the raw flour taste that would otherwise come through in the finished frosting, and it partially breaks down the starch so the roux thickens evenly rather than clumping.

Because there are no eggs in this recipe, there is no risk of curdling, no food safety concerns around raw whites, and no need for a candy thermometer. The only thing that can go wrong is adding the roux to the butter before it's fully cooled, which melts the fat and breaks the frosting. Get that one step right, and the rest takes care of itself.

Ermine frosting actually tastes really good! I admit making the roux did not seem very appetizing but after I gave it a taste, I could see why ermine frosting is the traditional frosting used with red velvet cake. It's so good!

Ermine Frosting Ingredients

The frosting is super smooth and creamy. A nice light vanilla flavor and no hint of a flour taste. I promise. 

Granulated sugar provides sweetness and also helps thicken the roux when cooked with the flour and milk. Because the sugar is cooked into a paste rather than added as powdered sugar, the finished frosting is significantly less sweet than American buttercream. Do not substitute powdered sugar here.

All-purpose flour is the thickening agent that makes ermine frosting unique. The starch in the flour gelatinizes when cooked with the milk, creating the paste that gives this frosting its structure. Measure by weight for the most consistent results.

Whole milk hydrates the flour and sugar into a smooth roux. Whole milk is recommended because the higher fat content produces a richer, creamier finished frosting. You can substitute 2% milk but the texture will be slightly less silky. Do not use non-dairy milk alternatives as they behave differently when heated with starch.

Unsalted butter is whipped into the cooled roux to create the final frosting. It must be fully softened to room temperature so it whips up light and fluffy before the roux goes in. Unsalted butter is used so the salt level can be controlled. For a slightly richer flavor, European-style butter with a higher fat content works beautifully here.

Vanilla extract is the primary flavor in this frosting. Use a high-quality pure vanilla extract or vanilla bean paste for the best result. You can also substitute almond extract, lemon emulsion, or any other flavoring in the same amount.

Salt balances the sweetness and deepens the overall flavor. It should not be detectable as saltiness, only as a rounding out of the vanilla and butter.

How do you make ermine frosting?

Making ermine frosting is actually pretty simple. 

Flour and sugar in a metal saucepan.
  1. Add the flour and sugar to a medium saucepan over medium heat. Whisk together and cook for 2 minutes, stirring constantly, until the mixture smells slightly nutty and looks dry and sandy. Watch carefully so it doesn't burn - you want lightly toasted, not browned.
Pouring milk into a metal saucepan with flour and sugar and a whisk.
  1. Reduce the heat to medium and slowly pour in the milk in a thin, steady stream while whisking constantly. The mixture will look thin at first. Keep whisking and it will begin to thicken.
Ermine frosting mixture with a gold whisk inside a metal saucepan.
  1. Increase to medium-high heat and bring to a simmer, whisking continuously. Continue cooking for one more minute after it reaches a simmer. The finished roux should be very thick and pudding-like - it should hold a shape when you drag the whisk through it and fall off the whisk in slow, heavy ribbons.
Ermine frosting roux being strained through a strainer with a white spatula.
  1. If your roux has any lumps, strain it through a fine mesh sieve into a heatproof bowl now, pressing it through with a spatula.
Ermine frosting roux in a clear bowl with plastic wrap on top.
  1. Press a sheet of plastic wrap directly onto the surface of the roux so no air touches it. This prevents a skin from forming. Refrigerate until completely cold, at least 2 hours or overnight. You can also spread it onto a sheet pan, cover with plastic, and freeze for 30 minutes if you're short on time. The roux must be fully cold - not cool, not slightly warm, but cold all the way through.
Creamed butter in a kitchenaid mixer.
  1. Add the softened butter to the bowl of your stand mixer with the whisk attachment. Whip on high for 2 to 3 minutes until the butter is very pale, light, and fluffy. It should look almost white and increase noticeably in volume.
  1. Transfer the cold roux into a piping bag. With the mixer running on medium, slowly pipe the roux into the whipped butter a little at a time, waiting a few seconds between additions. Adding it slowly ensures the roux and butter emulsify smoothly rather than curdling.
  1. Once all the roux is incorporated, add the vanilla and salt. Increase to high speed and whip for 1 to 2 more minutes until the frosting is very light, smooth, and fluffy. It should look like thick whipped cream and hold a soft peak.

EXPERT TIP: Ermine frosting is best used right after it's made. It sets as it sits and loses its light, creamy texture if left too long before using.

Common Mistakes to Avoid

Adding the roux before it's completely cold. This is the single most common reason ermine frosting fails. Even slightly warm roux will melt the butter and turn everything soupy. Be patient and let it chill fully in the refrigerator. If you're in a hurry, spread it thin on a sheet pan and freeze it.

Skipping the flour toasting step. Untoasted flour has a starchy, raw taste that will come through in the finished frosting. Two minutes of dry toasting in the pan completely eliminates this and is worth the extra step.

Adding the roux too fast. Dumping all the roux into the butter at once instead of adding it slowly almost always causes the frosting to break or look curdled. Pipe it in gradually with the mixer running for the smoothest result.

Trying to use ermine frosting under fondant. Ermine frosting is too soft to support the weight of fondant. It will compress and bulge under the fondant as it sits. Use it as a filling between cake layers or as a finish frosting, and choose a stiffer buttercream for any fondant-covered cakes.

Making it ahead and expecting it to keep. Ermine frosting does not hold well once made. The starch gel continues to firm up, and the texture becomes dense and less creamy within a few hours. Make the roux ahead of time and refrigerate it for up to a week, but whip the frosting fresh right before you need it.

Ermine Frosting FAQs

What does ermine frosting taste like?

Ermine frosting tastes like a lighter, less sweet version of buttercream - closer to whipped cream than traditional frosting. There is no detectable flour taste when the roux is made correctly. The vanilla comes through cleanly and the overall flavor is delicate, creamy, and just barely sweet. It's the frosting that people who say they "don't like frosting" actually enjoy.

What is the difference between ermine frosting and Swiss meringue buttercream?

Both are lighter and less sweet than American buttercream, but they use completely different structures. Swiss meringue buttercream is built on cooked egg whites whipped into a stable foam, then finished with butter. Ermine frosting uses no eggs at all and gets its structure from a cooked flour and milk roux. Ermine frosting is simpler to make and has a slightly lighter, airier texture, while Swiss meringue buttercream is more stable and better suited for warm environments.

Does ermine frosting need to be refrigerated?

Yes. Because ermine frosting contains milk, it should not be left at room temperature for more than a couple of hours. Refrigerate any leftover frosting in an airtight container for up to one week, or freeze for up to three months. The roux base on its own can also be made ahead and refrigerated for up to a week - just whip it fresh into the butter when you're ready to use it. Bring a frosted cake out of the refrigerator one to two hours before serving so the frosting softens back to its best texture.

Can you make ermine frosting ahead of time?

You can make the roux component up to a week ahead and store it refrigerated. However, the finished frosting is best used immediately after whipping. Once the roux and butter are combined, the frosting begins to firm up and lose its light, creamy consistency within a few hours. For the best results, make the roux in advance and whip the frosting fresh on the day you need it.

Why is my ermine frosting grainy?

Graininess is usually caused by the sugar not fully dissolving during cooking. Make sure you whisk constantly while the roux cooks and allow it to reach a full simmer before removing from the heat. If graininess is still an issue, strain the roux through a fine mesh sieve before chilling. Graininess can also happen if the butter is too cold when the roux is added - always make sure the butter is fully softened to room temperature first.

Can you color ermine frosting?

Yes. Add gel food coloring in the final step after all the roux is incorporated. Use gel or paste colors rather than liquid since liquid can thin the frosting. Add a small amount at a time and mix on low until you reach the desired shade. Because the frosting is so light in color, it takes color easily and produces bright, clean shades.

Can you make chocolate ermine frosting?

Yes. Once the frosting is fully whipped, add a quarter cup of sifted unsweetened cocoa powder and mix on low until fully incorporated. The cocoa will deepen the color and add a light chocolate flavor without significantly changing the texture.

Can you pipe ermine frosting?

Yes, ermine frosting pipes well when used immediately after making. It holds swirls and rosettes cleanly with a piping bag and tip. Because it softens quickly at room temperature and doesn't hold up well over time, pipe decorations right before serving rather than hours in advance.

More Frosting Recipes To Try

  • Swirls of swiss meringue buttercream on vanilla cupcakes on a pink plate.
    Swiss Meringue Buttercream
  • Close up of American buttercream rosettes
    American Buttercream Recipe
  • Piping easy buttercream rosettes onto a cake using a 1M star piping tip
    Easy Buttercream Frosting
  • Close up of pink Italian meringue buttercream piped into rosettes.
    Italian Meringue Buttercream

Watch: How To Decorate A Cake Step-by-Step

Before you start decorating, watch the video below where I show you every step of decorating a cake from start to finish. Seeing the process in action makes it much easier to follow along

- Liz Marek.

Start Learning Now
smiling woman holding a decorated cake in her hands

Recipe

Slice of cake with ermine frosting laying on a cake plate.
Print Recipe
4.87 from 348 votes

Ermine Frosting

Ermine frosting is light, creamy and made with cooked flour as a thickening agent. Often referred to as flour frosting or boiled milk frosting. 
Prep Time10 minutes mins
Cook Time30 minutes mins
Total Time40 minutes mins
Course: Dessert
Cuisine: American
Servings: 6 cups
Calories: 921kcal
Author: Liz Marek

Ingredients

Ermine Frosting Ingredients

  • 14 ounces granulated sugar
  • 3 ounces flour
  • 16 ounces whole milk
  • 16 ounces unsalted butter room temperature
  • 2 teaspoons vanilla extract
  • ¼ ounces salt
US Customary - Metric

Instructions

Ermine Frosting Instructions

  • Whisk together your flour and sugar in a medium saucepan over medium heat. Cook for about 2 minutes to toast the flour. Be careful not to burn it!
  • Slowly add in your milk, whisk to combine, and bring your heat to medium-high. Bring the mixture to a simmer, whisk continuously until it is thick and pudding-like. Once it's simmering, cook for one minute more.
  • (Optional) If your mixture has any lumps, place a colander on top of a heat-proof bowl and push your mixture through and into the bowl.
    Transfer the mixture into a heat-proof bowl. Cover the mixture with plastic wrap so that it is touching the surface without any air bubbles in between, this will prevent a skin from forming on the top of the mixture. Let cool in the refrigerator for a few hours or overnight.
    You can also transfer the mixture to a sheet pan, spread it out, cover it with plastic, and put it in the freezer for about 30 minutes to cool faster.
    Make sure the mixture is completely cool or it will melt your butter.
  • Add your softened butter to the bowl of your stand mixer and whisk on high until very light and fluffy, about 2-3 minutes.
  • Once the butter is fluffy, place the cooled flour mixture into a piping bag and slowly pipe it into your butter as your whip. Incorporating slowly ensures a smooth buttercream. 
  • Add in your vanilla and salt, then mix until everything is creamy. Use it to frost your cooled cake. This buttercream will set quickly, so it's best used immediately.

Video

Notes

  • Toast the flour and sugar dry in the pan for 2 minutes before adding the milk. This removes the raw flour taste from the finished frosting.
  • Whisk the milk in slowly and stir constantly to prevent lumps. If lumps form, strain the roux through a fine mesh sieve before chilling.
  • Press plastic wrap directly onto the surface of the roux before refrigerating. This prevents a skin from forming on top.
  • The roux must be completely cold before adding it to the butter. Even slightly warm will melt the butter and break the frosting.
  • Make sure your butter is fully softened to room temperature before whipping. Cold butter will not whip up light and fluffy.
  • Add the roux to the butter slowly using a piping bag with the mixer running. Adding it all at once can cause the frosting to curdle.
  • Use ermine frosting immediately after making it. It sets as it sits and loses its light, creamy texture within a few hours.
  • Do not use ermine frosting under fondant. It is too soft to support the weight and will compress and bulge.
  • To make chocolate ermine frosting, whip in ¼ cup of sifted cocoa powder at the end.
  • The roux can be made up to one week ahead and stored refrigerated. Whip fresh into butter the day you need it.

Nutrition

Serving: 2oz | Calories: 921kcal | Carbohydrates: 81g | Protein: 5g | Fat: 64g | Saturated Fat: 40g | Polyunsaturated Fat: 2g | Monounsaturated Fat: 16g | Trans Fat: 2g | Cholesterol: 172mg | Sodium: 497mg | Potassium: 162mg | Fiber: 0.4g | Sugar: 71g | Vitamin A: 2012IU | Calcium: 115mg | Iron: 1mg
{ "@context": "https://schema.org", "@type": "WebPage", "@id": "https://sugargeekshow.com/ermine-frosting/", "name": "Ermine Frosting", "about": [ {"@type": "Thing", "name": "Buttercream", "sameAs": "https://en.wikipedia.org/wiki/Buttercream"}, {"@type": "Thing", "name": "Roux", "sameAs": "https://en.wikipedia.org/wiki/Roux"}, {"@type": "Thing", "name": "Flour", "sameAs": "https://en.wikipedia.org/wiki/Flour"}, {"@type": "Thing", "name": "Butter", "sameAs": "https://en.wikipedia.org/wiki/Butter"}, {"@type": "Thing", "name": "Whole milk", "sameAs": "https://en.wikipedia.org/wiki/Milk"}, {"@type": "Thing", "name": "Vanilla extract", "sameAs": "https://en.wikipedia.org/wiki/Vanilla_extract"}, {"@type": "Thing", "name": "Starch gelatinization", "sameAs": "https://en.wikipedia.org/wiki/Starch_gelatinization"}, {"@type": "Thing", "name": "Cake decorating", "sameAs": "https://en.wikipedia.org/wiki/Cake_decorating"}, {"@type": "Thing", "name": "Red velvet cake", "sameAs": "https://en.wikipedia.org/wiki/Red_velvet_cake"}, {"@type": "Thing", "name": "Confectionery", "sameAs": "https://en.wikipedia.org/wiki/Confectionery"} ] }

Splatter Portrait Cake Tutorial

April 15, 2019 Course Preview

Splatter Portrait Cake Tutorial

Skill level: Intermediate

The theme of this birthday party was "Little Artists" for Arya, who is turning 4. We discussed a few options and settled on a 4-sided cake with a portrait of Arya at 1, 2, 3 and 4 years of age.

It was such a fun project and turned out so well, I'm very excited to share this technique with you. I think this technique can be applied in a number of ways and I look forward to seeing how you will apply this cool look.

47:51 Minutes of Instruction

What You Will Learn

  • Learn how to make an enormous square double-barrel buttercream cake
  • How to get super sharp buttercream edges
  • Learn how to use Photoshop to make your own portrait templates
  • How to make a realistic edible portrait on a cake with cool splatter effects

Splatter Portrait Cake Tutorial

Tutorial Chapters

  1. Making giant double-barrel cake 1:08
  2. Getting super sharp corners 7:46
  3. Stacking the cake 9:00
  4. Finishing top tier 18:38
  5. Making the portrait templates 23:10
  6. Preparing the portrait templates 28:20
  7. Paneling the cake 29:17
  8. Prepping splatter colors 34:23
  9. Making the portraits 38:13
  10. Finishing touches 45:25

Downloads

Materials List

Splatter Portrait Cake Tutorial

April 15, 2019 Paid Video

Splatter Portrait Cake

Skill level: Intermediate

The theme of this birthday party was "Little Artists" for Arya, who is turning 4. We discussed a few options and settled on a 4-sided cake with a portrait of Arya at 1, 2, 3 and 4 years of age.

It was such a fun project and turned out so well, I'm very excited to share this technique with you. I think this technique can be applied in a number of ways and I look forward to seeing how you will apply this cool look.

47:51 Minutes of Instruction

What You Will Learn

  • Learn how to make an enormous square double-barrel buttercream cake
  • How to get super sharp buttercream edges
  • Learn how to use Photoshop to make your own portrait templates
  • How to make a realistic edible portrait on a cake with cool splatter effects

Tutorial Chapters

  1. Making giant double-barrel cake 1:08
  2. Getting super sharp corners 7:46
  3. Stacking the cake 9:00
  4. Finishing top tier 18:38
  5. Making the portrait templates 23:10
  6. Preparing the portrait templates 28:20
  7. Paneling the cake 29:17
  8. Prepping splatter colors 34:23
  9. Making the portraits 38:13
  10. Finishing touches 45:25

Downloads

Materials List

banana split cake

April 15, 2019 Blog

Banana Split Drip Cake

A banana split cake made from decadent strawberry, vanilla, and chocolate cake and topped with chocolate drip and cherries!

I am in love with this banana split cake! It's so festive! Totally takes me back to those yummy banana splits I had when I was a kid with heaps of creamy ice cream and of course toppings like maraschino cherries, sprinkles, and nuts!. 

banana split cake

Whenever I have leftover cake batter, I always bake it up in a 6" round and freeze it. When I was still making cakes for clients I would use these cakes for the cake tastings. 

Now that it's up to me to eat all that leftover cake, I decided to take some of my leftover chocolate cake, strawberry cake, and banana cake and make a banana split drip cake! 

If you don't have any leftover cake in your freezer then go ahead and follow the recipe below. This will make one 8" layer of each flavor of cake. The perfect amount for a fun birthday or celebration!

How to make a banana split cake

After you bake up your layers, let them cool fully. I put mine in the freezer (unwrapped) for about an hour to speed up the process. 

Level off your cakes by cutting off the domes and trim off the brown from the bottom and sides (optional). 

I decided to fill my cakes with my fresh strawberry buttercream because it's more stable for traveling but you can definitely use stabilized whipped cream with fresh strawberries layered on top. Whipped cream is softer but tastes more like a traditional banana split cake. 

Slice of banana split cake

I finished my cake with a smooth layer of easy buttercream on the outside of the cake and then popped it back into the freezer to chill for 15 minutes while I made my chocolate drip. 

If you need more detailed info on how to make a cake then you can watch my free tutorial for beginners. 

I added some rainbow sprinkles to the base of the cake too, which really gives it the festive banana split look!

How to make a chocolate drip

To make the chocolate drip, I decided to go with a ganache drip but you can also make a water ganache drip if you prefer. 

To make the drip I combined heated 4 oz of cream on the stove in a small pan just until it started to steam. Do not let the cream boil or it will cause your ganache to be grainy.

I poured this cream over 6 oz of finely chopped semi-sweet chocolate. Press down the chocolate so that it's fully submerged in the cream. Let sit for 5 minutes. 

After 5 minutes you can whisk the chocolate until it's smooth. Sometimes you see some small lumps of unmelted chocolate. You can get rid of them with an immersion blender or pop everything into the microwave for 30 seconds to melt further. 

If your ganache is too thin, you can add in another ounce of melted chocolate to the mixture. If your ganache is too thick, add in another ounce of hot cream (can be warmed in the microwave). 

The chocolate you use will GREATLY affect the consistency of the ganache but no matter what, you can always fix your ganache. 

Once your ganache has cooled a bit, I pour mine into a piping bag so I can have more control of the drip. You can use a squeeze bottle too but a spoon will make your drips too globby and messy. 

how to make a chocolate drip

finish the drip by filling in the center with the excess ganache and smooth out any gaps. 

Finishing the banana split cake

Next, I added some chopped peanuts to the top of my cake. Traditionally, a banana split also has crushed pineapple and strawberries on top. I thought that would look too messy so I left it off. 

I used a 1M piping tip to make some swirls of buttercream on the top of my cake which looked SUPER cute when I added the maraschino cherries. You better believe I emptied my whole jar searching for the perfect cherries with intact stems.

You could definitely use fresh cherries too. They just don't have that classic bright red look that you usually see on a banana split. 

banana split cake

Add a few more rainbow sprinkles and the banana split drip cake is complete! I LOVED how this cake looked! The best part? My husband said this was one of the most delicious cakes he has had! He loved how all the flavors worked together. 

He is my biggest flavor critic so if he says it's good, it's really good!


Cake Batter and Frosting Calculator

Select an option below to calculate how much batter or frosting you need. Adjust the servings slider on the recipe card to change the amounts the recipe makes.

Choose a pan type

Choose a cake pan size
(based on 2" tall cake pan)

Choose a cake pan size
(based on 2" tall cake pan)

Choose a cake pan size
(based on 2" tall cake pan)

Cupcake Tin Size

Choose number of pans

Cups of Batter Needed

8 cups

Cups of Frosting Needed

5 cups

Note: measurements are estimated based off the vanilla cake recipe using standard US cake pans and sizes. Measurements used are for 2" tall cake pans only. Your results may vary. Do not overfill cake pans above manufacturer's recommended guidelines.

Recipe

banana split cake
Print Recipe
4.75 from 8 votes

Banana Split Cake Recipe

How to make a banana split cake with yummy banana, strawberry and vanilla cake layers. Filled with strawberry buttercream and topped with a decadent chocolate drip, sprinkles, nuts and maraschino cherries! The perfect celebration cake! (Makes one 8"x2" cake per flavor)
Prep Time35 minutes mins
Cook Time35 minutes mins
Total Time10 minutes mins
Course: Dessert
Cuisine: American
Servings: 24 servings
Calories: 496kcal
Author: Liz Marek

Ingredients

Banana Cake Ingredients

  • 6 oz cake flour
  • ¾ teaspoon baking soda
  • ½ teaspoon baking powder
  • ½ teaspoon cinnamon
  • ½ teaspoon salt
  • 3 large eggs room temperature
  • 4 oz sugar
  • 1 oz brown sugar
  • 4 oz very ripe banana puree (about 2 bananas)
  • 2 oz vegetable oil
  • 1 oz buttermilk room temperature
  • 4 oz softened butter

Vanilla Cake Recipe

  • 6 oz cake flour
  • 6 oz granulated sugar
  • 2 teaspoon baking powder
  • ⅛ teaspoon baking soda
  • ⅛ teaspoon salt
  • 4 oz unsalted butter room temperature
  • 1 teaspoon vanilla extract
  • 3 large eggs room temperature
  • 5 oz milk room temperature
  • 1 oz vegetable oil

Chocolate Cake Ingredients

  • 1.5 oz dutched cocoa powder
  • 4 oz boiling water
  • 2 large eggs room temperature
  • 1 teaspoon vanilla extract
  • 2 oz mayonaise
  • 7 oz cake flour
  • 6 oz granulated sugar
  • 1 teaspoon baking powder
  • ½ teaspoon baking soda
  • ½ teaspoon salt
  • 3 oz unsalted butter room temperature

Chocolate Drip

  • 4 oz hot cream
  • 7 oz semi-sweet or dark chocolate

Buttercream

  • 8 oz pasteurized egg whites
  • 16 oz unsalted butter softened
  • 16 oz powdered sugar
  • 1 teaspoon vanilla extract
  • ½ tsp salt
  • ¼ cup strawberry puree For filling

Instructions

Banana Cake Instructions

  • Preheat oven to 350ºF and prepare one 8" cake pans with cake goop or other cake release. Make sure all cold ingredients are room temp or slightly warmed.
    Combine together flour, baking soda, baking powder, cinnamon and salt and set aside.
    Combine together buttermilk, banana, oil and vanilla. Whisk and set aside.
    Place softened butter in the bowl of a stand mixer with the paddle attachment and cream until smooth. Sprinkle in brown and white sugar and whip on medium until light and fluffy.
    Add in your eggs one at a time, waiting for them to be combined before adding the next.
    Add in ⅓ of your flour mixture and then ⅓ of your liquid. Alternate two more times and mix until just combined.
    Pour into your prepared cake pans and bake for 35-40 minutes until a toothpick comes out cleanly. Let cool fully before frosting. 

Vanilla Cake Instructions

  • NOTE: It is SUPER IMPORTANT that all the room temperature ingredients listed above are room temperature and not cold or hot.
    Place 2oz of the milk and oil in a separate bowl or cup and set aside
    Combine remaining milk, vanilla and room temp eggs in a separate measuring cup and set aside
    Measure out dry ingredients (flour, sugar, baking powder, baking soda, and salt) and place them into the stand mixer bowl.
    Attach the paddle to the mixer, and turn on the slowest speed (setting 1 on Kitchen Aid mixers). Slowly add chunks of your softened butter until it is all added. Let mix until batter resembles coarse sand.
    Add milk/oil mixture into the dry ingredients and mix on medium speed (speed 4 on my KitchenAid) and mix for 2 full minutes. Do not skip this step or your cake will not rise.
    Add in ⅓ of your milk/egg mixture. Repeat 2 more times until batter is just combined. Don't forget to scrape your bowl.
    I always start by baking for 30 minutes for 8" then checking for doneness. If the cakes are still really jiggly, I add another 5 minutes. I check every 3 minutes after that until I'm close and then it's every 2 minutes. Cakes are done when a toothpick inserted in the center comes out with a few crumbs.
    Remove the cake pan from the oven and "tap" it lightly on the counter once to remove air from the cake and keep it from shrinking un-evenly.
    Place cakes on a cooling rack and press down the dome immediately with an oven mitt covered hand. After cakes have cooled for 10 minutes or the pans are cool enough to touch, flip the cakes over and remove from the pans onto the cooling racks to cool completely. Wrap in plastic wrap and chill in the refrigerator.
    Once the cakes are chilled in the refrigerator (about an hour for this size, longer for larger cakes), tort, fill and crumb coat all at once. If you do not plan on crumb coating the same day, you can leave the wrapped cakes on the countertop. Chilling can dry out your cakes before they are iced, so avoid keeping them in the refrigerator longer than necessary. Cakes can be frozen in freezer bags for later use as well.

Chocolate Cake Instructions

  • Preheat oven to 350ºF and prepare two 8" cake pans with cake goop or other cake release. Make sure all cold ingredients are room temp or slightly warmed.
    Bring the water to a boil. Add in cocoa powder.
    Whisk until smooth then add in cold mayonnaise, vanilla and eggs. Whisk to break up the eggs.
    Weigh out all dry ingredients (flour, sugar, baking powder, baking soda and salt) and place into a stand mixer bowl and attach the paddle attachment.
    Turn mixer on low (setting 1 on Kitchen Aid mixers). Add in your room temperature butter in small chunks. Combine on low until you achieve a sandy mixture.
    Add ½ of your liquid ingredients into your dry ingredients and mix on medium for 2 minutes. If you do not do this step, your cake could collapse.
    Turn your mixer back down to low and add in the rest of your liquids slowly. Stop once or twice to scrape the bowl as needed.
    Once they are all combined, turn back up to medium for another 30 seconds.
    Lightly grease one 8" round cake pans prepared with your choice of pan release. I prefer cake goop.
    Bake for 30 minutes at 350ºF depending on how big your pans are. The bigger the pan, the longer it will take for them to bake.
    When a toothpick comes out of the center with a few sticky crumbs on it, the cake is done.
    After the cakes have cooled for about 10 minutes, or the pans have cooled to the point they can be touched, flip the cakes over and remove from the pans onto a cooling rack to cool completely. I cover mine in plastic wrap to keep them from drying out why they cool.
    Once the cakes are completely cool you can trim them and frost them.

Chocolate drip

  • Chop chocolate finely and place in heat proof bowl.
    Heat cream until just starting to steam, do not boil.
    Pour hot cream over chocolate and let set 5 minutes. Whisk until smooth

Buttercream Instructions

  • Combine egg whites and powdered sugar in the stand of your mixer with whisk attachment. Mix on low to combine then bump up to high for 5 minutes. 
    Add in your softened butter in small chunks.
    Add in vanilla and salt.
    Whip on high until white, fluffy and creamy.
    Switch to paddle attachment and mix on low for 15 minutes to remove air bubbles. 
    Add ¼ cup strawberry puree to 1 cup buttercream and mix together until combined to use as your cake filling
    Save the rest of the buttercream for frosting the cake

Video

Nutrition

Serving: 1serving | Calories: 496kcal | Carbohydrates: 57g | Protein: 6g | Fat: 28g | Saturated Fat: 16g | Cholesterol: 103mg | Sodium: 319mg | Potassium: 134mg | Fiber: 1g | Sugar: 38g | Vitamin A: 830IU | Vitamin C: 2.9mg | Calcium: 46mg | Iron: 1.2mg

banana split cake

lollipop

April 1, 2019 Free Video

Lollipop Cake Tutorial

A lollipop recipe perfect for making custom lollipop cakes 

This lollipop recipe is easy to make and perfectly customizable. Change up the colors, flavorings and decoration to suit your theme. I love making this lollipop recipe because it makes a big impact and doesn't take a lot of work. Perfect for those trendy lollipop cakes!

lollipop recipe

What ingredients are in a lollipop recipe?

  1. 8 oz sugar
  2. 5 oz corn syrup
  3. 2 oz distilled or bottled water
  4. ½ teaspoon candy flavoring
  5. food coloring (optional)

The great thing about this simple homemade lollipop recipe is that the ingredients are easy to come by. Anyone can make them. You probably have these ingredients in your house already if you do any amount of baking. All you need is granulated sugar (not powdered), corn syrup, distilled (or bottled) water, candy flavoring and food coloring if desired. I also added some sprinkles to my lollipops for decoration. 

Candy flavoring might be the odd ingredient in there but it's easy to find. You can get candy flavoring at stores like Michaels or Jo-Anns craft stores or in your local cake decorating supply store. Candy flavoring is specially formulated to withstand the high temperatures of hot sugar without losing it's flavor. You can't use juice or extracts in place of candy flavoring and get the same results, unfortunately. 

Lorann oils candy oils for flavoring homemade lollipop recipe

What equipment and tools do you need to make a lollipop recipe?

To cook sugar you're going to need some equipment to make your life easier. I don't use any lollipop molds for this lollipop recipe but you can definitely use molds if you need a specific shape or size. Just make sure you are using molds made for hard candy, otherwise, they could melt from the hot sugar. 

  • Stainless steel pot with a heavy bottom to evenly distribute heat
  • Candy thermometer 
  • Lollipop sticks
  • Silicone mat
  • Culinary torch
  • Silicone gloves for protecting your hands

candy thermometer in pot making hard candy

How do you make homemade lollipops?

Making the lollipop recipe is actually pretty simple when it comes down to it. Combine your sugar, corn syrup and water in your saucepan and bring it to a boil. Reduce to medium heat to a steady simmer. No need to stir. Cover your mixture with the lid for 5 minutes. This causes condensation to form on the lid which will drip down the sides of the pan and wash away and stray crystals of sugar which can cause crystallization if not melted. 

Alternatively, you can also use a clean pastry brush and fresh water to brush around the sides of the saucepan to wash down the sugar crystals. Just make sure it's a new pastry brush and doesn't have any grease or food debris in the brush that might ruin your candy. 

cooking sugar to make homemade lollipops

Once the mixture is bubbling away, insert your candy thermometer and remove the lid. This is the part where we have to wait for the water to evaporate out of the mixture. That might take a few minutes. You will notice that your temperature will stay around 225ºF for a while until all the steam disappears. Do not stir the mixture at all.

Watch your candy thermometer carefully, as soon as all the steam disappears and your water is gone, the temperature will rise quickly and you don't want to burn it. Let your mixture bubble until it reaches 300ºF which is called the hard crack stage. 

Once you reach the hard crack stage, remove the mixture from the heat. Stir in your flavors and colors now if you prefer. Now you can pour your candy into your molds or onto your silicone mat to make your lollipops. 

How to make lollipops without a mold

To make your homemade lollipops, wait for your mixture to cool down a bit so it gets a little thicker. If you pour 300ºF sugar onto your mat it's going to run all over the place. 

You can also pour your candy into a smaller silicone measuring cup to have more control over the shape of your lollipop. If you need a lollipop template you can print out my lollipop template to place under the silicone. Make sure you wear some protective silicone gloves to prevent sugar burns. 

silicone measuring cup for hot sugar

Do a little test pour if you need to to make sure that the sugar is keeping it's shape. Make sure your surface is level or you're going to have a hard time getting round lollipops without a mold. 

Place your silicone mat over the template and pour your sugar until it's slightly smaller than the circle. Place one of your lollipop sticks in the bottom ⅓ of the hot sugar then turn it over so that the stick is totally covered (see video). 

If you're adding sprinkles, you can put a few on top now. For the gold leaf lollipops, I placed the leaf on the lollipop right after pouring.

adding sprinkle to lollipop

To make my marbled lollipops, I colored my candy with a drop of white food coloring and another bit with a drop of black food coloring. Swirl together and pour. If you want your lollipops clear, only add food coloring. If you want them to be opaque, add a drop of white food coloring along with your color. 

Let your lollipops cool for 10-15 minutes before lifting them off the silicone mat. 

Once your pops are cool you can lightly torch the back side to make them crystal clear (optional). 

torching lollipops to make them clear

How long do homemade lollipops last?

Lollipops don't really have an expiration date since they are made of sugar and sugar is naturally self-preserving. Don't tell me you've never eaten year old Halloween candy. I know I have. 

little girl eating homemade lollipop

I did a little test and left my lollipops at room temperature for a few weeks just to see what would happen. It's February so we got all kinds of weather. Snow, sun, rain, hail. The only thing that happened was they got a little sticky. They probably wouldn't have gotten sticky if I kept them covered but I wanted to know if the air would affect them. If you're in a very humid area you should def keep them covered or individually wrapped with cellophane to keep the lollipops from turning into a sticky mess. 

What can you do with leftovers?

You can pour leftover lollipop sugar onto a silicone mat and let it cool completely. Crush it into pieces an store in a plastic ziplock bag. Then you can re-melt it whenever you need some hard candy. No need to bring it back up to 300ºF, just melt in the microwave in a heat proof container. 

Can you make this lollipop recipe without corn syrup?

This lollipop recipe contains corn syrup because corn syrup prevents crystallization. In some places of the world, it can be hard to get corn syrup. No worries, you can still make homemade lollipops without the use of corn syrup.

Simply leave out the corn syrup from this recipe but be very careful to wash down the sides of your pan to prevent sugar crystals from growing. If your sugar does crystallize, there isn't a way to save it. 

How do you make a lollipop cake?

lollipop cake tutorial

You may have seen some trendy lollipop cakes on Instagram lately and wondered how they make them! I decided to make one of my own with my lollipop recipe and I love how it turned out! I made three different types of lollipops. Clear with gold leaf, clear with gold dragees and white marble. I made three of each kind and arranged them on top of my cake. 

lollipop cake tutorial

I decorated my marbled fondant cake with some gold leaf to match the lollipops and love how it turned out. The key is to arrange the lollipops and varying height and mix and match them so they look balanced. 

Want to learn how to make your own lollipop cake? Watch this video on how I created some beautiful gold and marble lollipops and used them to decorate my marble cake to create a trendy lollipop cake design!

For a sugar-free lollipop option, use Simi-Cakes ready to melt isomalt. 

Recipe

Print Recipe
4.95 from 17 votes

lollipop recipe

Homemade lollipops are fun and easy to make. The flavors and colors can be easily customized. The perfect homemade treat!
Prep Time5 minutes mins
Cook Time30 minutes mins
cooling15 minutes mins
Total Time35 minutes mins
Course: Dessert
Cuisine: American
Servings: 8 servings
Calories: 159kcal
Author: Liz Marek

Ingredients

Lollipop Recipe

  • 8 oz granulated sugar
  • 5 oz corn syrup
  • 2 oz distilled water (or bottled)
  • ½ teaspoon candy flavoring
  • food coloring (optional)

Instructions

  • Combine sugar, corn syrup and water in a heavy-bottomed, stainless steel pot over med-high heat. Bring to a boil
  • Cover the mixture with the lid and let condensation build for 5 minutes (this helps to wash the sugar off the sides of the pan). Remove lid and reduce heat to medium. 
  • Insert candy thermometer and let mixture cook (do not stir) until it reaches 300ºF.
  • Remove mixture from heat and stir in flavoring and colors
  • Let mixture cool a bit until it's thick enough to hold it's shape when poured and then pour into circles on your silicone mat (or into your candy molds). Insert your lollipop sticks and let cool completely before removing them from the mat. 
  • Torch the back sides of the lollipops (optional) to make them super clear. Store in air-tight containers at room temperature or wrap individually to prevent them from getting sticky. 

Video

Nutrition

Serving: 1serving | Calories: 159kcal | Carbohydrates: 41g | Sodium: 11mg | Sugar: 41g | Calcium: 2mg

how to make homemade lollipop recipe that tastes amazing! Flavors and colors are easily customized and it's perfect for making those trendy lollipop cakes!


Paint Palette Cookies

April 1, 2019 Course Preview

Paint Palette Cookies Tutorial

Skill level: Intermediate

Edible art taken to a whole other level! This sugar cookie tutorials teaches you how to make paint palette cookies that you can actually paint with.

How to cut out your cookies, do royal icing transfers, trace images using your phone and how to make food coloring paint!

A super fun tutorial that's great for an art party theme!

26:43 Minutes of Instruction

What You Will Learn

  • Learn how create cookies that can be painted on with food color paint palettes
  • How to create royal icing transfers for delicate details
  • Learn how to trace designs onto cookies for consistent results

Tutorial Chapters

  1. Making the cookies 0:10
  2. Making the royal icing 3:25
  3. Piping the white 5:27
  4. Royal icing transfer 10:35
  5. Peeling transfers 16:02
  6. Adding the transfers to cookie 17:35
  7. Piping the cookies 21:17

Downloads

Materials List

Paint Palette Template

Bunny Cookie Template (jpg)

Cute Dino Cookie Template (jpg)

Dino Egg Cookie Template (jpg)

Guinea Pig Cookie Template (jpg)

Ice Cream Cookie Template (jpg)

Kitty Cookie Template (jpg)

Narwhal Cookie Template (jpg)

Octopus Cookie Template (jpg)

Rainbow Cookie Template (jpg)

Rocketship Cookie Template (jpg)

Stegosaurus Cookie Template (jpg)

Unicorn Cookie Template (jpg)

Entire Cookie Template Pack (zip)

Paint Palette Cookies

April 1, 2019 Paid Video

Paint Palette Cookies

Skill level: Intermediate

Edible art taken to a whole other level! This sugar cookie tutorials teaches you how to make paint palette cookies that you can actually paint with.

How to cut out your cookies, do royal icing transfers, trace images using your phone and how to make food coloring paint!

A super fun tutorial that's great for an art party theme!

26:43 Minutes of Instruction

What You Will Learn

  • Learn how create cookies that can be painted on with food color paint palettes
  • How to create royal icing transfers for delicate details
  • Learn how to trace designs onto cookies for consistent results

Tutorial Chapters

  1. Making the cookies 0:10
  2. Making the royal icing 3:25
  3. Piping the white 5:27
  4. Royal icing transfer 10:35
  5. Peeling transfers 16:02
  6. Adding the transfers to cookie 17:35
  7. Piping the cookies 21:17

Downloads

Materials List

Paint Palette Template

Bunny Cookie Template (jpg)

Cute Dino Cookie Template (jpg)

Dino Egg Cookie Template (jpg)

Guinea Pig Cookie Template (jpg)

Ice Cream Cookie Template (jpg)

Kitty Cookie Template (jpg)

Narwhal Cookie Template (jpg)

Octopus Cookie Template (jpg)

Rainbow Cookie Template (jpg)

Rocketship Cookie Template (jpg)

Stegosaurus Cookie Template (jpg)

Unicorn Cookie Template (jpg)

Entire Cookie Template Pack (zip)

March 25, 2019 Blog

Banana Cake

This banana cake is insanely moist, flavorful and delicious! 

My mouth is watering thinking about this banana cake again. The first time I tasted it, I actually gasped it was so good! I actually only had to test this recipe twice before I was super happy with the recipe. 

banana cake

Top this amazing banana cake with my cream cheese frosting and I swear you will be eating slices all week like like I was.

I stored the leftover cake in the fridge wrapped in plastic wrap to keep it from drying out. I would cut a slice and let it warm for about 30 minutes before eating and omg, so good! It's not often you find a cake recipe that is just as good the next day as it was fresh. 

Can you make this banana cake recipe into cupcakes?

This banana cake can also be made into cupcakes very easily. The batter is pretty loose so I just poured it into my grease-proof cupcake liners to about ¾ full. They baked up in about 20 minutes and where delicious!

banana cupcake

How to choose the right bananas for banana cake

I don't know about you but we always have bananas in our house. Between my pregnancy nausea and my four-year-old, quick snacks are a must. But we never seem to eat ALL of the bananas. There is always one or two left in the bunch that gets too ripe. 

Rather than toss them, I let them continue to ripen. Until they almost start to turn black. Brown spots on bananas equal a sweeter flavor. Do not be tempted to use new bananas or you'll be sorely disappointed in the flavor. 

Then I put them in the freezer. Yea you heard me, the freezer. 

frozen bananas for banana cake

Freezing super ripe bananas actually brings out the sugar in the banana and makes them more flavorful. Plus it's a great way to store those extra ripe bananas until you need them. 

Preparing your banana cake ingredients

This recipe takes three bananas but if your bananas are really small, you might need four. Thaw your bananas in a bowl before you need them. They will drain a sugary liquid, don't worry, this is normal. I just drained off any extra liquid and tossed it. Then just mash it all together with a fork or in your blender to get it smooth.

mashed bananas

I often talk about ingredients needing to be at the same temperature for successfully baking from scratch. In this recipe you definitely want to make sure the bananas and eggs are room temp, the buttermilk is slightly warm and the butter is softened.

You can warm eggs by placing them in a bowl of warm water for 5 minutes before cracking. Buttermilk and butter can be warmed in the microwave. 

how to make buttermilk pancakes without buttermilk

If you don't have buttermilk you can replace the buttermilk with regular buttermilk plus 1 teaspoon of white vinegar. Let it sit for about 10 minutes then it will be ready to use. 

This banana cake recipe combines white sugar and brown sugar. The brown sugar adds some amazing flavor to the banana cake! Just make sure you sift the brown sugar because it tends to get some hard lumps in it and no one likes lumps in their cake. 

The first time I made this cake I didn't add any spices and it definitely lacked that punch I was looking for. The second time around I added in some cinnamon and it definitely adds some much-needed flavor. 

How to make the best banana cake

  1. Preheat your oven to 35oºF and prepare two 8"x2" cake pans with cake goop or another pan release. 
  2. Combine your flour, baking soda, baking powder, cinnamon and salt and set aside. 

how to make banana cake

  1. Combine your banana puree, oil, vanilla and buttermilk in a separate bowl and whisk to combine. Set aside. 

how to make banana cake

  1. In the bowl of a stand mixer, add your softened butter (not melted like mine was but if it is, it will be ok, mine was). Cream until smooth then sprinkle in your brown and white sugar. Mix on medium until lightened and fluffy. 
  2. Add in your eggs one at a time, letting them combine before adding the next. 
  3. Add in ⅓ of your dry ingredients while mixing on low. Then ⅓ of your liquid. Continue alternating dry/liquid two more times until just combined. Do not over-mix. 

how to make banana cake

  1. Pour the batter into your prepared cake pans and bake 35-40 minutes until the center of the cake is baked and a toothpick comes out clean. 

banana cake

Making the cream cheese frosting

This cream cheese frosting is soooo delicious with this banana cake. The frosting is firm enough to frost the cake and do some basic piping but still super soft and creamy. If you prefer a more stable cream cheese frosting you can add extra powdered sugar or try my crusting cream cheese frosting recipe. 

cream cheese frosting

Cream your softened butter in the bowl of the stand mixer with the paddle attachment until smooth. Then add in your softened cream cheese and blend together until combined. Add in your powdered sugar one cup at a time. Lastly, add in the extract and salt. Don't over-mix or your frosting could separate.

Don't forget to scrape the bottom of the bowl to make sure everything is combined well. 

How to caramelize bananas

Ok this part is TOTALLY unnecessary but I have always wanted to try to make caramelized bananas lol. I sliced up a fresh banana about ¼" thick and lightly coated them in white sugar. 

caramelize bananas

I heated my pan to med/high and sauteed my bananas until they started to turn brown. Then gave them a flip. They were very sticky and hard to flip, probably because I had no idea what I was doing. I let the bananas cool on a silicone mat. 

caramelized bananas

The caramelized bananas tasted great on the cake though!

How to make your banana cake

Once your cakes are baked, let them cool in the pan for 10 minutes then flip them out onto the cooling rack to cool the rest of the way. I keep mine covered with a tea towel to keep them from drying out. 

This banana cake is actually really easy to hand and pick up but feels soft. Don't be worried. 

I like a good amount of cream cheese frosting on my cake so I decided to tort my cakes (slice in half lengthwise). Slather on a good portion of cream cheese frosting between each layer. I decided to keep the outside of my banana cake frosted very roughly. 

frosting the banana cake

I used a star tip to pipe on some simple dollops on top of the cake and placed my sad caramelized bananas in the middle. Sure does look pretty!!

banana cake

That first bite was OMG good. I couldn't believe how tasty it was! So super moist, tons of banana flavor and that cream cheese frosting just brought it all together. 

banana cake

Watch my full video on making the most amazing banana cake ever!

Cake Batter and Frosting Calculator

Select an option below to calculate how much batter or frosting you need. Adjust the servings slider on the recipe card to change the amounts the recipe makes.

Choose a pan type

Choose a cake pan size
(based on 2" tall cake pan)

Choose a cake pan size
(based on 2" tall cake pan)

Choose a cake pan size
(based on 2" tall cake pan)

Cupcake Tin Size

Choose number of pans

Cups of Batter Needed

8 cups

Cups of Frosting Needed

5 cups

Note: measurements are estimated based off the vanilla cake recipe using standard US cake pans and sizes. Measurements used are for 2" tall cake pans only. Your results may vary. Do not overfill cake pans above manufacturer's recommended guidelines.

Recipe

Print Recipe
4.97 from 30 votes

Banana Cake

The most amazing banana cake recipe with tangy cream cheese frosting. The secret is frozen bananas! Makes two 8"x2" cake rounds or three 6"x2" rounds. 
Prep Time15 minutes mins
Cook Time35 minutes mins
Total Time10 minutes mins
Course: Dessert
Cuisine: American
Servings: 24 servings
Calories: 390kcal
Author: Liz Marek

Ingredients

Banana Cake Ingredients

  • 11 oz cake flour
  • 1 ½ teaspoon baking soda
  • 1 teaspoon baking powder
  • 1 teaspoon cinnamon
  • 1 teaspoon salt
  • 6 large eggs room temperature
  • 8 oz sugar
  • 3 oz brown sugar
  • 9 oz very ripe banana puree (about 3 bananas)
  • 4 oz vegetable oil
  • 3 oz buttermilk room temperature
  • 8 oz softened butter
  • 1 teaspoon vanilla

Cream Cheese Frosting Ingredients

  • 16 oz softened cream cheese
  • 8 oz softened butter unsalted
  • 1 teaspoon orange extract or vanilla
  • ½ teaspoon salt
  • 36 oz sifted powdered sugar 8 cups
US Customary - Metric

Instructions

Banana Cake Instructions

  • Preheat oven to 350ºF and prepare two 8" cake pans with cake goop or other cake release. 
  • Combine together flour, baking soda, baking powder, cinnamon and salt and set aside. 
  • Combine together buttermilk, thawed banana (drain off the excess liquid), oil and vanilla. Whisk and set aside. 
  • Place softened butter in the bowl of a stand mixer with the paddle attachment and cream until smooth. Sprinkle in brown and white sugar and whip on medium until light and fluffy. 
  • Add in your eggs one at a time, waiting for them to be combined before adding the next. 
  • Add in ⅓ of your flour mixture and then ⅓ of your liquid. Alternate two more times and mix until just combined. 
  • Pour into your prepared cake pans and bake for 35-40 minutes until a toothpick comes out cleanly. Let cool fully before frosting. 

Cream Cheese Frosting Instructions

  • Place softened butter in the bowl of your stand mixer with paddle attachment and cream on low until smooth
  • Place softened cream cheese in the bowl with butter in small chunks and cream on low until smooth and combined
  • Add in sifted powdered sugar one cup at a time until combined
  • Add your orange extract and salt. Combine until smooth and creamy. 

Nutrition

Serving: 1serving | Calories: 390kcal | Carbohydrates: 66g | Protein: 4g | Fat: 12g | Saturated Fat: 8g | Cholesterol: 73mg | Sodium: 310mg | Potassium: 89mg | Sugar: 55g | Vitamin A: 335IU | Calcium: 46mg | Iron: 0.5mg

 This is the best banana cake recipe I've ever had! The secret is frozen bananas and the perfect cream cheese frosting. Your family will love this cake!

spring pop cake tutorial

March 25, 2019 Blog

Spring Meringue And Lollipop Cake

This spring pop cake is so fun! Made with meringue pops and homemade lollipops, the design options are endless

I loved making this spring pop cake using my meringue cookie recipe and my homemade lollipop recipe. This design is trending on Instagram but I had no idea what to call it! I was totally inspired by the work of Instagram.com/annabel_bakery for this cake design. 

spring pop cake

What do you need to meringue pops?

To make your rose meringue pops you'll need to whip up a batch of my meringue cookie recipe.

  • I used electric pink and avocado green food coloring to color my meringue pop roses.
  • Lollipop sticks
  • Ateco 852 star tip (or whatever star tip you have)
  • Parchment paper
  • Large leaf piping tip
  • Piping bags
  • Sheet pan

Place your lollipop sticks on the parchment paper and pipe your rosettes over the top of the sticks. Add a couple of leaves to the outside. Pipe the extra meringue into small rosettes in between the lollipops.

meringue pops

Bake your meringue pops at 225ºF for 90 minutes. DO NOT OPEN THE DOOR. Just turn off the oven and leave them in the oven until the oven is completely cool. I just leave mine in the oven to cool overnight. Be careful not to turn the oven on the next day and burn them!

What do you need to make lollipops?

To make the lollipops, start with my homemade lollipop recipe.

  • Silicone baking mat
  • Lollipop sticks
  • Pearl dragees
  • Non-peril sprinkles
  • Kitchen torch
  • nitrile gloves

Pour your prepared lollipop mixture into 3" circles on top of your silicone baking mat and add your lollipop sticks. Then add your sprinkles. Let cool completely before removing from the silicone. 

spring pop cake

Torch the back sides of the lollipops to make them crystal clear before adding them to your cake. 

How to make the cake

To make the cake, start with a frosted and chilled 6" cake. If you need more info on how to make a cake, check out my how to make a cake tutorial. 

Combine ½ cup of easy buttercream with about 3 Tablespoons of strawberry puree. Mix the two together but not all the way. 

Spread the puree on the top ¼ of the cake roughly. Then use your spatula to swipe in a downward motion to drag the buttercream in a painterly effect.

buttercream swipe

How to decorate your spring pop cake

Now the fun part! Adding the meringue pops and lollipops! I started with the meringue pops and alternated with the lollipops. Add the leftover meringue pops on the cake to fill out the empty space. 

That's it! I love how this fun and festive cake turned out. I think it's the perfect cake to make for spring!

spring pop cake


Horse & Rider Cake Topper Tutorial

March 15, 2019 Course Preview

Horse & Rider Cake Topper Tutorial

Skill level: Intermediate

Everything you need to know about making cake toppers!

From advanced armatures and modeling chocolate, measuring scale and creating a realistic figure. This tutorials covers all the basics with tons of tips and tricks.

1:44:01 Minutes of Instruction

What You Will Learn

  • Liz Marek addresses common problems when working with armature wire
  • How to use a face mold to quickly get a basic face shape and then customize it to sculpt unique features
  • Liz Marek offers tips and tricks to help with blending modeling chocolate seams
  • Learn how to make fondant clothing for the rider figure
  • How to create a velvet grass texture for the green hill cake

Tutorial Chapters

  1. Scale & horse measurements 1:31
  2. Building the armature 5:34
  3. Bulking up structure 13:49
  4. Coloring modeling chocolate 17:11
  5. Girl topper measurements 19:28
  6. Coloring girl fondant 22:25
  7. Making the girl's face 23:51
  8. Roughing out the horse body 34:27
  9. Making horse back legs 36:52
  10. Horse's front legs 41:52
  11. Horse neck & head 44:59
  12. Making the hill cake 53:45
  13. Checking horse head measurements 58:05
  14. Horse head details 1:03:47
  15. Painting the horse 1:07:45
  16. Painting the girl's face 1:11:32
  17. Making horse's mane 1:15:46
  18. Making girl legs 1:18:49
  19. Placing girl on horse 1:21:47
  20. Adding the shirt 1:24:50
  21. Making the arms 1:27:09
  22. Adding girl's hair 1:31:42
  23. Covering the cake 1:34:57
  24. Velvet texture grass 1:37:16
  25. Placing topper 1:42:11

Downloads

Materials List

Horse Armature Template

Rider Armature Template

Horse & Rider Cake Topper Tutorial

March 15, 2019 Paid Video

Horse & Rider Cake Topper

Skill level: Intermediate

Everything you need to know about making cake toppers!

From advanced armatures and modeling chocolate, measuring scale and creating a realistic figure. This tutorials covers all the basics with tons of tips and tricks.

1:44:01 Minutes of Instruction

What You Will Learn

  • Liz Marek addresses common problems when working with armature wire
  • How to use a face mold to quickly get a basic face shape and then customize it to sculpt unique features
  • Liz Marek offers tips and tricks to help with blending modeling chocolate seams
  • Learn how to make fondant clothing for the rider figure
  • How to create a velvet grass texture for the green hill cake

Tutorial Chapters

  1. Scale & horse measurements 1:31
  2. Building the armature 5:34
  3. Bulking up structure 13:49
  4. Coloring modeling chocolate 17:11
  5. Girl topper measurements 19:28
  6. Coloring girl fondant 22:25
  7. Making the girl's face 23:51
  8. Roughing out the horse body 34:27
  9. Making horse back legs 36:52
  10. Horse's front legs 41:52
  11. Horse neck & head 44:59
  12. Making the hill cake 53:45
  13. Checking horse head measurements 58:05
  14. Horse head details 1:03:47
  15. Painting the horse 1:07:45
  16. Painting the girl's face 1:11:32
  17. Making horse's mane 1:15:46
  18. Making girl legs 1:18:49
  19. Placing girl on horse 1:21:47
  20. Adding the shirt 1:24:50
  21. Making the arms 1:27:09
  22. Adding girl's hair 1:31:42
  23. Covering the cake 1:34:57
  24. Velvet texture grass 1:37:16
  25. Placing topper 1:42:11

Downloads

Materials List
Horse Armature Template
Rider Armature Template

lollipop recipe

March 11, 2019 Blog

lollipop recipe

A lollipop recipe perfect for making custom lollipop cakes 

This lollipop recipe is easy to make and perfectly customizable. Change up the colors, flavorings and decoration to suit your theme. I love making this lollipop recipe because it makes a big impact and doesn't take a lot of work. Perfect for those trendy lollipop cakes!

lollipop recipe

What ingredients are in a lollipop recipe?

  1. 8 oz sugar
  2. 5 oz corn syrup
  3. 2 oz distilled or bottled water
  4. ½ teaspoon candy flavoring
  5. food coloring (optional)

The great thing about this simple homemade lollipop recipe is that the ingredients are easy to come by. Anyone can make them. You probably have these ingredients in your house already if you do any amount of baking. All you need is granulated sugar (not powdered), corn syrup, distilled (or bottled) water, candy flavoring and food coloring if desired. I also added some sprinkles to my lollipops for decoration. 

Candy flavoring might be the odd ingredient in there but it's easy to find. You can get candy flavoring at stores like Michaels or Jo-Anns craft stores or in your local cake decorating supply store. Candy flavoring is specially formulated to withstand the high temperatures of hot sugar without losing it's flavor. You can't use juice or extracts in place of candy flavoring and get the same results, unfortunately. 

Lorann oils candy oils for flavoring homemade lollipop recipe

What equipment and tools do you need to make a lollipop recipe?

To cook sugar you're going to need some equipment to make your life easier. I don't use any lollipop molds for this lollipop recipe but you can definitely use molds if you need a specific shape or size. Just make sure you are using molds made for hard candy, otherwise, they could melt from the hot sugar. 

  • Stainless steel pot with a heavy bottom to evenly distribute heat
  • Candy thermometer 
  • Lollipop sticks
  • Silicone mat
  • Culinary torch
  • Silicone gloves for protecting your hands
candy thermometer in pot making hard candy

How do you make homemade lollipops?

Making the lollipop recipe is actually pretty simple when it comes down to it. Combine your sugar, corn syrup and water in your saucepan and bring it to a boil. Reduce to medium heat to a steady simmer. No need to stir. Cover your mixture with the lid for 5 minutes. This causes condensation to form on the lid which will drip down the sides of the pan and wash away and stray crystals of sugar which can cause crystallization if not melted. 

Alternatively, you can also use a clean pastry brush and fresh water to brush around the sides of the saucepan to wash down the sugar crystals. Just make sure it's a new pastry brush and doesn't have any grease or food debris in the brush that might ruin your candy. 

cooking sugar to make homemade lollipops

Once the mixture is bubbling away, insert your candy thermometer and remove the lid. This is the part where we have to wait for the water to evaporate out of the mixture. That might take a few minutes. You will notice that your temperature will stay around 225ºF for a while until all the steam disappears. Do not stir the mixture at all.

Watch your candy thermometer carefully, as soon as all the steam disappears and your water is gone, the temperature will rise quickly and you don't want to burn it. Let your mixture bubble until it reaches 300ºF which is called the hard crack stage. 

Once you reach the hard crack stage, remove the mixture from the heat. Stir in your flavors and colors now if you prefer. Now you can pour your candy into your molds or onto your silicone mat to make your lollipops. 

How to make lollipops without a mold

To make your homemade lollipops, wait for your mixture to cool down a bit so it gets a little thicker. If you pour 300ºF sugar onto your mat it's going to run all over the place. 

You can also pour your candy into a smaller silicone measuring cup to have more control over the shape of your lollipop. If you need a lollipop template you can print out my lollipop template to place under the silicone. Make sure you wear some protective silicone gloves to prevent sugar burns. 

silicone measuring cup for hot sugar

Do a little test pour if you need to to make sure that the sugar is keeping it's shape. Make sure your surface is level or you're going to have a hard time getting round lollipops without a mold. 

Place your silicone mat over the template and pour your sugar until it's slightly smaller than the circle. Place one of your lollipop sticks in the bottom ⅓ of the hot sugar then turn it over so that the stick is totally covered (see video). 

If you're adding sprinkles, you can put a few on top now. For the gold leaf lollipops, I placed the leaf on the lollipop right after pouring.

adding sprinkle to lollipop

To make my marbled lollipops, I colored my candy with a drop of white food coloring and another bit with a drop of black food coloring. Swirl together and pour. If you want your lollipops clear, only add food coloring. If you want them to be opaque, add a drop of white food coloring along with your color. 

Let your lollipops cool for 10-15 minutes before lifting them off the silicone mat. 

Once your pops are cool you can lightly torch the back side to make them crystal clear (optional). 

torching lollipops to make them clear

How long do homemade lollipops last?

Lollipops don't really have an expiration date since they are made of sugar and sugar is naturally self-preserving. Don't tell me you've never eaten year old Halloween candy. I know I have. 

little girl eating homemade lollipop

I did a little test and left my lollipops at room temperature for a few weeks just to see what would happen. It's February so we got all kinds of weather. Snow, sun, rain, hail. The only thing that happened was they got a little sticky. They probably wouldn't have gotten sticky if I kept them covered but I wanted to know if the air would affect them. If you're in a very humid area you should def keep them covered or individually wrapped with cellophane to keep the lollipops from turning into a sticky mess. 

What can you do with leftovers?

You can pour leftover lollipop sugar onto a silicone mat and let it cool completely. Crush it into pieces an store in a plastic ziplock bag. Then you can re-melt it whenever you need some hard candy. No need to bring it back up to 300ºF, just melt in the microwave in a heat proof container. 

Can you make this lollipop recipe without corn syrup?

This lollipop recipe contains corn syrup because corn syrup prevents crystallization. In some places of the world, it can be hard to get corn syrup. No worries, you can still make homemade lollipops without the use of corn syrup.

Simply leave out the corn syrup from this recipe but be very careful to wash down the sides of your pan to prevent sugar crystals from growing. If your sugar does crystallize, there isn't a way to save it. 

How do you make a lollipop cake?

lollipop cake tutorial

You may have seen some trendy lollipop cakes on Instagram lately and wondered how they make them! I decided to make one of my own with my lollipop recipe and I love how it turned out! I made three different types of lollipops. Clear with gold leaf, clear with gold dragees and white marble. I made three of each kind and arranged them on top of my cake. 

lollipop cake tutorial

I decorated my marbled fondant cake with some gold leaf to match the lollipops and love how it turned out. The key is to arrange the lollipops and varying height and mix and match them so they look balanced. 

Want to learn how to make your own lollipop cake? Watch this video on how I created some beautiful gold and marble lollipops and used them to decorate my marble cake to create a trendy lollipop cake design!

For a sugar-free lollipop option, use Simi-Cakes ready to melt isomalt. 

Another showstopping homemade candy to try is kohakutou, a Japanese crystal gummy candy that looks like colorful gemstones.

Recipe

Print Recipe
4.95 from 17 votes

lollipop recipe

Homemade lollipops are fun and easy to make. The flavors and colors can be easily customized. The perfect homemade treat!
Prep Time5 minutes mins
Cook Time30 minutes mins
cooling15 minutes mins
Total Time35 minutes mins
Course: Dessert
Cuisine: American
Servings: 8 servings
Calories: 159kcal
Author: Liz Marek

Ingredients

Lollipop Recipe

  • 8 oz granulated sugar
  • 5 oz corn syrup
  • 2 oz distilled water (or bottled)
  • ½ teaspoon candy flavoring
  • food coloring (optional)

Instructions

  • Combine sugar, corn syrup and water in a heavy-bottomed, stainless steel pot over med-high heat. Bring to a boil
  • Cover the mixture with the lid and let condensation build for 5 minutes (this helps to wash the sugar off the sides of the pan). Remove lid and reduce heat to medium. 
  • Insert candy thermometer and let mixture cook (do not stir) until it reaches 300ºF.
  • Remove mixture from heat and stir in flavoring and colors
  • Let mixture cool a bit until it's thick enough to hold it's shape when poured and then pour into circles on your silicone mat (or into your candy molds). Insert your lollipop sticks and let cool completely before removing them from the mat. 
  • Torch the back sides of the lollipops (optional) to make them super clear. Store in air-tight containers at room temperature or wrap individually to prevent them from getting sticky. 

Video

Nutrition

Serving: 1serving | Calories: 159kcal | Carbohydrates: 41g | Sodium: 11mg | Sugar: 41g | Calcium: 2mg
how to make homemade lollipop recipe that tastes amazing! Flavors and colors are easily customized and it's perfect for making those trendy lollipop cakes!


March 5, 2019 Cake

Pot Of Gold Cake

I love this pot of gold cake with its beautiful rainbow drip made from water ganache! The cake is a yummy green velvet cake and filled with a beautiful rainbow buttercream. Topped with a giant pot of gold cake pop, this St. Patrick's day cake is the cutest!rainbow pot of gold cake for saint patrick's day. Green velvet cake with rainbow buttercream inside. Covered in a rainbow water ganache and topped with a fun pot of gold cake pop

My Saint Patrick's Day cake from last year was so fun to make, I decided to make another this year with my daughter Avalon's help. Ok so she basically took over. I'm fine with it. I'd rather be behind the camera anyway lol.

For the pot of gold cake, we're using the same delicious green velvet cake recipe for the base but you could use any flavor of cake like my Guinness cake. The recipe is actually the same as my red velvet cake but I switched out the red for green. You can do this with pretty much any of the darker colors like blue or purple and get some really nice colors and great flavor.

How to make the rainbow cake

Ok let's get to the cake making part. I made a batch of my green velvet cake and baked in three 6" round cake pans. Let them cool fully before frosting. I popped mine into the freezer for about an hour to get them cooling even faster.

Then I whipped up some of my easy buttercream. I reserved about three cups for frosting my cake. The rest I divided into 5 bowls and colored. Red, orange, yellow, lime green, light blue and purple/pink. I placed this buttercream into five bags and snipped off the tip.

rainbow buttercream in piping bags

Trim the dome off your cooled cakes (don't throw away the cake scraps, we'll use those later). Place your cakes onto a cake cardboard to start frosting and filling.

I started filling my cake layers with the rainbow buttercream. Starting with the blue in the center, then working my way to red, going in the order of blue, green, yellow, orange, red, pink, then starting over with the blue again until you reach the edge of the cake. The buttercream should be about ¼" thick so you have a nice rainbow showing through when you slice the cake.

rainbow buttercream cake

Now just crumb coat your cake, chill until firm and frost with your final layer of buttercream. I use a bench scraper to get nice straight sides. Check out my free tutorial on how to make your first cake if you want more info on frosting and filling a cake with straight edges.

How to make the rainbow drip cake

Ok time to make some water ganache! I actually only made 3oz of each color because you won't need very much to make the rainbow drip. I decided to go with pre-colored wilton candy melts so that I didn't have to color a bunch of chocolate. But if you only have white chocolate, you can just add regular food coloring to the water ganache after you make it.

rainbow water ganache

I made red, orange, yellow, lime green, light blue and purple water ganache. Divide the colors into small piping bags and snip off the tip. Don't snip off too much or it will all leak out.

Pipe your water ganache into a triangle on the top of the cake, letting the color drip over the edge a little. Continue on with the next color in the rainbow until you have made your way all the way around the cake. It should set up within a few minutes.

water ganache rainbow drip cake with pot of gold cake topper

How to make a pot of gold cake pop

Take your cake scraps and add a scoop of buttercream. Smoosh the cake and buttercream together to make a cake pop dough. Roll the dough into a ball about 3" wide. Place a cake pop stick dipped in some melted chocolate into the center of the cake pop and freeze 10 minutes.

Once your giant cake pop is chilled, you can dip the whole thing into a bowl of melted chocolate. Place the cake pop onto some parchment until the chocolate is set. The flat top becomes the top of the pot of gold. Cool huh!

Carefully lift your cake pop off the parchment paper and pipe on some yellow buttercream. Dip the buttercream in your gold confetti sprinkles for the coins.

Finishing the pot of gold cake

Pipe a nice big fluffy cloud of buttercream on top of the rainbow drip cake. Place the pot of gold cake topper right on top of the buttercream. I finished the bottom edge of the cake with some buttercream as well to hide the rough edge.

kid baking rainbow drip pot of gold cake for saint patricks day

I was super proud of how much of this cake Avalon was actually able to do. I had to help her with the frosting (because I'm a control freak) and doing the rainbow drip but she was able to do pretty much everything else.

A super fun cake to do with your kids or to take to a Saint Patrick's day party! Check out this super fun video of Avalon taking over and making this rainbow drip cake for Saint Patrick's Day.

rainbow pot of gold drip cake for saint patricks day

Cocoa Butter Cactus Cake

March 1, 2019 Course Preview

Cocoa Butter Cactus Cake Tutorial

Skill level: Intermediate

This week's tutorial is all about cocoa butter! If you've ever wondered how to use this amazing product, look no further than this online course. We cover how to paint with cocoa butter, how to airbrush, how to create an amazing edible velvet texture, how to create a stunning wicker design, edible succulents, a super cute prickly pear cactus cake topper and more.

There's a lot to cover in this course, so let's get our tools together and let's get started!

1:03:35 Minutes of Instruction

What You Will Learn

  • Learn how create a southwest-inspired cactus cake
  • How to airbrush and handpaint with cocoa butter
  • Learn how to create a wicker basket design using modeling chocolate
  • How to create a velvet spray texture on a cake tier using cocoa butter
  • Learn how to create modeling chocolate succulents

This week's tutorial is all about cocoa butter! If you've ever wondered how to use this amazing product, look no further than this online course. We cover how to paint with cocoa butter, how to airbrush, how to create an amazing edible velvet texture, how to create a stunning wicker design, edible succulents, a super cute prickly pear cactus cake topper and more. There's a lot to cover in this course, so let's get our tools together and let's get started!

Tutorial Chapters

  1. The upside-down method 1:08
  2. Final coat of buttercream 3:38
  3. Coloring modeling chocolate 4:26
  4. Covering the cakes 9:11
  5. Making a double barrel tier 12:47
  6. Prickly pear cactus topper 16:39
  7. Wicker pattern 20:53
  8. Cocoa butter painting 28:09
  9. Cactus topper details 39:10
  10. Adding velvet texture 42:32
  11. Painting wicker texture 47:22
  12. Chocolate succulents 50:37
  13. Stacking the tiers 54:58
  14. Adding final details 57:11

Downloads

Materials List

Cactus Painting Reference 01

Cactus Painting Reference 02

Wicker Reference

Cocoa Butter Cactus Cake

March 1, 2019 Paid Video

Cocoa Butter Cactus Cake

Skill level: Intermediate

This week's tutorial is all about cocoa butter! If you've ever wondered how to use this amazing product, look no further than this online course. We cover how to paint with cocoa butter, how to airbrush, how to create an amazing edible velvet texture, how to create a stunning wicker design, edible succulents, a super cute prickly pear cactus cake topper and more.

There's a lot to cover in this course, so let's get our tools together and let's get started!

1:03:35 Minutes of Instruction

What You Will Learn

  • Learn how create a southwest-inspired cactus cake
  • How to airbrush and handpaint with cocoa butter
  • Learn how to create a wicker basket design using modeling chocolate
  • How to create a velvet spray texture on a cake tier using cocoa butter
  • Learn how to create modeling chocolate succulents

Tutorial Chapters

  1. The upside-down method 1:08
  2. Final coat of buttercream 3:38
  3. Coloring modeling chocolate 4:26
  4. Covering the cakes 9:11
  5. Making a double barrel tier 12:47
  6. Prickly pear cactus topper 16:39
  7. Wicker pattern 20:53
  8. Cocoa butter painting 28:09
  9. Cactus topper details 39:10
  10. Adding velvet texture 42:32
  11. Painting wicker texture 47:22
  12. Chocolate succulents 50:37
  13. Stacking the tiers 54:58
  14. Adding final details 57:11

Downloads

Materials List
Cactus Painting Reference 01
Cactus Painting Reference 02
Wicker Reference

how to put fresh flowers on cake and how to make them food safe

February 24, 2019 Blog

Fresh Flowers On Cake

How to put fresh flowers on cake and how to make them food safe

Putting fresh flowers on a cake is a great way to add some gorgeous decoration to your wedding cake but it's important to make sure your flowers are prepared properly. Placing fresh flowers into a cake without sealing them can cause toxic chemicals (like pesticides) to leach into the cake and potentially cause a major food hazard to your guests. Follow this simple guide on how to put fresh flowers on cake without making anyone sick. 

how to put fresh flowers on cake and how to make them food safe

And if you're interested in making the gorgeous marble wedding cake, be sure to check out the other tutorials in this series. 

White velvet cake recipe

How to make your first cake 

How to get sharp edges on your buttercream

How to make a marble wedding cake

Why do you need to make flowers food safe?

Aside from leaching toxic chemicals into your cake, some flowers are actually poisonous to humans if eaten. Some of these flowers can cause an upset stomach but some are deadly poisonous. 

That doesn't mean you CAN'T use all these flowers on your cake but you should take extra precaution to make sure they are sealed, safe and clean before placing on the cake. 

Here is a list of poisonous flowers, some might surprise you. 

Step 1 - Where do you buy fresh flowers for your cake

I talked to my florist friend Kim who is the owner of Swoon Floral Design here in Portland and she says she get's her flowers at the flower market but you can get your flowers from a grocery store or whatever is most convenient to you. Make sure you buy more flowers than you think you need because some of the flowers might wilt and not look very nice when it's time to use them. 

Choose some flowers that are large as the main attraction and then some smaller flowers and leaves to use as fillers. If you are only using large flowers it will be harder to fill in holes in certain areas. 

Step 2 - How to keep fresh flowers from wilting

Usually flowers come with a packet of flower vitamins that you mix in with the water to help keep them fresh. Follow the instructions on how to mix this and then keep your flowers in water until you use them to avoid wilting. 

Step 3 - Who puts the fresh flowers on cake?

Once upon a time, I delivered a rustic buttercream cake to a wedding and placed it on the cake table. The florist arrived as I was setting up and proceeded to shove fresh roses into the cake without even asking me.

Even in the early days... I was pretty sure this wasn't ok. After that day I always let the florist, bride, coordinator, everyone know ahead of time that I would place the flowers myself. A copy of the cake sketch would be forwarded to the florist as well.

how to safely add fresh flowers to your wedding cake

I would instruct the bride to let the florist know to leave whatever flowers she had for me for the cake in a bucket of water by the cake table. If there wasn't a florist, I would let the bride know that I did not buy flowers and if she wanted flowers someone would have to buy them and place them at the table. 

Step 4 - What tools and materials do I need to put fresh flowers on cake

You'll need floral tape, scissors and plastic wrap. In the past I have used straws or water picks and those work pretty good too but sometimes my stems are too thick for the straws. 

Step 5 - How to make fresh flowers food safe

Making your fresh flowers food safe is pretty simple although it can be time consuming depending on how many flowers you need to put on the cake. I would typically allow myself an extra hour at set-up to place flowers. 

Cut your main large flower and a few smaller flowers to accent it. 

Trim some plastic wrap to about a 3"x3" square. 

Take about 4" of floral tape and give it a stretch to activate the stickiness. Wrap the floral tape around the plastic wrap to secure it to the flower

Now you can insert the flower into the cake without fear of the water leaking into the cake

What are some other ways to make flowers food safe? 

You can also use a product called Safety Seal which is food safe wax that when melted, you can dip the stems of flowers into the wax to seal them. This is great if you have access to a microwave when you need to put the flowers into the cake 

I have also used chocolate as a seal on the back of some gerbera daisies that I used to decorate my cream tart cake. 

Cream Tart decorated with fresh flowers sealed with chocolate

What about edible flowers?

Ok so now that you're probably scared to even put one flower on a cake, let me put your mind at ease. Toxicity levels will vary based on the level of contact with the flowers. For example, ingesting even a small part of some flowers can cause symptoms, whereas for others you’d need to ingest a large amount to see any effect. With any exposure or symptoms, it’s advised that you contact the Poison Control Center (800-222-1222) or your doctor immediately.

Stick to eating the cake and you should be ok. 


There are also quite a few flowers that are completely safe and can even be eaten. These edible flowers do not need to be sealed and can be placed directly on the cake IF they haven't been treated with any pesticides. Even edible flowers should not be eaten if they aren't organically grown. 

Fresh flowers on cake make a stunning cake decoration but it's important to make them food safe! Fresh flowers contain pesticides and some flowers are even poisonous. Make sure you're not adding toxic flowers to your cake with this fresh flowers on cake guide

how to make meringue cookie recipe

February 19, 2019 Blog

Meringue Cookie Recipe

My meringue cookie recipe makes a delicious, crisp cookie that tastes like a toasted marshmallow.

The first time I made a meringue cookie recipe was in pastry school. I had no idea they were so easy to make. Simply combine egg whites and sugar and whip it up! This meringue cookie recipe is perfect for making meringue pops or pretty much any shape you can think of. 


how to make meringue cookie recipe

What is an easy meringue cookie recipe

My meringue cookie recipe is super easy. The key to a perfect meringue cookie recipe isn't in the ingredients, it's in the baking (if you can call it that), it's more like a dehydration process. 

  • Just bring a couple of inches of water to a simmer in a pot.
  • Place a stainless steel mixing bowl over the simmering water.
  • Add in your egg whites and your sugar and whisk occasionally until the sugar dissolves.
  • Once the sugar is dissolved, you can begin whipping. Add in your vanilla and cream of tartar. I use my kitchenaid for this otherwise, it would take a long time to do with your hands. Let your meringue whip until it's at the stiff peak stage. 
  • Once your meringue is ready you can add color if you like. To make the rainbow meringue kisses, I place a little dab of food coloring on the inside of my piping bag with a toothpick so it colored the meringue as I piped. I used light blue, pink and yellow. 

meringue cookie recipe

How to bake meringue cookies

Most people do not bake their meringues for long enough which results in wrinkly or sticky meringues. 

  • Preheat your oven to 225ºF
  • Pipe your meringues onto parchment. If you're making multiple sizes, put larger meringues on a separate pan. 
  • Bake meringues 2" or smaller for 60 minutes. After the time is up, turn off the oven and leave them in the oven until it's completely cool (I let mine sit in there overnight). 
  • For larger meringues like meringue pops, bake for 90 minutes then let cool.  

How do I know if my meringue cookies are done?

Once your meringues are totally cool, they should lift right off the parchment paper. When you bite into them they should not be soft in the middle and feel very light and crisp. If you go to lift the meringue cookie off the paper and it sticks, they are not done yet. 

Why are my meringue cookies sticky?

The day I made my meringue cookies, it was raining like crazy. I thought for sure they would be sticky, but they weren't. As long as your meringue cookies are baked for long enough and left in the oven to completely cool, they won't be sticky. The stickiness comes from leftover moisture in the meringue coming to the surface and making it sticky. 

How long do meringue cookies last?

The great thing about meringue cookies is that you can make a whole bunch ahead of time and then save them for later. You can store meringue cookies in an airtight container for up to two weeks. Meringue cookies make great gifts because they stay fresh for so long. They do not need to be refrigerated. 

meringue cookie recipe

How do you change the flavor of the meringue cookie?

You can change the flavor of your meringue cookie very easily! Simply replace the extract with any other type of flavoring you desire like strawberry or peppermint. I thought about flavoring this meringue cookie recipe with bubblegum flavoring since it's a unicorn theme and all but I couldn't find any locally. Next time!

How do you make a meringue pop?

You can use this same recipe to make fun meringue pops! All the rage right now in the cake world. You can color your meringue the same way. This time pipe the meringue onto one half of a cake pop stick. Apply some fun sprinkles and bake as usual. These make great treats for parties, for using on cakes or for packaging individually for sales. 

For extra fun, try using a little edible glitter from never forgotten designs! I love how much it sparkles!

meringue pop


Recipe

how to make meringue cookie recipe
Print Recipe
4.90 from 49 votes

Meringue Cookie Recipe

How to make crispy crunchy rainbow meringue cookies. So easy to color, flavor and pipe into different shapes. 
Prep Time10 minutes mins
Cook Time1 hour hr 30 minutes mins
cooling1 hour hr 30 minutes mins
Total Time1 hour hr 40 minutes mins
Course: Dessert
Cuisine: American
Servings: 24 cookies
Calories: 11kcal
Author: Liz Marek

Ingredients

Meringue Cookie Ingredients

  • 3 egg whites fresh
  • ¼ teaspoon cream of tartar
  • 5 oz sugar
  • ½ teaspoon vanilla or other flavoring
  • 1 pinch salt

Instructions

Meringue cookie instructions

  • Pre-heat your oven to 225ºF and line a baking sheet with parchment paper
  • Bring 2 inches of water to a simmer in a pot. Place a clean stainless steel mixing bowl over the water. It shouldn't touch the water. 
  • Combine your egg whites and sugar and whisk to combine. Occasionally whisk as it's heating to distribute the heat and dissolve the sugar.  
  • Once your egg whites are at 110ºF (or when you don't feel any grains of sugar between your fingers) you're read to whip
  • Place the bowl on your stand mixer with the whisk attachment. Whisk on med for one minute, add in cream of tartar, salt and flavoring. 
  • Bump up to high and let whip until you reach STIFF peaks. 
  • Now you are ready to pipe your meringue onto the baking sheet in kisses, swirls or pops. The possibilities are endless!
  • Bake for 60 minutes, then turn off the oven but do not take out the cookies. Let them sit in the oven until they are completely cold. I leave mine in overnight. 

Video

Notes

Humidity warning: Do not bake meringue on a humid or rainy day. The sugar attracts moisture and the cookies will not crisp properly.
Rub test for dissolved sugar: Rub a small amount of whipped meringue between your fingers before piping. It should feel completely smooth. Grittiness means keep whipping.
Do not refrigerate: Refrigerator humidity will soften meringue cookies within hours. Store at room temperature only.
Storage: Airtight container at room temperature, up to 2 weeks. Freezer, up to 1 month.
Reviving soft meringues: Bake on a parchment-lined sheet at 200º F for 10 minutes and cool in the turned-off oven for 30 minutes.
Chocolate variation: Fold in 2 tablespoons of sifted unsweetened cocoa powder along with the vanilla.
Piping guide tip: Trace circle outlines on the back of the parchment paper as a size guide. Flip the paper over before using so the pencil marks do not touch the food.

Nutrition

Serving: 1cookie | Calories: 11kcal | Carbohydrates: 2g | Sodium: 6mg | Potassium: 11mg | Sugar: 2g

how to make rainbow meringue cookie recipe

February 18, 2019 Free Video

How To Stack Your First Fondant Cake

How to cover your buttercream cakes in a gorgeous marbled fondant and stack them flawlessly

I'm obsessed with marbled fondant. If you watched last weeks video on how to get super sharp edges on your buttercream cake, you're going to love this next tutorial on how to cover your cake in a gorgeous marble fondant. This marbled fondant look was inspired by one of my favorite marble turn tables and I just love how it turned out. 

How to make marbled fondant

To make the perfect marbled fondant, you start out with white fondant. I take out a couple of tablespoons of the white and color it ivory. Then I do the same with some and make some grey. Now comes the easy part. Just layer on top of each other and pull the fondant a couple of times to start mixing in the ivory and grey. But don't mix it too much. You want to keep those interesting lines and patterns. 

Next I roll out the marbled fondant using some cornstarch. Make sure you keep moving the fondant around every couple of rolls so that it doesn't stick to the table. Try flipping it over and seeing which side of the fondant you like better. I roll my fondant out to about 1/16 of an inch. Thin fondant results in sharper edges on your cake, plus who likes to eat thick fondant?

How to cover your cake in marbled fondant

Now it's time to cover our cake in our marbled fondant. I roll my fondant up onto my rolling pin and unroll it onto the well-chilled buttercream cake. Use your fondant smoother to work out any air that might be trapped under the top right away. Then you can start slowly pressing the fondant against the cake to work out the ruffles. Try not to pull the fondant down, just open up the folds of fondant and press gently against the cake.

Once your cake is covered, cut off the excess around the cake about 2" away from the board. Gently flip your cake upside down and use your fondant smoothers to smooth the fondant upwards all the way around the cardboard. Use an x-acto blade to cut off the fondant around the top of the board. This makes a really seamless look to your fondant cake. 

Lastly I use my fondant smoother to sharpen up the edges of the fondant. This can be a bit time consuming but I love how the super sharp edges on the fondant look. 

Once you're done with your fondant, carefully turn the cake right side up and place back into the fridge to keep it chilled until you're ready to stack your cakes. 

How to stack your fondant cakes

Once you have your cakes all covered in fondant, all that's left is to stack them. I like to use milkshake straws because they are strong, easy to cut and not expensive to buy. Make sure you're always cutting your straws evenly and inserting them straight up and down. Download my straw guide to understand how many straws you need to use for the best stability. After your straws are inserted you can stack your cakes. 

For a two tier cake, you can definitely stack your cake at home and then deliver the cake already stacked. It will be very stable. If you have a three tier cake you might consider traveling with the top tier separately and then adding it on top when you arrive. Bring some extra buttercream to fix any gaps. 

When your cakes are nicely chilled, it should be very easy to pick your cakes up. Place the first cake onto your cake board and secure with some melted chocolate to keep it from sliding around. Make sure it's centered. 

Then take your second tier and place it on top, making sure it's centered. I use a small amount of buttercream to fill in the gap between the layers and my finger to smooth it out for a seamless look. 

cake support guide

That's it! That's all there is to making a simple marble fondant cake. Make sure you watch the full video tutorial on how to cover your cakes in marbled fondant for step-by-step instructions. 

If you have any questions feel free to leave them for me in the comments. 

« Previous Page
Next Page »

Primary Sidebar

Hi, I'm Liz! I'm a cake artist and recipe developer, and I won Netflix's Is It Cake? Holiday 2 with a hyperrealistic Santa. I write foolproof recipes that explain why things work, not just how.

I also teach full-length cake tutorials, including sculpted cakes, at Sugar Geek University.

More about me →

Our Cake Greatest Hits

Check out our best cake recipes

Celebrate Halloween 🎃

  • black and white striped cake with pink drip, gummy eyeball with ice cream cone on top
    Gummy Eyeball Cake
    Cook Time1 Hours 30 Minutes
  • close up of a slice of black velvet cake
    Black Velvet Cake
    Cook Time50 Minutes
  • monster mash cheesecake brownies cut into squares on a white background. Sprinkles, pumpkins and plates around the brownies
    Monster Mash Cheesecake Brownies
  • close up of candy apples
    The Best Candy Apple Recipe
  • pumpkin pie recipe
    Pumpkin Pie Recipe
    Cook Time2 Hours
  • close up of pumpkin cheesecake bars on a plate
    Pumpkin Cheesecake Bars
    Cook Time4 Hours

Popular Recipes

  • close up of ganache drizzling into a bowl
    The Best Chocolate Ganache Recipe
    Cook Time20 Minutes
  • Piping easy buttercream rosettes onto a cake using a 1M star piping tip
    Easy Buttercream Frosting
    Cook Time25 Minutes
  • close up slice of marble cake
    Moist and Fluffy Marble Cake Recipe
    Cook Time40 Minutes
  • Slice of red velvet cake with cream cheese frosting on a white plate.
    Red Velvet Cake Recipe
    Cook Time1 Hours 40 Minutes

Footer

↑ back to top

About

  • Privacy Policy
  • Terms of Service

Newsletter

  • Sign Up! for emails and updates

Contact

  • Contact
  • About Us

Copyright © 2024 Sugar Geek Show, Inc. All Rights Reserved.

Rate This Recipe

Your vote:


A rating is required
A name is required
An email is required