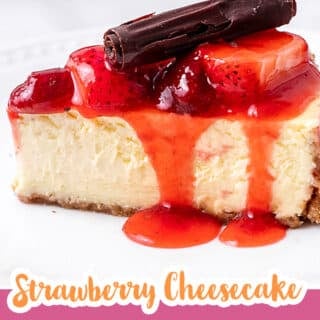
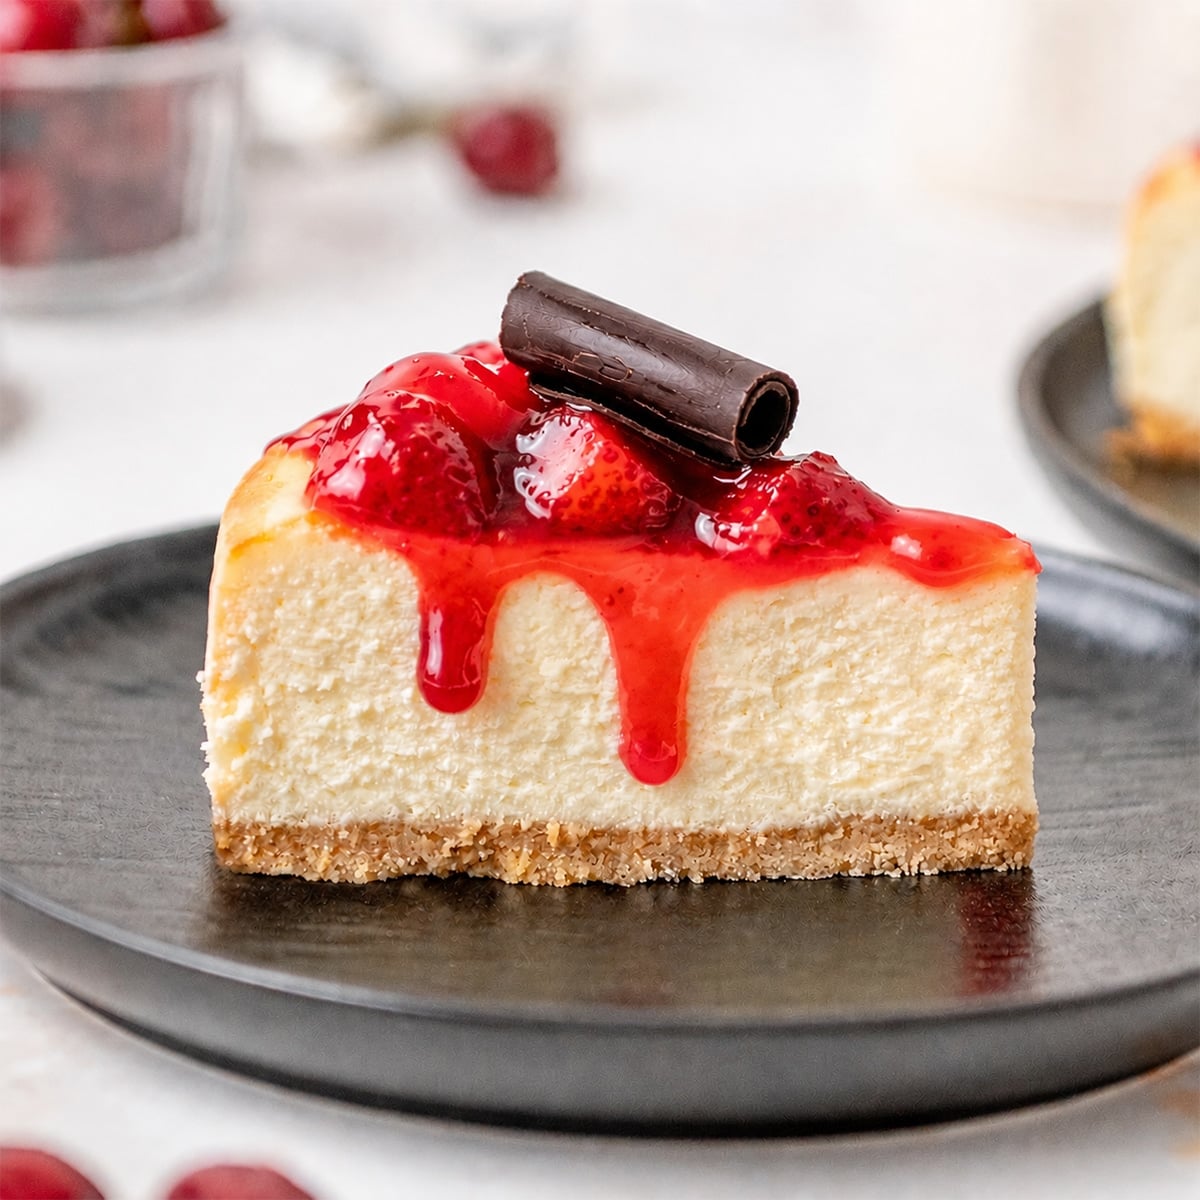
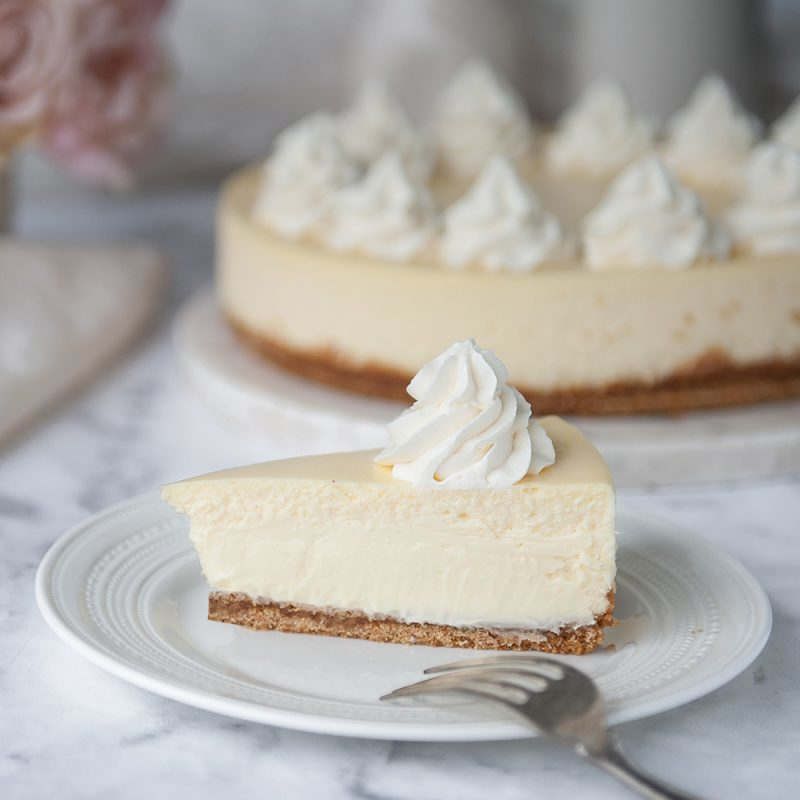
This classic strawberry cheesecake recipe has a crisp graham cracker crust, a silky cream cheese filling, and a glossy, fresh strawberry topping, finished with real chocolate curls. It is lighter and creamier than a dense New York slice, and if you have made my classic cheesecake recipe you already know the method that makes it foolproof.
Quick Glance at the Recipe: Strawberry Cheesecake
- Recipe Name: Strawberry Cheesecake
- Why You'll Love It: Lighter and creamier than New York style, with a crisp graham crust, a fresh strawberry topping, and real tempered chocolate curls. A true bakery-quality slice you make at home.
- Time and Difficulty: Intermediate. About 15 minutes of active prep, the rest is baking, cooling, and chilling (about 2 hours total).
- Main Ingredients: Graham cracker crust, cream cheese filling, fresh strawberry topping, and real chocolate for the curls.
- Method: Bake the crust, mix the filling, bake low and slow in a water bath, cool slowly in the oven, chill, cook a fresh strawberry topping, add optional chocolate curls
- Texture and Flavor: Silky, creamy filling, crisp buttery crust, bright sweet-tart strawberries, and crisp chocolate curls.
- Quick Tip: Use a thermometer and pull the cheesecake at 150º F in the center. The jiggle test is a guess; the thermometer is the truth.
Jump to:
- Quick Glance at the Recipe: Strawberry Cheesecake
- What Makes This Strawberry Cheesecake So Good
- Secrets To A Flawless Cheesecake
- Strawberry Cheesecake Ingredients
- How To Make Strawberry Cheesecake Step-By-Step
- Baking The Cheesecake In A Water Bath
- ClearJel vs Cornstarch For The Topping
- Make-Ahead, Storage, And Freezing
- Common Strawberry Cheesecake Problems To Avoid
- Final Thoughts
- Make This Strawberry Cheesecake Recipe Your Own
- Strawberry Cheesecake FAQs
- Other Cheesecake Recipes You'll Love
- Leave Me A Review⭐️⭐️⭐️⭐️⭐️
- Recipe
What Makes This Strawberry Cheesecake So Good
Most strawberry cheesecake recipes online give you a dense New York slice with a spoonful of canned pie filling on top. This one is different, and here is why it wins:
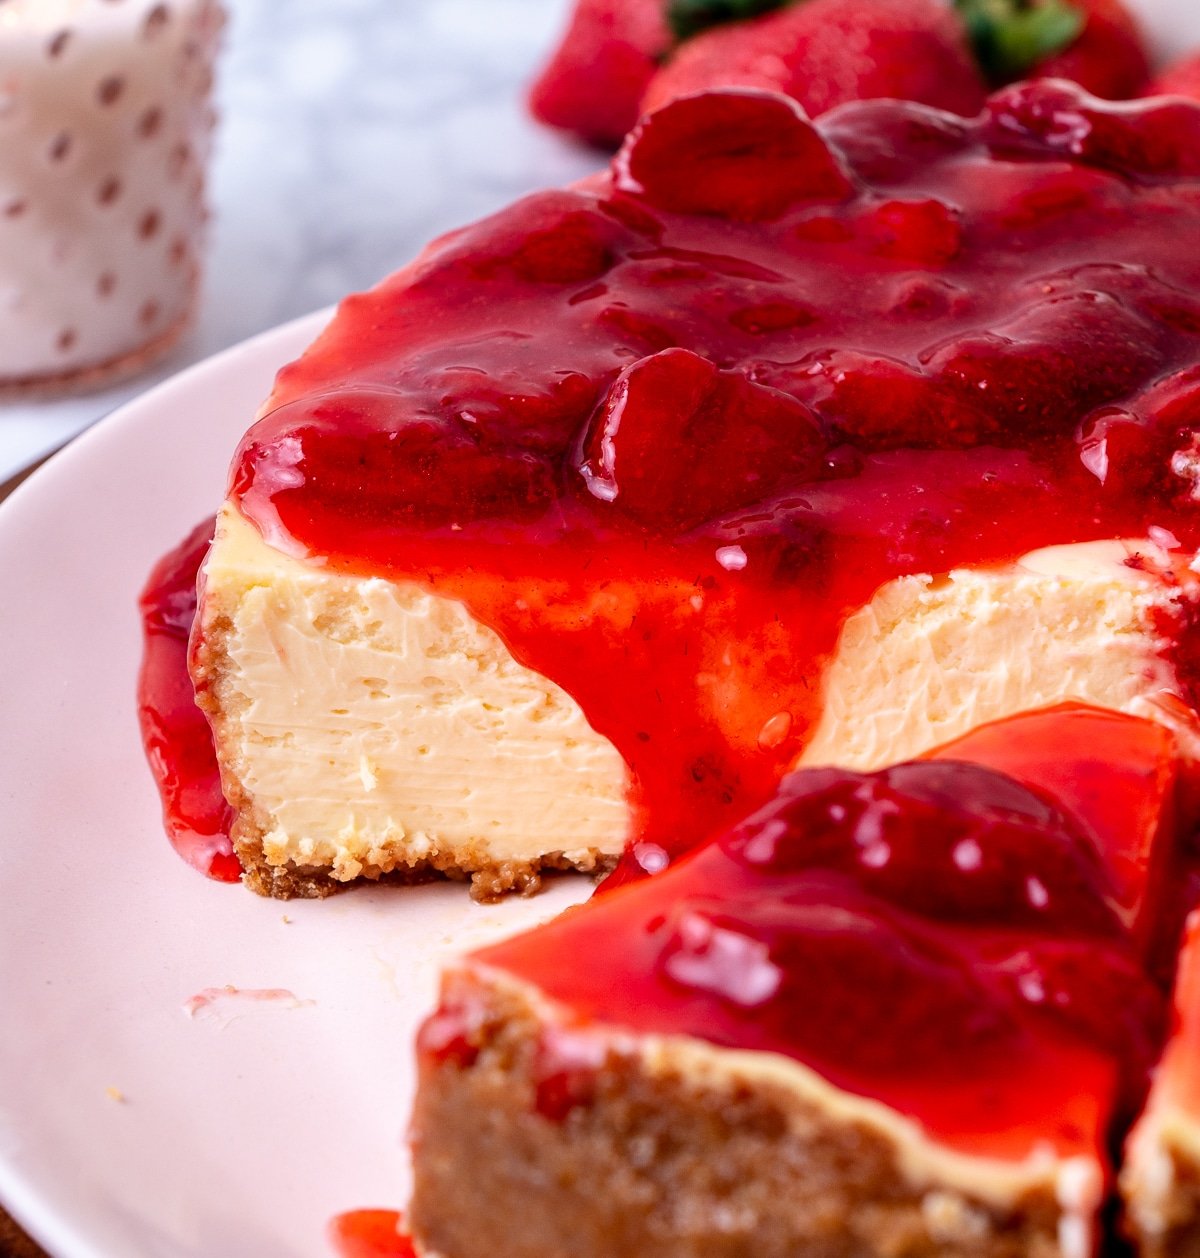
- It is a classic-style cheesecake, not New York style. The sour cream and a touch of heavy cream lighten the texture so the slice is creamy and almost mousse-like instead of heavy and firm. If you like a dense brick, the New York version is fine, but this is the one people go back for seconds of.
- The topping is fresh-cooked strawberries, not canned filling. Real berries, lemon juice, and a little zest taste like summer. There is no gluey, overly sweet canned flavor anywhere near this cake.
- I use ClearJel instead of cornstarch in the topping. It sets up shinier, clearer, and not gummy, and it holds better in the fridge so the topping does not turn to water on you the next day. More on that below.
- Real tempered chocolate curls. Crisp, snappy curls of real chocolate that melt in your mouth, like a chocolate-covered strawberry sitting on top of your slice. Same technique as my tempering chocolate tutorial. Totally optional but such a game changer!
- A foolproof water bath, plus a no-bath backup. The water bath is what keeps the texture creamy edge to edge, and I show you how to make it genuinely leakproof. If you do not want to fuss with it, I have a no-bath method too.
Secrets To A Flawless Cheesecake
These are the four things that take a cheesecake from "fine" to flawless. None of them are hard, but skipping them is where most cheesecakes go wrong.
- Everything cold needs to be room temperature first. Cream cheese, eggs, sour cream, and heavy cream all need to be at room temperature so they blend smooth with no lumps. Cold cream cheese is the number one cause of a lumpy filling.
- Do not overbake it. This is the single biggest secret to that silky texture. I always use a thermometer to check the center instead of relying on the jiggle test, because the jiggle test is a guess and the thermometer is not.
- Use a water bath. It prevents overbaking, sinking, and too much browning. If you do not want to do one, that is totally fine, and I have alternate instructions below.
- Turn the oven off and let it cool slowly inside. This is something I discovered making my classic cheesecake. Leaving the cheesecake in the turned-off oven for an hour lets it cool down SLOWLY, which is what stops cracks from forming.
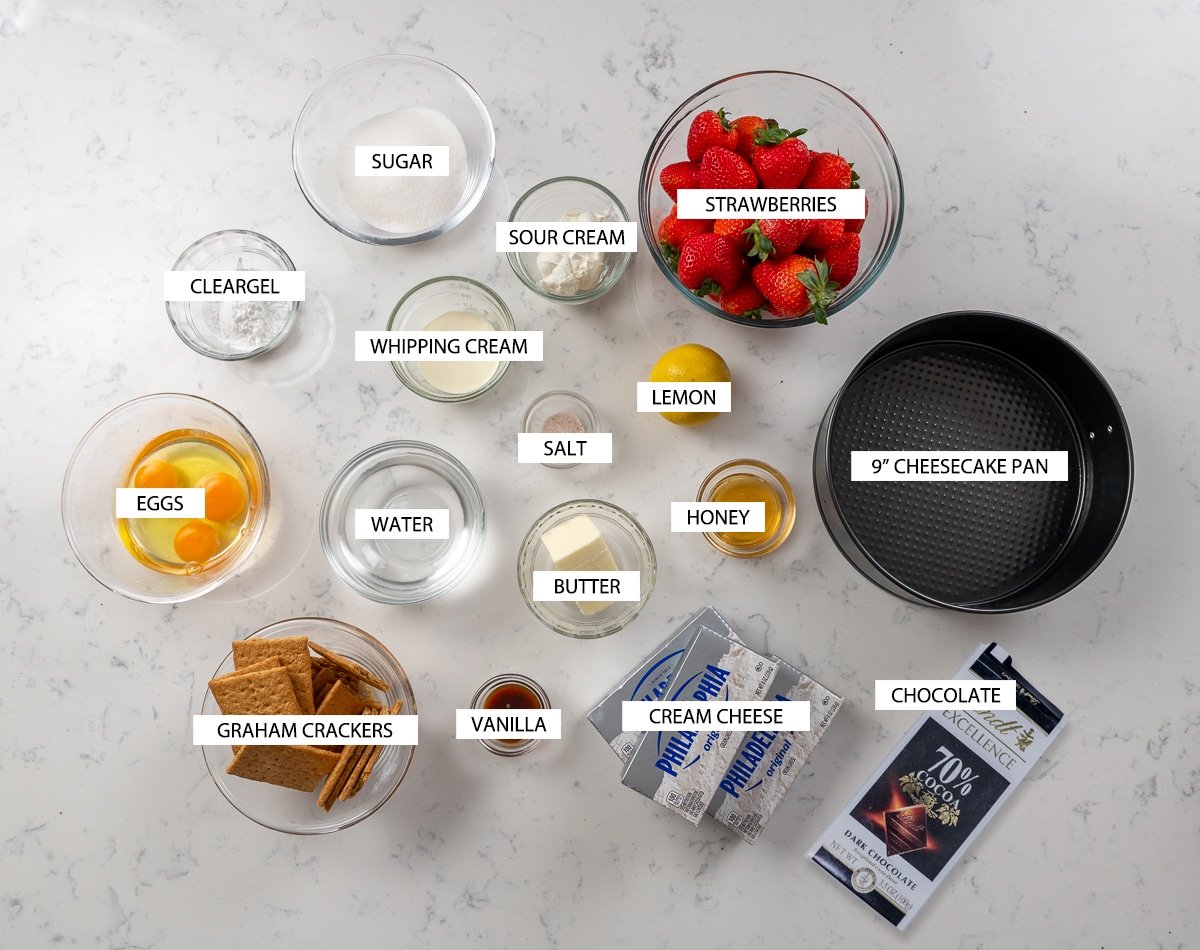
Strawberry Cheesecake Ingredients
This is a short list of mostly pantry and dairy-case staples. I always recommend weighing your ingredients with a digital kitchen scale for the most accurate results, especially the cream cheese and sugar. The only slightly unusual item is ClearJel, which is worth buying ahead if you want the shiniest topping.
Cream cheese. Full-fat, block-style cream cheese only. I prefer classic Philadelphia. The tubs of spreadable cream cheese have extra moisture and will not give you the right texture. Bring it fully to room temperature before you start.
Granulated sugar. Sweetens both the crust and the filling. Nothing fancy needed here.
Sour cream and heavy whipping cream. This is what lightens the texture and makes the final cheesecake creamier than a New York style slice. Use full-fat sour cream and bring both to room temperature.
Honey. A small amount in the filling for a soft, rounded sweetness. It is subtle but it is part of what makes this filling taste a little different from everyone else's.
Eggs. Room temperature, added one at a time so you do not beat extra air into the batter. Cold eggs do not incorporate well and lead to overmixing, which causes cracks. Vanilla extract and salt. The vanilla rounds out the filling and the salt keeps it from tasting flat. A scraped vanilla bean is delicious here if you have one.
Graham crackers and unsalted butter. Crushed graham crackers plus melted butter and sugar make the classic crisp, buttery crust.
Strawberries. The topping here is my 10 minute strawberry topping. You cook down half the berries into a thick, glossy sauce, then fold in the other half at the end, so you get big beautiful chunks of strawberry instead of mush. Fresh berries in peak season are ideal, but frozen work great off-season since they are picked and frozen at peak ripeness.
Lemon juice and lemon zest. These brighten up the strawberry topping and keep it from tasting one-note sweet.
ClearJel (or cornstarch). ClearJel thickens the strawberry topping so it does not run off the cake, and it looks less cloudy, shinier, and not as gummy as cornstarch. You can use cornstarch if that is what you have, but it is stronger than ClearJel, so use half as much.
Real chocolate for the curls. Use a bar that lists cocoa butter in the ingredients (I use Lindt 70%). Do not use chocolate chips, candy melts, or chocolate bark. If there is no cocoa butter, it is not real chocolate and it will not curl properly.
How To Make Strawberry Cheesecake Step-By-Step
Before you start: pull the cream cheese, eggs, sour cream, and heavy cream and bring them to room temperature (this takes a couple of hours, so plan ahead). Preheat your oven to 350º F for the crust. Move one rack to the lowest position and a second rack to the middle. Cut a parchment round for the bottom of the pan. This is a high-level overview. The full measurements and detailed steps are in the recipe card below.
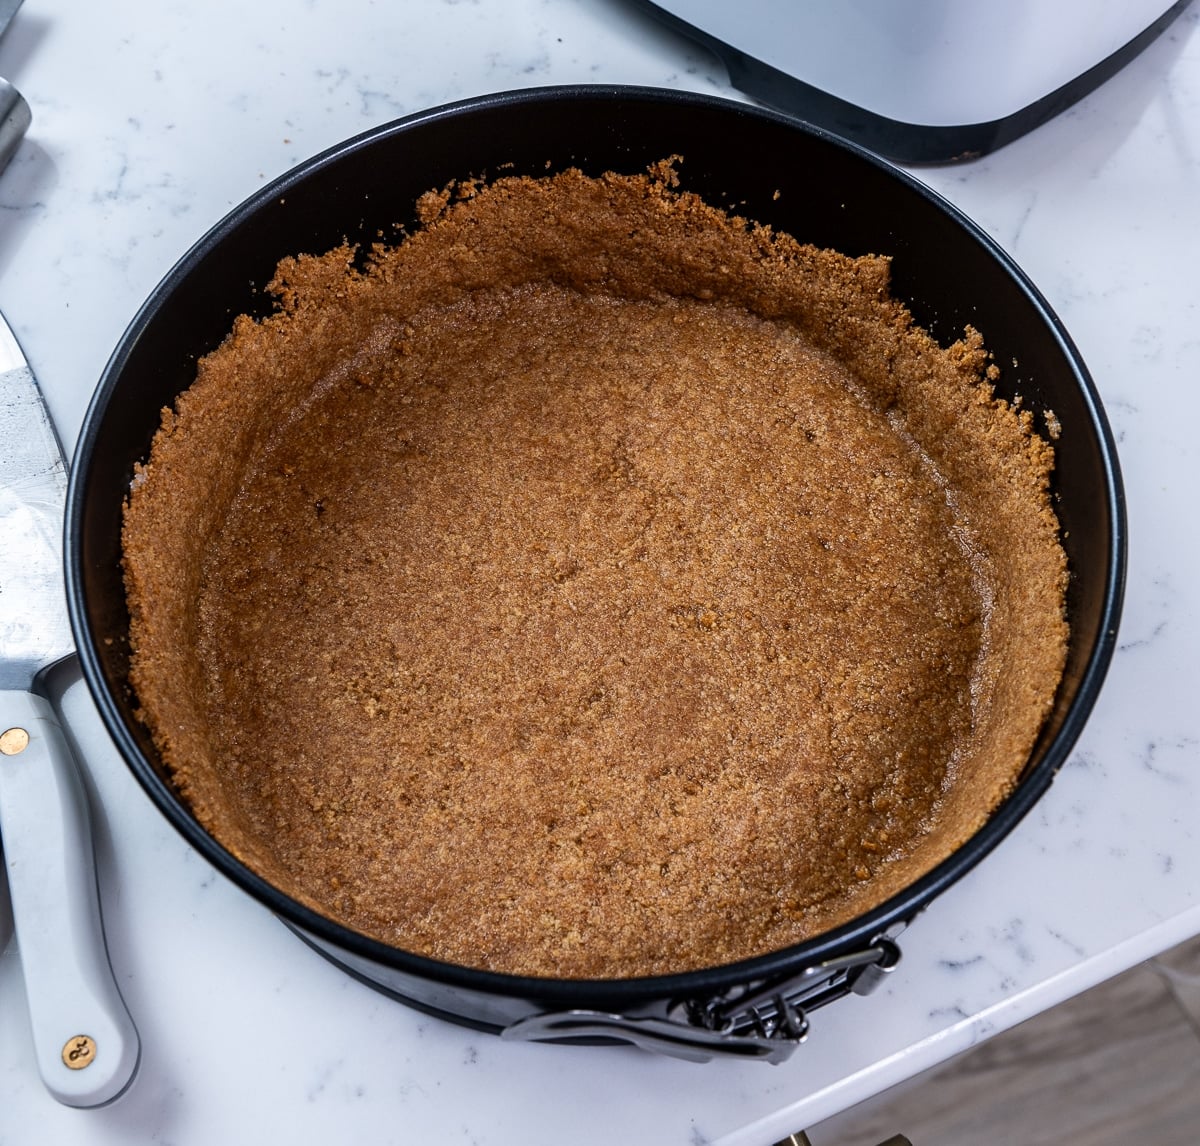
- Make the graham cracker crust. Crush the graham crackers (a food processor or a zip-top bag and a rolling pin both work), mix with the sugar and melted butter until it looks like wet sand, press firmly into the bottom and partway up the sides of the pan, and bake at 350º F until you can smell it toasting. Let it cool.
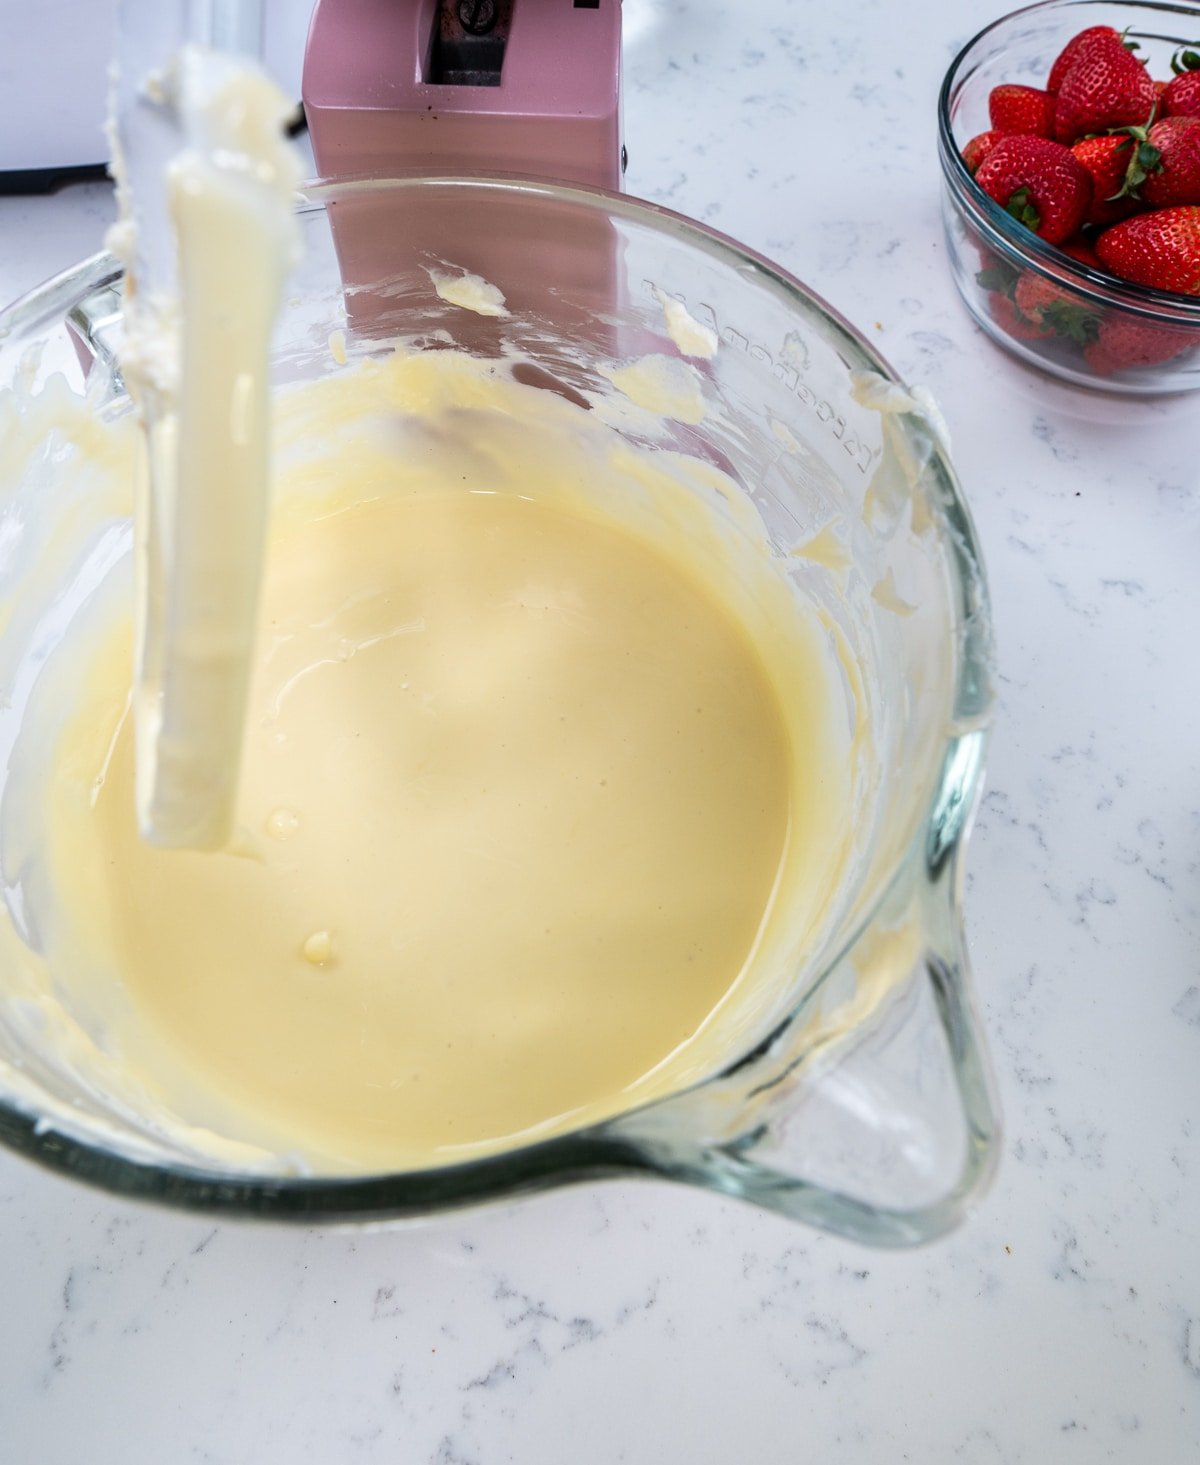
- Mix the filling. Beat the room-temperature cream cheese on low until it is completely smooth and no longer lumpy. Add the sugar, then the sour cream, heavy cream, honey, salt, and vanilla, and finally the eggs one at a time. Keep the mixer on low the whole time and scrape the bowl often, the goal is smooth, not airy. Every bit of mixing on low matters here, because air whipped into the batter is what makes a cheesecake puff up, then sink and crack.
PRO TIP: Drop a parchment round in the bottom of the pan before you press in the crumbs. It makes lifting the finished cheesecake off the base so much easier later. Press the crust tight with a flat-bottomed measuring cup or glass so it does not crumble when you slice.
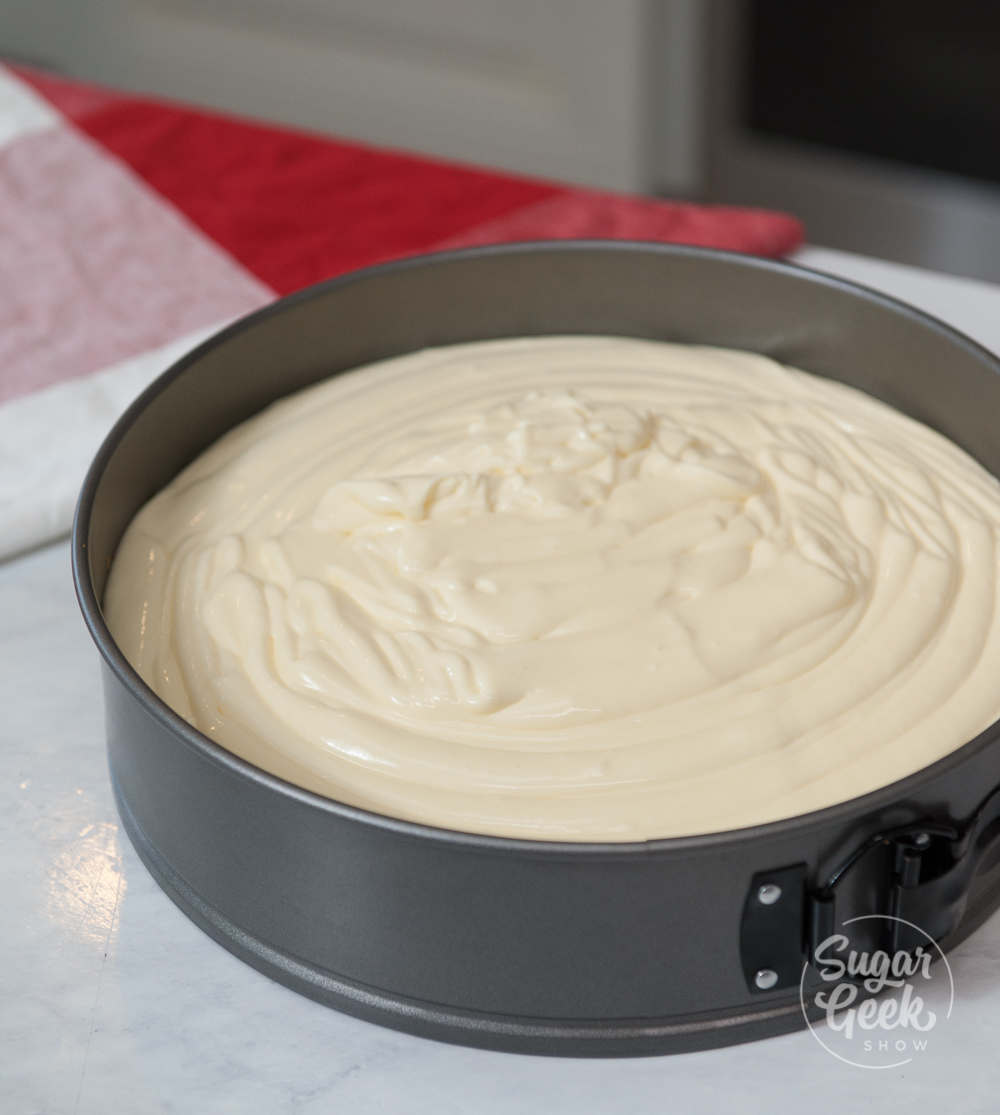
- Pour the filling into your springform pan over the cooled graham cracker crust.

- Set up your water bath (full instructions in the next section), and bake at 335º F. Do not open the oven door while it bakes. You are looking for a center that reaches 150º F on a thermometer and still has a slight wobble.
- Cool it slowly, then chill. When the cheesecake hits the right temperature, turn the oven off, crack the door, and leave the cheesecake inside for one more hour. This slow cooldown is what prevents cracks. Then refrigerate for at least 6 hours, ideally overnight, before you take it out of the pan.

- Cook the strawberry topping. This is my 10 minute strawberry topping. Simmer half the strawberries with the water, sugar, salt, lemon juice, and zest until thickened and reduced, whisk to crush them into a sauce, stir in a ClearJel slurry to set it, then fold in the remaining strawberries off the heat. Let it cool completely (it thickens more as it cools) before it goes anywhere near the cheesecake.
PRO TIP: Wait to cover the cheesecake with plastic wrap until it is fully cooled. If you cover it warm, condensation forms and drips water onto the surface.
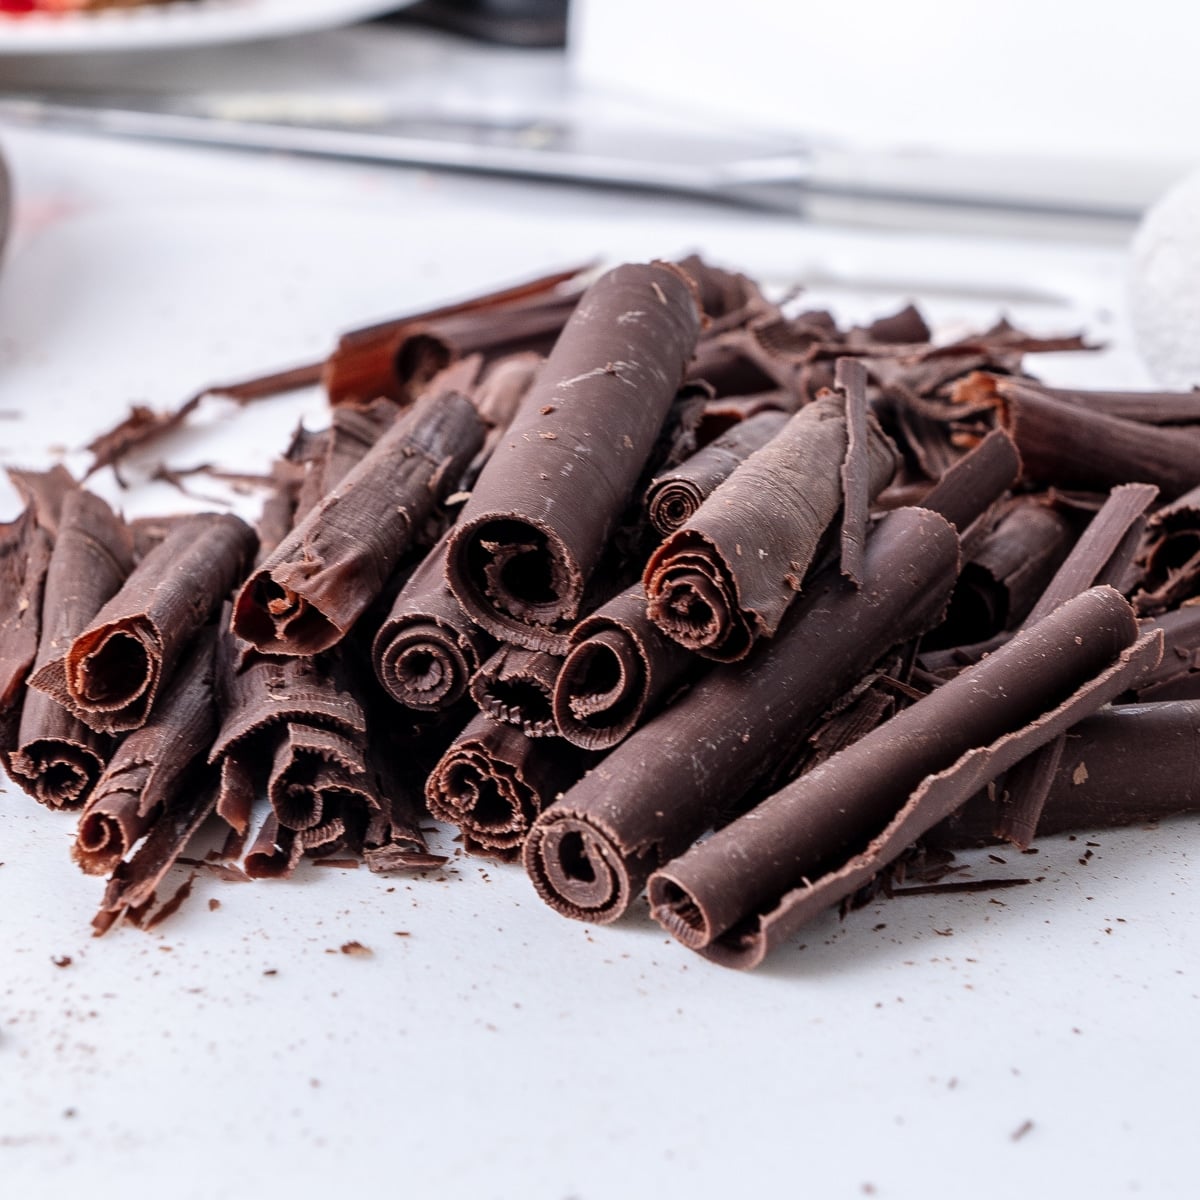
- Make the chocolate curls. Melt and temper real chocolate, spread it thin on a stone counter or the back of a sheet pan, wait for the shine to go matte, then push a bench scraper at a 45º angle to form curls.
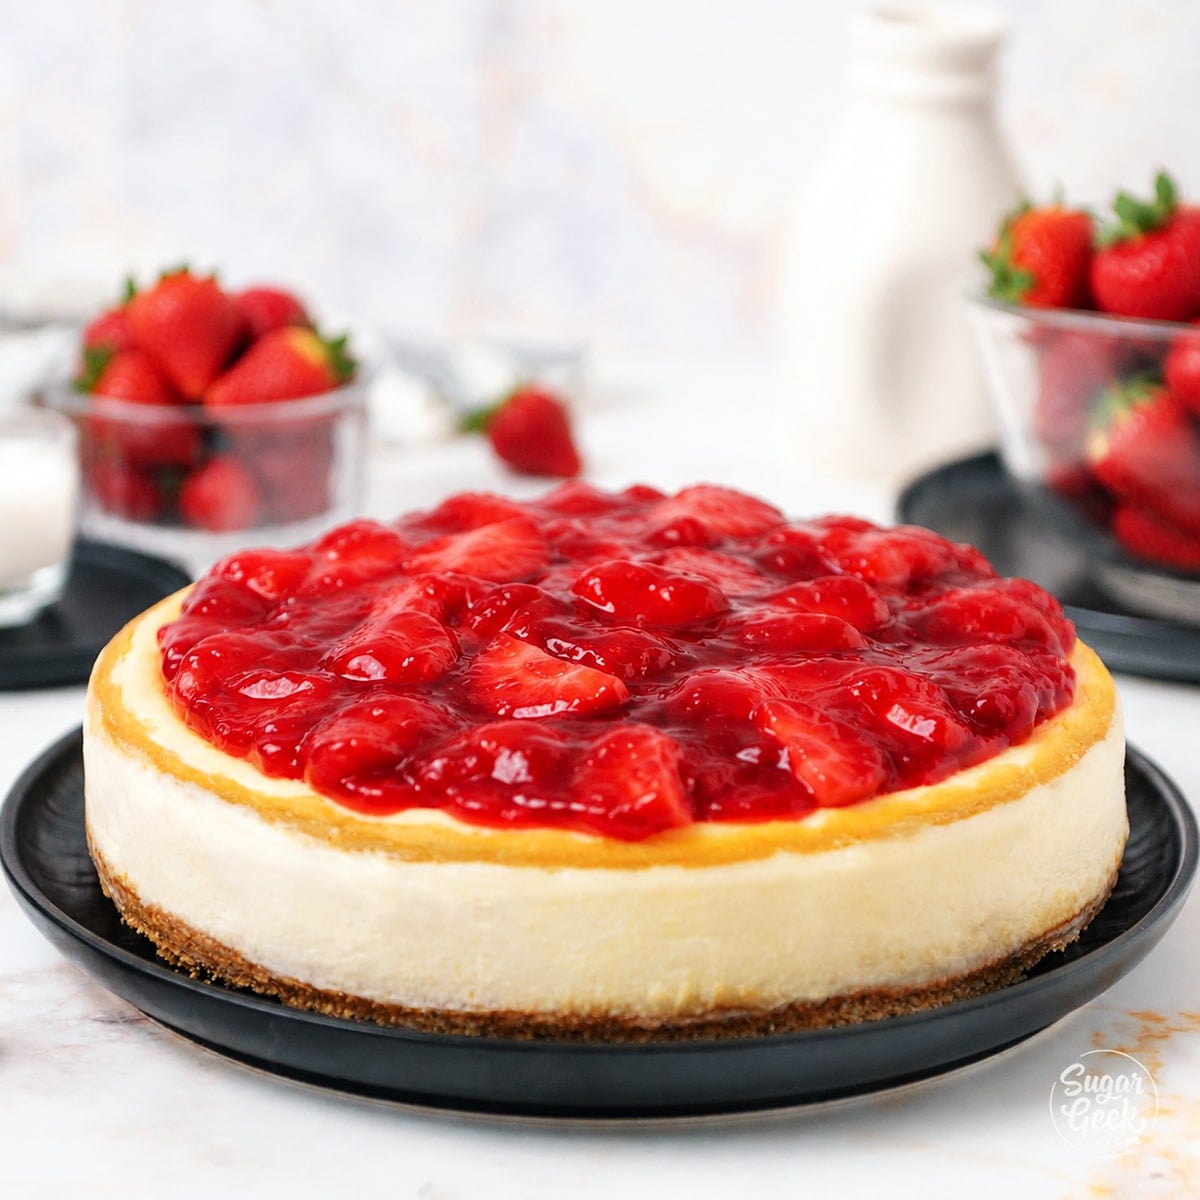
- Assemble. Lift the chilled cheesecake off the base onto a plate, spoon the cooled strawberry topping over the top, and pile the chocolate curls in the center.
PRO TIP: Do not stress if your curls crack or break. Even the broken ones look beautiful piled on the cheesecake, and you can always re-melt and re-temper the chocolate to try again. Refer to the recipe card below for the full measurements and timing.
Baking The Cheesecake In A Water Bath
I always bake cheesecake in a water bath because it gives the BEST results, baking gently and evenly at a low temperature so the outside does not overbake while the center finishes. There are two ways to do it, and there is also the option to skip it.
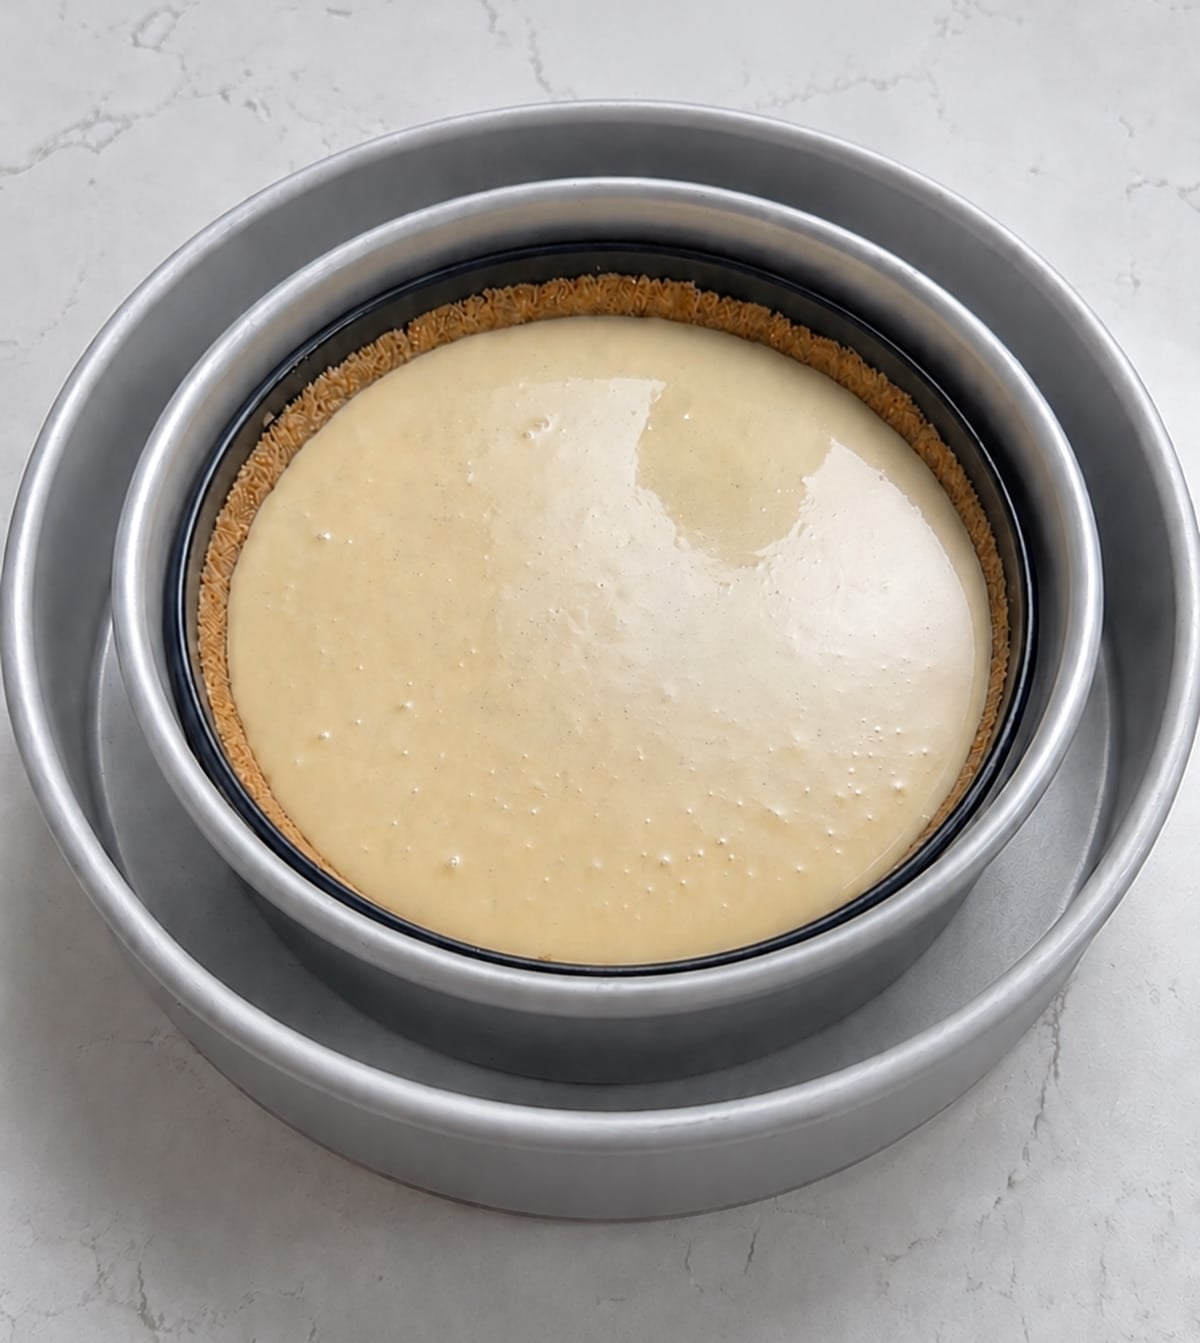
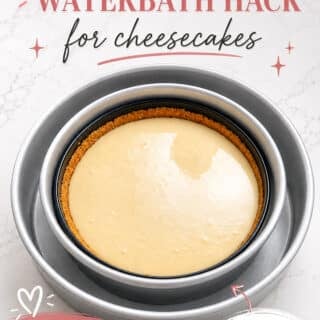
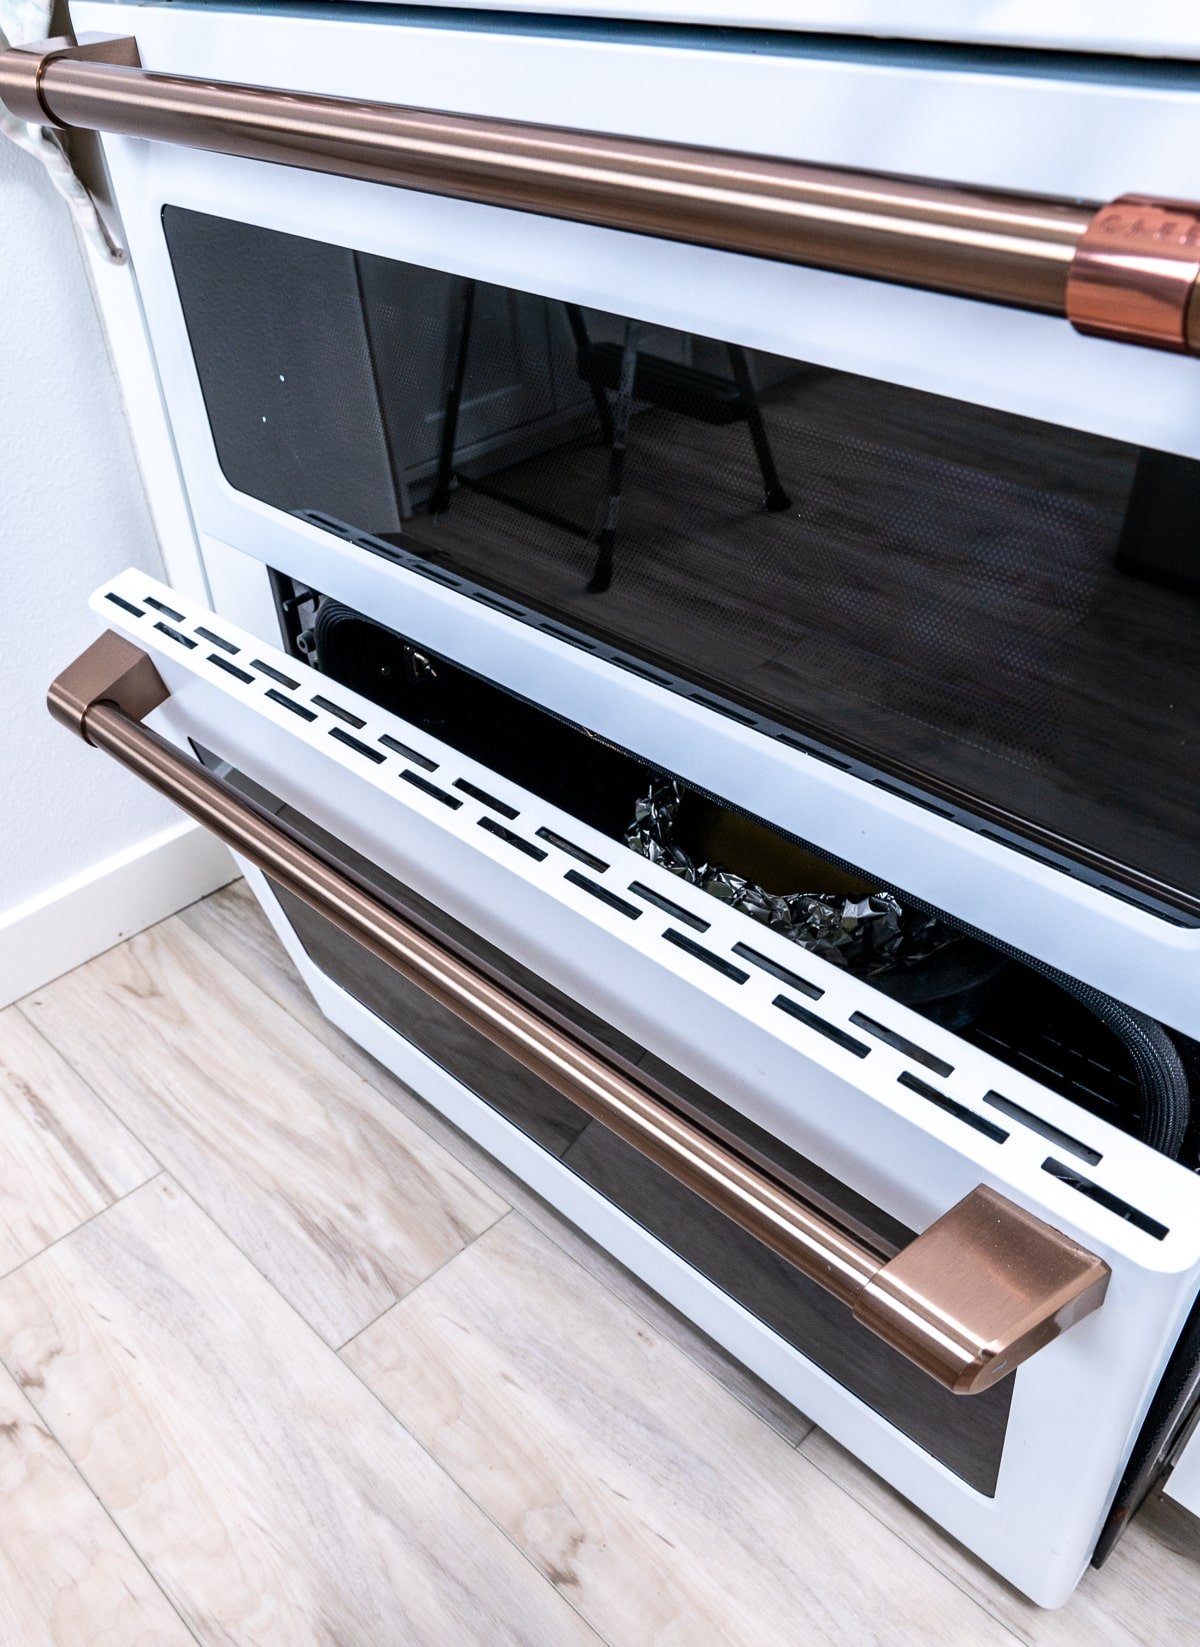
Method 1, the leakproof water bath (what I do). The trick to a water bath that does not leak is to put your 9" cheesecake pan inside a 10" cake pan first, which acts as a dry barrier. (If you do not have a 10" pan, wrap the cheesecake pan in two layers of heavy-duty foil instead.) Set that inside a larger roasting pan, place everything in the oven on the lowest rack, then pour hot water into the outer pan until it comes about ¾ of the way up the sides of the cheesecake pan. The water keeps the oven humid so the cheesecake bakes gently and does not brown or crack.
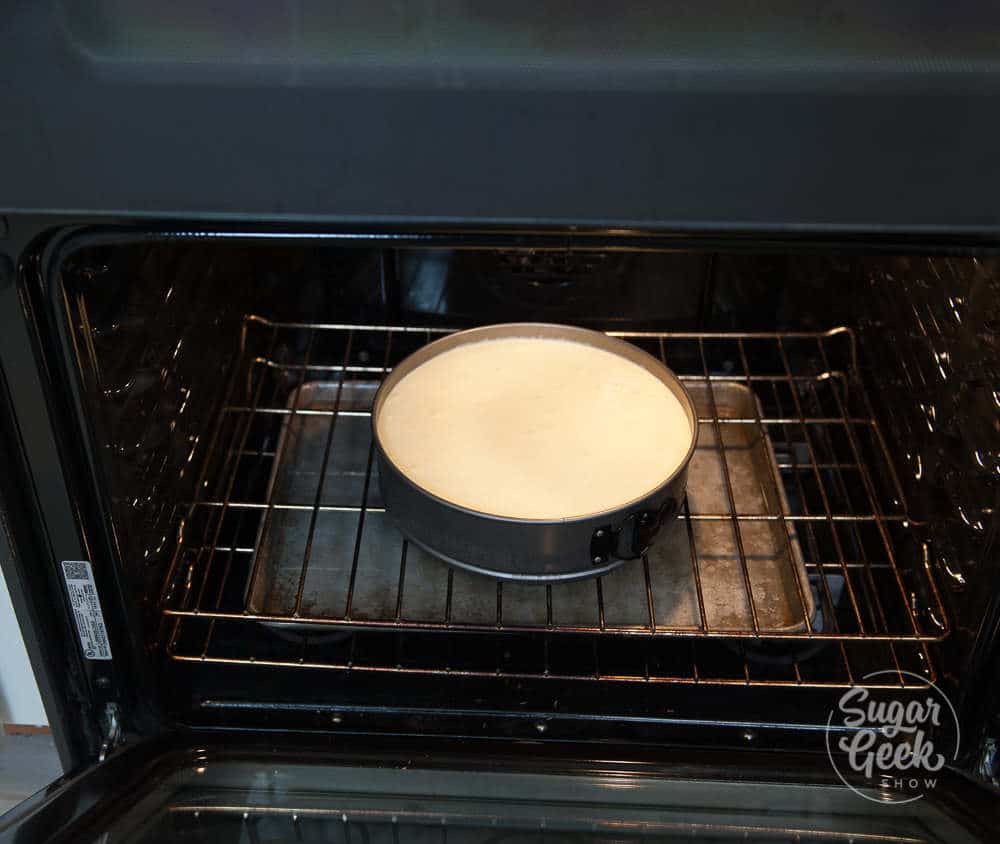
Method 2, the steam-pan method (no direct bath). If you don't have a large cake pan (if you're not a baker like me why would you) then you can put a sheet pan or roasting pan filled ¾ with hot water on the lowest oven rack and bake the cheesecake on the rack directly above it. The steam does most of the work of a water bath without the cheesecake pan ever touching the water. You will get some browning around the edges still but not as much as without and if you're putting a topping on top, you won't even notice it anyway.
Do you have to use a water bath at all? No. You can skip it completely. You will get a little more browning on top and a slightly less even texture inside, but the strawberry topping covers the browning and no one will ever know. Here is the honest tradeoff for THIS recipe specifically: because this is a lighter, classic-style filling (sour cream plus cream, more moisture than a dense New York batter), it benefits from the gentle, humid heat more than a heavy brick-style cheesecake does. The no-bath crowd online is usually baking a much denser batter that is more forgiving. So if you want that signature silky, creamy texture edge to edge, the bath (or at least the steam pan) is worth it here. If you mostly care about flavor and the topping is going on anyway, skip it.
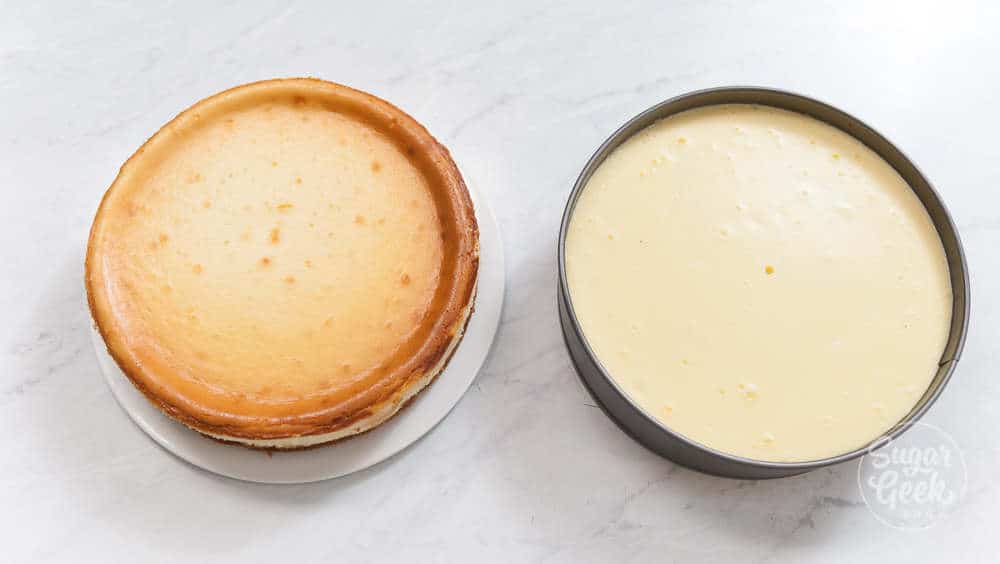
The cheesecake on the left was baked without a water bath (note the slightly raised edges and more browning) and the cheesecake on the right was baked with a waterbath.
However you bake it, the finish line is the same: a center that reads 150º F on a thermometer with a slight wobble. Turn the oven off, crack the door, and let it rest inside for one hour before chilling.
ClearJel vs Cornstarch For The Topping
People always ask why I reach for ClearJel instead of cornstarch. Both will thicken the topping, but they do not behave the same.
- ClearJel sets up clear and shiny, so the strawberries look glossy and bright instead of cloudy. It also does not turn gummy, and it holds its set better in the fridge, which matters a lot if you are making the topping ahead or storing leftovers (see the weeping fix below).
- Cornstarch works fine and is probably already in your pantry. It clouds the sauce slightly and can read a touch gummy, but on a cheesecake covered in fresh berries, most people will not notice. Cornstarch is stronger than ClearJel, so use half as much.
Either way, mix your thickener with cool water into a slurry first, then stir it into the simmering berries and cook for one minute so it activates. Adding dry starch straight to hot liquid gives you lumps.
Make-Ahead, Storage, And Freezing
Cheesecake is the rare dessert that is actually better made ahead, because it needs that long chill to set and slice cleanly anyway.
- Make-ahead: Bake the cheesecake a day (even two days) before you want to serve it and keep it chilled. Make the strawberry topping up to a week ahead and store it in the fridge in a separate container (it also freezes for up to 6 months). Make the chocolate curls the day of, since they are happiest crisp and fresh.
- Storing leftovers: Keep the cheesecake covered in the fridge for up to 5 days. If you have a lot left, store the topping separately and spoon it onto slices as you go, so the cake does not get soggy.
- Freezing: The plain cheesecake freezes beautifully. Chill it fully, then wrap it (whole or in slices) in plastic and then foil and freeze up to 2 months. Thaw overnight in the fridge. I do not recommend freezing it with the strawberry topping on, since the topping releases water as it thaws. Freeze the cake bare and add fresh topping after it thaws.
PRO TIP: For clean, bakery-style slices, run a large knife under hot water, wipe it dry, and cut. Wipe the blade clean between every slice. A warm, clean knife glides through cold cheesecake instead of dragging.
Common Strawberry Cheesecake Problems To Avoid
- Dense and heavy instead of creamy. You overbaked it. A few degrees past set turns this lighter filling rubbery. Pull it at 150º F in the center with a slight wobble and let the slow cooldown finish the job.
- A soggy line at the bottom of the crust. Water leaked into the pan during the bath. Use the pan-in-pan barrier or two tight layers of heavy-duty foil, or switch to the steam-pan method where the cheesecake never sits in water.
- Cloudy or gummy topping. Usually too much thickener, or cornstarch added dry. Use a slurry, cook it just one minute, and remember cornstarch needs only half the amount of ClearJel.
- Chocolate curls that crack or will not curl. The chocolate was too cold and hard when you scraped, or it was not real chocolate. Work while it is just matte (not fully set), and use a bar with cocoa butter in it. Chips and candy melts will not curl. If it sets too hard, warm the surface slightly and try again.
Final Thoughts
This really is the most delicious cheesecake you will ever have, and I think it will be your go-to from now on. The texture is the whole thing for me: that cool, silky, creamy slice with the bright strawberries and the snap of real chocolate on top. It tastes like a chocolate-covered strawberry grew up and became dessert.
If you only take one thing from this post, let it be the thermometer and the slow cooldown. Those two habits fixed cheesecake for me more than any other tip, and once you bake to 150º F and let it rest in the turned-off oven, you stop getting cracks and sad, overbaked edges. If you love this one, my classic cheesecake recipe is the plain canvas it is built on.
Make This Strawberry Cheesecake Recipe Your Own
Crust variations
The graham cracker crust is classic, but you have options. Swap the graham crumbs one-for-one for crushed gingersnaps, Biscoff cookies, vanilla wafers, or shortbread. For a chocolate base, use crushed chocolate sandwich cookies (scrape the filling out first) and you have an Oreo-style crust that plays beautifully with the chocolate curls.
Pan options
This recipe is built for a 9" cheesecake pan. If you use an 8" pan the cheesecake will be taller and need extra time, so add 15 to 20 minutes and keep baking to 150º F in the center. A 10" pan gives you a thinner cheesecake that bakes a little faster. You can also bake the filling as mini cheesecakes in a lined muffin tin for individual servings (start checking them early, since they bake much faster).
Flavor and topping twists
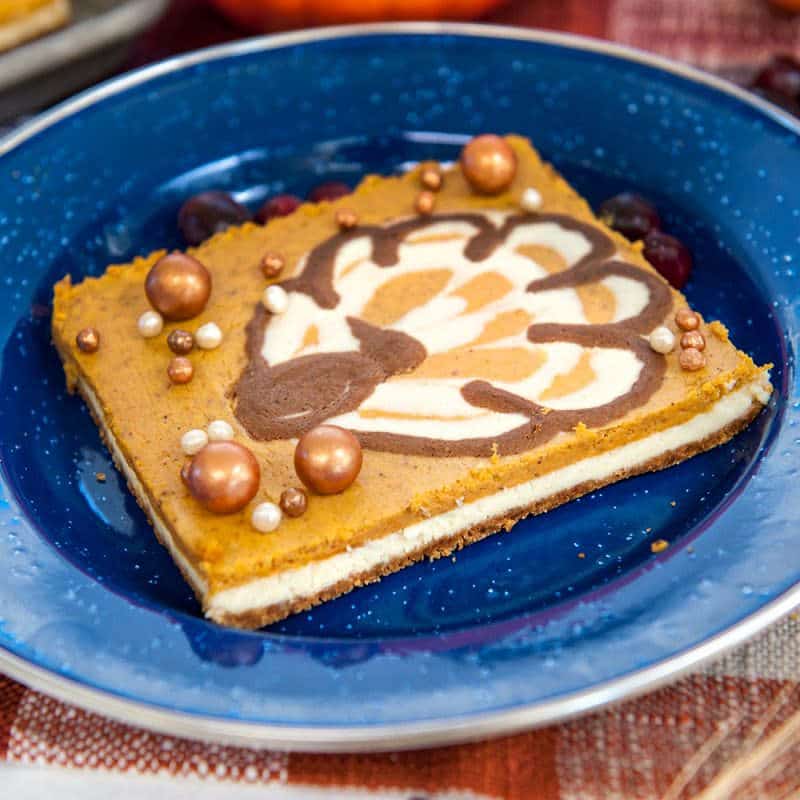
A scraped vanilla bean in place of the extract is delicious in the filling. You can swap the strawberry topping for the same cooked-fruit method with raspberries, blackberries, or cherries (my homemade cherry cheesecake walks through exactly that, or you can pour my from-scratch cherry pie filling on top for an even easier swap).
Strawberry Cheesecake FAQs
I do not recommend it. Fresh strawberries stirred into the filling release water as the cheesecake bakes, which makes the texture wet and a little mushy and can keep it from setting properly. Keep the berries in the cooked topping on top, where they belong, and the filling stays smooth and creamy.
Not at all. A browned top almost always means you skipped or shortened the water bath, and since the entire surface gets covered in strawberry topping, no one will ever see it. As long as the center hit 150º F and you cooled it slowly, the texture inside is exactly right.
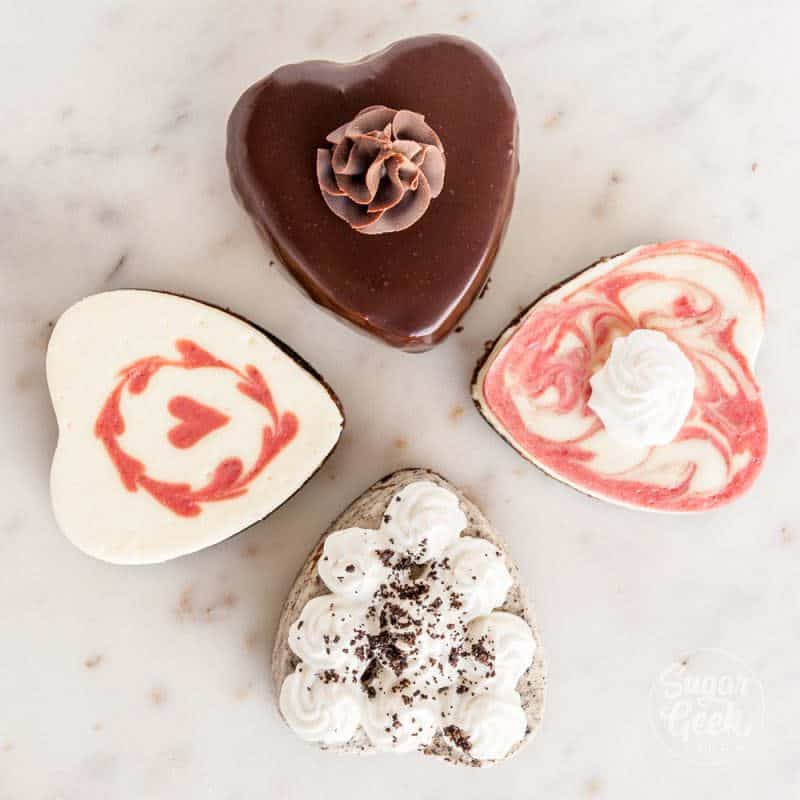
Yes, and it looks beautiful. The trick is to keep the two toppings in separate sections rather than swirled, because the cooked fruit sauces are loose enough that they will bleed into each other and turn muddy. Spoon each one onto its own half (or pipe a thin chocolate line down the middle as a divider) and add them close to serving time.
Use a real chocolate bar that lists cocoa butter in the ingredients, like Lindt. Skip chocolate chips, candy melts, and bark, because the added stabilizers make them too soft to curl. And yes, you can absolutely skip the curls. A scatter of shaved chocolate or a few fresh strawberries on top is just as pretty with a lot less effort.
Other Cheesecake Recipes You'll Love

Leave Me A Review
⭐️⭐️⭐️⭐️⭐️
If you tried this Strawberry Cheesecake Recipe or any other recipe on my blog, please leave a 🌟 star rating and let me know how it goes in the comments. I love hearing from you!
Recipe
Equipment
- 1 Stand mixer with paddle attachment
- 1 9" cheesecake pan
Ingredients
For The Cheesecake Crust
- 6 ounces graham crackers crushed
- 3 ounces unsalted butter melted
- 3 ounces granulated sugar
For The Cheesecake Filling
- 32 ounces cream cheese softened to room temperature
- 9 ounces granulated sugar
- 2 ounces sour cream room temperature
- 2 ounces heavy cream room temperature
- 1 ounce honey
- 4 large eggs warmed to room temperature
- ½ teaspoon salt
- 1 Tablespoon vanilla extract
For Strawberry Topping
- 16 ounces frozen strawberries or fresh if in season
- 6 ounces sugar
- ¼ teaspoon salt
- 4 ounces water
- 1 teaspoon fresh lemon juice
- ½ teaspoon lemon zest
- 2 Tablespoons ClearJel or 1 Tablespoon Cornstarch
- 1 ounce cool water for the ClearJel or Cornstarch
- 16 ounces fresh strawberries to stir in at the end
Chocolate Curls
- 8 ounces chocolate 1 bar real chocolate that lists cocoa butter in the ingredients (I like Lindt 70%)
Instructions
- Before you begin: Bring the cream cheese, eggs, sour cream, and heavy cream to room temperature. Preheat the oven to 350º F. Move the bottom rack to the lowest position and place a second rack in the middle. Cut a parchment round for the bottom of the pan. The cheesecake bakes in a water bath at 335º F (the same temperature as the Classic Cheesecake recipe).
Making the Graham Cracker Crust
- Grind the graham crackers in a food processor, or roll them in a large zip-top bag with a rolling pin, until finely crushed.
- Combine the graham cracker crumbs, melted butter, and sugar in a medium bowl until the mixture holds together.
- Place a parchment round in the bottom of the 9" pan to prevent sticking (optional). Pour in the crumb mixture and press it firmly and evenly into the bottom and partway up the sides with a flat-bottomed measuring cup.
- Bake the crust for 5 minutes at 350º F, until you can smell it toasting, then let it cool.
Making the Cheesecake Filling
- Place the room-temperature cream cheese in the bowl of a stand mixer with the paddle attachment. Beat on low until extra smooth and no longer lumpy.
- Sprinkle in the granulated sugar while mixing on low until combined and smooth.
- Add the room-temperature sour cream, heavy cream, honey, salt, and vanilla extract while mixing on low. Scrape the bowl to make sure all the cream cheese is incorporated.
- Add the eggs one at a time on low speed, letting each fully combine before adding the next. Do not whip in air.
- Pour the filling into the cooled graham cracker crust.
Baking the Cheesecake
- Set up the water bath: place the 9" cheesecake pan inside a 10" cake pan (or wrap it in two layers of heavy-duty foil), then set it inside a larger roasting pan. Place everything on the lowest oven rack. Carefully pour hot water into the outer pan until it reaches about ¾ of the way up the sides of the cheesecake pan. (No-bath option: skip the bath and instead set a pan of hot water on the lowest rack with the cheesecake on the rack above it.)
- Bake at 335º F for about 60 minutes without opening the oven door. The cheesecake should be set but still slightly jiggly in the center, with an internal temperature of 150º F.
- If it has not reached 150º F or is still too jiggly in the center, keep baking in 10-minute increments until done.
- Turn off the oven and crack the door open. Let the cheesecake cool inside for 60 more minutes to prevent cracking.
- Move the cheesecake to the fridge to chill for at least 6 hours, ideally overnight. Wait until it is fully cool to cover it with plastic wrap so condensation does not drip onto the top.
- Run a knife around the outside, or warm the outside of the pan with a kitchen torch, to release the cheesecake from the pan.
Making the Strawberry Topping
- Combine the frozen (or fresh if using all fresh) strawberries with the water, salt, sugar, lemon juice, and zest in a large saucepan and bring to a simmer over medium-high heat, stirring occasionally.
- Simmer 5 to 10 minutes until thickened and reduced by ⅓. Use a whisk to crush the berries into more of a sauce.
- Stir the ClearJel (or cornstarch) together with the cool water in a separate cup to make a slurry.
- Add the slurry to the simmering strawberries and cook 1 minute, stirring constantly, until thickened.
- Remove from the heat and stir in the remaining strawberries. Let the topping cool completely (it thickens as it cools) before spooning it over the cheesecake.
Chocolate Curls
- Chop the chocolate and place it in a medium microwave-safe bowl. Microwave 1 minute and stir.
- Continue microwaving in short bursts until the chocolate is 75% melted, then stir off the heat until fully melted (a few unmelted bits are fine).
- Spread the chocolate in a thin, even layer on a stone countertop (granite or quartz) or the back of a metal sheet pan.
- Wait until the shine disappears and the surface goes matte (about 30 seconds).
- Push a bench scraper into the chocolate at a 45º angle to form curls.
- Lift the chilled cheesecake off the base onto a serving plate. Spoon the cooled strawberry topping over the top in an even layer, then pile the chocolate curls in the center right before serving.
Video
Notes
- Use full-fat, block-style cream cheese (I like Philadelphia). Do not use the spreadable tub kind; the extra moisture changes the texture.
- A scraped vanilla bean can replace the vanilla extract and tastes delicious here.
- Use real chocolate with cocoa butter for the curls. Chocolate chips, candy melts, and bark will not curl.
- 9" cheesecake pan: standard, bake about 60 minutes to 150º F.
- 8" pan: taller cheesecake, add 15 to 20 minutes, bake to 150º F in the center.
- 10" pan: thinner cheesecake, check a little earlier.
- Mini cheesecakes in a lined muffin tin: bake much faster, start checking early.
- Bake the cheesecake 1 to 2 days ahead and keep chilled. Make the topping up to a week ahead and store separately (it freezes up to 6 months). Make the curls the day of.
- Store leftovers covered in the fridge up to 5 days. For lots of leftovers, store the topping separately and add to slices.
- Freeze the bare cheesecake (whole or sliced), wrapped in plastic then foil, up to 2 months. Thaw overnight in the fridge and add fresh topping. Do not freeze with the topping on.
- ClearJel out? Use half as much cornstarch.
- No water bath? Use the steam-pan method (pan of hot water on the rack below), or skip it and accept a little browning under the topping.
- Fresh strawberries in peak season are ideal for the topping, but frozen work great off-season since they are frozen at peak ripeness.
- Do not mix the filling on anything but low speed; whipped-in air causes puffing, sinking, and cracks.
- Do not overbake; pull at 150º F with a slight wobble in the center.
- Do not rush the cooldown; the hour in the turned-off oven is what prevents cracks.
- Do not put hot or warm topping on the cheesecake; cool it completely first.