• Skip to primary navigation
  • Skip to main content
  • Skip to primary sidebar
  • Halloween
  • Recipes
  • Free Tutorials
  • Cake Classes
  • Cake Commissions
  • About Liz

Sugar Geek Show logo

menu icon
go to homepage
  • Halloween
  • Recipes
  • Free Tutorials
  • Cake Classes
  • Cake Commissions
  • About Liz
subscribe
search icon
Homepage link
  • Halloween
  • Recipes
  • Free Tutorials
  • Cake Classes
  • Cake Commissions
  • About Liz
×
Home

Blog

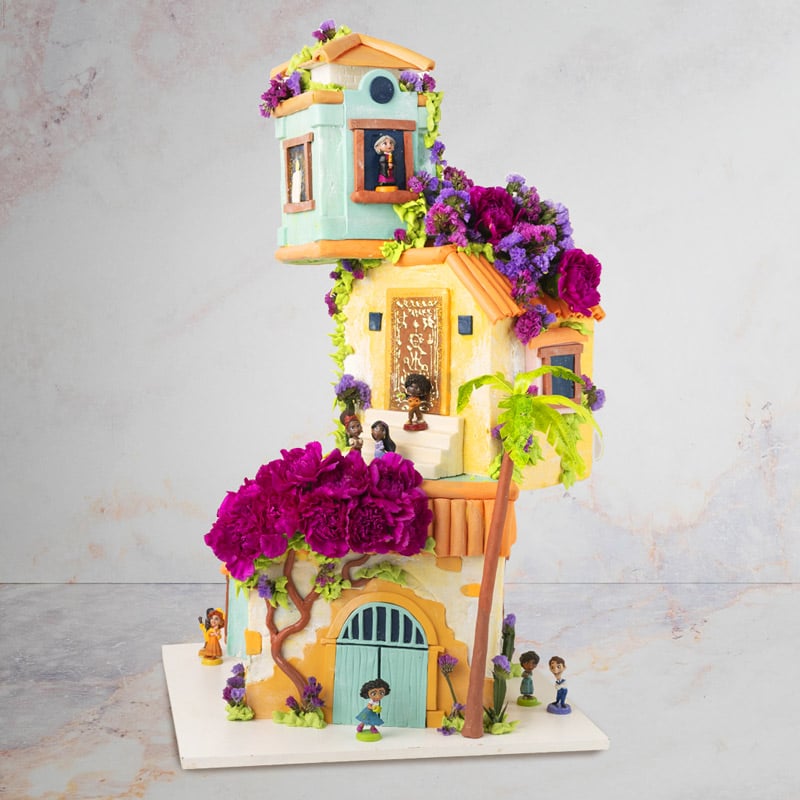
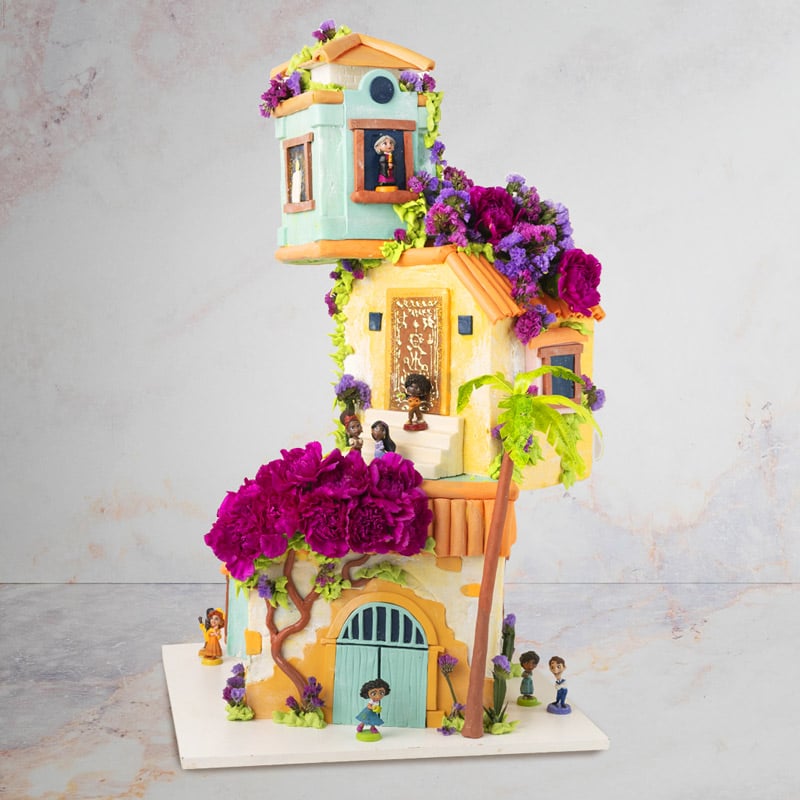
Cake sculpted to look like a gravity-defying house in the Disney movie Encanto

February 15, 2022 Course Preview

Encanto House Cake Tutorial

Skill level: Intermediate

I got the chance to make an Encanto-themed birthday cake recently and wanted it to feature the house Casita from the movie. There's many ways to approach house cakes, but for this project, I wanted to make something gravity-defying that felt like an homage to the popular topsy-turvy cakes that were really big when I was first getting into cake decorating so many years ago.

In this tutorial, you will learn how to build the cake structure to support this unique design, how to add all the details to the house, and you will learn how to create an edible stucco texture on the cake tiers to make them look authentic. We also go over how to make edible tree leaves, how to pipe foliage details, and how to insert real flowers into the cake in a food-safe way.

Please note: the Encanto figurines are not part of this tutorial, they are 1.5" tall action figures that were purchased at a retail store separately.

1:20:02 Minutes of Instruction

What You Will Learn

  • How to make a gravity-defying Encanto house cake
  • Learn how to create a realistic stucco texture
  • How to create edible roofing tiles
  • Learn how to make edible tree leaves
  • Liz's tips and tricks to add details to this unique cake design
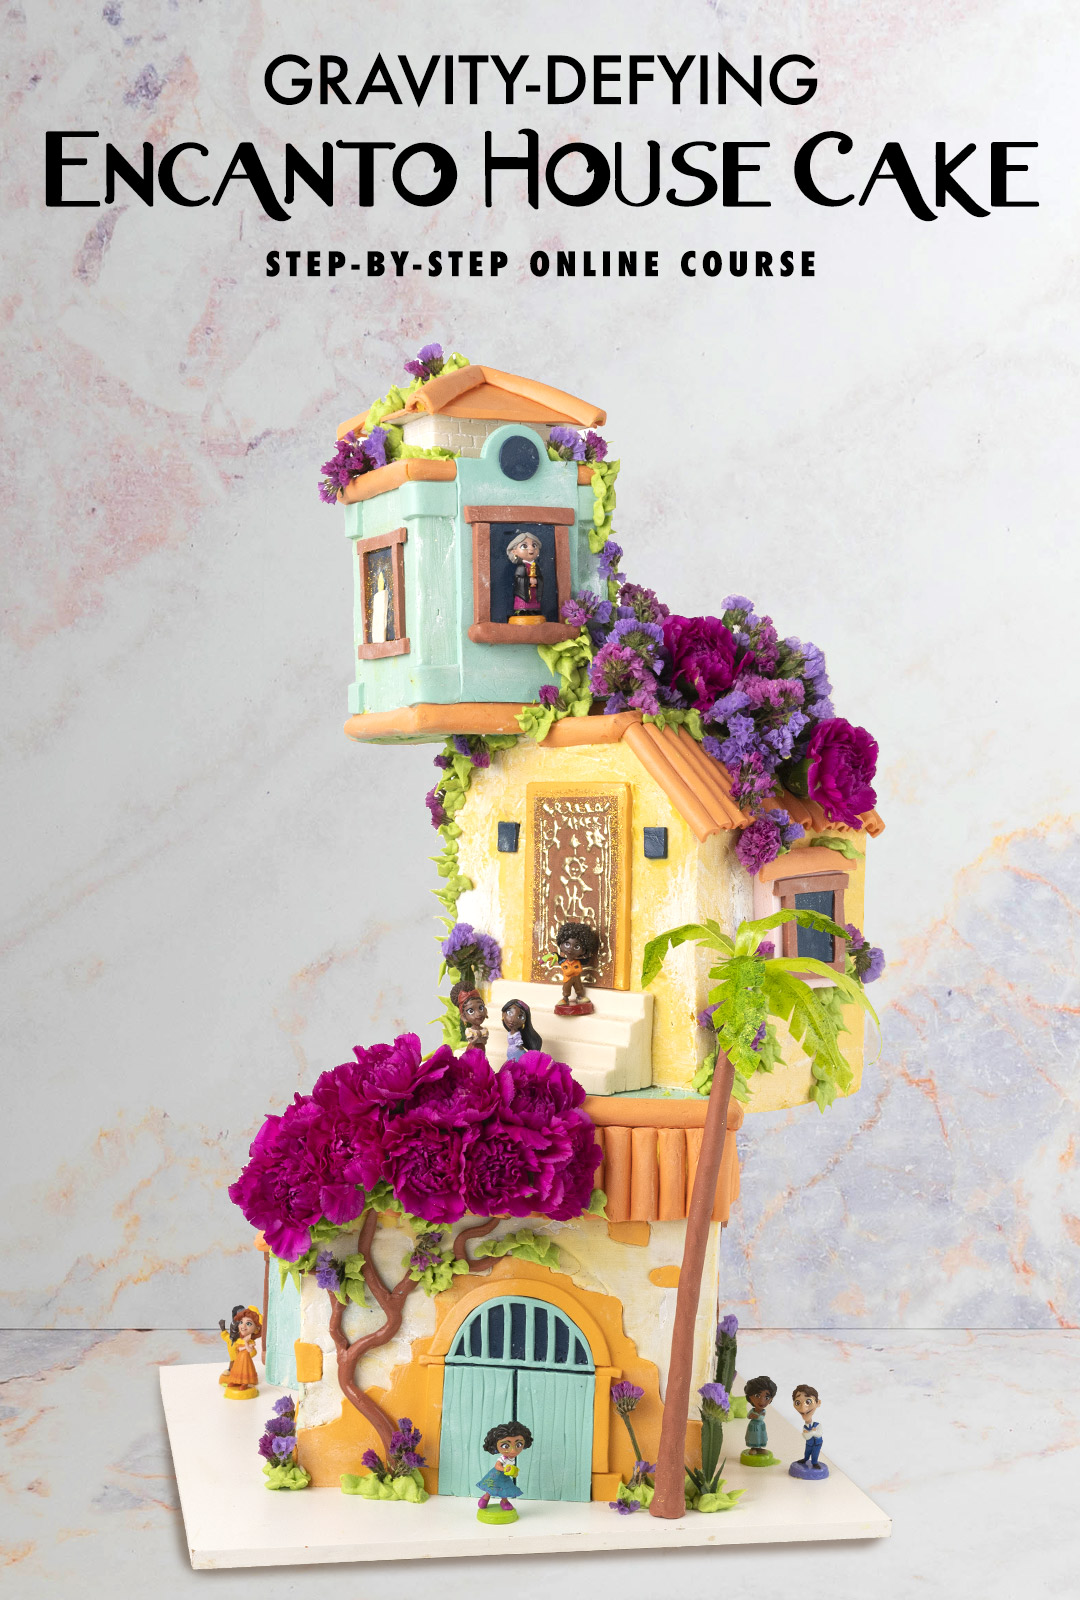
Cake sculpted to look like the House from the movie Encanto

Tutorial Chapters

  1. Overview Of The Structure 0:46
  2. Adding The Threaded Rod 9:09
  3. Coloring The Ganache 12:52
  4. Stacking The Lower Tier 13:19
  5. Texturing The Lower Tier 15:12
  6. Preparing The Second Tier 19:11
  7. Covering The Top Tier In Fondant 21:13
  8. Texturing The Second Tier Pt.2 24:45
  9. Making The Roof 26:13
  10. Texturing The Top Tier Pt.1 28:08
  11. Making The Roof Pt.2 29:47
  12. Texturing The Top Tier Pt.2 30:25
  13. Stacking The Middle Tier 30:49
  14. Making The Roof Pt.3 34:10
  15. Adding The Top Tier And Roof 34:32
  16. Coloring The Modeling Chocolate 39:23
  17. Making The Blue Door 43:06
  18. Preparing The Orange Tiles 46:16
  19. Dry Brushing The Cake 46:53
  20. Adding The Rock Texture 48:01
  21. Adding The Door Frame 50:02
  22. Adding The Blue Tiles 51:01
  23. Adding The Orange Tiles 52:23
  24. Making The Gold Door 54:48
  25. Making The Stairs 58:01
  26. Adding The Blue Details 59:24
  27. Preparing The Pink Window 59:41
  28. Adding The White Details 59:55
  29. Adding The Pink Window 1:00:55
  30. Adding The Orange Tiles & Details 1:01:13
  31. Adding The Turquoise Panel 1:04:10
  32. Preparing The Turquoise Square 1:05:29
  33. Adding The Blue Windows Pt.1 1:05:50
  34. Adding The Turquoise Square 1:06:23
  35. Coloring The Brown Modeling Chocolate 1:07:42
  36. Adding The Tree 1:08:41
  37. Painting The Gelatin Leaves 1:09:14
  38. Touching Up The House 1:10:18
  39. Adding The Brown Siding 1:11:07
  40. Adding The Candle 1:12:17
  41. Adding The Palm Tree 1:12:41
  42. Adding The Flowers 1:14:52
  43. Adding The Figurines 1:18:43
Downloads

Materials List

Door Template

Roof Template

Encanto Reference

Cake sculpted to look like a house from the Disney movie Encanto

February 15, 2022 Paid Video

Encanto House Cake

Skill level: Intermediate

I got the chance to make an Encanto-themed birthday cake recently and wanted it to feature the house Casita from the movie. There's many ways to approach house cakes, but for this project, I wanted to make something gravity-defying that felt like an homage to the popular topsy-turvy cakes that were really big when I was first getting into cake decorating so many years ago.

In this tutorial, you will learn how to build the cake structure to support this unique design, how to add all the details to the house, and you will learn how to create an edible stucco texture on the cake tiers to make them look authentic. We also go over how to make edible tree leaves, how to pipe foliage details, and how to insert real flowers into the cake in a food-safe way.

Please note: the Encanto figurines are not part of this tutorial, they are 1.5" tall action figures that were purchased at a retail store separately.

1:20:02 Minutes of Instruction

What You Will Learn

  • How to make a gravity-defying Encanto house cake
  • Learn how to create a realistic stucco texture
  • How to create edible roofing tiles
  • Learn how to make edible tree leaves
  • Liz's tips and tricks to add details to this unique cake design

Tutorial Chapters

  1. Overview Of The Structure 0:46
  2. Adding The Threaded Rod 9:09
  3. Coloring The Ganache 12:52
  4. Stacking The Lower Tier 13:19
  5. Texturing The Lower Tier 15:12
  6. Preparing The Second Tier 19:11
  7. Covering The Top Tier In Fondant 21:13
  8. Texturing The Second Tier Pt.2 24:45
  9. Making The Roof 26:13
  10. Texturing The Top Tier Pt.1 28:08
  11. Making The Roof Pt.2 29:47
  12. Texturing The Top Tier Pt.2 30:25
  13. Stacking The Middle Tier 30:49
  14. Making The Roof Pt.3 34:10
  15. Adding The Top Tier And Roof 34:32
  16. Coloring The Modeling Chocolate 39:23
  17. Making The Blue Door 43:06
  18. Preparing The Orange Tiles 46:16
  19. Dry Brushing The Cake 46:53
  20. Adding The Rock Texture 48:01
  21. Adding The Door Frame 50:02
  22. Adding The Blue Tiles 51:01
  23. Adding The Orange Tiles 52:23
  24. Making The Gold Door 54:48
  25. Making The Stairs 58:01
  26. Adding The Blue Details 59:24
  27. Preparing The Pink Window 59:41
  28. Adding The White Details 59:55
  29. Adding The Pink Window 1:00:55
  30. Adding The Orange Tiles & Details 1:01:13
  31. Adding The Turquoise Panel 1:04:10
  32. Preparing The Turquoise Square 1:05:29
  33. Adding The Blue Windows Pt.1 1:05:50
  34. Adding The Turquoise Square 1:06:23
  35. Coloring The Brown Modeling Chocolate 1:07:42
  36. Adding The Tree 1:08:41
  37. Painting The Gelatin Leaves 1:09:14
  38. Touching Up The House 1:10:18
  39. Adding The Brown Siding 1:11:07
  40. Adding The Candle 1:12:17
  41. Adding The Palm Tree 1:12:41
  42. Adding The Flowers 1:14:52
  43. Adding The Figurines 1:18:43
Downloads

Materials List

Door Template

Roof Template

Encanto Reference

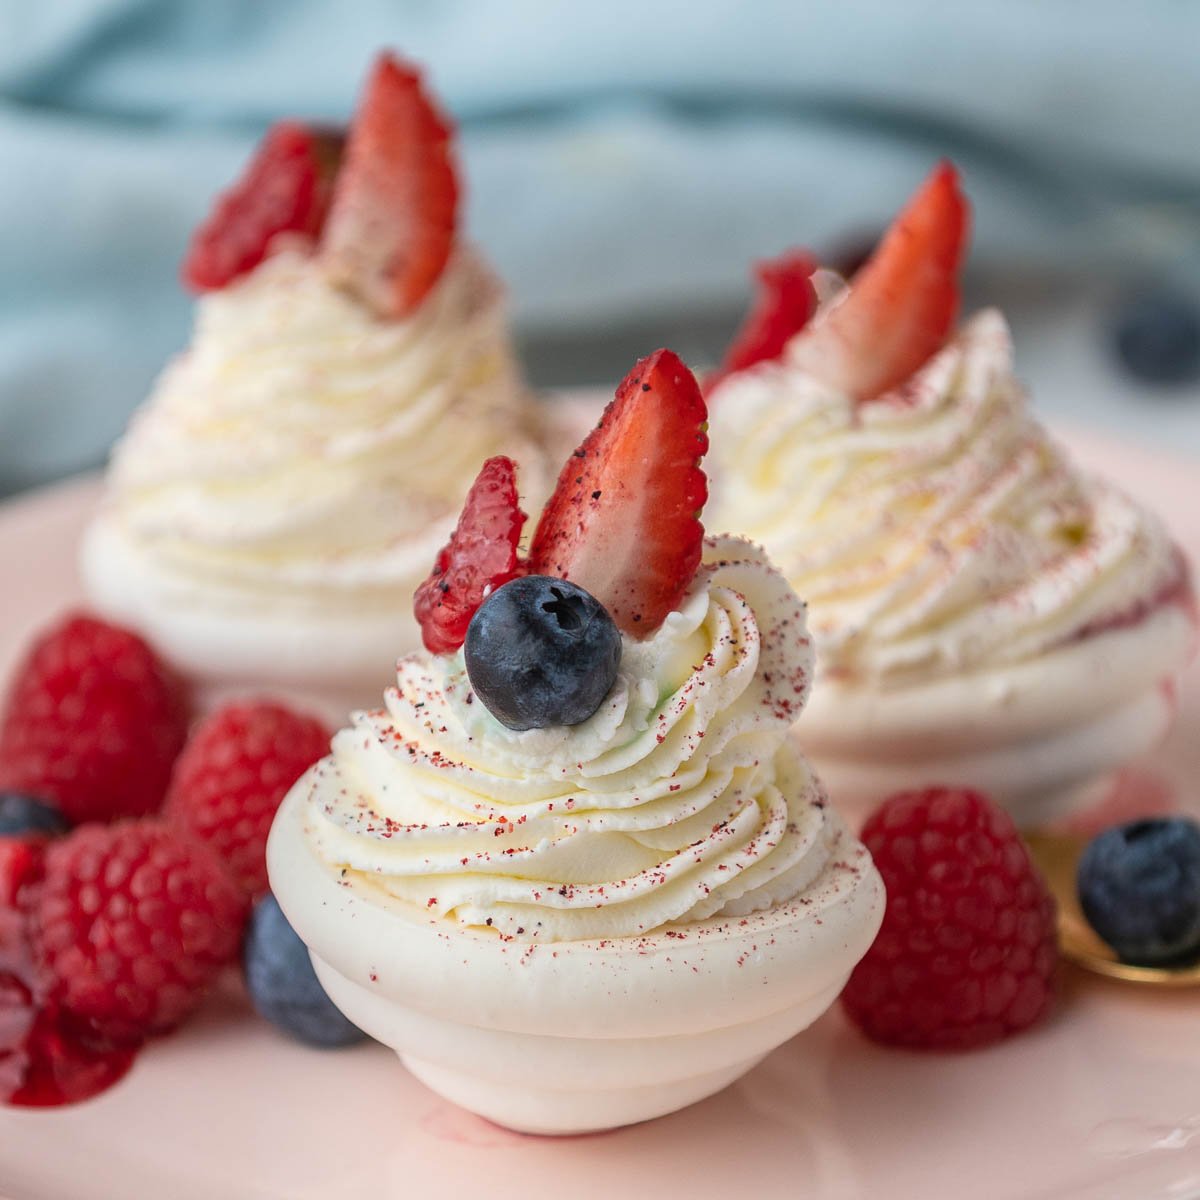
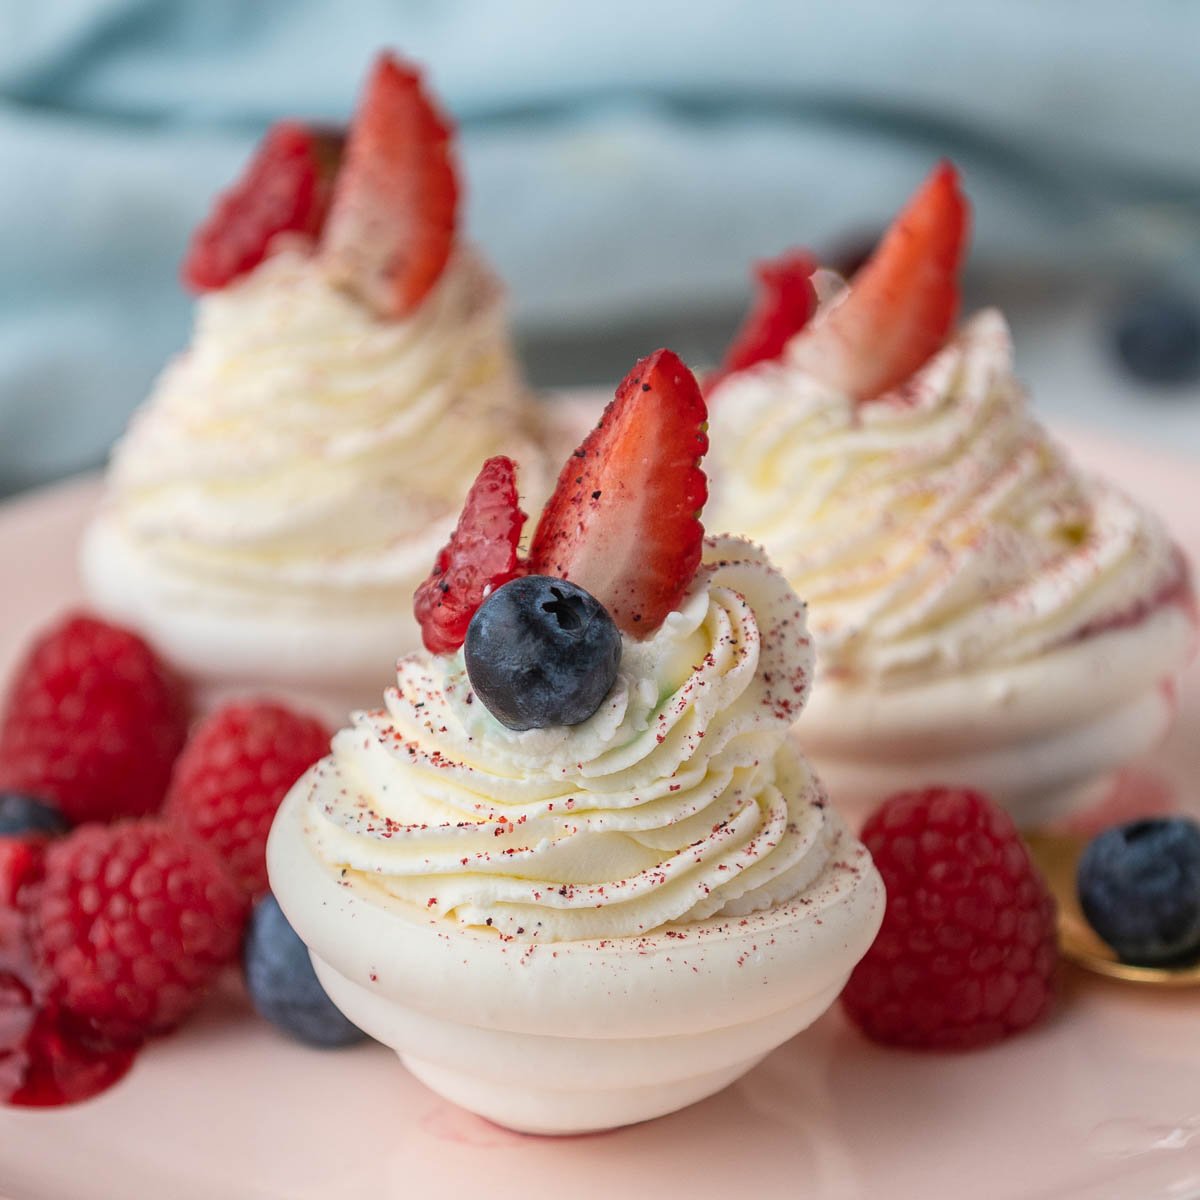
mini pavlova decorated with Chantilly cream and topped with fresh berries

February 9, 2022 4th of July

Mini Pavlova with Berry Chantilly Cream

Mini pavlova is crisp on the outside and marshmallowy soft on the inside. Filled with delicious, fresh berry compote and Chantilly cream, they make the perfect dessert for special occasions! Mini pavlova is ideal for spring and summer family gatherings or even a small wedding because they are elegant and the flavor is the perfect combination of crunchy, sweet, and chewy!

mini pavlova on a plate decorated with fresh strawberries, blueberries, and raspberries

Fresh, bright, and sweet, every bite of this mini pavlova tastes like spring! This mini pavlova recipe is great for family gatherings like Mother's Day, baby showers, and bridal showers. Decorate your mini pavlova with Chantilly cream and fresh berries, and you will have elegant, bite-sized treats at your fingertips!

This step-by-step recipe from Chef Christophe Rull can make up to 18 individual mini pavlovas, or if you prefer, one or two larger pavlovas that can be cut and served in portions.

What's In This Blog Post

  • Mini Pavlova Ingredients
  • How to Make Mini Pavlova
  • Preparing the Mixed Berry Compote
  • Making the Vanilla Chantilly Cream
  • Assembling the Mini Pavlova
  • FAQ
  • Extra Tips for Making Pavlova
  • What is the Origin of Pavlova?
  • More Recipes You'll Love

Mini Pavlova Ingredients

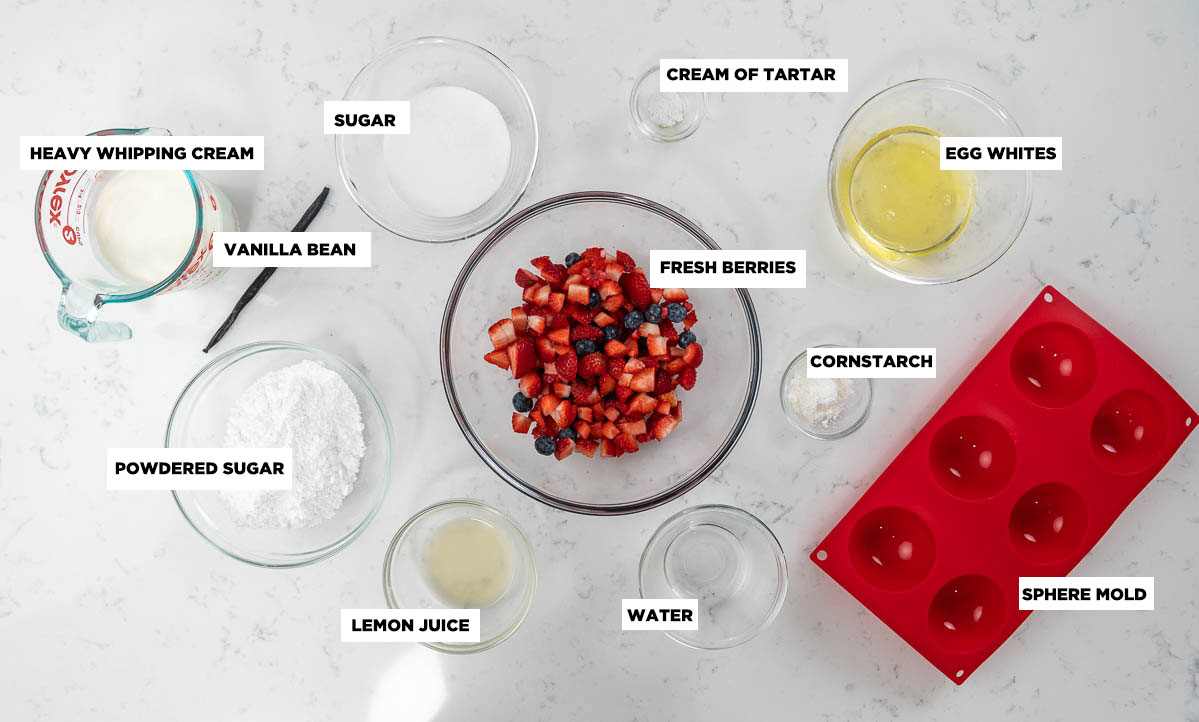
bird's-eye view of pavlova ingredients on the table

Egg whites: The key ingredient of this pavlova is room temperature egg whites. Be sure to give your eggs enough time to warm up before you begin the recipe. This will help ensure your meringue whips up nicely.

Cream of tartar: You technically don't need cream of tartar. But, if you use cream of tartar, it will help stabilize the egg whites so they don't collapse and will help the egg whites stay extra white.

Fresh berries: You can use frozen berries to prepare this mixed berry compote. However, fresh berries are preferred for this recipe because they will hold their shape better. If you have trouble keeping berries fresh for more than a couple of days, learn how to make them last longer using berry wash.

Adapt the fruit compote to whichever variation of fruits you prefer! You could do all one fruit, or you could opt for other kinds of fruits to use in this recipe like peach filling or cherry filling. If you're feeling creative you could even make your own compote using fruits like nectarines, kiwi, pineapple, passionfruit, cherries, and more!

How to Make Mini Pavlova

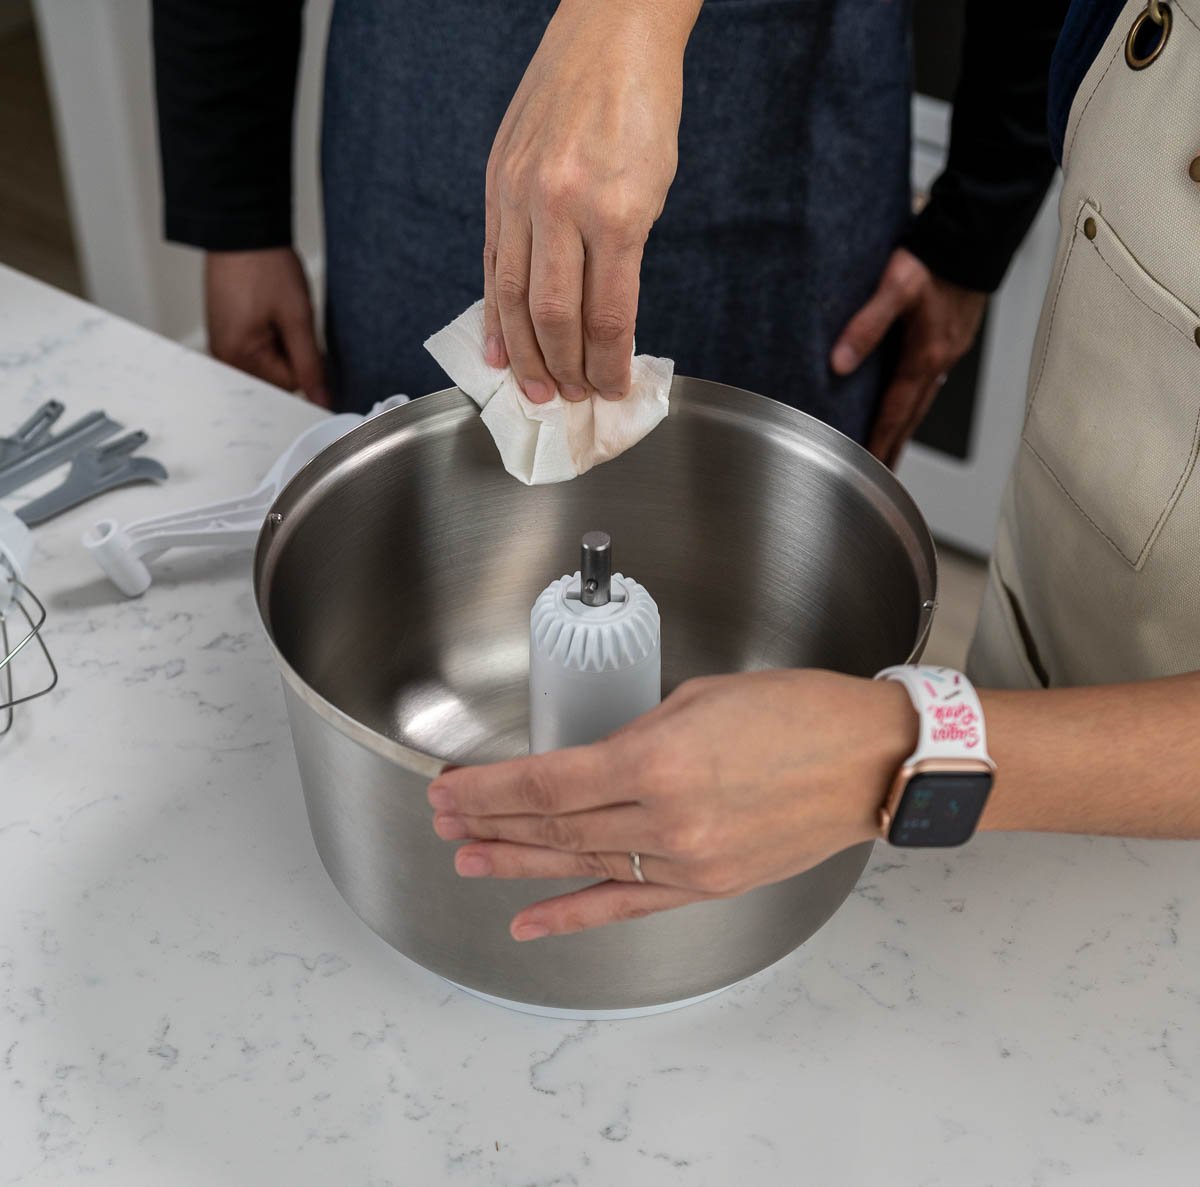
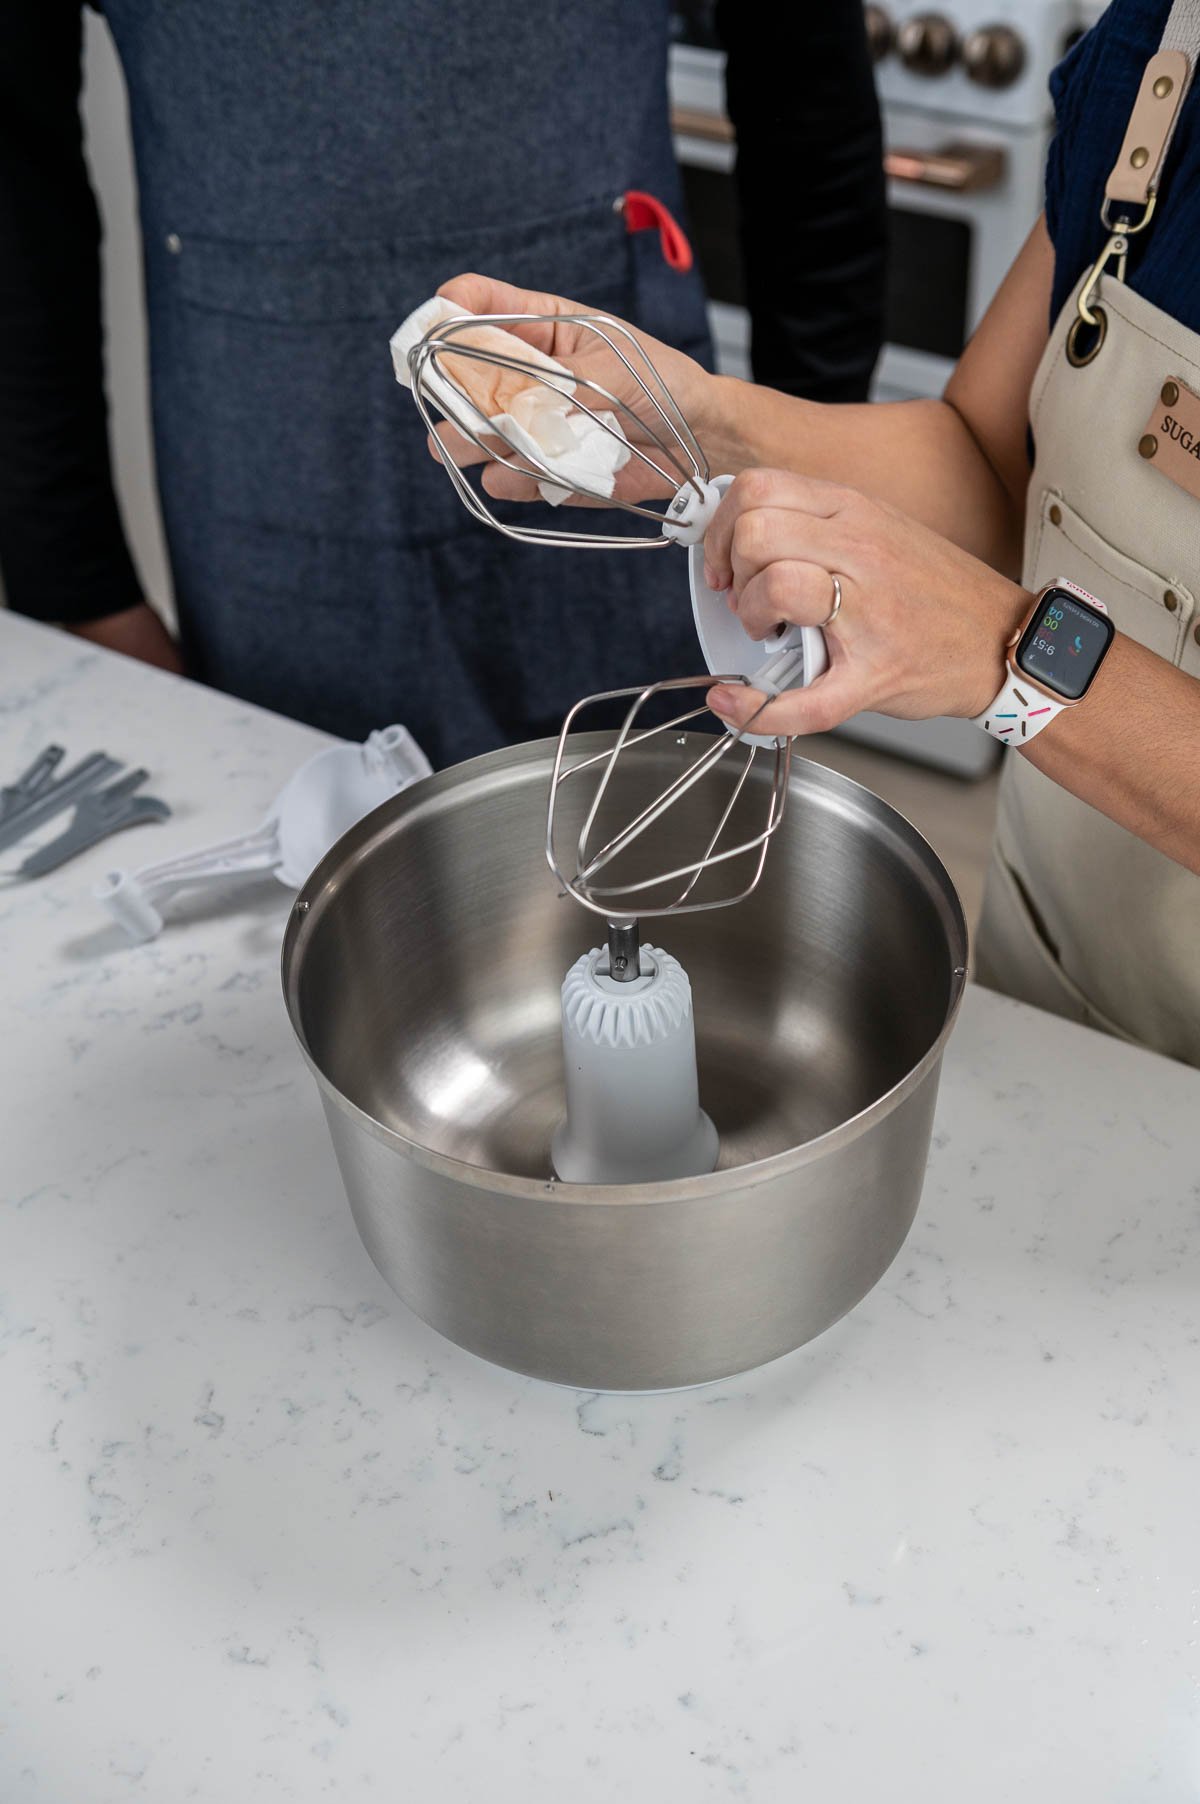
  1. Preheat your oven to 200°F (93°C). Before you begin making the pavlova, ensure that your mixing bowl is entirely clean and fully dry. Even a little bit of water, oil, or grease could throw off your entire recipe! Then, wipe down your clean mixing bowl and your attachments with vinegar!hand shown wiping down the stand mixer with a clothhands holding whisk attachments
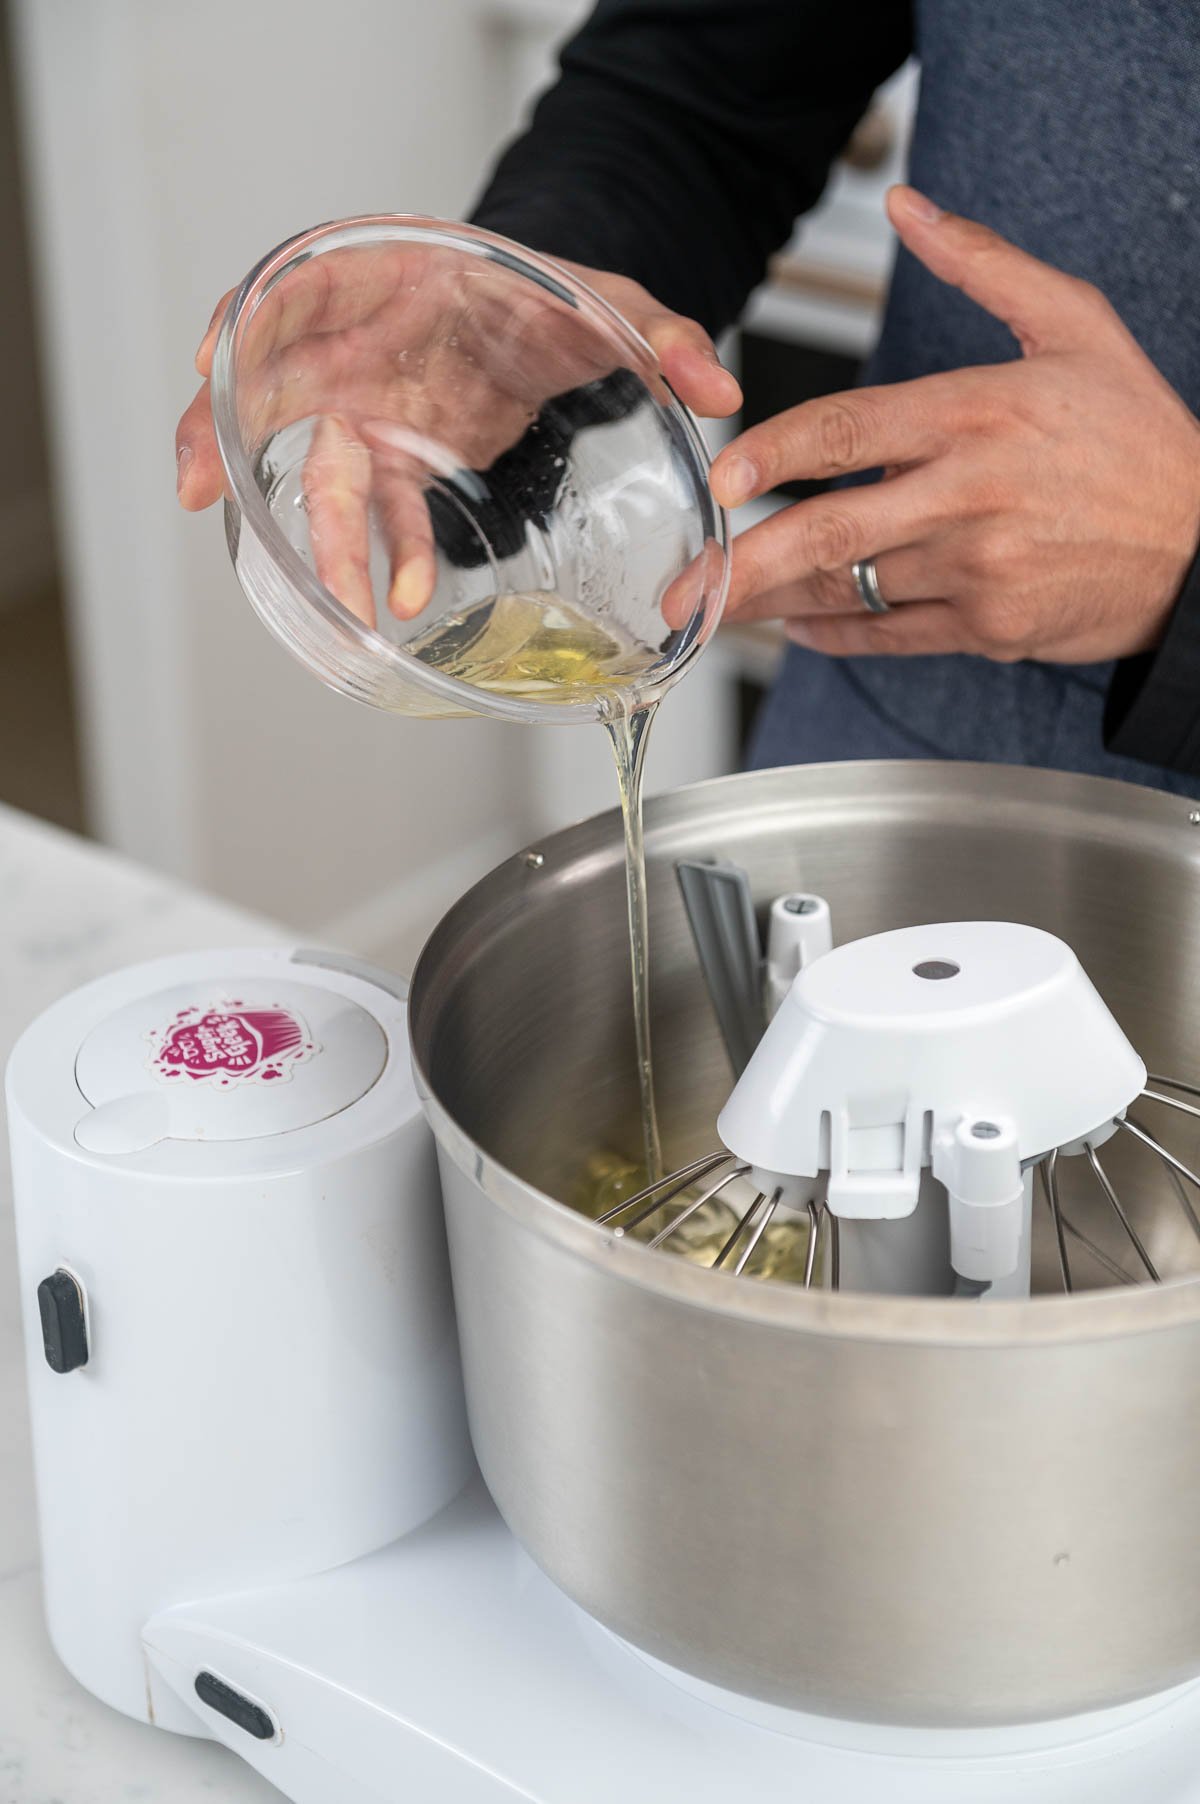
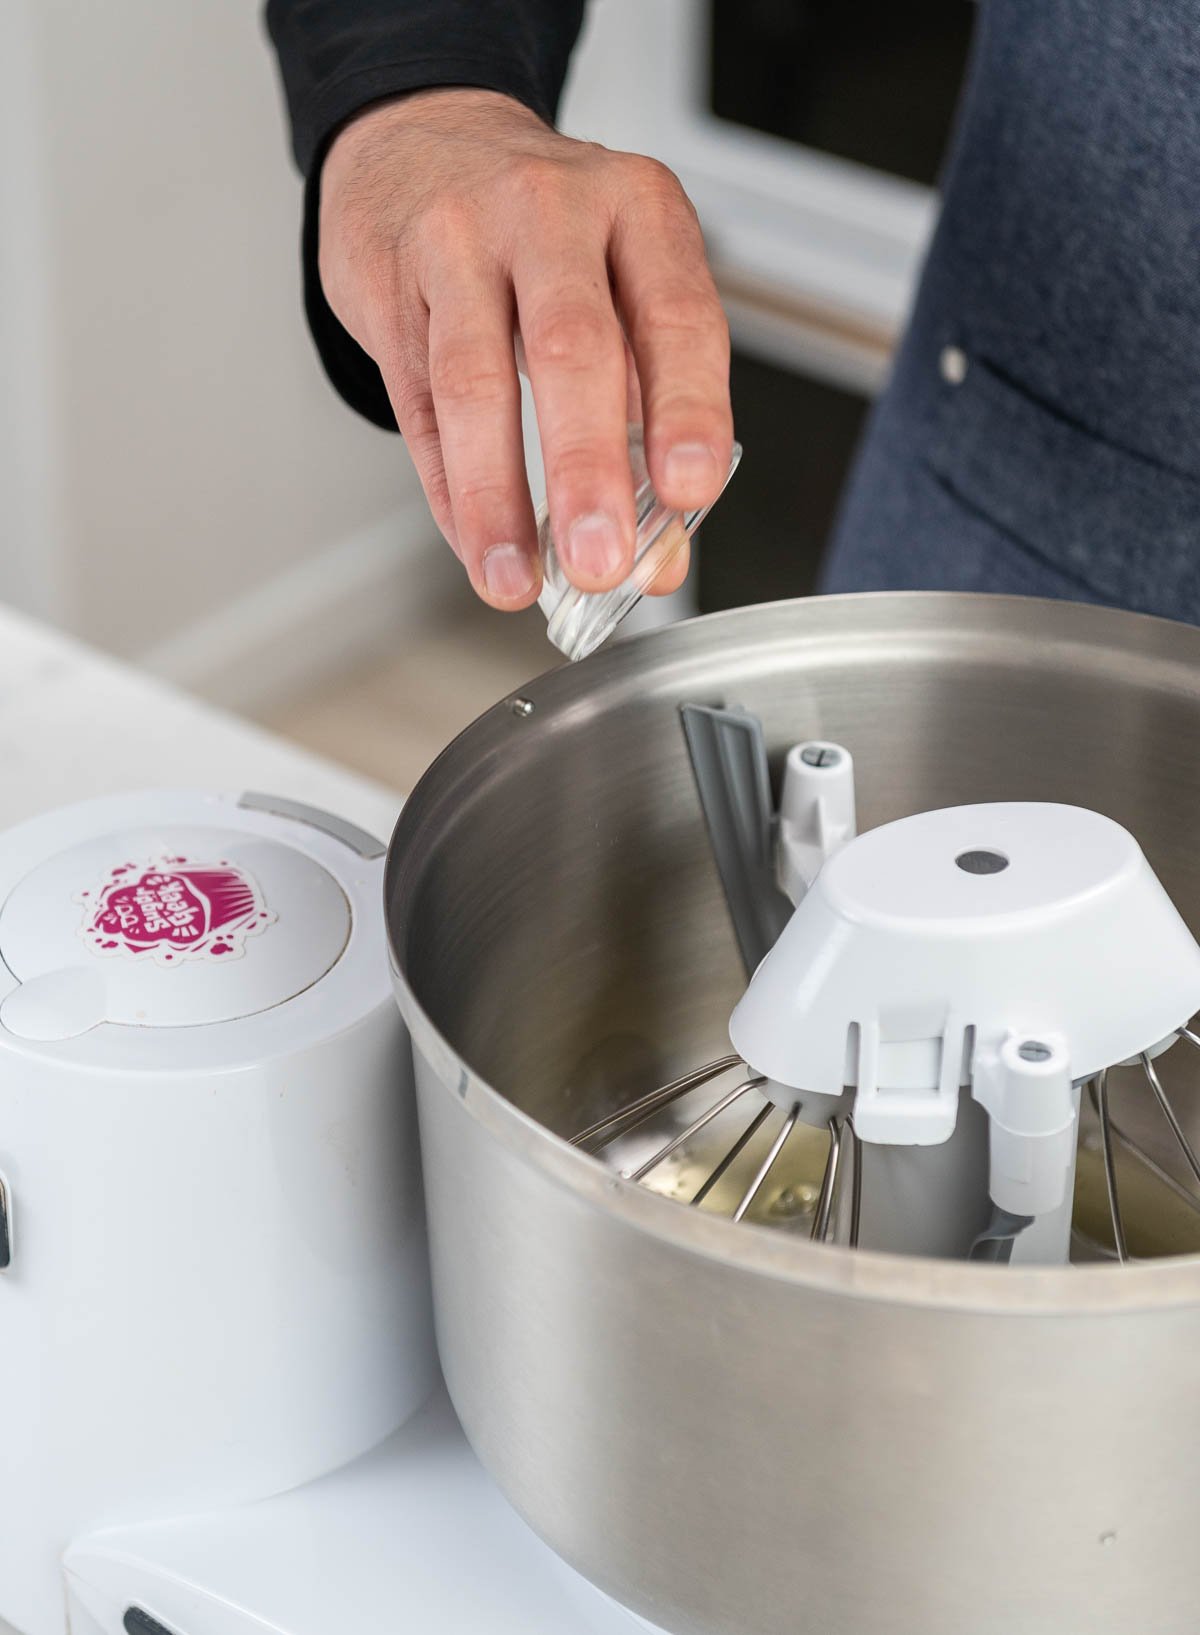
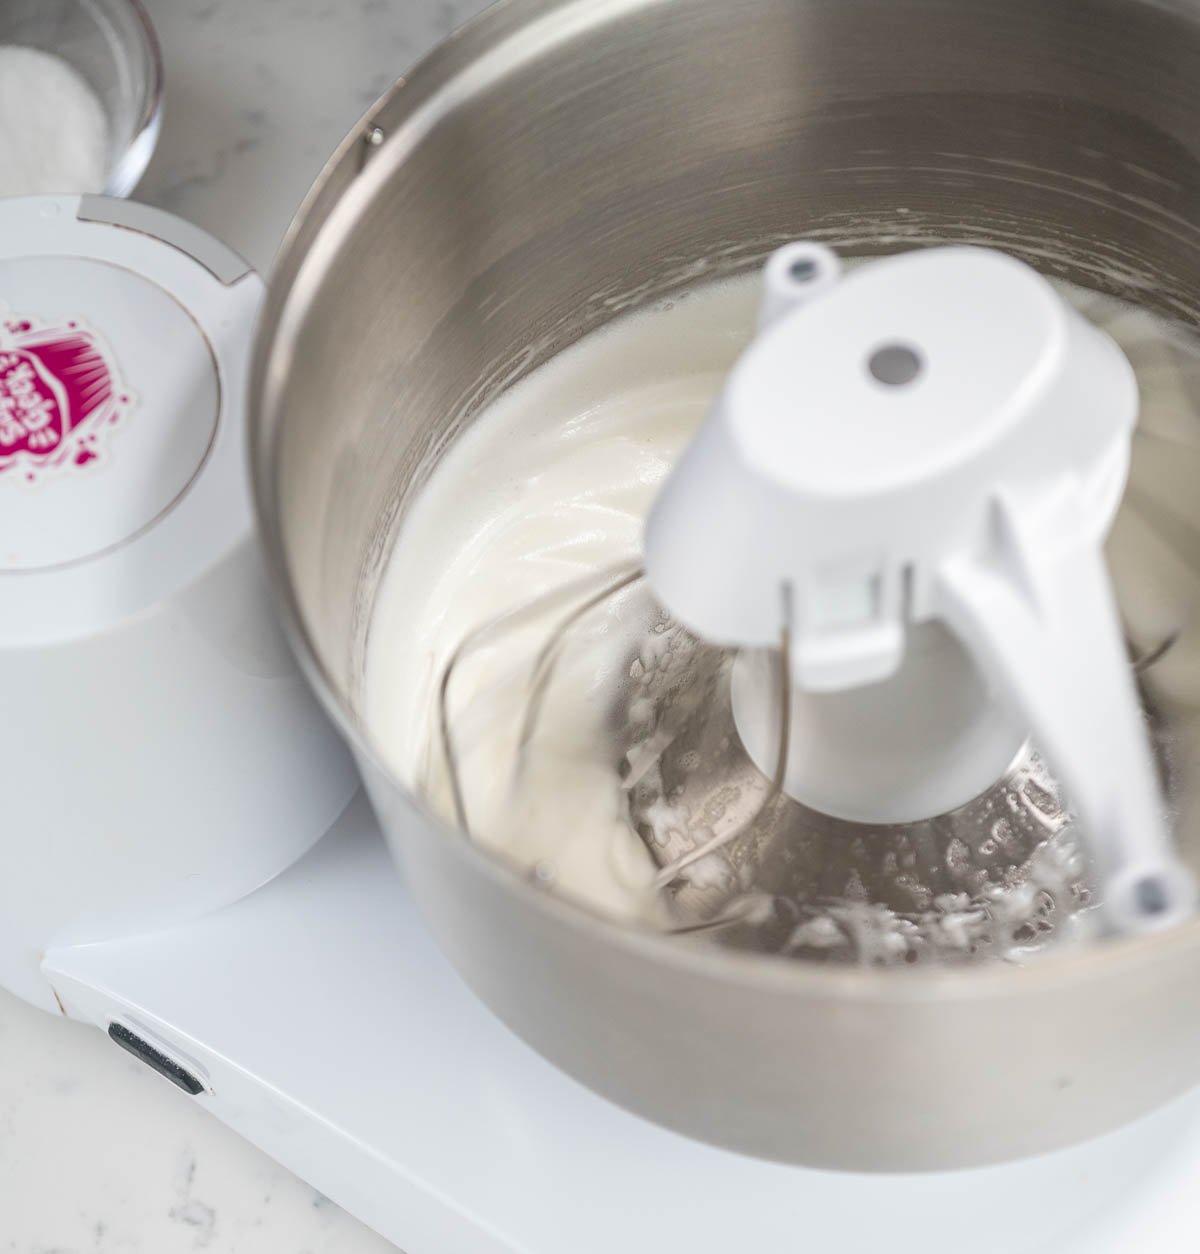
  2. First, using your stand mixer, whip the room temperature egg whites and cream of tartar on medium speed to a soft peak in a clean and dry mixing bowl.hand shown pouring ingredient into stand mixerhand pouring a small amount of ingredients into stand mixerstand mixer mixing ingredients
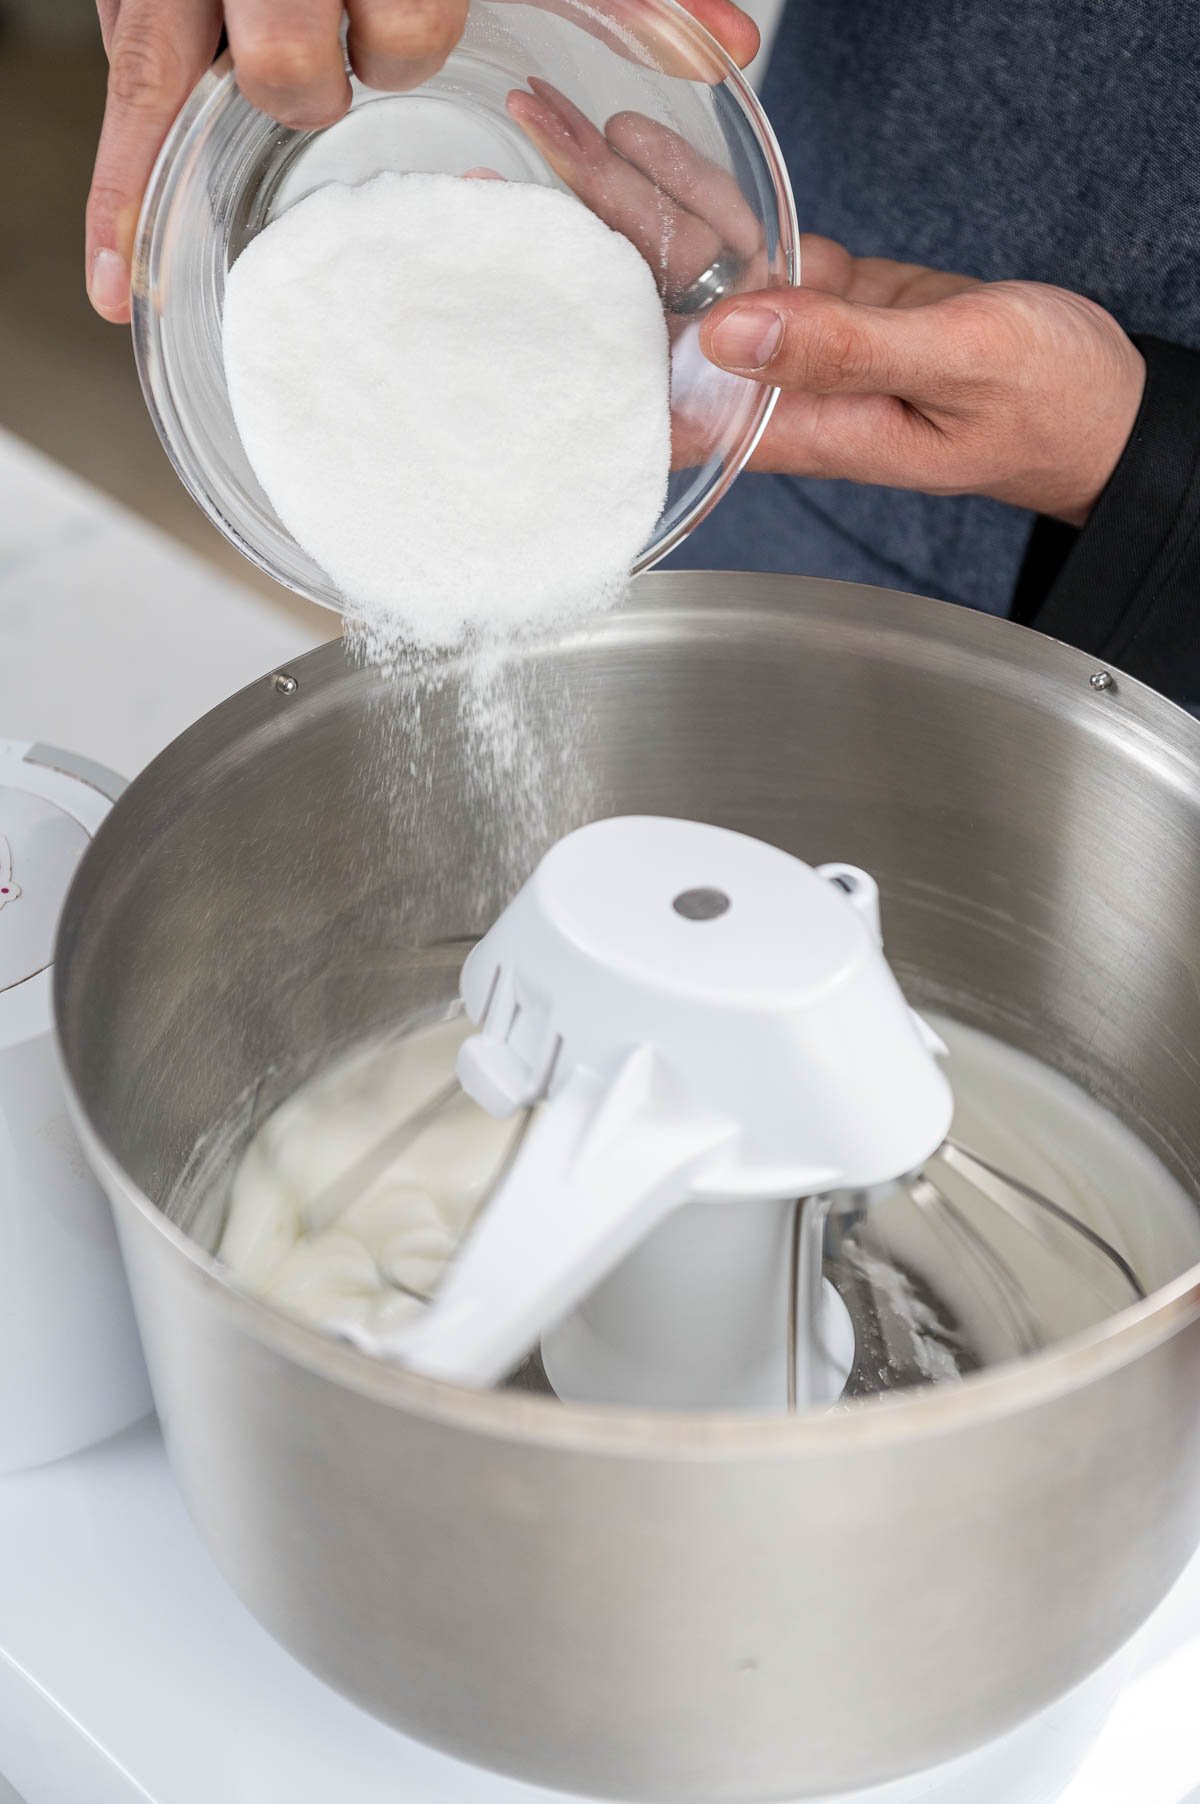
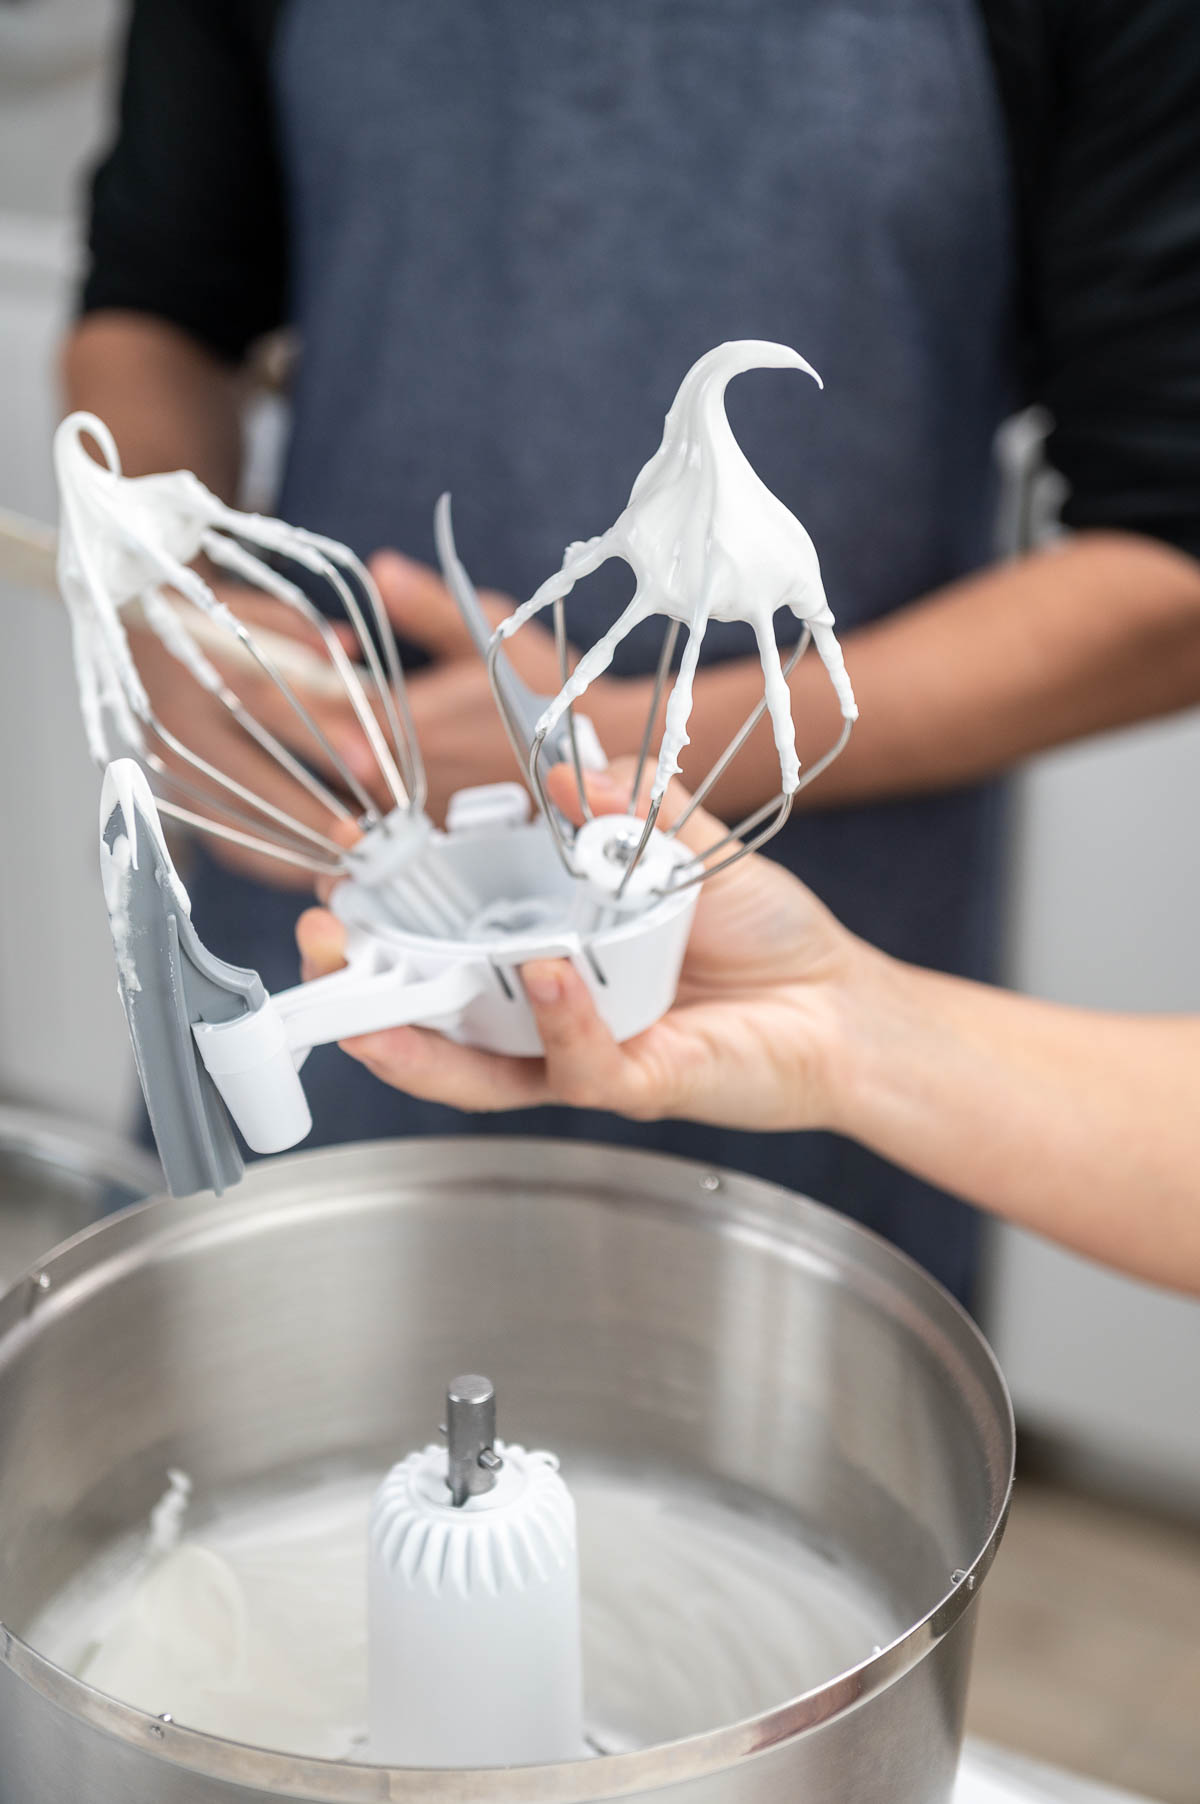
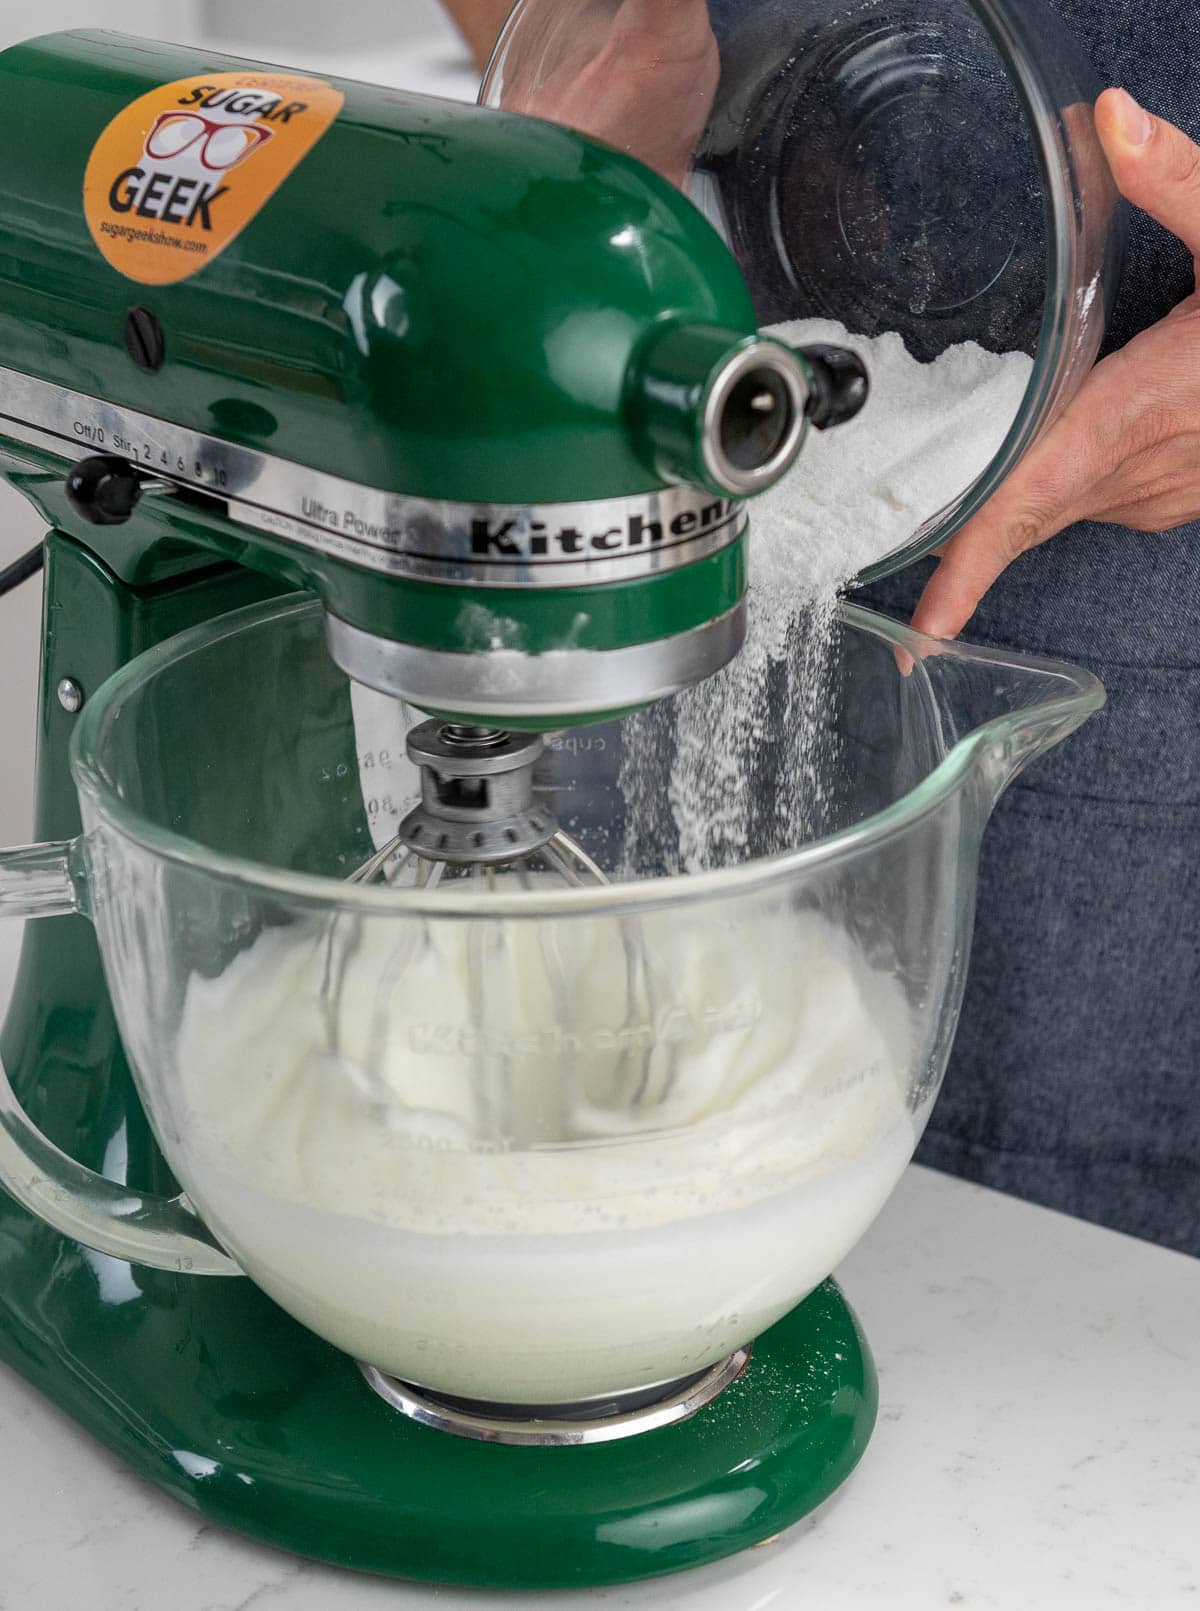
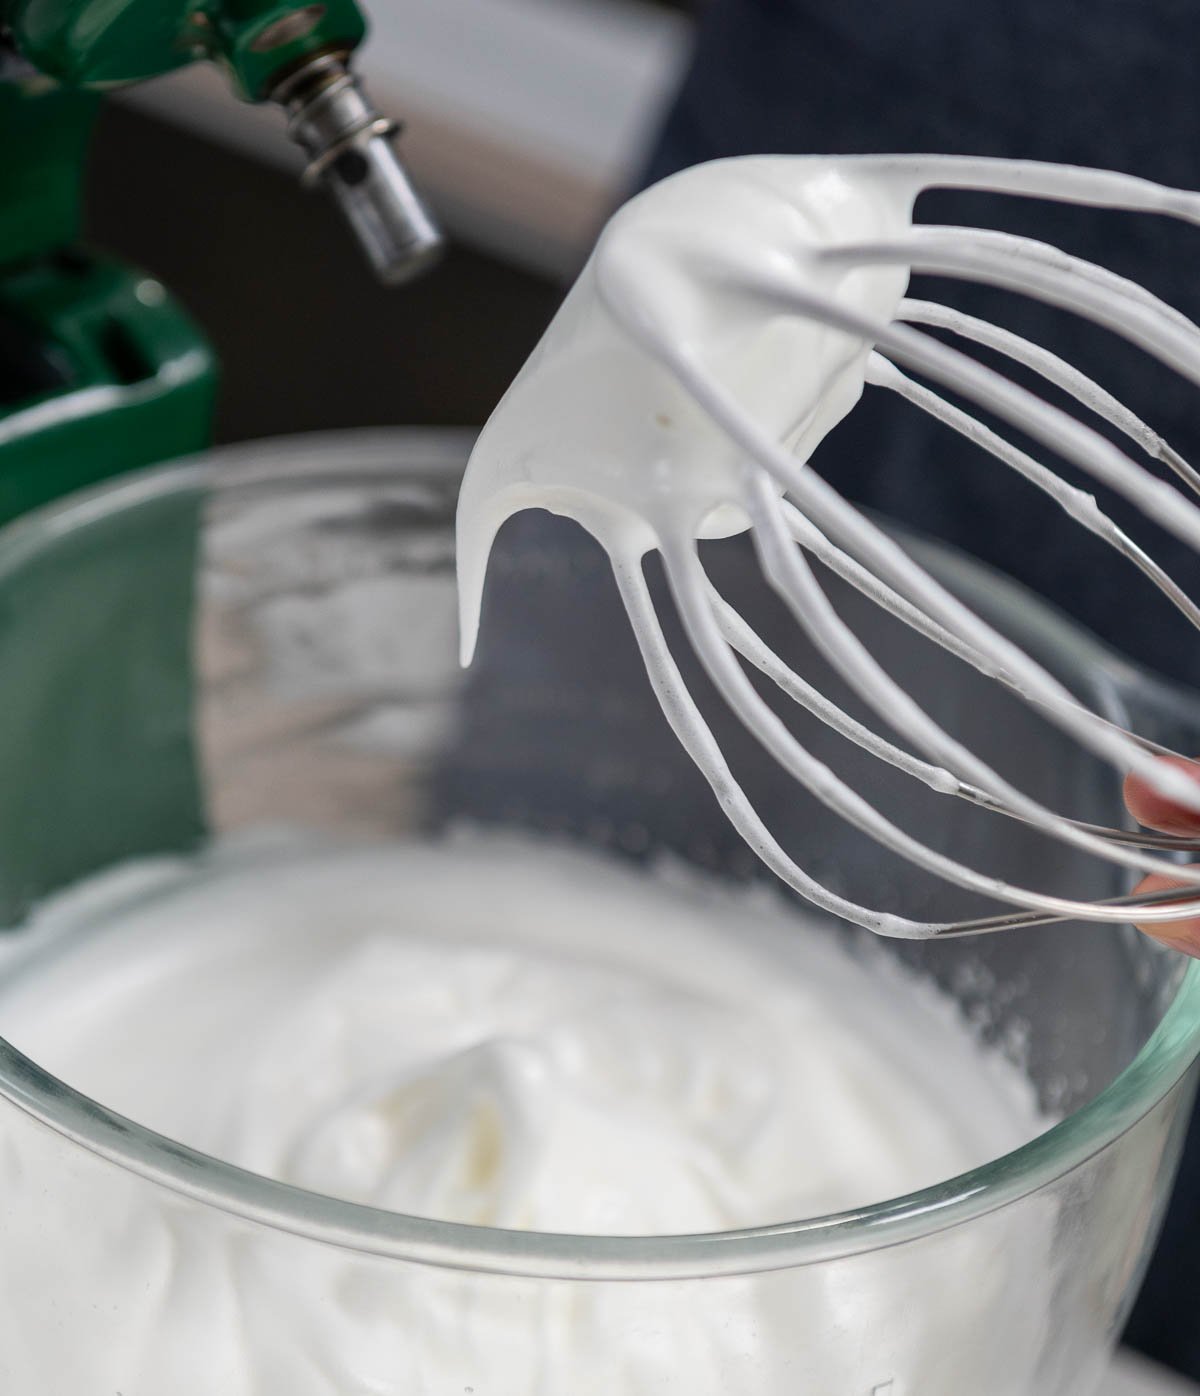
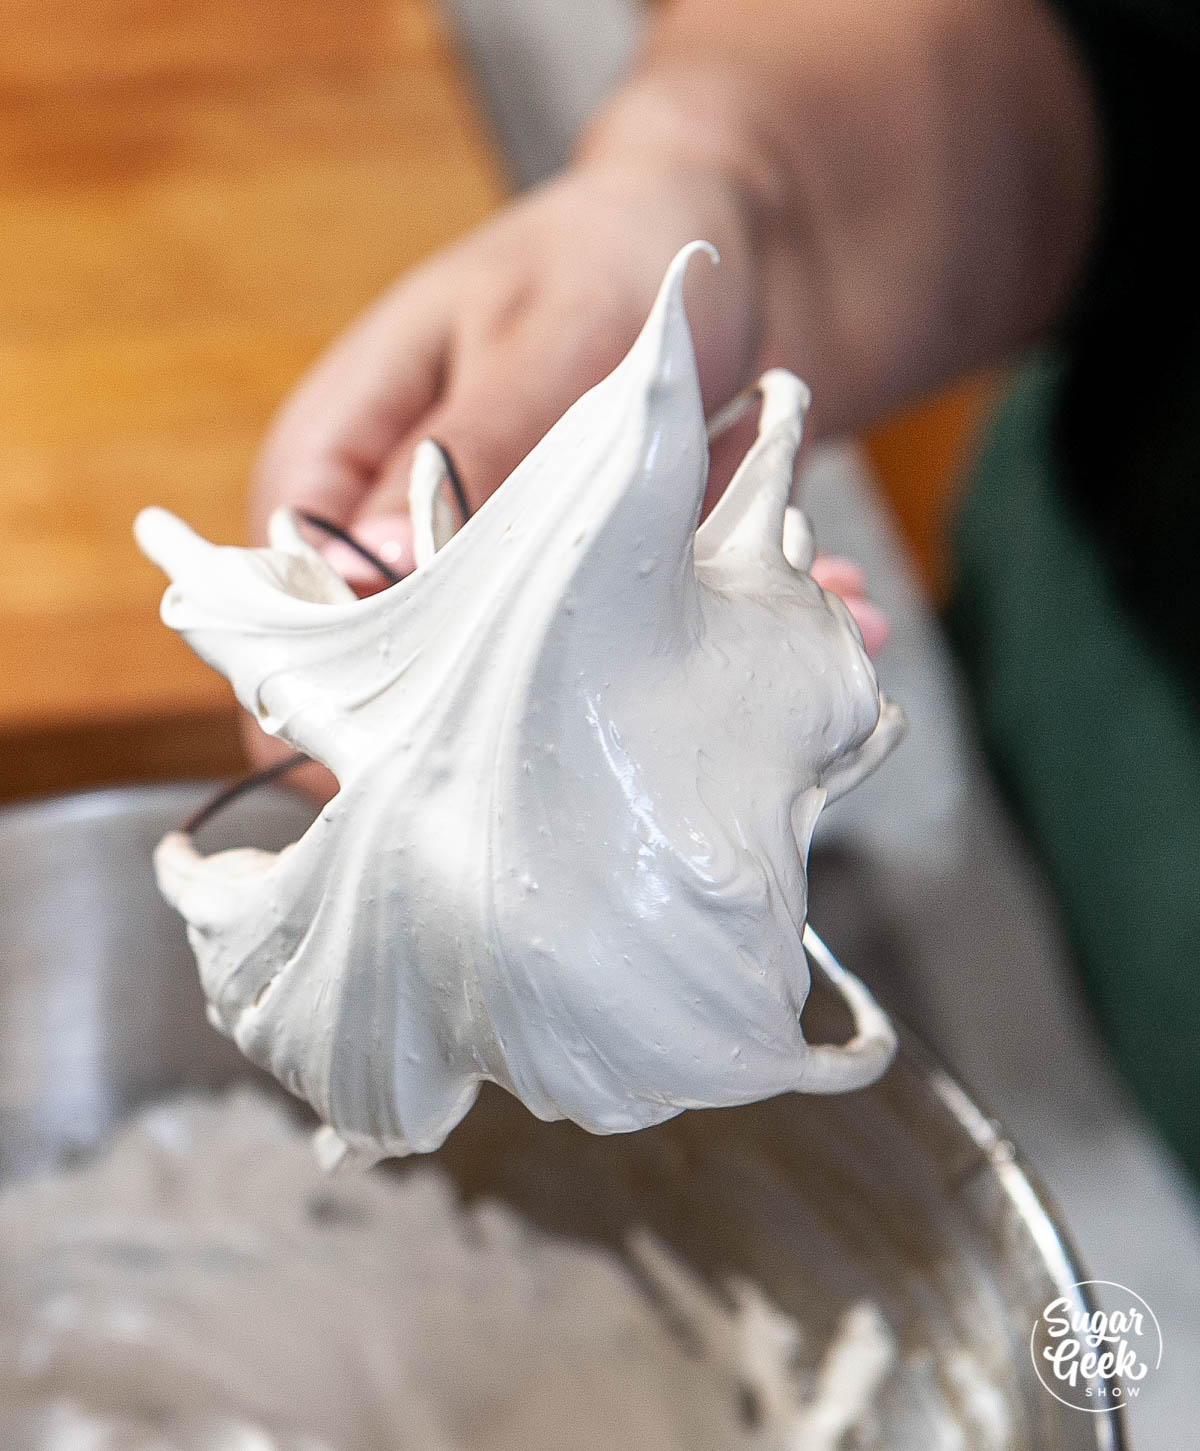
  3. Then, while it is mixing, slowly add your granulated sugar. Continue to mix until you reach stiff peaks.hand pouring ingredients into large mixing bowlhand holding whisk attachment with cream on it upside down
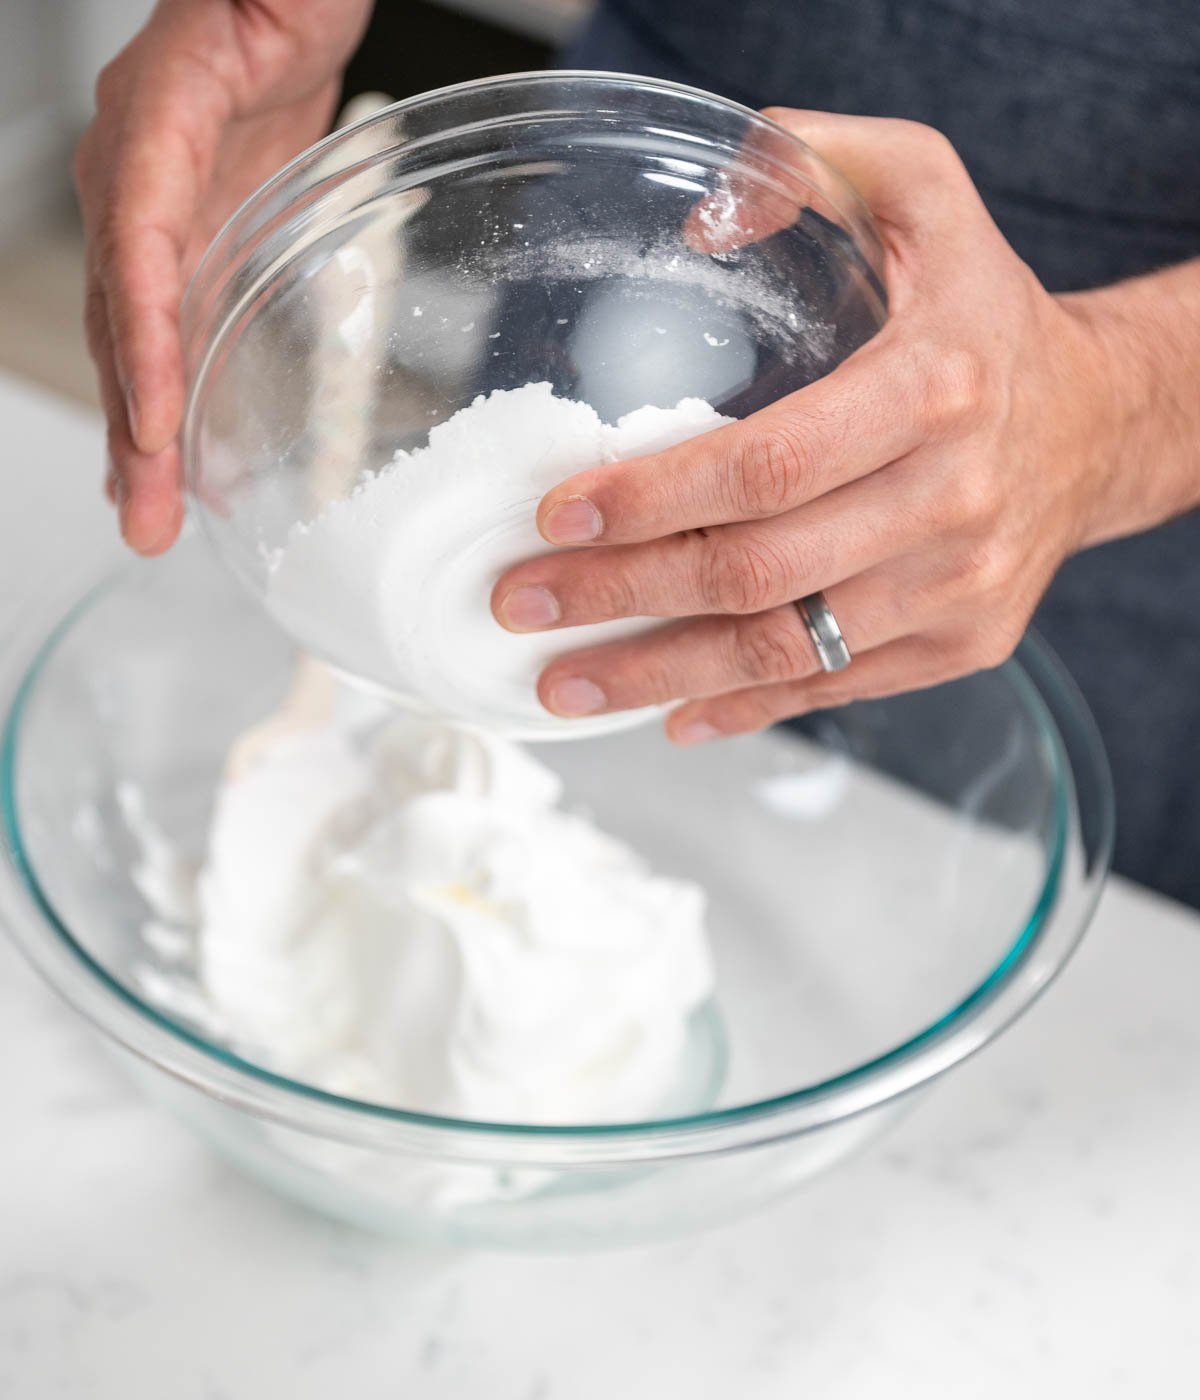
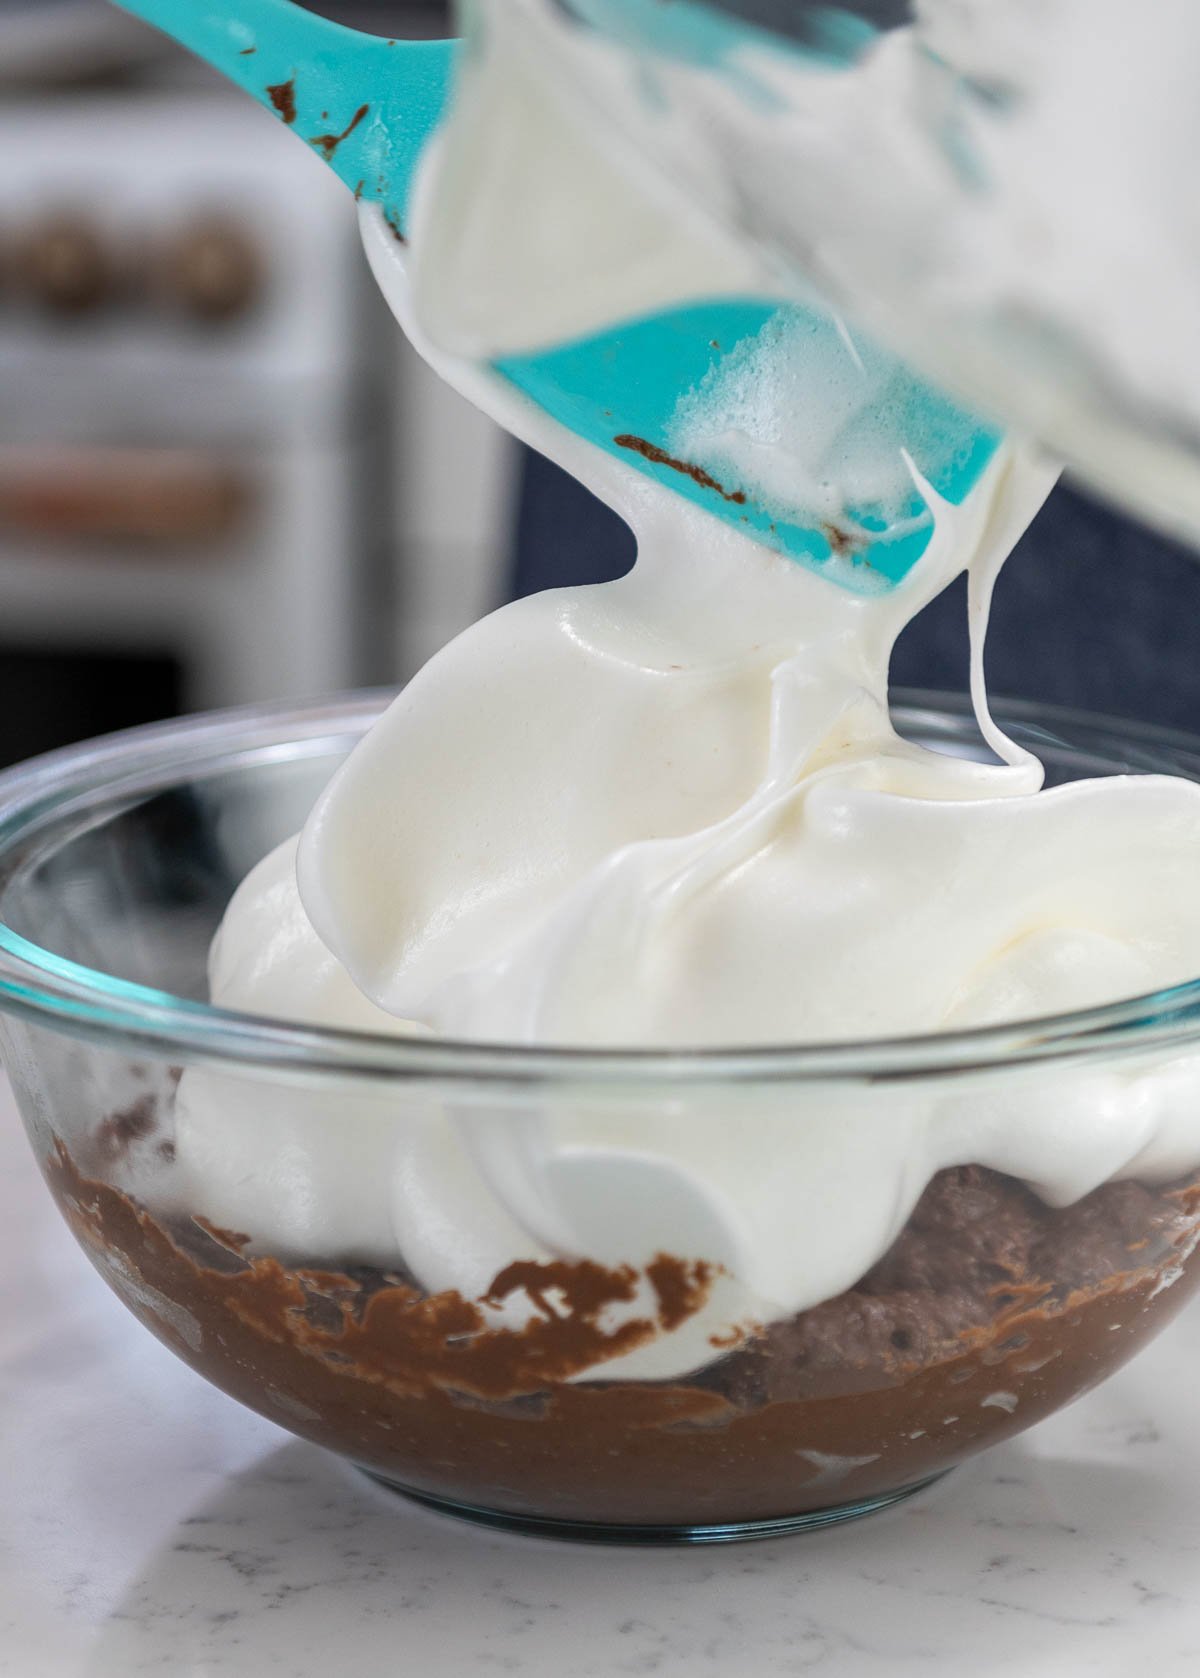
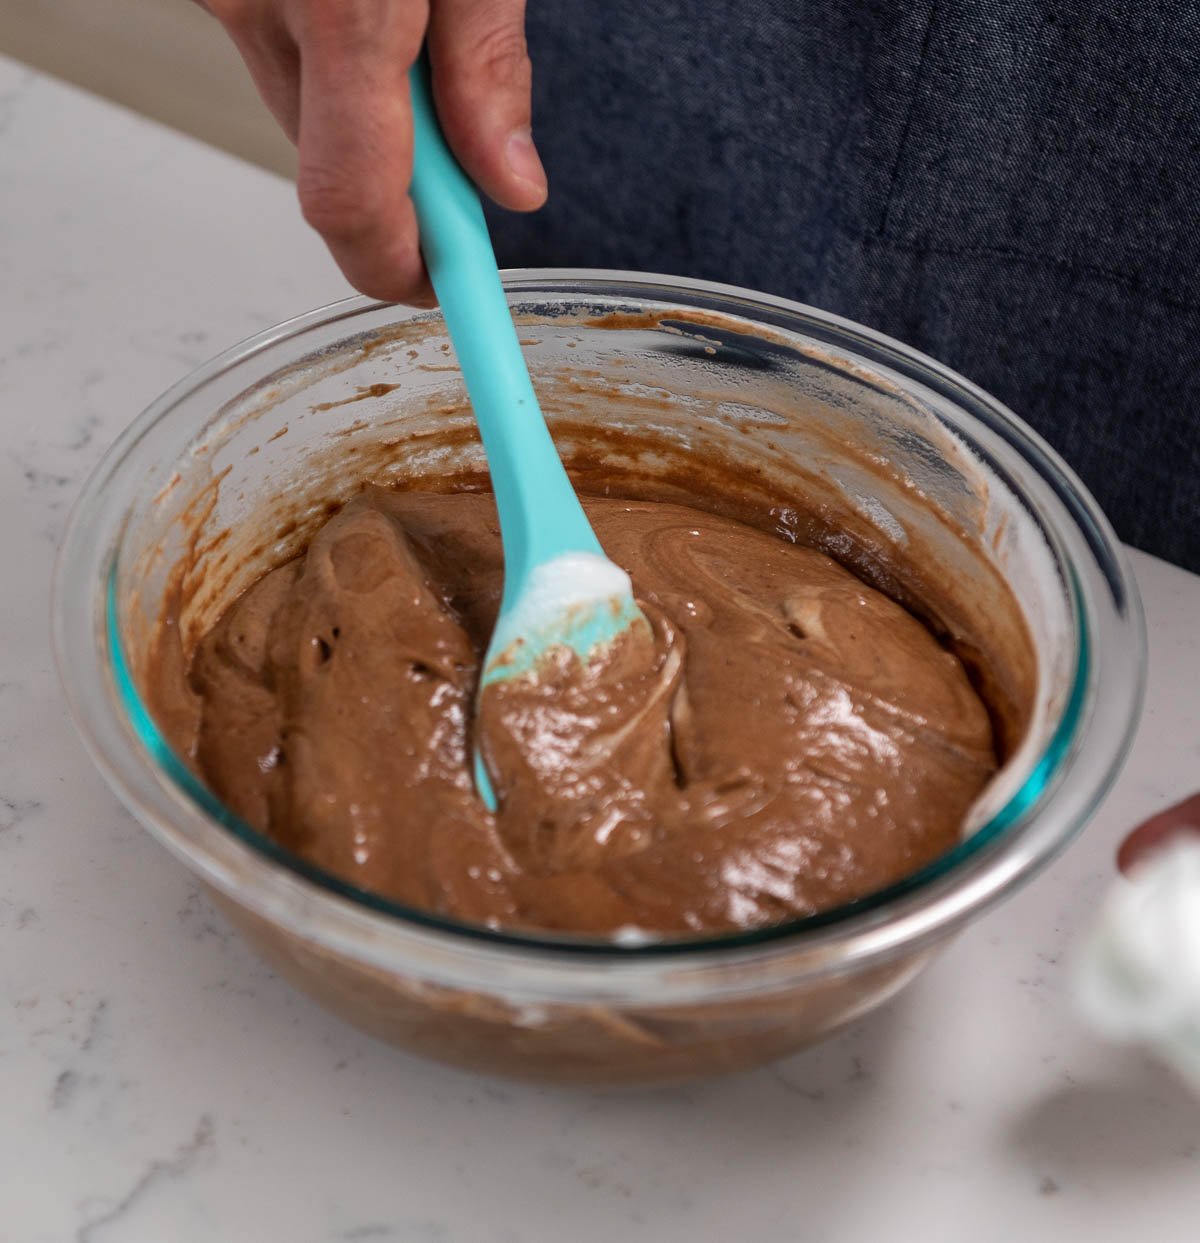
  4. Next, sift the powdered sugar over the stiff peaks. Gently fold the powdered sugar into the egg whites. Be careful not to deflate the meringue too much.hand shown pouring mixture into bowlspatula being used to mix creambowl of cream with spatula inside
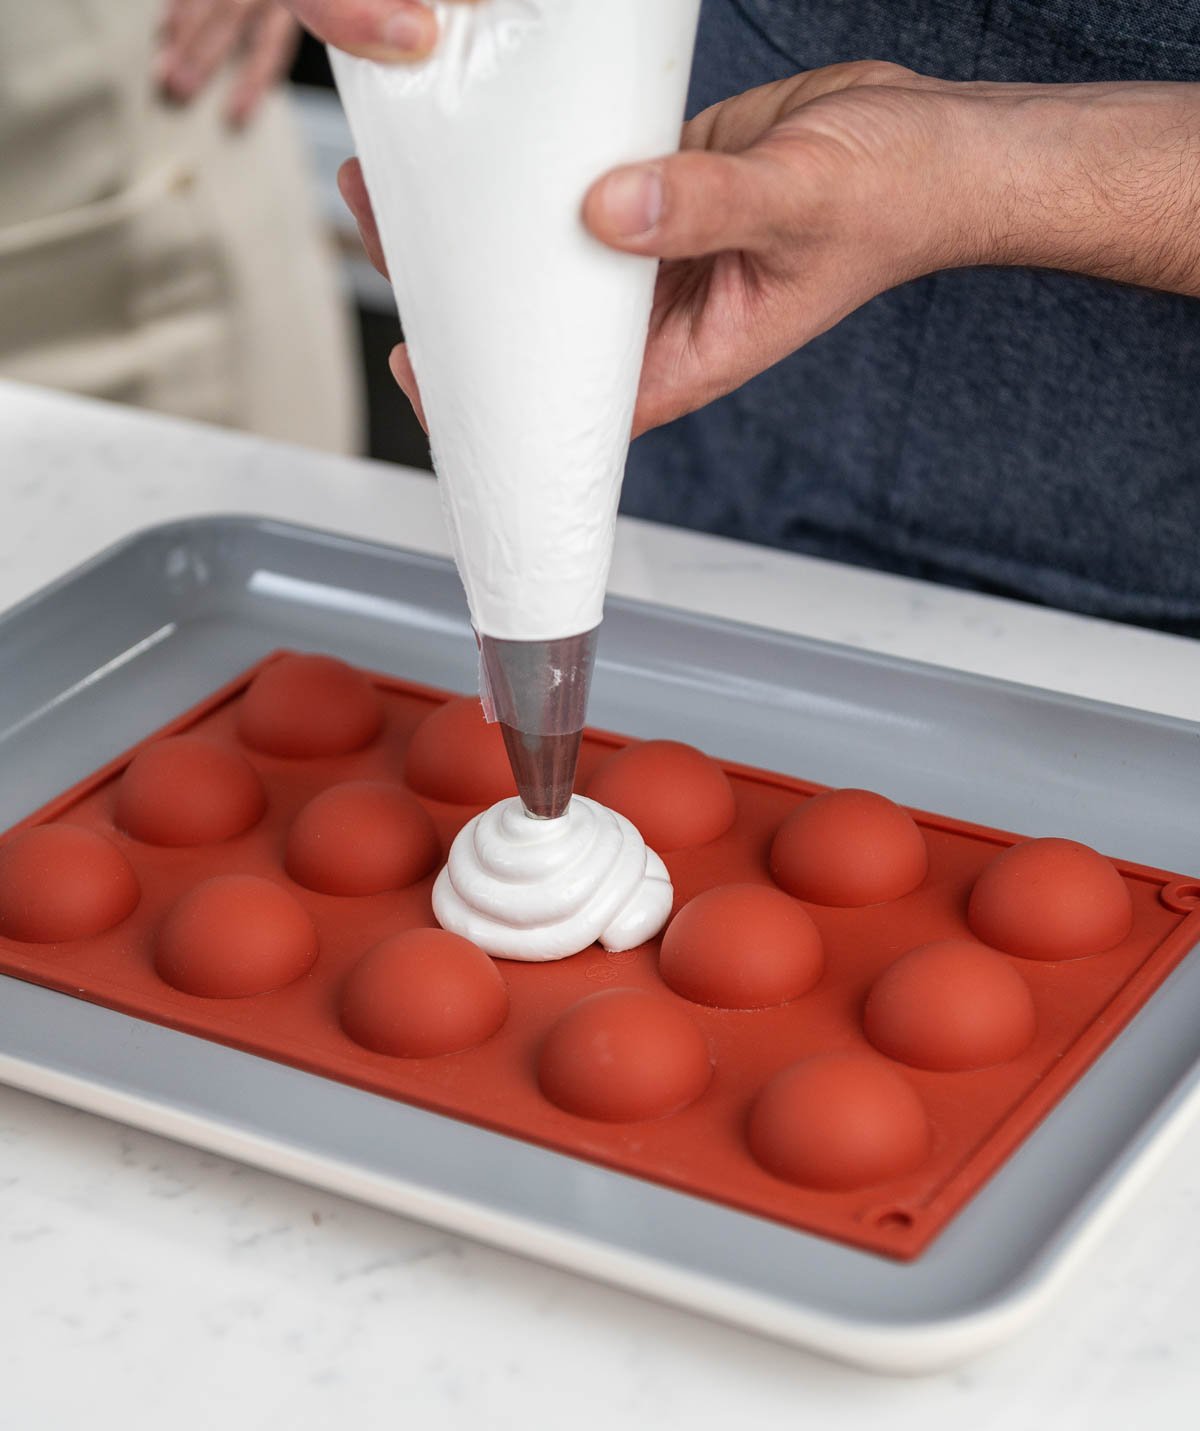
  5. Prepare a piping bag with plain tip #804. Fill the piping bag with meringue.hand holding a piping baghand shown filling a piping bag with cream
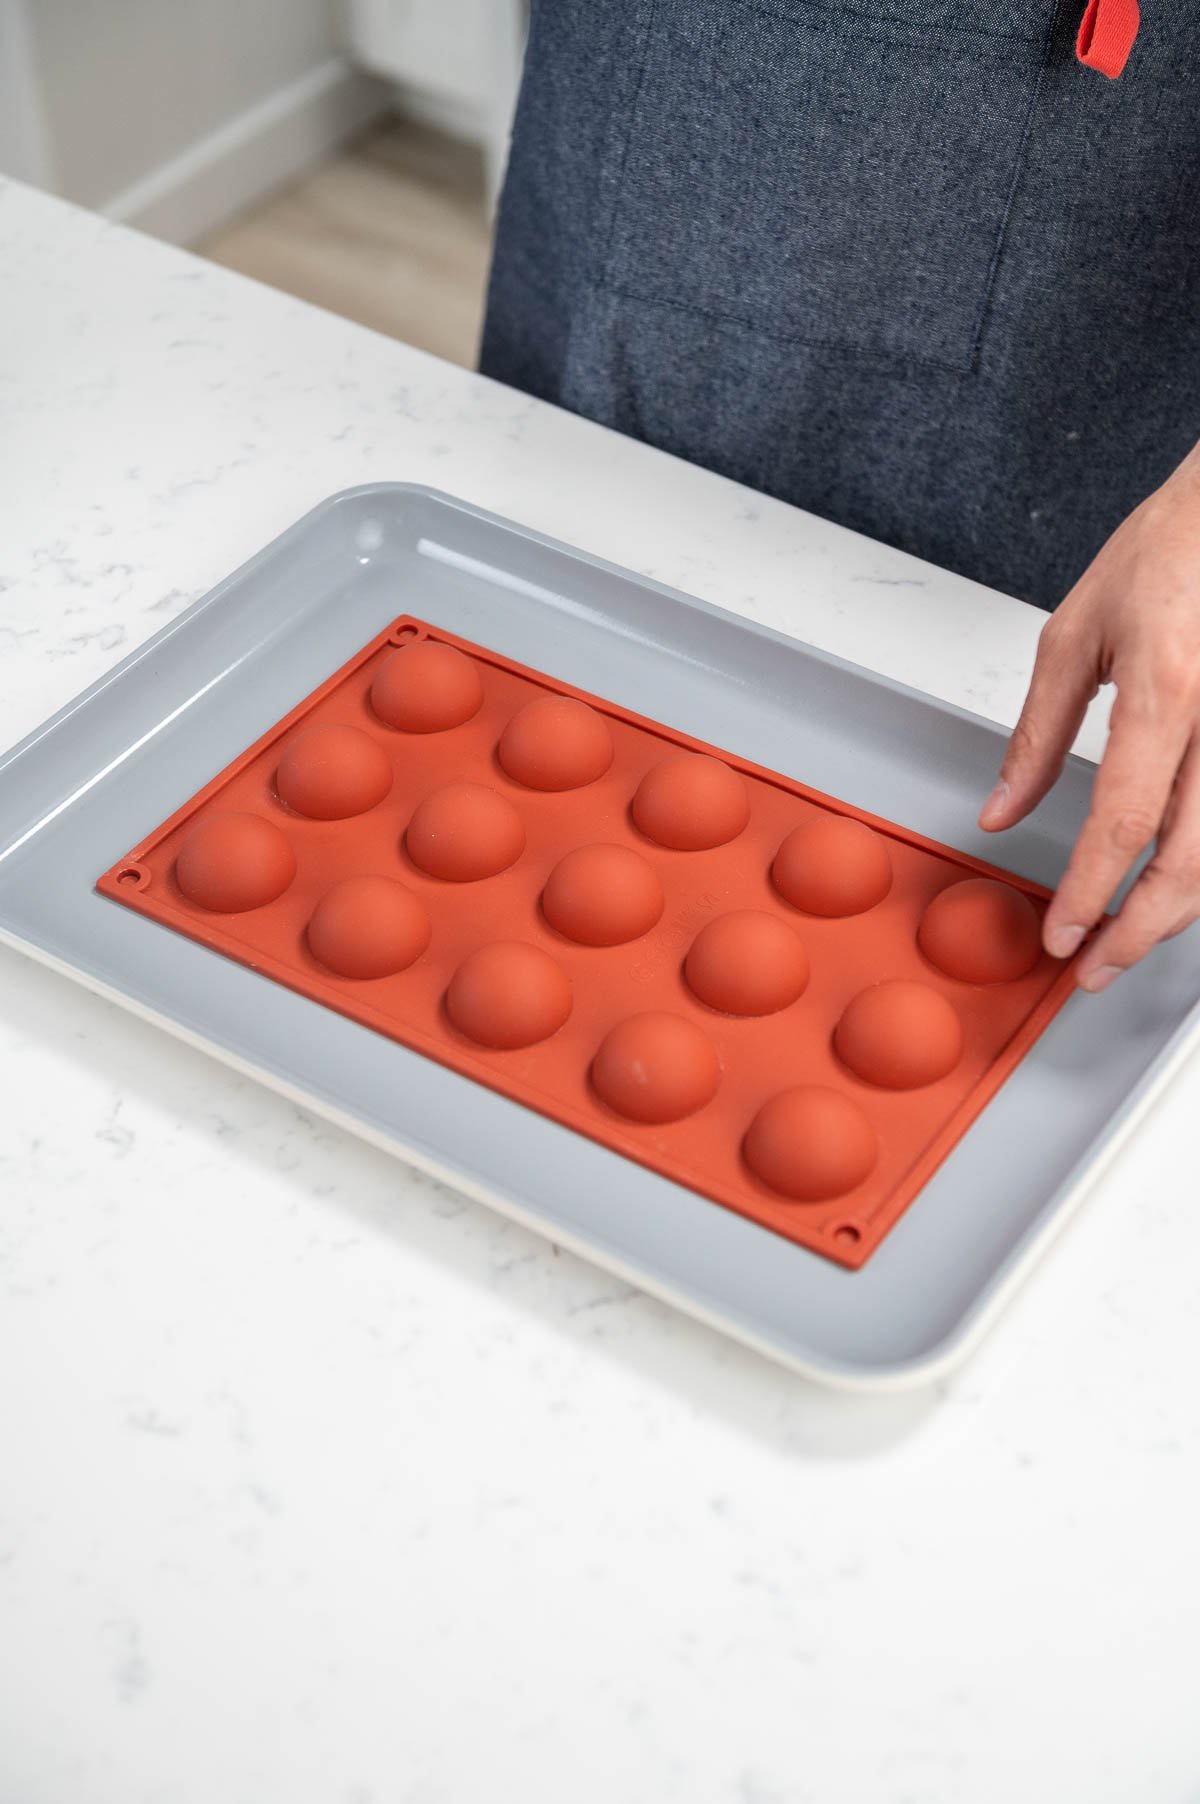
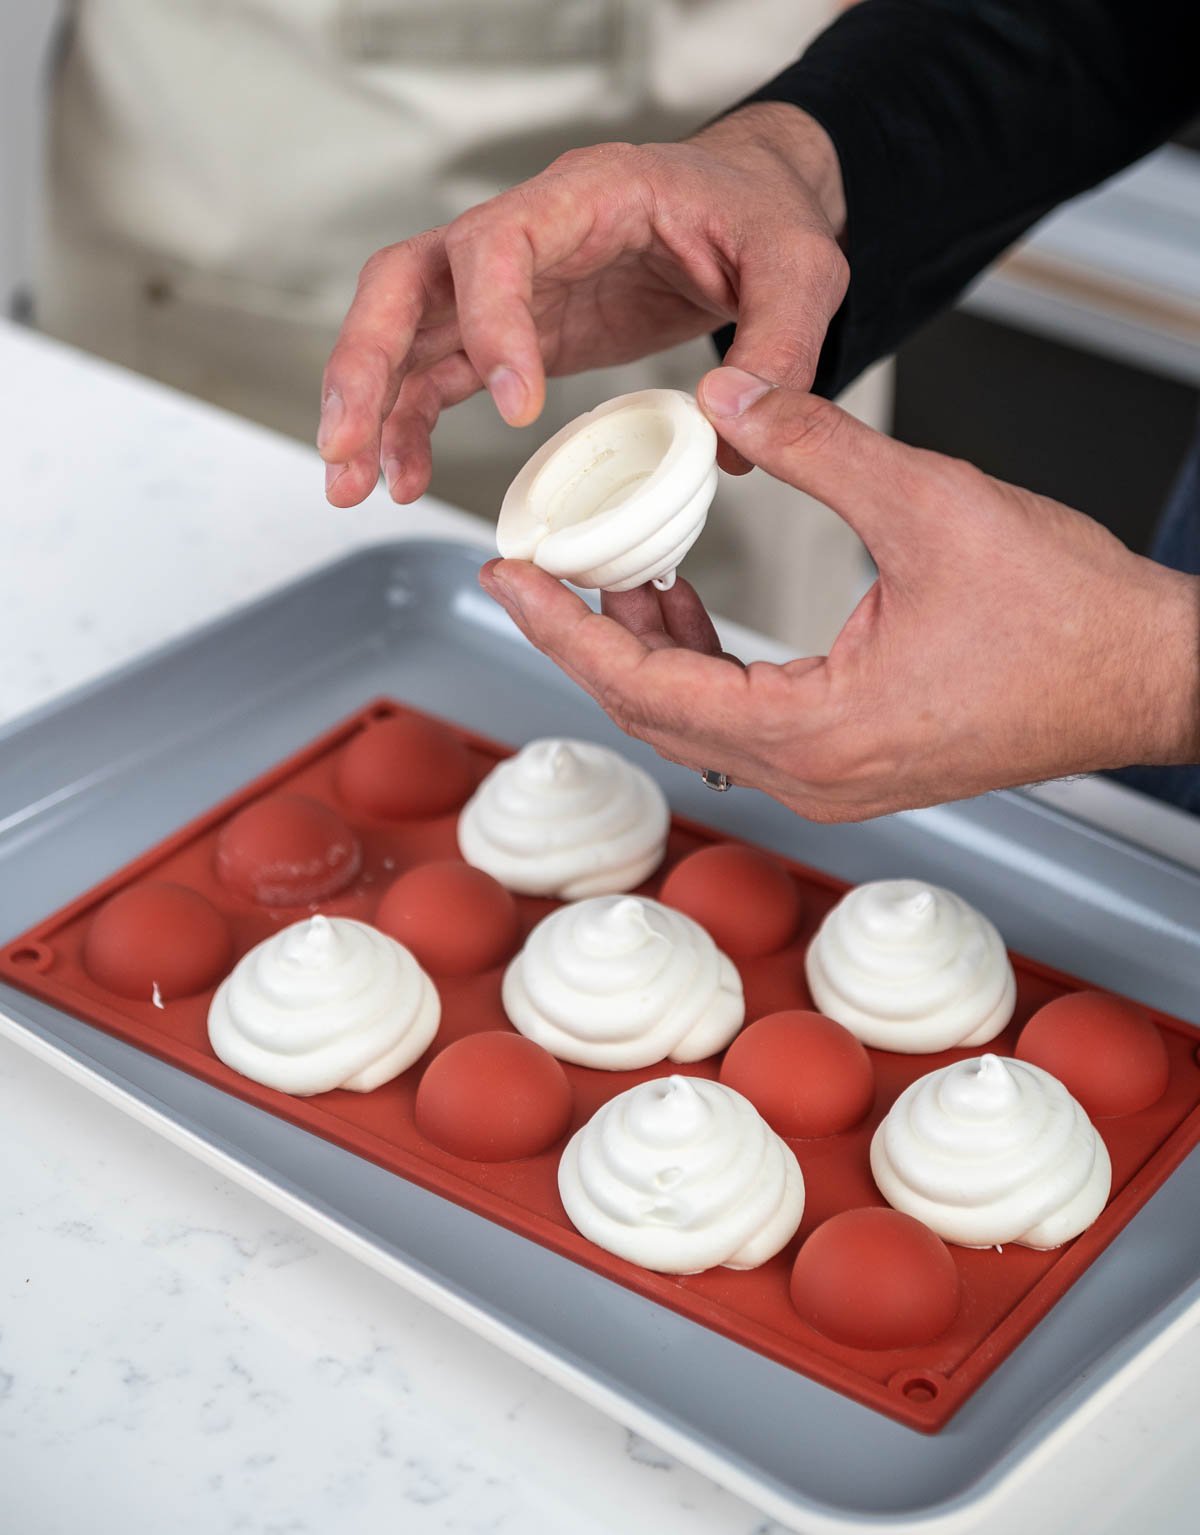
  6. Then, on the backside of the silicone sphere mold, pipe the meringue around the sphere. Make sure there are no spaces or gaps in the meringue.silicone sphere mold placed upside down with round half facing upmini pavlova piped onto the back of a sphere silicone moldmini pavlova piped onto the back of every other alternating sphere silicone mold
  7. Bake the meringue for 6-8 hours until it is firm and crunchy.
  8. Next, let the meringue cool completely.
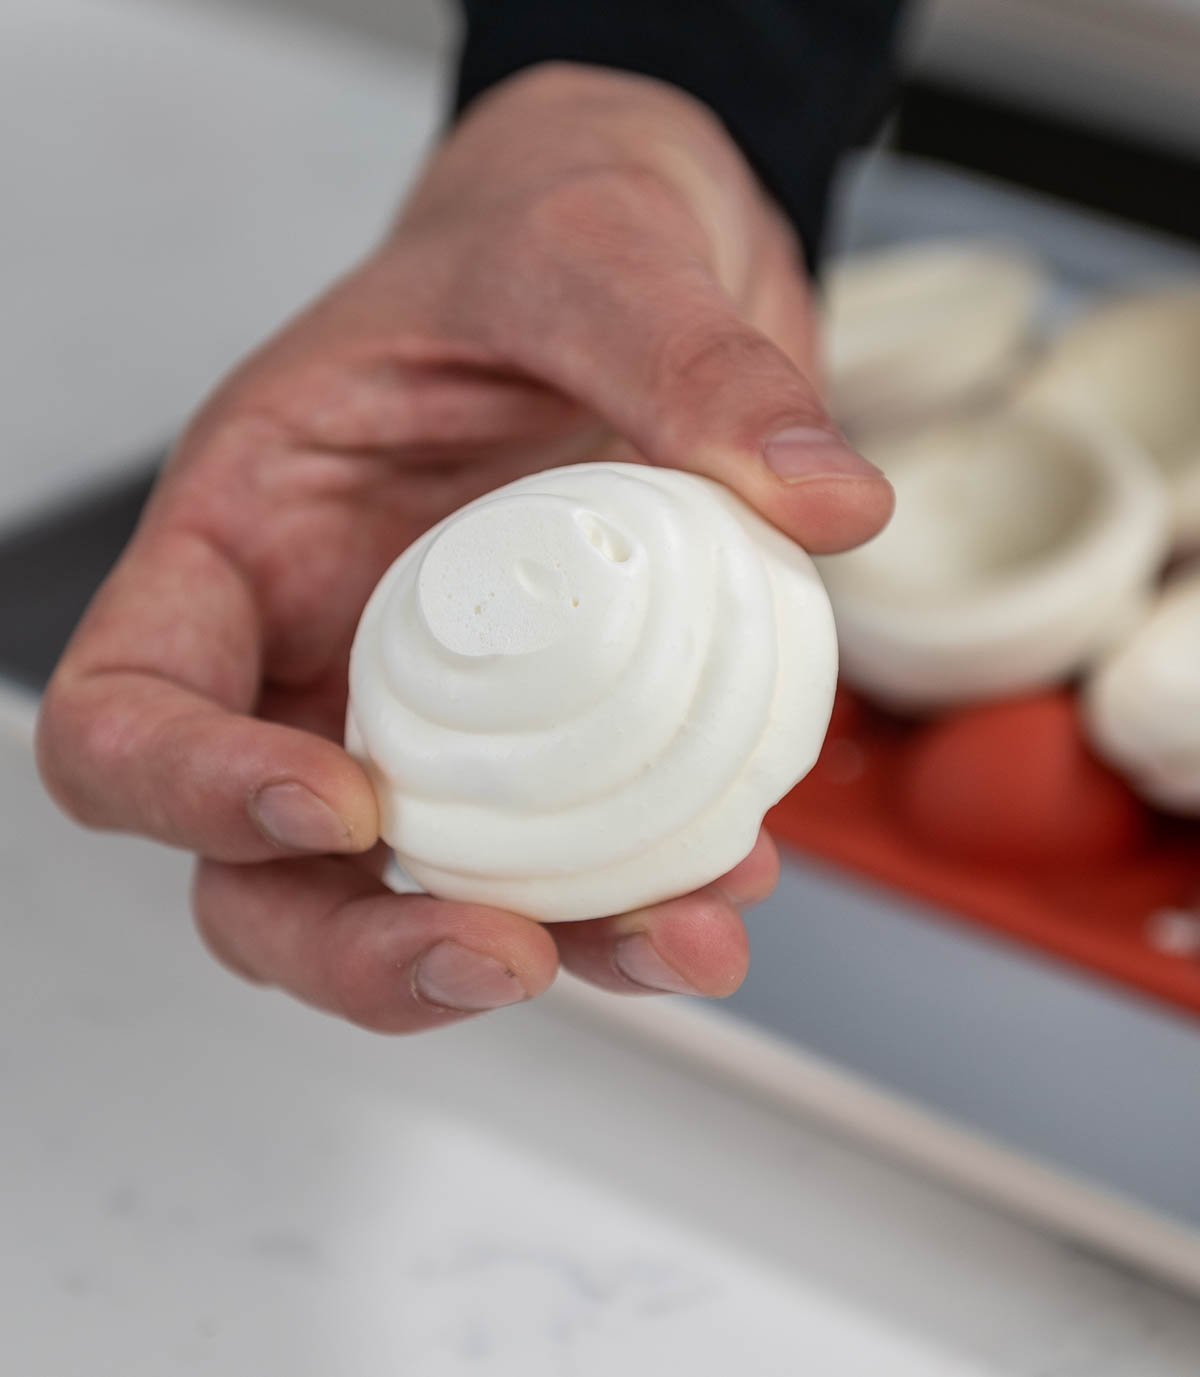
  9. Then, after the meringue is completely cooled, gently peel the silicone mold away while being careful to not to break the shell.hand flipping over baked mini pavlova shell to show the hollow side
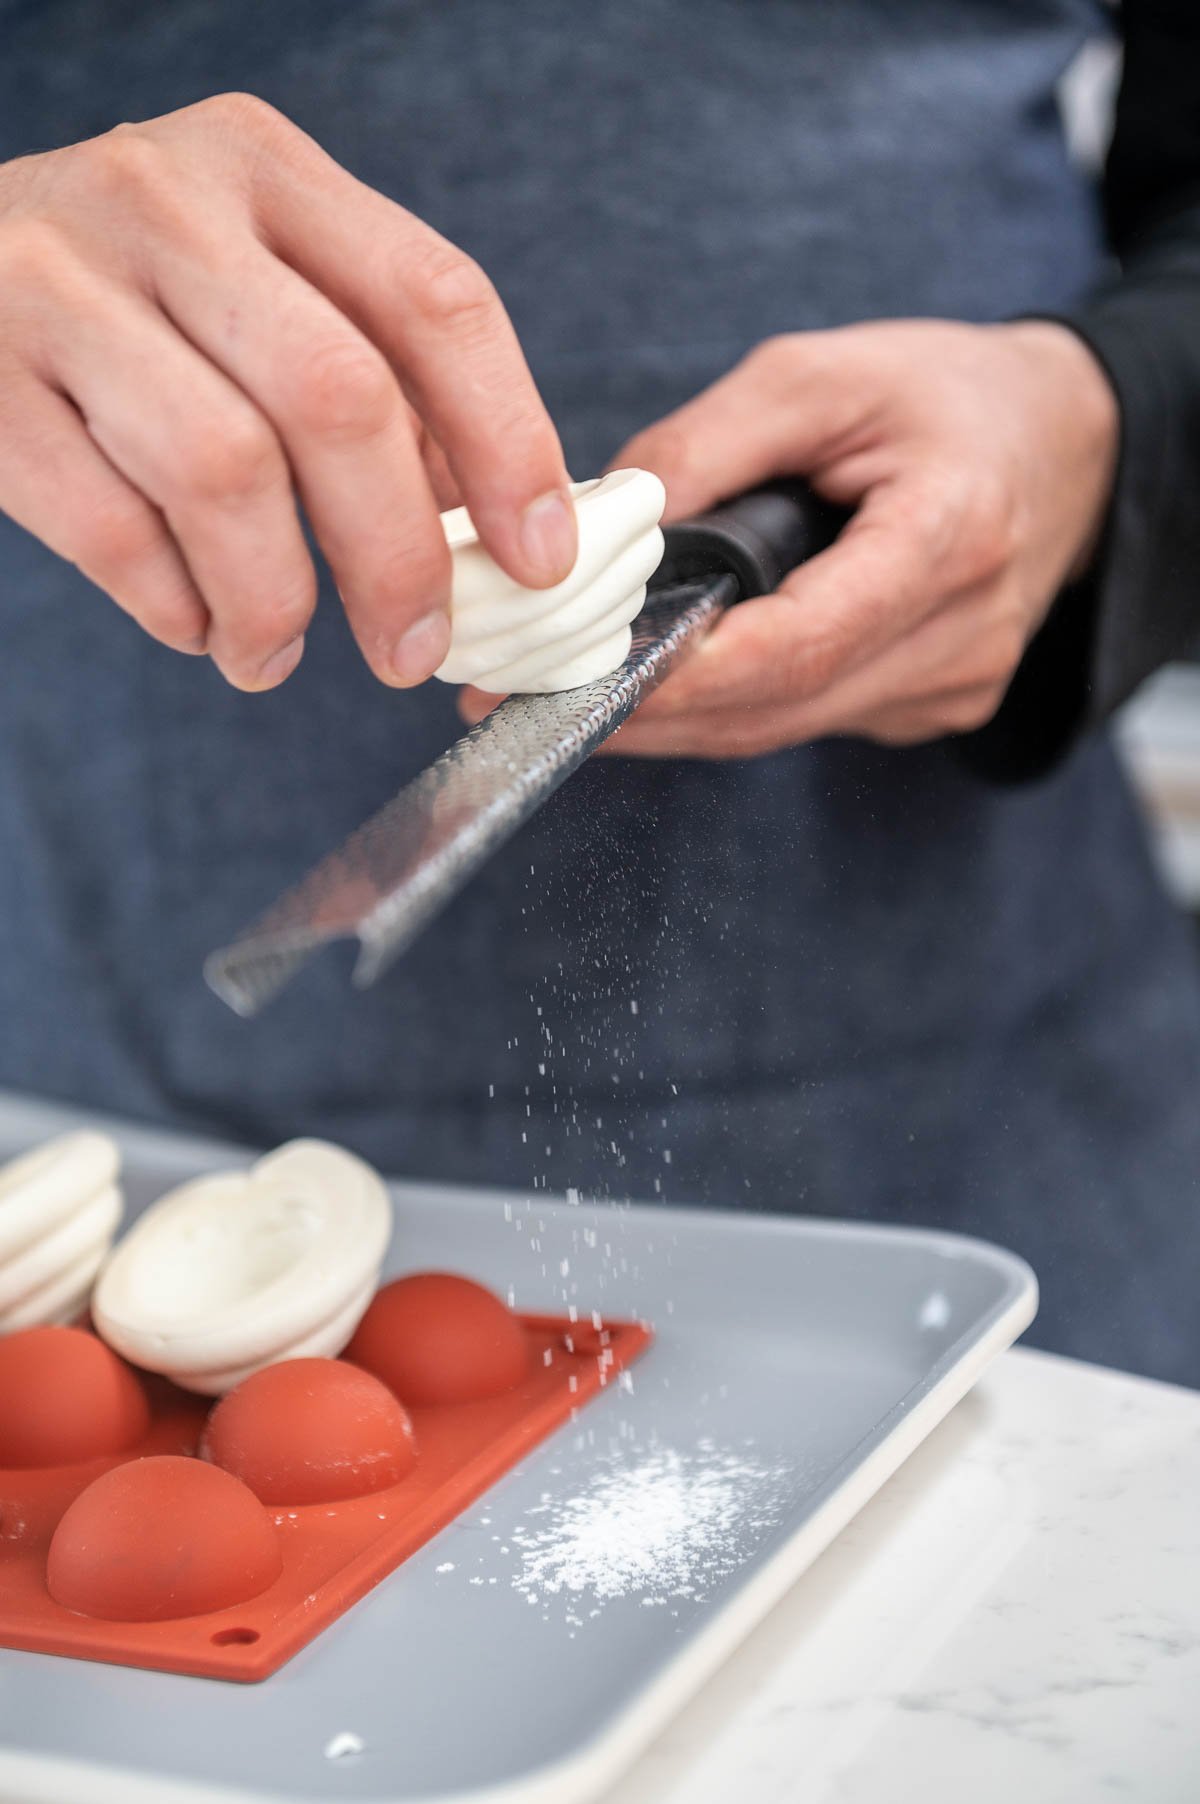
  10. Finally, when you are ready to assemble the pavlova, carefully scrape the point off of the bottom using a microplane so it will sit level on the plate.hand using a microplane to shave off bottom of pavlovahand holding mini pavlova shell

Preparing the Mixed Berry Compote

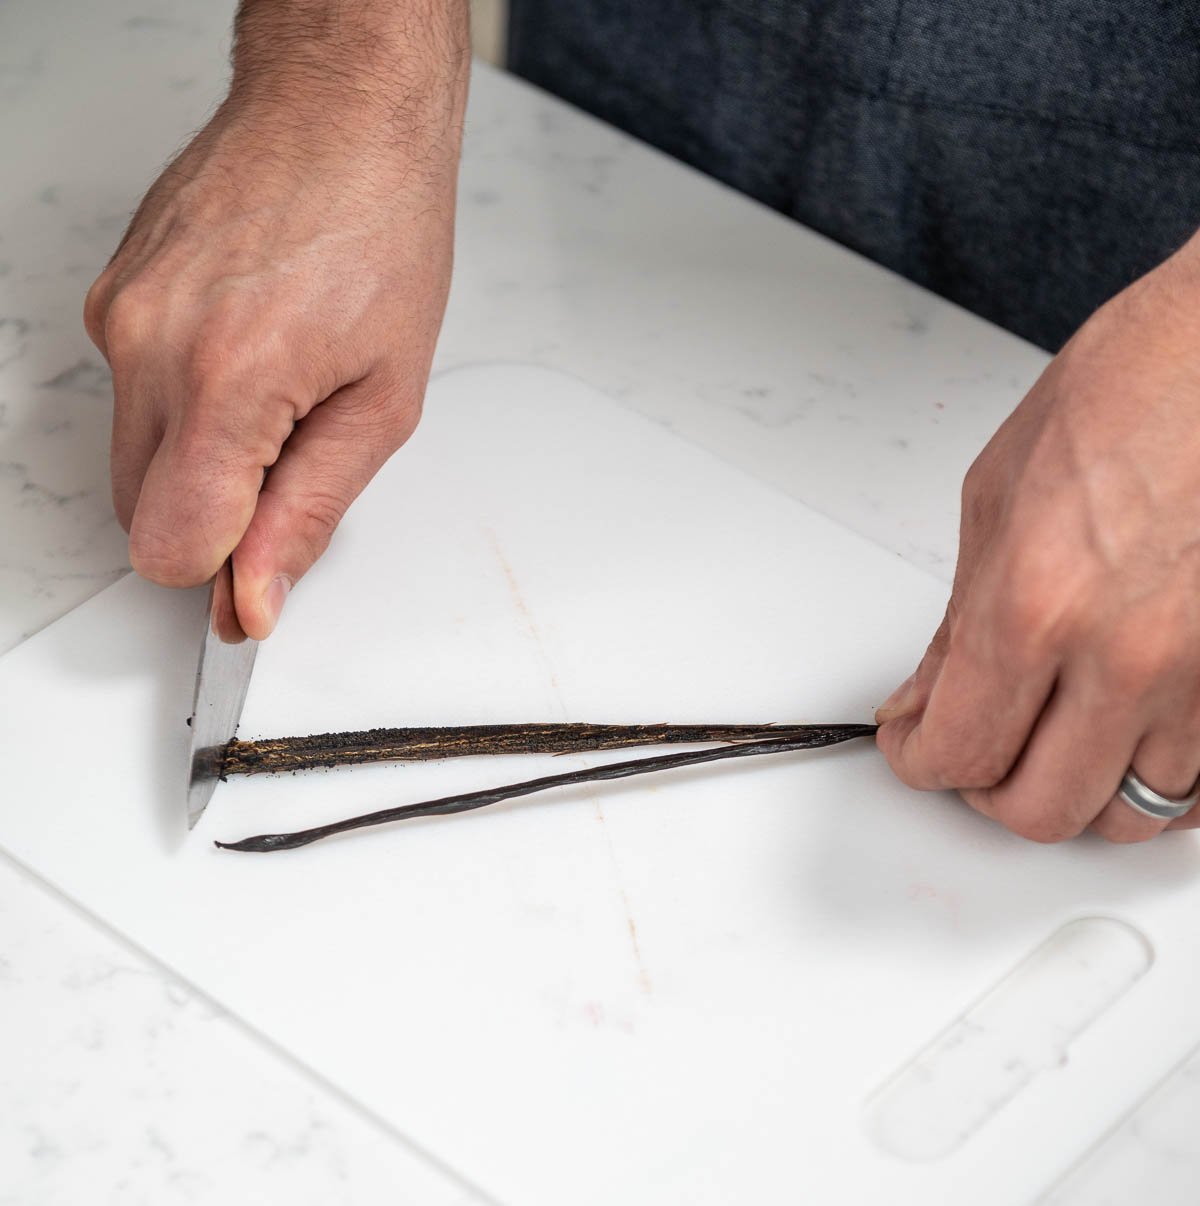
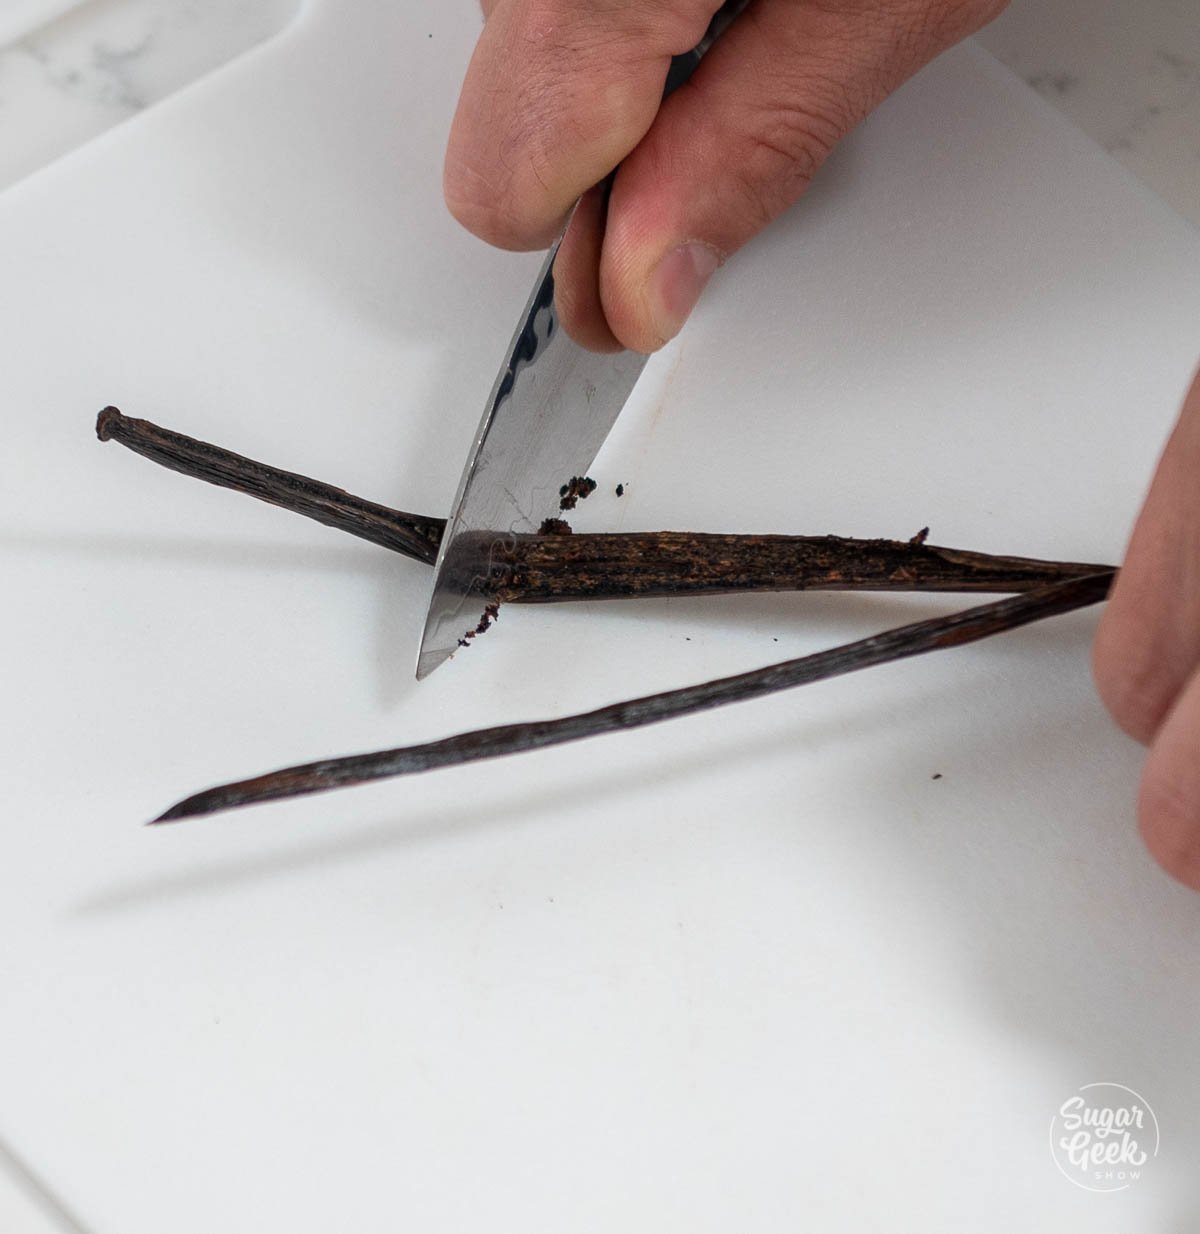
  1. First, use a paring knife to split and scrape the vanilla bean. Put the split vanilla bean into a heavy bottom saucepan.hands shown scraping vanilla bean pod
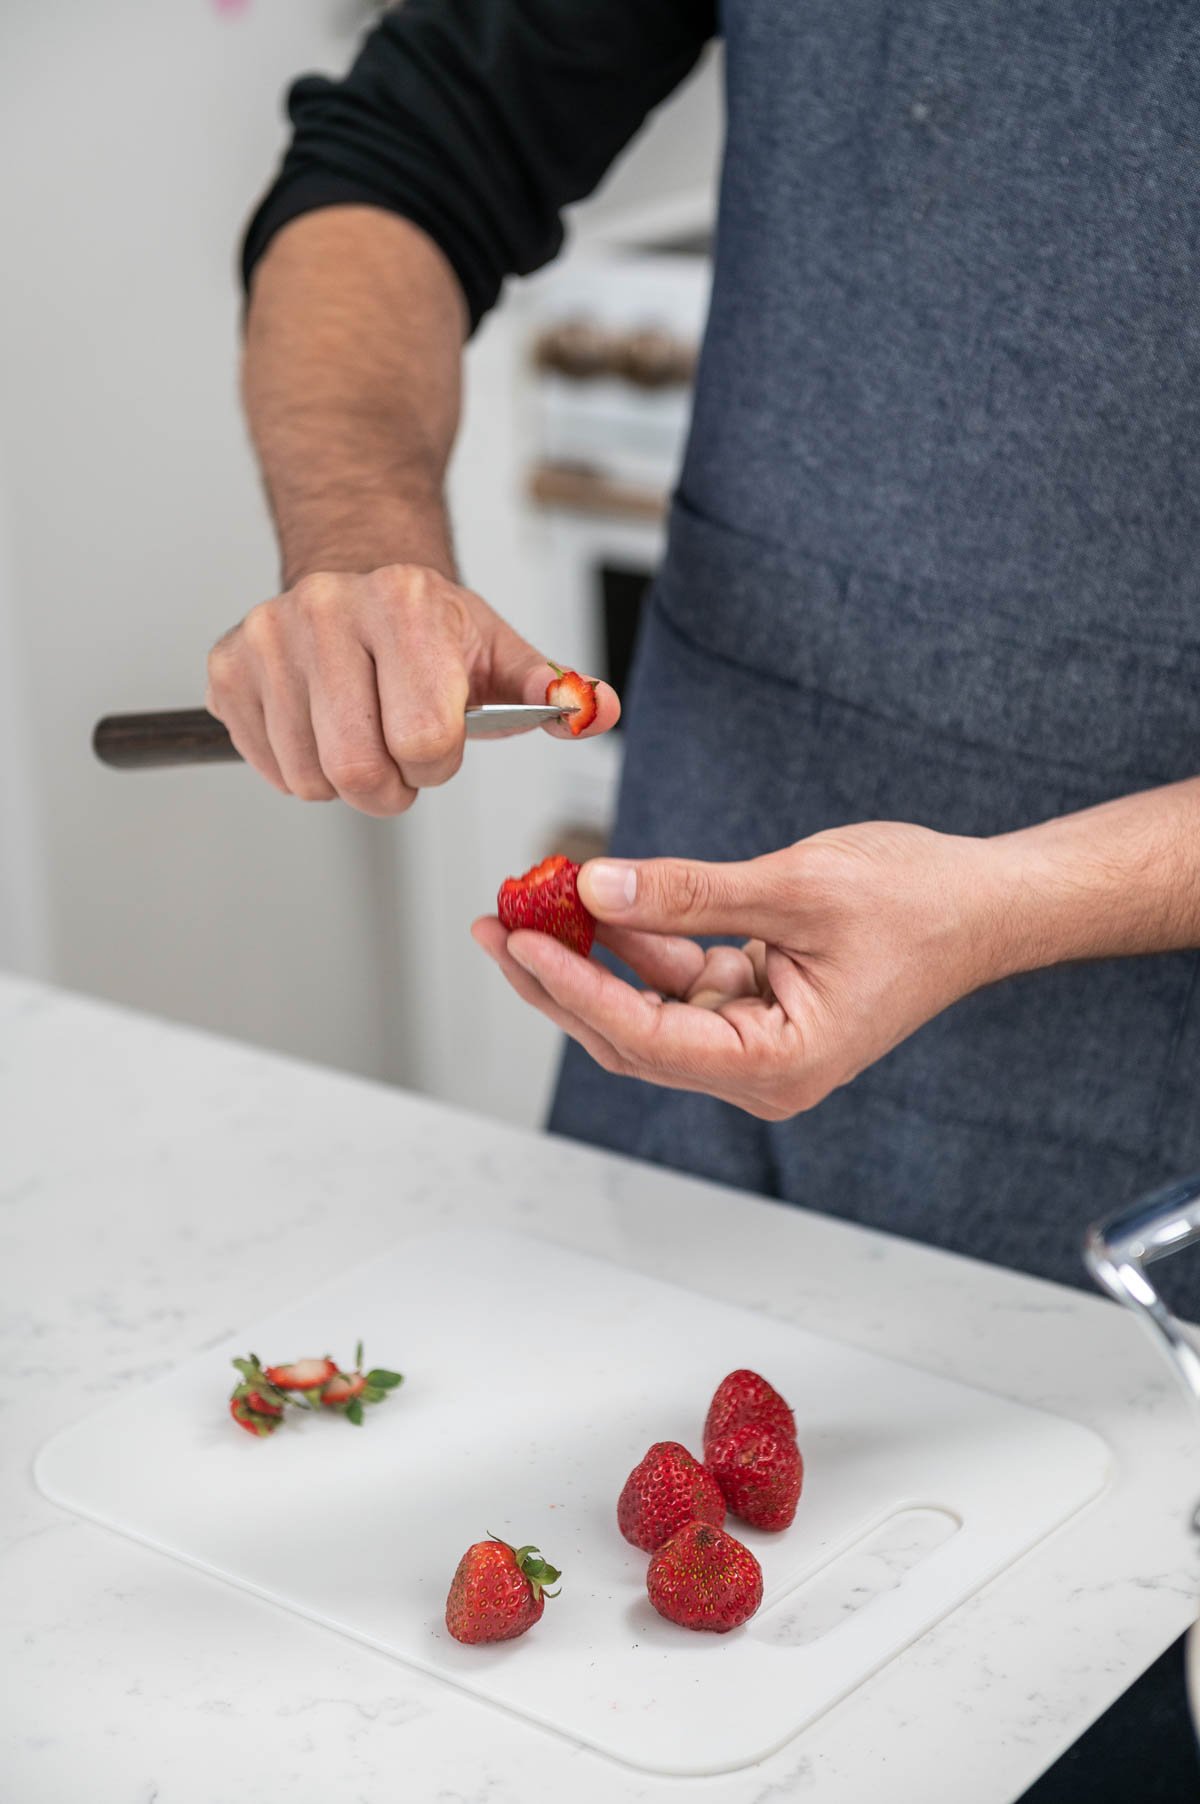
  2. Now you will prepare your mixed berries. Dice the strawberries into quarters, cut the raspberries in half, and leave the blueberries whole. PRO TIP: Fresh berries will keep their shape better, but frozen berries will work as well.hand shown cutting a strawberrybowl of cut berries
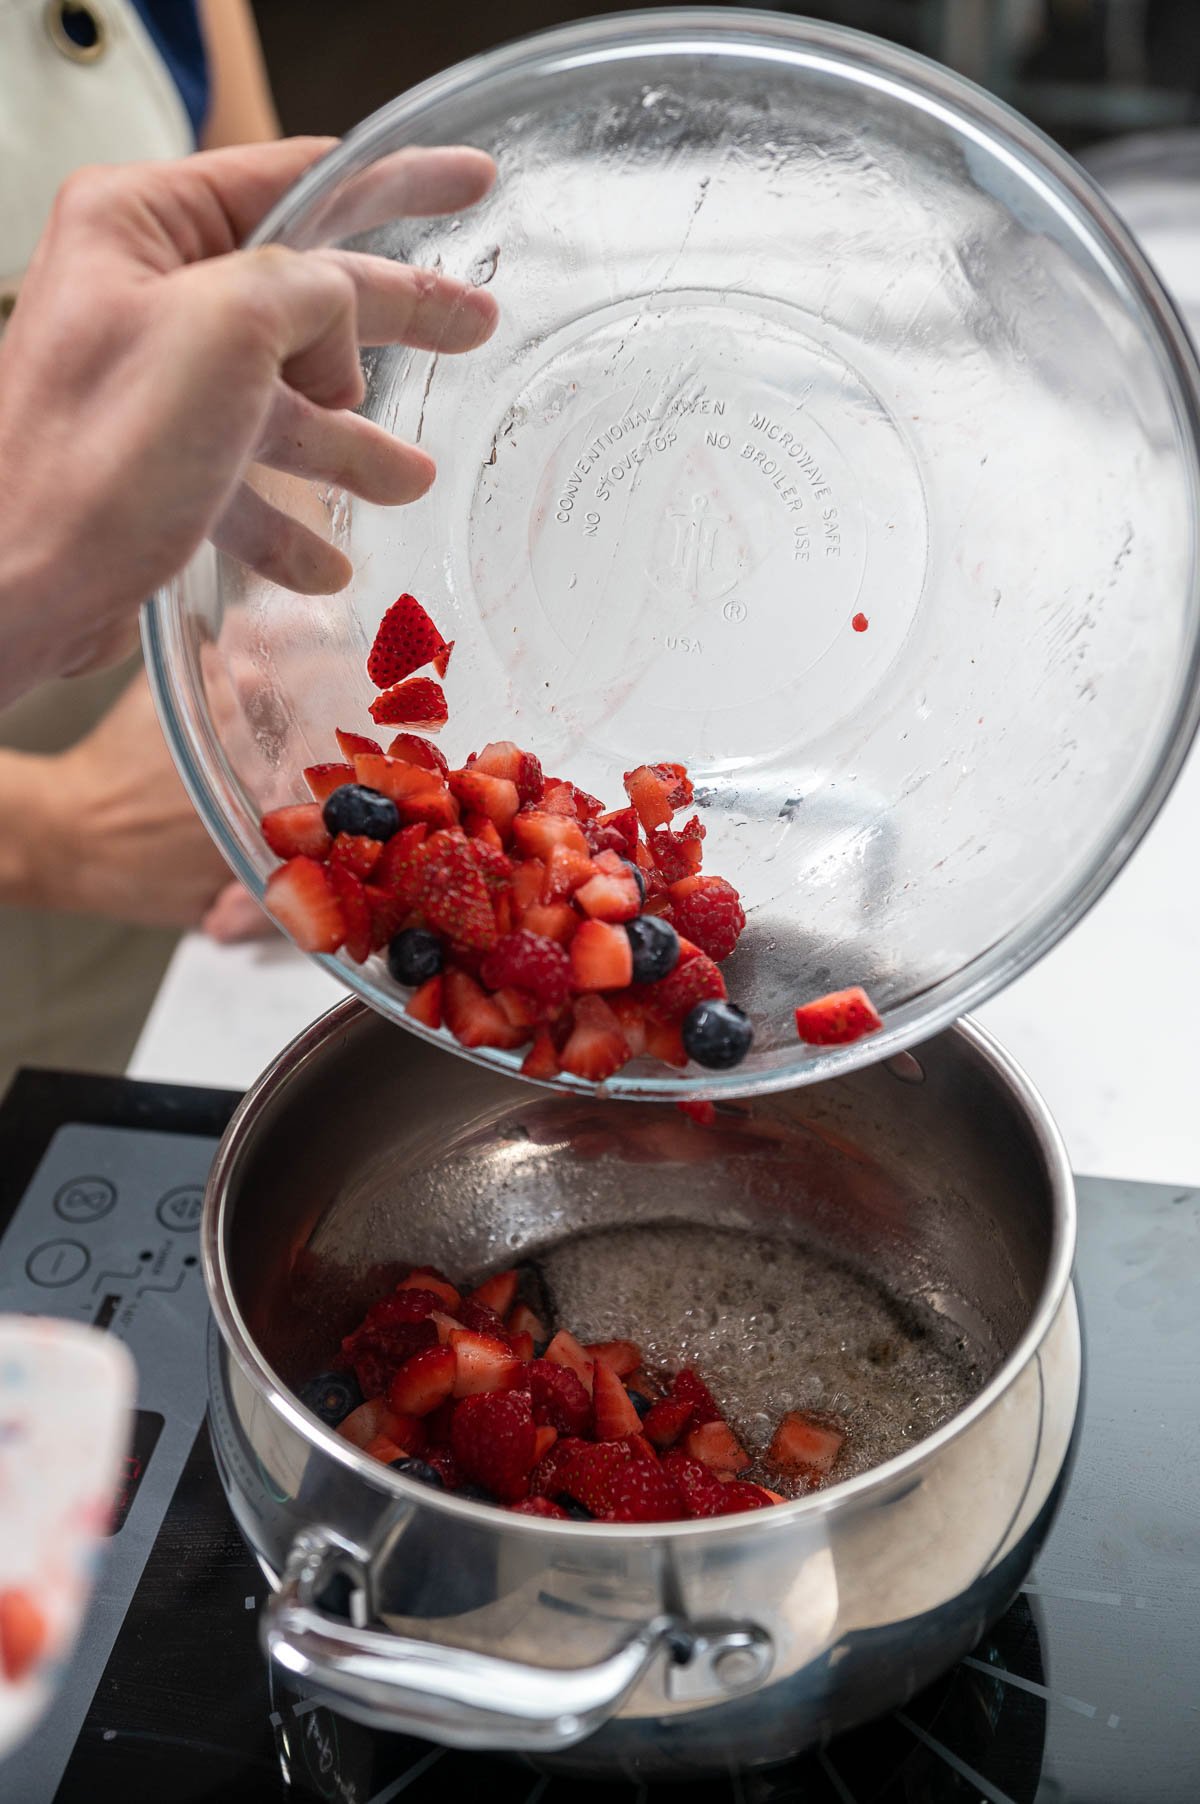
  3. Add the prepared mixed berries into the heavy bottom saucepan along with the vanilla bean.
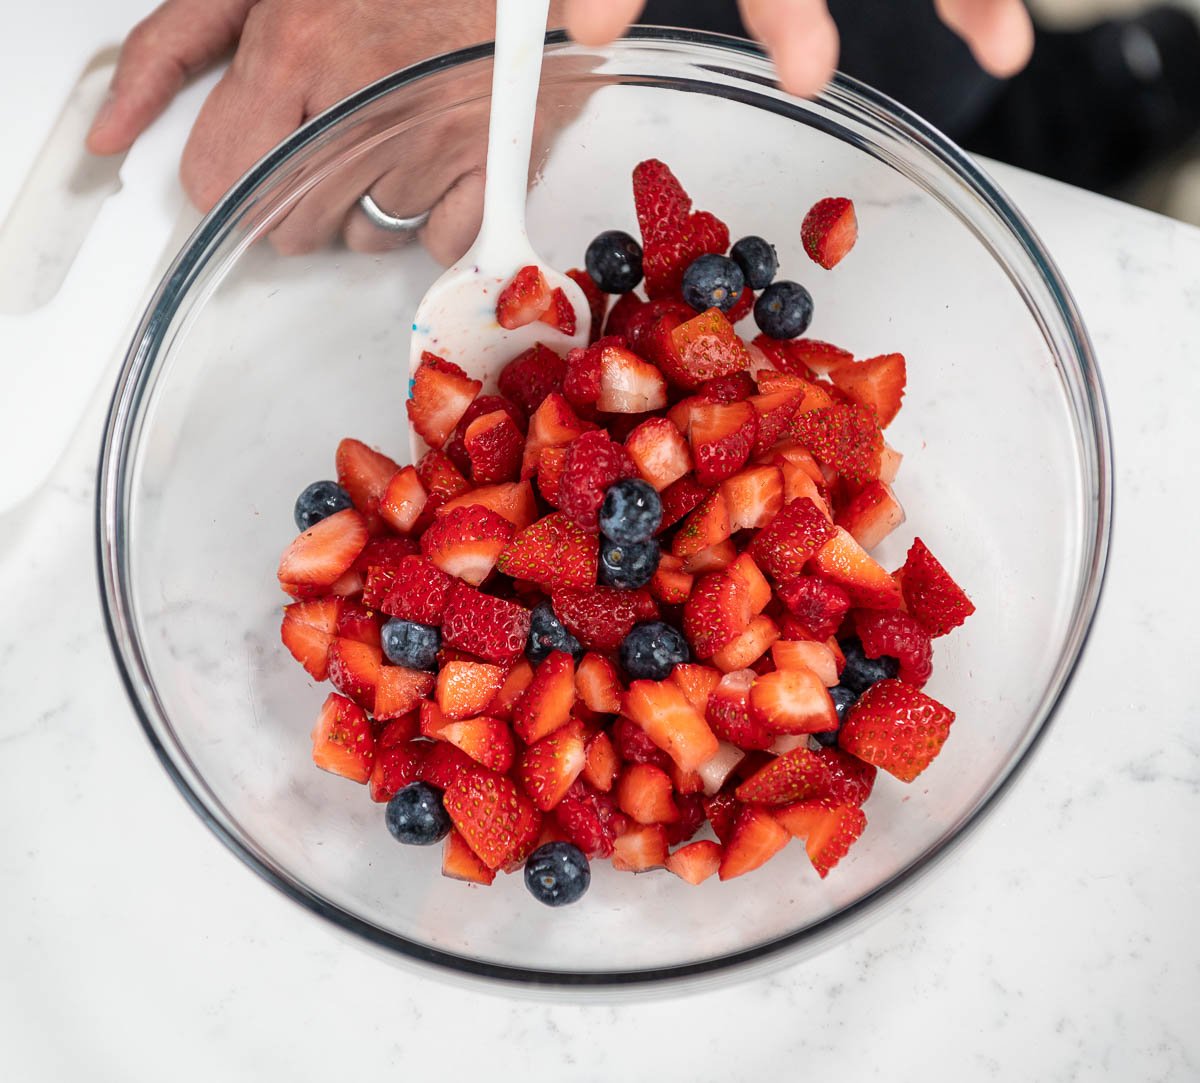
  4. Then, add in the sugar and the lemon juice and stir everything to combine.pouring fresh berries into a bowlmixing strawberries, raspberries, and blueberries in a large bowl using a spatula
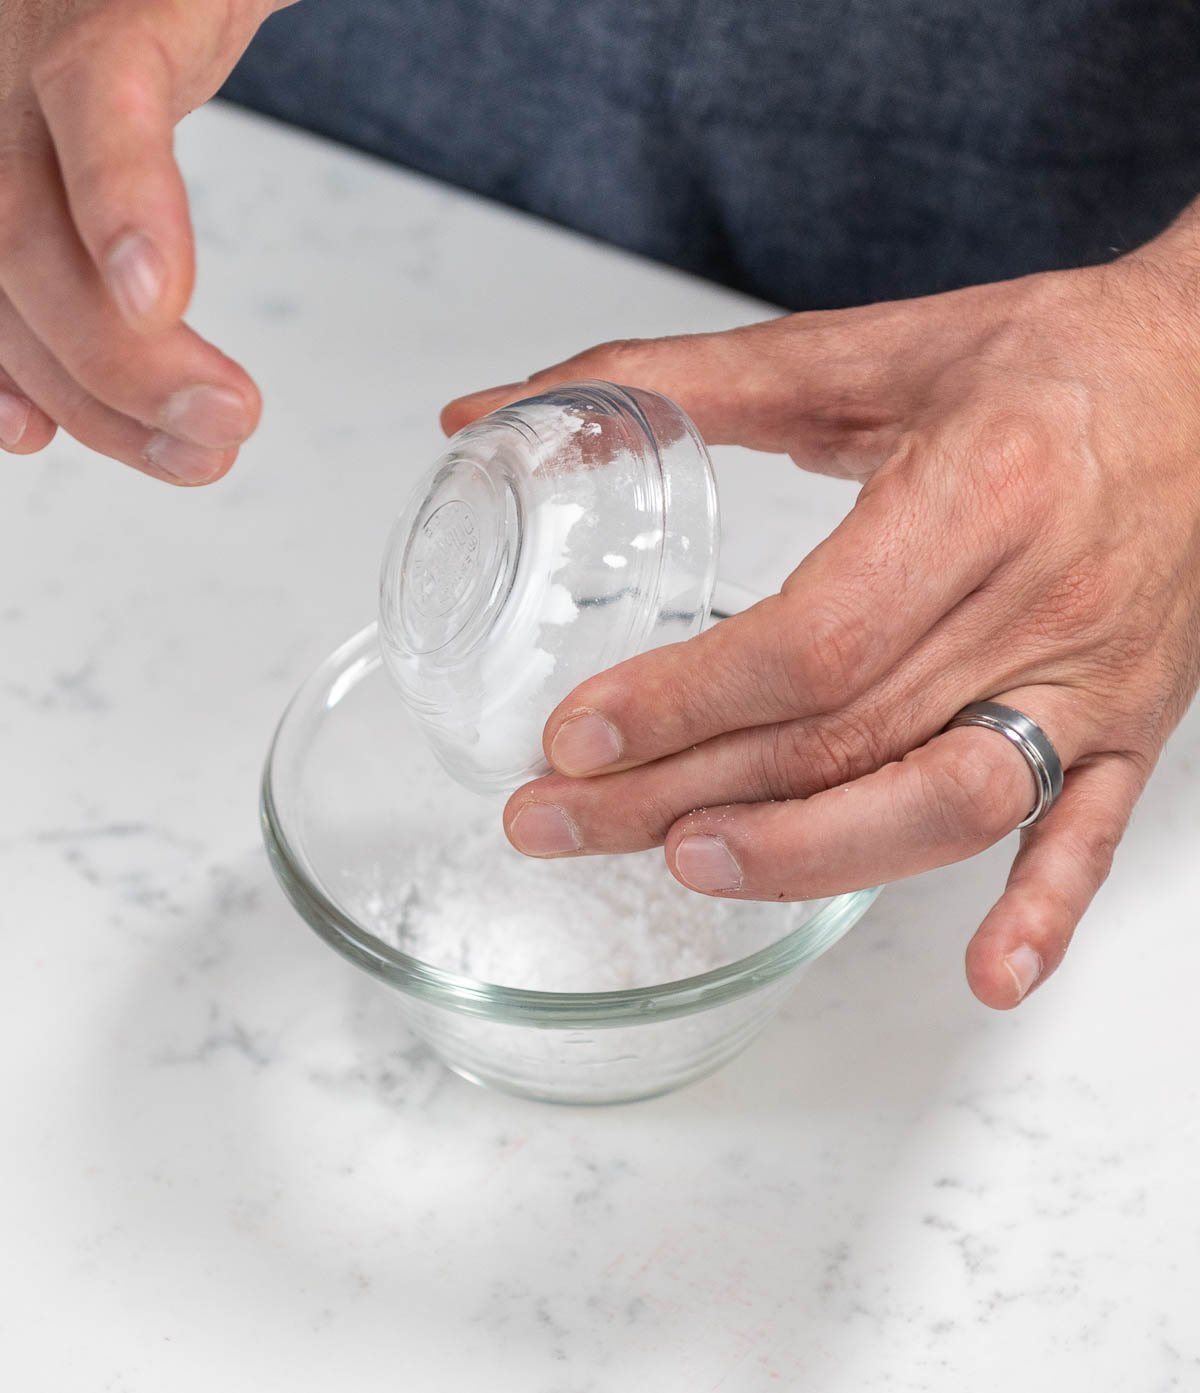
  5. Next, in a separate mixing bowl, combine the cornstarch and water. Mix until it is smooth.hands shown mixing dry ingredients
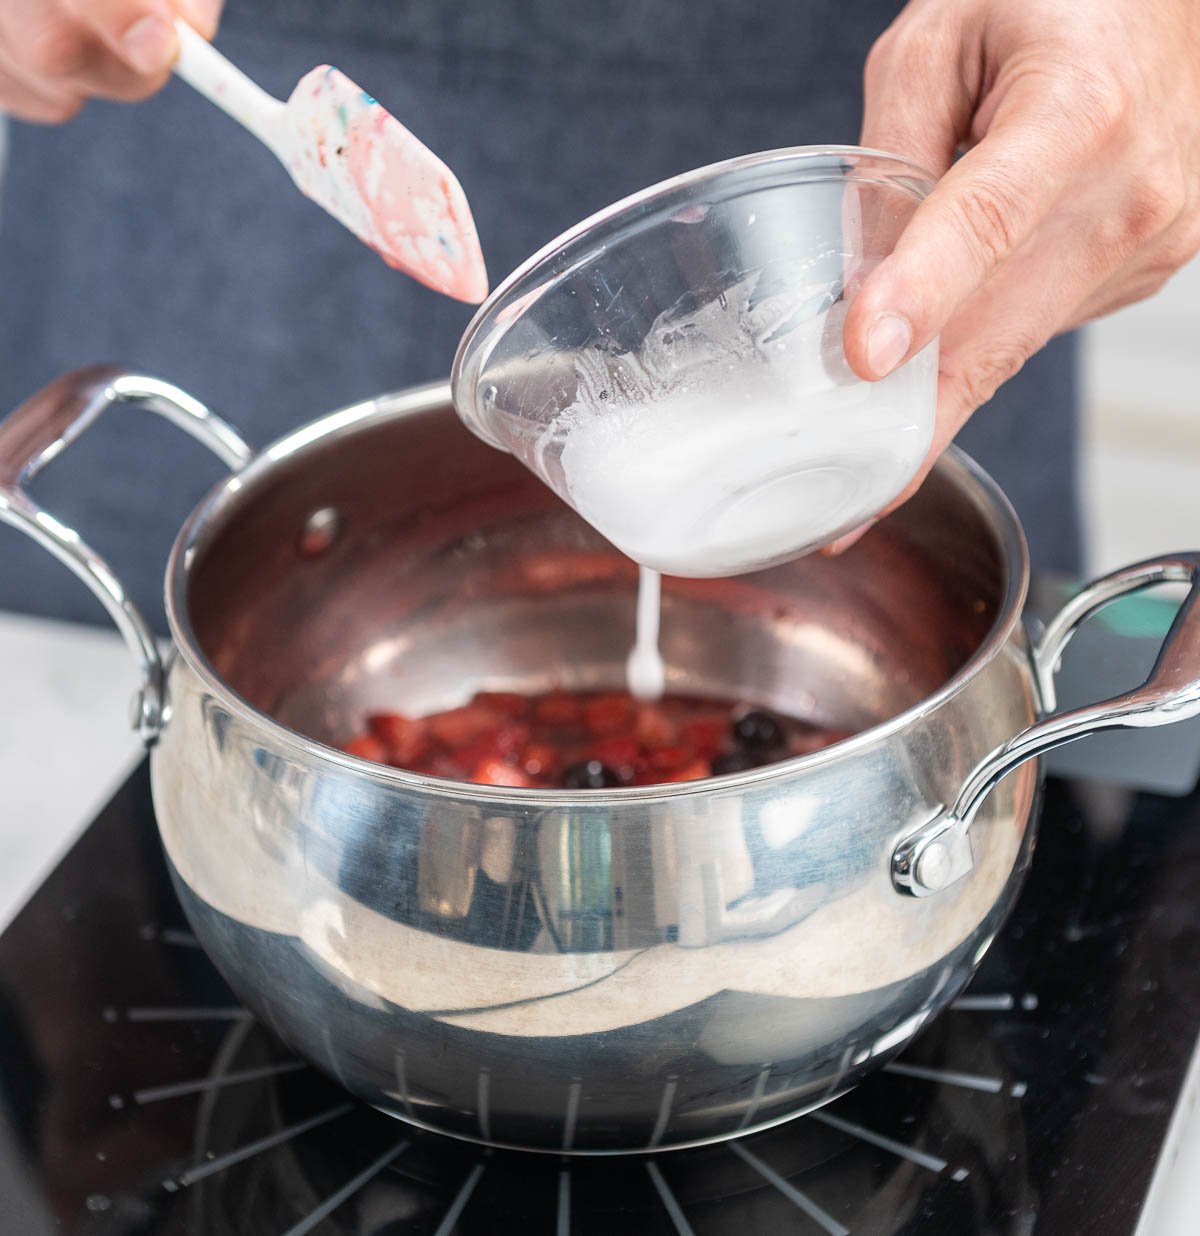
  6. Add the cornstarch mix to the berries in the saucepot and mix to combine.hand shown pouring mixture into berry sauce
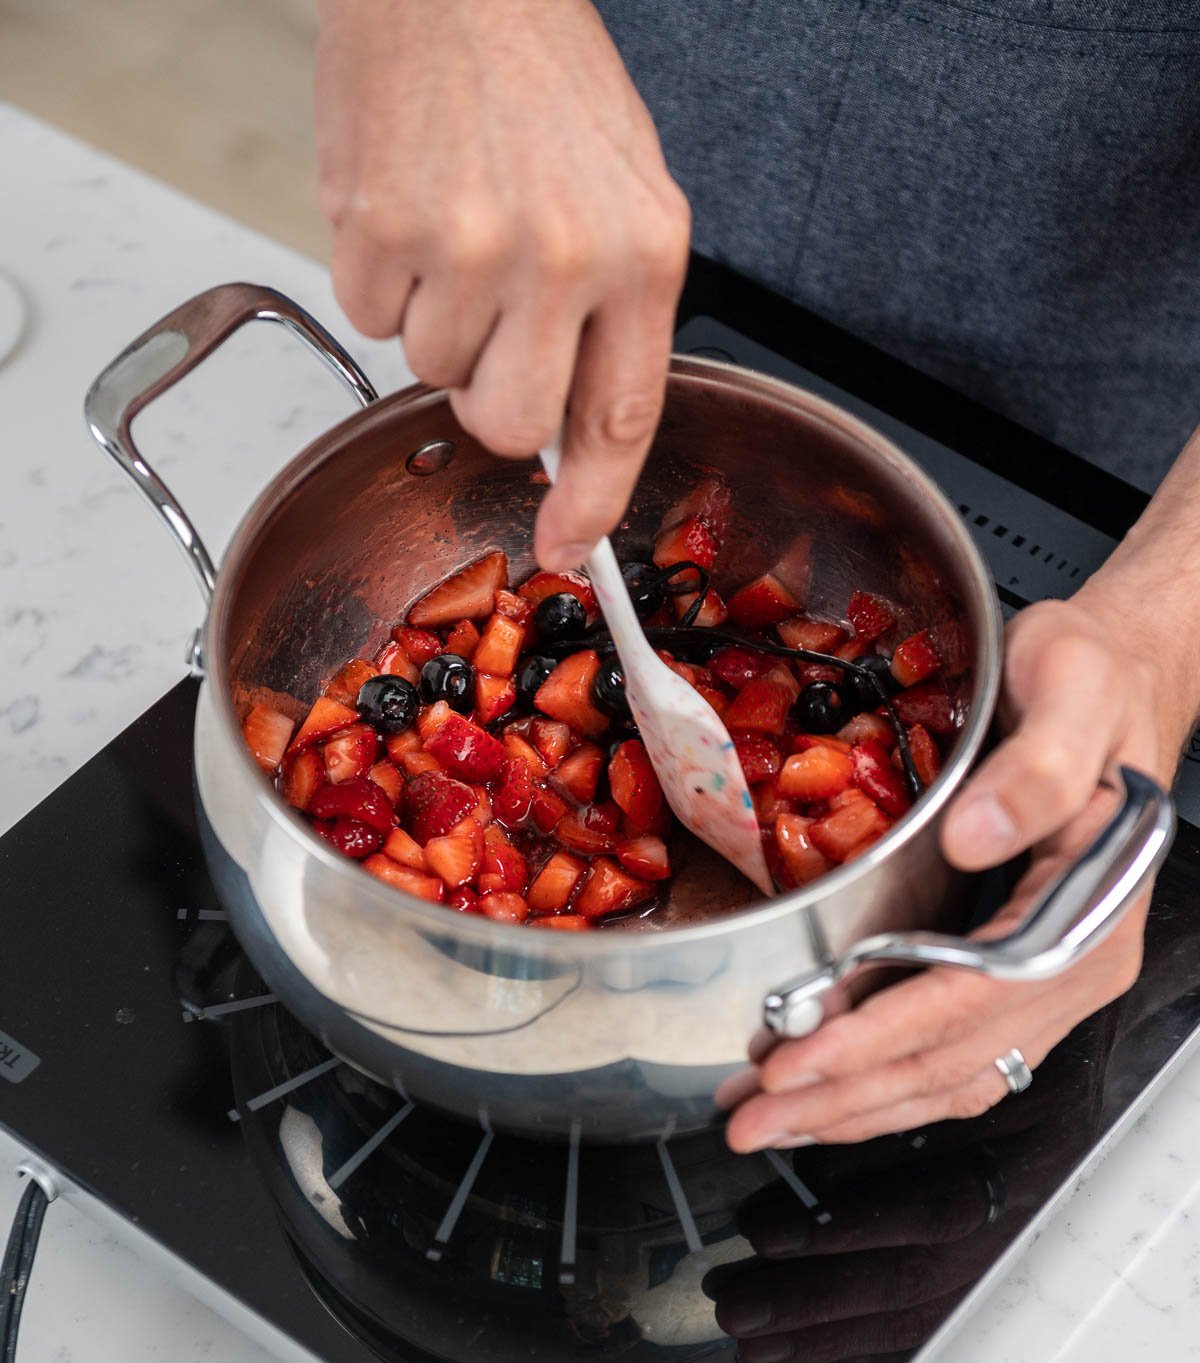
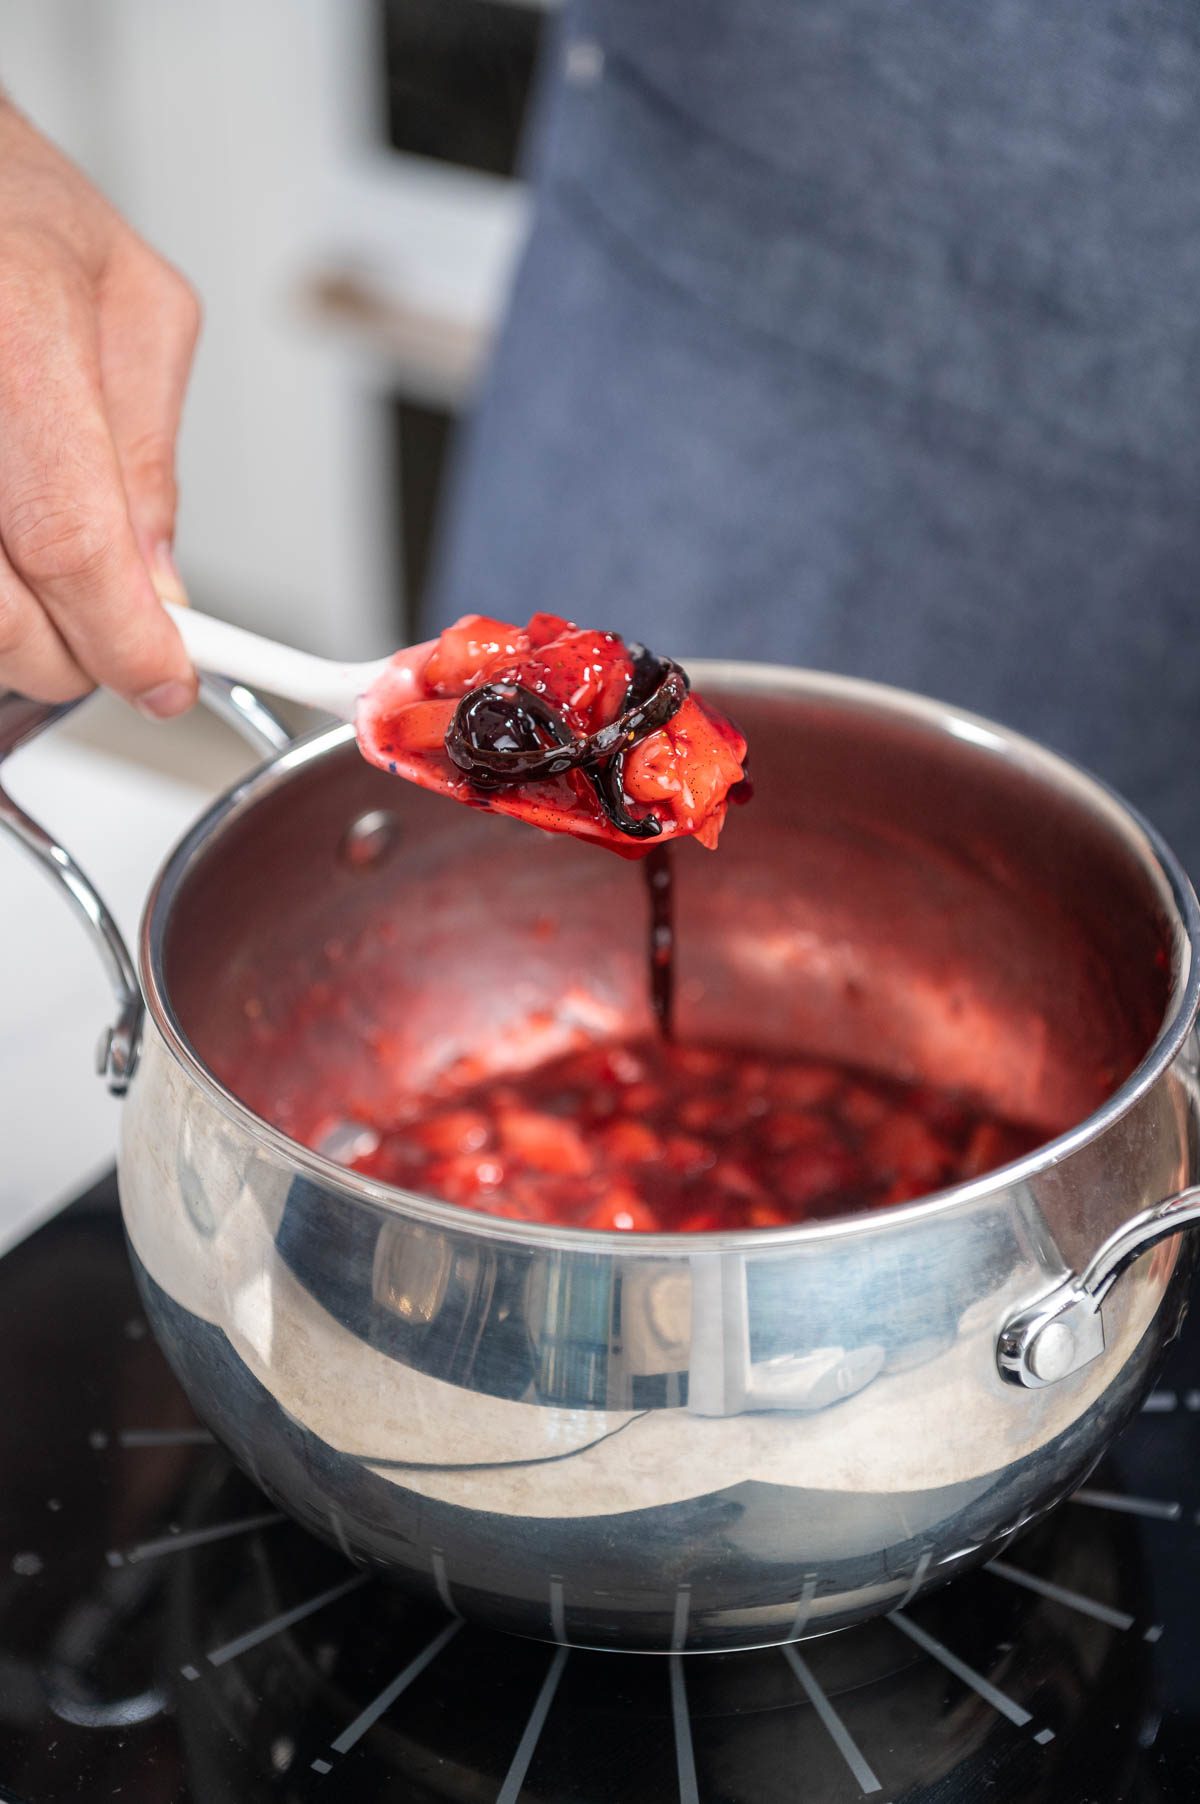
  7. Cook the berries over medium to low heat and continue to stir gently. Be careful not to scald the berries with high heat. The berries will begin to soften and release juices over medium to low heat.spatula holding up berry sauce mixture
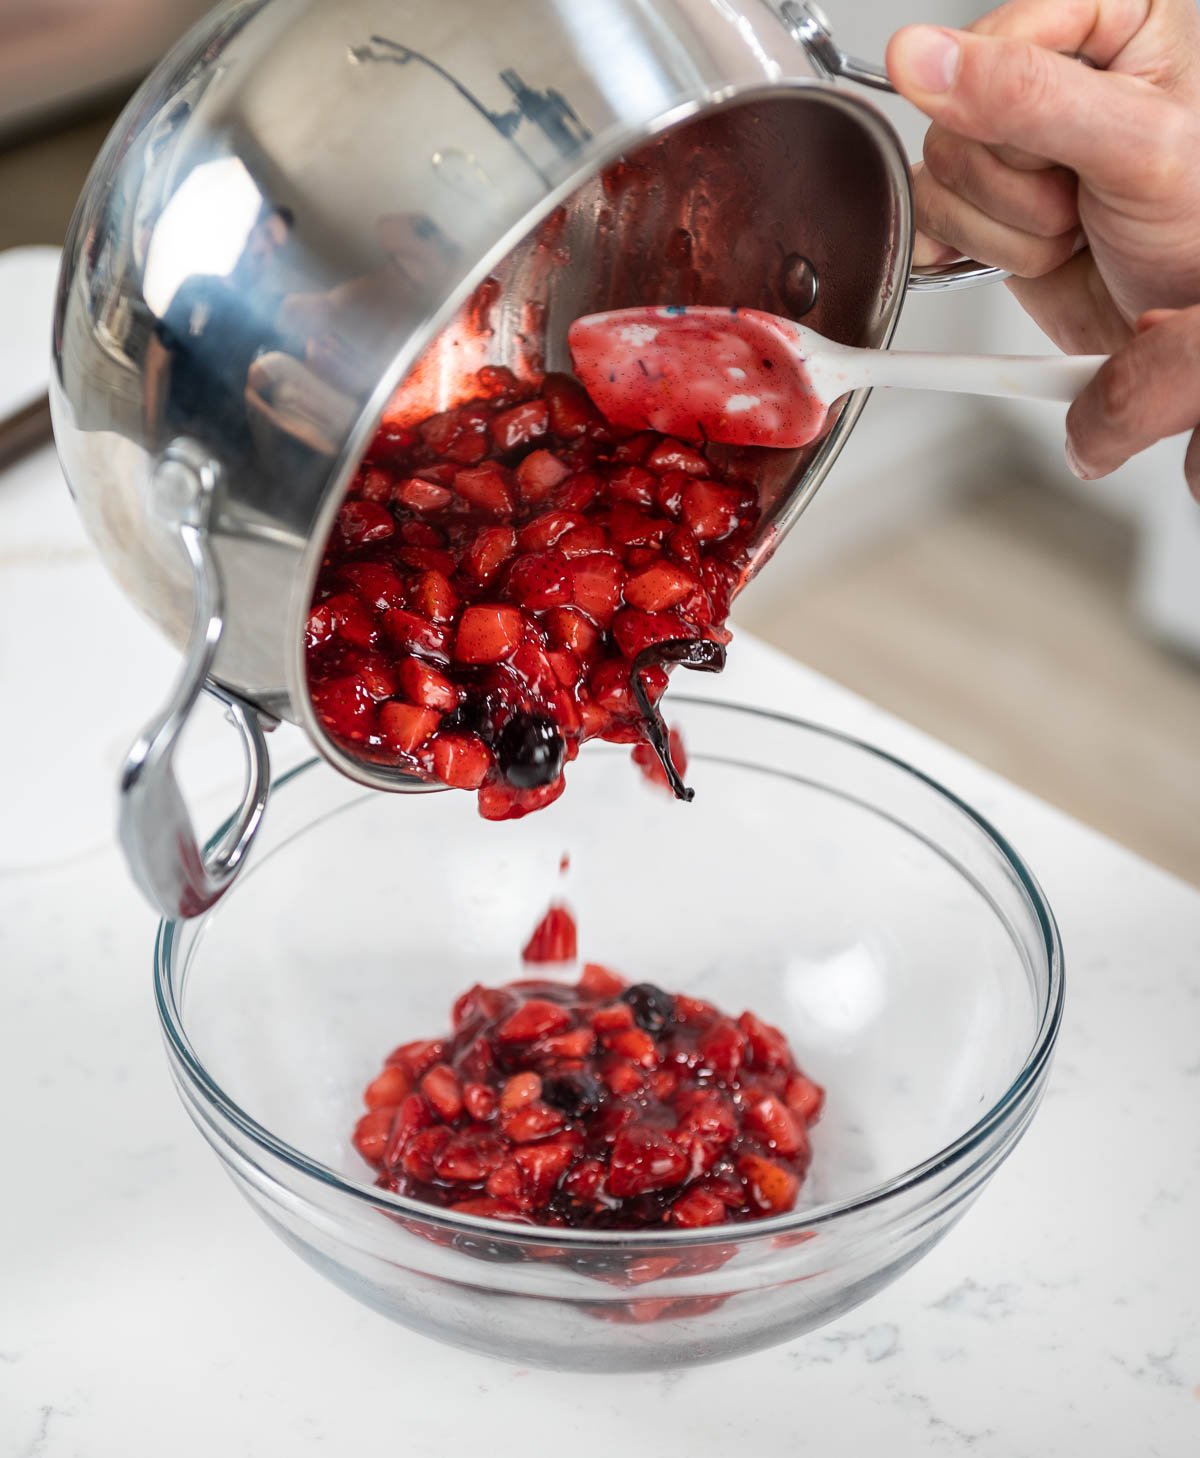
  8. When the berry juice mixture begins to boil, remove the saucepan from the heat and transfer the berry compote to another bowl to cool down.pouring berry sauce mixture into a bowl
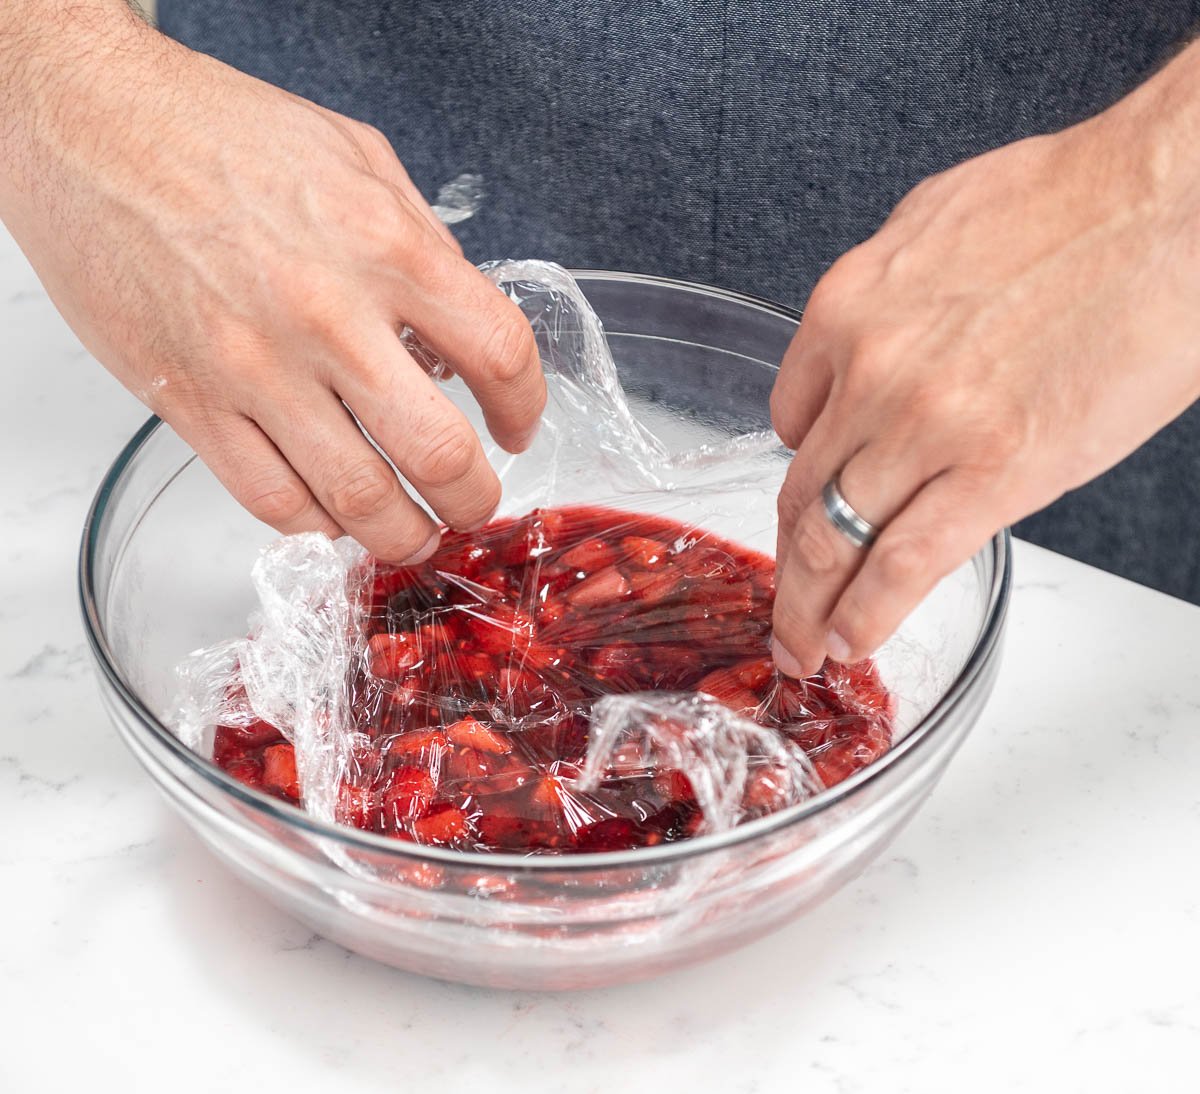
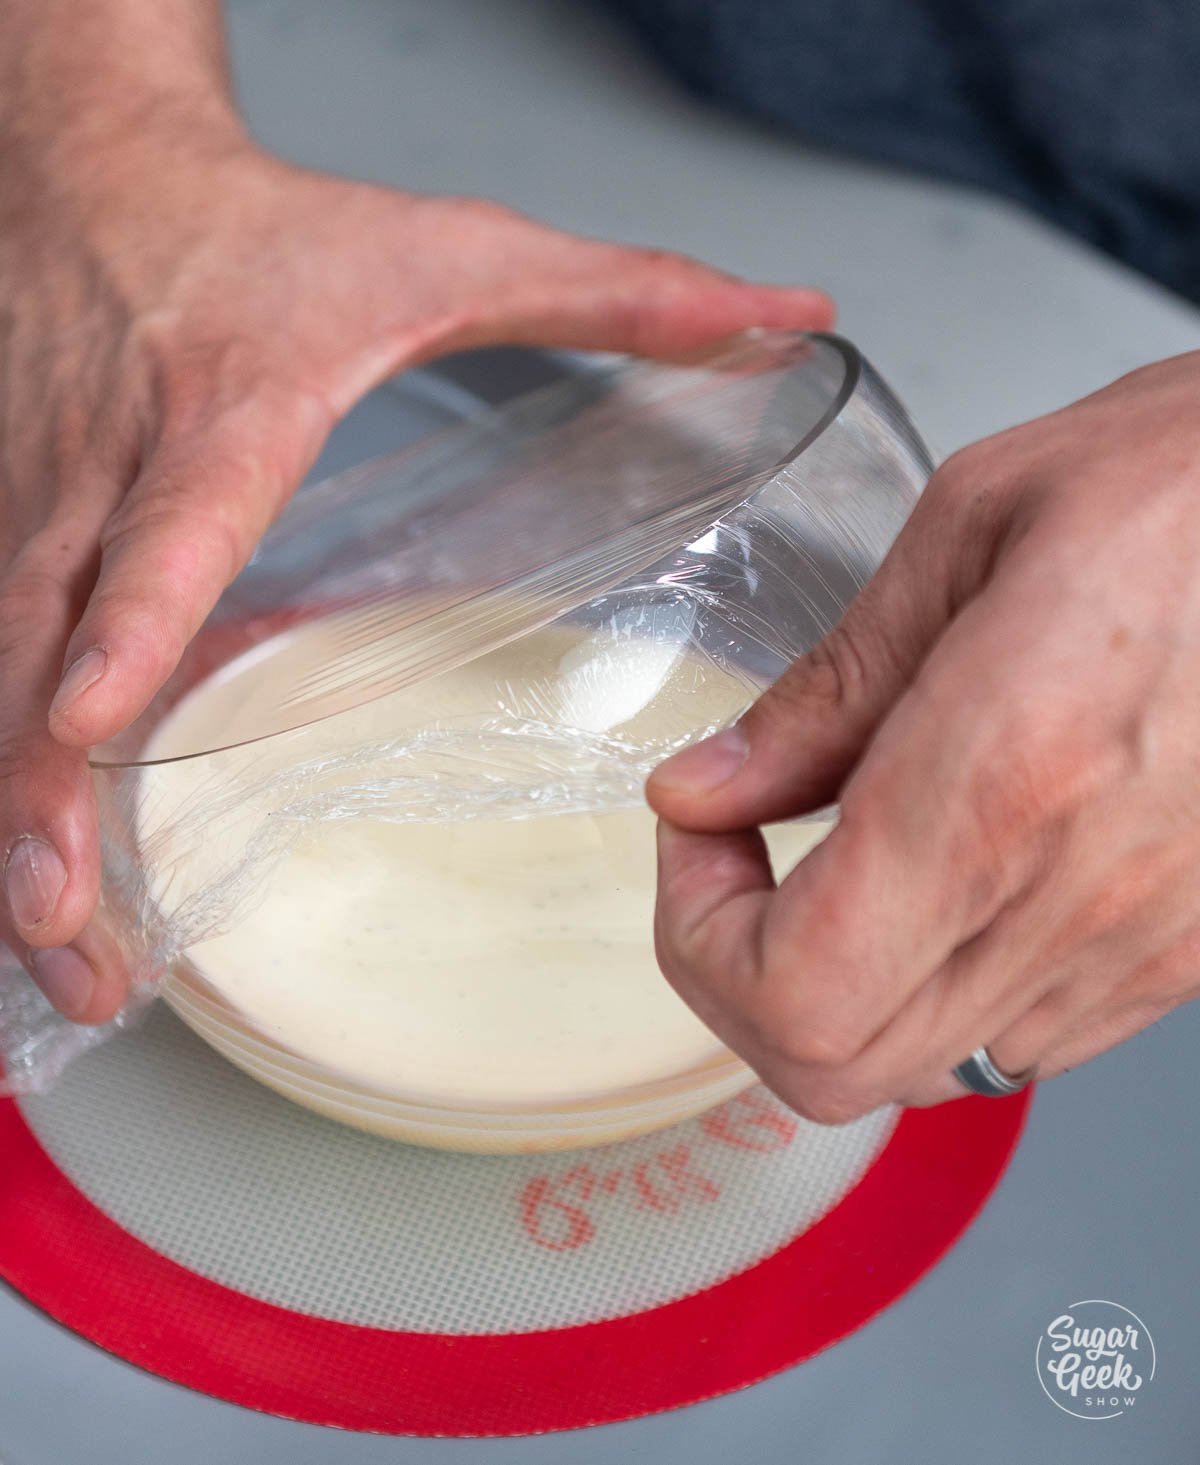
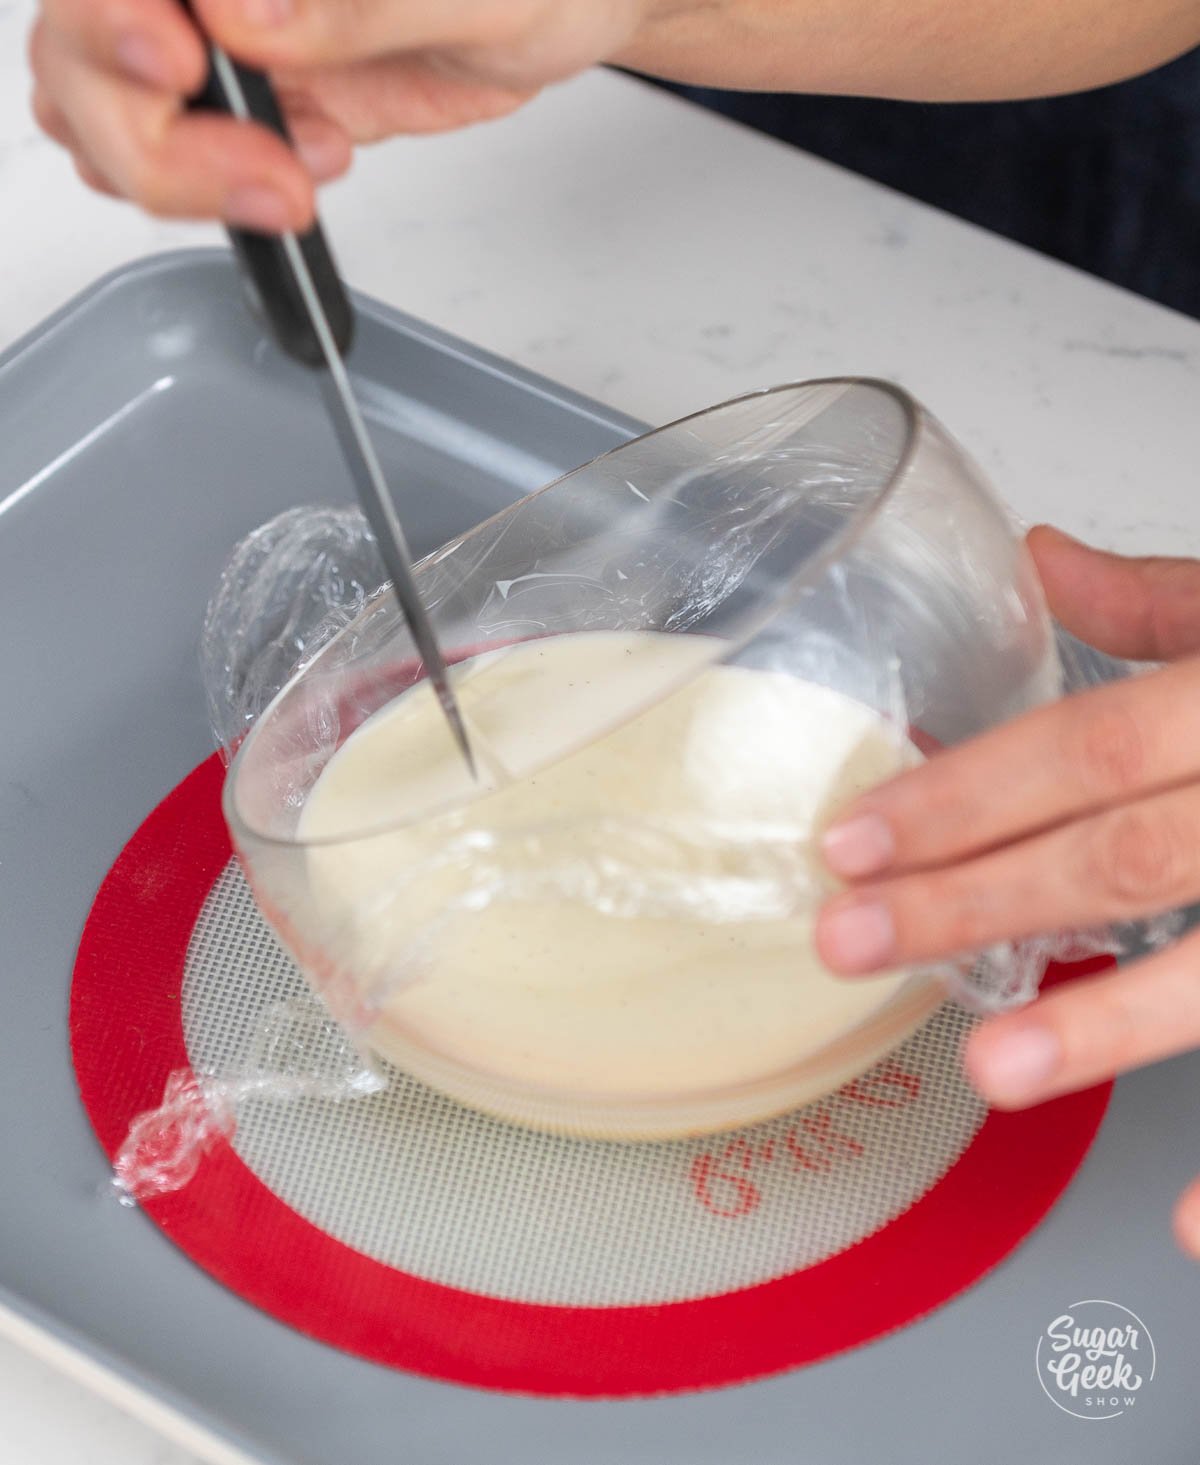
  9. Cover the berry compote with plastic wrap. Do this by pressing the plastic wrap right up against the surface of the berries. This step will prevent a layer of skin from forming over the berries mixture.placing plastic wrap on top of berry sauce in bowl
  10. Then, once the berries are covered in plastic wrap, place the bowl in the refrigerator until it is completely cool.
  11. Finally, when you are ready to assemble the pavlova, you can remove the vanilla bean pod from the berry compote.

Making the Vanilla Chantilly Cream

  1. Start with a clean mixing bowl. Use your stand mixer to whip cream, the seeds of 1 vanilla pod, and powdered sugar on medium speed until it reaches a stiff peak (but is still smooth in texture).
  2. Then, fill a large pastry bag fitted with your desired tip, and set it aside to pipe the cream on the pavlovas.

Assembling the Mini Pavlova

  1. First, place the mini pavlova hollow side up while making sure it stands balanced. If it won't stay up on its own or is unbalanced, use a microplane to even it out by gently scraping the bottom to a flat surface.
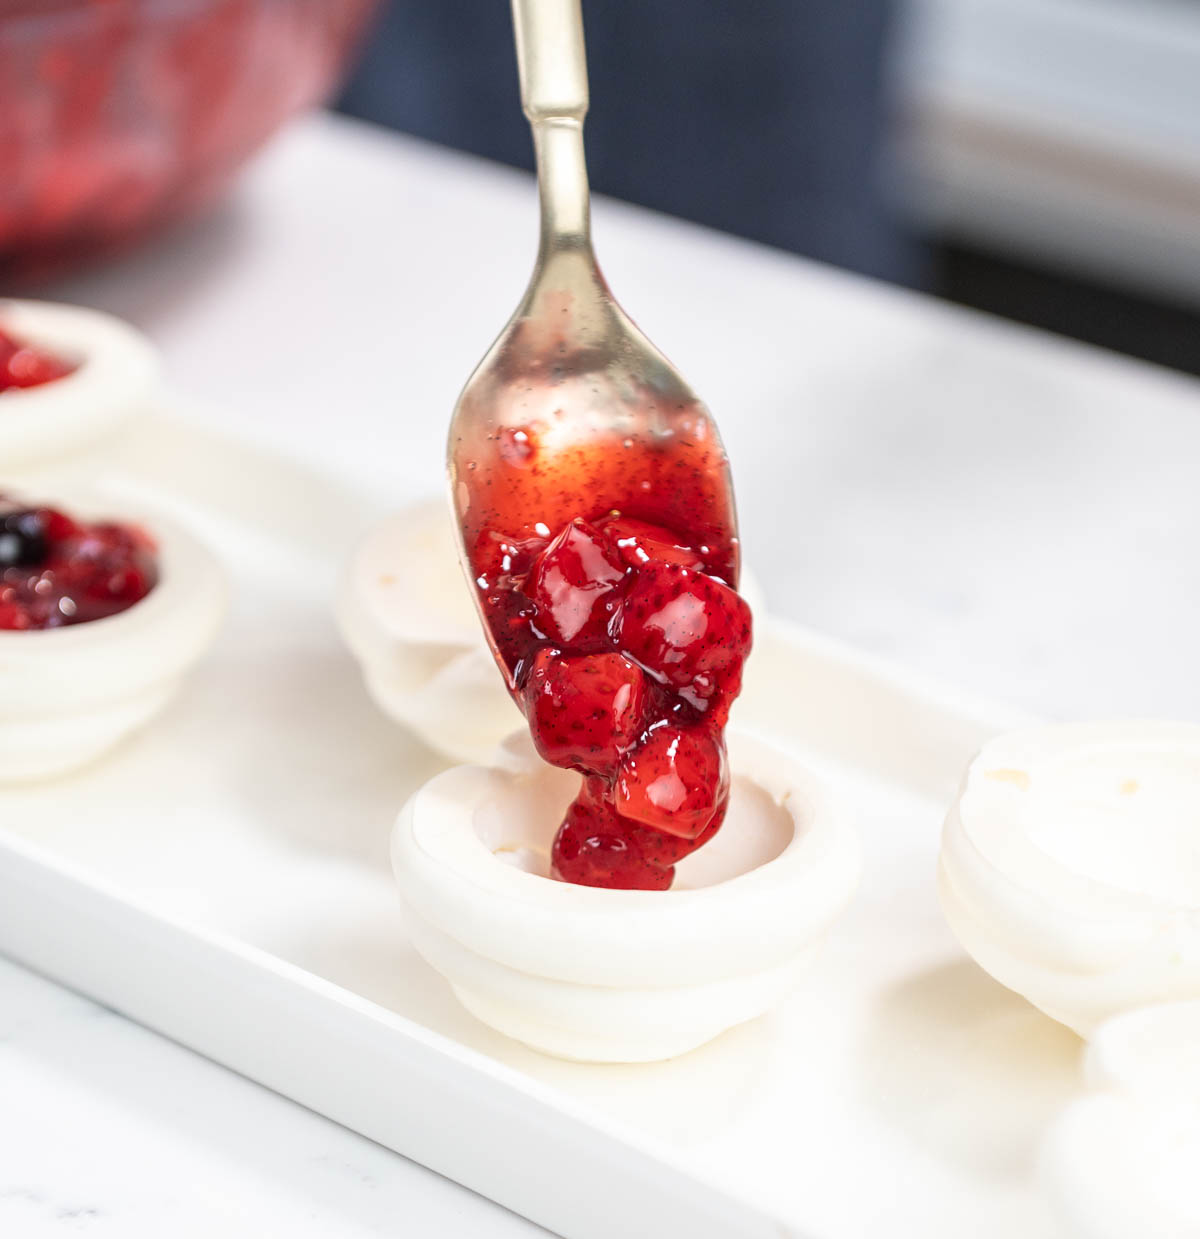
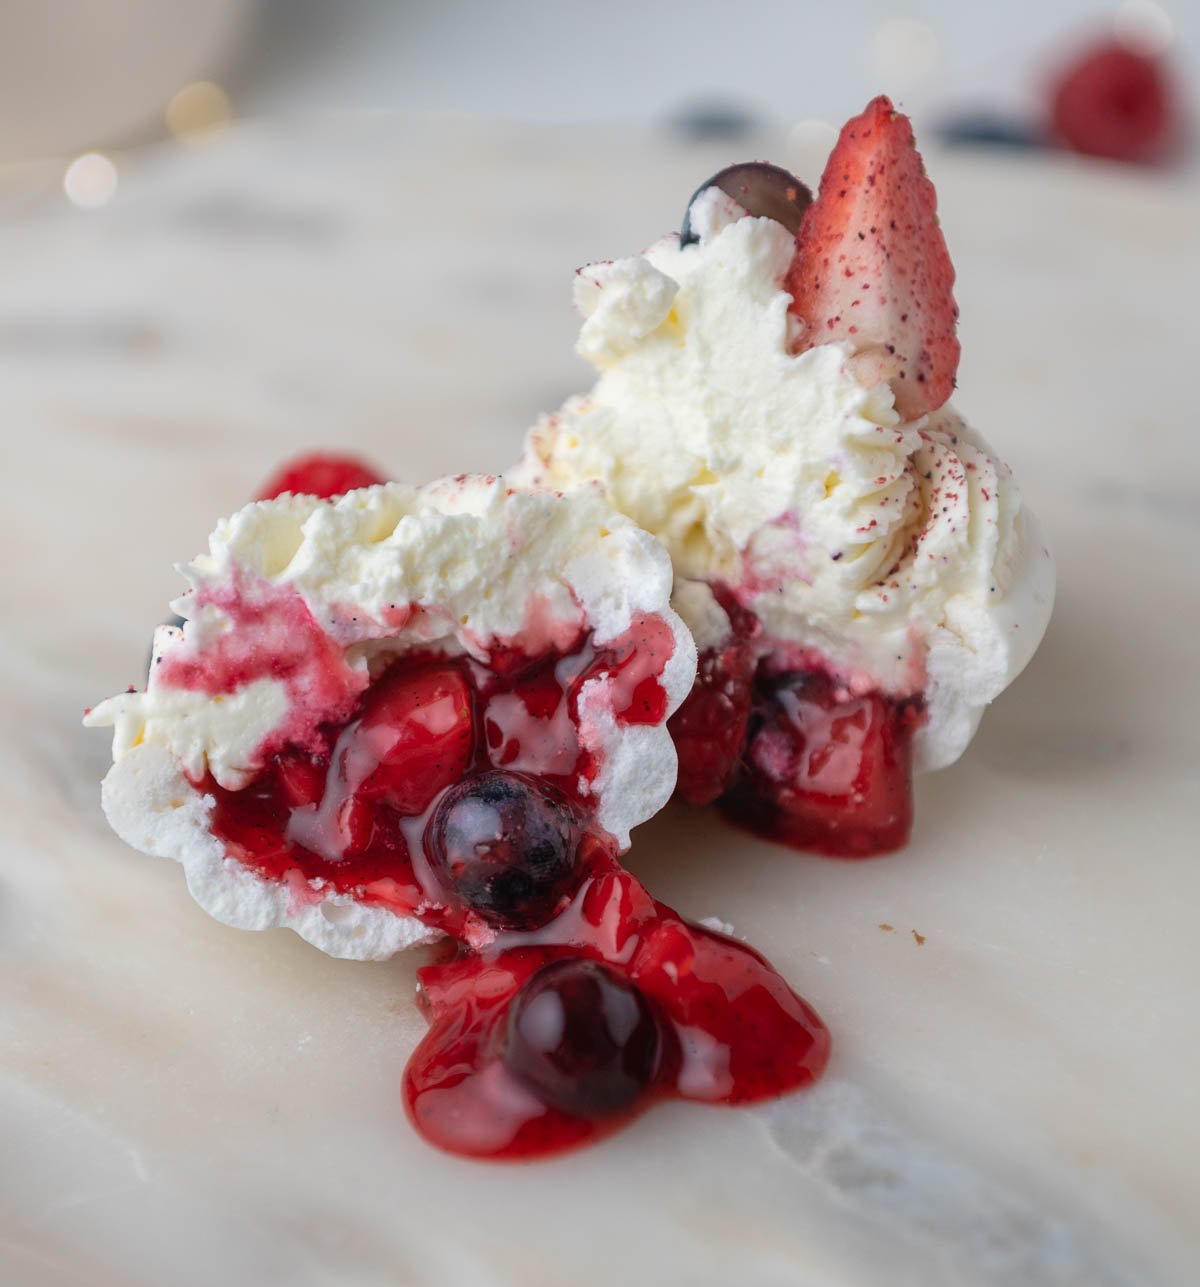
  2. Then, scoop about 1 tablespoon of berry compote into the pavlova.spoon pouring berry compote into mini pavlova shell
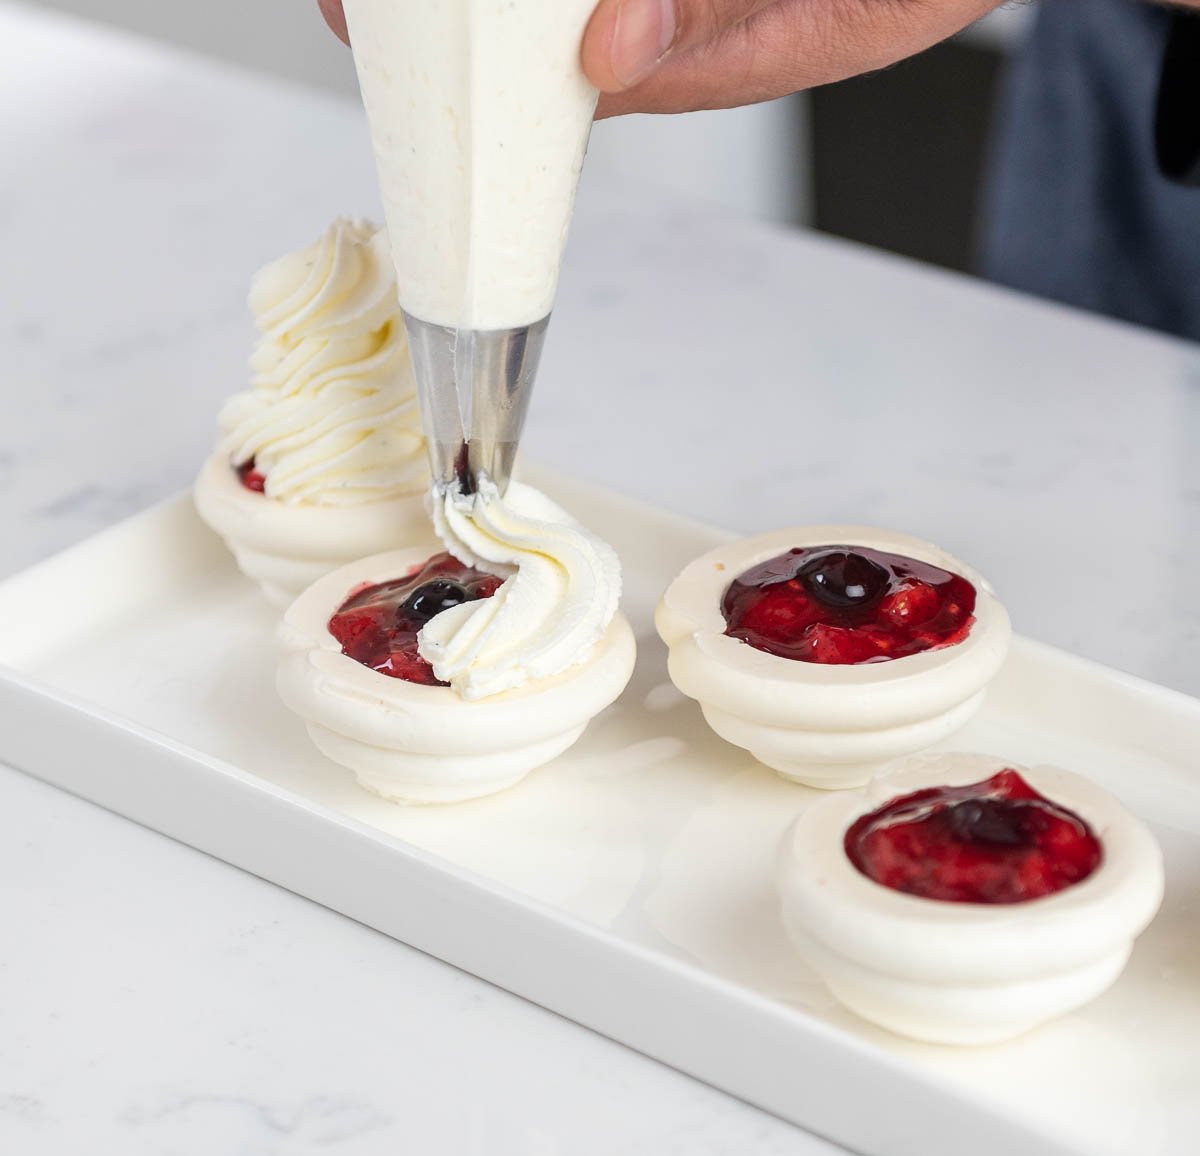
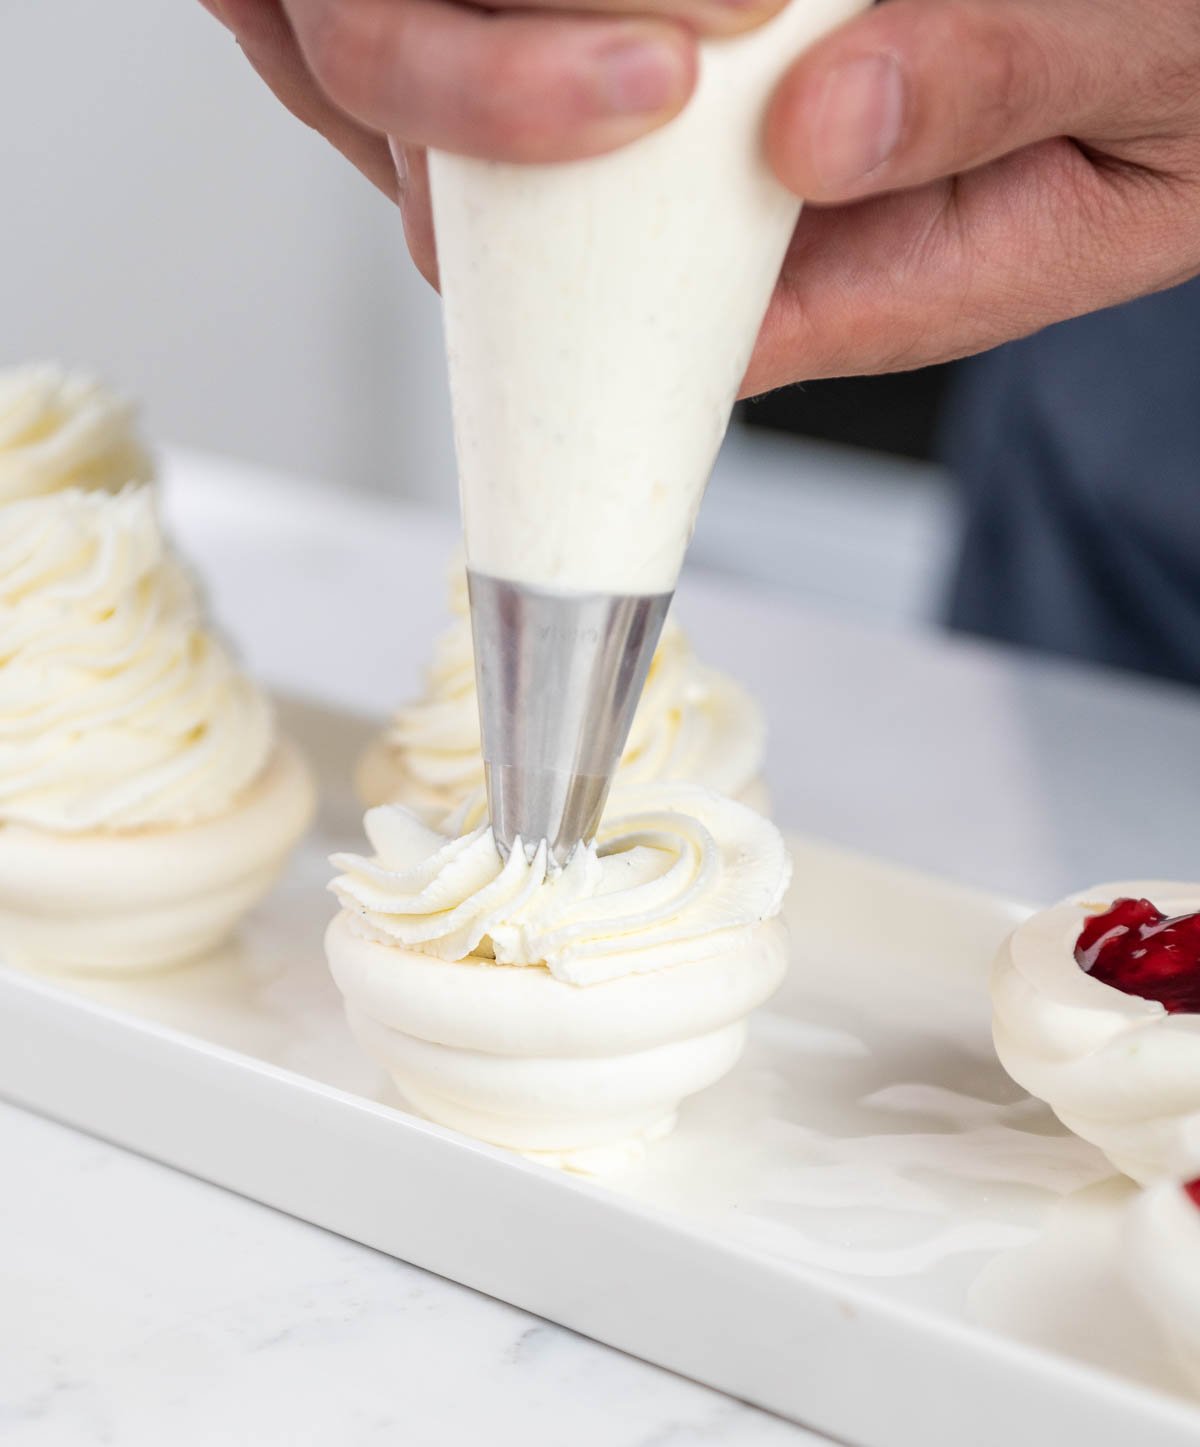
  3. Next, pipe a dollop of Chantilly cream on top of the berry compote making sure to fully cover the filling so that it does not leak out.hand piping cream into mini pavlova shellhand piping cream into mini pavlova shell
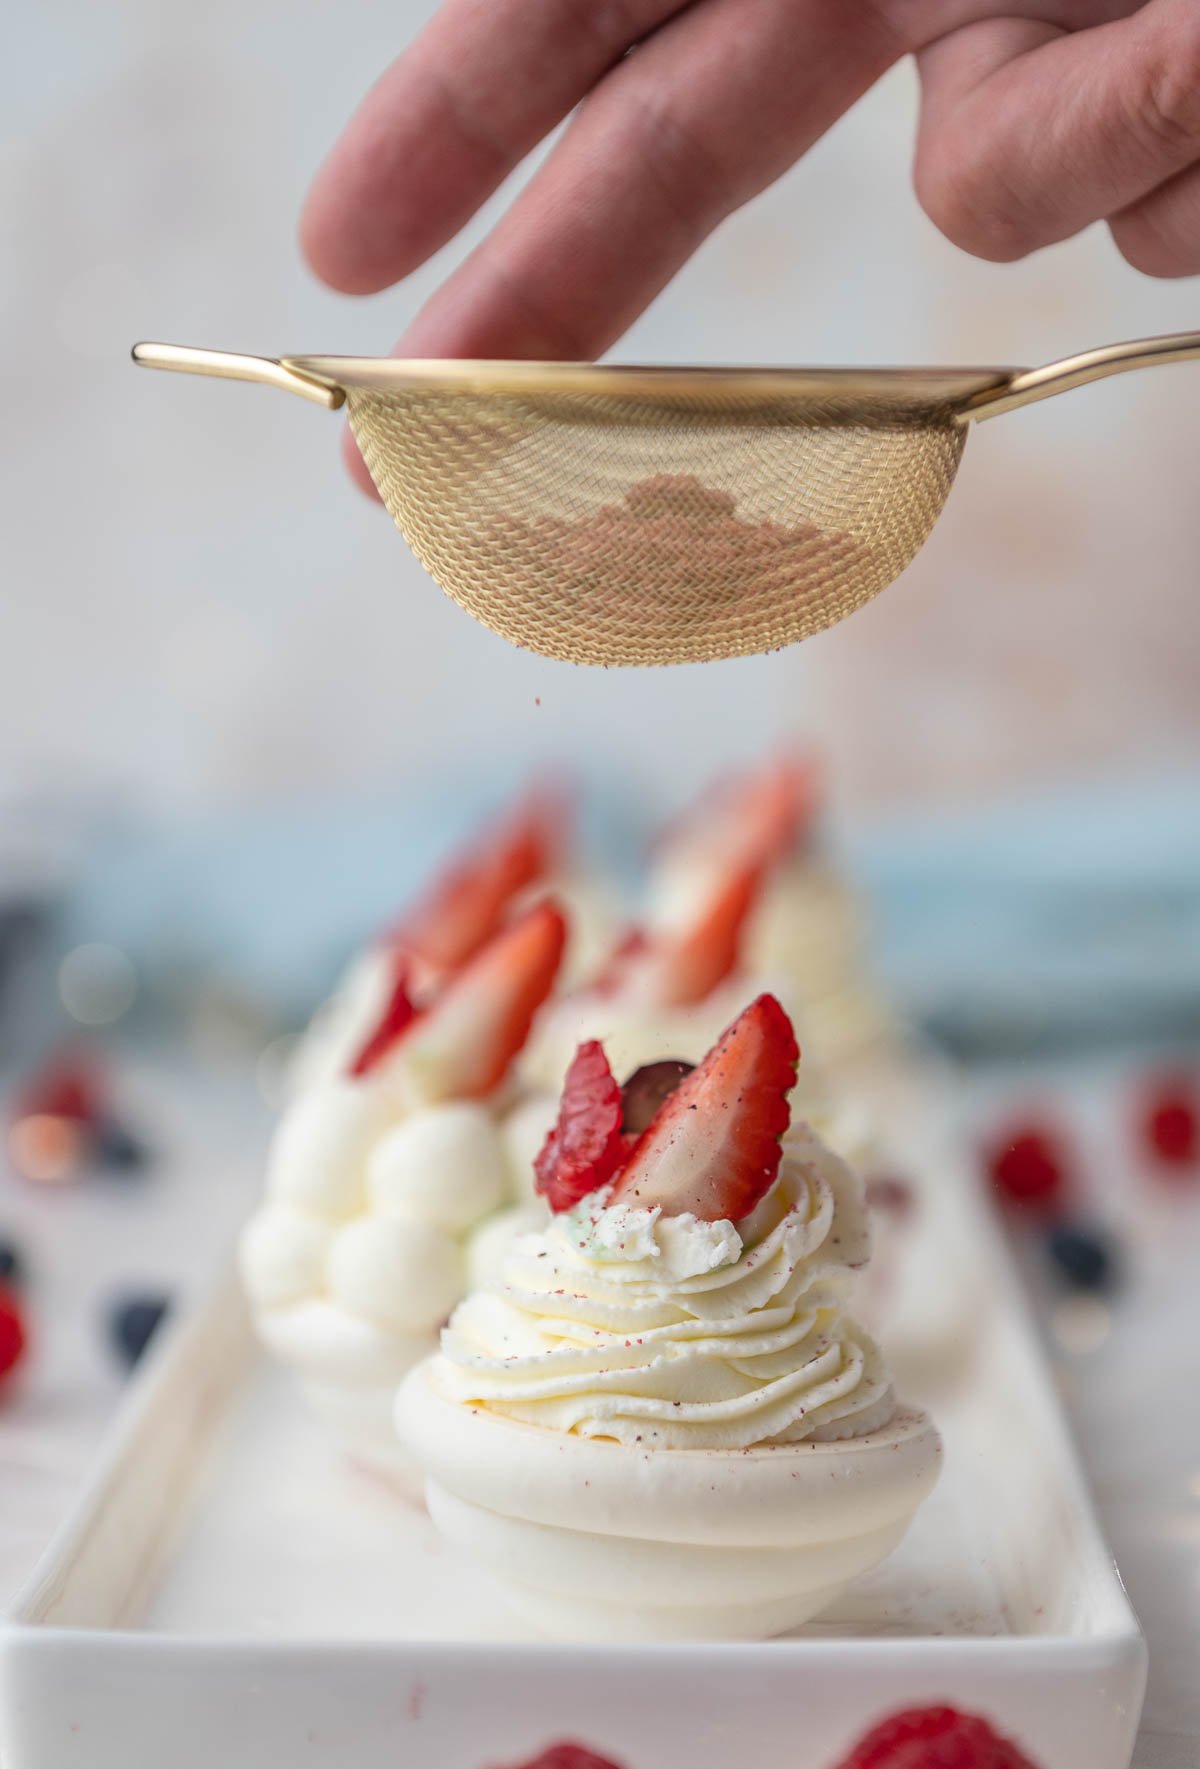
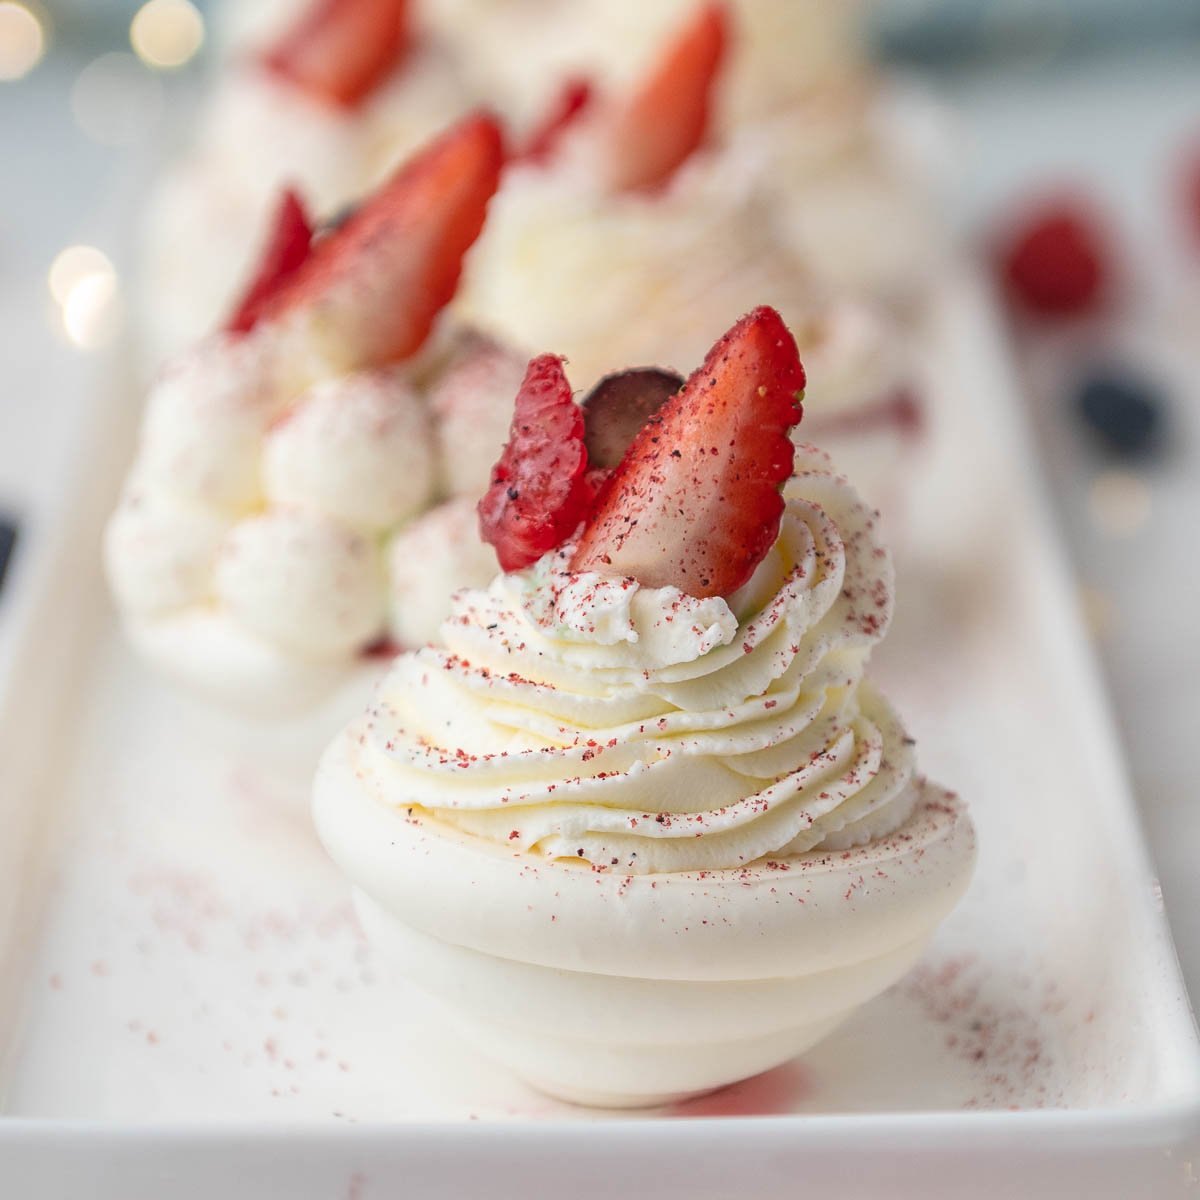
  4. Finally, garnish the mini pavlova with fresh fruit, mint, or any other topping of your choice. Chef Christophe used dehydrated berries to grate directly on top of the finished pavlova.hand sprinkling over a mini pavlova on a platemini pavlova decorated with Chantilly cream and topped with fresh berries

FAQ

What is a pavlova?

Pavlova is a meringue-based dessert that is topped with whipped cream and fresh fruit.

What is the difference between a meringue and a pavlova?

The biggest difference between meringue and pavlova is that a pavlova recipe has cornstarch. Cornstarch is a softening agent that keeps the center softer than the crisp, outer shell.

Both desserts are made from egg whites and equally delicious, but they taste quite different! Meringue is dry and crispy throughout. Pavlova is white, crisp, and glossy on the outside, and slightly chewy on the inside.

Can I make this dairy-free?

Yes! Switch out the heavy whipping cream for coconut milk to make it dairy-free. PRO TIP: Take your can of coconut milk and leave it in the refrigerator overnight. Meanwhile, this will allow the liquid and the fat to separate. Then, when you're ready to make your Chantilly cream, strain the liquid out and then use the remaining coconut fat to whip it into a dairy-free whipped cream!

What other kinds of fruit can I use?

Besides strawberries, blueberries, and raspberries, you can use any fruit variation you like to make your compote! A few ideas include nectarines, kiwi, pineapple, passionfruit, peach filling, or cherry filling!

What if I want to make a bigger pavlova?

Pipe larger discs of meringue on a piece of parchment paper, or on the back of a larger sphere mold using a larger piping tip (this method will create a hollow inside to fill inside).

Can I make pavlova ahead of time?

Yes, you can make pavlova a day in advance and store them in an airtight container. Then, fill them with berry compote and top them with Chantilly cream when you are ready to serve them.

How do I know when my pavlova is done?

Cooked pavlova is pale white with slight browning on the peaks.

Why is my pavlova chewy?

Pavlova tastes chewy when it was not properly cooled and dried out. You can avoid an unpleasant, chewy texture by allowing the pavlova to cool in the oven for as long as possible. In order to get that desirable, extra crispy outer layer, you need to allow the pavlova to properly set while it cools and dries.

Can I leave my pavlova in the oven overnight?

Yes! The best way to ensure your pavlova is entirely cooled is by leaving it untouched in the oven overnight (or at least several hours later).

Why is my pavlova brown?

Your pavlova may turn brown if your oven is too hot or has hot spots. You can fix this by cooking them at a slightly lower temperature for a little bit longer.

Why is my pavlova flat?

Not enough air was incorporated into the egg white mixture. While making pavlova, once you add sugar to the egg whites, the mixture will appear flat or deflated. The good news is that this is totally normal! And nothing is "wrong" with your pavlova as this is to be expected.

Extra Tips for Making Pavlova

  • First, before you begin making pavlova, ensure that your mixing bowl is entirely clean and fully dry. Even a little bit of water, oil, or grease could throw off your entire recipe! For example, just a streak of grease in your bowl could prevent you from whisking your egg whites into frothy peaks.
  • Wipe down your clean mixing bowl and your attachments with vinegar! Why? Because you want to make sure there isn't any butter residue on any of your attachments. In the long run, this will help ensure your meringue will whip up beautifully.
  • Definitely be sure to fully wash and thoroughly hand dry your bowl before you begin.
  • Avoid baking pavlova if the weather is especially humid. We want to create an ideal environment for our pavlova to dry thoroughly. If you have a portable space heater, you can place that in your kitchen to remove excess humidity from the air and help the pavlova dry out.
  • While a KitchenAid Stand Mixer is a great investment if you are baking regularly, you do not need one for this recipe. However, you do need a handheld electric beater if you don't have a stand mixer.

What is the Origin of Pavlova?

Pavlova gets its name from a Russian ballerina named Anna Pavlova who was a superstar in the early 20th century.

Anna Pavlova was a ballerina who was internationally known for her beauty and grace on the stage. Some people enjoyed her work so much so they decided to name a dessert after her!

Originating in Australia, the Davis Gelatine Corporation developed an early version of the pavlova that looks and tastes nothing like the pavlova we know and love! In fact, their version of pavlova was a dessert with multiple layers of gelatine and one layer of milk.

The more accurate and modern version of pavlova that you and I know was re-introduced in the 1950s in New Zealand and became a well-loved, holiday dessert around the 1980s. Fun fact: the pavlova recipe steadily became more popular as the cost of eggs went down!

berry compote spilling out of mini pavlova

More Recipes You'll Love

Stabilized whipped cream

How to make fresh berries last longer

Berry Chantilly cake

Recipe

mini pavlova on a plate decorated with fresh strawberries, blueberries, and raspberries
Print Recipe
5 from 2 votes

Mini Pavlova with Berry Chantilly Cream

A meringue-based dessert that is filled with a fresh berry compote, and topped with a dollop of fresh whipped cream that has been sweetened to perfection!
Prep Time20 minutes mins
Cook Time2 hours hrs
Total Time2 hours hrs 20 minutes mins
Course: Dessert
Cuisine: Australian
Servings: 18 Servings
Calories: 205kcal
Author: Liz Marek

Equipment

  • piping bag and plain tip #804
  • Silicone sphere molds 2"
  • microplane

Ingredients

Pavlova

  • 100 grams egg whites room temperature
  • 100 grams granulated sugar
  • 100 grams powdered sugar
  • 1 Pinch cream of tartar

Mixed Berry Compote

  • 80 grams sugar
  • 30 grams lemon juice
  • 1 vanilla bean (scraped)
  • 240 grams fresh strawberries (leaves removed)
  • 36 grams fresh blueberries
  • 40 grams fresh raspberries
  • 15 grams water
  • 10 grams cornstarch

Vanilla Chantilly

  • 300 grams heavy whipping cream
  • 30 grams powdered sugar
  • 1 vanilla bean (seeds scraped)
US Customary - Metric

Instructions

Making the Pavlova

  • Preheat your oven to 200°F (93°C). Before you begin making pavlova, ensure that your mixing bowl is entirely clean and fully dry. Even a little bit of water, oil, or grease could throw off your entire recipe! Then, wipe down your clean mixing bowl and your attachments with vinegar!
  • First, using your stand mixer, whip the room temperature egg whites and cream of tartar on medium speed to a soft peak in a clean and dry mixing bowl.
  • Then, while it is mixing, slowly add your granulated sugar. Continue to mix until you reach stiff peaks.
  • Next, sift the powdered sugar over the stiff peaks. Gently fold the powdered sugar into the egg whites. Be careful not to deflate the meringue too much.
  • Prepare a piping bag with plain tip #804. Fill the piping bag with meringue.
  • Then, on the backside of the silicone sphere mold, pipe the meringue around the sphere. Make sure there are no spaces or gaps in the meringue.
  • Bake the meringue for 6-8 hours until it is firm and crunchy.
  • Next, let the meringue cool completely.
  • Then, after the meringue is completely cooled, gently peel the silicone mold away while being careful to not to break the shell.
  • Finally, when you are ready to assemble the pavlova, carefully scrape the point off of the bottom using a microplane so it will sit level on the plate.

Preparing the Mixed Berry Compote

  • First, use a paring knife to split and scrape the vanilla bean. Put the split vanilla bean into a heavy bottom saucepan.
  • Now you will prepare your mixed berries. Dice the strawberries into quarters, cut the raspberries in half, and leave the blueberries whole. PRO TIP: Fresh berries will keep their shape better, but frozen berries will work as well.
  • Add the prepared mixed berries into the heavy bottom saucepan along with the vanilla bean.
  • Then, add in the sugar and the lemon juice and stir everything to combine.
  • Next, in a separate mixing bowl, combine the corn starch and water. Mix until it is smooth.
  • Add the cornstarch mix to the berries in the saucepot and mix to combine.
  • Cook the berries over medium to low heat and continue to stir gently. Be careful not to scald the berries with high heat. The berries will begin to soften and release juices over medium to low heat.
  • When the berry juice mixture begins to boil, remove the saucepan from the heat and transfer the berry compote to another bowl to cool down.
  • Cover the berry compote with plastic wrap. Do this by pressing the plastic wrap right up against the surface of the berries. This step will prevent a layer of skin from forming over the berries mixture.
  • Then, once the berries are covered in plastic wrap, place the bowl in the refrigerator until it is completely cool.
  • Finally, when you are ready to assemble the pavlova, you can remove the vanilla bean pod from the berry compote.

Making the Vanilla Chantilly Cream

  • Start with a clean mixing bowl. Use your stand mixer to whip cream, the seeds of 1 vanilla pod, and powdered sugar on medium speed until it reaches a stiff peak (but is still smooth in texture).
  • Then, fill a large pastry bag fitted with your desired tip, and set it aside to pipe the cream on the pavlovas.

Assembling the Pavlova

  • First, place the mini pavlova hollow side up while making sure it stands balanced. If it won't stay up on its own or is unbalanced, use a microplane to even it out by gently scraping the bottom to a flat surface.
  • Then, scoop about 1 tablespoon of berry compote into the pavlova.
  • Next, pipe a dollop of Chantilly cream on top of the berry compote making sure to fully cover the filling so that it does not leak out.
  • Finally, garnish the mini pavlova with fresh fruit, mint, or any other topping of your choice. Chef Christophe used dehydrated berries to grate directly on top of the finished pavlova.

Video

Notes

Important Things To Note Before You Start
  1. Bring your egg whites to room temperature (or even a little warm) before beginning to make your pavlova. 
  2. Practice Mise en Place (everything in its place). Measure out your ingredients ahead of time and have them ready before you start mixing to reduce the chances of accidentally leaving something out.
  3. Avoid baking pavlova if the weather is especially humid. We want to create an ideal environment for our pavlova to dry thoroughly. If you have a portable space heater, you can place that in your kitchen to remove excess humidity from the air and help the pavlova dry out.
  4. First, before you begin making pavlova, ensure that your mixing bowl is entirely clean and fully dry. Even a little bit of water, oil, or grease could throw off your entire recipe! For example, just a streak of grease in your bowl could prevent you from whisking your egg whites into frothy peaks.
  5. Unsure if your pavlova is done? Carefully pick up one of the pavlovas to make sure that it comes off of the parchment paper clean. If you can pick it up and there isn't any residue, it is done.

Nutrition

Calories: 205kcal | Carbohydrates: 30g | Protein: 2g | Fat: 9g | Saturated Fat: 6g | Polyunsaturated Fat: 1g | Monounsaturated Fat: 3g | Cholesterol: 34mg | Sodium: 24mg | Potassium: 87mg | Fiber: 1g | Sugar: 27g | Vitamin A: 373IU | Vitamin C: 14mg | Calcium: 22mg | Iron: 1mg
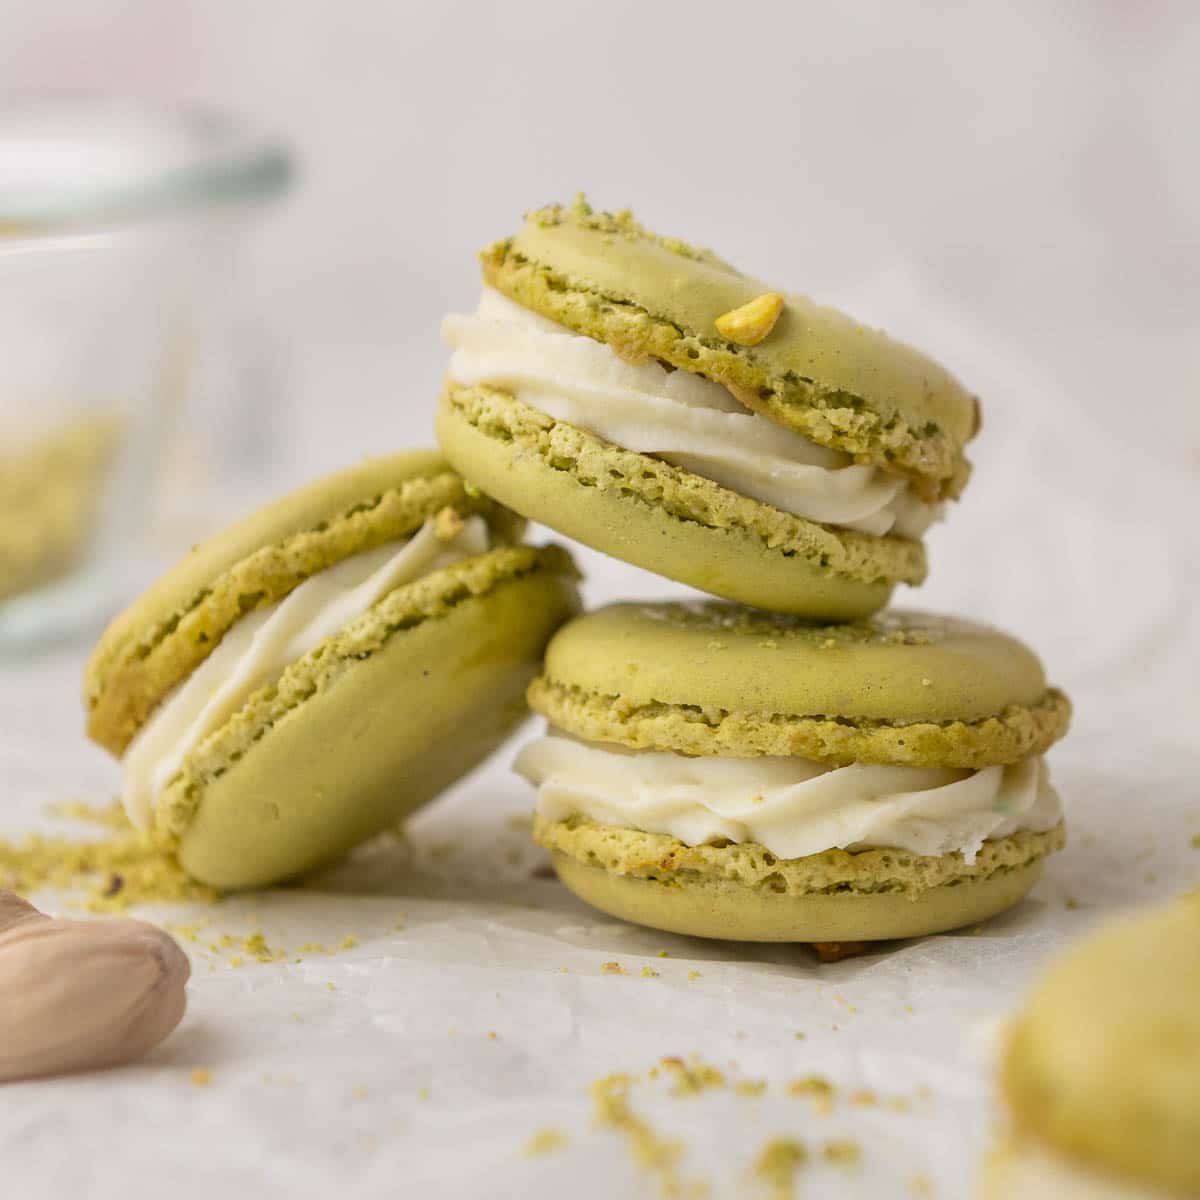
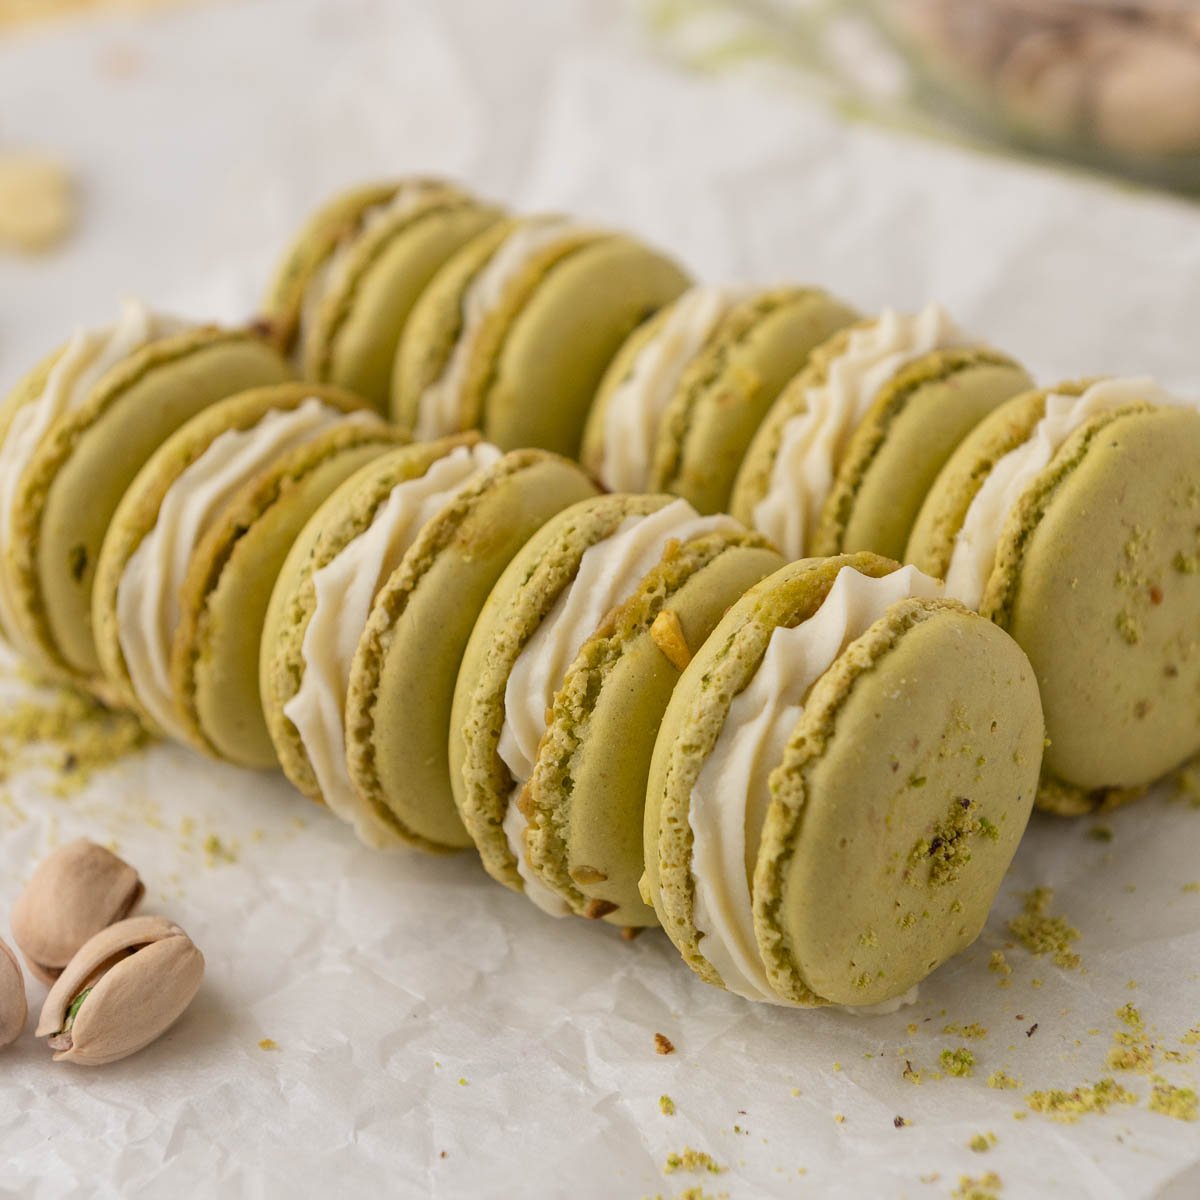
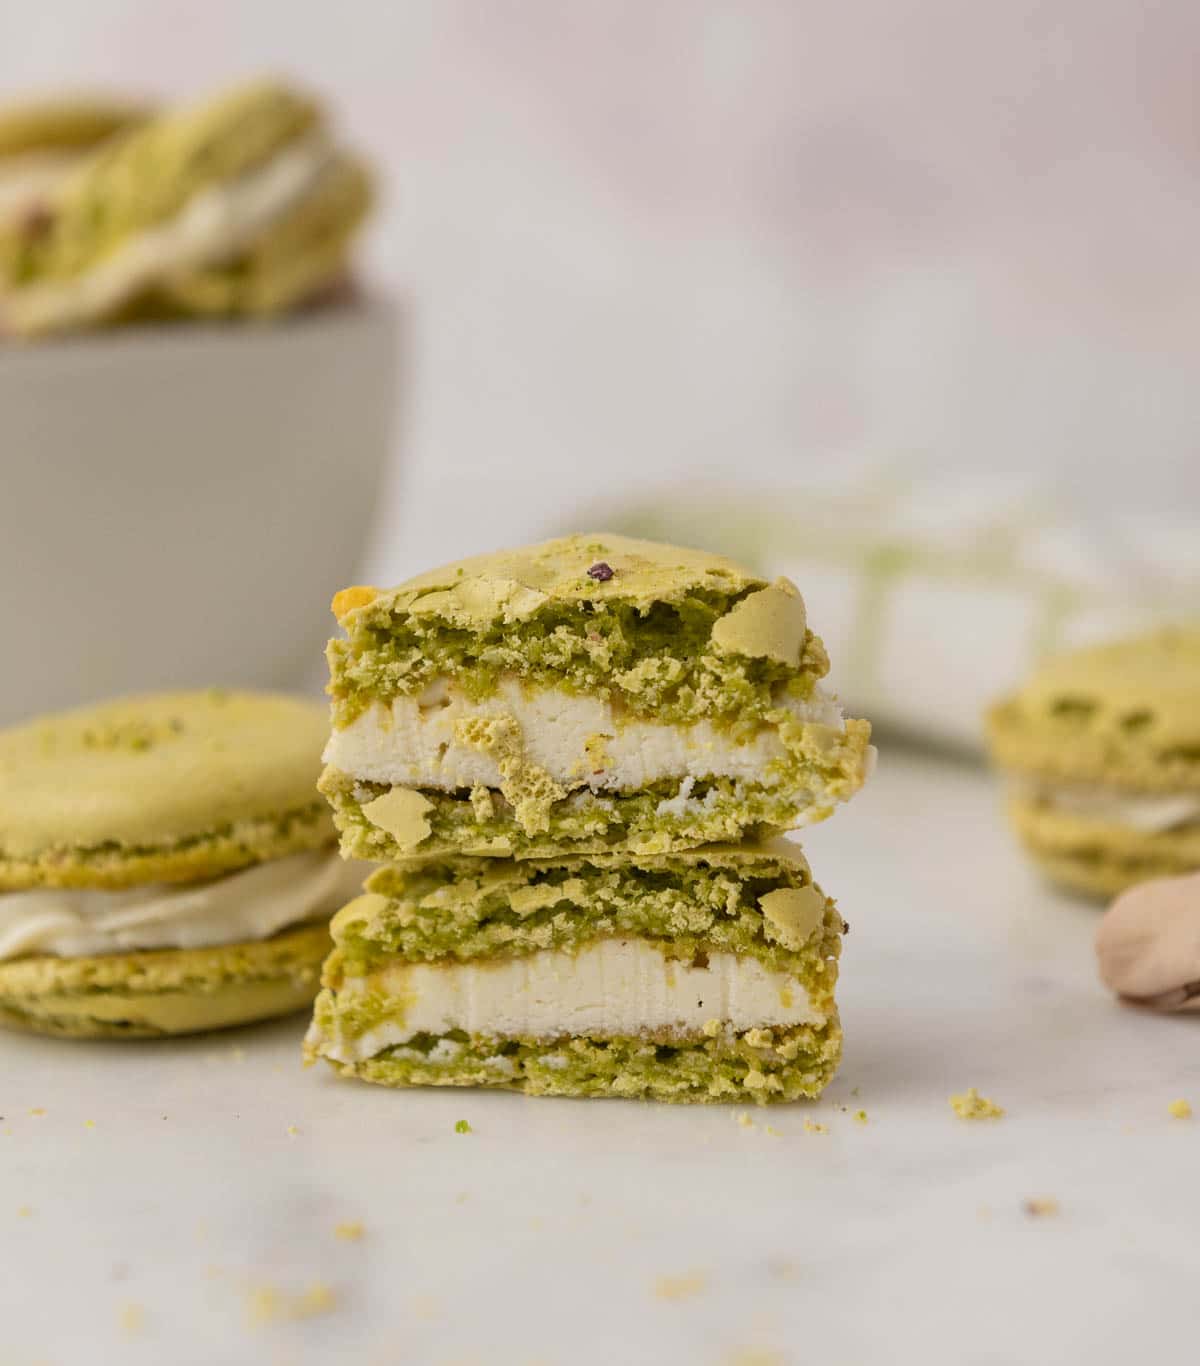
close up of three pistachio macarons

February 7, 2022 Cookies

Pistachio Macaron with White Chocolate Buttercream

This pistachio macaron recipe is based on my viral, no-fail French macaron recipe. The nuttiness of these crispy and chewy pistachio macarons pairs perfectly with the creamy, white chocolate buttercream filling! If you love pistachios, you need to save this recipe!

close up of three pistachio macarons

If you ask a baker which cookie has given them the biggest headache, chances are they will enthusiastically say "macarons!" They're notoriously difficult to make. Why? Because a lot could go wrong while making them. But, you won't need to reach for any aspirin today because this recipe is headache-free!

This is a foolproof, step-by-step pistachio macaron recipe that anyone can make! Keep reading to learn step-by-step how to make your very own nutty, crispy, chewy pistachio macarons.

Read through this blog post entirely and be sure to check out the FAQ section which will offer you additional tips, tricks, and ways to avoid common macaron mishaps!

What's In This Blog Post

  • Pistachio Macaron Ingredients
  • How to Make Pistachio Macarons
    • Before you get started, download and print my macaron template! This is an optional step.
  • Preparing the White Chocolate Ganache
  • Making the Easy Buttercream Frosting
  • FAQs
  • Tips for the Perfect Macarons
  • More Recipes You'll Love

Pistachio Macaron Ingredients

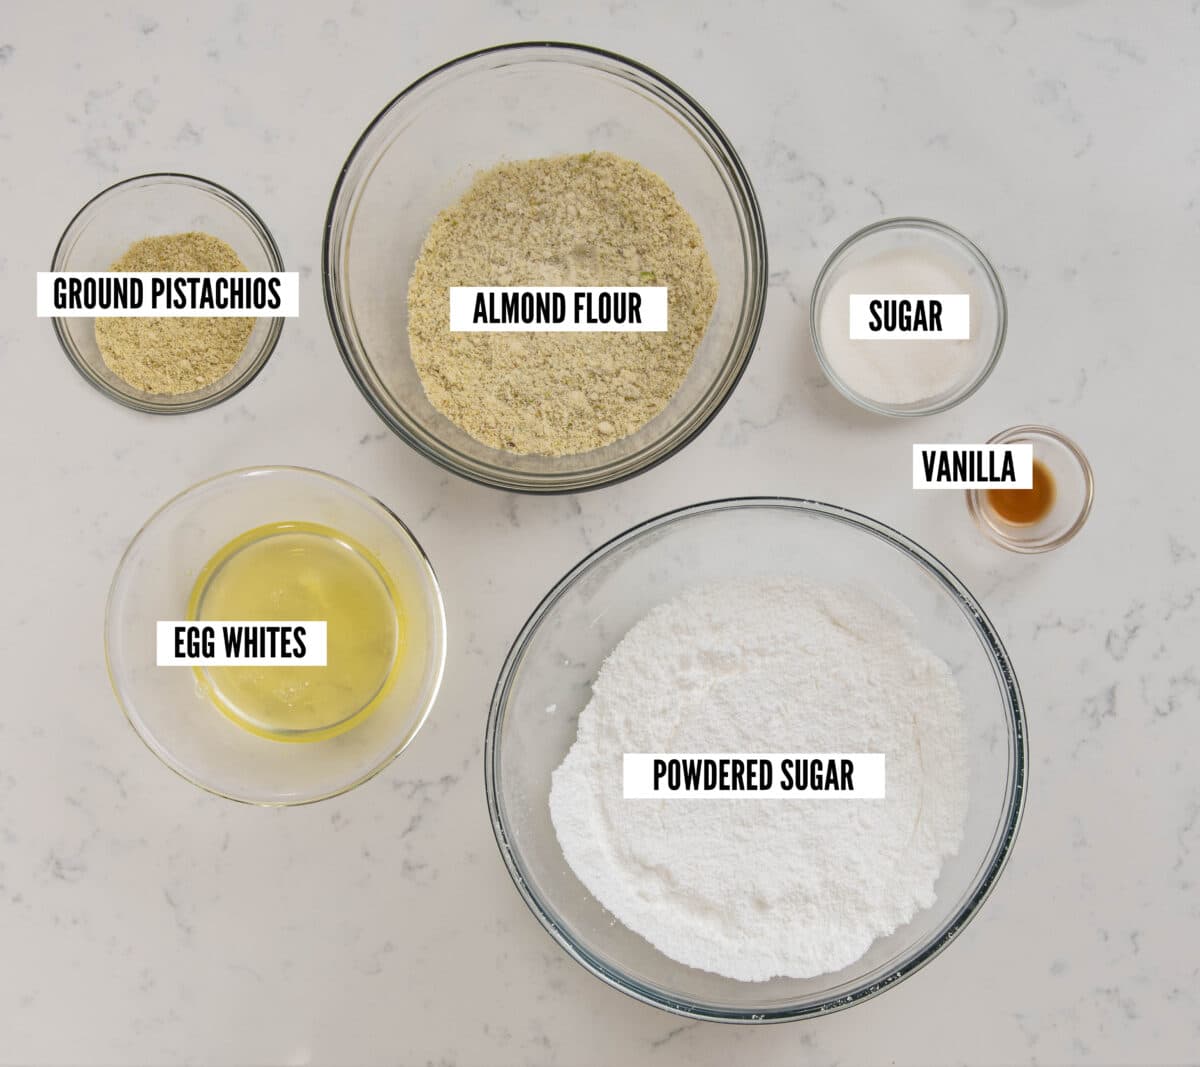
pistachio macaron ingredients

Before you get started, download and print my macaron template!

Almond Flour: Almond flour provides flavor, texture, and structure to the macarons. You can use storebought almond flour (I typically use Bob's Red Mill super fine almond flour), or if you prefer you can make your own.

Pistachio Flour: If you have a food processor, you can make your own pistachio flour for this recipe by grinding up pistachios to an ultra-fine texture (you will need 28 grams of pistachios). Or, you can buy pistachio flour online.

Want to take your white chocolate ganache to the next level and try a more advanced recipe to really elevate your pistachio macarons? Be sure to check out Chef Christophe Rull's white chocolate vanilla bean ganache that we used to make bonbons!

How to Make Pistachio Macarons

Before you get started, download and print my macaron template! This is an optional step.

  1. First, you'll want to prepare your pistachio flour. Use a food processor to grind your pistachios up to an ultra-fine, flour-like texture. Or, if you prefer, you can buy your own pistachio flour.
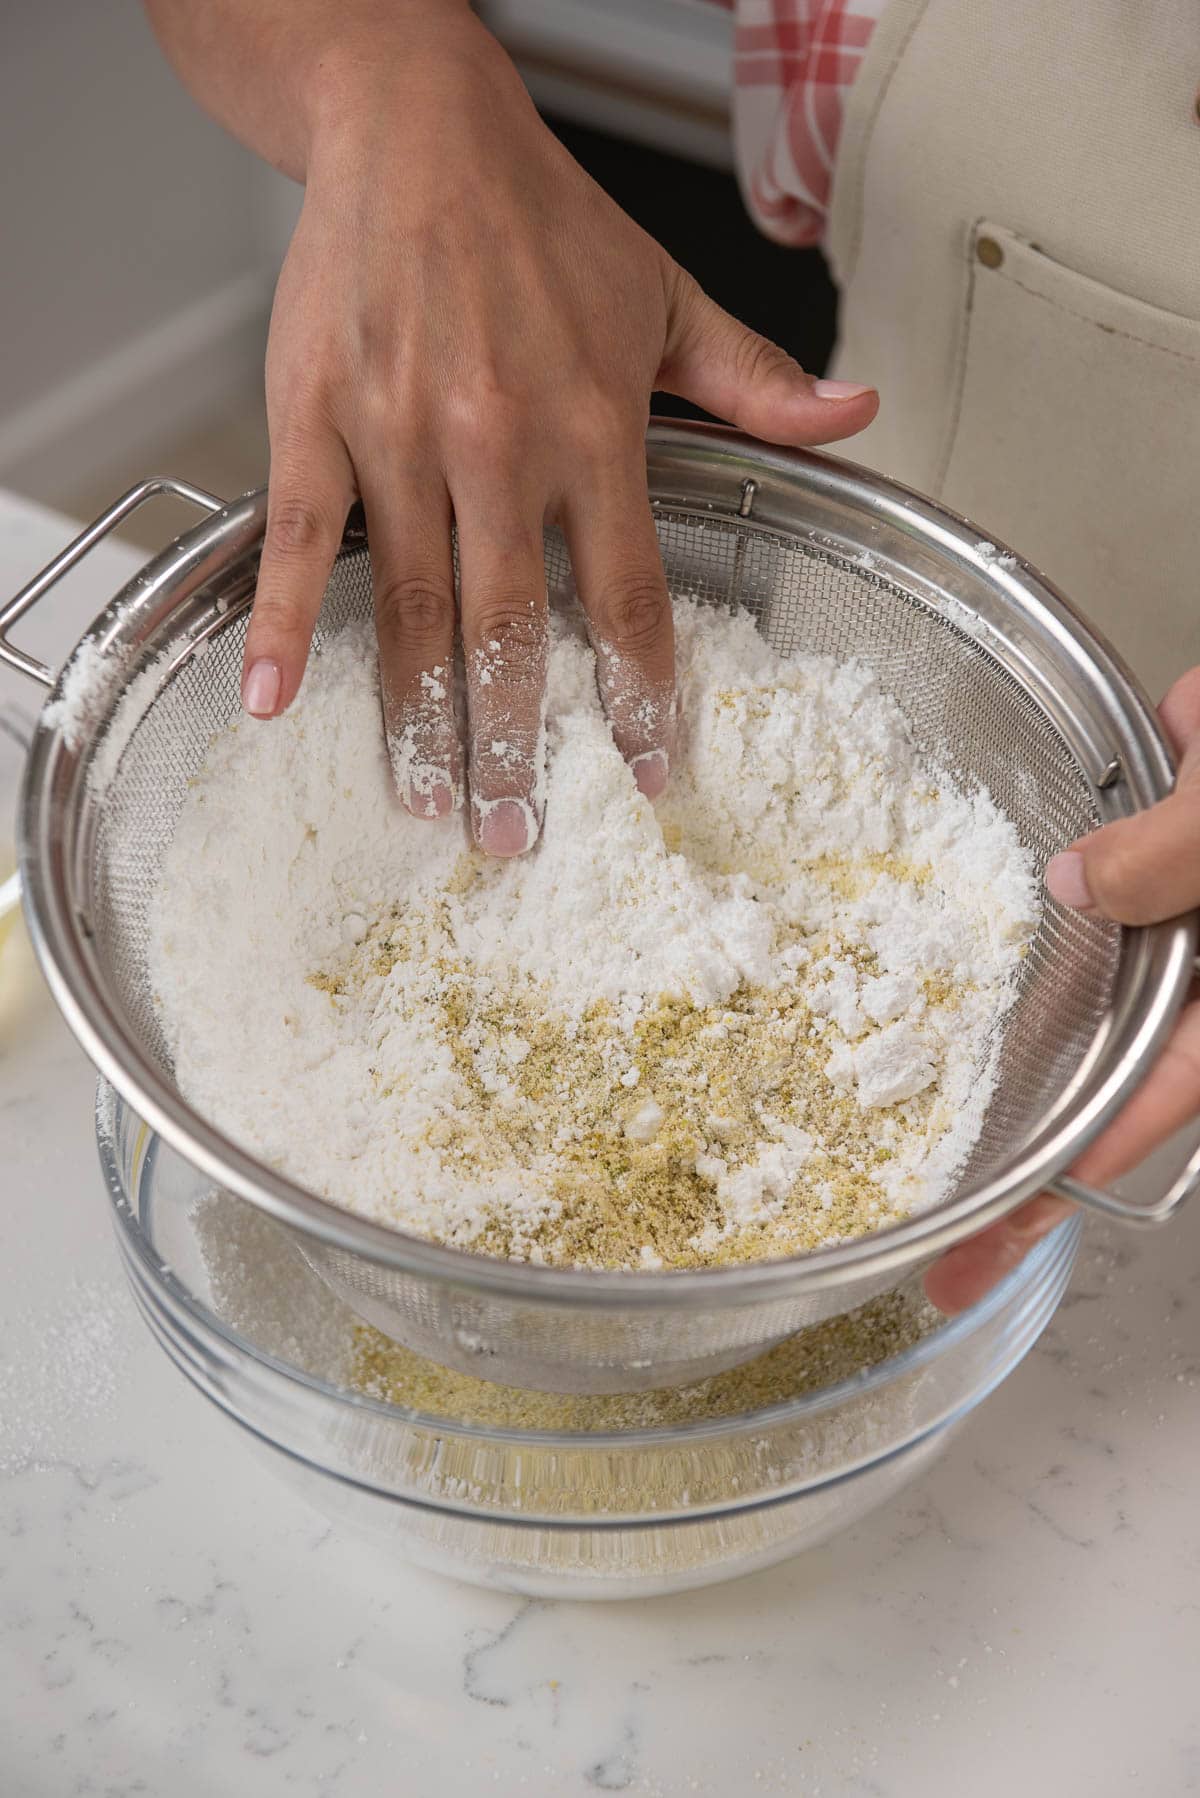
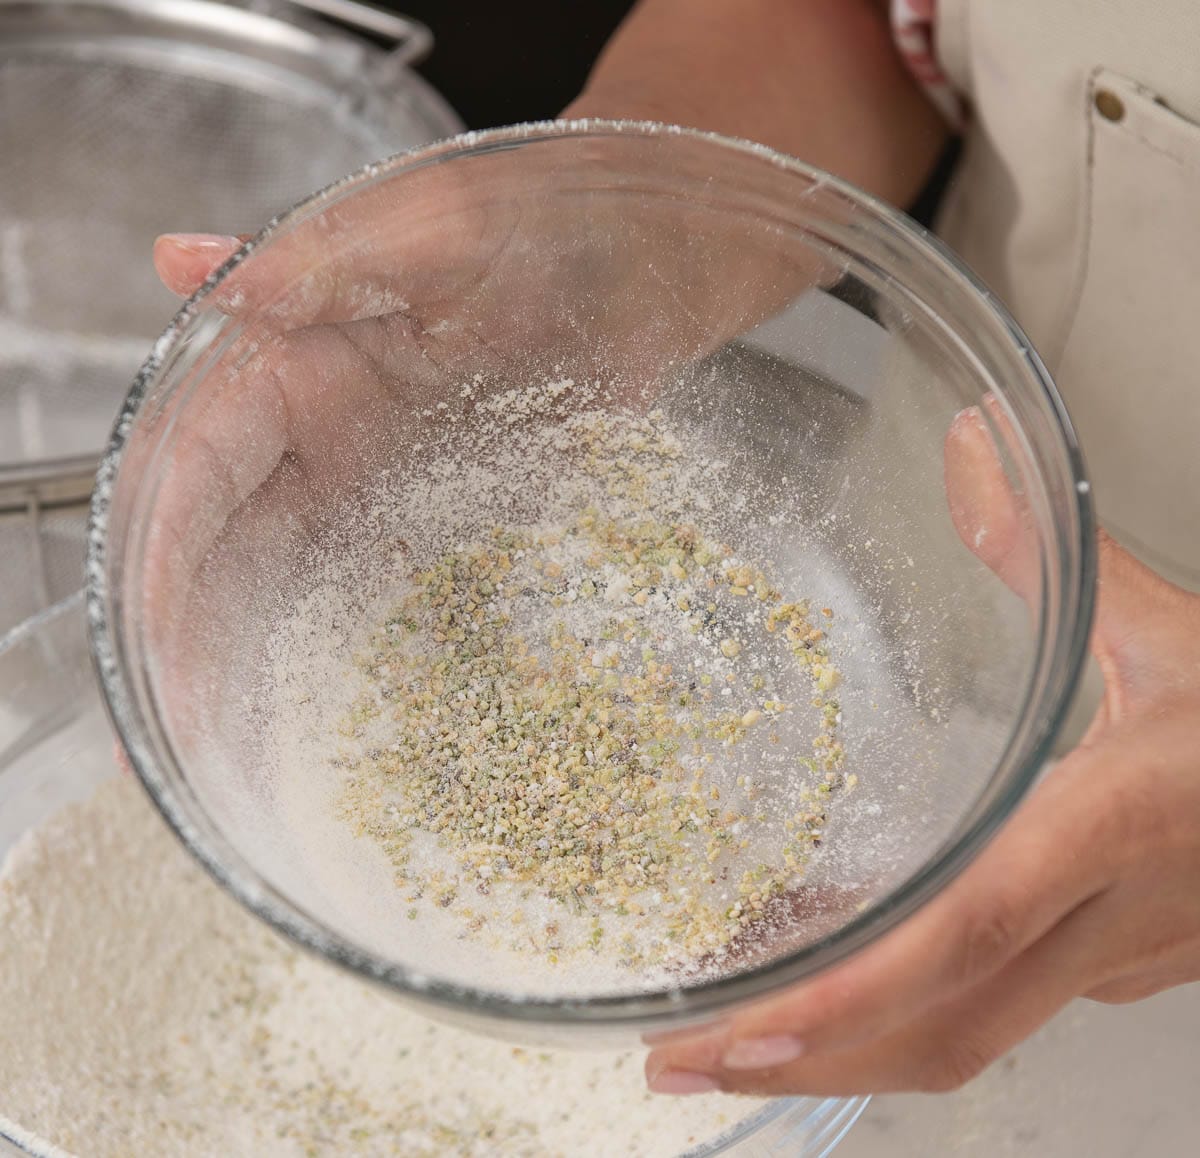
  2. Next, sift your pistachio flour, almond flour, salt, and powdered sugar into a large mixing bowl. Sift these ingredients 2 times. Other than sifting out large pieces, the reason you need to sift it twice is to allow the powdered sugar to properly mix with the flours while also aerating the flour (which will make it easier to mix with the egg whites). sifting pistachio macaron ingredientslarge pieces of pistachio in a sifter
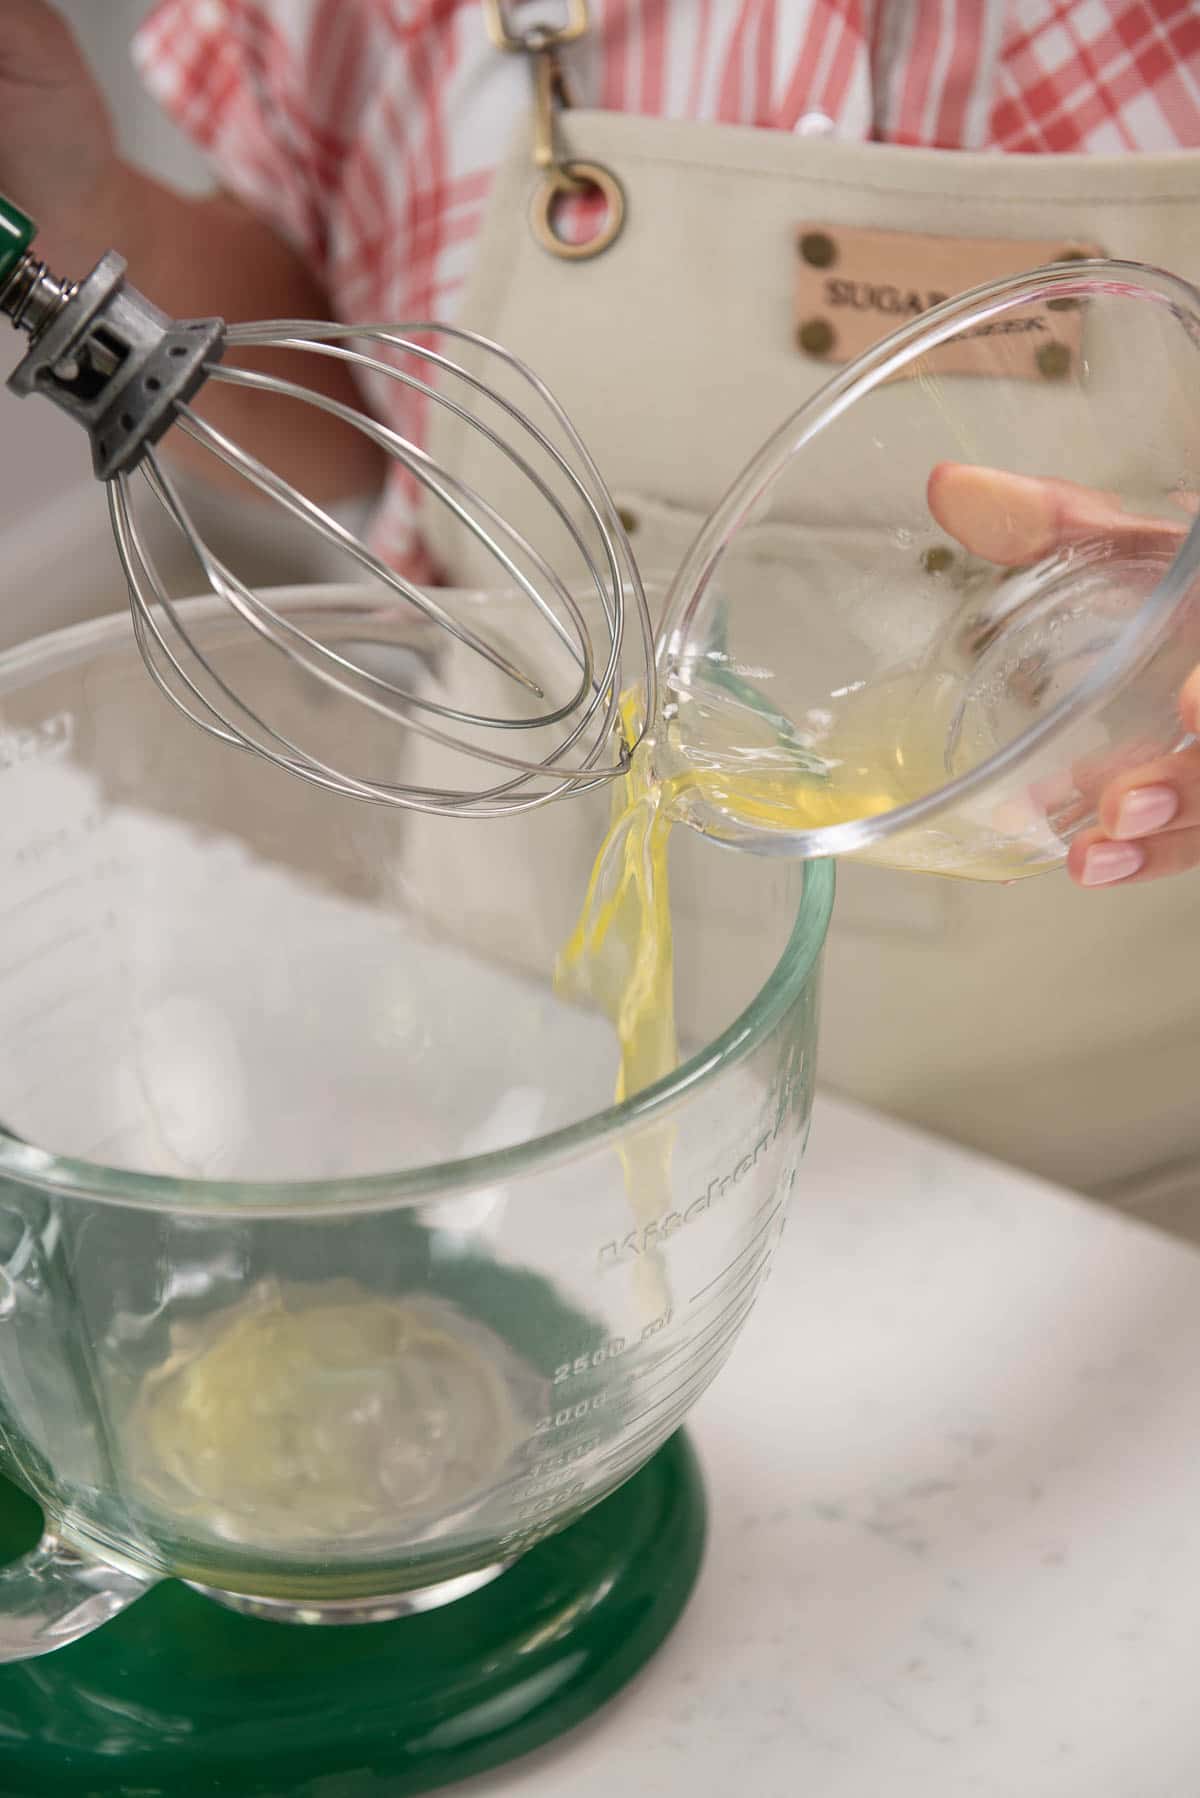
  3. Then, in the bowl of your stand mixer, add in the egg whites and mix them on medium speed using the whisk attachment until they appear foamy.adding egg whites to the bowl of your stand mixer
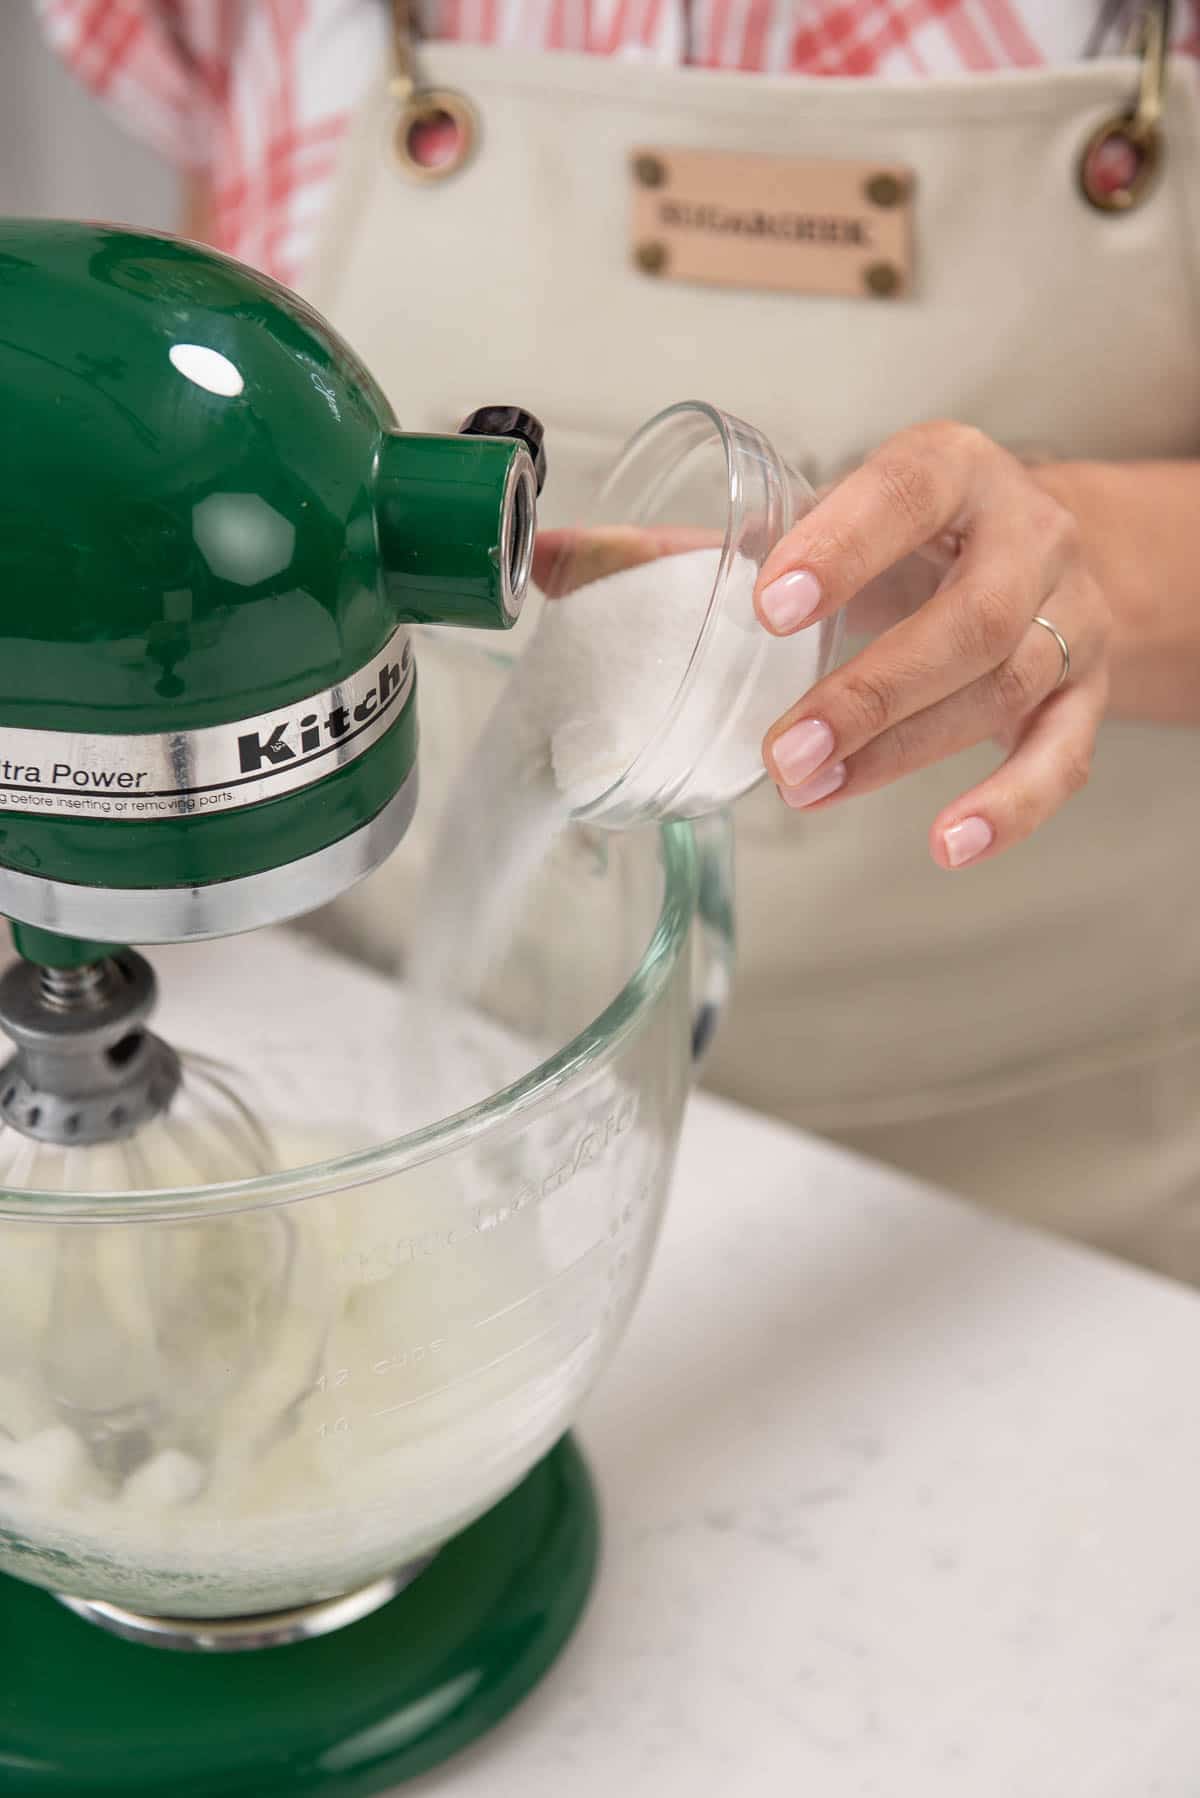
  4. Once the egg whites appear foamy, start to slowly sprinkle in the granulated sugar. Mix them until the egg whites turn white and you can see some lines forming in the surface from the whisk. Now, add in the cream of tartar and whip them until soft, glossy peaks form.
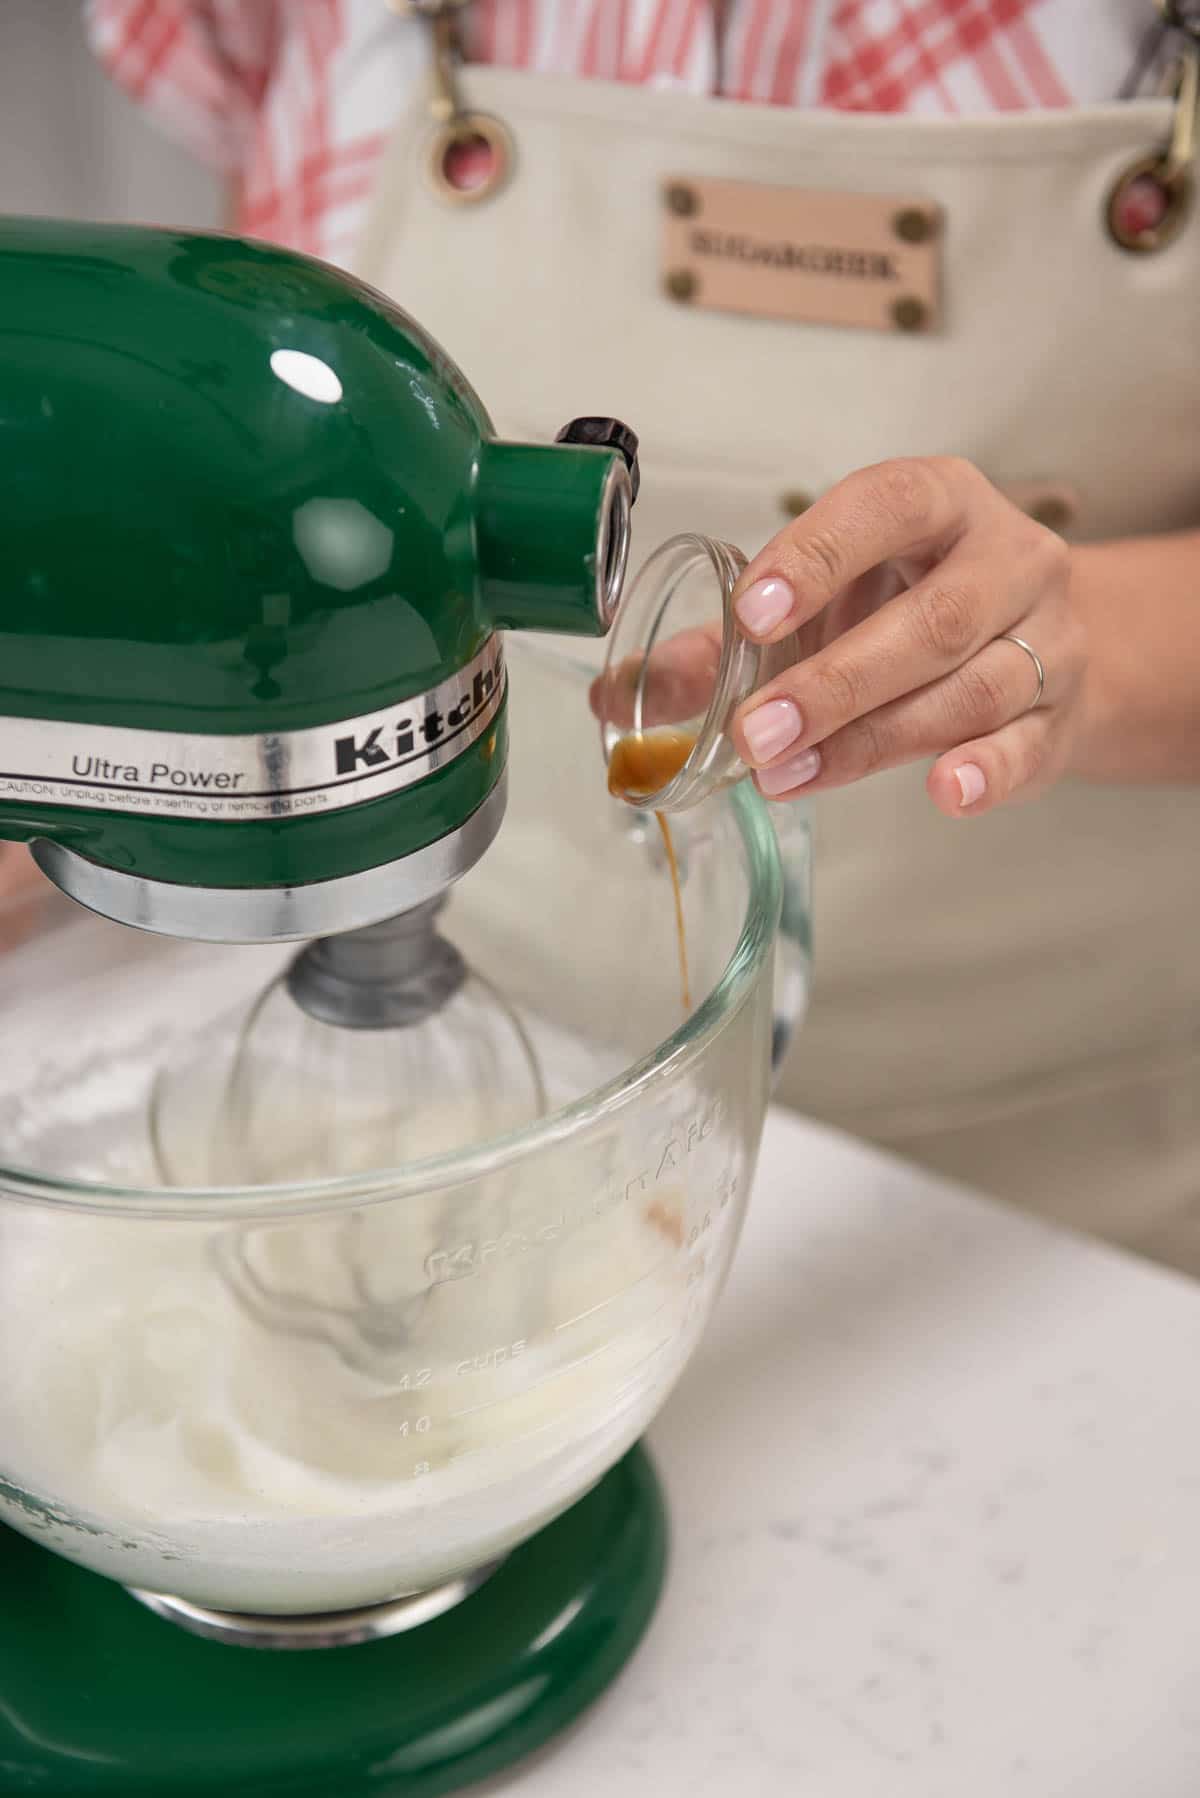
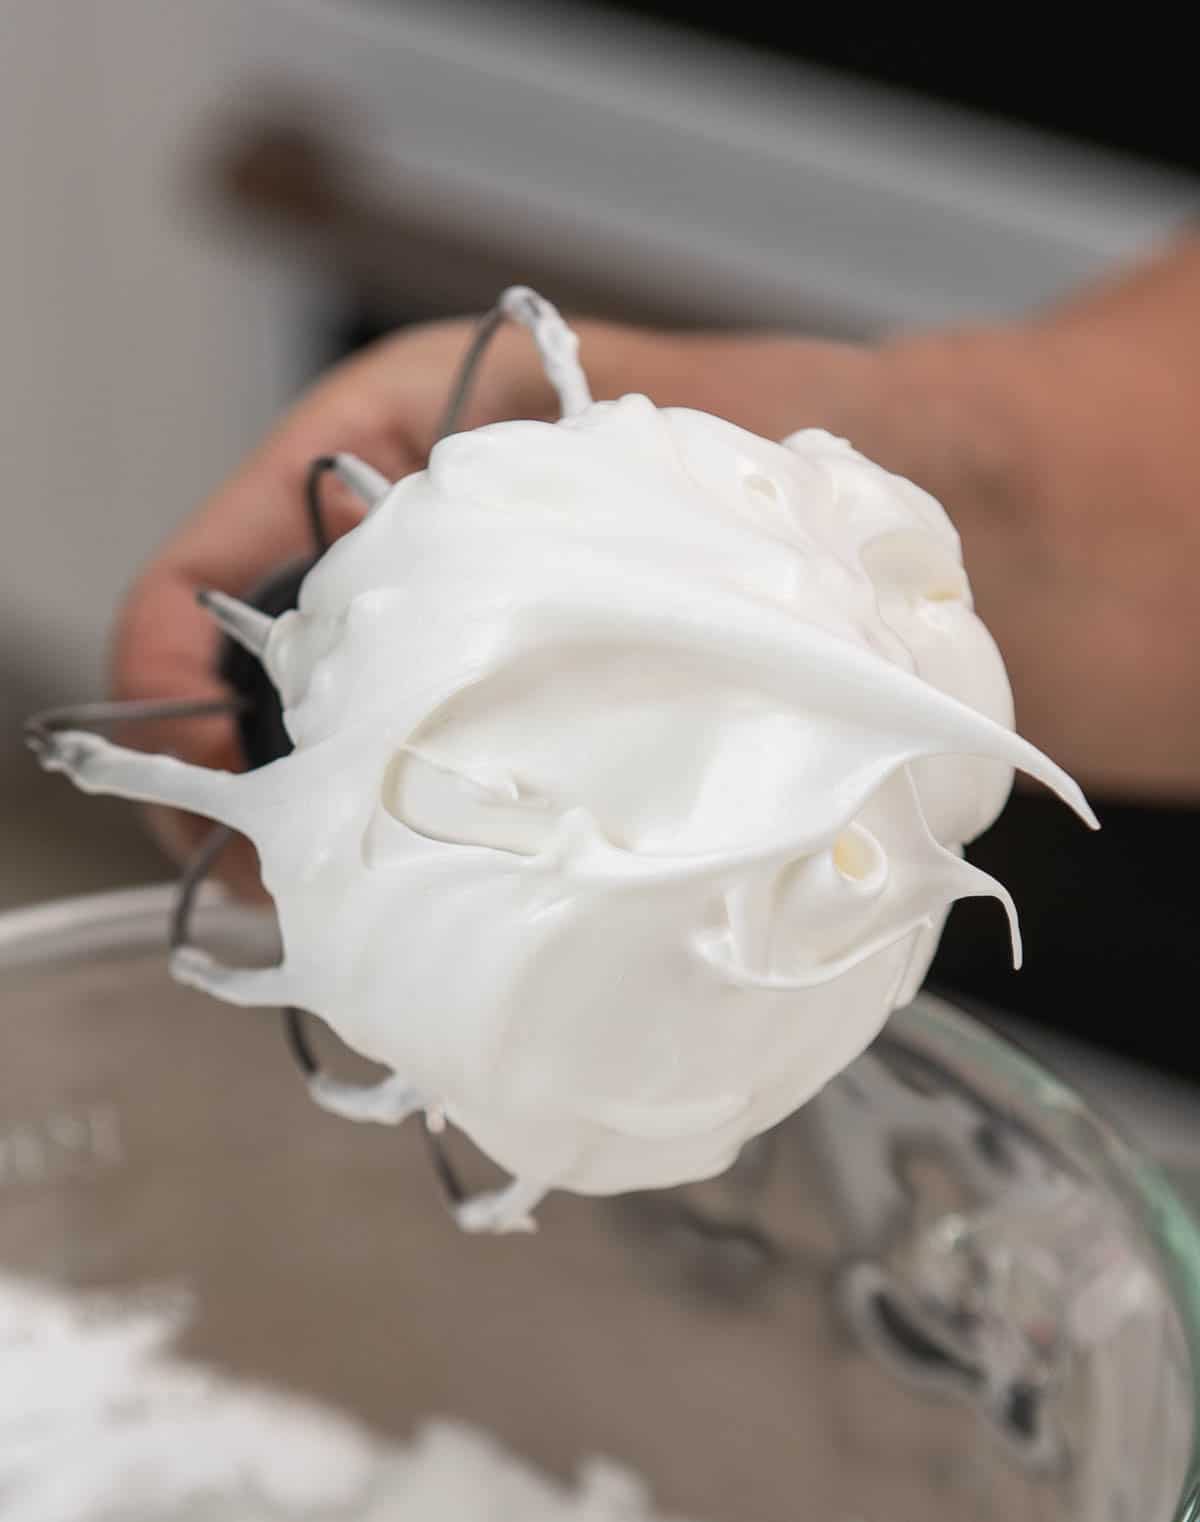
  5. Then, add in the vanilla extract and continue to mix until you have firm, glossy peaks. Usually, this process can take anywhere from 10 to 15 minutes. To test if your meringue is ready, turn off the mixer and remove the whisk attachment. Hold the whisk attachment to see if the meringue is firm enough to hold its shape without appearing curdled, dry, or breaking apart.close up of meringue at stiff peaks
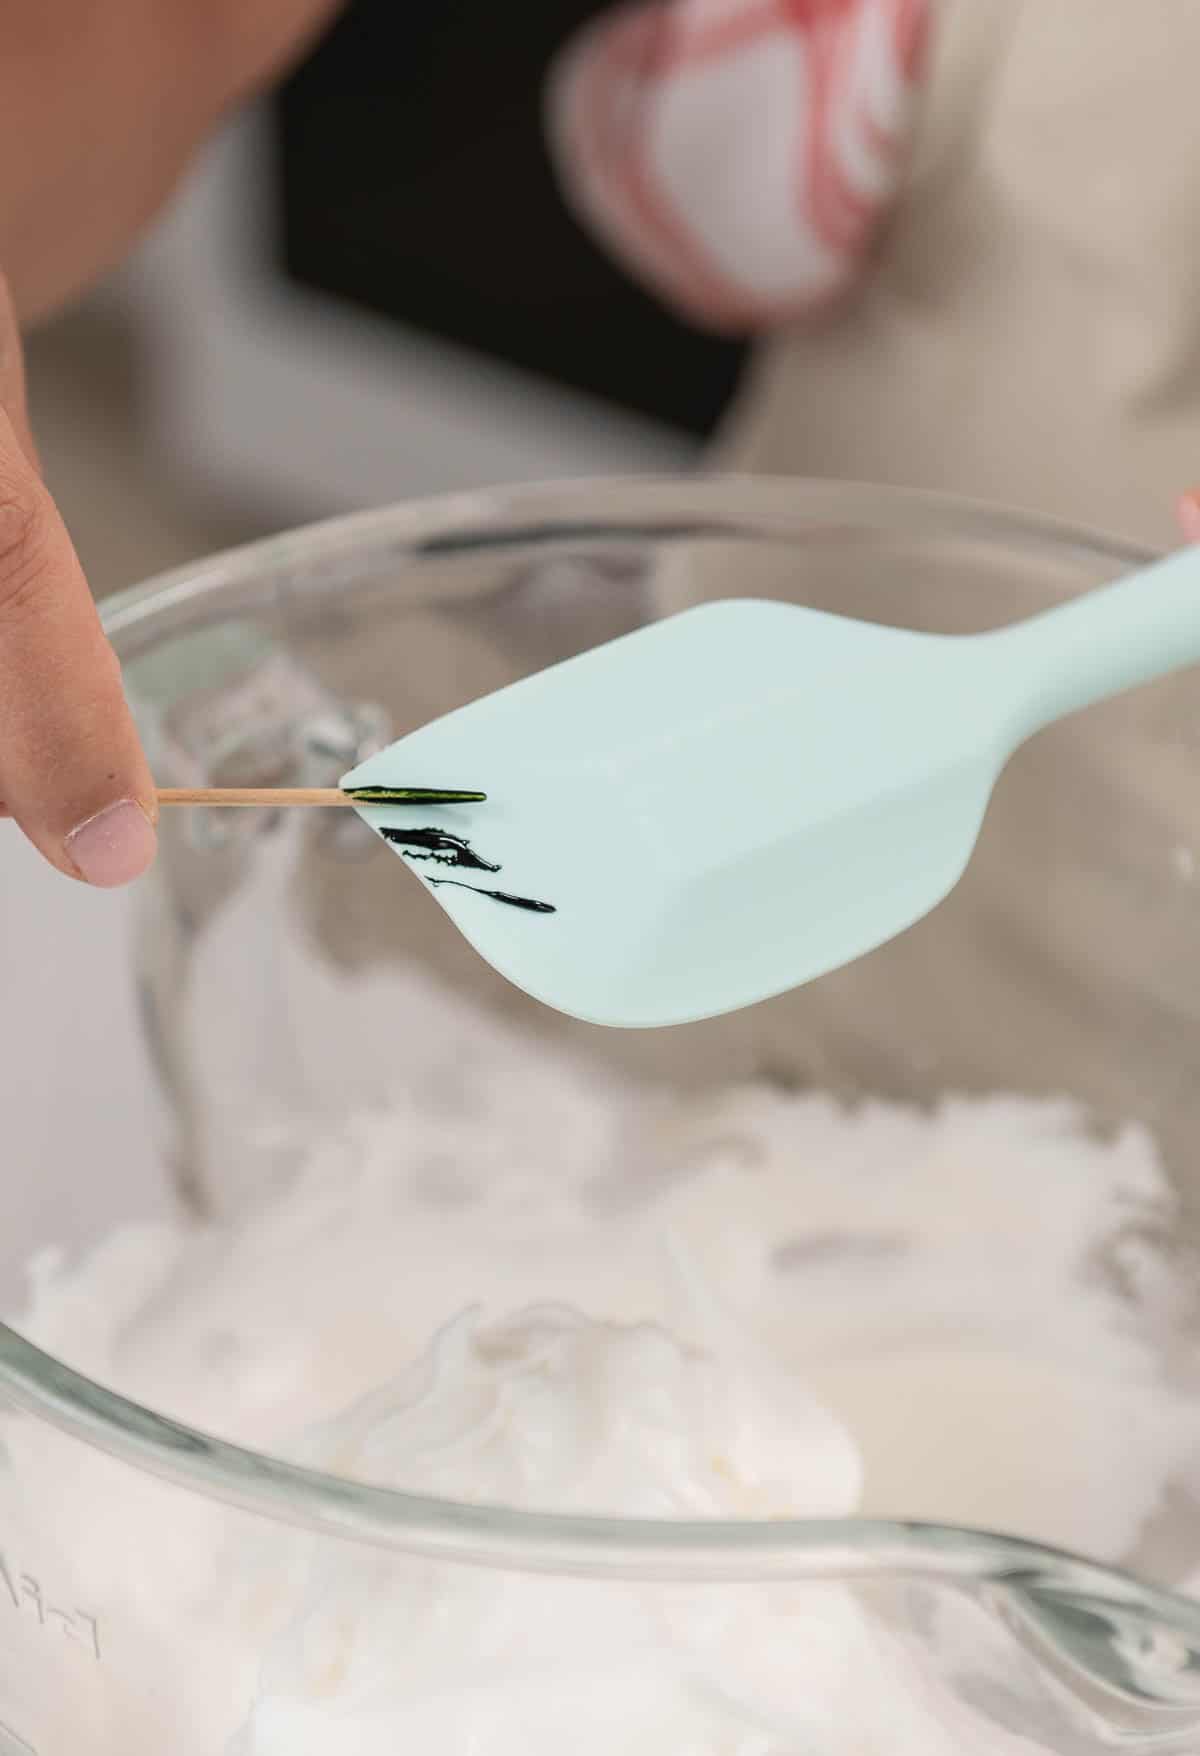
  6. Next, add in a very small amount of green food coloring (optional). I prefer to use Americolor food color gel. Use a toothpick to grab 2 drops of green food coloring and then wipe it onto a spatula. Then, use the spatula to gently fold it into your meringue.
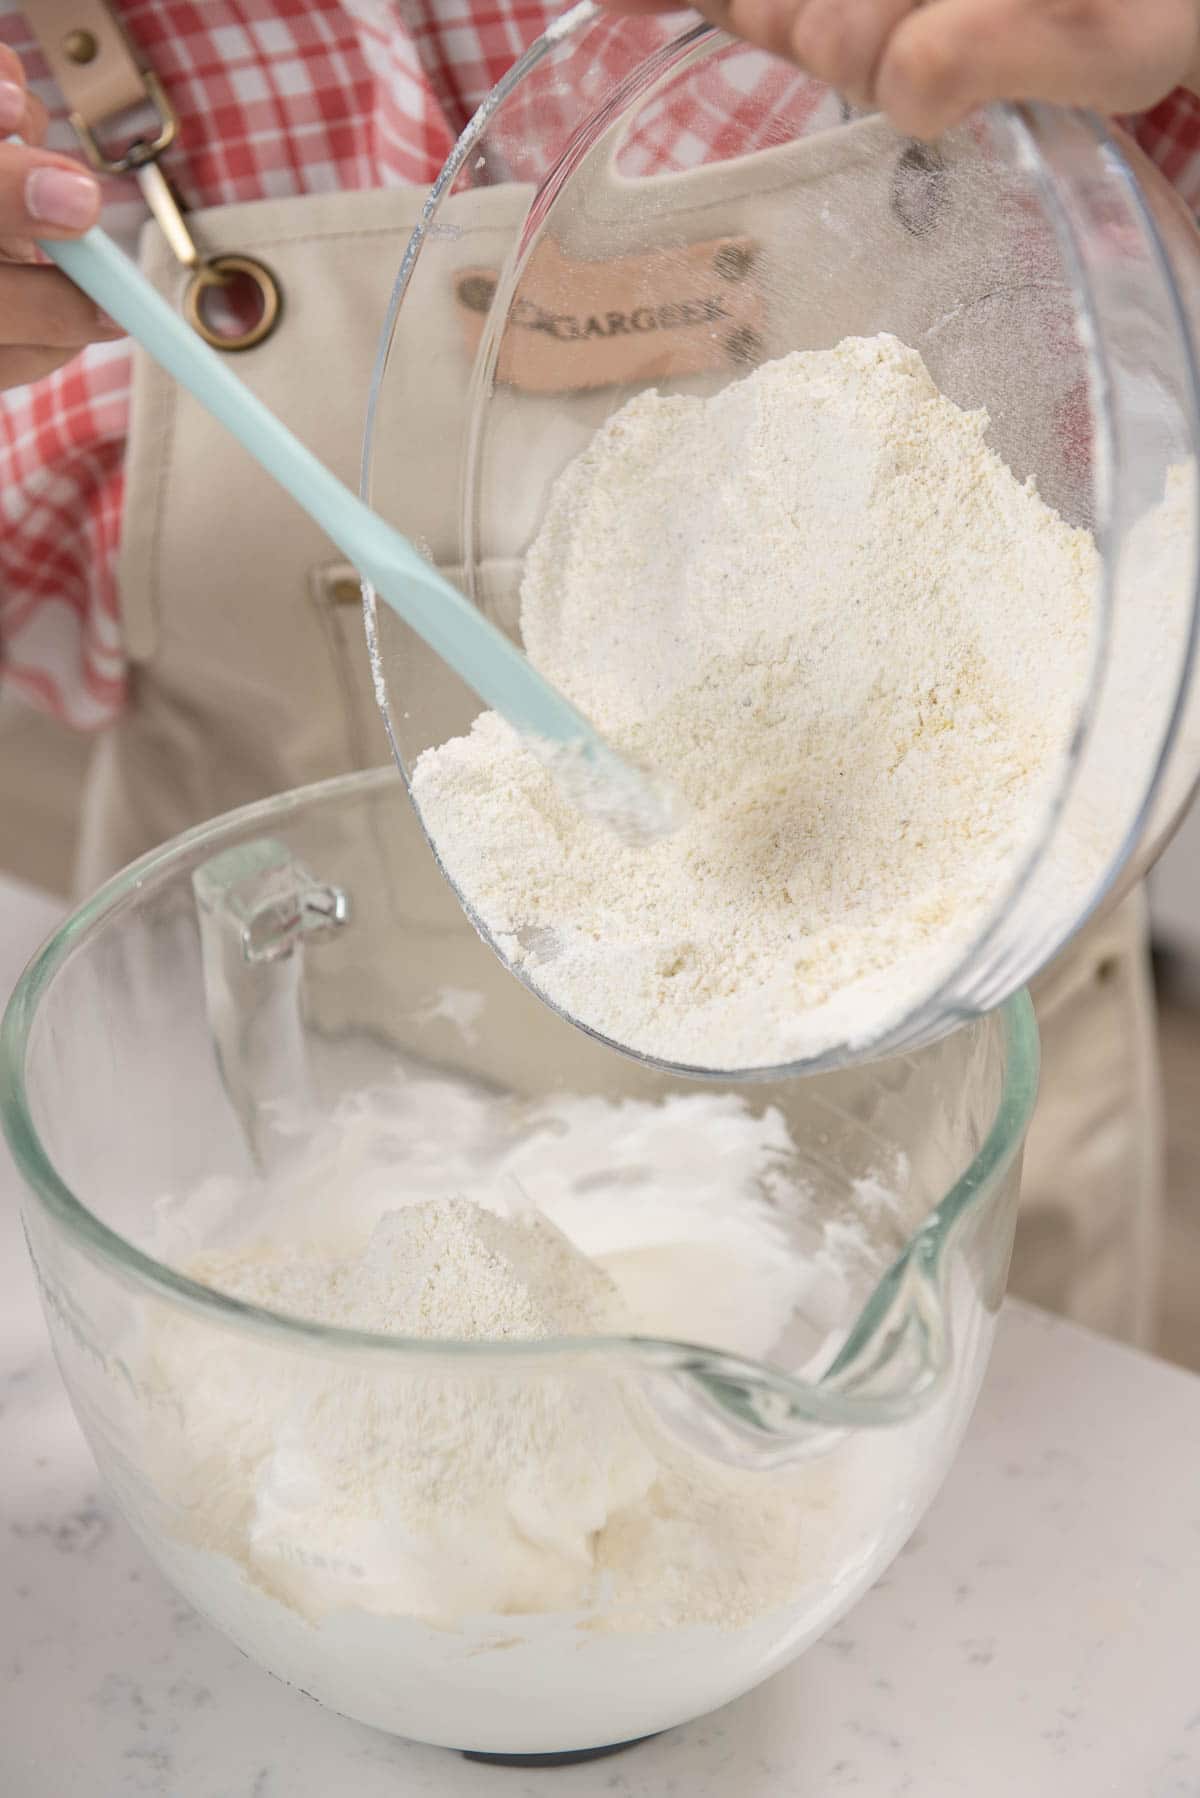
  7. Next, transfer ⅓ of your flour mixture into the meringue and fold it in.
  8. Once the flour is folded in and combined with the meringue, add in half of the remaining flour mixture and gently fold it in using a circular motion (like a tumble dryer).
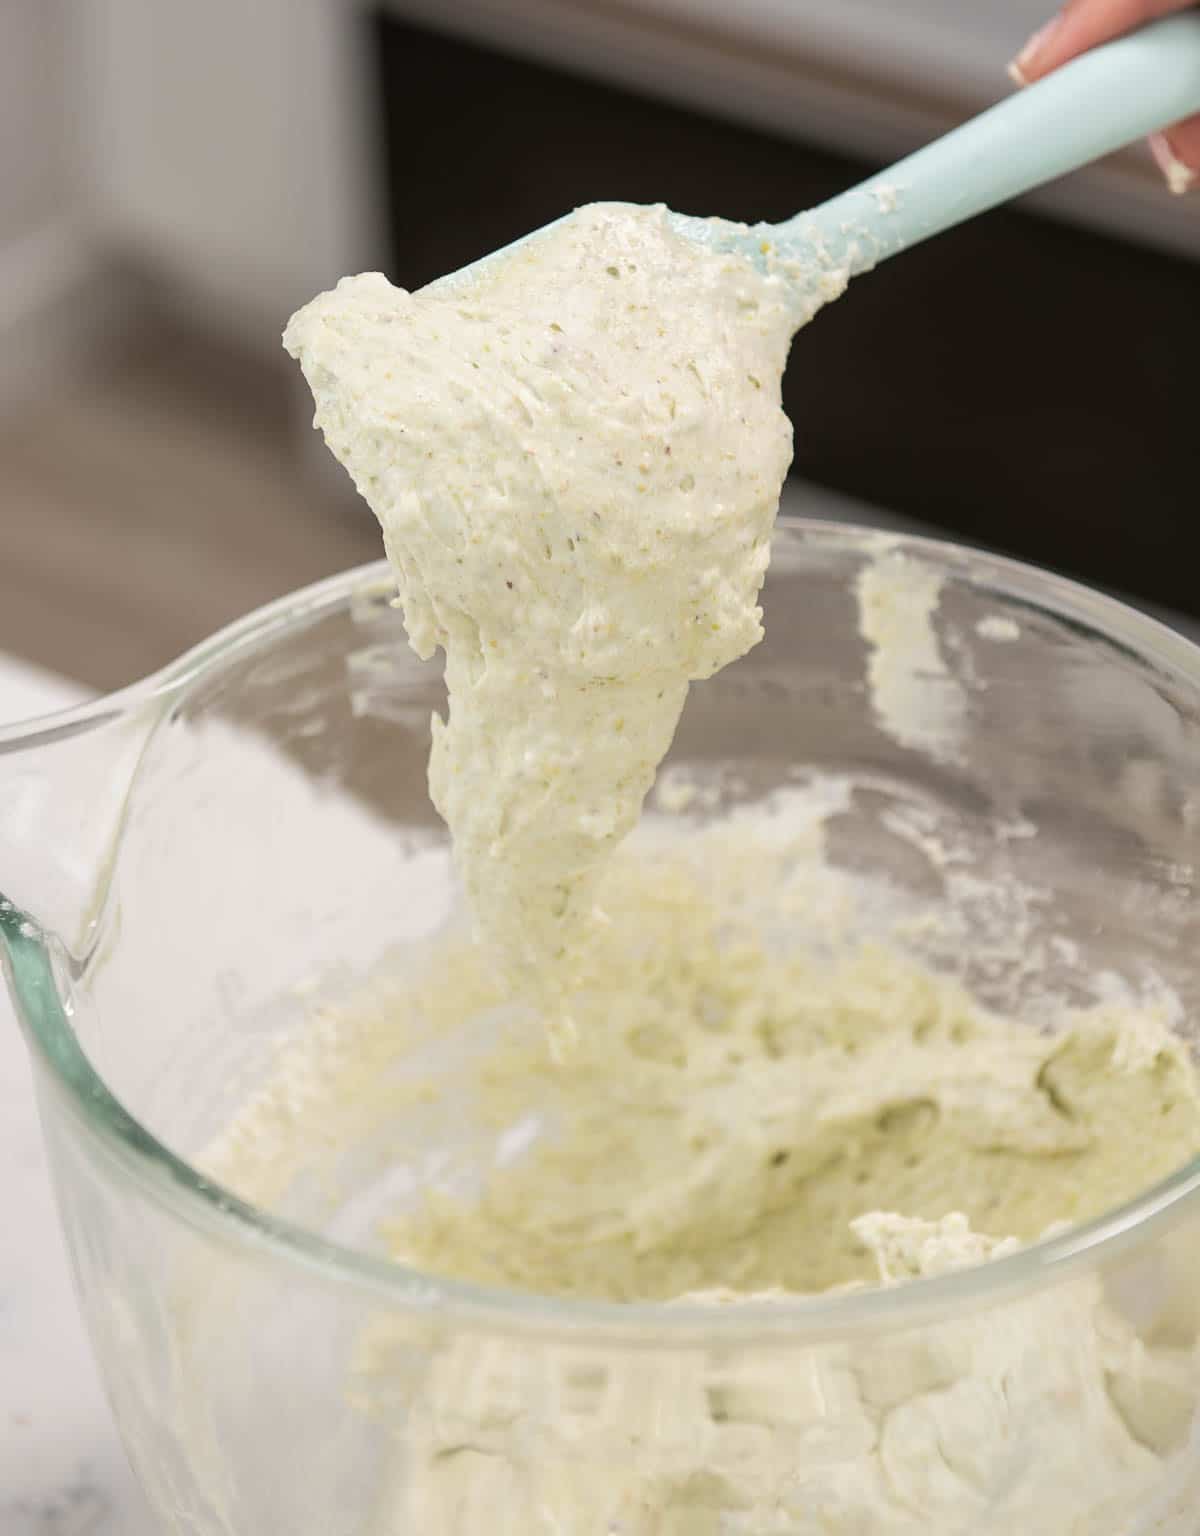
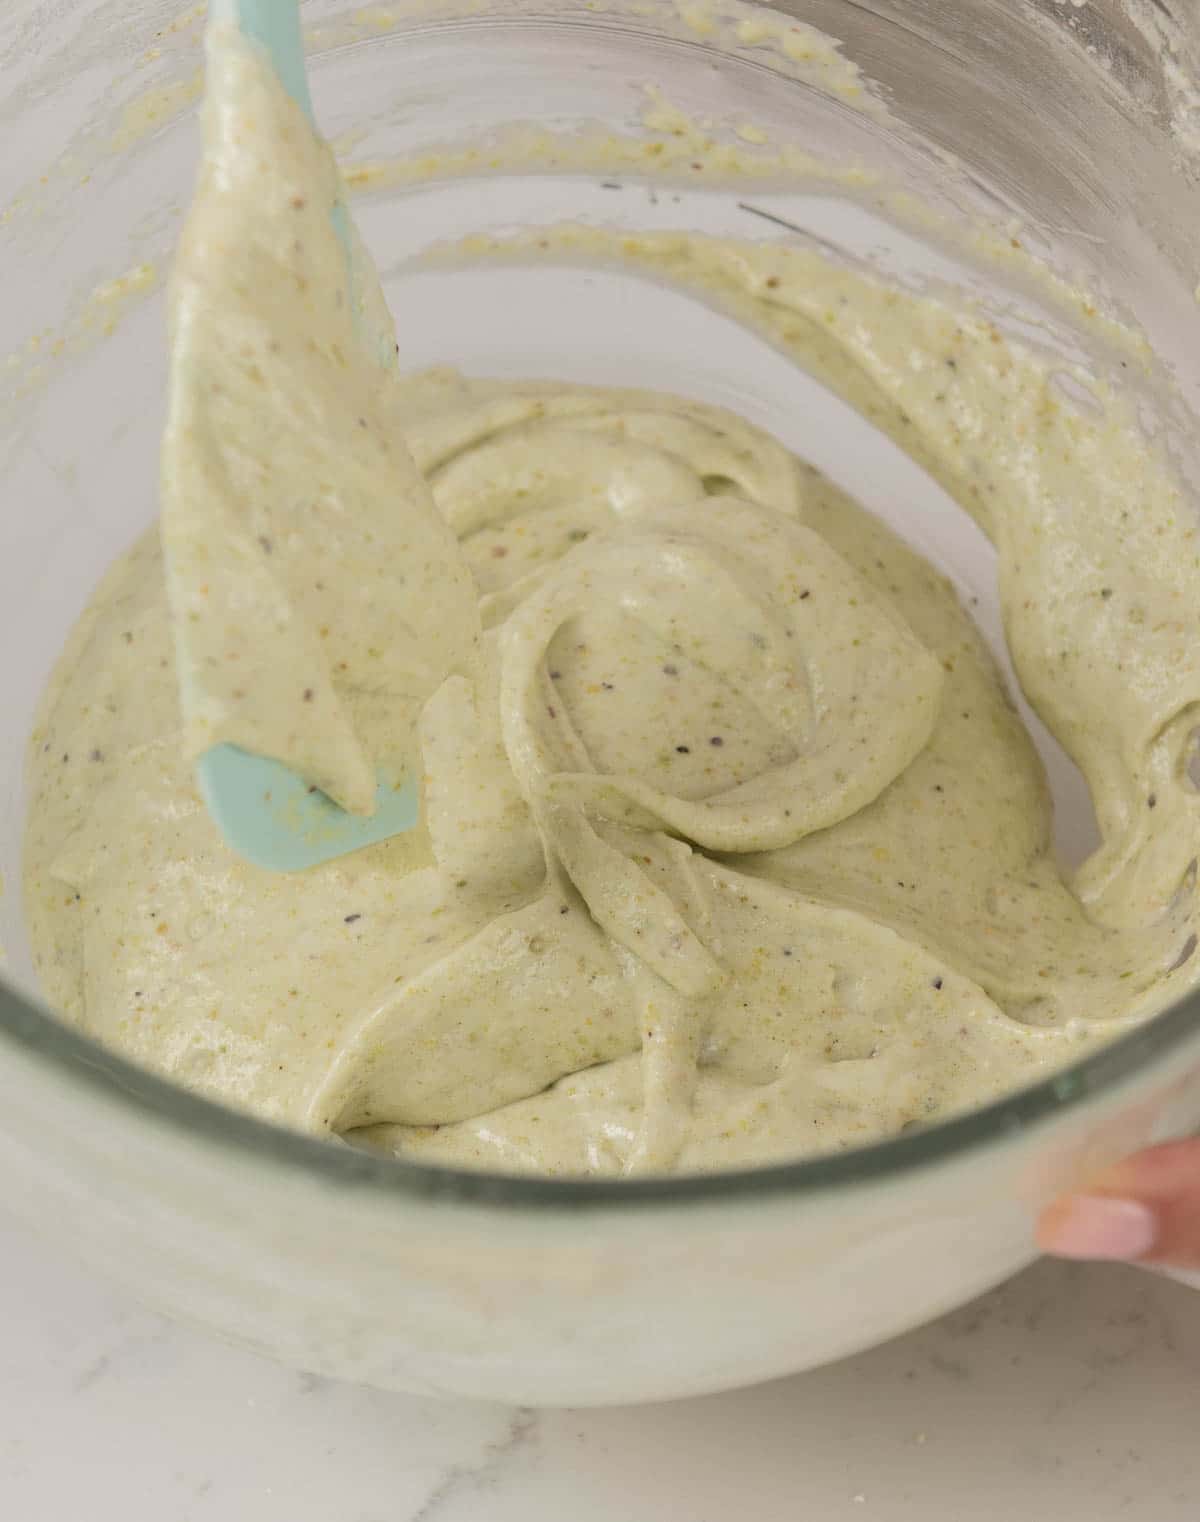
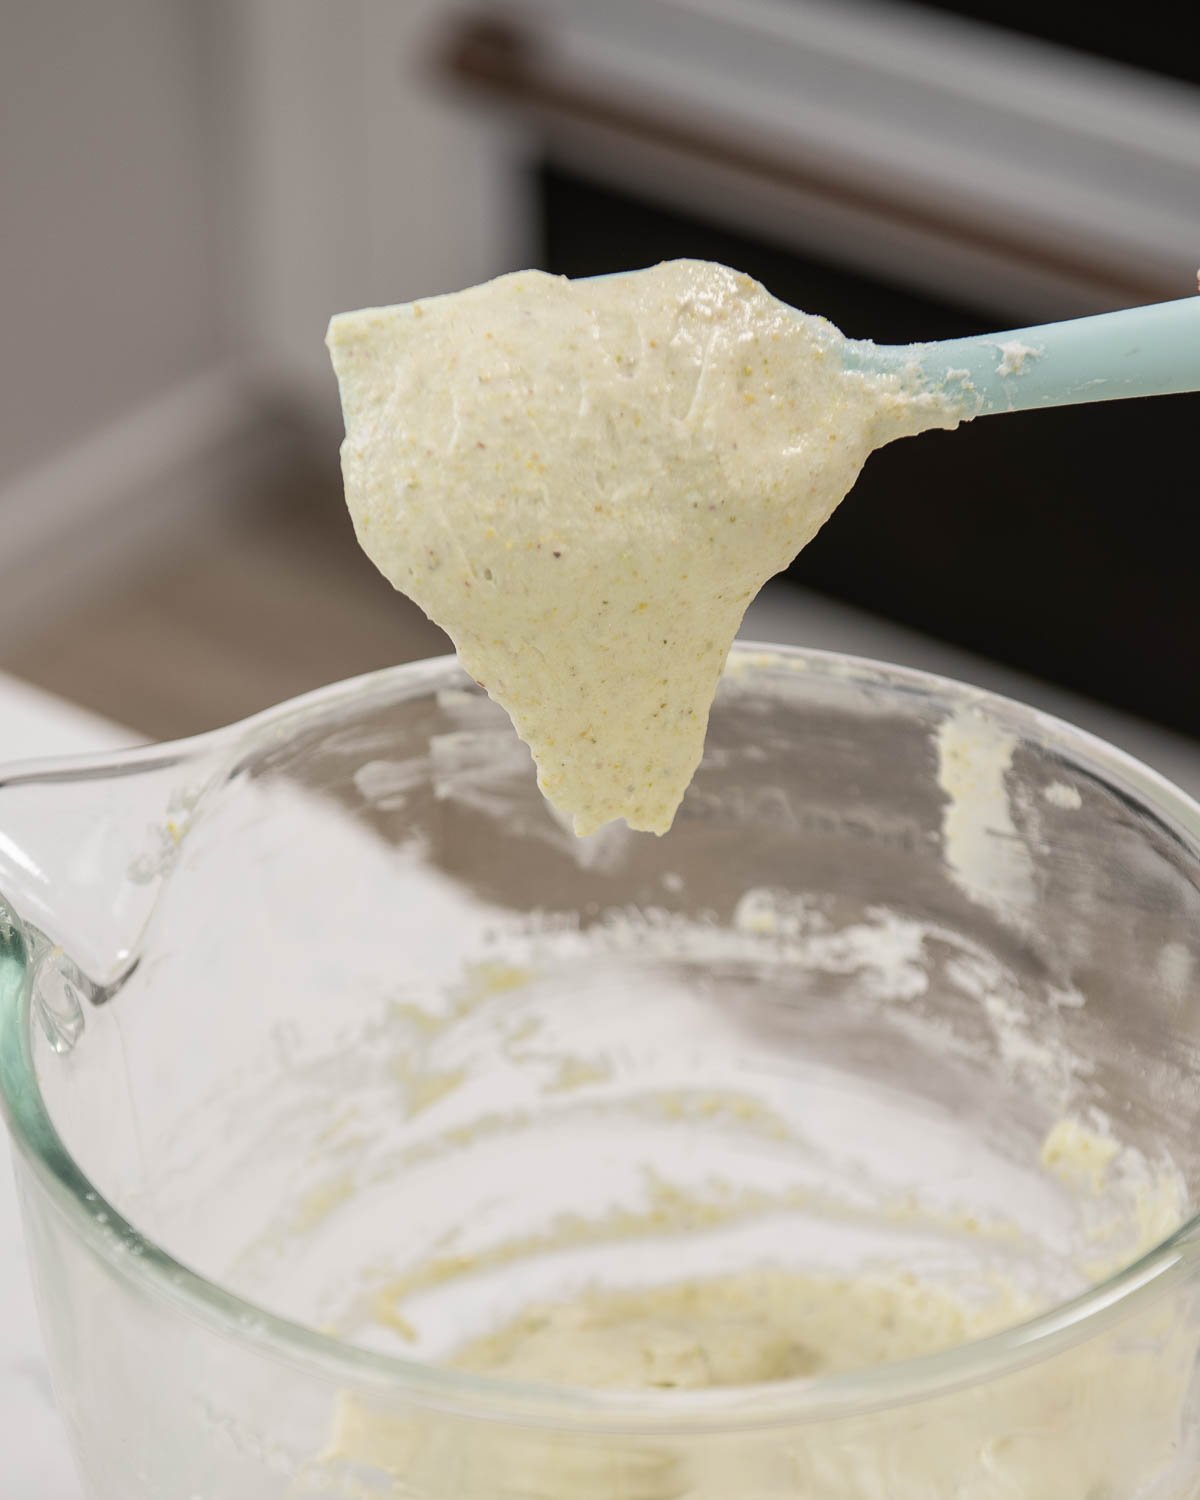
  9. Then, add in the rest of the flour mixture and continue to gently fold it in using a circular motion. When you do this, you want to gently move your spatula around the bowl without incorporating too much air into the mixture. While you're folding, occasionally, drag your spatula through the middle and then go back to using a circular motion. Stop folding the mixture once it no longer appears goopy and the batter begins to look stretchy. If you can draw a figure 8 using the batter that's falling off of your spatula, then your batter is ready.
  10. Preheat the oven to 300ºF (149ºC).
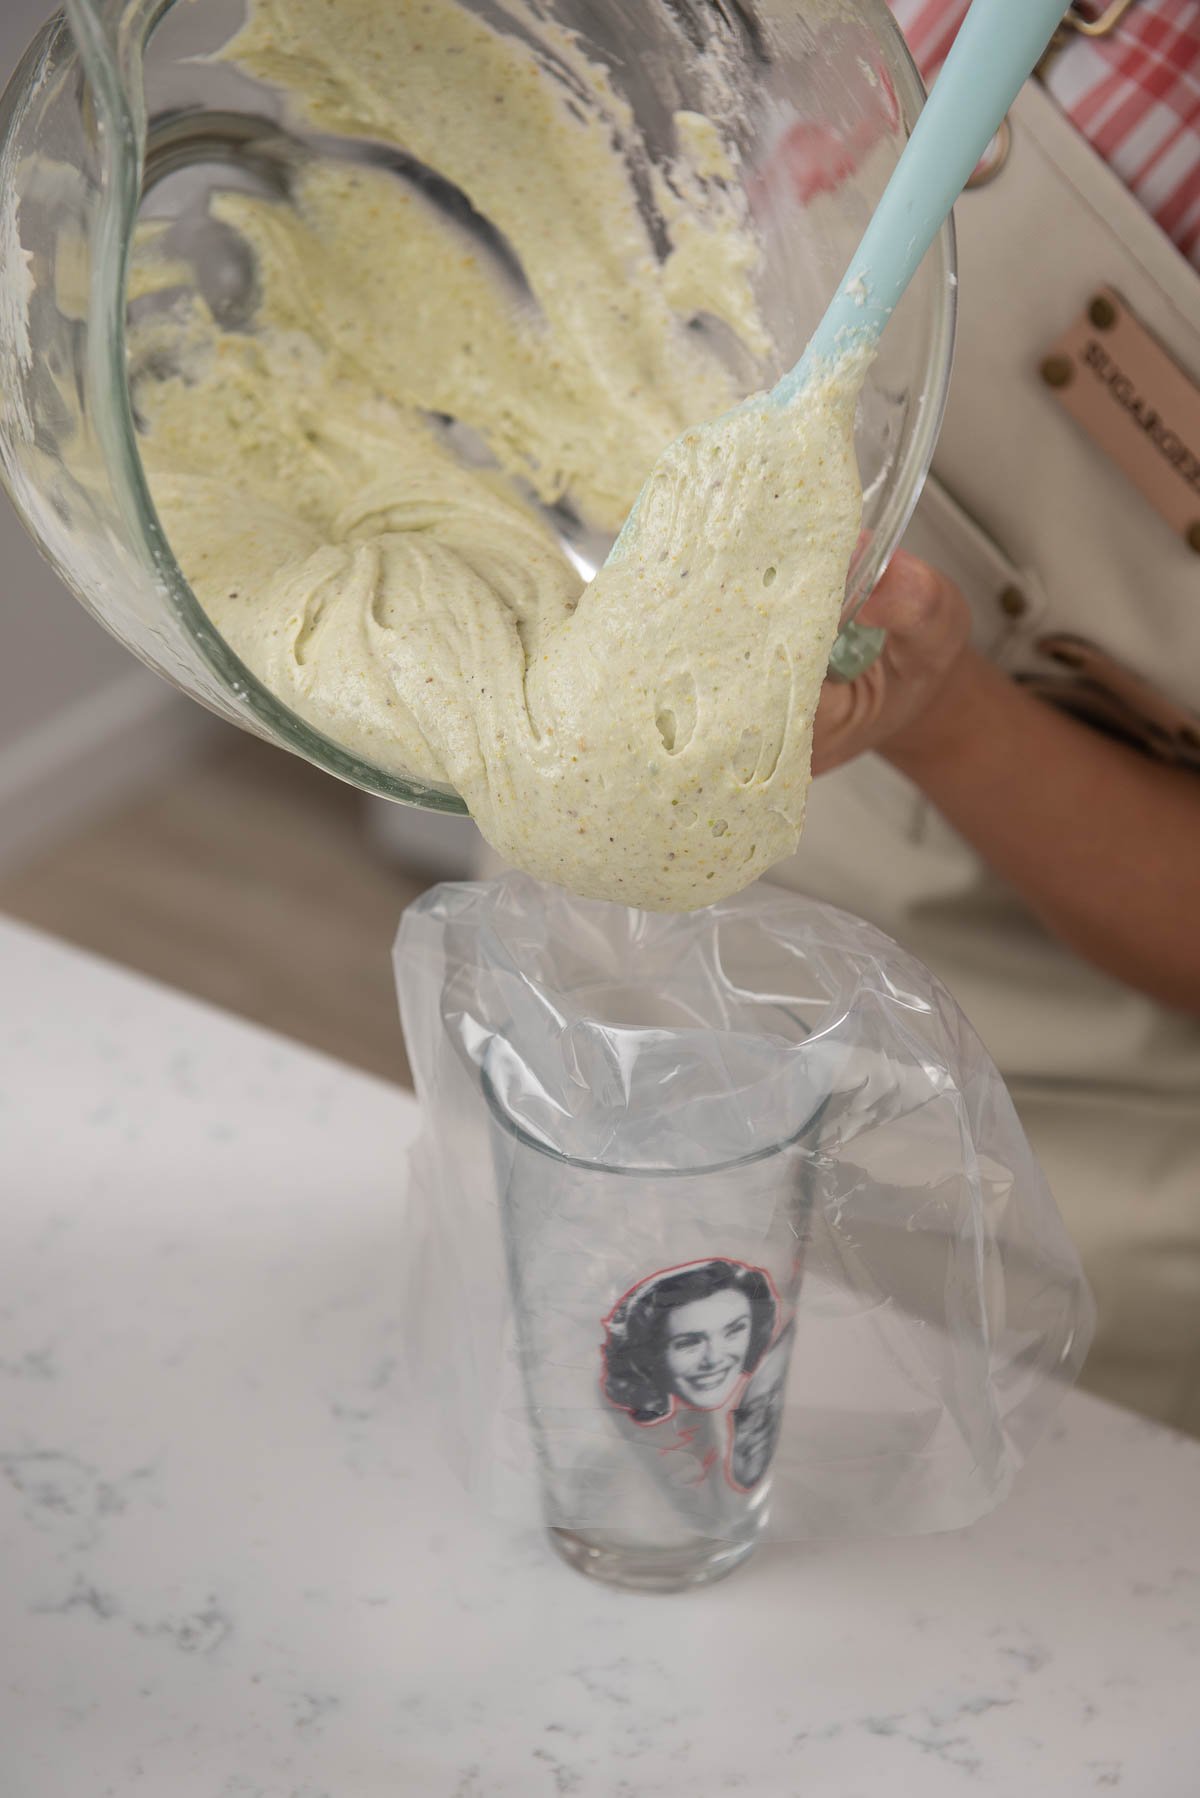
  11. Prepare a piping bag with a medium round tip, and fill it with the batter.
  12. Line a baking sheet with parchment paper. PRO TIP: Use a few dollops of batter to 'glue' down the parchment paper to your baking sheet to keep it from moving around.
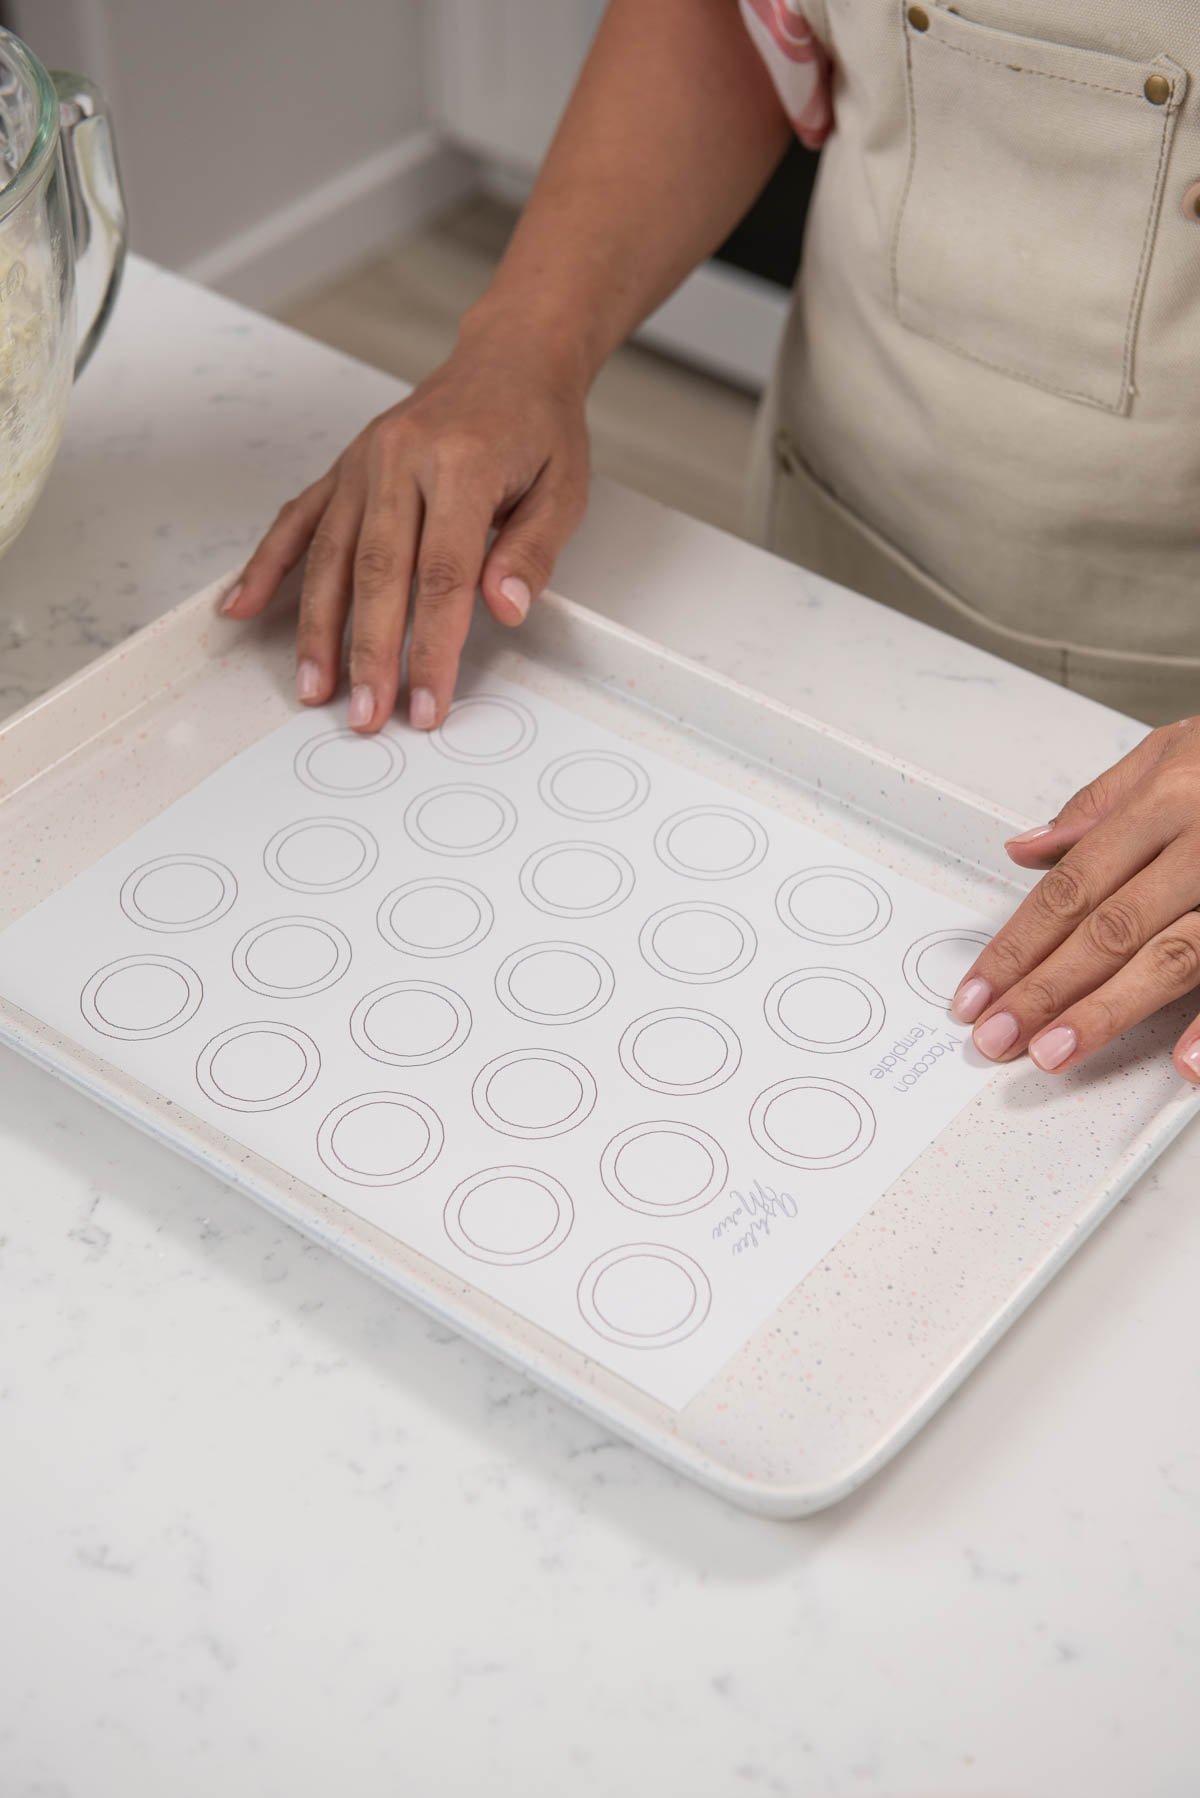
  13. Then, if you're using my macaron template, place that layer on top of your parchment paper. Finally, add another layer of parchment paper on top of the template.
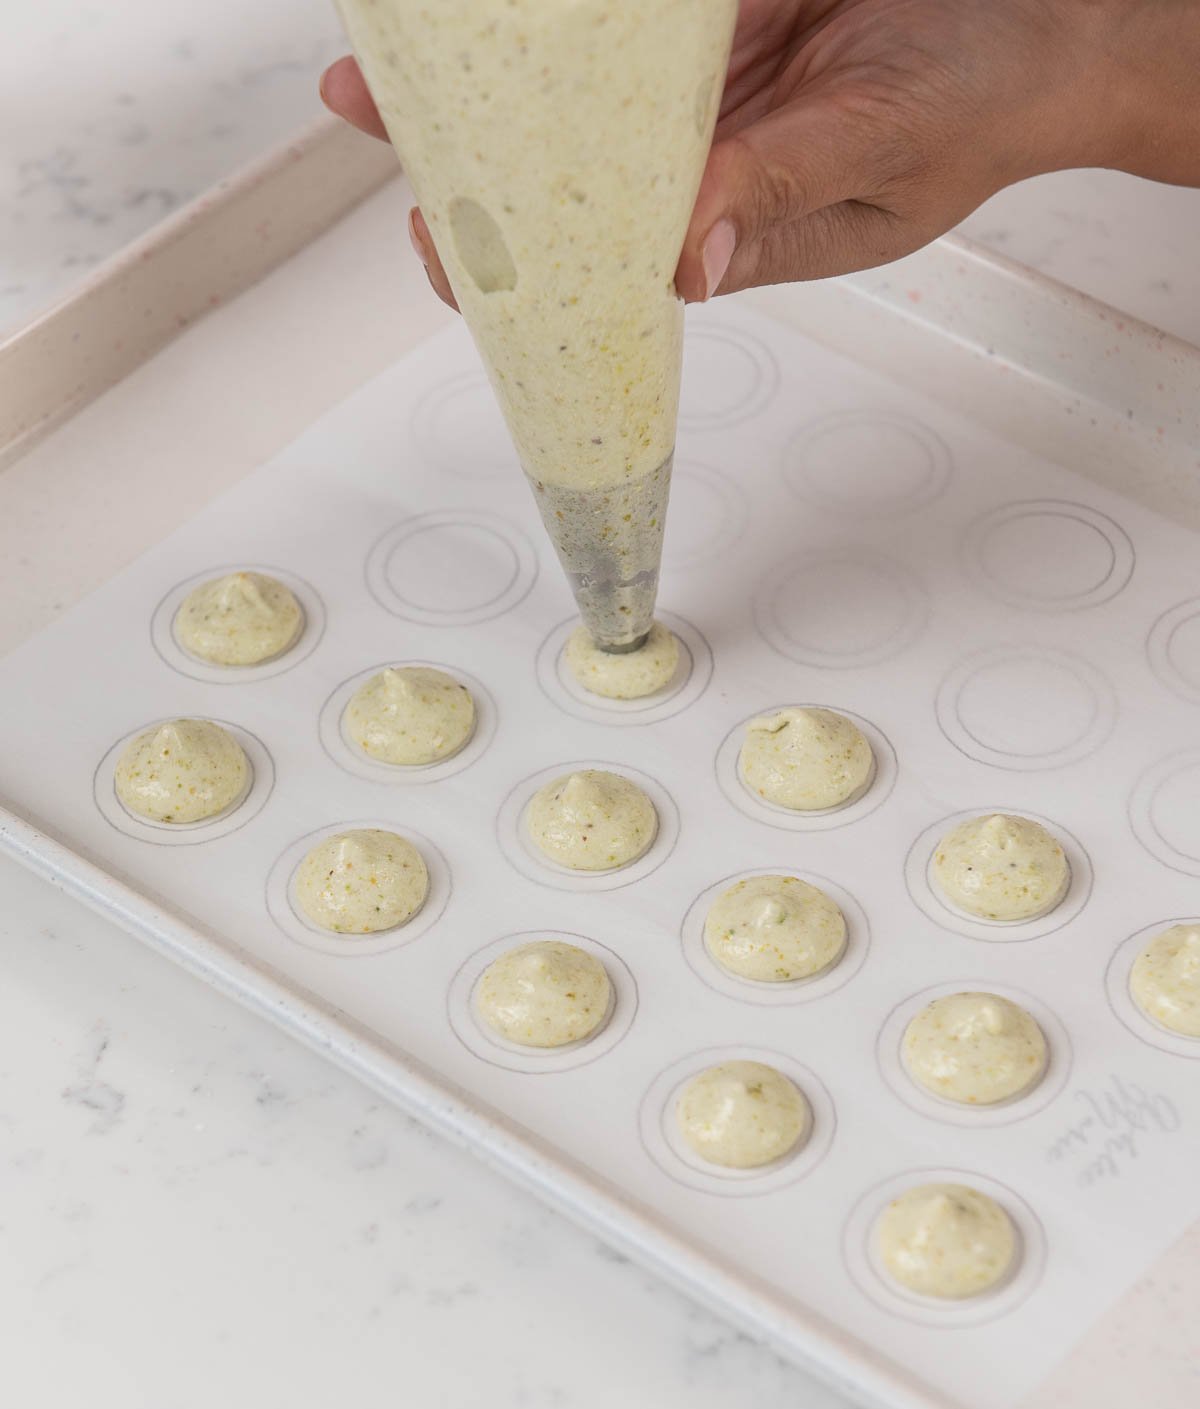
  14. Pipe your batter onto the parchment paper.
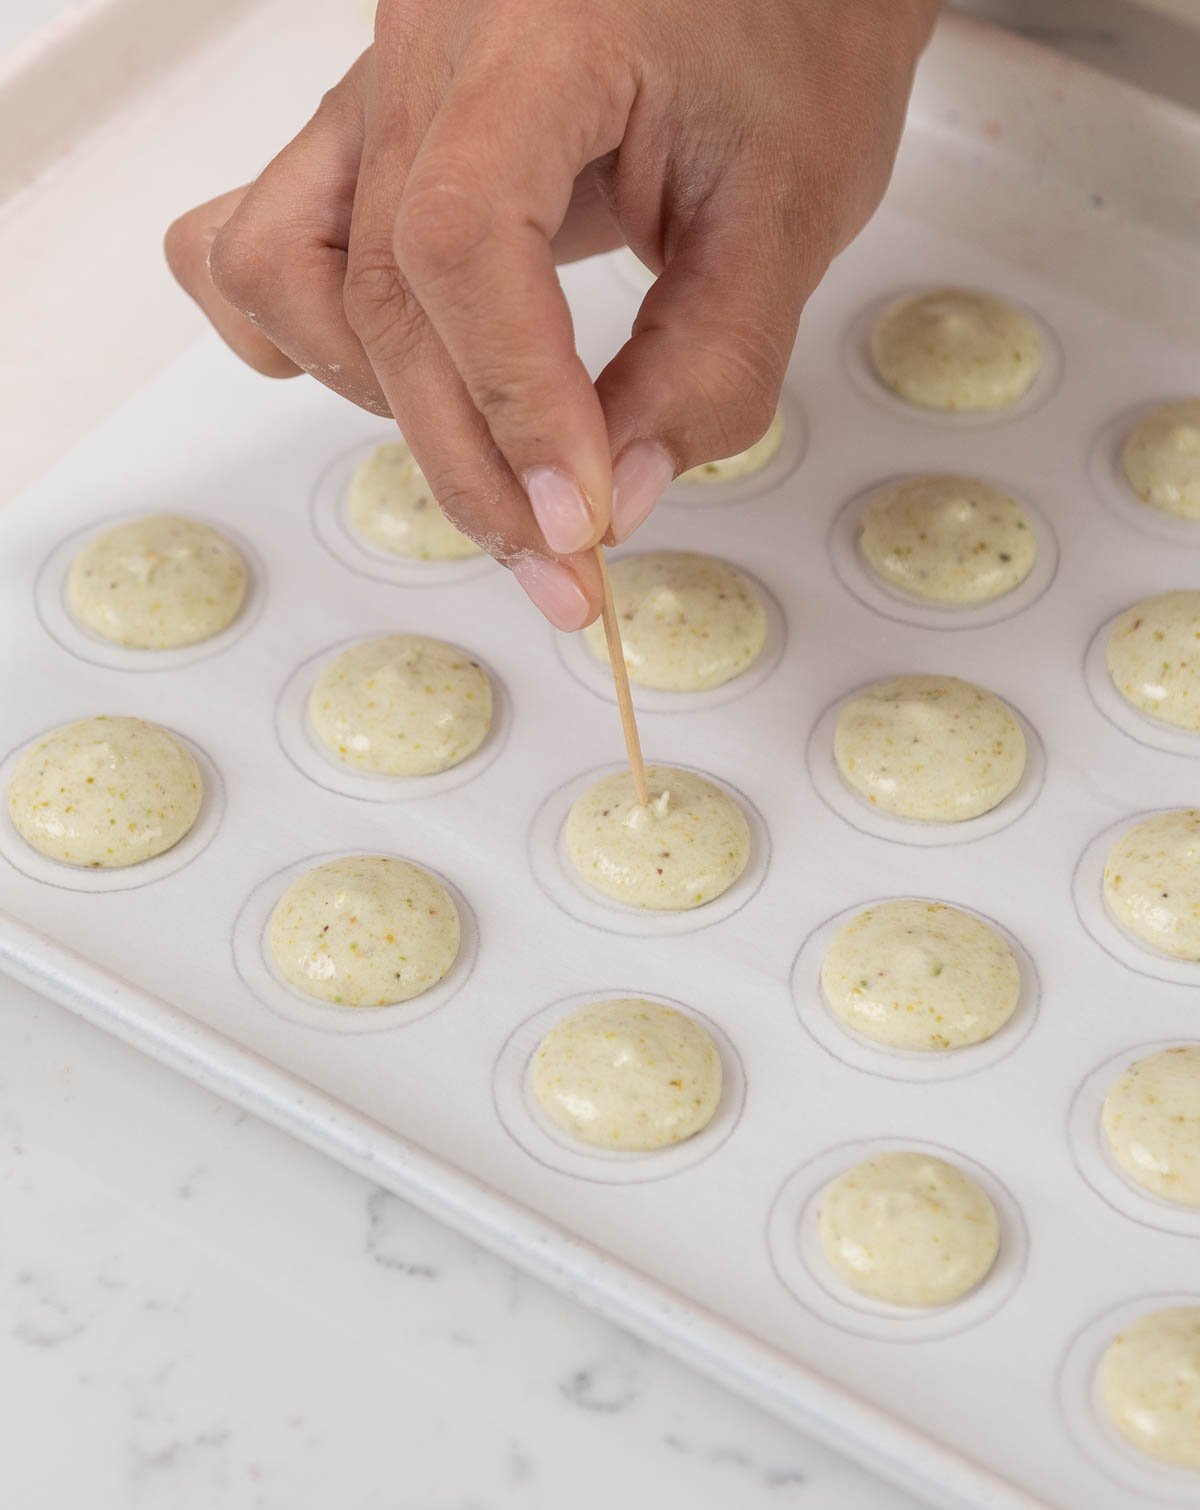
  15. Next, gently tap the baking sheet onto the countertop a few times to make sure there are no bubbles on the surface. Then, go in with a toothpick to break up any leftover bubbles. If you skip this step, your macarons may explode in the oven!
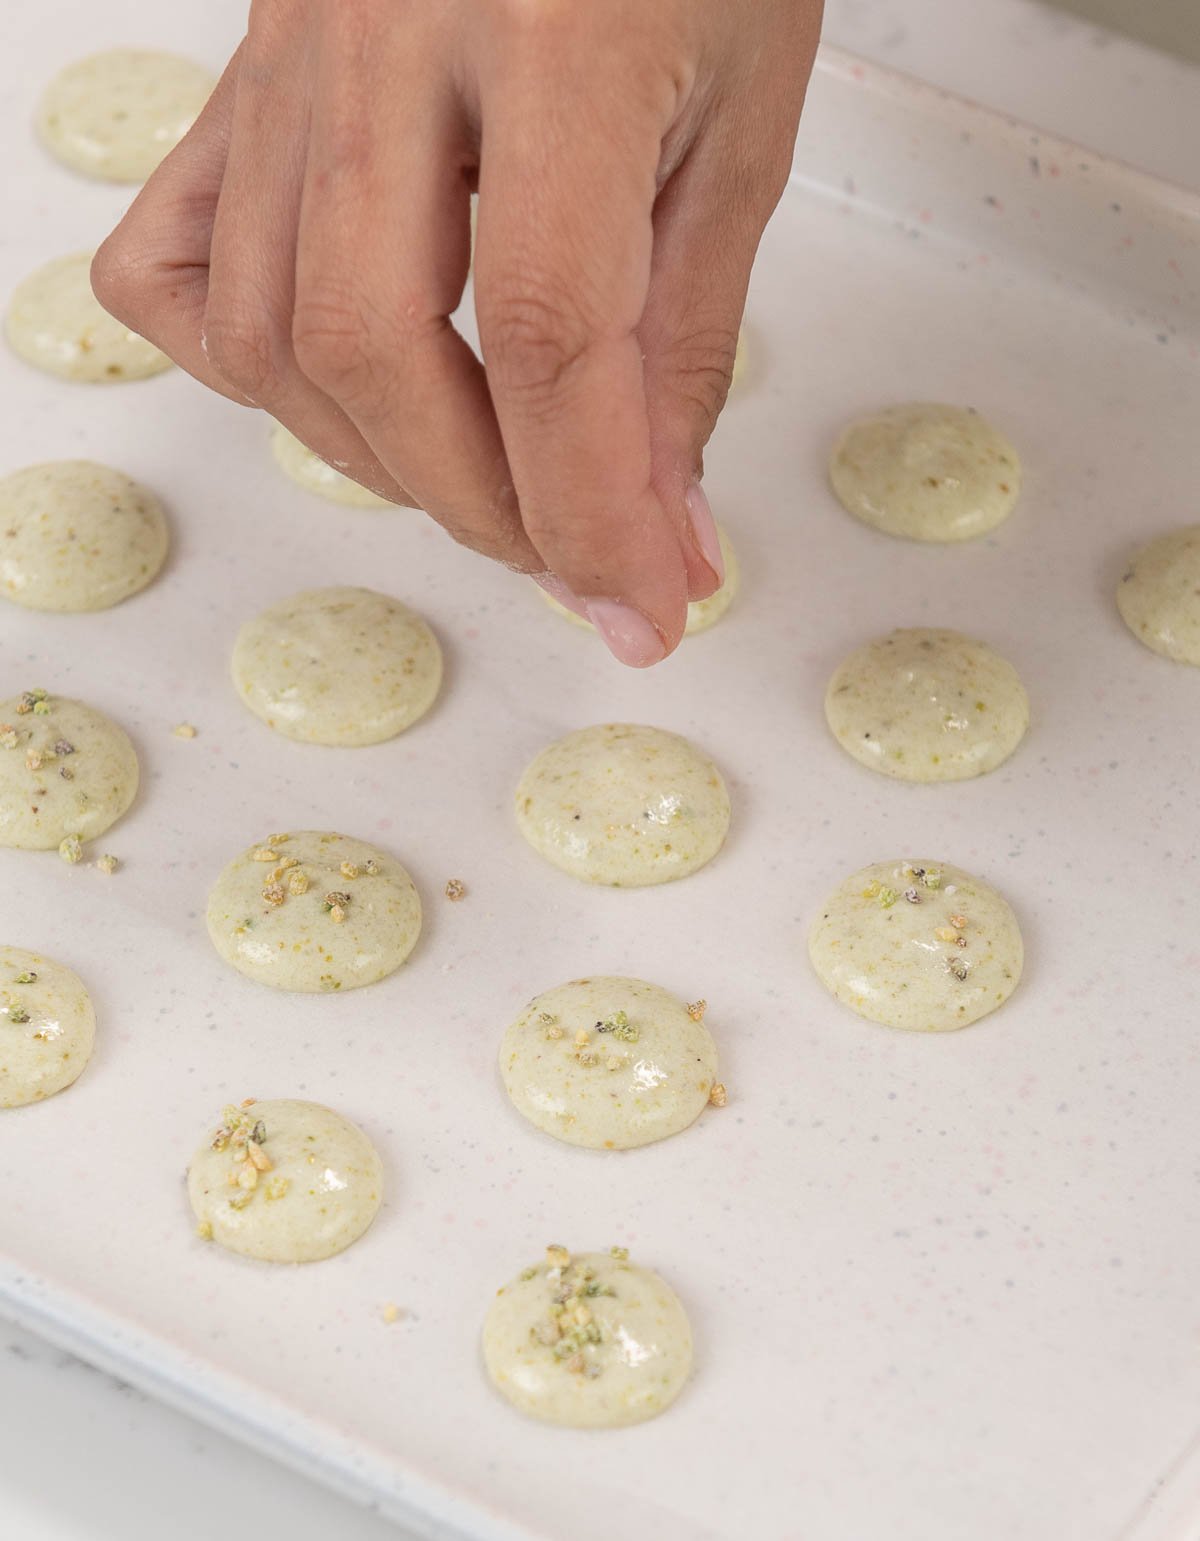
  16. (Optional) Sprinkle a pinch of ground-up pistachio pieces on top to garnish the macarons.
  17. Then, set the macarons aside at room temperature to dry. Ultimately, this can take anywhere from 15 minutes to a few hours depending on how humid it is where you are. Macarons are dry and ready to be baked in the oven once you can touch them and a crust or skin has appeared on the macaron.
  18. Bake in the oven at 300ºF (149ºC) for 10 to 15 minutes. Macarons are done once you see browning around the edges. If they are not quite baked, then bake them for an additional 1 minute because cooked cookies should pull away from the parchment paper easily without sticking. If they do stick, then they were not baked enough. PRO TIP: If you bake your macarons on a silicone mat, it may take a few extra minutes for them to bake properly.

Preparing the White Chocolate Ganache

  1. First, warm the chocolate in a microwave-safe bowl in the microwave for 1 minute. Be careful not to burn the chocolate since we only want to soften it.
  2. Next, using a saucepan, pour the heavy whipping cream into the pan and bring it to a simmer.
  3. Once the heavy whipping cream is simmering, carefully pour it over the chocolate in the microwave-safe bowl. Make sure the chocolate is fully covered.
  4. Then, let the heavy whipping cream and the chocolate set for 5 minutes.
  5. Whisk gently to combine the cream and the chocolate. Be careful not to incorporate any air into the bowl.
  6. Finally, pour it into a shallow pan or a dish to let it stiffen up. Then, stir it until it's creamy using it to fill your macarons. If your ganache is too firm, you can microwave it for 10 seconds to soften it, and then stir it until the ganache is the desired consistency. 

Making the Easy Buttercream Frosting

  1. First, place the egg whites and powdered sugar in a stand mixer bowl. Using the whisk attachment, combine the ingredients on low speed first, and then whip the ingredients on high for 1 minute to dissolve the powdered sugar 
  2. Then, add in the salt and the vanilla extract and mix.
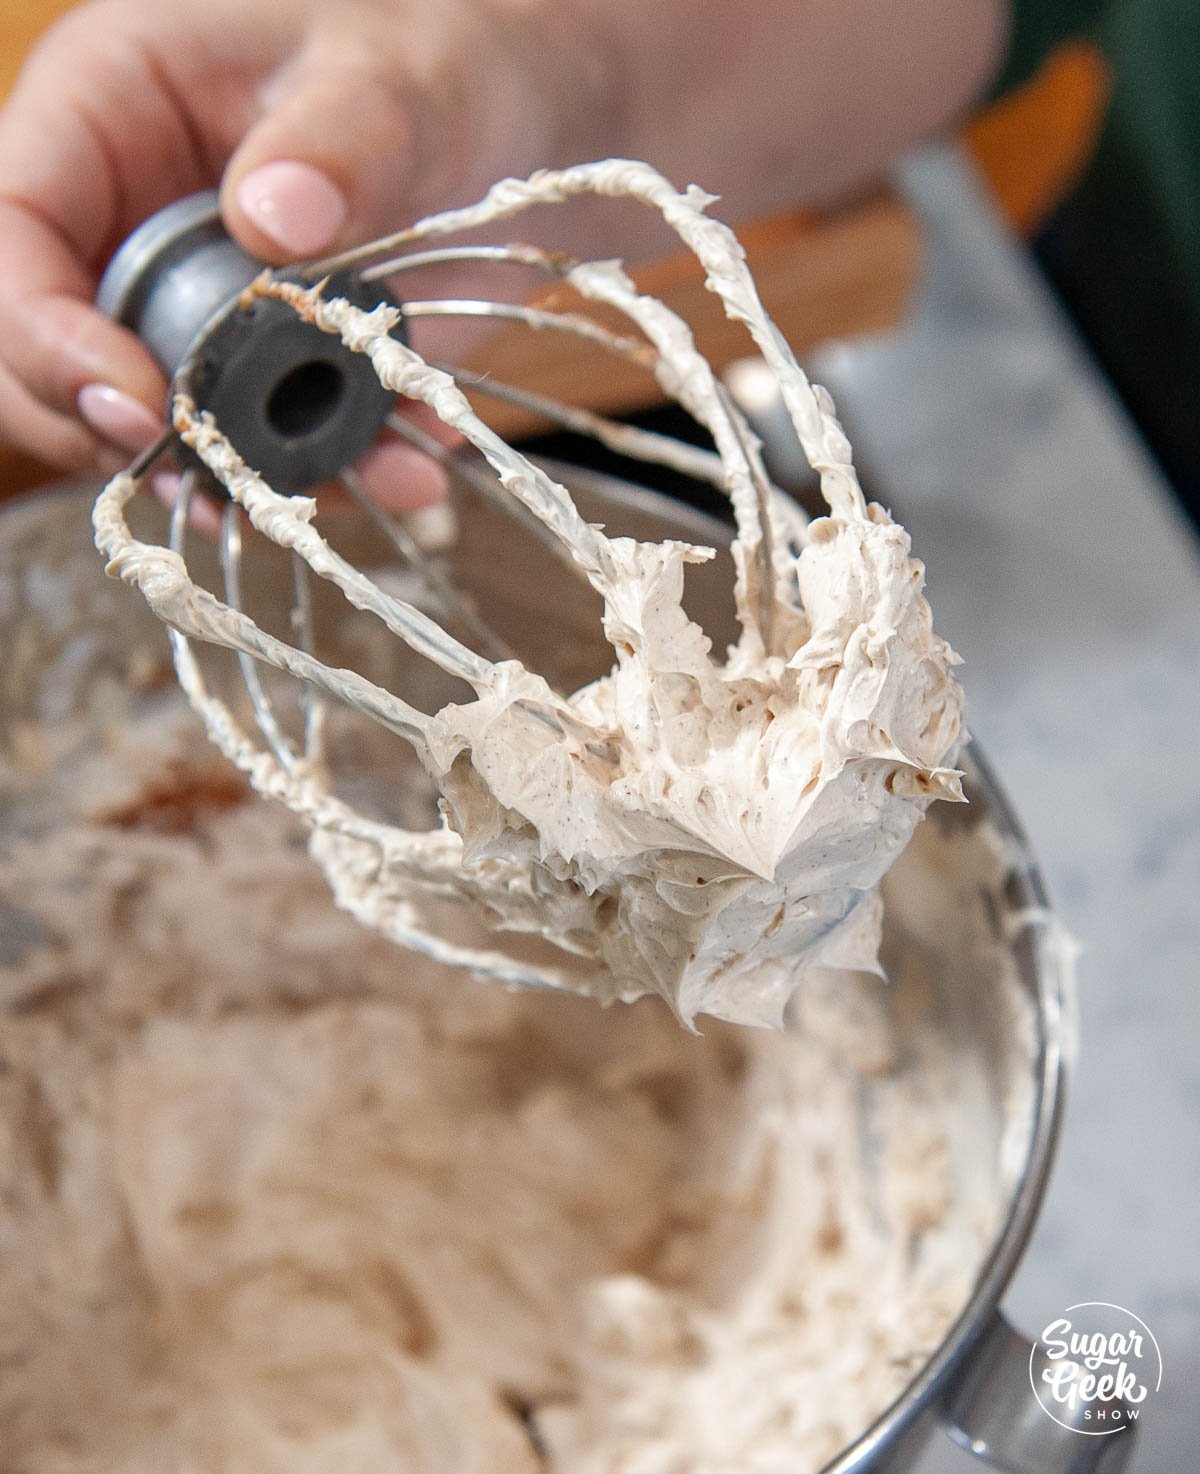
  3. Next, add in your butter in small chunks and whip it with the whisk attachment to combine everything. It will look curdled at first. This is normal. It will also look pretty yellow. Keep whipping. 
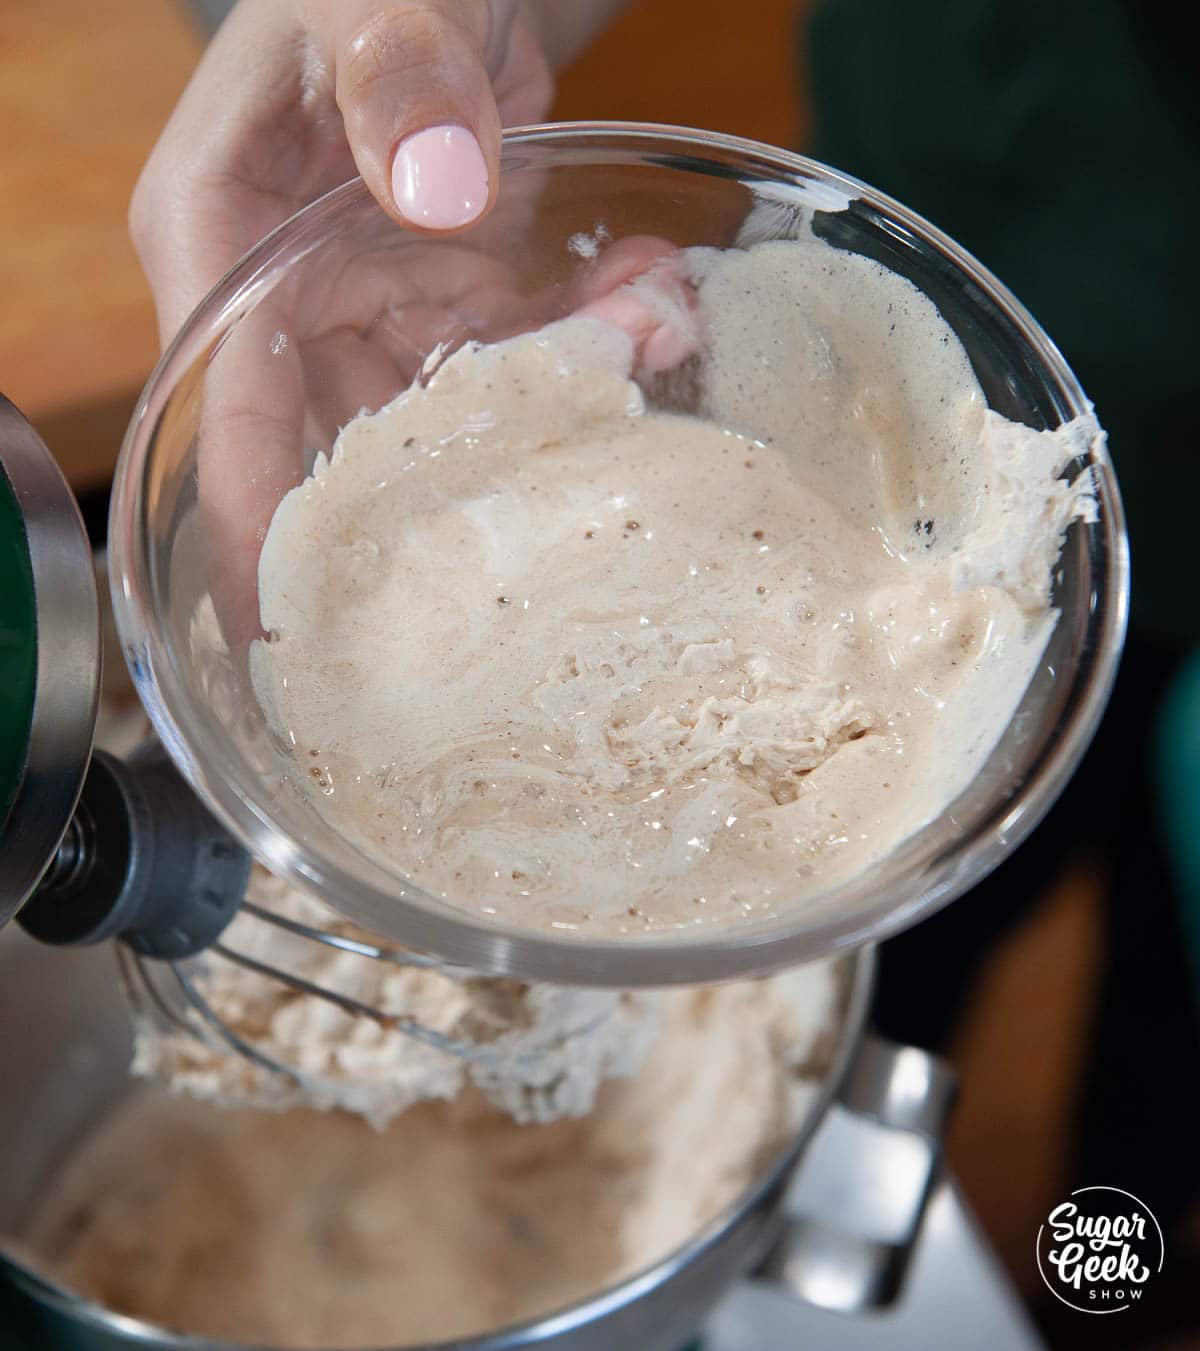
  4. If your buttercream looks curdled, remove about ⅓ cup of buttercream and melt it in the microwave for 10-15 seconds until it is just barely melted. Then, pour it back into the whipping buttercream to bring it all together.
  5. Next, add a very small drop of purple food coloring (optional). I would recommend using a toothpick to transfer it to the bowl. Then, whip it on high with the whisk attachment for 8-10 minutes until it is very white, light, and shiny. 
  6. Finally, taste the buttercream. If it tastes like sweet ice cream, then it's ready!

White Chocolate Buttercream Filling

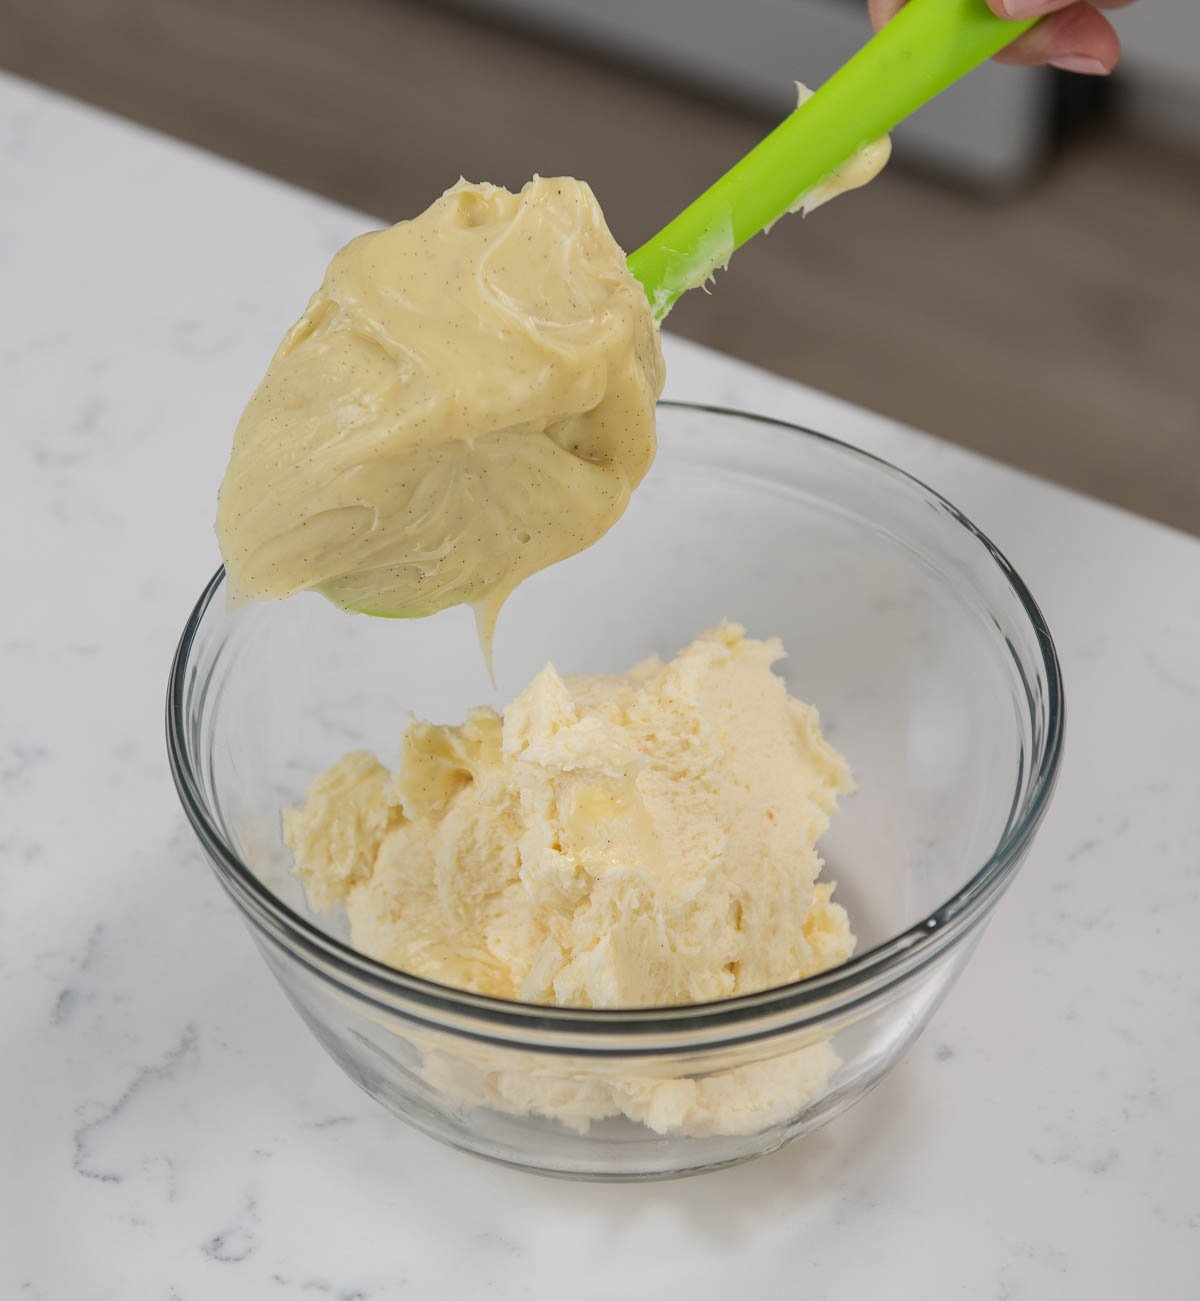
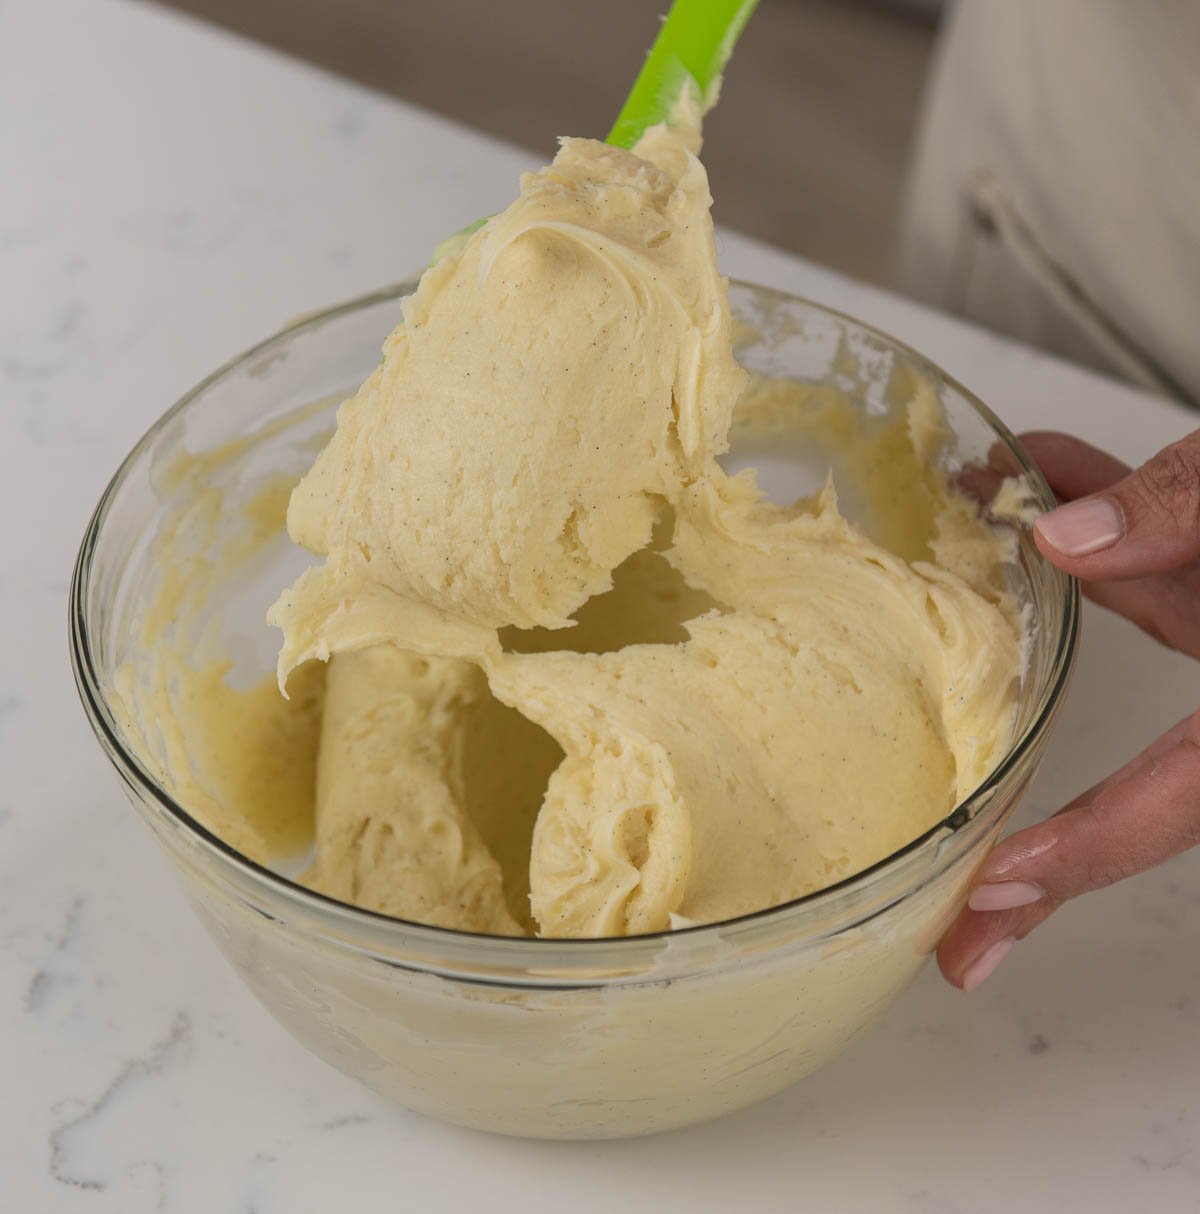
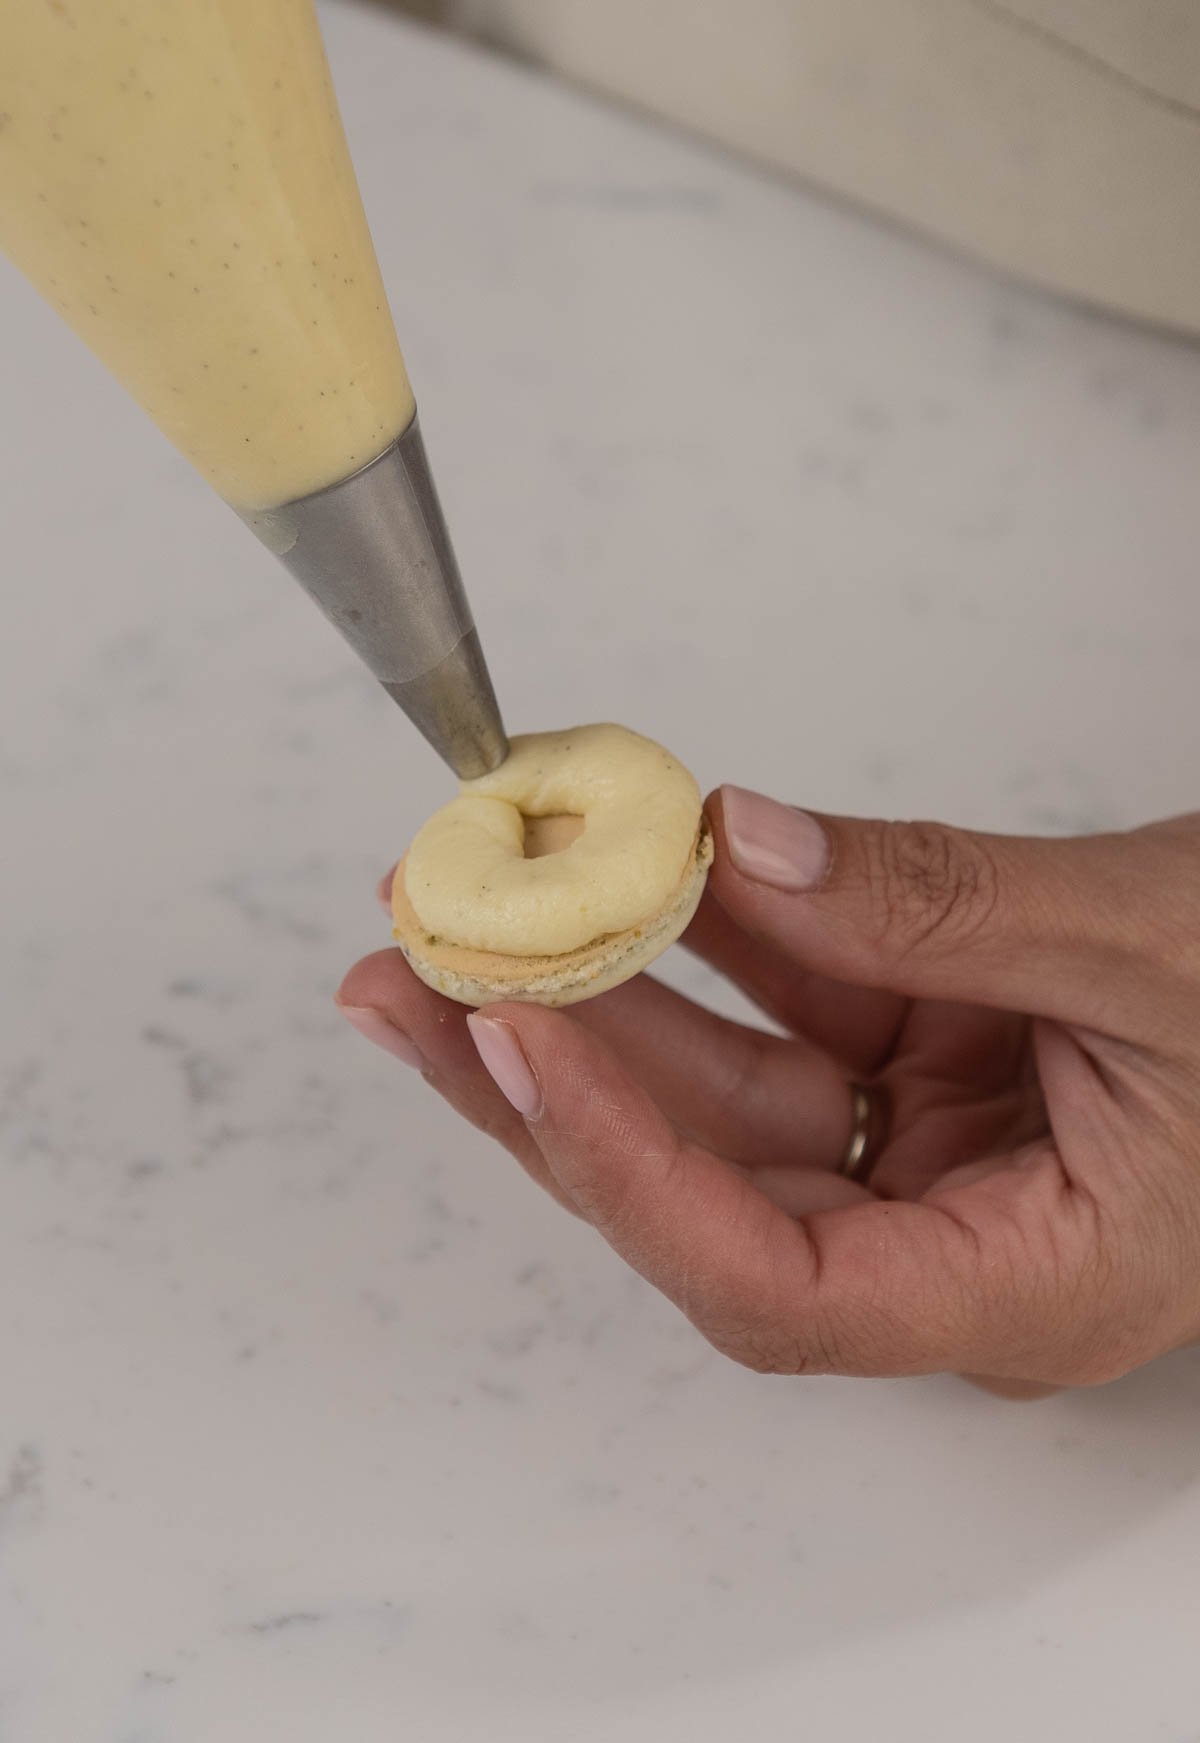
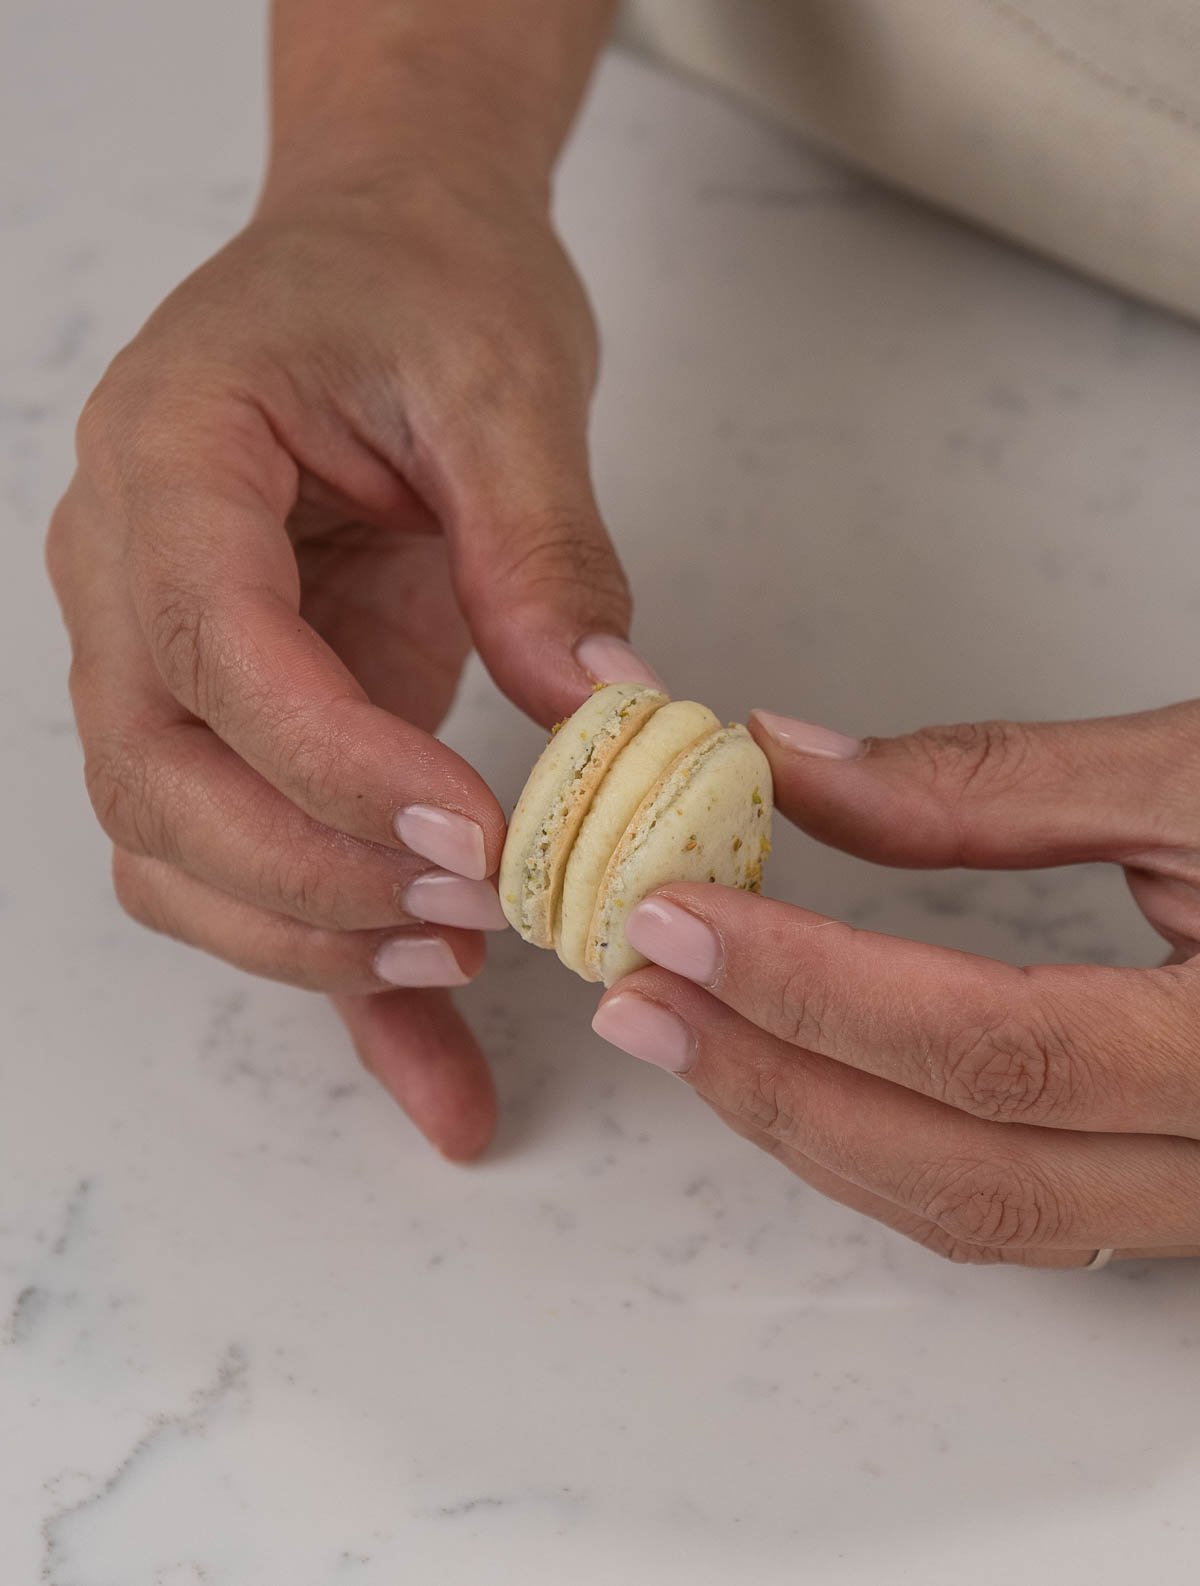
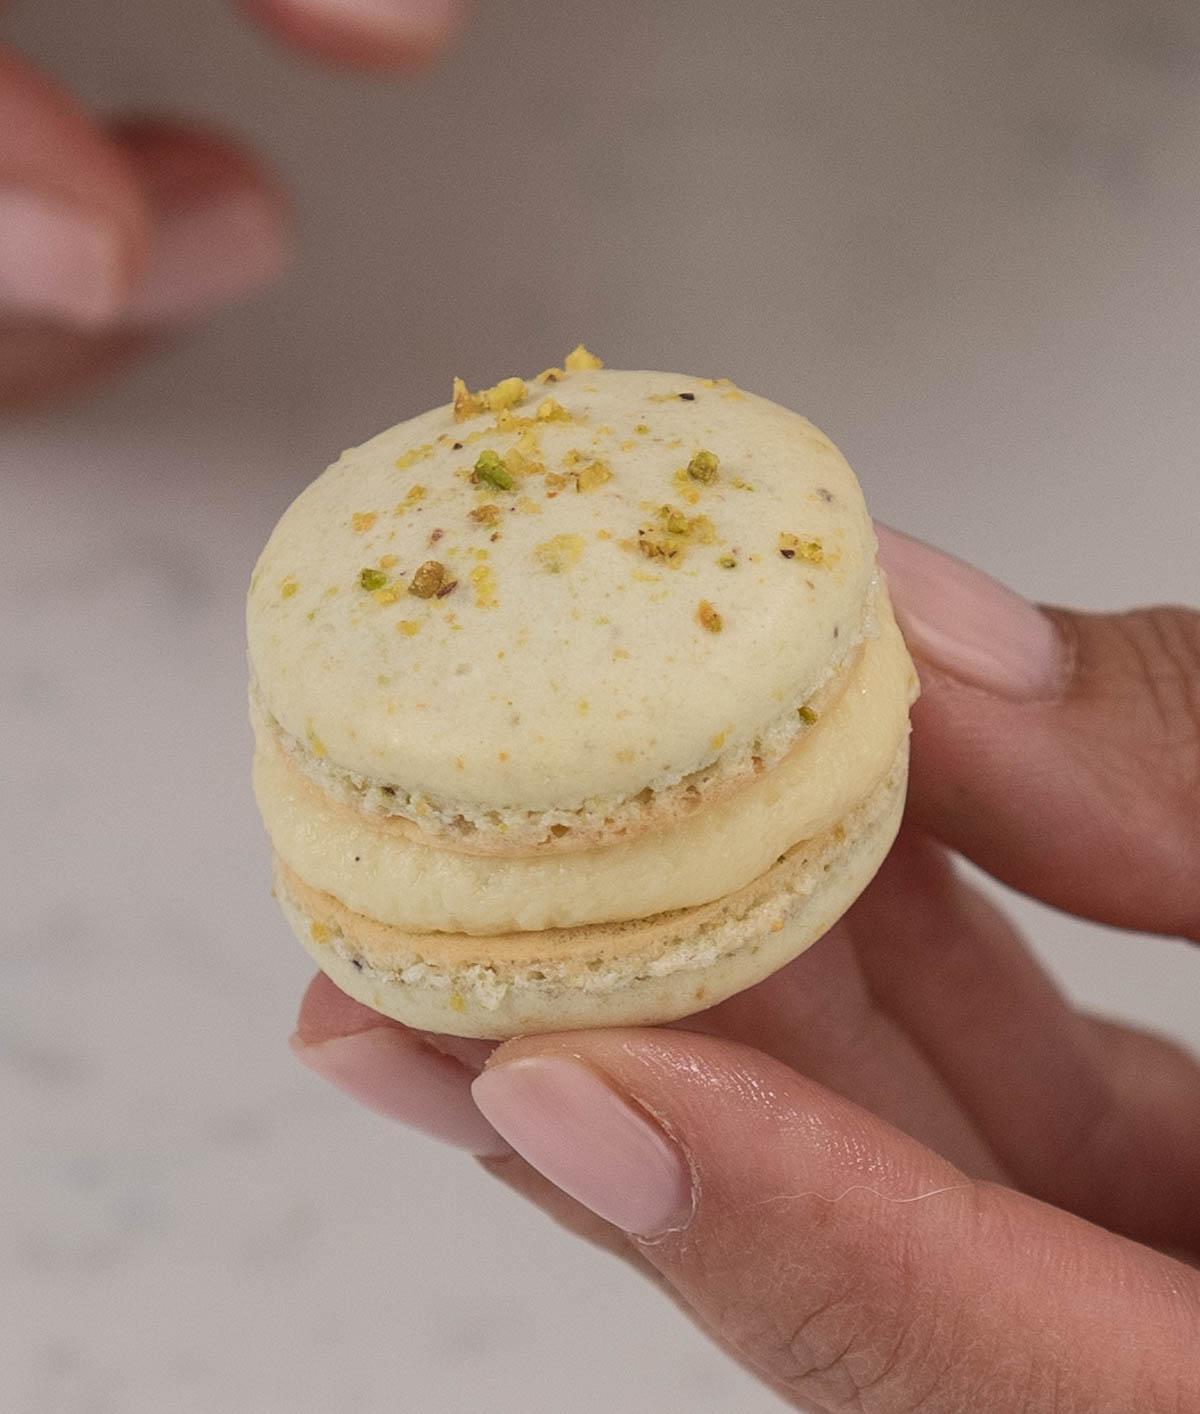
  1. Mix your white chocolate ganache with your buttercream frosting, and you are ready to fill a piping bag with your filling and assemble your macarons!hand using a spatula to add ganache to frostinghand using a spatula to gently fold fillinghand piping filling onto a macaronhands assembling a pistachio macaronhand holding a pistachio macaronpistachio macarons stacked and laying down

FAQs

Do I have to make white chocolate ganache and buttercream frosting?

Not at all! You can customize this macaron recipe if you do not want to make both. You can adjust it to include only the white chocolate ganache filling or even just the easy buttercream frosting by itself.

What is the difference between a macaron and a macaroon?

A macaron (mack-a-rohn) is a French cookie made with almond flour, sugar, and egg whites. It has a delicate, crispy shell and a soft and chewy center. They're not very sweet and are often brightly colored with a variety of flavors.

A macaroon (mack-a-roon) is a cookie made from shredded coconut, egg whites, and powdered sugar. It is usually scooped or piped into small balls and baked until the edges are golden brown. The texture is chewy and the flavor is very sweet. 

Why are my macarons flat?

Macarons will fall flat and will be hollow in the center due to overmixing the batter.

Why do my macarons blotchy?

Oily blotches on the surface of your macaron are from overmixing and causing the oil from the almond flour to release into the batter. Try folding the batter more gently.

Why are my macarons lumpy?

Undermixing your batter or not using super fine almond flour will make lumpy or rough-textured macarons.

Why are my macarons cracking?

Cracked macarons are from not letting them sit at room temp for long enough so they haven't had time to develop a shell or they were not mixed enough.

Why are my macarons hollow?

Hollow macaron shells can result from not popping the bubbles in the surface of the macarons before baking, or from the meringue being under-whipped.

Can I freeze macarons?

Absolutely! You can fill the macarons and freeze them for later. Obviously, this is especially helpful if you are making macarons for a party or an event.

Tips for the Perfect Macarons

PRO TIP: Prepare your egg whites a day in advance before mixing in order to make a stronger meringue! To do that, place the egg whites in an uncovered bowl in the refrigerator overnight (or even a couple of days if you plan ahead). If you do this, then it allows the water to evaporative out of them and ultimately whip into an ultimately stronger meringue to make macarons!

Additional tips and tricks:

  • Sift your ingredients before mixing
  • Weigh all your ingredients in grams for the best and most accurate results
  • Wipe the inside of your bowl and attachments well to make sure they are grease-free
  • Don't over-whip your egg whites. Ensure they are at the firm peak stage but still glossy and moist
  • If your room is very humid, put a space heater next to the macarons to help dry them out

More Recipes You'll Love

French macaron

Strawberry macaron

Chocolate macaron

White chocolate ganache

Recipe

close up of three pistachio macarons
Print Recipe
4.92 from 12 votes

Pistachio Macaron Recipe

No-fail, crispy and chewy pistachio macaron recipe filled with creamy, white chocolate buttercream.
Prep Time30 minutes mins
Cook Time15 minutes mins
Total Time45 minutes mins
Course: Dessert
Cuisine: French
Servings: 18 filled cookies
Calories: 500kcal
Author: Liz Marek

Equipment

  • Food Scale
  • Stand Mixer
  • Sifter
  • Parchment Paper
  • Piping Bag
  • 802 Round Piping Tip
  • Food processor

Ingredients

Pistachio Macarons

  • 1 ounce almond flour
  • 1 ounce pistachio flour
  • 4 ounces powdered sugar
  • 1 pinch salt
  • 2 ounces egg whites aged overnight in the fridge and brought to room temperature
  • ¼ teaspoon cream of tartar
  • 1 ounce granulated sugar
  • ½ teaspoon vanilla extract
  • 2 drops green gel food coloring

White Chocolate Ganache

  • 24 ounces White chocolate
  • 8 ounces heavy whipping cream

Easy Buttercream Frosting

  • 12 ounces unsalted butter (room temperature) You can use salted butter but it will affect the taste and you need to leave out additional salt
  • 12 ounces powdered sugar sifted if not from a bag
  • 1 teaspoon vanilla extract
  • ¼ teaspoon salt
  • 3 ounces pasteurized egg whites room temperature
  • 1 tiny drop purple food coloring (optional) for whiter frosting
US Customary - Metric

Instructions

Pistachio Macarons

  • Download my macaron template to print before you get started! This is an optional step.
  • First, you'll want to prepare your pistachio flour. Use a food processor to grind your pistachios up to an ultra-fine, flour-like texture. Or, if you prefer, you can buy your own pistachio flour.
  • Next, sift your pistachio flour, almond flour, salt, and powdered sugar into a large mixing bowl. Sift these ingredients 2 times. Other than sifting out large pieces, the reason you need to sift it twice is to allow the powdered sugar to properly mix with the flours while also aerating the flour (which will make it easier to mix with the egg whites).
  • Then, in the bowl of your stand mixer, add in the egg whites and mix them on medium speed using the whisk attachment until they appear foamy.
  • Once the egg whites appear foamy, start to slowly sprinkle in the granulated sugar. Mix them until the egg whites turn white and you can see some lines forming in the surface from the whisk. Now, add in the cream of tartar and whip them until soft, glossy peaks form.
  • Then, add in the vanilla extract and continue to mix until you have firm, glossy peaks. Usually, this process can take anywhere from 10 to 15 minutes. To test if your meringue is ready, turn off the mixer and remove the whisk attachment. Hold the whisk attachment to see if the meringue is firm enough to hold its shape without appearing curdled, dry, or breaking apart.
  • Next, add in a very small amount of green food coloring (optional). I prefer to use Americolor food color gel. Use a toothpick to grab 2 drops of green food coloring and then wipe it onto a spatula. Then, use the spatula to gently fold it into your meringue.
  • Next, transfer ⅓ of your flour mixture into the meringue and fold it in.
  • Once the flour is folded in and combined with the meringue, add in half of the remaining flour mixture and gently fold it in using a circular motion (like a tumble dryer).
  • Then, add in the rest of the flour mixture and continue to gently fold it in using a circular motion. When you do this, you want to gently move your spatula around the bowl without incorporating too much air into the mixture. While you're folding, occasionally, drag your spatula through the middle and then go back to using a circular motion. Stop folding the mixture once it no longer appears goopy and the batter begins to look stretchy. If you can draw a figure 8 using the batter that's falling off of your spatula, then your batter is ready.
  • Preheat the oven to 300ºF (149ºC).
  • Prepare a piping bag with a medium round tip, and fill it with the batter.
  • Line a baking sheet with parchment paper. PRO TIP: Use a few dollops of batter to 'glue' down the parchment paper to your baking sheet to keep it from moving around.
  • Then, if you're using my macaron template, place that layer on top of your parchment paper. Finally, add another layer of parchment paper on top of the template.
  • Pipe your batter onto the parchment paper.
  • Next, gently tap the baking sheet onto the countertop a few times to make sure there are no bubbles on the surface. Then, go in with a toothpick to break up any leftover bubbles. If you skip this step, your macarons may explode in the oven!

  • (Optional) Sprinkle a pinch of ground-up pistachio pieces on top to garnish the macarons.
  • Then, set the macarons aside at room temperature to dry. Ultimately, this can take anywhere from 15 minutes to a few hours depending on how humid it is where you are. Macarons are dry and ready to be baked in the oven once you can touch them and a crust or skin has appeared on the macaron.
  • Bake in the oven at 300ºF (149ºC) for 10 to 15 minutes. Your macarons will be done once you see browning around the edges. If they are not quite baked, then bake them for an additional 1 minute. Ultimately, cooked cookies should pull away from the parchment paper easily without sticking. If they do stick, they were not baked enough. PRO TIP: If you bake your macarons on a silicone mat, then it may take a few extra minutes for them to bake properly.

White Chocolate Ganache

  • First, warm the chocolate in a microwave-safe bowl in the microwave for 1 minute. Be careful not to burn the chocolate since we only want to soften it.
  • Next, using a saucepan, pour the heavy whipping cream into the pan and bring it to a simmer.
  • Once the heavy whipping cream is simmering, carefully pour it over the chocolate in the microwave-safe bowl. Make sure the chocolate is fully covered.
  • Then, let the heavy whipping cream and the chocolate set for 5 minutes.
  • Whisk gently to combine the cream and the chocolate. Be careful not to incorporate any air into the bowl.
  • Finally, pour it into a shallow pan or a dish to let it stiffen up. Then, stir it until it's creamy using it to fill your macarons. If your ganache is too firm, you can microwave it for 10 seconds to soften it, and then stir it until the ganache is the desired consistency. 

Easy Buttercream Frosting

  • First, place the egg whites and powdered sugar in a stand mixer bowl. Using the whisk attachment, combine the ingredients on low speed first, and then whip the ingredients on high for 1 minute to dissolve the powdered sugar 
  • Then, add in the salt and the vanilla extract and mix.
  • Next, add in your butter in small chunks and whip it with the whisk attachment to combine everything. It will look curdled at first. This is normal. It will also look pretty yellow. Keep whipping. 
  • If your buttercream looks curdled, remove about ⅓ cup of buttercream and melt it in the microwave for 10-15 seconds until it is just barely melted. Then, pour it back into the whipping buttercream to bring it all together.
  • (Optional) Add a very small drop of purple food coloring. I would recommend using a toothpick to transfer it to the bowl. Then, whip it on high with the whisk attachment for 8-10 minutes until it is very white, light, and shiny. 
  • Finally, taste the buttercream. If it tastes like sweet ice cream, then it's ready!

White Chocolate Buttercream Filling

  • Mix your white chocolate ganache with your buttercream frosting, and you are ready to fill a piping bag with your filling and assemble your macarons!

Video

Notes

Important Things To Note Before You Start
  1. Use a scale to weigh your ingredients (including liquids) unless otherwise instructed (Tablespoons, teaspoons, pinch, etc). Metric measurements are available in the recipe card. Scaled ingredients are much more accurate than using cups and help ensure the success of your recipe. 
  2. Practice Mise en Place (everything in its place). Measure out your ingredients ahead of time and have them ready before you start mixing to reduce the chances of accidentally leaving something out.
  3. PRO TIP: Prepare your egg whites a day in advance before mixing in order to make a stronger meringue! To do that, place the egg whites in an uncovered bowl in the refrigerator overnight (or even a couple of days if you plan ahead). If you do this, then it allows the water to evaporative out of them and ultimately whip into an ultimately stronger meringue to make macarons!
  4. If you're already comfortable making white chocolate ganache and want to try a more advanced version than the one in this recipe, you should use Chef Christophe Rull's white chocolate vanilla bean ganache recipe that we used to make bonbons! Just swap out the white chocolate ganache in this recipe for the vanilla bean version and you will love the added vanilla flavor! 

Nutrition

Calories: 500kcal | Carbohydrates: 50g | Protein: 4g | Fat: 33g | Saturated Fat: 20g | Polyunsaturated Fat: 1g | Monounsaturated Fat: 9g | Trans Fat: 1g | Cholesterol: 63mg | Sodium: 89mg | Potassium: 138mg | Fiber: 1g | Sugar: 49g | Vitamin A: 710IU | Vitamin C: 1mg | Calcium: 92mg | Iron: 1mg

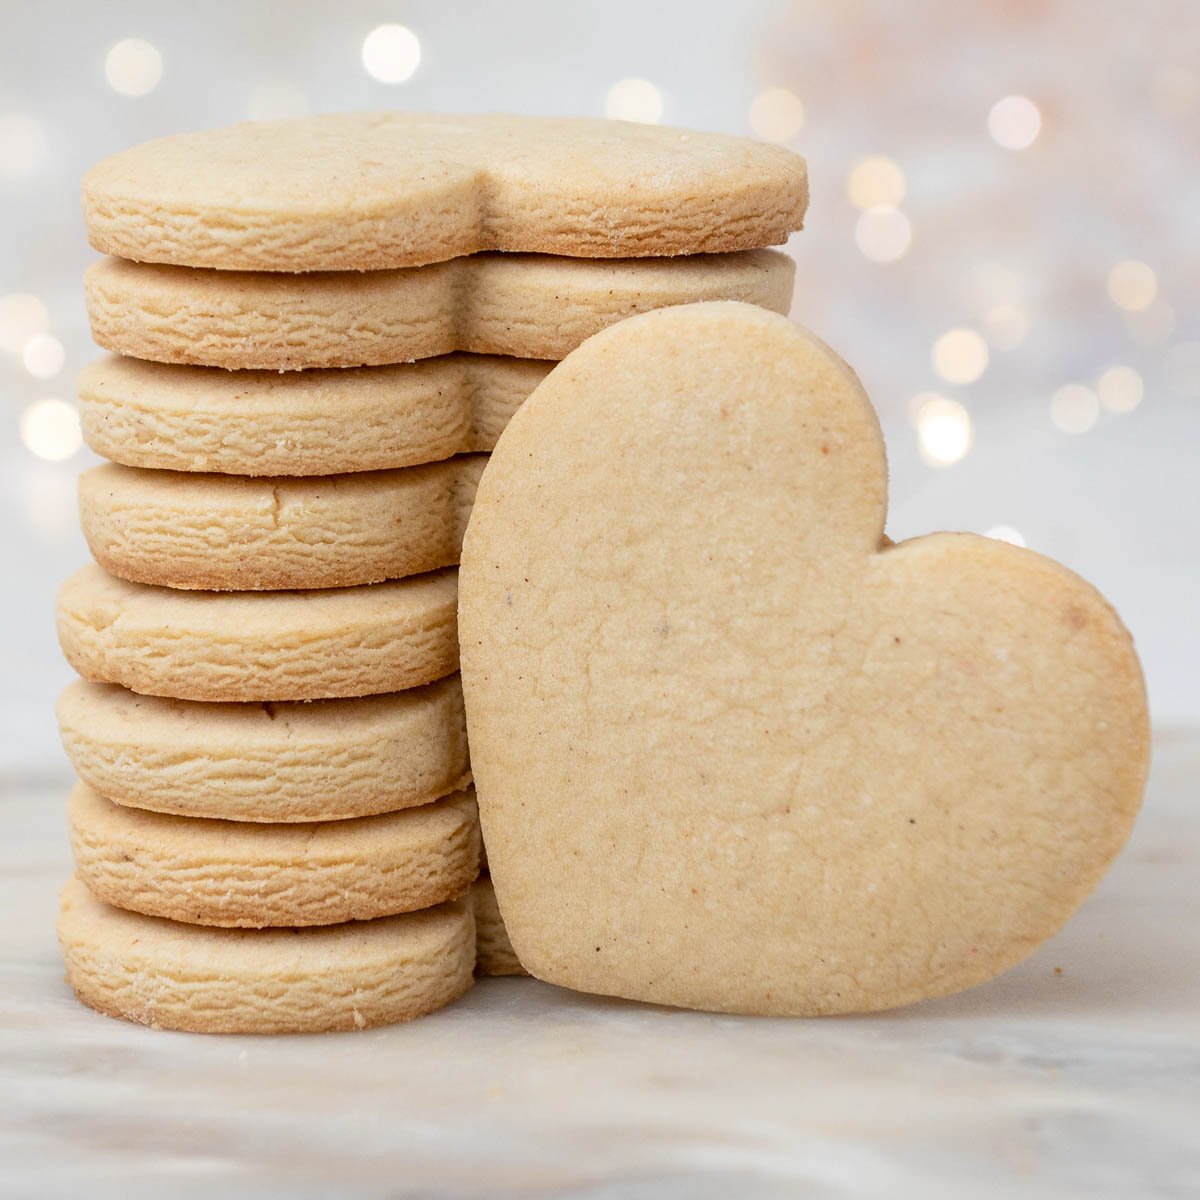
close up of heart shaped cut out sugar cookies

February 4, 2022 Blog

The Best Cut Out Sugar Cookie Recipe

This is the BEST cut out sugar cookie recipe! These cookies always hold their shape perfectly, bake up nice and soft, and have a delicious buttery and crisp edge. Perfect for decoring with my smooth royal icing. close up of heart shaped cut out sugar cookies

You can adapt this sugar cookie recipe to any holiday by switching out the vanilla and spices for other flavors like orange, almond, lemon, strawberry, etc. The options are endless! I've switched out ¼ of flour for cocoa powder to make them into chocolate sugar cookies!

This dough can easily be colored with regular food coloring to make fun Christmas cookies. Make a double batch and freeze your cookies to be decorated later!

What's In This Blog Post

  • Cut Out Sugar Cookie Ingredients
  • How to Make Cut Out Sugar Cookies Step-by-Step
  • FAQ
  • More Cookie Recipes You'll Love

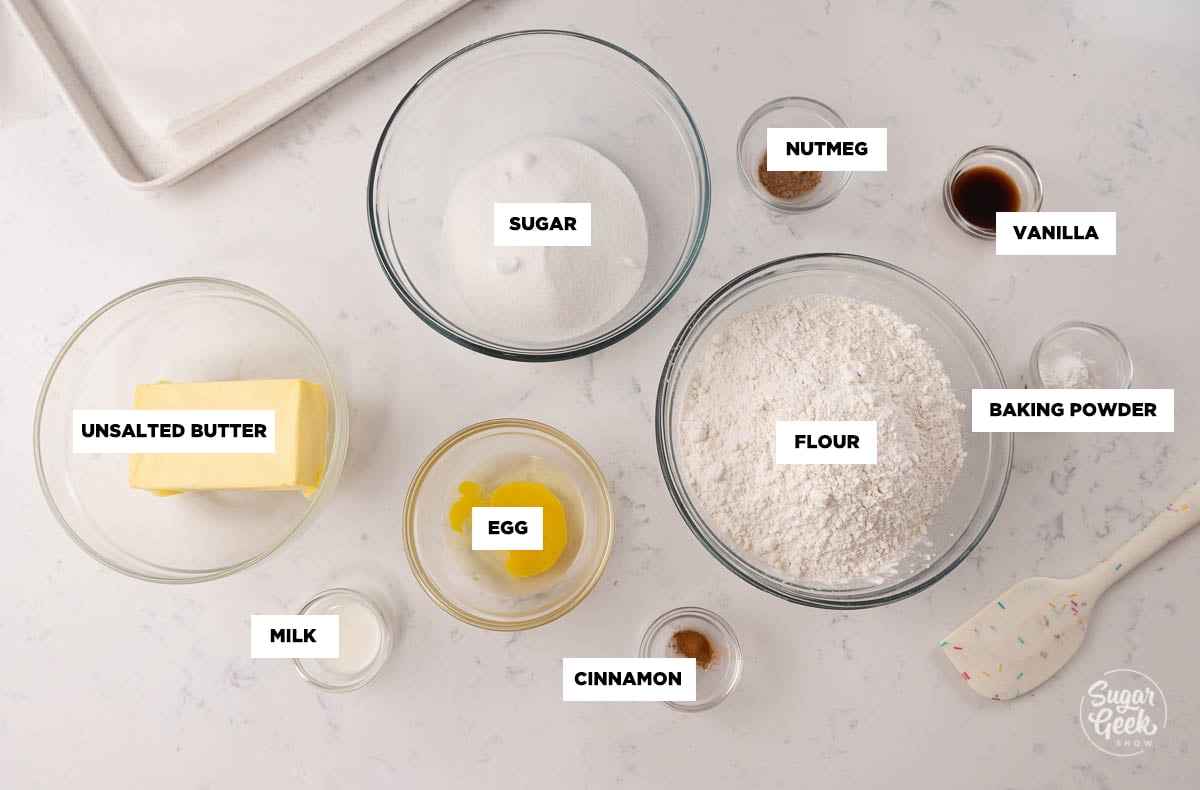
Cut Out Sugar Cookie Ingredients

How to Make Cut Out Sugar Cookies Step-by-Step

Remember to bring your butter and eggs to room temperature so your dough does not split. Your butter should be soft enough that you can press your finger into it but not melted. I place my eggs in a bowl of hot water for 5 minutes to bring them to room temp.

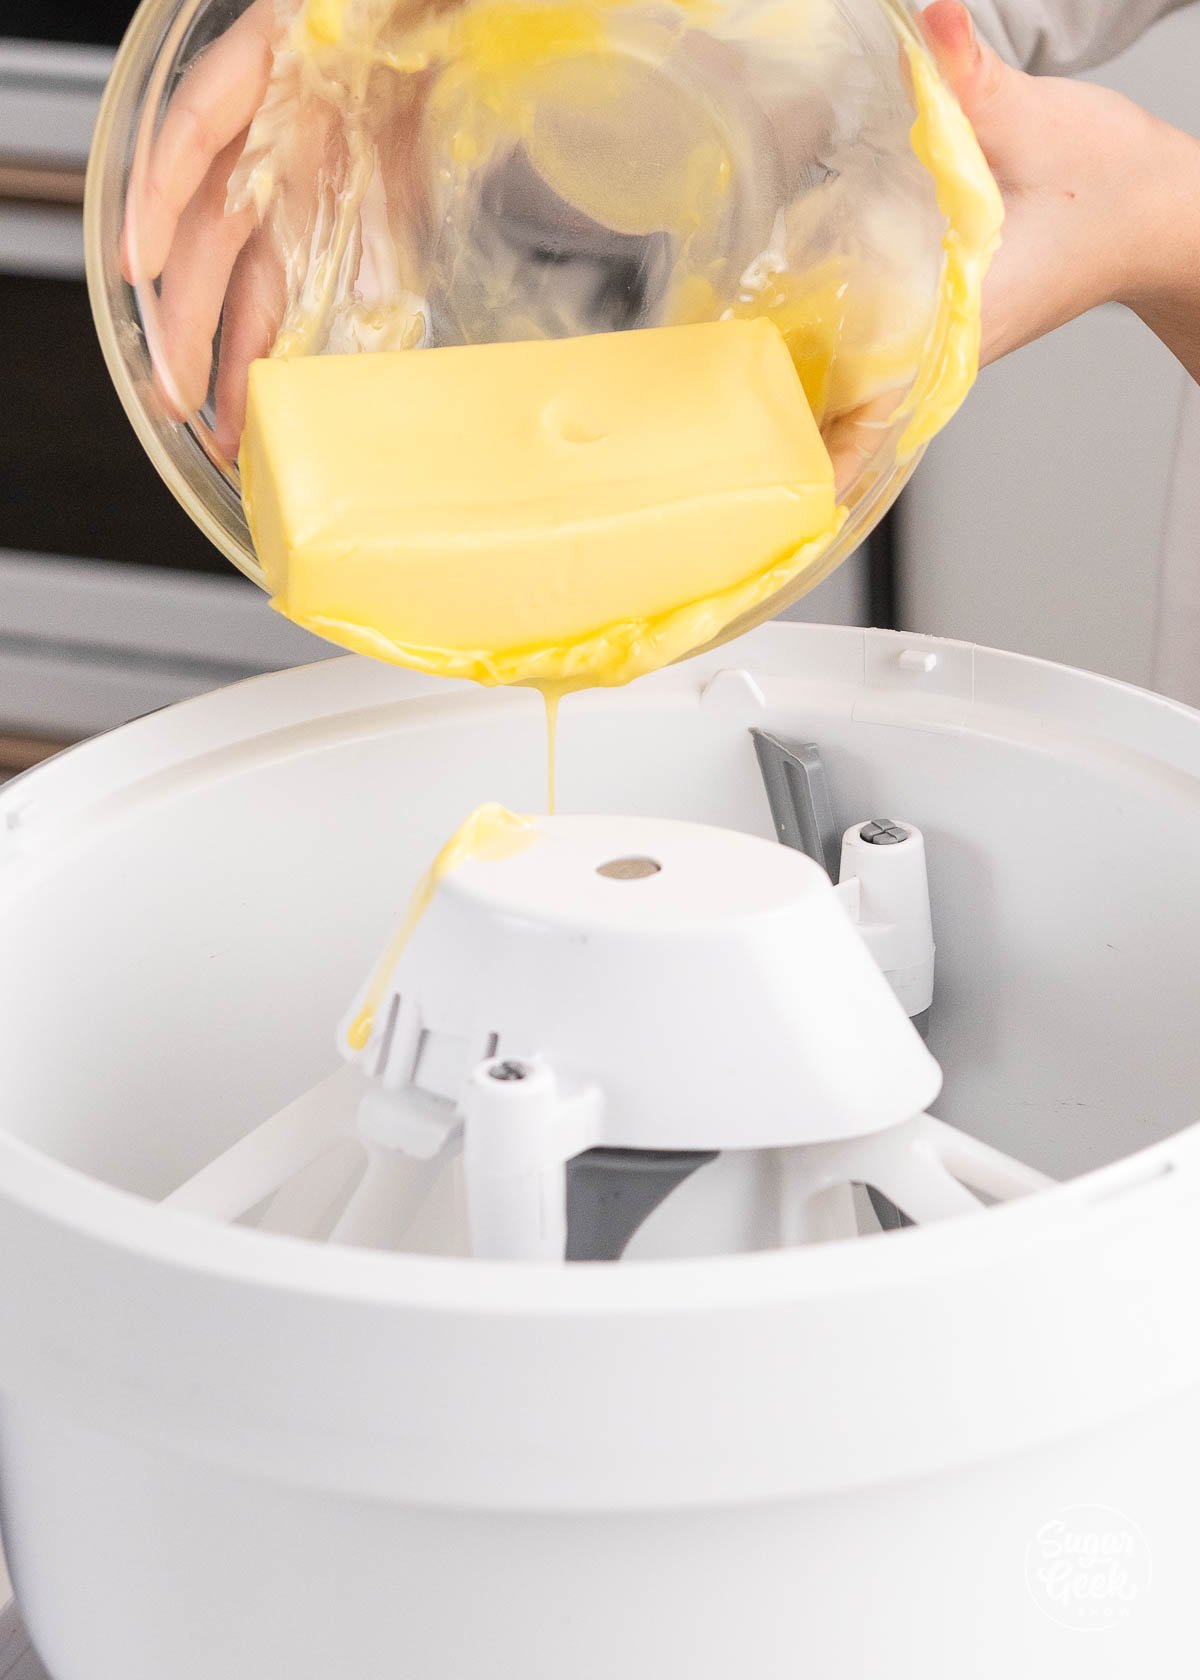
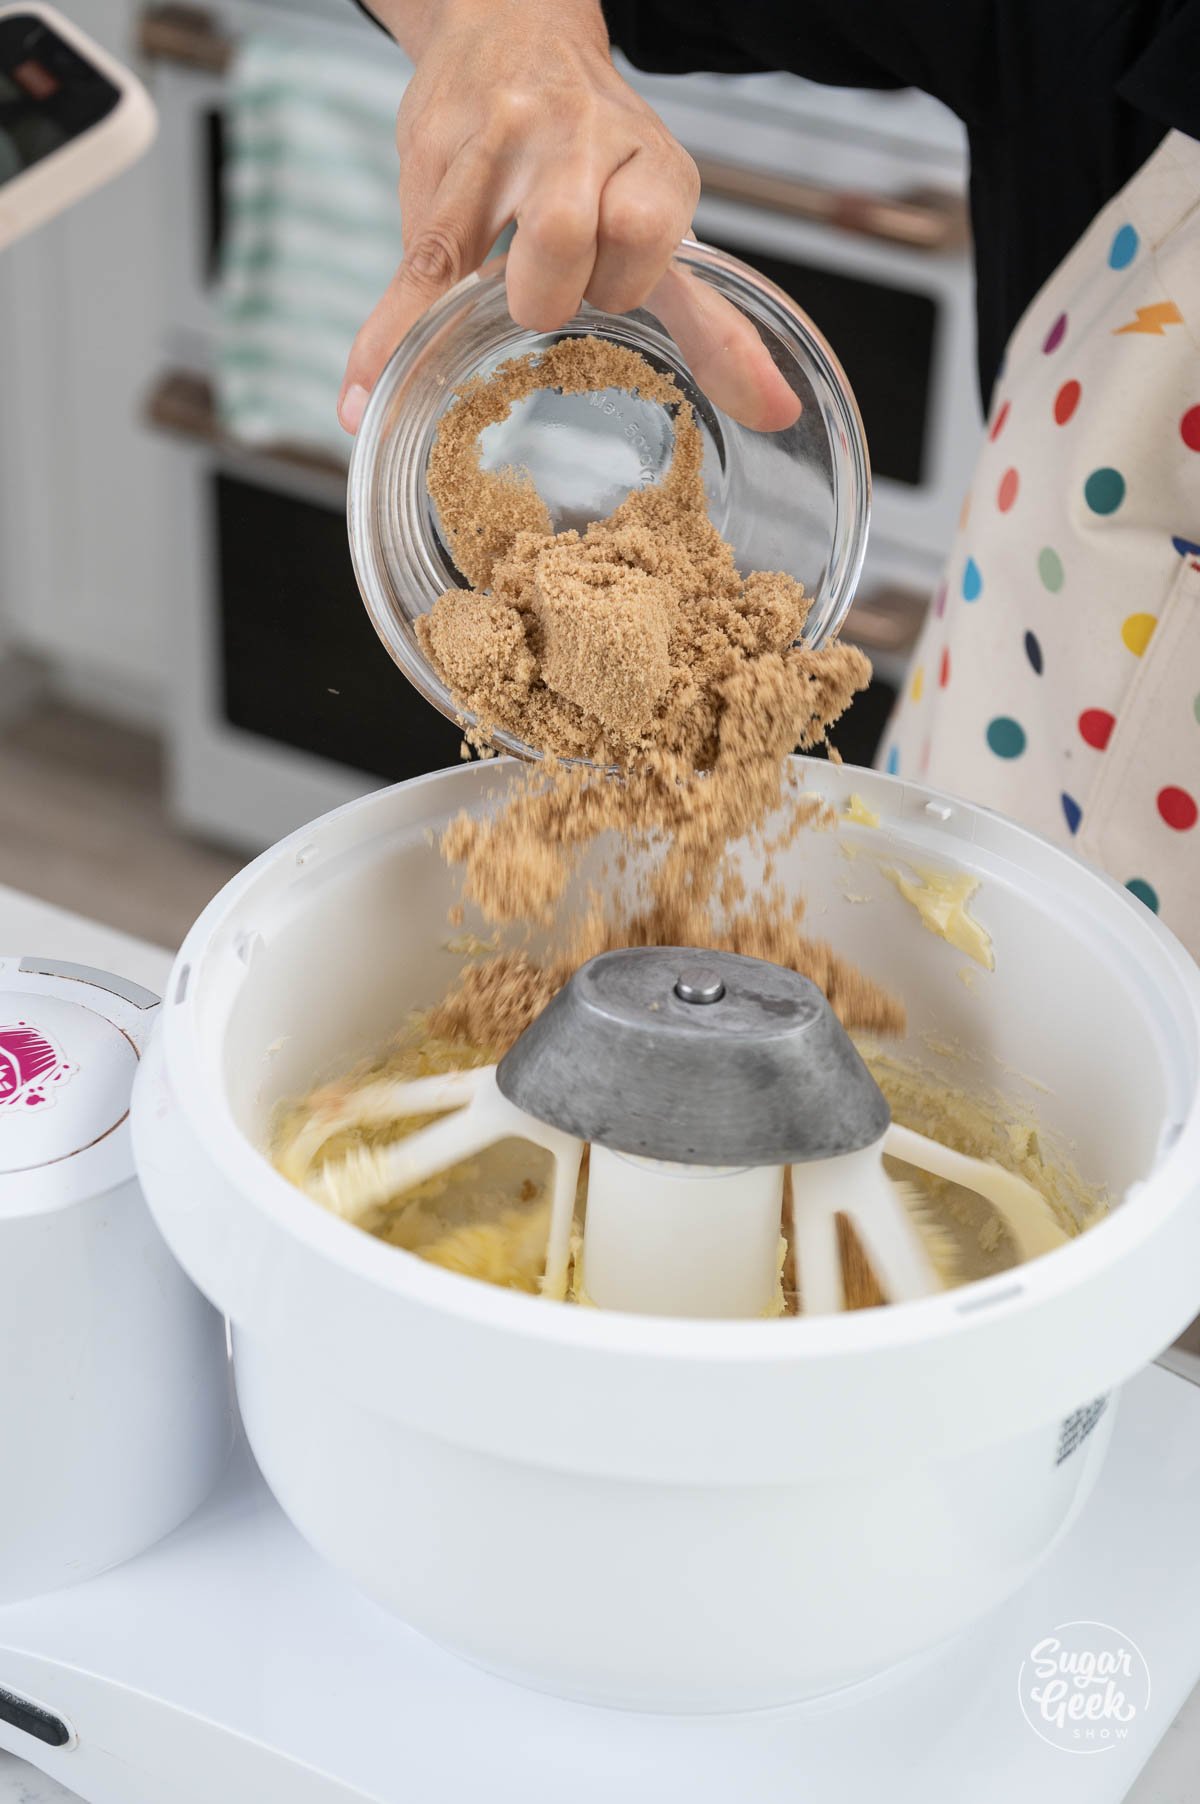
  1. In the bowl of your stand mixer, place your butter, salt, and granulated sugar. adding butter to a mixing bowl
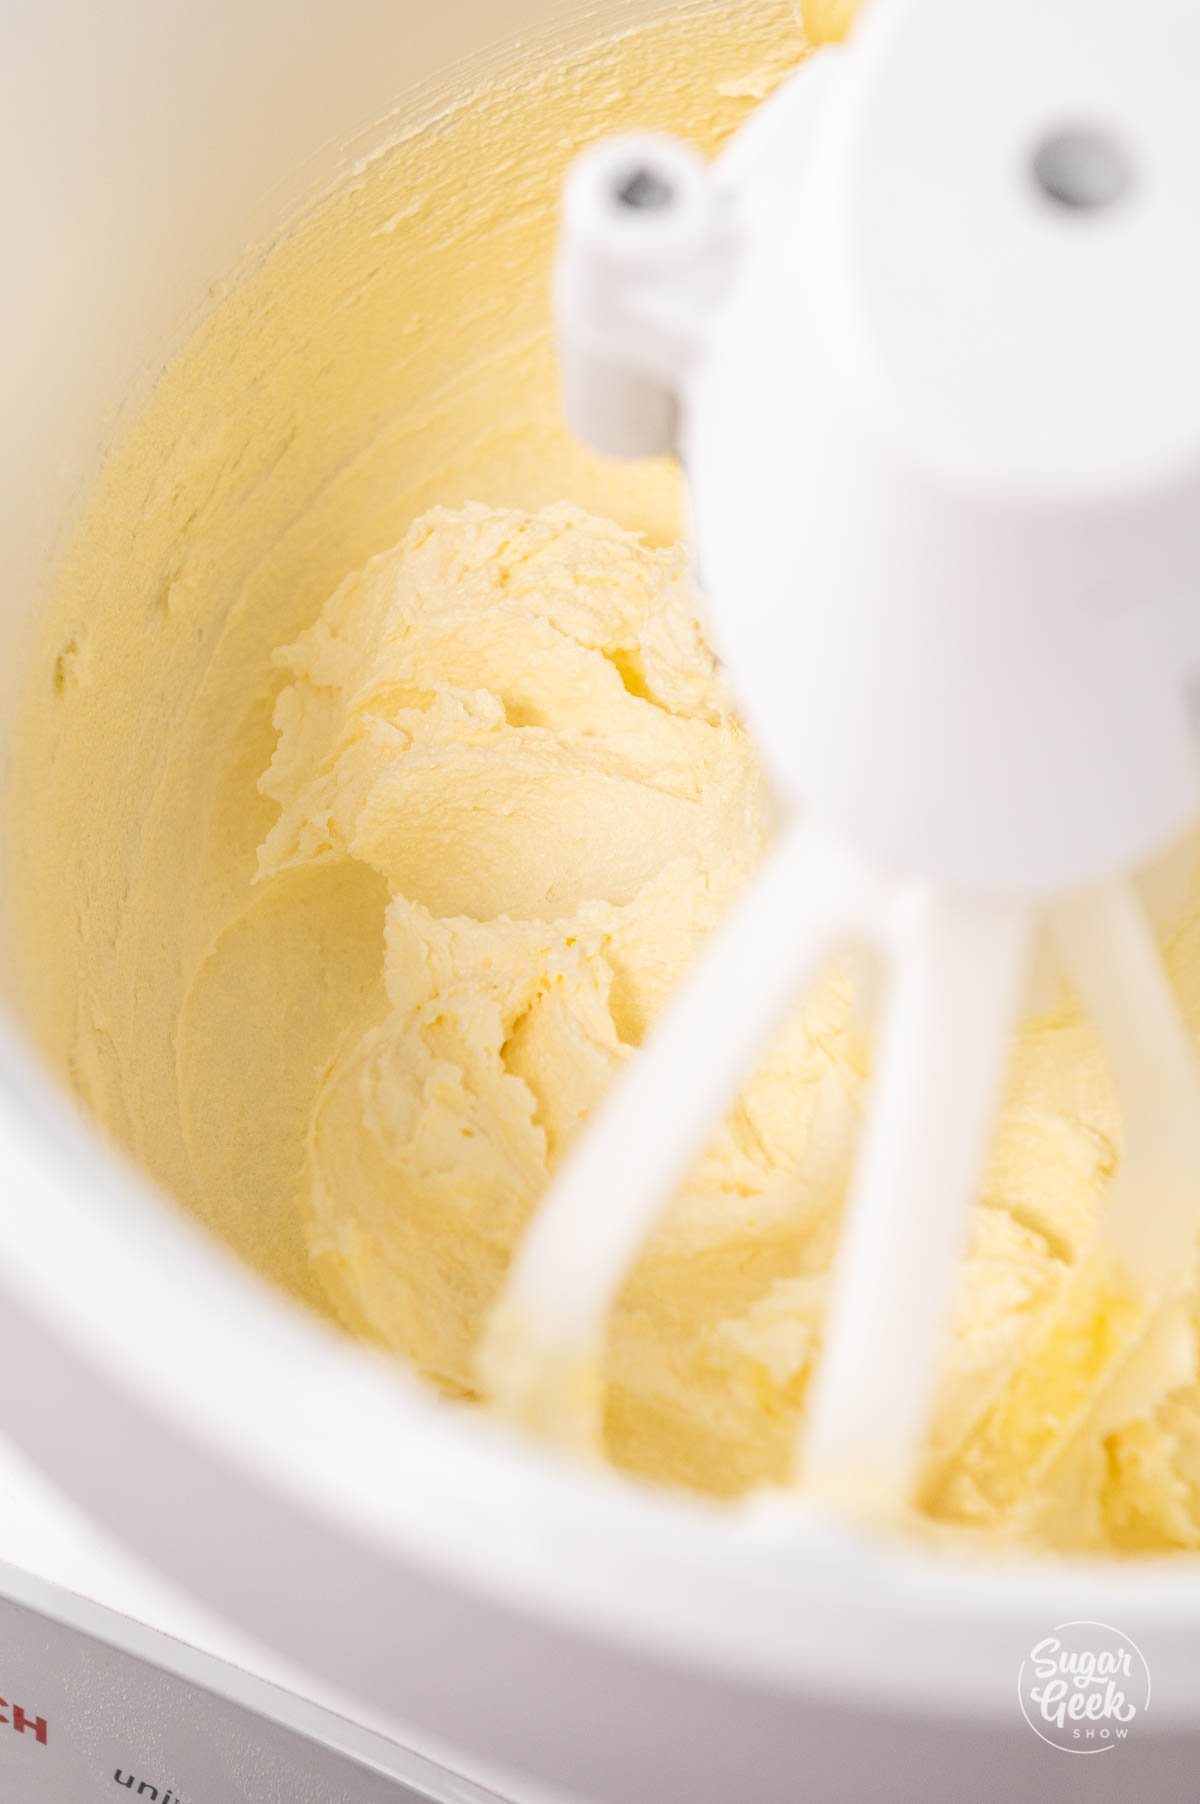
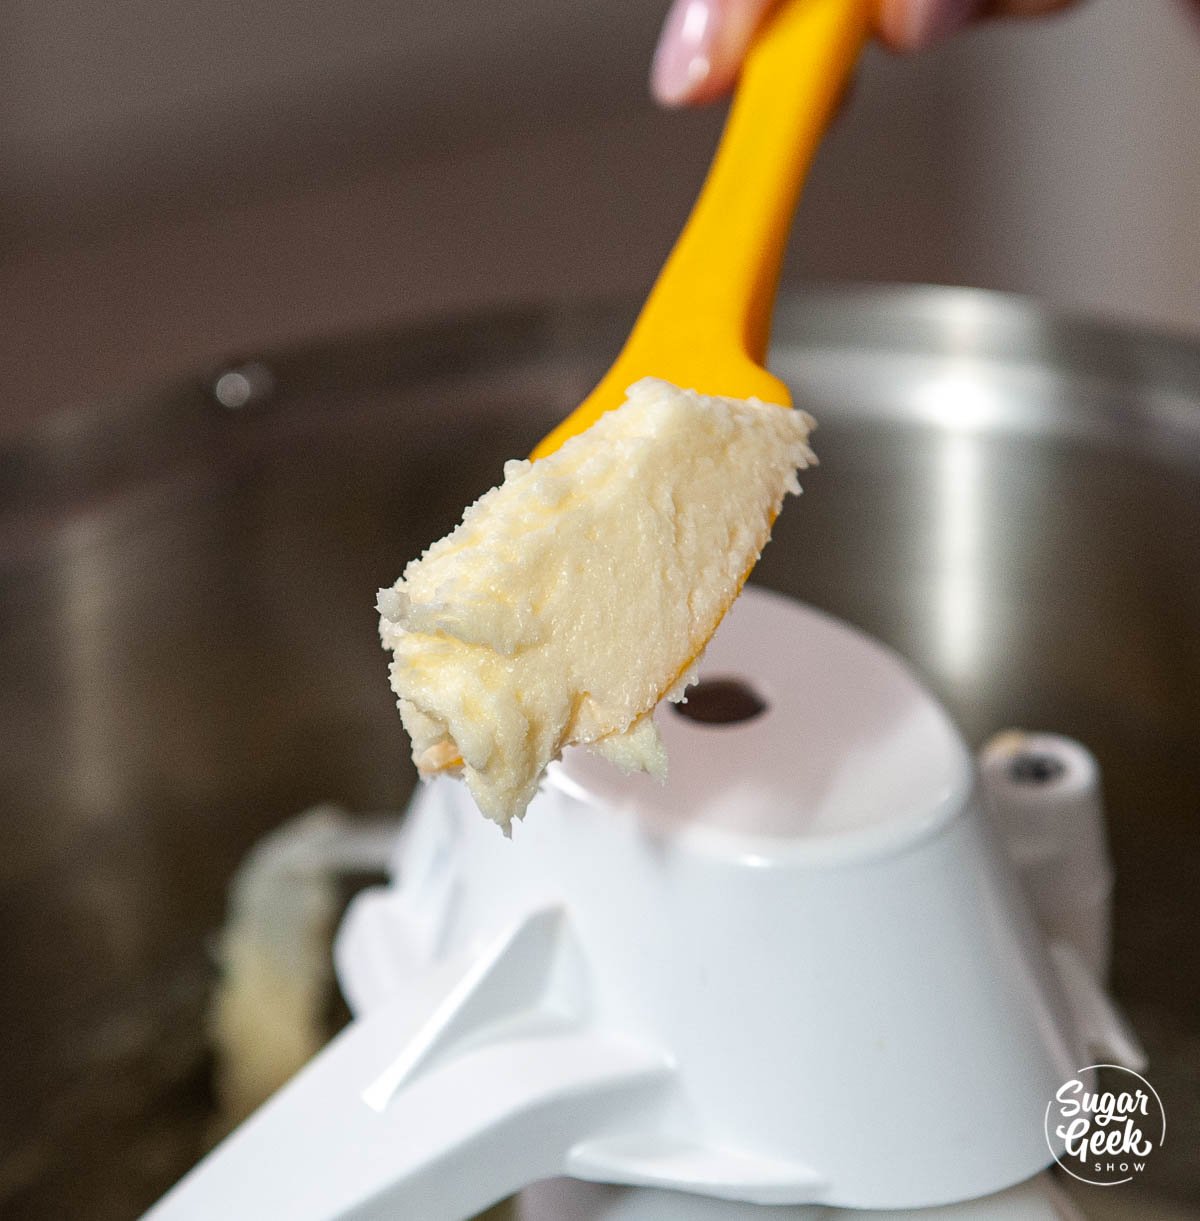
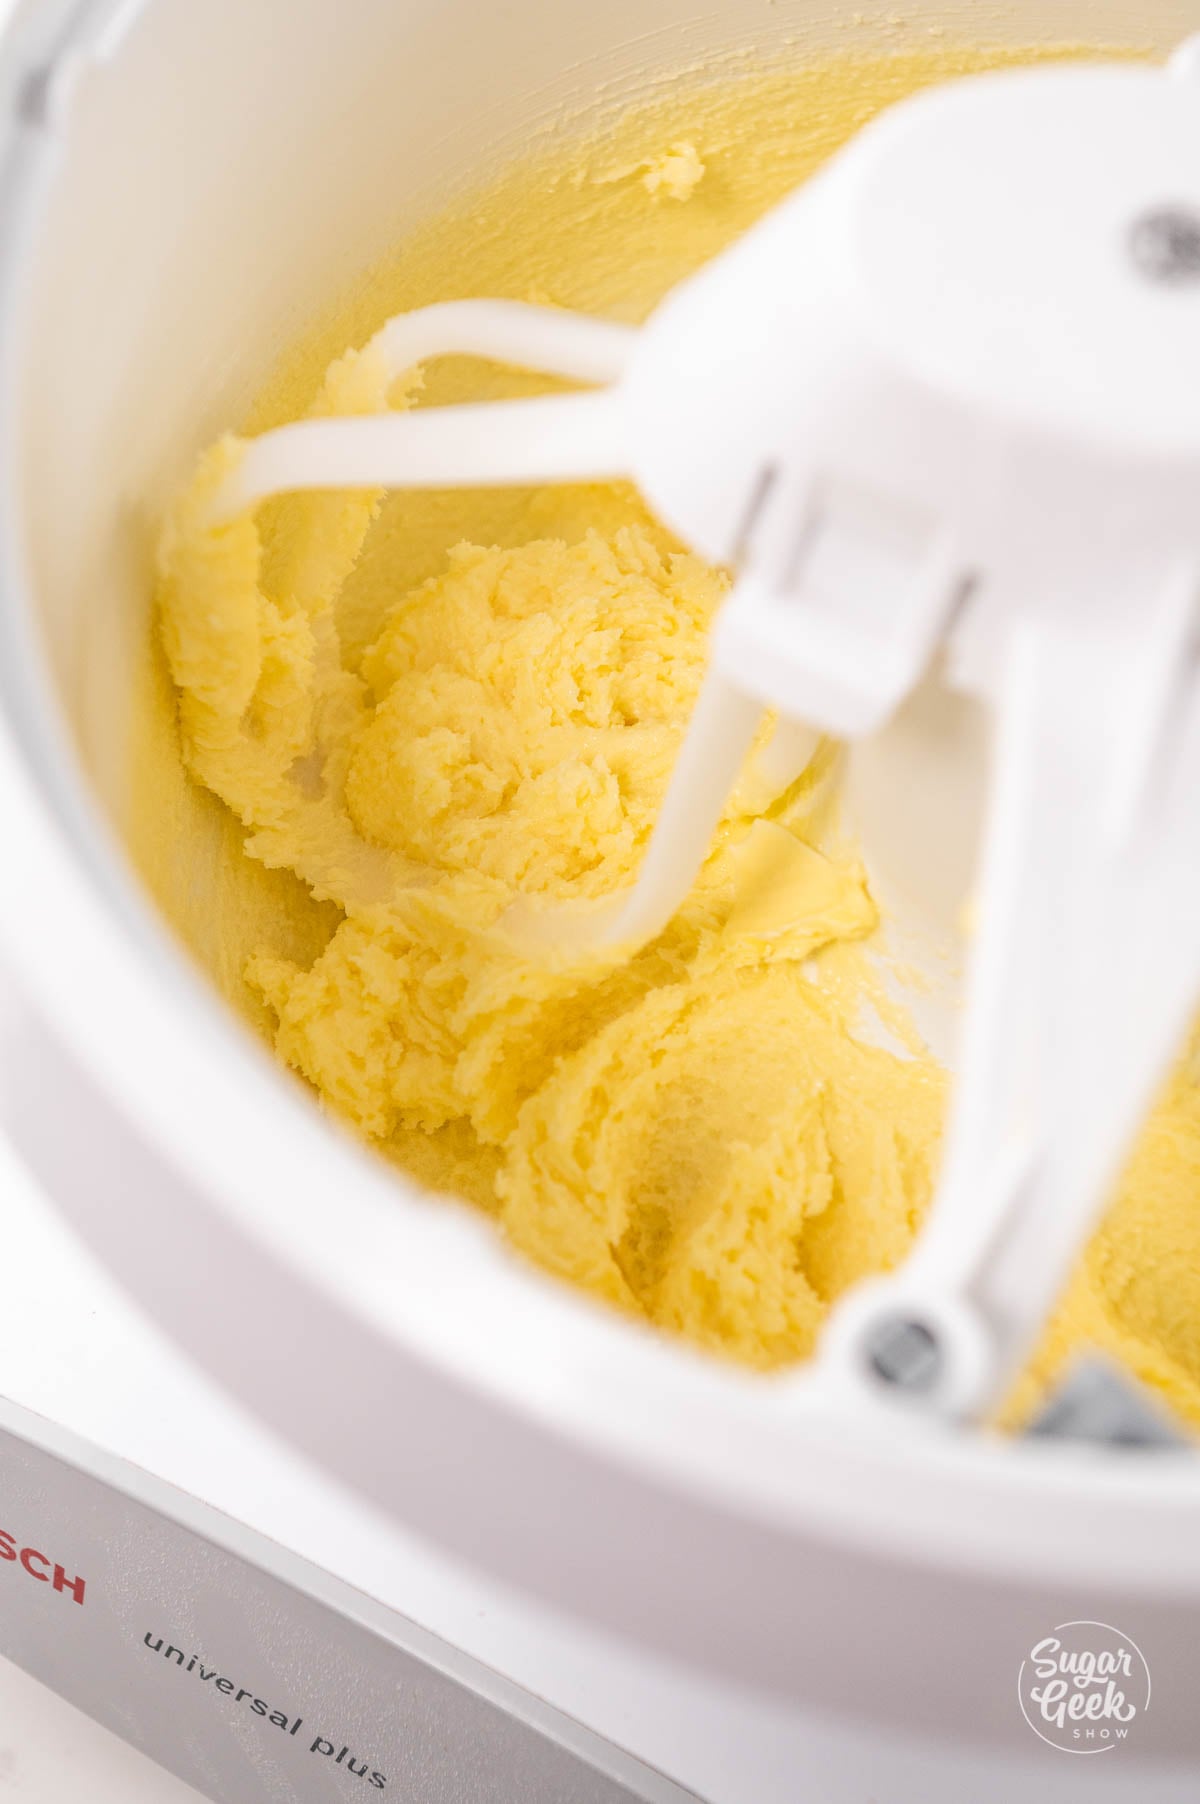
  2. Cream the butter and sugar on low using the paddle attachment. Creamed butter should be fluffy and pale yellow in color. close up of creamed butter and sugar
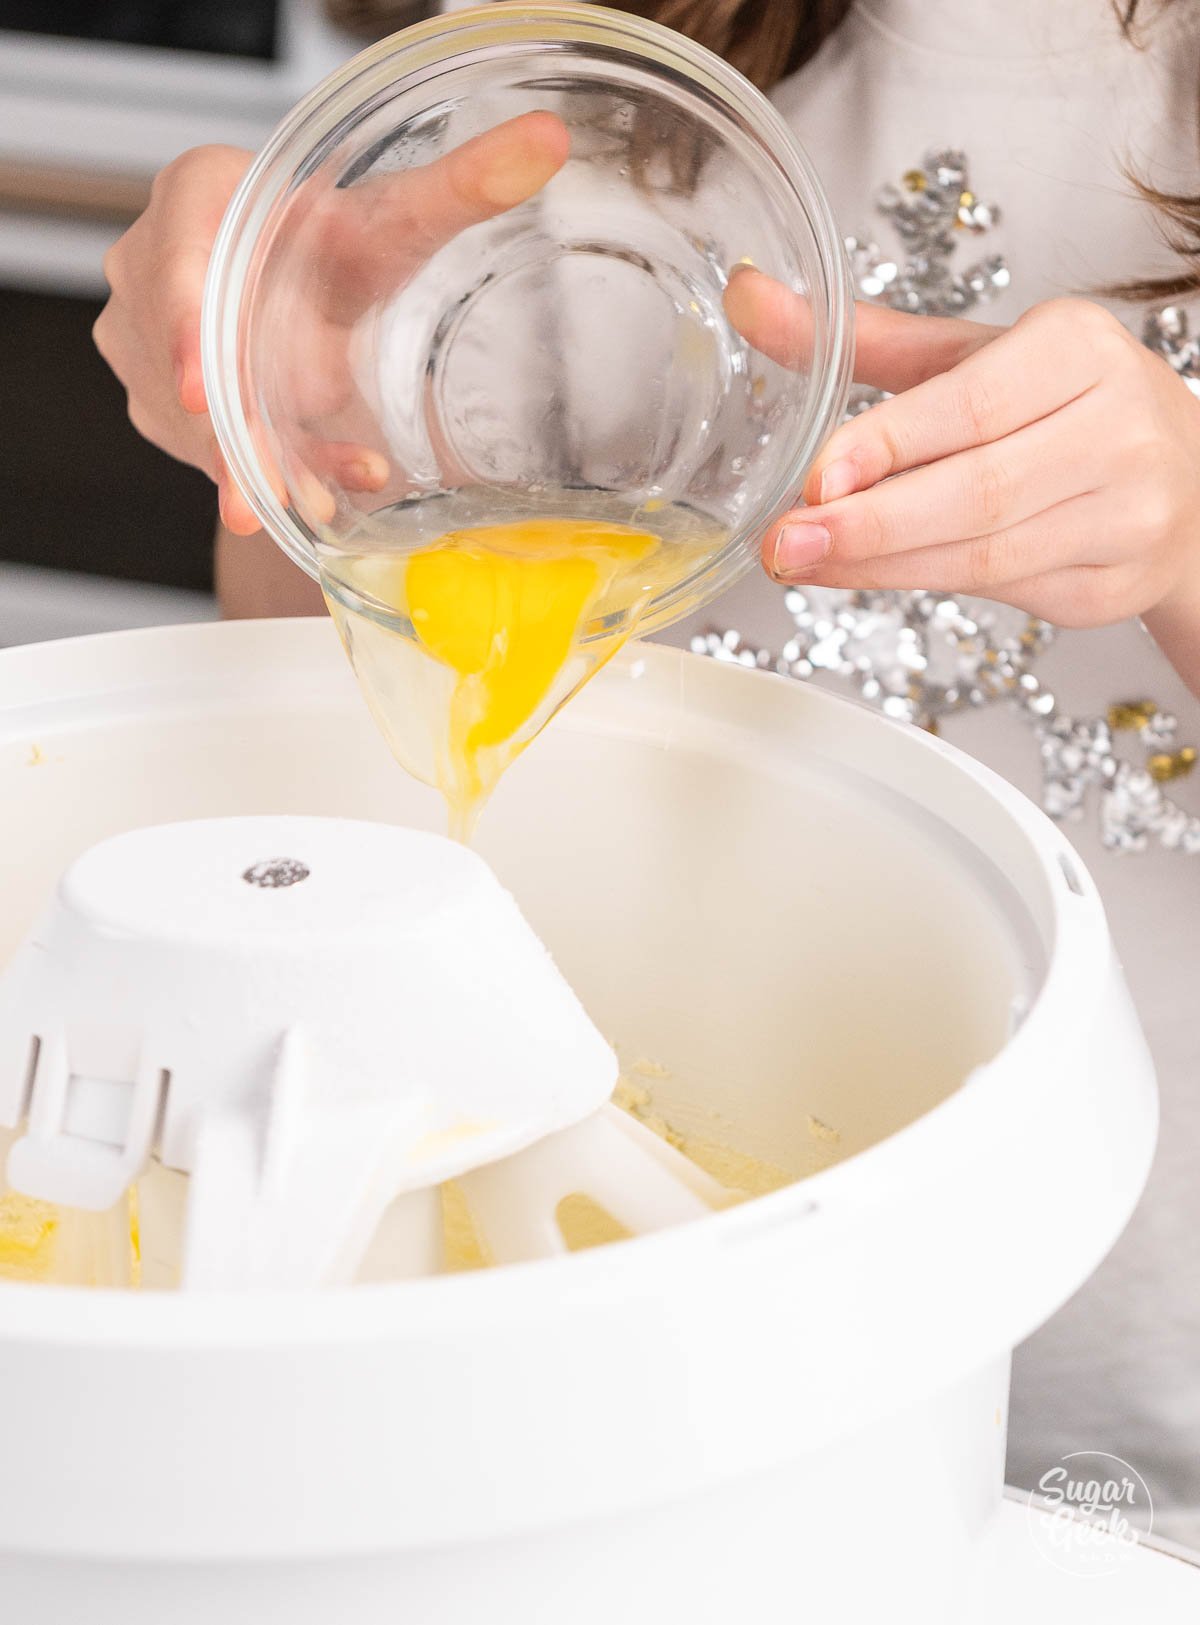
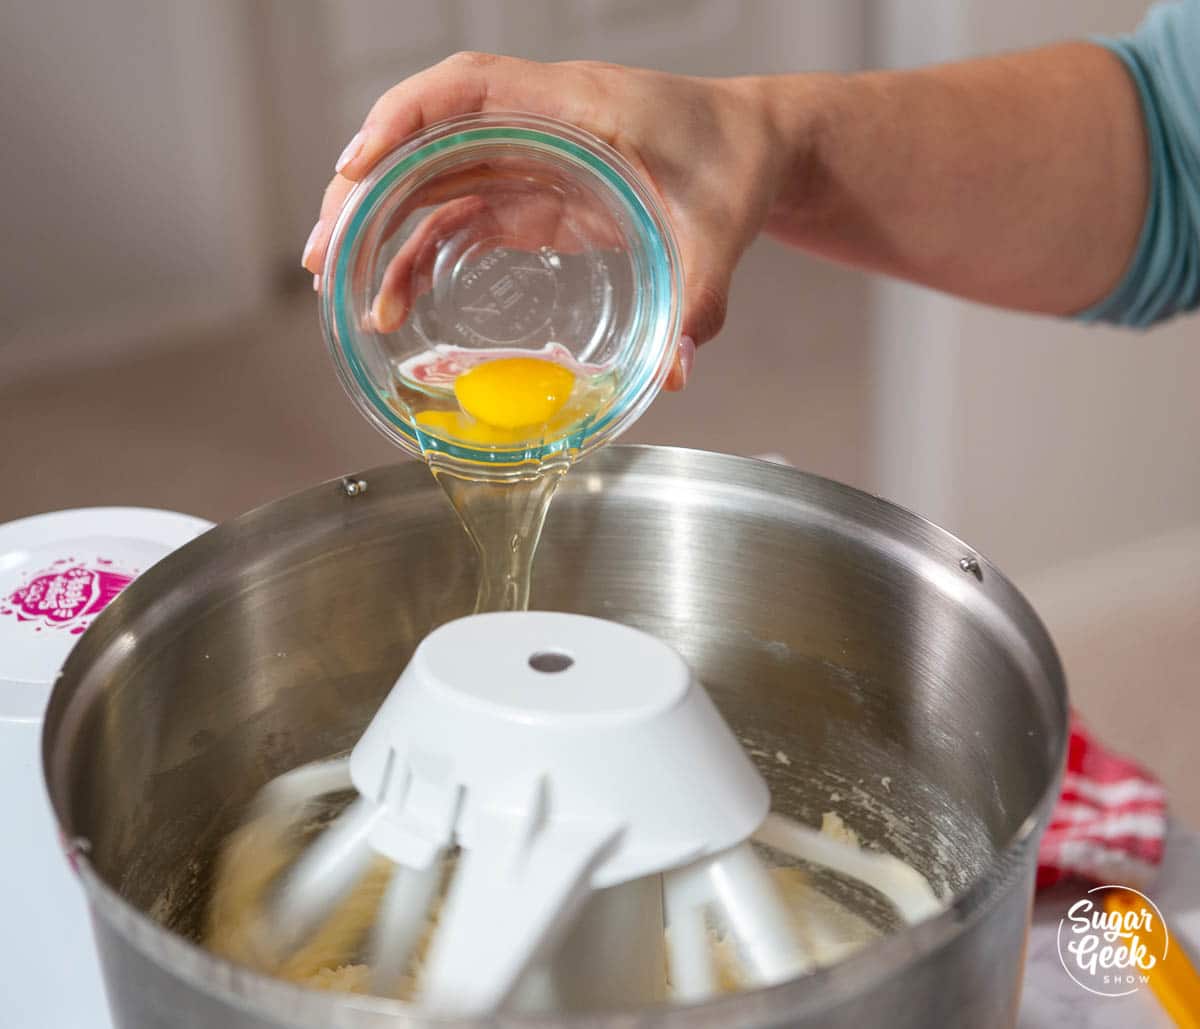
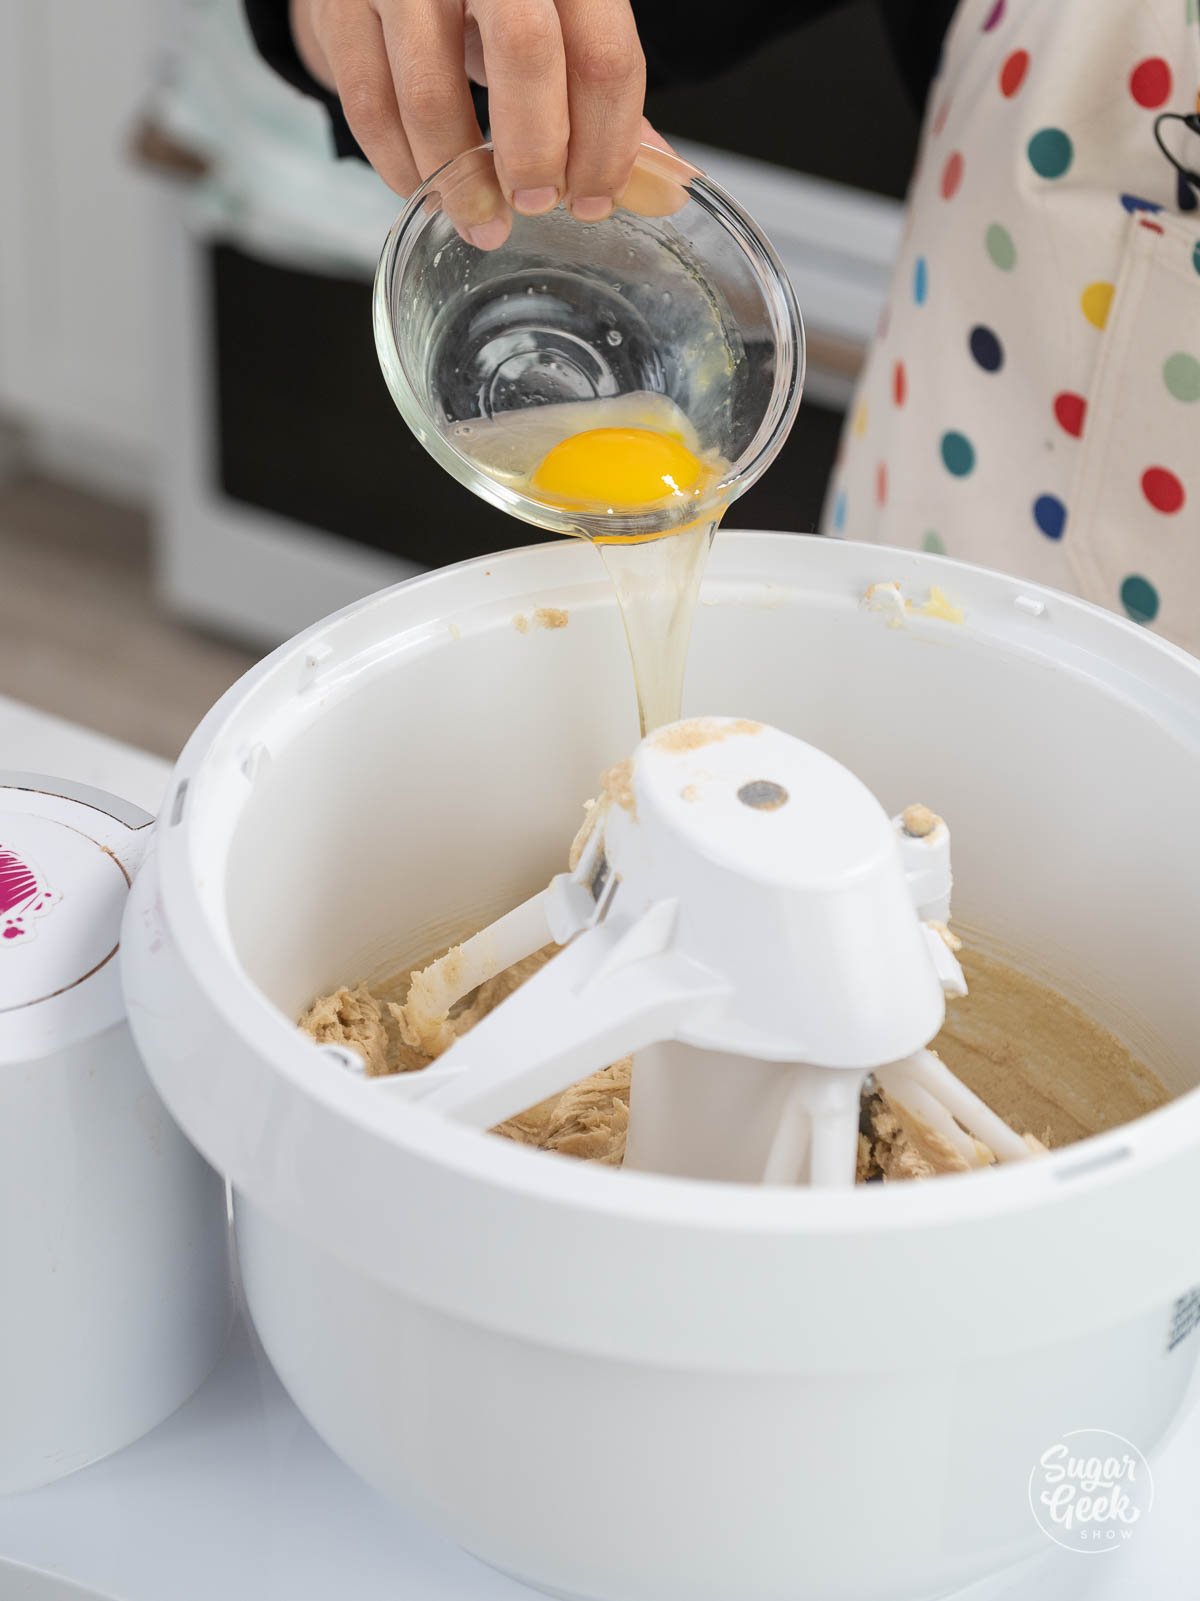
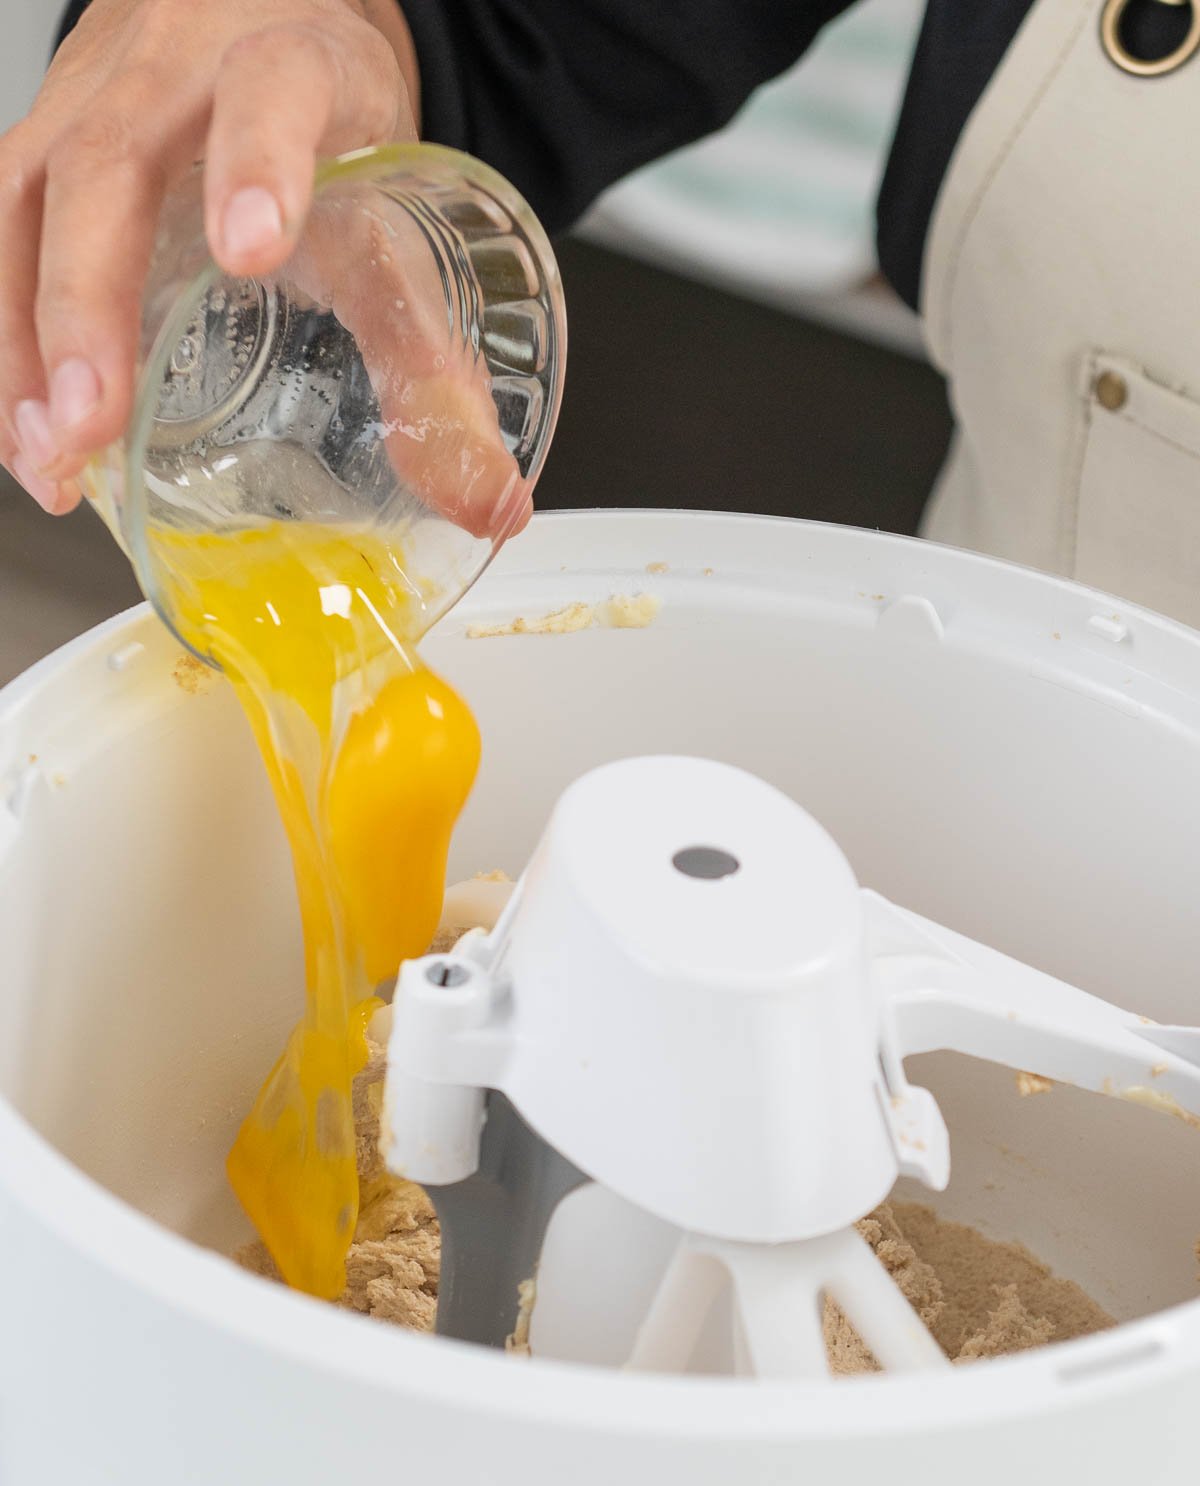
  3. Next, add the room temperature egg and mix it on medium speed (speed 2 on a Bosch, speed 4 on KitchenAid mixer) until it is fully incorporated. Scrape the bowl when necessary to make sure the egg incorporates.pouring an egg into sugar cookie ingredients
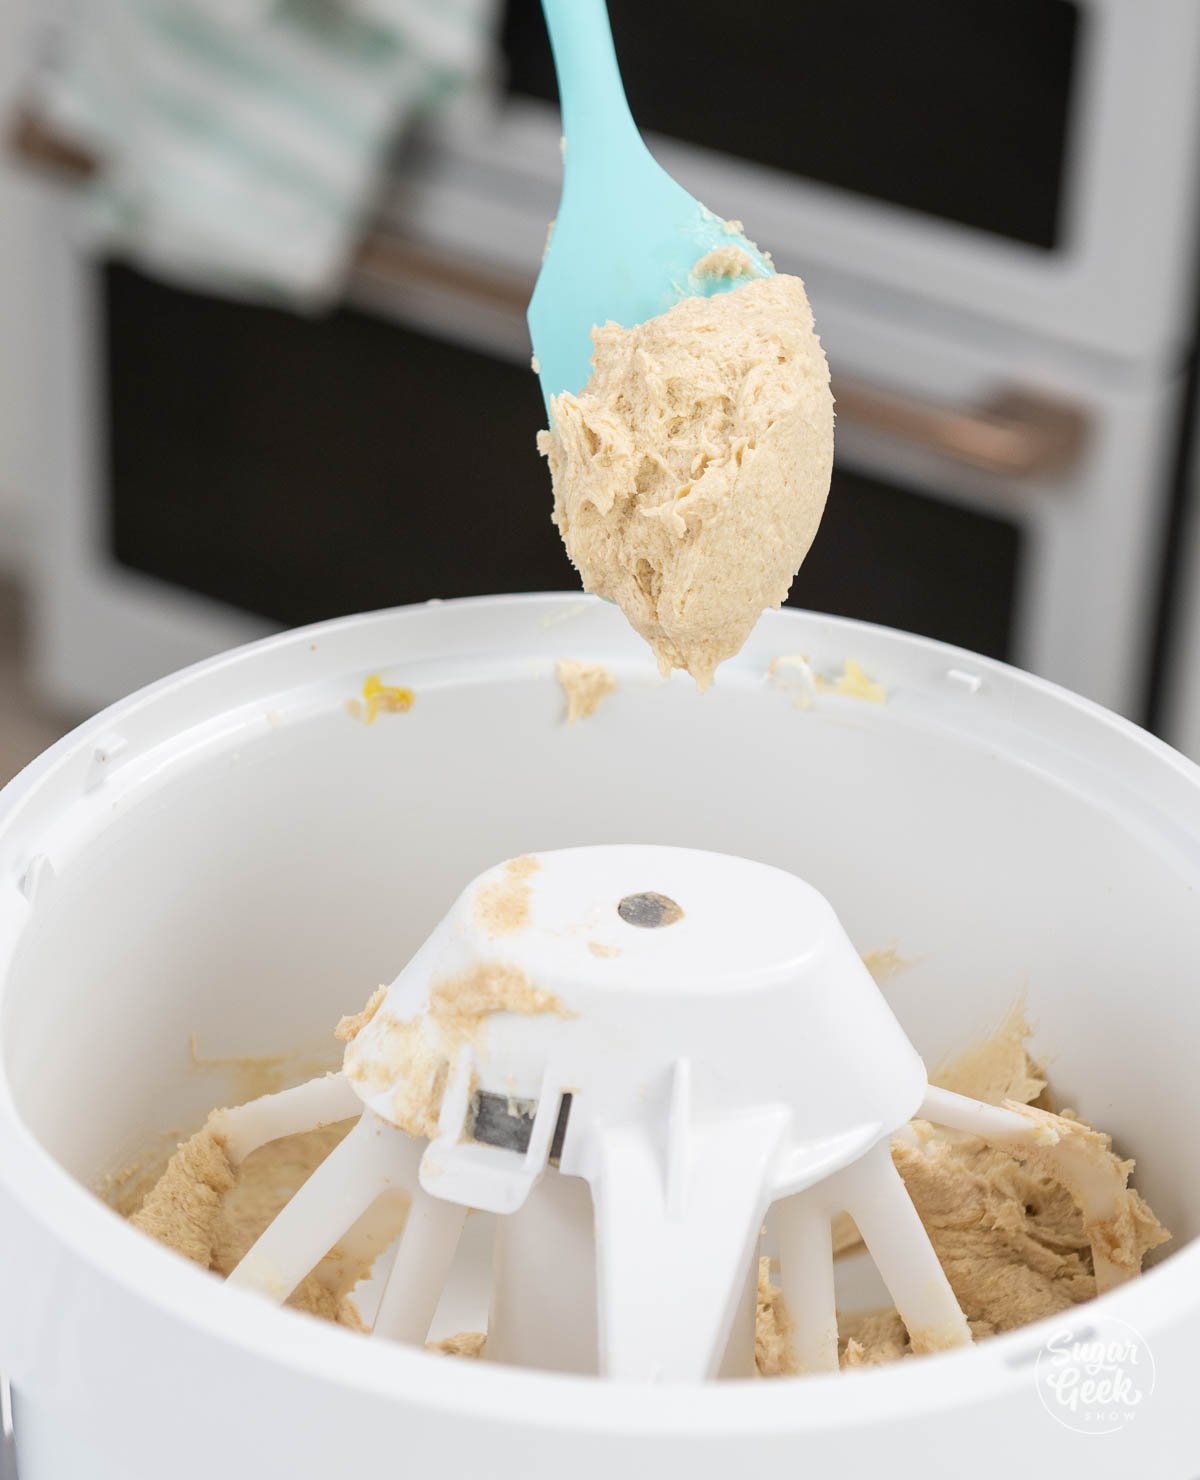
  4. Then, add in the vanilla extract and mix it until it's just incorporated.
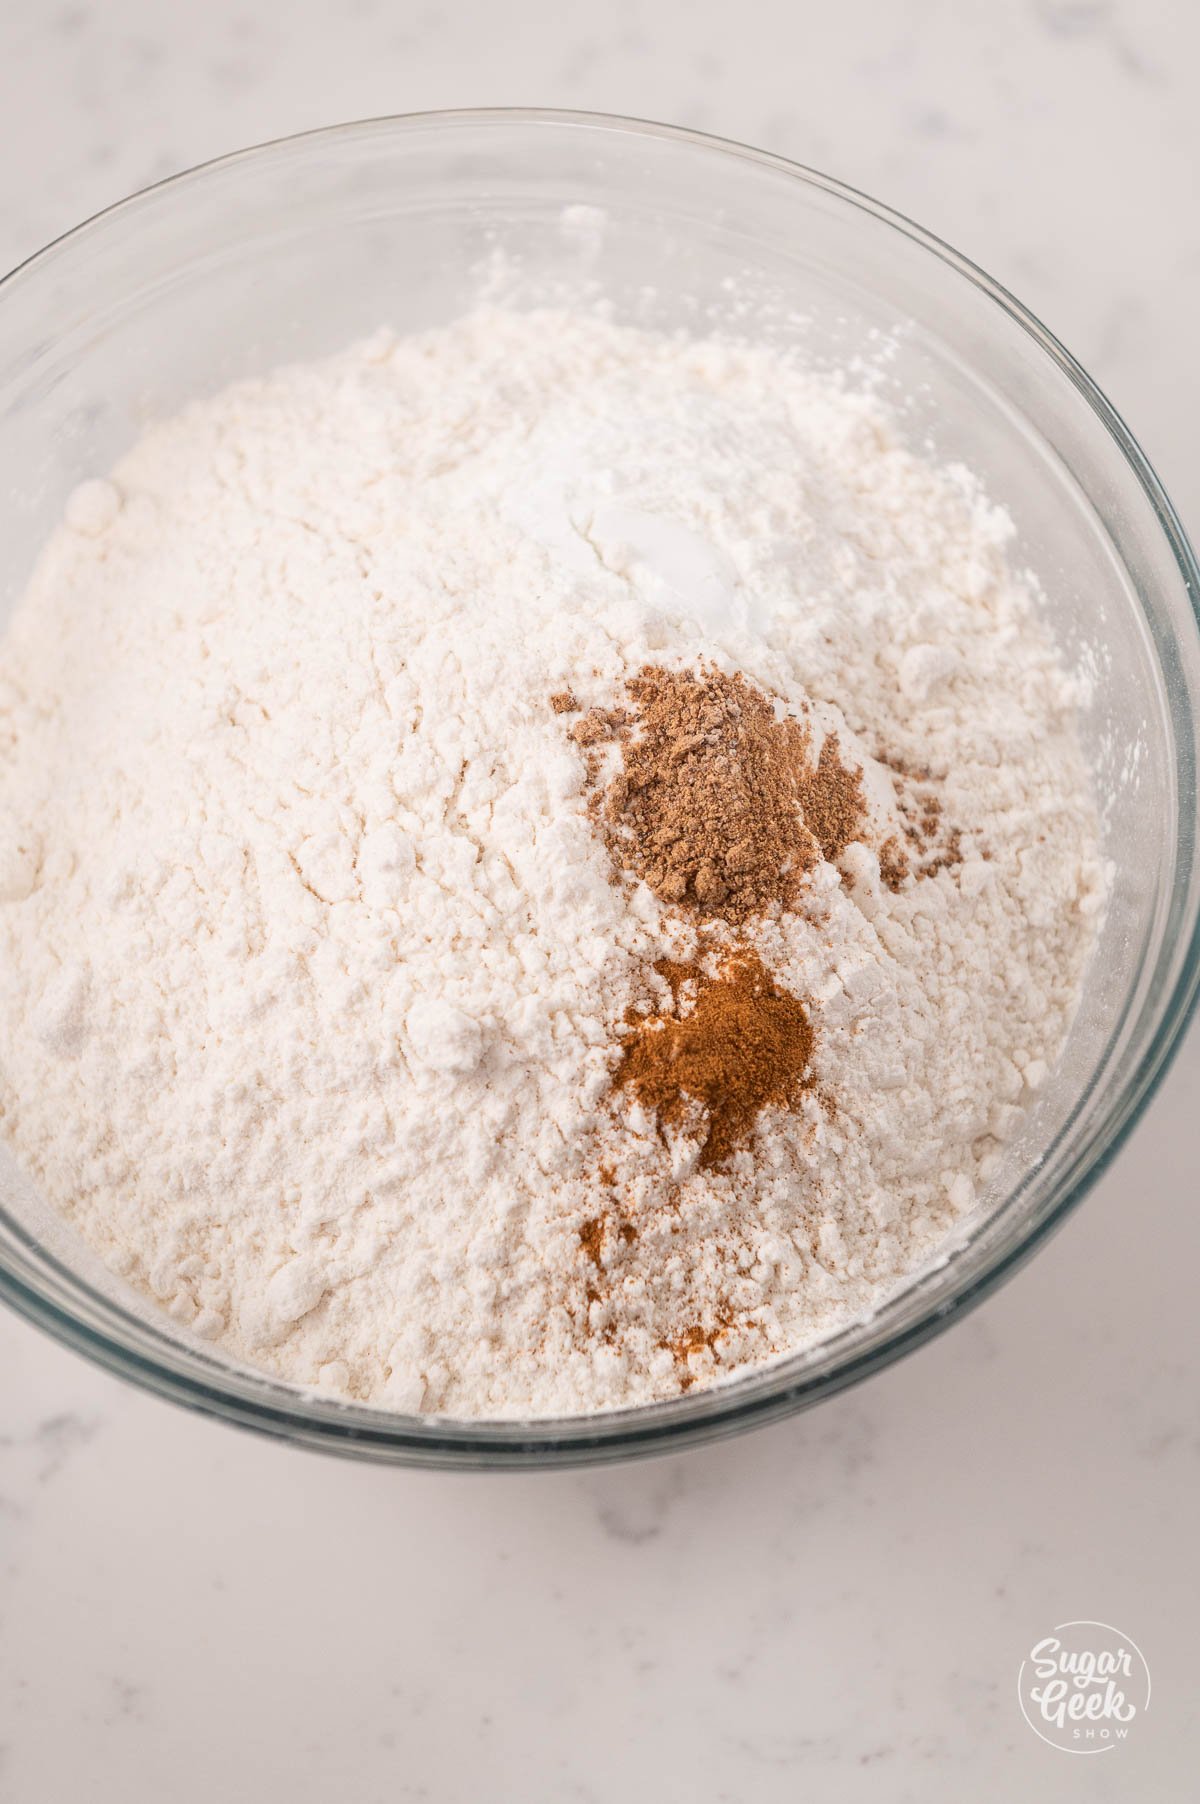
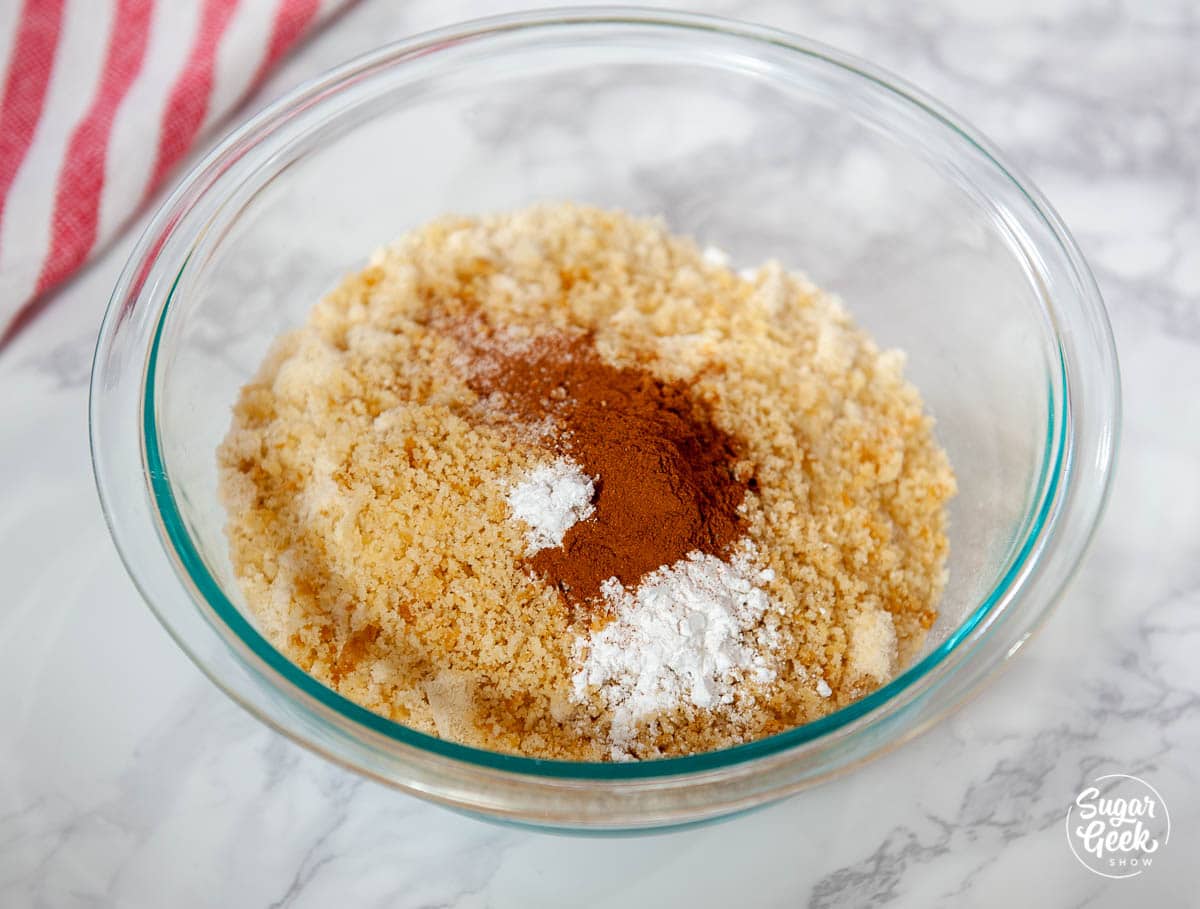
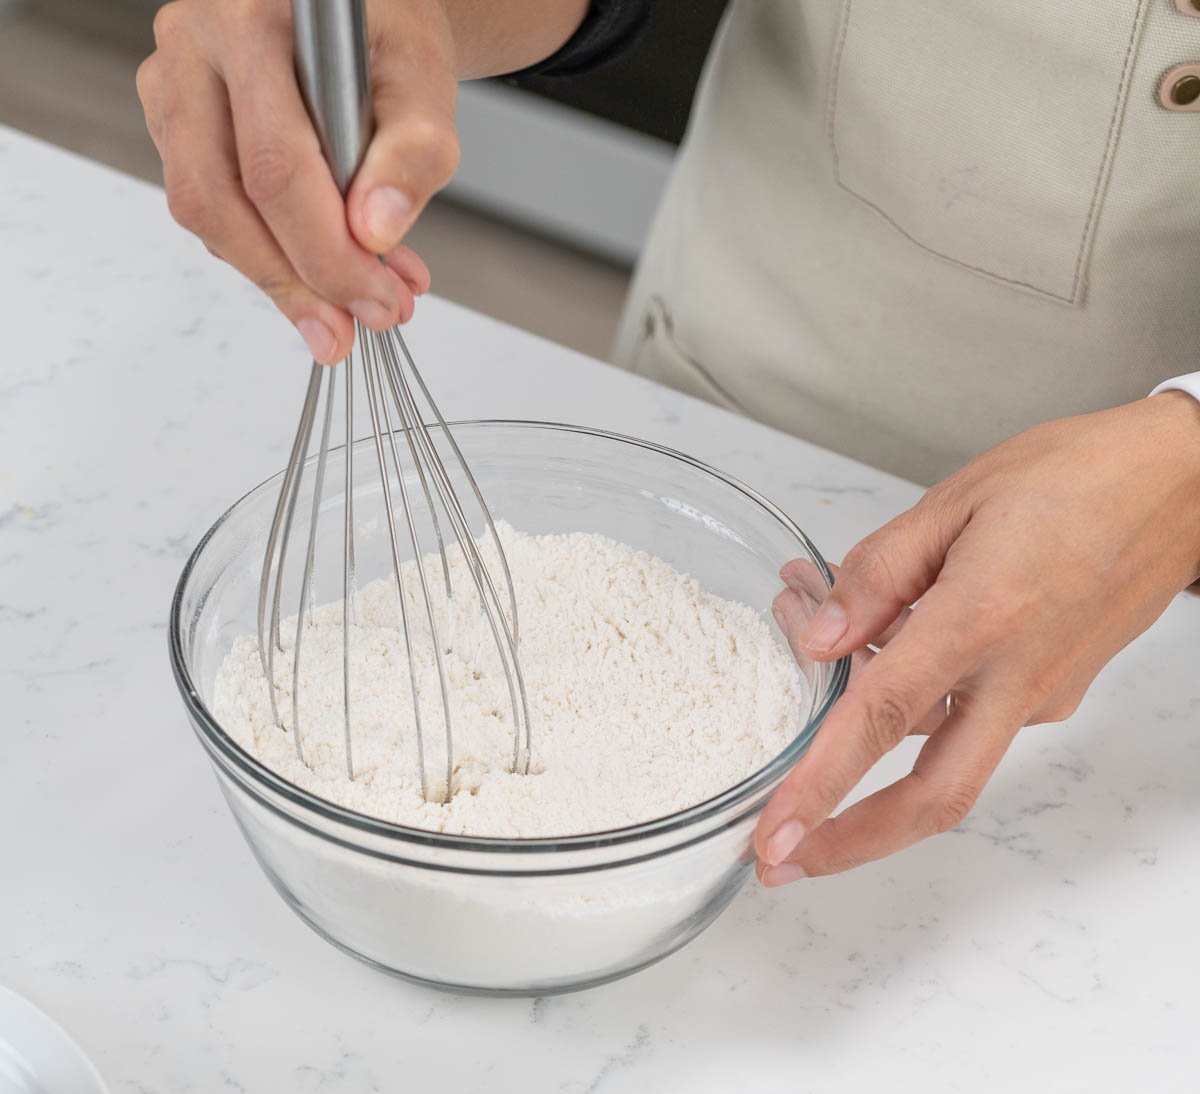
  5. In a separate bowl, whisk your dry ingredients (AP flour, baking powder, salt, cinnamon, and nutmeg) together. dry ingredients in a glass bowl
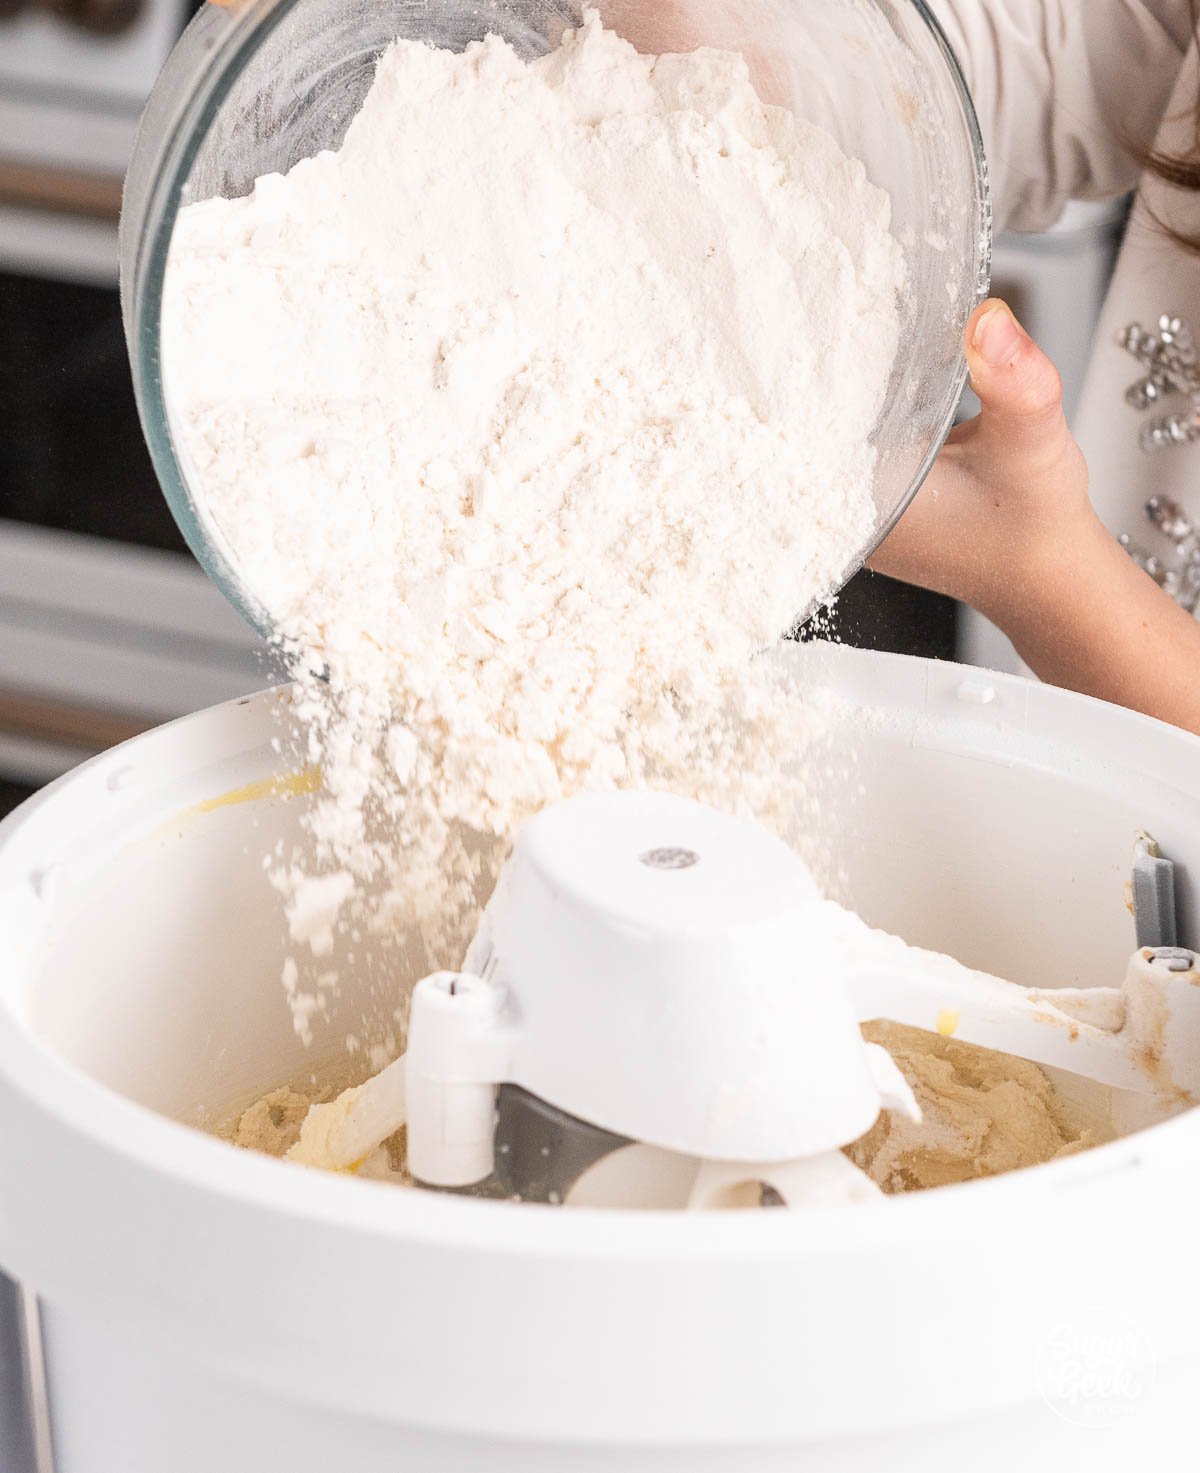
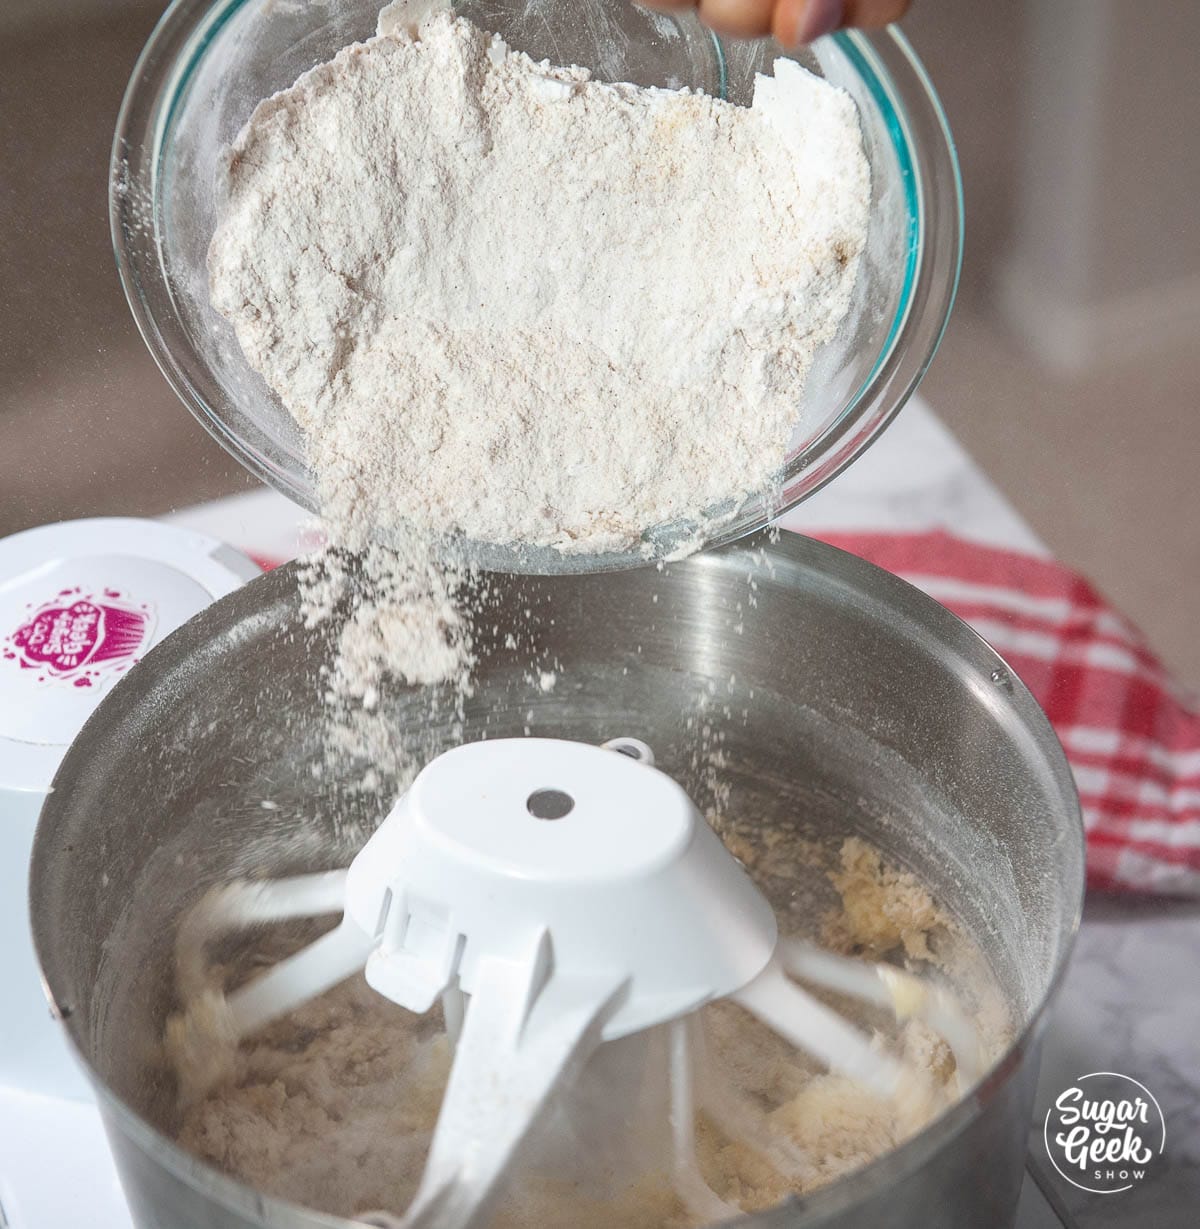
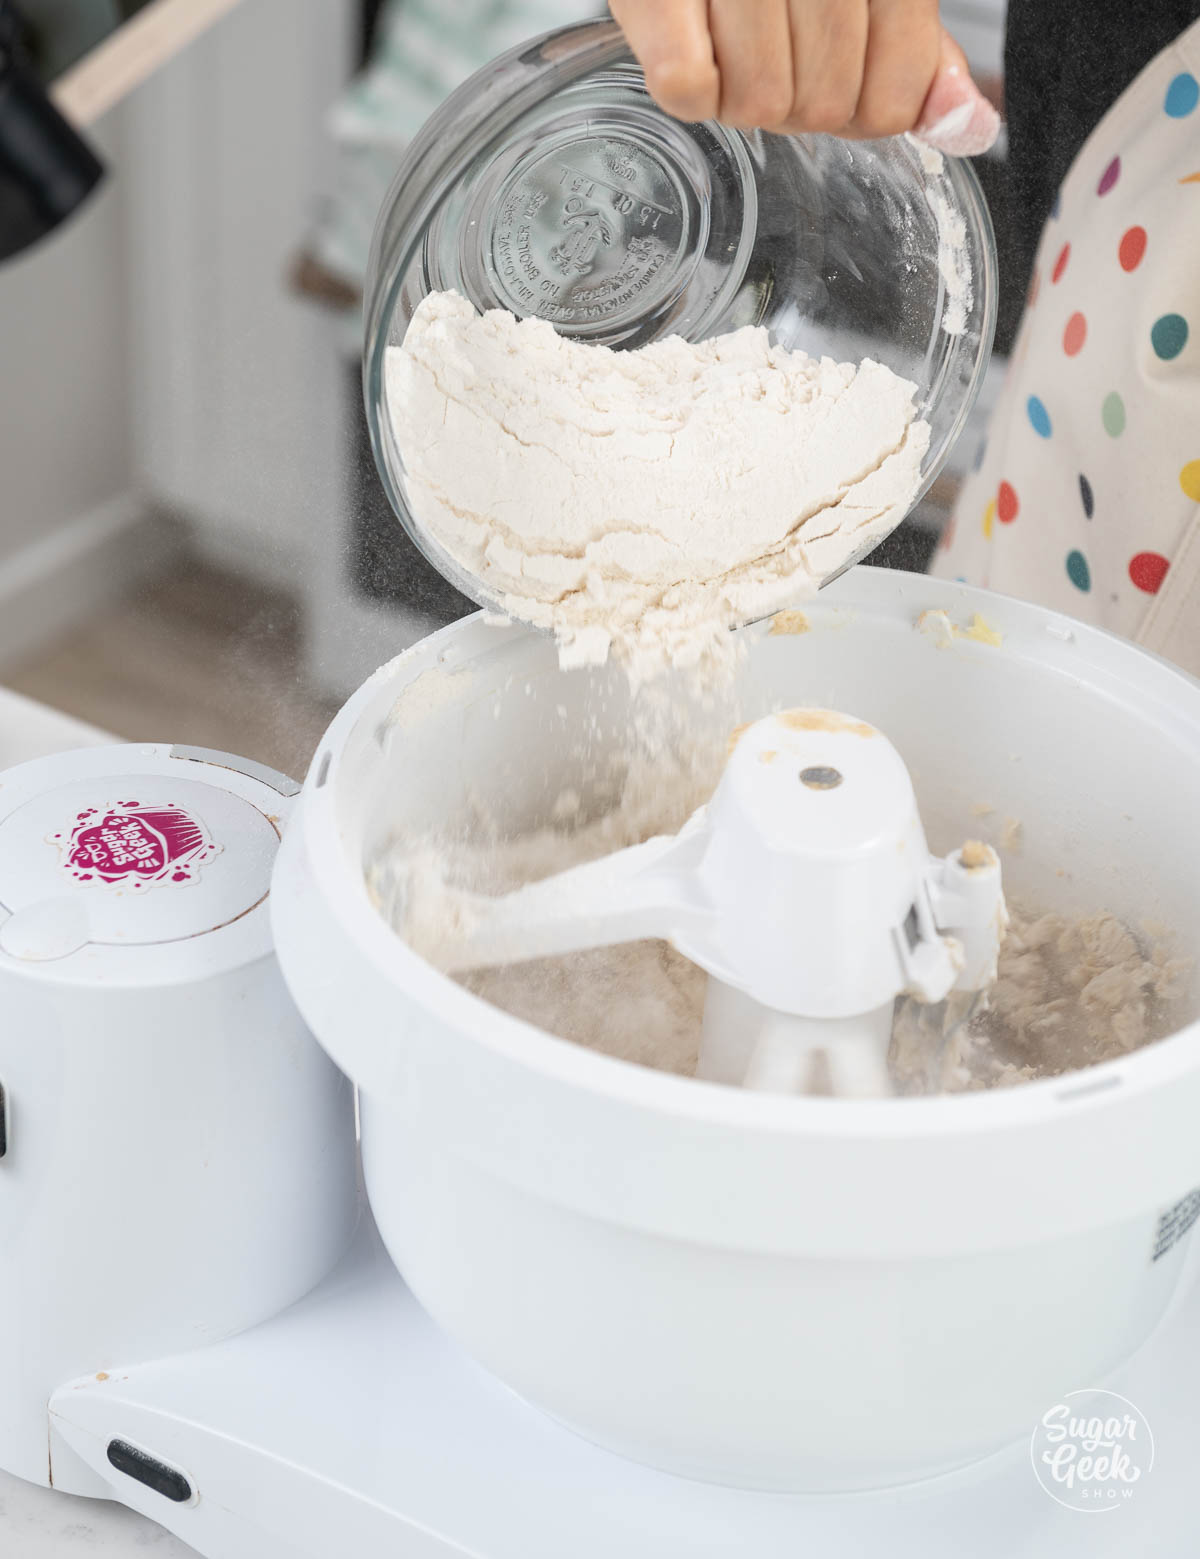
  6. Add in ⅓ of your dry ingredients to the egg mixture and mix on low until incorporated. Scrape the bowl as needed to fully incorporate the ingredients. Continue adding the flour mixture in thirds until all the dry ingredients are incorporated.adding flour into the bowl of a stand mixer
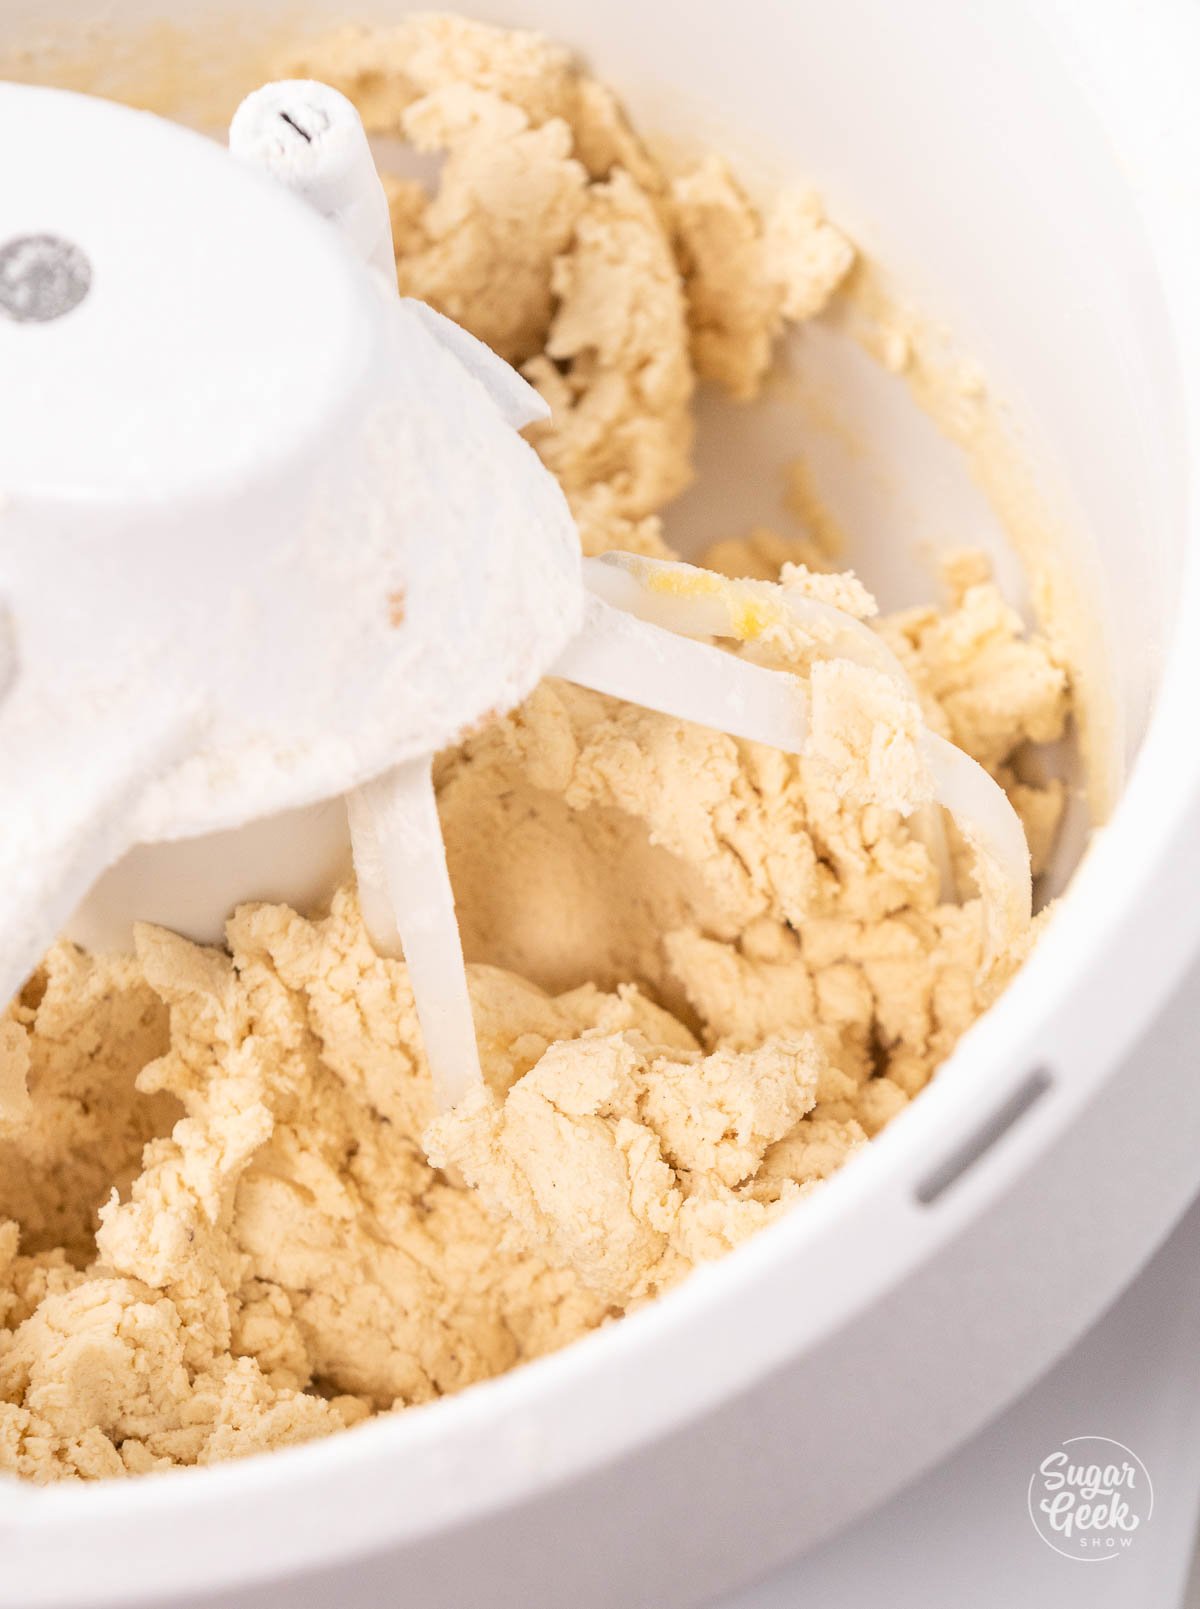
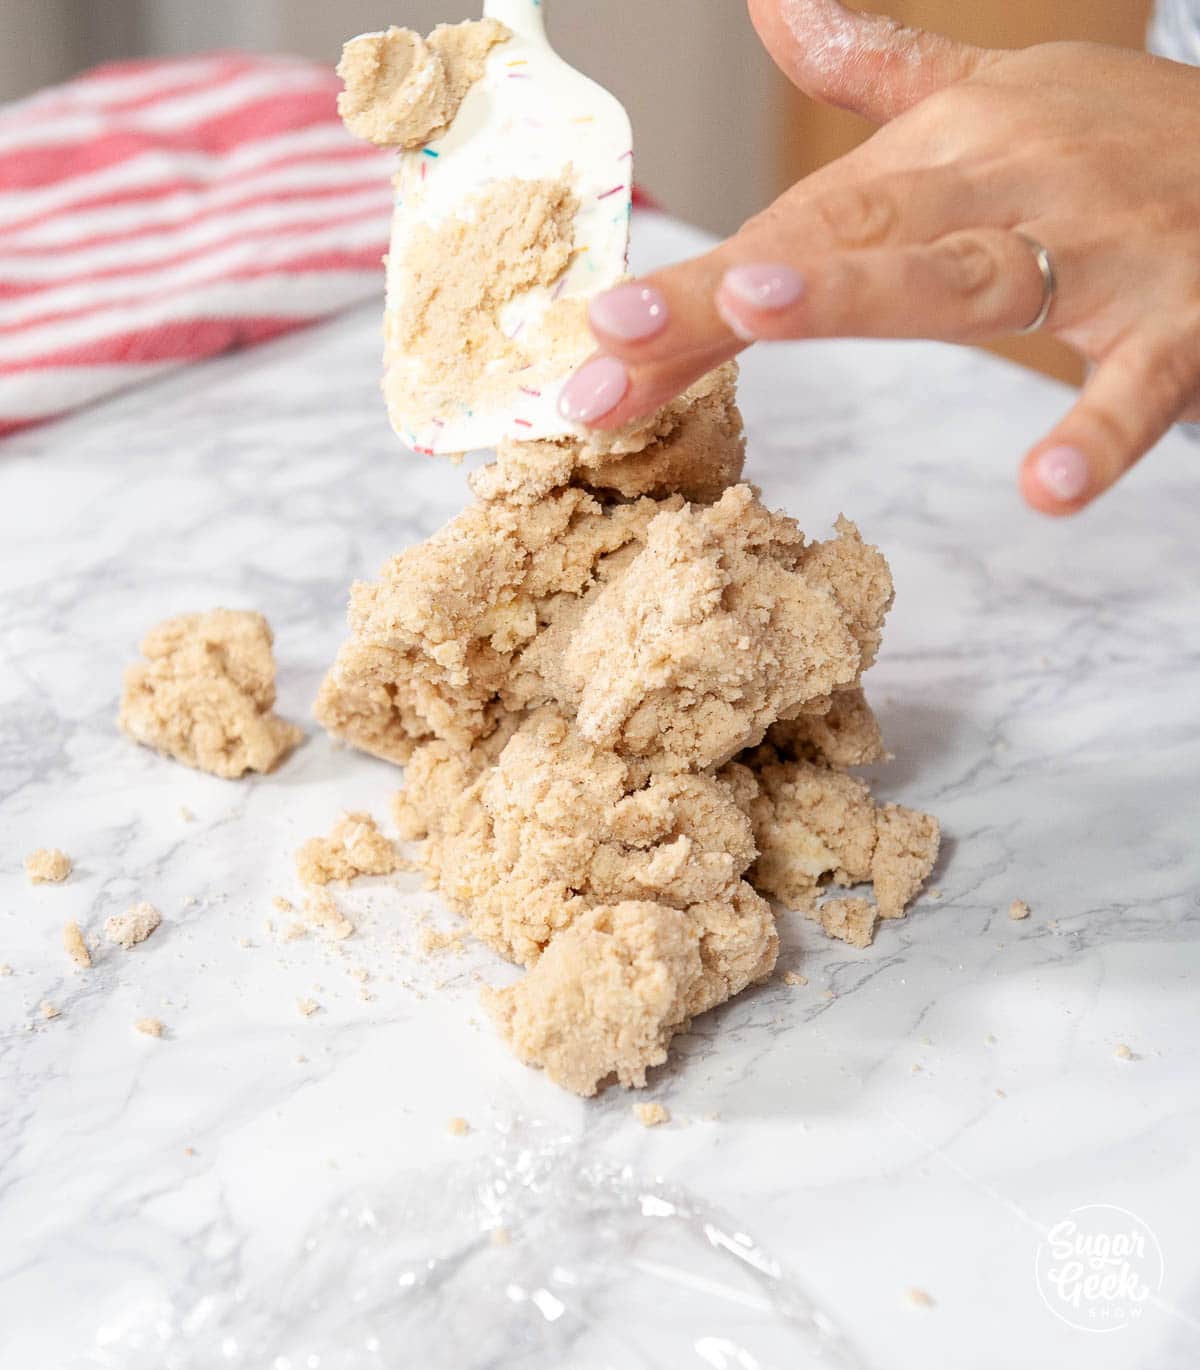
  7. Then, once the flour is fully incorporated you will add the milk. Continue to mix it on low until the dough becomes a solid mass. close up of sugar cookie dough
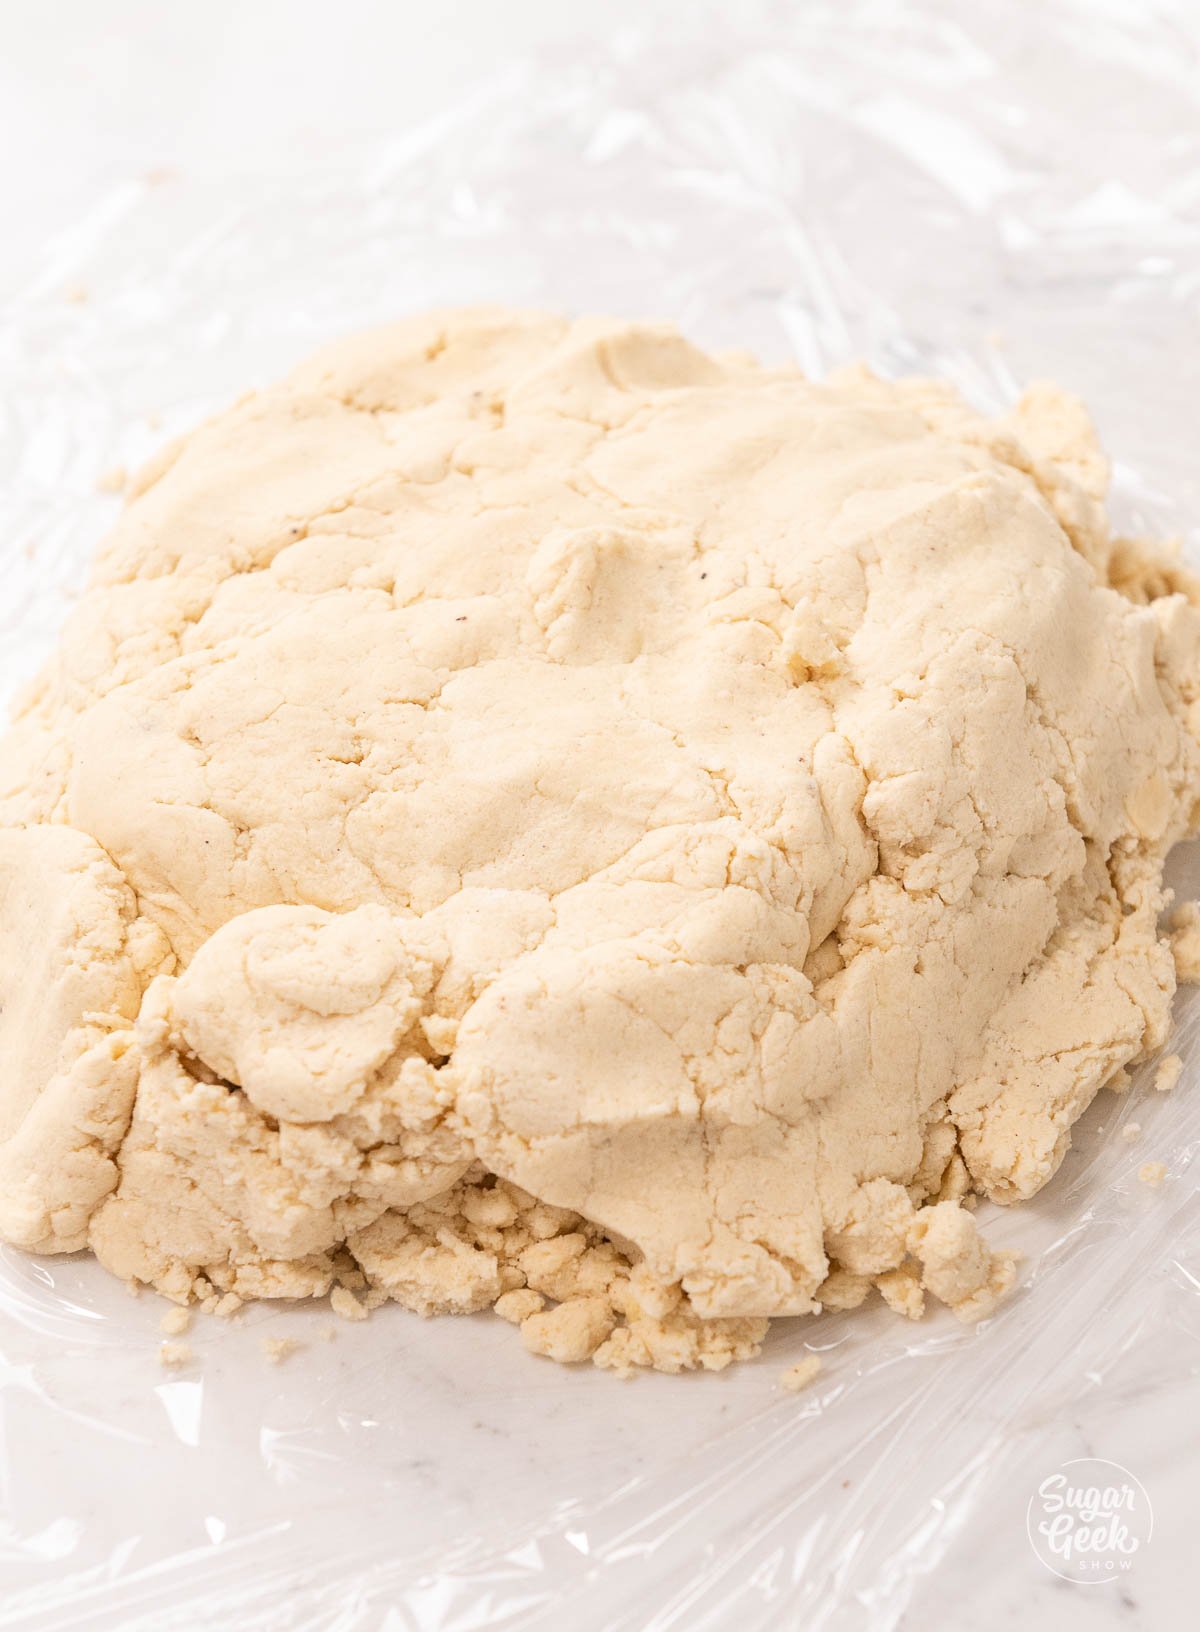
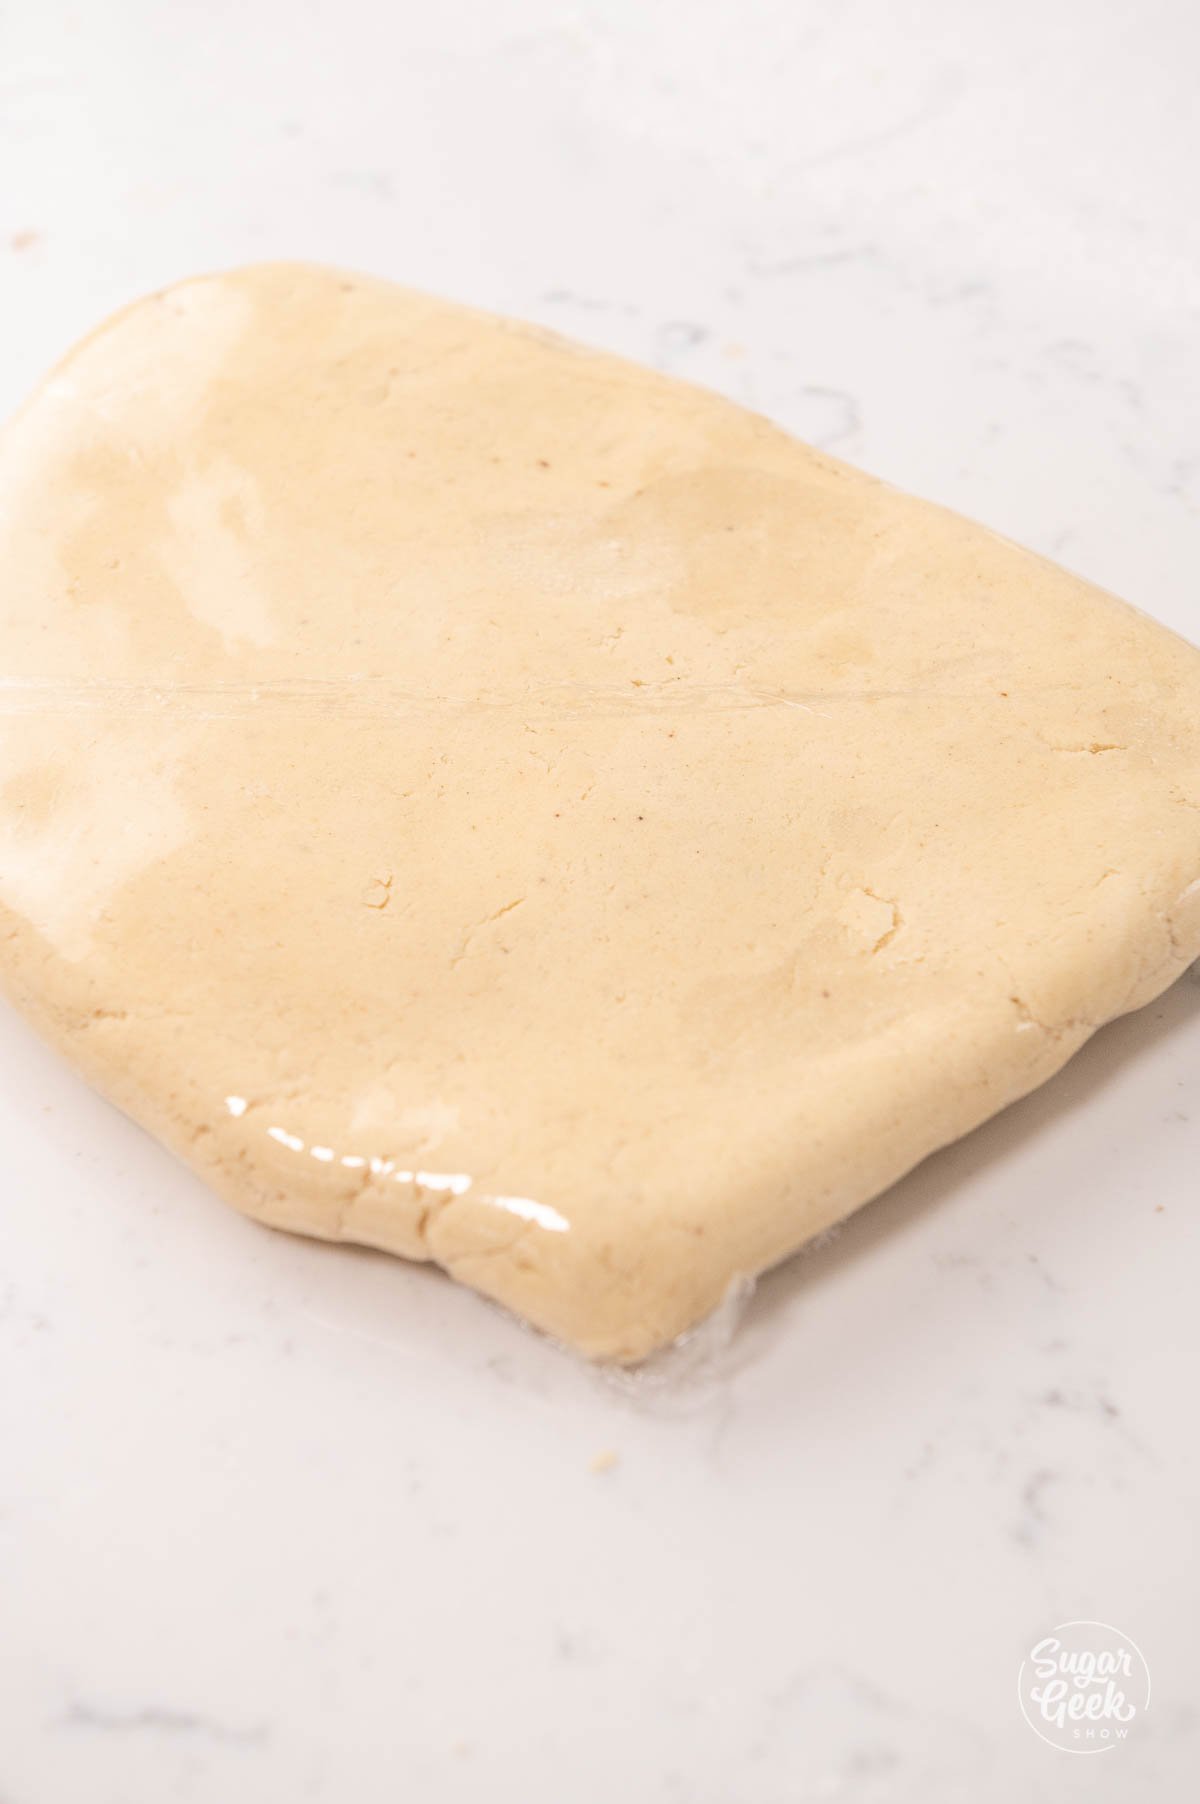
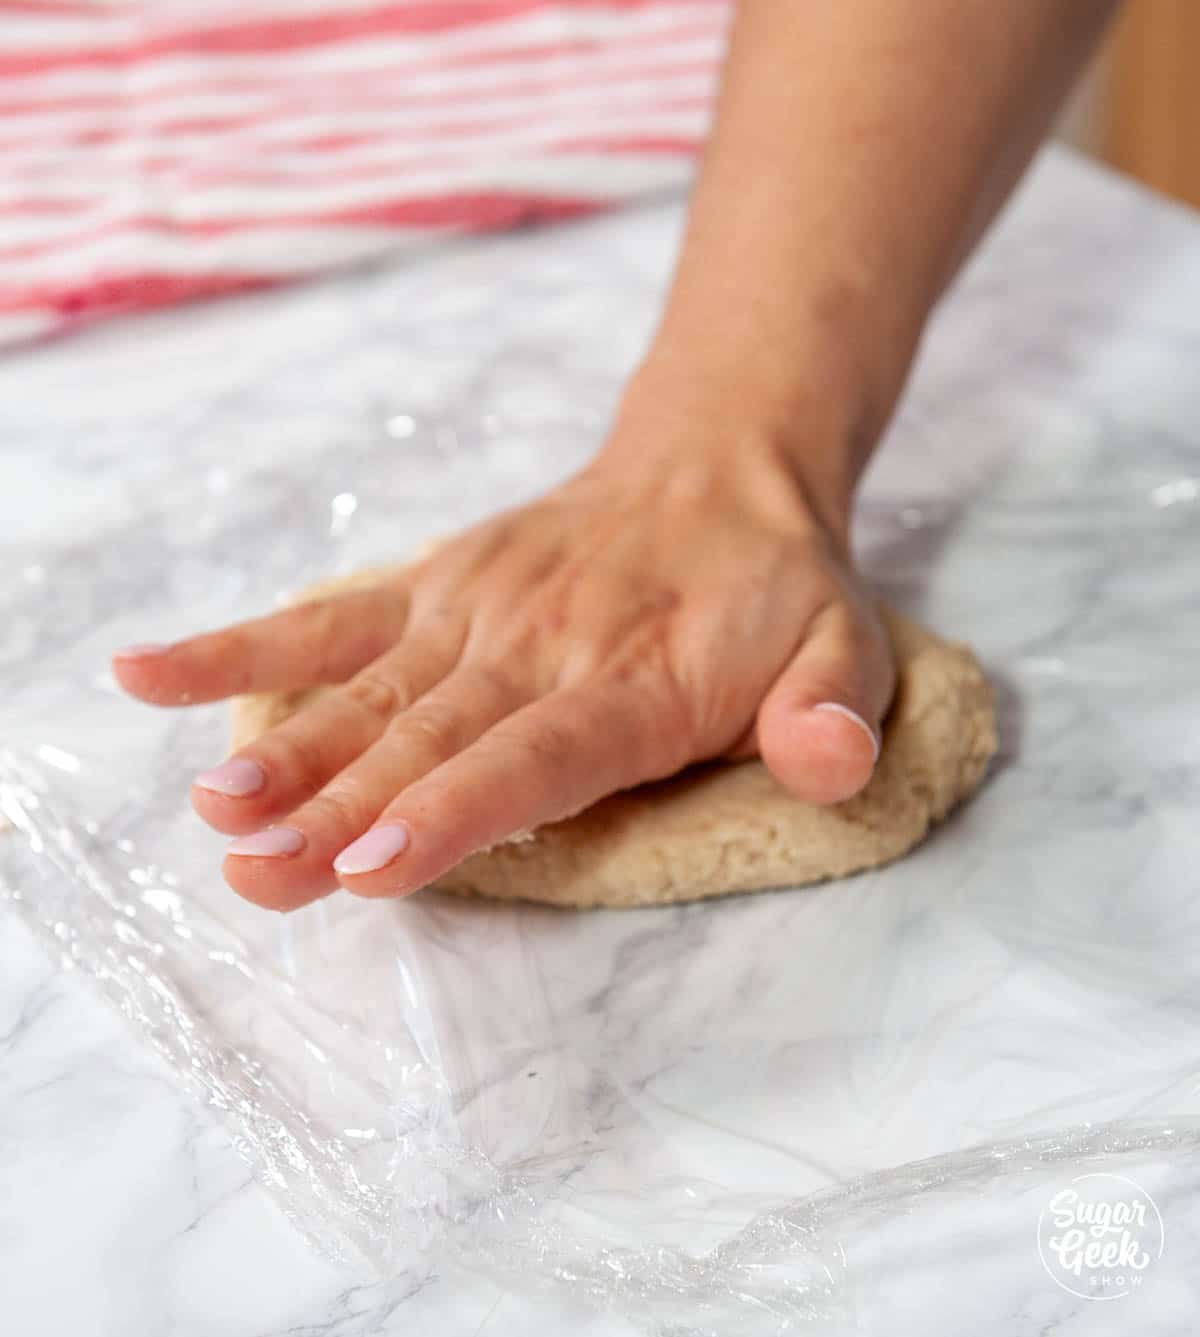
  8. Scrape out the mixer bowl and then wrap up your sugar cookie dough in plastic wrap. sugar cookie dough on plastic wrap
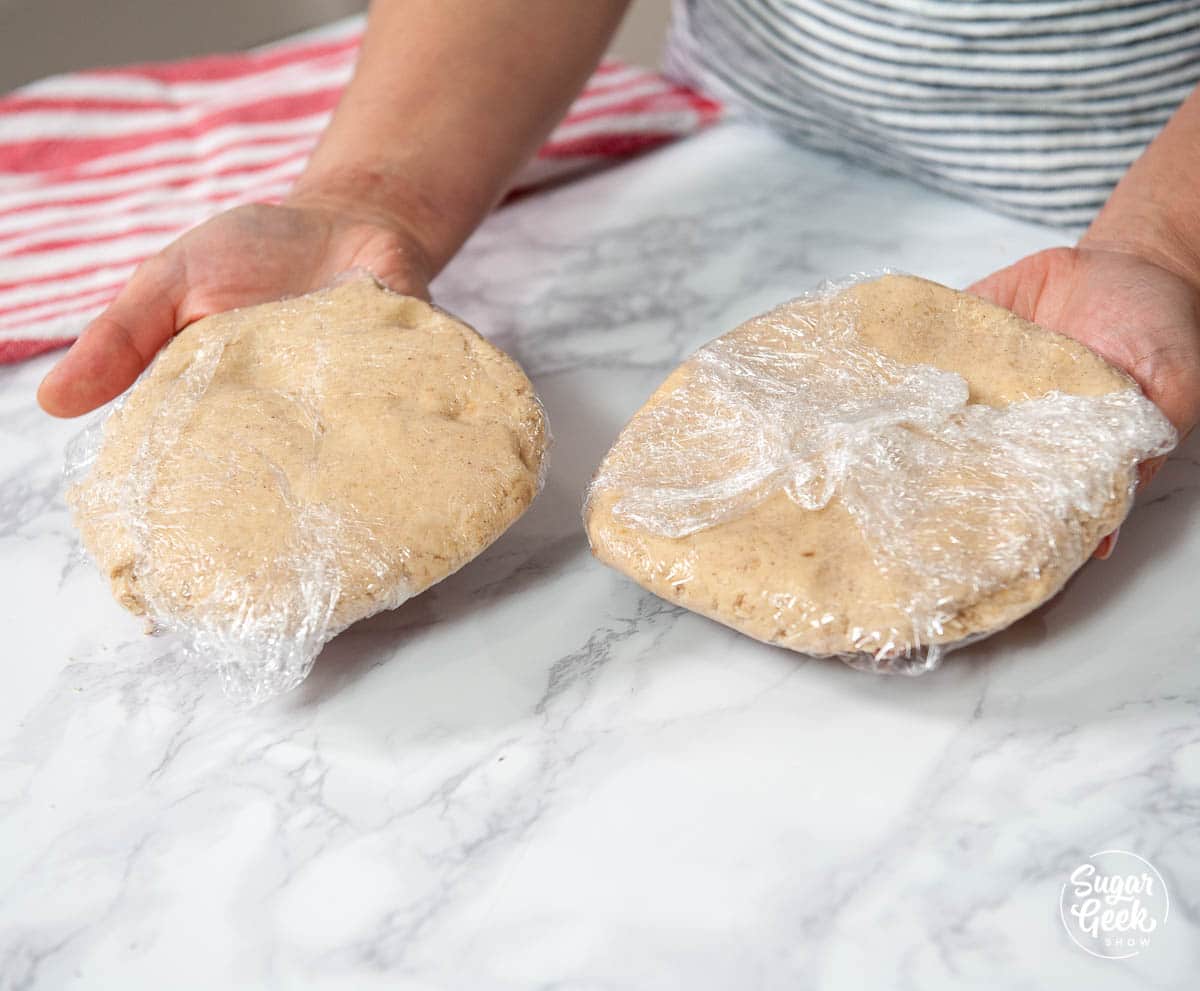
  9. Chill the cookie dough in the refrigerator for 2 hours. This gives the time for the flour to absorb the moisture which prevents your cookies from spreading. Chilling is the secret! You can even make this dough a day in advance if you want. wrapped sugar cookie dough
  10. Remove the dough from the fridge and give it a quick knead to soften it.
  11. Roll the dough out to about ¼" thick using a rolling pin and a dusting of flour.
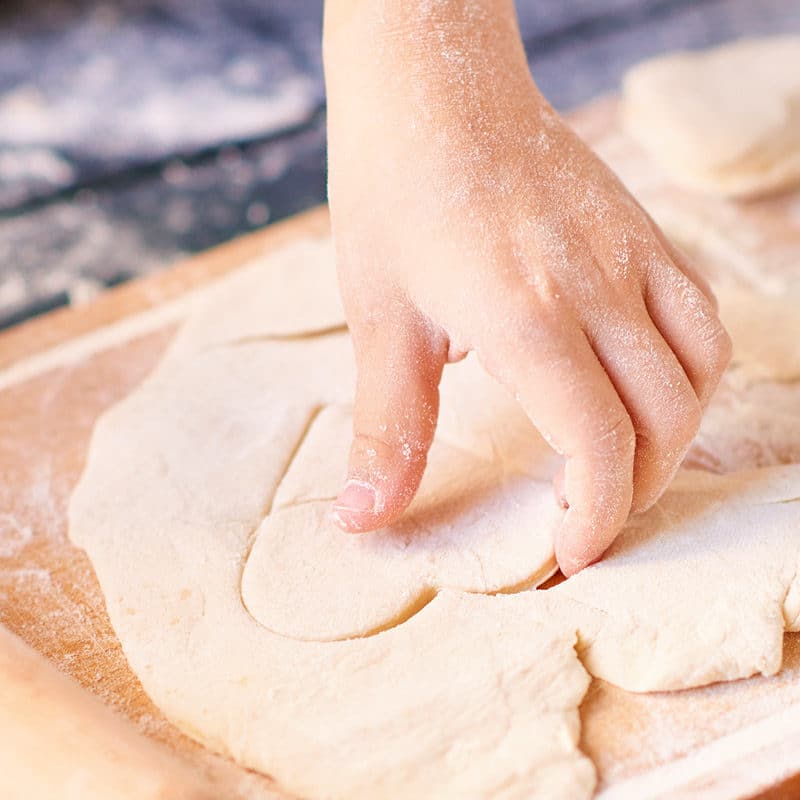
  12. Use your desired cookie cutter to cut out uniform shapes. close up of hand picking up a heart cut out sugar cookie
  13. Place the cookies on a baking sheet that's lined with parchment paper.
  14. Next, put the cookie sheet back in the refrigerator for about 15 minutes to allow the dough to chill again. Chilled cookie dough will keep their shape in the oven and not expand or warp.
  15. Bake the chilled cookies at (350ºF 177ºC) for 10-14 minutes depending on the size of the cookie. Cookies will be done once they are slightly golden brown on the edge. close up of cut out sugar cookies
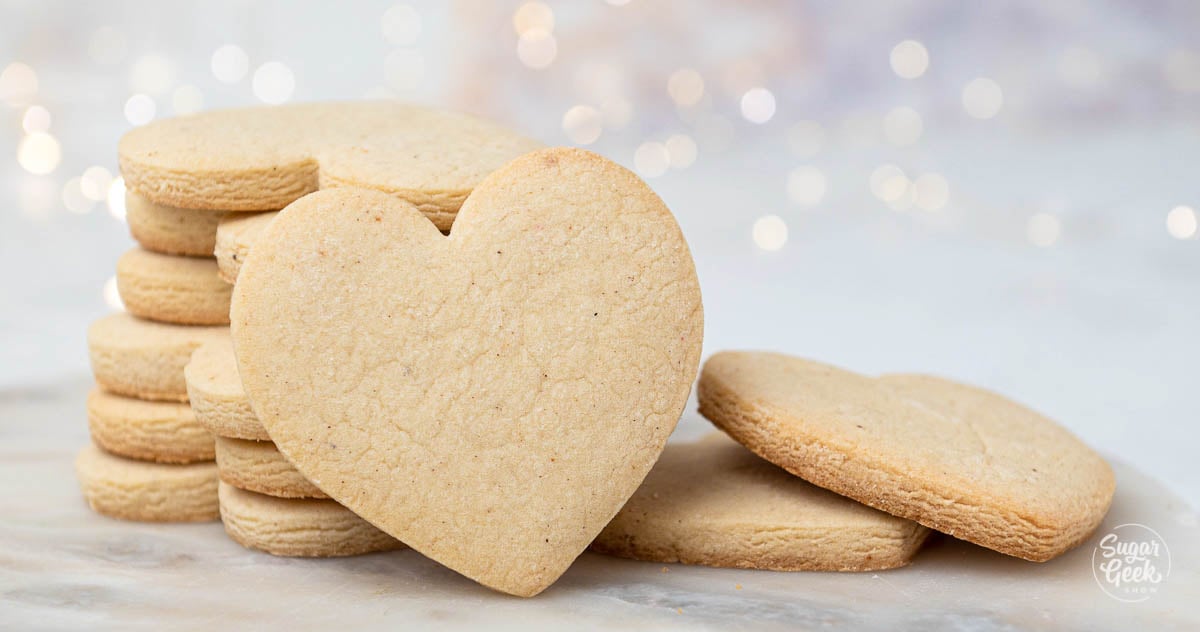
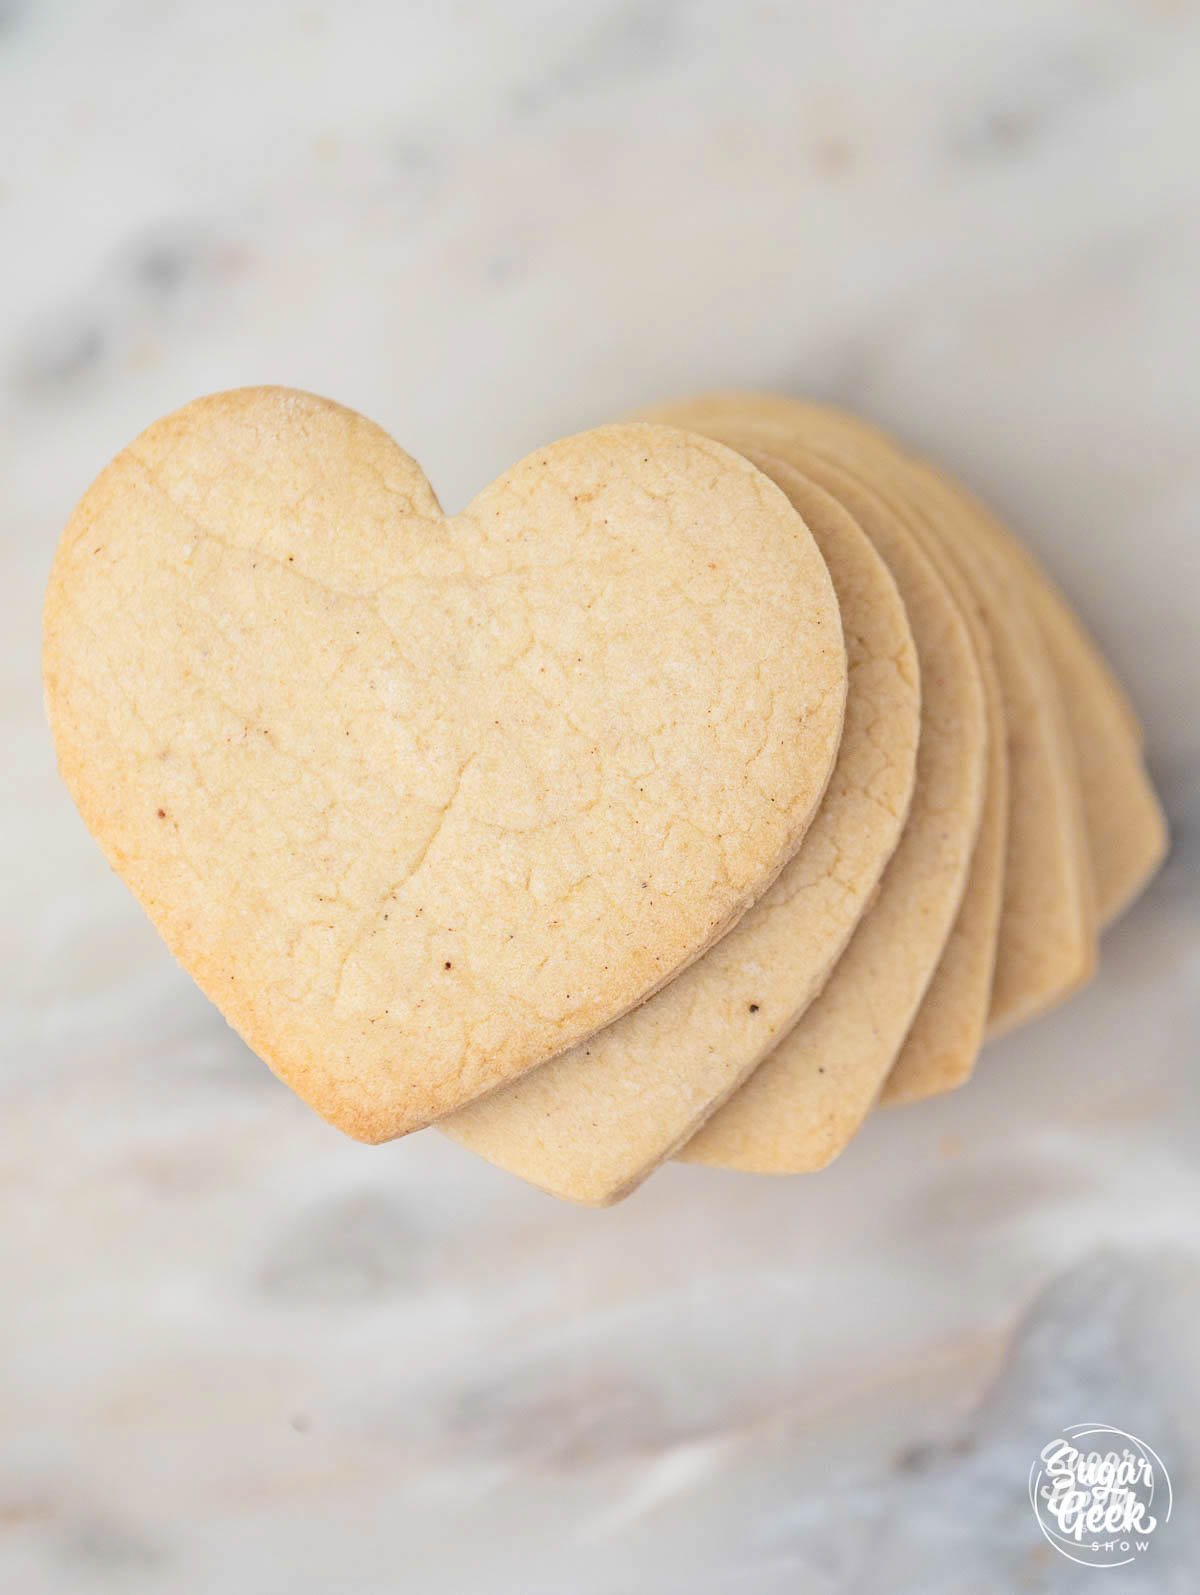
stacked heart shaped sugar cookies

Ready to decorate your sugar cookies? Check out my blog post on how to make the perfect royal icing for decorating cookies.

photo of sugar cookies with royal icing

FAQ

Can I substitute ingredients?

You can, but it's the results will be different. Here's some advice:

When you make substitutions in your cookie recipe, you always have to remember that not all ingredients contain the same amount of moisture.

First, you have to consider if what you're replacing has the same properties. Because brown sugar has more moisture in it than white sugar, if you take out the brown and replace it with white, you might end up with a crunchier cookie.

How do I make my sugar cookies light and puffy?

If you're going for a light, puffy cookie you can try to use shortening or even margarine but cut back on the amount of fat you use. Add an extra egg and cut back on the sugar.

Another tip for a more puffy cookie is to use cake flour or pastry flour and use baking powder instead of baking soda.

Also, you'll want to refrigerate your dough before baking your cookies.

What is the function of baking powder in cookies?

Baking powder is a two-in-one chemical leavening that combines a powdered alkali with a powdered acid. Since baking powder combines both of these, it eliminates the need for extra ingredients in your dough such as buttermilk, sour cream, or an acidic addition since no activation is needed when using baking powder. When it is added to a dough or batter, a chemical reaction takes place that produces carbon dioxide gas, inflating cookies.
If you forget the baking powder you'll probably end up with some very flat, hard cookies.

Why do my sugar cookies spread out so much?

Make sure your chill your dough for two hours before cutting out your sugar cookies and then chill your cut out cookies on the sheet pan before baking. This keeps the butter nice and cold and helps the cookies to keep their shape.

How long do sugar cookies last?

Sugar cookies are great to store if you keep them in a cool, dry cupboard or pantry. Make sure these locations are away from sinks, stoves, and ovens though. They will keep for about three weeks. You can freeze them for up to three months. Just make sure you have a seal that is secure, you can even vacuum pack a few cookies per bag. No one likes the taste of freezer burn on his or her cookies.

How do you keep homemade cookies soft?

Here is a little home tip for you that I do. I take a piece of bread (white is best because it doesn't transfer its taste to your cookies) and then place it in a container. Use one piece of bread per dozen cookies. The cookies will absorb moisture from the bread, therefore, keep them from drying out. This will keep your cookies soft much longer.

More Cookie Recipes You'll Love

Marbled Valentines Day Sugar Cookies

Soft and Chewy Snickerdoodle Cookies

Easy M&M Cookies

Copycat Lofthouse Cookies

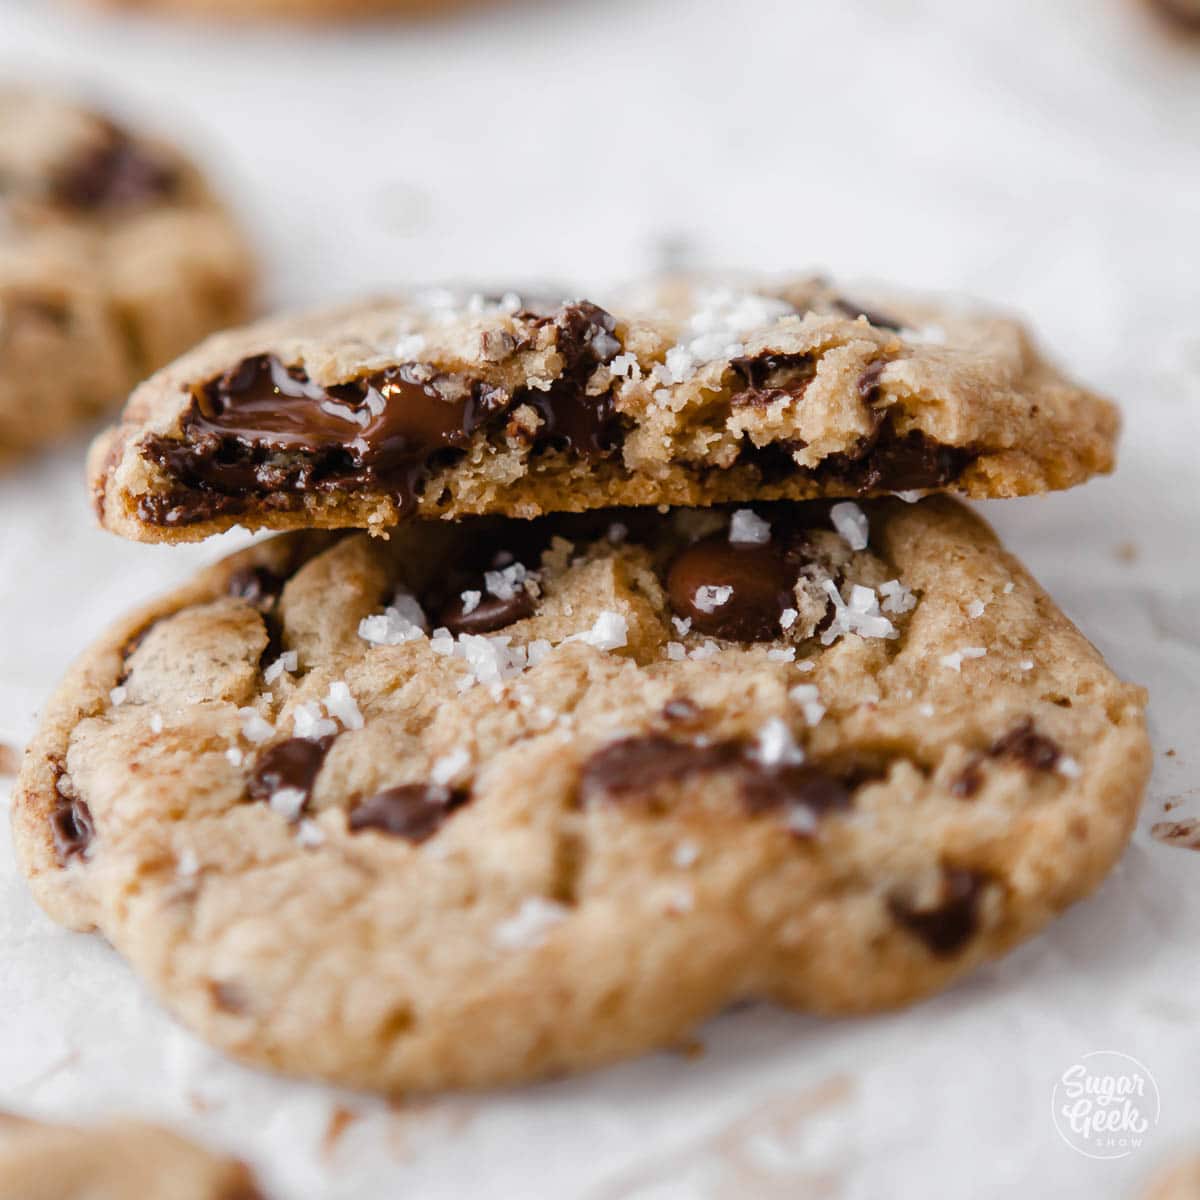
Sea Salt Chocolate Chip Cookies

Recipe

close up of heart shaped cut out sugar cookies
Print Recipe
4.77 from 94 votes

The Best Cut Out Sugar Cookie Recipe

The best no spread, no fail cut out sugar cookie recipe! These cookies are soft and buttery and always hold their shape! Switch out the flavors to make this recipe work for any occasion or holiday.
Prep Time15 minutes mins
Cook Time15 minutes mins
chilling2 hours hrs
Total Time2 hours hrs 30 minutes mins
Course: Dessert
Cuisine: American
Servings: 12 cookies
Calories: 322kcal
Author: Liz Marek

Ingredients

Ingredients

  • 8 ounces Unsalted butter Room temperature
  • 8 ounces Granulated sugar
  • 1 large Egg
  • 1 teaspoon Vanilla extract
  • 18 ounces AP flour
  • 1 ½ teaspoons Baking powder
  • ½ teaspoon Nutmeg
  • ½ teaspoon salt
  • 1 teaspoon Milk
  • ¼ teaspoon Cinnamon (optional)
US Customary - Metric

Instructions

Simple Sugar Cookie Instructions

  • In the bowl of your stand mixer, place your room temperature butter and granulated sugar.
  • Cream the butter and sugar using the paddle attachment and mix it on low until it's smooth. Creamed butter should be fluffy and pale yellow in color.
  • Next, add an egg and mix it on medium speed (speed 2 on a Bosch, speed 4 on KitchenAid mixer) until it is fully incorporated. Scrape the bowl when necessary to make sure the egg incorporates.
  • Then, add in the vanilla extract and mix it until it's just incorporated.
  • In a separate bowl, whisk your dry ingredients (AP flour, nutmeg, cinnamon, salt and baking powder) together. 
  • Add the dry ingredients into stand mixer about ⅓ of total dry ingredients at a time using a scoop. Mix it until it's fully incorporated. Start the speed on slow until the flour starts to incorporate, then turn up the speed to a medium speed setting. Scrape the bowl as needed to fully incorporate the ingredients.
  • Then, once the flour is fully incorporated you will add the milk. Continue to mix it on slow until the dough becomes a solid mass. 
  • Scrape out the mixer bowl and then wrap up your sugar cookie dough in plastic wrap.
  • Chill the cookie dough in the refrigerator for 2 hours. 
  • Knead the cookie dough, and then roll it until it is thin enough to cut cookie shapes.
  • Use your desired cookie cutter to cut out uniform shapes.
  • Place the cookies on a baking sheet that's lined with parchment paper.
  • Next, put the cookie sheet back in the refrigerator for about 15 minutes to allow the dough to chill again. Chilled cookie dough will keep it's shape in the oven and not expand or warp.
  • Bake the chilled cookies at (350ºF 177ºC) for 10-14 minutes depending on the size of the cookie. Cookies will be done once they are slightly golden brown on the edge.

Notes

  • Weigh your ingredients to avoid cookie failure. Using a kitchen scale for baking is super easy and gives you the best results every single time. 
  • Practice Mise en Place (everything in its place). Measure out your ingredients ahead of time and have them ready before you start mixing to reduce the chances of accidentally leaving something out.
  • After you prepare your cookie dough, ensure you wrap it up in some plastic wrap and chill it in the refrigerator for 2 hours. 
  • Chilled cookie dough will keep its shape in the oven and not expand or warp.

Nutrition

Serving: 1cookie | Calories: 322kcal | Carbohydrates: 40g | Protein: 3g | Fat: 16g | Saturated Fat: 9g | Cholesterol: 56mg | Sodium: 142mg | Potassium: 106mg | Sugar: 16g | Vitamin A: 495IU | Calcium: 39mg | Iron: 1.6mg
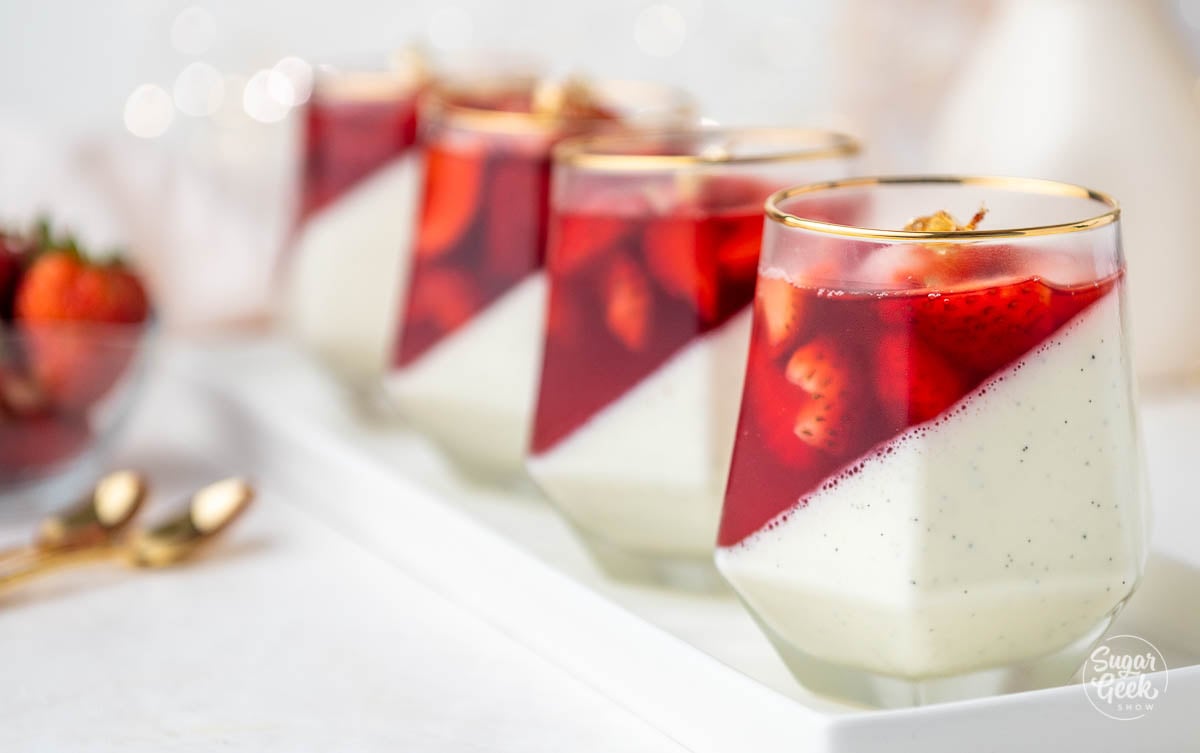
close up of panna cotta with strawberry gelee

February 1, 2022 gluten free

Panna Cotta with Strawberry Gelée

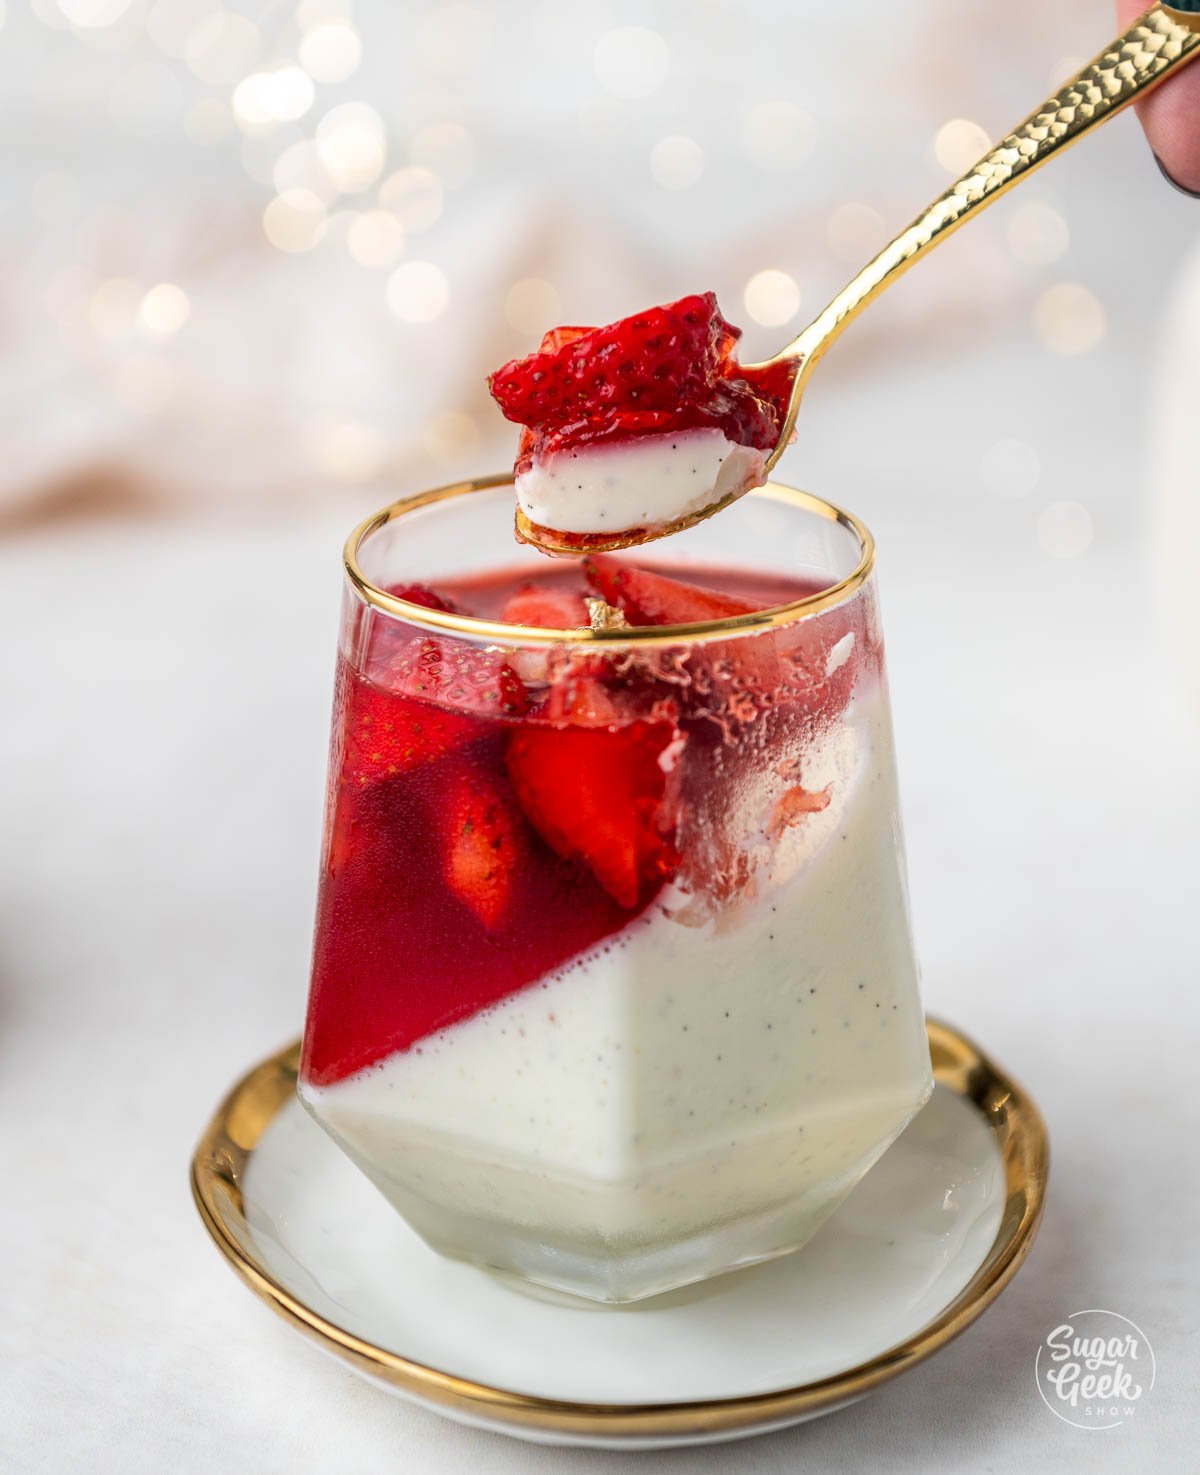
Smooth and creamy vanilla bean panna cotta and strawberry gelée are served on the diagonal in individual wine glasses. These beautiful and tasty desserts are perfect for weddings, bridal showers, or any special occasion.

Each bite of this dessert packs a punch of vibrant strawberries paired with creamy and sweet panna cotta. This elegant dessert is excellent for celebrations like bridal showers and weddings, or even as a special dessert for a romantic date night at home!

What's great about panna cotta is you can make it ahead of time and store it in the fridge for up to 7 days before you add in the strawberry. Chef Christophe Rull makes a beautiful presentation inside of a wine glass, but you can also prepare it in any vessel you like (it would look stunning in a martini glass, too!)

What's In This Blog Post

  • Panna Cotta Ingredients
  • Preparing the Strawberry Gelée
  • How to Make Panna Cotta
  • Assembling the Panna Cotta
  • FAQ
  • More Recipes You'll Love

Panna Cotta Ingredients

panna cotta ingredients

Gelatin: You will need gelatin (or agar-agar which is a vegetarian substitute for gelatin) in order to set your panna cotta. Either gelatin (or agar-agar) is needed to bind the ingredients together and transform the cream into a more solid form. If you do not have gelatin sheets you can also use powdered gelatin in place of the sheets (10 grams of powdered gelatin and 50 grams of water).

Vanilla bean: For more delicate desserts like this one, the quality of the vanilla you use really matters. Don't have a vanilla bean? No problem! You can substitute with 1 teaspoon of vanilla bean paste or a high-quality vanilla extract (and you will skip the step in the recipe that requires you to strain the vanilla pod and seeds from the cream).

Preparing the Strawberry Gelée

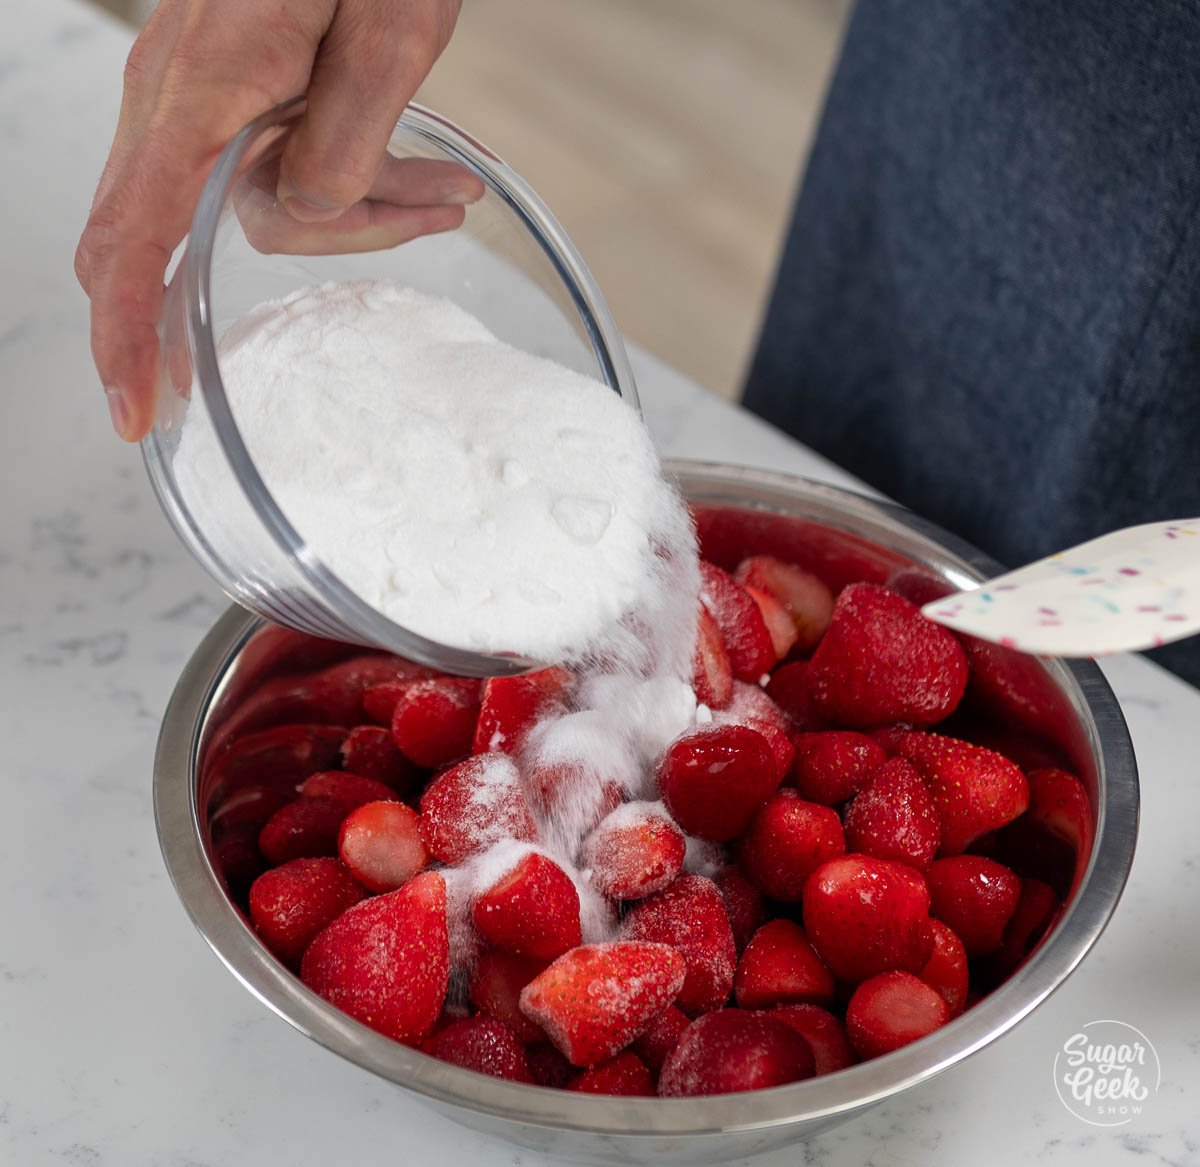
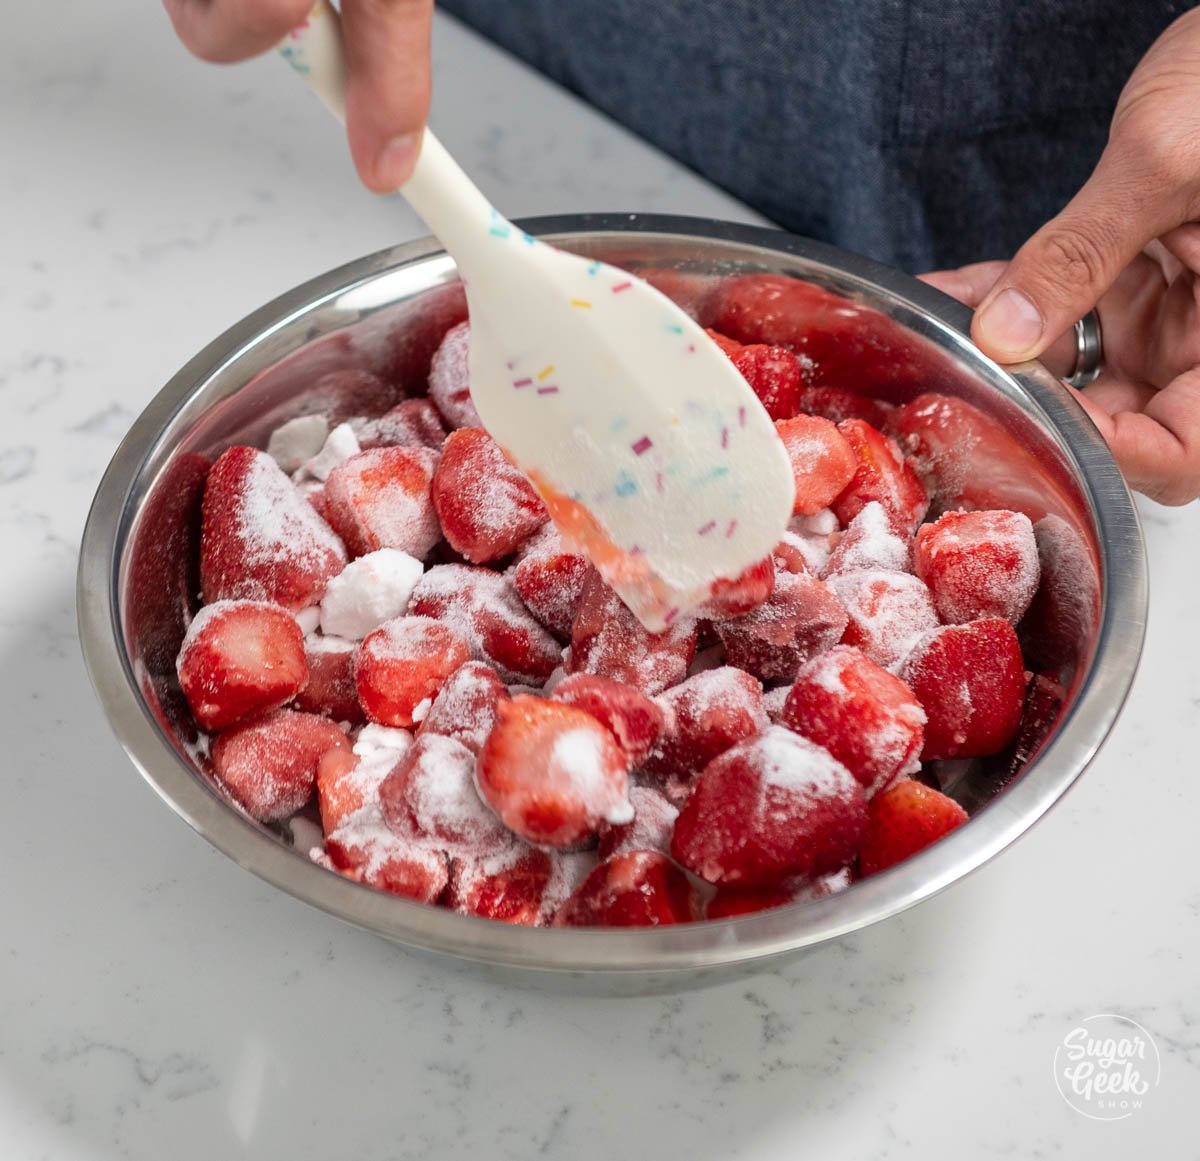
  1. First, you will begin by preparing the strawberry juice to make the jelly. To do this, combine the strawberries and the sugar together in a medium-sized bowl. Either frozen or fresh strawberries will work for this.pouring sugar over strawberries in a bowlmixing strawberries and sugar together with a spatula
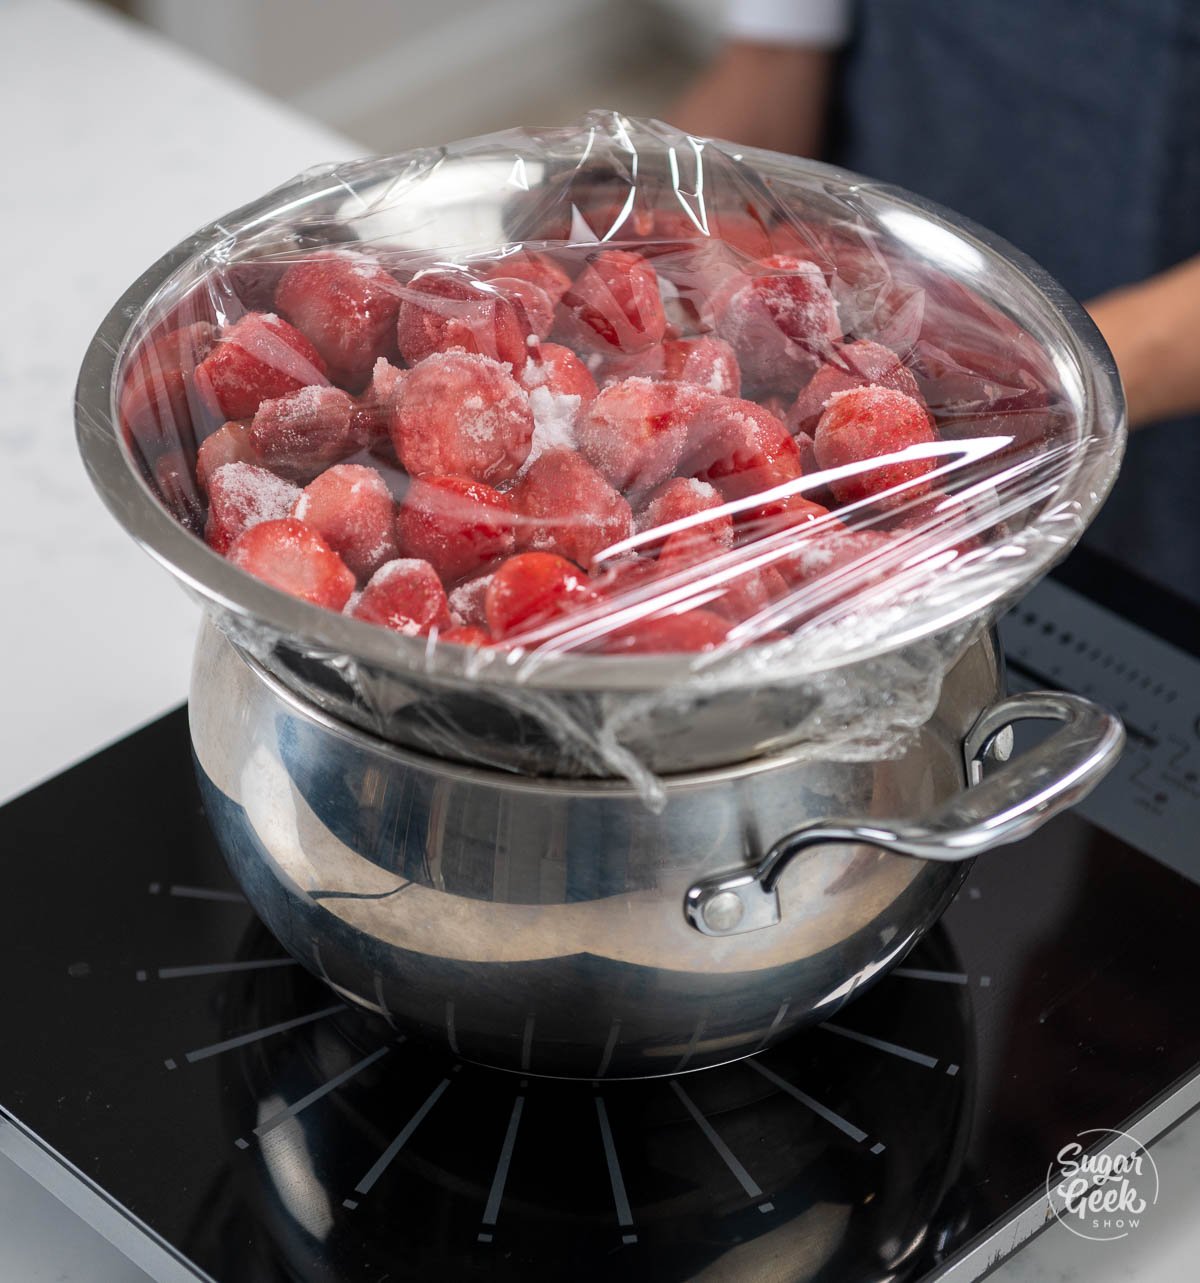
  2. Then, wrap the top of the bowl with plastic wrap to create a steam environment in the bowl. This is to extract as much juice and flavor from the berries as possible without losing moisture.bowl of strawberries on oven covered with plastic wrap
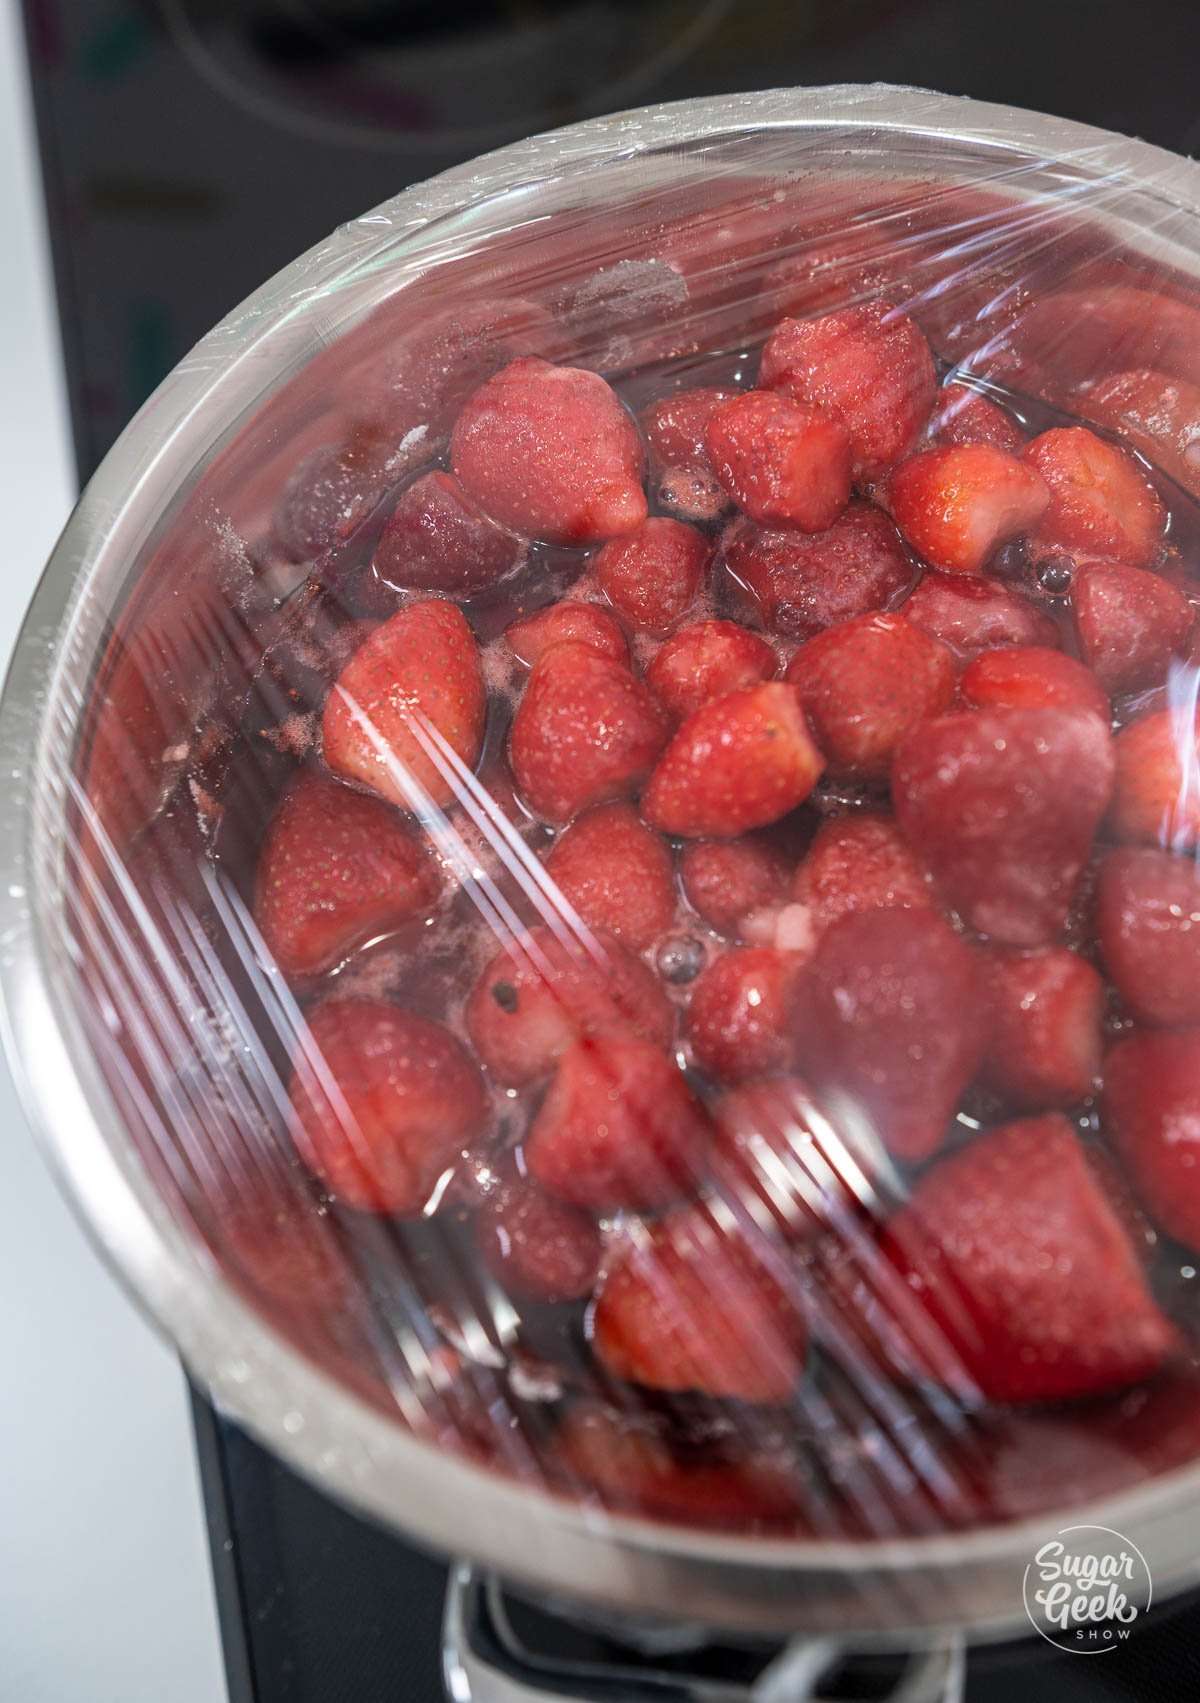
  3. Place the bowl on a double boiler and let it cook for 1 hour over medium . Once your berries have reduced, the berries should appear to be swimming in their own juice.top down view of strawberries inside bowl sitting inside strawberry juice
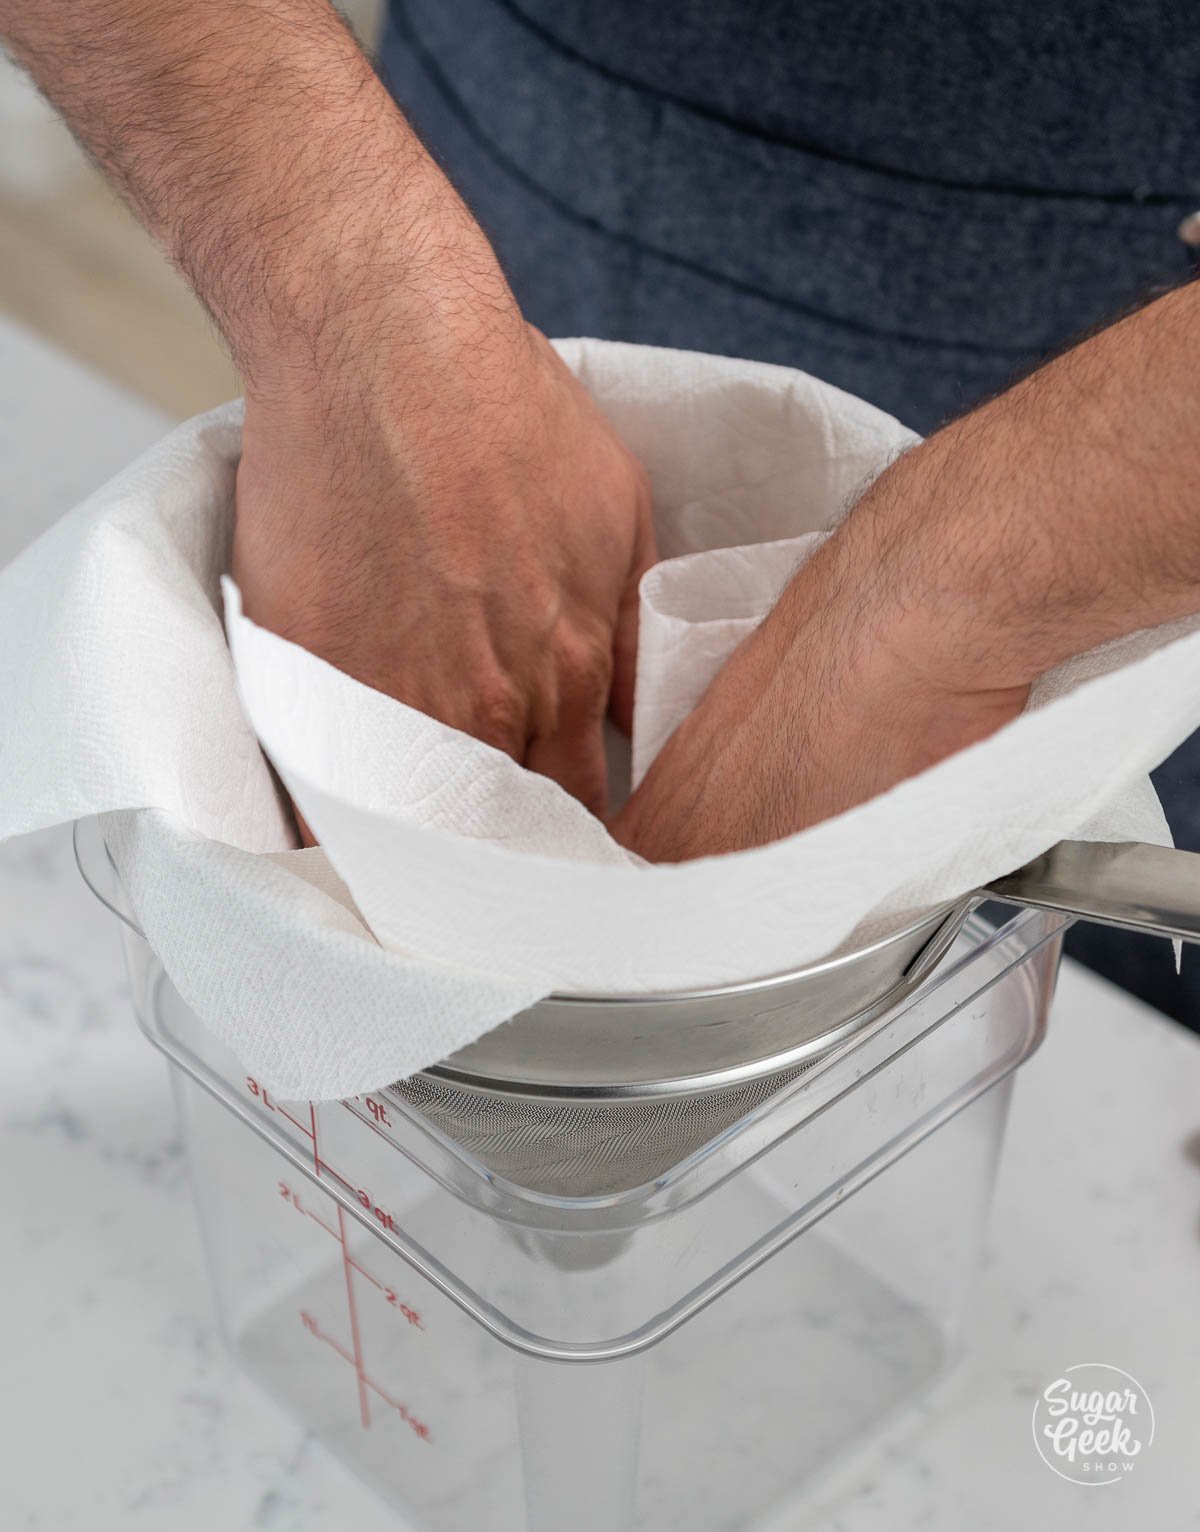
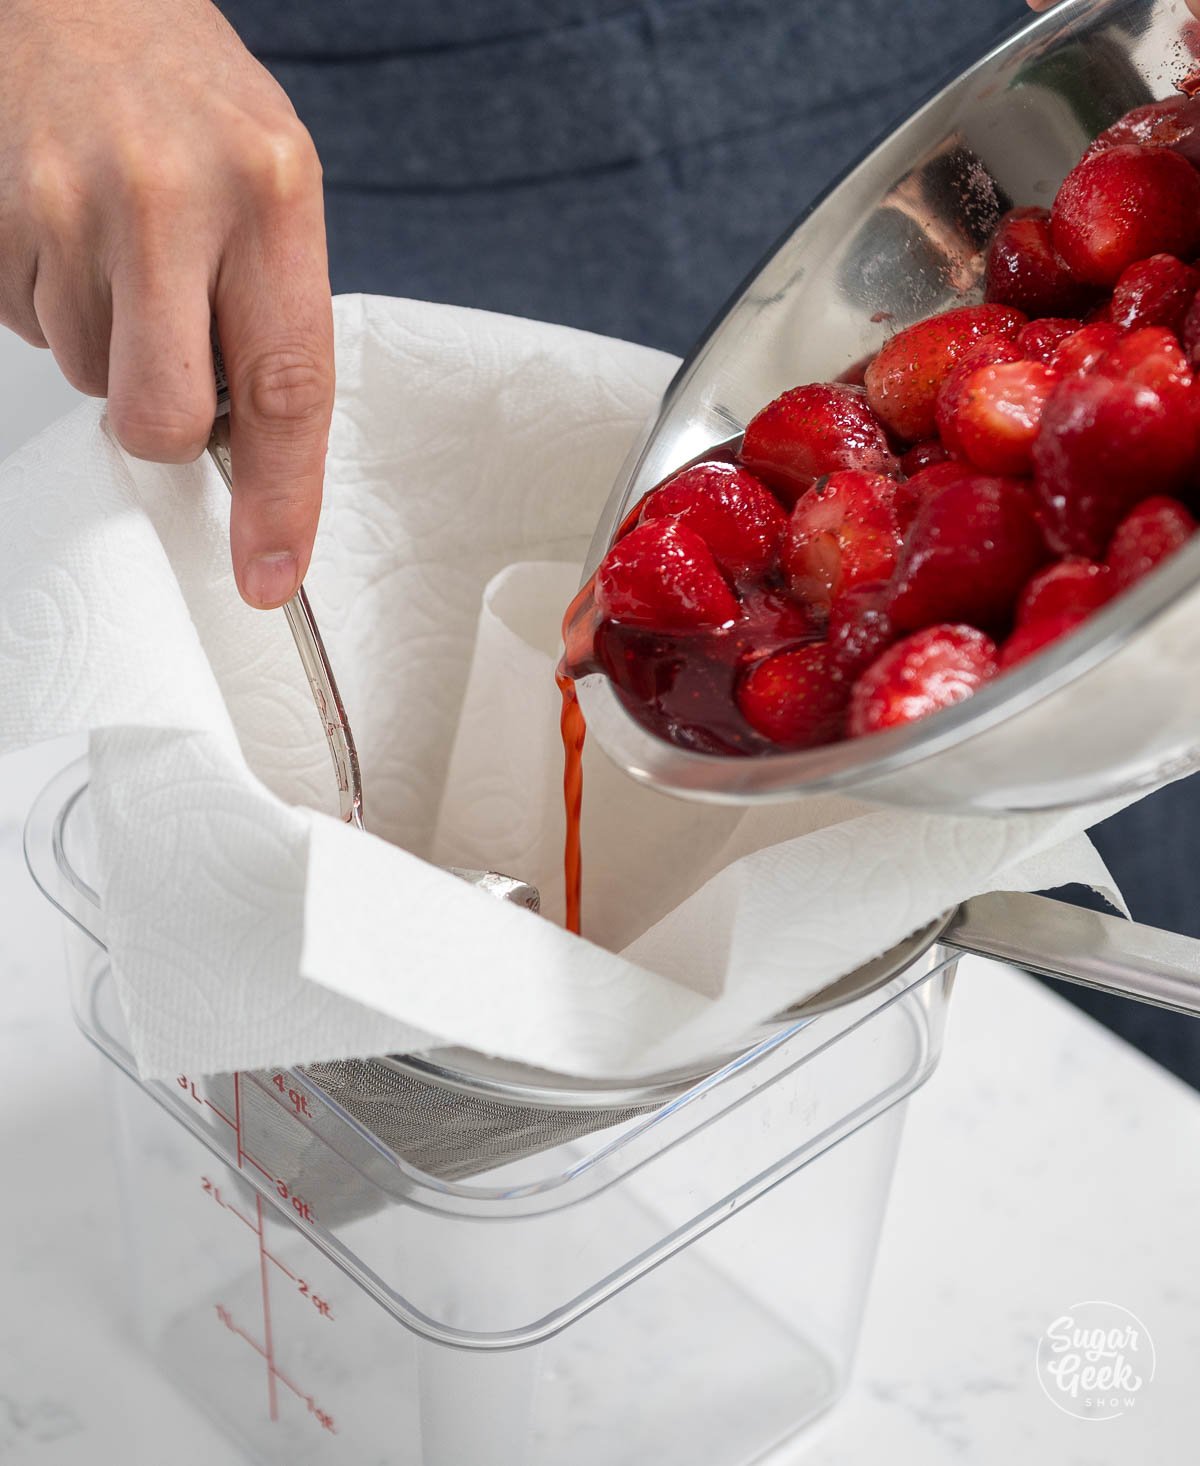
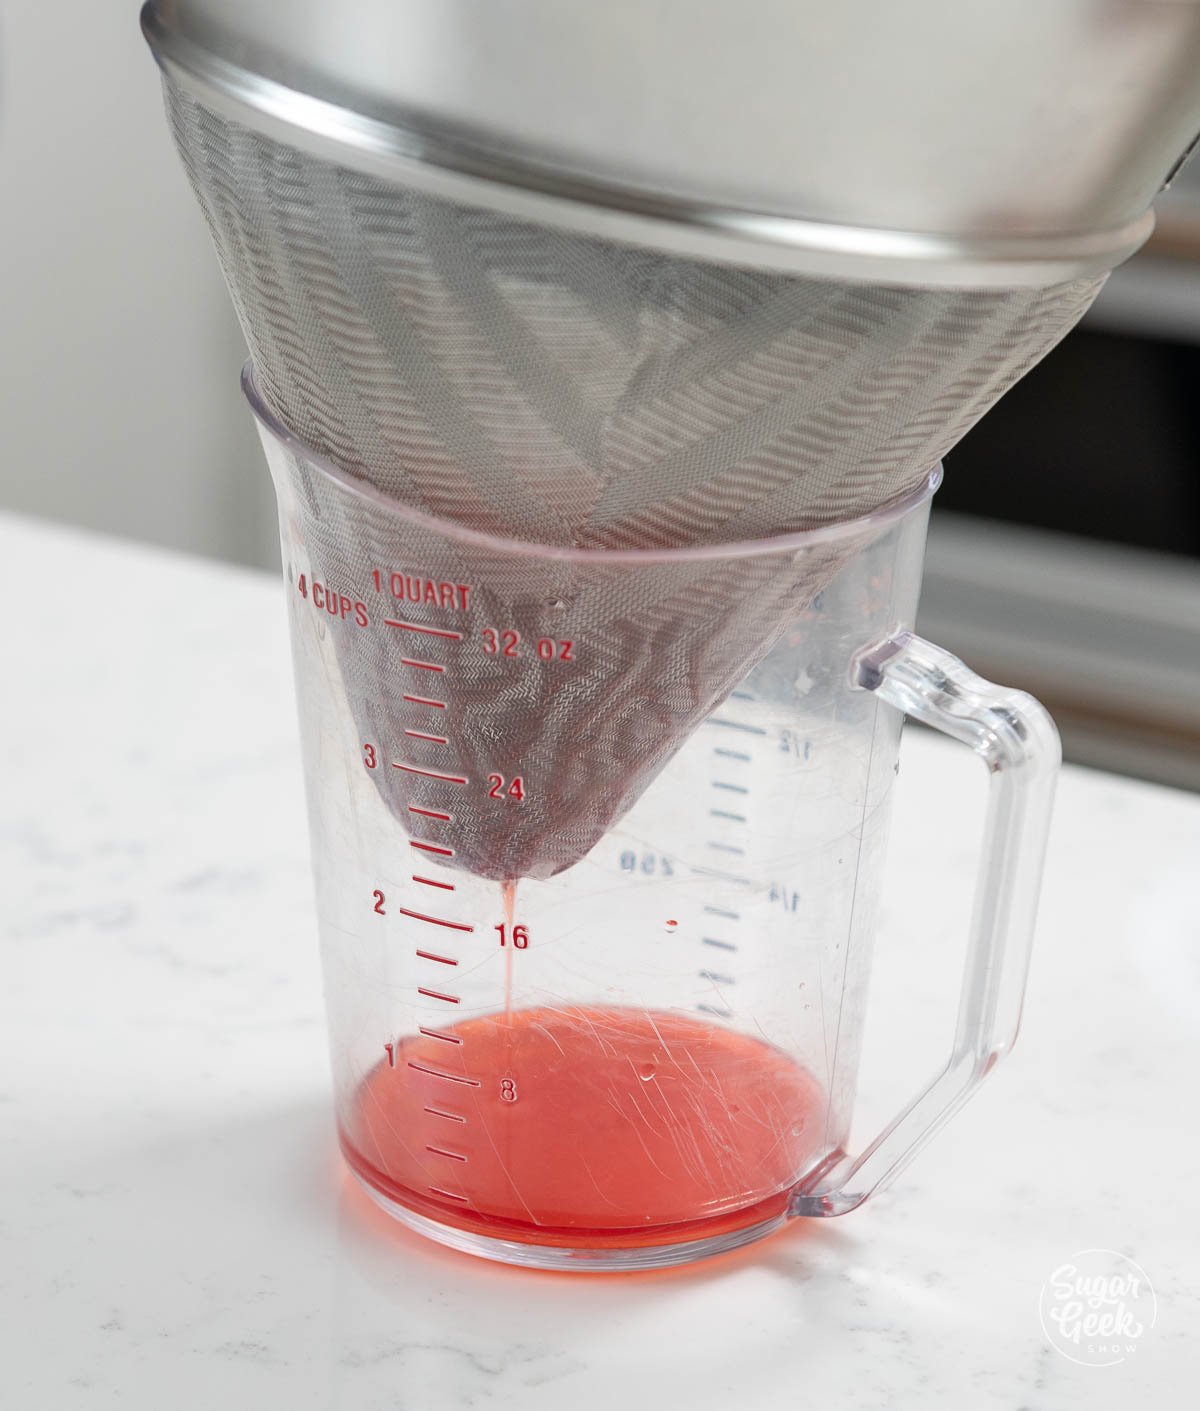
  4. Next, after the berries have reduced you will strain the berries over a chinois (fine mesh strainer) lined with a cheesecloth or a paper towel. This will remove all of the berry fibers and leave a beautiful, clear strawberry juice.hands inside of a cheesecloth over a strainerhand guiding a bowl of strawberries through a strainerstrainer inside of a large measuring cup with strawberry juice dripping

How to Make Panna Cotta

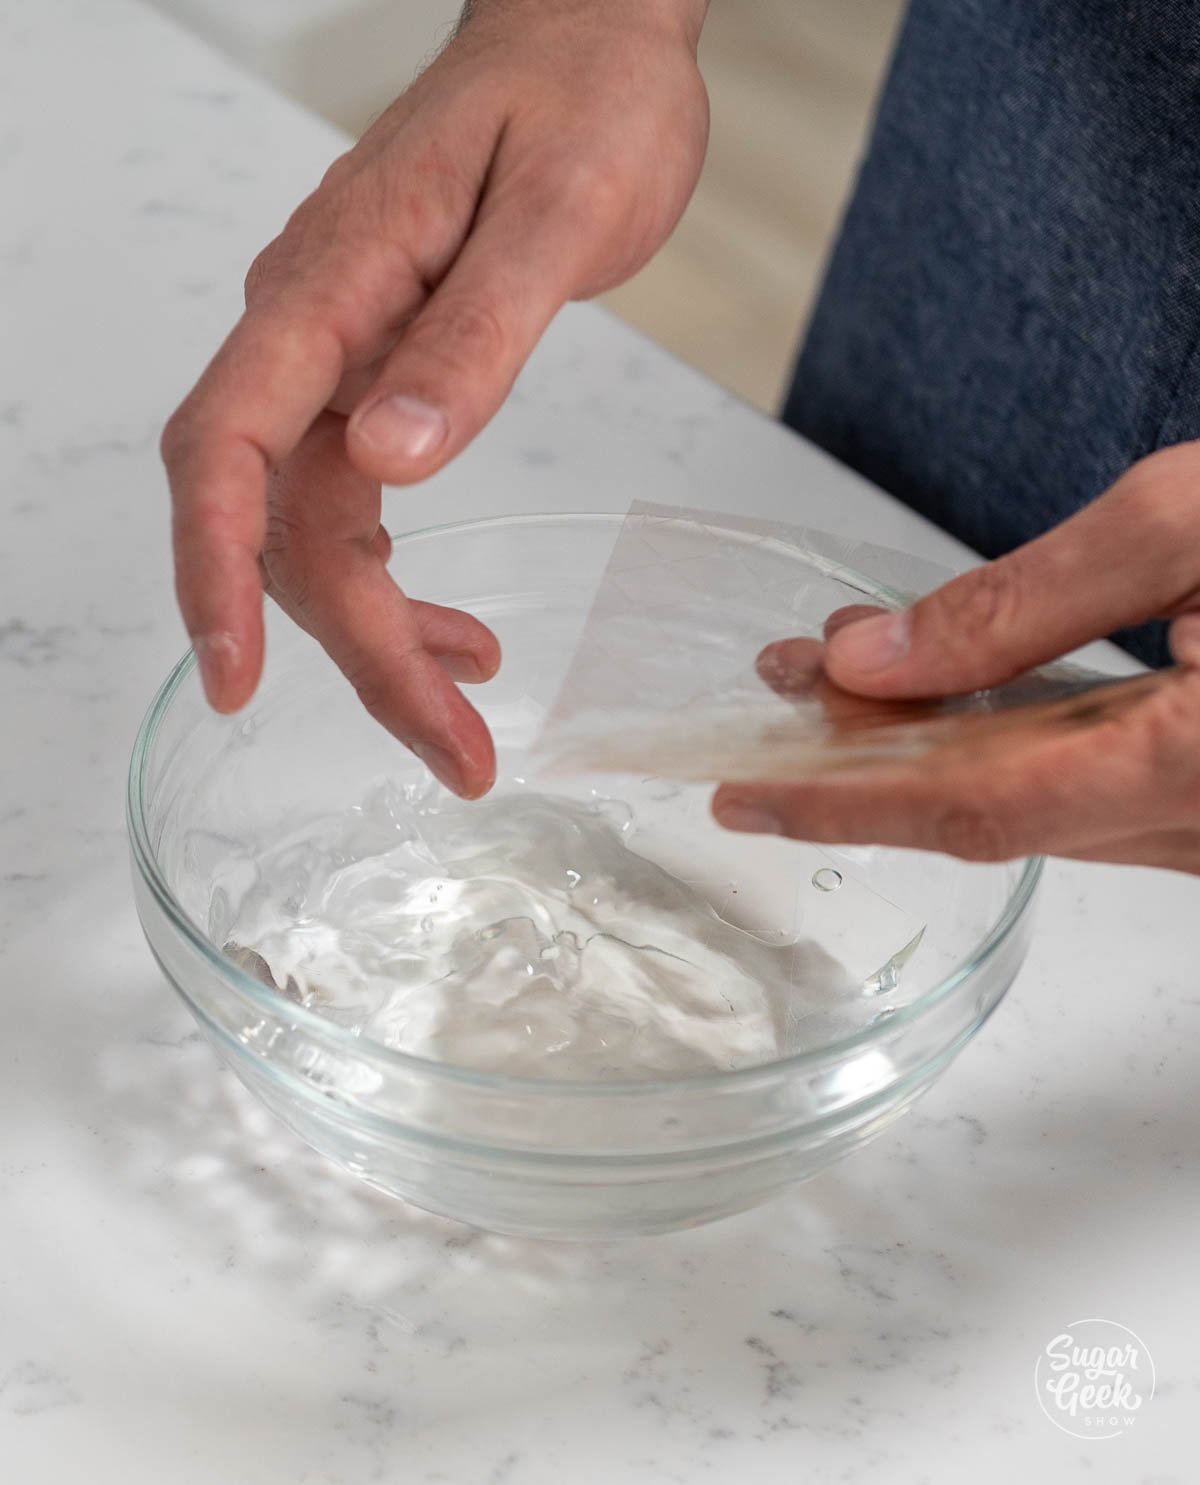
  1. In a bowl, measure 6 times the amount of cool water as gelatin. So for 8 grams of gelatin, you will need 48 grams of water. Place the sheets of gelatin in the water one at a time while making sure that they do not stick together. Let them bloom while you prepare the cream.hands holding a sheet of gelatin above a bowl of water
  2. Next, using a paring knife, split your vanilla bean and scrape the seeds from the pod. You will want to keep the pod so you can steep it in your cream.splitting a vanilla bean pod
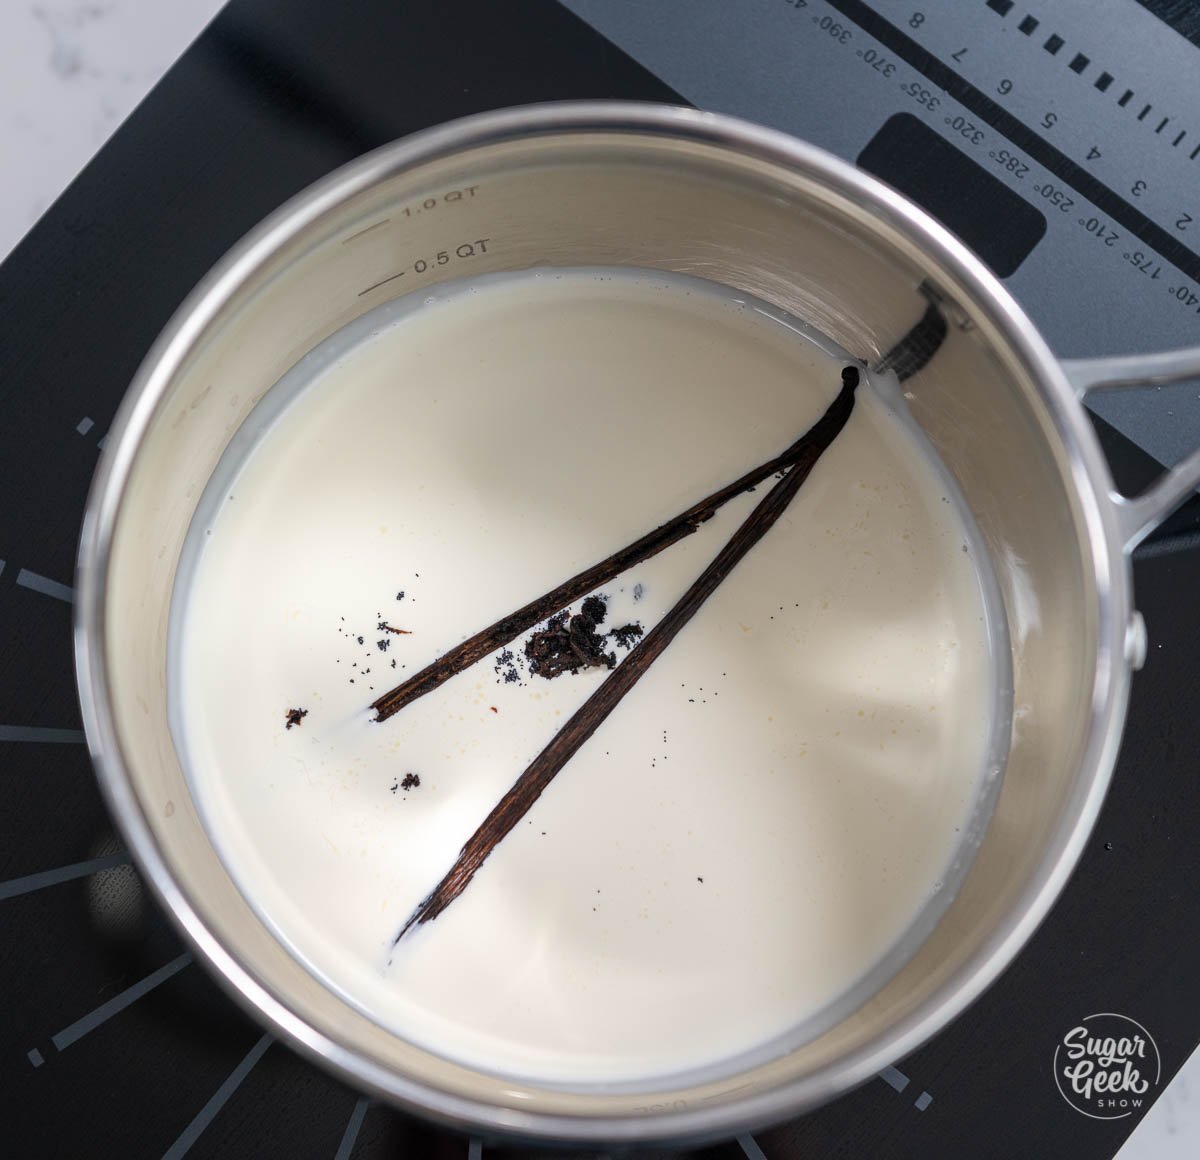
  3. Then, in a sauce pan, combine your heavy cream, sugar, and vanilla bean (both the seeds and the pod).vanilla bean pod and seeds sauce pan on top of cream
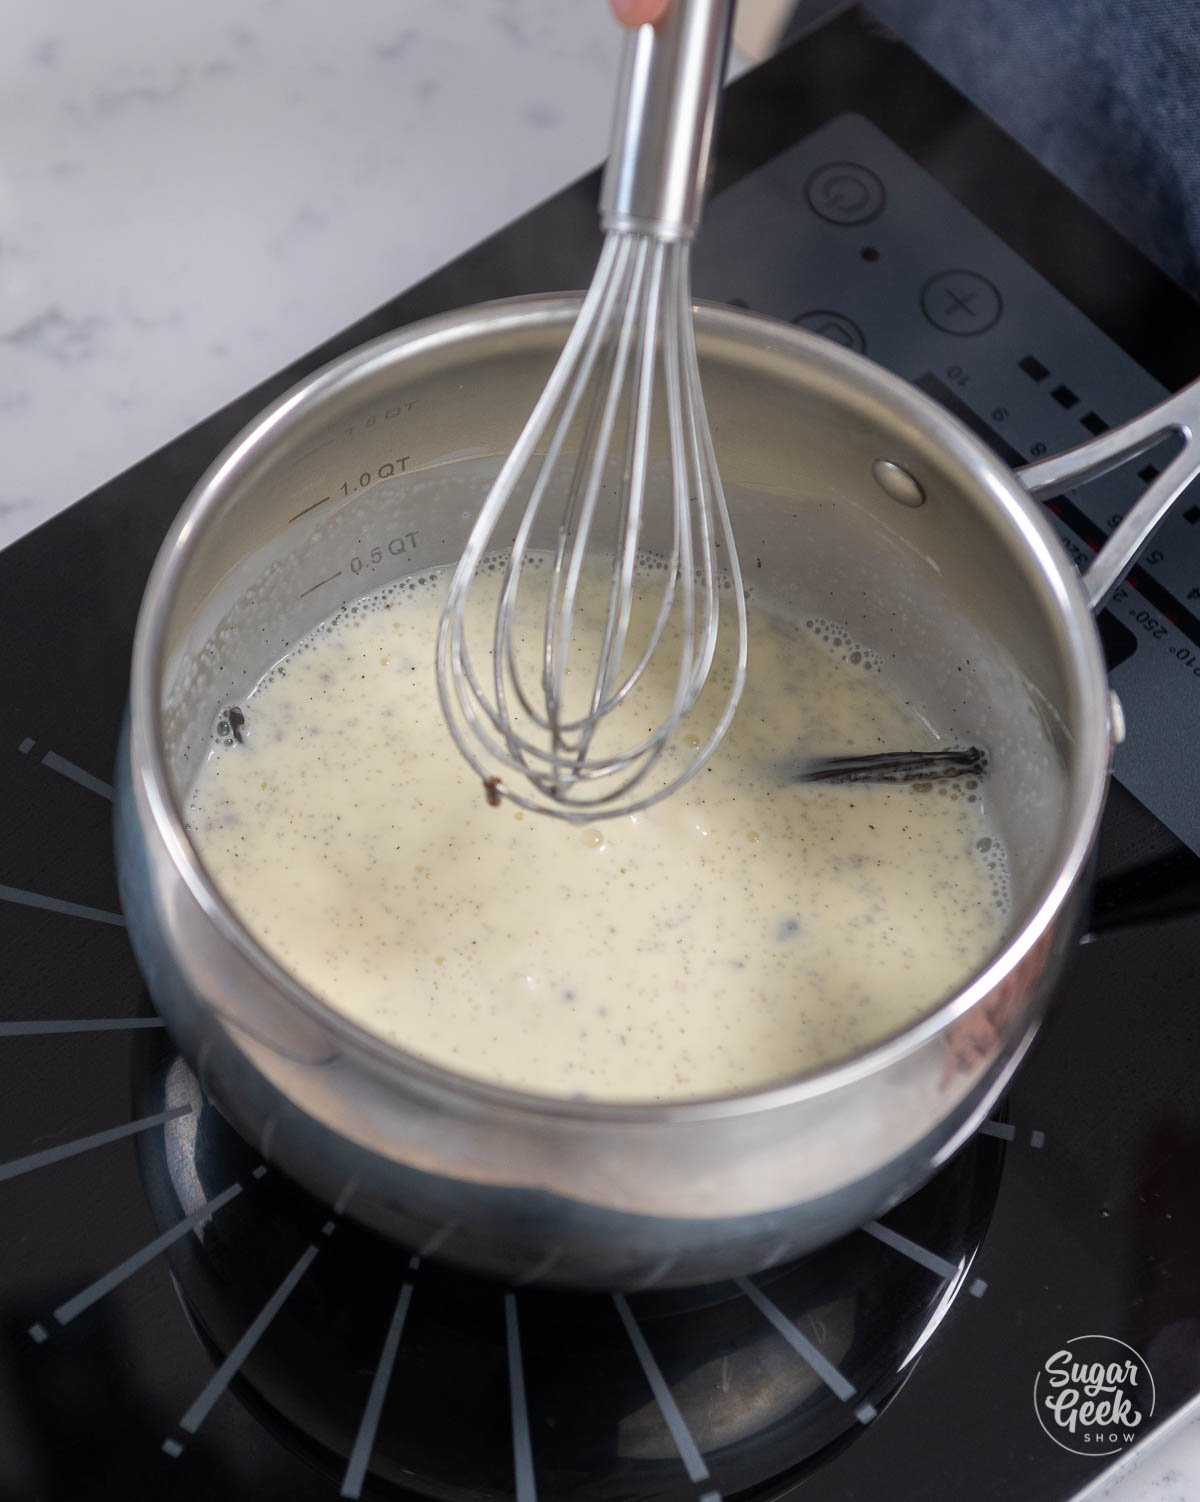
  4. Heat the mixture over medium heat until it is boiling.whisk resting over saucepan
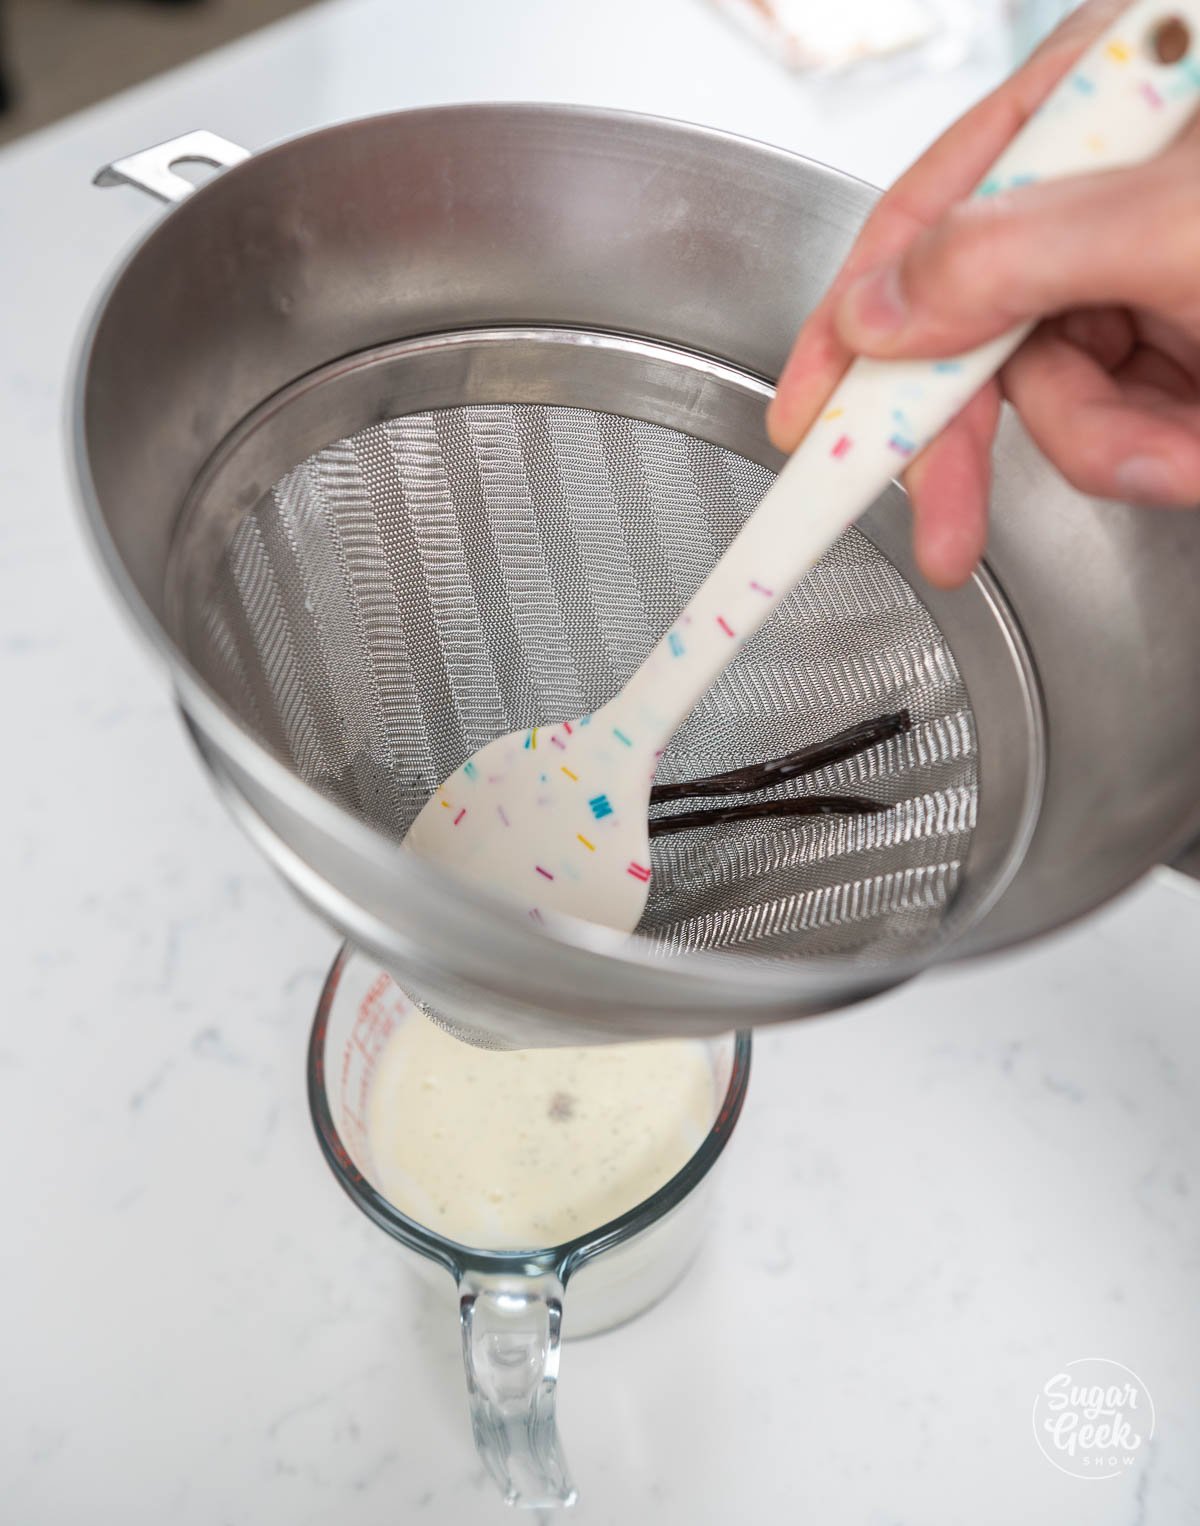
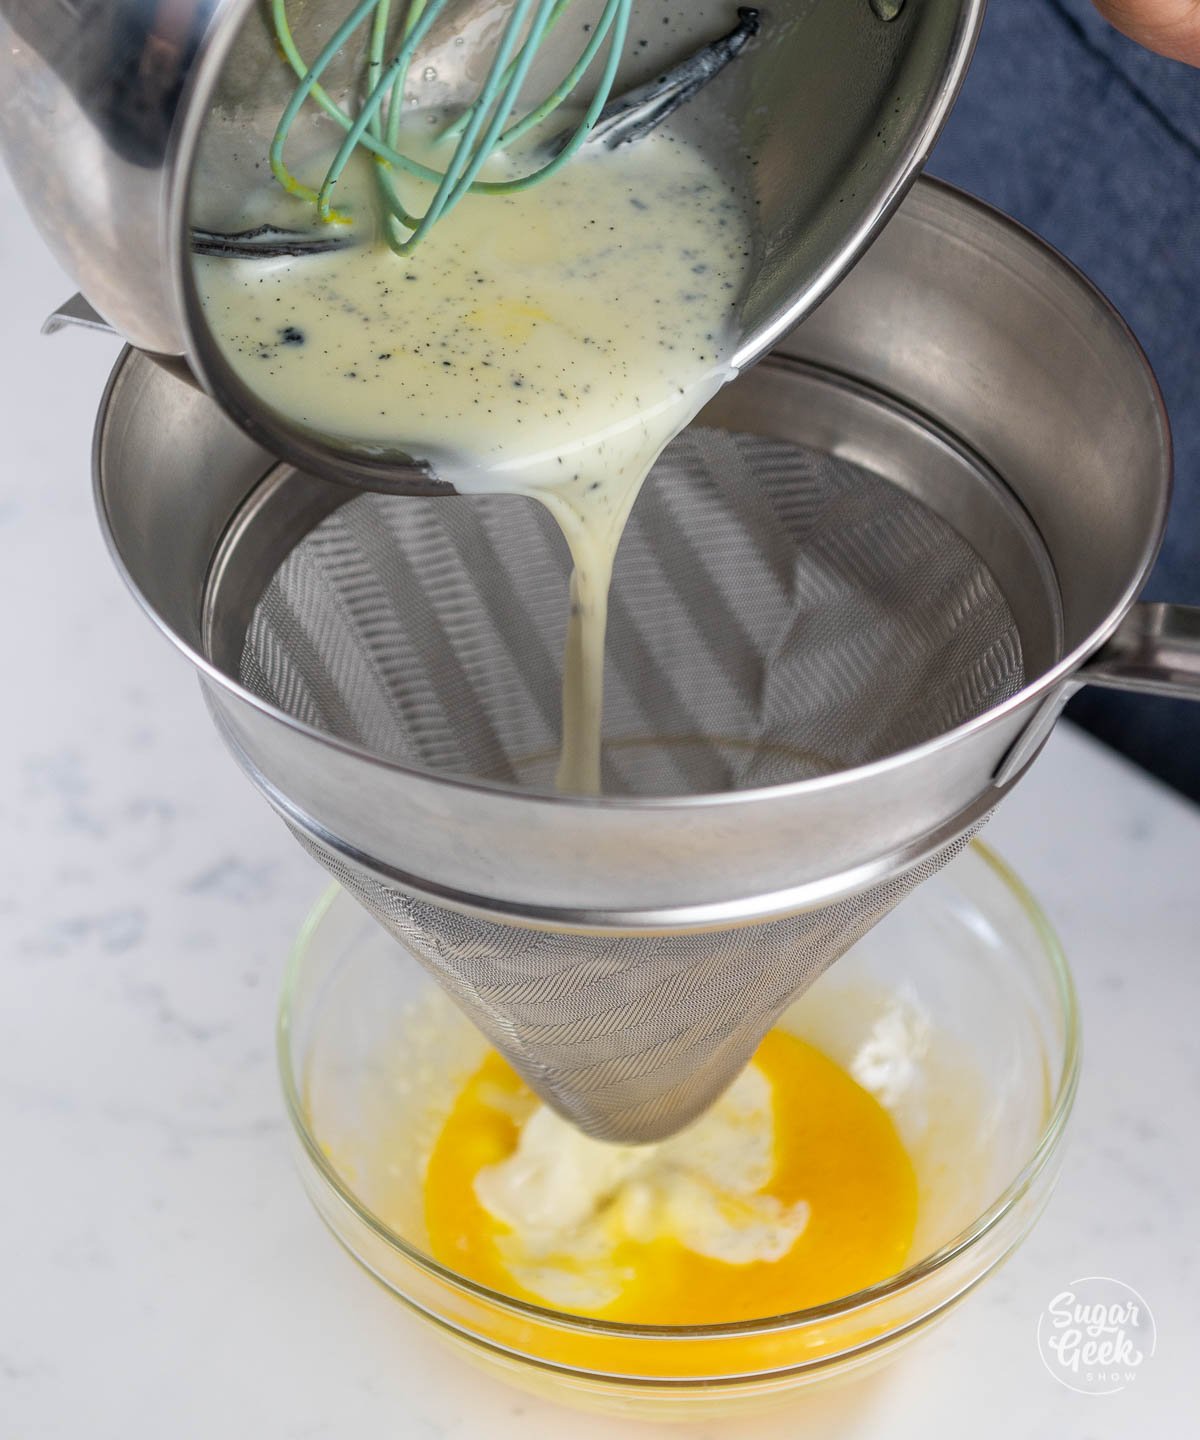
  5. Once the cream mixture is boiling, remove it from the heat and strain it through a fine, mesh strainer or a chinois into a bowl.hand holding a strainer with vanilla bean pod inside over a cup
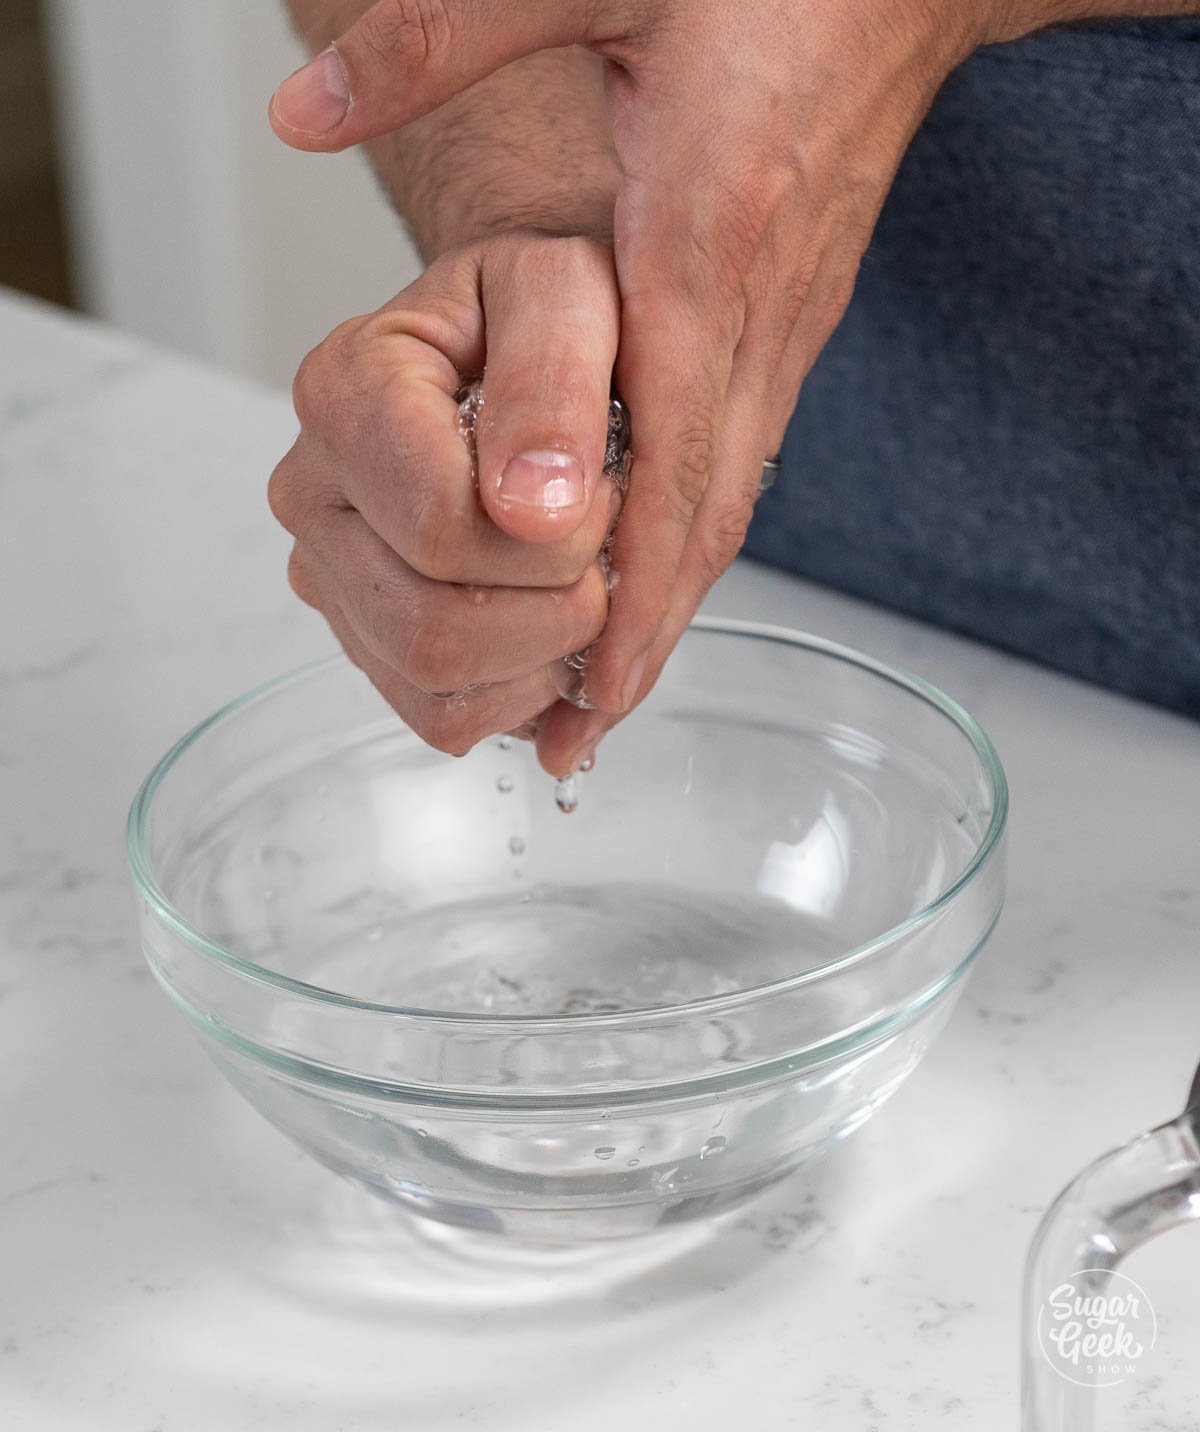
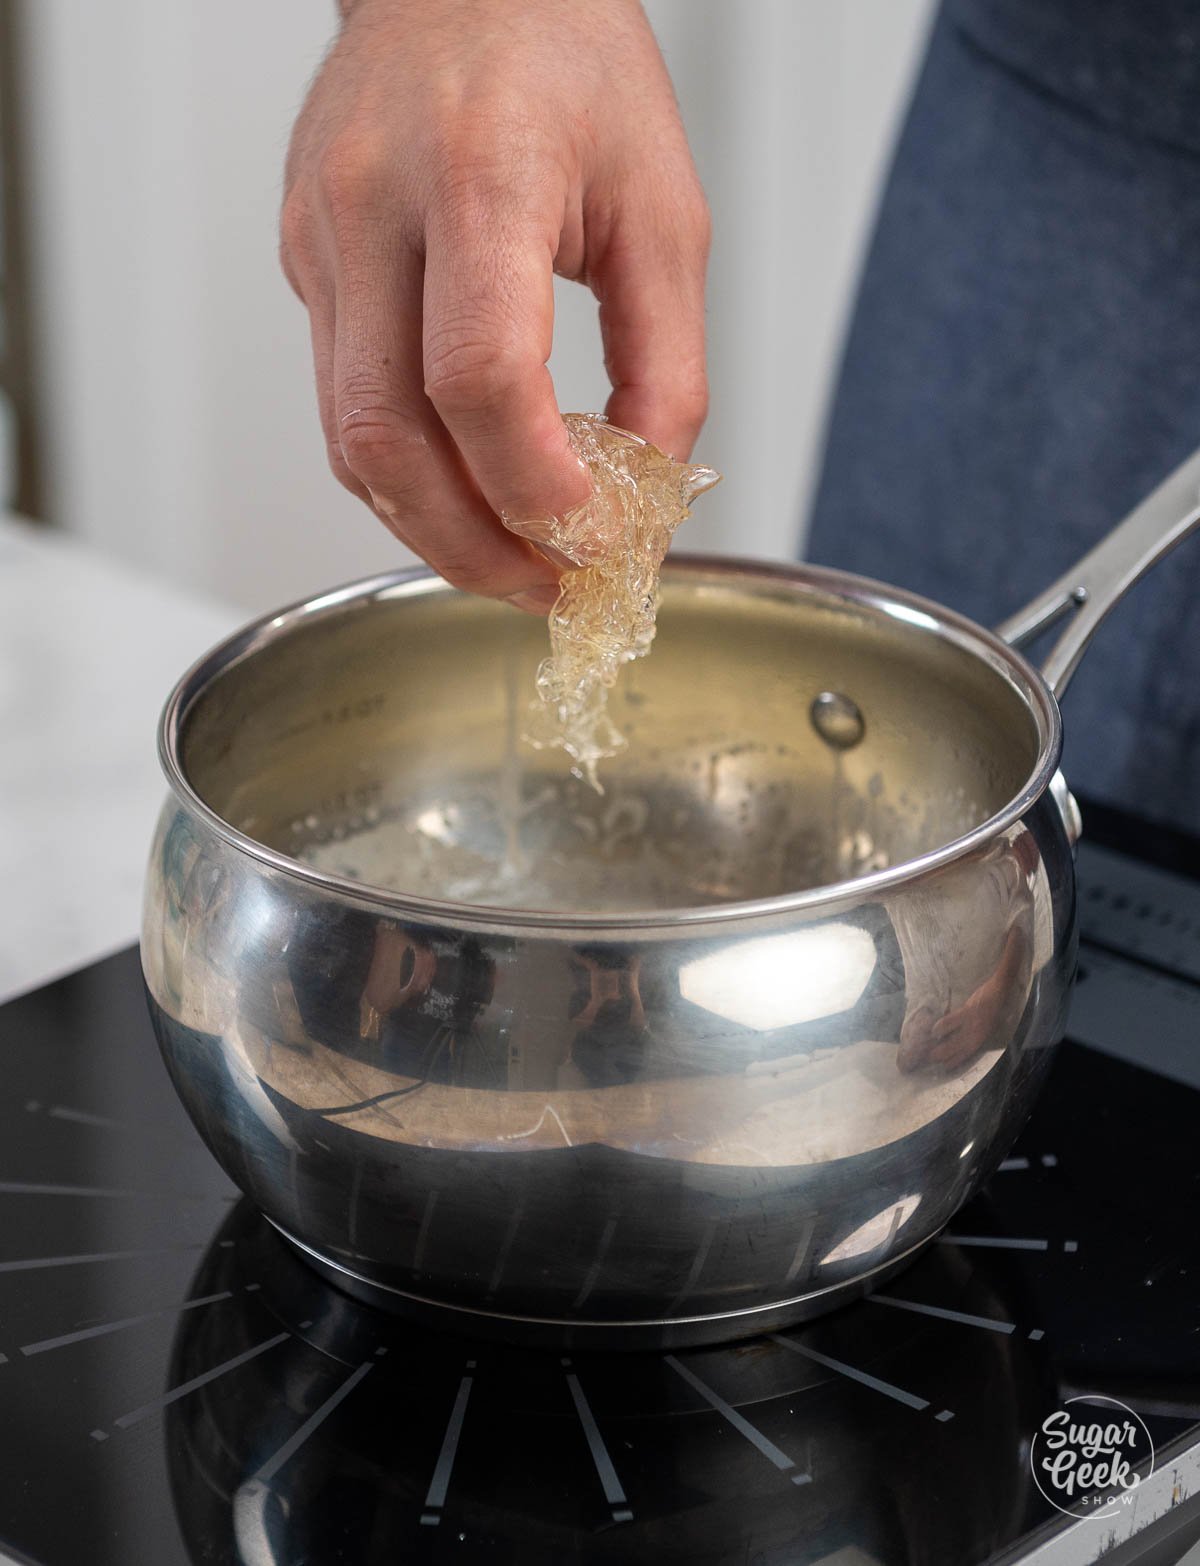
  6. With your hands, squeeze out the excess water from your bloomed gelatin sheets and then add them to the strained hot cream mixture. Stir until they are combined.hands shown squeezing water out of gelatin sheethand dropping gelatin inside of a saucepan
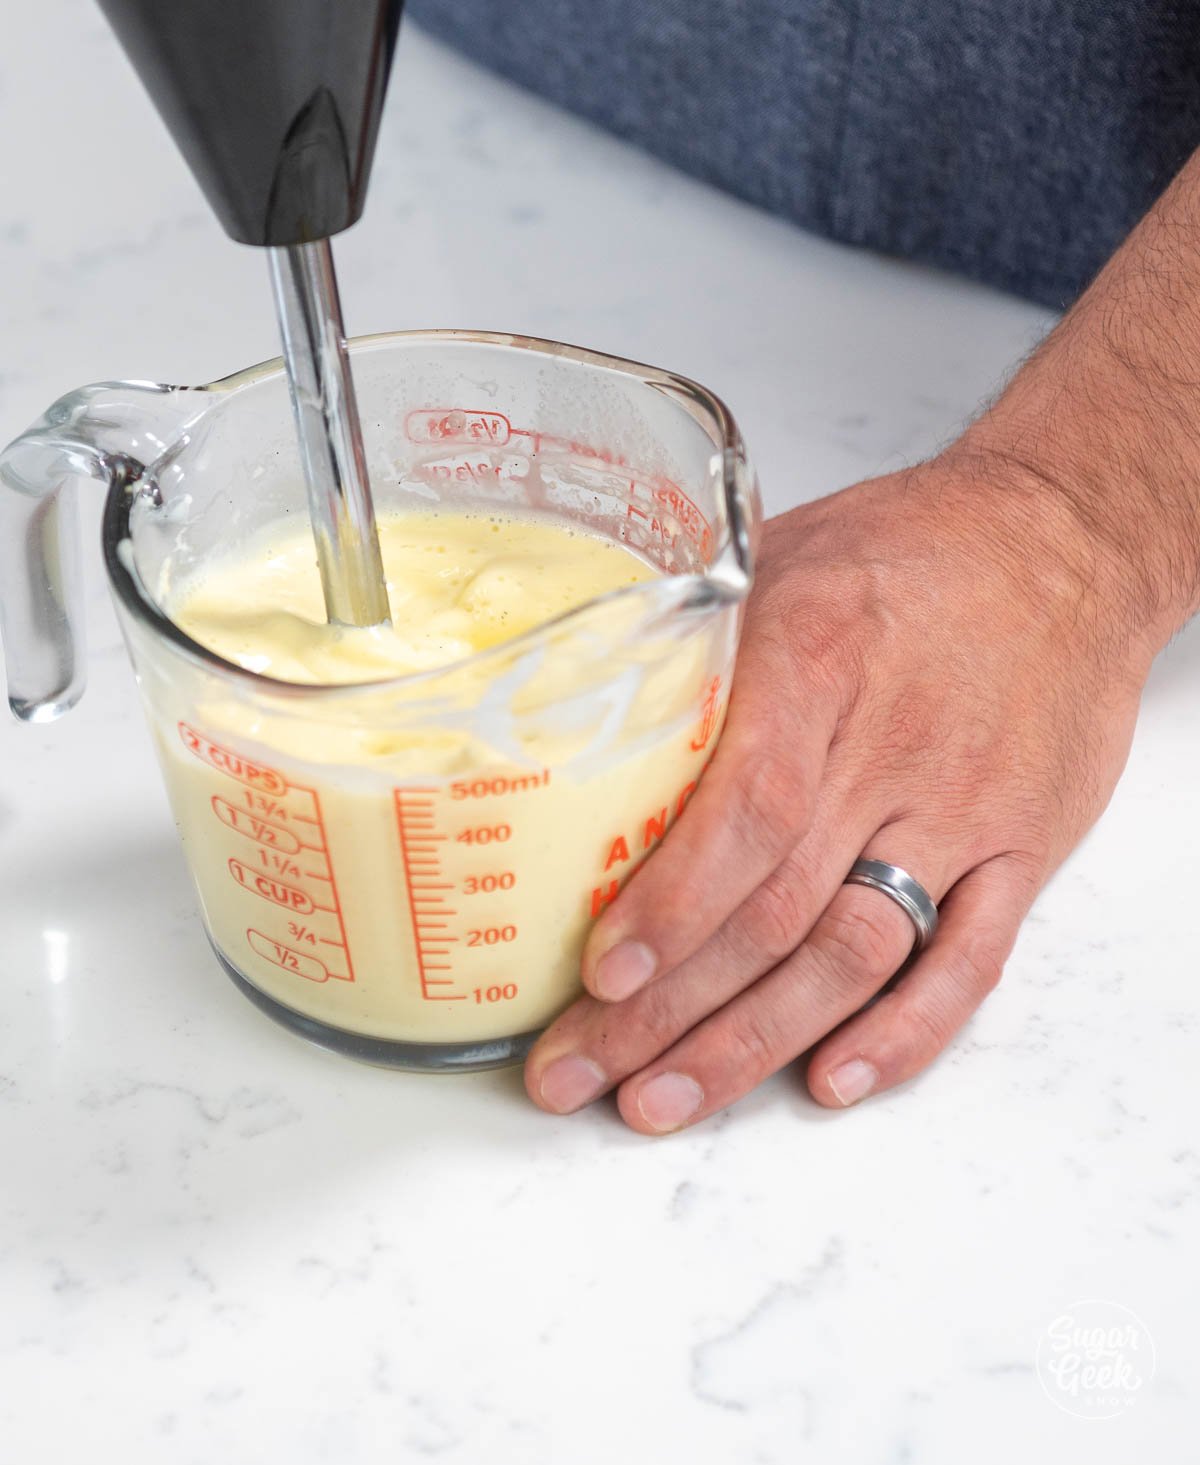
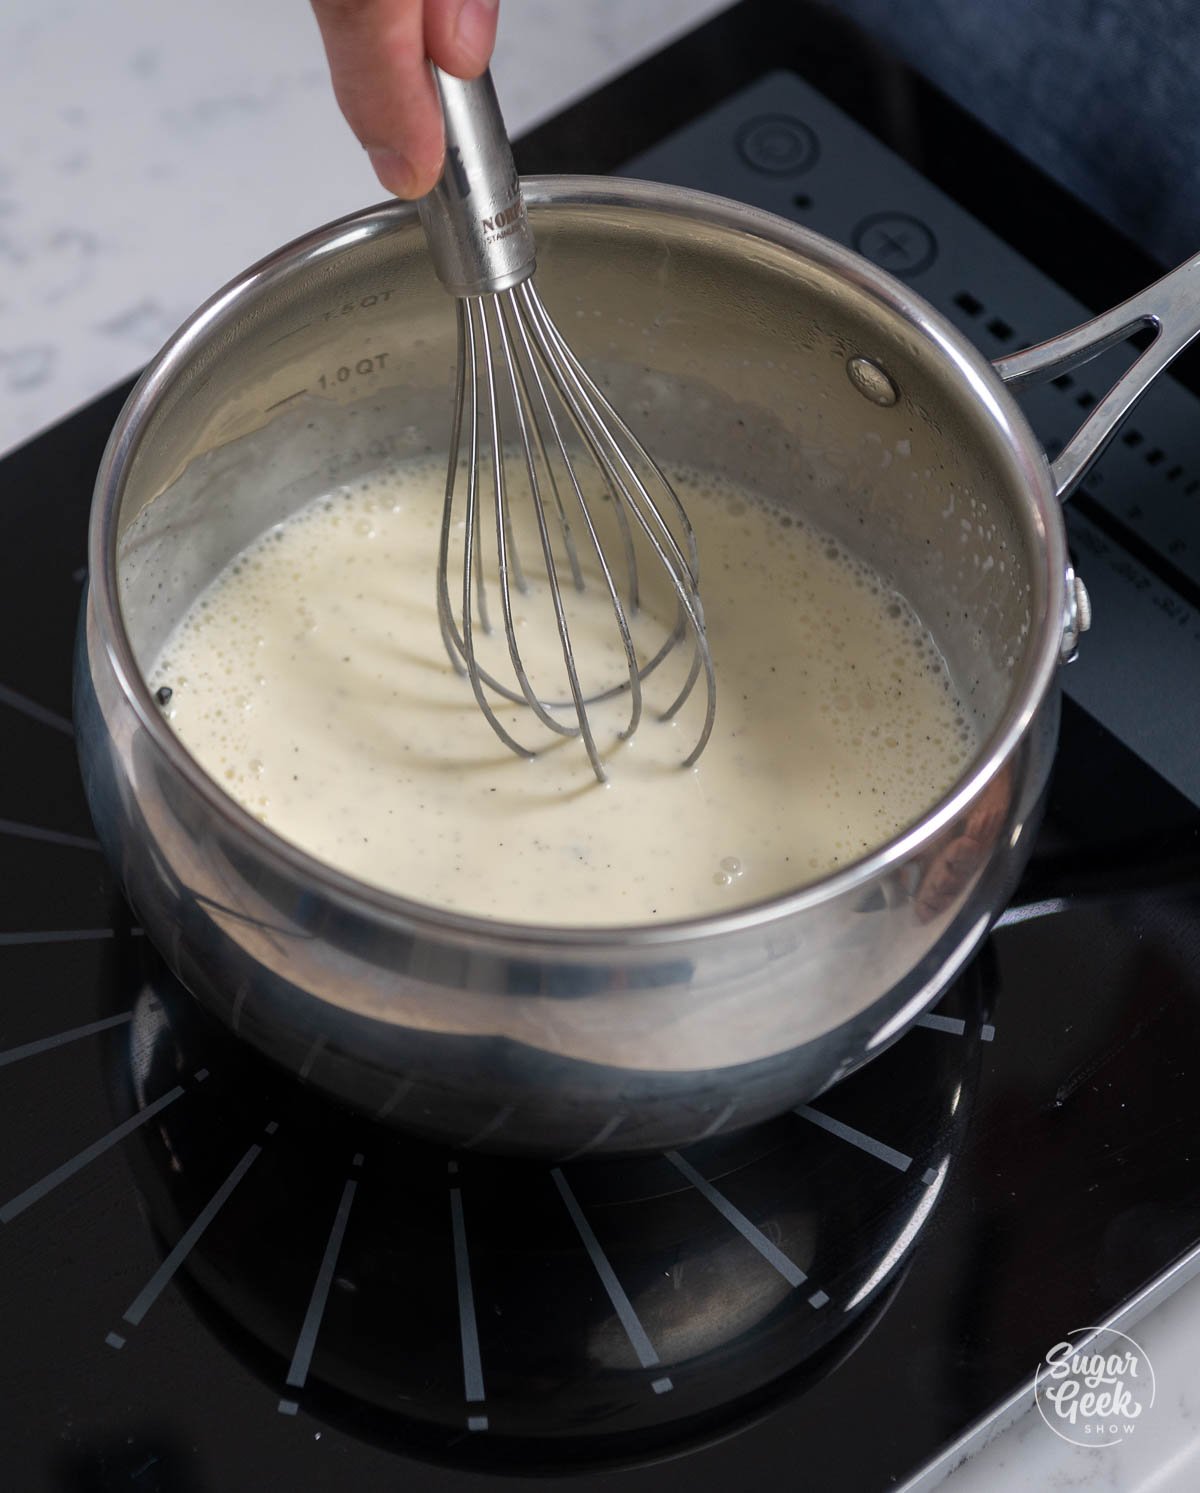
  7. Finally, add in your buttermilk and stir until they are combined and the gelatin has fully melted.whisking in saucepan

Assembling the Panna Cotta

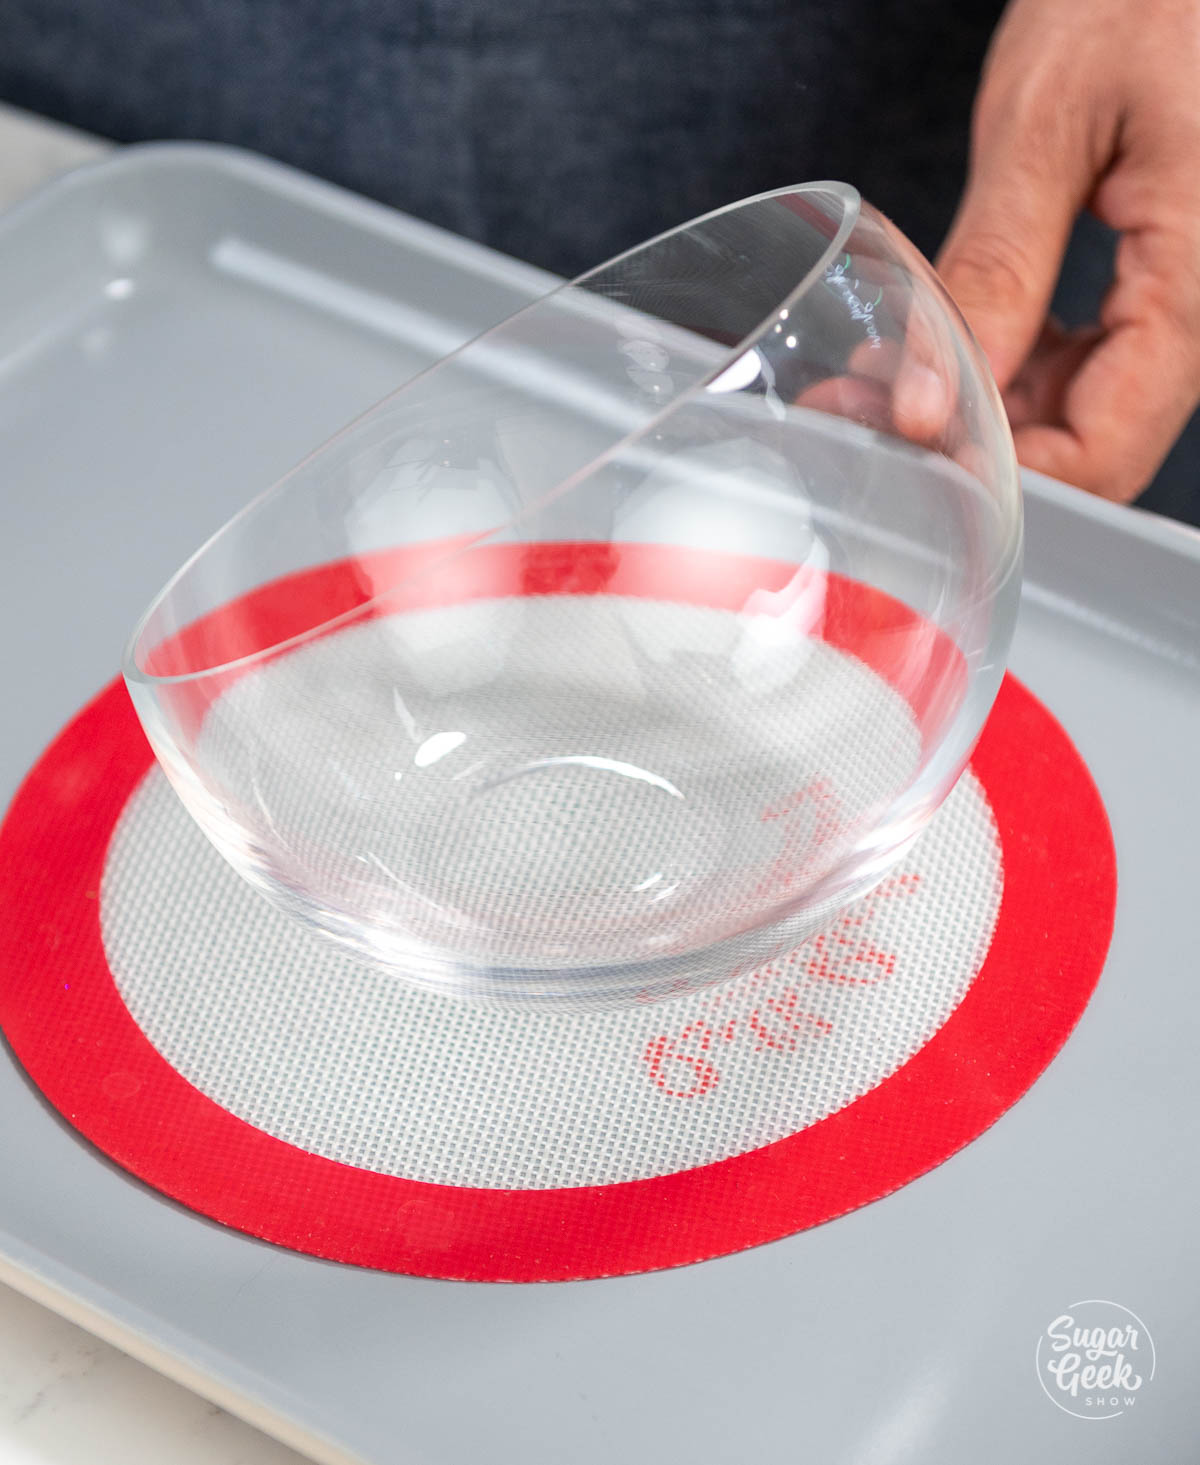
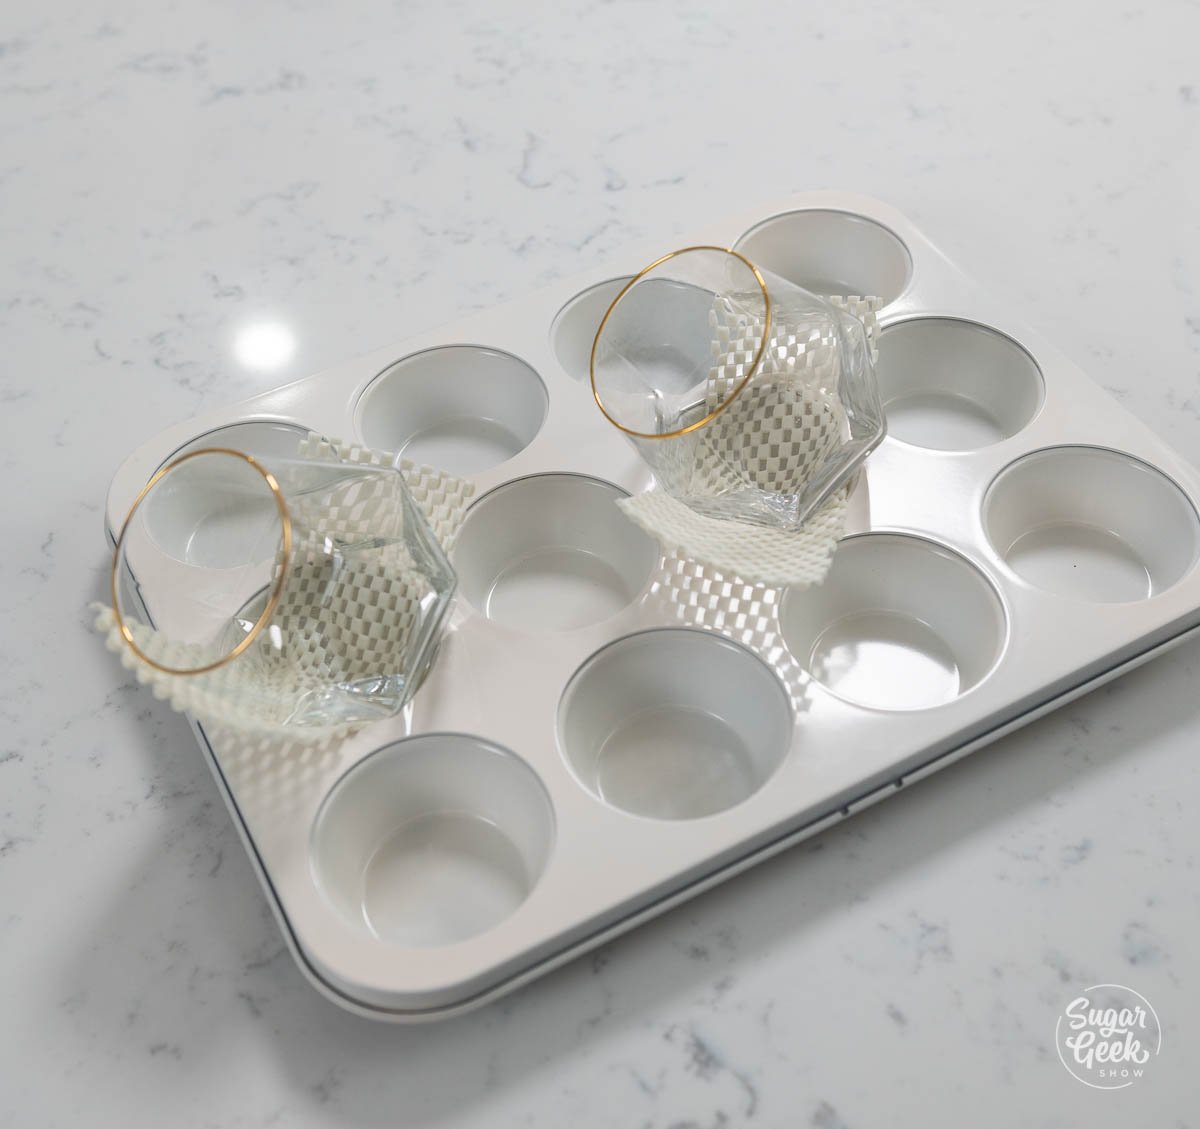
  1. Prepare your serving glasses or containers. PRO TIP: We used water to decide what angle we wanted our panna cotta to set at, and then cleaned and dried the glasses to get them ready for the panna cotta to be poured into. Make sure they are stable so they can be moved to the refrigerator carefully without spilling or sloshing. We used a non-skid mat and a cupcake tin to hold our glasses steady.muffin pan with 2 cups laying at an angle inside
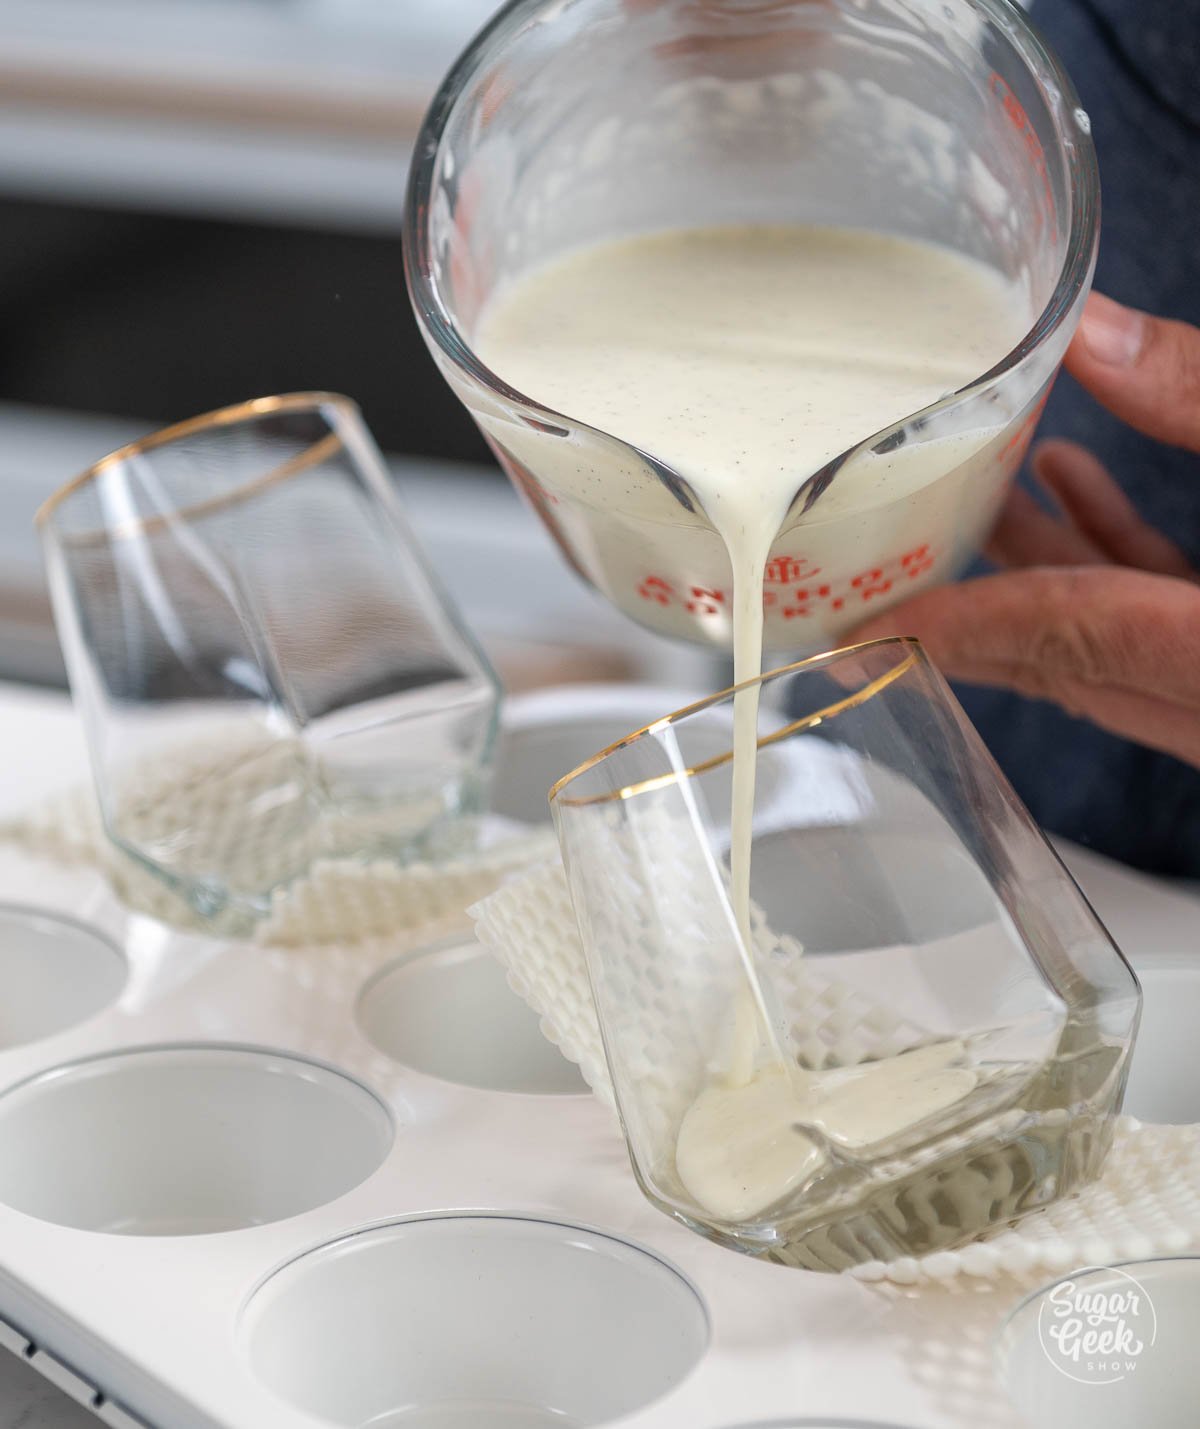
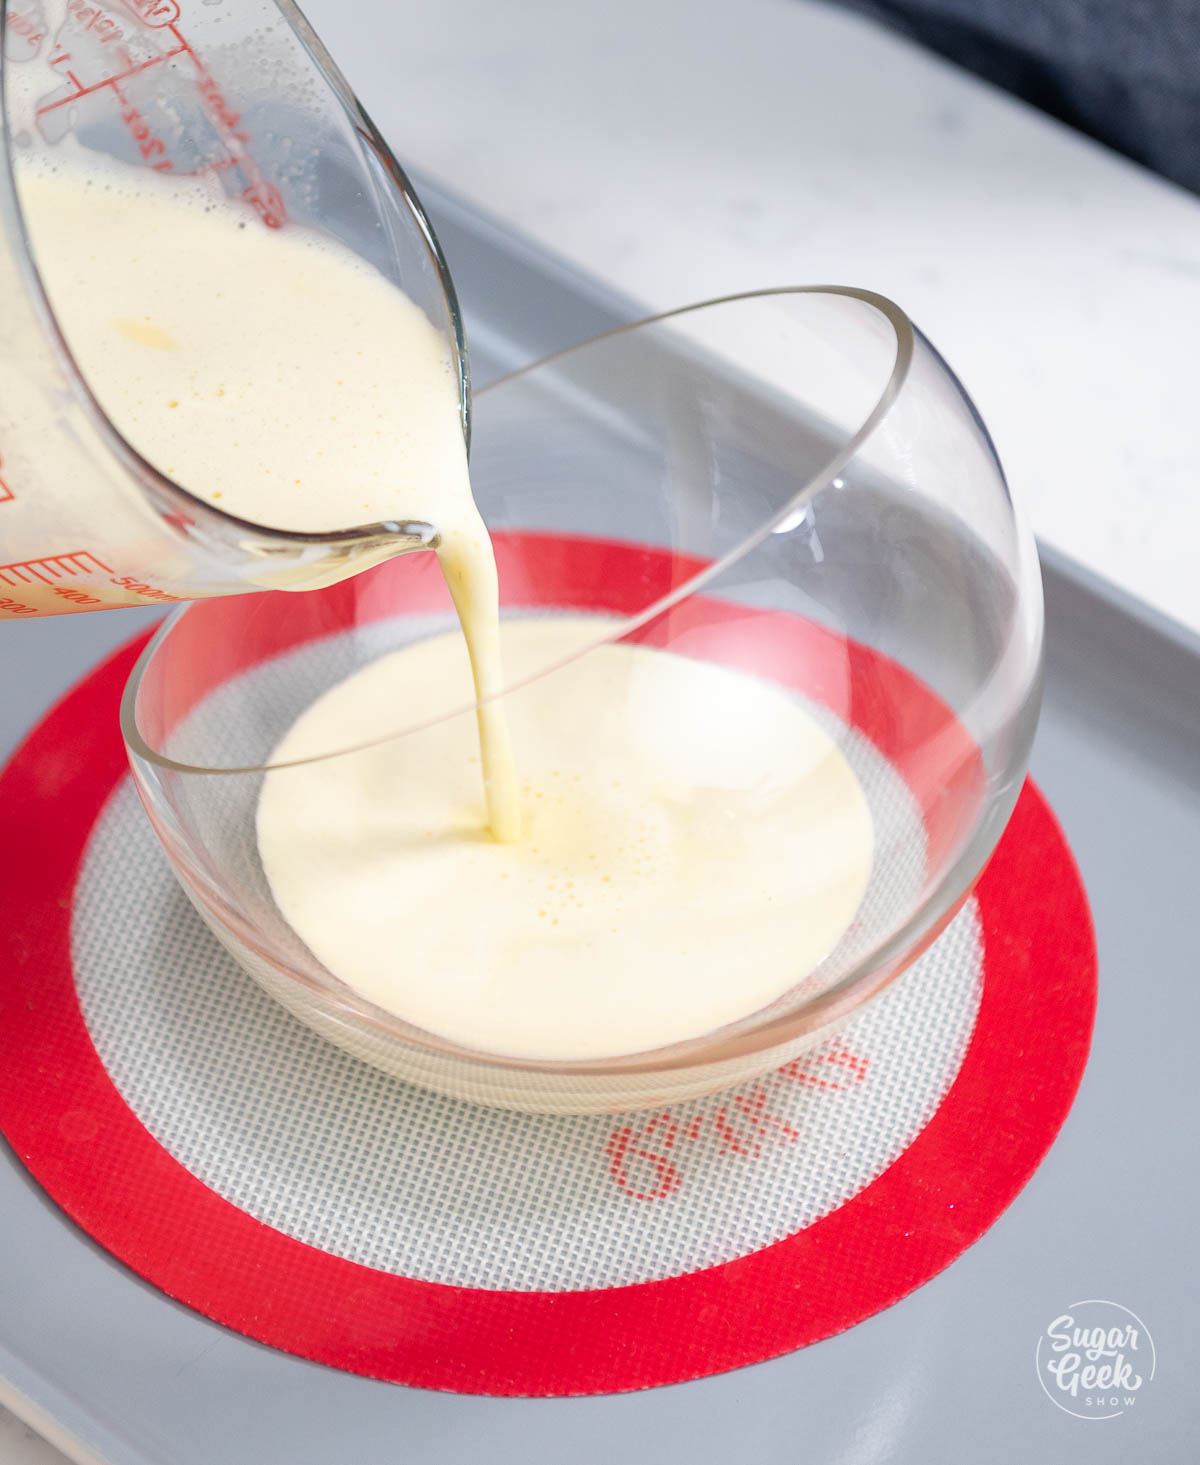
  2. Slowly pour your panna cotta into the glasses to your desired volume. We chose to fill ours with about 6 ounces of panna cotta mixture in each glass.pouring mixture into a wine glass that's sitting at a slight angle
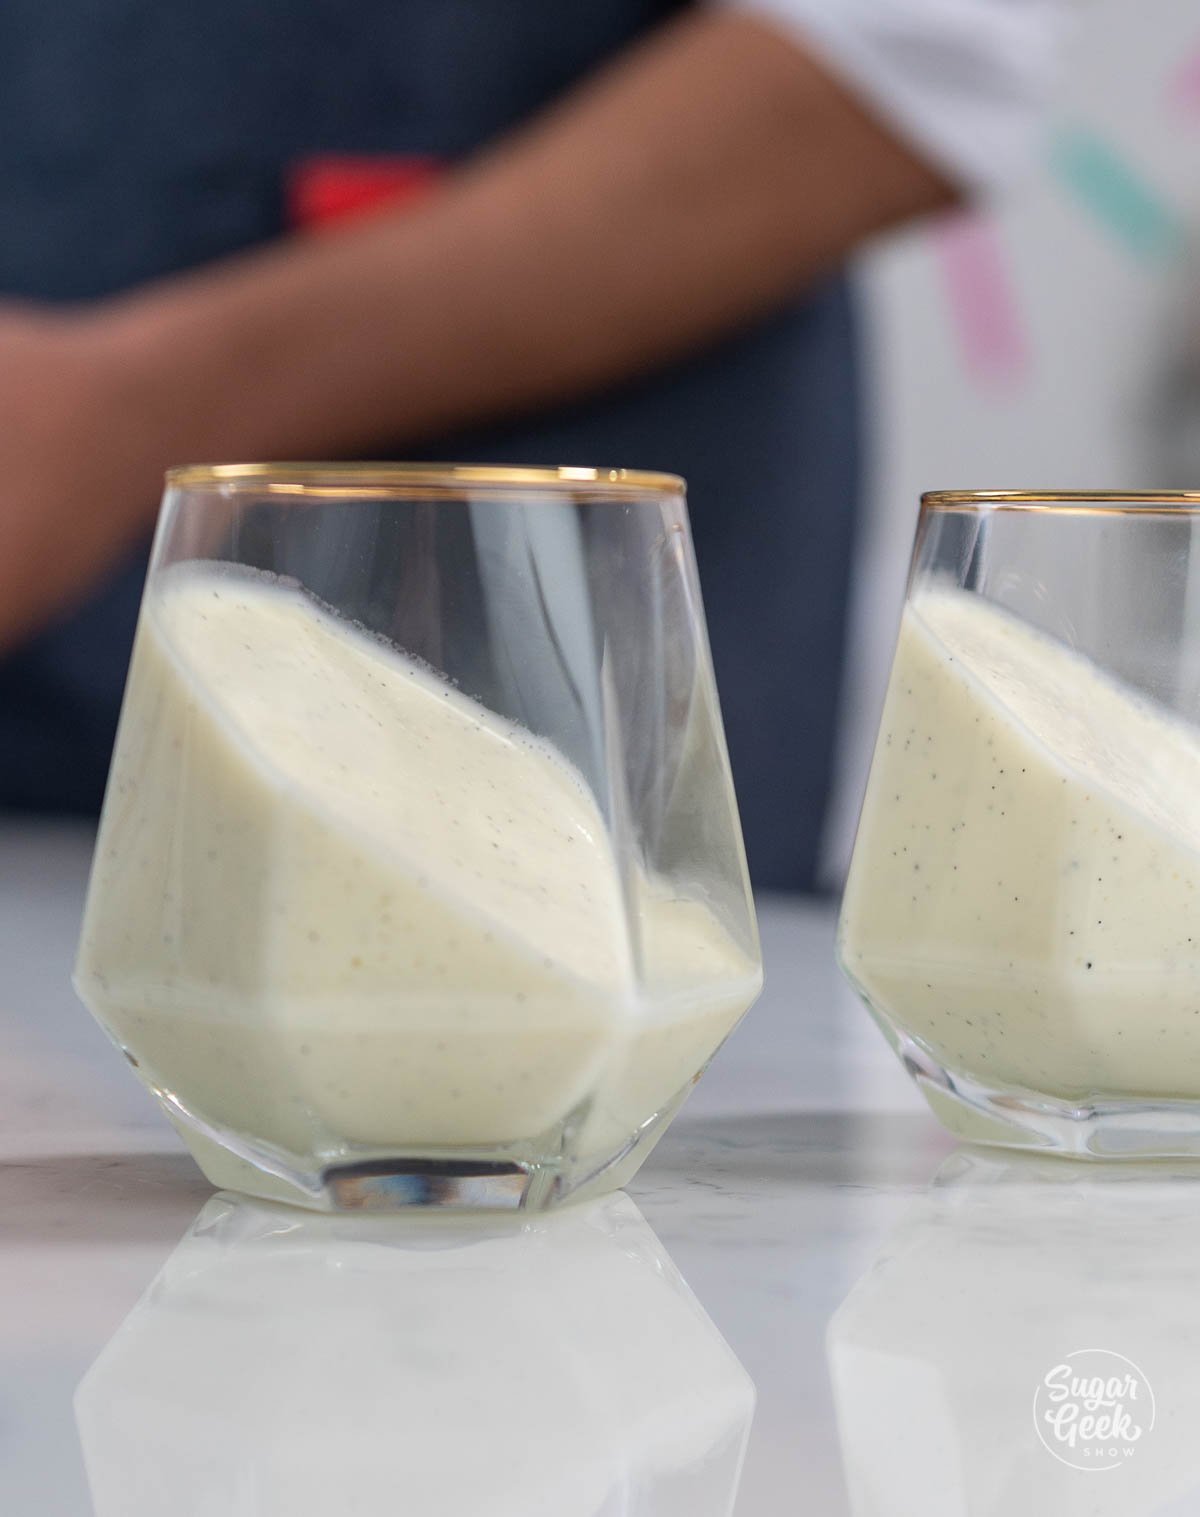
  3. Place the panna cotta in the fridge to completely set (it could take 5-6 hours). It should be firm with no movement when you gently tilt or shake the glass.panna cotta sitting at an angle inside of a wine glass
  4. Now, you will bloom your gelatin sheets for the strawberry jelly. In a bowl, measure 6 times the amount of cool water as gelatin. So for 8 grams of gelatin you will need 48 grams of water.
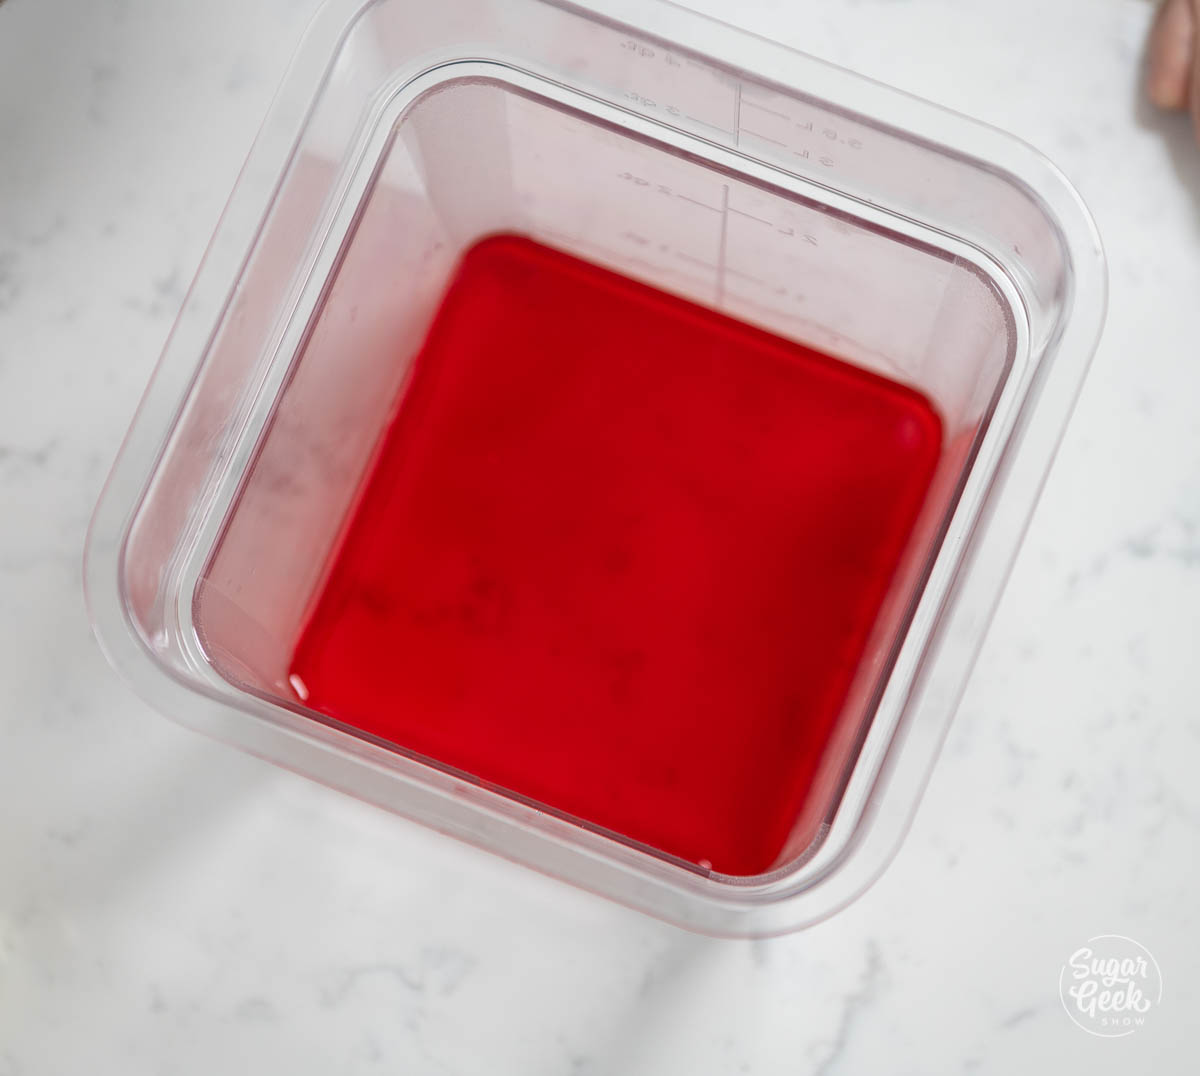
  5. Using a scale, measure 500 grams of the strawberry juice in a pourable container.bowl of strained strawberry juice
  6. Place the sheets of gelatin in the cool water one at a time while making sure they are not stuck together. Let them bloom for about 5 minutes.
  7. Next, squeeze the excess water from the gelatin sheets and then microwave it 30 seconds at a time to melt it. You only want to melt the gelatin (be careful not to boil it).
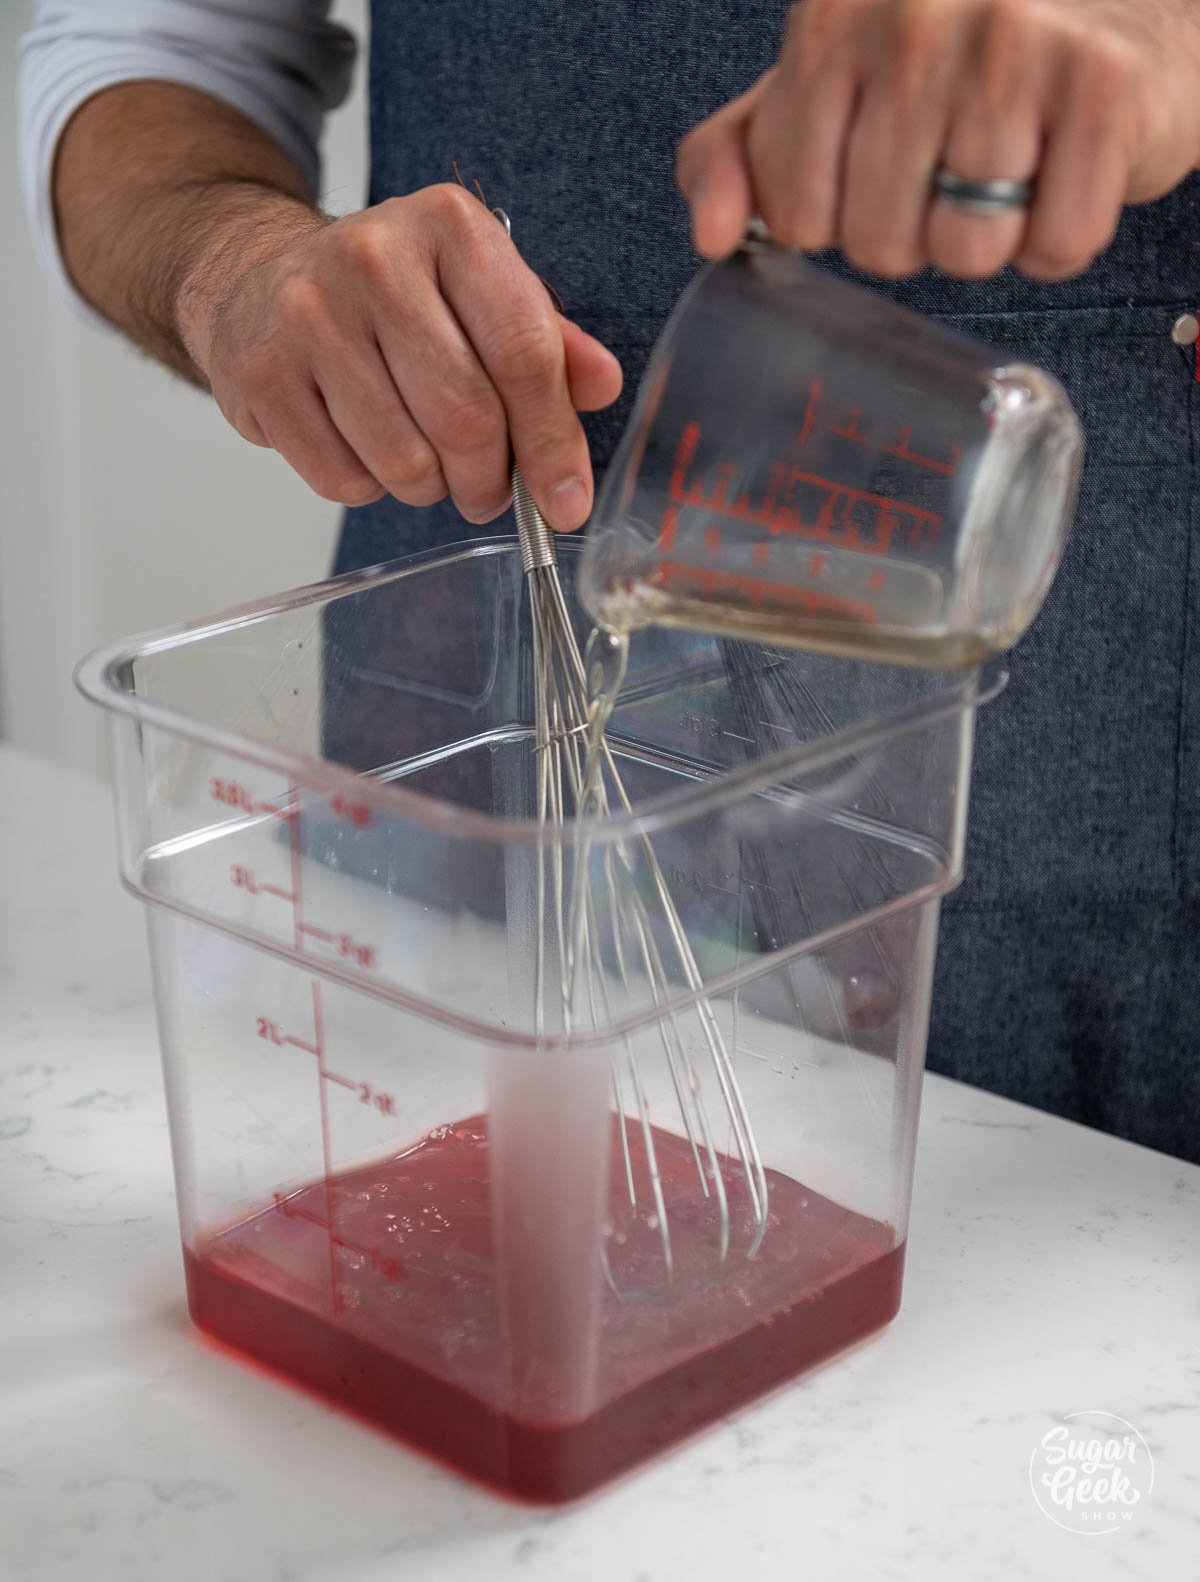
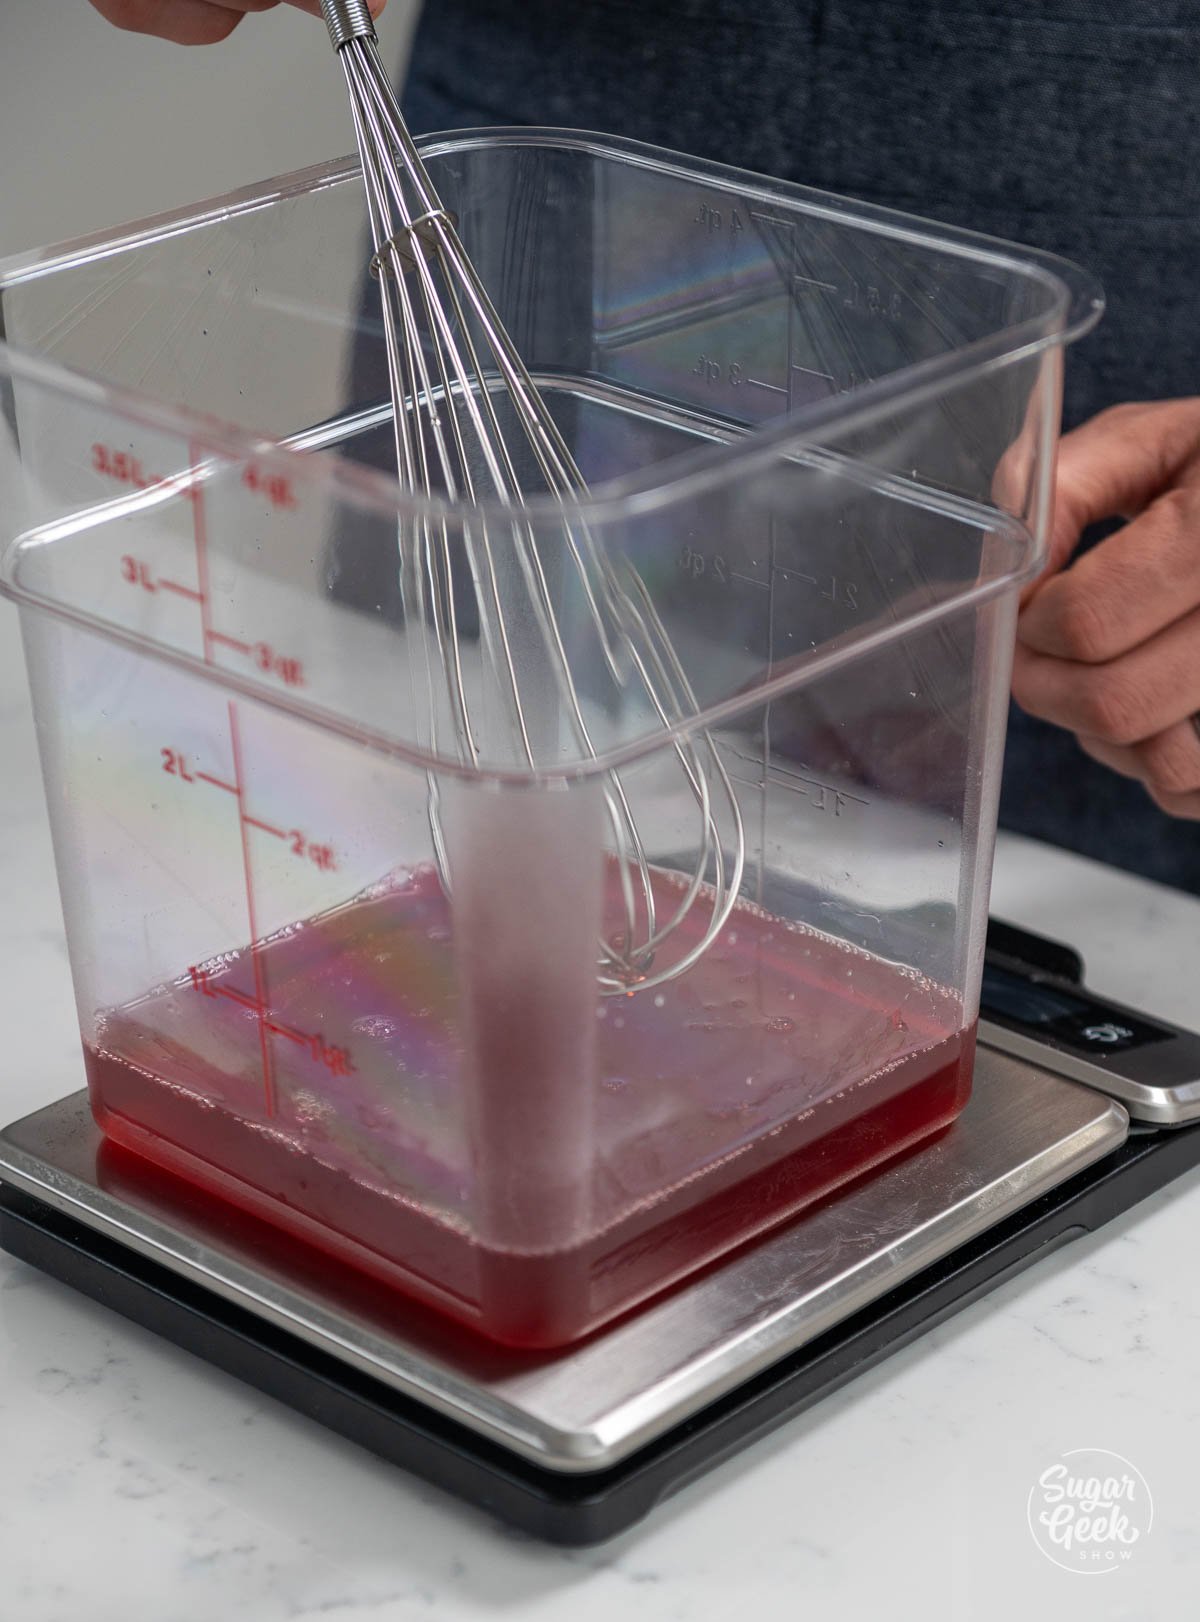
  8. Then, carefully pour the melted gelatin into the strawberry liquid. The juice should still be warm enough to melt the gelatin once added and mixed.hands shown pouring and whisking ingredients
  9. Gently stir them until they are combined. You do not want to incorporate too many bubbles. Allow them to cool to about 70ºF (21ºC).whisk inside of large measuring bowl
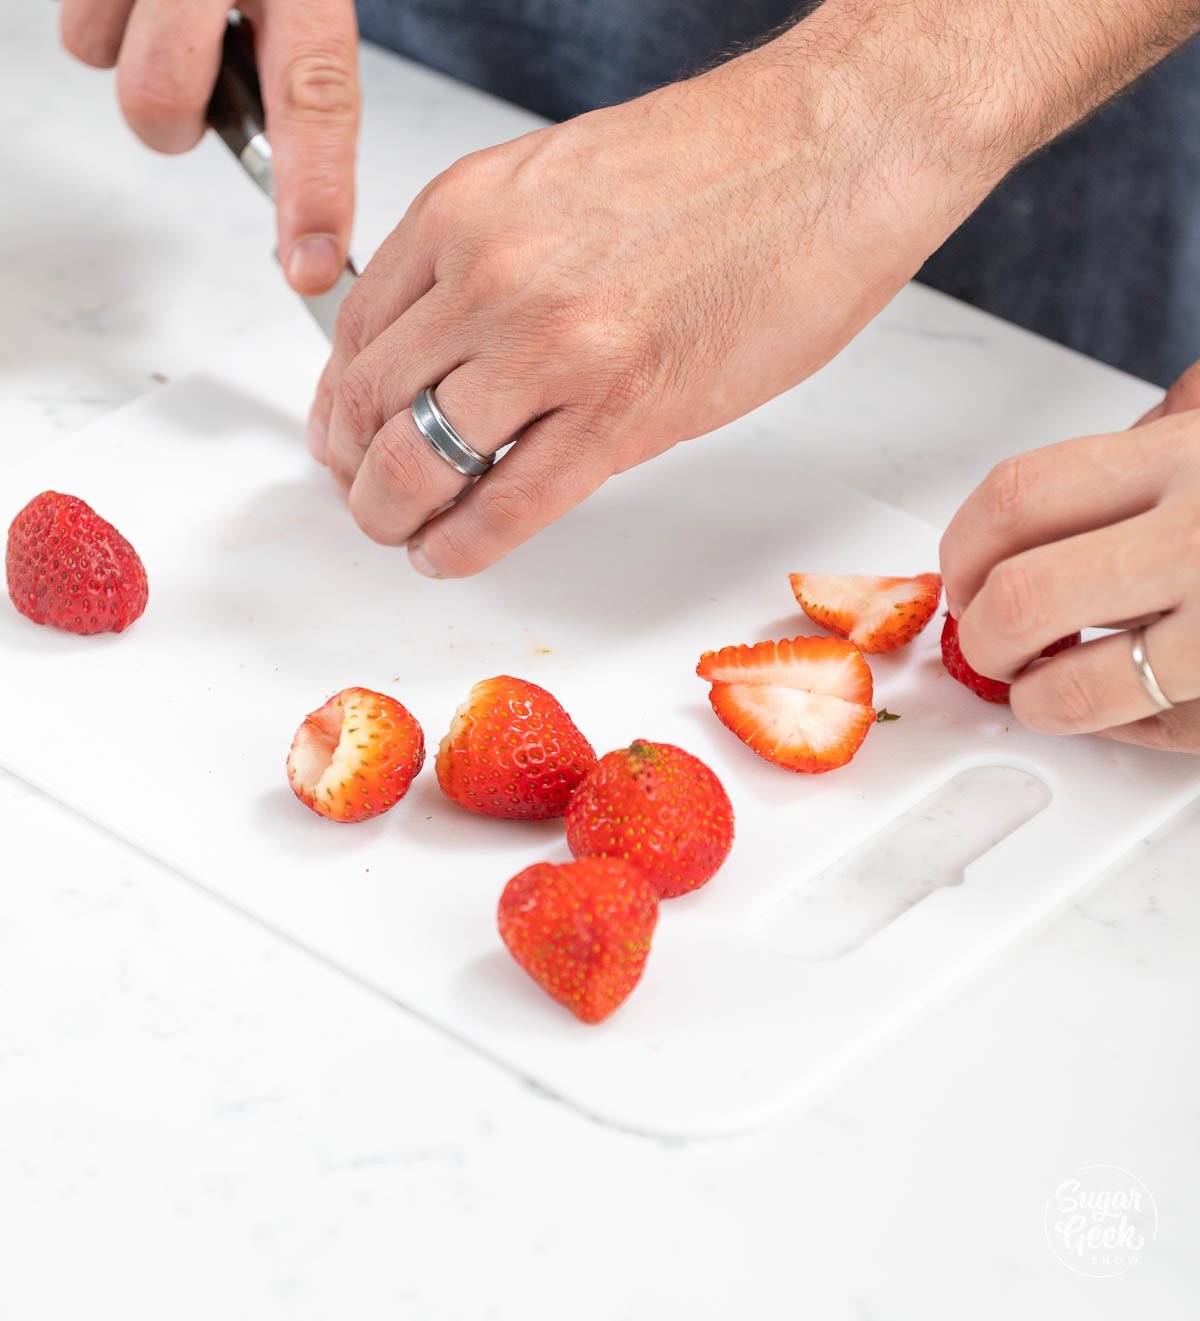
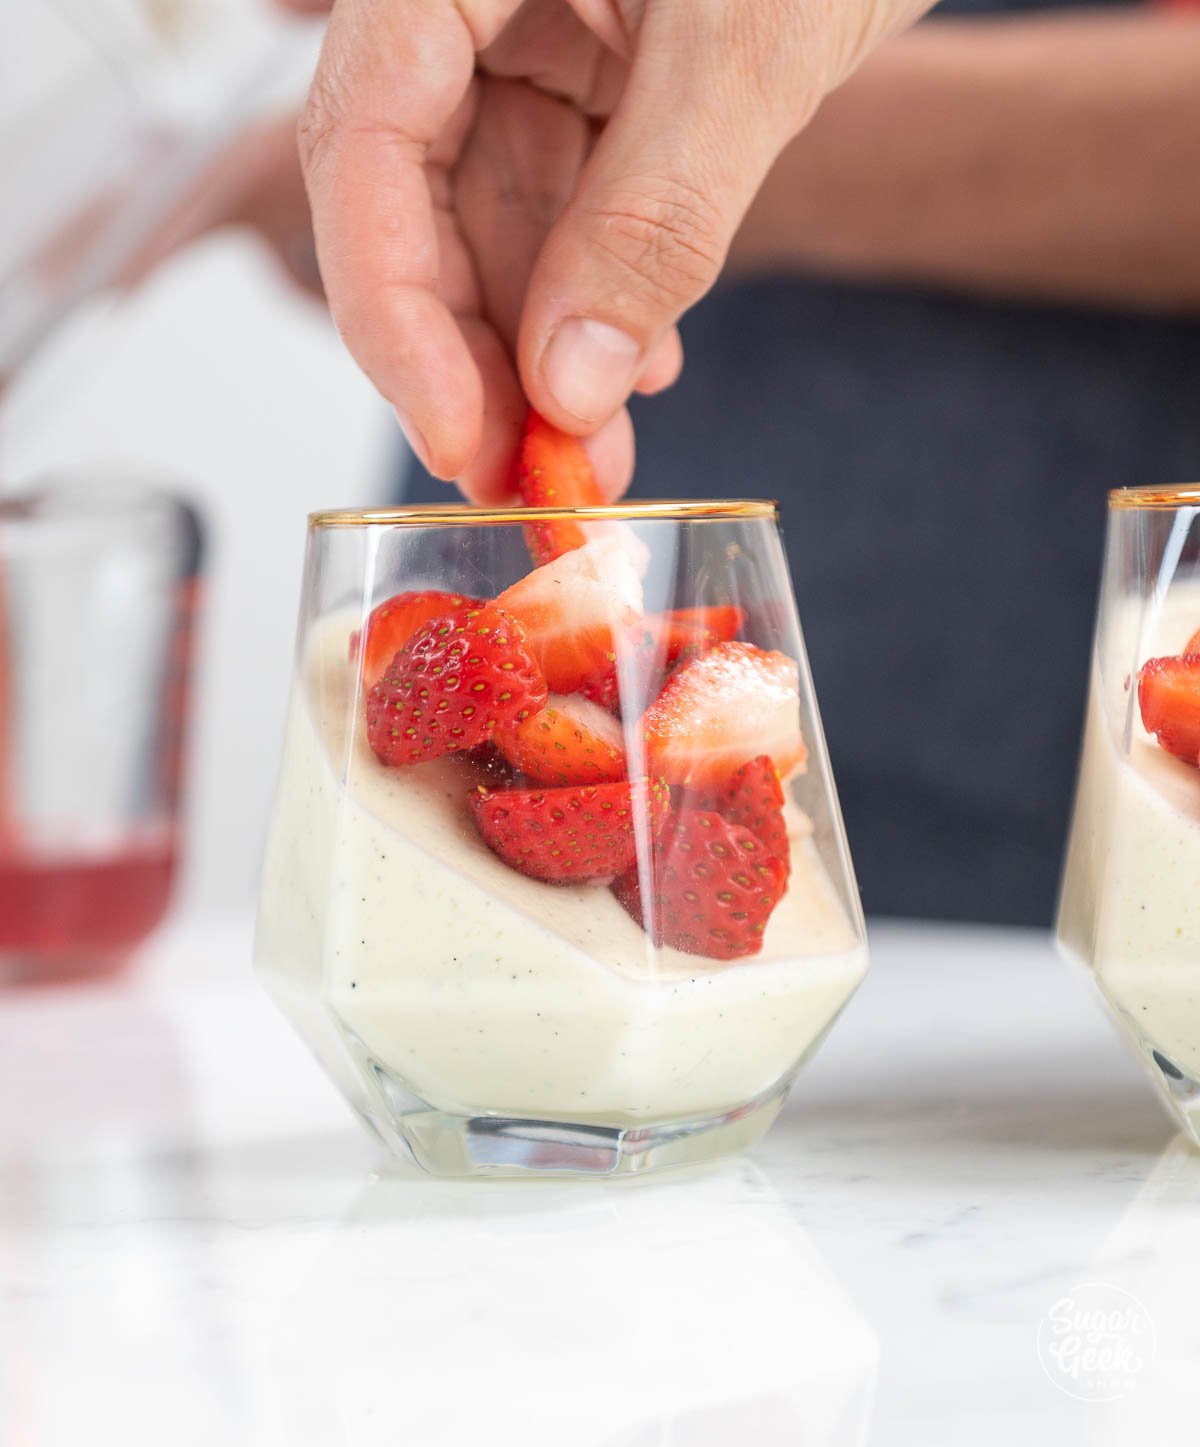
  10. Remove the stems from your strawberries and slice them into sections. Add the sliced strawberries on top of the panna cotta. hands shown chopping up strawberrieshand shown dropping strawberry pieces into wine glass filled with panna cotta
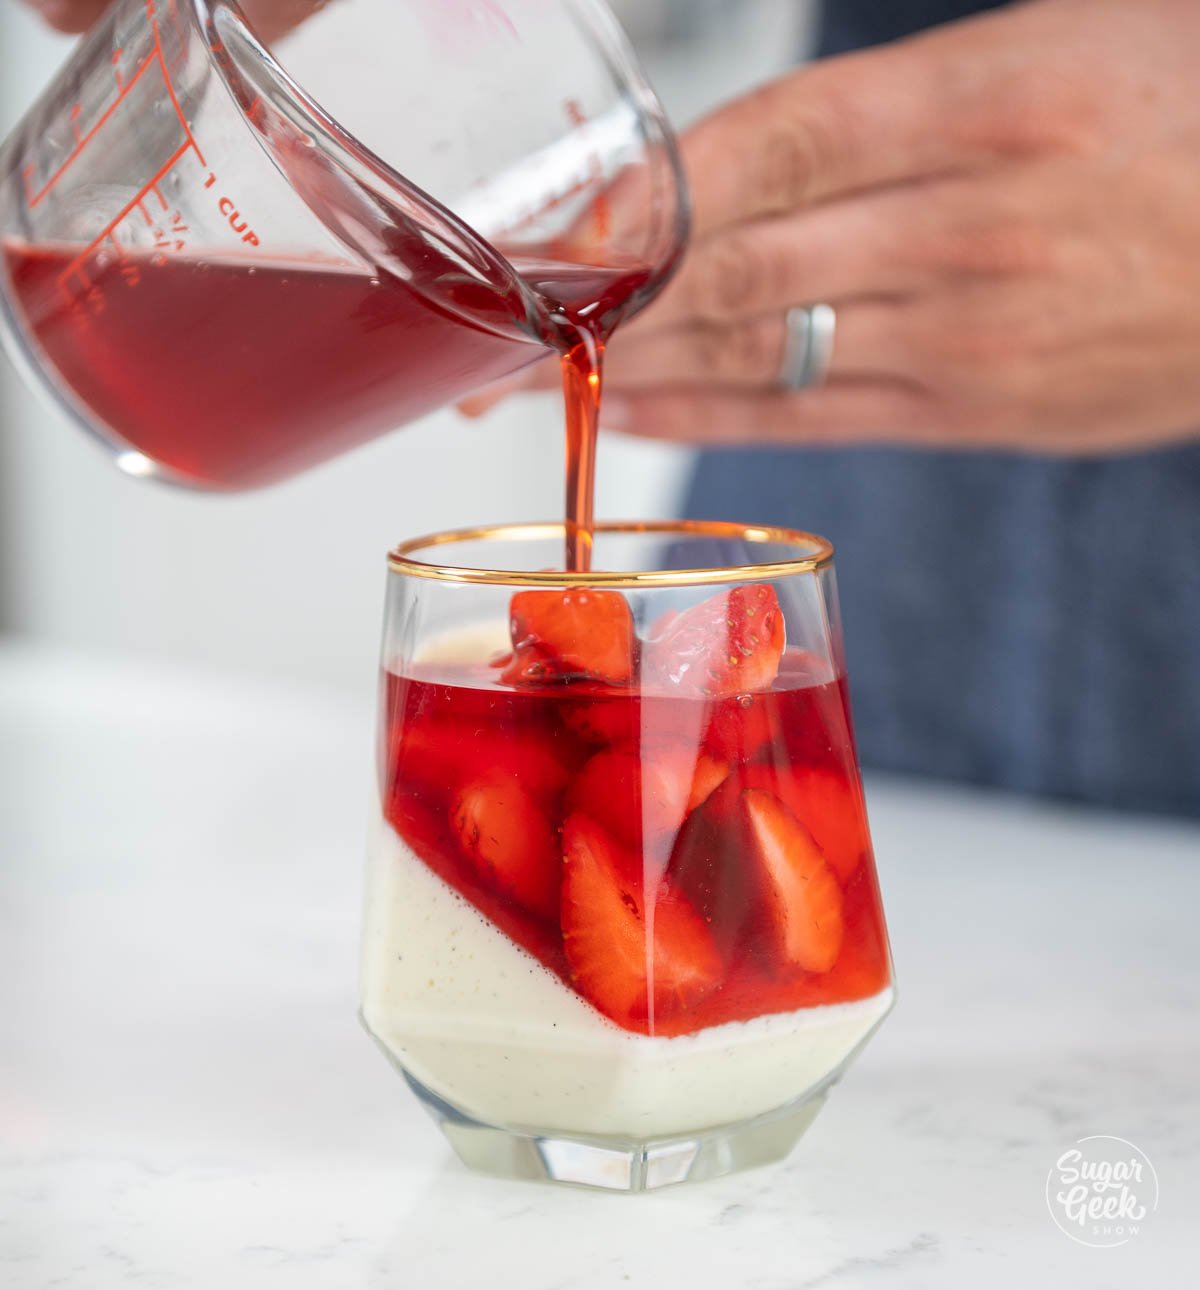
  11. Next, slowly pour the jelly mix over the strawberries until the volume matches the level of the panna cotta.pouring strawberry mixture over wine glass filled with strawberries on top of panna cotta
  12. Then, carefully place the panna cotta glasses back into the fridge for another 2 hours until the strawberry jelly is set.
  13. Panna cotta is either served chilled or at room temperature. Whatever you prefer! Garnish with edible gold and enjoy! dessert plate presentation of panna cotta with strawberry

FAQ

What does panna cotta taste like?

Silky, vanilla cream that has a thicker texture with a slight giggle.

What does panna cotta mean?

Cooked cream.

Can you make this dairy-free?

Absolutely! You can replace the heavy whipping cream with almond milk or coconut milk.

Could I use raspberry instead of strawberry for this recipe?

Yes! If you make it, be sure to tag me on Instagram or Facebook @sugargeekshow

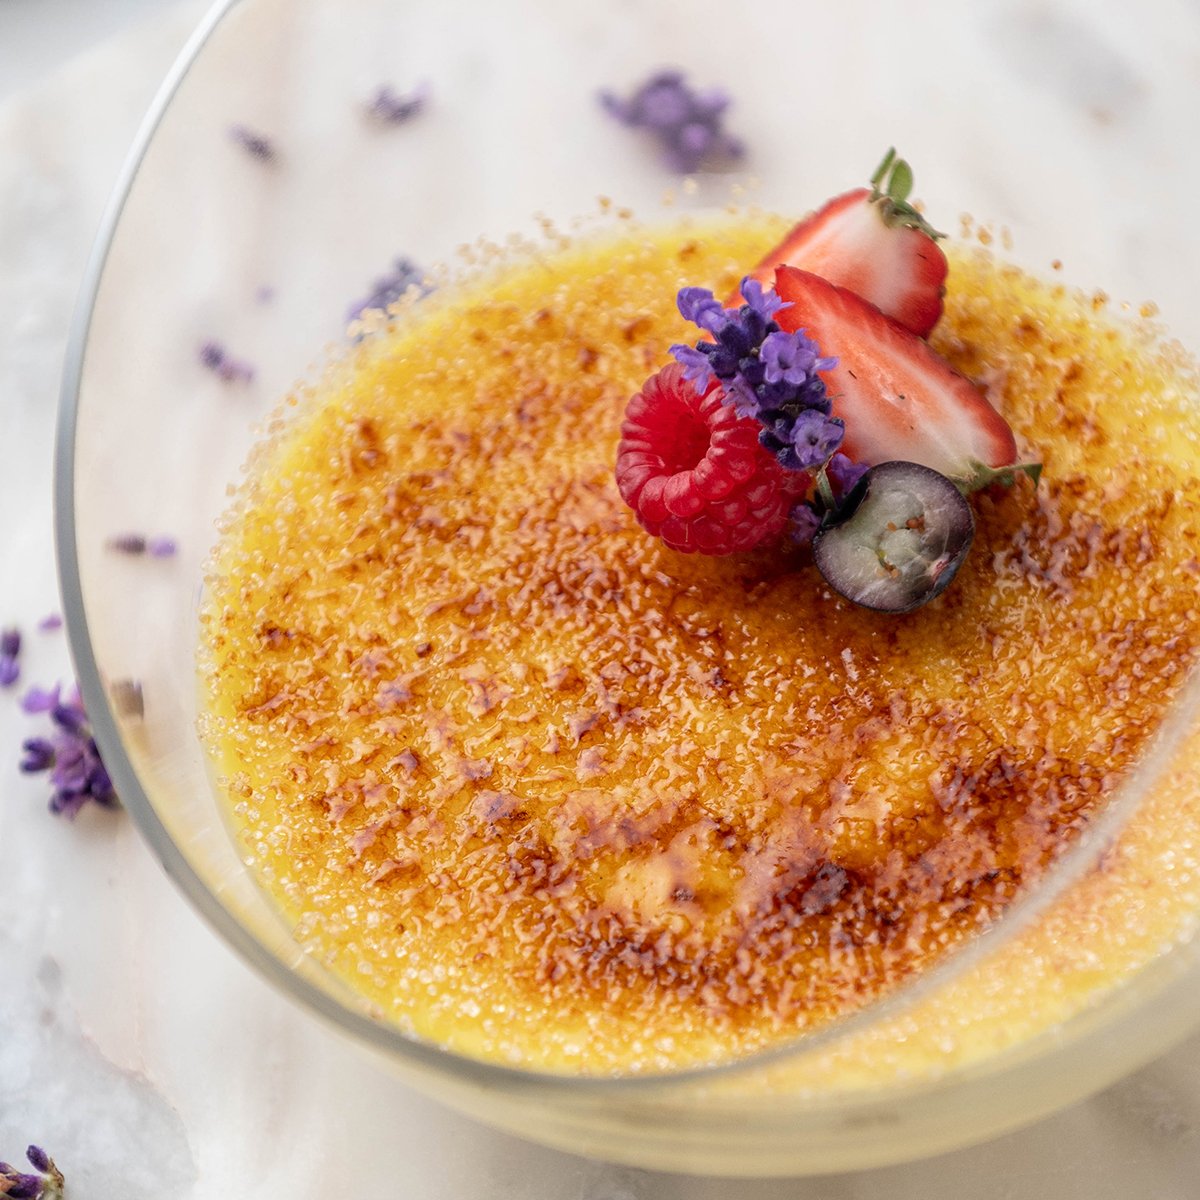
What's the difference between panna cotta and crème brûlée?

Panna cotta is gelatinized sweet cream prepared in the refrigerator, and crème brûlée is an egg custard that is baked in the oven and topped with crystallized sugar.

Is panna cotta like flan?

Yes, both are creamy desserts that have a slight giggle to them. But they are prepared in different ways and do not share similar flavors. Panna cotta is sweet cream that is thickened with gelatin, and flan is a custard made with eggs and surrounded by liquid caramel to give it a warmer, nuttier taste.

What kind of gelatin should I use?

You can use any kind of gelatin (or agar-agar) you prefer. You could also make your own gelatin sheet if you plan on needing more gelatin in the future.

Can I use anything other than gelatin to set it?

Yes, you can use agar-agar. Keep in mind, if you use agar-agar as a substitute you will have slightly different (firmer) results.

Can I use powdered gelatin?

Yep! Just replace the sheet gelatin with an equal amount of powdered gelatin. Sprinkle the gelatin over the water and let it absorb for 5 minutes.

Why is my panna cotta not setting?

You either did not incorporate enough gelatin (or agar-agar), or it needs to sit in the refrigerator a bit longer.

Why is my panna cotta separating?

Your gelatin did not bloom properly, or you did not squeeze out the excess water. To avoid this, set your gelatin in water and allow it to bloom (i.e. absorb liquid) for 5 minutes before using your hands to squeeze out any excess water. When the fat from the cream separates from the water in the gelatin, it creates two distinct layers that will separate your panna cotta.

golden spoon scooping a bite-size amount of panna cotta with strawberry gelée

More Recipes You'll Love

Crème brûlée

Basic gelatin sheet recipe

Strawberry puree

Lemon curd recipe

Recipe

Print Recipe
4.88 from 8 votes

Vanilla Bean Panna Cotta with Strawberry Gelée

Creamy, vanilla bean panna cotta topped with strawberry sauce is the perfect party dessert!
Prep Time10 minutes mins
Cook Time40 minutes mins
Total Time50 minutes mins
Course: Dessert
Cuisine: Italian
Servings: 6 servings
Calories: 360kcal
Author: Liz Marek

Ingredients

Strawberry Gelée

  • 1000 grams strawberries fresh or frozen
  • 200 grams sugar
  • 8 grams sheet gelatin
  • 48 Grams water

Vanilla Panna Cotta

  • 225 grams heavy whipping cream
  • 100 grams buttermilk
  • 45 grams sugar
  • 1 whole vanilla bean
  • 8 grams sheet gelatin
  • 48 Grams water

Instructions

Preparing the Strawberry Gelée

  • First, you will begin by preparing the strawberry juice to make the jelly. To do this, combine the strawberries and the sugar together in a medium-sized bowl. Either frozen or fresh strawberries will work for this.
  • Then, wrap the top of the bowl with plastic wrap to create a steam environment in the bowl. This is to extract as much juice and flavor from the berries as possible without losing moisture.
  • Place the bowl on a double boiler and let it cook for 1 hour over medium heat. Once your berries have reduced, the berries should appear to be swimming in their own juice.
  • Next, after the berries have reduced you will strain the berries over a chinois lined with a cheesecloth or a paper towel. This will remove all of the berry fibers and leave a beautiful, clear red liquid.

Making the Panna Cotta

  • In a bowl, measure 6 times the amount of cool water as gelatin. So for 8 grams of gelatin, you will need 48 grams of water. Place the sheets of gelatin in the water one at a time while making sure that they do not stick together. Let them bloom while you prepare the cream. *See the notes section below if you want to use powdered gelatin.
  • Next, using a paring knife, split your vanilla bean and scrape the seeds from the pod. You will want to keep the pod so you can steep it in your cream.
  • Then, in a sauce pan, combine your heavy cream, sugar, and vanilla bean (both the seeds and the pod).
  • Heat the mixture over medium heat until it is boiling.
  • Once the mixture is boiling, turn off the heat. Squeeze out the excess water from your bloomed gelatin sheets and then add them to the hot cream mixture. Stir until they are combined and the gelatin is melted.
  • Strain the mixture through a fine, mesh strainer or a chinois into a bowl.
  • Finally, add in your buttermilk and stir until they are combined.

Assembling the Panna Cotta Dessert Glasses

  • Prepare your serving glasses or containers. PRO TIP: We used water to decide what angle we wanted our panna cotta to set at, and then cleaned and dried the glasses to get them ready for the panna cotta to be poured into. Make sure they are stable so they can be moved to the refrigerator carefully without spilling or sloshing.
  • Slowly pour your panna cotta into the glasses to your desired volume. We chose to fill ours with about 6 ounces each.
  • Place the panna cotta in the fridge to completely set (it could take 5-6 hours). It should be firm with no movement when you gently tilt or shake the glass.
  • Now, you will bloom your gelatin sheets for the strawberry jelly. In a bowl, measure 6 times the amount of cool water as gelatin. So for 8 grams of gelatin you will need 48 grams of water.
  • Using a scale, measure 500 grams of the strawberry juice in a pourable container.
  • Place the sheets of gelatin in the cool water one at a time while making sure they are not stuck together. Let them bloom for about 5 minutes.
  • Next, squeeze the excess water from the gelatin sheets and then add them to the strawberry liquid. The juice should still be warm enough to melt the gelatin once added and mixed.
  • Gently stir them until they are combined. You do not want to incorporate too many bubbles. Allow them to cool to about 70ºF (21ºC).
  • Stand the set panna cotta glasses upright and then add sliced strawberries to the empty void in the glass to your desired height.
  • Next, slowly pour the jelly mix over the strawberries until the volume matches the level of the panna cotta.
  • Then, carefully place the panna cotta glasses back into the fridge for another 2 hours until the strawberry jelly is set.
  • Panna cotta is either served chilled or a room temperature. Whatever you prefer! (Optional) Garnish with edible gold and enjoy!

Video

Notes

Important Things To Note Before You Start
  1. You can make this a dairy-free recipe by replacing the cream with almond milk or coconut milk.
  2. If you do not have gelatin sheets you can use powdered gelatin. Mix together 10 grams of powdered gelatin and 50 grams of cold water and let it bloom for 5 minutes (one each for the panna cotta and one for the strawberry gelee).
  3. Need a vegetarian substitute for gelatin? You can use agar-agar.
  4. Once you add the gelatin to your cream, you do not want to boil the liquid again. Why? Because it will cause the cream and the gelatin to separate.
  5. Need to make this for a party? You can make and set your panna cotta for up to 7 days in the refrigerator. Just be sure to not add in any strawberry or sauce until a few hours before you're ready to serve it. 
  6. If you want an easier substitute for the strawberry concentrate, check out my strawberry reduction recipe.

Nutrition

Serving: 1servings | Calories: 360kcal | Carbohydrates: 56g | Protein: 5g | Fat: 15g | Saturated Fat: 9g | Polyunsaturated Fat: 1g | Monounsaturated Fat: 4g | Cholesterol: 53mg | Sodium: 40mg | Potassium: 307mg | Fiber: 3g | Sugar: 50g | Vitamin A: 599IU | Vitamin C: 98mg | Calcium: 73mg | Iron: 1mg
Cake sculpted to look like Boba Fett

February 1, 2022 Course Preview

Boba Fett Cake Tutorial

Skill level: Intermediate

In this tutorial, you will learn how to create a bobble-head stylized Boba Fett cake. Few characters are as popular and recognizable in the Star Wars universe as the notorious Boba Fett!

You will learn how to create this gravity-defying cake, featuring Boba Fett's iconic Mandalorian helmet shape, how to get the proportions of a Funko-Pop figure correct, adding the details including hands, boots, this helmet antenna, and his iconic blaster and jetpack.

There's a lot to cover in this tutorial, so let's get our tools together and let's get started!

1:38:07 Minutes of Instruction

What You Will Learn

  • How to create a Funko-Pop Boba Fett figure out of cake and edible materials
  • Learn how to sculpt Boba's helmet, blaster, jetpack and poncho
  • How to get the gravity-defying structure right

Cake sculpted to look like Boba Fett

Tutorial Chapters

  1. Making the bases 0:29
  2. Making the structure 1:07
  3. Adding the armature wire 9:57
  4. Stacking The Cakes 12:57
  5. Shaping The Cakes 16:04
  6. Coloring The Fondant 25:09
  7. Building Up The Torso 26:46
  8. Coloring The Fondant Pt. 1 32:56
  9. Covering The Cake In Fondant 34:30
  10. Making The Boots 39:17
  11. Building Up The Legs 43:28
  12. Bulking And Detailing The Torso 46:10
  13. Making The Gun 50:52
  14. Making The Antenna Pt. 1 54:39
  15. Making The Fist 56:20
  16. Painting The Helmet Pt. 1 59:28
  17. Coloring The Modeling Chocolate Pt. 2 1:01:30
  18. Detailing The Boots 1:03:38
  19. Making The Belt And Holster 1:08:47
  20. Adding The Body Armor 1:11:16
  21. Adding The Fist And Detailing 1:14:32
  22. Making The Antenna Pt. 2 1:15:42
  23. Making The Shoulder Pads 1:17:29
  24. Adding The Helmet Details 1:18:28
  25. Adding The Antenna 1:25:32
  26. Adding The Arm Cuff 1:27:35
  27. Making the Jetpack Pt. 1 1:28:21
  28. Adding The Gun And Hand 1:29:50
  29. Making And Adding The Poncho 1:31:09
  30. Making The Jetpack Pt. 2 1:32:35
  31. Painting The Helmet And Hand 1:34:28
  32. Painting The Final Details 1:35:43

Downloads

Materials List

Helmet Template - Top

Helmet Template - Bottom

Boba Fett Reference

Cake sculpted to look like Boba Fett

February 1, 2022 Paid Video

Boba Fett Cake

Skill level: Intermediate

In this tutorial, you will learn how to create a bobble-head stylized Boba Fett cake. Few characters are as popular and recognizable in the Star Wars universe as the notorious Boba Fett!

You will learn how to create this gravity-defying cake, featuring Boba Fett's iconic Mandalorian helmet shape, how to get the proportions of a Funko-Pop figure correct, adding the details including hands, boots, this helmet antenna, and his iconic blaster and jetpack.

There's a lot to cover in this tutorial, so let's get our tools together and let's get started!

1:38:07 Minutes of Instruction

What You Will Learn

  • How to create a Funko-Pop Boba Fett figure out of cake and edible materials
  • Learn how to sculpt Boba's helmet, blaster, jetpack and poncho
  • How to get the gravity-defying structure right

Tutorial Chapters

  1. Making the bases 0:29
  2. Making the structure 1:07
  3. Adding the armature wire 9:57
  4. Stacking The Cakes 12:57
  5. Shaping The Cakes 16:04
  6. Coloring The Fondant 25:09
  7. Building Up The Torso 26:46
  8. Coloring The Fondant Pt. 1 32:56
  9. Covering The Cake In Fondant 34:30
  10. Making The Boots 39:17
  11. Building Up The Legs 43:28
  12. Bulking And Detailing The Torso 46:10
  13. Making The Gun 50:52
  14. Making The Antenna Pt. 1 54:39
  15. Making The Fist 56:20
  16. Painting The Helmet Pt. 1 59:28
  17. Coloring The Modeling Chocolate Pt. 2 1:01:30
  18. Detailing The Boots 1:03:38
  19. Making The Belt And Holster 1:08:47
  20. Adding The Body Armor 1:11:16
  21. Adding The Fist And Detailing 1:14:32
  22. Making The Antenna Pt. 2 1:15:42
  23. Making The Shoulder Pads 1:17:29
  24. Adding The Helmet Details 1:18:28
  25. Adding The Antenna 1:25:32
  26. Adding The Arm Cuff 1:27:35
  27. Making the Jetpack Pt. 1 1:28:21
  28. Adding The Gun And Hand 1:29:50
  29. Making And Adding The Poncho 1:31:09
  30. Making The Jetpack Pt. 2 1:32:35
  31. Painting The Helmet And Hand 1:34:28
  32. Painting The Final Details 1:35:43

Downloads

Materials List

Helmet Template - Top

Helmet Template - Bottom

⅓ Scale Boba Fett Turnaround Reference

Boba Fett Scale Reference 01

Boba Fett Scale Reference 02

crème brûlée in a glass dish decorated with fruit and flowers

January 25, 2022 Mother's Day

Crème Brûlée

Crème brûlée is a smooth, ultra-creamy custard dessert with a crisp caramel topping that you crack through with your spoon. The smooth custard and crunchy sugar make a delicious combination in your mouth so it's no surprise it's a favorite dessert for many and popular in restaurants served with fresh berries.

crème brûlée in a glass dish decorated with fruit and flowers

Today, chef Christophe Rull is going to walk you through step-by-step how to bake a perfectly smooth and creamy crème brûlée, how to take the presentation up a notch by using different containers, and best of all, no water bath necessary!

What's great about this recipe is that it uses a low-temperature baking method to prevent you from overcooking the custard. This method is much safer since you do not have to worry about pouring hot water into a pan to create a water bath.

As an added bonus, when you bake custard at a lower temperature without a water bath, it gives you more opportunities to get creative with what dish you are baking your custard inside (and if you want to opt for a more decorative, oven-safe dish that's larger than a traditional ramekin).

What's In This Blog Post

  • Crème Brûlée Ingredients
  • How to Make Crème Brûlée
  • Caramelizing the Sugar
  • FAQ
  • More Recipes You'll Love

Crème Brûlée Ingredients

One of the best things about making crème brûlée is it only takes 5 common ingredients! If you don't have a vanilla bean then you can use 1 teaspoon of vanilla bean paste or extract although I do love the look of the vanilla bean seeds in the finished product!

How to Make Crème Brûlée

  1. Preheat your oven to 200ºF (93ºC).
  2. Split your vanilla bean in half with a sharp knife and remove the seeds with the tip. Scrape the seeds into your milk. Reserve the pod to use in the next step.
  3. In a heavy bottom saucepan over medium heat, combine the cream, milk, vanilla (both the seeds and the pod), and sugar. Bring it all to a boil.cutting open a vanilla bean podwhisk inside of bowl with cream and vanilla bean
  4. Once your mixture begins to boil, remove it from the heat.
  5. Whisk your eggs gently to break them up in a separate bowl.
  6. Pour about ⅓ of the hot milk mixture into the egg yolks while continually whisking. This will temper the eggs with the milk so that they wont curdle when you add the rest of the hot milk to them.pouring creme into eggs
  7. Once the eggs and the milk are thoroughly combined, add the egg mixture back into the pot with the remaining hot milk. Whisk to combine.
  8. Next, strain the custard mixture through a strainer or sieve to remove the vanilla fibers and the vanilla pod. straining into a bowl of eggs
  9. Use an immersion blender (optional) to blend the ingredients until they are smooth and homogenous. Try not to incorporate any air by keeping the head of the blender under the surface of the mixture.hand holding blender and blending crème brûlée mixture
  10. Fill your baking containers or ramekins ¾ of the way with custard. PRO TIP: It will be easier to place the containers on a sheet pan with a silicone baking mat underneath before filling them, and then move the entire sheet pan to the oven.glass dish on top of a non-slip mat on a baking sheetpouring crème brûlée into glass dish
  11. Then, tightly cover each container or ramekin with plastic wrap. Poke a few holes in the plastic wrap to allow some airflow. The plastic wrap will keep moisture in the containers so you don't get a skin on top and the low temperature of the oven allows the crème brûlée to be baked without a waterbath. wrapping plastic wrap around crème brûlée dishpoking holes in plastic wrap on top of crème brûlée
  12. Place the sheet pan on the middle rack in the preheated oven.
  13. Bake for about 1 hour and 25 minutes. I'm baking mine in large glass bowls that serve 2 people each, but you can also use ramekins. Baking time may vary. Once your custard has somewhat solidified around the perimeter of the ramekin and has a SLIGHT jiggle in the center, it is finished baking. If your custard appears to be mostly liquid, allow it to bake longer adding 10 minutes at a time until it reaches the desired consistency.
  14. Once the ramekins have been removed from the oven, allow them to cool for about 20 minutes. Then, place them in the fridge until they are completely cool.bowl of cooked crème brûlée on a baking dish

Caramelizing the Sugar

  1. When you are ready to serve the crème brûlée, spread a thin, even layer of sugar across the top of the custard. You can do this by placing a couple Tablespoons of sugar on top then gently turning the bowl so gravity does most of the work for you and moves the sugar around the surface.hand tiling the bowl of crème brûlée to move the sugar around the bowlhand tiling the bowl of crème brûlée to move the sugar around the bowl
  2. Using a culinary torch, heat the sugar until it reaches the desired caramelization on top. PRO TIP: Try to heat the sugar in small increments so you don't cook the custard under the sugar. The goal is to have a thin layer of crunchy caramelized (not burned) sugar on top of the cool custard. If you do not have a blow torch, place the ramekins back in the oven and broil them until the sugar has caramelized.hand holding a kitchen torch over crème brûlée
  3. Garnish with berries or fruit of your choice.hand placing fruits on top of crème brûléecrème brûlée in a glass dish decorated with fruits and a flower

FAQ

What is crème brûlée mostly made of?

Cream, sugar, egg yolks, and vanilla.

What does crème brûlée taste like?

It is a light and airy vanilla-flavored baked custard with a slightly crunchy layer of caramelized sugar on top.

Why is my crème brûlée eggy?

You may have over-baked it. Eggs will contract if they are baked too much and then they squeeze all of the water out of the dish. This results in a texture similar to scrambled eggs.

What sugar is best for crème brûlée?

Granulated sugar is ideal for baking the custard, and sprinkling Sugar in the Raw on top works best for getting the iconic caramelized sugar layer on top using a kitchen torch.

Why is my crème brûlée foamy?

If it had bubbles on top before it was baked, then it will be foamy. What you can do to get rid of these bubbles is gently use a kitchen torch to blow away the bubbles before you bake your custard.

Can I use brown sugar to make crème brûlée?

Yes! But if you use brown sugar instead of granulated sugar, it will be darker in color.

Is crème brûlée gluten-free?

Generally speaking, yes! It's always important to check that your ingredients are gluten-free, but traditionally it is gluten-free.

Do I need a torch?

No, not if you are baking custard inside of a ramekin. With ramekins, you can broil the custard instead of using a torch. However, if you are using a different baking dish you will want to be careful before putting it under the broiler (depending on how hot the dish can get before shattering).

spoonful of crème brûlée

More Recipes You'll Love

Chocolate Souffle

Coconut Custard

Panna Cotta With Strawberry Gelee

Crème Anglaise Recipe

Homemade Pastry Creme

Recipe

crème brûlée in a glass dish decorated with fruit and flowers
Print Recipe
4.67 from 9 votes

Crème Brûlée

A classic creamy custard dessert that balances the sweet textures of smooth and crunchy.
Prep Time10 minutes mins
Cook Time30 minutes mins
Total Time40 minutes mins
Course: Dessert
Cuisine: French
Servings: 4 people
Calories: 466kcal
Author: Liz Marek

Equipment

  • 4 oven safe bowls/ramekins
  • pot
  • Whisk
  • strainer
  • Kitchen torch

Ingredients

Crème Brûlée

  • 100 grams egg yolks
  • 70 grams granulated sugar
  • 250 grams milk
  • 250 grams heavy whipping cream
  • 1 vanilla bean (seeds scraped out, pod reserved)
  • 50 grams granulated sugar or sugar in the raw (set aside) (used to caramelize the custard after it's baked)

Garnish (Optional)

  • 155 grams fresh berries

Instructions

Making the Crème Brûlée

  • Preheat your oven to 200ºF (93ºC).
  • In a heavy bottom pot over medium heat, combine the milk, vanilla (both the seeds and the pod), and sugar. Bring it all to a boil.
  • Then, in a separate bowl, add in your egg yolk and gently whip it until it reaches a smooth consistency.
  • Once the milk has begun to boil, strain it to remove the vanilla pod, into your egg yolks and mix until combined.
  • Add the heavy cream.
  • Using an immersion blender, blend the custard to create an extra smooth consistency, about 15 seconds. Be sure not to allow a lot of air into the custard while it is blending.
  • Fill your baking containers or ramekins ¾ of the way with custard. PRO TIP: It will be easier to place the containers on a sheet tray before filling them, and then move the entire sheet tray to the oven. I used a silicone mat as well to avoid the bowl sliding.
  • Then, tightly cover each container or ramekin with plastic wrap. Poke a few holes in the plastic wrap to allow some airflow.
  • Carefully move your custard to the middle rack in the preheated oven.
  • Bake for about 1 hour and 25 minutes. I'm baking mine in large glass bowls that serve 2 people each, but you can also use ramekins. Baking time may vary. Once your custard has somewhat solidified around the perimeter of the ramekin and has a slight jiggle in the center, it is finished baking.
  • If your custard appears to be mostly liquid, allow it to bake longer adding 10 minutes at a time until it reaches the desired consistency.
  • Once the ramekins have been removed from the oven, allow them to cool for about 20 minutes. Then, place them in the fridge until they are completely cool.

Caramelizing the Sugar

  • When you are ready to serve the custard, spread a thin, even layer of granulated sugar across the top of the custard. You can do this by gently turning the bowl so gravity does most of the work for you and moves the sugar around the custard.
  • Using a kitchen blow torch, heat the sugar until it reaches the desired caramelization on top. PRO TIP: Try to do heat the sugar with a blow torch in small increments so you don't cook the custard under the sugar. The goal is to have a thin layer of crunchy caramelized (not burned) sugar on top of the cool custard.
    If you do not have a blow torch, place the ramekins back in the oven and broil them until the sugar has crystallized.
  • Garnish with berries or fruit of your choice.

Notes

Important Things To Note Before You Start
  1. Practice Mise en Place (everything in its place). Measure out your ingredients ahead of time and have them ready before you start to reduce the chances of accidentally leaving something out.
  2. Use a scale to weigh your ingredients (including liquids) unless otherwise instructed (Tablespoons, teaspoons, pinch, etc). Metric measurements are available in the recipe card. Scaled ingredients are much more accurate than using cups and help ensure the success of your recipe. 
  3. You do not need a kitchen blow torch if you are baking your custard in ramekins. If you are using another kind of baking dish, you will want to confirm how hot it can get before it shatters before you place it under the broiler in your oven. 

Nutrition

Calories: 466kcal | Carbohydrates: 39g | Protein: 7g | Fat: 32g | Saturated Fat: 18g | Polyunsaturated Fat: 2g | Monounsaturated Fat: 10g | Cholesterol: 363mg | Sodium: 63mg | Potassium: 217mg | Fiber: 1g | Sugar: 35g | Vitamin A: 1385IU | Vitamin C: 23mg | Calcium: 150mg | Iron: 1mg
closeup of chocolate souffle

January 20, 2022 Blog

Chocolate Soufflé With Crème Anglaise

This is how to get a perfectly light and airy chocolate soufflé with an intense chocolate flavor and topped with a creamy cremé Anglaise vanilla sauce. Follow Chef Christophe Rull's foolproof tips and tricks to get your chocolate soufflé to rise nice and tall. Anyone can make a soufflé!

closeup of chocolate soufflé

Don't be intimidated by the idea of baking a soufflé! This recipe will walk you through step-by-step how to prepare and bake chocolate soufflé that tastes light, airy, creamy, chocolatey, and stands tall every time you make it!

I've got all my tips and tricks to share with you, and this recipe will ensure you have all the information you need to successfully bake a chocolate soufflé!

What's In This Blog Post

  • Chocolate Soufflé Ingredients
  • Crème Anglaise Ingredients
  • Preparing the Crème Anglaise
  • How to Make Chocolate Soufflé Step-by-Step
  • Baking the Chocolate Soufflé
  • Tips for the Perfect Chocolate Soufflé
  • FAQ
  • More Recipes You'll Love

Chocolate Soufflé Ingredients

There aren't any tricky ingredients in this recipe but you might want to double-check your chocolate. I use extra-bitter Guayaquil but you could just look for a nice bar of dark chocolate at your grocery store like Lindt and just chop it up. You want to avoid chocolate chips because they contain thickeners that stop them from melting smoothly.

chocolate souffle ingredients

Crème Anglaise Ingredients

close up of creme anglaise vanilla sauce

To make crème anglaise you only need three ingredients: milk, eggs, and a vanilla bean.

Don't have a vanilla bean? No problem! You can substitute with 1 teaspoon of vanilla bean paste or a high-quality vanilla extract.

Preparing the Crème Anglaise

  1. First, cut your vanilla bean in half lengthwise and carefully scrape the seeds out with a knife.
  2. Next, pour the milk into a saucepan. Turn the heat onto medium heat.
  3. Then, add the vanilla bean seeds and the pod into the milk.vanilla bean pod and seeds in a saucepan with milk
  4. Bring the milk to a simmer, and then remove it from the heat. We are not trying to boil the milk, just heat it enough to enfuse it with the vanilla flavor.
  5. Next, strain the milk and vanilla bean mixture to remove the vanilla bean pod.
  6. In a mixing bowl, whisk the egg yolks to break them up.
  7. Add in ⅓ of the hot milk mixture into the egg yolks, and whisk to combine them. This will heat the eggs up just enough that they wont curdle when you add them into the saucepan with the rest of the cream. adding hot milk to egg mixture
  8. Once they are combined, add the egg yolk mixture back into the saucepan and turn the heat back up to medium.adding egg mixture into cream mixture in a saucepan
  9. Then, over medium heat, whisk the mixture constantly until it begins to bubble and thicken. Be very careful not to overheat the mixture. testing the thickness of creme anglaise
  10. When the mixture is thick enough to coat the back of a spoon and you can drag your finger through the center without the sauce dripping (a la nappe), your crème anglaise is ready.
  11. Strain the anglaise into a bowl to remove the vanilla fibers, and then cover it with plastic wrap (make sure the plastic wrap is touching the top of the sauce). straining creme anglaise
  12. Allow it to cool and set it aside until you're ready to drizzle it onto your soufflé.

How to Make Chocolate Soufflé Step-by-Step

  1. Prepare the ramekins by brushing them with soft but not melted butter in a vertical direction. This will help the soufflé to raise straight up. I'm using four, 4" x 2" ramekins but you can use smaller ramekins if you'd like.
  2. Then, coat the butter with a thin layer of granulated sugar. Add one Tablespoon of sugar to the ramekin and roll the sugar around to coat all sides evenly then remove the excess sugar by tapping it back into a separate bowl. Set the ramekins aside.
  3. Preheat your oven to 360°F (182°C)
  4. Add your milk to a heavy bottom saucepan and bring it to a boil over medium heat.
  5. Next, in a separate bowl, combine the egg yolk and cornstarch by whisking it until the mixture is smooth and the cornstarch is dissolved. Really whisk it together so you don't get any clumps of cornstarch.
  6. Add about ⅓ cup of the hot milk to the egg yolks and mix. This is tempering the eggs so they don't curdle. Pour the egg/milk mixture back into the pot with the rest of the hot milk and whisk.
  7. Stir it constantly over medium heat until the mixutre begins to bubble and thicken. Be careful not to cook the eggs too quickly. If its getting too hot, lift the pot away from the heat and continue whisking.
  8. Remove the pot from heat, and then add the chocolate to the saucepan.
  9. Keep stirring the mixture until the chocolate is fully incorporated and melted.
  10. Then, transfer the chocolate mixture to a bowl and set it aside.
  11. Next, in the bowl of your stand mixer with the whisk attachment, add in your egg whites and a pinch of cream of tartar. Make sure your bowl is very clean, use a little bit of white vinegar to clean your bowl and whisk attachment if needed.
  12. Whip the egg whites on medium speed until you reach soft peaks (lines beginning to form in the surface of the meringue).soft peaks
  13. Slowly add in your sugar while mixing on low.
  14. Continue to whip the egg whites at medium speed until they have reached a smooth medium peak (meringue holds its shape but the tip does not stand straigh up).
  15. Then, add in ⅓ of the meringue to the chocolate pastry cream and mix them together until they are fully incorporated. You do not need to be gentle at this point.
  16. Add the chocolate mixture into the bowl with the rest of the whipped egg whites.
  17. Next, gently fold the egg whites and chocolate mixture together carefully. Try not to deflate the egg whites too much. You only want to fold them until they are fully incorporated.

Baking the Chocolate Soufflé

  1. First, pour the soufflé mixture into a large piping bag.
  2. Snip the tip off the bag (about 1cm wide) and pipe the soufflé mixture into the ramekin. Keep the tip of the bag inside the batter as you squeeze. When the ramekin is full, stop the pressure and lift up.
  3. Using a flat spatula, level off the top of the soufflé mixture to the edge of the ramekin.
  4. Next, using the edge of your thumbnail, clean the very top edge around the ramekin to create a space between the batter and the edge of the ramekin. Make sure there is no batter on the edges or outsides of your ramekin.
  5. Repeat filling, leveling, and cleaning up the edges for each of your ramekins.
  6. Place the soufflés in a 360°F (182°C) oven for 15 minutes. Do not open the oven.You will know the soufflé is done when it has risen and has a very slight jiggle (but also a slight bounce back when it's gently touched).
  7. Serve the soufflé immediately. Garnish with powdered sugar and/or a drizzle of the crème anglaise sauce.

Tips for the Perfect Chocolate Soufflé

  • Practice Mise en Place (everything in its place). Measure out your ingredients ahead of time and have them ready right before you start mixing to reduce the chances of accidentally leaving something out.
  • The chocolate you use matters! Avoid using chocolate chips. Why? Because they contain thickeners that stop the chocolate from melting smoothly. I would recommend chopping up a bar of Lindt dark chocolate since it's relatively easy to find at the grocery store. If you want to use the same chocolate I did, I used extra-bitter guayaquil.
  • Be patient with your eggs. This is key to ensuring the correct taste and texture of your soufflé. You will want to be mindful of the recipe instructions and be careful to not cook the eggs too quickly.
  • Fold the egg whites and chocolate mixture gently. Start by taking your spatula and going around the edge of the bowl just under the mixture, then cut through the center. Repeat this until everything looks combined and then stop. You don't want to go overboard otherwise you will remove all of the air you've mixed into the soufflé. Why does that matter? Because we want air trapped inside the mixture so that when it is baked, your soufflé stands tall and does not collapse.
  • Whip your French meringue on medium. Whipping this meringue on a lower speed will create smaller bubbles, helping your souffle rise higher in the oven. Big bubbles pop faster than small bubbles.
  • Waiting for your oven to pre-heat? Chill the mixture in the refrigerator for 5 minutes while your oven heats up. Keeping the ingredients from getting too warm will help keep your soufflé from falling.

FAQ

What does a chocolate soufflé taste like?

A chocolate soufflé is light and airy on the outside, and creamy on the inside. It is rich with chocolate flavor and will almost melt in your mouth as you eat it.

What is a chocolate soufflé made of?

Chocolate, eggs yolks, egg whites, whole milk, granulated sugar, cornstarch, and cream of tartar.

What's the difference between a chocolate soufflé and a chocolate lava cake?

A chocolate soufflé is fully baked, and a chocolate lava cake is not. Chocolate lava cakes have a runny texture in the center, and chocolate soufflé has a more creamy texture.

What can I bake a soufflé in?

Ramekins are ideal to use if you are baking individual soufflés. If you want to bake a larger soufflé, you can use a soufflé dish or any other casserole dish that has deep sides. Ceramic or heatproof glass dishes work best.

Why did my chocolate soufflé fall?

Your chocolate soufflé most likely collapsed because it cooled down. You can avoid this by only taking the soufflé out of the oven when you are ready to serve it. Timing is key!

Another reason your soufflé may have deflated is that you did not fold the egg whites and chocolate mixture carefully enough. A gentle fold is the key to keeping all of the air inside of the mixture so that when the soufflé is baked it stands tall.

Soufflés trap heat inside the dish which is what causes them to rise. As soon as you take a soufflé out of the oven, the heat begins to escape and this will cause the soufflé to fall naturally.

Why does my soufflé taste eggy?


If your chocolate soufflé tastes more like scrambled eggs than custard, you may have cooked the eggs too quickly.

Chocolate soufflé should have a subtle egg flavor. Anything more than a subtle egg flavor would indicate a mistake was made while preparing the soufflé.

chocolate soufflé covered in sauce

More Recipes You'll Love

Chocolate Lava Cake

Death By Chocolate Cake

Pastry Cream Recipe

Crème Anglaise Recipe

Recipe

closeup of chocolate souffle
Print Recipe
5 from 4 votes

Chocolate Soufflé with Crème Anglaise

This recipe will walk you through step-by-step how to prepare and bake chocolate soufflé that tastes light, airy, creamy, chocolatey, and stands tall every time you make it!
Prep Time15 minutes mins
Cook Time15 minutes mins
Total Time30 minutes mins
Course: Dessert
Cuisine: French
Servings: 4 people
Calories: 316kcal
Author: Liz Marek

Equipment

  • Mixer with whip attachment
  • mixing bowl
  • pot
  • Whisk
  • brush
  • fine mesh strainer
  • ramekins (I'm using four, 4" ceramic ramekins)

Ingredients

Crème Anglaise

  • 250 grams whole milk
  • 60 grams egg yolks
  • 30 grams granulated sugar
  • 1 vanilla bean

Chocolate Soufflé

  • 250 grams whole milk
  • 60 grams egg yolk
  • 16 grams cornstarch
  • 125 grams 64% dark chocolate My favorite is Cacao Barry 64% Guayaquil chocolate
  • 250 grams fresh egg whites room temperature
  • 100 grams granulated sugar
  • 1 Pinch cream of tartar

Instructions

Making the Crème Anglaise Sauce

  • First, cut your vanilla bean in half lengthwise and carefully scrape the seeds out with a knife.
  • Next, pour the milk into a saucepan. Turn the heat on to medium heat.
  • Then, add in the vanilla bean seeds and the pod into the milk.
  • Bring the milk to a simmer, and then remove it from the heat.
  • Next, strain the milk and vanilla bean mixture over the saucepan to remove the vanilla bean pod.
  • In a mixing bowl, whisk the egg yolks to break them up.
  • Add in ⅓ of the hot milk mixture into the egg yolks, and whisk to combine them.
  • Once they are combined, add the egg yolk mixture back into the saucepan and turn the heat back up to medium.
  • Then, over medium heat, whisk the mixture constantly until it begins to bubble and thicken. Be very careful not to overheat the mixture.
  • When the mixture is thick enough to coat the back of a spoon and you can drag your finger through the center without the sauce dripping (a la nappe), your crème anglaise is ready.
  • Strain the anglaise into a bowl to remove the vanilla fibers, and then cover it with plastic wrap.
  • Allow to cool and set it aside until you're ready to drizzle it onto your soufflé.

Preparing the Chocolate Soufflé Mixture

  • Begin by preparing the ramekins by brushing them with butter in a vertical direction.
  • Then, coat the butter with a thin layer of granulated sugar. Set them aside.
  • Preheat your oven to 360°F (182°C)
  • In a heavy bottom potbelly over medium heat, bring the milk to a boil.
  • Next, in a separate bowl, combine the egg yolk and cornstarch by whisking it until the mixture is smooth and the cornstarch is dissolved. Really whisk it together so you don't get any clumps of cornstarch.
  • Add about ⅓ cup of the warm milk to the egg yolks and mix. This is tempering the eggs. Once you've done this, pour the egg/milk mixture back into the pot with the rest of the hot milk.
  • Stir it constantly over medium heat to cook the egg/milk mix to a boil. Be careful not to cook the eggs too quickly.
  • Remove the pot from heat, and then add the chocolate to the pot.
  • Keep stirring the mixture until the chocolate is fully incorporated.
  • Then, transfer the chocolate mixture to a bowl and set it aside.
  • Next, in the bowl of your stand mixer, add in your egg whites and a pinch of cream of tartar. Make sure your bowl is very clean, use a little bit of white vinegar to clean your bowl and whisk attachment if needed.
  • Begin to whip the egg whites in the bowl of your stand mixer on medium speed while bringing them to a soft peak.
  • Then, slowly add in the sugar while mixing.
  • Continue to whip the egg whites at medium speed until they have reached a smooth medium peak.
  • Then, once the egg whites have a smooth medium peak, add ⅓ of the egg whites to the chocolate pastry cream and mix them together until they are fully incorporated.
  • Now, pour the chocolate mixture into the bowl with the rest of the whipped egg whites.
  • Next, gently fold the egg whites and chocolate mixture together carefully. Try not to deflate the egg whites too much. You only want to fold them until they are fully incorporated.

Baking the Chocolate Soufflé

  • First, pour the soufflé mixture into a large, prepared piping bag.
  • Then, keeping the tip of the piping bag down in the prepared ramekin, fill the ramekin to the top making sure there are no air bubbles.
  • Using a flat spatula, level off the top of the ramekin.
  • Next, using the edge of your thumbnail, clean the very top edge around the ramekin to create a border. Make sure there is no batter on the edges or outsides of your ramekin.
  • Repeat filling, leveling, and cleaning up the edges for each of your ramekins.
  • Place the soufflés in a 360°F (182°C) oven for 15 minutes. You will know the soufflé is done when it has risen and has a very slight jiggle (but also a slight bounce back when it's gently touched).
  • Serve the soufflé immediately. Optional: Garnish with powdered sugar and/or a drizzle of the crème anglaise sauce.

Video

Notes

Important Things To Note Before You Start
  1. Practice Mise en Place (everything in its place). Measure out your ingredients ahead of time and have them ready right before you start mixing to reduce the chances of accidentally leaving something out.
  2. The chocolate you use matters! Avoid using chocolate chips. Why? Because they contain thickeners that stop the chocolate from melting smoothly. I would recommend chopping up a bar of Lindt dark chocolate since it's relatively easy to find at the grocery store. If you want to use the same chocolate I did, I used extra-bitter guayaquil.
  3. Be patient with your eggs. This is key to ensuring the correct taste and texture of your soufflé. You will want to be mindful of the recipe instructions and be careful to not cook the eggs too quickly.
  4. Fold the egg whites and chocolate mixture gently. Start by taking your spatula and going around the edge of the bowl just under the mixture, then cut through the center. Repeat this until everything looks combined and then stop. You don't want to go overboard otherwise you will remove all of the air you've mixed into the soufflé. Why does that matter? Because we want air trapped inside the mixture so that when it is baked, your soufflé stands tall and does not collapse.
  5. Whip your French meringue on medium. Whipping this meringue on a lower speed will create smaller bubbles, helping your souffle rise higher in the oven. Big bubbles pop faster than small bubbles.
  6. Waiting for your oven to pre-heat? Chill the mixture in the refrigerator for 5 minutes while your oven heats up. Keeping the ingredients from getting too warm will help keep your soufflé from falling.

Nutrition

Calories: 316kcal | Carbohydrates: 43g | Protein: 9g | Fat: 12g | Saturated Fat: 5g | Polyunsaturated Fat: 1g | Monounsaturated Fat: 4g | Cholesterol: 339mg | Sodium: 63mg | Potassium: 262mg | Fiber: 1g | Sugar: 39g | Vitamin A: 635IU | Calcium: 193mg | Iron: 1mg
three cakes sculpted to look like realistic cacti in plant pots

January 15, 2022 Course Preview

Cactus Cake Trio Tutorial

Skill level: Intermediate

Guest instructor Sara Weber returns for not one, not two, but three awesome, realistic cactus cakes in edible pots.

Each cactus is unique and features a host of tips and tricks, as Sara walks you through the process step-by-step. Learn to make three different realistic cacti, edible flower blossoms for each, and three different decorated pots, featuring a dipped pot, an intricately carved pattern on a pot, and a terrazzo tile pattern that's sure to be one of those "how did they make that?!" moments for your guests at the special occasion.

Sara showcases how to make the structure for the prickly pear, and how to protect and cover your structure in a food-safe way. There's tons of tricks and tips in this tutorial, so let's get our tools together and let's get started!

3:54:57 Minutes of Instruction

What You Will Learn

  • Learn how to create three different realistic cactus cakes in plant pots
  • How to plan out and structure these cakes using wooden dowels
  • Learn how to create a tall, ball and prickly pear cactus from edible materials
  • How to make edible soil
  • Learn how to make three different decorations for edible plant pots

Three cakes sculpted to look like cacti in plant pots

Tutorial Chapters

  1. Overview of the structure 0:33
  2. Measuring the pots 2:20
  3. Cutting the dowel rods 4:53
  4. Covering the dowel rods 7:05
  5. Finding the cake board center 8:25
  6. Adding the dowel rods 10:54
  7. Cutting the thick dowel rods 13:08
  8. Carving and crumb coating the cakes 22:19
  9. Putting the cakes on the boards 33:57
  10. Adding the ganache 39:20
  11. Paneling the cakes with fondant 53:13
  12. Coloring the fondant terrazzo tiles 1:07:39
  13. Coloring the modeling chocolate 1:15:24
  14. Making the fondant terrazzo tiles 1:17:55
  15. Paneling the terrazzo pot 1:30:14
  16. Decorating the dipped pot 1:45:28
  17. Decorating the carved pot 1:57:19
  18. Making the marble bases 2:06:49
  19. Making rice treat cactus toppers 2:09:23
  20. Carving the rice treat base 2:15:39
  21. Making the chocolate ridges 2:19:48
  22. Covering the tall cactus in fondant 2:25:40
  23. Covering the ball cactus in fondant 2:31:22
  24. Making the prickly pear cactus topper 2:43:38
  25. Shading the cacti 2:59:23
  26. Making the cactus spines 3:07:03
  27. Making the spines for the ball cactus 3:10:51
  28. Decorating the tall cactus 3:12:25
  29. Adding the prickly pear spines 3:18:07
  30. Making the flower toppers 3:20:29
  31. Decorating the ball cactus 3:41:46
  32. Finalizing the prickly pear cactus 3:45:56
  33. Making and adding the soil 3:49:03

Downloads

Materials List

Prickly Pear Template

Butterfly Wing Template

Pot Template

Petal Template

three cakes sculpted to look like realistic cacti in plant pots

January 15, 2022 Paid Video

Cactus Cake Trio

Skill level: Intermediate

Guest instructor Sara Weber returns for not one, not two, but three awesome, realistic cactus cakes in edible pots.

Each cactus is unique and features a host of tips and tricks, as Sara walks you through the process step-by-step. Learn to make three different realistic cacti, edible flower blossoms for each, and three different decorated pots, featuring a dipped pot, an intricately carved pattern on a pot, and a terrazzo tile pattern that's sure to be one of those "how did they make that?!" moments for your guests at the special occasion.

Sara showcases how to make the structure for the prickly pear, and how to protect and cover your structure in a food-safe way. There's tons of tricks and tips in this tutorial, so let's get our tools together and let's get started!

3:54:57 Minutes of Instruction

What You Will Learn

  • Learn how to create three different realistic cactus cakes in plant pots
  • How to plan out and structure these cakes using wooden dowels
  • Learn how to create a tall, ball and prickly pear cactus from edible materials
  • How to make edible soil
  • Learn how to make three different decorations for edible plant pots

Tutorial Chapters

  1. Overview of the structure 0:33
  2. Measuring the pots 2:20
  3. Cutting the dowel rods 4:53
  4. Covering the dowel rods 7:05
  5. Finding the cake board center 8:25
  6. Adding the dowel rods 10:54
  7. Cutting the thick dowel rods 13:08
  8. Carving and crumb coating the cakes 22:19
  9. Putting the cakes on the boards 33:57
  10. Adding the ganache 39:20
  11. Paneling the cakes with fondant 53:13
  12. Coloring the fondant terrazzo tiles 1:07:39
  13. Coloring the modeling chocolate 1:15:24
  14. Making the fondant terrazzo tiles 1:17:55
  15. Paneling the terrazzo pot 1:30:14
  16. Decorating the dipped pot 1:45:28
  17. Decorating the carved pot 1:57:19
  18. Making the marble bases 2:06:49
  19. Making rice treat cactus toppers 2:09:23
  20. Carving the rice treat base 2:15:39
  21. Making the chocolate ridges 2:19:48
  22. Covering the tall cactus in fondant 2:25:40
  23. Covering the ball cactus in fondant 2:31:22
  24. Making the prickly pear cactus topper 2:43:38
  25. Shading the cacti 2:59:23
  26. Making the cactus spines 3:07:03
  27. Making the spines for the ball cactus 3:10:51
  28. Decorating the tall cactus 3:12:25
  29. Adding the prickly pear spines 3:18:07
  30. Making the flower toppers 3:20:29
  31. Decorating the ball cactus 3:41:46
  32. Finalizing the prickly pear cactus 3:45:56
  33. Making and adding the soil 3:49:03

Downloads

Materials List

Prickly Pear Template

Butterfly Wing Template

Pot Template

Petal Template

cake sculpted to look like an airplane flying around a snowcapped mountain

December 25, 2021 Course Preview

Rotating Airplane Cake Tutorial

Skill level: Advanced

In this tutorial, you will learn how to create a realistic snow-capped mountain with a rotating airplane made from edible materials that appears to fly around the mountain!

This tutorial is packed with high-level tips and tricks, everything from how to make food-safe molds of complicated shapes and toys like the airplane I molded, to hooking up motors and structure that will create some really cool special effects.

2:06:47 Minutes of Instruction

What You Will Learn

  • Learn how to create a chocolate airplane from a mold you will make yourself
  • How to create the structure and use motors that will make the airplane rotate around the cake
  • Learn how to create one-part, two-part and pour molds using food-safe materials
  • How to airbrush the plane to add realistic details and designs
  • Learn how to sculpt and create a snow-capped mountain

Tutorial Chapters

  1. Stacking the cake 0:30
  2. Overview of the motor 5:40
  3. How to bend threaded rod 13:04
  4. How to cut threaded rod 14:23
  5. Making the structure 16:04
  6. Making the foam core box 20:39
  7. Attaching the motor to the base 23:29
  8. Adding the cake board 25:26
  9. Adding the rice cereal treats 26:22
  10. Adding the cake 27:54
  11. Overview of the tools 30:31
  12. Assessing the object 34:51
  13. Adding the clay 36:45
  14. Making the box 44:12
  15. Making the mold base 46:27
  16. Cutting out the walls 48:21
  17. Gluing the walls 51:54
  18. Mixing the silicone 54:10
  19. Pouring the silicone 56:55
  20. Removing the box and toy 59:06
  21. Testing the one-part mold 1:01:47
  22. Removing the test mold 1:04:05
  23. Preparing the wings 1:05:24
  24. Making a two-part mold 1:08:09
  25. Pouring the wing silicone: Part 1 1:20:36
  26. Pouring the wing silicone: Part 2 1:22:59
  27. Making a silicone rubber one-part mold 1:26:53
  28. Making a pour mold 1:30:03
  29. Unboxing the molds 1:30:36
  30. Making the chocolate molds 1:33:43
  31. Unmolding the chocolate pieces 1:36:28
  32. Shaving down the chocolate molds 1:40:45
  33. Attaching the rudder and elevators 1:41:24
  34. Coloring the fondant 1:42:27
  35. Adding and texturing the fondant 1:44:26
  36. Painting the snow 1:47:47
  37. Adding the fondant snowcap 1:49:18
  38. Making the airplane base 1:51:41
  39. Adding the airplane base 1:53:20
  40. Adding the wings 1:55:51
  41. Attaching the airplane 1:56:45
  42. Adding the fondant clouds 1:58:12
  43. Painting the plane 2:01:28
  44. Airbrushing the plane 2:03:29

Downloads

Materials List

cake sculpted to look like an airplane flying around a snowcapped mountain

December 25, 2021 Paid Video

Rotating Airplane Cake

Skill level: Advanced

In this tutorial, you will learn how to create a realistic snow-capped mountain with a rotating airplane made from edible materials that appears to fly around the mountain!

This tutorial is packed with high-level tips and tricks, everything from how to make food-safe molds of complicated shapes and toys like the airplane I molded, to hooking up motors and structure that will create some really cool special effects.

2:06:47 Minutes of Instruction

What You Will Learn

  • Learn how to create a chocolate airplane from a mold you will make yourself
  • How to create the structure and use motors that will make the airplane rotate around the cake
  • Learn how to create one-part, two-part and pour molds using food-safe materials
  • How to airbrush the plane to add realistic details and designs
  • Learn how to sculpt and create a snow-capped mountain

Tutorial Chapters

  1. Stacking the cake 0:30
  2. Overview of the motor 5:40
  3. How to bend threaded rod 13:04
  4. How to cut threaded rod 14:23
  5. Making the structure 16:04
  6. Making the foam core box 20:39
  7. Attaching the motor to the base 23:29
  8. Adding the cake board 25:26
  9. Adding the rice cereal treats 26:22
  10. Adding the cake 27:54
  11. Overview of the tools 30:31
  12. Assessing the object 34:51
  13. Adding the clay 36:45
  14. Making the box 44:12
  15. Making the mold base 46:27
  16. Cutting out the walls 48:21
  17. Gluing the walls 51:54
  18. Mixing the silicone 54:10
  19. Pouring the silicone 56:55
  20. Removing the box and toy 59:06
  21. Testing the one-part mold 1:01:47
  22. Removing the test mold 1:04:05
  23. Preparing the wings 1:05:24
  24. Making a two-part mold 1:08:09
  25. Pouring the wing silicone: Part 1 1:20:36
  26. Pouring the wing silicone: Part 2 1:22:59
  27. Making a silicone rubber one-part mold 1:26:53
  28. Making a pour mold 1:30:03
  29. Unboxing the molds 1:30:36
  30. Making the chocolate molds 1:33:43
  31. Unmolding the chocolate pieces 1:36:28
  32. Shaving down the chocolate molds 1:40:45
  33. Attaching the rudder and elevators 1:41:24
  34. Coloring the fondant 1:42:27
  35. Adding and texturing the fondant 1:44:26
  36. Painting the snow 1:47:47
  37. Adding the fondant snowcap 1:49:18
  38. Making the airplane base 1:51:41
  39. Adding the airplane base 1:53:20
  40. Adding the wings 1:55:51
  41. Attaching the airplane 1:56:45
  42. Adding the fondant clouds 1:58:12
  43. Painting the plane 2:01:28
  44. Airbrushing the plane 2:03:29

Downloads

Materials List

Chocolate sculpted to look like a giant ant with gelatin wings

December 14, 2021 Course Preview

Chocolate Ant Showpiece Tutorial

Skill level: Advanced

Ever wanted to learn how to create a free-standing edible showpiece made from just chocolate? Liz Marek breaks down how to create an enormous chocolate ant in this exciting tutorial.

In this course, you will learn how to create a giant ant featured in Liz's episode on Disney's Foodtastic series streaming on Disney+ made from tempered chocolate. Learn two different ways to make robot coupe, a moldable, chocolate medium that can be used like modeling chocolate. You will learn how to airbrush onto chocolate, something that can be very difficult to do with the oil-based nature of chocolate.

You will learn how to create the ant facial details, the antennae and eyes, along with the wings made from edible materials.

There's a lot to cover in this video, so let's get our tools together, and let's get started.

2:25:30 Minutes of Instruction

What You Will Learn

  • How to create an enormous ant showpiece made from tempered chocolate
  • Learn how to make two different kinds of robot coupe
  • How to make edible giant wings and how to airbrush with cocoa butter

Tutorial Chapters

  1. Scaling the ant 0:28
  2. Tempering the chocolate 6:46
  3. Pouring the chocolate 9:57
  4. Making wings from templates 12:32
  5. Making wings from templates 14:46
  6. Making sheet gelatin 16:25
  7. Pouring the wings 18:15
  8. Making the wings 21:10
  9. Putting the molded pieces together 25:56
  10. Shaping the body 30:56
  11. Connecting the body pieces 38:03
  12. Building up the body Pt. 1 50:30
  13. Smoothing down the chocolate 56:36
  14. Building up the body Pt. 2 1:05:01
  15. Smoothing the body Pt. 2 1:11:46
  16. Shining the body Pt. 1 1:16:07
  17. Making the legs Pt. 1 1:22:11
  18. How to make robot coupe 1:28:37
  19. Building the legs Pt. 2 1:30:16
  20. Cutting out the wings 1:34:16
  21. Painting the wings 1:36:20
  22. Building up the legs 1:40:51
  23. Smoothing the legs 1:44:49
  24. Shining the legs 1:48:30
  25. Building the body Pt. 3 1:48:50
  26. Setting up the airbrushing equipment 1:55:10
  27. Tempering the cocoa butter 2:02:43
  28. Painting the ant 2:04:25
  29. Adding the eyes 2:07:35
  30. Shining the ant Pt. 1 2:10:52
  31. Painting the ant Pt. 2 2:14:36
  32. Glossing the cocoa butter 2:17:42
  33. Shining the ant Pt. 3 2:19:07
  34. Putting it all together 2:21:55
  35. Finishing touches 2:24:12

Downloads

Materials List

Left Wing Template 01

Left Wing Template 02

Right Wing Template 01

Right Wing Template 02

Ant Reference 01

Ant Reference 02

Ant Wing Reference

Chocolate sculpted to look like a giant ant with gelatin wings

December 14, 2021 Paid Video

Chocolate Ant Showpiece

Skill level: Advanced

Ever wanted to learn how to create a free-standing edible showpiece made from just chocolate? Liz Marek breaks down how to create an enormous chocolate ant in this exciting tutorial.

In this course, you will learn how to create a giant ant featured in Liz's episode on Disney's Foodtastic series streaming on Disney+ made from tempered chocolate. Learn two different ways to make robot coupe, a moldable, chocolate medium that can be used like modeling chocolate. You will learn how to airbrush onto chocolate, something that can be very difficult to do with the oil-based nature of chocolate.

You will learn how to create the ant facial details, the antennae and eyes, along with the wings made from edible materials.

There's a lot to cover in this video, so let's get our tools together, and let's get started.

2:25:30 Minutes of Instruction

What You Will Learn

  • How to create an enormous ant showpiece made from tempered chocolate
  • Learn how to make two different kinds of robot coupe
  • How to make edible giant wings and how to airbrush with cocoa butter

Tutorial Chapters

  1. Scaling the ant 0:28
  2. Tempering the chocolate 6:46
  3. Pouring the chocolate 9:57
  4. Making wings from templates 12:32
  5. Making wings from templates 14:46
  6. Making sheet gelatin 16:25
  7. Pouring the wings 18:15
  8. Making the wings 21:10
  9. Putting the molded pieces together 25:56
  10. Shaping the body 30:56
  11. Connecting the body pieces 38:03
  12. Building up the body Pt. 1 50:30
  13. Smoothing down the chocolate 56:36
  14. Building up the body Pt. 2 1:05:01
  15. Smoothing the body Pt. 2 1:11:46
  16. Shining the body Pt. 1 1:16:07
  17. Making the legs Pt. 1 1:22:11
  18. How to make robot coupe 1:28:37
  19. Building the legs Pt. 2 1:30:16
  20. Cutting out the wings 1:34:16
  21. Painting the wings 1:36:20
  22. Building up the legs 1:40:51
  23. Smoothing the legs 1:44:49
  24. Shining the legs 1:48:30
  25. Building the body Pt. 3 1:48:50
  26. Setting up the airbrushing equipment 1:55:10
  27. Tempering the cocoa butter 2:02:43
  28. Painting the ant 2:04:25
  29. Adding the eyes 2:07:35
  30. Shining the ant Pt. 1 2:10:52
  31. Painting the ant Pt. 2 2:14:36
  32. Glossing the cocoa butter 2:17:42
  33. Shining the ant Pt. 3 2:19:07
  34. Putting it all together 2:21:55
  35. Finishing touches 2:24:12

Downloads

Materials List

Left Wing Template 01

Left Wing Template 02

Right Wing Template 01

Right Wing Template 02

Ant Reference 01

Ant Reference 02

Ant Wing Reference

close up of linzer cookies on a floral plate

December 10, 2021 Blog

Linzer Cookies

Linzer cookies are a holiday staple. They are crisp, buttery, and melt-in-your-mouth delicious! Dusted with powdered sugar and filled with homemade cranberry sauce, these might be the best Christmas cookies ever!

close up of linzer cookies on a floral plate

These Linzer cookies will make you the star of the Christmas cookie exchange! What's more, if you enjoy baking and giving homemade cookies as gifts, these package really nicely if you wait 24 hours after the cookies have been assembled and the jam has had some time to set!

What's In This Blog Post

  • Linzer Cookie Ingredients
  • How to Make Cranberry Filling for Linzer Cookies
  • How to Make Linzer Cookie Dough
  • How to Assemble Linzer Cookies
  • How do you use a Linzer cookie cutter?
  • FAQ
  • More Recipes You'll Love

Linzer Cookie Ingredients

linzer cookie ingredients

Almond flour - We are using almond flour today, but you could use any kind of nut flour like hazelnut or pistachio! 

Cake flour - If you don't have cake flour, remove 3 Tablespoons of All-Purpose flour and replace it with cornstarch.

If you're located in another country, you can find cake flour but it might need to be ordered online. In the UK, look for Shipton mills cake and pastry flour. 

Cranberry Jam - I'm making a yummy cranberry jam for my Linzer cookies, but any kind of sweet jam or filling will work! You can even use store-bought jam if you don't want to make your own.

Cake Crumbs - I always have leftover cake laying around, so this isn't an uncommon ingredient in my house. If you don't have extra cake crumbs on hand, you can either buy a cupcake or cake from the store and crumble that up, or just use more cake flour. The cake crumbs add more flavor to your cookies.

How to Make Cranberry Filling for Linzer Cookies

I like to make my cranberry filling ahead of time to allow it to cool down completely. You can easily make this a few days in advance. Don't like cranberry? Try making raspberry filling instead.

  1. Combine the water, sugar, zest, juice, and cranberries together in a saucepan over medium-high heat until it begins to simmer. Stir occasionally to prevent burning.cranberry filling ingredients simmering in a stainless steel pot
  2. Lower the heat to medium and let the mixture reduce for about 10 minutes or until the mixture is thickened. simmering cranberry filling in a stainless steel pot
  3. Remove from the heat and let the mixture cool before using. closeup shot of cranberry filling on a spatula
  4. Once your filling is cool, use an immersion blender or blender to make your cranberry filling smoother and easier to pipe. Totally optional. cranberry filling in a glass jar with a spoon

Pro-Tip: For a thicker filling, combine 2 teaspoons of cornstarch with 1 Tablespoon of cool water to make a slurry. Add the cornstarch to the filling at the end of cooking, and then cook it for an extra minute to thicken. 

How to Make Linzer Cookie Dough

  1. Combine your cake crumbs, cake flour, cinnamon, baking powder, salt, and almond flour together with a whisk. (If you don't have cake crumbs you can replace them with more almond flour) Set aside. Pro-Tip: You can use any kind of nut flour for this recipe including hazelnut, pistachio, or cashew! Linzer cookie ingredients in a glass bowl
  2. In the bowl of your stand mixer, cream the room temperature butter and the sugar until it's light and fluffy. butter and sugar creamed together on an orange spatula
  3. Add the room temperature egg and vanilla to your butter/sugar mixture and mix it until it's incorporated. adding egg to linzer cookie mixture in a mixing bowl
  4. While mixing on low, add in your flour mixture and mix until the dough comes together. Don't over-mix it. adding flour to the linzer cookie dough mixture
  5. Divide the dough into two flattened disks. pressing linzer cookie dough into disks
  6. Wrap in plastic and refrigerate for an hour or overnight. 

How to Assemble Linzer Cookies

  1. Preheat your oven to 325ºF and line a cookie sheet with some parchment paper.
  2. Let your dough warm up until you can roll it out without it cracking. Mine took about an hour. linzer cookie dough wrapped in plastic wrap and flattened into a disk
  3. Dust the rolling pin and the surface with some flour to prevent sticking. Roll out your dough to ⅛″ thick. rolling Linzer cookie dough out with a wooden rolling pin
  4. Use the Linzer cookie cutter without the window attachment and cut out 24 backs. cutting linzer cookies
  5. Bake for 10-12 minutes or until the edges begin to turn golden brown.
  6. Use the Linzer cookie cutter WITH the window attachment and cut out 24 fronts. cutting linzer cookies
  7. Bake for 9-11 minutes or until the edges just begin to turn golden brown. Pro-Tip: If you have any leftover dough you can press it together and roll out more fronts and backs and bake them off.  
  8. Transfer your baked cookies to a cooling rack to allow them to cool.
  9. Dust the fronts with some powdered sugar.dusting linzer cookies with powdered sugar
  10. Fill a piping bag with your cranberry filling. Pipe some filling around the outside of one of the back cookies, about ¼″ thick. filling linzer cookies with cranberry filling
  11. Place the front cookie on top and gently press down. pressing linzer cookies together
  12. Fill the center of the cookie with some more cranberry filling.filling the center of a linzer cookie with more filling

Your cranberry filling will develop a skin after 24 hours and will then be suitable to package if you desire. 

How do you use a Linzer cookie cutter?

Linzer cookies are often made using a Linzer cookie cutter. These cookie cutters usually have a fluted outer edge and a center cutter that is detachable so that you can make the cookies with the center cut out. 

close up of linzer cookie cutter with cookie dough

Some Linzer cookie cutters are all one piece. Use one side to cut the backs of the cookies and then flip the cutter over to cut the front of the cookie with the window.

Linzer cookies being cut from dough shot from above
close up of a womans hand holding a linzer cookie

FAQ

Do I need a Linzer cookie cutter?

You don't have to have a Linzer cookie cutter to make these cookies. You can use any cookie cutter that you have, and then use another, smaller cutter to make the window. Whatever cookie cutter you use, be sure to dust it with a little flour to prevent sticking while you cut your cookies. 

How do you store Linzer cookies?

You can freeze the dough before rolling it out for up to 6 months (thaw in the fridge) or freeze the finished cookies airtight for 1 month.

What flavor Linzer cookies are there?

There are all kinds of Linzer cookie variations. They can be filled with any type of sweet filling like raspberry, strawberry, cranberry, or even chocolate ganache. 

What is the filling of a traditional Linzer cookie?

Traditional Linzer cookies are made with either apricot or red currant jam.

Can I freeze the cranberry filling if I have leftovers?

Absolutely! Allow the cranberry filling to cool to room temperature, and then store any leftovers in a freezer-safe storage container for up to 6 months.

When were Linzer cookies invented?

In the 1850s, Franz Holzlhuber, an Austrian immigrant, who immigrated to America as a musician, artist, and poet is credited for bringing Linzertorte to America. A Linzer cookie is a variation of Linzertorte.

What nationality are Linzer cookies?

Linzer cookies are Austrian German.

Why are they called Linzer cookies?

Linzer cookies are an Austrian sweet made from the dough of a Linzer torte which just happens to be the oldest written recipe in existence. Named after the city of Linz, Austria, the torte is a kind of pie with a sweet black currant filling, sliced nuts, and an almond-based lattice crust. Dating back to 1655 when nuts were much easier to come by than ground-up wheat flour and less expensive. 

Eventually, someone had the grand idea to cut that dough into cookies shaped like hearts, stars, and circles. Half of the cookies would get the center cut out and this is called a Linzer eye. After the Linzer cookies were baked, they were traditionally filled with a black currant jam and dusted with powdered sugar. 

More Recipes You'll Love

Homemade Cranberry Sauce

Pumpkin Spice Cake

Tart Dough Recipe

Chocolate Peppermint Cookies

Hot Chocolate Cocoa Bombs

linzer cookies on a white plate

Recipe

close up of linzer cookies on a floral plate
Print Recipe
4.84 from 6 votes

Linzer Cookie Recipe

Linzer cookies are a traditional Christmas cookie made from a crispy, buttery tart dough, dusted with powdered sugar and filled with a sweet cranberry jam.
Prep Time15 minutes mins
Cook Time10 minutes mins
cooling2 hours hrs
Total Time2 hours hrs 25 minutes mins
Course: Dessert
Cuisine: german
Servings: 30 cookies
Calories: 133kcal
Author: Liz Marek

Equipment

  • Linzer cookie cutter (or two cutters, one about 2" and one ½")

Ingredients

Linzer Cookies

  • 6 ounces unsalted butter room temperature
  • 4 ounces granulated sugar
  • ½ teaspoon vanilla extract
  • 1 large egg room temperature
  • 1 ounce cake crumbs or cake flour
  • 8 ounces cake flour or substitute with All purpose flour, remove 3 Tablespoons of flour and replace with 3 Tablespoons of cornstarch.
  • 1 teaspoons ground cinnamon
  • 1 teaspoon baking powder
  • ½ teaspoon salt
  • 3 ounces almond flour or hazelnut flour, a combination of both, or pistachio flour

Cranberry Filling

  • 12 ounces cranberries
  • 7 ounces sugar
  • 8 ounces water
  • 1 Tablespoon orange zest
  • 3 Tablespoons orange juice
US Customary - Metric

Instructions

Cranberry Jam Instructions

  • Combine water, sugar, zest, juice, and cranberries together in a saucepan over medium-high heat until it begins to simmer. Stir occasionally to prevent burning.
  • Reduce the heat to medium and let the mixture reduce for about 10 minutes or until the mixture is thickened. 
  • Remove from the heat and let the mixture cool before using.
  • Once your filling is cool, use an immersion blender or blender to make your cranberry filling smoother and easier to pipe (optional). Pro-Tip: For a thicker filling, combine 2 teaspoon cornstarch with 1 Tablespoon cool water to make a slurry. Add the cornstarch to the filling at the end of cooking, and then cook it for an extra minute to thicken. 

Linzer Cookie Dough Instructions

  • Combine your cake crumbs, cake flour, cinnamon, baking powder, salt, and almond flour together with a whisk. (If you don't have cake crumbs you can replace them with more almond flour) Set aside. Pro-Tip: You can use any kind of nut flour for this recipe including hazelnut, pistachio, or cashew! 
  • In the bowl of your stand mixer, cream the room temperature butter and the sugar until it's light and fluffy. 
  • Add the room temperature egg and vanilla to your butter/sugar mixture and mix it until it's incorporated. 
  • While mixing on low, add in your flour mixture and mix until the dough comes together. Don't over-mix it. 
  • Divide the dough into two flattened disks.
  • Refrigerate for an hour or overnight.

Cookie Assembly Instructions

  • Preheat your oven to 325ºF and line a cookie sheet with some parchment paper.
  • Let your dough warm up until you can roll it out without it cracking. Mine took about an hour.
  • Dust the rolling pin and the surface with some flour to prevent sticking. Roll out your dough to ⅛″ thick. 
  • Use the Linzer cookie cutter without the window attachment and cut out 24 backs.
  • Bake for 10-12 minutes or until the edges begin to turn golden brown.
  • Use the Linzer cookie cutter WITH the window attachment and cut out 24 fronts.
  • Bake for 9-11 minutes or until the edges just begin to turn golden brown. Pro-Tip: If you have any leftover dough you can press it together and roll out more fronts and backs and bake them off.
  • Transfer your baked cookies to a cooling rack to allow them to cool.
  • Dust the fronts with some powdered sugar.
  • Fill a piping bag with your cranberry filling. Pipe some filling around the outside of one of the back cookies, about ¼″ thick. 
  • Place the front cookie on top and gently press down. 
  • Fill the center of the cookie with some more cranberry filling.

Video

Notes

Important Things To Note Before You Start
  1. Bring your butter and eggs to room temperature or even a little warm to ensure your batter does not break or curdle. 
  2. Use a scale to weigh your ingredients (including liquids) unless otherwise instructed (Tablespoons, teaspoons, pinch etc). Metric measurements are available in the recipe card. Scaled ingredients are much more accurate than using cups and help ensure the success of your recipe. 
  3. Practice Mise en Place (everything in it's place). Measure out your ingredients ahead of time and have them ready before you start mixing to reduce the chances of accidentally leaving something out.
  4. If the recipe calls for specific ingredients like cake flour, replacing it with all purpose flour and cornstarch is not recommended unless specified in the recipe that it's ok. Substituting ingredients may cause this recipe to fail. 
  5. If you're in the UK, search for Shipton mills cake and pastry flour. If you're in another part of the country, search for low protein cake flour.
  6. You can use any kind of nut flour including pistachio, cashew, or hazelnut in place of almond flour.
  7. You can substitute cake crumbs for more almond flour. The cake crumbs just add moisture to the cookie.
  8. You can blend your cranberry filling so that it's smoother if you desire.
  9. Your cranberry filling will develop a skin after 24 hours, and will then your cookies will be suitable to package up. These cookies are excellent for holiday cookie exchanges and homemade gifts!

Nutrition

Serving: 1cookie | Calories: 133kcal | Carbohydrates: 18g | Protein: 2g | Fat: 6g | Saturated Fat: 3g | Cholesterol: 18mg | Sodium: 43mg | Potassium: 38mg | Fiber: 1g | Sugar: 11g | Vitamin A: 161IU | Vitamin C: 3mg | Calcium: 17mg | Iron: 1mg
 
close up shot of double chocolate chip cookie

December 10, 2021 4th of July

Chewy Double Chocolate Chip Cookies

These chewy double chocolate chip cookies are a chocolate lover's dream come true! Rich, chocolatey, moist, and chewy. These cookies are basically brownie cookies. Oh, and they only take 20 minutes to make! 

close up shot of double chocolate chip cookie

Double chocolate cookies are nice and chewy and go perfectly with a tall glass of cold milk. Make a big batch ahead of time for a special gathering or freeze them and have a cookie to cure those chocolate cravings any time.

What's In This Blog Post

  • Double Chocolate Chip Cookie Ingredients
  • Why These Are The Best
  • Instructions
  • FAQ
  • More Recipes You'll Love

Double Chocolate Chip Cookie Ingredients

I like the ease of using chocolate chips, but you can make these the best cookies ever by adding chopped chocolate instead. You can use anything really, peanut butter chips, white chocolate chips, semi-sweet chocolate chips, or dark chocolate chips. The flavor combos are endless.

double chocolate chip cookie ingredients

This recipe uses all-purpose flour, which results in a perfectly chewy cookie.

I used natural cocoa powder in this recipe (Hershey's is a common brand) because the alkaline nature of the cocoa powder reacts with the baking soda to give that perfect rise and texture, resulting in a thicker cookie. You can absolutely use Dutch process cocoa powder but for best results, replace the baking soda with baking powder instead.

Light brown sugar adds a little moisture and flavor to these cookies but you can use white sugar or dark brown sugar.

I like to use a kitchen scale to measure my ingredients because it makes it so much easier to get accurate measurements, especially when measuring flour.

Why These Are The Best

If you are a chocolate lover like my daughter, then you will LOVE these cookies. They have everything a chocolate lover is looking for.

  • A little crispy on the outside, soft and chewy in the center.
  • Big chocolate chunks.
  • Lots of chocolate flavor without being overly sweet.
  • 10 minutes to make and 10 minutes to bake!
  • Freeze these cookies and take one out whenever you have a chocolate craving.

Instructions

  1. Bring your cold ingredients to room temperature. Room temperature ingredients mix together properly and create an emulsion; cold ingredients will split, and the dough will spread during baking.
  2. Preheat your oven to 350ºF (176ºC). Preheating is important for baking cookies so they puff up and don't spread.
  3. Prepare your cookie sheet pan with parchment paper or a silicone baking mat.
  4. Melt the unsalted butter in a medium bowl.
  5. Once the butter is melted, add in the cocoa powder and stir it until it's smooth and combined. Adding cocoa powder to the butter hydrates the cocoa and helps make a ooey-gooey chocolate cookie!close up of melted butter and cocoa powder being whisked in a glass bowl
  6. While mixing on low, add in the room temperature eggs, letting each egg mix in fully before adding in the next. If you add all the eggs in at once, they may not fully mix in.close up of eggs being added to double chocolate chip cookie recipe
  7. Add in the vanilla extract and mix everything on medium speed for two minutes until the mixture is light and fluffy.closeup of whipped eggs, cocoa powder, and butter
  8. Scrape down the sides of the bowl to make sure everything is combined.
  9. Add in your dry ingredients (flour, baking soda, and salt) and the chocolate chips.double chocolate chip cookie ingredients in a mixing bowl
  10. Mix everything until JUST combined. Do not over-mix. closeup of double chocolate chip cookie dough
  11. Use a small cookie scoop to make small dough balls (about two Tablespoons).
  12. Dip each ball into some of the chocolate chips and then place them onto the prepared cookie sheet about 3" apart with the chocolate chip cookies facing up.double chocolate chip cookie dough balls on a sheet pan
  13. Place the cookies into the fridge for 30 minutes. This allows time for the flour to absorb the moisture and for the butter to firm up, resulting in a thicker cookie that spreads less.
  14. Bake the cookies for 10 minutes or until the center of the cookie just starts to lose it's shine, and the edges are set. Resist the urge to over-bake the cookies, or they will be hard and dry.top view of double chocolate chip cookies on a cooling rack
  15. Place your sheet of cookies on a cooling rack for 5 minutes, then transfer them off the cookie sheet to cool on the wire rack to cool fully.

FAQ

Do I need a stand mixer to make chocolate chip cookies?

No, you do not need a stand mixer, but it can save you a lot of work if you do have one. If you do not have a stand mixer, you can absolutely mix this cookie dough by hand. Just be sure to mix by consistency, and not by time. You will get a nice arm workout from doing it!

What is the difference between this recipe and your chocolate chip cookies recipe?

This recipe is based on my chocolate chip cookie recipe, so they do taste similar. The only difference between these cookies and my chewy chocolate chip cookies is a little more butter and some delicious cocoa powder. I'm using HERSHEY'S cocoa powder, but you can use any kind of cocoa powder that you want. 

Why are my cookies so hard?

Overworked dough is usually the culprit for hard cookies. When you mix the dough longer than you need to after adding flour, it will form more gluten and result in tougher or harder cookies. Your cookies can also get tough from over-baking.

How long do chocolate chip cookies last at room temperature?

If you store your cookies in an airtight container at room temperature, they will last for up to 5 days.

More Recipes You'll Love

Master Chocolate Chip Cookies

Copycat Chocolate Chip Crumbl Cookies

Easy Homemade Brownies

Death by Chocolate Cake

Recipe

double chocolate chip cookie held by a hand close up being dunked in a glass mug of milk
Print Recipe
4.84 from 316 votes

Chewy Double Chocolate Chip Cookies

These chewy double chocolate chip cookies are perfect for the chocolate lover in your life! These cookies are moist, tender, rich, and chocolatey. Oh, and they only take 20 minutes to make!
Prep Time10 minutes mins
Cook Time10 minutes mins
Total Time20 minutes mins
Course: Dessert
Cuisine: American
Servings: 24 cookies
Calories: 194kcal
Author: Liz Marek

Equipment

  • #20 cookie scoop

Ingredients

  • 1 ⅛ cups unsalted butter melted (2 sticks + 2 tablespoon butter)
  • 1 cup light brown sugar packed
  • 1 cup granulated sugar packed
  • 2 large eggs room temperature
  • 2 teaspoons vanilla extract
  • 2 cups all purpose flour
  • ¾ cup cocoa powder natural
  • 1 teaspoon baking soda
  • ½ teaspoon salt
  • 2 cups chocolate chips semi-sweet
US Customary - Metric

Instructions

Double Chocolate Chip Cookie Instructions

  • Preheat your oven to 350ºF (177ºC) and prepare a sheet pan with parchment paper. 
  • First, melt the unsalted butter in a medium-sized mixing bowl.
  • Once the butter is melted, add in the cocoa powder and vanilla extract and stir it until it's smooth and combined. 
  • Combine the butter mixture with the brown sugar and white sugar in the bowl of your stand mixer with the paddle attachment attached and mix on medium speed until light and fluffy. About 2 minutes.
  • Next, add in the room temperature eggs while mixing on low, letting each mix in fully before adding the next.
  • Mix again on medium speed for 1-2 minutes until it's light and airy.
  • Scrape the bowl.
  • While mixing on low, add in the flour, salt, baking soda, and chocolate chips.
  • Next, mix the dough just enough so that it's combined. 
  • With a #20 cookie scoop, divide the dough into 2 Tablespoon-sized cookie dough balls. I like to dip the top of the ball into a bowl of chocolate chips to get even more chocolate into the cookies!
  • Next, place the cookie dough balls onto a sheet pan about 3″ apart.
  • Chill your cookies in the fridge for 30 minutes.
  • Bake the cookies for about 10 minutes, or until they are no longer shiny in the center and the edges are set.
  • Allow the cookies to cool for 5 minutes on the baking sheet.
  • Transfer the cookies to a cooling rack to allow them to cool all the way.

Video

Notes

Important Things To Note Before You Start
  1. Bring your eggs to room temperature. I like to put my eggs (still in the shell) in a bowl of hot water for 5 minutes. Room temperature eggs ensures that everything creams up nice and fluffy and you get that craggly top to your cookies.
  2. Let your cookie dough rest for 30 minutes for less cookie spread.
  3. If you have leftover dough, bake up all of the cookies and then you can freeze them. That way, you can have thaw and have baked cookies whenever you want!
  4. It is important to not crowd the pan, these are large cookies and will bake into each other. When too many cookies are on the pan they don't bake as evenly and can spread more than they do with more space. More space around the cookie allows more even air flow and makes a prettier cookie. 

Nutrition

Serving: 1cookie | Calories: 194kcal | Carbohydrates: 27g | Protein: 2g | Fat: 9g | Saturated Fat: 6g | Cholesterol: 38mg | Sodium: 105mg | Potassium: 73mg | Fiber: 1g | Sugar: 17g | Vitamin A: 288IU | Calcium: 17mg | Iron: 1mg
closeup of focaccia bread

December 10, 2021 4th of July

Easy Focaccia Recipe

This focaccia recipe is ultra-soft and chewy and my favorite bread to make as an appetizer or side dish for dinner. Making focaccia is super easy, only requires a few steps, and you can even turn this delicious recipe into edible focaccia bread art! The most important thing to have when it comes to making focaccia is patience. Don't rush yourself and you'll be very happy with the results!

closeup of focaccia bread

In my house, we eat focaccia at least once a week. We typically buy it from a local bakery that is literally the only place within 20 miles that sells it. They sell out quickly so you have to arrive really early to make sure you get some. Sometimes they wouldn't even make it because the person who usually makes it isn't there. Talk about disappointment!

So I decided to make my own easy focaccia recipe that comes together quickly! Most of the time needed for this recipe is spent just waiting for the yeast to do its thing and create all that yummy flavor.

If you love baking bread from scratch, my easy homemade bagel recipe is another great one to add to your rotation.

My overnight sourdough focaccia uses the same dimpling-and-olive-oil technique but trades instant yeast for a 12 hour fermentation that builds bigger flavor.

What's In This Blog Post

  • Focaccia Recipe Ingredients
  • How to Make Focaccia Step-by-Step
  • Focaccia Recipe Variations
  • FAQ
  • Understanding How Yeast Works
  • More Recipes You'll Love

Focaccia Recipe Ingredients

focaccia bread ingredients

Focaccia has a very specific texture. It's got a crisp outer layer and a soft and chewy interior with lots of flavor. I've had some really bad focaccia in my day, so I know what to avoid when it comes to focaccia recipes.

Bread flour - Bread flour is going to give you focaccia that has the best chewy texture and biggest bubbles, but you can use all-purpose flour if that's all you have. Bread flour has the highest protein content which results in more gluten development and a chewier bread.

Olive oil - Olive oil is arguably the most important ingredient you'll need other than yeast. Olive oil gives the focaccia that crispy outer texture, moisture, and flavor. You might think that there is too much olive oil in this recipe. But you have to trust me, you need it!

Toppings - I'm using rosemary on top of my focaccia, but you can use any fresh herb that you like along with your preferred cheeses, meats, or vegetables. The options truly are endless. Get creative!

Flake Salt - I love the texture and taste of flake salt which is a type of finishing salt but if you only have table salt then skip this step to avoid making the focaccia too salty.

How to Make Focaccia Step-by-Step

  1. Combine 8 ounces of your warm water (110ºF or 43ºC), yeast, and sugar and set it aside for 5 minutes or until it's foamy. If your yeast does not start growing it may be dead so make sure you have fresh yeast before starting.
  2. Put your yeast mixture and one cup of flour into the bowl of your Bosch stand mixer with the dough hook attached. Mix to combine. You can use a bowl and a spoon and then knead it by hand if you want to, but it will just take longer.
  3. Next add in the rest of your water, the olive oil, and the salt, and mix to combine.
  4. Then, keep adding in the rest of your flour while mixing on low until your dough starts pulling away from the sides of the bowl.
  5. Take the sticky dough out of the bowl and finish kneading it on the table with a tiny bit of flour until the dough looks smooth and bounces back when you touch it with your finger.
  6. Next, put the dough into a bowl greased with olive oil.
  7. Cover the bowl with plastic wrap, and place the covered bowl in a warm area for 1-2 hours or until the dough has doubled in size. I put my bread in my oven turned OFF with just the light on to proof my bread, or in a proofing drawer.
    focaccia bread dough in a bowl with olive oil
  8. Then, prepare your baking pan by covering the bottom of the pan with a thin layer of olive oil. I know this looks like a lot but trust me, you need it. You want it to be a swimming pool of oil!
    olive oil in a pan
  9. Take your very soft dough out of the bowl and stretch it with your hands to make it longer.
    stretching focaccia bread dough
  10. Next, place it into the pan with the oil and use your hands to stretch it out to the edges.
  1. Combine 8 ounces of your warm water (110ºF or 43ºC), yeast, and sugar and set it aside for 5 minutes or until it's foamy. If your yeast does not start growing it may be dead so make sure you have fresh yeast before starting.
  2. Put your yeast mixture and one cup of flour into the bowl of your Bosch stand mixer with the dough hook attached. Mix to combine. You can use a bowl and a spoon and then knead it by hand if you want to, but it will just take longer.
  3. Next add in the rest of your water, the olive oil, and the salt, and mix to combine.
  4. Then, keep adding in the rest of your flour while mixing on low until your dough starts pulling away from the sides of the bowl.
  5. Take the sticky dough out of the bowl and finish kneading it on the table with a tiny bit of flour until the dough looks smooth and bounces back when you touch it with your finger.
  6. Next, put the dough into a bowl greased with olive oil.
  7. Cover the bowl with plastic wrap, and place the covered bowl in a warm area for 1-2 hours or until the dough has doubled in size. I put my bread in my oven turned OFF with just the light on to proof my bread, or in a proofing drawer.
    focaccia bread dough in a bowl with olive oil
  8. Then, prepare your baking pan by covering the bottom of the pan with a thin layer of olive oil. I know this looks like a lot but trust me, you need it. You want it to be a swimming pool of oil!
    olive oil in a pan
  9. Take your very soft dough out of the bowl and stretch it with your hands to make it longer.
    stretching focaccia bread dough
  10. Next, place it into the pan with the oil and use your hands to stretch it out to the edges. If the dough shrinks back, let the dough rest for 20 minutes then come back and stretch it some more. Letting the dough rest relaxes the gluten and keeps it from shrinking. Keep doing this until you can get the dough all the way to the edges of the pan.
    stretching focaccia bread dough
  11. Cover the pan with some plastic wrap and put it in the fridge overnight. The yeast will continue eating those sugars and rise very slowly. The next day, you should have some nice bubbles on top of the dough.
    focaccia bread dough covered with plastic wrap
  12. Preheat your oven to 450ºF (232ºC) and take your dough out of the fridge.
  13. Use your fingers to pop the big bubbles and press dimples into the surface of the dough.
    pressing indents into focaccia bread dough with fingertips
  14. Drizzle olive oil onto the top of the dough so that it settles in those dimples.
    drizzling olive oil into focaccia bread dimples
  15. Sprinkle a healthy amount of flakey sea salt and chopped rosemary on top of the dough.
    adding rosemary and flakey salt to the top of the focaccia
  16. Bake the dough in a preheated oven (450ºF or 232ºC) on the middle rack for 25 minutes or until it's golden brown!
  17. Finally, brush the baked focaccia with more olive oil before serving.
    brushing focaccia with more olive oil
  1. stretching focaccia bread dough
  2. Cover the pan with some plastic wrap and put it in the fridge overnight. The yeast will continue eating those sugars and rise very slowly. The next day, you should have some nice bubbles on top of the dough.
    focaccia bread dough covered with plastic wrap
  3. Preheat your oven to 450ºF (232ºC) and take your dough out of the fridge.
  4. Use your fingers to pop the big bubbles and press dimples into the surface of the dough.
    pressing indents into focaccia bread dough with fingertips
  5. Drizzle olive oil onto the top of the dough so that it settles in those dimples.
    drizzling olive oil into focaccia bread dimples
  6. Sprinkle a healthy amount of flakey sea salt and chopped rosemary on top of the dough.
    adding rosemary and flakey salt to the top of the focaccia
  7. Bake the dough in a preheated oven (450ºF or 232ºC) on the middle rack for 25 minutes or until it's golden brown!
  8. Finally, brush the baked focaccia with more olive oil before serving.
    brushing focaccia with more olive oil
focaccia bread recipe

Focaccia Recipe Variations

Focaccia is an Italian-style flatbread that is very chewy and similar in texture to pizza dough. There are many ways to customize your focaccia recipe which is probably why it's so popular! Here are some flavor variations, including the one I am making today which is Focaccia al rosmarino.

  1. Focaccia al rosmarino - Focaccia bread covered in olive oil, freshly chopped rosemary, and flakey sea salt (or kosher salt).
  2. Focaccia alla salvia - Focaccia bread baked in olive oil and topped with freshly chopped sage and flakey salt.
  3. Rosemary garlic focaccia - Top your focaccia with olive oil, chopped rosemary, garlic, and thyme.
  4. Cheesy focaccia - Cover your focaccia in olive oil, garlic salt, and a good amount of Italian cheese like pecorino romano, parmesan or asiago. Sprinkle with freshly chopped parsley fresh out of the oven, and serve with marinara sauce.
  5. Focaccia pizza - The options here are endless. Add marinara sauce, pepperoni, and mozzarella cheese or any pizza toppings you like!
focaccia bread sliced into squares on a wooden cutting board
slices of baked focaccia with rosemary and flakey salt stacked on top of each other

FAQ

Can I use fresh yeast instead of active dry yeast?

Yes, you can. For this recipe, use one small cake (0.6 ounce) of compressed fresh yeast in lieu of 1 packet (.25 ounces) of active dry yeast.

How do you store focaccia bread?

Wrap it tightly in plastic wrap and store it at room temperature. It should stay fresh for about 2 days.

You can also refrigerate your focaccia and keep it fresh for about 4 days if you wrap it tightly in plastic wrap.

What do you serve focaccia with?

Focaccia is excellent sandwich bread because it is thick enough that it can be sliced in half horizontally and still maintain its shape.

It also goes really well with soup, salad, or anything that compliments the flavors you put into your dough (e.g. if you went heavy on the Italian seasonings, pair it with Italian dishes). But in reality, the possibilities are endless!

Is focaccia bread hard or soft?

Focaccia is soft, light, and chewy, but it should also have a crisp and salty crust.

Why is my focaccia not fluffy or chewy?

It could be the type of flour you used. The best flour to use to make focaccia bread is bread flour which gives you fluffy baked bread. Or, it could also be because you did not knead the dough enough for the gluten to form a structure which can result in flat or dense bread.

Why didn't my dough rise?

Check the expiration date on your yeast. Has it expired? Expired yeast is dead yeast that will not release carbon dioxide (which is what makes the bread dough rise).

Why is my focaccia dense?

If your focaccia is flat and dense, you likely did not knead the dough enough before you baked it. The kneading process is what develops the gluten structure and what makes your baked bread lighter in texture.

Make sure you keep kneading the dough until it looks smooth and bounces back when you touch it with your finger.

Understanding How Yeast Works

The basics of making a yeast-risen dough like this easy focaccia recipe are all the same, but different recipes may have slightly varied steps. This guide can help you understand how yeast-risen doughs work if you're not familiar.

Here you'll see an infographic showing you the steps of baking bread using yeast. While this graphic is not specific to this focaccia recipe, it gives you a general idea of the steps needed to use yeast leading up to when it's time to bake your bread.

  1. Activate the yeast - Mix yeast with a warm liquid (90ºF-100ºF) so that it starts growing.
  2. Develop a strong gluten structure - Make sure you mix your dough enough. It should look like a smooth ball and pass the windowpane test. Kneading is very important because under-kneaded bread will not be strong enough to trap CO2 gases created by the growing yeas and therefore will not rise.
  3. Warmth + Time - Give your dough time to rise (proof) in a warm spot (80º-90º) until it doubles in size. I like the oven with the light on or some ovens have a proofing option. If you're using instant yeast, the rising will happen a lot faster if you are using regular active yeast it will take longer. Cold environments will also stunt your yeast and your dough will take a lot longer to rise. 
  4. Shape your dough to prepare your focaccia (jump to the recipe to see the additional steps).
  5. Let it rise until it doubles in size again and then bake!

When you add yeast to the flour and add in warmth and a little bit of moisture, the yeast begins to eat the starch in the flour. As it eats the sugar, it produces CO2 (yes, bread is made of tiny yeast farts). Then that CO2 gets trapped in the gluten we developed during the mixing stage and expands, giving rise to your bread. If you're missing one of these steps, your focaccia won't turn out. 

closeup of focaccia bread

More Recipes You'll Love

Focaccia Bread Art

Easy Homemade Panettone

Easy Homemade Bagels

Master Sweet Dough Recipe

Recipe

closeup of focaccia bread
Print Recipe
4.88 from 16 votes

Easy Focaccia Recipe

This easy focaccia recipe is the best! Just mix, rest, stretch, and chill the dough overnight to let all that amazing flavor develop. Take it out of the fridge and bake it fresh with rosemary and flakey salt.
Prep Time10 minutes mins
Cook Time25 minutes mins
Resting1 day d 25 minutes mins
Course: Appetizer, Side Dish
Cuisine: Italian
Servings: 24 servings
Calories: 168kcal
Author: Liz Marek

Equipment

  • Stand mixer with a dough hook
  • 9" x 13" sheet pan

Ingredients

  • 16 ounces warm water (110ºF) divided into two bowls 2 cups
  • 1 Tablespoon granulated sugar
  • 7 grams active dry yeast (2 ½ teaspoons)
  • 2 ounces olive oil ¼ cup
  • 1 teaspoon salt
  • 1 Tablespoon flakey salt
  • 24 ounces bread flour or all-purpose flour (5 cups spooned and leveled)
  • 4 ounces olive oil for the pan and for drizzling on top of the focaccia after rising (½ cup)
  • 2 Tablespoons fresh rosemary chopped
US Customary - Metric

Instructions

Easy Focaccia Recipe Instructions

  • Combine 8 ounces of your warm water (110ºF or 43ºC), yeast, and sugar and set it aside for 5 minutes or until it's foamy.
  • Put your yeast mixture and one cup of flour into the bowl of your Bosch stand mixer with the dough hook attached. Mix to combine. You can use a bowl and a spoon and then knead it by hand if you want to, but it will just take longer.
  • Next add in the rest of your water, the olive oil, and the salt, and mix to combine.
  • Then, keep adding in the rest of your flour while mixing on low until your dough starts pulling away from the sides of the bowl.
  • Take the sticky dough out of the bowl and finish kneading it on the table with a tiny bit of flour until the dough looks smooth and bounces back when you touch it with your finger.
  • Next, put the dough into a bowl greased with olive oil.
  • Cover the bowl with plastic wrap, and place the covered bowl in a warm area for 1-2 hours or until the dough has doubled in size. I put my bread in my oven turned OFF with just the light on to proof my bread, or in a proofing drawer.
  • Then, prepare your baking pan by covering the bottom of the pan with a thin layer of olive oil. I know this looks like a lot but trust me, you need it. You want it to be a swimming pool of oil!
  • Take your very soft dough out of the bowl and stretch it with your hands to make it longer.
  • Next, place it into the pan with the oil and use your hands to stretch it out to the edges. If the dough shrinks back, let the dough rest for 20 minutes then come back and stretch it some more. Letting the dough rest relaxes the gluten and keeps it from shrinking. Keep doing this until you can get the dough all the way to the edges of the pan.
  • Cover the pan with some plastic wrap and put it in the fridge overnight. The yeast will continue eating those sugars and rise very slowly. The next day, you should have some nice bubbles on top of the dough.
  • Preheat your oven to 450ºF (232ºC) and take your dough out of the fridge.
  • Use your fingers to pop the big bubbles and press dimples into the surface of the dough.
  • Drizzle olive oil onto the top of the dough so that it settles in those dimples.
  • Sprinkle a healthy amount of flakey sea salt and chopped rosemary on top of the dough.
  • Bake the dough in a preheated oven (450ºF or 232ºC) on the middle rack for 25 minutes or until it's golden brown!
  • Finally, brush the baked focaccia with more olive oil before serving.

Video

Notes

Important Things To Note Before You Start
  1. Use a scale to weigh your ingredients (including liquids) unless otherwise instructed (Tablespoons, teaspoons, pinch etc). Metric measurements are available in the recipe card. Scaled ingredients are much more accurate than using cups and help ensure the success of your recipe. 
  2. Practice Mise en Place (everything in it's place). Measure out your ingredients ahead of time and have them ready before you start mixing to reduce the chances of accidentally leaving something out.
  3. I place my dough near my oven set to 170ºF (77ºC) to help the dough rise. Mine usually only takes about 1 hour if my room is warm.
Tips For Success
  • If your yeast does not start growing it may be dead so make sure you have fresh yeast before starting.
  • I put my bread in my oven turned OFF with just the light on to proof my bread, or in a proofing drawer.
  • If your yeast does not start growing it may be dead so make sure you have fresh yeast before starting
  • I put my bread in my oven turned OFF with just the light on to proof my bread, or in a proofing drawer.
  • If the dough shrinks back, let the dough rest for 20 minutes then come back and stretch it some more. Letting the dough rest relaxes the gluten and keeps it from shrinking. Keep doing this until you can get the dough all the way to the edges of the pan

Nutrition

Serving: 1serving | Calories: 168kcal | Carbohydrates: 21g | Protein: 4g | Fat: 8g | Saturated Fat: 1g | Sodium: 1mg | Potassium: 31mg | Fiber: 1g | Sugar: 1g | Vitamin A: 5IU | Vitamin C: 1mg | Calcium: 5mg | Iron: 1mg
 
hot chocolate bomb molds

December 5, 2021 Blog

Best Hot Chocolate Bomb Mold

I want to show you the COOLEST and easiest way to make hot cocoa bombs using a 3 piece mold! It makes it so easy! Just add your chocolate up to the first line, add in the inner liner and then the top piece and chill the chocolate until it sets. Then BOOM! Perfectly flat hot chocolate bomb shells with flat edges. This mold is a lot easier than using the polycarbonate molds and look just as shiny!

I like the 70mm size but they come in 50mm as well. I also teach you FOUR trendy hot cocoa bomb designs like the grinch, a gingerbread man, a sparkly snowman and a golden Christmas tree! Stick around for the end of the video to see how I rate the "pop" and color of each hot chocolate bomb!

Whats In This Blog Post

  • The Three Piece Hot Chocolate Bomb Mold
  • Ingredients To Make Hot Chocolate Bombs
    • Gingerbread Man Bomb
    • Grinch Hot Chocolate Bomb
    • Snowman Hot Chocolate Bomb
    • Gold Christmas Tree Bomb
  • How To Use The Three Piece Mold
  • How To Assemble Your Hot Chocolate Bombs
  • Decorating Your Hot Chocolate Bombs
    • Gingerbread Man
    • Grinch Bomb
    • Snowman Bomb
    • Gold Christmas Tree Bomb
  • FAQ

The Three Piece Hot Chocolate Bomb Mold

I got this three-piece mold from this ETSY shop and it comes with six sets but you can also buy them individually online if you search for three-piece mold. You can also find the three-piece mold in other shapes like hearts and eggs.

three piece hot chocolate bomb mold

Ingredients To Make Hot Chocolate Bombs

candy melts and almond bar

If you are a beginner, I highly recommend you use these meltables from sweet tooth fairy. You can get them at Michaels or Walmart and they are very smooth and tasty! They come in lots of colors and even flavors! Or you can use almond bark which is really inexpensive but the taste suffers so keep that in mind.

If you want to color your meltables make sure you use candy colors not food coloring or it will ruin your chocolate. I usually just buy the color of meltables that I want to use to save time to color my hot chocolate bombs.

candy food coloring

I prefer the taste and texture of real chocolate usually but it is a bit more work. I like Cacoa Barry couverture chocolate. If you want to learn to temper your own chocolate you can check out this tutorial. If you don't need a lot of chocolate, you can also use LINDT chocolate bars which is a really nice quality.

bag of chocolate

I use cocoa butter colors from Chef Rubber to color my real chocolate. Just melt them down and mix them into tempered chocolate.

colored cocoa butter

Here's a list of all the ingredients I used to decorate my hot chocolate bombs.

Gingerbread Man Bomb

gingerbread man hot chocolate bomb
  • Pumpkin spice meltables
  • White meltables
  • Black meltables
  • Chocolate meltables
  • Pink petal dust for cheeks
  • Mini marshmallows
  • Freeze-dried mini marshmallows
  • 2 Tablespoons Cocoa mix

Grinch Hot Chocolate Bomb

grinch hot chocolate bomb
  • White couverture chocolate (requires tempering)
  • Yellow cocoa butter
  • Green cocoa butter
  • Red heart sprinkle
  • Heart marshmallow
  • Mini marshmallows
  • Freeze-dried mini marshmallows
  • 2 Tablespoons Cocoa mix

Snowman Hot Chocolate Bomb

snowman hot chocolate bomb
  • White meltables
  • Crystal sugar sprinkles
  • Flash dust
  • Black meltables
  • Orange modeling chocolate
  • Freeze-dried lucky charm marshmallows
  • Strawberry Nesquick

Gold Christmas Tree Bomb

christmas tree hot chocolate bomb
  • White couverture chocolate (requires tempering)
  • Gold highlighter dust
  • Green chocolate (I used the leftover from the grinch bomb)
  • Gold star sprinkle
  • Silver dragees
  • Jimmy sprinkles for the gold powder

How To Use The Three Piece Mold

three piece hot chocolate bomb mold

The first thing you want to do is melt down your chocolate. You can use meltables if you don't want to temper your chocolate or you can use real chocolate and follow my chocolate tempering tutorial. If you use real chocolate and don't temper it, it may not come out of the mold and will be very fragile and possibly streaked-looking.

  1. Make sure your molds are clean but polishing them with a paper towel
  2. Melt down your meltables or temper your chocoate. It's best to do one color at a time and make all your shells first.melted chocolate
  3. Pour a couple spoonfuls of melted chocolate into the bottom mold up to the line. Its ok if you overfill a little.adding chocolate to the hot cocoa bomb mold
  4. Press in the inner liners.pressing the insert into three piece hot chocolate bomb mold
  5. Add the top piece to the three piece mold and press down until the chocolate reaches the top of the sphere.pressing the three piece mold together
  6. Place the mold into the fridge for 5-10 minutes or until the chocolate contracts (shrinks) in the mold and it can easily be removed. If you see a spot where the chocolate is still stuck to the mold then put it back in the fridge until it fully releases. pointing to where the chocolate is still stuck to the three piece hot chocolate bomb mold
  7. Take the hot chocolate mold shell out of the mold and remove the inner liner. removing the liner from the hot chocolate bomb
  8. Place your shells aside until you finish all the shells you want. I just put mine on a sheet pan to the side.

To clean your hot chocolate bomb molds, wash them in hot water, then hand dry.

How To Assemble Your Hot Chocolate Bombs

  1. To avoid getting fingerprints on your shells, I recommend wearing gloves.
  2. Warm a plate in the microwave for about 1 minute to make it warm.
  3. Place one half of the shell onto the plate to slightly melt the edge. Then repeat with the other half of the mold. warming a hot chocolate bomb shell
  4. Place one half of the shell onto a small bowl or a cupcake pan to hold the shell in place. chocolate bomb shell on a small bowl
  5. Fill the mold with two Tablespoons of hot chocolate mix filling a hot chocolate bomb shell with hot chocolate mix
  6. Add in whatever marshmallows, candies or mix-ins that you like hot chocolate bomb shell filled with marshmallows and candy
  7. Place the other shell on top and press with light firm pressure to seal the bombsealing a hot chocolate bomb with gloved hands
  8. Use your gloved finger to wipe off the excess chocolate
  9. Continue putting all your bombs together before decorating to speed up the process. I put mine on a cupcake pan to hold them in place.
  10. Decorate your bombsdecorating hot chocolate bombs
  11. Pour on one cup of steaming hot milk and watch them pop! melted hot chocolate bomb

Decorating Your Hot Chocolate Bombs

Gingerbread Man

gingerbread man hot chocolate bomb
  1. Place some white chocolate into a piping bag
  2. Pipe on the dots around the sphere, the ovals for the eyes and the hair
  3. Add some black chocolate into a piping bag
  4. Pipe on the dots for the eyes and the mouth
  5. Use a paintbrush to add some pink dust for the cheeks

Grinch Bomb

grinch hot chocolate bomb
  1. Place some of the green hot chocolate into a piping bag and snip off the tip. You don't want the opening to be really big.
  2. Drizzle the chocolate over the top of the bomb in a quick back and forth motion.
  3. While the chocolate is still wet, add the red heart sprinkle on top.

Snowman Bomb

snowman hot chocolate bomb
  1. Place some of the crystal sprinkles into a bowl
  2. Use your gloved hands to spread some melted white chocolate around the hot chocolate bomb
  3. Roll the bomb into the sprinkles and coat it well
  4. Add some flash dust to the bomb to give it sparkle
  5. Mold a small carrot shaped nose out of the orange modeling chocolate
  6. Attach the nose to the snowman with a bit of white chocolate
  7. Add some black melted chocolate into a piping bag and pipe on the eyes and the mouth

Gold Christmas Tree Bomb

christmas tree hot chocolate bomb
  1. Add some jimmy sprinkles into a bowl
  2. Add 1-2 teaspoons of gold luster dust and stir
  3. Roll your hot chocolate bomb in the sprinkles until it's evenly covered
  4. Pipe a Christmas tree on top of the bomb
  5. Add a star sprinkle and some silver dragees to finish the Christmas tree

More recipes you'll love!

How to temper chocolate the easy way

Chocolate caramel candy

How to temper chocolate with EZ temper

How to make chocolate covered strawberries

FAQ

What is a good size for hot chocolate bombs?

I prefer the 70mm bombs because it's the perfect amount of cocoa for an extra-large coffee mug

Why isn't my hot chocolate bomb coming out of the mold?

If you are using real chocolate that contains cocoa butter, it will not contract when it cools down unless you temper it (see blog post for more info on tempering). Using candy melts like Sweet Tooth Fairy Meltables, almond bark, or tempered chocolate is advised for shiny and stable hot chocolate bombs.

Do I have to temper my chocolate with a three-piece hot chocolate bomb mold?

If you are using real chocolate then you will always need to temper it but you can use meltables or real chocolate in the three piece mold and get very shiny shells.

Recipe

hot chocolate bomb molds
Print Recipe
5 from 1 vote

Three Piece Mold Hot Chocolate Bombs

Have you ever wondered what the best mold is to make those trendy viral hot chocolate bombs? Check out the three piece mold! Perfect hot chocolate bomb shells with no tempering required.
Prep Time10 minutes mins
cooling10 minutes mins
Total Time20 minutes mins
Course: Dessert
Cuisine: American
Servings: 6 servings
Calories: 97kcal
Author: Liz Marek

Equipment

  • Three Piece Hot Chocolate Bomb Mold

Ingredients

Gingerbread Man Hot Chocolate Bombs

  • 8 ounces pumpkin spice meltables
  • 1 ounce chocolate meltables
  • 2 Tablespoons cocoa mix
  • 1 Tablespoon freeze dried mini marshmallows
  • 2 Tablespoons Mini Marshmallows
  • 1 ounce black meltables
  • 1 ounce white meltables
  • ¼ teaspoon pink petal dust

Grinch Hot Chocolate Bomb

  • 8 ounces white couverture chocolate tempered
  • ¼ teaspoon yellow cocoa butter
  • ¼ teaspoon green cocoa butter
  • 2 Tablespoons Cocoa Mix
  • 1 Tablespoon mini freeze-dried marshmallows
  • 1 Tablesoon mini marshmallows
  • 1 heart marshmallow
  • 1 red heart sprinkle

Snowman Hot Cocoa Bomb

  • 8 ounces white meltables
  • ¼ cup clear crystal sprinkles
  • ¼ teaspoon flash dust
  • 1 ounce black meltables
  • 1 teaspoon orange modeling chocolate or fondant
  • 1 Tablespoon freeze-dried lucky charms marshmallows
  • 1 Tablespoon mini marshmallows
  • 2 Tablespoons Strawberry Newsquick

Gold Christmas Tree Bomb

  • 8 ounces white couverture chocolate tempered
  • 1 teaspoon gold highlighter dust
  • 1 Tablespoon green chocolate either meltables or leftover from the grinch
  • 1 small gold star sprinkle
  • ¼ tespoon silver dragees
  • ¼ cup jimmy sprinkles for the gold powder
  • 2 Tablespoons cocoa mix
  • 1 Tablespoon freeze-dried mini marshmallows
  • 1 Tablespoon mini marshmallows
  • 1 teaspoon crushed peppermint

Instructions

Hot Chocolate Bomb Assembly

  • Pour your desired chocolate into the bottom mold up to the line near the bottom.
  • Place your insert inside and press down a little
  • Place the top mold on and press down until the chocolate fills the entire sphere
  • Put the hot chocolate bomb mold into the fridge to chill for 10-15 minutes or until the chocolate pulls away from the mold
  • Remove the shells carefully from the mold and remove the insert from the shell
  • Make all your shells at once before assembling your bombs
  • Heat a ceramic plate in the microwave and heat on high for 1 minute until hot
  • Place your first shell on the hot plate and melt the edge slightly
  • Place your shell onto a small pinch bowl or cupcake pan to keep it in place
  • Fill the shell with your desired cocoa mix, marshmallows or candies
  • Heat the other half of your shell and place it on top of the filled shell
  • Press together firmly for 5 seconds then wipe off the excess chocolate with a gloved finger
  • Decorate the hot chocolate bomb as desired. See the the video in this blog for ideas!

Video

Notes

I am using the 70mm three-piece mold 
If you're using real chocolate that contains cocoa butter you will need to temper your chocolate to make sure it releases from the mold and is shiny and strong. 
If you do not want to temper your chocolate then I recommend you use meltables or almond bark which does not contain cocoa butter and does not need to be tempered. 
Be sure to use cocoa butter colors to color real chocolate
Use candy food coloring to color meltables or use pre-colored meltables. Do not use regular food coloring or it will ruin the chocolate. 

Nutrition

Serving: 1serving | Calories: 97kcal | Carbohydrates: 20g | Protein: 1g | Fat: 3g | Saturated Fat: 2g | Polyunsaturated Fat: 1g | Monounsaturated Fat: 1g | Trans Fat: 1g | Sodium: 136mg | Potassium: 1mg | Fiber: 1g | Sugar: 15g | Vitamin A: 2IU | Calcium: 17mg | Iron: 1mg
Gingerbread house with powdered sugar snow, isomalt icicles, edible trees and fence

December 1, 2021 Course Preview

DIY Gingerbread House Tutorial

Skill level: Intermediate

Guest instructor Mitchie Curran returns for this fun holiday special! In this video, you will learn how to take a store-bought gingerbread house kit give it the ol' fixer-upper treatment, taking a broken-down double-wide and converting it into a cozy upscale bungalow. Mitchie offers several tips and tricks that will level-up your gingerbread house into an amazing snowy masterpiece.

Mitchie also breaks down how to make ginger clay, a special material that works just like modeling chocolate, how to bake your own gingerbread house kits, and a fast trick for getting your gingerbread pieces to stick together.

There's a lot to cover in this tutorial, so let's get our tools together and let's get started!

51:35 Minutes of Instruction

What You Will Learn

  • How to upgrade a store-bought gingerbread house kit or bake your own gingerbread house kit into a beautiful cozy gingerbread cottage
  • Learn how to make ginger clay
  • Mitchie's trick on getting gingerbread to stick together without using royal icing (and waiting forever for it to dry)

Tutorial Chapters

  1. Overview of the equipment 0:35
  2. Assessing the gingerbread 5:05
  3. Cutting the gingerbread 8:01
  4. Trimming the pieces 11:22
  5. Making ginger clay 13:00
  6. Coloring the ginger clay 15:59
  7. Making a color wash 18:42
  8. Gluing the gingerbread together 19:55
  9. Making your own gingerbread 23:04
  10. Rolling out the gingerbread dough 27:54
  11. Cutting out gingerbread pieces 32:02
  12. Making the decorations 34:15
  13. Decorating the house 37:54

Downloads

Materials List

Gingerbread house with powdered sugar snow, isomalt icicles, edible trees and fence

December 1, 2021 Paid Video

DIY Gingerbread House Tutorial

Skill level: Intermediate

Guest instructor Mitchie Curran returns for this fun holiday special! In this video, you will learn how to take a store-bought gingerbread house kit give it the ol' fixer-upper treatment, taking a broken-down double-wide and converting it into a cozy upscale bungalow. Mitchie offers several tips and tricks that will level-up your gingerbread house into an amazing snowy masterpiece.

Mitchie also breaks down how to make ginger clay, a special material that works just like modeling chocolate, how to bake your own gingerbread house kits, and a fast trick for getting your gingerbread pieces to stick together.

There's a lot to cover in this tutorial, so let's get our tools together and let's get started!

51:35 Minutes of Instruction

What You Will Learn

  • How to upgrade a store-bought gingerbread house kit or bake your own gingerbread house kit into a beautiful cozy gingerbread cottage
  • Learn how to make ginger clay
  • Mitchie's trick on getting gingerbread to stick together without using royal icing (and waiting forever for it to dry)

Tutorial Chapters

  1. Overview of the equipment 0:35
  2. Assessing the gingerbread 5:05
  3. Cutting the gingerbread 8:01
  4. Trimming the pieces 11:22
  5. Making ginger clay 13:00
  6. Coloring the ginger clay 15:59
  7. Making a color wash 18:42
  8. Gluing the gingerbread together 19:55
  9. Making your own gingerbread 23:04
  10. Rolling out the gingerbread dough 27:54
  11. Cutting out gingerbread pieces 32:02
  12. Making the decorations 34:15
  13. Decorating the house 37:54

Downloads

Materials List

close up of christmas crack

November 29, 2021 Candy

Christmas Crack Recipe

This Christmas Crack recipe is so easy to make and only takes 30 minutes! This candy is called "Christmas crack," because it cracks in your mouth when you bite it! It's just a simple caramel poured over saltine crackers and topped with melted chocolate and sprinkles! Follow this recipe for the perfect caramel that's hard enough to crack but not so hard it breaks your teeth!

closeup of christmas crack on a red plate

The first time I made Christmas crack I didn't use a candy thermometer. I just kind of eyeballed it. This resulted in a slightly runny caramel and not so much "crack". The next time I used my handy candy thermometer and it was a lot easier! So if you have one, you should def use it for this! Takes all the guesswork out of it.

What this Christmas cracker recipe actually reminds me of is a homemade TWIX candy. The saltine cracker turns into a wonderfully crisp, almost cookie layer. The caramel is firm but not so firm that it hurts to bite into. The chocolate and salty cracker really sends this candy into the next dimension and is TRULY hard to stop eating! This was the first Christmas candy I made with my family and now it's officially a tradition. 

What's in this blog post?

  • Christmas Crack Ingredients
  • How To Make The Toffee
  • Christmas Cracker Recipe Assembly Instructions
  • What is Christmas Crack?
  • FAQ
  • More Recipes You'll Love

Christmas Crack Ingredients

With only five ingredients (including sprinkles) this recipe is hard to mess up! The true hero is using a candy thermometer to cook your caramel so you get the perfect crack! If you don't have a candy thermometer then make sure you boil the caramel for a full 5 minutes.

If you don't have any chocolate chips on hand, you can chop up a bar of chocolate, and that works just as well! Experiment with flavored chocolates to make your Christmas crack recipe your own!

How To Make The Toffee

  1. Preheat your oven to 400ºF (204ºC) and line your pan with a silicone mat, tinfoil, or parchment paper coated with pan spray or cake goop. I used cake goop around the edges of my pan and silicone mat.close up of greasing a sheet pan
  2. Line the bottom of your pan with crackers in an even layer. I had to trim my last layer to make it all fit. Set the pan with crackers aside.placing saltine crackers on a sheet pan
  3. Place the brown sugar, butter, and salt into a medium saucepan on medium heat and stir it until the butter is melted. Use a silicone or wooden spoon to prevent your sugar from crystalizing. christmas crack ingredients in a saucepan
  4. Increase the temperature to medium-high and continue to cook the caramel. You will want to cook it until the temperature reads 280ºF (138ºC) on your candy thermometer which takes about 5 minutes. Watch the sugar cook and stir regularly to keep the butter from separating from the sugar. While a candy thermometer isn't required, it will help ensure the success of your Christmas cracker recipe.closeup of candy thermometer in a pot of toffee
  5. Once the toffee reaches the desired temperature, remove it from the heat.
  6. Pour the toffee over the crackers and spread it with a spatula to coat the crackers evenly.smoothing toffee over saltine crackers
  7. Place the crackers into the oven for 3-5 minutes or until they start to bubble again. Then, remove them from the oven.

Christmas Cracker Recipe Assembly Instructions

  1. Spread the chocolate chips evenly over the hot cracker toffee. sprinkling chocolate chips onto crackers and toffee
  2. Place them back in the oven for 1 minute to melt the chocolate. Or let sit on the countertop for 5 minutes until the chocolate gets soft and looks glossy.
  3. Remove the pan from the oven, and slowly spread the chocolate chips evenly over the toffee with your offset spatula.smoothing chocolate chips with an offset spatula
  4. Dust the sprinkles over the top or add any kind of toppings you want like chopped nuts, toasted coconut flakes, pretzels, or even candy!adding sprinkles to christmas crack
  5. Put the Christmas crackers into the freezer for at least 20 minutes or let them sit at room temperature overnight to harden.
  6. Since you used a silicone mat and/or goop, the crackers will lift out of the pan easily and then you can crack the bar into pieces! This is the fun part!closeup of cracking christmas crack candy

What is Christmas Crack?

Christmas Crack, which is also referred to as Christmas cracker candy, is a type of candy made up of saltine crackers coated in caramel or toffee and topped with melted chocolate. This tasty treat has many nicknames including Christmas Crack, cracker candy, and even caramel bark.

Christmas Crack has a nice crunch to it, and the ingredients you will need to make it may already be in your pantry!

The perfect bite of salty and sweet, Christmas Crack is a festive holiday treat the whole family can enjoy. It's also a delicious, homemade gift you can prepare in large quantities to wrap and give to your coworkers, friends, and family around the holidays. Did someone say holiday cookie exchange?

closeup of Christmas crack

FAQ

Why is my Christmas Crack chewy?

Being a little chewy is normal and makes for a better mouthfeel than super hard, break your tooth caramel but if it's TOO chewy it can be a bit sticky. Make sure you heat your brown sugar mixture to 280ºF (138ºC) or let it boil for 5 minutes before removing it from the heat. 

What can I use instead of saltine crackers?

No saltine crackers? No problem! You can use any kind of cracker you want or even pretzels! The best part about Christmas Crack is every family can make it their own. You could use graham crackers, water biscuits, Ritz, Club crackers, or even pretzels.

Can you freeze Christmas crack?

Yes! If you want to freeze your leftover Christmas crack for later, you can store it in a freezer-safe, airtight container for up to 3 months.

Why did my toffee get grainy?

If you don't cook your sugar at a high enough temperature or if you use a metal spoon to mix, you can shock your sugar and cause it to crystalize. Always use a rubber spatula or wooden spoon to mix sugar.

Why is my toffee too hard?

Don't be tempted to let your toffee boil for too long or you can end up with a very hard candy that will not be easy on the teeth.

More Recipes You'll Love

Chocolate Caramel Candy

Caramel Sauce Recipe

Homemade Sticky Buns

Recipe

close up of christmas crack
Print Recipe
5 from 6 votes

Christmas Crack Recipe

This Christmas cracker candy (also known as Christmas Crack) is highly addictive and CRACKS when you bite into it! Follow this foolproof recipe for the perfect candy every time in less than 20 minutes!
Prep Time10 minutes mins
Cook Time10 minutes mins
Total Time20 minutes mins
Course: Dessert
Cuisine: American
Servings: 35 pieces
Calories: 47kcal
Author: Liz Marek

Equipment

  • 18"x13" ½ sheet pan
  • candy thermometer (optional)

Ingredients

  • 1-2 sleeves saltine crackers (about 45) make sure they are salted
  • 12 ounces dark brown sugar (packed) (1.5 cup packed)
  • 12 ounces unsalted butter (1.5 cup)
  • ¼ teaspoon salt
  • 12 ounces chopped chocolate or chocolate chips (2 cups)
  • ½ cup decorative sprinkles or alternative topping
US Customary - Metric

Instructions

  • Preheat your oven to 400ºF (204ºC) and line your pan with a silicone mat or parchment paper coated with pan spray or cake goop. I used cake goop around the edges of my pan and silicone mat.
  • Line the bottom of your pan with crackers in an even layer and set it aside.

Toffee

  • Place the brown sugar, butter, and salt into a medium sauce pan on medium-high heat and stir it until the butter is melted.
  • Next, cook the caramel. You will want to cook it until the temperature reads 280ºF (138ºC) on your candy thermometer which takes about 5 minutes. Watch the sugar cook and stir regularly to keep the butter from separating from the sugar. While a candy thermometer isn't required, it will help ensure the success of your Christmas cracker recipe.
  • Once the toffee reaches the desired temperature, remove it from heat.
  • Then, pour the toffee over the crackers and spread it with a spatula to coat the crackers evenly.
  • Place the crackers into the oven for 3-5 minutes or until they start to bubble again. Then, remove them from the oven.

Christmas Cracker Assembly

  • Spread the choocolate chips evenly over the hot cracker toffee.
  • Place them back in the oven for 1 minute to melt the chocolate. Or let it sit on the countertop for 5 minutes until the chocolate melts.
  • Remove the pan from the oven, and slowly spread the chocolate chips evenly over the toffee with an offset spatula.
  • Add sprinkles over the top or any kind of toppings you want like chopped nuts, toasted coconut flakes, pretzels, or even candy!
  • Put the Christmas crackers into the freezer for at least 20 minutes. You can also let them sit overnight at room temperature.
  • Since you used a silicone mat and/or goop, the crackers will lift out of the pan easily. You will just lift and crack into them into your desired pieces.

Video

Notes

Important Things To Note Before You Start
  1. Use a scale to weigh your ingredients (including liquids) unless otherwise instructed (Tablespoons, teaspoons, pinch, etc). Metric measurements are available in the recipe card. Scaled ingredients are much more accurate than using cups and help ensure the success of your recipe. 
  2. Practice Mise en Place (everything in its place). Measure out your ingredients ahead of time and have them ready before you start mixing to reduce the chances of accidentally leaving something out.
  3. While it isn't required, a candy thermometer will help you ensure the success of your recipe.
  4. You will be working with hot sugar, so please make sure you are working safely.
  5. There are so many ways to personalize this candy, have fun with the toppings and cracker combinations. Have everything ready to go before you start. Once the sugar starts cooking you don't want to walk away. It also cools pretty quickly, so it's best to be prepared to get through every step.
  6. If you are using salted butter, then you can omit the added salt. If you are using unsalted crackers then use more salt, ½ tsp. You could also use flakey salt on top. 

Nutrition

Serving: 3pieces | Calories: 47kcal | Carbohydrates: 1g | Protein: 1g | Fat: 5g | Saturated Fat: 3g | Cholesterol: 14mg | Sodium: 18mg | Potassium: 2mg | Fiber: 1g | Sugar: 1g | Vitamin A: 162IU | Calcium: 2mg
vanilla bundt cake with vanilla glaze

November 21, 2021 Blog

Moist Vanilla Bundt Cake Recipe

This moist vanilla bundt cake has a tender crumb and golden crust. Covered in not one but two glazes, this vanilla bundt cake recipe ensures that this cake stays moist for days!

vanilla bundt cake with vanilla glaze

It's easier than ever to bake a vanilla bundt cake that rises up beautifully with a golden crust on the outside and releases well from the bundt cake pan. Since it stays fresh for up to 5 days while keeping it room temperature, this vanilla bundt cake is perfect to make a few days before your family comes to visit for the holidays!

Read on to learn everything you ever needed to know about making moist vanilla bundt cake! 

What's In This Blog Post

  • Vanilla Bundt Cake Ingredients
  • How to Make Vanilla Bundt Cake
  • Make Your Own Simple Syrup Using These Steps
  • Preparing the Vanilla Glaze
  • Bundt Cake Decorating Instructions
  • FAQ
  • Where did the bundt cake come from?
  • More Recipes You'll Love

Vanilla Bundt Cake Ingredients

bundt cake ingredients

Buttermilk: Buttermilk is the magic ingredient to make any cake moist and delicious. If you do not have buttermilk, you can use one of my preferred buttermilk substitutes.

Vegetable oil: I use vegetable oil to keep my cakes moist like my red velvet cake and my pumpkin spice cake.

High-quality vanilla: I prefer the vanilla from Nielsen-Massey. Vanilla is very expensive, but when it's the only flavor in your cake, now is the time to use it. The better the vanilla quality, the better the cake will taste!

How to Make Vanilla Bundt Cake

  1. Preheat the oven to 350ºF (177ºC) and adjust the rack to the lower-middle of the oven so it's not too close to the top element.
  2. Coat your bundt cake pan in a thin, even layer of cake goop or another pan release that contains flour. Oil sprays will not work and may cause your bundt cake to stick to the pan.
  3. In a medium-sized bowl, whisk together the flour, baking powder, baking soda, and salt. Then, set it aside.
  4. Next, using another medium-sized bowl, combine together your room temperature buttermilk, oil, and vanilla extract and then set it aside.
  5. In the bowl of your stand mixer, cream the room temperature butter on low speed until it's smooth using the paddle attachment.
  6. Then, sprinkle in your sugar and cream it until it is light and fluffy. Scrape the bowl if needed.
  7. While mixing on low, add in your room temperature eggs one at a time. Let them mix fully before you add the next egg.
  8. Next, add in ⅓ of your flour mixture, and then ⅓ of your liquid mixture. Repeat this process two more times. Scrape the bowl as needed. Mix the ingredients just until they are combined. Do not over-mix.
  9. Pour the batter (the batter will be thick) into your prepared bundt cake pan. how full to fill a bundt cake pan
  10. Bake the cake at 350ºF (177ºC) for 45-50 minutes, or until a skewer inserted into the deepest part of the cake comes out clean. My cake took exactly 47 minutes to bake.
  11. Remove the cake from the oven, and let it cool for 15 minutes before turning it out onto a cooling rack.the best bundt cake pan to use

Make Your Own Simple Syrup Using These Steps

  1. Place water and sugar in a medium-sized saucepan.
  2. Then, heat the water and sugar in a saucepan and bring it to a boil.
  3. Once it's brought to a boil, remove the pan from heat.
  4. Then, add in vanilla extract.
  5. Let it cool.

Preparing the Vanilla Glaze

  1. Sift powdered sugar into a medium-sized bowl.
  2. Add in your buttermilk and extract and stir until it is smooth and creamy.
  3. Then, add a couple of drops of white food coloring if you want your glaze to be more opaque.

Bundt Cake Decorating Instructions

  1. When you first take the cake out of the oven, brush ⅓ of your simple syrup over the top of the cake.
  2. Let it cool for 15 minutes.
  3. Then, turn the cake over onto a cooling rack. I put my cake on a cardboard cake round to prevent sticking. Make sure the cooling rack is over a cookie sheet to catch any glaze drips.the best bundt cake pan to use
  4. Brush the cake all over with the simple syrup and then let it cool for 2 hours.
  5. Drizzle your thick, vanilla cake glaze over the top of your cooled cake.
  6. Once the glaze stops dripping, you can transfer the cake to a cake plate.how to decorate a bundt cake
  7. Keep your bundt cake covered with plastic wrap, or keep it at room temperature inside a cake dome to keep it from drying out. 

FAQ

What makes a bundt cake a bundt cake?

A bundt cake is literally any cake that is baked in a bundt cake pan. 

Can I add flavor to my bundt cake?

You can change the flavor of your bundt cake by switching out the extracts, adding in zest, dried fruits, nuts, chocolate, or even puree. The flavor possibilities are endless!

How full do you fill a bundt cake pan?

Fill your pan about ⅔ of the way in your bundt cake pan. You will do this in order to avoid the cake batter from spilling out the top or getting a dome. Once your bundt pan is filled, tap your filled pan on the counter a couple of times to avoid bubbles. 

How long does vanilla bundt cake last?

It can be kept at room temperature for up to 5 days or frozen for 6 months (defrost the frozen cake before serving).

How do I remove a cake that's stuck in the bundt pan?

Wet a towel with boiling hot water (be careful). Then, use tongs to wring out the excess water and then place it over the top of your cake pan to warm it up. This should help the cake release.

If all else fails, remove the cake from the pan and then patch it up as best you can and cover it with frosting. 

Why is my vanilla bundt cake sticking to the pan?


Here are 4 reasons why your bundt cake might be sticking:

#1 The cake pan was not greased with a flour-based cooking spray. I prefer using cake goop. It's easy, inexpensive to make, and creates a beautiful crust that helps the bundt cake release. 

#2 Not greasing thoroughly. Don't forget to grease the nooks and crannies as well as the center tube. Use a pastry brush and create a nice even layer to grease the pan.

#3 You removed the cake from the pan too soon. It's important to let that crusty layer cool down so it doesn't pull away from the hot cake. Let the cake cool for 15 mins in the pan before turning it out onto a cooling rack. Then, let it cool for another 2 hours before cutting into it.

#4 Your cake is too cold. Don't leave your cake in the pan for too long otherwise, the sugar will fully solidify and glue your cake to the pan. Wiggle it a bit to get your bundt cake to release.

#5 Your nonstick bundt pan may be damaged or dirty. Don't scratch your nonstick surfaces, and always handwash the pan with a soft dishcloth and soapy water.

What's the best bundt pan to use?

Aluminum bundt cake pans will give you the best results.

Pans made of silicone, ceramic, or glass may look nice but they do not produce that nice brown outer crust that gives the bundt cake its classic look.

I'm using the Nordic Ware Platinum Collection Anniversary Bundt Pan, which is widely regarded as the best bundt cake pan. It has a non-stick surface for easy release, and it is lightweight with handles that make it easier to flip. 

How do I keep a vanilla bundt cake moist?

Using buttermilk and oil in your cake batter will keep it moist, but the last step to a super moist bundt cake is using glaze.

I prefer to make two glazes. One is a thin glaze called simple syrup that is brushed on all sides of the cake while it's still warm. Then a second glaze which is thicker and flavored slightly with vanilla and citrus oil seals in all that moisture so the cake doesn't dry out. 

Where did the bundt cake come from?

Bundt cakes are believed to have originated from Germany. They are similar to the Gugelhupf cakes from Europe which are made from a yeasted dough (usually with nuts and fruits) and baked in a decorative, tube-shaped pan. These cakes are usually taller and skinnier than a typical bundt cake. 

The word "bund" in German means "tied" or "bind," so one theory is that a "bund cake" is so named because it was served at social gatherings or for people that you were emotionally or socially tied to. 

When German immigrants came to America, they couldn't bring their Gugelhupf pans with them because they were made of cast iron or thick ceramic, and therefore they were too heavy to travel with. Today, bundt cake pans as we know them are a little lighter, shorter, and rounder than traditional Gugelhupf pans. 

gugelhupf cake
Traditional alsatian pastry: Kouglof with raisins and almonds

In the 1940s, H. David Dalquist who co-founded the company Nordic Ware created an aluminum version of the traditional Gugelhupf pan. A "t" was added to the name bund for trademark reasons and thus the first "bundt cake pan" was born. And it flopped! No one was interested in buying them.  

Nordic Ware almost discontinued the pan due to a lack of interest. In 1966, Ella Helfrich took second place at the annual Pillsbury Bake-Off and won $5,000 with her bundt cake recipe, the tunnel of fudge. This resulted in over 200,000 requests for the bundt cake pan from the public. Since then, over 60 million bundt cake pans have been sold, and it is the most sold pan in the USA. 

close up of moist vanilla bundt cake
vanilla bundt cake

More Recipes You'll Love

Chocolate Bundt Cake

Moist and Fluffy Vanilla Cupcakes

Basic Muffin Recipe

White Velvet Buttermilk Cake Recipe

Moist Vanilla Cake with Easy Buttercream

Recipe

close up of vanilla bundt cake with vanilla glaze and slice cut out of the cake
Print Recipe
4.86 from 95 votes

Moist Vanilla Bundt Cake Recipe

The most amazing moist vanilla bundt cake that is firm enough to hold it's shape in a bundt pan but still tender enough to enjoy for days. Buttermilk and a touch of orange make this the best vanilla bundt cake ever. Add in fresh fruit, nuts, chocolate, spices, or puree to switch up the flavors to your liking.
Prep Time5 minutes mins
Cook Time45 minutes mins
Course: Dessert
Cuisine: American
Servings: 14 servings
Calories: 601kcal
Author: Liz Marek

Equipment

  • bundt cake pan
  • pastry brush

Ingredients

Vanilla Bundt Cake Ingredients

  • 16 ounces All Purpose Flour
  • 1 teaspoon baking powder
  • 1 teaspoon baking soda
  • ½ teaspoon salt
  • 10 ounces unsalted butter softened
  • 14 ounces granulated sugar
  • 3 large eggs room temperature
  • 8 ounces buttermilk room temperature
  • 3 ounces vegetable oil
  • 2 teaspoons vanilla extract

Simple Syrup

  • 4 ounces granulated sugar
  • 4 ounces water
  • 1 teaspoon vanilla extract

Vanilla Glaze

  • 8 ounces powdered sugar sifted
  • 3 Tablespoons buttermilk
  • ¼ teaspoon orange or lemon extract
  • 1 teaspoon vanilla extract
  • 2-3 drops white food coloring optional
US Customary - Metric

Instructions

Vanilla Bundt Cake Instructions

  • Preheat the oven to 350ºF (177ºC) and adjust the rack to the lower-middle of the oven so it's not too close to the top element.
  • Coat your bundt cake pan in a thin, even layer of cake goop or another pan release that contains flour. Oil sprays will not work and may cause your bundt cake to stick to the pan.
  • In a medium-sized bowl, whisk together the flour, baking powder, baking soda, and salt. Then, set it aside.
  • Next, using another medium-sized bowl, combine together your room temperature buttermilk, oil, and vanilla extract and then set it aside.
  • In the bowl of your stand mixer, cream the room temperature butter on low speed until it's smooth using the paddle attachment.
  • Then, sprinkle in your sugar and cream it until it is light and fluffy. Scrape the bowl if needed.
  • While mixing on low, add in your room temperature eggs one at a time. Let them mix fully before you add the next egg.
  • Next, add in ⅓ of your flour mixture, and then ⅓ of your liquid mixture. Repeat this process two more times. Scrape the bowl as needed. Mix the ingredients just until they are combined. Do not over-mix.
  • Pour the batter (the batter will be thick) into your prepared bundt cake pan.
  • Bake the cake at 350ºF (177ºC) for 45-50 minutes, or until a skewer inserted into the deepest part of the cake comes out clean. My cake took exactly 47 minutes to bake.
  • Remove the cake from the oven, and let it cool for 15 minutes before turning it out onto a cooling rack.

Simple Syrup Glaze Instructions

  • Place water and sugar in a medium-sized saucepan.
  • Then, heat the water and sugar in a saucepan and bring it to a boil.
  • Once it's brought to a boil, remove the pan from heat.
  • Then, add in vanilla extract.
  • Let it cool.

Vanilla Bundt Cake Glaze Instructions

  • Sift powdered sugar into a medium-sized bowl.
  • Add in your buttermilk and extract and stir until it is smooth and creamy.
  • Then, add a couple of drops of white food coloring if you want your glaze to be more opaque.

Decorating Instructions

  • When you first take the cake out of the oven, brush ⅓ of your simple syrup over the top of the cake.
  • Let it cool for 15 minutes.
  • Then, turn the cake over onto a cooling rack. I put my cake on a cardboard cake round to prevent sticking. Make sure the cooling rack is over a cookie sheet to catch any glaze drips.
  • Brush the cake all over with the simple syrup and then let it cool for 2 hours.
  • Drizzle your thick, vanilla cake glaze over the top of your cooled cake.
  • Once the glaze stops dripping, you can transfer the cake to a cake plate.
  • Keep your bundt cake covered with plastic wrap, or keep it at room temperature inside a cake dome to keep it from drying out. 

Video

Notes

If you do not have buttermilk, you can use one of my preferred buttermilk substitutes.
Important Things To Note Before You Start
  1. Bring all your ingredients to room temperature or even a little warm (eggs, buttermilk, butter, etc) to ensure your batter does not break or curdle. 
  2. Use a scale to weigh your ingredients (including liquids) unless otherwise instructed (Tablespoons, teaspoons, pinch etc). Metric measurements are available in the recipe card. Scaled ingredients are much more accurate than using cups and help ensure the success of your recipe. 
  3. Practice Mise en Place (everything in it's place). Measure out your ingredients ahead of time and have them ready before you start mixing to reduce the chances of accidentally leaving something out.
  4. If the recipe calls for specific ingredients like cake flour, replacing it with all-purpose flour and cornstarch is not recommended unless specified in the recipe that it's ok. Substituting ingredients may cause this recipe to fail. 
  5. Do not overmix the cake or you can over-work the gluten and get big holes called tunneling.
  6. Add eggs one at a time while beating just until the yolk disappears.
  7. Always add the dry ingredients alternately with the liquid, beginning and ending with the dry ingredients.
  8. To prevent air bubbles, slowly spoon the batter into the prepared pan.
  9. Open the door of the oven only when ready to check for doneness.

Nutrition

Serving: 1g | Calories: 601kcal | Carbohydrates: 87g | Protein: 6g | Fat: 27g | Saturated Fat: 18g | Cholesterol: 91mg | Sodium: 203mg | Potassium: 110mg | Fiber: 1g | Sugar: 61g | Vitamin A: 598IU | Calcium: 50mg | Iron: 2mg
 

closeup of nutella stuffed cookies

November 17, 2021 4th of July

Nutella Stuffed Chocolate Chip Cookies

You will love these soft and chewy chocolate chip cookies stuffed to the brim with molten Nutella filling. The buttery and crispy edge of my classic chocolate chip cookies combined with that sweet, hazelnut flavor is unbeatable. Serve with a cold glass of milk or a scoop of ice cream and it makes for the perfect cozy-day treat.

closeup of nutella stuffed cookies

First, we need to make the "stuff" for our stuffed cookies. I'm using Nutella because I love how that classic, hazelnut flavor combines with buttery chocolate chip cookies. You can stuff a cookie with anything, though! You can use marshmallows to make a s'mores cookie, Reese's for a peanut butter cookie, or even Oreos for a cookies and cream cookie.

Heads up, there is some chilling required in this recipe, but you wouldn't want your Nutella oozing out the sides of your cookie and making a sad mess, right? We want gorgeous, gooey lava centers for our stuffed cookies. Make sure you read this recipe all the way through before beginning. This will help you plan out your time accordingly. If you are in a hurry and don't have time to do the proper chilling, the cookies could possibly not have the desired outcome.

What's In This Recipe

  • Ingredients
  • How to make Nutella stuffed cookies step-by-step
    • Nutella Prep
    • Making The Cookie Dough
    • How To Stuff The Cookies
  • FAQ
  • More Cookie Recipes You'll Love

Ingredients

nutella stuffed cookie ingredients

Nutella/Hazelnut spread: You can use any brand of hazelnut chocolate spread at your local store. This spread has different additives than just a regular ganache has, so it could behave differently if you choose to replace the Nutella with a homemade ganache.

Eggs: Cold eggs work best for this recipe to prevent spreading, to learn more about the science of the chocolate chip cookie, check out my master chocolate chip recipe. Also, depending on where you live in the world, your eggs might be larger or smaller. I'm using an egg that weighs about 1.6 ounces.

How to make Nutella stuffed cookies step-by-step

Nutella Prep

  1. Line a cookie sheet that fits in your freezer with parchment paper. placing dollops of nutella on a parchment paper lined sheet pan
  2. Scoop the Nutella into 2 teaspoon size dollops. This recipe will make about 20 cookies.
  3. Place them in the freezer for about an hour (or overnight) before beginning the cookie process. They soften very quickly so it is easiest to have the Nutella portions frozen and work quickly.

Making The Cookie Dough

  1. In a bowl, whisk together the flour, salt, and baking soda. combining dry ingredients in a mixing bowl
  2. In the bowl of your stand mixer with the paddle attachment, add in the butter and mix until smooth. I'm using my Bosch Universal Plus mixer, but you can use a KitchenAid, or hand mixer as well.
  3. Add in both the brown sugar and white sugar and cream together on medium speed until pale and fluffy, this could take about 2-4 minutes or more depending on your mixer.adding brown sugar to a mixing bowl
  4. While mixing on low, add in the eggs one at a time, mixing until fully incorporated before adding the next. adding an egg to the mixing bowl
  5. Add the teaspoon of vanilla and mix briefly until combined. Your mixture should look homogenous and not curdled. closeup of cookie dough
  6. Gradually add the flour mixture and mix until just combined.adding flour to cookie mixture
  7. Finally, add in the chocolate chips and mix until evenly distributed. Save a few to add to the tops of the cookies for decoration.adding chocolate chips to mixer

How To Stuff The Cookies

  1. Using a #20 size scoop (roughly 3 Tablespoons), scoop the cookie dough onto a sheet pan lined with parchment paper. It's okay if all of the dough balls are on one sheet pan, you will not be baking them all together at this point.scooping cookie dough
  2. Refrigerate the dough balls for at least 30 minutes. The dough will be easier to work with once it's cold and it will allow the flour to absorb the moisture in the batter, which prevents spreading!scooping cookie dough onto the sheet pans
  3. Once your dough balls have chilled, and the Nutella balls are frozen, you'll want to stuff your cookies.
  4. Divide your dough ball into 2 even pieces. dividing cookie dough balls in half
  5. Flatten the pieces slightly. flattening cookie dough
  6. Sandwich the frozen nutella in between the two flattened pieces of cookie dough and press the dough around the nutella so it's totally covered. wrapping cookie dough around nutellanutella stuffed cookies
  7. Place all of the stuffed cookies back on the tray and refrigerate for another hour, or overnight. This will give the dough and Nutella time to come to the same temperature, resulting in a more even bake. placing cookie dough balls on a sheet pan with parchment paper
  8. An hour before you're ready to bake, preheat your oven to 375°F and prepare a cookie sheet with parchment paper.
  9. Place 6 cookies onto the pan and top with a few extra chocolate chips so they look extra pinterest worthy after baking. (optional) adding chocolate chips to the top of cookie dough
  10. Bake at 375°F for 10-15 minutes. Check the progress of the cookie at 10 minutes, the center may appear to be underdone, but it should look baked, and not "wet". If it does appear wet and shiny over the Nutella ball, continue to bake for an extra 2 minutes at a time until it is finished baking. nutella stuffed cookies baked example
  11. Cool the cookies on the tray for 5-10 minutes before attempting to move them to a cooling rack. The molten center will make it weak and could possible crack the cookie when you try to move it. Also, let it cool a bit before biting into it so the lava center doesn't burn the skin in your mouth. Ouch!
  12. After cooling you can store the cookies at room temperature for up to 1 week. Nutella is shelf-stable, but if you're stuffing your cookies with other ingredients be sure to check if they need refrigeration such as cream cheese filling.

FAQ

  • Can I stuff my cookies with anything besides Nutella?
  • Yes, you can! Stuffed cookies are super popular right now. Get creative with using caramel, candies, cream cheese filling, and pretty much anything else your brain can imagine! You can even stuff your cookies with other cookies like Oreos or candy bars!

    More Cookie Recipes You'll Love

    1. Chewy Double Chocolate Chip Cookies
    2. Authentic Snickerdoodle Cookies
    3. Chocolate Chip Crumbl Cookies (Copycat Recipe)
    4. Lofthouse Cookies (Copycat Recipe)
    5. Chocolate Macarons
    6. Red Velvet Cookies

    Recipe

    closeup of nutella stuffed cookies
    Print Recipe
    4.94 from 15 votes

    Nutella Stuffed Cookies

    Soft and chewy chocolate chip cookies stuffed with creamy Nutella. The ultimate must make gourmet cookie!
    Prep Time5 minutes mins
    Cook Time10 minutes mins
    chilling1 hour hr
    Total Time1 hour hr 15 minutes mins
    Course: Dessert
    Cuisine: American
    Servings: 20 Cookies
    Calories: 247kcal
    Author: Liz Marek

    Equipment

    • #20 size scoop (roughly 3 Tablespoons)
    • Cookie sheet
    • Stand mixer (hand mixer works too)

    Ingredients

    • 8 ounces unsalted butter softened, but not melted (2 cups)
    • 5 ounces brown sugar (¾ cup)
    • 5 ounces white sugar (¾ cup)
    • 12 ounces all purpose flour (2 ½ cups)
    • 1 teaspoon salt
    • 1.5 teaspoons baking soda
    • 2 large cold eggs
    • 1 teaspoon vanilla extract
    • 6 ounces semi-sweet chocolate chips
    • 6 ounces hazelnut spread (Nutella) (1 cup)
    US Customary - Metric

    Instructions

    The Nutella Centers

    • Line a cookie sheet that fits in your freezer with parchment paper. Scoop the Nutella into about 20, 2 teaspoon size dollops. This recipe will make about 20 cookies.
    • Place them in the freezer for about an hour before beginning the cookie process. They soften very quickly so it is easiest to have the Nutella portions frozen hard.

    The Cookie Dough

    • Prepare a cookie sheet with parchment paper.
    • In a separate bowl, combine the flour, salt, and baking soda.
    • In the bowl of your stand mixer with the paddle attachment, add butter and mix until smooth.
      I'm using my Bosch Universal Plus mixer, but you can use a KitchenAid, or hand mixer as well.
    • Add both sugars and cream together on medium speed until pale and fluffy, this could take about 2-4 minutes.
    • Add the eggs, one at a time until fully incorporated into the sugar mixture.
    • Add the teaspoon of vanilla and mix briefly.
    • Gradually add the flour mixture and mix until just combined.
    • Finally, add the chocolate chips and mix until evenly distributed. Save a few to add to the tops of the cookies for decoration.

    Stuffing and Baking the Cookies

    • Using a #20 size scoop (roughly 3 Tablespoons), scoop the cookie dough onto a sheet pan lined with parchment. It's okay if all of the dough balls are on one sheet pan, you will not be baking them all together.
      You can adjust the size of your dollop and cookie scoop to be a larger cookie or a smaller cookie. Just remember your baking time will need to adjust too. 
    • Refrigerate the dough balls for at least 30 minutes. The dough will be easier to work with once it's cold and it will allow the flour to absorb the moisture in the batter, which prevents spreading!
    • Once your dough balls have chilled, and the Nutella balls are frozen, you'll want to stuff your cookies.
      Divide your dough ball into 2 pieces, place the Nutella ball onto the bottom piece, and sandwich the other half on top. Make sure to completely cover the Nutella, and have a little more of the dough on the bottom of the cookie.
    • Place all of the stuffed cookies back on the tray and refrigerate for another hour, or overnight. This will give the dough and Nutella time to come to the same temperature, resulting in a more even bake.
    • An hour before you're ready to bake, preheat your oven to 375°F and prepare a cookie sheet with parchment paper.
    • Place 6 cookies onto the pan and top with a few extra chocolate chips. (optional)
    • Bake at 375°F for 10-15 minutes. Check the progress of the cookie at 10 minutes, the center may appear to be underdone, but it should look baked, and not "wet". If it does appear wet and shiny over the Nutella ball, continue to bake for an extra 2 minutes at a time until it is finished baking.
    • Cool the cookies on the tray for 5-10 minutes before attempting to move them to a cooling rack. The molten center will make it weak and could possible crack the cookie when you try to move it. Also, let it cool a bit before biting into it so the lava center doesn't burn the skin in your mouth. Ouch!
    • Transfer to a cooling rack and store at room temperature for up to 1 week. Nutella is shelf-stable, but if you're stuffing your cookies with other ingreidnets be sure to check the expiration date.

    Video

    Notes

    • Make sure you read this recipe all the way through before beginning. This will help you plan out your time accordingly. The prep of this recipe has a lot of start and stop steps in it. If you are in a hurry and don't have time to do the proper chilling, the cookies could possibly not have the desired outcome. 
    • You can use any brand of hazelnut chocolate spread at your local store. This spread has different additives than just a regular ganache has, so it could behave differently if you choose to replace the Nutella with a homemade ganache. If you decide to try this, let me know how it works out! 
    • You can adjust the size of your dollop and cookie scoop to be a larger cookie or a smaller cookie. Just remember your baking time will need to adjust too. 
    • Cold eggs work best for this recipe to prevent spreading, to learn more about the science of the chocolate chip cookie, check out my master recipe.

    Nutrition

    Serving: 1cookie | Calories: 247kcal | Carbohydrates: 32g | Protein: 2g | Fat: 13g | Saturated Fat: 8g | Polyunsaturated Fat: 1g | Monounsaturated Fat: 3g | Trans Fat: 1g | Cholesterol: 25mg | Sodium: 203mg | Potassium: 79mg | Fiber: 1g | Sugar: 17g | Vitamin A: 288IU | Calcium: 17mg | Iron: 1mg
    materials used to make one-part, two-part and pour molds

    November 15, 2021 Course Preview

    Mold-Making Basics Tutorial

    Skill level: Intermediate

    Mold-making is one of the fundamental skills needed to take your cake creations to the next level. Everything can be sculpted, but when it comes to certain objects that need to look like they were made by a machine, creating a mold can be the next best thing.

    In this tutorial, you will learn all of the basics needed to create one-part, two-part, and pour molds. You will learn: how to plan out a mold, how to prep your piece for molding, an easy way to clean the bits of clay from your mold after casting it, how to make sure the chocolate gets into every part of it with no air-holes or gaps and what to do when things go wrong.

    Please note: this tutorial covers all the aspects of getting started making food-safe molds and mold making. Liz does not show how to create a cake or assemble the chocolate airplane in this tutorial.

    1:03:50 Minutes of Instruction

    What You Will Learn

    • Learn how to make one-part, two-part, and pour molds
    • Liz's tips and tricks to making a successful mold you can use again and again
    • The types of materials you should use (and shouldn't use) to make sure your molds cure correctly and don't leak or break

    Tutorial Chapters

    1. Overview of the tools 0:52
    2. Assessing the object 5:10
    3. Adding the clay 7:05
    4. Making the box 14:32
    5. Making the mold base 16:47
    6. Cutting out the walls 18:39
    7. Gluing the walls 22:14
    8. Mixing the silicone 24:29
    9. Pouring the silicone 27:15
    10. Removing the box and toy 29:25
    11. Testing the one-part mold 32:06
    12. Removing the test mold 34:24
    13. Preparing the wings 35:44
    14. Making a two-part mold 38:28
    15. Pouring the wing silicone: part 1 50:57
    16. Pouring wing silicone: part 2 53:19
    17. Making a silicone rubber one-part mold 57:13
    18. Making a pour mold 1:00:23
    19. Unboxing the molds 1:00:56

    Downloads

    Materials List

    materials used to make one-part, two-part and pour molds

    November 15, 2021 Paid Video

    Mold-Making Basics

    Skill level: Intermediate

    Mold-making is one of the fundamental skills needed to take your cake creations to the next level. Everything can be sculpted, but when it comes to certain objects that need to look like they were made by a machine, creating a mold can be the next best thing.

    In this tutorial, you will learn all of the basics needed to create one-part, two-part, and pour molds. You will learn: how to plan out a mold, how to prep your piece for molding, an easy way to clean the bits of clay from your mold after casting it, how to make sure the chocolate gets into every part of it with no air-holes or gaps and what to do when things go wrong.

    Please note: this tutorial covers all the aspects of getting started making food-safe molds and mold making. Liz does not show how to create a cake or assemble the chocolate airplane in this tutorial.

    1:03:50 Minutes of Instruction

    What You Will Learn

    • Learn how to make one-part, two-part, and pour molds
    • Liz's tips and tricks to making a successful mold you can use again and again
    • The types of materials you should use (and shouldn't use) to make sure your molds cure correctly and don't leak or break

    Tutorial Chapters

    1. Overview of the tools 0:52
    2. Assessing the object 5:10
    3. Adding the clay 7:05
    4. Making the box 14:32
    5. Making the mold base 16:47
    6. Cutting out the walls 18:39
    7. Gluing the walls 22:14
    8. Mixing the silicone 24:29
    9. Pouring the silicone 27:15
    10. Removing the box and toy 29:25
    11. Testing the one-part mold 32:06
    12. Removing the test mold 34:24
    13. Preparing the wings 35:44
    14. Making a two-part mold 38:28
    15. Pouring the wing silicone: part 1 50:57
    16. Pouring wing silicone: part 2 53:19
    17. Making a silicone rubber one-part mold 57:13
    18. Making a pour mold 1:00:23
    19. Unboxing the molds 1:00:56

    Downloads

    Materials List

    stack of red velvet cookies

    November 12, 2021 Blog

    Stuffed Red Velvet Cookies

    Red velvet cookies STUFFED with cream cheese frosting and drizzled with melted white chocolate chips are the perfect treat for Valentine's day. This red velvet cookie recipe isn't just colored red, it gets it's true red velvet flavor from a mixture of buttermilk, cocoa powder and baking soda. If you love my classic red velvet cake, you'll love this cookie recipe.

    stack of red velvet cookies

    To me, red velvet just isn't red velvet without cream cheese frosting. You may think stuffing a cookie is complicated but it couldn't be simpler and the result truly takes these cookies to the next level of delicious! All you have to do is freeze your frosting first then mold the cookie dough balls around the frozen balls before baking. 

    After you cookies have cooled down, all that's left to do is drizzle on that white chocolate and you'll have the most amazing red velvet cookies you've ever had!

    If these cookies leave you craving more red velvet, my red velvet layer cake is the full from-scratch version with cream cheese frosting between every layer.

    hands breaking a red velvet cookie in half

    What's In This Blog Post

    • Red Velvet Cookie Ingredients
    • How To Make The Cream Cheese Filling
    • Making The Red Velvet Cookie Dough
    • Putting The Cookies Together
    • How To Store Red Velvet Cookies
    • FAQ

    Red Velvet Cookie Ingredients

    red velvet cookie ingredients

    Buttermilk is the secret ingredient here. The tangy flavor is the secret to a true red velvet flavor. If you don't have any buttermilk don't worry, you can make your own buttermilk substitute with regular milk and some white vinegar. 

    Natural cocoa powder like Hershey's is preferred for this recipe (not dutch process cocoa) because it's acidic and will react to the addition of buttermilk and baking soda, adding to the overall flavor of the cookies. 

    Full fat cream cheese is needed for the cookie filling. I prefer Philadelphia brand cream cheese which you can find in most grocery stores. 

    White chocolate chips are needed for that final drizzle on top of the red velvet cookies. Not only does it taste delicious but it looks so pretty! I prefer a bar of Lindt white chocolate that you can chop finely and temper easily so the chocolate sets up on top of the cookies. You can use any kind of white chocolate that you like but I would look for a brand that contains cocoa butter which tastes better than fake chocolate like candy wafers or candy melts.

    Red food coloring is needed to ensure the vibrancy of the red color in these cookies. I prefer the use of a nice super red food color gel over liquid food coloring or if you don't want to use food coloring you can use a teaspoon of beet powder which is a nice natural alternative.

    How To Make The Cream Cheese Filling

    You'll want to make the cream cheese filling first so that it has time to freeze while you prepare the cookie dough.

    1. Combine the cream cheese, sugar, flour, and salt in the bowl of your stand mixer with the whisk attachment or a hand mixer on low speed until smooth. Take care not to over mix as cream cheese liquifies the more it is mixed.cream cheese filling dollops on a blue sheet pan with parchment paper
    2. Scoop the frosting (or pipe it) into small balls (about 2 Tablespoons worth) onto a parchment lined cookie sheet.
    3. Place the cookie sheet into the freezer for at least 1 hour or until they are firm.

    Making The Red Velvet Cookie Dough

    1. In a separate bowl, combine the all purpose flour, cocoa powder, baking soda, and salt. Whisk them together and set them aside. 
    2. In the bowl of your stand mixer with paddle attachment attached, cream together the room temperature, unsalted butter, white sugar, and brown sugar until it is pale and fluffy. This takes about 2-3 minutes. close up of whipped sugar and butter on a blue spatula
    3. While mixing on low, add the eggs to the creamed butter mixture one at a time, waiting until each egg is fully incorporated before adding the next. 
    4. Add in the vanilla extract, red food coloring and buttermilk. Mix until just combined. 
    5. Add the dry ingredients mixture to the wet ingredients gradually while the mixer is running on low, until the dough is fully combined. Make sure to scrape the bottom of the bowl so all of the butter and sugar are evenly mixed into the dough. red velvet cookie dough
    6. Cover the dough with plastic wrap and chill the cookie dough for at least 60 minutes or overnight. Chilling your cookie dough is an important step to hydrating the flour. If you don't give the flour time to hydrate, your cookies will spread too much during baking.red velvet cookie dough in a clear bowl with clear wrap on top

    Putting The Cookies Together

    1. Preheat your oven to 350ºF (176ºC) and prepare two cookie sheets with parchment paper.
    2. Portion the cookie dough out into roughly 2oz portions using a medium cookie scoop. scooping red velvet cookie dough
    3. Working quickly with the cold dough, divide it in 2 pieces and flatten them slightly. two hands separating red velvet cookie dough into two pieces
    4. Form the two pieces around your frozen ball of cream cheese frosting. sandwiching cookie dough around cream cheese filling
    5. Place the cookie back onto the cookie sheet and chill the cookies for 10 minutes. 

      Note: The cream cheese filling dollops do not freeze hard, so working quickly so it all doesn't get too sticky is ideal. This dough is also very sticky, if it becomes too sticky dip your fingers in some flour to help, or put the dough back in fridge.
    6. Place your cookies onto your prepared baking sheet pan. I put about 6 cookies on each sheet pan to allow room to spread.balls of red velvet cookie dough on a cookie sheet
    7. Bake the cookies in the preheated oven for approximately 12-14 minutes. The center will look underbaked, if it appears wet, bake for another 1-2 minutes until it doesn't appear wet anymore.baked red velvet cookies
    8. Once the cookies have cooled, temper some white chocolate and place it in a piping bag or parchment paper cone and drizzle across the top of the cookies.

    The texture of these cookies bake up with a wonderful crisp edge and chewy centers. 

    How To Store Red Velvet Cookies

    Because these cookies contain cream cheese, they should be stored in the fridge in an air-tight container to prevent drying out. However, they can be left at room temperature for about 4 hours safely.

    Storing cookies in an air-tight container helps the cookies retain moisture. 

    Baked goods begin to stale after 24 hours so they should be eaten within 48 hours for the best flavor and texture.

    If you're not going to enjoy those cookies within 48 hours you can freeze them! I like to freeze mine first then wrap them individually and put them into a ziplock freezer bag to prevent freezer burn and to keep them from sticking to each other.

    FAQ

    What flavor is red velvet?

    The main flavor of red velvet is vanilla and cocoa powder but what truly gives red velvet its name is the velvety texture and the hint of tang that comes from using buttermilk and cream cheese in the recipe.

    Why didn't my red velvet cookies turn out red?

    If you don't use enough red food coloring or you don't use gel-based food coloring then the color of the cocoa powder will dominate the red and the cookies will look more brown rather than red.

    Recipe

    stack of red velvet cookies
    Print Recipe
    4.80 from 166 votes

    Red Velvet Cookies Stuffed With Cream Cheese

    The secret to the best red velvet cookies is buttermilk and baking soda! These cookies are soft and chewy and taste just like red velvet cake, right down to the fluffy cream cheese frosting stuffed inside and the white chocolate drizzle on top.
    Prep Time5 minutes mins
    Cook Time12 minutes mins
    chilling1 hour hr
    Total Time1 hour hr 17 minutes mins
    Course: Dessert
    Cuisine: American
    Servings: 18 cookies
    Calories: 311kcal
    Author: Liz Marek

    Equipment

    • Stand mixer with paddle attachment
    • Digital Kitchen Scale
    • Medium cookie scoop
    • Piping bag or zip-top bag

    Ingredients

    Red Velvet Cookies

    • 1 ounce cocoa powder
    • 12 ounces all-purpose flour
    • 1 teaspoon soda
    • ½ teaspoon salt
    • 7 ounces unsalted butter room temperature
    • 5 ounces brown sugar
    • 5 ounces white sugar
    • 2 large eggs room temperature
    • ½ teaspoon vanilla
    • 1 Tablespoon red food color gel
    • 1 Tablespoon buttermilk
    • 4-6 ounces white chocolate for decoration

    Cream Cheese Filling

    • 6 ounces cream cheese room temp
    • 5 ounces powdered sugar
    • ½ teaspoon salt
    • 1 Tablespoon flour
    US Customary - Metric

    Instructions

    Before You Begin

    • Make the cream cheese filling and freeze before starting the cookie dough. The filling needs at least 30 minutes in the freezer (longer is better) to be firm enough to wrap dough around. Bring butter, eggs, and cream cheese to room temperature before starting.

    Cream Cheese Filling

    • Combine cream cheese, powdered sugar, flour, and salt in a stand mixer with whisk attachment or hand mixer on low. Mix until just smooth. Do not overmix.
    • Scoop or pipe approximately 2-teaspoon mounded discs onto a parchment-lined sheet pan.
    • Freeze for at least 30 minutes until firm.

    Cookie Dough

    • Whisk together flour, cocoa powder, baking soda, and salt. Set aside.
    • Cream butter, brown sugar, and white sugar together until pale and fluffy, about 2 to 3 minutes.
    • Add eggs one at a time, mixing fully between each addition.
    • Add vanilla, red food coloring, and buttermilk. Mix until just combined.
    • Add dry ingredients gradually on low until fully mixed. Scrape the bowl bottom.
    • Cover with plastic wrap and refrigerate at least 60 minutes or overnight.

    Assembly and Baking

    • Preheat oven to 350º F. Line two sheet pans with parchment.
    • Portion chilled dough into 2-ounce balls. Divide each ball in half and flatten slightly.
    • Place a frozen cream cheese disc on one piece. Wrap the other piece over it and press firmly to seal, with no thin spots or gaps. Roll into a ball. Refrigerate assembled balls for 10 minutes.
    • Place 6 balls per sheet pan.
    • Bake for 12 to 14 minutes until edges are set. Center will look slightly underbaked. Cool completely on the pan.
    • Drizzle with tempered white chocolate. Let set 30 minutes before handling.

    Video

    Notes

    Cocoa powder: Natural cocoa only. Dutch-processed destroys the flavor chemistry that makes red velvet taste like red velvet.
    Cream cheese: Full-fat only. Room temperature. Do not overmix the filling.
    Sealing tip: The seam must be fully closed with no thin spots. This is what prevents filling from leaking. Press firmly all the way around and check for visible cream cheese before baking.
    Make-ahead options:
    • Refrigerate unassembled dough: up to 2 days.
    • Freeze assembled stuffed dough balls: up to 3 months. Bake from frozen at 350º F, 14 to 16 minutes.
    • Freeze baked cookies: up to 2 months. Thaw at room temperature 30 minutes.
    Richer cheesecake filling upgrade: Add 1 tablespoon sour cream and an extra ½ teaspoon vanilla to the filling for a more cheesecake-like center.
    Storage: Refrigerator in airtight container up to 5 days. Room temperature up to 4 hours. Let come to room temperature for 15 to 20 minutes before eating.

    Nutrition

    Serving: 1cookie | Calories: 311kcal | Carbohydrates: 43g | Protein: 3g | Fat: 15g | Saturated Fat: 9g | Polyunsaturated Fat: 1g | Monounsaturated Fat: 4g | Trans Fat: 1g | Cholesterol: 36mg | Sodium: 248mg | Potassium: 96mg | Fiber: 1g | Sugar: 28g | Vitamin A: 406IU | Vitamin C: 1mg | Calcium: 38mg | Iron: 1mg

    close up of cranberry filling in a jar with a spoon

    November 6, 2021 Filling

    Homemade Cranberry Filling

    Homemade cranberry filling is so easy to make and perfect for the holiday season! All you really need is one bag of cranberries, some sugar, water, an orange, and 10 minutes of your time. This filling is nice and thick and can be incorporated into easy buttercream, homemade whipped cream, used as a cake filling, tart filling, Linzer cookies, and more!

    close up of cranberry filling in a jar with a spoon

    What's great about this cranberry filling recipe is that it's got some real texture to it. But if you prefer your filling to be a bit smoother, just blend up your cranberry filling after it has cooled down to make it nice and smooth. 

    What's In This Blog Post

    • Homemade Cranberry Filling Ingredients
    • How to Make Cranberry Filling Step-By-Step
    • More Cranberry Filling Ingredients Combinations
    • FAQ
    • More Recipes You'll Love

    Homemade Cranberry Filling Ingredients

    cranberry sauce ingredients in clear bowls

    How to Make Cranberry Filling Step-By-Step

    1. In a saucepan, combine water, sugar, zest, juice, and cranberries together over medium-high heat until it begins to simmer. Stir occasionally to prevent burning.
      cranberry filling ingredients simmering in a stainless steel pot
    2. Reduce the heat to medium and let the mixture reduce for about 10 minutes or until the mixture is thickened. It will thicken even more as it cools.
      simmering cranberry filling in a stainless steel pot
    3. Remove from the heat and let the mixture cool before using. 
      closeup shot of cranberry filling on a spatula
    4. Once your filling is cool, use an immersion blender or blender to make your cranberry filling smoother. This is totally optional. 
    5. Store in an airtght container in the fridge for up to 2 weeks or freeze for 6 months.
      cranberry filling in a glass jar with a spoon

    More Cranberry Filling Ingredients Combinations

    Try out some of these combinations and make this homemade cranberry filling your own!

    In place of water you can use: 

    • Apple juice
    • Apple cider
    • Orange juice
    • Red Wine

    In place of sugar try:

    • Brown sugar
    • Maple syrup
    • Honey
    • Corn syrup
    • Agave syrup

    In place of orange zest and juice:

    • Lemon
    • Lime

    Add more flavors by adding in other fruits like blueberries, strawberries, or apple chunks. You could even add in spices like cinnamon, cloves, and nutmeg for some warmth and extra flavor! It's all up to you to customize this filling and make it your own! 

    closeup of homemade cranberry sauce in a white bowl

    FAQ

    What recipes use cranberry filling?

    My absolute favorite recipe to use cranberry filling is to make Linzer cookies! You can also use cranberry filling to enhance easy buttercream or homemade whipped cream. In addition to those, cranberry filling can also be used as a cake or tart filling.

    How do you make cranberry filling thicker?

    If you want to thicken your cranberry filling further, combine 2 teaspoons of cornstarch with 1 Tablespoon of cool water to make a slurry. Add the slurry into the cranberry filling at the end of cooking and cook for 1 extra minute until it's thickened. 

    How long does it take to cool homemade cranberry filling?

    Cranberry filling takes about 2 hours in the fridge to cool completely. This homemade cranberry filling is quite thick when it cools down due to the natural pectin in the cranberries skin.

    What tastes good with cranberries?

    Cranberries are extremely tart and pair well with sweeter fruits like oranges, apples, and pineapples. The sweetness of these fruits will help cut through the tartness of the cranberries.

    Can you eat raw cranberries?

    Yes! They are very tart in flavor so they can be a little jarring to eat on their own, but you can definitely eat raw cranberries if you desire.

    Can I use frozen cranberries to make cranberry filling?

    Absolutely! It will take longer to cook the cranberries down if they are frozen solid, but no recipe adjustments are needed to make cranberry filling with frozen cranberries.

    More Recipes You'll Love

    Traditional Linzer Cookies

    Fresh Blueberry Filling

    Apple Pie Filling

    Lemon Curd

    Recipe

    closeup of cranberry sauce in a clear jar with a spoon
    Print Recipe
    4.50 from 4 votes

    Homemade Cranberry Filling

    This sweet and tart homemade cranberry filling only takes four ingredients and 10 minutes to make. This recipe accommodates several other ingredient substitutions and flavor ideas.
    Prep Time1 minute min
    Cook Time10 minutes mins
    Total Time11 minutes mins
    Course: Side Dish
    Cuisine: American
    Servings: 1 cup
    Calories: 949kcal
    Author: Liz Marek

    Equipment

    • 1 Immersion blender optional

    Ingredients

    • 12 ounces fresh cranberries
    • 7 ounces sugar or maple syrup, brown sugar, honey, etc
    • 8 ounces water or apple juice, orange juice, red wine, etc
    • 1 Tablespoon orange zest or lemon, lime
    • 3 Tablespoons fresh squeezed orange juice or lemon, lime
    US Customary - Metric

    Instructions

    Homemade Cranberry Filling Instructions

    • In a saucepan, combine the water, sugar, orange zest, orange juice, and cranberries over medium-high heat until it begins to simmer. Stir occasionally to prevent burning.
    • Reduce the heat to medium and let the mixture reduce for about 10 minutes, or until thickened. It will thicken even more as it cools.
    • Remove from the heat and let the mixture cool before using. This takes about 2 hours in the fridge to cool completely.
    • Once the filling is cool, use an immersion blender or blender to make it smoother, if desired. This step is optional.
    • Store in an airtight container in the fridge for up to 2 weeks, or freeze for up to 6 months.

    Video

    Notes

    Ingredient notes: Fresh or frozen cranberries both work here, no adjustments needed if using frozen. Cranberries are naturally high in pectin, which is what thickens this filling as it cools, so no cornstarch or gelatin is required.
    Pan options: A stainless steel or enamel saucepan works best here. Avoid uncoated aluminum or cast iron. Due to the cranberries' acidity, these metals can react and give the filling a slightly metallic taste.
    Make-ahead and storage: Keeps in an airtight container in the fridge for up to 2 weeks, or in the freezer for up to 6 months. Thaw in the fridge before using if frozen.
    Substitutions: In place of water, try apple juice, apple cider, orange juice, or red wine. In place of sugar, try brown sugar, maple syrup, honey, corn syrup, or agave. In place of orange zest and juice, use lemon or lime instead. See the Make This Recipe Your Own section above for more ways to customize it, including mix-ins like other fruits or warm spices.
    Critical do-nots: Don't skip the full cooling time! It needs it to reach its final thick texture. Don't use an aluminum or cast iron pan because the cranberries' acidity can react with it.

    Nutrition

    Serving: 2ounces | Calories: 949kcal | Carbohydrates: 245g | Protein: 2g | Fat: 1g | Saturated Fat: 0.04g | Polyunsaturated Fat: 0.2g | Monounsaturated Fat: 0.1g | Sodium: 21mg | Potassium: 391mg | Fiber: 13g | Sugar: 217g | Vitamin A: 331IU | Vitamin C: 81mg | Calcium: 51mg | Iron: 1mg
     

    November 1, 2021 4th of July

    Copycat Chocolate Chip Crumbl Cookies

    Copycat Crumbl chocolate chip cookies are thick, gooey, and caramelized on the edges in a way that regular chocolate chip cookies simply cannot match, and making them at home means your whole kitchen smells like the inside of that little pink shop. This is the recipe I reach for when I want a truly over-the-top cookie experience, and it might have edged out my classic chocolate chip cookie recipe as my personal favorite. Five simple ingredients you already have, one bowl, and 30 minutes of chilling is all it takes.

    hand pulling cookie apart chocolate melting inside

    Quick Glance: Copycat Chocolate Chip Crumbl Cookies

    • Recipe Name: Copycat Chocolate Chip Crumbl Cookies
    • Why You'll Love It: These giant, gooey cookies have a craggly caramelized exterior, a soft and buttery center, and taste almost identical to the real thing straight from the pink box.
    • Time and Difficulty: 10 minutes prep + 30 minutes chill + 10 to 12 minutes bake | Easy
    • Main Ingredients: All-purpose flour, butter, brown sugar, white sugar, egg, vanilla, milk chocolate chips
    • Method: Cream butter and sugar, add egg and flour, chill dough, bake at high heat
    • Texture and Flavor: Thick and cakey with a gooey, buttery center and crispy caramelized edges. Rich milk chocolate flavor throughout.
    • Quick Tip: Do not overbake. The cookies should still look slightly raw in the center when you pull them out. They continue cooking on the hot pan.
    ChatGPT
    Google AI
    Perplexity
    Grok
    Add us as a trusted site on Google
    [feast_advanced_jump_to]

    Why This Recipe Works

    The signature Crumbl cookie texture comes from three deliberate choices: the size, the chill, and the bake temperature.

    At 5 ounces per cookie (roughly the size of a tennis ball), these are significantly larger than a standard cookie. The mass means the outside can develop a caramelized, slightly crispy edge while the center stays completely gooey and underbaked. A smaller cookie would cook through entirely at the same oven temperature. The size is not optional if you want that signature texture. My sea salt chocolate chip cookies use a much smaller format and bake through completely by comparison.

    Chilling the dough for at least 30 minutes before baking is what prevents the cookies from spreading out flat. Cold butter takes longer to melt in the oven, which gives the flour more time to set before the fat liquefies. It also gives the flour time to fully hydrate, which deepens the flavor and produces a more cohesive dough that holds its thick shape. Overnight chilling produces an even better result if you have the time. I use the same overnight chill technique in my double chocolate chip cookies for the same reason.

    The combination of brown sugar and white sugar is intentional. White sugar encourages spread and crispness at the edges. Brown sugar adds hygroscopic moisture that keeps the center soft and chewy for days. Together, they give you the best of both, crispy caramelized edges and a center that stays soft even after the cookie cools.

    Baking at 375 degrees rather than a lower temperature is what creates that caramelized edge so quickly. The higher heat drives the Maillard reaction at the surface before the center has time to fully cook through. This is exactly what gives Crumbl cookies their distinctive craggly, golden exterior.

    The egg temperature also matters. A cold egg straight from the fridge produces a thicker cookie with less spread. A room-temperature egg produces slightly more spreading. For the most authentic Crumbl look, use a cold egg.

    Chocolate Chip Copycat Crumbl Cookie Ingredients

    The ingredients to make chocolate chip copycat crumbl cookies are totally normal things you can find in your pantry.

    photo of baking ingredients on countertop

    Unsalted butter must be softened to room temperature before mixing. It should be soft enough to leave an indent when you press it but still holding its shape, not greasy or melted. I use this same standard for butter temperature across all my baking recipes including my easy buttercream frosting and American buttercream. Room temperature butter creams properly with the sugar and gives you that light, fluffy base that creates the craggly top.

    Brown sugar adds moisture, a light molasses flavor, and a subtle chewiness that keeps the center soft. Do not substitute all white sugar as the cookies will be crispier throughout and lose that gooey center.

    White sugar contributes sweetness and helps the edges caramelize and crisp up in the oven. The combination of both sugars is what gives you the contrast between the crispy edge and the soft center.

    All-purpose flour provides the structure. Measure by weight for the most consistent results. Too much flour and the dough will be crumbly. Too little and the cookies will spread flat. I talk about proper flour measurement in more detail in my vanilla cake recipe.

    Baking soda and baking powder work together to give these cookies their lift and that signature domed, cakey thickness. Both are needed for the right texture.

    Salt balances the sweetness and deepens the chocolate flavor. Do not skip it.

    Egg at cold temperature produces a thicker cookie with less spread, which is what you want for the authentic Crumbl look. If your dough is too dry and crumbly and will not form into balls, add a small amount of extra egg rather than liquid. Not all eggs weigh the same and a typical large egg in the US weighs about 1.6 ounces.

    Vanilla extract rounds out the flavor. Use pure vanilla extract for the best result.

    Milk chocolate chips are what Crumbl uses and they give the cookies that sweeter, creamier chocolate flavor compared to semi-sweet. Use large chips or Hershey's milk chocolate kisses for the most authentic look. Save a few to press into the tops of the cookies before baking. If you love chocolate cookies, my double chocolate chip cookies use a similar method with a chocolate dough base.

    Common Mistakes To Avoid

    Using melted or cold butter. The butter must be softened to room temperature before creaming. Cold butter will not cream properly and produces a dense, flat cookie. Melted butter causes too much spread. It should be soft enough to leave a finger indent but still holding its shape. I cover butter temperature in depth in my American buttercream recipe since it is the same principle.

    Skipping the chill. Chilling is not optional for this recipe. Unchilled dough spreads out flat and you lose the thick, cakey center that makes these cookies special. Thirty minutes is the minimum and overnight produces an even better result.

    Overbaking. These cookies should come out of the oven looking underdone. The center should still appear slightly raw and glossy. They firm up significantly as they cool on the hot pan. If they look fully baked in the oven they will be dry and hard once cool.

    Crowding the pan. Only 4 cookies per tray. These are large cookies and need space for airflow. Too many on one pan causes uneven baking and encourages spreading.

    Using the wrong chocolate chips. Crumbl uses large milk chocolate chips, not semi-sweet. The sweeter, creamier flavor of milk chocolate is part of what makes these taste like the original.

    Not scraping the bowl. Butter and sugar hide at the bottom and sides of the bowl during creaming. Always scrape down thoroughly before adding the flour so everything is evenly incorporated. I mention this in almost every recipe because it is one of the most commonly skipped steps in baking.

    That gives you links in the opening, Why This Recipe Works, Ingredients, and Common Mistakes sections. What notes would you like in the recipe card?

    How To Make Chocolate Chip Copycat Crumbl Cookies Step-By-Step

    Sheet pan covered in parchment paper
    1. Prepare your pans. Line two cookie sheets with parchment paper and set aside. Make sure you have enough refrigerator space for both trays.
    whisking dry ingredients in a bowl
    1. Mix the dry ingredients. In a separate bowl, combine the flour, baking soda, baking powder, and salt. Whisk together and set aside. Always measure your flour by weight for the most accurate results.
    Creamed butter in the bottom of a mixer bowl.
    1. Cream the butter and sugar. In the bowl of your stand mixer with the paddle attachment, add the butter and mix until smooth. Add both sugars and cream together on medium speed until pale and fluffy, about 3 to 5 minutes. Do not forget to scrape the bowl between additions.
    Pouring egg into a mixer.
    1. Add the egg and vanilla. Add the egg and mix on medium until fully incorporated. Add the vanilla and mix briefly.
    mixing cookie dough in a mixer
    1. Add the flour. Gradually add the flour mixture and mix until just combined. Do not overmix. If the batter is too thick and crumbly and will not form into balls, add a small amount of extra egg.
    chocolate chip cookie dough in the mixer
    1. Add the chocolate chips. Add the chocolate chips and mix until evenly distributed. Save a few to press into the tops of the cookies before baking.
    cookie dough ball on a food scale
    1. Scoop the dough. Scoop and measure the dough into 5-ounce balls, roughly the size of a tennis ball. Place 4 dough balls on each cookie sheet, evenly spaced. Gently press each ball down slightly. This recipe makes 8 cookies total across 2 trays.
    four chocolate chip cookies on a baking sheet, hand wearing a glove pressing down on a cookie dough ball
    1. Add chips to tops. Press a few extra chocolate chips onto the tops of each cookie.
    hands wearing pink gloves pointing at smushed cookie dough ball on a baking sheet
    1. Chill. Refrigerate the trays for at least 30 minutes or overnight. Do not skip this step. Chilling is what prevents spreading and gives you that thick, cakey texture.

      Preheat your oven to 375 degrees while the dough is chilling.
    four chocolate chip cookies on parchment paper on a baking sheet in the oven
    1. Bake. Bake on the middle rack for 10 to 12 minutes. Do not overbake. The cookies will still look slightly raw in the center and the edges will be lightly browned. They continue cooking on the hot pan as they cool.
    chocolate chip cookies pulled apart and exposing the melted chocolate on the inside
    1. Cool. Let the cookies cool on the pan for 5 minutes before transferring to a cooling rack. Store in an airtight container for up to 1 week.

    PRO TIP: These cookies are best served warm. Microwave for 10 to 15 seconds before eating for that gooey, melted chocolate experience.

    Chocolate Chip Copycat Crumbl Cookies FAQs

    Can I make smaller Crumbl cookies?

    Yes but the texture will be different. The thick, gooey center is a result of the large size. Smaller cookies will bake through more quickly and lose that signature underdone center. If you make smaller cookies, reduce the bake time and watch them closely.

    Do Crumbl cookies require chilling?

    Yes. Chilling the dough before baking is what prevents the cookies from spreading flat and gives you that thick, domed shape. The minimum is 30 minutes but overnight chilling produces an even better result because it gives the flour more time to fully hydrate.

    How do I get the craggly top?

    The craggly top comes from room temperature butter that is creamed properly with the sugar and from pressing the dough balls down slightly before chilling. Do not skip the creaming step and make sure your butter is at room temperature, not cold.

    Can I use semi-sweet chocolate chips?

    You can, but the flavor will be noticeably different. Crumbl uses milk chocolate chips specifically for their sweeter, creamier flavor. Semi-sweet chips produce a more intense chocolate flavor that does not taste as much like the original.

    How long do these cookies last?

    Stored in an airtight container at room temperature, these cookies stay fresh for up to 1 week. Warm them in the microwave for 10 to 15 seconds before eating to bring back the gooey center.

    Can I freeze the dough?

    Yes. Portion the dough into 5-ounce balls, place on a tray, freeze until solid, then transfer to a zip-lock bag. Bake from frozen at 375 degrees adding 2 to 3 extra minutes to the bake time.

    More Cookie Recipes To Try

    • Pumpkin Chocolate Chip Cookies
    • close up shot of double chocolate chip cookie
      Chewy Double Chocolate Chip Cookies
    • Sea Salt Chocolate Chip Cookies
    • chocolate chip cookie split in half with melted chocolate chips. Shot from the top
      Master chocolate chip cookie recipe

    Leave Me A Review
    ⭐️⭐️⭐️⭐️⭐️

    If you tried this Chocolate Chip Copycat Crumbl Cookie Recipe or any other recipe on my blog, please leave a 🌟 star rating and let me know how it goes in the comments. I love hearing from you!

    Recipe

    Print Recipe
    4.84 from 455 votes

    Copycat Chocolate Chip Crumbl Cookie

    Looking for a true copycat Crumbl cookie recipe? Big dense and chewy milk chocolate chip cookies with that signature craggily look on top. Put them in that cute little pink box and you'll hardly be able to tell the difference!
    Prep Time10 minutes mins
    Cook Time11 minutes mins
    Chilling30 minutes mins
    Total Time51 minutes mins
    Course: Dessert
    Cuisine: American
    Servings: 8 5 oz cookies
    Calories: 547kcal
    Author: Liz Marek

    Ingredients

    • 4 ounces butter softened, but not melted (½ cup)
    • 5.25 ounces brown sugar (¾ cup)
    • 5.25 ounces white sugar (¾ cup)
    • 11.25 ounces all purpose flour (2 ¼ cups)
    • 1 teaspoon baking soda
    • 1 teaspoon baking powder
    • ½ teaspoon salt
    • 1 large egg cold (room temperature egg if you want your cookies to spread more)
    • 1 teaspoon vanilla extract
    • 2 cups milk chocolate chips extra large! (I actually used mini Hershey's kisses)
    US Customary - Metric

    Instructions

    Making the dough

    • Prepare a cookie sheet with a piece of parchment paper.
    • In a separate bowl, combine the flour, baking soda, baking powder, and salt.
    • In the bowl of your stand mixer with the paddle attachment, add butter and mix until smooth.
      I'm using my Bosch Universal Plus mixer, but you can use a KitchenAid, or hand mixer as well.
    • Add both sugars and cream together on medium speed until pale and fluffy. About 3-5 minutes.
    • Add the egg and mix until fully incorporated. Add the vanilla.
    • Gradually add the flour mixture and mix until just combined.
    • Add the chocolate chips and mix until evenly distributed. (Save a few to use on the tops of your cookies.)

    Forming and baking the cookies

    • Scoop and measure the dough into 5 ounce balls. (Or about the size of a tennis ball.)
    • Place 4 dough balls onto a cookie sheet, evenly spaced. Gently press them down slightly. This batch will make 8, 5 oz cookies so divide them onto 2 separate trays.
    • (optional) Add a few chocolate chips on top to get pinterest-worthy cookies.
    • Preheat your oven to 375°F
    • Chill the dough in the refrigerator for 30 minutes or overnight.
    • Bake in a 375°F oven on the middle rack for 10-12 minutes. Do not overbake these! They will still look slightly raw in the center and be lightly browned on the edges.
    • Cool the cookies for 5 minutes on the pan, then transfer them to a cooling rack. Store in an airtight container for up to 1 week.
    • Pro-Tip: I like to warm these cookies up in the microwave and eat them warm for that gooey-chocolate experience!

    Video

    Notes

    Use a kitchen scale to measure your ingredients, especially the flour. Too much flour makes the dough crumbly and the cookies dry. Too little and they spread flat. Weight measurements give you consistent results every time.
    Bring your butter to room temperature before mixing. It should be soft enough to leave a finger indent but still holding its shape. Cold butter will not cream properly and melted butter causes too much spread.
    Do not overbake. Pull the cookies out when the edges are lightly browned and the centers still look slightly raw and glossy. They continue cooking on the hot pan as they cool. Overbaked cookies will be dry and hard.
    Chilling the dough is not optional. At least 30 minutes in the refrigerator is required to prevent spreading and get that thick, cakey shape. Overnight chilling produces an even better result.
    Only place 4 cookies per tray. These are large cookies and need space for even airflow. Crowding the pan causes uneven baking and spreading.
    Use large milk chocolate chips for the most authentic Crumbl flavor. Mini Hershey's kisses also work great. Semi-sweet chips will give you a noticeably different flavor.
    These cookies are best served warm. Microwave for 10 to 15 seconds before eating to bring back the gooey, melted chocolate center.
    To freeze the dough, portion into 5 ounce balls, freeze on a tray until solid, then store in a zip-lock bag for up to 3 months. Bake from frozen at 375 degrees, adding 2 to 3 extra minutes to the bake time.

    Nutrition

    Serving: 1cookie | Calories: 547kcal | Carbohydrates: 86g | Protein: 5g | Fat: 21g | Saturated Fat: 13g | Polyunsaturated Fat: 1g | Monounsaturated Fat: 3g | Trans Fat: 1g | Cholesterol: 62mg | Sodium: 409mg | Potassium: 131mg | Fiber: 1g | Sugar: 54g | Vitamin A: 388IU | Calcium: 50mg | Iron: 2mg
    { "@context": "https://schema.org", "@type": "WebPage", "name": "Copycat Chocolate Chip Crumbl Cookies", "url": "https://sugargeekshow.com/recipe/copycat-chocolate-chip-crumbl-cookies/", "description": "How to make copycat Crumbl chocolate chip cookies at home with thick, gooey centers and caramelized edges using simple pantry ingredients.", "about": [ { "@type": "Thing", "name": "Cookie", "sameAs": "https://en.wikipedia.org/wiki/Cookie" }, { "@type": "Thing", "name": "Chocolate chip cookie", "sameAs": "https://en.wikipedia.org/wiki/Chocolate_chip_cookie" }, { "@type": "Thing", "name": "Butter", "sameAs": "https://en.wikipedia.org/wiki/Butter" }, { "@type": "Thing", "name": "Brown sugar", "sameAs": "https://en.wikipedia.org/wiki/Brown_sugar" }, { "@type": "Thing", "name": "Maillard reaction", "sameAs": "https://en.wikipedia.org/wiki/Maillard_reaction" }, { "@type": "Thing", "name": "Milk chocolate", "sameAs": "https://en.wikipedia.org/wiki/Milk_chocolate" }, { "@type": "Thing", "name": "Baking", "sameAs": "https://en.wikipedia.org/wiki/Baking" }, { "@type": "Thing", "name": "Gluten", "sameAs": "https://en.wikipedia.org/wiki/Gluten" }, { "@type": "Thing", "name": "Caramelization", "sameAs": "https://en.wikipedia.org/wiki/Caramelization" }, { "@type": "Thing", "name": "Confectionery", "sameAs": "https://en.wikipedia.org/wiki/Confectionery" } ] }

    Cake sculpted to look like a monster truck

    November 1, 2021 Course Preview

    Monster Truck Cake Tutorial

    Skill level: Intermediate

    For my son's 2nd birthday, it was pretty easy to pick a theme, monster trucks! Ezra is constantly talking about trucks so we went all out for his party, and the cake was no exception.

    In this tutorial, you will learn how to make a gravity-defying monster truck birthday cake and actually can roll around, so we made a texas sheet cake that it put tire treads into. And speaking of tires, yes, the tires are edible too!

    There's many cool details and tricks in this tutorial, so let's get our tools together and let's get started.

    1:03:36 Minutes of Instruction

    What You Will Learn

    • How to make a birthday cake in the shape of a monster truck
    • Learn how to create the structure to support this gravity-defying design
    • How to hand-paint the flames and make the edible tires

    Cake sculpted to look like a monster truck

    Tutorial Chapters

    1. Adding the monster clay 0:37
    2. Building the mold casing 8:05
    3. Adding the tire to the mold 10:40
    4. Adding the Oomoo 11:35
    5. Making the chocolate tire 13:37
    6. Cutting the threaded rod 15:05
    7. Making the base 16:00
    8. Adding the tires 22:35
    9. Adding the chassis 25:26
    10. Painting the base and tires 28:07
    11. Stacking and carving the cake 32:18
    12. Crumb coating the cake 35:56
    13. Covering the cake in fondant 39:26
    14. Adding the fenders 46:55
    15. Adding the bumpers and lights 50:25
    16. Adding the grill 55:10
    17. Adding the straws 56:34
    18. Painting the details 58:30
    19. Painting the flames 59:39
    20. Adding the shock absorbers 1:02:23

    Downloads

    Materials List
    Truck Template

    Cake sculpted to look like a monster truck

    November 1, 2021 Paid Video

    Monster Truck Cake

    Skill level: Intermediate

    For my son's 2nd birthday, it was pretty easy to pick a theme, monster trucks! Ezra is constantly talking about trucks so we went all out for his party, and the cake was no exception.

    In this tutorial, you will learn how to make a gravity-defying monster truck birthday cake and actually can roll around, so we made a texas sheet cake that it put tire treads into. And speaking of tires, yes, the tires are edible too!

    There's many cool details and tricks in this tutorial, so let's get our tools together and let's get started.

    1:03:36 Minutes of Instruction

    What You Will Learn

    • How to make a birthday cake in the shape of a monster truck
    • Learn how to create the structure to support this gravity-defying design
    • How to hand-paint the flames and make the edible tires

    Tutorial Chapters

    1. Adding the monster clay 0:37
    2. Building the mold casing 8:05
    3. Adding the tire to the mold 10:40
    4. Adding the Oomoo 11:35
    5. Making the chocolate tire 13:37
    6. Cutting the threaded rod 15:05
    7. Making the base 16:00
    8. Adding the tires 22:35
    9. Adding the chassis 25:26
    10. Painting the base and tires 28:07
    11. Stacking and carving the cake 32:18
    12. Crumb coating the cake 35:56
    13. Covering the cake in fondant 39:26
    14. Adding the fenders 46:55
    15. Adding the bumpers and lights 50:25
    16. Adding the grill 55:10
    17. Adding the straws 56:34
    18. Painting the details 58:30
    19. Painting the flames 59:39
    20. Adding the shock absorbers 1:02:23

    Downloads

    Materials List
    Truck Template

    October 30, 2021 Blog

    Moist Gingerbread Cake

    This perfectly spiced gingerbread cake is super moist and paired with delicious brown sugar Swiss meringue buttercream. The best wintery cake to make you feel warm and cozy inside and out!

    This gingerbread cake recipe is super simple to make and you don't even need a stand mixer to make it! Decorate yours however you like with your favorite holiday sprinkles, or you can make your very own miniature, gingerbread men cookies to sit on top like I did!

    Add another holiday classic to your Christmas baking with my homemade panettone recipe, perfect for gifting in individual paper molds.


    What's In This Blog Post

    • Gingerbread Cake Ingredients
    • How to Make Gingerbread Cake Step-By-Step
    • How to Make Brown Sugar Swiss Meringue Buttercream
    • How to Make White Chocolate Water Ganache
    • How To Decorate A Gingerbread Cake
    • FAQ
    • More Recipes You'll Love

    Gingerbread Cake Ingredients

    gingerbread cake ingredients

    The most important ingredient in your gingerbread cake is ginger! We're using freshly grated ginger and ground ginger for tons of ginger flavor. You can grate your own ginger or buy your own pre-made. But trust me, you don't want to leave it out. 

    One of the reasons this cake is so moist is because it uses dark brown sugar, un-sulfured molasses, buttermilk, and a little bit of oil. I'm using canola oil which has the most neutral oil, but you could also use vegetable oil. 

    grandmas sulfured molasses in a jar

    Make sure your molasses is un-sulfured and not black-strap molasses which is very bitter and too strong of a flavor for baking. 

    Another key ingredient of this recipe is buttermilk! Did you know that buttermilk is often used in baking because the acidity breaks down the gluten protein, resulting in a more tender cake? It's true. If you find that you do not have or cannot get access to buttermilk, you can make your own buttermilk substitute. 

    How to Make Gingerbread Cake Step-By-Step

    1. Preheat your oven to 335°F (170°C). Bring your buttermilk, eggs, and coffee to room temperature. Measure out all of your ingredients by weight with a food scale. I do not recommend converting this recipe to cups because you can accidentally add too much flour which will make your cake dry. 
      gingerbread cake liquid ingredients in a large glass bowl
    2. In a large bowl, add your molasses, oil, coffee, vanilla, melted butter, eggs, freshly grated ginger, and buttermilk. Whisk everything together to break up the egg yolks and combine, and then set it aside.
      gingerbread cake dry ingredients in a white stand mixer bowl
    3. In the bowl of your stand mixer, add the AP flour, brown sugar, cinnamon, powdered ginger, salt, and baking soda. Add the paddle attachment and mix on low for a few seconds to combine. I'm using my Bosch Universal Plus mixer, you can also use a hand mixer or even a whisk for this cake.
      adding liquid ingredients to dry ingredients while mixing
      close up of gingerbread cake batter in a mixing bowl
    4. While mixing on low, add in your wet ingredient mixture and mix it until it's just combined (takes about 10-15 seconds). Mix with a spatula to make sure there are no pockets of flour.
    5. Prepare three, 6″x2″ cake pans or two, 8″x2″ cake pans with cake goop or your preferred pan release.
      pouring gingerbread cake batter into cake pans
    6. Divide the batter into your greased cake pans. I like to weigh my pans with a scale to see if I divided the batter evenly.
    7. Bake at 335°F (170°C) for 35-40 minutes (for 6″ pans, less for 8″ pans).
    8. Remove your cakes from the oven once the tops are set and a toothpick comes out clean. Let your cakes rest in the pans for 10-15 minutes or until the pans are just barely warm.
    9. Flip the cakes out onto a cooling rack. Wrap them in plastic wrap to cool at room temperature until you are ready to stack, or freeze the cakes for 30 minutes. Do NOT stack warm cakes. You can wrap and freeze these cakes for a few days before they lose too much moisture.
      gingerbread cake on a cooling rack
      gingerbread cakes on a cooling rack

    I made brown sugar Swiss meringue buttercream to go with this cake because I love how silky and smooth it is, but this cake would also go great with cream cheese frosting, whipped cream frosting, ermine buttercream, or my easy buttercream recipe.

    How to Make Brown Sugar Swiss Meringue Buttercream

    1. Bring two inches of water to a simmer over medium-high heat. Once it's simmering, reduce the heat to medium-low.
    2. Place your egg whites and brown sugar together in the metal bowl of your stand mixer and whisk to combine.
      egg whites and brown sugar in a metal mixing bowl
    3. Place the bowl on top of the simmering water and whisk continuously until the grains of sugar are dissolved. Don't walk away or you could accidentally cook your eggs. Pro-tip - (or oops I accidentally multi-tasked and got distracted tip) if you do walk away and see some bits of cooked egg, you can strain it out and then continue with your buttercream. It's not ruined.
      hand touching egg whites and brown sugar mix
    4. Once you cannot feel any grains of sugar, take the egg mixture off the heat and attach it to your stand mixer with the whisk attachment.
    5. Turn the mixer onto high and let your eggs whip until you reach stiff, STIFF peaks. Stiff peaks is when the meringue stands straight up from the whisk. This can take 5-15 minutes depending on the strength of your mixer.
      egg and brown sugar mixture whisking on a stand mixer
    6. Because I'm impatient, I like to scoop out my meringue and place it onto a cookie sheet to cool down quickly in the fridge. You can stick the whole bowl in the fridge but it takes much longer. You can't whip in the butter until the meringue is cool or it will melt the butter and you'll be left with brown sugar soup!
      brown sugar meringue on a green sheet pan
    7. After about 10-20 minutes, your meringue shouldn't feel warm anymore. Scoop it back into the bowl and start mixing on medium speed while adding in your chunks of room temperature butter. Some people have had issues with their buttercream becoming soupy cause the meringue was too warm.
    8. Add in your salt, vanilla, and cinnamon.
      Close up of brown sugar buttercream on a whisk
    9. Increase the speed to high and whip the buttercream until it's light and fluffy and doesn't taste like butter anymore.

    Pro-Tip: If your buttercream is too cold and seems like it's clinging to the sides of the bowl and whisk you can fix it. Remove about 1 cup of the buttercream and place it into a bowl. Microwave it until it's barely melted. It took me about 30 seconds.

    Pour the half-melted buttercream back into the bowl and continue mixing, it should get light and fluffy now. 

    How to Make White Chocolate Water Ganache

    1. Combine your chocolate and water together and microwave it for about 1 minute until the chocolate begins to melt. Stir until it's smooth.
    2. Add in 1 teaspoon of white food coloring so that the drip is nice and white and not transparent. Set the water ganache aside to cool to about 90ºF. Make sure your cake is cold and your water ganache is cooled, or it will drip too far down the side of the cake.
    Click on this image to go to the how to decorate your first cake tutorial

    How To Decorate A Gingerbread Cake

    If you want to learn more about the fundamentals of decorating a cake, check out my how to decorate your first cake tutorial. 

    1. Place your first layer of cake onto a 6″ round cake board or directly onto your cake plate. Spread a thin layer of buttercream on top that is about ¼″ thick. 
    2. Repeat with the second layer of cake. Try to keep your layers of buttercream an even thickness.
    3. Cover the entire cake with a thin layer of buttercream. This is called the crumb coat. Then place the cake into the freezer for about 15 minutes to firm up the crumb coat.
    4. Apply your final coat of buttercream and smooth out the sides and top with a bench scraper and an offset spatula.  
    5. Place your cake back into the fridge to chill while you make your water ganache. 
    6. Drip the water ganache down the sides of the cake and fill in the center with the leftover ganache. Smooth out any gaps with a spatula or spoon. 
    7. Wait until the ganache sets or put the cake into the fridge for 10 minutes before adding your swirls of buttercream. I was not patient and the buttercream ended up pushing some of the ganache over the edges of the cake and ruined my drip a little.
    8. I added these cute little gingerbread cookies to the top of my cake. The lines are just piped with melted white chocolate. Super easy and tasty!

    FAQ

    Can gingerbread cake be frozen?

    Yes! If you want to freeze your gingerbread cake, wrap it tightly in plastic wrap and then store it into a freezer-safe storage bag. If you store it properly, gingerbread cake can be stored for up to 2 months in the freezer.

    Why is my gingerbread cake dry?

    Most likely your gingerbread cake is dry because your oven is too hot. Check your oven with an oven thermometer and reduce the temperature accordingly if it is running hotter than you need it to be.

    Can this recipe be made into cupcakes?

    Yes! This recipe also makes about 24 cupcakes (depending on your pan size). Fill the liners ⅔ way full and bake for about 20 minutes until the center of the cupcake is set.

    Why did my gingerbread cake set in the center?

    Make sure to position your oven rack in the center and place the pans side-by-side on the middle rack. Do not open the oven door for at least 30 minutes and make sure to bake until a toothpick comes out of the center clean. Weighing your ingredients instead of converting to cups will also ensure you have the right ratios for ingredients.

    More Recipes You'll Love

    Gingerbread House Recipe

    Gingerbread Cookies

    Water Ganache

    Brown Butter Buttercream


    Cake Batter and Frosting Calculator

    Select an option below to calculate how much batter or frosting you need. Adjust the servings slider on the recipe card to change the amounts the recipe makes.

    Choose a pan type

    Choose a cake pan size
    (based on 2" tall cake pan)

    Choose a cake pan size
    (based on 2" tall cake pan)

    Choose a cake pan size
    (based on 2" tall cake pan)

    Cupcake Tin Size

    Choose number of pans

    Cups of Batter Needed

    8 cups

    Cups of Frosting Needed

    5 cups

    Note: measurements are estimated based off the vanilla cake recipe using standard US cake pans and sizes. Measurements used are for 2" tall cake pans only. Your results may vary. Do not overfill cake pans above manufacturer's recommended guidelines.


    Recipe

    Print Recipe
    4.83 from 34 votes

    Moist Gingerbread Cake

    This super moist spiced gingerbread cake is made with smooth and creamy brown sugar buttercream. The perfect cake for Christmas.
    Prep Time5 minutes mins
    Cook Time35 minutes mins
    Total Time40 minutes mins
    Course: Dessert
    Cuisine: American
    Servings: 12 servings
    Calories: 870kcal
    Author: Liz Marek

    Equipment

    • Three 6"x2" cake pans
    • Stand mixer with whisk attachment

    Ingredients

    Gingerbread Cake

    • 15 ounces all-purpose flour
    • 10 ounces dark brown sugar
    • 1.5 teaspoons baking soda
    • 1.5 teaspoons salt
    • 3 teaspoons ground ginger powdered
    • 3 teaspoons ground cinnamon
    • 3 teaspoons grated ginger fresh, or from a tube
    • ¼ teaspoon ground cloves
    • 8 ounces buttermilk room temperature
    • 4 ounces unsalted butter melted, not hot
    • 4 ounces canola oil or vegetable
    • 2 ounces coffee room temperature
    • 1 teaspoon vanilla extract
    • 4 ounces un-sulfured molasses I used Grandma's brand
    • 2 large eggs room temperature

    Brown Sugar Swiss Meringue Buttercream

    • 8 ounces egg whites  fresh is better, you can use boxed if needed
    • 14 ounces light brown sugar
    • ¾ teaspoon salt
    • 18 ounces unsalted butter room temperature
    • 1 Tablespoon vanilla extract
    • 1 Tablespoon ground cinnamon

    White Chocolate Water Ganache

    • 6 ounces white chocolate I prefer guittard white chocolate wafers
    • 1 ounce warm water
    US Customary - Metric

    Instructions

    • Before you begin: Preheat your oven to 335º F (170º C). Bring your buttermilk, eggs, and coffee to room temperature, and measure everything by weight rather than cups.

    Gingerbread Cake

    • In a large bowl, add your molasses, oil, coffee, vanilla, melted butter, eggs, freshly grated ginger, and buttermilk. Whisk everything together to break up the egg yolks and combine, then set it aside.
    • In the bowl of your stand mixer, add the flour, brown sugar, cinnamon, powdered ginger, salt, and baking soda. Attach the paddle and mix on low for a few seconds to combine.
    • While mixing on low, add in your wet ingredient mixture and mix until just combined, about 10 to 15 seconds. Mix with a spatula to make sure there are no pockets of flour.
    • Prepare three 6" x 2" cake pans or two 8" x 2" cake pans with cake goop or your preferred pan release.
    • Divide the batter evenly into your greased cake pans. I like to weigh my pans with a scale to see if I divided the batter evenly.
    • Bake at 335º F (170º C) for 35 to 40 minutes (for 6" pans, less for 8" pans).
    • Remove your cakes from the oven once the tops are set and a toothpick comes out clean. Let them rest in the pans for 10 to 15 minutes, or until the pans are just barely warm.
    • Flip the cakes out onto a cooling rack. Wrap them in plastic wrap to cool at room temperature until ready to stack, or freeze for 30 minutes. Do not stack warm cakes.

    Brown Sugar Swiss Meringue Buttercream

    • Set up a double boiler: fill a large pot with about 2 inches of water and bring it to a simmer, then reduce the heat to medium-low. Place the metal bowl of your stand mixer on top of the pot. The water should not touch the bottom of the bowl.
    • Add your egg whites and brown sugar to the bowl and whisk to combine.
    • Whisk continuously until the grains of sugar dissolve. Don't walk away, or you risk cooking the eggs.
    • Once you can't feel any grains of sugar left, take the mixture off the heat and attach the bowl to your stand mixer with the whisk attachment.
    • Turn the mixer onto high and let your eggs whip until you reach stiff, STIFF peaks. Stiff peaks is when the meringue stands straight up from the whisk. This can take 5-15 minutes depending on the strength of your mixer.
    • Because I'm impatient, I like to scoop out my meringue and place it onto a cookie sheet to cool down quickly in the fridge. You can stick the whole bowl in the fridge but it takes much longer. You can't whip in the butter until the meringue is cool or it will melt the butter and you'll be left with brown sugar soup!
    • After about 10-20 minutes, your meringue shouldn't feel warm anymore. Scoop it back into the bowl and start mixing on medium speed while adding in your chunks of room temperature butter. 
    • Add in your salt, vanilla, and cinnamon.
    • Increase the speed to high and whip until light and fluffy.

    White Chocolate Water Ganache

    • Add your chocolate and water in a glass bowl. Microwave for about 1 minute, until the chocolate begins to melt. Stir until smooth.
    • Add in 1 teaspoon of white food coloring so the drip looks bright white instead of transparent. Set the ganache aside to cool to about 90º F. Make sure your cake is cold and your ganache has cooled before you drip it, or it will run too far down the sides.

    Cake Assembly

    • Once your cake layers are completely cool and your buttercream is ready, place your first layer of cake onto a 6" round cake board or directly onto your cake plate. Spread a thin layer of buttercream on top, about ¼" thick.
    • Repeat with your second layer, keeping the buttercream layers an even thickness.
    • Place your third and final layer on top, upside down so the flat bottom of the cake becomes the top of your stack.
    • Cover the entire cake with a thin layer of buttercream, this is the crumb coat. Place the cake in the freezer for about 15 minutes to firm it up.
    • Apply your final layer of buttercream and smooth out the sides and top with a bench scraper and an offset spatula. Place your cake in the fridge to chill while you make your water ganache.
    • Drip the water ganache down the sides of the cake and fill in the center with the leftover ganache. Smooth out any gaps with a spatula or spoon.
    • Wait until the ganache sets, or chill the cake for 10 minutes, before piping buttercream swirls on top.
    • I decorated my cake by adding cute little gingerbread cookies. The lines are just piped with melted white chocolate. Super easy and tasty!

    Video

    Notes

    Ingredient notes: Use unsulphured molasses, not blackstrap, which is too bitter for baking. Canola oil has the most neutral flavor, but vegetable oil works too. If a recipe calls for a specific ingredient like cake flour, substituting all-purpose flour and cornstarch isn't recommended unless the recipe says it's fine, this recipe already calls for all-purpose flour specifically. All-purpose flour has a protein level of 10 to 12%, cake flour is 9% or less.
    Pan options: This recipe fills three 6" x 2" cake pans or two 8" x 2" cake pans, bake time is slightly shorter for the larger 8" pans. Use the Cake Batter and Frosting Calculator above for other pan sizes.
    Make-ahead and storage: Baked, unfrosted cake layers can be wrapped tightly and frozen for a few days without losing much moisture. Chill your cake before frosting and filling, and keep it chilled in the fridge before delivery for easier transporting. You can cover a frosted, chilled cake in fondant if needed. It's also a good cake for stacking.
    Substitutions: No buttermilk on hand? Use one of my buttermilk substitutes. Almost any frosting pairs well with this cake, including the brown sugar Swiss meringue buttercream in this recipe, easy buttercream, ermine, whipped cream, or cream cheese frosting.
    Critical do-nots: Don't stack warm cake layers. Don't add butter to the meringue until it's fully cooled, or you'll end up with brown sugar soup instead of buttercream. If your buttercream looks broken or is clinging to the sides of the bowl, it's usually just too cold. Remove about 1 cup, microwave it until barely melted (about 30 seconds), then pour it back in and keep mixing until it comes together light and fluffy.

    Nutrition

    Serving: 1serving | Calories: 870kcal | Carbohydrates: 92g | Protein: 8g | Fat: 53g | Saturated Fat: 28g | Cholesterol: 145mg | Sodium: 662mg | Potassium: 336mg | Fiber: 2g | Sugar: 64g | Vitamin A: 1375IU | Calcium: 124mg | Iron: 3mg
    close up slice of marble cake

    October 30, 2021 Blog

    Moist and Fluffy Marble Cake Recipe

    Moist and fluffy marble cake made from scratch doesn't have to be complicated. Many times, you guys have asked me for an easy marble cake recipe that did not require two cake recipes. After a lot of testing, I finally have the PERFECT recipe for you based on my ever-popular vanilla cake recipe! 

    What makes this cake so amazing is all you have to do is make the vanilla cake and then flavor part of the cake with my chocolate mixture to make the chocolate batter then swirl it all together! Simple!

    Pair it with chocolate frosting and ganache drip and you've got yourself a vanilla and chocolate lover's dream cake!

    If you like a fun mix-in layer cake, my homemade Oreo cake folds chopped Oreos into a soft white cake the same easy way.

    The light half of this marble cake is built on my white cake from scratch, swirled together with chocolate batter for that classic marbled look.

    What's In This Blog Post

    • Marble Cake Ingredients
    • Cake Batter Instructions
    • Marbling the Cake Batter Step-by-Step
    • How to Make Ganache Frosting
    • Ganache Drip Instructions
    • Decorating Step-by-Step
    • What is marble cake made of?
    • Why is it called a marble cake?
    • FAQ
    • More Cake Recipes You'll Love

    Marble Cake Ingredients

    Buttermilk - Buttermilk adds moisture, delicate texture, and flavor to the cake. If you do not have buttermilk, you can make your own using my preferred buttermilk substitutes.

    Cake flour - Cake flour has a lower protein content than all-purpose flour. What this means is that when you use cake flour in your cake recipe, your cake will be more tender and have a softer crumb.

    PRO TIP: Do not fall for the "just add cornstarch to regular flour" trick. It does not work for this recipe. Your cake will look and taste like cornbread.

    If you're in the UK search for Shipton mills soft cake and pastry flour or flour that has a protein level of 9% or less.

    Cake Batter Instructions

    1. Prepare three 8"x2" cake pans with cake goop or another preferred pan spray. Preheat the oven to 335ºF (168ºC).
    2. Bring your butter, milk, and eggs to room temperature. It's really important when making a cake for the ingredients to all be slightly warm so they create an emulsion.
    3. Heat the water until it's simmering and then combine it with your cocoa powder.
    4. Stir it until the cocoa powder is moistened. It will look lumpy, but that is normal.
      blooming cocoa powder with hot water in a clear bowl and metal whisk
    5. Set it aside and let it cool while you prepare the cake batter.
    6. In a separate container, combine ¾ cup of the milk and the oil together and set it aside.
    7. In a separate container, combine the remaining milk, eggs, vanilla, and almond extract together. Whisk it to break up the eggs, and then set it aside.
    8. In the bowl of your stand mixer, combine the flour, sugar, baking powder, baking soda, and salt with the paddle attachment. Mix for 10 seconds to combine everything.
    9. Add your softened butter to the flour mixture and mix on low until the mixture resembles coarse sand (this takes about 30 seconds). This style of mixing is called the reverse creaming method, and it will result in a very velvety, moist cake. A lot of my other cake recipes like brown butter cake and white velvet buttermilk cake use this method.
    10. Add in your milk/oil mixture and mix it on low until the dry ingredients are moistened.
    11. Increase the speed to medium (setting 2 on my Bosch Mixer, setting 4 on a KitchenAid) and let it mix for 2 minutes to develop the cake's structure. If you don't let your cake mix on this step, your cake could collapse.
    12. Scrape your bowl and then reduce the speed to low.
    13. Add in your egg mixture in three batches, letting the batter mix for 15 seconds between additions.
    14. Scrape down the sides again to make sure everything has incorporated.

    Marbling the Cake Batter Step-by-Step

    1. Take out ⅓ of your batter and combine it with the cooled chocolate mixture and fold it gently until it's combined.
    2. Layer your batter into your pans, starting with vanilla, then chocolate, and ending with vanilla.
    3. Use a butter knife to swirl them together gently to create the marbling effect. Do not over-mix or your cake will not have a marbled interior.
      Vanilla and chocolate cake batter in a cake pan and lightly marbled together
    4. Bake the cakes for 35-40 minutes at 335ºF (168ºC) or until a toothpick inserted into the center comes out cleanly (but the cake has not begun to shrink yet from the sides of the pan). IMMEDIATELY TAP THE PAN FIRMLY on the countertop once to release the steam from the cake. This stops the cake from shrinking. Your bake time may vary depending on your oven and the size of cake pans you use.
    5. Let the cakes cool for 10 minutes inside of the pan before flipping them out. The cake will shrink a bit and that is normal.
      marble cake freshly baked in a cake pan, cooling on a wire rack
    6. Flip the cake onto a cooling rack and let it cool completely. I chill my cakes before handling them, or you can wrap them in plastic wrap and freeze them to trap moisture in the cake.
    7. Thaw the cake on the countertop while it's still wrapped before frosting.

    How to Make Ganache Frosting

    1. Place your chocolate into a heatproof bowl.
    2. Heat your cream until it just begins to simmer. Do not boil it or your ganache will be grainy.
    3. Pour the hot cream over your chocolate.
    4. Let it sit for 5 minutes.
    5. Add your vanilla and salt to the chocolate mixture and whisk it until it's smooth and creamy.
    6. Pour your ganache into a shallow pan and let it cool to peanut butter consistency. Mine takes about 20 minutes to thicken up.
    7. Frost your cake with the ganache and then place it in the fridge for 20 minutes. This cake also pairs well with easy buttercream or chocolate Swiss meringue buttercream.
    8. Dust it with cocoa powder using a soft (new) makeup brush to make the velvet texture.

    Ganache Drip Instructions

    1. Heat the cream until it's just steaming, and then pour it over chocolate.
    2. Let it sit for 5 minutes.
    3. Whisk it until it's smooth.
    4. Let it cool until it's slightly warm to the touch before piping it onto your CHILLED cake. 

    Decorating Step-by-Step

    If you need to learn more or are new to cake decorating, check out my blog post on how to decorate your first cake step-by-step.

    1. Place your first cake layer onto your cake plate, and then spread on a layer of the ganache about ¼" thick. Repeat this step with the last two cake layers. I like using ganache because it's super stable and delicious, but chocolate buttercream or easy buttercream would also pair well.
    2. Cover the whole cake in a thin layer of ganache. This is called the crumb coat.
    3. Then, put the entire cake in the fridge for 20 minutes. 
    4. Prepare your chocolate drip and let it cool to 90ºF (32ºC).
    5. Apply your final layer of ganache and smooth it out with your offset spatula and bench scraper. 
    6. Using a soft (new) makeup brush, apply some cocoa powder to the outside of the ganache to make it look like it has a velvet texture. 
    7. Put your drip ganache into a piping bag and snip off the tip.
    8. Drip the ganache all the way around the top of the cake and finish it off with sprinkles.
    marble cake frosted with chocolate ganache with chocolate ganache drip and sprinkles on top

    What is marble cake made of?

    Marble cake is made when you add a small amount of dark-colored batter to light-colored batter, and then lightly mix it to give the cake a marbled appearance. 

    Why is it called a marble cake?

    The idea of marbling two different colored batters into a cake originated in nineteenth-century Germany. Marble cake made its way to America with German immigrants before the Civil War. Originally, the cakes were marbled with molasses and spices.

    three slices of marble cake with chocolate frosting on white plates with gold forks

    In 1889, a recipe appeared in a popular cookbook that took advantage of Americans' obsession with chocolate and replaced molasses with chocolate. Thus, the popular marble cake that we know about today was born. 

    During the 50's all the way through the 70's, bakeries in New York were adding almond extract to their marble cake batter as a signature flavor and sometimes referred to it as German marble cake. This was originally more of a snacking cake meant to be sliced and served without frosting and eaten with tea or coffee.

    three slices of marble cake on three white plates with gold forks. Shot from above. Surrounded by three copper mugs, greenery and cherry blossoms

    FAQ

    Can I bake this cake in other pans?

    Surprisingly, I get this question a lot. This recipe is meant to be baked in three 8" x 2" cake pans so that you get three nice layers of cake in each slice. But you can definitely use other sizes of cake pans like a ¼ sheet pan or square pans.

    You may need to increase or decrease the recipe to fit the size of your pan.

    Can I use this recipe to make cupcakes?

    You can also use this recipe to make cupcakes, but it makes a lot! My cupcakes baked at 350ºF for 15 minutes but you should bake them until the center bounces back when you touch it. 

    Can I use this recipe to make a bundt cake or individual loaves?

    Yes, you may use a bundt pan or a loaf pan. Just follow the same process of taking out ⅓ of the batter and adding in the bloomed cocoa powder to make the vanilla cake batter chocolate.

    Can I use regular milk instead of buttermilk?

    Yes, you can. But you will need to create a homemade buttermilk substitute first using regular milk along with other ingredients. There are several buttermilk substitutes I would recommend in place of buttermilk for this recipe.

    Why is my marble cake dry?

    Whenever you're introducing cocoa powder into a cake recipe, it can dry the cake out. You can avoid dry cake when you bloom your cocoa powder before mixing it with your vanilla cake batter.

    Blooming is when you combine the cocoa powder with hot water, coffee or cold oil and let it sit for a few minutes until it starts to look spongy. Now that the cocoa powder is moistened, it won't suck up all the moisture from your vanilla cake batter. 

    Why did my marble cake crack?

    Your oven temperature was most likely too high. Check your oven with an oven thermometer and reduce the temperature accordingly if it is running hotter than you need it to be.

    More Cake Recipes You'll Love

    Cinnamon Toast Cake

    Chocolate Bundt Cake

    Triple Chocolate Cake

    Irish Cream Cake

    Chocolate Drip

    Recipe

    close up slice of marble cake
    Print Recipe
    4.92 from 236 votes

    Moist and Fluffy Marble Cake Recipe

    You can transform my favorite vanilla cake into the best marble cake by adding a little chocolate! Super easy and super tasty!
    Prep Time10 minutes mins
    Cook Time40 minutes mins
    Total Time40 minutes mins
    Course: Dessert
    Cuisine: American, german
    Servings: 9 cups
    Calories: 822kcal
    Author: Liz Marek

    Equipment

    • Stand Mixer
    • Paddle Attachment

    Ingredients

    Marble Cake Ingredients

    • 16 ounces cake flour
    • 16 ounces granulated sugar
    • 1 teaspoon salt
    • 1 Tablespoon baking powder
    • 1 teaspoon baking soda
    • 4 large eggs room temperature
    • 5 ounces vegetable oil
    • 14 ounces buttermilk room temperature or slightly warm
    • 8 ounces butter unsalted and softened
    • 2 teaspoon vanilla
    • ½ teaspoon almond extract
    • 1 ounce cocoa powder dutch or natural
    • 3 ounces hot water
    • 1 Tablespoon cocoa powder for dusting

    Ganache Frosting

    • 16 ounces semi-sweet chocolate
    • 16 ounces heavy whipping cream
    • ¼ teaspoon salt
    • 1 teaspoon vanilla extract

    Ganache Drip

    • 6 ounces semi-sweet chocolate
    • 4 ounces heavy whipping cream
    US Customary - Metric

    Instructions

    Cake Batter Instructions

    • Prepare three 8″x2″ cake pans with cake goop or another preferred pan spray. Preheat your oven to 335ºF (168ºC).
    • Bring your butter, milk, and eggs to room temperature. It's really important when making a cake for the ingredients to all be slightly warm so they create an emulsion.
    • Heat the water until it's simmering and then combine it with your cocoa powder.
    • Stir it until the cocoa powder is moistened. It will look lumpy, but that is normal.
    • Set it aside and let it cool while you prepare the cake batter.
    • In a separate container, combine ¾ cup of the milk and the oil together and set it aside.
    • In a separate container, combine the remaining milk, eggs, vanilla, and almond extract together. Whisk it to break up the eggs, and then set it aside.
    • In the bowl of your stand mixer, combine the flour, sugar, baking powder, baking soda, and salt with the paddle attachment. Mix for 10 seconds to combine everything.
    • Add your softened butter to the flour mixture and mix on low until the mixture resembles coarse sand (this takes about 30 seconds). This style of mixing is called the reverse creaming method, and it will result in a very velvety, moist cake. A lot of my other cake recipes like brown butter cake and white velvet buttermilk cake use this method.
    • Add in your milk/oil mixture and mix it on low until the dry ingredients are moistened.
    • Increase the speed to medium (setting 2 on my Bosch Mixer, setting 4 on a KitchenAid) and let it mix for 2 minutes to develop the cake's structure. If you don't let your cake mix on this step, your cake could collapse.
    • Scrape your bowl and then reduce the speed to low.
    • Add in your egg mixture in three batches, letting the batter mix for 15 seconds between additions.
    • Scrape down the sides again to make sure everything has incorporated.

    Marbling the Cake Batter Instructions

    • Take out ⅓ of your batter and combine it with the cooled chocolate mixture and fold it gently until it's combined.
    • Layer your batter into your pans, starting with vanilla, then chocolate, and ending with vanilla.
    • Use a butter knife to swirl them together gently. Do not over-mix or your cake will not have a marbled interior.
    • Bake the cakes for 35-40 minutes at 335ºF (168ºC) or until a toothpick inserted into the center comes out cleanly (but the cake has not begun to shrink yet from the sides of the pan). IMMEDIATELY TAP THE PAN FIRMLY on the countertop once to release the steam from the cake. This stops the cake from shrinking.
    • Let the cakes cool for 10 minutes inside of the pan before flipping them out. The cake will shrink a bit and that is normal.
    • Flip the cake onto a cooling rack and let it cool completely. I chill my cakes before handling them, or you can wrap them in plastic wrap and freeze them to trap moisture in the cake.
    • Thaw the cake on the countertop while it's still wrapped before frosting.

    Ganache Frosting Instructions

    • Place your chocolate into a heatproof bowl.
    • Heat your cream until it just begins to simmer. Do not boil it or your ganache will be grainy.
    • Pour the hot cream over your chocolate.
    • Let it sit for 5 minutes.
    • Add in your vanilla and salt to the chocolate mixture and whisk it until it's smooth and creamy.
    • Pour your ganache into a shallow pan and let it cool to peanut butter consistency. Mine takes about 20 minutes to thicken up.
    • Frost your cake with the ganache and then place it into the fridge for 20 minutes. This cake also pairs well with easy buttercream or chocolate Swiss meringue buttercream.
    • Dust it with cocoa powder using a soft (new) makeup brush to make the velvet texture.

    Ganache Drip Instructions

    • Heat the cream until it's just steaming, and then pour it over chocolate.
    • Let it sit for 5 minutes.
    • Whisk it until it's smooth.
    • Let it cool until it's slightly warm to the touch before piping it onto your CHILLED cake. 

    Video

    Notes

    Buttermilk substitute - regular milk plus 2 Tablespoons of vinegar or lemon juice. You can also use powdered buttermilk. 
    Important Things To Note Before You Start
    1. Bring all your ingredients to room temperature or even a little warm (eggs, buttermilk, butter, etc) to ensure your batter does not break or curdle. 
    2. Use a scale to weigh your ingredients (including liquids) unless otherwise instructed (Tablespoons, teaspoons, pinch etc). Metric measurements are available in the recipe card. Scaled ingredients are much more accurate than using cups and help ensure the success of your recipe. 
    3. Practice Mise en Place (everything in it's place). Measure out your ingredients ahead of time and have them ready before you start mixing to reduce the chances of accidentally leaving something out.
    4. Chill your cakes before frosting and filling. You can cover a frosted and chilled cake in fondant if you wish. This cake is also great for stacking. I always keep my cakes chilled in the refrigerator before delivery for easy transporting. Learn more about decorating your first cake. 
    5. If the recipe calls for specific ingredients like cake flour, replacing it with all purpose flour and cornstarch is not recommended unless specified in the recipe that it’s ok. Substituting ingredients may cause this recipe to fail. 
    All purpose flour is a plain flour with no rising agents. It has a protein level of 10%-12%
    Cake flour is a soft, low protein flour of 9% or less. 
    Cake flour sources: UK - Shipton Mills Cake & Pastry Flour

    Nutrition

    Serving: 1serving | Calories: 822kcal | Carbohydrates: 73g | Protein: 10g | Fat: 56g | Saturated Fat: 36g | Cholesterol: 150mg | Sodium: 455mg | Potassium: 463mg | Fiber: 5g | Sugar: 44g | Vitamin A: 1162IU | Vitamin C: 1mg | Calcium: 138mg | Iron: 3mg

    October 28, 2021 Blog

    Chocolate Raspberry Galaxy Bonbons

    Chef Christophe Rull shows us how to create these shiny, chocolate galaxy bonbons filled with a smooth raspberry puree filling and decadent chocolate ganache. Learn how to make tempered cocoa butter colors from scratch, airbrush a unique galaxy pattern, and fill and close your bonbons.

    What's In This Blog Post

    • Chocolate Raspberry Galaxy Bonbon Ingredients
    • Tools and Equipment
    • Before you begin
    • How to make the raspberry filling
    • How to make the ganache filling
    • How to make cocoa butter colors
    • How to make airbrush the bonbon shells
    • How to make the bonbon shell
    • How to fill and close the bonbons
    • More chocolate recipes & tutorials

    Chocolate Raspberry Galaxy Bonbon Ingredients

    Tools and Equipment

    Every chocolatier is going to be familiar with these tools but if you're new to chocolate work, make sure you get these basic chocolate-making supplies before you attempt to make molded chocolates.

    Before you begin

    You must have properly tempered chocolate before you begin the bonbon process. If you need to learn how to temper chocolate you can watch Chef Christophe's previous video on tempering chocolate using the EZ Temper Machine or you can use my easy chocolate tempering method.

    You also want to have a clean mold! I'm using a polycarbonate mold from Cacao Barry.

    How to make the raspberry filling

    1. Pour the raspberry puree into a medium saucepan over medium heat.
    2. In a separate bowl, mix the sugar and NH Pectin together.
    3. Bring the raspberry puree to a boil, then slowly whisk in the sugar and pectin together. Mix thoroughly to ensure you do not have any lumps.
    4. Boil for a few minutes to activate the NH Pectin (this will allow the raspberry puree to solidify and be ready to use in our bonbons).
    5. Turn off the heat and transfer the filling to separate container
    6. Put a sheet of plastic wrap on top so it's touching the surface and cool completely. Store this raspberry mixture somewhere that's room temperature (you don't want it to be too warm otherwise it will not firm up, and you don't want it to be too cold otherwise it may be too difficult to create your bonbons).

    How to make the ganache filling

    1. Add your chocolate to a heat-safe container.
    2. Heat up the glucose in the microwave for about 10 seconds.
    3. Add the heavy whipping cream and glucose into a sauce pan.
    4. Bring it to a simmer over medium heat (stirring occasionally). Be careful not to boil or burn the cream.
    5. Carefully pour the hot mixture over your chocolate. Mix together.
    6. Add in your butter in chunks.
    7. Use an immersion blender to mix the butter with the ganache. Hold the immersion blender at a slight angle under the surface of the ganache to blend. Do not incorporate any air.
    8. Fill a large piping bag with your ganache filling and twist the top closed so the filling doesn't spill out.
    9. Cool the ganache in the piping bag to below 86ºF (30ºC). Pro-Tip: place your piping bag onto the counter to cool the ganache faster.

    How to make cocoa butter colors

    1. Melt the cocoa butter and white chocolate in the microwave in 30 second increments to prevent burning.
    2. Bring the temperature down to 91ºF (33ºC) and add 1% of cocoa butter paste (See Christophe's tempering chocolate recipe) to temper the cocoa butter. This will make the bonbons shinier!
    3. Cool the cocoa butter down to 86ºF (30ºC).
    4. To color your own cocoa butter, stir in your cocoa butter flowers. Using Power Flowers is a great way to get really vibrant chocolate colors. (Our raspberry color- red 4 pieces of red, 4 pieces of white.) (Our purple color- 1 ¼ red, ¾ blue, and 2 ½ white)
    5. Store this cocoa butter mixture at 86ºF (30ºC) until you're ready to use it. (it is not needed but you can easily achieve this using a Waring Chocolate Warmer.)
    6. Repeat this process for any additional colors you want to use to create your galaxy bonbons.
    7. For the black cocoa butter, I prefer the pre-made "Abyss" from Chef Rubber. Make sure to temper it by adding 1% of cocoa butter paste at 91ºF (33ºC) and cooling to 86ºF (30ºC) as well.
    8. Pour the colored cocoa butters into new bowls over a cheese cloth which will strain any lumps and gritty pieces to give you smooth, cocoa butters that are ready to create chocolate bonbon shells!

    How to make airbrush the bonbon shells

    1. Place some parchment paper onto your work surface to catch the chocolate and get your bench scraper ready.
    2. Dip a brush into one of your cocoa butter colors, and then flick the brush using your finger to create paint-like splatter across each and every one of the bonbon cavities. This will create the top layer of the speckles on your galaxy bonbon (I would recommend you use white cocoa butter for this step).
    3. Once you are happy with your speckles, turn the bonbon tray upside down and wipe it across a paper towel to clean the excess cocoa butter.
    4. Refrigerate the bonbon tray for about 5 minutes to allow it to set before you add in more colors.
    5. When you're ready to add your second color (we used purple), use a spoon to add a small drop into each bonbon cavity.
    6. Once you've added your second color to each cavity, use a cotton ball, a paintbrush, or your finger to wipe and swirl the color around. It does not need to be perfect but what you do not want is a thick layer of purple (otherwise you won't see the other colors).
    7. When you're happy with your second layer of color, turn the bonbon tray upside down and wipe it across a paper towel to clean the excess cocoa butter.
    8. Add your next colored cocoa butter (we used red) to an air gun. Be sure to check the temperature of the cocoa butter you are putting into the air gun and it should be about 86ºF (30ºC). If it is a little cold, you can heat it up in the microwave in 5 second increments until it reaches the desired temperature.
    9. Airbrush the black cocoa butter on lightly to each and every bonbon cavity. Once you're happy with your third colored cocoa butter and are satisfied with the airbrushing, turn the bonbon tray upside down and wipe it across a paper towel to clean the excess cocoa butter. If you wish to add airbrush more color in, be sure to wipe the bonbon tray each time you add more color and clean it.
    10. If you are working with one air gun, empty the air gun and add in your next color (for this step we used black cocoa butter). It's important to check the temperature of the cocoa butter you are putting into the air gun and it should be about 86ºF (30ºC).
    11. Use a large airbrush to spray the black cocoa butter generously across the bonbon mold to fill each and every bonbon cavity (the larger airbrush will make this process go faster, but if you only have a small airbrush that is okay it may just take a little bit longer).
    12. Turn the bonbon tray upside down and wipe it across a paper towel to clean the excess black cocoa butter from the mold.
    13. Stand the bonbon mold tray on its side to allow the chocolate to crystallize for about 10 minutes.

    How to make the bonbon shell

    You must have properly tempered chocolate before you begin the bonbon process. If you need to learn how to temper chocolate you can watch Chef Christophe's previous video on tempering chocolate using the EZ Temper Machine or you can use my easy chocolate tempering method.

    1. Place some parchment paper onto your work surface to catch the chocolate and get your bench scraper ready.
    2. Melt your dark chocolate either in the microwave or on a double boiler.
    3. Add in a few handfuls of tempered (chocolate comes tempered) chocolate to bring the temperature down. Stirring occasionally, cool your chocolate to 95ºF (35ºC).
    4. Add in the cocoa butter and mix.
    5. When you're ready to fill the bonbon mold with your filling, pour the chocolate into a piping bag and then cut a small hole in the piping bag (⅛") in the tip.
    6. Once each cavity has been filled with filling, pick the mold up by holding the edges and try not to put your hands agains the cavities directly or the heat from your hands can ruin the temper of the chocolate shells. Tap the edge of the mold with your bench scraper to release any air bubbles.
    7. Turn the mold over and tap out the excess chocolate to create a nice thin shell.
    8. Scrape off the excess chocolate from the surface of the mold with your bench scraper.
    9. Set your mold on its side for five minutes to help the chocolate to set evenly. You can see in this photo how even the chocolate is on all sides.

    How to fill and close the bonbons

    1. Check the temperature of your dark chocolate ganache filling inside the piping bag (ideally you want it to be between 77-84ºF (25-29ºC).
    2. Pipe the dark chocolate ganache filling into each cavity about half way.
    3. Refrigerator for 10 minutes to set.
    4. Using a mixer, add the set raspberry jelly and mix it so that it is creamier in texture so that it is easier to pipe.
    5. Fill a large piping bag with the raspberry filling, and then cut a small hole in the piping bag (⅛") in the tip.
    6. Pipe the raspberry filling into each cavity in a tight, spiral motion on top of the chocolate ganache. The mold cavities should be almost full but not quite 100% full (there needs to be a little bit of room in order to close the bonbons).
    7. Gently and carefully tap the bonbon mold on the counter to get rid of any air bubbles.
    8. Let is set at room temperature for about 30 minutes. It helps if your room is colder than 70ºF. You can put the bonbons in the fridge but you can risk adding condensation to the ganache which can compromise the integrity of the bonbon and mold can grow.
    9. When you are ready to close your bonbons, pipe tempered chocolate onto the back of the bonbon until it's halfway covered using the pinching technique.
    10. Place your acetate onto the back of the mold and use the bench scraper to scrape away the excess chocolate.
    11. Place the bonbons into the fridge for 30 minutes to 1 hour (Christophe prefers to allow them to crystallize for up to 24 hours).
    12. De-mold your bonbons by quickly turning the mold over onto parchment paper to release them from the mold. Twist the mold back and forth to allow the bonbons to release from the mold and then tap the mold onto parchment paper again if they did not come out of the mold on the first try.

    More chocolate recipes & tutorials

    White chocolate bonbons with vanilla bean ganache

    Hot chocolate bombs

    How to temper chocolate in the microwave

    Recipe

    Print Recipe
    5 from 6 votes

    Chocolate Raspberry Galaxy Bonbons

    Learn how to make shiny galaxy bonbons with a raspberry chocolate center with chef Christophe Rull!
    Prep Time10 minutes mins
    Cook Time30 minutes mins
    Total Time40 minutes mins
    Course: Dessert
    Cuisine: French
    Servings: 50 bonbons
    Calories: 190kcal
    Author: Liz Marek

    Equipment

    • bonbon mold
    • heatgun
    • acetate sheets
    • Bench scraper
    • fine mesh strainer
    • infrared thermometer

    Ingredients

    Raspberry Filling

    • 250 grams raspberry puree Or make your own (see notes below)
    • 25 grams granulated sugar
    • 2.5 grams pectin NH

    Dark Chocolate Ganache

    • 440 grams heavy whipping cream
    • 60 grams glucose or corn syrup
    • 300 grams dark chocolate I use 64% extra bitter Guayaquil by Cacao Barry
    • 120 grams unsalted butter (cut into chunks) 80% butter fat works best (Plugra, or European butter)

    Chocolate Shells

    • 1000 grams couverture dark chocolate
    • 10 grams pre-tempered cocoa butter (optional) see blog post

    Galaxy Design

    • 100 grams cocoa butter
    • 100 grams white chocolate I use Zéphyr 34% white chocolate by Cacao Barry
    • colored cocoa butter or color your own using Flower Power cocoa butter colors

    Instructions

    Making the shell

    • Before you start anything, make sure to CLEAN YOUR MOLDS! Polycarbonate molds work best to make the shiniest bonbons, but you have to temper your chocoalte and cocoa butter correctly. If your chocolate isn't tempered, the bonbons won't come out of the mold.

    The raspberry filling

    • Pour the raspberry puree into a medium saucepan over medium heat. 
    • In a separate bowl, mix the sugar and NH Pectin together. 
    • Bring the raspberry puree to a boil, then slowly whisk in the sugar and pectin together. Mix thoroughly to ensure you do not have any lumps.
    • Boil for a few minutes to activate the NH Pectin (this will allow the raspberry puree to solidify and be ready to use in our bonbons). 
    • Turn off the heat and transfer the filling to a separate container.
    • Put a sheet of plastic wrap on top so it's touching the surface and cool completely to room temperature.

    The dark chocolate ganache

    • Add your chocolate to a heat-safe container. 
    • Heat up the glucose in the microwave for about 10 seconds. 
    • Add the heavy whipping cream and glucose into a sauce pan.
    • Bring it to a simmer over medium heat (stirring occasionally). Be careful not to boil or burn the cream.
    • Carefully pour the hot mixture over your chocolate. Mix together.
    • Add in your butter in chunks.
    • Use an immersion blender to mix the butter with the ganache. Hold the immersion blender at a slight angle under the surface of the ganache to blend. Do not incorporate any air.
    • Fill a large piping bag with your ganache filling and twist the top closed so the filling doesn't spill out. 
    • Cool the ganache in the piping bag to below 86ºF (30ºC).
      Pro-Tip: place your piping bag onto the counter to cool the ganache faster.

    Making cocoa butter colors

    • Melt the cocoa butter and white chocolate in the microwave in 30-second increments to prevent burning.
    • Bring the temperature down to 91ºF (33ºC) and add 1% of cocoa butter paste (See Christophe's tempering chocolate recipe) to temper the cocoa butter. This will make the bonbons shinier! 
    • Cool the cocoa butter down to 86ºF (30ºC).
    • To color your own cocoa butter, stir in your cocoa butter flowers. Using Power Flowers is a great way to get really vibrant chocolate colors.
      (Our raspberry color- red 4 pieces of red, 4 pieces of white.) (Our purple color- 1 ¼ red, ¾ blue, and 2 ½ white)
    • Store this cocoa butter mixture at 86ºF (30ºC) until you're ready to use it. (it is not needed but you can easily achieve this using a Waring Chocolate Warmer.) 
    • Repeat this process for any additional colors you want to use to create your galaxy bonbons.
    • For the black cocoa butter, I prefer the pre-made "Abyss" from Chef Rubber. Make sure to temper it by adding 1% of cocoa butter paste at 91ºF (33ºC) and cooling to 86ºF (30ºC) as well.
    • Pour the colored cocoa butters into new bowls over a cheese cloth which will strain any lumps and gritty pieces to give you smooth, cocoa butters that are ready to create chocolate bonbon shells!

    Video

    Notes

    EZ Tempering Machine
    Waring Chocolate Warmer
    Cacoa Barry Chocolate
    Cocoa Butter Drops
    Thermometer
    • Raspberry puree: If you don't have premade raspberry puree, make your own by mixing together 250 grams of raspberries, 25 grams of simple syrup, cooking that down, mixing it with an immersion blender, and then cooking it down with the pectin. 
    • If you haven't watched Christophe's video on how to temper chocolate with the EZ Temper machine, you'll want to watch that first.
    • Also learn how to make beautiful chocolate decorations like curls, squares, discs, and a tiara in Christophe's easy decorations tutorial.
    • No tempering machine? No problem! You can temper your chocolate in the microwave or use the traditional seeding method to get your chocolate tempered.

    Nutrition

    Serving: 1bonbon | Calories: 190kcal | Carbohydrates: 16g | Protein: 2g | Fat: 15g | Saturated Fat: 9g | Polyunsaturated Fat: 1g | Monounsaturated Fat: 5g | Trans Fat: 1g | Cholesterol: 13mg | Sodium: 9mg | Potassium: 55mg | Fiber: 3g | Sugar: 10g | Vitamin A: 132IU | Vitamin C: 1mg | Calcium: 14mg | Iron: 1mg

    chocolate horse showpiece

    October 20, 2021 Blog

    Chocolate Rocking Horse Showpiece

    Chef Christophe Rull shows us how to transform tempered chocolate into a 3D rocking horse showpiece! These are some of the techniques that a pastry chef needs to create strong and stable chocolate sculptures!

    chocolate horse

    I was so excited to see how Christophe made this showpiece, I tried to make one of my own alongside his demonstration but I made mine into a rocking unicorn haha!

    What's In This Blog Post

    • Chocolate Rocking Horse Ingredients
    • Tools & Equipment
    • Making The Chocolate Pieces
    • Assembling The Chocolate Horse

    Chocolate Rocking Horse Ingredients

    You want to start with tempered chocolate! This is super important for a strong and stable showpiece. So if you don't know how to temper chocolate, make sure you watch Christophe's tutorial on how to temper chocolate with cocoa butter or you can temper your own chocolate using a traditional seeding method or in a microwave.

    Tools & Equipment

    You can download your free horse template here.

    Horse Template #1

    Horse Template #2

    Horse Template #3

    Making The Chocolate Pieces

    1. Lay your newsprint down onto the table and then place your large sheet of acetate over the top.
    2. Arrange all your templates on top of the acetate to make sure you have enough space for all the pieces.horse templates
    3. Make a border with your ¼" plexiglass spacers around the templates. Remove the templates and set them aside for now.
    4. Fill your pastry bag with the tempered chocolate and glue the spacers down.
    5. Fill the center of the square with tempered chocolate.tempered chocolate
    6. Use a ruler or straight edge to make the chocolate flat and even.
    7. Once the chocolate starts to look slightly matte (after about 5 minutes) trace between the chocolate and the plexiglass border and remove the border.tracing on tempered chocolate
    8. Place the template on top of the chocolate and trace around it with your skewer to cut out the shapes. Work quickly before the chocolate fully sets. tracing chocolate horse onto tempered chocolate
    9. You can make extra pieces just in case of breakage.
    10. Remove the templates and discard them.
    11. Place the chocolate pieces on top of a large sheet pan or plexiglass with parchment paper underneath. Put some parchment on top of the chocolate. Place a large piece of plexiglass or heavy sheet pan on top so as the chocolate sets in the cooler, it does not curl.
    12. After 10 minutes you can take the chocolate out of the cooler.
    13. Remove the chocolate pieces from the surrounding chocolate. If you have any cracked pieces watch the video to watch how Christophe fixes broken pieces. chocolate horse pieces
    14. Brush the chocolate pieces with a wire brush to create a wooden texture. Brush off the excess chocolate dust with a pastry brush.

    Assembling The Chocolate Horse

    1. Begin attaching the legs with tempered chocolate and set the pieces with cold spray. Pay close attention to making sure your pieces are straight. Turn the horse over and attach the legs to the other side.
    2. Wipe off any excess chocolate with your fingers to keep the structure clean looking.
    3. Attach the curved pieces of chocolate to the base with tempered chocolate and set with cold spray.
    4. Attach all the cross pieces with tempered chocolate and set with cold spray.
    5. Attach the horse to the base with tempered chocolate and cold spray, making sure the horse is straight up and down.
    6. Attach the seat, rocking horse handles and tail and you're done! We used a food processor to blend the chocolate and form it into the handles, check out Christophe's chocolate flower for more information.
    chocolate rocking horse

    More Chocolate Recipes & Tutorials

    Hot Chocolate Bombs

    Chocolate Ganache 101

    Water Ganache Drip

    How To Temper Chocolate In The Microwave

    Recipe

    chocolate horse showpiece
    Print Recipe
    5 from 2 votes

    Chocolate Horse Showpiece

    A chocolate horse showpiece makes a great centerpiece for a fun party or event. Chef Christophe Rull shows us how to transform tempered chocolate into a strong and stable chocolate horse! You can use these same techniques for many different types of projects.
    Prep Time10 minutes mins
    Cook Time10 minutes mins
    Assembly30 minutes mins
    Total Time50 minutes mins
    Course: Dessert
    Cuisine: French
    Servings: 10 servings
    Calories: 528kcal
    Author: Liz Marek

    Equipment

    • Newsprint
    • Large and Small Acetate Sheets
    • ¼" thick acrylic strips
    • Horse Template
    • Wire Brush
    • EZ Temper Machine (optional)
    • Cold Spray

    Ingredients

    For the tempered chocolate

    • 1000 grams couverature chocolate
    • 10 grams tempered cocoa butter paste (optional)

    Instructions

    Making the Chocolate Pieces

    • Lay your newsprint down onto the table and then place your large sheet of acetate over the top.
    • Arrange all your templates on top of the acetate to make sure you have enough space for all the pieces.
    • Make a border with your ¼" plexiglass spacers around the templates. Remove the templates and set them aside for now.
    • Fill your pastry bag with the tempered chocolate and glue the spacers down.
    • Fill the center of the square with tempered chocolate.
    • Use a ruler or straight edge to make the chocolate flat and even.
    • Once the chocolate starts to look slightly matte (after about 5 minutes) and is slightly tacky but not fully set. You may need to start tracing in areas where it is set. The chocolate doesn't always set at the same time.
    • Trace between the chocolate and the plexiglass border and remove the border.
    • Place the template on top of the chocolate and trace around it with your skewer to cut out the shapes. Work quickly before the chocolate fully sets.
    • You can make extra pieces just in case of breakage.
    • Remove the templates and discard them.
    • Place the chocolate pieces on top of a large sheet pan or plexiglass with parchment paper underneath. Put some parchment on top of the chocolate. Place a large piece of plexiglass or heavy sheet pan on top so as the chocolate sets in the cooler, it does not curl.
    • After 10 minutes you can take the chocolate out of the cooler.
    • Remove the chocolate pieces from the surrounding chocolate. If you have any cracked pieces watch the video to watch how Christophe fixes broken pieces.
    • Brush the chocolate pieces with a wire brush to create a wooden texture. Brush off the excess chocolate dust with a pastry brush.

    Assembling the Chocolate Horse

    • Begin attaching the legs with tempered chocolate and set the pieces with cold spray. Pay close attention to making sure your pieces are straight.
    • Wipe off any excess chocolate with your fingers to keep the structure clean looking.
    • Attach the curved pieces of chocolate to the base with tempered chocolate and set with cold spray.
    • Attach all the cross pieces with tempered chocolate and set with cold spray.
    • Attach the horse to the base with tempered chocolate and cold spray, making sure the horse is straight up and down.
    • Finally, attach the seat to the top of the horse.
    • You can add more details like eyes, ears, handles or other decorations and details if you want.

    Video

    Notes

    EZ Tempering Machine
    Waring Chocolate Warmer
    Cacao Barry Chocolate
    Cocoa Butter Drops
    Thermometer
    If you haven't watched Christophe's video on how to temper chocolate with the EZ Temper machine, you'll want to watch that first.
    No tempering machine? No problem! You can temper your chocolate in the microwave or use the traditional seeding method to get your chocolate tempered.

    Nutrition

    Serving: 1serving | Calories: 528kcal | Carbohydrates: 49g | Protein: 6g | Fat: 43g | Saturated Fat: 26g | Polyunsaturated Fat: 1g | Monounsaturated Fat: 14g | Sodium: 5mg | Fiber: 10g | Sugar: 34g
    closeup of pumpkin shaped bread

    October 15, 2021 Bread

    Easy Pumpkin Shaped Bread

    This pumpkin-shaped bread is the easiest fall centerpiece you will ever make, and it comes together in under an hour from start to finish. Soft, fluffy, lightly enriched with milk and olive oil, and tied with kitchen twine before baking so the loaf bakes into perfect pumpkin segments. It is the same fast dough I use in my soft and buttery dinner rolls, shaped into a holiday showpiece with about ten extra minutes of effort.closeup of pumpkin shaped bread

    My daughter Avalon loved it the first year I posted the recipe so much that she made her own video on it, and we have had it on our Thanksgiving table every year since. If you love my fast bread recipe or my brioche bread recipe, you already know the technique. The pumpkin shape is just kitchen twine and a single short proof.

    Quick Glance at the Recipe: Easy Pumpkin Shaped Bread

    • Recipe Name: Easy Pumpkin Shaped Bread
    • Why You'll Love It: A jaw-dropping holiday centerpiece that takes under 60 minutes from start to finish, thanks to instant yeast and a single short proof.
    • Time and Difficulty: Easy. 10 minutes prep, 25 minutes proof, 25 to 30 minutes in the oven.
    • Main Ingredients: Bread flour, instant yeast, sugar, warm milk, salt, olive oil, plus kitchen twine and a cinnamon stick for the stem.
    • Method: Mix and knead a soft enriched dough, single proof until doubled, divide and shape into two balls, tie loosely with twine, score the sides, egg wash, and bake until golden.
    • Texture and Flavor: Soft, pillowy, slightly sweet from the milk and sugar with a tender crumb. Mild enough to serve next to roast turkey, soup, or stew, or to slice and toast with butter and jam.
    • Quick Tip: Tie the twine LOOSELY. The dough needs room to expand in the oven, and tight twine will strangle the loaf and split the segments instead of defining them.
    ChatGPT
    Google AI
    Perplexity
    Grok
    Add us as a trusted site on Google
    [feast_advanced_jump_to]

    What Makes This Pumpkin-Shaped Bread Different
    ⭐⭐⭐⭐

    Most pumpkin-shaped bread recipes I see online fall into one of two camps. Either they are dense enriched doughs that need three hours of proofing time, or they are sweet pumpkin puree quick breads that are really just my pumpkin chocolate chip bread in a different pan. Mine is neither. It is a fast, fluffy, savory-leaning enriched yeast bread that uses instant yeast and a single short proof to get you from mixer to oven in about 40 minutes. The pumpkin shape comes from kitchen twine, not from any pumpkin ingredient, which means this loaf doubles as a bread basket centerpiece next to your turkey OR a sweet breakfast bread toasted with butter and jam.

    • Bread flour for crisp pumpkin segments. Bread flour is 12 to 13 percent protein versus 10 to 11 percent for all-purpose, which means stronger gluten and a loaf that holds the pumpkin segments crisply through oven spring instead of melting into a blob. All-purpose works in a pinch but the segments will be softer and rounder.
    • Twine before bake, not after. Some recipes tell you to tie the twine after baking, which gives you a round loaf with string on top. Tying before baking, while the dough still has half its rise left, is what forces the dough to balloon up between the strings and creates the deep, defined pumpkin grooves you actually see in the photos.
    • Instant yeast for the fast timeline. Active dry yeast needs to bloom in warm liquid for 10 minutes and then proofs for 60 to 90 minutes. Instant yeast goes straight into the flour and the dough proofs in about 25 minutes once shaped. The recipe card has the longer timing if active dry is all you have.
    • Milk and olive oil for tenderness. Plain water doughs bake up chewy and lean. Milk adds sugar and fat that brown the crust and tenderize the crumb, and olive oil keeps the bread soft for two to three days on the counter without going stale. The same combo carries my soft and buttery dinner rolls and my brioche bread recipe.

    Pumpkin-Shaped Bread Ingredients

    This is a pantry-friendly enriched yeast dough. Bread flour, instant yeast, warm milk, sugar, salt, and a fat. That is the whole list. I always recommend weighing your ingredients with a digital kitchen scale for the most accurate results, especially with the flour, since a heavy hand on the scoop can turn a soft loaf into a brick.

    pumpkin shaped bread ingredients in bowls on a white countertop.
    • Bread flour. The higher protein gives the loaf the structure to hold the pumpkin segments through the bake. All-purpose works if it is what you have, but the segments will be a little softer and rounder. If using whole wheat, drop the total to 24 ounces because whole wheat absorbs more liquid than white flour. My honey whole wheat bread recipe is built on that same swap.
    • Instant yeast. Goes straight into the flour with everything else. Do not confuse with active dry yeast, which has to bloom in warm liquid first. If you only have active dry, use the same amount but bloom it in the warm milk and sugar for 10 minutes before adding the flour, and expect the proof to take 90 minutes instead of 25.
    • Granulated sugar. Feeds the yeast and gives the crust a deeper golden color thanks to Maillard browning. Two ounces is just enough to support the yeast without turning the bread sweet.
    • Warm milk. Liquid, fat, sugar, and protein all in one. Bring it to 110 to 115 degrees F, no hotter, or you will kill the yeast. Whole milk gives the richest result, but 2 percent works fine. Almond milk, oat milk, or water all work as direct subs if you are dairy free, just expect a slightly less rich crumb.
    • Salt. Non-negotiable. Salt slows the yeast just enough to give the gluten time to develop, plus it carries the flavor of the whole loaf. Add it after the initial mix so it never touches the yeast directly.
    • Olive oil. Adds fat that keeps the crumb soft and tender for two or three days. Avocado oil, melted butter, or any neutral fat all work as substitutes. Butter gives a more dinner-roll flavor, olive oil keeps it savory-leaning, which I prefer next to roast turkey or a bowl of soup.
    • Egg (for the wash). One egg whisked with a tablespoon of water gives you the deep golden brown lacquered top you see in the photos. Without the egg wash the bread will look pale and matte. If you do not have an egg, brushing with milk gets you about 80 percent of the way there.
    • Cinnamon stick or candy apple stick (for the stem). Press into the center after baking to finish the pumpkin shape. Not edible, but it is what sells the visual.

    How To Make Pumpkin-Shaped Bread Step-By-Step

    Pull the cold ingredients out of the fridge and warm the milk to 110º-115ºF before you start. Preheat your oven to 375ºF while the dough is doing its single proof. Line a baking sheet with parchment paper and cut four pieces of kitchen twine (about 20 inches long each) before you shape the loaves so you are not scrambling with sticky hands. Refer to the recipe card for exact weights and timing.

    Bread ingredients in the bowl of a stand mixer.
    1. Mix the dough. Combine bread flour, instant yeast, sugar, and warm milk in the bowl of your stand mixer with the dough hook attached and mix on low for one minute.
    Adding olive oil to bread ingredients in a mixing bowl.
    1. Adjust and knead. Add the salt and olive oil, then knead on speed 2 for about 8 minutes, or until the dough is smooth, elastic, and pulling cleanly away from the sides of the bowl.
    Bread dough in the bowl of a stand mixer with the dough attachment.
    1. If the dough is too wet, add flour a tablespoon at a time. If too dry, add water a tablespoon at a time. The dough should look smooth and elastic.
    Bread dough in a glass bowl with a towel.
    1. First proof. Knead the dough on a lightly floured surface for 4 or 5 turns to form a smooth ball. Place it top side down into a lightly oiled bowl, then flip it so the top is coated in oil.

    PRO TIP: Run the windowpane test for bread after 5 minutes of kneading. Pinch off a piece of dough and stretch it between your fingers. If it stretches into a thin translucent window without tearing, the gluten is developed and you can stop. If it tears, knead another 2 minutes and test again.

    Bread dough proofing in a glass bowl.
    1. Cover with a clean cloth and proof in a warm spot for about 25 minutes, or until the dough has doubled in size.
    Bread dough shaped into a smooth ball.
    1. Divide and shape. Punch the dough down and divide into two equal pieces. Pull the edges of each piece up and into the center to form a smooth taut ball. Pinch the seam closed underneath.

    PRO TIP: No warm spot in your kitchen? Turn your oven on to 170ºF, then turn it off and open the door. Set the bowl on the open door near the warm air, NOT inside the oven. The residual heat is the perfect proofing temperature without cooking the dough.

    Bakers twine arranged in a criss cross pattern on a sheet pan lined with parchment paper.
    1. Arrange the twine. Lay two 20-inch pieces of twine in a cross on your lined baking sheet, then lay two more across the first two so you have eight spokes radiating from a center point. Place a shaped dough ball seam side down on top of the twine.
    Egg washing bread dough with bakers twine and parchment.
    1. Egg wash. Whisk one egg with one tablespoon of water and brush a thin even coat over the dough ball. The wash is what gives the loaf its golden lacquer.
    Hands tying bakers twine around a round ball of bread dough.
    1. Tie loosely. Bring opposite ends of each twine piece up and over the loaf and tie them in a loose knot on top of the dough. The twine should sit ON the surface, not dig into it. Trim the long ends close to the knot.
    Tied bread dough with bakers twine and scored.
    1. Score the sides. Use a razor blade or sharp paring knife to cut a few shallow wheat-pattern slashes into the side of each segment between the twine. The slashes look beautiful AND they give the dough a controlled place to expand.

    PRO TIP: Loose is the keyword here. The bread will roughly double in size again during oven spring, and tight twine will split the loaf through the segments instead of puffing up between them. Loose ties give you deep, defined pumpkin grooves. Tight ties give you a torn loaf.

    Baked pumpkin shaped bread on a cooling rack.
    1. Bake. Bake at 375ºF for 25 to 30 minutes, or until the loaves are deep golden brown and the internal temperature reads 190º- 200ºF on an instant-read thermometer.
    Inserting a stick into pumpkin shaped bread.
    1. Cool, untie, and add the stem. Let the loaves cool on the pan for 10 minutes, then carefully snip and slide the twine out of the grooves. Press a cinnamon stick or candy apple stick into the center as the pumpkin stem. Brush with melted butter for a glossy finish if you want. Serve warm.

    Common Pumpkin-Shaped Bread Problems To Avoid

    • The twine bakes into the bread. Almost always a tie that was too tight, or dough that over-proofed in the pan before going in the oven. Tie loosely, and if your dough has already doubled in the bowl, get it into the oven within 5 to 10 minutes of tying.
    • The segments fade, and the loaf bakes round. A too-loose tie, or all-purpose flour with not enough protein to hold the segments. Tighten the twine a touch (still loose, not strangling), and switch to bread flour if you used all-purpose.
    • The bread is pale on top. You skipped or under-applied the egg wash. One whole egg whisked with one tablespoon of water, brushed in an even coat right before the loaves go in the oven. Milk gets you part of the way there but it will still bake lighter than the photos.
    • The crumb is dense and tight. Either the yeast was killed by milk that was too hot (over 120ºF), or the proof was too short. The dough should double in size before you shape it. If it has not doubled in 25 minutes, give it another 10 to 15. Cold kitchens proofs slower.
    • The dough never came together in the mixer. Likely too dry. Add water one tablespoon at a time on speed 2 until the dough hydrates and starts to clear the sides of the bowl. Flour absorbs different amounts of water depending on humidity, brand, and how you measured it.

    Final Thoughts

    This pumpkin-shaped bread is one of those recipes that looks like you spent the whole afternoon in the kitchen but actually fits between two episodes of a sitcom. It has been on my Thanksgiving table since 2021, and the centerpiece moment of pulling it out of the oven still gets the same reaction every year. Bake one loaf and tuck it into a bread basket next to my crispy baked chicken thighs for an easy weeknight dinner, or bake both and use them as edible décor down the middle of the holiday table next to a spatchcock turkey and a bowl of homemade cranberry sauce. Either way, do not skip the kitchen twine. The twine IS the recipe.

    Pumpkin-Shaped Bread FAQs

    Does this bread taste like pumpkin?

    No. There is no pumpkin puree, pumpkin spice, or pumpkin flavor in the recipe. The pumpkin name refers to the shape only. The flavor is mildly sweet and on the savory side overall, closer to a soft dinner roll than to a sweet pumpkin loaf, which is what makes it work next to roast turkey or a bowl of soup.

    Why is my pumpkin bread not pumpkin-shaped after baking?

    The most common reason is tight twine, which strangles the dough and causes the segments to tear instead of puff. The second most common reason is all-purpose flour, which does not have enough protein to hold the segments crisply. Tie loosely and use bread flour for the best definition.

    Can I make pumpkin shaped bread ahead of time?

    Yes. Bake the loaves the day before, let them cool completely, then wrap tightly in plastic wrap and store at room temperature overnight. Refresh in a 300º F oven for 5 to 10 minutes before serving to bring back the soft texture. Do not refrigerate enriched bread. The fridge dries it out faster than the counter.

    What kind of twine do I use?

    100 percent natural cotton kitchen twine, sometimes labeled baker's twine or butcher's twine. Do not use synthetic or polyester string. Anything plastic will melt in the oven. Cotton twine is safe up to baking temperatures.

    Can I freeze pumpkin-shaped bread?

    Yes. Cool completely, wrap tightly in plastic wrap and then foil, and freeze for up to one month. Thaw at room temperature, then warm in a 300º F oven for 10 minutes to revive the soft crumb and golden crust before serving.


    More Bread Recipes To Try

    • closeup of sliced brioche bread
      Brioche Bread Recipe
    • focaccia bread decorated with vegetables to look like flowers shot from above
      Focaccia Bread Art
    • loaf of honey whole wheat bread shot from above with three slices in front on a white background
      Honey Whole Wheat Bread Recipe
    • closeup of homemade dinner rolls with butter and sea salt
      Fast Dinner Rolls

    Leave Me A Review
    ⭐️⭐️⭐️⭐️⭐️

    If you tried this pumpkin-shaped bread or any other recipe on my blog, please leave a 🌟 star rating and let me know how it goes in the comments. I love hearing from you!

    Recipe

    closeup of pumpkin shaped bread
    Print Recipe
    4.85 from 142 votes

    Pumpkin Shaped Bread

    This soft and fluffy pumpkin shaped bread only takes 60 minutes to make and creates the most beautiful centerpiece for your fall holiday table. A lightly enriched yeast dough tied with kitchen twine bakes into perfect pumpkin segments, finished with a cinnamon stick stem.
    Prep Time10 minutes mins
    Cook Time20 minutes mins
    proofing30 minutes mins
    Total Time1 hour hr
    Course: Appetizer
    Cuisine: American
    Servings: 24 servings
    Calories: 158kcal
    Author: Liz Marek

    Equipment

    • Stand mixer with dough hook
    • Razor blade
    • Bakers twine

    Ingredients

    • 28 ounces bread flour or all purpose (about 5 ½ cups, spooned and leveled)
    • 10 grams instant yeast needs to be instant (about 3 teaspoons)
    • 2 ounces sugar (4 Tablespoons)
    • 18 ounces warm milk (110ºF) or water (two cups)
    • 1 ½ teaspoons salt
    • 2 ounces olive oil or melted butter (¼ cup)
    • 1 large egg for the egg wash
    • 1 Tablespoon water for the egg wash
    • 1 large cinnamon stick or caramel apple stick for the stem
    • 1 Tablespoon melted butter to brush onto the finished bread
    US Customary - Metric

    Instructions

    • Mix the dough. Combine bread flour, instant yeast, sugar, and warm milk in the bowl of your stand mixer with the dough hook attached. Mix on low for one minute.
    • Adjust and knead. Add the salt and olive oil, then knead on speed 2 for about 8 minutes, or until the dough is smooth, elastic, and clearing the sides of the bowl. Add flour 1 tablespoon at a time if too wet, or 1 tablespoon of water at a time if too dry.
    • After 5 minutes, run the windowpane test by pinching off a piece of dough and stretching it between your fingers. If it stretches thin without tearing, the gluten is developed. If it tears, knead 2 more minutes and test again.
    • First proof. Turn the dough out onto a lightly floured surface and knead 4 or 5 turns to form a smooth ball. Place seam side up in a lightly oiled bowl, then flip so the top is coated. Cover with a clean cloth and proof in a warm spot for about 25 minutes, or until doubled in size.
    • Divide and shape. Punch the dough down, divide into two equal pieces, and shape each into a smooth round by pulling the edges into the center. Pinch the seam closed underneath.
    • Arrange the twine. For each loaf, lay two 20-inch pieces of twine in a cross on the parchment-lined pan, then lay two more across the first two for a total of eight spokes radiating from a center point. Place the shaped dough seam side down on top of the twine.
    • Egg wash. Whisk 1 egg with 1 tablespoon of water and brush a thin even coat over each loaf using a soft pastry brush. Do not skip the wash or the bread will bake pale.
    • Tie loosely. Bring opposite ends of each twine piece up and over the loaf and tie a loose knot on top of the dough. The twine should sit on the surface, not cut into it. Trim the long ends close to the knot.
    • Score the sides. Use a razor blade or sharp paring knife to cut a few shallow wheat-pattern slashes into the side of each segment between the twine.
    • Bake. Bake at 375º F for 25 to 30 minutes, or until the loaves are deep golden brown and the internal temperature reads 190 to 200º F on an instant-read thermometer.
    • Cool, untie, and add the stem. Cool on the pan for 10 minutes, then carefully snip and slide the twine out of the grooves. Press a cinnamon stick or candy apple stick into the center as the pumpkin stem. Brush with melted butter for a glossy finish if desired. Serve warm.

    Video

    Notes

    • Ingredient notes: Bread flour gives the best segment definition. All-purpose works but the segments will be softer. Whole wheat works at 24 ounces (not 28) because it absorbs more liquid.
    • Instant vs. active dry yeast: This recipe is written for instant yeast. If using active dry, bloom it in the warm milk and sugar for 10 minutes first, then expect the proof to take 90 minutes instead of 25. Shape, egg wash, tie, and score, then rest 30 minutes before baking.
    • Proofing trick: Turn your oven on to 170º F, then turn it off and open the door. Set the bowl on the open oven door (NOT inside the oven) for the perfect proofing environment.
    • Egg wash substitute: Brush with milk for similar (but slightly paler) browning if you are out of eggs or have an allergy.
    • Make-ahead and storage: Bake the day before, cool completely, wrap tightly in plastic at room temperature. Refresh in a 300º F oven for 5 to 10 minutes before serving. Do not refrigerate. Freezes well for up to one month wrapped in plastic and foil.
    • Critical do-nots: Do not tie the twine tight. Do not use synthetic string. Do not skip the egg wash if you want the lacquered golden top. Do not over-proof on the pan after tying. Get the loaves in the oven within 5 to 10 minutes of tying.

    Nutrition

    Serving: 1serving | Calories: 158kcal | Carbohydrates: 27g | Protein: 4g | Fat: 4g | Saturated Fat: 1g | Polyunsaturated Fat: 1g | Monounsaturated Fat: 2g | Trans Fat: 0.02g | Cholesterol: 9mg | Sodium: 153mg | Potassium: 41mg | Fiber: 1g | Sugar: 2g | Vitamin A: 27IU | Vitamin C: 0.01mg | Calcium: 8mg | Iron: 0.4mg

    Cake with hand painted graffiti and an edible red dress with Cruella cake topper

    October 15, 2021 Course Preview

    Cruella Birthday Cake Tutorial

    Skill level: Intermediate

    Bring your punk rock fashionistas to this party, we're making a Cruella birthday cake! I got the chance to make this cake for an artistic little girl that's really into the new Disney movie and I had a blast making this.

    This cake features a flowing edible red dress, newsprint graffiti, and a polka dot patterned cake inside, making the cake slices really stand out and be dalmatian-themed. This cake will knock the socks off your guests and inspire youngsters to explore their fashion interests.

    Please note: the arcylic Cruella cake topper is not part of this tutorial. You can get the downloadable template to make it here (scroll to the bottom and click on the 'free download' button)

    32:48 Minutes of Instruction

    What You Will Learn

    • Learn the internal structure to support the extra tall double barrel cake
    • How to make the flowing edible dress
    • Learn how to hand-paint and add premade graffiti elements to the cake
    • How to make the polka-dot patterned cake

    Cake decorated with an edible red dress, newsprint graffiti and hand painted details to look like Cruella movie

    Tutorial Chapters

    1. Making the cake pops 0:37
    2. Making the white cakes 5:38
    3. Adding the batter 6:45
    4. Making the wafer paper dress 9:31
    5. Airbrushing the dress 10:23
    6. Frosting the cakes 11:42
    7. Making the structure 16:07
    8. Stacking the cakes 18:08
    9. Covering the cake in fondant 19:57
    10. Painting the cake 25:33
    11. Adding the wafer paper newsprint 27:45
    12. Adding the dress 30:18

    Downloads

    Materials List
    Newsprint Template

    Cake with hand painted graffiti and an edible red dress with Cruella cake topper

    October 15, 2021 Paid Video

    Cruella Birthday Cake

    Skill level: Intermediate

    Bring your punk rock fashionistas to this party, we're making a Cruella birthday cake! I got the chance to make this cake for an artistic little girl that's really into the new Disney movie and I had a blast making this.

    This cake features a flowing edible red dress, newsprint graffiti, and a polka dot patterned cake inside, making the cake slices really stand out and be dalmatian-themed. This cake will knock the socks off your guests and inspire youngsters to explore their fashion interests.

    Please note: the arcylic Cruella cake topper is not part of this tutorial. You can get the downloadable template to make it here (scroll to the bottom and click on the 'free download' button)

    32:48 Minutes of Instruction

    What You Will Learn

    • Learn the internal structure to support the extra tall double barrel cake
    • How to make the flowing edible dress
    • Learn how to hand-paint and add premade graffiti elements to the cake
    • How to make the polka-dot patterned cake

    Tutorial Chapters

    1. Making the cake pops 0:37
    2. Making the white cakes 5:38
    3. Adding the batter 6:45
    4. Making the wafer paper dress 9:31
    5. Airbrushing the dress 10:23
    6. Frosting the cakes 11:42
    7. Making the structure 16:07
    8. Stacking the cakes 18:08
    9. Covering the cake in fondant 19:57
    10. Painting the cake 25:33
    11. Adding the wafer paper newsprint 27:45
    12. Adding the dress 30:18

    Downloads

    Materials List
    Newsprint Template

    close up of chocolate flower

    October 14, 2021 Blog

    Chocolate Flower Cake Topper

    Chef Christophe Rull shows us some amazing chocolate techniques with this chocolate flower showpiece. Learn how to sculpt with tempered chocolate, assemble a chocolate flower and add color with cocoa butter. This chocolate flower makes an amazing topper for a wedding cake!

    What's in this blog post

    • Chocolate flower tools & equipment
    • Chocolate flower ingredients
    • How to make the flower petals
    • How to make the flower base
    • Making the chocolate tendrils
    • Assembling the chocolate flower
    • How to color the flower with cocoa butter

    Chocolate flower tools & equipment

    These are the tools that Christophe used very often for making not only a chocolate flower but a lot of types of chocolate sculptures. You can purchase the petal mold here if you want to use this exact mold. Any silicone or polycarbonate sphere mold will work for the base. Here are some options on Amazon.

    Some other things you might not have on hand that Chef Christophe uses.

    EZ Temper Machine - A fantastic tool for tempering chocolate easily and quickly. You simply add in some unmelted cocoa butter the day before, let the machine bring it to the perfect temperature for proper crystalization then you can add that pre-tempered cocoa butter paste to melted chocolate (1-2% of the total chocolate mass) at 34ºC and then voila, tempered chocolate!adding tempered cocoa butter to melted chocolate in front of the ez temper machine

    Waring Chocolate Warmer - If you don't have a chocolate tempering machine, keeping your chocolate in temper can be a challenge. The Waring chocolate warmer keeps your tempered chocolate at the exact temperature it needs to be to stay in temper which allows you to work with your chocolate for longer without the need to re-temper.

    waring chocolate warmer

    Chocolate flower ingredients

    We are using Zephyr white chocolate from Cocao Barry which is a fantastic chocolate to work with but any white chocolate couverture is going to work great.

    You will also need some colored cocoa butter. I got this from Chef Rubber which has a very extensive inventory of colored cocoa butter products.

    We are also using tempered cocoa butter paste from the EZ Temper machine but if you don't have the EZ temper you can temper your cocoa butter using the traditional tempering method.

    white chocolate flower ingredients

    How to make the flower petals

    Begin by making sure your chocolate is in temper. Chef Christophe recommends you always do a test to make sure your chocolate is properly crystallizing. Better safe than sorry! If you need a refresher on how to temper chocolate using the EZ Temper machine you can watch this video or you can use my method for tempering in the microwave.

    1. Cut your acetate to be just a bit bigger than the petal mold
    2. Fill your piping bag with some tempered chocolate and tie the opening to work clean. adding tempered chocolate to a piping bag
    3. Use the pinch and release method to fill the petal cavities with white chocolate.Filling the petal mold with tempered chocolate
    4. Place the sheet of acetate on top of the mold and press to make sure your petals are completely filled. pressing acetate onto the petal mold
    5. Use your bench scraper to press the the chocolate flat and remove the excess chocolate from the mold.using a bench scraper to remove the excess chocolate
    6. Place the piping bag into the chocolate warmer to keep it at the proper temperature to use later.
    7. Set the mold in the fridge to crystalize.

    How to make the flower base

    1. Use your piping bag to fill your 2" sphere mold (you only need 2 half) but you can make extras just in case.
    2. Fill your 1.5" sphere mold to make two full spheres. fill 1" sphere mold with chocolate
    3. Place the spheres into the fridge to set while you work on the tendrils.

    Making the chocolate tendrils

    Did you know you can sculpt with tempered chocolate? I was amazed by this technique.

    1. Start by adding your unmelted chocolate pieces into a food processor. chocolate in a food processor
    2. Turn the food processor on and blend until the chocolate forms a ball. Do not over-mix it. Now it's ready to sculpt.
    3. Use your hands and your cake board to roll out some long tendrils.
    4. Cut the end to the length you want it to be.
    5. sharpen the tip and bend it into a nice artistic shape.
    6. The chocolate will set as it cools and be very strong. chocolate tendrils

    Assembling the chocolate flower

    1. Turn your petal mold over (opening side down) and pull the mold off the petals so they don't break. de-molding chocolate petals from a mold
    2. Unmold your spheres.demolding chocolate spheres
    3. Use your spatula and kitchen torch to melt the top of the half sphere just a bit.
    4. Place the second sphere on top and use the cold spray to set the sphere. glueing two chocolate spheres together
    5. Working quickly, dip the rounded tip of the flower petal into the tempered chocolate, lay the petal against the base of the chocolate sphere and use the cold spray to set it. Arrange the petals at a slight angle to create movement. attaching chocolate petals to the chocolate base
    6. Continue adding petals around until you have a few layers of petals.
    7. You can pipe a little tempered chocolate in the center of the flower and use the airbrush to add texture to the center of the flower.
    8. Glue another sphere on top of the 2" base at a 45" angle as we did before with the spatula and kitchen torch.
    9. Attach you tendrils to the back of the base with some more tempered chocolate and set with the cold spray.
    10. Attach the chocolate flower to the front of the sphere with melted chocolate and set with cold spray.

    How to color the flower with cocoa butter

    1. Melt your colored cocoa butter in the microwave. Cool to 30ºC.
    2. Add your tempered cocoa butter paste at 29ºC to your melted colored cocoa butter.
    3. Add the melted cocoa butter to your airbrush and you can color the flower.
    4. Start with yellow and then add highlights with red.

    Now your chocolate flower is complete! It can be attached to the cake with a little melted chocolate.

    finished chocolate flower

    Chef Christophe uses a Waring dehydrator to store his airbrush and cocoa butter to keep it at the correct temperature for airbrushing.

    Recipe

    close up of chocolate flower
    Print Recipe
    5 from 2 votes

    Chocolate Flower Cake Topper

    Chef Christophe Rull shows us some amazing chocolate techniques with this chocolate flower showpiece. Learn how to sculpt with tempered chocolate, assemble a chocolate flower and add color with cocoa butter. This chocolate flower makes an amazing topper for a wedding cake!
    Prep Time30 minutes mins
    Cook Time20 minutes mins
    cooling20 minutes mins
    Total Time1 hour hr 10 minutes mins
    Course: Dessert
    Cuisine: French
    Servings: 1 flower
    Calories: 2271kcal
    Author: Liz Marek

    Equipment

    • Sphere Molds
    • Petal Mold
    • Acetate
    • Bench scraper
    • infrared thermometer
    • Piping Bag
    • Air Brush
    • EZ Temper Machine (optional)
    • Waring Chocolate Warmer (optional)

    Ingredients

    • 200 grams tempered white chocolate https://sugargeekshow.com/how-to-temper-chocolate-with-cocoa-butter/
    • 200 grams white chocolate couverature
    • 2 Tablespoons red cocoa butter
    • 1 Tablespoon yellow cocoa butter
    • 2 Tablespoons tempered cocoa butter paste optional, if you don't have the EZ temper then you will have to temper the colored cocoa butter and chocolate using either the microwave or traditional seeding method

    Instructions

    How to Make the Flower Petals

    • Cut your acetate to be just a bit bigger than the petal mold.
    • Fill your piping bag with some tempered chocolate and tie the opening to work clean.
    • Use the pinch and release method to fill the petal cavities with white chocolate.
    • Place the sheet of acetate on top of the mold and press to make sure your petals are completely filled.
    • Use your bench scraper to press the the chocolate flat and remove the excess chocolate from the mold.
    • Place the piping bag into the chocolate warmer to keep it at the proper temperature to use later.
    • Set the mold in the fridge to crystalize.

    How to Make the Flower Base

    • Use your piping bag to fill your 2″ sphere mold (you only need 2 half) but you can make extras just in case.
    • Fill your 1.5″ sphere mold to make two full spheres.
    • Place the spheres into the fridge to set while you work on the tendrils.

    Making the Chocolate Tendrils

    • Start by adding your unmelted chocolate pieces into a food processor.
    • Turn the food processor on and blend until the chocolate forms a ball. Do not over-mix it. Now it's ready to sculpt.
    • Use your hands and your cake board to roll out some long tendrils.
    • Cut the end to the length you want it to be.
    • Sharpen the tip and bend it into a nice artistic shape.
    • The chocolate will set as it cools and be very strong.

    Assembling the Chocolate Flower

    • Turn your petal mold over (opening side down) and pull the mold off the petals so they don't break.
    • Unmold your spheres.
    • Use your spatula and kitchen torch to melt the top of the half sphere just a bit.
    • Place the second sphere on top and use the cold spray to set the sphere.
    • Working quickly, dip the rounded tip of the flower petal into the tempered chocolate, lay the petal against the base of the chocolate sphere and use the cold spray to set it. Arrange the petals at a slight angle to create movement.
    • Continue adding petals around until you have a few layers of petals.
    • You can pipe a little tempered chocolate in the center of the flower and use the airbrush to add texture to the center of the flower.
    • Glue another sphere on top of the 2″ base at a 45″ angle as we did before with the spatula and kitchen torch.
    • Attach you tendrils to the back of the base with some more tempered chocolate and set with the cold spray.
    • Attach the chocolate flower to the front of the sphere with melted chocolate and set with cold spray.

    How to Color the Flower with Cocoa Butter

    • Melt your colored cocoa butter in the microwave. Cool to 30ºC.
    • Add your tempered cocoa butter paste at 29ºC to your melted colored cocoa butter.
    • Add the melted cocoa butter to your airbrush and you can color the flower.
    • Start with yellow and then add highlights with red.

    Video

    Nutrition

    Calories: 2271kcal | Carbohydrates: 248g | Protein: 28g | Fat: 137g | Saturated Fat: 84g | Polyunsaturated Fat: 4g | Monounsaturated Fat: 37g | Cholesterol: 84mg | Sodium: 363mg | Potassium: 1372mg | Fiber: 8g | Sugar: 236g | Vitamin A: 120IU | Vitamin C: 2mg | Calcium: 815mg | Iron: 3mg
    « Previous Page
    Next Page »

    Primary Sidebar

    Hi, I'm Liz! I'm a cake artist and recipe developer, and I won Netflix's Is It Cake? Holiday 2 with a hyperrealistic Santa. I write foolproof recipes that explain why things work, not just how.

    I also teach full-length cake tutorials, including sculpted cakes, at Sugar Geek University.

    More about me →

    Our Cake Greatest Hits

    Check out our best cake recipes

    Celebrate Halloween 🎃

    • black and white striped cake with pink drip, gummy eyeball with ice cream cone on top
      Gummy Eyeball Cake
      Cook Time1 Hours 30 Minutes
    • close up of a slice of black velvet cake
      Black Velvet Cake
      Cook Time50 Minutes
    • monster mash cheesecake brownies cut into squares on a white background. Sprinkles, pumpkins and plates around the brownies
      Monster Mash Cheesecake Brownies
    • close up of candy apples
      The Best Candy Apple Recipe
    • pumpkin pie recipe
      Pumpkin Pie Recipe
      Cook Time2 Hours
    • close up of pumpkin cheesecake bars on a plate
      Pumpkin Cheesecake Bars
      Cook Time4 Hours

    Popular Recipes

    • close up of ganache drizzling into a bowl
      The Best Chocolate Ganache Recipe
      Cook Time20 Minutes
    • Piping easy buttercream rosettes onto a cake using a 1M star piping tip
      Easy Buttercream Frosting
      Cook Time25 Minutes
    • close up slice of marble cake
      Moist and Fluffy Marble Cake Recipe
      Cook Time40 Minutes
    • Slice of red velvet cake with cream cheese frosting on a white plate.
      Red Velvet Cake Recipe
      Cook Time1 Hours 40 Minutes

    Footer

    ↑ back to top

    About

    • Privacy Policy
    • Terms of Service

    Newsletter

    • Sign Up! for emails and updates

    Contact

    • Contact
    • About Us

    Copyright © 2024 Sugar Geek Show, Inc. All Rights Reserved.

    Rate This Recipe

    Your vote:


    A rating is required
    A name is required
    An email is required