• Skip to primary navigation
  • Skip to main content
  • Skip to primary sidebar
  • Halloween
  • Recipes
  • Free Tutorials
  • Cake Classes
  • Cake Commissions
  • About Liz

Sugar Geek Show logo

menu icon
go to homepage
  • Halloween
  • Recipes
  • Free Tutorials
  • Cake Classes
  • Cake Commissions
  • About Liz
subscribe
search icon
Homepage link
  • Halloween
  • Recipes
  • Free Tutorials
  • Cake Classes
  • Cake Commissions
  • About Liz
×
Home

Blog

close up of white chocolate bonbon

October 6, 2021 Blog

White Chocolate Bonbons With Vanilla Bean Ganache

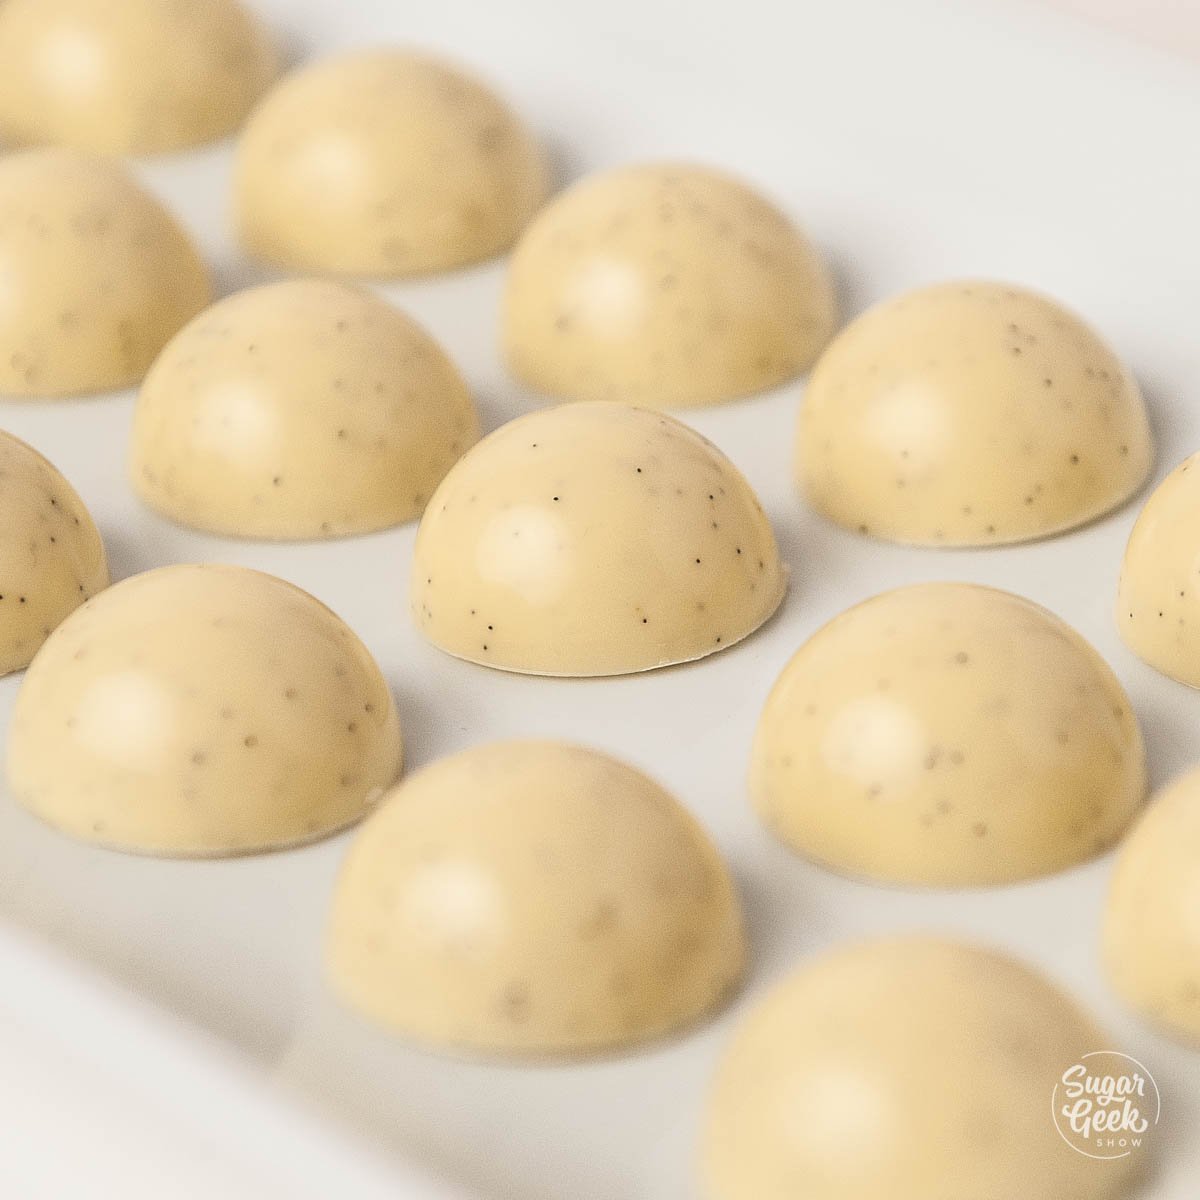
These bonbons have a thin and shiny chocolate shell filled with a truly amazing silky soft, white chocolate vanilla bean ganache. I actually thought I didn't like white chocolate until I tasted these bonbons! No joke!
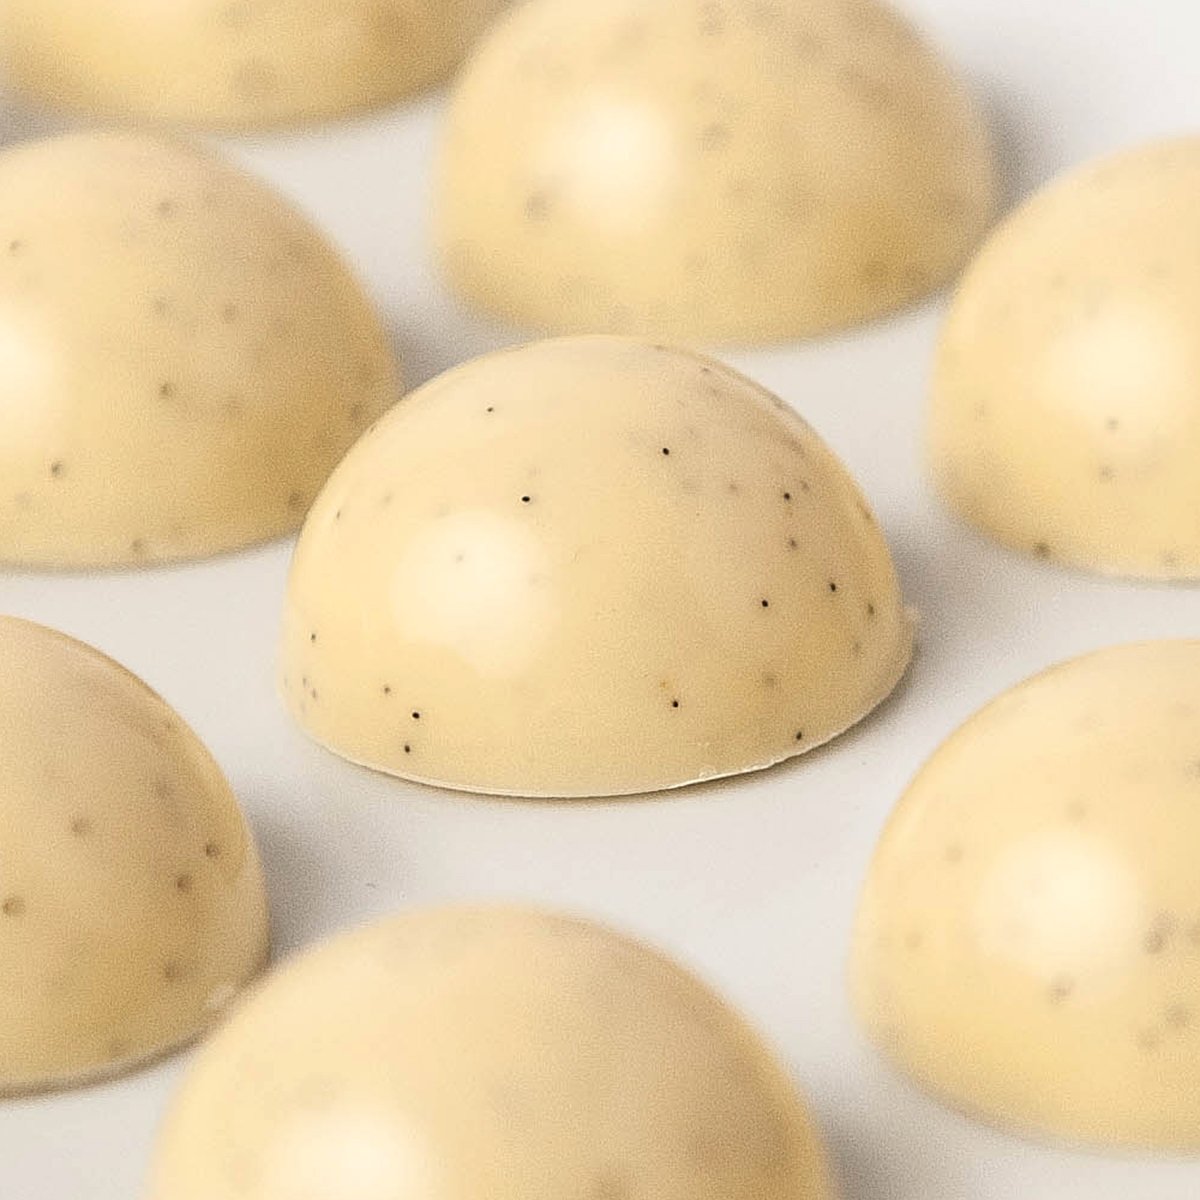
close up of white chocolate bonbon

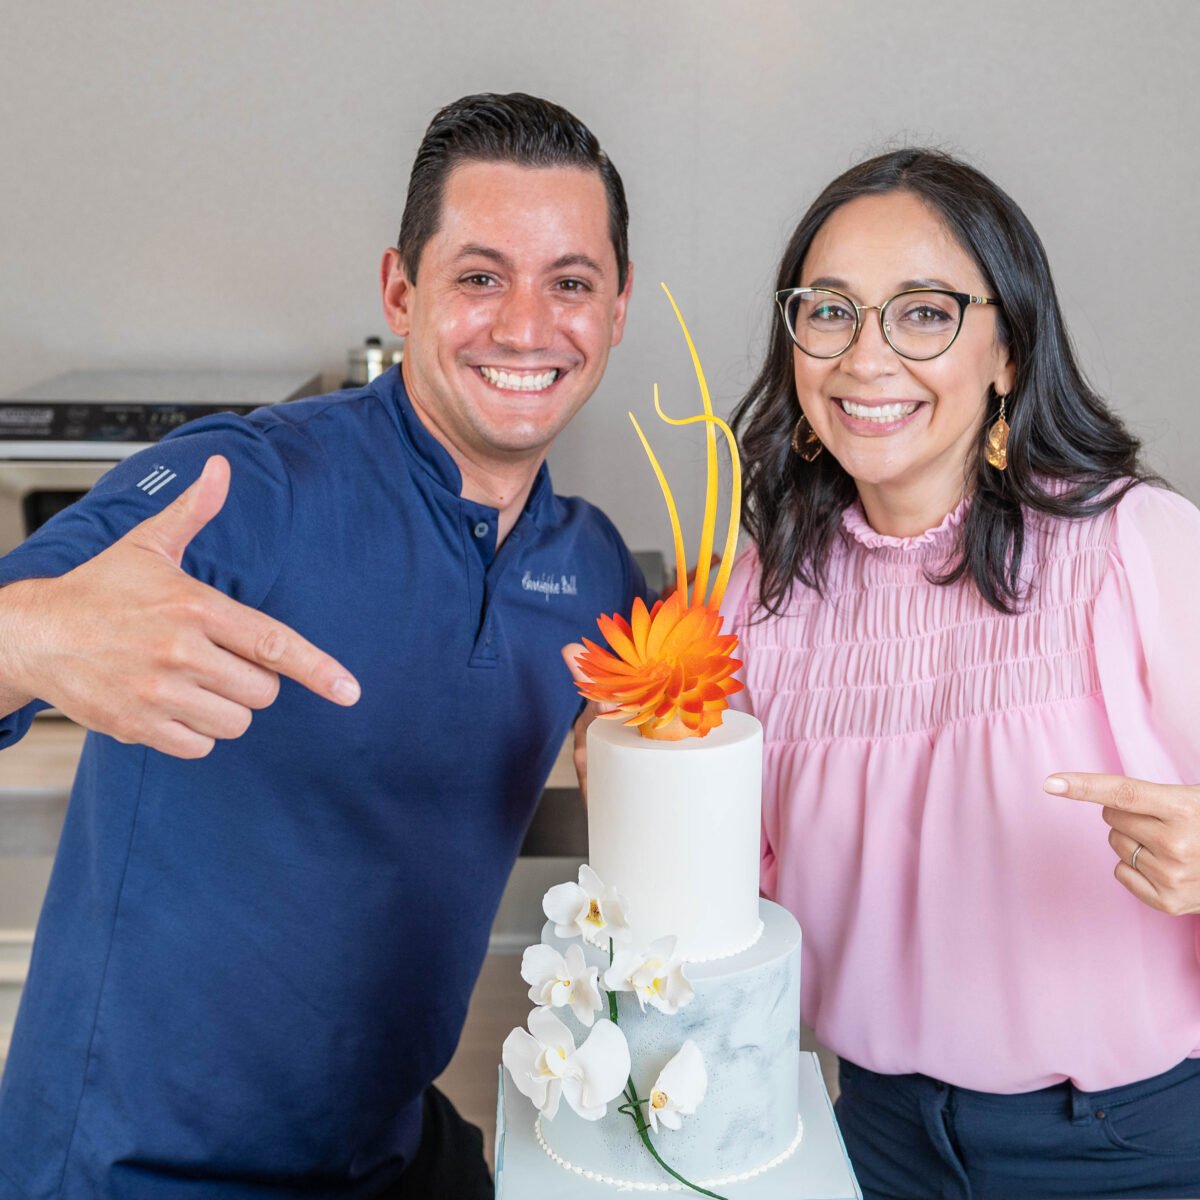
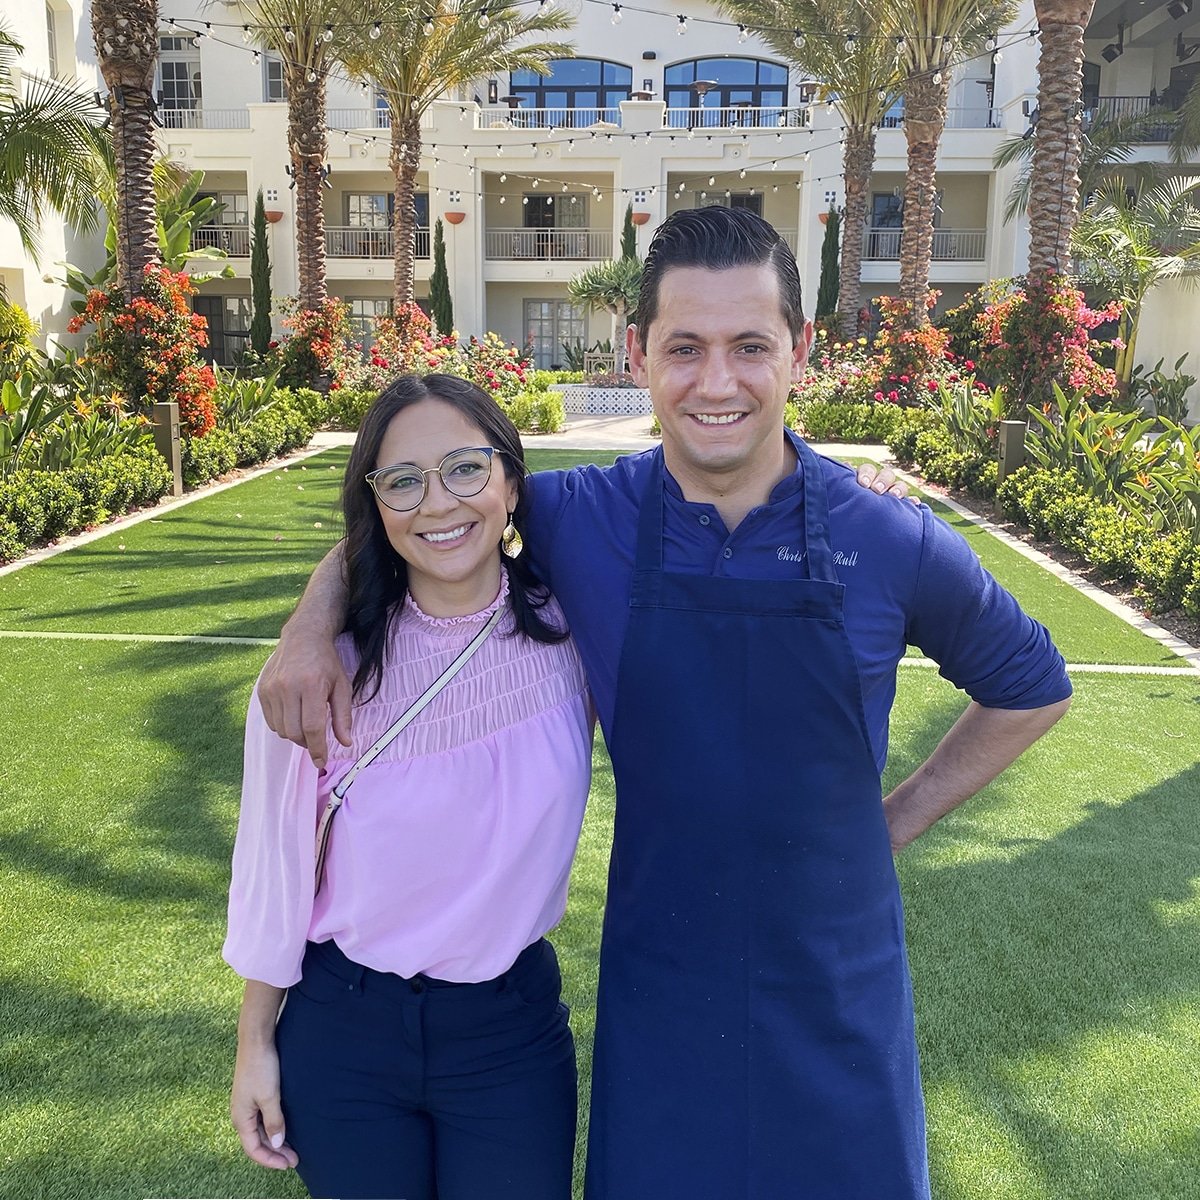
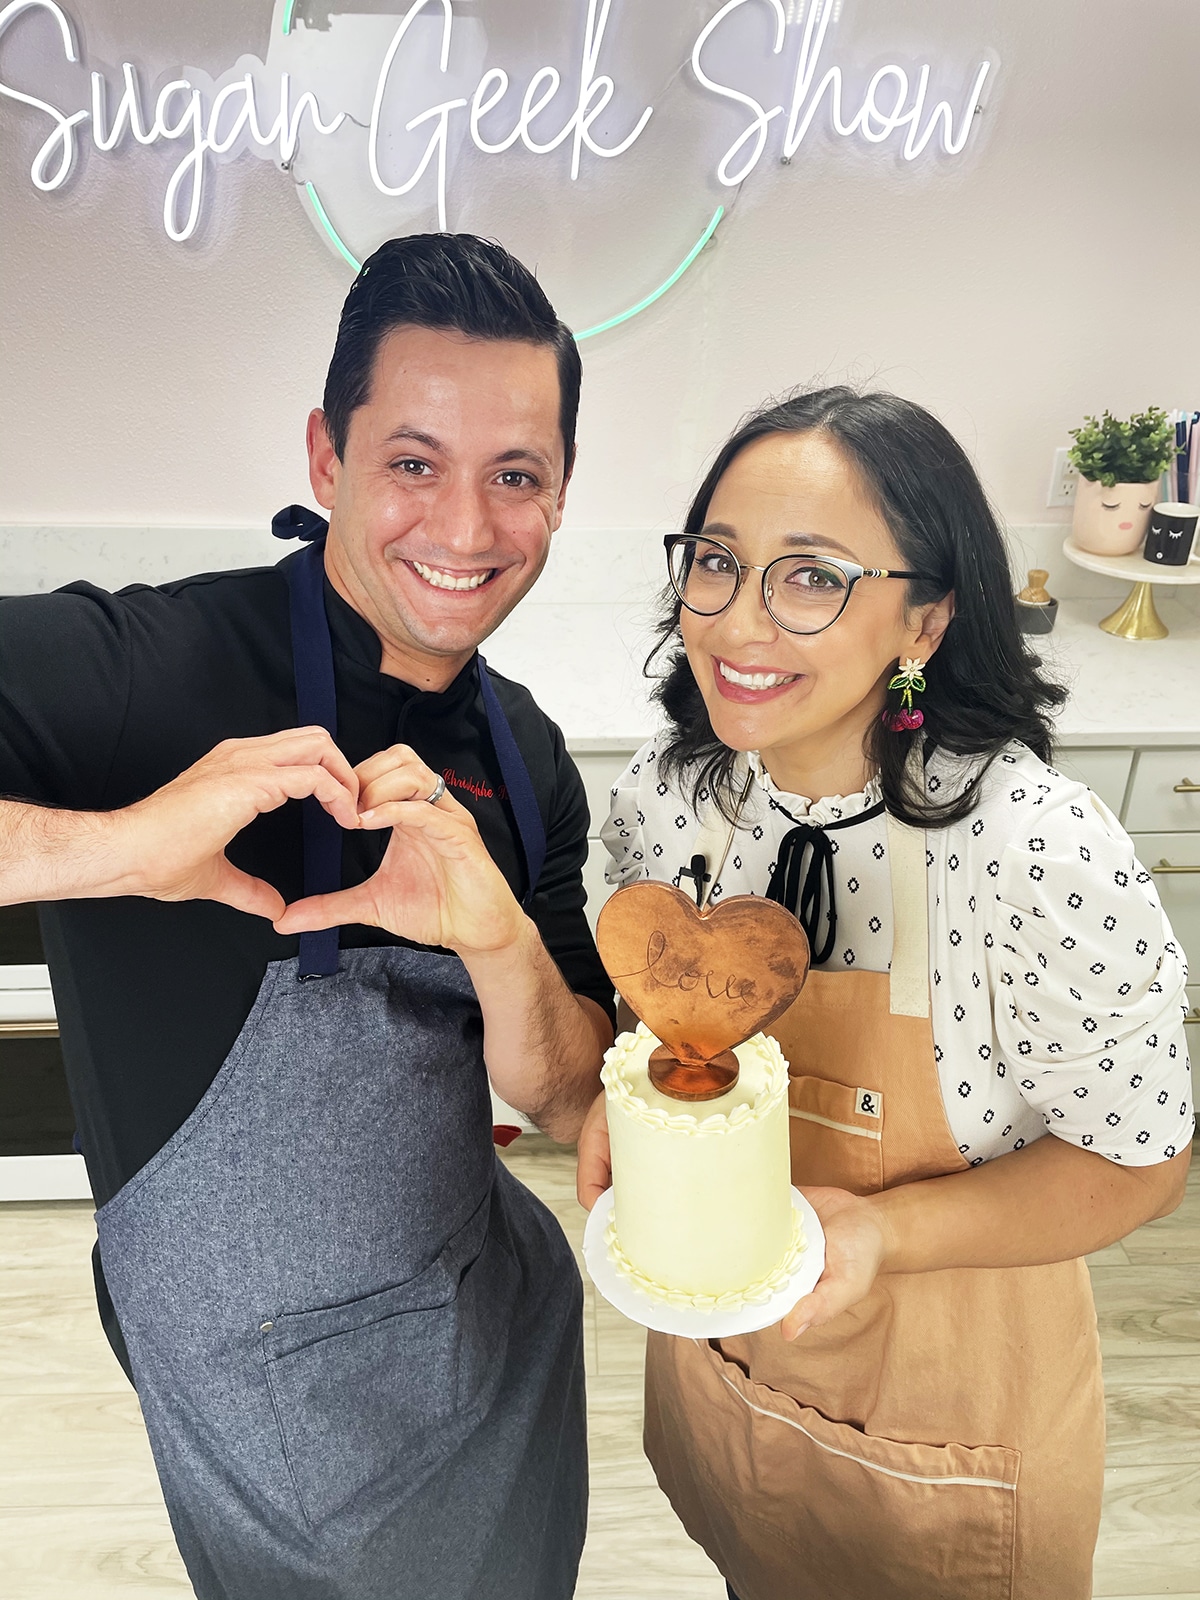
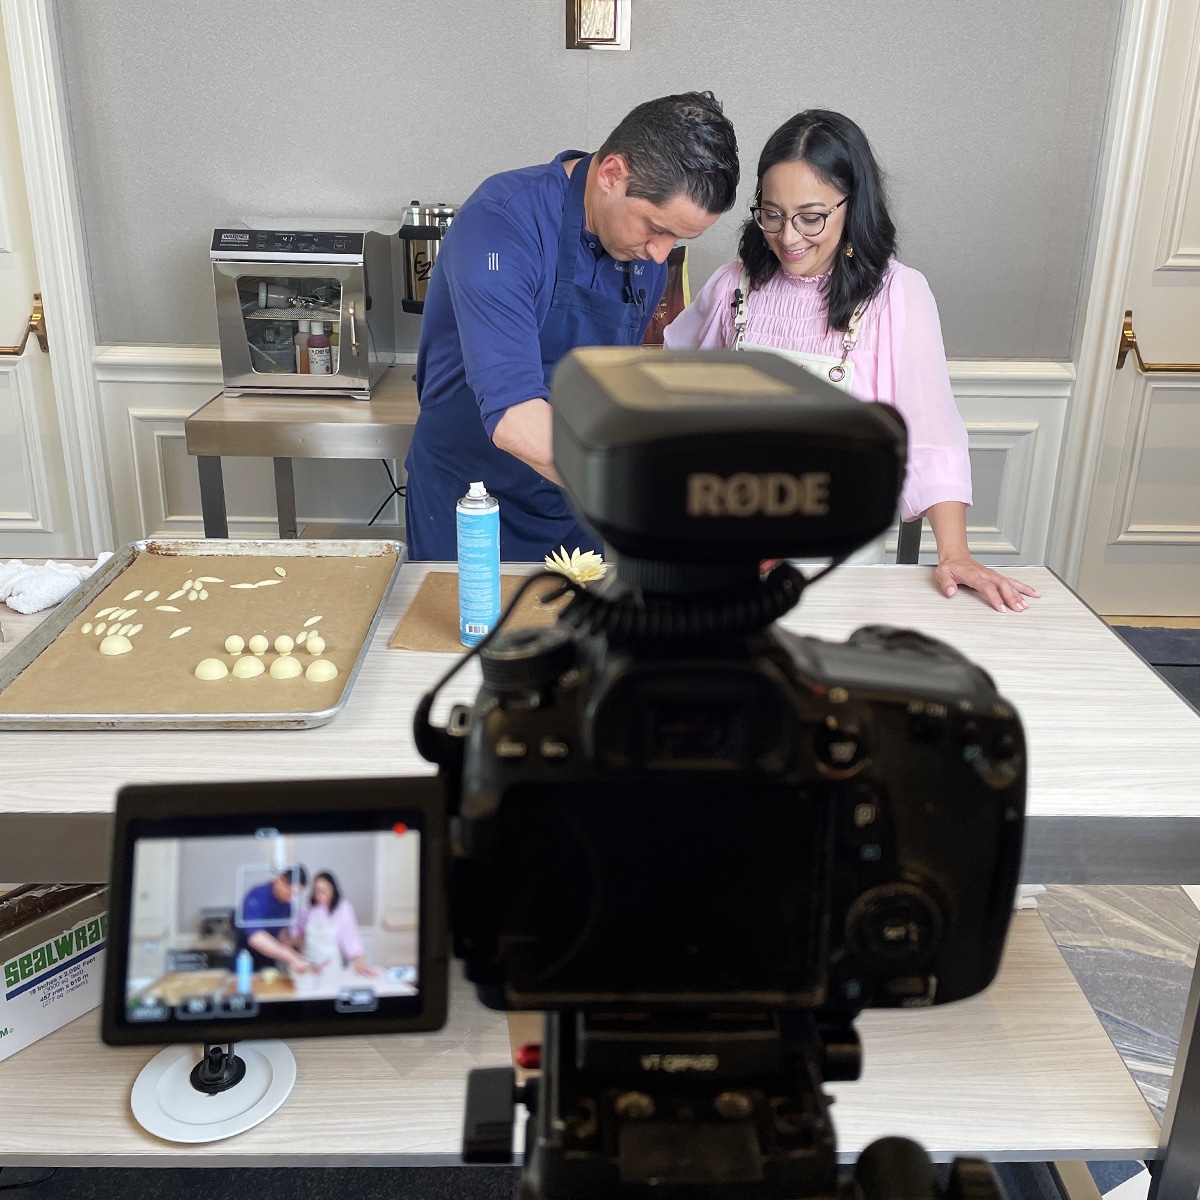
Chef Christophe Rull shows us how to achieve the perfect chocolate bonbons step by step. If you're a novice chocolatier and want to move into making your own flavored bonbons and ganache fillings, you don't want to miss this valuable information! Keep reading to learn how!

Table of contents

  • What is a bonbon?
  • Chocolate bonbon ingredients
  • Chocolate bonbon equipment
  • How to make white chocolate vanilla bean ganache
  • How to temper the chocolate

What is a bonbon?

A bonbon is a small molded chocolate candy. They are usually filled with things like ganache, sauces, liqueurs, or other sweet fillings. Remember those chocolate-covered cherries from Christmas? That's a kind of bonbon. But in my opinion, the worst version.

In this blog post, Chef Christophe Rull is going to show you how to make your own bonbons! Never buy stale Valentine's day candy again or start selling your own custom bonbon flavors. Once you get the basics down, you'll be making bonbons like crazy!
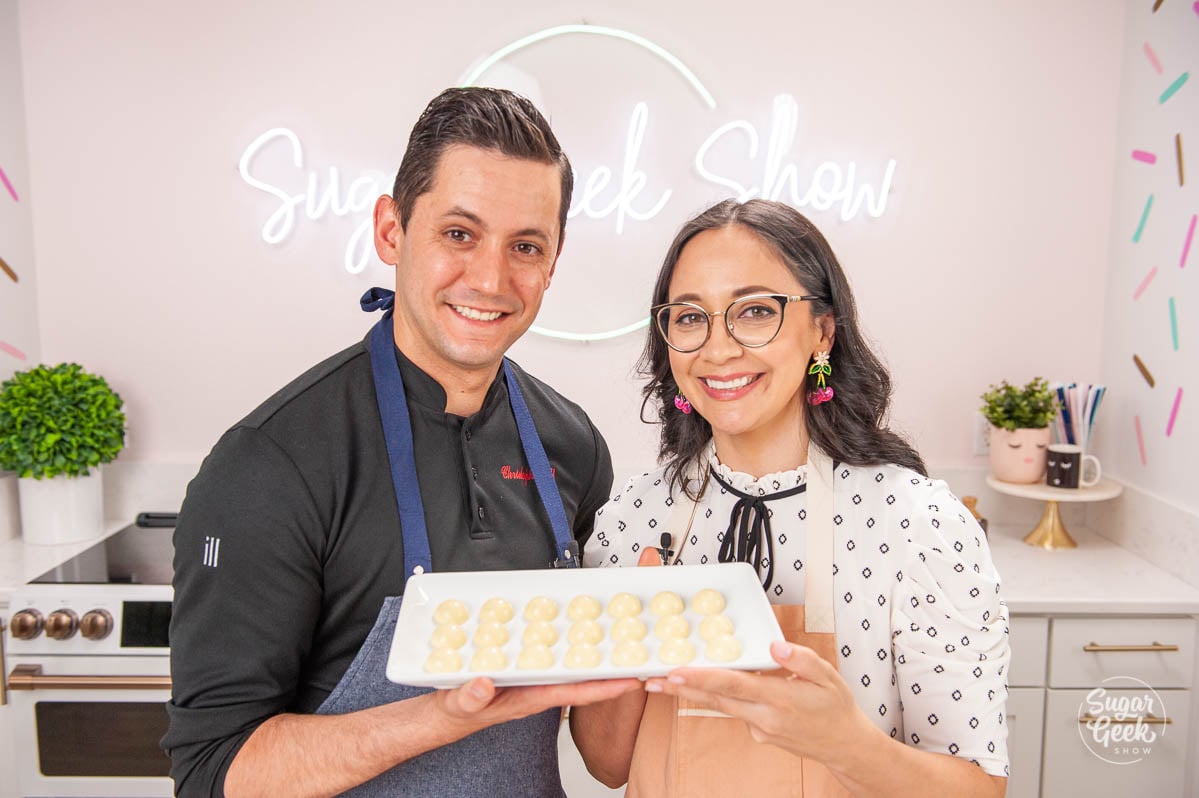
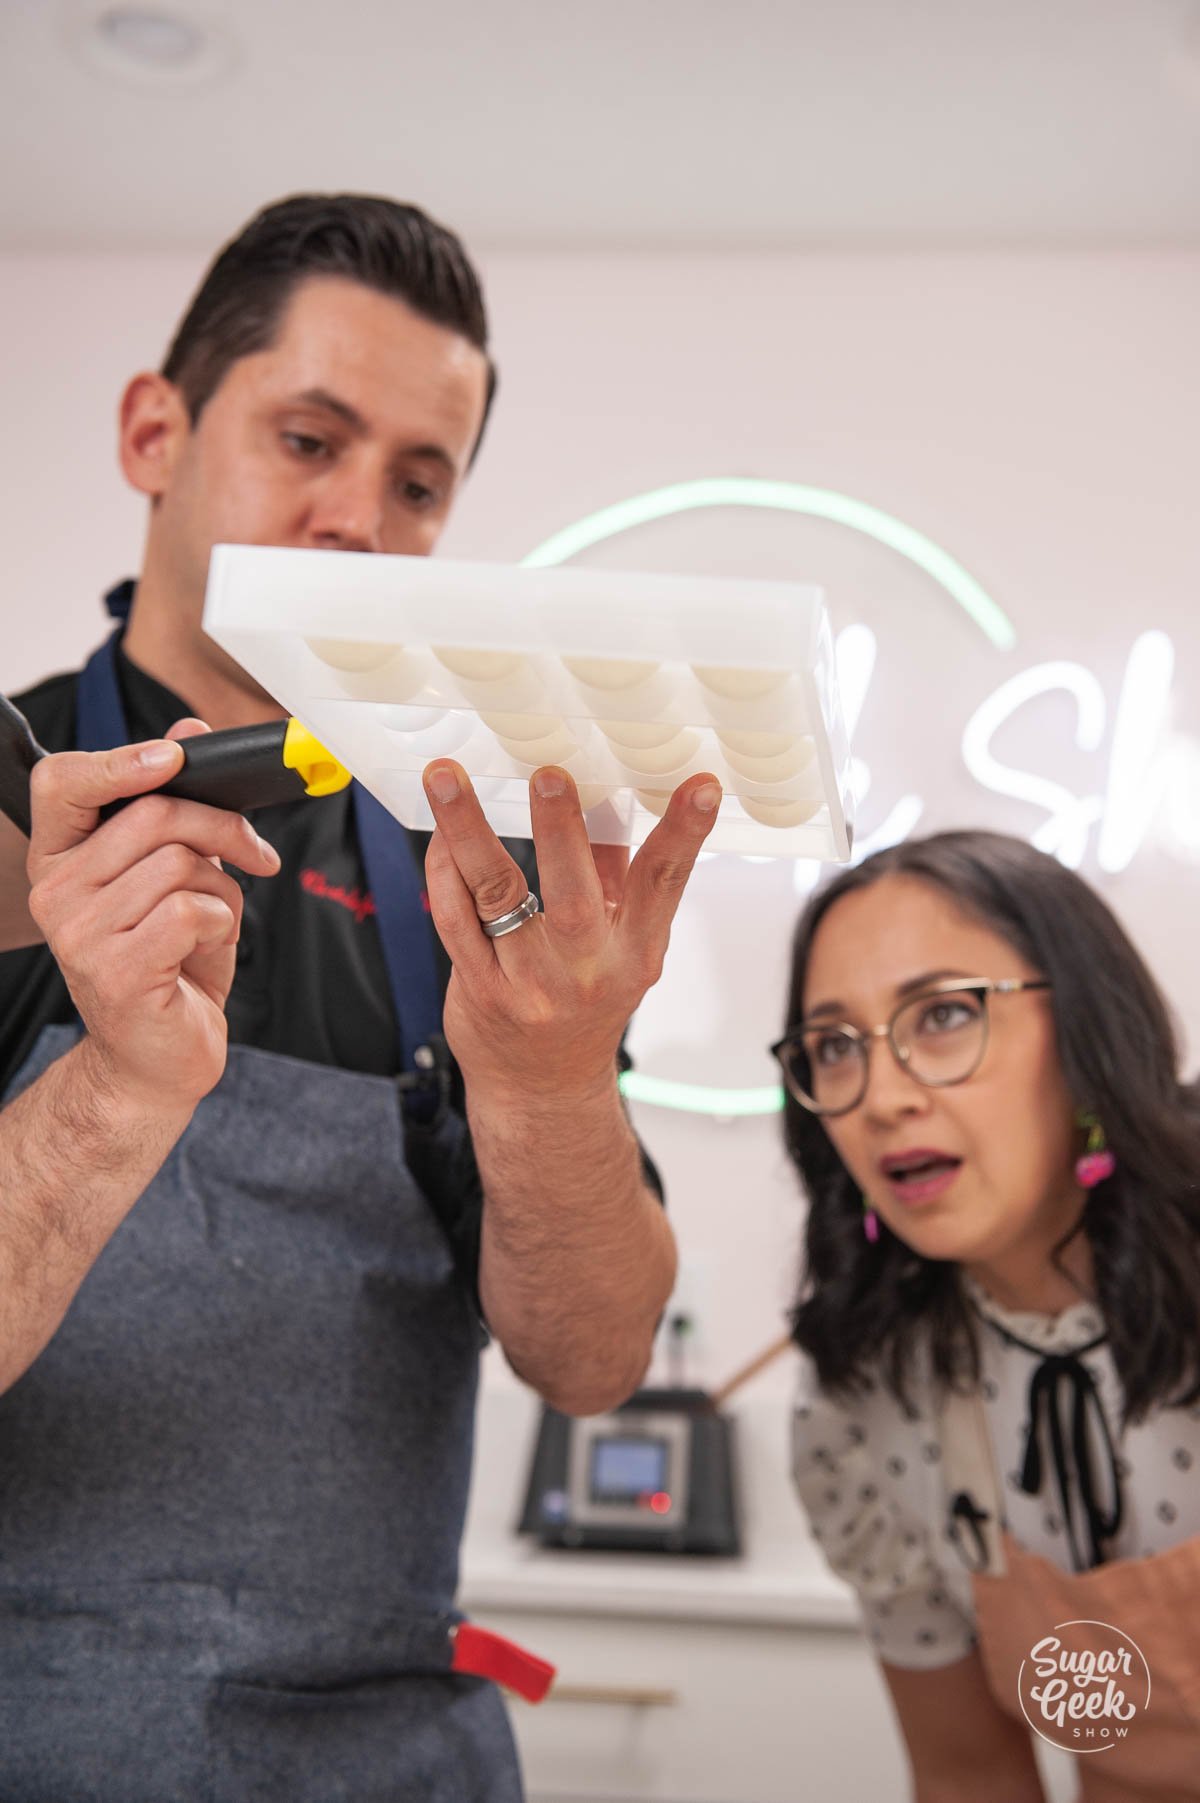
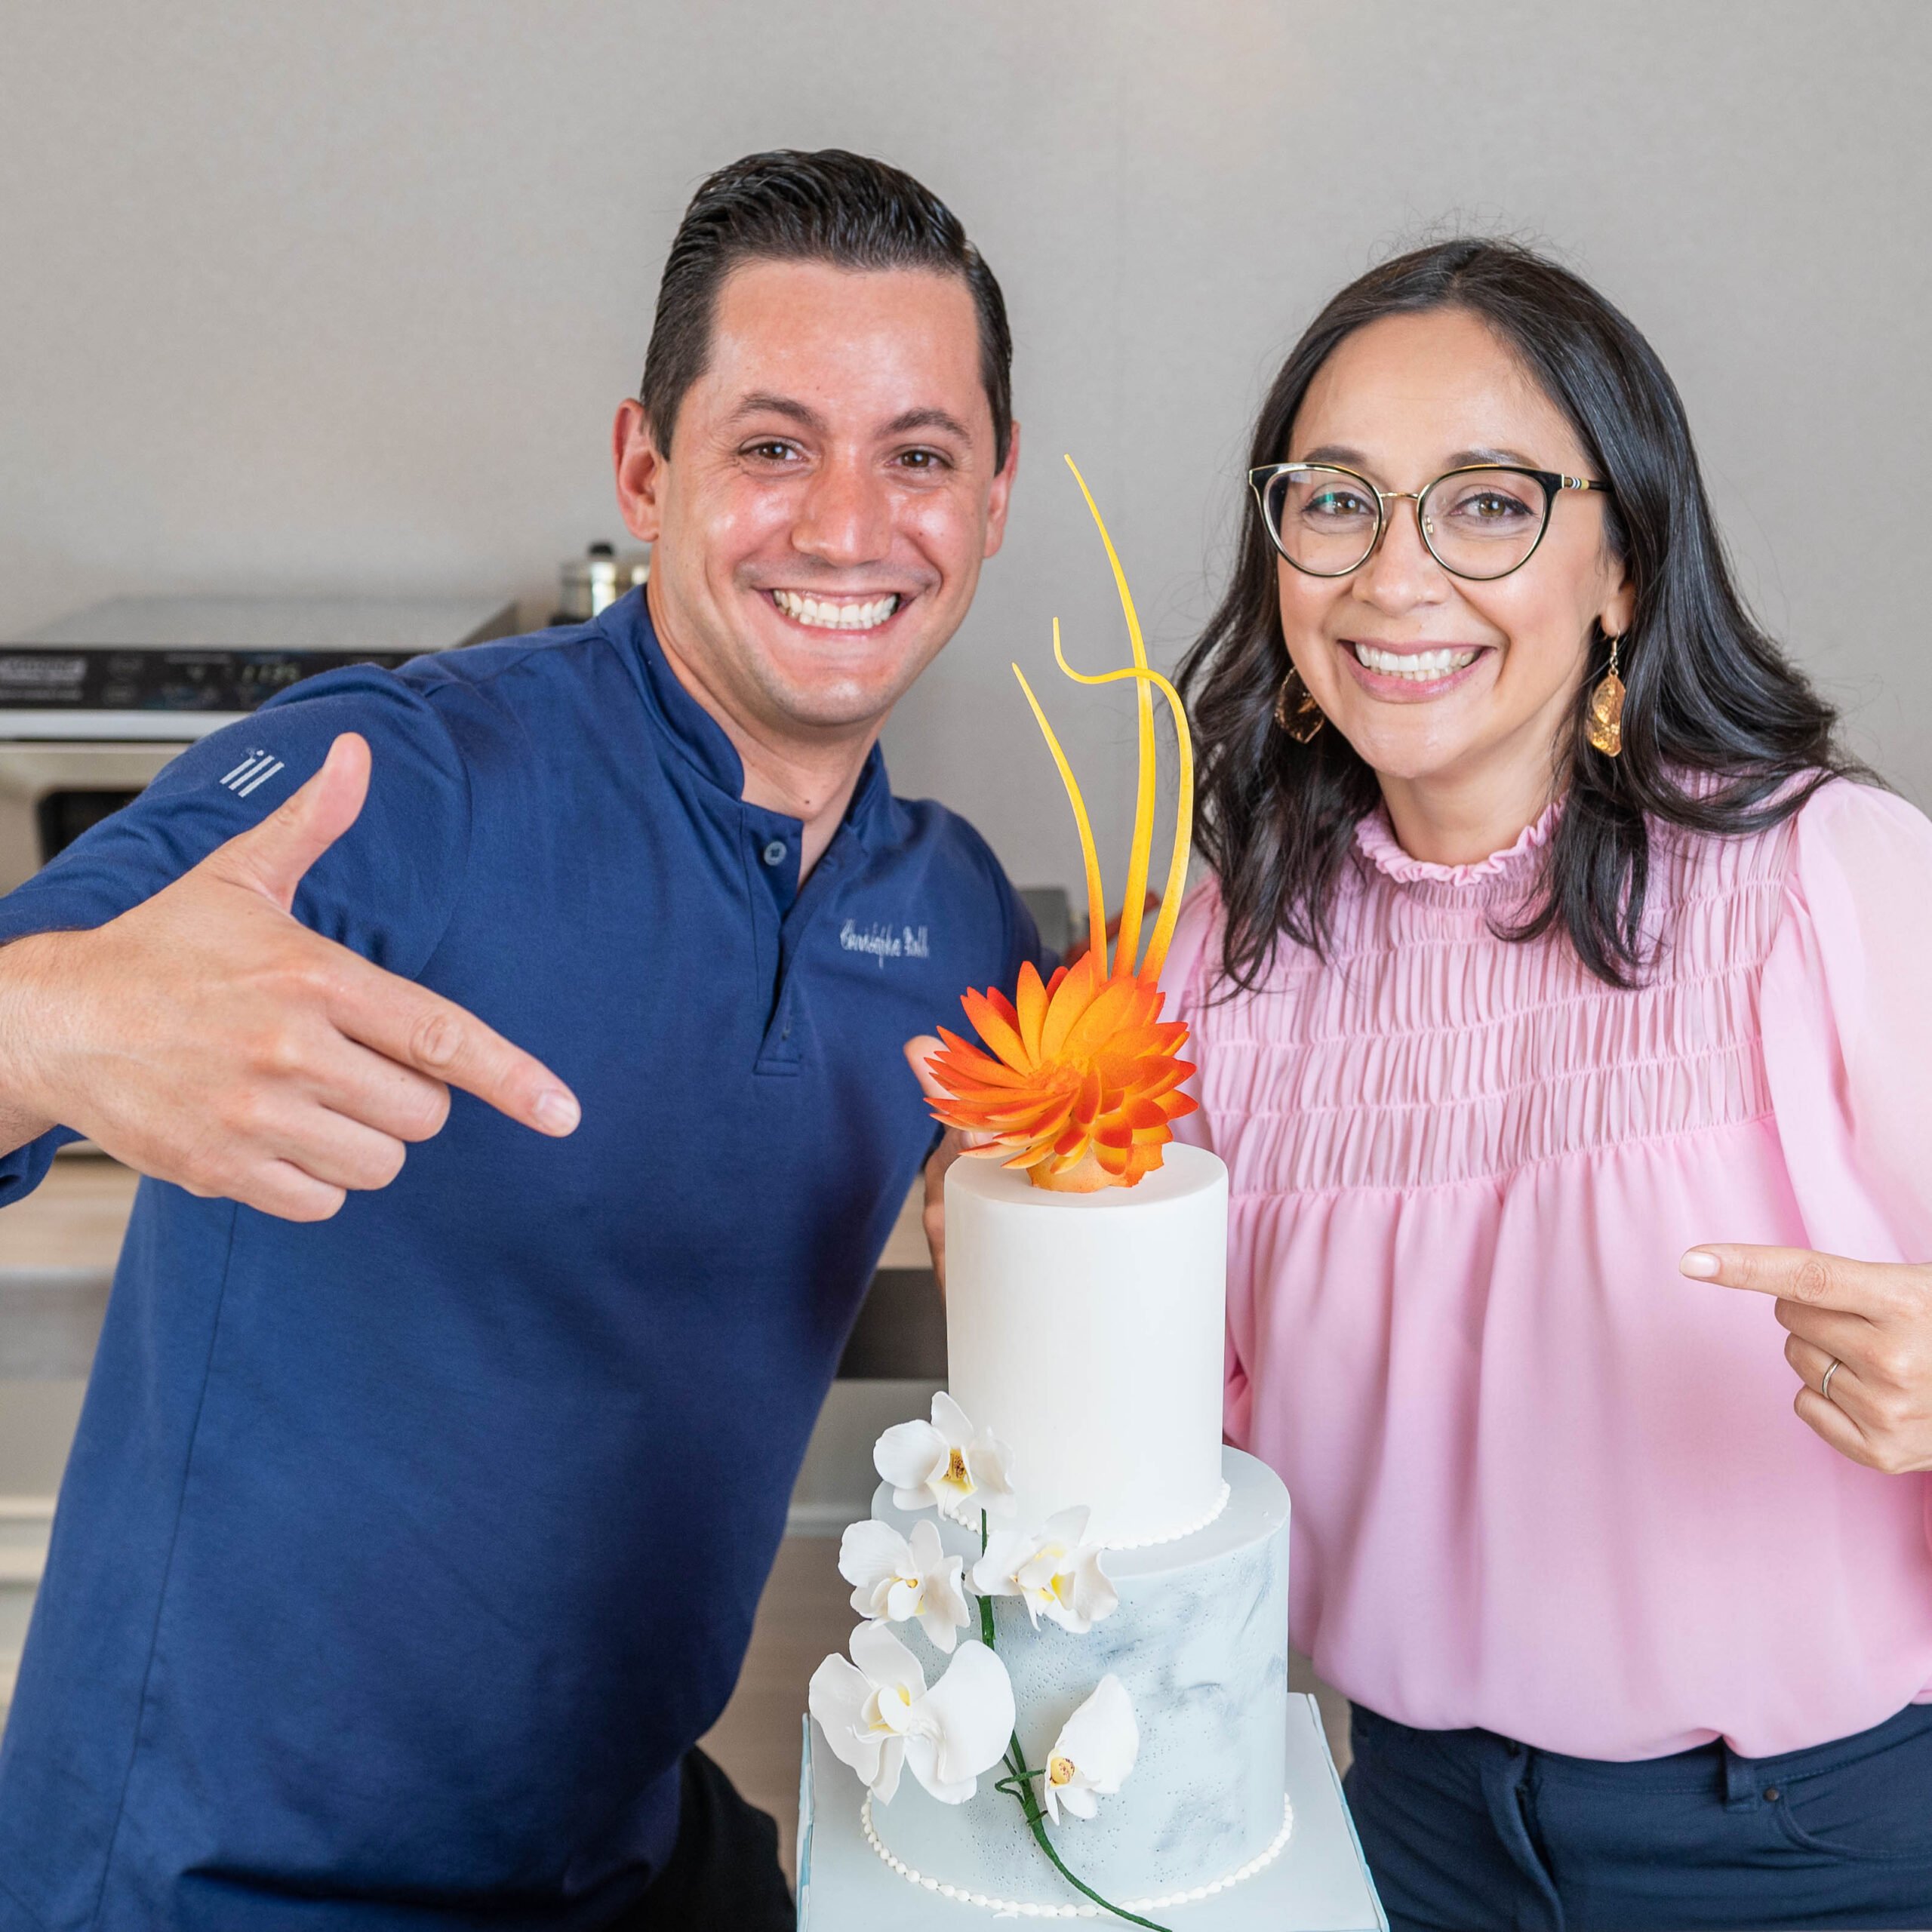
christophe rull and liz marek holding a tray of bonbons

Chocolate bonbon ingredients

chocolate bonbon ingredients

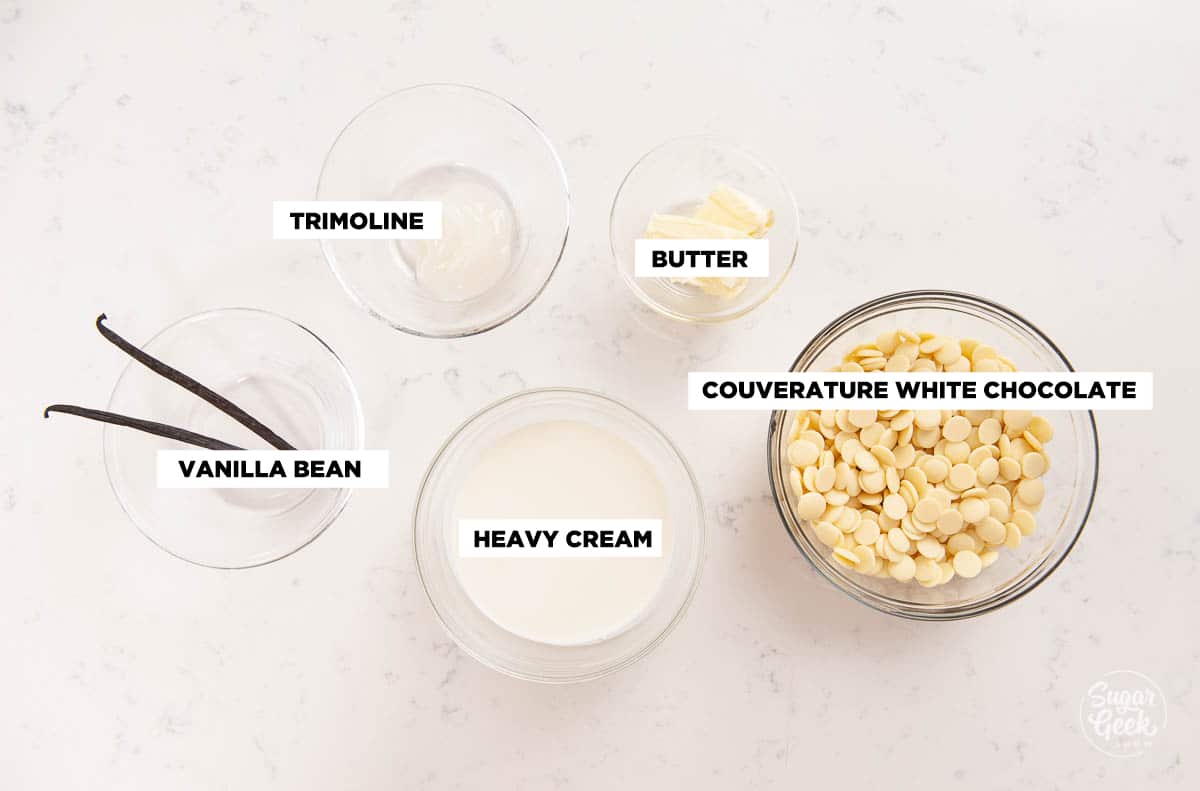
Since the main ingredient to bonbons is chocolate, make sure you're using very high-quality couverature chocolate. The better the quality, the better the taste.

To make these chocolate bonbons we are using really high-quality white chocolate from Cacoa Barry. This chocolate is really nice and thin and perfect for making a shiny, delicious chocolate bonbon.

Since vanilla is our main flavor, we're going all out and using a very fat and juicy Tahitian vanilla bean or you can save some money by using vanilla bean paste or even a good vanilla extract. If you use extract you won't have the pretty specs of vanilla bean in your shell but it will still taste yummy!

Another ingredient you might not have on hand is trimoline which is a form of invert sugar much like corn syrup. Trimoline prevents crystalization, adds sweetness, and gives the ganache a very smooth texture. The best substitutions for trimoline are molasses, honey, corn syrup, or glucose syrup.

Chocolate bonbon equipment

Every chocolatier is going to be familiar with these tools but if you're new to chocolate work, make sure you get these basic chocolate-making supplies before you attempt to make molded chocolates.
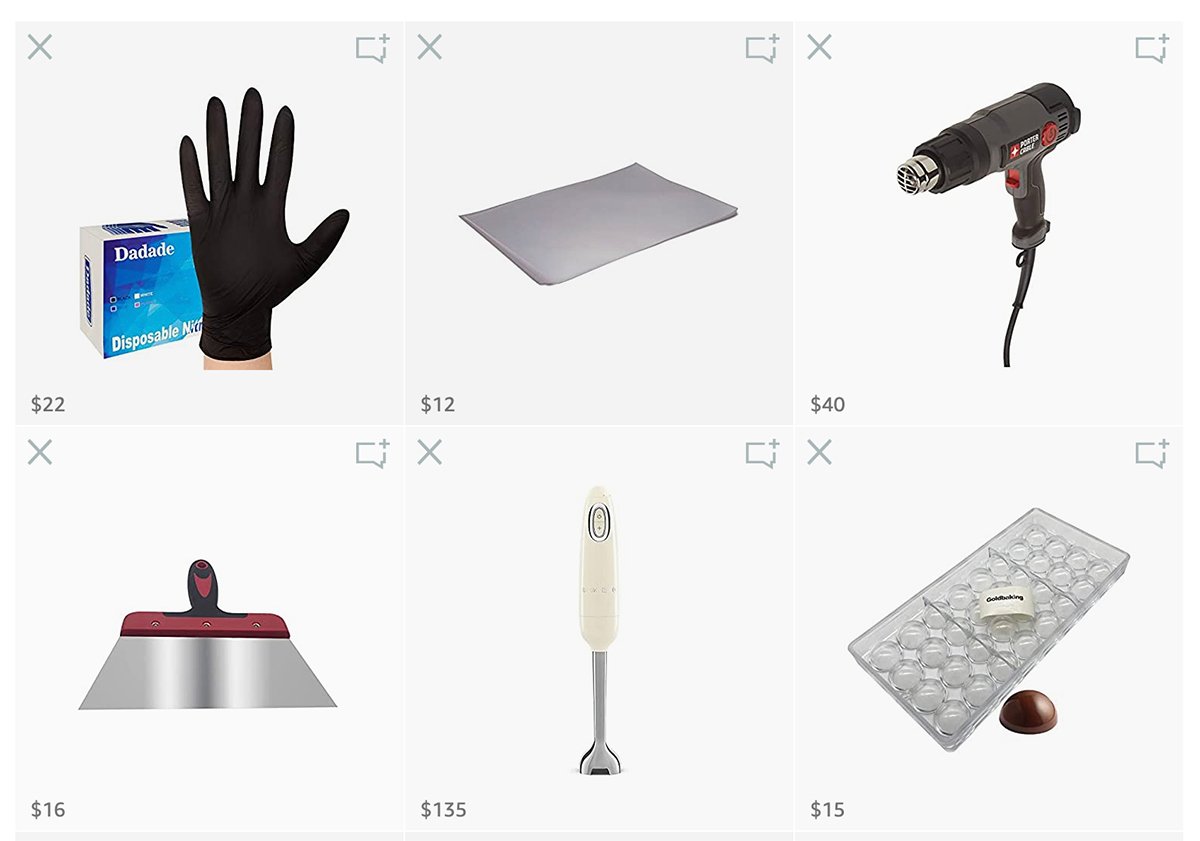
  • Bonbon mold
  • Immersion blender
  • Bench scraper
  • Heat gun
  • Infrared Thermometer
  • Acetate
  • Fine strainer
  • Large piping bag

How to make white chocolate vanilla bean ganache

It's extremely important to make sure you have properly tempered chocolate before you begin the bonbon process. If you need to learn how to temper chocolate you can watch Chef Christophe's previous video on tempering chocolate using the EZ Temper Machine or you can use my easy chocolate tempering method.

First, we want to make our white chocolate ganache. This needs time to firm up so you want to make it at least 6 hours or a day in advance.

  1. Melt your white chocolate in the microwave in 30 second increments to prevent burning or over a double boiler until it reaches 104ºF (40ºC). Set it aside.
  2. Add your heavy cream and trimoline to a medium saucepan.
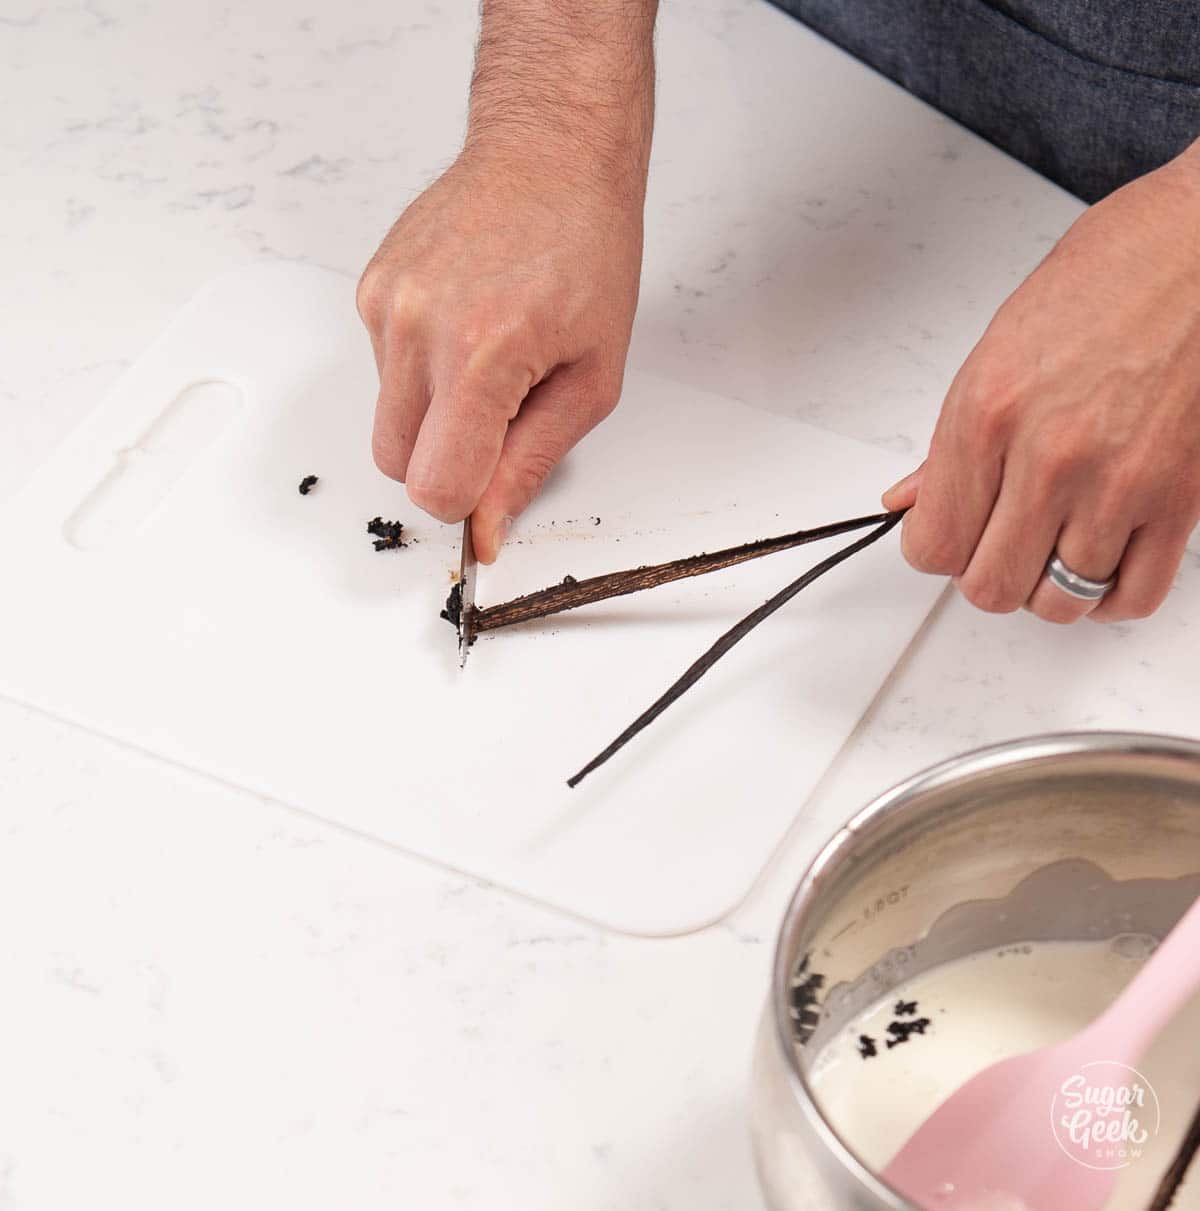
  3. Scrape the vanilla bean seeds by cutting down the center of the bean first and then scraping the seeds with the flat side of a knife. scraping vanilla seeds from a vanilla bean pod
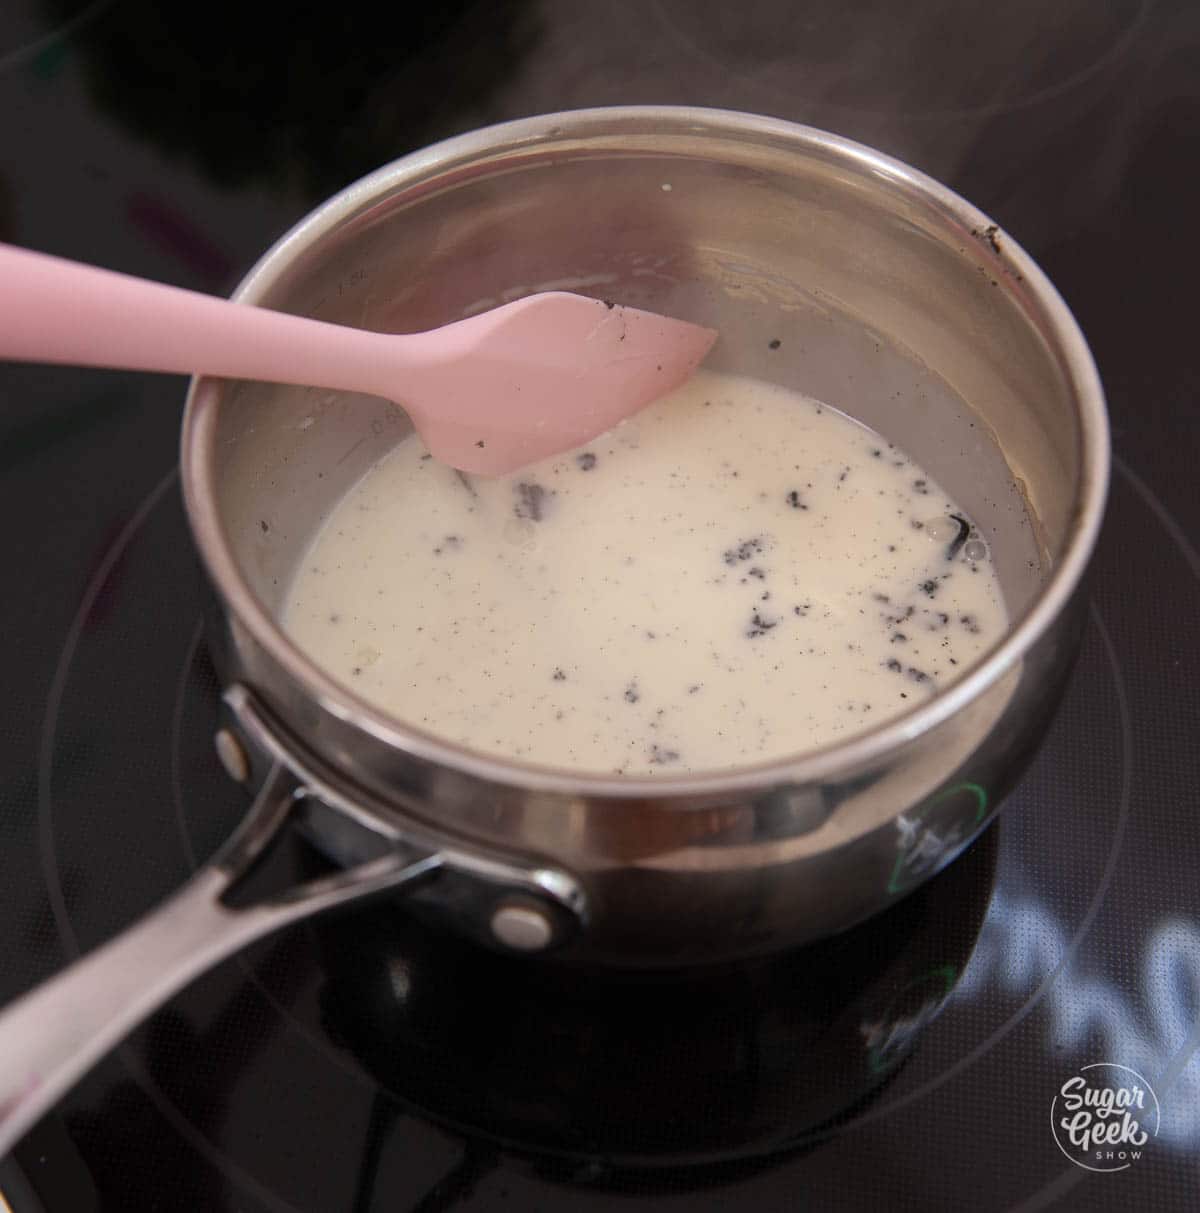
  4. Add the vanilla bean seeds to the saucepan.vanilla bean ganache ingredients in a saucepan
  5. Bring your cream to a simmer over medium-high heat (stirring occasionally) and let it simmer for 1 minute and then remove it from the heat. Don't boil the cream.
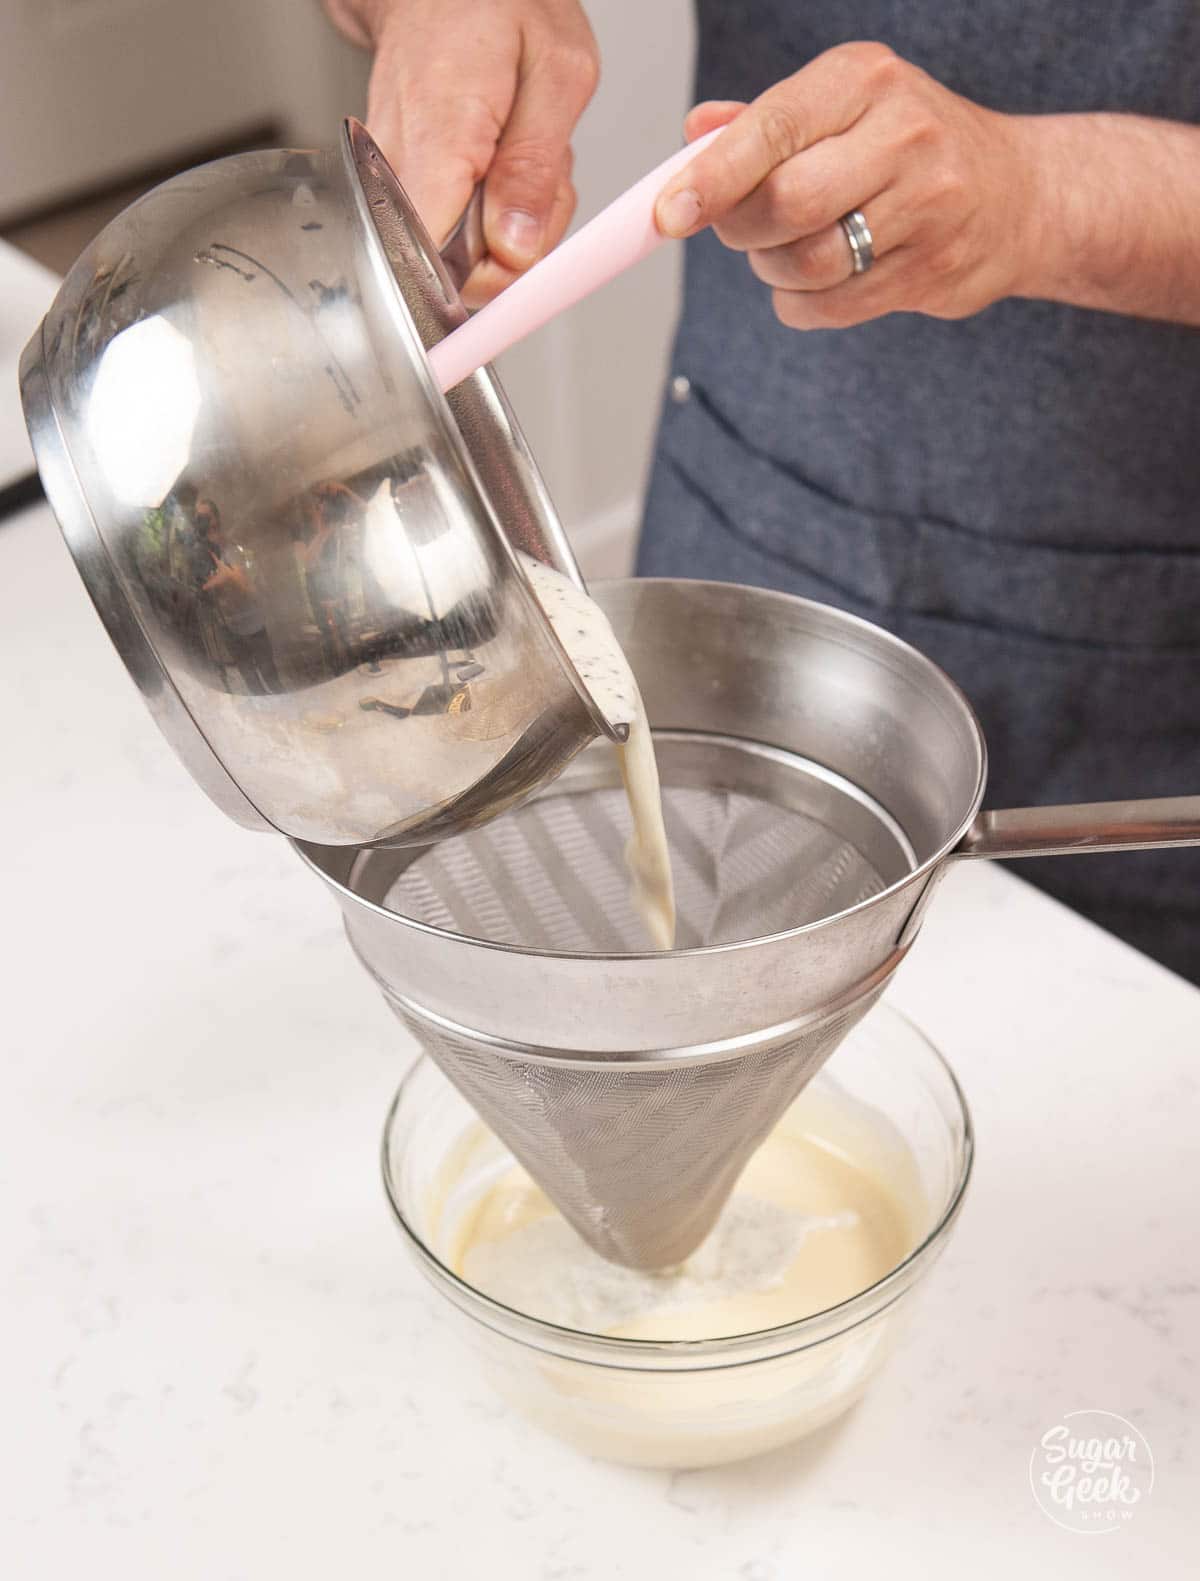
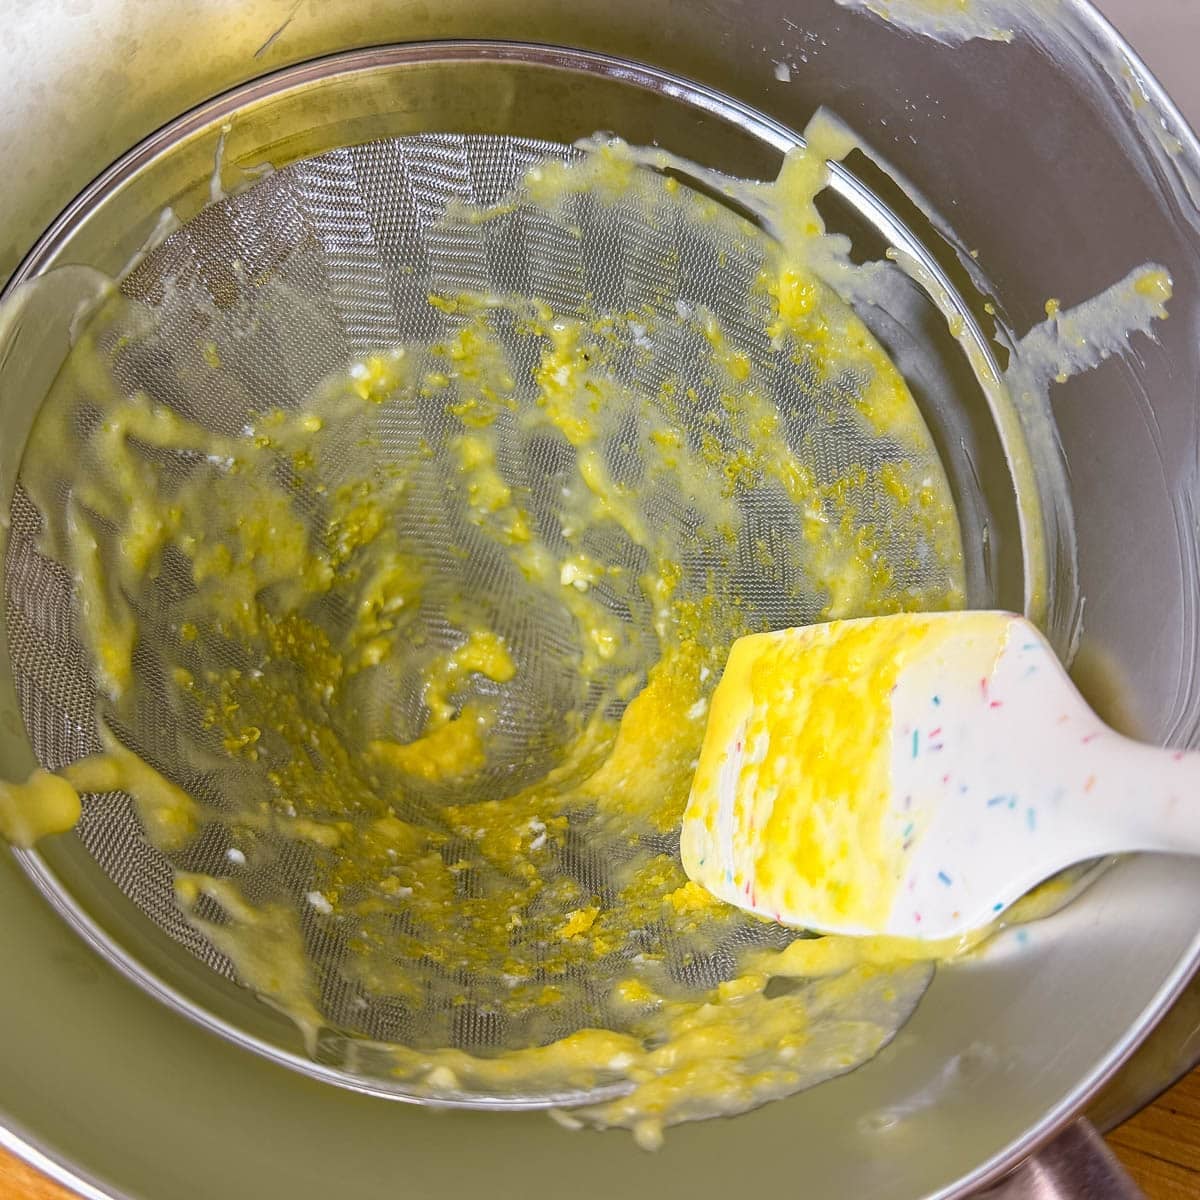
  6. Strain the mixture through a fine strainer to remove any bits of bean pod. straining vanilla bean ganache
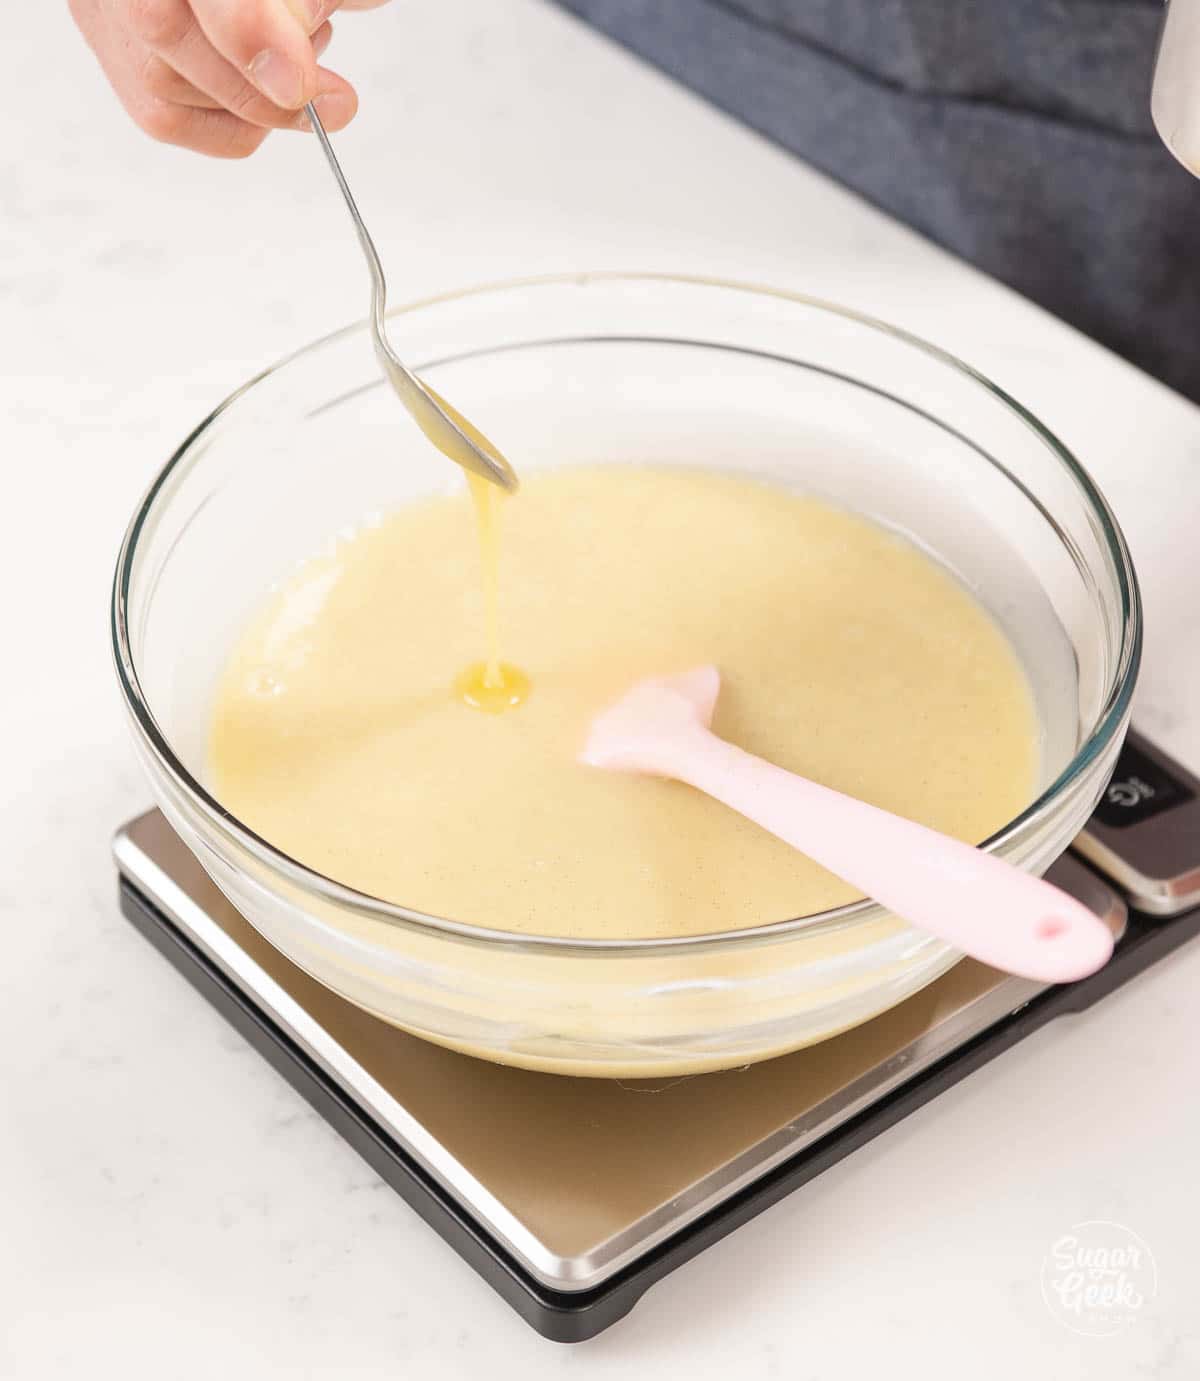
  7. Add half of the cream mixture to your melted chocolate and stir until smooth. Starting with half will help prevent separation.melted white chocolate vanilla bean ganache
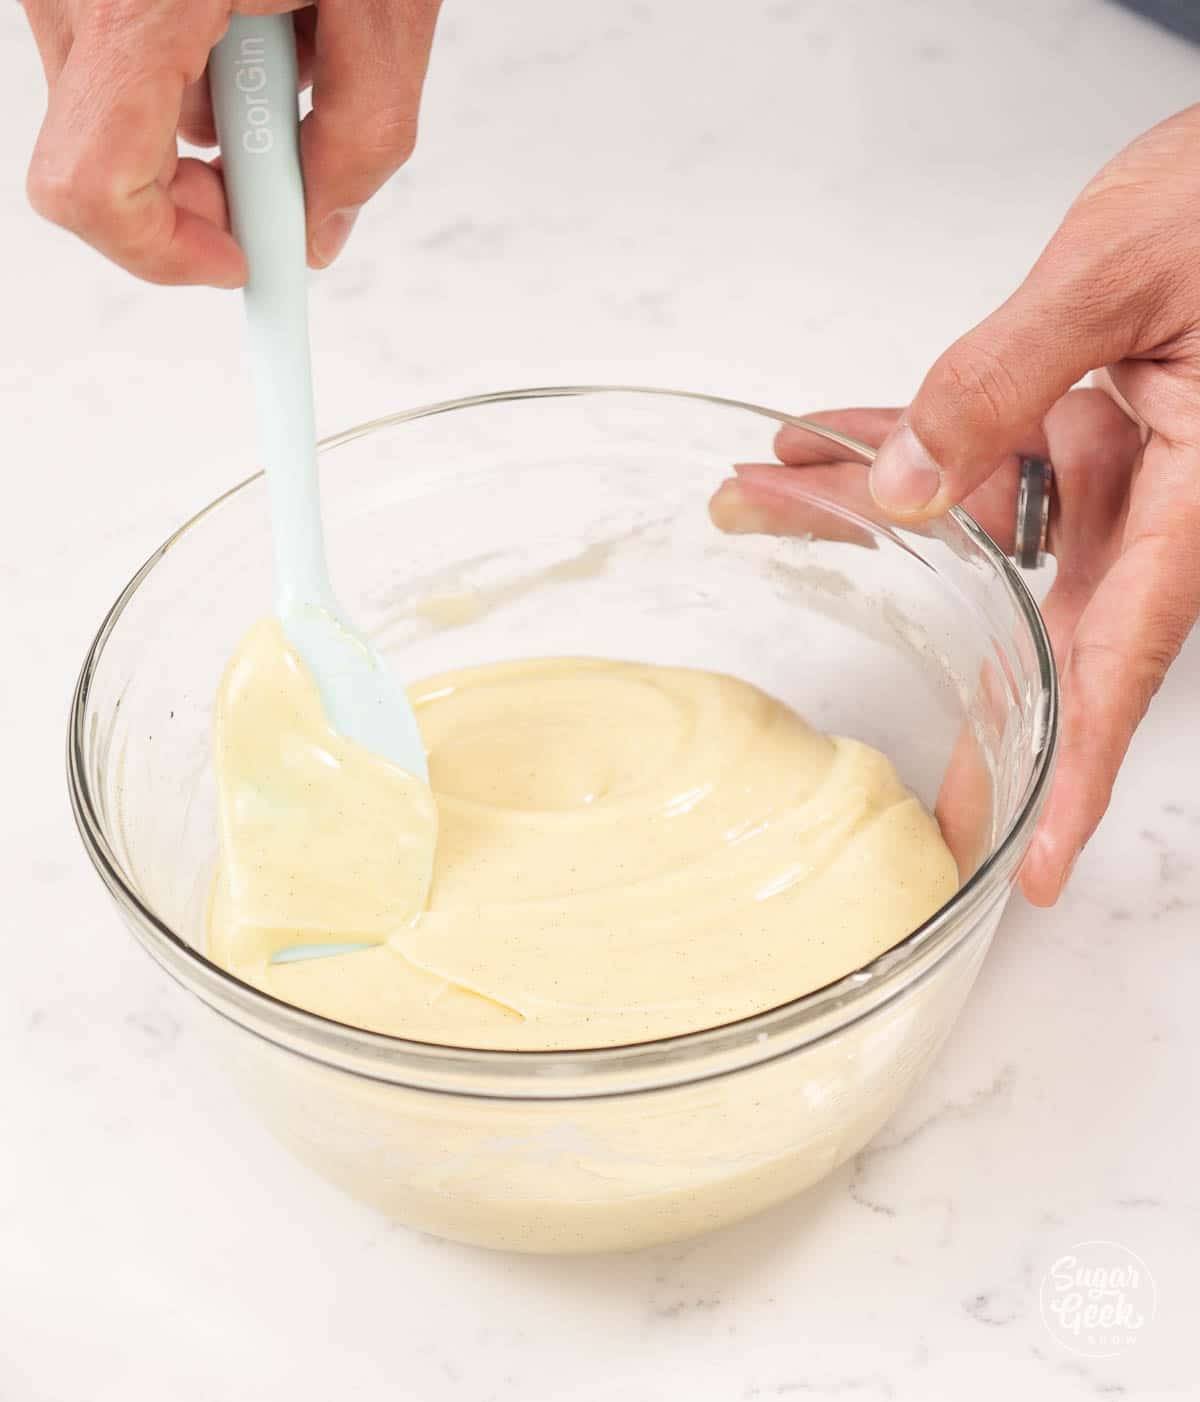
  8. Then add in the rest of the cream and stir until smooth. It may look curdled before it looks smooth and that is normal. Just keep mixing.
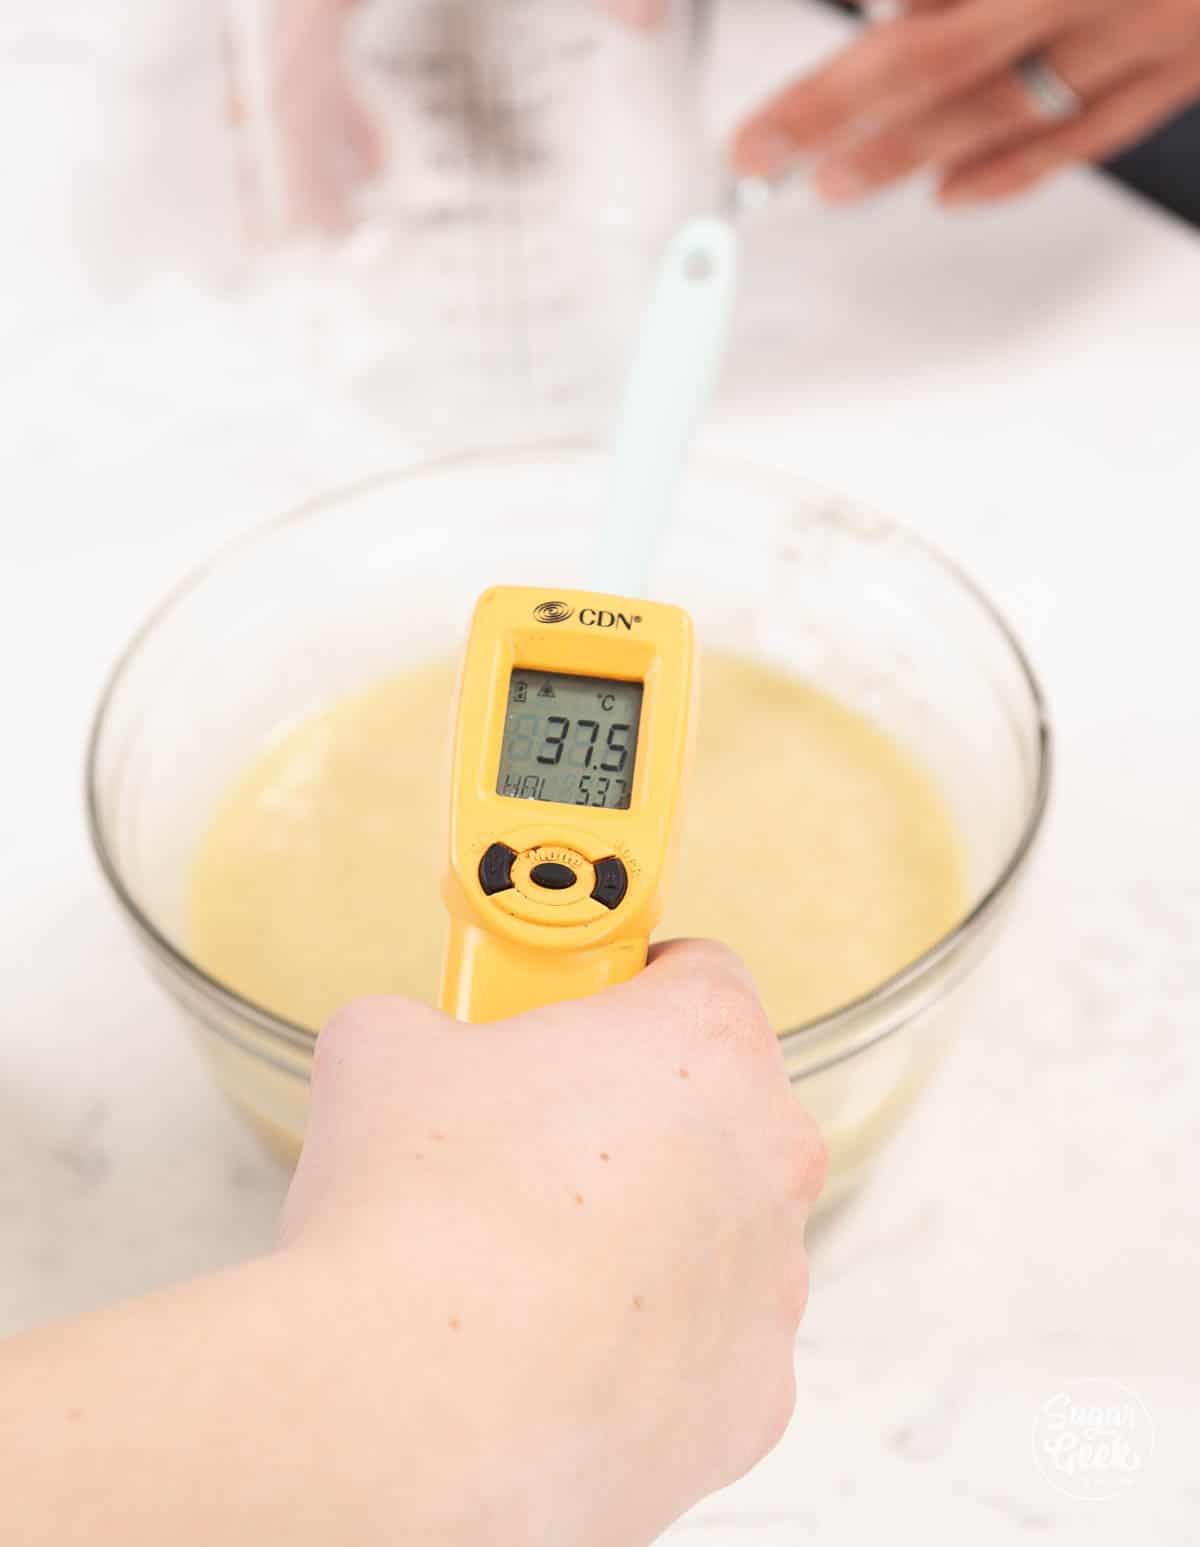
  9. Cool your ganache to around 104ºF (40ºC) so it doesn't melt your butter.ganache cooling
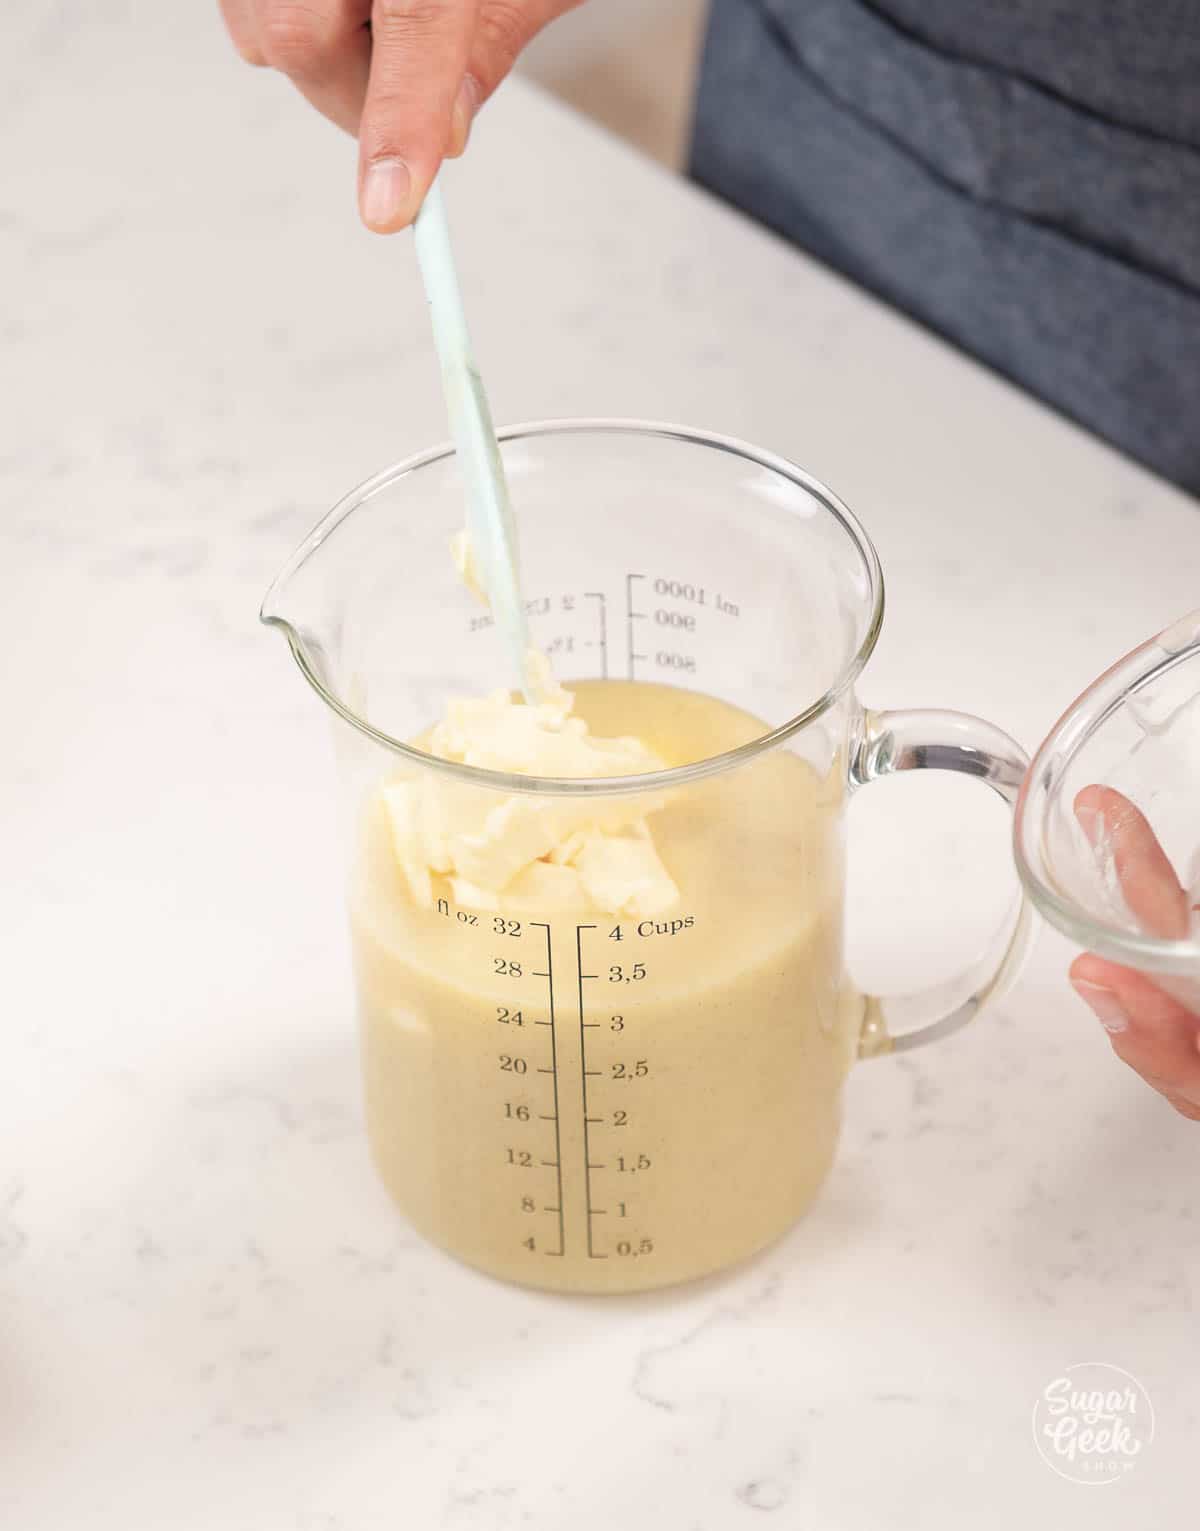
  10. Pour your ganache into a tall measuring cup or glass and add in your softened butter. adding softened butter to ganache in a measuring cup
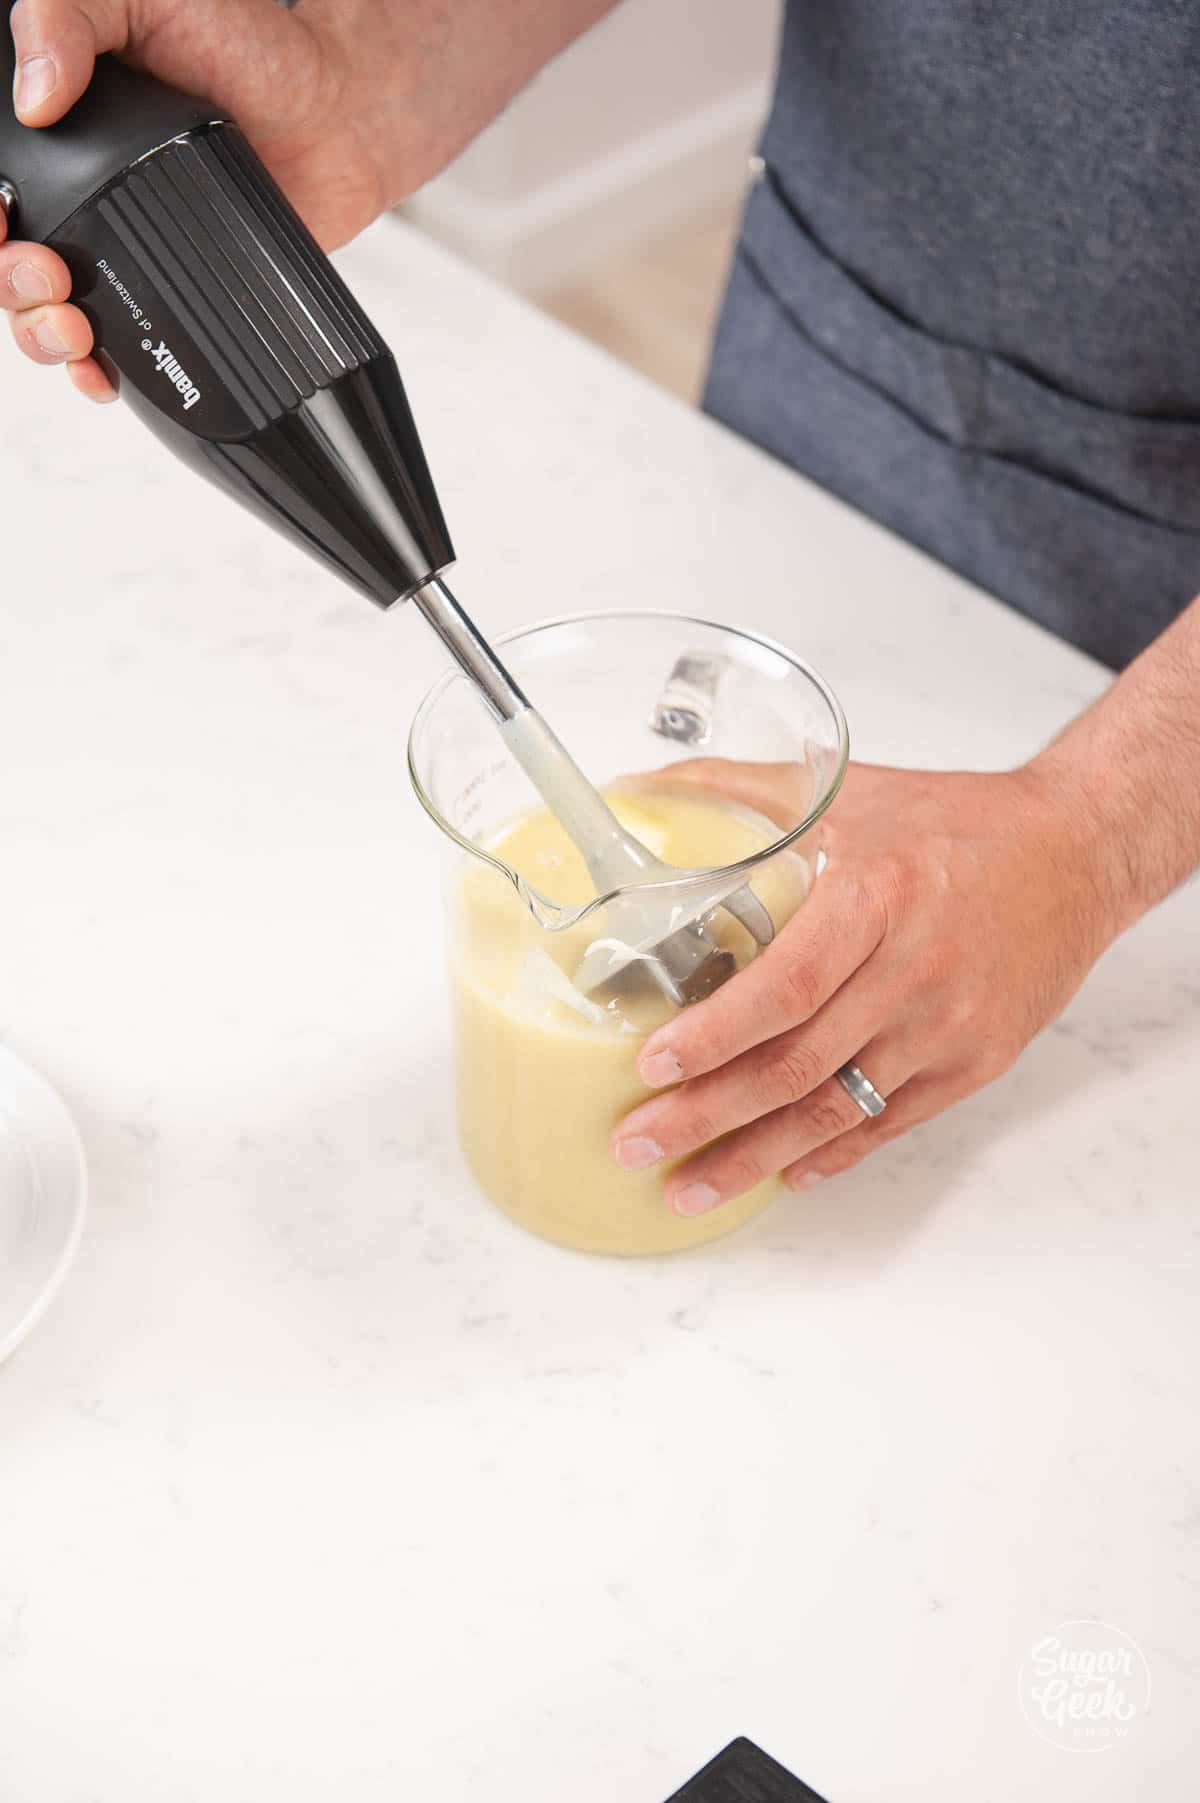
  11. Use an immersion blender to mix the butter with the ganache. Hold the immersion blender at a slight angle under the surface of the ganache to blend. Do not incorporate any air. blending ganache with an immersion blender
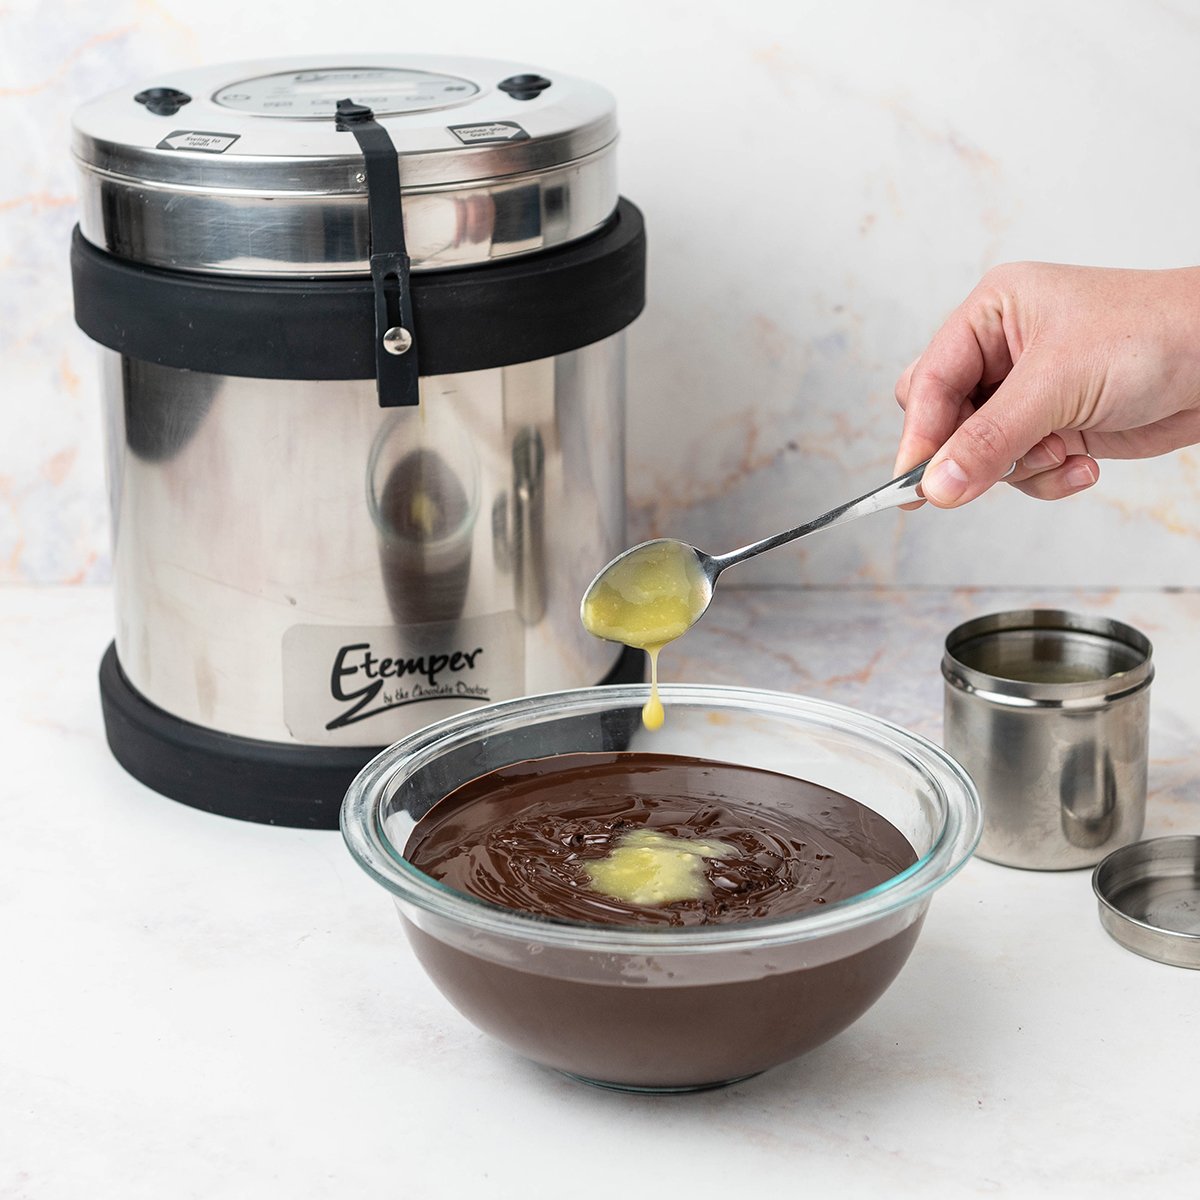
  12. Cool your ganache to 34ºF and add in your tempered cocoa butter from the EZ Temper machine. If you don't have an EZ Temper you can skip this step. The tempered cocoa butter will help the ganache set up much faster than untempered cocoa butter. adding pre-tempered cocoa butter to ganache
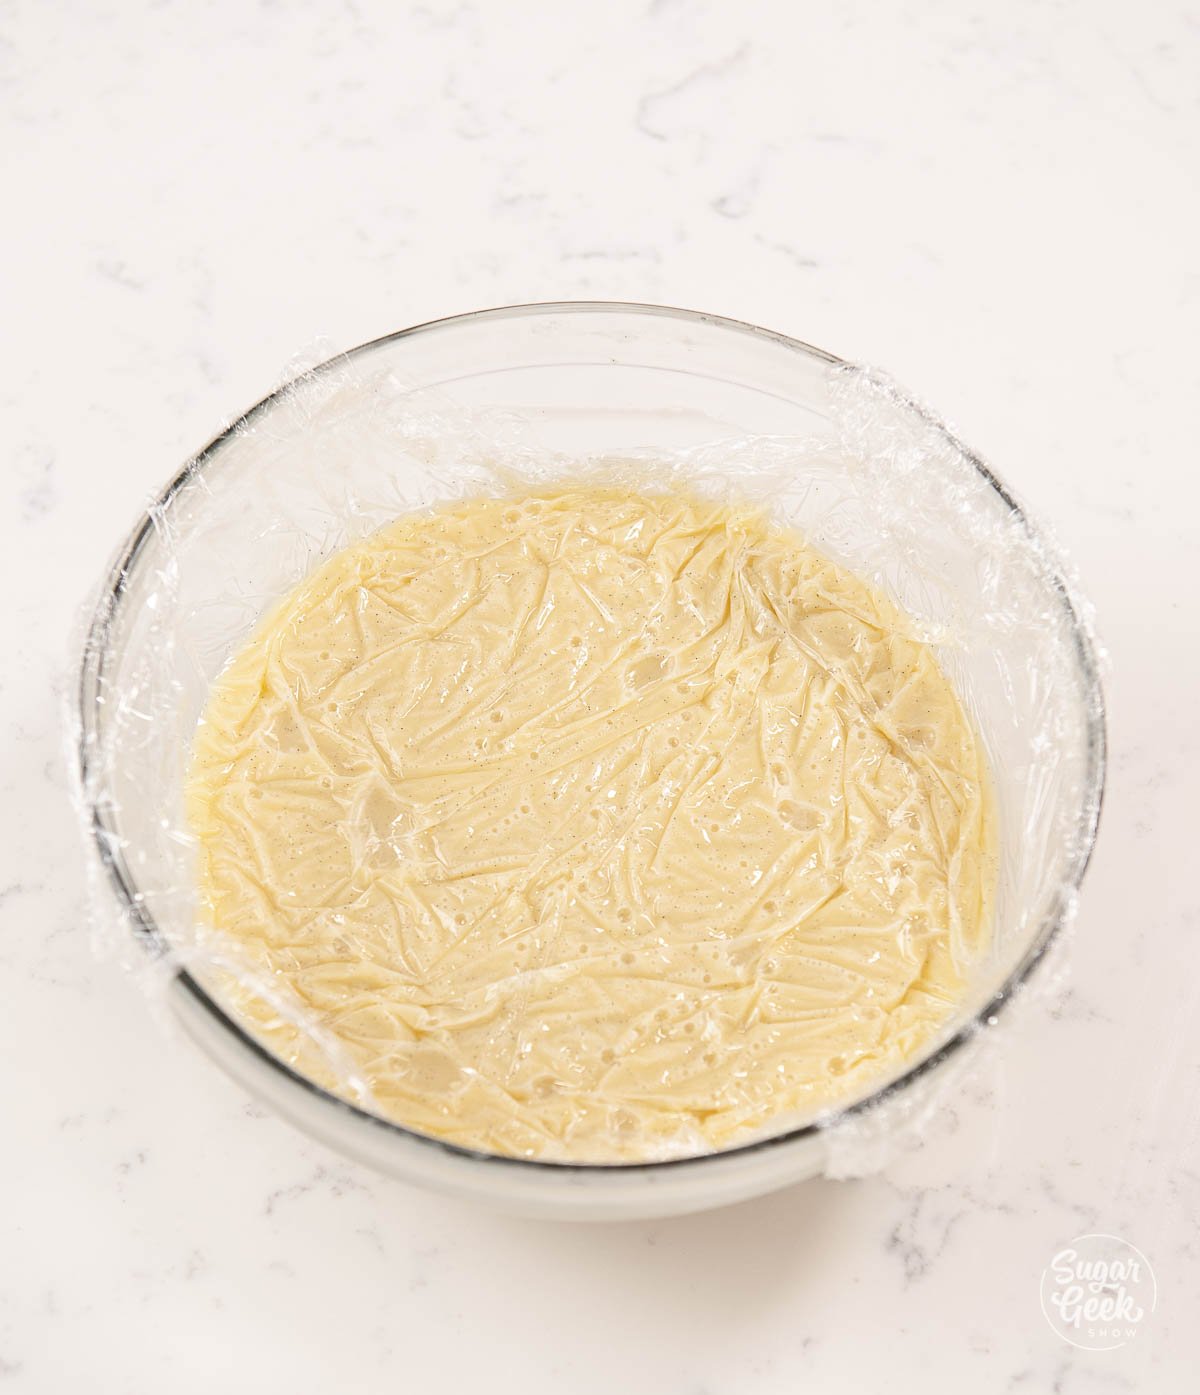
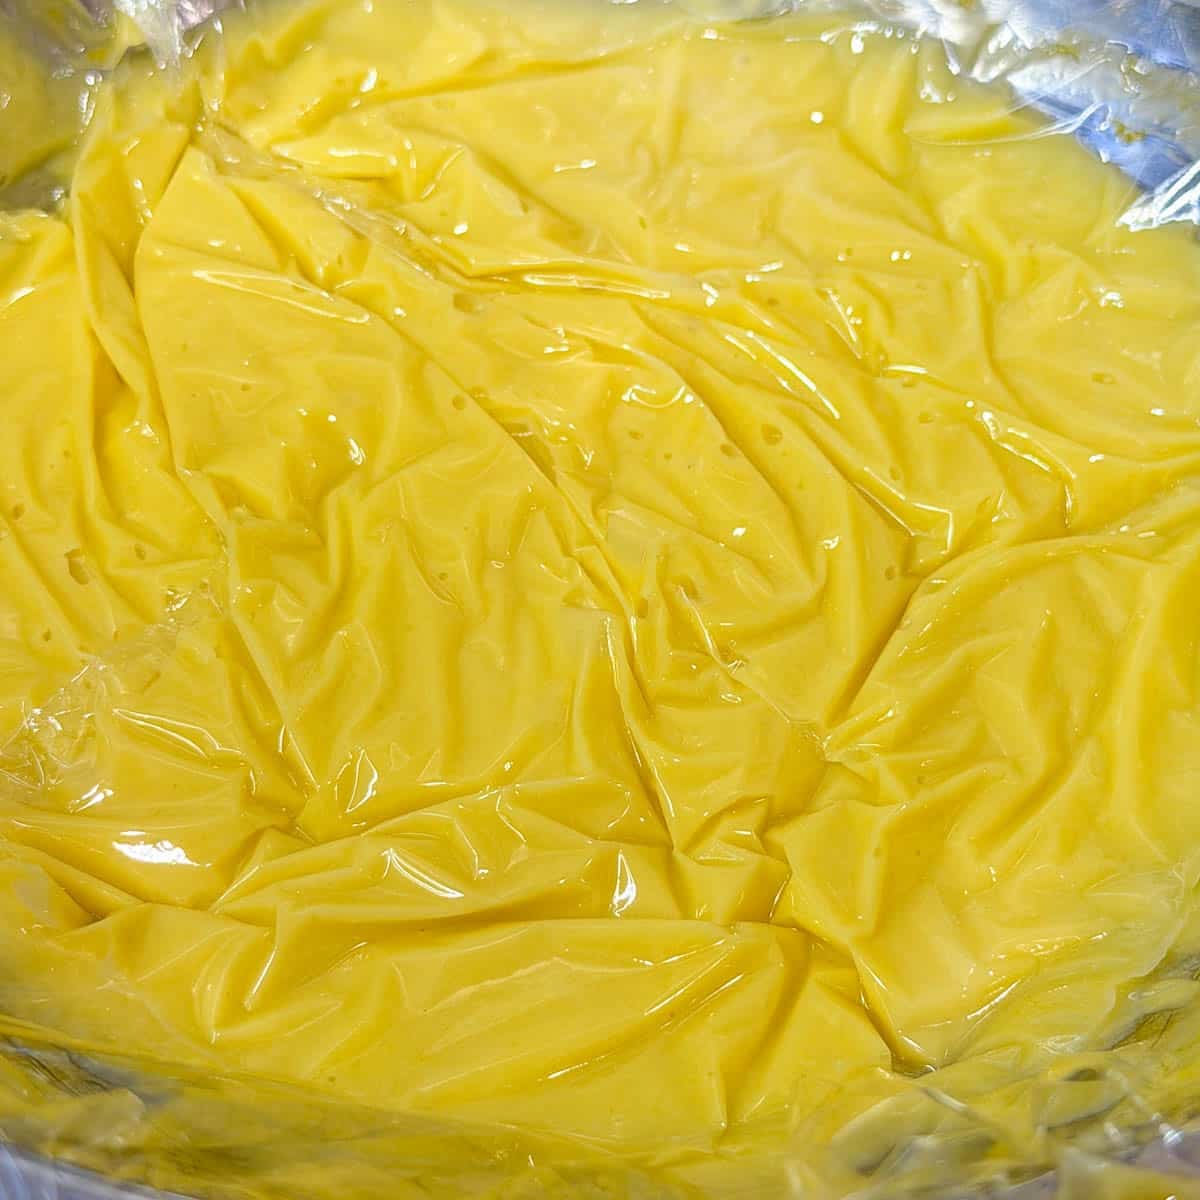
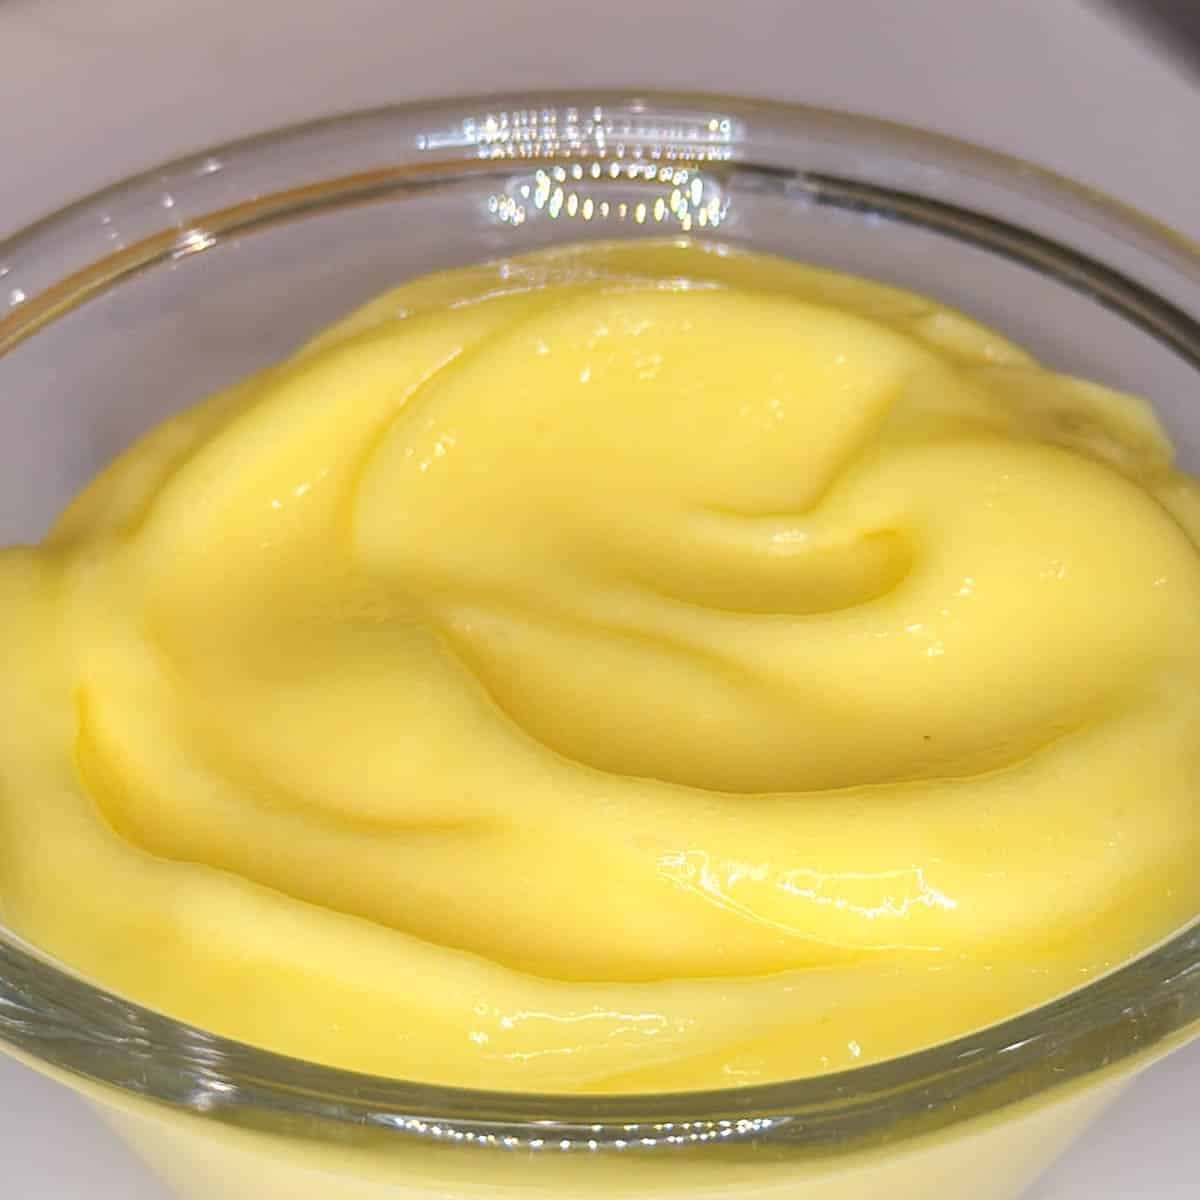
  13. Place some plastic wrap on top of the ganache and set it aside to firm up (make sure your room is below 70ºF) or your ganache and chocolate may not set up. If your room is too warm you can place the ganache in the fridge but your room should be below 70ºF anyway to be working with chocolate. vanilla bean ganache in a clear glass bowl with plastic wrap on top

How to temper the chocolate

Once again, we are using the EZ temper machine to temper our chocolate. If you do not have an EZ temper machine then follow the instructions for tempering in the microwave or the seeding method for white chocolate.

  1. Melt 1000 grams couverature white chocolate to 100ºF-114ºF (45ºC) either in the microwave or on a double boiler.
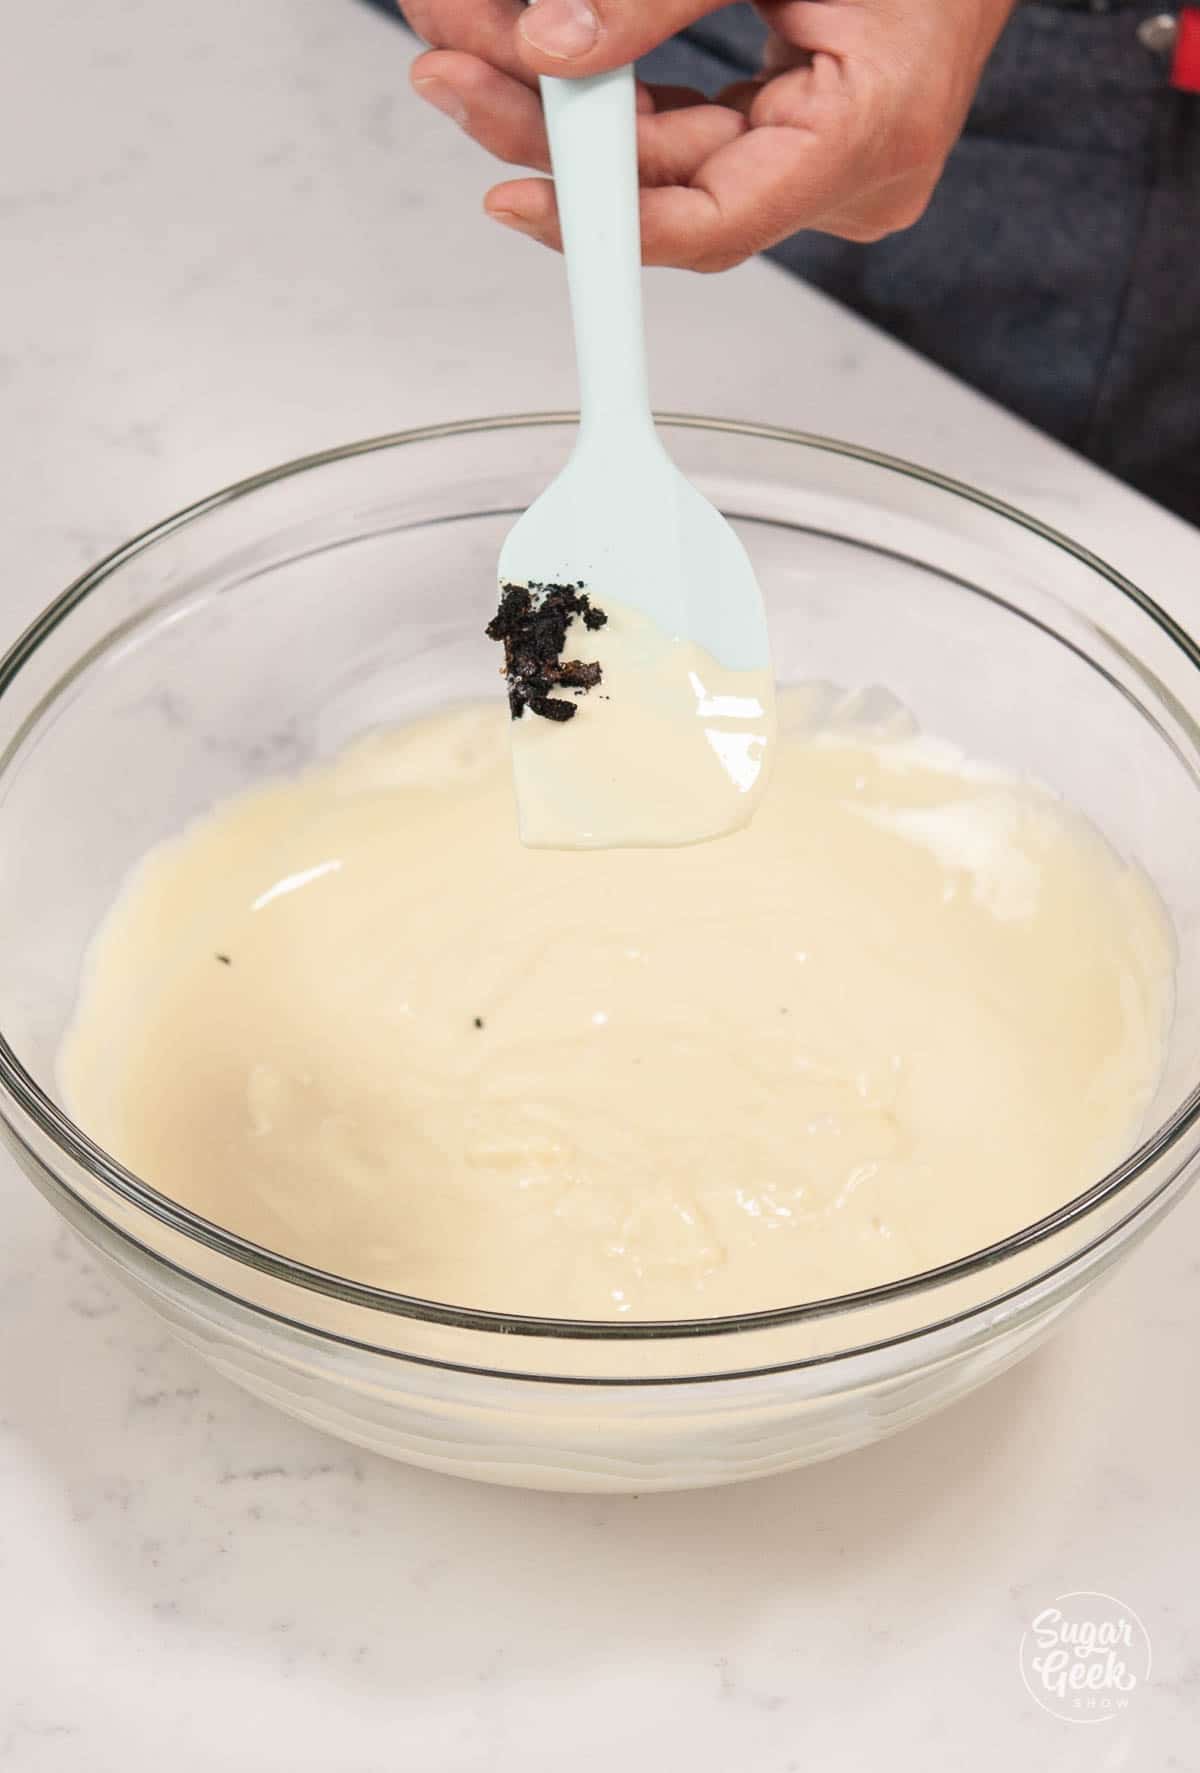
  2. Add the seeds of one vanilla bean pod (optional but looks and tastes amazing!) adding vanilla bean seeds to melted white chocolate
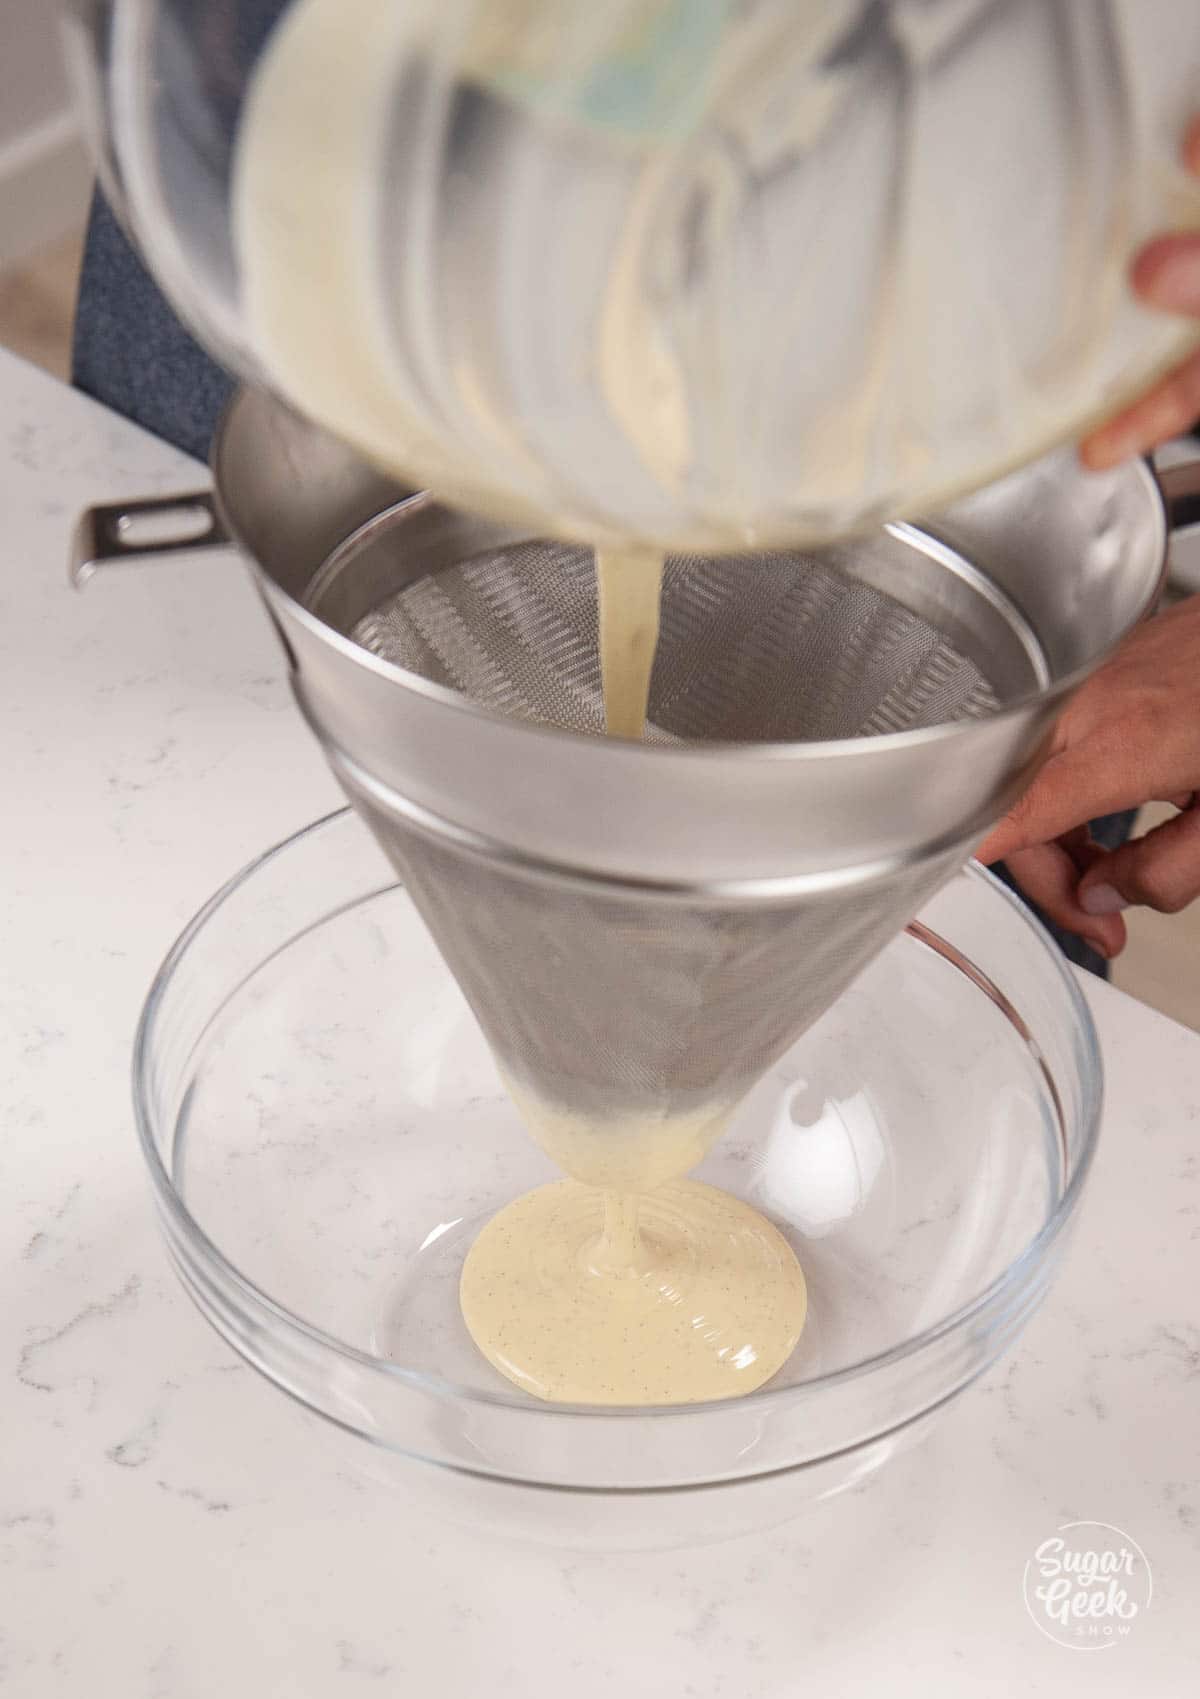
  3. Strain the melted chocolate to remove any large fibersstraining white chocolateadding vanilla bean seeds to melted white chocolate
  4. Cool the chocolate to 95ºF (34ºC) by adding small amounts of un-melted chocolate and stirring.
  5. At 34ºC, add 10 grams of your pre-crystalized cocoa butter from the EZ temper machine.
  6. Stir your chocolate continuously until it reaches 84ºF (29ºC). Stirring helps distribute the crystals and makes a stronger final product.
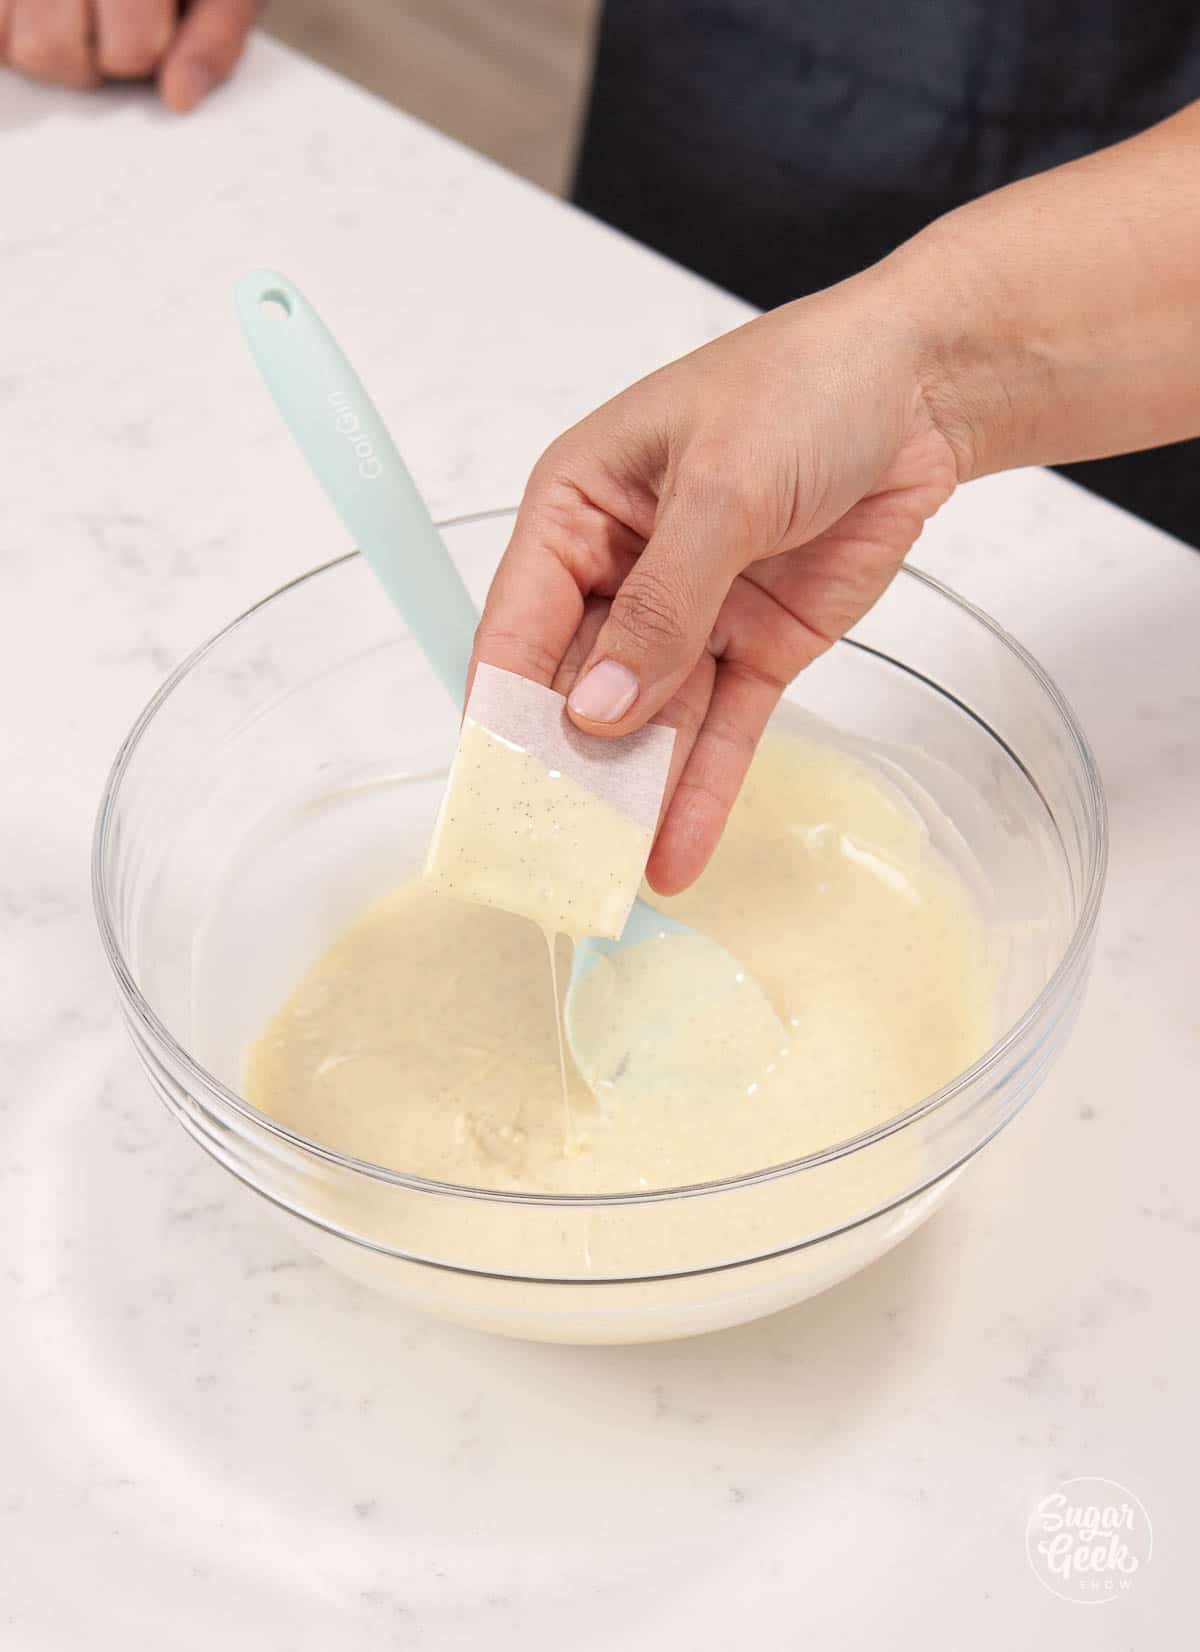
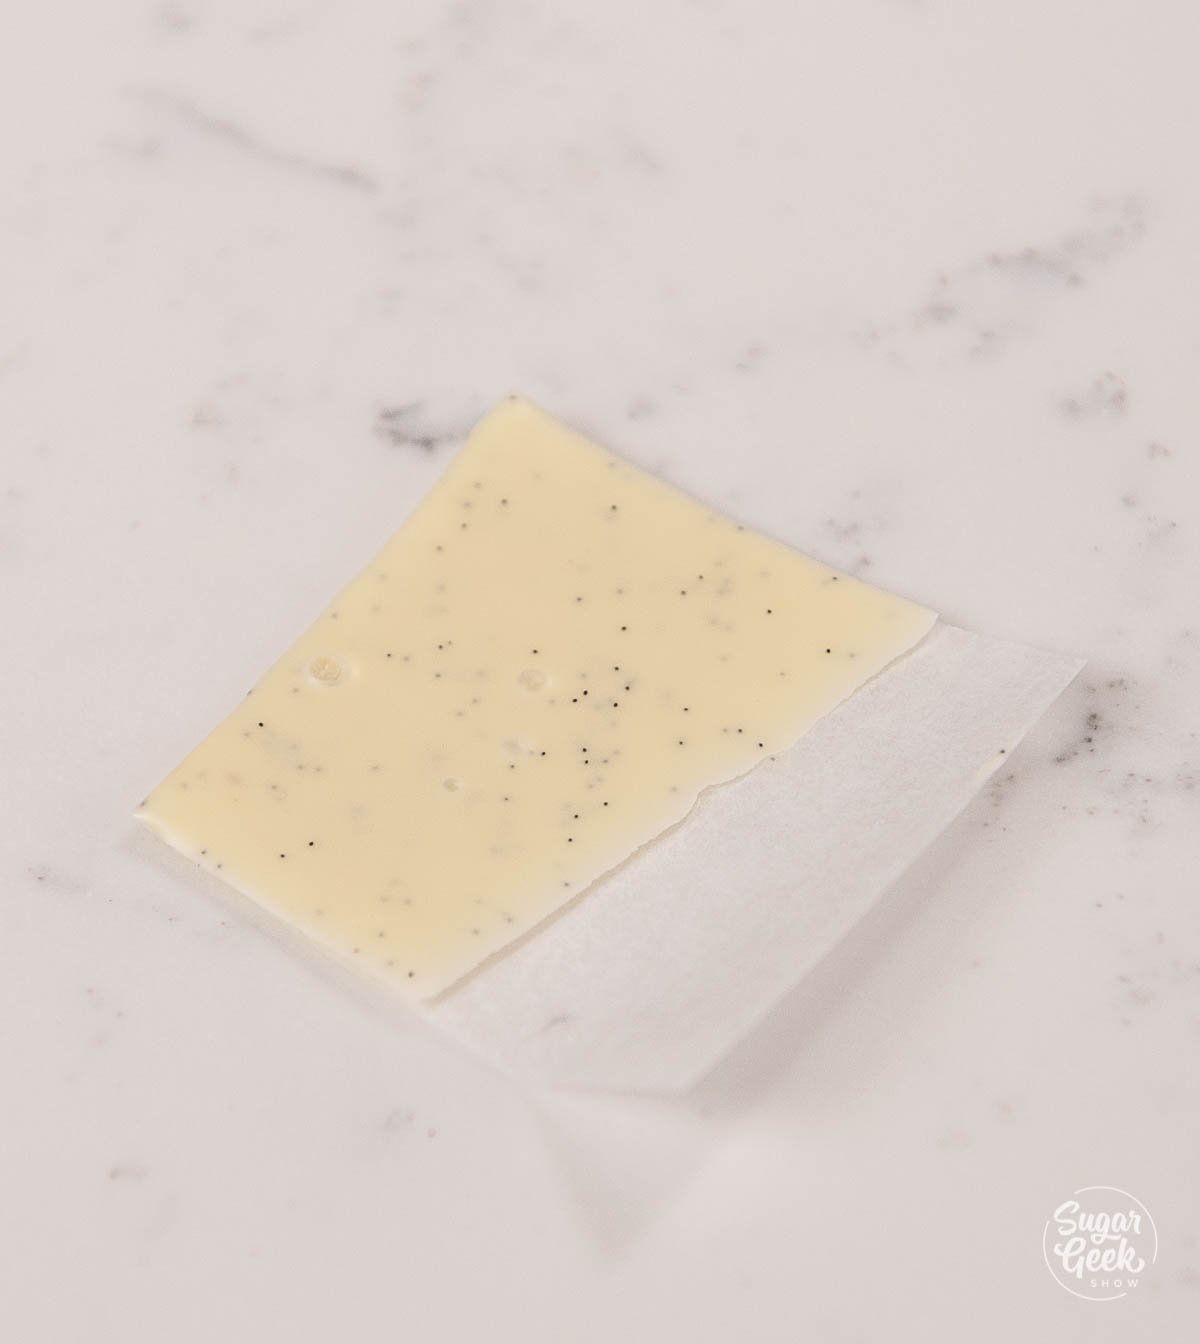
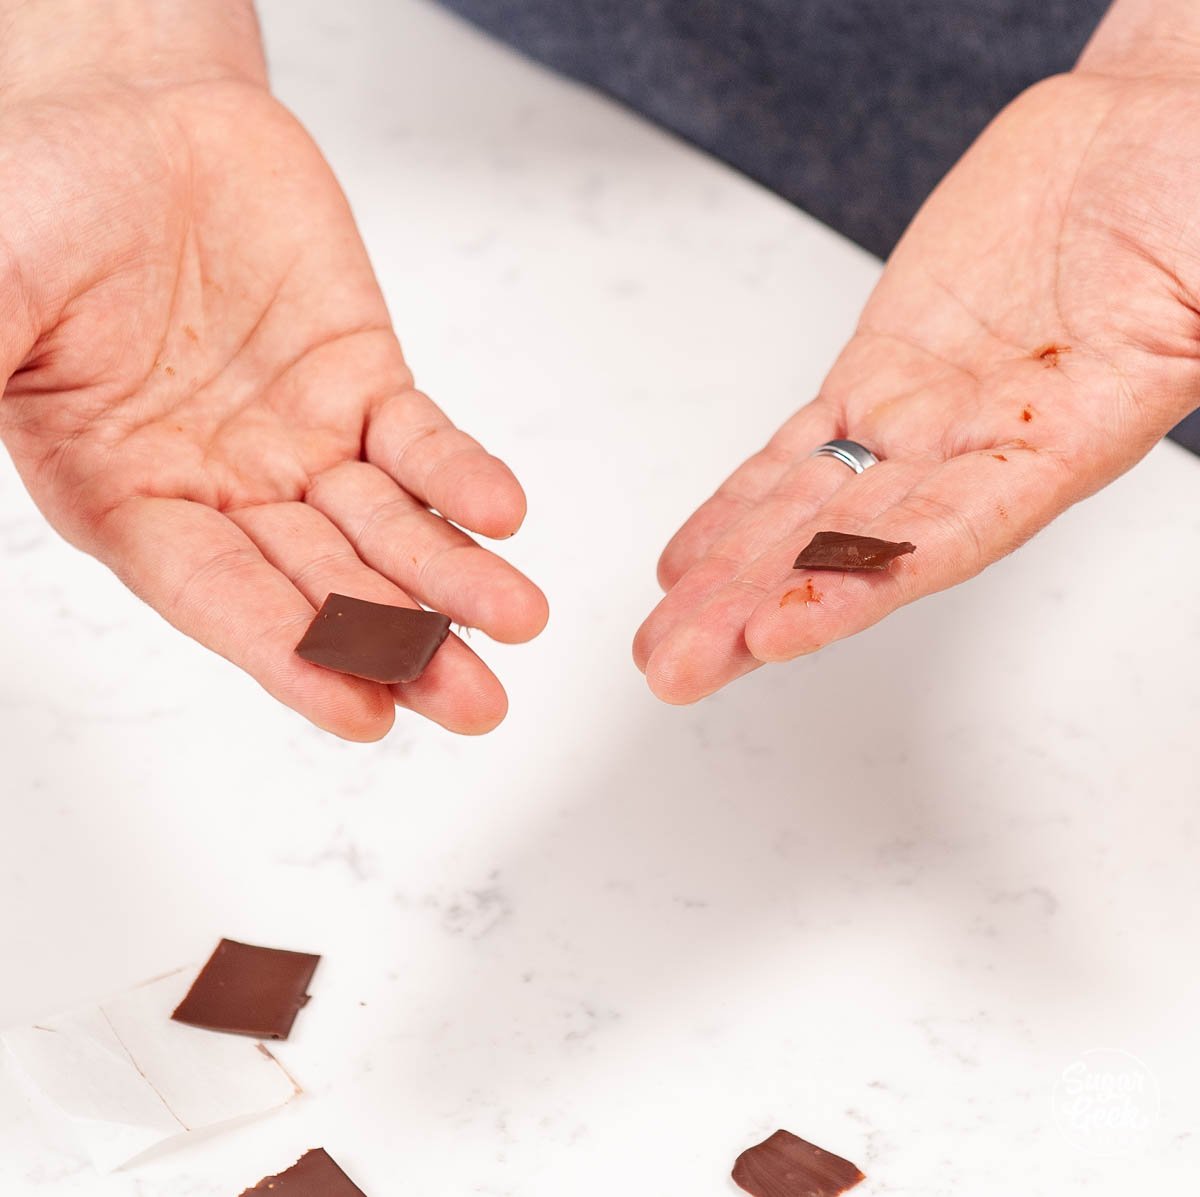
  7. Test your chocolate by dipping a piece of parchment paper into the tempered chocolate and set it on the table. Your room should be colder than 70ºF. testing white chocolate for proper temper on a square of parchment paper
  8. If the chocolate contracts and sets within 5 minutes and has a nice shine and snap, your chocolate is tempered and you can move forward. If your chocolate is not tempered then add another 5 grams of tempered cocoa butter and stir until well combined and re-do the test. close up of tempered chocolate on a square of parchment paper
  9. It's helpful to have a Waring chocolate warmer to keep your chocolate tempered while you work on your bonbons, otherwise you will have to keep an eye on the temperature of your chocolate and warm it when necessary. Be careful not to over-heat it or you can break the temper.

How to make chocolate bonbon shells

  1. Place some parchment paper onto your work surface to catch the chocolate and get your bench scraper ready.
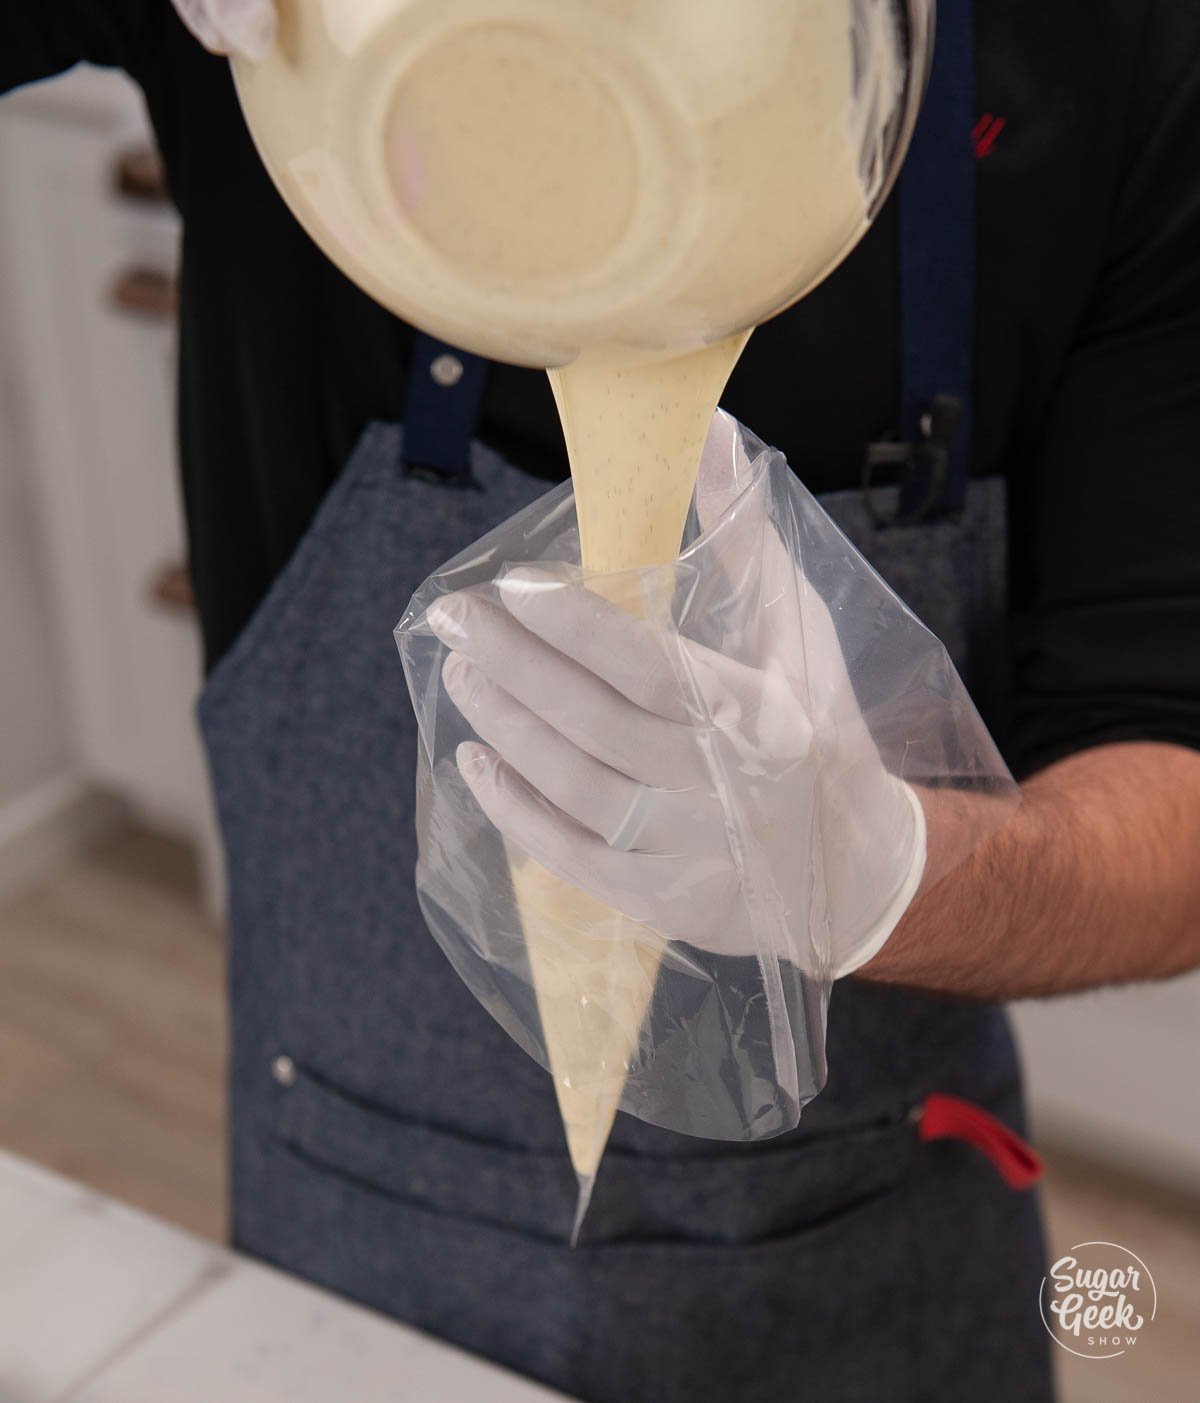
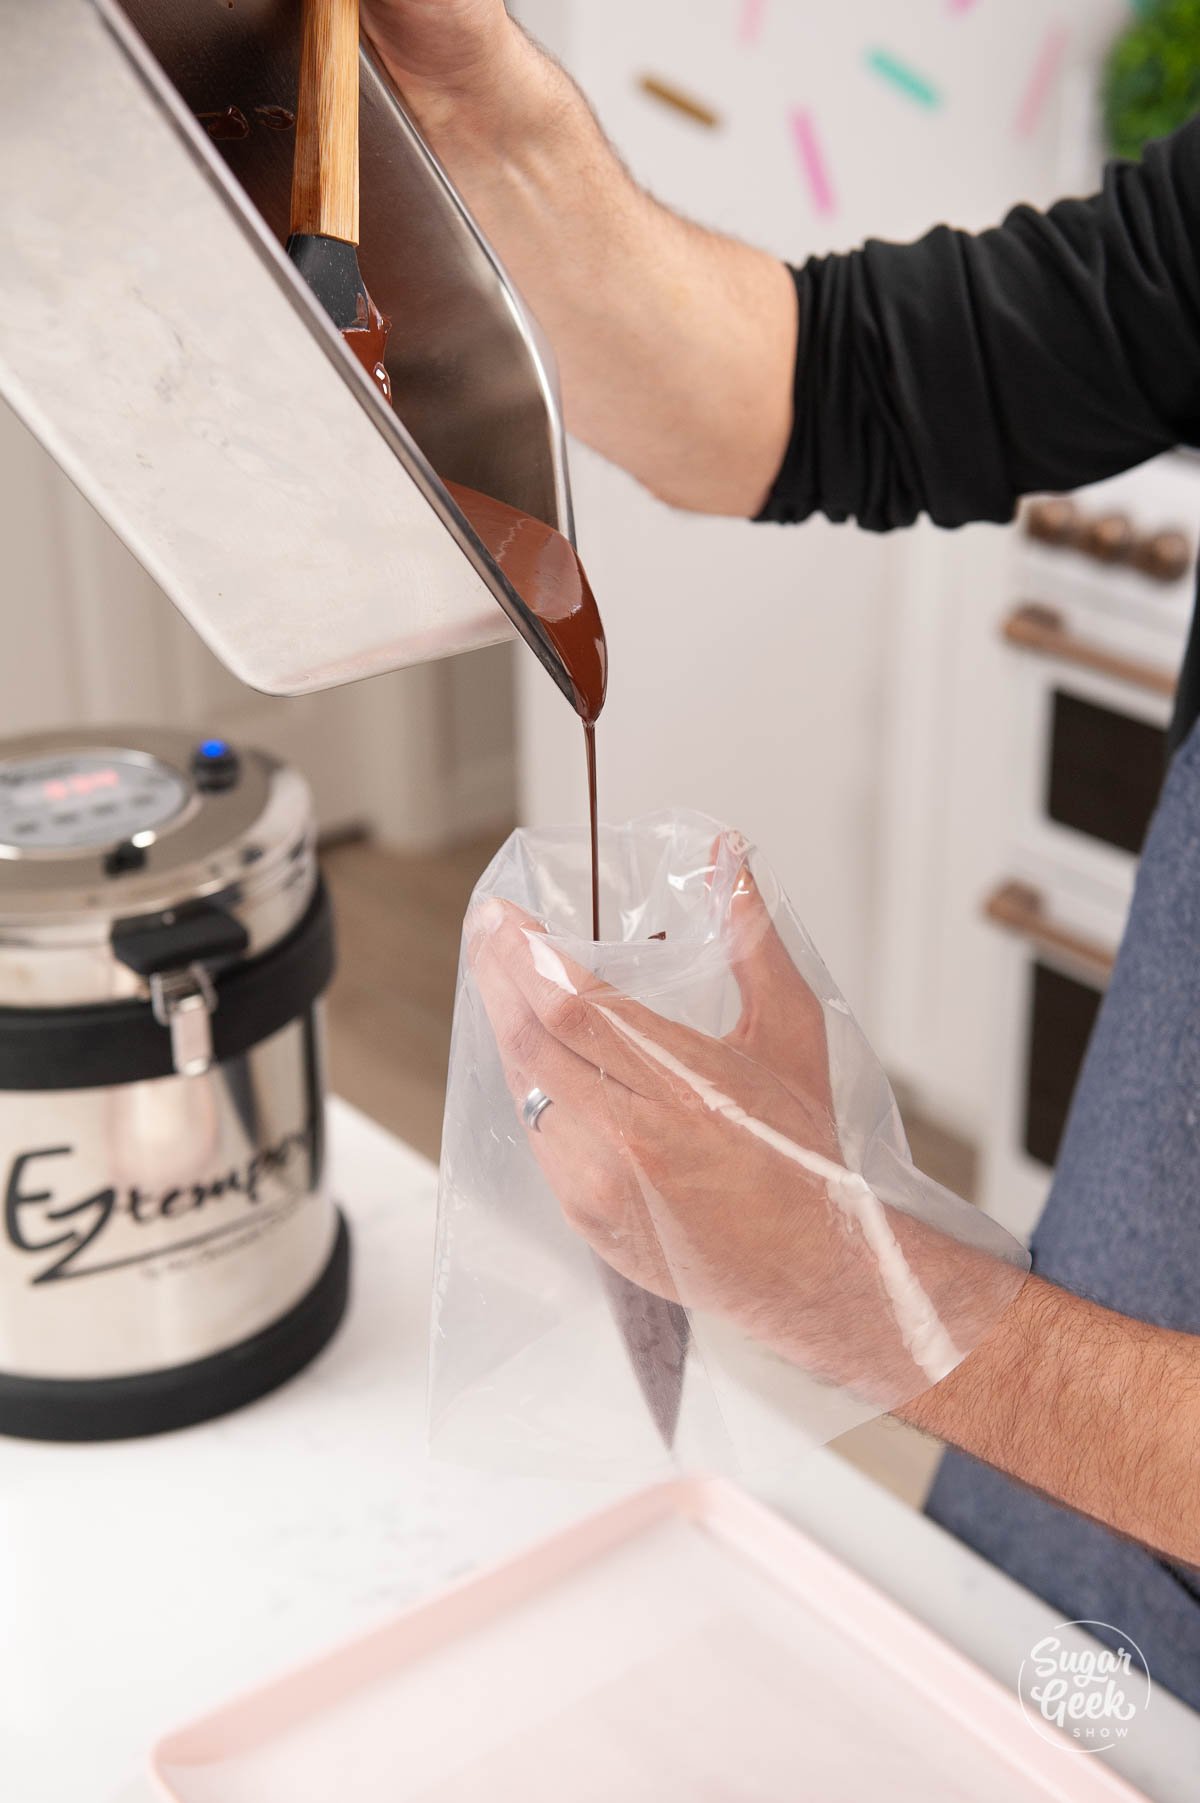
  2. Fill a large piping bag with your tempered chocolate and twist the top closed so the chocolate doesn't spill out. filling a piping bag with tempered white chocolate
  3. Cut a small hole (⅛") in the tip for the chocolate.
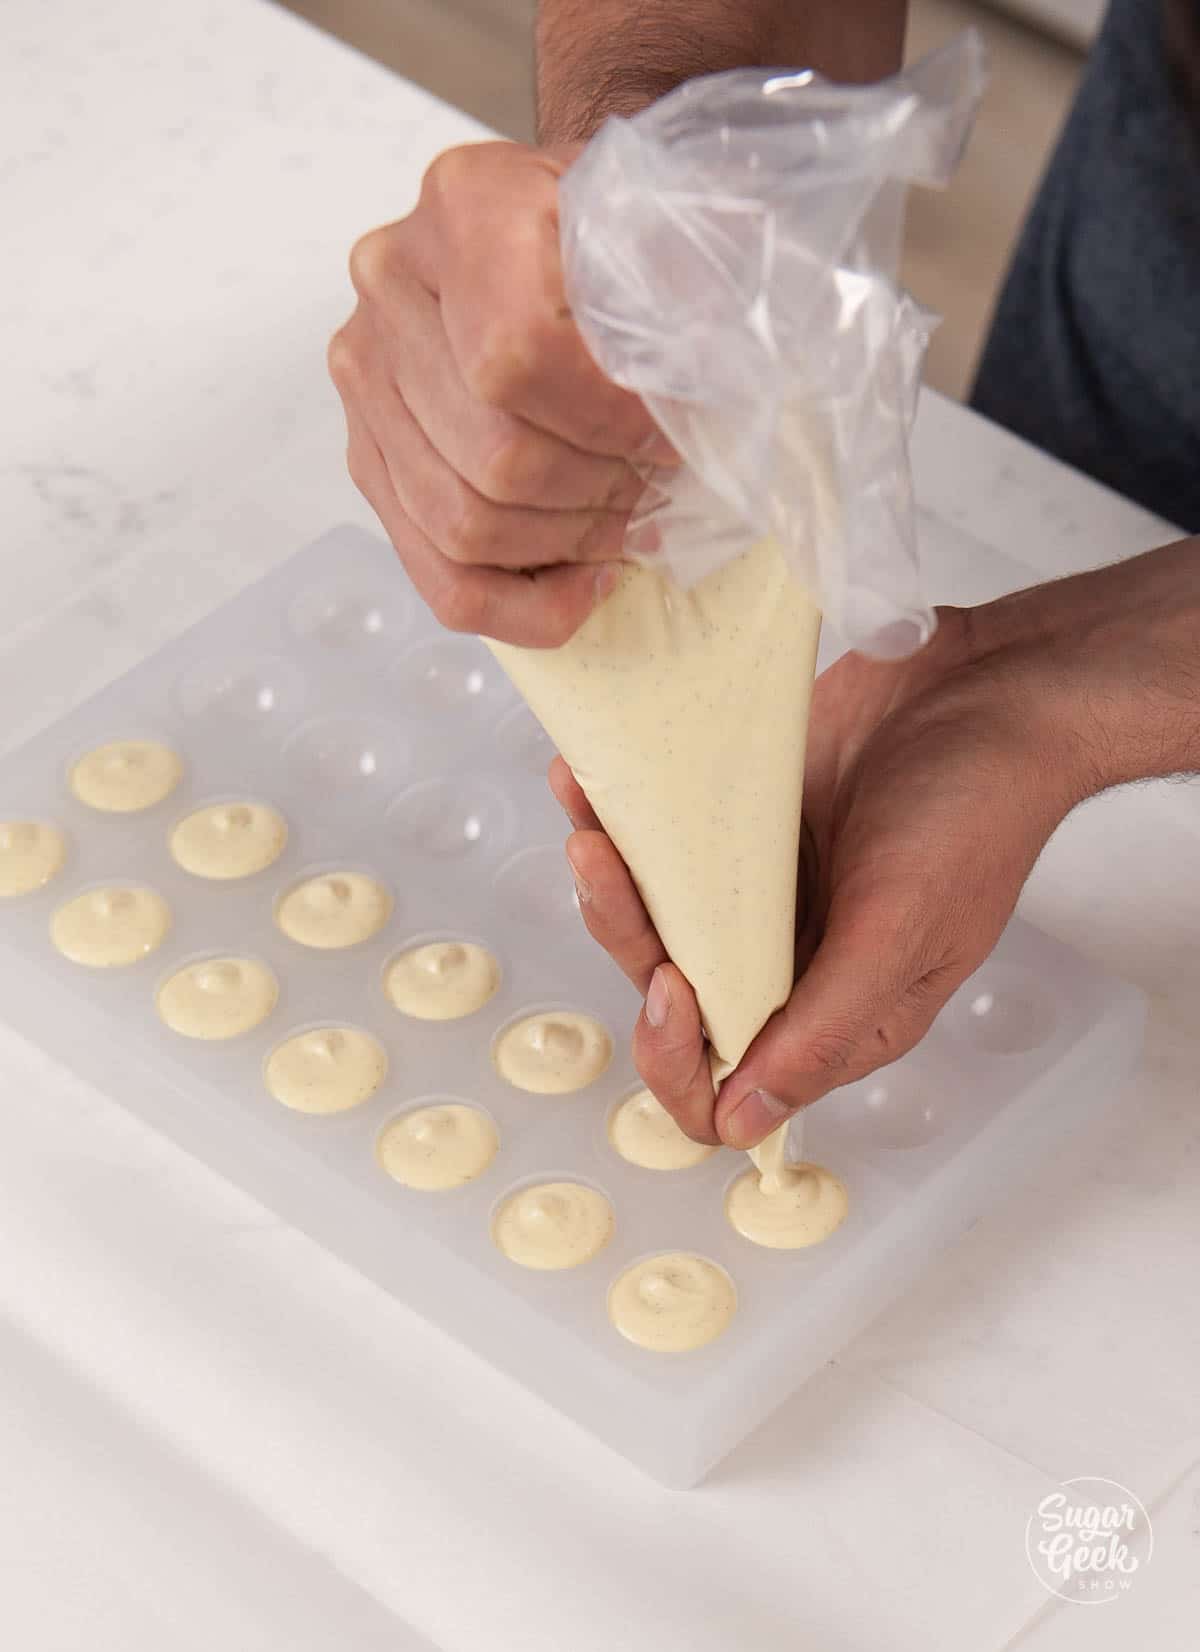
  4. Begin filling each bonbon cavity all the way to the top with the chocolate by pinching and releasing the opening of the piping bag. Watch the video to see Chef Christophe demonstrate this technique. This takes practice to be consistent with each mold.filling bonbon mold with tempered chocolate
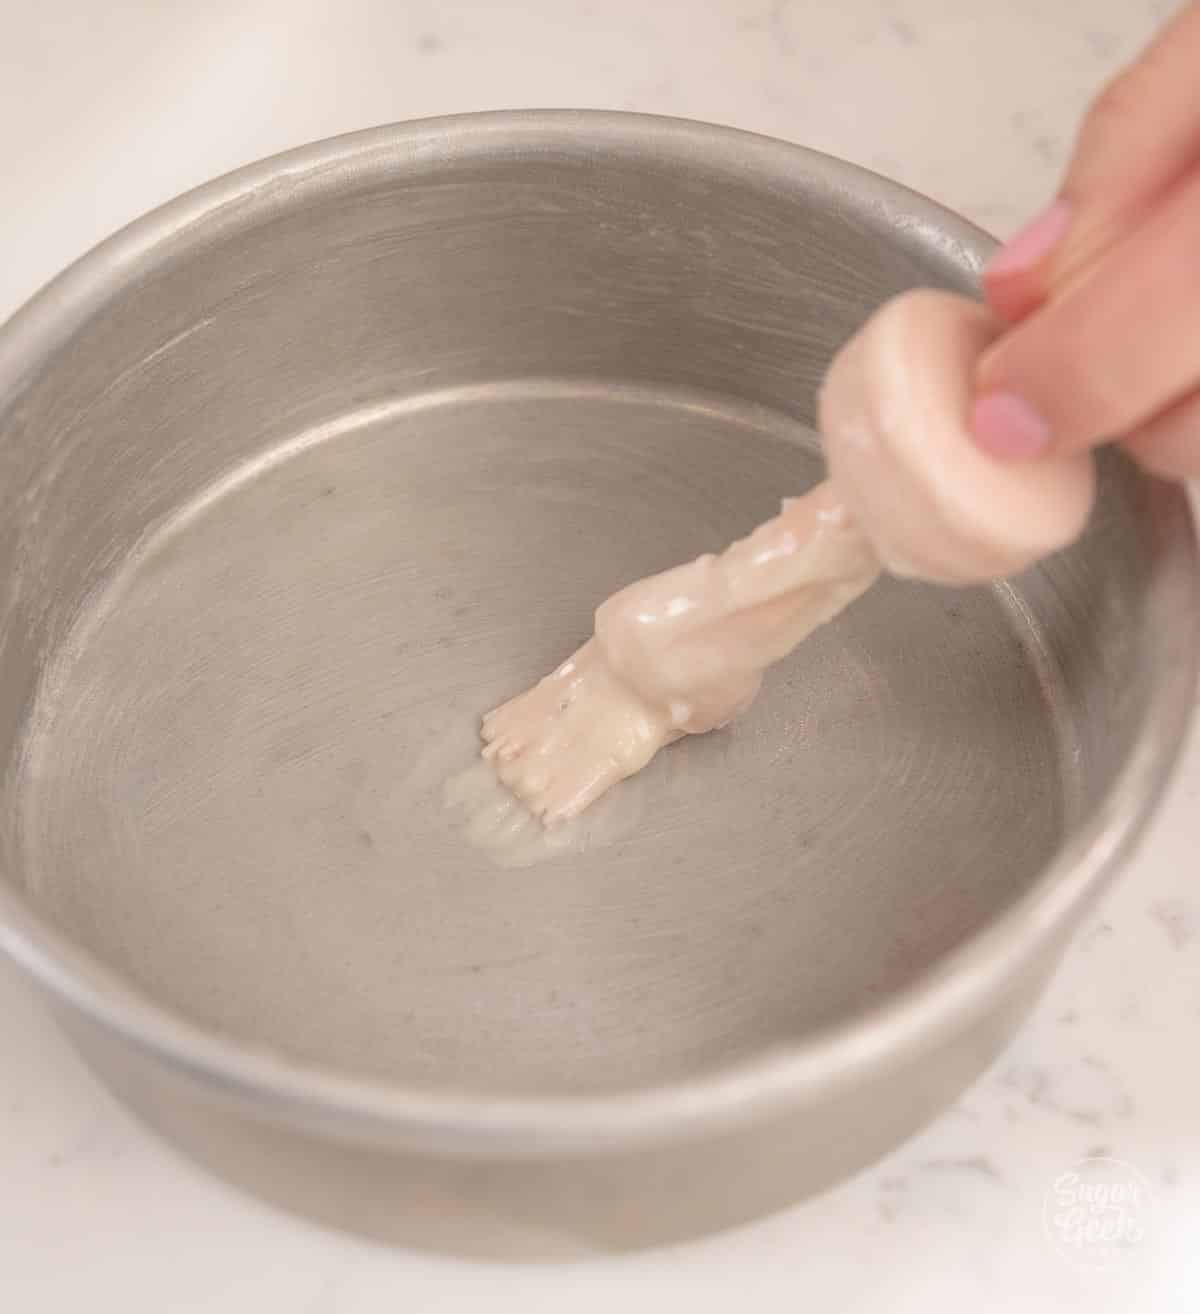
  5. Pick the mold up by holding the edges and try not to put your hands agains the cavities directly or the heat from your hands can ruin the temper of the chocolate shells. Tap the edge of the mold with your bench scraper to release any air bubbles. tapping bubbles out of the chocolate bonbon sells
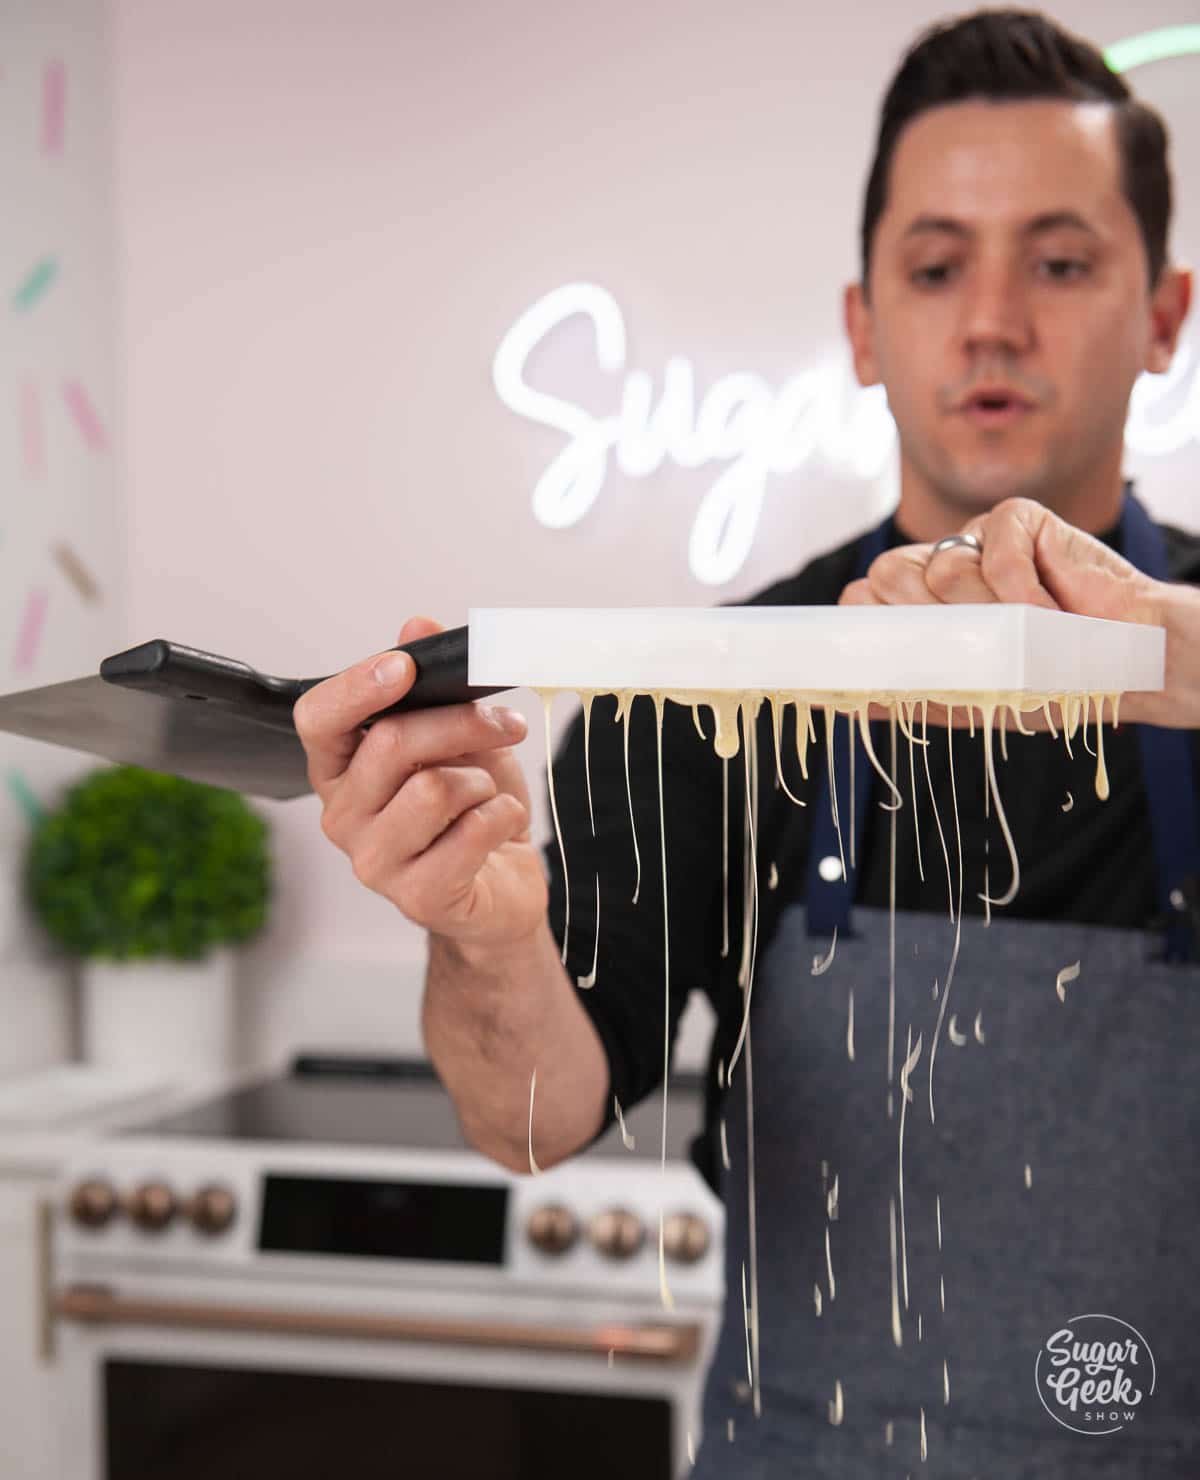
  6. Turn the mold over and tap out the excess chocolate to create a nice thin shell.tapping out excess chocolate from a bonbon mold
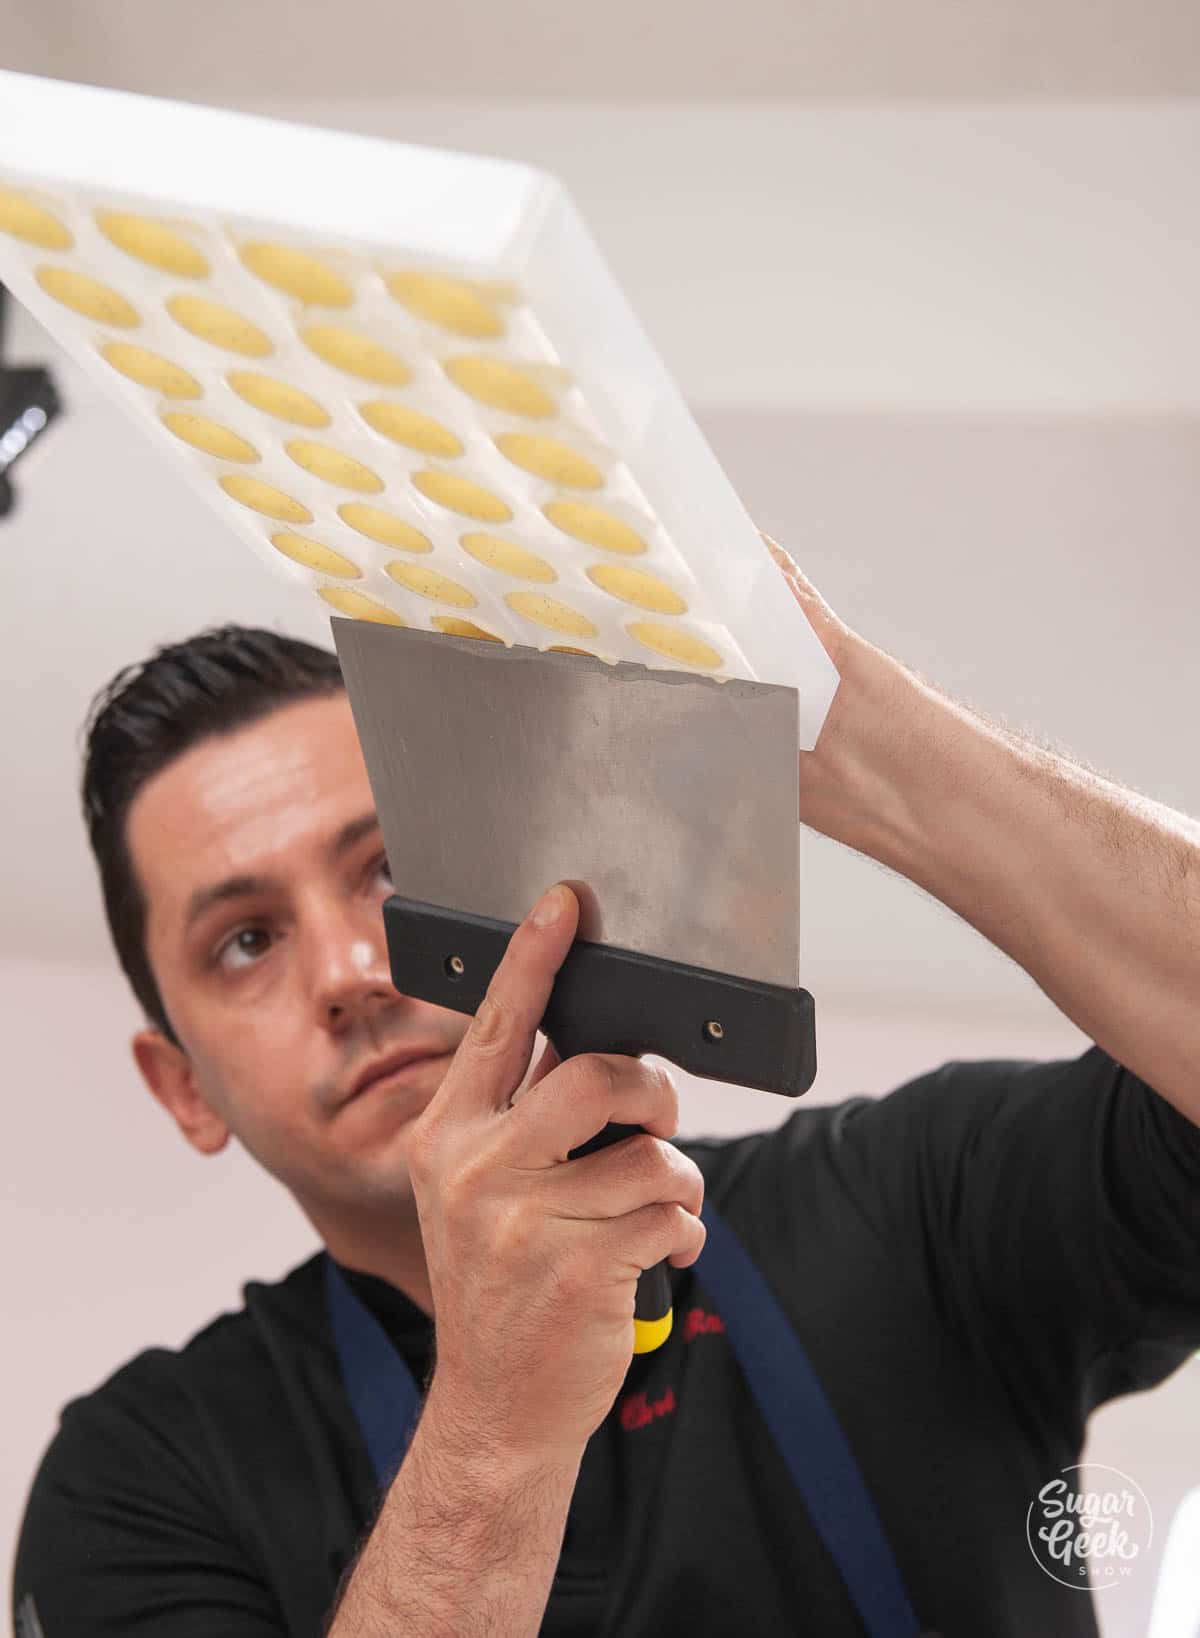
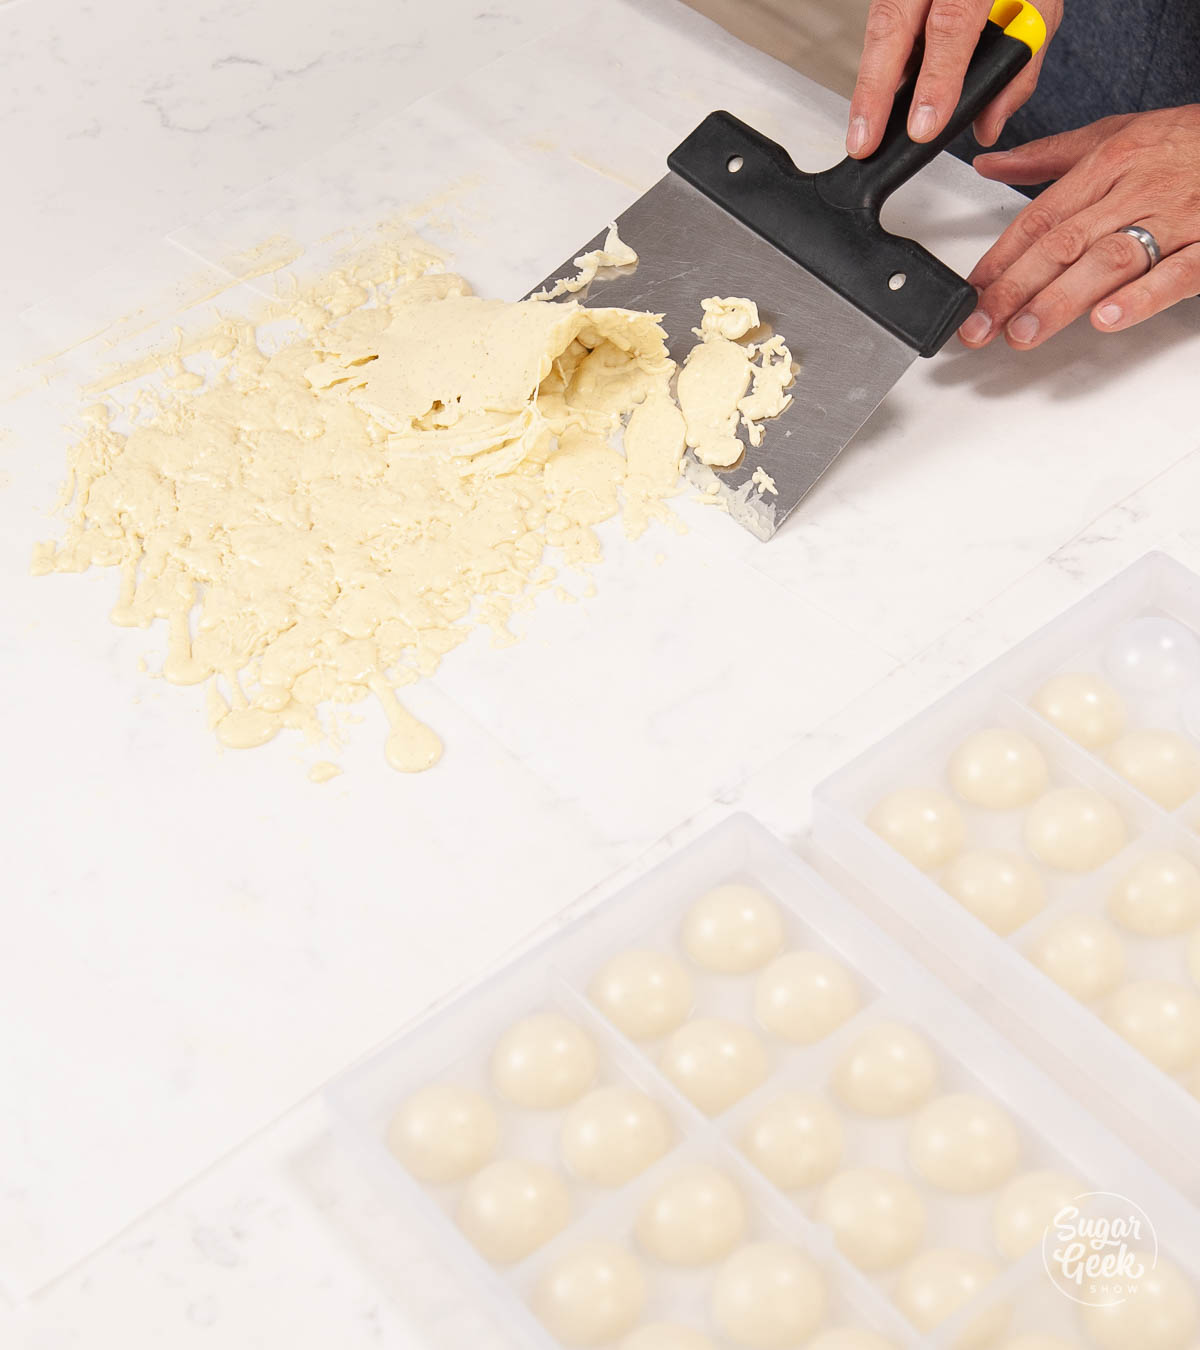
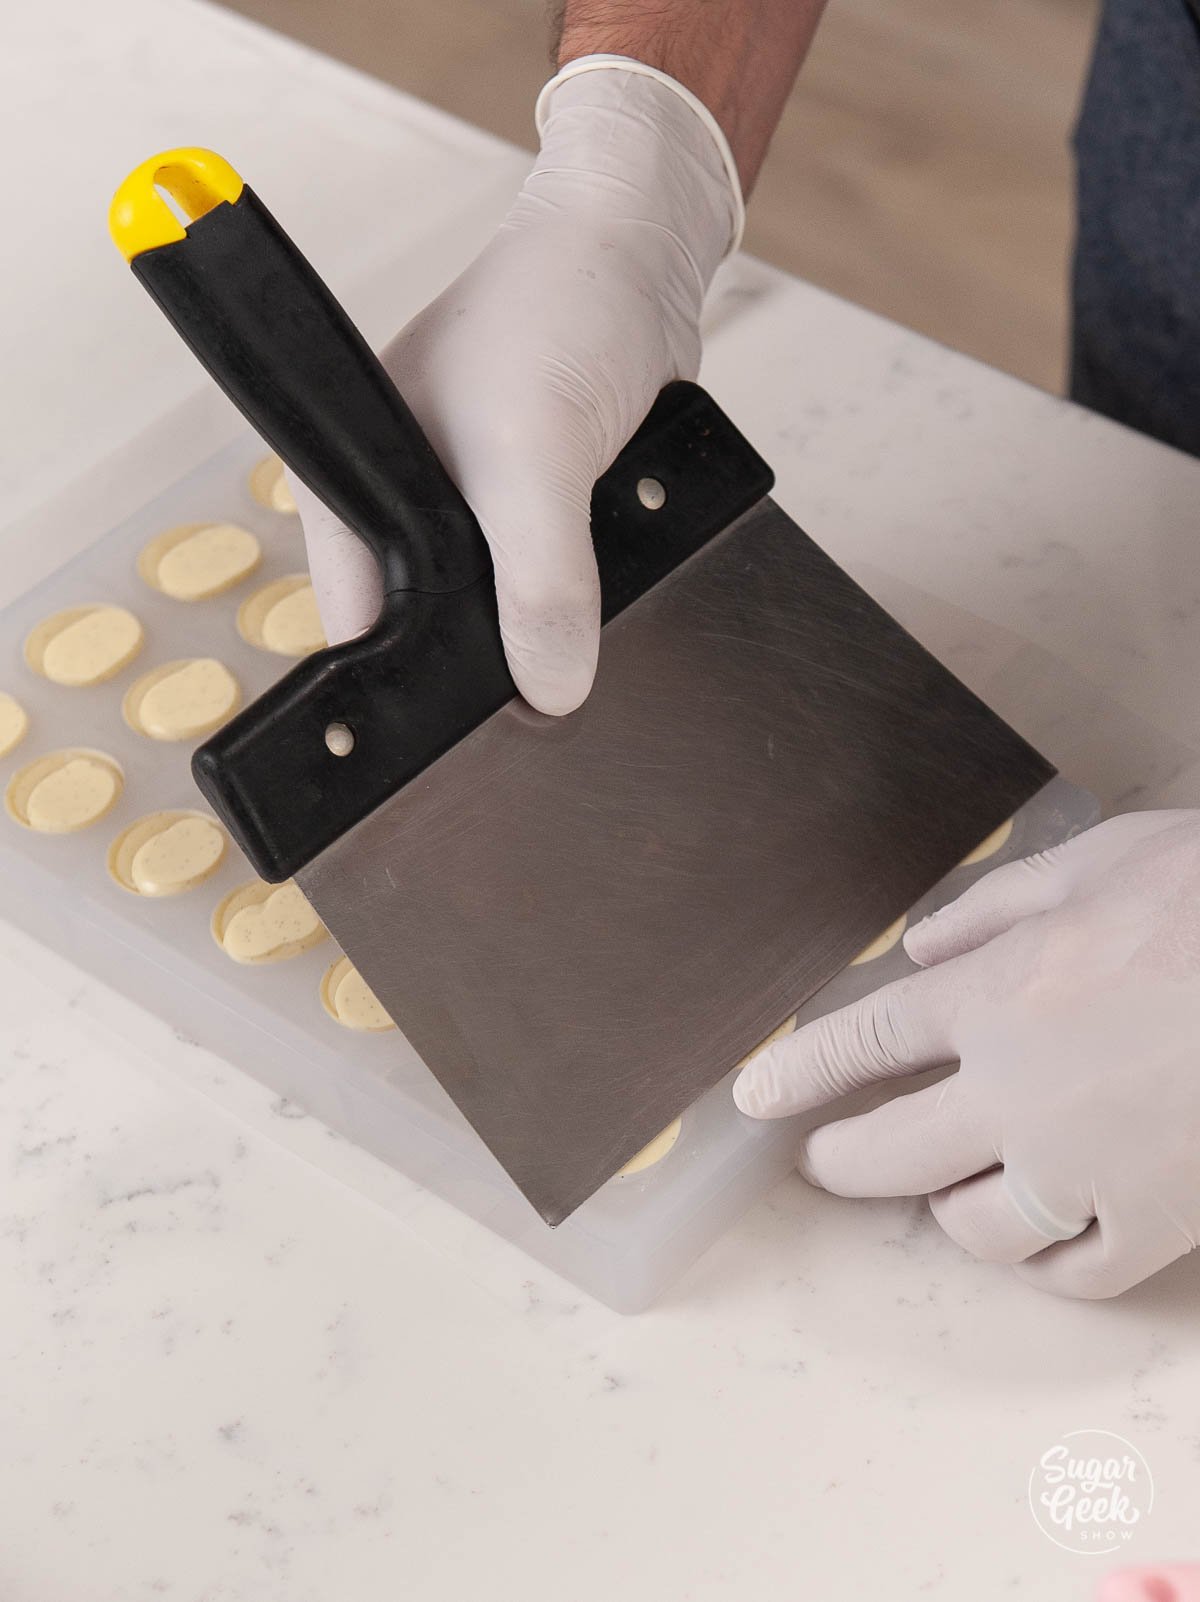
  7. Scrape off the excess chocolate from the surface of the mold with your bench scraper.scraping off excess chocolate from bonbon mold
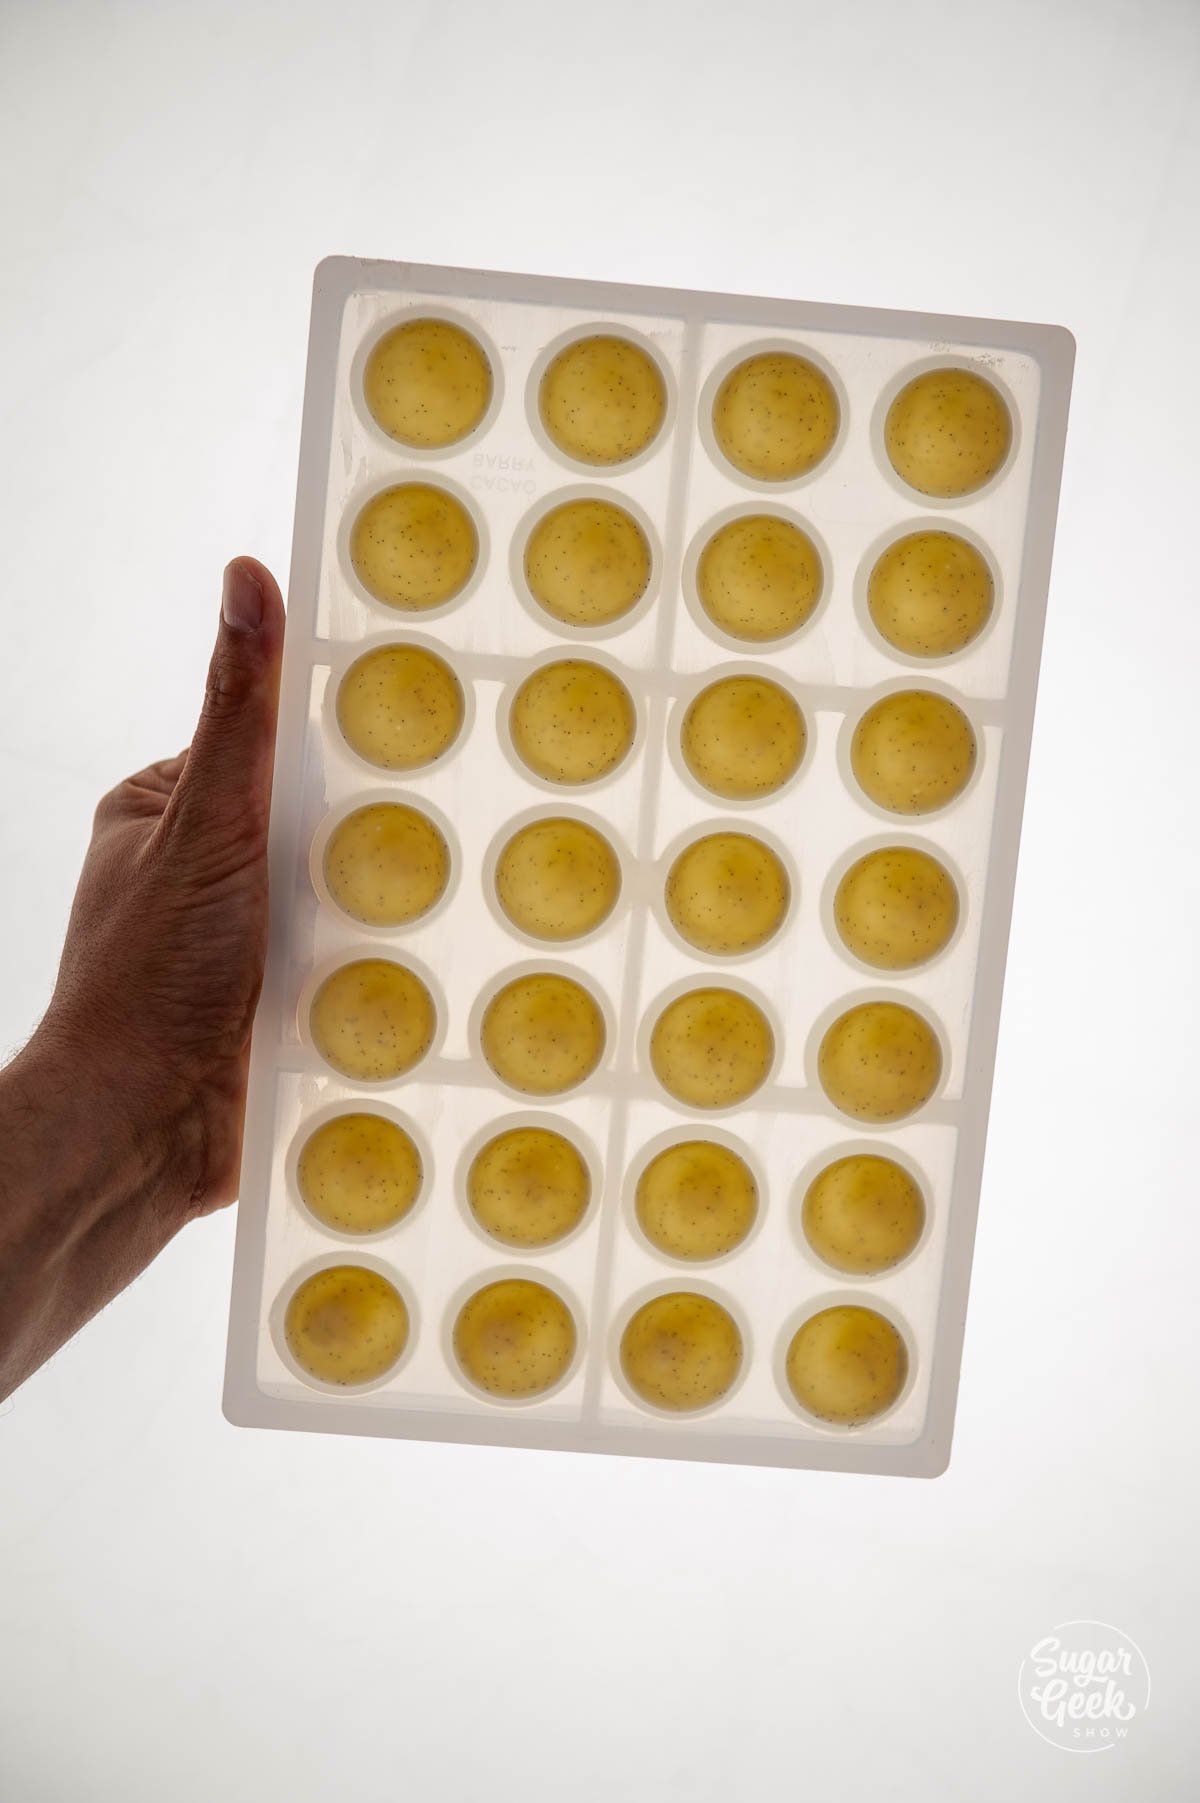
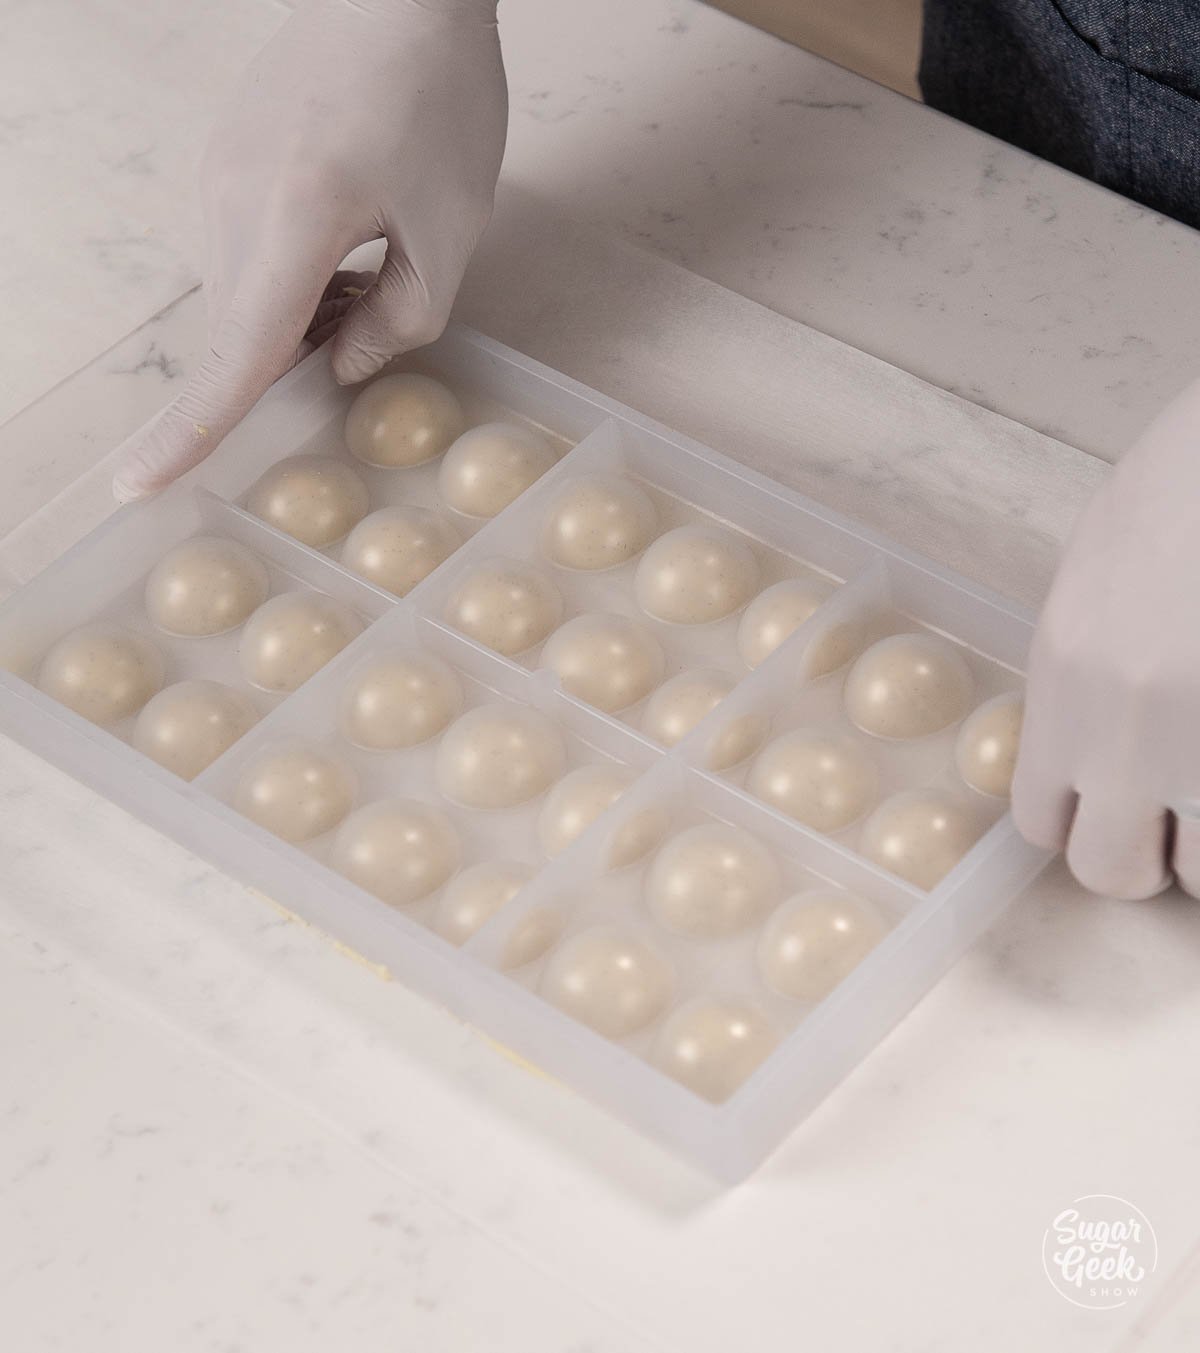
  8. Set your mold on its side for five minutes to help the chocolate to set evenly. You can see in this photo how even the chocolate is on all sides. chocolate bonbon mold backlit
  9. Place the mold cavity side opening down onto parchment paper for 20 minutes to crystalize. You can also scrape up your excess chocolate to use another time.

How to fill and close your chocolate bonbon

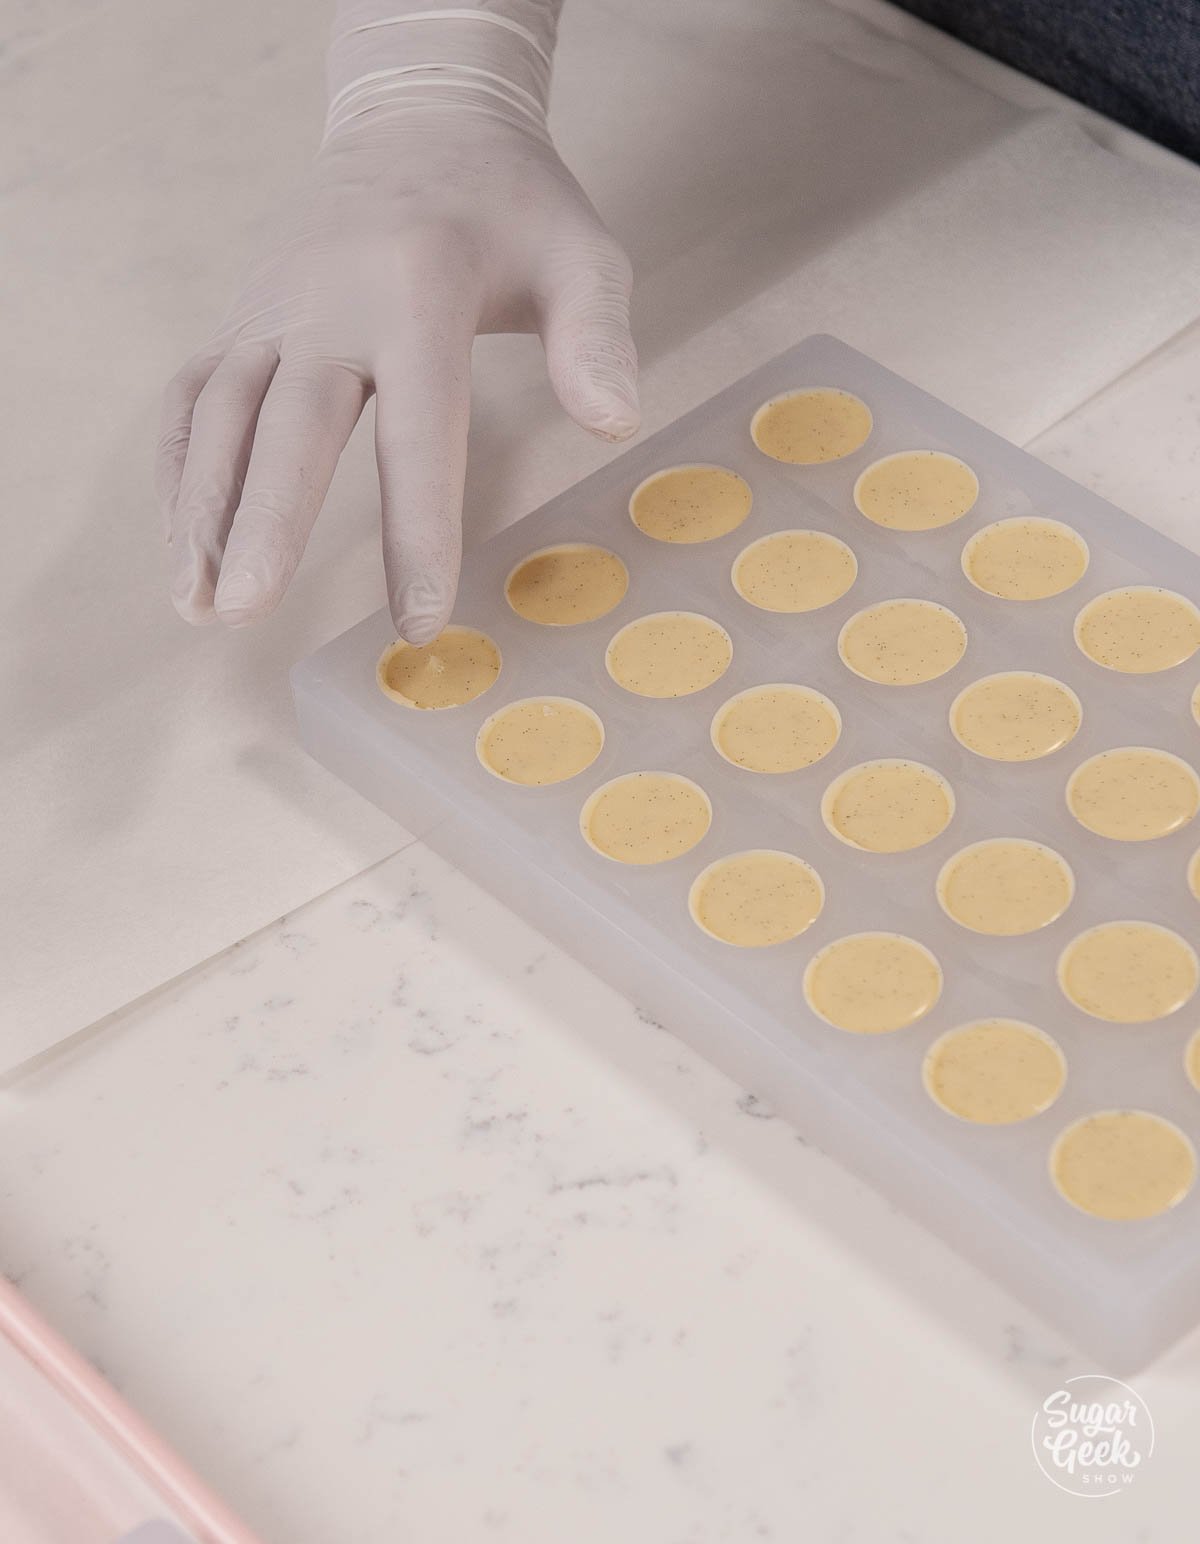
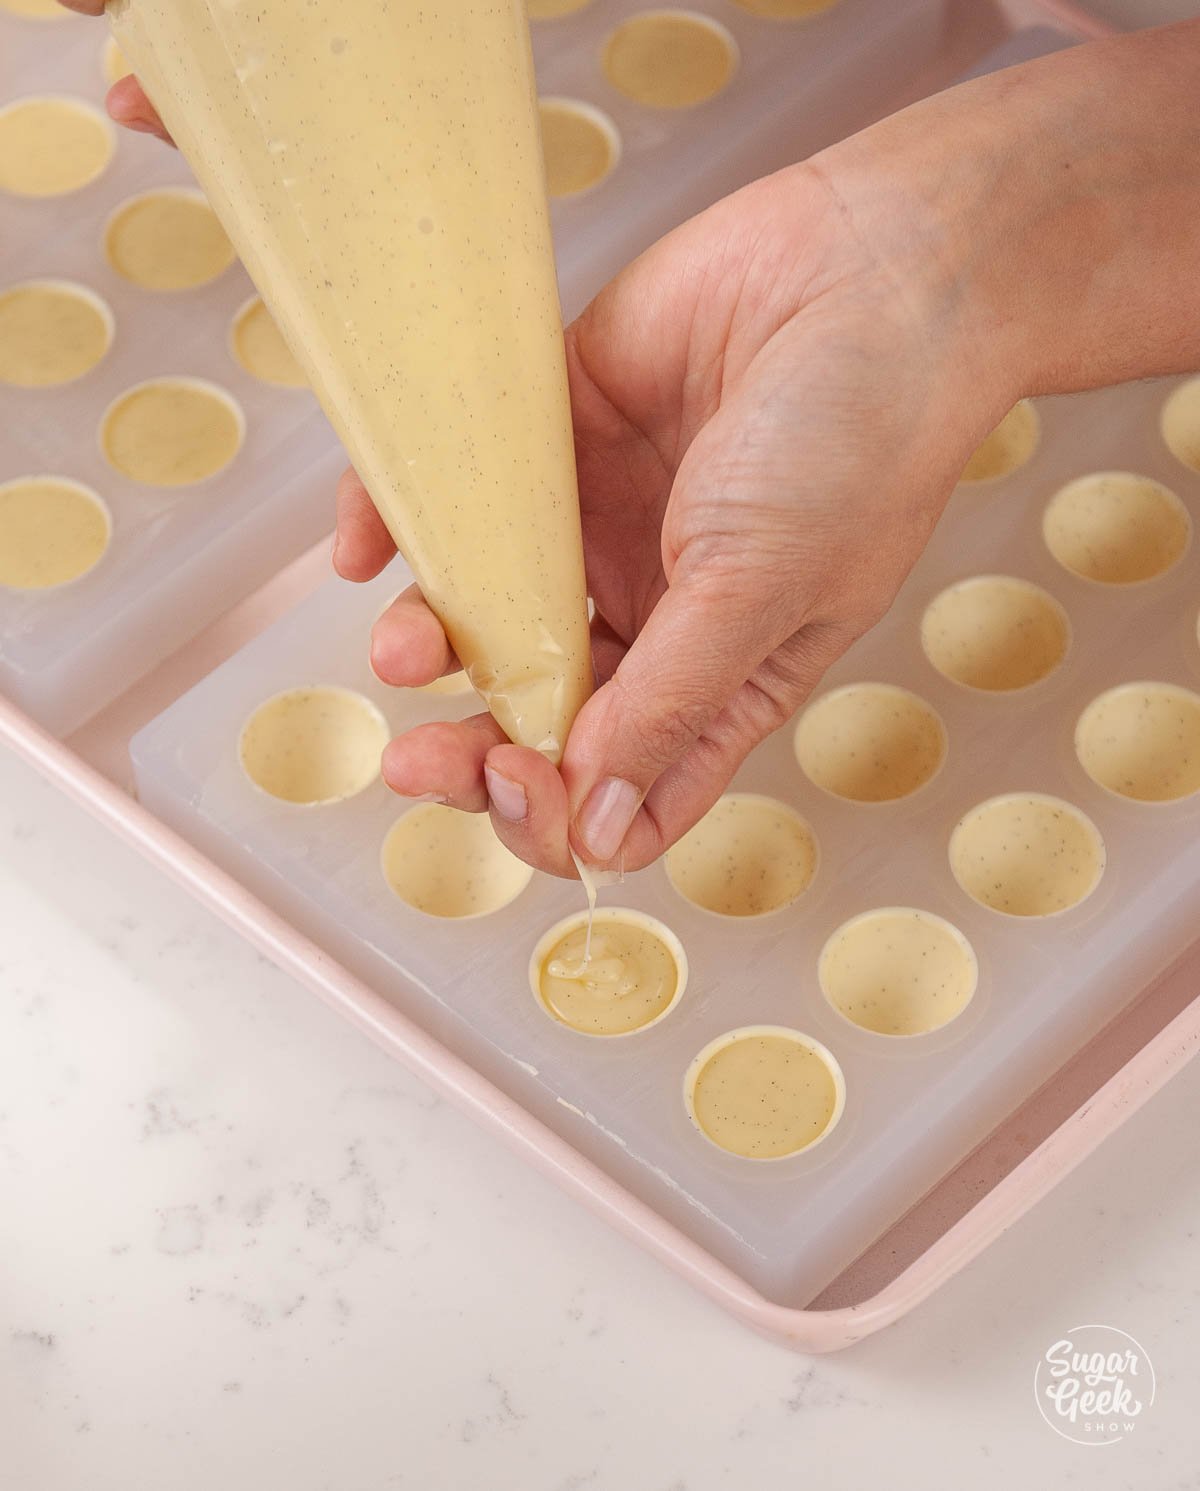
  1. Fill your piping bag with your ganache and twist the top to make sure it doesn't spill out the top. Cut ⅛" off the tip of the piping bag.
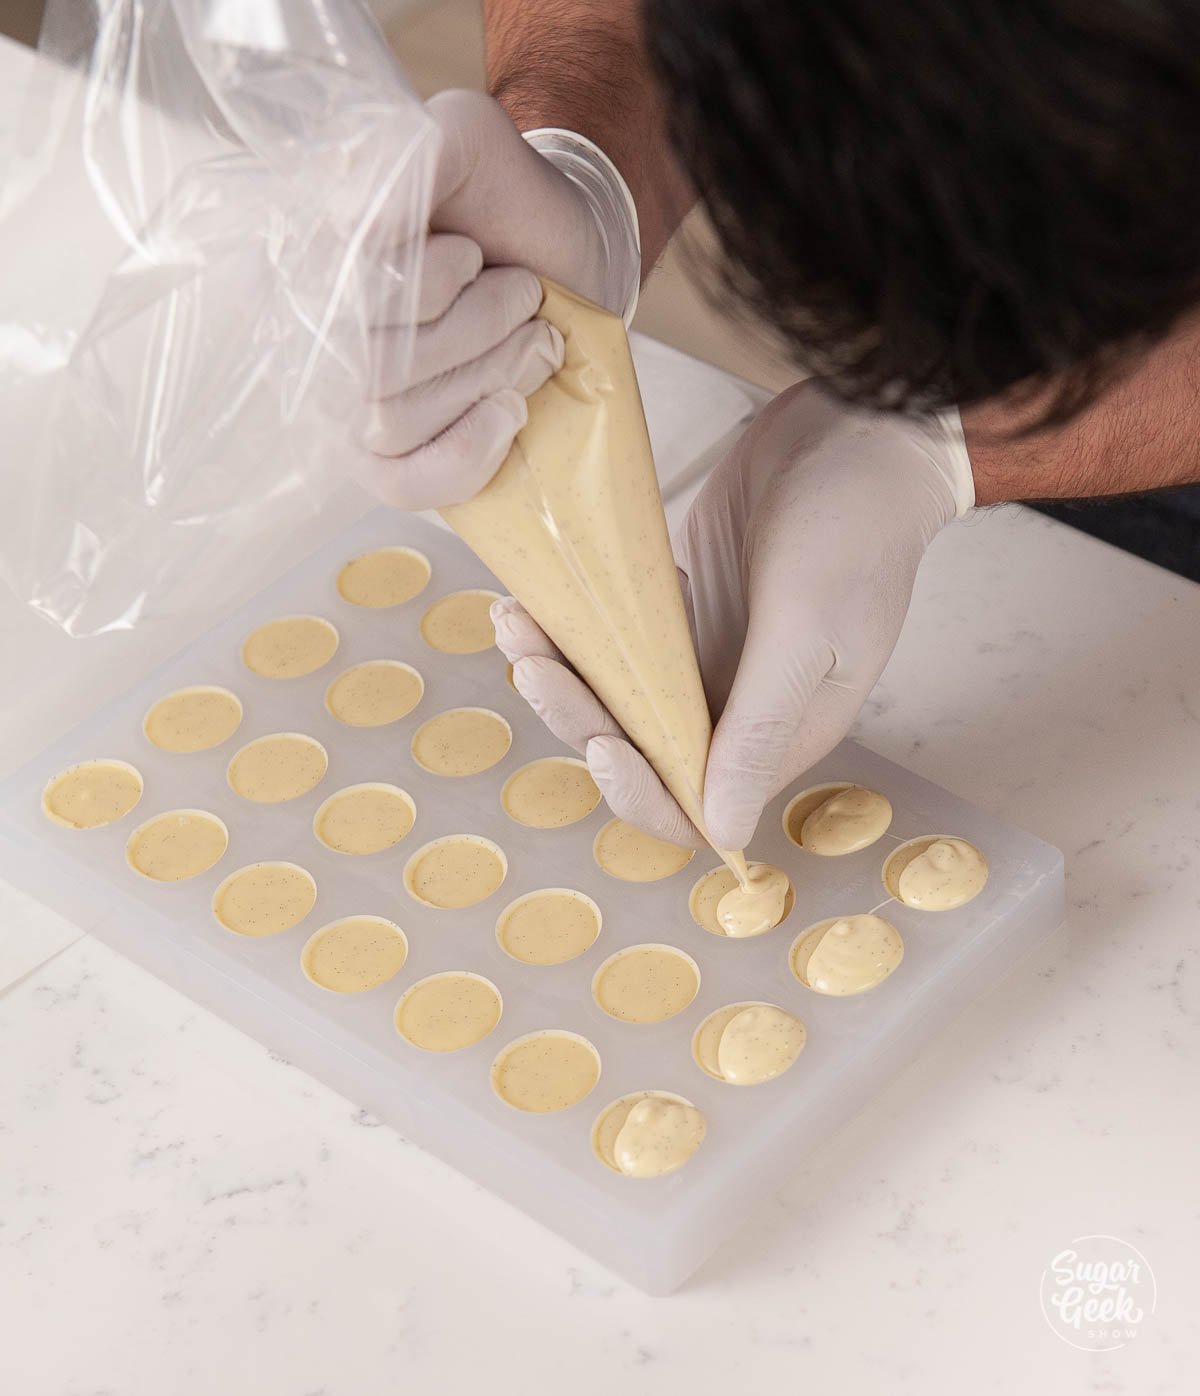
  2. Fill your bonbon shells with your ganache filling just shy (⅛") of the top of the shell using the same pinching and release method used earlier. This space is left so you can close the bonbon. The goal is to have the bottom of the shell the same thickness as the sides. filling the bonbon cavity with tempered chocolate
  3. Let your bonbons crystalize at room temperature until the ganache has firmed up. It helps if your room is colder than 70ºF. You can put the bonbons in the fridge but you can risk adding condensation to the ganache which can compromise the integrity of the bonbon and mold can grow. testing ganache for firmness
  4. Once the ganache has set, pipe the tempered chocolate onto the back of the bonbon until it's ¾ covered using the pinching technique. piping chocolate ganache onto the back of your bonbon mold
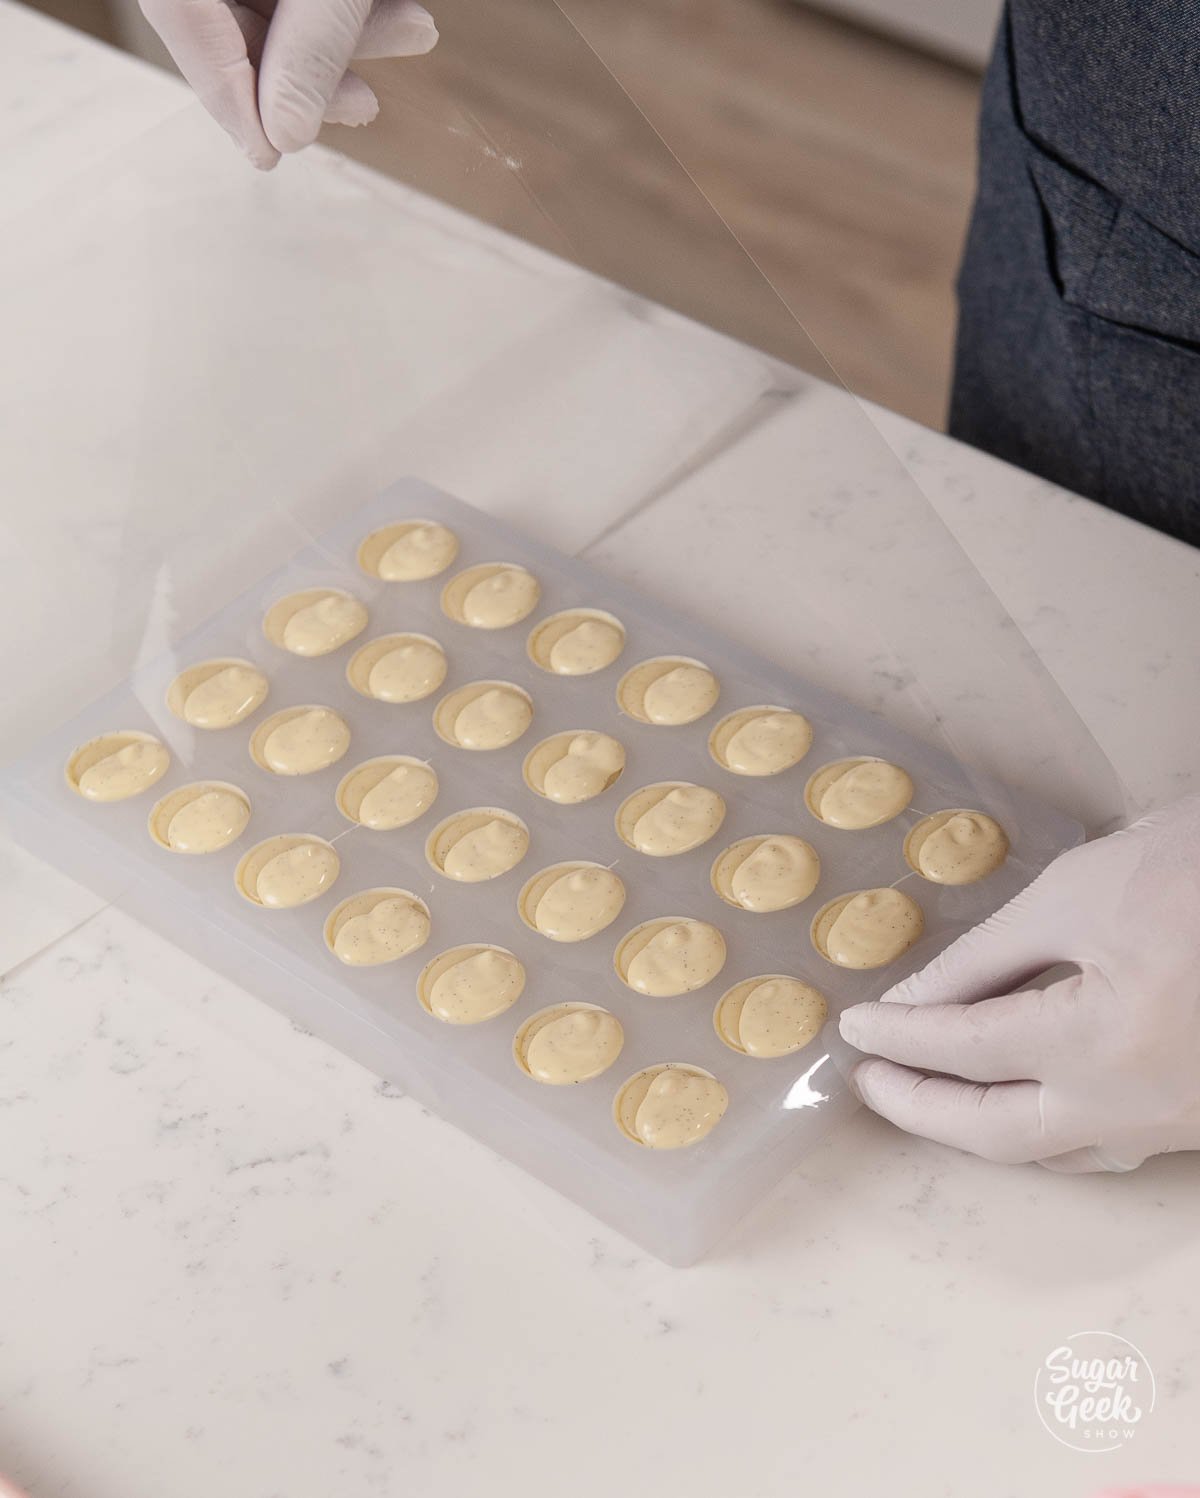
  5. Place your acetate onto the back of the mold and use the bench scraper to scrape away the excess chocolate. placing acetate on the back of the bonbon moldclosing the bonbon mold with acetate and bench scraper
  6. Place the bonbons into the fridge for 10 minutes. You will see the chocolate pull away from the mold as it contracts.
  7. De-mold your bonbons by quickly turning the mold over onto parchment paper to release them from the mold. chocolate mold on parchment paper
white chocolate vanilla bean bonbons

Recipe

close up of white chocolate bonbon
Print Recipe
4.67 from 3 votes

White Chocolate Bonbons with Vanilla Bean Ganache

Learn to make shiny and professional-looking white chocolate bonbons with vanilla bean ganache with celebrity pastry chef, Christophe Rull. Christophe teaches us how to prepare a delicious ganache, how to make beautiful bonbon shells, and how to fill and close your bonbons.
Prep Time20 minutes mins
Cook Time2 minutes mins
Cooling30 minutes mins
Total Time52 minutes mins
Course: Dessert
Cuisine: French
Servings: 100 bonbons
Calories: 15kcal
Author: Liz Marek

Equipment

  • bonbon mold
  • heatgun
  • acetate sheets
  • Bench scraper
  • fine mesh strainer
  • infrared thermometer

Ingredients

For the white chocolate vanilla bean ganache

  • 263 grams cream
  • 67 grams trimoline
  • 1 grade A vanilla bean
  • 500 grams couverture white chocolate
  • 100 grams white chocolate

For the bonbon shells

  • 1000 grams couverture white chocolate
  • 1 grade A vanilla bean
  • 10 grams pre-tempered cocoa butter optional (see blog post)
US Customary - Metric

Instructions

For the ganache

  • Melt your white chocolate in the microwave in 30 second increments to prevent burning or over a double boiler until it reaches 104ºF (40ºC). Set it aside.
  • Add your heavy cream and trimoline to a medium saucepan.
  • Scrape the vanilla bean seeds by cutting down the center of the bean first and then scraping the seeds with the flat side of a knife.
  • Add the vanilla bean seeds to the saucepan.
  • Bring your cream to a simmer over medium-high heat (stirring occasionally) and let it simmer for 1 minute and then remove it from the heat. Don't boil the cream.
  • Strain the mixture through a fine strainer to remove any bits of bean pod.
  • Add half of the cream mixture to your melted chocolate and stir until smooth. Starting with half will help prevent separation.
  • Then add in the rest of the cream and stir until smooth. It may look curdled before it looks smooth and that is normal. Just keep mixing.
  • Cool your ganache to around 104ºF (40ºC) so it doesn't melt your butter.
  • Pour your ganache into a tall measuring cup or glass and add in your softened butter.
  • Use an immersion blender to mix the butter with the ganache. Hold the immersion blender at a slight angle under the surface of the ganache to blend. Do not incorporate any air.
  • Cool your ganache to 34ºF and add in your tempered cocoa butter from the EZ Temper machine. If you don't have an EZ Temper you can skip this step. The tempered cocoa butter will help the ganache set up much faster than untempered cocoa butter.
  • Place some plastic wrap on top of the ganache and set it aside to firm up (make sure your room is below 70ºF) or your ganache and chocolate may not set up. If your room is too warm you can place the ganache in the fridge but your room should be below 70ºF anyway to be working with chocolate.

Chocolate bonbon shells

  • Place some parchment paper onto your work surface to catch the chocolate and get your bench scraper ready.
  • Fill your piping bag with your tempered chocolate and twist the ends so the chocolate doesn't spill out.
  • Cut a small hole (⅛") in the tip for the chocolate.
  • Begin filling each bonbon cavity all the way to the top with the chocolate by pinching and releasing the opening of the piping bag.
  • Pick the mold up by holding the edges and try not to put your hands agains the cavities directly or the heat from your hands can ruin the temper of the chocolate shells. Tap the edge of the mold with your bench scraper to release any air bubbles.
  • Turn the mold over and tap out the excess chocolate to create a nice thin shell.
  • Scrape off the excess chocolate from the surface of the mold with your bench scraper.
  • Set your mold on its side for five minutes to help the chocolate to set evenly.
  • Place the mold cavity side opening down onto parchment paper for 20 minutes.

Filling and closing the bonbons

  • Fill your bonbon shells just shy of the top of the shell to leave room to close the shell.
  • Let your bonbons crystalize at room temperature until the ganache has firmed up. It helps if your room is colder than 70ºF. You can put the bonbons in the fridge but you can risk adding condensation to the ganache which can compromise the integrity of the bonbon and mold can grow.
  • Pipe the tempered chocolate onto the back of the bonbon until it's halfway covered using the pinching technique.
  • Place your acetate onto the back of the mold and use the bench scraper to scrape away the excess chocolate.
  • Place the bonbons into the fridge for 10 minutes.
  • De-mold your bonbons by quickly turning the mold over onto parchment paper to release them from the mold.

Video

Notes

EZ Tempering Machine
Waring Chocolate Warmer
Cacoa Barry Chocolate
Cocoa Butter Drops
Thermometer
  • If you haven't watched Christophe's video on how to temper chocolate with the EZ Temper machine, you'll want to watch that first.
  • Also learn how to make beautiful chocolate decorations like curls, squares, discs, and a tiara in Christophe's easy decorations tutorial.
  • No tempering machine? No problem! You can temper your chocolate in the microwave or use the traditional seeding method to get your chocolate tempered.

Nutrition

Serving: 1bonbon | Calories: 15kcal | Carbohydrates: 1g | Protein: 1g | Fat: 1g | Saturated Fat: 1g | Polyunsaturated Fat: 1g | Monounsaturated Fat: 1g | Cholesterol: 4mg | Sodium: 2mg | Potassium: 5mg | Fiber: 1g | Sugar: 1g | Vitamin A: 39IU | Vitamin C: 1mg | Calcium: 4mg | Iron: 1mg
closeup of caramel apples

October 4, 2021 Candy

Caramel Apples Recipe

Homemade caramel apples are everything you want fall to taste like, and making them from scratch is so much better than anything you can buy at a fair or grocery store. Crisp, tart apples coated in thick, buttery caramel that actually sticks and sets perfectly without sliding off. Pair these with my candy apple recipe and you have the ultimate fall candy spread.

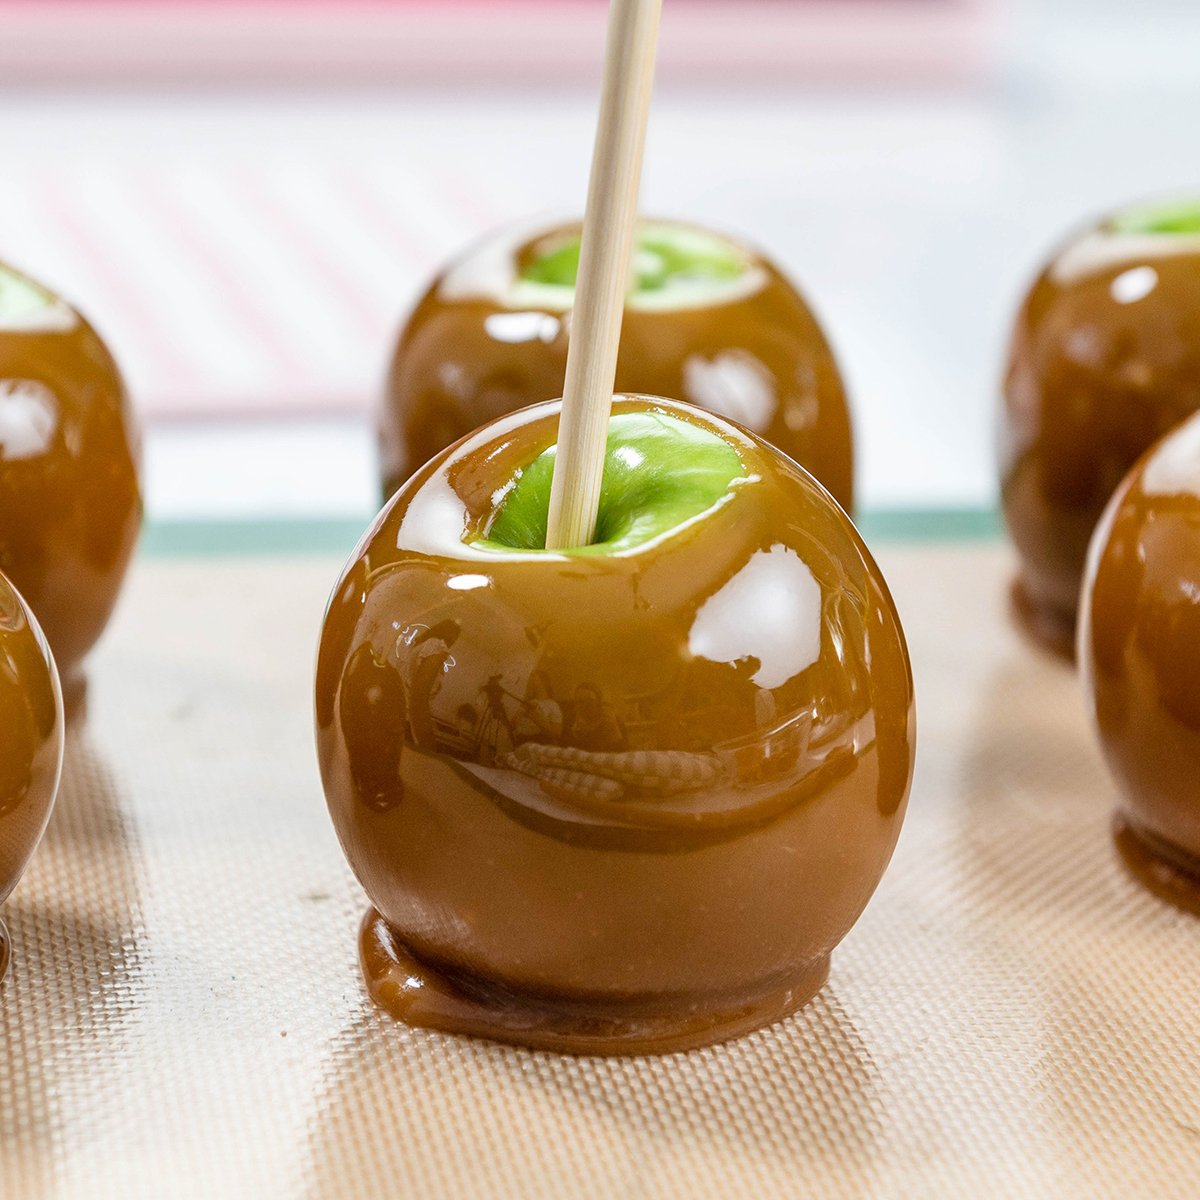
Glossy caramel apples on a silicone mat.

Quick Glance at the Recipe

  • Recipe Name: Caramel Apples Recipe
  • Why You'll Love It: Classic homemade caramel apples with rich, buttery caramel that sticks perfectly to fresh apples.
  • Time and Difficulty: Easy recipe with about 10 minutes prep and 20 minutes cooking time, plus an overnight chill for the apples.
  • Main Ingredients: Granny Smith apples, brown sugar, corn syrup, butter, heavy cream, and vanilla.
  • Method: Remove wax from apples, cook caramel to 240 to 245º F, cool it to 190 to 200º F, then dip chilled apples until evenly coated.
  • Texture and Flavor: Crisp tart apples covered in chewy, buttery caramel.
  • Quick Tip: Wash apples in hot water first to remove the wax so the caramel sticks perfectly.
ChatGPT
Google AI
Perplexity
Grok
Add us as a trusted site on Google
[feast_advanced_jump_to]

After I posted my candy apple recipe, I got so many requests for caramel apples. Not only are they a fun family project, but making them from scratch tastes so much better than store-bought versions.

The caramel in this recipe is similar to my caramel sauce, but cooked slightly thicker so it clings beautifully to the apples without sliding off. The result is rich, buttery caramel with the perfect chewy texture.

You can even use this caramel to make chocolate caramel candy or drizzle it over desserts.

Whether you're making them for Halloween, a fall party, or just because you're craving a classic caramel apple, this recipe delivers that nostalgic fairground flavor, only better because it's made fresh in your own kitchen.

Ready in about 30 minutes of active time (plus an overnight apple chill), this easy caramel apples recipe is one of the most fun homemade treats you can make during apple season. If you love caramel and apples together, try my caramel apple pie next.

What Makes These Caramel Apples So Good

  • The biggest reason homemade caramel apples fail is the wax. Store-bought apples are coated in food-grade wax to keep them shiny and fresh. The moment hot caramel touches that wax coating, the wax melts and your caramel slides right down to the bottom of the apple. A hot water bath before dipping strips that wax completely so the caramel has bare apple skin to grip.
  • Chilling the apples overnight is the other non-negotiable step. A cold apple cools the caramel the instant it makes contact, so instead of sliding down it firms into an even, clingy layer. Room temperature apples cannot do this. The caramel stays liquid too long and pools at the base.
  • Corn syrup is what keeps the caramel smooth and glossy. It prevents the sugar molecules from bonding into gritty crystals as the caramel cooks and cools. Without it you risk grainy caramel that looks and feels sandy rather than silky.
  • Cooking to exactly 240 to 245º F is the difference between chewy caramel and hard candy. Below 240º F the caramel is too soft and runs off the apple. Above 245º F you are heading toward a crunchy, jaw-breaking caramel that is not pleasant to bite through.
  • Letting the caramel cool to 190 to 200º F before dipping is the step most people skip because they are impatient. Caramel above 210º F is too fluid and slides straight off even a cold apple. At dipping temperature it is still pourable but thick enough to coat and stay put.

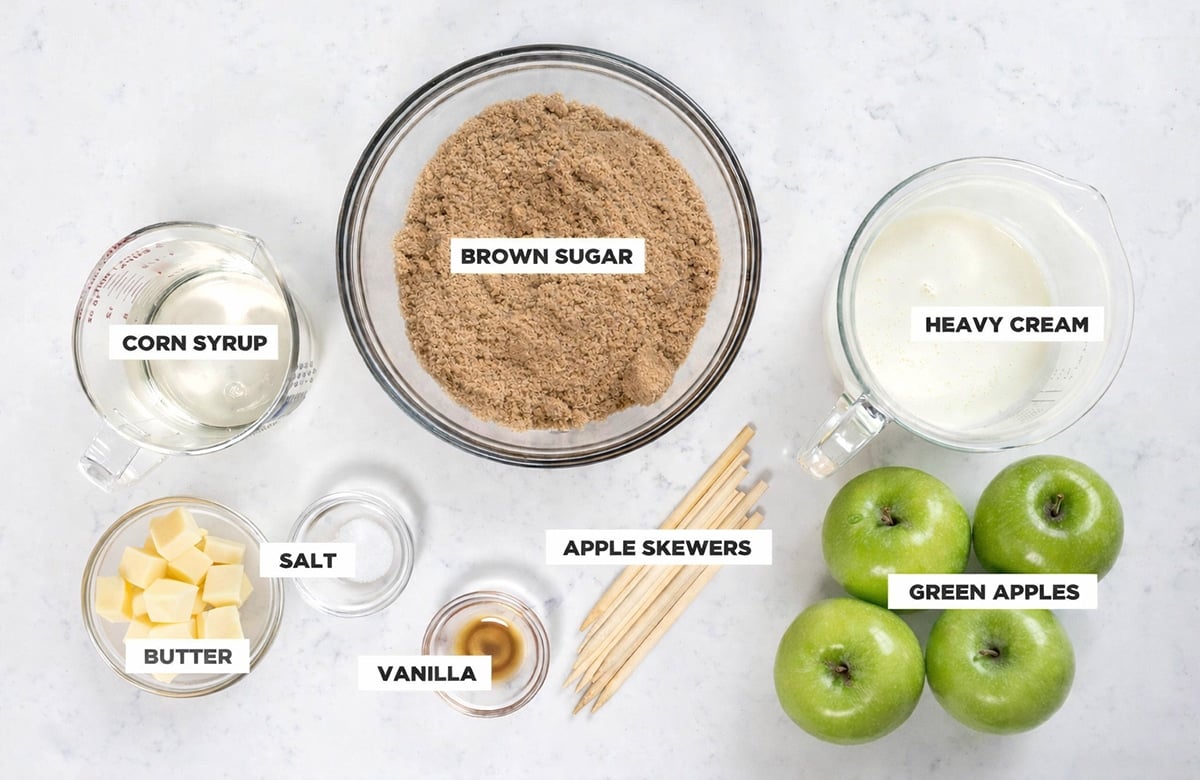
Caramel apple ingredients

One of the best parts about this recipe is its simplicity. Most of these ingredients are probably already in your pantry.

Caramel apple ingredients in bowls on a countertop.
  • Granny Smith Apples. Granny Smiths are my favorite because their tartness cuts through the sweetness of the caramel. Fuji and Honeycrisp also work well. Choose firm apples that are small to medium. Large apples mean less caramel per bite and a harder-to-handle final product.
  • Brown Sugar. Brown sugar gives the caramel its deep, molasses-rich flavor. I use light brown sugar. Dark brown sugar will work but produces a stronger, more molasses-forward flavor.
  • Corn Syrup. Corn syrup keeps the caramel from crystallizing while it cooks, so it stays smooth instead of grainy. Glucose syrup can be used as a substitute. Do not substitute maple syrup or honey, they behave differently and will change your texture.
  • Unsalted Butter. Butter adds richness and helps emulsify the caramel so it stays smooth and glossy. Coconut oil or vegan butter can be used if needed, but the flavor will shift.
  • Heavy Cream. Heavy cream adds both fat and liquid, loosening the cooked sugar while keeping the caramel smooth and creamy. Evaporated milk is a good substitute if you don't have cream.
  • Salt. Salt balances the sweetness and wakes up the caramel flavor. Without it, the caramel tastes flat.
  • Vanilla Extract. Vanilla rounds out the caramel flavor. You can also experiment with cinnamon, pumpkin spice, almond extract, or chai-infused cream for seasonal variations.

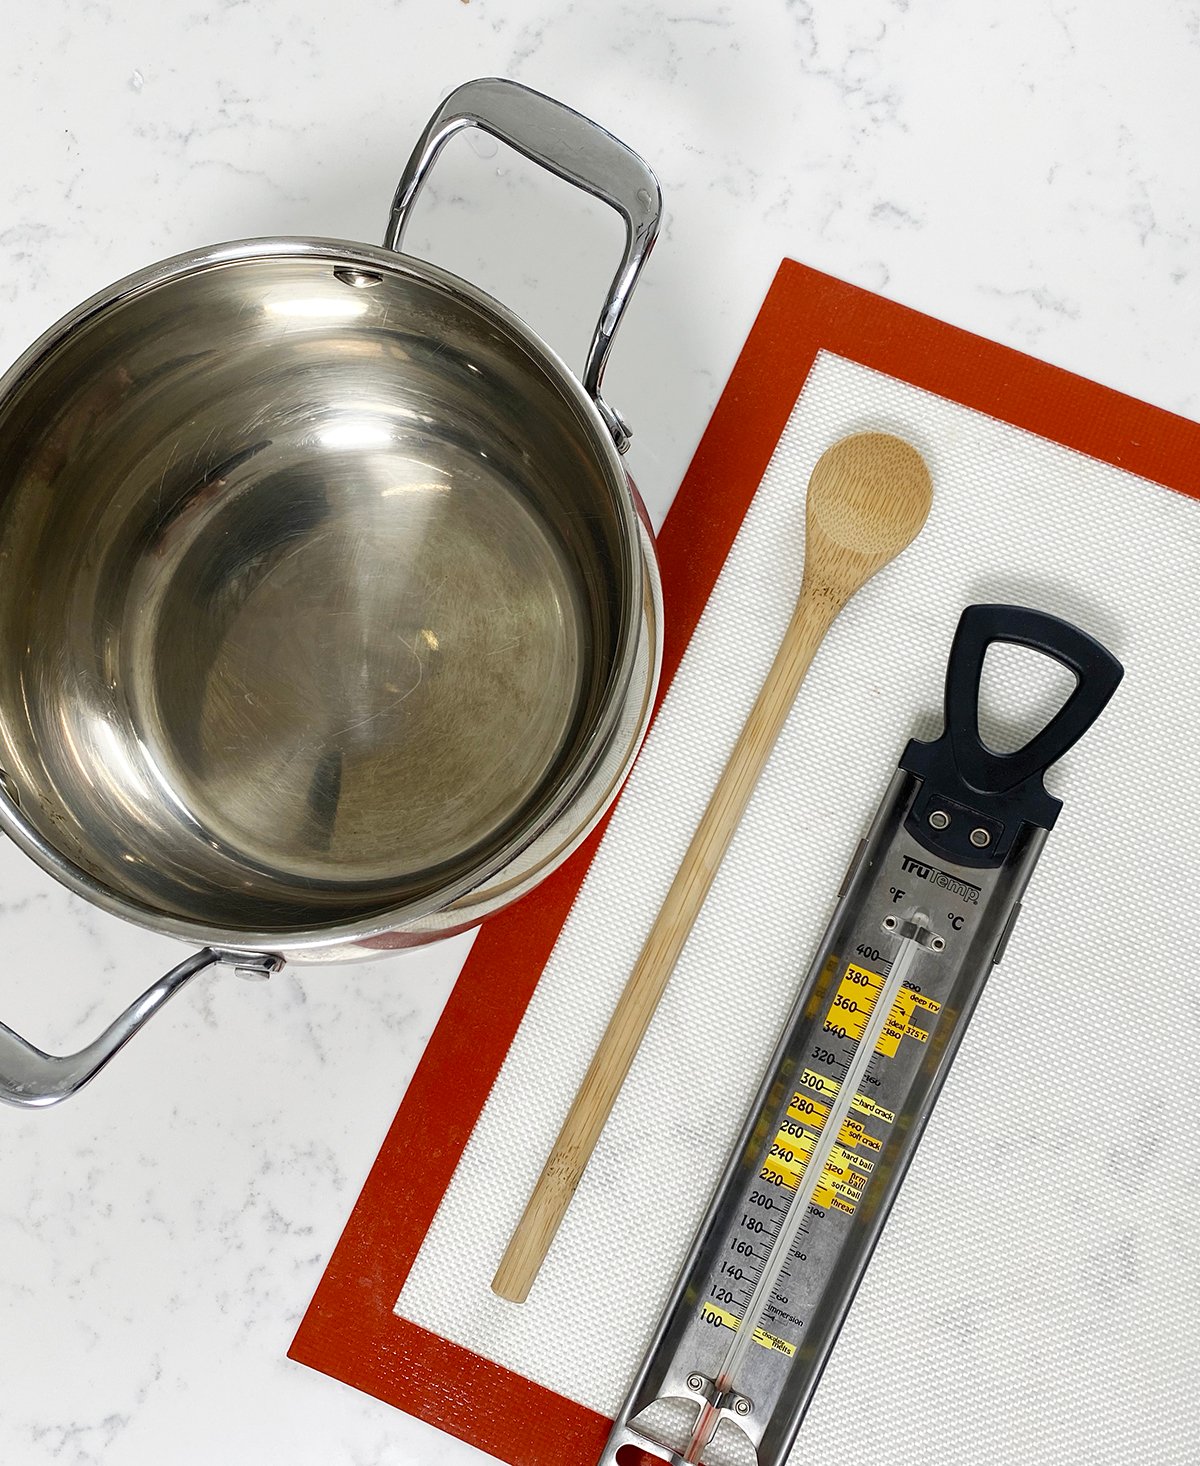
PRO TIP: Don't forget you'll need a candy thermometer for the caramel, a silicone mat, and apple sticks!

How To Make Caramel Apples Step-By-Step

Start a day ahead so the apples have time to dry and chill overnight. Any water left on the skin can cause bubbles in your caramel.

caramel apple tools on a countertop
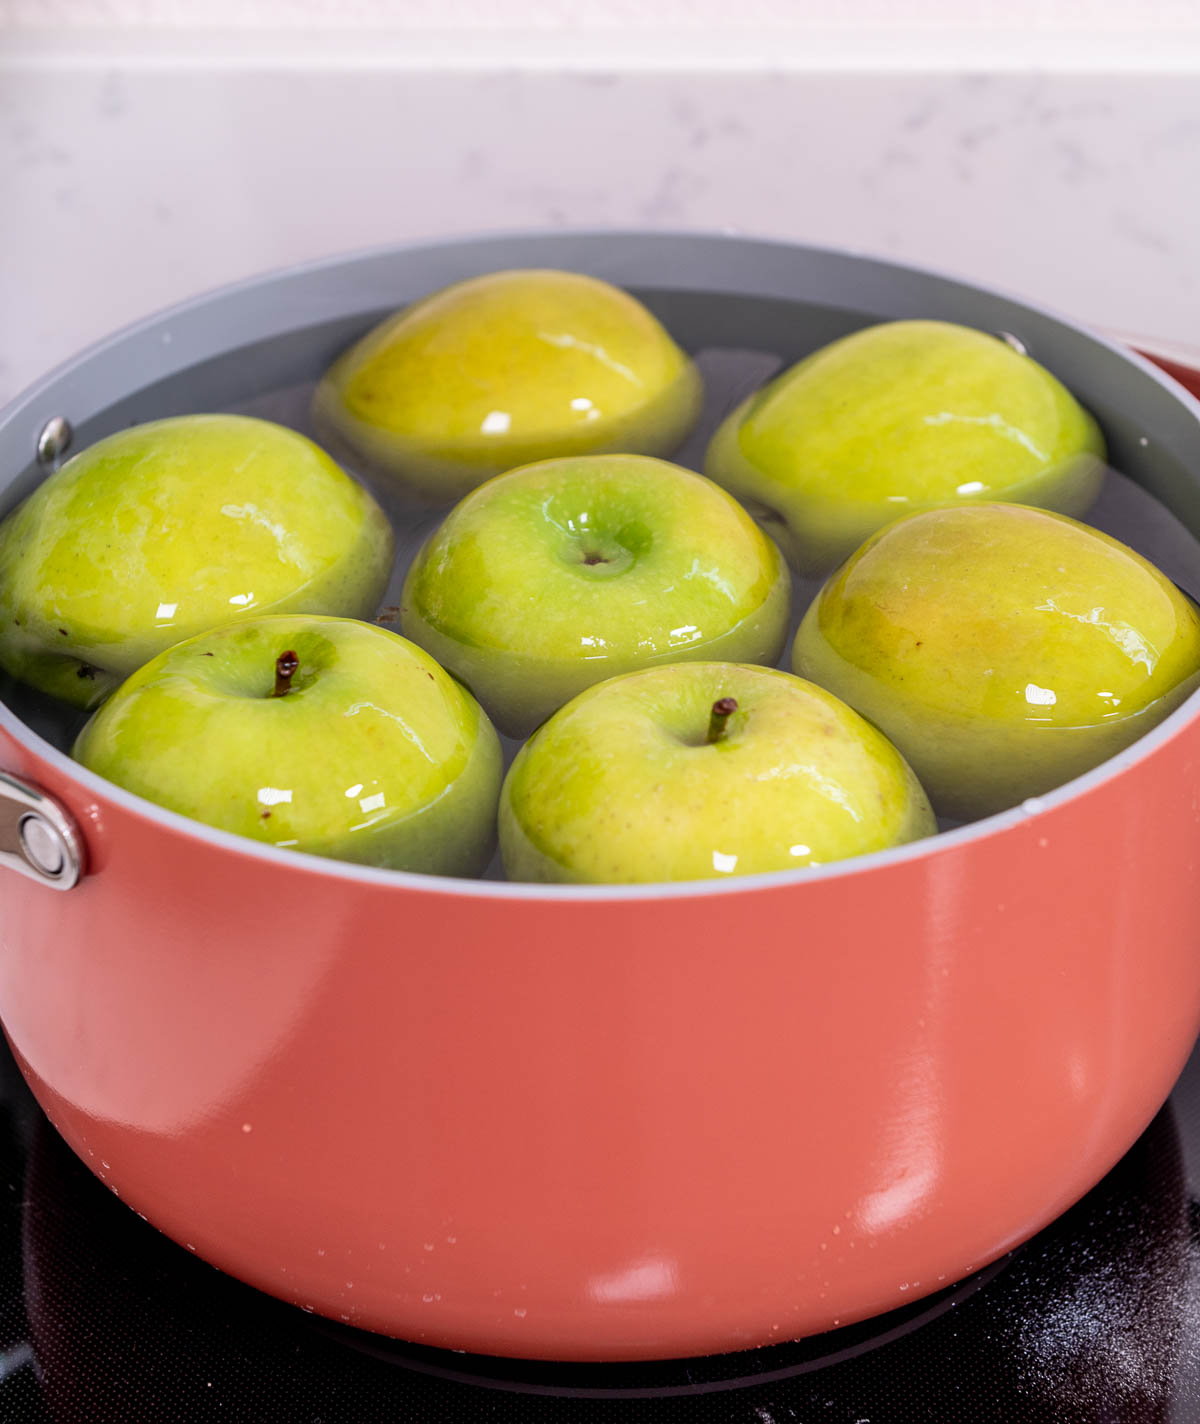
  1. Bring a large pot of water to almost boiling and then remove it from the heat.
granny smith apples in Pot of hot water
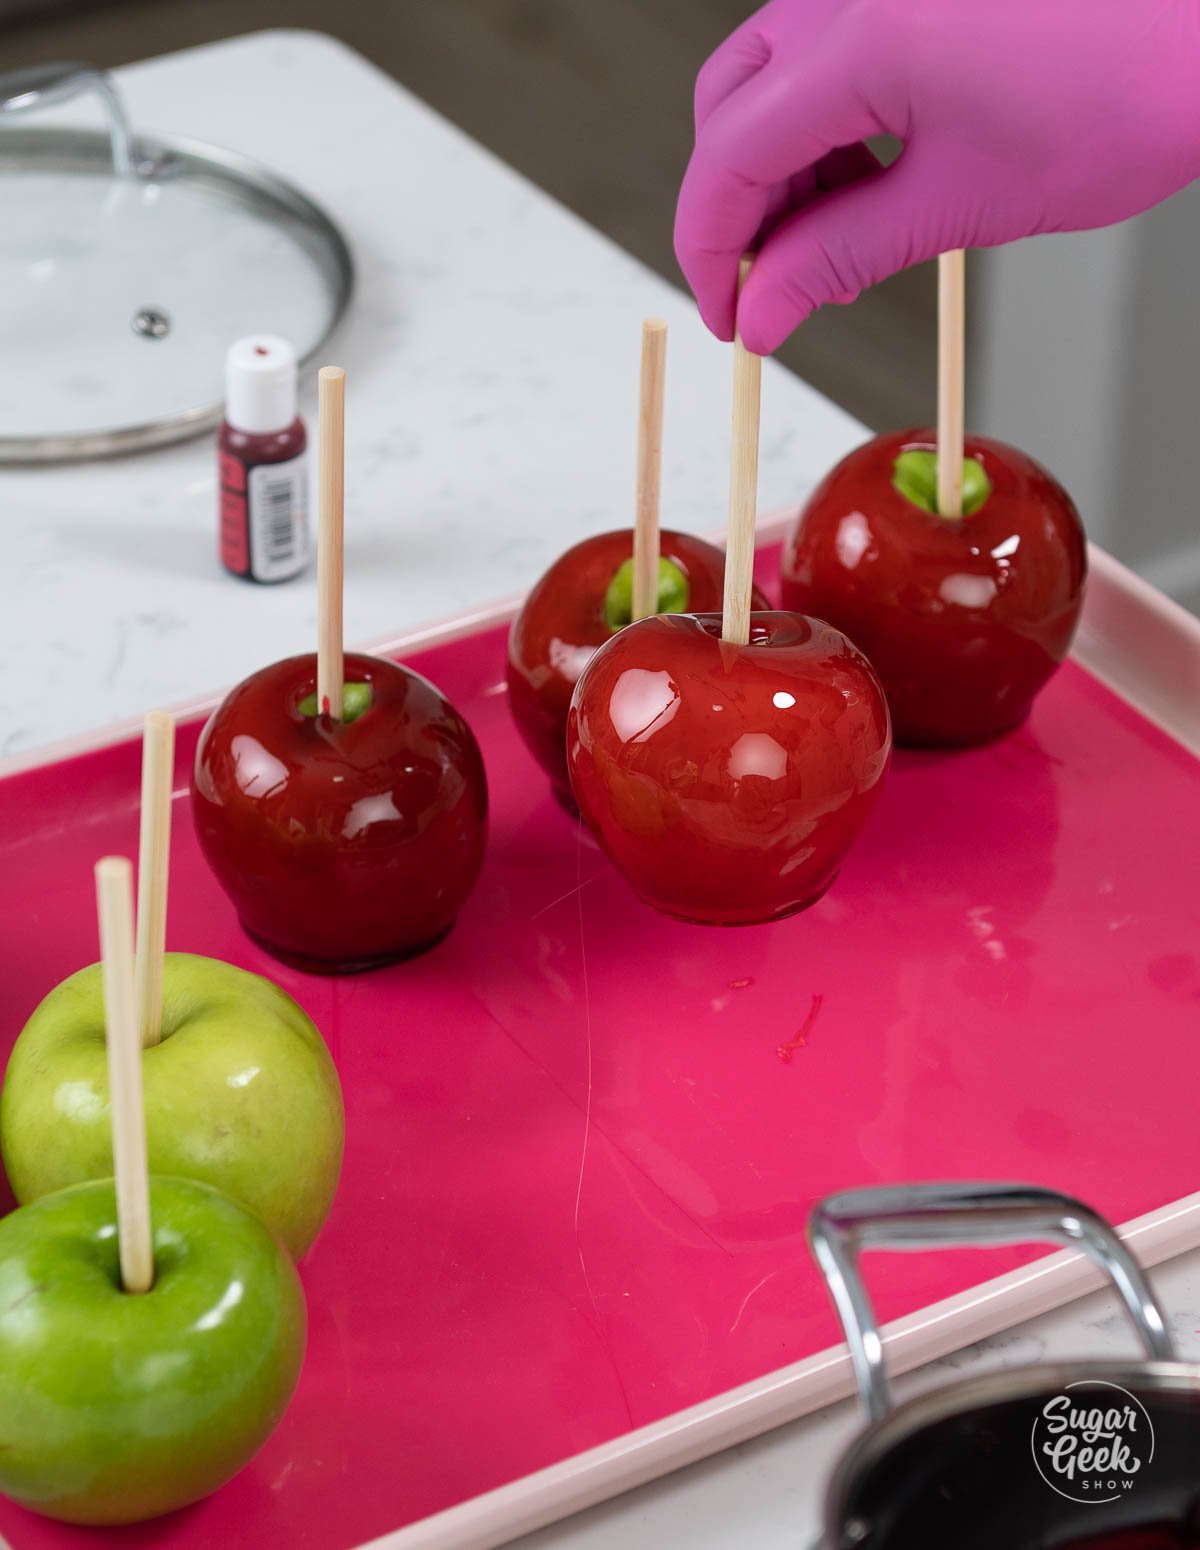
  1. Submerge your apples in the hot water for 1 minute, use a wooden spoon to push them down or rotate them as needed. Don't worry if your apples get discolored from the heat of the water. The caramel covers it completely once you dip.
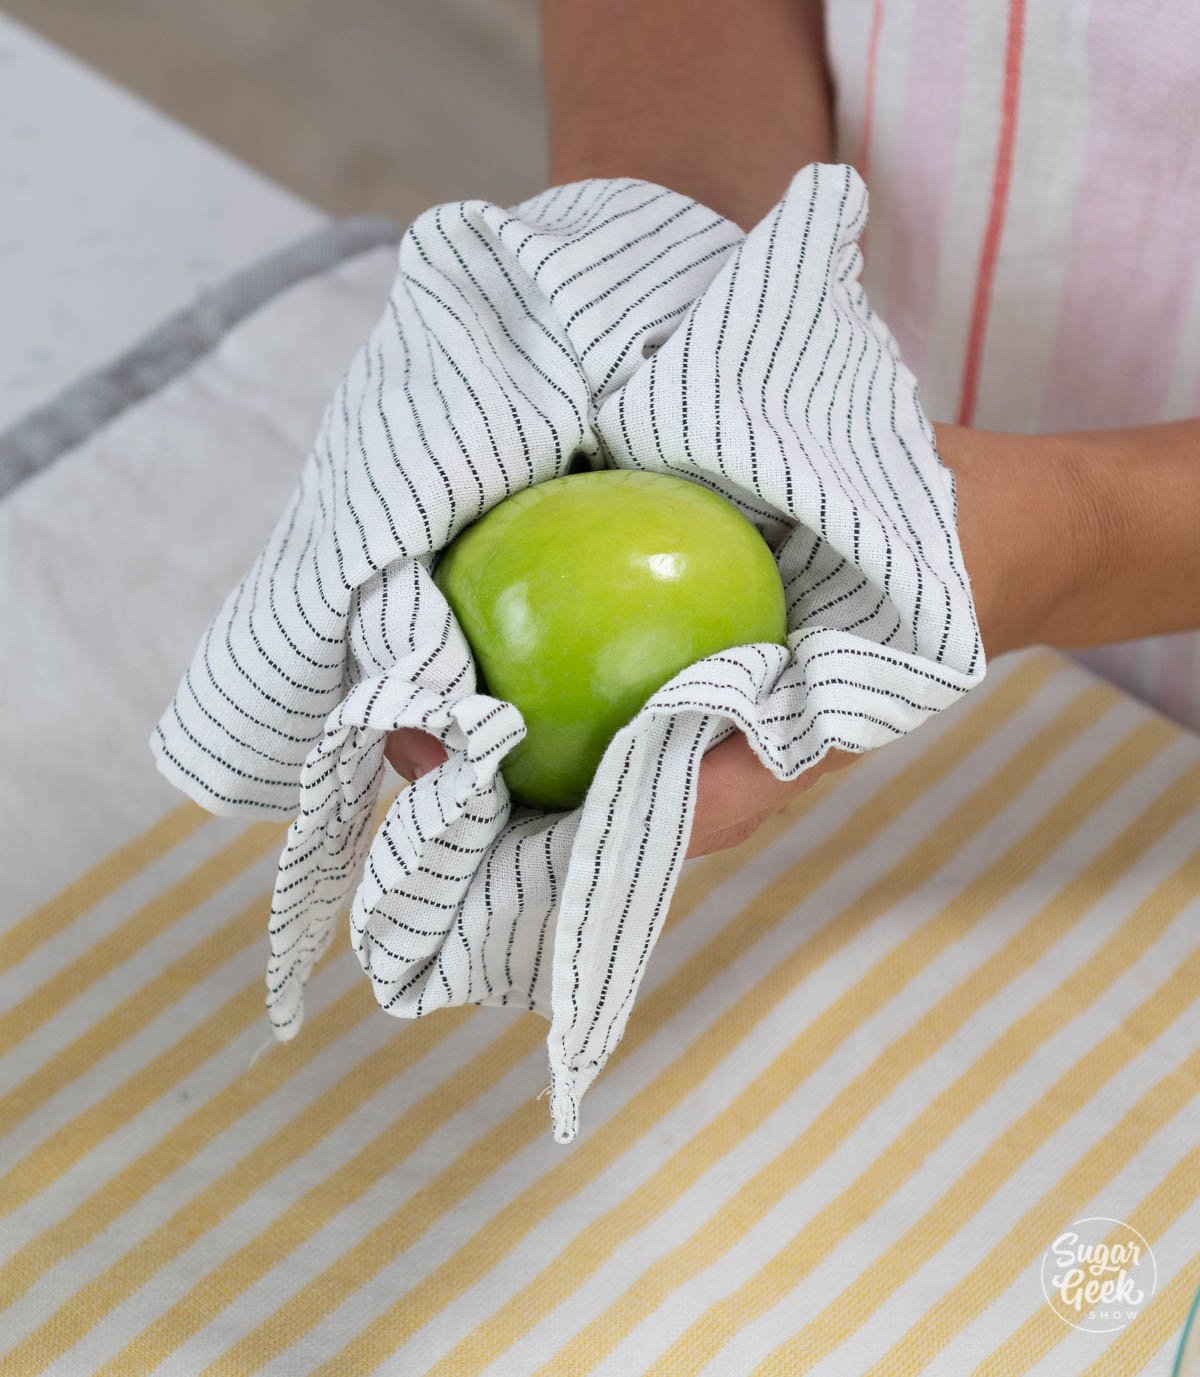
wiping apple with towel
  1. Remove the apples from the hot water and rub the surface with a clean towel to remove any wax residue. Pay special attention to the top and bottom stem area to remove water as well.
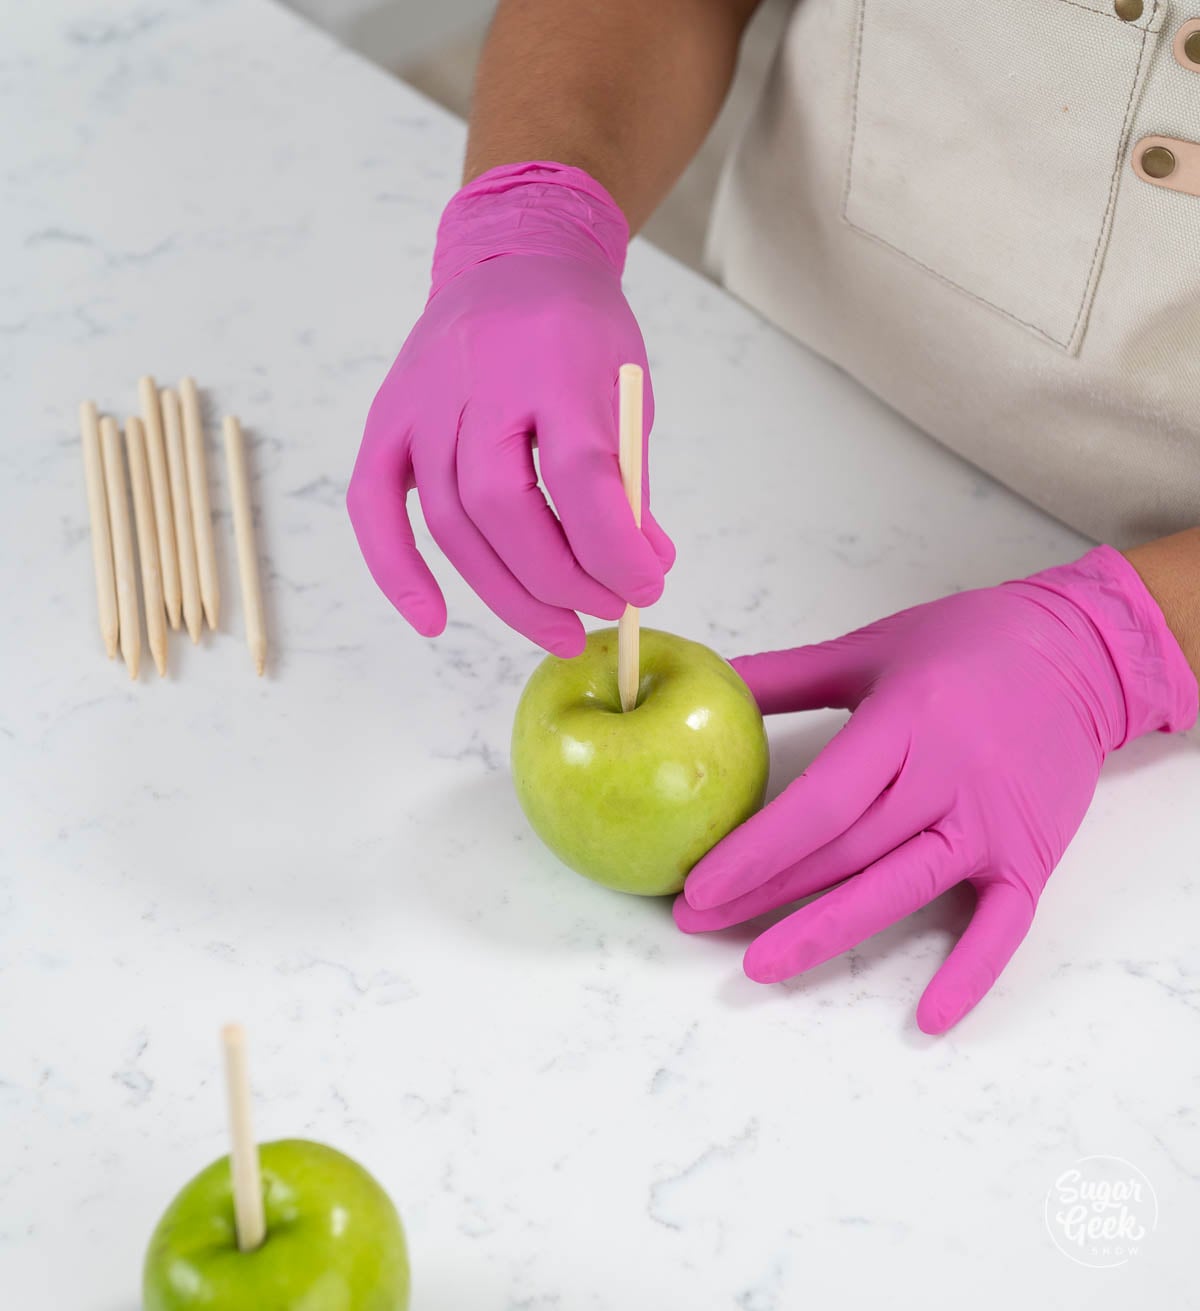
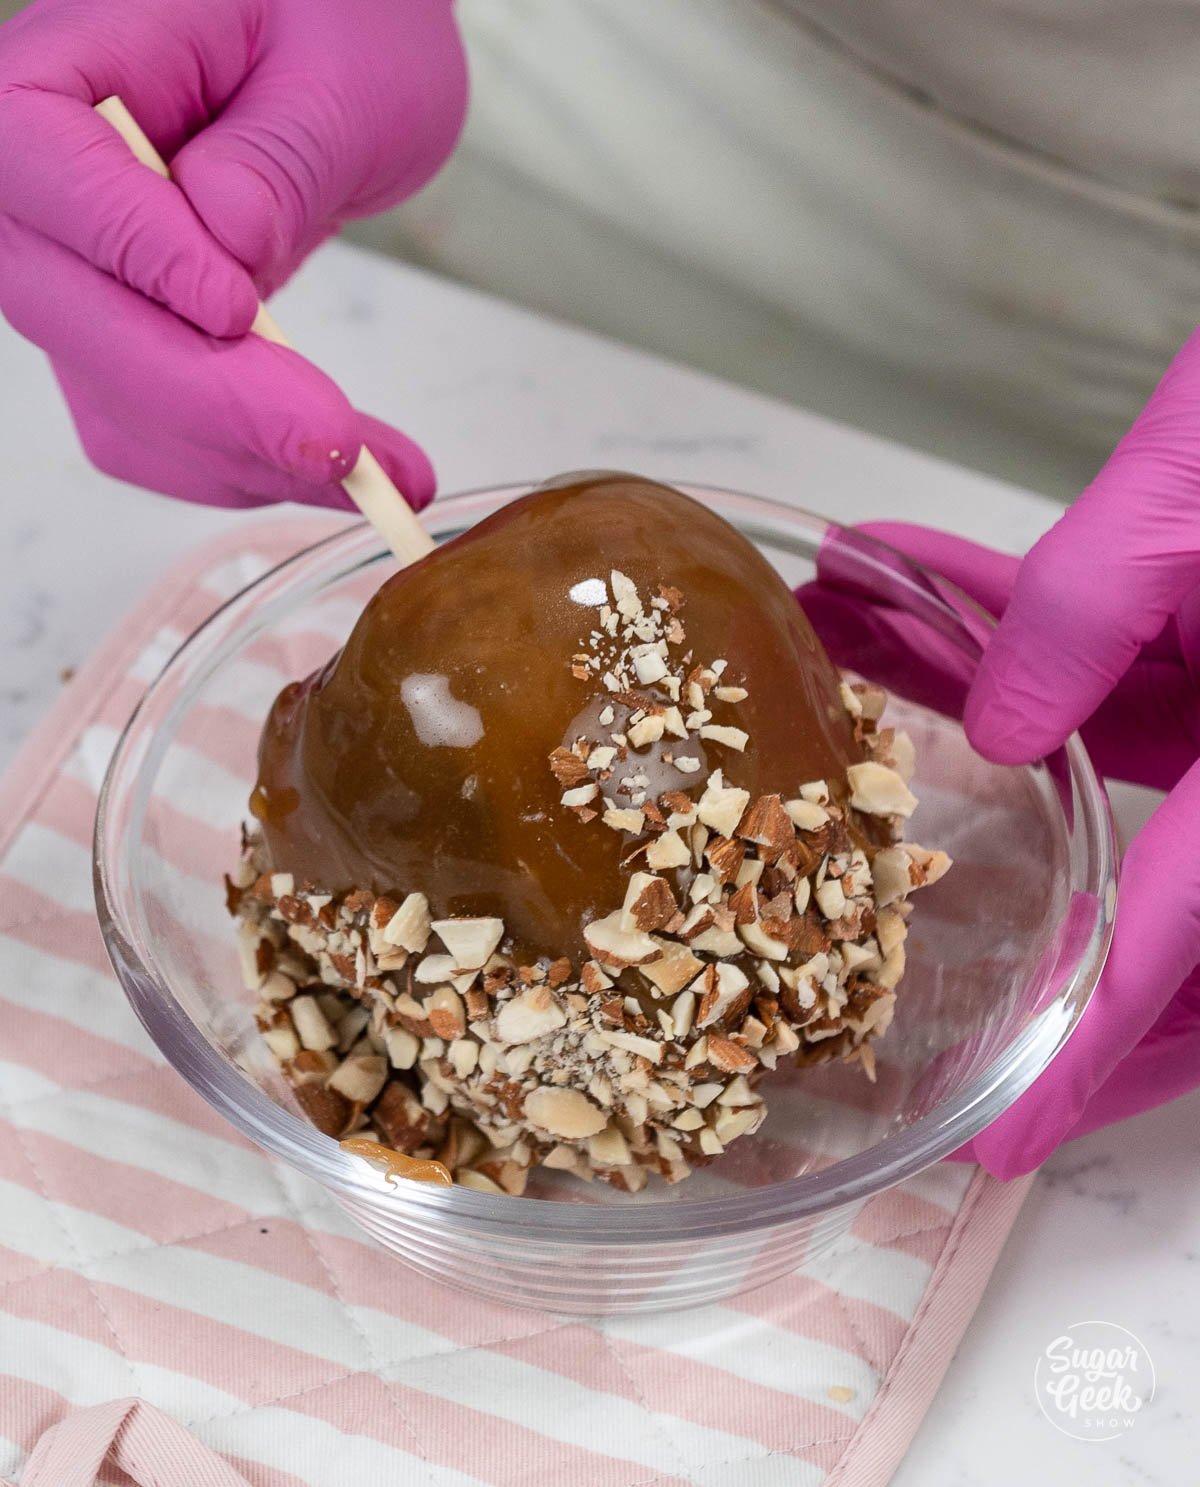
hands with pink gloves inserting apple sticks into green apples
  1. Twist off the stems from the apples.

    Insert your candy apple sticks. I place my apple onto the work surface and then push the stick into the apple rather than holding the apple and pushing the stick in. This way you can make sure the sticks are all straight up and down. Make sure you are using apple sticks, which are thicker and sturdier than wooden skewers, which can break under the weight of the apple after dipping.
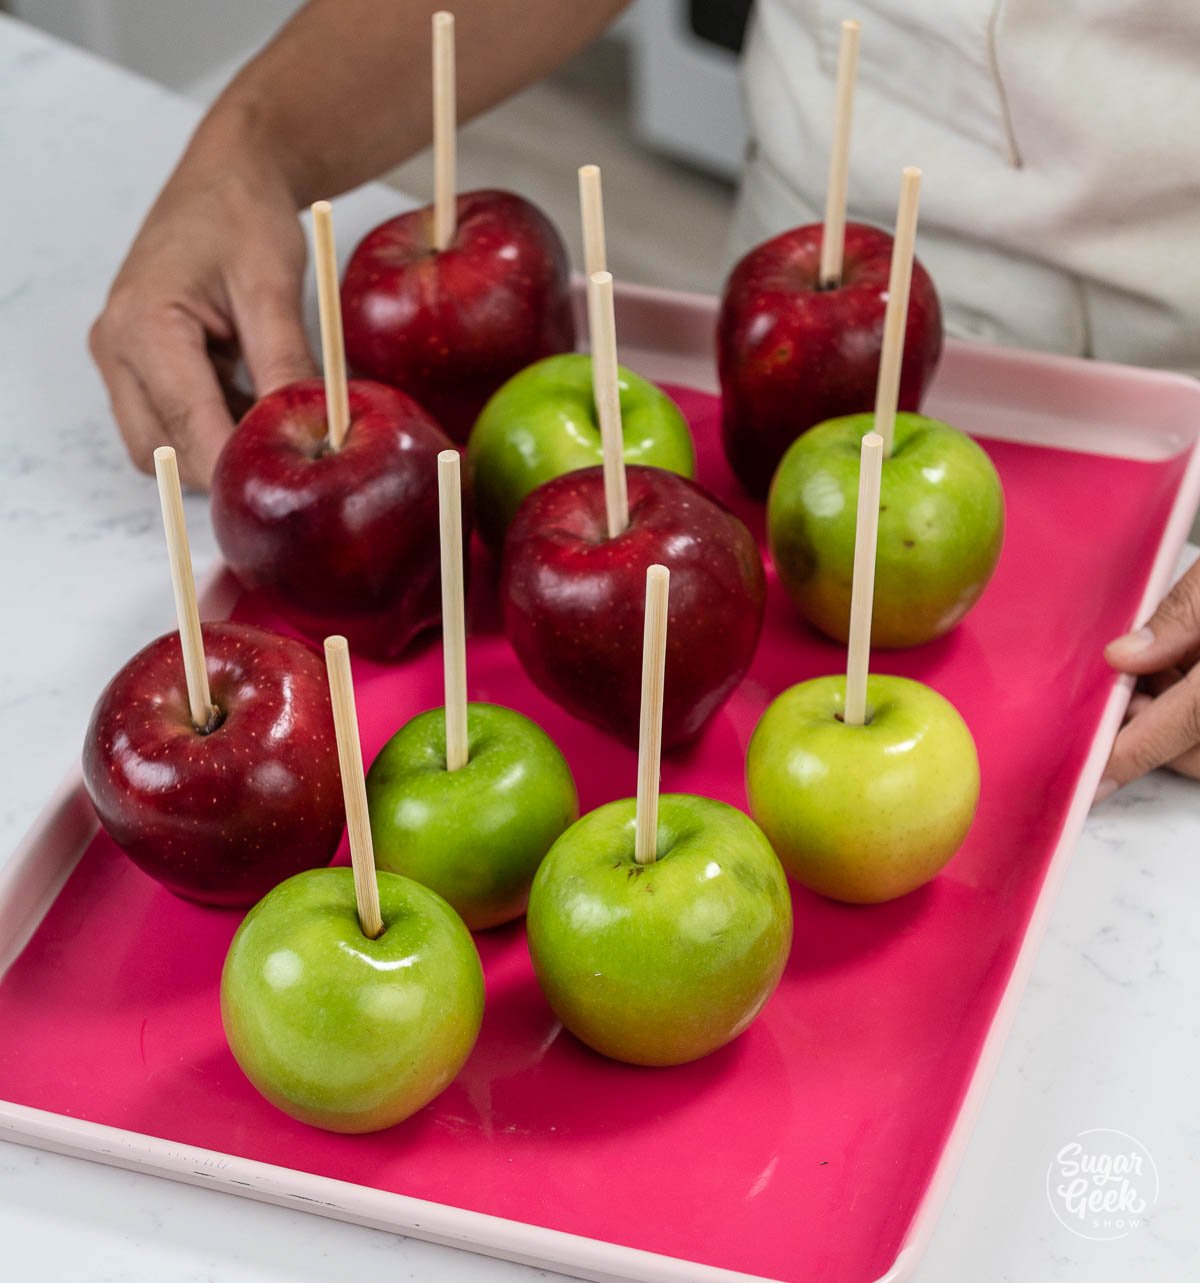
green and red apples on a sheetpan with a pink silicone mat
  1. Place your apples onto a lined baking sheet (with a silicone mat or greased parchment paper) and then put them into the fridge to chill overnight.

Once your apples are prepared, you can make your caramel.

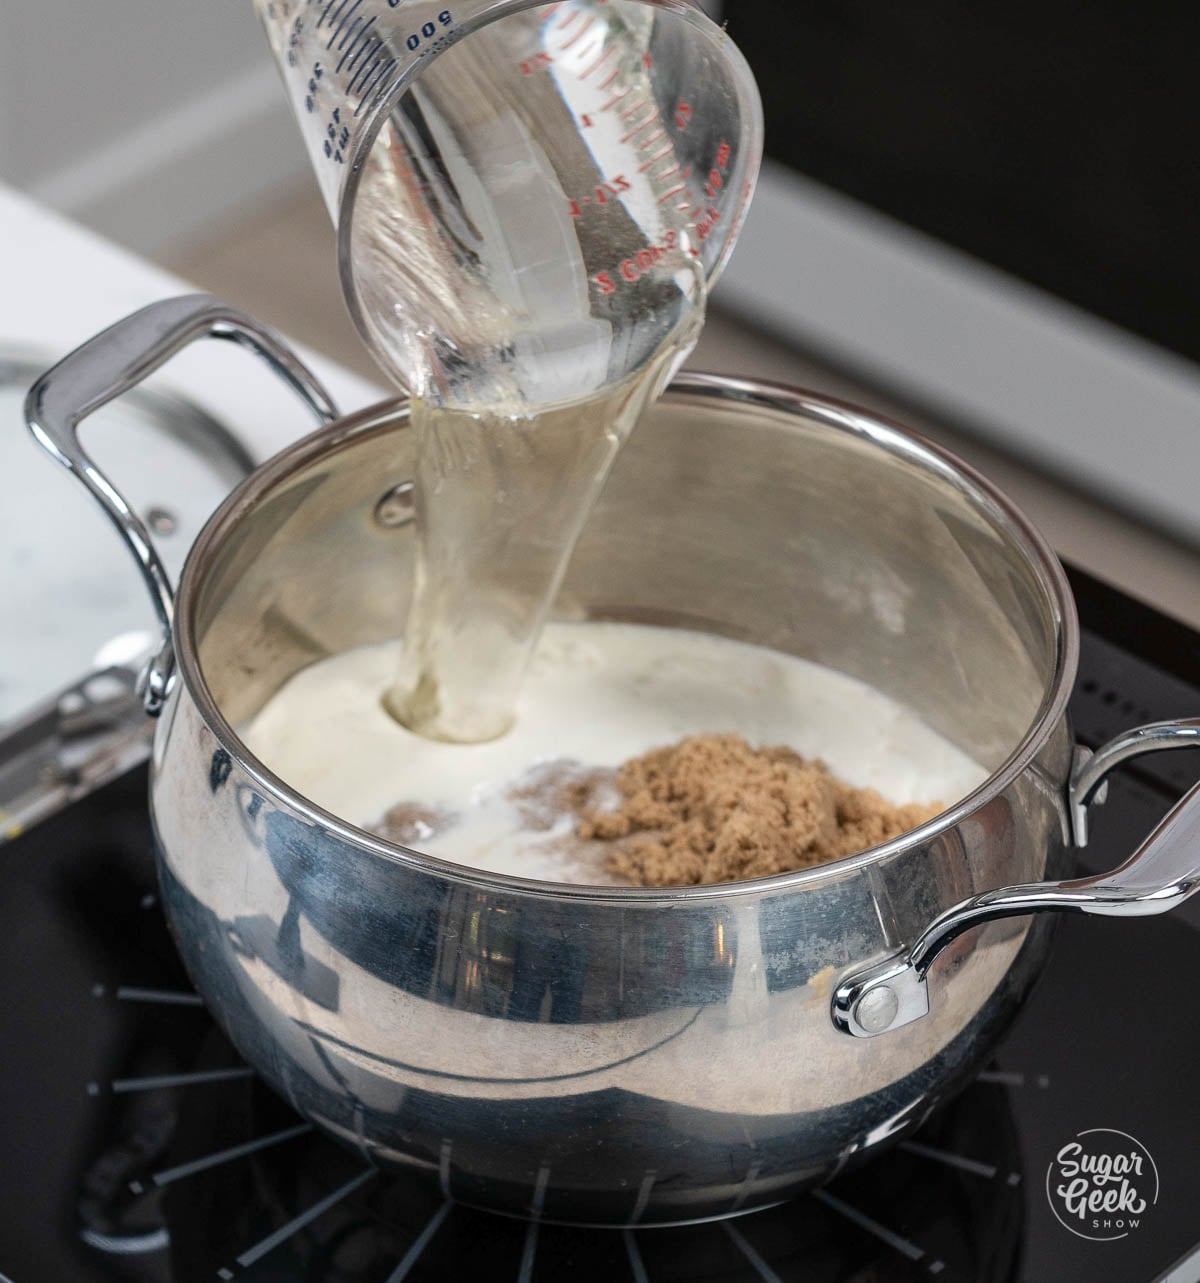
caramel apple ingredients in
  1. In a heavy-bottomed saucepan, combine the brown sugar, corn syrup, cream, salt, and butter. Mix to combine.
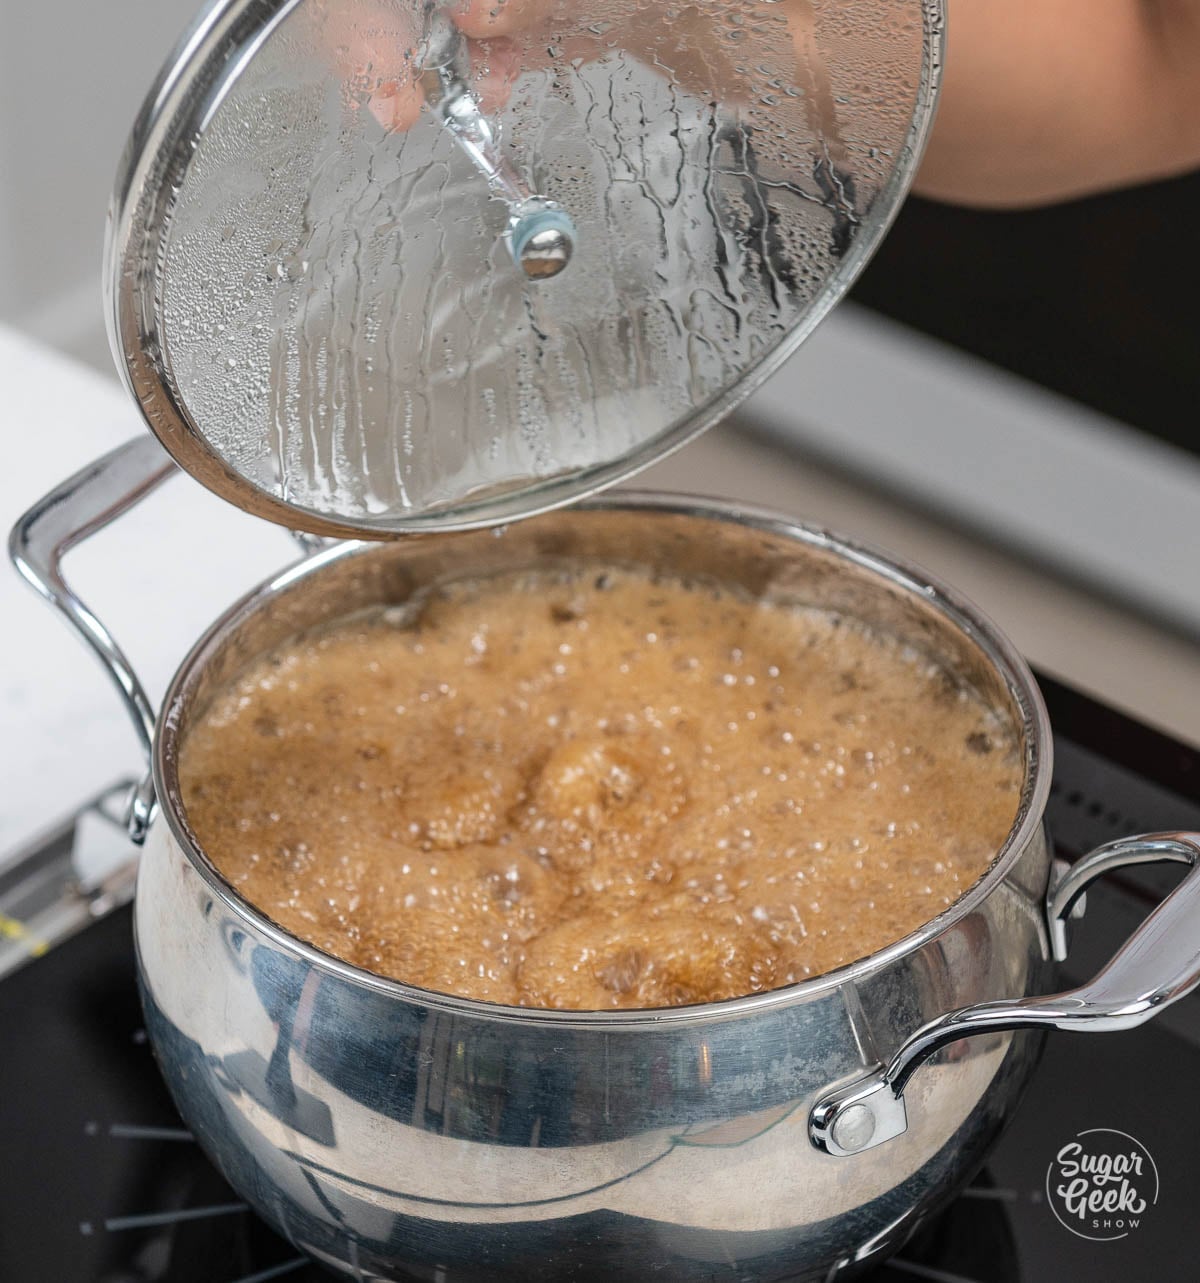
pot of boiling caramel
  1. Stir over medium-high heat until the butter melts. Once melted, stop stirring and allow the caramel to come to a boil.
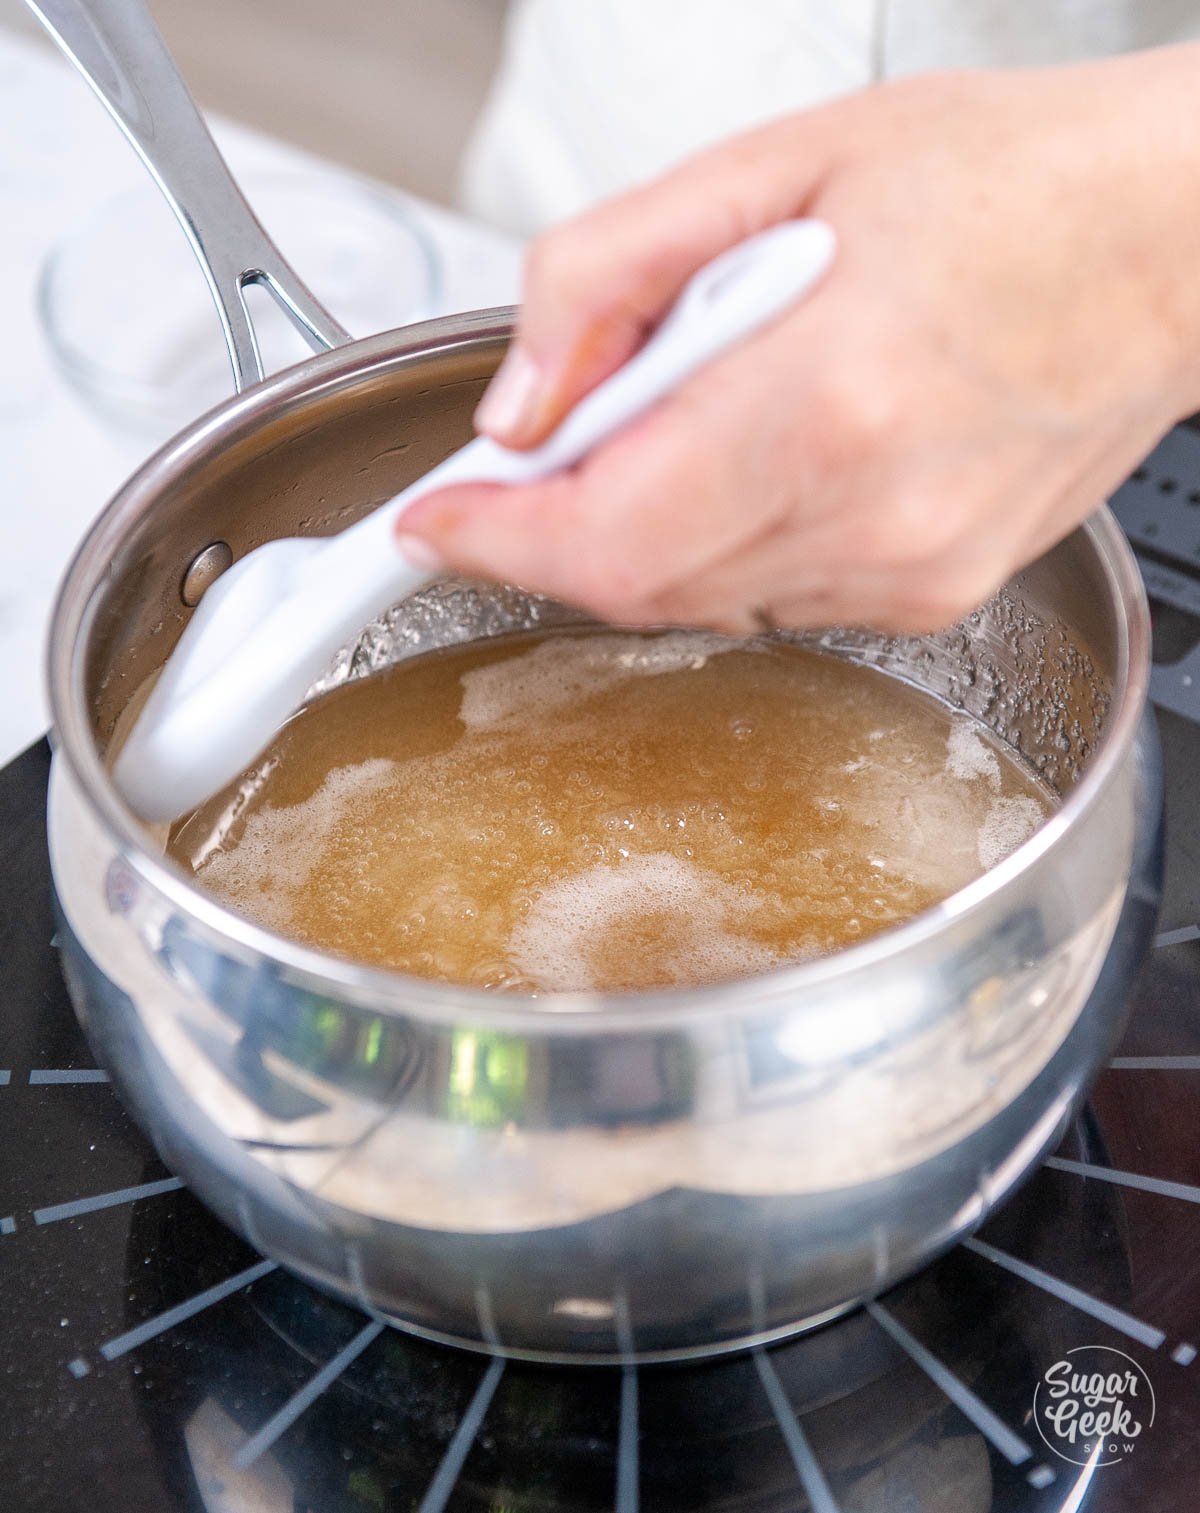
hand brushing the inside of a medium saucepan
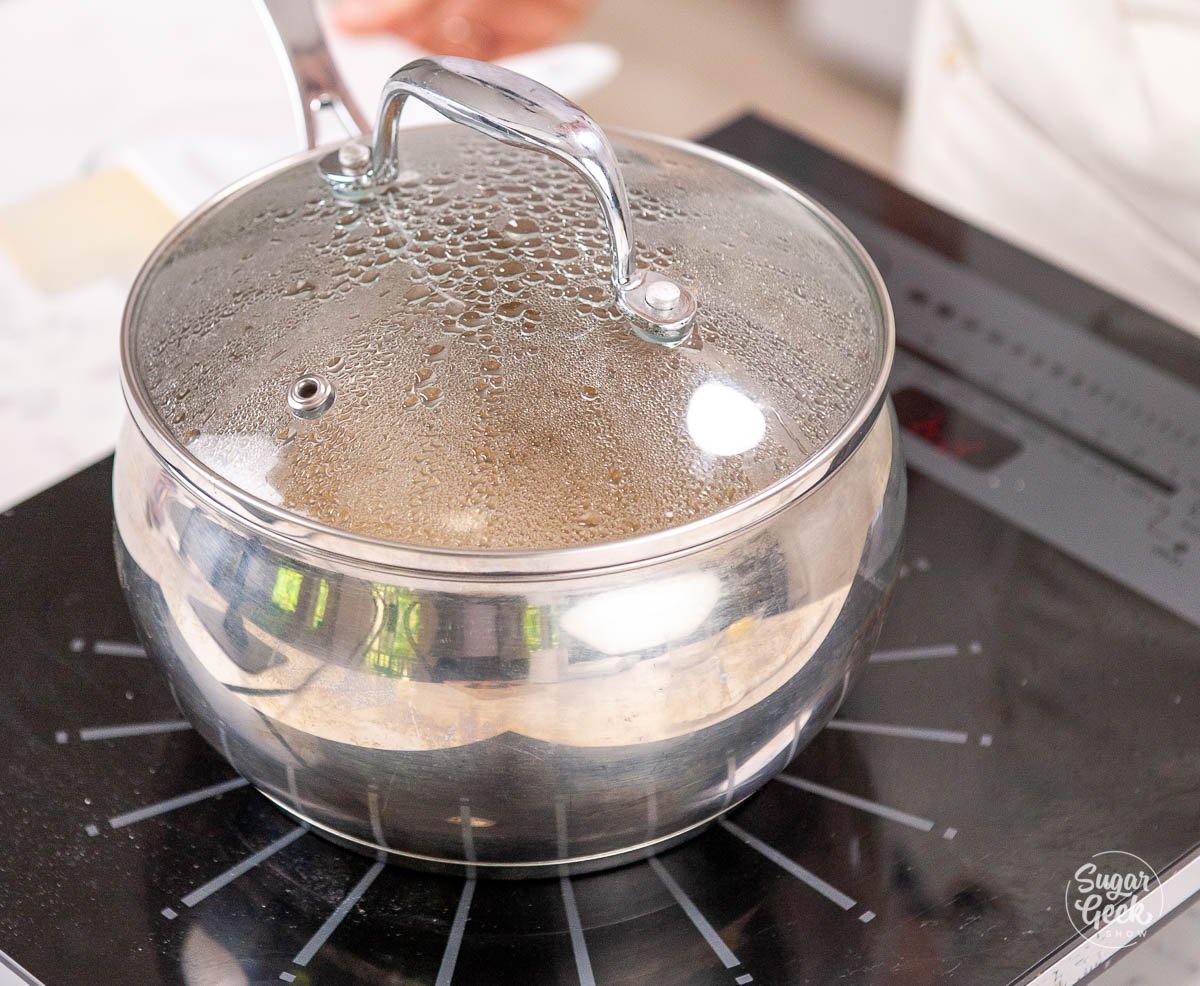
medium sauce pan simmering with pot cover on
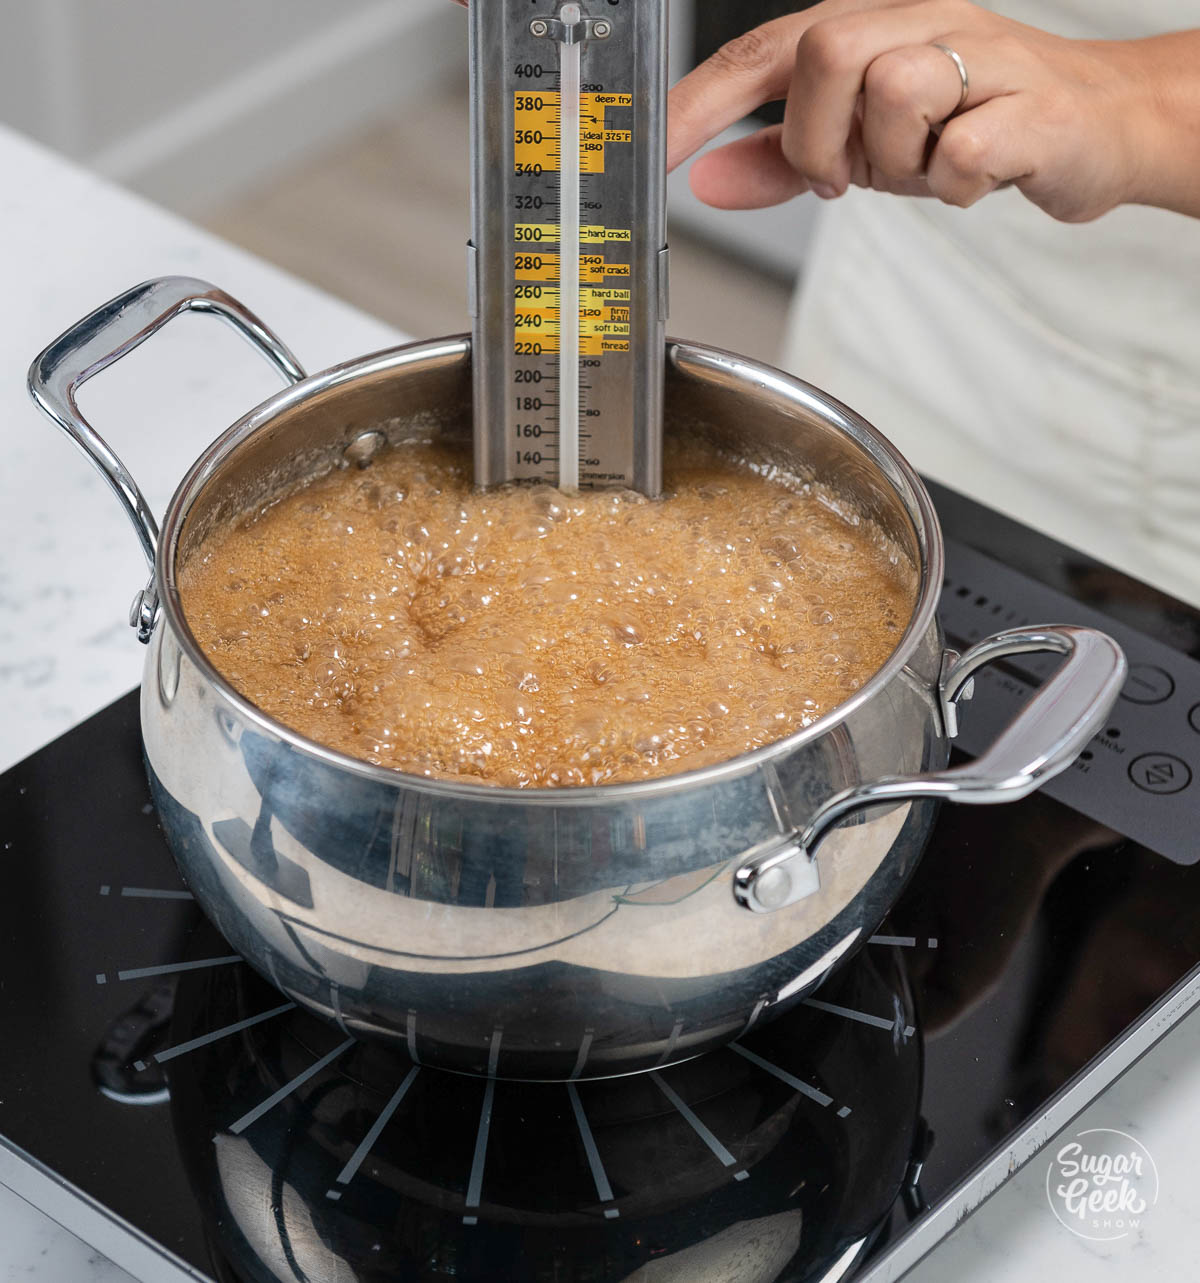
  1. Use a wet pastry brush to wash down the sides of the pan to prevent sugar crystals. Cover the pot with a lid and cook for about 5 minutes so the condensation washes down the sides.

womans hand placing a candy thermometer into a saucepan of caramel cooking
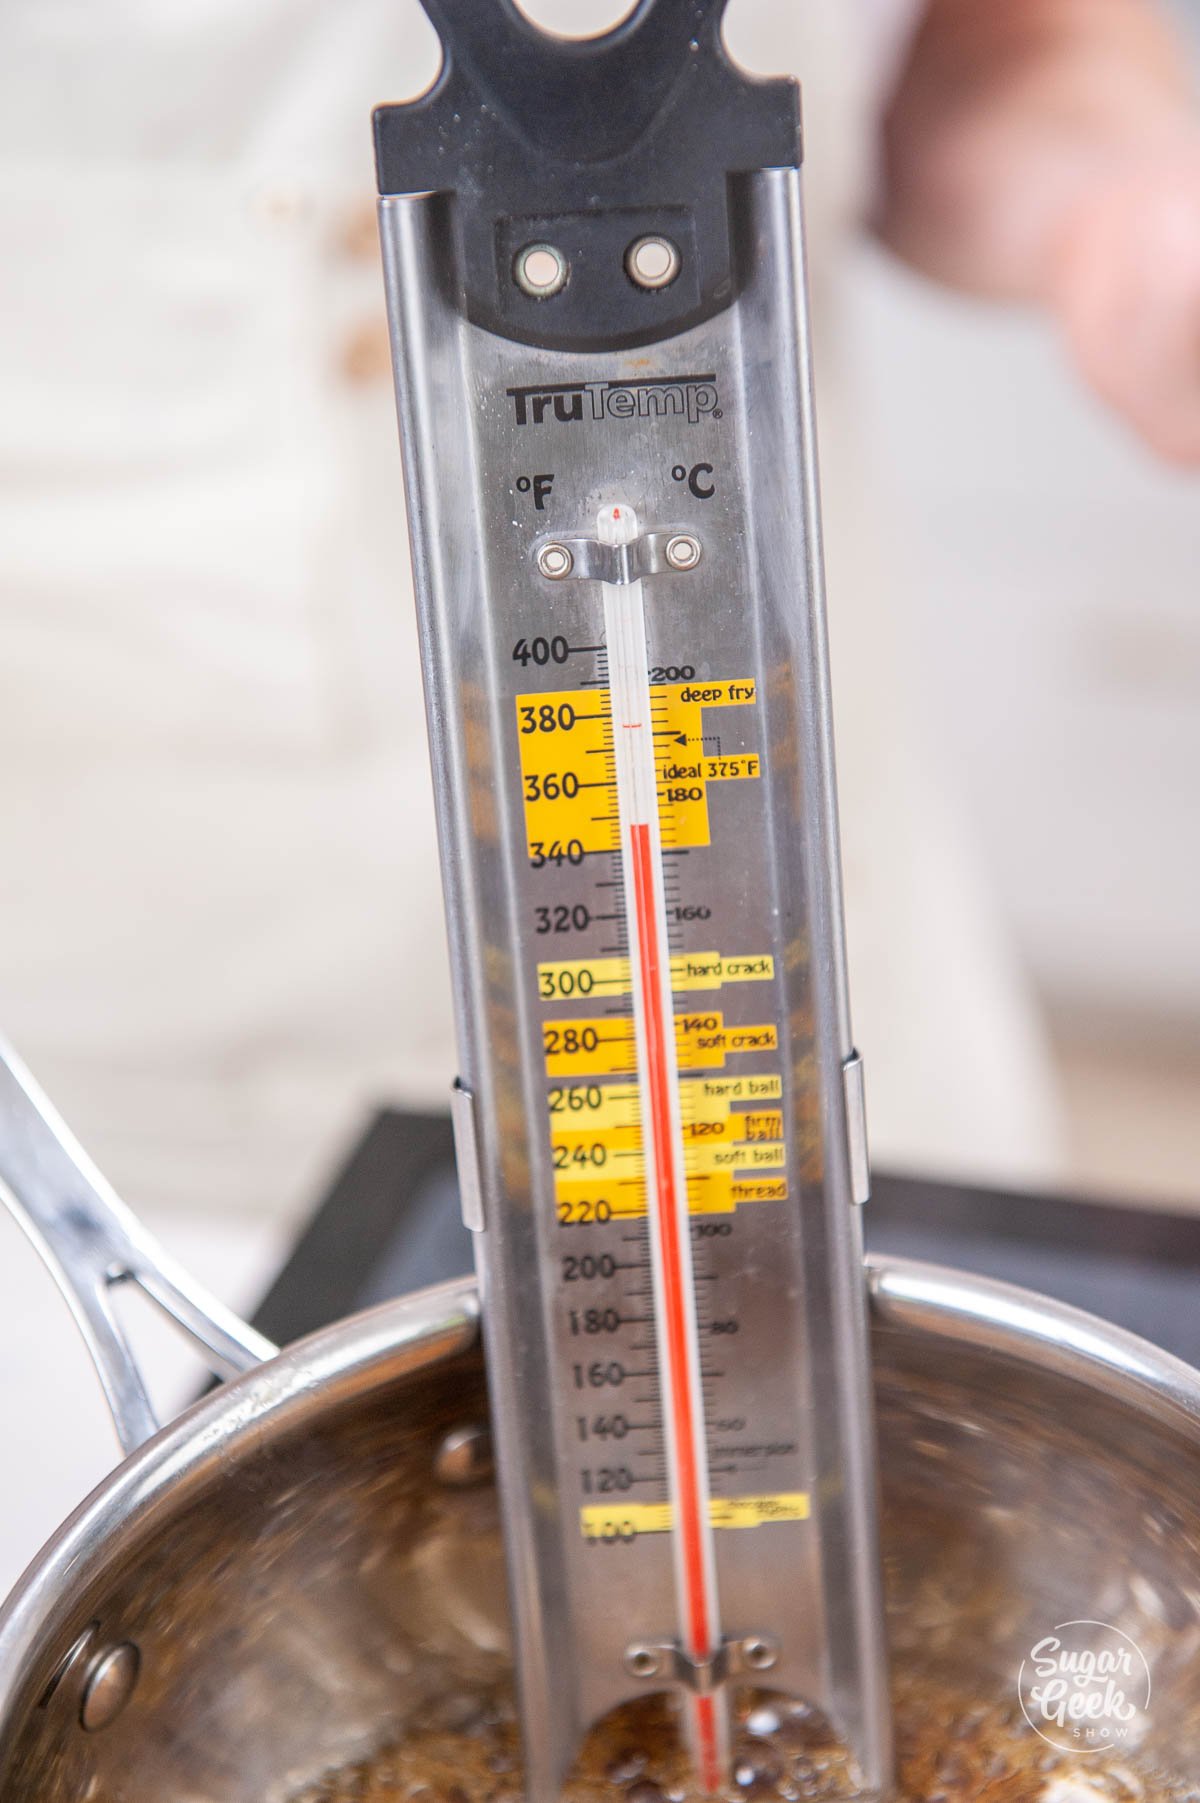
close up of candy thermometer cooking in caramel
  1. Attach a candy thermometer and cook until the caramel reaches 240 to 245º F.
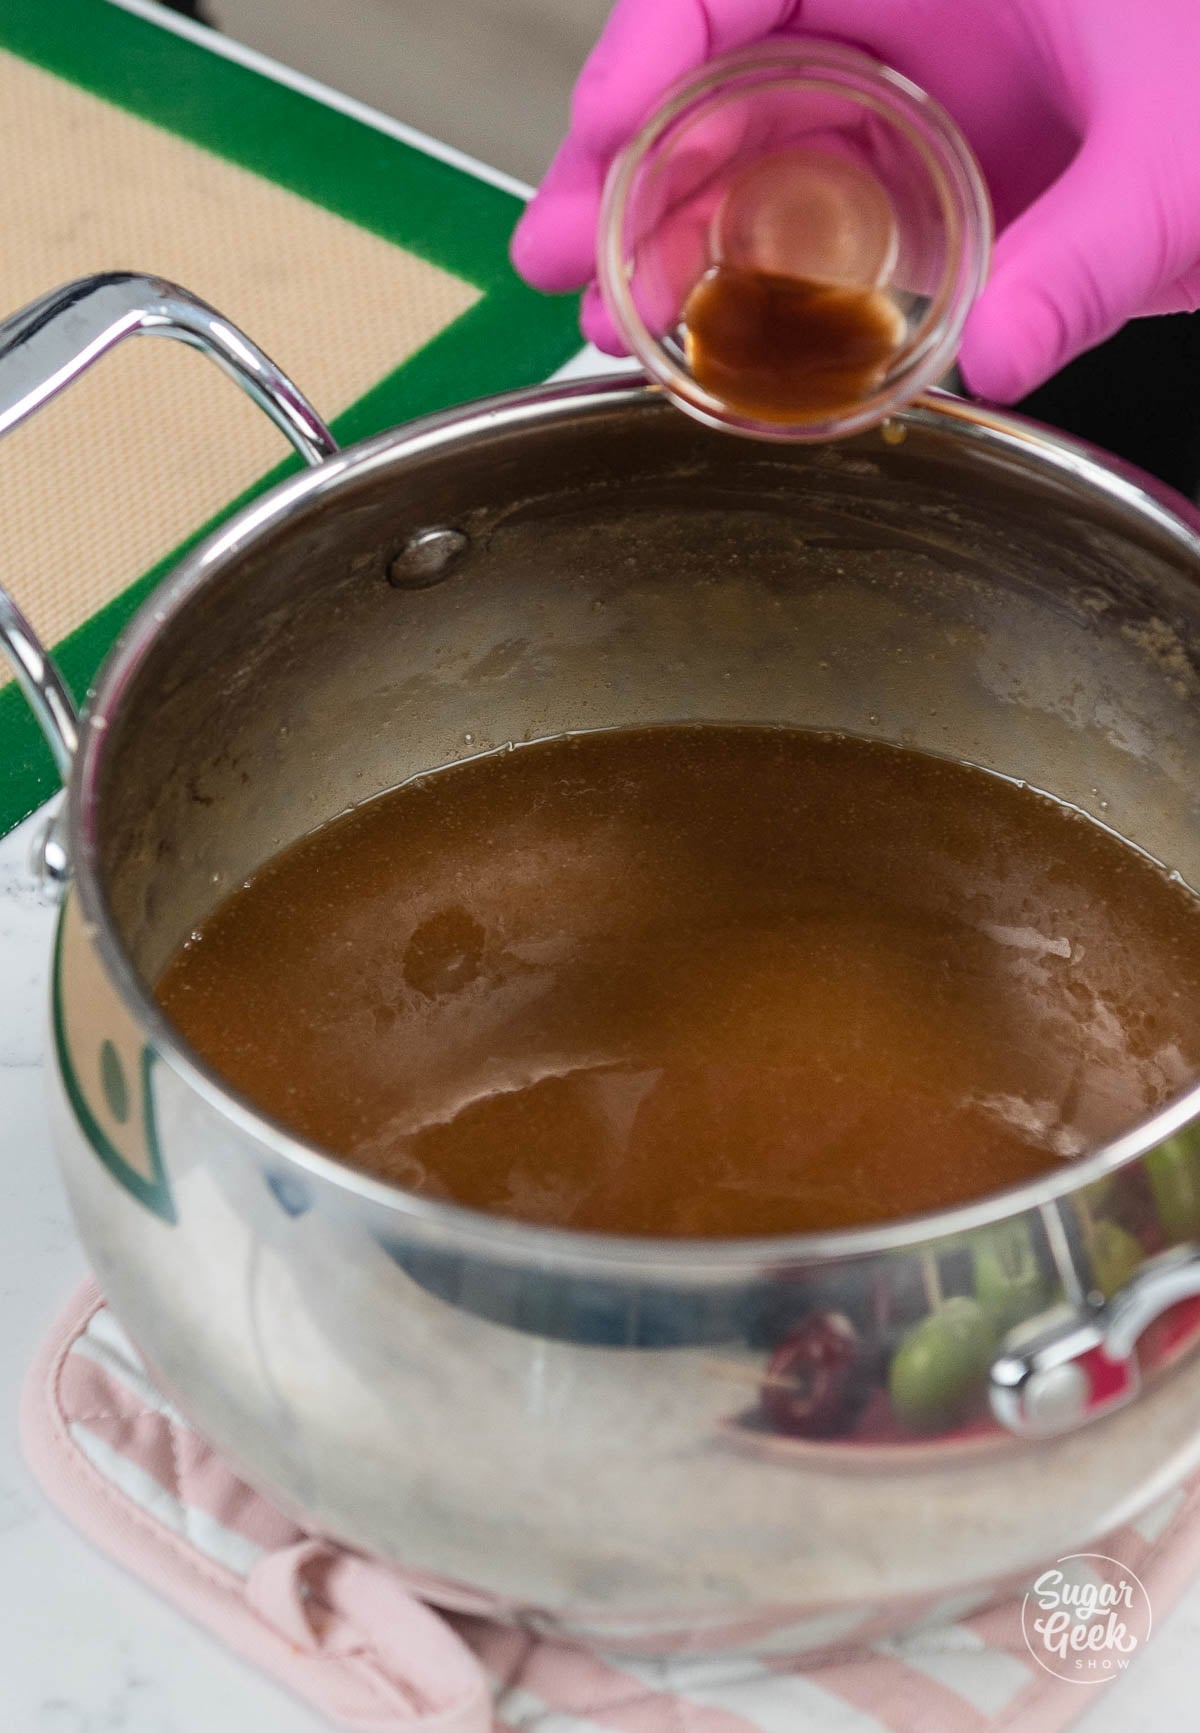
pink gloved hand pouring vanilla into a pot of cooked caramel
  1. Remove the caramel from the heat and carefully stir in the vanilla.
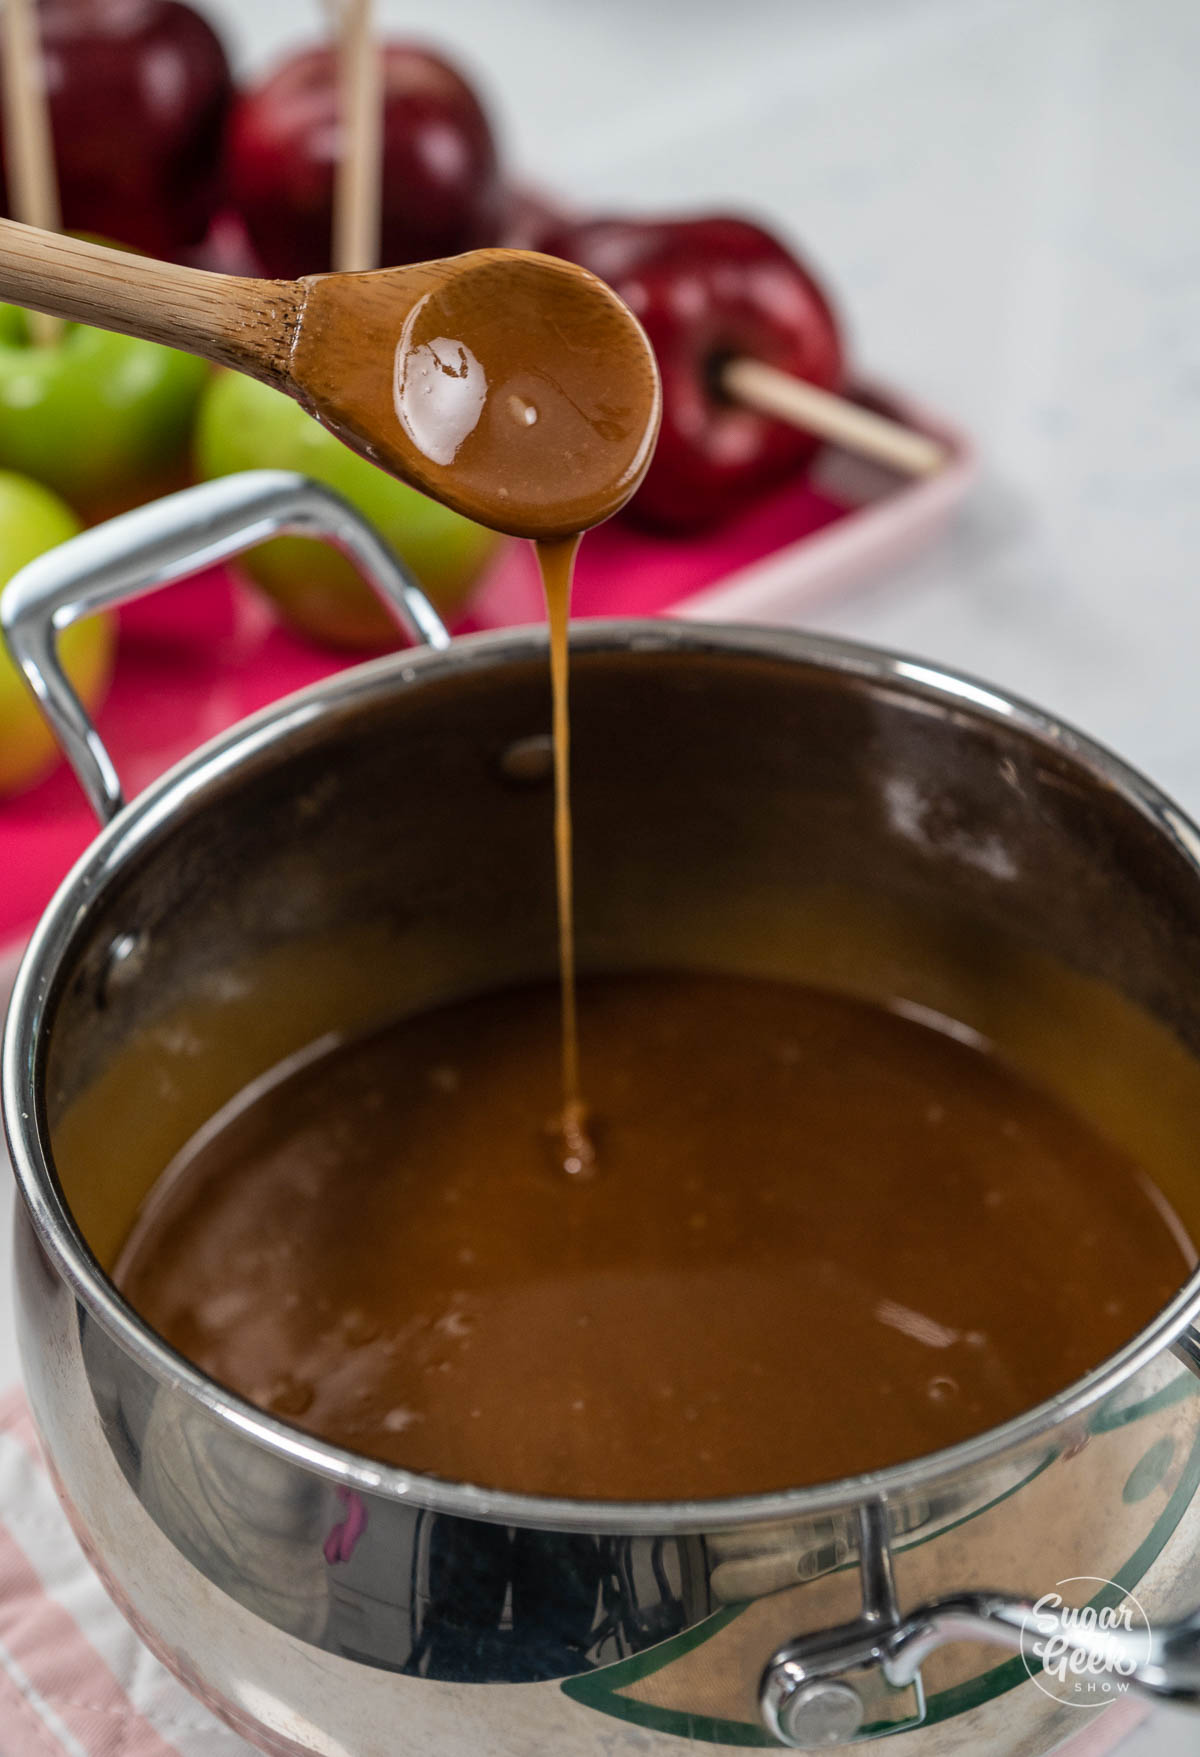
pot of caramel dripping from a spoon back into the pot
  1. Allow the caramel to cool for about 5 to 10 minutes until it reaches roughly 190 to 200º F, which is the perfect dipping temperature.
apple being dipped into caramel
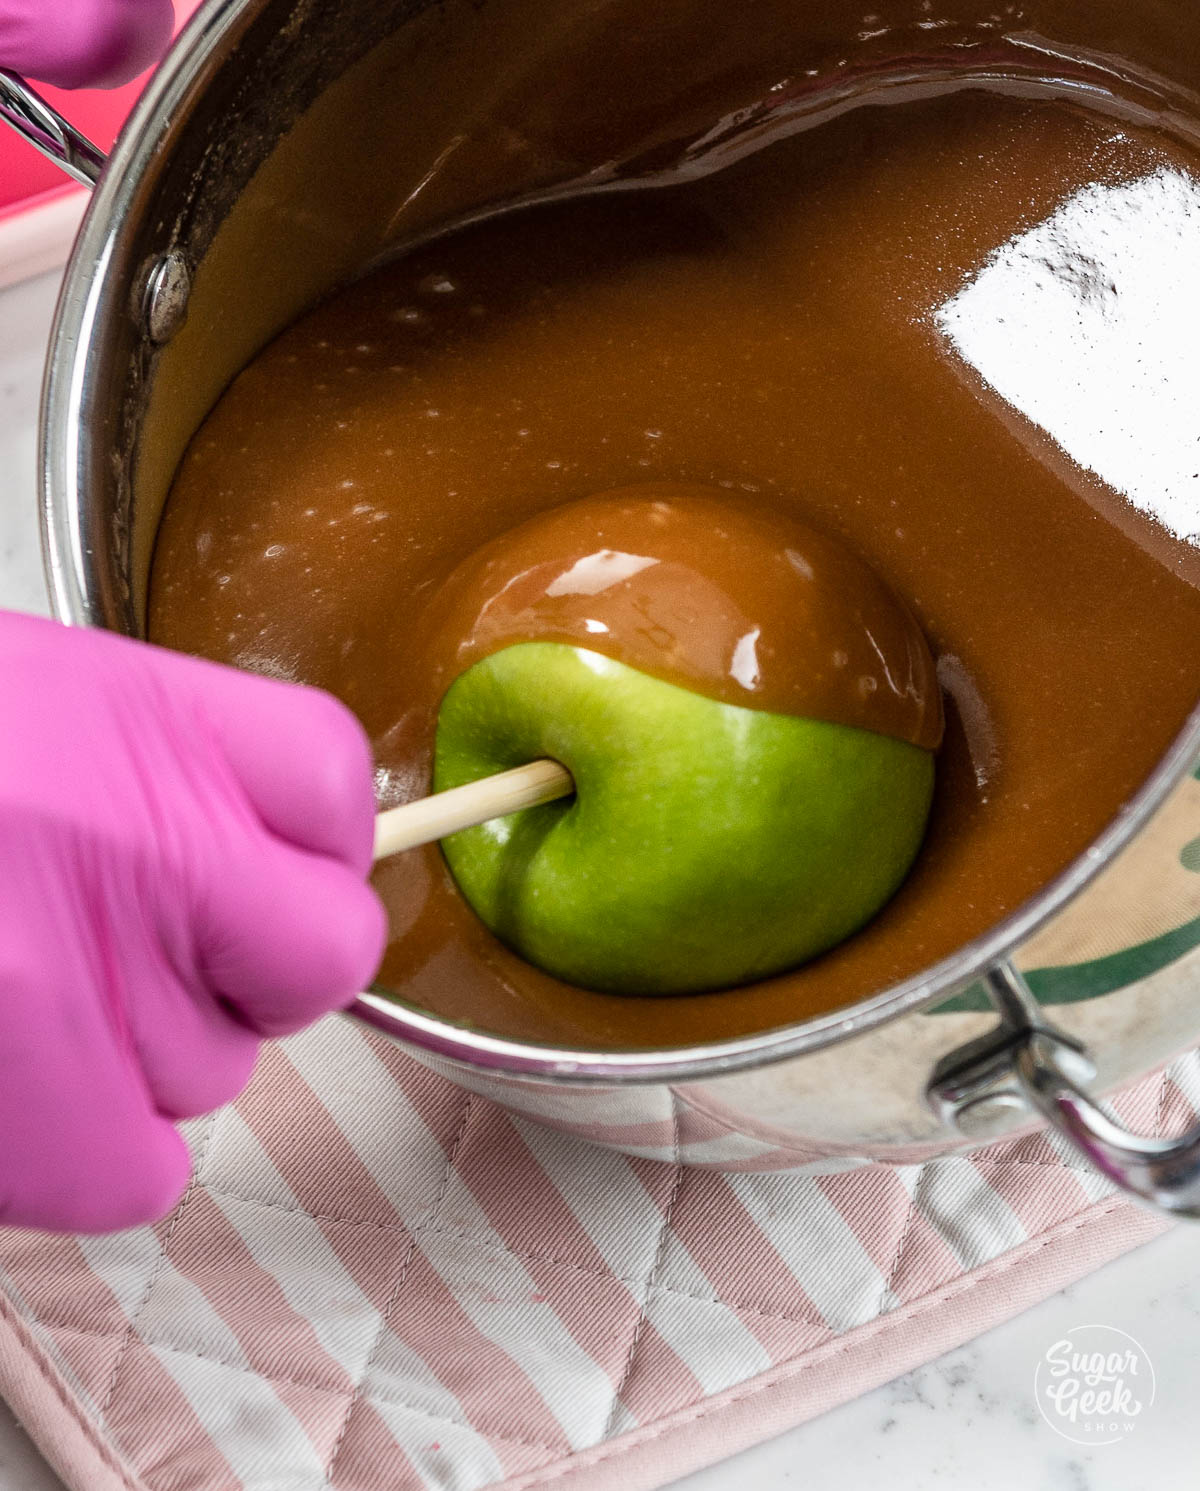
  1. Take a few apples out of the fridge at a time and wipe each one dry right before dipping. Tilt the pot slightly and roll each apple in the caramel until evenly coated.
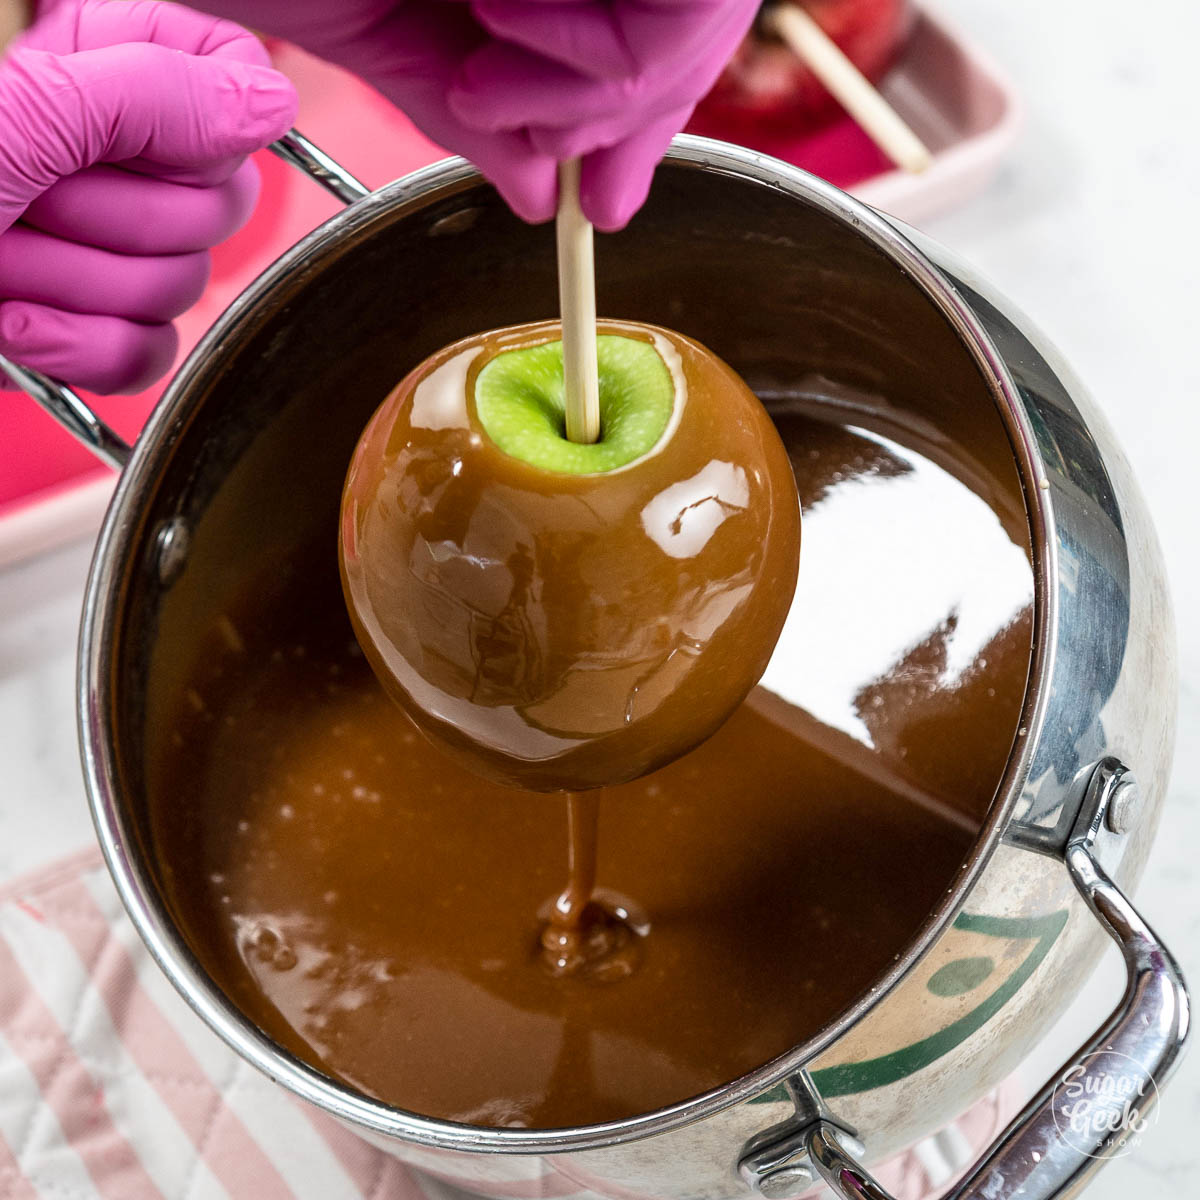
holding a dipped caramel apple by the stick over a pot of caramel
  1. Let excess caramel drip off and gently scrape the bottom of the apple on the edge of the pot. This prevents too much caramel from pooling at the bottom of the caramel apples.

PRO TIP: Leave some space between the caramel and the stick so some of the apple is showing. This makes a cleaner, more professional final look.

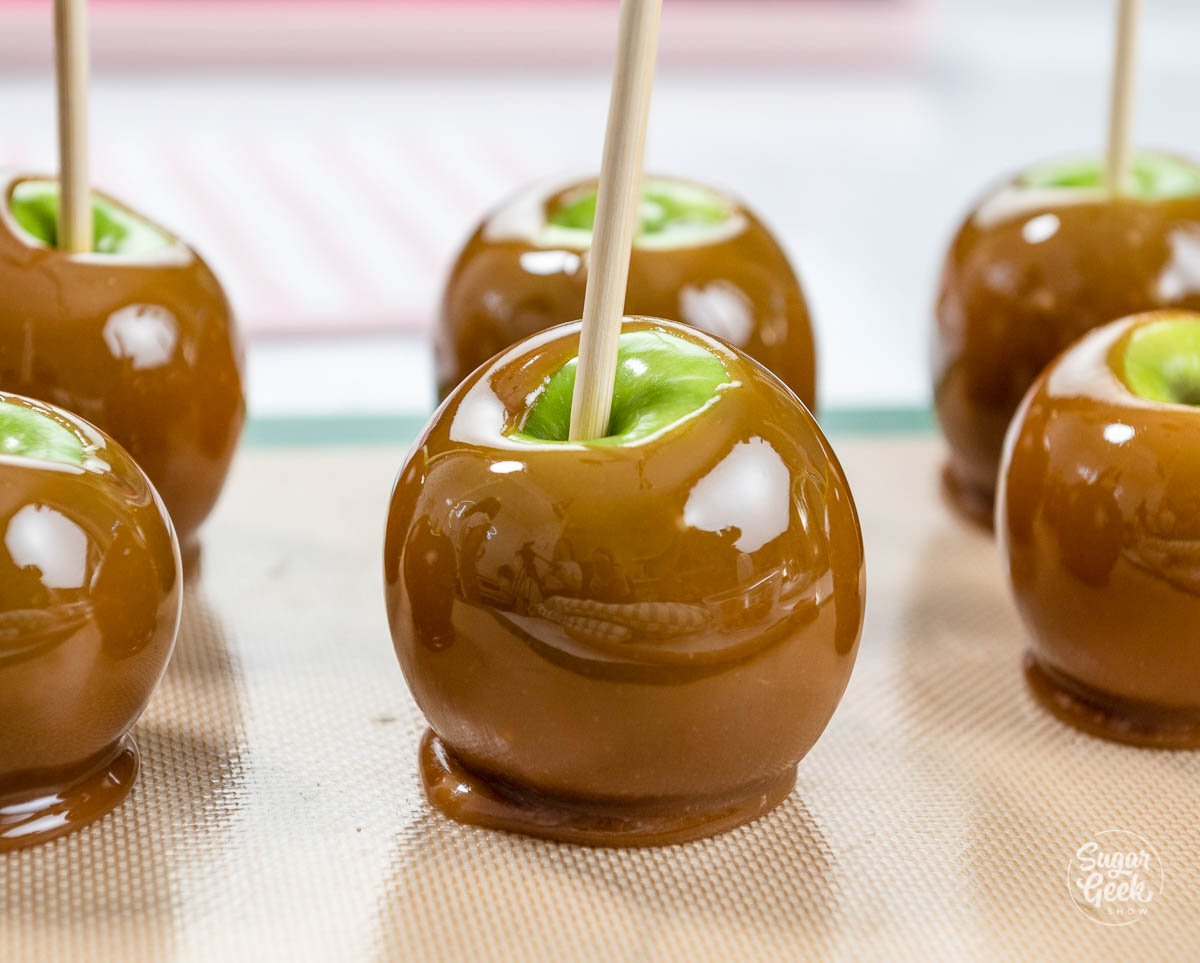
caramel apples on a silicone mat
  1. Place the dipped apples onto a silicone mat or greased parchment paper.
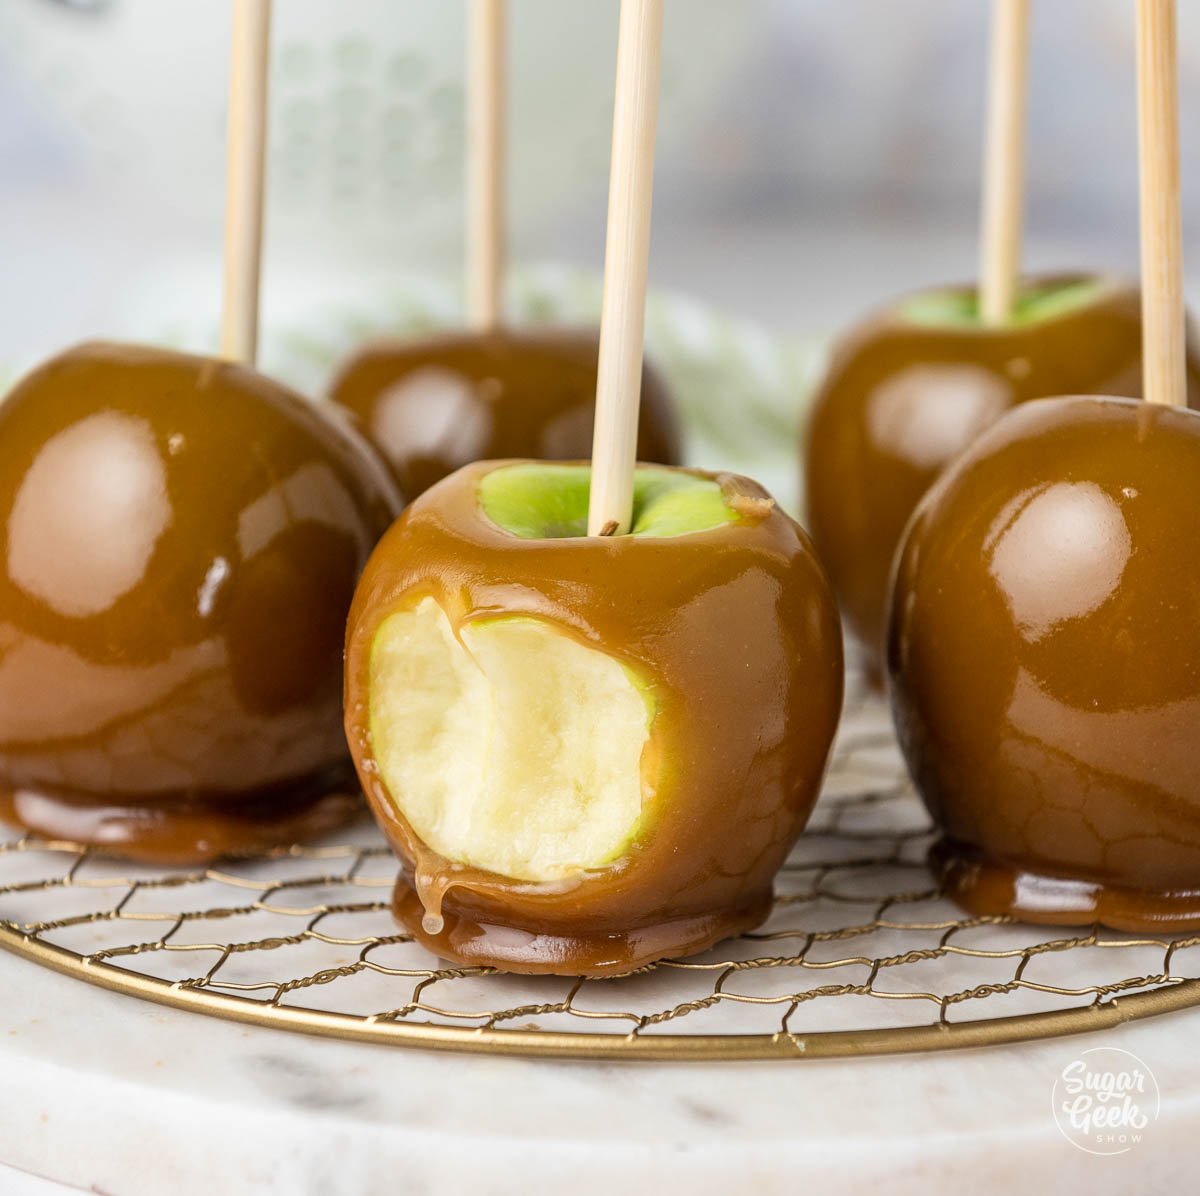
close up of caramel apple with a bite taken out of it
  1. Allow the caramel apples to cool completely before serving. The caramel will be firm and shiny but soft enough to bite into. You can also cut the caramel apple into slices before serving.

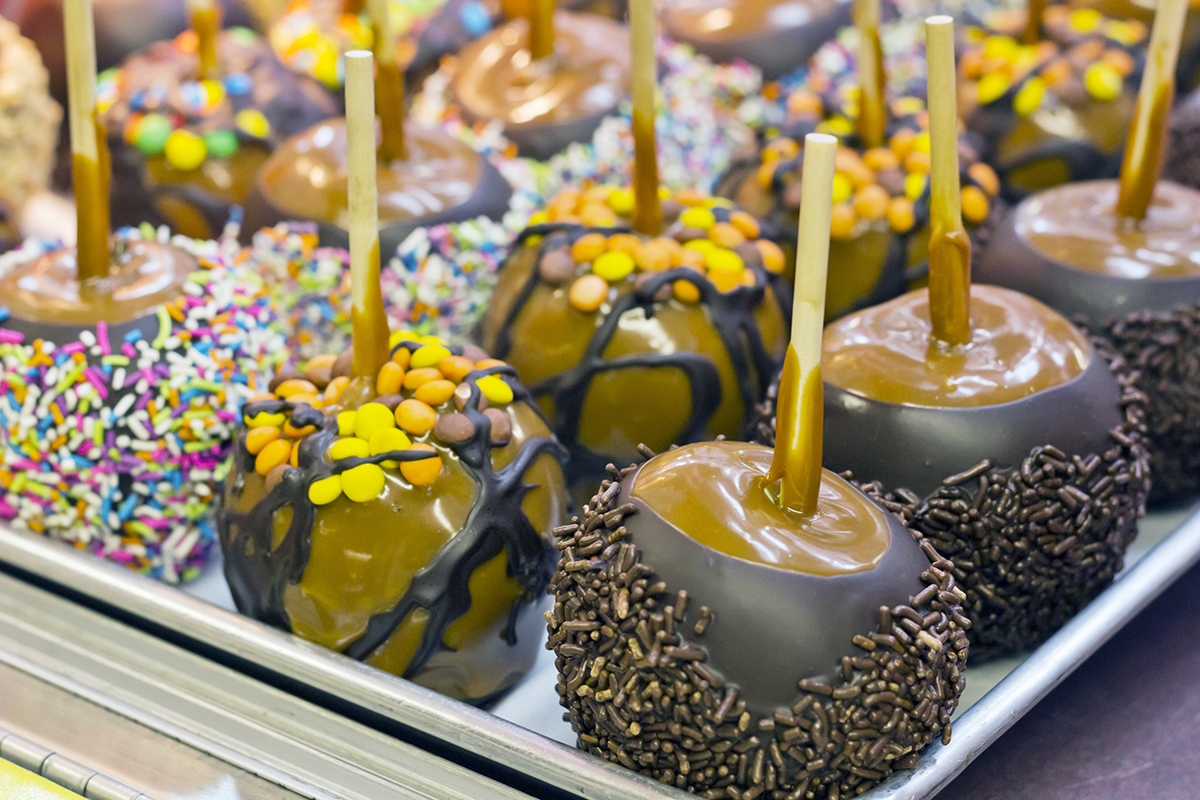
Caramel apples are easy to customize with toppings. Some favorites include:

  • Chopped peanuts
  • Pecans
  • Toasted coconut flakes
  • Crushed Oreos
  • Butterfinger pieces
  • Mini M&M's
  • Sprinkles

You can also drizzle the apples with tempered chocolate for a glossy finish that stays stable at room temperature.

adding toppings to caramel apples
caramel apples covered in chocolate, sprinkles, and candy

Common Caramel Apple Problems
To Avoid

  • Skipping the hot water wash. Store-bought apples are coated in wax and that wax will cause your caramel to slide off the moment it makes contact. Submerging in near-boiling water for one minute and rubbing dry removes the wax completely and gives the caramel a clean surface to bond to.
  • Using apples that are wet or warm. Moisture on the apple surface causes the caramel to bubble and slide. Warm apples do not set the caramel quickly enough and you will end up with a pool of caramel at the base. Make sure the apples are bone dry and refrigerator cold before dipping.
  • Dipping when the caramel is too hot. Caramel straight off the stove is too fluid and will slide right off even a perfectly cold apple. Let it cool to 190 to 200º F before dipping.
  • Not cooking the caramel to the correct temperature. Under-cooked caramel is too soft and will slowly drip down the apple as it cools. Use a candy thermometer and make sure you hit 240 to 245º F for the right chewy texture.
  • Using weak sticks that bend after dipping. Wooden skewers are too thin and can snap under the weight of a caramel-coated apple. Use proper candy apple sticks, which are thicker and sturdier, and push them in firmly before chilling so they are fully secured.

Final Thoughts

Making beautiful caramel apples isn't hard. The real secret is understanding why things go wrong, because once you know that, you can fix almost anything. Wash off the wax so the caramel has something to grip, make sure your apples are completely dry so you don't get bubbles, and cook your caramel to the right temperature so it sets up chewy instead of sliding off or turning rock hard. Get those three things right, and your caramel apples will look like they came straight from a candy shop.

FAQ

My first apple was perfect, so why did the rest get bubbles?

Bubbles usually mean there was moisture on the apple. Cold apples collect condensation as they sit on the counter, so the first one dips perfectly and the ones that waited get wet. Take out just a few apples at a time and wipe each one dry right before dipping.

What is the difference between candy apples and caramel apples?


Candy apples have a hard candy shell made from sugar and corn syrup, while caramel apples have a soft, chewy caramel coating made from butter, cream, and sugar.

How long do caramel apples last?

Caramel apples are best eaten within 2 to 3 days. Store them in an airtight container in the refrigerator.

What's the best way to eat a caramel apple?


You can bite into it, but many people prefer cutting it into wedges first so it's easier to eat.

More Apple Recipes

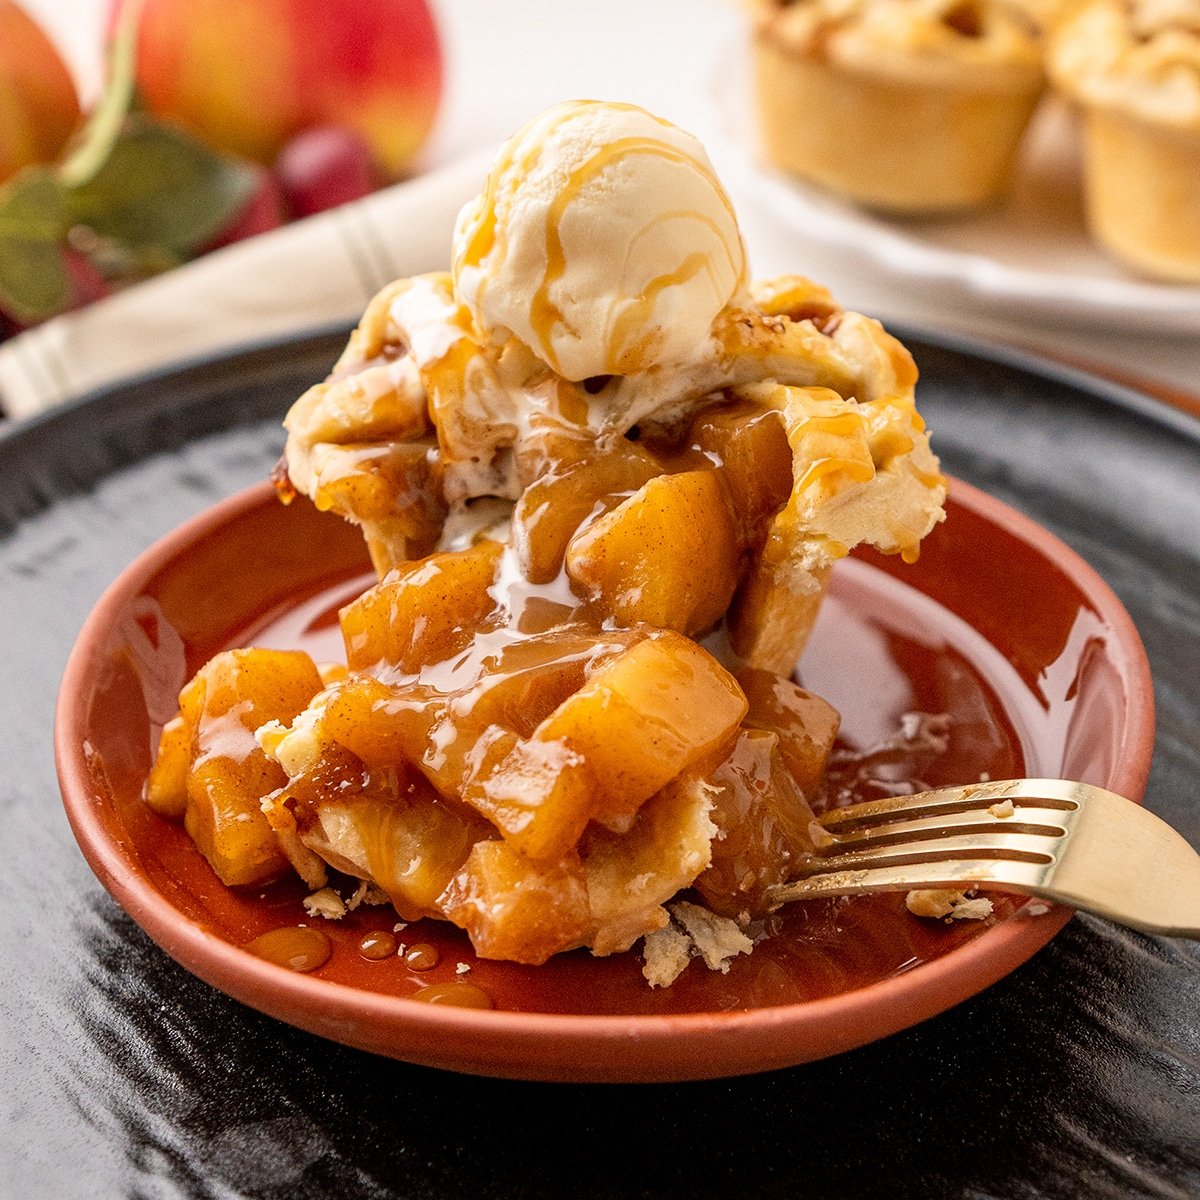
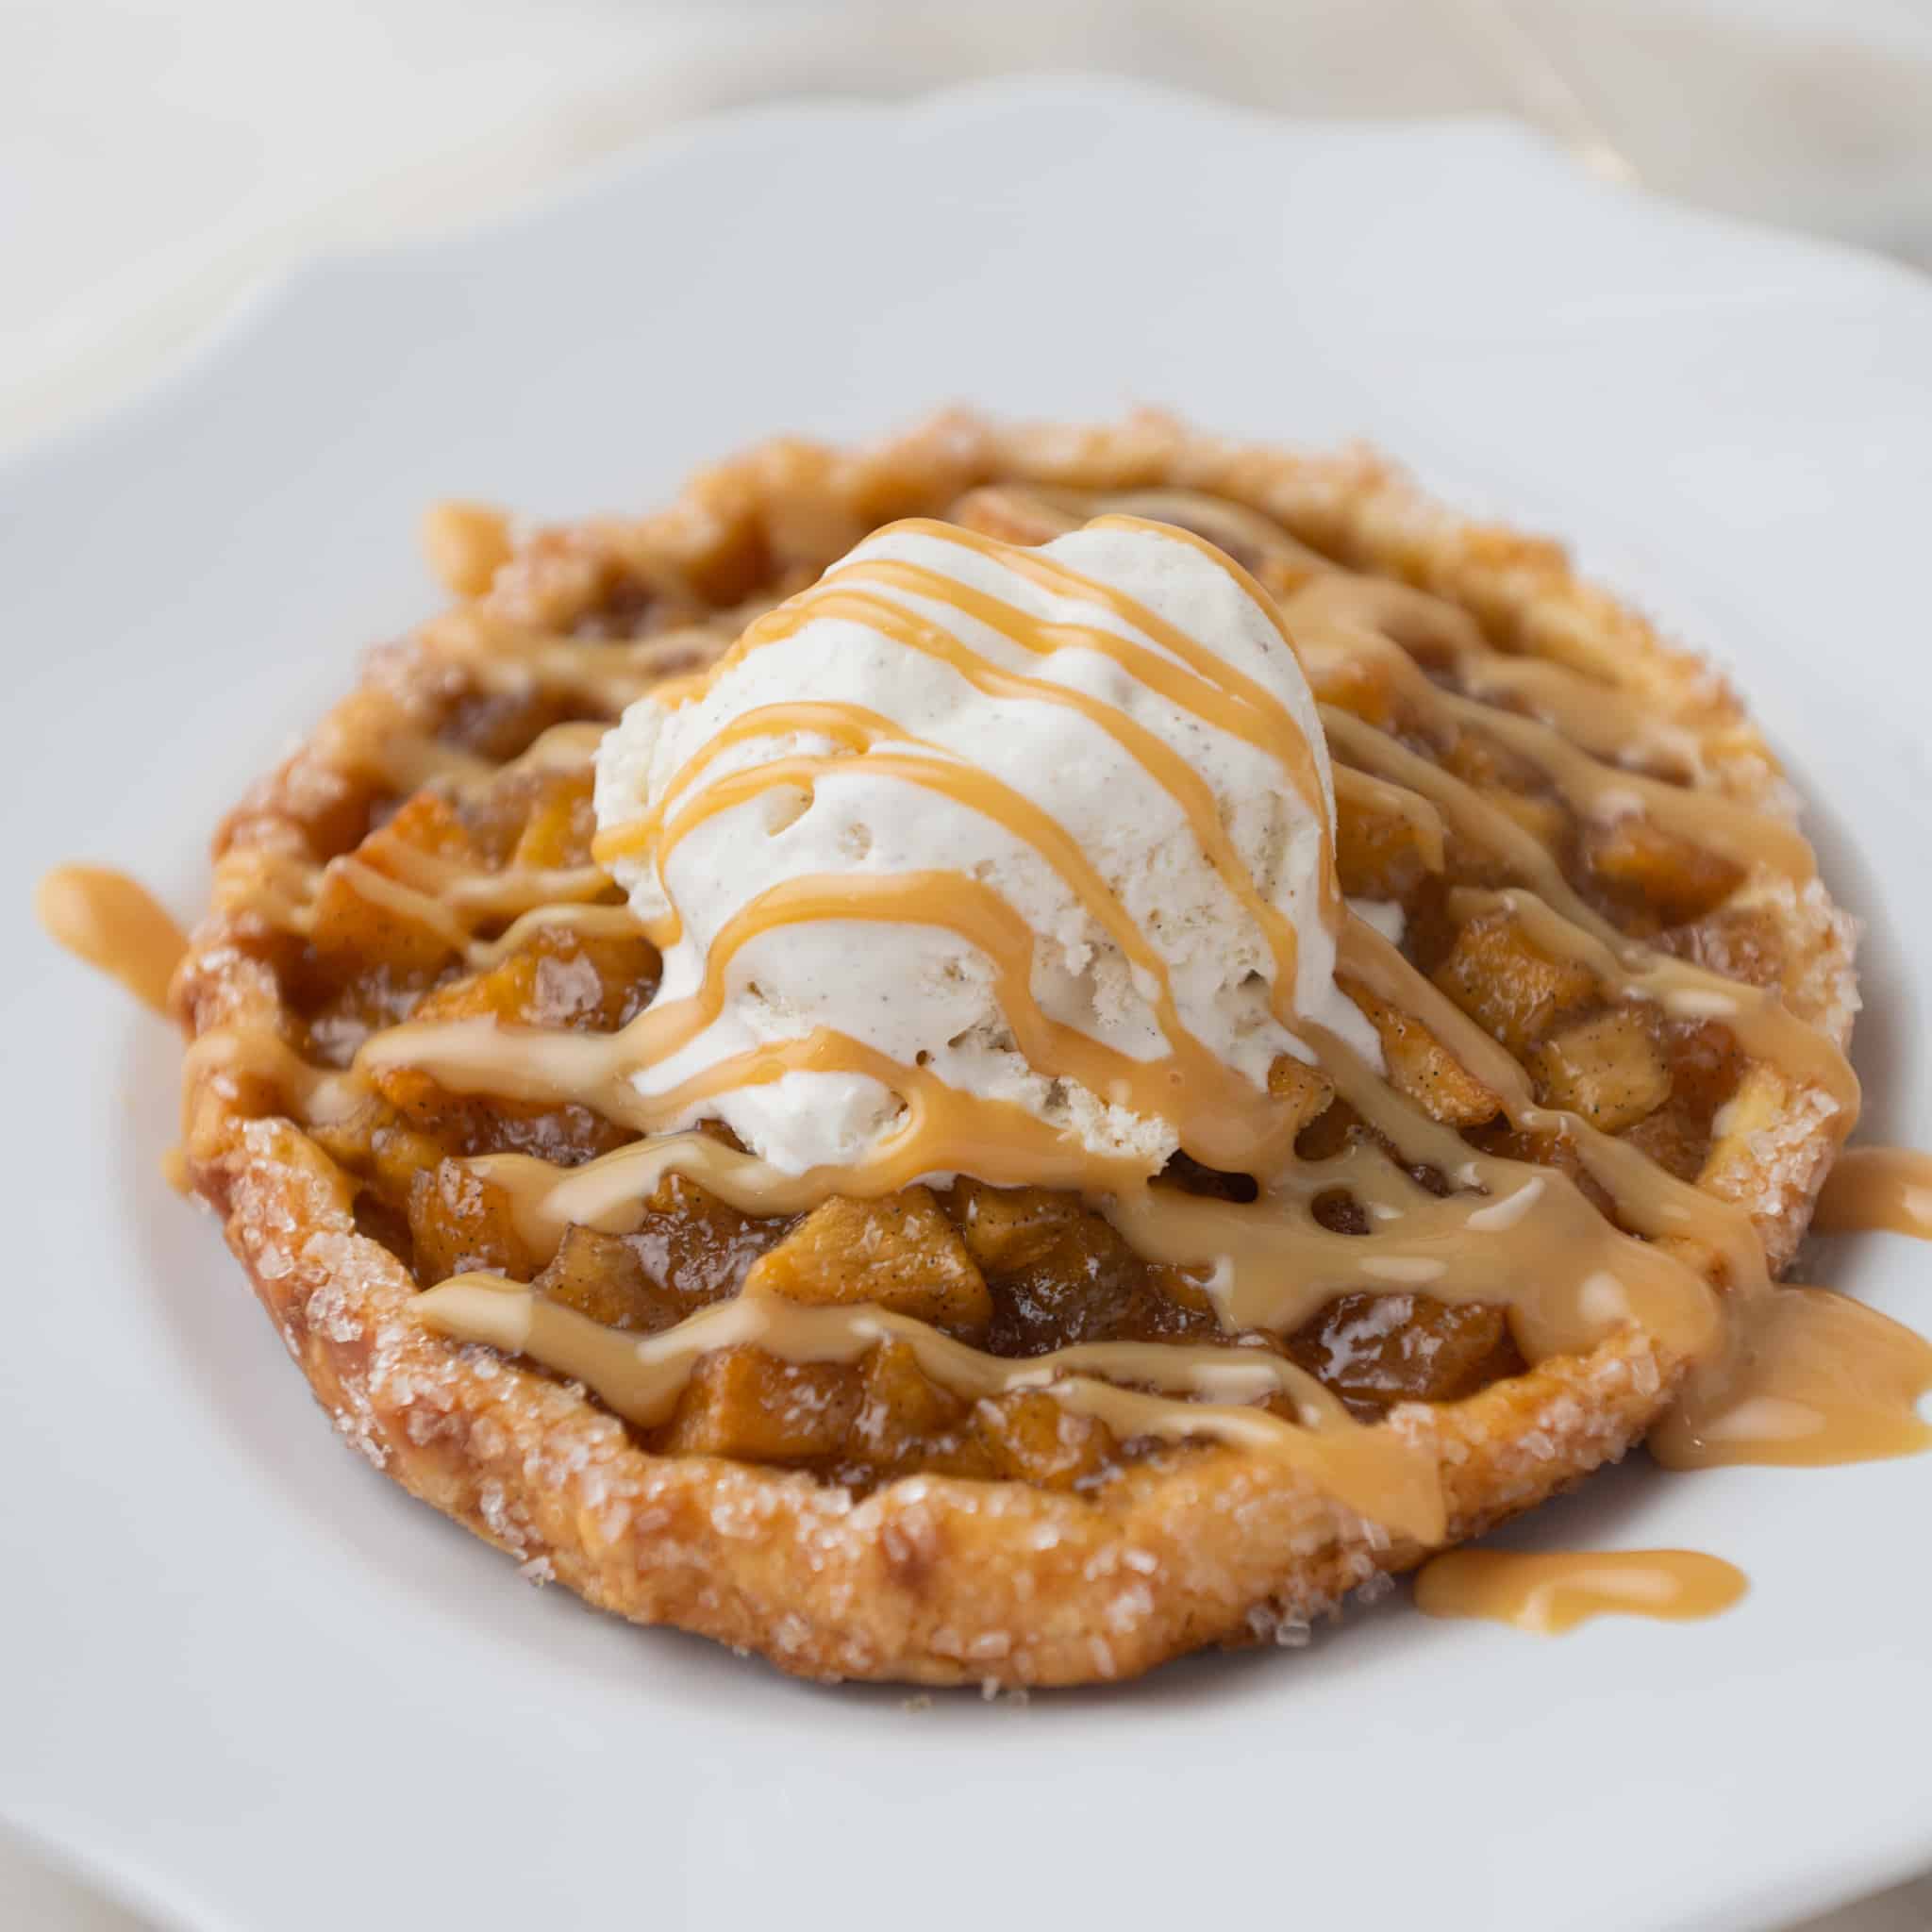
  • Finished mini apple pie with ice cream.
    Mini Apple Pies
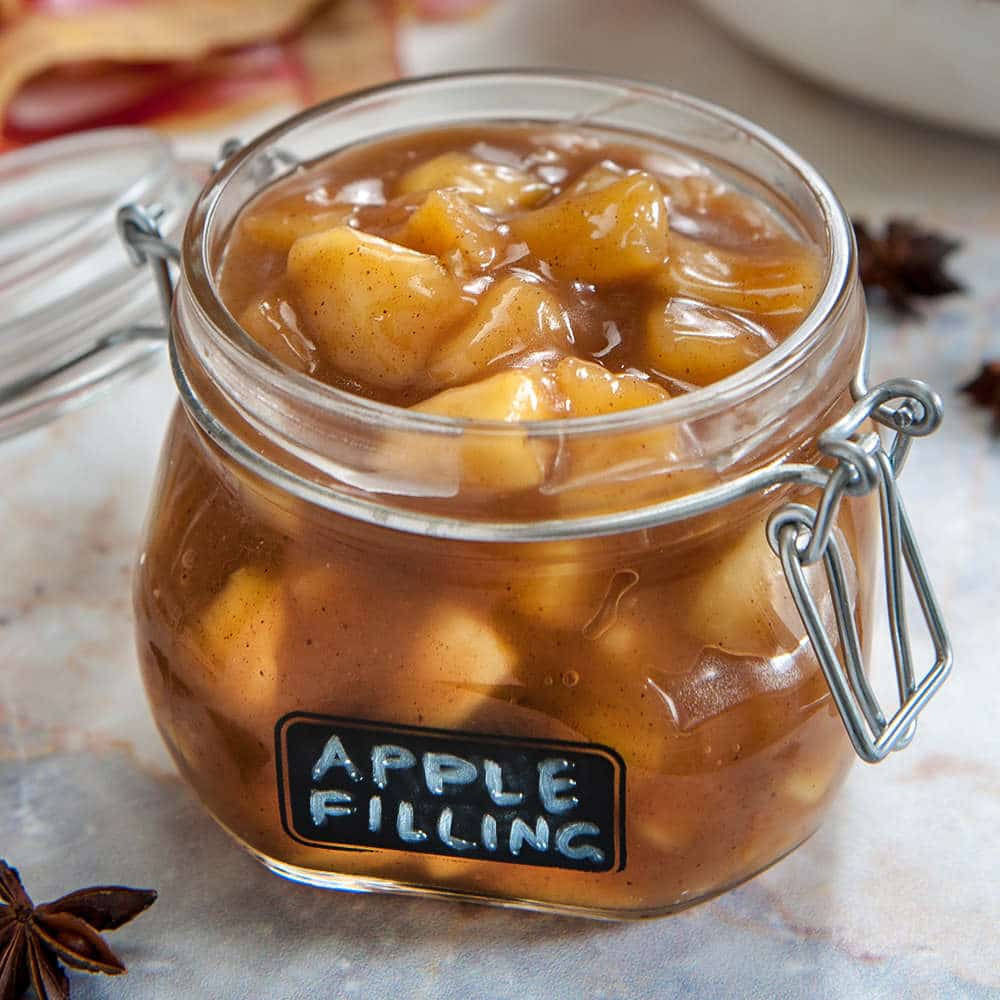
  • apple filling in glass jar with lid and black label on front that says apple filling
    Apple Filling
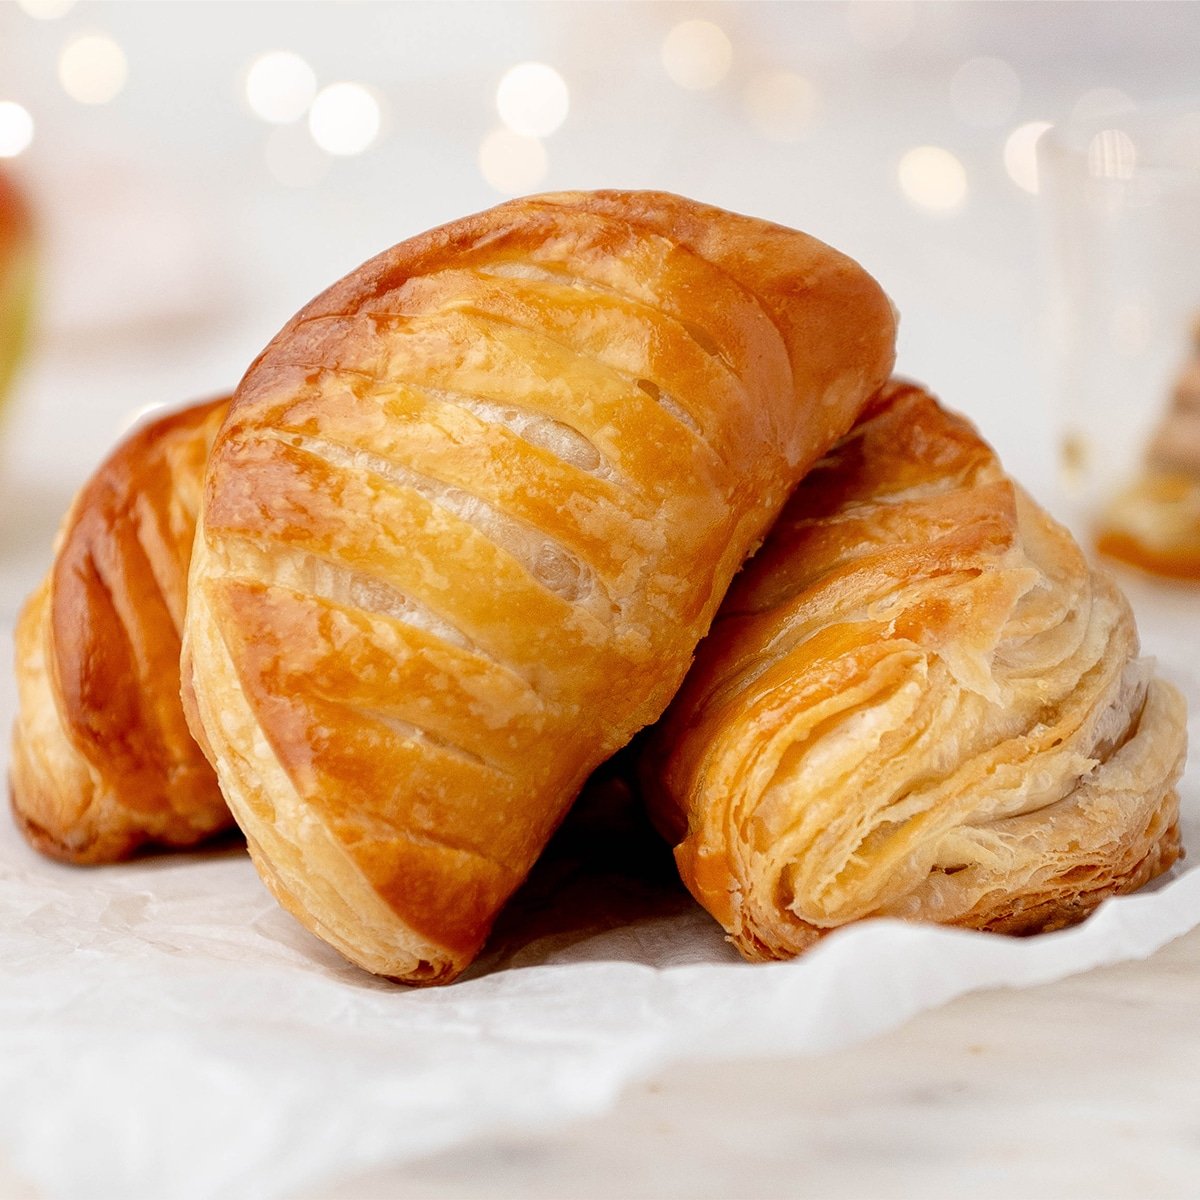
  • Apple Turnover Recipe
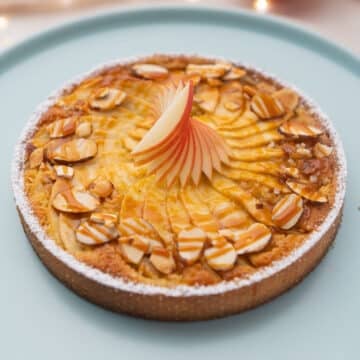
  • close up of french apple tart on a blue plate
    Apple Tart Recipe
  • picture of apple gallette
    Apple Galette
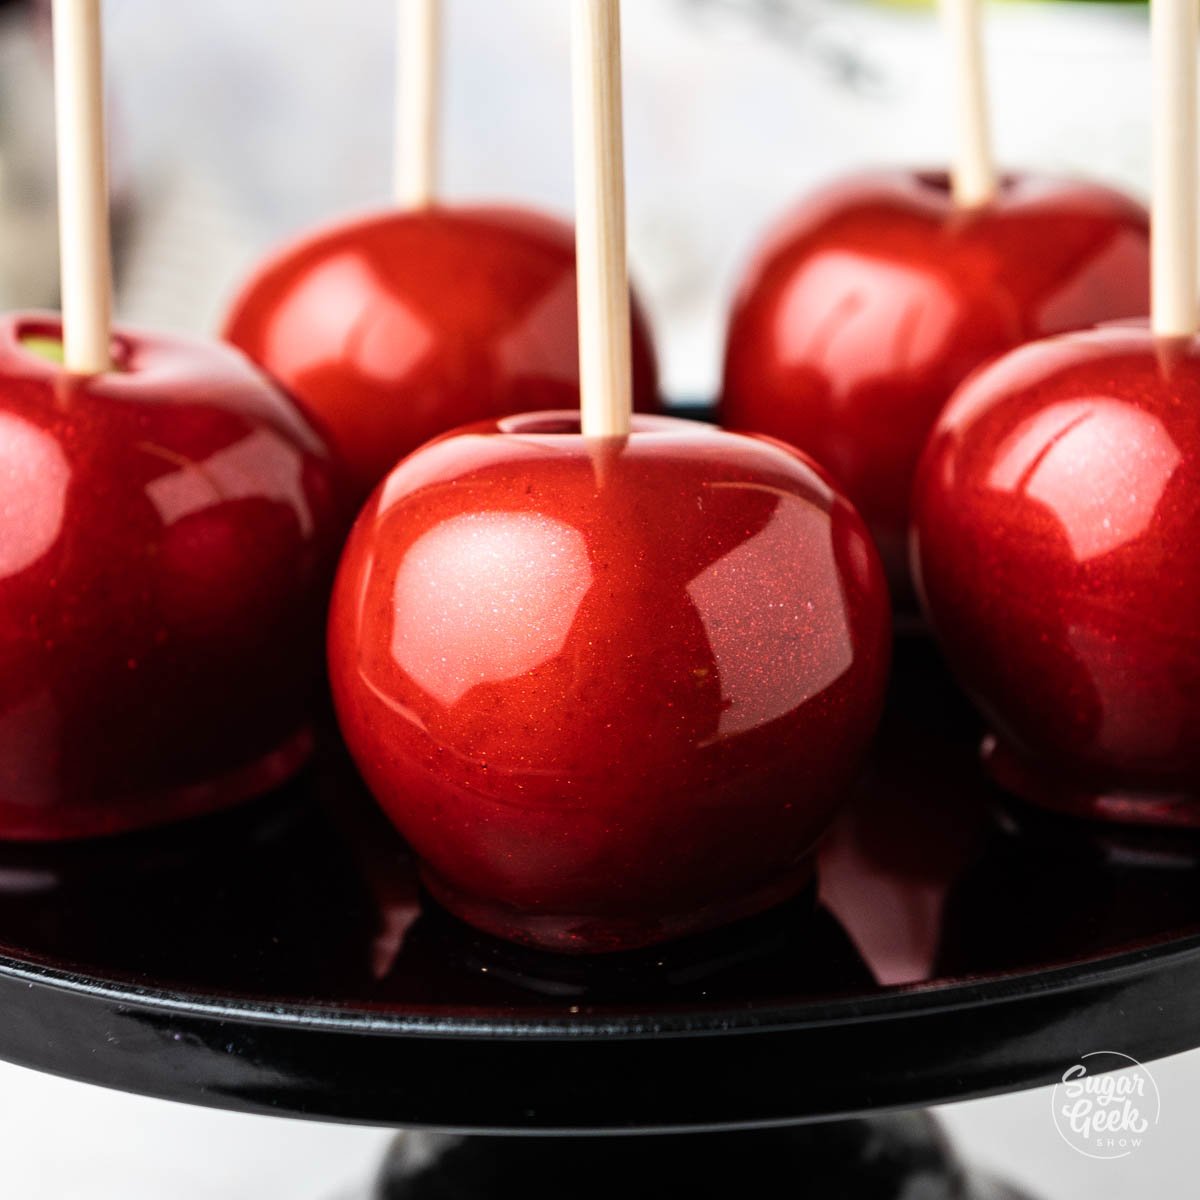
  • close up of candy apples
    The Best Candy Apple Recipe
  • apple pie
    Caramel Apple Pie
  • closeup of fresh apple cake recipe with brown butter buttercream on grey plate
    Fresh Apple Cake Recipe

Leave Me A Review
⭐️⭐️⭐️⭐️⭐️

If you tried this Caramel Apple Recipe or any other recipe on my blog, please leave a 🌟 star rating and let me know how it goes in the comments. I love hearing from you!

Recipe

caramel apples on a silicone mat
Print Recipe
4.81 from 26 votes

Easy Caramel Apples

Rich, buttery, and soft caramel apples are so easy to make! All you need are a few ingredients that you probably already have in your pantry and 30 minutes! Easy caramel apples are great for serving as individual treats or during the holidays.
Prep Time10 minutes mins
Cook Time20 minutes mins
Total Time30 minutes mins
Course: Dessert
Cuisine: American
Servings: 8 servings
Calories: 566kcal
Author: Liz Marek

Equipment

  • Candy Thermometer
  • heavy bottom sauce pan
  • Apple sticks
  • silicone mat
  • clean pastry brush
  • wooden spoon

Ingredients

  • 8-10 medium granny smith apples
  • 15 ounces brown sugar
  • 8 ounces corn syrup
  • 2.5 ounces unsalted butter
  • 10 ounces heavy cream
  • ½ teaspoon salt
  • 1 Tablespoon vanilla extract
US Customary - Metric

Instructions

Day 1 - Apple Preparation

  • Bring a large pot of water to almost a boil then remove it from the heat
  • Submerge your apples in the water for 1 minute to remove the wax from the apples.
  • Dry the apples well, rubbing with pressure to make sure all the wax is removed.
  • Remove the stems from the apples by twisting them off.
  • Place your stick into apples, making sure the apple stands up straight up. Give your apple a little shake to make sure the stick is secure.
  • Place all your apples onto a sheet pan lined with a silicone mat and put them into the fridge to chill overnight or until you are ready to dip your apples.

Day 2 - Making Caramel Apples

  • In a heavy bottom sauce pan, combine the brown sugar, corn syrup, cream, salt, and butter.
  • Over medium-high heat stir the mixture until butter has melted and then continue to cook the mixture without any further stirring.
  • Use a clean pastry brush with water to wash down the sides of the pot to prevent crystalization.
  • Place the lid on the saucepan and let the mixture boil for 5 minutes. The condensation will also wash down the sides of the pot to prevent crystalization.
  • Attach your candy thermometer to the side of the pan and continue to cook the caramel until it reached 240-245ºF
  • Remove the caramel from the heat and stir in the vanilla, taking care not to burn yourself as the caramel will bubble up when you add it.
  • Let the caramel cool down for 5-10 minutes. It will be ready to dip around 190-200ºF. If your caramel is too runny, allow it to cool for 5 more minutes, it will continue to set up.
  • Using an oven mitt to hold your pot of caramel at an angle, gently roll your apple in the caramel until evenly coated.
  • Let the excess caramel drip off the bottom and gently scrap the excess on the edge of the pan before placing the apple on the silicone mat to cool.
  • Let the apples cool completely. Placing the apples in the fridge will speed up the cooling, however you need to wrap them after coming out of the fridge or they will condensate. Apples will last in the fridge in an airtight container for a few days.

Video

Notes

Caramel cooked 240-245ºF will result in a nice firm caramel that will not slide down the apple but will also be soft enough to bite into. 
It is recommended that you slice your apples before eating them
You can pour excess caramel into candy molds and wrap them in wax paper to make soft caramel candies. 
If your caramel starts to get too thick while you are dipping it, return it to medium heat until it's softened again and begin dipping again. 
To clean your saucepan, fill your pot with hot water and bring it to a boil for 5 minutes. Set the pot aside and let it cool down then wash it as usual. 

Nutrition

Serving: 1serving | Calories: 566kcal | Carbohydrates: 100g | Protein: 2g | Fat: 20g | Saturated Fat: 13g | Polyunsaturated Fat: 1g | Monounsaturated Fat: 5g | Trans Fat: 0.3g | Cholesterol: 59mg | Sodium: 190mg | Potassium: 304mg | Fiber: 4g | Sugar: 94g | Vitamin A: 841IU | Vitamin C: 9mg | Calcium: 85mg | Iron: 1mg
Cake sculpted to look like a realistic turkey sitting in a roasting pan

October 1, 2021 Course Preview

Turkey Dinner Cake Tutorial

Skill level: Intermediate

Guest instructor Kristin Eagles from The Girl Next Door Bakes showcases a realistic turkey cake that will make your guests wonder, "Are we having second dinner?"

Kristin breaks down how to create this amazing cake, giving tips on how to place it in a turkey roaster pan, how to stack and carve the cake layers, how to provide internal support for the turkey legs and how to paint it and give it a realistic shine that will look just like the real thing.

45:00 Minutes of Instruction

What You Will Learn

  • How to make a cake that looks just like a real turkey
  • Learn how to create the internal structure to support the turkey legs
  • How to paint the cake to look just like a delicious cooked turkey

Tutorial Chapters

  1. Stacking the cakes 1:30
  2. Carving the body 4:55
  3. Making the turkey tail 13:42
  4. Frosting the cake 15:55
  5. Making the drumsticks 17:48
  6. Making the fondant turkey skin 19:59
  7. Covering the turkey in fondant 25:07
  8. Covering the legs in fondant 29:43
  9. Making the wings 32:21
  10. Painting and adding the glaze 35:26

Downloads

Materials List

Turkey Template 01

Turkey Template 02

Turkey Reference 01

Turkey Reference 02

Cake sculpted to look like a realistic turkey sitting in a roasting pan

October 1, 2021 Paid Video

Turkey Dinner Cake

Skill level: Intermediate

Guest instructor Kristin Eagles from The Girl Next Door Bakes showcases a realistic turkey cake that will make your guests wonder, "Are we having second dinner?"

Kristin breaks down how to create this amazing cake, giving tips on how to place it in a turkey roaster pan, how to stack and carve the cake layers, how to provide internal support for the turkey legs and how to paint it and give it a realistic shine that will look just like the real thing.

45:00 Minutes of Instruction

What You Will Learn

  • How to make a cake that looks just like a real turkey
  • Learn how to create the internal structure to support the turkey legs
  • How to paint the cake to look just like a delicious cooked turkey

Tutorial Chapters

  1. Stacking the cakes 1:30
  2. Carving the body 4:55
  3. Making the turkey tail 13:42
  4. Frosting the cake 15:55
  5. Making the drumsticks 17:48
  6. Making the fondant turkey skin 19:59
  7. Covering the turkey in fondant 25:07
  8. Covering the legs in fondant 29:43
  9. Making the wings 32:21
  10. Painting and adding the glaze 35:26

Downloads

Materials List

Turkey Template 01

Turkey Template 02

Turkey Reference 01

Turkey Reference 02

chocolate decorations

September 29, 2021 Blog

Basic Chocolate Decorations With Chef Christophe Rull

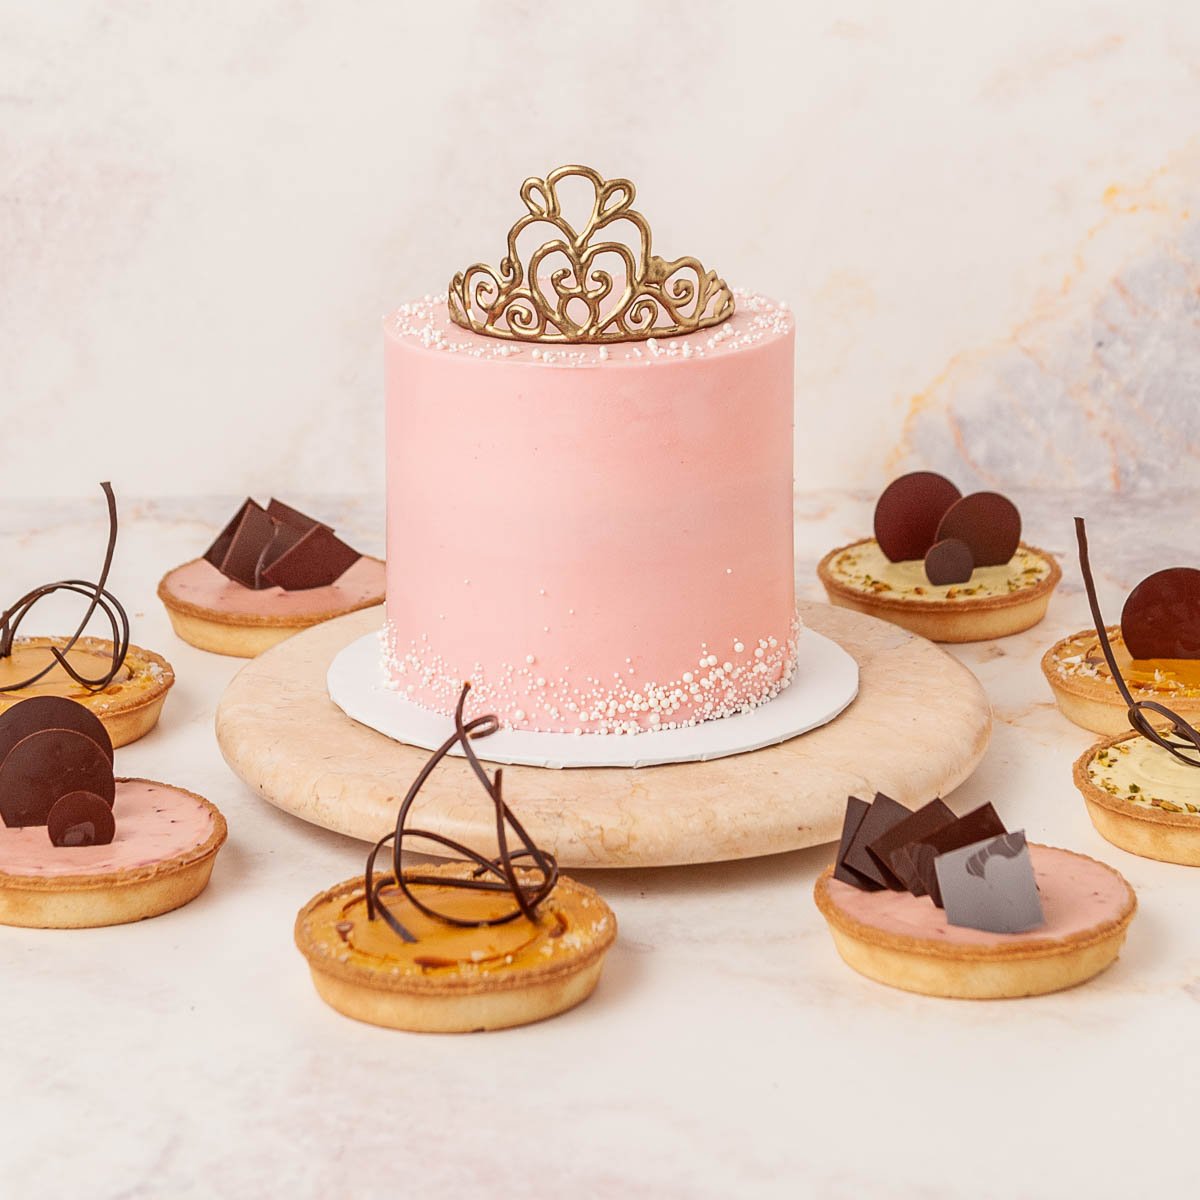
Making simple chocolate decorations is one of the first things a pastry chef in training learns (right after learning how to properly temper chocolate). Today Chef Christophe is going to show us how to make simple chocolate shapes, chocolate curls, and a beautiful chocolate tiara!

Chef Christophe has so many great tips and tricks for you in this blog post like how to clean your surface without water, and the best way to get gold dust to stick to chocolate! I can't wait for you to see them! So let's get our tools together and let's get started!


Tools & Equipment Needed

  • EZ Tempering Machine
  • Chocolate Warmer
  • Offset Spatula
  • Acetate Sheets
  • Tiara Template
  • Circle Cutters
  • Cake Comb With Teeth (for chocolate curls)
  • Bench Scraper
  • Small Paring Knife
  • Piping Bag (for tiara)
  • 6" cake dummy or coffee can
  • Grand Marnier (alcohol)
  • Gold Luster Dust
  • Airbrush
  • Tape

If you haven't watched Christophe's video on how to temper chocolate with the EZ Temper machine, you'll want to watch that first.

No tempering machine? No problem! You can temper your chocolate in the microwave or use the traditional seeding method to get your chocolate tempered.
How To Make Chocolate Circles

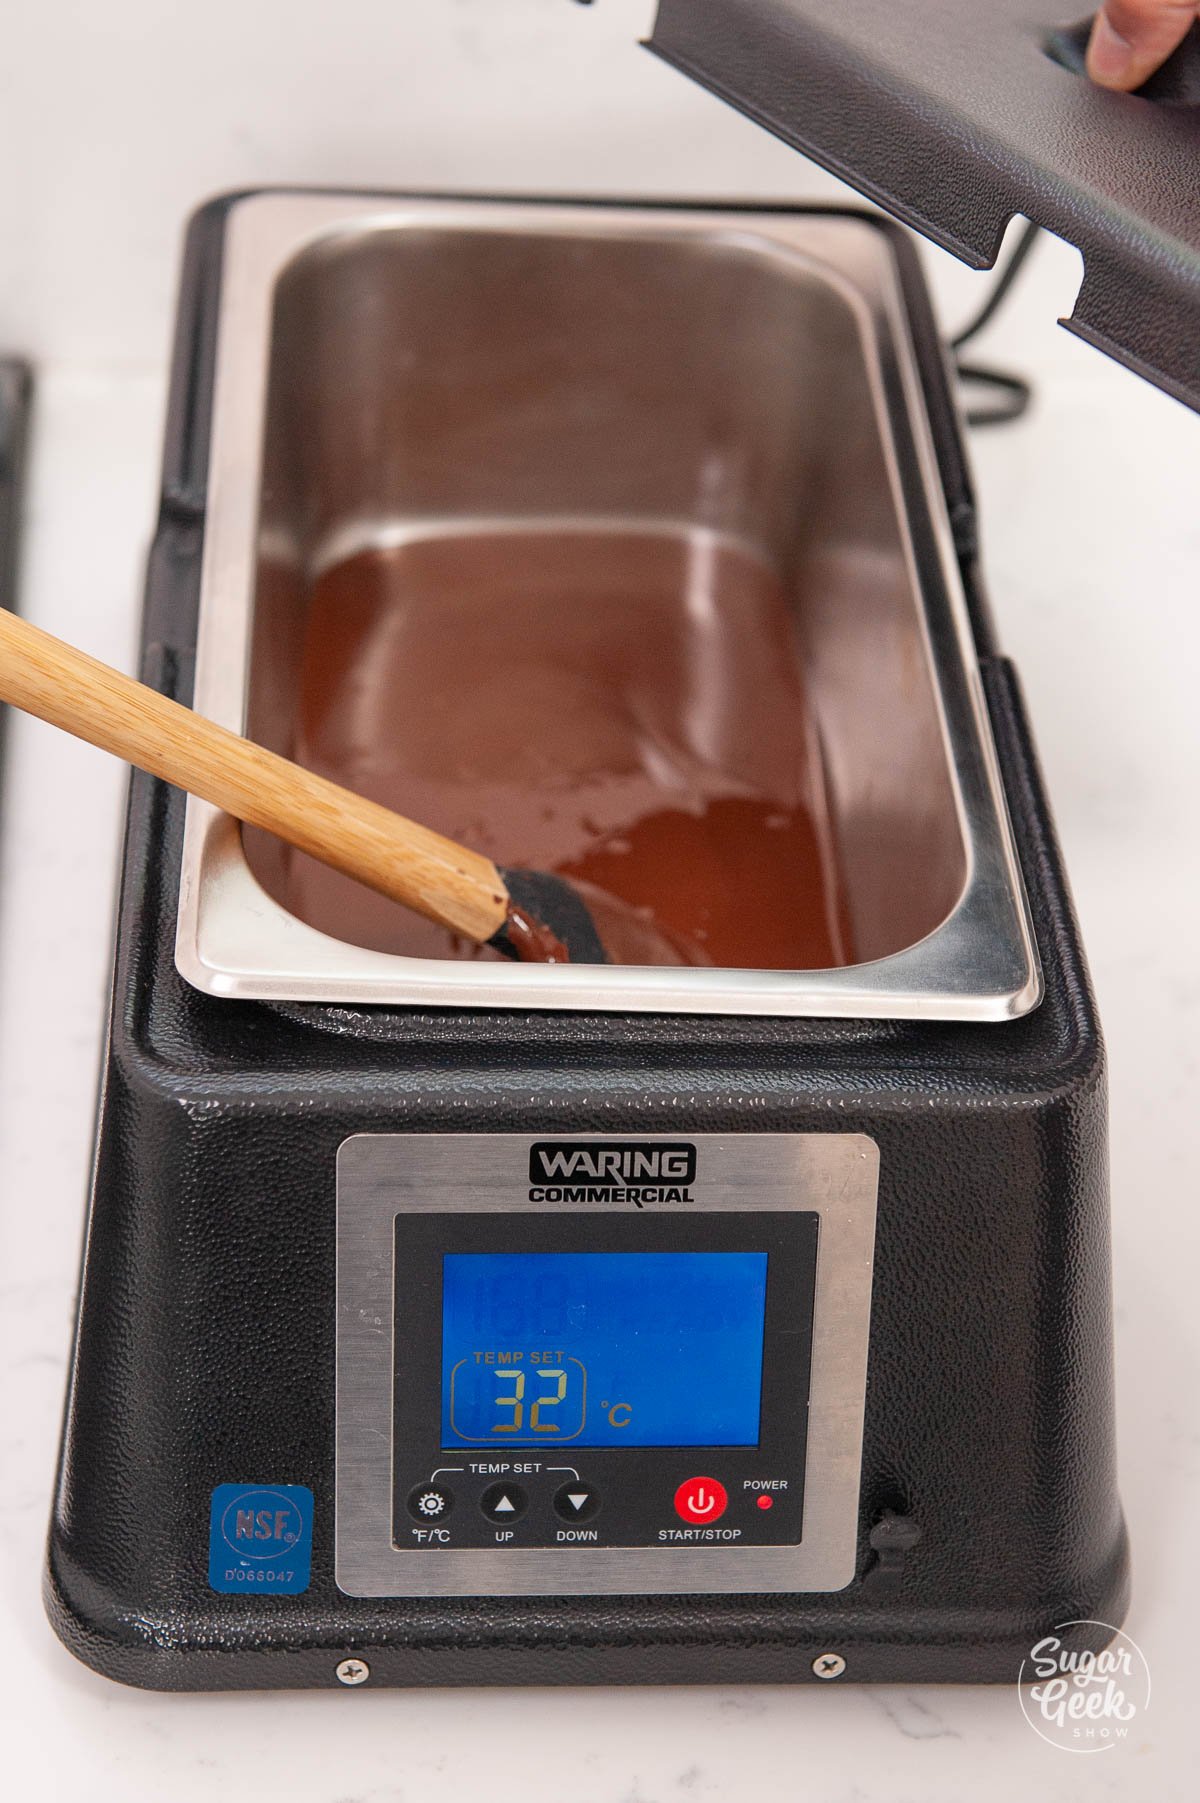
  1. Prepare your tempered dark chocolate and keep it in the warmer at 89ºF (32ºC). The working temperature for both white chocolate and milk chocolate is between 82ºF and 86ºF (29ºC and 30ºC).waring chocolate warmer
  2. Place your acetate on top of your work surface.
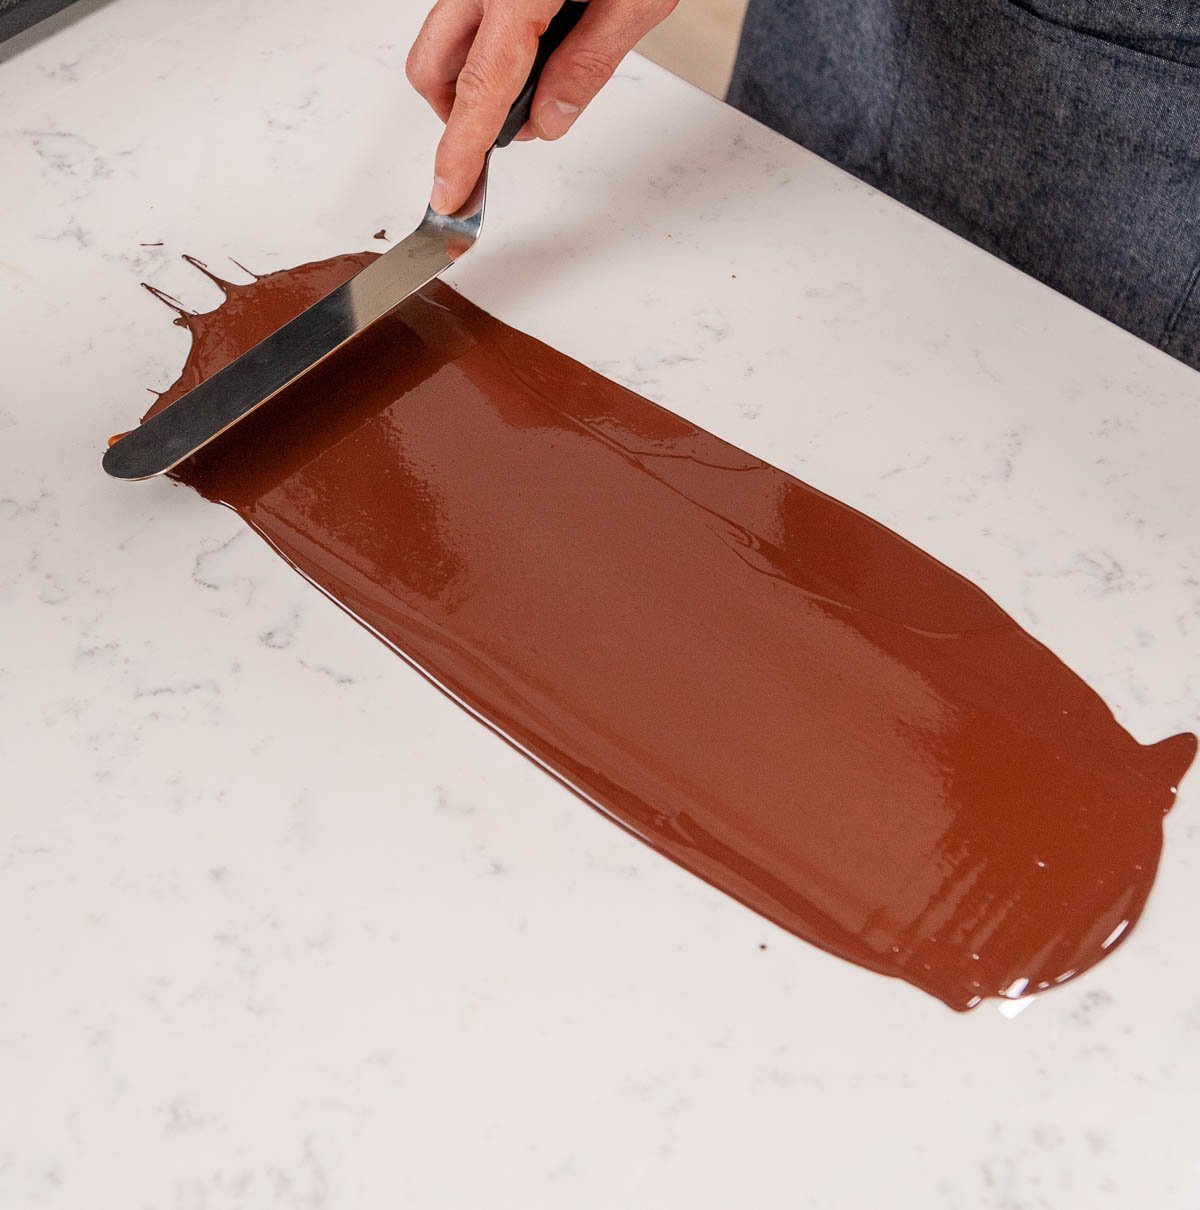
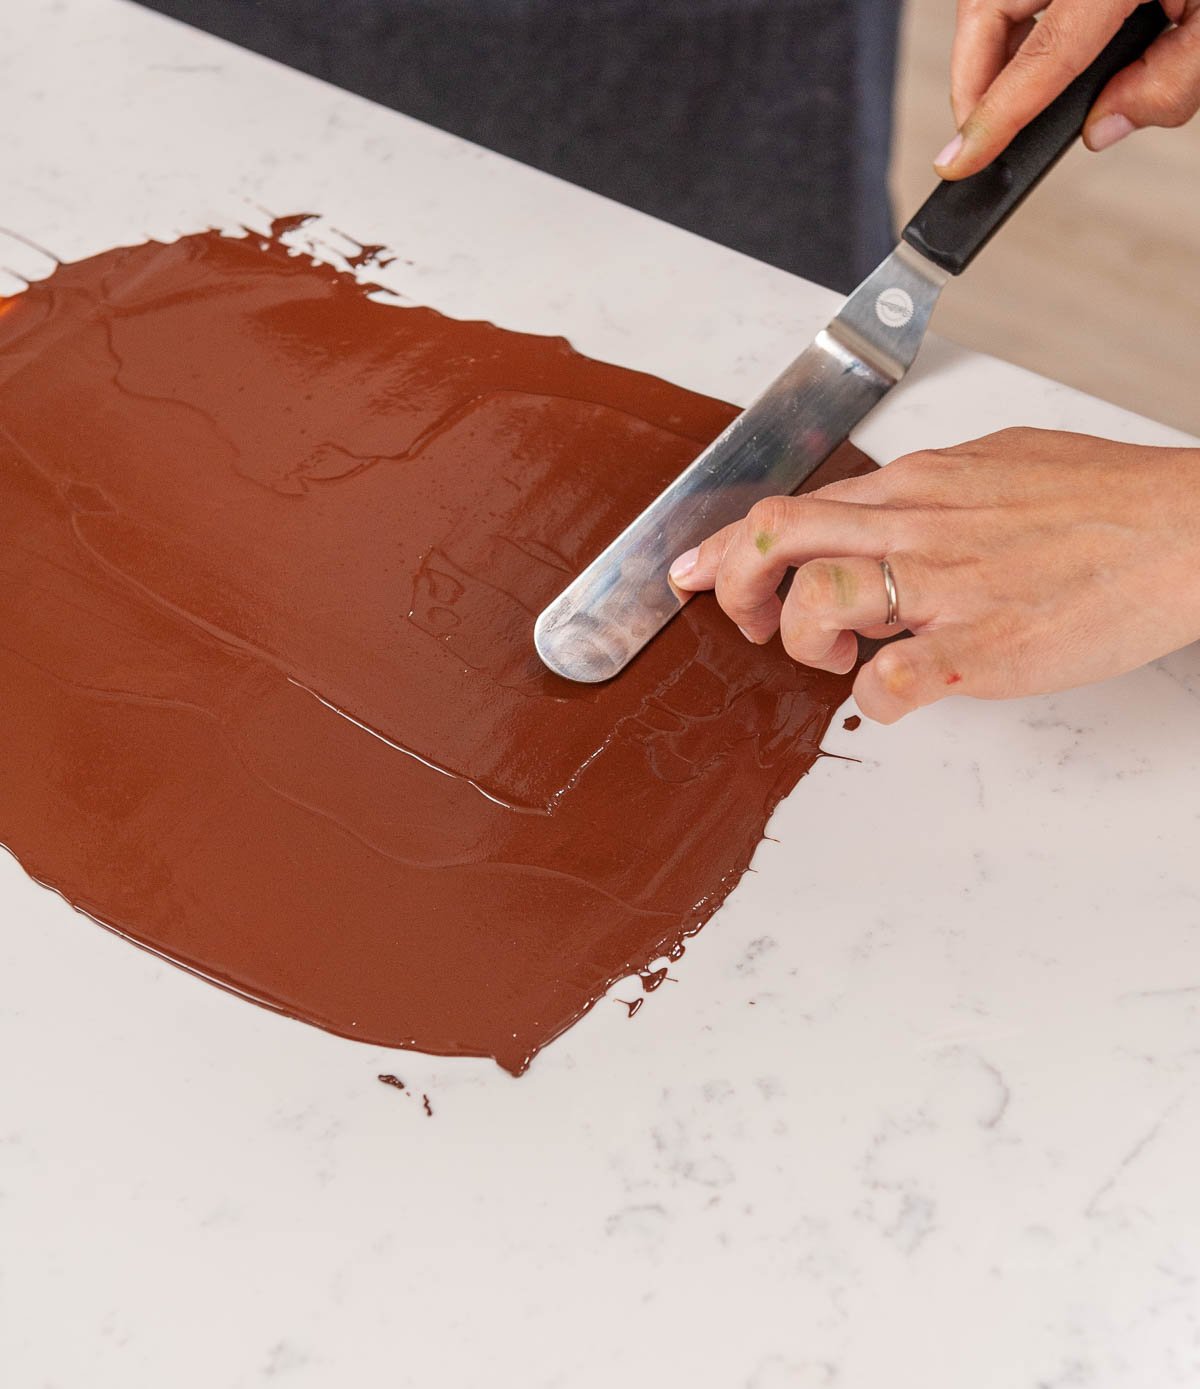
  3. Spread your tempered chocolate over your acetate sheet very thin and as evenly as possible with your offset spatula. spreading chocolate on acetate with an offset spatula
  4. Pick the acetate up carefully and move it over to detach it from the chocolate that went over the edges.
  5. After a few minutes, the chocolate will begin to lose it's shine and look matte but is still soft.
  6. Now is the time to use your circle cutter to cut some shapes. Work quickly. cutting circles out of thin chocolate
  7. You can also use a knife to free-hand shapes or use different size cutters.
  8. Place the acetate and chocolate in between two pieces of parchment paper and sandwich between two sheet pans to fully crystalize. (About 10 minutes in the refrigerator.) This is to prevent the chocolate from curling. chocolate on acetate between two sheet pans
  9. Clean your surface with a bench scraper, not water so you do not contaminate your surface.
  10. Carefully peel the acetate off the back of the squares and handle them with gloved hands so that you avoid leaving fingerprints.chocolate circles on a tart

How To Make Chocolate Squares

  1. Prepare your tempered chocolate and keep it in the warmer at 89ºF (32ºC)
  2. Place your acetate on top of your work surface
  3. Spread your tempered chocolate over your acetate sheet very thin and as evenly as possible with your offset spatula.
  4. Pick the acetate up carefully and move it over to detach it from the chocolate that went over the edges.
  5. After a few minutes, the chocolate will begin to lose it's shine and look matte but is still soft.
  6. Use a ruler to cut the lines in the chocolate to make your squares. cutting chocolate squares on acetate with a knife and ruler
  7. Place the acetate and chocolate in between two pieces of parchment paper and sandwich between two sheet pans to fully crystalize. (About 10 minutes in the refrigerator.) This is to prevent the chocolate from curling.
  8. Clean your surface with a bench scraper, not water so you do not contaminate your surface.
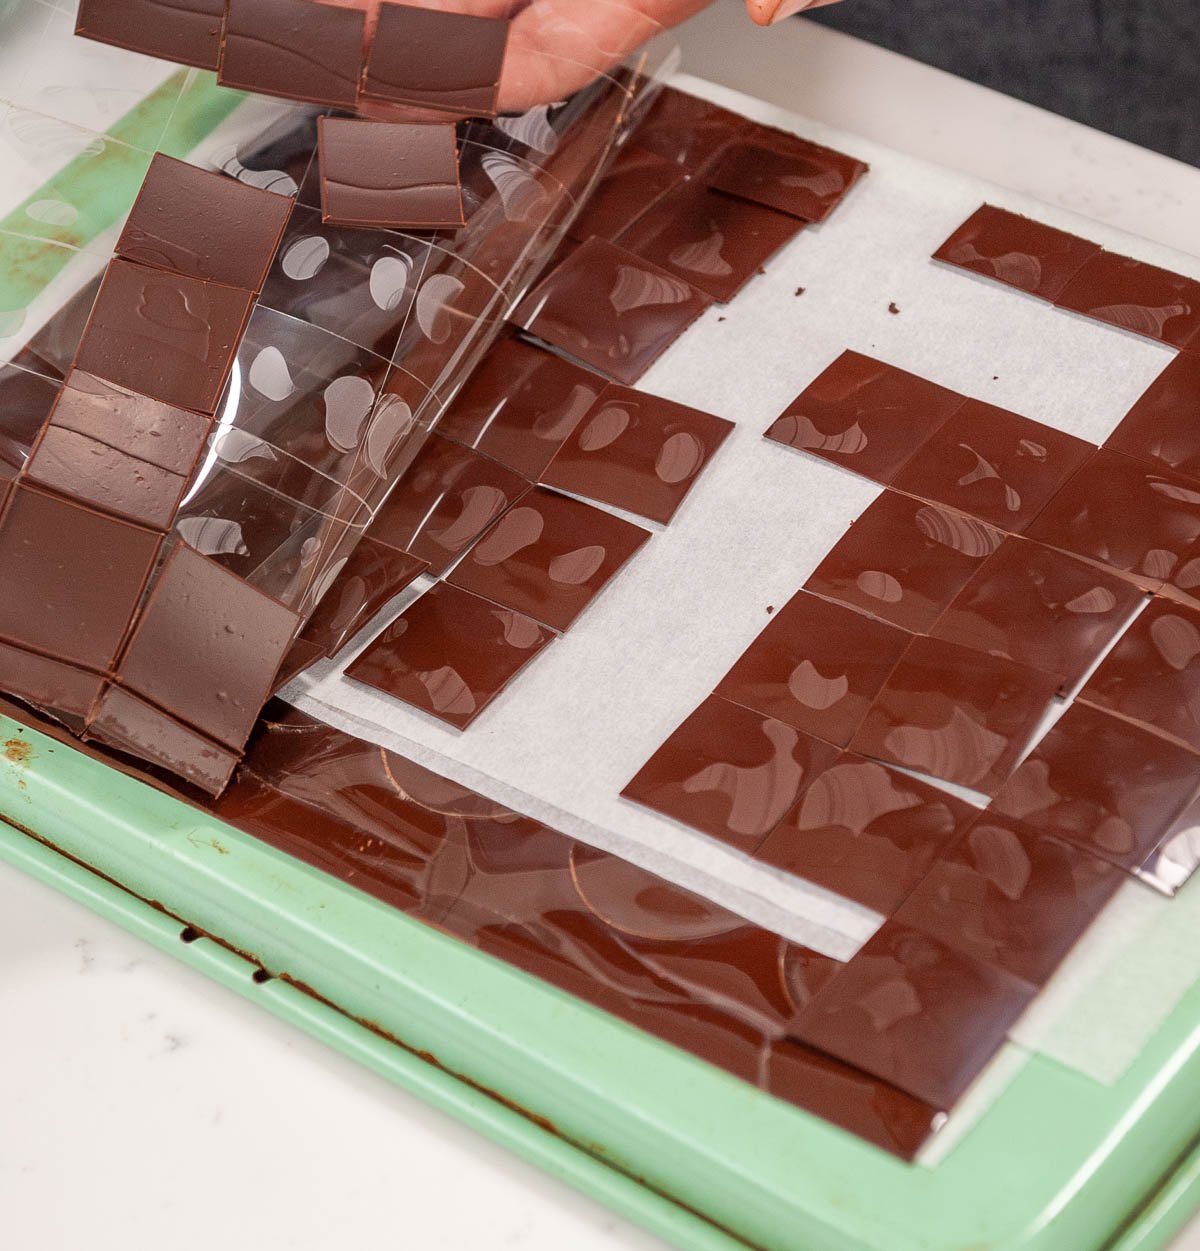
  9. Carefully peel the acetate off the back of the squares and handle them with gloved hands so that you avoid leaving fingerprints.removing chocolate squares from acetate

How To Make Chocolate Curls

  1. Prepare your tempered chocolate and keep it in the warmer at 89ºF (32ºC)
  2. Place your acetate (6"X18") on top of your work surface
  3. Spread your tempered chocolate over your acetate sheet very thin and as evenly as possible with your offset spatula. spreading tempered chocolate on acetate with an offset spatula
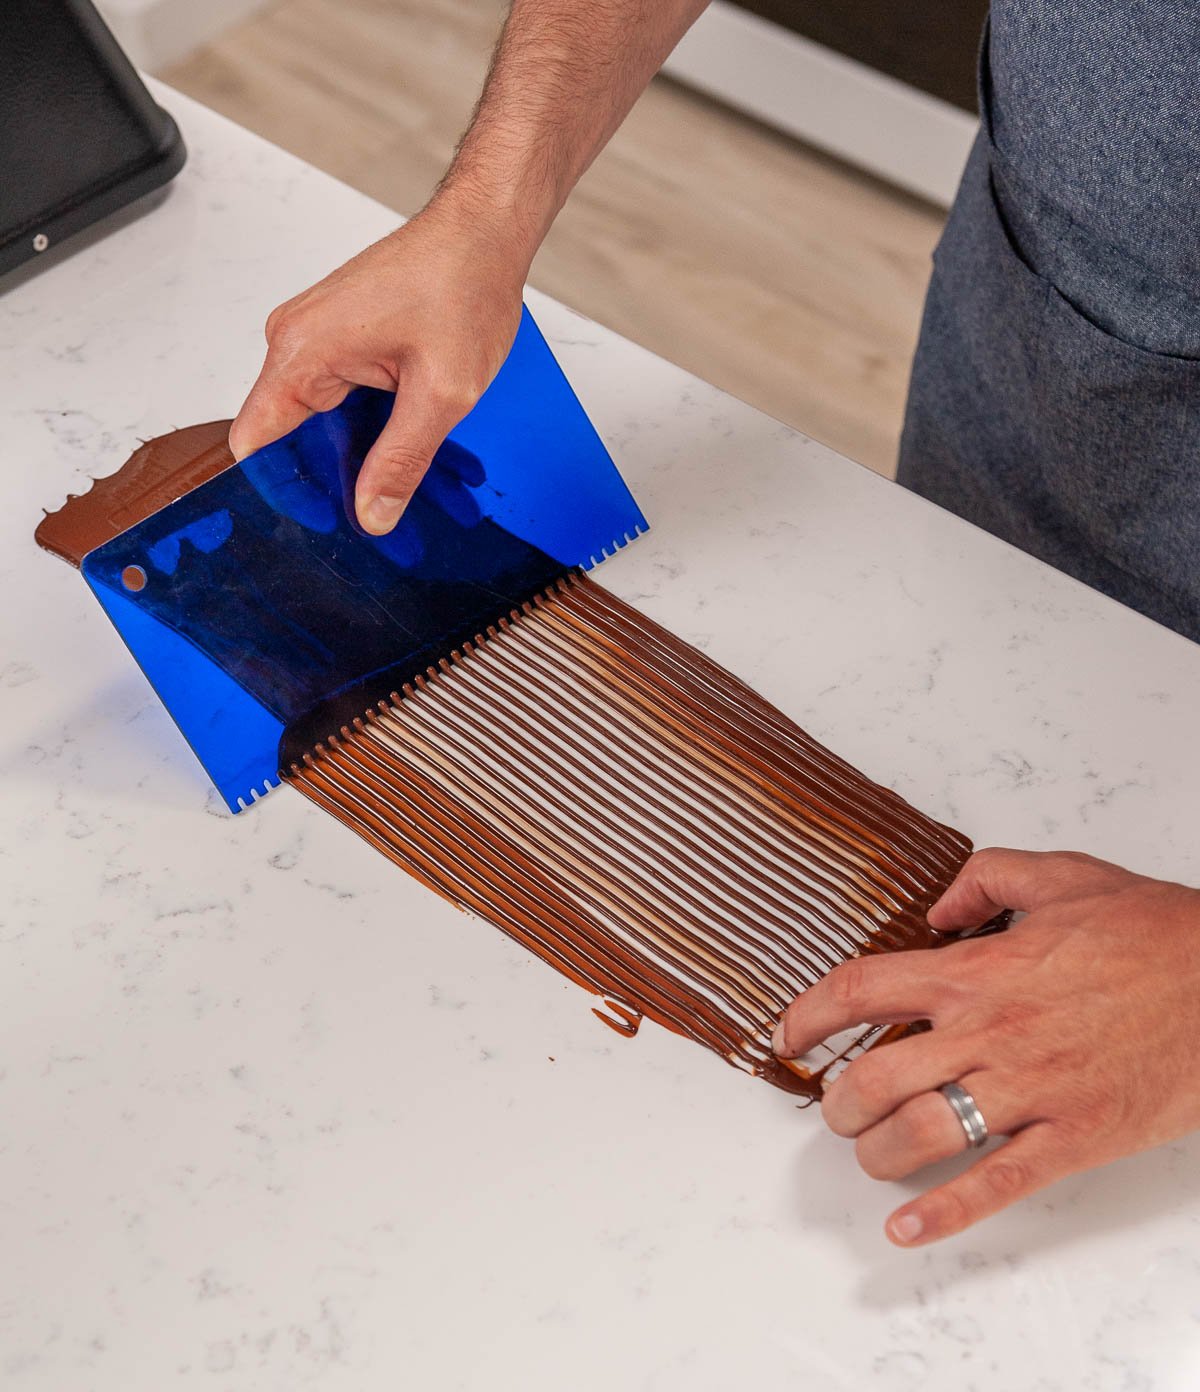
  4. Use your cake comb to remove some of the chocolate from the acetate and make lines.using a cake comb to scrape lines into chocolate on acetate
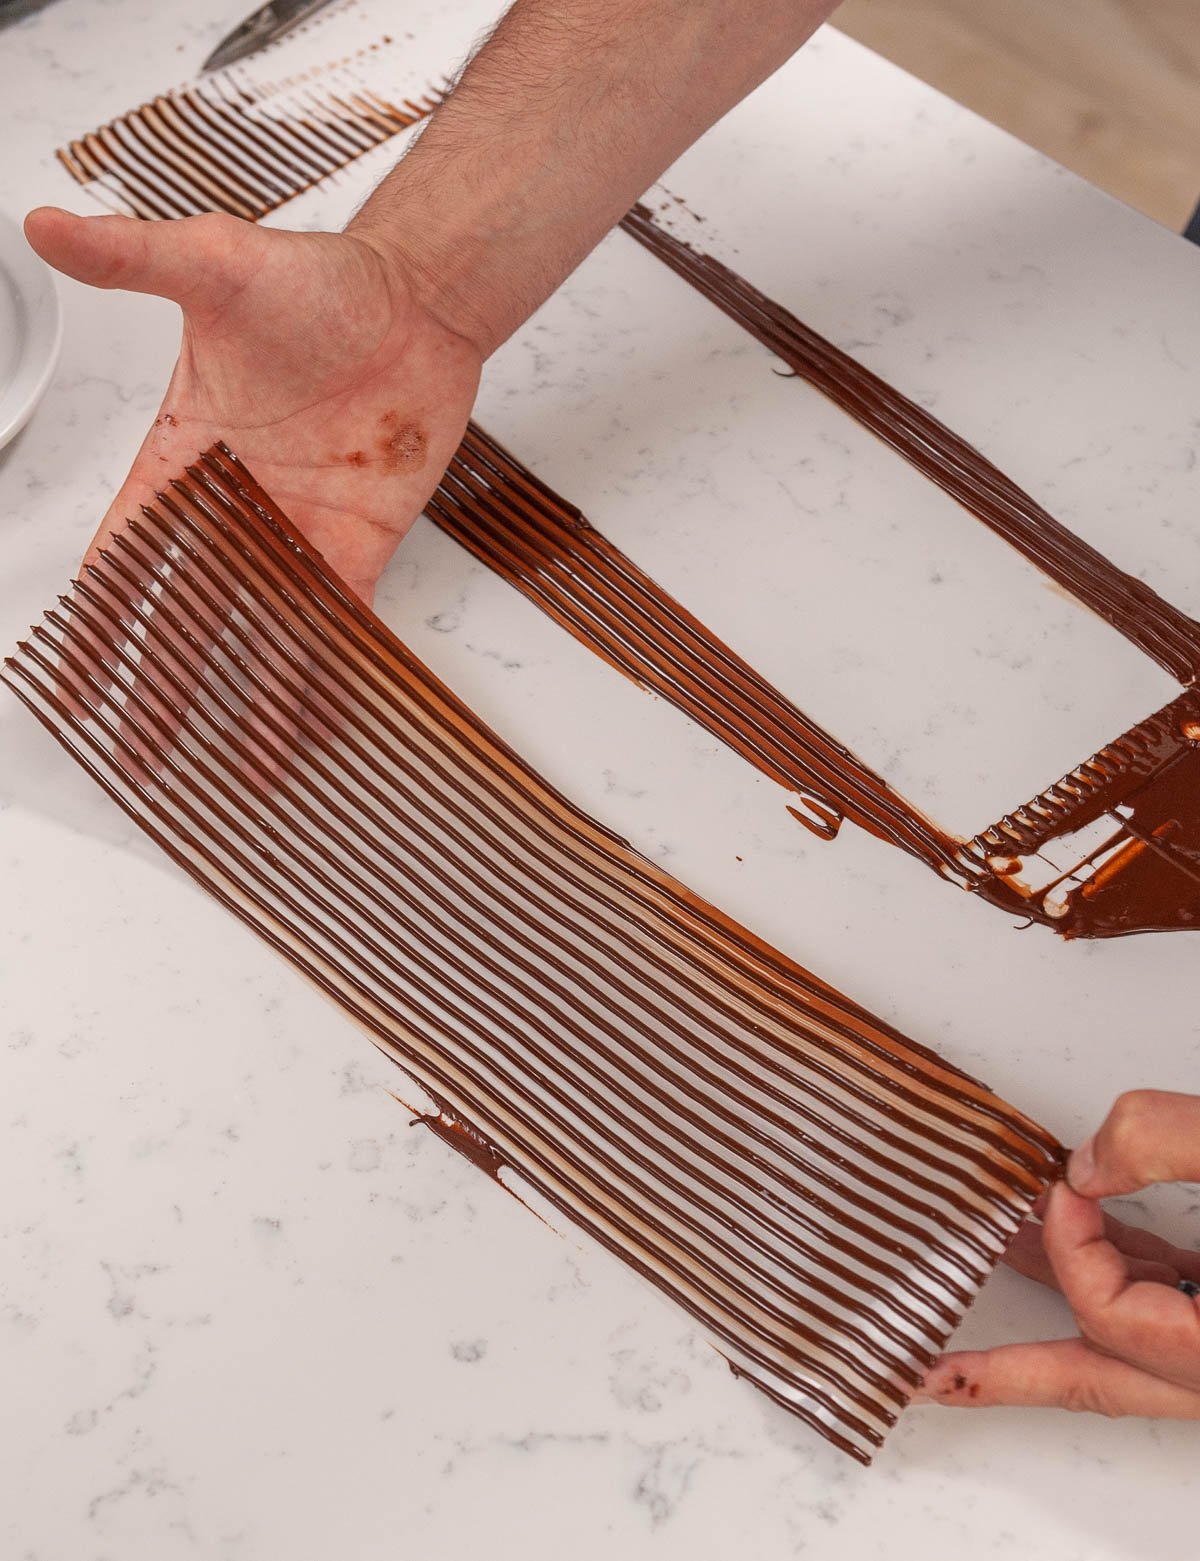
  5. Pick the acetate up carefully and move it over to detach it from the chocolate that went over the edges. holding acetate with lines of chocolate on top
  6. Wait for the chocolate to lose it's shine and look matte but still soft
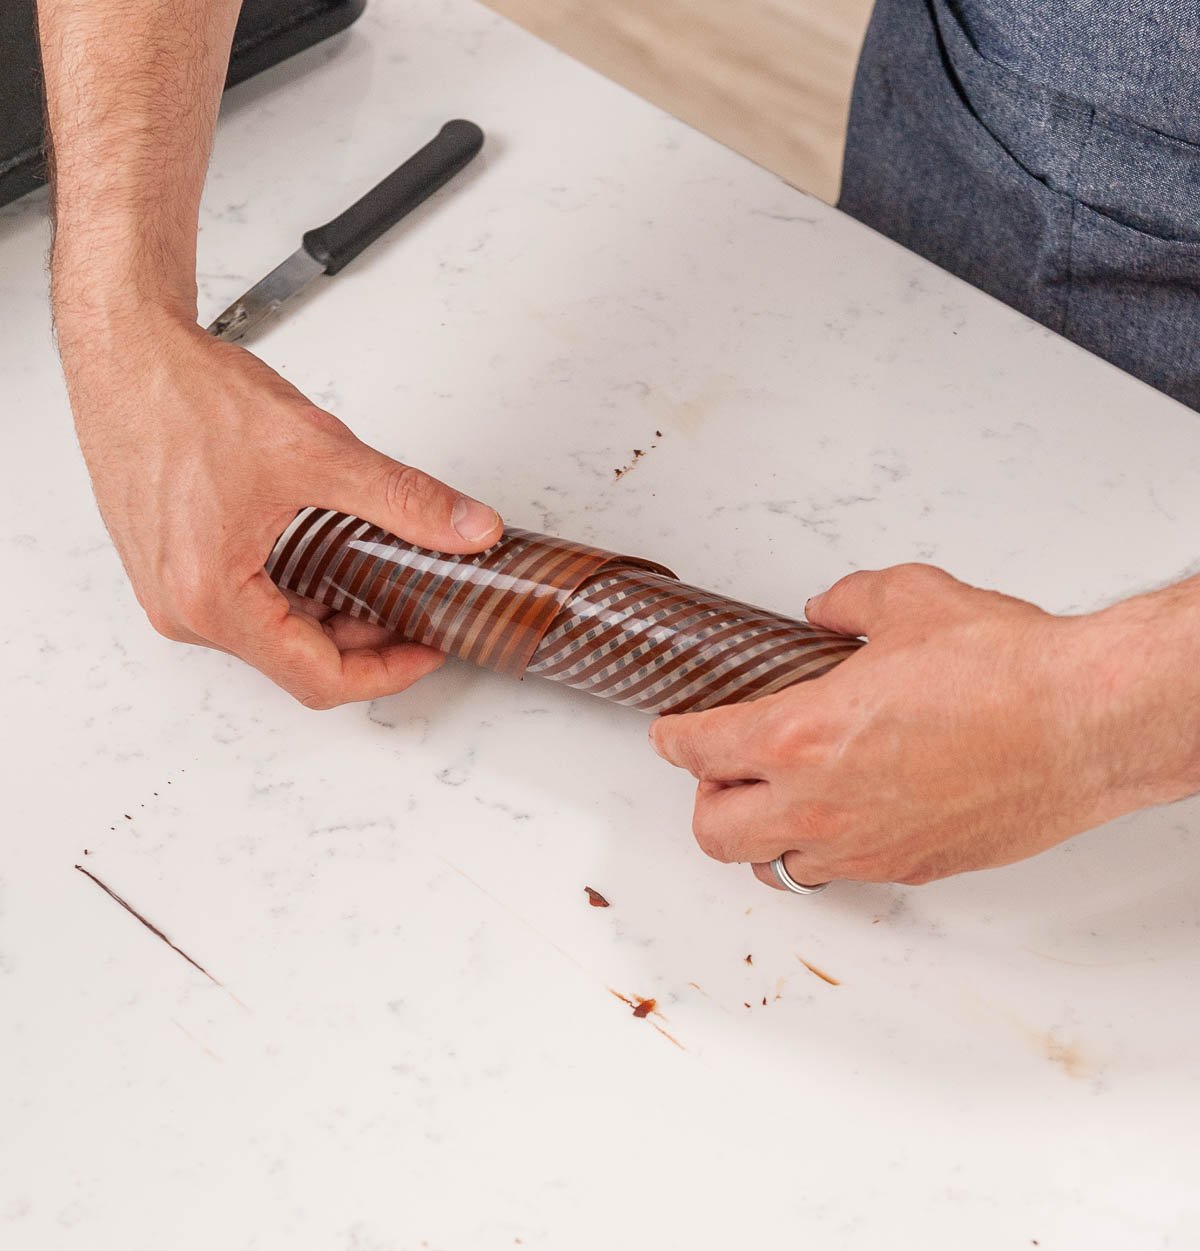
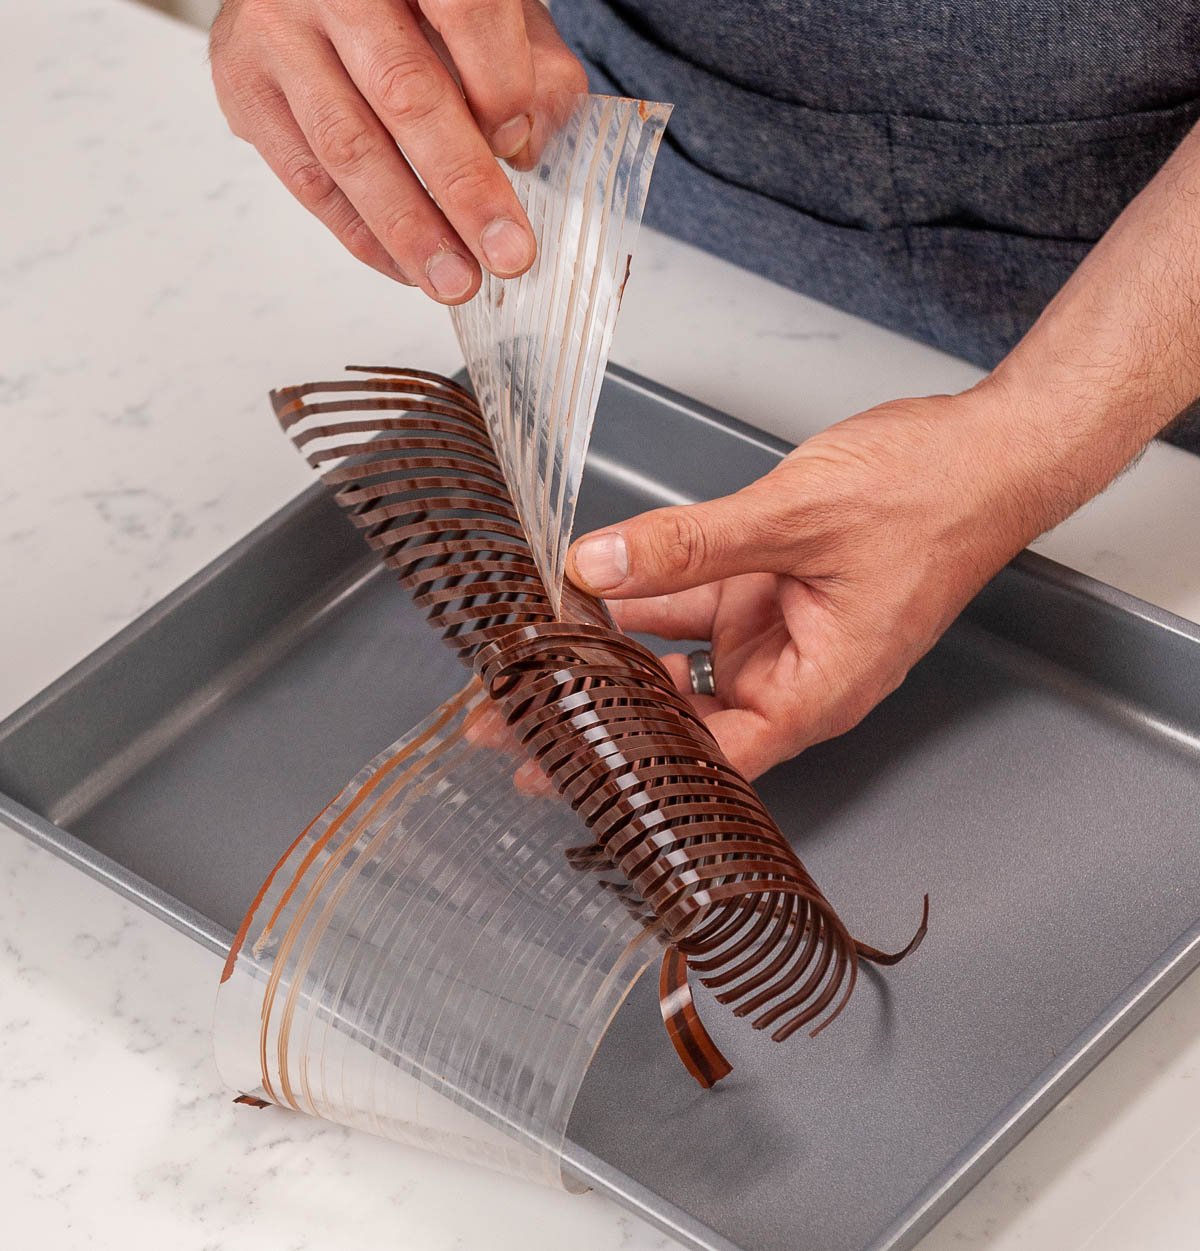
  7. Carefully twist the acetate over onto itself. twisting chocolate on acetate
  8. Let it fully crystalize (5-10 minutes)twisted acetate with chocolate
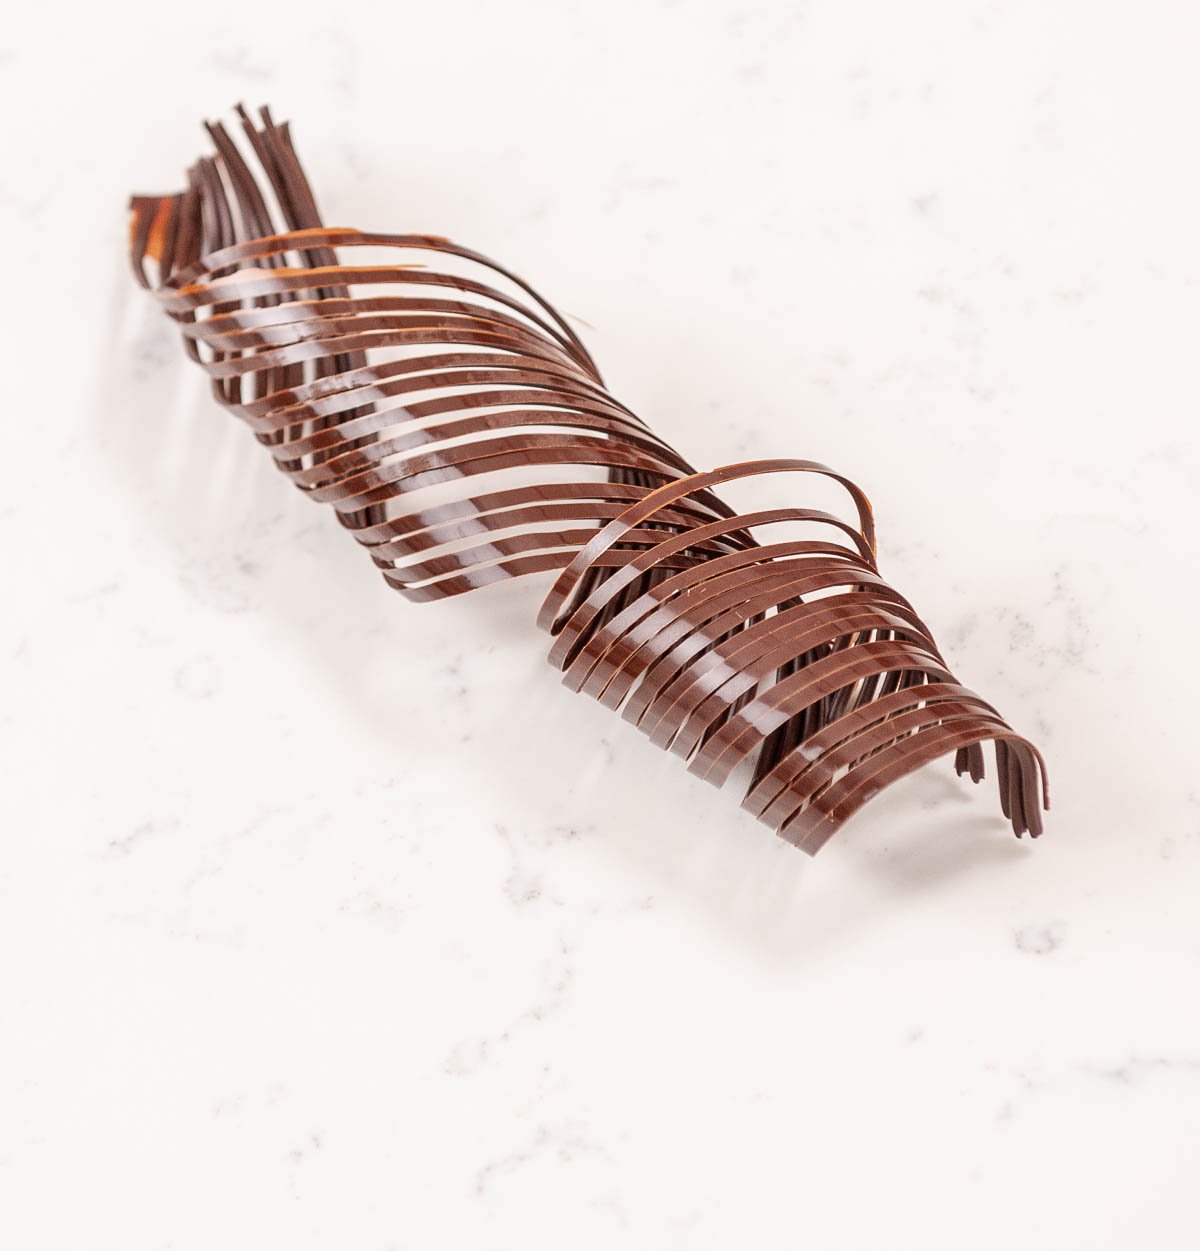
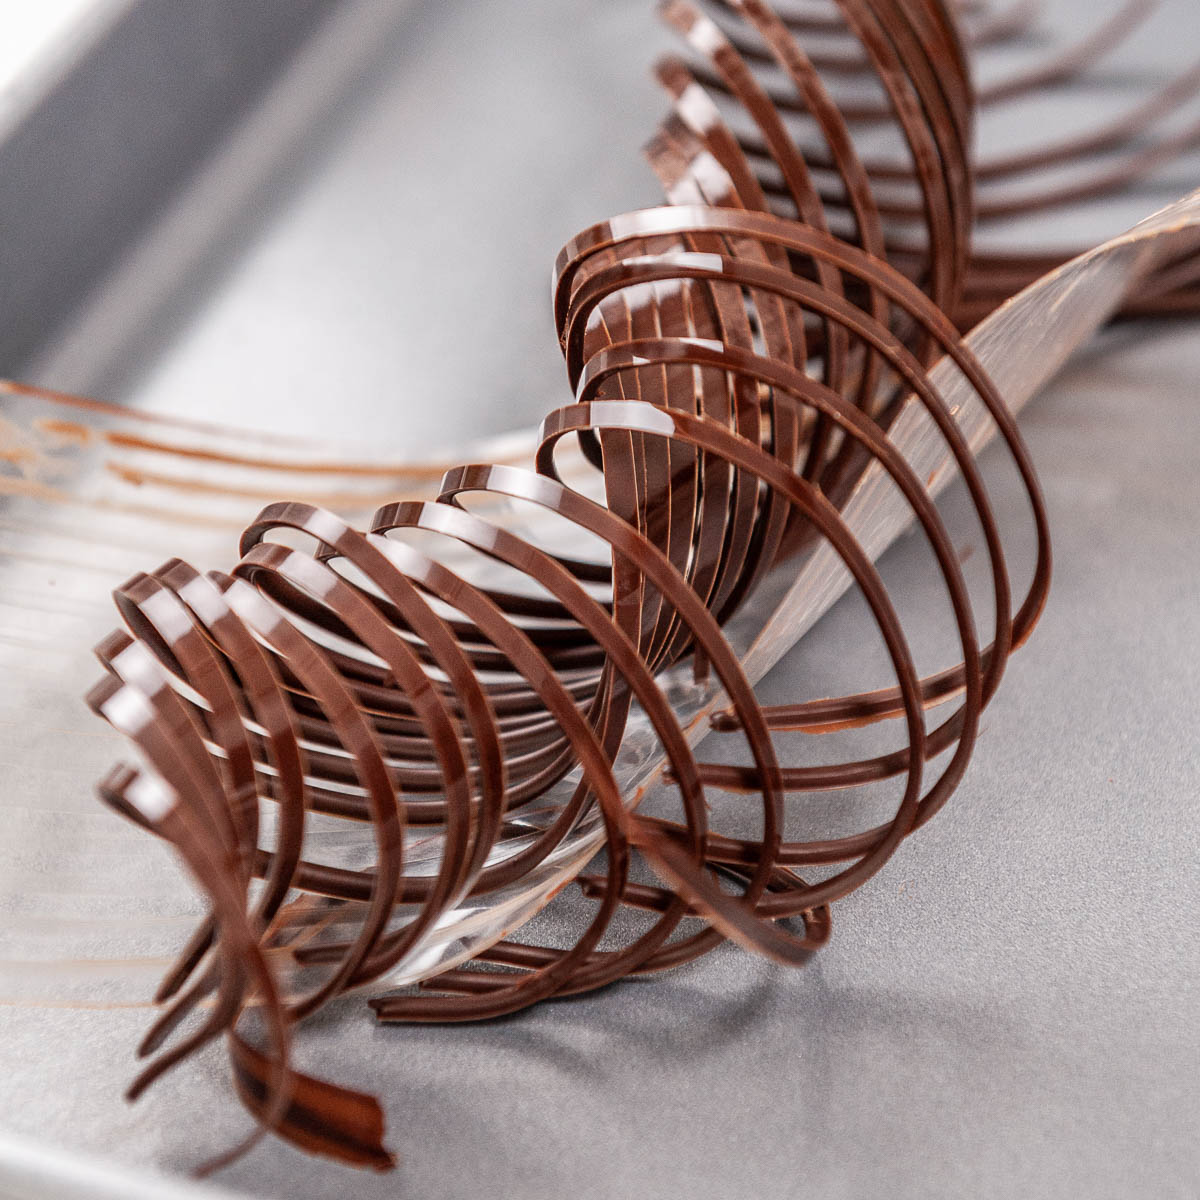
  9. Carefully peel off the acetate from the curls. Some will break and that is normal and to be expected. peeling acetate off chocolate curls
close up of chocolate curls

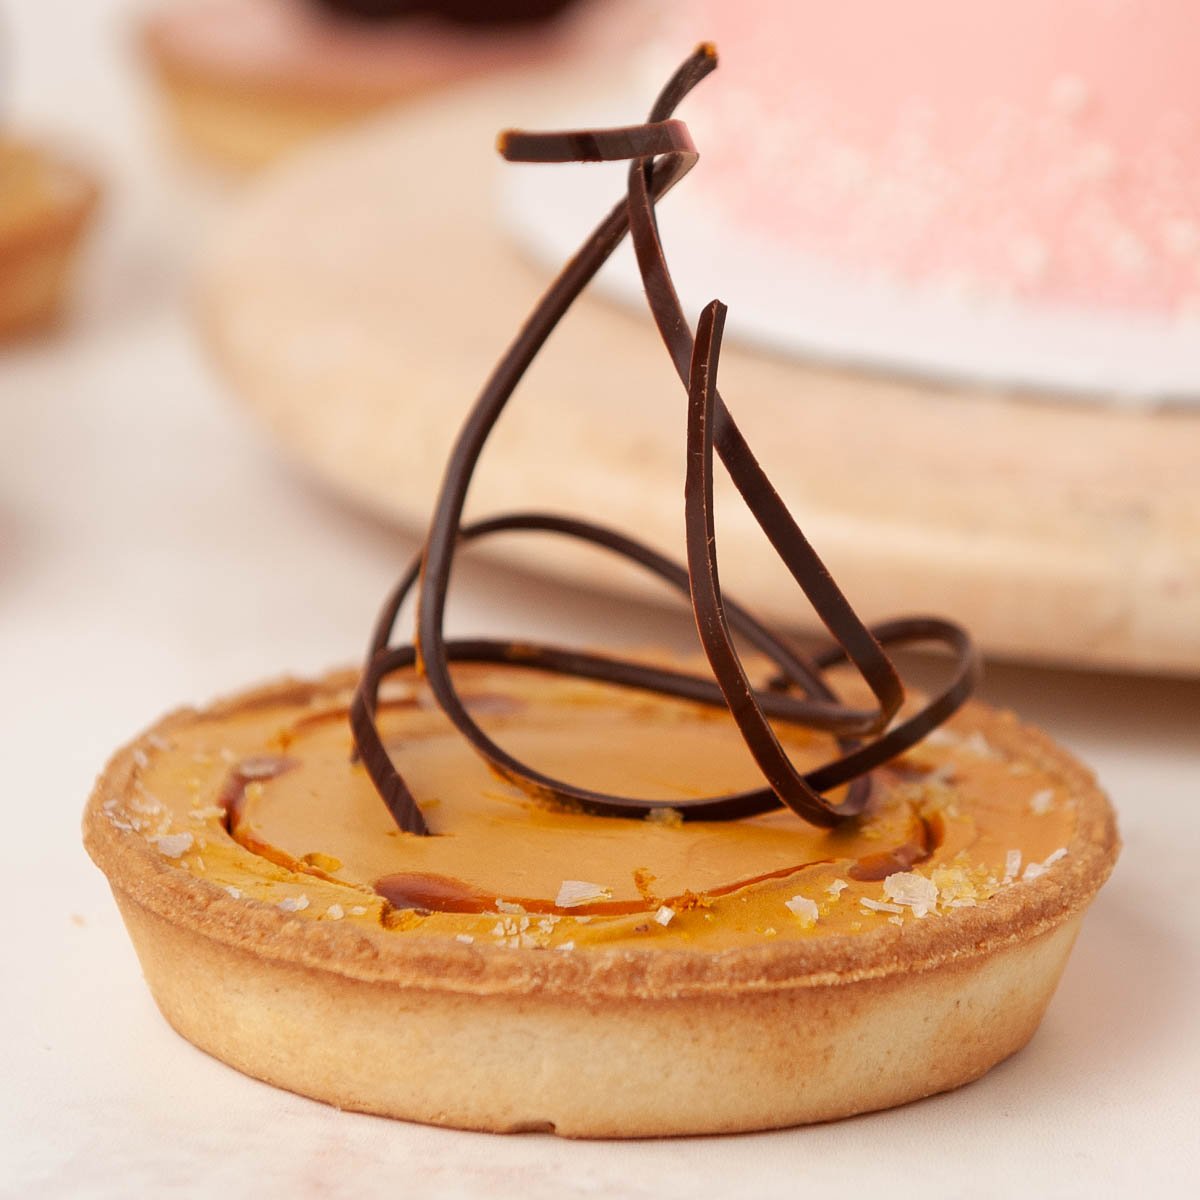
Now you can add the curls to the top of your tarts or cakes!

chocolate curls on a tart

How To Make A Chocolate Tiara

  1. Prepare your tempered chocolate and keep it in the warmer at 89ºF (32ºC)
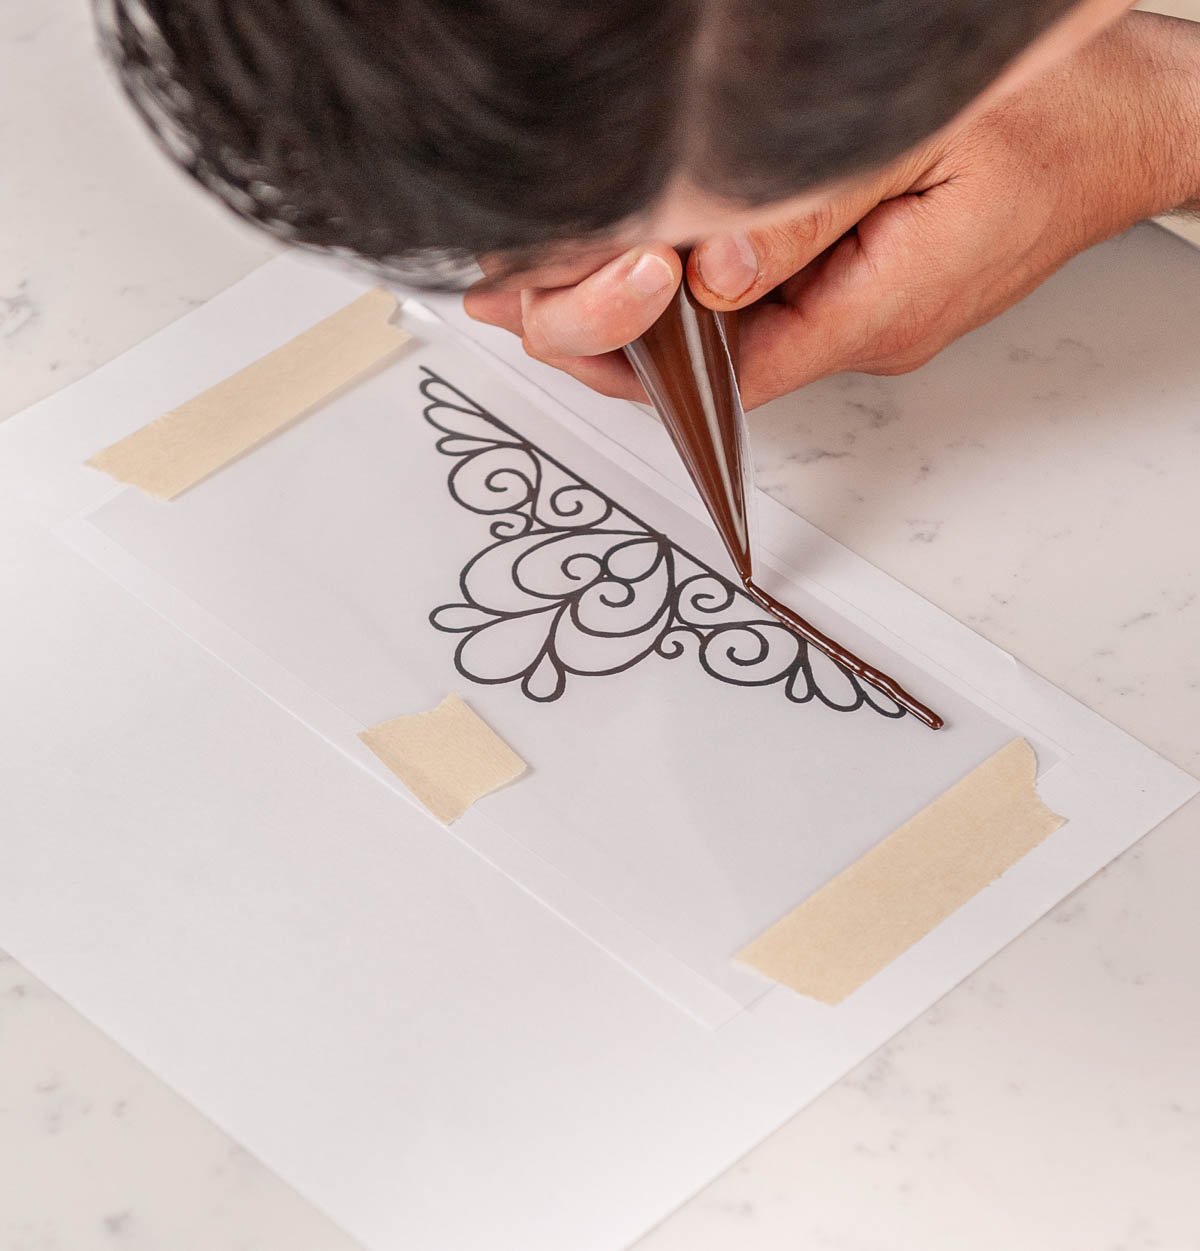
  2. Place your acetate over your tiara template and tape it down so that it doesn't shift.
  3. Pour your tempered chocolate into your piping bag and snip off the tip, not too big! adding chocolate to a piping bag
  4. Pipe the chocolate onto the acetate, following the lines of the template. piping chocolate into a tiara shape
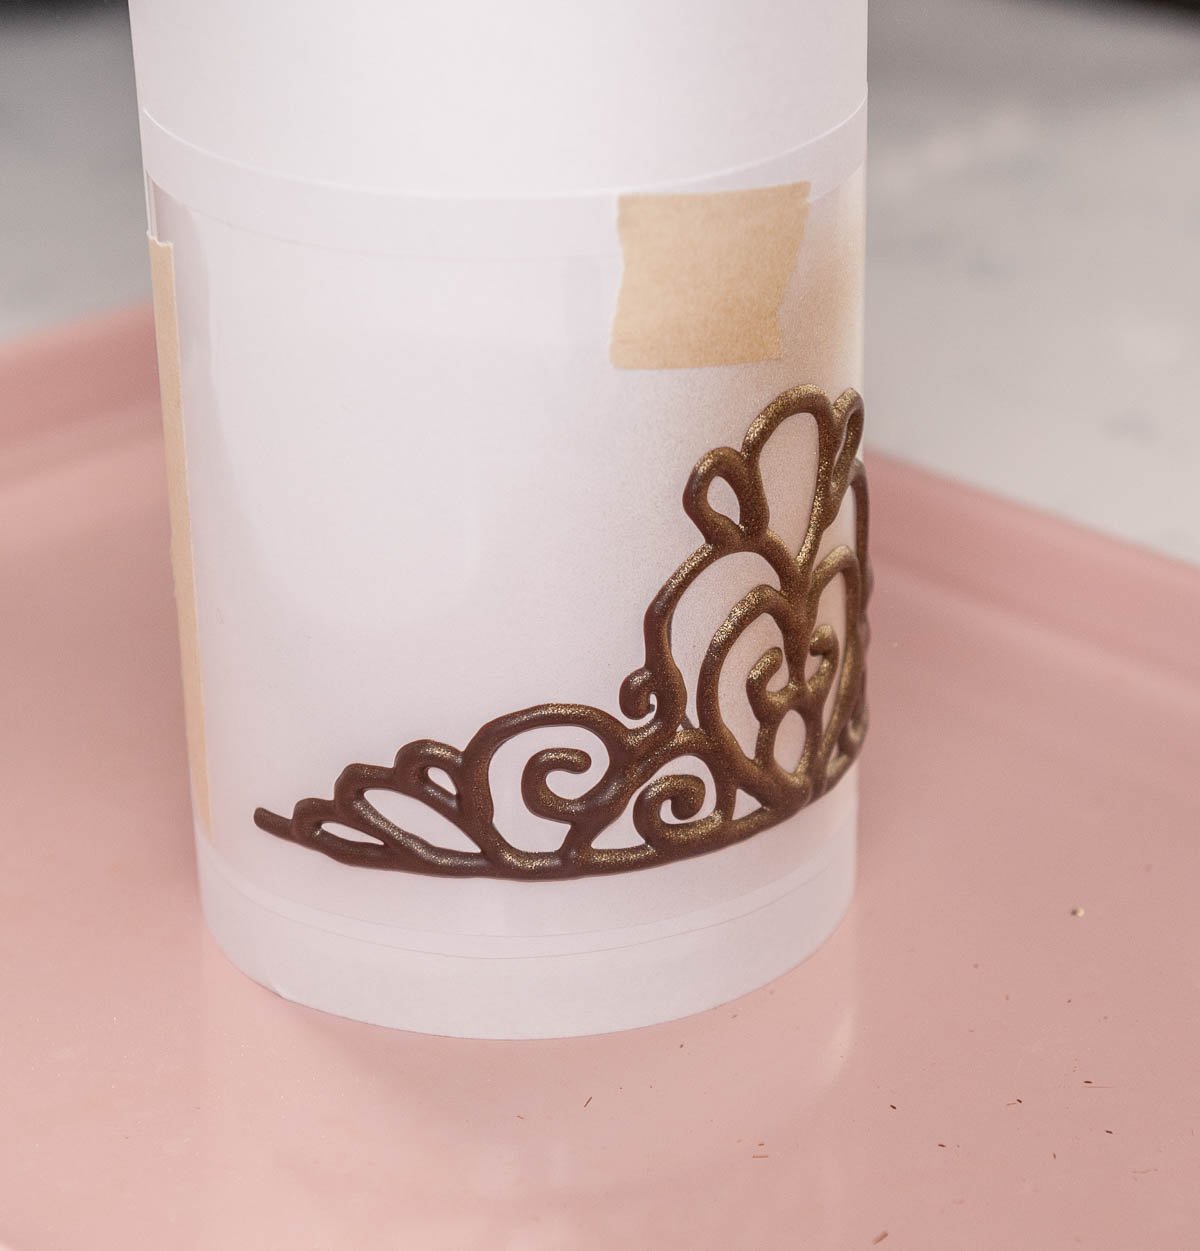
  5. After your chocolate loses it's shine but is still soft, you can tape the tiara to the styrofoam dummy to give it a curve.taping the chocolate tiara to a styrofoam dummy
  6. Allow the tiara to fully crystalize in the fridge for 5 minutes.
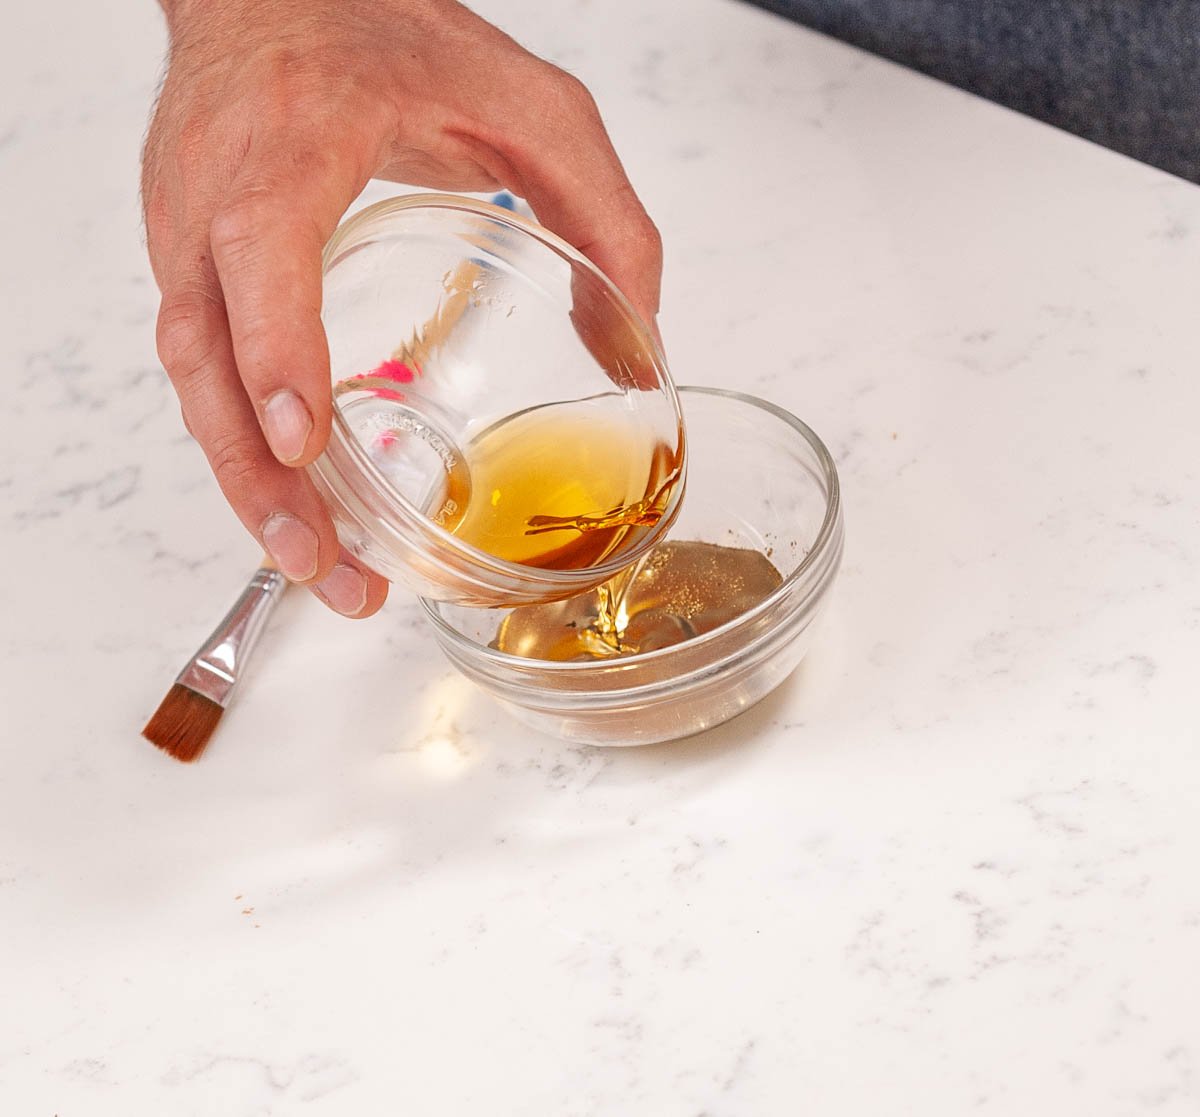
  7. Mix 1 Tablespoon Grand Marnier and 1 teaspoon super gold dust together. Grand Marnier makes the gold stick to the chocolate really well so that it doesn't rub off! So cool!adding grand marnier to gold powder
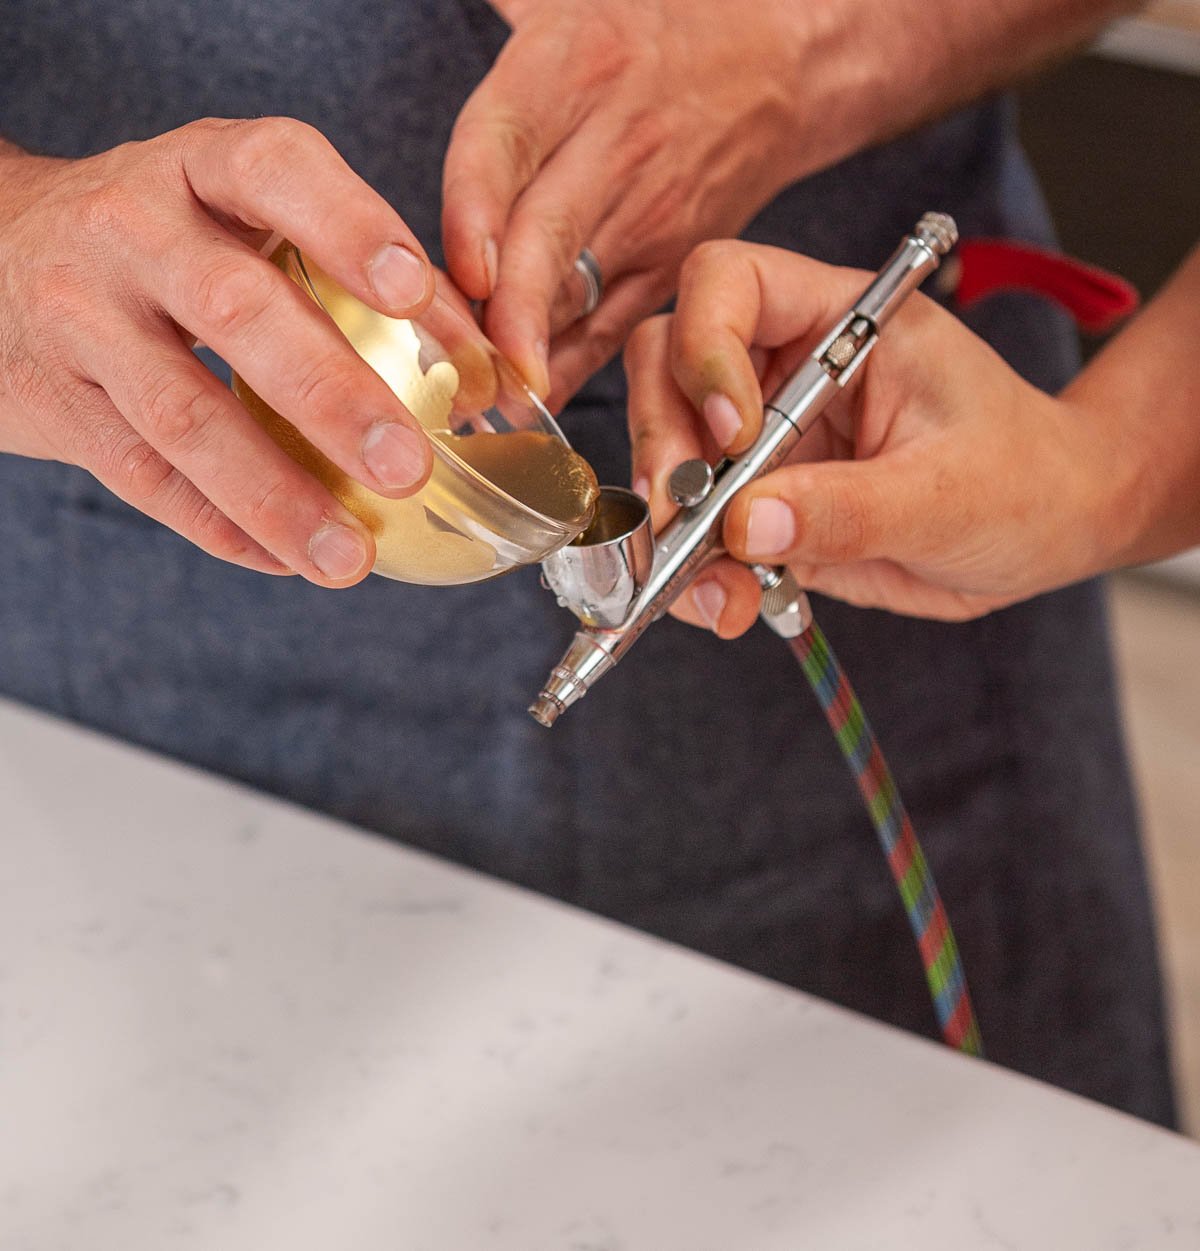
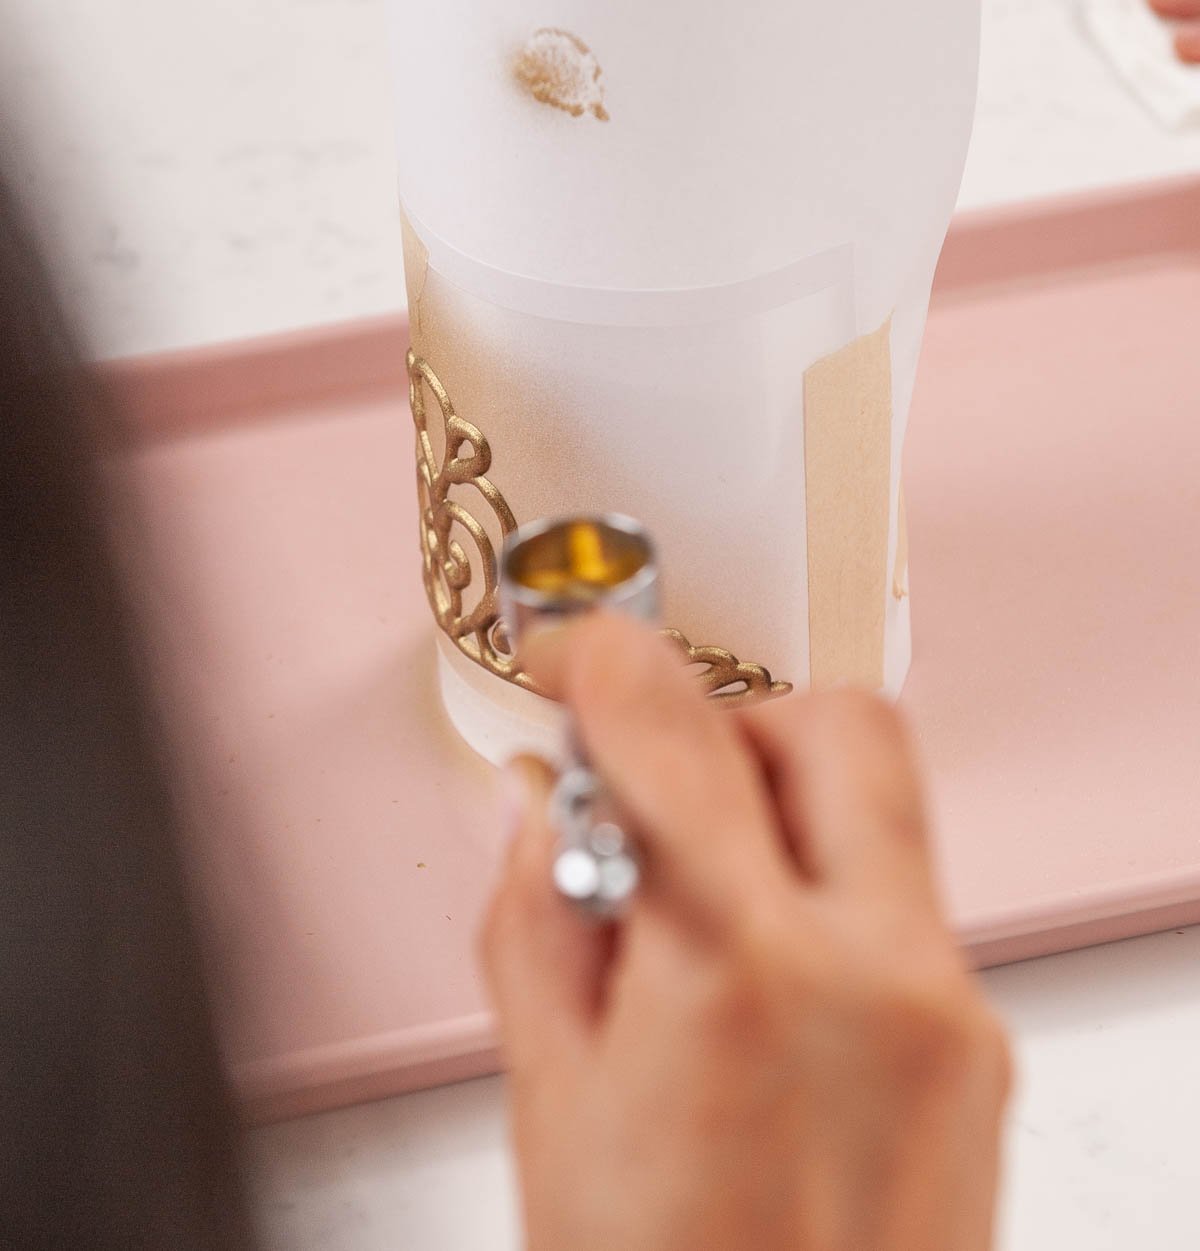
  8. Add the gold mixture to your airbrush and spray your chocolate tiara. adding gold mixture to an airbrushairbrushing a chocolate tiara gold
  9. Very carefully remove the styro from the paper by lifting the paper, not lifting the chocolate.
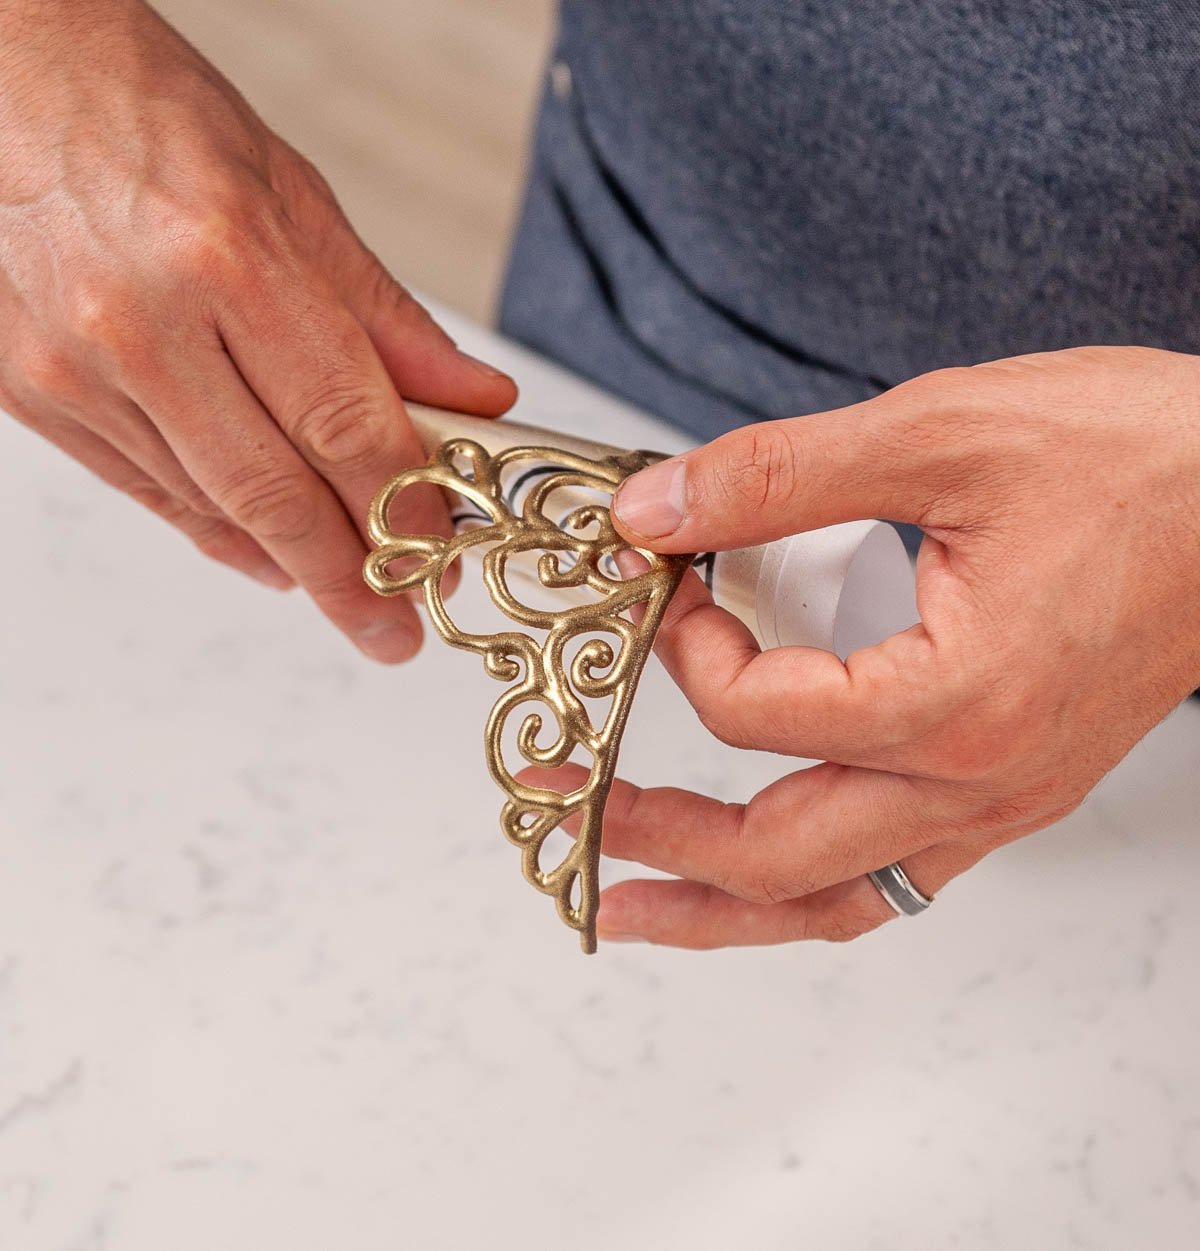
  10. Bend the acetate off the back of the tiara carefully to release it from the acetate. removing the chocolate tiara from the acetate
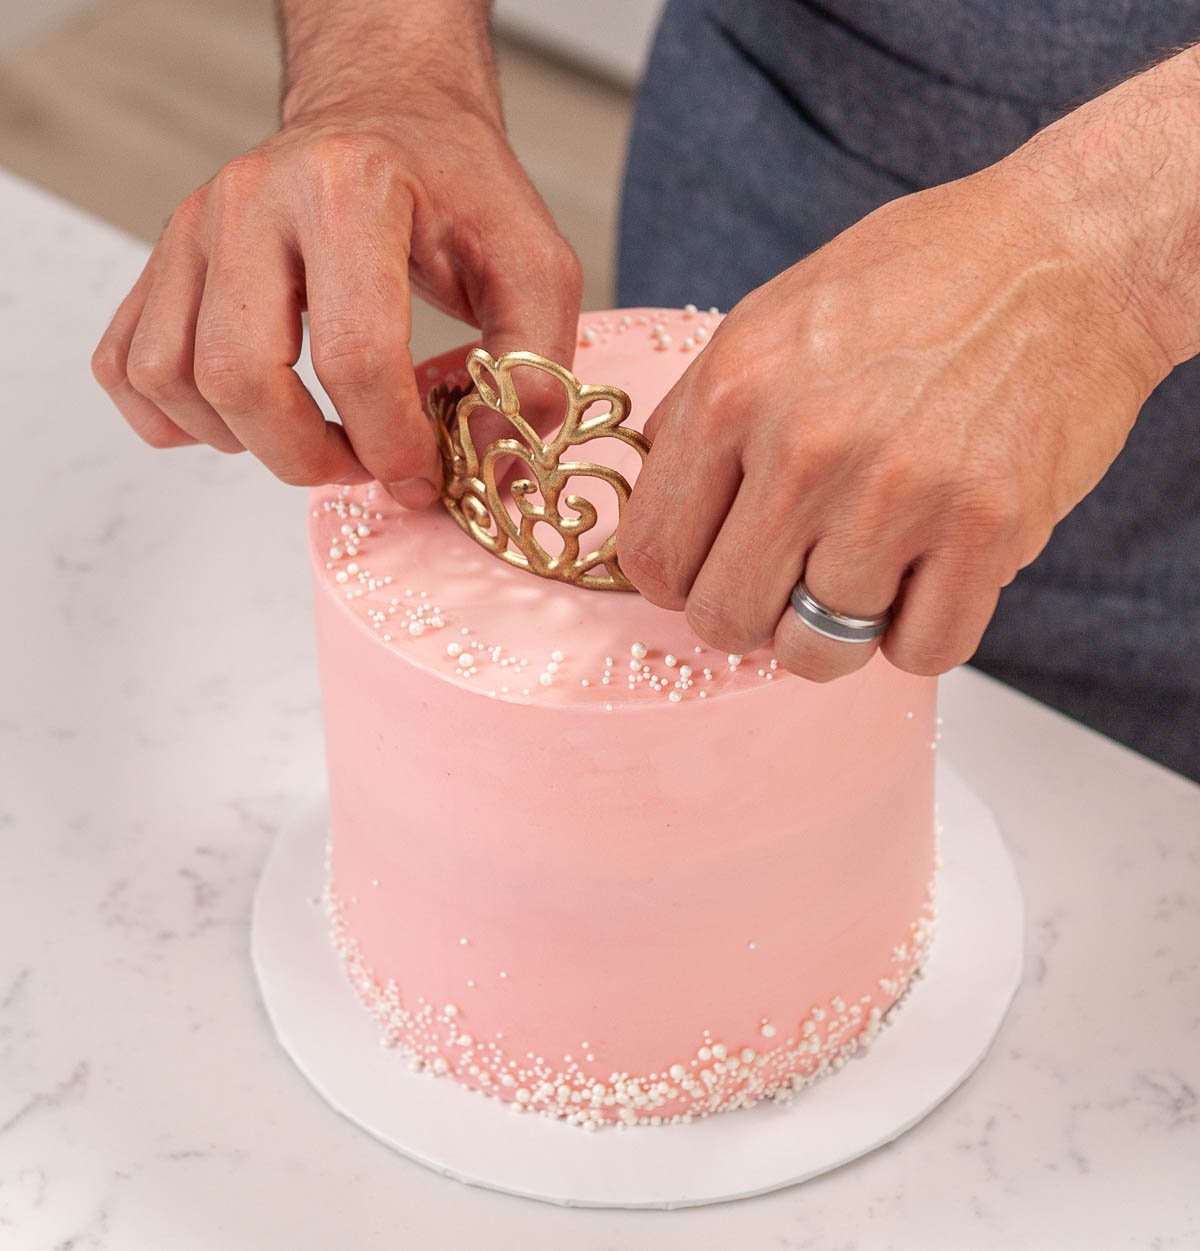
  11. Now you can place the tiara on top of the cake! placing a chocolate tiara on top of the cake

There are so many fun ways to make tempered chocolate decorations and we're barely scratching the surface. we've got more fun chocolate projects coming to you from Chef Christophe so let us know in the comments what you want to learn!

More Chocolate Recipes & Tutorials

How to temper chocolate with the EZ Temper machine

How to temper chocolate the easy way

6 Easy chocolate decorations

How to make hot chocolate bombs

Chocolate covered strawberries

Recipe

chocolate decorations
Print Recipe
5 from 1 vote

Easy Chocolate Decorations

Chef Christophe Rull shows us how to make easy chocolate decorations including chocolate curls, circles, squares, and a beautiful golden chocolate tiara!
Prep Time15 minutes mins
Cook Time0 minutes mins
Cooling30 minutes mins
Total Time45 minutes mins
Course: Dessert
Cuisine: American
Servings: 10 servings
Calories: 304kcal
Author: Liz Marek

Equipment

  • EZ Tempering Machine
  • Waring Chocolate Warmer
  • Thermometer
  • Acetate strips and sheets
  • Spatula
  • Piping Bags

Ingredients

  • 600 grams Chocolate https://www.cacao-barry.com/en-US/chocolate-couverture-cocoa/chd-p64ebpu/extra-bitter-guayaquil
  • 6 grams Cocoa Butter https://ifigourmet.com/collections/chocolate-products/products/cocoa-butter-1

Instructions

How To Temper Chocolate

  • Place your cocoa butter into the internal warmer of the EZ Tempering Machine the day before you need it. Let it warm overnight. If you don't have an EZ Tempering Machine, temper your chocolate using the traditional seeding method.
  • Melt 600 grams of bittersweet chocolate in the microwave or over a double boiler to 113ºF (45ºC) It's important to melt the chocolate to this temperature so that all the crystals in the cocoa butter are broken down properly and new crystals can re-form successfully.
  • Add in a few handfuls of tempered (chocolate comes tempered) chocolate to bring the temperature down. Stirring occasionally, cool your chocolate to 95ºF (35ºC).
  • At 89ºF (32ºC) add in 6-7 grams (1-2% of total chocolate weight) of your tempered cocoa butter paste from the EZ temper machine to the melted chocolate.
  • Stir and cool the mixture to 32ºF. At this point, the chocolate is tempered but make sure you do a test to make sure your chocolate is in temper before using it.
  • Carefully warm your chocolate to the ideal working temperature (usually found on the side of the bag if your chocolate is from Cacoa Barry) before using.

How To Make Chocolate Decorations

  • After you've tempered your chocolate, you can do almost anything with it! Make sure to keep it at the correct working temperatures for the type of chocolate you are using.
    Dark chocolate: 89ºF (32ºC)
    White and milk chocolate: 82ºF and 86ºF (29ºC and 30ºC)
  • Watch the video tutorial or read the blog post above for steps on how to make chocolate circles, squares, curls, and a tiara.

Video

Notes

Chocolate Tiara Template
EZ Tempering Machine
Waring Chocolate Warmer
Cacoa Barry Chocolate
Cocoa Butter Drops
Thermometer
If you haven't watched Christophe's video on how to temper chocolate with the EZ Temper machine, you'll want to watch that first.
No tempering machine? No problem! You can temper your chocolate in the microwave or use the traditional seeding method to get your chocolate tempered.
 

Nutrition

Serving: 1serving | Calories: 304kcal | Carbohydrates: 36g | Protein: 2g | Fat: 21g | Saturated Fat: 12g | Polyunsaturated Fat: 1g | Monounsaturated Fat: 7g | Sodium: 10mg | Potassium: 174mg | Fiber: 3g | Sugar: 31g | Calcium: 14mg | Iron: 2mg
adding tempered cocoa butter to melted chocolate in front of the ez temper machine

September 23, 2021 Blog

How To Temper Chocolate With Cocoa Butter

Chef Christophe Rull (former Executive Pastry Chef of the Park Hyatt Aviara and one of the stars of the Bake Squad) shows us his favorite chocolate tempering machine for making the perfect batch of tempered chocolate.

So if you're looking to take the leap into working with chocolate, you don't want to miss this blog post. We'll be going over the basics of chocolate composition, why we need to temper, and of course, HOW to temper with this amazing machine! You won't believe how easy it is (I know I was blown away!)

Ingredients & Equipment

When you need to make a lot of chocolate pieces at a time, you don't have time to melt small batches at a time like I do with the microwave method. But there are still some time-saving techniques you can adopt using the tools that Christophe uses.

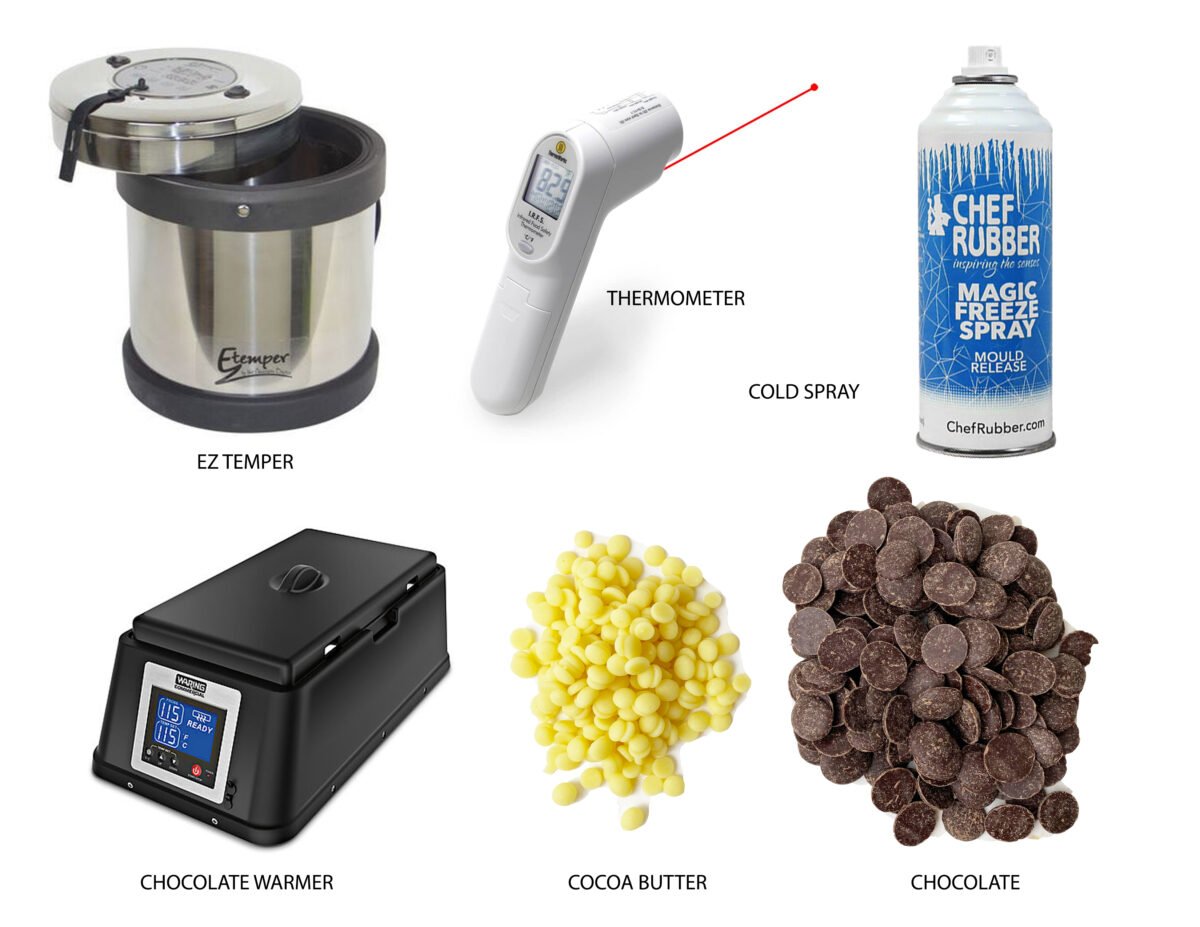
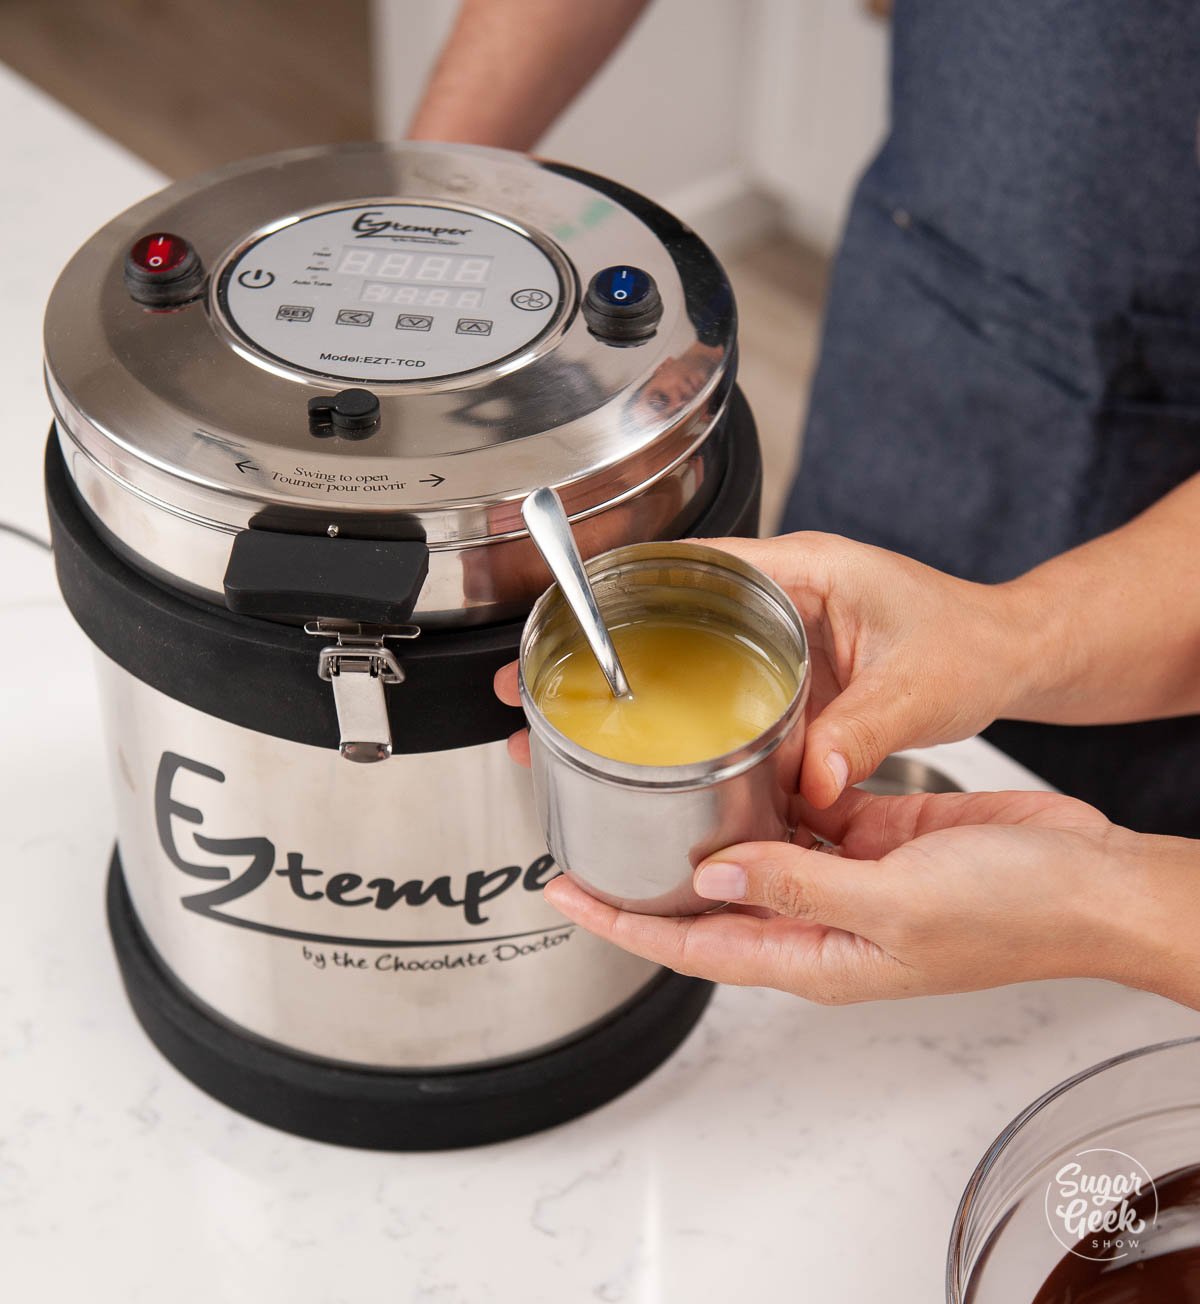
EZ-Temper Machine: The EZ-Temper machine is a great little gadget that melts cocoa butter to the exact temperature it needs to be for the good crystals in cocoa butter to form. It can be held at that temperature indefinitely so that any time you need tempered chocolate, you just add it to your melted chocolate and you're good to go! Super duper easy and time-saving.

Cocoa Butter Drops: I love these small cocoa butter drops from IFI Gourmet because they are really small and able to be melted perfectly in the EZ Tempering Machine.

All you have to do is add 1-2% of this melted cocoa butter to your melted chocolate at 89ºF (32ºC), stir, and your chocolate is tempered!

Waring Chocolate Warmer: This is a must for big chocolate projects. After your chocolate is tempered, the waring chocolate warmer keeps your chocolate at the perfect temperature so that you don't have to worry about your chocolate getting too cold and falling out of temper before you can use it.

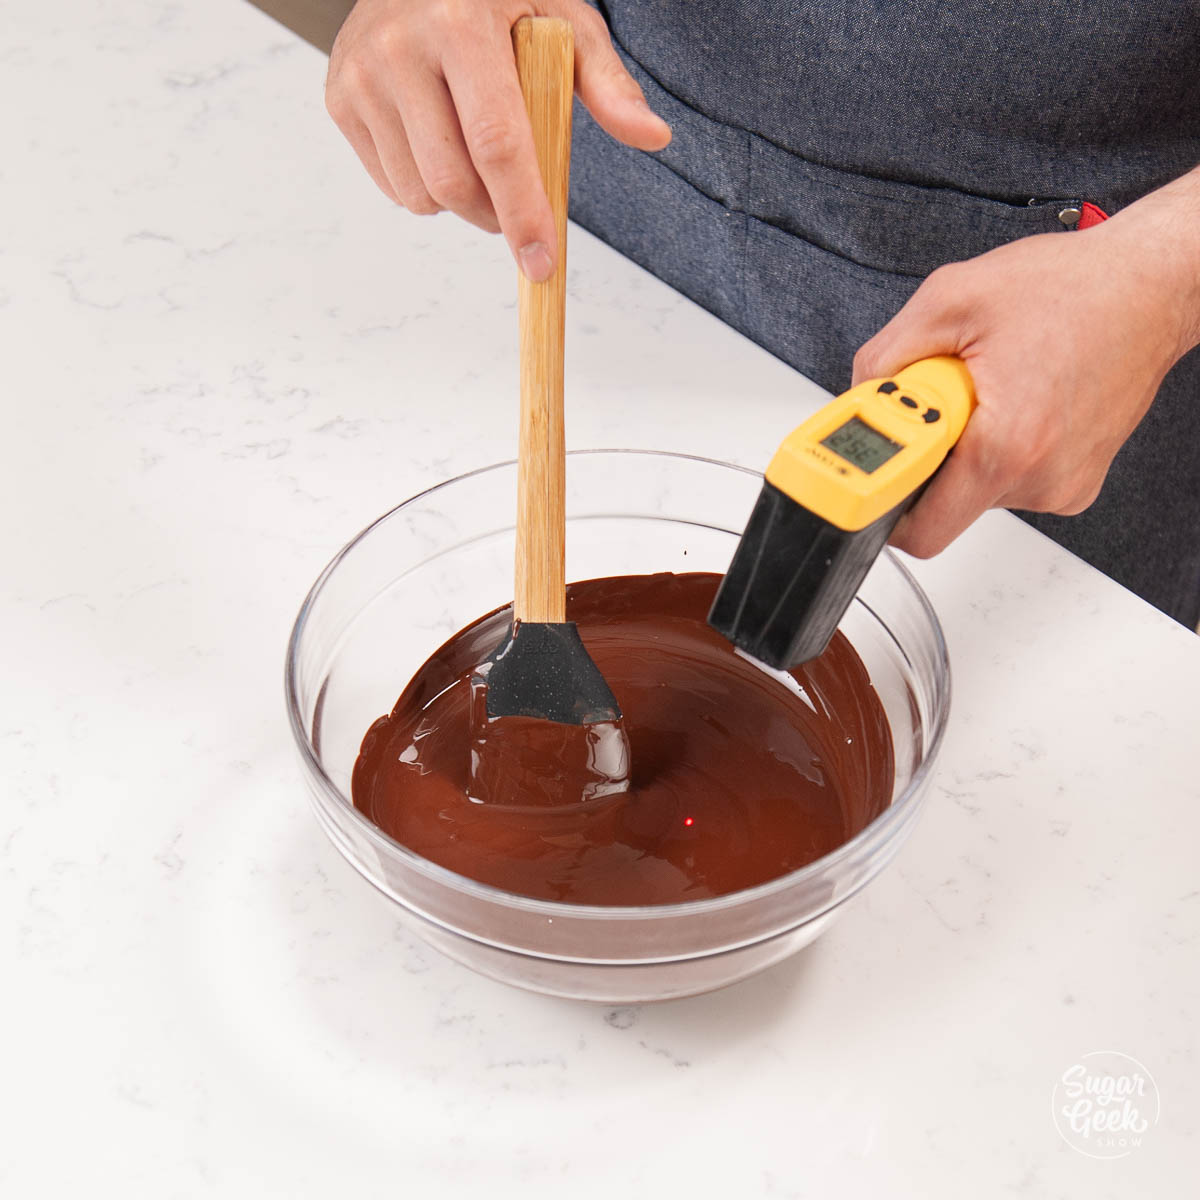
Thermometer: You simply cannot temper chocolate without a trusty thermometer! I love the infrared thermometer from Thermoworks because it's super accurate and you don't have to touch the chocolate to get a reading. Sometimes the difference between tempered and untempered is two degrees so it's important to always know the temperature of your chocolate.

Cold Spray: A good, food-safe cold spray is a must for quickly setting your chocolate pieces.

What's In This Blog Post?

  • Ingredients & Equipment
  • Why Do You Need To Temper Chocolate?
  • What Chocolate Should I Use For Tempering?
  • How To Store Tempered Chocolate

Why Do You Need To Temper Chocolate?

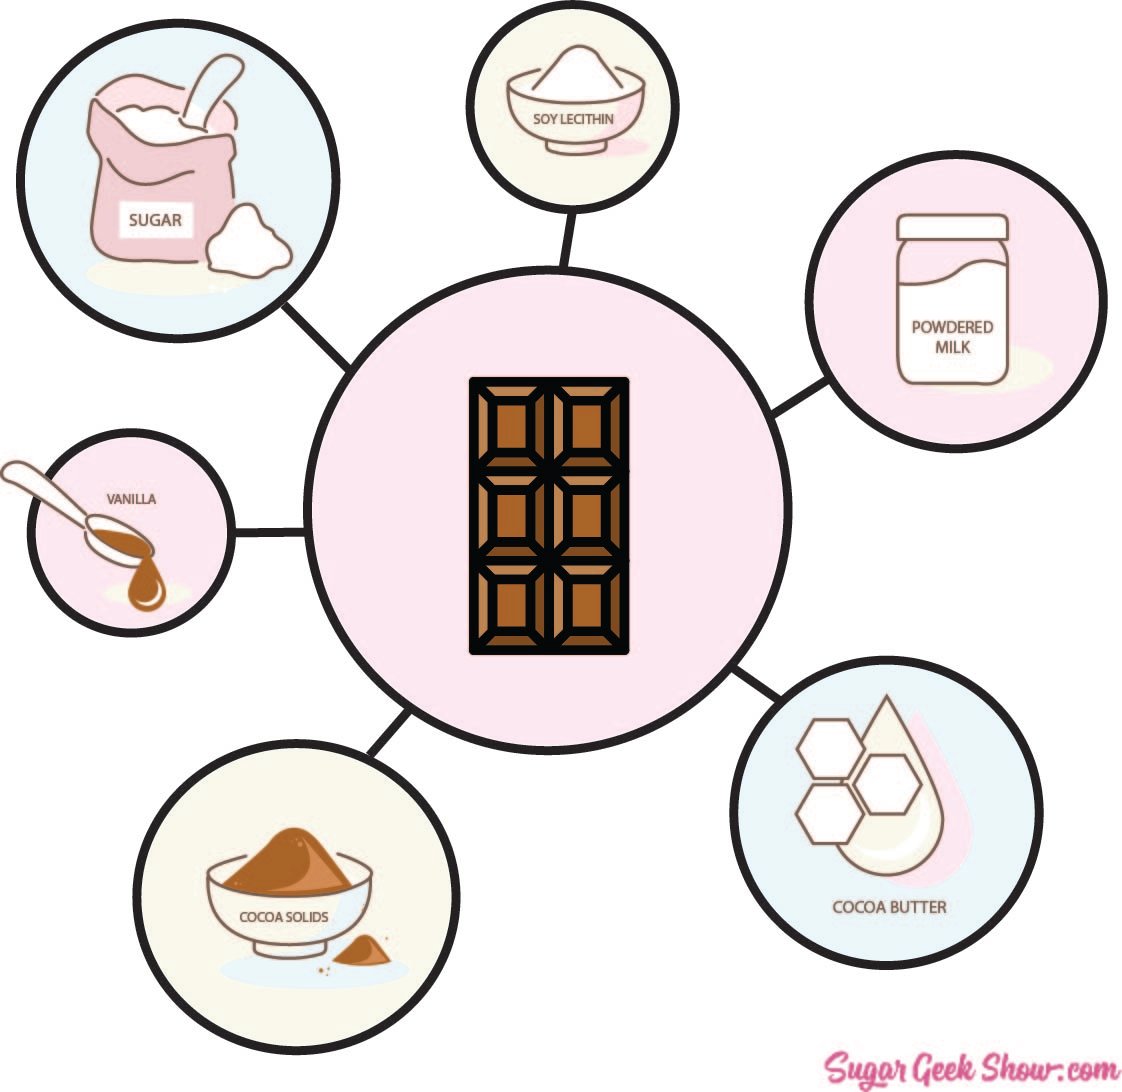
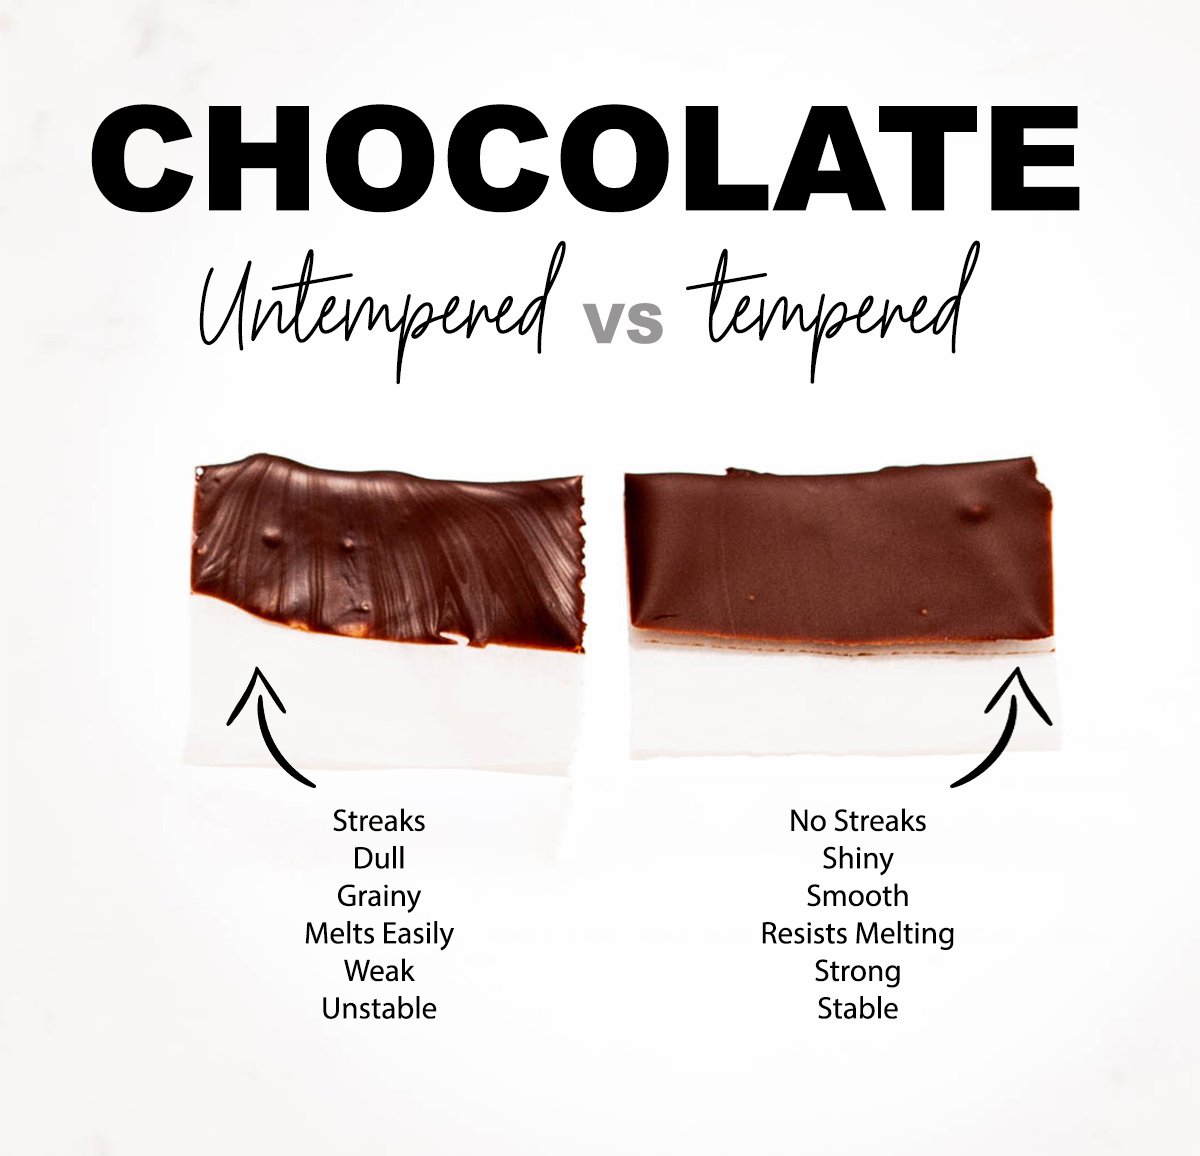
When you melt chocolate, you are breaking up all the components that make up chocolate (cocoa solids, cocoa butter, sugar, milk, etc). If you were to just let this chocolate solidify naturally, you will notice that the chocolate has some streaks in it (cocoa butter separation), it will not be shiny and will most likely have a grainy texture (untempered crystalline structure).

Tempering chocolate controls how the cocoa butter solidifies so that only the proper crystals form and all the components come back together to form a smooth, strong, and shiny chocolate once again.

When you're making gravity-defying showpieces, high-end chocolate pastries, and showpieces, your chocolate needs to be tempered to perfection.

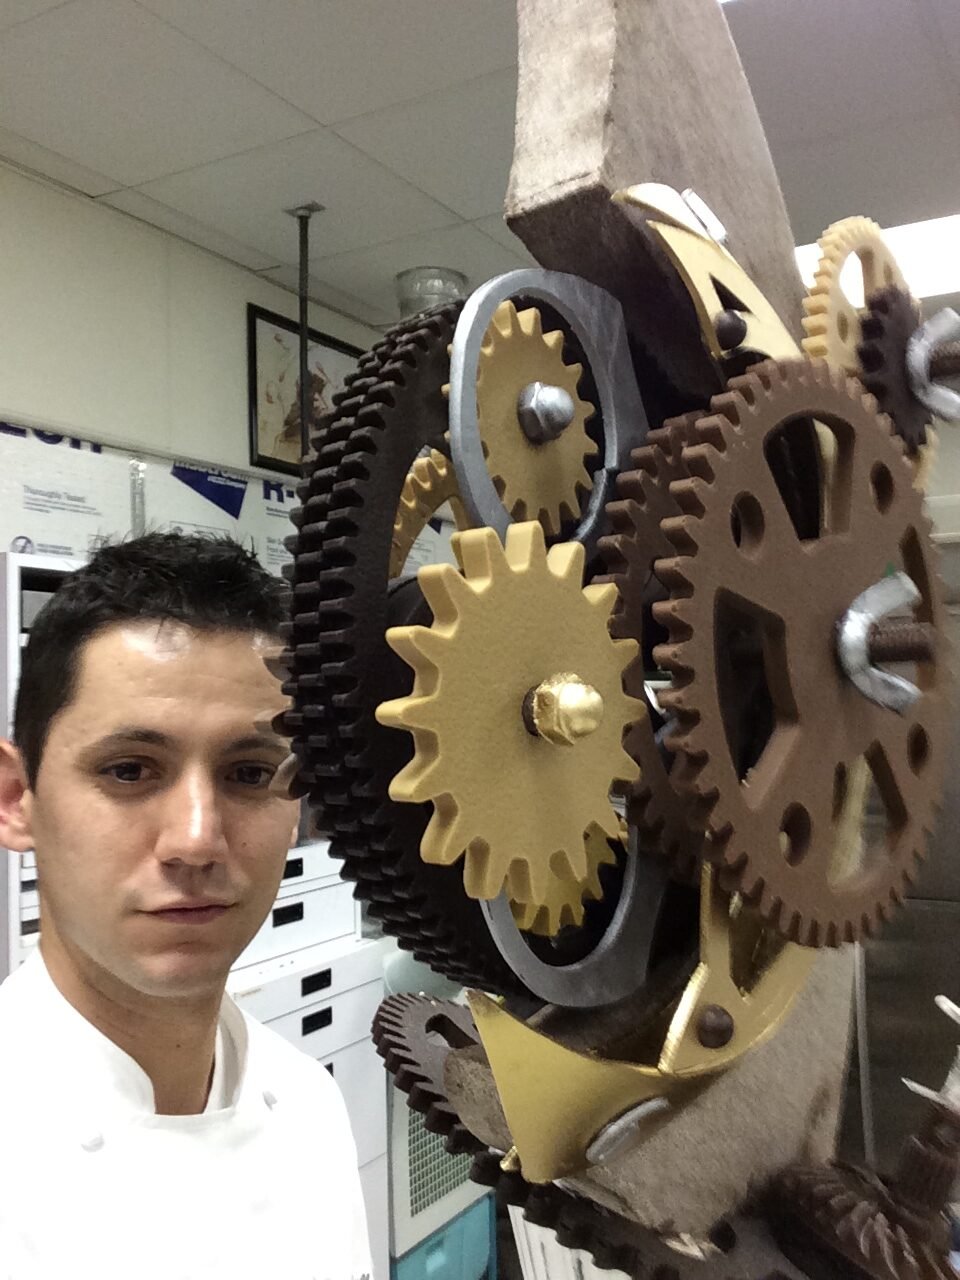
Chistophe posing next to a large chocolate showpiece created with different types of tempered chocolate

Tempering is also important for when you're using chocolate in polycarbonate molds like you use to make shiny hot chocolate bombs or for making bonbons.

So we only need to temper "real" chocolate. Real chocolate contains cocoa butter and is derived from the cocoa pod, not imitation chocolate which may contain wax or palm kernel oil in place of cocoa butter which cannot be tempered.
What Chocolate Should I Use For Tempering?

Whenever you hear us talk about "real" chocolate, we're referring to chocolate that is derived from a cocoa pod and contains cocoa butter. If your chocolate doesn't have cocoa butter, tempering won't work.

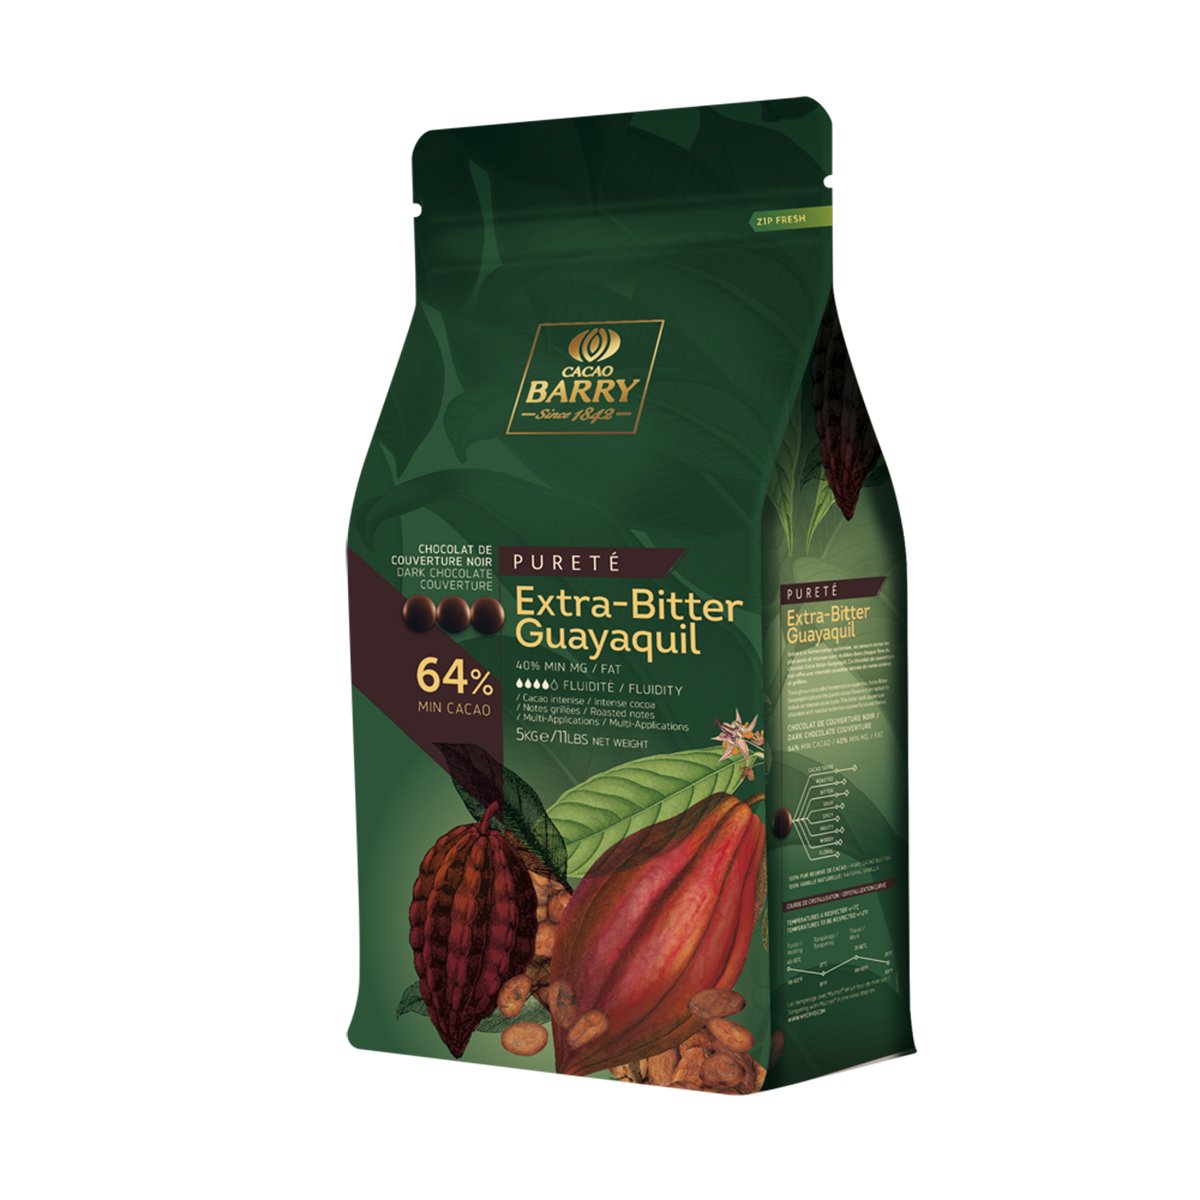
Christophe and I both love to use Cacao Barry chocolate. The chocolate not only tastes delicious but there are SO many options for flavor and workability. The best part is, every bag says right on the side what the cocoa solid content is, the cocoa butter content and what temperatures it needs to be tempered to. So it's great for aspiring chocolatiers.

For today's lesson we are using Cacao Barry extra bitter, Guayaquil which has 64% cocoa and 40% fluidity which makes it perfect for making little toppers that need to be strong and shiny.

You, of course, can use any kind of chocolate that you like but just keep in mind that different chocolates will have different amounts of fluidity even if they do contain cocoa butter. You can add in more cocoa butter to get your chocolate more fluid but be careful, it is possible to add too much.

We also really love working with Cacoa Barry because they put a lot of effort into ethically sourcing their chocolate and paying their workers a fair wage. Learn more about how chocolate is made from bean to bar.

It is possible to use imitation chocolate for some projects but for our purposes, we will only be talking about using real chocolate.

How To Temper Chocolate With An EZ Temper Machine

EZ Temper Machine

Tempering chocolate can seem really complicated but it's pretty simple. We are heating and cooling the chocolate to specific temperatures to make the good, strong crystals in the cocoa butter form and for all the components to come back together. Most people's problems come from not using the right chocolate or not knowing what temperatures their specific chocolate needs to be tempered to.

If you're a beginner, I highly suggest using the same chocolate Christophe is using or at least real chocolate that is 60-70% cocoa content.

Remember to turn your EZ Temper on the day before you need to use it so that your cocoa butter has time to melt down to the correct temperature and be ready to use.

Step 1 - Melt 600 grams of bittersweet chocolate in the microwave or over a double boiler to 113ºF (45ºC) It's important to melt the chocolate to this temperature so that all the crystals in the cocoa butter are broken down properly and new crystals can re-form successfully.

melted chocolate in a clear bowl

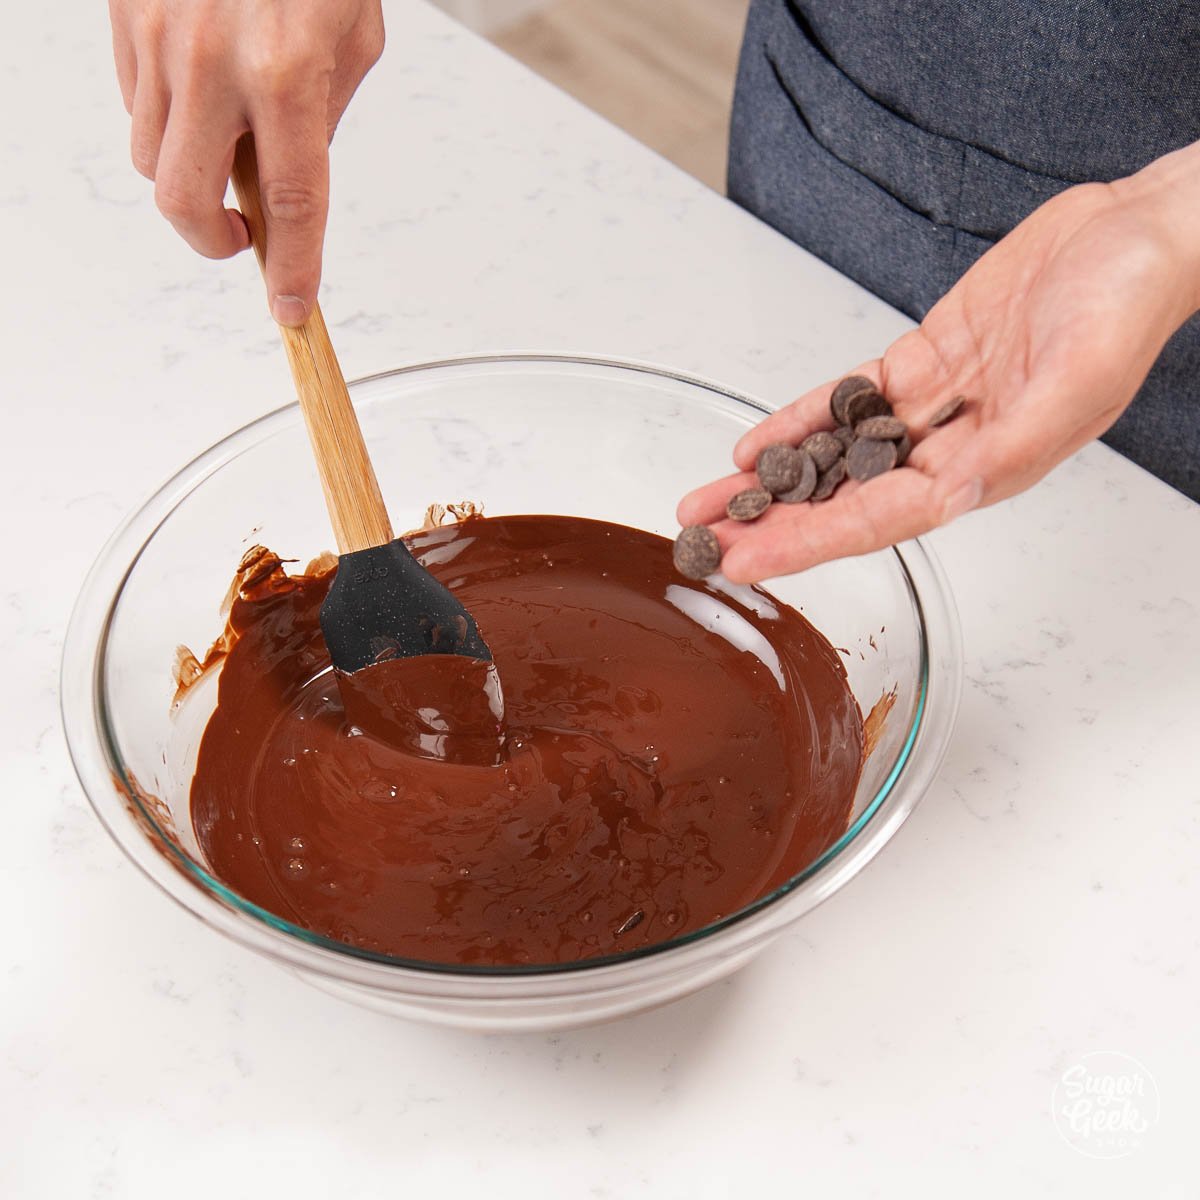
Step 2 - Add in a few handfuls of tempered (chocolate comes tempered) chocolate to bring the temperature down. Stirring occasionally, cool your chocolate to 95ºF (35ºC).adding tempered chocolate to melted chocolate

Step 3 - When your chocolate is at 95ºF (35ºC) add in 6 grams (1-2% of total chocolate weight) of your tempered cocoa butter paste from the EZ temper machine to the melted chocolate. adding tempered cocoa butter to melted chocolate

Step 4 - Stir and cool the mixture to 32ºF. At this point, the chocolate is tempered but make sure you do a test to make sure your chocolate is in temper before using it. bowl of tempered chocolate

How Do I Know If My Chocolate Is In Temper?

It's always a good idea to test your chocolate to see if its tempered properly before you start using it because it's easy to test, it's not easy to scrape untempered chocolate out of your mold and start all over.

To test your chocolate, dip a piece of parchment paper into your chocolate and lay it on the table. Your chocolate should solidify in about 5 minutes. The surface should look smooth, shiny. The chocolate should snap in half and not melt too easily in your hands.testing the temper of chocolate on parchment paper

Note: Your room should be between 64ºF (18ºC) - 68ºF (20ºC) for your chocolate to solidify properly. A warm room and chocolate do not mix.

If you see some streaks in your chocolate (blooming) a dull surface or the chocolate is not solidifying, you may need to add more tempered cocoa butter or re-temper your chocolate and pay closer attention to your temperatures and make sure you are stirring well to distribute the cocoa butter crystals evenly.

How To Store Tempered Chocolate

Now that our chocolate is tempered, you want to keep it that way! Christophe stores his tempered chocolate in a warming machine at exactly 89ºF (32ºC) so that it's ready to use at any moment.

waring chocolate warmer

You can leave the chocolate in the warmer as long as you need to.

Once you are done with your chocolate it's a good idea to pour it out onto parchment so it doesn't solidify into your warmer. Then you can chop it up and store it in a container to be used again later when you need some tempered chocolate.

How To Make A Chocolate Heart Topper With Tempered Chocolate

Making a simple chocolate cake topper is a great way to add detail to a cake that is really simple to reproduce, tastes amazing and looks amazing! All you need is a heart cookie cutter, a 3" circle cutter, some metallic dust, kitchen torch, brush and cold spray.

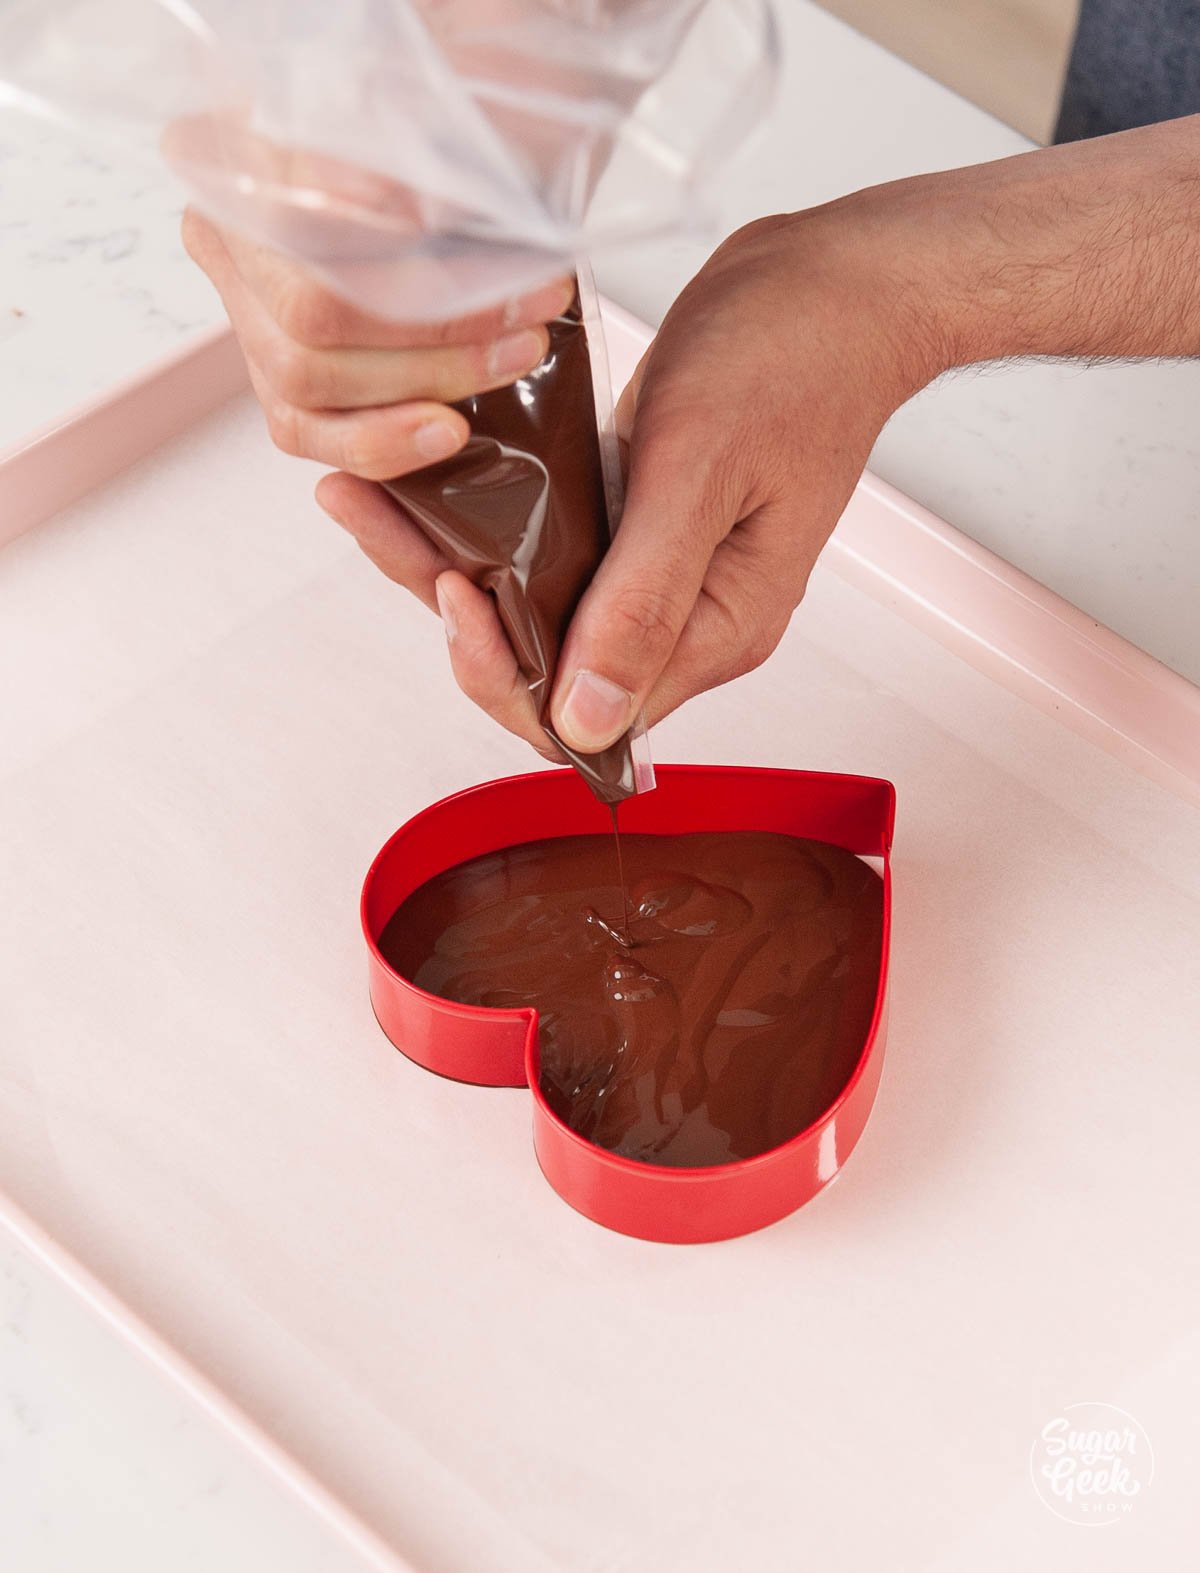
Step 1: Place the heart cutter and circle cutter on top of some parchment paper on a sheet pan. Pour the tempered chocolate into the mold until it's about ½" thick. Pouring tempered chocolate into a heart cookie cutter

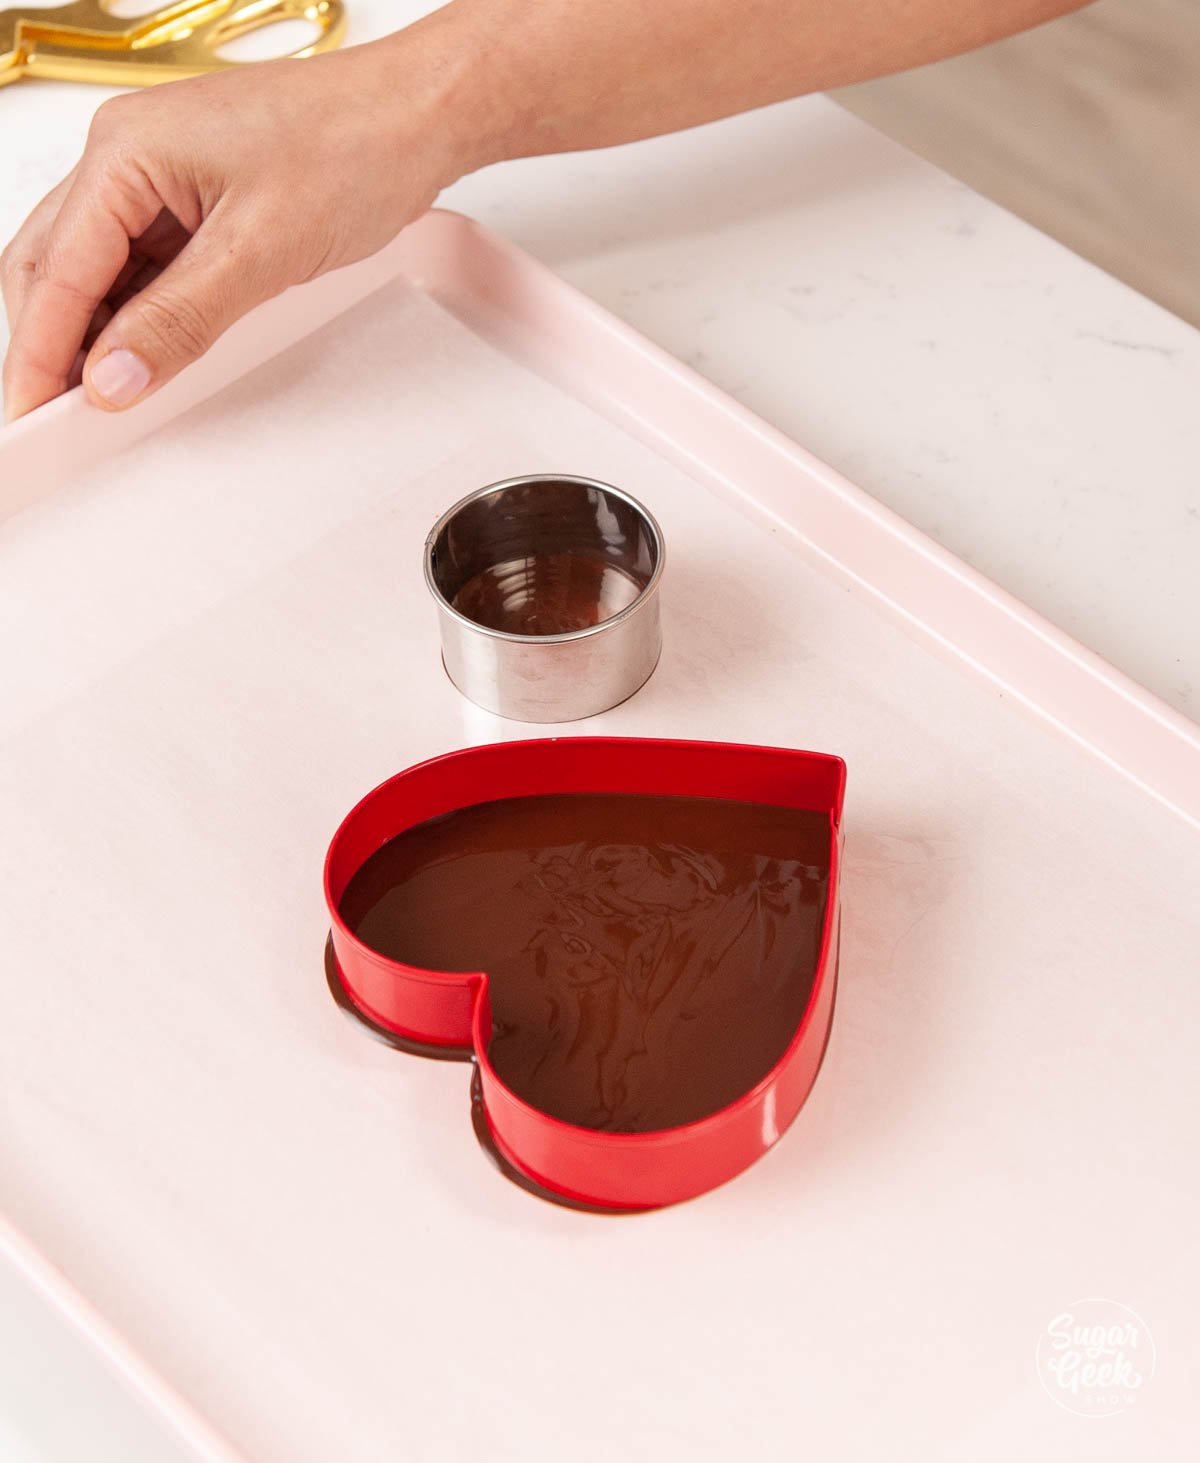
Step 2: Repeat the process with the round cutter.

Step 3: Place the sheet pan into the fridge for about 10 minutes. The cold causes the tempered chocolate to contract and pull away from the cutters.tempered chocolate inside a heart and circle cookie cutter

Step 4: Remove the chocolate from the cookie cutters with gloved hands so you don't leave fingerprints.

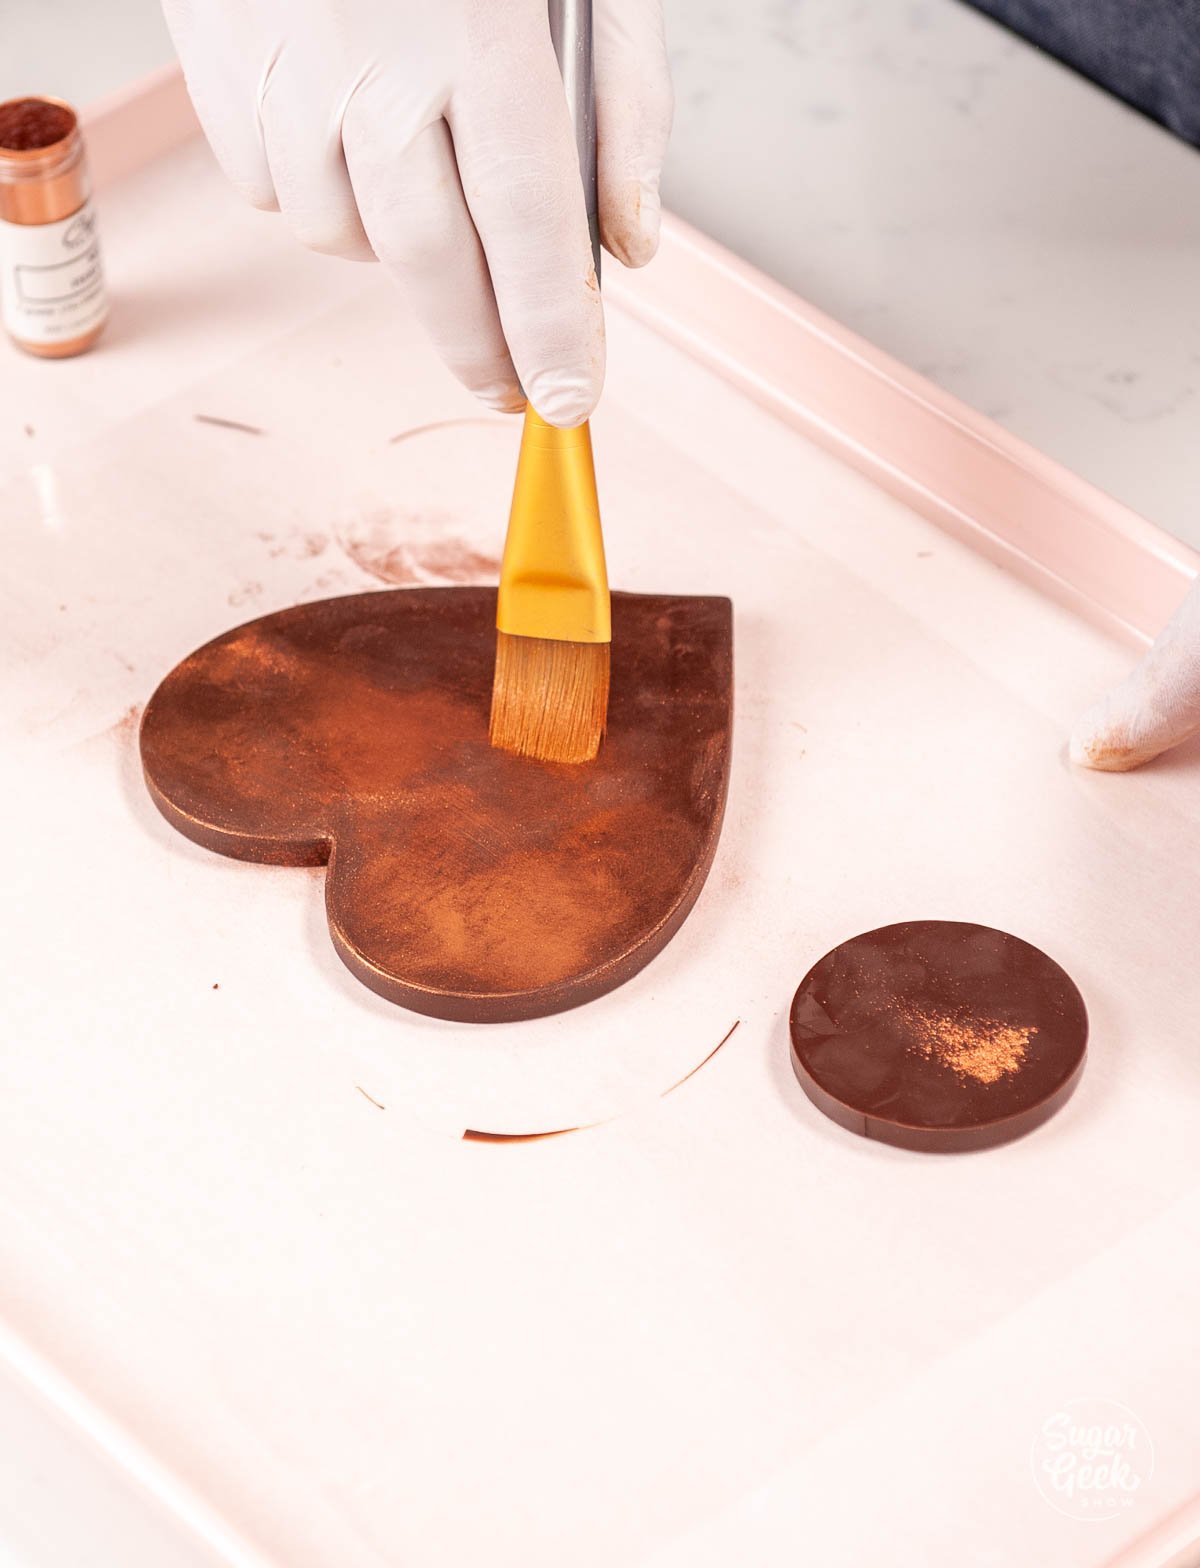
Step 5: Use a paintbrush to cover the chocolate in the metallic dust.brushing the chocolate with metallic dust

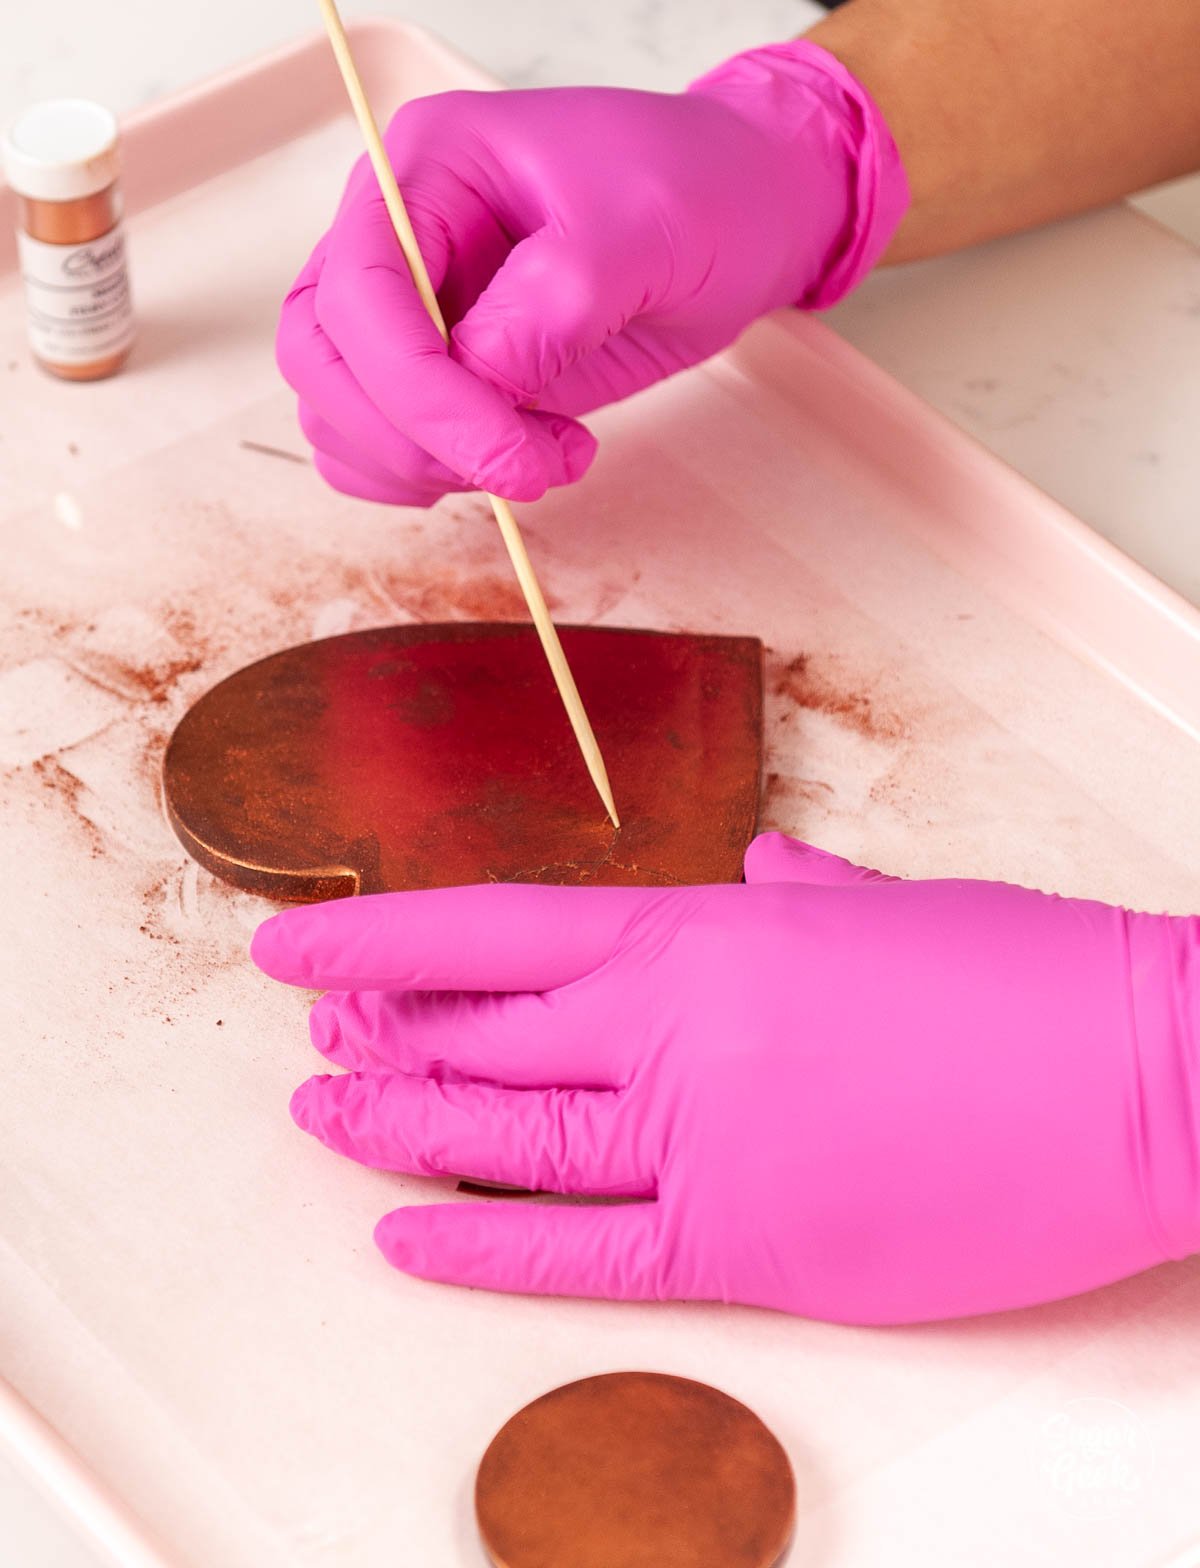
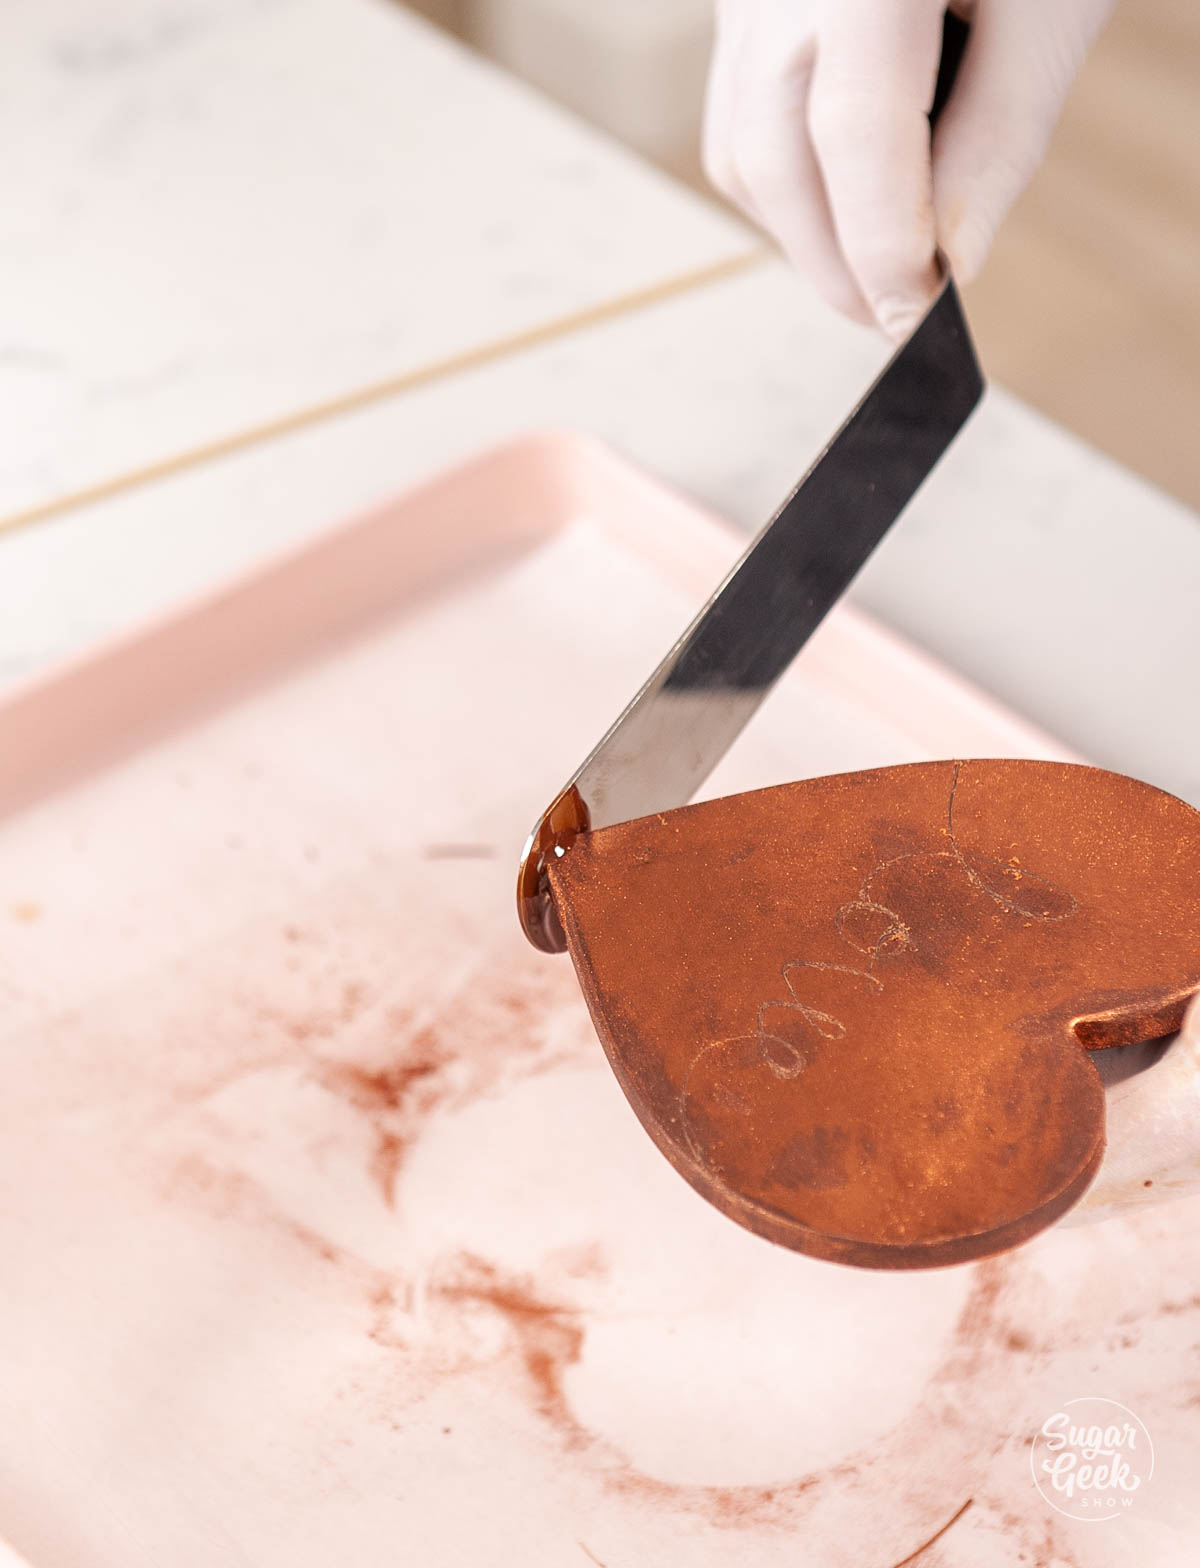
Step 6: Use a toothpick or other sharp tool to write a word in the dust. I wrote the word "love". engraving chocolate with a wooden skewer

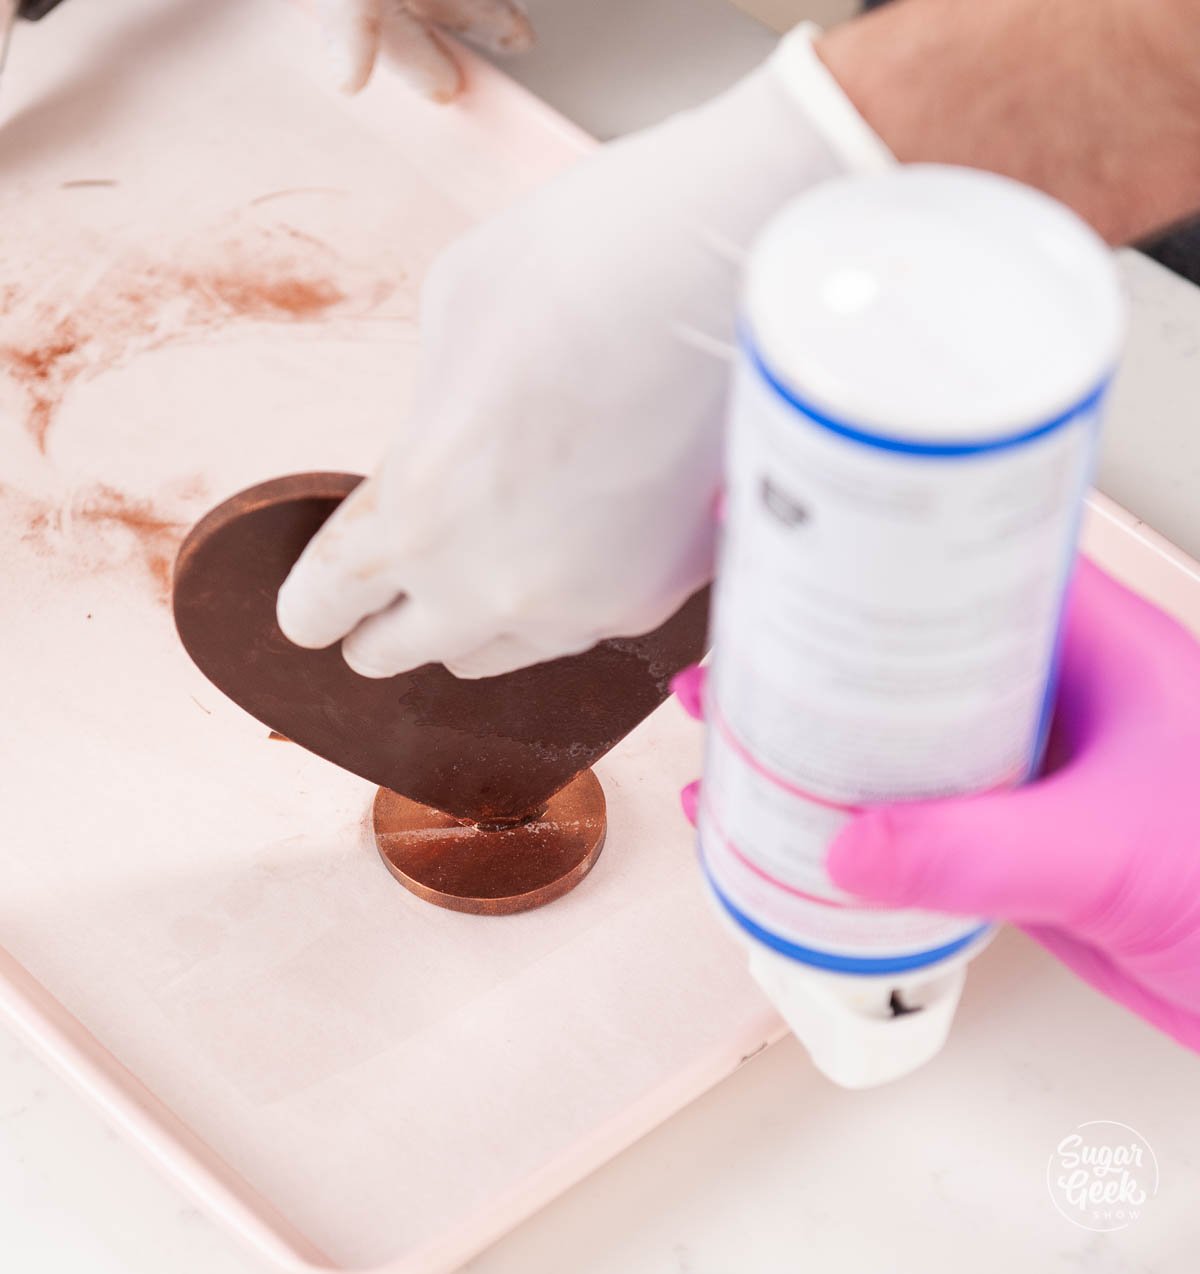
Step 7: Use your kitchen torch to heat the tip of your offset spatula and melt the center of the chocolate circle slightly. melting the tip of the chocolate heart with hot spatula

Step 8: Place the heart on top of the circle and use the cold spray to set the melted chocolate and it will hold the heart in place. setting melted chocolate with cold spray

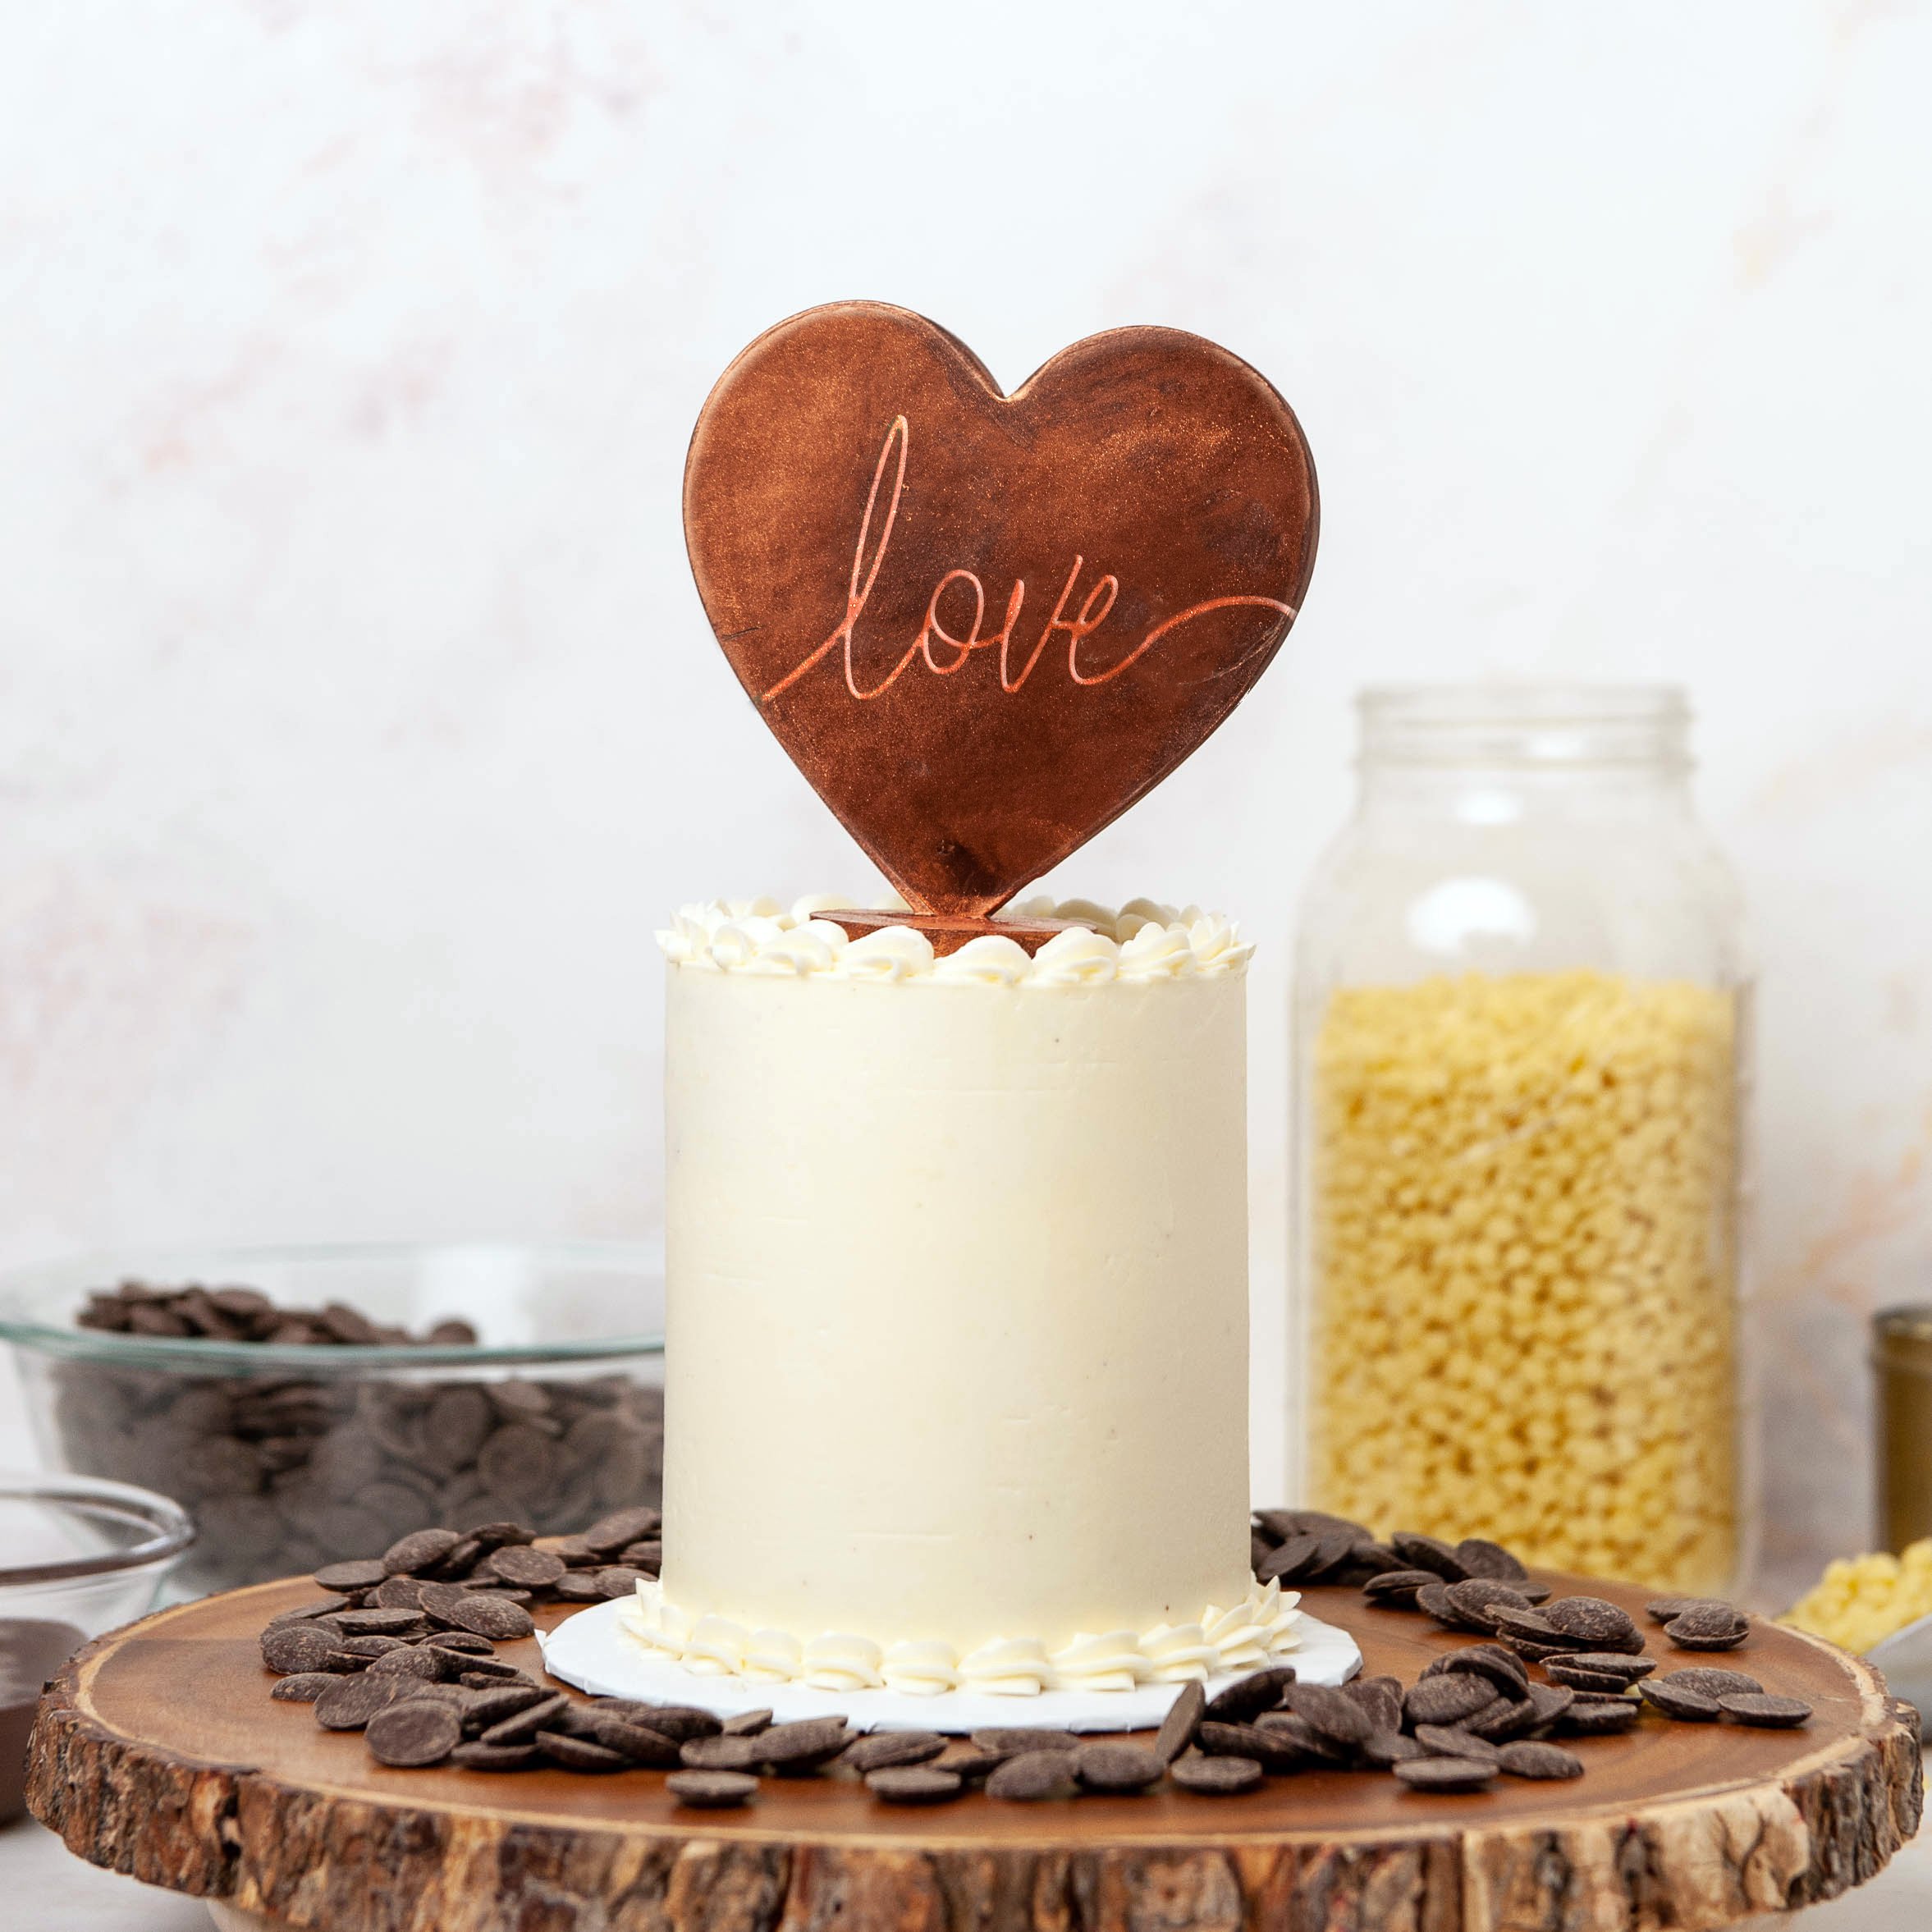
Step 9: Now you can place your heart topper on top of the cake!chocolate heart cake topper

So now you know the basics of how Christophe tempers his chocolate in large batches to create so many different things! As you can imagine, now that we have the basics down, we will be building upon these basic concepts for all our future chocolate projects.

FAQ

What If I Don't Have A Tempering Machine?

If you don't have an EZ Temper machine or warmer, you can always temper your chocolate by hand using the seeding method. You'll have to pay close attention to your temperatures to make sure your chocolate stays at the proper temperatures by moving the bowl back onto the simmering water if it gets too cold. Make sure you don't get it too hot or it will fall out of temper and you'll have to start all over again.

More Chocolate Recipes & Tutorials

Hot Chocolate Bombs

Chocolate Ganache 101

Water Ganache Drip

How To Temper Chocolate In The Microwave

Recipe

adding tempered cocoa butter to melted chocolate in front of the ez temper machine
Print Recipe
5 from 2 votes

Chocolate Tempering With The EZ Tempering Machine

Chef Christophe Rull shows us how he tempers large amounts of chocolate easily and efficiently with the EZ Temper machine so he can create beautiful and shiny pastries, chocolates and showpieces.
Prep Time15 minutes mins
Cook Time0 minutes mins
Cooling30 minutes mins
Total Time45 minutes mins
Course: Dessert
Cuisine: American
Servings: 10 servings
Calories: 304kcal
Author: Liz Marek

Equipment

  • EZ Tempering Machine
  • Waring Chocolate Warmer
  • Thermometer

Ingredients

  • 600 grams Chocolate https://www.cacao-barry.com/en-US/chocolate-couverture-cocoa/chd-p64ebpu/extra-bitter-guayaquil
  • 6 grams Cocoa Butter https://ifigourmet.com/collections/chocolate-products/products/cocoa-butter-1

Instructions

  • Place your cocoa butter into the internal warmer of the EZ Tempering Machine the day before you need it. Let it warm overnight.
  • Melt 600 grams of bittersweet chocolate in the microwave or over a double boiler to 113ºF (45ºC) It's important to melt the chocolate to this temperature so that all the crystals in the cocoa butter are broken down properly and new crystals can re-form successfully.
  • Add in a few handfuls of tempered (chocolate comes tempered) chocolate to bring the temperature down. Stirring occasionally, cool your chocolate to 95ºF (35ºC).
  • At 89ºF (32ºC) add in 6-7 grams (1-2% of total chocolate weight) of your tempered cocoa butter paste from the EZ temper machine to the melted chocolate.
  • Stir and cool the mixture to 32ºF. At this point, the chocolate is tempered but make sure you do a test to make sure your chocolate is in temper before using it.
  • Carefully warm your chocolate to the ideal working temperature (usually found on the side of the bag if your chocolate is from Cacoa Barry) before using.

Video

Notes

EZ Tempering Machine
Waring Chocolate Warmer
Cacoa Barry Chocolate
Cocoa Butter Drops
Thermometer

Nutrition

Serving: 1serving | Calories: 304kcal | Carbohydrates: 36g | Protein: 2g | Fat: 21g | Saturated Fat: 12g | Polyunsaturated Fat: 1g | Monounsaturated Fat: 7g | Sodium: 10mg | Potassium: 174mg | Fiber: 3g | Sugar: 31g | Calcium: 14mg | Iron: 2mg
close up of candy apples

September 21, 2021 Blog

The Best Candy Apple Recipe

The perfect shiny red candy apples have a super thin layer of sweet candy coating with no bubbles and the perfect amount of cinnamon flavor. Not only is making your own candy apples from scratch incredibly easy (compared to unwrapping 100's of cinnamon candies and melting them) you won't believe how good they taste! Read on for all my tips and tricks for perfectly shiny and sparkly homemade candy apples. 

close up of candy apples

This perfect candy apple recipe is exactly what you need to wow at your next Halloween party or if you've had many fails before, this recipe will fix all your problems!

What's In This Blog Post

  • Candy Apple Ingredients & Equipment Needed
  • How To Make Candy Apples Step By Step
  • What Ingredients Were Used To Make The First Candy Apple?
  • Candy Apple FAQ

Candy Apple Ingredients & Equipment Needed

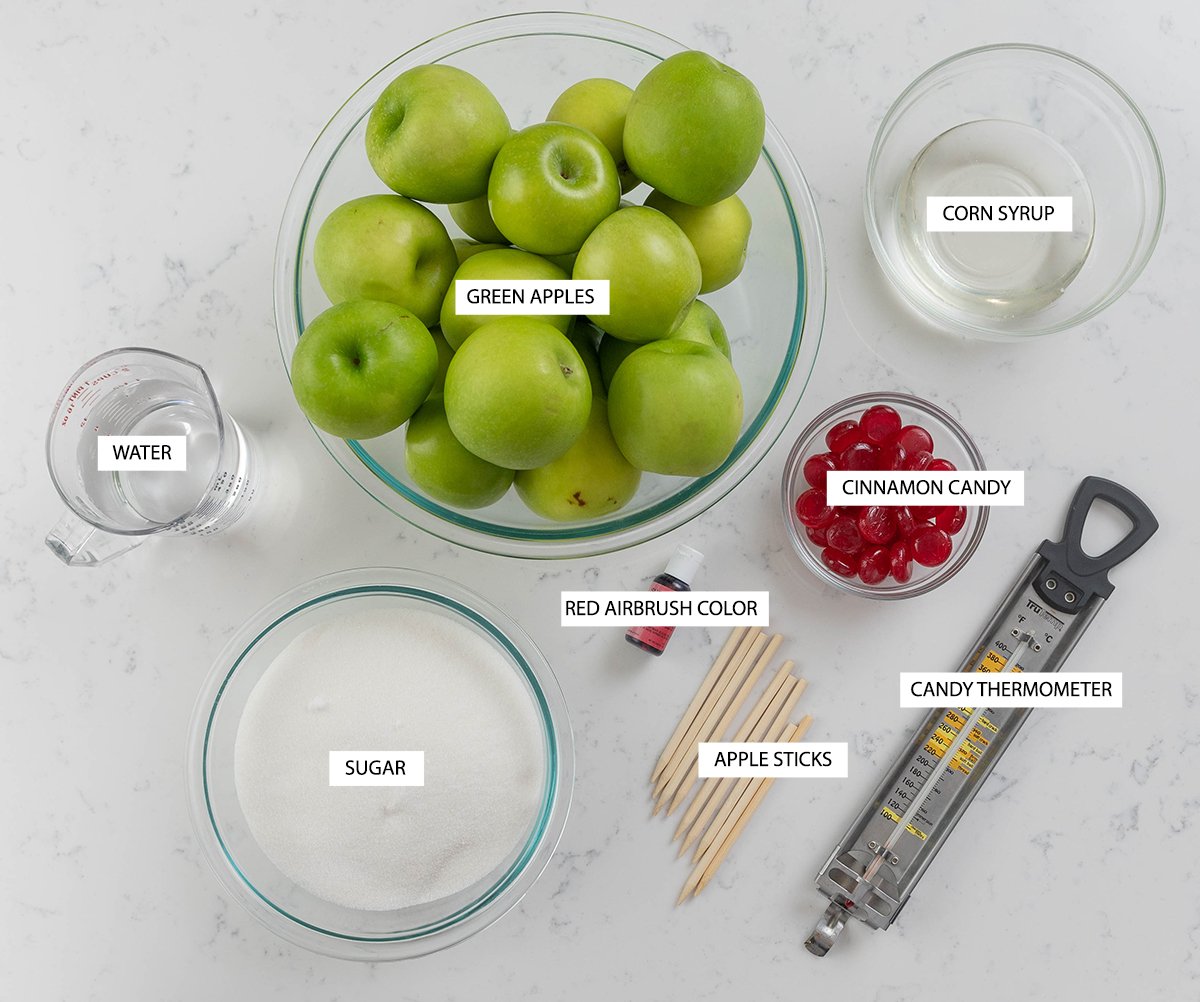
overhead shot of candy apple ingredients

Candy Thermometer - The most important thing for this candy apple recipe is to use a candy thermometer to ensure you cook your sugar all the way to the hard crack stage. You can check your sugar the old fashioned way but its a risk and trust me you don't want to do all the work of boiling sugar only for it to fail.

Wooden Sticks - If you don't have any you can make your own by cutting a ¼" dowel into 5" long pieces and sharpening one end with a pencil sharpener or even use popsicle sticks or wooden skewers.

Silicone Mat - If you don't have a silicone mat you can use a sheet of aluminum foil to rest your candy apples on.

Light Corn Syrup - Corn syrup in this recipe keeps the candy from crystalizing and makes it extra shiny! If you don't have any corn syrup you can use glucose or just replace the corn syrup with more white sugar equal in weight.

Food Coloring - This is a must if you want the best candy apples that are a beautiful red color! You can use liquid or gel food coloring.

Edible Glitter - This is absolutely optional but you can get edible glitter at most craft stores like michales or JoAnn fabrics.Crisp Apples - I think the only way to make a true great candy apple is to use green granny smith apples. They are tart and not sweet and go perfectly with the sweetness of the cinnamon sugar coating.

Cinnamon Candy - I'm using cinnamon candy in my recipe because I could not find any cinnamon extract ANYWHERE! Maybe there is a shortage? If you don't have cinnamon candy, you can use ¼ teaspoon cinnamon extract instead or 1 teaspoon ground cinnamon which tastes SO GOOD but does leave some specs in the finish of the candy apple. If you're feeling really bougie, try adding a little nutmeg, clove, or pumpkin spice! Yum!

How To Make Candy Apples Step-By-Step

Making candy apples is really a two-day process. Not because it takes a long time but it's just easier. So here's my process. 

Day 1

  1. WASH THEM APPLES! And I mean like wash them really really well. Apples come with this wax coating that causes annoying bubbles to appear under the sugar. The best way to wash your apples is to scrub every inch of them in hot hot water with a paper towel or to even heat some water until it just starts to steam (not boil) and dunk your apples in the water for 1 minute. Rose Bakes says to add some baking soda to the water too. Rotate them with a spoon to make sure you submerge the whole apple. 
    note* It will brown the apples but once you dip them in sugar, you won't be able to tell. wiping apple with towel
  2. Scoop them out with a slotted spoon and dry them well with paper towels and store the apples in the fridge overnight. Don't worry about removing the stems yet. Cold apples are the best apples for dipping.
  3. You CAN dip the apples right away but you risk getting bubbles from leftover water on the apples so make sure you dry them really really well, especially the top and bottom.

Day 2

  1. Gather all your pre-measured ingredients for the candy apples so you are prepared and not rushed. 
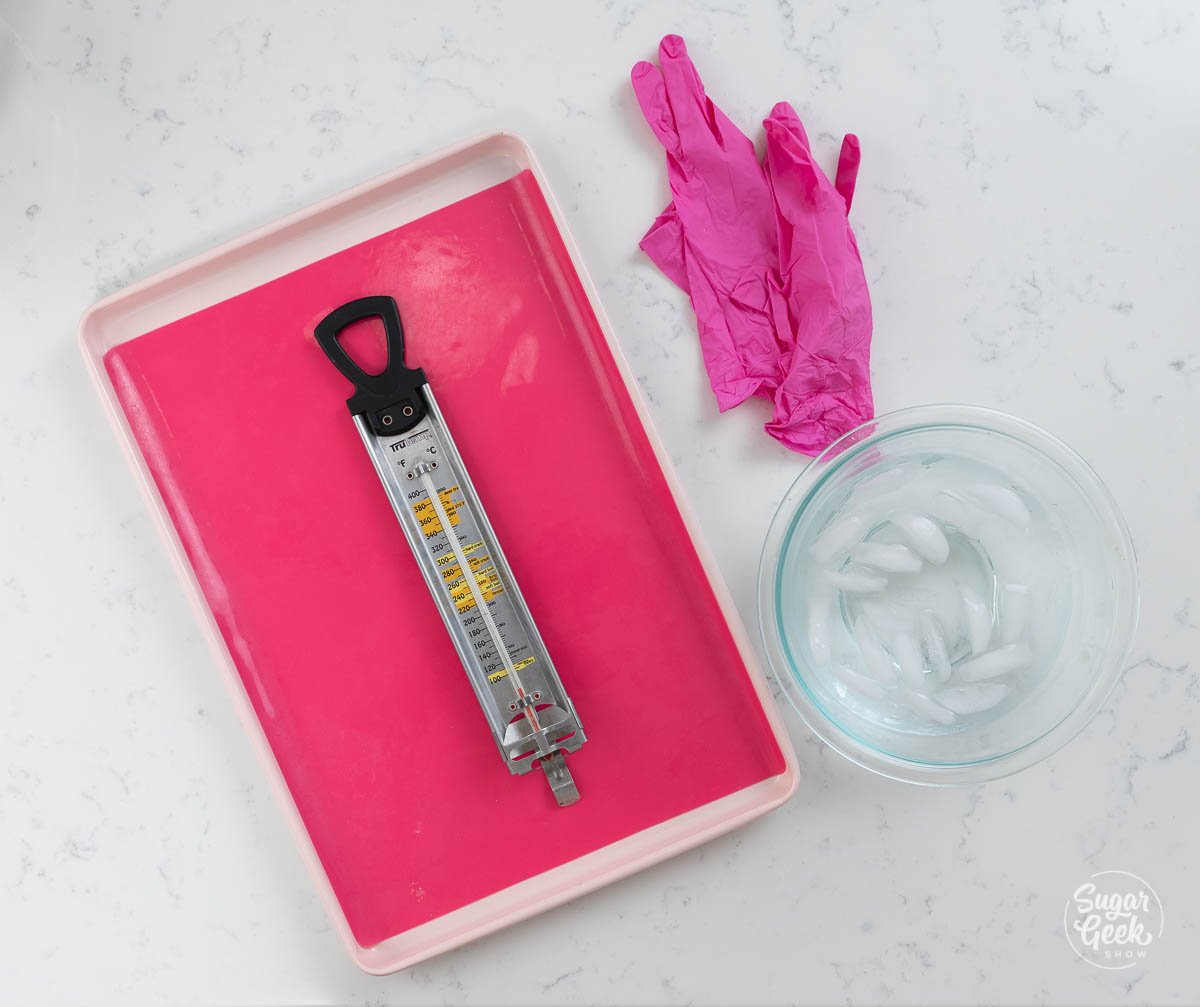
  2. Place a silicone mat or a sheet of tinfoil sprayed with a little cooking spray onto a sheet pan for the dippled apples to go on. candy apple supplies shot from above
  3. Keep a bowl of ice water nearby and wear some gloves for protection against hot sugar drips! If you do happen to get some sugar on your hand, you can quickly remove the glove and the sugar will come with it instead of burning your hand or you can quickly dip your hand in the ice water to harden the sugar and stop it from burning.
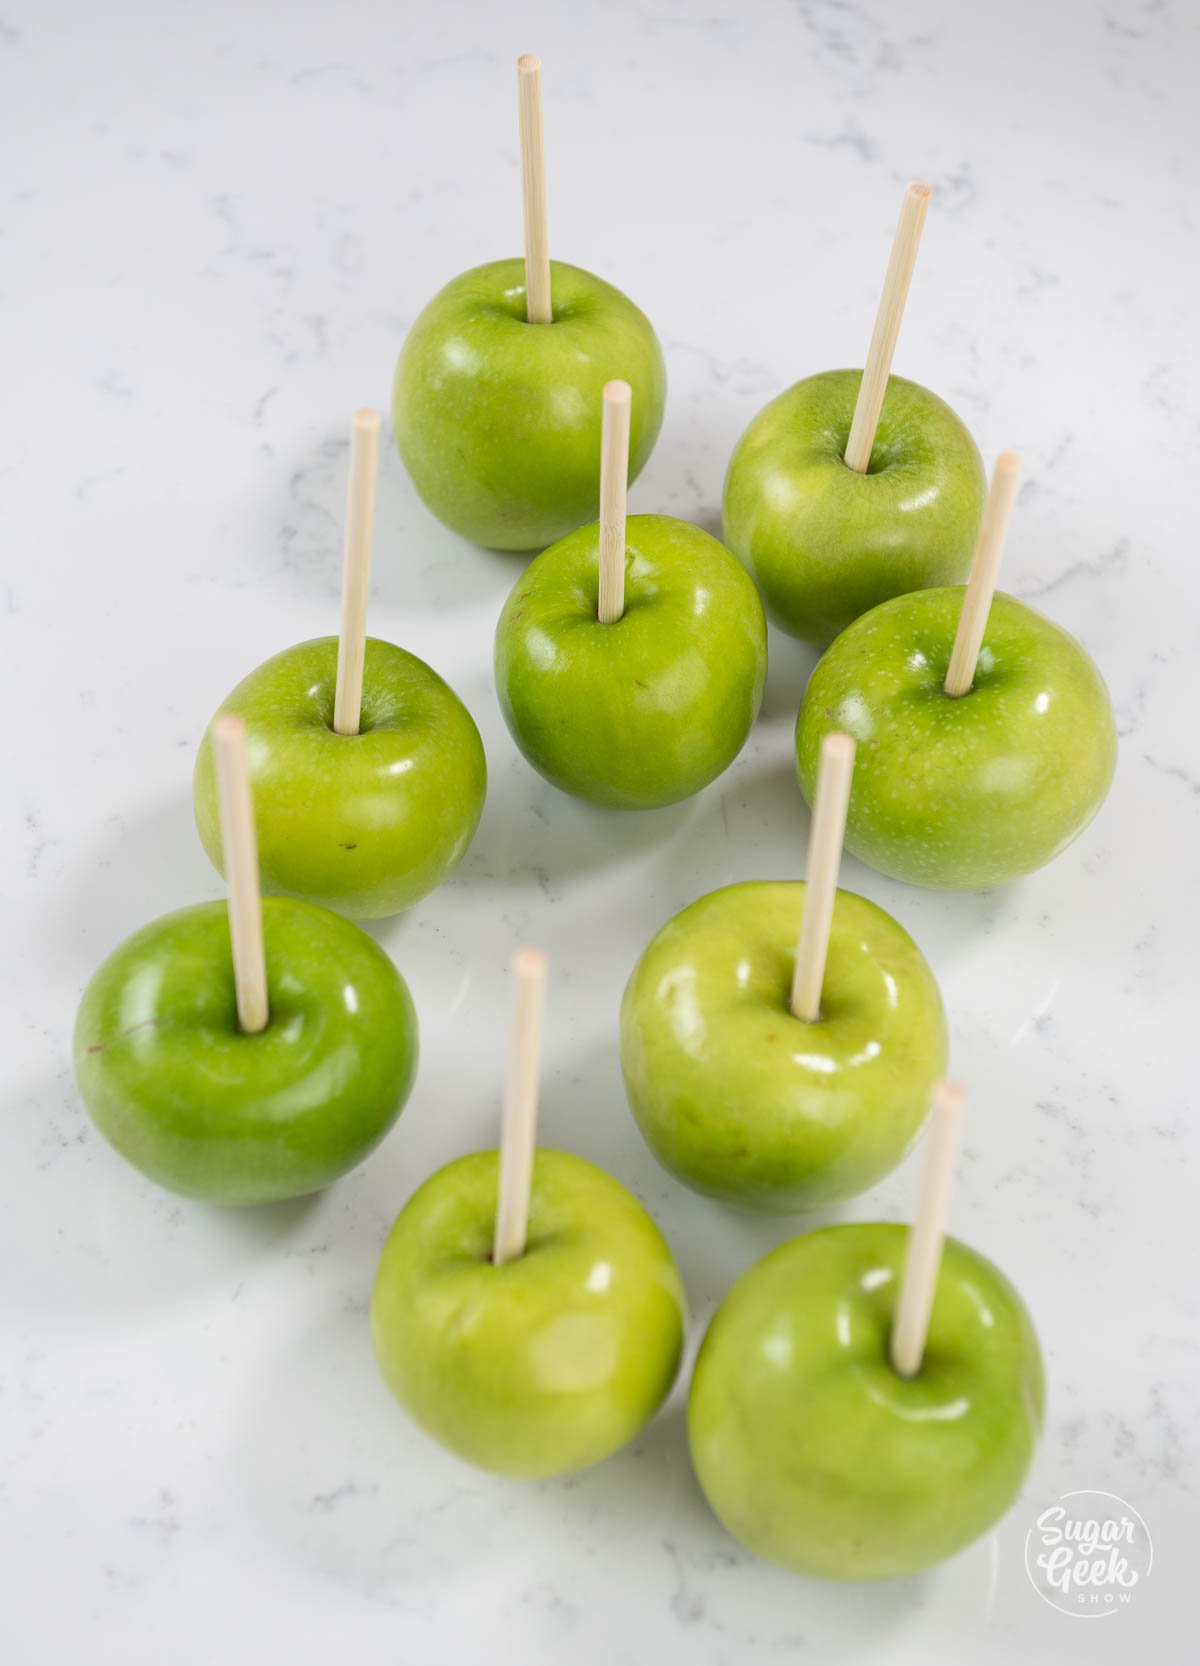
  4. Remove the stems from your apples and insert the sticks. Make sure the apple is sitting on the work surface and then push the stick in, this will ensure your sticks are straight up and down. green apples with sticks inside
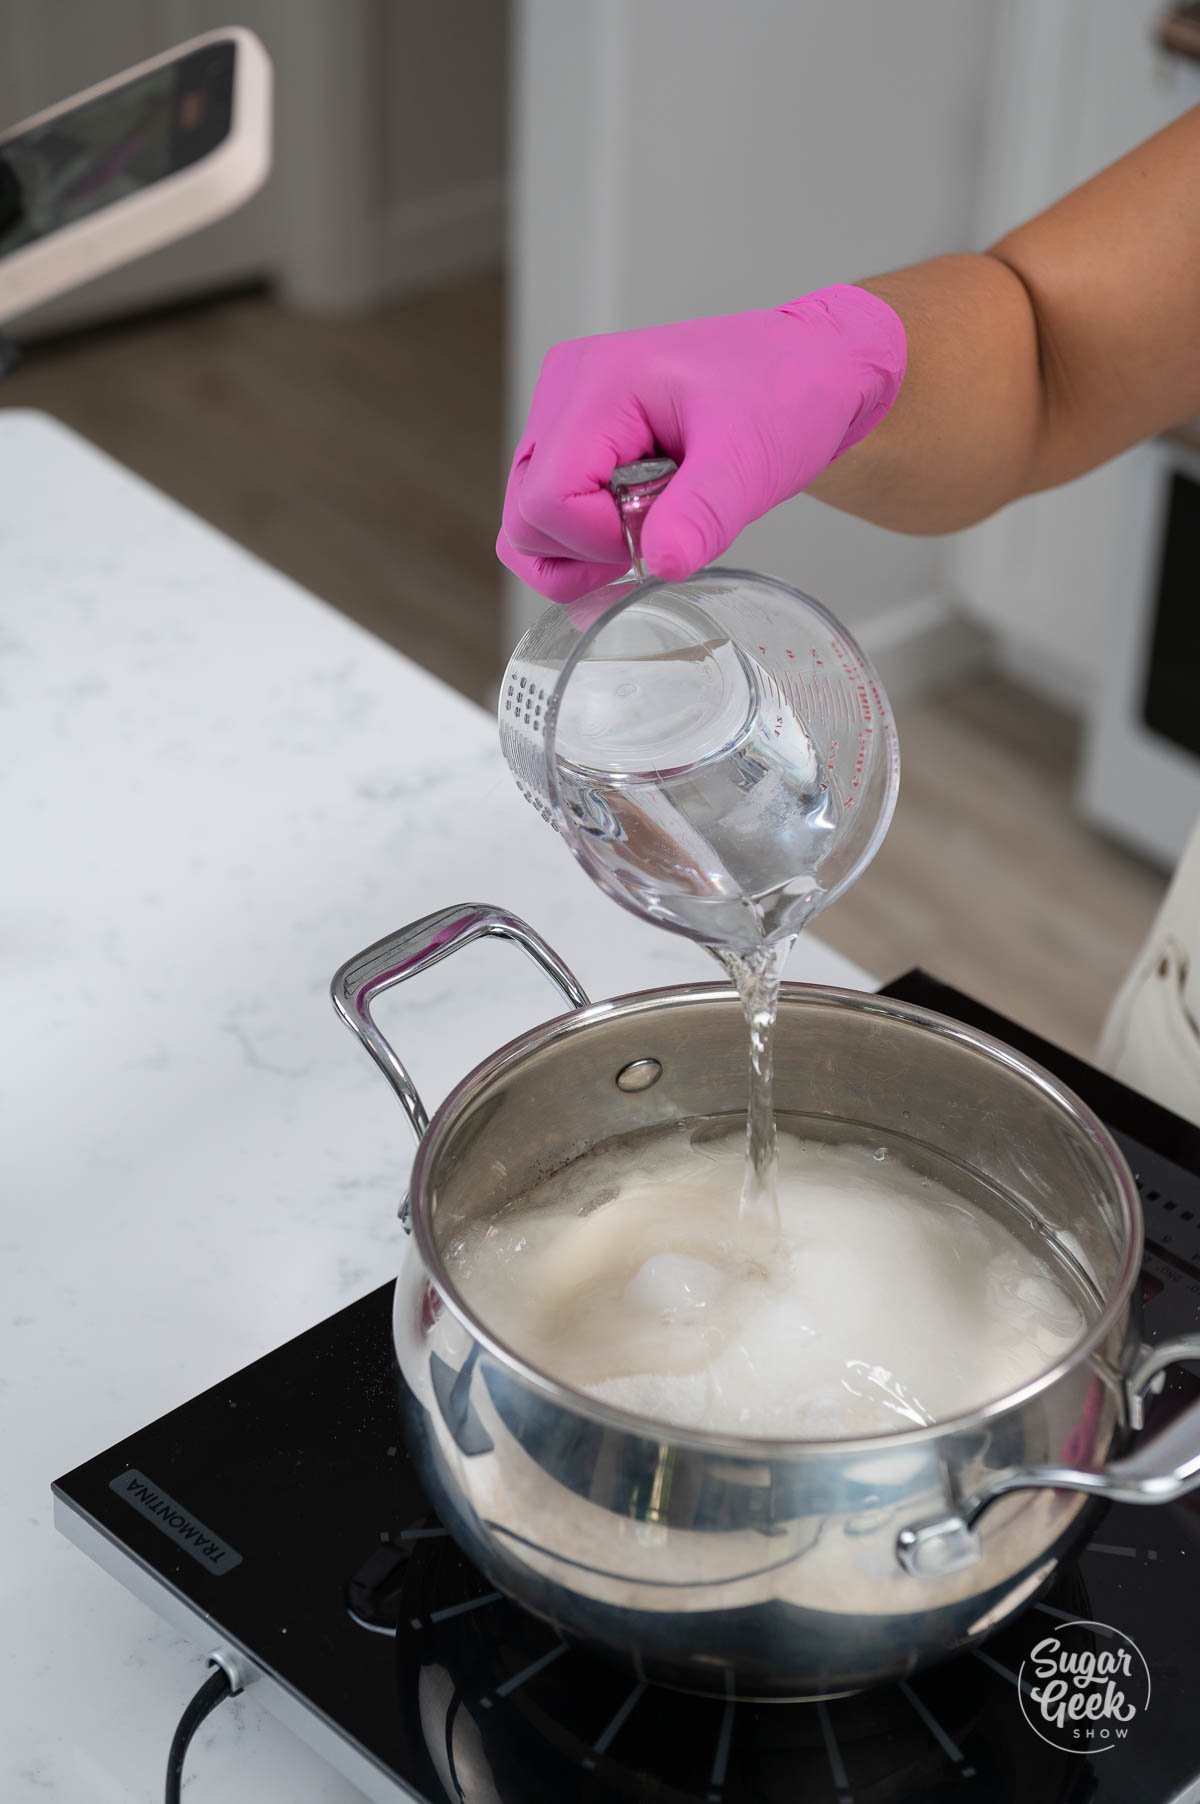
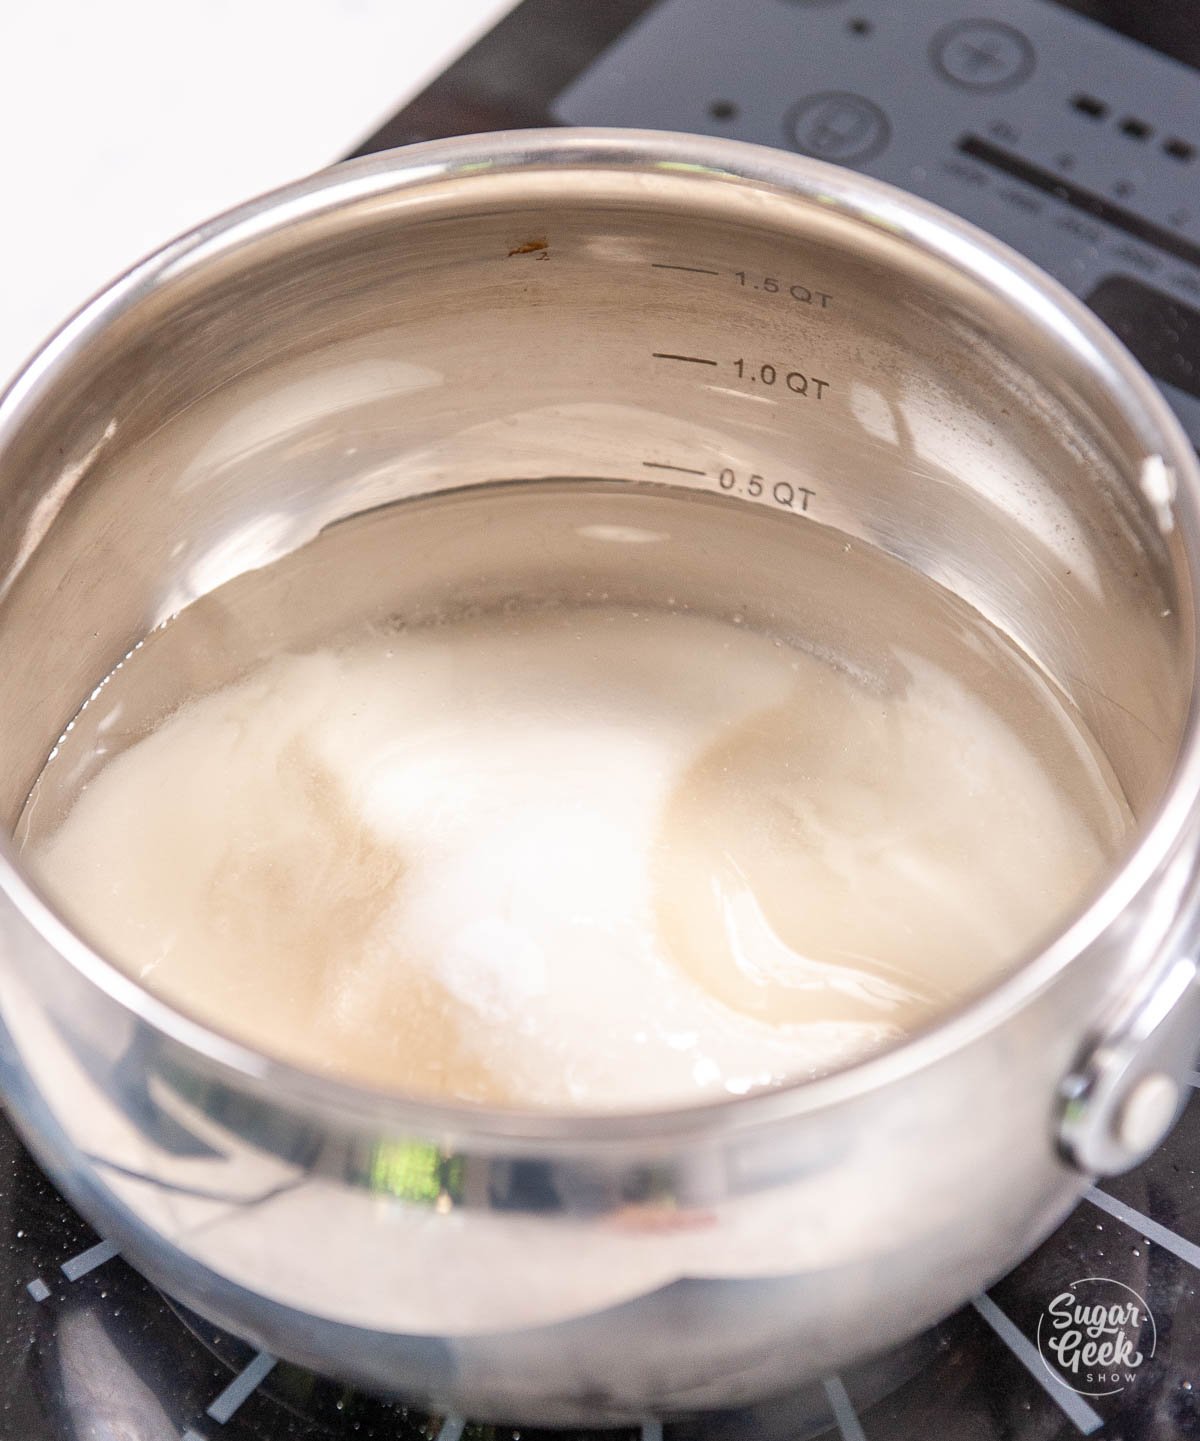
  5. In a heavy-bottomed saucepan, combine sugar, syrup, and water, and then mix it gently with a wooden spoon to combine.sugar, water and corn syrup in a large saucepan
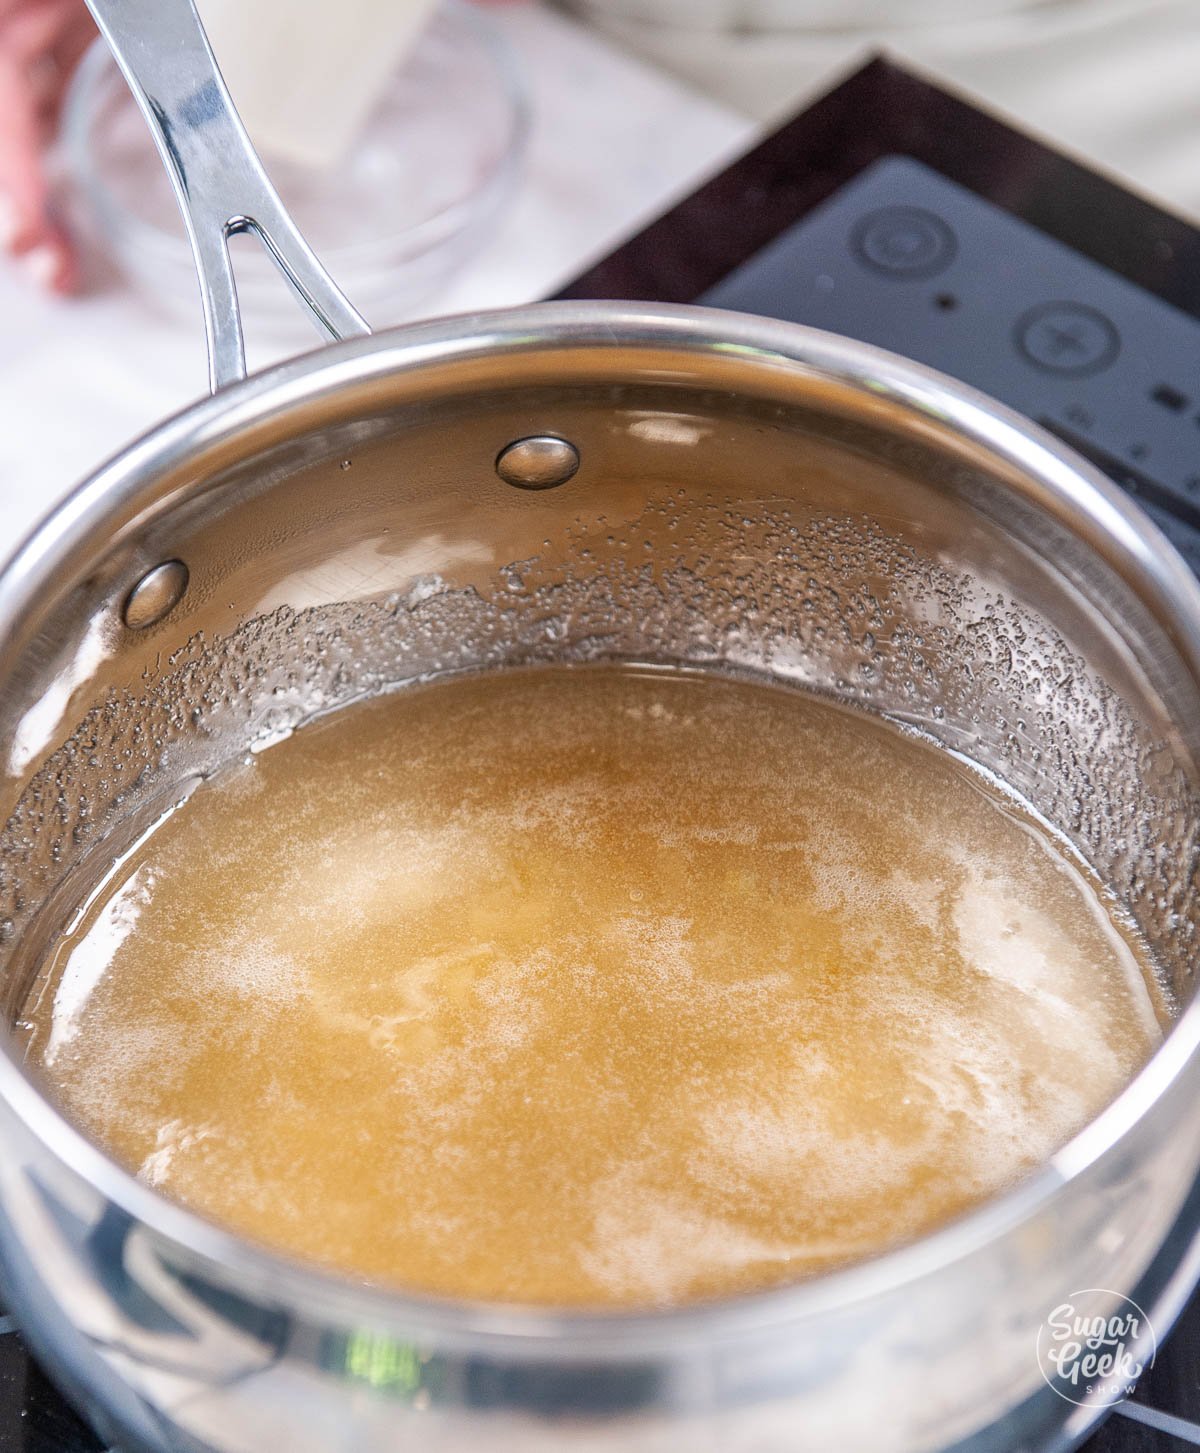
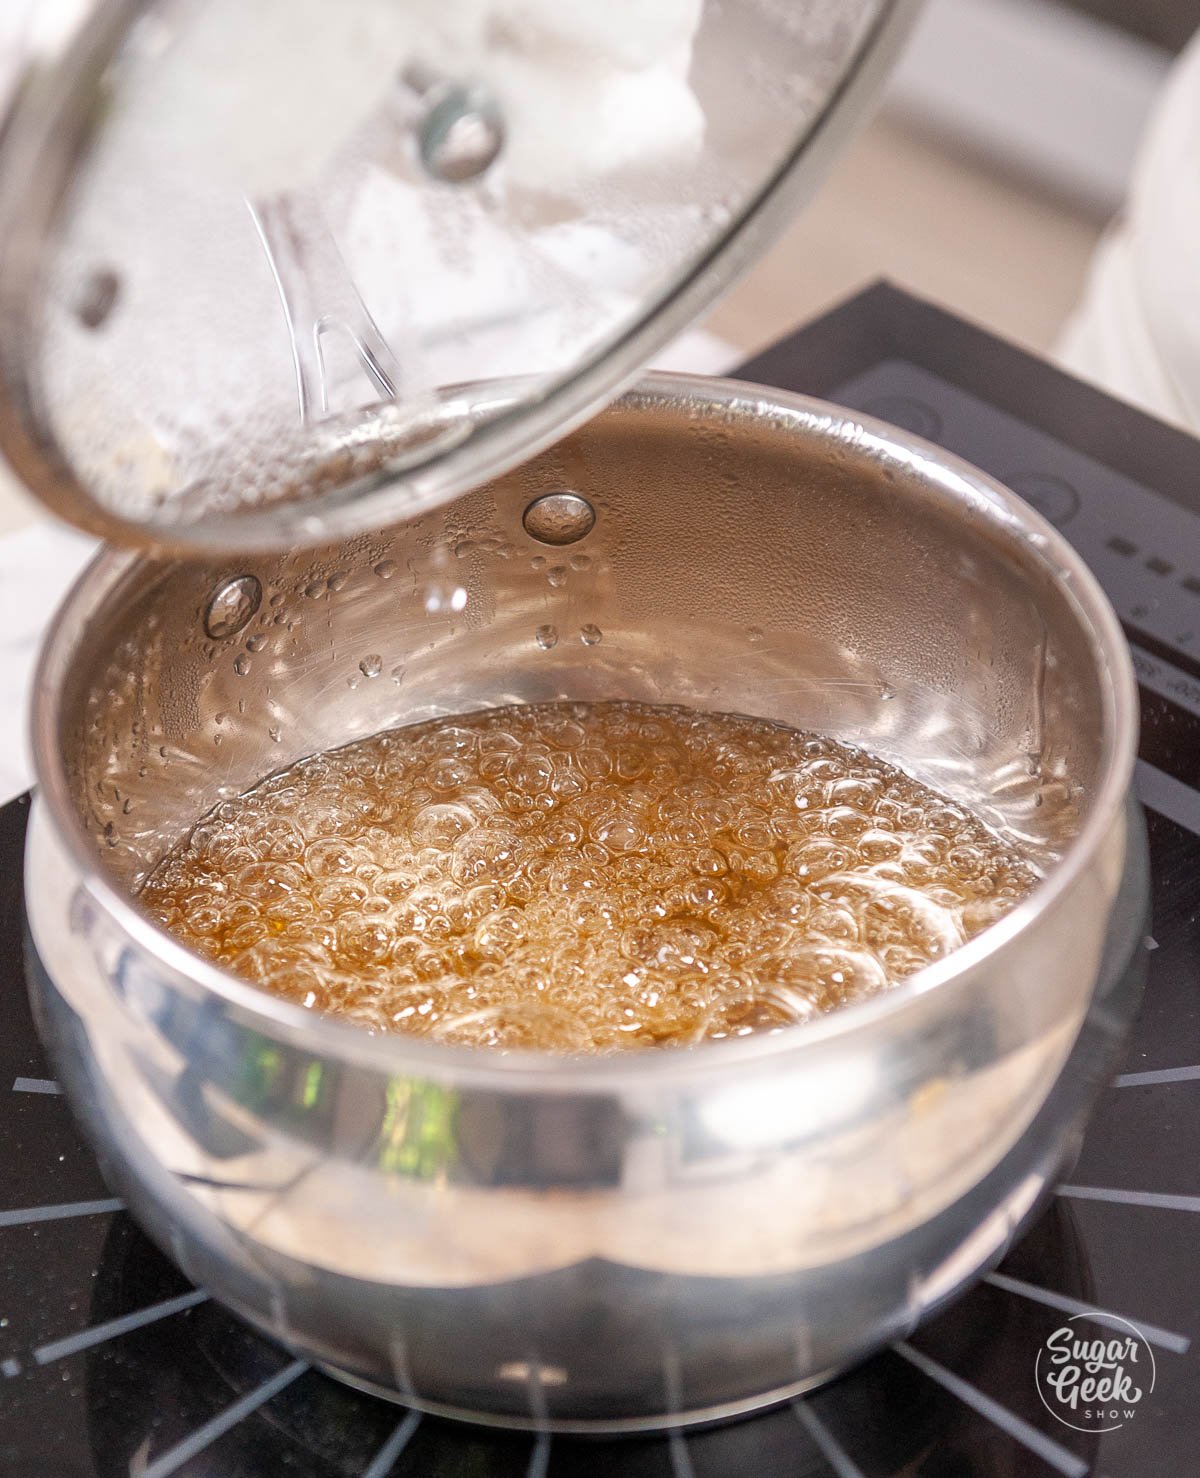
  6. Bring the sugar mixture to a boil over medium-high heat with the lid on the saucepan. Let it simmer for 5 minutes. This ensures all the sugar dissolves and your mixture does not crystalize.
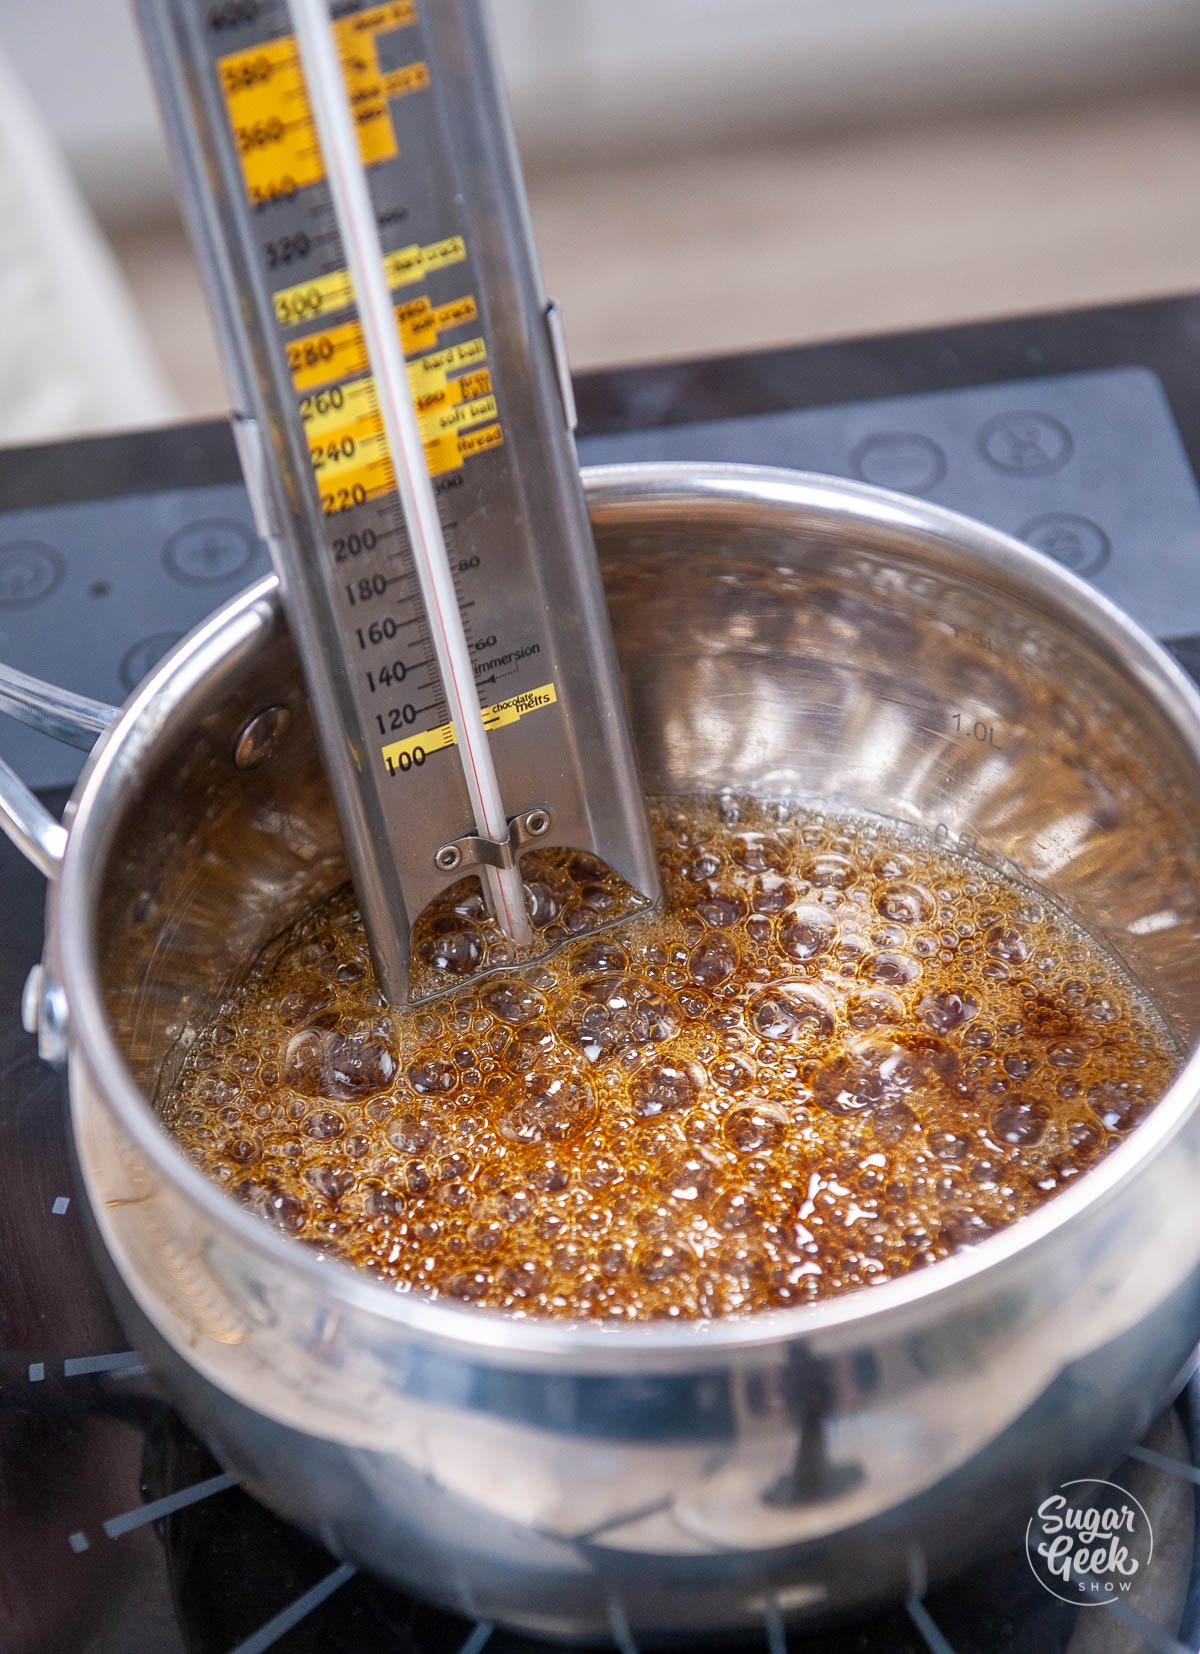
  7. Remove the lid and add in your cinnamon candies and your candy thermometer. candy thermometer in candy apple mixture
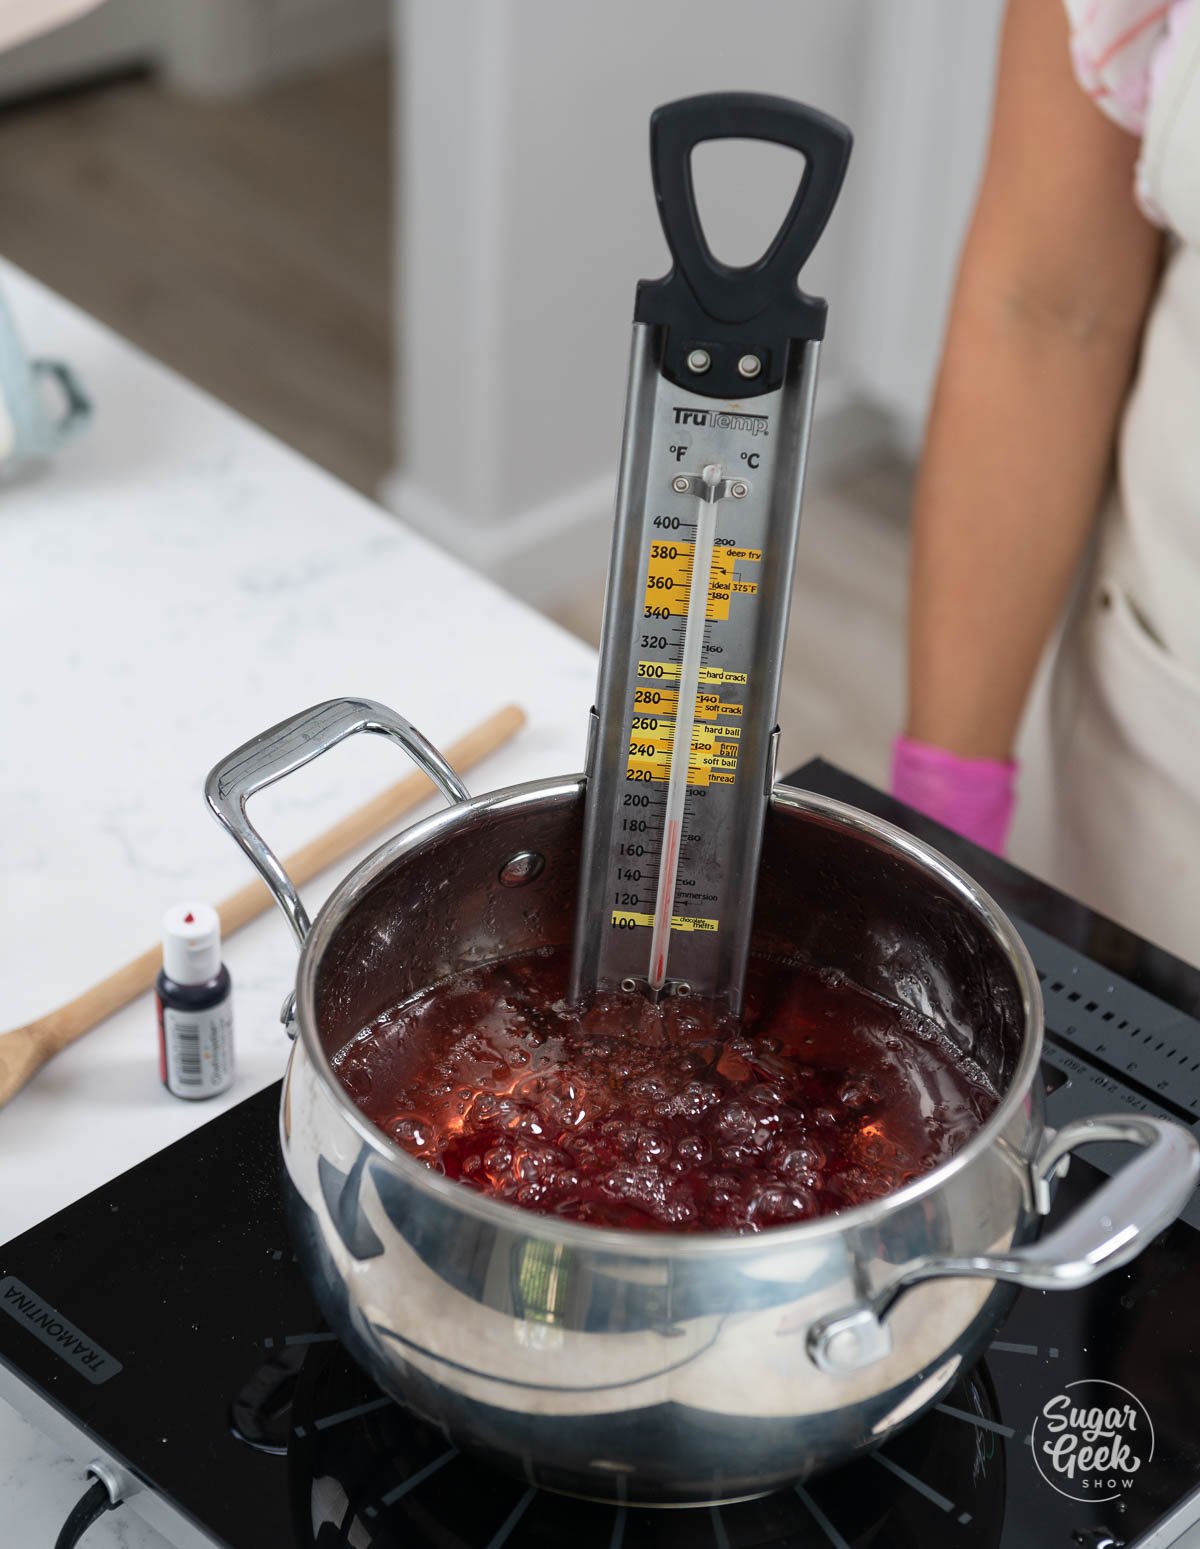
  8. Over medium heat, without any further stirring begin to heat the sugar mixture until it reaches 300ºF. The candy cooks slowly so it could take up to 30 minutes to reach this temperature. It could take more or less time, keep a close eye on your thermometer. Be patient, it will get there. You might notice your temperature hangs out for a while at 250ºF and that is normal because the water is still evaporating. Once all the water is gone, the temp will begin to rise again. 
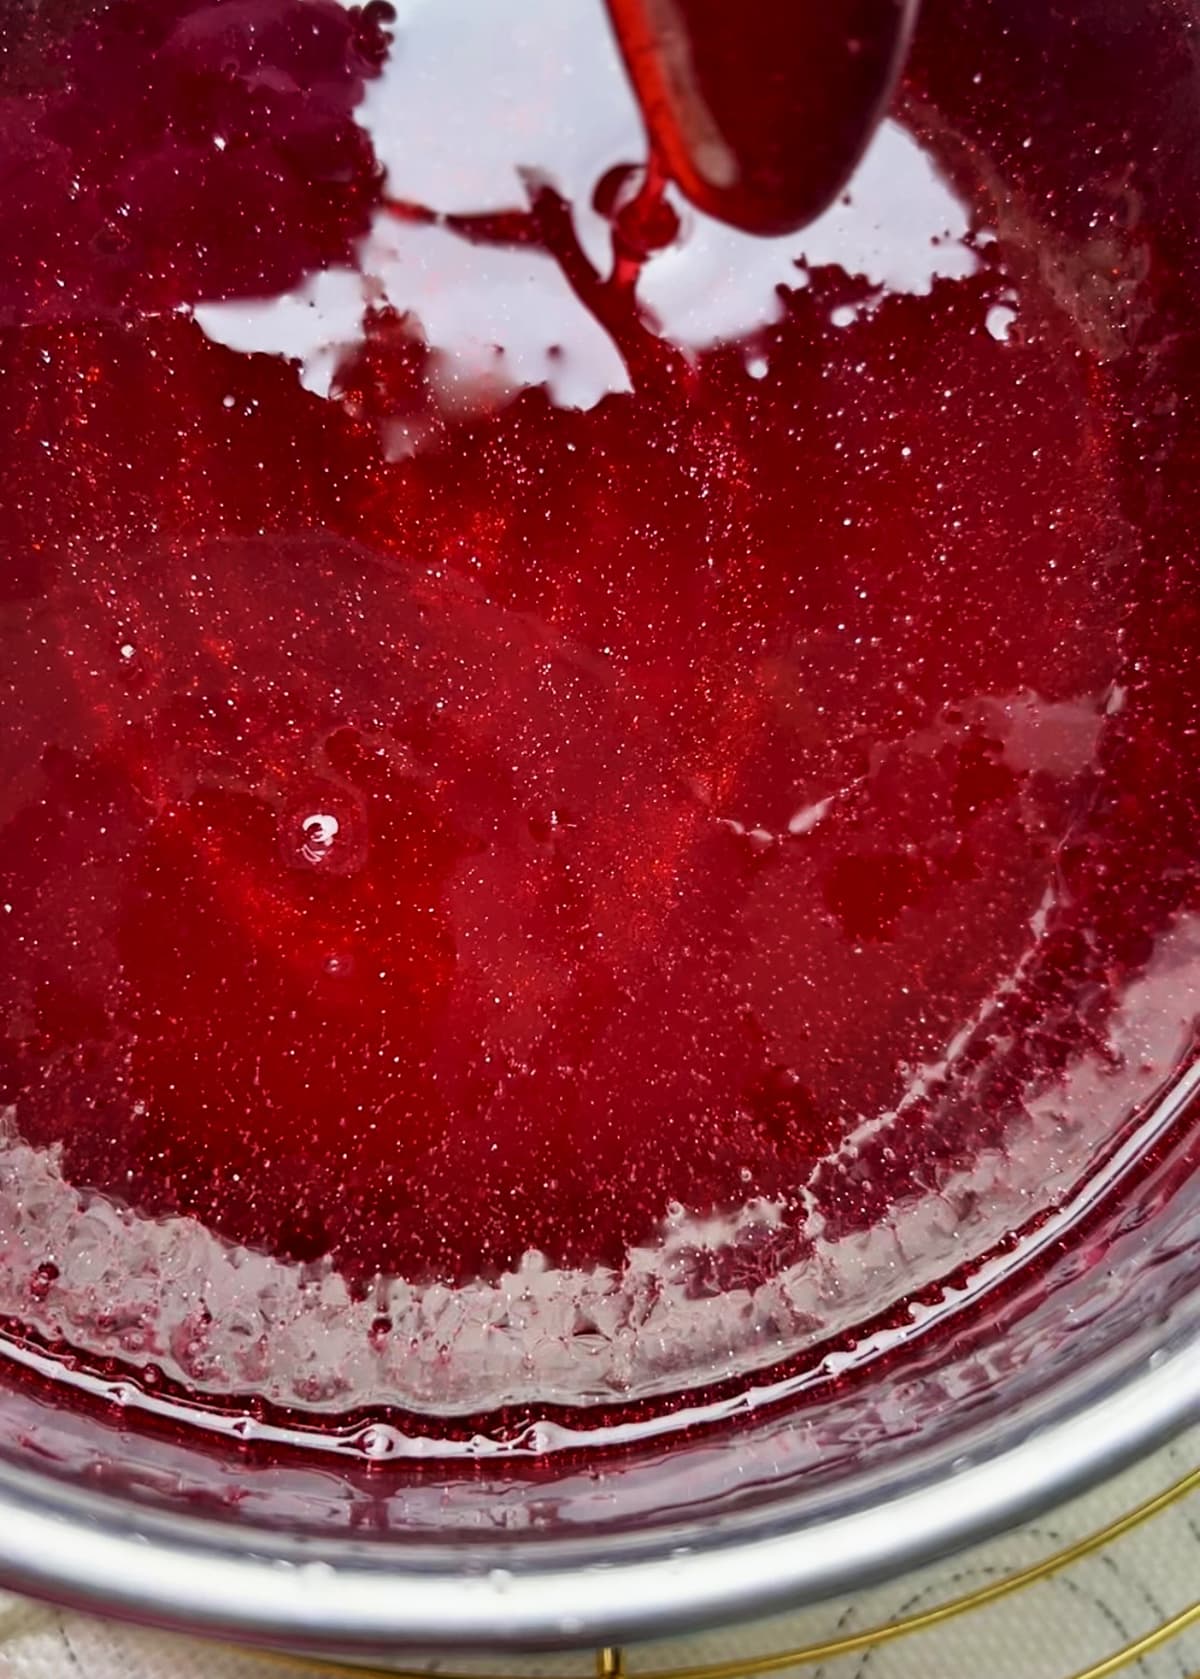
  9. Once your sugar has reached 300ºF, remove the pan from the heat. This is when you will add your food coloring and your edible glitter (if you want). close up of candy apple sugar
  10. Let the candy cool slightly to about 270-280ºF before dipping your apples.
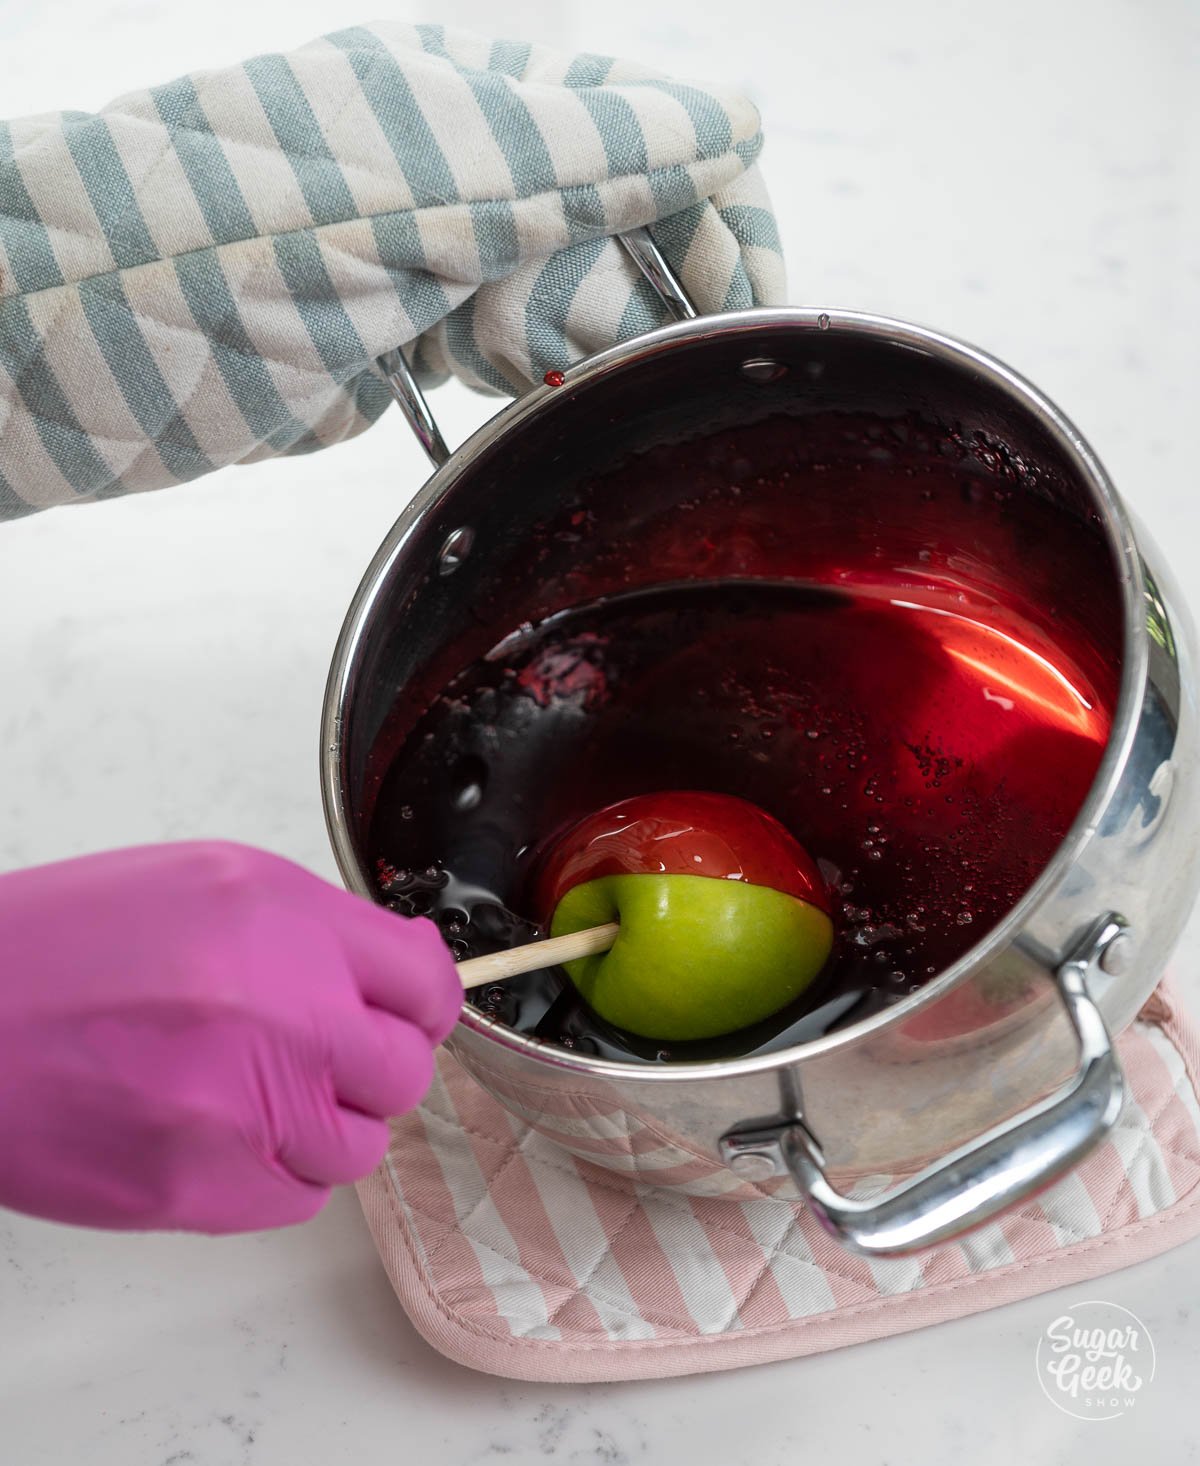
  11. Now you can tilt the saucepan and roll your apples in the hot sugar to coat them. You only need a thin coat!dipping a green apple in candy apple mixture
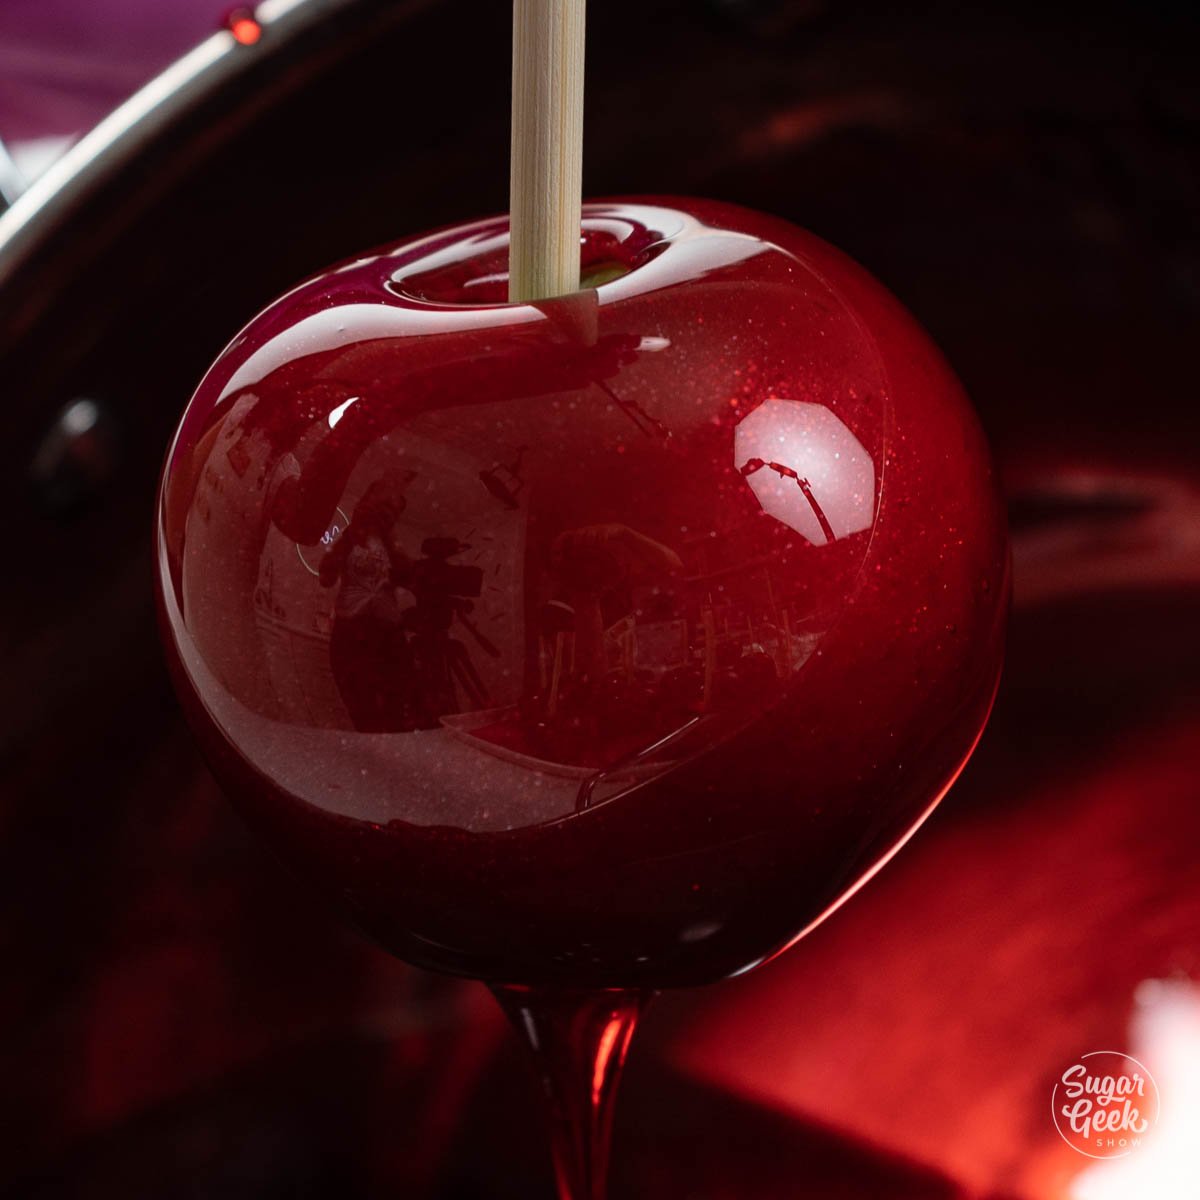
  12. Lift the apple out and let the excess drip off. I even scrape the bottom of mine a bit on the edge of the pot so I don't get a bunch of excess sugar pooling around the bottom of the apple.close up of coated candy apple
  13. Place the apple onto the silicone mat and in about 10-15 minutes your candy apples will be ready to enjoy! So yummy!close up of candy apples being placed onto a pink silicone mat

Can you believe how GORGEOUS these candy apples turned out? So so shiny and really tasty! If you've never had a candy apple before, give it a try! You might be surprised how good they are. The perfect combination of a little tart and a little sweet with a little crunch! Definitely my favorite homemade dessert for the fall season.

If you love making candy that doubles as a centerpiece, you have to try kohakutou crystal gummy candy.

If you prefer a soft, chewy caramel coating instead of a hard candy shell, try my caramel apples recipe.

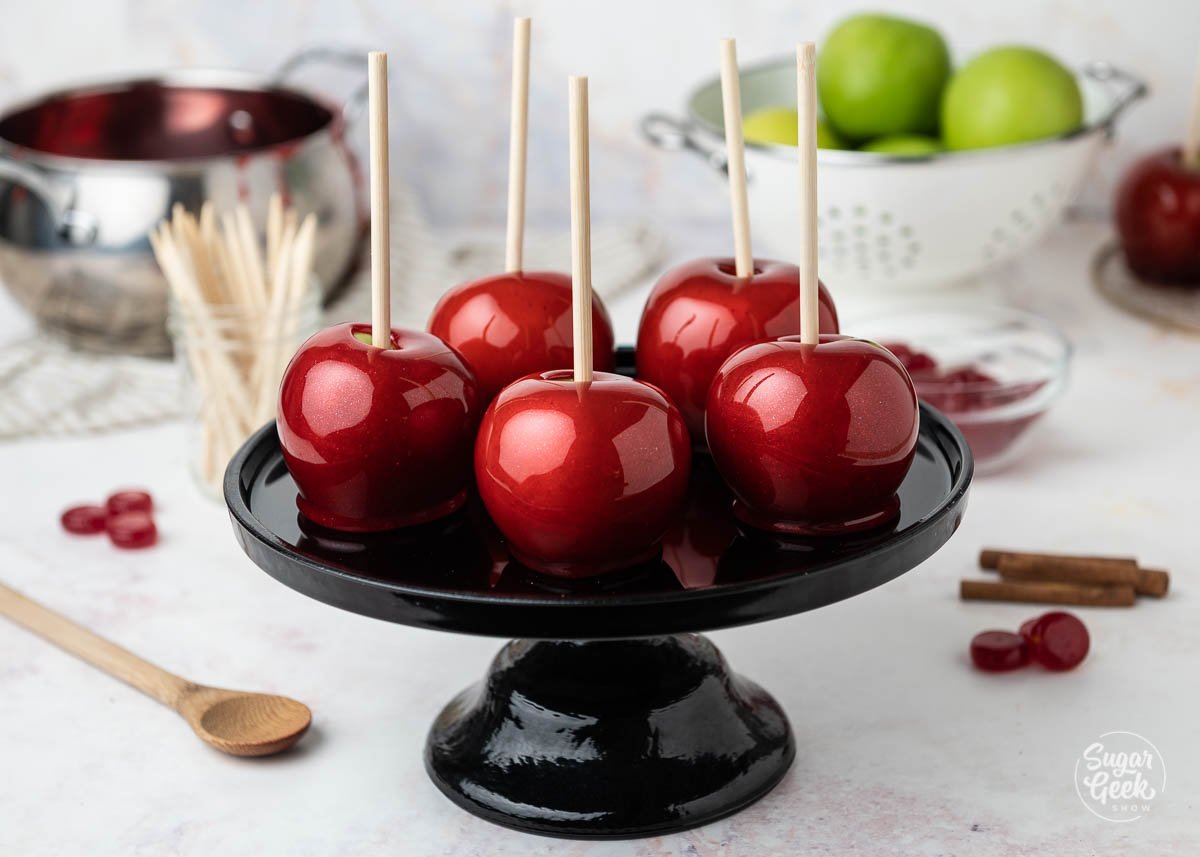
close up of candy apples on a black cake pedestal

What Ingredients Were Used To Make The First Candy Apple?

Candy Apple FAQ

How Long Does It Take For Candy Apples To Harden?

When your sugar is cooked to 300ºF the candy should harden fully within 10 minutes and be ready to eat.

Why Are My Candy Apples Sticky?

The sugar coating your candy apples will get sticky over time as they absorb moisture from the air. The other thing could be that you didn't cook the sugar to 300ºF.

How Do I Prevent Bubbles In My Candy Apples?

Make sure you wash your apples really well to remove all the wax from the surface of the apples, dry them really well and dip them the day after you wash them.

How Do I Color My Candy Apples?

You can add any type of food coloring to your sugar mixture. For more opaque colors, add a couple of drops of white food coloring as well.

Can I Flavor My Candy Apples?

Yes, its very easy to add extracts or candy flavoring to candy apple sugar.

How Do I Store Candy Apples?

It's best to store candy apples in the fridge and enjoy them within 24-48 hours of making them.

How Do You Eat A Candy Apple?

The candy is very hard and although you COULD bite into it, it's much easier to slice it first then enjoy.

What Ingredients Where Used To Make The First Candy Apple

Candy apples are covered in hard candy, flavored with cinnamon. But where did they come from? I did some digging and found out that candymaker William W. Kolb is credited with inventing the first candy apple in Newark, New Jersey in 1908. His candies were made with sugar, corn syrup, red food coloring, and powdered cinnamon. 

Kolb was looking for ways to sell his cinnamon candy during Christmas but no one was buying. He decided to showcase his cinnamon candy by dipping green apples into the cinnamon candy and placing them in his window display. 

The bad news is no one wanted to buy his cinnamon candies but they were crazy for is candy apples! Candy apples quickly became very popular as not only a Christmas treat but also became popular to give out to trick-or-treaters during Halloween. They remained popular treats until the 1970s where old wives' tales began to circulate about blades or needles being placed into apples. 

If you've ever actually bitten into a candy apple then you know that sugar is very sharp! So my theory is some kid actually cut their mouth on the sugar because no actual recorded reports of razor blades or needles found in candy apples have ever been found. For this reason, I always cut my candy apple into slices to eat it instead of biting into the hard candy.

Recipe

candy apples on a black platter
Print Recipe
4.91 from 11 votes

The Best Candy Apple Recipe

Perfectly smooth and shiny candy apples with a glassy ruby-red shell, deep cinnamon flavor, and no bubbles. The two-day method (overnight apple chill plus hard crack candy) is what makes this recipe foolproof.
Prep Time10 minutes mins
Cook Time30 minutes mins
Cooling10 minutes mins
Course: Dessert
Cuisine: American
Servings: 8 apples
Calories: 549kcal
Author: Liz Marek

Equipment

  • heavy bottom saucepan
  • Candy Thermometer
  • silicone mat
  • clean pastry brush
  • Apple skewers
  • nitrile gloves (optional for precaution while dipping)

Ingredients

  • 8-10 small granny smith apples
  • 30 ounces granulated sugar
  • 12 ounces water
  • 6 ounces corn syrup
  • ¼ teaspoon food coloring, optional
  • 8 ounces cinnamon hard candy
  • ¼ teaspoon flash dust optional
US Customary - Metric

Instructions

  • The night before, scrub the apples in very hot water for 10 to 15 seconds to melt off the wax, dry them well, and chill them uncovered on a paper-towel-lined tray overnight. The day of, line a sheet pan with a silicone mat (or oiled foil), keep a bowl of ice water within arm's reach for sugar safety, and put on nitrile gloves. Insert wooden sticks into the chilled apples right before you start cooking and return the prepped apples to the fridge.
  • Combine sugar, water, and corn syrup. Add the sugar, water, and corn syrup to a heavy-bottomed saucepan. Stir gently with a wooden spoon to combine. Do not splash syrup up the sides of the pan.
  • Boil with the lid on for 5 minutes. Bring the mixture to a boil over medium-high heat, then cover with a lid for 5 minutes. The trapped steam washes stray sugar crystals back into the syrup so the batch will not crystallize at the hard crack stage. If your saucepan does not have a lid, use a clean wet pastry brush to wash down the sides with water every minute during this phase.
  • Add the cinnamon candy and thermometer. Remove the lid, drop in the 8 ounces of cinnamon hard candy, and clip a candy thermometer to the side of the pan. Do not stir from this point forward.
  • Cook to 300º F. Over medium heat, hold a steady simmer and let the candy climb to 300º F (hard crack). The thermometer will hang around 250º F for several minutes while the water evaporates, then it will climb fast. Total cook is around 25 to 30 minutes.
  • Add color and glitter off heat. Once the candy hits 300º F, pull the pan off the heat. Add the food coloring and edible glitter and swirl gently to combine.
  • Cool to 280º F before dipping. Let the candy sit until the active bubbling settles and the thermometer reads 280º F.
  • Tilt and roll to dip. Pull cold apples from the fridge one at a time. Tilt the saucepan, roll the apple in the hot candy, dip deep enough to coat almost to the core, and let the excess drip off before placing stick-up on the silicone mat
  • Set and serve. Let the candy apples set at room temperature for 10 to 15 minutes until the shell is fully hard. If the candy thickens before you finish dipping, return it to low heat for a minute or two to liquify. Pour any leftover candy into silicone molds for hard candies.

Video

Notes

 
  • Ingredient notes: Granny Smith is the strong move here, tart and firm. Soft sweet apples like Red Delicious will let the shell slide off. Cinnamon hard candy is the cleanest flavor route. Use ¼ teaspoon cinnamon extract off heat as a swap, or 1 teaspoon ground cinnamon if that is all you have (expect visible specks in the shell).
  • Equipment notes: A candy thermometer is non-negotiable. Hard crack at 300º F is the line between a glassy shell and a sticky shell. If you must work without one, use the ice water test: drop ½ teaspoon of syrup into ice water and check for a thin, brittle thread that snaps cleanly.
  • Make-ahead and storage: Best the day they are made. The shell stays glassy for about 24 hours at room temperature. Wrap each apple individually in a cellophane bag once the shell is fully set. Do not refrigerate uncovered (condensation makes them sticky), and do not freeze (the shell will crack).
  • Sugar safety: Hot sugar burns are severe. Keep a bowl of ice water within arm's reach the entire time you are cooking. If you get sugar on your skin, immediately remove the glove or dip the area in ice water to harden the sugar before pulling it off.
  • Critical do-nots: Do not stir after the boil starts. Do not dip wet or warm apples. Do not dip at 300º F (wait for 280º F). Do not skip the wax removal step. Do not refrigerate the finished apples uncovered.
Chef Master Food Color Use this code to get 10% off your order!!! ► SUGARGEEKTEN

Nutrition

Serving: 1apple | Calories: 549kcal | Carbohydrates: 143g | Protein: 1g | Fat: 1g | Saturated Fat: 1g | Polyunsaturated Fat: 1g | Monounsaturated Fat: 1g | Sodium: 18mg | Potassium: 162mg | Fiber: 4g | Sugar: 138g | Vitamin A: 80IU | Vitamin C: 7mg | Calcium: 14mg | Iron: 1mg
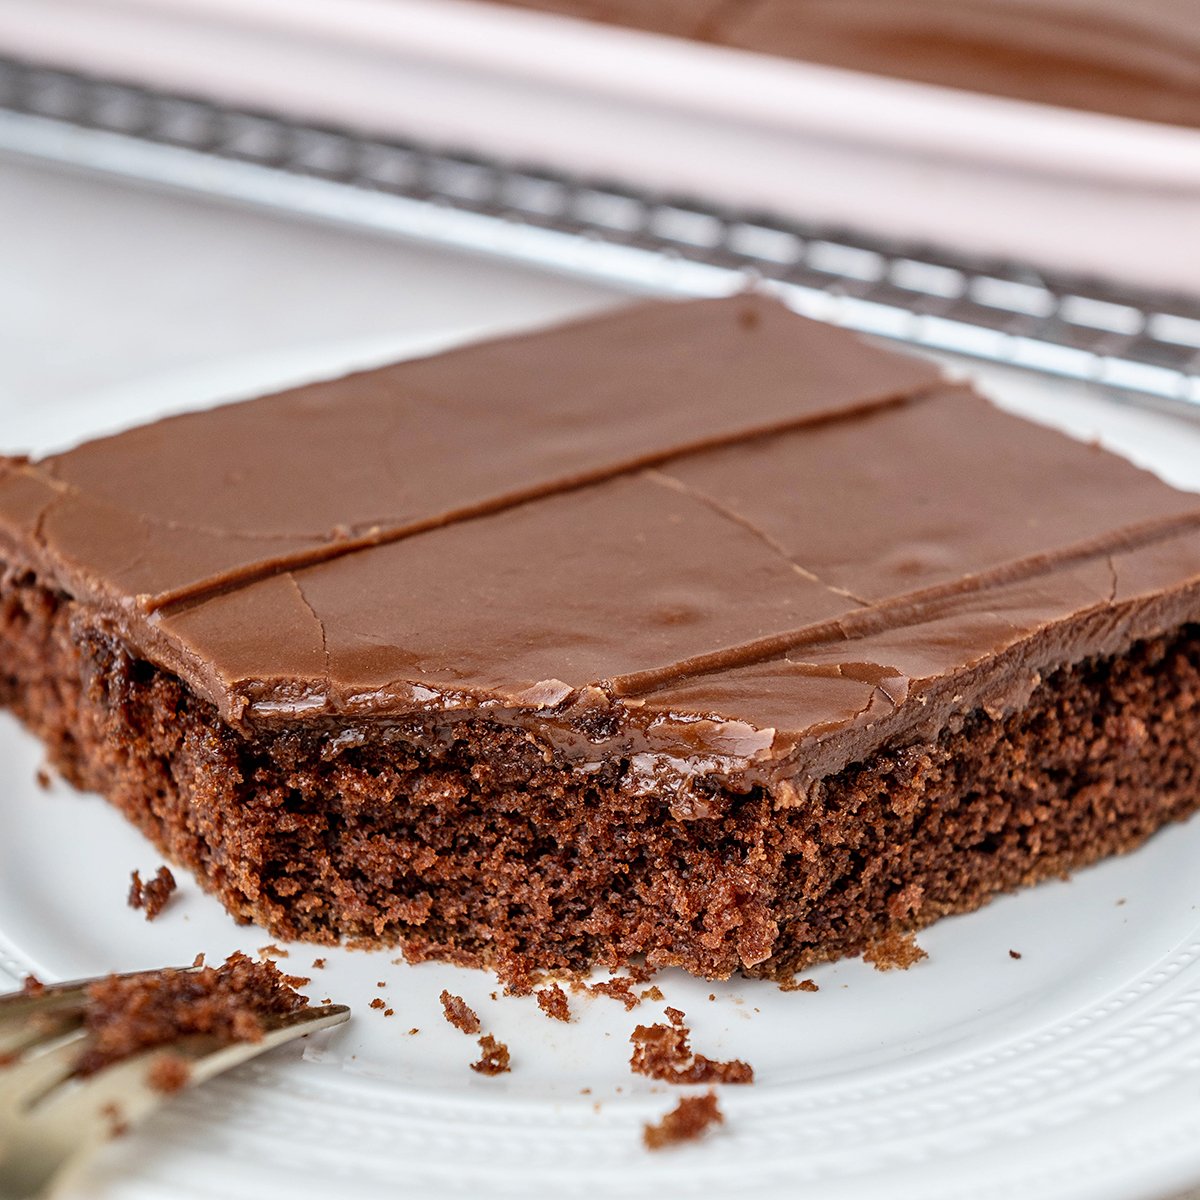
close up of a slice of chocolate sheet cake

September 19, 2021 Cake

Classic Texas Sheet Cake

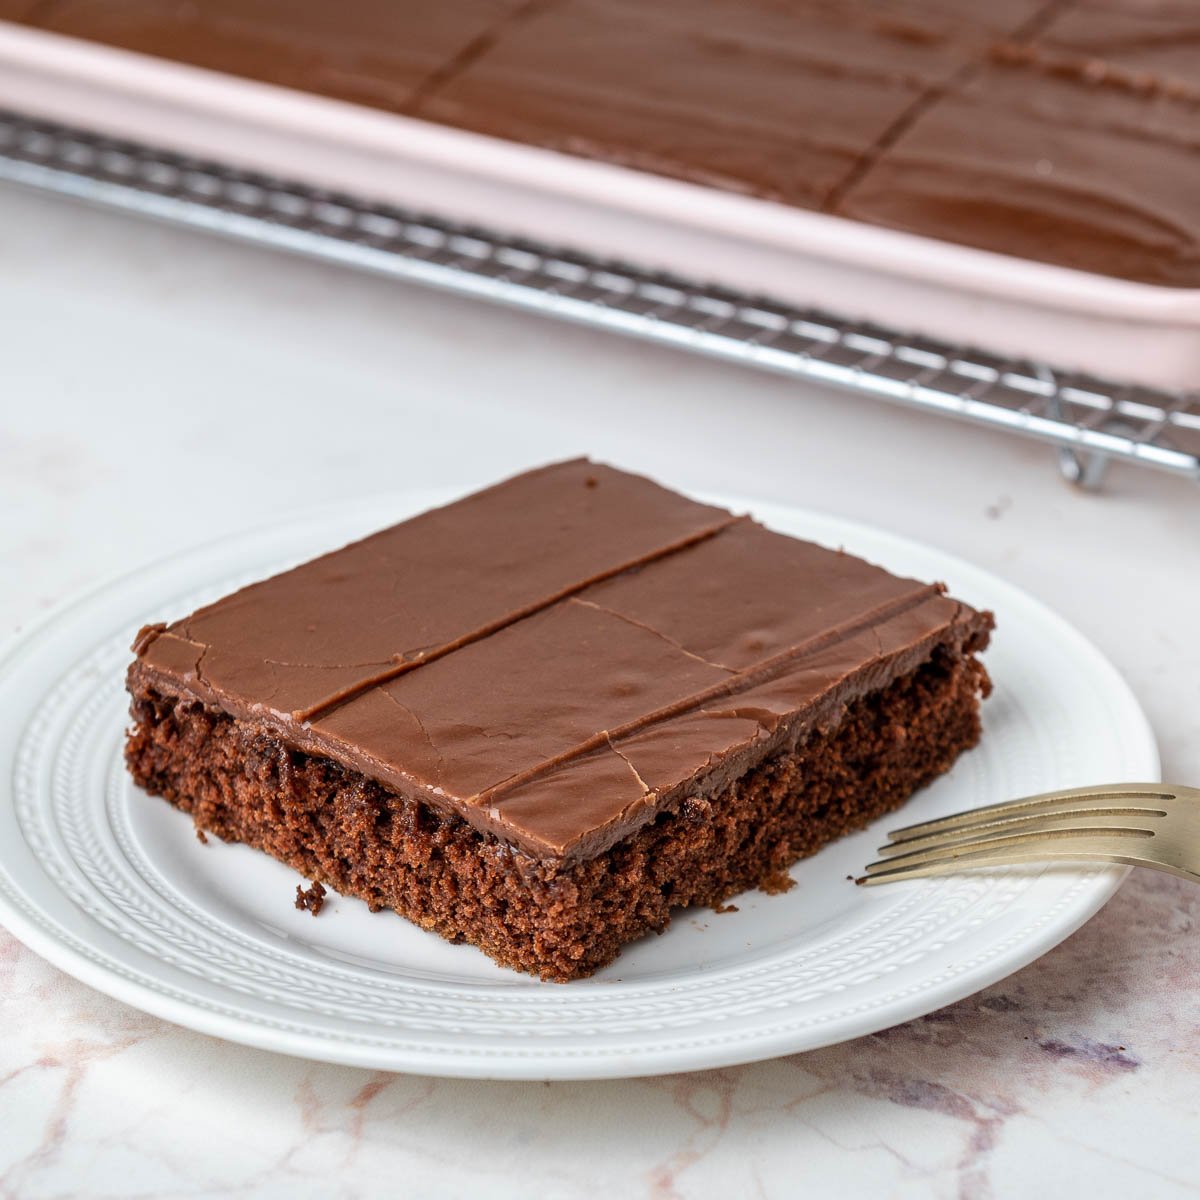
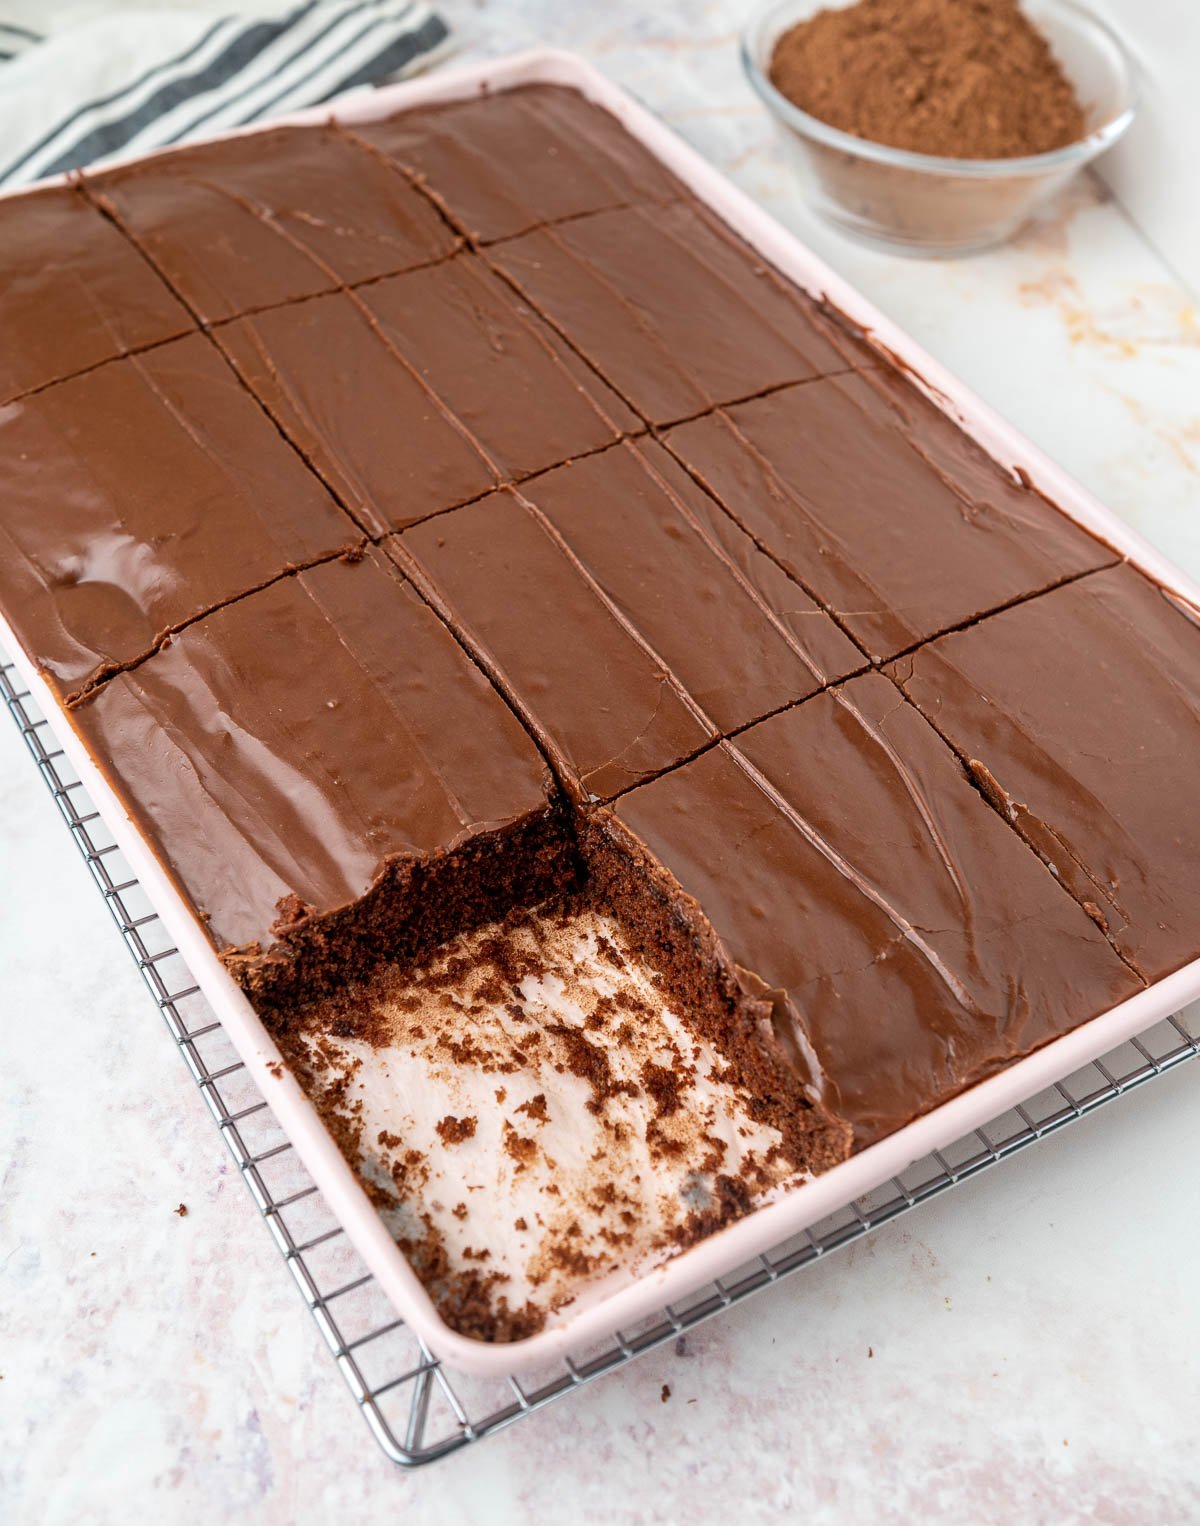
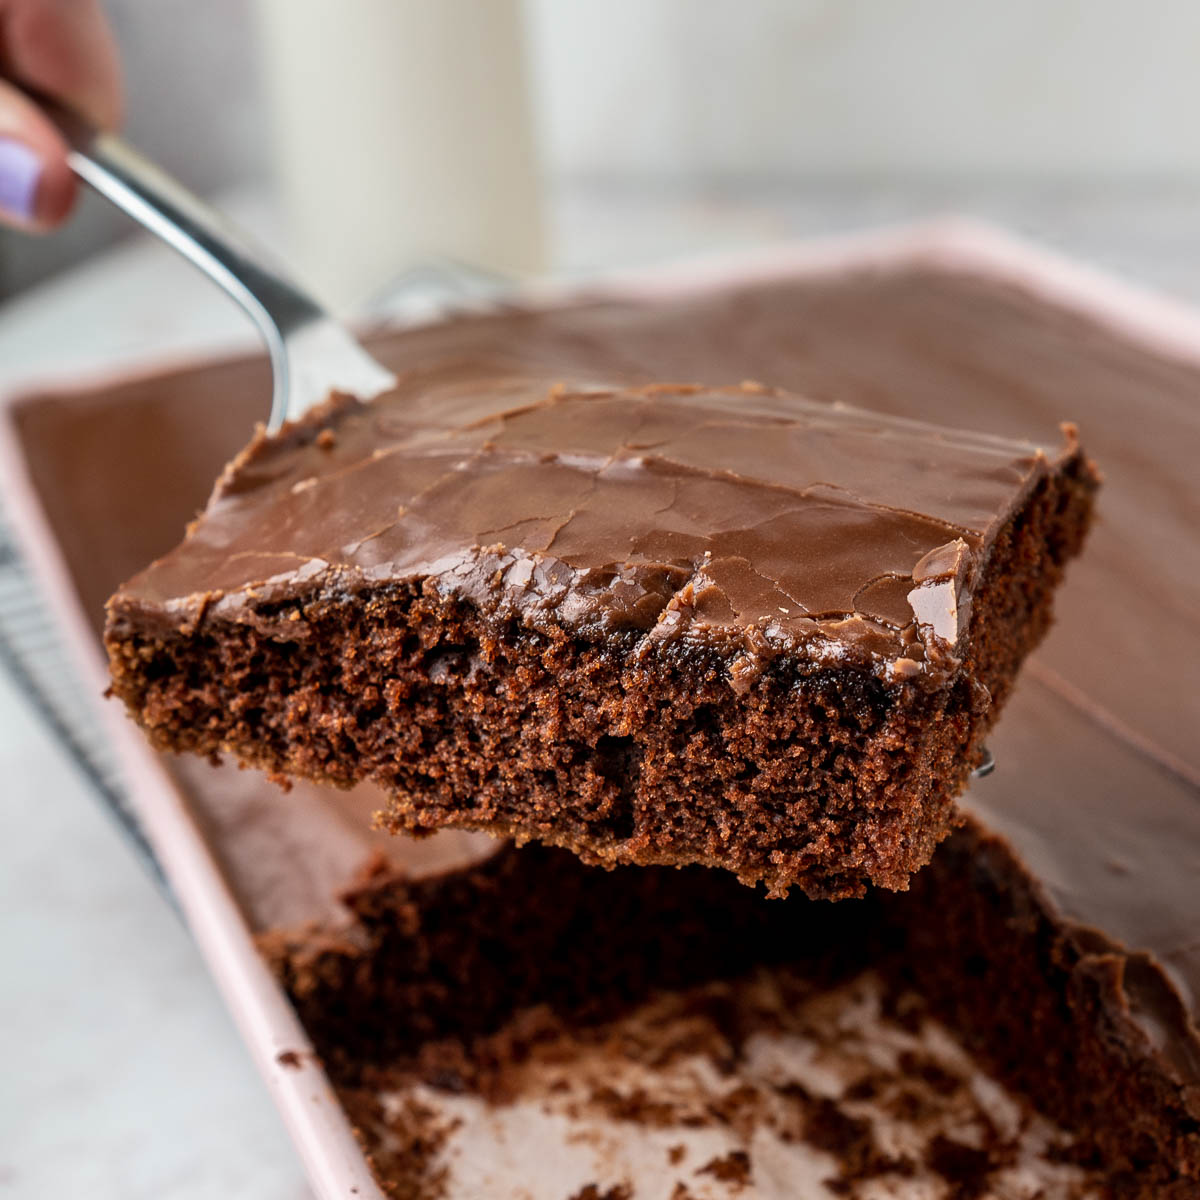
Texas sheet cake isn't your typical chocolate cake. It's rich, decadent, and HUGE because you bake it in a sheet pan and then cover it in warm and gooey chocolate glaze. This cake only takes 30 minutes to make so it's perfect for large gatherings, parties, or a BBQ.

close up of a slice of chocolate sheet cake

Texas sheet cake is one of my favorite go-to easy recipes just like my easy chocolate cake, Chocolate WASC, brownies, and double chocolate chip cookies!

What's In This Blog Post?

  • Ingredients & Equipment Needed
  • How To Make Texas Sheet Cake Step By Step
  • What Makes Texas Sheet Cake Different Than Chocolate Cake?
  • More Easy Recipes For Gatherings

Ingredients & Equipment Needed

The most important thing to have to make a Texas sheet cake is a Texas-sized pan! AKA a half sheet pan. Typically the pan is 13"x18" and about 2" tall. If you're an avid baker, you might already have one on hand but if not, don't fret, you can use a cookie sheet or jelly roll pan pretty much the same way as long as it has sides. You may have to slightly adjust your batter recipe or bake leftover batter as cupcakes (YUM!) if your pan is slightly smaller.

You can even bake this recipe in traditional cake pans or cupcakes! So many options!

How To Make Texas Sheet Cake Step By Step

Texas Sheet Cake

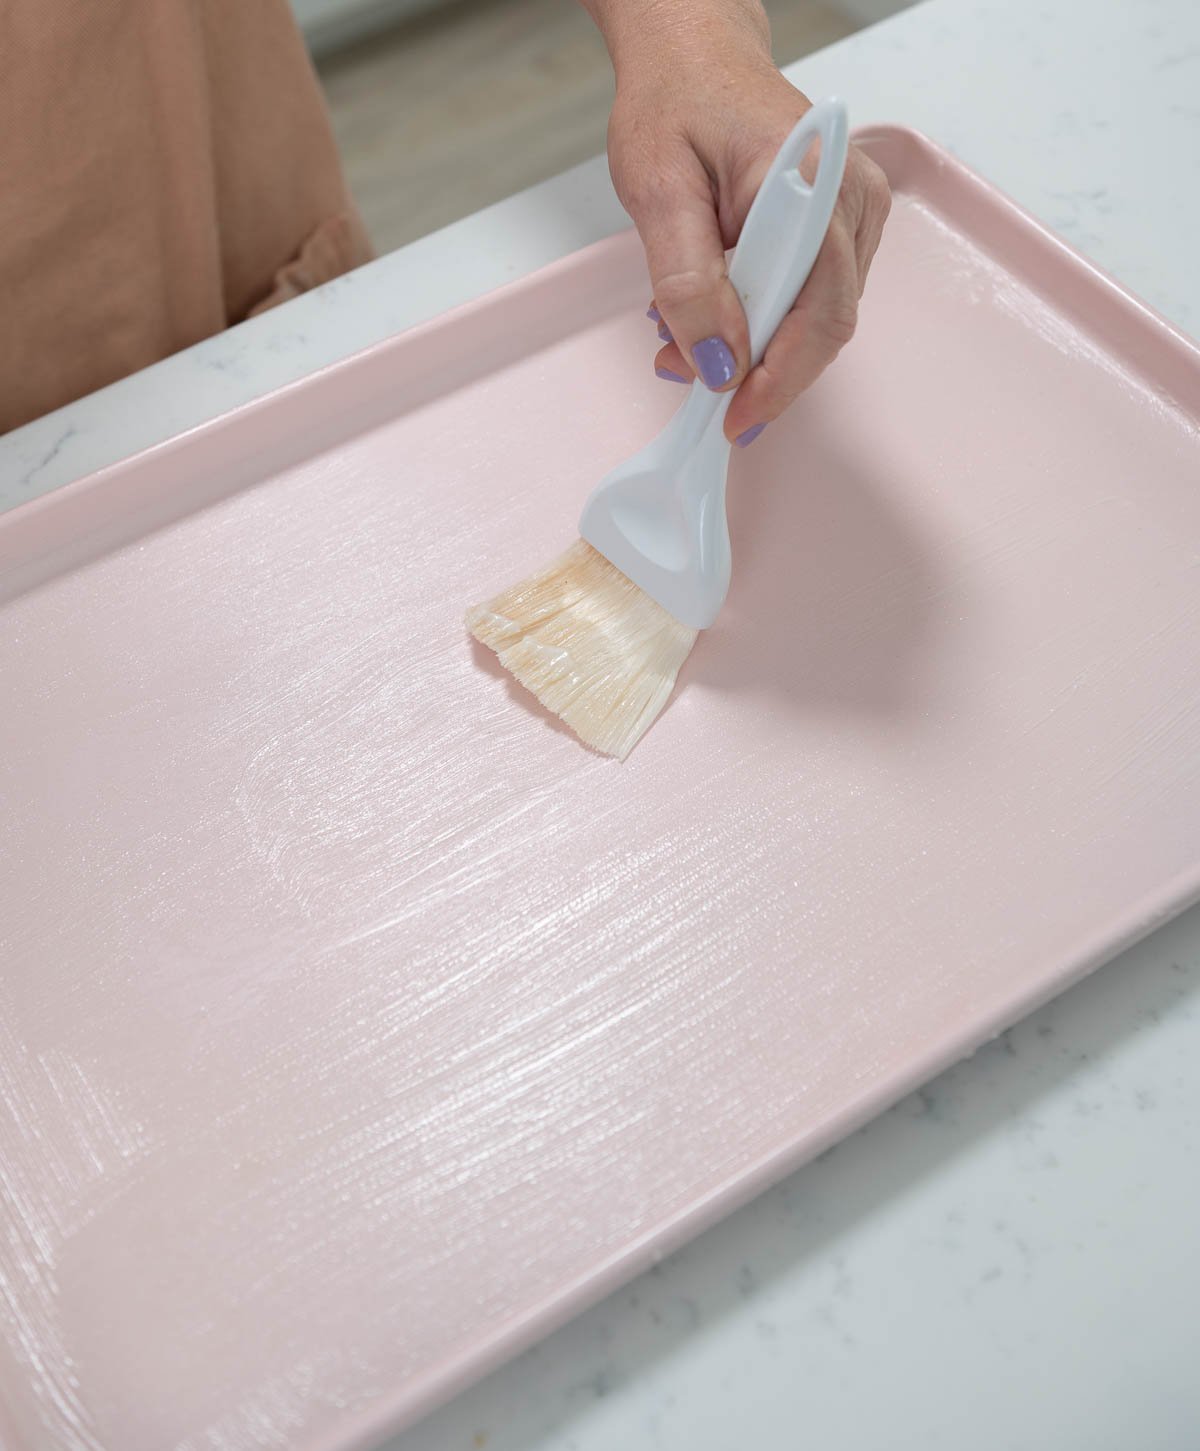
  1. Preheat your oven to 375ºF and prepare your half sheet pan with cake goop or whatever pan release you like. You can line the pan with parchment if you're worried about sticking.
    brushing cake goop on a pink sheet pan
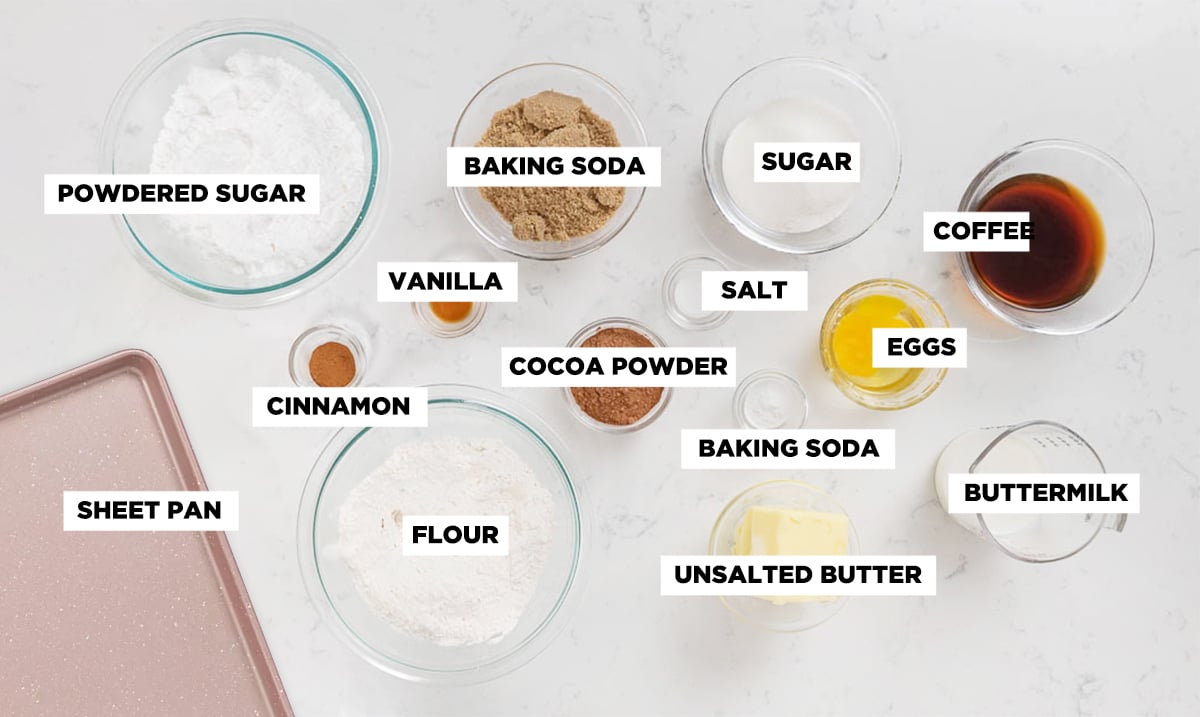
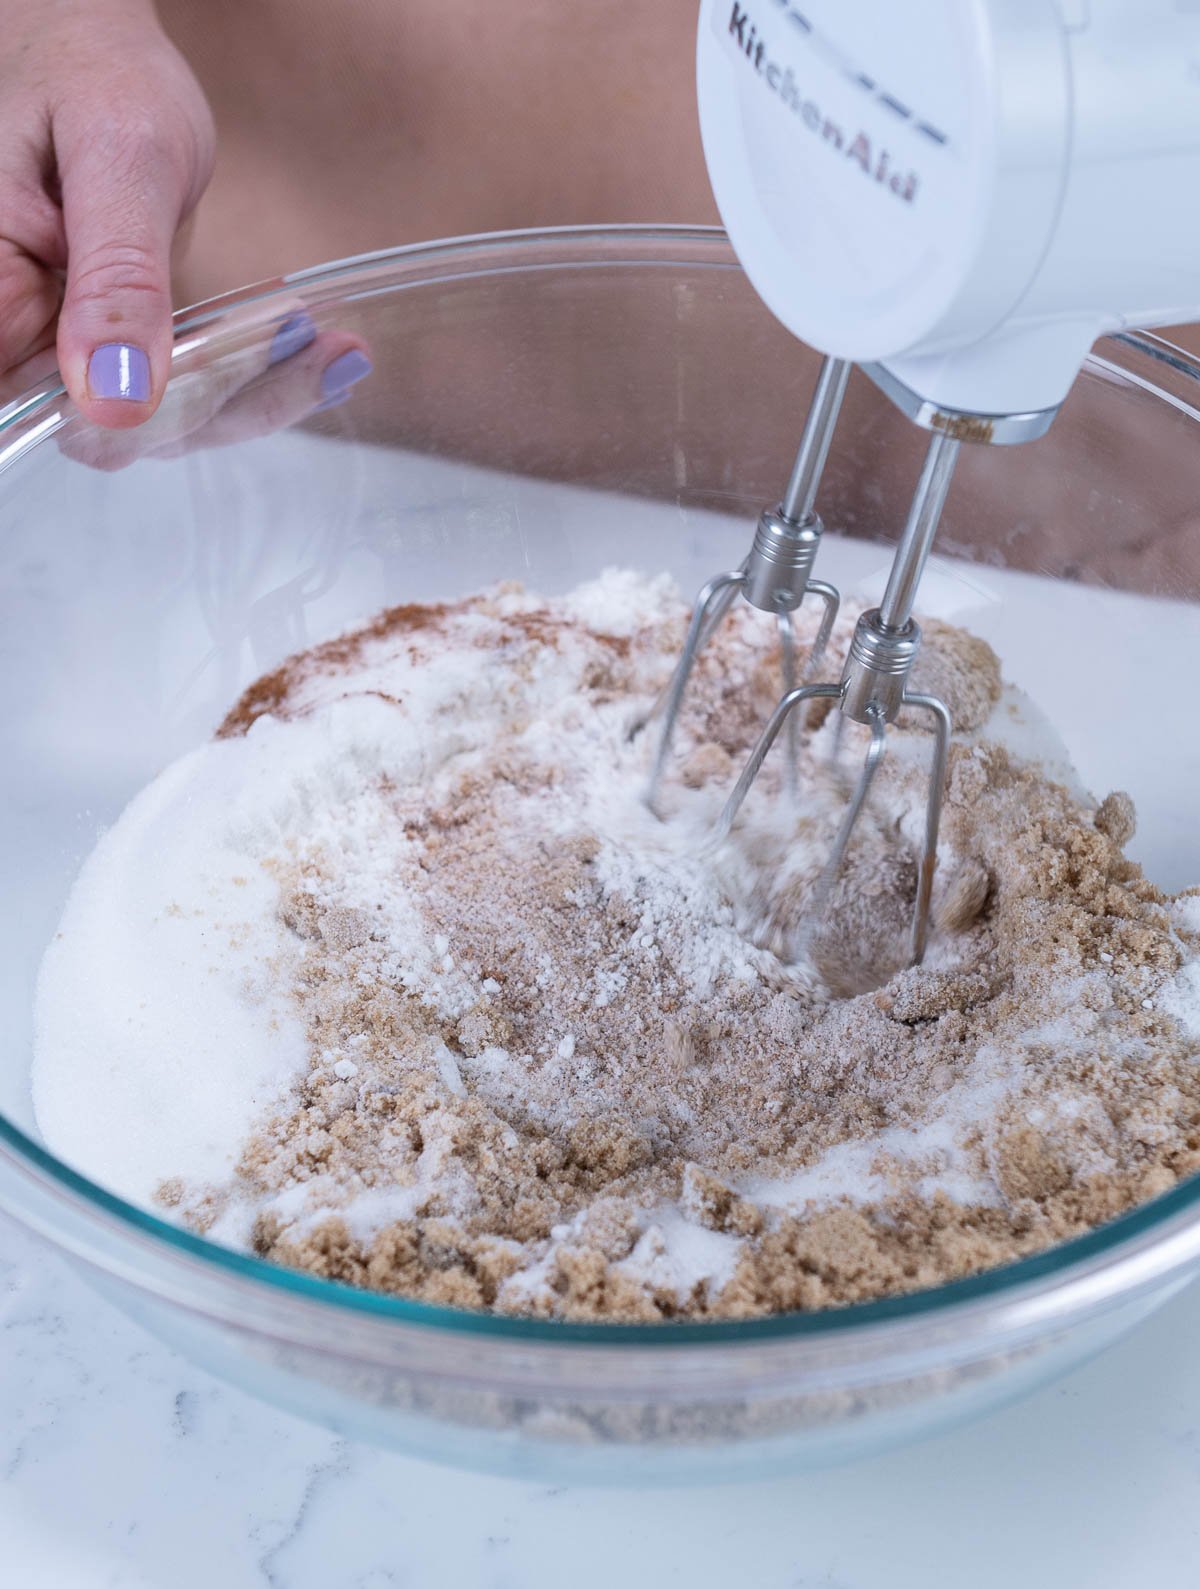
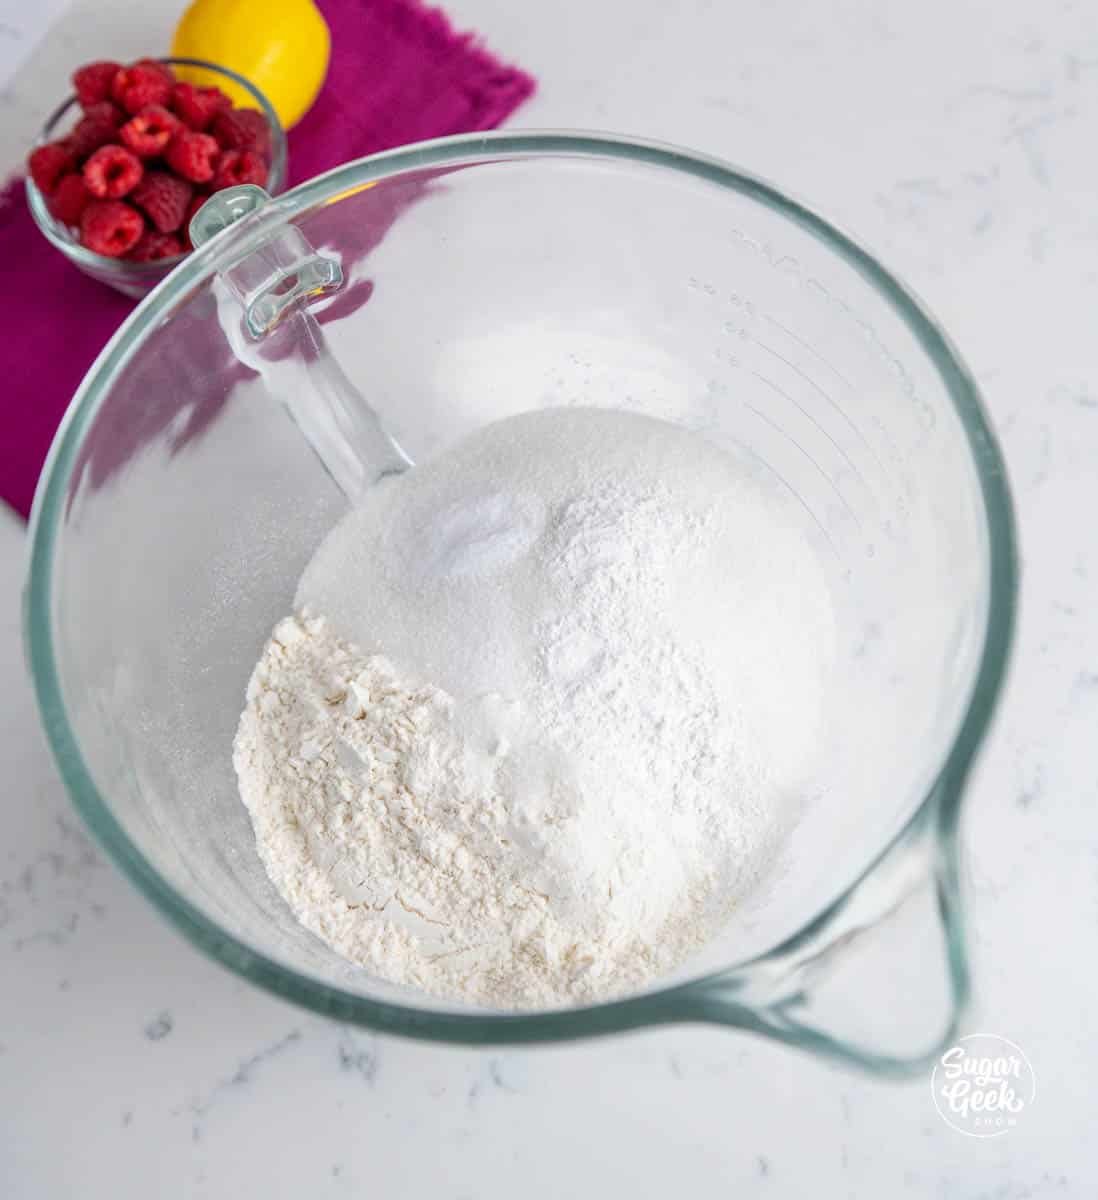
  2. In a large mixing bowl, combine the flour, white sugar, brown sugar, cinnamon, baking soda, and salt, and set aside.
    texas sheet cake dry ingredients in a clear mixing bowl
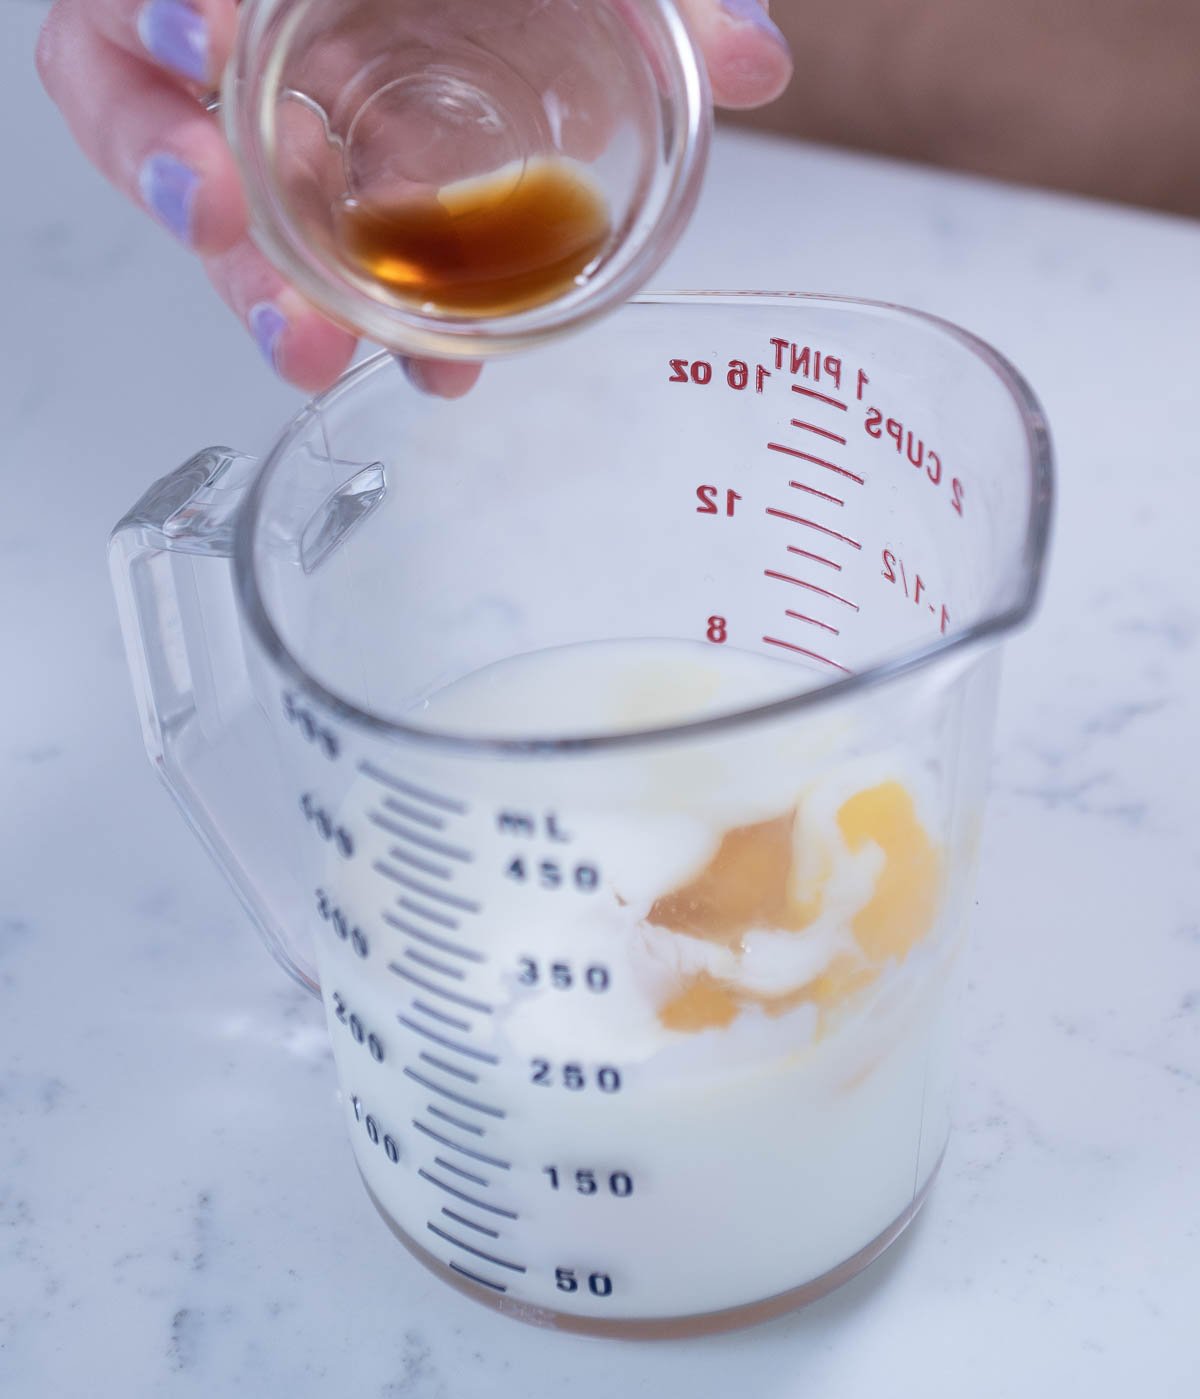
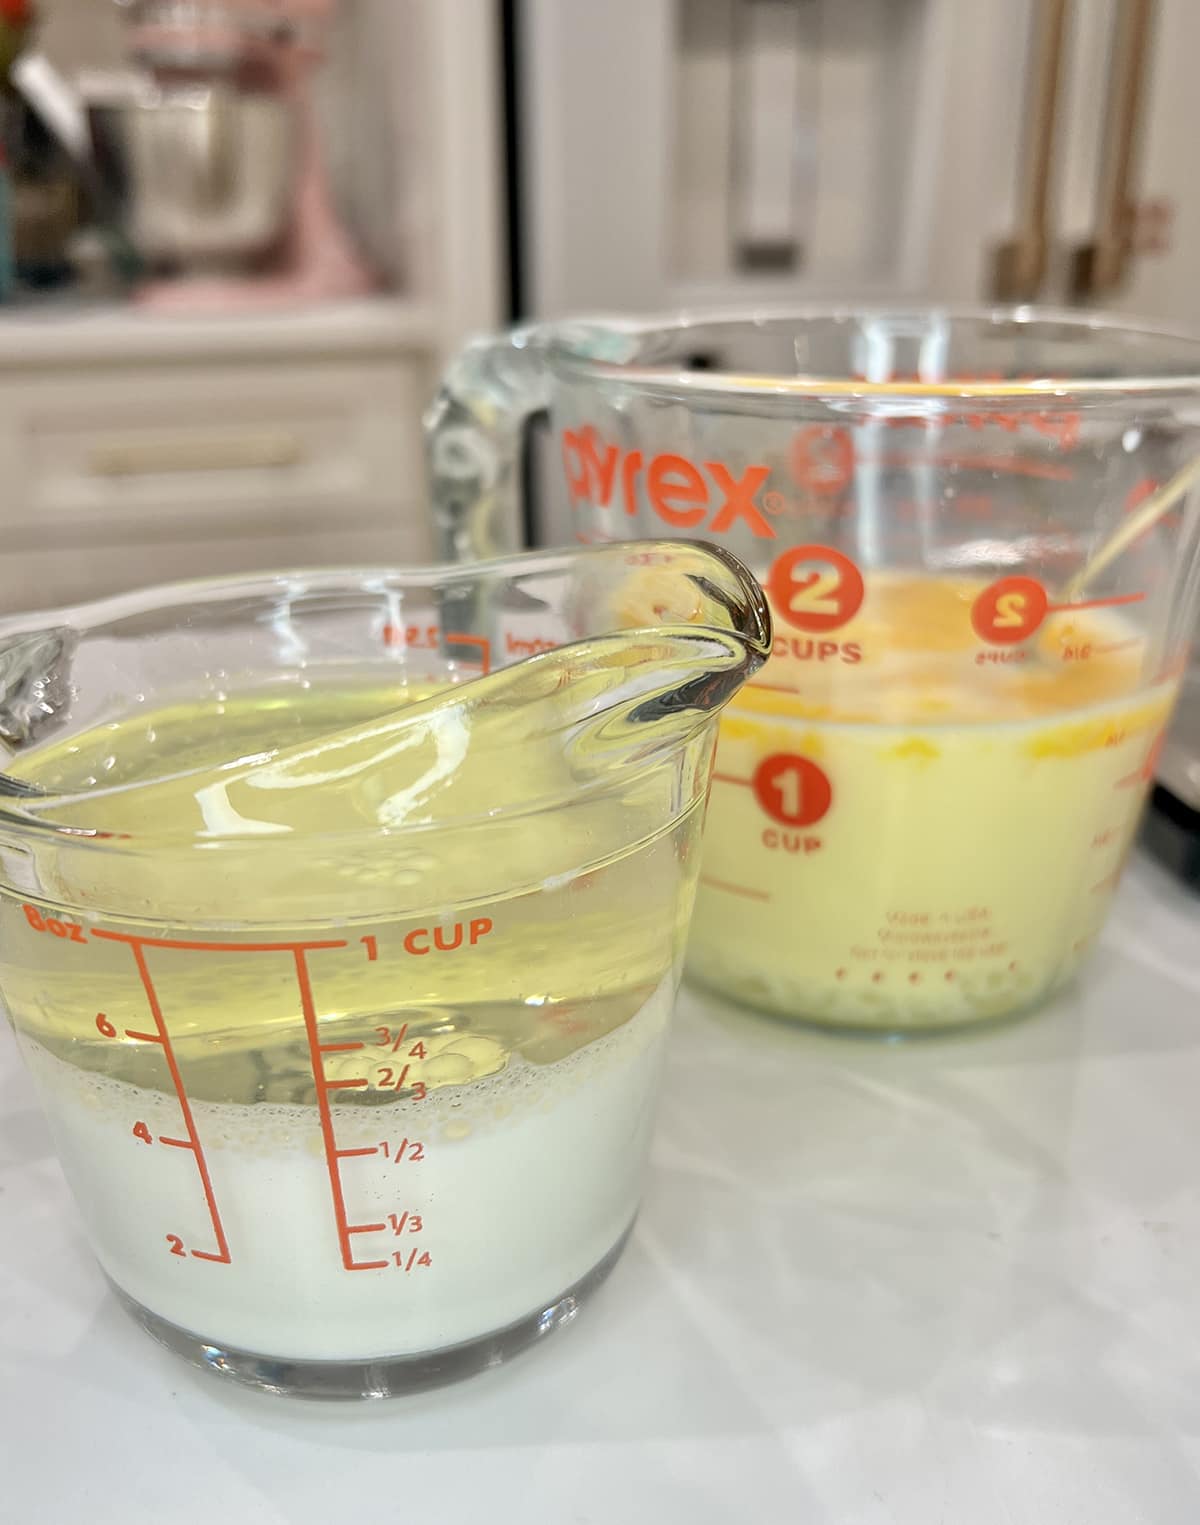
  3. In a separate bowl, combine the eggs, buttermilk, and vanilla and set aside.
    texas sheet cake liquid ingredients in a measuring cup
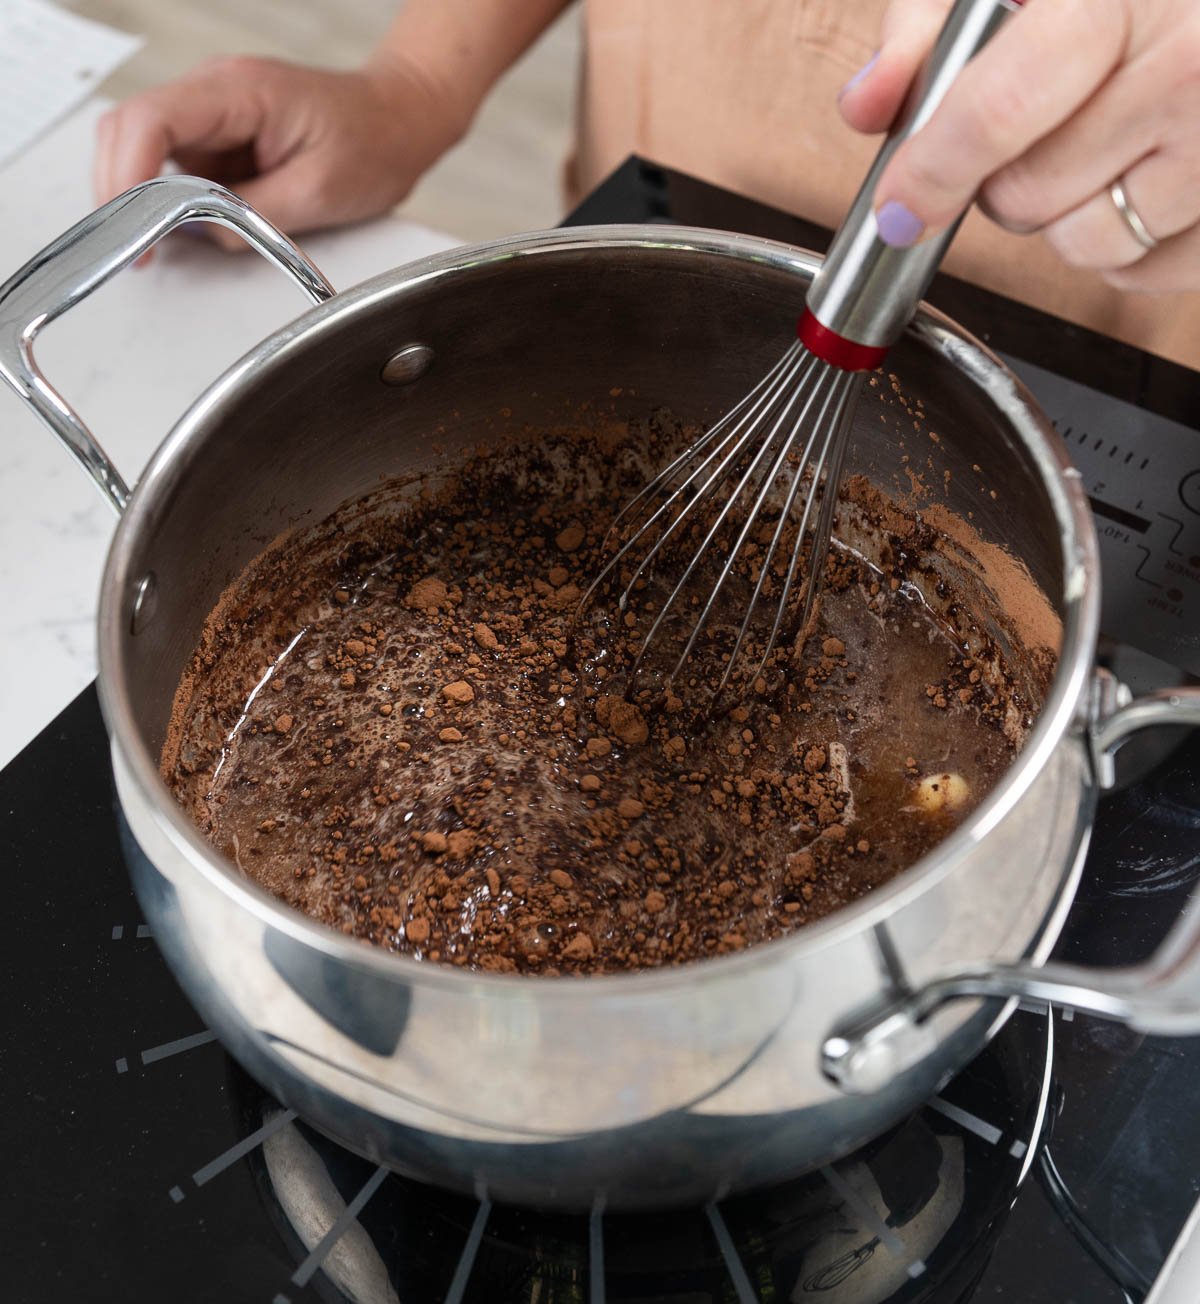
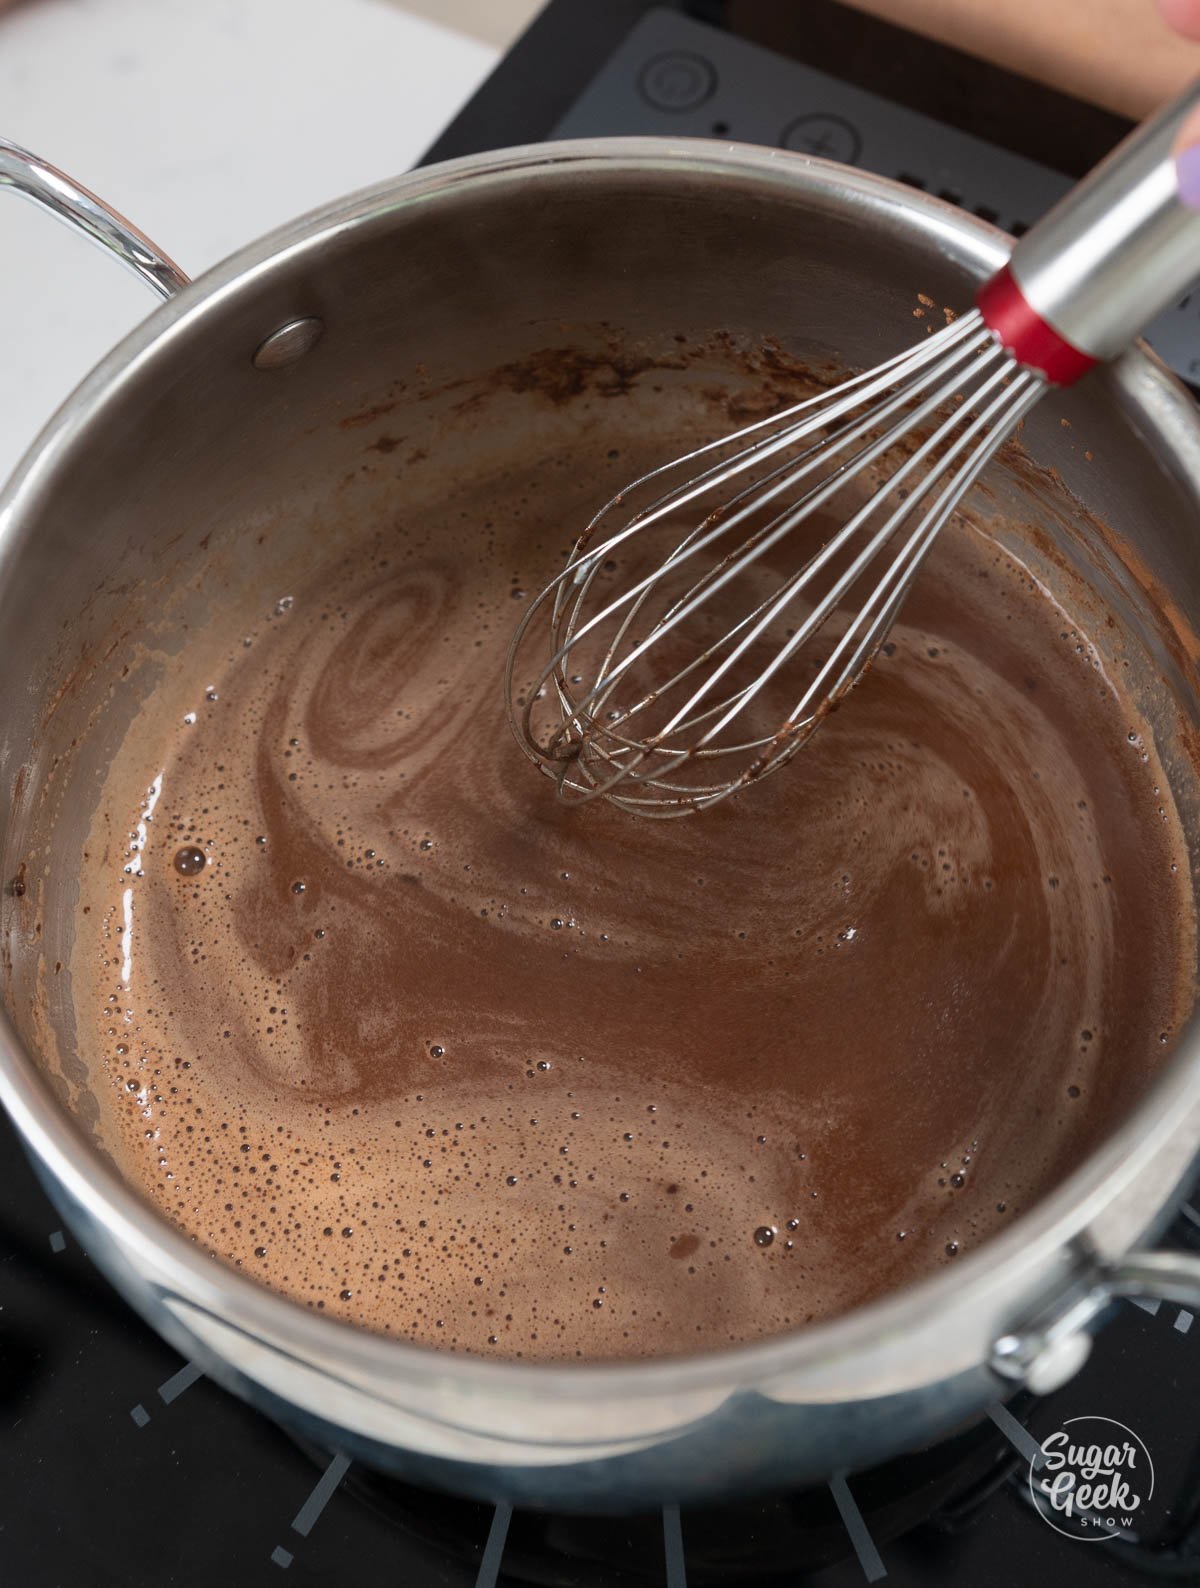
  4. In a saucepan, combine the cocoa powder, butter, and coffee over medium heat. Heat until the mixture begins to simmer, stirring occasionally to prevent burning.
    texas sheet cake ingredients in a saucepan
  5. Once the chocolate mixture begins to boil, remove it from the heat.
    butter and cocoa mixture in a saucepan
  6. Add the buttermilk mixture to the flour mixture and mix until combined.
    mixing texas sheet cake batter in a clear mixing bowl
  7. Add the cocoa mixture to the flour and milk mixture and mix until combined.
    texas sheet cake batter
  8. Pour the cake batter into your prepared sheet pan.
    texas sheet cake batter in a sheet pan
  9. Bake for 15-20 minutes or until a toothpick inserted comes out from the center with just a few sticky crumbs.
  10. While the cake is baking, prepare your glaze.

Texas Sheet Cake Glaze

  1. In a saucepan, combine the butter, cocoa, and buttermilk. Whisk them together and bring them to a boil over medium heat. Stir occasionally to prevent burning.
    texas sheet cake glaze ingredients in a saucepan
  2. Add the powdered sugar, salt, and vanilla to the warm mixture and whisk until smooth. Remove from the heat.
    adding sugar to texas sheet cake glaze
  3. Once the cake comes out of the oven, let it cool for 5 minutes, and then pour the chocolate glaze over the cake. The cake and frosting should both still be warm. The glaze soaks into the warm sheet cake making it super moist!
    pouring glaze over warm texas sheet cake
    spreading glaze over warm texas sheet cake

Storage

Let the cake finish cooling before serving it. Serve the cake directly on the sheet pan. Store leftovers at room temperature in an air-tight container. If you live in a hot and humid area, the cake will last longer stored in the fridge.

What Makes Texas Sheet Cake Different Than Chocolate Cake?

You may know the Texas sheet cake as a funeral cake (any dessert served at a funeral reception made for a lot of guests), sheath cake (a term that comes from the name sheet cake), or Mexican chocolate cake (a similar recipe but with cinnamon added). close up of texas sheet cake sliced in a pan

This cake is thinner and larger than a standard chocolate sheet cake and glazed warm out of the oven with a rich, buttery, chocolate glaze mixed with toasted pecans. This glaze makes the cake incredibly moist and darn right delicious.

It is baked in a large sheet cake pan which is perfect for serving big gatherings. If you're looking for more summer dessert recipes, this cake just screams "take me to a barbeque!"

One of the best things about this cake is that you just add the ingredients together in the bowl and mix! Super easy and the perfect cake to bake for a big gathering which is probably why it has gained such popularity.

The original recipe may vary from family to family but whatever the recipe may be one thing is true, Texas sheet cake is forever ingrained in Americana culture as a must-serve dessert at any important gathering.

This recipe was shared with me by our amazing recipe tester, Erin. It was her Mother's recipe that was given to her by a member of their church. Their family grew up serving this dessert at every gathering back in Texas so it's a true family recipe. This recipe does not have pecans but you could totally mix in a cup of toasted pecans with the glaze if that's what you like!close up of texas sheet cake on a serving spoon

Why is it called a Texas sheet cake?

It is unclear whether or not the Texas sheet cake originated in Texas. Some say the recipe first showed up in a Texas newspaper, others say it gets its name from being big like the size of Texas. Either way, this recipe is a real crowd-pleaser and is widely known as a symbol of friendship and hospitality.

What size pan should I use?

A half sheet pan is typically about 13" wide by 18" long and is about 2" tall. You can also use a cookie sheet or jelly roll pan as long as it has sides. You may have to slightly adjust your batter recipe, baking time, or bake leftover batter as cupcakes if you're using a smaller pan.

Can I add toppings to my Texas sheet cake?

Yes! Some popular toppings include chopped pecans, crushed candy bars, Oreos, almonds, and peanuts.

Can I replace the buttermilk?

If you don't have buttermilk, check out my buttermilk substitutes blog post for more info on how to use sour cream, milk and vinegar, or even lemon juice instead of buttermilk.

More Easy Recipes For Gatherings

Blackberry sponge cake

Lemon pound cake

Cinnamon coffee crumb cake

Fresh fruit tart

Recipe

close up of a slice of chocolate sheet cake
Print Recipe
4.65 from 14 votes

Classic Texas Sheet Cake Recipe

Perfectly moist Texas sheet cake covered in a gooey, warm chocolate glaze. This cake recipe is often passed down through generations and is perfect for serving at large gatherings, parties, weddings, and BBQs.
Prep Time10 minutes mins
Cook Time20 minutes mins
Course: Dessert
Cuisine: American
Servings: 24 servings
Calories: 298kcal
Author: Liz Marek

Equipment

  • 13"x18" sheet pan with 2" sides

Ingredients

  • 10 ounces all purpose flour
  • ½ teaspoon salt
  • 1 teaspoon baking soda
  • 7 ounces sugar
  • 7 ounces brown sugar
  • ½ teaspoon cinnamon
  • 1 ounce natural cocoa powder Like Hershey's
  • 8 ounces unsalted butter room temperature
  • 6 ounces coffee or water
  • 2 large eggs
  • 4 ounces buttermilk
  • 1 teaspoon vanilla

Chocolate Glaze

  • 4 ounces unsalted butter
  • 1 ounce natural cocoa powder like Hershey's
  • 2 ounces buttermilk
  • 16 ounces powdered sugar
  • 1 teaspoon vanilla extract
  • ¼ teaspoon salt
US Customary - Metric

Instructions

For The Texas Sheet Cake

  • Preheat your oven to 375ºF and prepare your half sheet pan with cake goop or whatever pan release you like.
  • In a large mixing bowl, combine the flour, soda, cinnamon, white and brown sugar, and set aside.
  • In a separate bowl, combine the eggs, milk, and vanilla and set aside.
  • In a saucepan, combine the cocoa powder, butter, and coffee over medium heat. Heat until the mixture begins to simmer, stirring ocassionally to prevent burning. Once it begins to boil, remove it from the heat.
  • Add the milk mixture to the flour mixture and mix until combined.
  • Add the chocolate mixture to the flour and milk mixture and mix until combined.
  • Bake for 15-20 minutes or until a toothpick inserted comes out from the center with just a few sticky crumbs.
  • While the cake is baking, prepare your glaze.

Texas Sheet Cake Glaze

  • In a saucepan, combine the butter, cocoa, and the buttermilk. Whisk them together and bring it to a boil over medium heat. Stir occasionally to prevent burning.
  • Add the sugar, salt, and vanilla to the warm mixture and whisk until smooth.
  • Once the cake comes out of the oven, let it cool for 5 minutes, and then pour the chocolate glaze over the cake. The cake and frosting should both still be warm. The glaze soaks into the warm sheet cake making it super moist!
  • Serve the cake directly on the sheet pan. Store leftovers at room temperature in an air tight container.

Notes

If your glaze is too thick, you can add in 1-2 Tablespoons of water to thin it out to the desired consistency.
Feel free to add in toasted pecans to your Texas sheet cake
If you don't have a sheet pan you can use any kind of cake pan, cupcake or even a loaf pan.
A half sheet pan is typically about 13" wide by 18" long and is about 2" tall. You can also use a cookie sheet or jelly roll pan as long as it has sides. You may have to slightly adjust your batter recipe, baking times, or bake leftover batter as cupcakes if you're using a smaller pan.

Nutrition

Serving: 1serving | Calories: 298kcal | Carbohydrates: 46g | Protein: 3g | Fat: 13g | Saturated Fat: 8g | Polyunsaturated Fat: 1g | Monounsaturated Fat: 3g | Trans Fat: 1g | Cholesterol: 47mg | Sodium: 137mg | Potassium: 83mg | Fiber: 1g | Sugar: 35g | Vitamin A: 389IU | Vitamin C: 1mg | Calcium: 26mg | Iron: 1mg
Wedding cake with a sculpted dragon sitting on top fighting bride and groom cake toppers

September 15, 2021 Course Preview

Dragon Wedding Cake Tutorial

Skill level: Intermediate

I have been asked over and over to make a classic red dragon on a cake and when this Dungeons and Dragons die-hard couple approached me about doing a dragon-themed wedding cake, I jumped on the chance to make it.

In this tutorial, you will learn how to create the artistic painted design on the wedding cake tiers, along with the sculpted classic red dragon out of edible materials. Learn how to create the unique structure that will support the dragon, how to sculpt the muscles and facial features, how to add edible teeth and an edible fireball. The wings in particular turned out amazing and have a show-stopping quality to them that will surely impress your nerdy guests.

There's a lot to cover in this tutorial, so let's get our tools together and let's get started!

2:22:41 Minutes of Instruction

What You Will Learn

  • How to make a red dragon cake sculpted out of edible materials
  • Learn how to create the internal structure to support the dragon
  • How to paint the cake tiers using edible oil paints
  • How to arrange real flowers onto a cake

Tutorial Chapters

  1. Making the wings 0:55
  2. Measuring the dragon 10:55
  3. Shaping the PVC pipe 16:17
  4. Making the cake dummy 19:21
  5. Adding the straws and foil tape 25:34
  6. Adding the armature wire 28:31
  7. Coloring the modeling paste 35:40
  8. Adding bulk to the dragon 36:37
  9. Adding muscles part 1 41:49
  10. Detailing the abdomen 48:06
  11. Prepping the cake boards 52:21
  12. Stacking the cakes 56:21
  13. Making the water ganache 59:37
  14. Painting the cake 1:01:01
  15. Attaching the dragon 1:07:52
  16. Making the head 1:11:43
  17. Adding the wings 1:24:14
  18. Adding the tail 1:25:43
  19. Adding chocolate to the wings 1:28:50
  20. Building up the arms 1:33:40
  21. Adding the legs 1:40:29
  22. Torching the wings 1:47:21
  23. Adding scale texture 1:50:06
  24. Carving and texturing the face 1:53:11
  25. Adding claws 1:55:57
  26. Painting the dragon 2:00:10
  27. Making the isomalt fire 2:13:24
  28. Adding the eyes 2:14:32
  29. Making the fireball 2:15:13
  30. Adding teeth 2:18:50
  31. Making and adding bouquet 2:19:37

Downloads

Materials List

Dragon Wing Template 01

Dragon Wing Template 02

Dragon Wing Template 03

Dragon Wing Template 04

Wedding cake with a sculpted dragon sitting on top fighting bride and groom cake toppers

September 15, 2021 Paid Video

Dragon Wedding Cake

Skill level: Intermediate

I have been asked over and over to make a classic red dragon on a cake and when this Dungeons and Dragons die-hard couple approached me about doing a dragon-themed wedding cake, I jumped on the chance to make it.

In this tutorial, you will learn how to create the artistic painted design on the wedding cake tiers, along with the sculpted classic red dragon out of edible materials. Learn how to create the unique structure that will support the dragon, how to sculpt the muscles and facial features, how to add edible teeth and an edible fireball. The wings in particular turned out amazing and have a show-stopping quality to them that will surely impress your nerdy guests.

There's a lot to cover in this tutorial, so let's get our tools together and let's get started!

2:22:41 Minutes of Instruction

What You Will Learn

  • How to make a red dragon cake sculpted out of edible materials
  • Learn how to create the internal structure to support the dragon
  • How to paint the cake tiers using edible oil paints
  • How to arrange real flowers onto a cake

Tutorial Chapters

  1. Making the wings 0:55
  2. Measuring the dragon 10:55
  3. Shaping the PVC pipe 16:17
  4. Making the cake dummy 19:21
  5. Adding the straws and foil tape 25:34
  6. Adding the armature wire 28:31
  7. Coloring the modeling paste 35:40
  8. Adding bulk to the dragon 36:37
  9. Adding muscles part 1 41:49
  10. Detailing the abdomen 48:06
  11. Prepping the cake boards 52:21
  12. Stacking the cakes 56:21
  13. Making the water ganache 59:37
  14. Painting the cake 1:01:01
  15. Attaching the dragon 1:07:52
  16. Making the head 1:11:43
  17. Adding the wings 1:24:14
  18. Adding the tail 1:25:43
  19. Adding chocolate to the wings 1:28:50
  20. Building up the arms 1:33:40
  21. Adding the legs 1:40:29
  22. Torching the wings 1:47:21
  23. Adding scale texture 1:50:06
  24. Carving and texturing the face 1:53:11
  25. Adding claws 1:55:57
  26. Painting the dragon 2:00:10
  27. Making the isomalt fire 2:13:24
  28. Adding the eyes 2:14:32
  29. Making the fireball 2:15:13
  30. Adding teeth 2:18:50
  31. Making and adding bouquet 2:19:37

Downloads

Materials List
Dragon Wing Template 01
Dragon Wing Template 02
Dragon Wing Template 03
Dragon Wing Template 04

kittea party cake display with balloon arch

September 3, 2021 Events

Avalons 7th Birthday Kit-TEA Party

For this year's party, we went all out! The theme was "what if cats had a fancy tea party". What would they wear, what would they eat, drink and what games would they play? I can't wait to show you all the Purrrrr-fect details.

cake display with balloon arch

Party Details

  • Invitation & Signage
  • Setup & Decor
  • Cake & Cupcake Display
  • Kit -TEA Party Food & Desserts
  • Tea & Beverages
  • Party Favors & Games
  • Vendor Links
  • Recipe & Tutorial Links

Invitation & Signage

Even though we sent out kit-Tea party invitations digitally, we still have one designed by our lovely friend at Alvalumos! I just love her hand-drawn invitations and stickers! The other signs, stickers, and printables were designed by my lovely friend Kelsey!

cat party adoption certificate printable
cat-tastic goodie bag sign
adopt a kitten printable
food menu printable

Setup & Decor

Guests were greeted by a larger-than-life balloon arch that led them to the main tea party area. More balloons in the shape of teapots, cats, and centerpieces covered the entire back yard which was recently renovated JUST to have this party. Now THAT is over the top!

balloon arch entrance
kittea party decorations
cat birthday party balloons

Cats and Kittens (that's ladies and gents to you) were invited to put on a pair of ears to get into the spirit of the party before taking a seat at the most epic tea party table you've ever seen! The table was overflowing with balls of yarn, bowls for ice cream, and the cutest cat plates ever!

mom and daughter posing in cat ear headbands in front of balloons
kittea party table decorations
cat tea party table decorations
woman pouring from a teapot
little girl drinking from a small teacup
mom kissing daughter next to balloons

Cake & Cupcake Display

Of course, the kit-TEA party cake had to have an epic display. The cake backdrop was made with some pieces of PVC pipe, some old curtains, and lots and lots of balloons! The cake display was actually a cart made for a nursery but it made the perfect table for the cake.

cake display with balloon arch

Avalon had a lot to say about how her tea party birthday cake looked like this year! She did NOT want any cats on her cake because the party was all about what cats would eat and drink at a tea party, and cats do not eat cats lol. Makes sense to me! So we went with a topsy turvy teapot cake with lots of chocolate spheres and cute little mice.

tea party cake

The ADORABLE cat toppers were made by our favorite fondant artist, Mimicafe Union. She even made two customs toppers to look like Avalon and her brother Ezra.

cat cupcake toppers
boy and girl cat cupcake toppers
mom posing with daughter

Kit -TEA Party Food & Desserts

What's a party without food? Our kit-tea party was catered by Just A Dash Kitchen who makes the MOST amazing food and appetizers! Everyone was raving about how good everything was, even the kids! The menu was a lot of fun and had everything from simple ham and cheese fish-shaped tea sandwiches to elaborate pinwheel pizza puffs and Caprese skewers! Perfect for a tea party for cats and kittens.

tea party food
charcuterie board
meatball appetizers
chicken curry puff pastry appetizers
watermelon feta mint appetizers

You will probably not be surprised to learn I went way over the top for the desserts! Aside from making the cake and cupcakes, I also made some delicious lemon bars (Avalons favorite flavor other than chocolate is lemon!), sushi-themed petit fours, and bite-sized pavlova! They were a big hit!

I have a lot of talented baker friends and I definitely took advantage of their skills to make some adorable yarn cake pops, cat-themed macarons, cat-themed sugar cookies, and fish skeleton cookies.

cat themed desserts
yarn ball cake balls
tea pot cake pops
fish skeleton cookies
sushi petit fours
cat cupcakes and pavlova
lemon bars

If that wasn't enough, we also had an ice cream bar! I told you I went way overboard ok? I just had to because what else was I going to put in these adorable ceramic ice cream cones.

making an ice cream sundae
ice cream bar
girl smiling with ceramic ice cream cone
girl making ice cream sundae

Tea & Beverages

The beverage station was one of my favorite setups, to be honest! We did three kinds of ice tea (because it was really hot outside!) including peach tea, virgin Moscow mule, and virgin sangria. Each tea cup came with a little honey stick for mixing. We also had two huge containers of lemon cucumber water and lemonade for the kiddos.

tea bar
glitter bomb cocktails and tea
strawberry lemonade and cucumber lemon water

My favorite part of the beverage station was the glitter bomb cocktails though! We had champagne or apple cider options for adults and kids. Big puffy clouds of cotton candy dissolve immediately when champagne or cider is poured on top leaving behind a gorgeous cocktail of glitter (edible) and bubbles! These were SUCH a hit!

glitter bomb cocktails

Party Favors & Games

What's a tea party without some fun and games? After guests arrived, they were invited to put on a pair of adorable cat ears then head on over to the cat adoption center where you could pick out your very own kitten and give it a name. Then it's time to make your new kitten a collar at the collar station!

cat themed favors
cat adoption center
cat collar station
cat adoption game

We also had a giant yarn ball race. I am not going to even tell you how long it took to wrap all these dang rubber balls in yarn. But the kids had a blast so it was worth it.

yarn ball race
yarn ball race

Enjoy this little video montage of the party! A huge thank you to all my amazing friends who helped assemble all the moving parts and pieces for this party. Seriously could not have done it without them <3

Vendor Links

Cat Themed Sugar Cookies - Jam Cakes

Cat Macarons - Mamas Artisan Sweets

Cat Cupcake Toppers - MimiCafe Union

Yarn Ball & Tea Pot Cake Pops - Flour By Design

Fish Skeleton Cookies - Those Bailey's Cookies

Balloons - BR Konexion

Table Rentals - Barbur Blvd Rentals

Photography - Images From Amy

Recipe & Tutorial Links

Lemon Bars

Pavlova

Sushi Petit Fours

Glitter Bomb Cocktails

Chocolate Cupcakes

Topsy Turvy Teapot Cake

Topsy turvy Cake with teacups and mouses sculpted on it

September 1, 2021 Paid Video

Topsy Turvy Tea Party Birthday Cake

Skill level: Intermediate

For Avalon's birthday party this year, the theme was cats and tea parties, or a "kit-tea" party. Avalon didn't want cats on the cake (because why would cats eat cats?) so we went with mice, teapots and lots and lots of bubbles.

In this tutorial, you'll learn how to create a beautiful tea party cake with a classic gravity-defying topsy turvy design with a twist, there's a floating element to each tier allowing bubbles or flowers to be put between the tiers. You'll learn how to create this structure which opens up possibilities for all sorts of interesting designs.

There's a lot to cover in this tutorial, so let's get our tools together and let's get started!

1:14:52 Minutes of Instruction

What You Will Learn

  • Learn how to create a gravity-defying topsy turvy cake
  • How to sculpt and create mice, teapots and bubbles
  • Learn how to make a floating teapot stream and wafer paper sails

Tutorial Chapters

  1. Overview of the materials 0:42
  2. Making the structure 3:16
  3. Covering in fondant 16:25
  4. Stacking the cakes 24:01
  5. Making the chocolate bubbles 25:25
  6. Making the wafer paper sails 28:44
  7. Making the teacups 33:37
  8. Making the teapot base & spout 41:38
  9. Adding the teapot 46:30
  10. Making the water ganache 56:38
  11. Adding the water ganache drip 57:14
  12. Adding the teacups & mice: part 1 58:34
  13. Making the water spout 1:03:55
  14. Adding the teacups & mice: part 2 1:06:10
  15. Painting the decorations 1:09:29
  16. Adding the chocolate bubbles 1:11:46
  17. Attaching the wafer paper fan 1:15:05

Downloads

Materials List

Topsy turvy Cake with teacups and mouses sculpted on it

September 1, 2021 Course Preview

Topsy Turvy Tea Party Birthday Cake Tutorial

Skill level: Intermediate

For Avalon's birthday party this year, the theme was cats and tea parties, or a "kit-tea" party. Avalon didn't want cats on the cake (because why would cats eat cats?) so we went with mice, teapots and lots and lots of bubbles.

In this tutorial, you'll learn how to create a beautiful tea party cake with a classic gravity-defying topsy turvy design with a twist, there's a floating element to each tier allowing bubbles or flowers to be put between the tiers. You'll learn how to create this structure which opens up possibilities for all sorts of interesting designs.

There's a lot to cover in this tutorial, so let's get our tools together and let's get started!

1:14:52 Minutes of Instruction

What You Will Learn

  • Learn how to create a gravity-defying topsy turvy cake
  • How to sculpt and create mice, teapots and bubbles
  • Learn how to make a floating teapot stream and wafer paper sails

Tutorial Chapters

  1. Overview of the materials 0:42
  2. Making the structure 3:16
  3. Covering in fondant 16:25
  4. Stacking the cakes 24:01
  5. Making the chocolate bubbles 25:25
  6. Making the wafer paper sails 28:44
  7. Making the teacups 33:37
  8. Making the teapot base & spout 41:38
  9. Adding the teapot 46:30
  10. Making the water ganache 56:38
  11. Adding the water ganache drip 57:14
  12. Adding the teacups & mice: part 1 58:34
  13. Making the water spout 1:03:55
  14. Adding the teacups & mice: part 2 1:06:10
  15. Painting the decorations 1:09:29
  16. Adding the chocolate bubbles 1:11:46
  17. Attaching the wafer paper fan 1:15:05

Downloads

Materials List

christophe rull and liz marek

August 19, 2021 Blog

Meet Chef Christophe Rull

Sugar Geek Show's newest pastry chef/chocolatier is here to teach all things chocolate and pastry! I know Christophe from our time on Halloween Wars, working together on showpieces over the years and classes but now I want you guys to know him! Take it away Christophe!

christophe rull and liz marek

Bonjour Sugar Geeks - Christophe here!

I'm so excited to join the Sugar Geek Show team and to teach alongside Liz. Not sure if you know about our history, but we go way back, in fact, all the way back to Halloween Wars (which we won!).

Liz and I met by pure luck when we were paired up together on the show. We had never heard of each other and happened to be thrown onto the same team. That was when I realized how talented Liz is, and we have been creating and competing together ever since!

team ghould posing in front of final showpiece
Team Ghoul'd with their winning showpiece on Halloween Wars season 7

Who am I?

So a little bit about me… I am a French-born pastry chef and have worked in hospitality for almost all of my life. Growing up, I spent a lot of time in the kitchen with my family, which quickly became a way for me to be in my own little world where I didn't have to think about or worry about anything else except what I was making. 

By the time I was 15 I had the choice to either continue with school or learn a job - I chose to start my culinary career. I spent five years of apprenticeship in both savory and pastry before I started to travel in France to gain experience and learn from some of the best chefs.

My first stop was a ski resort in Meribel where I fell in love with the artistry and creative freedom that comes with being a pastry chef and the rest is history.

Outside of the kitchen, you'll find me spending my time in the water. I love to surf, fish and I am also a certified scuba diver. Regardless of what I'm doing, I try my best to tie together passion with personality.


How Did I Get into Baking Competitions? 

While working at the Aria Resort & Casino in Las Vegas I had the opportunity to extend my knowledge by working on thousands of artistry showpieces for our VIP clients and events. Making sugar sculptures and chocolate structures is an art form that most people won't necessarily experience at home.

I'll never forget being a part of creating the largest showpiece of my career, a hanging mobile of 20 sugar sculptures that descended from the ceiling as the dinner finale at a gala for the Michael Jordan Foundation. The progression to entering competitions was a natural next step!

Do You Have any Advice for New Pastry Chefs or At-Home Bakers? 

Are you new to baking? Don't worry because you have to start somewhere. The key to being successful in everything you do in life is to be truly passionate about it - and that includes baking!

Nothing is more important than following your dreams, and this can be done by improving your skill sets, learning from the best, reading books, taking classes, and surrounding yourself with people that are just as passionate as you are.

At one point we are all beginners, and some of the fun in that is seeing where we started and how we turned into what we know and who we are today. For example, below is an image from my very first sugar showpiece competition, 14 years ago….

Christophe Rull and Liz Marek showing off their chocolate rocking horses they made using Christophe's techniques

What's to Come! 

Now you're probably wondering why I'm really here and joining the Sugar Geek Show, and I can answer that with one word - chocolate!

My upcoming episodes will focus on all things chocolate and teach you how to temper chocolate properly (which I promise is easier than you think!).

We'll also be making some fun chocolate desserts including chocolate shapes, white chocolate bon bons, and more. These recipes will help bring your baking to the next level - whether you own a bakery or are serving friends and family!

New to Baking with Chocolate? No Problem! 

Don't worry! Regardless if you're a Cake Newb or a Sugar Geek Show Elite, these recipes work for all skill levels. While some may be more tactical or challenging, I will be taking the time to explain everything one step at a time. I want to help make baking fun and exciting, so get ready to laugh and be happy during these chocolate episodes.

Christophe stars in the new Netflix show Bake Squad, featuring Christina Tosi, Ashley Holt, Gonzo Jimenez and 
Maya-Camille Broussard

My Sugar Geek Show chocolate episodes launch on September 16, 2021, and I look forward to baking with all of you! In the meantime, you can catch me on Netflix in my new competition show Bake Squad.

A cake sculpted to look like a real variegated Monstera plant

August 15, 2021 Course Preview

Variegated Monstera Cake Tutorial

Skill level: Intermediate

I loved making this Monstera Cake for Staghorn Mercantile's 3rd anniversary. In this tutorial, you will learn how to create a realistic variegated Monstera plant out of edible materials, how to create the plant pot cake, how to add hand-painted details and shapes that read exactly the way they would on a real Monstera.

There's a lot to cover in this tutorial, so let's get our tools together and let's get started!

1:08:28 Minutes of Instruction

What You Will Learn

  • How to create a monstera plant cake with edible materials
  • Learn how to make the edible leaves and details to match a plant-lover's expectations
  • How to make a potted plant and edible dirt to look just like the real thing

Tutorial Chapters

  1. Preparations 1:04
  2. Making the leaves 4:37
  3. Cutting out the leaves 9:59
  4. Making the paint 12:34
  5. Painting the leaves 13:10
  6. Crumb coating the cakes 24:58
  7. Building the pot base 26:27
  8. Carving the cake 31:12
  9. Covering the pot in buttercream 32:32
  10. Covering in modeling chocolate 34:41
  11. Stacking the cake 42:38
  12. Smoothing the cake 43:15
  13. Adding feet 44:24
  14. Adding the leaves 48:58
  15. Coloring the modeling chocolate 58:05
  16. Adding the stems 59:08
  17. Painting the cake 1:03:43
  18. Making and adding the soil 1:07:09

Downloads

Materials List

Monstera Leaf Template 01

Monstera Leaf Template 02

Monstera Leaf Template 03

Leaf Reference

A cake sculpted to look like a real variegated Monstera plant

August 15, 2021 Paid Video

Variegated Monstera Cake

Skill level: Intermediate

I loved making this Monstera Cake for Staghorn Mercantile's 3rd anniversary. In this tutorial, you will learn how to create a realistic variegated Monstera plant out of edible materials, how to create the plant pot cake, how to add hand-painted details and shapes that read exactly the way they would on a real Monstera.

There's a lot to cover in this tutorial, so let's get our tools together and let's get started!

1:08:28 Minutes of Instruction

What You Will Learn

  • How to create a monstera plant cake with edible materials
  • Learn how to make the edible leaves and details to match a plant-lover's expectations
  • How to make a potted plant and edible dirt to look just like the real thing

Tutorial Chapters

  1. Preparations 1:04
  2. Making the leaves 4:37
  3. Cutting out the leaves 9:59
  4. Making the paint 12:34
  5. Painting the leaves 13:10
  6. Crumb coating the cakes 24:58
  7. Building the pot base 26:27
  8. Carving the cake 31:12
  9. Covering the pot in buttercream 32:32
  10. Covering in modeling chocolate 34:41
  11. Stacking the cake 42:38
  12. Smoothing the cake 43:15
  13. Adding feet 44:24
  14. Adding the leaves 48:58
  15. Coloring the modeling chocolate 58:05
  16. Adding the stems 59:08
  17. Painting the cake 1:03:43
  18. Making and adding the soil 1:07:09

Downloads

Materials List
Monstera Leaf Template 01
Monstera Leaf Template 02
Monstera Leaf Template 03
Leaf Reference

close up of three gummy crystals

August 12, 2021 Candy

Gummy Crystals

close up of three gummy crystals

This is my favorite way to make gummy crystals that are super clear, sparkly and oh so beautiful on a geode cake!

Equipment & Ingredients

Crystal Molds

Clear Gelatin - 300 Bloom

Flash Dust (10%) OFF

https://www.sugarartsupply.com/discount/SUGARGEEK2021

Recipe

close up of three gummy crystals
Print Recipe
4.75 from 4 votes

Gummy Crystals

How to make beautiful gummy crystals that are super clear, sparkly and oh so yummy to eat!
Prep Time5 minutes mins
Cook Time1 minute min
Cooling6 hours hrs
Total Time6 hours hrs 6 minutes mins
Course: Dessert
Cuisine: American
Servings: 4 crystals
Calories: 2kcal
Author: Liz Marek

Equipment

  • crystal molds

Ingredients

  • 16 ounces cool water
  • 60 grams super clear bloom 300 gelatin
  • ½ teaspoon strawberry extract clear
  • ¼ teaspoon citric acid
  • ¼ teaspoon flash dust
  • 1-2 drops food coloring optional

Instructions

  • Pour liquid into a microwave safe bowl or pouring vessel. Sprinkle gelatin over top of liquid and gently push and stir dry gelatin into liquid. Set aside for 5 minutes.
  • Microwave the gelatin mixture at 100%, for 15 seconds. Stir, microwave again for 15 seconds stir. If gelatin still appears lumpy microwave again for 15 seconds and stir. Do not overheat or boil.
  • Add the citric acid, stir.
  • Set it aside for 10 minutes to allow gelatin to settle and foam to rise.
  • Skim the foam off the gelatin and discard
  • Add in your extract and flash dust and stir to combine
  • Pour the gelatin into your desired molds. I'm using the crystal molds from simicakes.com
  • Use a toothpick to add some swirls of color. Don't add too much.
  • Place the molds on top of a sheet pan and refrigerate for a minimum of 6 hours
  • Carefully remove the gummy crystals from the molds and place on top of your cake!

Notes

Buy clear gelatin: https://caljavaonline.com/products/clear-gelatin-300-bloom
Buy flash dust and get 10% off your order: https://www.sugarartsupply.com/discount/SUGARGEEK2021
 

Nutrition

Serving: 1g | Calories: 2kcal | Carbohydrates: 1g | Sodium: 6mg | Potassium: 1mg | Sugar: 1g | Calcium: 3mg
liz marek and christophe rull standing outside

August 10, 2021 Blog

Christophe Rull Joins Sugar Geek Show

Sugar Geek Show Has a New Pastry Chef! 

Hi Sugar Geeks - Liz here and I'm so excited to share some big news with you. You may have seen some teasers, but I'm thrilled to share that Christophe Rull is the Sugar Geek Show's newest pastry chef!  

I can't wait for Christophe (a French-born pastry chef) to join the team because not only is he like a brother to me, but he also approaches projects and recipes in a way that is very similar to me. He's passionate, curious, and loves to share his knowledge. Ever since we worked together on Halloween Wars (which we won!), we have tried to find other ways to work together. So this is a perfect collaboration! Not only am I excited to learn from Christophe, but I am thrilled for everything he is going to teach the Sugar Geek community about chocolate and pastry.

Yes we already have some really popular tutorials on chocolate like tempering chocolate in the microwave, hot chocolate bombs and chocolate covered strawberries but trust me when I say that's just the tip of the chocolate iceberg! Christophe is going to show us so much more!

So How Did I Meet Christophe?  

team ghould posing in front of final showpiece

The first time I met Christophe was on the set of Halloween Wars. At first, I thought he was going to be a very formal and rigid pastry chef. However, I quickly realized he was just like me, super creative and passionate about his craft - and we just clicked! After we won the competition, I knew that I wanted to work together more. Since then, we have done several projects, including a giant gingerbread house, an Elvis Presley showpiece, and a chocolate Christmas tree. 

One thing I find hilarious is that Christophe has been practicing pastry since he was 14 years old, and never realizes what a wealth of information he truly is and how much he has to share. Things that seem super simple to him, literally blow my mind! He always tests something until he is completely satisfied with the outcome and prepares everything ahead of time so when it is time to make the project, everything goes very smoothly. I strive to be as well prepared, organized, and knowledgeable as Christophe.

Everyone I know always LOVES Christophe! His personality is contagious and infectious and he is simply just fun to be around. Not only is he knowledgeable but he is super funny! Christophe is someone who the Sugar Geeks can rely on for accurate and experienced explanations on all facets of pastry and chocolate. They'll probably like him better than me to be honest, and I wouldn't blame them! 

What Makes Christophe a "Sugar Geek"? 

I always say you're either a Sugar Geek or you're not. We define a Sugar Geek as someone who wants to know why things work, not just how. They obsess over quality and details that other people would not normally care about. Sugar Geeks are also all about sharing their knowledge with other Geeks. Christophe is definitely all those things - he was born a Sugar Geek!

Christophe inspires me to learn things that I think are even too technical for me, like tempering chocolate and crystallization. He is so passionate and dedicates time to practicing techniques over and over until he has them perfected. Most importantly, he is always willing to do anything to make any project successful. He is super humble and inspires me to be the same way with my team and my community.

Who's Ready to Learn About Chocolate?!

mike brown christophe rull and liz marek in front of a christmas tree display

I feel like in the last few years there has been a surge of interest in working with chocolate at a professional level, which is super exciting. From making chocolate sails to chocolate spheres, and more recently the super-viral hot chocolate bombs, I am seeing chocolate EVERYWHERE! There will always be a market for people who want the easy way of making chocolate decorations, but I am seeing more and more people interested in the more challenging techniques and methods that are not usually shared anywhere besides pasty school.

Most pastry chefs learn from other chefs in a school or technical setting and those techniques are not usually taught outside of that setting. So I want to open the door to that information! When I first started sharing my own techniques about cake decorating, I got a lot of flack from industry professionals saying we should not share that knowledge. Christophe and I both feel that when you share techniques and knowledge freely, it makes the entire community stronger. 

Cake decorating and just making desserts, in general, is always about doing something that other people aren't doing. And because not a lot of people know how to use chocolate - if you are one that can - you are in high demand. Right now people seem to be most interested in learning about how to make shiny spheres and gravity-defying showpieces. I think a lot of that has to do with Amaury Guichon, who over recent years has taken social media by storm with his incredible chocolate showpieces (instagram:@amauryguichon). I know they have inspired me!

Stay Tuned For More! 

BAKE SQUAD (L to R) CHRISTINA TOSI and CHRISTOPHE RULL in episode 101 of BAKE SQUAD Cr. KIT KARZEN/NETFLIX © 2021

Get ready to have your mind blown with each of Christophe's episodes! I am incredibly excited to share all the tutorials and techniques that we have filmed so far and I know there are so many more to come. I feel confident that it would be impossible to cover everything that Christophe has to share, but darn it, we sure are going to try! Regardless if you're a Cake Newb or a Sugar Geek Show Elite, these recipes will work for all skill levels, so don't worry about that.

Christophe's Sugar Geek Show episodes launch on September 23, 2021, and we look forward to baking with all of you! In the meantime, you can learn more about Christophe on Netflix in his new competition show Bake Squad and follow him on Instagram! 

Cake with a portrait painted on it with edible paints

August 1, 2021 Paid Video

Painted Portrait Cake

Skill level: Intermediate

Learn to create a beautiful birthday cake with a hand-painted portrait using Karen Portaleo's new Edible Artist oil paints. You will learn how to make this elaborate cake, with hand-painted golden details scrollwork flourishes and along with the gravity-defying flower hoop. This flower hoop is an awesome show-stopping piece that's sure to please party goers.

There's a lot to cover in this tutorial, so let's get our tools together and let's get started!

52:39 Minutes of Instruction

What You Will Learn

  • How to paint a portrait onto a cake using edible oil paints
  • Learn how to add scrollwork details to a cake
  • How to create a gravity-defying floral hoop and how to arrange flowers on it

Tutorial Chapters

  1. Overview of the structure 0:29
  2. Attaching board "feet" 4:39
  3. Attaching the hoop 9:34
  4. Stacking the cakes 17:12
  5. Adding the center circle 19:52
  6. The portrait outline 24:21
  7. Painting the portrait 28:58
  8. Making gold details 40:39
  9. Preparing the flowers 47:20
  10. Decorating the hoop 48:59

Downloads

Materials List

Cake with a portrait painted on it with edible paints

August 1, 2021 Course Preview

Painted Portrait Cake Tutorial

Skill level: Intermediate

Learn to create a beautiful birthday cake with a hand-painted portrait using Karen Portaleo's new Edible Artist oil paints. You will learn how to make this elaborate cake, with hand-painted golden details scrollwork flourishes and along with the gravity-defying flower hoop. This flower hoop is an awesome show-stopping piece that's sure to please party goers.

There's a lot to cover in this tutorial, so let's get our tools together and let's get started!

52:39 Minutes of Instruction

What You Will Learn

  • How to paint a portrait onto a cake using edible oil paints
  • Learn how to add scrollwork details to a cake
  • How to create a gravity-defying floral hoop and how to arrange flowers on it

Tutorial Chapters

  1. Overview of the structure 0:29
  2. Attaching board "feet" 4:39
  3. Attaching the hoop 9:34
  4. Stacking the cakes 17:12
  5. Adding the center circle 19:52
  6. The portrait outline 24:21
  7. Painting the portrait 28:58
  8. Making gold details 40:39
  9. Preparing the flowers 47:20
  10. Decorating the hoop 48:59

Downloads

Materials List

July 22, 2021 4th of July

Moms Blackberry Sponge Cake

Luscious blackberries layered with super moist and fluffy sponge cake and served with a scoop of vanilla ice cream. This was our family's go-to dessert for every special occasion when I was growing up.

close up of blackberry sponge cake on a white plate

I'm so excited to finally share it with my Sugar Geek family in honor of what would have been my Mother's 74th birthday. I snagged this photo from my Dad's photo album and I dare say as I hit my 40's, I look more and more like her every day.

What's in this blog post

  • What is blackberry sponge cake?
  • Blackberry Sponge Cake Ingredients
  • How to make blackberry sponge cake
  • Blackberry Sponge Cake FAQ
  • Other berry recipes you'll love

What is blackberry sponge cake?

Blackberry sponge cake is a recipe that my mom made a lot when I was growing up. I never saw her measure the blackberries, it really depended on how big the dish was she was baking in which was usually a glass dish.

Every summer my Dad would send us to the backyard with a big 50-gallon bucket and a ladder to pick blackberries. They would be thick and hanging from the bushes that grew wild in huge bunches, sweetened by the sun to perfection. My sisters and I would not come back into the house until the bucket was full and our hands were stained with purple juices. We probably ate just as many berries as we picked.

My Dad would then begin the canning and freezing process. Some of the berries would be transformed into thick blackberry syrup that he would ration out for only very special occasions. Some would be made into jam and some would be canned to use in the wintertime.

But we always saved a couple of quarts to make some fresh blackberry sponge cake. I watched my mom make this many times and after she passed away, my Dad would make it, and then when I was old enough, I also would make it.

This recipe is very near and dear to my heart and I hope you enjoy it with your family as much as I enjoyed it with mine and a little bit of my Mother can live on through her baking.

Blackberry Sponge Cake Ingredients

This recipe is so easy to put together and can be used with any seasonal fruit you have on hand and every day baking ingredients

  • Eggs
  • Sugar
  • Salt
  • Flour
  • Baking Powder
  • Butter
  • Water
  • Blackberries (or any other kind of fruit)

I took this opportunity to take the kiddos to Hoffman Farms Store, a local you-pick fruit stand so they could experience picking your own plump berries, just like I did when I was a kid. Avalon and Ezra really got into it and we had a ton of fun!

The thing I love about this recipe is that it's incredibly easy to make and you can switch out the berries for any kind of fruit that is in season! Strawberries, rhubarb, peaches, blueberries, raspberries, apples... the list goes on and on. You can even switch out the white sugar for brown sugar and add in some different spices depending on the fruit that you're using.

If you're lucky enough to live in Oregon, you can even use Marionberries which are like blackberries but about 3 times as big! Just look at this comparison!

blackberry and marion berry in the palm of a hand

How to make blackberry sponge cake

  1. Preheat your oven to 375ºF
  2. Fill your 9"x13" pan ¾ of the way full of fresh or frozen blackberries.
  3. Sprinkle the sugar over the top of the blackberries.
    sugar sprinkled over blackberries in a white baking dish
  4. Bake the berries and the sugar mixture until the berries are bubbling in the center. This usually takes about 30 minutes.
    hot blackberries in a white baking dish
  5. Once the berries are bubbling, you can start making the sponge cake.
  6. Sift your flour and baking powder and set it aside.
  7. Place the butter into the boiling water and set it aside.
    butter in hot water
  8. Place the eggs and the salt into the bowl of your stand mixer with the whisk attachment and whisk on medium until foamy.
  9. Reduce the speed to low and sprinkle in the sugar.
    clear bowl sprinkling sugar into stand mixer bowl
  10. Turn the speed up to medium high and whisk until thick and the batter falls in ribbons (ribbon stage).
  11. Fold in the sifted flour and baking powder.
  12. Fold in the melted butter and water.
    folding in melted butter into sponge cake batter
  13. Pour the sponge cake batter on top of the hot berries and marble the berries slightly so some of the berries are on top of the sponge.
    adding sponge cake batter to hot berries
  14. Bake for about 20 minutes or until the sponge is set and golden brown.
    baked blackberry sponge cake
  15. Serve immediately with a scoop of vanilla ice cream.
    blackberry sponge cake

Blackberry Sponge Cake FAQ

Can I use other kinds of fruit?

Yes you can! Any berry or fruit that you like can be used in place of blackberries.

Can this be made ahead?

I don't recommend making this ahead of time, it tastes the best warm out of the oven but it can be re-heated if you have leftovers. Store leftovers in the fridge because of the fresh fruit.

Can this be made into a layer cake?

I don't recommend it but it could be made into an upside-down cake by baking it into a cake pan and then flipping it out onto a platter before serving.

Other berry recipes you'll love

Blackberry Lime Cake

Berry Wash (How to Make Fresh Berries Last Longer)

Fresh Berry Cake Filling Recipe

Marionberry (Blackberry Filling Recipe)

Recipe

close up of blackberry sponge cake on a white plate
Print Recipe
4.72 from 7 votes

Blackberry Sponge Cake

A fluffy cloud like vanilla sponge baked to perfection atop a luscious layer of ripe blackberries makes the perfect blackberry sponge cake. Serve this warm with a big scoop of vanilla ice cream and be transported to my favorite childhood dessert.
Prep Time5 minutes mins
Cook Time20 minutes mins
heating berries30 minutes mins
Total Time55 minutes mins
Course: Dessert
Cuisine: American
Servings: 8 servings
Calories: 320kcal
Author: Liz Marek

Equipment

  • 9"x13" baking dish

Ingredients

Blackberry Mixture

  • 35 ounces blackberries fresh or frozen
  • 4 ounces sugar

Sponge Cake Batter

  • 3 large eggs room temperature
  • ⅛ teaspoon salt
  • 6 ounces sugar
  • 4 ounces flour
  • 1 teaspoon baking powder
  • 2 ounces unsalted butter
  • 2 Tablespoons boiling water
US Customary - Metric

Instructions

  • Preheat your oven to 375ºF 
  • Fill your 9"x13" pan ¾ of the way full of fresh or frozen blackberries
  • Sprinkle the sugar over the top of the blackberries.
  • Bake the berries and the sugar mixture until the berries are bubbling in the center. This usually takes about 30 minutes. 
  • Once the berries are bubbling, you can start making the sponge cake. 
  • Sift the flour and the baking powder and set aside.
  • Place the butter in the boiling water and set aside.
  • Place the eggs and the salt into the bowl of your stand mixer with the whisk attachment and whisk on medium until foamy.
  • Reduce the speed to low and sprinkle in the sugar.
  • Turn the speed up to medium high and whisk until thick and the batter falls in ribbons (ribbon stage). 
  • Fold in the sifted flour and baking powder.
  • Fold in the melted butter and water.
  • Pour the sponge cake batter on top of the hot berries and marble the berries slightly so some of the berries are on top of the sponge. 
  • Bake for about 20-25 minutes or until the sponge is set and golden brown. 
  • Serve immediately with a scoop of vanilla ice cream. 

Notes

Switch out the blackberries for marionberries, strawberries, rhubarb, peaches, raspberries, blueberries, or even apples! This recipe is super forgiving and can be adapted to any kind of fruit you like. 
Switch out the white sugar for brown sugar for autumn flavors
Replace the butter with brown butter for more flavor
Feel free to add in spices like cinnamon, nutmeg or extracts

Nutrition

Serving: 1serving | Calories: 320kcal | Carbohydrates: 59g | Protein: 6g | Fat: 8g | Saturated Fat: 4g | Polyunsaturated Fat: 1g | Monounsaturated Fat: 2g | Trans Fat: 1g | Cholesterol: 85mg | Sodium: 66mg | Potassium: 295mg | Fiber: 7g | Sugar: 42g | Vitamin A: 544IU | Vitamin C: 26mg | Calcium: 72mg | Iron: 2mg
Gravity-defying cake sculpted to look like a floating cube from Roblox

July 15, 2021 Course Preview

Roblox Floating Cube Cake Tutorial

Skill level: Intermediate

My best friend's daughter is really into the video game Roblox and for her birthday I created this floating cube cake to surprise her. In this tutorial, you will learn how to create a gravity-defying cake cube made with no big support pieces, everything is edible!

You will also learn my tips and tricks for getting sharp edges on cube shapes, how to add this splashy galaxy effect to the cake board and how to create the game avatar portrait.

56:37 Minutes of Instruction

What You Will Learn

  • How to create a gravity-defying Cube made from edible ingredients
  • Learn how to create a beautiful galaxy design on the cake board
  • How to create the portrait of the game character avatar

Tutorial Chapters

  1. Making the square template 0:29
  2. Preparing the acrylics 2:45
  3. Frosting the cake 4:55
  4. Carving the cake 15:12
  5. Building the structure 17:08
  6. Frosting the base cake 20:05
  7. Making the chocolate base 22:40
  8. Decorating the cake board 29:18
  9. Stacking the triangles 31:46
  10. Stacking the cube 33:42
  11. Paneling the cube 40:46
  12. Adding edible images 42:41
  13. Making the avatar decoration 44:32
  14. Painting the cake 49:53

Downloads

Materials List

Edible Image Template 01

Edible Image Template 02

Gravity-defying cake sculpted to look like a floating cube from Roblox

July 15, 2021 Paid Video

Roblox Floating Cube Cake

Skill level: Intermediate

My best friend's daughter is really into the video game Roblox and for her birthday I created this floating cube cake to surprise her. In this tutorial, you will learn how to create a gravity-defying cake cube made with no big support pieces, everything is edible!

You will also learn my tips and tricks for getting sharp edges on cube shapes, how to add this splashy galaxy effect to the cake board and how to create the game avatar portrait.

56:37 Minutes of Instruction

What You Will Learn

  • How to create a gravity-defying Cube made from edible ingredients
  • Learn how to create a beautiful galaxy design on the cake board
  • How to create the portrait of the game character avatar

Tutorial Chapters

  1. Making the square template 0:29
  2. Preparing the acrylics 2:45
  3. Frosting the cake 4:55
  4. Carving the cake 15:12
  5. Building the structure 17:08
  6. Frosting the base cake 20:05
  7. Making the chocolate base 22:40
  8. Decorating the cake board 29:18
  9. Stacking the triangles 31:46
  10. Stacking the cube 33:42
  11. Paneling the cube 40:46
  12. Adding edible images 42:41
  13. Making the avatar decoration 44:32
  14. Painting the cake 49:53

Downloads

Materials List
Edible Image Template 01
Edible Image Template 02

Cake sculpted to look like a Minecraft Pig character

July 1, 2021 Course Preview

Minecraft Pig Cake Tutorial

Skill level: Intermediate

Learn how to create a cake that looks like a pig from the video game Minecraft. Almost every kid loves Minecraft and if you haven't been asked to make a Minecraft cake yet, you will be soon.

If you have avoided making Minecraft cakes because they are notoriously hard to make, you're in luck. Liz Marek breaks down all the tips and tricks needed to pull off this Minecraft pig cake with stellar results.

There's a lot of subtle details that can't be missed, so let's get our tools together and let's get started.

1:19:59 Minutes of Instruction

What You Will Learn

  • Learn how to make a cake shaped like a pig from the video game Minecraft
  • Liz's tips and tricks to getting sharp edges with buttercream
  • Learn the structure and how to print graphics from the game that are edible

Tutorial Chapters

  1. Preparing the boards 0:44
  2. Stacking the head cake 9:46
  3. Stacking the body cake 14:06
  4. Frosting the body cake 17:09
  5. Frosting the head cake 27:10
  6. Assembling the structure 31:28
  7. Making the legs 34:30
  8. Attaching the head 44:20
  9. Finishing the cakes 47:24
  10. Cutting the cake shape 50:39
  11. Adding the cake 55:06
  12. Adding modeling chocolate 1:02:40
  13. Making the nose 1:12:40
  14. Adding edible images 1:14:08
  15. Airbrushing the cake 1:16:59

Downloads

Materials List

Pig Cake Drilling Template

Pig Body Back Template

Pig Body Front Template

Pig Body Left Template

Pig Body Right Template

Pig Body Top Template

Pig Head Front Template

Pig Head Left Template

Pig Head Right Template

Pig Head Top and Back Template

Pig Front Leg Template

Pig Back Leg Template

Pig Reference

Cake sculpted to look like a Minecraft Pig character

July 1, 2021 Paid Video

Minecraft Pig Cake

Skill level: Intermediate

Learn how to create a cake that looks like a pig from the video game Minecraft. Almost every kid loves Minecraft and if you haven't been asked to make a Minecraft cake yet, you will be soon.

If you have avoided making Minecraft cakes because they are notoriously hard to make, you're in luck. Liz Marek breaks down all the tips and tricks needed to pull off this Minecraft pig cake with stellar results.

There's a lot of subtle details that can't be missed, so let's get our tools together and let's get started.

1:19:59 Minutes of Instruction

What You Will Learn

  • Learn how to make a cake shaped like a pig from the video game Minecraft
  • Liz's tips and tricks to getting sharp edges with buttercream
  • Learn the structure and how to print graphics from the game that are edible

Tutorial Chapters

  1. Preparing the boards 0:44
  2. Stacking the head cake 9:46
  3. Stacking the body cake 14:06
  4. Frosting the body cake 17:09
  5. Frosting the head cake 27:10
  6. Assembling the structure 31:28
  7. Making the legs 34:30
  8. Attaching the head 44:20
  9. Finishing the cakes 47:24
  10. Cutting the cake shape 50:39
  11. Adding the cake 55:06
  12. Adding modeling chocolate 1:02:40
  13. Making the nose 1:12:40
  14. Adding edible images 1:14:08
  15. Airbrushing the cake 1:16:59

Downloads

Materials List
Pig Cake Drilling Template
Pig Body Back Template
Pig Body Front Template
Pig Body Left Template
Pig Body Right Template
Pig Body Top Template
Pig Head Front Template
Pig Head Left Template
Pig Head Right Template
Pig Head Top and Back Template
Pig Front Leg Template
Pig Back Leg Template
Pig Reference

Cake sculpted to look like a realistic pug dog

June 15, 2021 Course Preview

Pug Cake Tutorial

Skill level: Advanced

Guest instructor Natalie Sideserf from Sideserf Cakes joins us today for this awesome, super realistic Pug cake.

Learn how to pose, sketch and plan out this lovable pug dog cake design. Natalie offers several tips and tricks that she uses when creating dog cakes like this one.

Natalie breaks down how to sculpt the face, the ears and facial features, how to sculpt the legs and tail and how to texture and paint lifelike colors onto the pug to make it look just like the real thing.

There's a lot to cover in today's tutorial, so let's get our tools together and let's get started!

2:25:28 Minutes of Instruction

What You Will Learn

  • How to sculpt a realistic Pug dog cake
  • Learn how to plan out and design the cake structure
  • Natalie's tips and tricks to get realistic texture and details
  • How to sculpt the facial features, paws, toes, tail and more

Tutorial Chapters

  1. Sketching the body 0:38
  2. Planning out the structure 4:27
  3. Cutting threaded rod and boards 6:18
  4. Building the structure 10:47
  5. Adding structure to the board 15:34
  6. Covering in foil tape 20:18
  7. Building up the belly 23:44
  8. Stacking the cakes 31:06
  9. Carving the cakes 33:36
  10. Covering in buttercream 38:05
  11. Sketching the face 40:45
  12. Covering in modeling chocolate 42:34
  13. Blending the seams 46:03
  14. Sculpting the face 50:06
  15. Adding the eyes 1:10:07
  16. Making the jawline 1:18:15
  17. Making face wrinkles 1:23:50
  18. Making the ears 1:26:57
  19. Making head wrinkles 1:30:32
  20. Making the right arm 1:32:17
  21. Making the toes 1:37:02
  22. Making the left arm 1:39:29
  23. Making the back legs 1:42:48
  24. Making the tail 1:52:22
  25. Adding hair and texture 1:53:39
  26. Painting the eyes 1:57:54
  27. Painting the face 2:03:47
  28. Painting the body 2:16:22
  29. Making the carpet board 2:17:54

Downloads

Materials List

Pug Reference 01

Pug Reference 02

Pug Reference 03

Pug Sketch 01

Pug Sketch 02

Pug Cake Board Template

Cake sculpted to look like a realistic pug dog

June 15, 2021 Paid Video

Pug Cake

Skill level: Advanced

Guest instructor Natalie Sideserf from Sideserf Cakes joins us today for this awesome, super realistic Pug cake.

Learn how to pose, sketch and plan out this lovable pug dog cake design. Natalie offers several tips and tricks that she uses when creating dog cakes like this one.

Natalie breaks down how to sculpt the face, the ears and facial features, how to sculpt the legs and tail and how to texture and paint lifelike colors onto the pug to make it look just like the real thing.

There's a lot to cover in today's tutorial, so let's get our tools together and let's get started!

2:25:28 Minutes of Instruction

What You Will Learn

  • How to sculpt a realistic Pug dog cake
  • Learn how to plan out and design the cake structure
  • Natalie's tips and tricks to get realistic texture and details
  • How to sculpt the facial features, paws, toes, tail and more

Tutorial Chapters

  1. Sketching the body 0:38
  2. Planning out the structure 4:27
  3. Cutting threaded rod and boards 6:18
  4. Building the structure 10:47
  5. Adding structure to the board 15:34
  6. Covering in foil tape 20:18
  7. Building up the belly 23:44
  8. Stacking the cakes 31:06
  9. Carving the cakes 33:36
  10. Covering in buttercream 38:05
  11. Sketching the face 40:45
  12. Covering in modeling chocolate 42:34
  13. Blending the seams 46:03
  14. Sculpting the face 50:06
  15. Adding the eyes 1:10:07
  16. Making the jawline 1:18:15
  17. Making face wrinkles 1:23:50
  18. Making the ears 1:26:57
  19. Making head wrinkles 1:30:32
  20. Making the right arm 1:32:17
  21. Making the toes 1:37:02
  22. Making the left arm 1:39:29
  23. Making the back legs 1:42:48
  24. Making the tail 1:52:22
  25. Adding hair and texture 1:53:39
  26. Painting the eyes 1:57:54
  27. Painting the face 2:03:47
  28. Painting the body 2:16:22
  29. Making the carpet board 2:17:54

Downloads

Materials List
Pug Reference 01
Pug Reference 02
Pug Reference 03
Pug Sketch 01
Pug Sketch 02
Pug Cake Board Template

close up of caramel sauce in a jar with a spoon

June 3, 2021 Filling

Foolproof Caramel Sauce Recipe

This rich, buttery, creamy homemade caramel sauce is one of my all-time favorite small-batch recipes, and it comes together with just a few simple ingredients in about 15 minutes. Whether you drizzle it over ice cream, swirl it into buttercream, use it as a filling for chocolate caramel candies, or spoon it over a warm cookie sheet of brownies, this easy caramel sauce is the kind of foolproof recipe you'll want to keep in your fridge at all times.

jar filled with creamy caramel sauce and a spoon covered in caramel

Once you taste the depth of real caramelized sugar, you will never go back to store-bought again. The flavor is unreal - smooth, rich, and glossy - and you'd never guess it comes from nothing more than white sugar, a cup of butter, heavy cream, and a pinch of salt. The entire process is just a beautiful chemical reaction, and when you let the sugar dissolve and cook to a deep amber on medium heat, something magical happens.

The best part? This caramel sauce stores beautifully in a mason jar or any airtight container in the refrigerator for up to 30 days. It also freezes well if you want to make a few small batches ahead for gifting.

This salted caramel sauce is also the base for my homemade caramel apples recipe, just cooked a little thicker so it clings to the apples without sliding off.

What's In This Blog Post

  • Caramel Sauce Ingredients
  • How to Make Caramel Sauce Step-by-Step
  • How to Get a Richer Caramel Flavor
  • FAQ
  • You might also like

Caramel Sauce Ingredients

You might be surprised to learn that this decadent recipe is simply a combination of hot sugar, cream, unsalted butter, and salt. That's it. Whether you're making a wet caramel (with water and corn syrup) or a dry caramel (just sugar), the process is the same - letting the sugar syrup reach a deep golden brown before adding the other ingredients.

caramel sauce ingredients

White sugar - This is the base of every homemade caramel sauce. It melts into caramelized sugar and gives you that classic deep amber flavor. You can replace it with brown sugar for a richer, molasses-style caramel, but the texture will be slightly thicker.

Water - Helps the sugar dissolve evenly and prevents hot spots as it boils.

Corn syrup - Keeps the sugar syrup smooth and helps prevent crystallization. Replace with glucose syrup or omit entirely if you're making a dry caramel.

Heavy cream - Gives the caramel its creamy, silky consistency. You can replace it with half-and-half in a pinch, but the sauce won't be quite as thick.

Unsalted butter - Adds richness, shine, and body. Salted butter works too-just reduce the added salt.

Pinch of salt - Balances the sweetness and enhances the caramel flavor. You can replace it with flaky sea salt for a salted caramel finish.

Vanilla extract - Adds warmth and depth. Replace with vanilla bean paste or the seeds from one vanilla pod for a stronger vanilla flavor.

Most people undercook their caramel, which leads to pale sugar, so keep a close eye on the inside of the pan and don't walk away once the color starts to change.

How to Make Caramel Sauce Step-by-Step

If this is your first time making caramel, don't worry - you don't need a candy thermometer, but it is helpful if you're unsure about temperature. The fastest way to get comfortable with caramel is simply watching how it changes color.

water, sugar, and corn syrup into a medium saucepan
hand brushing the inside of a medium saucepan
medium sauce pan simmering with pot cover on
caramel sauce cooking in medium sauce pan
candy thermometer sitting inside pot of cooking caramel on stove top
pouring and whisking cream into cooked caramel sauce pan
whisking butter into hot caramel sauce pan
spoon dripping caramel sauce into sauce pan
pouring caramel sauce into small glass container
  1. Add the water, white sugar, and corn syrup to a heavy-bottomed saucepan and bring it to a boil over medium-high heat.
  2. Brush the sides of the pot with a pastry brush dipped in hot water to dissolve any sugar crystals on the sides of the pan.
  3. Cover the pot for 5 minutes to allow steam to wash down the sides and ensure every grain of sugar dissolves.
  4. Uncover and continue boiling the sugar syrup until it begins to deepen in color. This takes about 10 minutes - no stirring needed.
  5. Once the mixture reaches a deep amber color (or 350ºF), remove from the heat immediately.
  6. Add a small amount of heavy cream to the hot caramel while whisking slowly. It will bubble up - this is normal.
  7. Add the remaining cream in a slow stream, followed by the unsalted butter, pinch of salt, and vanilla.
  8. Whisk until the sauce becomes smooth and shiny.
  9. Allow the caramel to cool to room temperature. It will thicken as it cools.

This entire process moves quickly, so prep everything ahead of time. Caramel goes from perfect to burned in seconds due to hot spots, so don't walk away.

How to Get a Richer Caramel Flavor

The key to the richest caramel flavor is to make sure you push the caramel color to a deep golden brown without burning it. Darker color equals more caramel flavor!

You can also add extras like crushed candy canes for a peppermint variation, bourbon for warmth, or vanilla bean for a more aromatic finish. These additions go in after the butter is fully incorporated.

spoon dripping caramel sauce into sauce pan

Storing Caramel Sauce

Once the caramel cools, pour it carefully into a microwave-safe mason jar, an airtight container, or any heat-safe vessel. Remember: caramel hardens as it cools, so choose something you can easily reheat.

To warm it, microwave in 5-7 second bursts and stir between each - overheating can cause separation.

Store in the refrigerator for up to 30 days or in the freezer for up to 90 days. Always follow normal safety precautions when working with boiling water or hot caramel, because it sticks and can cause burns.

Tips to Avoid Crystallization

Crystallization happens when sugar molecules group too tightly. Here's how to avoid it:

  • Use a clean, oil-free pan and utensils.
  • Dissolve all sugar with the brush method.
  • Don't stir once the sugar begins boiling.
  • Keep the lid on for 5 minutes so steam can dissolve stray crystals.
  • Use corn syrup, which helps prevent sugar from reforming crystals.

A candy thermometer can help ensure you're not overheating your sugar.

Extra Tips for Perfect Caramel

  • Prep all ingredients so you can work quickly.
  • Don't add ingredients too soon - wait for a deep brown color.
  • Remove from heat the moment it hits amber to avoid burning.
  • If you're using brown sugar, note that it produces a different caramel flavor and texture than classic white sugar.
  • Avoid pouring caramel onto parchment paper - it sticks. Always use heat-proof containers.

I've been making this caramel sauce for years, and it's still one of the most versatile recipes in my kitchen. A spoonful goes a long way, and the extra depth from homemade caramel is absolutely unbeatable.

FAQ

Can you add chocolate to the caramel?

Start with your finished caramel sauce and add 2 to 4 oz of chopped chocolate (semi-sweet or dark works best) to the warm sauce and stir together.

How do I make my caramel sauce thicker?

The key to a thicker caramel sauce is adding more butter.

Should you stir caramel?

Stirring caramel while it cooks is not necessary. In fact, you really should NOT stir caramel while it's cooking at all.
If you stir and agitate the caramel too much while it's wet, this will result in clumpy caramel that starts to recrystallize (which will give you those pesky jagged edges and become more solid than liquid).

Can you use this recipe to make caramel candy?

Although similar, caramel sauce and caramel candy are prepared differently. Caramel candy used inside candy bars or on caramel apples is typically cooked by combining the sugar, cream, corn syrup, butter, and salt all together and once and letting it cook until it's thick and golden brown.

What is the difference between caramel sauce and dulce de leche?

While both caramel and dulce de leche are cooked sugar and milk, the main difference between the two is that true caramel sauce is made by cooking sugar until it's a deep brown and then mixing it with cream and butter.
Dulce de leche is made by boiling sweet milk until the water evaporates and the mixture browns and thickens. Dulce de leche stays in a soft, sauce-like state at room temperature, but the caramel sauce will get thicker and firmer as it cools down.

You might also like

Chocolate caramel candy

Tempering chocolate the easy way

How to brown butter

How to cook isomalt

Recipe

close up of caramel sauce in a jar with a spoon
Print Recipe
4.79 from 23 votes

Salted Caramel Recipe

Delicious, creamy and rich salted caramel. Great for adding to buttercream or using as a filling for cake decorating. Drizzle over the top of your cake for added decadence.
Prep Time5 minutes mins
Cook Time15 minutes mins
Total Time20 minutes mins
Course: Dessert
Cuisine: American
Servings: 28 oz
Calories: 126kcal
Author: Liz Marek

Equipment

  • Medium saucepan with a lid
  • candy thermometer (optional)

Ingredients

Ingredients

  • 14 ounces granulated sugar
  • 2 ounces water
  • 4 ounces corn syrup
  • 6 ounces unsalted butter
  • 8 ounces heavy cream
  • 1 teaspoon sea salt
  • 1 tablespoon vanilla extract
US Customary - Metric

Instructions

Instructions

  • Combine the sugar, corn syrup, water, and salt in a medium to large sized saucepan. Bring to a simmer over medium-high heat. No need to stir.
  • Brush the sides of the pot down with a clean and oil-free pastry brush (preferably one only used for water or sugar) to make sure all the grains of sugar are dissolved.
  • Cover the pot with the lid for 5 minutes and allow the condensation to continue to dissolve all the grains of sugar on the sides of the pot that might cause your caramel to crystalize.
  • Remove the lid and attach a candy thermometer if you are using one.
  • Continue cooking the sugar until it's a deep golden amber color or the candy thermometer reads 350º (hard crack stage) This can take from 5-10 minutes so keep an eye on it to avoid burning.
  • Remove the sugar from the heat from heat and slowly whisk in a couple Tablespoons of the cream (it will bubble and steam) then continue whisking in the rest of the cream in a slow stream.
  • Add in your butter, salt, and your vanilla. Stir until creamy and smooth.
  • The sauce will thicken as it cools down. Store leftover sauce in the refrigerator for up to a month or freeze for 6 months or more.

Notes

Use a super clean pot and utensils. Using items that are not completely clean can contaminate your sauce and cause it to crystallize.
Make sure you allow the sugar to get that deep brown color but don't burn it.
A few tips for success. Get all your ingredients ready before you start so you can move to the next step right when you need to. The sugar will be too pale one minute and too dark the next so keep your eyes on it! Don’t be tempted to add your ingredients too soon. You want a nice dark color but not burned. A darker color means a richer flavor.
Store in refrigerator covered for up to a month.

Nutrition

Serving: 1oz | Calories: 126kcal | Carbohydrates: 14g | Fat: 7g | Saturated Fat: 4g | Cholesterol: 24mg | Sodium: 24mg | Potassium: 7mg | Sugar: 14g | Vitamin A: 270IU | Vitamin C: 0.1mg | Calcium: 7mg
Cake sculpted to look like a piranha plant from Super Mario Brothers video game

June 1, 2021 Course Preview

Piranha Plant Cake Tutorial

Skill level: Advanced

This classic Super Mario enemy is back again in all it's glory. If there's one thing that I wanted to teach in this tutorial, it was how to get that crazy bend in the Piranha plant's neck without compromising the creative vision and it turned out so good!

In this tutorial, you will learn how to create a dynamic cake structure to support the Piranha Plant's head, how to detail the teeth, lips spots and leaves, how to add and sculpt the tongue and how to create the green pipe cake.

There's a lot to cover in this tutorial, so let's get our tools together and let's get started!

1:14:15 Minutes of Instruction

What You Will Learn

  • How to make a Piranha Plant cake out of edible materials
  • Learn how to create a green pipe cake just like in the video game series
  • How to create this unique cake structure, the plant's details and leaves
  • Learn how to add dynamic poses to your structures to create dramatic cake toppers

Tutorial Chapters

  1. Cutting the wood 0:32
  2. Making the pipe cake 4:58
  3. Making the chocolate base 8:54
  4. The piranha head structure 12:44
  5. Curving the plant stem 23:05
  6. Finishing the structure 36:45
  7. Adding the piranha cake 40:30
  8. Shaping the mouth 42:13
  9. Adding the pipe cake 47:13
  10. Covering in modeling chocolate 47:39
  11. Making the tongue 54:16
  12. Adding the teeth 58:31
  13. Making lips and polka dots 1:00:42
  14. Paneling the pipe cake 1:03:50
  15. Making the leaves 1:09:05

Downloads

Materials List

Piranha Plant Reference

Cake sculpted to look like a piranha plant from Super Mario Brothers video game

June 1, 2021 Paid Video

Piranha Plant Cake

Skill level: Advanced

This classic Super Mario enemy is back again in all it's glory. If there's one thing that I wanted to teach in this tutorial, it was how to get that crazy bend in the Piranha plant's neck without compromising the creative vision and it turned out so good!

In this tutorial, you will learn how to create a dynamic cake structure to support the Piranha Plant's head, how to detail the teeth, lips spots and leaves, how to add and sculpt the tongue and how to create the green pipe cake.

There's a lot to cover in this tutorial, so let's get our tools together and let's get started!

1:14:15 Minutes of Instruction

What You Will Learn

  • How to make a Piranha Plant cake out of edible materials
  • Learn how to create a green pipe cake just like in the video game series
  • How to create this unique cake structure, the plant's details and leaves
  • Learn how to add dynamic poses to your structures to create dramatic cake toppers

Tutorial Chapters

  1. Cutting the wood 0:32
  2. Making the pipe cake 4:58
  3. Making the chocolate base 8:54
  4. The piranha head structure 12:44
  5. Curving the plant stem 23:05
  6. Finishing the structure 36:45
  7. Adding the piranha cake 40:30
  8. Shaping the mouth 42:13
  9. Adding the pipe cake 47:13
  10. Covering in modeling chocolate 47:39
  11. Making the tongue 54:16
  12. Adding the teeth 58:31
  13. Making lips and polka dots 1:00:42
  14. Paneling the pipe cake 1:03:50
  15. Making the leaves 1:09:05

Downloads

Materials List
Piranha Plant Reference

Cake scultped to look like Super Mario jumping on top of a green pipe

May 15, 2021 Course Preview

Super Mario Cake Tutorial

Skill level: Intermediate

In this tutorial, you will learn how to create Super Mario leaping out of a green pipe, perfect for any video game lover's special event. Liz Marek breaks down how to create dynamic poses using armature techniques that can be adapted and changed as needed.

You will also learn how to create Mario's overalls, gloves, facial features and cap. There's a lot to learn in this tutorial, so let's get our tools together and let's get started!

1:39:45 Minutes of Instruction

What You Will Learn

  • How to make a Super Mario figure out of edible materials
  • Learn how to create a green pipe cake just like in the video game series
  • How to create Mario's facial features, mustache and signature cap
  • Learn how to add dynamic poses to your structures to create dramatic cake toppers

Tutorial Chapters

  1. Making the cake pipe 0:28
  2. The body structure 4:24
  3. The arms and legs structure 15:16
  4. The head structure 22:02
  5. Modeling chocolate head 27:52
  6. Adding the shirt 32:05
  7. Adding the shoes 38:46
  8. Adding the overalls 42:52
  9. Adding the ears 53:31
  10. Adding the eyes 58:41
  11. Adding the mouth 1:00:48
  12. Painting the eyes 1:07:27
  13. Adding a mustache 1:09:34
  14. Adding a nose 1:11:55
  15. Smoothing 1:14:37
  16. Adding eyebrows and hair 1:16:33
  17. Adding the hat 1:19:19
  18. Adding the fists 1:25:27
  19. Finishing the pipe 1:30:27
  20. Finishing the boot 1:32:12
  21. Paneling the pipe cake 1:33:43

Downloads

Materials List

Mario Reference

Cake scultped to look like Super Mario jumping on top of a green pipe

May 15, 2021 Paid Video

Super Mario Cake

Skill level: Intermediate

In this tutorial, you will learn how to create Super Mario leaping out of a green pipe, perfect for any video game lover's special event. Liz Marek breaks down how to create dynamic poses using armature techniques that can be adapted and changed as needed.

You will also learn how to create Mario's overalls, gloves, facial features and cap. There's a lot to learn in this tutorial, so let's get our tools together and let's get started!

1:39:45 Minutes of Instruction

What You Will Learn

  • How to make a Super Mario figure out of edible materials
  • Learn how to create a green pipe cake just like in the video game series
  • How to create Mario's facial features, mustache and signature cap
  • Learn how to add dynamic poses to your structures to create dramatic cake toppers

Tutorial Chapters

  1. Making the cake pipe 0:28
  2. The body structure 4:24
  3. The arms and legs structure 15:16
  4. The head structure 22:02
  5. Modeling chocolate head 27:52
  6. Adding the shirt 32:05
  7. Adding the shoes 38:46
  8. Adding the overalls 42:52
  9. Adding the ears 53:31
  10. Adding the eyes 58:41
  11. Adding the mouth 1:00:48
  12. Painting the eyes 1:07:27
  13. Adding a mustache 1:09:34
  14. Adding a nose 1:11:55
  15. Smoothing 1:14:37
  16. Adding eyebrows and hair 1:16:33
  17. Adding the hat 1:19:19
  18. Adding the fists 1:25:27
  19. Finishing the pipe 1:30:27
  20. Finishing the boot 1:32:12
  21. Paneling the pipe cake 1:33:43

Downloads

Materials List
Mario Reference

Cake sculpted to look like King Kong's face

May 1, 2021 Course Preview

King Kong Facial Expressions Tutorial

Skill level: Intermediate

Guest instructor Timbo Sullivan of Cakes by Timbo and Baketopia joins us today for another amazing tutorial, this time featuring how he creates facial expressions on a figure. Timbo will teach you how to create a stylized King Kong cake and breaks down his process for creating the different facial features. Timbo also shows how to change the features to create different expressions, and creates King Kong with a closed and open mouth.

There's a lot to cover in this tutorial, so let's get our tools together and let's get started!

1:02:16 Minutes of Instruction

What You Will Learn

  • How to sculpt King Kong's face
  • Learn how to create different expressions and an open and closed mouth
  • How to create edible fur, teeth, scars and facial details
  • Learn how to color King Kong and create shiny areas on the eyes and teeth

Tutorial Chapters

  1. Carving the cake 0:43
  2. Covering in ganache 4:28
  3. Sculpting the face 4:51
  4. Adding facial details 14:04
  5. Making wrinkles and texture 19:10
  6. Adding the eyes 24:29
  7. Adding spot colors 28:47
  8. Dry brushing 30:25
  9. Airbrushing 31:33
  10. Adding fur 35:27
  11. Adding scars 39:21
  12. Painting the eyes 41:07
  13. Making the mouth 46:30
  14. Making the teeth 48:45
  15. Making the ears 57:53
  16. Final touches 59:40

Downloads

Materials List

King Kong Reference

Cake sculpted to look like King Kong's face

May 1, 2021 Paid Video

King Kong Facial Expressions

Skill level: Intermediate

Guest instructor Timbo Sullivan of Cakes by Timbo and Baketopia joins us today for another amazing tutorial, this time featuring how he creates facial expressions on a figure. Timbo will teach you how to create a stylized King Kong cake and breaks down his process for creating the different facial features. Timbo also shows how to change the features to create different expressions, and creates King Kong with a closed and open mouth.

There's a lot to cover in this tutorial, so let's get our tools together and let's get started!

1:02:16 Minutes of Instruction

What You Will Learn

  • How to sculpt King Kong's face
  • Learn how to create different expressions and an open and closed mouth
  • How to create edible fur, teeth, scars and facial details
  • Learn how to color King Kong and create shiny areas on the eyes and teeth

Tutorial Chapters

  1. Carving the cake 0:43
  2. Covering in ganache 4:28
  3. Sculpting the face 4:51
  4. Adding facial details 14:04
  5. Making wrinkles and texture 19:10
  6. Adding the eyes 24:29
  7. Adding spot colors 28:47
  8. Dry brushing 30:25
  9. Airbrushing 31:33
  10. Adding fur 35:27
  11. Adding scars 39:21
  12. Painting the eyes 41:07
  13. Making the mouth 46:30
  14. Making the teeth 48:45
  15. Making the ears 57:53
  16. Final touches 59:40

Downloads

Materials List
King Kong Reference

handing pulling a slice of margarita cake out of the cake

April 16, 2021 Blog

Margarita Cake With Tequila Lime Jell-O Layer

This tequila lime margarita cake is made with three layers of moist lime cake, filled with zesty lime curd and topped with silky smooth buttercream and a boozy margarita gelatin on top! This is the PERFECT cake for Cinco de Mayo!

handing pulling a slice of margarita cake out of the cake

This recipe takes some time to make but it's TOTALLY worth it! I like to make the lime curd, gelatin, and cakes one day before so they are all ready to go when I need them.

What's in this blog post

  • Margarita cake ingredients
  • How to make the lime cake
  • Making the margarita gelatin layer
  • How to make lime curd
  • Cake assembly
  • Margarita Cake FAQ
  • More Citrus Recipes You'll Love

Margarita cake ingredients

margarita cake ingredients

I love turning drinks into cakes! I wanted to stay true to that delicious margarita flavor and incorporate as much tequila and lemon-lime flavor as possible so I used Blanco Espolon tequila because I absolutely love the flavor but you can use whatever tequila you like best.

This might look like a ton of ingredients but I have grouped the different ingredients into the lime cake, the lime curd, and the margarita gelatin layer. I highly recommend making the curd and gelatin ahead of time so they have time to cool down.

How to make the lime cake

  1. Preheat your oven to 335ºF and prepare three 6"x2" cake pans with cake goop or another preferred pan release.
  2. Combine the lime juice, zest, tequila, lemon extract, and milk and set it aside.margarita cake liquid ingredients
  3. Combine the flour, baking powder, and salt and set it aside.margarita cake dry ingredients
  4. Add your softened butter and sugar to the bowl of your stand mixer with the paddle attachment attached and cream it on medium-high speed until it's light, white, and fluffy (about 4-5 minutes). This is where you develop the structure of the cake, so don't be afraid to really let it mix. adding sugar to creamed butter
  5. Next, add in your egg whites (make sure they are room-temp or even slightly warm) ⅓ at a time while mixing on low, letting them mix in before adding the next part.adding egg whites to butter sugar mixture
  6. Add in ⅓ of your dry ingredients to the egg/butter mixture and mix on low until just combined. Then add in ½ of your liquids, then dry, then liquids, and the rest of your dry. Mix until just combined.adding dry ingredients to butter mixtureadding liquid ingredients to margarita cake
  7. Divide your batter evenly between your prepared cake pans and bake them for or 25-35 minutes or until a toothpick comes out from the center clean or the top bounces back when you lightly touch it. I'm using three, 6" x 2" cake pans, but you can also use two, 8" x 2" pans. baked lime cake
  8. Let the cake layers cool 15 minutes then turn out cakes onto a cooling rack. Wrap them in plastic wrap while still warm and place into the freezer to flash chill. This locks in the moisture. Once cool but not frozen, you can then trim off the brown edges of your cakes and frost as desired.
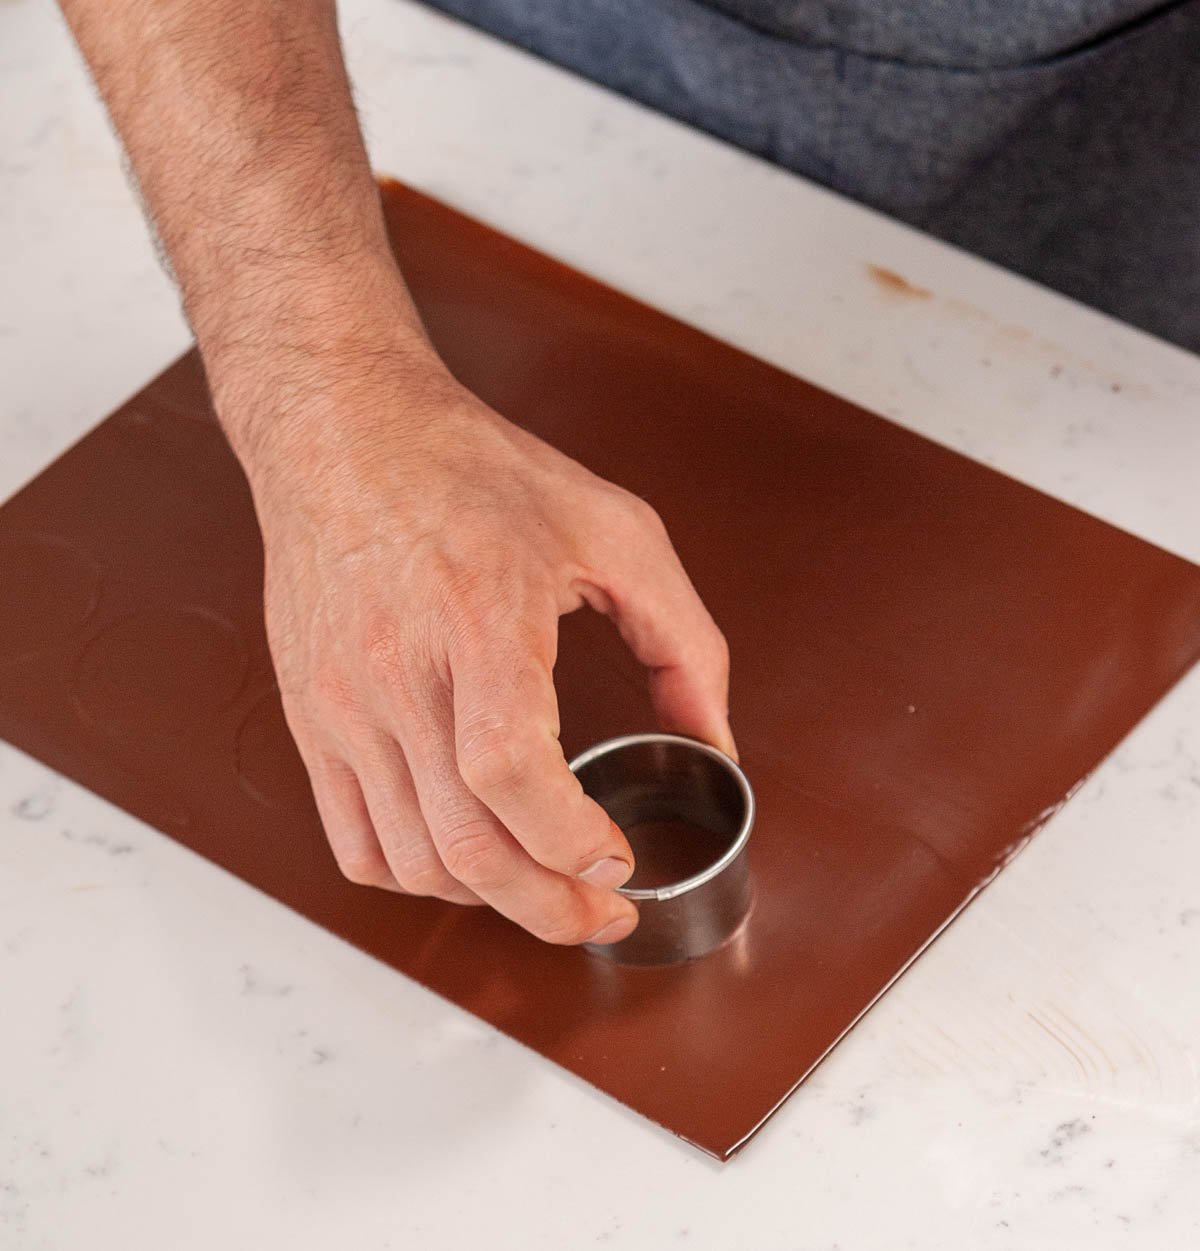
Making the margarita gelatin layer

Yes, there is an actual margarita Jell-o shot on top of this cake. It might sound weird but it's totally fun and tastes delicious!

  1. Sprinkle the gelatin over the cold water and let it soak for 5 minutes.close up of bloomed gelatin in a glass bowl
  2. Add the margarita mix, lime juice, and sugar to the gelatin mixture and stir to combine.adding margarita mix to gelatin mixture in a measuring cup
  3. Microwave (or heat on a stovetop over low heat) until dissolved. About 15-30 seconds. The granules of gelatin will look clear when it's melted. Scoop any white foam off the surface with a spoon to keep your gelatin clear.margarita gelatin melted in a clear bowl with a spoon
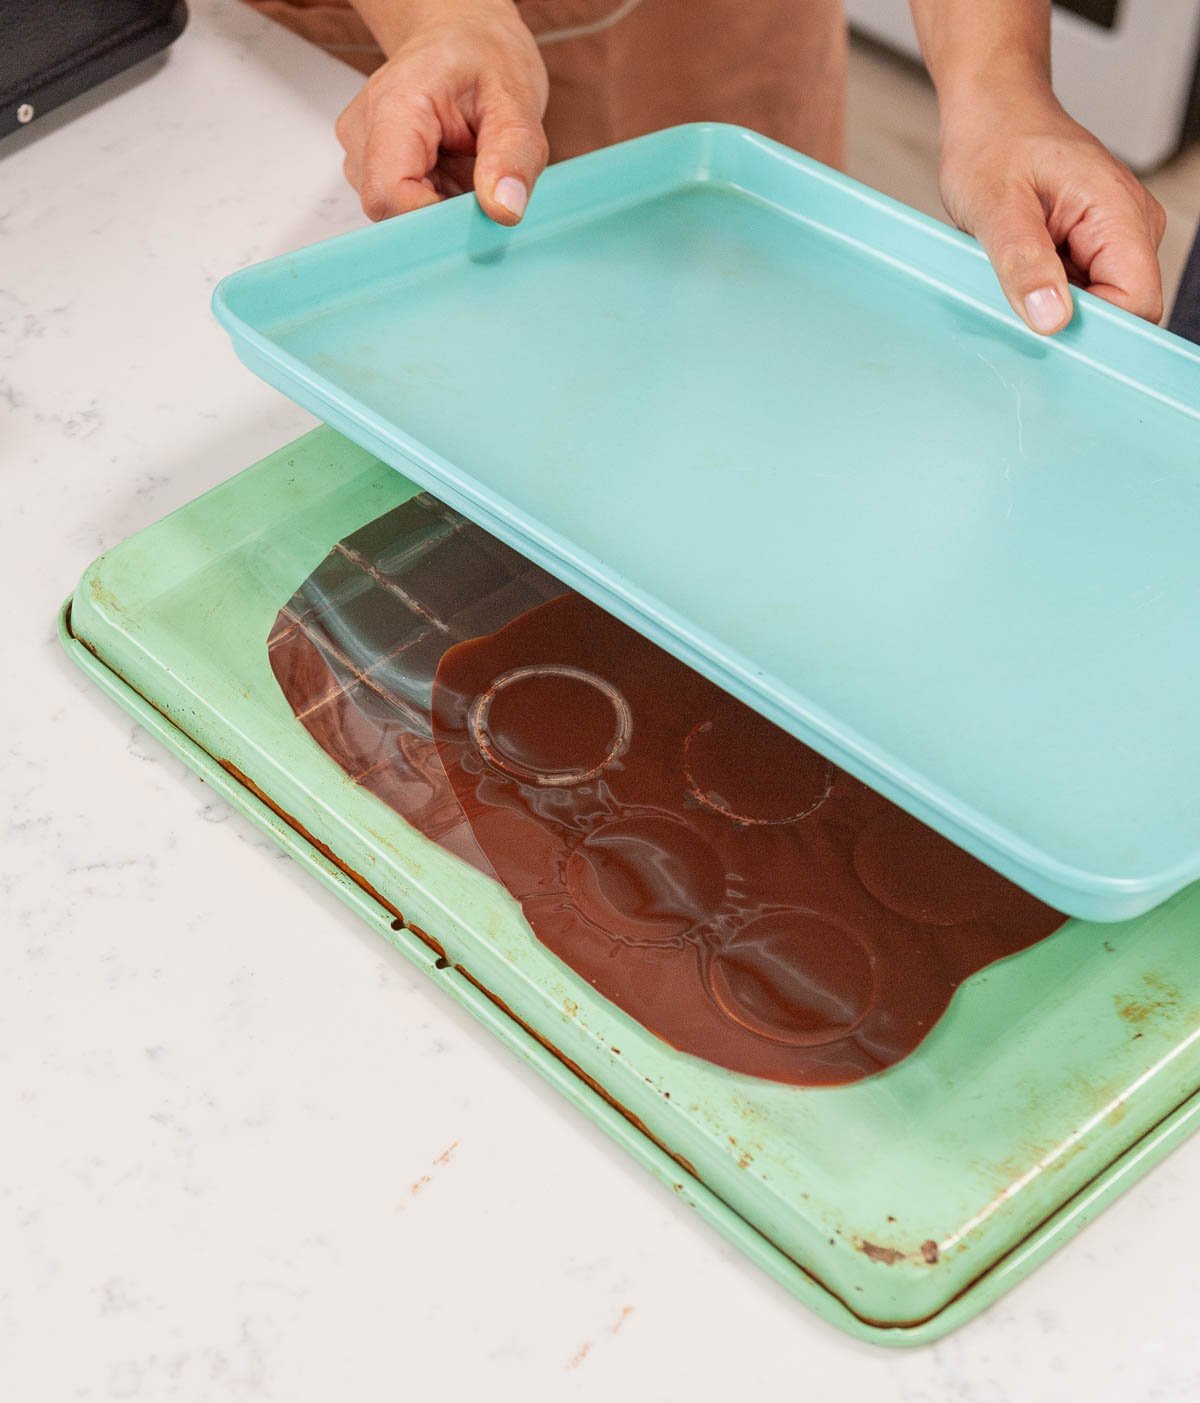
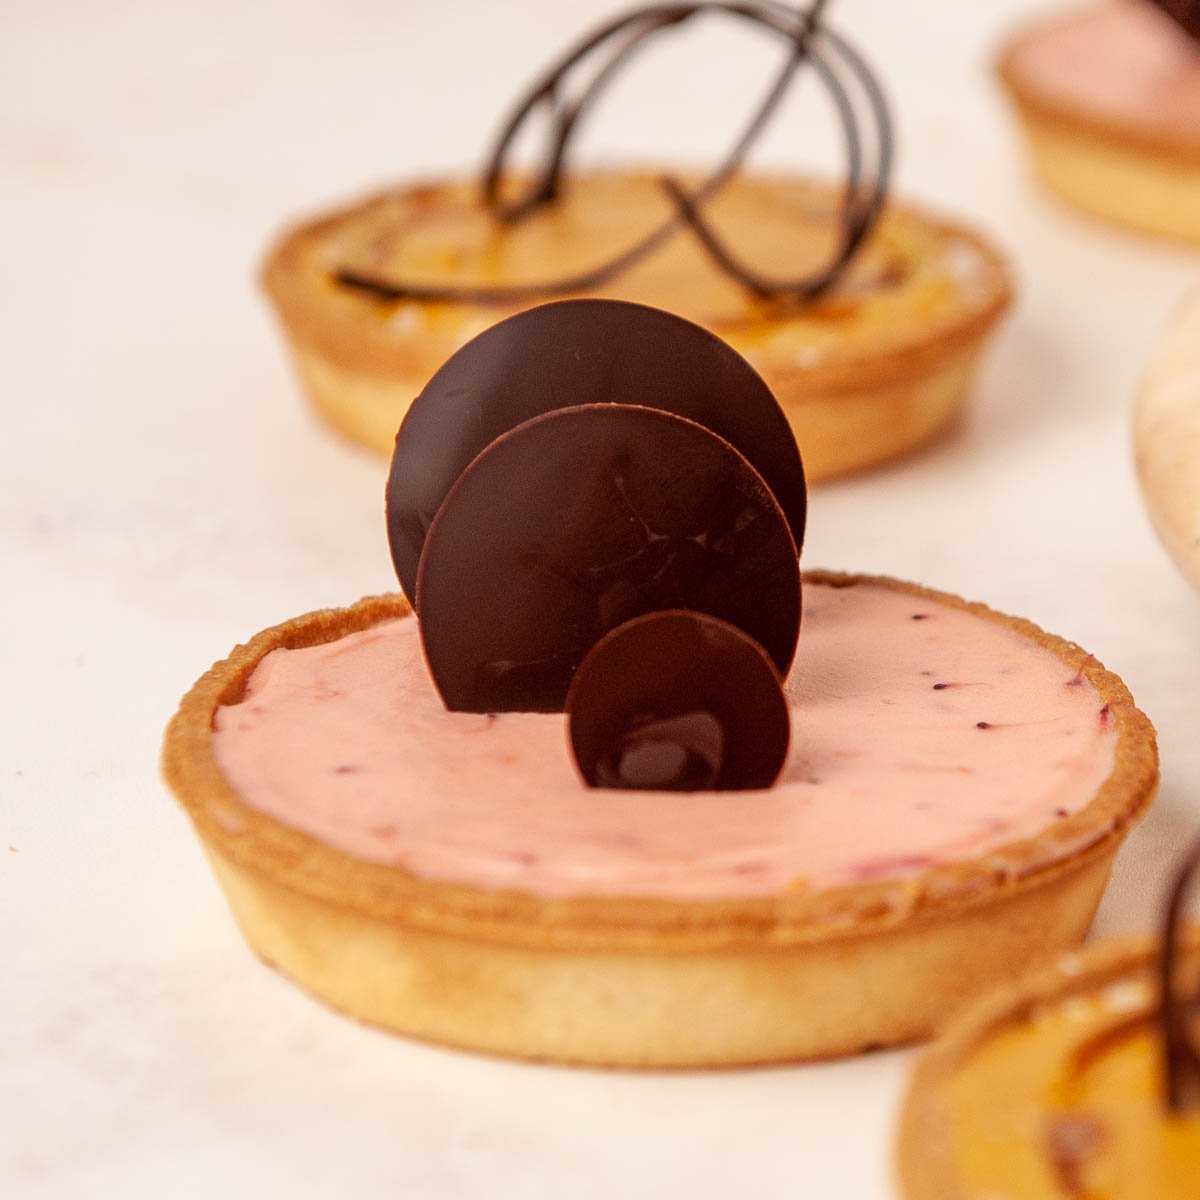
  4. Stir in the tequila and Grand Marnier. Pour half the mixture into a lightly greased ice cube tray and refrigerate for a few hours or overnight. Save the leftover in a measuring cup and refrigerate for later. You will be re-melting this portion. pouring margarita gelatin into ice cube mold
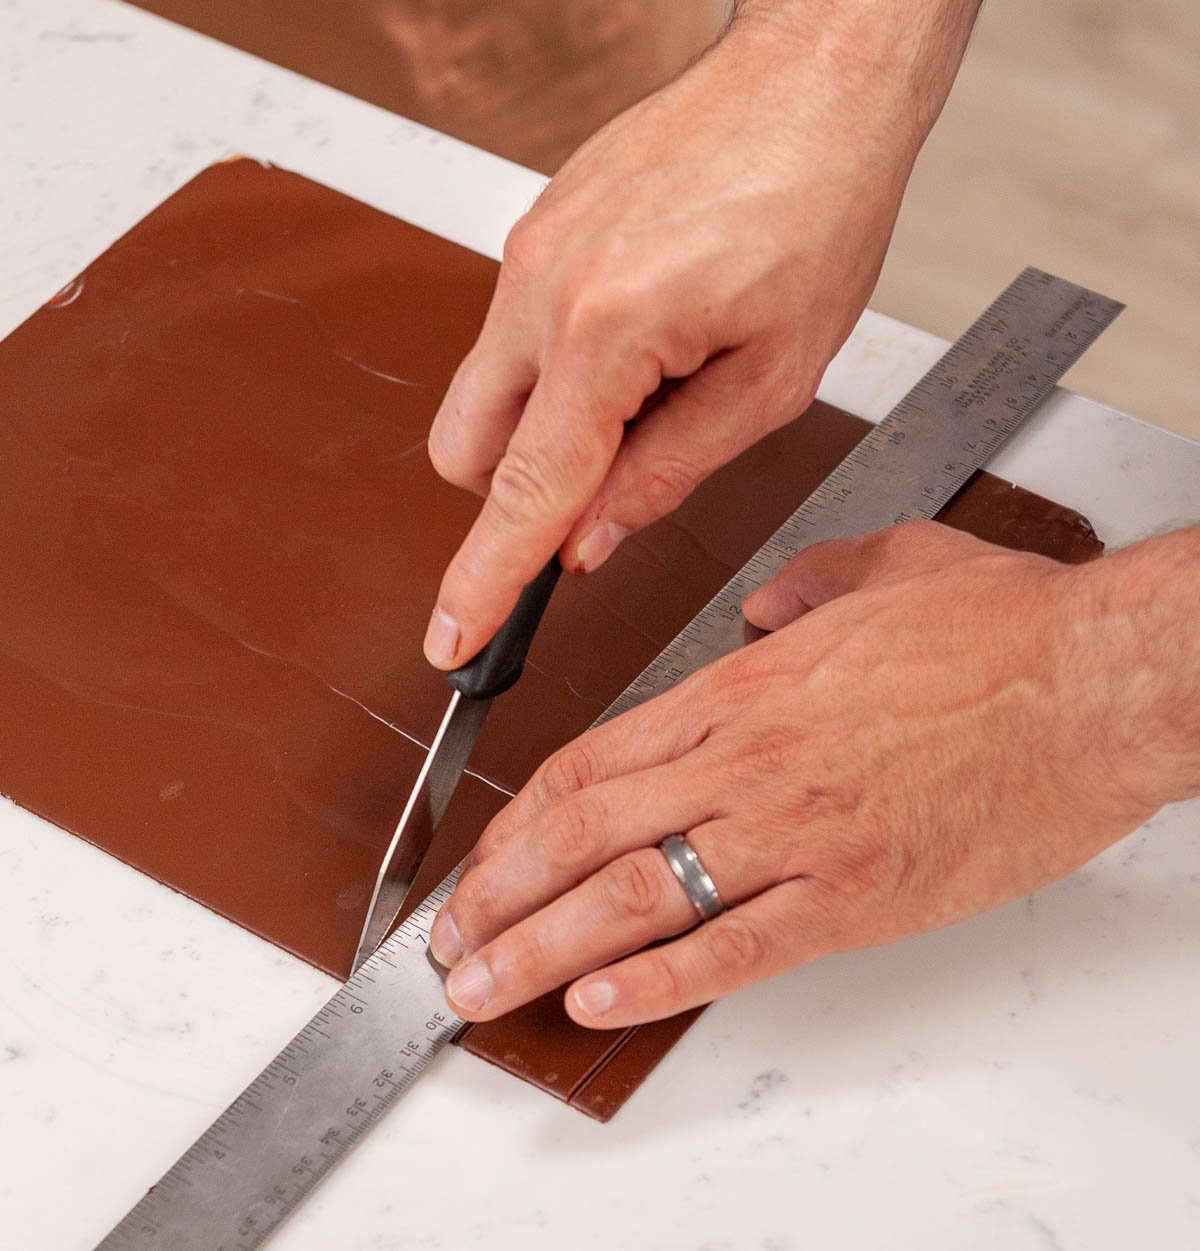
How to make lime curd

  1. Zest the limes, then slice them in half and juice them into a measuring cup. Use a small colander or a lemon juicer to keep out any seeds.
  2. Place the egg yolks, cornstarch, and salt in a large bowl. Whisk well to combine and set aside. (You will be adding more to this later, so make sure it's a large enough bowl.)adding cornstarch to lime curd mixture
  3. Add your lime juice, granulated sugar, and lime zest to a saucepan and bring it to a simmer over medium heat, whisking to prevent burning. lime juice mixture in a medium saucepan
  4. When it has reached a simmer, scoop about 1 cup of the lime juice mixture and slowly add it into the egg yolk mixture while whisking continuously.adding hot lime juice mixture to egg yolk mixture with a measuring cup
  5. Add the tempered egg mixture back into the lime mixture while whisking constantly. Keep an eye on it and keep whisking until it thickens, if you walk away for even a minute, the eggs can curdle.adding egg yolk mixture back to the hot lemon juice mixture
  6. Continue cooking and whisking your lemon curd until it thickens (about 170º F) and just begins to bubble then remove it from the heat. You can strain it if needed to remove any egg bits or the pieces of lime zest.
  7. Add your butter in chunks to the lime curd and whisk it until the butter is melted and combined. Remove the lime curd from the heat. It will continue to thicken as it cools.adding butter to lime curd
  8. Add in your tequila and Grand Marnier (both optional) and stir until smooth.
  9. Cover the curd with plastic wrap (make sure the wrap touches the surface so your curd doesn't form a skin) and refrigerate for a minimum of 2 hours or overnight. adding plastic wrap on top of lime curd in a clear bowl

Cake assembly

If you need more help on decorating your first cake, check out my video tutorial.Click on this image to go to the how to decorate your first cake tutorial

  1. Trim the domes off your chilled cake layers so they are nice and flat. I also like to trim the brown off the sides and the bottom but you don't have to. Place the first cake layer onto a 6" cake board or onto your cake platter.trimmed lime cake layer on a cake board
  2. Spread a thin layer of your easy buttercream onto the cake layer so the curd doesn't soak into the cake. Pipe a dam of buttercream around the outside edge so the curd doesn't spill out.adding a dam of buttercream to the lime cake
  3. Fill the inside with about ¼" of your lime curd. You don't want it too thick.adding lime curd to cake with an offset spatula
  4. Place the second layer of cake on top and repeat the process again with buttercream and curd. Then put the final layer of cake on top. adding the second layer of cake
  5. Cover the entire cake in a thin layer of buttercream. This is the crumbcoat and locks in the crumbs so they don't get into the final layer of buttercream.applying a crumbcoat of buttercream to the cake with an offset spatula
  6. Refrigerate your cake for 15 minutes so that the buttercream firms up.
  7. While your cake is chilling, microwave the leftover gelatin that we made earlier until it's liquid but let it cool down so it's not hot. It shouldn't be warmer than 90ºF. It should only take about 15-30 seconds to melt.
  8. Apply the final layer of buttercream and use a bench scraper to make sure the sides of the cake are very straight and smooth. Smooth out the top of the cake as well with an offset spatula. applying the final layer of buttercream to the lime cake
  9. Refrigerate your cake again for 15 minutes.
  10. Wrap your acetate around the outside of the cake, making sure you're getting it as close to the buttercream as possible. Tape the edges so it doesn't unravel. adding acetate to the cake
  11. Pipe some buttercream into any gaps from the top so the gelatin doesn't leak out. piping buttercream into the gap of the cake
  12. Refrigerate the cake again for 15 minutes so the buttercream firms up.
  13. Remove the gelatin gummies from the ice cube tray and place them on top of your cake in a little pile.adding the margarita gelatin ice cubes to the top of the cake
  14. Pour a thin layer of your cooled gelatin on top of the cake, about ¼" thick. adding a thin layer of margarita gelatin to the top of the cake
  15. Place the cake back into the fridge to chill until you're ready to serve it.
  16. Carefully pull off the acetate once the gelatin layer is set, it should set within 10-15 minutes. pulling the acetate off the margarita cake
  17. I added some crystal sprinkles around the outer edge right before serving and also some thinly sliced limes around the outside and one on top that I attached with a toothpick. Don't add these too soon or they will drip and weep in the fridge. If your limes are not sticking to the side of your cake, pipe a little buttercream onto the back to help them stick on margarita cake

Margarita Cake FAQ

Can you make this into a bundt cake?

Yes you can use the tequila lime cake batter for a bundt cake without making any changes to the recipe. I would use a simple powdered sugar glaze with lime juice and a splash of tequila instead of frosting.

Does this margarita cake need to be refrigerated?

Yes because of the lime curd, this cake needs to be refrigerated. However, it can be left at room temperature for a few hours with no problems. The cake should be consumed at room temperature as well. Cold cake can taste dry.

More Citrus Recipes You'll Love

Lemon Curd

Jelly Island Cake

Lemon Velvet Cake

Cake Batter and Frosting Calculator

Select an option below to calculate how much batter or frosting you need. Adjust the servings slider on the recipe card to change the amounts the recipe makes.

Choose a pan type

Choose a cake pan size
(based on 2" tall cake pan)

Choose a cake pan size
(based on 2" tall cake pan)

Choose a cake pan size
(based on 2" tall cake pan)

Cupcake Tin Size

Choose number of pans

Cups of Batter Needed

8 cups

Cups of Frosting Needed

5 cups

Note: measurements are estimated based off the vanilla cake recipe using standard US cake pans and sizes. Measurements used are for 2" tall cake pans only. Your results may vary. Do not overfill cake pans above manufacturer's recommended guidelines.

Recipe

handing pulling a slice of margarita cake out of the cake
Print Recipe
4.86 from 14 votes

Margarita Cake

This margarita cake is perfect for Cinco de Mayo! Moist layers of zesty lime and tequila cake filled with thick and creamy lime curd and topped with margarita gelatin on top!
Prep Time30 minutes mins
Cook Time35 minutes mins
Refrigeration1 day d
Course: Dessert
Cuisine: American
Servings: 8 cups
Calories: 964kcal
Author: Liz Marek

Equipment

  • silicone ice cube tray
  • Acetate collar, scissors, and tape
  • Three, 6" x 2" or two, 8" x 2" cake pans
  • 6" Cake board, offset spatula, bench scraper for decorating
  • Chef's knife

Ingredients

Margarita Gelatin

  • 10 grams gelatin KNOX
  • 2 ounces cool water
  • 4 ounces margarita mix
  • 2 Tablespoons sugar
  • 2 Tablespoons lime juice
  • 2 ounces tequila
  • 1 Tablespoon Grand Marnier

Lime Curd

  • 8 ounces lime juice
  • 6 ounces sugar
  • 5 large egg yolks
  • ¼ teaspoon salt
  • 1 Tablespoon cornstarch
  • 4 ounces unsalted butter
  • 2 Tablespoons lime zest
  • 1 Tablespoon Tequila
  • 1 teaspoon Grand Marnier

Lime Cake

  • 8 ounces unsalted butter softened but not melted
  • 14 ounces sugar
  • 6 ounces egg whites room temperature
  • 14 ounces all purpose flour
  • 2 ½ teaspoons baking powder
  • ½ teaspoon salt
  • 1 teaspoon lemon extract
  • 5 ounces milk slightly warm
  • 2 ½ ounces tequila You can substitute with milk or lime juice
  • 2 ½ ounces lime juice
  • 2 ounces vegetable oil
  • 2 Tablespoons lime zest

Easy Buttercream

  • 16 ounces unsalted butter softened but not melted
  • 16 ounces powdered sugar
  • 2 teaspoons vanilla extract
  • ½ teaspoon salt
  • 4 ounces pastuerized egg whites
US Customary - Metric

Instructions

Margarita Gelatin

  • Sprinkle the gelatin onto the cool water and let it absorb for 5 minutes
  • Add the bloomed gelatin to the margarita mix, sugar, and lime juice.
  • Melt the gelatin mixture in the microwave for about 30 seconds or in a saucepan over low heat until the gelatin granules turn clear.
  • Let the mixture sit for 5 minutes then scoop off the foam from the surface
  • Stir in the tequila and Grand Marnier.
  • Pour ¾ of the mixture into ice cube molds. Save the rest to pour it on top of the cake later. Don't worry if it solidifies, you can just re-melt it when you're ready to use it.
    If you don't have an ice cube tray, you can pour the liquid into a shallow, glass pyrex dish, let it set up, and slice them into cubes with a knife.
  • Place the ice cube tray in the fridge to chill for at least a few hours or overnight.

Lime Curd

  • Zest the limes, then slice them in half and juice them into a measuring cup. Use a small colander or a lemon juicer to keep out any seeds.
  • Place the egg yolks, cornstarch, and salt in a large bowl. Whisk well to combine and set aside. (You will be adding more to this later, so make sure it's a large enough bowl.)
  • Add your lime juice, granulated sugar, and lime zest to a saucepan and bring it to a simmer over medium heat, whisking to prevent burning.
  • When it has reached a simmer, scoop about 1 cup of the lime juice mixture and slowly add it into the egg yolk mixture while whisking continuously.
  • Add the tempered egg mixture back into the lime mixture while whisking constantly. Keep an eye on it and keep whisking until it thickens, if you walk away for even a minute, the eggs can curdle.
  • I cook my curd for about 2 minutes because I like thick lime curd. Use a thermometer to check the temperature of the lime curd. Removing the curd at 170 ºF (76 ºC)will yield a thinner consistency while removing it at 180 ºF (82ºC) will be thicker.
  • Add your butter in chunks to the lime curd and whisk it until the butter is melted and combined. Remove the lime curd from the heat. It will continue to thicken as it cools.
  • Add in your tequila and Grand Marnier (both optional) and stir until smooth.
  • Pour the finished lime curd into a heat-proof jar or bowl. Cover the curd with plastic wrap so that it is touching the surface of the curd without any air bubbles in between, this will prevent a skin from forming on the top of the curd. Refrigerate for minimum of 2 hours. Store it in the fridge for up to one week or freeze it for up to a year.

Lime Cake

  • Preheat your oven to 335 ºF and prepare three 6"x2" cake pans with cake goop or another preferred pan release. You can also use two 8"x2" pans, just bake for longer.
  • Combine the lime juice, zest, tequila, lemon extract, and milk and set it aside
  • Combine the flour, baking powder, and salt and set it aside.
  • Add your softened butter and sugar to the bowl of your stand mixer with the paddle attachment attached and cream it on medium-high speed until it's light, white, and fluffy (about 4-5 minutes).
  • Add in your egg whites (make sure they are room-temp or even slightly warm) ⅓ at a time while mixing on low, letting them mix in before adding the next part.
  • Add in ⅓ of your dry ingredients to the egg/butter mixture and mix on low until just combined. Then add in ½ of your liquids, then dry, then liquids, and the rest of your dry. Mix until just combined.
  • Divide your batter evenly between your prepared cake pans and bake them for or 25-35 minutes or until a toothpick comes out from the center clean or the top bounces back when you lightly touch it.
  • Let the cake layers cool for 15 minutes in the pans then turn them out onto a cooling rack. Wrap warm and place into the freezer to flash chill. This locks in the moisture. Once cool but not frozen you can then trim off the brown edges of your cakes and frost as desired.
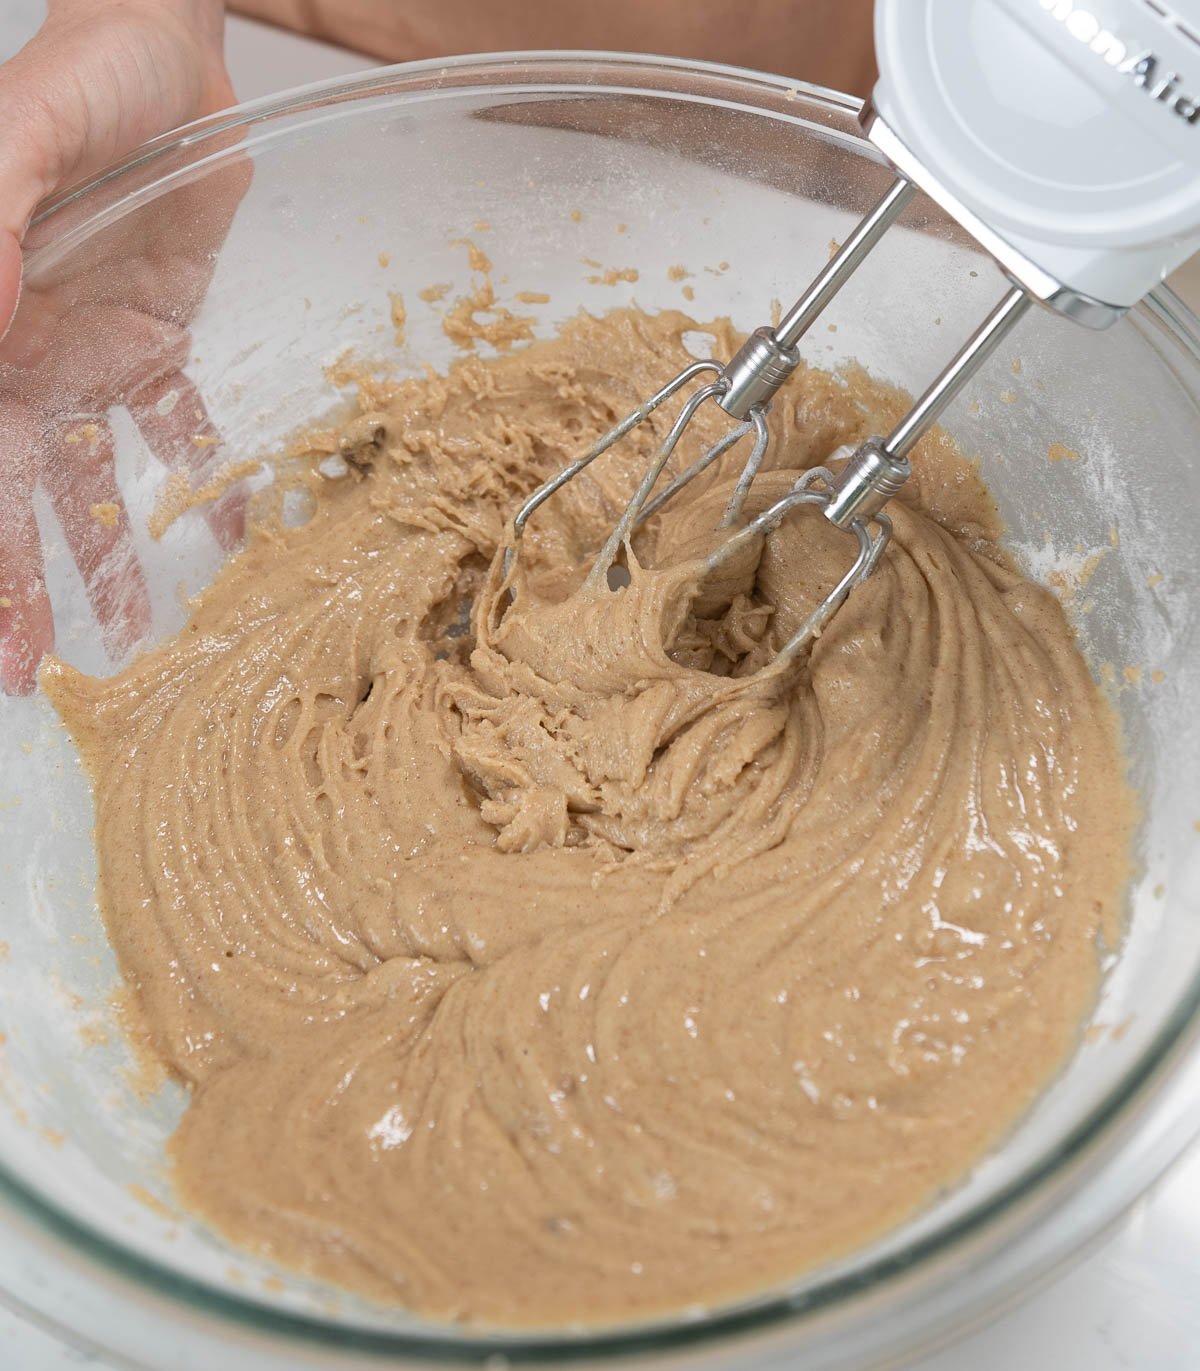
Easy Buttercream

  • Place egg whites and powdered sugar in a stand mixer bowl. Attach the whisk and combine ingredients on low and then whip on high for 1-2 minutes to dissolve the powdered sugar. 
  • Add in your salt and vanilla extract
  • Add in your softened butter in chunks and whip with the whisk attachment to combine. It will look curdled at first. This is normal. It will also look pretty yellow. Keep whipping on high until it no longer tastes like butter, about 8-10 minutes.
  • Switch to a paddle attachment and mix on low for 15-20 minutes to make the buttercream very smooth and remove air bubbles. This isn't required but if you want really creamy frosting, you don't want to skip it. 

Video

Notes

  1. Weigh your ingredients to avoid cake failure. Using a kitchen scale for baking is super easy and gives you the best results every single time. 
  2. Make sure all your cold ingredients are room temperature or slightly warm (butter, milk, eggs, to create a cohesive batter. Curdled batter causes cakes to collapse.
  3. Make your own pan release (cake goop!) The best pan release ever! 
  4. Need more help with making your first cake? Check out my how to decorate your first cake blog post. 
  5. If you don't want to add alcohol to the cake layers you can replace the tequila and Grand Marnier with more milk or lime juice. 
  6. You can leave the alcohol out of the lime curd.
  7. If you want the gelatin layer to be alcohol-free, replace the tequila and Grand Marnier with more margarita mix. 
  8. A stand mixer works best for this cake recipe, but you can also use a hand mixer. Just go by look and consistency instead of time while mixing, you will have to mix for longer. I use a Bosch Universal Plus mixer!

Nutrition

Serving: 1slice | Calories: 964kcal | Carbohydrates: 122g | Protein: 11g | Fat: 46g | Saturated Fat: 29g | Trans Fat: 1g | Cholesterol: 208mg | Sodium: 288mg | Potassium: 313mg | Fiber: 2g | Sugar: 79g | Vitamin A: 1267IU | Vitamin C: 13mg | Calcium: 116mg | Iron: 3mg

Cake carved to look like Air Jordan Nike Shoe and Shoe Box

April 15, 2021 Paid Video

Air Jordan Shoe Cake

Skill level: Intermediate

There's no shoe more iconic than the Air Jordan and today, we're gonna be making this legendary shoe out of cake. Learn how to create the shape, how to layer up the various pieces of the shoe, add the laces and create the polish.

You will also create a shoe box, complete with edible images and lettering.

1:08:28 Minutes of Instruction

What You Will Learn

  • How to create an Air Jordan shoe out of cake
  • Learn how to create the layers of the shoe, the sole and laces
  • How to adjust the shoe if it's a slightly different size

Tutorial Chapters

  1. Stacking the box cake 0:38
  2. Making the shoe template 2:16
  3. Stacking the shoe cake 5:20
  4. Carving the shoe cake 7:22
  5. Making sharp square edges 11:49
  6. Preparing the fondant 18:22
  7. Covering the side of the shoe 27:08
  8. Adding top red details 30:19
  9. Adding toe details 36:39
  10. Adding heel details 40:01
  11. Adding the sole 41:14
  12. Adding the base band 42:35
  13. The bottom of the shoe 46:24
  14. Making the Nike swish 48:18
  15. Adding shoe logos 50:12
  16. Adding shoelaces 51:34
  17. Final shoe details 53:45
  18. Paneling the box cake 55:08
  19. Adding logos to the box 1:01:15
  20. Stacking the shoe and box 1:07:27

Downloads

Materials List
Shoe Cake Cutting Pieces 01
Shoe Cake Cutting Pieces 02
Sole Template
Shoe Cake Placement Template
Shoe Cake Cutting Template
Edible Images
Shoe Cake Label

Cake carved to look like Air Jordan Nike Shoe and Shoe Box

April 15, 2021 Course Preview

Air Jordan Shoe Cake Tutorial

Skill level: Intermediate

There's no shoe more iconic than the Air Jordan and today, we're gonna be making this legendary shoe out of cake. Learn how to create the shape, how to layer up the various pieces of the shoe, add the laces and create the polish.

You will also create a shoe box, complete with edible images and lettering.

1:08:28 Minutes of Instruction

What You Will Learn

  • How to create an Air Jordan shoe out of cake
  • Learn how to create the layers of the shoe, the sole and laces
  • How to adjust the shoe if it's a slightly different size

Tutorial Chapters

  1. Stacking the box cake 0:38
  2. Making the shoe template 2:16
  3. Stacking the shoe cake 5:20
  4. Carving the shoe cake 7:22
  5. Making sharp square edges 11:49
  6. Preparing the fondant 18:22
  7. Covering the side of the shoe 27:08
  8. Adding top red details 30:19
  9. Adding toe details 36:39
  10. Adding heel details 40:01
  11. Adding the sole 41:14
  12. Adding the base band 42:35
  13. The bottom of the shoe 46:24
  14. Making the Nike swish 48:18
  15. Adding shoe logos 50:12
  16. Adding shoelaces 51:34
  17. Final shoe details 53:45
  18. Paneling the box cake 55:08
  19. Adding logos to the box 1:01:15
  20. Stacking the shoe and box 1:07:27

Downloads

Materials List

Shoe Cake Cutting Pieces 01

Shoe Cake Cutting Pieces 02

Sole Template

Shoe Cake Placement Template

Shoe Cake Cutting Template

Edible Images

Shoe Cake Label

lemon layer cake slice with lemon curd filling and buttercream on a white plate

April 12, 2021 Cake

Lemon Velvet Cake Recipe

If there is one lemon velvet cake I get asked about more than any other at cake consultations, it is this one. The reverse creaming method gives it that ultra-soft, velvety crumb, and I use three layers of real lemon flavor: fresh juice, zest, and a pinch of citric acid, so it actually tastes like lemon rather than just smelling like it. Paired with silky homemade lemon curd and tangy cream cheese frosting, this is the cake that makes people ask for seconds before they finish their first slice.

Lemon cake slice with lemon curd filling and buttercream on a white plate with a gold fork

Quick Glance: Lemon Cake Recipe

  • Recipe Name: Lemon Cake Recipe
  • Why You'll Love It: Ultra moist, fluffy, and bursting with real lemon flavor
  • Time and Difficulty: 2-3 hours for baking, making the lemon curd and decorating | Intermediate
  • Main Ingredients: Cake flour, buttermilk, lemon juice & zest, citric acid, butter, oil, cream cheese
  • Method: Reverse creaming method
  • Texture and Flavor: Soft, velvety crumb with bright citrus flavor
  • Quick Tip: Make the lemon curd ahead of time for best results
ChatGPT
Google AI
Perplexity
Grok
Add us as a trusted site on Google
[feast_advanced_jump_to]

Lemon Cake Ingredients

This lemon cake recipe relies on a few key ingredients combined with the reverse creaming method to make a lemon cake with a moist, velvety cake crumb with silky smooth lemon curd and tart lemon cream cheese frosting on the outside to balance it all out.

lemon cake ingredients
  • Buttermilk - tenderizes the crumb and creates a fluffy texture. If you're out of buttermilk, you can make a buttermilk substitute.
  • Cake flour - provides a soft, delicate crumb due to low protein.
  • Lemon juice - adds acidity and light lemon flavor; substitute with fresh over bottled when possible
  • Lemon zest - delivers a strong natural lemon flavor without extra liquid.
  • Citric acid - enhances tartness and boosts lemon flavor; optional and can be omitted
  • Butter - adds richness and flavor.
  • Oil - keeps the cake moist even when chilled; substitute with any neutral oil
  • Eggs - provide structure, stability, and richness; no substitute recommended
  • Cream cheese - adds tangy flavor to the frosting; substitute with mascarpone for a milder taste

What Makes This Cake So Moist?

This lemon cake recipe, much like my vanilla cake and white velvet buttermilk cake recipes, has some key ingredients for maximum moistness and melt-in-your-mouth velvet texture. 

  • Buttermilk - breaks down the gluten in cake flour and reacts with acidic ingredients to create a very light and fluffy cake that is extremely tender! No buttermilk? No problem, you can make your own buttermilk substitute.
  • Cake flour - cake flour has less gluten in it than AP flour, resulting in a very tender cake crumb.
  • Reverse mixing method - The reverse creaming method is the process of coating your dry ingredients with butter before you add the liquids. This butter "shortens" the gluten strands and gives the cake its velvet crumb.
  • Oil - Very important in butter cakes to keep your cakes from drying out. When a cake is cold, the butter in the cake get's hard and can make the cake taste dry. Cakes should always be consumed at room temperature for the best results. 

This lemon cake recipe uses professional baking techniques to create a soft, bakery-quality crumb with bold lemon flavor. If you're new to layer cakes, this step-by-step guide will walk you through everything.

When I make this cake, I make my curd one day in advance so that it has time to cool down in the fridge. You can also bake your cakes in advance if you want, and then wrap them in plastic wrap and freeze them until you are ready to decorate.

Lemon Curd Step-By-Step

Once you make your own lemon curd, it's hard to ever go back to buying it. Nothing compares to that pure, bright, fresh lemon flavor. I prefer to make my lemon curd one day in advance and then have it ready to go the next day. I learned this recipe from the Culinary Institute of America and I have scaled it so it makes exactly the right amount of lemon curd filling for this cake recipe.

lemon curd ingredients in a metal bowl
  1. First, combine the lemon juice, lemon zest, sugar, whole egg, and egg yolks in a heatproof bowl and whisk until smooth.
lemon curd ingredients in a metal bowl over a white saucepan
  1. Next, place the bowl over a pot of simmering water and cook the mixture while whisking constantly to prevent curdling.
Thickened lemon curd over a white saucepan.
  1. Continue cooking until the mixture thickens and reaches 170-175°F.
cooked lemon curd in a metal bowl with cubes of cold butter on top
  1. Remove the curd from the heat and immediately whisk in the cold butter and salt until fully incorporated and smooth.
leftover lemon zest in a strainer
  1. If desired, strain the curd through a fine mesh sieve to remove zest and ensure a silky texture.
lemon curd in a metal bowl with plastic wrap on top
  1. Place some plastic wrap over the curd so that it's touching the surface, and then refrigerate it until you need it. It will thicken as it cools.
smooth lemon curd in a glass bowl

PRO TIP: Whisking constantly prevents the eggs from curdling and promotes even thickening.

Lemon Cake Step-By-Step

Before starting this lemon cake recipe, make sure all of your ingredients are at room temperature so your batter mixes smoothly and does not curdle. I also weigh all my ingredients out with a kitchen scale. Liquids are weighed as well as dry ingredients.

Silicone brush applying cake goop to a cake pan.
  1. Preheat your oven to 335°F (168°C) and prepare your cake pans with cake goop or parchment paper.
Close up of liquid ingredients in two measuring cups.
  1. In one bowl, combine half of the buttermilk with the oil and set it aside.

    In another separate bowl, whisk together the remaining buttermilk, eggs, lemon juice, lemon zest, and lemon extract until combined. Set it aside.
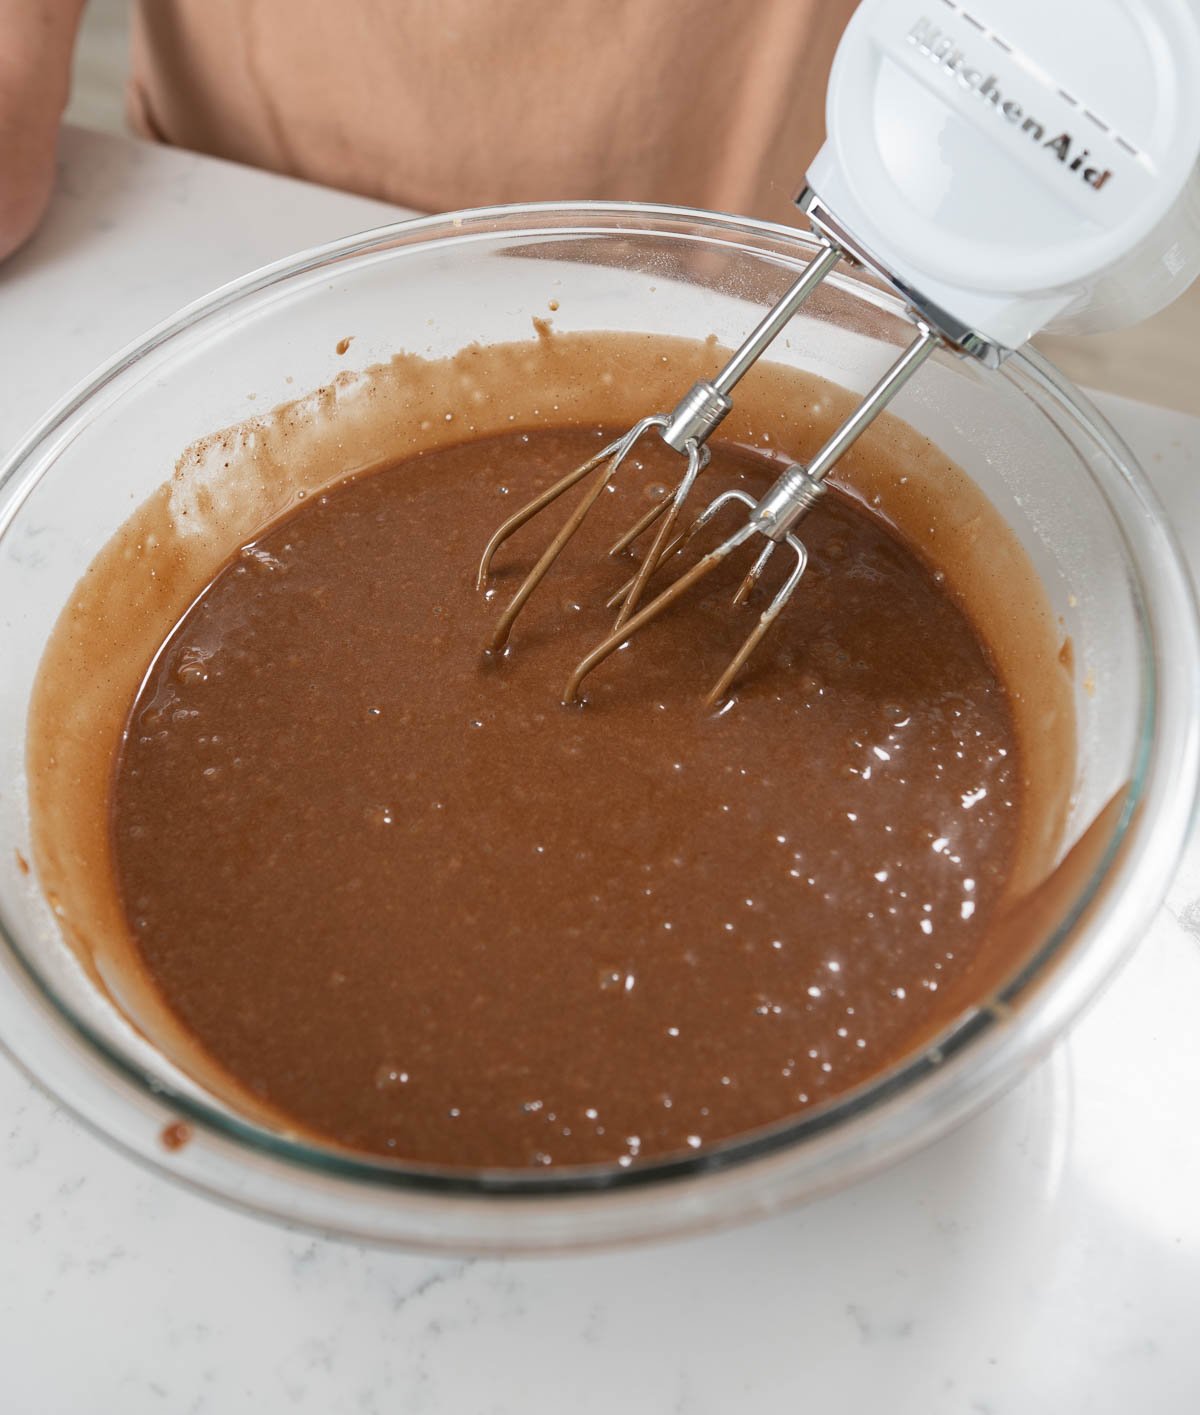
Stand mixer bowl full of dry ingredients.
  1. Add the cake flour, sugar, salt, baking powder, and baking soda to the bowl of your stand mixer and mix briefly to combine.
Hand holding mixed dry ingredients.
  1. Add the softened butter in small chunks to the dry ingredients while mixing on low speed until the mixture resembles coarse sand.
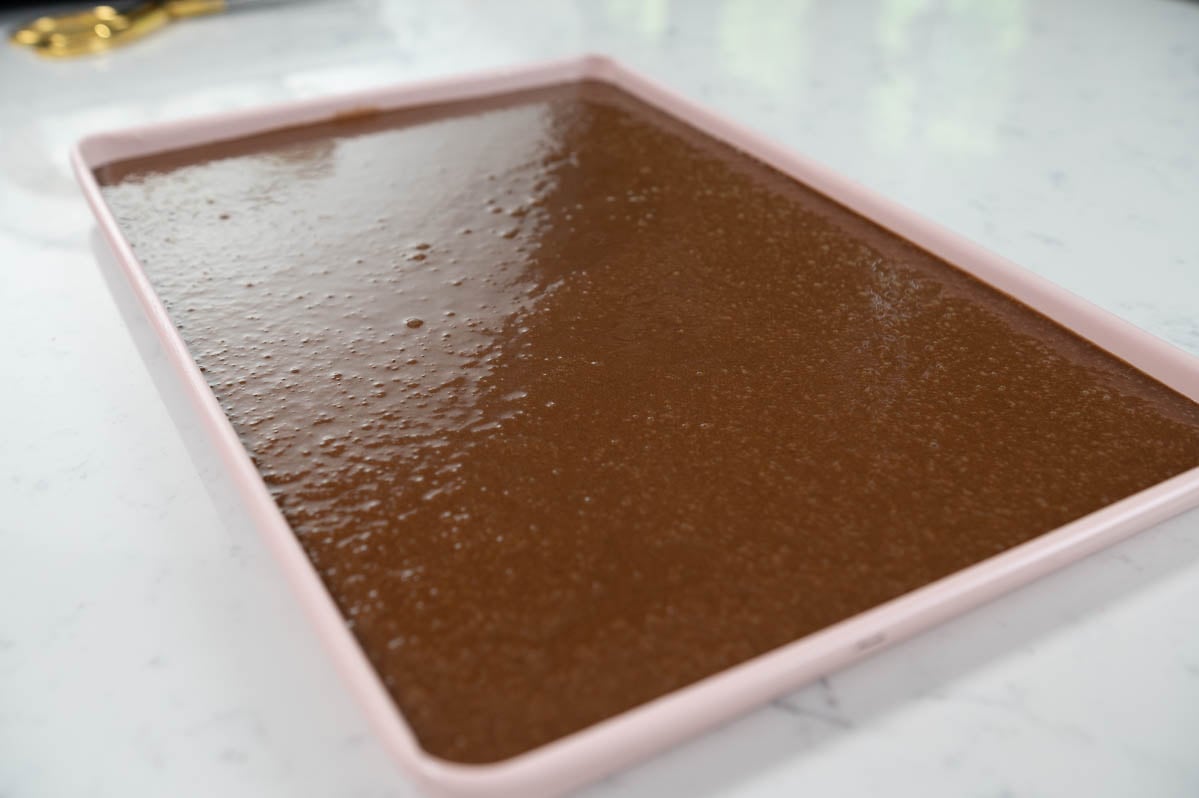
Pouring liquid ingredients into a stand mixer bowl.
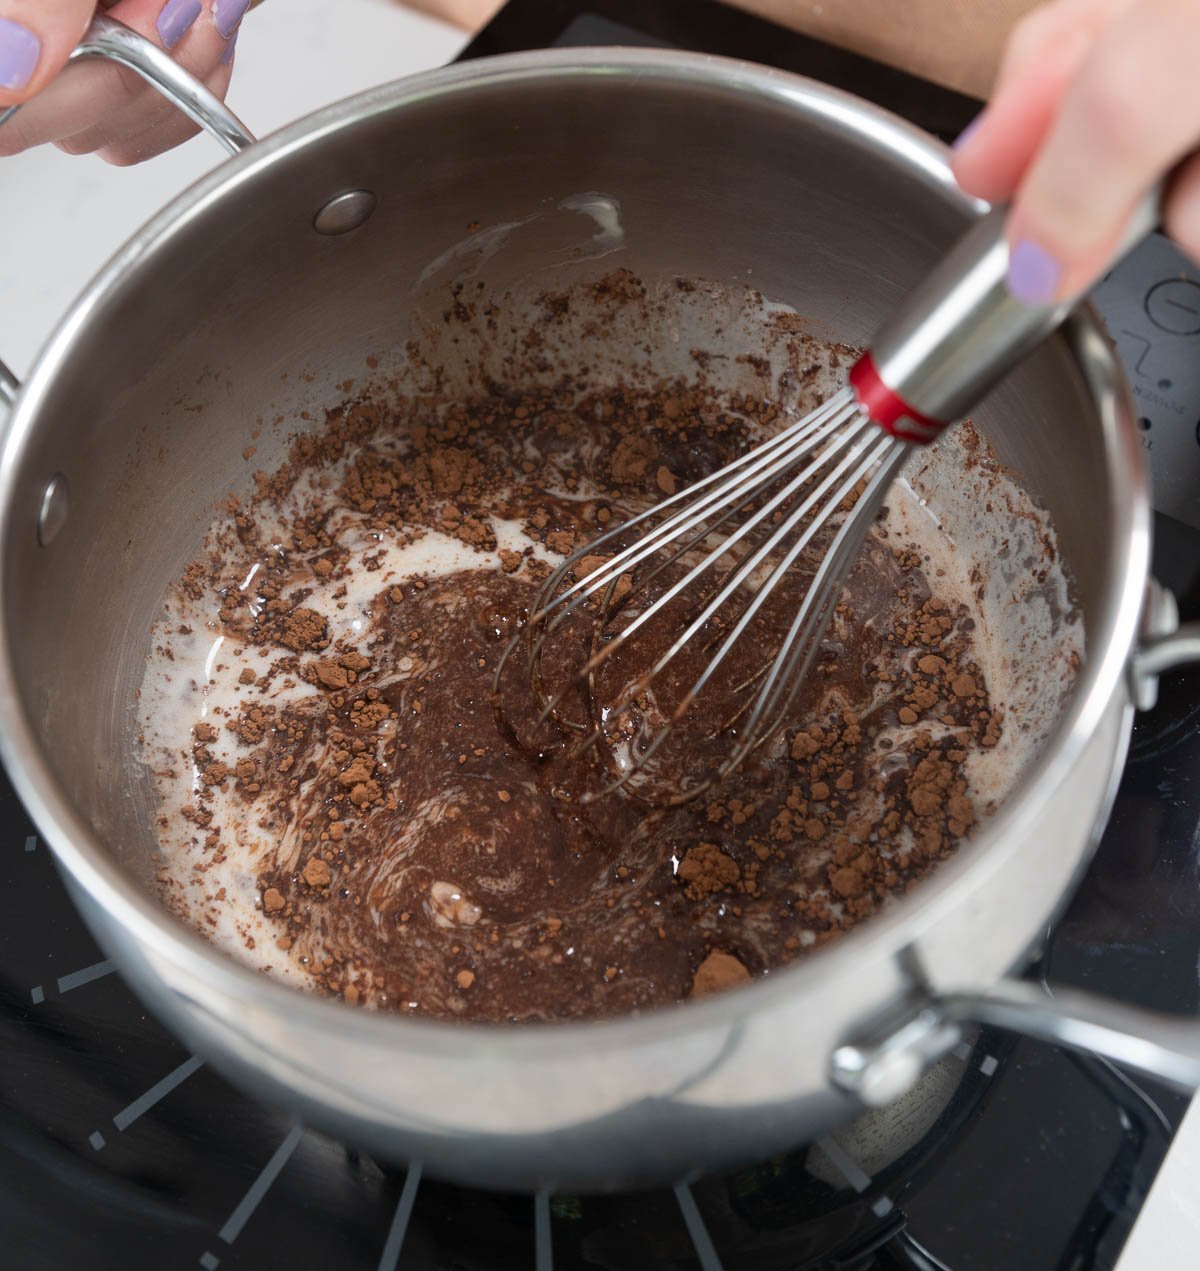
  1. Add the buttermilk and oil mixture to the dry ingredients and mix on medium speed for two minutes.
Adding egg mixture to a stand mixer bowl.
  1. Slowly add the egg mixture in three parts, mixing for about 10 seconds between each addition and scraping the bowl as needed.
Three cake pans full of cake batter.
  1. Fill your cake pans about three-quarters full with batter and bake for 30-40 minutes, or until a toothpick inserted into the center comes out clean.
Pot holders holding a baked cake.
  1. Allow the cakes to cool in the pans for about 10 minutes before turning them out onto a cooling rack.

    Once they are slightly warm, wrap them in plastic wrap and chill them in the refrigerator until firm and easy to handle.

Lemon Cream Cheese Frosting

This lemony cream cheese adds the perfect amount of tang and sweetness to accent the moist cake layers and tart lemon curd filling.

Creamed softened butter in the bottom of a glass stand mixer bowl.
  1. First, place the softened butter into a mixing bowl with the paddle attachment and cream it until smooth and fluffy.
Cream cheese and butter creamed in a stand mixer with the paddle attachment.
  1. Next, add the softened cream cheese and mix on low speed until fully combined and smooth.
Hand pouring a container of sugar into a stand mixer bowl.
  1. Gradually add the powdered sugar, mixing on low speed until incorporated before adding more.
Close up of cream cheese frosting on the paddle attachment of a stand mixer.
  1. Finally, add the extract and salt, and mix just until everything is smooth and combined.

Lemon Cake Assembly

This lemon cake is literally bursting at the seams with so much lemon flavor! I love this cake so much! The cake is so so soft and fluffy but combined with the lemon curd and the lemon cream cheese frosting, this cake is far and above the best lemon cake ever.

Pot holders holding a baked lemon cake layer.
  1. First, trim the tops of your cake layers so they are level and even.
Cutting brown sides of a cake layer with a serrated knife.
  1. Place the first cake layer onto a cake board or serving plate.
Piping a buttercream dam on top of a cake layer.
  1. Pipe a ring of buttercream around the edge of the cake to create a dam. This prevents the curd from oozing out of the sides of the cake.
Smoothing lemon curd on top of a layer cake.
  1. Fill the center with a layer of lemon curd and spread it evenly.
Stacking lemon cake layers.
  1. Place the second cake layer on top and repeat the process.
Covering the lemon cake in a crumb coat with an offset spatula.
  1. Add the final cake layer and apply a thin crumb coat of frosting over the entire cake.
Smoothing frosting on the lemon cake with an offset spatula.
  1. Chill the cake in the refrigerator for 15 minutes to set the crumb coat.
  2. Apply the final layer of frosting and smooth the sides and top with a bench scraper or spatula.
Adding lemon slices to the top of a lemon layer cake.
  1. Optional: Add a few swirls of frosting on top and drizzle leftover lemon curd or add some lemon slices for decoration.

Cake Batter and Frosting Calculator

Select an option below to calculate how much batter or frosting you need. Adjust the servings slider on the recipe card to change the amounts the recipe makes.

Choose a pan type

Choose a cake pan size
(based on 2" tall cake pan)

Choose a cake pan size
(based on 2" tall cake pan)

Choose a cake pan size
(based on 2" tall cake pan)

Cupcake Tin Size

Choose number of pans

Cups of Batter Needed

8 cups

Cups of Frosting Needed

5 cups

Note: measurements are estimated based off the vanilla cake recipe using standard US cake pans and sizes. Measurements used are for 2" tall cake pans only. Your results may vary. Do not overfill cake pans above manufacturer's recommended guidelines.

Common Mistakes When Making Lemon Cake

  • Using cold ingredients - Cold butter will not blend properly into the dry ingredients during the reverse creaming step, and cold eggs can cause the batter to curdle and look broken. Make sure your butter, eggs, and buttermilk are all fully at room temperature before you start mixing.
  • Skipping the frosting dam for the lemon curd filling - Lemon curd is much thinner than buttercream. Without a ring of frosting piped around the edge of each cake layer, the curd will squeeze out the sides when you stack the layers and make the cake unstable and difficult to frost.
  • Skipping the crumb coat - A crumb coat seals in any loose crumbs before the final layer of frosting goes on. Without it you will end up with crumbs showing through the finished surface, which is especially noticeable with a pale cream cheese frosting.
  • Overbaking the layers - This cake should come out of the oven the moment a toothpick comes out clean and the top springs back when touched. Even a few extra minutes can dry out the crumb and undo all the moisture work the buttermilk and oil are doing.
  • Not chilling the layers before assembling - Warm cake layers are fragile and will slide around under the weight of the frosting and filling. Chilling them for at least 30 minutes makes them firm, easy to trim, and much easier to stack cleanly.

Lemon Cake FAQs

Can I use lemon juice instead of lemon extract in this lemon cake recipe?


No. Lemon juice adds liquid but not enough flavor. Use extra zest instead or a little more citric acid.

Can I turn this lemon cake recipe into cupcakes?

Yes. Fill the liners ⅔ full, bake at 400°F for 5 minutes, then 350°F until done (18-25 minutes total).

Can I use limes instead of lemons in this lemon cake recipe?


Yes. Substitute the same amount of lime juice and zest in place of the lemon, and use lime extract instead of lemon extract if you can find it. The result is a bright, tangy lime velvet cake with the same soft, velvety crumb. The citric acid is optional either way but helps punch up the flavor.

How do I store this lemon cake?

Store the lemon cake in the fridge for up to 3 days. Bring it to room temperature before serving it for the best texture.

Can I make this lemon cake ahead of time?

Yes, and making it ahead actually improves the results. Bake the cake layers up to 3 days in advance, wrap them tightly in plastic wrap, and refrigerate or freeze them. The lemon curd can be made up to a week ahead and stored in an airtight container in the fridge. For the best results, assemble and frost the cake the day before serving.

More Lemon Desserts You'll Love

  • close up of a slice of lemon tart with creme fraiche and a raspberry on a white plate
    The Best Lemon Tart Recipe
  • close up of sliced lemon pound cake
    Lemon Pound Cake Recipe
  • Finely textured slice of olive oil cake with a dusting of powdered sugar on top.
    Lemon Olive Oil Cake
  • lemon blueberry scone on a cooling rack
    Lemon Blueberry Scones

Watch: How To Decorate A Cake Step-by-Step

Before you start decorating, watch the video below where I show you every step of decorating a cake from start to finish. Seeing the process in action makes it much easier to follow along

- Liz Marek.

Start Learning Now
smiling woman holding a decorated cake in her hands

Recipe

lemon layer cake slice with lemon curd filling and buttercream on a white plate
Print Recipe
4.92 from 204 votes

Lemon Velvet Cake

Moist and velvety lemon cake with homemade lemon curd and a tangy lemon cream cheese frosting
Prep Time15 minutes mins
Cook Time35 minutes mins
Total Time45 minutes mins
Course: Dessert
Cuisine: American
Servings: 8 cups
Calories: 1613kcal
Author: Liz Marek

Equipment

  • Stand Mixer

Ingredients

Lemon Cake Ingredients

  • 13 ounces Cake flour
  • 13 ounces granulated sugar
  • ½ teaspoon salt
  • 2 teaspoon baking powder
  • ½ teaspoon baking soda
  • 8 ounces unsalted butter Softened but not melted
  • 10 ounces buttermilk Or regular milk with 1 tablespoon white vinegar added
  • 3 ounces vegetable oil Or canola oil
  • 3 Large Eggs 1 large egg weighs about 1.67oz
  • 1 Tablespoon Lemon Zest About one lemon
  • 2 teaspoons Lemon Extract
  • 2 Tablespoons Lemon Juice Fresh or bottled is ok

Lemon Curd

  • 3 ounces Lemon Juice Fresh or bottled is ok
  • 1 Tablespoon Lemon Zest About two lemons worth
  • 3 ounces Sugar
  • 1 large Egg
  • 2 large Egg Yolks
  • 1 pinch citric acid
  • 2 ounces Unsalted Butter
  • 1 pinch salt

Lemon Cream Cheese Frosting

  • 16 ounces cream cheese softened
  • 8 ounces Unsalted Butter Softened but not melted
  • 36 ounces Powdered Sugar sifted
  • ½ teaspoon lemon extract
  • ½ teaspoon salt
US Customary - Metric

Instructions

Lemon Cake Instructions

  • Preheat your oven to 335º F/168º C
    Prepare three, 6"x2" or two, 8"x2" cake pans with cake goop or another pan release. For square pans or cakes over 12", I also use parchment paper.
  • Combine the 4oz of buttermilk with the oil and set aside.
  • To the remaining 6oz of buttermilk, add your eggs, lemon zest, lemon extract, and lemon juice. Whisk lightly to break up the eggs and set aside.
  • Place cake flour, sugar, salt, baking powder, and baking soda into the bowl of your stand mixer with the paddle attachment attached.
  • Turn the mixer onto the lowest speed. Add in your softened butter in small chunks mix until the flour mixture resembles coarse sand.
  • Add your oil/milk mixture all at once to the dry ingredients and mix on medium (speed 2 on a bosch, speed 4 on KitchenAid) for 2 full minutes to develop the cake's structure.
  • Scrape the bowl. This is an important step. If you skip it, you will have hard lumps of flour and unmixed ingredients in your batter. If you do it later, they will not mix in fully.
  • Slowly add in the milk/egg mixture in 3 parts, letting the batter mix for 10 seconds between additions. Stop to scrape the bowl once more halfway through.
    Your batter should be thick and not separated. If it is separated, some of your ingredients could have been too cold or you added your liquids too quickly.
  • Fill your cake pans ¾ full with cake batter. Give the pan a little tap on each side to level out the batter and get rid of any air bubbles. You can also weigh your cake pans to ensure that each pan has the same amount of cake batter.
  • Bake at 335º F/168º C for 35-40 minutes or until a toothpick comes out cleanly from the center of the cake and the top of the cake bounces back when you touch it.
  • After cakes have cooled for 15 minutes or the pans are cool enough to touch, flip the cakes over onto a cooling rack and let cool until barely warm. Wrap your cakes in plastic wrap and chill in the refrigerator before frosting so they are easier to handle. You can also put them in the freezer if you are in a hurry for them to cool down.
  • Once the cakes are chilled you can now trim, fill, and decorate your cake as you wish.

Lemon Curd Instructions

  • First, combine the lemon juice, lemon zest, sugar, whole egg, and egg yolks, and citric acid in a heatproof bowl and whisk until smooth.
  • Next, place the bowl over a pot of simmering water and cook the mixture while whisking constantly to prevent curdling.
  • Continue cooking until the mixture thickens and reaches 170-175°F.
  • Remove the curd from the heat and immediately whisk in the butter and salt until fully incorporated and smooth.
  • If desired, strain the curd through a fine mesh sieve to remove zest and ensure a silky texture.
  • Cover the lemon curd with plastic wrap so its touching the surface of the curd while it cools to prevent a skin from forming on the surface. The lemon curd will firm up as it cools.

Cream Cheese Frosting

  • First, place the softened butter into a mixing bowl and cream it until smooth and fluffy.
  • Next, add the softened cream cheese and mix on low speed until fully combined and smooth.
  • Gradually add the powdered sugar, mixing on low speed until incorporated before adding more.
  • Finally, add the extract and salt, and mix just until everything is smooth and combined.

Cake Assembly

  • First, trim the tops of your cake layers so they are level and even.
  • Place the first cake layer onto a cake board or serving plate.
  • Pipe a ring of buttercream around the edge of the cake to create a dam.
  • Fill the center with a layer of lemon curd and spread it evenly.
  • Place the second cake layer on top and repeat the process.
  • Add the final cake layer and apply a thin crumb coat of frosting over the entire cake.
  • Chill the cake in the refrigerator for 15 minutes to set the crumb coat.
  • Apply the final layer of frosting and smooth the sides and top with a bench scraper or spatula.

Video

Notes

  • For best results, always bring your ingredients to room temperature before starting this lemon cake recipe so your batter mixes smoothly and does not curdle.
  • Do not skip the reverse creaming method, because this technique is what gives this lemon cake its ultra-soft, velvety crumb.
  • Use a kitchen scale to weigh your ingredients for accuracy, especially the flour and liquids, since this lemon cake recipe is very sensitive to ratios.
  • Fresh lemon zest is essential for strong lemon flavor, so do not rely on lemon juice alone.
  • Citric acid is optional, but it adds a bright, bakery-style tang that takes this lemon cake recipe to the next level.
  • Make the lemon curd at least one day in advance so it has time to fully set and develop flavor.
  • Chill your cake layers before assembling, because cold cakes are easier to trim, stack, and frost.
  • Always use a buttercream dam when filling with lemon curd to prevent the filling from leaking out of the sides.
  • Do not overbake your cakes, or they will lose moisture and become dry instead of soft and fluffy.
  • For the best texture and flavor, serve this lemon cake at room temperature, because cold butter can make the crumb feel firm.

Nutrition

Serving: 1serving | Calories: 1613kcal | Carbohydrates: 224g | Protein: 15g | Fat: 77g | Saturated Fat: 46g | Polyunsaturated Fat: 4g | Monounsaturated Fat: 20g | Trans Fat: 2g | Cholesterol: 337mg | Sodium: 629mg | Potassium: 345mg | Fiber: 1g | Sugar: 186g | Vitamin A: 2613IU | Vitamin C: 8mg | Calcium: 186mg | Iron: 1mg

April 2, 2021 4th of July

Sea Salt Chocolate Chip Cookies

These sea salt chocolate chip cookies are thick and chewy and have an absolutely DIVINE flavor thanks to brown butter and sea salt on the inside and outside of the cookie. Sea salt intensifies and brings out the natural chocolate flavor and takes those chocolate chip cookies from good to gourmet! If you love my master chocolate chip cookie recipe, you will love these!

Table Of Contents

  • Ingredients
  • How To Brown Butter
  • How To Make Sea Salt Chocolate Chip Cookies
  • Sea Salt Chocolate Chip Cookies FAQ

Ingredients

You won't need any special ingredients for this gourmet chocolate chip cookies but you will notice that I like to brown my butter before making these cookies. Browning your butter adds SO MUCH flavor to the cookie. If you don't want to bother with browning, you don't have to! These cookies will still taste amazing!

How To Brown Butterbrown butter in clear jar

The first thing you want to do is brown your butter. You can do this days in advance if you want to, just keep the brown butter at room temperature after you make it so it's soft when you want to use it.

  1. Place your butter into a medium-sized saucepan and melt it over medium-high heat, whisking constantly.
  2. Your butter will begin to foam up as you whisk and that is normal.brown butter in a shallow stainless steel pan
  3. Continue whisking until you begin to see the butter go from golden brown to a deep brown and emits a warm nutty aroma. You may have to remove the saucepan off the heat to push the foam to the side and see the butter.
  4. Pour the brown butter into another dish to cool down before you use it. brown butter in saucepan

How To Make Sea Salt Chocolate Chip Cookies

  1. Preheat your oven to 375ºF and line a cookie sheet with parchment paper or a silicone baking mat.
  2. Place your cooled brown butter, white sugar and brown sugar into the bowl of your stand mixer with the whisk attachment. Cream until light and fluffy (3-5 minutes on medium speed). You can also just do this by hand or use a hand mixer. pouring brown sugar into a bowl
  3. While mixing on low, add one egg, let it mix in fully before adding the next. Then add the vanilla and whisk to combine.adding eggs to chocolate chip cookie mixture
  4. Remove the bowl from the stand mixer. Add the flour, baking soda, and salt and fold with a spatula until just combined. Do not over-mix. folding the cookie batter with a spatula
  5. Fold in the chocolate chips.adding chocolate chips to the cookie batter
  6. Cover your dough and chill for a minimum of 30 minutes or up to 24 hours.
  7. Use a small cookie scoop (roughly 2 Tablespoons) to portion out your cookies onto your prepared sheet pan.scooping chocolate chip cookie dough
  8. Add a few chocolate chip cookies on top of the dough balls so that when they bake, they look even more beautiful! chocolate chip cookie dough balls on a white background
  9. Bake your cookies for 11-12 minutes until they begin to brown around the edges. Don't over-bake your cookies! Under-baked is better than over-baked for a soft and chewy cookie.
  10. Immediate sprinkle more flaky sea salt on top of your cookies.close up of chocolate chip cookie
  11. Let your cookies cool on the cookie sheet for about five minutes and then transfer them to a cooling rack to cool fully (if you can wait that long to eat them!)close up of a tray of chocolate chip cookies
chocolate chip cookie being dunked in milk

Sea Salt Chocolate Chip Cookies FAQ

Does sea salt go on the cookies before or after baking?

Once the chocolate chip cookies are done baking, immediately sprinkle the flaky sea salt on top so that it sticks to the cookies. I also like to use a fine sea salt inside the cookie while baking.

Why does sea salt taste so good on cookies?

Sea salt intensifies the flavor of your baked goods, especially chocolate! The contrast between sweet and salty is absolutely divine!

Can I use salted butter instead of unsalted butter?

You can use salted butter instead of unsalted but the amount of salt in a stick of butter is a lot more than what you would typically add to a baking recipe. Bakers usually use unsalted butter so that they can control the amount of salt in their recipes. If you do use salted butter, omit the added salt so that your cookies do not become overly salted.

Other Recipes You Will Love

Master Chocolate Chip Cookie Recipe

Snickerdoodle Cookie Recipe

Double Chocolate Chip Cookies

Recipe

closeup of sea salt chocolate chip cookie on a white background
Print Recipe
4.81 from 379 votes

Sea Salt Chocolate Chip Cookies

Thick and chewy chocolate chip cookies made with brown butter and a sprinkle of sea salt bring out that rich chocolate flavor and take those cookies from good to gourmet!
Prep Time10 minutes mins
Cook Time12 minutes mins
Course: Dessert
Cuisine: American
Servings: 20 cookies
Calories: 292kcal
Author: Liz Marek

Ingredients

  • 6 ounces unsalted butter
  • 7 ounces brown sugar
  • 2 ounces white sugar
  • 2 large eggs
  • 1 ½ Tablespoons vanilla extract
  • 8 ounces all purpose flour
  • 1 teaspoon baking soda
  • ½ teaspoon salt
  • 16 ounces semi-sweet chocolate chips
  • 1 teaspoon sea salt flakes for sprinkling on top of cookies
US Customary - Metric

Instructions

  • Preheat your oven to 375ºF. line a pan with parchment paper or a silicone baking mat and set it aside.
  • Place your butter into a medium-size saucepan and bring it to a simmer over medium-high heat, whisking constantly.
  • Continue whisking the butter until it begins to turn a golden brown color and releases a nutty aroma. Do not walk away from the butter or it can get burned. Set it aside to cool until it no longer feels warm. You can put it in the fridge in a shallow pan to speed up the process.
  • Once your butter has cooled, place it into the bowl of your stand mixer with the whisk attachment. Add the white and brown sugar and cream until light and fluffy (3-4 minutes on medium speed)
  • While mixing on low, add in your eggs, letting the first one mix in fully before adding in the second one.
  • Then add in the vanilla and whisk to combine.
  • Remove the bowl from the stand mixer. Add in your flour, baking soda, and the first quantity of salt and hand mix with a spatula until just combined.
  • Fold in your chocolate chips with a spatula. Do not over-mix your dough.
  • Cover your dough with plastic wrap and place it into the fridge to rest for a minimum of 30 minutes or up to 24 hours.
  • Use a small cookie scoop (roughly two Tablespoons) to scoop your dough and place them onto your cookie sheet about 2" apart.
  • Add a few chocolate chips on top of the balls if you want to make them look extra pretty after baking
  • Bake your cookies for 11-12 minutes or just until they start to get golden brown around the edges. It's better to under-bake then to over-bake. This makes the cookies extra soft and chewy.
  • Immediately after your remove the cookies from the oven, sprinkle some more sea salt on top of the cookies.
  • Let the cookies cool for 5 minutes on the cookie sheet before carefully transferring them to a cooling rack (if you can stop yourself from eating them!)

Notes

For this recipe, your ingredients do not need to be at room temperature
You don't have to brown the butter but the browning does add a lot of delicious flavors
Leftover cookies can be stored at room temperature in a ziplock bag for up to a week or frozen for up to 6 months. 

Nutrition

Serving: 1cookie | Calories: 292kcal | Carbohydrates: 33g | Protein: 3g | Fat: 16g | Saturated Fat: 10g | Trans Fat: 1g | Cholesterol: 38mg | Sodium: 126mg | Potassium: 164mg | Fiber: 2g | Sugar: 21g | Vitamin A: 251IU | Calcium: 29mg | Iron: 2mg
Sugar cookie with icing designed to look like Cinderella

April 1, 2021 Course Preview

Cinderella Cookie Tutorial

Skill level: Intermediate

Guest instructor Lucie Radcliffe of Lucie Bakes teaches us how to make an incredible, edible Cinderella Cookie! In this tutorial, you will learn how to create and decorate this show-stopper cookie, how to add dimension to your cookie designs, and how to add extra details like Cinderella's shimming glass slipper and ruffled ballroom dress.

1:17:25 Minutes of Instruction

What You Will Learn

  • How to create a beautiful detailed Cinderella Cookie
  • Learn how to map out and build up colors to create this iconic design
  • How to create shading and dimension on a cookie
  • Lucie's tips and tricks to add bling and detail to make this cookie shine

Tutorial Chapters

  1. Tracing the outline 0:36
  2. Piping the outline 5:45
  3. Flooding the cookie 9:44
  4. Preparing to paint 18:59
  5. Painting facial details 20:58
  6. Painting the ears and hair 31:34
  7. Shading the face and neck 35:30
  8. Painting the upper body 39:30
  9. Painting the lower body 43:54
  10. Painting skirt ruffles 48:02
  11. Adding dimension 50:10
  12. Sleeve and bustle details 51:18
  13. Dress shadows 54:57
  14. Dress highlights 1:00:44
  15. Final shadows 1:05:40
  16. Shading the collarbone 1:06:46
  17. Adding sparkle 1:07:41
  18. Making the glass slipper 1:10:32
  19. Accessories and final details 1:11:43

Downloads

Materials List

Blue Velvet Sugar Cookies Recipe

Royal Icing Recipe 01

Royal Icing Recipe 02

Cinderella Cookie Template

Cinderella Transfer Template

Cookie Flooding Template

Cinderella Cookie Face Detailing Guide

Dress Embroidery Guide

Final Details Guide

« Previous Page
Next Page »

Primary Sidebar

Hi, I'm Liz! I'm a cake artist and recipe developer, and I won Netflix's Is It Cake? Holiday 2 with a hyperrealistic Santa. I write foolproof recipes that explain why things work, not just how.

I also teach full-length cake tutorials, including sculpted cakes, at Sugar Geek University.

More about me →

Our Cake Greatest Hits

Check out our best cake recipes

Celebrate Halloween 🎃

  • black and white striped cake with pink drip, gummy eyeball with ice cream cone on top
    Gummy Eyeball Cake
    Cook Time1 Hours 30 Minutes
  • close up of a slice of black velvet cake
    Black Velvet Cake
    Cook Time50 Minutes
  • monster mash cheesecake brownies cut into squares on a white background. Sprinkles, pumpkins and plates around the brownies
    Monster Mash Cheesecake Brownies
  • close up of candy apples
    The Best Candy Apple Recipe
  • pumpkin pie recipe
    Pumpkin Pie Recipe
    Cook Time2 Hours
  • close up of pumpkin cheesecake bars on a plate
    Pumpkin Cheesecake Bars
    Cook Time4 Hours

Popular Recipes

  • close up of ganache drizzling into a bowl
    The Best Chocolate Ganache Recipe
    Cook Time20 Minutes
  • Piping easy buttercream rosettes onto a cake using a 1M star piping tip
    Easy Buttercream Frosting
    Cook Time25 Minutes
  • close up slice of marble cake
    Moist and Fluffy Marble Cake Recipe
    Cook Time40 Minutes
  • Slice of red velvet cake with cream cheese frosting on a white plate.
    Red Velvet Cake Recipe
    Cook Time1 Hours 40 Minutes

Footer

↑ back to top

About

  • Privacy Policy
  • Terms of Service

Newsletter

  • Sign Up! for emails and updates

Contact

  • Contact
  • About Us

Copyright © 2024 Sugar Geek Show, Inc. All Rights Reserved.

Rate This Recipe

Your vote:


A rating is required
A name is required
An email is required