
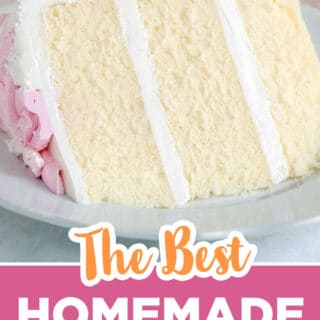
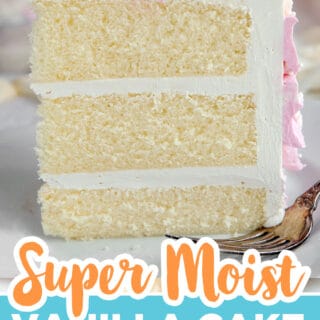
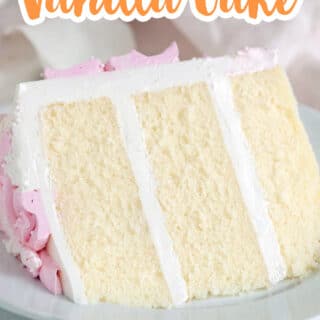
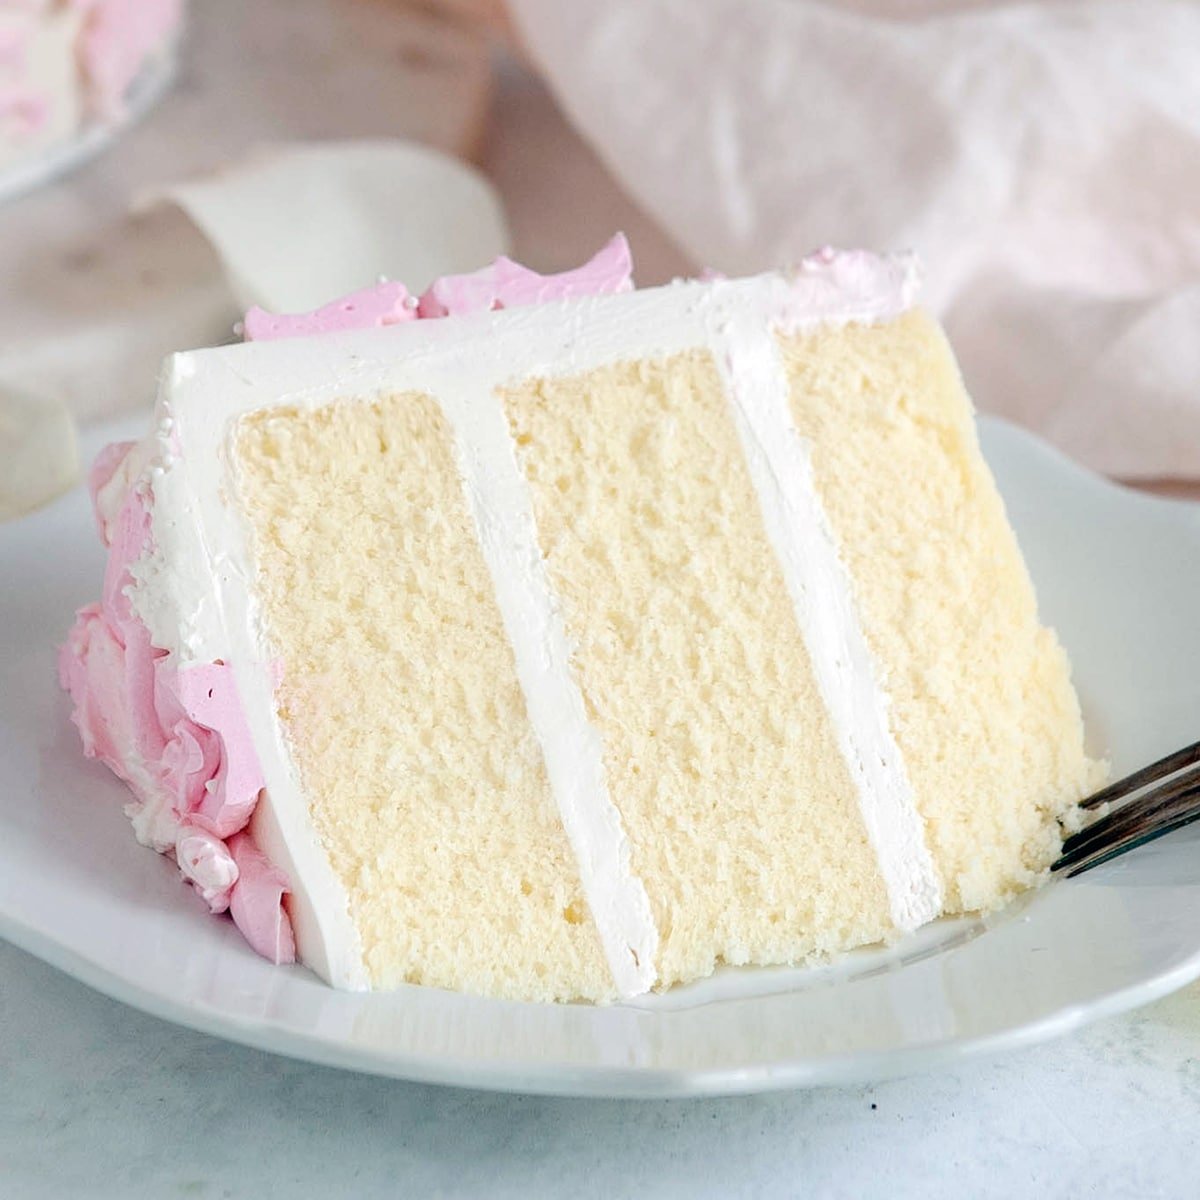
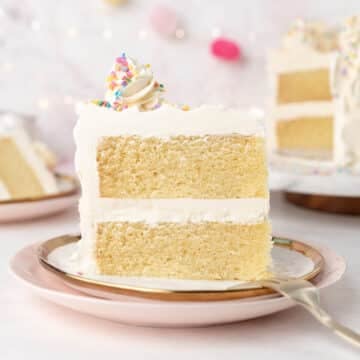
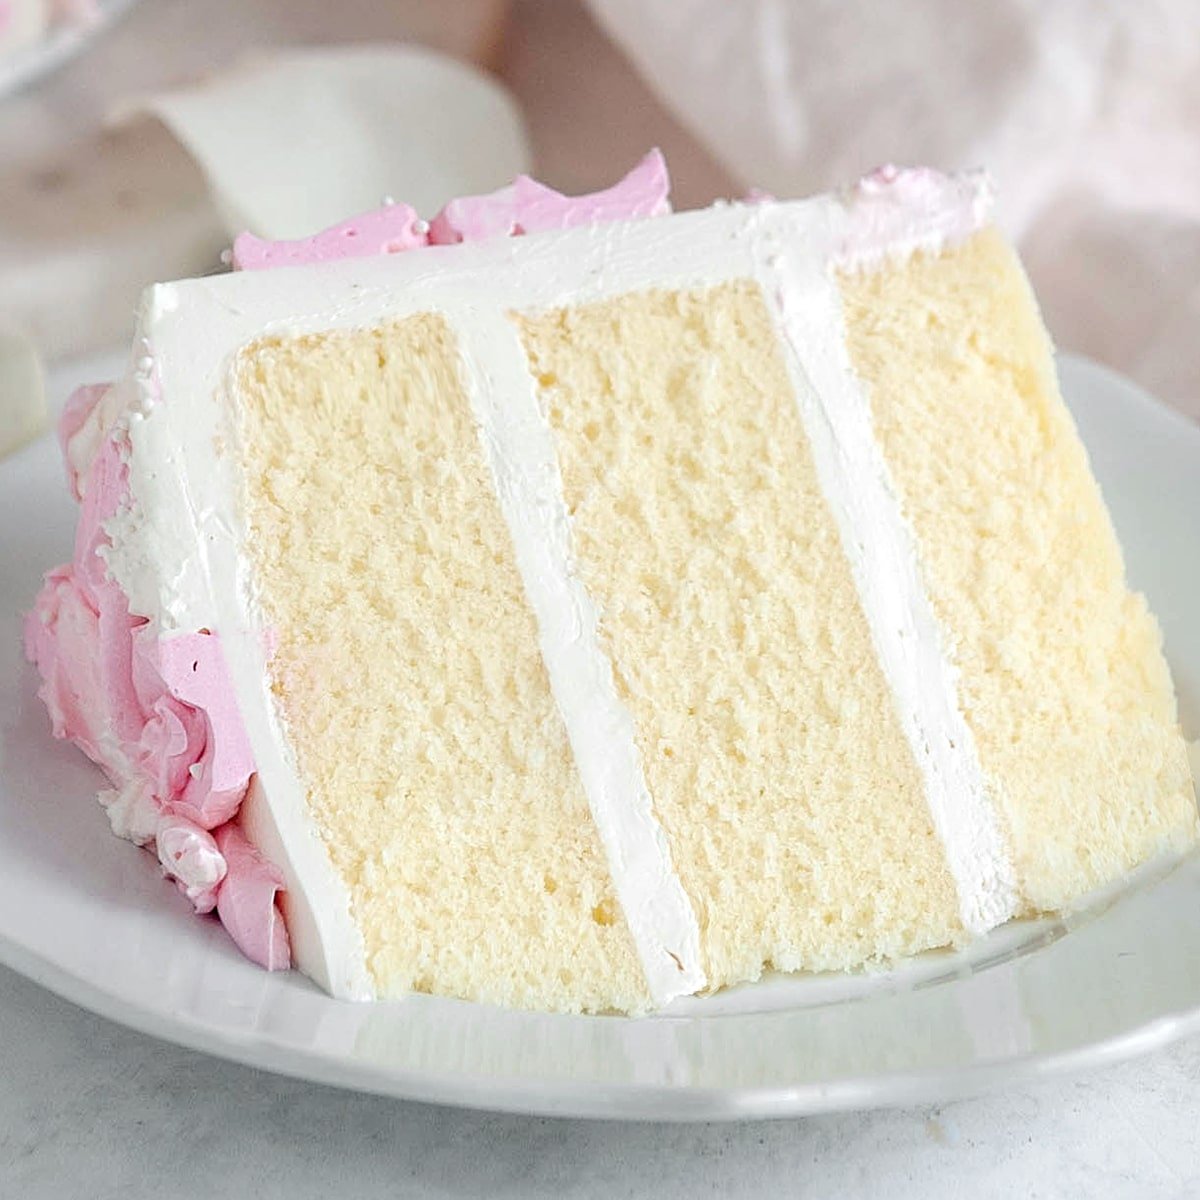
Vanilla cake is one of the most important recipes to have in your baking arsenal, and this version has been my go-to professional recipe for over ten years for weddings, birthdays, and special occasion cakes. The reverse creaming method gives it an incredibly moist, tender crumb that stays soft for days, and it bakes up naturally flat so there is almost no trimming or waste. If you are new to baking layer cakes, my how to decorate a cake guide walks through the entire process step-by-step.
Quick Glance: Vanilla Cake Recipe
- Recipe Name: Vanilla Cake Recipe
- Why You'll Love It: Soft, buttery vanilla cake with an ultra-moist crumb that stays tender for days.
- Time and Difficulty: Prep time: 15 minutes Bake time: 20-30 minutes Difficulty: Intermediate
- Main Ingredients: Cake flour, butter, sugar, eggs, milk, vanilla extract
- Method: Reverse creaming method: Dry ingredients are combined with the butter first, then the liquid ingredients are mixed in.
- Texture and Flavor: Light, fluffy crumb with rich vanilla flavor
- Quick Tip: Mix the batter for the full two minutes during the reverse creaming stage to properly develop the cake's structure.
Jump to:
- Quick Glance: Vanilla Cake Recipe
- What Makes This Vanilla Cake Work So Well
- Vanilla Cake Ingredients
- Tips For Success
- Vanilla Cake Recipe Step-By-Step
- Batter & Frosting Calculator
- Cake Batter and Frosting Calculator
- Cups of Batter Needed
- Cups of Frosting Needed
- Common Vanilla Cake Mistakes To Avoid
- Vanilla Cake FAQs
- More Vanilla Recipes You'll Love
- Watch: How To Decorate A Cake Step-by-Step
- Recipe
Next to my white velvet buttermilk cake, and lemon blueberry cake, this moist vanilla cake is one of our most popular recipes. I have been using this recipe for over ten years for my cake clients with nothing but rave reviews. This is the cake that turns those "I don't even like cake" consultations into OMG we need to book you right now clients! This is perfect for special occasions like weddings, showers, and it makes the perfect birthday cake!
If you want to make these as cupcakes, my vanilla cupcake recipe uses the same reverse creaming method in a perfectly portioned size.
What Makes This Vanilla Cake Work So Well
One of the key techniques used in this recipe is the reverse creaming method. This mixing technique coats the flour in butter before adding liquids, which prevents excess gluten development and results in an incredibly tender crumb.
The texture of this vanilla cake is extremely soft and moist with a delicate crumb. Some bakers are surprised by how tender it is, but that softness is exactly what makes this cake so delicious.
Another reason this recipe works so well is the combination of butter and oil. Butter adds rich flavor while oil keeps the cake moist for several days.
This cake also bakes very flat, which means less trimming and less cake waste. That makes it perfect for layered cakes, wedding cakes, and decorated celebration cakes.
If you want a bright white crumb instead of this golden vanilla one, use only egg whites and make my white cake instead.
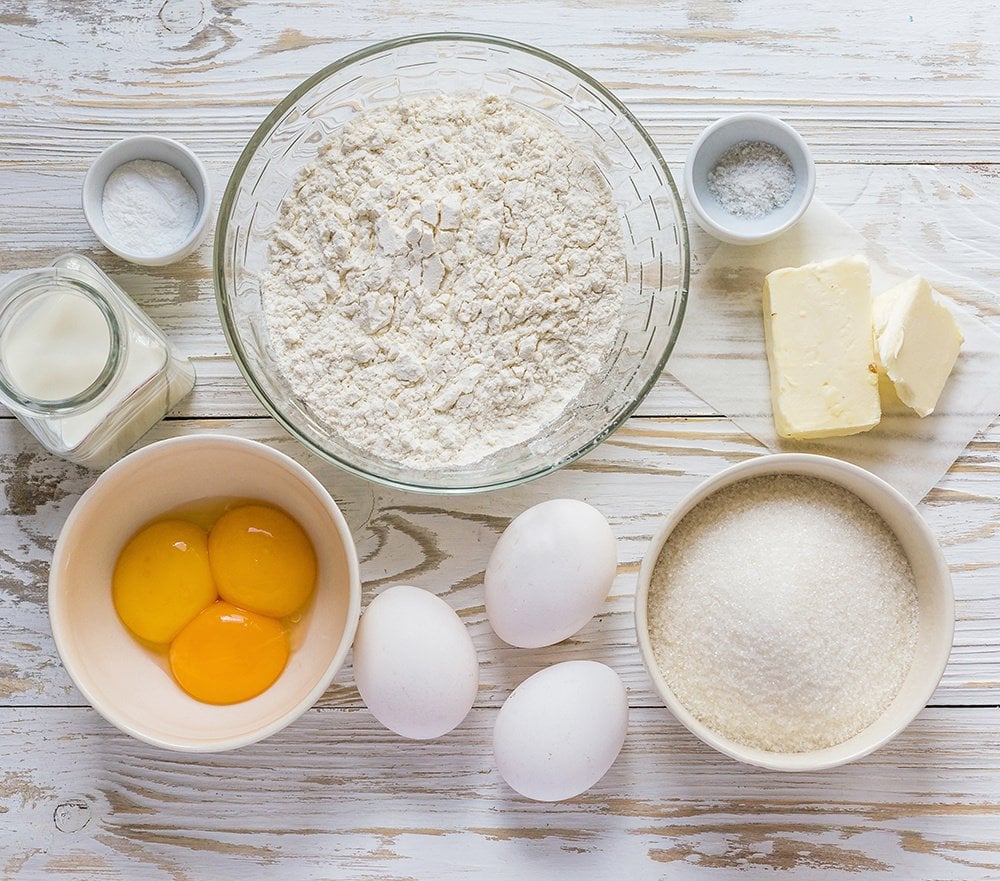
Vanilla Cake Ingredients
The secret to this ultra-moist and tender vanilla cake is using cake flour and the reverse creaming method.

Cake flour is used instead of all-purpose flour because it has a lower protein content, which results in a softer and more tender crumb. If you only have all-purpose flour, you can make a substitute by removing two tablespoons of flour per cup and replacing it with cornstarch, but the texture will not be exactly the same.
Sugar adds sweetness, moisture, and structure to the cake. Reducing the sugar may affect the texture and stability of the cake.
Baking Powder and Baking Soda These ingredients provide lift and help the cake rise properly. Baking soda reacts immediately while baking powder reacts during baking.
Vanilla is the primary flavor in this vanilla cake recipe. For the best flavor, use high-quality vanilla extract or vanilla bean paste.
Unsalted butter adds rich flavor and helps create a tender crumb. Unsalted butter is typically used so the salt level in the recipe can be controlled.
Milk adds moisture and helps activate the gluten structure in the cake.
Vegetable oil helps keep the cake moist for several days. Other neutral oils, such as canola or grapeseed oil, can also be used.
Tips For Success
- Measure your ingredients using a kitchen scale. Baking is a science and weight measurements provide the most accurate results.
- Bring your butter, milk, and eggs to room temperature before mixing. Room temperature ingredients help create a smooth batter and proper emulsion.
- Do not skip the mixing stage. The reverse creaming method requires mixing for about two minutes to properly develop the cake structure.
- If you live above 5,000 feet in elevation, you may need to slightly reduce the baking powder so the cake does not collapse.
Vanilla Cake Recipe Step-By-Step
- Bring your butter, milk, and eggs to room temperature. This step is very important because if these ingredients are not all the same temperature, the batter could curdle and separate during baking, leading to bad texture and rise.
Preheat your oven to 335°F. and prepare your cake pans with cake goop or your preferred pan release.
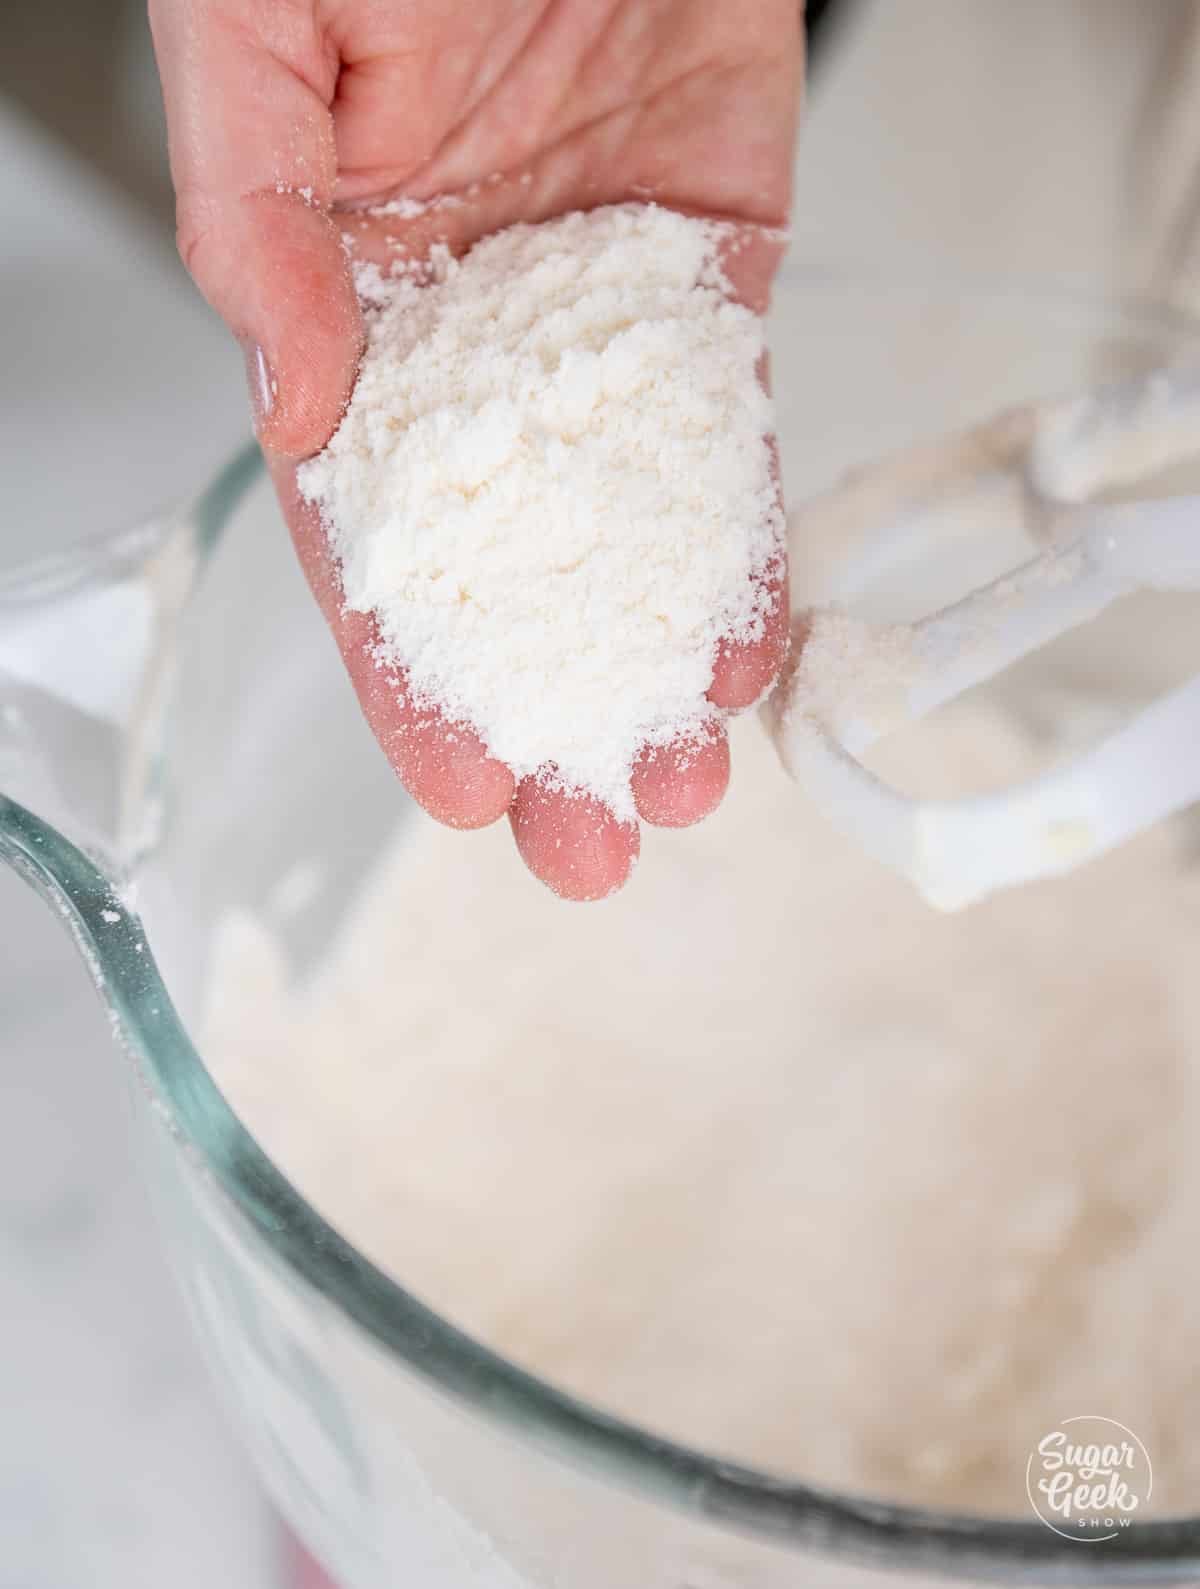
- Combine the cake flour, sugar, baking soda, baking powder, and salt in the bowl of a stand mixer.
While mixing on low, add softened butter in small chunks and mix until the mixture looks like coarse sand.
- Combine half the milk and the oil.
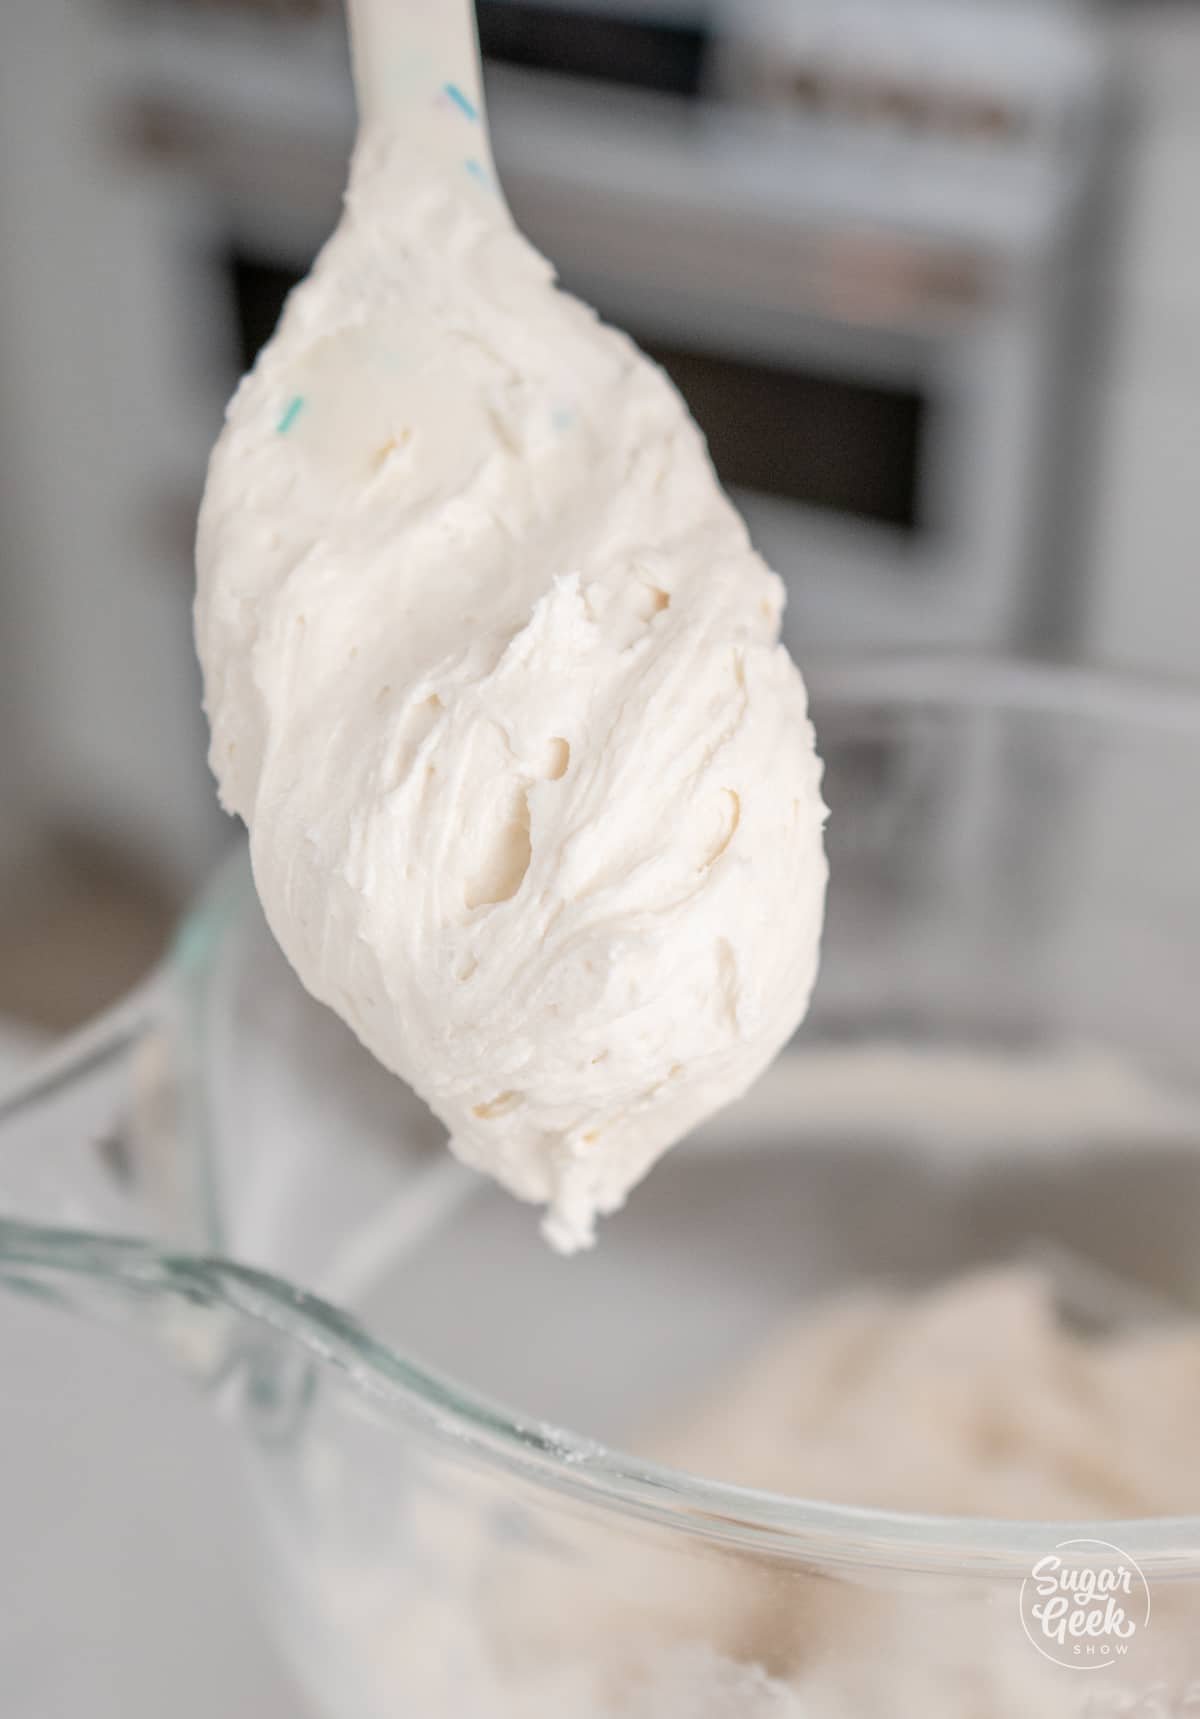
Add the milk and oil mixture all at once to the dry ingredients mixture and mix for two minutes on medium speed. The batter should look thick and not separated.
Scrape the bowl thoroughly after the two-minute mix. If you skip this, hard lumps of flour will stay in the batter and will not mix in fully later.

- Whisk the rest of the milk, vanilla extract, and the eggs together to combine.
Slowly add the egg and milk mixture while mixing on low speed just until combined.
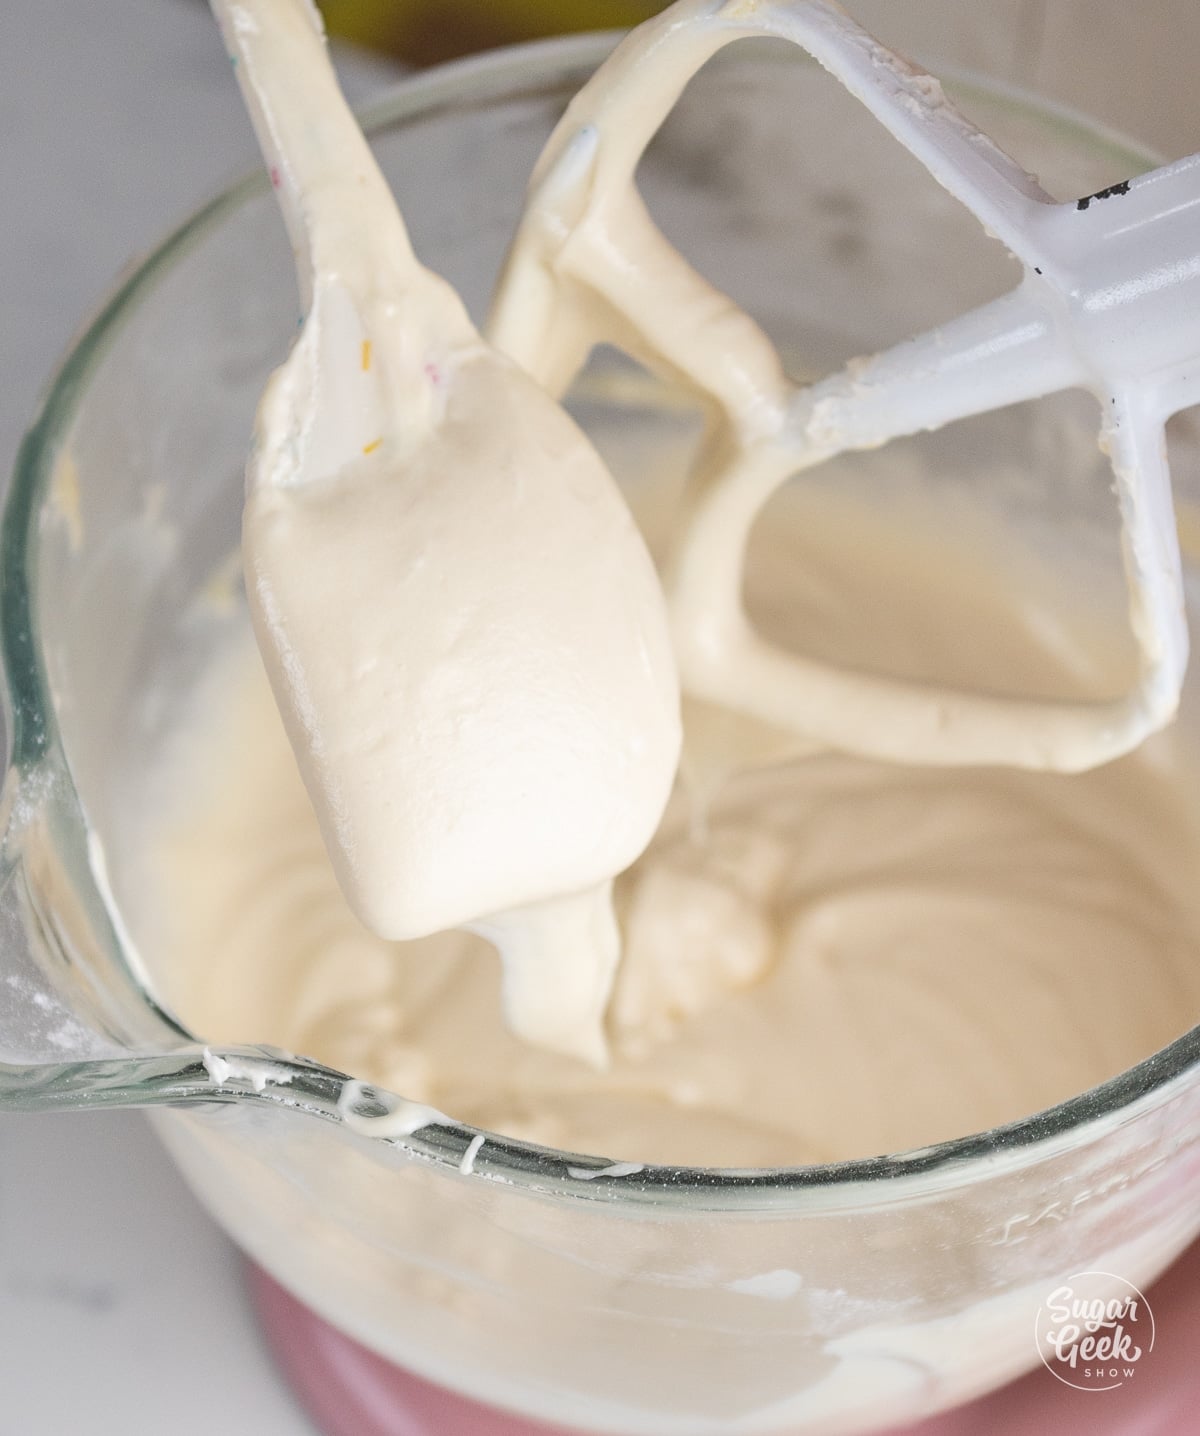
- The finished batter should be thick, smooth, and slightly glossy.
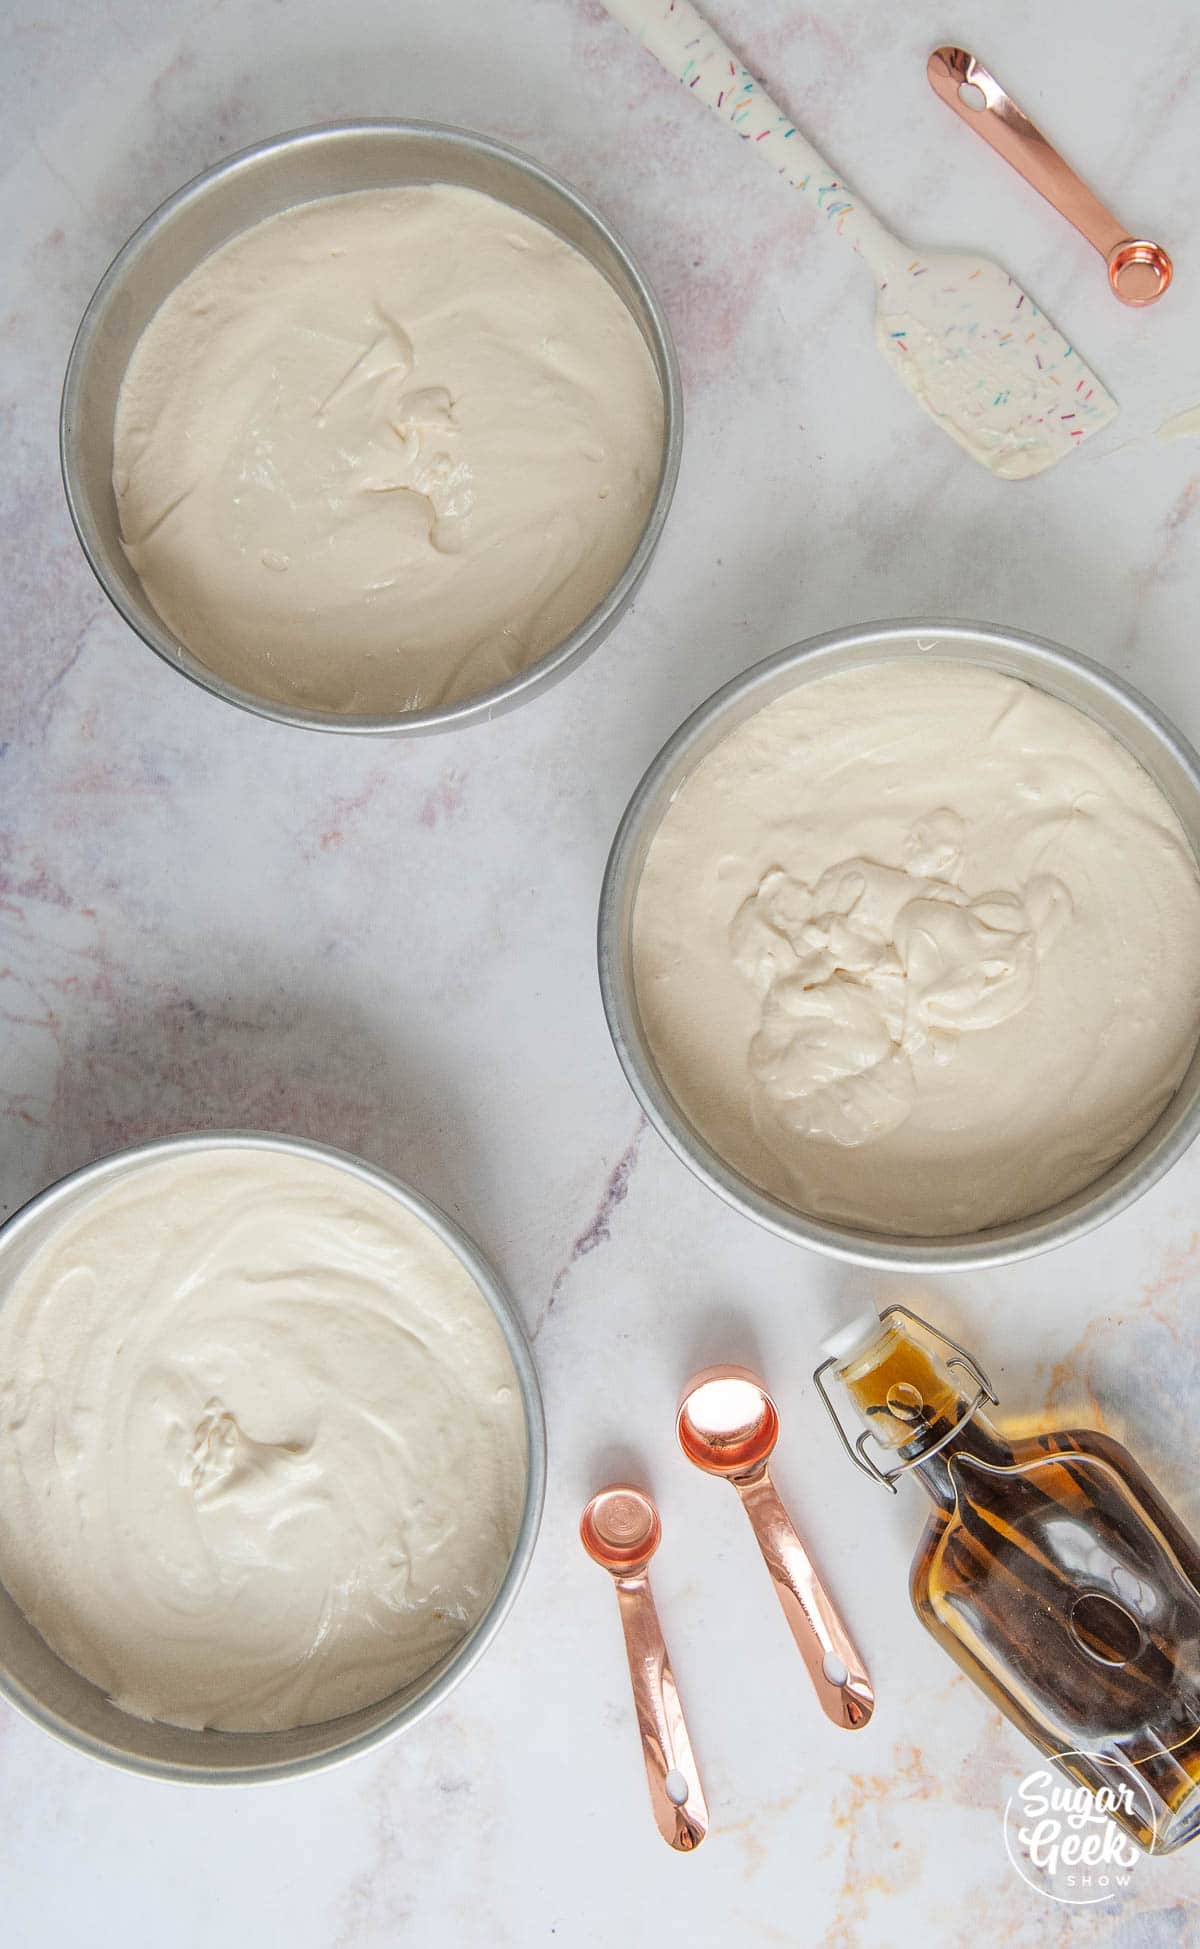
- Divide the batter into three prepared 8-inch cake pans.
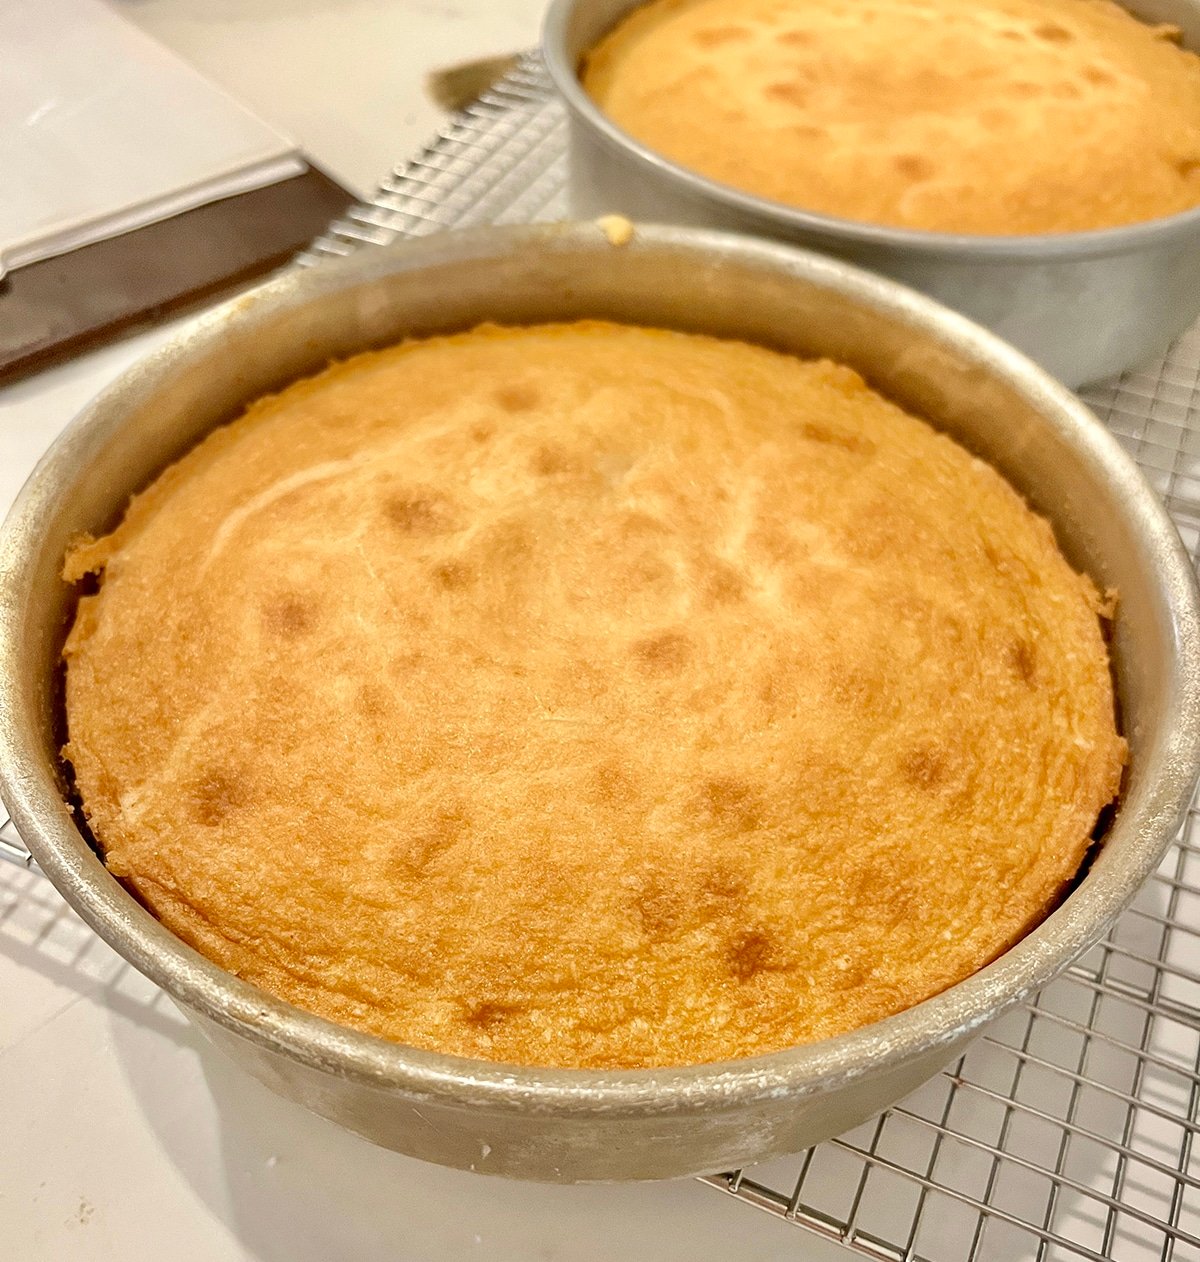
- Bake for 20-30 minutes or until a toothpick inserted into the center comes out clean. Immediately tap the pan on the counter once to release air and reduce shrinking.
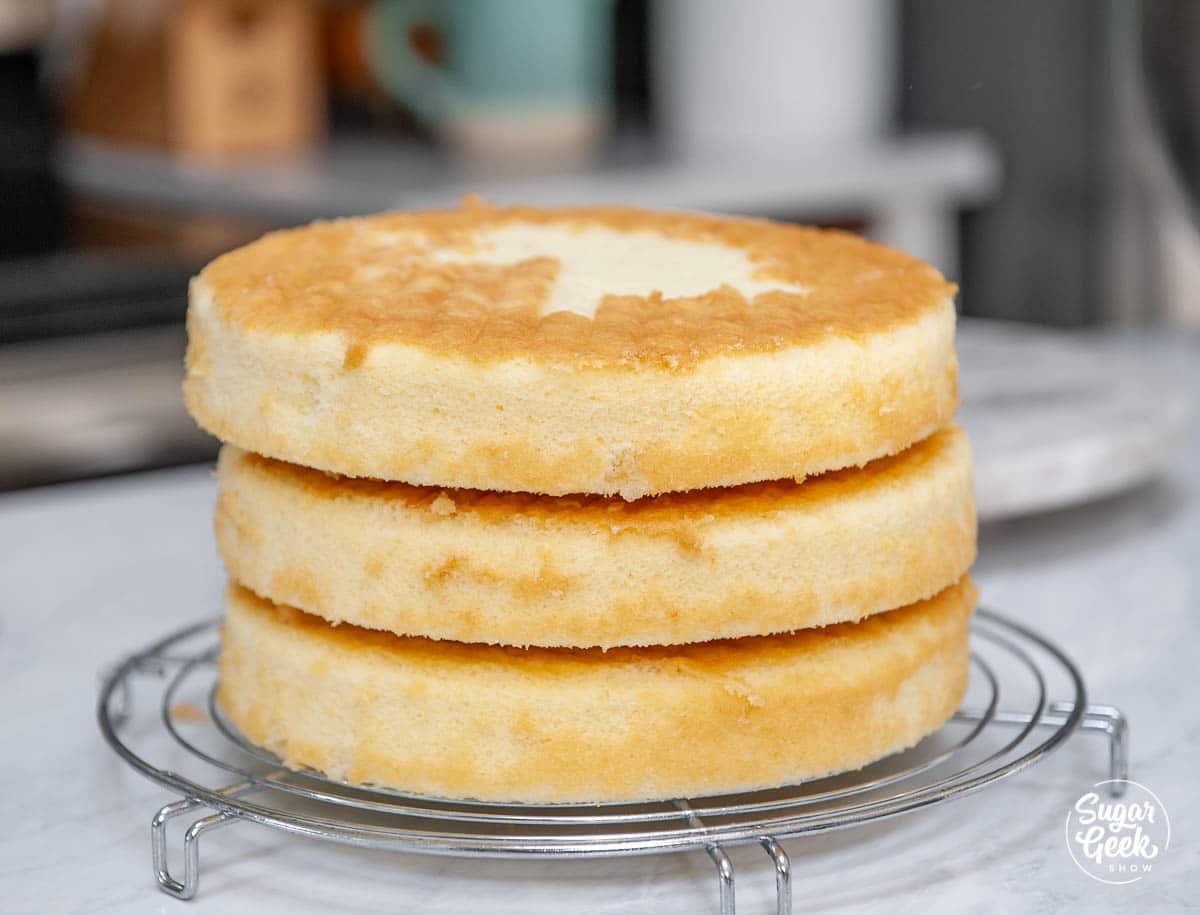
- Cool cakes in the pans until barely warm before removing them onto a cooling rack.
Batter & Frosting Calculator
Cake Batter and Frosting Calculator
Select an option below to calculate how much batter or frosting you need. Adjust the servings slider on the recipe card to change the amounts the recipe makes.
Choose a pan type
Choose a cake pan size
(based on 2" tall cake pan)
Choose a cake pan size
(based on 2" tall cake pan)
Cupcake Tin Size
Choose number of pans
Cups of Batter Needed
8 cups
Cups of Frosting Needed
5 cups
Note: measurements are estimated based off the vanilla cake recipe using standard US cake pans and sizes. Measurements used are for 2" tall cake pans only. Your results may vary. Do not overfill cake pans above manufacturer's recommended guidelines.
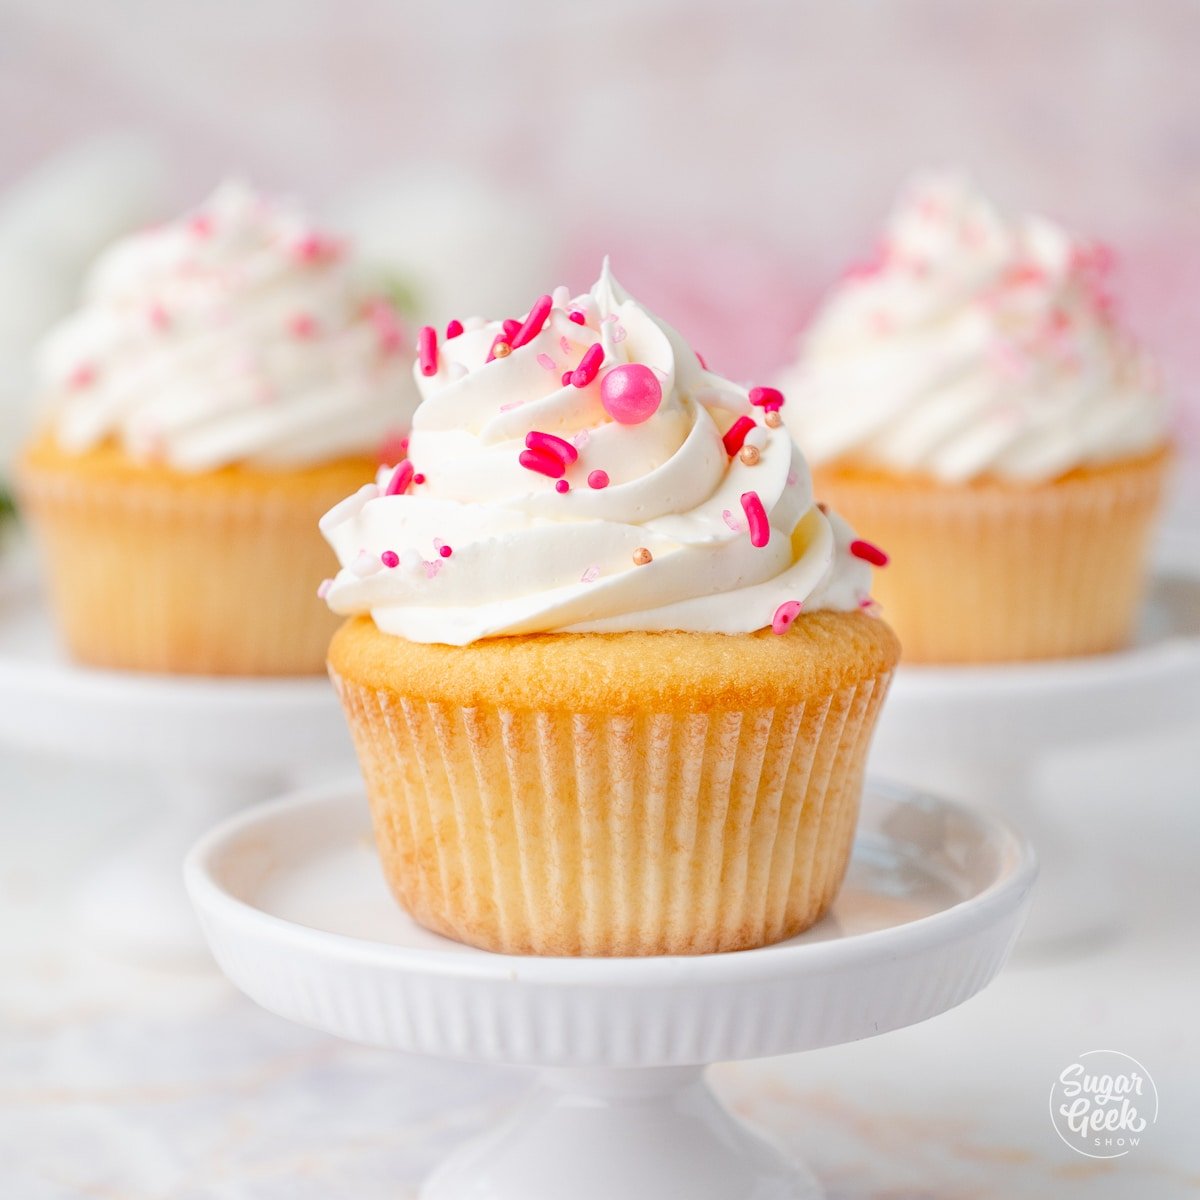
This recipe makes three 8-inch cake layers, two 9-inch cake layers, or about 24 cupcakes. The easy buttercream recipe included makes 8 cups of frosting, enough to frost and fill the layered cake. Store leftover frosting in the fridge for up to 1 week or freeze for up to 6 months.
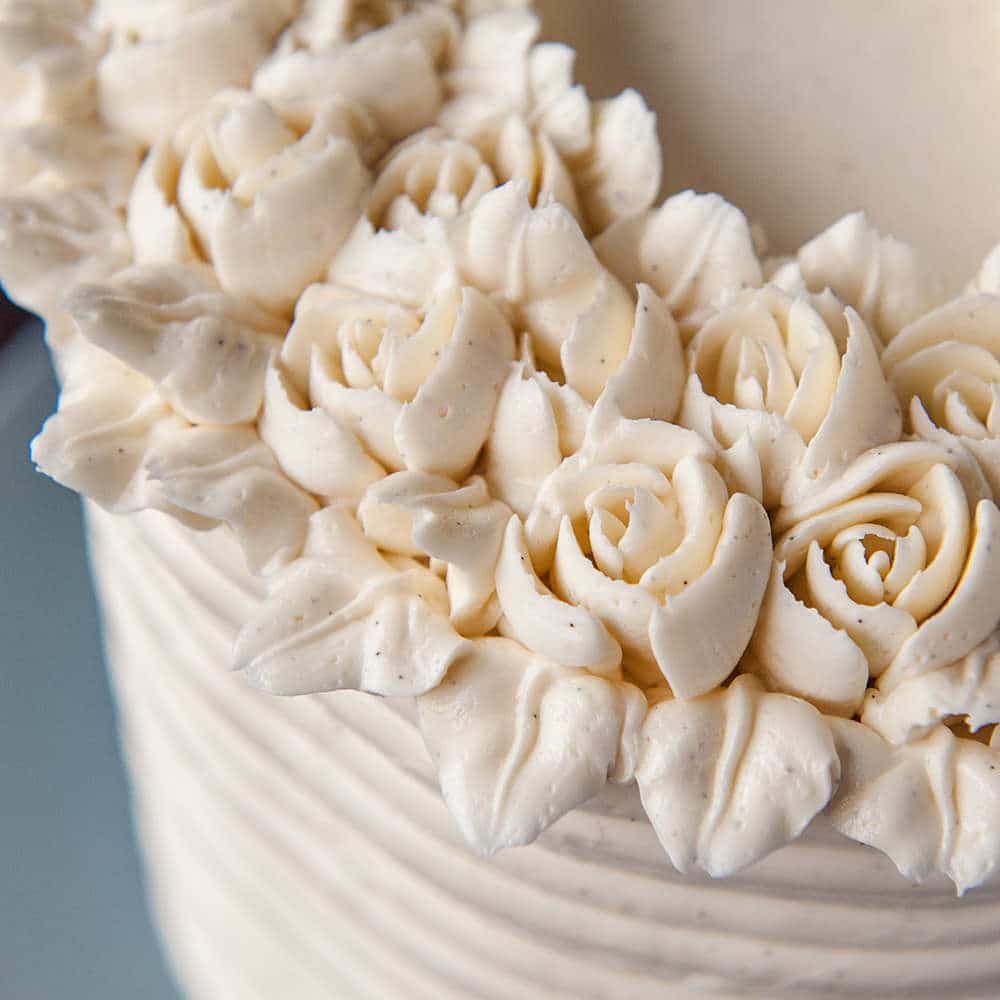
Top it with a batch of my American buttercream recipe for a classic combination that never fails. If you want to skip the buttercream entirely, try frosting this cake with white chocolate ganache instead, which is incredibly stable and has a gorgeous vanilla flavor. Or you can top with a pretty pink drip cake finish
Common Vanilla Cake Mistakes To Avoid
Using cold ingredients. Cold butter, eggs, and milk will not emulsify properly during mixing and can cause the batter to look curdled and broken. Set everything out at least an hour before you start, or warm your eggs in a bowl of warm water for 5 minutes and microwave your milk for 20 seconds.
Overbaking the cake. This recipe bakes at a lower temperature for a reason, but it can still dry out if left in too long. Start checking at 30 minutes with a toothpick and touch the surface gently. If it springs back, it is done. A few moist crumbs on the toothpick are fine. A completely clean toothpick often means it went too far.
Skipping the two-minute mixing stage. The reverse creaming method requires the full two minutes of mixing after the milk and oil go in. This stage is what develops the structure of the cake. Cutting it short results in a weaker crumb that can sink or have an uneven texture.
Not scraping the bowl. Hard lumps of unmixed flour and butter hide at the bottom of the bowl during mixing. If you do not scrape down thoroughly after the two-minute mix, those lumps will stay in the batter and create dense spots in the finished cake.
Using low-quality vanilla extract. Vanilla is the only flavor in this cake, so it has nowhere to hide. Use a good pure vanilla extract or vanilla bean paste. Imitation vanilla will produce a noticeably weaker, more artificial flavor.
Vanilla Cake FAQs
Cake flour has a lower protein content than all-purpose flour, which produces a softer, more tender crumb. The reverse creaming method coats the flour in butter before any liquid is added, and cake flour's lower protein helps prevent excess gluten from forming during the two-minute mixing stage. If you only have all-purpose flour on hand, you can make a substitute by removing two tablespoons of flour per cup and replacing them with cornstarch, but the texture will not be exactly the same.
Yes, this recipe is flexible across several pan sizes. The full recipe makes three 8-inch cake layers, two 9-inch cake layers, or about 24 cupcakes. For a half sheet pan, you will need three full batches of batter to fill the pan properly. Smaller pans bake faster than larger ones, so check for doneness with a toothpick starting at 18 to 20 minutes for cupcakes and 25 to 30 minutes for 8-inch layers.
Yes, this vanilla cake recipe works beautifully as cupcakes. Fill cupcake liners about two-thirds full and bake at 350°F for 18 to 20 minutes, or until the centers spring back when lightly touched. The full recipe yields approximately 24 cupcakes.
Yes, this vanilla cake freezes very well. Wrap each cooled cake layer tightly in plastic wrap and store in the freezer for up to two months. Thaw the layers at room temperature for one to two hours before frosting and decorating. The buttercream frosting can also be frozen separately for up to six months in an airtight container.
Yes, you can use a non-dairy milk like almond, oat, or soy milk in place of regular whole milk in this recipe. Choose an unsweetened and unflavored variety so it does not change the cake's flavor. Some non-dairy milks have a thinner consistency than whole milk, which can slightly affect the cake's final texture, but the recipe will still work.
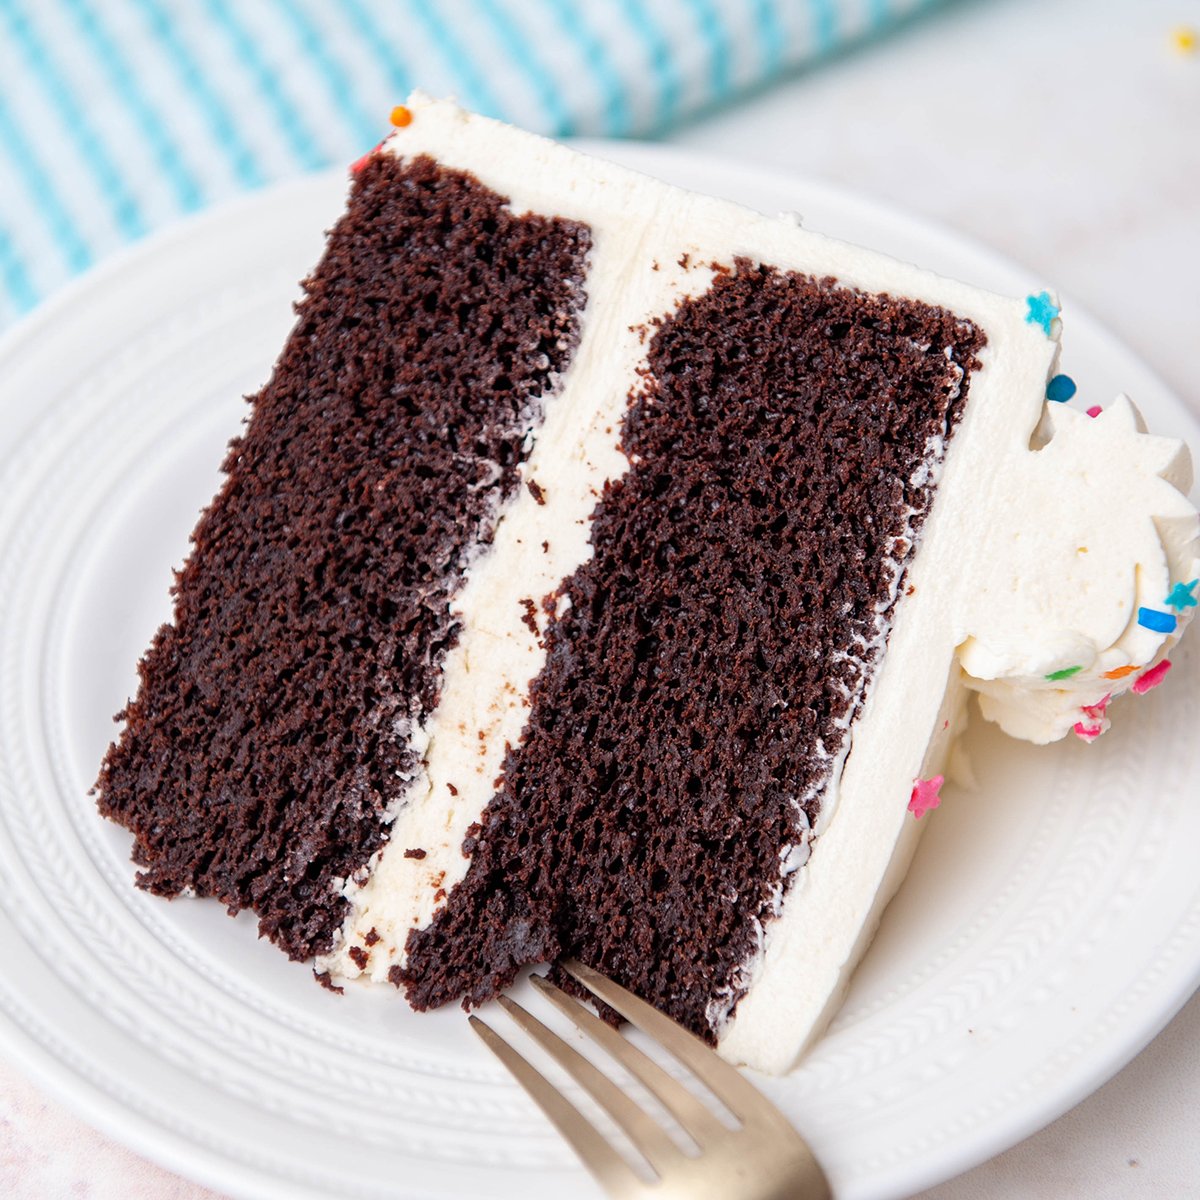
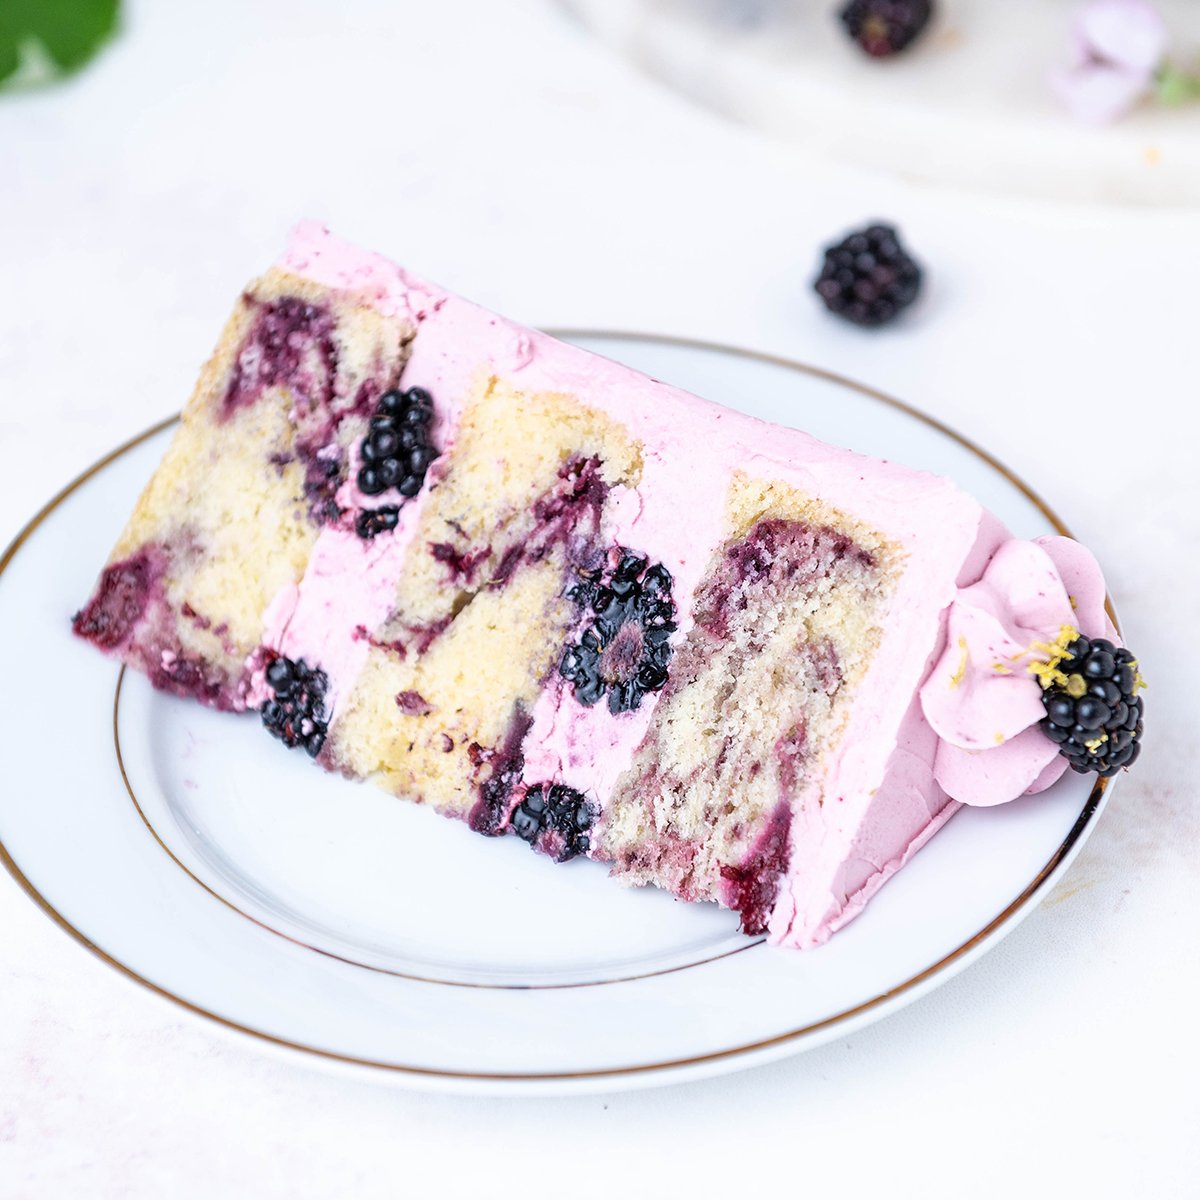
Yes, this vanilla cake is a great base for many flavor variations. Add lemon zest for a lemon vanilla cake, a teaspoon of almond extract for an almond cake, or sprinkles for a funfetti cake. You can also fold in mini chocolate chips, fresh berries, or a swirl of fruit jam between the layers to customize the flavor without changing the structure.
The slightly lower oven temperature gives the cake a more even rise without doming or cracking on top. At 350°F, the edges of the cake set faster than the center, which often causes the top to dome and the edges to dry out. Baking at 335°F allows the cake to rise slowly and evenly, producing a flat, tender layer that is easier to stack and decorate without trimming.
More Vanilla Recipes You'll Love
Watch: How To Decorate A Cake Step-by-Step
Before you start decorating, watch the video below where I show you every step of decorating a cake from start to finish. Seeing the process in action makes it much easier to follow along
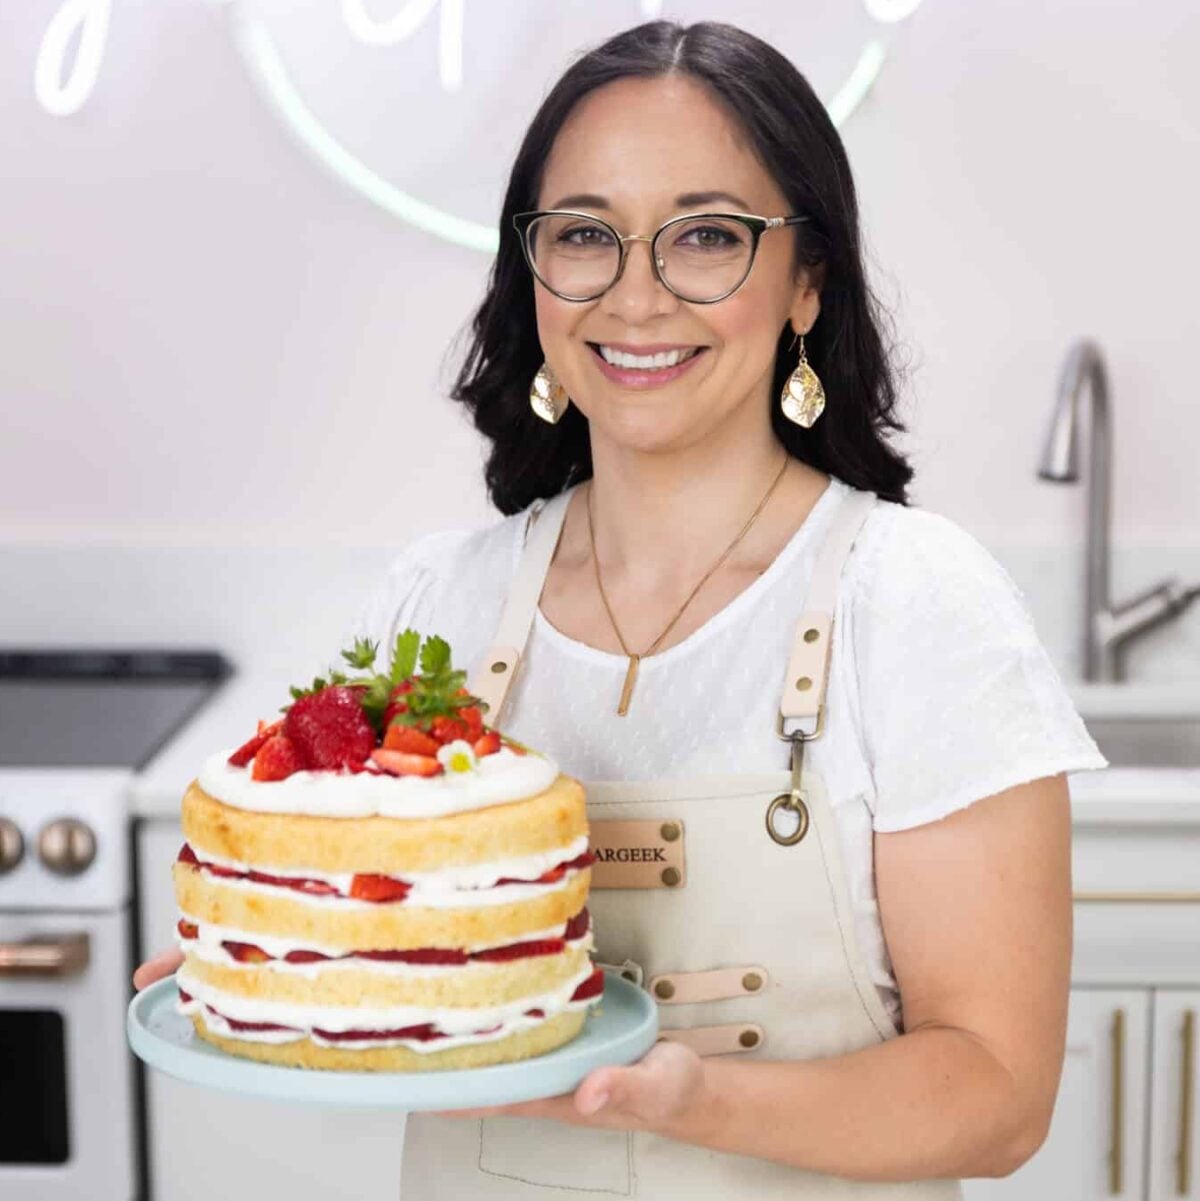
- Liz Marek.
Recipe
Equipment
- Food Scale
- 8" x 2" Cake Pans (3)
Ingredients
Vanilla Cake Recipe
- 4 ounces milk to be mixed with the oil
- 3 ounces canola oil
- 6 ounces milk to be mixed with the eggs
- 1 tablespoon vanilla extract or 1 vanilla bean pod
- 3 large eggs room temperature
- 13 ounces cake flour
- 13 ounces granulated sugar
- 3 teaspoons baking powder
- ¼ teaspoon baking soda
- ½ teaspoon salt
- 8 ounces unsalted butter softened to room temperature but not melted
Easy Buttercream Frosting
- 16 ounces powdered sugar
- 4 ounces pasteurized egg whites
- 2 teaspoons vanilla extract
- 16 ounces unsalted butter softened to room temperature but not melted
- ¼ teaspoon salt
- 1 TINY drop purple food coloring to offset the yellow color (optional)
- 3 drops electric pink food coloring for the flowers
- 1 Tablespoon white sprinkles for decorating
Instructions
Vanilla Cake
- IMPORTANT: This is the BEST vanilla cake because I use a scale so it turns out perfectly 🙂 If you convert to cups I cannot guarantee good results. Make sure all your (cold ingredients) butter, eggs, milk are at room temperature or a little warm. See my post about how to use a scale if you don't know how to measure by weight.
- Heat oven to 335º F/168º C . Prepare three 8"x2" cake pans with cake goop or another preferred pan release.
- Place the 4 oz of milk in a separate measuring cup. Add the oil to the milk and set it aside.
- To the remaining 6 oz of milk, add the vanilla and room temperature eggs. Whisk gently to combine. Set aside.
- Place the flour, sugar, baking powder, baking soda, and salt into the bowl of your stand mixer with the paddle attachment.
- Turn the mixer onto the slowest speed. Slowly add chunks of your softened butter until it is all added then let everything mix until it looks like coarse sand.
- Add your milk/oil mixture all at once to the dry ingredients and mix on medium (speed 4 on kitchenaid, speed 2 on the Bosch) for 2 full minutes to develop the structure. Set a timer! Don't worry, this will not over-mix the cake.
- After 2 minutes, scrape the bowl. This is an important step. If you skip it, you will have hard lumps of flour and unmixed ingredients in your batter. If you do it later, they will not mix in fully.
- Slowly add in the milk/egg mixture while mixing on low, stopping to scrape the bowl one more time halfway through. Mix until just combined. Your batter should be thick and not too runny.
- Divide the batter into your greased cake pans and fill ¾ of the way full. I like to weigh my pans to make sure they're even.
- Bake for 20-30 minutes and check your cakes. Do the "done test". Insert a toothpick to see if it comes out clean. Sometimes wet batter doesn't show up so make sure it's clean and not just wet. Then gently touch the top of the cake, does it spring back? Oven temperatures vary so if it's not done yet, bake for a few more minutes (2-3) and check again until it passes the "done" test.
- Remove the cakes from the oven and give them a tap on the countertop to release air and prevent too much shrinking. Let them cool on a cooling rack until they are barely warm.
- After cooling for about 10 minutes, place the cooling rack on top of the cake, placing one hand on top of the cooling rack and one hand under the pan and flip the pan and the cooling rack over so the pan is now upside down on the cooling rack. Remove the pan carefully. Repeat with the other pan.
- After the cakes are fully cooled, carefully wrap them in plastic wrap and place them into the freezer or fridge for about 30 minutes to firm up the cakes and make them easier to handle for stacking.
Easy Buttercream Frosting
- Place egg whites and powdered sugar in a stand mixer bowl. Attach the whisk, combine ingredients on low and then whip on high for 5 minutes. Add the vanilla extract and salt.
- Add in your softened butter in chunks and whip with the whisk attachment to combine. It will look curdled at first. This is normal. It will also look pretty yellow. Keep whipping.
- Whip on high for 8-10 minutes until it's very white, light and shiny. If you don't whip it enough, it could end up tasting buttery.
- Optional: If you want whiter frosting, add in a tiny drop of purple to counteract the yellow in the butter (too much will make the frosting grey or light purple.)
- Optional: Switch to a paddle attachment and mix on low for 15-20 minutes to make the buttercream very smooth and remove air bubbles. This isn't required but if you want really creamy frosting, you don't want to skip it.
- After your cakes are chilled, fill them with your favorite frosting and frost the outside. If you're not familiar with decorating cakes, check out my how to make your first cake blog post! Watch the video to see how I made the palette knife buttercream flowers.
Video
Notes
Baking is a science, and measuring ingredients by weight ensures consistent results every time. Cup measurements can vary significantly depending on how the flour is scooped. Room temperature ingredients are essential
Butter, eggs, and milk should all be at room temperature before mixing. Cold ingredients can cause the batter to break and may result in a dense or uneven cake. Do not skip the two-minute mixing stage
Because this recipe uses the reverse creaming method, mixing the batter for the full two minutes is necessary to properly develop the cake’s structure. Pan size options
This vanilla cake recipe makes:
• three 8-inch cake layers
• two 9-inch cake layers
• about 24 cupcakes Cupcake baking instructions
Fill liners about two-thirds full and bake at 350°F for 18–20 minutes, or until the centers spring back when lightly touched. Storage
Frosted cakes can be stored at room temperature for up to 24 hours if covered. After that, refrigerate and bring to room temperature before serving. Freezing cake layers
Cake layers freeze very well. Wrap tightly in plastic wrap and freeze for up to 2 months. Thaw at room temperature before decorating. Flavor variations
You can easily customize this recipe by adding:
• lemon zest for lemon vanilla cake
• almond extract for almond cake
• sprinkles for funfetti cake

Catherine Perez says
Hey I am planning on making this cake. Can I substitute whole milk with 2% less fat milk?
The Sugar Geek Show says
Yes it will be ok 🙂
Nen says
I recently made a 6” tall cake (5 layers-1.25” thick) using this recipe. I did 3 layers, cake board then 2 layers on top and of course your easy buttercream between all layers. Would this have held up without the cake board support?
The Sugar Geek Show says
I think using a board was a good move although you could have made a 6" tall cake with no problem, that's just a very tall slice of cake
Shrushti says
Hi, I used this recipe as base for my bub's first birthday... Turned out amazing!! Right now we live in Austrlia and I couldn't find cake flour in nearby supermarkets.. But they have self-raising cake flour.. So can I skip leavening agent and follow other instructions??
The Sugar Geek Show says
Self rising flour is still not the same as cake flour. Cake flour is a soft, low protein flour that you can find in the UK but you might have to order it. I know others have told me they use Shipton Mills cake and pastry flour in the UK
eugenia d says
Hi, what brand of cake flour do use? Sadly, Bob's Red Mill's cake flour is now discontinued. Thank you
The Sugar Geek Show says
Oh bummer! I actually buy Swans cake flour in bulk from cash and carry
eugenia d says
Perfect! Thanks so much!
Noura says
Can I use this recipe to make a sheet cake?
The Sugar Geek Show says
You sure can
Beverly Brown says
Please clarify this paragraph: Reduce the speed to low. Add in 1/3 of your milk/egg mixture and let it mix in fully. Repeat 2 more times until batter is just combined. Don't forget to scrape your bowl. Divide your batter into your pans.
I think you are supposed to add the 4 oz. milk and beat at speed 4 and then use the mixture at the end-is that correct?
The Sugar Geek Show says
The 4oz of milk plus oil goes in after you mix the butter with the flour and mix on medium for two minutes. The rest of the milk with the eggs goes into the mixture in thirds at the end. That's what I mean by adding in 1/3 of your milk/egg mixture then repeating it two more times
Amanda says
Do you know how many cups of batter this recipe makes? I'd like to use it to make a tiered wedding cake, and am just trying to figure out how many recipes I would need to make. Also, does this recipe turn out alright if it's doubled or tripled? I know some cakes do better Just one batch at a time.
The Sugar Geek Show says
I don't know exactly how many cups of batter it makes, I don't measure my cakes with cups. Yes it can be doubled and tripled without any changes.
Hana says
Hi, I am really going to try this. But I have never come across cake flour and only have self raising flour. Is that what you mean by cake flour?
The Sugar Geek Show says
In the UK, search for Shipton Mills soft cake and pastry flour. It is a low protein flower, not self rising
Hana says
Thank you so much .I just googled and found out it was quite expensive but I came across some substitute for cake flour like adding two tablespoon or cornflour with a cup of wheat flour - 2 tbsp wheat flour. Do you think this will work.?
The Sugar Geek Show says
Unfortunately, that won't work. It has to be a soft low protein cake flour of 9% protein or less to do the reverse creaming method. Adding cornstarch to regular flour is not the same. The cake will just end up tasting like cornbread.
Nicole says
Thank you thank you thank you for this amazing recipe!
I absolutely love love loovvveeee this cake, if you're planning on baking a cake for someone, I suggest baking extra for yourself or you're going to have a tough time parting ways with your finished cake haha
I do have a few questions though, I think the sweetness level was perfect, but my parents and grandparents all found it too sweet (they tried it without any buttercream, it was just the cake base), how much sugar would I be able to reduce from the recipe before it starts to affect the integrity??
Also, you said this cake works for stacked/tiered cakes, and I've noticed in the comments about 2 tiered fondant cakes
But will it still be able to hold up well as a 4 tiered buttercream cake? (6"- 8"- 10"- 12") I would assume it would work just fine as long as I have proper amount of dowels in the tiers, but I'm also so nervous about attempting this.
Thank you again Liz, your recipes are all so fantastic and heaven sent!
The Sugar Geek Show says
Hi Nicole, you can't reduce any of the sugar or the cake will not be properly balanced. Cake is sweet so that's just part of the nature of the beast 🙂 If it wasn't sweet, it'd be more like cornbread. You can use this cake for as many tiers as you like. This was my vanilla cake that I used for wedding cakes back when I was making cakes for clients. Cake is supported by the cake supports, not by the cake so it doesn't matter what recipe you use as long as your cake tiers are properly supported.
Jen says
Hi, can i use this recipe to make a 14x20in rectangular cake?How can i adjust the cooking time? Would it be the same? Would the temp be the same as well? Thanks!
The Sugar Geek Show says
You will need more batter to fill such a big pan. I usually make a triple batch for that big of a pan and the time will increase for baking. Usually 45 minutes or more. You will just have to keep an eye on it to see exactly how much time it will take to bake. Do the toothpick test or lightly touch the top to see if it springs back
Mira says
Hello. I’m typing this as the cake bakes. But right of the bat I know something is wrong already. When I added the oil and milk mixture to the flour it did not turn into a batter consistency like in your video but looked more like a dough. I measured out every ingredient correctly. Could it be due to low humidity where I live? And what can I do to fix this? Thank you!
The Sugar Geek Show says
If the batter was too thick then something must have been off in the measurements. Did you measure by weight or by cups? Did you change any of the ingredients such as replacing cake flour with AP flour?
Mayra says
Hi! I’m a beginner and was just wondering what you think about using other type of oils in this recipe, for example Olive oil?
Or grape seed oil.
Also different milk as well. Like 2%
The Sugar Geek Show says
You can definitely use different types of milk, whole milk just adds more fat so it's moister. I wouldnt use olive oil unless you want the cake to have an olive oil taste. Grapeseed oil would be ok because it doesn't have a flavor.
Mary says
This cake is so yummy!!! I’m making it a second time but this time I am not crumb coating until the next day. One section says to wrap and chill overnight in the fridge. Another section says to wrap and leave on the counter overnight as the fridge can dry it out. Which option is the best? 🙂 And if it is to leave it on the counter, do I chill it then in the fridge for a short while before I attempt to torte and fill?
Thanks so much Liz!!!
The Sugar Geek Show says
On the counter is best so it doesnt dry out but before stacking I will put them in the fridge or freezer to just make them colder but it's not 100% necessary
susan says
Hey, it's me again! I have a few more questions I'm hoping you can help with:
1. Can I premix the dry ingredients and let them sit around for an extended period of time (a day or two or three???) before actually using? This would help me work more efficiently in my kitchen when baking multiple cakes!
2. Would you have any concerns regarding doubling this recipe provided that my mixer can accommodate the extra load and all ingredients are incorporated evenly (I would think it would work but I read somewhere that sometimes there might be a glitch...)?
3. I am fearful (yes, FEARFUL) to try the easy SMB recipe...does it really pipe well? Good for, say, a ruffle cake?!?!
Thanks for your help--'glad you do what you do!
The Sugar Geek Show says
I haven't ever tried pre-mixing dry ingredients but I don't see why that would be a problem. You can double or triple this recipe with no issues. Easy buttercream is great for piping 🙂
susan lehner says
FABULOUSLY delicious cake! And holy cow--I had no idea about the importance of using a kitchen scale vs. measuring cups. There was a significant difference in quantity when I measured 3 oz of oil on my kitchen scale vs. in a measuring cup. 3oz on the scale = ~4 oz in the measuring cup. Does this sound right to you, or did I do something wrong? Super curious about this b/c it makes me want to use my scale for EVERYTHING!!!!!
The Sugar Geek Show says
You should use your scale for everything haha! Yes, oil is heavier than water.