
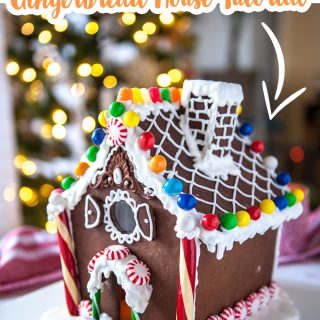
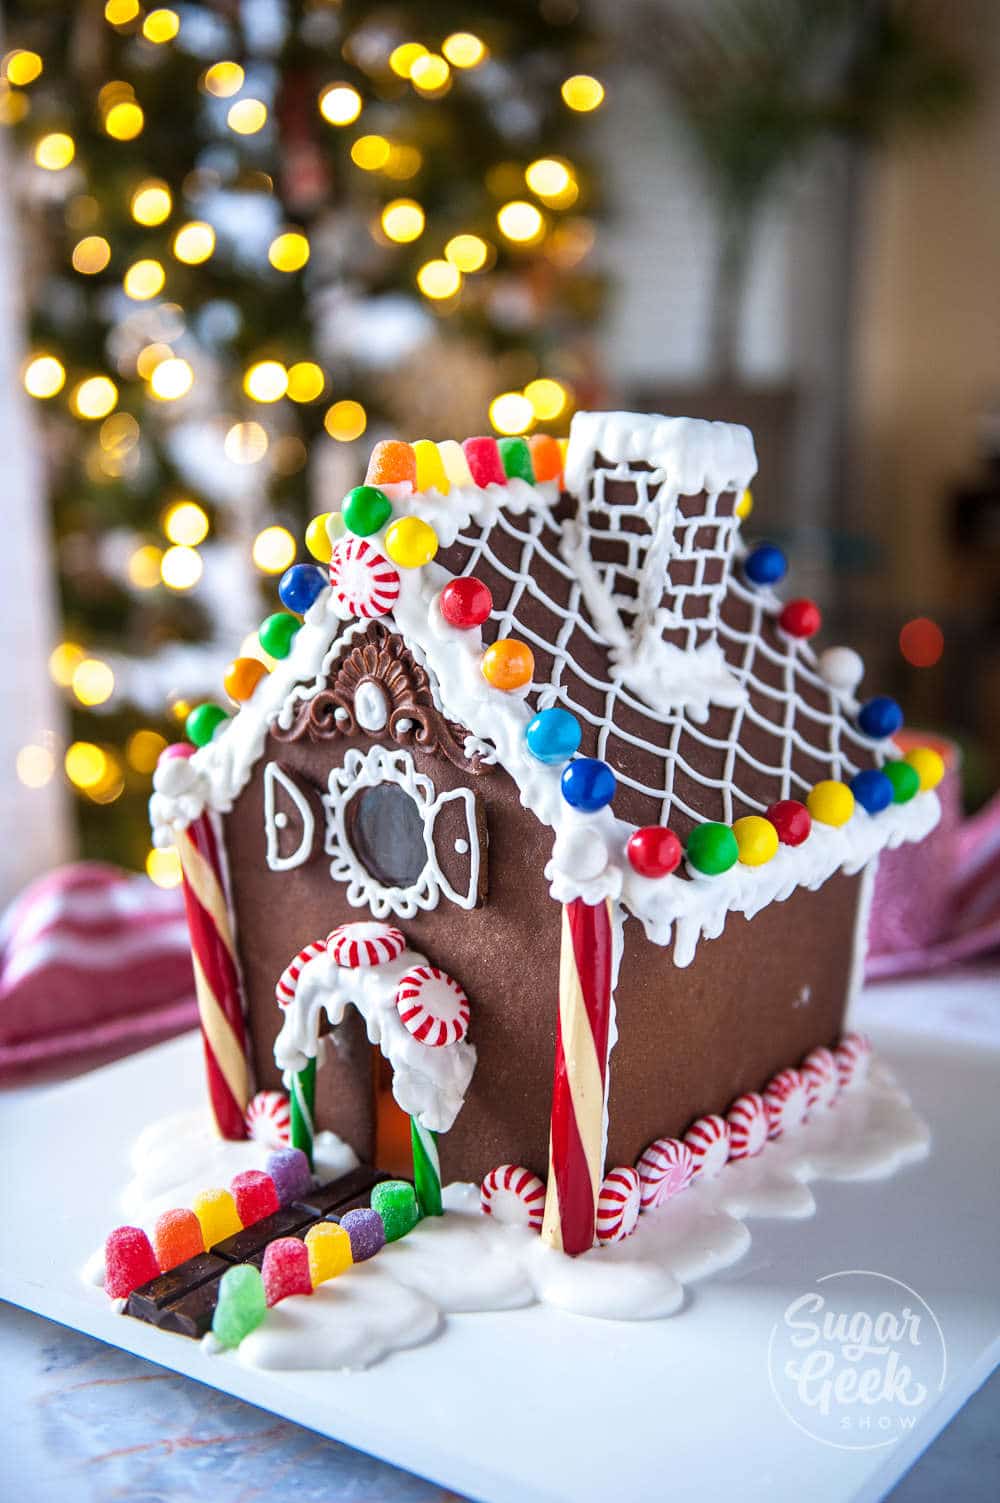
Last year I had so much fun making my classic gingerbread house, this year I wanted to up the anty and try making one with a curved roof. I was inspired by my friend Sonny from Freed's Bakery in Las Vegas. He makes the MOST amazing gingerbread houses (and cakes!). Check them out on Instagram.
I asked Sonny how he makes his awesome curved roof gingerbread houses and he showed me his secret! I asked him permission to show you and he agreed. Thanks Sonny!
I'm also going to show you a few other tricks for making some cool gingerbread house effects.

Can you eat this gingerbread?
This is a construction-grade gingerbread meaning it's REALLY HARD. It doesn't have any leavening in it so it doesn't puff up or spread. You could definitely eat it but it's very hard and meant to last. Since we aren't eating this gingerbread house then you can replace molasses with karo syrup. It will make the gingerbread lighter in color though.
What do you need to make this curved roof gingerbread house?
- Curved roof gingerbread house template
- Gingerbread dough
- Stiff royal icing
- Cookie sheet with parchment paper or a silicone mat
- #2 piping tip and a piping bag
- Old round cookie cutter or tin can
- Food safe baroque scroll mold
- Foam core and tape
- X-acto blade
- Clear isomalt for the windows
- Assorted candy for decorating
- Creme brulee torch
- Isomalt sealer or oil
Curved roof gingerbread house timeline
Day 1 - Make your foam core template, bake your gingerbread, pour in isomalt windows, and let the pieces cool overnight.
Day 2 - Make your stiff royal icing, assemble your gingerbread walls (let dry for an hour), assemble the gingerbread house details and add candy.
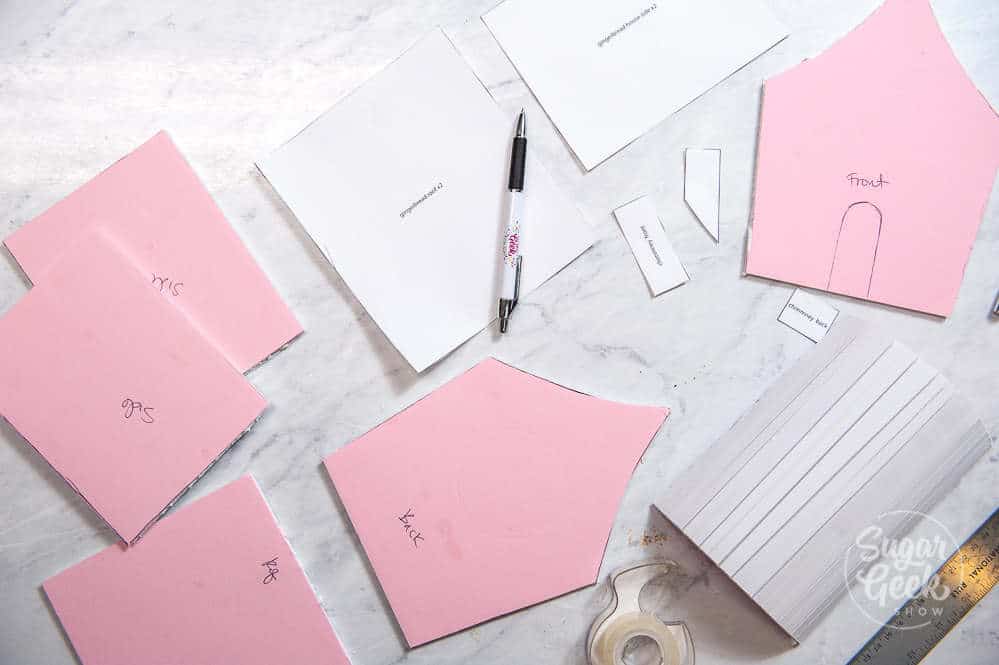
Making the curved roof gingerbread house template
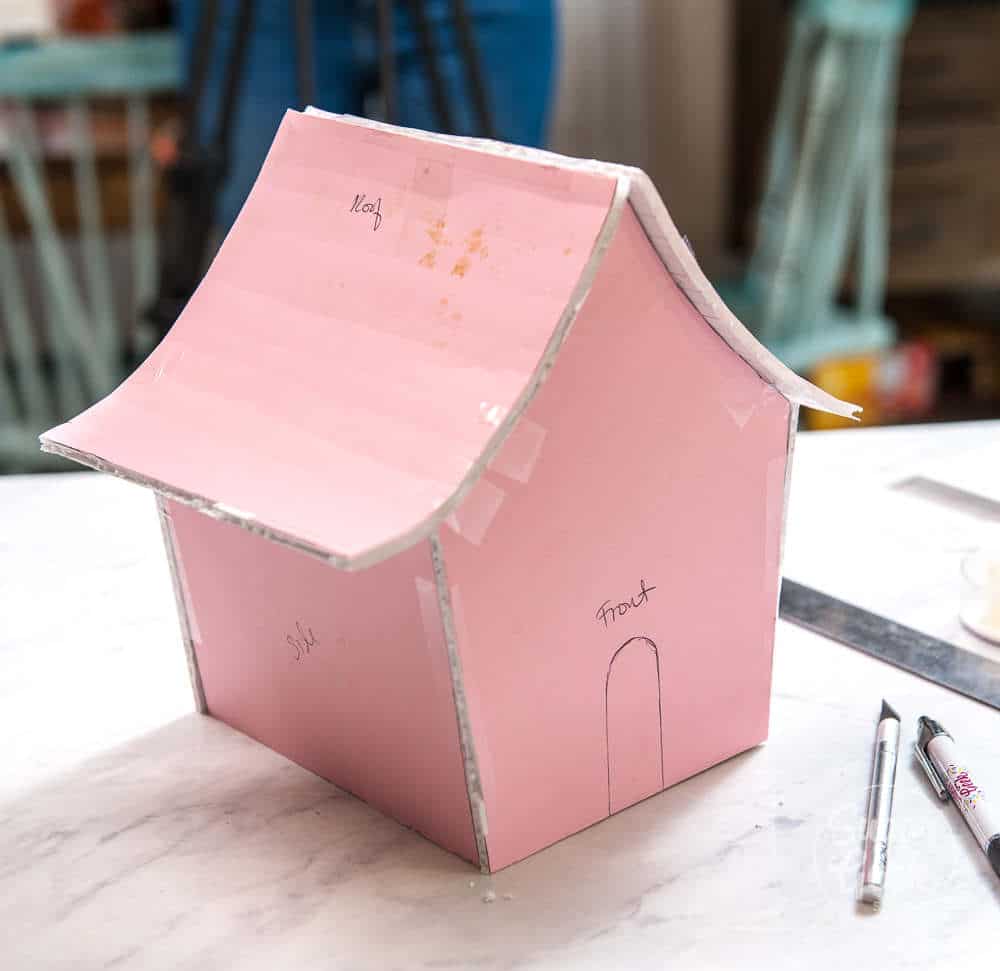
Print out your paper gingerbread house paper template and transfer the walls and roof to your foam core. Cut them out land then cut some shallow lines into the roof about ¼" wide. Don't cut all the way through the foam (see video).
These shallow cuts allow you to curve the roof.
Tape together the walls and roof of the foam core and set aside to use later to curve your gingerbread cookie.
Cut out the rest of your paper gingerbread house templates and set aside to use for your dough.
Baking the curved roof gingerbread house pieces
Roll your gingerbread out to about ⅛" thick using a rolling pin on top of some parchment paper that is trimmed to the size of your sheet pan.
Place your parchment paper with dough onto the sheet pan and transfer the whole thing into the freezer for about 20 minutes. Roll out the rest of your dough and place it into another pan with parchment paper and freeze. Freezing just helps you make cleaner cuts.
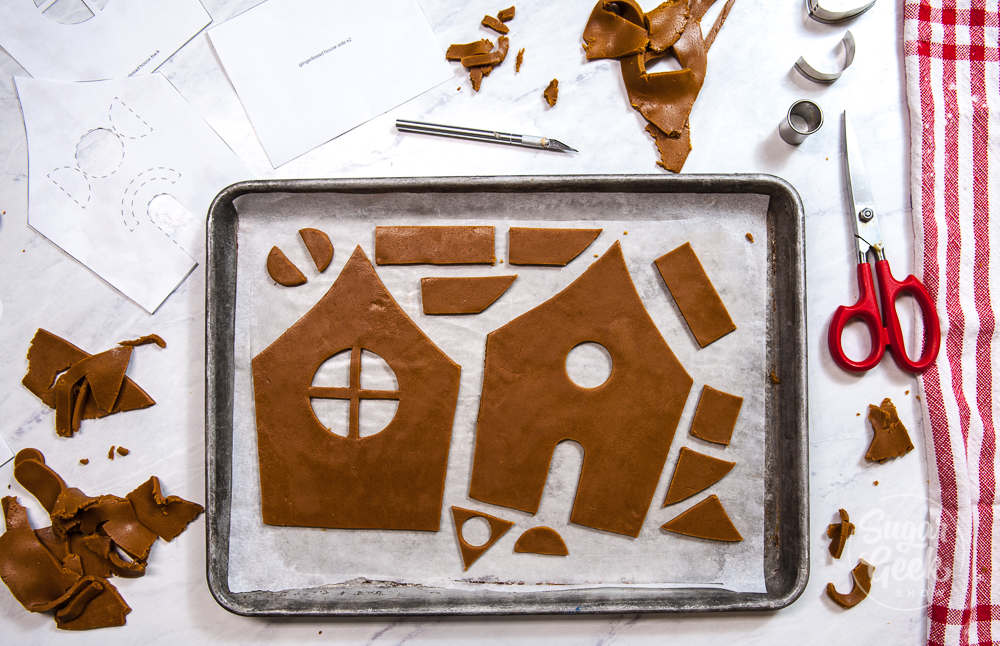
Arrange your paper templates onto the frozen dough to make them all fit. Make sure there is about ½" of space in between pieces so they bake evenly. Try to keep big pieces on one pan and smaller pieces on another pan.
Cut out the pieces (except the piece for the curved porch) and remove the excess dough. Cut out the windows and then set the pieces aside while you make your curved pieces and molded pieces.
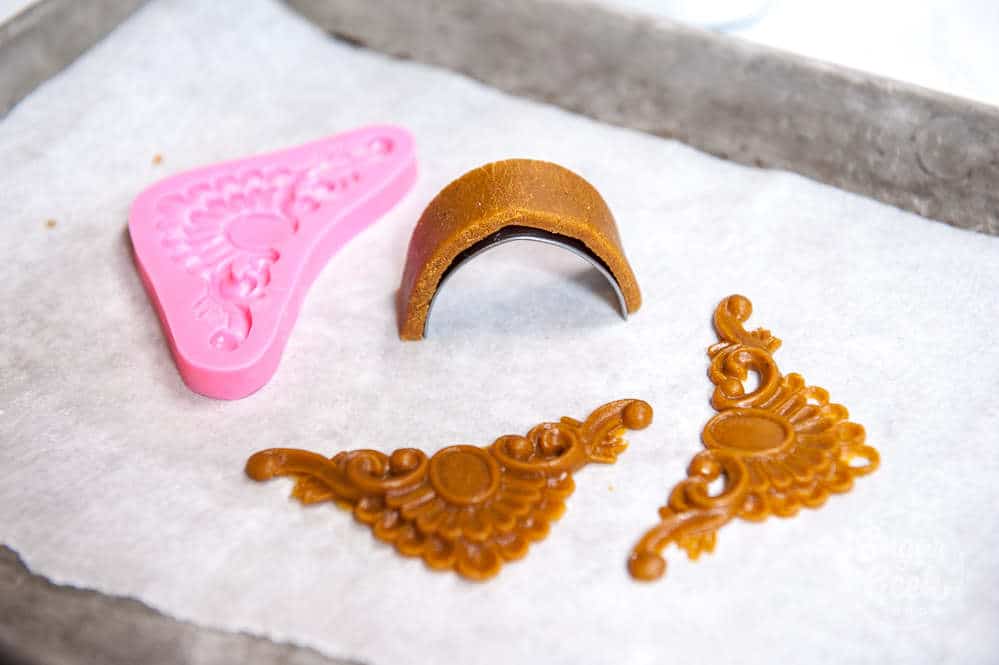
Making molded gingerbread house pieces
If you want some decorative scroll pieces on your gingerbread house, you can press gingerbread dough into silicone molds (make sure they are approved for baking to 300ºF and food safe).
Press the dough into the mold and then freeze it for 20 minutes. Carefully remove the dough from the mold and then place on the pan with the other pieces of gingerbread.
Making Curved Gingerbread Pieces
Roll out some of your leftover gingerbread and trace the shape of the front porch template.
Using an old curved cookie cutter (or you can cut out a pop can) for the shape. Place the cookie dough over the metal and then freeze for 20 minutes. Place it on the cookie sheet with the other pieces.
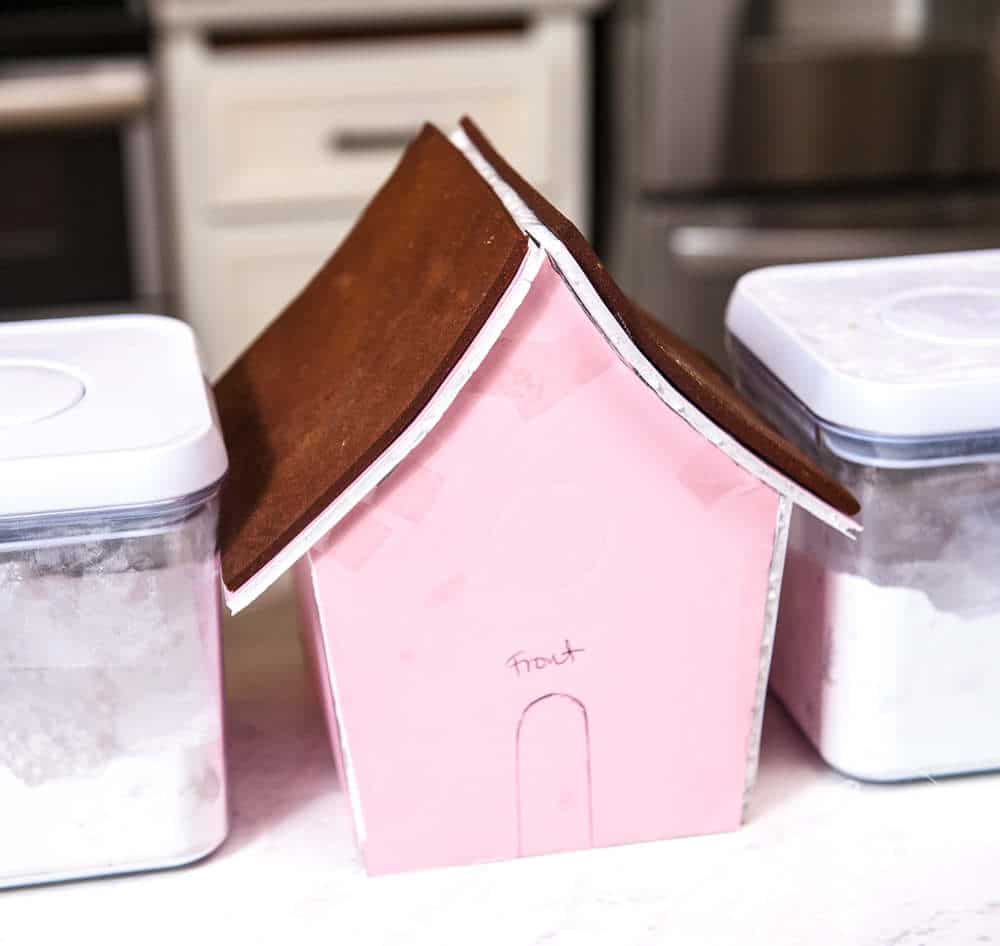
Making the curved gingerbread house roof
As soon as the roof is done (about 45 minutes), carefully remove it from the oven and transfer the cookie to the top of the foam core template and allow the cookie to curve. I used some heavy containers to keep the cookie from falling off.
Let the cookies cool fully before attempting to move them.
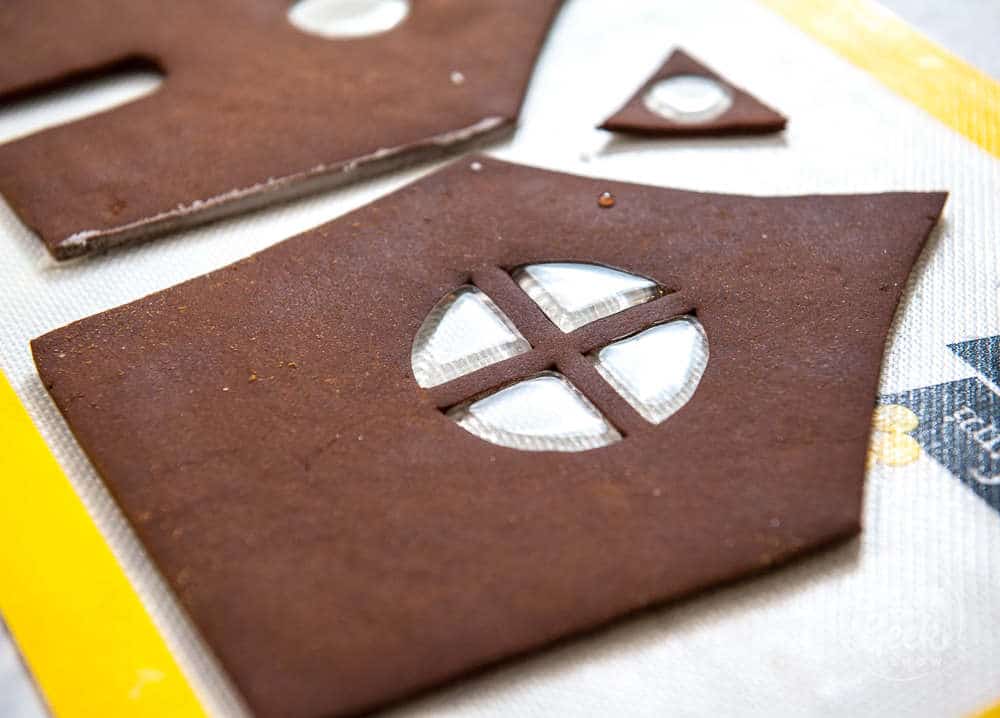
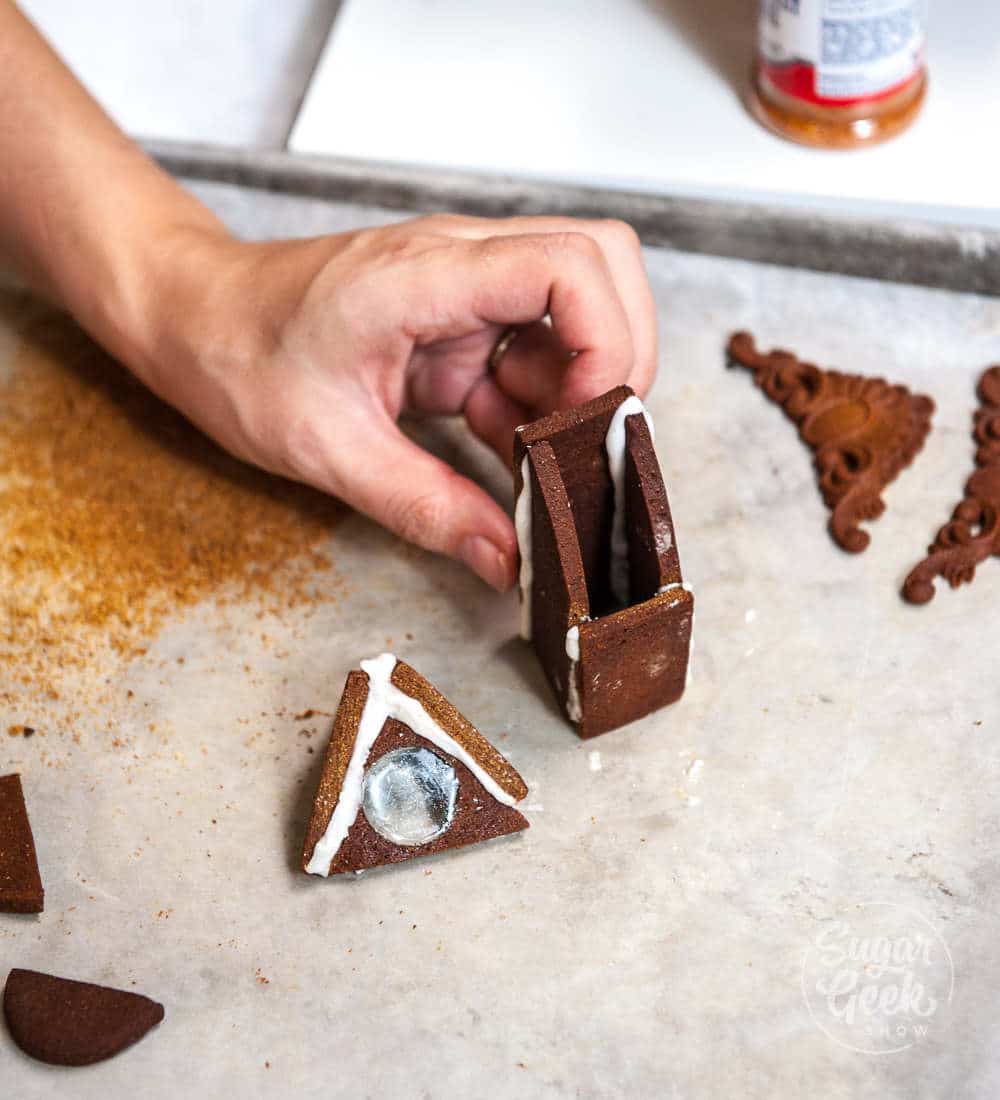
Making the gingerbread house windows
Before you assemble the walls, meltdown some clear isomalt or some hard candies. Last year I used jolly ranchers to create the stained glass window look.
Place the pieces that need isomalt onto a silicone baking mat. Pour the isomalt into the windows and let it cool fully.
Gently pull the cookies off the mat and then use your creme brulee torch to lightly torch the back of the isomalt to remove the bubbles and texture from the mat.
Seal the isomalt with some isomalt sealer like PME glaze or you can rub some vegetable oil on the isomalt to keep it from crystalizing.
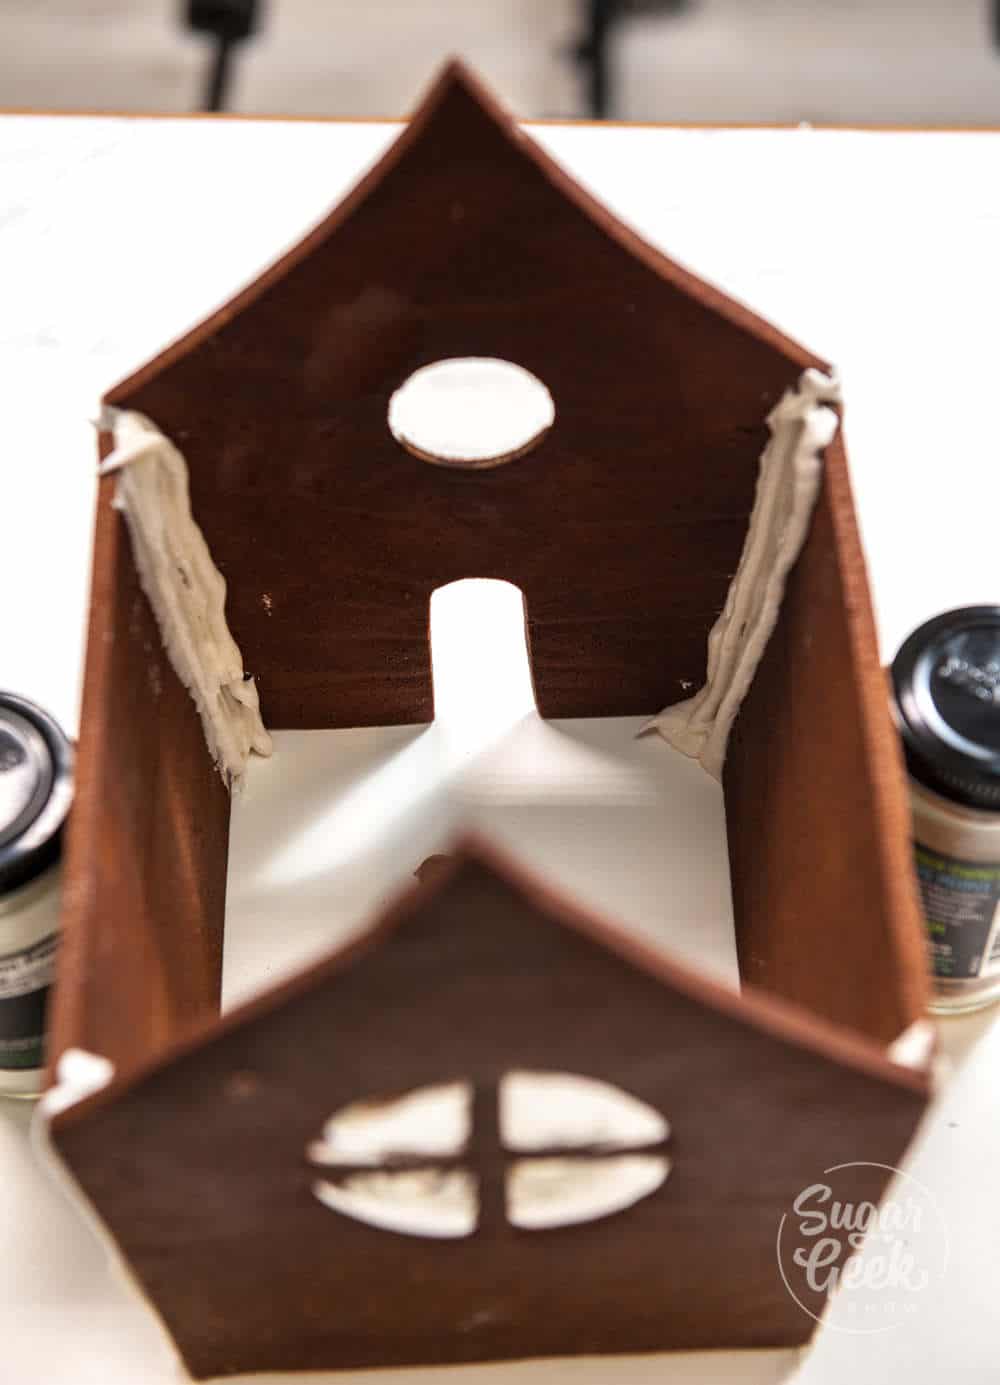
Assembling the gingerbread house
To avoid gingerbread house catastrophe, you want to assemble the walls first with STIFF royal icing and then let it dry for an hour. This ensures the walls will be strong enough to support the weight of the roof and all the candy you add on top!
Use a Microplane to sand down any pieces of gingerbread that aren't quite straight.
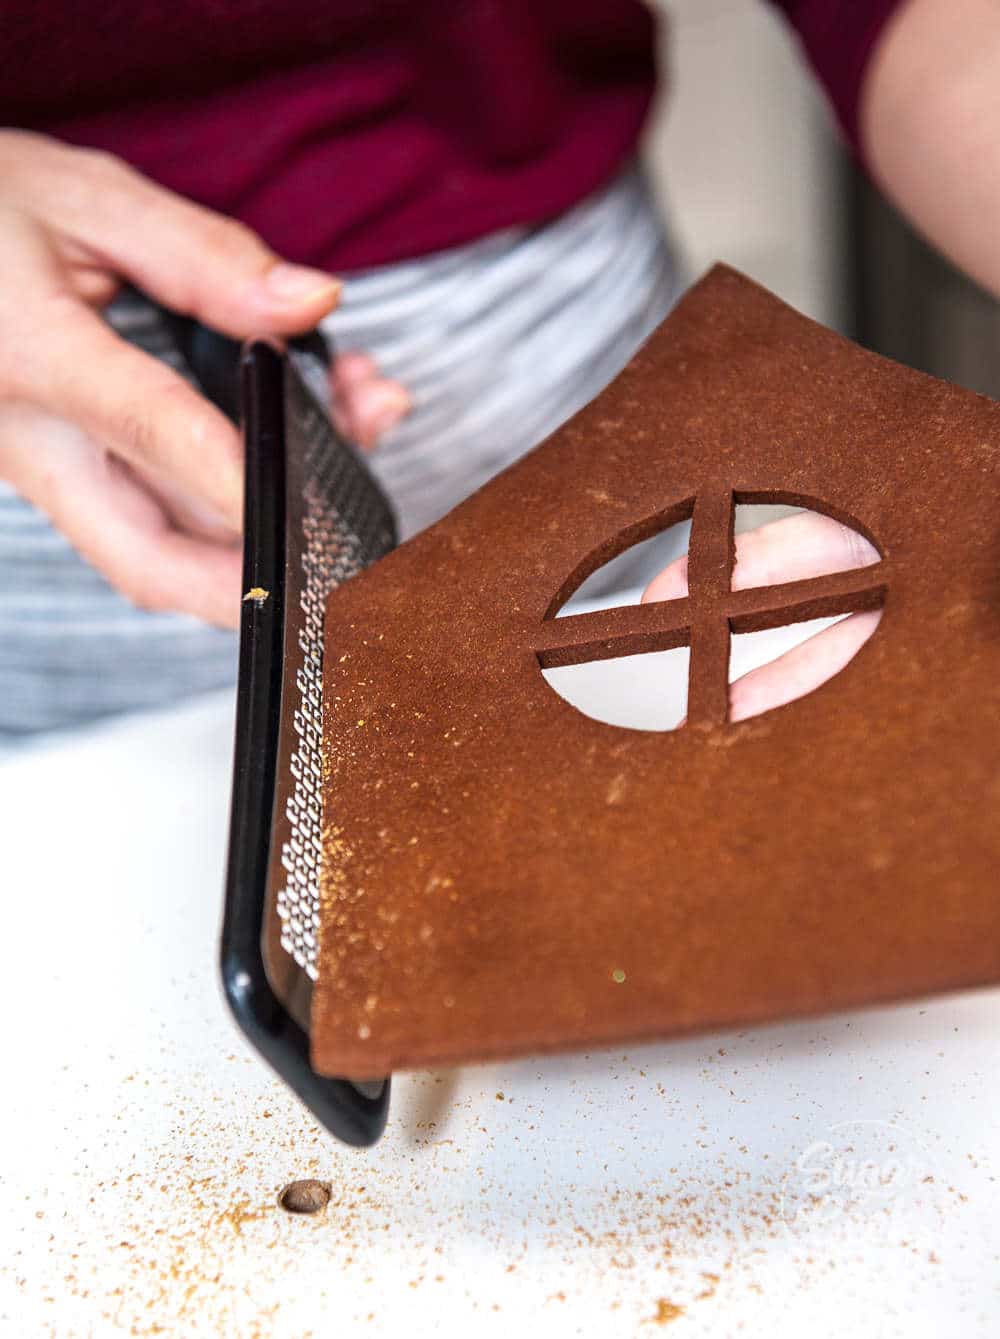
Place about ½ cup of your stiff royal icing into a piping bag. Don't overfill it or it will be hard to pipe.
Glue the front and back pieces of gingerbread to the sides with a generous bead of royal icing. Use something to prop up the sides and keep them in place while it dries.
You can also glue gingerbread together with melted isomalt but I don't recommend that unless you're experienced with using isomalt because the drips can burn.
I assembled my house on top of a cake board so I could decorate it later and it makes it easy to move it around. Don't glue the house down to the board yet so you can lift it up to put a battery-operated candle inside.
Once the walls are dry you can add on the roof with some more royal icing. Let the roof dry while you assemble the chimney and the side window.
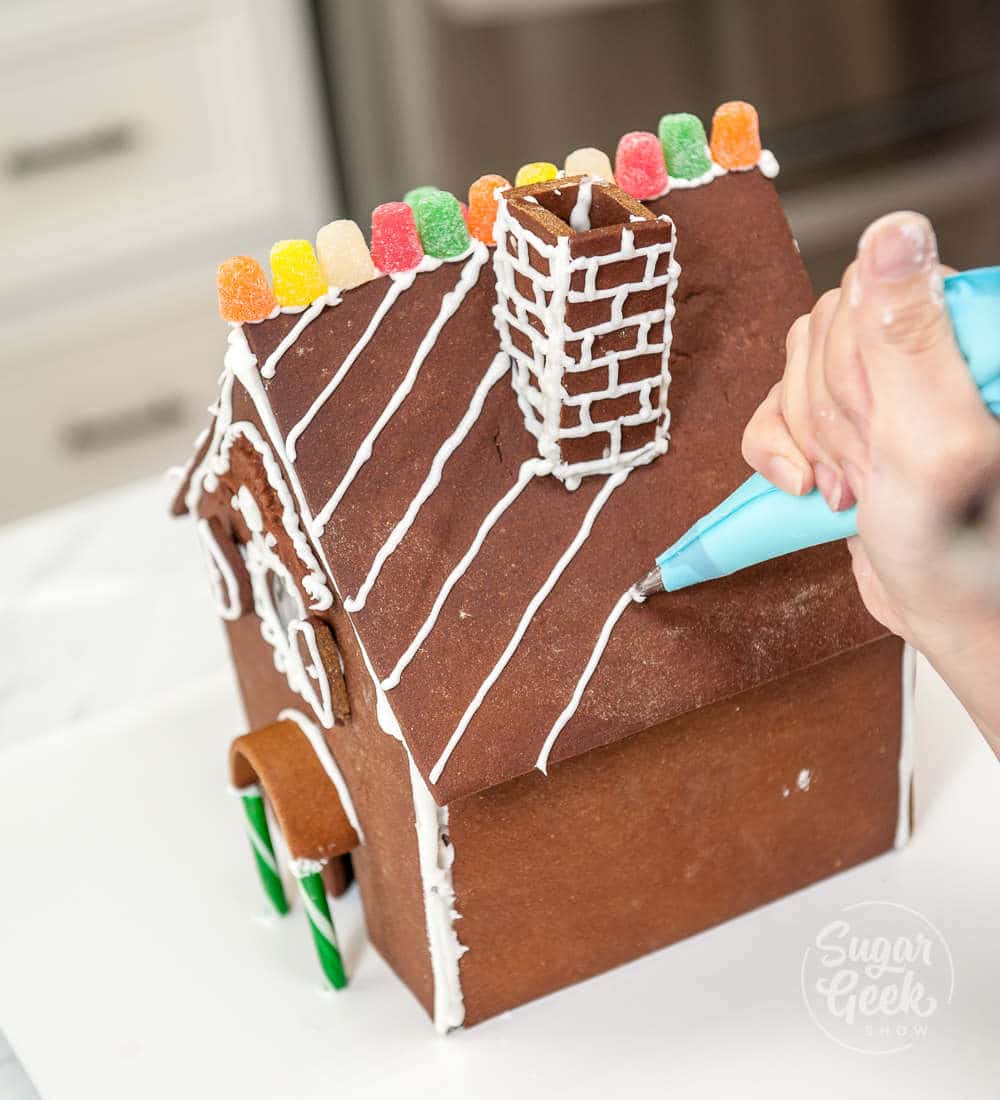
Decorating the gingerbread house
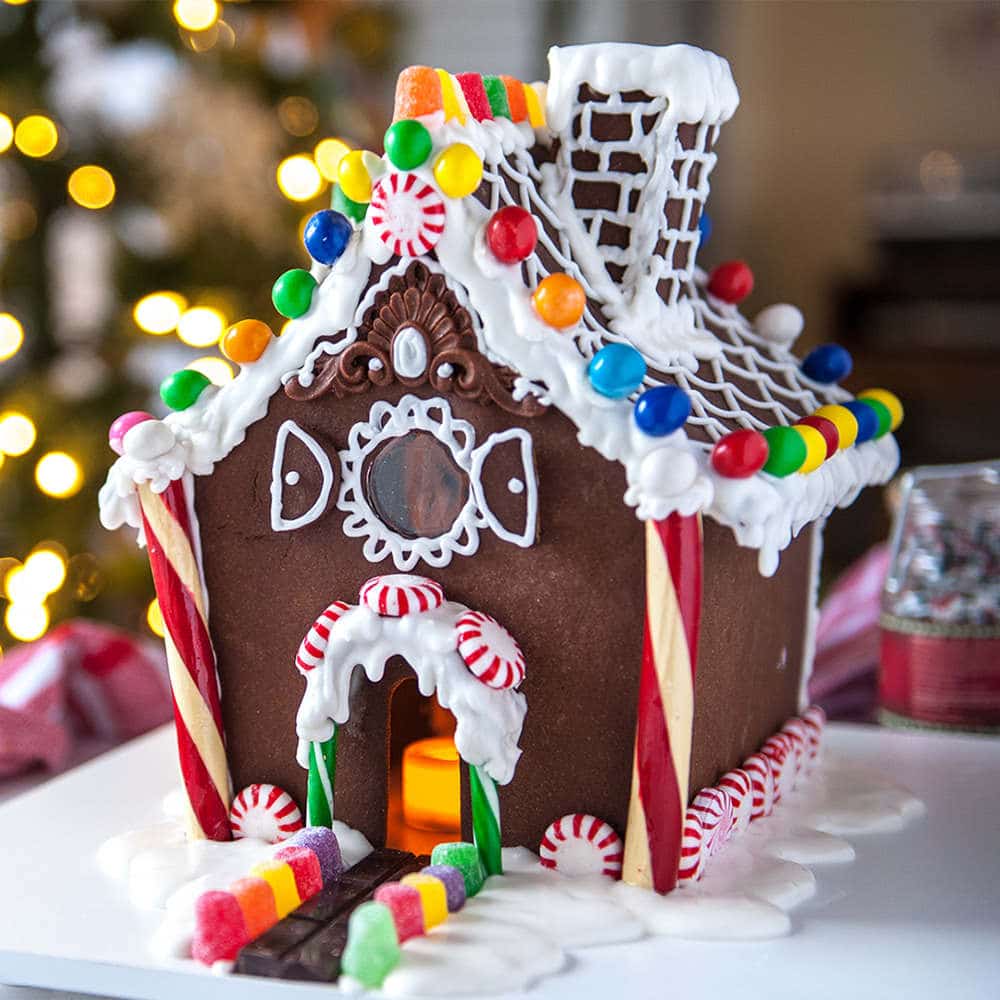
Now you can glue the chimney and the gable onto the side of the house. Add your curved front porch to the front of the house and support with some candy canes. Add your shutters to the sides of the windows.
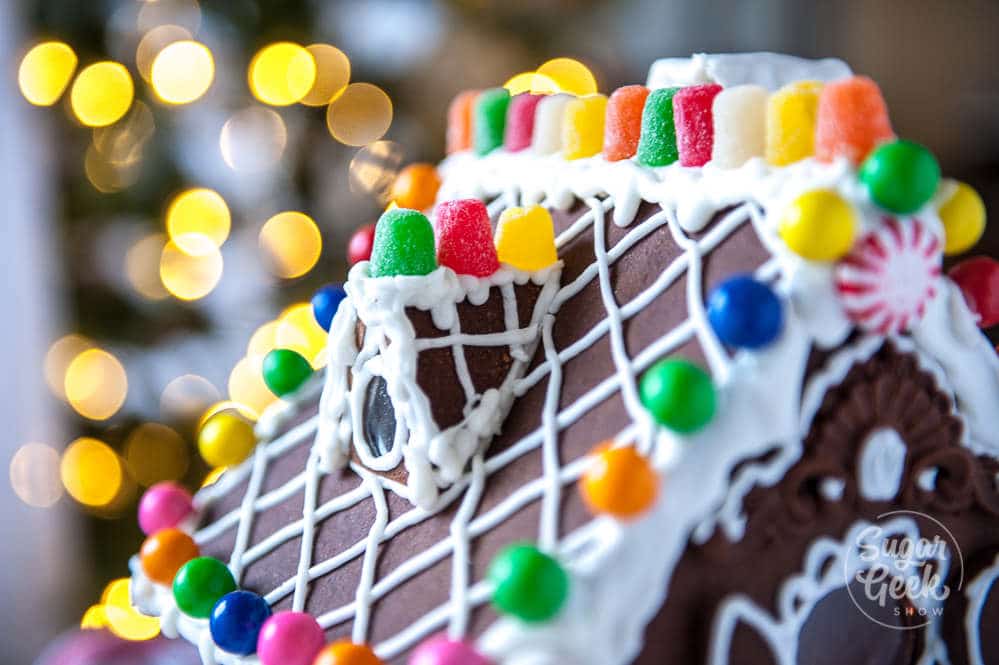
Pipe on details like the brick texture and the criss-cross pattern on the roof with more royal icing. I used a #2 piping tip.
Add on any kind of candy you like for details. I used gumdrops, gumballs, and candy canes.

Add some battery operated lights inside the gingerbread house and put it on display! This gingerbread house will not collapse or go bad. It's not great for eating because of how hard the cookie is. If you want to eat gingerbread, I recommend you bake up some of my gingerbread cookies for details around the house and you can eat those.
Want more Christmas recipes? Check these out!
Giant gingerbread man cookie
No-spread sugar cookie recipe
Glitter crinkle cookies
Classic gingerbread house tutorial
Easy Christmas cookie ideas for kids
Recipe
Equipment
- Stand Mixer with paddle and whisk attachment
- #2 piping tip and bag
- Foam core
- creme brulee torch
Ingredients
Gingerbread House Recipe
- 30 oz AP Flour
- ¾ tsp cinnamon
- ¼ teaspoon ginger
- ½ teaspoon nutmeg
- ¼ teaspoon cloves
- ¾ teaspoon salt
- 7 oz vegetable shortening
- 6 oz granulated sugar
- 16 oz molasses or karo syrup
- 1 Large egg
- 2 ounces clear isomalt for the windows
Stiff Royal Icing Recipe
- 16 ounces powdered sugar sifted
- 2 ounces pasteurized egg whites
- ¼ teaspoon cream of tartar
- 1 teaspoon vanilla extract
Instructions
For The Gingerbread House
- Preheat your oven to 300ºF. Transfer your wall/roof template to your foam core and assemble (See video for instructions).
- Sift your dry ingredients together, set aside
- Microwave vegetable shortening (or melt on stovetop in pot) until liquid but not hot
- In a stand mixer, whisk shortening, sugar and molasses together. Add the egg and mix until combined
- Switch to the paddle attachment and add your dry ingredients. Mix on medium/low until a smooth ball starts to form, do not over mix
- Roll out dough onto parchment paper or a baking mat to ¼" thick. Try to make the dough as even in thickness as possible.
- Freeze dough for 20 minutes (optional)
- Cut shapes out using your templates. Remove excess dough (can be used to re-roll out and make more pieces)
- Form the front porch cutout over a cookie cutter cut in half or tin can (see video)
- Fill your silicone mold with cookie dough and freeze 20 minutes. Remove from mold and place on cookie sheet with the rest of your pieces
- Bake in an oven set to 300º F for 45 minutes. Remove small pieces and the roof pieces. Bake the walls another 15 minutes or until very firm.
- Place warm gingerbread roofs on top of your foam core template to form to the curve of the roof. Let cool fully.
- Once gingerbread is done, remove from the oven and let fully cool before moving. Your gingerbread is now ready to be assembled.
For The Royal Icing
- Combine your egg whites, sifted powdered sugar, and cream of tartar in the bowl of your stand mixer with the whisk attached.
- Mix on low to get the ingredients combined then bump up to high for 1-2 minutes. Add in your vanilla extract and whip until it's white. No need to mix for longer than 5 minutes.
- Place the royal icing into a bowl or container with a lid. Your THICK royal icing is now ready to be thinned down to the consistency you desire.
Video
Nutrition


jill says
Excellent info and recipe!! Followed these techniques and recipes to make my very first gingerbread house. I created my own design and templates and am so happy with the results. I found this all super clear and spot on. Thank you so much!
Cynthia Igne says
About to make this recipe but nervous about the bake be time. This is not intended to be eaten right?
Sugar Geek Show says
No, this recipe shouldn't be eaten
Lori Snow says
Thanks so much for the gingerbread recipe and excellent tutorial! I am thrilled with the results, the curved roof especially and I did stained glass windows all around. I love how strong the gingerbread is, with no worries about it collapsing.
Robbin Hunsberger says
I ended up remaking the dough. This time I weighed everything instead of measuring by volume. (Turns out that there are wildly different conversions for the weight of a cup of flour out there!) So weighing obviously made a helpful difference. I also omitted 3 oz of flour. It came out perfect! I love this recipe! The dough is very easy to work with, doesn't change shape when it bakes, and makes walls that are super strong!! Liz, I used nearly all of your techniques and am so grateful that shared them in this video! Really helped me to make a successful gingerbread house!
Susan Marie Jones says
I made my gingerbread pieces yesterday but forgot to curve the roof pieces to fit the house. Is there a way to soften the gingerbread pieces so I can reshape? Everything g turned out great. I hate to waste these 2 pieces. Thank you.
Elizabeth Marek says
I'm not sure if you can, you can try and re-warm them in the oven
Robbin Hunsberger says
Hi Liz,
Thanks so much for all of your great instructions! I am in the process of making your gingerbread recipe, but the dough is extremely dry and crumbly. Was I not supposed to add all the flour? I added 10 oz more melted shortening and a little water to make it soft enough, but now I'm not sure this will bake up right. I have a batch in the oven now as a test. Any suggestions? Thank you! [Robbin from Easton, PA)
Elizabeth Marek says
Perhaps there was a mismeasurement somewhere, the dough is not dry at all
Alex says
For the last 35 years I have been hosting a party for friends and family each making our own house. We drink wine and listen to Christmas carols and admire our creations. In 2019 I was adamant I wanted to make fairy like houses with the curved roof. I could't find anything online how to make the curved roof. I've done bowed windows on a can but this was a thought provoker. I wound up getting some metal roof tiles from the hardware store and bending them to fit the shape of the roof line. I dried the baked gingerbread on the roof tile and it was OK. I made two with this technique but one of my guests who is a very accomplished baker could not get her pieces to line up. Using the dryfit technique above would get rid of any difficulties. I'll be trying that this year. Thank you for the video.