• Skip to primary navigation
  • Skip to main content
  • Skip to primary sidebar
  • Recipes
  • Tutorials
  • Online Shop
  • About Us
  • Contact Us

Sugar Geek Show logo

menu icon
go to homepage
  • Recipes
  • Tutorials
  • Online Shop
  • About Us
  • Contact Us
subscribe
search icon
Homepage link
  • Recipes
  • Tutorials
  • Online Shop
  • About Us
  • Contact Us
×
Home › Recipe

Updated: Mar 11, 2020 · Published: Feb 17, 2020 by Elizabeth Marek · This post may contain affiliate links · 39 Comments

Classic Cheesecake Recipe

Jump to Recipe Jump to Video Print Recipe
perfect classic cheesecake

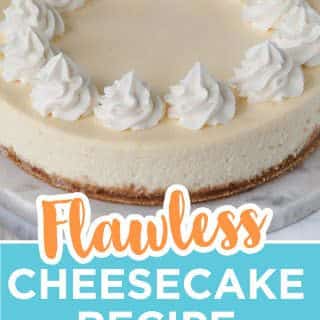
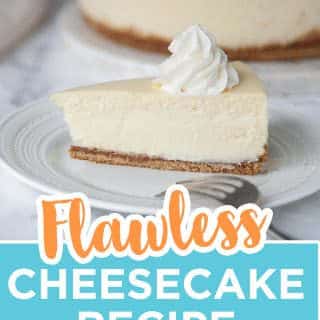
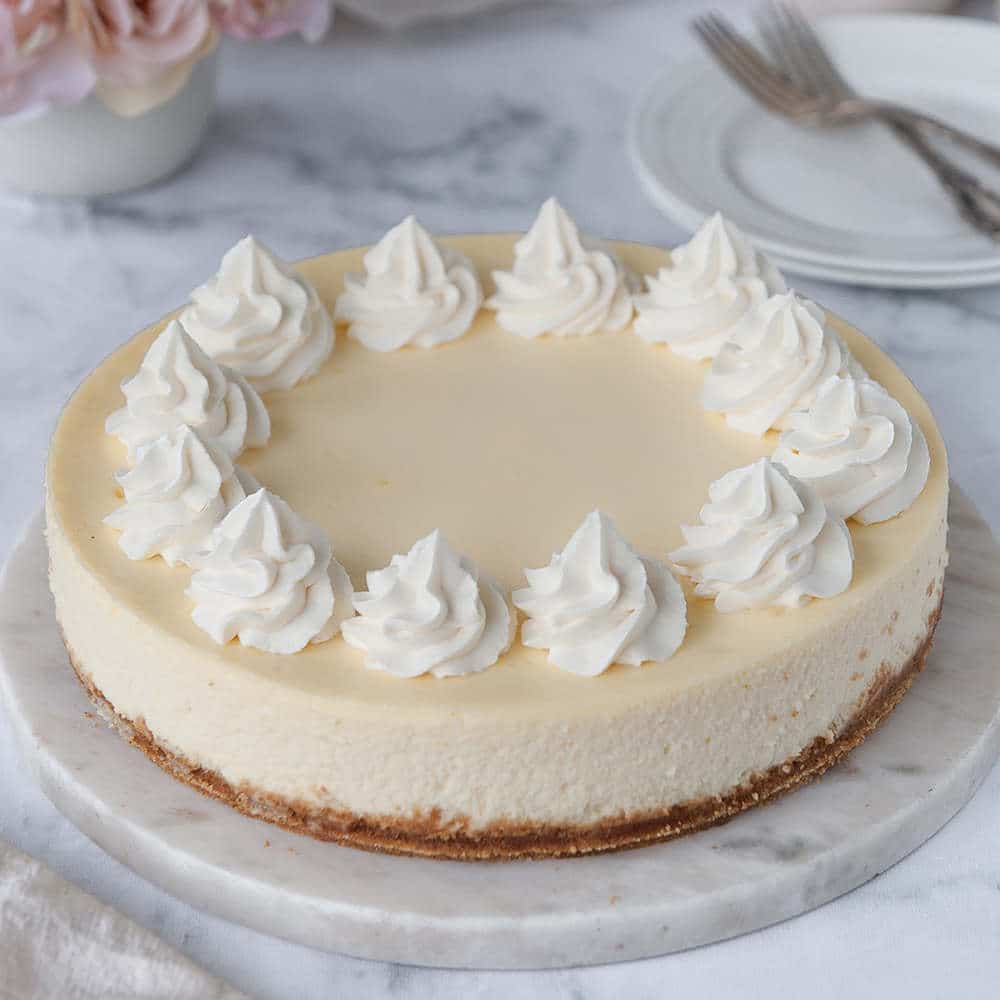
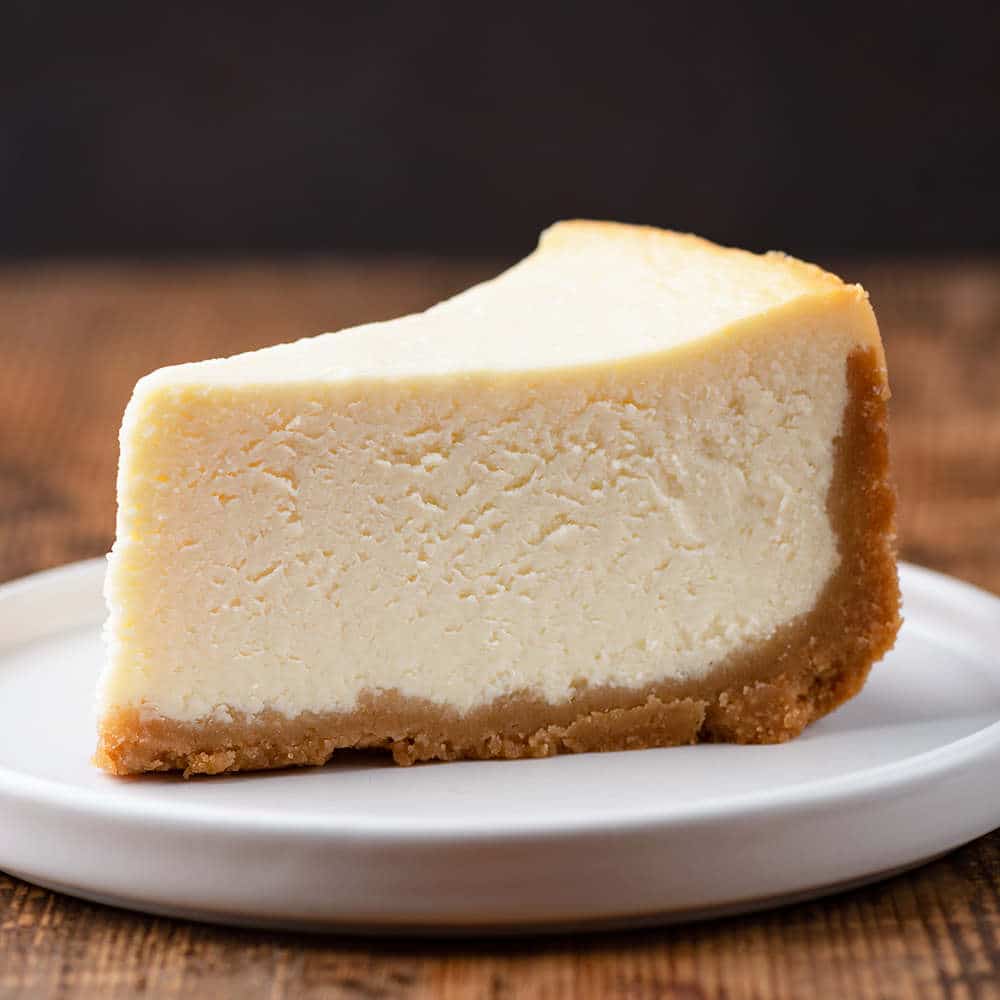
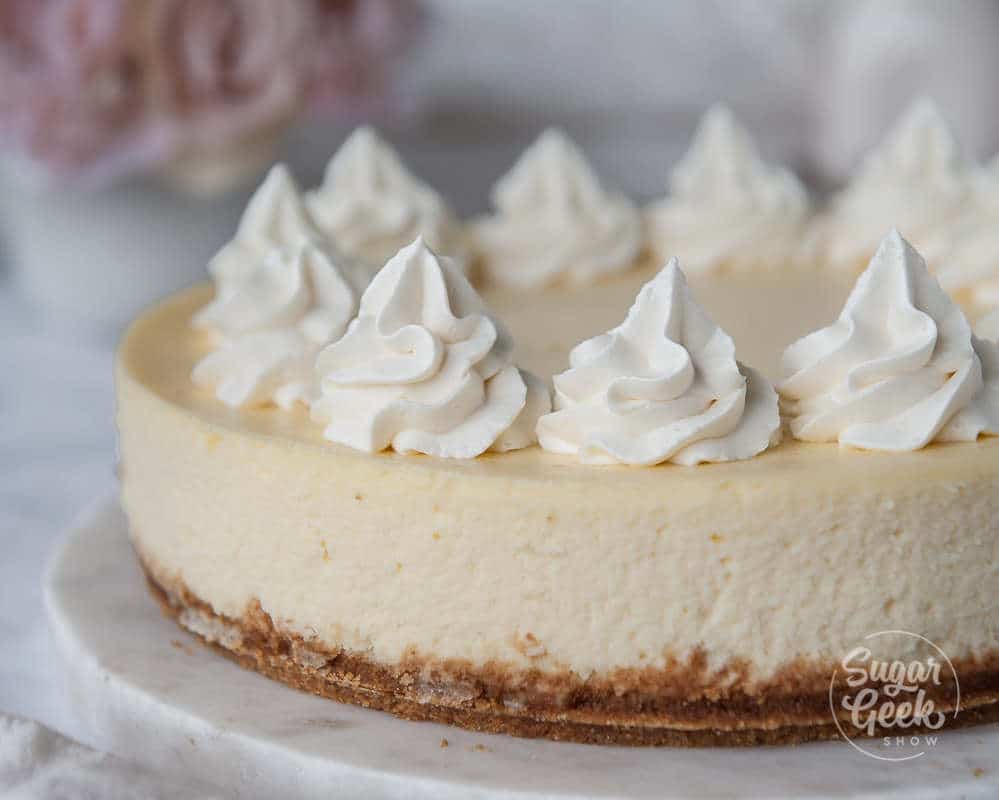
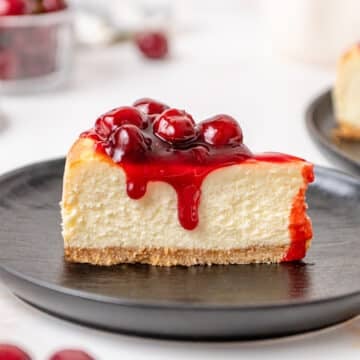
Smooth and creamy classic cheesecake recipe with a buttery graham cracker crust

How to make a classic cheesecake recipe with a perfectly creamy center, zero cracks, and the perfect crunchy graham cracker crust! Don't be intimidated by cheesecake! The hardest part is waiting for it to bake and cool before you devour it!

slice of cheesecake on a white plate with whole cheesecake in the background

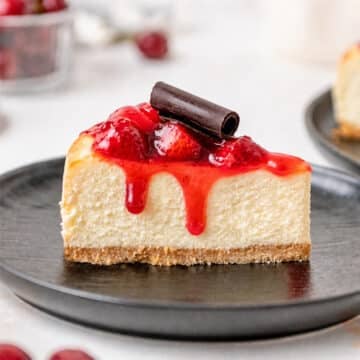
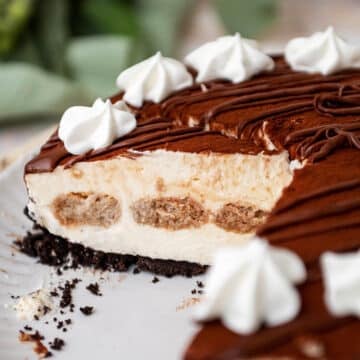
Top this classic cheesecake recipe with chocolate ganache drip, caramel sauce or even raspberry filling! I love a classic cherry filling or strawberry filling with my cheesecake. But I'm more of a fruit lover. You can also top cheesecake with lemon curd, apple filling or berry filling! The flavor possibilities are endless! 

How do you make a cheesecake?

Here are the main steps to making a cheesecake. We will go into more detail about these steps later but here's an overview. You will need one 9" springform cheesecake pan for this recipe.

  1. Preheat your oven to 350ºF. 
  2. Take your cream cheese out of the fridge and unwrap it so it can come to room temperature. Place eggs in a bowl of warm water to warm them up. Pour cream and sour cream into a measuring cup and let come to room temperature.
  3. Prepare your graham cracker crust, bake for 5 minutes and then let it cool.
  4. Decrease the oven temperature to 335º
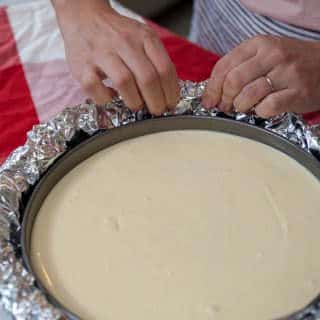
  5. Wrap your cheesecake pan in two layers of heavy-duty aluminum foil. Fold-down the edges so they are out of the way. 
  6. Place a large cookie sheet or ½ sheet pan on the bottom rack of the oven. 
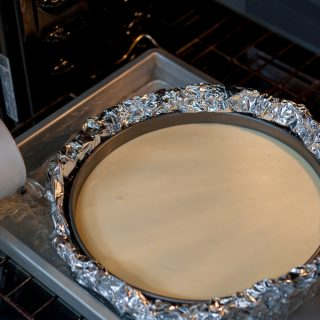
  7. Place the wrapped cheesecake into the pan and then fill the pan ¾ full of hot water. 
  8. Bake for 60 minutes or until the internal temperature reaches 150F (don't open the door at all) then after 60 minutes turn off the oven and crack the door open. Let the cheesecake cool down slowly in the oven for another 60 minutes to prevent cracking. 
how to mini cheesecake hearts

Do you have to do a water bath?

The reason for a water bath is to stop the sides of the cheesecake from cooking faster than the center. The water also keeps the oven nice and moist so that the top of the cheesecake doesn't dry out and crack. 

comparing cheesecake baked in a waterbath and no waterbath. one has a browned surface and one does not


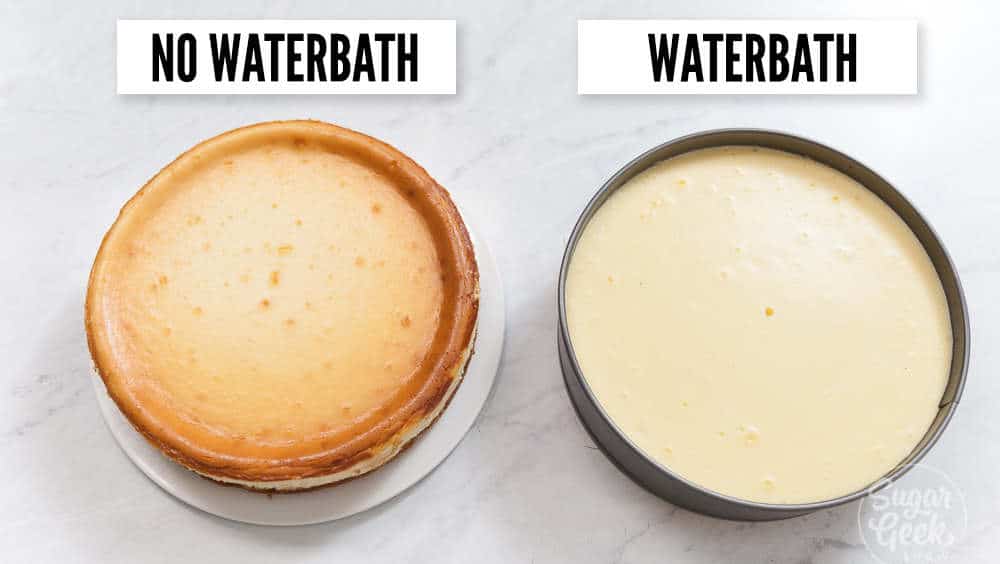
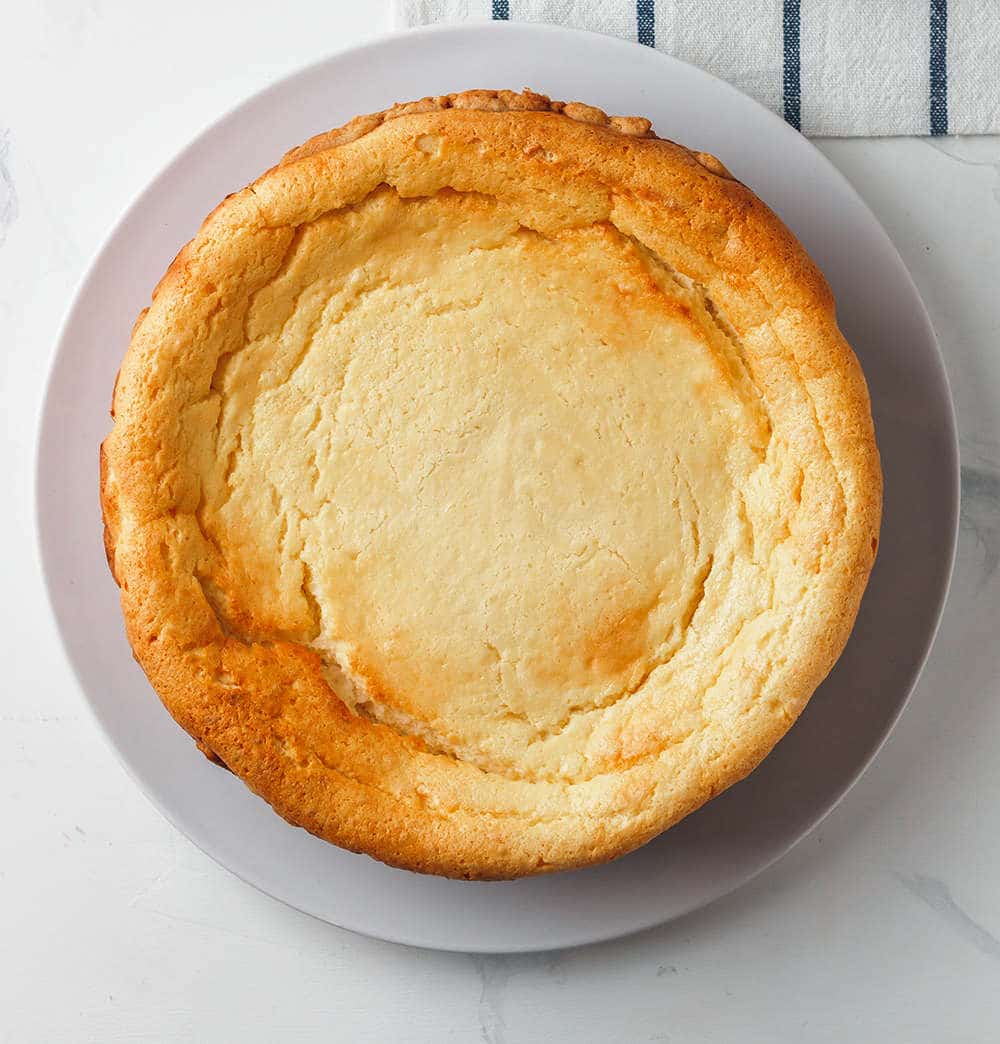
Let's say you're totally freaked out about doing the water bath thing. Totally understandable. The good news is you don't have to do a water bath. Just be aware that your cheesecake will end up with a little brown on the top. The brown will not affect the taste at all. 

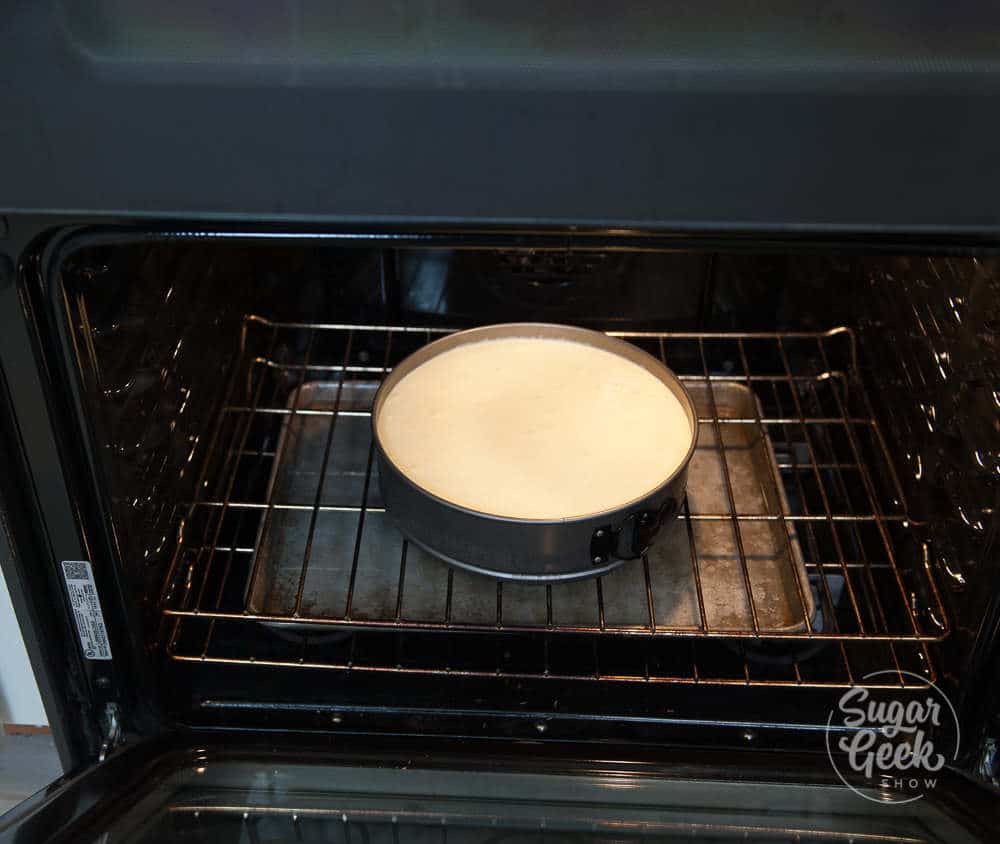
  1. Move the oven rack to the bottom of the oven and place a sheet pan on top. Fill ¾ of the way full with hot water. Move the other oven rack to just above the sheet pan. 
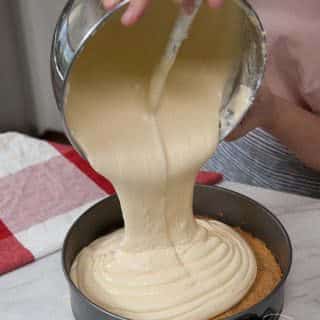
  2. Prepare your cheesecake batter according to the recipe and pour it into your cooled crust. 
  3. Place your cheesecake onto the oven rack above the water and set your timer for 60 minutes. Do not open the oven at all during this time. 
  4. After 60 minutes, check the internal temperature to make sure it's reached 150ºF. Increase the baking time if needed. Then, turn off the oven and crack the door. Let your cheesecake cool for another 60 minutes in the oven. Letting the cheesecake cool this way prevents cracking.

cheesecake without a waterbath

Why did my cheesecake crack?

There are a few reasons a classic cheesecake recipe might crack. 

  1. Too much air was incorporated into the batter - Make sure you mix your ingredients on low. The idea is to incorporate as little air as possible so that your cheesecake is creamy and doesn't puff up while baking. 
  2. Drastic temperature change - Taking a cheesecake from a hot oven to a cold kitchen can cause it to deflate too quickly, causing cracks. Letting your cheesecake cool in the oven after you turn it off prevents cracking. Don't worry, even if you get cracks, the cheesecake will still taste delicious!
  3. The oven was too hot - If your oven is too hot, it can cause your cheesecake to rise too much and then deflate. Hot ovens can also cause your cheesecake to brown too much on top. 
  4. Over-baking - You might be tempted to just bake your cheesecake for extra time to make sure it's really done in the center but over-baking your cheesecake can cause the eggs in the batter to shrivel up and cause major cracking. The texture will also be really rubbery instead of creamy. 

cracked cheesecake

How do you know when your cheesecake is done?

Most people say that your cheesecake is done when the edges are set and the center has a slight wobble. Unless you know what you're looking for, this can be confusing. 

Eating an under-cooked cheesecake can be unsafe (consuming raw eggs) as well as not holding its shape when cut. 

To avoid this, you can use a thermometer to check the center. When it reads 150ºF, the cheesecake is done. Do not test the cheesecake before 60 minutes has passed.

Give the cheesecake a slight tap and note how much it jiggles. Now you will know what to look for the next time you bake a cheesecake and you won't have to test it.  

perfect cheesecake with no browning or cracks. Whipped cream piped on top

What's the difference between New York-style cheesecake and a classic cheesecake recipe?

This is a classic cheesecake recipe. It's light, creamy and not too sweet. New York-style cheesecake is denser than classic cheesecake.

slice of New York cheesecake on a white plate with wooden background

If you love New York-style cheesecake, you can easily convert this recipe by adding in ¼ cup of flour, the zest of one lemon and 2 teaspoons lemon juice to the cheesecake batter. 

Can you make a classic cheesecake recipe without a springform pan?

Yes, you can! When I was in pastry school, we had to make 6 cheesecakes every day to serve in the restaurant. We made our cheesecakes in regular cake pans.

  1. Place a piece of parchment paper in the bottom of the pan before you bake your graham cracker crust. 
  2. Fill your pan with batter (you may need to cut the recipe in half if using a regular cake pan) and then bake as usual. 
  3. After your cheesecake has cooled, put it into the freezer overnight. 
  4. Take the cheesecake out of the freezer and use a creme brulee torch to lightly warm the outside edges of the pan or dip the pan in some hot water for about 2 minutes to loosen the cheesecake from the pan. Do not get any water on the inside. 
  5. Turn the pan upside down and the cheesecake will slide right out. Because the cheesecake is frozen, it won't get damaged. 
  6. Place it onto a plate in the fridge to defrost fully and then serve! 

closeup of classic cheesecake with whipped cream piped on top

How long does cheesecake last?

Cheesecake can be stored in the fridge for 4-5 days and still be good to eat. Although in my house, it never lasts that long. 

Want more cheesecake recipes? Check these out?
Mini cheesecake hearts
Cherry Cheesecake

Recipe

slice of cheesecake on a white plate with whole cheesecake in the background

Classic Cheesecake Recipe

How to make a classic cheesecake with a perfectly creamy center, zero cracks, and the perfect crunchy graham cracker crust! Don't be intimidated by cheesecake! The hardest part is waiting for it to bake and cool before you devour it!
Print Recipe Pin Recipe Rate Recipe
Prep Time: 15 minutes minutes
Cook Time: 1 hour hour
cooling: 1 day day 1 hour hour
Course: Dessert
Cuisine: American
Servings: 12 servings
Calories: 773kcal
Author: Elizabeth Marek

Equipment

  • Stand mixer with paddle attachment
  • 9" springform pan with removable bottom
  • Large pan for waterbath

Ingredients

For The Cheesecake Crust

  • 8 ounces graham crackers crushed
  • 4 ounces unsalted butter melted
  • 4 ounces granulated sugar

For The Cheesecake Filling

  • 48 ounces cream cheese softened to room temperature
  • 13 ounces granulated sugar
  • ¼ teaspoon salt
  • 1 Tablespoon vanilla extract
  • 3 ounces heavy cream room temperature
  • 3 ounces sour cream room temperature
  • 6 large eggs room temperature
US Customary - Metric

Instructions

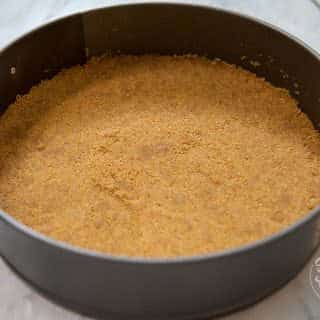
For the graham cracker crust

  • Preheat your oven to 350ºF
  • Combine your graham crackers, melted butter and sugar together in a bowl and mix by hand until blended
  • Place your parchment paper into the bottom of your springform pan then place your graham cracker filling on top.
  • Press the graham cracker filling flat with a flat measuring cup. Compress it well so that your crust holds together after it's baked. I don't like to bring my crust up the sides but you can if you want. You might want to double the recipe if you're going to do that.
  • Bake your crust for 5 minutes then remove it from the oven and let it cool while you prepare the cheesecake filling
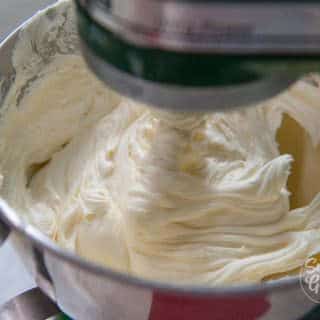
For the cheesecake

  • Reduce your oven temperature to 335ºF
  • Place the cream cheese in the bowl of your stand mixer with the paddle attachment and cream on LOW until smooth and lump-free, then add in your sugar and continue creaming on low until blended and smooth.
  • Scrape down the sides of the bowl two or three times to ensure NO lumps are in the mixture, these will not come out once you add in the eggs. .
  • Add sour cream and heavy cream, vanilla and salt and blend on low until smooth.
  • Add eggs one at a time on low, waiting until they are completely blended before adding the next. Scrape the bowl after each addition.
  • Wrap two layers of tin foil around your pan and fold down the top edges. Make sure there are no tears or holes.
  • Move your oven rack to the lowest spot in the oven. Place the cheesecake pan into a large cake pan and into the oven. Fill the pan so that its ¾ of the way full. Bake for 60 minutes. DO NOT open the oven door for at least 60 minutes or risk cracking your cheesecake.
  • Test your cheesecake. When your cheesecake is done, it will have a slight wiggle in the center when you tap the side and the sides will be set. You can also use a thermometer to take the temperature of the center. When the center reads 150ºF it is done. Add more time as needed to reach the right temperature and then make note of how long it took to reach that temperature so you know how long to bake next time.
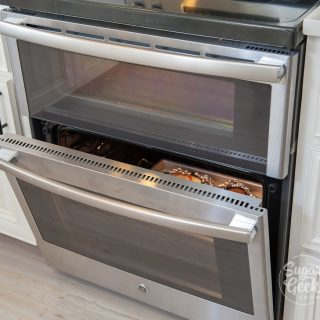
  • Turn your oven off, crack the oven door open, and let cheesecake cool in the oven for 1 hour. (This helps prevent cracking.)
  • Remove the cheesecake from the water bath carefully (it should be cool enough to take out with your hands) and refrigerate overnight before serving. (Or at least 6 hours)
  • Run a knife around the outside of the cheesecake to separate it from the pan, or use a kitchen torch to lightly warm the outside. Remove from the springform pan and serve.

Video

Notes

*Note* if you don't have a second oven rack, you can place a cooling rack in the water and place your cheesecake on top so it's not in the water. You can also wrap your cheesecake pan in aluminum foil to prevent water from getting inside.

Nutrition

Serving: 1serving | Calories: 773kcal | Carbohydrates: 60g | Protein: 12g | Fat: 55g | Saturated Fat: 30g | Cholesterol: 264mg | Sodium: 587mg | Potassium: 244mg | Fiber: 1g | Sugar: 49g | Vitamin A: 2061IU | Calcium: 157mg | Iron: 2mg
Tried this recipe?Let us know how it was!

More Recipe

  • close up of sausage gravy on biscuits
    Keto Sausage Gravy
  • close up of keto biscuits on a plate
    Fluffy Keto Biscuits
  • gold drip on a white cake
    Drip Cake Recipe
  • sliced focaccia on a wooden board
    Easy Sourdough Focaccia Recipe

Reader Interactions

Comments

  1. Eleni Paipeti says

    February 19, 2020 at 2:37 pm

    ❤

    Reply
  2. Jordan says

    February 20, 2020 at 1:52 pm

    Is there a difference between this recipe and the cherry cheesecake recipe (minus the topping of course)?do you prefer one recipe over the other?

    Reply
    • The Sugar Geek Show says

      February 20, 2020 at 7:22 pm

      It's the same recipe, the only difference is that the cherry cheesecake doesn't have a waterbath and browns on top so it depends more on how you want the cheesecake to look. Waterbath or no waterbath

      Reply
  3. Lydia says

    February 29, 2020 at 7:42 pm

    5 stars
    So good!! I made this last night so it was ready this morning and I had it for breakfast! Now I need to give it away so I don’t eat it all! So delicious! And I appreciate your telling what temperature the cheesecake needed to be! I think that helped a lot! And now I’ll know for next time how long I need it to be in the oven and it be done! So excited about this recipe!

    Reply
    • The Sugar Geek Show says

      February 29, 2020 at 10:16 pm

      yay! I'm so glad! Thermometers really do make life so much easier. No guessing 😀

      Reply
  4. CeeCee says

    March 07, 2020 at 3:30 pm

    5 stars
    Liz Liz Liz, this was the most amazing Cheesecake. This is truly the BEST I've ever made, and I what I love most NO FLOUR or Cornstarch. You are a genius when it comes to baking, I love love love your recipes, haven't had a bad one yet. Thank you for this AMAZING silky smooth Cheesecake, and that crust perfect. Looking forward to more of your recipes.

    Reply
    • The Sugar Geek Show says

      March 08, 2020 at 9:12 am

      Thank you so much CeeCee <3

      Reply
  5. Sarah says

    March 09, 2020 at 8:47 am

    Wow!! Love this cheesecake recipe! I have made a lot of cheesecakes lately and this recipe is by far the best one so far and will be my go-to from now on. I made two of them, one with Heath bar pieces in it and a chocolate ganache drizzle over the top and more Heath bar pieces. The second one I made was a plain cheesecake with a homemade strawberry sauce over the top and they both came out absolutely perfect

    Reply
    • The Sugar Geek Show says

      March 09, 2020 at 9:19 am

      Thank you so much! Half the battle is in how you bake it 😀 Now you've got a base to work with for unlimited flavors 😀

      Reply
  6. Tammy R says

    March 20, 2020 at 8:07 am

    Can I add mini peanut butter cups to this?

    Reply
    • The Sugar Geek Show says

      March 20, 2020 at 8:54 am

      I would chop them up but yes I believe you could 🙂

      Reply
  7. Sanviti says

    March 23, 2020 at 6:30 am

    Any substitute for sour cream?

    Reply
    • The Sugar Geek Show says

      March 23, 2020 at 8:45 am

      Greek yogurt 😀

      Reply
  8. Becky Anderson says

    April 04, 2020 at 2:44 pm

    For cupcakes would you reduce heat or same? How long baking?

    Reply
    • The Sugar Geek Show says

      April 05, 2020 at 9:25 am

      I would bake them in cupcake liners and it would take much less time for them to bake since they are smaller. Not sure exactly how long 🙂

      Reply
  9. Remille says

    April 17, 2020 at 1:07 pm

    I just made this! No cracks and perfect top! I’ll add the whipped cream on tome and blueberries sauce once it has cooled off and add some white chocolate shavings on the side. ?

    Reply
    • The Sugar Geek Show says

      April 18, 2020 at 1:37 pm

      Yum yum yum! love the idea of adding white chocolate

      Reply
  10. Anne says

    April 28, 2020 at 12:31 pm

    Hi Liz, love your recipes. Can I reduce the amounts in this recipe as I only have 24 ounces of cream cheese on hand and would love to stay out of the grocery store right now? Also, should I still bake it for an hour (since it will be smaller) before checking the temp?

    Reply
    • The Sugar Geek Show says

      April 28, 2020 at 2:10 pm

      If you reduce the cream cheese you will have to reduce all the ingredients. The cheesecake will be slightly shorter too so it will definitely take less time to bake. Use a thermometer or the jiggle test to see when it's done.

      Reply
  11. Sarah says

    May 09, 2020 at 1:14 pm

    5 stars
    Love this recipe!

    Reply
  12. LolaB says

    May 24, 2020 at 6:50 pm

    5 stars
    Thanks for the recipe. 48ounces of cream cheese seems a lot, so i reduced everything to half. But i was a bit confused with the baking. One picture shows the hot water on the lower rack and the other pic/video shows the pan in the water bath. I used the 1st method, hot water in lower rack and it came out perfect!! I had a small crack but i covered with whipped cream. This recipe is a keeper!!!

    Reply
    • Elizabeth Marek says

      May 24, 2020 at 6:52 pm

      Hi Lola, the two photos are two variations that you can use depending on what you prefer. The water bath below or the pan in the water bath. I am so glad it worked for you!

      Reply
  13. Maria says

    June 01, 2020 at 3:27 pm

    5 stars
    Hi Liz, first I'd like to start off by saying THANK YOU; thank you so incredibly much for sharing all your knowledge and recipes! I'm a self-taught, amateur baker, and I have been searching for years for those small tips and tricks to actually create the food item on the photo of an accompanying recipe--because many are excluding essential information to successfully replicate the "at-home" recipes. That was until I found your site!

    I have made a few of your recipes over the past few months, and every single time has yielded complete success. With so much going well when I follow your advice and steps, I decided to once more tackle cheesecake, after 7-8 years of being too reluctant to make another attempt. I struggled with over-browning the top, drying out the cake itself, and so many cracks, you'd think I was aiming for it. But I have come to trust your culinary skills so much, I knew all I had to do was watch your YouTube tutorial, and read through this recipe blog--that simple.

    To no surprise, following your recipe in detail rendered yet another marvelous dessert--I made it New York style marbled with lemon curd! The color of the exterior is beautifully creamy. The texture of every bite is so incredibly rich and densely soft. Also, no cracks. My friends and family enjoyed this cheesecake recipe so much, I was asked to make it again only a week later! The best part aside from enjoying consuming this cheesecake, is how much more I now enjoy baking. You've made a fan out of me!

    One question: how is the baking time modified if I were to use smaller or larger springform pans?

    Thank You!

    Reply
    • Elizabeth Marek says

      June 03, 2020 at 11:36 am

      Thank you so much. I'm so glad you are enjoying the recipes. For larger or smaller pans you may need to bake for less time or more.

      Reply
  14. Makalie says

    June 15, 2020 at 11:26 pm

    Can I halve this recipe and bake it in a 6 inch springform pan?

    Reply
    • Elizabeth Marek says

      June 16, 2020 at 8:24 am

      Yes you can

      Reply
  15. Vickie Murray says

    June 17, 2020 at 12:05 pm

    Can I substitute Monk Fruit Sweetener in this recipe?

    Reply
    • Elizabeth Marek says

      June 18, 2020 at 9:55 am

      Yes you can

      Reply
  16. Makalie Schile says

    June 17, 2020 at 10:01 pm

    Thank you! Should I still bake it for 60 minutes? Or cut the time in half?

    Reply
    • Elizabeth Marek says

      June 18, 2020 at 9:32 am

      The baking time will definitely be less time but I'm not sure how much. You will have to test for yourself.

      Reply
  17. Carmen Hayne says

    July 07, 2020 at 11:07 am

    If I wanted to make a vanilla bean version, how much vanilla bean paste should I add? And do i still add the vanilla extract in addition to the vanilla bean paste? I can't wait to try this! Your recipes never have failed me!

    Reply
    • Elizabeth Marek says

      July 08, 2020 at 10:25 am

      I would use one vanilla bean and leave out the vanilla extract

      Reply
  18. Robyn Snyder says

    August 06, 2020 at 3:04 am

    Hi!! I would like to incorporate berries into the cheesecake but I’m not sure if it would ruin it. What do you think?

    Reply
    • Elizabeth Marek says

      August 17, 2020 at 2:57 pm

      Whole berries is not recommended but you can swirl in a berry reduction and it will bake perfectly

      Reply
  19. Michelle says

    September 21, 2020 at 5:59 am

    5 stars
    Cheesecake was the best recipe I've tried!!
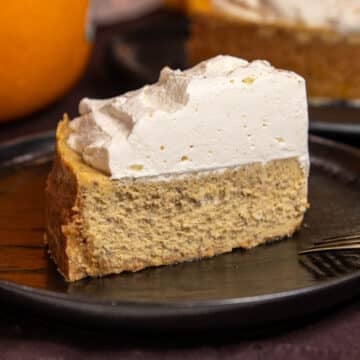
    Can it be adapted to a pumpkin cheesecake? Thank you!

    Reply
    • Sugar Geek Show says

      September 21, 2020 at 4:35 pm

      Thank you!! Yes, check out my turkey day pumpkin cheesecake bars for a recipe you can duplicate 🙂

      Reply
  20. Daisy says

    January 28, 2021 at 11:12 am

    5 stars
    This recipe is just hands down delicious. I’ve made one before it was good too but this one is my #1 for sure. I made it for my dad as he is a cheesecake lover and even he and my mom said this one was so much better and they prefer this one lol. Highly recommend this recipe.

    Reply
  21. Nicky says

    March 30, 2025 at 12:42 pm

    Hello Liz,

    Can I bake it without the crust so I can use it for the middle layer of a red velvet cake?

    Reply
    • Elizabeth Marek says

      April 29, 2025 at 2:51 pm

      Yes that sounds delish

      Reply
5 from 22 votes (15 ratings without comment)

Leave a Reply Cancel reply

Your email address will not be published. Required fields are marked *

Recipe Rating


All comments are subject to our Terms of Use

Primary Sidebar

Liz Marek with strawberry cake

Hi, I'm Liz! I'm an artist and cake decorator from Portland, Oregon. Cakes are my obession, which is why I'm dedicated to crafting tried-and-true recipes, small cake tutorials, as well as advanced online cake courses!

More about me →

Buy Flawless Fondant

Sugar Geek Flawless Fondant
It's incredibly stretchy, stays soft on the cake and can be rolled 50% thinner than other brands without tearing or becoming transparent. No elephant skin, no frustration, just flawless fondant every time. Buy Fondant

Our Cake Greatest Hits

Check our our best cake recipes

Summer Recipes

  • closeup of vanilla cake with vanilla buttercream slice on a white plate
    Moist Vanilla Cake Using Cake Flour
    Cook Time45 Minutes
  • slice of pink velvet cake with whipped cream frosting and fresh raspberries on a white plate
    Pink Velvet Cake
    Cook Time40 Minutes
  • slice of fresh strawberry cake on a white plate with strawberries behind it
    Fresh Strawberry Cake
    Cook Time1 Hours 10 Minutes
  • close up shot of double chocolate chip cookie
    Chewy Double Chocolate Chip Cookies
    Cook Time20 Minutes
  • Fast Bread Recipe
    Cook Time1 Hours
  • sourdough bread cut open to show crumb
    Beginners Sourdough Bread Recipe Step-By-Step
    Cook Time25 Hours 10 Minutes

Popular Recipes

  • ganache cake with dark, milk, and white chocolate on it
    The Best Chocolate Ganache Recipe
    Cook Time20 Minutes
  • close up of easy buttercream rosettes
    Easy Buttercream Frosting
    Cook Time10 Minutes
  • close up slice of marble cake
    Moist and Fluffy Marble Cake Recipe
    Cook Time40 Minutes
  • close up of red velvet cake slice
    Red Velvet Cake Recipe
    Cook Time1 Hours 40 Minutes

Footer

↑ back to top

About

  • Privacy Policy
  • Terms of Service
  • Fondant

Newsletter

  • Sign Up! for emails and updates

Contact

  • Contact
  • About Us
  • About Liz Marek

Copyright © 2024 Sugar Geek Show, Inc. All Rights Reserved.

Rate This Recipe

Your vote:


A rating is required
A name is required
An email is required

Recipe Ratings without Comment

Something went wrong. Please try again.