• Skip to primary navigation
  • Skip to main content
  • Skip to primary sidebar
  • Father's Day
  • Recipes
  • Free Tutorials
  • Sign Up
  • About Liz

Sugar Geek Show logo

menu icon
go to homepage
  • Father's Day
  • Recipes
  • Free Tutorials
  • Sign Up
  • About Liz
subscribe
search icon
Homepage link
  • Father's Day
  • Recipes
  • Free Tutorials
  • Sign Up
  • About Liz
×
Home

Blog

cake sculpted to look like a squirrel holding a giant donut

March 1, 2021 Paid Video

Squirrel Cake

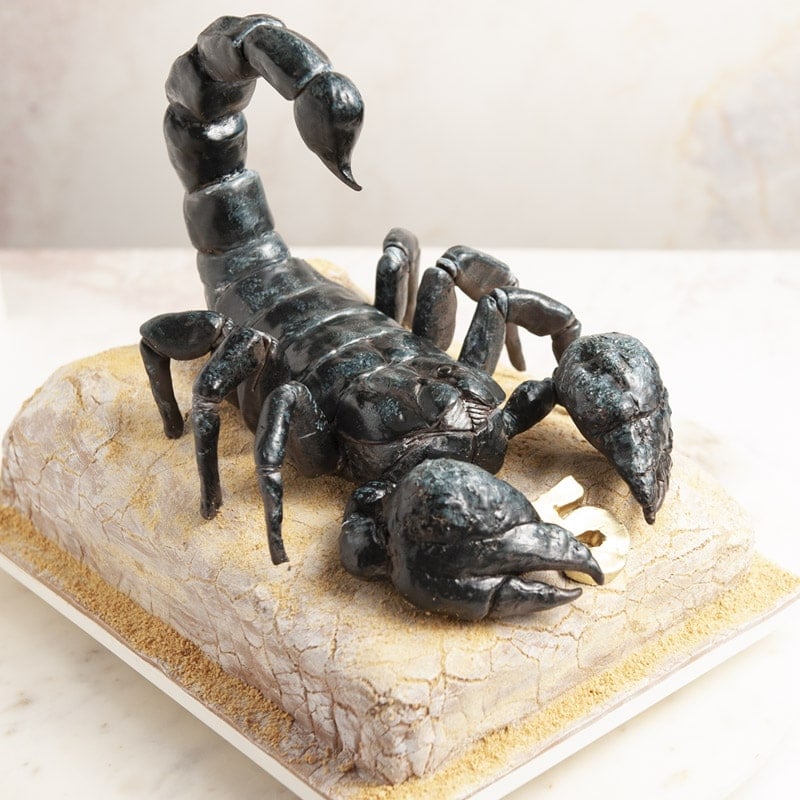
Skill level: Advanced

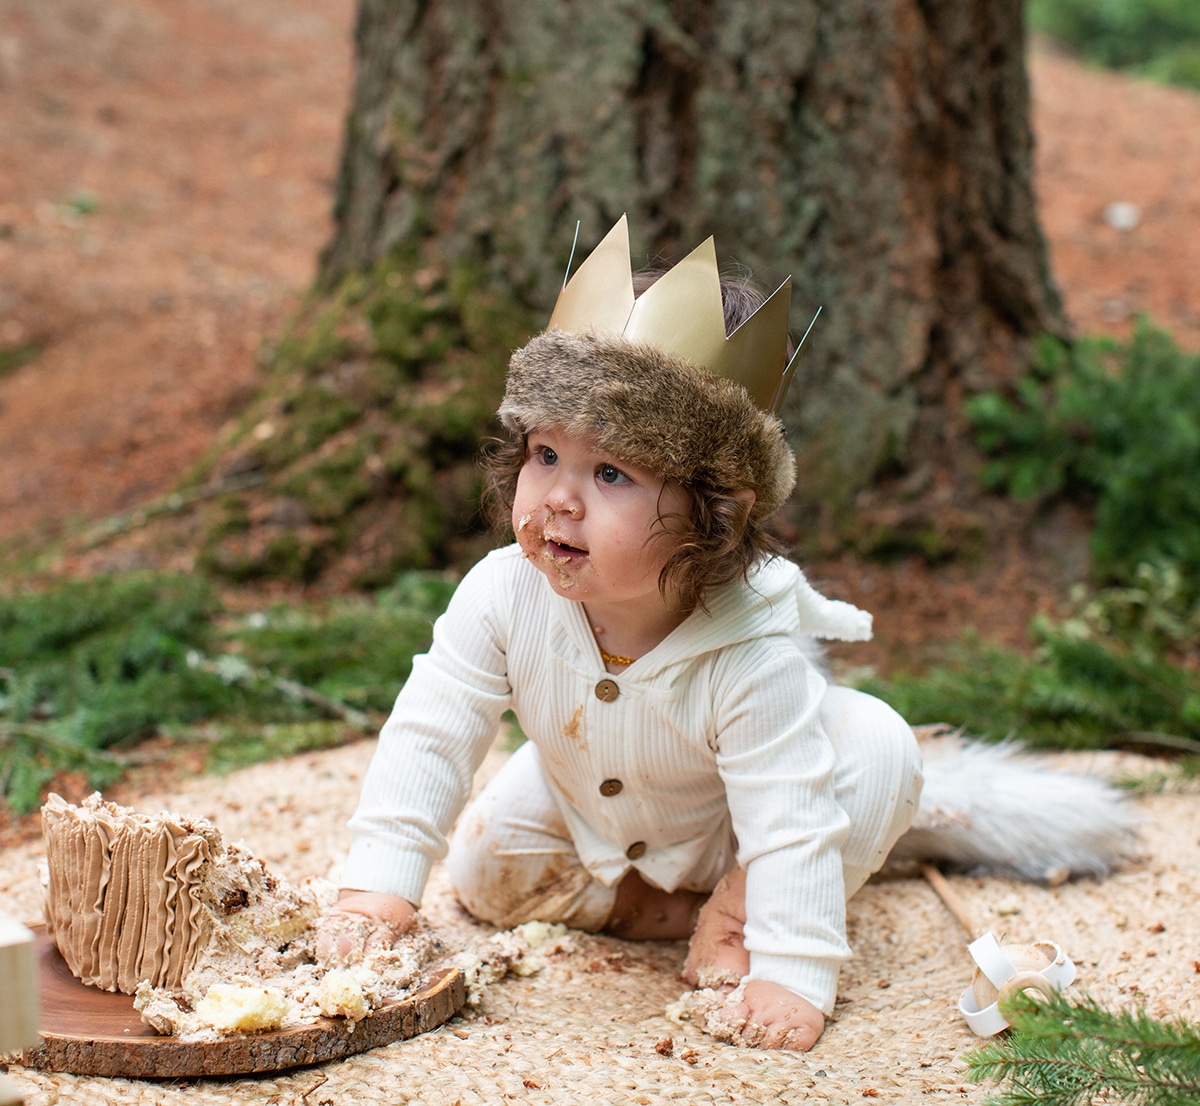
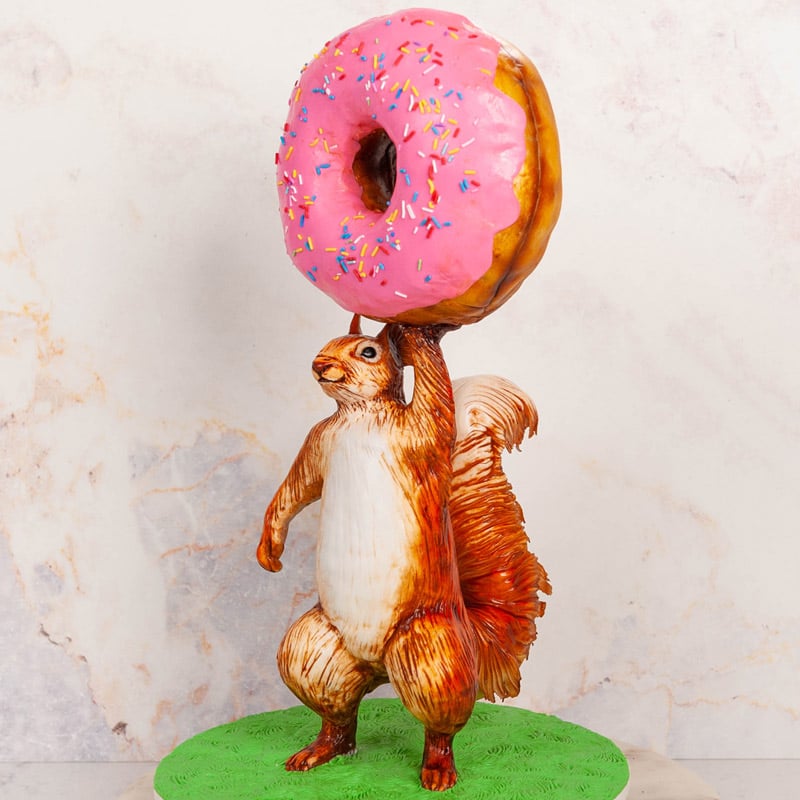
I got a opportunity to work with Disney making this squirrel cake holding a giant donut. This project turned out amazing. In this tutorial, you will learn how to create a standing squirrel holding a giant donut. If you've ever wondered how to create a vertical donut shape, let me tell you, it's not easy, but I break down the process step-by-step.

You will also learn how to create the squirrel's fur, how to paint the donut and squirrel to look life-like, and how to add the expressive eyes and donut frosting.

There's a lot to cover in this tutorial, so let's get our tools together, and let's get started!

2:07:53 Minutes of Instruction

What You Will Learn

  • How to create a gravity-defying squirrel cake holding a giant donut
  • Learn how to make a vertically-standing giant donut
  • How to sculpt and paint fur on an animal
  • Learn how to make expressive eyes and facial features on a squirrel without looking too much like a person

Tutorial Chapters

  1. Cutting Wooden Pieces 0:25
  2. The lower body structure 8:24
  3. The upper body structure 15:35
  4. The donut base structure 19:26
  5. Making it food safe 22:03
  6. The tail structure 23:32
  7. The donut structure 26:14
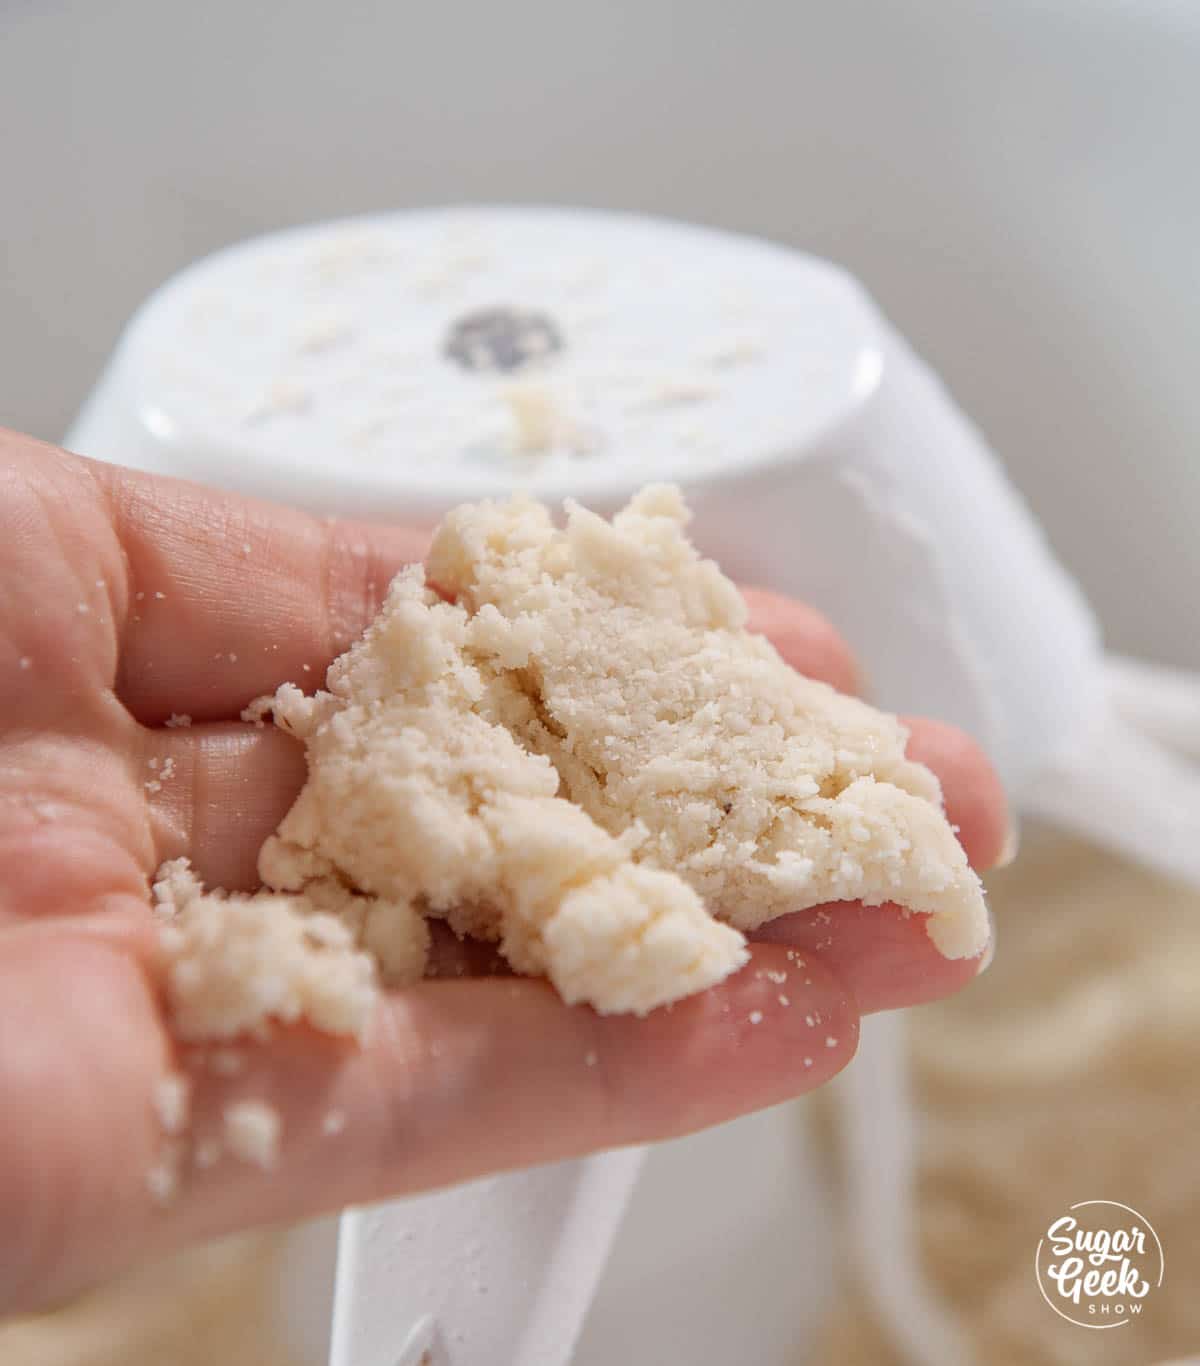
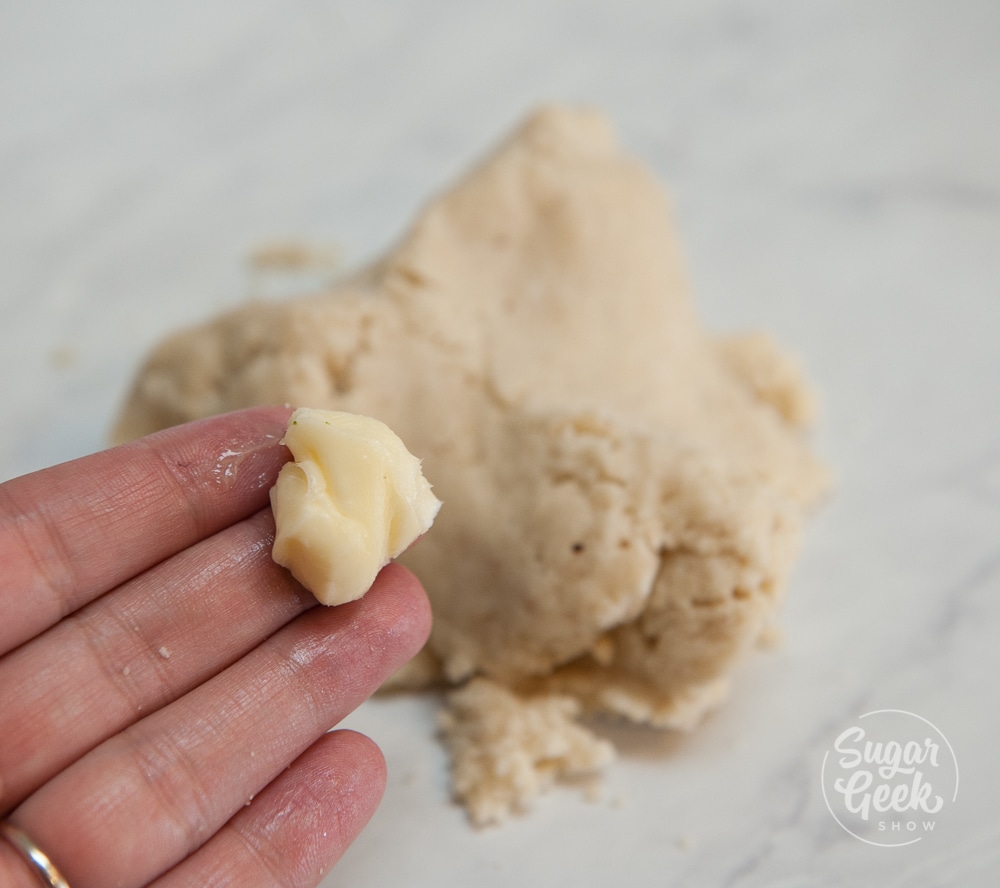
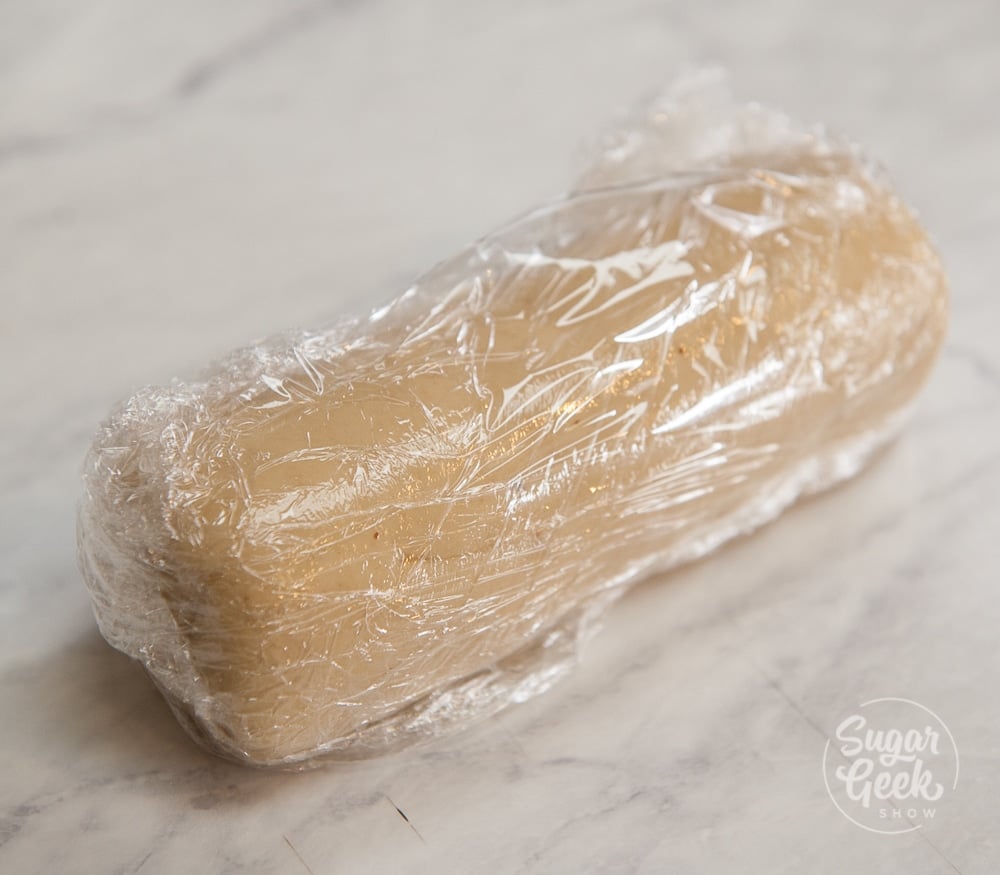
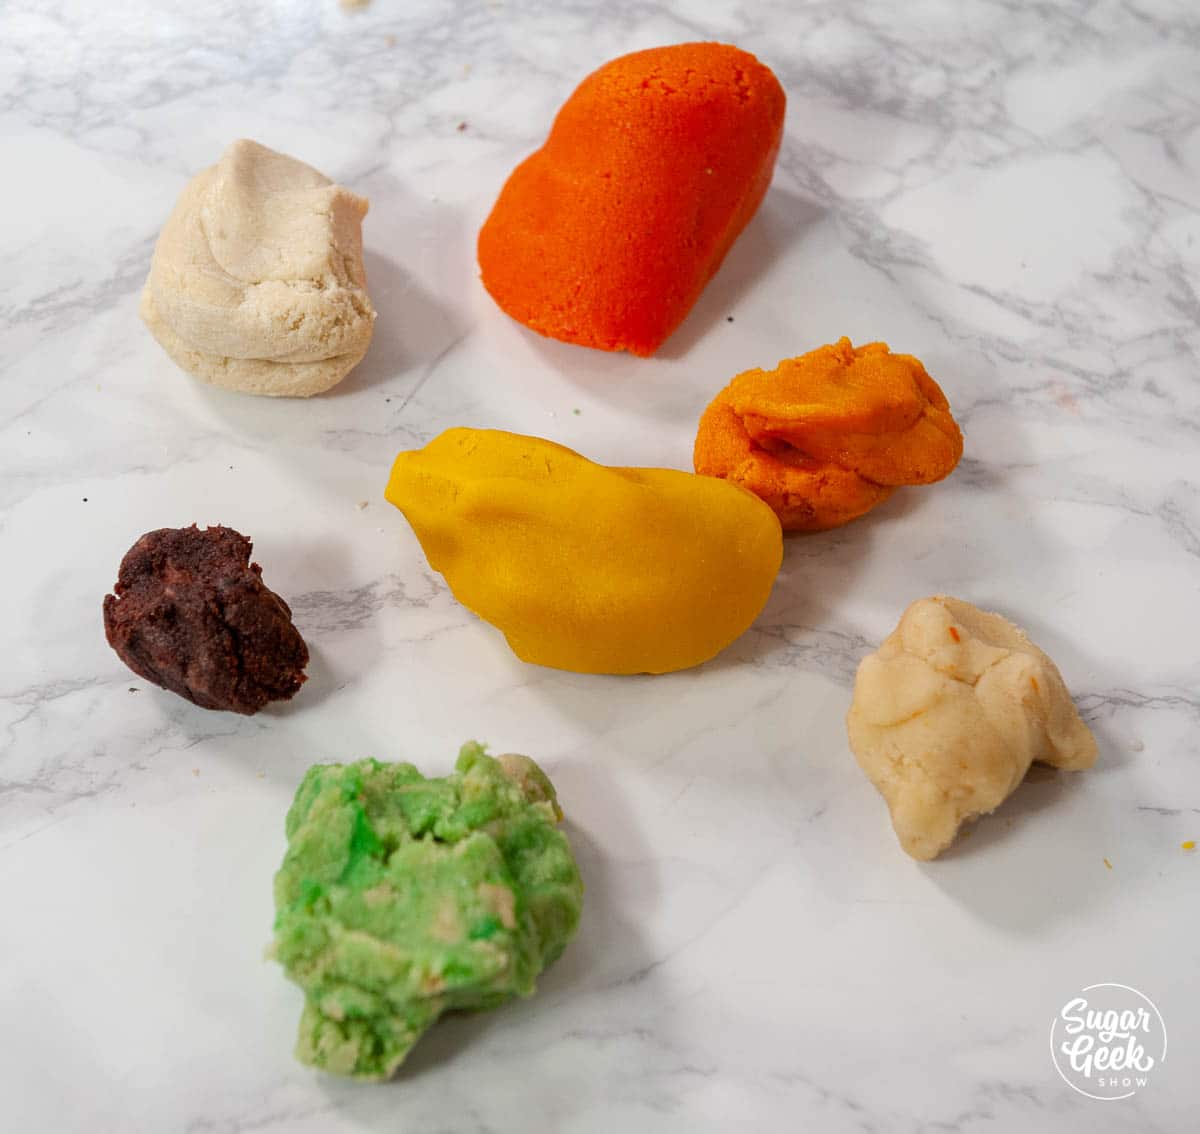
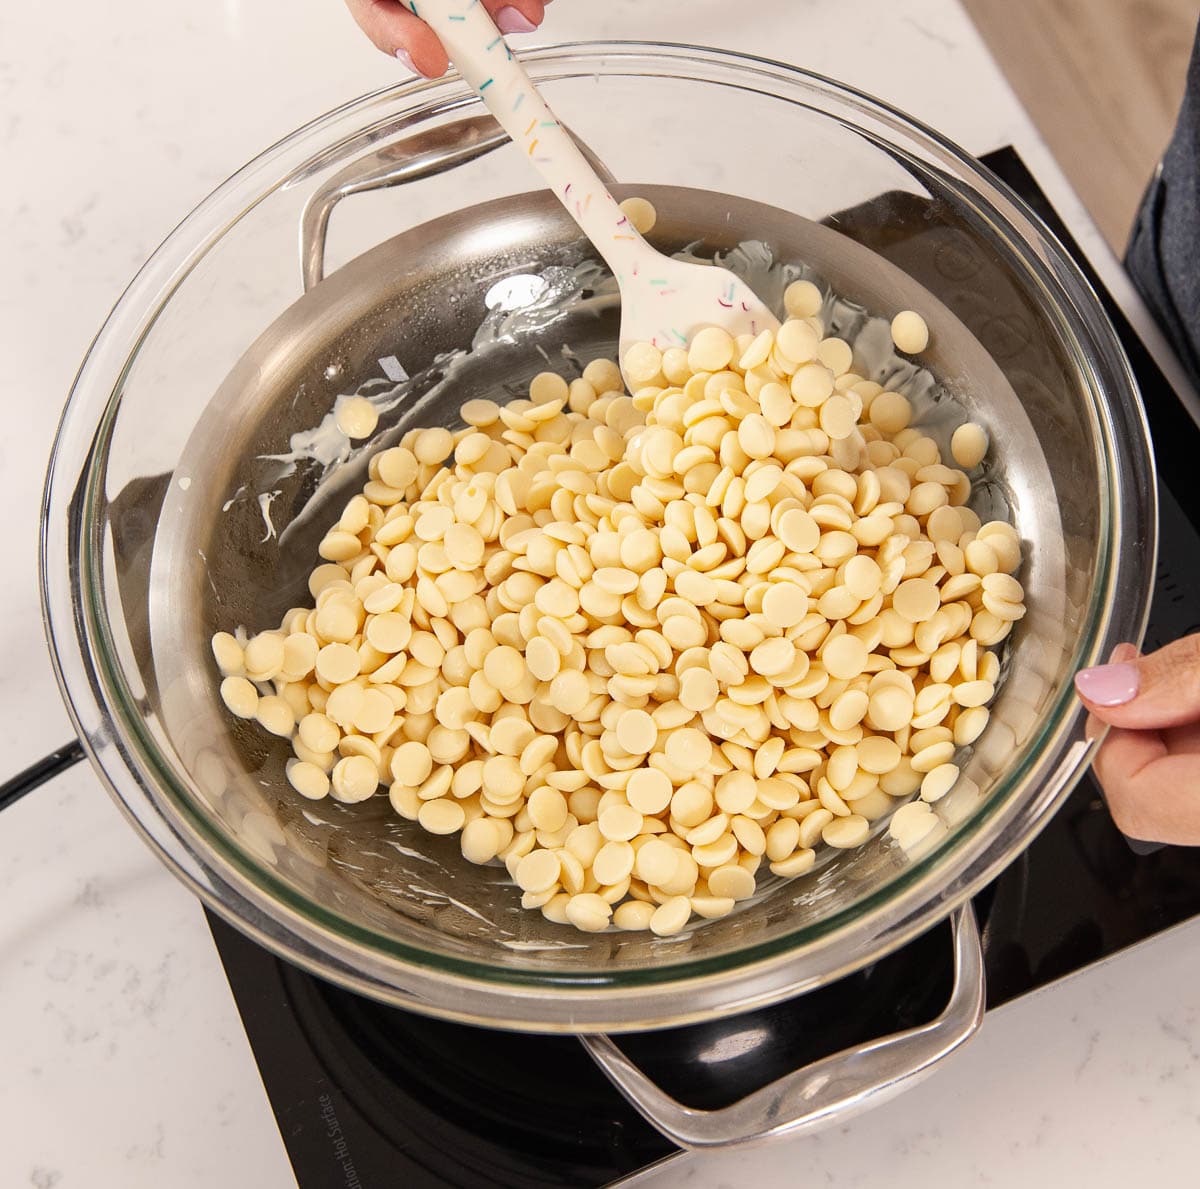
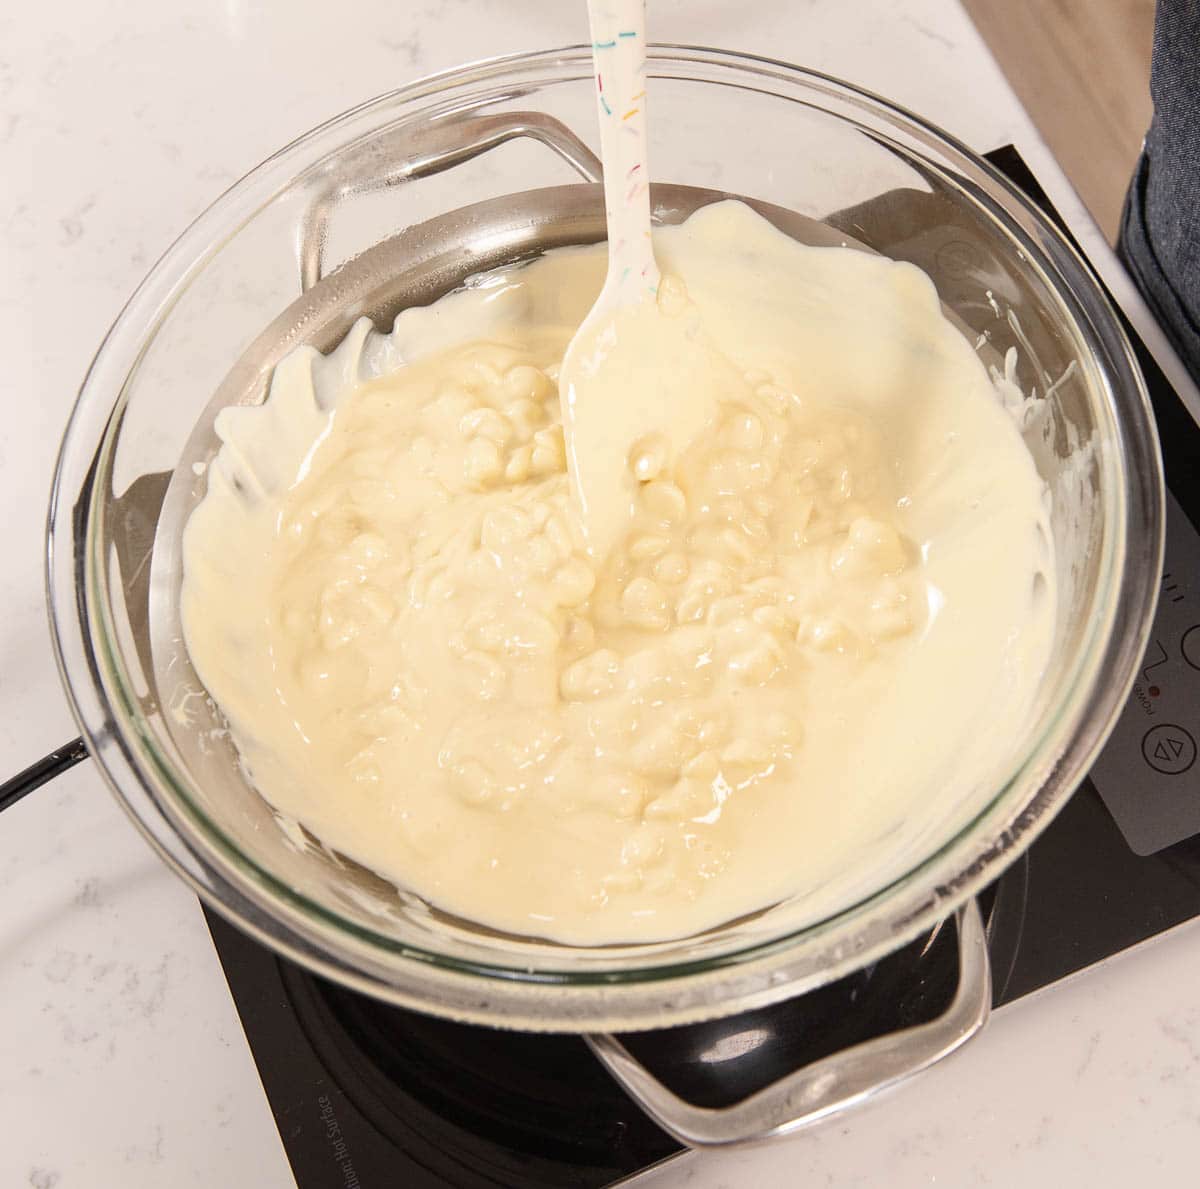
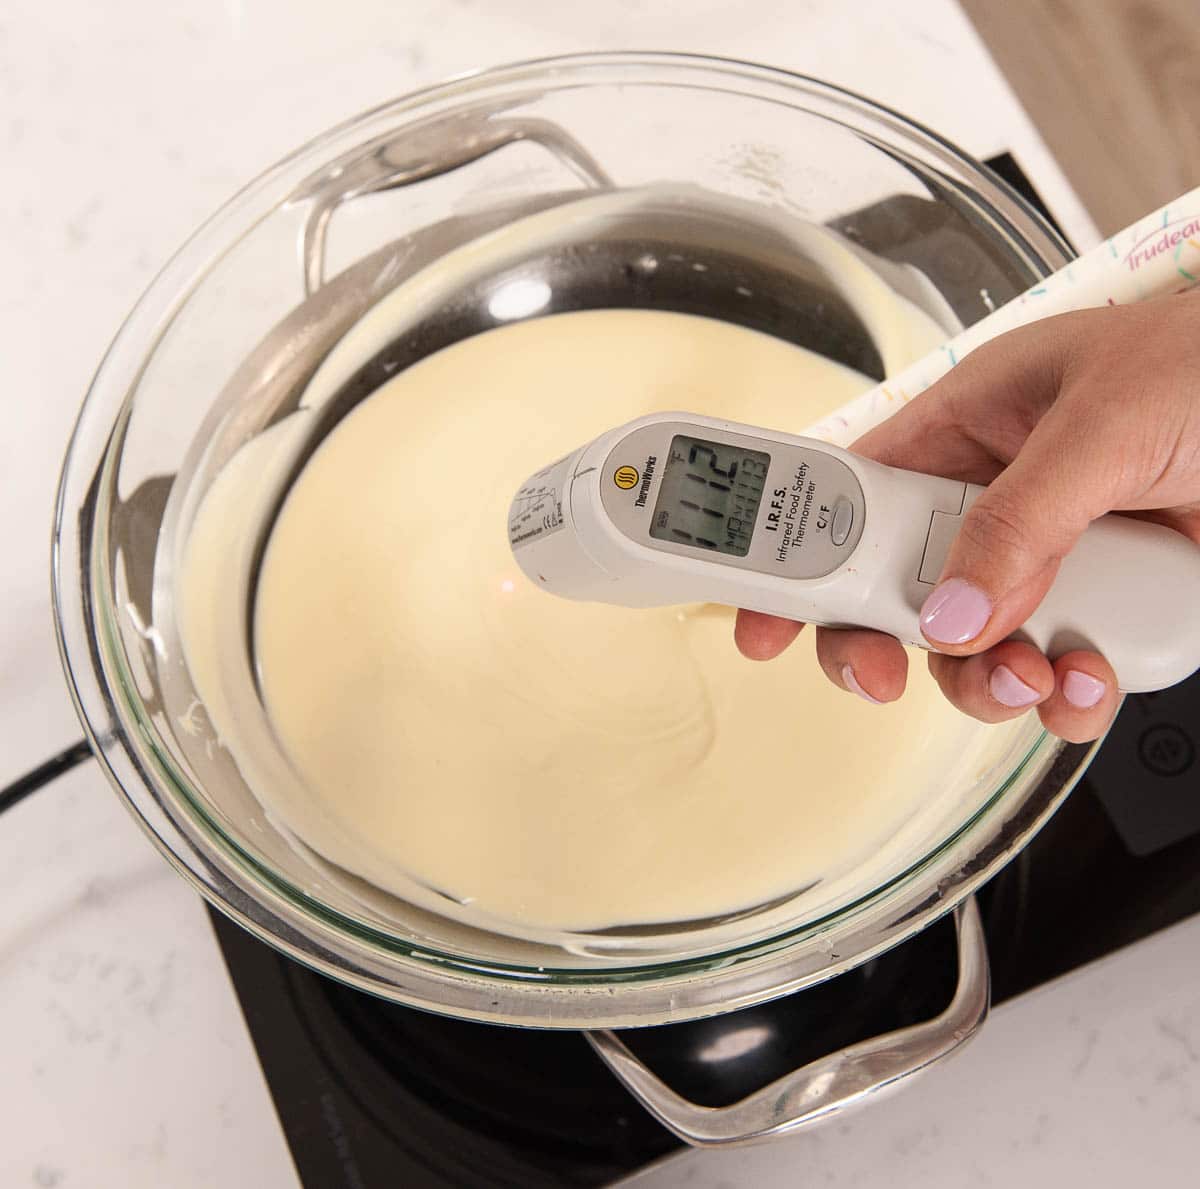
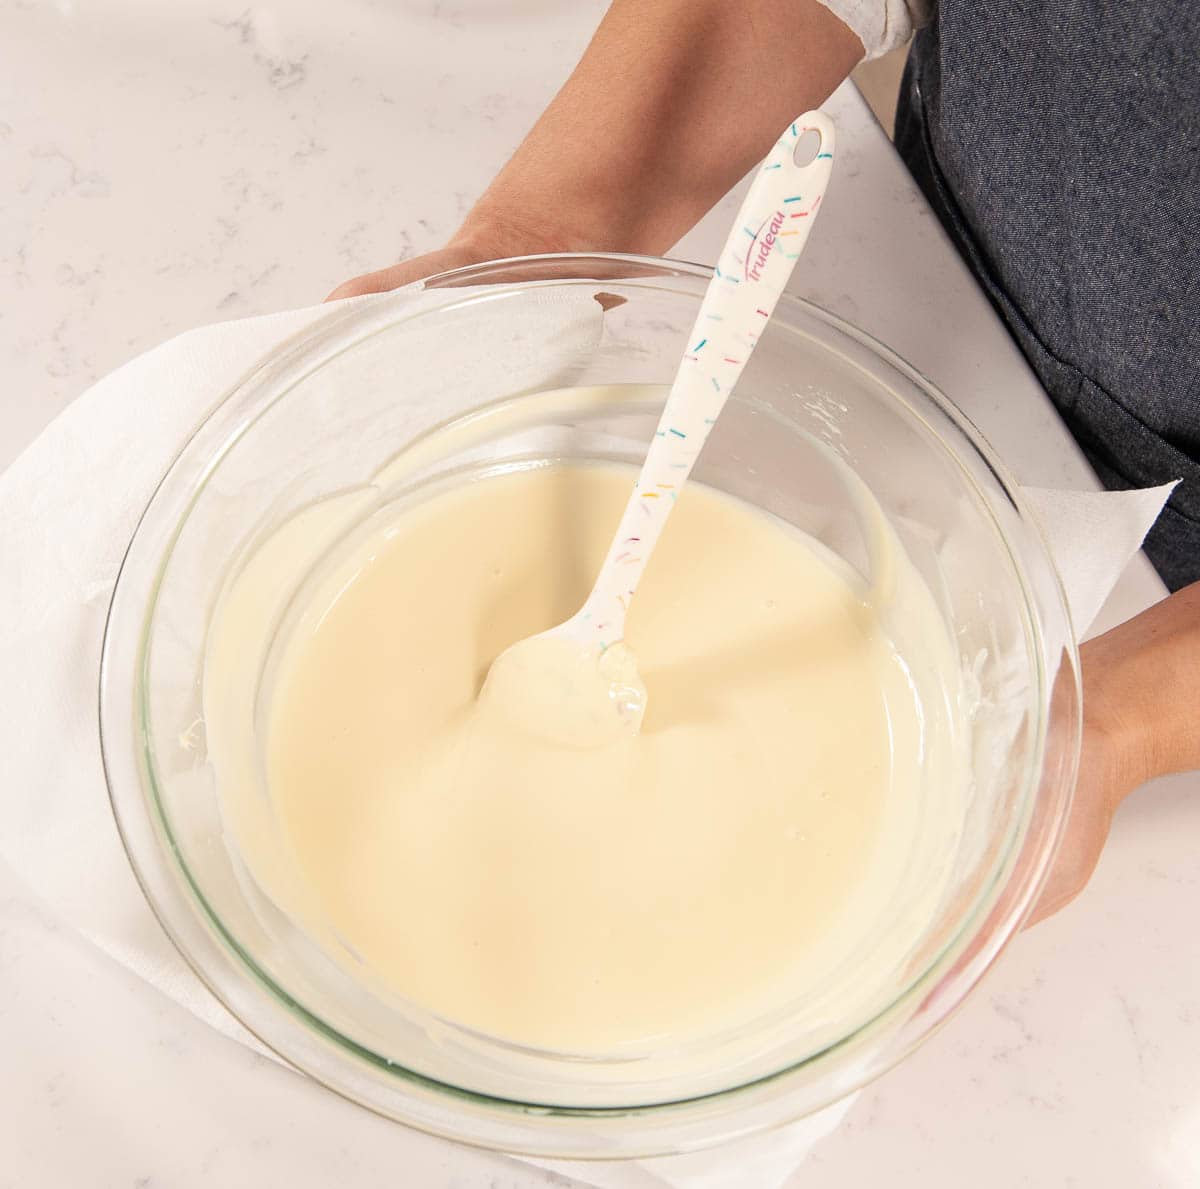
  8. Modeling chocolate - the base 30:19
  9. Modeling chocolate - the top 38:25
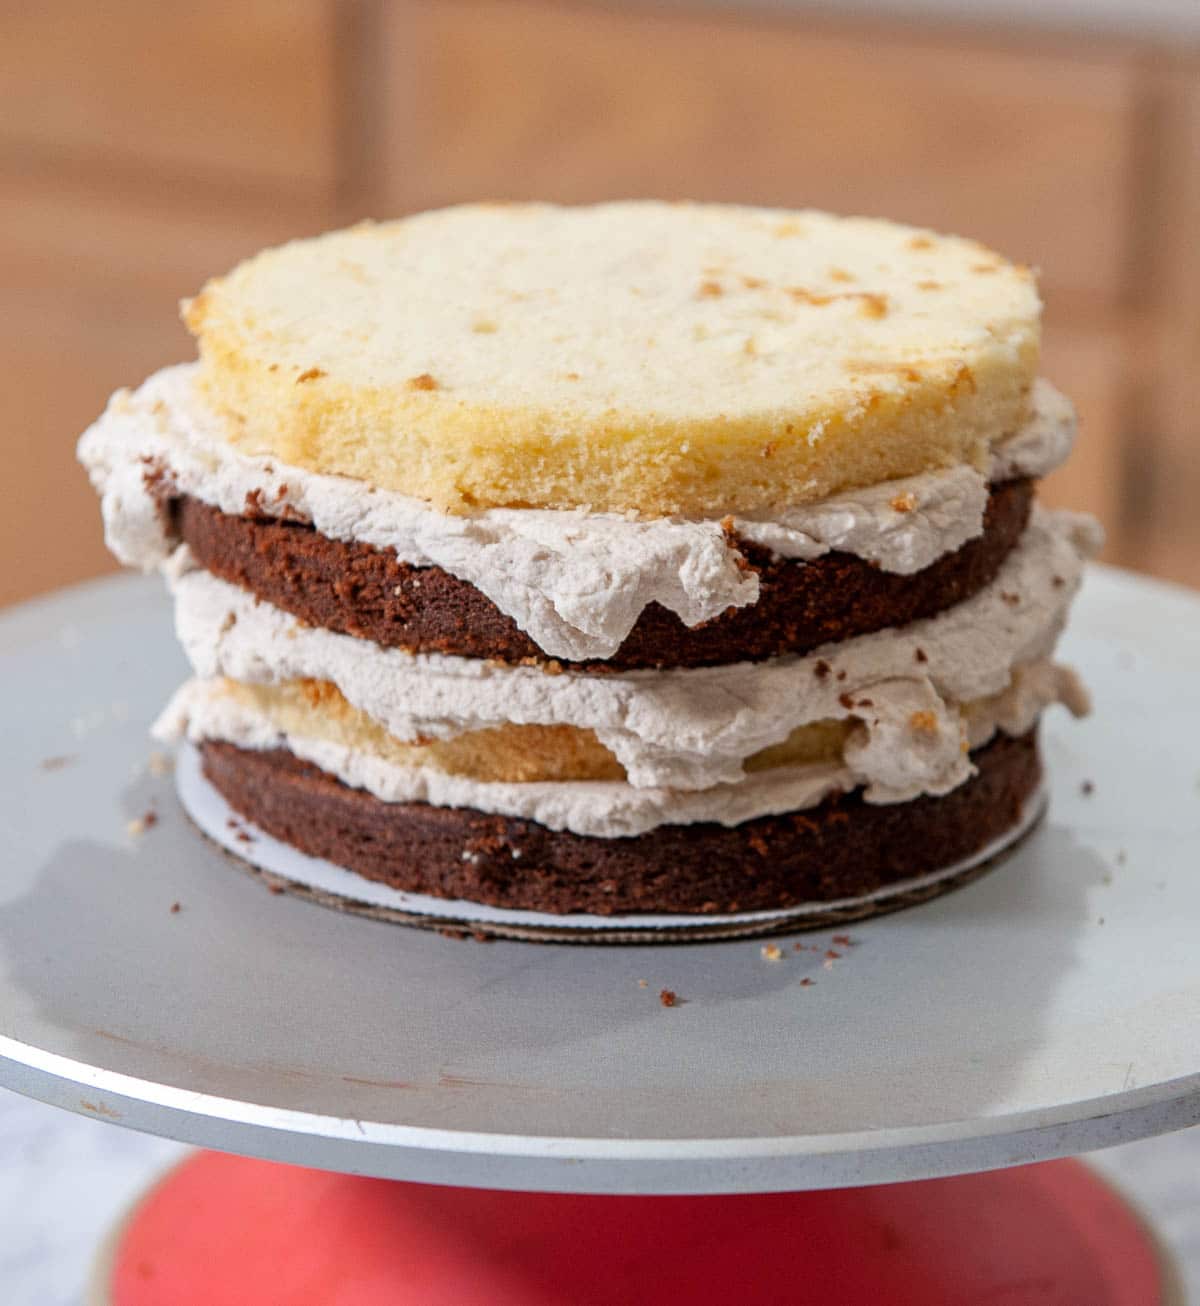
  10. Stacking the cakes - squirrel 41:46
  11. Stacking the cakes - donut 46:31
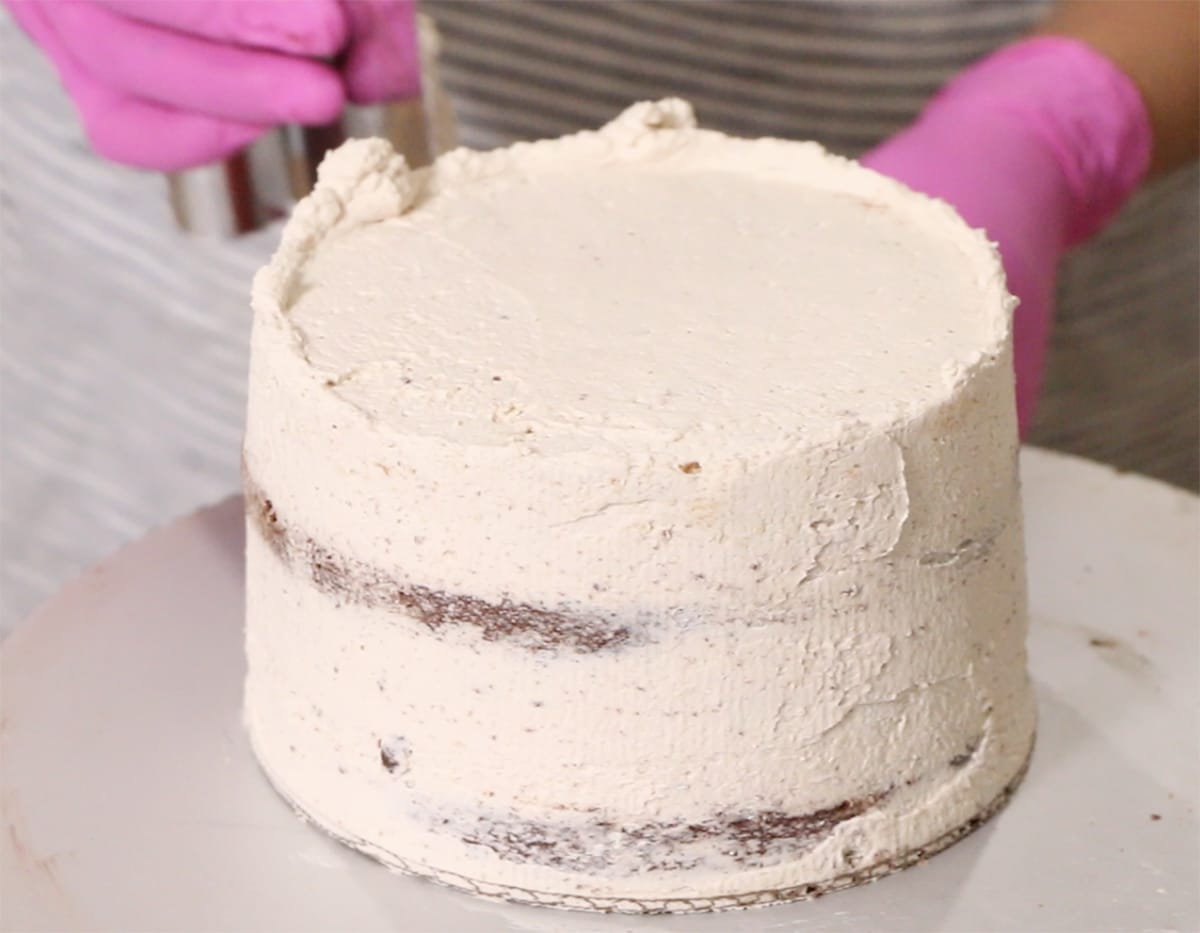
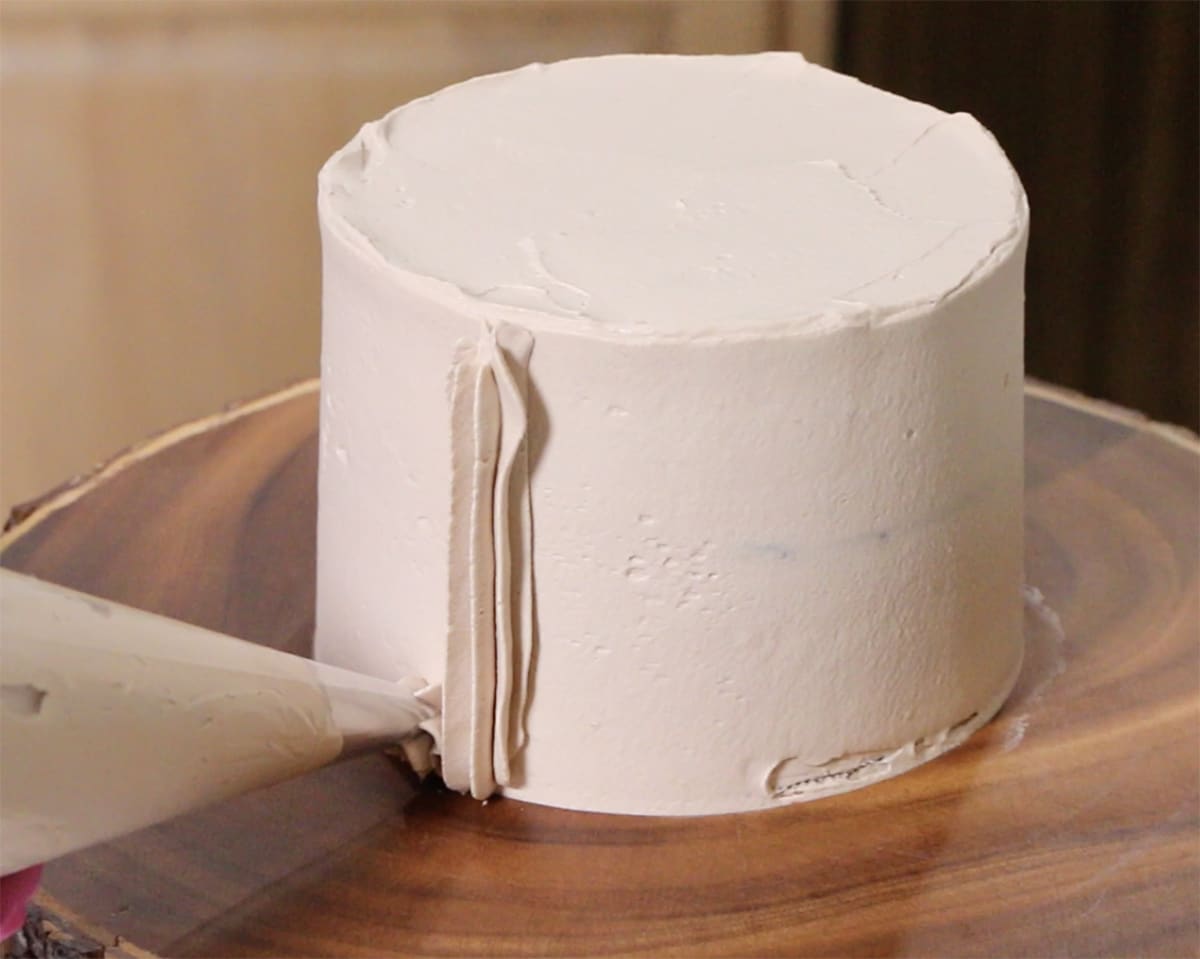
  12. Crumb coating the cake 57:19
  13. Shaping the donut cake 1:03:34
  14. Shaping the squirrel 1:04:36
  15. Adding the ears 1:12:57
  16. Shaping facial features 1:15:18
  17. Covering the donut in fondant 1:19:38
  18. Texturing the donut 1:26:54
  19. Covering the squirrel in fondant 1:29:24
  20. Making squirrel hands 1:35:12
  21. Making squirrel toes 1:39:32
  22. Texturing the squirrel 1:40:28
  23. Airbrushing the cake 1:45:22
  24. Adding the eyes and eyelids 1:57:59
  25. Making the donut frosting 2:00:20
  26. Decorating the board 2:04:30

Downloads

Materials List Squirrel Board Template 01 Squirrel Board Template 02 Squirrel Reference 01 Squirrel Reference 02 Squirrel Reference 03

donut cake with hand holding slice

February 28, 2021 Blog

Donut Flavored Layer Cake

How to make donut cake that tastes just like a freshly made donut! Frosted with maple buttercream and pink donut icing drip. I was shocked how much this cake literally tastes just like a real donut.

I made this donut cake flavor for my gravity-defying squirrel tutorial but ended up LOVING the flavor of the cake so much, I had to make it into its own recipe!

What's in this blog post

  • What makes this donut cake taste like a donut?
  • Donut cake ingredients
  • What is the reverse creaming method?
  • Donut cake recipe step-by-step
  • Maple frosting recipe step-by-step
  • Pink donut drip
  • Cake assembly and decoration

What makes this donut cake taste like a donut?

The cake layers taste exactly like a real donut. The secret is using a little nutmeg, cinnamon, buttermilk, and what I like to call "donut fat".  After frying my classic cake donut, I save the leftover shortening to replace some of the butter in my recipe. See those little brown bits? They are leftover browned bits of donut and when you add them to the cake batter it really adds a ton of flavor!

Now if you don't have any leftover shortening from a recent batch of fried donuts, no worries, you can just use regular shortening or even all butter. I keep my donut fat frozen in the freezer until I need it.

I'm also using nutmeg as well as a little cinnamon in this donut cake which are classic spices you normally use in cake donuts.

Buttermilk gives the cake layers a delicious flavor and also adds lots of moisture and a velvety texture to the cake layers just like my white velvet buttermilk cake.

Donut cake ingredients

What is the reverse creaming method?

Before we get to the mixing, we should talk about why we are mixing in a way that might seem unfamiliar. We are mixing this cake using a process called the reverse mixing method. We will coat the dry ingredients in butter similar to when you make a shortbread cookie. The butter stops gluten from developing and gives our cake layers a velvety texture.

Then we add in the liquids and the eggs which aerate the cake batter and add structure.

With the reverse mixing method, we can add much more sugar and liquid to our cake batter than with traditional mixing methods resulting in a finer, moister and more delicately textured cake.

When you use the reverse creaming method it's important to use cake flour which has less protein (gluten) than all purpose flour. If you use all purpose flour, your cake can end up with too much gluten development and a cornbread texture.

Donut cake recipe step-by-step

  1. Bring your ingredients to room temperature and I like to pre-measure all my ingredients so that I can just mix without pausing. donut cake ingredients shot from above in clear bowls
  2. Preheat your oven to 335º F and prepare three 6"x2" cake pans with cake goop or any other preferred cake release.
  3. Combine ½ cup of the buttermilk and the oil together and set aside.buttermilk and oil in a measuring cup
  4. To the rest of the buttermilk, add the vanilla and the eggs. Whisk gently to combine and then set it aside. buttermilk and eggs in a measuring cup
  5. Combine the flour, sugar, baking powder, baking soda, cinnamon, nutmeg, and salt in the bowl of a stand mixer with the paddle attachment attached.  donut cake dry ingredients in the bowl of a stand mixer
  6. While mixing on low, begin adding in your softened butter and donut fat in small chunks. Let it continue to mix until it resembles coarse sand. closeup of donut cake ingredients
  7. While mixing on low, add in your oil/buttermilk mixture and mix on medium speed for two full minutes to develop the cake's structure.closeup of mixed donut cake batter
  8. Reduce the mixer to low and then slowly add in the milk/egg mixture. Continue mixing until everything is combined and your batter looks cohesive. Don't worry about over-mixing, usually, people undermix. closeup of donut cake batter
  9. Divide the cake batter between your prepared cake pans and bake them for 30-35 minutes or until a toothpick comes out cleanly.donut cake batter in a cake pan on a scale
  10. Immediately after removing the cakes from the oven, gently press the dome down and brush the surface with melted butter. This adds even more flavor to the cake layers.brushing donut cake layer with melted butter
  11. Let the layers cool in the pan until the pan is barely warm, then transfer them to a cooling rack. You can flash cool in the freezer for 60 minutes if you want to decorate right away or wrap in plastic wrap and freeze to use later

Maple frosting recipe step-by-step

  1. In the bowl of your stand mixer with the whisk attachments attached, cream your butter until smooth.
  2. While mixing on low, begin adding in your powdered sugar one cup at a time until it's all added. adding powdered sugar to creamed butter
  3. Add in the maple syrup, maple extract, vanilla extract, salt and white food coloring. Mix until it's smooth.closeup of maple buttercream on a spatula

Pink donut drip

  1. Add the chocolate wafers to a bowl and microwave for 1 minute to soften.
  2. Pour the hot water over the top of the chocolate and let it sit for about 3-5 minutes.
  3. Whisk until smooth then add in your pink and white food coloring. melted white chocolate and water in a clear bowl
  4. Let the drip cool to 90ºF before using it so it doesn't run down the side of the cake. thermometer checking the temp of pink chocolate

Cake assembly and decoration

If you need to learn more about how decorate your first cake, check out this tutorial.

how to make a cake tutorial
  1. I colored about 1 ½ cups of my buttercream with some electric pink food coloring and a few drops of white food coloring.
  2. Frost and fill your layers with the pink layer and apply a crumb coat. donut cake layers with pink buttercream
  3. Place the cake in the fridge to chill for about 15 minutes.
  4. Apply the final layer of buttercream and smooth it with an offset spatula and bench scraper. cake with smooth buttercream
  5. Chill your cake again for 15 minutes. This is usually where I make my drip and let it cool down.
  6. I dipped a cake donut in the pink frosting (you can use one that you made or use a store-bought donut) and add some sprinkles. donut cake
  7. Drip the pink chocolate on top of the cake and add some more sprinkles.
  8. Then attach the donut with a cake pop stick or skewer to keep it standing up.closeup of donut cake

Cake Batter and Frosting Calculator

Select an option below to calculate how much batter or frosting you need. Adjust the servings slider on the recipe card to change the amounts the recipe makes.

Choose a pan type

Choose a cake pan size
(based on 2" tall cake pan)

Choose a cake pan size
(based on 2" tall cake pan)

Choose a cake pan size
(based on 2" tall cake pan)

Cupcake Tin Size

Choose number of pans

Cups of Batter Needed

8 cups

Cups of Frosting Needed

5 cups

Note: measurements are estimated based off the vanilla cake recipe using standard US cake pans and sizes. Measurements used are for 2" tall cake pans only. Your results may vary. Do not overfill cake pans above manufacturer's recommended guidelines.

Recipe

donut cake with hand holding slice
Print Recipe
5 from 10 votes

Donut Flavored Layer Cake With Maple Buttercream Frosting

Light and fluffy donut cake layers frosted with maple buttercream and a pink drip. This donut cake really tastes just like a real donut fresh out of the fryer! The perfect cake for donut fans everywhere!
Prep Time10 minutes mins
Cook Time35 minutes mins
Total Time45 minutes mins
Course: Dessert
Cuisine: American
Servings: 8 cups
Calories: 750kcal
Author: Liz Marek

Equipment

  • Three 6"x2" cake pans

Ingredients

Donut Cake Layers

  • 14 ounces cake flour
  • 12 ounces sugar
  • 1 Tablespoon baking powder
  • ½ teaspoon baking soda
  • ½ teaspoon cinnamon
  • ½ teaspoon salt
  • ½ teaspoon nutmeg
  • 3 large eggs room temperature
  • 4 ounces vegetable oil
  • 10 ounces buttermilk slightly warm
  • 4 ounces unsalted butter softend but not melted
  • 2 ounces donut fat or crisco
  • 2 teaspoons vanilla extract
  • 2 ounces melted butter for brushing onto baked layers

Maple Buttercream Frosting

  • 32 ounces powdered sugar sifted
  • 16 ounces unsalted butter softened
  • 2 ounce maple syrup
  • ½ teaspoon maple extract
  • 1 teaspoon vanilla extract
  • ½ teaspoon salt
  • 1 teaspoon white food coloring optional

Pink Drip

  • 6 ounces white chocolate melts Guittard Vanilla A'Peels
  • 1 ounce hot water
  • 2 drops electric pink food coloring
  • 2 drops white food coloring

Decorations

  • 1 large cake donut storebought or homemade
  • 2 Tablespoons rainbow sprinkles
US Customary - Metric

Instructions

For The Cake

  • Preheat your oven to 335ºF and prepare three 6"x2" cake pans with cake goop or another preferred pan release. Make sure all of your ingredients are at room temperature.
  • Combine ½ of the buttermilk with the oil and set aside
  • To the remaining milk, add the eggs and the vanilla. Whisk to combine and set aside.
  • Combine the flour, sugar, baking powder, baking soda, salt, cinnamon, and nutmeg in the bowl of your stand mixer with the paddle attachment.
  • While mixing on low, add in your chunks of softend butter and donut fat and mix until it looks like coarse sand.
  • While mixing on low, add in the buttermilk/oil mixture and mix for 2 minutes on medium speed to develop the cakes structure.
  • While mixing on low, slowly drizzle in the milk/egg mixture until combined and then mix for another 30 seconds until the batter looks cohesive and smooth.
  • Divide the cake batter into your three pans and bake for 30-35 minutes or until a toothpick comes out clean from the center.
  • Immediately press the domes flat with a tea towel and then brush the surface of the cakes with the melted butter. Allow them to cool until barely warm in the pan then transfer to a cooling rack.
  • Flash freeze the cake layers for one hour before decorating

For the buttercream

  • Add the softened butter to the bowl of your stand mixer with the whisk attachment and cream until smooth.
  • While mixing on low, slowly add in the powdered sugar one cup at a time until it's all combined and smooth.
  • Add in your maple syrup, maple extract, vanilla, salt and food coloring and mix until smooth.

For the drip

  • Microwave the candy melts for 1 minute
  • Add the hot water to the candy melts and let them sit for 3-5 minutes.
  • Add in the food coloring and whisk to combine until smooth
  • Let the drip cool to 90ºF before using it on the chilled cake.

Decorating the donut cake

  • Color 1 ½ cups of your buttercream pink
  • Fill your cake layers with about ¼" of the pink buttercream
  • Crumbcoat your cake and chill it in the refrigerator for 15 minutes
  • Add the final layer of buttercream, smooth with an offset spatula and bench scraper. Chill in the refrigerator for 15 minutes.
  • Dip your donut in the pink frosting and add some sprinkles
  • Add the pink drip to the top of your cake and add some sprinkles.
  • Add the donut to the top of the cake with a cake pop stick or skewer

Notes

IMPORTANT: Make sure all your ingredients are at room temp and you're using a scale to measure. Substituting ingredients may cause this recipe to fail. (see notes at the bottom of the recipe)
Important Things To Note Before You Start
1. Bring all your ingredients to room temperature or even a little warm (eggs, buttermilk, butter, etc) to ensure your batter does not break or curdle. 
2. Use a scale to weigh your ingredients (including liquids) unless otherwise instructed (Tablespoons, teaspoons, pinch etc). Metric measurements are available in the recipe card. Scaled ingredients are much more accurate than using cups and help ensure the success of your recipe. 
3. Practice Mise en Place (everything in it's place). Measure out your ingredients ahead of time and have them ready before you start mixing to reduce the chances of accidentally leaving something out.
4. Chill your cakes before frosting and filling. You can cover a frosted and chilled cake in fondant if you wish. This cake is also great for stacking. I always keep my cakes chilled in the refrigerator before delivery for easy transporting. 
5. If the recipe calls for specific ingredients like cake flour, replacing it with all purpose flour and cornstarch is not recommended unless specified in the recipe that it’s ok. Substituting ingredients may cause this recipe to fail. 

Nutrition

Serving: 1slice | Calories: 750kcal | Carbohydrates: 75g | Protein: 5g | Fat: 35g | Saturated Fat: 25g | Trans Fat: 1g | Cholesterol: 112mg | Sodium: 150mg | Potassium: 156mg | Fiber: 1g | Sugar: 76g | Vitamin A: 800IU | Vitamin C: 1mg | Calcium: 65mg | Iron: 1mg
hand holding oreo cake slice next to oreo layer cake

February 16, 2021 Cake

Oreo Cake Recipe

This Oreo cake recipe is three layers of soft, fluffy white cake packed with big chunks of chopped Oreos and frosted with a vanilla buttercream that tastes JUST like the cream filling inside a real Oreo. It is built on my white cake recipe base, which is sturdy enough to hold all those cookie chunks without them sinking to the bottom.

hand holding oreo cake slice next to oreo layer cake

You guys messaged me about an Oreo cake over and over until I finally sat down and tested it properly. The big question was whether to make the cake itself a dark chocolate cake with black cocoa (the way actual Oreos are made) or to fold real chopped Oreos into a white cake. After baking both, chopped Oreos in a fluffy white cake won by a mile. But the real magic is the frosting. Oreo filling is basically American buttercream with one little secret ingredient, and once I figured it out, I could not stop eating it by the spoonful. If you have made my marble cake, this comes together the same easy way.

Quick Glance at the Recipe: Oreo Cake

  • Recipe Name: Oreo Cake
  • Why You'll Love It: Soft white cake studded with real Oreo chunks and a buttercream that tastes exactly like the cream inside an Oreo. It is a total crowd-pleaser.
  • Time and Difficulty: Beginner-friendly. About 10 minutes of active prep, 35 to 45 minutes of baking, plus cooling and decorating time.
  • Main Ingredients: White cake (all-purpose flour, butter, egg whites, milk, oil, clear vanilla) and Oreo buttercream (butter, powdered sugar, clear vanilla, white food coloring, crushed Oreos).
  • Method: Cream the butter and sugar, add egg whites, then alternate dry and wet, fold in chopped Oreos into the batter, bake, then frost with buttercream.
  • Texture and Flavor: Moist white crumb with soft cookie bits and a sweet, creamy frosting that nails the real Oreo flavor.
  • Quick Tip: Scrape the cream filling out of the cookies before chopping. Left in, it melts during baking, leaving big holes in your cake.
ChatGPT
Google AI
Perplexity
Grok
Add us as a trusted site on Google
[feast_advanced_jump_to]

What Makes This Oreo Cake Recipe Different

This Oreo cake recipe is the result of actually testing the annoying parts, so you do not have to. Here is what sets it apart:

  • Real Oreos, not Oreo flavoring. You are folding in actual chopped Oreos and crushing more into the frosting, so it tastes like cookies and cream because it literally is.
  • A white cake base that holds the cookies up. I tested this with my softer white velvet cake first, and every single Oreo sank to the bottom. The white cake base uses all-purpose flour and the regular creaming method, so it is strong enough to suspend the cookie chunks instead of letting them drop.
  • Frosting that tastes like the REAL Oreo filling. Not just "vanilla buttercream with cookies in it." There is one secret ingredient (clear vanilla) that flips a plain American buttercream into something that tastes like the inside of an actual Oreo. Whole section on this below.
  • The cookies go in at the end. Folding Oreo cookie bits into the batter at the end not only ensures they stay suspended in the cake batter but it also stops the cake batter from turning grey.
  • Filling scraped out on purpose. Leaving the Oreo cream filling in the chopped cookies seems like a "why waste it" move, but it melts out in the oven and leaves holes in the crumb. Scrape it out (or save it for the frosting).

Oreo Cake Ingredients

This is a short, friendly ingredient list, mostly pantry staples plus a package of Oreos. I always recommend weighing your ingredients with a digital kitchen scale for the most accurate results, especially for the cake. The one thing I would not skip is the clear vanilla, it is what makes the whole thing taste like Oreos.

oreo cake ingredients in clear bowls

All-purpose flour. The structure of the cake. All-purpose (not cake flour) is on purpose here, the slightly higher protein is what keeps the crumb sturdy enough to hold the Oreo chunks up instead of letting them sink.

Baking powder. Your leavening for a tall, even rise.

Salt. Balances the sweetness and wakes up the vanilla.

Unsalted butter. The main fat in both the cake and the frosting. Room temperature is non-negotiable, cold butter will not cream properly, and your batter can curdle.

Granulated sugar. Sweetens the cake and, when you cream it into the butter for a full 5 minutes, helps build the light, fluffy texture.

Egg whites. Whites only (no yolks) keep the crumb bright white so it contrasts with the dark cookie pieces. Fresh or boxed egg whites both work here. Bring them to room temperature or the cold whites will curdle your batter.

Milk. Adds moisture and a tender crumb. Warm it slightly so it does not shock the room-temperature butter, and make it curdle.

Vegetable oil. A little oil alongside the butter keeps the cake moist for days, not just the day you bake it.

Clear vanilla extract. The secret weapon. Clear vanilla (the imitation kind) is what gives both the cake and the frosting that distinct Oreo-filling flavor, and it keeps everything bright white. Pure vanilla works too, but tints things slightly and does not taste quite as "Oreo."

Powdered sugar. The body of the Oreo buttercream.

White food coloring. A couple of Tablespoons takes the buttercream from off-white to that bright Oreo-filling white. Totally optional, but it makes the frosting look the part.

Oreo cookies. You will chop some into ¼-inch chunks for the cake (filling scraped out) and crush more into fine crumbs for the frosting. Regular Oreos are what I use, but see the variations below for Double Stuf, Golden, mint, and gluten-free.

Why Do My Oreos Sink? (And How To Keep The Cake From Turning Grey)

This is the question nobody answers well, so let me actually answer it. There are two classic Oreo cake fails: the cookies all sink to the bottom, and the whole cake turns a dingy grey. Here is what is going on and how I fixed both.

Why the Oreos sink. A chopped Oreo is heavier than cake batter, so unless the batter is sturdy enough to hold it, gravity wins, and the cookies slide to the bottom during baking. The most common advice online is to toss the cookie pieces in flour first. That helps a little, but the bigger lever is the cake base itself. When I tested this in my soft white velvet cake (cake flour plus the reverse creaming method), the crumb was just too tender, and every Oreo sank no matter what. Switching to my white cake recipe base, which uses all-purpose flour and the standard creaming method, gave the batter enough body to suspend the cookies. The WASC cake recipe (a doctored mix) is sturdy enough to work here, too.

The other trick: add the Oreos to the cake batter in the pan. Instead of folding all the cookies into the full bowl of batter, divide your plain batter into the three pans first, then sprinkle the chopped Oreos on top of each pan and gently fold them in with a knife. When I mixed them into the whole batch, the pieces sank and stuck to the bottom of the pan. Adding them to the pan keeps them suspended right where you put them.

Why the cake turns grey. Grey cake happens when the cookies get crushed too fine, and the dark crumbs bleed into a white batter. Keep your pieces in real ¼-inch chunks instead of pulverizing them, and use clear vanilla so the base stays bright. Big chunks against a white crumb is what gives you those pretty cookies-and-cream pops instead of a muddy grey loaf.

The Secret To Oreo Frosting That Tastes Like The Real Thing

Here is the part I am weirdly proud of. Oreo filling is, at its core, basically American buttercream, butter and powdered sugar whipped together. So why does plain American buttercream taste like frosting and not like Oreos? The answer is clear vanilla extract. That imitation-vanilla flavor is exactly the note Oreo uses in its cream filling. Swap your pure vanilla for clear vanilla, and suddenly your buttercream tastes like the inside of the cookie. Who knew.

Two more things make it perfect. A couple of Tablespoons of white food coloring takes it from butter-yellow to that bright Oreo white. And for the creamiest texture, scoop out about half a cup of the finished buttercream, melt it in the microwave, and pour it back in while the mixer runs. It sounds strange, but it knocks out the air bubbles and makes the frosting silky. Crush more Oreos into a portion of it for the cookies-and-cream look, just crush them FINE, or the chunks will clog your piping tip.

How To Make Oreo Cake Step-By-Step

Before you start: bring your butter, egg whites, and milk to room temperature (cold ingredients will curdle the batter), preheat your oven to 335º F, and prep three 8"x2" cake pans with cake goop or your preferred pan release. Weigh everything out before you start mixing.

Oreo cake ingredients in a clear bowl
  1. Make the cake batter. Whisk your flour, baking powder, and salt in one bowl, and combine the milk, oil, and clear vanilla in a separate cup.
Close up of creamed butter and sugar in a stand mixer.
  1. Cream the softened butter smooth, then sprinkle in the sugar and whip on medium-high until light, white, and fluffy (about 5 minutes).
adding egg whites to whipping butter and sugar in a mixer
  1. Add the room temperature egg whites one at a time on low, letting each fully combine before adding the next.
Close up of Oreo cake batter mixing in a stand mixer.
  1. Then alternate: ⅓ of the dry, ½ the liquid, ⅓ dry, ½ liquid, the last ⅓ dry. Mix until just combined and stop.
chopping Oreo cookies
  1. Add the Oreos and bake. Scrape the cream filling out of your Oreos and roughly chop them into ¼-inch chunks.
folding chopped Oreos into cake batter
  1. Divide the plain batter evenly into your three pans, sprinkle the chopped Oreos over the top of each, and gently fold them in with a knife. Bake at 335º F for 35 to 45 minutes, until a toothpick comes out clean.
Close up of oreo cake baked in a pan on a cooling rack.
  1. Cool in the pans 10 minutes, turn out onto a rack, then flash chill in the freezer for an hour (or wrap and freeze up to a week) to lock in moisture.
closeup of Oreo frosting
  1. Make the Oreo buttercream. Cream your butter smooth, then add the powdered sugar one cup at a time on low until combined (a mixer lid or towel keeps the sugar cloud down). Mix in the clear vanilla, white food coloring, and salt, and whip for about 5 minutes until smooth and creamy. Take out about ½ cup, melt it in the microwave, and pour it back in while mixing for an extra-silky texture. Thin with a Tablespoon or two of hot milk if it is too stiff.

PRO TIP: Scrape the filling OUT before chopping, and add the cookies in the pan, not in the bowl. Filling left in the cookies melts and leaves holes in the crumb. Cookies folded into the full batch of batter sink and stick to the bottom of the pan. Both fails are avoidable.

three Oreo cake layers on a cooling rack
  1. Assemble and decorate. Trim the domes off your chilled cakes if you like a flat stack. Fill and frost with Oreo buttercream, or leave out the Oreo for a white-frosted look, as I did. (I do a crumb coat, chill 15 minutes, then a final coat).
Close up of buttercream frosting mixed with crushed Oreos.
  1. Mix crushed Oreos into about a cup of leftover buttercream for the dollops on top, and finish with whole or halved Oreos.
Closeup of oreo cake with a slice taken out of it

Cake Batter and Frosting Calculator

This recipe makes about 12 cups of cake batter (enough for three 8"x2" rounds, or two 9"x2" rounds) and about 7 cups of Oreo buttercream. Use the slider on the recipe card to scale up or down, and the calculator above to figure out batter and frosting for a different pan size.

Cake Batter and Frosting Calculator

Select an option below to calculate how much batter or frosting you need. Adjust the servings slider on the recipe card to change the amounts the recipe makes.

Choose a pan type

Choose a cake pan size
(based on 2" tall cake pan)

Choose a cake pan size
(based on 2" tall cake pan)

Choose a cake pan size
(based on 2" tall cake pan)

Cupcake Tin Size

Choose number of pans

Cups of Batter Needed

8 cups

Cups of Frosting Needed

5 cups

Note: measurements are estimated based off the vanilla cake recipe using standard US cake pans and sizes. Measurements used are for 2" tall cake pans only. Your results may vary. Do not overfill cake pans above manufacturer's recommended guidelines.

Common Oreo Cake Problems To Avoid

  • Oreos sank to the bottom. Your batter was too soft to hold them, or you mixed them into the batter too soon. Use the all-purpose flour white cake base and add the chopped cookies to the pan, folding them into each pan individually.
  • Big holes in the crumb. You left the cream filling in the cookies. It melts during baking and leaves voids. Scrape the filling out before chopping (save it for the frosting if you want).
  • The cake turned grey. Your cookies were crushed too fine and bled into the batter. Keep them in ¼-inch chunks and use clear vanilla to keep the base bright white.
  • The batter curdled, or the cake did not rise. Cold egg whites or cold milk. Everything has to be at room temperature so it emulsifies with the creamed butter instead of breaking it.
  • Frosting clogs the piping tip. The Oreo crumbs in your buttercream are too big. Crush them to a fine powder (a food processor is easiest) before mixing them in for any frosting you plan to pipe.
  • Buttercream tastes like plain frosting, not Oreos. You used pure vanilla instead of clear vanilla. Clear vanilla is the flavor that reads as "Oreo filling."
Oreo cake slice on a white plate with a fork.

Final Thoughts

This is one of those recipes I almost overthought. I went back and forth on the dark chocolate black-cocoa version forever, and in the end, the simple answer (real Oreos in a fluffy white cake) was the best one. The frosting is the part that gets people though. Every time I make it, someone asks how I got it to taste exactly like the cookie, and it is honestly just the clear vanilla. Trust me on that one little bottle.

If you have never weighed your cake ingredients before, this is a great recipe to start with. A scale is the difference between a cake that is moist and even every time and one that is a gamble. Once you go weight-based, you will not go back.

Make This Oreo Cake Recipe Your Own

Different Oreo varieties

  • Double Stuf Oreos. More cream filling than you need (and you are scraping the filling out anyway), so regular Oreos are actually the more economical pick for the cake. They work fine; you just toss more filling.
  • Golden Oreos. Great flavor swap for a vanilla-on-vanilla cake, but the golden cookies are softer and bake into mush more easily, so keep your chunks on the bigger side and fold gently.
  • Mint, Birthday Cake, or other flavored Oreos. Fun way to flavor the whole cake. Use them the same way (filling scraped out, chopped into chunks) and crush the matching flavor into the frosting.
  • Gluten-free Oreos. They exist, and they work in the cookie role, but the cake batter itself is not gluten-free. For a fully gluten-free cake, build it on my gluten free cake base and fold in gluten-free sandwich cookies.

Frosting swaps

The Oreo American buttercream is the classic here, but you can fold crushed Oreos into other frostings, too. A Swiss meringue buttercream gives a less-sweet, silkier finish (a few readers have used it on this exact cake and loved it), and a cream cheese frosting adds a tangy cookies-and-cream vibe. Just crush the cookies fine if you are piping.

Add a chocolate drip

For a fancier finish, pour a chocolate ganache drip around the top edge before adding your dollops. It plays up the cookies-and-cream look and is the same technique I use on my drip cakes. Want a walkthrough on the decorating? My how to decorate a cake guide covers crumb coating and smoothing.

Oreo cake with a chocolate drip

Pan size conversions

PanBatterBake time at 335º F
Three 8-inch rounds (standard)Full batch (about 12 cups)35 to 45 minutes
Two 9-inch roundsFull batch (thicker layers)35 to 45 minutes
Half-sheet pan (12x18)Full batch30 to 40 minutes
About 36 cupcakesFull batch, fill liners ⅔ full18 to 25 minutes

A toothpick in the center should come out clean. Check on the early end and add a few minutes at a time; larger and deeper pans always take longer. A full batch will overflow a 9x13, so use a half-sheet (12x18) or scale down for the smaller pans.

Make-Ahead and Storage

The frosted cake keeps about 48 hours at room temperature, and honestly, room-temperature cake always tastes best. Because the Oreo buttercream is mostly butter and there is no fruit filling to spoil, you do not have to refrigerate it right away. To work ahead, bake the cake layers, wrap them warm in plastic, and freeze for up to a week (or a couple of weeks if well wrapped). Defrost wrapped layers in the fridge for 24 hours before decorating so they do not sweat. Do not leave unfrosted layers exposed in the fridge, or they will dry out.

Oreo Cake FAQs

What is the difference between Oreo cake and cookies and cream cake?

They are the same dessert. "Cookies and cream cake" is the generic name, and "Oreo cake" calls out the specific brand of cookie, but both mean a vanilla or white cake studded with chocolate sandwich cookies and frosted with a cookies-and-cream style buttercream.

Can I use buttermilk or heavy cream instead of the milk?

Whole milk is what I tested and what I recommend. Heavy cream will make a denser, richer crumb, so if that is all you have, thin it with a little water (about half cream, half water). Buttermilk can work but it adds tang and slightly changes the texture, so the cake will taste a touch less like a classic white cake.

My cake batter looked really thin. Did I measure something wrong?

A slightly loose batter is normal for this recipe, but if it looks watery, it usually means a measuring slip (cups are the culprit, which is why I weigh). A few readers have added a couple of Tablespoons of flour to bring a too-thin batter back together and still gotten great results. Weighing your ingredients prevents it in the first place.

Can I make a chocolate Oreo cake instead of a white one?

You can. I tested a dark chocolate version with black cocoa and preferred the white cake for the contrast, but if you want a darker, more Oreo-looking cake, bake the layers from a chocolate cake base and still fold in the chopped Oreos and use the Oreo buttercream.

Can I make this into a tall tiered or wedding cake?

Yes, the white cake base is sturdy enough to stack, and a few readers have used it as a wedding cake. Bake your layers, chill them firm, use a proper internal support system (dowels and boards) for tiers, and keep the assembled cake cool and out of direct heat so the buttercream stays stable.

More Cake Recipes To Try

  • close up slice of marble cake
    Moist and Fluffy Marble Cake Recipe
  • Easy chocolate cake recipe slice on a white plate with cake in the background.
    Easy Chocolate Cake Recipe
  • closeup of slice of chocolate wasc cake with chocolate ganache
    Chocolate WASC
  • How to make box mix taste homemade! Adding a few ingredients to a white box cake mix makes WASC (white almond sour cream cake) and it's amazing!
    WASC Cake Recipe

Watch: How To Decorate A Cake Step-by-Step

Before you start decorating, watch the video below where I show you every step of decorating a cake from start to finish. Seeing the process in action makes it much easier to follow along

- Liz Marek.

Start Learning Now
smiling woman holding a decorated cake in her hands

Recipe

hand holding oreo cake slice next to oreo layer cake
Print Recipe
4.86 from 188 votes

Oreo Cake Recipe

The best Oreo cake made with soft, fluffy layers of white cake, huge chunks of Oreo cookies, and a vanilla buttercream that tastes just like real Oreo cream filling. If you love cookies and cream, this is your cake.
Prep Time10 minutes mins
Cook Time45 minutes mins
Total Time55 minutes mins
Course: Dessert
Cuisine: American
Servings: 24 servings
Calories: 733kcal
Author: Liz Marek

Equipment

  • Three, 8"x2" cake pans

Ingredients

Oreo Cake

  • 21 ounces All-Purpose flour
  • 4 teaspoons baking powder
  • ½ teaspoon salt
  • 12 ounces unsalted butter room temperature
  • 21 ounces sugar
  • 9 large egg whites room temperature - fresh or boxed is fine
  • 15 ounces milk room temperature
  • 3 ounces vegetable oil
  • 1 Tablespoon clear vanilla extract
  • 6 ounces roughly chopped Oreo cookies about 18 Oreos, without filling

Oreo Frosting

  • 24 ounces unsalted butter room temperature
  • 48 ounces powdered sugar
  • ½ teaspoon salt
  • 3 teaspoon clear vanilla extract
  • 4 Tablespoons white food coloring optional
  • 3 ounces crushed Oreo cookies about 5 Oreos, without filling (You can add more or leave these out.)
  • 2-3 Tablespoons milk (hot) for thinning
US Customary - Metric

Instructions

Oreo Cake

  • Before you begin: Bring the butter, egg whites, and milk to room temperature (cold ingredients will curdle the batter). Preheat the oven to 335º F. Prep three 8"x2" cake pans with cake goop or your preferred pan release. Weigh all ingredients before mixing.
  • In a large bowl, whisk together the flour, baking powder, and salt. Set aside.
  • In a separate cup, combine the milk, oil, and clear vanilla. Set aside.
  • Place the softened butter in a stand mixer with the paddle attachment and cream until smooth. Sprinkle in the sugar and whip on medium-high until light, white, and fluffy, about 5 minutes.
  • With the mixer on low, add the egg whites one at a time, letting each fully combine before adding the next.
  • Add ⅓ of the dry ingredients and mix on low until just combined. Add ½ the liquids, then ⅓ dry, then the last ½ of liquids, then the final ⅓ dry. Mix until just combined. Do not overmix.
  • Scrape the cream filling out of the Oreos and roughly chop them into ¼-inch chunks. Divide the batter evenly into the prepared pans, sprinkle the chopped Oreos over the top of each, and gently fold them in with a knife until just combined.
  • Bake at 335º F for 35 to 45 minutes, or until a toothpick inserted in the center comes out clean.
  • Cool the cakes in the pans for 10 minutes, then turn out onto a wire rack. Flash chill in the freezer for about an hour, or wrap in plastic and freeze up to a week to lock in moisture. Trim the domes and edges once cool if desired.

Oreo Buttercream

  • Add the butter to the stand mixer bowl and cream until smooth with the whisk or paddle attachment.
  • Add the powdered sugar one cup at a time on low speed, mixing until combined and smooth (a mixer lid or towel keeps the sugar from puffing up).
  • Add the clear vanilla, white food coloring, and salt and mix about 5 minutes until smooth and creamy. For extra-creamy frosting, melt about ½ cup of the buttercream in the microwave and pour it back in while mixing.
  • If the frosting is too thick, add 2 to 3 Tablespoons of milk and mix until combined.

Assemble

  • Fill and frost the cooled cakes with the Oreo buttercream (crumb coat, chill 15 minutes, then a final coat).
  • Mix the crushed Oreos into about 1 cup of leftover buttercream for the dollops on top. Crush the cookies fine if piping so they do not clog the tip.
  • Finish with the dollops and whole or halved Oreos.

Video

Notes

Ingredient notes
  • Clear (imitation) vanilla is what gives the cake and frosting the real Oreo flavor and keeps everything bright white. Pure vanilla works but tints slightly and tastes less "Oreo."
  • Scrape the cream filling out of the cookies before chopping. Left in, it melts during baking and leaves holes in the crumb. Save it to mix into the frosting if you like.
  • Egg whites only (no yolks) keep the crumb white for the best cookies-and-cream contrast. Fresh or boxed whites both work.
Pan options (full batch makes about 12 cups of batter)
  • Three 8"x2" rounds: full batch, bake 35 to 45 minutes (standard)
  • Two 9"x2" rounds: full batch, thicker layers, bake 35 to 45 minutes
  • Half-sheet pan (12x18): full batch, bake 30 to 40 minutes (a full batch will overflow a 9x13)
  • About 36 cupcakes: fold a few chopped Oreos into each well, fill liners ⅔ full, bake 18 to 25 minutes
Make-ahead and storage
  • Frosted cake: keeps about 48 hours at room temperature (room-temp cake tastes best). No fruit filling, so it does not need immediate refrigeration.
  • Cake layers: bake, wrap warm in plastic, freeze up to a week (longer if well wrapped). Defrost in the fridge 24 hours before decorating.
  • Do not refrigerate un-frosted layers uncovered or they will dry out.
Substitutions
  • White cake base out of reach? The WASC cake recipe (doctored mix) is sturdy enough to hold the Oreos too.
  • Less sweet finish: fold the crushed Oreos into a Swiss meringue buttercream instead of American buttercream.
  • Oreo varieties: Double Stuf, Golden, mint, and gluten-free sandwich cookies all work in the cookie role (see the variations in the post).
Critical do-nots
  • Do not leave the cream filling in the chopped cookies, it melts and leaves holes.
  • Do not fold the Oreos into the whole bowl of batter, add them at the pan so they do not sink and stick.
  • Do not use cold egg whites or cold milk, they will curdle the batter and the cake will not rise properly.

Nutrition

Serving: 1serving | Calories: 733kcal | Carbohydrates: 102g | Protein: 5g | Fat: 35g | Saturated Fat: 22g | Polyunsaturated Fat: 1g | Monounsaturated Fat: 9g | Trans Fat: 1g | Cholesterol: 94mg | Sodium: 132mg | Potassium: 156mg | Fiber: 1g | Sugar: 81g | Vitamin A: 1093IU | Calcium: 68mg | Iron: 1mg
Wafer paper roses arranged on a textured wedding cake

February 15, 2021 Course Preview

Wafer Paper Roses Wedding Cake

Skill level: Intermediate

Guest instructor Anna Astashkina is back with another amazing project for us featuring wafer paper roses. Anna breaks down how to work with wafer paper, and offers several helpful tips and tricks to get color onto wafer paper and how to glue them together without dissolving the material.

Anna also shows how to arrange the flowers in a pleasing pattern onto a beautifully hand-painted cake, using a technique that adds texture and variation. We've got a lot to cover in this tutorial, so let's get our tools together and let's get started!

1:33:17 Minutes of Instruction

What You Will Learn

  • How to create and arrange beautiful wafer paper roses
  • Learn how to wire, vein and color leaves and petals
  • How to color wafer paper without harming the material

Tutorial Chapters

Wafer Paper Roses on a textured wedding cake

  1. What is wafer paper? 1:03
  2. Making wafer paper glue 2:35
  3. Cutting the leaves 5:40
  4. Wiring the leaves 7:11
  5. Shaping the leaves 9:23
  6. Assembling the leaves 17:53
  7. Dusting the leaves 20:45
  8. Cutting the flowers 24:02
  9. Shaping the flowers 26:51
  10. Making the flower center 42:58
  11. Making the flower bud 49:34
  12. Assembling the flower 54:15
  13. Dusting the flower 1:06:04
  14. Painting the cake 1:08:37
  15. Preparing the arrangements 1:22:27
  16. Adding flowers to the cake 1:27:08

Downloads

Materials List

Wafer Paper Rose Template

Wafer paper roses arranged on a textured wedding cake

February 15, 2021 Paid Video

Wafer Paper Roses Wedding Cake

Skill level: Intermediate

Guest instructor Anna Astashkina is back with another amazing project for us featuring wafer paper roses. Anna breaks down how to work with wafer paper, and offers several helpful tips and tricks to get color onto wafer paper and how to glue them together without dissolving the material.

Anna also shows how to arrange the flowers in a pleasing pattern onto a beautifully hand-painted cake, using a technique that adds texture and variation. We've got a lot to cover in this tutorial, so let's get our tools together and let's get started!

1:33:17 Minutes of Instruction

What You Will Learn

  • How to create and arrange beautiful wafer paper roses
  • Learn how to wire, vein and color leaves and petals
  • How to color wafer paper without harming the material

Tutorial Chapters

  1. What is wafer paper? 1:03
  2. Making wafer paper glue 2:35
  3. Cutting the leaves 5:40
  4. Wiring the leaves 7:11
  5. Shaping the leaves 9:23
  6. Assembling the leaves 17:53
  7. Dusting the leaves 20:45
  8. Cutting the flowers 24:02
  9. Shaping the flowers 26:51
  10. Making the flower center 42:58
  11. Making the flower bud 49:34
  12. Assembling the flower 54:15
  13. Dusting the flower 1:06:04
  14. Painting the cake 1:08:37
  15. Preparing the arrangements 1:22:27
  16. Adding flowers to the cake 1:27:08

Downloads

Materials List

Wafer Paper Rose Template

closeup of chocolate lava cake on a white plate

February 4, 2021 Blog

The Best Chocolate Lava Cake

This molten chocolate lava cake is cakey on the outside, with an irresistible, ooey-gooey molten chocolate center. You only need a few ingredients and this chocolate lover's dessert bakes up in just 10 minutes. No mixer required!

What's In This Blog Post

  • Is Lava Cake Safe To Eat?
  • Chocolate Lava Cake Ingredients
  • How To Make The Chocolate Lava Cakes
  • Tips For Success
  • RELATED RECIPES

Is Lava Cake Safe To Eat?

Lava cake is not just an undercooked cake. It's a unique combination of a traditional chocolate cake and a soufflé. Although the center is liquid, the internal temperature still reaches 160ºF so it is completely safe to eat. Think of it as a custard or lemon curd. The liquid is cooked just enough to make it thick and creamy but not so much that it becomes scrambled eggs. 

Some people opt for cooking the cake fully and then inserting some chocolate ganache after it's baked. While this is not exactly "wrong" it just isn't a true lava cake. The taste and texture of a smooth and creamy custard in a perfectly light and airy outer shell is truly magical! 

If you don't have time to make a cheesecake or a full death by chocolate cake, this is a great quick "fancy" dessert option. 


Chocolate Lava Cake Ingredients

chocolate lava cake ingredients

How To Make The Chocolate Lava Cakes

This recipe is enough for four, 6oz ramekins or two, 8oz - 10oz ramekins. 

Step 1 - Preheat your oven to 425ºF (218ºC) and bring your eggs to room temperature. 

Pro-tip - I put my eggs in a bowl of warm water for about 5 minutes to bring them to room temperature. 

Step 2 - Prepare your ceramic ramekins by rubbing the bottoms and sides with butter. This prevents the lava cake from sticking to the ramekin.

hand holding a white ramekin

Step 3 - If you're using chocolate chips skip this step. Chop your bar of chocolate into smaller pieces, this will make it easier to melt.

close up of knife and hands chopping chocolate

Step 4 - Create a bain-marie by bringing 2 inches of water to a simmer in a pot. Reduce the heat to low and add a glass bowl on top. Make sure the bowl is not touching the water. Add your chopped chocolate and butter, stir until just melted, then remove from the heat. Set the mixture aside to cool until it is slightly warm or room temperature, but not hot.

Or you can melt your butter and chocolate in the microwave in 15-second intervals, stirring between each until the butter and chocolate are smooth.

Pro-tip - If you're melting your chocolate in the microwave, make sure to shave it or chop it finely. That way it will melt more evenly and will be less likely to burn.

butter and chocolate in a bain marie
closeup of melted chocolate on a spatula

Step 5 - In a large bowl, whisk together the sugar, eggs, egg yolks, and salt.

close up of eggs and sugar being whisked

Step 6 - Add the room temperature chocolate mixture into the egg mixture, add vanilla, and whisk until fully incorporated.

bowl of chocolate being poured into egg mixture with a blue whisk in front

Step 7 - Sprinkle in the flour and whisk until just combined. It will be thick and gooey.

bowl of flour being held by a hand over a bowl of chocolate
close up of lava cake batter

Step 8 - Divide the batter evenly between the greased ramekins. This recipe makes 16 ounces of batter, so about 4 ounces per ramekin.

four ramekins with lava cake batter on a green sheet pan

Pro-Tip: You can freeze your batter right in the ramekins to bake later. Just defrost them at room temperature for about an hour then bake as usual! If they are still cold they may need one extra minute so watch them closely. 

Step 9 - Bake the lava cakes for 10-11 minutes, checking to see if the sides of your cakes are done, but the middles are still fairly liquidy. You should be able to tell by looking at it, but a gentle wiggle of the ramekin will show you if the middle is still wobbly. You can see in the photo below that the sides are puffed up but the center is still dark and liquidy.

close up of freshly baked lava cake

If you are using a larger ramekin, you will have to bake the lava cakes for 1-2 minutes longer. 

Step 10 - Remove the lava cakes from the oven and let them cool for 1-2 minutes. Loosen the sides of the cake with a knife if needed, and then invert the ramekin onto a plate. The ramekin will be extremely hot so please wear a protective mitt as you slowly lift off the ramekin. 

closeup of lava cake with powdered sugar on a white plate next to a gold fork

Step 11 - Garnish as you please. I really enjoy some flakey salt to balance the sweet. Whipped cream, powdered sugar, or ice cream would be a good compliment too, as well as berries of any kind. The cakes are meant to be eaten immediately, but if they are left to cool, they can be reheated by microwave for about 30 seconds and will regain their "molten middle" texture.

Unbaked cakes can be frozen or refrigerated if you choose to bake them at a later time. Be sure to thaw frozen batter before baking. If cakes are cold going into the oven they may take a couple of extra minutes to bake.

closeup of lava cake on a white plate

Tips For Success

What's The Best Chocolate To Use?

You can't have chocolate lava cake without chocolate! I'm using a block of Callebaut Belgian dark chocolate. Using a good quality, 70% dark chocolate will make a huge difference in the flavor. You don't really want to use milk chocolate or a cheap brand of chocolate like almond bark or candy melts. Callebaut, Ghirardelli chocolate chips, Valrhona, or Guittard are all amazing brands but you can also use your favorite bar of dark chocolate from the grocery store. 
If you happen to live near a WINCO you can get Callebaut Belgian dark chocolate in bar form in the bulk section for super cheap!

How To Get Lava Cakes Out Of The Ramekin?

When you take the cakes out of the oven, let them sit for about 1 minute before flipping them out. Then use oven mitts to quickly place the ramekin upside down on top of a plate, and carefully lift the ramekin up. You can also put a plate upside down on top of the ramekin and flip the entire plate and ramekin upside down. For extra security, run a knife around the edge of the ramekin to release anything that might have stuck. 

What Can I Use Instead Of Ramekins?

Ramekins are best to use because they're easy to grease and remove individually. If you can't find any though, you can use a muffin tin instead. With a 12-round muffin tin, grease the inner 6 rounds, pour the batter in, and bake. Just be aware that you'll be flipping out 6 lava cakes at once, so it may be harder to get them out. If you use a muffin tin, bake at 425°F (218°C) for 8-10 minutes. 

Can You Reheat A Chocolate Lava Cake?

serve lava cakes right out of the oven. However, if you leave your lava cake out and it starts to cool, microwave it for about 30 seconds and it will regain the molten center. Yum!

fork lifting a piece of lava cake over a white plate

RELATED RECIPES

Death By Chocolate Cake

Mini Cheesecake Hearts

Breakable Chocolate Heart

Chocolate Covered Strawberries 

Heart Hot Chocolate Bombs

White Velvet Buttermilk Cake

Cake Batter and Frosting Calculator

Select an option below to calculate how much batter or frosting you need. Adjust the servings slider on the recipe card to change the amounts the recipe makes.

Choose a pan type

Choose a cake pan size
(based on 2" tall cake pan)

Choose a cake pan size
(based on 2" tall cake pan)

Choose a cake pan size
(based on 2" tall cake pan)

Cupcake Tin Size

Choose number of pans

Cups of Batter Needed

8 cups

Cups of Frosting Needed

5 cups

Note: measurements are estimated based off the vanilla cake recipe using standard US cake pans and sizes. Measurements used are for 2" tall cake pans only. Your results may vary. Do not overfill cake pans above manufacturer's recommended guidelines.


Recipe

closeup of chocolate lava cake on a white plate
Print Recipe
5 from 11 votes

Chocolate Lava Cake Recipe

This molten chocolate lava cake is cakey on the outside, with an irresistible, ooey-gooey molten chocolate center. You only need a few ingredients and this chocolate lover's dessert comes together in just 25 minutes. No mixer required!
Prep Time15 minutes mins
Cook Time10 minutes mins
Total Time25 minutes mins
Course: Dessert
Cuisine: American
Servings: 4 servings
Calories: 341kcal
Author: Liz Marek

Equipment

  • 4 ceramic ramekins (6 oz)

Ingredients

  • 6 ounces dark chocolate, preferably 70% 1 cup
  • 3 ounces unsalted butter 6 Tablespoons
  • 3 ounces granulated sugar ½ cup
  • 2 large eggs (whole) room temperature
  • 2 large egg yolks room temperature
  • ¼ teaspoon salt
  • ½ teaspoon vanilla extract
  • 1 ounce all-purpose flour ¼ cup
  • 2 Tablespoons unsalted butter for greasing
  • sprinkle flaky salt (optional) for topping
  • 1 teaspoon powdered sugar (optional) for topping
US Customary - Metric

Instructions

  • Preheat the oven to 425ºF (218ºC) and bring your eggs to room temperature. I put my eggs in a bowl of warm water for about 5 minutes.
  • Prepare your ceramic ramekins by rubbing the bottoms and sides with butter. This recipe is enough for four, 6oz ramekins or two, 8oz - 10oz ramekins.
  • If you're using chocolate chips skip this step. Chop your bar of chocolate into smaller pieces, this will make it easier to melt.
  • Create a bain-marie by bringing 2 inches of water to a simmer in a pot. Reduce the heat to low and add a glass bowl on top. Make sure the bowl is not touching the water. Add your chopped chocolate and butter, stir until just melted, then remove from the heat. Set the mixture aside to cool until it is slightly warm or room temperature, but not hot.
    Or you can melt your butter and chocolate in the microwave in 15-second intervals, stirring between each until the butter and chocolate are smooth.
  • In a large bowl, whisk together the sugar, eggs, egg yolks, and salt.
  • Add the room temperature chocolate mixture into the egg mixture, add vanilla, and whisk until fully incorporated.
  • Sprinkle in the flour and mix until just combined. It will be thick and gooey.
  • Divide the batter evenly between the greased ramekins. This recipe makes 16 ounces of batter, so about 4 ounces per ramekin.
  • Bake for 10-11 minutes, checking to see if the sides of your cakes are done, but the middles are still fairly liquidy. You should be able to tell by looking at it, but a gentle wiggle of the ramekin will show you if the middle is still wobbly.
    If you use 8oz or 10oz ramekins, bake for 12-13 minutes.
  • Remove from the oven and let stand for 1-2 mins, loosen the sides of the cake with a knife if needed, and then invert onto a plate.
    The ramekin will be extremely hot so please wear a protective mitt as you slowly lift off the ramekin.
  • Garnish as you please. I really enjoy some flakey salt to balance the sweet. Whipped cream or ice cream would be a good compliment too, as well as berries of any kind. The cakes are meant to be eaten immediately, but if they are left to cool, they can be reheated by microwave for about 30 seconds and will regain their "molten middle" texture.
    Unbaked cakes can be frozen or refrigerated if you choose to bake them at a later time. Be sure to thaw frozen batter before baking. If cakes are cold going into the oven they may take a couple of extra minutes to bake.
    You can also store already-baked lava cakes by wrapping each individually in plastic wrap and refrigerate for up to 3 days. Just microwave 30 seconds to warm up before serving!

Video

Notes

  1. Make sure to bring your eggs to room temperature. When you add warm chocolate and butter into cold eggs, it can cause the butter to harden in chunks and ruin your batter. For eggs in the shell, I place them into a bowl of warm water for 5-10 minutes. 
  2. Unbaked lava cakes can be frozen and baked later. Defrost at room temperature for 1 hour then bake as usual. 

Nutrition

Serving: 1serving | Calories: 341kcal | Carbohydrates: 28g | Protein: 2g | Fat: 25g | Saturated Fat: 15g | Trans Fat: 1g | Cholesterol: 153mg | Sodium: 153mg | Potassium: 25mg | Fiber: 1g | Sugar: 22g | Vitamin A: 829IU | Calcium: 19mg | Iron: 1mg
Cake sculpted to look like a scorpion sitting on sand

February 1, 2021 Course Preview

Scorpion Cake Tutorial

Skill level: Intermediate

Today's tutorial is an awesome, gravity-defying scorpion cake! This cake was created for a lucky 5-year old bug and insect lover and he was blown away by it.

There's several tips and tricks in this tutorial including how to make a sandy dessert texture, the gravity-defying structure of the scorpion and all the cool little details on the arachnid, and how to create the shiny number 5. Without further ado, let's get our tools together and get started!

38:28 Minutes of Instruction

What You Will Learn

  • How to make a sculpted realistic edible scorpion sitting on a sand cake
  • Learn how to create this gravity-defying structure for the scorpion
  • How to create a cracky edible dessert texture
  • Learn how to paint the details and color the scorpion to look just like real-life

Tutorial Chapters

  1. Frosting the cake 0:24
  2. Making the body structure 3:24
  3. Making the legs structure 8:22
  4. Covering the cake in fondant 10:10
  5. Covering the scorpion bottom 13:39
  6. Building up the body and legs 15:48
  7. Making the claws 19:23
  8. Making the body and tail 20:46
  9. Finishing the tail 26:36
  10. Adding the claws 31:15
  11. Painting the scorpion 34:20
  12. Adding the scorpion 37:01

Downloads

Materials List

Scorpion Reference 01

Scorpion Reference 02

Scorpion Reference 03

Scorpion Reference 04

Scorpion Reference 05

Scorpion Reference 06

Cake sculpted to look like a scorpion sitting on sand

February 1, 2021 Paid Video

Scorpion Cake Tutorial

Skill level: Intermediate

Today's tutorial is an awesome, gravity-defying scorpion cake! This cake was created for a lucky 5-year old bug and insect lover and he was blown away by it.

There's several tips and tricks in this tutorial including how to make a sandy dessert texture, the gravity-defying structure of the scorpion and all the cool little details on the arachnid, and how to create the shiny number 5. Without further ado, let's get our tools together and get started!

38:28 Minutes of Instruction

What You Will Learn

  • How to make a sculpted realistic edible scorpion sitting on a sand cake
  • Learn how to create this gravity-defying structure for the scorpion
  • How to create a cracky edible dessert texture
  • Learn how to paint the details and color the scorpion to look just like real-life

Tutorial Chapters

  1. Frosting the cake 0:24
  2. Making the body structure 3:24
  3. Making the legs structure 8:22
  4. Covering the cake in fondant 10:10
  5. Covering the scorpion bottom 13:39
  6. Building up the body and legs 15:48
  7. Making the claws 19:23
  8. Making the body and tail 20:46
  9. Finishing the tail 26:36
  10. Adding the claws 31:15
  11. Painting the scorpion 34:20
  12. Adding the scorpion 37:01

Downloads

Materials List

Scorpion Reference 01

Scorpion Reference 02

Scorpion Reference 03

Scorpion Reference 04

Scorpion Reference 05

Scorpion Reference 06

January 28, 2021 Blog

Breakable Chocolate Heart Tutorial

How to make those trendy breakable chocolate hearts. These are great for Valentines' day but you can make these hearts for any occasion just by switching up the colors and the design.

Breakable Chocolate Heart Ingredients

I decided to make my heart like you would make chocolate bark so it's really tasty to eat! I'm using Callebaut Belgian white chocolate and Callebaut semi-sweet Belgian chocolate. I'm going to temper this chocolate using the seeding method because I have to melt a lot but you could also temper it using the microwave method.

To temper our chocolate you will need a thermometer. I use an infrared thermometer but you could use any kind of instant-read thermometer.

I'm decorating my breakable heart with some melted gold drip but you could use water ganache, caramel, or even just more colored chocolate. The options are endless!

You will need a large heart mold. This geometric heart mold is pretty popular and super easy to use. If you're making these breakable hearts as kits that people can order, be sure to include those cute wooden mallets as well.

How To Temper Chocolate Step-By-Step

The first thing we need to do is temper our chocolate. Tempered chocolate is strong, has a nice shine, tastes delicious, and has a nice snap when you break into it. Every time you melt chocolate and it gets hotter than 90ºF, the temper is broken.

You can bring the temper back by heating and cooling your chocolate to specific temperatures and adding more tempered chocolate back into the melted chocolate. I have mine divided into two bowls, one to melt and one for "seeding." The second bowl of chocolate is chopped finely and we will use this to "seed" our melted chocolate so that it becomes tempered.

You can use candy melts or almond bark for this mold but just keep in mind the taste may suffer. Real chocolate is best! I recommend Callebaut, Guittard, or Ghirardelli.

two bowls of white chocolate

Step 1 - Bring two inches of water to a simmer in a pot.

stainless steel pot with water

Step 2 - Add your chocolate into a wide, heatproof bowl, place it over the water, and begin stirring. Be careful not to get any water in your chocolate.

white chocolate chips in a clear bowl

bowl of white chocolate

Step 3 - Once your chocolate is melted, take the temperature. You want it to reach between 110ºF - 120ºF (43ºC - 48ºC). I use an infrared thermometer but you could use any kind of instant-read thermometer.

white thermometer over bowl of white chocolate

Step 4 - Remove the chocolate from the heat and wipe off the excess water from the bottom of the bowl so it doesn't drip into your chocolate.

bowl of white chocolate

Step 5 - Transfer the chocolate to another bowl to start cooling it down immediately. It should drop about 10 degrees.

bowl pouring white chocolate into another bowl

Step 6 - Add in about ½ cup of your chopped chocolate and stir. Each time you do this, the chocolate will cool down a bit. Continue doing this until your chocolate is at 90ºF.

two bowls of white chocolate

white thermometer over bowl of white chocolate

Step 7 - Add in just 1-2 Tablespoons of your super finely chopped chocolate and stir.

Step 8 - Continue stirring occasionally until your chocolate reaches 79ºF.

Step 9 - Carefully re-heat your white chocolate on the pot of water for 1-2 seconds or in the microwave for 5 seconds until you reach 86º-88ºF. Never let your chocolate go above 88ºF for white chocolate or it will go out of temper again.

Working temperatures for different chocolate:

  • White chocolate - Heat to 113ºF - cool to 79ºF - heat to 86º - 88ºF for working
  • Milk chocolate - Heat to 113º F - cool to 79ºF - heat to 84º - 86ºF for working
  • Semi-Sweet and Dark Chocolate - Heat to 113ºF - cool to 82ºF - heat to 88º-90ºF for working

Step 10 - Test your temper. Place a small amount of melted chocolate onto some parchment paper. Refrigerate it for 5 minutes or until it's set. Take it out and break it in half. If it's shiny and has a nice snap, it is in temper. If it bends or is floppy, you may have not tempered correctly. Heat it back up to 90ºF, add ½ cup more chopped chocolate, then repeat steps 7-10.

spatula spooning white chocolate onto parchment paper two hands holding two pieces of white chocolate

How To Make A Breakable Chocolate Heart Step-By-Step

Step 1 - Pour about ½ cup of tempered chocolate into your mold. Move your chocolate around the mold to make an even layer. You can use a paintbrush or spatula if you have problems getting good coverage, make sure to build up the center point of the heart. Dump out the excess chocolate back into your bowl.

At this step, my white chocolate was at about 82ºF. It was still melted, but when I worked with it at 88ºF, it was too liquidy and wouldn't build up on the edges. 

white silicone mold with white chocolate

Step 2 - Scrape the upper edge to remove any excess chocolate.

white silicone mold with white chocolate

Step 3 - Place the mold upside-down on a sheet pan with parchment paper or a silicone baking mat and place it into the fridge for 5 minutes.

chocolate heart mold on a pink sheet pan

Step 4 - Finely chop some semi-sweet chocolate (or any chocolate you want) and melt it in the microwave for 30 seconds. Then stir. Repeat in 15-second increments until the chocolate is 90% melted. Make sure the temperature never goes above 90ºF. Stir until it's fully melted. For more info on tempering in the microwave, follow this tutorial.

finely chopped milk chocolate bar on a wooden cutting board

spatula spooning chocolate into white chocolate breakable heart

Step 5 - Brush the chocolate onto the white chocolate in an even layer, making sure to build up the edges of the heart.

paintbrush with chocolate on a chocolate heart

Step 6 - Place the chocolate heart back into the fridge for 5 minutes, or until set.

Step 7 - De-mold the heart and repeat the process if you want to make a two-sided heart. You do not need to re-temper the chocolate, just slowly heat it in the microwave again until it's at the right temperature. 88ºF for white chocolate, 90ºF for semi-sweet chocolate.

Pro-Tip: Pour out the leftover chocolate onto plastic wrap, let it harden, and then wrap it up. Now you have tempered chocolate ready to be chopped and used again!

Step 8 - If your heart shells have rough edges, you can melt them down a bit and flatten them on a warm plate.

hand pressing chocolate breakable heart on a hot plate hand holding chocolate breakable heart

Step 9 - If you're making a two-sided heart box, place the top heart on top of the bottom heart and seal together with a thin line of melted chocolate. I like to use a piping bag for this, but you can also just seal it together by melting one side on the warm plate.

Step 10 - To decorate, melt your gold drip in the microwave in 15-second increments until it's liquid. I give the bottle a squeeze after each time in the microwave.

Step 11 - Let the drip cool down a bit so it's not super loose. You can do a test drip on the side of a glass to see if it's thick enough.

Step 12 - Drizzle the gold drip on top of the heart and while the drip is still wet, add some crushed up freeze-dried strawberries and sprinkles.

pink gloved hand adding freeze dried strawberries to chocolate heart

Step 13 - Place some Valentine's day candy in the heart and fill it with chocolate-covered strawberries or any kind of treat that you want!

What Do You Put Inside Breakable Chocolate Hearts?

You can put anything inside a breakable chocolate heart! You can do chocolate covered strawberries like I did, candy, money, jewelry, cake, heart hot chocolate bombs, cake pops, chocolate covered pretzels, cookies, toys, or other kinds of yummy baked goodies!

chocolate covered strawberries

I decided to make my breakable heart double-sided but many people just lay the one chocolate heart over the top of the goodies inside a box with some colorful shredded paper. I love this version from Marble City Sweets!

breakable heart with wooden mallet in a box

How To Color Chocolate

red breakable heart

There are a few ways to color chocolate. My favorite way is to add pre-colored cocoa butter from Chef Rubber to my melted chocolate. Just melt in the microwave and add to your tempered chocolate.

You can also use candy coloring which is oil-based and is sold at most places that cake decorating supplies are sold like Michaels. Just be careful not to add too much if you're making candy shells because it can mess with the stability of the chocolate.

candy coloring

You cannot add gel or liquid-based food coloring to the melted chocolate or it will get super thick and just seize up on you. The only way to use this chocolate after it has seized is to make it into a ganache.

The other option is you can use powdered food coloring that is oil soluble (meaning it will dissolve in oil-based foods). Just add a little to your chocolate, melt together and stir!

Related Recipes

Chocolate Covered Strawberries

Heart Hot Chocolate Bombs

How To Temper Chocolate

Berry Wash

Red Velvet Cake

Tempering Chocolate with Cocoa Butter

Recipe

Print Recipe
5 from 9 votes

Breakable Chocolate Heart

How to make a trendy breakable chocolate heart that you can fill with candy and treats and then smash to bits! Get tips and tricks on how to temper chocolate using the seeding method and how to create a delicious white and dark chocolate geometric heart. A fun and tasty DIY treat for any occasion!
Prep Time20 minutes mins
cooling10 minutes mins
Total Time30 minutes mins
Course: Appetizer, Dessert
Cuisine: American
Servings: 1 heart
Calories: 488kcal
Author: Liz Marek

Equipment

  • Instant Read Thermometer
  • Geometric Heart Mold

Ingredients

  • 14 ounces Callebaut Belgian White Chocolate or any high-quality chocolate with cocoa butter in it.
  • 14 ounces Callebaut Belgian Semi-Sweet Chocolate
  • 1 Tablespoon Gold Drip
  • 2 Tablespoons Crushed Freeze-Dried Strawberries
  • 1 Tablespoon Sprinkles
  • 6 Large Chocolate Covered Strawberries
  • 4 Ounces Candy Hearts
US Customary - Metric

Instructions

Tempering the chocolate

  • For this recipe, I am using the seeding method to temper my chocolate but you can also temper in the microwave. For more info, follow this tutorial. 
  • Bring two inches of water to a simmer in a pot.
  • Add your chocolate into a wide, heatproof bowl, place it over the water, and begin stirring. Be careful not to get any water in your chocolate. 
  • Once your chocolate is melted, take the temperature. You want it to reach between 110ºF - 120ºF (43ºC - 48ºC). I use an infrared thermometer but you could use any kind of instant-read thermometer. 
  • Remove the chocolate from the heat and wipe off the excess water from the bottom of the bowl so it doesn't drip into your chocolate. 
  • Transfer the chocolate to another bowl to start cooling it down immediately. It should drop about 10 degrees.
  • Add in about ½ cup of your chopped chocolate and stir. Each time you do this, the chocolate will cool down a bit. Continue doing this until your chocolate is at 90ºF. 
  • Add in just 1-2 Tablespoons of your super finely chopped chocolate and stir.
  • Continue stirring occasionally until your chocolate reaches 79ºF.
  • Carefully re-heat your white chocolate on the pot of water for 1-2 seconds or in the microwave for 5 seconds until you reach 86º-88ºF. Never let your chocolate go above 88ºF for white chocolate or it will go out of temper again. 
  • Working temperatures for different chocolate:
    White chocolate - Heat to 113ºF - cool to 79ºF - heat to 86º - 88ºF for working
    Milk chocolate - Heat to 113º F - cool to 79ºF - heat to 84º - 86ºF for working
    Semi-Sweet and Dark Chocolate - Heat to 113ºF - cool to 82ºF - heat to 88º-90ºF for working
  • Test your temper. Place a small amount of melted chocolate onto some parchment paper. Refrigerate it for 5 minutes or until it's set. Take it out and break it in half. If it's shiny and has a nice snap, it is in temper. If it bends or is floppy, you may have not tempered correctly. Heat it back up to 90ºF, add ½ cup more chopped chocolate, then repeat steps 8-12. 

Making A Breakable Heart

  • Pour about ½ cup of tempered chocolate into your mold. Move your chocolate around the mold to make an even layer. You can use a paintbrush or spatula if you have problems getting good coverage, make sure to build up the center point of the heart. Dump out the excess chocolate back into your bowl.
    At this step, my white chocolate was at about 82ºF. It was still melted, but when I worked with it at 88ºF, it was too liquidy and wouldn't build up on the edges. 
  • Scrape the upper edge to remove any excess chocolate. 
  • Place the mold upside-down on a sheet pan with parchment paper or a silicone baking mat and place it into the fridge for 5 minutes. 
  • Meltdown (temper) some semi-sweet or milk chocolate and brush the chocolate on top of the white chocolate in an even layer, making sure to build up the edges of the heart.
  • Place the chocolate heart back into the fridge for 5 minutes, or until set. 
  • De-mold the heart and repeat the process if you want to make a two-sided heart. You do not need to re-temper the chocolate, just slowly heat it in the microwave again until it's at the right temperature. 88ºF for white chocolate, 90ºF for semi-sweet chocolate, 84ºF for milk chocolate. 
    Pour out the leftover chocolate onto plastic wrap, let it harden, and then wrap it up. Now you have tempered chocolate ready to be chopped and used again!
  • If your heart shells have rough edges, you can melt them down a bit and flatten them on a warm plate. 
  • If you're making a two-sided heart box, place the top heart on top of the bottom heart and seal it together with a thin line of melted chocolate. I like to use a piping bag for this, but you can also just seal it together by melting one side on the warm plate. 
  • To decorate, melt your gold drip in the microwave in 15-second increments until it's liquid. I give the bottle a squeeze after each time in the microwave. 
  • Let the drip cool down a bit so it's not super loose. You can do a test drip on the side of a glass to see if it's thick enough. 
  • Drizzle the gold drip on top of the heart and while the drip is still wet, add some crushed up freeze-dried strawberries and sprinkles. 
  • Place some Valentine's day candy in the heart and fill it with chocolate-covered strawberries or any kind of treat that you want!
    Note: chocolate strawberries can last for up to 12 hours at room temperature, you might want to place each strawberry in a cupcake liner inside of your breakable heart if you're not serving immediately.
  • Serve your breakable heart with a mini hammer and enjoy!

Video

Notes

Using real chocolate will result in better tasting hearts. Chocolate chips, baking chocolate, or melting wafers contain wax and other emulsifiers that affect the taste and melting consistency. 
  • Callebaut Belgian white, milk, or semi-sweet chocolate
  • Couverture White Chocolate (any brand)
  • Lindt chocolate bars (chopped finely)
 

Nutrition

Serving: 1heart | Calories: 488kcal | Carbohydrates: 123g | Fat: 1g | Saturated Fat: 1g | Sugar: 118g

heart hot chocolate bomb

January 25, 2021 Candy

Heart Hot Chocolate Bombs

Heart hot chocolate bombs are the perfect treat for Valentine's day. If you loved the hot chocolate bomb trend that took over social media in December, you'll love these geometric heart versions. All you need is a heart mold, some delicious chocolate mix, hot chocolate mix, and 20 minutes of your time!

heart hot chocolate bomb in a white mug shot from above

Heart Hot Chocolate Bomb Ingredients
heart hot chocolate bomb ingredients

For this tutorial, we are going to be making three types of heart hot chocolate bombs using white chocolate and a geometric heart mold. You can use semi-sweet chocolate, dark chocolate, or even milk chocolate. I like to use really nice tasting chocolate in my bombs because I like the flavor but you could also use almond bark or candy melts.

If you are going to use real chocolate then you will have to temper it so that it has a strong shell and is nice and shiny. Don't worry, you can easily temper your chocolate in the microwave using a thermometer.

What Are Hot Chocolate Bombs?

Hot chocolate bombs are a fun way to take your hot chocolate up a notch! A thin chocolate shell is filled with flavored hot chocolate mix and marshmallows. Sometimes other flavors are incorporated as decor like caramel or peppermint. Drop it into a hot cup of milk and watch the hot chocolate bomb explode!

heart hot chocolate bomb in front of a white mug with gold trim

How To Make Heart Hot Chocolate Bombs Step-By-Step

Step 1 - Make sure your molds are clean & dry. Cut your molds into individual hearts. This will make them easier to fill. Line a sheet pan with a piece of parchment paper to hold your molds.

Step 2 - Melt your chocolate. I chop my chocolate even if it's in chip form so that it melts faster. The smaller your bits of chocolate, the easier they will melt and the easier it is to control the temperature of your chocolate. Place your chocolate in a heatproof bowl and microwave it for 30 seconds. Stir to distribute the heat. Heat for 15 seconds and then stir.

Make sure the temperature of the chocolate never goes above 88ºF so that it stays in temper. Repeat the 15-second heating and stirring until the chocolate is 90% melted. Continue stirring until it's fully melted.

thermometer checking the temperature of a bowl of white chocolate shot from above

Step 3 - Divide your melted chocolate into three batches. In one batch I added 1 Tablespoon of ground up freeze-dried strawberries, one batch I added a teaspoon of pink melted cocoa butter, and one batch I left white. If your chocolate has cooled down too much, heat it up again for 5 seconds to get to 88ºF again.

white chocolate colored pink in a bowl with a spoon

Pro-Tip: You can add in any kind of dry ingredient to melted chocolate like sprinkles, nuts, crushed cookies etc. As long as it doesn't have any liquid, it will work! 

Step 4 - Line all your molds up and start filling them with chocolate one by one, all the way to the top edge. Don't overfill them.

heart molds being filled with melted pink chocolate

Step 5 - Once they are all filled, start emptying the chocolate back into the bowl. Start with the first mold you filled and work your way to the most recent. Tap the mold or shake it slightly to remove as much of the excess chocolate as possible. Thick shells will be hard to melt.

emptying heart hot chocolate molds over a pink bowl

Step 6 - Scrape the top edge with a spatula to make it nice and clean.

scraping the edge of the heart hot chocolate mold

Step 7 - Place the mold upside down on your sheet pan with parchment paper.

heart hold chocolate hold held in a hand over a sheet pan

Step 8 - Place the molds into the freezer or fridge for 5 minutes to make them set.

Step 9 - Remove the molds from the freezer and with gloved hands, carefully remove the chocolate hearts from the mold.

remove molds from the heart molds

Step 10 - Make sure you have some melted chocolate ready to go for drizzling. I re-melted the chocolate leftover from the heart molds (never going above 88ºF) and placed it into a piping bag.

Step 11 - If your edges are not flat, you can melt them slightly on a hot plate. I warmed mine in the microwave for 1 minute.

melting geometric chocolate hearts on a hot plate

Step 12 - Fill one side of your heart shell with 1 Tablespoon of strawberry cocoa mix. I used Nesquick.

filling heart chocolate molds with hot chocolate mix and strawberry oil

Step 13 - Add two drops of strawberry oil for more strawberry flavor! (optional).

Step 14 - Add some marshmallows on top.

close up of chocolate heart with marshmallows on top

Step 15 - Place your shell on top and squeeze it together to seal it. Make sure you are wearing gloves to avoid fingerprints. You can also pipe chocolate onto the edge and seal it and then wipe away the excess chocolate.

Step 16 - Drizzle some melted chocolate on top, add some sprinkles, crushed strawberries, anything you want!

I like to package my heart hot chocolate bombs in cupcake wrappers. Make sure you include instructions on how to use them or your client might take a bite out of them thinking they are candy! You can get these cool labels and stir sticks here.

hot chocolate bombs on a plate with a mug behind it

holding a heart hot chocolate bomb over a white mug

To use your heart hot chocolate bombs, place them in a mug that holds 14-16 oz of liquid. Pour steaming hot milk on top and watch it explode! Stir and enjoy!

Store leftover bombs at room temperature in a ziplock or airtight container.

Related Recipes

Hot Chocolate Bombs

Heart Lollipop Cake

How To Temper Chocolate in the Microwave

Tempering Chocolate with Cocoa Butter

Strawberry Cake Recipe

How To Ship Cookies

Recipe

heart hot chocolate bomb
Print Recipe
5 from 1 vote

Heart Hot Chocolate Bomb

How to make heart hot chocolate bombs that taste like strawberries and cream! The perfect gift idea for Valentines day
Prep Time10 minutes mins
Cooling5 minutes mins
Total Time15 minutes mins
Course: Appetizer
Cuisine: American
Servings: 4 hearts
Calories: 630kcal
Author: Liz Marek

Ingredients

  • 16 ounces white chocolate callebaut white chocolate
  • 4 Tablespoons strawberry NesQuick hot chocolate mix
  • 8 drops strawberry oil
  • 1 Tablespoon ground freeze-dried strawberries
  • 2 drops pink cocoa butter
  • 1 Tablespoon sprinkles
US Customary - Metric

Instructions

  • Line a cookie sheet with some parchment paper and set it aside. Make sure your mold is washed, dried and cut into individual hearts for easy molding.
  • Chop your chocolate finely and then place into the microwave for 30 seconds. Stir.
  • Continue heating for 15-second increments and stirring. Check the temperature every time to make sure you do not go above 88ºF. If you do go above 88ºF then you can temper the chocolate using the seeding method. See the blog post for more details.
  • Once your chocolate is melted you can divide it into three batches. I colored one batch with a few drops of pink cocoa butter, one batch with some crushed freeze-dried strawberries and one I left white.
  • Heat your melted chocolate up to 88ºF again (I re-heat in 5-second increments only).
  • Pour the chocolate into the heart mold and let it cool for a few moments to build up the shell.
  • Pour the excess chocolate out of the mold and give it a shake to make sure as much is out as possible.
  • Place the mold upside down onto the parchment paper. Once all the molds are done, place the tray into the freezer for 5 minutes.
  • Carefully remove the chocolate shells from the mold.
  • Heat a plate up in the microwave for 1 minute. Place the front and back of one mold onto the plate for 5 seconds to melt the edges and flatten them out. Then remove them from the plate.
  • Fill one half of the mold with 1 Tablespoon of cocoa mix. Add 2 drops of strawberry oil for more flavor and as many marshmallows as you can fit in there.
  • Add the top of the mold onto the back and press together with gloved hands to seal.
  • Drizzle more melted chocolate on top of the hearts and add sprinkles, crushed dried strawberries, or any decorations you want.

Video

Notes

Using real white chocolate will result in better tasting hot chocolate bombs. Chocolate chips, baking chocolate, or melting wafers contain wax and other emulsifiers that affect the taste and melting consistency. 
  • Callebaut Belgian white chocolate
  • Couverture White Chocolate (any brand)
  • Lindt chocolate bars (chopped finely)
To temper white chocolate, chop it finely, melt in the microwave in 15-second increments, stirring in between, and checking the temperature. Never let the chocolate go above 88ºF. 

Nutrition

Serving: 1heart | Calories: 630kcal | Carbohydrates: 71g | Protein: 7g | Fat: 37g | Saturated Fat: 22g | Trans Fat: 1g | Cholesterol: 24mg | Sodium: 113mg | Potassium: 339mg | Fiber: 1g | Sugar: 71g | Vitamin A: 34IU | Vitamin C: 1mg | Calcium: 229mg | Iron: 1mg

doctored red velvet

January 18, 2021 Blog

Doctored Red Velvet Cake Mix

This is how I doctor a red velvet box mix to make it taste more like it's made from scratch. The added ingredients give the cake a better texture, more flavor, and more stability for stacking. Doctoring a box mix is a great way to make your cake taste better if you're not a confident baker yet or you just need a shortcut.  

doctored red velvet

The doctored version is the shortcut, and the scratch red velvet cake recipe is the full from-scratch version for when you want maximum flavor and texture control.

Doctored Red Velvet Cake Ingredients

This recipe is based on my WASC cake recipe and my chocolate WASC. The reason why we add more ingredients to a box mix is that on its own, a box mix is pretty fluffy and soft. Nothing wrong with that really but most of my readers are professional cake decorators or passionate hobby bakers and like a firmer cake for stacking. 
doctored red velvet cake ingredients

The funny thing is, red velvet from scratch is really really easy to make too. Probably one of the easiest cakes to bake from scratch so if you're interested in taking that leap, check out my authentic red velvet cake recipe.

If you don't have buttermilk, you can make a buttermilk substitute or use milk instead. 


Doctored Red Velvet Cake Step-By-Step

Step 1 - Preheat your oven to 335ºF and prepare three 8"x2" cake pans with cake goop or your preferred type of pan release. 

Step 2 - Bring your eggs, sour cream, and buttermilk to room temperature. 

Step 3 - Combine the cake mix and all your ingredients in the bowl of your stand mixer with the whisk attachment attached. 

doctored red velvet cake ingredients in a bowl

Step 4 - Mix on low for 30 seconds to combine the ingredients then scrape the bowl. 

Step 5 - Increase the speed to medium and mix for two minutes. 

Step 6 - Divide the batter between the three pans and bake for 25-30 minutes or until a toothpick comes out of the center cleanly. 

doctored red velvet cake in cake pans

Step 7 - Let your cakes cool in the pan until the pan is barely warm (about 10 minutes) then flip them out onto a wire rack to cool fully.  

If you want to decorate your cake right away, I suggest placing the cakes into the freezer for 60 minutes to flash cool them and then you can frost them. Or you can wrap them in plastic wrap and freeze them overnight if you want to decorate the next day.

Pro-tip: Freezing your cakes warm locks in moisture and prevents them from drying out. 

Step 8 - After your cakes are cool you can decorate your cake however you want or check out the video to see how I decorated mine with this cute ombre look!

How To Decorate The Cake

I colored ⅓ of my buttercream dark pink with super red food coloring from Americolor and then ⅓ a light pink with the same food coloring and left the last bit white. 

If you need to learn more about how to decorate cakes you can check out my how to make your first cake tutorial.

three layers of doctored red velvet cake with buttercream

To smooth the outside of my cake, I'm using the crown jewel cake comb from Ester Cakes. 

doctored red velvet

Related Recipes

Authentic Red Velvet Cake

Cream Cheese Frosting

Stable Cream Cheese Frosting

White Velvet Cake

Pink Velvet Cake

Cake Batter and Frosting Calculator

Select an option below to calculate how much batter or frosting you need. Adjust the servings slider on the recipe card to change the amounts the recipe makes.

Choose a pan type

Choose a cake pan size
(based on 2" tall cake pan)

Choose a cake pan size
(based on 2" tall cake pan)

Choose a cake pan size
(based on 2" tall cake pan)

Cupcake Tin Size

Choose number of pans

Cups of Batter Needed

8 cups

Cups of Frosting Needed

5 cups

Note: measurements are estimated based off the vanilla cake recipe using standard US cake pans and sizes. Measurements used are for 2" tall cake pans only. Your results may vary. Do not overfill cake pans above manufacturer's recommended guidelines.


Recipe

doctored red velvet
Print Recipe
4.77 from 304 votes

Doctored Red Velvet Box Mix Cake

How to make a boring red velvet box mix taste extra moist and delicious! Almost as good as homemade. No one will ever know!
Prep Time5 minutes mins
Cook Time30 minutes mins
Total Time35 minutes mins
Course: Dessert
Cuisine: American
Servings: 9 cups
Calories: 500kcal
Author: Liz Marek

Equipment

  • Three, 8"x2" cake pans
  • Stand mixer, hand mixer or even a bowl with a whisk
  • For decorating: 8" cake board, bench scraper, offset spatula, rustic scallop cake comb, piping bag and Wilton 2D piping tip.

Ingredients

Doctored Red Velvet Cake

  • 1 box red velvet cake mix I like Betty Crocker Delights super moist red velvet cake mix, or Duncan Hines.
  • 5 ounces all purpose flour 1 cup spooned in and leveled
  • 7 ounces granulated sugar 1 cup
  • 6 ounces sour cream, room temperature or plain greek yogurt - ¾ cup
  • 2 Tablespoons cocoa powder
  • ½ teaspoon salt
  • ½ teaspoon baking soda
  • 1 teaspoon vanilla extract
  • 2 ounces vegetable oil ¼ cup
  • 4 ounces unsalted butter, melted ½ cup
  • 12 ounces buttermilk, room temperature or regular milk + 1 tablespoon of white vinegar. 1 ½ cups
  • 3 large eggs room temperature
  • 1 Tablespoon Super Red Food Coloring

Easy Swiss Meringue Buttercream

  • 6 ounces pasteurized egg whites
  • 24 ounces sifted powdered sugar
  • 2 teaspoons vanilla extract
  • ½ teaspoon salt
  • 24 ounces unsalted butter room temperature
  • ⅛ teaspoon yellow food coloring
  • 1 teaspoon electric pink food coloring
  • 2 Tablespoons super red food coloring
US Customary - Metric

Instructions

For The Cake

  • Preheat oven to 335℉. Prepare three 8" round cake pans. I prefer to use cake goop. 
  • Add all of your ingredients into the bowl of your stand mixer with the paddle attachment attached and mix on low for 2 minutes to combine.
  • Stop and scrape the bowl and then mix on medium for two minutes. 
  • Pour batter into your cake pans and bake for 25-30 minutes until a toothpick comes out of the center with just a few sticky crumbs clinging to the toothpick. I gently touch the top of the cake to see if it bounces back to check if it's done. If it needs more time only bake for 1 minute more then check again.
  • Let cool a few minutes in the pan before turning out onto a cooling rack. Let cool fully and frost. 

Easy Swiss Meringue Buttercream

  • Place egg whites and powdered sugar in a stand mixer bowl. Attach the whisk and combine ingredients on low and then whip on high for 1 minute to dissolve the powdered sugar 
  • Add in your salt and vanilla extract
  • Add in your butter in chunks and whip with the whisk attachment to combine. It will look curdled at first. This is normal. It will also look pretty yellow. Keep whipping. 
  • If your buttercream looks curdled, remove about ⅓ cup of buttercream and melt it in the microwave for 10-15 seconds until JUST barely melted. Pour it back into the whipping buttercream to bring it all together.
  • Switch to a paddle attachment and mix on low for 15-20 minutes to make the buttercream very smooth and remove air bubbles. This isn't required but if you want really creamy frosting, you don't want to skip it. 

Video

Nutrition

Serving: 1slice | Calories: 500kcal | Carbohydrates: 50g | Protein: 2g | Fat: 30g | Saturated Fat: 20g | Cholesterol: 112mg | Sodium: 150mg | Potassium: 30mg | Fiber: 1g | Sugar: 35g | Vitamin A: 400IU | Calcium: 15mg | Iron: 1mg
Cake with a floating cloud tier and rainbow with a unicorn cake topper sitting on top of it

January 15, 2021 Course Preview

Floating Cloud Unicorn Cake Tutorial

Skill level: Intermediate

Learn how to make this super-cute gravity-defying floating cloud unicorn cake! In this online course, you will learn how to create a structure that supports the floating cloud, how to create an edible shiny rainbow, learn how to sculpt the cutest little unicorn cake topper you ever did see, and how to create the edible clouds floating around the sky blue base cake.

1:23:39 Minutes of Instruction

What You Will Learn

  • Learn how to make a gravity-defying cloud and rainbow
  • How to create a cute unicorn cake topper and how to sculpt all the facial details
  • What to cover a cake in fondant and what to do when your fondant tears
  • How to create cute edible clouds

Tutorial Chapters

  1. Frosting the cake 0:35
  2. Making the structure 2:06
  3. Covering the cake in fondant 7:33
  4. Adding the bottom tier 18:36
  5. Coloring the isomalt 20:38
  6. Pouring and shaping the isomalt 25:05
  7. Making the rainbow base 31:45
  8. Adding the second tier 38:37
  9. Making the cloud 42:39
  10. Making the body 47:21
  11. Making the legs 49:08
  12. Making the head 54:28
  13. Adding facial details 57:31
  14. Adding ears and eyes 1:00:35
  15. Painting the unicorn 1:02:30
  16. Adding the horn 1:05:05
  17. Making the eyelashes 1:06:32
  18. Final unicorn details 1:07:28
  19. Making the rainbow 1:08:21
  20. Adding cloud decorations 1:14:09
  21. Adding the rainbow and unicorn 1:18:05
  22. Making the unicorn hair 1:20:30

Downloads

Materials List

Cake with a floating cloud tier and rainbow with a unicorn cake topper sitting on top of it

January 15, 2021 Paid Video

Floating Cloud Unicorn Cake

Skill level: Intermediate

Learn how to make this super-cute gravity-defying floating cloud unicorn cake! In this online course, you will learn how to create a structure that supports the floating cloud, how to create an edible shiny rainbow, learn how to sculpt the cutest little unicorn cake topper you ever did see, and how to create the edible clouds floating around the sky blue base cake.

1:23:39 Minutes of Instruction

What You Will Learn

  • Learn how to make a gravity-defying cloud and rainbow
  • How to create a cute unicorn cake topper and how to sculpt all the facial details
  • What to cover a cake in fondant and what to do when your fondant tears
  • How to create cute edible clouds

Tutorial Chapters

  1. Frosting the cake 0:35
  2. Making the structure 2:06
  3. Covering the cake in fondant 7:33
  4. Adding the bottom tier 18:36
  5. Coloring the isomalt 20:38
  6. Pouring and shaping the isomalt 25:05
  7. Making the rainbow base 31:45
  8. Adding the second tier 38:37
  9. Making the cloud 42:39
  10. Making the body 47:21
  11. Making the legs 49:08
  12. Making the head 54:28
  13. Adding facial details 57:31
  14. Adding ears and eyes 1:00:35
  15. Painting the unicorn 1:02:30
  16. Adding the horn 1:05:05
  17. Making the eyelashes 1:06:32
  18. Final unicorn details 1:07:28
  19. Making the rainbow 1:08:21
  20. Adding cloud decorations 1:14:09
  21. Adding the rainbow and unicorn 1:18:05
  22. Making the unicorn hair 1:20:30

Downloads

Materials List

January 10, 2021 Filling

Lemon Curd

This lemon curd is all about bold, bright lemon flavor, and it comes together in about two minutes once it starts cooking. I developed it specifically to use as the filling in my lemon cake recipe, and it's bright, tart, and not overly sweet.

lemon curd on a gold spoon in a clear bowl

Quick Glance: Lemon Curd Recipe

  • Recipe Name: Lemon Curd Recipe
  • Why You'll Love It: This lemon curd is bright, tangy, and not overly sweet, with a bold lemon flavor.
  • Time and Difficulty: Easy to make and comes together in about 2 minutes once it starts cooking.
  • Main Ingredients: Fresh lemon juice, lemon zest, citric acid, whole eggs, egg yolks, sugar, butter, and salt.
  • Method: Whisk the lemon curd over simmering water until thickened, then whisk in the butter for a silky-smooth lemon curd.
  • Texture and Flavor: Smooth, creamy, thick, and perfectly tart with a strong, fresh lemon flavor.
  • Quick Tip: Cook the curd to 175°F for the perfect thickness to use as a filling.
ChatGPT
Google AI
Perplexity
Grok
Add us as a trusted site on Google
[feast_advanced_jump_to]

If you've only ever had super-sweet, one-note lemon curd before, this version is completely different. It's fresh, tangy, and actually tastes like real lemons.

You might be intimidated by the idea of making your own lemon curd from scratch but I promise it's super easy! If you're like me, you end up with leftover egg yolks pretty often from making a white cake or macarons. In fact, I think lemon curd might have been invented specifically to use up those leftover egg yolks. 

Lemon Curd Ingredients

I'm not a big fan of super-sweet lemon curd. I like mine to be pretty tart. If you do like sweeter lemon curd, you can add one or two more ounces of sugar and adjust the sweetness to your taste.  I learned how to make this lemon curd when I was attending the Culinary Institute of America and I loved how easy it is to make and how thick it is.

Fresh lemon juice - provides the main bright, tangy flavor - fresh is best, but bottled will work in a pinch.
Lemon zest - adds concentrated lemon oil flavor and makes the curd taste more intense - do not skip this because it makes a big difference. Lemon flavor comes from the zest, not the juice.
Citric acid - boosts the tartness and enhances the lemon flavor without adding more liquid - you can leave it out if needed, but the flavor will be slightly less punchy.
Eggs - add richness, color, and creaminess - using both eggs and yolks gives the best texture. The eggs are what thicken the lemon curd.
Granulated sugar - balances the acidity and sweetness - you can adjust slightly if you prefer a sweeter curd.
Salt - enhances the overall flavor and balances the sweetness - just a small amount is needed.
Butter - adds a smooth, creamy finish and richness - unsalted butter is best, so you can control the salt level. The more butter you add to your curd, the thicker your final lemon curd will be.

How To Make Lemon Curd Step-By-Step

Making lemon curd is very simple, but you do need to stay nearby and whisk continuously so the eggs do not overcook.

lemon curd ingredients
  1. Start by zesting your lemons with a microplane and setting the zest aside. Make sure you avoid the white pith because it is bitter and can affect the flavor of your curd.
closeup of lemon juice in a measuring cup
  1. Cut the lemons in half and juice them into a measuring cup, making sure to remove any seeds.
lemon curd ingredients in a metal bowl
  1. In a heat-proof bowl, whisk together the whole eggs, egg yolks, sugar, citric acid, lemon juice, and salt until the mixture is smooth and fully combined.
lemon curd ingredients in a metal bowl with a whisk over a white saucepan
  1. Place the bowl over a saucepan of simmering water and begin whisking.
thickened lemon curd over a white saucepan
  1. After about a minute, the mixture will begin to foam and thicken.
thickened lemon curd in a metal bowl with three cubes of butter
  1. Once the mixture thickens and you reach 175ºF, remove the bowl from the saucepan and whisk in the cold butter.
strainer with leftover pieces of lemon curd inside and a white spatula
  1. Optional: Strain the lemon curd through a sieve to remove the lumps of lemon zest and any bits of cooked egg for a super silky texture.
lemon curd in a metal bowl with plastic wrap on top
  1. Place some plastic wrap on the lemon curd and refrigerate it for a minimum of one hour or overnight before use.
lemon curd in a glass bowl

Lemon Curd FAQs

Can I make lemon curd without citric acid?

Yes, you can leave out the citric acid, but it will slightly reduce the intensity of the lemon flavor. The citric acid helps give the curd that extra bright, tangy punch.

Why use both whole eggs and egg yolks in lemon curd?

Using both gives you the best texture because the whole eggs provide structure while the extra yolks add richness and creaminess.

Can I use this lemon curd as a cake filling?

Yes, this recipe is specifically designed for that. Just make sure it is cooked to at least 175°F and always use a buttercream dam to keep it from leaking out.

Can I add lemon curd to buttercream?

Yes, you can mix about half a cup of lemon curd into buttercream to add a bright lemon flavor.

Why does my lemon curd taste metallic?

This can happen if you use a low-quality metal pan because the acid from the lemons reacts with the metal. Using a better-quality pan or a double boiler can help prevent this.

Can I freeze lemon curd?

Yes, lemon curd freezes very well and can be stored for up to six months.

How do I fix curdled lemon curd?

If your curd has small lumps, you can strain it through a fine mesh sieve to remove them and make it smooth again.

Final Thoughts

This is the exact lemon curd I use in my lemon cake because it has the perfect balance of tart flavor, smooth texture, and stability. It's quick to make, incredibly flavorful, and one of those recipes you will find yourself using over and over again.

More Lovely Lemon Recipes

  • closeup of lemon blueberry sourdough focaccia
    Lemon Blueberry Sourdough Focaccia
  • close up of lemon raspberry bars
    Easy Lemon Raspberry Bars
  • close up of a slice of lemon tart with creme fraiche and a raspberry on a white plate
    The Best Lemon Tart Recipe
  • close up of sliced lemon pound cake
    Lemon Pound Cake Recipe


Leave Me A Review
⭐️⭐️⭐️⭐️⭐️

If you tried this Lemon Curd Recipe or any other recipe on my blog, please leave a 🌟 star rating and let me know how it goes in the comments. I love hearing from you!

Recipe

lemon curd on a gold spoon in a clear bowl
Print Recipe
4.80 from 24 votes

Lemon Curd Recipe

Tart and tangy homemade lemon curd that is thick enough to use as a cake filling, tarts or filling pastries. Making your own lemon curd is so easy and a great way to use up extra egg yolks.
Prep Time10 minutes mins
Cook Time20 minutes mins
Total Time30 minutes mins
Course: Dessert
Cuisine: American
Servings: 1 cup
Calories: 942kcal
Author: Liz Marek

Ingredients

  • 3 ounces lemon juice
  • 2 Tablespoons lemon zest from two lemons
  • 3 ounces sugar
  • 1 large egg
  • 2 large egg yolks
  • 1 pinch salt
  • 1 pinch citric acid
  • 2 ounces butter
US Customary - Metric

Instructions

  • Zest the lemons, then slice them in half and juice them into a measuring cup. Use a small colander or a lemon juicer to keep out any seeds.
  • Add your lemon juice, granulated sugar, and lemon zest and citric acid to a large, shallow metal bowl over a simmering pot of water.
  • Stir constantly until the mixture reaches 170ºF and begins to thicken.
  • Remove the mixture from the heat and add the butter in chunks on top and allow it to melt.
  • Once the butter is melted, you can mix it all together. Strain the mixture if you have small chunks of egg that need to be removed.
  • Pour the finished lemon curd into a heat-proof jar or bowl. Cover the curd with plastic wrap so that it is touching the surface of the curd without any air bubbles in between, this will prevent a skin from forming on the top of the curd.  Store it in the fridge for up to one week or freeze it for up to a year.

Video

Notes

  • Whisk constantly while cooking to prevent the eggs from scrambling and to ensure a smooth, creamy texture.
  • Do not let the lemon curd boil, because high heat can cause the eggs to curdle and create a grainy texture.
  • Use fresh lemon juice and zest for the best flavor, since bottled juice will taste dull and less vibrant.
  • Straining the curd is optional, but it will give you a perfectly silky texture and remove any bits of cooked egg or zest.
  • Add the butter after removing the curd from the heat so it emulsifies properly and creates a smooth finish.
  • If your curd seems too thin, continue cooking it gently until it reaches 170-175°F, which is when it fully thickens.
  • The lemon curd will thicken more as it cools, so do not overcook it trying to make it thick right away.
  • Store the lemon curd in the refrigerator for up to one week in an airtight container.
  • Place plastic wrap directly on the surface of the curd while cooling to prevent a skin from forming.

Nutrition

Serving: 2ounces | Calories: 942kcal | Carbohydrates: 94g | Protein: 13g | Fat: 60g | Saturated Fat: 34g | Polyunsaturated Fat: 4g | Monounsaturated Fat: 18g | Trans Fat: 2g | Cholesterol: 675mg | Sodium: 493mg | Potassium: 228mg | Fiber: 2g | Sugar: 88g | Vitamin A: 2188IU | Vitamin C: 48mg | Calcium: 108mg | Iron: 2mg


closeup of chai whoopie pie

January 6, 2021 Blog

Chai Whoopie Pie Recipe

These chai whoopie pies are kind of a cross between a cookie and a cupcake. Firm enough to hold in your hand but soft and fluffy inside. Filled with a creamy mascarpone whipped cream frosting, they are the ultimate wintertime treat. 

closeup of chai whoopie pie

They say whoopie pies were invented by using up leftover cake batter. Makes sense to me because these are like little cakes but a little bit firmer so that they hold their shape. Golden brown and firm on the outside but nice and soft and fluffy like a cake on the inside.  

Chai means "tea" in India where it originated from and refers to the milky black tea flavored with warm spices that's very common there. Each family's recipe is different, but common spices to include are cinnamon, cardamom, ginger, cloves, star anise, and sometimes fennel, nutmeg, pepper, or coriander. For these whoopie pies, we are going to use homemade chai spice! Or you can use pre-mixed chai spice if you have some on hand.

pile of chai whoopie pies on a wooden board

Chai Whoopie Pie Ingredients

Don't be intimidated by all these ingredients, most of them are spices! This pic includes all the ingredients for the mascarpone whipped cream filling as well. If you don't have mascarpone you can just use stabilized whipped cream, cream cheese frosting, or even easy buttercream. 


How To Make Chai Whoopie Pies Step-By-Step

Step 1 - Bring your milk, butter, and eggs to room temperature so that they combine in the batter and form a proper emulsion. Cold ingredients will cause the batter to curdle and your whoopie pies will not rise. I microwave my milk for 40 seconds, place my eggs in a bowl of hot water for 5 minutes and microwave my butter in 15-second increments until you can press your finger into the surface but the butter still holds its shape. 

I also like to measure out all of my ingredients before I start mixing. That way I don't forget any ingredients! I measure everything by weight and use a scale for the most accuracy. Click here to learn how to measure with a food scale. 

egg in a clear bowl of hot water on white background room temperature butter

Step 2 - Preheat your oven to 375ºF and line two cookie sheets with parchment paper. 

Step 3 - Combine all the spices, flour, salt, and baking powder in a bowl and set it aside. 

Step 4 - Cream your room temperature butter and sugar together for 2-3 minutes on medium-high or until it's light and fluffy. Cold butter will not cream properly which will result in flat cookies. 

butter and brown sugar creamed together

Step 5 - While mixing on low, add in ONE room temperature egg at a time. Let the first mix in fully before adding the next to prevent your batter from curdling. Mix until smooth. 

close up of egg in a clear bowl

Step 6 - Add in your vanilla extract and mix until combined. 

Step 7 - While mixing on low, alternate adding in the flour mixture and milk. I start with the flour and add in ⅓, then ½ of the milk, then ⅓ of the flour mixture, the rest of the milk, and then the rest of the flour. I like to finish the mix by hand-folding to make sure all the flour is mixed in well and the bowl is scraped. This reduces the chance of over-mixing which will cause the whoopie pies to be dry and hard. 

closeup of whoopie pie batter

Step 8 - Using a 1 Tablespoon cookie scoop, scoop your batter onto your sheet pans. I can fit about 12 per cookie sheet. You can use a larger cookie scoop, just bake for about 2 minutes longer.

closeup of chai whoopie pie batter being scooped with a cookie scoop

Step 9 - Bake your chai whoopie pies at 375°F (190°C) for 8-9 minutes or until the dome is just set. Don't over-bake them.

When the cookie is puffy and bounces back when you lightly touch the top, it's done. It should be lightly golden brown on the bottom. 

chai whoopie pies on a cookie sheet

Step 10 - Transfer your whoopie pies to a cooling rack and let them cool down completely before you fill them. 

Mascarpone Whipped Cream Filling

Step 1 - In the bowl of your stand mixer with the whisk attachment, combine the whipped cream and the powdered sugar. Whisk on high until you begin to see lines forming on the surface and the cream is thickened but not yet forming peaks. 

whipped cream with soft peaks

Step 2 - Add in the mascarpone cheese and vanilla and whip on medium-high until firm peaks form and barely hold their shape. The cream will set up even more after you pipe the filling so try not to over-whip it. 

mascarpone whipped cream in a mixing bowl

Chai Whoopie Pie Assembly

After your cookies are cool, match them up by similar size. Fill with some of your mascarpone whipped cream and sandwich the two sides together. 

assembling chai whoopie pies

Because of the whipped cream filling, these cookies will need to be stored in an airtight container in the fridge. They will be ok for about 3 days and then will start to dry out. (Ours never last that long because they are so tasty!)

close up of chai whoopie pie with a bite taken out

You can also freeze the whole cookie, filling and all for up to six months! They will defrost in about 10 minutes or just eat them frozen like a delicious chai spice ice cream sandwich. Yum!

Pro-tip: To make chocolate whoopie pies, take out 3 oz of the flour, and add 3 oz of unsweetened cocoa powder. To make vanilla whoopie pies, just leave out the chai spices and add an extra teaspoon of vanilla extract.

Related Recipes

Applesauce Spice Cake

Brown Sugar Buttercream

Snickerdoodles

Recipe

closeup of chai whoopie pie
Print Recipe
5 from 1 vote

Chai Whoopie Pies With Mascarpone Whipped Cream

Chai spiced whoopie pies that are soft and fluffy and filled with mascarpone whipped cream filling! The perfect wintertime treat.
Prep Time20 minutes mins
Cook Time8 minutes mins
Total Time28 minutes mins
Course: Dessert
Cuisine: American
Servings: 36 cookies
Calories: 171kcal
Author: Liz Marek

Equipment

  • 1 Tablespoon cookie scoop (#60)

Ingredients

Chai Whoopie Pies

  • 8 ounces unsalted butter, room temperature 1 cup
  • 8 ounces light brown sugar 1 cup
  • 2 large eggs room temperature
  • 2 teaspoon vanilla extract
  • 2 teaspoons ground cinnamon
  • 2 teaspoons ground ginger
  • 1 teaspoon cardamom
  • ½ teaspoon ground cloves
  • ½ teaspoon nutmeg
  • ½ teaspoon all spice
  • ½ teaspoon black or white pepper
  • 2 teaspoons baking powder
  • ½ teaspoon salt
  • 14 ounces all purpose flour 1 ¾ cups
  • 6 ounces milk, room temperature ¾ cup

Whipped Mascarpone Filling

  • 8 ounces mascarpone cheese
  • 8 ounces heavy cream
  • 1 ounce powdered sugar
US Customary - Metric

Instructions

Chai Whoopie Pie

  • Bring your eggs, milk, and butter to room temperature. I microwave the milk for 40 seconds, the butter for 15-second increments until it's softened but still firm and I place the eggs in a bowl of hot water (shells still on) for five minutes.
  • Preheat your oven to 375ºF and line two cookie sheets with parchment paper
  • Combine all spices together with the flour, salt, and baking powder and set aside.
  • Cream your room temperature butter and sugar together for 2-3 minutes on medium-high or until it's light and fluffy. Cold butter will not cream properly which will result in flat cookies. 
  • While mixing on low, add in ONE room temperature egg. Let it mix in fully before adding the next to prevent your batter from curdling. Mix until smooth. 
  • Add in your vanilla extract and mix until combined. 
  • While mixing on low, alternate adding in the flour mixture and milk. I start with the flour and add in ⅓, then ½ of the milk, then ⅓ of the flour mixture, the rest of the milk, and then the rest of the flour. I like to finish the mix by hand-folding to make sure all the flour is mixed in well and the bowl is scraped. This reduces the chance of over-mixing which will cause the whoopie pies to be dry and hard. 
  • Using a 1 Tablespoon cookie scoop, scoop your batter onto your sheet pans. I can fit about 12 per cookie sheet. 
  • Bake your chai whoopie pies for 8-9 minutes or until the dome is just set. Don't over-bake them. 
  • Transfer your whoopie pies to a cooling rack and let them cool down completely before you fill them. 

Mascarpone Whipped Cream

  • In the bowl of your stand mixer with the whisk attachment, combine the whipped cream and the powdered sugar. Whisk on high until you begin to see lines forming on the surface and the cream is thickened but not yet forming peaks. 
  • Add in the mascarpone cheese and vanilla and whip on medium-high until firm peaks form and barely hold their shape. The cream will set up even more after you pipe the filling so try not to over-whip it. 
  • After your cookies are cool, match them up by similar size. Fill with some of your mascarpone whipped cream and sandwich the two sides together. 
    Because of the whipped cream filling, these cookies will need to be stored in an airtight container in the fridge. They will be ok for about 3 days and then will start to dry out or you can freeze them for up to 6 months.

Video

Notes

Pro-tip: Make these chocolate whoopie pies, take out 3 oz of the flour, and add 3 oz of unsweetened cocoa powder.
 
COOKIE SCOOP: I'm using a 1 Tablespoon cookie scoop and bake my whoopie pies for 9 minutes. You can use a larger scoop, just bake for 1-2 minutes more. When the cookie is puffy and bounces back when you lightly touch the top, it's done. It should be lightly golden brown on the bottom. 

Nutrition

Serving: 1cookie | Calories: 171kcal | Carbohydrates: 16g | Protein: 2g | Fat: 11g | Saturated Fat: 7g | Cholesterol: 39mg | Sodium: 79mg | Potassium: 60mg | Fiber: 1g | Sugar: 7g | Vitamin A: 361IU | Vitamin C: 1mg | Calcium: 39mg | Iron: 1mg

Cake sculpted to look like a cat sitting on a blue pillow

January 1, 2021 Course Preview

Cat Cake and How to Ship a Cake Tutorial

Skill level: Intermediate

In this tutorial, you will learn how to create this charming cat cake sitting on a pillow I made for a lovely client that lived out of state. Shipping cakes is one of those things you always hear cake decorators talk about but no one ever really breaks down step-by-step how you would ship a cake, from the beginning of the design process, all the way through to taping up the box, so I thought I would show my process. It might sound daunting, but I promise, it's a breeze!

Learn how to create a realistic cat cake complete with shiny isomalt eyes, fur texture, whiskers and a pretty kitty tail. This cake is sitting on a sculpted pillow cake that I break down how to create as well. There's a lot to cover in this tutorial, so let's get our tools together and let's get started.

1:43:07 Minutes of Instruction

What You Will Learn

  • How to create a realistic sculpted cat sitting on a pillow from cake and rice cereal treats
  • Learn how to plan out and construct a project that can be shipped in boxes and survive the journey
  • How to create realistic cat ears, eyes, tail and whiskers
  • Learn how to ship a cake through the postal system and have it arrive safely

Tutorial Chapters

  1. Planning out the structure 0:31
  2. The cat structure 3:39
  3. The cake board 12:34
  4. Making the cat body 16:55
  5. Making the frosting 22:22
  6. Making the pillow structure 23:01
  7. Stacking and carving the cake 25:07
  8. Frosting the cake 30:02
  9. Carving the cake 31:44
  10. Covering the cat in fondant 39:50
  11. Adding the toes 44:14
  12. Making fur texture 47:03
  13. Making the eyes 50:12
  14. Sculpting the cat face 56:41
  15. Finishing the cat fur 1:00:18
  16. Making the cat ears 1:04:24
  17. Adding the eyes 1:11:15
  18. Adding final details 1:15:47
  19. Adding whiskers 1:18:26
  20. Covering the pillow in fondant 1:19:41
  21. Adding the tail 1:26:59
  22. Packing the pillow cake 1:31:48
  23. Packing the cat 1:38:45

Downloads

Materials List

Cat Reference 01

Cake sculpted to look like a cat sitting on a blue pillow

January 1, 2021 Paid Video

Cat Cake and How to Ship a Cake

Skill level: Intermediate

In this tutorial, you will learn how to create this charming cat cake sitting on a pillow I made for a lovely client that lived out of state. Shipping cakes is one of those things you always hear cake decorators talk about but no one ever really breaks down step-by-step how you would ship a cake, from the beginning of the design process, all the way through to taping up the box, so I thought I would show my process. It might sound daunting, but I promise, it's a breeze!

Learn how to create a realistic cat cake complete with shiny isomalt eyes, fur texture, whiskers and a pretty kitty tail. This cake is sitting on a sculpted pillow cake that I break down how to create as well. There's a lot to cover in this tutorial, so let's get our tools together and let's get started.

1:43:07 Minutes of Instruction

What You Will Learn

  • How to create a realistic sculpted cat sitting on a pillow from cake and rice cereal treats
  • Learn how to plan out and construct a project that can be shipped in boxes and survive the journey
  • How to create realistic cat ears, eyes, tail and whiskers
  • Learn how to ship a cake through the postal system and have it arrive safely

Tutorial Chapters

  1. Planning out the structure 0:31
  2. The cat structure 3:39
  3. The cake board 12:34
  4. Making the cat body 16:55
  5. Making the frosting 22:22
  6. Making the pillow structure 23:01
  7. Stacking and carving the cake 25:07
  8. Frosting the cake 30:02
  9. Carving the cake 31:44
  10. Covering the cat in fondant 39:50
  11. Adding the toes 44:14
  12. Making fur texture 47:03
  13. Making the eyes 50:12
  14. Sculpting the cat face 56:41
  15. Finishing the cat fur 1:00:18
  16. Making the cat ears 1:04:24
  17. Adding the eyes 1:11:15
  18. Adding final details 1:15:47
  19. Adding whiskers 1:18:26
  20. Covering the pillow in fondant 1:19:41
  21. Adding the tail 1:26:59
  22. Packing the pillow cake 1:31:48
  23. Packing the cat 1:38:45

Downloads

Materials List Cat Reference 01

Sugar flowers in an arrangement on top of a cake

December 15, 2020 Course Preview

Sugar Flowers 101 Tutorial

Skill level: Intermediate

Guest instructor Alexandria Murray of Fine Spun Cakes joins us today to deliver a step-by-step class on constructing, dusting and arranging sugar flowers. Alexandria offers loads of tips and tricks on how to create a wildflower arrangement out of gumpaste and wafer paper.

Alexandria breaks down how to create hypericum berries, lilacs, daisies with pollen in the center, as well as wafer paper leaves to create a stunning arrangement.

1:38:49 Minutes of Instruction

What You Will Learn

  • Learn how to create a wild flower arrangement using gumpaste and wafer paper
  • How to craft sugar flowers using a clear, concise process
  • Alexandria breaks down dusting flowers into repeatable steps
  • Learn tips on how to arrange flowers as a focal piece on a cake

Tutorial Chapters

  1. The berry tools 0:57
  2. Coloring the gumpaste 2:17
  3. Making the berries 4:33
  4. Making the berry calyx 8:23
  5. The daisy tools 12:43
  6. Making the daisy centers 17:15
  7. Dipping the daisies 21:10
  8. Making daisy petals 23:03
  9. The lilac tools 35:47
  10. Making the lilacs 40:04
  11. Coloring wafer paper leaves 48:40
  12. Cutting and shaping leaves 58:11
  13. Attaching leaves and wires 1:03:09
  14. Dusting the flowers 1:10:31
  15. Taping the flowers 1:18:27
  16. Assembling the flowers 1:26:45

Downloads

Materials List

Sugar flowers in an arrangement on top of a cake

December 15, 2020 Paid Video

Sugar Flowers 101

Skill level: Intermediate

Guest instructor Alexandria Murray of Fine Spun Cakes joins us today to deliver a step-by-step class on constructing, dusting and arranging sugar flowers. Alexandria offers loads of tips and tricks on how to create a wildflower arrangement out of gumpaste and wafer paper.

Alexandria breaks down how to create hypericum berries, lilacs, daisies with pollen in the center, as well as wafer paper leaves to create a stunning arrangement.

1:38:49 Minutes of Instruction

What You Will Learn

  • Learn how to create a wild flower arrangement using gumpaste and wafer paper
  • How to craft sugar flowers using a clear, concise process
  • Alexandria breaks down dusting flowers into repeatable steps
  • Learn tips on how to arrange flowers as a focal piece on a cake

Tutorial Chapters

  1. The berry tools 0:57
  2. Coloring the gumpaste 2:17
  3. Making the berries 4:33
  4. Making the berry calyx 8:23
  5. The daisy tools 12:43
  6. Making the daisy centers 17:15
  7. Dipping the daisies 21:10
  8. Making daisy petals 23:03
  9. The lilac tools 35:47
  10. Making the lilacs 40:04
  11. Coloring wafer paper leaves 48:40
  12. Cutting and shaping leaves 58:11
  13. Attaching leaves and wires 1:03:09
  14. Dusting the flowers 1:10:31
  15. Taping the flowers 1:18:27
  16. Assembling the flowers 1:26:45

Downloads

Materials List

close up of brown sugar swiss meringue buttercream on a cupcake

December 14, 2020 Frosting and Icing

Brown Sugar Swiss Meringue Buttercream

Silky smooth brown sugar buttercream is a winter baking dream come true! Brown sugar is dissolved into egg whites over low heat and then we whip it into a super fluffy meringue! Whip in your butter, vanilla, some cinnamon, and salt and you have the best buttercream ever!

close up of brown sugar swiss meringue buttercream on a cupcake

What's In This Blog Post

  • Brown Sugar Buttercream Ingredients
  • Brown Sugar Buttercream Step-By-Step
  • Related Recipes

Brown Sugar Buttercream Ingredients

I love the flavor the brown sugar adds to this swiss meringue buttercream frosting. I added cinnamon to my recipe but you could use any kinds of spices you like to accent the cake you are pairing it with. I'm putting this buttercream on my gingerbread cake recipe but it would also taste amazing with apple spice cake, pumpkin spice cake, or even brown butter cake!

brown butter cake ingredients

If you don't have brown sugar or you don't want to take the extra step of dissolving the brown sugar into the egg whites and making the meringue, you can make this buttercream using my easy buttercream recipe. Just add in 4 Tablespoons of molasses and 2 Tablespoons of cinnamon. 


Brown Sugar Buttercream Step-By-Step

  1. Bring two inches of water to a simmer over medium-high heat. Once it's simmering, reduce the heat to medium-low.
  2. Place your egg whites and brown sugar together in the metal bowl of your stand mixer and whisk to combine.
  3. Place the bowl on top of the simmering water and whisk continuously until the grains of sugar are dissolved. Don't walk away or you could accidentally cook your eggs. Pro-tip - (or oops I accidentally multi-tasked and got distracted tip) if you do walk away and see some bits of cooked egg, you can strain it out and then continue with your buttercream. It's not ruined. hand touching egg whites and brown sugar mix
  4. Once you cannot feel any grains of sugar, take the egg mixture off the heat and attach it to your stand mixer with the whisk attachment. Turn the mixer onto high and let your eggs whip until you reach stiff STIFF peaks. Stiff peaks are when the meringue stands straight up from the whisk. This can take 5-15 minutes, depending on the strength of your mixer.egg and brown sugar mixture whisking on a stand mixer
  5. Because I'm impatient, I like to scoop out my meringue and place it onto a cookie sheet to cool down quickly in the fridge. You can stick the whole bowl in the fridge, but it takes much longer. We can't whip in the butter until the meringue is cool, or it will melt the butter and we'll get brown sugar soup!brown sugar meringue on a green sheet pan
  6. After about 10 minutes, your meringue shouldn't feel warm anymore. Scoop it back into the bowl and start mixing on medium speed while adding in your chunks of room temperature butter.
  7. Add in your salt, vanilla, and cinnamon. Increase the speed to high and whip the buttercream until it's light and fluffy and doesn't taste like butter anymore. Close up of brown sugar buttercream on a whisk

    Pro-Tip: If your buttercream is too cold and seems like it's clinging to the sides of the bowl and whisk you can fix it. Remove about 1 cup of the buttercream and place it into a bowl. Microwave it until it's barely melted. It took me about 30 seconds.

    Pour the half-melted buttercream back into the bowl and continue mixing, it should get light and fluffy now. 

Related Recipes

Moist Vanilla Cake Recipe

Brown Butter Cake

Fresh Apple Cake

Recipe

close up of brown sugar swiss meringue buttercream on a cupcake
Print Recipe
5 from 12 votes

Brown Sugar Swiss Meringue Buttercream

Silky smooth brown sugar buttercream is a winter baking dream come true! Brown sugar is dissolved into egg whites over low heat and then we whip it into a super fluffy meringue! Whip in your butter, vanilla, some cinnamon, and salt and you have the best buttercream ever!
Prep Time10 minutes mins
Cook Time10 minutes mins
Cooling15 minutes mins
Total Time35 minutes mins
Course: Dessert
Cuisine: French
Servings: 6 cups
Calories: 890kcal
Author: Liz Marek

Equipment

  • Stand mixer with whisk attachment

Ingredients

  • 8 ounces egg whites fresh is better, you can use boxed if needed
  • 14 ounces light brown sugar
  • ¾ teaspoon salt
  • 18 ounces unsalted butter room temperature
  • 1 Tablespoon vanilla extract
  • 1 Tablespoon ground cinnamon
US Customary - Metric

Instructions

  • Bring two inches of water to a simmer over medium-high heat. Once it's simmering, reduce the heat to medium-low.
  • Place your egg whites and brown sugar together in the metal bowl of your stand mixer and whisk to combine.
  • Place the bowl on top of the simmering water and whisk continuously until the grains of sugar are dissolved. Don't walk away or you could accidentally cook your eggs.
  • Once you cannot feel any grains of sugar, take the egg mixture off the heat and attach it to your stand mixer with the whisk attachment. Turn the mixer onto high and let your eggs whip until you reach stiff STIFF peaks. Stiff peaks is when the meringue stands straight up from the whisk. This can take 5-15 minutes depending on the strength of your mixer.
  • Because I'm impatient, I like to scoop out my meringue and place it onto a cookie sheet to cool down quickly in the fridge. You can stick the whole bowl in the fridge but it takes much longer. We can't whip in the butter until the meringue is cool or it will melt the butter and we'll get brown sugar soup!
  • After about 10 minutes, your meringue shouldn't feel warm anymore, scoop it back into the bowl and start mixing on medium speed while adding in your chunks of room temperature butter.
  • Add in your salt, vanilla, and cinnamon.
  • Increase the speed to high and whip the buttercream until it's light and fluffy and doesn't taste like butter anymore.

Video

Nutrition

Serving: 4oz | Calories: 890kcal | Carbohydrates: 67g | Protein: 5g | Fat: 69g | Saturated Fat: 44g | Cholesterol: 183mg | Sodium: 382mg | Potassium: 170mg | Fiber: 1g | Sugar: 65g | Vitamin A: 2125IU | Calcium: 91mg | Iron: 1mg
cookie boxing tutorial

December 7, 2020 Blog

Cookie Boxing Tutorial

Easy cookie boxing tutorial for shipping your cookies, hot chocolate bombs, and homemade marshmallows with NO breakage! All you need is a pretty bakery box, plastic wrap, some cardstock, and some shredded paper for packing! I shipped these cookies from Oregon to Texas as a test and they arrived perfectly.

I used my snickerdoodle, double chocolate chip cookie, lemon shortbread, homemade marshmallows, and hot chocolate bombs for this cookie boxing but you can use any cookie recipe you want. 

cookies being boxed up for shipping

What's in this blog post

  • Cooking Boxing Supplies
  • Cookie Boxing Step-By-Step
  • Related Cookie Recipes

My friend Sara from Sara's Sweets TX was the one who taught me how to package cookies this way. Over the years she has sent me box after box of beautifully decorated sugar cookies and they always arrive perfectly. 

She actually heat seals the cookies inside cellophane with the cardboard backing and then wraps each cookie in bubble wrap! Very time consuming but when the cookies look as amazing as these, it's not hard to see why she goes through that extra effort. 

dinosaur cookies

These are hand-painted dinosaur cookies from Avalon's Dino-FOUR birthday.

Bug Theme Sugar Cookies
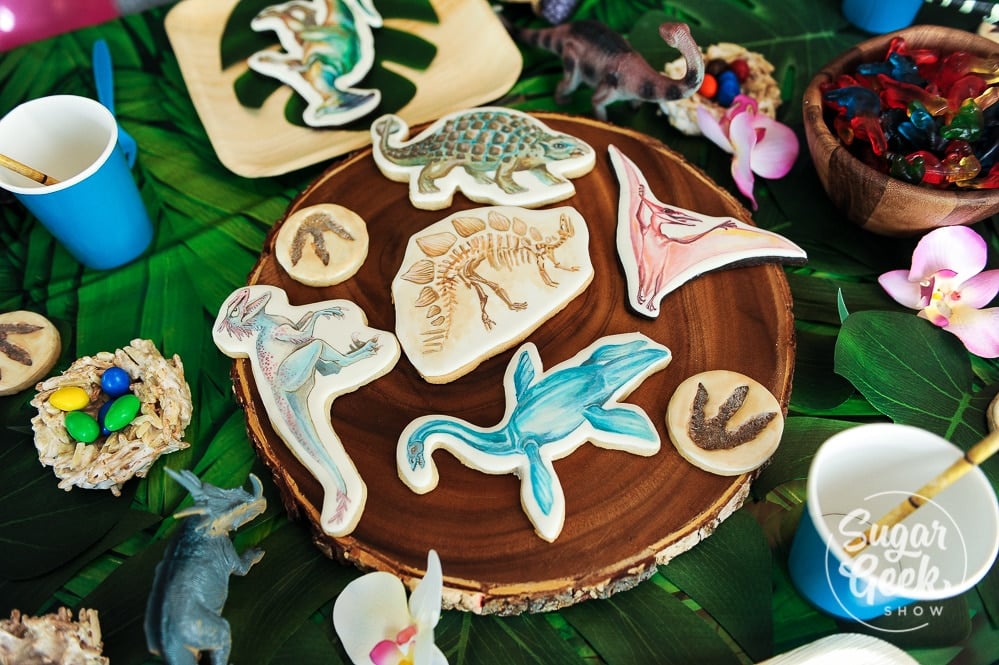
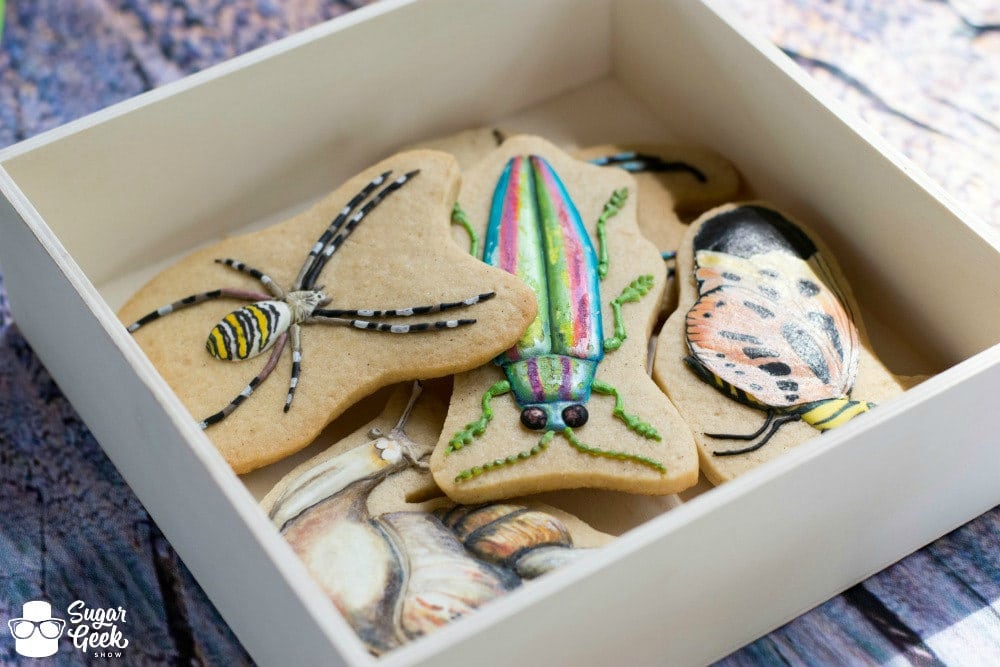
Gorgeous bug-themed cookies for Avalons' third bug birthday party. 

Cooking Boxing Supplies

It's a good idea to have everything you want to ship already baked ahead of time. I freeze my cookies to keep them fresh. You don't need to freeze marshmallows, candy, or chocolates. 

cooking boxing supplies

I got these cute Christmas bakery boxes online and they came in a pack of 12. They measure 8"x6"x3" and fit perfectly inside a flat rate box from USPS. 

I also used some shredded paper and plastic wrap to pack my cookies. The plastic wrap keeps them fresh and the shredded paper provides padding so that they don't end up turning into crumbled broken cookies during shipping. 

You'll also need some heavy cardstock or cake boards to place in between your larger cookies so they don't break during shipping. 

I use parchment paper to wrap up smaller cutout cookies like shortbread or Linzer cookies. 

Cupcake liners work great to hold your hot chocolate cocoa bombs in place so they don't roll around. 

I found some adorable little treat bags to put my marshmallows in but you could just wrap them in more plastic wrap if you want. 

This isn't required but some cute stickers and ribbon are also nice to decorate some of the wrapped goodies. 

Cute labels for your hot chocolate bombs

Cookie Boxing Step-By-Step

Step 1 - Cut some cardstock or cake boards to the size of your larger cookies. 

snickerdoodle cookies with cardboard in between

If you have sugar cookies that are cut into shapes, just make the cardboard either a circle or square so that all sides of the cookie are supported. No need to cut it exactly to the shape of the cookie 

Step 2 - Place the cardboard between the two cookies (flat back sides together) and then wrap with plastic wrap to hold them in place. The cardboard will support the cookie during shipping and keep it from bending and breaking. 

snickerdoodles wrapped in plastic wrap with a snowflake sticker

Step 3 - Wrap your hot chocolate bombs in plastic wrap and place them into a cupcake wrapper. It's good to include a hot chocolate tag or something that explains how to use hot chocolate bombs because I have learned not everyone knows to add hot milk and stir, they just eat them and get surprised by that hot chocolate mix inside haha. 

hot chocolate bomb wrapped in plastic wrap inside a cupcake wrapper

Step 4 - Stack your cutout cookies end to end to make a log. Wrap them in a layer of plastic wrap to keep them together and seal in the freshness. Wrap the outside with parchment paper and tie the ends with string. The parchment paper will help protect the delicate edges during shipping. 

wrapping cutout cookies in plastic wrap
wrapping cutout cookies in parchment paper

Step 5 - Place marshmallows into goodie bags or wrap them in plastic wrap. Goodie bags are also great for smaller meringue cookies or chocolates. 

homemade marshmallows in a goodie bag with a ribbon

Step 6 - Layer all your goodies in the box and fill any empty spaces with shredded paper. You don't want any gaps. Gaps allow movement and movement = breakage. 

packing cookies in a box

Step 7 - Close your box and place it into your larger box with more shredded paper on the bottom, sides, and top. If you're in a really hot area or it's summertime when you're reading this, you might want to include a cold pack.

how to ship your cookies without them breaking

Now your cookies are ready to ship! Shipping your cookies is a great way to spread Holiday cheer, show loved ones near and far you are thinking of them, and also a great way to expand your business if you sell cookies!

Related Cookie Recipes

Lemon shortbread cookies recipe

Linzer cookies recipe

Homemade marshmallows recipe

Shiny hot cocoa bombs tutorial

Chewy double chocolate chip cookies recipe

Authentic snickerdoodle cookie recipe

Chewy chocolate chip cookies

Peppermint Chocolate Cookies

Chocolate macarons recipe

Copycat Lofthouse cookie recipe

Chewy gingerbread cookie recipe

No-spread sugar cookie recipe

Recipe

cookie boxing tutorial
Print Recipe
5 from 1 vote

Cookie Boxing Tutorial

How to package and box your cookies, homemade marshmallows, hot chocolate bombs, or other goodies so that you can ship them without them breaking or cracking.
Prep Time5 minutes mins
Cook Time5 minutes mins
Author: Liz Marek
Cost: $2

Ingredients

Cookie Boxing Materials

  • 1 8"x6" bakery box
  • 1 medium USPS flat rate box
  • shredded paper
  • plastic wrap
  • parchment paper
  • 2 regular cupcake wrappers
  • 1 3"x4" goodie bag
  • 1 8"x11" cardstock or cake board

Instructions

  • Cut some cardstock or cake boards to the size of your larger cookies. 
  • Place the cardboard between the two cookies (flat back sides together) and then wrap with plastic wrap to hold them in place. The cardboard will support the cookie during shipping and keep it from bending and breaking. 
  • Wrap your hot chocolate bombs in plastic wrap and place them into a cupcake wrapper. It's good to include a paper tag or something that explains how to use hot chocolate bombs because I have learned not everyone knows to add hot milk and stir, they just eat them and get surprised by that hot chocolate mix inside haha.
  • lace marshmallows into goodie bags or wrap them in plastic wrap. Goodie bags are also great for smaller meringue cookies or chocolates. 
  • Layer all your goodies in the box and fill any empty spaces with shredded paper. You don't want any gaps. Gaps allow movement and movement = breakage. 
  • Close your box and place it into your larger box with more shredded paper on the bottom, sides, and top. If you're in a really hot area or it's summertime when you're reading this, you might want to include a cold pack.
  • Now your cookies are ready to ship! Shipping your cookies is a great way to spread Holiday cheer, show loved ones near and far you are thinking of them, and also a great way to expand your business if you sell cookies!

Video

Notes

Bake all your cookies in advance and freeze them until you are ready to ship them
Add a cold pack to the top of your box if you're in a hot area
 
closeup of vanilla cake with vanilla buttercream slice on a white plate

December 5, 2020 Cake

Vanilla Cake Recipe

Vanilla cake is one of the most important recipes to have in your baking arsenal, and this version has been my go-to professional recipe for over ten years for weddings, birthdays, and special occasion cakes. The reverse creaming method gives it an incredibly moist, tender crumb that stays soft for days, and it bakes up naturally flat so there is almost no trimming or waste. If you are new to baking layer cakes, my how to decorate a cake guide walks through the entire process step-by-step.

Slice of vanilla cake with white buttercream on a white plate

Quick Glance: Vanilla Cake Recipe

  • Recipe Name: Vanilla Cake Recipe
  • Why You'll Love It: Soft, buttery vanilla cake with an ultra-moist crumb that stays tender for days.
  • Time and Difficulty: Prep time: 15 minutes Bake time: 20-30 minutes Difficulty: Intermediate
  • Main Ingredients: Cake flour, butter, sugar, eggs, milk, vanilla extract
  • Method: Reverse creaming method: Dry ingredients are combined with the butter first, then the liquid ingredients are mixed in.
  • Texture and Flavor: Light, fluffy crumb with rich vanilla flavor
  • Quick Tip: Mix the batter for the full two minutes during the reverse creaming stage to properly develop the cake's structure.
ChatGPT
Google AI
Perplexity
Grok
Add us as a trusted site on Google
[feast_advanced_jump_to]

Next to my white velvet buttermilk cake, and lemon blueberry cake, this moist vanilla cake is one of our most popular recipes. I have been using this recipe for over ten years for my cake clients with nothing but rave reviews. This is the cake that turns those "I don't even like cake" consultations into OMG we need to book you right now clients! This is perfect for special occasions like weddings, showers, and it makes the perfect birthday cake!

If you want to make these as cupcakes, my vanilla cupcake recipe uses the same reverse creaming method in a perfectly portioned size.

What Makes This Vanilla Cake Work So Well

One of the key techniques used in this recipe is the reverse creaming method. This mixing technique coats the flour in butter before adding liquids, which prevents excess gluten development and results in an incredibly tender crumb.

The texture of this vanilla cake is extremely soft and moist with a delicate crumb. Some bakers are surprised by how tender it is, but that softness is exactly what makes this cake so delicious.

Another reason this recipe works so well is the combination of butter and oil. Butter adds rich flavor while oil keeps the cake moist for several days.

This cake also bakes very flat, which means less trimming and less cake waste. That makes it perfect for layered cakes, wedding cakes, and decorated celebration cakes.

If you want a bright white crumb instead of this golden vanilla one, use only egg whites and make my white cake instead.

Vanilla Cake Ingredients

The secret to this ultra-moist and tender vanilla cake is using cake flour and the reverse creaming method.

vanilla cake ingredients

Cake flour is used instead of all-purpose flour because it has a lower protein content, which results in a softer and more tender crumb. If you only have all-purpose flour, you can make a substitute by removing two tablespoons of flour per cup and replacing it with cornstarch, but the texture will not be exactly the same.

Sugar adds sweetness, moisture, and structure to the cake. Reducing the sugar may affect the texture and stability of the cake.

Baking Powder and Baking Soda These ingredients provide lift and help the cake rise properly. Baking soda reacts immediately while baking powder reacts during baking.

Vanilla is the primary flavor in this vanilla cake recipe. For the best flavor, use high-quality vanilla extract or vanilla bean paste.

Unsalted butter adds rich flavor and helps create a tender crumb. Unsalted butter is typically used so the salt level in the recipe can be controlled.

Milk adds moisture and helps activate the gluten structure in the cake.

Vegetable oil helps keep the cake moist for several days. Other neutral oils, such as canola or grapeseed oil, can also be used.

Tips For Success

  • Measure your ingredients using a kitchen scale. Baking is a science and weight measurements provide the most accurate results.
  • Bring your butter, milk, and eggs to room temperature before mixing. Room temperature ingredients help create a smooth batter and proper emulsion.
  • Do not skip the mixing stage. The reverse creaming method requires mixing for about two minutes to properly develop the cake structure.
  • If you live above 5,000 feet in elevation, you may need to slightly reduce the baking powder so the cake does not collapse.

Vanilla Cake Recipe Step-By-Step

room temperature ingredients
  1. Bring your butter, milk, and eggs to room temperature. This step is very important because if these ingredients are not all the same temperature, the batter could curdle and separate during baking, leading to bad texture and rise.

    Preheat your oven to 335°F. and prepare your cake pans with cake goop or your preferred pan release.
hand showing the course sand texture after mixing the butter and flour.
  1. Combine the cake flour, sugar, baking soda, baking powder, and salt in the bowl of a stand mixer.

    While mixing on low, add softened butter in small chunks and mix until the mixture looks like coarse sand.
a spatula showing the texture of the cake batter mixture before adding the eggs and oil.
  1. Combine half the milk and the oil.

    Add the milk and oil mixture all at once to the dry ingredients mixture and mix for two minutes on medium speed. The batter should look thick and not separated.

    Scrape the bowl thoroughly after the two-minute mix. If you skip this, hard lumps of flour will stay in the batter and will not mix in fully later.
hand adding the egg and oil mixture to the mixing bowl.
  1. Whisk the rest of the milk, vanilla extract, and the eggs together to combine.

    Slowly add the egg and milk mixture while mixing on low speed just until combined.
finished cake batter on a spatula.
  1. The finished batter should be thick, smooth, and slightly glossy.
overhead shot of vanilla cake in pans
  1. Divide the batter into three prepared 8-inch cake pans.
close up of baked cakes in pans
  1. Bake for 20-30 minutes or until a toothpick inserted into the center comes out clean. Immediately tap the pan on the counter once to release air and reduce shrinking.
stack of vanilla cake layers on a cooling rack
  1. Cool cakes in the pans until barely warm before removing them onto a cooling rack.

Batter & Frosting Calculator

Cake Batter and Frosting Calculator

Select an option below to calculate how much batter or frosting you need. Adjust the servings slider on the recipe card to change the amounts the recipe makes.

Choose a pan type

Choose a cake pan size
(based on 2" tall cake pan)

Choose a cake pan size
(based on 2" tall cake pan)

Choose a cake pan size
(based on 2" tall cake pan)

Cupcake Tin Size

Choose number of pans

Cups of Batter Needed

8 cups

Cups of Frosting Needed

5 cups

Note: measurements are estimated based off the vanilla cake recipe using standard US cake pans and sizes. Measurements used are for 2" tall cake pans only. Your results may vary. Do not overfill cake pans above manufacturer's recommended guidelines.

This recipe makes three 8-inch cake layers, two 9-inch cake layers, or about 24 cupcakes. The easy buttercream recipe included makes 8 cups of frosting, enough to frost and fill the layered cake. Store leftover frosting in the fridge for up to 1 week or freeze for up to 6 months.

Top it with a batch of my American buttercream recipe for a classic combination that never fails. If you want to skip the buttercream entirely, try frosting this cake with white chocolate ganache instead, which is incredibly stable and has a gorgeous vanilla flavor. Or you can top with a pretty pink drip cake finish

Common Vanilla Cake Mistakes To Avoid

Using cold ingredients. Cold butter, eggs, and milk will not emulsify properly during mixing and can cause the batter to look curdled and broken. Set everything out at least an hour before you start, or warm your eggs in a bowl of warm water for 5 minutes and microwave your milk for 20 seconds.

Overbaking the cake. This recipe bakes at a lower temperature for a reason, but it can still dry out if left in too long. Start checking at 30 minutes with a toothpick and touch the surface gently. If it springs back, it is done. A few moist crumbs on the toothpick are fine. A completely clean toothpick often means it went too far.

Skipping the two-minute mixing stage. The reverse creaming method requires the full two minutes of mixing after the milk and oil go in. This stage is what develops the structure of the cake. Cutting it short results in a weaker crumb that can sink or have an uneven texture.

Not scraping the bowl. Hard lumps of unmixed flour and butter hide at the bottom of the bowl during mixing. If you do not scrape down thoroughly after the two-minute mix, those lumps will stay in the batter and create dense spots in the finished cake.

Using low-quality vanilla extract. Vanilla is the only flavor in this cake, so it has nowhere to hide. Use a good pure vanilla extract or vanilla bean paste. Imitation vanilla will produce a noticeably weaker, more artificial flavor.

Vanilla Cake FAQs

Why does this vanilla cake recipe use cake flour instead of all-purpose flour?

Cake flour has a lower protein content than all-purpose flour, which produces a softer, more tender crumb. The reverse creaming method coats the flour in butter before any liquid is added, and cake flour's lower protein helps prevent excess gluten from forming during the two-minute mixing stage. If you only have all-purpose flour on hand, you can make a substitute by removing two tablespoons of flour per cup and replacing them with cornstarch, but the texture will not be exactly the same.

Can I bake this vanilla cake recipe in different pan sizes?

Yes, this recipe is flexible across several pan sizes. The full recipe makes three 8-inch cake layers, two 9-inch cake layers, or about 24 cupcakes. For a half sheet pan, you will need three full batches of batter to fill the pan properly. Smaller pans bake faster than larger ones, so check for doneness with a toothpick starting at 18 to 20 minutes for cupcakes and 25 to 30 minutes for 8-inch layers.

Can I make cupcakes from this vanilla cake recipe?

Yes, this vanilla cake recipe works beautifully as cupcakes. Fill cupcake liners about two-thirds full and bake at 350°F for 18 to 20 minutes, or until the centers spring back when lightly touched. The full recipe yields approximately 24 cupcakes.

Can I freeze this vanilla cake?

Yes, this vanilla cake freezes very well. Wrap each cooled cake layer tightly in plastic wrap and store in the freezer for up to two months. Thaw the layers at room temperature for one to two hours before frosting and decorating. The buttercream frosting can also be frozen separately for up to six months in an airtight container.

Can I substitute the milk with a non-dairy alternative?

Yes, you can use a non-dairy milk like almond, oat, or soy milk in place of regular whole milk in this recipe. Choose an unsweetened and unflavored variety so it does not change the cake's flavor. Some non-dairy milks have a thinner consistency than whole milk, which can slightly affect the cake's final texture, but the recipe will still work.

Can I add other flavors to this vanilla cake recipe?

Yes, this vanilla cake is a great base for many flavor variations. Add lemon zest for a lemon vanilla cake, a teaspoon of almond extract for an almond cake, or sprinkles for a funfetti cake. You can also fold in mini chocolate chips, fresh berries, or a swirl of fruit jam between the layers to customize the flavor without changing the structure.

Why does this recipe bake at 335°F instead of 350°F?

The slightly lower oven temperature gives the cake a more even rise without doming or cracking on top. At 350°F, the edges of the cake set faster than the center, which often causes the top to dome and the edges to dry out. Baking at 335°F allows the cake to rise slowly and evenly, producing a flat, tender layer that is easier to stack and decorate without trimming.

More Vanilla Recipes You'll Love

  • Vanilla cupcakes on a white stands decorated with white buttercream and pink sprinkles.
    Moist Vanilla Cupcake Recipe
  • slice of vanilla cake on a plate
    Easy Vanilla Cake
  • vanilla bundt cake with vanilla glaze
    Moist Vanilla Bundt Cake Recipe
  • vanilla bean buttercream flowers
    Vanilla Bean Buttercream

Watch: How To Decorate A Cake Step-by-Step

Before you start decorating, watch the video below where I show you every step of decorating a cake from start to finish. Seeing the process in action makes it much easier to follow along

- Liz Marek.

Start Learning Now
smiling woman holding a decorated cake in her hands

Recipe

closeup of vanilla cake with vanilla buttercream slice on a white plate
Print Recipe
4.93 from 2268 votes

Moist Vanilla Cake Recipe With Easy Buttercream

How to make the best vanilla cake with the reverse creaming method. Super moist, delicate texture and unforgettable flavor.
Prep Time15 minutes mins
Cook Time30 minutes mins
Total Time45 minutes mins
Course: Dessert
Cuisine: American
Servings: 8 cups
Calories: 445kcal
Author: Liz Marek

Equipment

  • Food Scale
  • 8" x 2" Cake Pans (3)

Ingredients

Vanilla Cake Recipe

  • 4 ounces milk to be mixed with the oil
  • 3 ounces canola oil
  • 6 ounces milk to be mixed with the eggs
  • 1 tablespoon vanilla extract or 1 vanilla bean pod
  • 3 large eggs room temperature
  • 13 ounces cake flour
  • 13 ounces granulated sugar
  • 3 teaspoons baking powder
  • ¼ teaspoon baking soda
  • ½ teaspoon salt
  • 8 ounces unsalted butter softened to room temperature but not melted

Easy Buttercream Frosting

  • 16 ounces powdered sugar
  • 4 ounces pasteurized egg whites
  • 2 teaspoons vanilla extract
  • 16 ounces unsalted butter softened to room temperature but not melted
  • ¼ teaspoon salt
  • 1 TINY drop purple food coloring to offset the yellow color (optional)
  • 3 drops electric pink food coloring for the flowers
  • 1 Tablespoon white sprinkles for decorating
US Customary - Metric

Instructions

Vanilla Cake

  • IMPORTANT: This is the BEST vanilla cake because I use a scale so it turns out perfectly 🙂 If you convert to cups I cannot guarantee good results. Make sure all your (cold ingredients) butter, eggs, milk are at room temperature or a little warm. See my post about how to use a scale if you don't know how to measure by weight.
  • Heat oven to 335º F/168º C . Prepare three 8"x2" cake pans with cake goop or another preferred pan release.
  • Place the 4 oz of milk in a separate measuring cup. Add the oil to the milk and set it aside.
  • To the remaining 6 oz of milk, add the vanilla and room temperature eggs. Whisk gently to combine. Set aside.
  • Place the flour, sugar, baking powder, baking soda, and salt into the bowl of your stand mixer with the paddle attachment.
  • Turn the mixer onto the slowest speed. Slowly add chunks of your softened butter until it is all added then let everything mix until it looks like coarse sand.
  • Add your milk/oil mixture all at once to the dry ingredients and mix on medium (speed 4 on kitchenaid, speed 2 on the Bosch) for 2 full minutes to develop the structure. Set a timer! Don't worry, this will not over-mix the cake.
  • After 2 minutes, scrape the bowl. This is an important step. If you skip it, you will have hard lumps of flour and unmixed ingredients in your batter. If you do it later, they will not mix in fully.
  • Slowly add in the milk/egg mixture while mixing on low, stopping to scrape the bowl one more time halfway through. Mix until just combined. Your batter should be thick and not too runny.
  • Divide the batter into your greased cake pans and fill ¾ of the way full. I like to weigh my pans to make sure they're even.
  • Bake for 20-30 minutes and check your cakes. Do the "done test". Insert a toothpick to see if it comes out clean. Sometimes wet batter doesn't show up so make sure it's clean and not just wet. Then gently touch the top of the cake, does it spring back? Oven temperatures vary so if it's not done yet, bake for a few more minutes (2-3) and check again until it passes the "done" test.
  • Remove the cakes from the oven and give them a tap on the countertop to release air and prevent too much shrinking. Let them cool on a cooling rack until they are barely warm.
  • After cooling for about 10 minutes, place the cooling rack on top of the cake, placing one hand on top of the cooling rack and one hand under the pan and flip the pan and the cooling rack over so the pan is now upside down on the cooling rack. Remove the pan carefully. Repeat with the other pan.
  • After the cakes are fully cooled, carefully wrap them in plastic wrap and place them into the freezer or fridge for about 30 minutes to firm up the cakes and make them easier to handle for stacking.

Easy Buttercream Frosting

  • Place egg whites and powdered sugar in a stand mixer bowl. Attach the whisk, combine ingredients on low and then whip on high for 5 minutes. Add the vanilla extract and salt.
  • Add in your softened butter in chunks and whip with the whisk attachment to combine. It will look curdled at first. This is normal. It will also look pretty yellow. Keep whipping. 
  • Whip on high for 8-10 minutes until it's very white, light and shiny. If you don't whip it enough, it could end up tasting buttery.
  • Optional: If you want whiter frosting, add in a tiny drop of purple to counteract the yellow in the butter (too much will make the frosting grey or light purple.)
  • Optional: Switch to a paddle attachment and mix on low for 15-20 minutes to make the buttercream very smooth and remove air bubbles. This isn't required but if you want really creamy frosting, you don't want to skip it. 
  • After your cakes are chilled, fill them with your favorite frosting and frost the outside. If you're not familiar with decorating cakes, check out my how to make your first cake blog post! Watch the video to see how I made the palette knife buttercream flowers.

Video

Notes

Use a kitchen scale for best results
Baking is a science, and measuring ingredients by weight ensures consistent results every time. Cup measurements can vary significantly depending on how the flour is scooped.
Room temperature ingredients are essential
Butter, eggs, and milk should all be at room temperature before mixing. Cold ingredients can cause the batter to break and may result in a dense or uneven cake.
Do not skip the two-minute mixing stage
Because this recipe uses the reverse creaming method, mixing the batter for the full two minutes is necessary to properly develop the cake’s structure.
Pan size options
This vanilla cake recipe makes:
• three 8-inch cake layers
• two 9-inch cake layers
• about 24 cupcakes
Cupcake baking instructions
Fill liners about two-thirds full and bake at 350°F for 18–20 minutes, or until the centers spring back when lightly touched.
Storage
Frosted cakes can be stored at room temperature for up to 24 hours if covered. After that, refrigerate and bring to room temperature before serving.
Freezing cake layers
Cake layers freeze very well. Wrap tightly in plastic wrap and freeze for up to 2 months. Thaw at room temperature before decorating.
Flavor variations
You can easily customize this recipe by adding:
• lemon zest for lemon vanilla cake
• almond extract for almond cake
• sprinkles for funfetti cake

Nutrition

Serving: 1serving | Calories: 445kcal | Carbohydrates: 46g | Protein: 4g | Fat: 28g | Saturated Fat: 18g | Cholesterol: 88mg | Sodium: 113mg | Potassium: 98mg | Fiber: 1g | Sugar: 35g | Vitamin A: 807IU | Calcium: 48mg | Iron: 1mg

closeup of lemon shortbread cookies

December 2, 2020 Blog

Classic Lemon Shortbread Cookie Recipe

Light, buttery and crisp lemon shortbread cookies with a tangy lemon glaze. Incredibly easy to make and takes less than 15 minutes! Hello easy! 

closeup of lemon shortbread cookies

This is a great recipe to make around the holidays because they ship so easily, but they are a fantastic cookie to make any time of the year. Especially if you're a lemon lover like me! It's very easy compared to other shortbread cookies recipes too, there is no need to roll out the dough, just roll it into a log, chill, and cut!

LEMON SHORTBREAD COOKIE INGREDIENTS

lemon shortbread ingredients

I love a strong lemon flavor so I'm using lemon zest, lemon juice, lemon extract, AND citric acid which is basically powdered lemon! You can totally leave out the citric acid if you want but if you are a lemon lover then you won't be sorry. You can find citric acid in the canning supply aisle at your grocery store. 

LEMON SHORTBREAD COOKIES STEP-BY-STEP

These cookies are so simple to make, I had my daughter Avalon lend me a hand. She enjoys adding in the ingredients and of course, taste-testing. If you want to have your kids help you bake more often but get stressed out from the mess, the easiest way to let them help is to measure everything out ahead of time and all they have to do is add it to the bowl when you tell them. 

Step 1 - Whisk together the flour, salt, and citric acid in a bowl. Set aside.

Step 2 - Cream your softened butter and sugar together for 2-3 minutes until it's light and airy. There isn't any leavening in this recipe so this air is what will give your cookie its lift and texture. I'm using my Bosch Universal Plus mixer, but you can use an electric mixer if you want, just make sure to mix for longer.

creamed butter and sugar

Step 3 - Add in your room temperature egg, lemon extract, and zest and mix until it's incorporated. 

Step 4 - While mixing on low, slowly add in your flour mixture and mix until the dough just begins to stick together. Do not over-mix or you'll end up with chewy, tough cookies. 

lemon shortbread cookie dough

Step 5 - On a lightly floured surface, divide the dough in half and press the dough into two log shapes that are about 3" in diameter. 

shaping lemon shortbread into a log

Step 6 - Roll the log in some sanding sugar or sprinkles if you desire. I think it makes the cookie so pretty! 

rolling lemon shortbread dough in sanding sugar

Step 7 - Wrap the cookie dough in plastic wrap and let it chill for at least two hours or overnight. 

Step 8 - Preheat your oven to 350ºF and line a cookie sheet with parchment paper. 

Step 9 - Slice your dough into ¼" thick pieces. 

slicing lemon shortbread cookie dough with a knife

Arrange them on the cookie sheet with about 1" of space in between. The cookies will not spread so don't worry about them running into each other. Now they're ready to bake!

lemon shortbread cookies on a pink cookie sheet with parchment paper

Step 10 - Bake your lemon shortbread cookies for 12-14 minutes in your preheated oven until they just start to get golden around the bottom edge. You want to bake shortbread for less time than you think, they will be soft when they first come out of the oven but once they cool down they will be perfect. I transfer my cookies to a cooling rack after about 5 minutes out of the oven. Make sure to bake shortbread a little less than you think, they can burn very easily.

Step 11 - Whisk together your sifted confectioner's sugar and lemon juice to make your glaze. Drizzle the glaze over the top of your cookies with a spoon or use a piping bag. The drizzle will set in about 30 minutes.

piping glaze onto baked lemon shortbread cookies on a cooling rack

After 24 hours, the glaze will be firm and you can package the cookies to ship or to stack for storage. 

stack of lemon shortbread cookies tied with red and white twine

TIPS FOR THE BEST SHORTBREAD COOKIES

  • Don't over-mix your dough or you'll end up with chewy shortbread instead of crisp.
  • I find these cookies to be the easiest if I make the dough a day in advance. Knead the dough until it just starts sticking together then roll the dough into a log and wrap it in plastic wrap.
  • Let the dough chill overnight or for a minimum of 2 hours and the dough will be very easy to slice and bake. Chilling the dough also keeps the shortbread from spreading while it bakes. 
  • Don't overbake your shortbread. There will be some very light browning around the edges and that's it. If you overbake them, they will be very hard and dry instead of light and crisp.
lemon shortbread cookies on a white plate with gold edge on a yellow napkin

WHAT'S THE DIFFERENCE BETWEEN A SHORTBREAD COOKIE AND A SUGAR COOKIE?

Sugar cookies and shortbread cookies are similar but have some differences. Sugar cookies are typically lighter, sweeter, and softer than a shortbread cookie and often decorated. Shortbread cookies are denser, more crumbly, and less sweet than sugar cookies. Shortbread cookies are typically made with a ratio of one part sugar, two parts butter, and three parts flour. 

Sugar cookies typically have baking powder or baking soda which causes the cookies to rise and have a lighter texture. Shortbread cookies do not have any baking powder or baking soda and rely on the air whipped into the butter/sugar for their texture. 

woman and girl biting into lemon shortbread cookies

WHY IS IT CALLED SHORTBREAD?

Shortbread is so named because of its crumbly texture (from an old meaning of the word "short," as opposed to "long," or stretchy). In this case, we're talking about gluten strand development. When water comes in contact with gluten (in this case, flour) then the strands of gluten get longer and longer causing the dough to become chewier and chewier. Sometimes this is a good thing, like when you're making bread or pasta.

But in cookies, we don't want them to be chewy, we want them to be crisp. Shortbread is made by coating the flour in butter first, so that the liquid in the dough cant reach the gluten as easily, causing the cookies to be crisper. Pie crust is also a type of shortbread. 

closeup of lemon shortbread cookies with lemon glaze on a cooling rack

WHY IS MY SHORTBREAD CHEWY?

Even though we are coating the flour in butter first, you can still end up with chewy shortbread if you knead your dough too much. Keep your dough chilled and try not to handle it too much. The warmer the dough gets the softer the butter gets and will no longer be coating the flour. 

The dough can be made the day before and refrigerated or frozen up 3 months in advance. Defrost, cut, and bake!

Related Recipes

No Spread Sugar Cookies

Gingerbread Cookies

Chewy Chocolate Chip Cookies

Hot Chocolate Bombs

How To Ship Cookies

Recipe

closeup of lemon shortbread cookies
Print Recipe
4.88 from 16 votes

Lemon Shortbread Cookies

Classic lemon shortbread cookies are crisp, buttery, and melt in your mouth delicious. Glaze and zest from fresh lemons take this cookie over the top! A lemon lover's dream come true!
Prep Time1 minute min
Cook Time12 minutes mins
chilling2 hours hrs
Total Time2 hours hrs 13 minutes mins
Course: Dessert
Cuisine: American
Servings: 48 cookies
Calories: 91kcal
Author: Liz Marek

Equipment

  • Stand mixer with the paddle attachment Or an electric hand mixer

Ingredients

Lemon Shortbread Cookies

  • 8 ounces unsalted butter, room temperature 1 cup
  • 6 ounces granulated sugar 1 cup
  • 1 large egg, room temperature
  • 1 teaspoon lemon extract
  • 1 teaspoon lemon zest
  • 12 ounces all-purpose flour 2 cups
  • 1 teaspoon salt
  • ¼ teaspoon citric acid optional, just adds an extra lemon-tart flavor

Lemon Glaze

  • 7 ounces powdered sugar, sifted 1 ¾ cups
  • 3 Tablespoons fresh lemon juice plus more if needed
US Customary - Metric

Instructions

  • Whisk together your flour, salt, and citric acid in a bowl and set it aside.
  • Cream your softened butter and sugar together in a stand mixer with the whisk attachment for 1-2 minutes until it's light and fluffy.
  • Add in the room temperature egg, lemon extract, and zest and mix until combined.
  • While mixing on low, add the flour mixture to the egg mixture until the dough just begins to stick together. Do not over-mix.
  • On a lightly floured surface, divide the dough in half and press the dough into two log shapes that are about 3" in diameter. 
    Roll in sanding sugar sprinkles if you desire. It adds a nice sparkle to the finished cookie.
  • Wrap the dough in plastic wrap, and refrigerate for two hours or overnight.
  • Preheat your oven to 350ºF and line a baking sheet with parchment paper.
  • Slice your lemon shortbread dough into ¼" thick slices.
  • Arrange the cookies on a baking sheet lined with parchment paper with about 1" of space in between each cookie. They won't spread.
  • Bake at 350°F (180°C) for 12-14 min until slightly golden brown around the edges.
    They will be soft when they first come out of the oven but once they cool down they will be perfect. Do not over bake!
  • Let your cookies cool for 5 minutes then carefully transfer them to a cooling rack to fully cool down.

Lemon Glaze

  • Sift your confectioner's sugar and whisk in your lemon juice. Add more if the glaze is too thick.
  • Drizzle the glaze over the cookies with a spoon or a piping bag. The glaze will fully set up after 24 hours and then the cookies can be stacked or packaged.

Video

Notes

BEFORE YOU START

1. Bring all your ingredients to room temperature or even a little warm (eggs, buttermilk, butter, etc) to ensure your batter does not break or curdle. 
2. Use a scale to weigh your ingredients (including liquids) unless otherwise instructed (Tablespoons, teaspoons, pinch etc). Metric measurements are available in the recipe card. Scaled ingredients are much more accurate than using cups and help ensure the success of your recipe. 
3. Practice Mise en Place (everything in it's place). Measure out your ingredients ahead of time and have them ready before you start mixing to reduce the chances of accidentally leaving something out.

TIPS FOR THE BEST SHORTBREAD COOKIES

  • Don't over-mix your dough or you'll end up with chewy shortbread instead of crisp.
  • I find these cookies to be the easiest if I make the dough a day in advance. Knead the dough until it just starts sticking together then roll the dough into a log and wrap it in plastic wrap.
  • Let the dough chill overnight or for a minimum of 2 hours and the dough will be very easy to slice and bake. Chilling the dough also keeps the shortbread from spreading while it bakes. 
  • Don't overbake your shortbread. There will be some very light browning around the edges and that's it. If you overbake them, they will be very hard and dry instead of light and crisp.

Nutrition

Serving: 1cookie | Calories: 91kcal | Carbohydrates: 13g | Protein: 1g | Fat: 4g | Saturated Fat: 2g | Cholesterol: 14mg | Sodium: 51mg | Potassium: 11mg | Fiber: 1g | Sugar: 8g | Vitamin A: 124IU | Vitamin C: 1mg | Calcium: 3mg | Iron: 1mg
 
Sugar flowers arranged in a rustic holiday pattern

December 1, 2020 Course Preview

Rustic Holiday Floral Arrangement Tutorial

Skill level: Intermediate

World-renowned instructor and master sugar artist Nicholas Lodge joins us today for this beautiful rustic holiday floral arrangement. Nicholas brings his wealth of knowledge, tips and tricks to the table, breaking down how to create realistic roses, eucalyptus, pine needles, branches, and antlers into a harmonious arrangement that can be used on any holiday project.

Nicholas has packed nearly 3 hours of step-by-step instruction into this tutorial, so let's get our tools together and let's get started.

2:44:12 Minutes of Instruction

What You Will Learn

  • How to create a beautiful rustic holiday floral arrangement
  • Nicholas' tips and tricks to get consistent sugar flowers
  • How to color pine needles, roses and antlers in a realistic way
  • Learn how to prepare gumpaste and fondant
  • How to create realistic pine needles in two different ways
  • Learn how to create small, medium and large sugar roses

Tutorial Chapters

  1. Modifying fondant 2:25
  2. Preparing the wires 9:31
  3. Molding the pine cones 15:16
  4. Coloring the pine cones 33:20
  5. Pine needles: Technique #1 39:58
  6. Pine needles: Technique #2 46:38
  7. Coloring the pine needles 54:05
  8. Assembling the branches 55:46
  9. Making the spruce leaves 1:02:15
  10. Making the large antlers 1:12:57
  11. Making the small antlers 1:35:44
  12. Coloring the antlers 1:40:46
  13. Making eucalyptus leaves 1:43:36
  14. Taping eucalyptus leaves 1:49:59
  15. Coloring the eucalyptus 1:54:45
  16. Making a rose cone center 1:57:50
  17. Preparing the gum paste 2:01:59
  18. The rose bud 2:04:10
  19. The mid-size rose 2:12:47
  20. The full-size rose 2:18:28
  21. Making rose calyx 2:28:10
  22. Coloring the rose 2:31:06
  23. Assembling the arrangement 2:33:42

Downloads

Materials List

Sugar flowers arranged in a rustic holiday pattern

December 1, 2020 Paid Video

Rustic Holiday Floral Arrangement

Skill level: Intermediate

World-renowned instructor and master sugar artist Nicholas Lodge joins us today for this beautiful rustic holiday floral arrangement. Nicholas brings his wealth of knowledge, tips and tricks to the table, breaking down how to create realistic roses, eucalyptus, pine needles, branches, and antlers into a harmonious arrangement that can be used on any holiday project.

Nicholas has packed nearly 3 hours of step-by-step instruction into this tutorial, so let's get our tools together and let's get started.

2:44:12 Minutes of Instruction

What You Will Learn

  • How to create a beautiful rustic holiday floral arrangement
  • Nicholas' tips and tricks to get consistent sugar flowers
  • How to color pine needles, roses and antlers in a realistic way
  • Learn how to prepare gumpaste and fondant
  • How to create realistic pine needles in two different ways
  • Learn how to create small, medium and large sugar roses

Tutorial Chapters

  1. Modifying fondant 2:25
  2. Preparing the wires 9:31
  3. Molding the pine cones 15:16
  4. Coloring the pine cones 33:20
  5. Pine needles: Technique #1 39:58
  6. Pine needles: Technique #2 46:38
  7. Coloring the pine needles 54:05
  8. Assembling the branches 55:46
  9. Making the spruce leaves 1:02:15
  10. Making the large antlers 1:12:57
  11. Making the small antlers 1:35:44
  12. Coloring the antlers 1:40:46
  13. Making eucalyptus leaves 1:43:36
  14. Taping eucalyptus leaves 1:49:59
  15. Coloring the eucalyptus 1:54:45
  16. Making a rose cone center 1:57:50
  17. Preparing the gum paste 2:01:59
  18. The rose bud 2:04:10
  19. The mid-size rose 2:12:47
  20. The full-size rose 2:18:28
  21. Making rose calyx 2:28:10
  22. Coloring the rose 2:31:06
  23. Assembling the arrangement 2:33:42

Downloads

Materials List

homemade marshmallows featured

November 23, 2020 Blog

Homemade Marshmallow Recipe

Homemade marshmallows are sweet, soft, fluffy pillows that melt-in-your-mouth. homemade marshmallows are 1000 times better than store-bought and a lot easier to make than you think. Flavor your marshmallows with different extracts, food coloring, mix-ins like dried nuts or freeze-dried fruit. The options are endless!

homemade marshmallows featured

Take your s'mores up a notch at your summer BBQ or gift them with hot chocolate bombs for a Holiday treat.

HOMEMADE MARSHMALLOWS VS STORE BOUGHT
jet puff marshmallows ingredients label

You may not think that there is much difference between homemade marshmallows and storebought and if you look at the ingredients, they might look very similar. I picked up a bag of marshmallows at my grocery store and recognized most things aside from tetrasodium pyrophosphate and blue 1.

But the texture, the TEXTURE is totally different. We all know what a regular marshmallow tastes like. Sweet, a little like vanilla, and chewy. I thought that was normal.

Then I had my first homemade marshmallow and I was shocked. It literally dissolved in my mouth. There was no chewing. Like a creamy kind of cotton candy, it just melted away. The vanilla bean and the touch of honey add so much more flavor dimension. I cannot wait to experiment with more flavors.

HOMEMADE MARSHMALLOW INGREDIENTS

homemade marshmallow ingredients

Homemade marshmallows are made from only a few ingredients. Sugar, water, corn syrup, gelatin, salt, and flavoring. They get their light texture from whipping the sugar and incorporating lots and lots of air.

Honey and corn syrup are types of invert sugar, meaning that they inhibit sugar crystals from forming and keep things moist. Too much and you'll have a sticky, melty mess but a little can work wonders. You don't have to use honey and corn syrup though, you can use any kind of invert sugar such as glucose, golden syrup, maple syrup, agave syrup, or even molasses if you wanted to make gingerbread marshmallows!

HOW TO MAKE MARSHMALLOWS FROM SCRATCH

Step 1 - Get everything ready. Once you start making marshmallows, there isn't any time to prep anything. Pre-measure all your ingredients, get out all your tools, prep your pans. Scrape your vanilla bean pod.

homemade marshmallow equipment

Step 2 - Brush a 9"x9"x2" pan with canola oil with a pastry brush. Make sure you get into the corners, the sides and the top edges, do not miss any spots. I don't recommend using vegetable oil or any kind of oil with a flavor because it transfers to the marshmallows.

lining a square metal pan with parchment paper

Step 3 - Line the pan with 2 pieces of parchment paper going in opposite directions.

Cut the 1st piece of parchment paper to be 9"x13" and the 2nd to be 9"x 20". The longer piece is going to fold on top of the marshmallows later on. Oil the parchment paper as well. If you don't oil your pan and parchment paper, the marshmallows will stick.

hand brushing oil onto parchment paper with a pastry brush

Step 4 - Add the gelatin and cold water to the bowl of your stand mixer and let it absorb for 15 minutes while you make your sugar syrup.

gelatin and water in the bowl of a stainless steel mixing bowl

Step 5 -Add the corn syrup, honey, sugar, and water to a medium saucepan. Stir together to combine, then turn the heat on to medium-high to bring it to a boil. Do not stir the mixture again.

hand pouring corn syrup into saucepan

Step 6 - Cover the pot with a lid. Once it reaches a boil, let the condensation gather on the lid for 5 minutes then remove the lid and attach a candy thermometer. The condensation helps brush any rogue grains of sugar down from the sides which can cause crystalization.

Step 7 -  Reduce the heat to medium and continue cooking the sugar until it reaches 240°F (115°C). Whatever you do, DO NOT STIR!

close up of candy thermometer

Pro-Tip: Do not be alarmed if your mixture is staying at 225°F for a while, it will remain here while the water is evaporating from the sugar syrup. Once steam stops rising, the temperature of the syrup will rise quickly so don't walk away!

Step 8 - Once the sugar reaches 240°F, carefully remove the pan from the heat and take off your candy thermometer. With the whisk attachment, start your mixer on low to break up the bloomed gelatin, then slowly pour in the hot syrup between the blades and the side of the mixer while mixing on low.

streaming sugar syrup into mixing bowl

Step 9 - Add in the vanilla and salt.

small glass bowl held by hand pouring out salt and vanilla bean

Step 10 - Turn your mixer up to high and whip for 8-10 minutes. When the mixer bowl is slightly warm to the touch, not hot or cold, it's done. Once it's done, move very quickly as the marshmallows will start to set up almost immediately.

marshmallow fluff in a stainless steel mixing bowl

Step 11 - Grease a spatula (and your hand) with canola oil and pour the marshmallow fluff into your prepared pan. This can be challenging, it helps to have a 2nd person to hold the bowl while you scoop out the marshmallow fluff.

marshamllow fluff poured into an oiled pan

Then oil your hands or spatula again and spread the fluff out to the sides of the pan. It will be very sticky. Cover with the long end of the oiled parchment and smooth to the edges with your hands.

marshmallow fluff going into a greased square pan

Step 12 - Let the marshmallow sit at room temperature for a minimum of 2 hours, preferably overnight. The longer you let them rest, the easier they will be to cut.

Step 13 - Once set up, lift the sides of the parchment paper to remove the marshmallows from the pan. Then peel off the top layer of parchment paper and dust the top with powdered sugar. Dust your surface with powdered sugar as well, remove the bottom parchment paper from your marshmallows and place the square on your prepared surface. You really can't have too much powdered sugar. It prevents sticking and we will brush off the excess later.

dusting homemade marshmallows with powdered sugar

Step 14 - Coat your bench scraper, knife, or scissors with a layer of canola oil to help prevent sticking. I found that a 10" long bench scraper worked the best for cutting marshmallows. Clean your bench scraper with a warm washcloth in between cuts for less sticking and more precision. If you don't have a bench scraper, you can use a taping knife or something similar.

cut homemade marshmallows with an oiled bench scraper

Cut your marshmallows into 2" squares (or whatever size you prefer).

hand holding a cut homemade marshmallow

Coat each marshmallow in more powdered sugar to prevent sticking and store at room temperature for up to 4 days.

closeup of cut homemade marshmallows on a cutting board

I highly recommend toasting homemade marshmallows to use in s'mores or dipping some in chocolate to use in a cup of hot cocoa. So freaking delicious!

homemade marshmallow being dipped in hot cocoa

HOW TO KEEP HOMEMADE MARSHMALLOWS FROM STICKING

  • Canola oil and powdered sugar are your best friends when it comes to homemade marshmallows. Coating everything in oil from your pan, parchment paper, bench scraper, knives, and even your hands will help the sticking problem.
  • Don't cut your marshmallows for 24 hours.
  • Dust your work surface liberally with powdered sugar as a base for cutting your marshmallows.
  • After you cut the marshmallows into squares, it's best practice to roll them in powdered sugar to prevent the sides from sticking to each other.
  • Let your marshmallows dry out at room temperature for 24-48 hours to develop a skin which keeps them from sticking together and makes them easier to toast.

HOW TO MAKE MARSHMALLOWS WITHOUT A SUGAR THERMOMETER

Using a candy thermometer is the easiest way to make marshmallows. I like to use this candy thermometer, or an infrared heat thermometer from Thermo works. That's great because then nothing has to touch the sugar syrup and you can get an accurate reading without the mess!

how to cook sugar without a thermometer

If you absolutely cannot get a thermometer, you can try to do the softball test. If you haven't done this before, I would only recommend it for seasoned professionals. About every 5 minutes, take about a teaspoon of the sugar syrup and place it into a bowl of cold water. If the sugar comes together in the water and you can form it into a firm ball with your fingers without it collapsing, then it's ready. It will be pliable and able to hold its shape when you press it with your fingers. If it dissolves or flattens then the syrup is not ready yet. 

WHY ARE MY MARSHMALLOWS DENSE?

If your sugar syrup goes over 240 even a couple of degrees, your sugar will be too firm and will cause your marshmallows to be hard instead of fluffy.

Keep a close eye on your thermometer and take it off the heat the second it gets to 240ºF and immediately pour into your gelatin.

Also, check to make sure your thermometer is reading accurately. Insert your candy thermometer into a pot of water and bring it to a rolling boil. The bubbles should be constant and vigorous. At sea level, the boiling point for water is 212º F or 100 C; this will be our baseline. Leave your thermometer in the water for five minutes to give it time to get an accurate reading. If it reads 212ºF it's accurate. If not, it may need calibration or you need a better thermometer.

MARSHMALLOWS WITHOUT GELATIN

Gelatin is an important ingredient in getting homemade marshmallows to have that fluffy texture. You can use agar agar powder (telephone brand) instead of gelatin, but it will not have the same consistency. Check out this highly rated recipe for vegan marshmallows.

HOW LONG DO HOMEMADE MARSHMALLOWS LAST?

Store homemade marshmallows in an air-tight container and they basically last forever! Pop them in the freezer to keep them fresh and prevent them from drying out.

RELATED RECIPES

Hot Chocolate Bombs

Marzipan

Marshmallow Fondant

Homemade Lollipops

Recipe

homemade marshmallows featured
Print Recipe
4.87 from 30 votes

Homemade Marshmallow Recipe

Homemade marshmallows are so easy to make! All you need is sugar, corn syrup, honey, water, gelatin, salt, and flavoring! Homemade marshmallows are light, fluffy and just melt in your mouth. You'll never go back to buying marshmallows after you taste these!
Prep Time10 minutes mins
Cook Time10 minutes mins
Cooling2 hours hrs
Total Time2 hours hrs 20 minutes mins
Course: Dessert
Cuisine: American
Servings: 16 marshmallows
Calories: 214kcal
Author: Liz Marek

Equipment

  • Candy Thermometer
  • Stand mixer with the whisk attachment
  • 9"x9"x2" square pan (Width x Length x Height) You can use a 9"x13" pan as well, but your marshmallows will be much shorter.
  • Bench scraper or long knife for cutting

Ingredients

  • 21 grams unflavored gelatin (3 packs) I use knox gelatin powder, you can use agar agar to make them vegan but it won't have the same texture.
  • 4 ounces cold water (½ cup) for the gelatin
  • 6 ounces corn syrup (¾ cup) or honey, golden syrup or maple syrup
  • 2 ounces honey (¼ cup) or corn syrup
  • 12 ounces granulated sugar (2 cups)
  • 4 ounces water (½ cup) for the sugar syrup
  • ¼ teaspoon salt
  • 1 whole vanilla bean or 2 teaspoons vanilla extract
  • 4 ounces canola oil (½ cup) for brushing utensils
  • 4 ounces powdered sugar (¼ cup) for dusting
US Customary - Metric

Instructions

  • You have to move quickly with marshmallows, as they set up very fast. Pre-measure all your ingredients, scrap your vanilla bean. Also have your candy thermometer, mixer and tools ready to go.
  • Cut the 1st piece of parchment paper to be 9"x13" and the 2nd to be 9"x 20". The longer piece is going to fold on top of the marshmallows later on.
    Line the pan with 2 pieces of parchment paper going in opposite directions.
    Oil the parchment paper as well. If you don't oil your pan and parchment paper, the marshmallows will stick.
  • Add the gelatin and cold water to the bowl of your stand mixer and let it absorb for 15 minutes while you make your sugar syrup.
  • Add the corn syrup, honey, sugar and water to a medium sauce pan. Stir together to combine, then turn the heat on to medium-high. Don't mix it again. Cover the mixture with a lid and let the condensation gather for 5 minutes to wash down the sides of the pot and dissolve any rogue grains of sugar.
  • Remoce the lid and reduce the heat to medium. Carefully attach your candy thermometer. Continue heating but do not stir! Heat until it reaches 240°F (115°C).
    Do not be alarmed if your mixture is staying at 225°F for a while, it will remain here while the water is evaporating from the sugar syrup. Once steam stops rising, the temperature of the syrup will rise quickly.
  • Once it reaches 240°F, carefully remove the pan from the heat and take off your candy thermometer.
    Turn your mixer on medium and slowly drizzle the sugar syrup into the mixer. Aim the stream so it goes between the whisk and the side of the bowl. If you pour onto the whisk you'll end up with hard bits of sugar in your marshmallows.
    Add in the vanilla and salt.
  • Turn your mixer up to high and whip for 8-10 minutes. When the mixer bowl is slightly warm to the touch, not hot or cold, it's done. Once it's done, move very quickly as the marshmallows will start to set up almost immediately.
  • Grease a spatula (and your hand) with canola oil and pour the marshmallow fluff into your prepared pan. This can be challenging, it helps to have a 2nd person to hold the bowl while you scoop out the marshmallow fluff.
    Then oil your hands or spatula again and spread the fluff out to the sides of the pan. It will be very sticky. Cover with the long end of the oiled parchment and smooth to the edges with your hands.
  • Let sit at room temperature for a minimum of 2 hours, preferably overnight. The longer you let them rest, the easier they will be to cut.
  • Once set up, lift the sides of the parchment paper to remove the marshmallows from the pan. Then peel off the top layer of parchment paper and dust the top with powdered sugar. Dust your surface with powdered sugar as well, remove the bottom parchment paper from your marshmallows and place the square on your prepared surface. You really can't have too much powdered sugar, it will help prevent sticking.
  • Coat your bench scraper, knife or scissors with a layer of canola oil to help prevent sticking. I found that a 10" long bench scraper worked best for cutting marshmallows.
    Cut your marshmallows into 2" squares (or whatever size you prefer).
    Coat each marshmallow in more powdered sugar and store at room temperature in an airtight container. They can last for months!
  • I highly recommend toasting them to use in s'mores or dipping some in chocolate to use in a cup of hot cocoa.
  • Leave your cut marshmallows at room temp for 24-48 hours to dry out a bit. Store in an air tight bag or freeze.

Video

Notes

  1. It is important to measure all of your ingredients by weight instead of converting to cups. A kitchen scale is very easy to use, just place a bowl on top, hit tare and pour in the ingredient. Check out my blog post on how to use a scale for more information. 
  2. You MUST use a thermometer when making marshmallows
  3. Do not stir your sugar syrup while it's heating up, that could lead to crystallization. 

Nutrition

Serving: 1marshmallow | Calories: 214kcal | Carbohydrates: 39g | Protein: 1g | Fat: 7g | Saturated Fat: 1g | Sodium: 44mg | Sugar: 39g | Calcium: 1mg | Iron: 1mg
 
stack of bacon cheddar scones on a white plate

November 23, 2020 Biscuits and Scones

Bacon Cheddar Scones

These bacon cheddar scones are moist, tender and so so satisfying. They are the perfect thing to make for breakfast for a big gathering. You can even prep the scones a day ahead and have them ready to bake in the morning. 

closeup of bacon cheddar scone on a white plate with eggs

How To Make Bacon Cheddar Scones Step-By-Step

Step 1 - Preheat your oven to 425ºF. Prepare your bacon, ham, and shallots. I diced up my bacon, shallots, and ham and put them on a sheet pan, and baked until crispy. Transfer to a sheet pan with a paper towel to drain the grease and then into the freezer to cool down while you prepare your dough. You can also do this the day before. 

bacon, ham and shallots on a paper towel

Step 2 - Grate your cold butter then place it into the freezer to keep it cold. 

cold grated butter in front of a metal grater on white countertop

Step 3 - Combine your flour, salt, sugar, garlic powder, and baking powder in a large bowl. Mix to combine. 

bacon cheddar scone dry ingredients in a mixing bowl

Step 4 - Add your frozen grated butter and toss to combine until the butter is coated with the flour mixture. 

mixing biscuit ingredients with hand

Step 5 - Add in your bacon, ham, shallots, and chopped scallions. Toss to combine. 

Step 6 - Add your buttermilk in ¼ cup at a time, mixing with your hand or a fork until the dough is barely sticking together. The wetter your dough is and the more you work it, the tougher your scones will be. 

bacon cheddar scone ingredients in a bowl

Step 7 - Transfer your shaggy dough to the countertop. Press it together with your hands into a rectangle that is about 1" thick. 

bacon cheddar scone shaggy dough

Step 8 - Cut your scones into about 12 even rectangles.

bacon cheddar scones cut into rectangles

Pro-Tip: Traditionally, scones are cut into wedges. I prefer a rectangle over a wedge so that the scone bakes evenly. The points of wedges can get dried out. 

Step 9 - Arrange your scones onto your parchment-lined baking sheet and brush with egg wash (one egg plus one Tablespoon of water whisked together). Sprinkle some flaky salt on top. 

bacon cheddar scones cut into rectangles

Step 10 - Bake for about 25 minutes or until your scones are golden brown. 

bacon cheddar scones with flaky salt

Step 11 - Immediately after taking your scones out of the oven, brush with melted butter and sprinkle more chopped scallions on top if you prefer. 

closeup of bacon cheddar scones in a stack

I actually doubled this recipe to make a huge batch of scones for a Holiday brunch. They were such a hit! Serve them up with some eggs and fresh coffee. 

closeup of bacon cheddar scone with eggs

Related Recipes

Bacon Cheddar Chive Biscuits

Buttermilk Biscuits

Easy Bagel Recipe

Recipe

stack of bacon cheddar scones on a white plate
Print Recipe
4.75 from 4 votes

Bacon Cheddar Scones

These bacon cheddar scones are moist, tender and so so satisfying. They are the perfect thing to make for breakfast for a big gathering. You can even prep the scones a day ahead and have them ready to bake in the morning. 
Prep Time20 minutes mins
Cook Time25 minutes mins
Total Time45 minutes mins
Course: Breakfast
Cuisine: American
Servings: 12 scones
Calories: 401kcal
Author: Liz Marek

Equipment

  • Cheese grater

Ingredients

  • 20 ounces Pastry Flour or All Purpose Flour
  • 1 teaspoons Salt
  • ½ teaspoon garlic salt
  • 2 Tablespoons Baking Powder
  • 4 teaspoons sugar
  • 8 ounces cold butter grated and stored in the freezer
  • 8 ounces shredded cheddar cheese
  • 1 ounce scallions or chives finely chopped plus more for sprinkling
  • ½ medium shallot diced
  • 4 ounces thick cut bacon
  • 4 ounces ham or bacon
  • 14 ounces buttermilk
  • 4 ounces melted butter for brushing on top of scones
  • 1 Tablespoon flaky salt optional

Egg Wash

  • 1 large egg
  • 1 Tablespoon water

Instructions

  • Preheat your oven to 425ºF with the rack in the center of the oven. Line sheet pan with some parchment paper.
  • Place your bacon, chopped shallots and ham onto a sheet pan and bake in the oven until crispy. Set aside to cool and then place into the freezer while your prepare your dough.
  • Grate your cold butter and put it into the freezer to keep it cold. Cold butter equals a flakier scone.
  • Combine your flour, salt, garlic salt, baking powder, and sugar in a large mixing bowl.
  • Add the shredded frozen butter and toss with a spoon until the mixture looks crumbly and the butter is evenly coated in the flour mixture.
  • Add in your cheese, chopped chives, chilled bacon, ham and shallots and toss to combine.
  • Add in ¼ of your cream mixture and gently mix with your hand or a spoon. Add in another ¼ cup and mix. Repeat with ¼ cup of milk until the dough is barely sticking together. If you dont use all the milk its ok. The wetter the dough, the tougher your biscuits will be.
  • Place your dough onto the counter top and push it together with your hands into rectangle that is about 1" thick.
  • Use a knife to cut the dough into 12 equal pieces. I prefer to cut into a rectangle instead of a wedge so that the scone bakes evenly.
  • Brush the tops of the scones with egg wash (1 egg plus 1 Tablespoon of water whisked together) and sprinkle some flaky salt on top.
  • Bake in the oven for 25 minutes or until they are golden brown.
  • Once your scones are done baking, immediately brush with melted butter and sprinkle more chopped scallions on top.
  • Store leftover scones in a sealed container in the fridge, refresh in the oven before serving.

Notes

Keep all your ingredients very cold for the flakiest and most tender scones
You can make your scones the day before and store them in the fridge on a parchment lines sheet pan covered with plastic wrap until you are ready to bake them. 
If your hands are hot, use a fork or a spoon to mix your dough to avoid melting the butter. 

Nutrition

Serving: 1scone | Calories: 401kcal | Carbohydrates: 38g | Protein: 16g | Fat: 22g | Saturated Fat: 12g | Trans Fat: 1g | Cholesterol: 71mg | Sodium: 694mg | Potassium: 494mg | Fiber: 5g | Sugar: 3g | Vitamin A: 510IU | Vitamin C: 1mg | Calcium: 283mg | Iron: 2mg

close up slice of pumpkin spice cake

November 16, 2020 Blog

Pumpkin Spice Cake

Pumpkin spice cake is one of those recipes that never fails to disappoint. It's super moist, packed with real pumpkin flavor, and has that perfect balance of warm spices without tasting like a candle.

close up slice of pumpkin spice cake

This pumpkin spice cake recipe has been a Sugar Geek Show favorite for years because the cake layers stay incredibly soft even after chilling, and the tangy cream cheese frosting adds just the right amount of richness. Whether you're making a homemade cake for a holiday party or this is your first time baking anything with pumpkin, this one earns a permanent spot in your recipe box.

Table of contents

  • My Inspiration
  • Ingredient Breakdown
  • Step-by-Step Instructions
  • FAQ
  • RELATED RECIPES

My Inspiration

Every year around fall, I get flooded with messages asking for the best pumpkin cake, pumpkin sheet cake, pumpkin bundt cake, and pumpkin cheesecake bars. But the only thing I ever crave is a really good pumpkin spice cake recipe that tastes like it came straight from a bakery.

I developed this one back when Avalon was tiny and obsessed with fresh pumpkin everything. It was the first time I realized you could get amazing results from pure pumpkin puree without needing tons of oil or sweetness to cover it up. And since then, this has become the base for all of my favorite pumpkin recipes.

Ingredient Breakdown

This pumpkin spice cake uses common baking ingredients you probably already have around your house.

pumpkin spice ingredients

All-purpose flour is the structure of the cake. We weigh it so the cake batter stays balanced and you don't accidentally dry it out. You can use a gluten-free blend but expect a softer, more tender crumb.

Baking soda and baking powder give the cake layers lift. Because pumpkin puree is heavy and full of moisture, you really need both.

Ground cinnamon, cloves, nutmeg, ginger, and a little salt bring the whole pumpkin spice vibe to life. You can also replace the individual spices with pumpkin pie spice if that's what you have. Just don't use pumpkin pie filling by mistake-it already has spices and sugar in it.

Granulated sugar and brown sugar work together to keep the cake soft and add deeper caramel notes.

Eggs at room temperature whip up nicely and help emulsify the batter.

Pure pumpkin puree (canned pumpkin works perfectly) gives the cake its signature pumpkin flavor. You can even make your own homemade pumpkin puree. The flavor is SO good!

Vegetable oil keeps the crumb tender, even after the cake cools. You can swap it for melted coconut oil or any neutral oil.

Melted butter adds richness and flavor. I like using both butter and oil together so the cake stays moist without being greasy.

Buttermilk at room temperature is the secret to getting that beautifully soft, fluffy texture. You can make your own by combining milk with a tablespoon of white vinegar and letting it rest for five minutes.

Vanilla extract ties the spices together so the pumpkin doesn't overpower everything.

For the cream cheese frosting, you only need cream cheese, butter, icing sugar, vanilla extract, and salt. The combination creates that perfect tangy cream cheese frosting that pairs so well with pumpkin. If you want a whiter frosting, add a drop of white food coloring. If you want a maple frosting twist, replace part of the vanilla with a tablespoon of maple syrup. Replacing some of the butter with browned butter can really elevate this recipe as well.

Tips & Tricks

  • Use room temperature ingredients so the batter emulsifies properly.
  • Line the bottom of your baking pan with parchment paper to help the cake release cleanly.
  • If you want extra sturdy cake layers for carving or stacking, chill them on a wire rack or cooling rack before trimming.
  • If your pumpkin puree is watery, strain it or use canned pumpkin for consistency.
  • Don't over-mix once you add the flour mixture. Pumpkin cakes can get dense fast.
  • Freeze your cake layers before stacking for the cleanest cuts, especially on the top of the cake.
  • Leftover pumpkin puree freezes beautifully-store it in an airtight container so you can use it later.

Step-by-Step Instructions

  1. Preheat your oven to 350ºF and prepare three 8x2 cake pans with cake goop. You can also use two 9-inch pans if that's what you have. Line the bottoms with parchment paper.
  2. In a large bowl, whisk together the flour, baking soda, baking powder, cinnamon, cloves, nutmeg, ginger, and salt.
  3. In the bowl of your stand mixer fitted with the paddle attachment, mix your room temperature eggs, granulated sugar, brown sugar, and vanilla extract on medium to medium-high speed for about a minute.pumpkin spice cake ingredients in a clear bowl
  4. Add the pumpkin puree, vegetable oil, melted butter, and buttermilk. Mix just until smooth.pumpkin spice liquid ingredients
  5. Add the flour mixture slowly, mixing on low speed so you don't overwork the cake batter. combining pumpkin spice cake ingredients
  6. Stop as soon as everything looks fully incorporated.closeup of pumpkin spice cake batter
  7. Divide the batter evenly between your pans and smooth the tops.
  8. Bake for 30-35 minutes or until the center bounces back when lightly touched and a toothpick comes out clean. Let the cakes cool in the pans for 10 minutes, then turn them out onto a wire rack to finish cooling. Trim the domes with a serrated knife once the cake layers are fully cool.closeup of baked pumpkin cake
  9. To make the cream cheese frosting, cream the room temperature cream cheese with the paddle attachment until smooth.
  10. Add the butter and mix again until smooth.
  11. Then slowly add the icing sugar one cup at a time.
  12. Finish with vanilla and salt and mix on low for 5-6 minutes until silky.

To decorate, crumb coat your chilled cake layers and refrigerate for about 20 minutes. Add your final layer of frosting, smooth the sides, and clean the top of the cake so it looks sharp. Pipe dollops around the top if you want extra texture or height.

pumpkin cake layers with cream cheese frosting
pumpkin spice cake with a crumbcoat
piping a wood grain texture onto the side of a cake
piping dollops of cream cheese frosting on top of the cake
adding marzipan candy pumpkins to the top of the cake

Store the finished cake in the fridge. For the best texture, let it sit at room temperature for about two hours before serving.

Final Thoughts

This really is the best pumpkin cake if you love big fall flavor without a dense, heavy crumb. It's easy enough for beginners but produces a bakery-quality result every single time. You can turn it into a pumpkin sheet cake, a pumpkin bundt cake, cupcakes, or even the base for pumpkin cheesecake bars. The formula is just that dependable.

FAQ

What's the difference between pumpkin puree and pumpkin pie filling?

Pumpkin pie filling is sweetened and spiced. Pure pumpkin puree is just pumpkin.

Can I bake this in one tall baking pan?

You can, but the bake time will be much longer and the center may dry out.

Can I freeze the cake?

Yes. Freeze the cake layers wrapped tightly, and freeze leftover frosting for up to six months.

Why does everything need to be room temperature?

Cold ingredients don't emulsify properly and can make the cake dense.

Can I make this into cupcakes?

Yes-bake at 350ºF for 18-20 minutes.

RELATED RECIPES

Brown Butter Cream Cheese Frosting

Applesauce Spice Cake

Pumpkin Puree

German Chocolate Cake

Marzipan Candy Pumpkins

Cake Batter and Frosting Calculator

Select an option below to calculate how much batter or frosting you need. Adjust the servings slider on the recipe card to change the amounts the recipe makes.

Choose a pan type

Choose a cake pan size
(based on 2" tall cake pan)

Choose a cake pan size
(based on 2" tall cake pan)

Choose a cake pan size
(based on 2" tall cake pan)

Cupcake Tin Size

Choose number of pans

Cups of Batter Needed

8 cups

Cups of Frosting Needed

5 cups

Note: measurements are estimated based off the vanilla cake recipe using standard US cake pans and sizes. Measurements used are for 2" tall cake pans only. Your results may vary. Do not overfill cake pans above manufacturer's recommended guidelines.

Recipe

closeup of pumpkin spice cake on a white plate
Print Recipe
4.88 from 58 votes

Pumpkin Spice Cake With Cream Cheese Frosting

This pumpkin spice cake is my favorite "welcome to fall" treat. A super moist butter cake that uses real pumpkin puree, pumpkin spices, buttermilk, and oil which helps it stay moist, even after a week in the fridge. Frosted with cream cheese frosting and adorable marzipan candy pumpkins! Its really the perfect centerpiece for the Holidays.
Prep Time10 minutes mins
Cook Time40 minutes mins
Course: Dessert
Cuisine: American
Servings: 10 cups
Calories: 1909kcal
Author: Liz Marek

Equipment

  • Stand Mixer with paddle attachment, hand mixer or whisk
  • three, 8"x2" cake pans (or two pans)
  • Piping Bag
  • Modeling tools
  • #3 Round Piping Tip
  • Medium leaf pipnig tip

Ingredients

Pumpkin Spice Cake Ingredients

  • 18 ounces All Purpose Flour
  • 2 teaspoons Baking Soda
  • 2 teaspoons Baking Powder
  • 1 Tablespoon Cinnamon
  • 2 teaspoons Cloves
  • 2 teaspoons Nutmeg
  • ½ teaspoon Ginger
  • 1 ½ teaspoons Salt
  • 8 large Eggs room temperature
  • 14 ounces Granulated Sugar
  • 3 ounces Light Brown Sugar
  • 15 ounces Pumpkin Puree
  • 4 ounces Vegetable Oil
  • 1 Tablespoon Vanilla Extract
  • 5 ounces Buttermilk room temperature, or combine milk with 1 tablespoon of white vinegar and rest for 5 minutes.
  • 6 ounces Melted Butter

Cream Cheese Frosting Ingredients

  • 16 ounces cream cheese room temperature
  • 8 ounces unsalted butter room temperature
  • 32 ounces powdered sugar sifted
  • ½ teaspoon salt
  • 1 teaspoon vanilla extract
US Customary - Metric

Instructions

Cake Instructions

  • Preheat your oven to 350ºF (177ºC) and prepare three, 8"x2" cake pans with cake goop or another preferred pan release. You can also use two 9" pans, just bake for longer. Measure out your ingredients with a scale and bring eggs and buttermilk to room temperature. 
  • In a large bowl, add your flour, baking soda, baking powder, cinnamon, cloves, ginger, nutmeg and salt and whisk together to combine. Set aside. 
  • In the bowl of your stand mixer, add your room temperature eggs, white sugar, brown sugar and vanilla. Mix on medium/medium-high with the paddle attachment for 1 minute. You can also do this with a hand mixer, just mix for longer and go by look instead of time. It should look aerated and bubbly. 
  • Add in your pumpkin puree, oil, melted butter and room temperature buttermilk and mix until combined.
    Make sure you're using pumpkin puree and not pumpkin pie filling, which has added spices and flavors.
  • Slowly add in your flour mixture and mix on low until all your dry ingredients are just incorporated and your batter is smooth. Do not over-mix. 
  • Pour batter into three, 8"x2" prepared cake pans and smooth out. Bake the cakes for 30-35 minutes or until the center of the cake bounces back when you touch it and a toothpick comes out clean.
    Cool the cakes for ten minutes in the pan and turn out onto a wire rack to cool fully before frosting. I like to trim off the domes of my cake to make it easier to stack. You can wrap the cakes in plastic wrap and freeze to chill them faster.

Frosting Instructions

  • Cream the softened cream cheese with the paddle attachment until smooth. Add in your softened butter and continue creaming on low until fully incorporated and smooth. 
  • Slowly add in powdered sugar one cup at a time, letting fully incorporate before adding the next cup. Add in vanilla and salt. Mix at low for 5-6 minutes until smooth.
  • For a whiter frosting, add white food coloring. Store leftover frosting in the fridge for up to a week or freeze up to 6 months. 

Marzipan Pumpkins

  • Divide your marzipan into 5-7 sections and color them with food coloring. I used egg yellow, orange, red, green, white, and brown for the pumpkin stems.
  • Roll a piece of marzipan into a ball and use a modeling tool to add lines to the side.
  • Form a small stem for the top of the pumpkin
  • Dust the lines with some edible food coloring dust to add shading. I used a dark reddish orange for the orange pumpkins and dark green for the green pumpkins and the white pumpkins.

Decorating Your Cake

  • Trim the domes off your cooled pumpkin layers
  • Fit a piping bag with a coupler so that you can easily switch between a round piping tip and a leaf piping tip.
  • Add a layer of cream cheese frosting with your offset spatula. Try to keep the layer nice and even, I shoot for about ¼" thick frosting.
  • Add your second layer of cake. Add more frosting and finish with the last layer of cake on top.
  • Cover the whole cake in a thin layer of your cream cheese frosting. This is called the crumb coat and seals in the loose crumbs. Place into the fridge or freezer for about 20 minutes to firm up the frosting.
  • Add your final layer of buttercream with your offset spatula. Smooth the sides with a bench scraper to make the sides smooth and then smooth the top with your offset spatula. (see the video in the recipe card for more visual instructions)
  • Use your piping bag to add some wood grain to the sides of the cake and pipe a border around the top of the cake of some dollops of frosting.
  • Add your marzipan pumpkins on top of the frosting dollops
  • Fill in the spaces with piped leaves using a leaf piping tip.
  • Store your finished cake in the fridge until it's ready to be served but the cake will taste the best if you take it out of the fridge two hours before serving to allow it time to warm up.

Video

Notes

Important Things To Note Before You Start
1. Bring all your ingredients to room temperature or even a little warm (eggs, buttermilk, butter, etc) to ensure your cake batter does not break or curdle. 
2. Use a scale to weigh your ingredients (including liquids) unless otherwise instructed (Tablespoons, teaspoons, pinch etc). Scaled ingredients are much more accurate than using cups and help ensure the success of your recipe. 
3. Practice Mise en Place (everything in it's place). Measure out your ingredients ahead of time and have them ready before you start mixing to reduce the chances of accidentally leaving something out.
4. Chill your cakes before frosting and filling. You can cover a frosted and chilled cake in fondant if you wish. This cake is also great for stacking. I always keep my cakes chilled in the refrigerator before delivery for easy transporting. 
5. I'm using my Bosch Universal Plus mixer for this recipe, check out my review for comparisons, pros and cons, and more information.
6. Check out my 'how to make your first cake' blog post to learn how to properly trim, fill, stack, crumb coat, frost and decorate a cake. I decorated this cake using my offset spatula, bench scraper, a turn table, an 8" cake board, and adorable little marzipan pumpkins. 
7. I also used a #10 round wilton piping tip to make this cool, modern tree texture on the outside of the cake. Check out my video below to see how I did it! 
8. If you don't have buttermilk, you can make your own with yogurt, sour cream, or even vinegar and milk. Check out my buttermilk blog post for recipes. 

Nutrition

Serving: 0.25cups | Calories: 1909kcal | Carbohydrates: 268g | Protein: 15g | Fat: 89g | Saturated Fat: 54g | Cholesterol: 417mg | Sodium: 1292mg | Potassium: 385mg | Fiber: 3g | Sugar: 223g | Vitamin A: 9610IU | Vitamin C: 1.8mg | Calcium: 171mg | Iron: 4.2mg
 

pumpkin puree recipe

November 16, 2020 Culinary Techniques

Homemade Pumpkin Puree

You won't believe how easy it is to make your own pumpkin puree at home. No need to buy it in a can. Fresh pumpkin puree has more flavor and color than canned puree. All you need is a sweet pumpkin, some shortening or oil, and 45 minutes for roasting. Blend and done! Your pumpkin recipes will taste even better with fresh pumpkin puree!

pumpkin puree recipe

WHAT PUMPKINS MAKE THE BEST PUMPKIN PUREE?

Pumpkins that make the best puree are sweet and have smooth outer skin. During the Autumn months, you will typically see something called "sugar pumpkins" or "pie pumpkins" in the produce section. These are what you want to make your pumpkin puree. 

sugar pumpkins

You might be tempted to use a big orange Jack-o-lantern pumpkin to make your puree but that would be a mistake. Jack-o-lantern pumpkins are very bland and have a stringy texture.

But you're not limited! You can also make puree from butternut squash, acorn squash, Baby Pam, Autumn Gold, Ghost Rider, New England Pie Pumpkin, Lumina (which are white), Cinderella, and Fairy Tale pumpkins. Pumpkins keep for a very long time in a cool dry place so you can even grow your own pumpkins (they are so easy to grow!) and turn them into puree later! 

different types of pumpkins for pumpkin puree

HOW TO MAKE PUMPKIN PUREE STEP-BY-STEP

For this recipe, I'm using two sugar pumpkins that weigh about 3 lbs. The amount of pumpkin puree you get from your pumpkins will vary. These two made about 2 cups.

Step 1 - Preheat your oven to 400ºF and line a baking sheet with parchment paper. Wash your pumpkins and pat dry. Use a sharp knife to cut them in half.

pumpkin sliced in half

Step 2 - Remove the seeds with your hand or spoon. You can roast these pumpkin seeds if you want! They make a fantastic snack and are high in vitamins. 

removing pumpkin seeds from a pumpkin with a spoon

Step 3 - Rub some vegetable shortening on the fleshy side of the pumpkin. This will keep it from drying out and also create some yummy caramelization aka more flavor in your puree. 

hand applying shortening to a cut pumpkin

Step 4 - Place the pumpkin halves flesh side down onto your baking sheet. Poke some holes in the skin with a sharp knife about ¼" deep. This will help steam escape while roasting. 

knife piercing the skin of a cut pumpkin

Step 5 - Place into the oven and roast for 45-60 minutes until the surface of the pumpkin is soft to the touch (use a spoon to test). 

spoon pressing the surface of a roasted pumpkin

Step 6 - Remove the pumpkins from the oven and let them cool a bit so you can pick them up.

closeup of roasted pumpkin half

Step 7 - Remove the pumpkin from the skin and place into a food processor. Blend for 3-5 minutes or until the puree is very smooth.

spoon scooping pumpkin from the skin

pumpkin puree shot from above in a food processor

Step 8 - Your pumpkin puree is ready to use! You can store it in a ziplock bag for up to a week or freeze it for up to 6 months. I like freezing in a quart-sized bag that is pre-weighed so I know exactly h0w much pumpkin I have.

pumpkin puree in a freezer bag

Related Recipes

Olive Oil and Sea Salt Pumpkin Seeds

Pumpkin Pie

Pumpkin Spice Cake

Recipe

pumpkin puree recipe
Print Recipe
5 from 2 votes

Homemade Pumpkin Puree

How to make your own homemade pumpkin puree at home. Use this delicious puree to make your favorite pumpkin recipe!
Prep Time10 minutes mins
Cook Time45 minutes mins
Total Time55 minutes mins
Course: Side Dish
Cuisine: American
Servings: 2 cups
Calories: 113kcal
Author: Liz Marek

Ingredients

  • 2 small sugar pumpkins about 3 lbs each
  • 2 Tablespoons vegetable shortening

Instructions

  • Preheat your oven to 400ºF and line a baking sheet with parchment paper
  • Wash and pat dry your pumpkins then slice your pumpkins in half with a sharp knife.
  • Remove the seeds and strings and set aside to roast later or discard
  • Cover the cut edge with a layer of vegetable shortening to keep it from drying out and to encourage carmelization
  • Pierce the skin 6-8 times with a sharp knife about ¼" deep to allow steam to release while roasting
  • Once the skin is soft, remove the pumpkin from the oven and let cool until you can handle it
  • Scoop out the pumpkin and place it into a food processor
  • Blend the pumpkin until it's very smooth 3-5 minutes
  • Place into the fridge for up to a week or freeze for up to 6 months.

Notes

This recipe does not contain salt so that the puree is not salty. 
You can use other types of pumpkin to make purees such as acorn squash, butternut, or cinderella pumpkins. Jack-o-lantern pumpkins do not make great puree because they are bland. 

Nutrition

Serving: 1cup | Calories: 113kcal | Fat: 13g | Saturated Fat: 3g | Sodium: 1mg


Marble buttercream cake tier with cute standing cake topper holding a staff

November 15, 2020 Course Preview

Rey Star Wars Standing Cake Topper Tutorial

This is a great tutorial for making a standing cake topper that looks like Rey from Star Wars. Learn how to build a basic cake topper armature, how to model all the features and body, and of course how to make all the fondant clothes.

This tutorial also shows you how to make a really awesome natural stone texture using 100% buttercream! Doesn't that look so cool!

Skill level: Intermediate

Often times, I'm asked to create a simple cake on a smaller budget, but the clients want something just as impressive as a sculpted cake. This cute, standing cake topper with an interesting texture on the cake is my go-to option for this clients, and they always love the end result!

In this tutorial, you will learn how to create a standing cake topper with stylized facial features, fun clothing details and a staff. This topper happens to look like Rey from the new Star Wars movies but you could adapt this to match nearly anyone, just as long as the clothing and eye color and hair look similar.

I also present this unique way to create a marbled buttercream effect that I promise will be a show-stopper.

There's a lot to cover in this tutorial, so let's get our tools together and let's get started!

1:16:07 Minutes of Instruction

What You Will Learn

  • Learn how to create a cute standing cake topper with fun details and a likeness
  • How to make clothing, facial details, and a staff
  • Learn how to make a beautiful marbled buttercream texture on a cake tier

Marbled buttercream cake tier with cute standing cake topper holding a staff

Tutorial Chapters

  1. Sculpting the head and face 0:40
  2. Building the body structure 9:35
  3. Making and shaping the body 12:36
  4. Making and shaping the arms 16:23
  5. Making boots and pants 19:53
  6. Making a shirt 30:45
  7. Adding the sash 33:49
  8. Finishing face details 37:23
  9. Adding the head 44:38
  10. Making ears 46:13
  11. Making hair 47:26
  12. Marble buttercream 53:44
  13. Adding Rey to the cake 1:03:16
  14. Making Rey's staff 1:06:00
  15. Making Rey's hands 1:08:30
  16. Adding final details 1:12:49


Downloads

Materials List

Marble buttercream cake tier with cute standing cake topper holding a staff

November 15, 2020 Paid Video

Cute Standing Cake Topper

Skill level: Intermediate

Often times, I'm asked to create a simple cake on a smaller budget, but the clients want something just as impressive as a sculpted cake. This cute, standing cake topper with an interesting texture on the cake is my go-to option for this clients, and they always love the end result!

In this tutorial, you will learn how to create a standing cake topper with stylized facial features, fun clothing details and a staff. This topper happens to look like Rey from the new Star Wars movies but you could adapt this to match nearly anyone, just as long as the clothing and eye color and hair look similar.

I also present this unique way to create a marbled buttercream effect that I promise will be a show-stopper.

There's a lot to cover in this tutorial, so let's get our tools together and let's get started!

1:16:07 Minutes of Instruction

What You Will Learn

  • Learn how to create a cute standing cake topper with fun details and a likeness
  • How to make clothing, facial details, and a staff
  • Learn how to make a beautiful marbled buttercream texture on a cake tier

Tutorial Chapters

  1. Sculpting the head and face 0:40
  2. Building the body structure 9:35
  3. Making and shaping the body 12:36
  4. Making and shaping the arms 16:23
  5. Making boots and pants 19:53
  6. Making a shirt 30:45
  7. Adding the sash 33:49
  8. Finishing face details 37:23
  9. Adding the head 44:38
  10. Making ears 46:13
  11. Making hair 47:26
  12. Marble buttercream 53:44
  13. Adding Rey to the cake 1:03:16
  14. Making Rey's staff 1:06:00
  15. Making Rey's hands 1:08:30
  16. Adding final details 1:12:49

Downloads

Materials List

close up of marzipan candy pumpkins on a white plate

November 14, 2020 Candy

The Best Marzipan Recipe

This marzipan recipe is made from a dough that consists of ground-up almonds, sugar, and flavoring. It is commonly shaped into fruits, vegetables, or other types of foods and has become increasingly popular as favors for weddings. Marzipan candy is fun to make and is only limited by your imagination!

finished marzipan.

Today I'm going to show you how to make some adorable marzipan pumpkins using this easy marzipan recipe that I'm going to use as cake toppers for my pumpkin spice cake. You could package these up and gift them in a candy box or even use them as cupcake toppers. 

What's In This Blog Post

  • Ingredients
  • How To Make Marzipan
  • How to make marzipan pumpkins
  • How to color marzipan
  • Tips For Success
  • FAQ
  • Related Recipes
 

Ingredients

marzipan candy ingredients

All you need to make this marzipan recipe is some finely ground almond flour, powdered sugar, corn syrup (or honey), and some flavoring. You can also grind your own flour using blanched almonds if you have a strong food processor although I find using almond flour to be much much easier and it results in a finer marzipan. 


How To Make Marzipan

  1. Place almond flour and sugar in the bowl of your stand mixer with the paddle attachment (or you can mix by hand with a spatula).almond flour and powdered sugar in the bowl of a stand mixer
  2. Add in your flavoring and the corn syrup and blend for 1 minute until the starts sticking together. If your marzipan seems dry, add in another teaspoon of corn syrup and keep blending.closeup of hand holding marzipan dough
  3. Finish kneading your marzipan on the counter with your butter until smooth. It should feel fairly stiff and a bit sticky.marzipan recipe
  4. Wrap the marzipan up in plastic wrap and seal in a ziplock bag. Refrigerate for an hour or so until it's cool enough to handle. Keeps in the fridge for 6 weeks or freeze for 6 months or more.marzipan candy wrapped in plastic wrap

How to make marzipan pumpkins

Today I'm making some cute marzipan candy pumpkins from this marzipan recipe but you can make any shape really! Fruits, vegetables, tiny donuts, the options are limitless! All you need is a little food coloring (I like Americolor food coloring) and some edible dusts (I like TheSugarart dusts). 

For tools I'm just using some simple modeling tools but you could use the end of a paintbrush or a toothpick. 

Step 1 - Coloring the marzipan

Divide the marzipan recipe and knead until smooth. I wanted about the same amount of colors for each of my pumpkins and then a small amount for the stems. If your marzipan is really sticky, use gloves and apply a little bit of vegetable shortening to your hands.

I  made white, ivory, dark orange, medium orange, yellow, light green, and brown, but you can make whatever colors you want.

How to color marzipan

  • Yellow -  add about ½ teaspoon of electric yellow and 1 drop of egg yellow to about 1 cup of uncolored marzipan and knead together.
  • Dark Orange -  add about ¼ teaspoon of electric orange to ½ cup of the yellow marzipan and knead together. You don't want to add straight orange to marzipan, so make sure to build the colors.
  • Medium Orange - add about 4 drops of electric orange to ½ cup of the yellow marzipan and knead together.
  • White - add 3 drops of bright white food coloring to ½ cup of uncolored marzipan.
  • Green - add 2-3 drops of electric yellow and 3-4 drops of leaf green to ½ cup of uncolored marzipan and knead together.
  • Brown - add 3-4 drops of chocolate brown food coloring to ¼ cup of uncolored marzipan and knead together.
  • White - add 3-4 drops of white food coloring to ¼ cup of uncolored marzipan and knead until smooth.

Step 2 - Be creative with the sizes of your pumpkins, I made small, medium, and large. For small pumpkins, use about ½ teaspoon of marzipan, for medium pumpkins use about 1 ½ teaspoons, and for large pumpkins use about a tablespoon. Roll it into a ball.

orange marzipan candy ball held by pink gloved hands

Step 3 - Place the ball down on a table and use a ball tool or the end of a paintbrush to make a small indent at the top in the center.

orange marzipan candy ball with pink gloved hand holding modeling tool

Step 4 - Use a modeling tool or a toothpick to indent some lines, dragging the tool from the center indent to the bottom of the pumpkin. Clean off your modeling tool after a few indents, as it will start to get sticky.

marzipan candy pumpkin held by pink gloved hand and black modeling tool above

I like to then use my fingers to round out the ridges to make them look more realistic.

Step 5 - Take a tiny piece of the brown marzipan and roll it into a triangle shape. Place that onto the center indent at the top and use the end of your modeling tool or toothpick to push the base of the brown marzipan into the side ridges of the pumpkin. Snip off the very tip of the brown marzipan with scissors to make it look like a stem.

marzipan candy pumpkin with brown marzipan stem

Step 6 - Use a darker orange or red to dust in the lines of the pumpkin to add depth and interest to the marzipan candy design. 

dusting marzipan candy pumpkin with red petal dust

I used medium-dark chocolate petal dust for my white pumpkins and dark green dust for my green pumpkins. For other types of fruits and vegetables, you can also use food coloring and a fine paintbrush to add even more detailing. The surface of marzipan is not super smooth so whatever you make naturally looks very realistic. 

closeup of marzipan candy pumpkins on a cake

Marzipan candy does not need to be refrigerated unless you're not going to use it for a while. Keep it sealed in a plastic bag or container for 6 weeks or freeze for 6 months or more. 

Tips For Success

  • Use finely ground almond flour for a finely textured marzipan or grind your own from blanched almonds
  • Let marzipan rest before your shape it into candy
  • You can flavor marzipan with different types of candy flavoring depending on the shapes you are making
  • You can add cocoa powder to marzipan to make it chocolate
  • You can use marzipan to cover your cakes in place of fondant
  • You can roll the marzipan into balls and dip it into tempered chocolate to make chocolate covered marzipan candies.

FAQ

What's the difference between marzipan and almond paste?

Almond paste and marzipan both use almonds and sugar, but marzipan is typically sweeter and smoother, often used for decorative purposes or as a candy. Almond paste has a higher almond content and is usually used as a filling or ingredient in baked goods

How long does this homemade marzipan recipe last?

Stored in the refrigerator, homemade marzipan has quite a long shelf life and may last up to 4-5 weeks. Make sure to wrap your marzipan in cling film and place it in an airtight bag or container to retain its moisture.

How can I tell if marzipan has gone bad?

How do you tell if marzipan is bad? The main signs that marzipan has gone bad are changes in color, smell, or texture. If the marzipan has turned hard, overly dry and brittle, or shows any signs of mold, it's definitely time to throw it away.

Related Recipes

Almond Paste Recipe

How To Temper Chocolate

Yule Log Recipe

Frangipane Pear Tart

Recipe

homemade marzipan
Print Recipe
4.60 from 5 votes

Marzipan Recipe

Make your own marzipan candies at home. Shape them into fun designs, color them, and use them for decorations, wedding favors, or as gifts!
Prep Time15 minutes mins
Total Time15 minutes mins
Course: Dessert
Cuisine: german
Servings: 11 ounces
Calories: 166kcal
Author: Liz Marek

Equipment

  • Ball tool and sculpting tool, or the end of a paintbrush and a toothpick.
  • Scissors
  • Paint brush for dusting

Ingredients

  • 5 ounces almond flour (Fine) I like bobs redmill
  • 6 ounces powdered sugar
  • 1 teaspoon  almond extract or vanilla or rose extract
  • 3 ounces corn syrup
  • 1 Tablespoon  butter (optional for kneading)
  • electric yellow, leaf green, bright white, egg yellow, ivory, chocolate brown, electric orange, red, Americolor soft gel paste food color
  • optional buttercup, cut kiwi, lemon, almond and poppy petal dust I get mine from the www.thesugarart.com
US Customary - Metric

Instructions

How To Make Marzipan

  • Place almond flour and sugar in the bowl of your stand mixer with the paddle attachment (or you can mix by hand with a spatula).
  • Add in your flavoring and the corn syrup and blend for 1 minute until the starts sticking together. If your marzipan seems dry, add in another teaspoon of corn syrup and keep blending.
    Finish kneading your marzipan on the counter with your butter until smooth. It should feel fairly stiff and a bit sticky.
  • Wrap the marzipan up in plastic wrap and seal in a ziplock bag. Refrigerate for an hour or so until it's cool enough to handle. Keeps in the fridge for 6 weeks or freeze for 6 months or more.

Marzipan Candy Pumpkins

  • Follow my video tutorial for instructions.
    Knead the homemade or store-bought marzipan and divide into sections to color. If your marzipan is really sticky, use gloves and apply a little bit of vegetable shortening to your hands.
    I divided into 7 sections and made white, ivory, dark orange, medium orange, yellow, light green and brown, but you can make whatever colors you want.
    You can use fondant or modeling chocolate to make these pumpkins too, but marzipan is so fun and tastes great!
    For yellow, add about ½ teaspoon of electric yellow and 1 drop of egg yellow to about 1 cup of uncolored marzipan and knead together.
    For dark orange, add about ¼ teaspoon of electric orange to ½ cup of the yellow marzipan and knead together. You don't want to add straight orange to marzipan, so make sure to build the colors.
    For medium orange, add about 4 drops of electric orange to ½ cup of the yellow marzipan and knead together.
    For white, add 3 drops of bright white food coloring to ½ cup of uncolored marzipan.
    For green, add 2-3 drops of electric yellow and 3-4 drops of leaf green to ½ cup of uncolored marzipan and knead together.
    For brown, add 3-4 drops of chocolate brown food coloring to ¼ cup of uncolored marzipan and knead together.
  • Be creative with the sizes of your pumpkins, I made small, medium and large. For small pumpkins, use about ½ teaspoon of marzipan, for medium pumpkins use about 1 ½ teaspoons, and for large pumpkins use about a tablespoon.
    Take the amount of marzipan you desire and roll it into a ball.
  • Place the pumpkin down on a table and using a ball tool or the end of a paintbrush, make a small indent at the top in the center.
  • Use a modeling tool or a toothpick to indent some lines, dragging the tool from the center indent to the bottom of the pumpkin. Clean off your modeling tool after a few indents, as it will start to get sticky.
    I like to then use my fingers to round out the ridges to make them look more realistic.
  • Take a tiny piece of the brown marzipan and roll it into a triangle shape. Place that onto the center indent at the top and use the end of your modeling tool or toothpick to push the base of the brown marzipan into the side ridges of the pumpkin. Snip off the very tip of the brown marzipan with scissors to make it look like a stem.
  • Optional: Use petal dust to add highlights to the pumpkins and make them look realistic. I like to mix and match my colors, and use a makeup brush or paintbrush to add color to the ridges and outsides of the pumpkins.
  • Store marzipan pumpkins in the refrigerator for up to 6 weeks.

Video

Notes

Use finely ground almond meal for a finely textured marzipan or grind your own from blanched almonds
Let marzipan rest before your shape it into candy
You can flavor marzipan with different types of candy flavoring depending on the shapes you are making
You can add cocoa powder to marzipan to make it chocolate
 

Nutrition

Serving: 1ounce | Calories: 166kcal | Carbohydrates: 24g | Protein: 3g | Fat: 7g | Saturated Fat: 1g | Polyunsaturated Fat: 0.04g | Monounsaturated Fat: 0.3g | Trans Fat: 0.04g | Cholesterol: 3mg | Sodium: 14mg | Potassium: 1mg | Fiber: 1g | Sugar: 22g | Vitamin A: 34IU | Calcium: 29mg | Iron: 0.5mg
roasted pumpkin seeds in a yellow bowl

November 10, 2020 Blog

Sea Salt and Olive Oil Roasted Pumpkin Seeds

This is the absolute BEST WAY to make crispy, crunchy, salty, roasted pumpkin seeds. No need to shell them, they are delicious whole! All you need is some pumpkin seeds, salt, olive oil, and 20 minutes in the oven.

roasted pumpkin seeds in a yellow bowl

I don't know about you but I have a few leftover Halloween pumpkins that are begging to be used up. What better way than to make a ton of roasted pumpkin seeds! My mouth is watering just thinking about them. 

So after the kids got done with pumpkin carving, I gathered up all the seeds and decided to make us a snack!

girl looking up from carved pumpkin

What's in this blog post

  • Roasted Pumpkin Seed Ingredients
  • What Pumpkin Seeds Are Good For Roasting?
  • How To Roast Pumpkin Seeds Step-By-Step
  • Are Pumpkin Seeds Good For You?
  • Related Pumpkin Recipes

Roasting your own pumpkin seeds is incredibly easy. Just wash the pumpkin away from the seeds in a colander, bring a pot of heavily salted water to a boil, and cook your seeds for a few minutes. This gets that yummy salt on the inside of the seeds as well as the outside!

Then drain your seeds, put them on a sheet pan with some olive oil and bake until nice and crispy! No need to shell them, you can eat the shells too! Seriously SO GOOD and so easy!

Roasted Pumpkin Seed Ingredients

All you need to make the most delicious roasted pumpkin seeds is some salt (I like pink Himalayan sea salt because of the health benefits and the flavor), some olive oil (or avocado oil), and pumpkin seeds!

You can also get super creative with your toppings! Try these savory versions.

  • 2 Tablespoons Parmesan cheese 1 teaspoon Italian herbs
  • 2 teaspoons curry powder
  • 2 teaspoons Cajun seasoning
  • 3 teaspoons ranch seasoning packet
A parchment lined baking sheet is covered with roasted pumpkin seeds that were coated in maple syrup and spices- a delicious way to use up the leftover seeds from pumpkin carving. High point of view- looking down.

If you want to try some sweet options, replace the olive oil with butter, and try these seasoning combinations.

  • 2 teaspoons Cinnamon and sugar and 1 teaspoon pumpkin spice
  • 1 Tablespoon maple syrup and 1 teaspoon pumpkin spice
  • 2 teaspoons honey 1 teaspoon cinnamon sugar

The options are endless! Get creative!

What Pumpkin Seeds Are Good For Roasting?

Colorful pumpkins decoration stock images. Pumpkins in the garden. Beautiful autumn decoration with pumpkins. Pile of pumpkins

You can roast the seeds from any pumpkin including squash! The most common cultivar of pumpkin grown specifically for its seeds is the Styrian pumpkin, which yields the small, smooth green seeds sold in grocery stores. Styrian pumpkin seeds are ideal for eating because they are rich in oil and naturally hull-less. 


How To Roast Pumpkin Seeds Step-By-Step

Step 1 - Gather your pumpkin seeds. After you cut the top off your pumpkin, scoop everything out with your hands or a strong spoon. I just put all my pumpkin guts onto a big sheet pan. Don't worry about the pumpkin strings, we'll get rid of those next. 

pumpkin seeds in a hand over the top of a carved pumpkin

Step 2 - Place your pumpkin seeds and strings into a colander in your sink. Run some cool water over the top, moving the seeds from side to side with your hand. The water will remove all the pumpkin from the seeds. If you have a few strings leftover don't worry, it won't hurt anything. 

washing pumpkin seeds in a colander

pumpkin seeds in a colander

Step 3 - Place your seeds in a measuring cup to see how many you have. This will determine how much water we need to bring to a boil. You need 2 cups of water and 1 Tablespoon of salt (sea salt preferred) for every ½ cup of pumpkin seeds. I have 2 cups of pumpkin seeds so I will need 8 cups of water and 4 Tablespoons of salt.

pumpkin seeds in a measuring cup

Step 4 - Add your salt to the water and bring it to a boil.

adding salt to water in a stainless steel pot shot from overhead

Step 5 - Carefully add in your pumpkin seeds and let them boil for 10 minutes. This process softens the shells and gets that yummy salt inside your pumpkin seeds, making them super tasty!

boiling pumpkin seeds in salted water

Step 6 - Remove your pumpkin seeds from the heat and strain them. Add a generous drizzle of olive oil to your baking sheet. Then add your seeds.

adding olive oil to a pink sheet pan

Step 7 - Toss them with your hands to cover them in oil evenly. Spread them out into one even layer on the pan. Sprinkle some more salt on top. Trust me!

hand adding salt to pumpkin seeds on a pink sheet pan

Step 8 - Bake your pumpkin seeds in the oven at 400ºF for about 20 minutes or until they are nice and golden brown. Larger seeds will take longer to bake, smaller seeds will take less time. Go by color, not by time. 

Pro -Tip: If your pumpkin seeds are still chewy after you've let them cool down, you can put them back into the oven for 5-10 minutes. You want them to be crunchy when they are done baking.

baking pumpkin seeds in the oven

When your pumpkin seeds are done, just take them out of the oven and let them cool down before you enjoy your tasty snack! No need to take off the shells, you can eat them whole. So good!


Are Pumpkin Seeds Good For You?

Pumpkin seeds are one of the best snack foods you can eat. They are packed full of nutrients that your body needs to be healthy. Pumpkin seeds contain fiber, magnesium, zinc, antioxidants, vitamin B2, and healthy fats. 

So next time you get the urge to carve a pumpkin, maybe carve up a few extra and make a big batch of delicious pumpkin seeds!

Related Pumpkin Recipes

Pumpkin Spice Cake

Pumpkin Cheesecake Bars

Pumpkin Pie 

Recipe

roasted pumpkin seeds in a yellow bowl
Print Recipe
5 from 1 vote

Sea Salt and Olive Oil Roasted Pumpkin Seeds

This is the absolute BEST WAY to make crispy, crunchy, salty, roasted pumpkin seeds. No need to shell them, they are delicious whole!
Prep Time5 minutes mins
Cook Time20 minutes mins
boiling10 minutes mins
Total Time35 minutes mins
Course: Appetizer
Cuisine: American
Servings: 2 cups
Calories: 420kcal
Author: Liz Marek

Ingredients

  • 2 cups pumpkin seeds
  • 4 Tablespoons pink himalyan sea salt (plus more for sprinkling) or any kind of salt that you like
  • 1 Tablespoon olive oil

Instructions

  • Preheat your oven to 400ºF
  • Remove your pumpkin seeds from the pumpkin with your hand or a spoon
  • Place the pumpkin seeds into a colendar and rinse with cool water to get all the pumpkin strings off
  • Measure the pumpkin seeds. You will need 2 cups of water for every half cup of pumpkin seeds and 1 Tablespoon of sea salt. I had two cups of pumpkin seeds so I used 8 cups of water and four Tablespoons of sea salt.
  • Add your salt to the water in a large pot and bring it to a boil
  • Add in your pumpkin seeds and boil them for 10 minutes. This softens the shells and makes the inside of the pumpkin seeds salty instead of just the outside.
  • Strain your seeds and spread them out onto a sheet pan with 1 Tablespoon of olive oil. Toss the seeds to coat them in the oil and then spread them out in an even layer. Sprinkle more sea salt on top.
  • Roast your pumpkin seeds for about 20 minutes or until they start to turn golden brown. Smaller seeds will need less time, larger seeds will take more time. Go by color of the seed, not by time.
  • Remove your seeds from the oven and let them cool before enjoying! You can keep these stored in a ziplock bag at room temperture for up to a week or 1-2 months in the fridge.

Video

Notes

You can use any type of pumpkin seed to roast
Let your pumpkin seeds cool down before you eat them
If your pumpkin seeds are still chewy after you've let them cool down, you can put them back into the oven for 5-10 minutes. You want them to be crunchy when they are done baking.
Store your pumpkin seeds for up to a week in a ziplock bag at room temperature or 2-3 months in the fridge. 

Nutrition

Serving: 1cup | Calories: 420kcal | Carbohydrates: 7g | Protein: 19g | Fat: 38g | Saturated Fat: 7g | Sodium: 5mg | Potassium: 518mg | Fiber: 4g | Sugar: 1g | Vitamin C: 1mg | Calcium: 29mg | Iron: 6mg

November 5, 2020 Cookies

Snickerdoodle Cookies Recipe with Cream of Tartar

If you're a snickerdoodle fan, you'll love these soft and chewy snickerdoodles! This authentic recipe uses cream of tartar for the perfect amount of tang and texture. Takes less than 30 minutes to make and bake! 

snickerdoodle cookie closeup

Some people think that a snickerdoodle cookie is just a big sugar cookie covered in cinnamon sugar but if you love snickerdoodle cookies, you know that they are so much more! True snickerdoodles are made with cream of tartar which reacts with baking soda and salt, giving these cookies their classic tangy flavor and soft texture. 

Cream of tartar also specifically reacts with sugar and prevents crystalization so your snickerdoodles stay VERY soft instead of crispy.

Snickerdoodles puff up in the oven but are only baked for 10 minutes so that they collapse down and give you that classic crinkled top. Read on to learn how to make the PERFECT snickerdoodle!

Table of contents

  • Ingredients
  • How to make Snickerdoodles Step-By-Step
  • Tips for Perfect Snickerdoodles
  • Frequently asked questions
  • Related Recipes

Ingredients

snickerdoodle ingredients

Snickerdoodle purists will say that if there isn't cream of tartar in the recipe, then it's not a real snickerdoodle. But if you really are desperate to make some snickerdoodles and don't have any cream of tartar on hand then these are the best substitutions. 

  1. Baking Powder - Made from a combination of baking soda and cream of tartar, this is a good replacement for the baking soda and cream of tartar in your snickerdoodle recipe. The only difference is that a classic snickerdoodle recipe has more cream of tartar than baking soda so you will lose a bit of that tangy flavor if you use just baking powder.  
  2. Lemon Juice - Contains the same acidic levels as cream of tartar and can be substituted in equal amounts. The flavor will be slightly different. 
  3. White Vinegar - Similar acidic levels and can be substituted in equal amounts. The flavor may be a little off. 

How to make Snickerdoodles Step-By-Step

Step 1 - Bring your butter and eggs to room temperature (not cold at all). I warm my eggs by placing them in a bowl of warm water for 5-10 minutes. 

egg in a clear bowl of hot water on white background

Step 2 - In the bowl of your stand mixer with the paddle attachment, mix the softened butter, granulated sugar, and light brown sugar on medium speed until light and fluffy (about 1 minute). 

butter and sugar creamed together

Step 3 -Add the eggs (whole and yolk) and mix on medium speed for 2-3 minutes until light and creamy. This gives lift to the cookies and will cause them to rise and fall, creating those beautiful cracks.

butter, sugar and eggs creamed together

Step 4 - Add in the vanilla, cream of tartar, baking soda, salt, and cinnamon. Mix for 1 minute on medium, scraping the sides of the bowl.

Step 5 - Add the flour and mix on low until just combined.

snickerdooodle cookie dough in a mixing bowl

Step 6 - Combine your cinnamon and sugar in a medium bowl, stir evenly to combine. This is your cookie topping. 

cinnamon sugar topping

Step 7 - Use a medium cookie scoop (#24) to make 2-Tablespoon-sized dough balls. Shape dough into a ball shape and roll in the cinnamon-sugar mixture. I only coat the top in cinnamon sugar, but you can roll the entire ball if desired.

snickerdoodle dough in a cookie scoop
snickerdoodle dough rolled into a ball
rolling snickerdoodle cookie ball in cinnamon sugar

Step 8 - Place on prepared baking sheet about 2-3 inches apart. Preheat oven to 350ºF (177ºC) and line a baking sheet with parchment paper.

Step 9 - Allow your cookies to rest for 20 minutes while your oven heats up. This will reduce the amount of spreading and your cookies will be thicker. Totally optional. 

snickerdoodle dough balls on a pink cookie sheet

Step 10 - Bake for 10-12 minutes, 10 if you want soft snickerdoodles, 12 if you want the edges to be slightly crispy. The cookies will be puffy and first then slowly collapse as they cool which creates those classic cracks and delicious chewy centers. 

snickerdoodle cookies on a cooling rack

Step 11 - Cool the cookies on the baking sheet for 5 minutes and transfer to a wire rack to cool completely. Store at room temperature for about 4 days or freeze for 6 months.

snickerdoodles on a white plate

Tips for Perfect Snickerdoodles

closeup of snickerdoodle with bite taken out of it
  • Don't skip the cream of tartar, it's the key ingredient!
  • Don't cream the sugar/butter mixture for too long or you'll end up with flat snickerdoodles.
  • Make sure you mix the egg/sugar mixture for two full minutes to get those classic snickerdoodle cracks.
  • Don't be tempted to over-bake your cookies! They will seem under-baked at first but will be perfect when they are cool. 

Frequently asked questions

Where did Snickerdoodles originate?

The origin of the snickerdoodle is unclear but it's believed to have been around since the late 1800s. The modern idea of the snickerdoodle might have started in New England and is of German or Dutch decent. 'Schneckennudeln,' which translates roughly to 'snail dumpling' is a German sweet bun dessert similar to cinnamon rolls.

How to prevent snickerdoodles from going flat

1. More Flour - Add 1 ounce of flour for a thicker, puffier cookie. 
2. Butter Temperature - If your butter is too warm, your snickerdoodles may spread more than usual. You can also chill your snickerdoodles for 60 minutes for thicker cookies. 
3. Oven Temperature - If your oven is not calibrated, it might be cooler than what your dial is saying. Try increasing your temperature by 25 degrees to see if that helps set your snickerdoodles before they spread too far. 

Can I use gluten-free flour?

Yes, you can use a gluten-free baking mix such as Bobs Redmill 1:1 baking mix or Cup 4 Cup gluten-free mix in place of flour.

Are snickerdoodles the same as sugar cookies?

No, a true snickerdoodle isn't just a sugar cookie with cinnamon. It contains cream of tartar for a tangy flavor and requires specific mixing to give it those signature cracks on top.

What do snickerdoodle cookies taste like?

Snickerdoodles have a chewy texture in the center and are slightly crispy on the outside. They have a tangy flavor from the cream of tartar, and a sweet hint of cinnamon and sugar.

Related Recipes

Crinkle Cookies

Lofthouse Cookie (Copycat recipe)

Chocolate Chip Cookies

Strawberry Macarons

Double Chocolate Chip Cookies

Recipe

Print Recipe
4.77 from 17 votes

Snickerdoodle Cookies Recipe with Cream of Tartar

Soft, chewy, tangy, and a perfectly crinkled top. These snickerdoodle cookies use cream of tartar for that classic flavor and texture.
Prep Time5 minutes mins
Cook Time10 minutes mins
Resting20 minutes mins
Total Time35 minutes mins
Course: Dessert
Cuisine: American
Servings: 20 cookies
Calories: 244kcal
Author: Liz Marek

Equipment

  • Baking sheet lined with parchment paper

Ingredients

Snickerdoodle Cookie

  • 8 ounces unsalted butter softened, not melted
  • 8 ounces granulated sugar
  • 4 ounces light brown sugar
  • 1 whole egg room temperature
  • 1 egg yolk room temperature
  • 2 teaspoons vanilla extract
  • 14 ounces All purpose flour
  • 1 teaspoon baking soda
  • 2 teaspoon cream of tartar see blog post for substitutes
  • ½ teaspoon salt
  • ½ teaspoon ground cinnamon

Cinnamon Sugar Mixture

  • 2 ounces granulated sugar
  • 4 teaspoons ground cinnamon
US Customary - Metric

Instructions

  • Line a baking sheet with parchment paper. Bring the butter and eggs to room temperature (slightly warm).
  • In the bowl of your stand mixer with the paddle attachment, mix the softened butter, granulated sugar and light brown sugar on medium speed until light and fluffy, 1-2 minutes. See above for pictures. You can also use a hand mixer, you'll just have to mix for longer.
  • Add in the egg and egg yolk and mix on medium speed for 2-3 minutes until light and creamy. This gives lift to the cookies and will cause them to rise and fall, creating those beautiful cracks.
  • Add in the baking soda, cream of tartar, salt, cinnamon, and vanilla extract. Mix for 1 minute on medium, scraping the sides of the bowl.
  • Add the flour and mix on low until just combined.
  • Combine your cinnamon and sugar in a medium bowl, stir evenly to combine.
  • Use a medium cookie scoop to make 2-Tablespoon sized dough balls. Roll each into a ball shape and roll in cinnamon sugar mixture. I only coat the top in cinnamon sugar, but you can roll the entire ball if desired.
  • Place the cookie balls onto the prepared baking sheet about 2-3 inches apart.
  • Preheat oven to 350ºF (177ºC) and let your cookies rest at room temperature for 20 minutes while the oven heats up. This prevents over-spreading but it's optional.
  • Bake for 10-12 minutes, 10 if you want soft cookies, 12 if you want the edges to be slightly crispy.
  • Cool the cookies on the baking sheet for 5 minutes and transfer to a wire rack to cool completely. Store at room temperature for about 4 days.

Video

Notes

  1. Although this recipe is in cups too, I HIGHLY recommend you measure your ingredients using a food scale. It makes baking so much easier and will lead to more successful recipes. Follow my tutorial to learn how to use a scale. 1 oz= 28 grams.
  2. Make sure to bring your butter and eggs to room temperature. You should be able to press a finger into the top of the butter and make a light indent. I leave my butter at room temperature for at least 2 hours and place my eggs (still in the shell) in a bowl of warm water for 5 minutes to warm them up. If your ingredients are cold, they will not combine correctly and could prevent your cookies from rising. 
  3. Don't skip the cream of tartar for that truly authentic snickerdoodle taste. If you can't get cream of tartar, leave out the cream of tartar and baking soda and replace the total amount (baking soda + cream of tartar) with baking powder. 
  4. Don't overbake! Your snickerdoodles will seem very under-baked but trust me, when they cool down they will be perfect. Even better on day two!

Nutrition

Serving: 1cookie | Calories: 244kcal | Carbohydrates: 37g | Protein: 3g | Fat: 10g | Saturated Fat: 6g | Cholesterol: 42mg | Sodium: 120mg | Potassium: 86mg | Fiber: 1g | Sugar: 20g | Vitamin A: 308IU | Calcium: 17mg | Iron: 1mg
cake sculpted to look like a pulled pork sandwich with french fries, ketchup and a pretzel bun

November 1, 2020 Course Preview

Pulled Pork Sandwich Cake Tutorial

Skill level: Intermediate

Guest instructor Timbo Sullivan from Cakes by Timbo joins us today for his take on an awesome pulled pork sandwich style cake. Timbo brings his unique style and tricks to this project, creating a delicious sandwich with tools you probably already have laying around the kitchen.

To top it all off, Timbo adds edible french fries and ketchup on top of a sculpted wooden cake board. Awesome details like the pretzel bun, veggies and mayo push this design over the top. This cake is sure to be a crowd-pleaser at any event!

58:16 Minutes of Instruction

What You Will Learn

  • How to create a pulled pork/brisket style sandwich from cake and edible materials
  • Learn how to make a pretzel bun and classic veggie fillings
  • Timbo's tips and tricks to create realistic shading and wrinkles on the buns
  • How to make the edible french fries and ketchup
  • Learn how to create a realistic wooden cake board

Tutorial Chapters

  1. Texturing the board 0:34
  2. Airbrushing the board 3:54
  3. Making a shadow 7:55
  4. Preparing the cakes 9:52
  5. Making the buns 10:40
  6. Airbrushing the buns 21:34
  7. Preparing the fondant 27:17
  8. Making the veggies 29:09
  9. Making the pulled pork 34:18
  10. Adding the fillings 38:01
  11. Cutting the pretzel top 41:37
  12. Airbrushing the pretzel top 46:22
  13. Glazing the sandwich 49:48
  14. Adding pepper 51:22
  15. Making the french fries 52:08
  16. Airbrushing the french fries 54:58
  17. Finishing touches 56:27

Downloads

Materials List

cake sculpted to look like a pulled pork sandwich with french fries, ketchup and a pretzel bun

November 1, 2020 Paid Video

Pulled Pork Sandwich Cake

Skill level: Intermediate

Guest instructor Timbo Sullivan from Cakes by Timbo joins us today for his take on an awesome pulled pork sandwich style cake. Timbo brings his unique style and tricks to this project, creating a delicious sandwich with tools you probably already have laying around the kitchen.

To top it all off, Timbo adds edible french fries and ketchup on top of a sculpted wooden cake board. Awesome details like the pretzel bun, veggies and mayo push this design over the top. This cake is sure to be a crowd-pleaser at any event!

58:16 Minutes of Instruction

What You Will Learn

  • How to create a pulled pork/brisket style sandwich from cake and edible materials
  • Learn how to make a pretzel bun and classic veggie fillings
  • Timbo's tips and tricks to create realistic shading and wrinkles on the buns
  • How to make the edible french fries and ketchup
  • Learn how to create a realistic wooden cake board

Tutorial Chapters

  1. Texturing the board 0:34
  2. Airbrushing the board 3:54
  3. Making a shadow 7:55
  4. Preparing the cakes 9:52
  5. Making the buns 10:40
  6. Airbrushing the buns 21:34
  7. Preparing the fondant 27:17
  8. Making the veggies 29:09
  9. Making the pulled pork 34:18
  10. Adding the fillings 38:01
  11. Cutting the pretzel top 41:37
  12. Airbrushing the pretzel top 46:22
  13. Glazing the sandwich 49:48
  14. Adding pepper 51:22
  15. Making the french fries 52:08
  16. Airbrushing the french fries 54:58
  17. Finishing touches 56:27

Downloads

Materials List

close up of hot chocolate bomb between fingers

October 30, 2020 Candy

Shiny Hot Chocolate Bombs With Marshmallows

Hot chocolate bombs are chocolate spheres filled with hot chocolate mix and lots of marshmallows! Pour steaming hot milk over the top and watch the chocolate melt away and release those marshmallows into your milk. So much fun and makes a great gift!

I created this recipe back in 2019 when hot chocolate bombs were just beginning to be a thing. Originally posted by Eric Torres Garcia, who now has a cocoa bomb company! The idea went mega viral and soon everyone wanted to make cocoa bombs.

I noticed a lot of people making them were using low-quality chocolate or fake chocolate to make their bombs and having lots of problems. This recipe shows you how to make the most perfect hot chocolate bombs from high-quality, tempered chocolate that actually tastes delicious!

What's In This Blog Post

  • Ingredients and tools needed
  • How to make hot chocolate bombs
    • Temper your chocolate
    • Make the hot chocolate bomb shells
    • Assemble the hot chocolate bombs
  • How to use hot chocolate bombs
  • Hot chocolate bomb flavor variations
  • Frequently Asked Questions
  • More Chocolate Recipes

Ingredients and tools needed

Making hot cocoa bombs isn't too complicated, but there are a few tools and ingredients to make hot chocolate bombs you need to have on hand.

hot chocolate bomb ingredients
  1. Good quality chocolate. I like to use Callebaut, but any chocolate will work. Just remember, the better it tastes, the better hot chocolate bomb it will make!
  2. A thermometer to keep track of the temperature of your chocolate. Absolutely a must. Don't even attempt this without one. You can buy food thermometers at the grocery store in the kitchen supplies aisle. I'm using an infrared thermometer because it's a little bit easier to keep clean.
  3. Silicone sphere mold to make your bombs. This is the easiest mold to use if you're not familiar with tempering chocolate. I will also show you how to use acrylic sphere molds in the recipe card below for you overachievers out there.
  4. Bench scraper if you are using an acrylic mold. You don't need one for silicone molds.
  5. Spoon for smoothing the chocolate.
  6. Piping bag for sealing together the spheres.
  7. Parchment paper if you're using an acrylic mold.
  8. Hot chocolate mix of your choice. You can use any kind you like but we stick to the classic Swiss Miss flavor.
  9. Mini marshmallows of your choice. I like these mini marshmallows because you can fit a bunch in one bomb making them more dramatic!
  10. Sprinkles to decorate the outside if you want. I like these sprinkles from wilton because they have a nice variety.
  11. Hot Chocolate Bomb Labels These were made by my friend and they are so cute!

How to make hot chocolate bombs

Here's a rundown on how to make hot chocolate bombs! This is such a fun thing to do with a group or with your family. The first thing we will need to do is temper our chocolate.

Tempering just means we are melting the chocolate at a controlled temperature so that it sets up again. If you've ever melted chocolate and it never set, or it grew weird white spots, you understand why tempering is important.

Don't worry, we're doing this the easy way in the microwave, and it only takes 5 minutes! If you don't have a microwave or if you prefer, you can use the seeding method.

Temper your chocolate

If you're not comfortable with tempering chocolate, you can use merkens compound chocolate. It does not require melting but it doesn't taste as good as real chocolate and it doesn't melt as well sometimes.

  1. Melt chocolate at 50% power in short 15-second bursts, stirring after each burst until about 75% melted. The point here is not to overheat, but to keep the temperature of the chocolate as low as possible. Your chocolate should be less than 90ºF.
  2. If your chocolate gets to hot, chop up some of your chocolate into small pieces and add it to your hot chocolate in small amounts to cool down your chocolate.
  3. Keep stirring without heating. The residual heat from the bowl will melt the rest of the chocolate.
  4. At 90ºF, you should only have tiny unmelted pieces of chocolate in the bowl. Keep stirring.
  5. If needed, return the bowl back to the microwave for another 10 seconds and keep stirring until everything is melted.
  6. This process ensures a shiny finish and firm snap, which makes the best hot chocolate bombs!

Make the hot chocolate bomb shells

I recommend making all your shells first. Your chocolate will begin to cool and set up, so working fast is best. If your chocolate does set up, you can re-melt it in 5-second intervals and stir to get it melted again.

  1. Fill your mold halfway with the melted chocolate. Use a spoon to gently coat the mold in chocolate, all the way up to the edges.
  2. Flip the mold upside down to empty out the excess chocolate onto the parchment paper. You can reuse this chocolate later!
  3. Place the mold upside down on parchment paper to set up. Setting up should only take 5-10 minutes. You can place them in the fridge to speed up the process but its not necessary.
  4. Remove the shells by pressing gently from the bottom and remove the shells from the molds, and set aside for assembly.

Assemble the hot chocolate bombs

Assembly goes fast! Have all your shells, sprinkles, and cocoa mix ready to go. Put some chocolate in a piping bag and set it in a drinking glass that has been warmed for 1 minute in hot water or the microwave to help keep the chocolate melted. It's also a great way to keep your countertop mess-free.

I also use a hot ceramic plate (heated in the microwave) to melt my spheres to get them flat and to secure them together. You could also use a skillet warmed for only a few seconds. You don't want to burn the chocolate.

  1. Warm a ceramic plate in the microwave for a minute or two until it's quite warm. Use this place to slightly melt the shells to clean up the edges and make sure they are flat.
  2. Place some parchment paper over your work surface to catch excess chocolate during drizzling.
  3. The easiest way to assemble is to place the first shell of the mold into an empty cupcake liner. This holds it in place while you fill.
  4. Fill the shell with hot cocoa mix and sprinkles!
  5. Make sure your plate is hot again.
  6. Warm the top shell edge slightly and place it on top of the filled shell.
  7. Hold for 10 seconds to seal and set it aside.
  8. Now it's time to decorate! You can decorate any way you like, but I enjoy doing a simple drizzle of chocolate and adding some sprinkles on top! You may need to rewarm the chocolate for 10 seconds to make it smooth again. I use a piping bag to pipe over the bombs, then immediately add the sprinkles.
close up of hot chocolate bomb

How to use hot chocolate bombs

I tested these hot chocolate bombs out in various amounts of milk and found that 14 ounces was about perfect. I heat my milk until it's steaming (not boiling). Place the hot chocolate bomb in the bottom of the mug and pour the hot milk on top. The hot cream opens up the bomb, and all the marshmallows escape! So fun!

Hot chocolate cocoa bomb dropped into hot milk in copper mug

Use a spoon to stir so that the cocoa and chocolate melt into the hot milk.

Hot chocolate cocoa bomb with hot milk in a copper mug

Hot chocolate bombs make a great gift! Wrap them in a plastic bag with a fun tie and some instructions for use. Put it in a mug and give them as gifts for the Holidays! Nothing says I love you like hot chocolate!

Hot chocolate bomb flavor variations

Hot chocolate bomb variations go beyond classic cocoa. Here are some other flavor variations to consider. Using flavored chocolate and switching up your sprinkles for crushed candies can change the flavor.

  • Peppermint Mocha - add crushed candy canes with the marshmallows inside and to the drizzle on the outside.
  • Salted Caramel - Use caramel-flavored hot chocolate mix on the inside and crunched up caramel bits on the outside. I like this caramel flavored mix from Swiss Miss.
  • Cookies & Cream - Make your hot chocolate bomb shells using white chocolate and mix in crunched up oreo cookies.
  • S'mores - Just add a few crunched up graham crackers to the drizzle and torch a few marshmallows, and voila! S'mores hot chocolate bombs!
  • Mocha - Add a scoop of instant espresso mix into your hot chocolate bombs for an extra caffeine boost!

Frequently Asked Questions

Can you ship hot chocolate bombs?

Yes, you can ship these. Package them in tins inside the cupcake liners and place shredded paper around them to keep them from breaking.

Can you grate the chocolate instead of shaving it?

Yes, you can. The reason we chop the chocolate is just so that it melts at a lower temperature.

Can I temper in a melting pot?

A melting pot has a pretty high temperature but you can definitely use the pot to melt the chocolate and then use chopped chocolate to seed it and get it tempered again. Just pay attention to your temperatures.

How long do hot chocolate bombs last?

There isnt anything in hot chocolate bombs that will spoil. They will last as long as the ingredients used last. Check expiration dates for more information.

What kind of chocolate can you use for hot chocolate bombs?

You can use real chocolate (contains cocoa butter) or compound chocolate (like candy melts) and get good results. The main difference is that real chocolate will taste better and melt better in hot milk. Compound chocolate does not require tempering but does not taste as good and tends to not melt as well.

More Chocolate Recipes

How to temper chocolate three ways

Chocolate caramel candies

6 Tempered chocolate techniques

Recipe

Print Recipe
4.99 from 310 votes

Hot Chocolate Bombs

How to make beautiful, shiny and professional looking hot chocolate bombs! How to easily temper chocolate and simple decorating!
Prep Time10 minutes mins
Cook Time5 minutes mins
Cooling10 minutes mins
Total Time25 minutes mins
Course: Dessert
Cuisine: American
Servings: 6 spheres
Calories: 87kcal
Author: Liz Marek

Equipment

  • Thermometer
  • 2 ½" Sphere Mold (silicone or acrylic)

Ingredients

  • 24 ounces semi-sweet couverture chocolate I prefer Callebaut, you can also use any high quality bar chocolate. You can use candy melts, if you're using a silicone mold but they don't taste as good.
  • 1 cup mini marshmallows
  • 6 Tablespoons hot chocolate mix
US Customary - Metric

Instructions

For Silicone Molds

  • Place the chocolate into a bowl and heat for 30 seconds (my microwave is 1000 watts)
  • Stir the chocolate, moving the chocolate that is on the outside, towards the center.
  • Heat again for 15 seconds and stir again.
  • Repeat this process until the chocolate is ALMOST melted but not fully melted. Never heating for longer than 15 seconds and never going above 90F. If you go above 90º you will have to temper your chocolate by seeding (see my blog post for more info)
  • Stir until fully melted.
  • Fill your molds halfway with chocolate and use a spoon to smooth the chocolate up to the edges, taking care to make sure the walls are evenly coated.
  • Turn the mold over and shake out the excess chocolate.
  • Use a bench scraper to scrape off the excess chocolate.
  • Turn the mold upside down onto the parchment paper and allow them to set up in the fridge for 10 minutes.
  • Carefully remove the chocolate shells from the mold by gently pushing up from the bottom until the shell releases.
  • Heat a ceramic plate and use it to smooth out the edges of the chocolate shells.
  • Place the shells in cupcake liners for stability. Fill the shells with hot cocoa mix and marshmallows.
  • If needed, warm the edge of the top shell once again on the plate and place it on top of the filled shell. Hold for 10 seconds to seal.
  • Fill your piping bag with about ¼ cup of the leftover melted chocolate. Snip the tip off and drizzle chocolate over the hot chococlate bombs. Immediately top with some sprinkles.

For Acrylic Molds

  • Chop your chocolate finely with a sharp chefs knife
  • Add your chocolate to a bowl and microwave for 30 seconds (my microwave is 1000 watts)
  • Stir the chocolate, moving the chocolate that is on the outside, towards the center.
  • Heat again for 15 seconds and stir again.
  • Repeat this process until the chocolate is ALMOST melted but not fully melted. Never heating for longer than 15 seconds and never going above 90F. If you go above 90º you will have to temper your chocolate by seeding (see my blog post for more info)
  • Polish your mold with a paper towel to remove and residue from the inside to prevent the chocolate from sticking.
  • Warm the acrylic mold slightly with a hair dryer or heat gun so it doesnt feel cold but not hot either.
  • Pour the chocolate (at 90ºF) into the molds and tap on the table a few times to remove bubbles.
  • Dump the chocolate back into the bowl, use the edge of your bench scraper to tap out as much of the chocolate as possible. You don't want the chocolates to be too thick.
  • Scrape off the excess chocolate from the top of the mold back into the bowl.
  • Turn the mold upside down onto some parchment paper to let the chocolate drain further and almost completely set. About 5 minutes. The chocolate should lift away from the parchment paper easily but still be soft.
  • Scrape off the excess chocolate again and then place the mold into the freezer for 5 minutes.
  • The freezer will cause the chocolate to contract and pull away from the mold. If it's not tempered, it will not contract and there will be no way to get the chocolate out. You can tell if your chocolate is tempered because if you look under the mold, it wont be stuck to the molds anymore. If you have a couple spots where it still is, it will be ok and still release with no problem.
  • Quickly turn your mold over onto the table to release the chocolate from the mold. Now they are ready to assemble.
  • Add 1 Tablespoon of hot chocolate mix to half the sphere and some marshmallows.
  • Pipe some melted chocolate onto the top of the sphere at attach the top piece of the sphere. Pressing gently but firmly.
  • Use a gloved hand to wipe away the excess chocolate for a clean look or roll in some sprinkles to finish decorating them!

Video

Notes

TIPS FOR SUCCESS!
The Best Chocolate - Semi-sweet couverture chocolate or high quality bar chocolate. Not candy melts, chocolate chips or candy coating.  
Hot Chocolate Bomb Mold - Silicone molds or acrylic molds work well. Silicone is the easiest but takes longer. Acrylic is more complicated but you can do more at once. 
Thermometer - You will need a simple kitchen thermometer or infrared thermometer to track the temperature of your chocolate. 
To temper your chocolate like a pro, see Chef Christophe's tutorial on how to temper chocolate with cocoa butter and an EZ tempering machine. 

Nutrition

Serving: 1bomb | Calories: 87kcal | Carbohydrates: 18g | Protein: 1g | Fat: 2g | Saturated Fat: 2g | Sodium: 134mg | Fiber: 1g | Sugar: 14g | Calcium: 15mg | Iron: 1mg

chocolate and vanilla cake slice with chocolate whipped cream on a white plate

October 19, 2020 Cake

First Birthday Smash Cake Tutorial

A smash cake is a small cake that is decorated simply to be smashed by a toddler, typically on their first birthday! You don't need to be a professional cake decorator to make a cute smash cake! All you need is some cake, whipped cream and about 60 minutes! You can do this! 

smash cake with chocolate whipped cream

Tools & Supplies

To make your smash cake all you need are a couple of small cake pans, I'm using two 6"x 2" Fat Daddio pans. A 6" round cake board or flat platter to build your cake on, a spatula or spoon for spreading the frosting, and something to pipe with if you want a design.

cake decorating tools

I'm using a 1M piping tip and a disposable piping bag. A turntable will make it a little easier to smooth the frosting but it's not 100% necessary! I also have a bench scraper that I got from the dollar store which is really great for smoothing out the sides of the cake for the crumb coat. 

If you want to learn more about how to decorate your very first cake, I have a free tutorial for beginners here. 

Click on this image to go to the how to decorate your first cake tutorial

You can get cake pans and all your supplies at most grocery stores in the baking aisle or at craft stores like Michaels or Joann Fabric in the cake decorating aisle. 

Ingredients

smash cake ingredients

You should have almost everything you need already in your cabinet except the following. 

Buttermilk: Makes the cake extra tender. No buttermilk? You can make your own substitution here. 

Unsalted butter: Salted butter contains too much salt and will make your cake salty so bakers usually use unsalted butter and add in the amount of salt that is necessary. 

Oetker Whipped Cream Stabilizer: Helps the whipped cream keep it's shape in warm weather but it's not required. You can see all my other ways to stabilize whipped cream on this post. 

Chocolate Syrup: I wanted to flavor my whipped cream so it tasted like chocolate milk but that's optional! 

What flavor should a smash cake be?

chocolate and vanilla cake slice with chocolate whipped cream on a white plate

Smash cakes can be any flavor you want but typically, toddlers are not used to foods that have really intense flavors so most parents opt for simple flavors like vanilla or chocolate. In this recipe, I will show you how to make a delicious vanilla cake (from scratch) and how to turn half of it into chocolate! 

The reason I decided to make my smash cake half vanilla and half chocolate is because I wasn't sure which flavor my son Ezra would like best, so I decided to give him options! If you want to make your smash cake all vanilla, or all chocolate, that's totally up to you!

What is the best frosting for a smash cake?

chocolate whipped cream in a glass bowl

There are a lot of types of frosting you can use for your baby's first smash cake, like easy buttercream or chocolate ganache. But I think the BEST frosting to use is some whipped cream that is not too sweet. The reason I like using whipped cream is that the taste is very similar to milk that your baby is already used to drinking. I added a tiny bit of chocolate to my whipped cream but that is completely optional.

And yes, you can color the whipped cream if you want. Just add a drop of liquid food coloring to the whipped cream along with the powdered sugar and vanilla extract. 

The main thing you want to be careful of is over-whipping. Whipped cream goes from liquid to butter in no time so never walk away from it while it's whipping. It's better to under-whip and stop at the point it's just starting to form peaks than to over-whip and end up with butter because you can't fix it after it's been over-whipped. 

How big should a smash cake be?

Typically, a toddler hasn't had much cake (if any) by the time they are one. So a smash cake should not be very big. Some people even just do a little cupcake instead of a smash cake and that's totally fine!

one year old boy with cake and wooden letters in the foreground

But if you're planning a photo shoot as I did for Ezra's first birthday, you might want to do a 6" cake. It's still very small but big enough that you'll be able to get a few snaps of the destruction before the cake is completely destroyed. 

I actually made two 6" cakes. One for Ezra to smash and one for the family to eat after the smashing. If you want to make two cakes, just double the recipe below by adjusting the "servings" slider on the recipe card to read 24 instead of 12. Then you will have enough batter for two cakes. 

one year old boy reaching towards a smash cake

If you don't want to make the second cake in three 6" pans, you can use two 8" pans. Or you can use the cake batter calculator above the recipe to figure out how much cake batter you would need for pretty much any shaped pan you can think of. 


How to make a smash cake step-by-step

Step 1 - Make the cake batter. I'm using my white velvet buttermilk cake (see the recipe at the bottom of this blog post) but I've adapted it to have a little less sugar and whole eggs instead of egg whites. I love this cake because it's very soft and easy for a toddler to eat. You can also add food coloring to the cake if you want a colorful smash cake, like in my rainbow cake recipe. 

Pro-tip: Make sure your eggs, buttermilk, and butter are all room temperature or even a little warm. Cold ingredients do not mix together well and will ruin your cake. 

buttermilk cake batter on a blue spatula

Step 2: Divide the batter in half and add the cocoa powder mixture to half to make it chocolate instead of vanilla. I coat my pans with cake goop but you can use any pan release that you like. Fill your cake pan halfway with batter. 

vanilla cake batter in a clear bowl

Step 3: Bake the cakes. If you only have one pan, you can put the leftover cake batter in the fridge until you're ready to bake it. The cakes are done baking when you can touch the tops of the cakes and the cake springs back. This may take a few minutes more or less than the time listed in the recipe and can vary greatly if you are using a different size pan. 

chocolate cake batter in a cake pan

After your cakes are baked, let them cool in the pan until the pan is just barely warm (not cold or they might stick). Invert the cakes onto a cooling rack and let them cool fully before frosting. I put mine into the freezer for about 30 minutes to speed up this process. 

You can also wrap the cakes in plastic wrap and put them in the fridge overnight if you don't plan on decorating the same day as baking. 

chocolate cake coming out of the pan onto a cooling rack

Step 4: Make your whipped cream. I am using my stabilized whipped cream recipe with Oetker stabilizing powder but you can skip the powder if you want. I added a little chocolate syrup to my whipped cream which made it taste like chocolate milk! Soooo tasty! 

Pro-tip: Don't make your whipped cream until you are ready to frost your cake. Once it sets up, it won't be creamy again. 

chocolate whipped cream in a mixing bowl

Make sure you don't over-whip your whipped cream or it will turn to butter and it can't be saved. You want to stop mixing at the point that you see peaks forming but it's not quite stiff yet. 

Step 5: Stack your cakes. If your cakes have a dome, use a serrated knife to remove the dome. Makes a great snack to fuel all this hard work you're doing! 

Cut each layer in half length-wise to make it thinner (optional). This is called torting your cake. Make sure your cakes are cold so they are easy to handle and don't crumble while you're stacking. 

Place your first layer onto the cake board or onto your cake platter. Spread on a layer of your chocolate whipped cream and smooth it with your spatula. Try to keep it as level as you can and about ¼" thick. 

Place the next layer of cake on top and continue this process until you've used all your cake layers. 

chocolate and vanilla cake with whipped cream on a turntable

Step 6: Crumb coat. Apply a thin layer of whipped cream over the entire cake to seal in the crumbs. Place the whole cake into the freezer for 15 minutes before moving onto the final step. 

smash cake crumb coat

Step 7: Decorate the cake. 

To decorate the smash cake, I decided to use a piping bag and 1M piping tip. Start at the bottom and squeeze while moving upward.

decorating smash cake with piping bag and chocolate whipped cream

Do this all the way around the cake and done! You can also make rosettes or just use your offset spatula to do a rustic finish. It's totally up to you! I purposefully kept this tutorial really simple so that anyone can make a smash cake!

smash cake crown topper

You can get my gold crown printable cake topper template here. Just print the template on gold cardstock and glue the ends together OR you can glue two together to make a crown for a toddler! I added some faux fur to the bottom so it looks more like the crown from Where The Wild Things Are. 

Remember, you should never have fondant or any small objects on a smash cake because they are a choking hazard. 

Tips For Success

  1. A cold cake is a yucky cake. Make sure you take your cake out of the fridge the morning of the smash cake session. At least a few hours in advance to give the cake time to warm up.
  2. Toddlers don't usually know what to do with a cake at first, encourage them to taste by putting their hand in the frosting or give them a little taste of the frosting with your finger to get them started. 
  3. A tired baby plus a smash cake does not go well. When my daughter Avalon turned one, I made the mistake of doing her smash cake at the end of the party when she was exhausted and wanted no part of that cake. Start the party with the smash cake then do a quick wardrobe change afterward and enjoy the party!

where the wild things are smash cake session

Cake Batter and Frosting Calculator

Select an option below to calculate how much batter or frosting you need. Adjust the servings slider on the recipe card to change the amounts the recipe makes.

Choose a pan type

Choose a cake pan size
(based on 2" tall cake pan)

Choose a cake pan size
(based on 2" tall cake pan)

Choose a cake pan size
(based on 2" tall cake pan)

Cupcake Tin Size

Choose number of pans

Cups of Batter Needed

8 cups

Cups of Frosting Needed

5 cups

Note: measurements are estimated based off the vanilla cake recipe using standard US cake pans and sizes. Measurements used are for 2" tall cake pans only. Your results may vary. Do not overfill cake pans above manufacturer's recommended guidelines.


Recipe

chocolate and vanilla cake slice with chocolate whipped cream on a white plate
Print Recipe
5 from 5 votes

Smash Cake Recipe

Layers of moist vanilla and chocolate cake layered with creamy chocolate whipped cream frosting! The best smash cake recipe plus step-by-step tutorial.
Prep Time15 minutes mins
Cook Time7 minutes mins
Total Time22 minutes mins
Course: Dessert
Cuisine: American
Servings: 12 servings
Calories: 340kcal
Author: Liz Marek

Equipment

  • Two 6"x2" cake pans
  • 1M piping tip and piping bag
  • Offset Spatula

Ingredients

Smash Cake

  • 3 ounces hot water
  • 1 ounce cocoa powder
  • 7 ounces Cake Flour
  • 5 ounces granulated sugar
  • ¼ teaspoon salt
  • 2 teaspoon baking powder
  • ¼ teaspoon baking soda
  • 2 large eggs room temperature
  • 2 ounces vegetable oil
  • 5 ounces buttermilk room temperature or slightly warm
  • 3 ounces unsalted butter room temperature
  • 1 teaspoon vanilla

Chocolate Whipped Cream

  • 12 ounces heavy whipping cream cold
  • 2 ounces powdered sugar
  • 1 teaspoon vanilla extract
  • 2 Tablespoons Hershey's chocolate syrup or sifted cocoa powder
  • 1 package Oetkers whipped cream stabilizer
US Customary - Metric

Instructions

Smash Cake Recipe

  • Combine the cocoa powder with the hot water and whisk until smooth. Set aside to cool.
  • Combine half the buttermilk with the vegetable oil and set aside.
  • Add the egg and vanilla to the remaining buttermilk and whisk to combine. Set aside.
  • Into the bowl of your stand mixer with the paddle attachment attached, add in your flour, sugar, salt, baking powder, and baking soda and mix for 10 seconds to combine.
  • While mixing on low, add in your softened butter and mix until the mixture looks like coarse sand.
  • While mixing on low, add in your buttermilk/oil mixture and mix for 2 minutes to develop the cakes structure.
  • Scrape the bowl and then continue mixing on low while slowing drizzling in the buttermilk/egg mixture until cohesive.
  • Divide the cake batter in half and add the chocolate mixture to half the vanilla cake batter and stir to combine.
  • Coat two 6"x2" cake pans with cake goop or another preferred pan release. Fill one pan with the vanilla mixture and the other with the chocolate.
  • Bake your cakes at 350ºF for 25-30 minutes or until the cake bounces back when you touch the top.
  • Let your cakes cool in the pan until they are barely warm to the touch but not cold.
  • invert your cakes onto a cooling rack to cool the rest of the way. I put my cakes in the freezer for 30 minutes (on the cooling rack) so they can cool down further and are easier to handle while stacking the cake. Watch my video above to see how to stack and decorate.

Chocolate Whipped Cream

  • Combine your heavy cream and powdered sugar, vanilla and stabilizer (optional) in the bowl of your stand mixer with the whisk attachment.
  • Mix on medium until you start to see soft peaks form.
  • Add in your chocolate syrup and mix until combined. Do not over mix. Whipped cream should hold it's shape but still be very soft. It will continue to whip and become more stable as you frost the cake.

Video

Notes

  1. Make sure your eggs, buttermilk, and butter are all room temperature before you make your cake or the cake won't combine properly.
  2. Chill your cakes before stacking and frosting 
  3. Don't overwhip your whipped cream so that it stays nice and smooth
  4. You can omit the chocolate if you want your cakes to be vanilla or you can double the chocolate if you want all the cake batter to be chocolate instead of vanilla.
  5. If you’re in the UK search for Shipton mills soft cake and pastry flour or flour that has a protein level of 9% or less. Doing the cornstarch and AP flour trick will not work for this cake, it is formulated specifically with the reverse creaming method to use cake flour.

Nutrition

Serving: 1cup | Calories: 340kcal | Carbohydrates: 32g | Protein: 5g | Fat: 23g | Saturated Fat: 15g | Cholesterol: 86mg | Sodium: 109mg | Potassium: 169mg | Fiber: 1g | Sugar: 17g | Vitamin A: 658IU | Vitamin C: 1mg | Calcium: 73mg | Iron: 1mg

Sculpted cake that looks like a funko pop figurine in the likeness of Maleficent

October 15, 2020 Course Preview

Maleficent Funko Pop Cake Tutorial

Skill level: Intermediate

I had the opportunity to make a birthday cake for my neighbor who is obsessed with Funko Pop figurines, her absolute favorite being Maleficent and I had a blast making this cake for her!

In this tutorial, you'll learn the structure to use when designing a gravity-defying Funko Pop cake, how to create the details and elements, as well as how to make the glowing magical green flames behind Maleficent.

There's a lot to cover in this tutorial, so let's get our tools together and let's get started!

1:38:49 Minutes of Instruction

What You Will Learn

  • How to make gravity-defying Maleficent Funko Pop cake
  • Learn how to create the edible glowing green flames
  • Tips and tricks to add details onto Maleficent

Tutorial Chapters

  1. Scaling the cake 0:40
  2. Making the cake structure 5:47
  3. Black modeling chocolate 9:55
  4. Making the board structure 11:18
  5. Making the wing structure 22:26
  6. Making the body 25:32
  7. Decorating the board 29:22
  8. Continuing the body 35:02
  9. The body details 46:52
  10. Adding the cake head 50:48
  11. Making the horns 55:20
  12. Covering in fondant 59:13
  13. Smoothing the head 1:09:51
  14. Making the eyes 1:12:09
  15. Making horn details 1:17:38
  16. Making the collar 1:20:48
  17. Making isomalt flames 1:23:19
  18. Adding the flames 1:30:40

Downloads

Materials List

Cake Board Template

Sculpted cake that looks like a funko pop figurine in the likeness of Maleficent

October 15, 2020 Paid Video

Maleficent Funko Pop Cake

Skill level: Intermediate

I had the opportunity to make a birthday cake for my neighbor who is obsessed with Funko Pop figurines, her absolute favorite being Maleficent and I had a blast making this cake for her!

In this tutorial, you'll learn the structure to use when designing a gravity-defying Funko Pop cake, how to create the details and elements, as well as how to make the glowing magical green flames behind Maleficent.

There's a lot to cover in this tutorial, so let's get our tools together and let's get started!

1:38:49 Minutes of Instruction

What You Will Learn

  • How to make gravity-defying Maleficent Funko Pop cake
  • Learn how to create the edible glowing green flames
  • Tips and tricks to add details onto Maleficent

Tutorial Chapters

  1. Scaling the cake 0:40
  2. Making the cake structure 5:47
  3. Black modeling chocolate 9:55
  4. Making the board structure 11:18
  5. Making the wing structure 22:26
  6. Making the body 25:32
  7. Decorating the board 29:22
  8. Continuing the body 35:02
  9. The body details 46:52
  10. Adding the cake head 50:48
  11. Making the horns 55:20
  12. Covering in fondant 59:13
  13. Smoothing the head 1:09:51
  14. Making the eyes 1:12:09
  15. Making horn details 1:17:38
  16. Making the collar 1:20:48
  17. Making isomalt flames 1:23:19
  18. Adding the flames 1:30:40

Downloads

Materials List

Cake Board Template

« Previous Page
Next Page »

Primary Sidebar

Hi, I'm Liz! I'm passionate about creating reliable, foolproof recipes that don't just tell you how to cook, but why things work - so you can skip the guesswork and confidently make the best sweet and savory dishes of your life.

More about me →

Our Cake Greatest Hits

Check out our best cake recipes

👨‍🍼 Celebrate Father's Day

  • Close up of three crispy baked chicken thighs on a plate.
    Crispy Baked Chicken Thighs
    Cook Time50 Minutes
  • close up of a sliced ribeye steak
    How To Cook A Ribeye
    Cook Time24 Hours 14 Minutes
  • close up of creamy mac and cheese on a serving spoon
    Creamy Baked Mac And Cheese
    Cook Time35 Minutes
  • close up of a keto smash burger
    Smash Burgers Recipe
    Cook Time25 Minutes
  • Hawaiian Mac Salad
    Cook Time2 Hours 20 Minutes
  • Smoked Beef Tenderloin
    Cook Time2 Hours 55 Minutes

Popular Recipes

  • close up of ganache drizzling into a bowl
    The Best Chocolate Ganache Recipe
    Cook Time20 Minutes
  • Piping easy buttercream rosettes onto a cake using a 1M star piping tip
    Easy Buttercream Frosting
    Cook Time25 Minutes
  • close up slice of marble cake
    Moist and Fluffy Marble Cake Recipe
    Cook Time40 Minutes
  • Slice of red velvet cake with cream cheese frosting on a white plate.
    Red Velvet Cake Recipe
    Cook Time1 Hours 40 Minutes

Footer

↑ back to top

About

  • Privacy Policy
  • Terms of Service

Newsletter

  • Sign Up! for emails and updates

Contact

  • Contact
  • About Us

Copyright © 2024 Sugar Geek Show, Inc. All Rights Reserved.

Rate This Recipe

Your vote:


A rating is required
A name is required
An email is required