


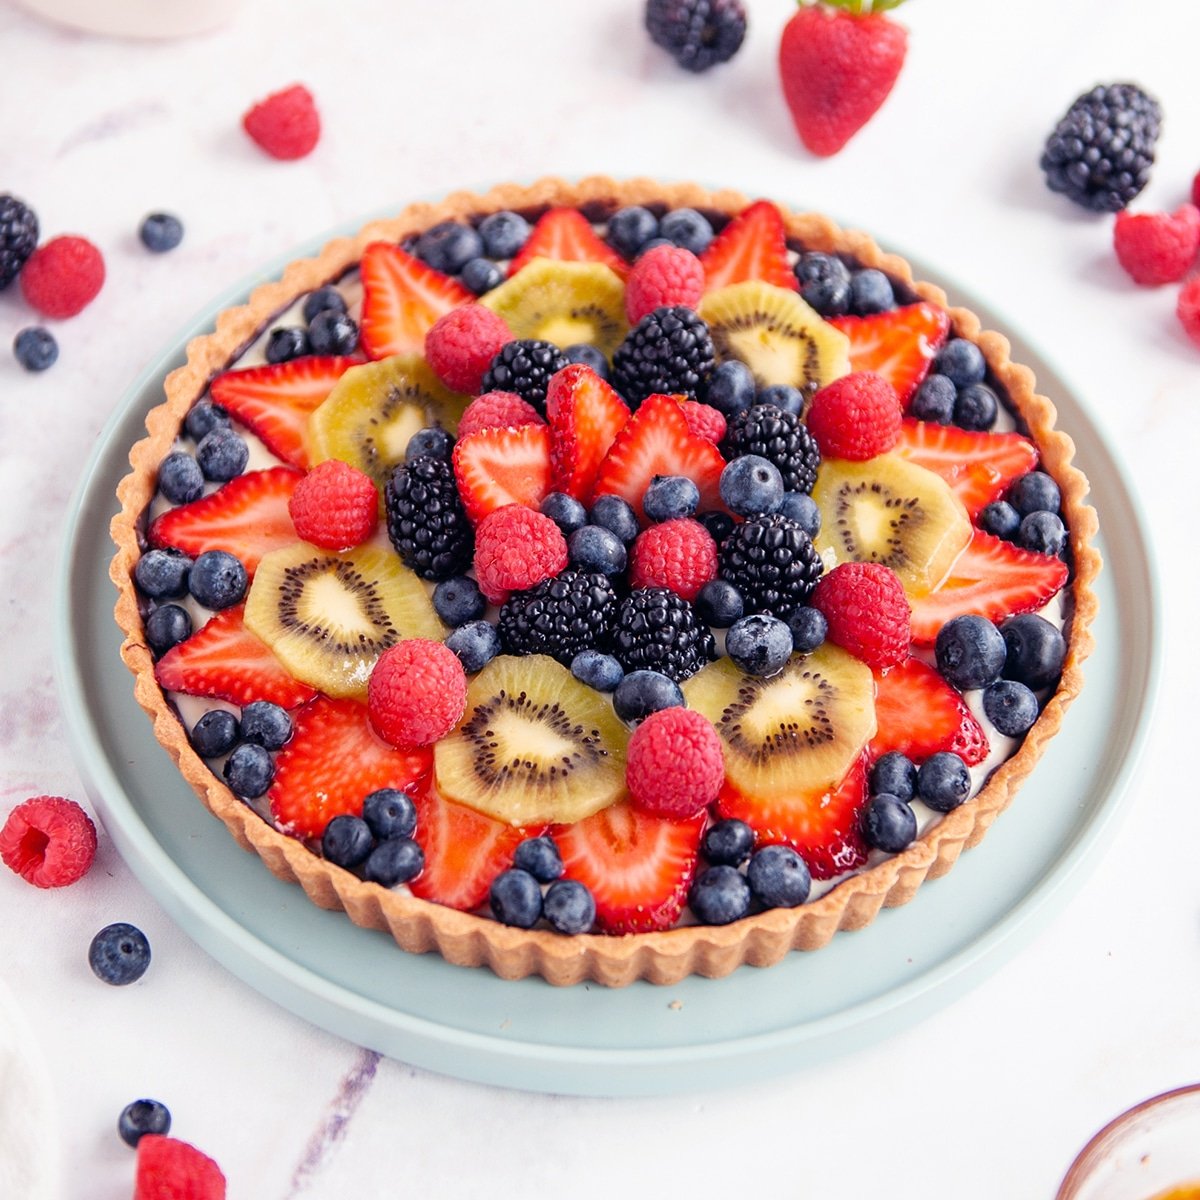
A fresh fruit tart is a summertime staple! I love this buttery shortcrust filled with sweet and creamy vanilla custard and topped with lots of fresh berries! Follow my tips for keeping your berries fresher longer, how to keep the crust nice and crisp, and how to make an easy glaze using jam!
Fruit Tart Ingredients
There are a lot of ingredients in this photo because we're making tart dough, pastry cream, and topping it with fresh berries and glaze. Don't be intimidated though, all these ingredients are very common in most household kitchens. Make sure your butter is room temperature. Soft enough to leave an indent with your finger but not melted. Your eggs should also be warm. I place mine (while still in the shell) into a bowl of warm water for 5 minutes.
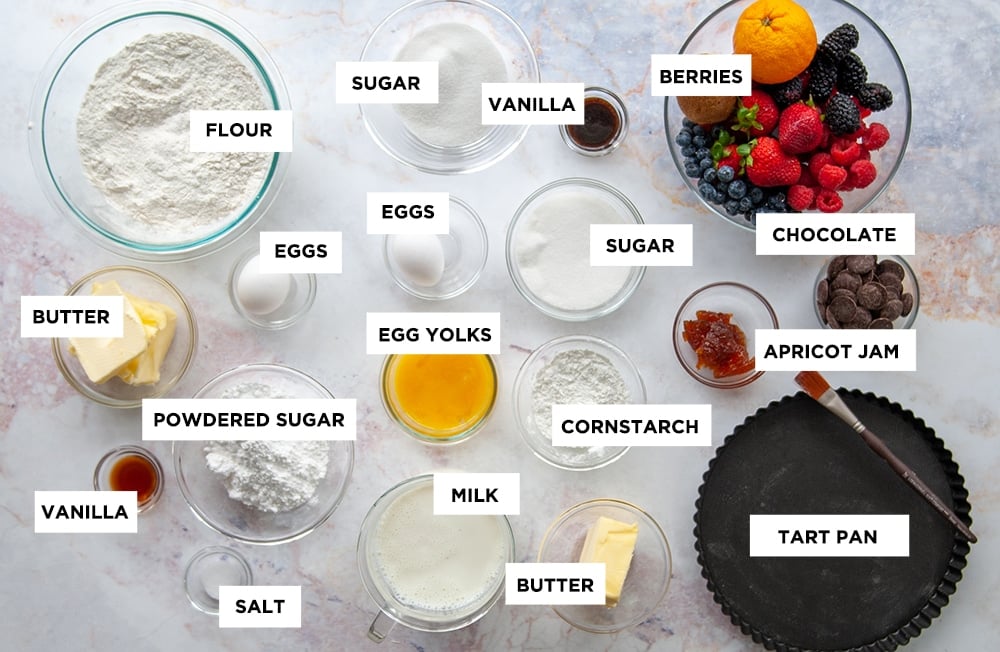
Note: This recipe makes enough dough for 2 tarts (maybe even three depending on the size of your pan). Theoretically, you could cut this recipe in half by whisking the whole egg and cutting it in half but it's really easy to just freeze the extra dough to use for later!
How to Make a Fresh Fruit Tart
Making The Tart Dough Step-By-Step
Step 1 - Add the softened butter into the bowl of your stand mixer with the paddle attachment. Mix on medium speed for about 30 seconds until it's smooth.
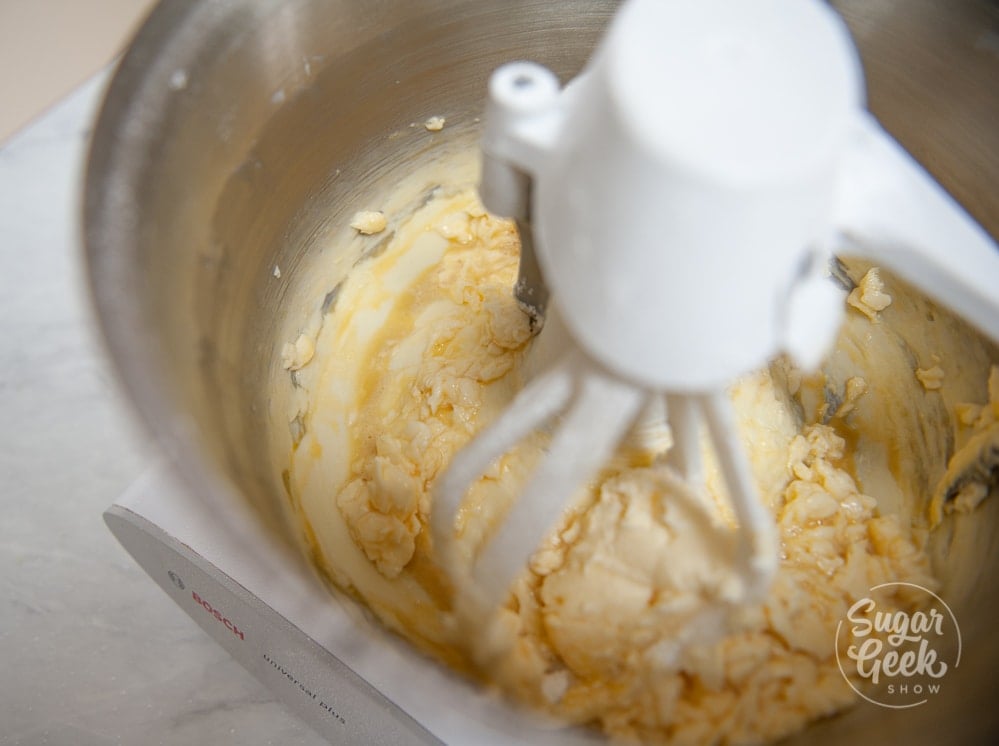
Step 2 - Add in your sifted powdered sugar, salt, and mix until smooth.
Step 3 - Add in the vanilla and the egg and mix until combined.
Step 5 - Gradually add your flour and mix until everything starts to come together and a dough forms.
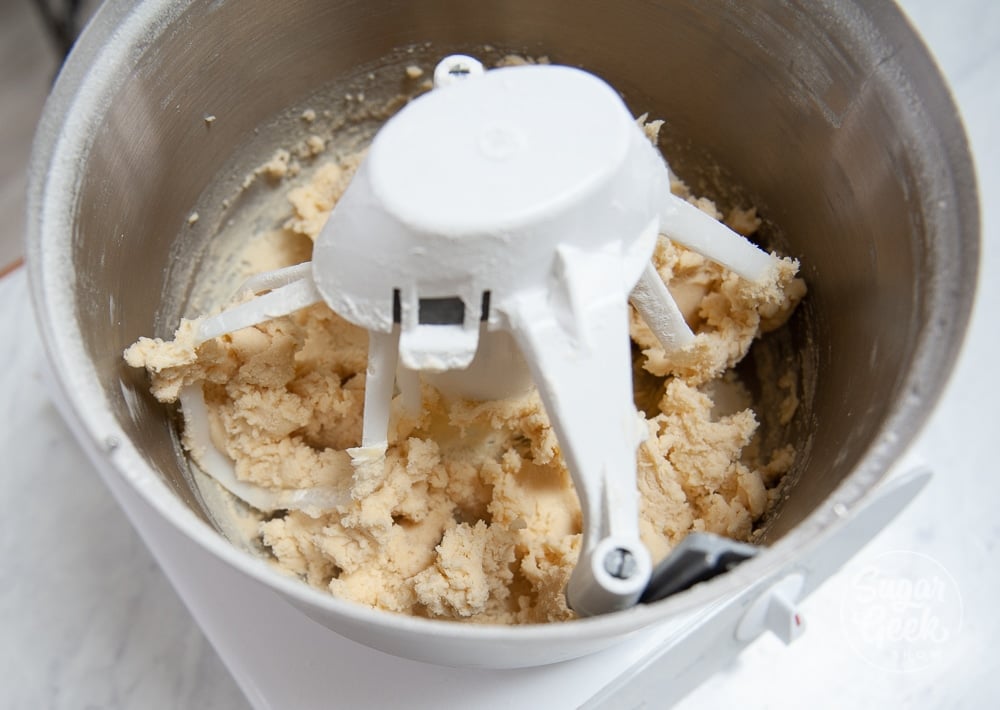
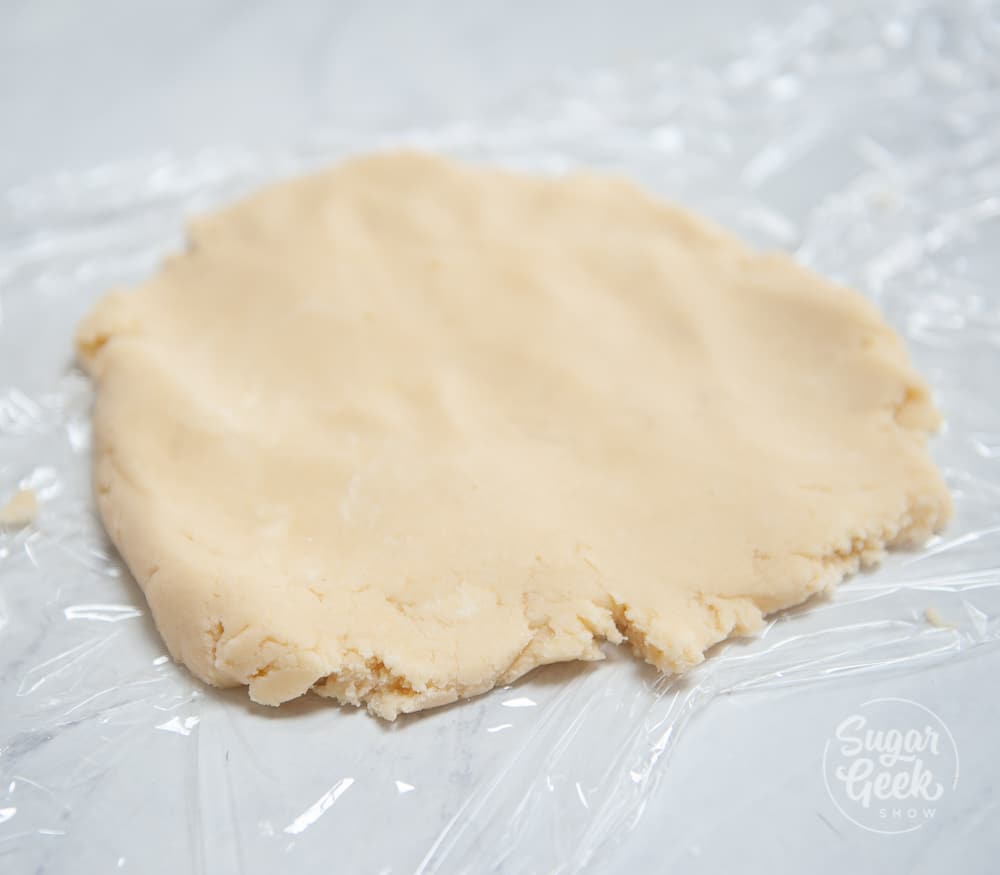
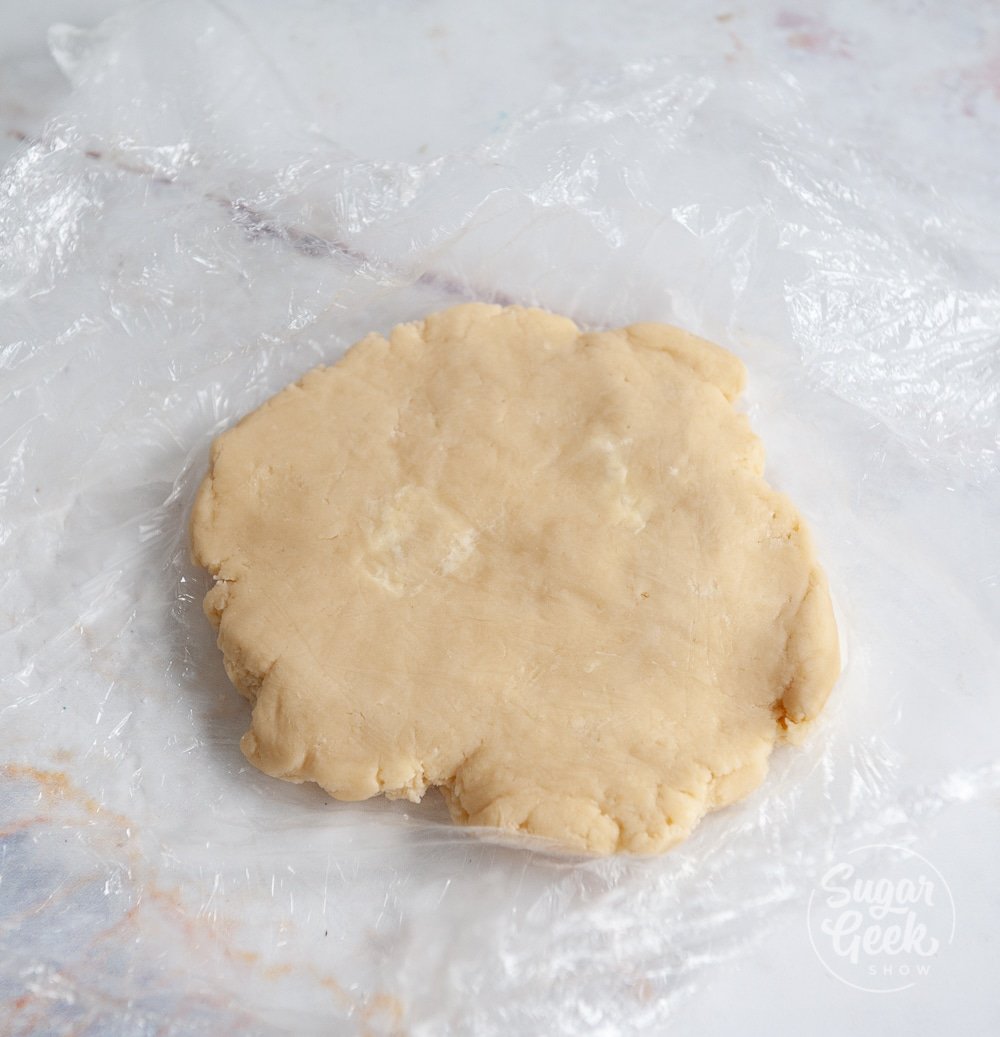
Step 6 - Divide the dough into 2 pieces, wrap in plastic wrap and flatten into disks. Refrigerate for a minimum of 1 hour before using your dough. If you skip this step, your crust will melt in the oven.
Pastry Cream Step-By-Step
This pastry cream recipe is a baking staple. It's basically vanilla pudding (if you're in the USA) or a custard. It's super versatile and can even be made dairy-free by replacing milk with coconut milk and butter with vegan butter!
Pro Tip: Use real vanilla bean or vanilla bean paste to take your cream up a notch. Vanilla extract will work fine, but I love seeing all the little black specks in my dessert. Plus the star flavor is vanilla, so why not?! 1 vanilla bean pod = 1 tablespoon vanilla.
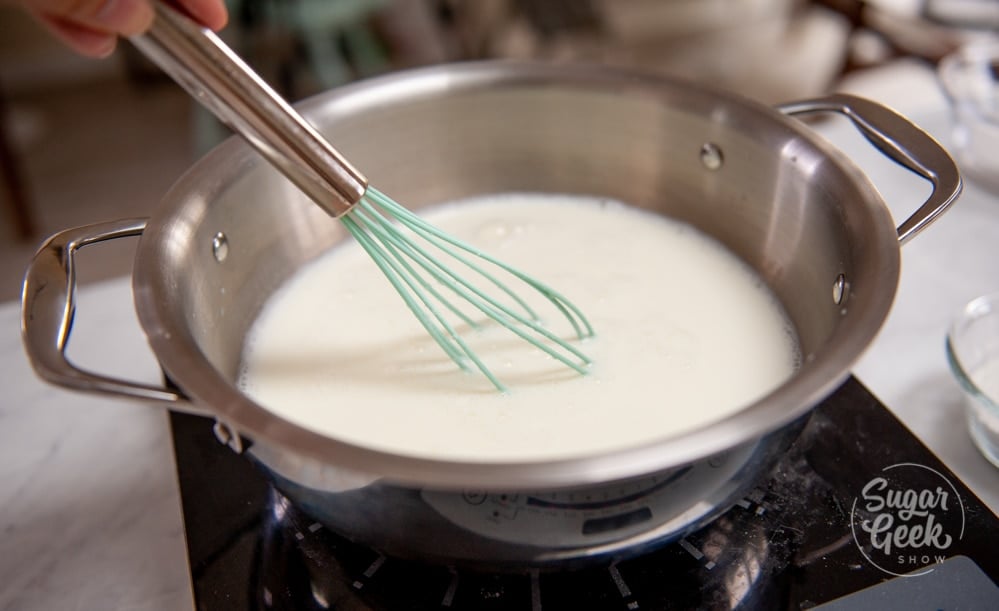
Step 1 - Bring milk and first quantity of sugar (5 oz) to a simmer over medium-high heat. Whisking constantly to avoid burning.
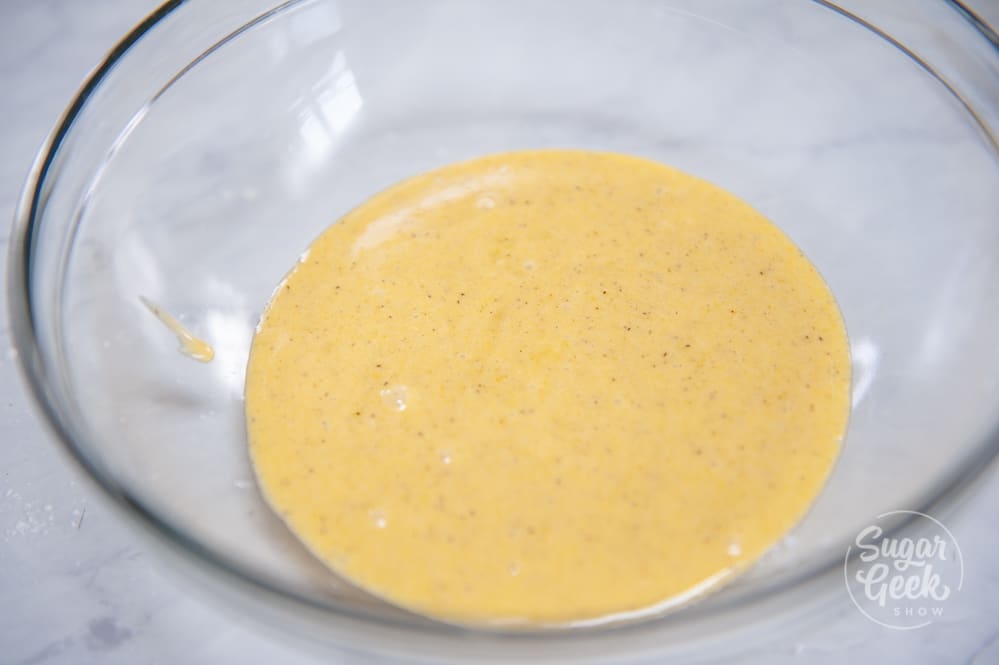
Step 2 - In a separate, large heatproof bowl, combine the eggs, cornstarch, vanilla extract, and the second quantity of sugar (4 oz), whisk to combine.
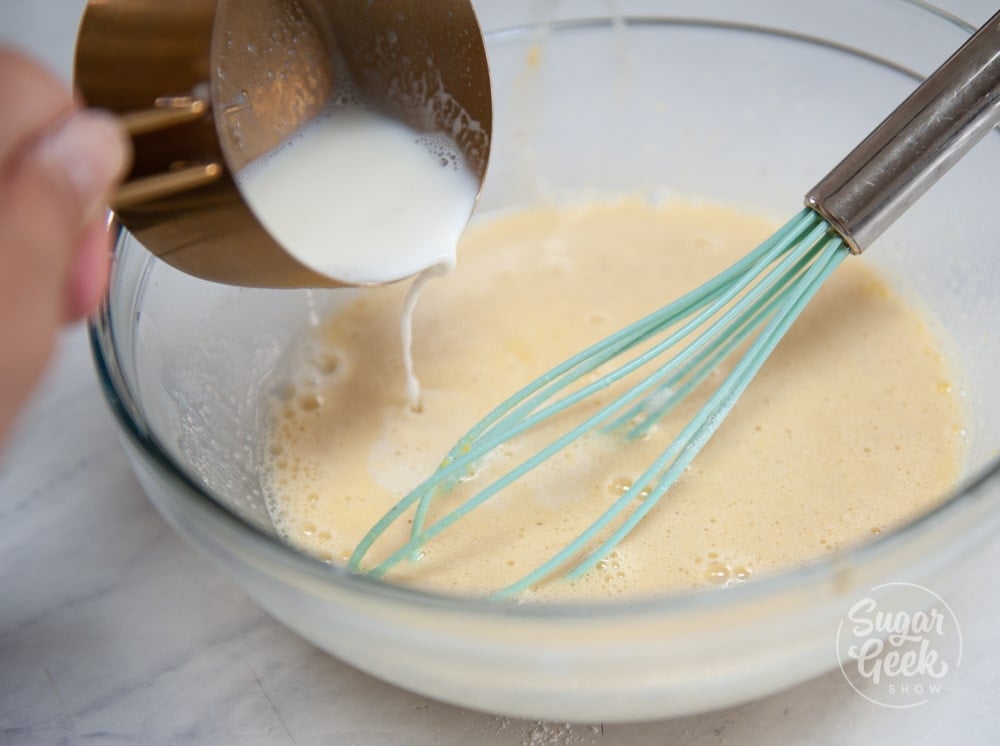
Step 3 - Once the milk is simmering, turn off the heat and add ¼ of your hot milk mixture to the egg mixture VERY slowly while whisking constantly. This is going to temper (slowly heat) your egg yolk mixture and avoid curdled scrambled eggs. Whisk until smooth.
Step 4 - Turn the heat back on (medium) and slowly add the mixture to the rest of the milk in your saucepan, whisking constantly. Bring it to a simmer.
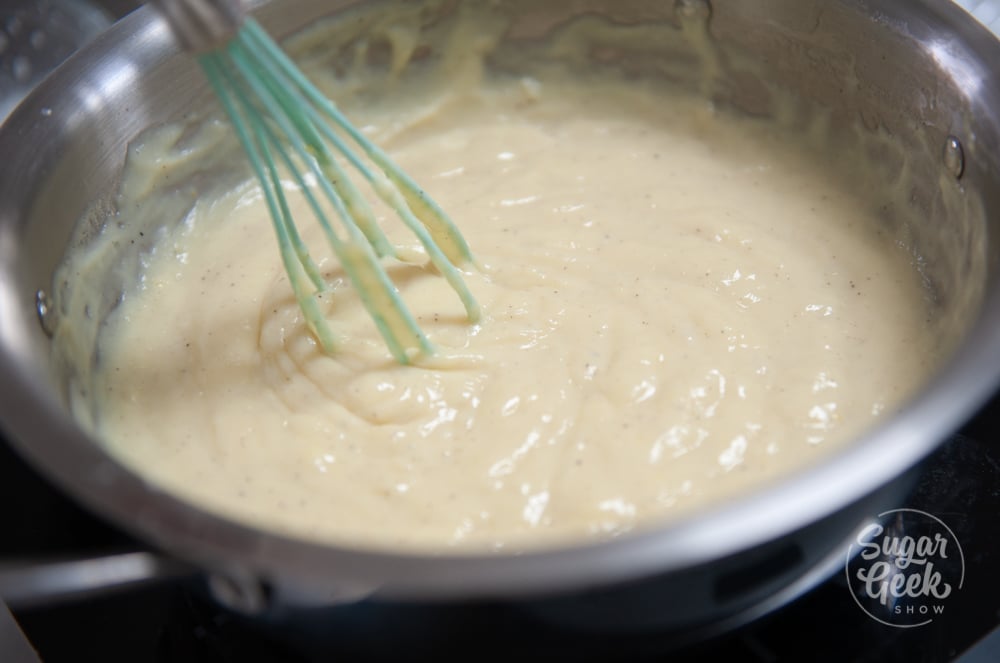
Step 5 - Once your mixture starts bubbling, continue whisking for 1 minute to ensure the mixture is cooked and properly thickened.
Step 6 - Pour your mixture into a heatproof container. Divide your softened butter into cubes and place them on top of the pastry cream, allowing them to melt. Do not cover.
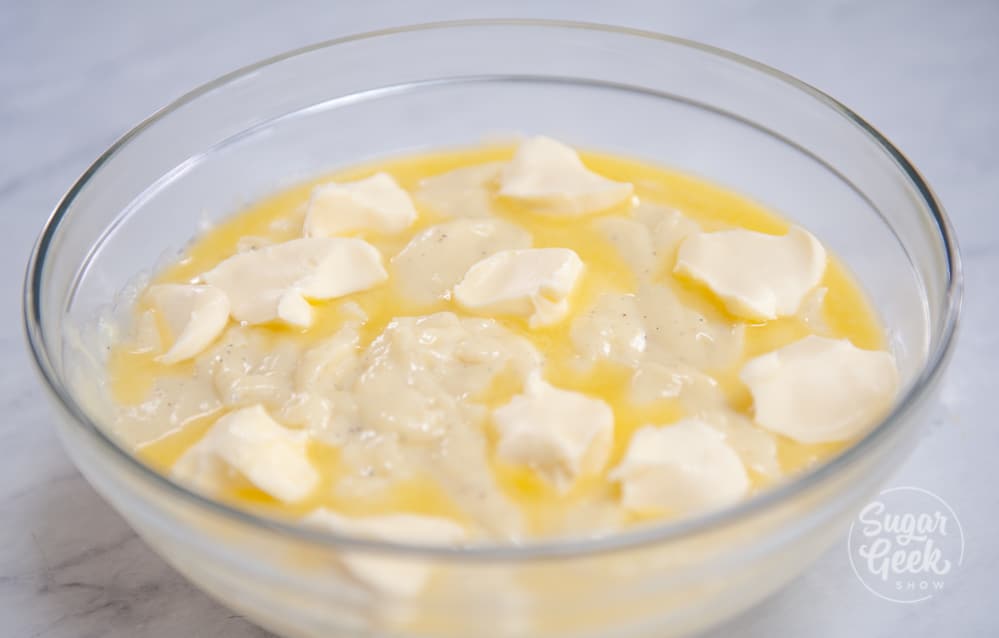
Step 7 - Allow your pastry cream to cool at room temperature until just warm to the touch. This will take a few hours. You will know it's ready to stir when the bowl feels barely warm and the edges of the butter are starting to turn solid in color.
Step 8 - Stir in your butter with a whisk. Don't be worried if it looks curdled at first, this is normal. Just keep whisking until smooth.
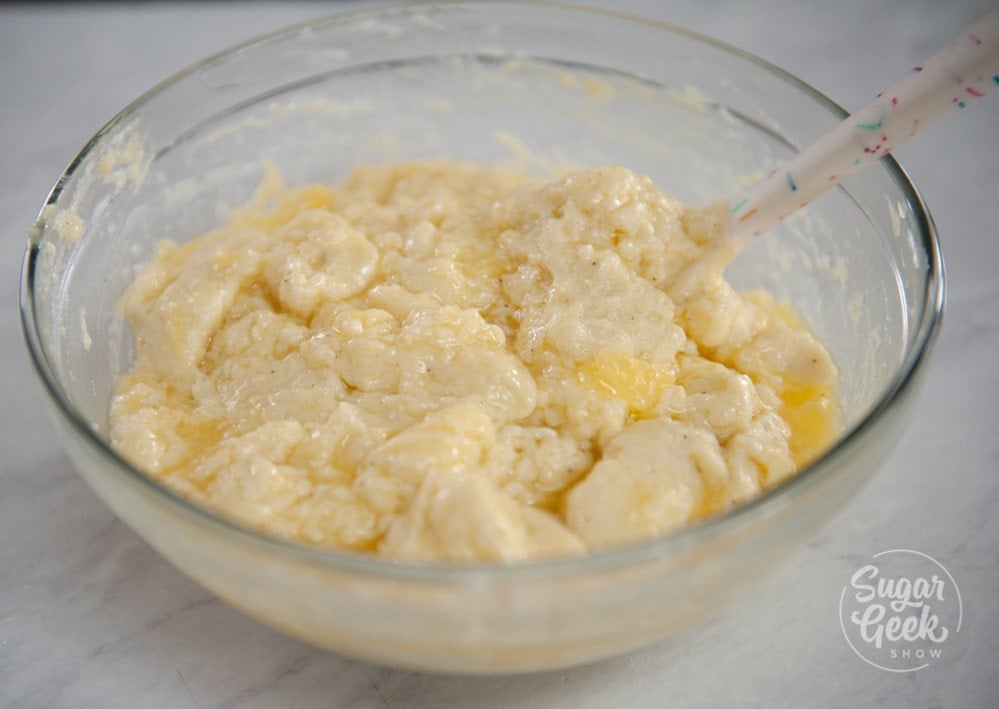
Pro Tip - Use an immersion blender to make your pastry cream super smooth and creamy
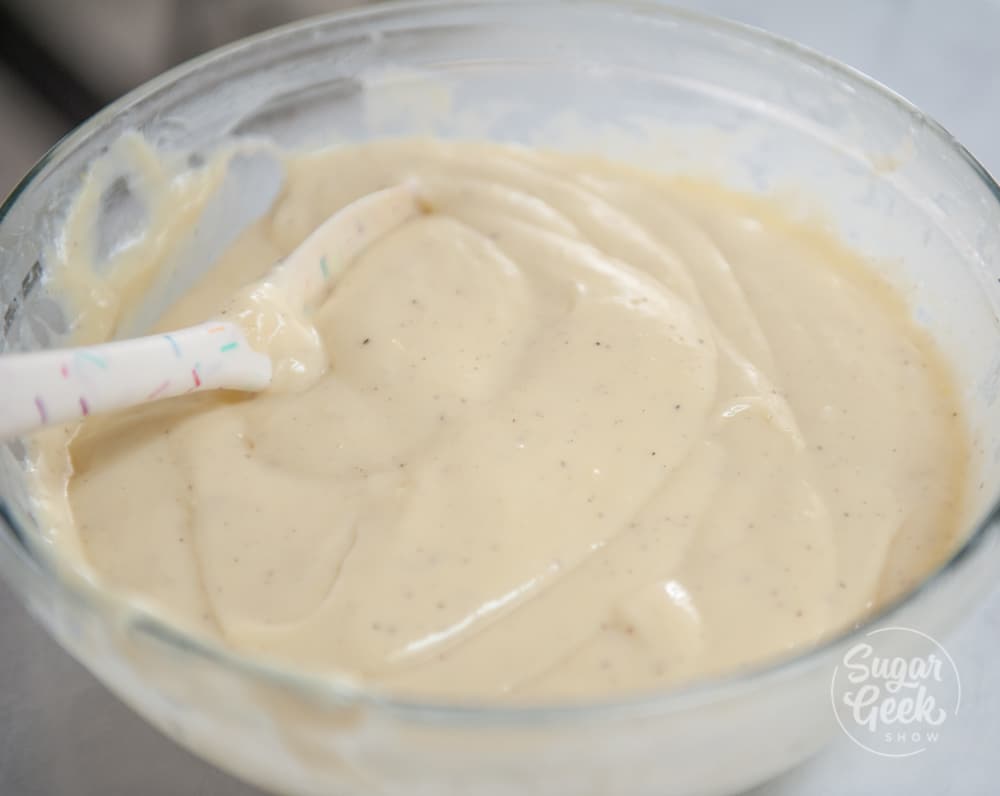
Step 9 - Cover the pastry cream with plastic wrap so that it's touching the surface of the pastry cream to avoid a skin forming. Let it cool fully before using it in a tart shell.
Fruit Tart Assembly Step-By-Step
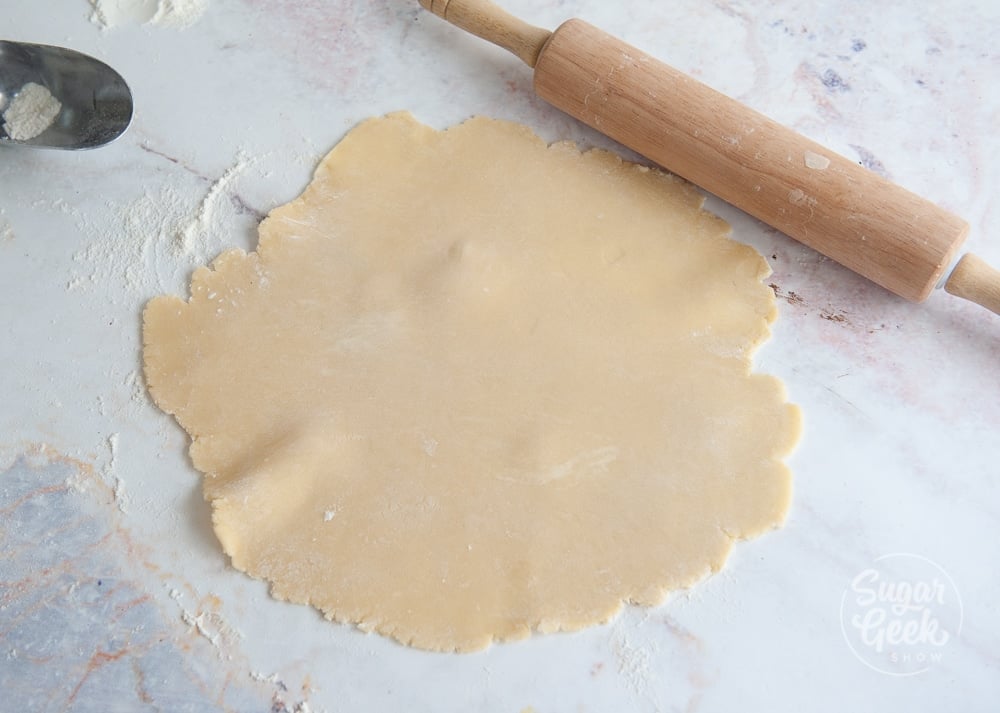
Step 1 - Take your tart dough out of the refrigerator about 30-60 minutes before rolling it out. It should be slightly flexible but still firm.
Step 2 - Lightly flour your surface and rolling pin and roll it out to ⅛ inch thick. Don't make it too thick! Use a ruler to check the thickness. Rotate frequently and pinch together any cracks when rolling.
Step 3 - Roll the dough up onto your rolling pin and lay it into the tart shell. I prefer a tart pan with a removable bottom. That way you can see the beautiful edges of the tart after baking. The removable bottom also makes it easy to take the crust out of the tin. You can make a tart in a regular pie pan, you just won't be able to remove it from the pan.
Step 4 - Carefully lift the dough up on the sides and press it into the pan. Use your fingers to press the dough into the ridges on the side. Don't press too hard that you press through the dough. Make sure you get into the bottom corners!
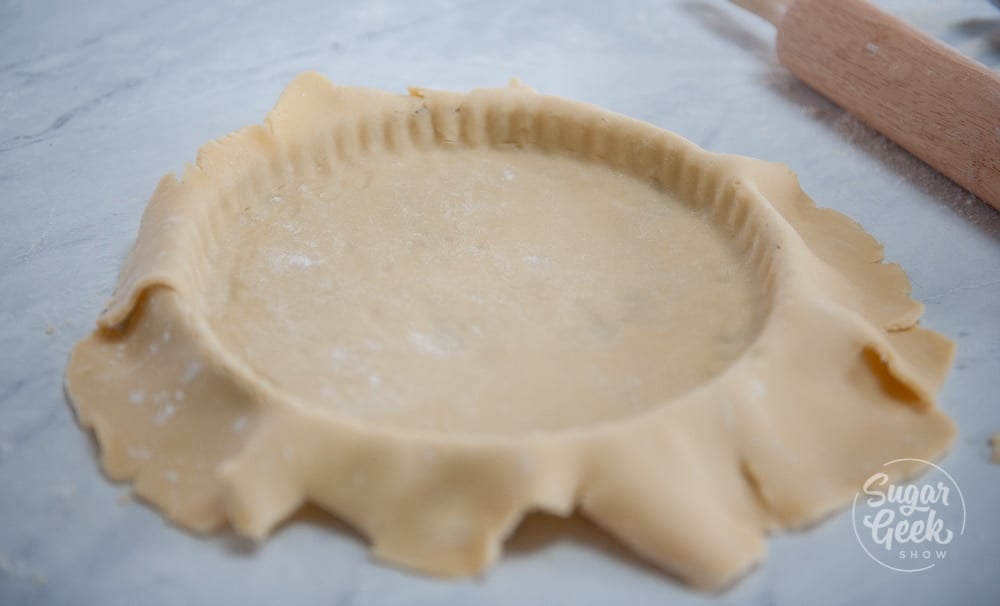
Step 5 - Roll your rolling pin flush across the top of the tart shell to remove the excess dough. Squish together the leftovers and save them to make another tart!
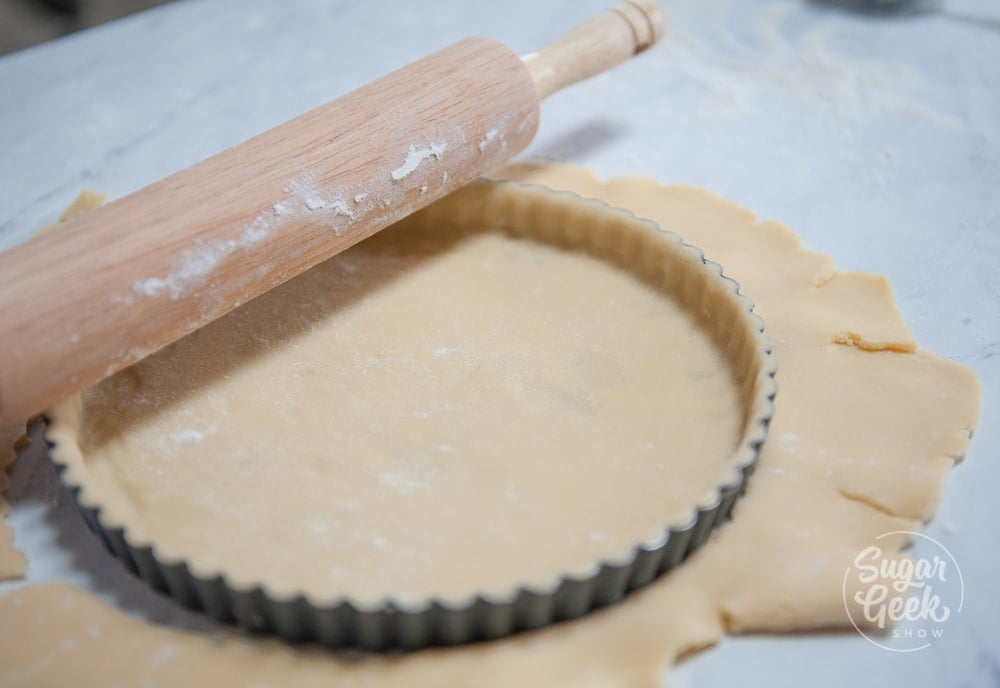
Step 6 - Freeze the tart shell for 20 minutes. Do NOT skip this step!
Step 7 - Press a layer of tin foil into the tart shell, all the way into the corners and fill with pie weights. Also, do this if you're using a regular pie pan instead of a tart shell.
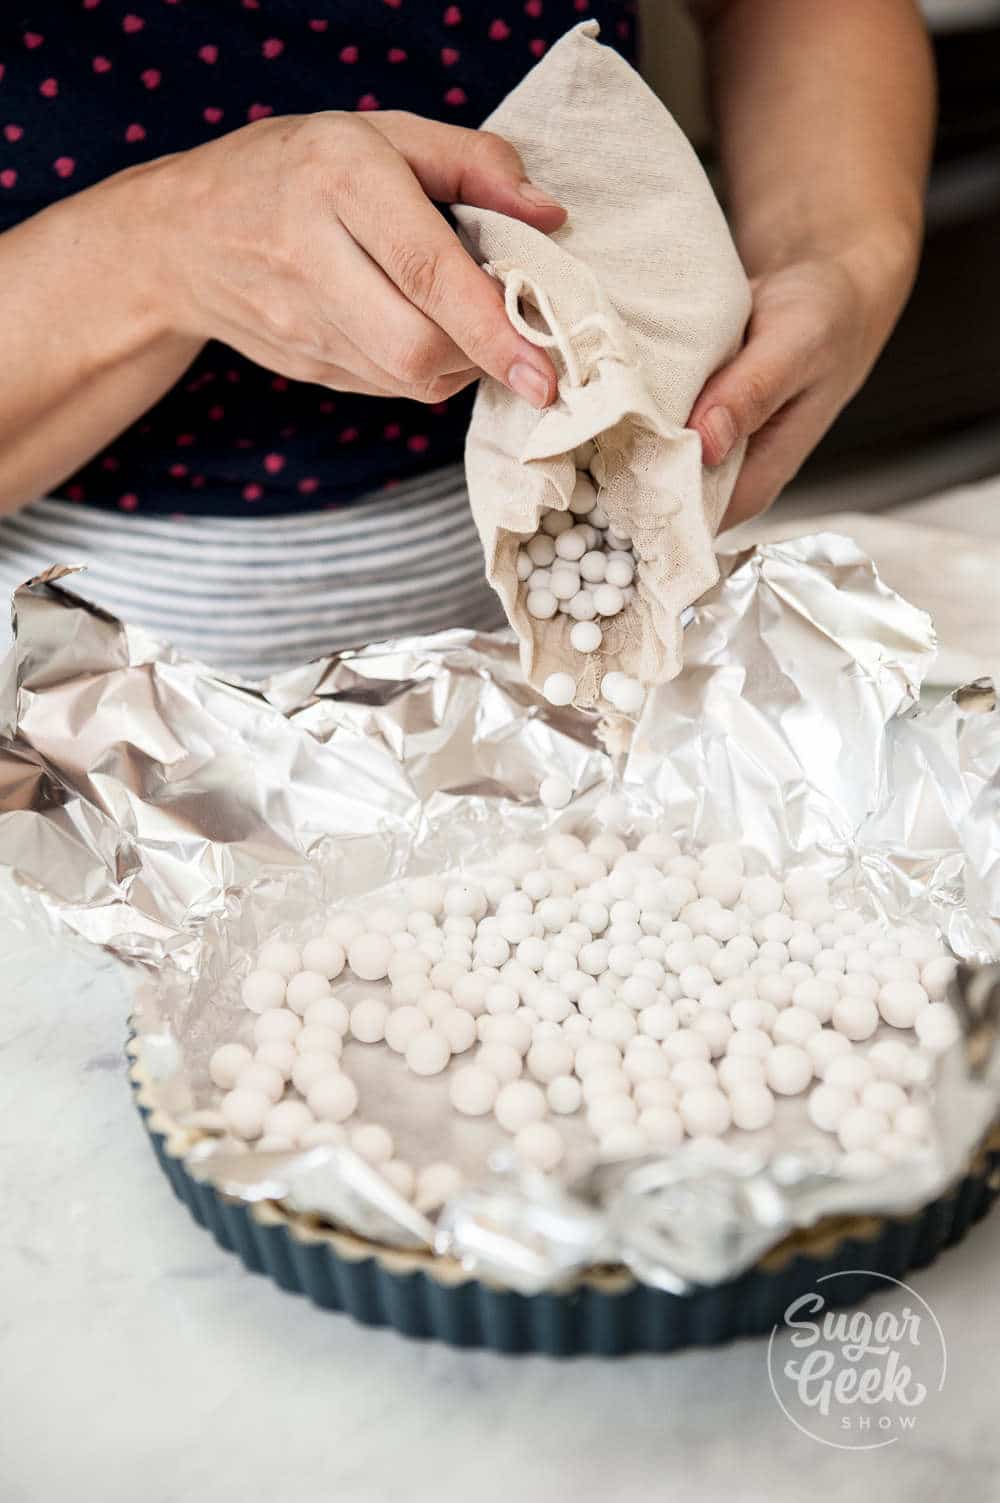
Step 8 - Place on top of a baking sheet and blind bake in the oven for 30 minutes. Rotate after 15 minutes to promote even browning. After 30 minutes, lift out the weights and bake for another 10 minutes. The edges will be golden brown and will start to pull away from the edges of the pan.
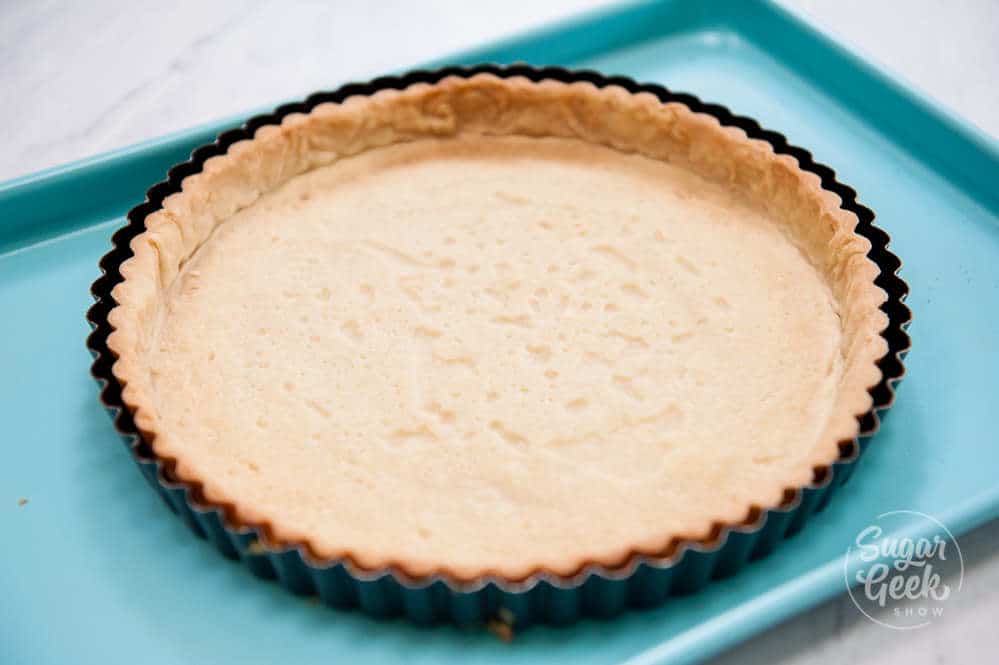
Step 9 - Place the whole tart and pan into the fridge to cool down.
Fresh Fruit Tart Assembly Step-By-Step
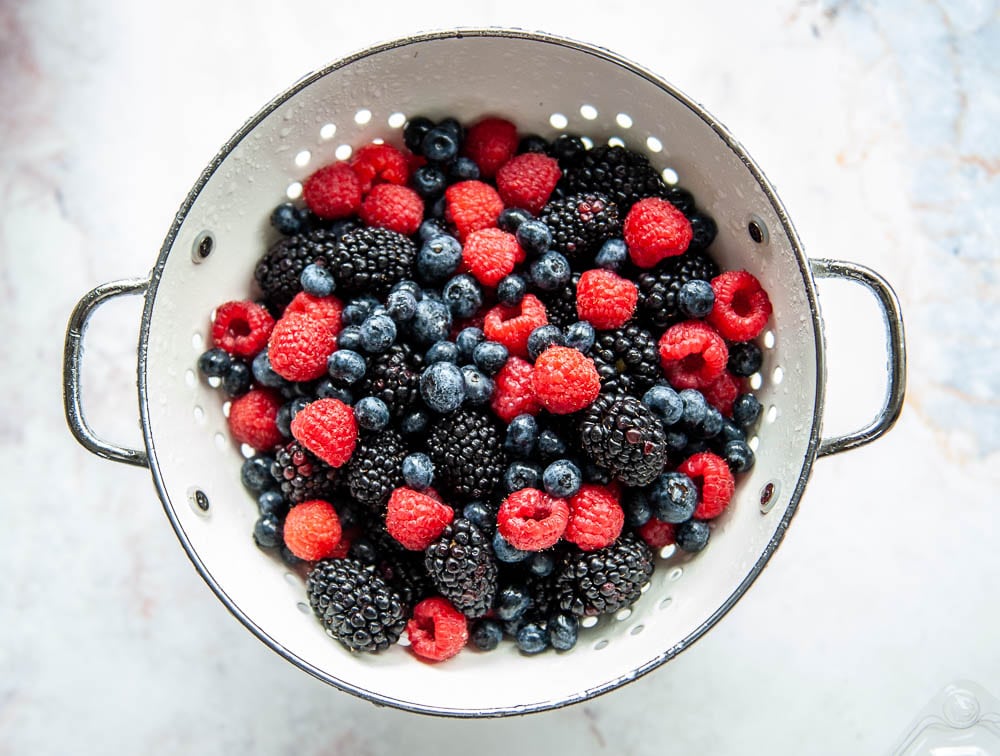
Step 1 - Wash all of your fruit and dry fully. Check out my berry wash recipe to learn how to make your fruit last up to 3 weeks in the fridge!
Step 2 - Prepare your strawberries and kiwi fruit and cut in ⅛ inch thick slices. You do not need to cut berries because they will get mangled looking.
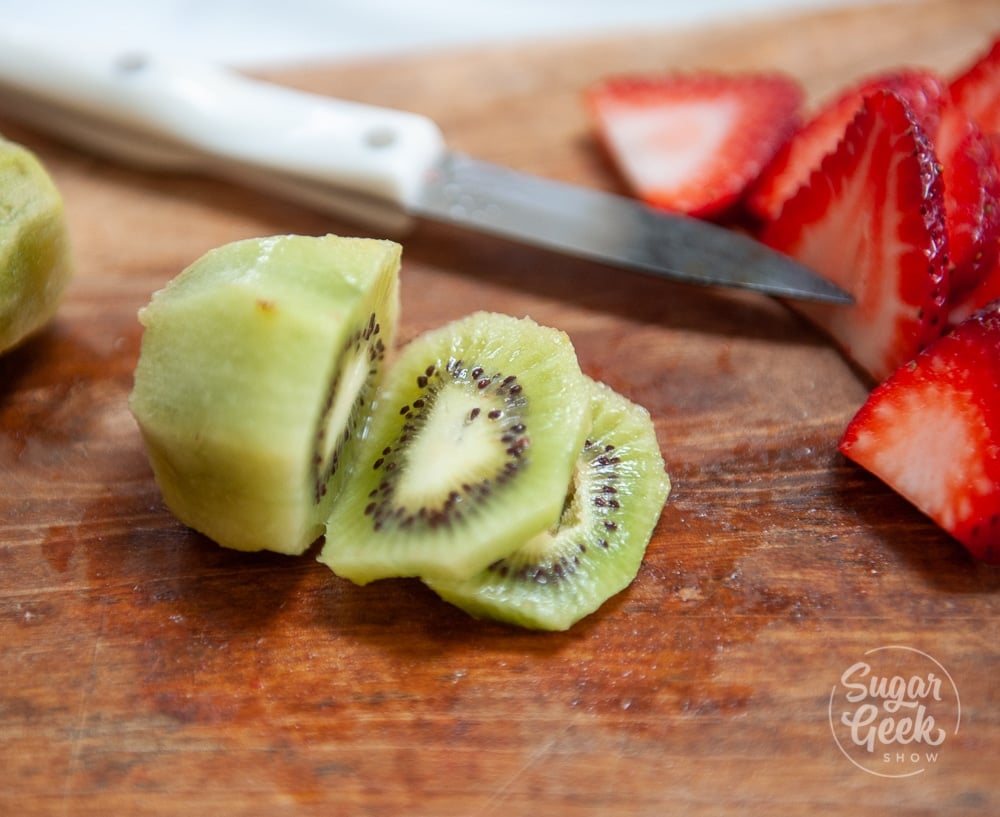
Pro Tip: You want to use the sharpest knife possible when cutting fruits and vegetables. The sharper the knife, the easier it is to cut and the less likely you'll be to push too hard or slip and injure yourself.
Step 3 - Gently lift your cooled tart out of the tart pan. Transfer to a plate or keep it on the bottom pan.
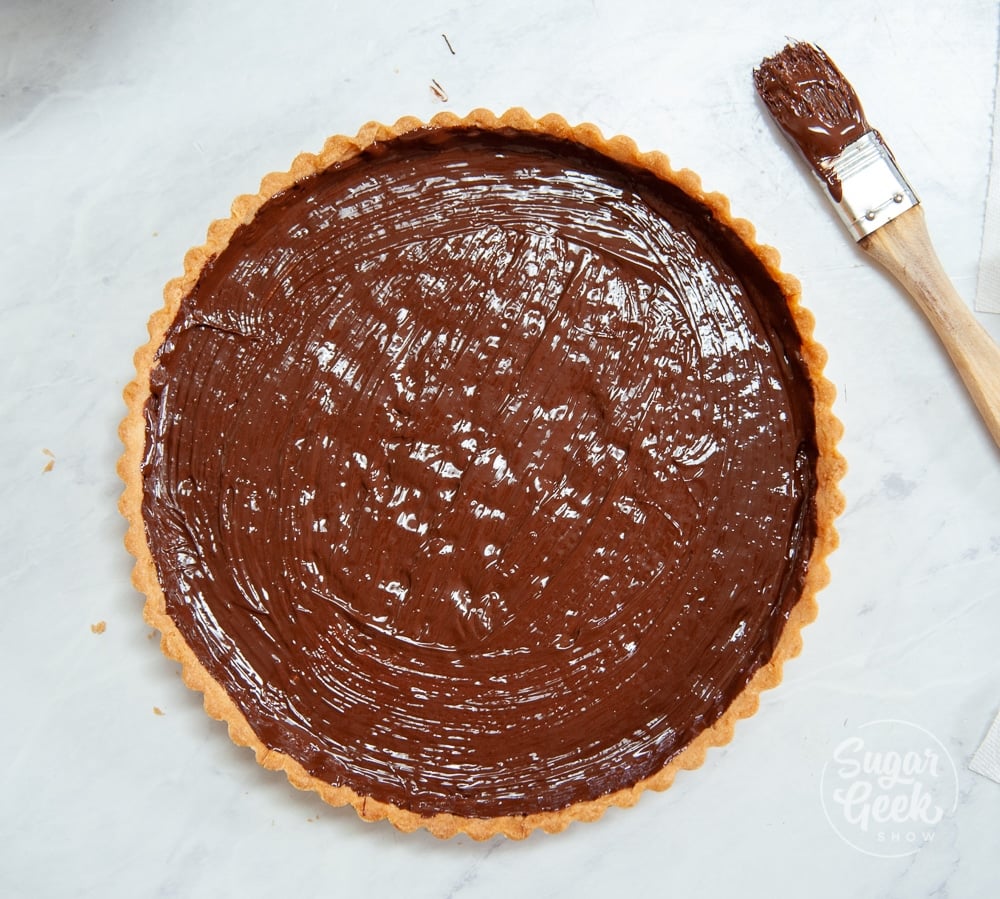
Pro Tip - Dab a bit of melted chocolate on the plate to glue the tart shell to the plate and keep it from sliding around
Step 4 - Optional: Melt down some chocolate and brush a thin layer onto the inside of the tart shell. This is a trick I learned while working at a Safeway bakery and will keep the crust from getting soggy. Refrigerate for 5-10 minutes to set the chocolate.
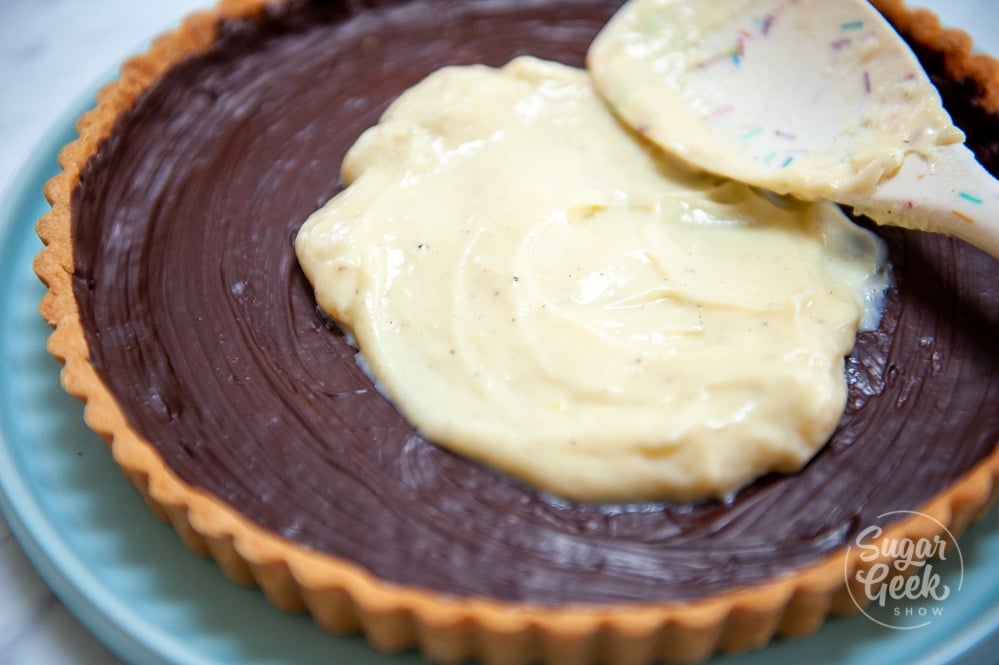
Step 5 - Add in the pastry cream and use a spatula to smooth it out. Fill the tart with pastry cream.
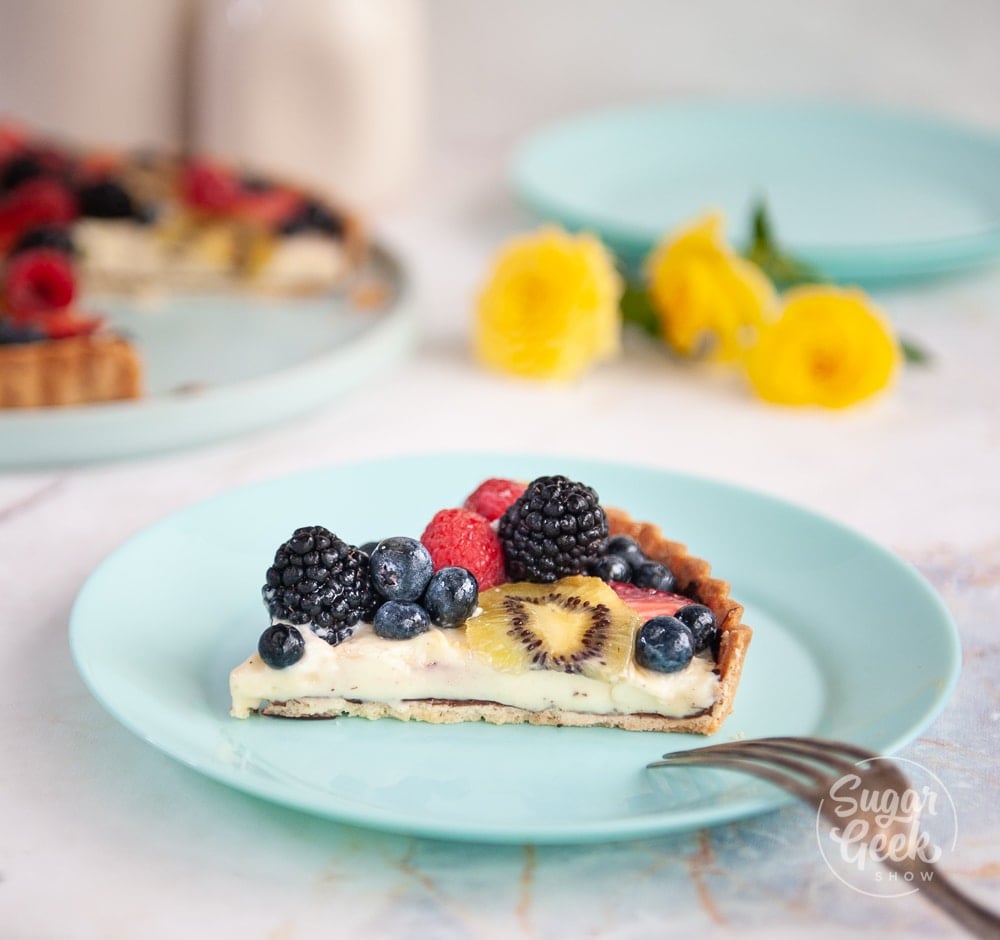
Step 6 - Decorate the tart with your fruit! I like to go from the outside-in and have contrasting colors when I layer my fruit.

Step 7 - Mix the apricot preserves and water and then microwave until melted (about 10 seconds). Glaze the cut strawberries and kiwi with the mixture. This will keep your fruit from drying out and looking very shiny! You can also thin piping gel or corn syrup with water and use it as a glaze.
Step 8 - Refrigerate until serving. I left mine in the fridge overnight and ate this the next day for my husband, Dan's birthday!
The pastry cream sets up overnight so that you can cut through it but is still soft and creamy. The chocolate keeps the crust super crisp and actually tastes amazing with the fresh fruit.
FAQ
Can I Use Granulated Sugar Instead Of Powdered Sugar
Granulated sugar tends to aerate the butter and make the dough fluffy which is not what we want. The air pockets expand and cause the dough to shrivel and shrink during baking
CAN I DO THIS WITHOUT A STAND MIXER?
You can definitely make tart dough without a stand mixer. You can use a hand-held mixer or you can even just mix with a fork by hand.
RELATED RECIPES:
Red Wine Poached Pear Frangipane Tart
Recipe
Equipment
- Rolling Pin
- Stand mixer with the paddle attachment
- 9 ½" Tart pan with a removable bottom. (You can also use a pie pan.)
- Pie weights for blind baking (Or dried beans, rice, etc.)
- pastry brush
- Knife
Ingredients
Pâte sucrée (tart dough recipe)
- 4 ounces powdered sugar
- 8 ounces unsalted butter room temperature
- ½ teaspoon salt
- 1 teaspoon vanilla extract
- 12 ounces all purpose flour
- 1 large egg room temperature
Pastry Cream
- 32 ounces whole milk substitute: almond, soy, coconut milk etc.
- 5 ounces sugar
- 1 Tablespoon vanilla extract use vanilla bean paste or 1 vanilla bean pod if desired
- 3 ounces cornstarch
- 4 ounces sugar
- 4 egg yolks
- 1 large egg
- 4 ounces unsalted butter softened
Fresh Fruit Tart
- ¼ cup semi-sweet chocolate optional for keeping the crust from getting soggy.
- 2 cups mixed berries of your choice
- 2 Tablespoons apricot preserves for glazing any kind of jam will work.
- 1 Tablespoon water
Instructions
Pâte sucrée (tart dough recipe)
- Add the butter into the bowl of your stand mixer with the paddle attachment. Mix on medium speed for about 30 seconds.
- Place a colander over the bowl of your stand mixer and sift in your powdered sugar. This is not required, but if your powdered sugar has lumps in it, it will show up in your crust.
- Add in the salt. Mix on low until everything is combined.
- Add in the vanilla and the egg and mix until combined.
- Then gradually add your flour and mix until everything starts to come together and a dough forms.
- Divide the dough into 2 pieces. (This is enough for 2 tarts.) Wrap dough in plastic wrap and flatten into 2 disks. Refrigerate for minimum of 1 hour before using. If you skip this step, your crust will melt in the oven.
Pastry Cream
- Bring milk and first quantity of sugar (5 oz) to a simmer over medium high heat. Whisking constantly to avoid burning.
- In a separate, large heat proof bowl, combine the eggs, cornstarch, vanilla extract, and the second quantity of sugar (4 oz), whisk to combine.
- Once the milk is simmering, turn off the heat and add ¼ of your hot milk mixture to the egg mixture VERY slowly while whisking constantly. This is going to temper your egg yolk mixture and avoid curdled scrambled eggs. Whisk until smooth.
- Turn the heat back on (medium) and slowly add the mixture to the rest of the milk in your saucepan, whisking constantly. Bring to a simmer.
- Once your mixture starts bubbling, continue whisking for 1 minute to ensure the mixture is cooked and properly thickened.
- Pour your mixture into a heatproof container. Divide your softened butter into cubes and place them on top of the pastry cream, allowing them to melt. Do not cover.
- Allow your pastry cream to cool at room temperature until just warm to the touch. This will take a few hours.
- Stir in your butter with a whisk. Don't be worried if it looks curdled at first, this is normal. Just keep whisking until smooth.
- Optional: Blend pastry cream with an emersion blender to make it extra smooth.
- Cover with plastic wrap so that it's touching the surface of the pastry cream to avoid a skin forming. Chill before using. Can be kept in the refrigerator for 2-3 days.
The Tart Shell
- Take your tart dough out of the refrigerator about 30 minutes before rolling it out. It should be slightly flexible but still firm.
- Lightly flour your surface and rolling pin and roll it out to ⅛ inch thick. Don't make it too thick! Use a ruler to check the thickness. Rotate frequently and pinch together any cracks when rolling.
- Roll the dough up onto your rolling pin and lay it into the tart shell.
- Carefully lift the dough up on the sides and press it into the pan. Use your fingers to press the dough into the ridges on the side. Don't press too hard that you press through the dough. Make sure you get into the bottom corners!
- Roll your rolling pin flush across the top of the tart shell to remove the excess dough. (Squish together the leftovers and save them to make another tart!)
- Freeze the tart shell for 20 minutes. Do NOT skip this step!
- Preheat your oven to 350ºF
- Press a layer of tin foil into the tart shell, all the way into the corners and fill with pie weights. (Also do this if you're using a regular pie pan instead of a tart shell.)
- Place on top of a baking sheet and blind bake in the oven for 30 minutes. Rotate after 15 minutes to promote even browning. After 30 minutes, lift out the weights and bake for another 10 minutes. The edges will be golden brown and will start to pull away from the edges of the pan.
- Place the whole tart and pan into the fridge to cool down.
Assembling The Fruit Tart
- Wash all your fruit and dry fully.
- Cut off the tops of your strawberries and slice ⅛ inch thick.
- Cut the ends of the kiwi off and use a sharp paring knife to cut off the skin. Slice ⅛ inch thick.
- Gently lift your cooled tart out of the tart pan. Transfer to a plate or keep it on the bottom pan. (Tip: dab a bit of chocolate to the plate to keep the tart from sliding around.)
- Optional: Melt down the chocolate and brush a thin layer onto inside of the tart shell. (This will keep the crust from getting soggy.)
- Refrigerate for 5-10 minutes to set the chocolate.
- Add in the pastry cream and use a spatula to smooth it out. Fill the tart ¾ full with cream.
- Add the fruit to decorate however you like! See my pictures above for ideas.
- Mix the apricot preserves and water, microwave until melted. Glaze the cut fruit (strawberries and kiwi) with the mixture.
- Serve immediately or refrigerate overnight. Lasts 1-2 days in the refrigerator.


Liv says
I am pretty sure I followed your exact recipe but when I cut the tart, the side crust is falling off from the slice. I have made 7 tarts in two different settings and all have the same problem. Any idea why they sides fall apart when we cut it?
Elizabeth Marek says
It could be that your crust is too thick
Nic says
Hi, is it normal for the crust to shrink after baking?
Sugar Geek Show says
yes very normal
Lisa says
Can I make small tarts with this recipe thank you
Elizabeth Marek says
You sure can
Samantha says
This was super fun making! I used dried bean cause I don't have pie weights but the dough sank down the sides after it baked and a lot of dough is in the base and not so much up the sides. But other than that it turned out amazing!
Elizabeth Marek says
Make sure the tart is fully frozen before baking and the tart is filled all the way to the top with beans
Vickie says
I’m in the process of making this. Not sure what happened...my dough just breaks a part....as I’m rolling it out. Like it crumbles....what should I do differently?
Elizabeth Marek says
It's just a little cold, let it warm up a bit more and keep rolling
Sunaina says
Hello Sugar Geek,
So I followed the recipe. I may have over mixed prior to putting the dough in the fridge for that hour? But when I took it out after that hour I tried rolling it out onto one of those baking silicone mats and it kept sticking regardless of how much flower I put on. I tried 2-3 times and once I even managed to wrap it around the rolling pin to lay on to the pie pan but it just stuck together and fell a part on the pie pan. Heeellllppp? Should I leave it in the fridge overnight or maybe - again - maybe I over mixed with the hand blender because my texture seemed way more creamier than your doughy texture before I put it in the fridge
Elizabeth Marek says
It sounds like you may not have used the correct amounts while measuring. Did you use a scale?
Zahra says
Amazing taste and a lot of fun to decorate with my 6 year old. My only problem was that it did not set properly on the inside... I had to serve it with a spoon (so embarrassing). I was pretty certain I did everything exactly as instructed but then later noticed that I used regular sugar instead of powdered sugar. I only picked up on this mistake when looking at the picture of your ingredients. Could that have been why it didn’t set?
Elizabeth Marek says
Did you let the tart set overnight? It will take time for the pastry cream to fully set but it should have set within 8 hours or so. I dont think the sugar in the tart crust would have affected the filling being loose.
Vams says
Okay. Thank you very much. This is a very good recipe. Everyone loved it. I made it in a regular cake pan and it didn’t stick even without any oil or parchment paper. It tasted amazing! 🤩😊❤️
Vams says
And how long does the tart dough last in the fridge/freezer? How long does the pastry cream last in the fridge?
Elizabeth Marek says
Tart dough lasts a week in the fridge or 6 months in the freezer. Pastry cream is good for two days in the fridge and cannot be frozen.
Vams says
Okay. Thank you very much!! Sorry but I have another question. Can I use a cake pan and just put parchment paper underneath it so that it doesn’t stick? And can I use 1% milk instead of whole milk for the vanilla custard?
Elizabeth Marek says
The tart dough will not stick to the sides of a cake pan because the sides are straight. Yes you can use 1% milk.
Vams says
Why do you need to use pie weights? And if I don't have any pie weights, what can I use?
Elizabeth Marek says
To pre-bake the tart shell you have to use weights or the tart shell will bubble up during baking. If you don't have pie weights you can use rice or dried beans 🙂