

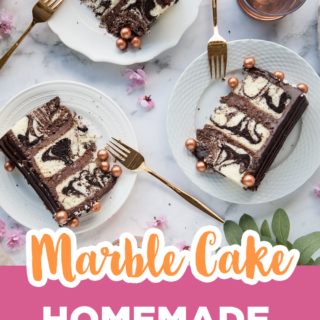
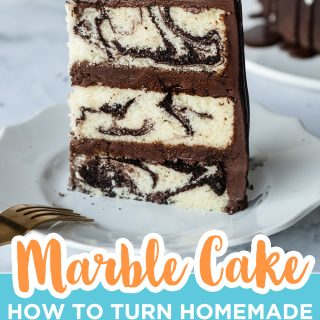
Moist and fluffy marble cake made from scratch doesn't have to be complicated. Many times, you guys have asked me for an easy marble cake recipe that did not require two cake recipes. After a lot of testing, I finally have the PERFECT recipe for you based on my ever-popular vanilla cake recipe!
What makes this cake so amazing is all you have to do is make the vanilla cake and then flavor part of the cake with my chocolate mixture to make the chocolate batter then swirl it all together! Simple!
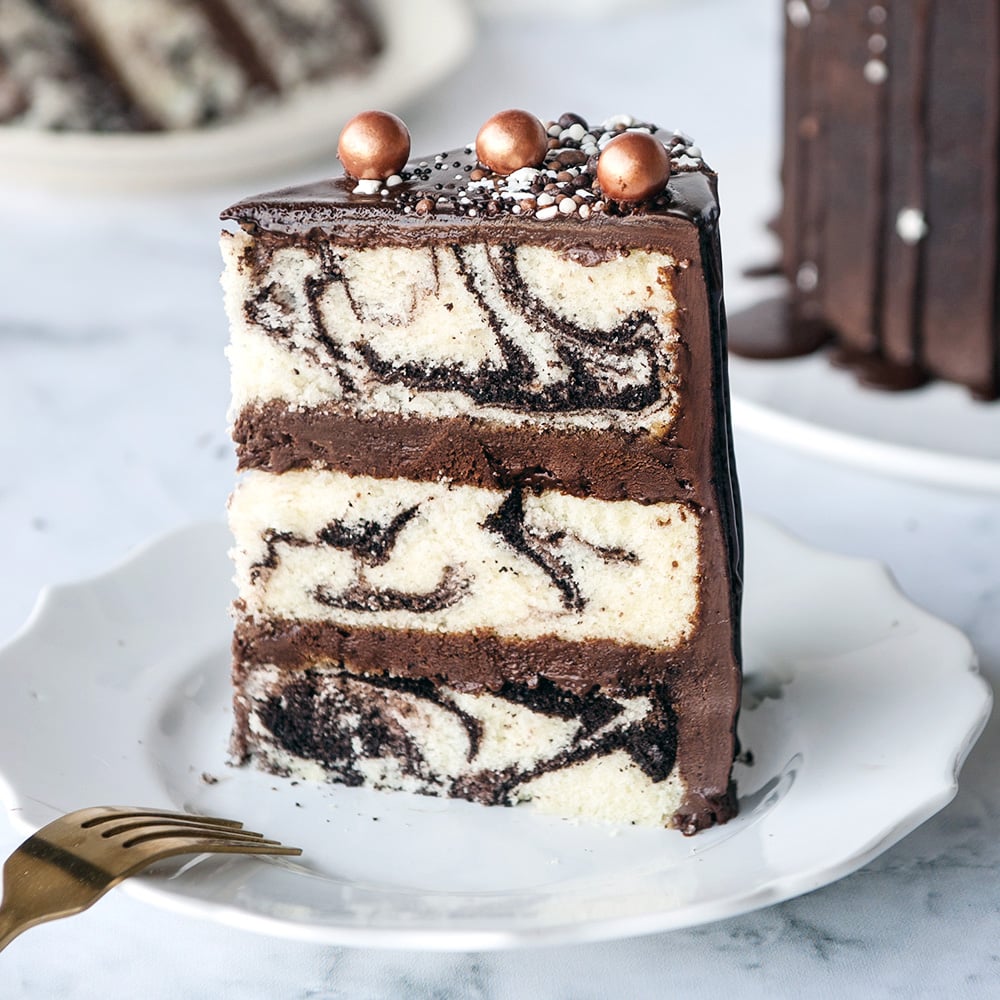
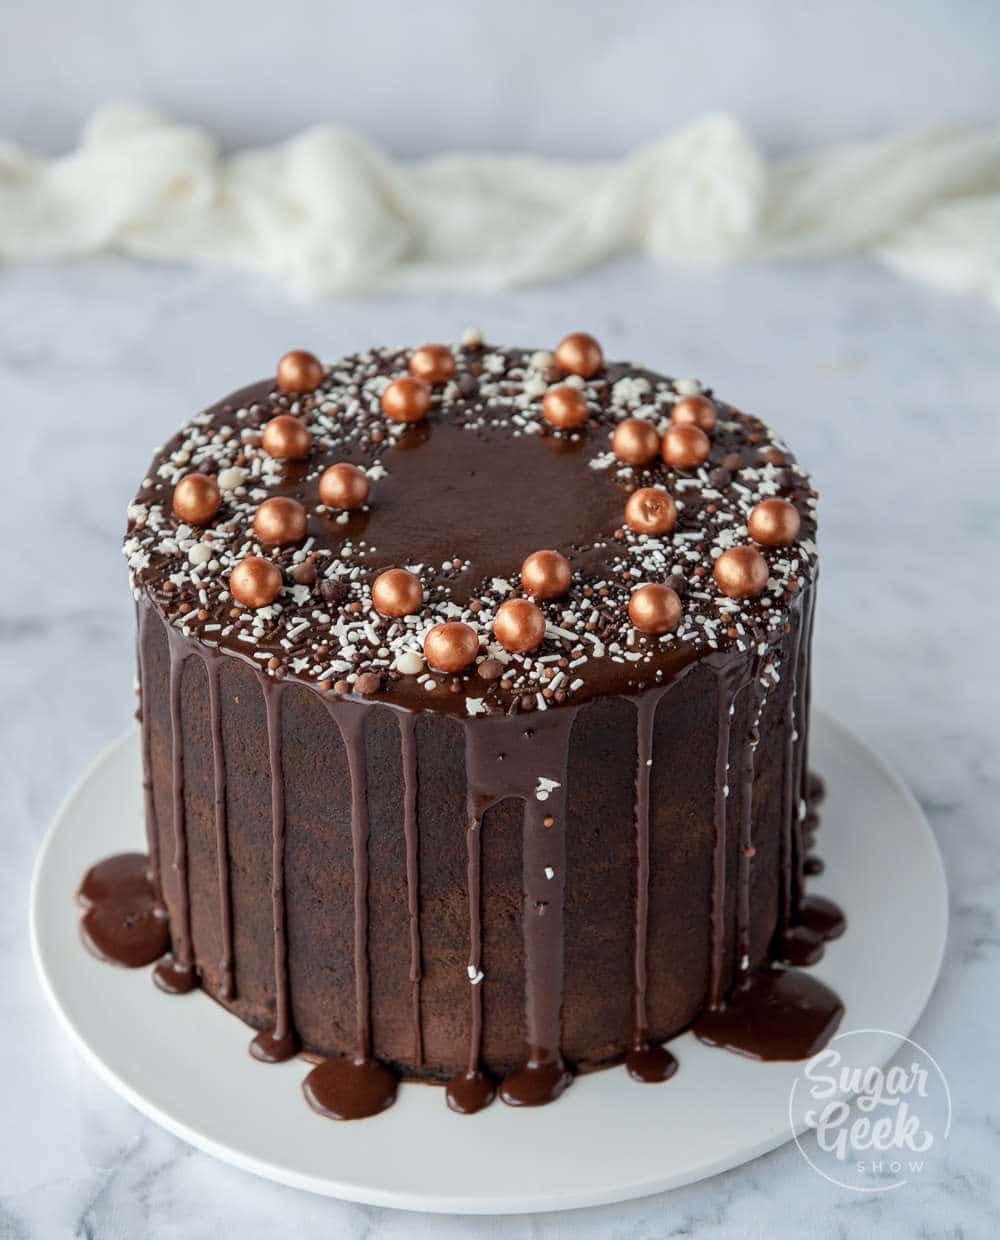
Pair it with chocolate frosting and ganache drip and you've got yourself a vanilla and chocolate lover's dream cake!
What's In This Blog Post
Marble Cake Ingredients
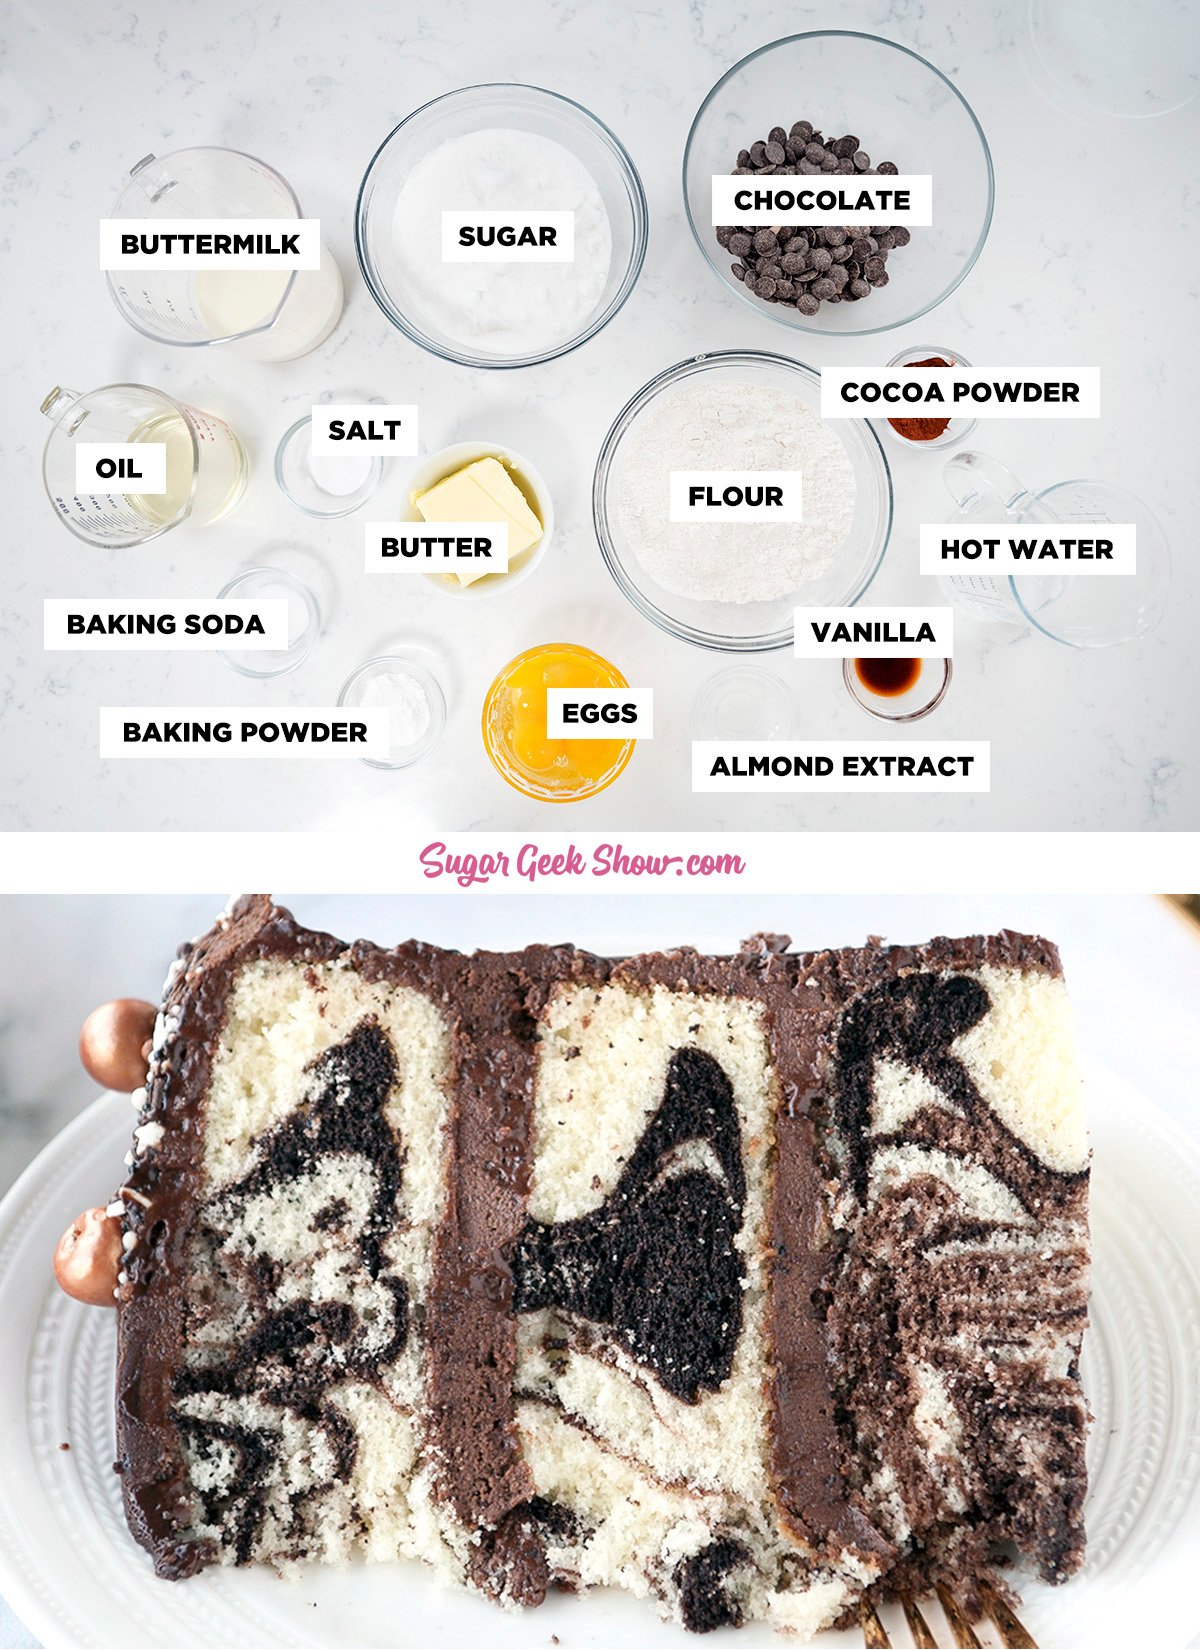
Buttermilk - Buttermilk adds moisture, delicate texture, and flavor to the cake. If you do not have buttermilk, you can make your own using my preferred buttermilk substitutes.
Cake flour - Cake flour has a lower protein content than all-purpose flour. What this means is that when you use cake flour in your cake recipe, your cake will be more tender and have a softer crumb.
PRO TIP: Do not fall for the “just add cornstarch to regular flour” trick. It does not work for this recipe. Your cake will look and taste like cornbread.
If you’re in the UK search for Shipton mills soft cake and pastry flour or flour that has a protein level of 9% or less.
Cake Batter Instructions
- Prepare three 8"x2" cake pans with cake goop or another preferred pan spray. Preheat the oven to 335ºF (168ºC).
- Bring your butter, milk, and eggs to room temperature. It’s really important when making a cake for the ingredients to all be slightly warm so they create an emulsion.
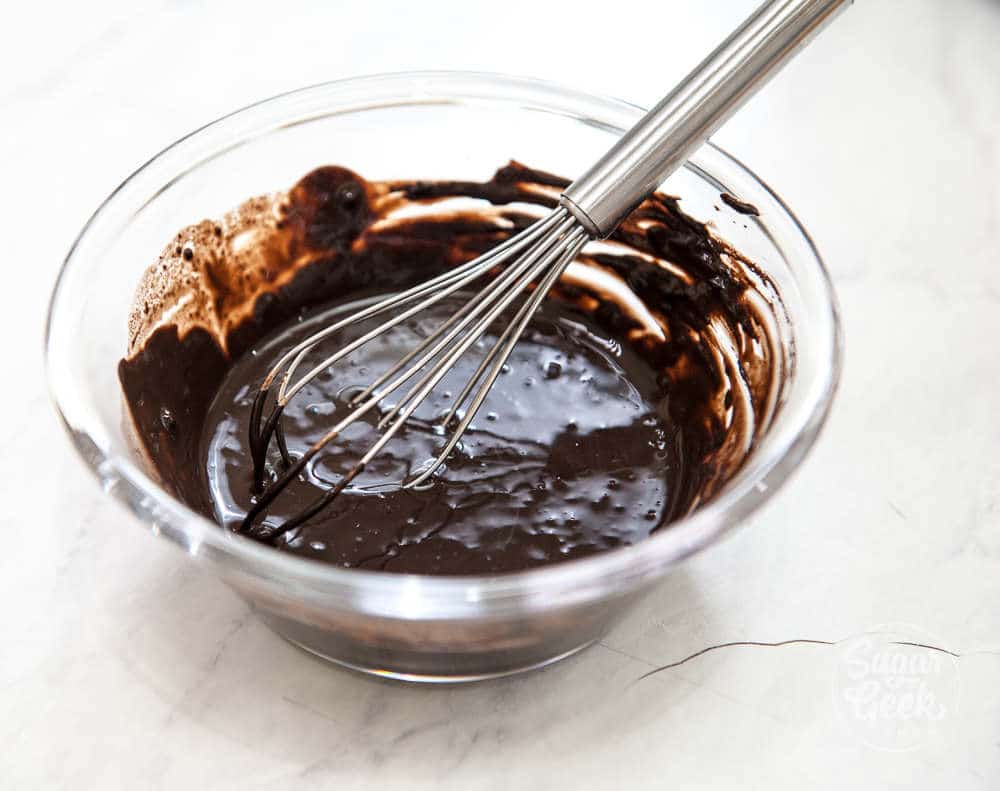
- Heat the water until it’s simmering and then combine it with your cocoa powder.
- Stir it until the cocoa powder is moistened. It will look lumpy, but that is normal.

- Set it aside and let it cool while you prepare the cake batter.
- In a separate container, combine ¾ cup of the milk and the oil together and set it aside.
- In a separate container, combine the remaining milk, eggs, vanilla, and almond extract together. Whisk it to break up the eggs, and then set it aside.
- In the bowl of your stand mixer, combine the flour, sugar, baking powder, baking soda, and salt with the paddle attachment. Mix for 10 seconds to combine everything.
- Add your softened butter to the flour mixture and mix on low until the mixture resembles coarse sand (this takes about 30 seconds). This style of mixing is called the reverse creaming method, and it will result in a very velvety, moist cake. A lot of my other cake recipes like brown butter cake and white velvet buttermilk cake use this method.
- Add in your milk/oil mixture and mix it on low until the dry ingredients are moistened.
- Increase the speed to medium (setting 2 on my Bosch Mixer, setting 4 on a KitchenAid) and let it mix for 2 minutes to develop the cake's structure. If you don't let your cake mix on this step, your cake could collapse.
- Scrape your bowl and then reduce the speed to low.
- Add in your egg mixture in three batches, letting the batter mix for 15 seconds between additions.
- Scrape down the sides again to make sure everything has incorporated.
Marbling the Cake Batter Step-by-Step
- Take out ⅓ of your batter and combine it with the cooled chocolate mixture and fold it gently until it's combined.
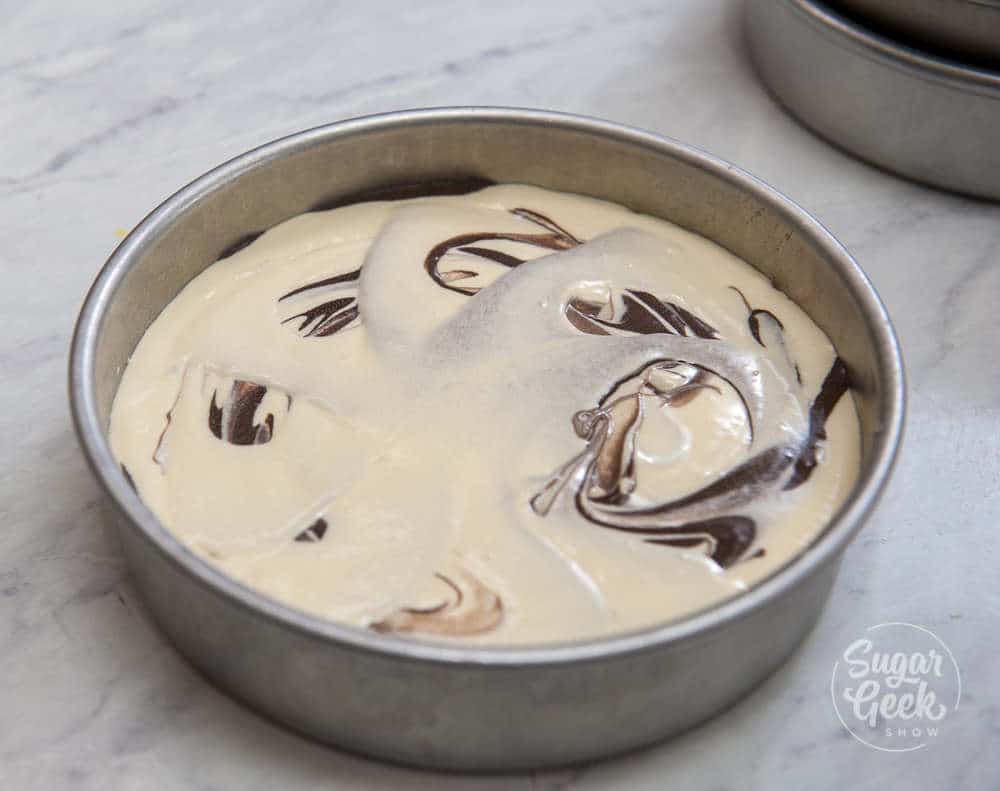
- Layer your batter into your pans, starting with vanilla, then chocolate, and ending with vanilla.
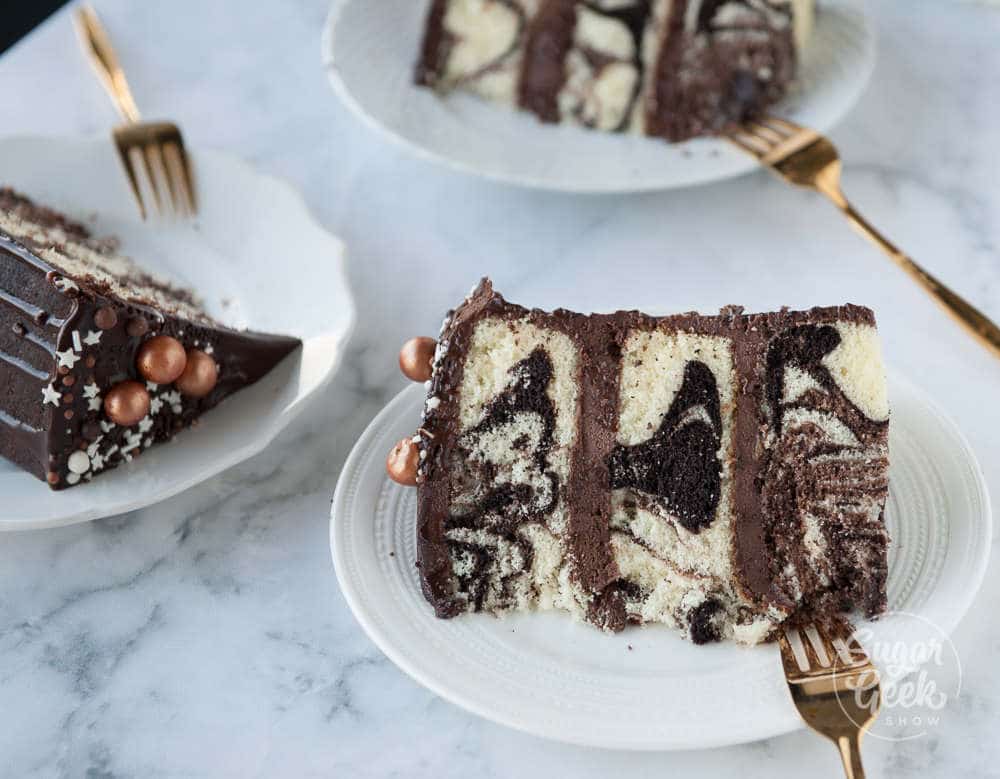
- Use a butter knife to swirl them together gently to create the marbling effect. Do not over-mix or your cake will not have a marbled interior.
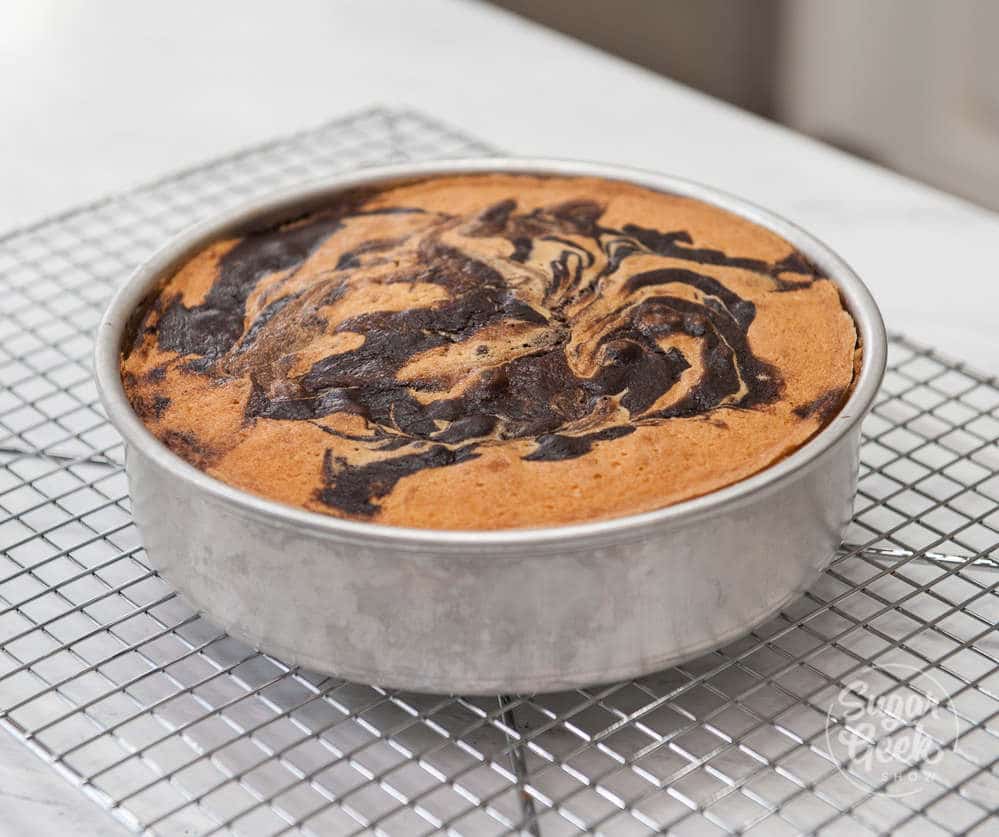
- Bake the cakes for 35-40 minutes at 335ºF (168ºC) or until a toothpick inserted into the center comes out cleanly (but the cake has not begun to shrink yet from the sides of the pan). IMMEDIATELY TAP THE PAN FIRMLY on the countertop once to release the steam from the cake. This stops the cake from shrinking. Your bake time may vary depending on your oven and the size of cake pans you use.
- Let the cakes cool for 10 minutes inside of the pan before flipping them out. The cake will shrink a bit and that is normal.

- Flip the cake onto a cooling rack and let it cool completely. I chill my cakes before handling them, or you can wrap them in plastic wrap and freeze them to trap moisture in the cake.
- Thaw the cake on the countertop while it's still wrapped before frosting.
How to Make Ganache Frosting
- Place your chocolate into a heatproof bowl.
- Heat your cream until it just begins to simmer. Do not boil it or your ganache will be grainy.
- Pour the hot cream over your chocolate.
- Let it sit for 5 minutes.
- Add your vanilla and salt to the chocolate mixture and whisk it until it's smooth and creamy.
- Pour your ganache into a shallow pan and let it cool to peanut butter consistency. Mine takes about 20 minutes to thicken up.
- Frost your cake with the ganache and then place it in the fridge for 20 minutes. This cake also pairs well with easy buttercream or chocolate Swiss meringue buttercream.
- Dust it with cocoa powder using a soft (new) makeup brush to make the velvet texture.
Ganache Drip Instructions
- Heat the cream until it's just steaming, and then pour it over chocolate.
- Let it sit for 5 minutes.
- Whisk it until it's smooth.
- Let it cool until it's slightly warm to the touch before piping it onto your CHILLED cake.
Decorating Step-by-Step
If you need to learn more or are new to cake decorating, check out my blog post on how to decorate your first cake step-by-step.
- Place your first cake layer onto your cake plate, and then spread on a layer of the ganache about ¼" thick. Repeat this step with the last two cake layers. I like using ganache because it's super stable and delicious, but chocolate buttercream or easy buttercream would also pair well.
- Cover the whole cake in a thin layer of ganache. This is called the crumb coat.
- Then, put the entire cake in the fridge for 20 minutes.
- Prepare your chocolate drip and let it cool to 90ºF (32ºC).
- Apply your final layer of ganache and smooth it out with your offset spatula and bench scraper.
- Using a soft (new) makeup brush, apply some cocoa powder to the outside of the ganache to make it look like it has a velvet texture.
- Put your drip ganache into a piping bag and snip off the tip.
- Drip the ganache all the way around the top of the cake and finish it off with sprinkles.
What is marble cake made of?
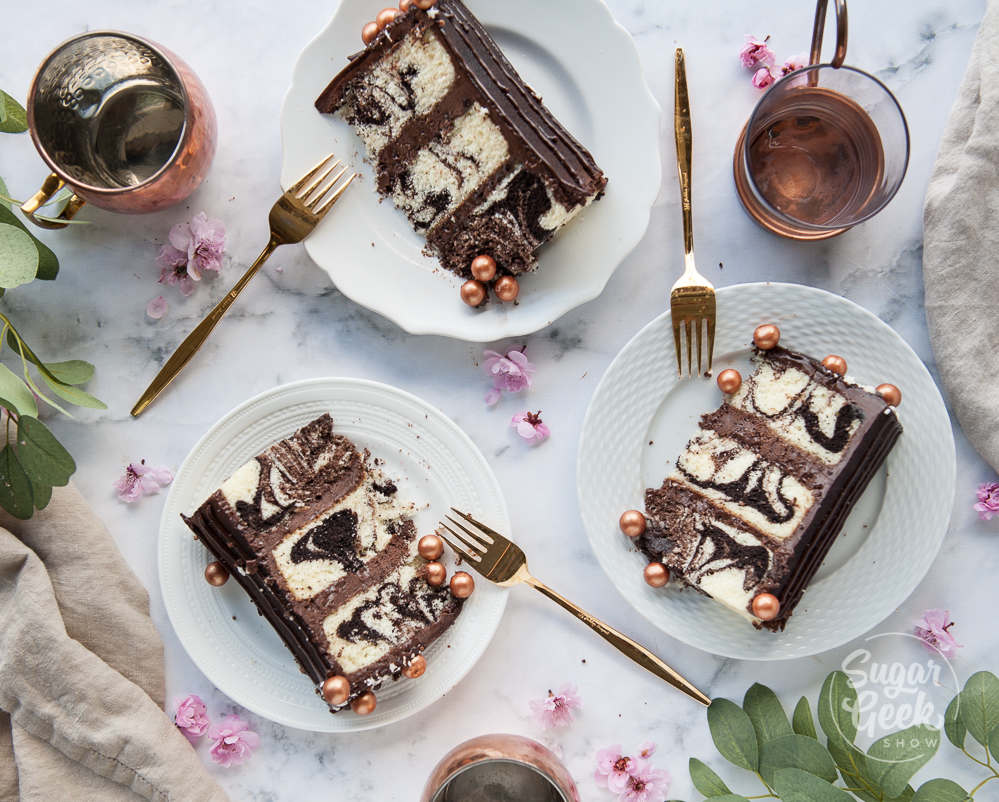
Marble cake is made when you add a small amount of dark-colored batter to light-colored batter, and then lightly mix it to give the cake a marbled appearance.
Why is it called a marble cake?
The idea of marbling two different colored batters into a cake originated in nineteenth-century Germany. Marble cake made its way to America with German immigrants before the Civil War. Originally, the cakes were marbled with molasses and spices.
In 1889, a recipe appeared in a popular cookbook that took advantage of Americans' obsession with chocolate and replaced molasses with chocolate. Thus, the popular marble cake that we know about today was born.
During the 50's all the way through the 70's, bakeries in New York were adding almond extract to their marble cake batter as a signature flavor and sometimes referred to it as German marble cake. This was originally more of a snacking cake meant to be sliced and served without frosting and eaten with tea or coffee.
FAQ
Surprisingly, I get this question a lot. This recipe is meant to be baked in three 8" x 2" cake pans so that you get three nice layers of cake in each slice. But you can definitely use other sizes of cake pans like a ¼ sheet pan or square pans.
You may need to increase or decrease the recipe to fit the size of your pan.
You can also use this recipe to make cupcakes, but it makes a lot! My cupcakes baked at 350ºF for 15 minutes but you should bake them until the center bounces back when you touch it.
Yes, you may use a bundt pan or a loaf pan. Just follow the same process of taking out ⅓ of the batter and adding in the bloomed cocoa powder to make the vanilla cake batter chocolate.
Yes, you can. But you will need to create a homemade buttermilk substitute first using regular milk along with other ingredients. There are several buttermilk substitutes I would recommend in place of buttermilk for this recipe.
Whenever you're introducing cocoa powder into a cake recipe, it can dry the cake out. You can avoid dry cake when you bloom your cocoa powder before mixing it with your vanilla cake batter.
Blooming is when you combine the cocoa powder with hot water, coffee or cold oil and let it sit for a few minutes until it starts to look spongy. Now that the cocoa powder is moistened, it won't suck up all the moisture from your vanilla cake batter.
Your oven temperature was most likely too high. Check your oven with an oven thermometer and reduce the temperature accordingly if it is running hotter than you need it to be.
More Cake Recipes You'll Love
Recipe
Equipment
- Stand Mixer
- Paddle Attachment
Ingredients
Marble Cake Ingredients
- 16 ounces cake flour
- 16 ounces granulated sugar
- 1 teaspoon salt
- 1 Tablespoon baking powder
- 1 teaspoon baking soda
- 4 large eggs room temperature
- 5 ounces vegetable oil
- 14 ounces buttermilk room temperature or slightly warm
- 8 ounces butter unsalted and softened
- 2 teaspoon vanilla
- ½ teaspoon almond extract
- 1 ounce cocoa powder dutch or natural
- 3 ounces hot water
- 1 Tablespoon cocoa powder for dusting
Ganache Frosting
- 16 ounces semi-sweet chocolate
- 16 ounces heavy whipping cream
- ¼ teaspoon salt
- 1 teaspoon vanilla extract
Ganache Drip
- 6 ounces semi-sweet chocolate
- 4 ounces heavy whipping cream
Instructions
Cake Batter Instructions
- Prepare three 8″x2″ cake pans with cake goop or another preferred pan spray. Preheat your oven to 335ºF (168ºC).
- Bring your butter, milk, and eggs to room temperature. It’s really important when making a cake for the ingredients to all be slightly warm so they create an emulsion.
- Heat the water until it’s simmering and then combine it with your cocoa powder.
- Stir it until the cocoa powder is moistened. It will look lumpy, but that is normal.
- Set it aside and let it cool while you prepare the cake batter.
- In a separate container, combine ¾ cup of the milk and the oil together and set it aside.
- In a separate container, combine the remaining milk, eggs, vanilla, and almond extract together. Whisk it to break up the eggs, and then set it aside.
- In the bowl of your stand mixer, combine the flour, sugar, baking powder, baking soda, and salt with the paddle attachment. Mix for 10 seconds to combine everything.
- Add your softened butter to the flour mixture and mix on low until the mixture resembles coarse sand (this takes about 30 seconds). This style of mixing is called the reverse creaming method, and it will result in a very velvety, moist cake. A lot of my other cake recipes like brown butter cake and white velvet buttermilk cake use this method.
- Add in your milk/oil mixture and mix it on low until the dry ingredients are moistened.
- Increase the speed to medium (setting 2 on my Bosch Mixer, setting 4 on a KitchenAid) and let it mix for 2 minutes to develop the cake’s structure. If you don’t let your cake mix on this step, your cake could collapse.
- Scrape your bowl and then reduce the speed to low.
- Add in your egg mixture in three batches, letting the batter mix for 15 seconds between additions.
- Scrape down the sides again to make sure everything has incorporated.
Marbling the Cake Batter Instructions
- Take out ⅓ of your batter and combine it with the cooled chocolate mixture and fold it gently until it’s combined.
- Layer your batter into your pans, starting with vanilla, then chocolate, and ending with vanilla.
- Use a butter knife to swirl them together gently. Do not over-mix or your cake will not have a marbled interior.
- Bake the cakes for 35-40 minutes at 335ºF (168ºC) or until a toothpick inserted into the center comes out cleanly (but the cake has not begun to shrink yet from the sides of the pan). IMMEDIATELY TAP THE PAN FIRMLY on the countertop once to release the steam from the cake. This stops the cake from shrinking.
- Let the cakes cool for 10 minutes inside of the pan before flipping them out. The cake will shrink a bit and that is normal.
- Flip the cake onto a cooling rack and let it cool completely. I chill my cakes before handling them, or you can wrap them in plastic wrap and freeze them to trap moisture in the cake.
- Thaw the cake on the countertop while it’s still wrapped before frosting.
Ganache Frosting Instructions
- Place your chocolate into a heatproof bowl.
- Heat your cream until it just begins to simmer. Do not boil it or your ganache will be grainy.
- Pour the hot cream over your chocolate.
- Let it sit for 5 minutes.
- Add in your vanilla and salt to the chocolate mixture and whisk it until it’s smooth and creamy.
- Pour your ganache into a shallow pan and let it cool to peanut butter consistency. Mine takes about 20 minutes to thicken up.
- Frost your cake with the ganache and then place it into the fridge for 20 minutes. This cake also pairs well with easy buttercream or chocolate Swiss meringue buttercream.
- Dust it with cocoa powder using a soft (new) makeup brush to make the velvet texture.
Ganache Drip Instructions
- Heat the cream until it’s just steaming, and then pour it over chocolate.
- Let it sit for 5 minutes.
- Whisk it until it’s smooth.
- Let it cool until it’s slightly warm to the touch before piping it onto your CHILLED cake.
Video
Notes
Cake flour sources: UK - Shipton Mills Cake & Pastry Flour
Denyel says
Hi Liz, Thanks again for all of your amazing recipes and tips. You're my go-to professional baker.
My question, I am attempting a large cake project that requires sturdy cake layers. It will have various sizes and shape cake layers that will be stacked high. Would you recommend using this cake recipe for something like that?
Sugar Geek Show says
Hi Denyel, yes this marble cake recipe is very soft and moist but also sturdy for stacked and sculpted cakes. I used this recipe for my 'Light Fury' cake tutorial. I also have cake recipes specifically for sculpting if you need something extra extra sturdy. Hope this helps!
Lynn N. says
This marble cake is so delicious and easy to make! There is no need for any other recipe!
Olivia says
What do you do when the recipe calls for a fraction of an egg? Use egg white or break a yolk apart?
Thanks,
Olivia
Elizabeth Marek says
Whisk the egg together then kind of guess
Kristin says
I made this for a friend's kid's birthday. It was a big hit. and My husband and I ate the scraps I cut off when I leveled it. SO GOOD. Could tell just from the scraps how fluffy but not-at-all dry it was. I make a lot of cakes and my husband is my main taste tester and he immediately declared that this is the cake he wants for his birthday in 3 months! Thanks for sharing your recipe!
maya nikolova says
This was by far the best cake I have ever made and it was so moist and fluffy. I followed the recipe exact and everything went great. My friends who have tried everything I make were speechless after they ate it.
I just had to make more ganache as I didn’t have enough for the final coat - but I am sure I waisted some more between the layers lol. I end up making the ganache first and let it set while I made the sponge - so by the time my cake cooled off , the ganache was perfect consistency. I added some pecans between the layers for some crunch.
THANK YOU for all your recipes and videos- you have been my Covid free time and definitely I became Covid baker .
Amber says
This cake turned out AMAZING! super moist, and delicious!! The only problem I seemed to run into....I baked the cake, let it cool, wrapped it and froze for about 6 days before decorating. When we ate the cake....it was sort of crumbly to me...not dry...yet crumbly. Did I do something wrong? Or what could have caused this? Thank you!!
Sarah says
Can I use normal flour or does it need to be cake flour?
Sugar Geek Show says
This recipe needs cake flour because it uses the reverse creaming method. If you use AP flour it could turn out with a cornbread-like consistency, so using a softer flour will make it have that delicious texture.
Ana says
Does this recipe make enough for 3 8” layers
Sugar Geek Show says
Yes, or 2 9" layers
Ameerah says
Hi Liz, I'd love to make this cake. Could you please give the ingredients in cups?
Thanks
Sugar Geek Show says
Hi Ameera, my cake recipes are only in ounces and grams because it is more accurate to measure by weight than volume. I know it’s a new challenge for many people but it really makes baking easier! I have information about how to use a scale and an ounces to cups conversion chart on my blog post if you can’t get a scale right now though: https://sugargeekshow.com/news/digital-kitchen-scale/
Shannon says
Hi Liz, can I cover this cake with fondant?
Sugar Geek Show says
Yes!
Jaya P says
Hello Liz. I am a huge fan of all your recipes. I have to make a marble cake for a carved cake? I would like to only use your recipe? Can this be used for carving?
Sugar Geek Show says
Thank you! Yes I use it to carve all the time.
Maya says
Hi Liz! I want to make this cake but i have an electric oven it doesn’t have a 335°F on the ticks. what do a i do?
Elizabeth Marek says
Bake at 350ºF and make sure you check the cake in the last 10 minutes to make sure you are not over-baking it.
Julie says
I made this for my mothers birthday. This is the best marble cake I ever had!
Julie says
Can I use the same amount of egg whites than whole eggs in this recipe. I’d like to colour the cake.
Elizabeth Marek says
Yes you can do that
Xylina M Shelton says
First off that was the best tasting batter that I have had since my momma and will be my go to vanilla cake recipe...
The cakes are in the oven now and I can't wait... I'm making your butter cream and chocolate Gamache (forgive spelling) and going to try to marble the outside 2. My daughter's 24 birthday ❤
MLT19 says
Haven't made this yet but definitely want to try it. It looks amazing and the reviews are fantastic.
I do have a question. Have you ever tried making it with a sugar substitute? And, if so, which one did you use?
Elizabeth Marek says
you can use a sugar substitute, I like lakanto
Jay says
Wonderfull cake and best marble I’ve ever tried so far. I actually didn’t have cake flour so I subbed with AP and cornstarch. I know you say you don’t recommend it but it still turned out great. Moist, rich flavor with a nice crumb. The cocoa + hot water for me was the game changer. No doubt every marble cake recipe I tried in the past, where they’d stir it in the batter, was so dry. This is the second successful cake recipe I’ve tried from your blog. Thanks!!