
Isomalt - The Perfect Edible Medium
Isomalt is the perfect thing for making beautiful clear candy decorations for your cakes, candies and desserts! Isomalt is similar to using sugar except that it doesn't turn a yellow color when it is heated to high temperatures. It also stands up to humidity better than sugar so it's a great choice to use as a decoration.

What Is Isomalt?
Isomalt is a sugar substitute (usually found in sugar free candies) and is GREAT for using as edible decorations. Isomalt is probably not something you've heard of unless you are a cake decorator or pastry chef but you don't have to be an expert to use it!
Can You Eat Isomalt?

So like... can you eat it?
I get that question a lot.
Isomalt is actually made from beets and is safe to eat. The reason why some people think it's not edible is that your body does not actually digest it. It passes right through you (literally) so if you eat a LOT you can get an upset stomach but you'd have to eat more than a golf ball sized piece for it to do any damage.
Where Do You Get Isomalt?
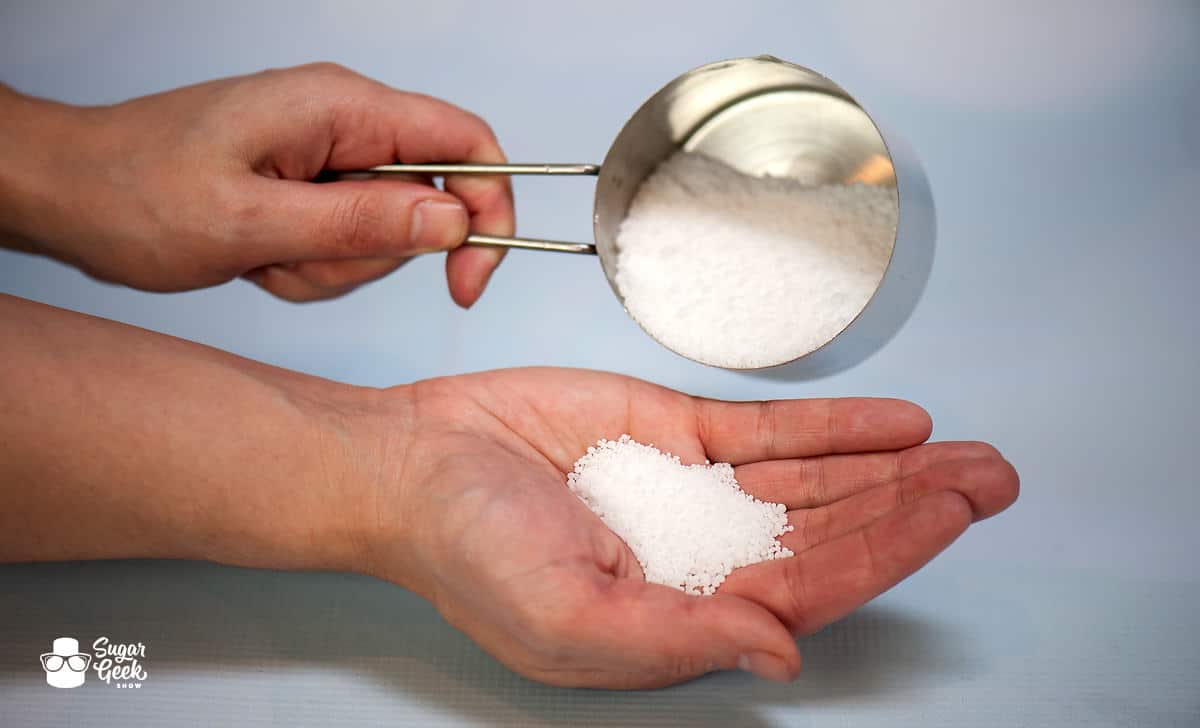
There are basically two different types of isomalt you can buy. Sometimes you can find raw isomalt granules at cake supply shops or you can buy them online. The kind that is raw and still needs to be cooked to the proper temperature.
The benefits of buying your own raw isomalt and cooking it yourself is that it's a lot cheaper BUT if you don't do it correctly you could end up with a big clumpy mess so be sure to follow my recipe for cooking clear isomalt if you want to make it yourself. Once you cook it you can then pour it into small puddles or silicone ice cube tray and let it cool. Once cooled you can store it in ziplock baggies and you'll have isomalt on hand any time you need some!
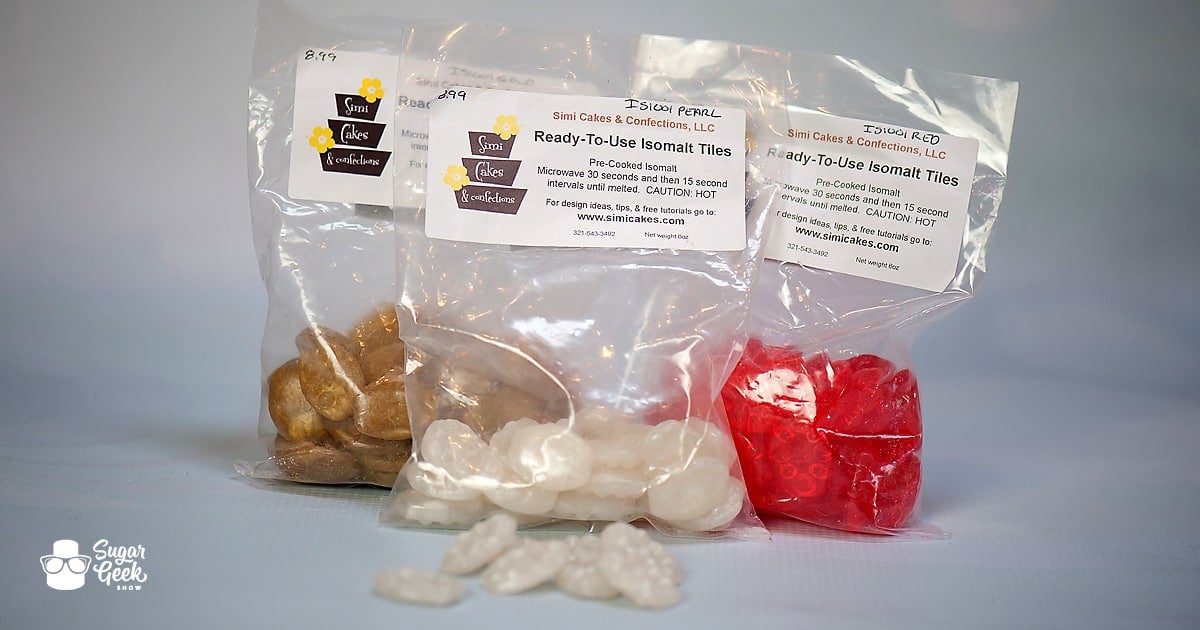
Then there is pre-cooked isomalt that all you have to do is melt it down in a microwave. Our first tip for working with isomalt is buying it Ready-To-Use from Simi Cakes & Confections! Their ready to use isomalt can be popped in the microwave in 20-30 second intervals and boom it is ready to pour, pull or cast! SO convenient. Simi Cakes isomalt is exceptionally clear and definitely affordable. One of the best things about isomalt is there is never any waste so you really get your money's worth.
Equipment For Working With Isomalt
To work with isomalt you will need a few tools! You can find any of these items at most grocery stores or you can have a glass of wine and add it all to your online cart in one swoop like I did *grins*
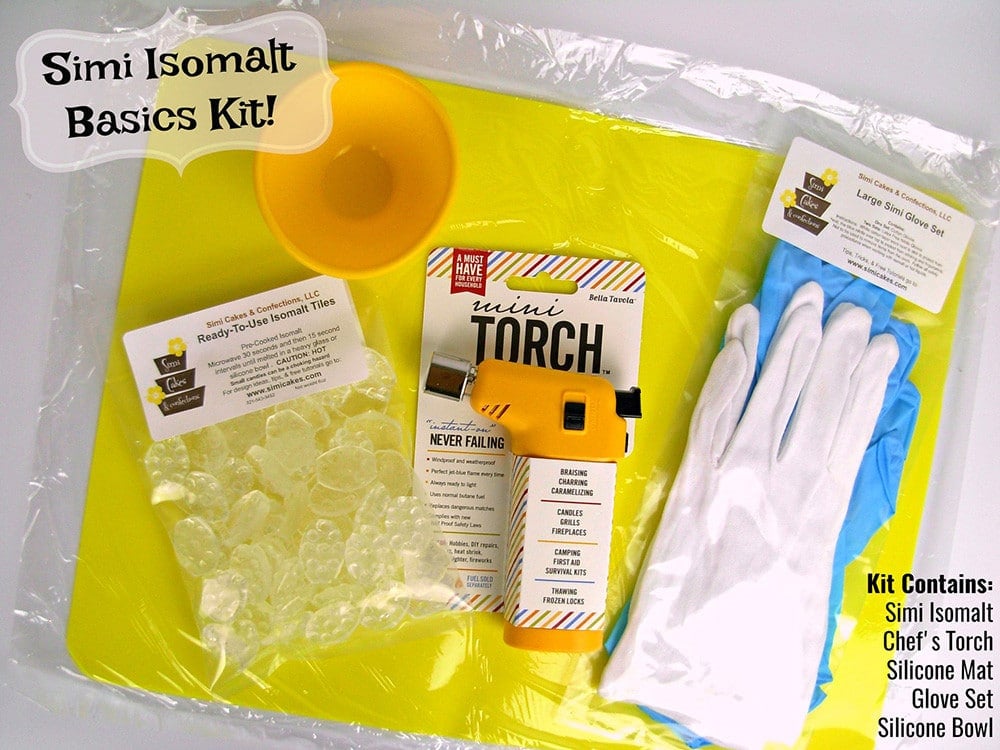
Simicakes makes a beginners isomalt tool kit that really is perfect if you want to just start making cool stuff right away but I'll also list them out separately for you. *note: this list contains affiliate links which does not affect the price for you.
- Small Blow Torch - A must have for clearing up the surface bubbles, gluing together pieces and re-heating sections to keep working with them. Who doesn't enjoy making fire??
- Silicone Mat - Inexpensive and easy to find, this is a must have for working on top of. Silicone is heat resistant so the isomalt wont stick to it (unlike your dining room table).
- Silicone Bowl - I am notorious for stealing these bowls from my friend Sidney at cake shows. You can never have too many! They are perfect for melting down small amounts, coloring or letting it cool so you can pop out the leftovers and store it to use later. For very small pouring, sometimes I use silicone cupcake liners but you have to be careful not to fill them too full.

- Gloves - I actually prefer using nitrile gloves that I buy at my local pharmacy. I get the size small for a tight fit and it protects my hands from getting burned from little drips. If melted isomalt lands on your skin and you try to wipe it away, you'll take your skin with it. When you have gloves on, all you have to do is take off the glove if you get a drip on you and you won't get a burn.
- Airbrush Color - This is optional but great for adding color to your isomalt. I prefer to buy it clear and color it as I need it rather than buying pre-colored isomalt.
- Cake Gloss - You'll need to spray your finished pieces with some glaze to seal it from humidity, otherwise they will get cloudy and white. Spray them right after you make them. I love the cake gloss from swank cake design because it's a very fine spray and isn't very yellow.
- Candy thermometer - You'll only need this if you're going to be cooking your own isomalt from raw granules but I am including it just in case because you definitely can't make your own without it.
Things To Make With Isomalt
Ok so I bet you're super excited to actually MAKE something with isomalt now huh? I don't blame you, it's pretty freaking awesome to work with! Before you start melting and torching, check out this great video on the basics of working with isomalt from Simicakes
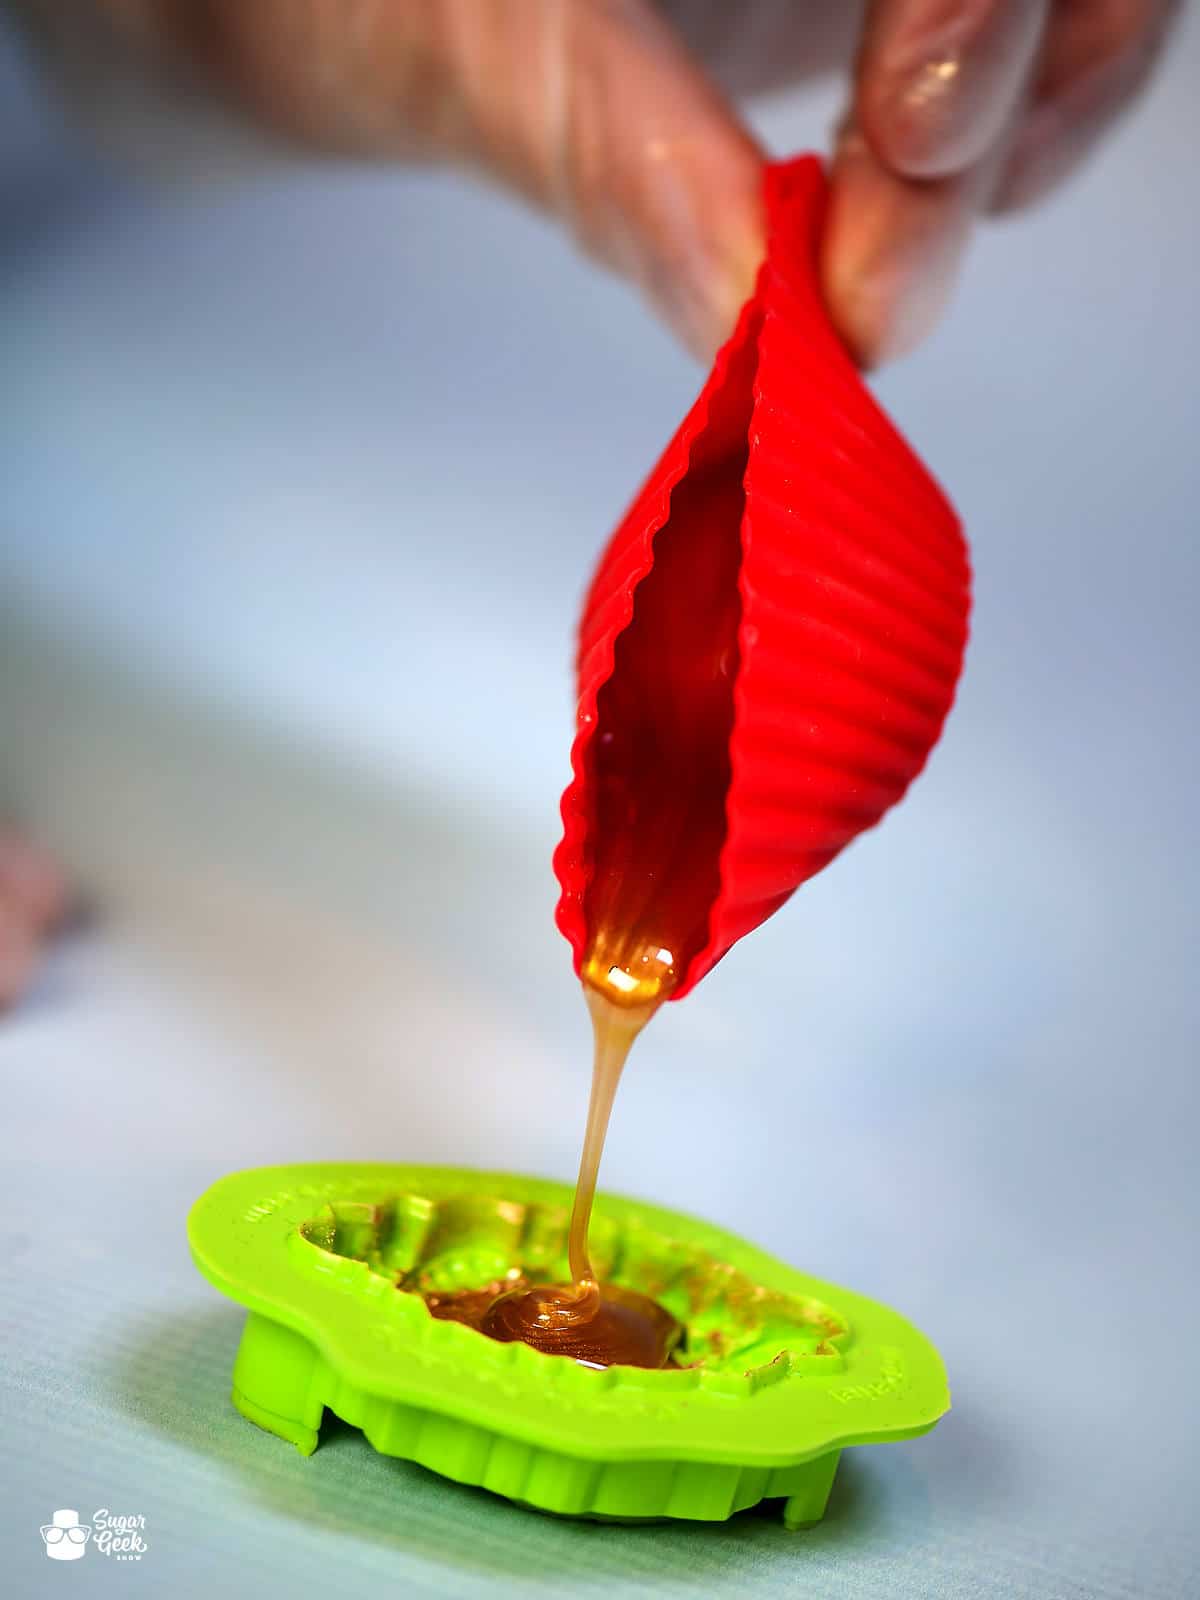
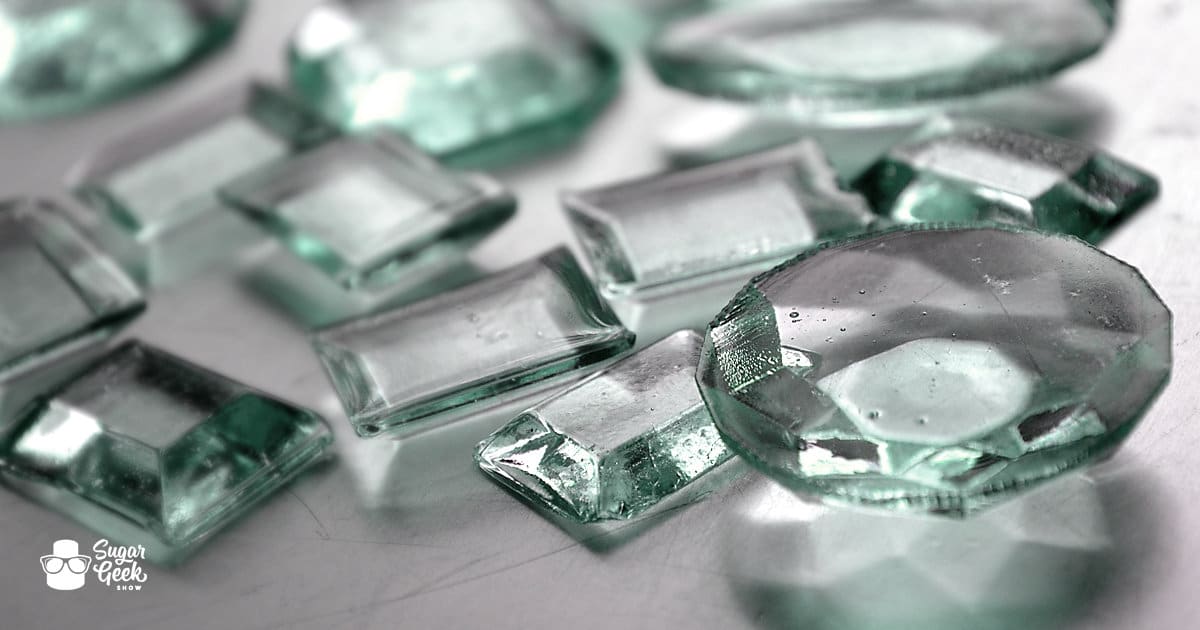
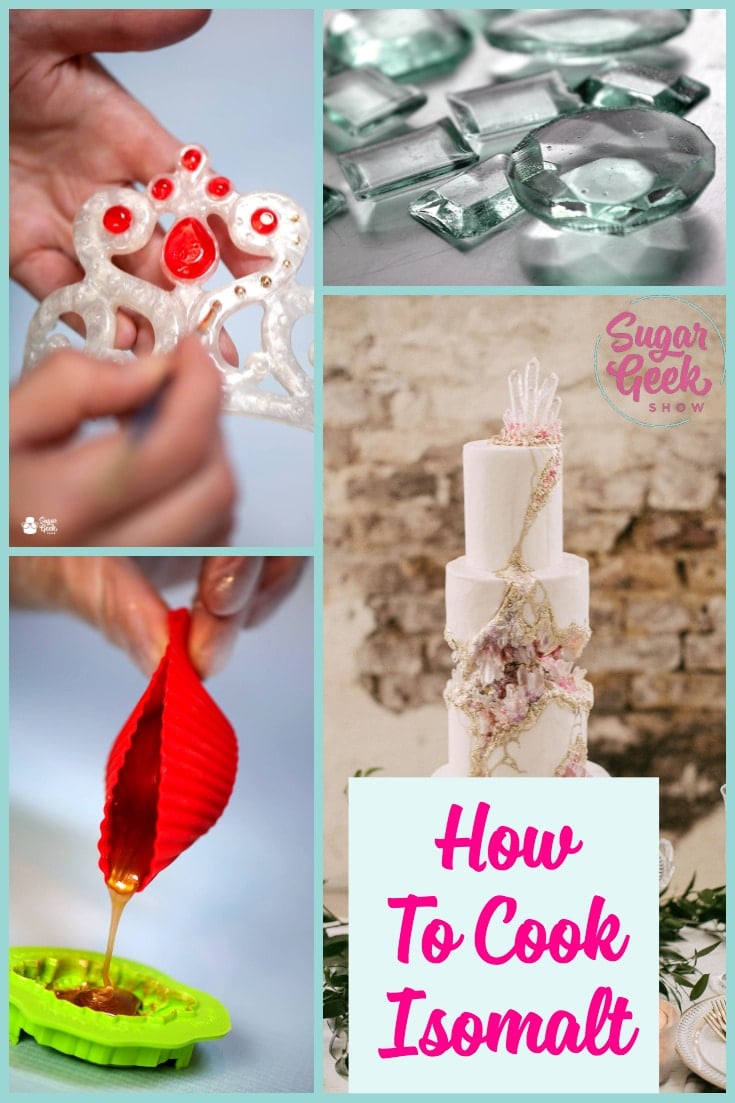
Shiny Isomalt Gems - One of the first things I ever made with isomalt was shiny gems! I was obsessed! I made sooo many! To make the gems you can use hard candy molds which look like plastic but are actually acrylic. Don't put isomalt in plastic molds, they will melt!
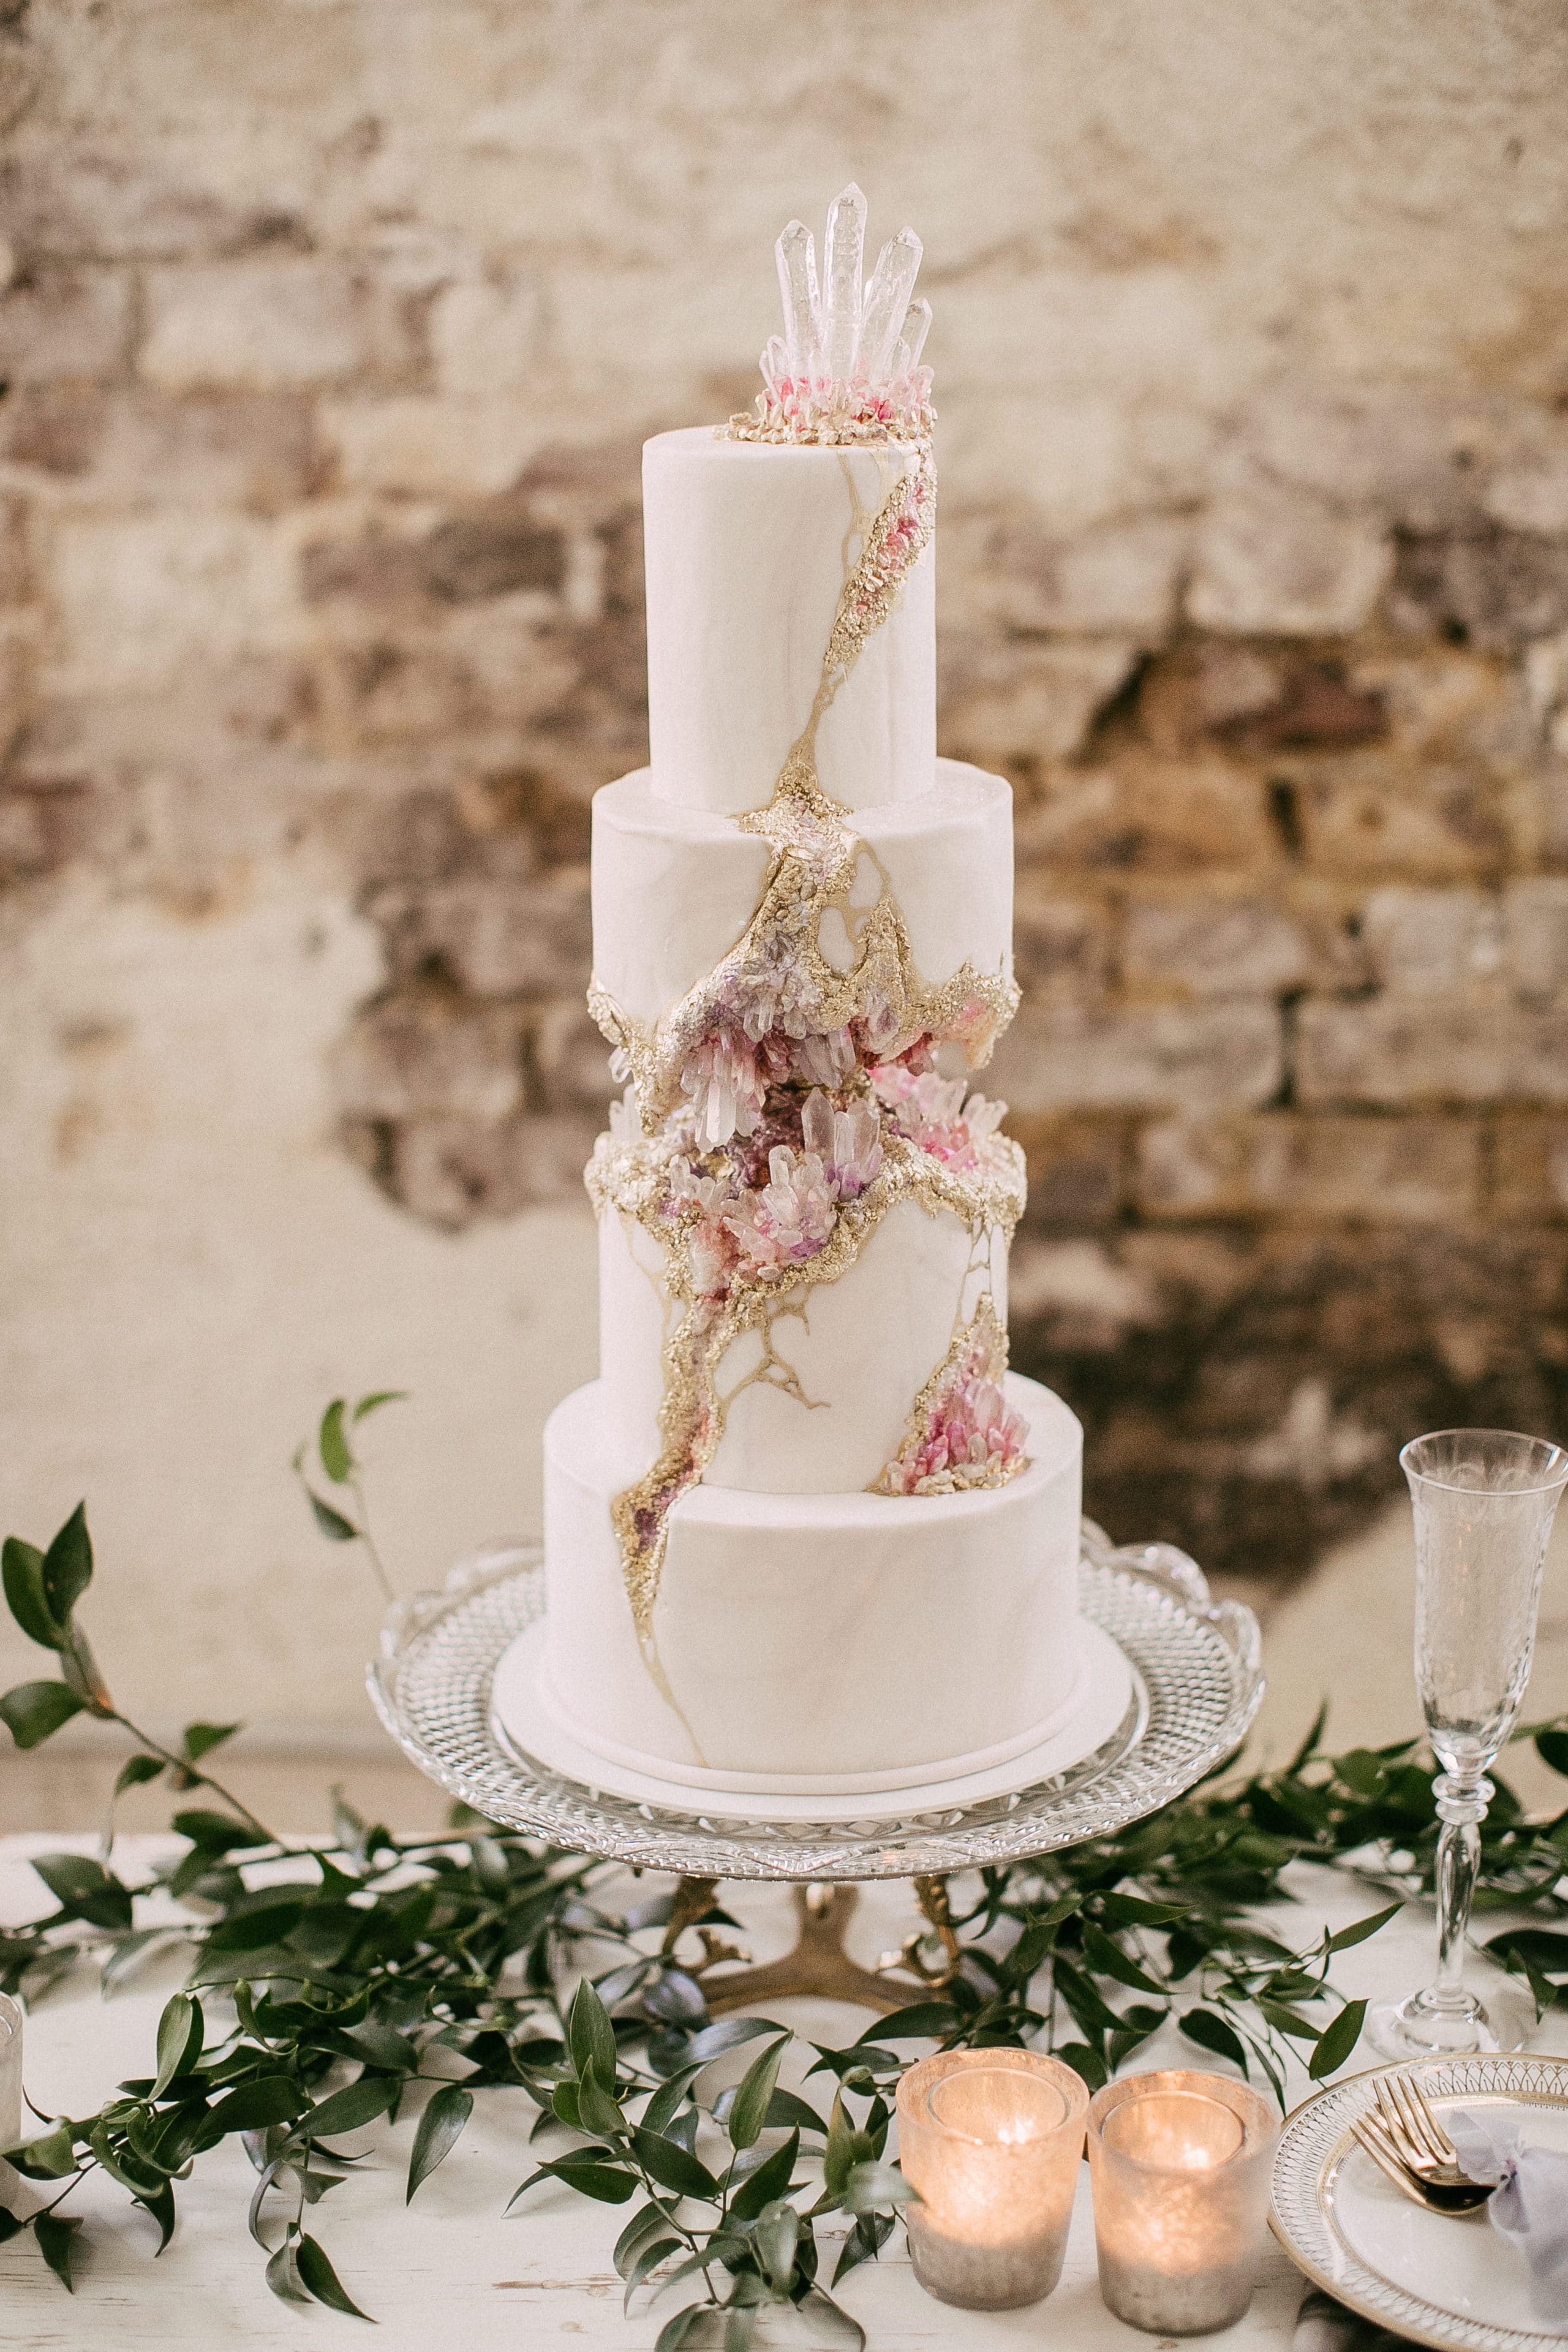
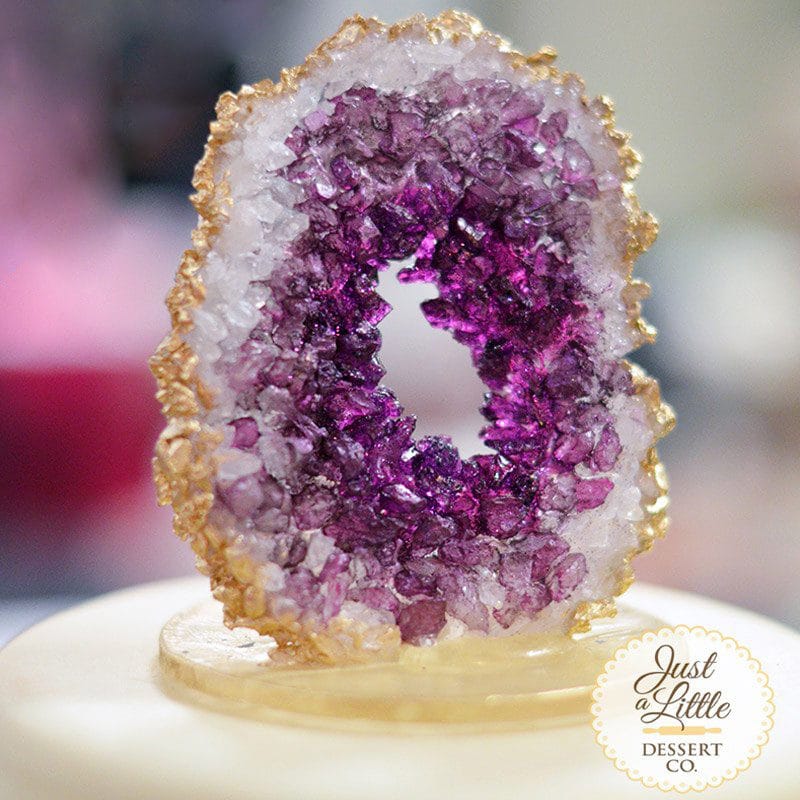
Isomalt Crystals - The geode cake trend is still super popular! SO popular that I invented some crystal molds so I could make this kintsugi wedding cake tutorial. The cake was so popular it went viral!
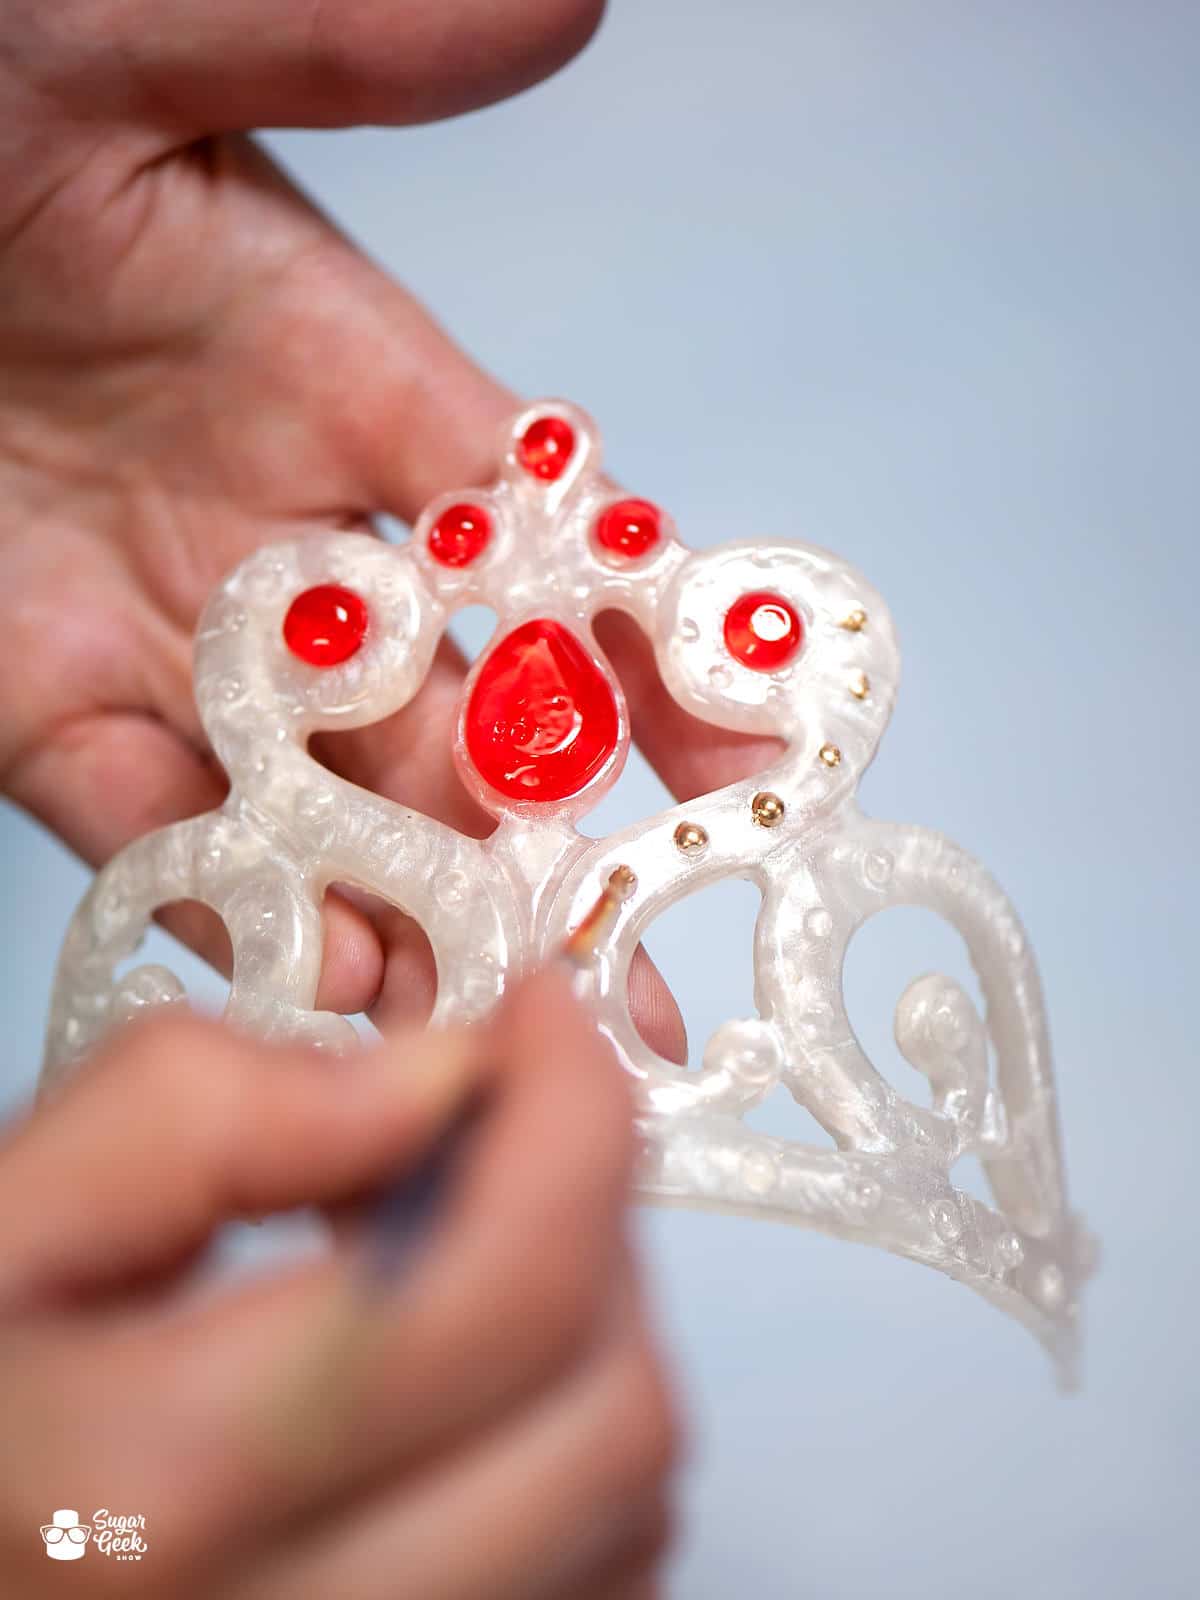
Edible Crown Tutorial - Isomalt is such amazing stuff! It can be poured into molds and shaped so easily while it's still warm. I used isomalt and molds to make this edible candy crown!
Glitter Eyes - I loved making these edible glitter eyes for all kinds of different types of sculpted cakes! They look just like shiny eyes you find on beanie boo toys.
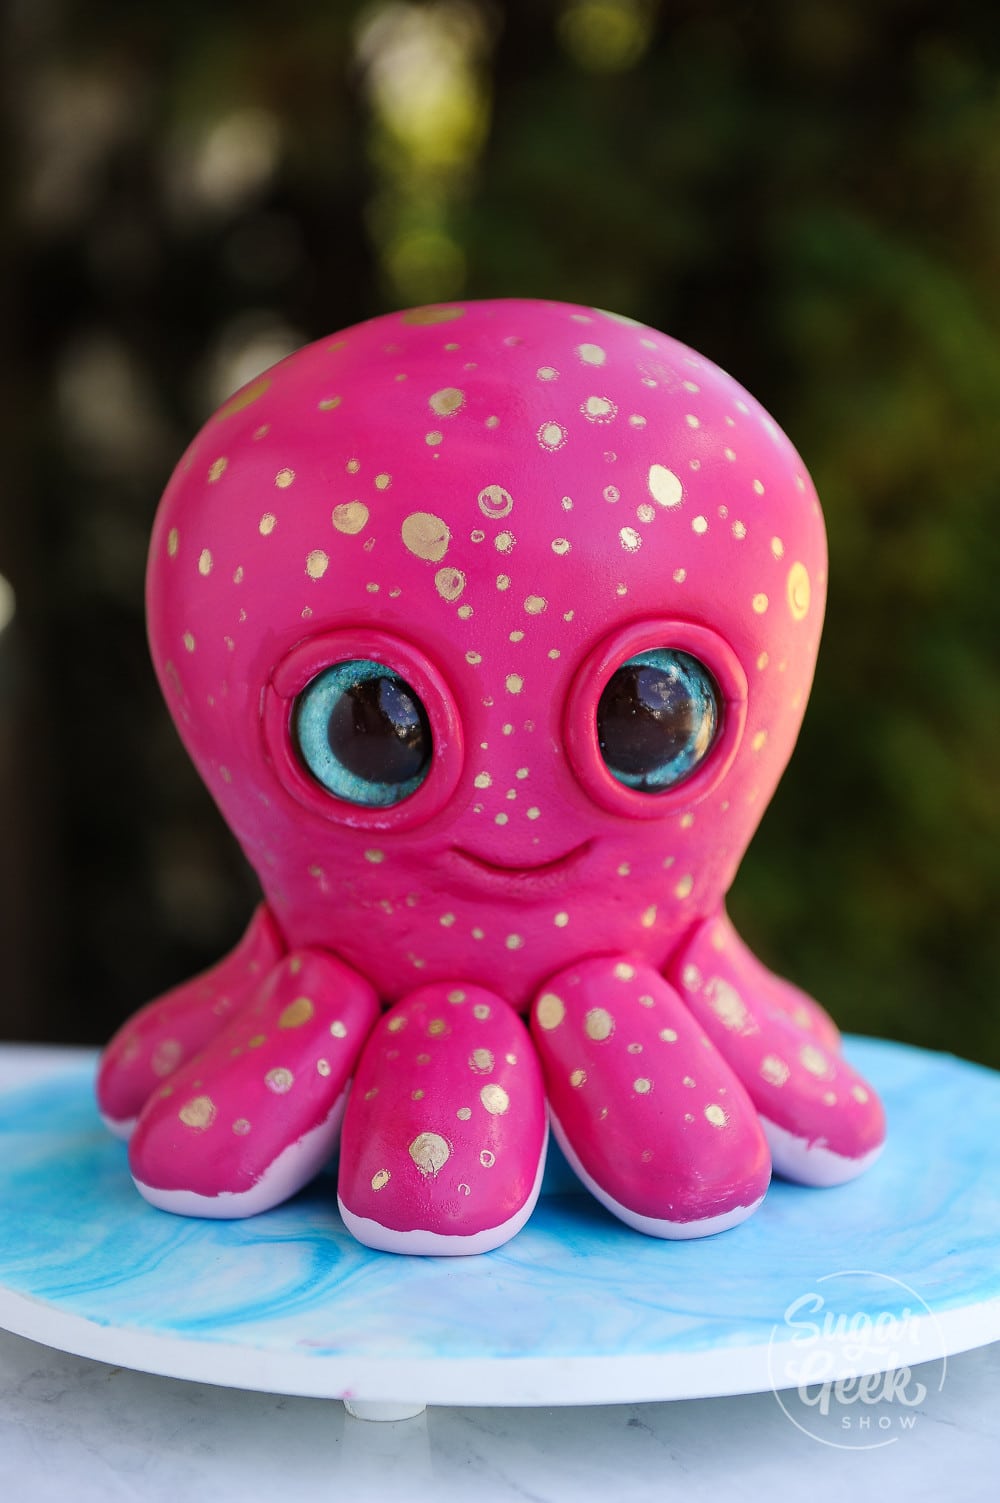
Edible Eye Tutorial - The one thing I probably make the most of with isomalt is realistic eyes for my sculpted cakes! People always ask me if they are edible which is kind of an odd thing to ask about eyes really, haha.

Geode Cake Topper - When I saw this cake topper at a cake show I was amazing and had to find out how it was made! This was right before the geode cake trend took off and now you see versions of this topper everywhere.
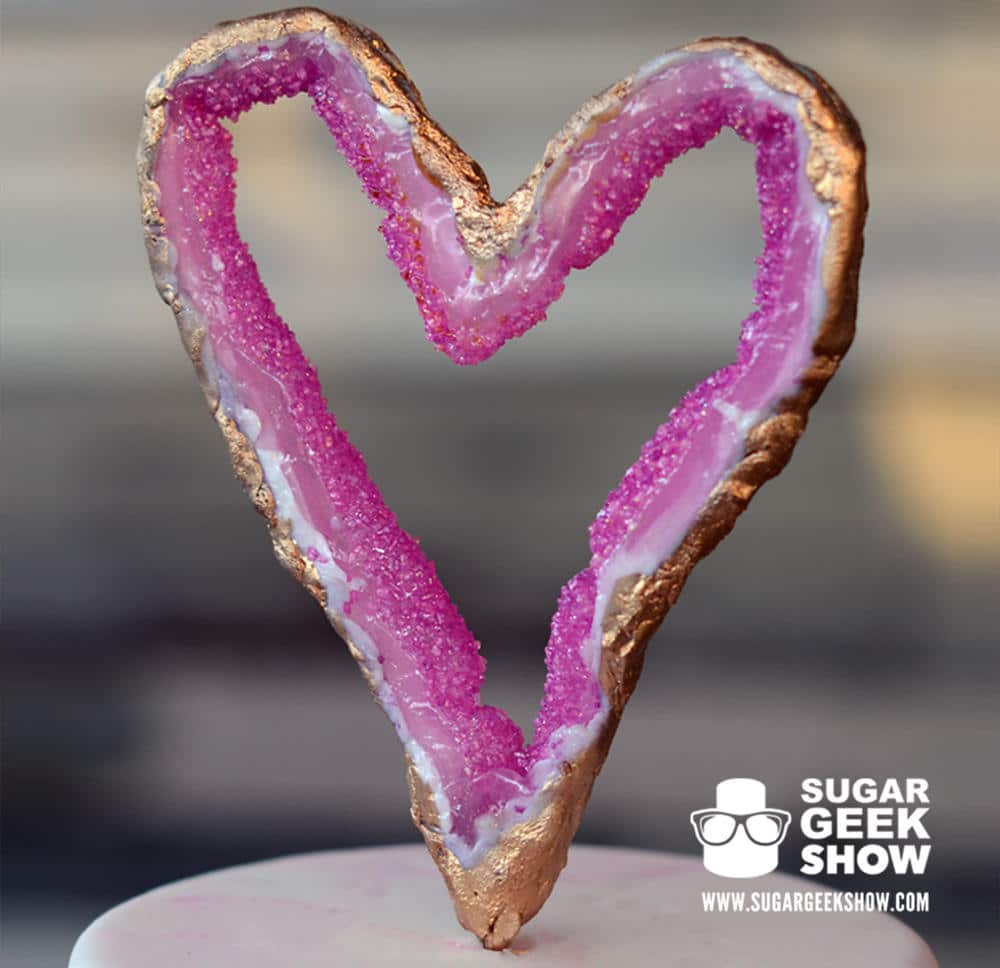
Geode Heart Cake Topper - This was a really fun take on the trendy geode cake toppers for Valentines day. So easy to make and no special molds required.
Blown Sugar Bubbles - If you want to learn a whole bunch of awesome techniques for using isomalt, check out our online tutorial from the amazing Sidney from Simi Cakes and Confections. In this tutorial she teaches you how to use different types of molds, how to pull sugar with your hands and shape it, how to paint on isomalt, how to blow bubbles and how to make cool candles! (coming Dec 1, 2018)
Clear Isomalt Recipe
If you want to make your own isomalt from raw granules, follow this recipe that I got from simicakes. It works perfectly every time!
I hope this post has motivated you to use isomalt if you haven't or helped solve some issues you may have had if you have! We also have many tutorials available for Premium and Elite Members that incorporate even more ways and tips for using isomalt. Get your isomalt on!
Recipe
Ingredients
Ingredients
- 1 cup Raw isomalt
- ¼ cup Distilled water
Supplies
- 1 Candy thermometer
- 1 nonstick pot
- 1 silmat
Instructions
Instructions
- In a very clean, nonstick pot, add ¼ cup distilled water to every cup raw isomalt.
- Bring to a boil on medium-high heat. Do not stir.
- After the mixture is boiling, turn to medium heat and cover with a lid for 5 minutes and simmer. This step prevents crystals from forming around the edges. Do not stir.
- Take lid off and simmer uncovered until temp reaches 320º F (160º C). This can take up to an hour. Be patient. Do not stir.
- Once cooked you can pour into puddles on a silmat, let cool then break into chunks to use later.
- Isomalt can be reheated in the microwave by starting with 30 seconds and then moving to 15 second increments.
Video
Notes
Nutrition


Maria Watkins says
I am going to make Lollypops with the isonalt, do I have to put oil on the round molds?
Elizabeth Marek says
No oil is required
Tara Cappis says
Is isomalt powder the same as the crystals? Mine that I got seems to be really fine powder
Elizabeth Marek says
I am not sure, I have never seen powder before. Does it have any instructions with it?
Betty says
Where can I buy your crystal mold?
Elizabeth Marek says
http://www.simicakes.com
Di says
I used the microwave to melt the isomalt . Making a window in a cookie. No bubbles perfect. But it is not setting
Elizabeth Marek says
Did you start with raw isomalt? If so then it needs to be cooked to the temperature listed first before you can start melting it with the microwave.
Mark Vrabel says
Could you use isomalt as a sugar replacement in BBQ sauce? Artificial sweeteners will not caramelize and come out looking like flat paint, not very appealing.
Elizabeth Marek says
Good question! I'm not sure about that!
Sue says
Do you have to use a non stick pan for the isomalt, or can you use a heavy stainless steel lined copper pot?
Elizabeth Marek says
You definitely can use a copper pot 🙂
Tashera Young says
I tried this twice and both times my isomalt came out brownish. Why does this happen ?
Elizabeth Marek says
It could be that you are not using distilled water, your pan is not super clean or you are over-cooking your isomalt and not stopping the cooking with the cold water
Eeman A says
Hi I’ve been trying Isomalt so many times but as soon as I take it from here it becomes so hard to work with if I want to shape it, I seen a video you was shape it and work with it as Fondant please can you Tell me how to get my Isomalt to be pliable. Many thanks
Eeman
The Sugar Geek Show says
If you want isomalt to stay pliable then you will need to consistently apply heat to it. This is merely a recipe to make the isomomalt.
Barbara says
Can isamalt be used in place of royal icing to glue together the roof of a gingerbread house
The Sugar Geek Show says
Absolutely, just wear gloves and be careful 🙂
Cheryl A Chapman says
Hi. Thank you for all of the awesome information. I was wondering, do do you keep your gems from getting sticky and cloudy?
The Sugar Geek Show says
I spray them with clear glaze like PME glaze
Kim says
My problem is finding any kind of idomalt.. raw or other. Not to be found in stores !! Very disappointing as I was planning on using for upcoming grandsons cake
Any ideas how to get any? Not sure online ordering will
Arrive on time
The Sugar Geek Show says
If you can't find isomalt then try my lollipop recipe. https://sugargeekshow.com/lollipop-recipe/
Lisa Foss says
Thank you for this. It was very informative and helpful! Also, thank you very much for the warnings about gloves. I did not use gloves the last time I tried Isomalt. I'm a very cautionary tale.....
Shaunn says
I've noticed that ready-to-nuke isomalt is becoming easier to find. My question; can it be made super sour? Can it be flavored, such as with Lorann oils? I'm thinking of Jolly Rancher sour (not regular) candies. Love super sour sweets, but JR sours aren't always easy to find. Have tried to make my own, but most sugar-based super sour candy recipes have been great disappointments.
Thank you! Best regards for continued success!
The Sugar Geek Show says
Yes, very easily. Just add any candy oils that you like and a little citric acid
Dwi says
Hi. Im really really newbie.. what is the difference isomalt vs sugar+glucose? I have tried make a bowl from sugar+glucose.
The Sugar Geek Show says
Isomalt is a sugar free substitue and is less likely to get sticky or crystalize like sugar
Lauren says
So easy this way!
Kristen says
Did you use the raw or the one that is ready to go?
The Sugar Geek Show says
This is how to cook RAW isomalt and turn it into ready-to-melt isomalt. There is no need to cook ready made isomalt. Just melt it and use it.
Udara Mendis says
Hi, I made isomalt sails following the instructions in the packet which is 2 cups isomalt and 1/4 cup water. However it comes out perfectly but later when I rest the sail on the cake it starts to collapse, it tend to fall from sides and also melt and shatter down as time goes on. Could you please tell me a way to avoid this from happening? Anything I can add?
The Sugar Geek Show says
Sounds like the isomalt was not cooked to the proper temperature
Ann Shamberg says
I hate to tell you, but this is NOT a recipe FOR isomalt. You just tell everyone HOW to use RAW ISOMALT and use it in it's clear form, not make it from SCRATCH!
The Sugar Geek Show says
I'm not sure what you mean. This is a recipe on how to prepare isomalt. I understand that it's not making isomalt from scratch. That's not something you can do without a chemistry degree. I hope that clears things up for you.