
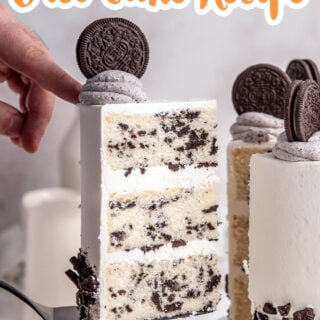
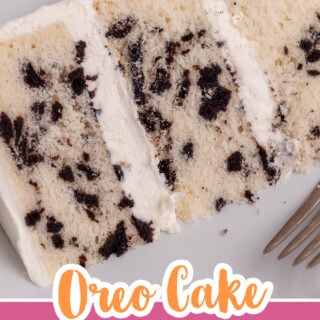
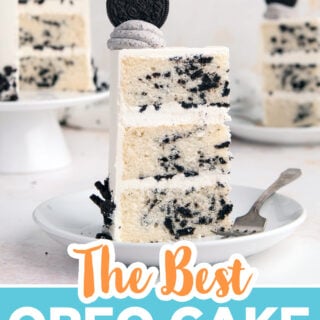
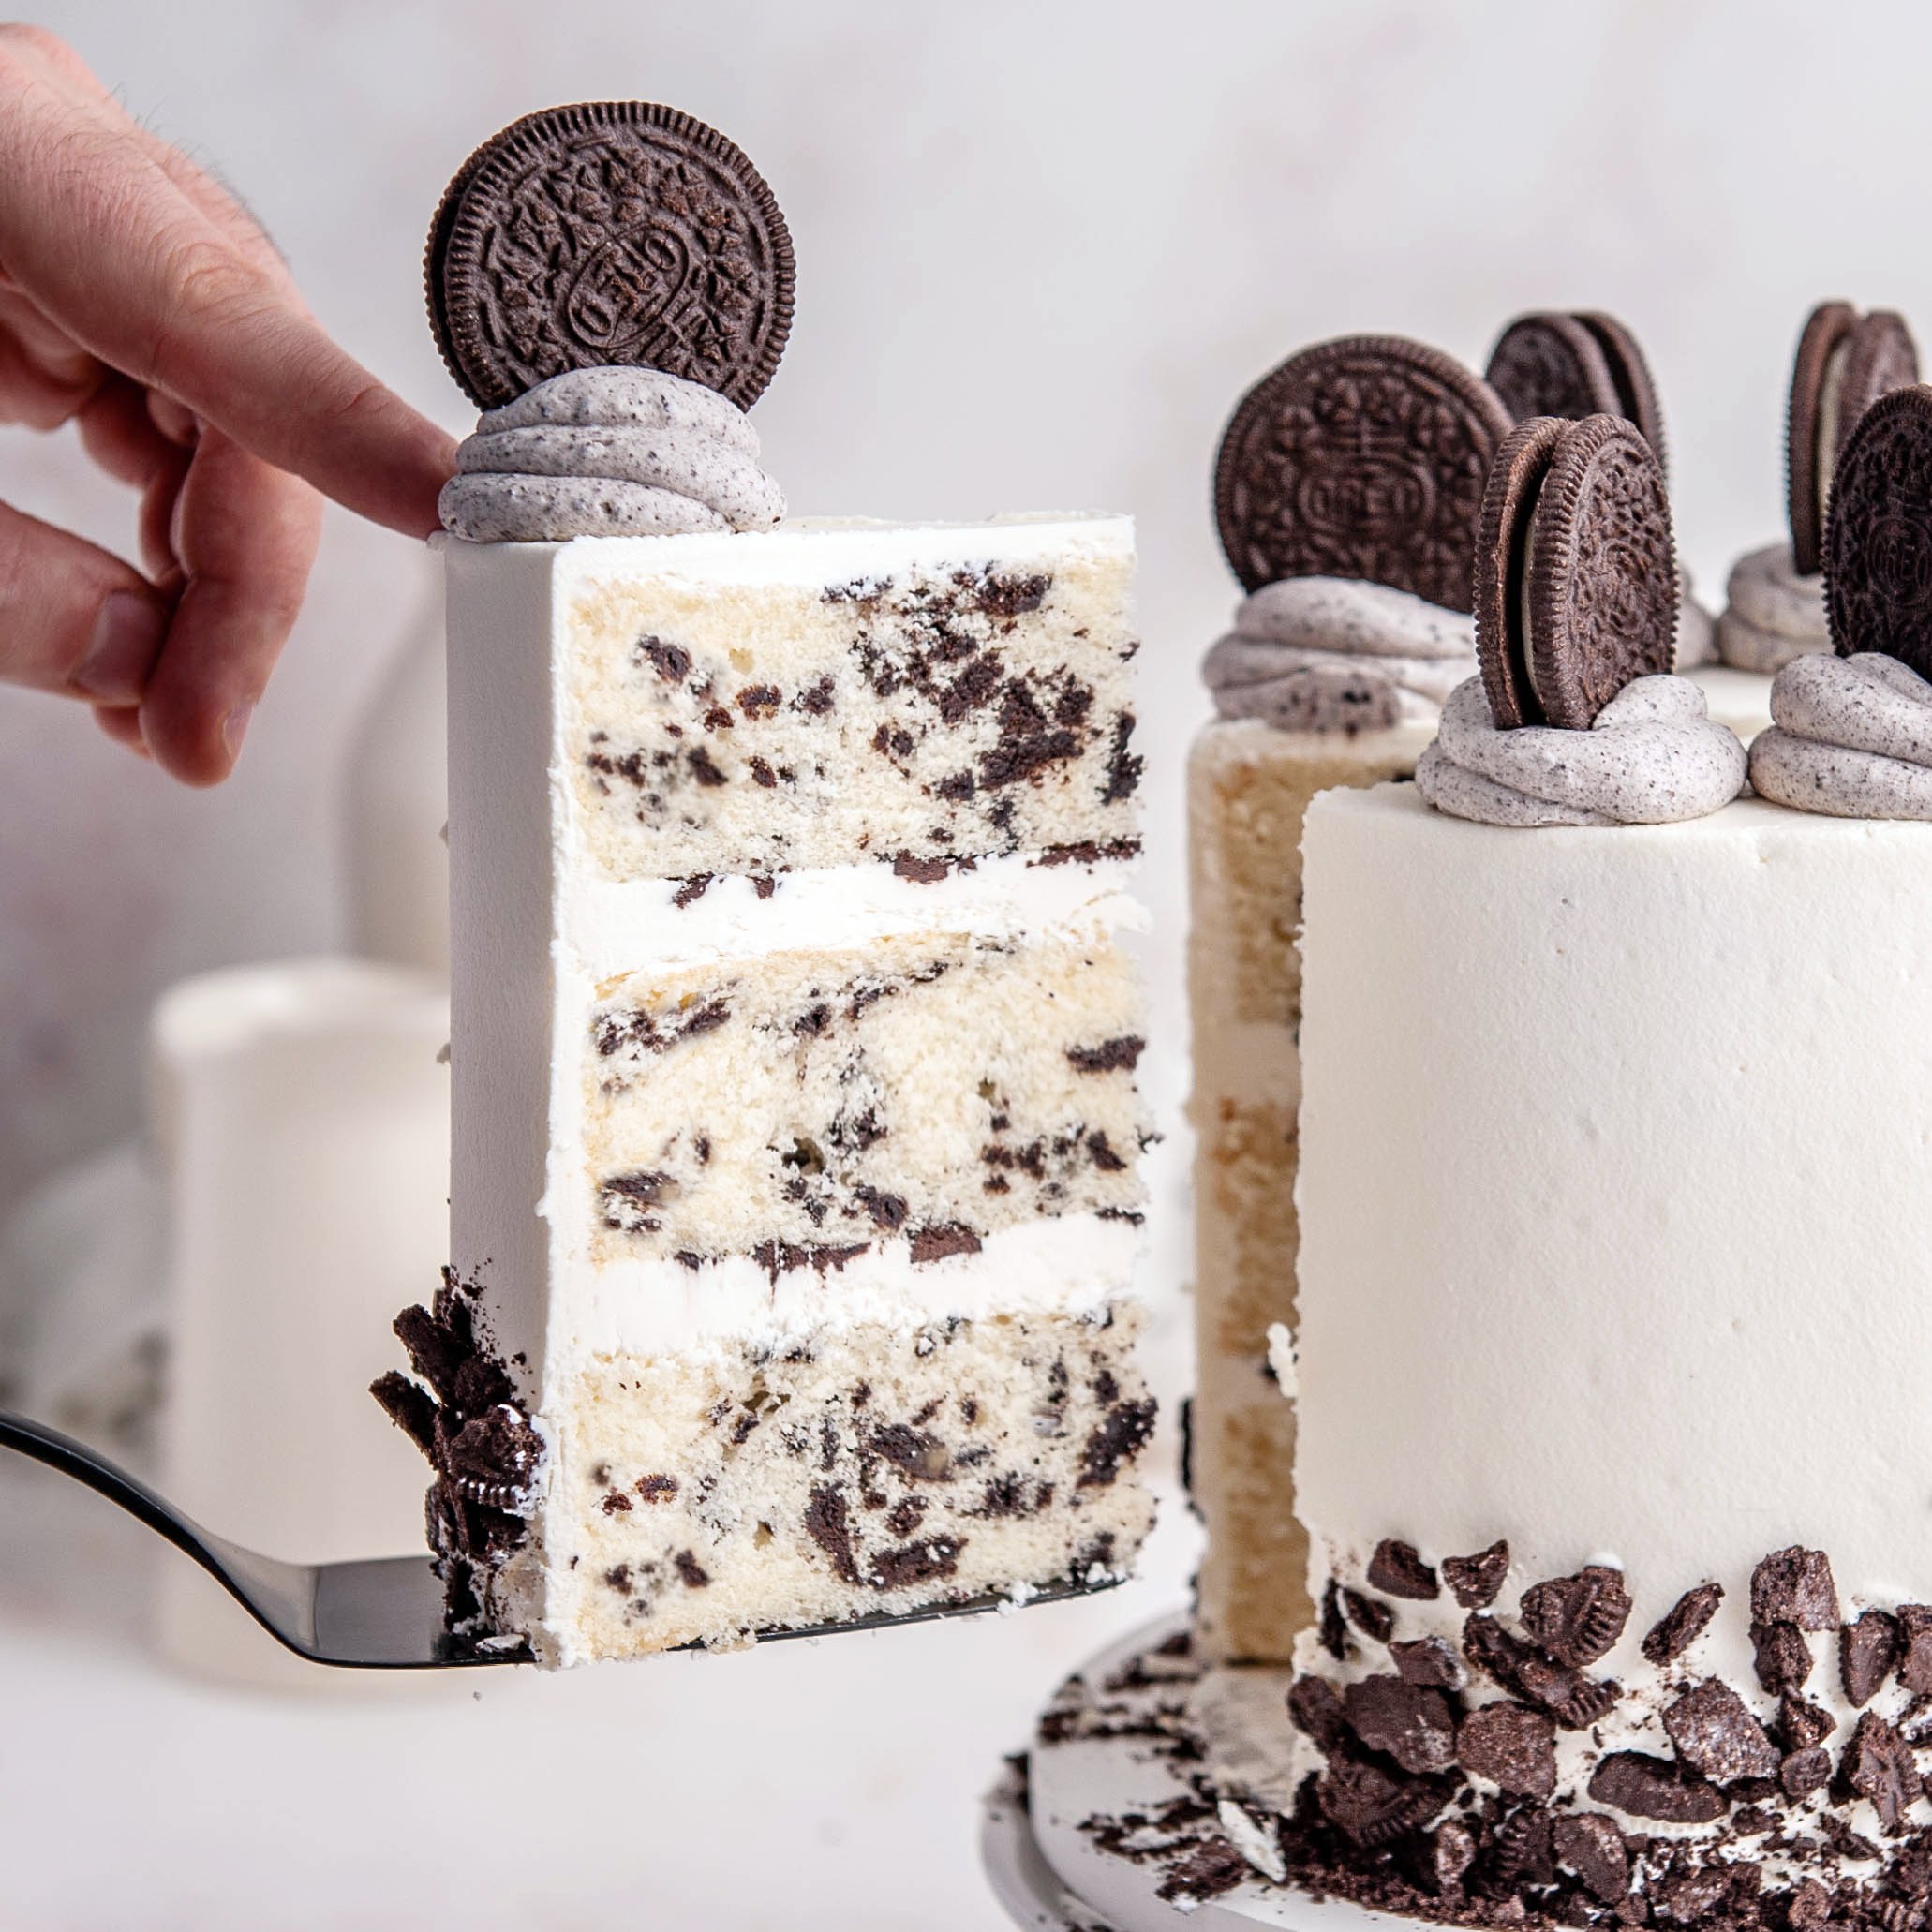
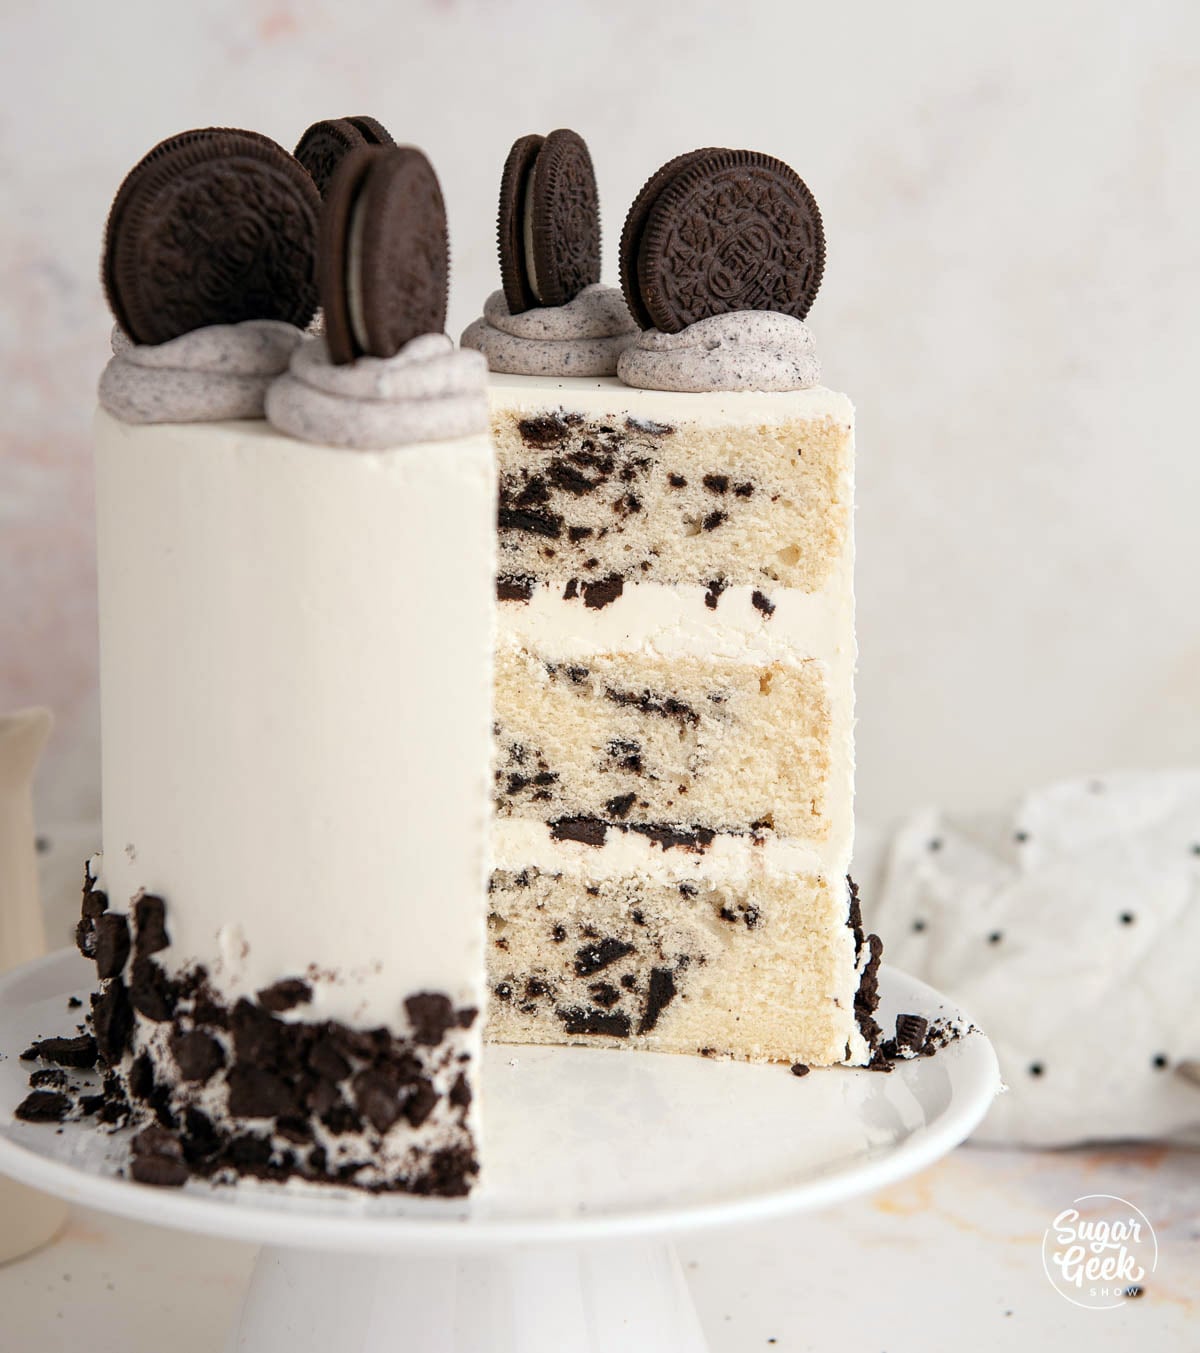
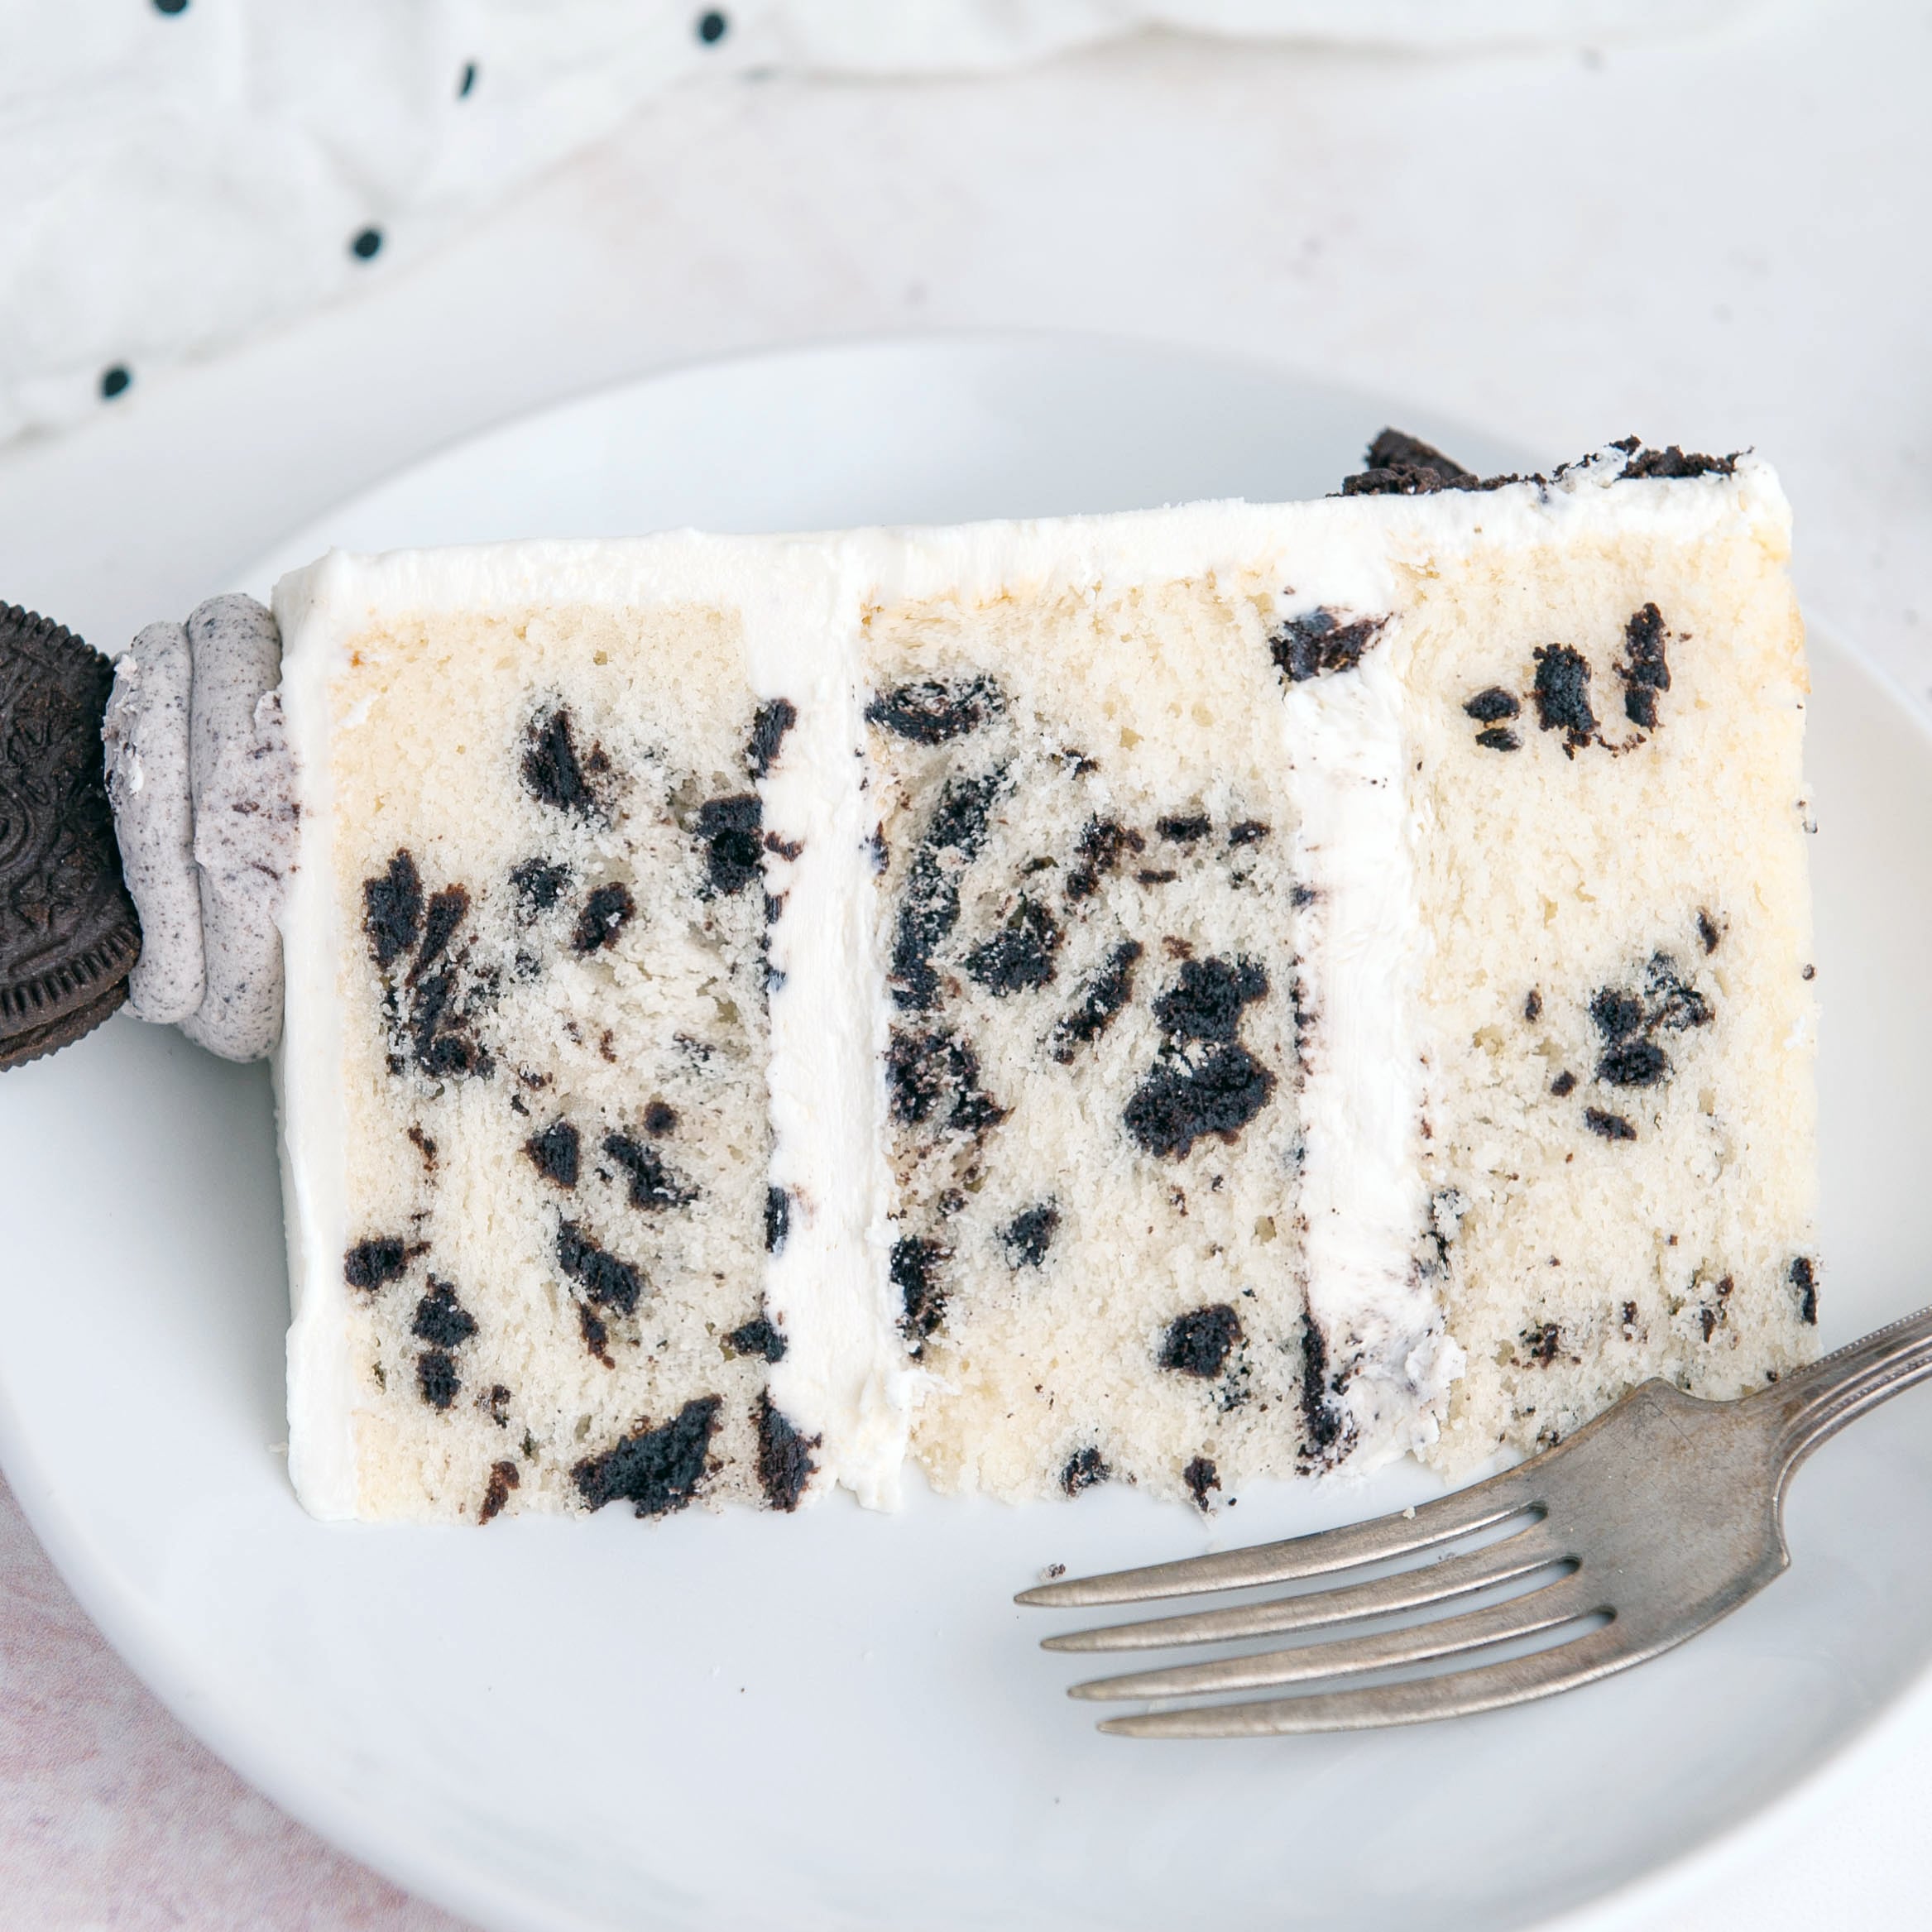
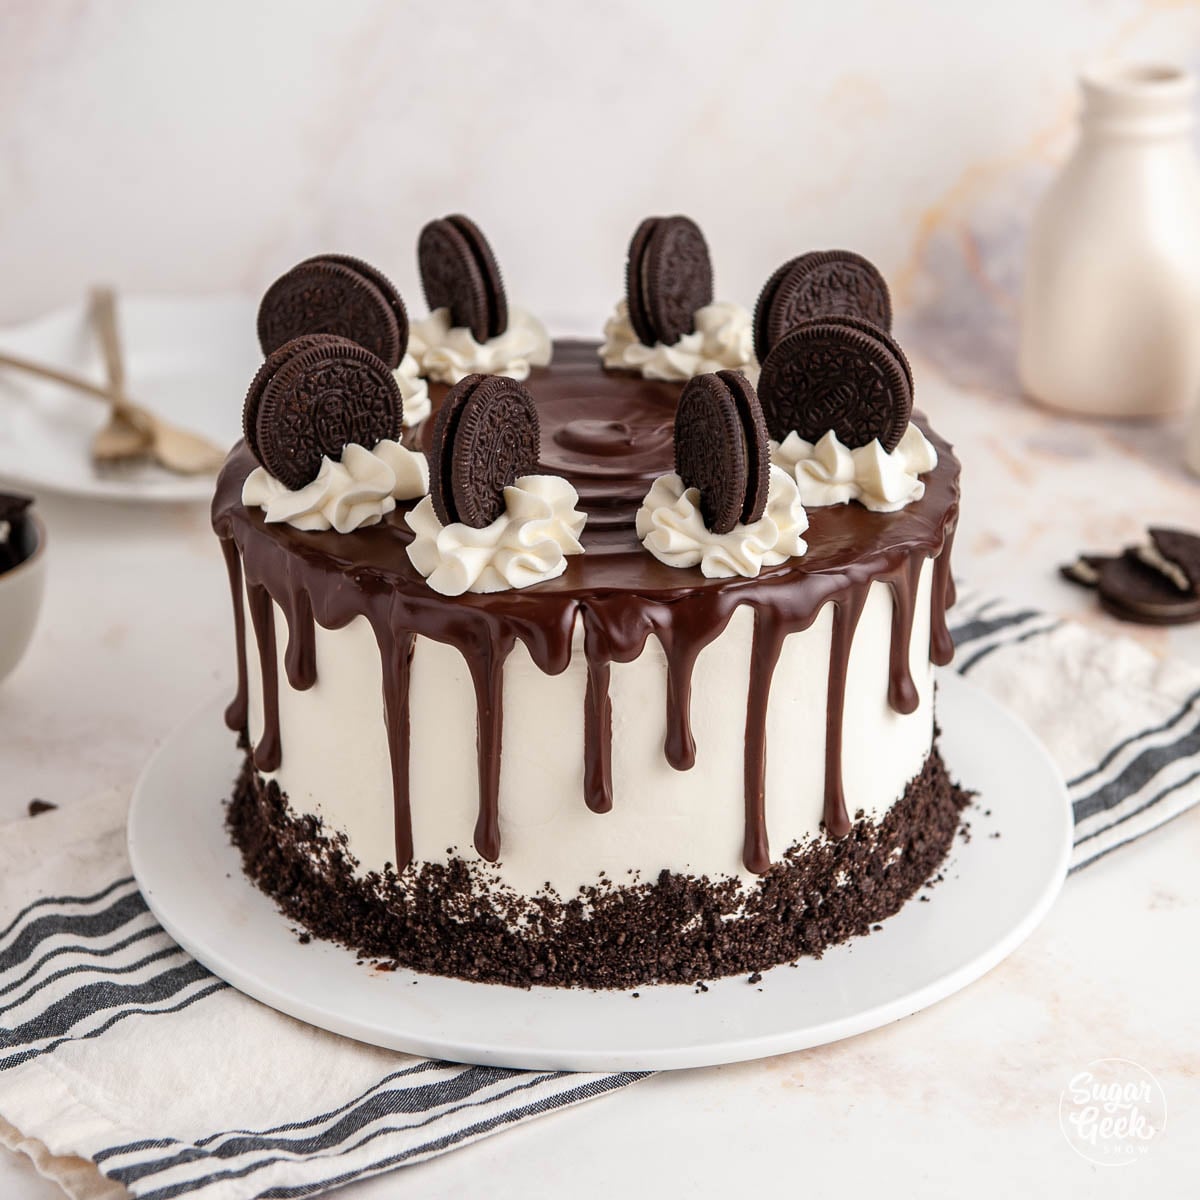
This Oreo cake recipe is three layers of soft, fluffy white cake packed with big chunks of chopped Oreos and frosted with a vanilla buttercream that tastes JUST like the cream filling inside a real Oreo. It is built on my white cake recipe base, which is sturdy enough to hold all those cookie chunks without them sinking to the bottom.
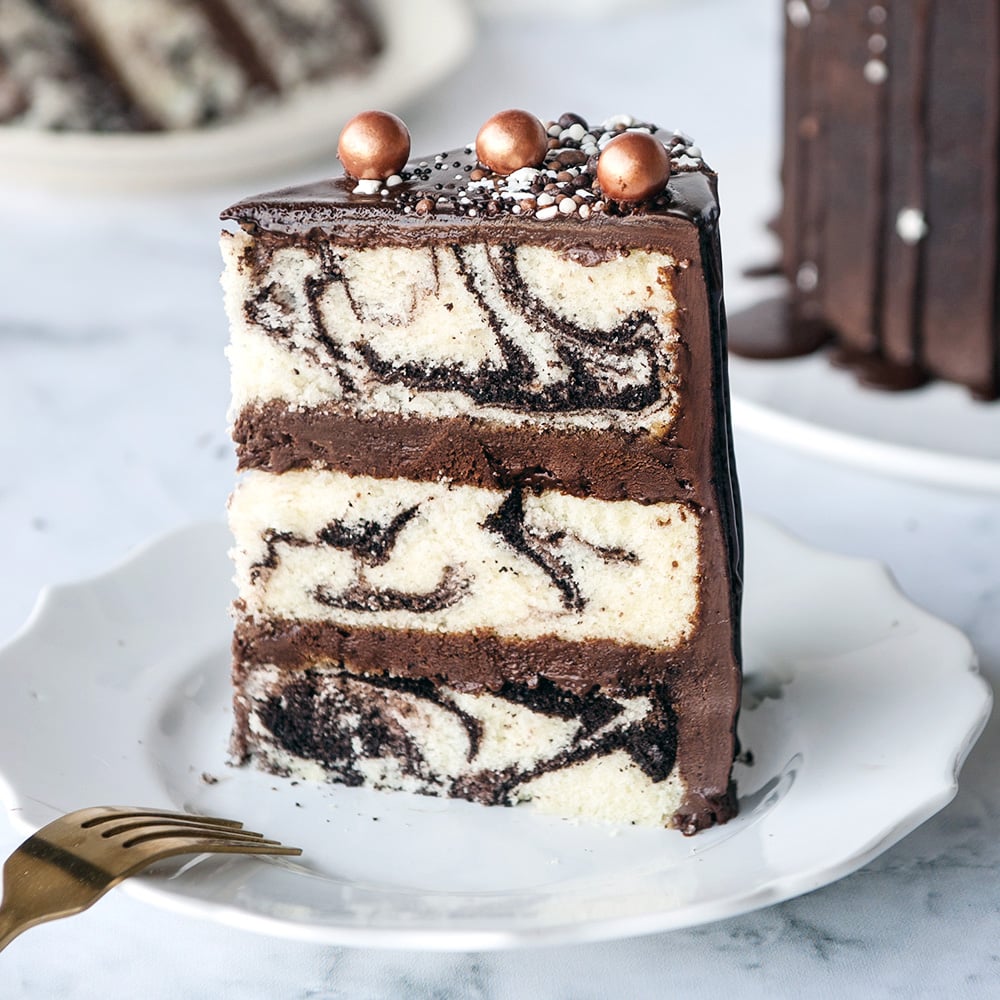
You guys messaged me about an Oreo cake over and over until I finally sat down and tested it properly. The big question was whether to make the cake itself a dark chocolate cake with black cocoa (the way actual Oreos are made) or to fold real chopped Oreos into a white cake. After baking both, chopped Oreos in a fluffy white cake won by a mile. But the real magic is the frosting. Oreo filling is basically American buttercream with one little secret ingredient, and once I figured it out, I could not stop eating it by the spoonful. If you have made my marble cake, this comes together the same easy way.
Quick Glance at the Recipe: Oreo Cake
- Recipe Name: Oreo Cake
- Why You'll Love It: Soft white cake studded with real Oreo chunks and a buttercream that tastes exactly like the cream inside an Oreo. It is a total crowd-pleaser.
- Time and Difficulty: Beginner-friendly. About 10 minutes of active prep, 35 to 45 minutes of baking, plus cooling and decorating time.
- Main Ingredients: White cake (all-purpose flour, butter, egg whites, milk, oil, clear vanilla) and Oreo buttercream (butter, powdered sugar, clear vanilla, white food coloring, crushed Oreos).
- Method: Cream the butter and sugar, add egg whites, then alternate dry and wet, fold in chopped Oreos into the batter, bake, then frost with buttercream.
- Texture and Flavor: Moist white crumb with soft cookie bits and a sweet, creamy frosting that nails the real Oreo flavor.
- Quick Tip: Scrape the cream filling out of the cookies before chopping. Left in, it melts during baking, leaving big holes in your cake.
Jump to:
- Quick Glance at the Recipe: Oreo Cake
- What Makes This Oreo Cake Recipe Different
- Oreo Cake Ingredients
- Why Do My Oreos Sink? (And How To Keep The Cake From Turning Grey)
- The Secret To Oreo Frosting That Tastes Like The Real Thing
- How To Make Oreo Cake Step-By-Step
- Cake Batter and Frosting Calculator
- Cake Batter and Frosting Calculator
- Cups of Batter Needed
- Cups of Frosting Needed
- Common Oreo Cake Problems To Avoid
- Final Thoughts
- Make This Oreo Cake Recipe Your Own
- Pan size conversions
- Make-Ahead and Storage
- Oreo Cake FAQs
- More Cake Recipes To Try
- Watch: How To Decorate A Cake Step-by-Step
- Recipe
What Makes This Oreo Cake Recipe Different
This Oreo cake recipe is the result of actually testing the annoying parts, so you do not have to. Here is what sets it apart:
- Real Oreos, not Oreo flavoring. You are folding in actual chopped Oreos and crushing more into the frosting, so it tastes like cookies and cream because it literally is.
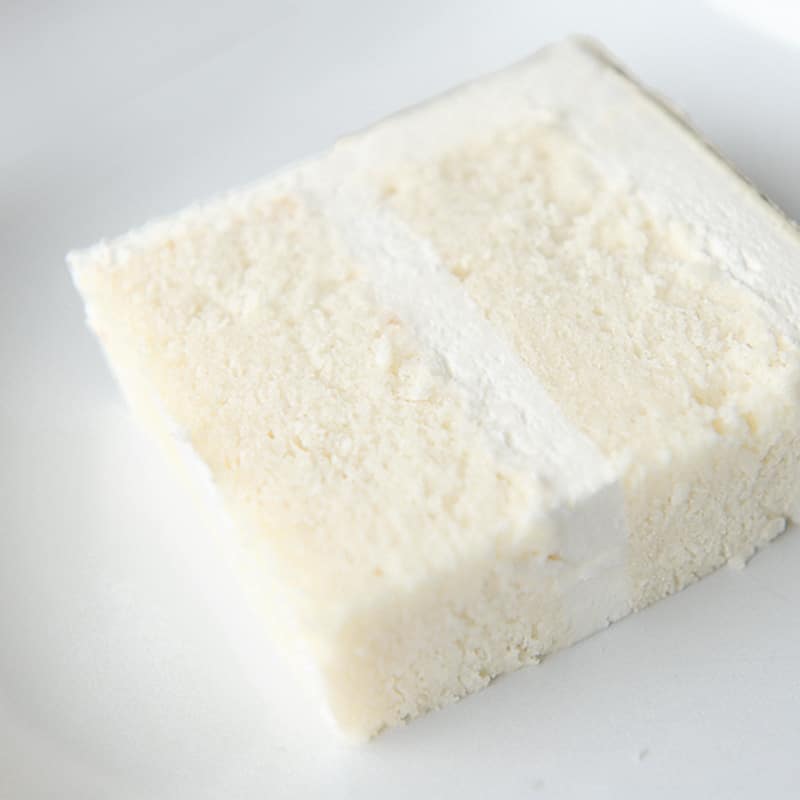
- A white cake base that holds the cookies up. I tested this with my softer white velvet cake first, and every single Oreo sank to the bottom. The white cake base uses all-purpose flour and the regular creaming method, so it is strong enough to suspend the cookie chunks instead of letting them drop.
- Frosting that tastes like the REAL Oreo filling. Not just "vanilla buttercream with cookies in it." There is one secret ingredient (clear vanilla) that flips a plain American buttercream into something that tastes like the inside of an actual Oreo. Whole section on this below.
- The cookies go in at the end. Folding Oreo cookie bits into the batter at the end not only ensures they stay suspended in the cake batter but it also stops the cake batter from turning grey.
- Filling scraped out on purpose. Leaving the Oreo cream filling in the chopped cookies seems like a "why waste it" move, but it melts out in the oven and leaves holes in the crumb. Scrape it out (or save it for the frosting).
Oreo Cake Ingredients
This is a short, friendly ingredient list, mostly pantry staples plus a package of Oreos. I always recommend weighing your ingredients with a digital kitchen scale for the most accurate results, especially for the cake. The one thing I would not skip is the clear vanilla, it is what makes the whole thing taste like Oreos.
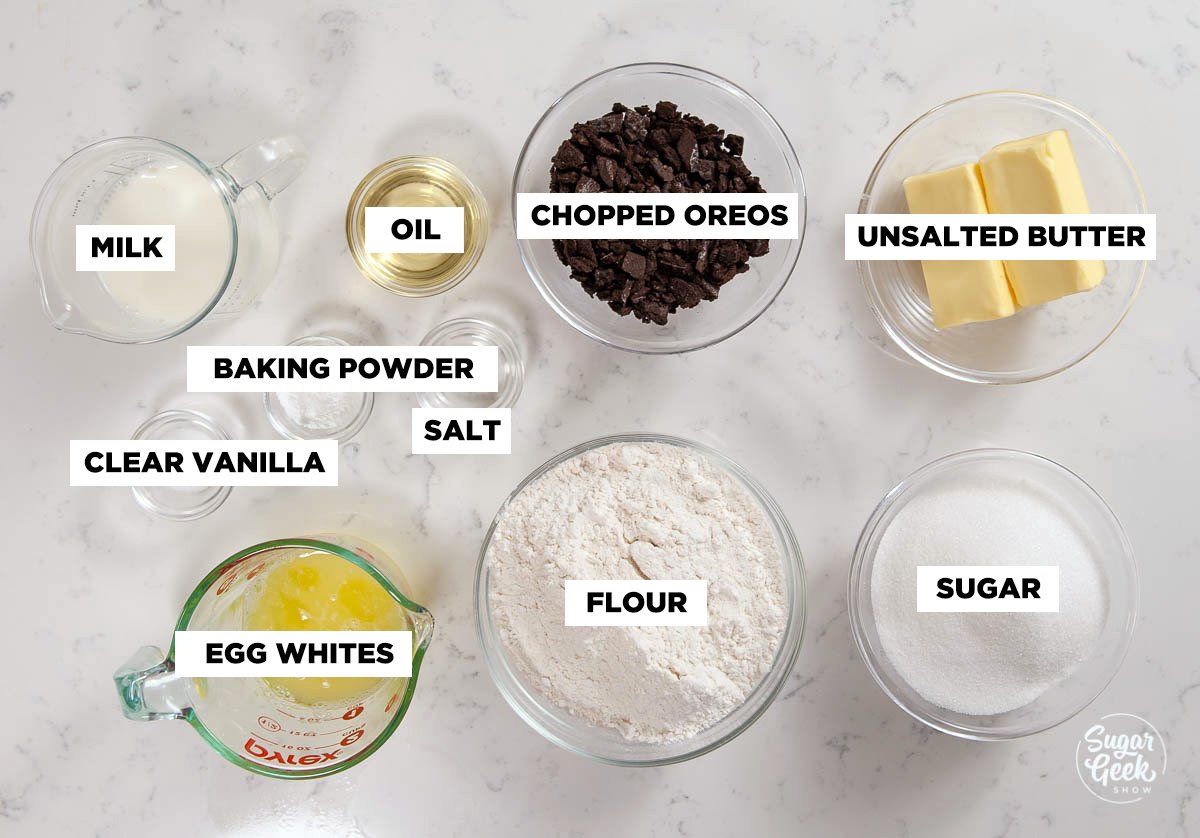
All-purpose flour. The structure of the cake. All-purpose (not cake flour) is on purpose here, the slightly higher protein is what keeps the crumb sturdy enough to hold the Oreo chunks up instead of letting them sink.
Baking powder. Your leavening for a tall, even rise.
Salt. Balances the sweetness and wakes up the vanilla.
Unsalted butter. The main fat in both the cake and the frosting. Room temperature is non-negotiable, cold butter will not cream properly, and your batter can curdle.
Granulated sugar. Sweetens the cake and, when you cream it into the butter for a full 5 minutes, helps build the light, fluffy texture.
Egg whites. Whites only (no yolks) keep the crumb bright white so it contrasts with the dark cookie pieces. Fresh or boxed egg whites both work here. Bring them to room temperature or the cold whites will curdle your batter.
Milk. Adds moisture and a tender crumb. Warm it slightly so it does not shock the room-temperature butter, and make it curdle.
Vegetable oil. A little oil alongside the butter keeps the cake moist for days, not just the day you bake it.
Clear vanilla extract. The secret weapon. Clear vanilla (the imitation kind) is what gives both the cake and the frosting that distinct Oreo-filling flavor, and it keeps everything bright white. Pure vanilla works too, but tints things slightly and does not taste quite as "Oreo."
Powdered sugar. The body of the Oreo buttercream.
White food coloring. A couple of Tablespoons takes the buttercream from off-white to that bright Oreo-filling white. Totally optional, but it makes the frosting look the part.
Oreo cookies. You will chop some into ¼-inch chunks for the cake (filling scraped out) and crush more into fine crumbs for the frosting. Regular Oreos are what I use, but see the variations below for Double Stuf, Golden, mint, and gluten-free.
Why Do My Oreos Sink? (And How To Keep The Cake From Turning Grey)
This is the question nobody answers well, so let me actually answer it. There are two classic Oreo cake fails: the cookies all sink to the bottom, and the whole cake turns a dingy grey. Here is what is going on and how I fixed both.
Why the Oreos sink. A chopped Oreo is heavier than cake batter, so unless the batter is sturdy enough to hold it, gravity wins, and the cookies slide to the bottom during baking. The most common advice online is to toss the cookie pieces in flour first. That helps a little, but the bigger lever is the cake base itself. When I tested this in my soft white velvet cake (cake flour plus the reverse creaming method), the crumb was just too tender, and every Oreo sank no matter what. Switching to my white cake recipe base, which uses all-purpose flour and the standard creaming method, gave the batter enough body to suspend the cookies. The WASC cake recipe (a doctored mix) is sturdy enough to work here, too.
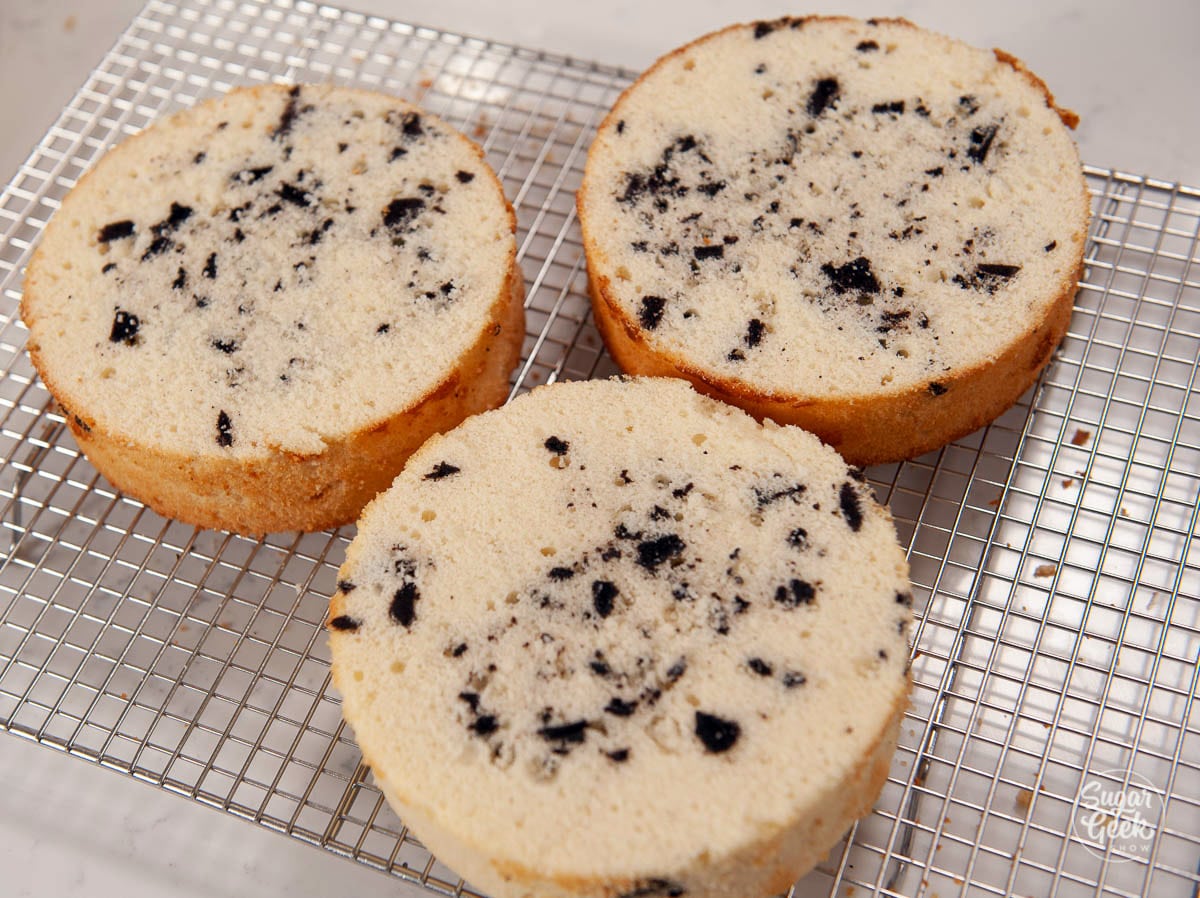
The other trick: add the Oreos to the cake batter in the pan. Instead of folding all the cookies into the full bowl of batter, divide your plain batter into the three pans first, then sprinkle the chopped Oreos on top of each pan and gently fold them in with a knife. When I mixed them into the whole batch, the pieces sank and stuck to the bottom of the pan. Adding them to the pan keeps them suspended right where you put them.
Why the cake turns grey. Grey cake happens when the cookies get crushed too fine, and the dark crumbs bleed into a white batter. Keep your pieces in real ¼-inch chunks instead of pulverizing them, and use clear vanilla so the base stays bright. Big chunks against a white crumb is what gives you those pretty cookies-and-cream pops instead of a muddy grey loaf.
The Secret To Oreo Frosting That Tastes Like The Real Thing
Here is the part I am weirdly proud of. Oreo filling is, at its core, basically American buttercream, butter and powdered sugar whipped together. So why does plain American buttercream taste like frosting and not like Oreos? The answer is clear vanilla extract. That imitation-vanilla flavor is exactly the note Oreo uses in its cream filling. Swap your pure vanilla for clear vanilla, and suddenly your buttercream tastes like the inside of the cookie. Who knew.
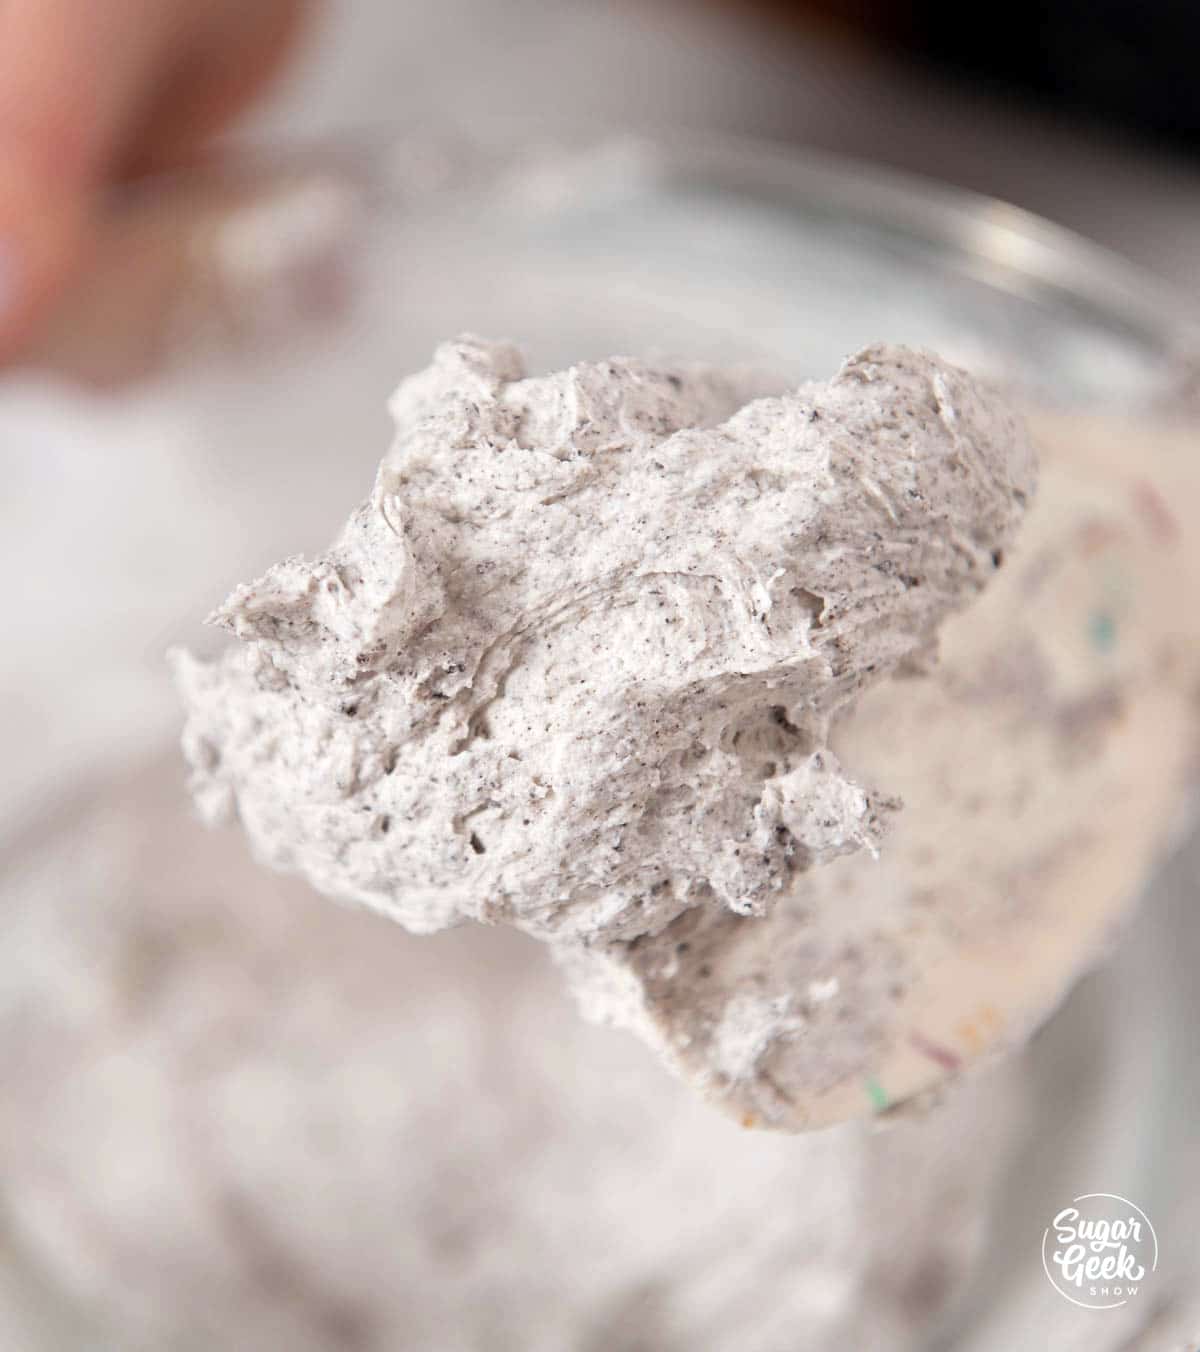
Two more things make it perfect. A couple of Tablespoons of white food coloring takes it from butter-yellow to that bright Oreo white. And for the creamiest texture, scoop out about half a cup of the finished buttercream, melt it in the microwave, and pour it back in while the mixer runs. It sounds strange, but it knocks out the air bubbles and makes the frosting silky. Crush more Oreos into a portion of it for the cookies-and-cream look, just crush them FINE, or the chunks will clog your piping tip.
How To Make Oreo Cake Step-By-Step
Before you start: bring your butter, egg whites, and milk to room temperature (cold ingredients will curdle the batter), preheat your oven to 335º F, and prep three 8"x2" cake pans with cake goop or your preferred pan release. Weigh everything out before you start mixing.
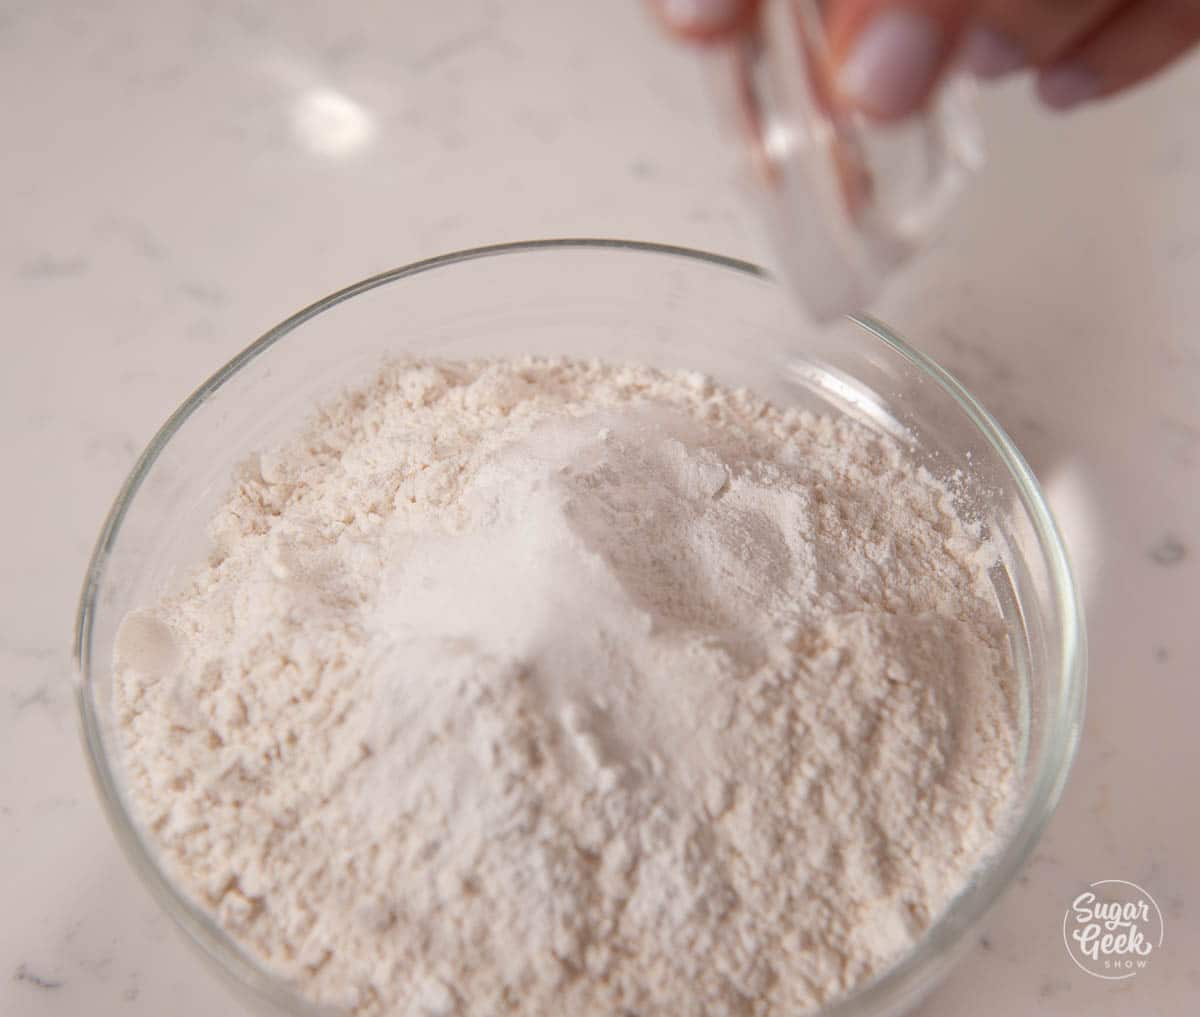
- Make the cake batter. Whisk your flour, baking powder, and salt in one bowl, and combine the milk, oil, and clear vanilla in a separate cup.
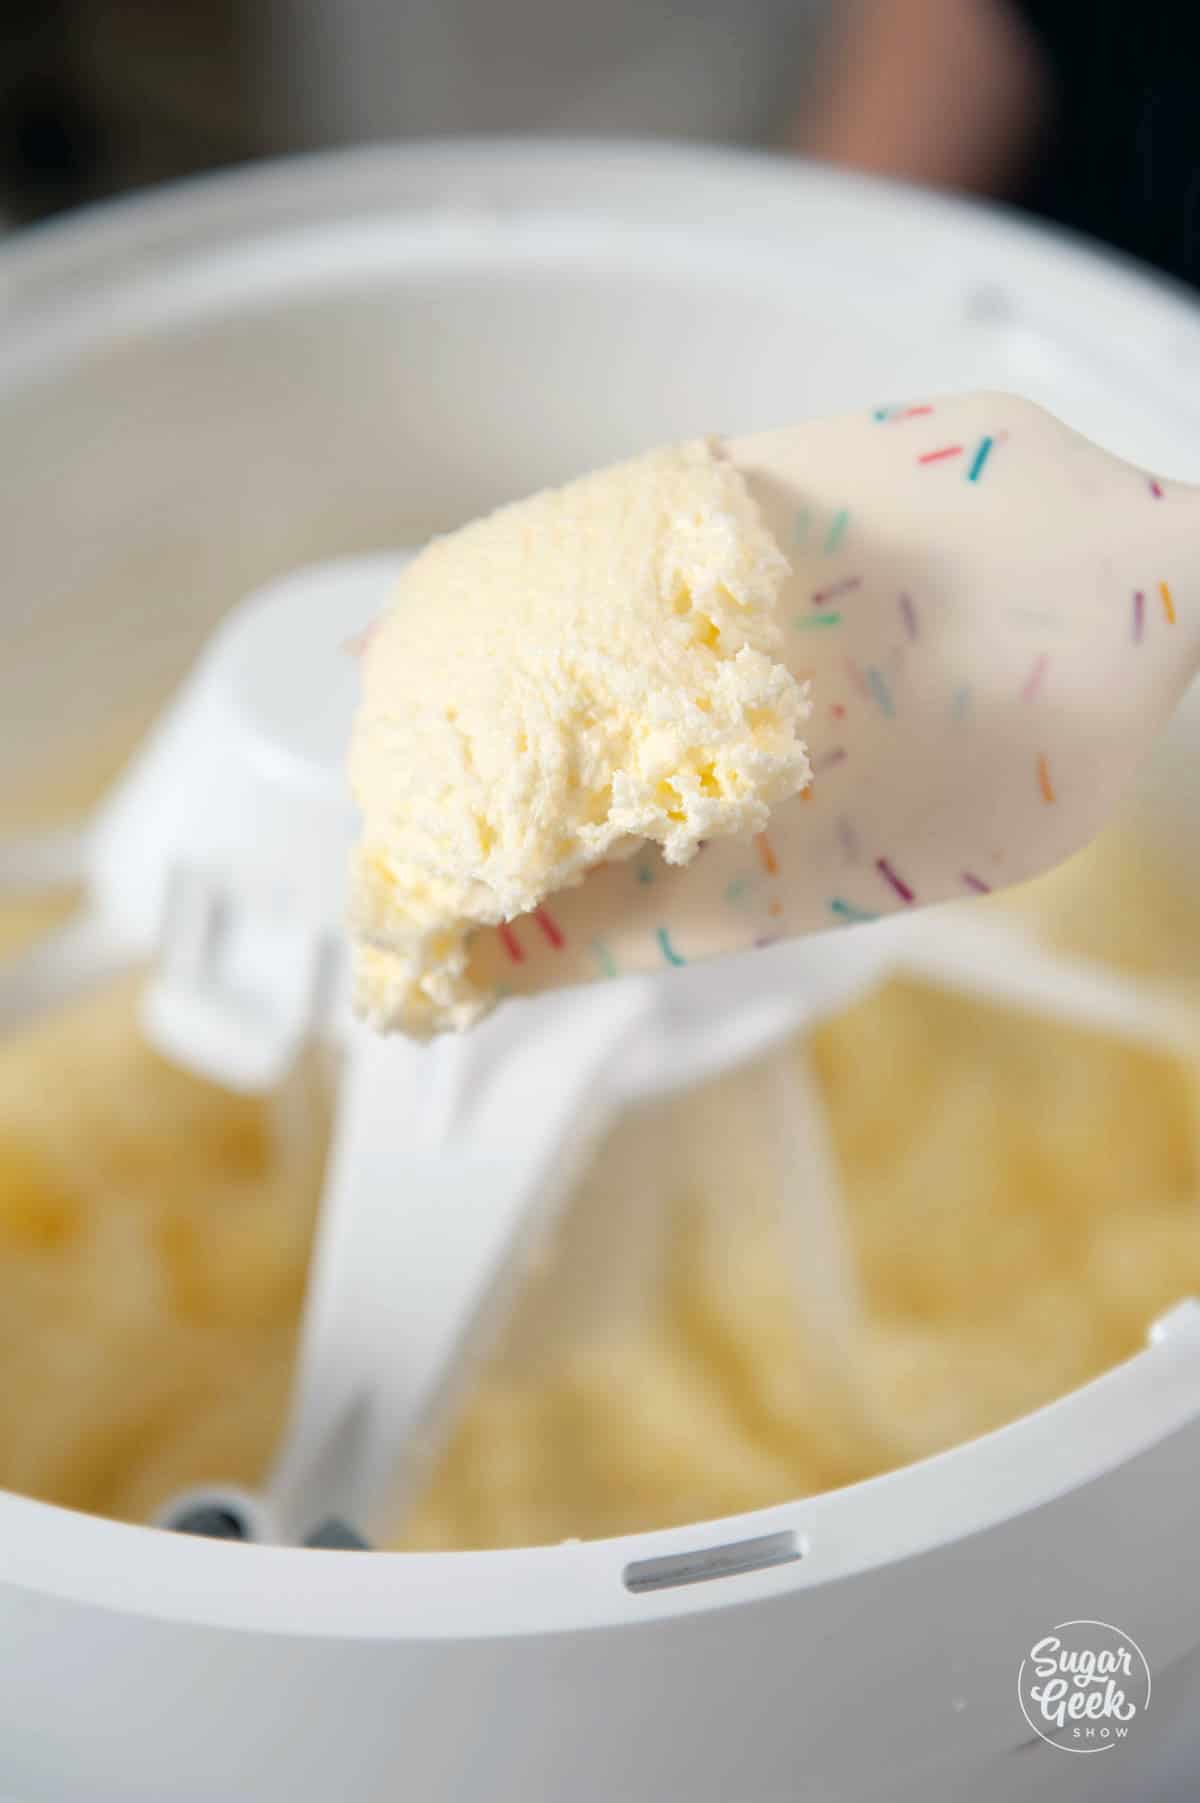
- Cream the softened butter smooth, then sprinkle in the sugar and whip on medium-high until light, white, and fluffy (about 5 minutes).
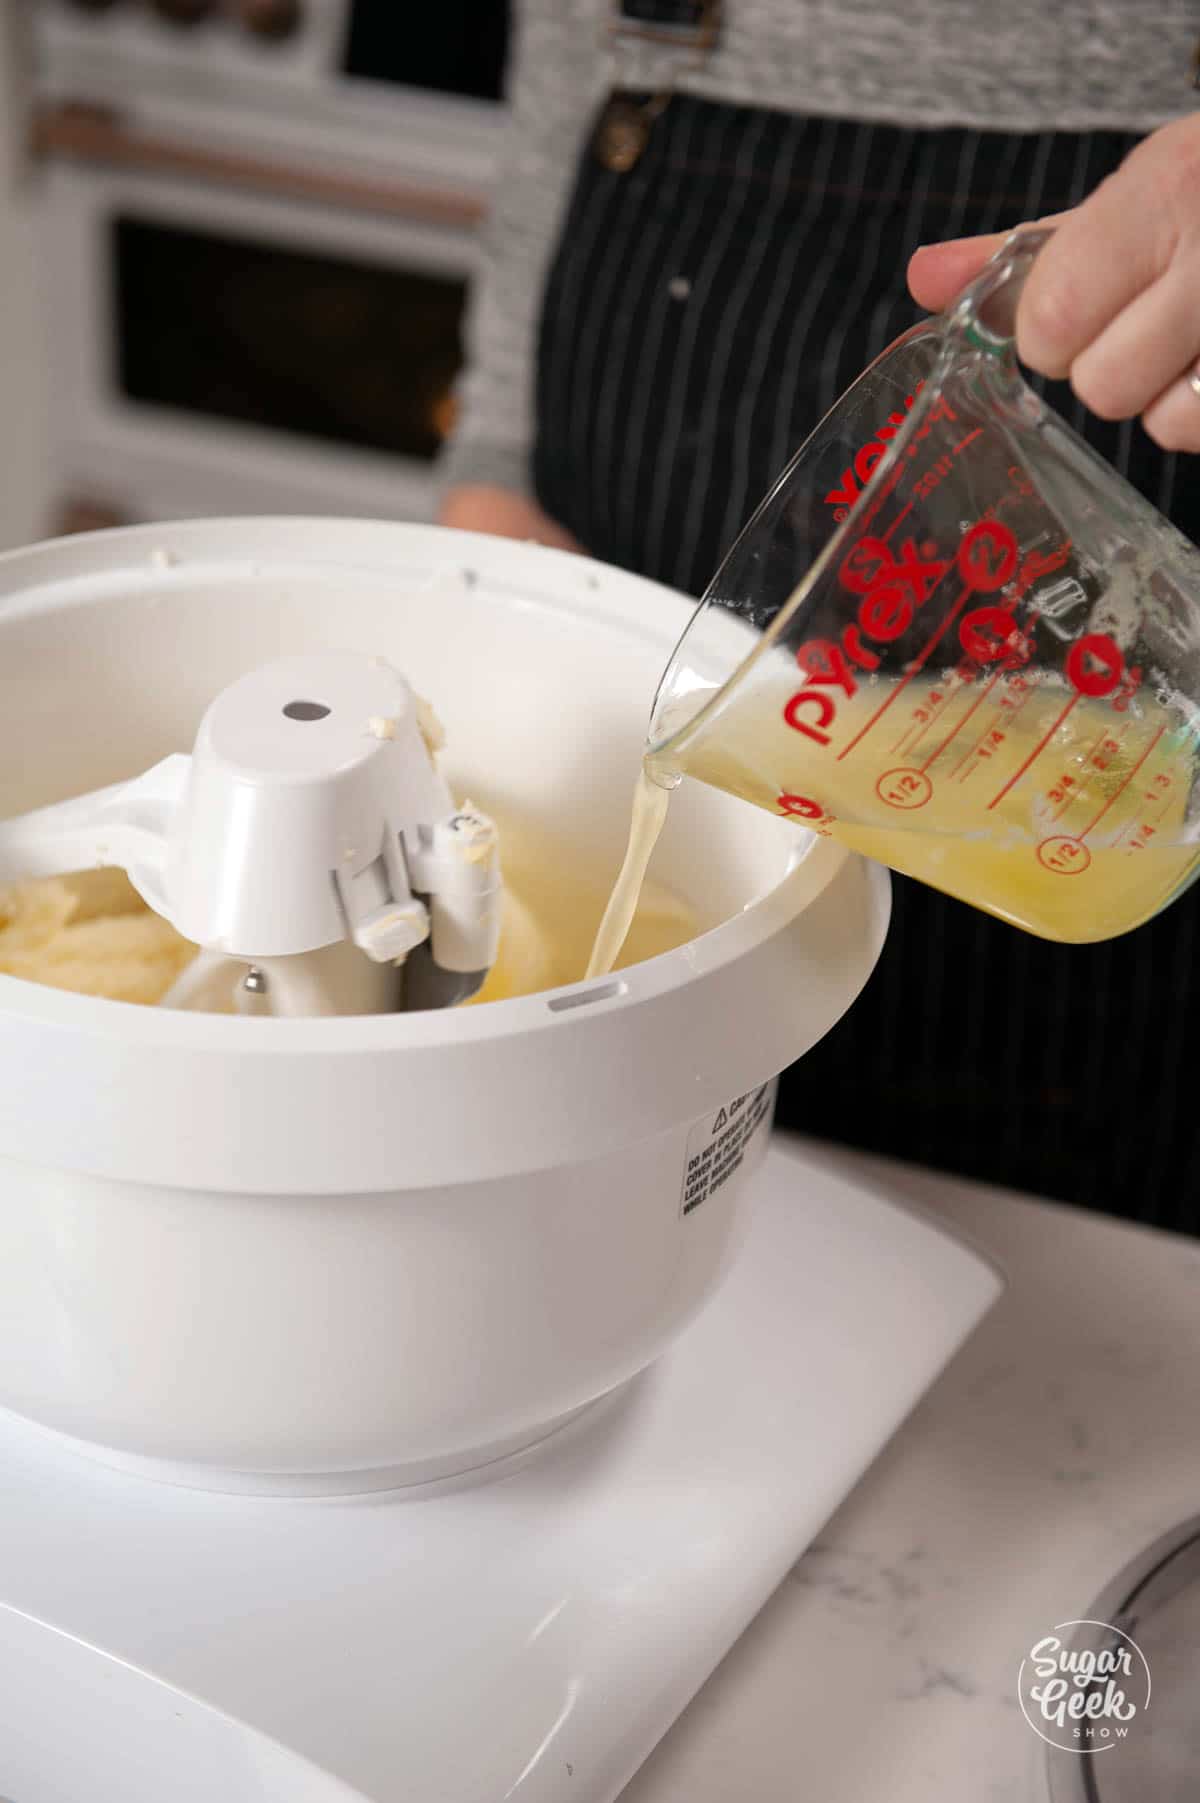
- Add the room temperature egg whites one at a time on low, letting each fully combine before adding the next.

- Then alternate: ⅓ of the dry, ½ the liquid, ⅓ dry, ½ liquid, the last ⅓ dry. Mix until just combined and stop.
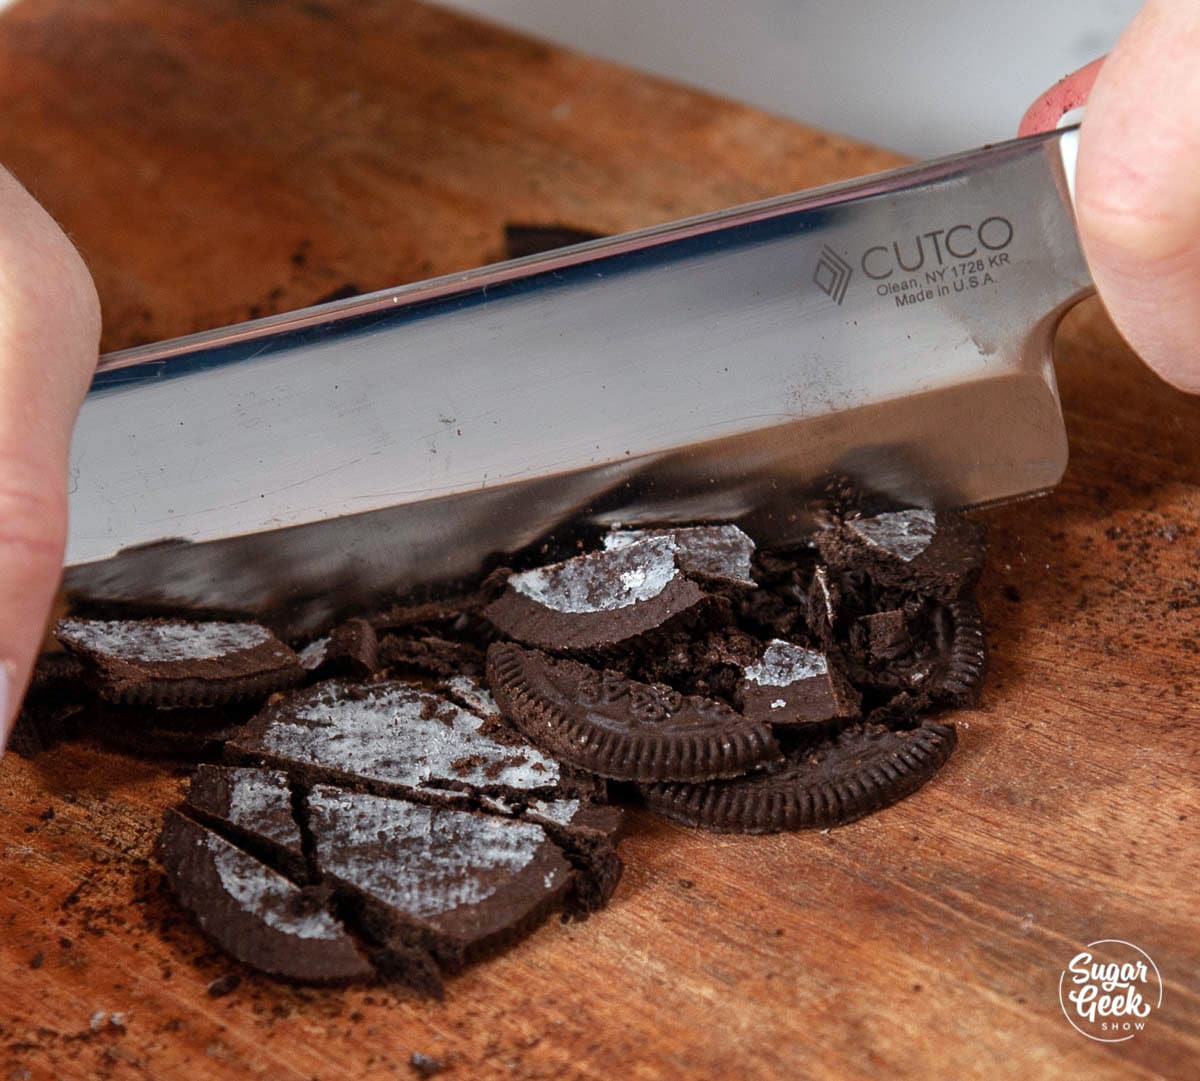
- Add the Oreos and bake. Scrape the cream filling out of your Oreos and roughly chop them into ¼-inch chunks.
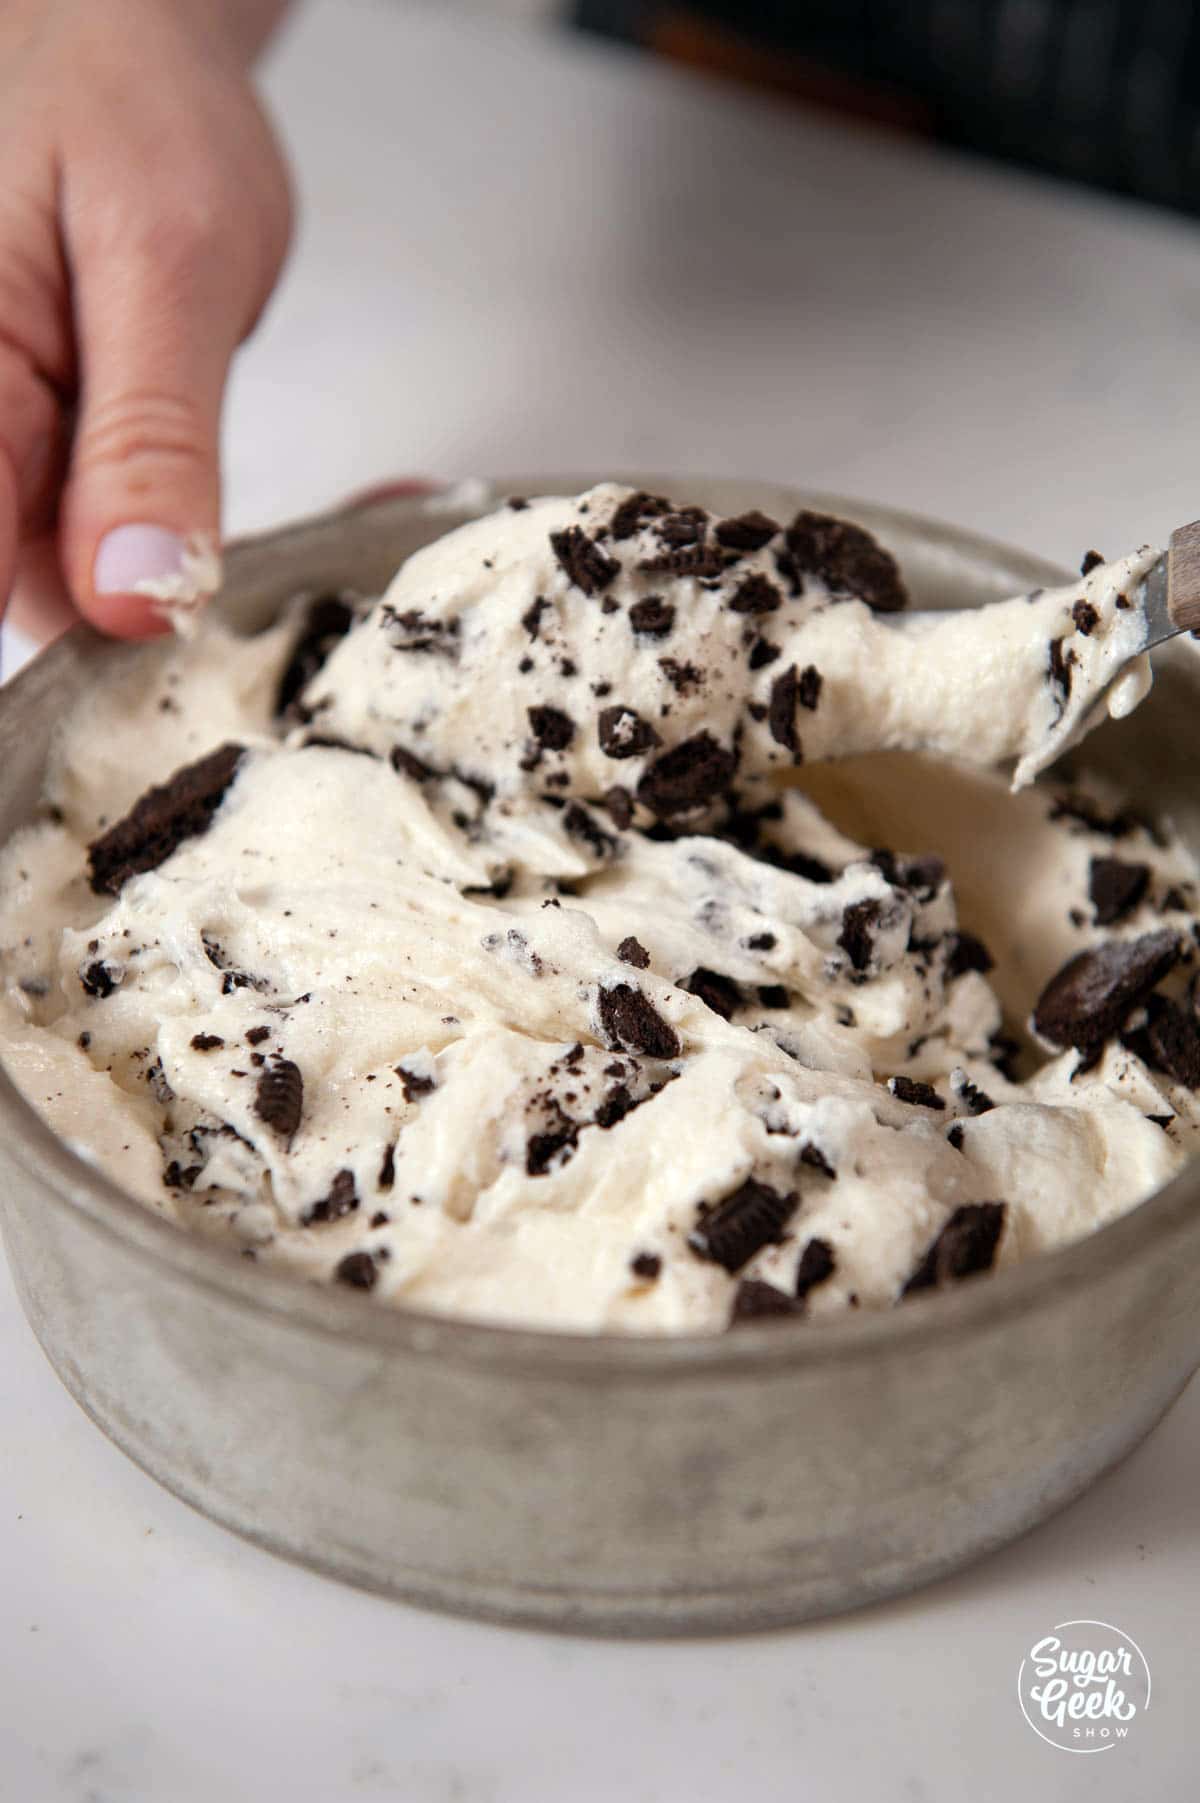
- Divide the plain batter evenly into your three pans, sprinkle the chopped Oreos over the top of each, and gently fold them in with a knife. Bake at 335º F for 35 to 45 minutes, until a toothpick comes out clean.
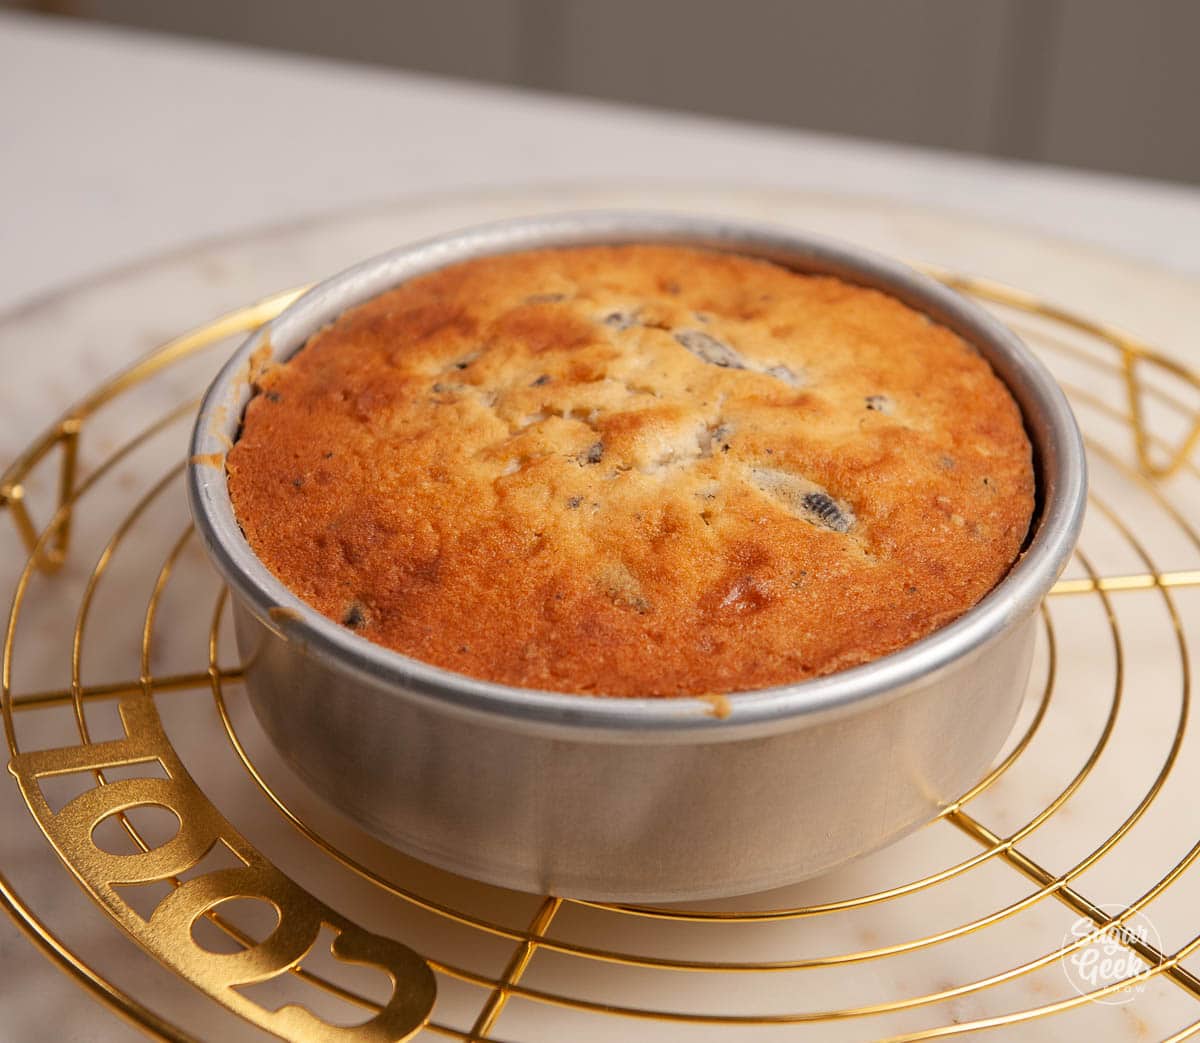
- Cool in the pans 10 minutes, turn out onto a rack, then flash chill in the freezer for an hour (or wrap and freeze up to a week) to lock in moisture.
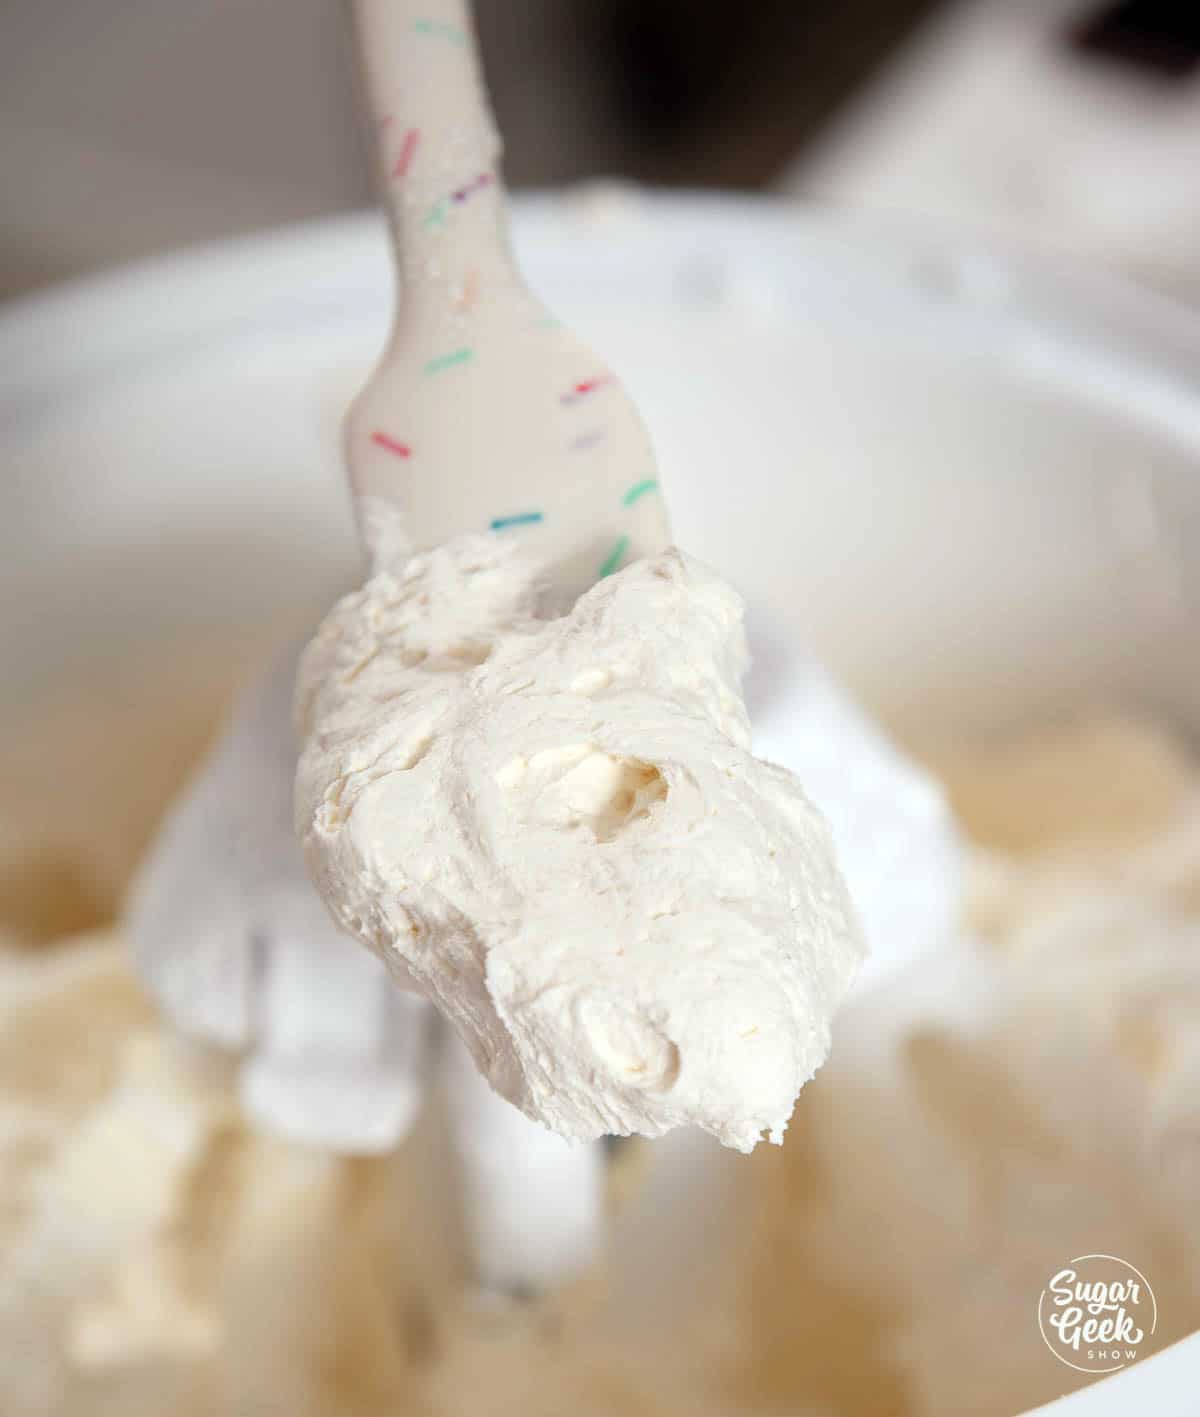
- Make the Oreo buttercream. Cream your butter smooth, then add the powdered sugar one cup at a time on low until combined (a mixer lid or towel keeps the sugar cloud down). Mix in the clear vanilla, white food coloring, and salt, and whip for about 5 minutes until smooth and creamy. Take out about ½ cup, melt it in the microwave, and pour it back in while mixing for an extra-silky texture. Thin with a Tablespoon or two of hot milk if it is too stiff.
PRO TIP: Scrape the filling OUT before chopping, and add the cookies in the pan, not in the bowl. Filling left in the cookies melts and leaves holes in the crumb. Cookies folded into the full batch of batter sink and stick to the bottom of the pan. Both fails are avoidable.
- Assemble and decorate. Trim the domes off your chilled cakes if you like a flat stack. Fill and frost with Oreo buttercream, or leave out the Oreo for a white-frosted look, as I did. (I do a crumb coat, chill 15 minutes, then a final coat).
- Mix crushed Oreos into about a cup of leftover buttercream for the dollops on top, and finish with whole or halved Oreos.
Cake Batter and Frosting Calculator
This recipe makes about 12 cups of cake batter (enough for three 8"x2" rounds, or two 9"x2" rounds) and about 7 cups of Oreo buttercream. Use the slider on the recipe card to scale up or down, and the calculator above to figure out batter and frosting for a different pan size.
Cake Batter and Frosting Calculator
Select an option below to calculate how much batter or frosting you need. Adjust the servings slider on the recipe card to change the amounts the recipe makes.
Choose a pan type
Choose a cake pan size
(based on 2" tall cake pan)
Choose a cake pan size
(based on 2" tall cake pan)
Cupcake Tin Size
Choose number of pans
Cups of Batter Needed
8 cups
Cups of Frosting Needed
5 cups
Note: measurements are estimated based off the vanilla cake recipe using standard US cake pans and sizes. Measurements used are for 2" tall cake pans only. Your results may vary. Do not overfill cake pans above manufacturer's recommended guidelines.
Common Oreo Cake Problems To Avoid
- Oreos sank to the bottom. Your batter was too soft to hold them, or you mixed them into the batter too soon. Use the all-purpose flour white cake base and add the chopped cookies to the pan, folding them into each pan individually.
- Big holes in the crumb. You left the cream filling in the cookies. It melts during baking and leaves voids. Scrape the filling out before chopping (save it for the frosting if you want).
- The cake turned grey. Your cookies were crushed too fine and bled into the batter. Keep them in ¼-inch chunks and use clear vanilla to keep the base bright white.
- The batter curdled, or the cake did not rise. Cold egg whites or cold milk. Everything has to be at room temperature so it emulsifies with the creamed butter instead of breaking it.
- Frosting clogs the piping tip. The Oreo crumbs in your buttercream are too big. Crush them to a fine powder (a food processor is easiest) before mixing them in for any frosting you plan to pipe.
- Buttercream tastes like plain frosting, not Oreos. You used pure vanilla instead of clear vanilla. Clear vanilla is the flavor that reads as "Oreo filling."
Final Thoughts
This is one of those recipes I almost overthought. I went back and forth on the dark chocolate black-cocoa version forever, and in the end, the simple answer (real Oreos in a fluffy white cake) was the best one. The frosting is the part that gets people though. Every time I make it, someone asks how I got it to taste exactly like the cookie, and it is honestly just the clear vanilla. Trust me on that one little bottle.
If you have never weighed your cake ingredients before, this is a great recipe to start with. A scale is the difference between a cake that is moist and even every time and one that is a gamble. Once you go weight-based, you will not go back.
Make This Oreo Cake Recipe Your Own
Different Oreo varieties
- Double Stuf Oreos. More cream filling than you need (and you are scraping the filling out anyway), so regular Oreos are actually the more economical pick for the cake. They work fine; you just toss more filling.
- Golden Oreos. Great flavor swap for a vanilla-on-vanilla cake, but the golden cookies are softer and bake into mush more easily, so keep your chunks on the bigger side and fold gently.
- Mint, Birthday Cake, or other flavored Oreos. Fun way to flavor the whole cake. Use them the same way (filling scraped out, chopped into chunks) and crush the matching flavor into the frosting.
- Gluten-free Oreos. They exist, and they work in the cookie role, but the cake batter itself is not gluten-free. For a fully gluten-free cake, build it on my gluten free cake base and fold in gluten-free sandwich cookies.
Frosting swaps
The Oreo American buttercream is the classic here, but you can fold crushed Oreos into other frostings, too. A Swiss meringue buttercream gives a less-sweet, silkier finish (a few readers have used it on this exact cake and loved it), and a cream cheese frosting adds a tangy cookies-and-cream vibe. Just crush the cookies fine if you are piping.
Add a chocolate drip
For a fancier finish, pour a chocolate ganache drip around the top edge before adding your dollops. It plays up the cookies-and-cream look and is the same technique I use on my drip cakes. Want a walkthrough on the decorating? My how to decorate a cake guide covers crumb coating and smoothing.
Pan size conversions
| Pan | Batter | Bake time at 335º F |
|---|---|---|
| Three 8-inch rounds (standard) | Full batch (about 12 cups) | 35 to 45 minutes |
| Two 9-inch rounds | Full batch (thicker layers) | 35 to 45 minutes |
| Half-sheet pan (12x18) | Full batch | 30 to 40 minutes |
| About 36 cupcakes | Full batch, fill liners ⅔ full | 18 to 25 minutes |
A toothpick in the center should come out clean. Check on the early end and add a few minutes at a time; larger and deeper pans always take longer. A full batch will overflow a 9x13, so use a half-sheet (12x18) or scale down for the smaller pans.
Make-Ahead and Storage
The frosted cake keeps about 48 hours at room temperature, and honestly, room-temperature cake always tastes best. Because the Oreo buttercream is mostly butter and there is no fruit filling to spoil, you do not have to refrigerate it right away. To work ahead, bake the cake layers, wrap them warm in plastic, and freeze for up to a week (or a couple of weeks if well wrapped). Defrost wrapped layers in the fridge for 24 hours before decorating so they do not sweat. Do not leave unfrosted layers exposed in the fridge, or they will dry out.
Oreo Cake FAQs
They are the same dessert. "Cookies and cream cake" is the generic name, and "Oreo cake" calls out the specific brand of cookie, but both mean a vanilla or white cake studded with chocolate sandwich cookies and frosted with a cookies-and-cream style buttercream.
Whole milk is what I tested and what I recommend. Heavy cream will make a denser, richer crumb, so if that is all you have, thin it with a little water (about half cream, half water). Buttermilk can work but it adds tang and slightly changes the texture, so the cake will taste a touch less like a classic white cake.
A slightly loose batter is normal for this recipe, but if it looks watery, it usually means a measuring slip (cups are the culprit, which is why I weigh). A few readers have added a couple of Tablespoons of flour to bring a too-thin batter back together and still gotten great results. Weighing your ingredients prevents it in the first place.
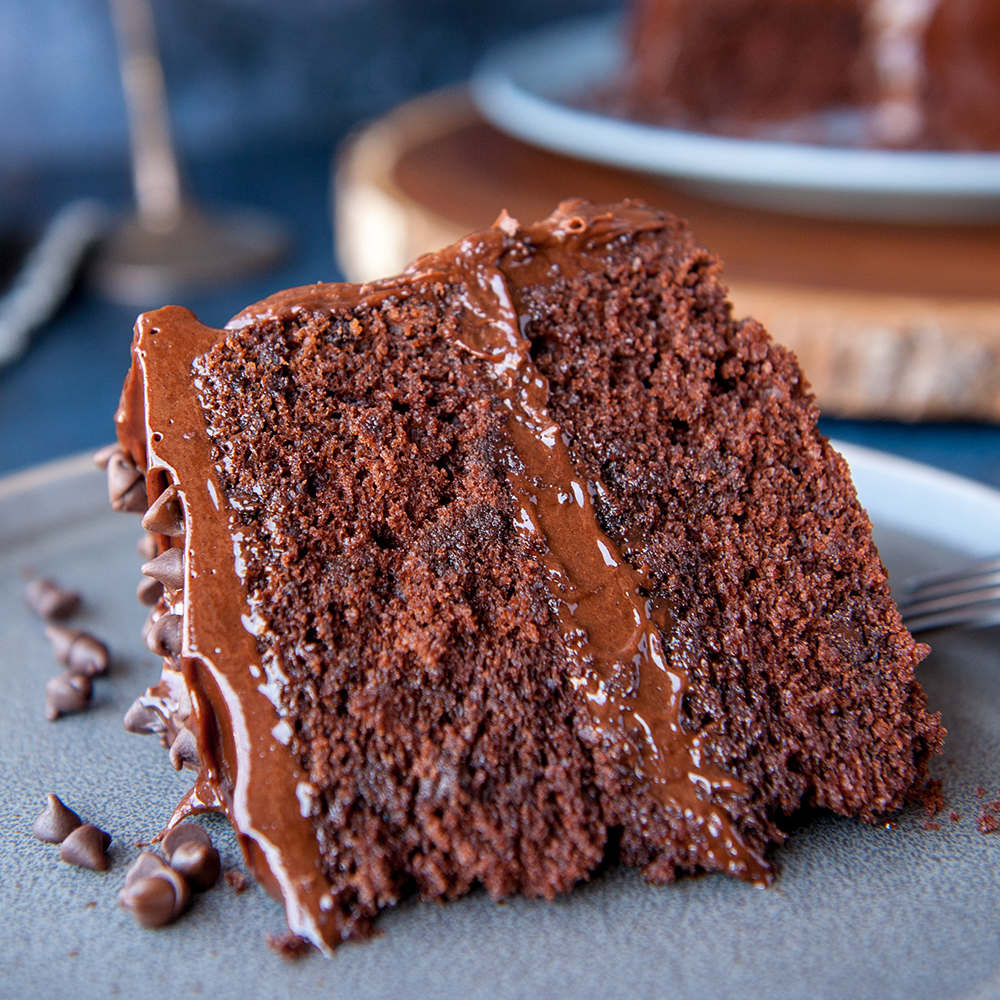
You can. I tested a dark chocolate version with black cocoa and preferred the white cake for the contrast, but if you want a darker, more Oreo-looking cake, bake the layers from a chocolate cake base and still fold in the chopped Oreos and use the Oreo buttercream.
Yes, the white cake base is sturdy enough to stack, and a few readers have used it as a wedding cake. Bake your layers, chill them firm, use a proper internal support system (dowels and boards) for tiers, and keep the assembled cake cool and out of direct heat so the buttercream stays stable.
More Cake Recipes To Try

Watch: How To Decorate A Cake Step-by-Step
Before you start decorating, watch the video below where I show you every step of decorating a cake from start to finish. Seeing the process in action makes it much easier to follow along
- Liz Marek.

Recipe
Equipment
- Three, 8"x2" cake pans
Ingredients
Oreo Cake
- 21 ounces All-Purpose flour
- 4 teaspoons baking powder
- ½ teaspoon salt
- 12 ounces unsalted butter room temperature
- 21 ounces sugar
- 9 large egg whites room temperature - fresh or boxed is fine
- 15 ounces milk room temperature
- 3 ounces vegetable oil
- 1 Tablespoon clear vanilla extract
- 6 ounces roughly chopped Oreo cookies about 18 Oreos, without filling
Oreo Frosting
- 24 ounces unsalted butter room temperature
- 48 ounces powdered sugar
- ½ teaspoon salt
- 3 teaspoon clear vanilla extract
- 4 Tablespoons white food coloring optional
- 3 ounces crushed Oreo cookies about 5 Oreos, without filling (You can add more or leave these out.)
- 2-3 Tablespoons milk (hot) for thinning
Instructions
Oreo Cake
- Before you begin: Bring the butter, egg whites, and milk to room temperature (cold ingredients will curdle the batter). Preheat the oven to 335º F. Prep three 8"x2" cake pans with cake goop or your preferred pan release. Weigh all ingredients before mixing.
- In a large bowl, whisk together the flour, baking powder, and salt. Set aside.
- In a separate cup, combine the milk, oil, and clear vanilla. Set aside.
- Place the softened butter in a stand mixer with the paddle attachment and cream until smooth. Sprinkle in the sugar and whip on medium-high until light, white, and fluffy, about 5 minutes.
- With the mixer on low, add the egg whites one at a time, letting each fully combine before adding the next.
- Add ⅓ of the dry ingredients and mix on low until just combined. Add ½ the liquids, then ⅓ dry, then the last ½ of liquids, then the final ⅓ dry. Mix until just combined. Do not overmix.
- Scrape the cream filling out of the Oreos and roughly chop them into ¼-inch chunks. Divide the batter evenly into the prepared pans, sprinkle the chopped Oreos over the top of each, and gently fold them in with a knife until just combined.
- Bake at 335º F for 35 to 45 minutes, or until a toothpick inserted in the center comes out clean.
- Cool the cakes in the pans for 10 minutes, then turn out onto a wire rack. Flash chill in the freezer for about an hour, or wrap in plastic and freeze up to a week to lock in moisture. Trim the domes and edges once cool if desired.
Oreo Buttercream
- Add the butter to the stand mixer bowl and cream until smooth with the whisk or paddle attachment.
- Add the powdered sugar one cup at a time on low speed, mixing until combined and smooth (a mixer lid or towel keeps the sugar from puffing up).
- Add the clear vanilla, white food coloring, and salt and mix about 5 minutes until smooth and creamy. For extra-creamy frosting, melt about ½ cup of the buttercream in the microwave and pour it back in while mixing.
- If the frosting is too thick, add 2 to 3 Tablespoons of milk and mix until combined.
Assemble
- Fill and frost the cooled cakes with the Oreo buttercream (crumb coat, chill 15 minutes, then a final coat).
- Mix the crushed Oreos into about 1 cup of leftover buttercream for the dollops on top. Crush the cookies fine if piping so they do not clog the tip.
- Finish with the dollops and whole or halved Oreos.
Video
Notes
- Clear (imitation) vanilla is what gives the cake and frosting the real Oreo flavor and keeps everything bright white. Pure vanilla works but tints slightly and tastes less "Oreo."
- Scrape the cream filling out of the cookies before chopping. Left in, it melts during baking and leaves holes in the crumb. Save it to mix into the frosting if you like.
- Egg whites only (no yolks) keep the crumb white for the best cookies-and-cream contrast. Fresh or boxed whites both work.
- Three 8"x2" rounds: full batch, bake 35 to 45 minutes (standard)
- Two 9"x2" rounds: full batch, thicker layers, bake 35 to 45 minutes
- Half-sheet pan (12x18): full batch, bake 30 to 40 minutes (a full batch will overflow a 9x13)
- About 36 cupcakes: fold a few chopped Oreos into each well, fill liners ⅔ full, bake 18 to 25 minutes
- Frosted cake: keeps about 48 hours at room temperature (room-temp cake tastes best). No fruit filling, so it does not need immediate refrigeration.
- Cake layers: bake, wrap warm in plastic, freeze up to a week (longer if well wrapped). Defrost in the fridge 24 hours before decorating.
- Do not refrigerate un-frosted layers uncovered or they will dry out.
- White cake base out of reach? The WASC cake recipe (doctored mix) is sturdy enough to hold the Oreos too.
- Less sweet finish: fold the crushed Oreos into a Swiss meringue buttercream instead of American buttercream.
- Oreo varieties: Double Stuf, Golden, mint, and gluten-free sandwich cookies all work in the cookie role (see the variations in the post).
- Do not leave the cream filling in the chopped cookies, it melts and leaves holes.
- Do not fold the Oreos into the whole bowl of batter, add them at the pan so they do not sink and stick.
- Do not use cold egg whites or cold milk, they will curdle the batter and the cake will not rise properly.
Victoria P. says
I used this recipe for my wedding cake, my absolute favorite! Paired it with a swiss merengue buttercream. It was a crowd pleaser for sure!
Sarah says
This is the 5th cake I have made under your excellent instruction and thanks to you my children (and some co-workers) believe I am an amazing cake baker. Thank you for your excellent directions and specific tips for success. Every cake I have made has been "the best cake ever" Thanks again!
Grettel AP says
Delicious. I have done it a few days ago and it was spectacular, it is soft and moist and at the same time firm, perfect. Thanks!!! Only one thing: when choosing the sizes and number of molds, I had to adjust the amount of flour a little (+ 1/4 cup approximately) because it was being very liquid, but it turned out well. Thank you so much.
Kliff says
Hi Liz! Just wondering if i can use swiss meringue buttercream for this cake?
Elizabeth Marek says
Yes you sure can
Vickie says
Hi Liz,
Do I keep whipping the frosting till it doesn’t taste like butter? You have mentioned doing that in the last 2 cake recipes I followed.
Thank you for your help.
Vickie
Elizabeth Marek says
This frosting is mostly sugar so you don't have to worry about whipping it too much
Angela says
Hi Ms. Liz, I’m such a big fan of yours and thank you for sharing all of you delicious recipe with us!! I have a question regarding this cake. It says that it will keep in the freezer for a week and I haven’t seen this in other recipes. Is that how long it will be good for? I have to make about 3 cakes in the same week two for my boys birthday and Easter, all of yours of course. Would it be okay in the freezer for 2 weeks or so? Thank you soo very much!
Elizabeth Marek says
You can freeze any cake if you need to make it ahead of time, two weeks is ok too. Just make sure you defrost for 24 hours in the fridge or it will sweat like crazy
Bev S says
I made this cake for my daughter’s birthday this weekend based on her request for an Oreo cake - it was soooo good! Thank you for another amazing recipe!
Vickie M says
Just baked the cakes for my daughter’s birthday on Saint Patrick’s day 3 days away .. they came out beautifully and are in the freezer till Wednesday then I will decorate it with your frosting recipe I can’t wait! I must say this is the first time I weighed my ingredients and I may do this from now on with my recipes .. this cake looks moist feels moist and smells amazing! I look forward to making more of your amazing cake recipes!!! I’m a Fan ..😊
Elizabeth Marek says
Yay! I'm so so glad you liked it and congratulations on weighing your ingredients! I know it's a big step but trust me, you'll never want to go back 😀
Renee Pannoni says
Hi Liz - just wanted to say thank you for a great recipe. I made it today for my sons 16th bday. It looked as great as it tasted! Wish I could post a picture here!! Ty!