
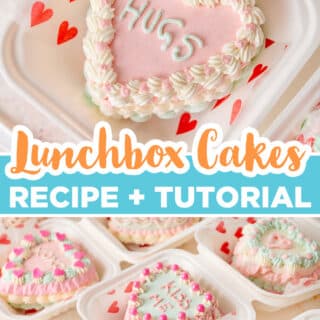


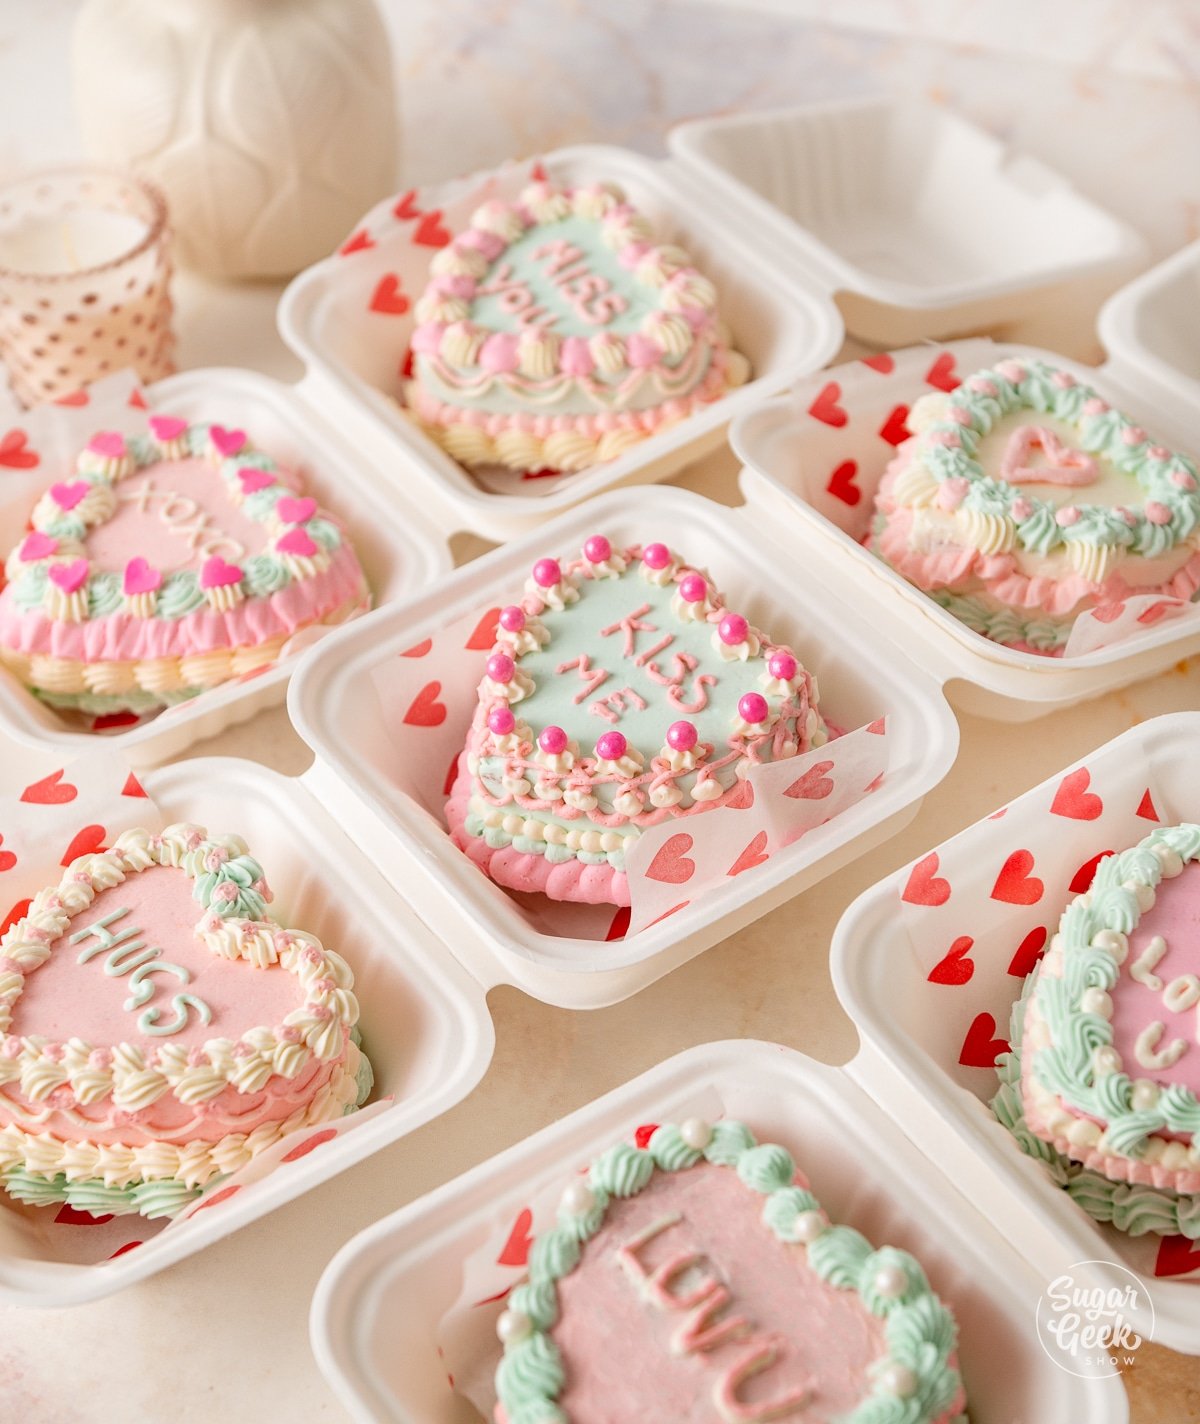
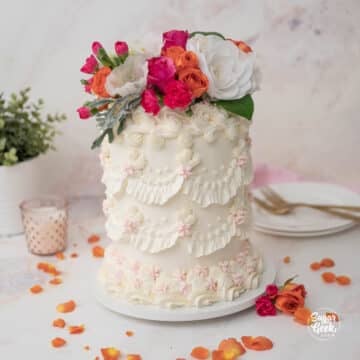
Lunchbox cakes are miniaturized versions of regular full-size cakes, served in a cute little to-go box! You can decorate them just like big cakes, but because they are small, lunchbox cakes are easier to make, decorate, handle, store, pack, and transport. As pretty as they are delicious, these mini versions are perfect for any celebration from a casual picnic to a special occasion.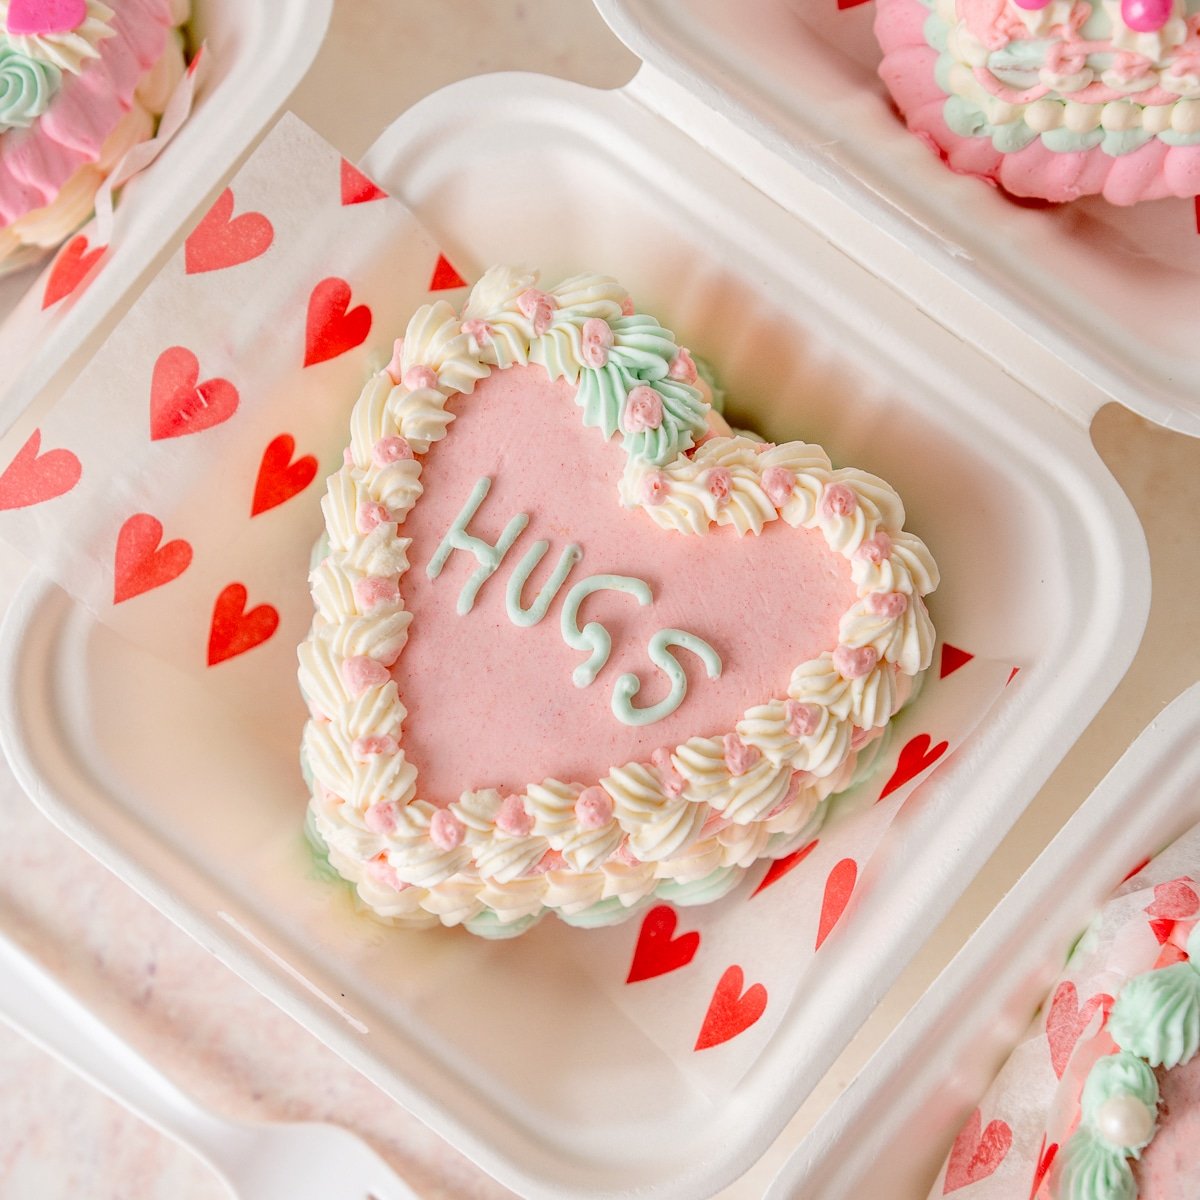
Lunchbox (bento or Korean lunchbox cake) cakes are mini cakes originating from South Korea. They are packaged and eaten inside takeout boxes, making them perfect for gifts that you don't have to share! The best part is you can use any of your cookie cutters or mini cake pans, however, I found it easier to bake my cake in a sheet pan and cut shapes out.
Lunchbox Cake Ingredients
Cake: You can use vanilla cake, chocolate cake, carrot cake, or any flavor you like, but I am using my doctored strawberry box cake mix to get to the decorating part faster.
Buttercream: My easy buttercream frosting is my favorite recipe because it's super easy to make and like a mock-Swiss meringue buttercream. You can use any type of frosting that you like, although whipped cream frosting and cream cheese won't color as well as American buttercream or Italian buttercream.
Filling: Depending on the type of cake you're using and whether or not you want to torte your lunchbox cakes, a filling can pair nicely and add extra flavor. I used my strawberry puree as a filling with the strawberry box cake, but check out my other filling recipes for more ideas!
How to Make Lunchbox Cakes
Lunchbox cakes are very easy to make, but decorating can be a bit time-consuming depending on how detailed you want to make your cakes. I recommend making your cake the day ahead and freezing it overnight, then making your buttercream, assembling the cakes, and piping on the same day.
Making A Strawberry Box Mix Cake
- Place all of the ingredients into a mixing bowl and mix for 2 minutes on medium speed.
- Pour the batter into 2 quarter sheet pans that have been prepared with cake goop, pan spray, or parchment paper. The size of your sheet pan may vary, so fill the sheet pan ½ way full. If you have leftover batter, you can freeze it or bake the remaining batter in a smaller cake pan. This recipe will make eight, 3.5" mini cakes, but it will depend on the size of the cutter and shape.
- Bake at 350ºF for 15-20 minutes or until a toothpick inserted comes out clean.
- Allow the cake to cool for 15 minutes in the pan.
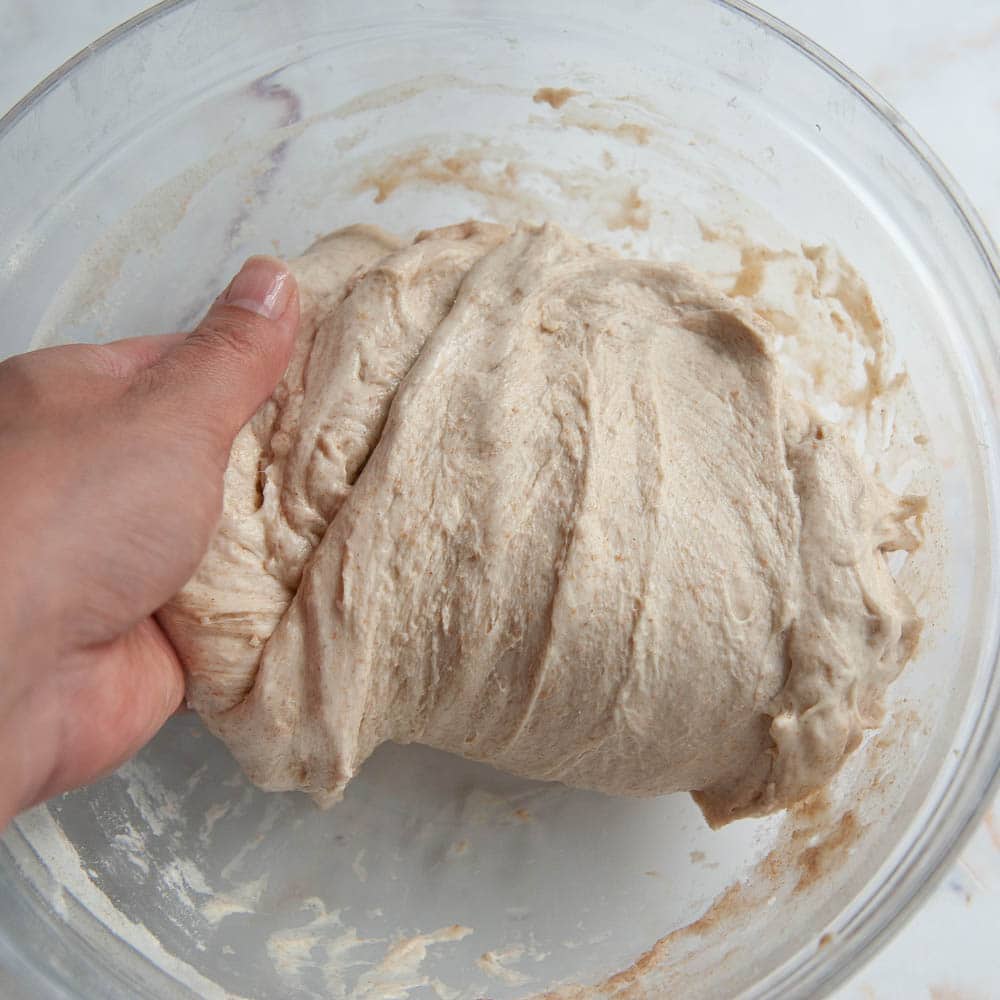
- Flip out the cake and wrap it in plastic wrap and freeze it until you are ready to start assembling your cake. If you are making your cakes ahead of time, keep them in the freezer for up to 2 months.

Making Easy Buttercream Frosting
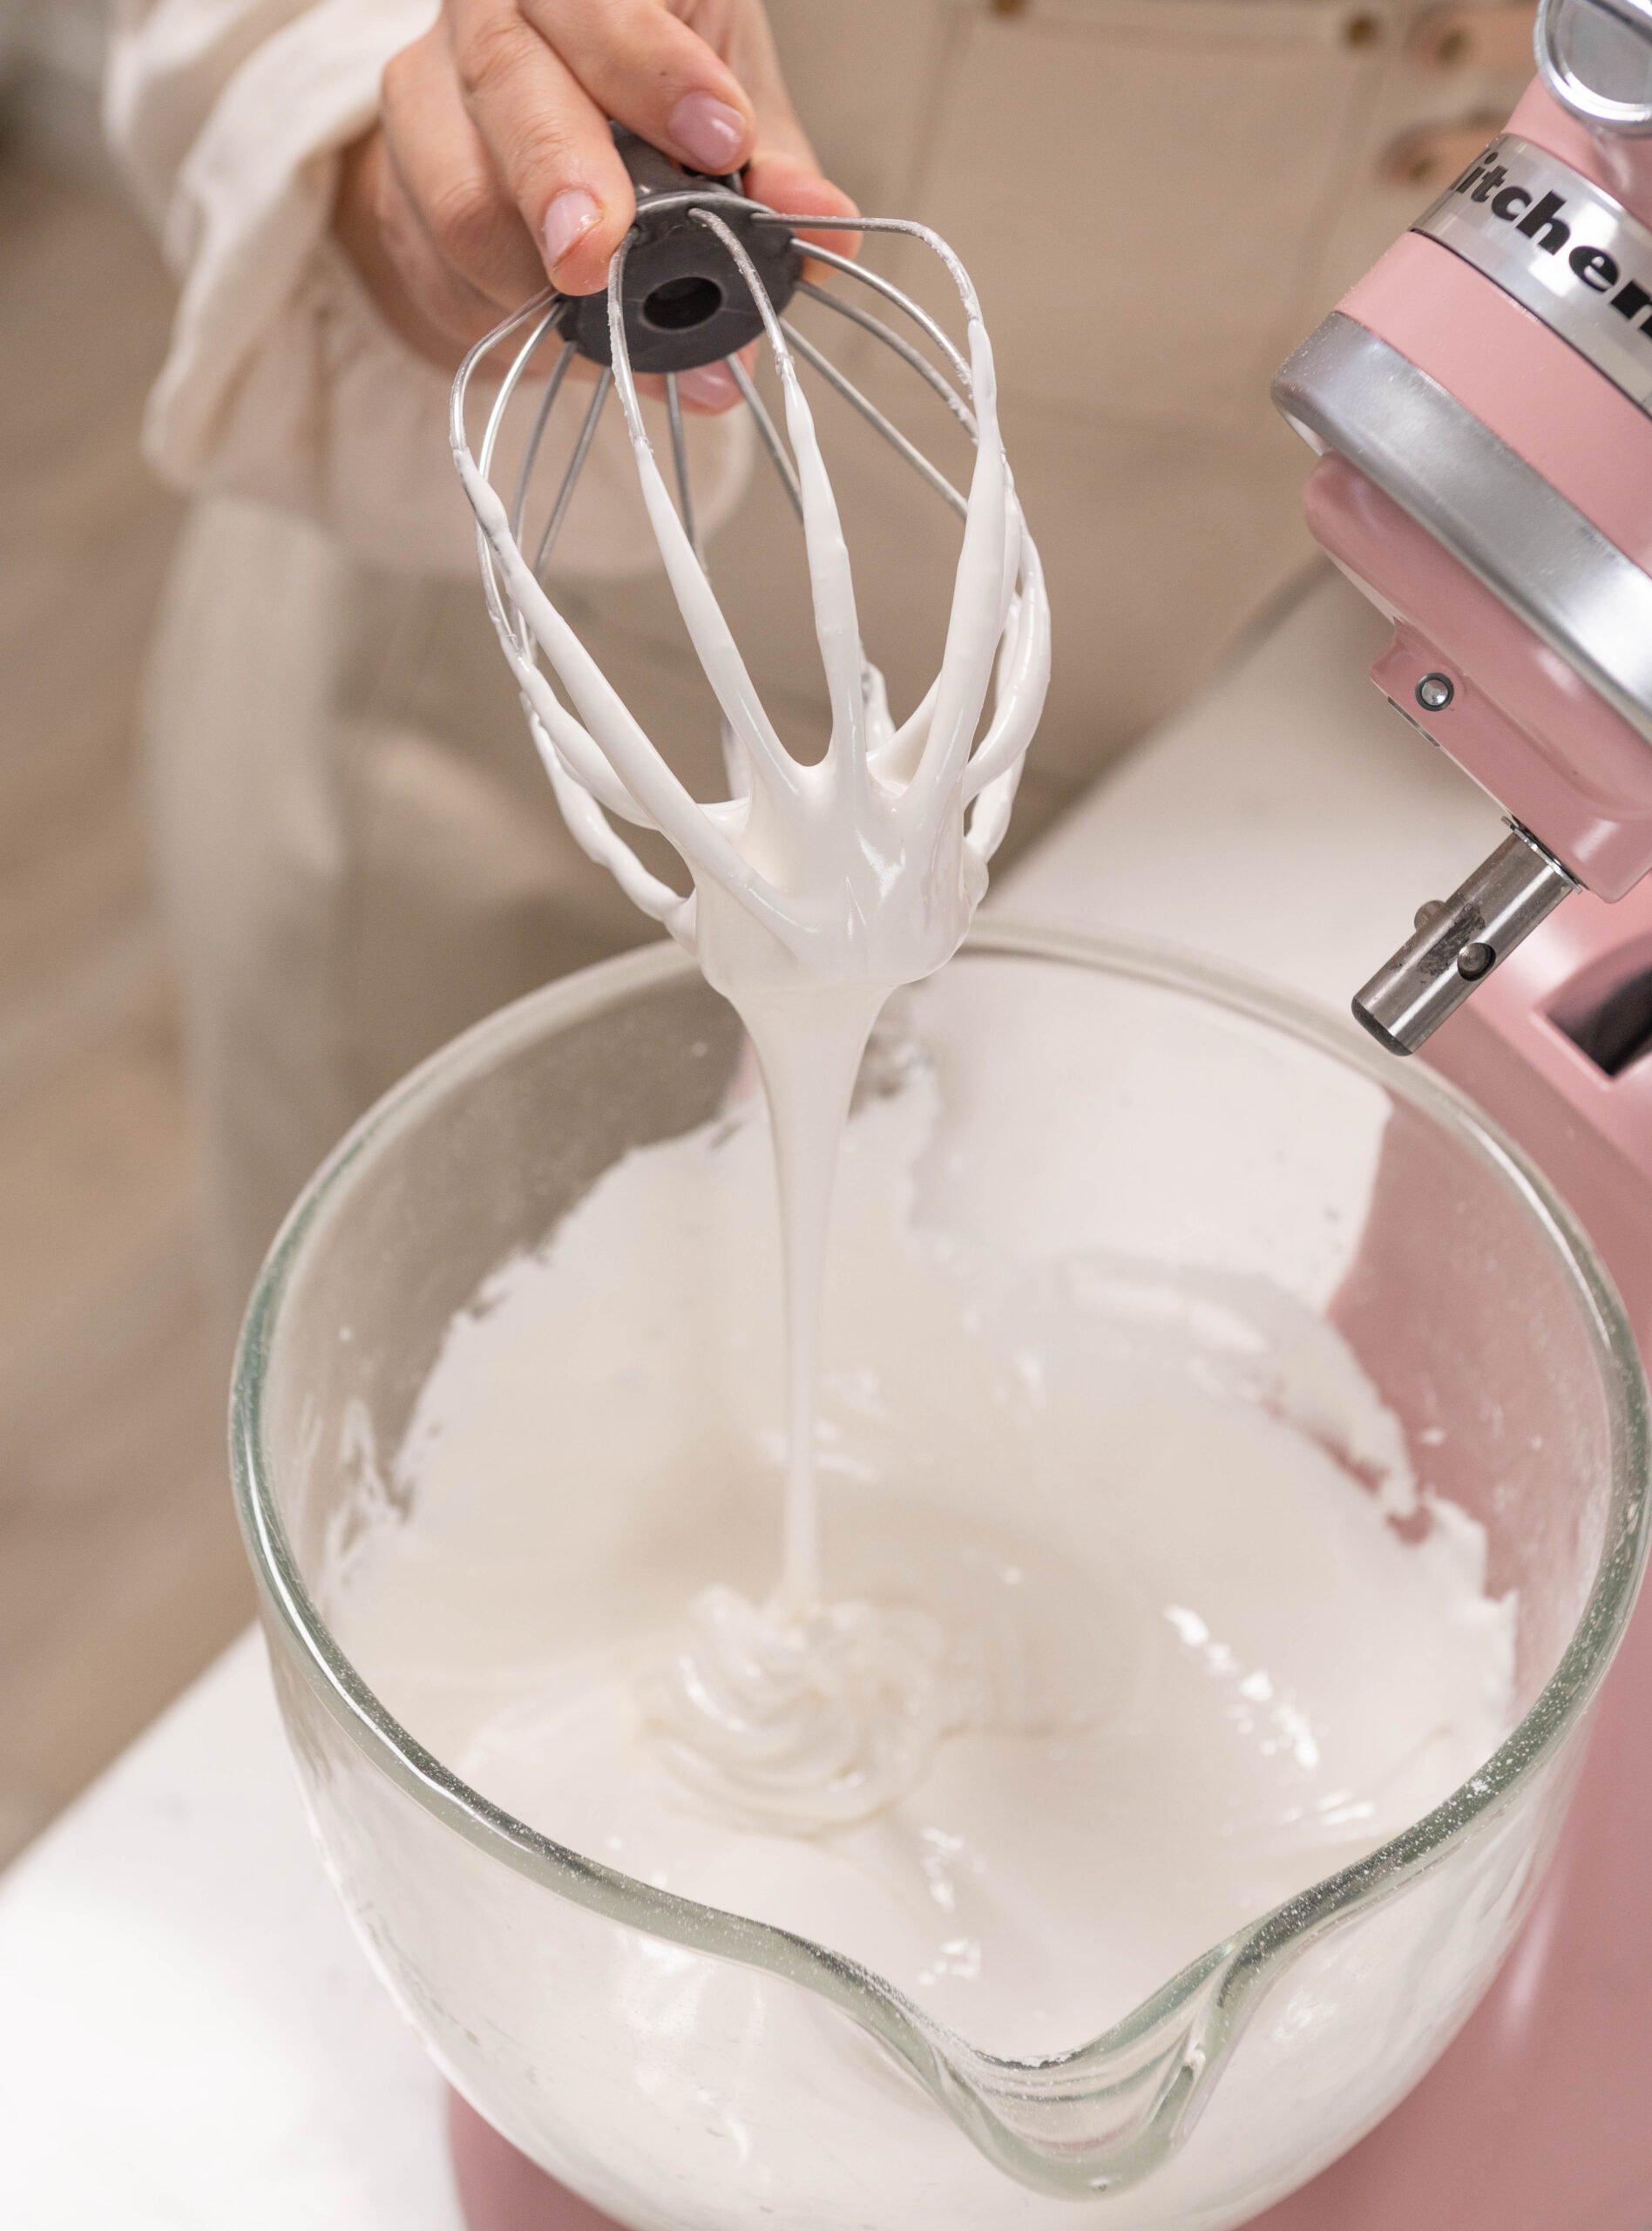
- Place the pasteurized egg whites and powdered sugar in the bowl of a stand mixer with the whisk attachment. Mix on low until combined and then bump up to high and whip for 3 minutes until it looks like royal icing.

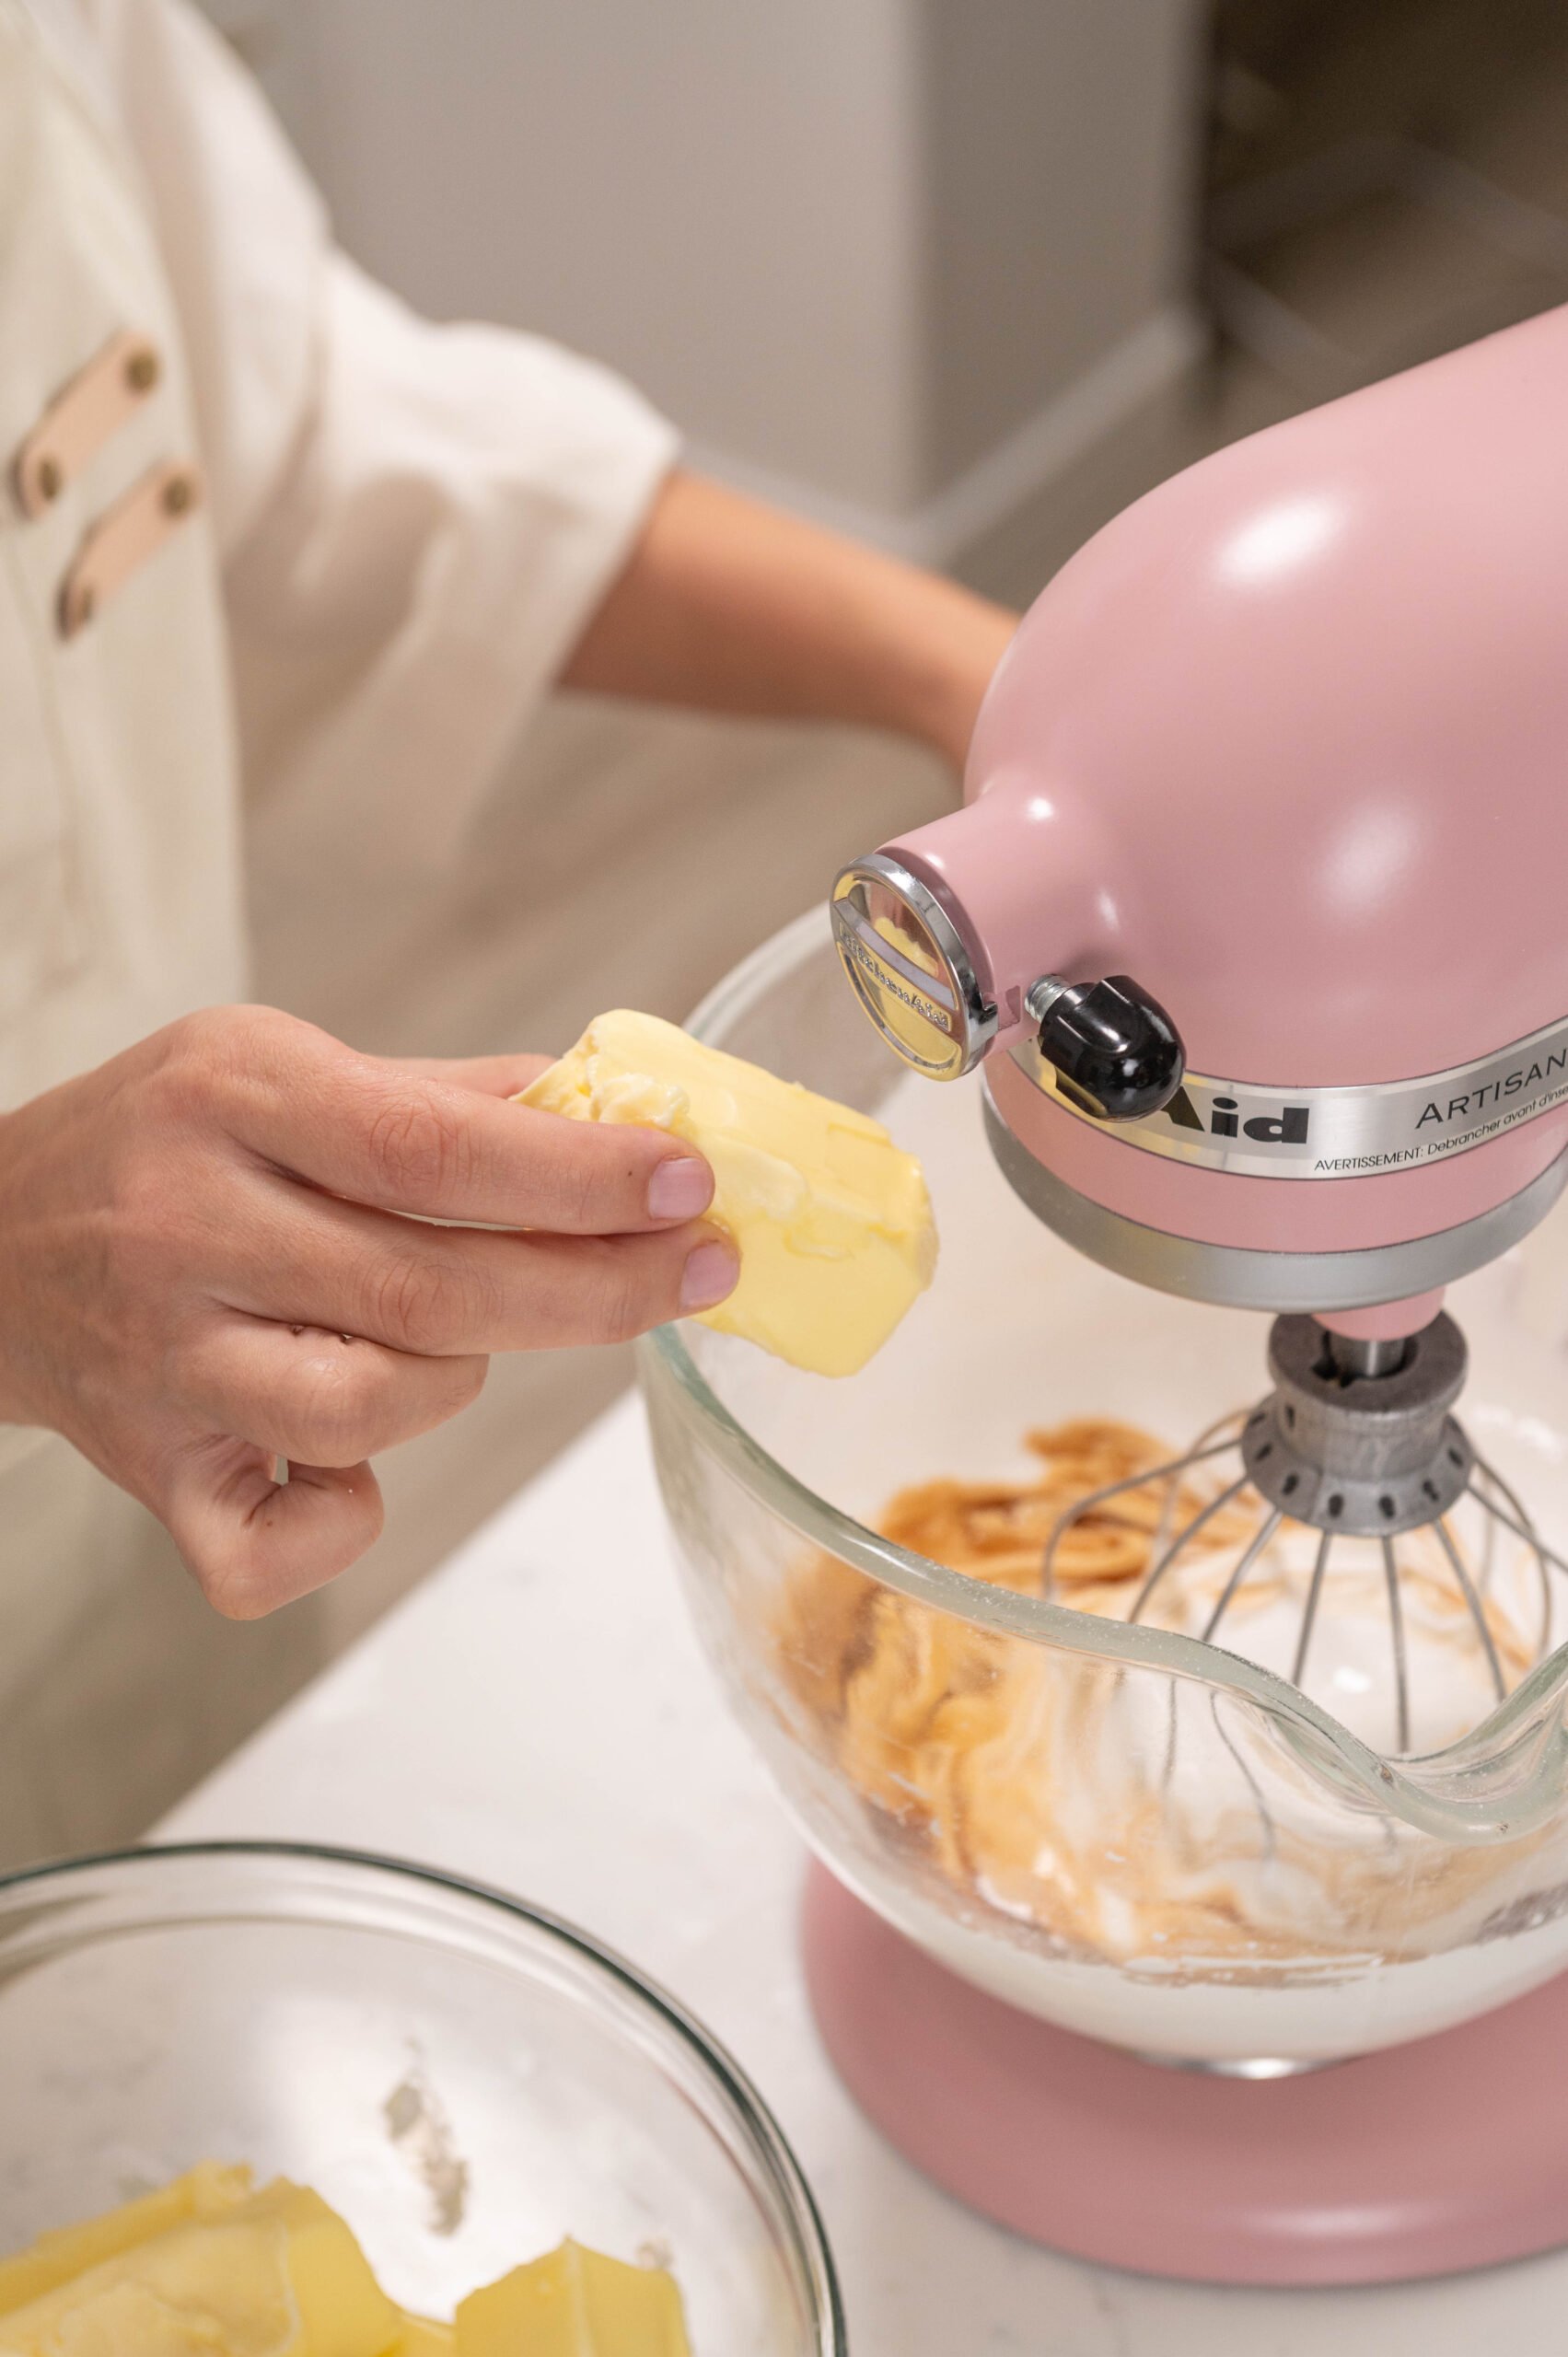
- Add in your salt and then your butter in small pieces while mixing on low until combined, then bump up to high. Whip until light, white and fluffy and it doesn't taste like butter anymore. This can take 10-15 minutes.

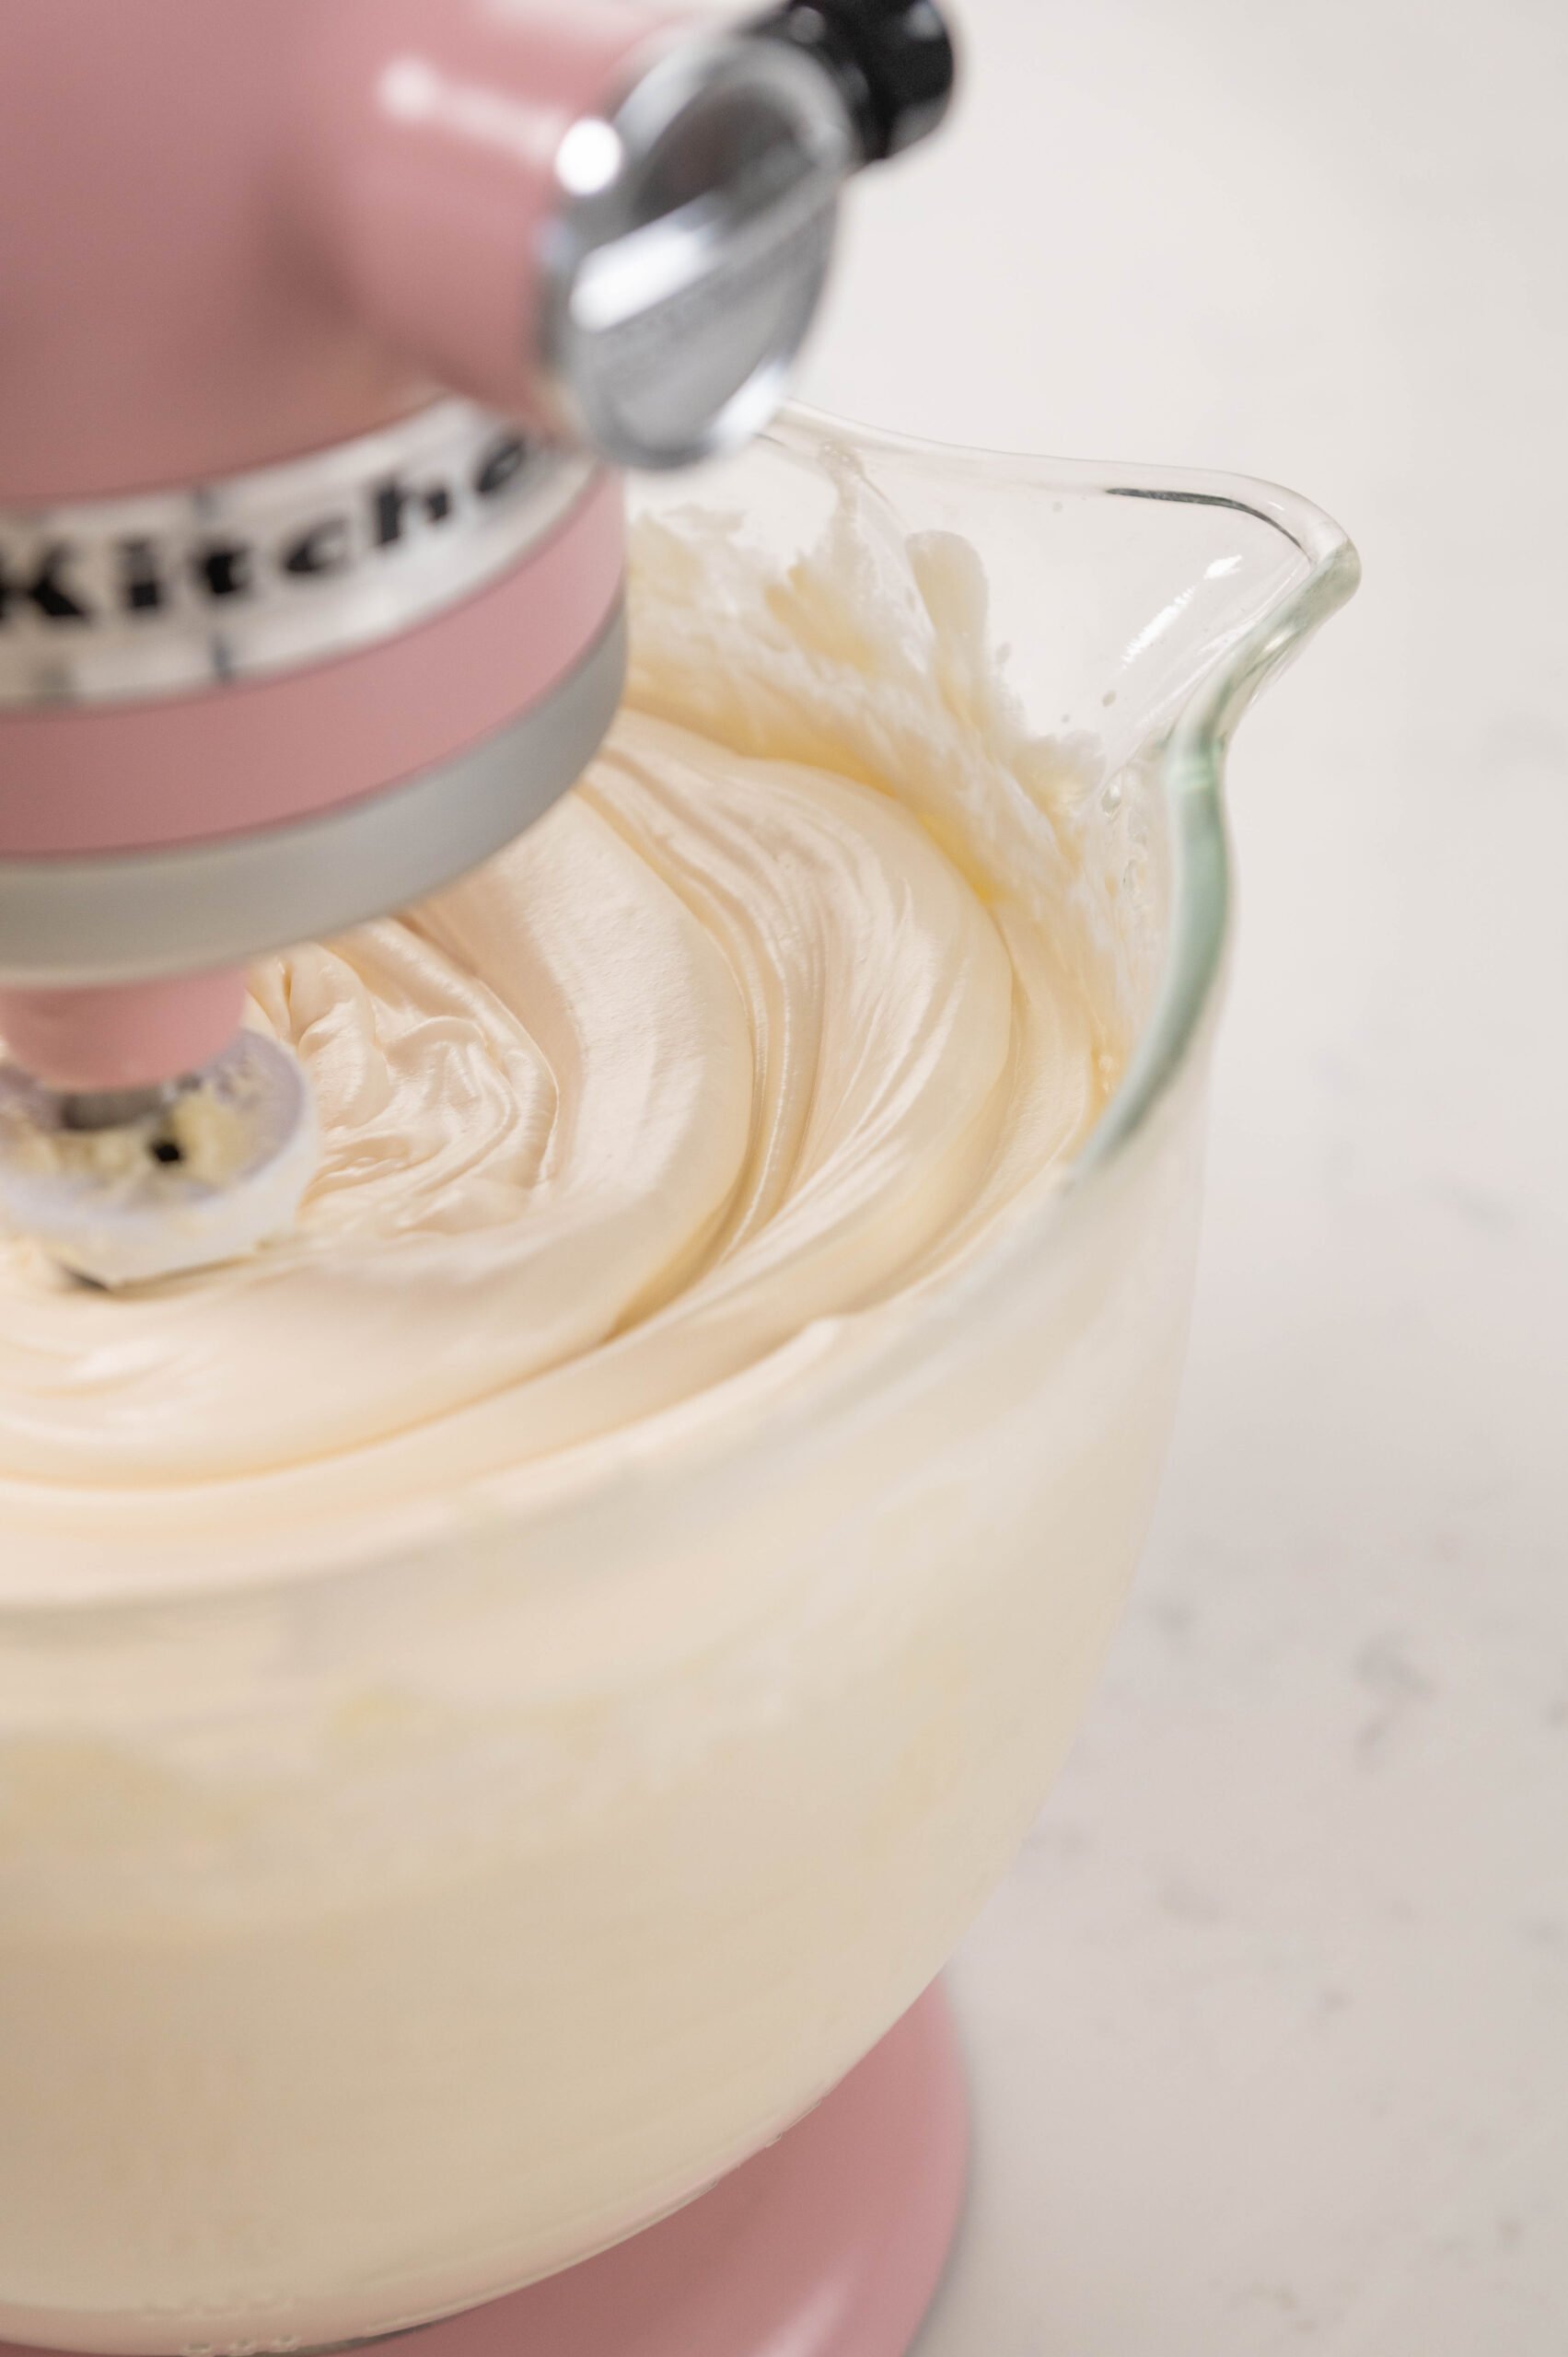
- Switch to the paddle attachment and mix on low for 15 minutes until it's smooth and bubble-free (optional).
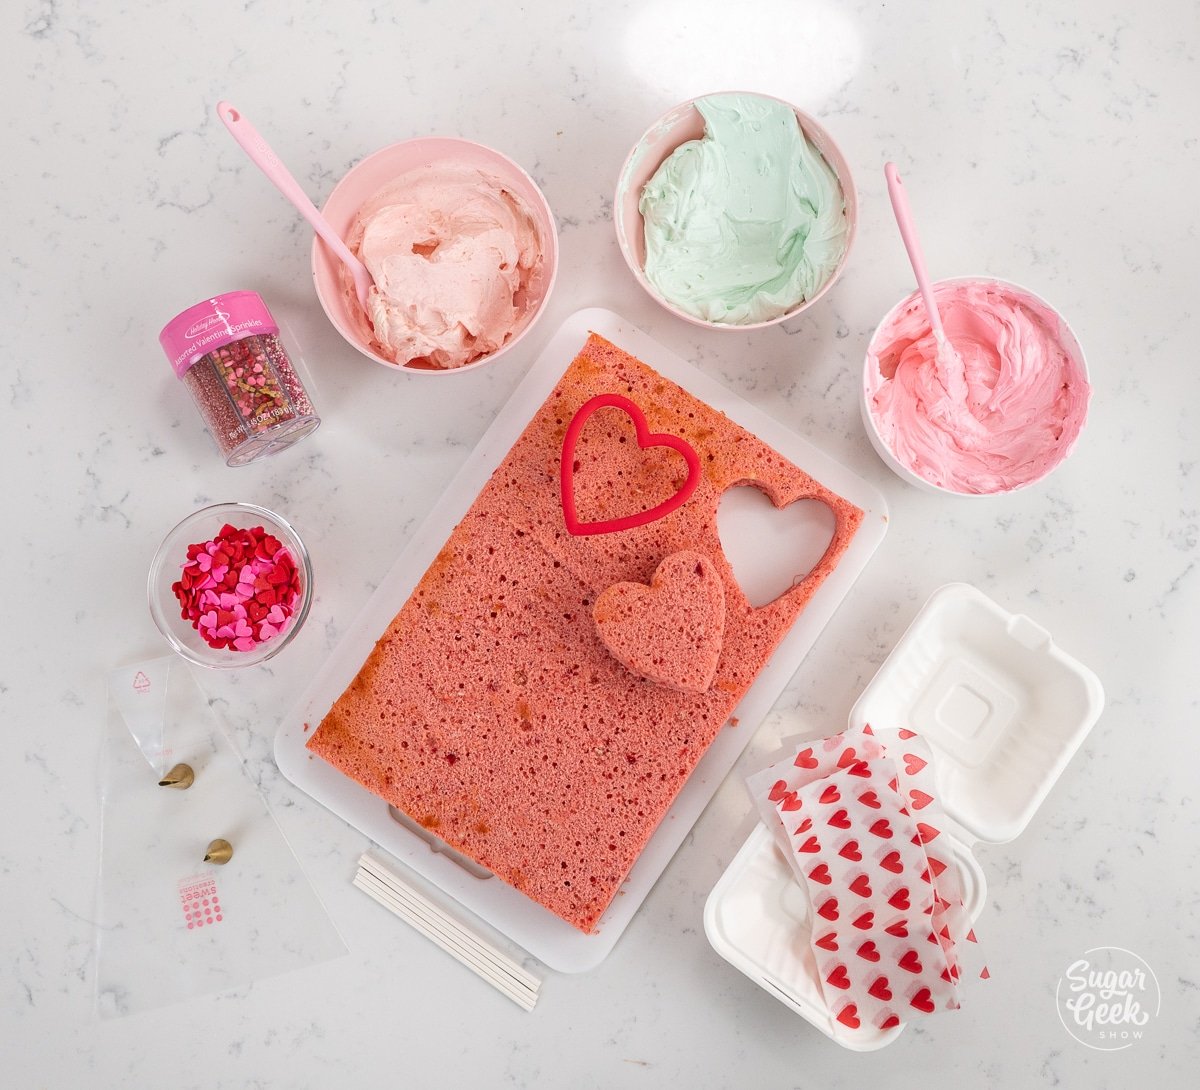
- Color your buttercream in as many colors as you like. I like ChefMaster gel food coloring over liquid for the best colors.
- Fill piping bags with the colored buttercream, using as many as necessary for your color palate. Pro-Tip: Use a coupler in each of your piping bags so that you can easily switch piping tips for different designs.
Assembling the Lunchbox Cakes
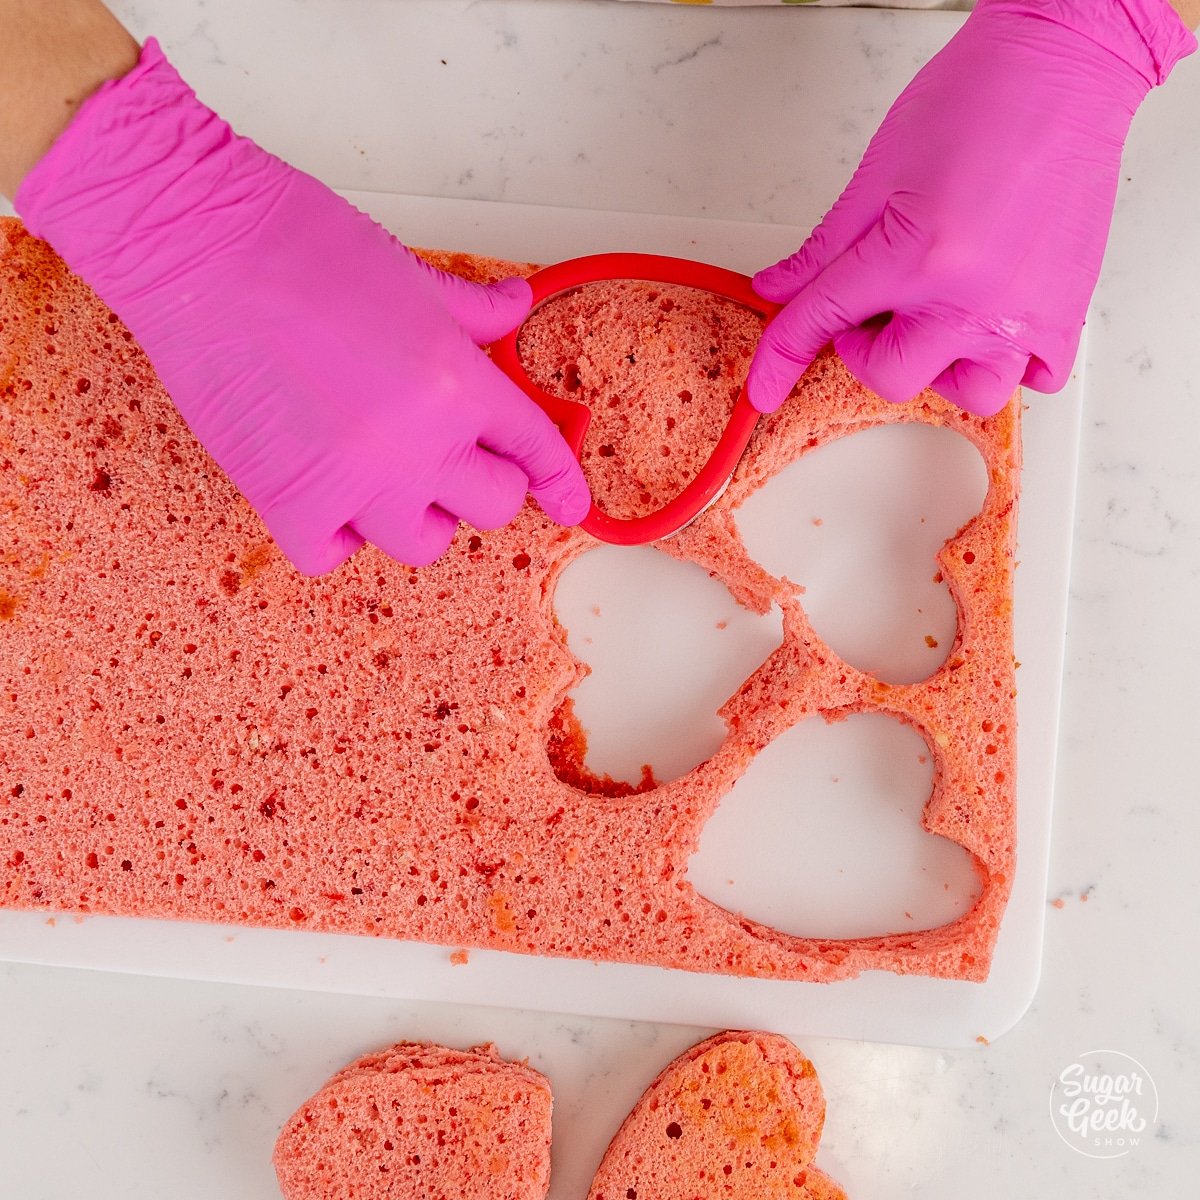
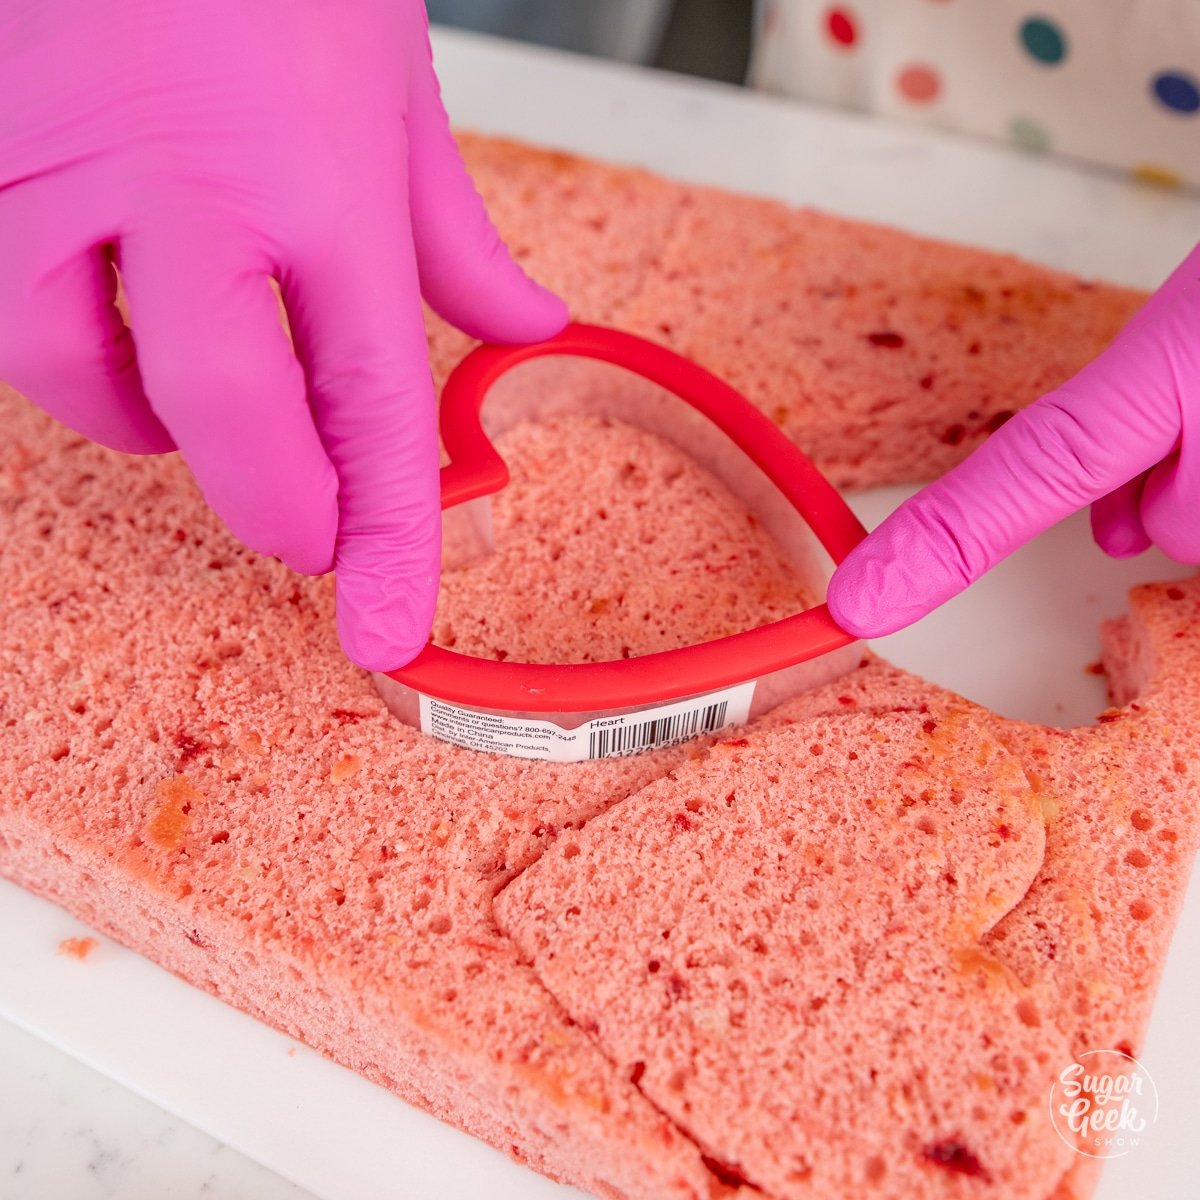
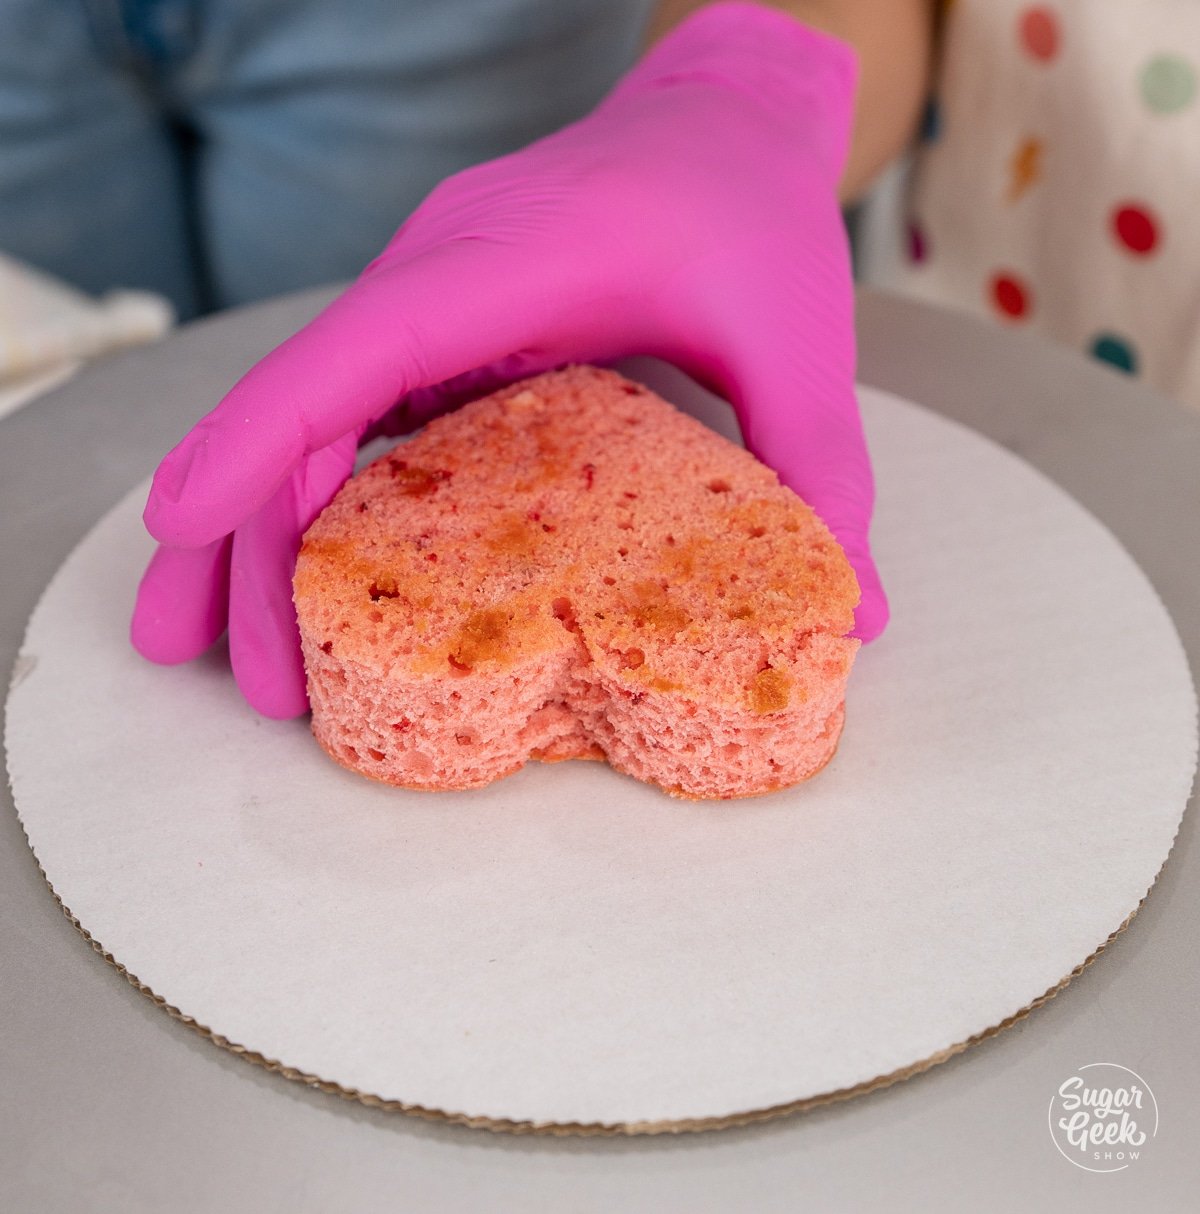
- Once your sheet cakes have chilled completely use your desired cutter (I used a 3" heart cutter) to cut out as many cakes as possible, about 16. Cold cakes are easier to cut, and handle and are less crumbly.
- Set the cake on a small cake board so you can easily move it.

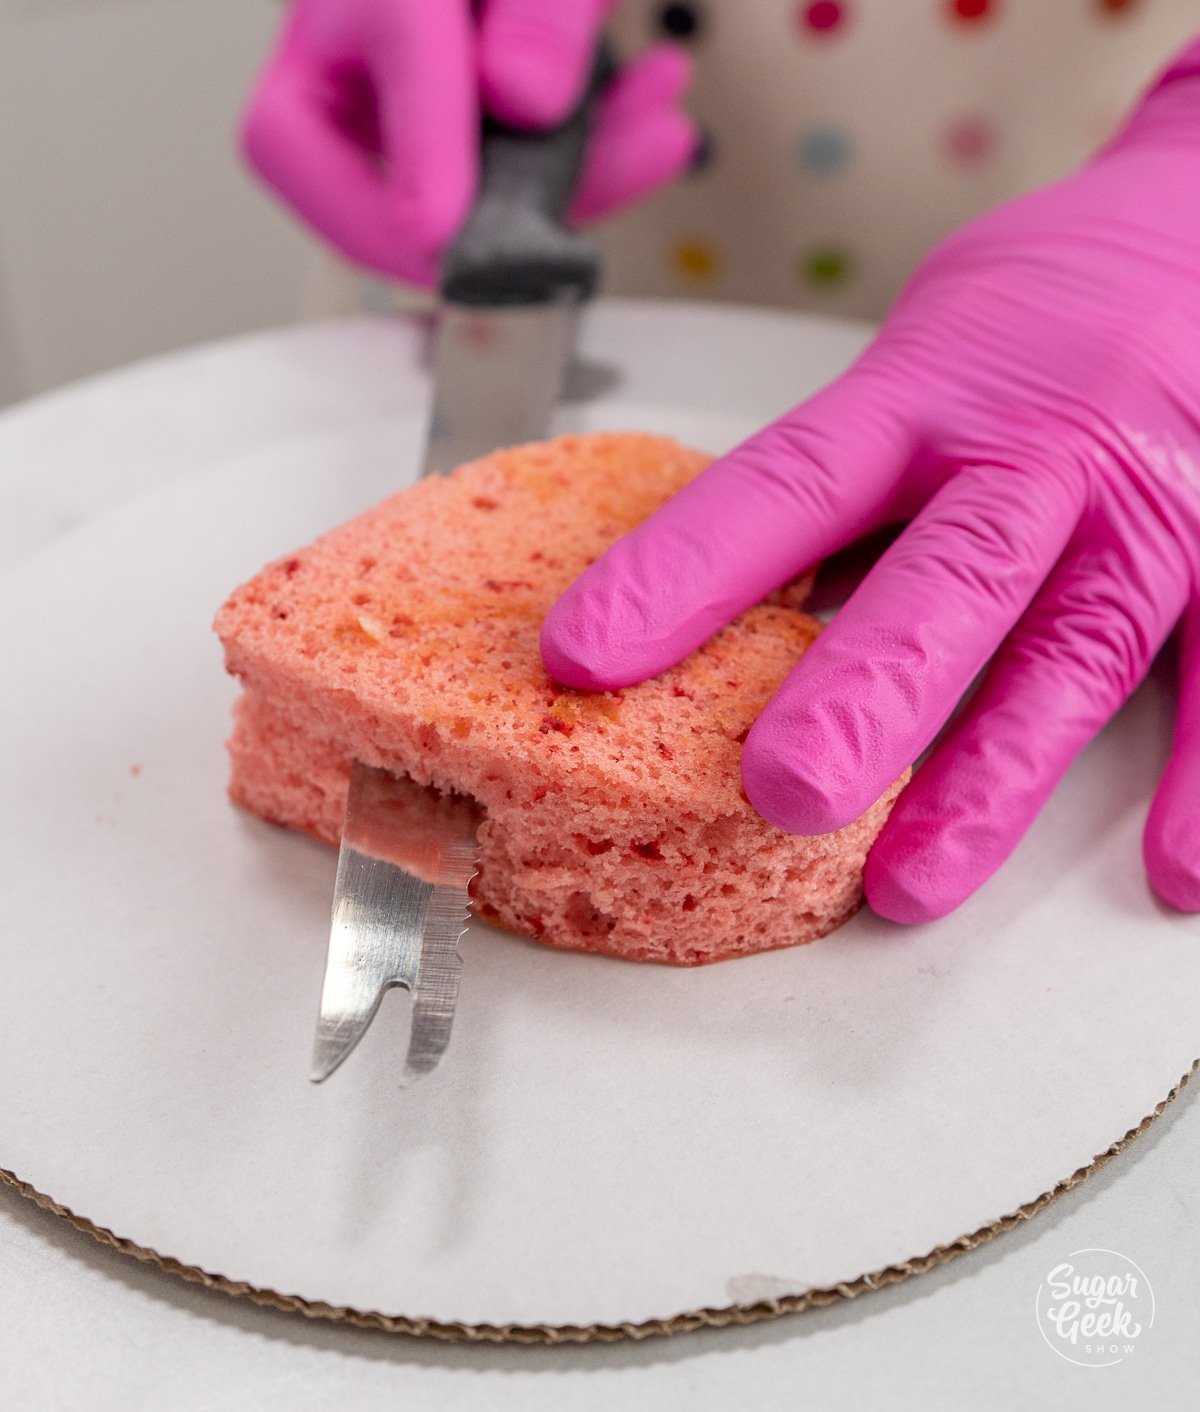
- Torte the little cake in half moving slowly with a serrated knife and turning the cake as you cut. You will have a thin cake layer, so handle it gently. (Optional)

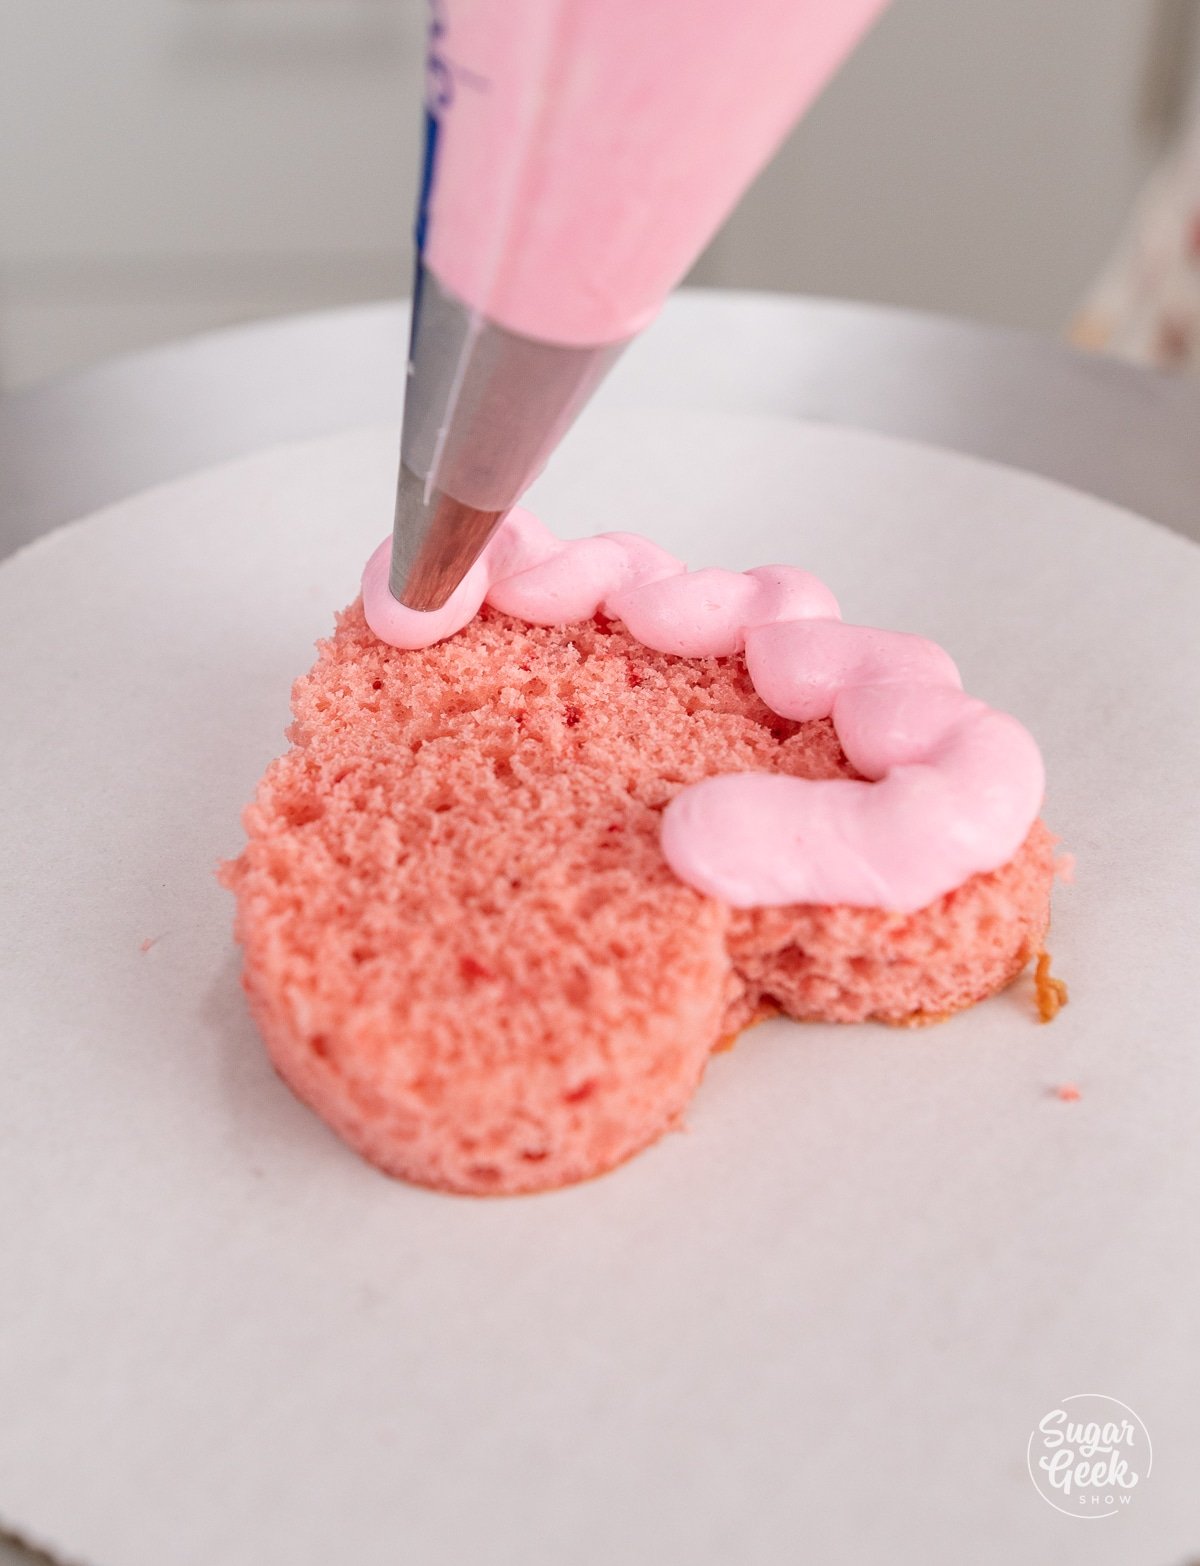
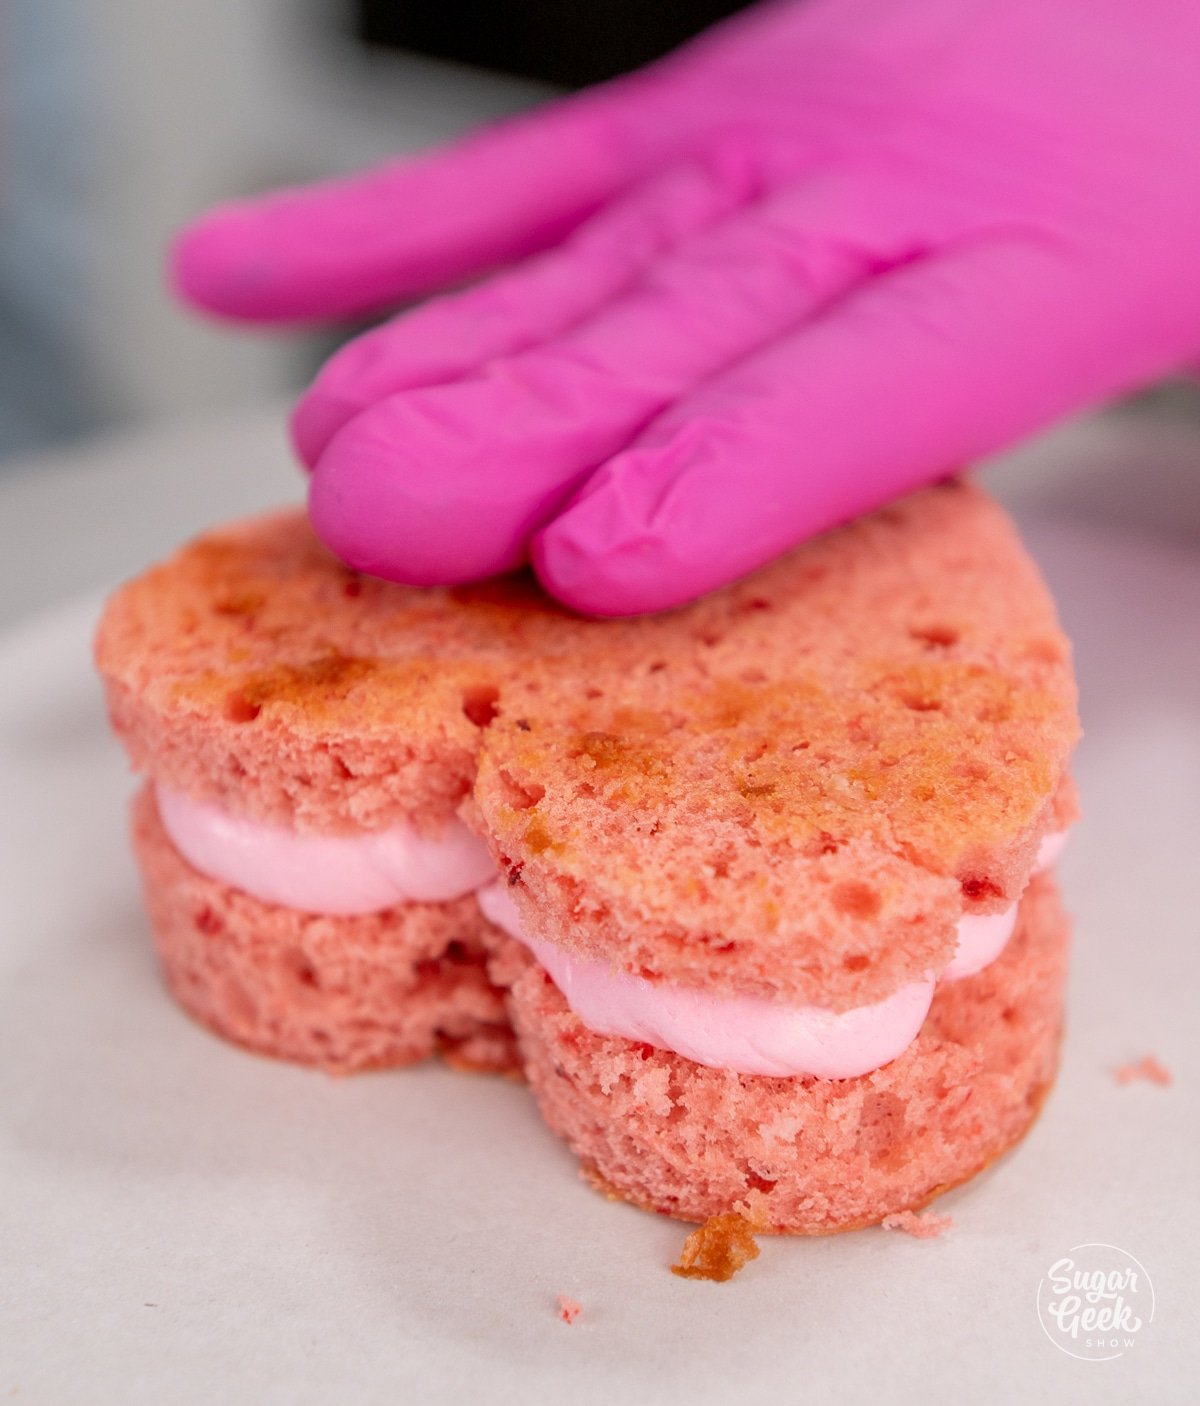
- Pipe a dam of buttercream around the edge of the cake.

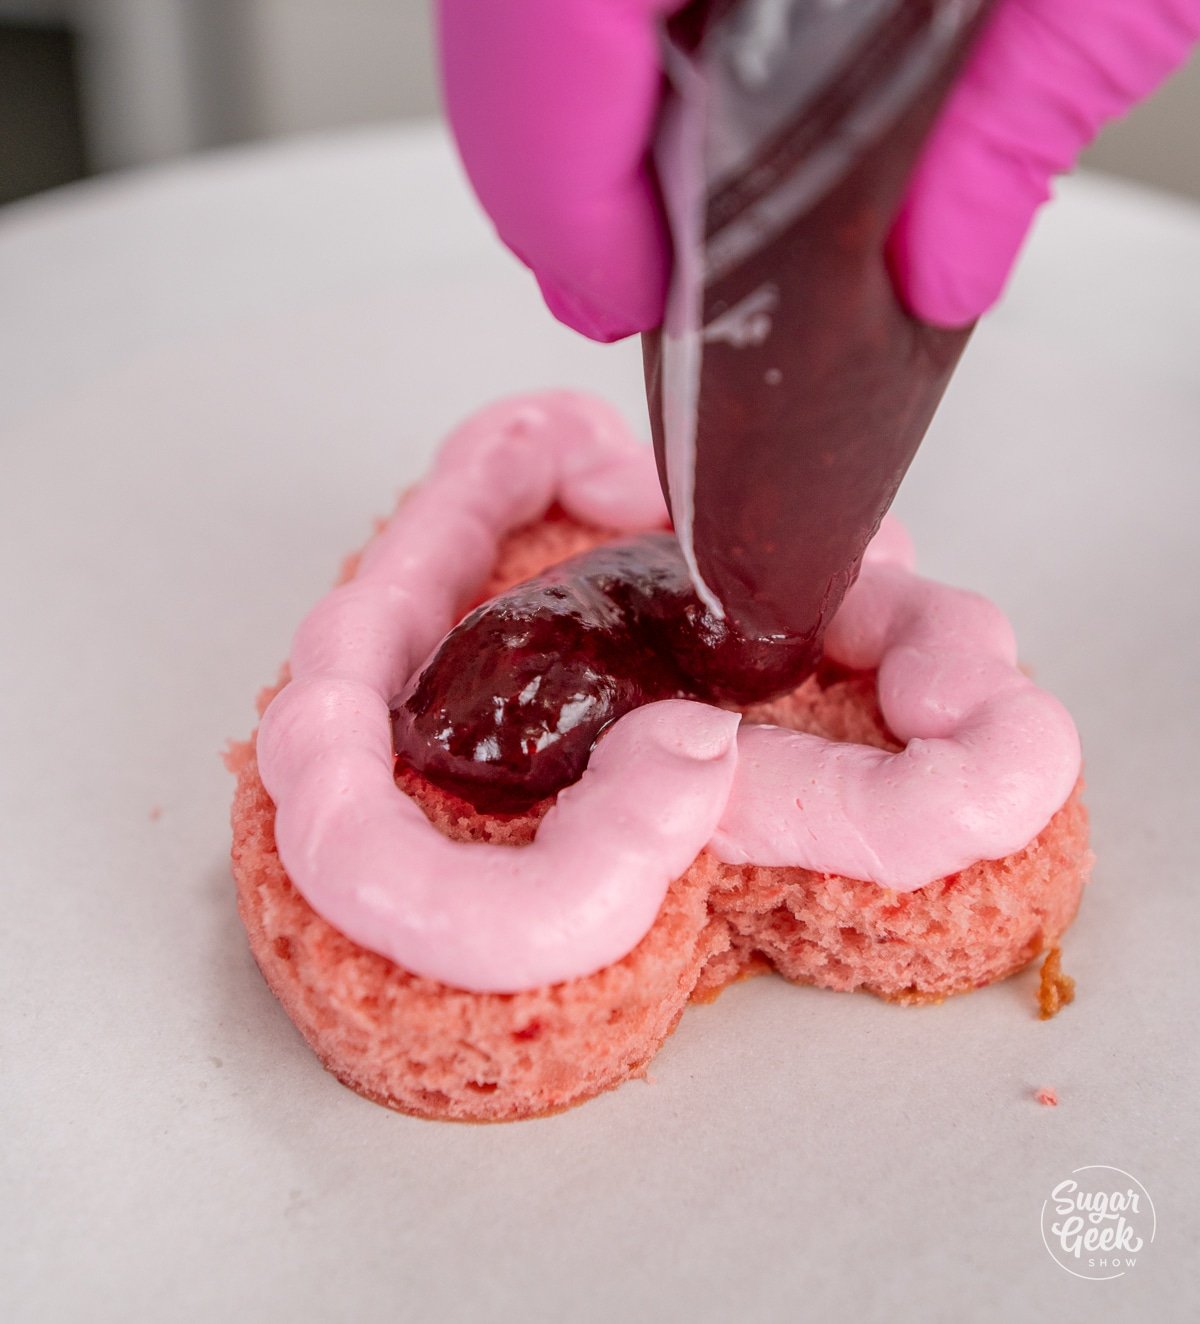
- Fill the center of the dam with a few Tablespoons of filling.

- Place the next layer of cake on top. If your cakes are very soft and sliding, let them rest in the freezer for 15-30 minutes to firm up.

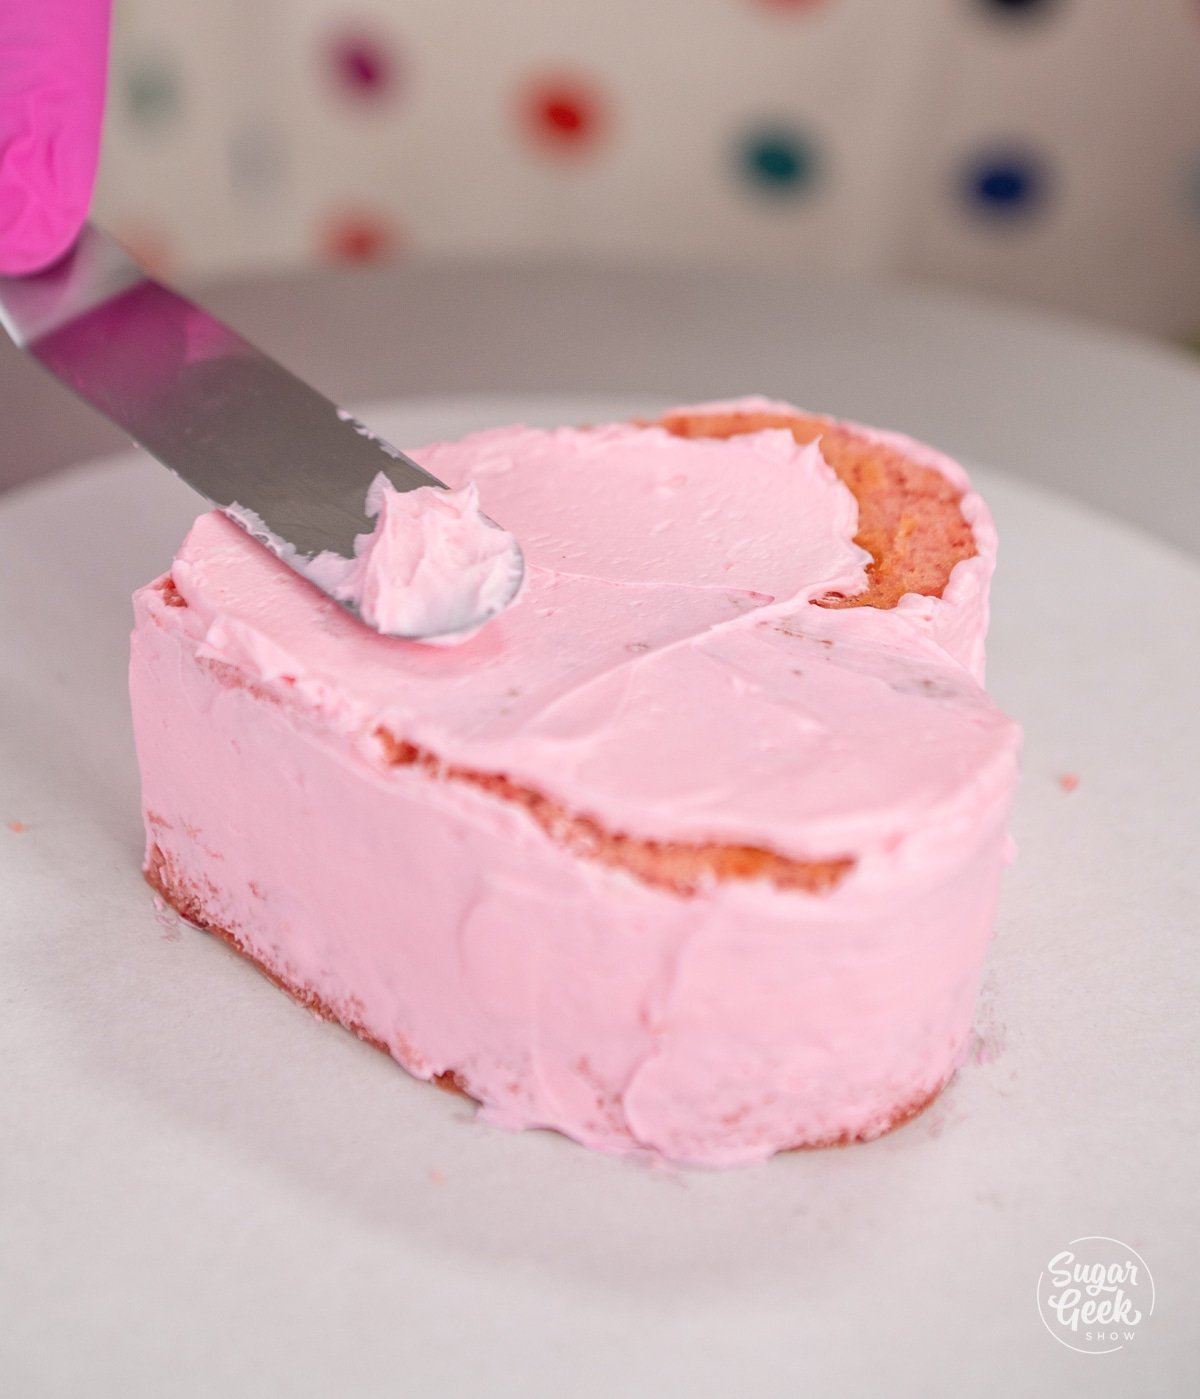
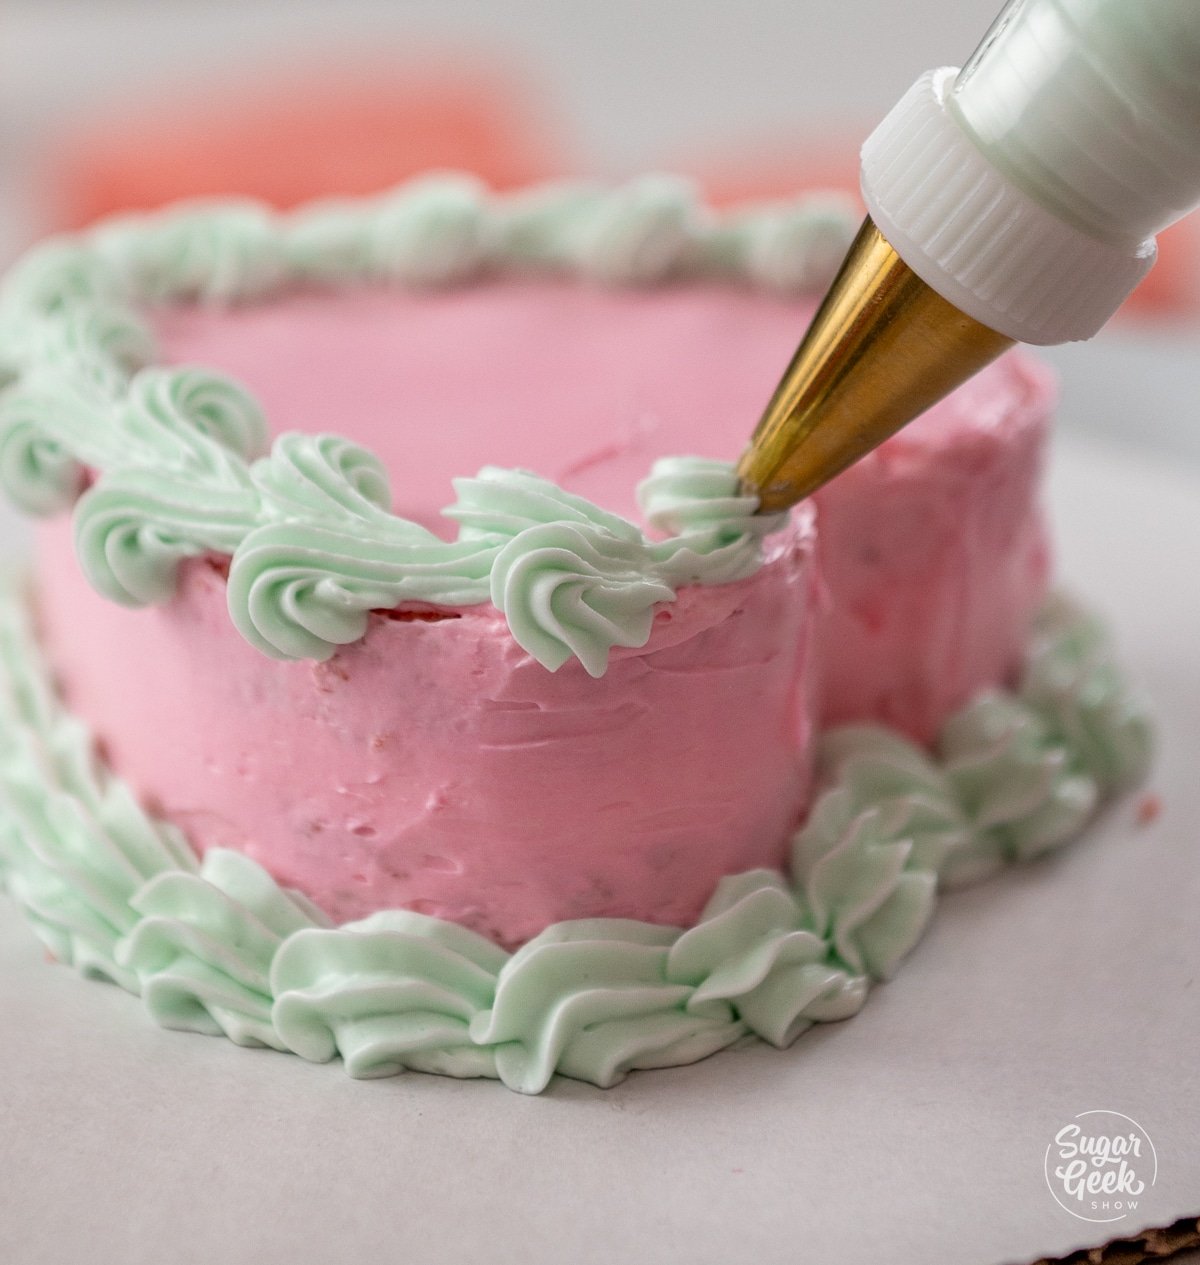
- With a small offset spatula, coat the exterior of the cake with your desired base color, then do a second layer of buttercream. Complete all of the buttercream coats before moving on to piping the edges and decor.

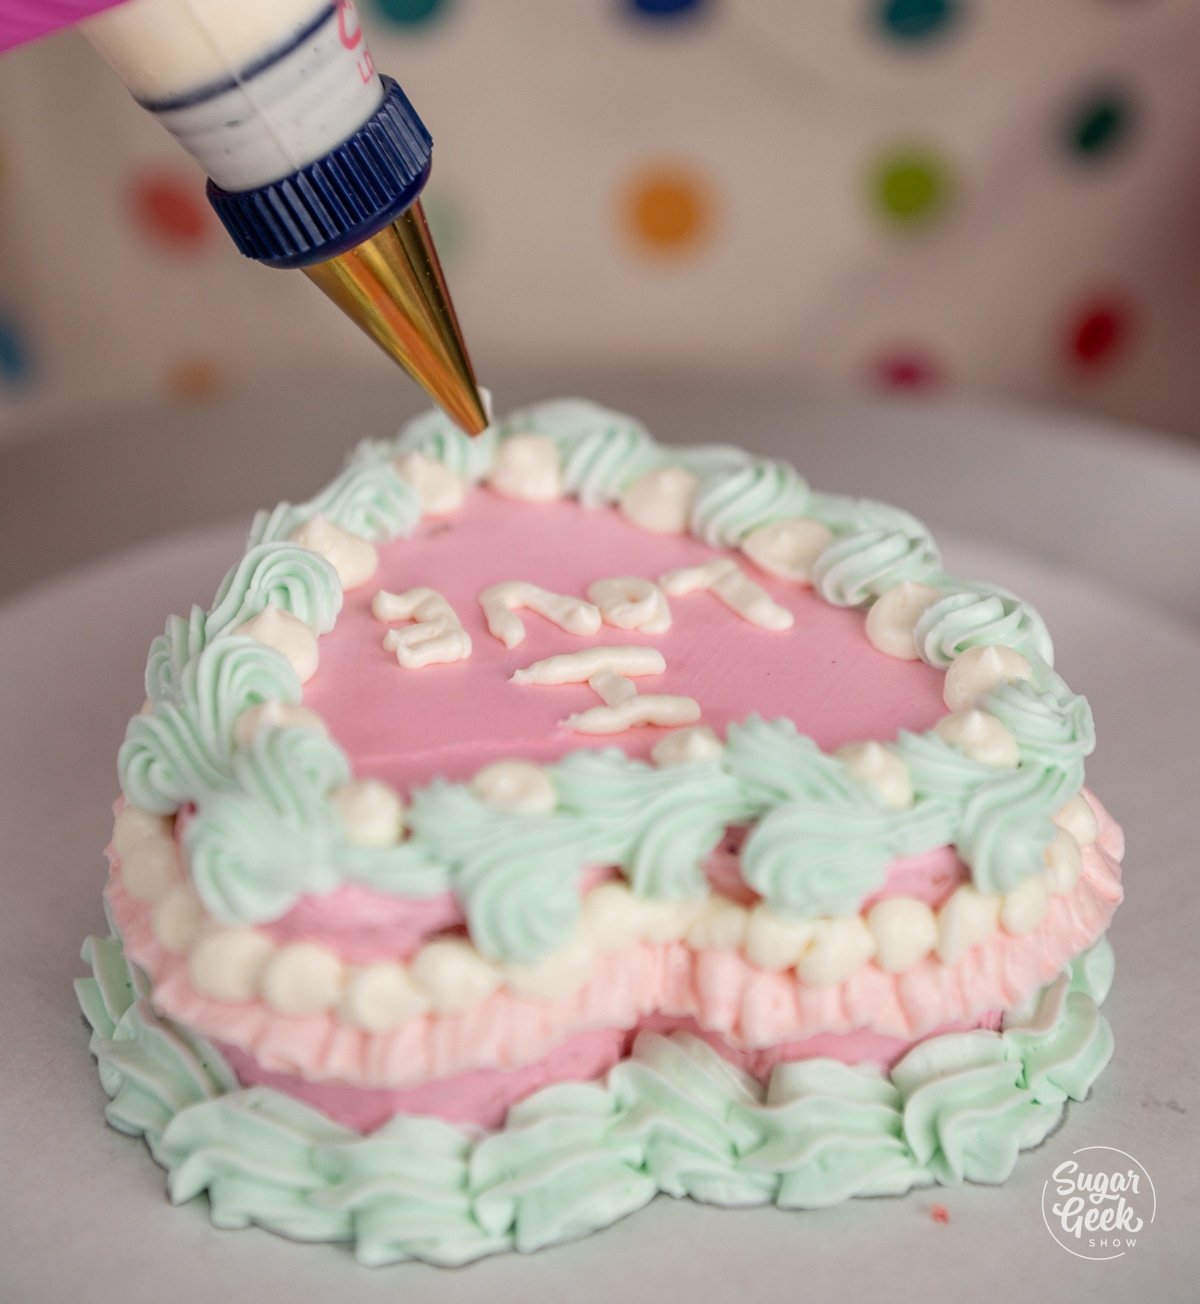
- Practice your piping design briefly on a piece of parchment so you know you like it. It will be easier to scrape off the parchment than the cake!

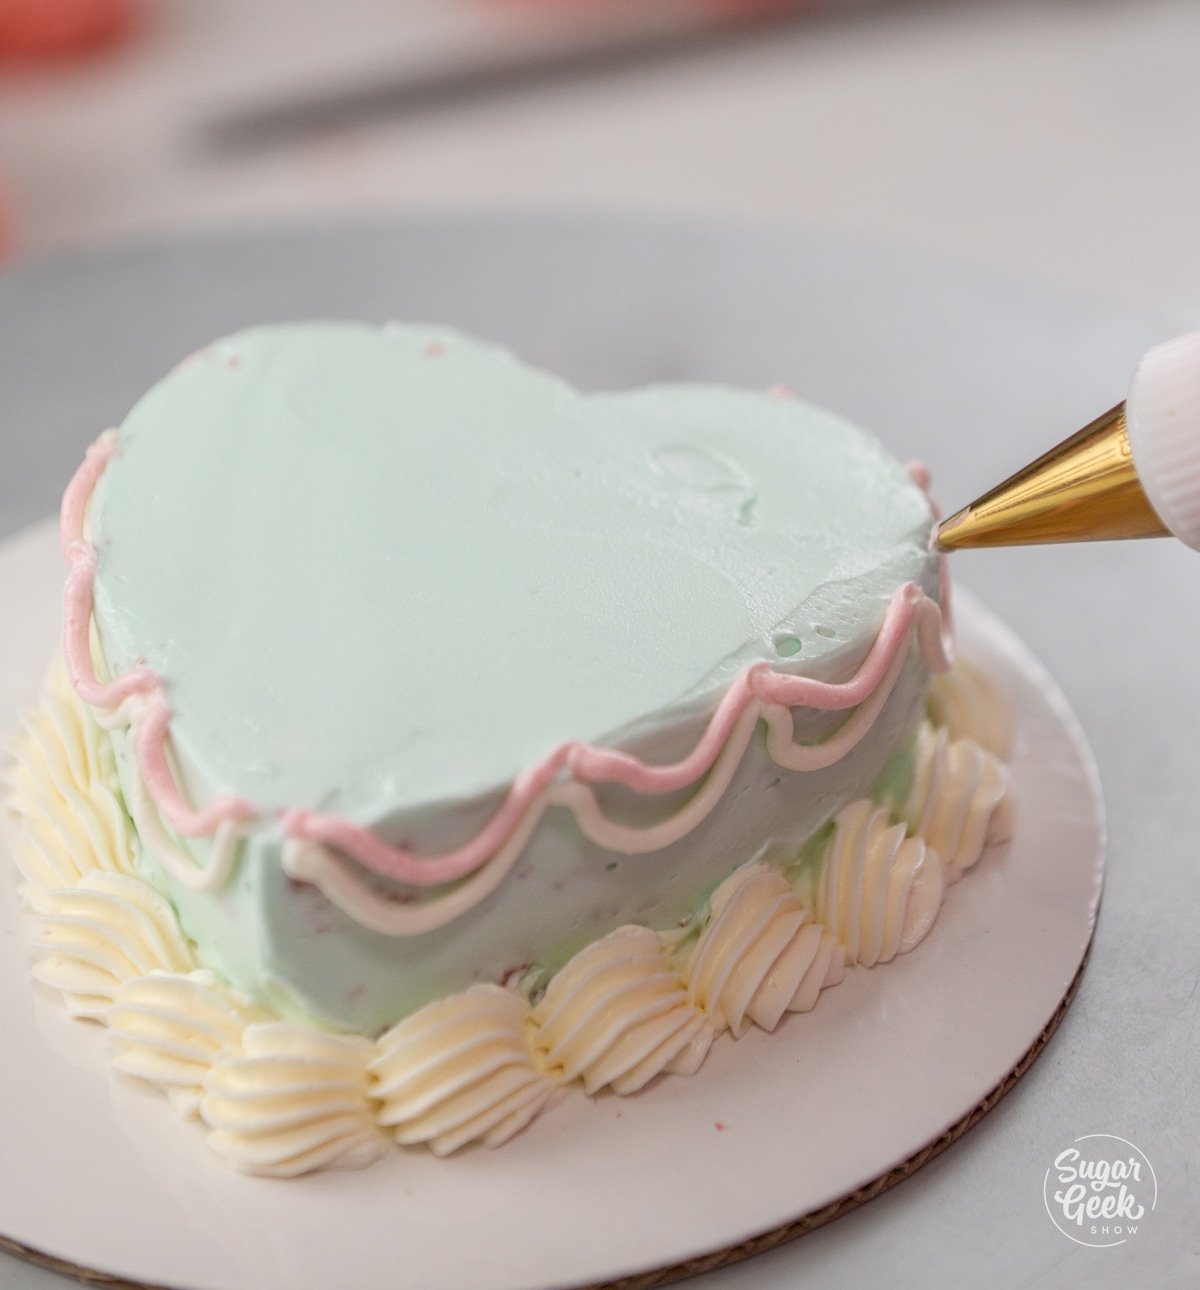
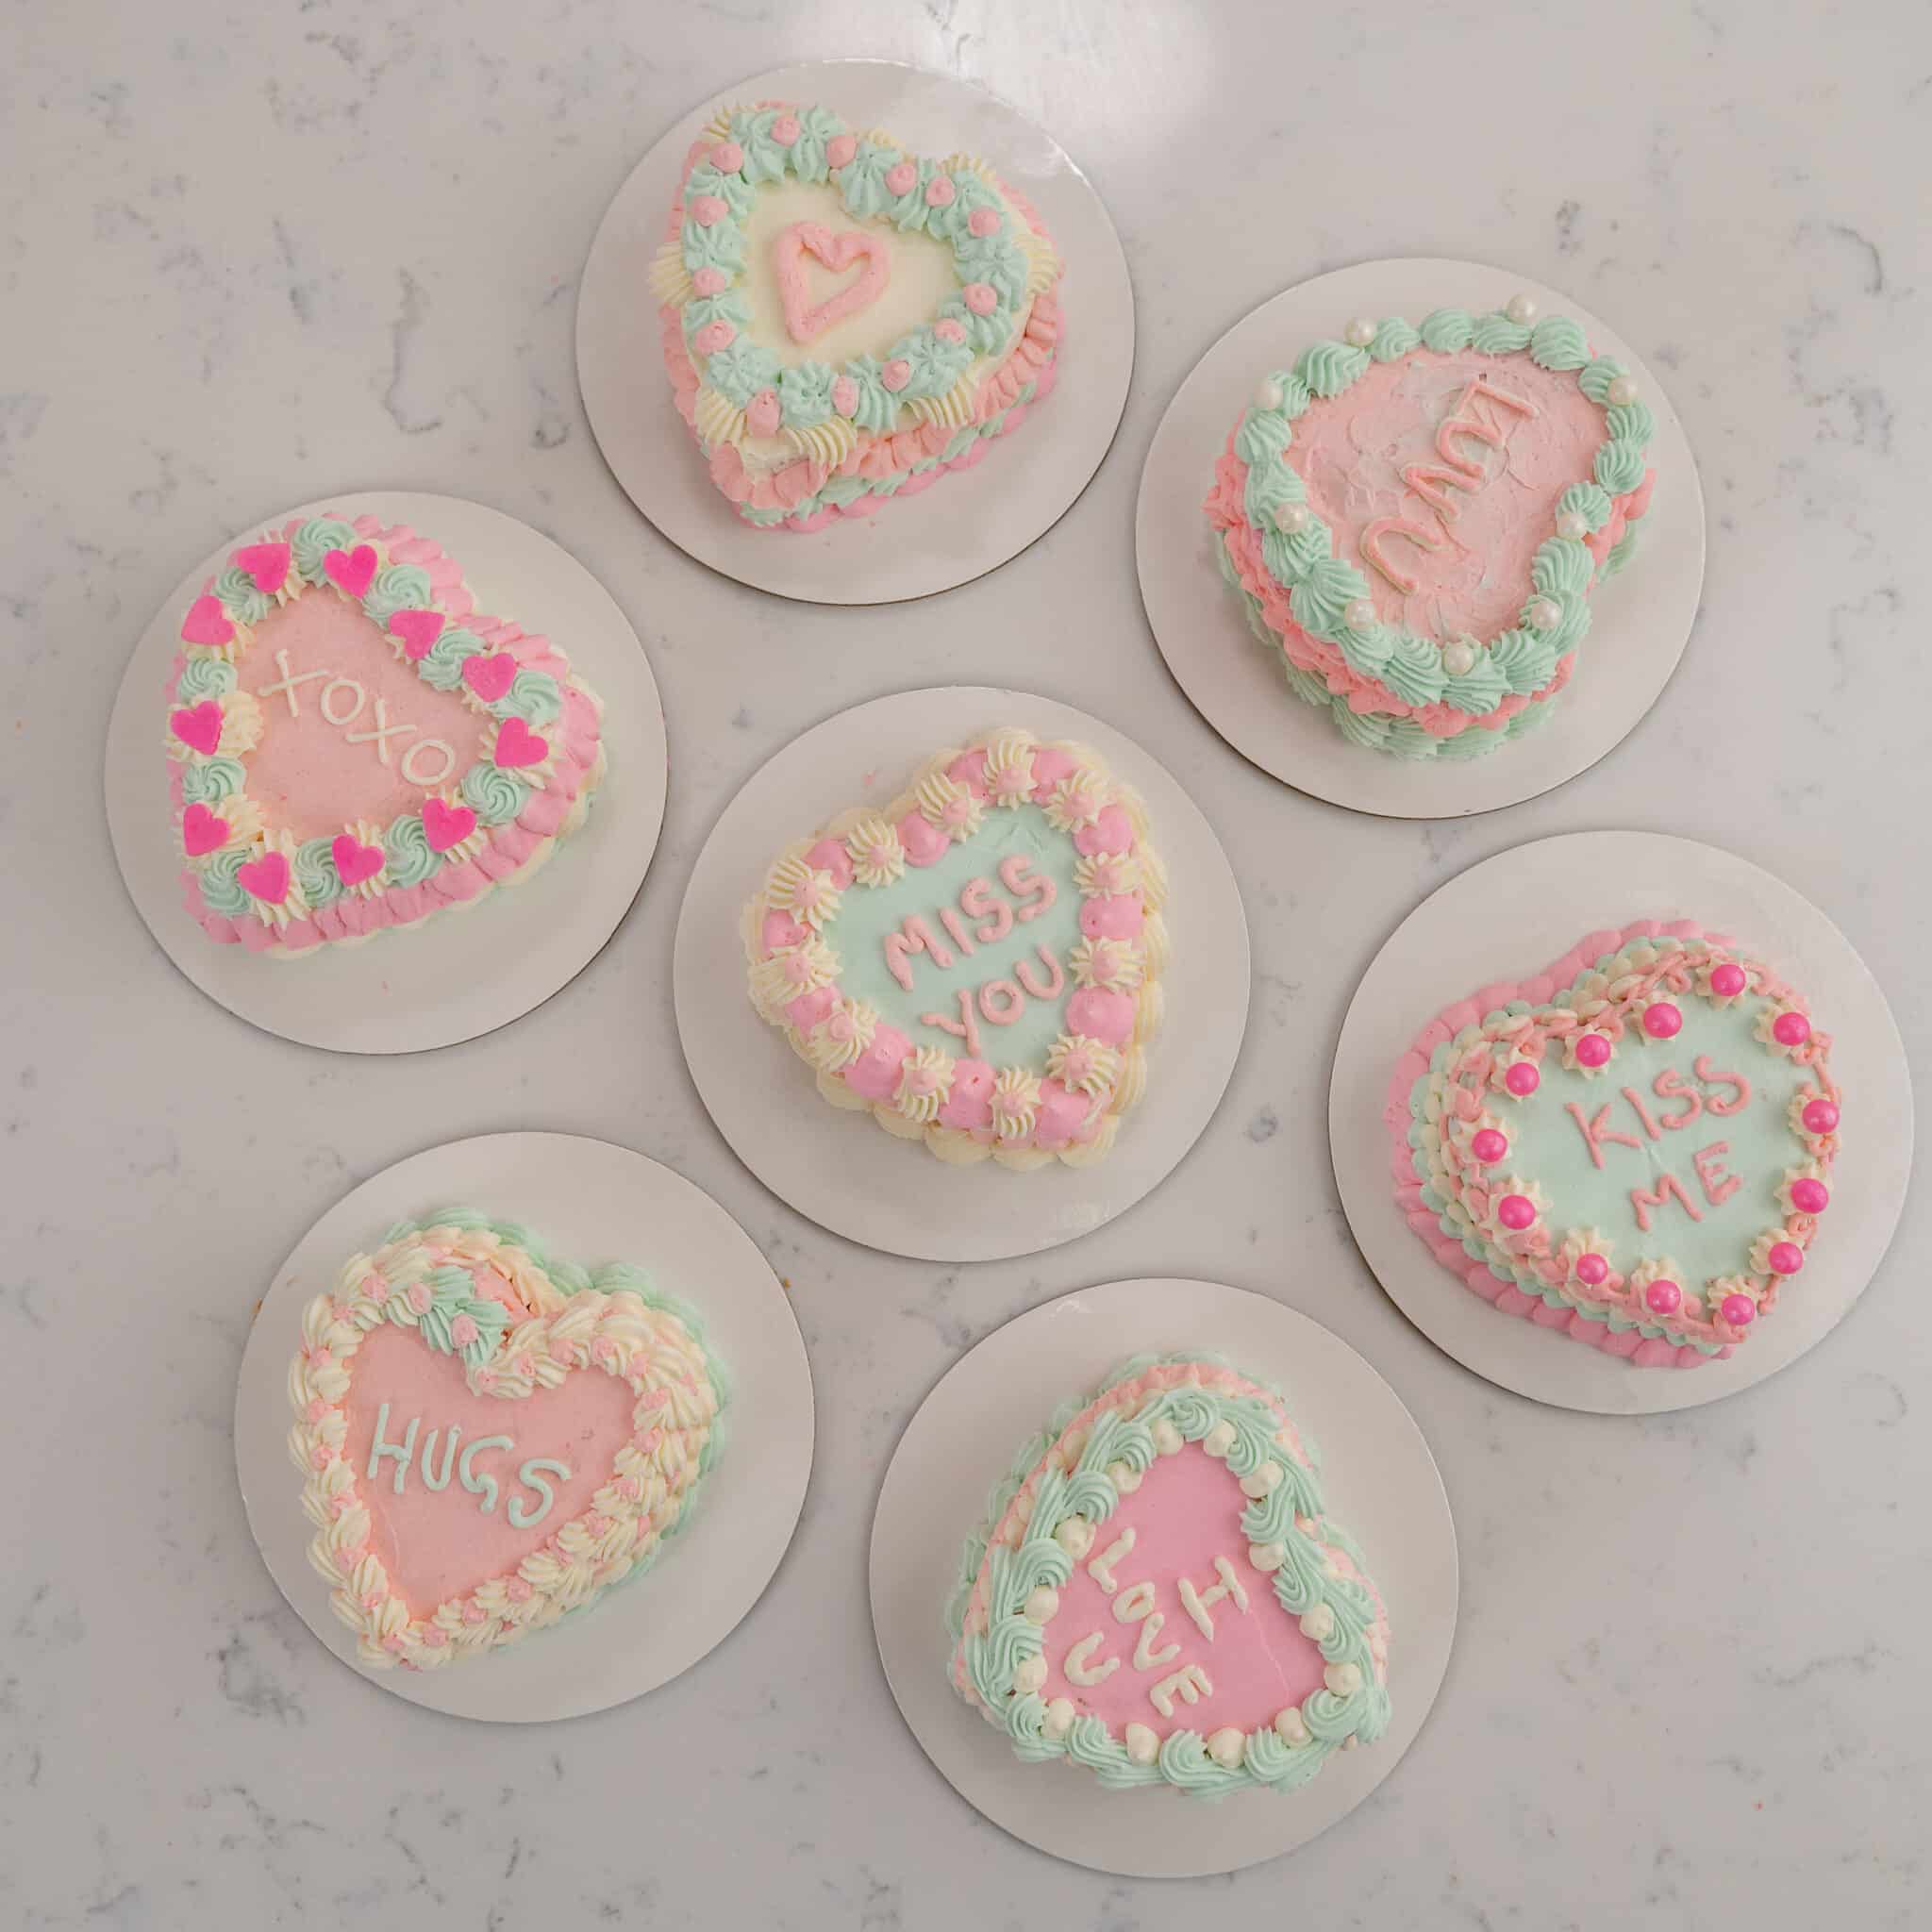
- Now you can get creative and make these cakes as ornate or as simple as you like.

- Finish your design with cute messages on top.

- Once you are finished decorating all of your mini cakes, place them in the freezer to set. It will be much easier to move them without messing up the design if the buttercream is frozen.
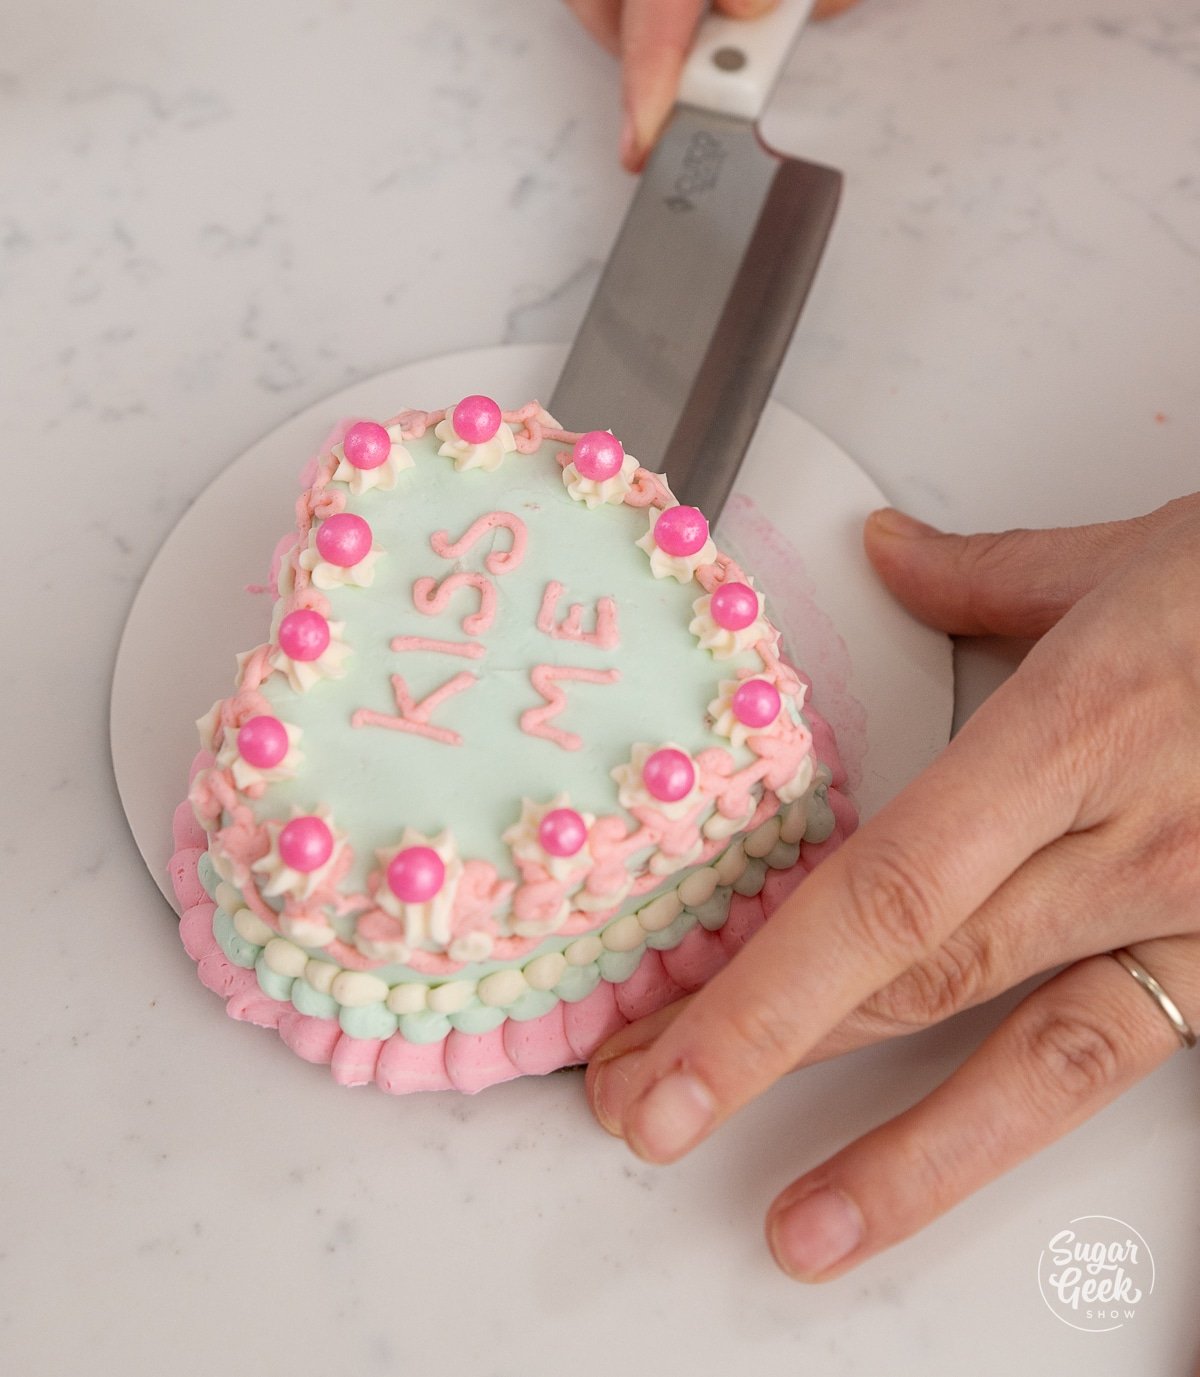
- Remove the cake from the cake board with an offset spatula or knife.

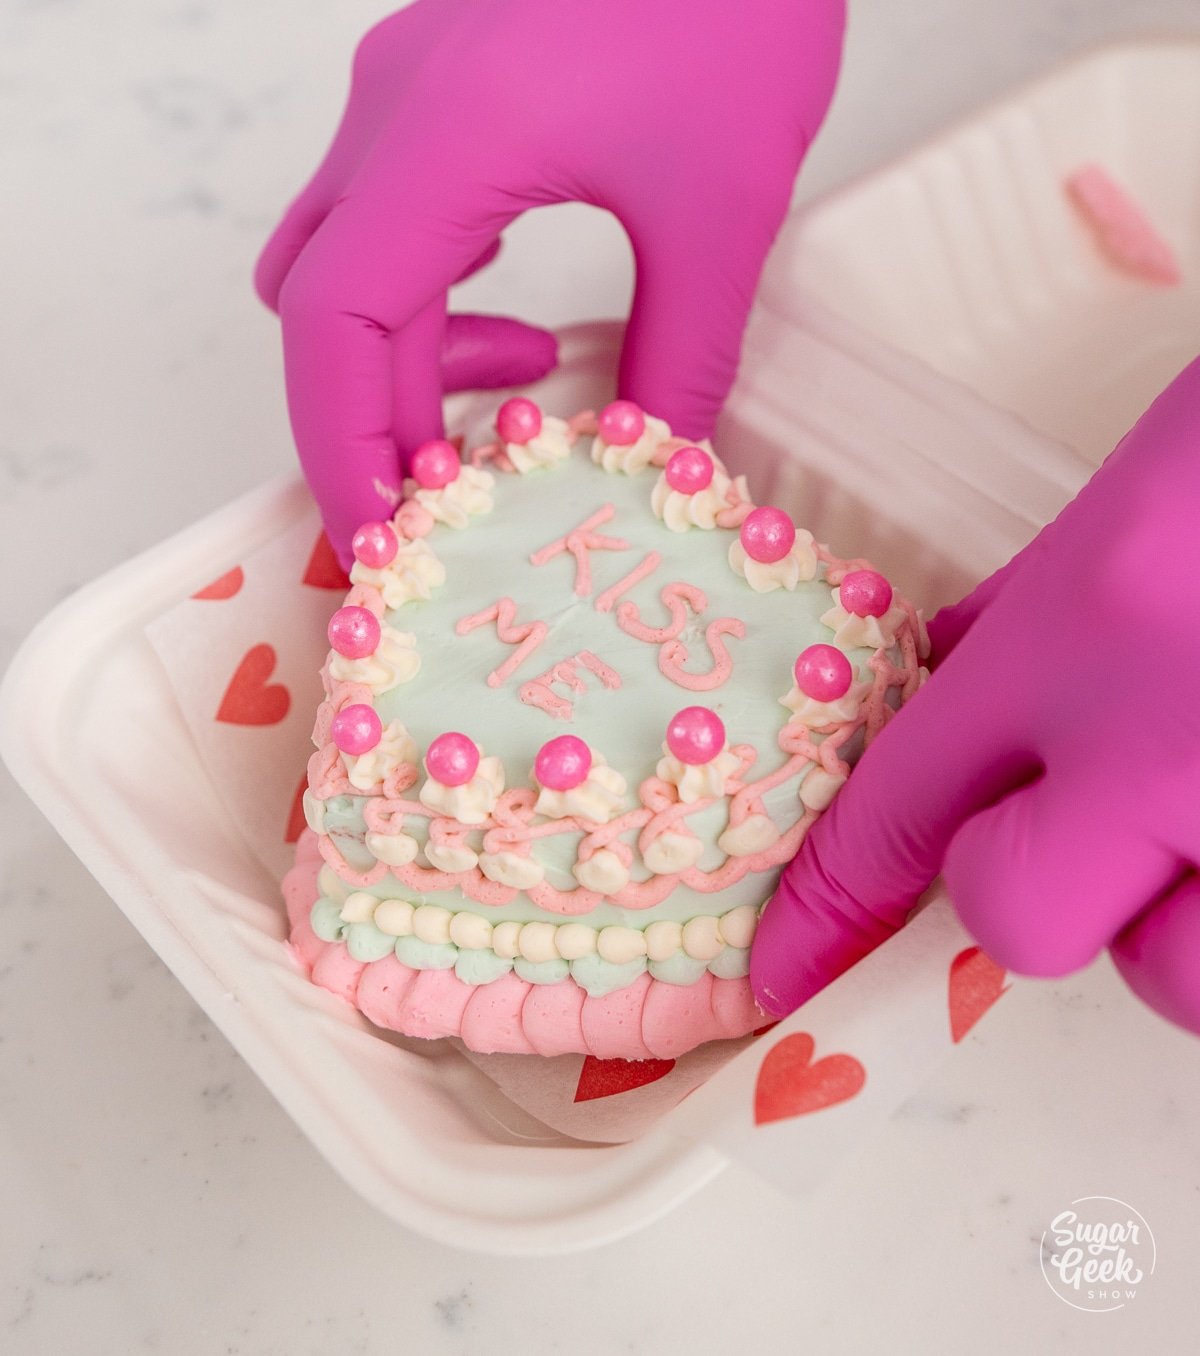
- Place a sheet of parchment paper in a little to-go container, add the cake inside, and add a fork on top.

- If you are not serving these right away, wrap them in plastic wrap and keep them in the freezer until you are ready to package. Also, you could package them, wrap the box in plastic wrap and keep them in the freezer. They will keep up to 2 months in the freezer.

FAQ
Both names refer to a small cake packaged in clamshell containers for easy transport and fun cute cakes. These are a staple in Korean cafes.
You could use my stabilized whip cream to frost the cakes, however, it will be slightly more difficult to pipe designs with the whipped cream, as well as color them. The more you agitate the whipped cream the closer it gets to butter.
It's important that your cakes are frozen before assembling your lunch boxes. Place a small square of parchment in the container and then the cake on top. Carefully close the box and then tape a fork to the lid.
Related Recipes
Moist Vanilla Cake From Scratch
Recipe
Equipment
- 1 3" heart shaped cutters
- 1 cupler and pipng tips
- 16 coated 6" cake boards
- 16 to-go containers
- cute parchment paper for lining the boxes
Ingredients
Doctored Strawberry Box Mix Cake
- 1 box strawberry cake mix or white if you can't find strawberry
- 1 cup all purpose flour (5 oz)
- 1 cup granulated sugar (7 oz)
- ¼ teaspoon salt
- 1 cup sour cream (8 oz) room temperature
- ½ cup melted unsalted butter (4 oz)
- ½ cup milk
- ¾ cup strawberry puree or preserves (6 oz) strawberry puree recipe
- 3 large eggs
- 1 teaspoon strawberry emulsion or extract I like amoretti or LorAnn oils
- ½ teaspoon lemon extract
Easy Buttercream
- 24 ounces powdered sugar sifted if not from a bag
- 6 ounces pasteurized egg whites room temperature
- 24 ounces unsalted butter room temperature
- ½ teaspoon salt
- 2 teaspoons vanilla extract
- various gel food colors
Filling
- 1 cup strawberry preserves or any filling you like
Instructions
Making A Strawberry Box Mix Cake
- Place all of the ingredients into a mixing bowl and mix for 2 minutes on medium speed.
- Pour the batter into 2 quarter sheet pans that have been prepared with cake goop, pan spray, or parchment paper. The size of your sheet pan may vary, so fill the sheet pan ½ way full. If you have leftover batter, you can freeze it or bake the remaining batter in a smaller cake pan. This recipe will make eight, 3.5" mini cakes, but it will depend on the size of the cutter and shape.
- Bake at 350ºF for 15-20 minutes or until a toothpick inserted comes out clean.
- Allow the cake to cool for 15 minutes in the pan.
- Flip out the cake and wrap it in plastic wrap and freeze it until you are ready to start assembling your cake. If you are making your cakes ahead of time, keep them in the freezer for up to 2 months.
Making Easy Buttercream Frosting
- Place the pasteurized egg whites and powdered sugar in the bowl of a stand mixer with the whisk attachment. Mix on low until combined and then bump up to high and whip for 3 minutes until it looks like royal icing.
- Add in your salt and then your butter in small pieces while mixing on low until combined, then bump up to high. Whip until light, white and fluffy and it doesn't taste like butter anymore. This can take 10-15 minutes.
- Switch to the paddle attachment and mix on low for 15 minutes until it's smooth and bubble-free (optional).
- Color your buttercream in as many colors as you like. I like ChefMaster gel food coloring over liquid for the best colors.
- Fill piping bags with the colored buttercream, using as many as necessary for your color palate. Pro-Tip: Use a coupler in each of your piping bags so that you can easily switch piping tips for different designs.
Assembling the Lunchbox Cakes
- Once your sheet cakes have chilled completely use your desired cutter (I used a 3" heart cutter) to cut out as many cakes as possible, about 16. Cold cakes are easier to cut, and handle and are less crumbly.
- Set the cake on a small cake board so you can easily move it.
- Torte the little cake in half moving slowly with a serrated knife and turning the cake as you cut. You will have a thin cake layer, so handle it gently. (Optional)
- Pipe a dam of buttercream around the edge of the cake.
- Fill the center of the dam with a few Tablespoons of filling.
- Place the next layer of cake on top. If your cakes are very soft and sliding, let them rest in the freezer for 15-30 minutes to firm up.
- With a small offset spatula, coat the exterior of the cake with your desired base color, then do a second layer of buttercream. Complete all of the buttercream coats before moving on to piping the edges and decor.
- Practice your piping design briefly on a piece of parchment so you know you like it. It will be easier to scrape off the parchment than the cake!
- Now you can get creative and make these cakes as ornate or as simple as you like.
- Finish your design with cute messages on top.
- Once you are finished decorating all of your mini cakes, place them in the freezer to set. It will be much easier to move them without messing up the design if the buttercream is frozen.
- Remove the cake from the cake board with an offset spatula or knife.
- Place a sheet of parchment paper in a little to-go container, add the cake inside, and add a fork on top.
- If you are not serving these right away, wrap them in plastic wrap and keep them in the freezer until you are ready to package. Also, you could package them, wrap the box in plastic wrap and keep them in the freezer. They will keep up to 2 months in the freezer.
Leave a Reply