

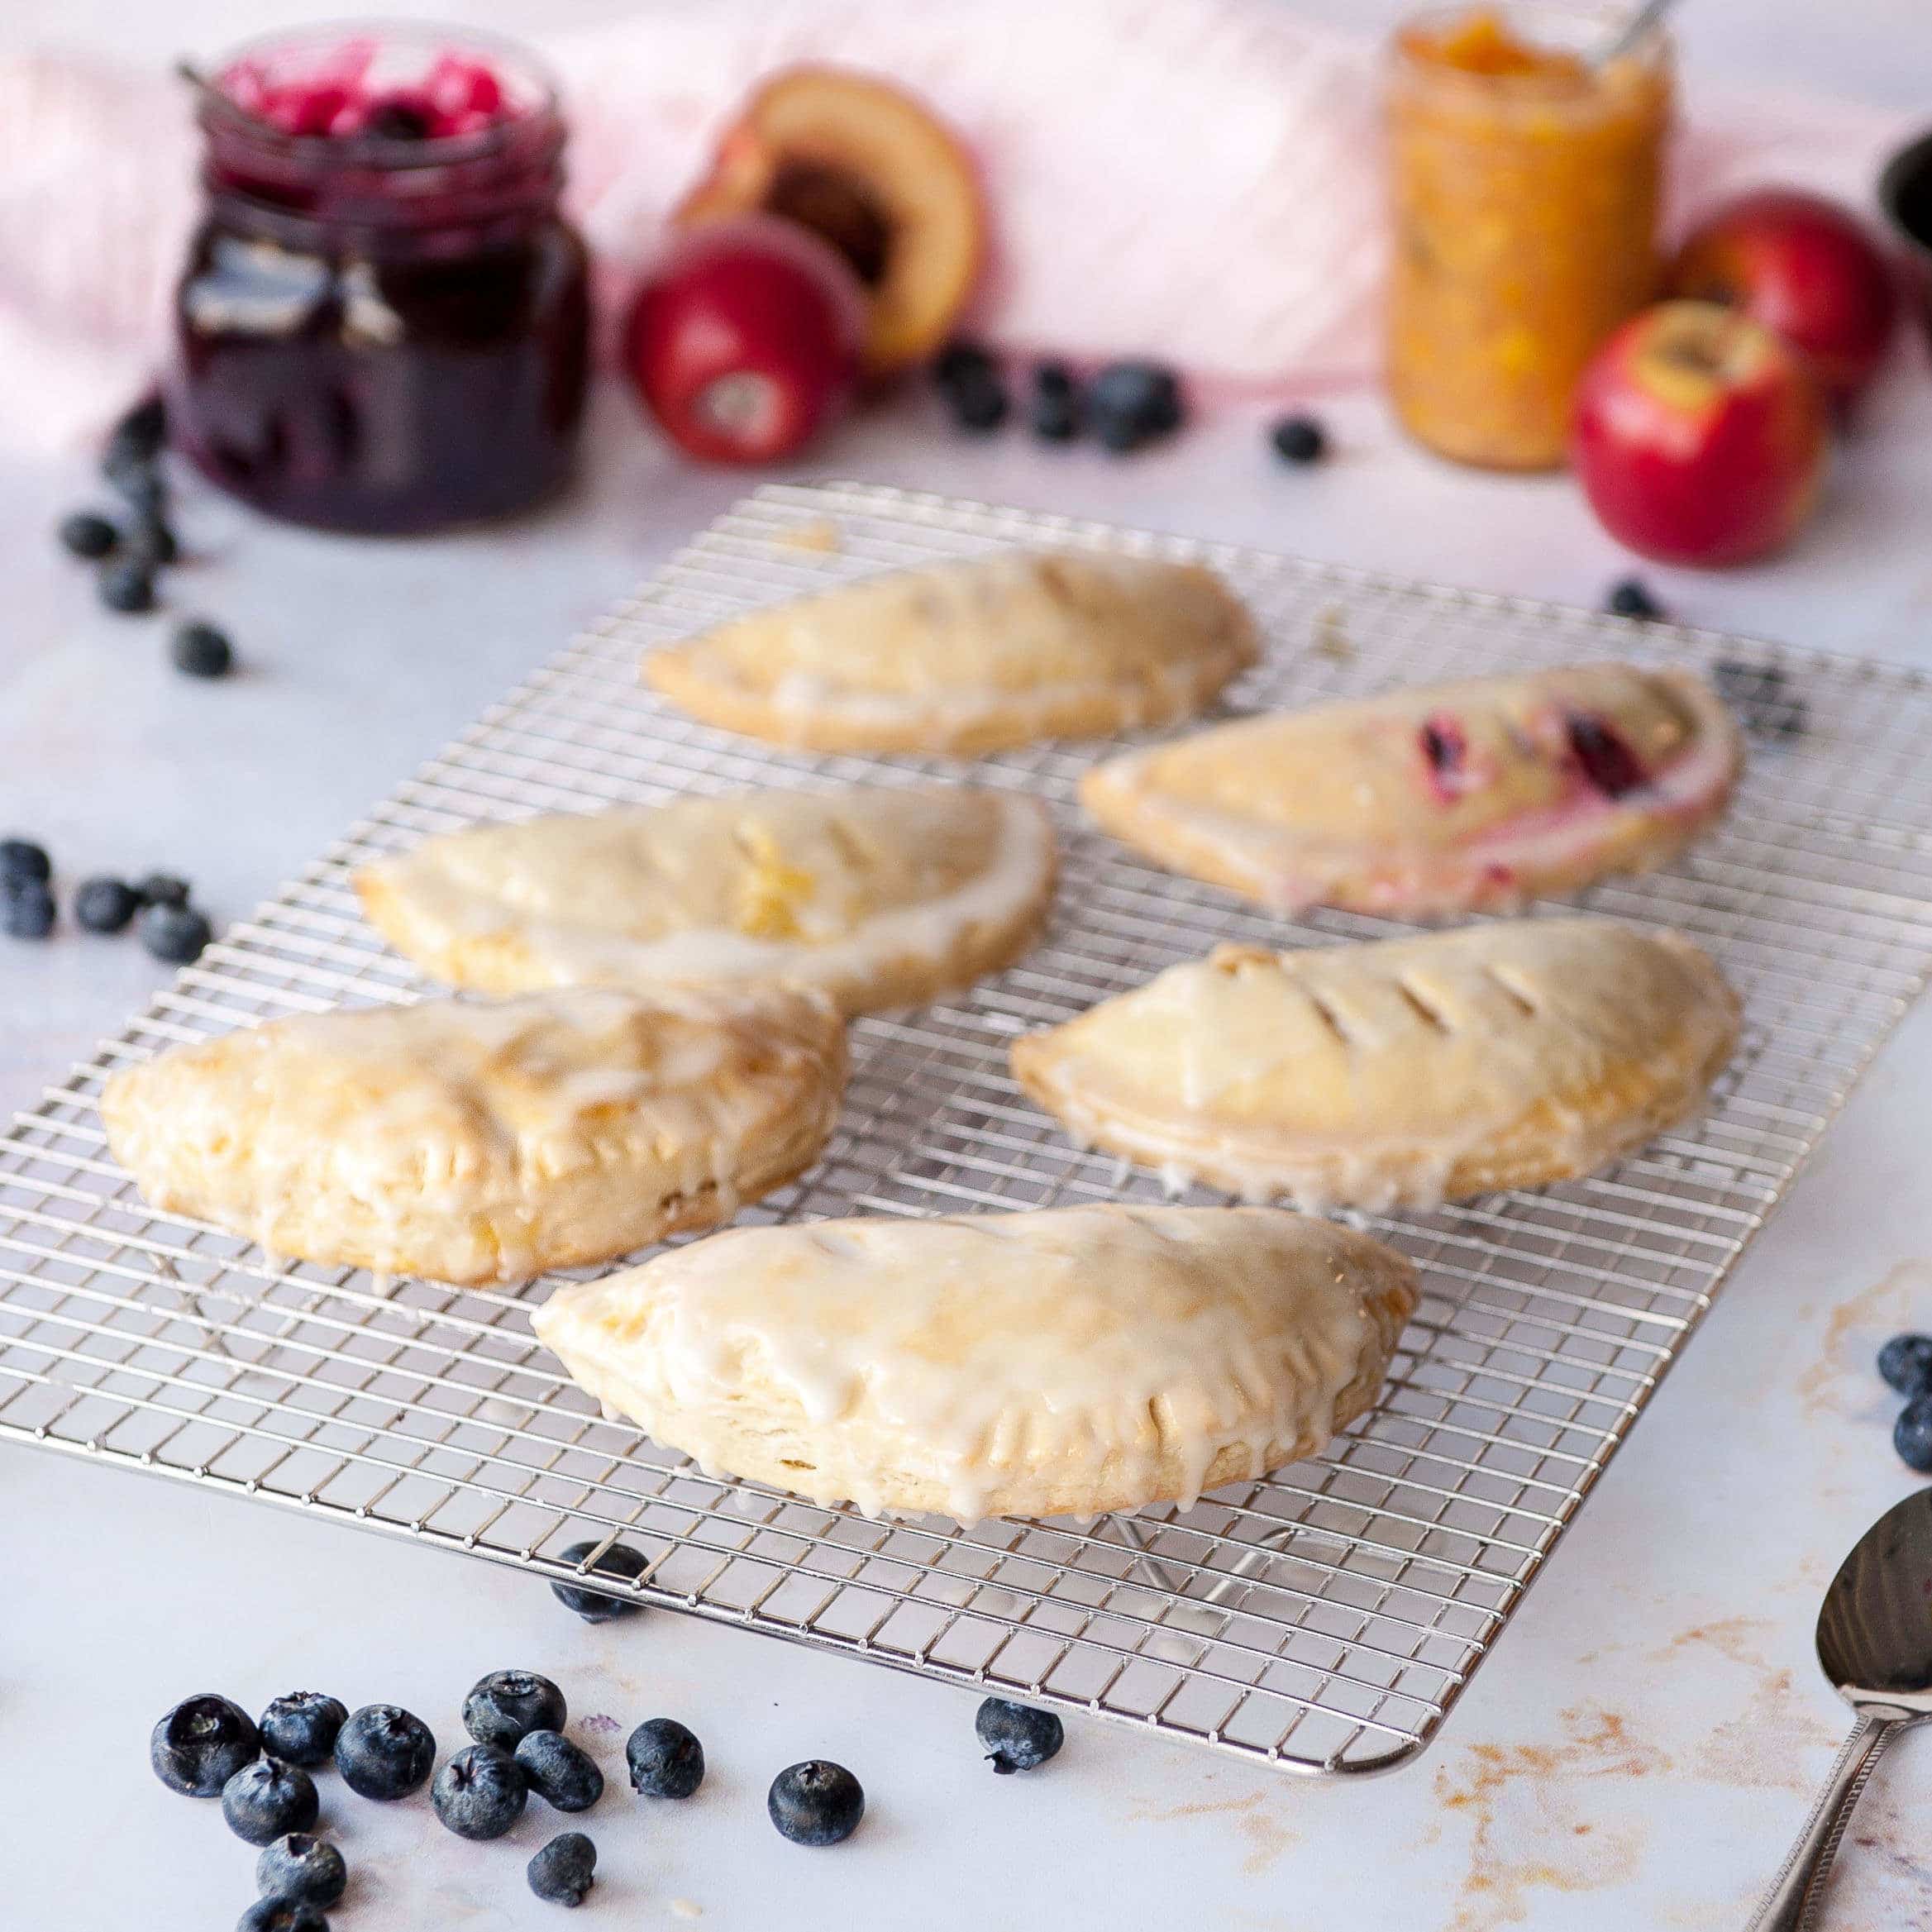
Homemade hand pies with a sweet or savory filling, wrapped in a buttery, flaky crust. Bake them, deep fry them or even use the air fryer with no leaking! Fill them with your favorite flavors like apple filling, peach filling, lemon curd, and blueberry filling. Everything you love about a pie in the palm of your hand.
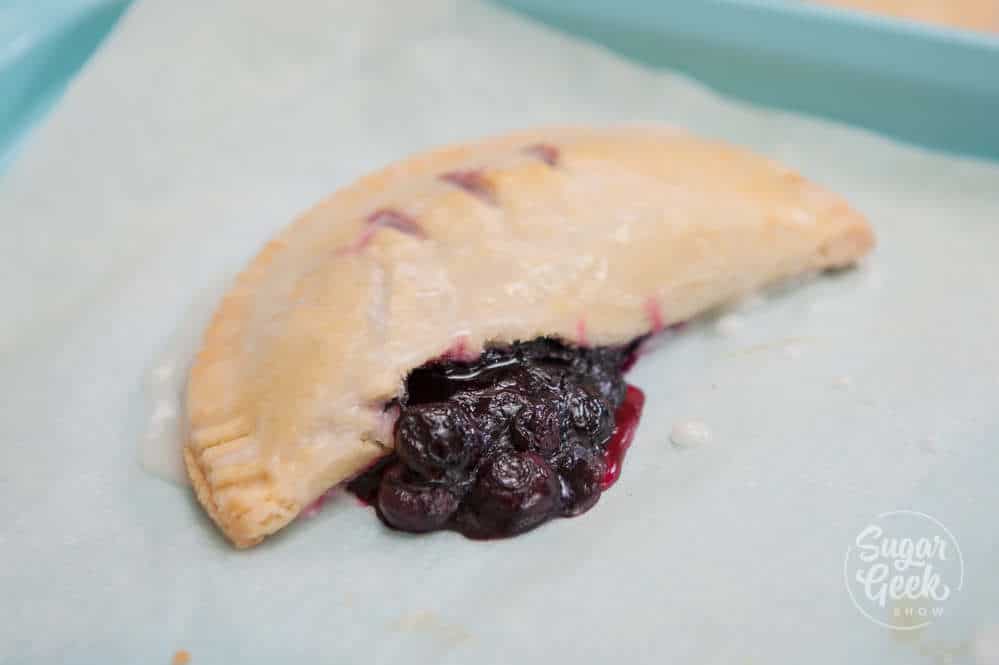
A hand pie is basically a miniature pie that fits in your hand. It can be sweet or savory and is made by placing a small amount of filling onto a circular (or rectangular) piece of pie dough, folding the dough over and sealing it shut before baking. You'll be shocked how much easier they are to make than an actual pie.
Hand pies make great desserts for parties and weddings because there's no need to cut a pie and serve it. Simply set them out and the guests can serve themselves!
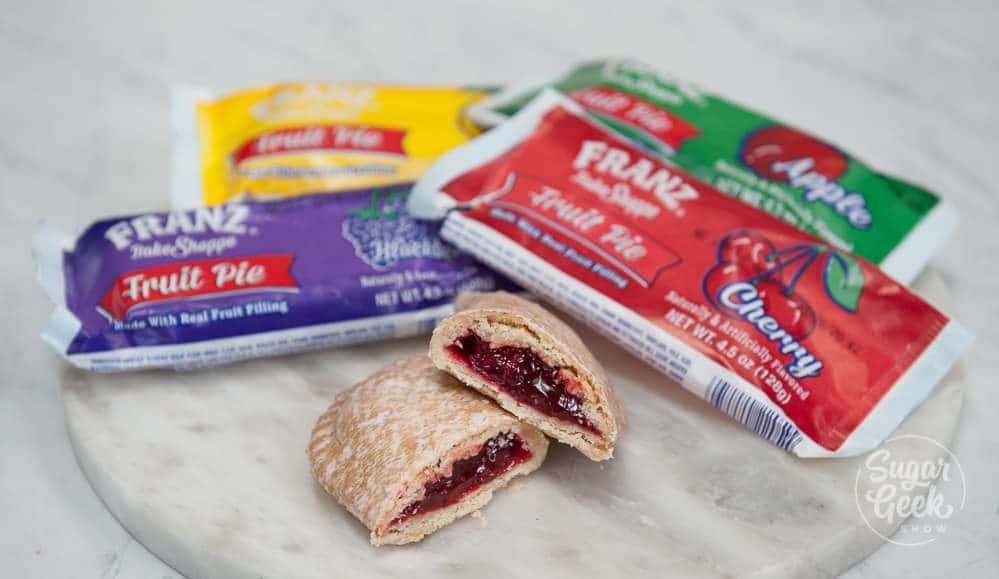
Does anybody else remember these hand pies? The grocery store was always a magical place for me when I was a child. The bakery would always give me a "free sample" and if I was really good, my dad would buy me one of those $1 hand pies.
I used to LOVE these! We very rarely got any kind of treats or sweets growing up so this was a major big deal if you ever got one of these.
I decided to show Avalon what she was missing so I picked her up one while I was out (and one for myself of course).
Sadly the hand pie was not as I remembered. The crust was stale and bland and the filling was very goopy and not very flavorful.
Why are childhood treats never as good as we remember them?
So of course, I had to try and remake them for myself but this time, extra delicious and with multiple fillings!
HAND PIE INGREDIENTS
There are endless options for making hand pies as far as flavors go, depending on the season. Most of the ingredients you will need are pretty standard like flour, salt, sugar, eggs, water, and butter.
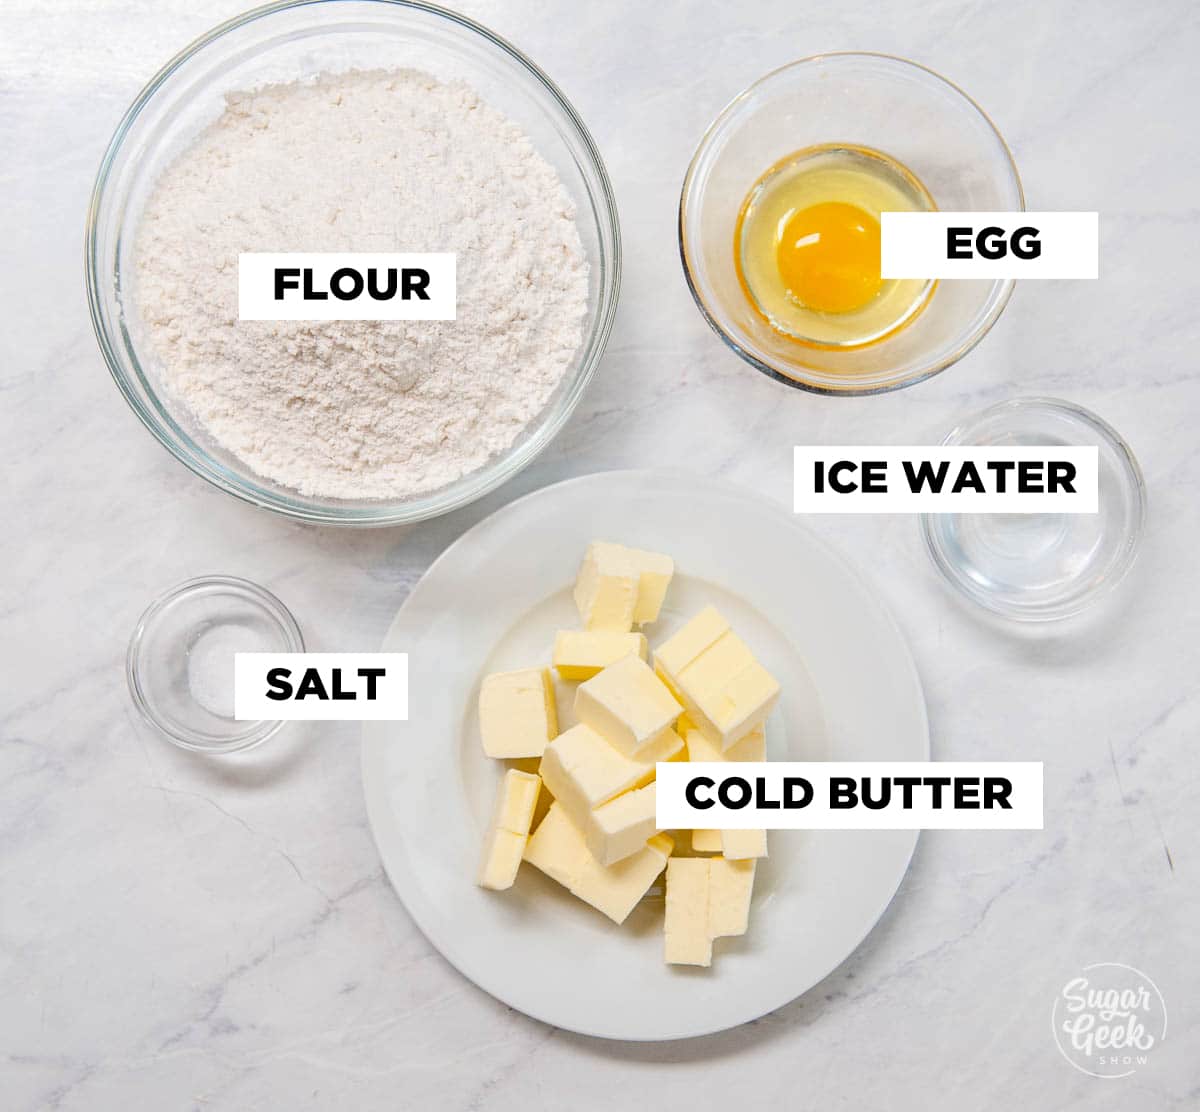
For the filling, the ingredients will vary. One ingredient you might need to purchase ahead of time is ClearGel (similar to cornstarch but stays really shiny) or you can use cornstarch if that's all you have.
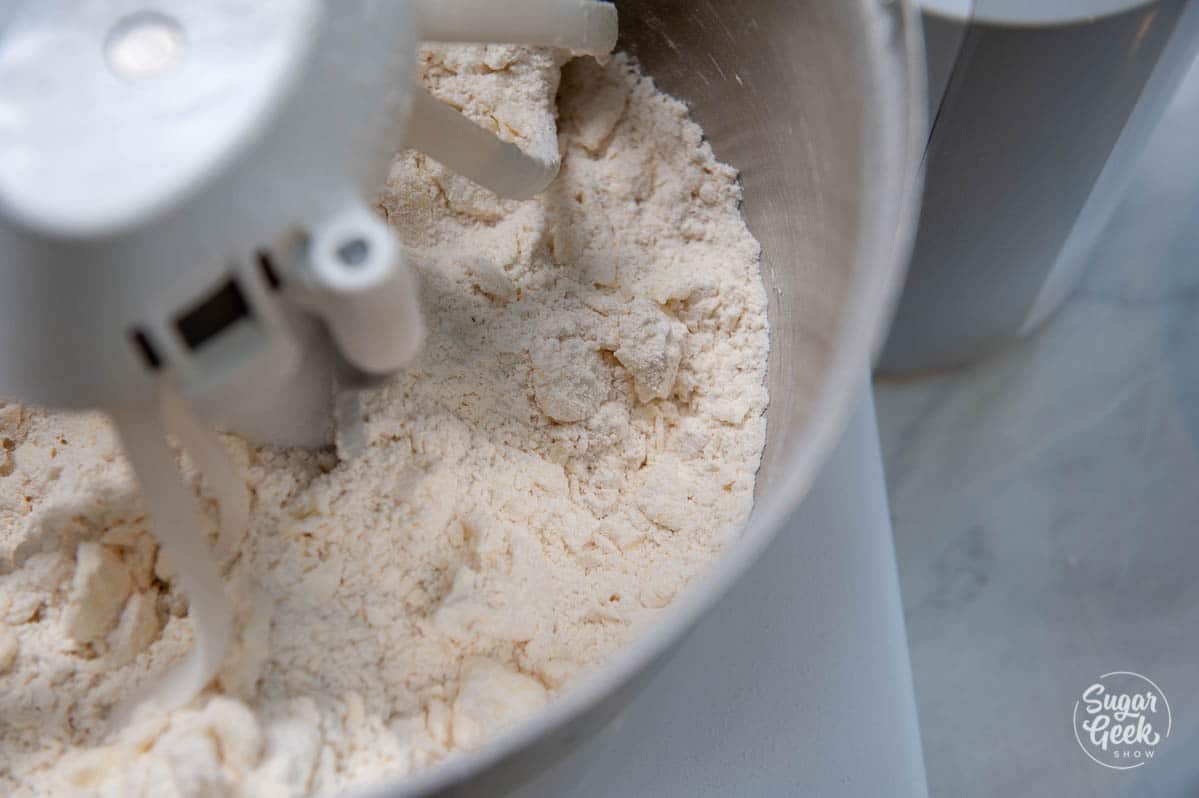
PÁTE BRISÉE (MEALY PIE DOUGH) STEP-BY-STEP
Pâte Brisée is a French version of classic pie dough. It's great for hand pies because it repels liquid while baking, making sure your hand pies don't get soggy.
Step 1 - Place flour, salt, and cold butter pieces into the bowl of your stand mixer and blend on low until mixture resembles coarse sand.
Step 2 - Add in your egg and just enough cold water to bring the mixture together.
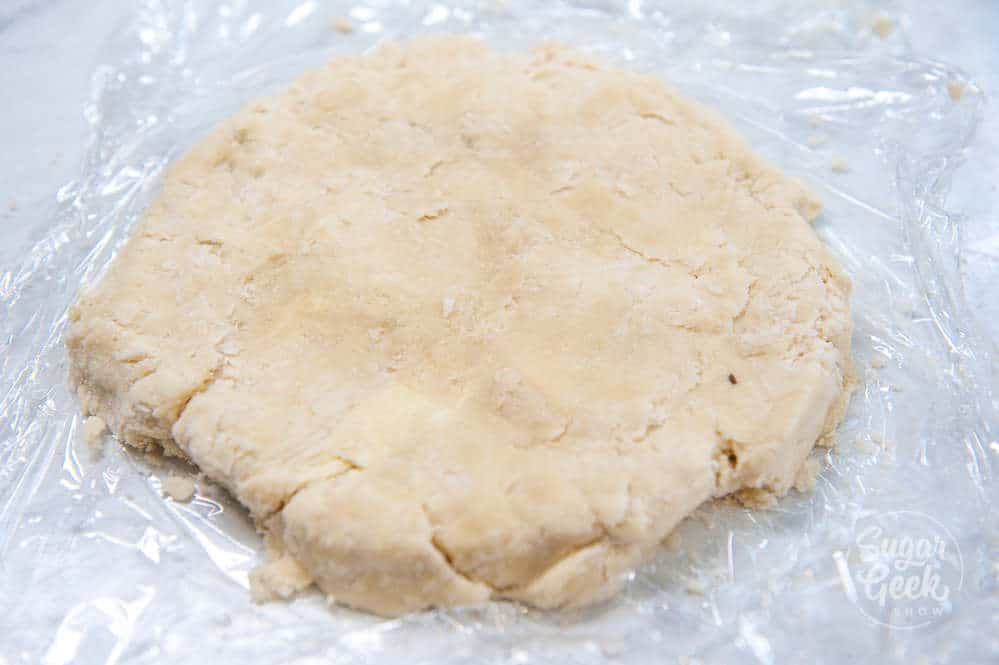
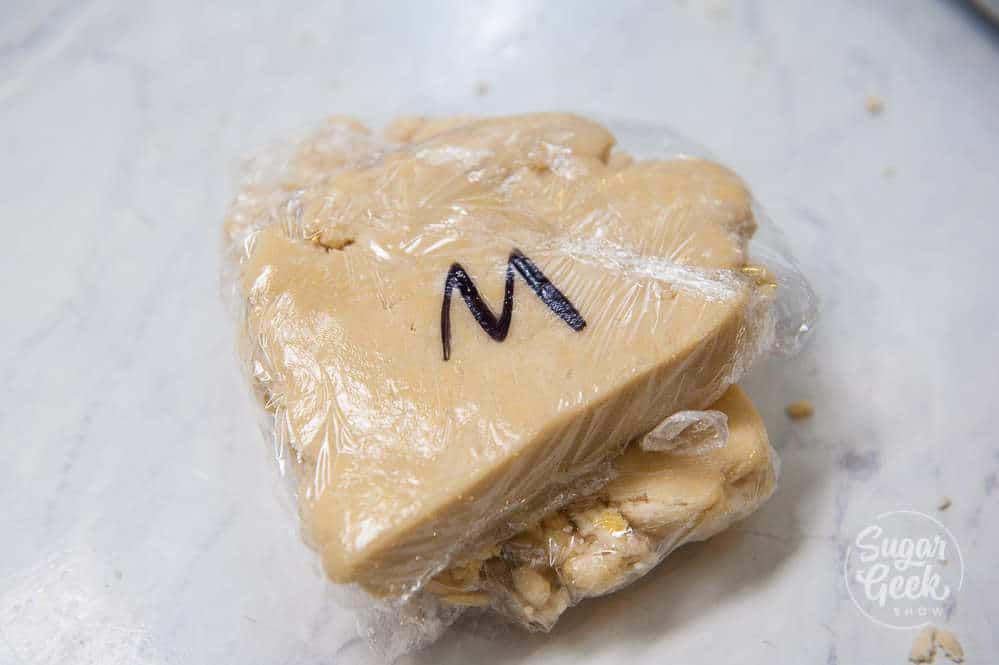
Step 3 - Press into a disk and wrap with plastic wrap. Chill for one hour minimum. Don't skip the chilling, or your pie crust will melt in the oven.
HOMEMADE HAND PIES STEP-BY-STEP
Step 1 - Preheat your oven to 400ºF and line 2 large sheet pans with parchment paper. The parchment paper will save you from a messy clean-up if one of your hand-pies bursts during baking which can happen!
Step 2 - Take out the chilled pie dough and place it on a flat surface dusted with flour. Let your dough warm up for a bit (around 20-40 minutes) until you can roll it out without it cracking. You don't want it TOO warm though or it will stick to your rolling pin. Take out your filling(s) and let it come to room temperature.
Step 3 -Roll out your cold pie dough to ⅛" thick and cut into 6" circles. I also made some with a 5" cutter so the pies were a little smaller and better if you don't want such huge servings.
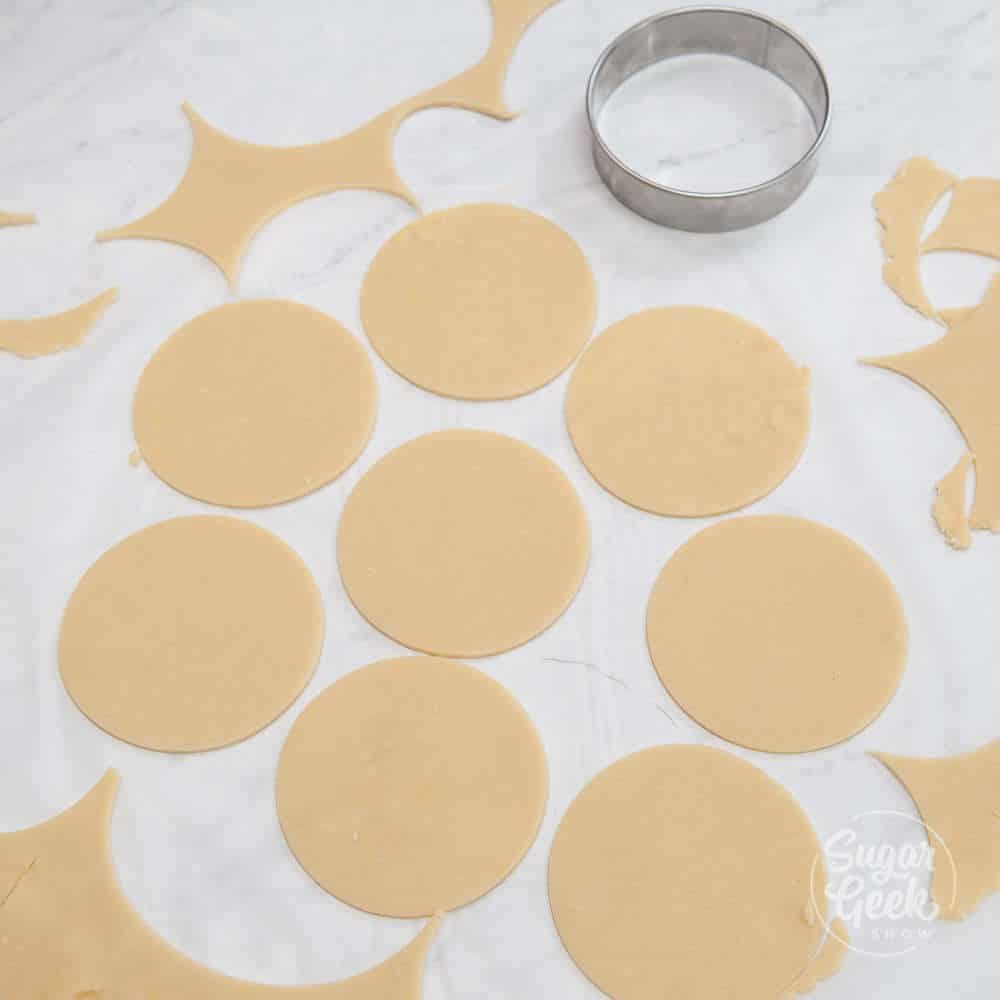
Pro Tip: When rolling out cold pie dough, start in the center and work your way out, making tiny little rolls and rotating frequently until it becomes easier to roll. Go slow and be patient!
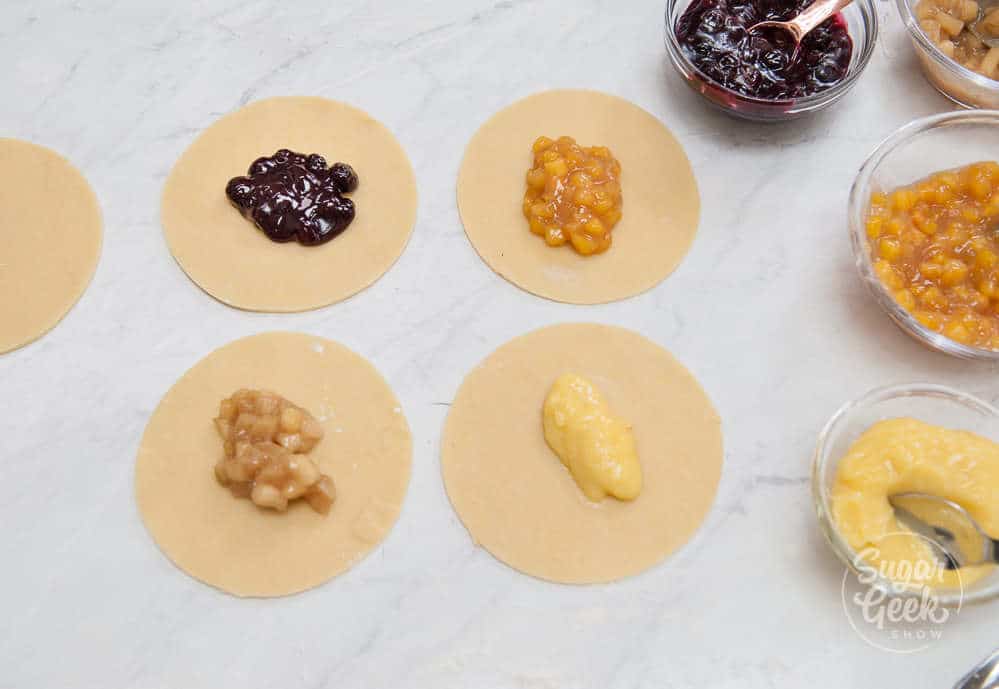
Step 4 - Add 3 Tablespoon of filling (don't overfill or they will burst while baking) 5" circles only need 1 Tablespoon of filling. If you're using curd, you can add a tiny bit more.
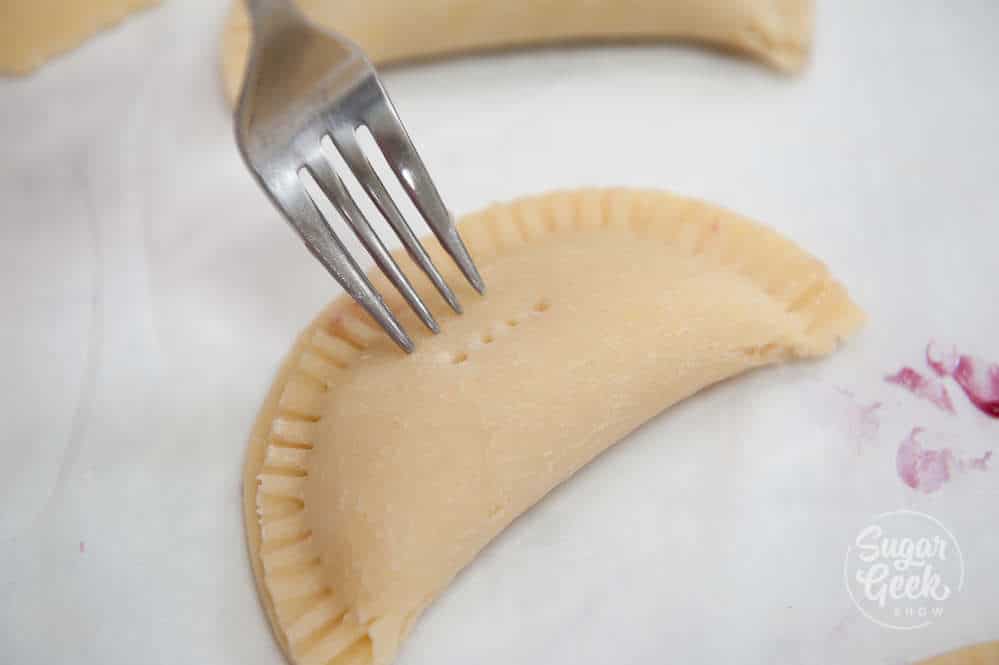
Step 5 - Brush the edges with egg wash, fold and crimp edges firmly to seal shut with a fork.
Step 6 - With a small sharp knife, cut 3 slits into the top, center of the pie. Be careful to not cut all the way through to the bottom, but really make sure the slits are open. Air will release through these vents while baking and keep your filling from blowing out.

WHAT'S THE BEST WAY TO BAKE HAND PIES?
Baking, air-frying, or deep-frying? Which way is the best way to bake those tasty hand pies? I wanted to find out so I tested out each way of baking.
First up, baked hand-pies!
Step 1 -Place pies on the baking sheet and refrigerate for 20 minutes.
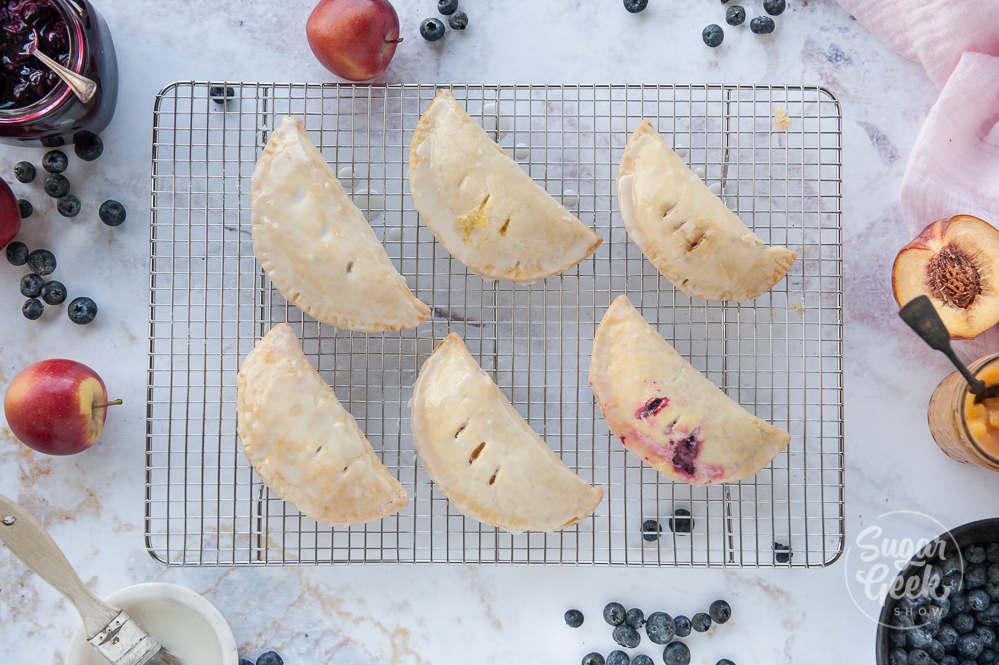
Step 2 - Bake for 20-25 minutes. They should be golden brown on the tops and bottoms and the filling will just be starting to bubble.
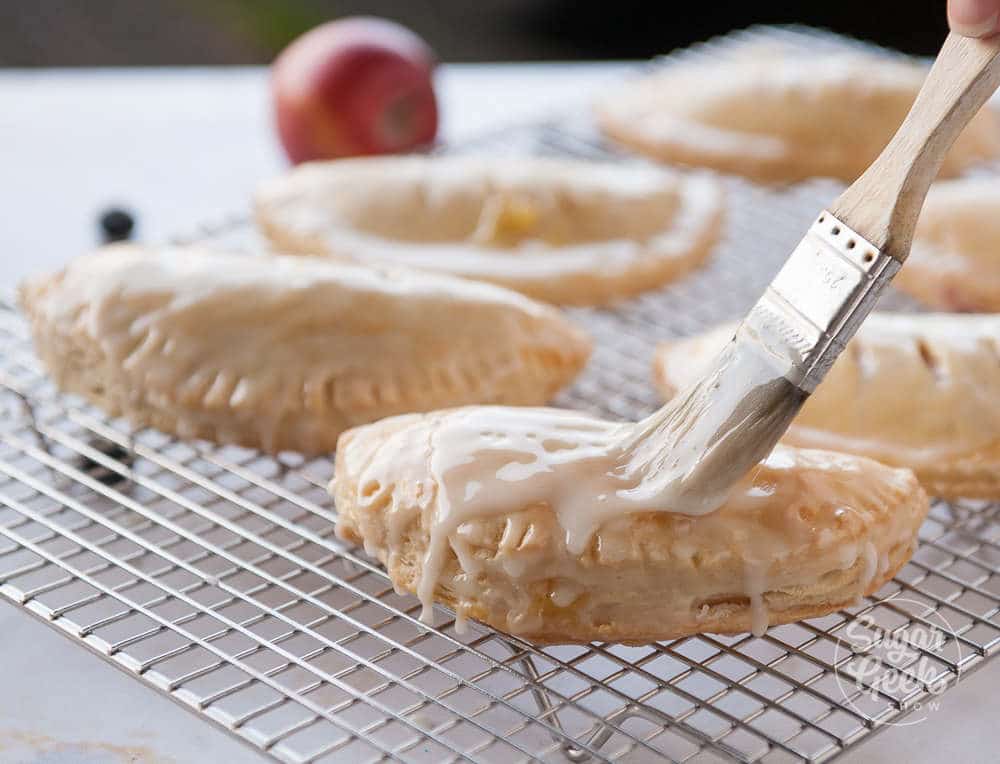
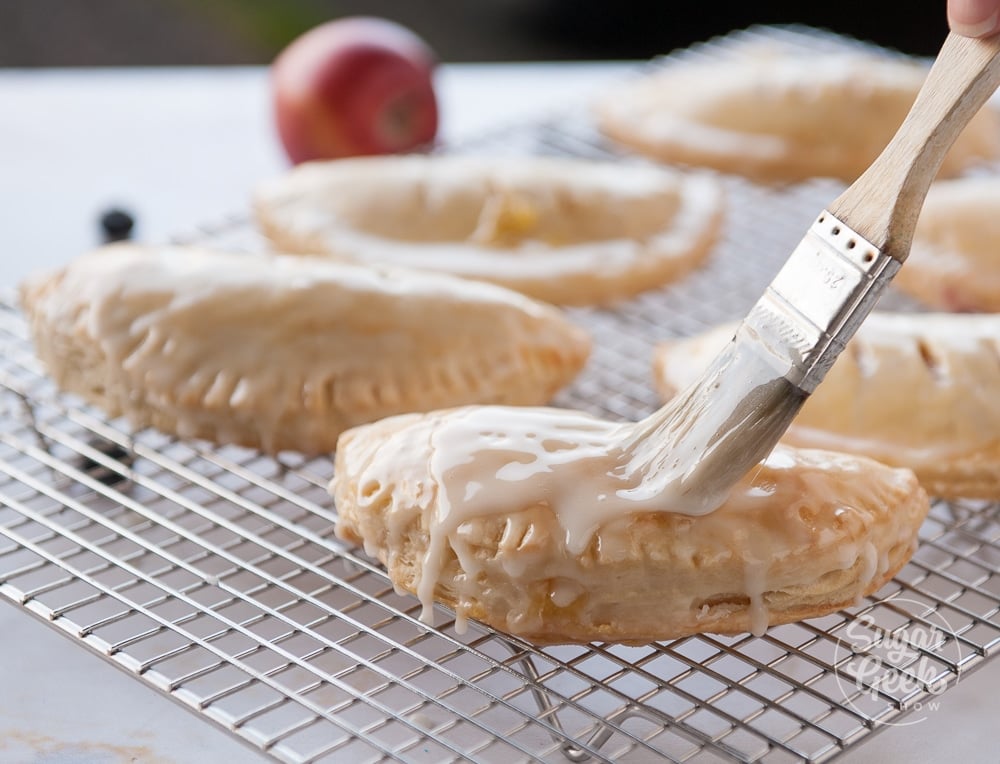
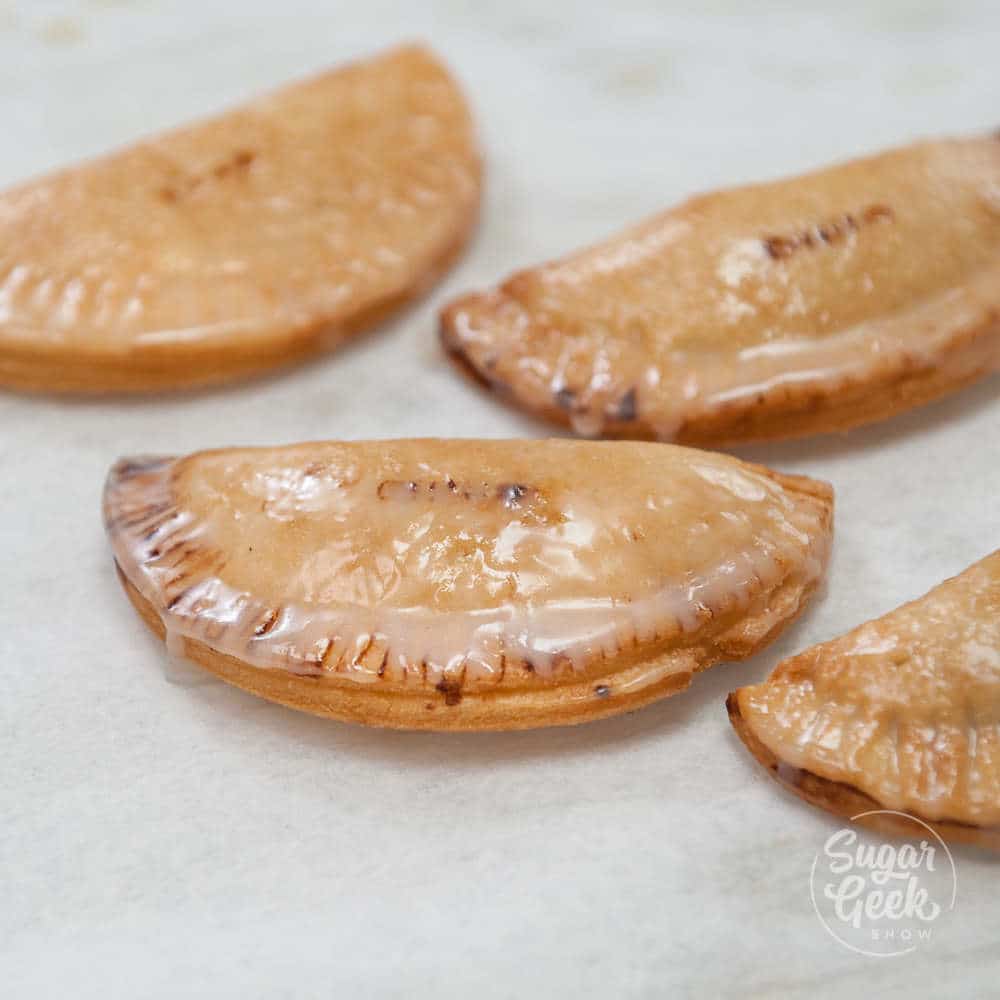
Step 3 -Let your hand pies cool for 10 minutes. While your hand pies are cooling, make your glaze. Just whisk the powdered sugar and lemon juice together until smooth.
DEEP FRIED HAND PIES
Most hand pies are baked but you can (and should) try making fried hand pies! The crust bubbles up beautifully and is EXTRA crispy when you fry your hand pies.
Step 1 - Prepare your hand pies as usual but instead of cutting 3 slits with a knife, use a fork to dock 3 holes on the top, and then place them in the fridge to chill for at least one hour.
Step 2 - Heat up 4 inches of neutral oil (like vegetable shortening or canola oil) in a deep pot (like a dutch oven) to 375ºF. Use a thermometer to keep an eye on the temp. Make sure you place the pot at the back of the stove, especially if you have kids. Hot oil is very dangerous and so are splashes.
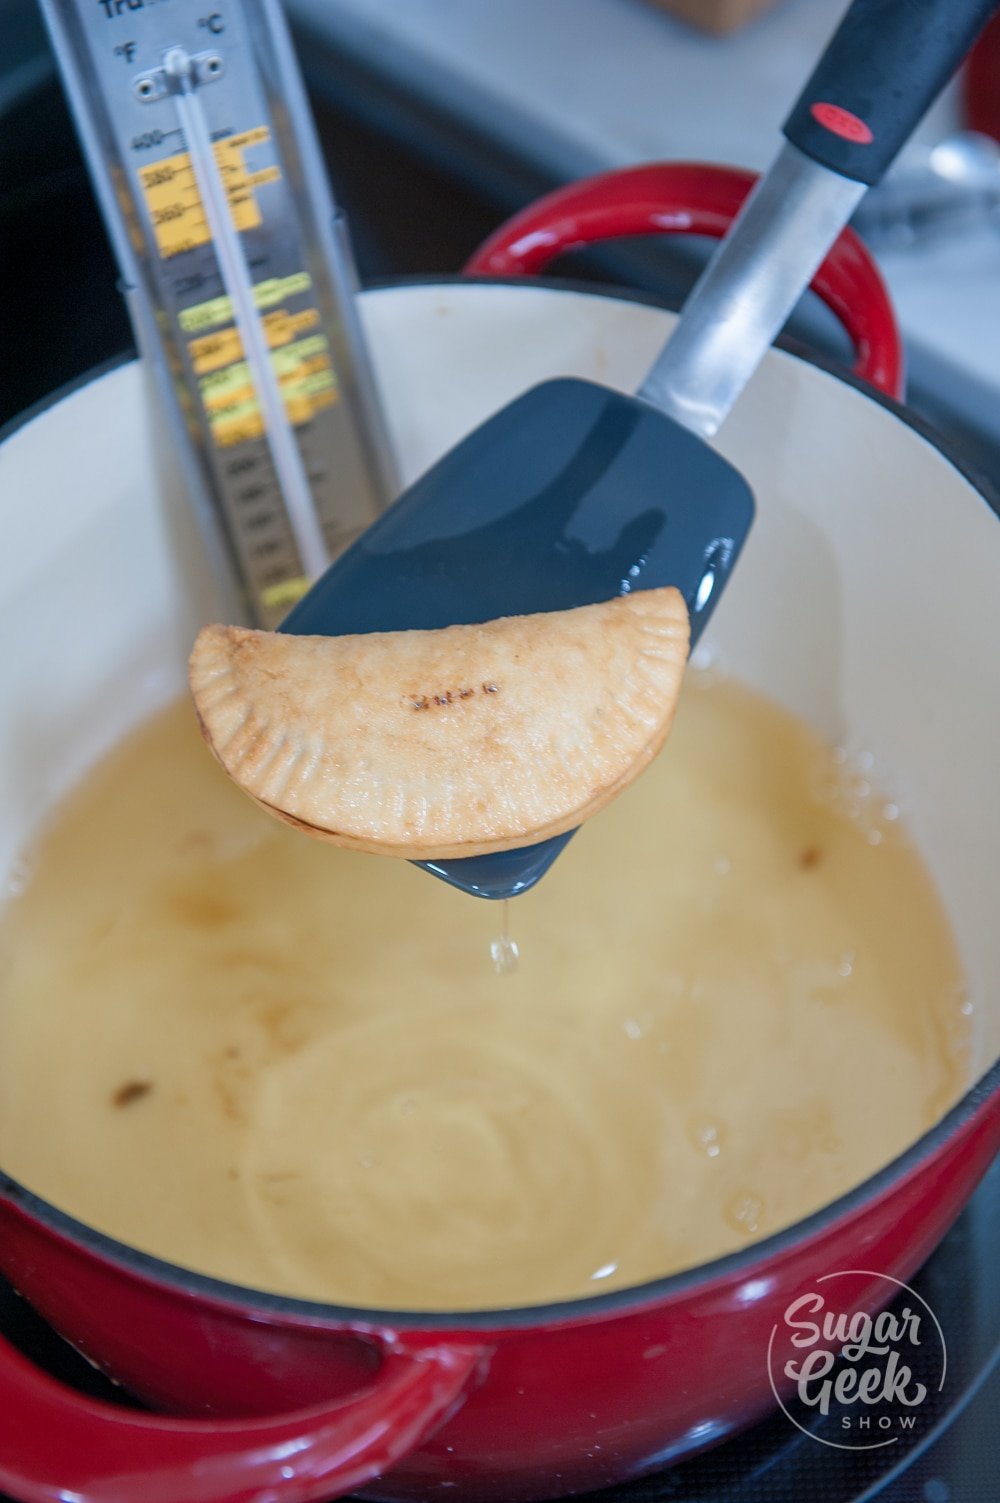
Step 3 - Place 2-3 hand pies in the hot oil and fry 3-4 minutes until golden brown.
Step 4 - Drain on a paper towel, cool for 10 mins then dust in powdered sugar or cover in sugar glaze before serving. They are best when eaten the same day.
Deep-fried hand pies taste the MOST like the store-bought versions but I wasn't a huge fan of the deep-fried version compared to the air fried.
AIR FRIED HAND PIES
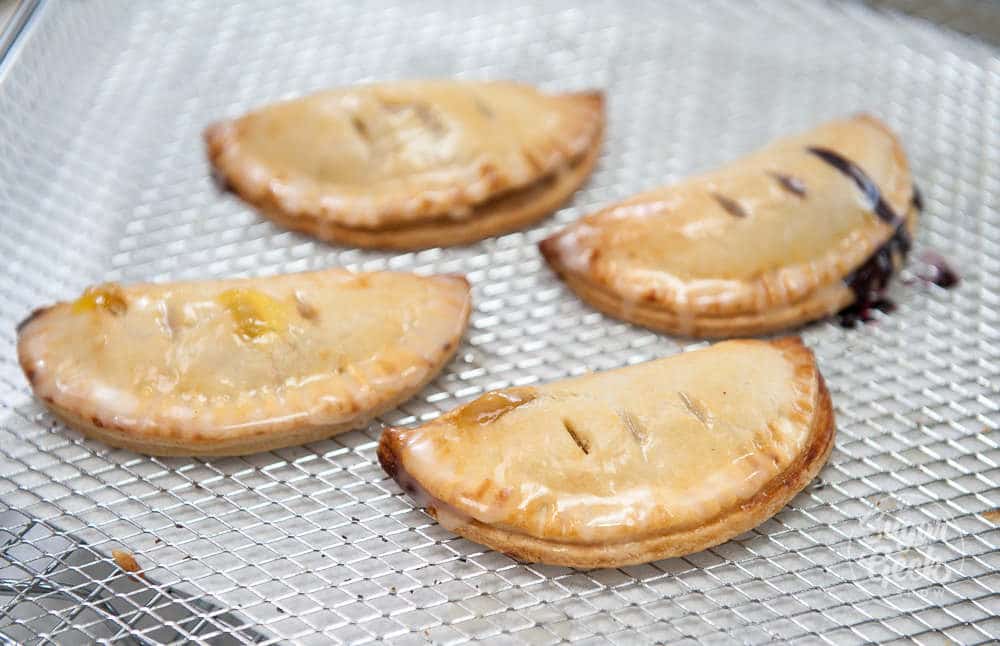
If you happen to have an air fryer, you can fry your hand pies that way. This is actually my favorite way to make hand pies. The air fryer makes the dough SUPER light and crisp without the added oil from deep frying.
Step 1 - Prepare your hand pies as usual and chill for one hour.
Step 2 - Brush the surface with egg wash and sprinkle on some sanding sugar for color and flavor (optional).
Step 3 - Set your temperature to 400ºF on your air fryer.
Step 4 - Place your hand pies inside the air fryer basket and fry for 13-15 minutes or until golden brown.
WHAT KIND OF CRUST IS BEST FOR HAND PIES?
A hand pie is a tiny version of a full-sized pie so we want to use a similar pie crust. I'm using Pâte Brisée which is a very simple, not-too-sweet but delicious crust.
It's very similar to pie dough but the texture is finer and stronger than traditional pie dough. Perfect for making hand pies. Pâte Brisée is also perfect for savory hand pies since it doesn't contain any sugar.
HOW DO I STOP MY PIES FROM LEAKING?
There are three reasons why your hand-pie might be leaking. Follow these steps to make sure your hand-pies don't burst.
- Don't Overfill - You might think you want to fill that hand pie to the max but filling expands while baking so if your hand pie is too full, the filling will expand and then leak out of your crust.
- Seal The Edges - Make sure you really seal those edges. Dampen the crust with a little egg wash and then press together with a fork. Make sure there isn't any filling on the edge of the dough or it will break the seal and cause the hand pie to leak.
- Vent - Don't forget to give your pies some vents for steam to escape during baking, otherwise, the pressure can build up and cause your hand pie to leak everywhere.
- Cracking - Cracks can also cause your pies to burst while baking. Smooth them out to prevent your filling from seeping out.
WHAT KIND OF FILLING IS GOOD FOR HAND PIES?
Apple and blueberry are the most popular fillings for hand pies but you can use pretty much any type of filling you like including cherry filling, lemon curd, chocolate pastry cream, strawberry filling or peach filling.
If you don't want to make a bunch of homemade fillings, you can buy pre-made pie filling at the grocery store and I won't judge you one bit.
For savory hand pies, you can try chicken pot pie filling, creamy mushrooms, and beef, or even ham and cheese for a breakfast hand pie.
I'm not convinced there's any meal that could not be transformed into a hand pie.
Peach Filling
Blueberry Filling
Cherry Filling
Lemon Curd
Strawberry Reduction
Berry Filling
Recipe
Equipment
- Stand mixer with paddle attachment
Ingredients
For the hand pie dough
- 12 ounces all-purpose flour
- ¼ teaspoon salt
- 6 ounces cold unsalted butter cut into cubes or grated
- 1 large egg
- 1 ounce ice cold water
Fruit filling
- 16 ounces fresh or frozen fruit (apples, peaches, blueberries, strawberries etc)
- 2 Tablespoons lemon juice you can use more or less to your taste
- 6 ounces water or juice that complements the flavor of the fruit
- 1 ounce unsalted butter
- 2 ounces sugar white or brown
- ¼ teaspoon salt
- 1 ounce ClearGel or ½ ounce cornstarch
- 1 ounce water
Glaze
- 4 ounces powdered sugar
- 1 Tablespoon lemon juice
Instructions
For the hand pie dough
- Place flour, salt, and cold butter pieces into the bowl of your stand mixer and blend on low until mixture resembles coarse sand.
- Add in your egg and just enough water to bring the mixture together
- Press into a disk and wrap with plastic wrap. Chill for one hour.
For the fruit filling
- Prepare your fresh fruit by chopping into small cubes (if needed) or use frozen fruit. No need to defrost.
- Place your fruit and butter in a large saucepan over medium-high heat until the butter is melted and bubbling.
- Add in your water (or juice), sugar, lemon juice, and salt and mix until combined. Bring to a simmer.
- Combine your ClearGel with your water and whisk to make a slurry. Pour into your simmering mixture and mix for 1-2 minutes to cook the gel. If you're using cornstarch, you only need to cook until it's clear.
- Remove from the heat and let the mixture cool.
How to make hand pies
- Preheat your oven to 400ºF and line a large sheet pan with parchment paper
- Let your dough stand at room temperature for 15 minutes to let it soften a bit
- Dust your surface with flour. Begin by pressing your dough with your rolling pin to start flattening it.
- Roll your dough out to ⅛ thick or about the thickness of a cake board. Thinner than you think. Thinner dough results in a crisper, crunchier crust for your hand pies.
- Cut your dough into 6" circles. I used a 6" cake board as a template or you can use a 5" circle cutter if you want smaller hand pies.
- Fill your 6" hand pie with 3 tablespoons of fruit filling (5" circles take 1 heaping Tablespoon). Do not overfill.
- Brush the outside edge with egg wash (one egg whisked with 1 tablespoon of cold water)
- Fold the hand pie over and crimp with a fork to seal well
- Use a knife or fork to make some vents on top
- Brush the hand pies with more egg wash and place them onto a sheet pan lined with parchment paper. Chill for 20 minutes.
- Bake for 20-25 minutes. They should be golden brown and the filling will just be starting to bubble.
- Let your hand pies cool for 10 minutes.
- While your hand pies are cooling, make your glaze. Just whisk the powdered sugar and lemon juice together until smooth.
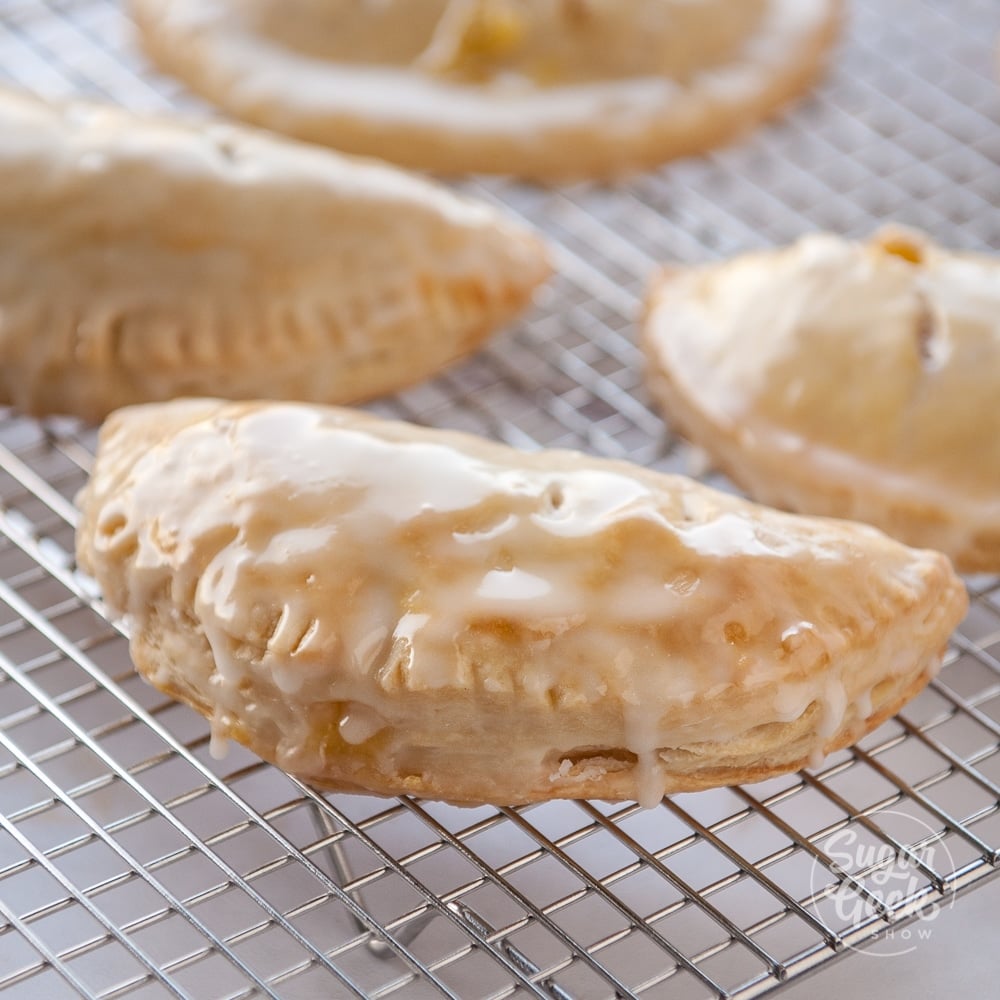
- Use a pastry brush to brush the thin glaze over the hand pies and enjoy!
- These hand pies taste best the day they are baked but will last for three days in an airtight container in the fridge or frozen for up to 2 months.
Video
Notes
- Prepare your hand pies as usual and chill 20 minutes
- Brush the surface with egg wash and sprinkle on some sanding sugar for color and flavor (optional).
- Set your temperature to 400ºF on your air fryer
- Place your hand pies inside the air fryer basket and fry for 13-15 minutes until golden brown and filling just begins to bubble
- Prepare your hand pies as usual but do not cut large slits for vents, use a fork for small vents so the filling doesn't leak out. Then place them in the fridge to chill for at least one hour.
- Heat up 4 inches of neutral oil (like vegetable shortening or canola oil) in a deep pot (like a dutch oven) to 375ºF. Use a thermometer to keep an eye on the temp. Make sure you place the pot at the back of the stove, especially if you have kids. Hot oil is very dangerous and so are splashes.
- Place 2-3 hand pies in the hot oil and fry 3-4 minutes until golden brown.
- Drain on a paper towel and then dust in powdered sugar or cover in sugar glaze before serving. They are best when eaten the same day.


Heidi S says
Thank you for the sweet idea.
Happy Holidays :》:)
Julie Ann Sardon says
Can I use jam instead of canned pie filling?
Elizabeth Marek says
You can but it might turn out differently
clarissa says
These pies are very tasty, albeit time consuming. Everything took me about 3 hours (I could just be slow). I've never had such crispy, flaky crust. I made a few adjustments- added 3 Tablespoons of white sugar to the crust and increased the water accordingly, and added pumpkin pie spice to the filling. Very yummy, would make again.
Sara says
Hey Liz, I want to make these hand pies and freeze them after baking. I was wondering if I can reheat these in the microwave? I was wondering if I put the cooked pies from the freezer into the microwave if it would get soggy in the microwave. Please let me know if it is ok to put cooked hand pies in the microwave and if so how long.
Sugar Geek Show says
Hi, I think they would definitely get soggy in the microwave. I recommend freezing them before you bake them, and then bake or air fry when you're ready to eat them.
Kristi De says
OMGosh, this recipe is perfection! I made a double recipe and stuffed one batch with Black Forest ham and cheddar, and canned (I know!!) apples and cherries. My Lort....the flaky butteriness...not a word recognized by spellcheck, but there you have it...YUM!! Will definitely make my own fruit fillings or use my homemade jams - why didn't I think of this?? - next time. Thank you!!
ToiKakes says
OMGGGGGGG!!!! These are just delightful, for real. I've made them twice now. My family and friends love them so much that they have the nerve to put in special flavor requests, lol. I am in love with these, they really do take you back to childhood. Thanks Liz!!!!
annie terry says
Delicious! I made blueberry apple fruit filling and bake them in the oven and they tasted great! I used Trader Joe’s frozen pie crust to save time 😊
Nancy A Schroeder says
Made peach. Used the air fryer. They were perfect. Bottom crust crisp and delicious.
Elizabeth Marek says
Yay!! sounds delicious!