This classic French Croissant Recipe will help you conquer your fears in making your own at home! The crisp flaky layers and soft buttery center will have you making these regularly. A classic French staple recipe that’s perfect for breakfast, brunch, or any occasion. 
The key to a flaky croissant is proper lamination, but you don’t need a fancy dough sheeter or bread proofer to make these. If this is your first time making a homemade croissant recipe, don't worry. Learn from Chef Christophe how to make the puff pastry dough and laminate it all by hand! Make these delicious croissants ahead of time and freeze them before baking to save time.
Table of contents
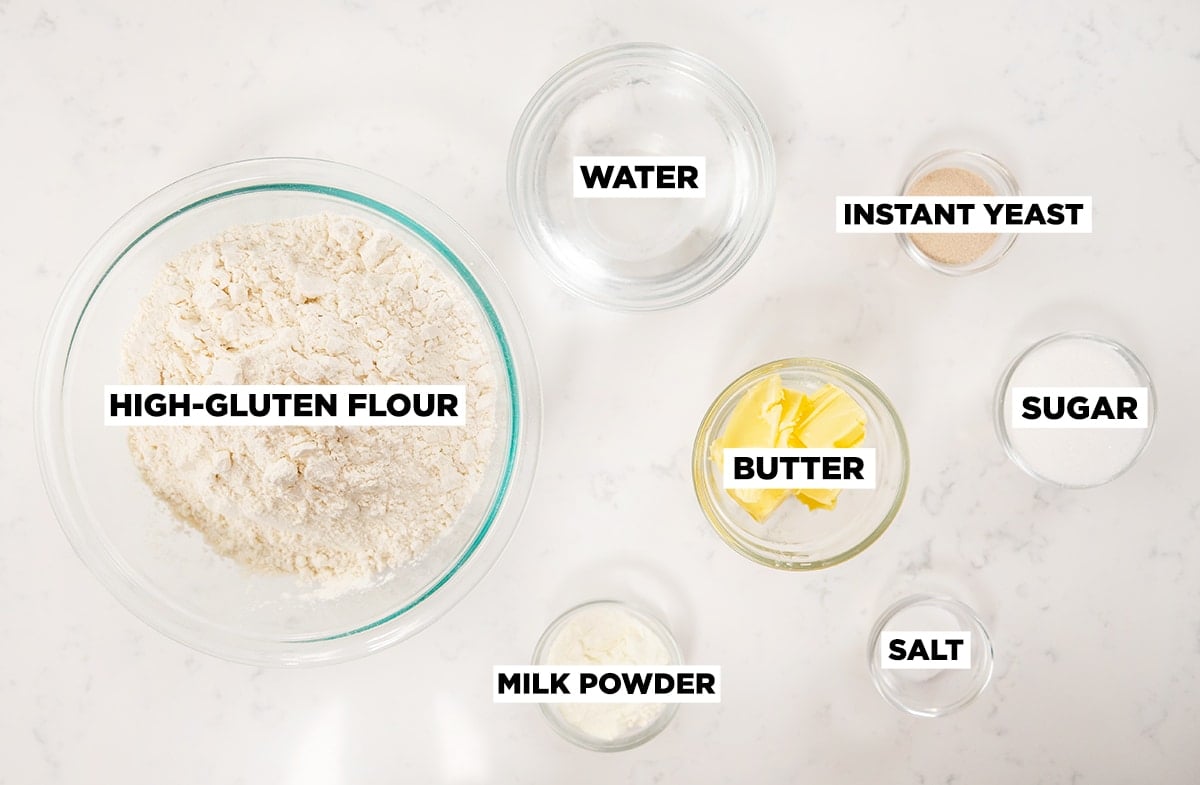
Croissant Ingredients
High Gluten Flour is important when making bread because bread flour has more proteins which will develop more gluten. This is important for the croissants to hold their shape.
Milk Powder is basically dehydrated milk. This is important for the croissants because the milk powder will help create super soft layers without adding extra moisture.
European Butter has a higher fat percentage, which means the croissants will have amazing flavor and super flakey layers. Plugra or President are great brands you can find at the store and they have fat percentages over 80%.
Instant Yeast is fast acting and will help our croissant dough rise quickly and is easier to use than fresh levain. You can also use active dry yeast, but it will take about double the amount of time to proof.
How to Make Homemade Croissants
Making homemade croissants is a labor of love, and can be fairly time-consuming with all of the proofing and chilling. You can make them all in one day, but if you want to serve them for breakfast I recommend making the croissant dough, proofing it, making and chilling the butter block, laminating the dough, chilling that, then rolling out the croissants, placing them on a sheet pan and chilling them overnight. Then proof the croissants and bake them on the morning you're ready to serve.
Making Croissant Dough
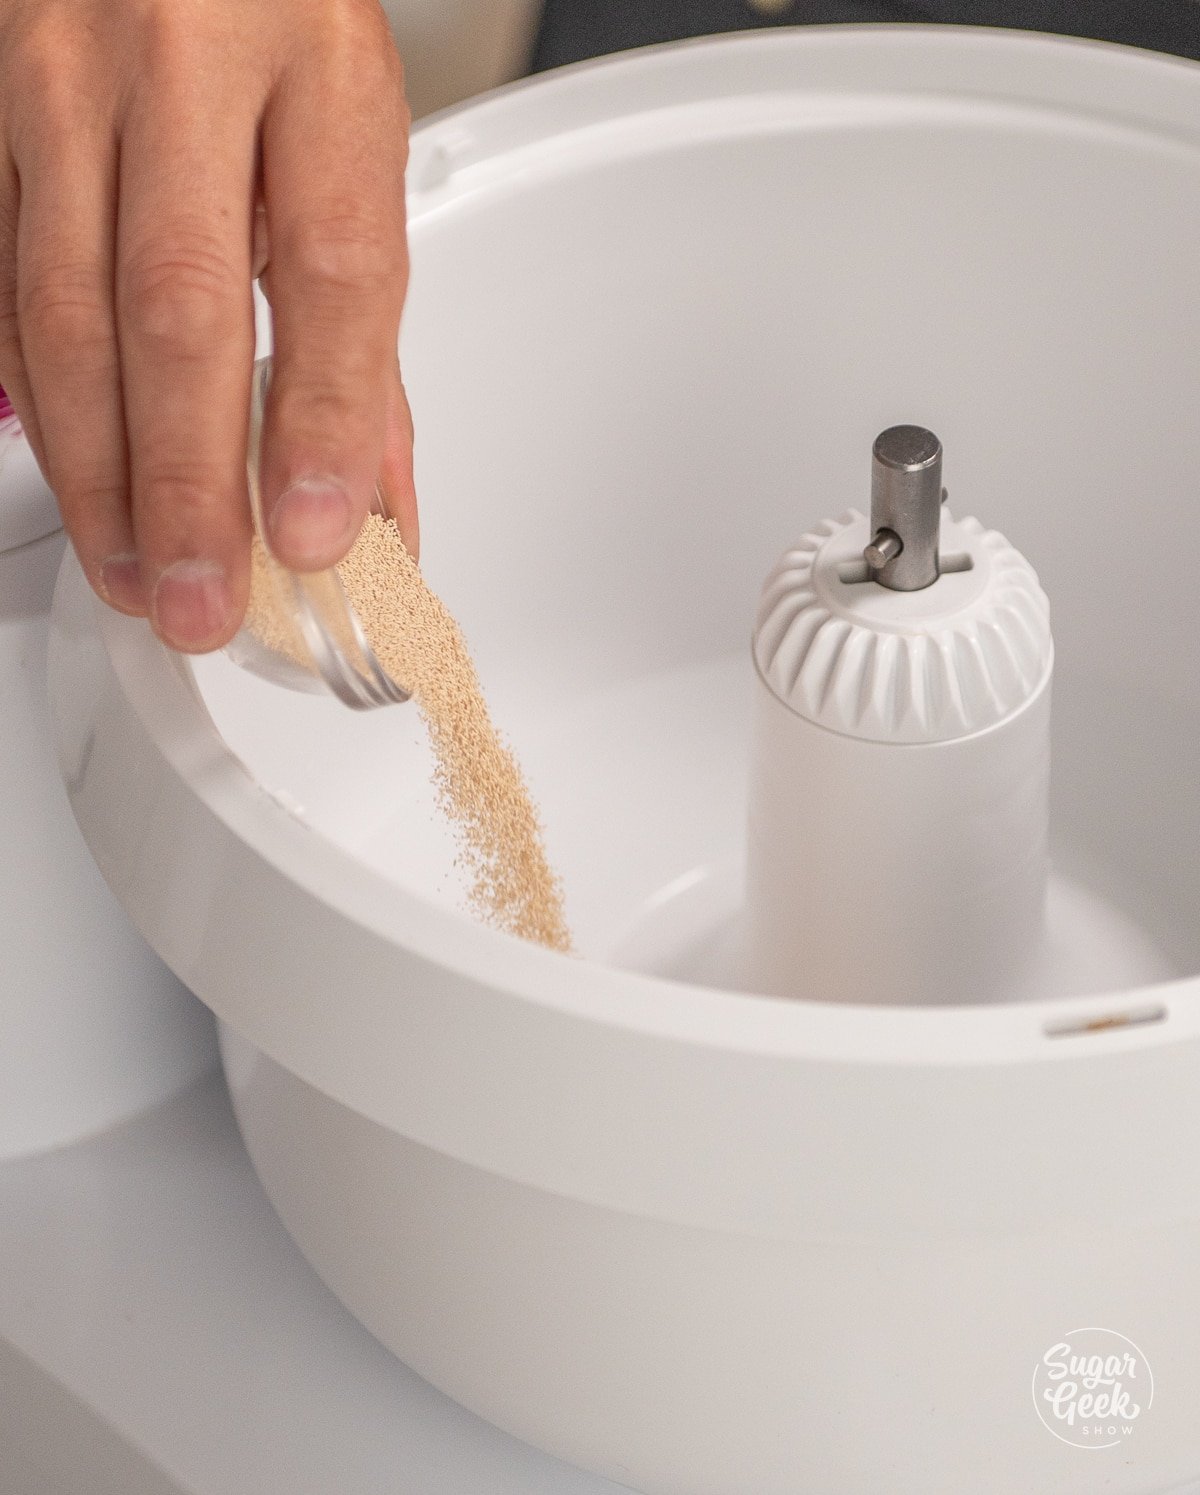
- Add the cold water and instant yeast into the bowl of a stand mixer and gently whisk it to break up any lumps.
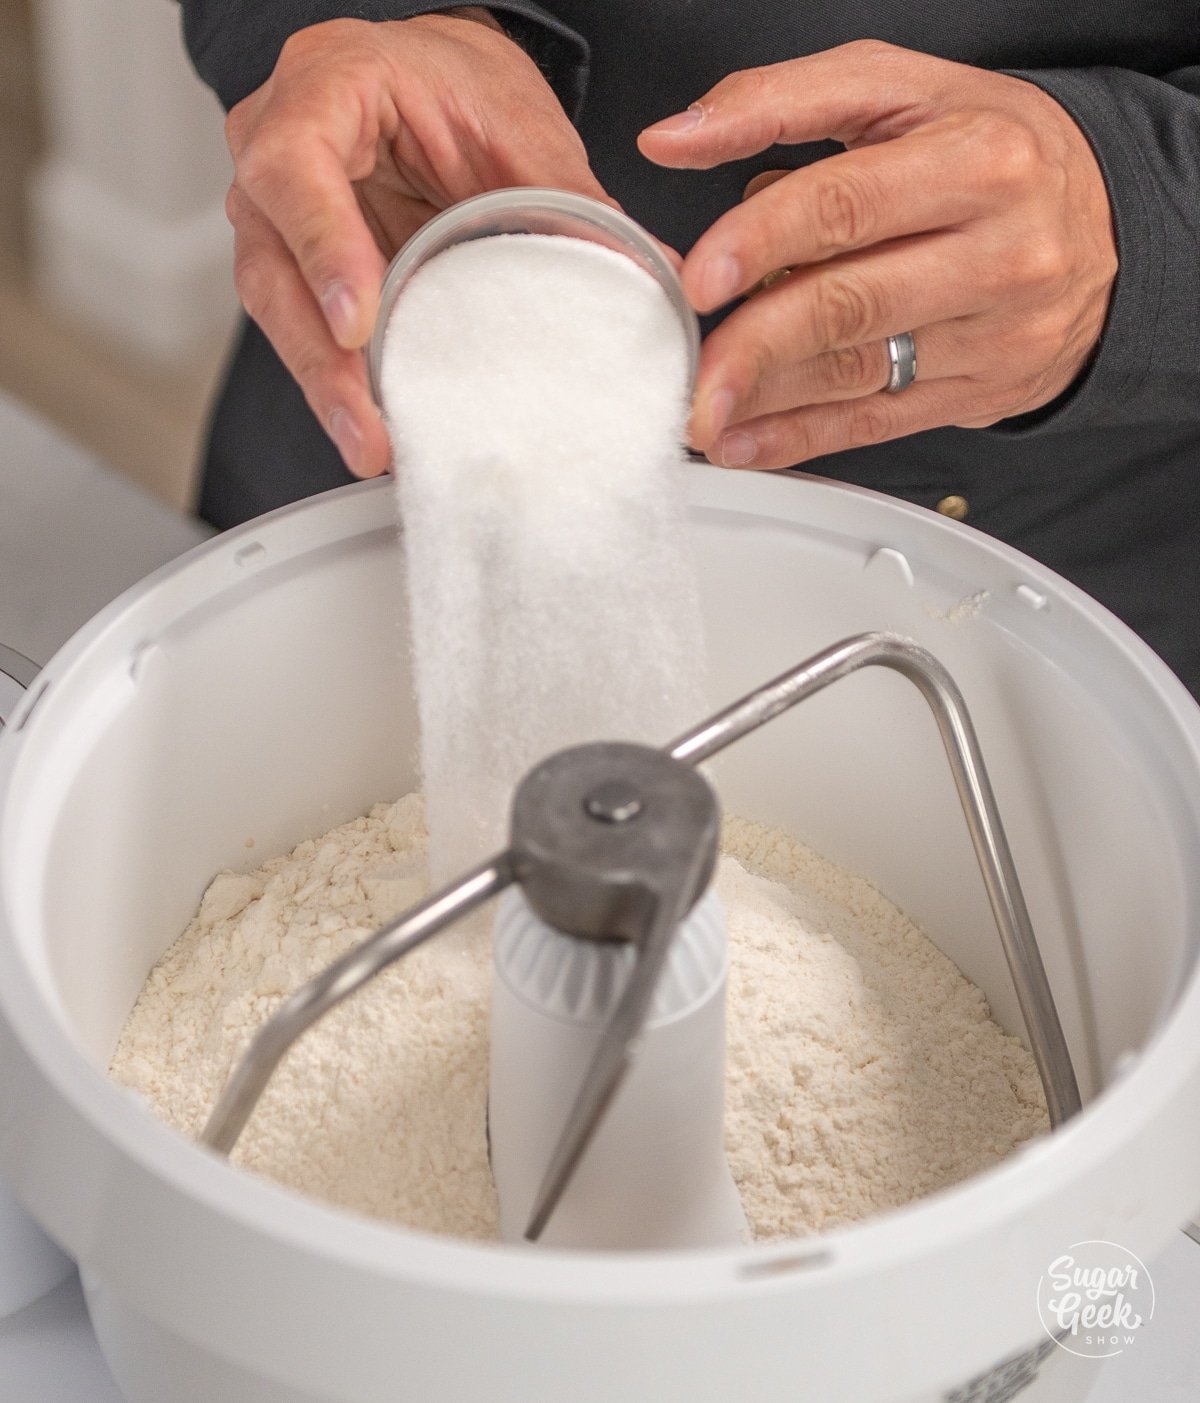
- Next, add the milk powder, flour, sugar, and salt to the bowl of your stand mixer with the dough hook attachment and mix on low for a few seconds to combine.
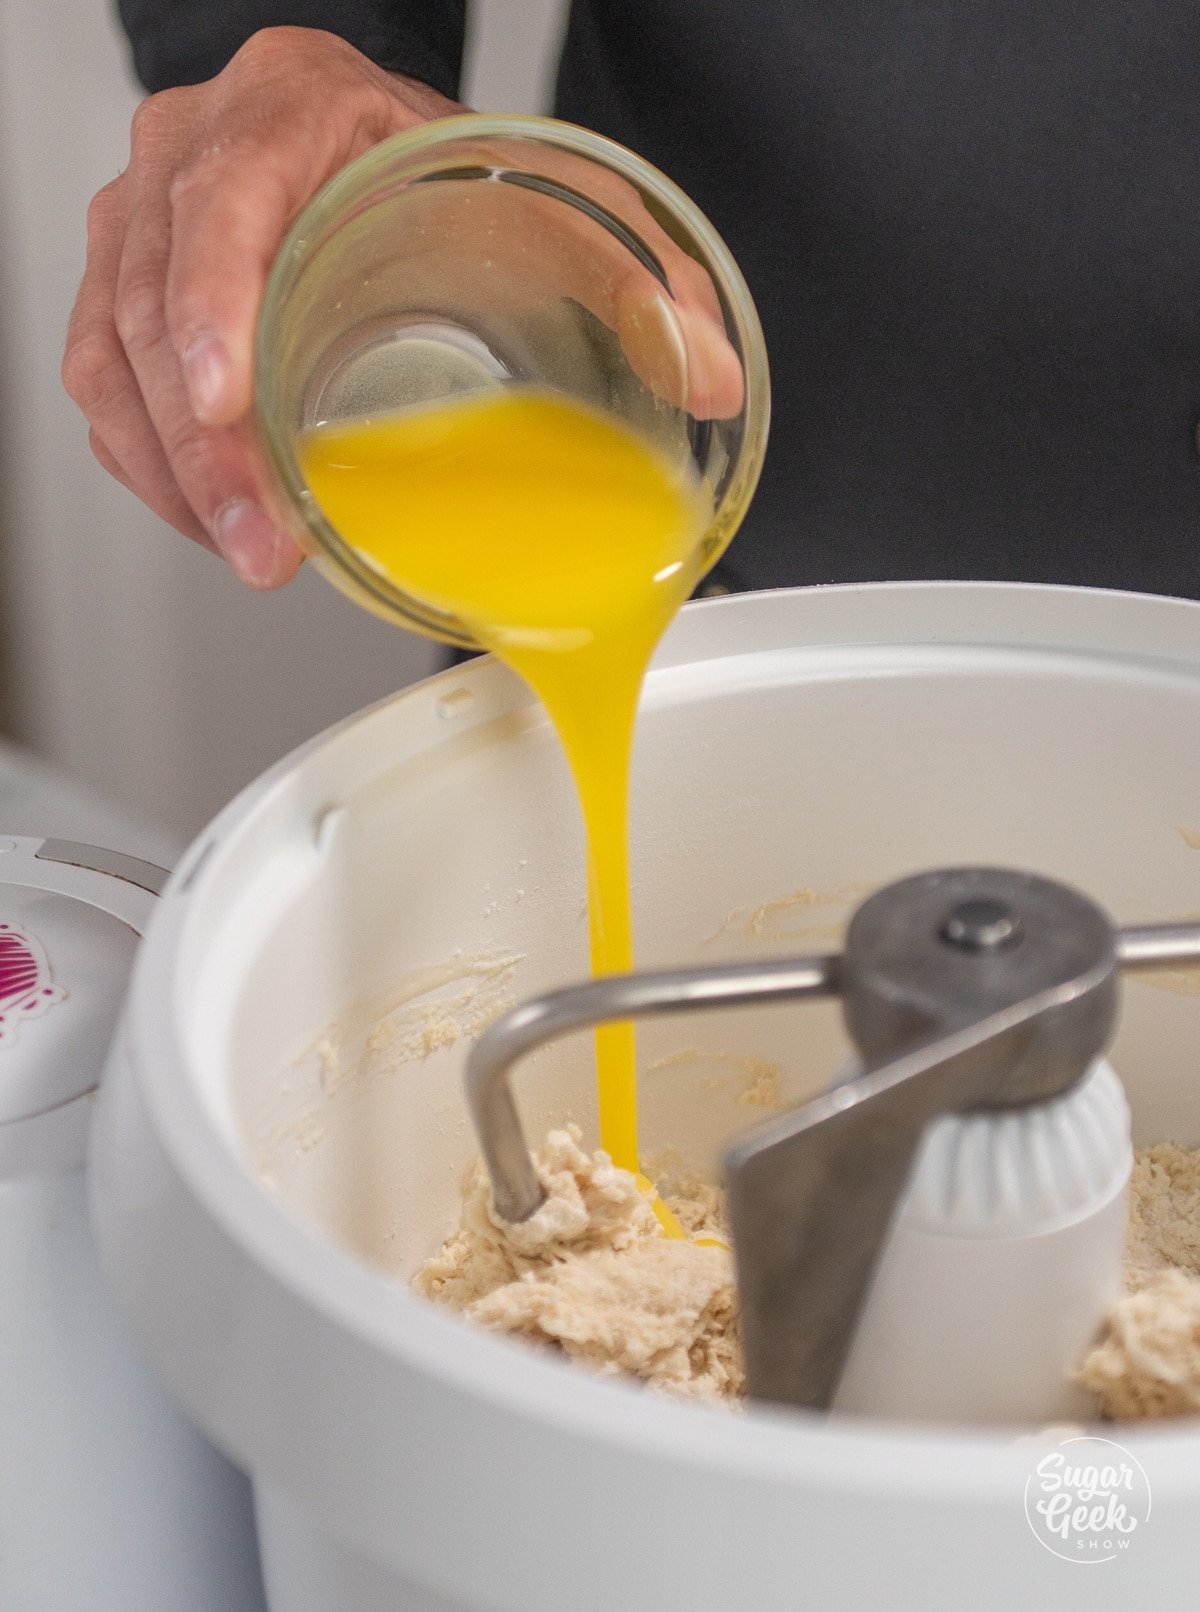
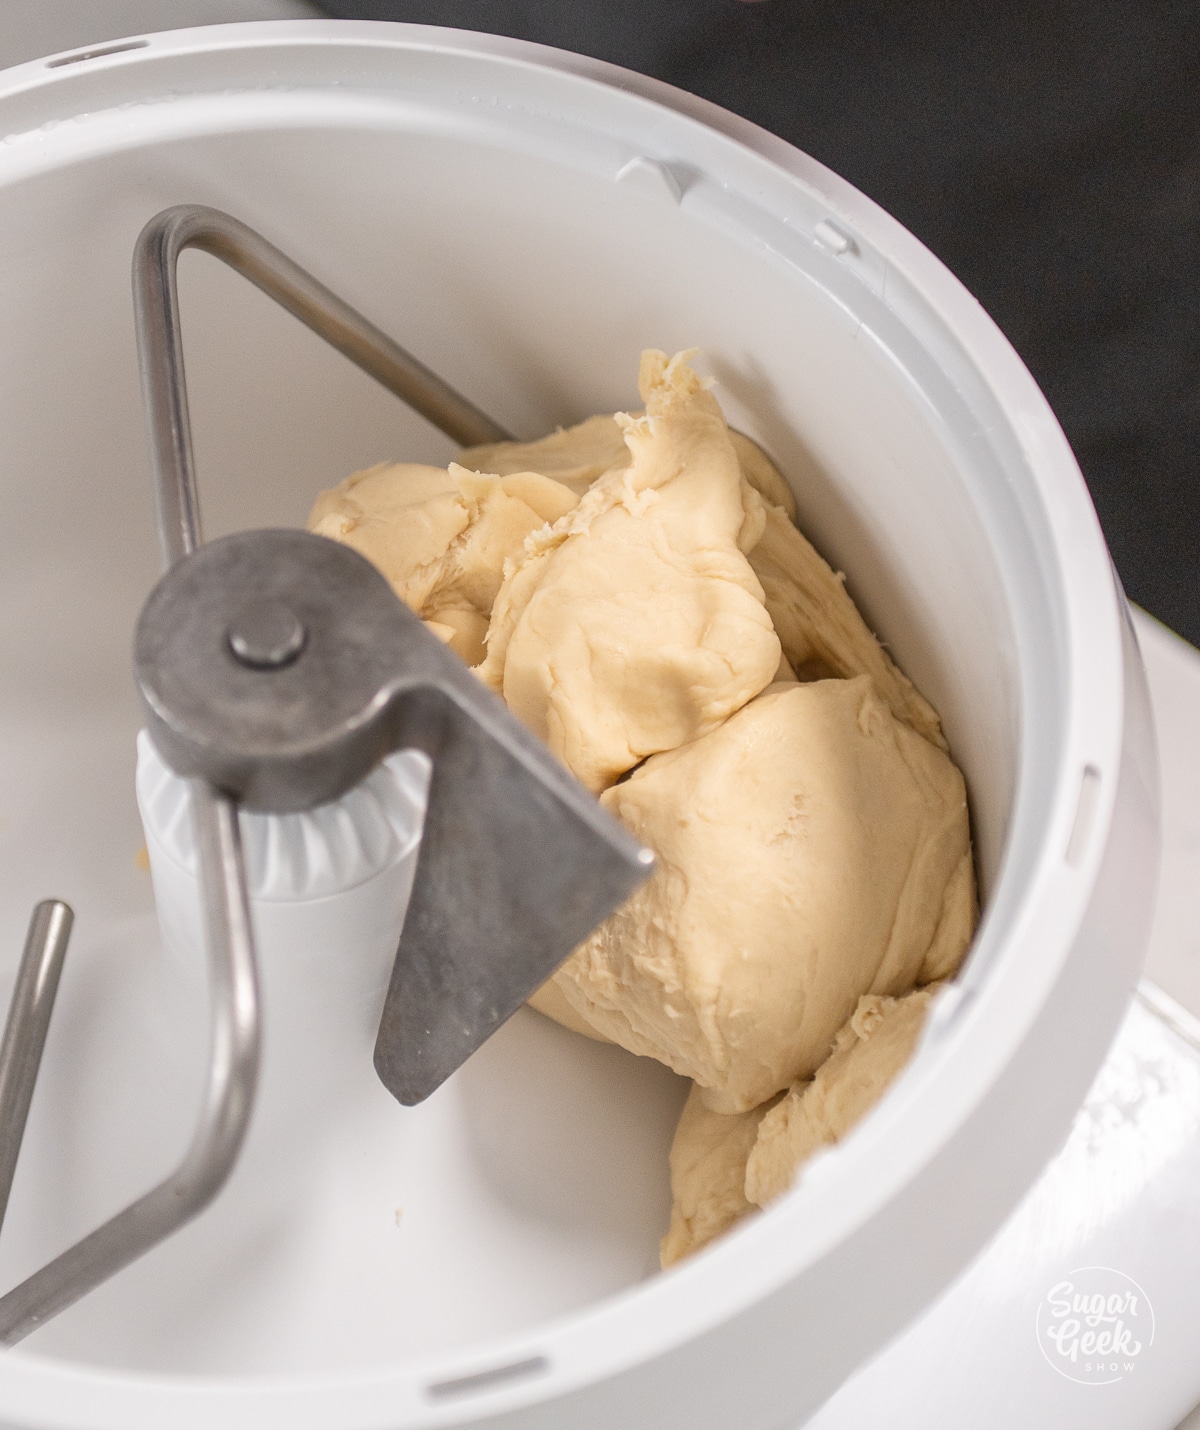
- Add the cold melted butter and mix on low speed for about 4 minutes.
- Mix for another 4 minutes on medium speed. If you don't have a stand mixer, you can knead by hand until the dough bounces back when you touch it.
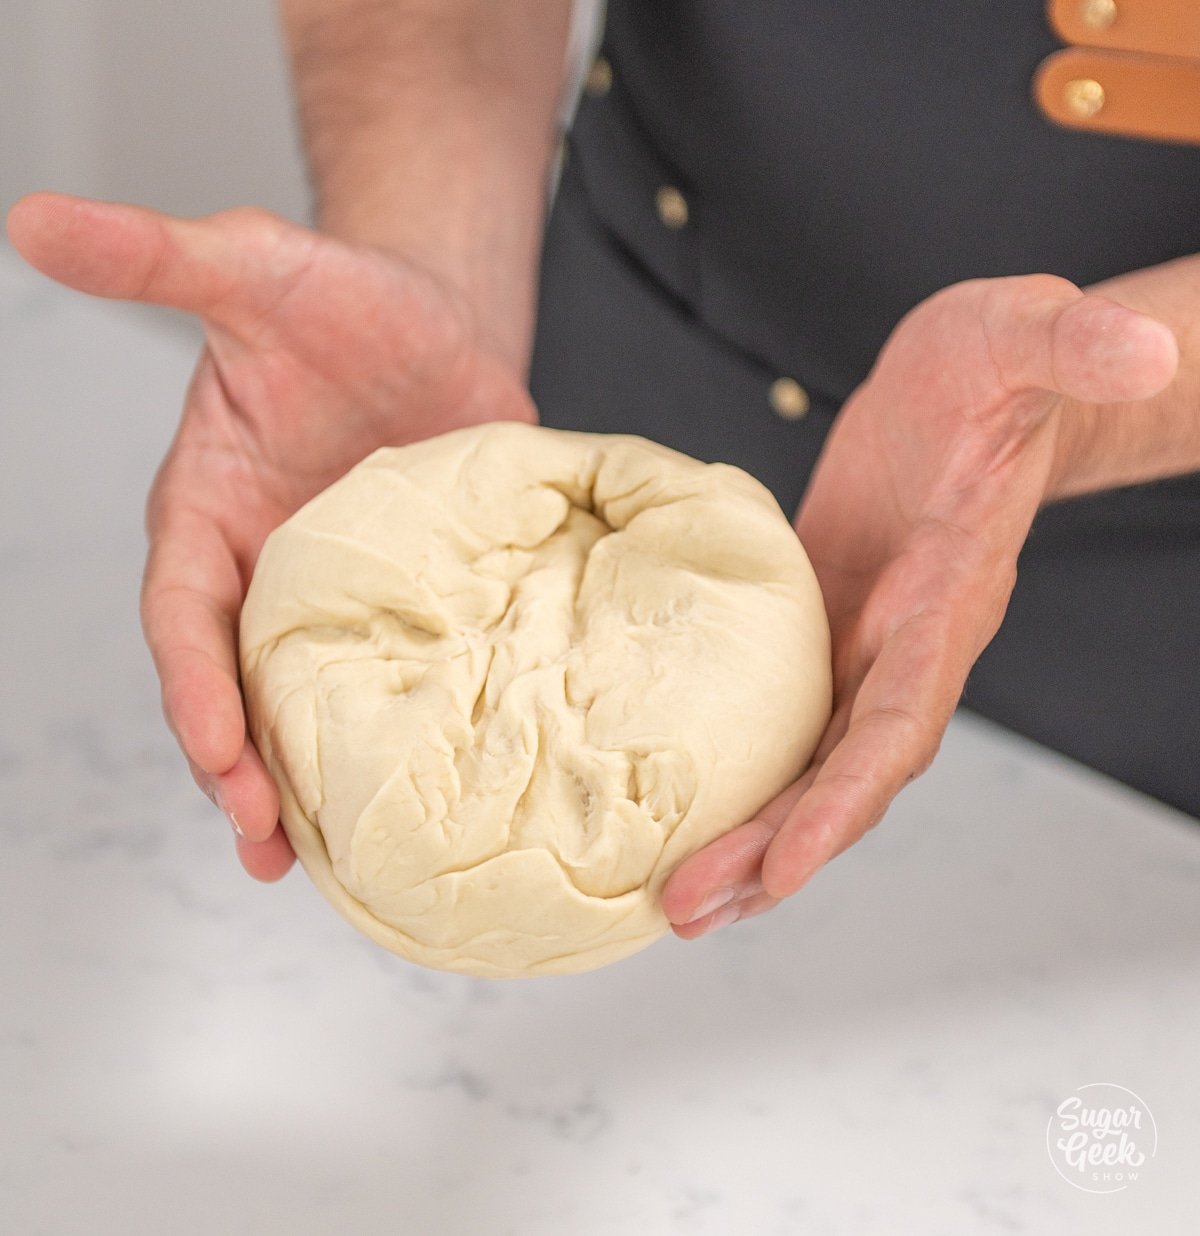
- After the dough is done mixing, take it out and knead it by hand. Shape the dough into a ball by cupping both of your hands around your dough and moving the dough in small circular formations while the bottom of the dough is still touching the table. Repeat this over and over until your dough ball is tight, smooth, and well combined.
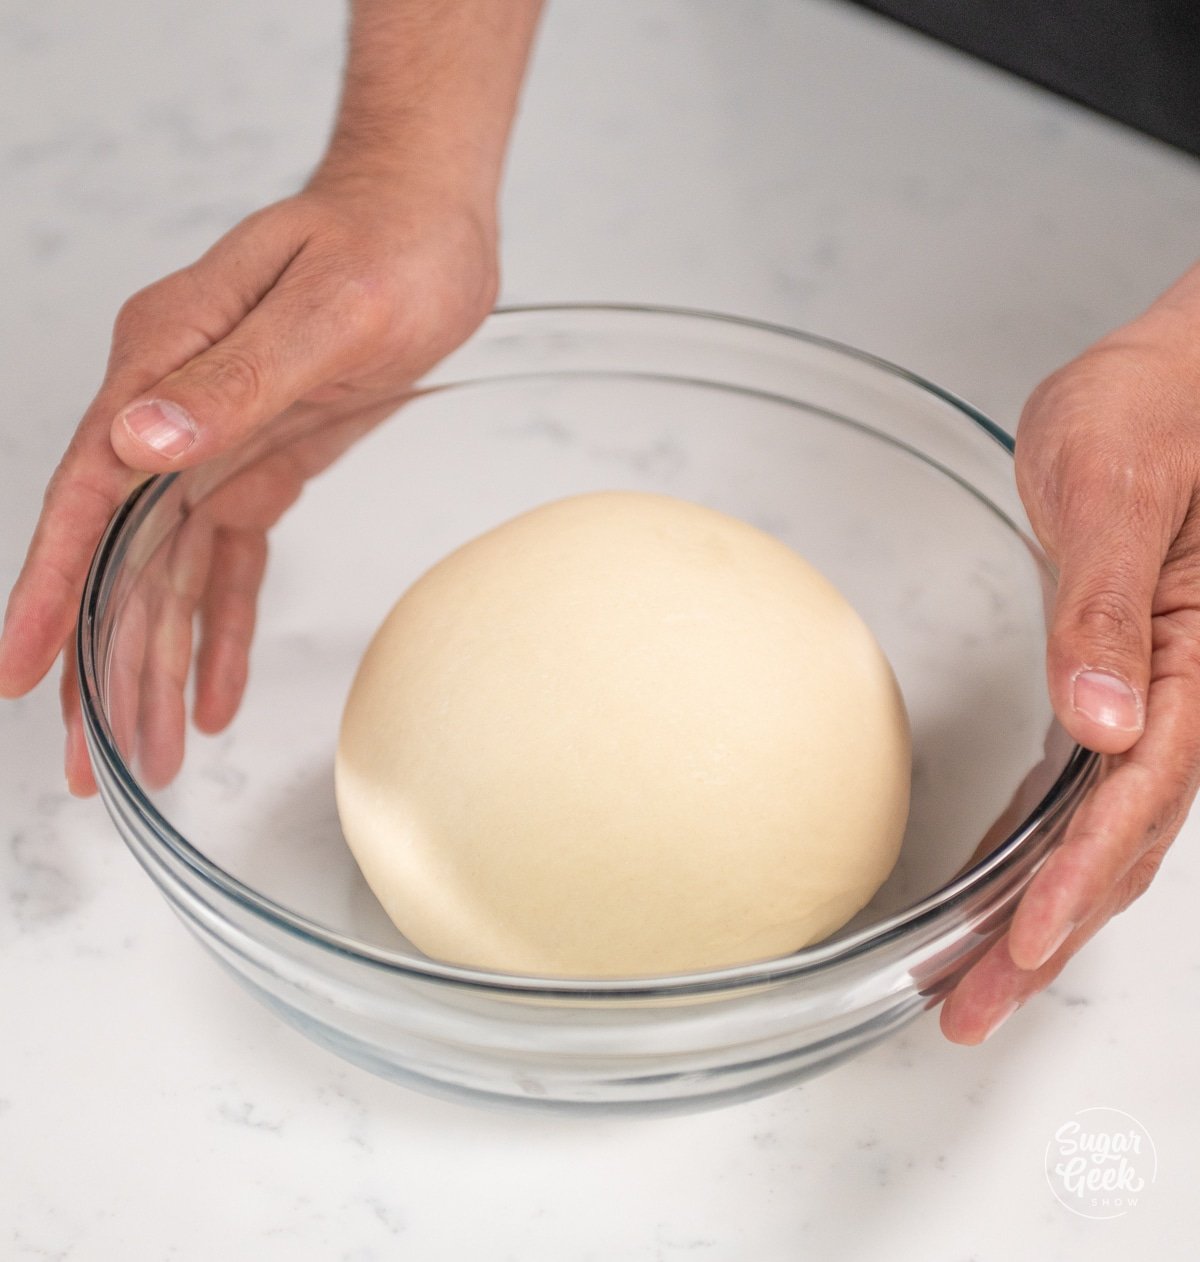
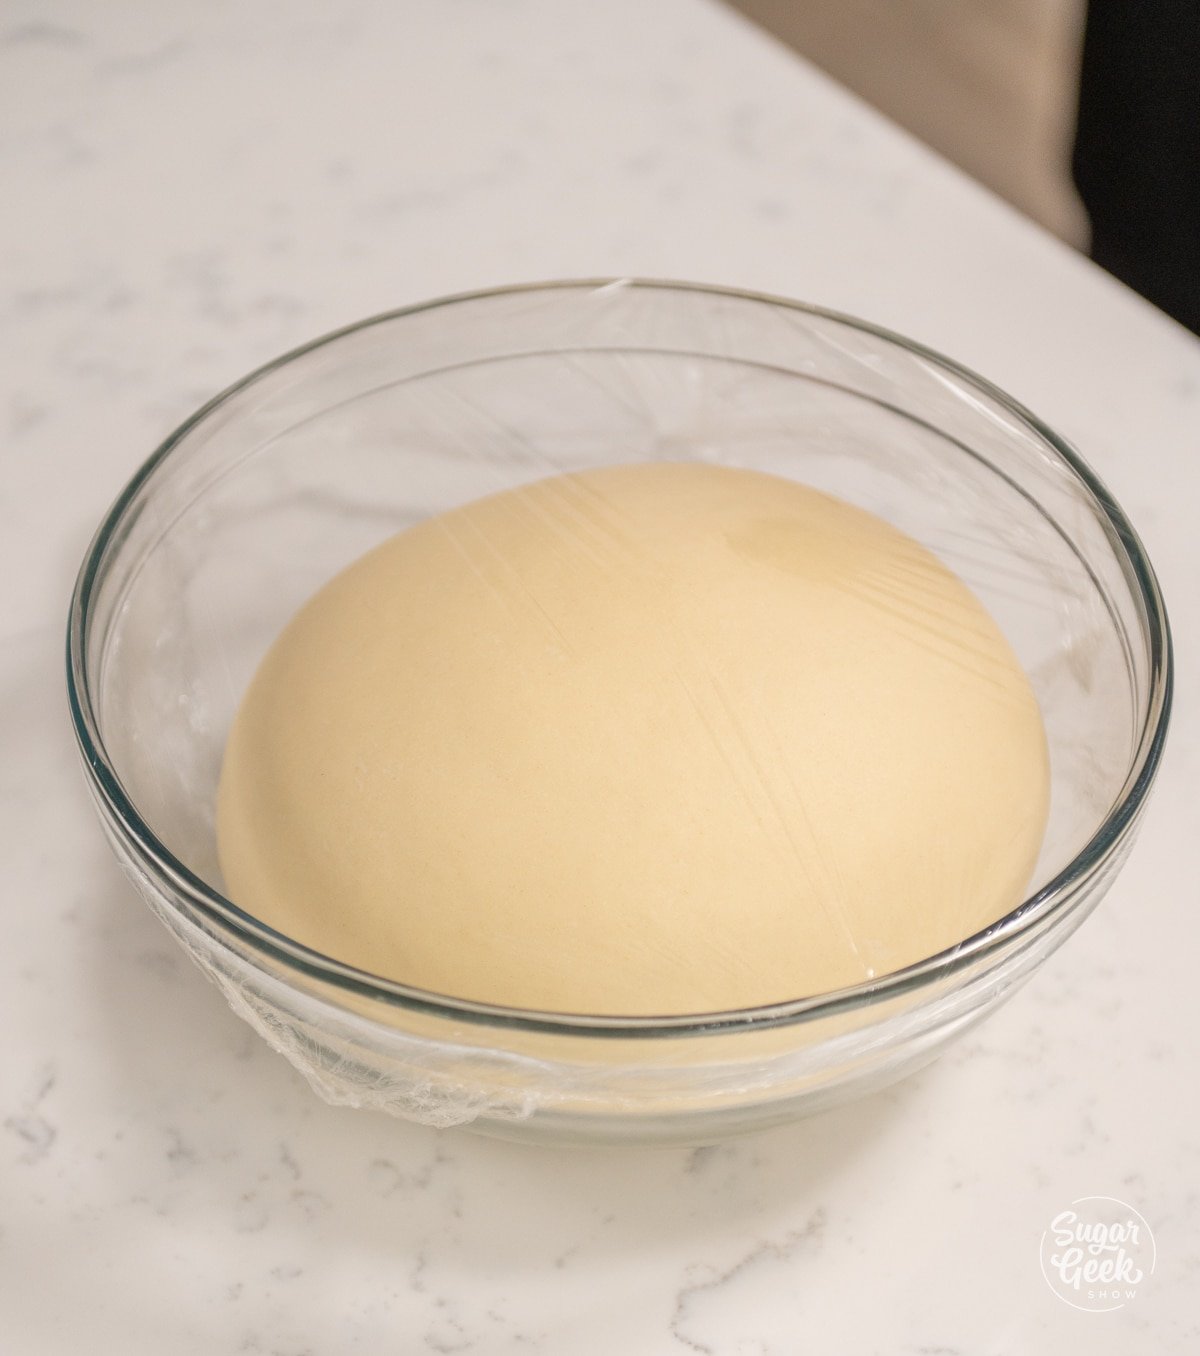
- Place your dough into a medium-sized bowl, cover it with plastic, and let it rise until it doubles in size. At room temperature (72°F) this will take about 2 hours to proof. In a warm environment (90°F), it will take about 1 hour. I like to place it in my oven with the light on and leave the door open.
Making the Butter Block
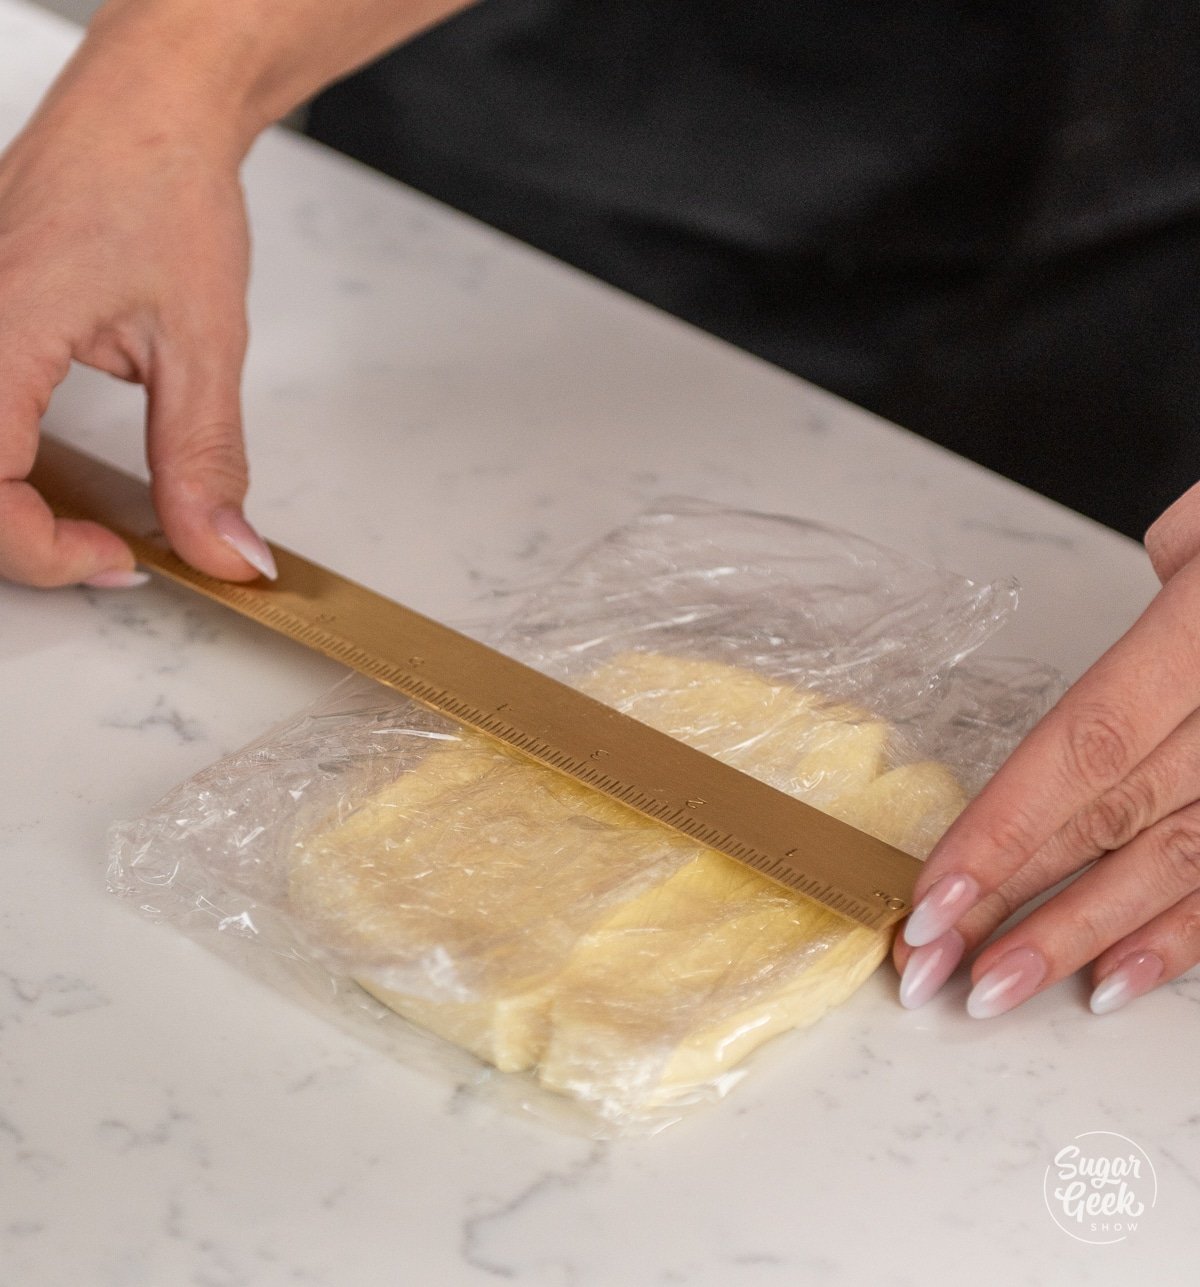
- Make sure to soften your butter before creating your butter block so that it's easy to roll out. You should be able to press a finger into the surface of the butter and easily make an indent.
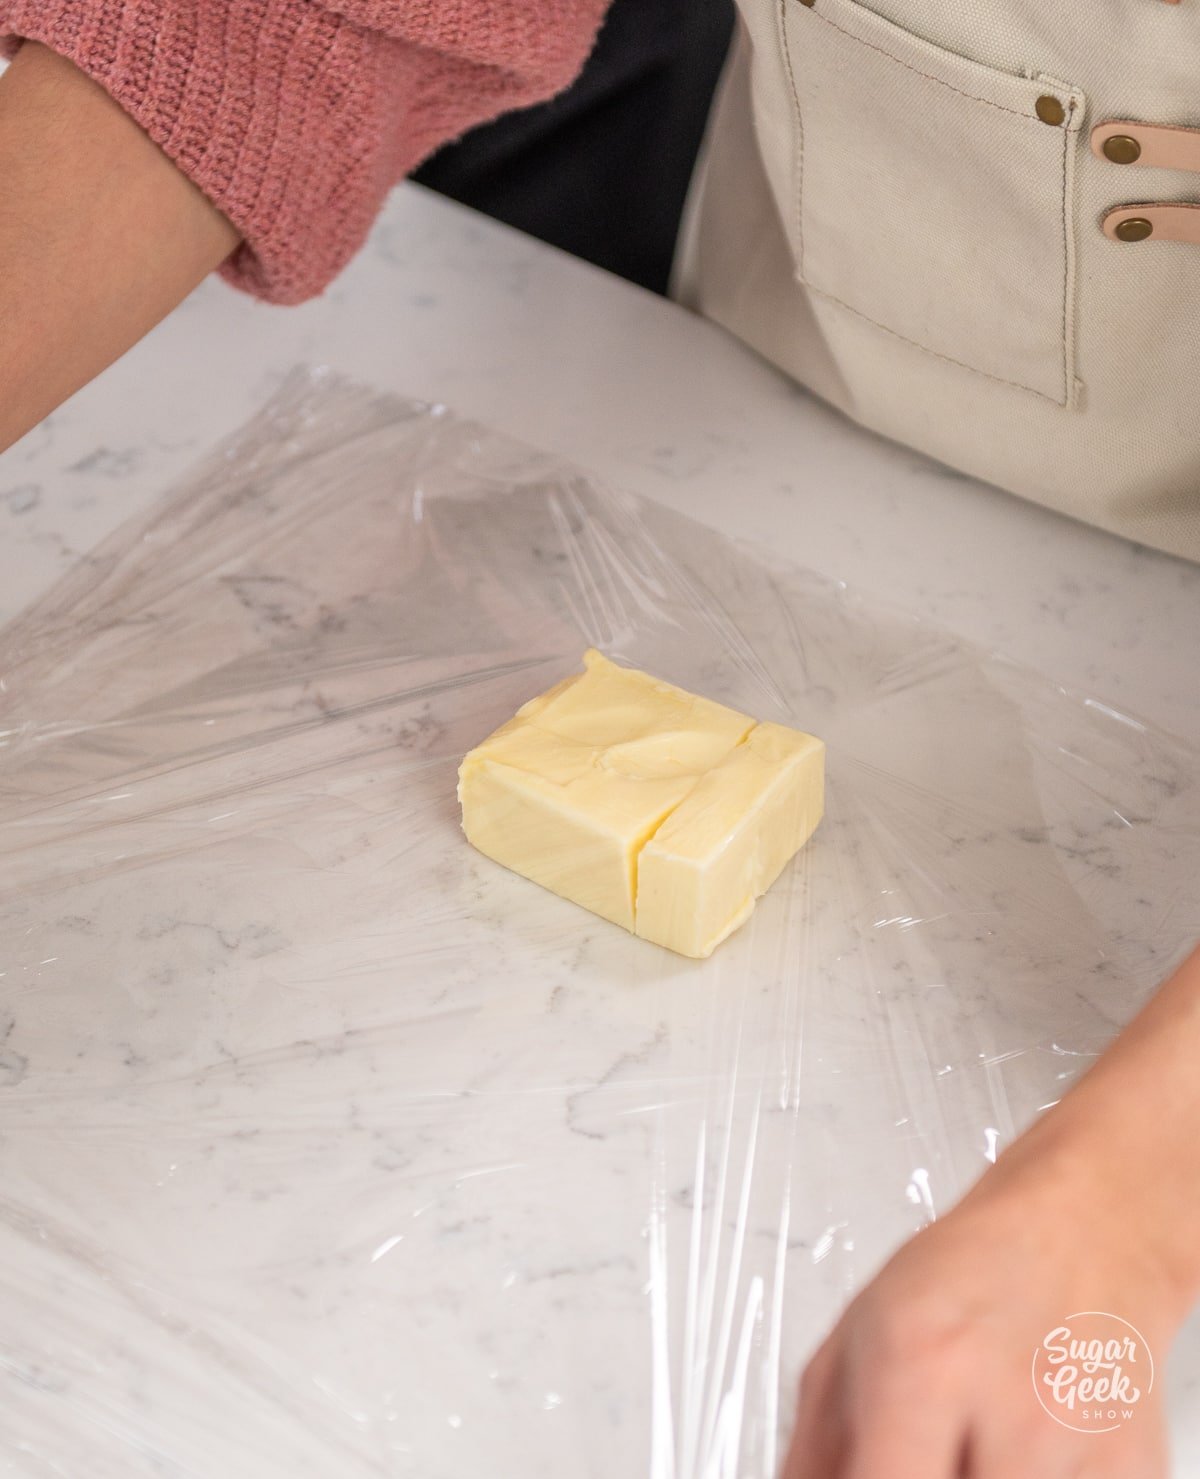
- Lay out a large sheet of plastic wrap and place the butter in the center.
- Fold the plastic wrap to make an 8" by 8" square. This is the size that we'll want our butter block to be.
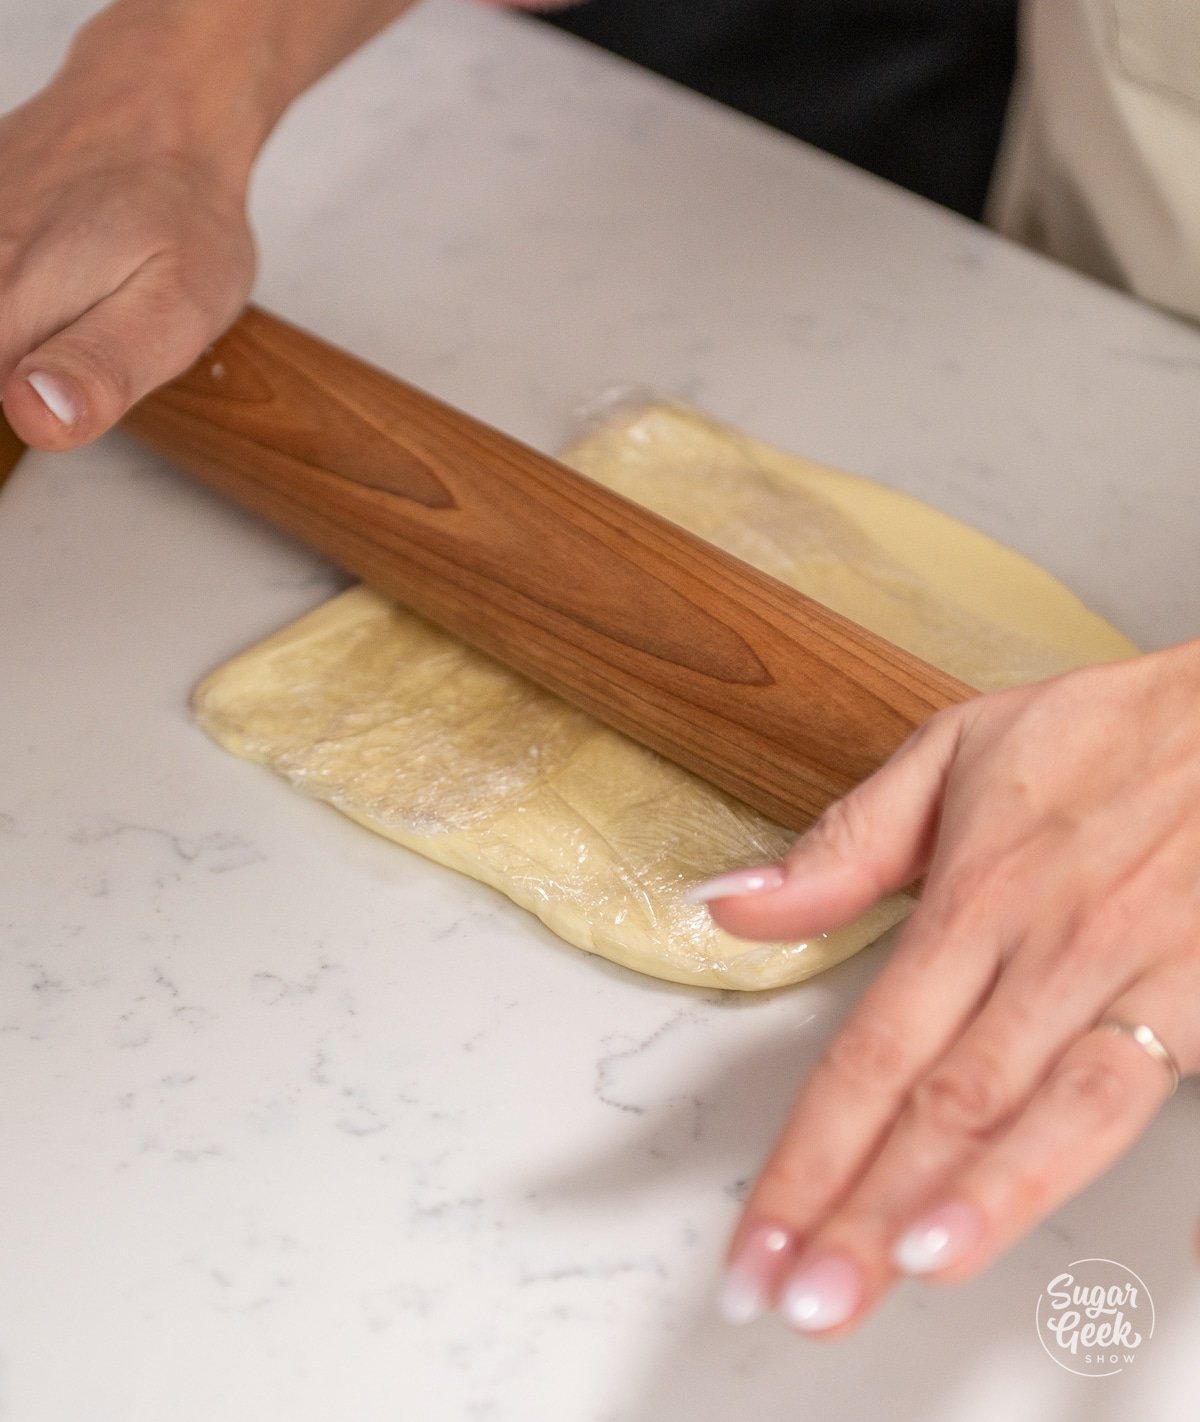
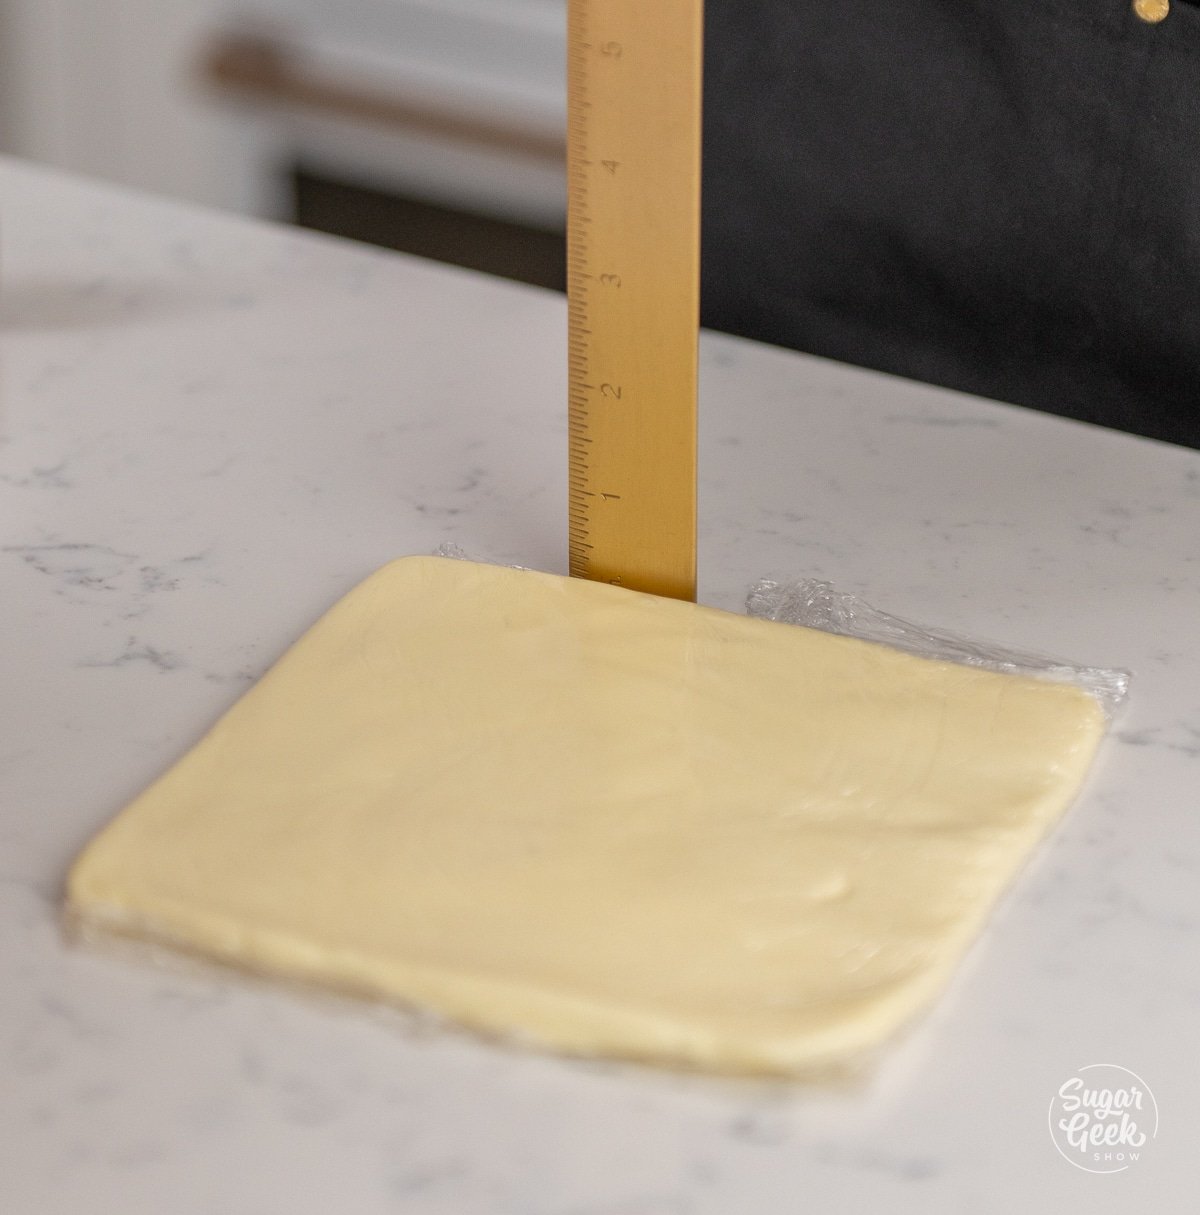
- Roll the butter with a rolling pin into the corners of the plastic wrap until it is about ¼" thick.
- Refrigerate the butter block until your dough is ready.
Laminating the Dough
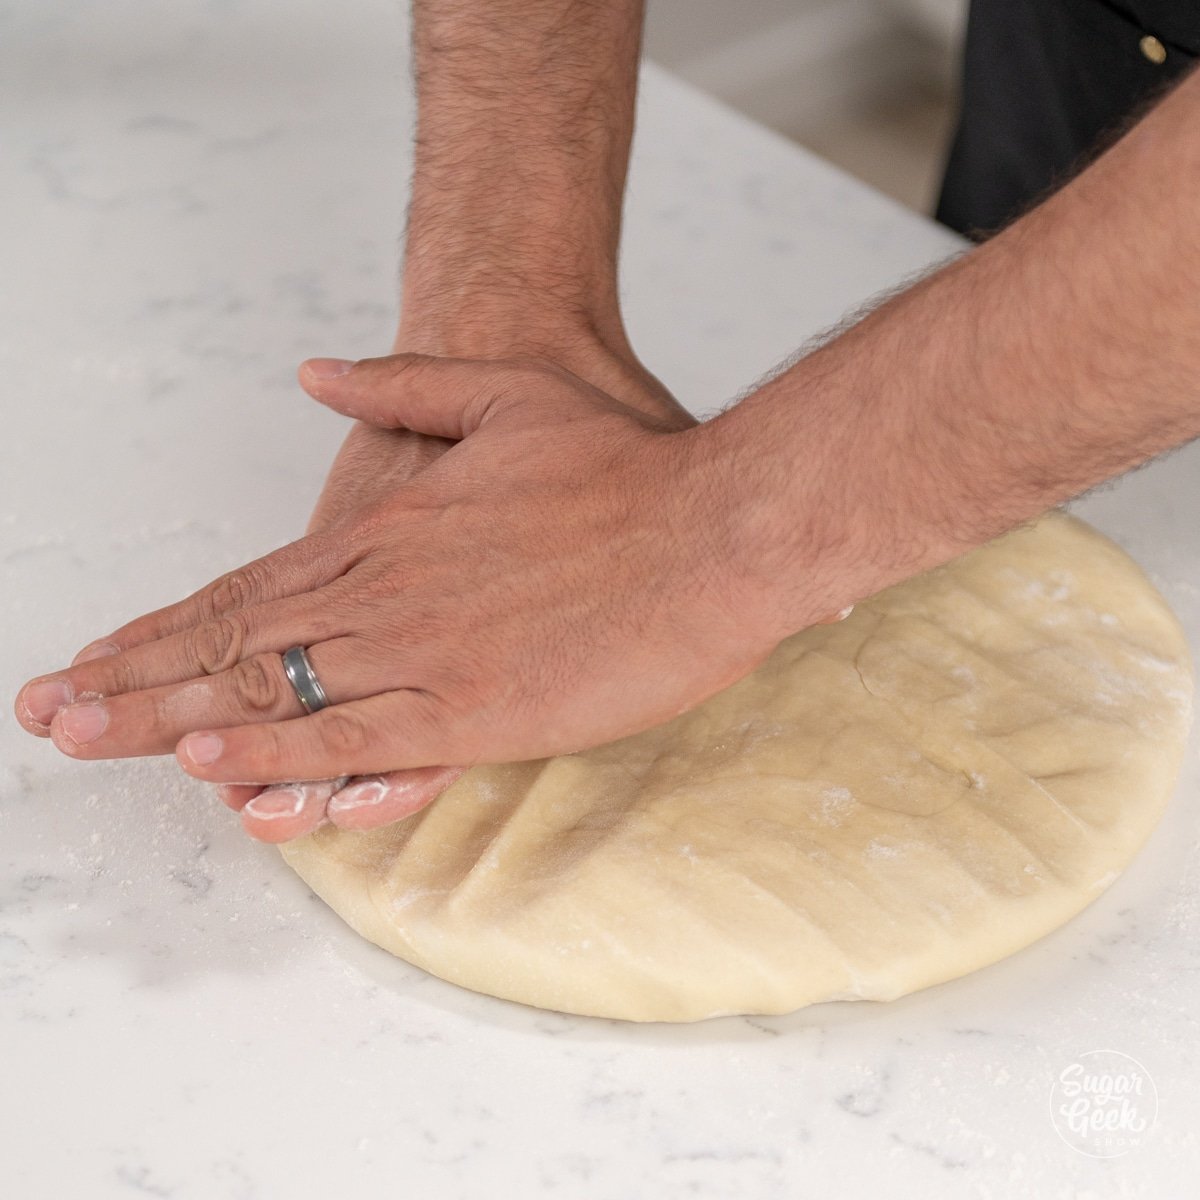
- Once your dough has doubled in size, place it onto a lightly floured work surface and gently press it down with your hands.
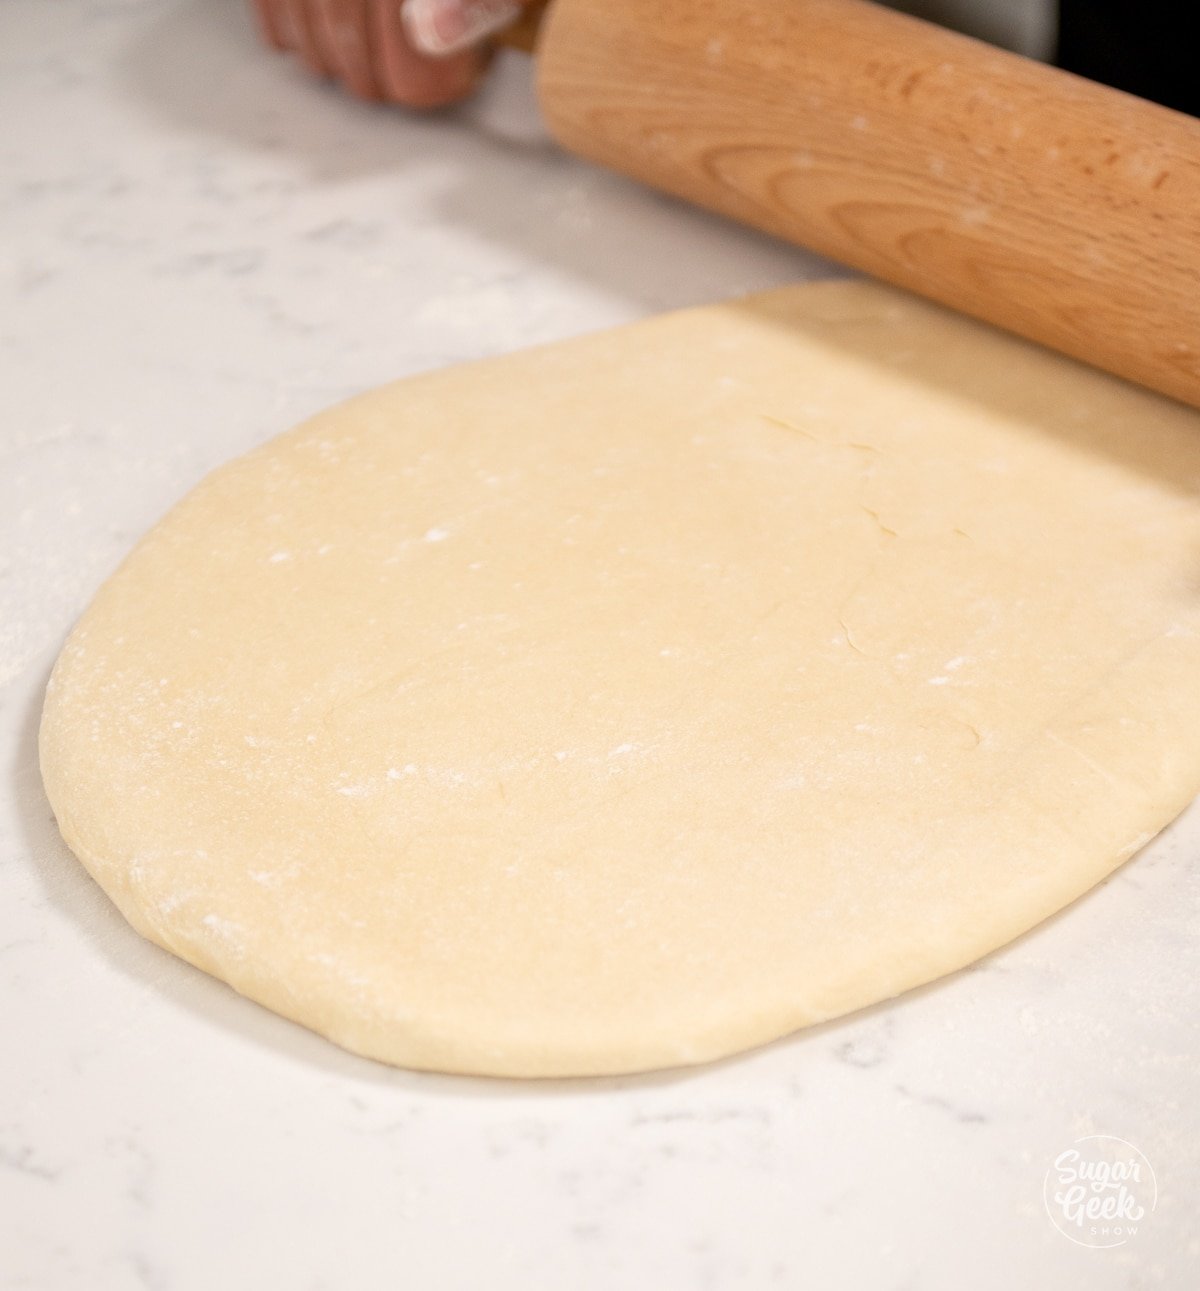
- Roll the dough into an 8” by 16” rectangle.
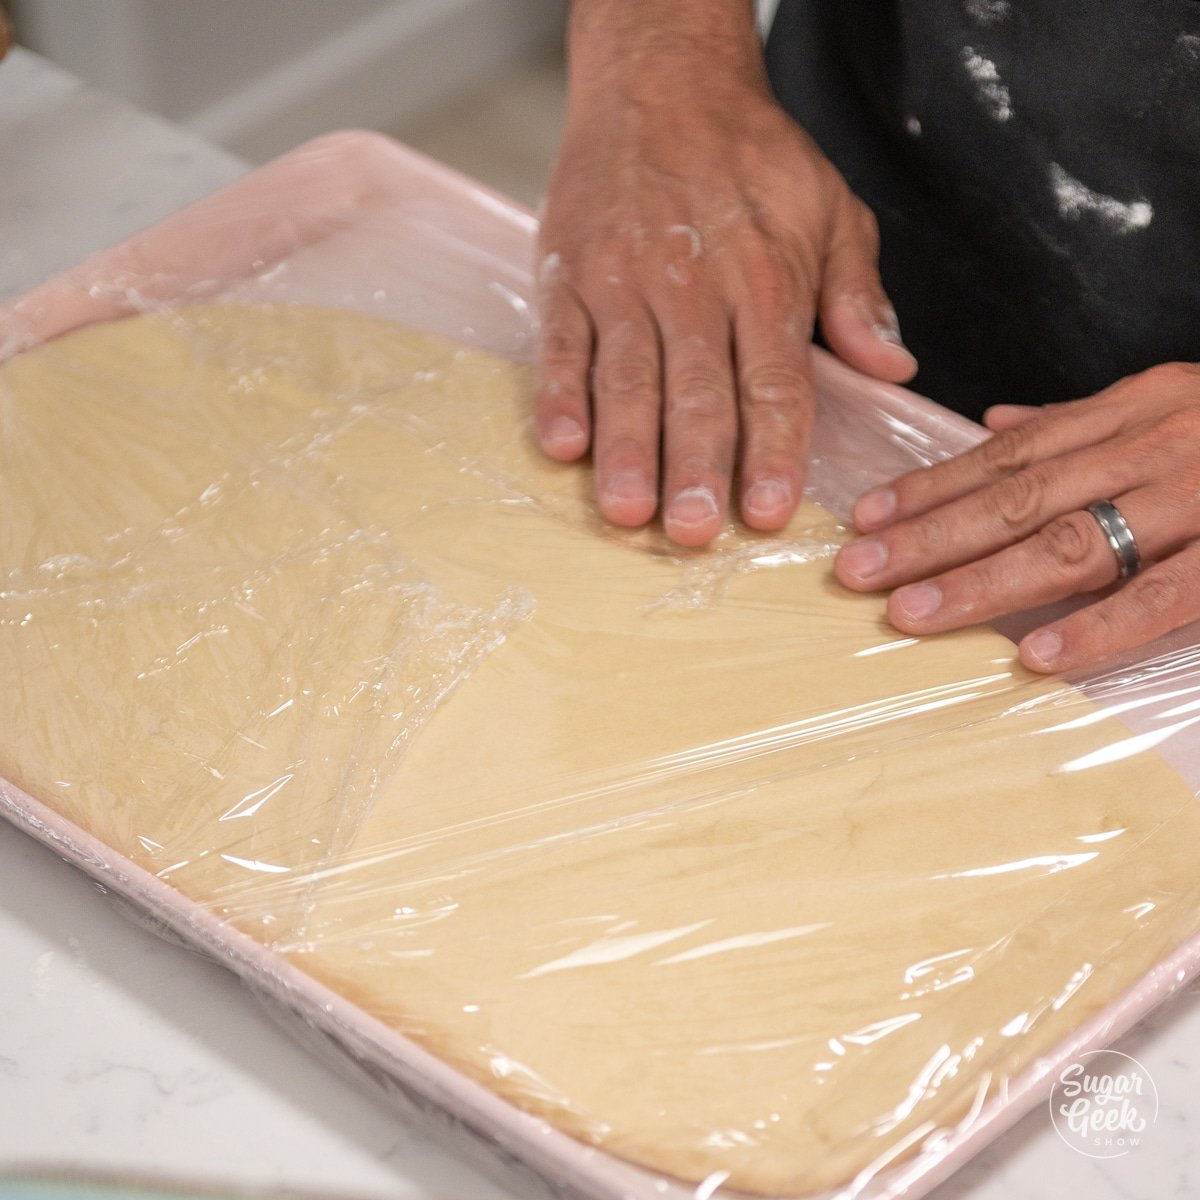
- Place the dough onto a sheet pan, wrap it in plastic wrap, and freeze it until it is firm for about 15 minutes.
- Take the cold butter block and dough out of the freezer and unwrap them.
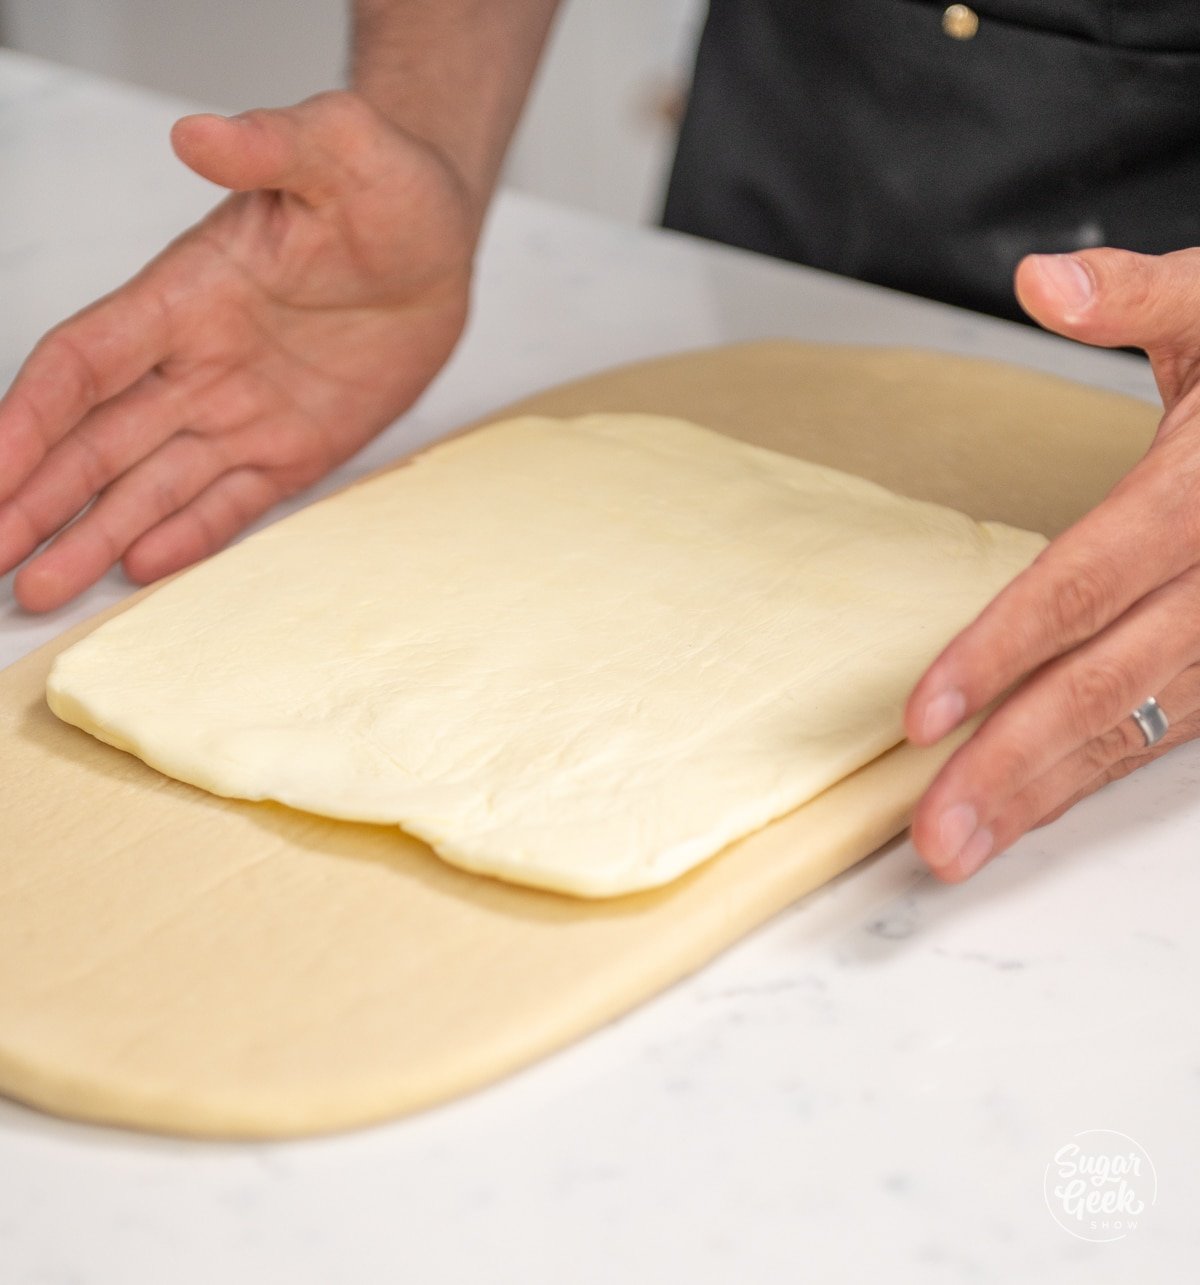
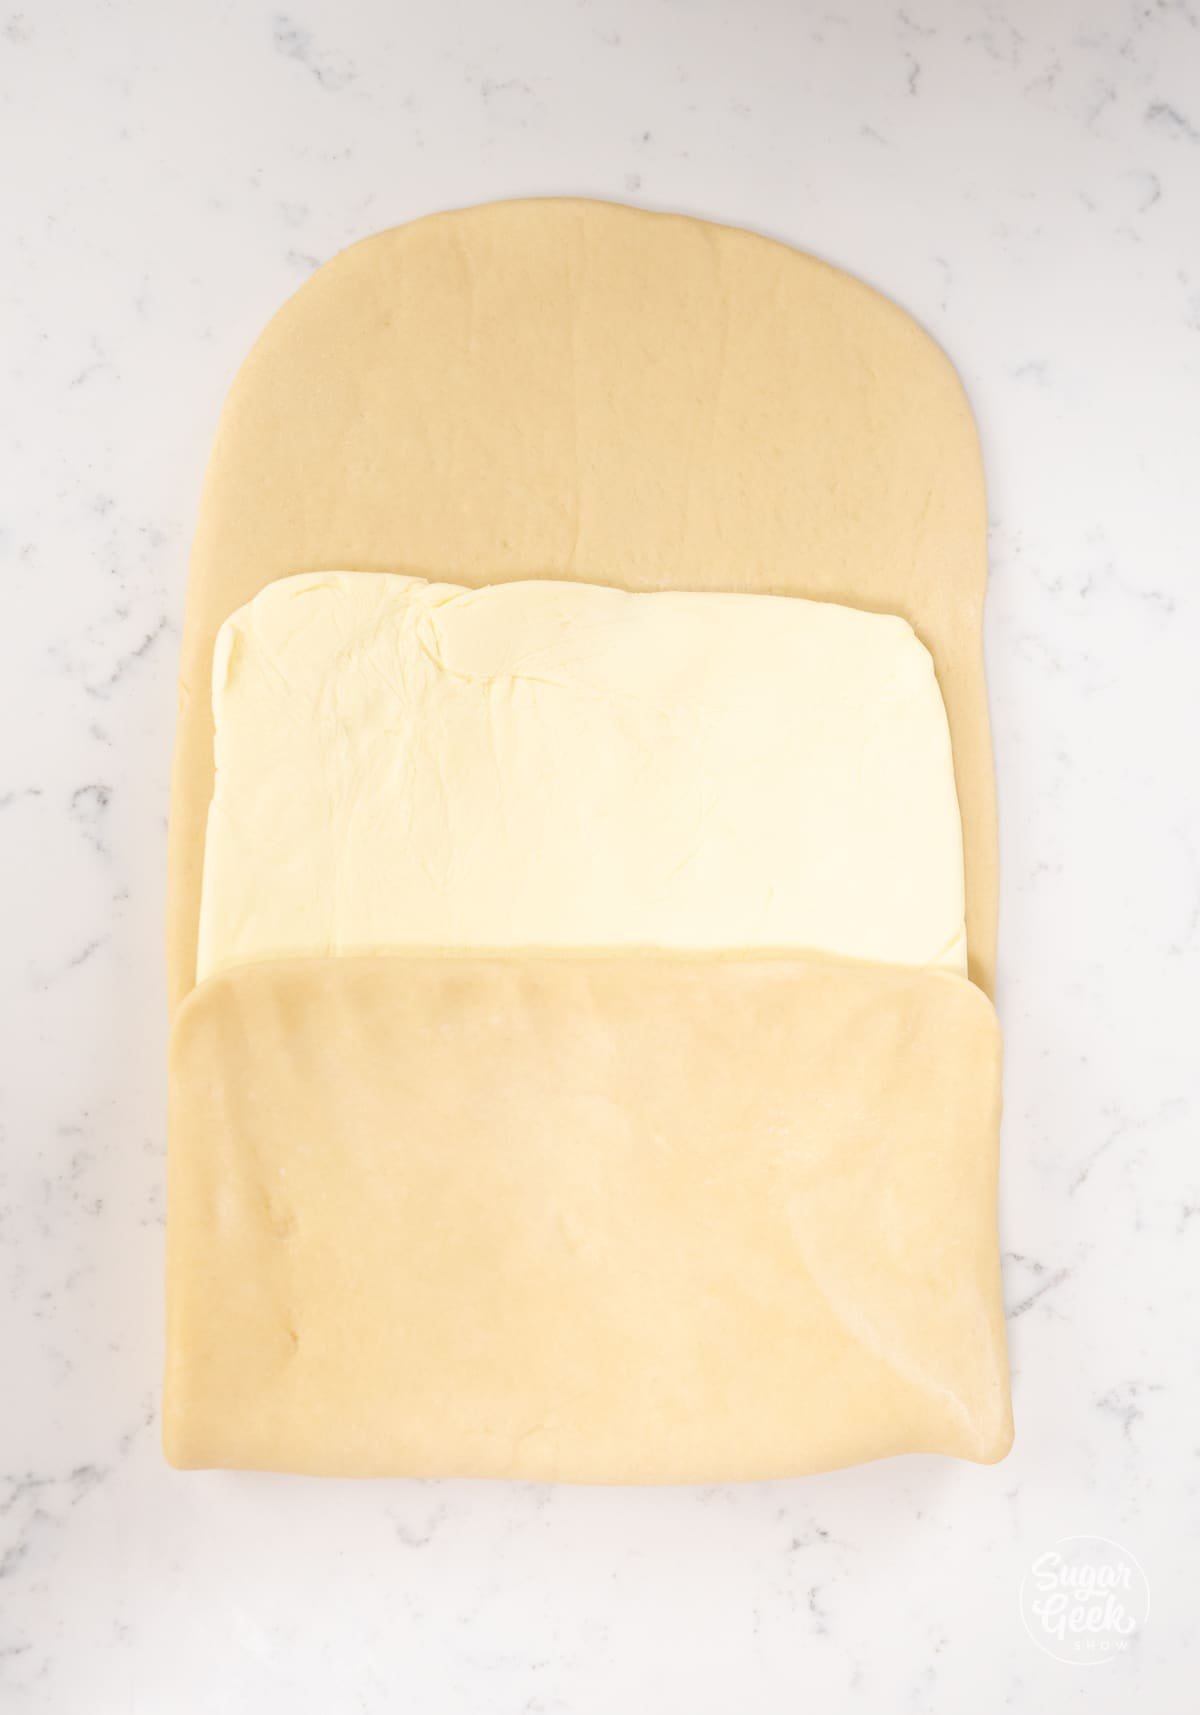
- Place the butter block in the center of your dough.
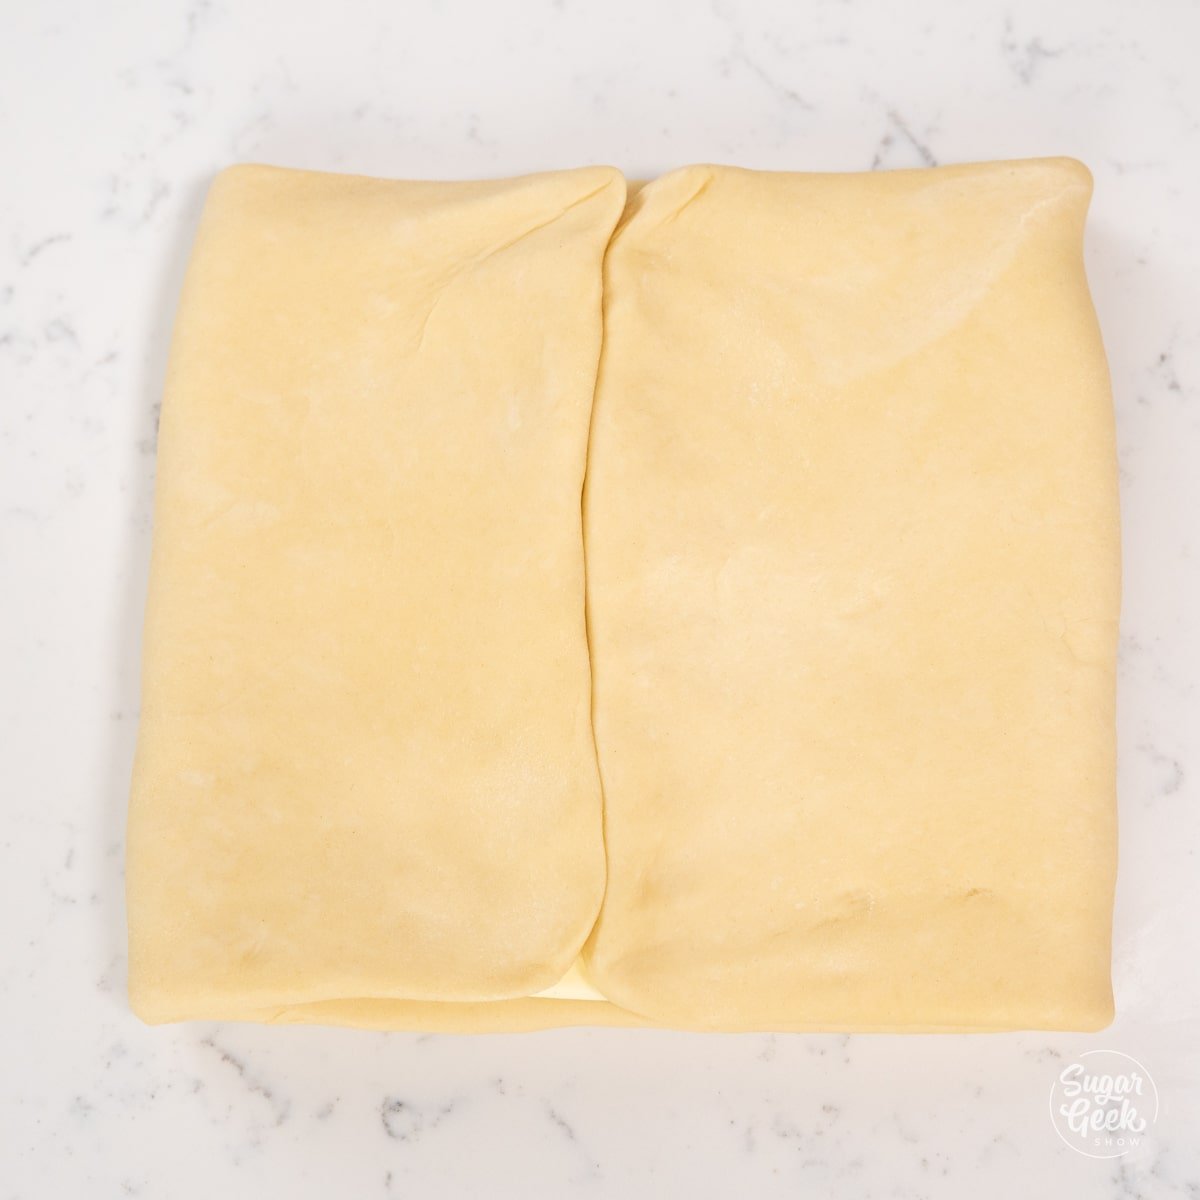
- Fold the bottom and top of the croissant dough into the center of the butter block until they are touching.
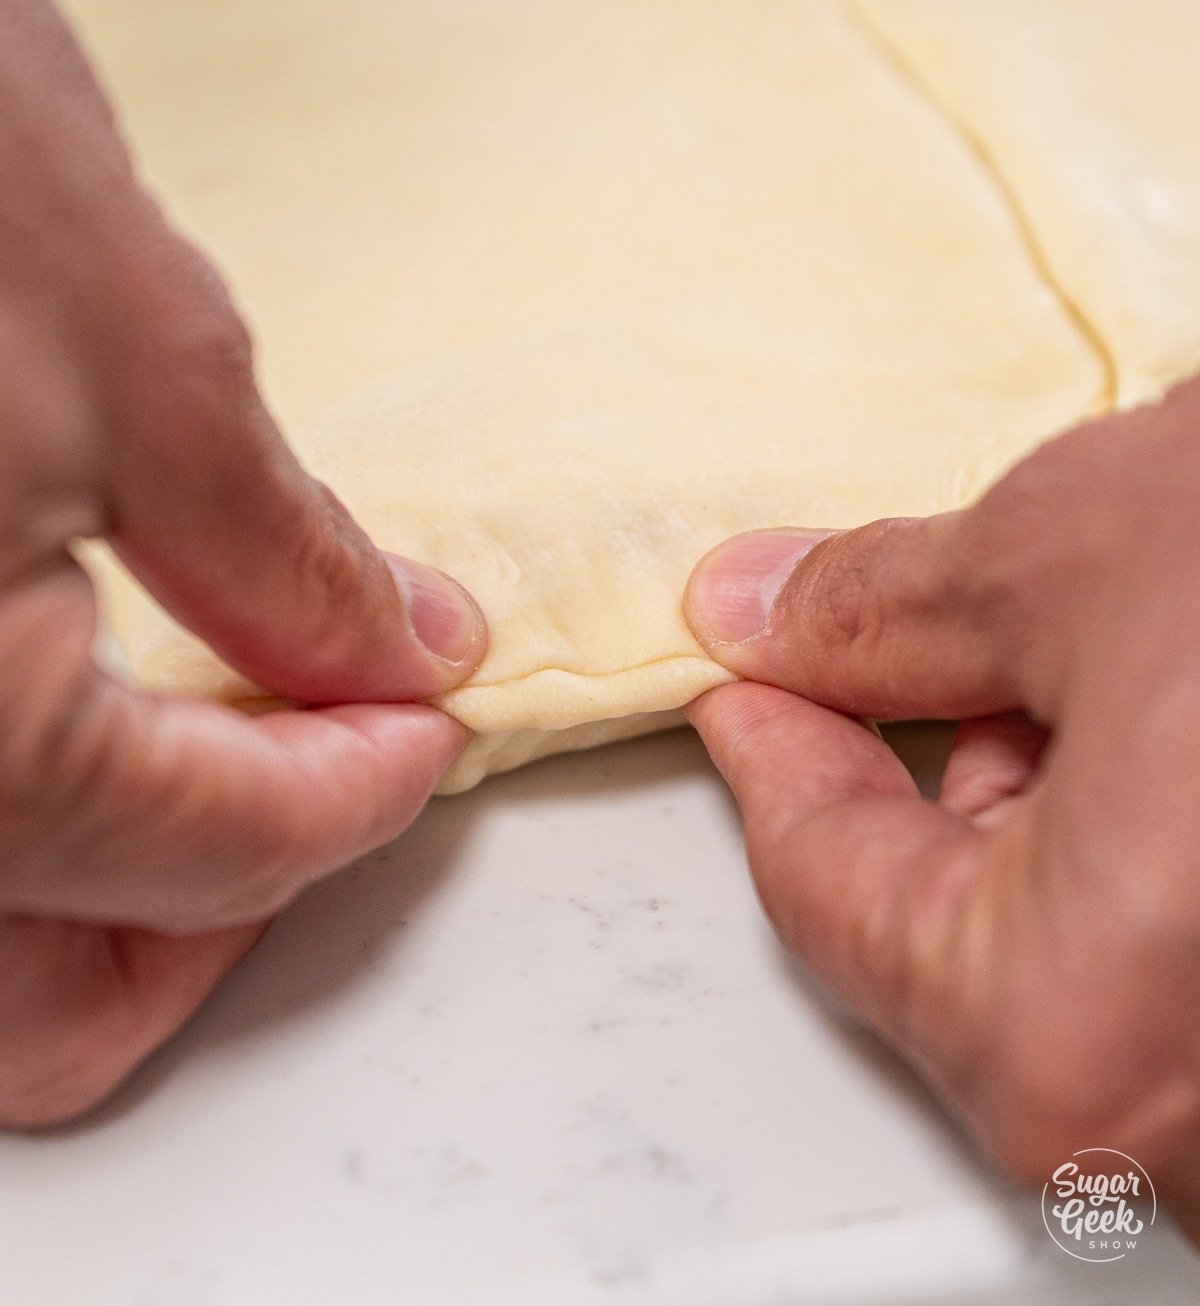
- Enclose the butter in the dough by pinching the edges of the dough with your fingers.
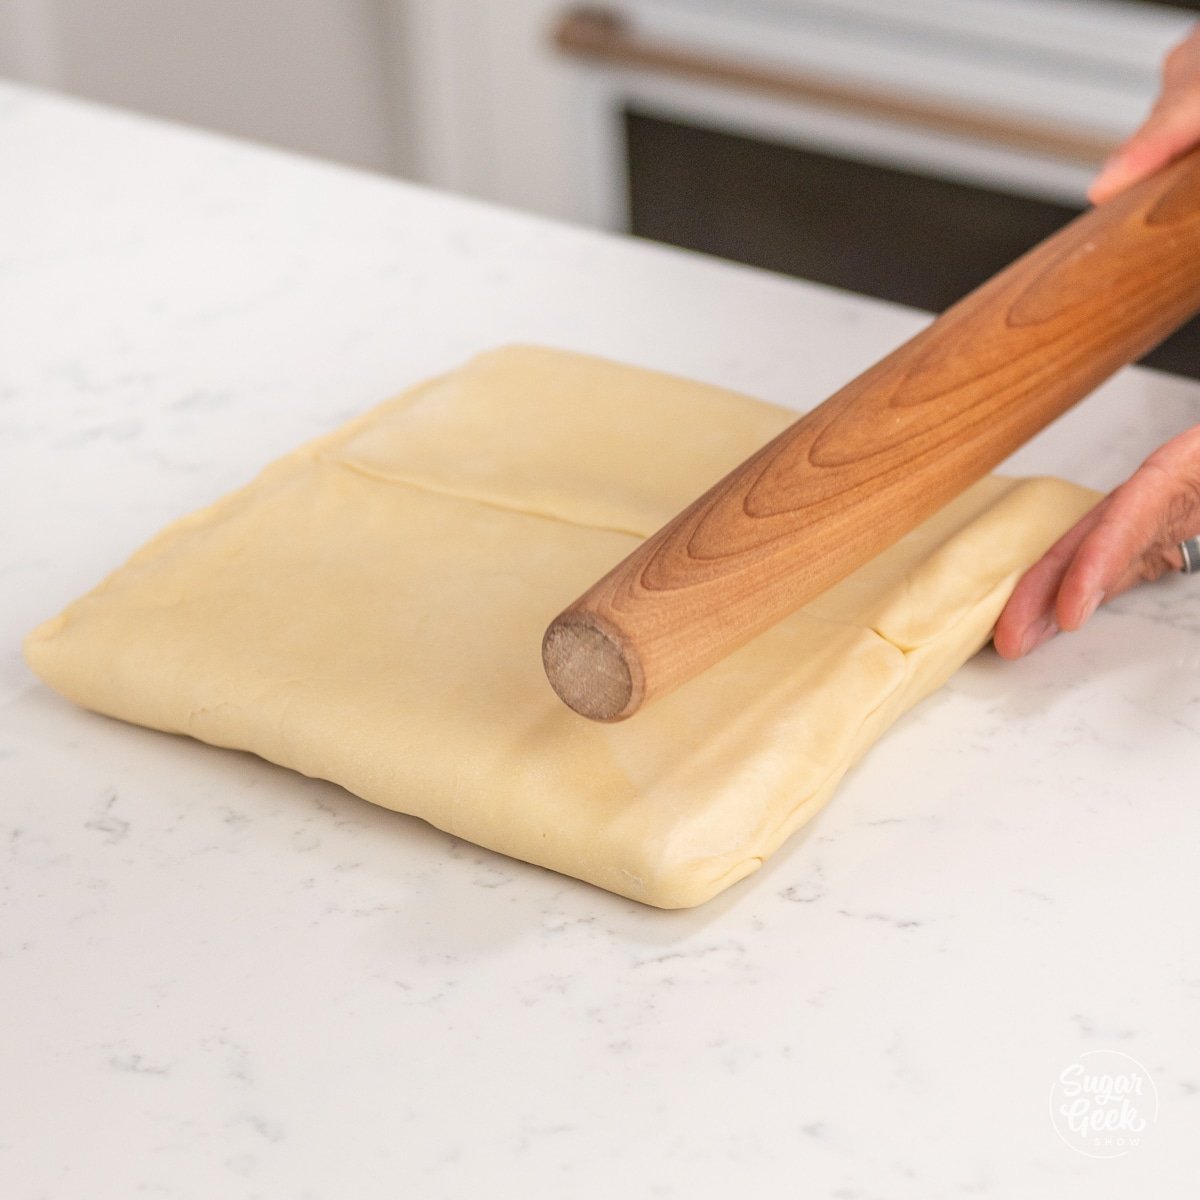
- Tap the edges of the butter block with your rolling pin to make sure they have been pressed into the corners.
- Rotate the croissant dough 90 degrees so that the seam is down the middle. Pro-Tip: Work quickly so that the butter doesn't melt.
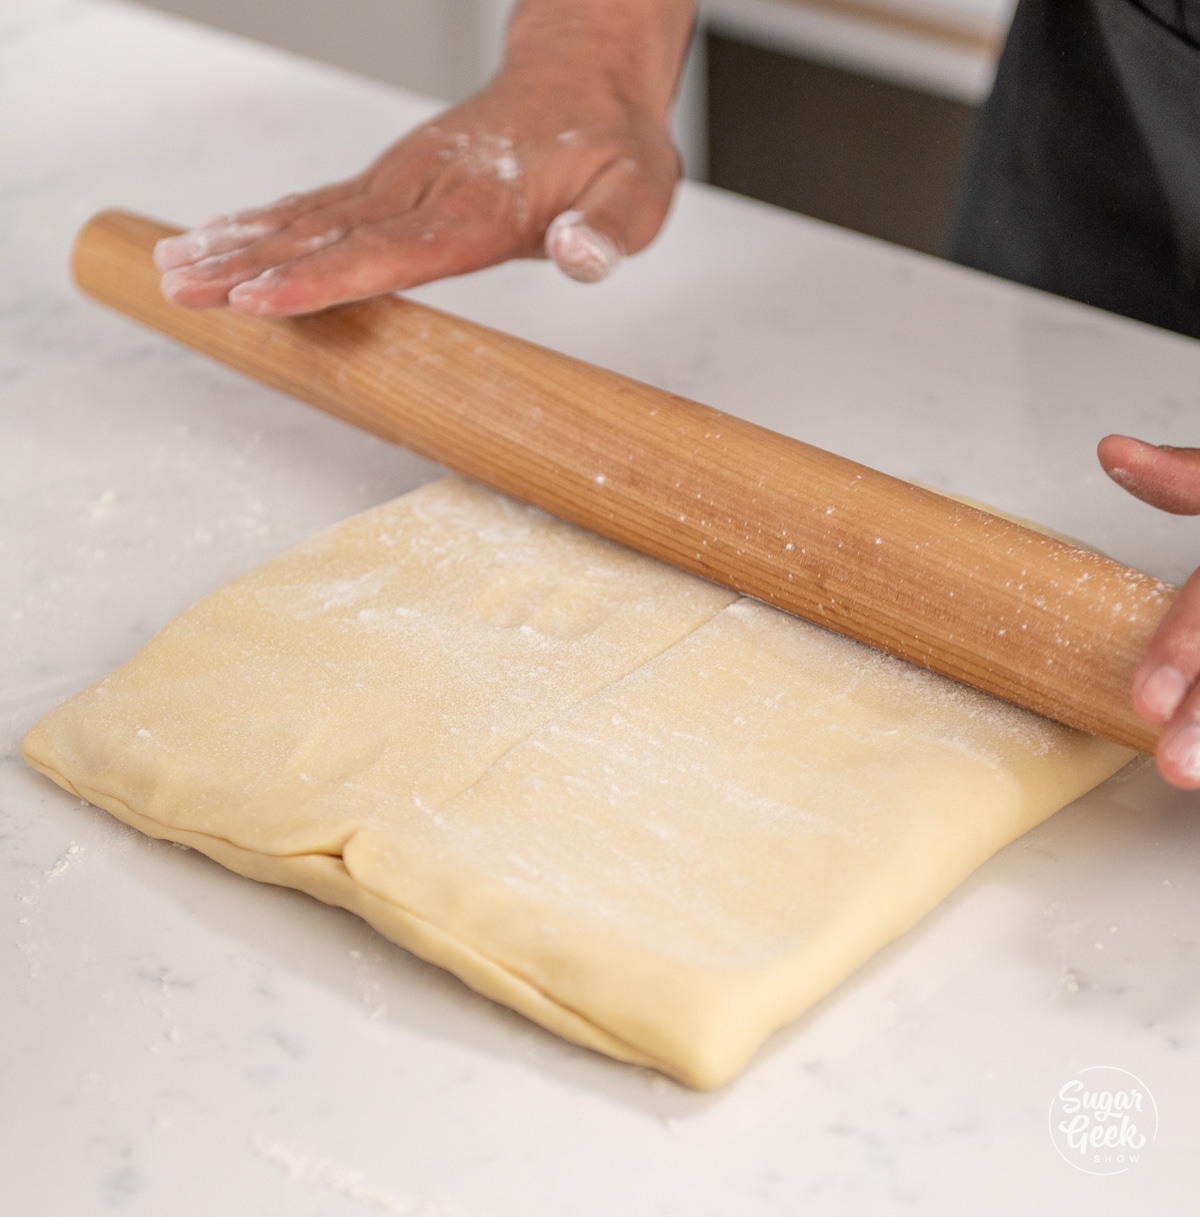
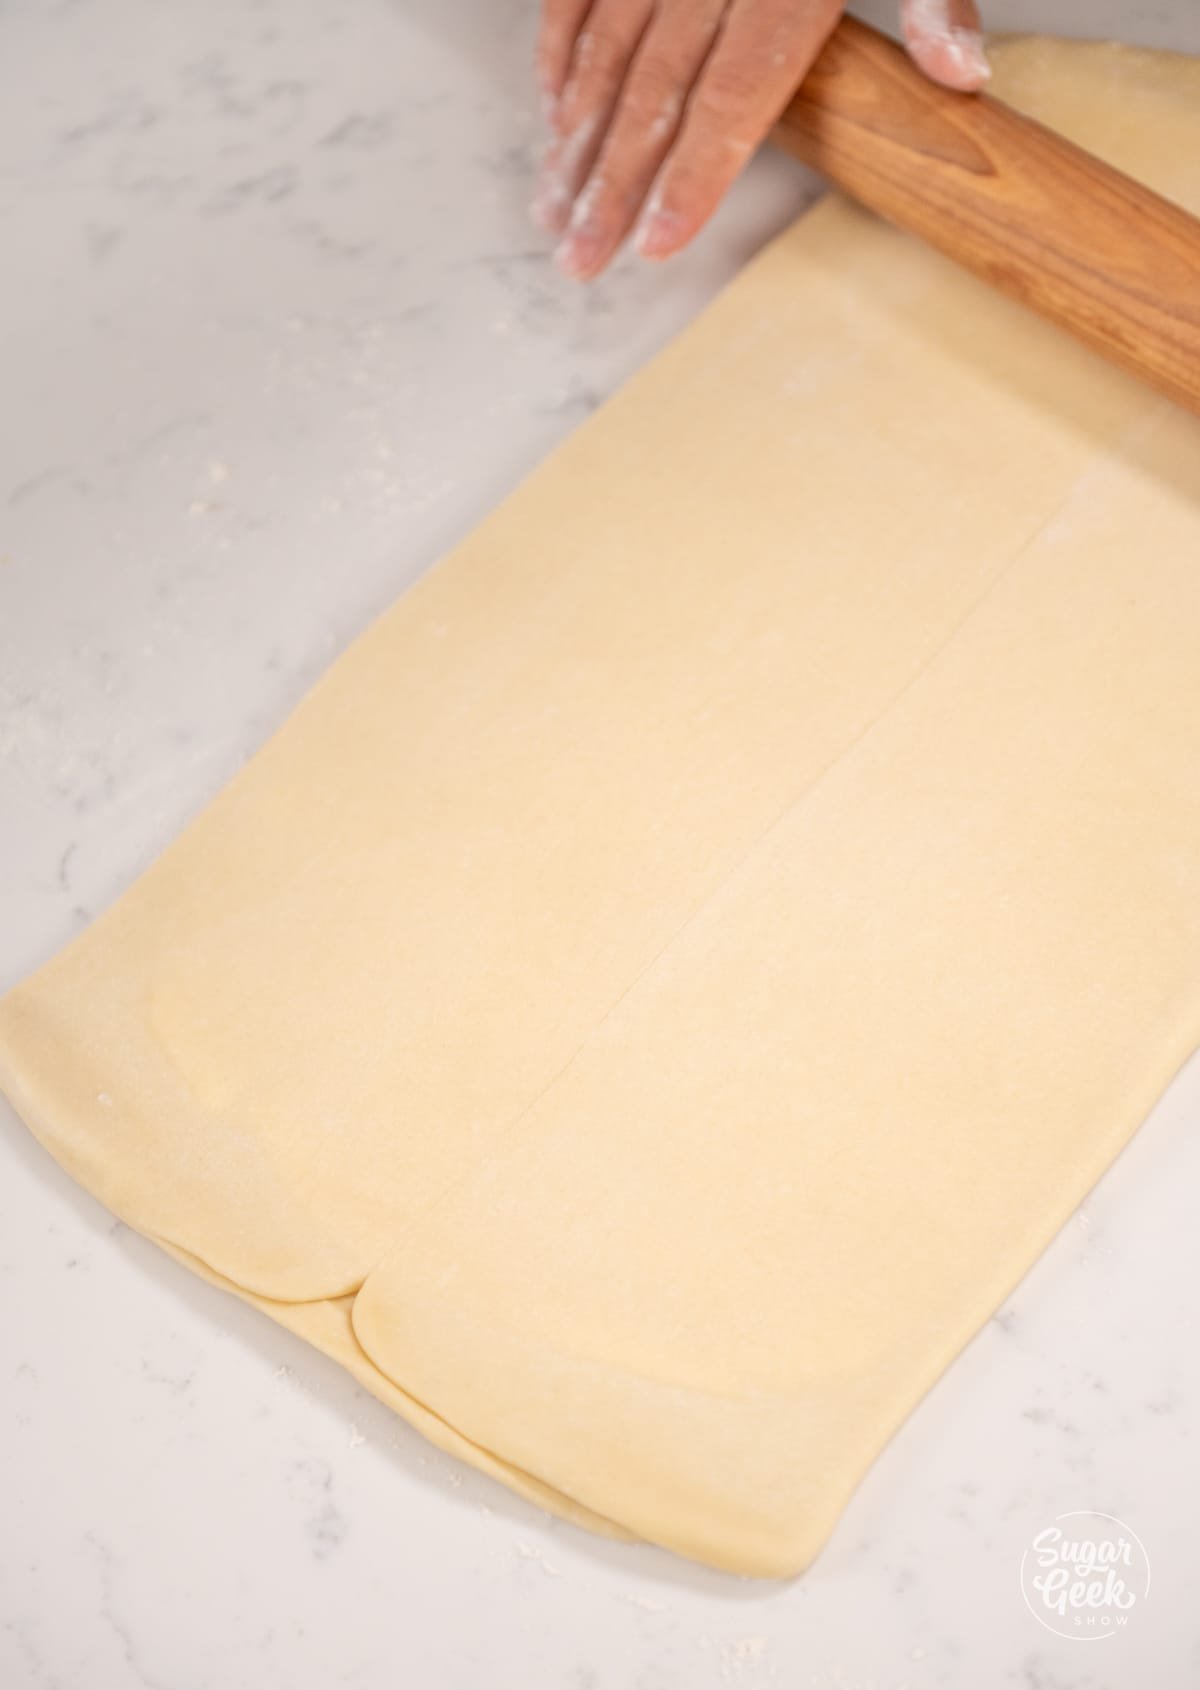
- Flour the bottom and top of the dough and roll it out to be ¼" thick, about an 8" by 22" rectangle.
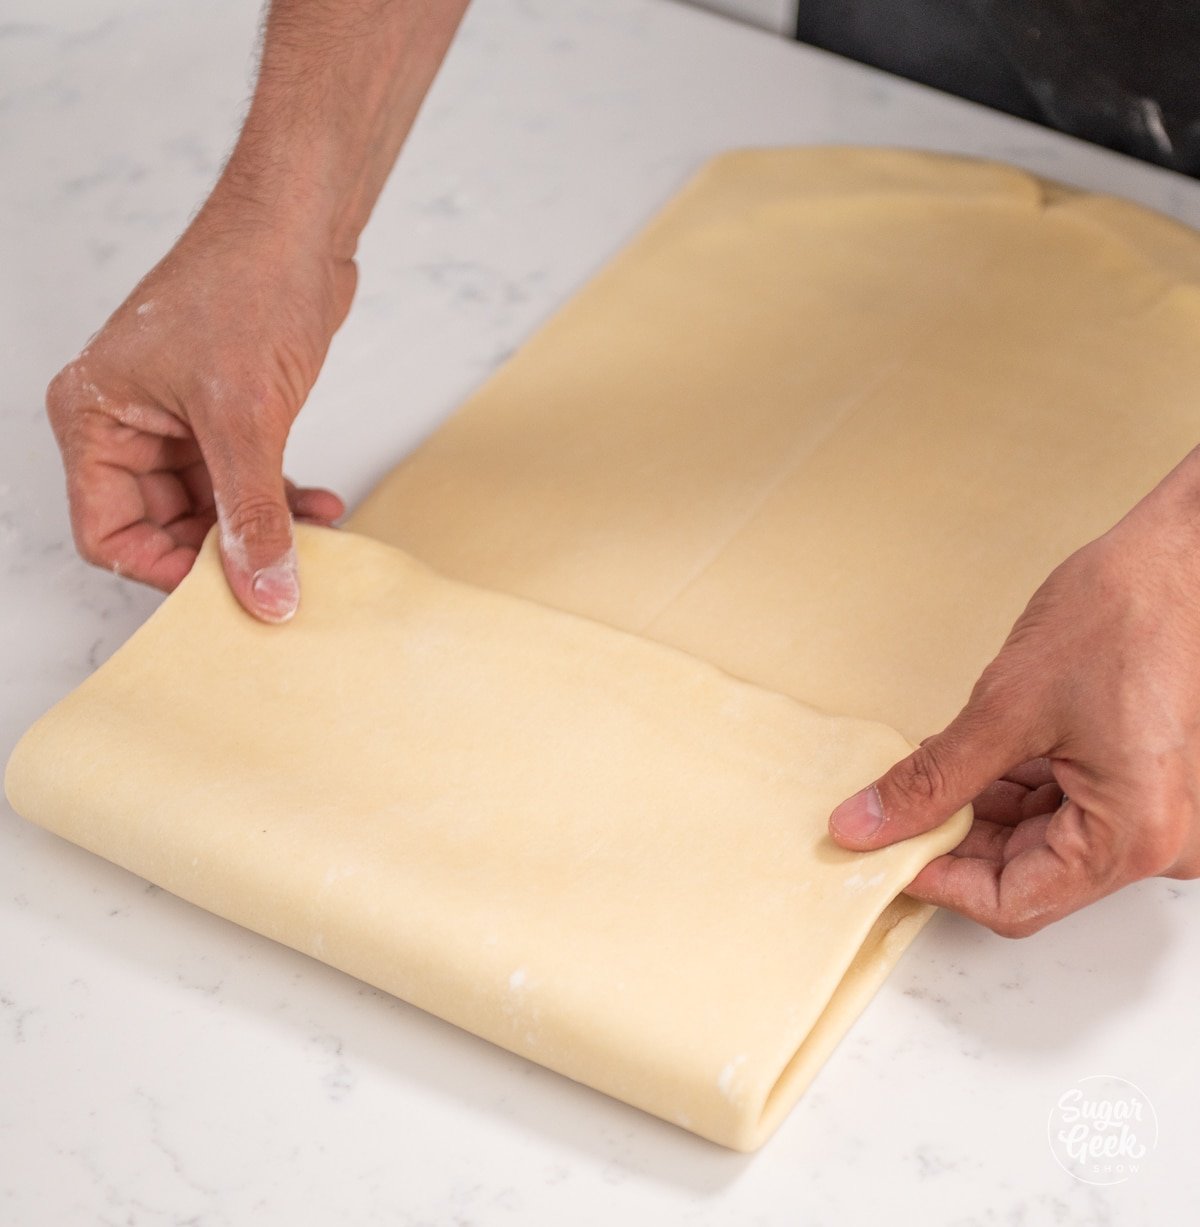
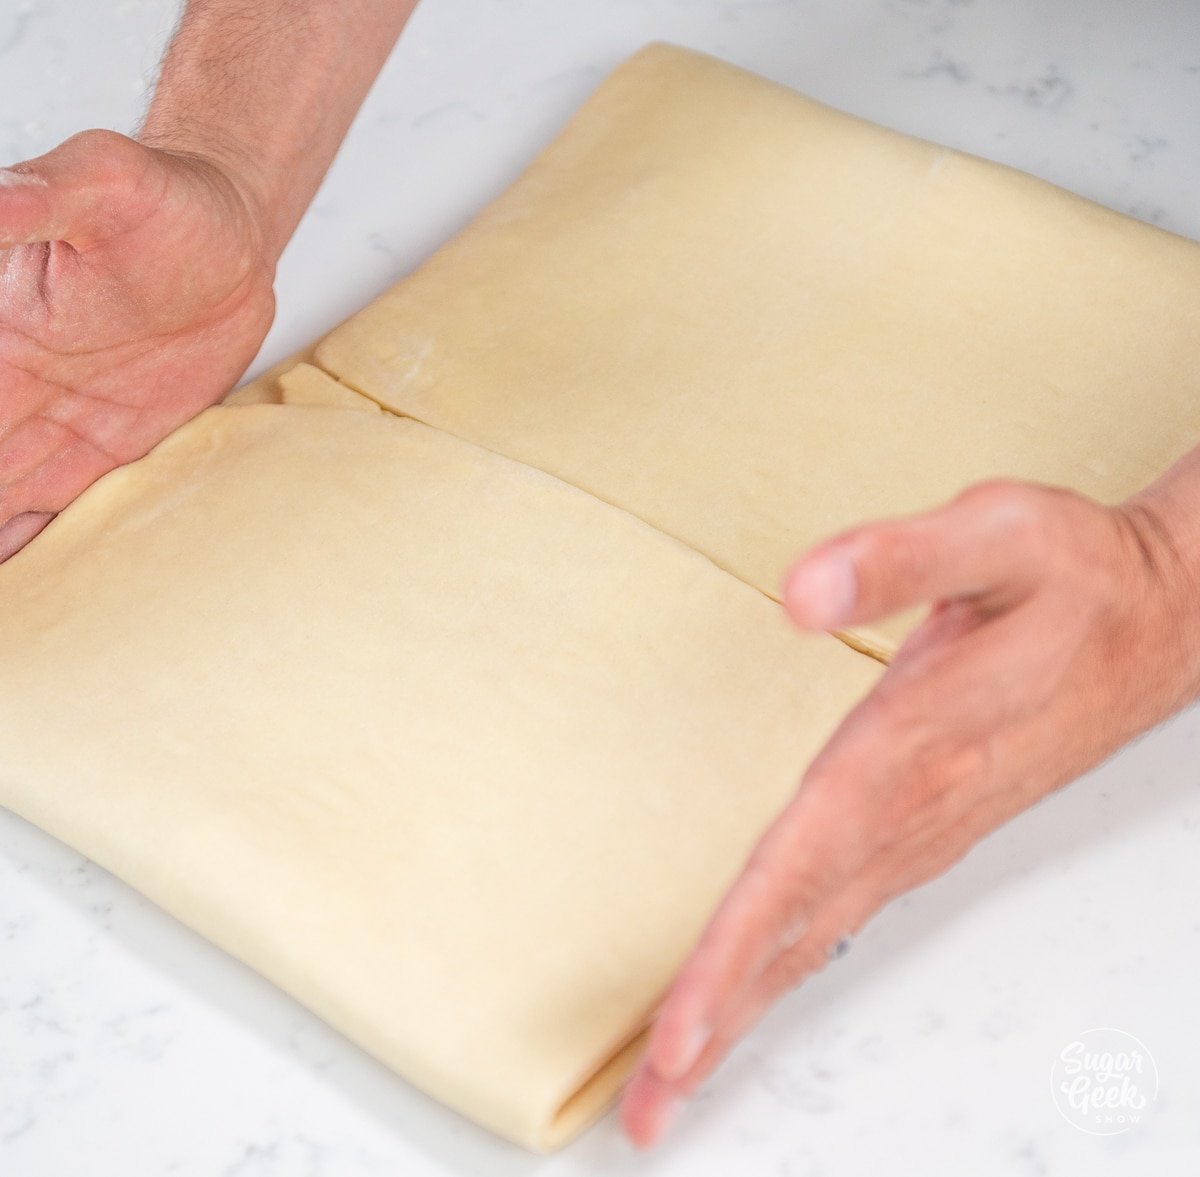
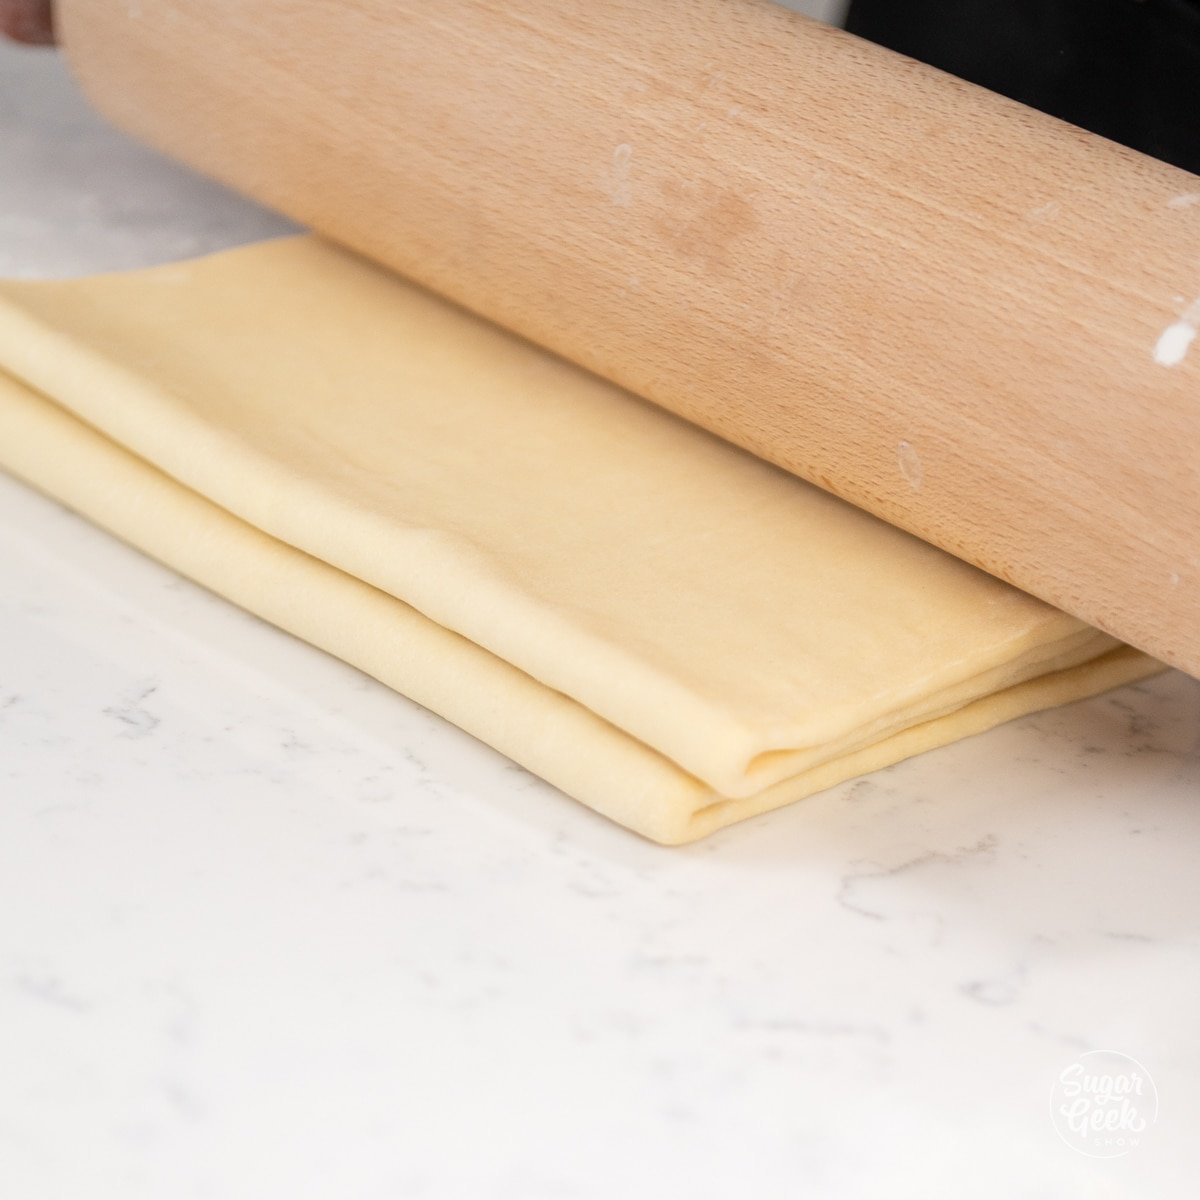
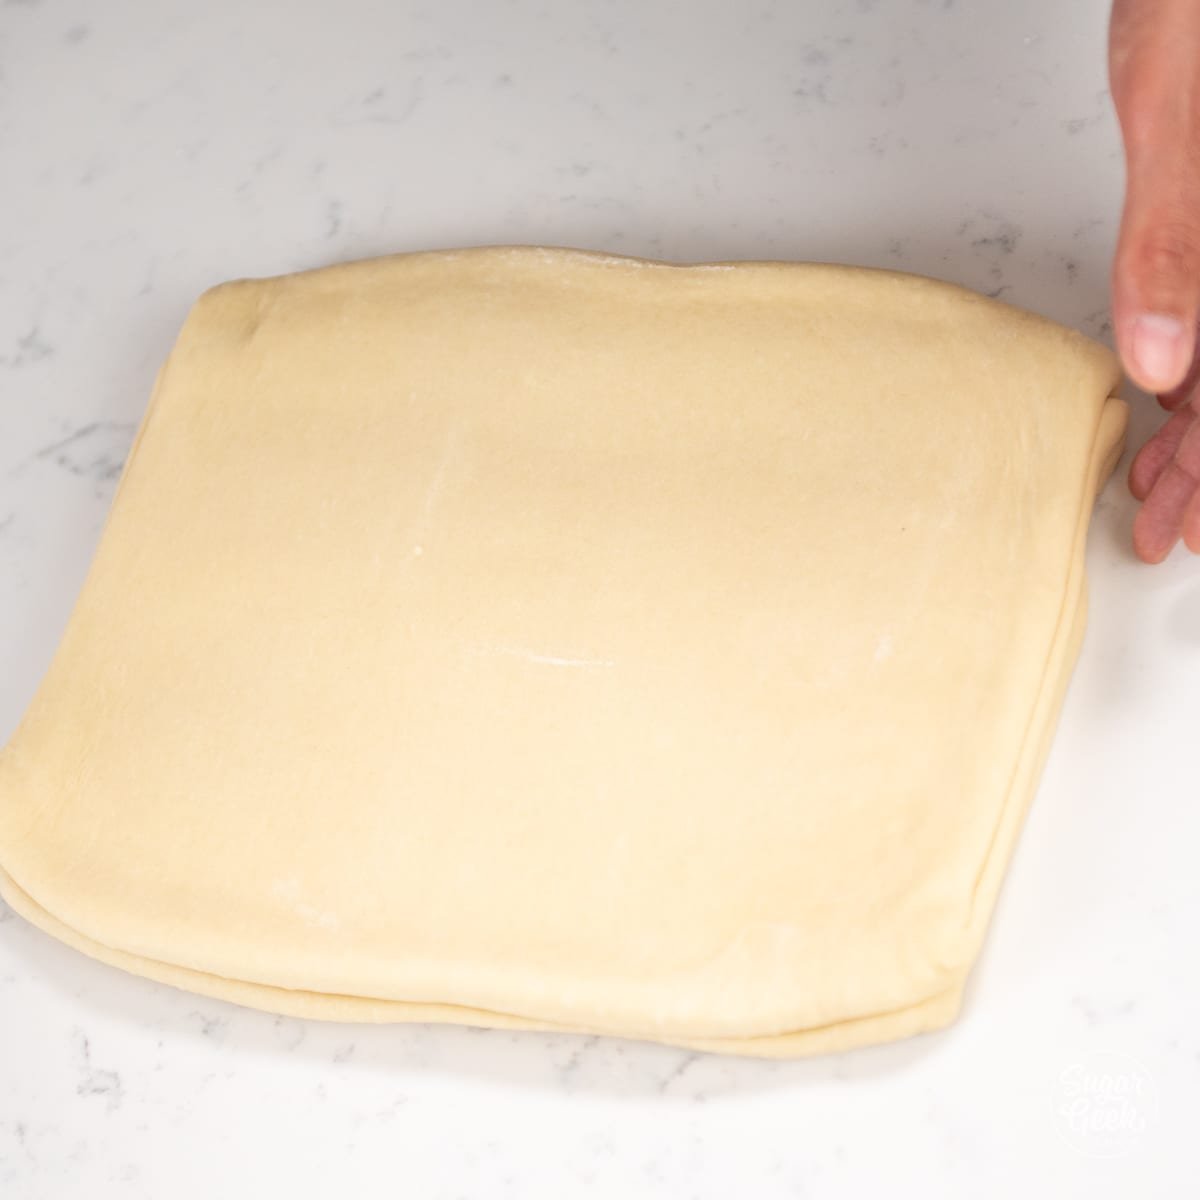
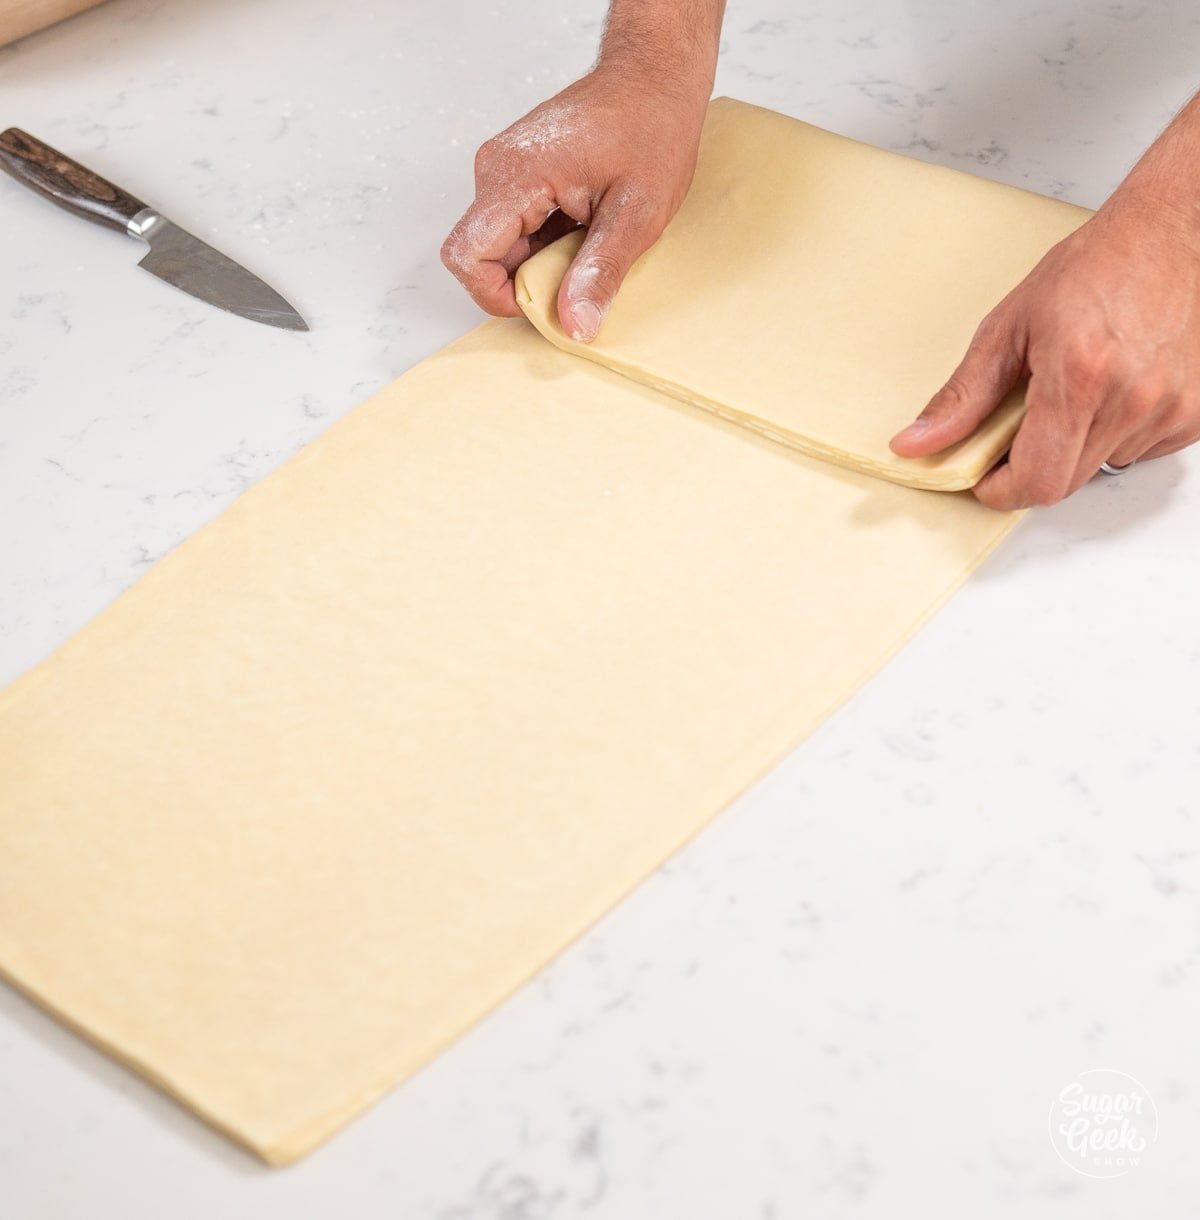
- Do a book fold by folding the top and bottom to the center of the dough again.
- Then fold the entire dough in half and do another 90-degree turn.
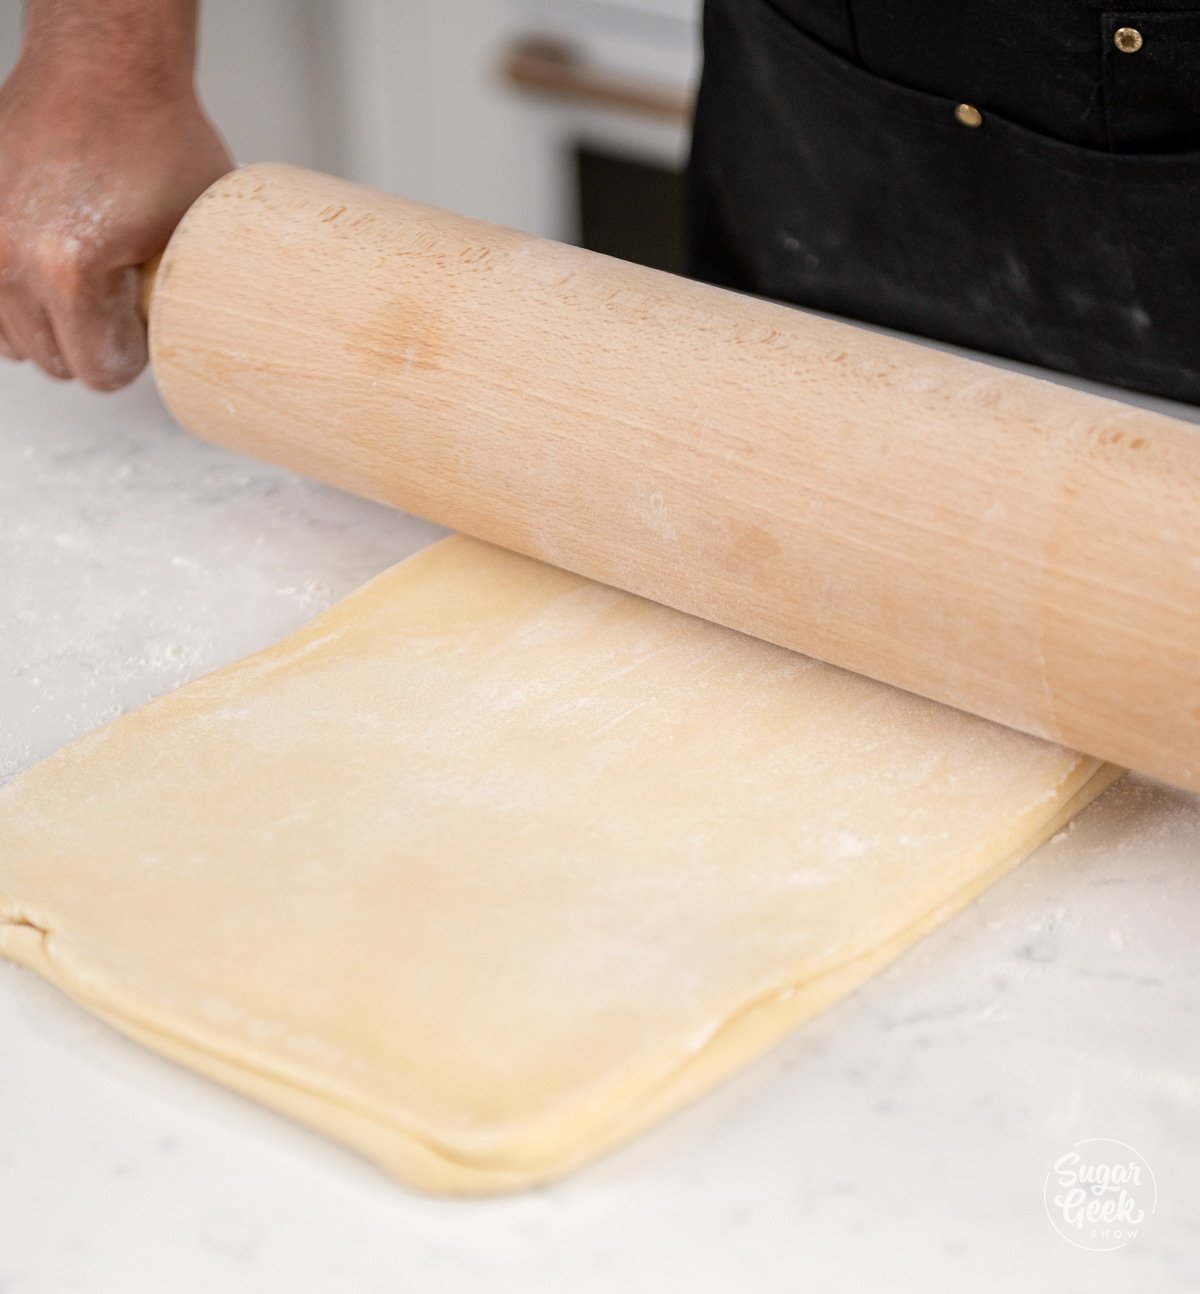
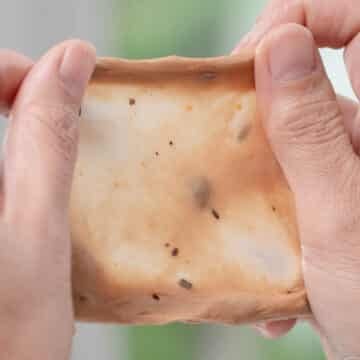
- Gently roll the dough a little bit into a rectangular shape so that it is easier to cut out after chilling. You will feel your dough starting to get stretchy.
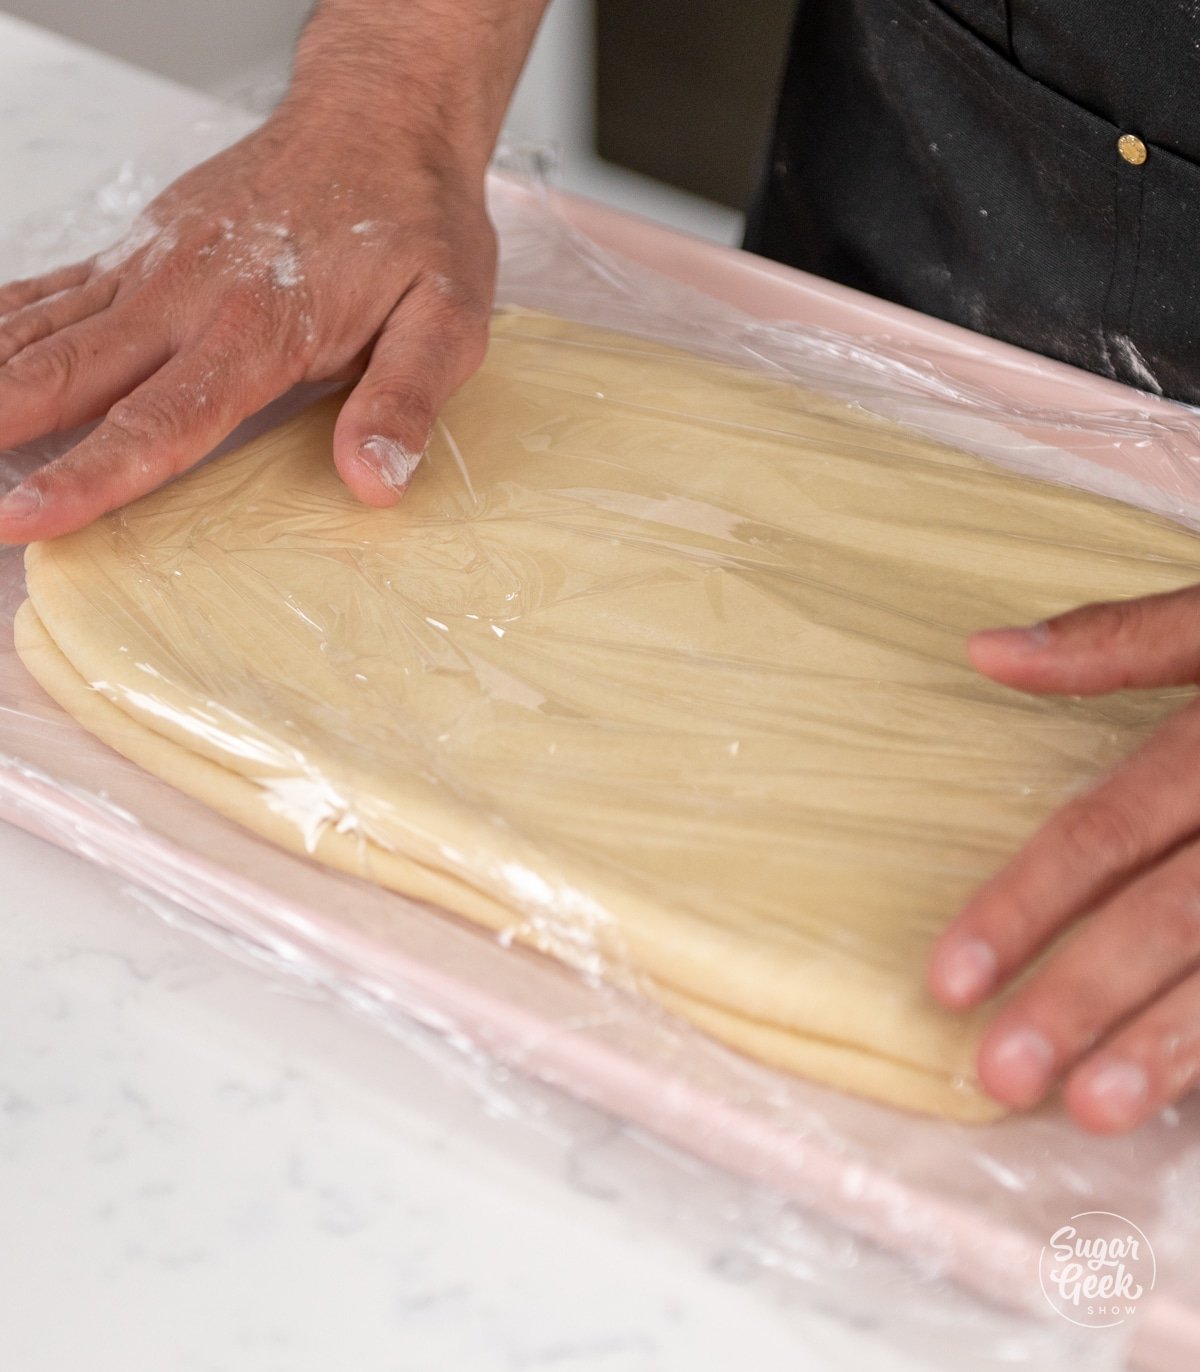
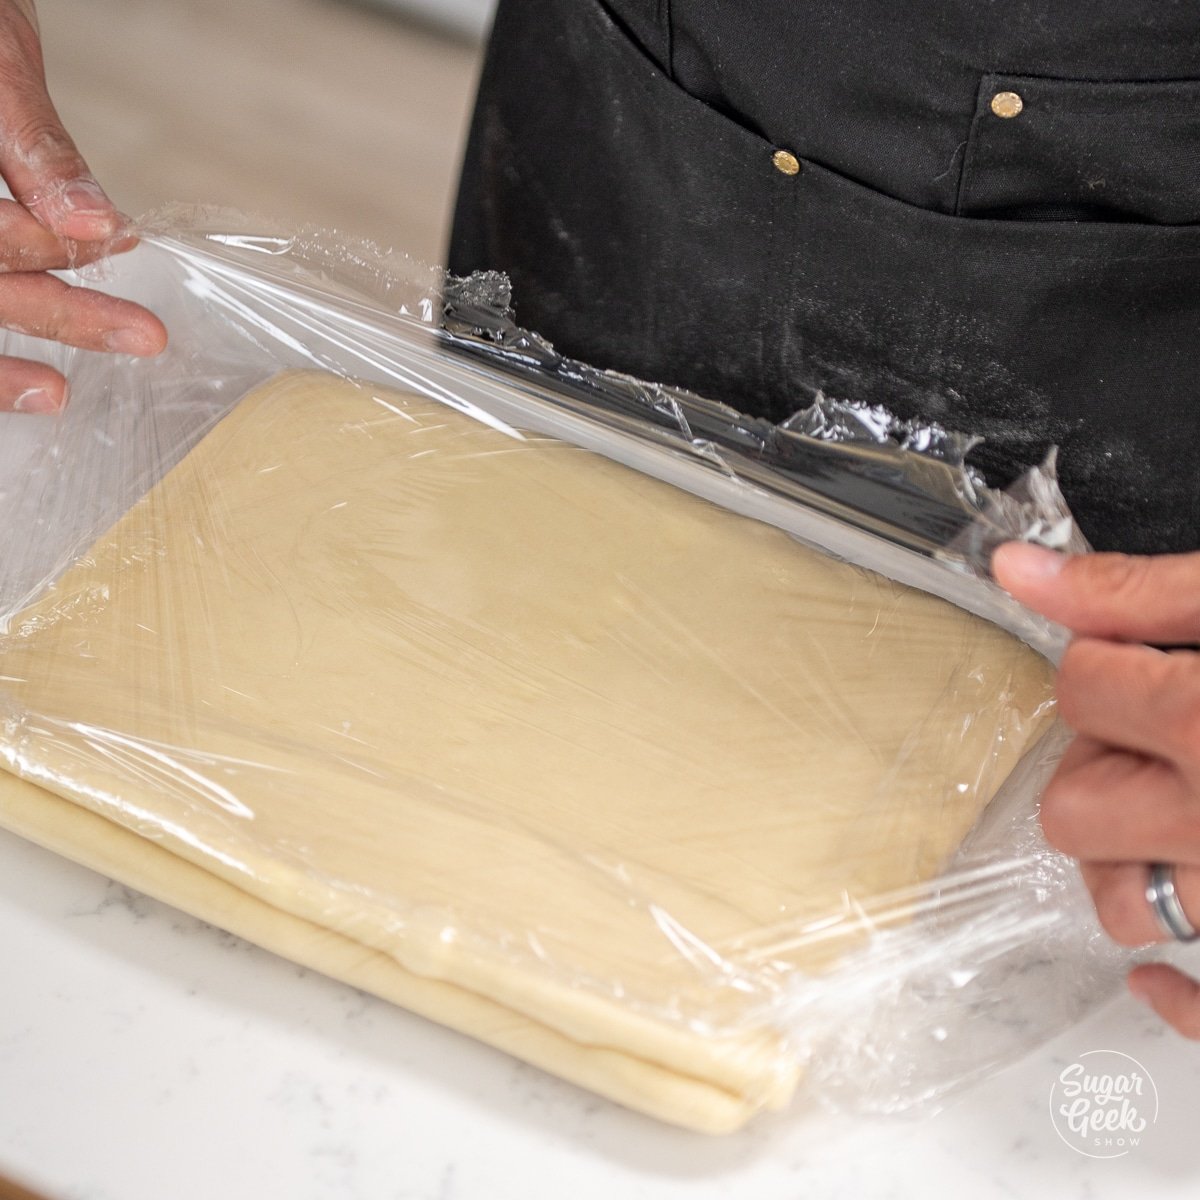
- Wrap the dough in plastic wrap and freeze it for 10 to 15 minutes.
- Do a second book fold by repeating steps 10 through 13. Brush off any excess flour.
- Wrap the dough in plastic wrap and freeze it for another 15 to 30 minutes. Pro-Tip: If you want to make your croissant dough a day ahead, this is a good place to stop. Refrigerate the dough overnight, then proof and assemble them the next day.
Assembling the Croissants
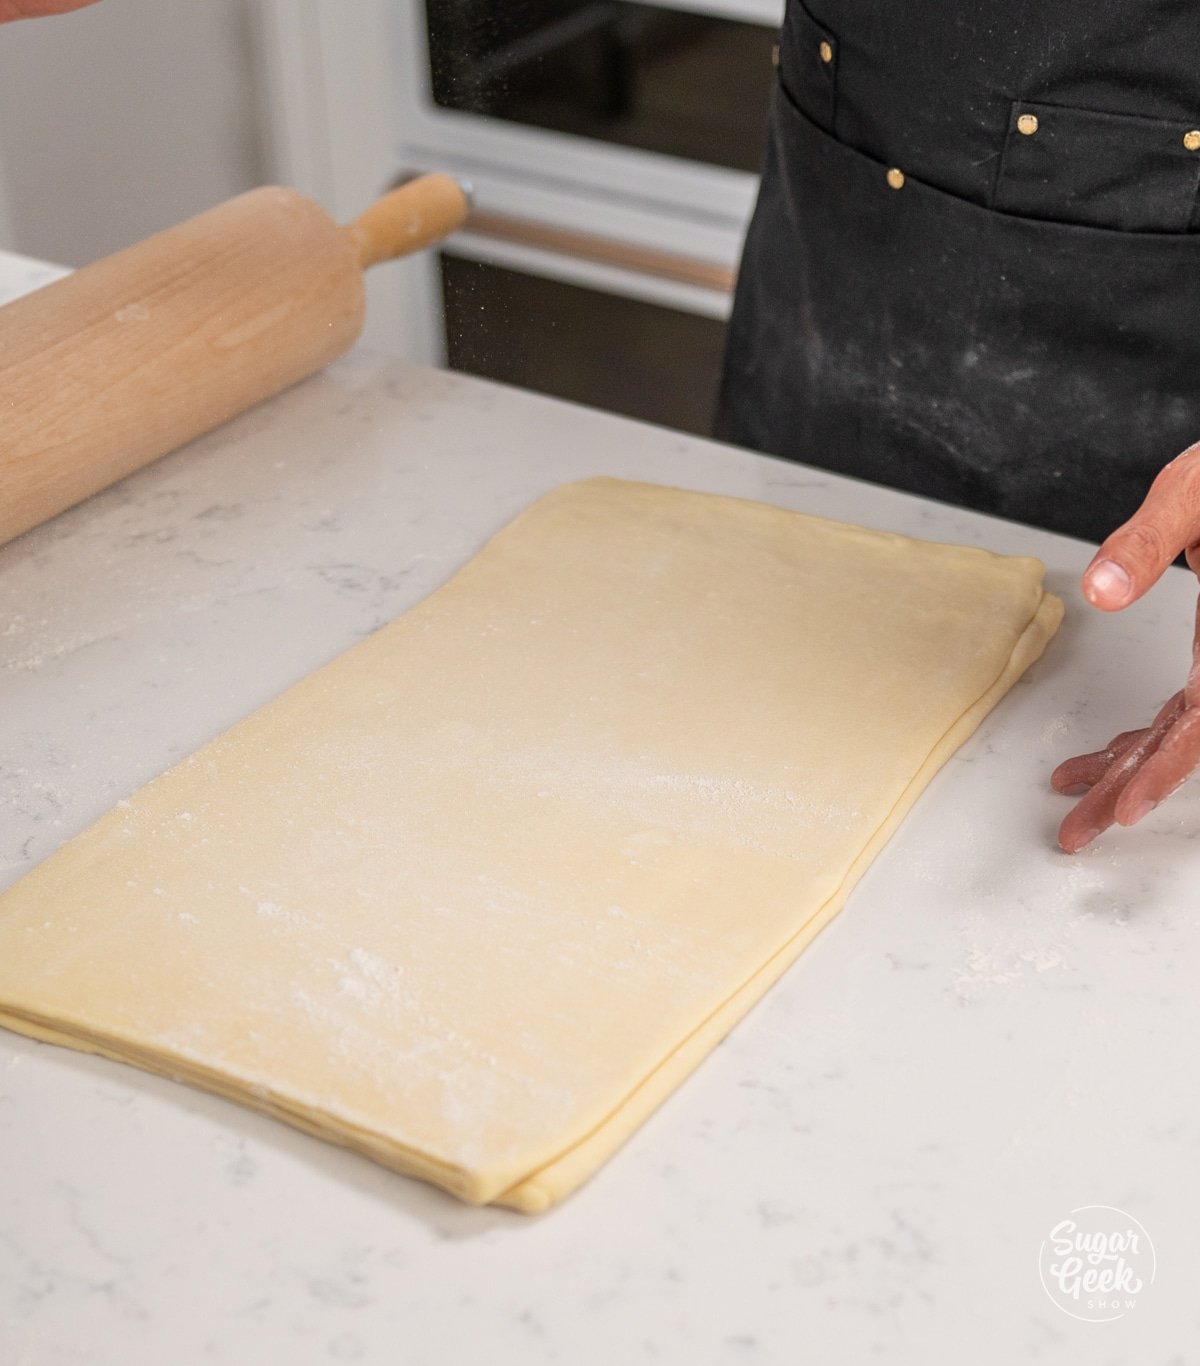
- Take the croissant dough out and place it on a lightly floured surface with the short side of the folds facing to the side.
- Roll the dough lengthwise into a long rectangle. Roll until it is 4mm (1/32") thick and about 9" wide. Pro-Tip: Fold and unfold the dough as you're rolling it to flour the surface and keep it from sticking. If your gluten is very stretchy and not rolling out, let it rest for 15 minutes.
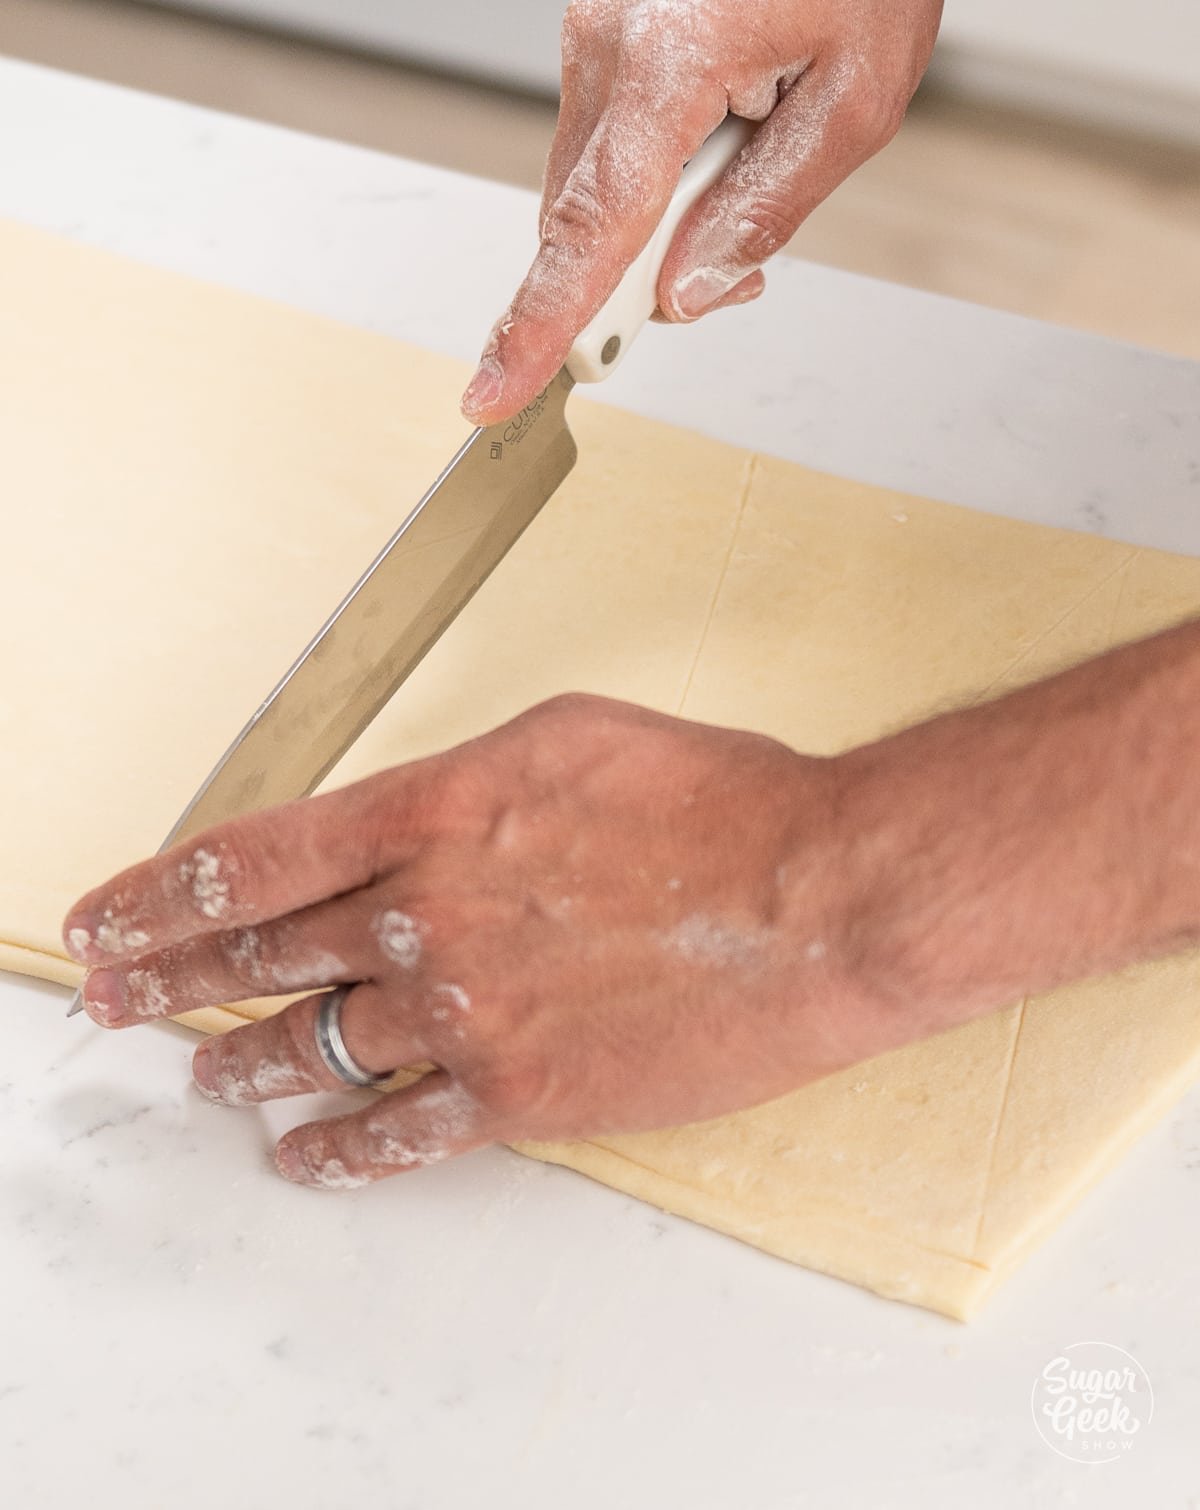
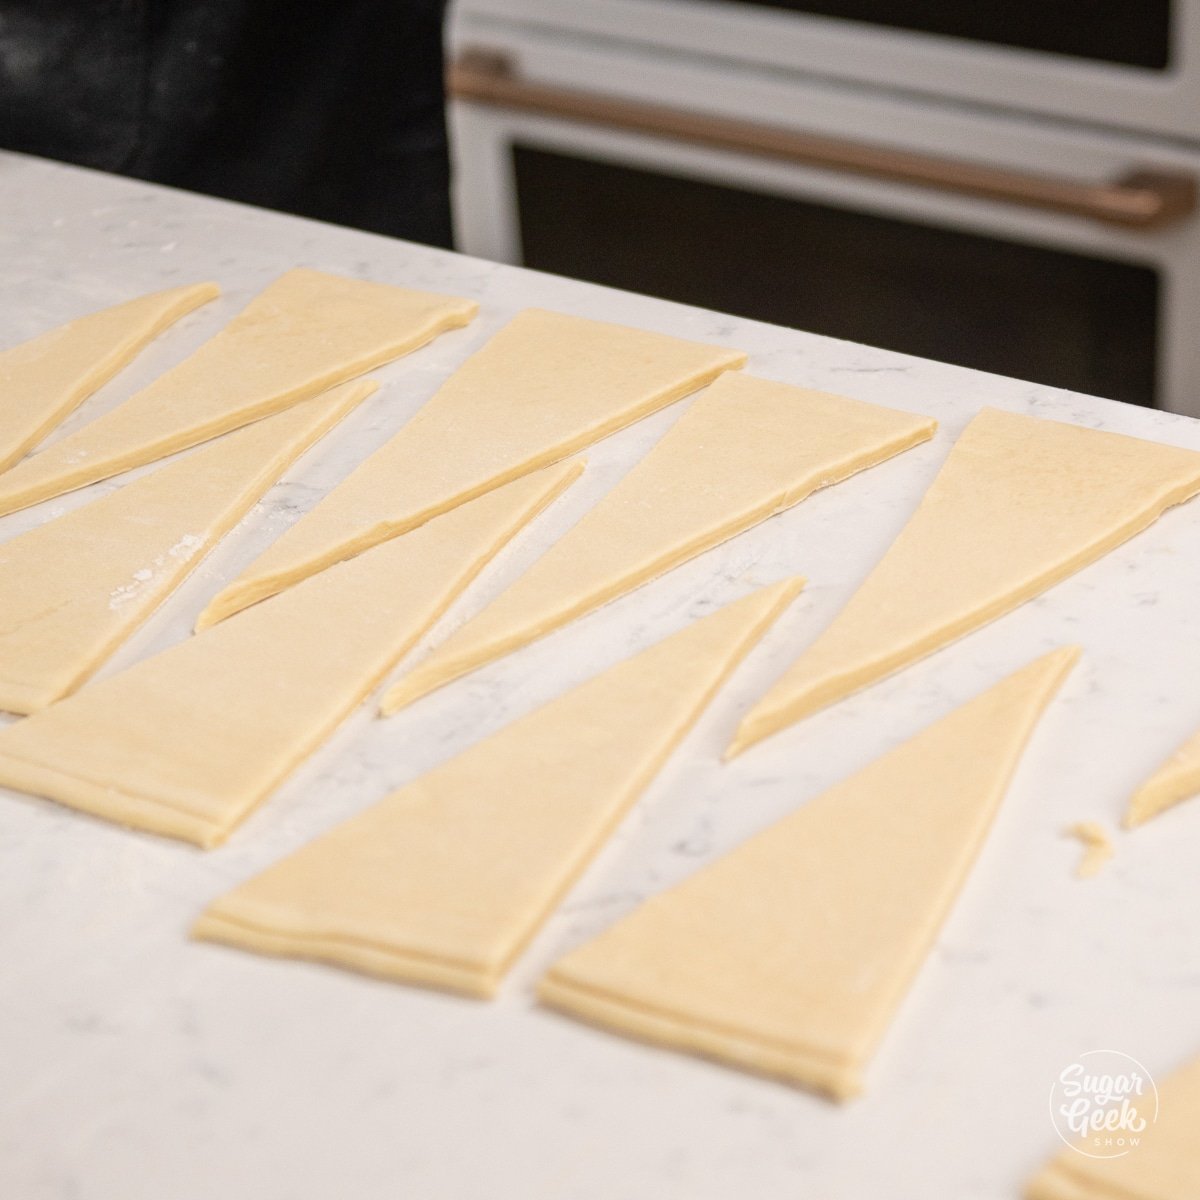
- Cut out about 12 small triangles at an angle that are each 4" wide and about 9" long with a sharp knife or a pizza cutter. Pro-Tip: Mark the cuts first and use a ruler before cutting them.
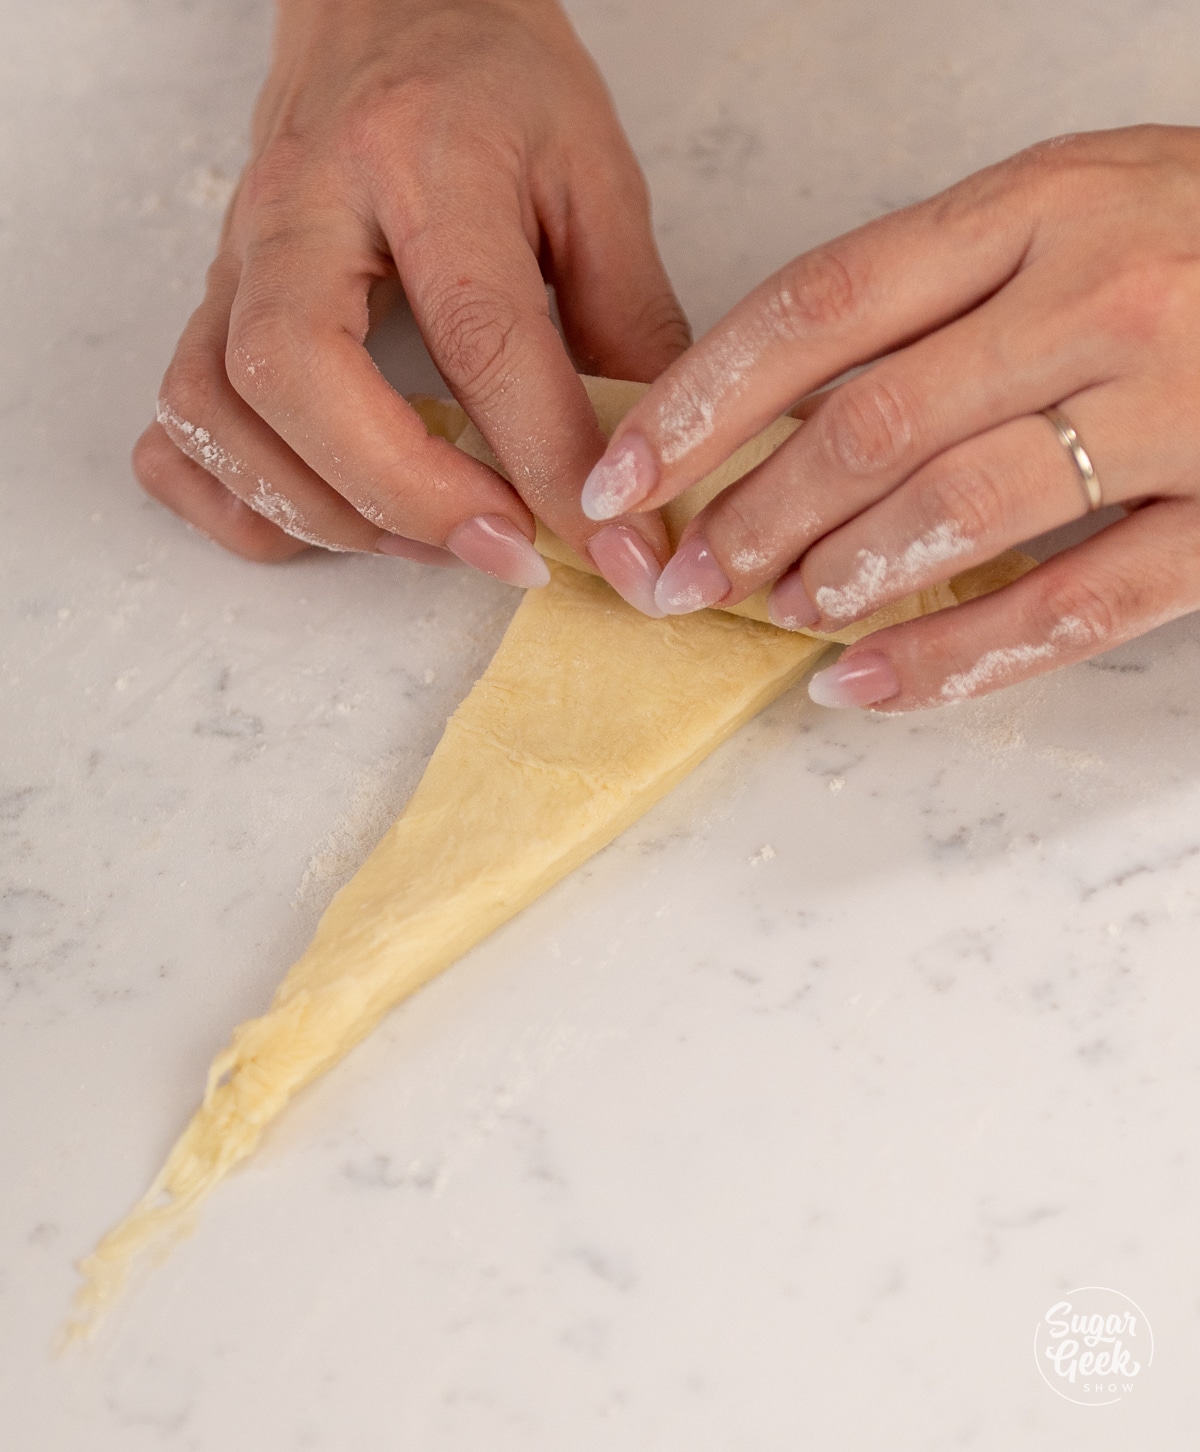
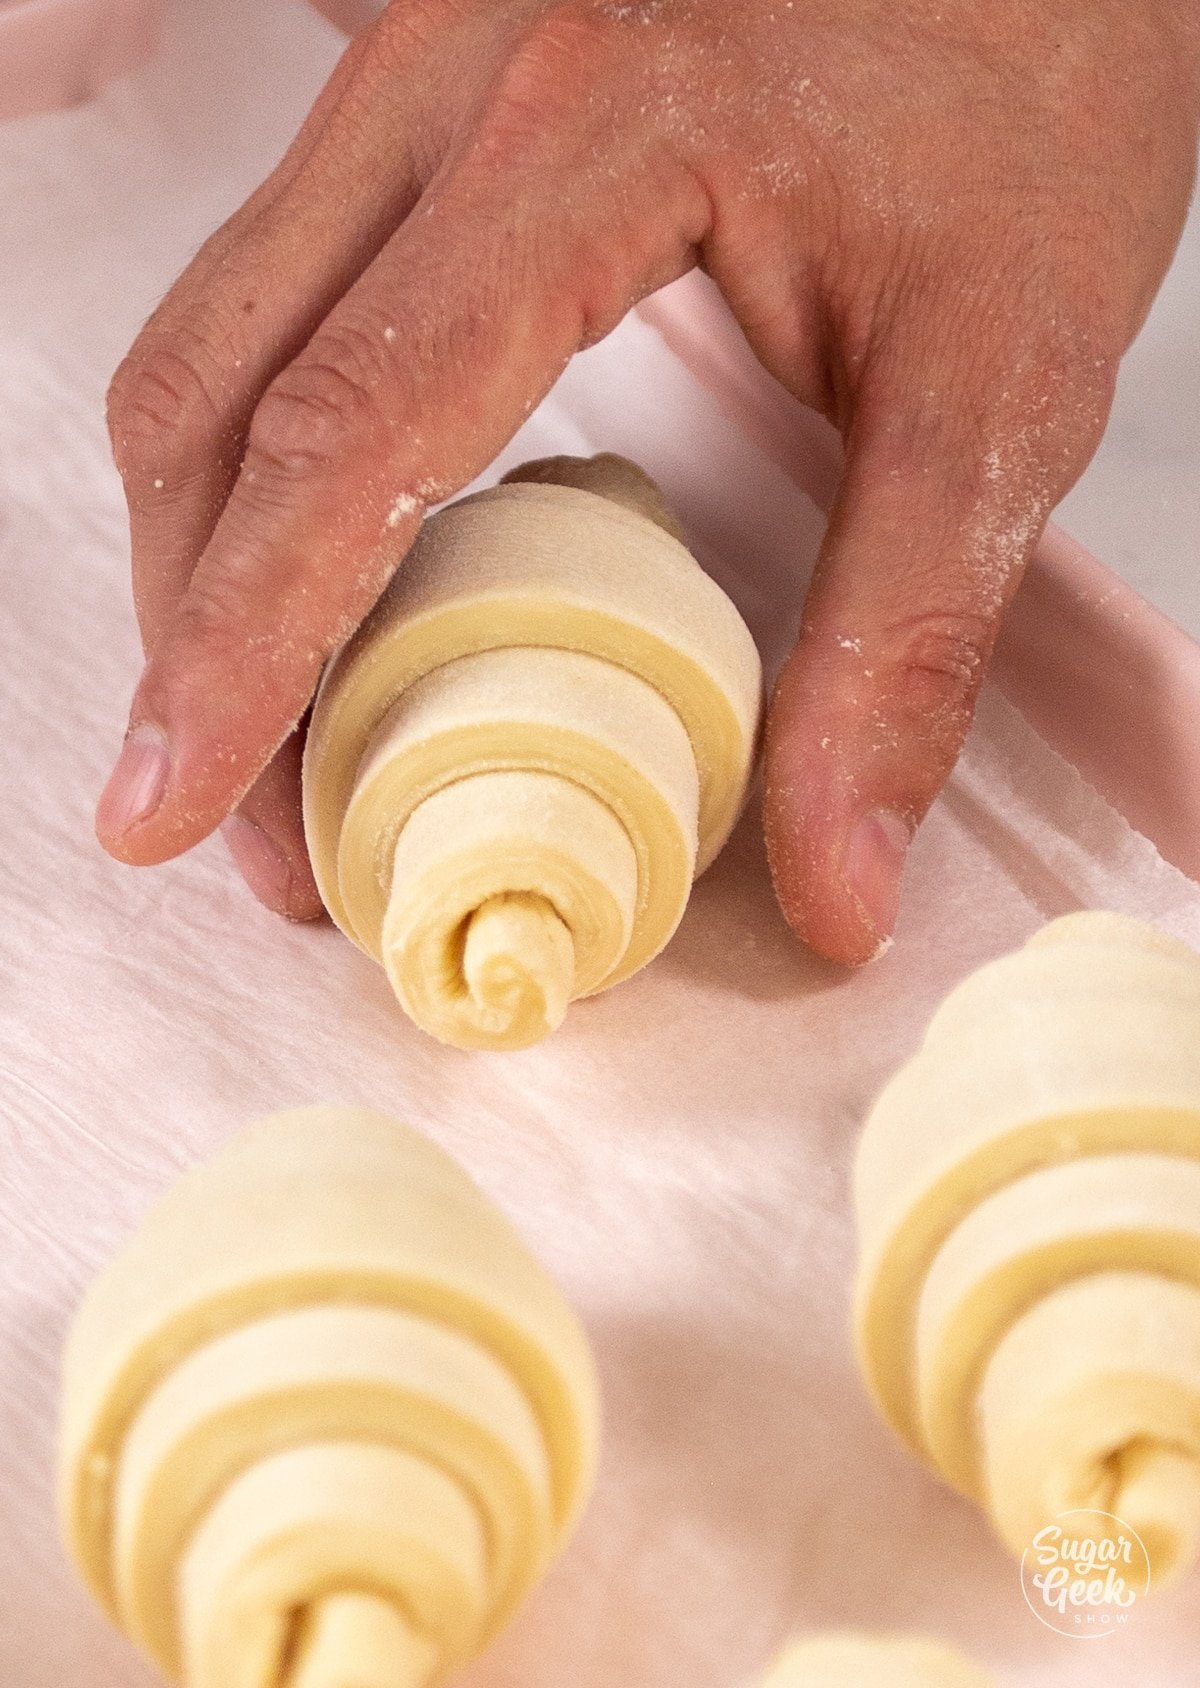
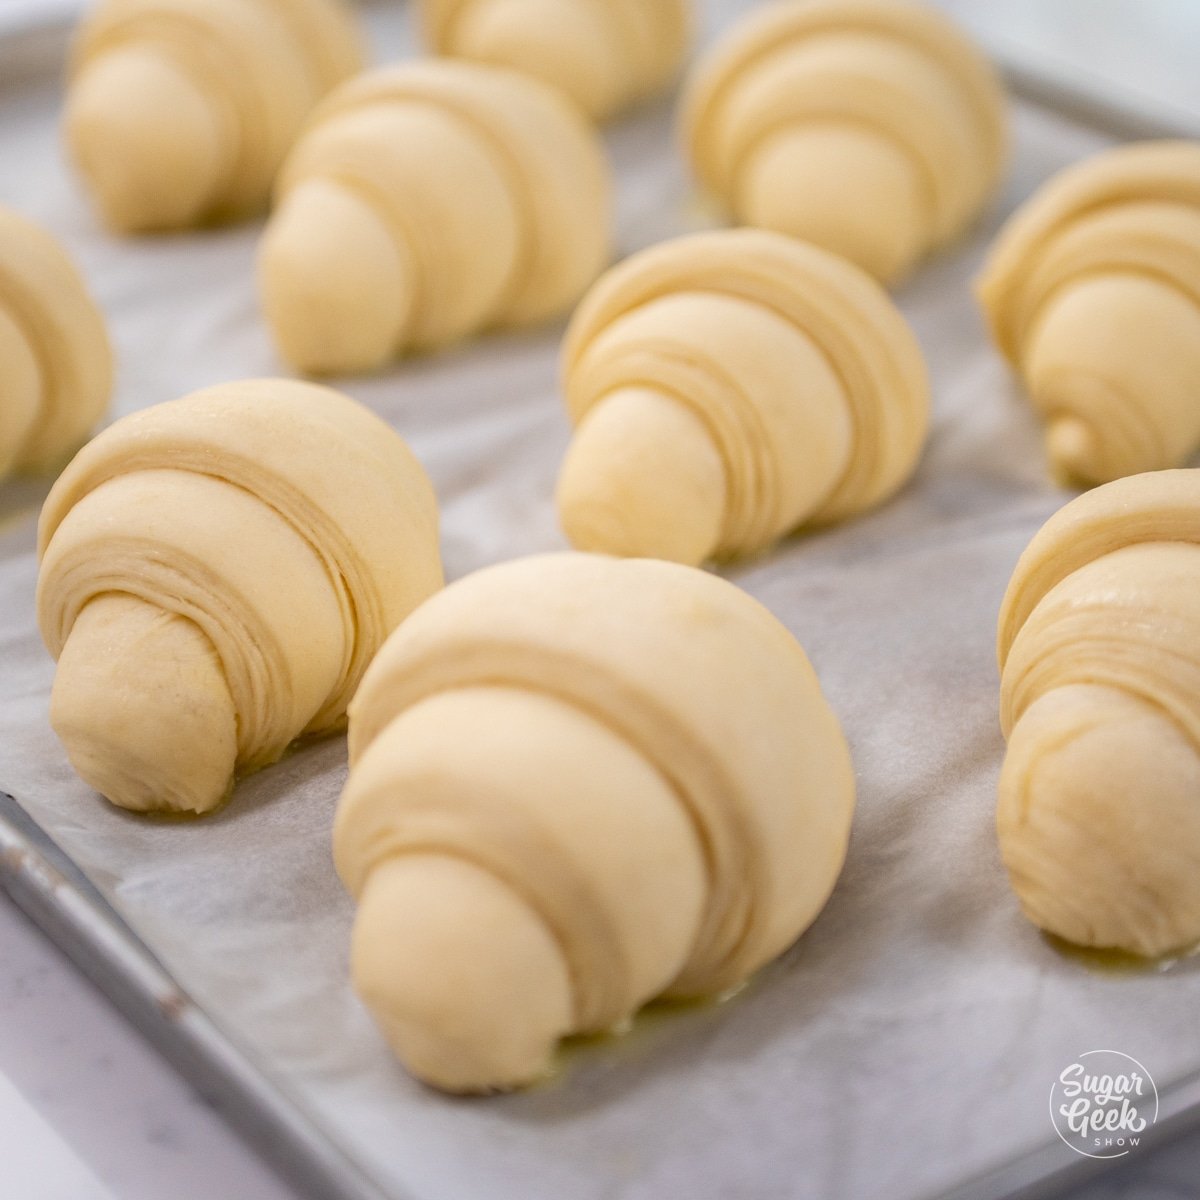
- Roll each triangle into a crescent shape by holding the wide base of the dough with your fingers and slowly rolling it tightly toward the point, making sure to tuck the dough in as you go. If you roll the croissant too loose, it will fall apart in the oven.
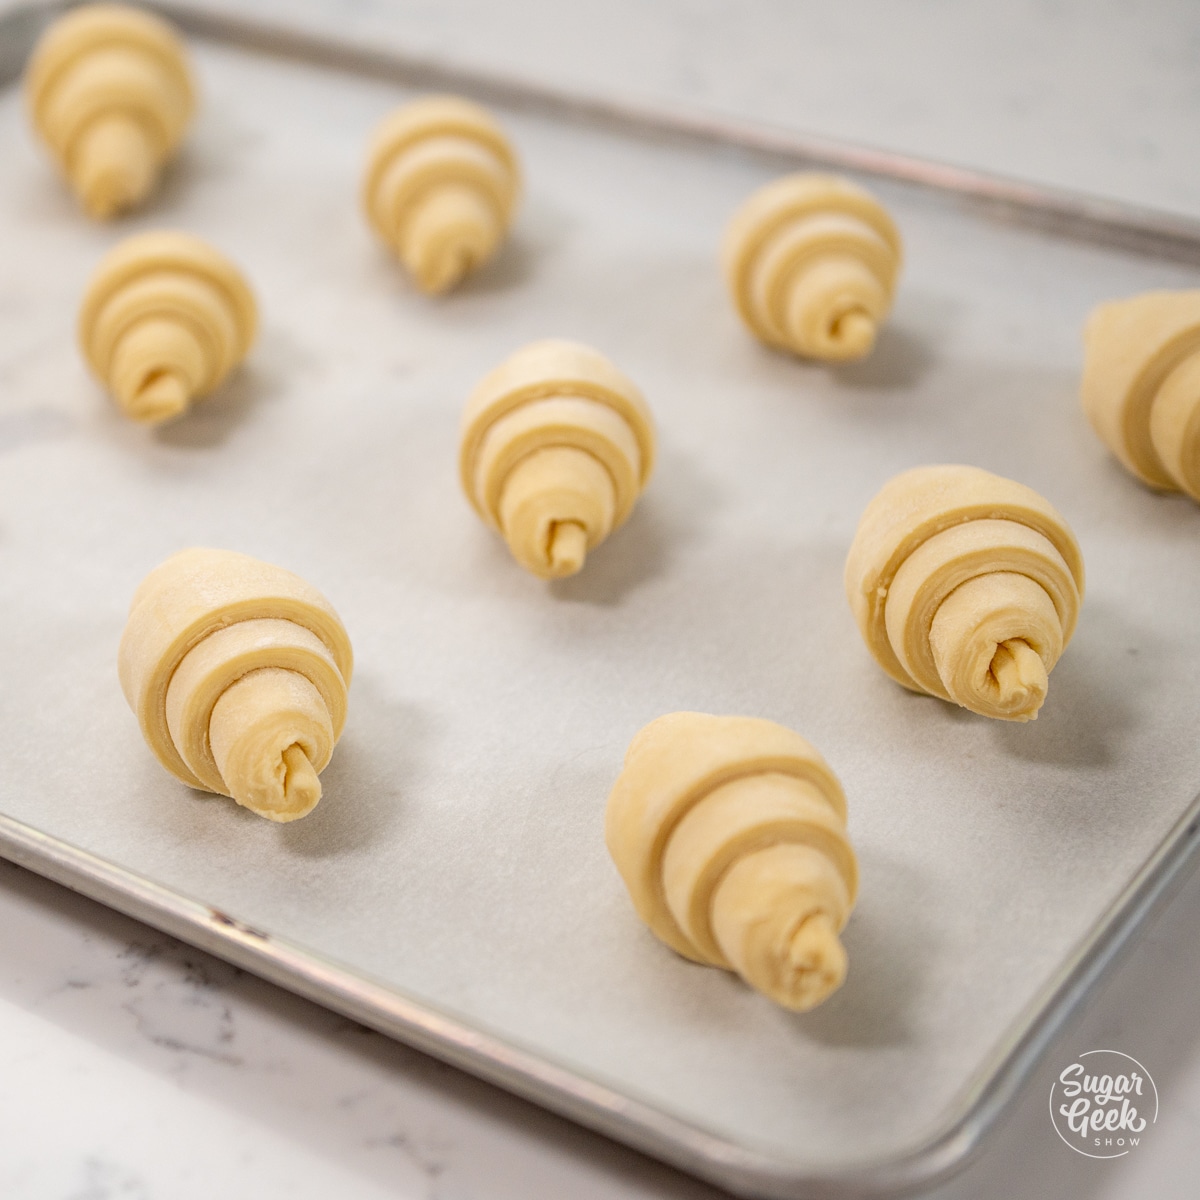
- Set the rolled croissants onto a baking sheet lined with a piece of parchment paper and cover it with plastic wrap. If you're making these ahead of time, you can refrigerate the croissants at this stage and proof them in the morning before baking.
Proofing the Croissants
- Place the shaped croissants on a large sheet pan lined with parchment paper so that they are about 2" apart and are facing the same direction. You might need two sheet pans if your pans are small.
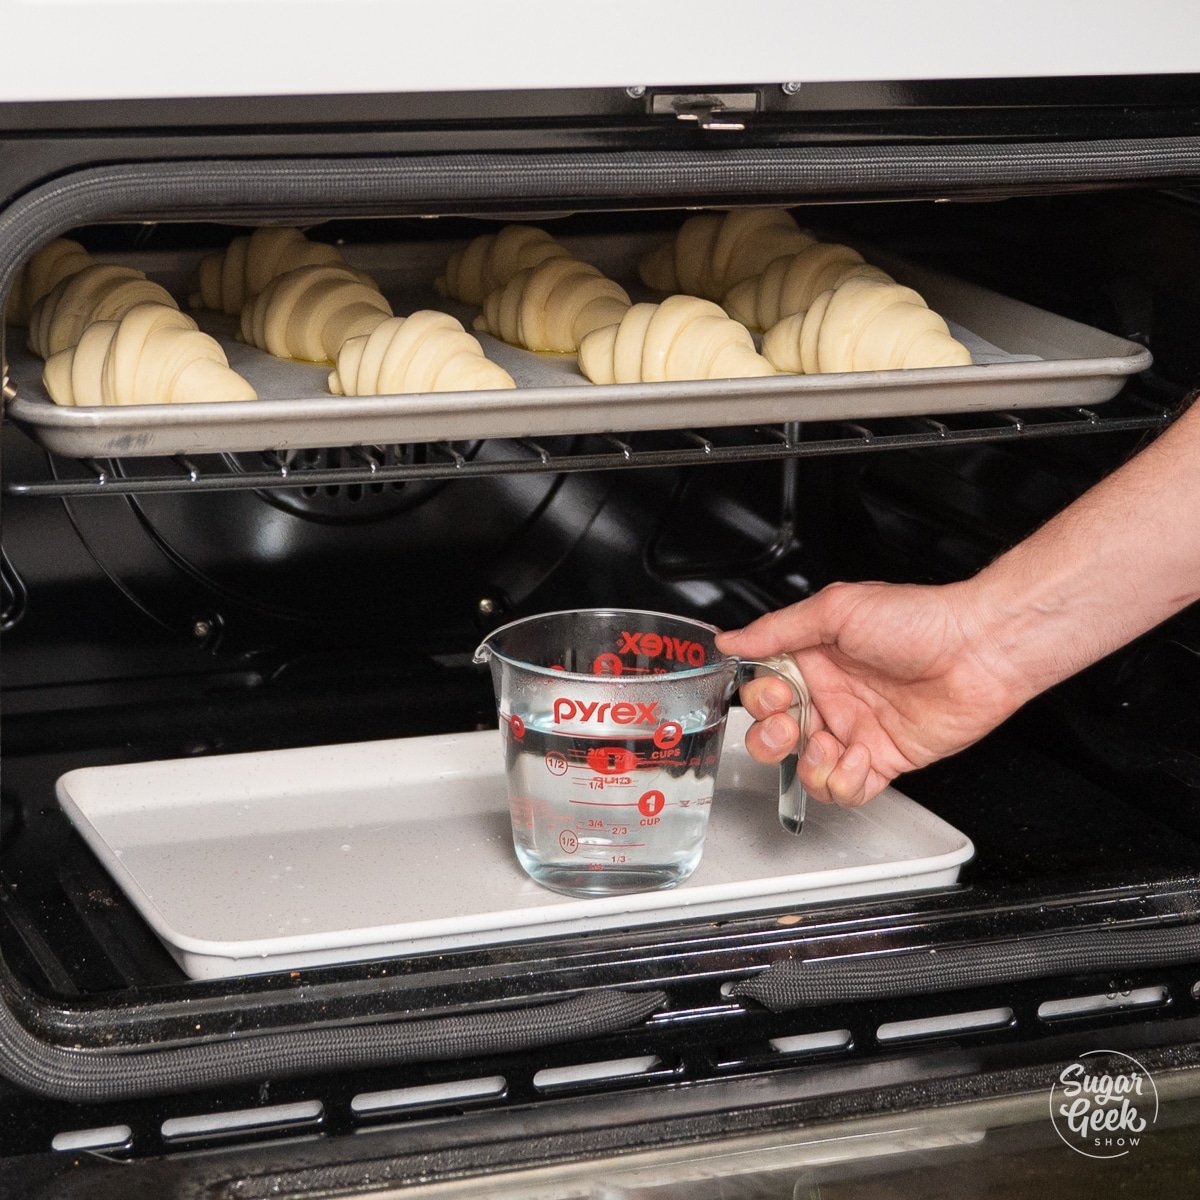
- Create a water bath by pouring some hot water (not boiling) into a large bowl or a small rectangular pan.
- Stick the bowl or pan at the bottom oven rack to create steam.
- Place your croissants (uncovered) on the highest oven rack above the water bath. The ideal temperature for proofing croissants is between 76°F and 78°F.
- Make sure to turn your oven light on, then close the oven. (Do not open your oven too often to check on the croissants. This will let the humidity out and the croissants won't rise.)
- Proof for about 1 hour or until the croissants double in size and are jiggly.
Baking the Croissants
- Preheat the oven to 370°F (190°C) in the convection mode of your oven.
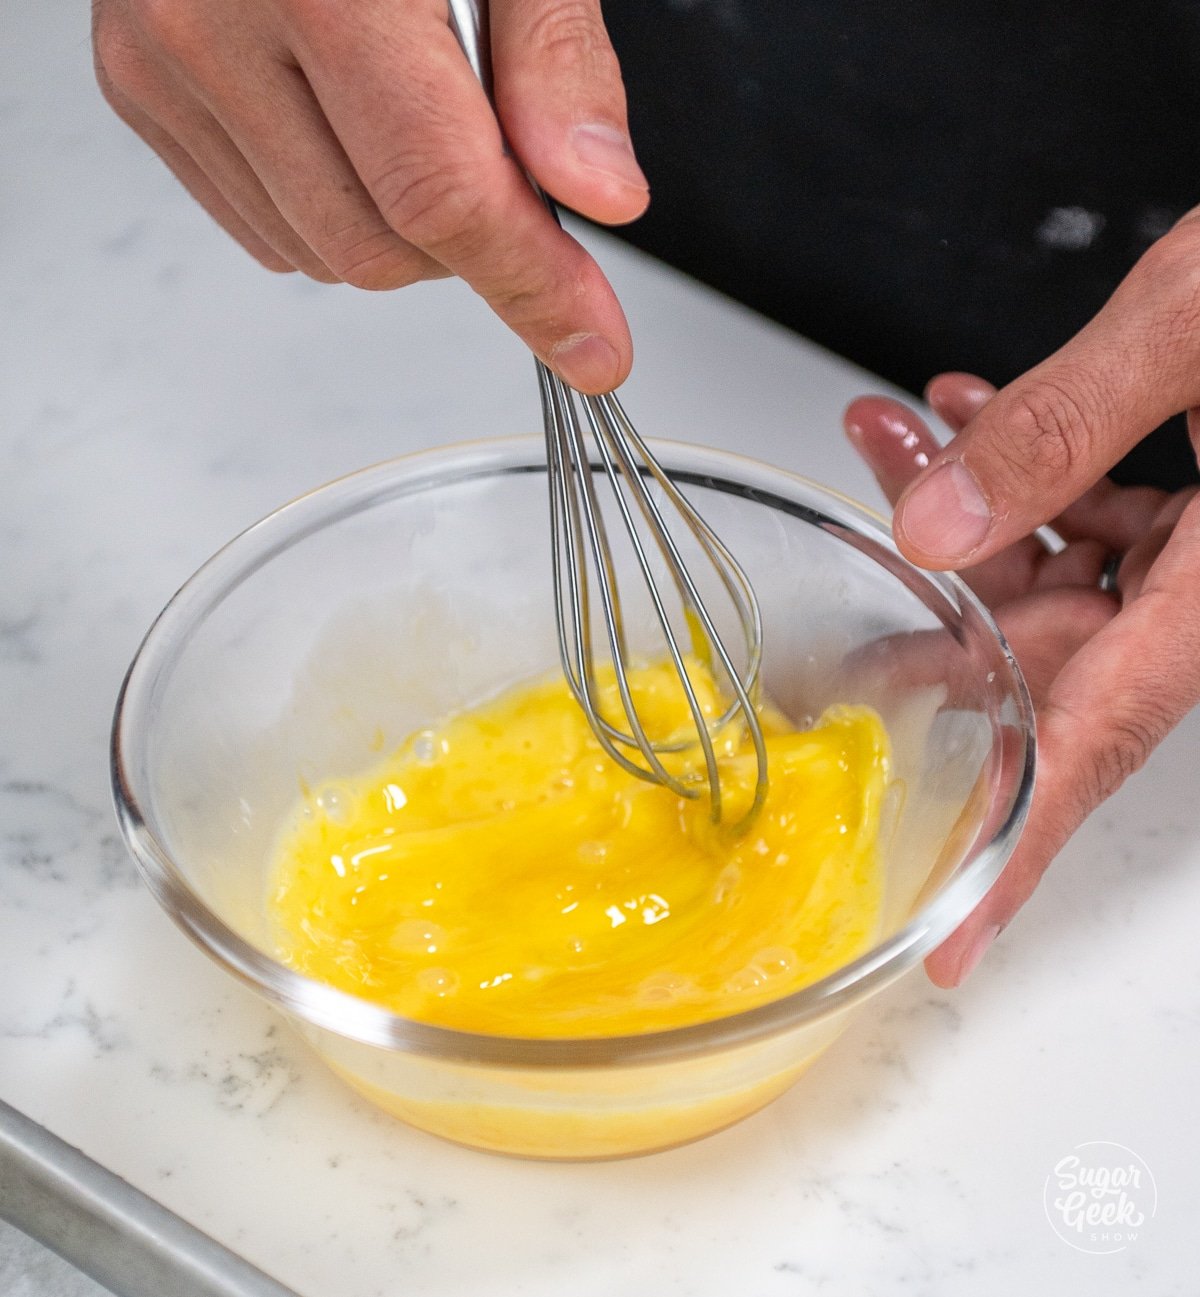
- Create an egg wash by whisking together 3 egg yolks with 2 Tablespoons of water. Pro-tip: Pour the egg wash into a clean spray bottle to get a more even coating over your croissants.
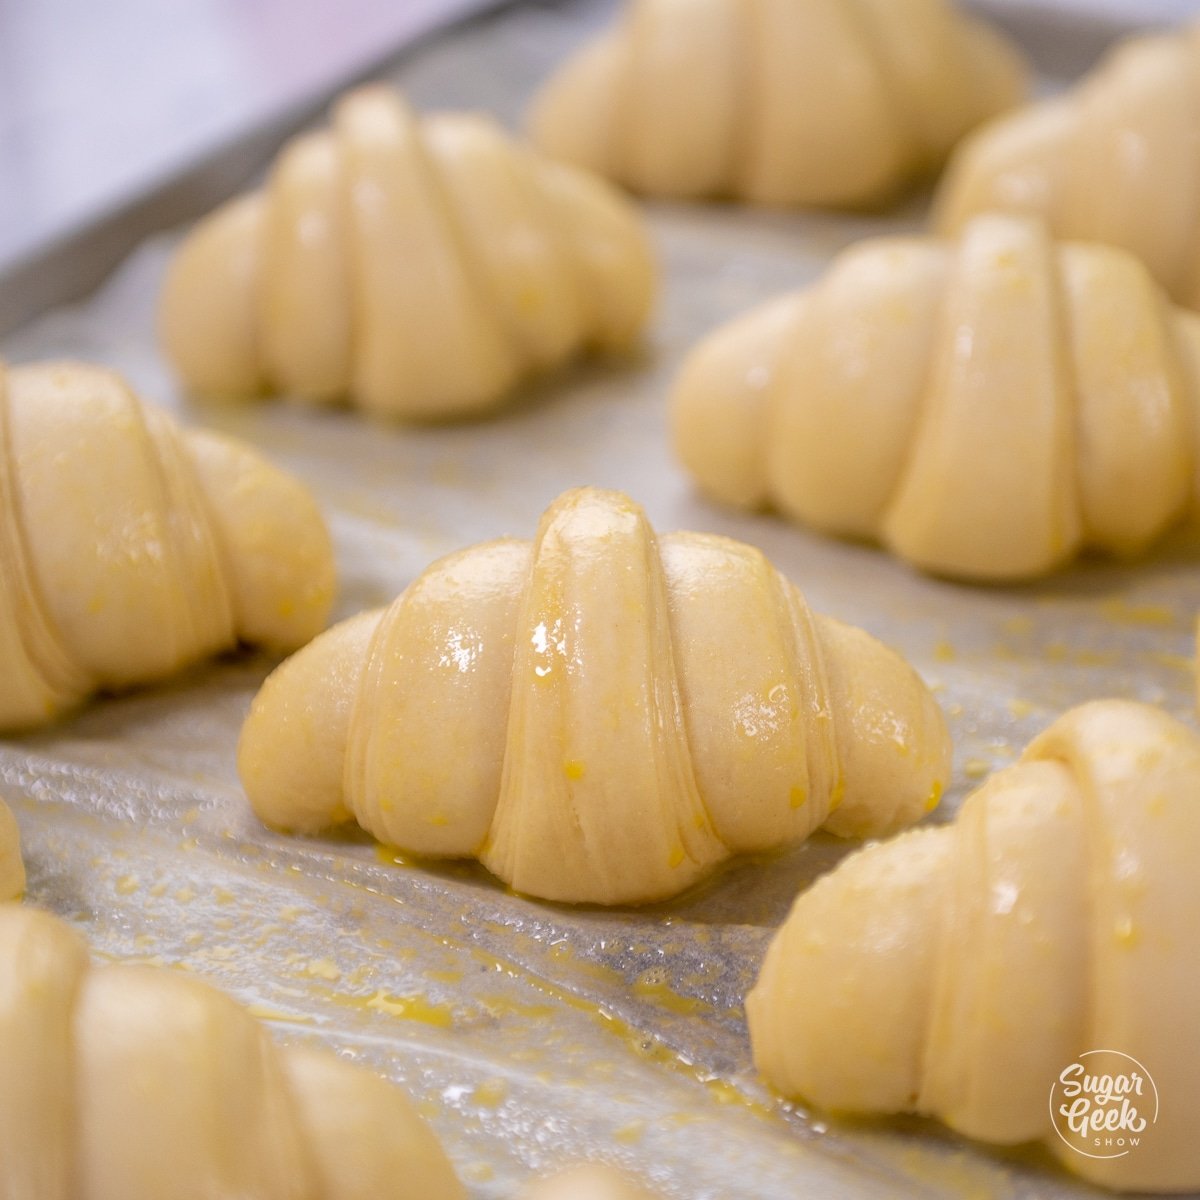
- Brush a thin layer of egg wash all over each croissant, making sure to get the sides and bottom edges. Pro-Tip: Fill a clean spray bottle with the egg wash and spray the croissants for an even layer.
- Bake your croissants for about 20 minutes until they are golden brown and flaky.
- These croissants are best eaten within 24 hours of baking, but they're best kept fresh by freezing them in an airtight container until serving.
FAQ
Egg-washing your croissants will produce a really nice golden color along with a little extra crispness. An all-egg yolk wash will give an even better color than full eggs.
Yes, you can use margarine or any vegan butter you would like and the process will still work for croissants. The high fat in regular butter is important to create the crispy layers, therefore using vegan butter will not produce super flakey layers, but margarine can still produce good puff pastry.
You can fill them with anything you'd like, some popular ways of serving croissants are with different jams, filling them with Nutella or almond cream to make almond croissants, or serving them with ham or cheese. Just add them in when rolling your croissant dough. The possibilities are endless.
Yes, you just need to add your coloring to the dough. If you want to be extra fancy, you can color specific layers of your dough to have alternating colors throughout your croissants.
Yes, to make croissants ahead of time, you can assemble them, freeze the unbaked croissants, then proof and bake them when you’re ready to serve. Frozen croissants will last for up to 3 months.
Related Recipes
Apple Turnover Recipe From Scratch
Classic French Apple Tart Recipe
Recipe

Equipment
- 1 Stand mixer with the hook attachment
- 1 pastry brush
Ingredients
Croissant Dough
- 290 grams cold water
- 14 grams instant yeast
- 560 grams high-gluten flour (bread flour) all purpose flour is okay too
- 60 grams granulated sugar
- 10 grams salt
- 16 grams milk powder
- 70 grams unsalted butter European butter like "plugra"
Lamination
- extra flour for sprinkling
- 300 grams unsalted butter European butter like "plugra"
Egg Wash
- 3 large egg yolks
- 2 Tbsp water
Instructions
Making Croissant Dough
- Add the cold water and instant yeast into the bowl of a stand mixer and gently whisk it to break up any lumps.
- Next, add the milk powder, flour, sugar, and salt to the bowl of your stand mixer with the dough hook attachment and mix on low for a few seconds to combine.
- Add the cold melted butter and mix on low speed for about 4 minutes.
- Mix for another 4 minutes on medium speed. If you don't have a stand mixer, you can knead by hand until the dough bounces back when you touch it.
- After the dough is done mixing, take it out and knead it by hand. Shape the dough into a ball by cupping both of your hands around your dough and moving the dough in small circular formations while the bottom of the dough is still touching the table. Repeat this over and over until your dough ball is tight, smooth, and well combined.
- Place your dough into a medium-sized bowl, cover it with plastic, and let it rise until it doubles in size. At room temperature (72°F) this will take about 2 hours to proof. In a warm environment (90°F), it will take about 1 hour. I like to place it in my oven with the light on and leave the door open.
Making the Butter Block
- Make sure to soften your butter before creating your butter block so that it's easy to roll out. You should be able to press a finger into the surface of the butter and easily make an indent.
- Lay out a large sheet of plastic wrap and place the butter in the center.
- Fold the plastic wrap to make an 8" by 8" square. This is the size that we'll want our butter block to be.
- Roll the butter with a rolling pin into the corners of the plastic wrap until it is about ¼" thick.
- Refrigerate the butter block until your dough is ready.
Laminating the Dough
- Once your dough has doubled in size, place it onto a lightly floured work surface and gently press it down with your hands.
- Roll the dough into an 8” by 16” rectangle.
- Place the dough onto a sheet pan, wrap it in plastic wrap, and freeze it until it is firm for about 15 minutes.
- Take the cold butter block and dough out of the freezer and unwrap them.
- Place the butter block in the center of your dough.
- Fold the bottom and top of the croissant dough into the center of the butter block until they are touching.
- Enclose the butter in the dough by pinching the edges of the dough with your fingers. Tap the edges of the butter block with your rolling pin to make sure they have been pressed into the corners.
- Rotate the croissant dough 90 degrees so that the seam is down the middle. Pro-Tip: Work quickly so that the butter doesn't melt.
- Flour the bottom and top of the dough and roll it out to be ¼" thick, about an 8" by 22" rectangle.
- Do a book fold by folding the top and bottom to the center of the dough again.
- Then fold the entire dough in half and do another 90-degree turn.
- Gently roll the dough a little bit into a rectangular shape so that it is easier to cut out after chilling. You will feel your dough starting to get stretchy
- Wrap the dough in plastic wrap and freeze it for 10 to 15 minutes.
- Do a second book fold by repeating steps 10 through 13. Brush off any excess flour.
- Wrap the dough in plastic wrap and freeze it for another 15 to 30 minutes. Pro-Tip: If you want to make your croissant dough a day ahead, this is a good place to stop. Refrigerate the dough overnight, then proof and assemble them the next day.
Assembling the Croissants
- Take the croissant dough out and place it on a lightly floured surface with the short side of the folds facing to the side.
- Roll the dough lengthwise into a long rectangle. Roll until it is 4mm (1/32") thick and about 9" wide. Pro-Tip: Fold and unfold the dough as you're rolling it to flour the surface and keep it from sticking. If your gluten is very stretchy and not rolling out, let it rest for 15 minutes.
- Cut out about 12 small triangles at an angle that are each 4" wide and about 9" long with a sharp knife or a pizza cutter. Pro-Tip: Mark the cuts first and use a ruler before cutting them.
- Roll each triangle into a crescent shape by holding the wide base of the dough with your fingers and slowly rolling it tightly toward the point, making sure to tuck the dough in as you go. If you roll the croissant too loose, it will fall apart in the oven.
- Set the rolled croissants onto a baking sheet lined with a piece of parchment paper and cover it with plastic wrap. If you're making these ahead of time, you can refrigerate the croissants at this stage and proof them in the morning before baking.
Proofing the Croissants
- Place the shaped croissants on a large sheet pan lined with parchment paper so that they are about 2" apart and are facing the same direction. You might need two sheet pans if your pans are small.
- Create a water bath by pouring some hot water (not boiling) into a large bowl or a small rectangular pan.
- Stick the bowl or pan at the bottom oven rack to create steam.
- Place your croissants (uncovered) on the highest oven rack above the water bath. The ideal temperature for proofing croissants is between 76°F and 78°F.
- Make sure to turn your oven light on, then close the oven. (Do not open your oven too often to check on the croissants. This will let the humidity out and the croissants won't rise.)
- Proof for about 1 hour or until the croissants double in size and are jiggly.
Baking the Croissants
- Preheat the oven to 370°F (190°C) in the convection mode of your oven.
- Create an egg wash by whisking together 3 egg yolks with 2 Tablespoons of water. Pro-tip: Pour the egg wash into a clean spray bottle to get a more even coating over your croissants.
- Brush a thin layer of egg wash all over each croissant, making sure to get the sides and bottom edges. Pro-Tip: Fill a clean spray bottle with the egg wash and spray the croissants for an even layer.
- Bake your croissants for about 20 minutes until they are golden brown and flaky.
- These croissants are best eaten within 24 hours of baking, but they're best kept fresh by freezing them in an airtight container until serving.





Leave a Reply