
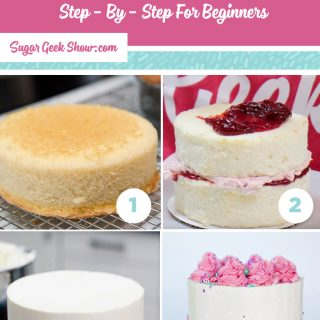
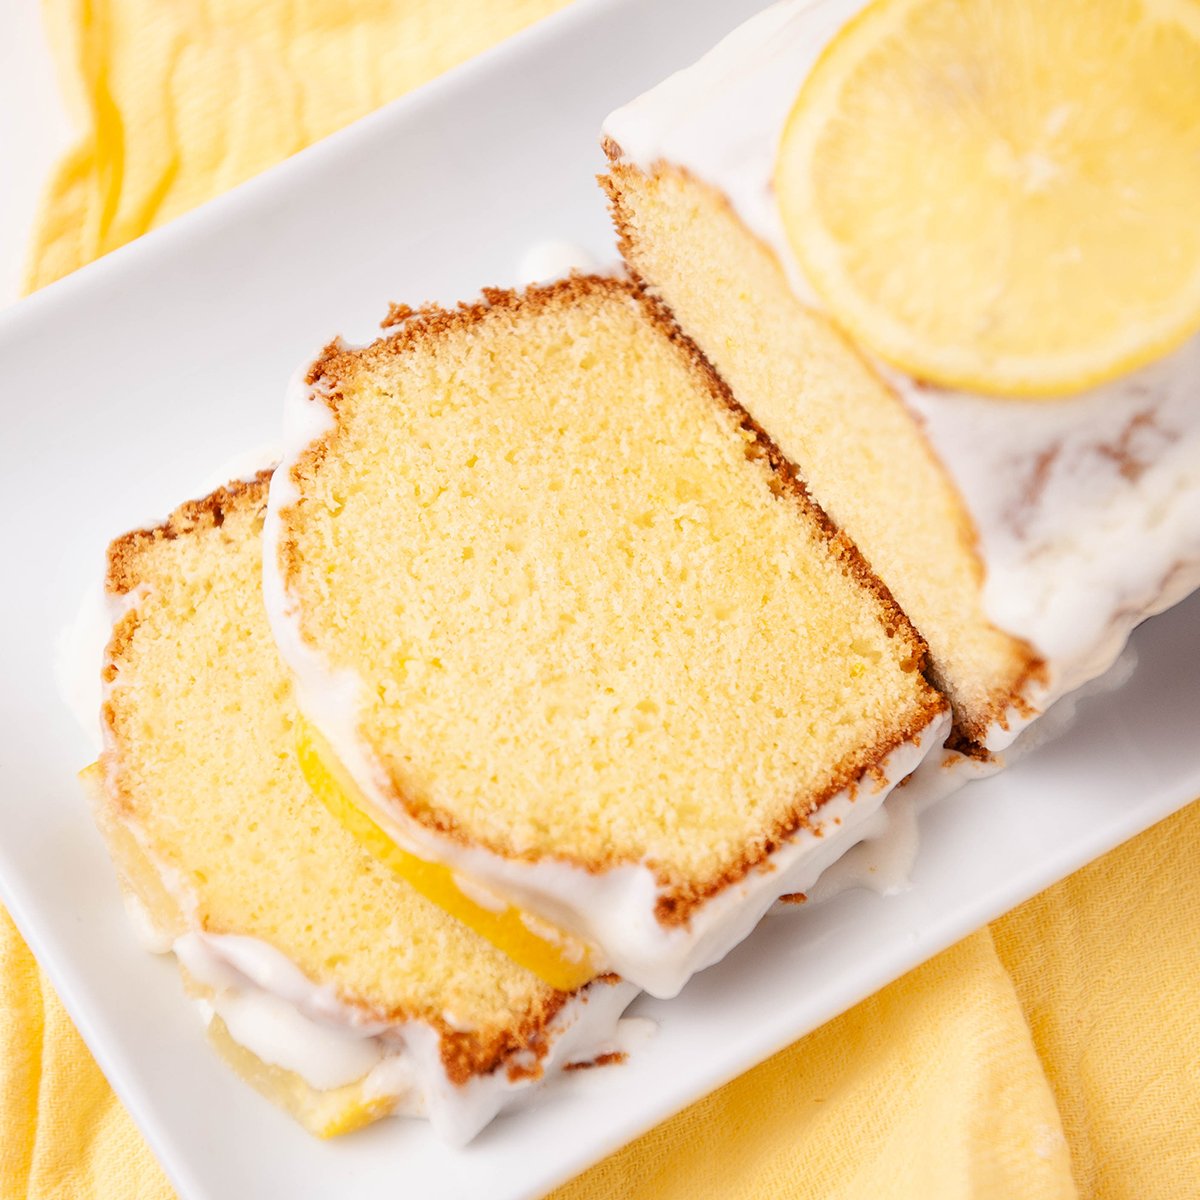
How to make a cake step-by-step. From baking, trimming, frosting and simple decorating
Ready to make your first cake but don't know where to start? Today I'm going to show you how to decorate your very first cake and explain every step from tools, baking a basic vanilla cake, trimming, frosting with sharp edges and of course decorating!
What You Need To Make Your First Cake Shopping List
Tools Recommended *note: this list contains affiliate links which do not cost you anything but I may make a few bucks off the sale*
- Three 6" cake pans
- Bench Scraper
- Offset spatula
- 6" cake board
- Turntable
- Piping bag
- Piping tip
- Three 6" cakes - baked and cooled
- Easy Buttercream (one batch)
- Food coloring
- Sprinkles
- Strawberry filling (optional)
I was inspired to make this post because my daughter's teacher approached me one day asking if I had any tips on how to make a cake for the first time. It was her Mother's birthday and she had never baked or decorated a cake but had her heart on making one.
Of course, I had tons of links to send her, recipes, videos and more and I could tell she looked a little overwhelmed. It then occurred to me at that moment that I had never made a video showing someone who had never made a cake, how to make one from start to finish.
Which is really ironic because I myself not that long ago (2007) picked up my first box mix and can of lemon frosting to make my first cake and I had no idea what I was doing. I remember having a lot of questions about the process but at the time, no one to ask.
Why was the cake so soft and why is it cracking?
Why won't this frosting stick to the side of the cake?
Is it supposed to taste like this?
So here is my complete guide on how to make a cake for the very first time from start to finish! Even if you've never made a cake before, this will clear it all up for you. I recommend you read through this entire post first before you start baking so you can be sure to have all your tools and ingredients ready to go. I prefer to bake the day before I need the cake so I have time to let the cake rest and chill.
Cake Decorating Timeline
It's really hard to bake a cake and decorate it all in one day. This is my basic timeline for making a cake and giving myself plenty of time to get it finished. I always finish a cake the day before it's due so that if something goes wrong, I have time to fix it. I've included some details in my timeline for extra things like making toppers or answering emails just in case you're looking to start taking orders.
- Tuesday - Office work, look at the weeks orders to see if I need to buy anything like tools or ingredients. Go over orders to see if I need to start on any toppers or make-ahead pieces.
- Wednesday - Grocery shopping for supplies, start working on toppers or things that need to dry.
- Thursday - Bake cakes, make frosting and fondant. Cover cake board. Wrap and chill cakes overnight in the fridge or freeze cakes until cold but not frozen so I can crumb coat them (about an hour). I like to have cakes crumb coated early so that I have more time to decorate, especially if I have multiple tiers to decorate on Friday.
- Friday - Apply the final coat of buttercream and decorate. Store finished cakes in the refrigerator. I have a regular residential fridge with no freezer and adjustable shelves that I use for my cake orders. Fondant covered cakes can also be stored in the fridge. They might sweat a little when they come out of the fridge but condensation does not hurt the cake.
- Saturday - Deliver cakes. Obviously, if your cake is due on another day you can adjust this timeline.
- Sunday/Monday - Cake decorators weekend. Don't forget to give yourself time off or you'll burn out! Even fun things like decorating cakes can become really overwhelming and exhausting if you don't give yourself breaks. Especially if you have a family and a full-time job on top of decorating cakes.
Cake Decorating Tools
Before you bust out the bowls and whisks, we need to talk about cake decorating tools. You don't need everything on this list but if you get serious, it's a good list to follow. Below are the absolute MUSTS to have before you decorate your first cake and where to get them.
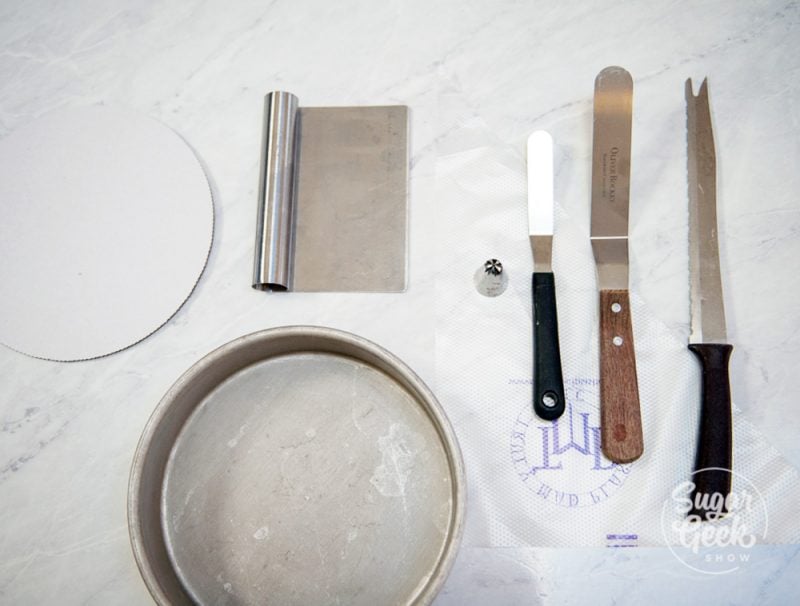
- Professional cake pan - The absolute #1 thing you need is a good cake pan. There is nothing worse than wasting all that time and ingredients on a cake that is burned on the outside, soft in the middle and the sides aren't straight. I bought my cake pans at my local cake decorating store but you can also find them at kitchen kaboodle or amazon. Psssst - Wilton pans are not professional pans. (sorry Wilton). You'll need two 8" cake pans for a two-layer cake or three 6" cake pans if you want three layers. (if you only have one then your batter might go bad while the first one is baking).
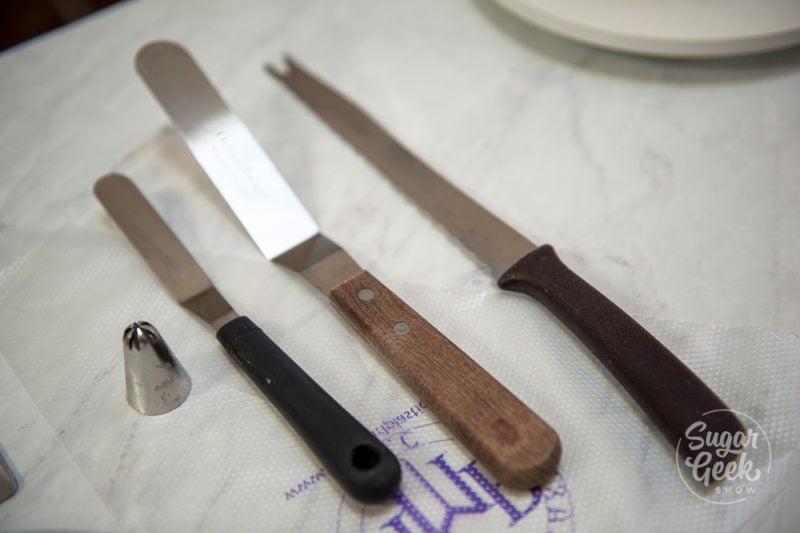
- Offset spatula - You don't need two sizes, you could get away with just the small one really but I do use both sizes on every cake. The offset spatula is a must so that you don't actually get your fingers in the buttercream as you're smoothing out your layers of buttercream. You can buy them at most grocery stores or cake supply stores.
- Serrated knife - Nothing fancy. A serrated knife is also known as a bread knife. As long as it has those little teeth it will work just fine for cutting the tops off your cakes to make them nice and flat. You probably already have this knife in your kitchen.

- Optional cake decorating tools (but really nice to have)
- Bench Scraper - This is my #1 baking tool. I use it all the time for getting my cakes perfectly smooth on the sides. I got mine at the dollar store but you can also find them at most grocery stores in the kitchen section or cake decorating store.
- Turn Table - You're definitely going to want a turntable. It just makes frosting the cake so so much easier. My first turntable was the little plastic one from Michaels and I used my 40% off coupon to buy it. You can also use a lazy susan if you have one with a flat top.
- Cake cardboard - These are also called cake boards or cake cards. They are thin boards that you build your cake on and allow you to easily move your cake from the turntable to the cake platter. You can build your cake directly on the plate but it's a little harder to get the sides perfectly smooth. If you're going for a rustic buttercream finish though it's not absolutely necessary. I get my cake boards from amazon but you can get them from Michaels or other stores that carry cake decorating supplies. Make sure you get the kind that has a smooth edge not scalloped.
- Piping Bag - I love me some disposable piping bags. If you don't have any or can't find any, you can use a ziplock bag in a pinch with the tip cut off. I get mine from Truly Mad Plastics but any piping bag from the grocery store or cake store will be fine for this.
- Piping Tip - Don't forget a piping tip if you want to pipe some pretty rosettes on the top of the cake! My favorite tip is a 2F but any star tip will do like a Wilton 1M.
- Sprinkles - Nothing says party like sprinkles! Grab some pretty sprinkles to decorate the top of the cake. I got mine from Fancy Sprinkles but you can find sprinkles in the baking aisle at most grocery stores or cake decorating stores.
- Gel Food Coloring - If you want to color some of your buttercream you're going to need some gel food color (not liquid food color they sell in grocery stores). I got mine in the cake decorating aisle at Michaels. You don't need a lot.

How To Make A Box Cake Taste Like Scratch (WASC)
I'll let you in on a little secret, there are plenty of professional cake decorators out there who don't bake from scratch, they use a box mix and add ingredients to it to make it taste more like a scratch cake. This is called a doctored box mix and is quite tasty!
The most popular doctored cake mix is WASC which stands for White Almond Sour Cream Cake. But you don't have to use a white box mix, you can make the same adjustments to a yellow or funfetti box mix and it will taste just as good. If you want to use a chocolate box mix then check out the Chocolate WASC.
If you want to make your WASC into funfetti then add in ¼ cup of jimmy sprinkles (the long skinny kind) or confetti sprinkles. Mix into the batter at the very end of making the cake batter.
How To Bake A Cake
Preheat your oven to 350ºF and place the oven rack in the center of the oven. If it's too low the bottom of your cake will burn. If it's too high the top will get too crispy. Let your oven preheat for at least 30 minutes to give the oven time to get hot enough.
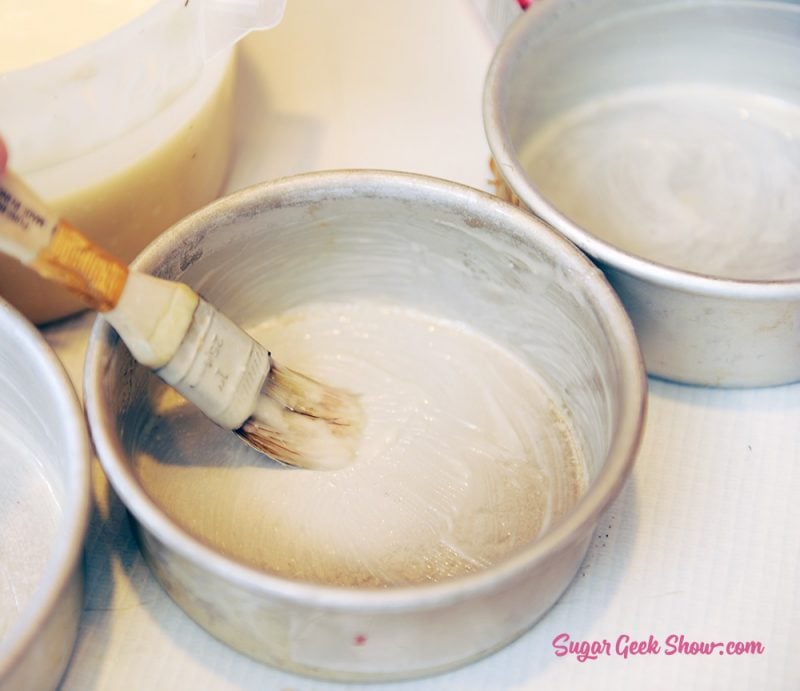
Grease your pans. I prefer to use a homemade cake release called cake goop which is super simple to make. You can also use PAM or you can coat the inside of your pan with a thin layer of vegetable shortening, dust it with some all-purpose flour and tap out the excess flour. Make sure you go all the way up the sides.
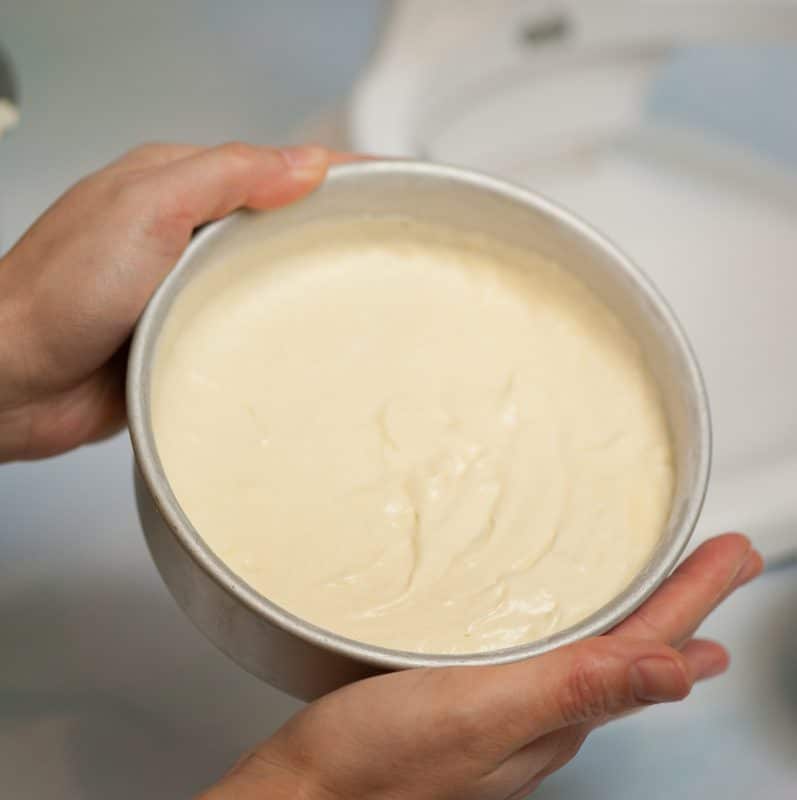
Place all your ingredients into the bowl of a stand mixer (or you can do this by hand) and mix on medium for 2 minutes. Divide your batter evenly between your cake pans.
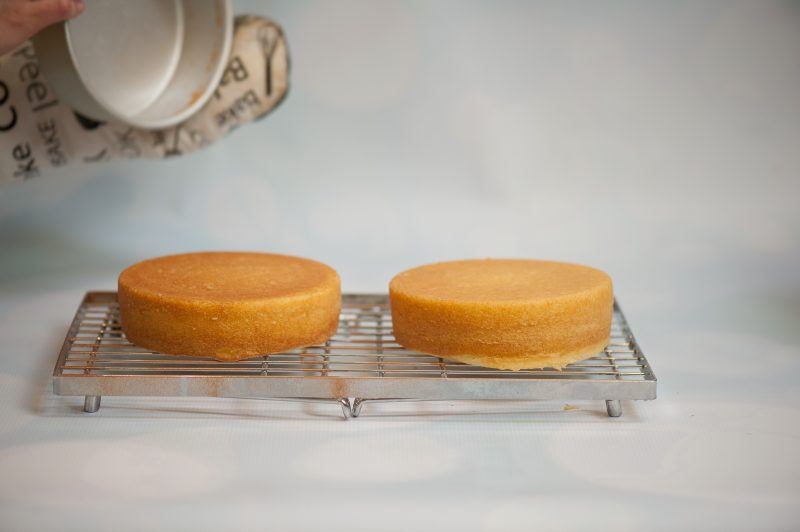
Bake your cakes in the oven 30-40 minutes until a toothpick comes out of the center of the cake cleanly. It's ok to bake your cakes for longer if they are not done. Place the cake pans onto a cooling rack or on top of your oven to cool down.
Once the cake pans are cool enough to handle (about 15 minutes), you can turn them upside down onto the cooling rack and the cake should fall right out. Let them cool for another 10-15 minutes until barely warm.
Wrapping And Chilling Your Cakes
Once your cakes are cool enough to handle, wrap them in two layers of plastic wrap and place into the freezer to chill for two hours (if you want to decorate your cake the same day as baking) or you can place them into the fridge to chill overnight. This is what I like to do so that I am not rushed to decorate. Do not freeze your cakes solid if you plan on using them the same day or it will just take a really long time to defrost them.
If you do freeze your cakes, place them on the counter still wrapped until they are defrosted.
Chilling your cakes is super important so that you can trim them and handle them without them breaking. The chilling causes the butter inside the cake to get nice and hard but will get soft again when the cake comes to room temperature.
Making Easy Buttercream Frosting
Now is a good time to make your buttercream. I know a lot of beginners think they want to use whipped cream because it is light and creamy but for making a cake, you will get nothing but headaches. I prefer to make my easy buttercream frosting because you can just throw everything into the mixer, whip it up until it's white and it's done! It's super light and not too sweet.
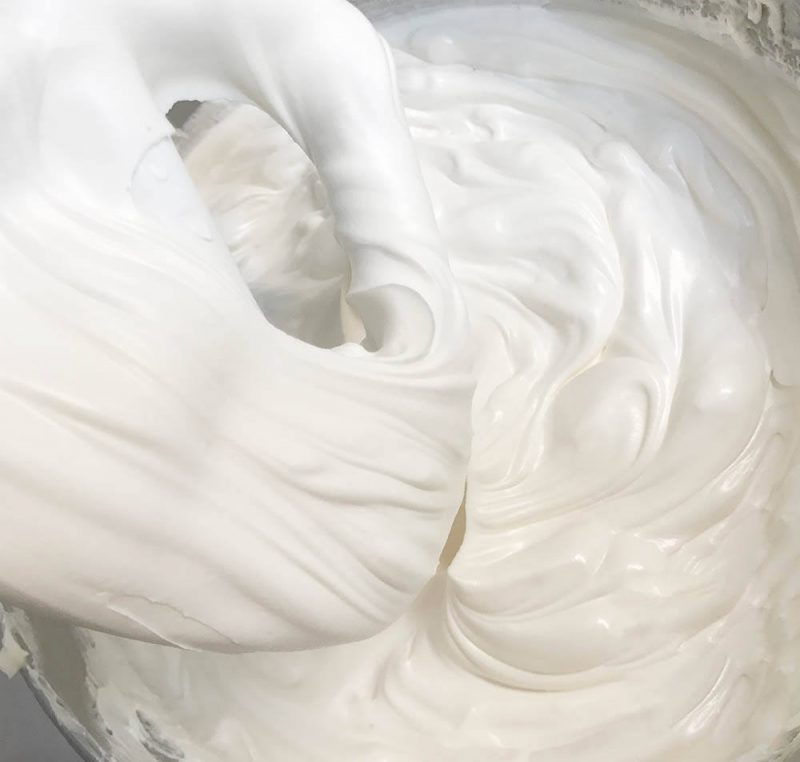
The easy buttercream frosting is also great for frosting the cake and getting a smooth finish and is firm enough to pipe with.
Store your easy buttercream at room temperature with plastic wrap covering the top until you need it. If you leave it out overnight make sure you whip it a little bit before you use it to make it smooth again.
Store leftover buttercream in the fridge or freeze it for up to 6 months in a ziplock bag.
Trimming Your Cakes
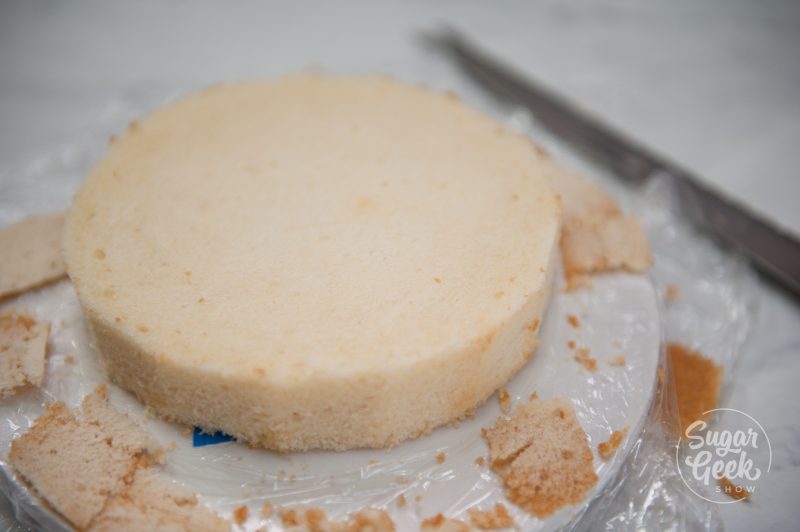
Time to trim our cakes! Now at the very least, you should cut off the dome of your cake. Place your cake onto your turntable and unwrap the plastic wrap. Leave the plastic wrap under the cake for easy clean up of crumbs.
Use the line between the base of the dome and the side of the cake as a guide. Slowly start cutting along the line about ½" and rotate your cake as you cut. Once you have cut all the way around the outside, start slowly cutting the top of the dome off, using the first cut as a guide. Keep your knife nice and flat and just go slow.
Optional: Trim The Brown Edges Off Your Cake
This is definitely a bonus option but I always trim off the brown from my cakes because I think it makes a prettier slice. It's honestly pretty easy to do and also makes the cake very slightly smaller so you have less of a chance of having brown show through your buttercream.
Turn your cake upside down so the bottom is at the top. Slide your knife just under the brown "skin" and slowly cut it off in one piece. Keep your knife nice and flat for best results. Do the same thing to the sides.
You can see the difference.
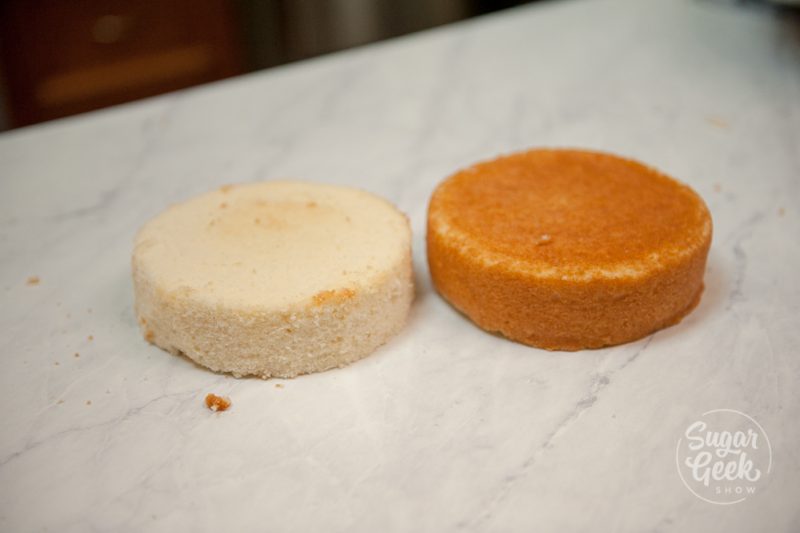
If the brown doesn't bother you then you can definitely skip this step.
Stacking And Filling Your Cake
Time to start stacking our cake! Start by placing your cake board onto the turntable and center it. Place a small dollop of buttercream on the board and put your first cake layer on the board. There should be a little space all the way around your cake between the cake and the board.
Place a big dollop of buttercream on top of the layer and use your offset spatula to push the buttercream to the edges of the cake. Then hold the spatula at a 45º angle, with the tip in the center of the buttercream and turn the cake slowly to flatten out the buttercream. Keep your spatula level so that the layer of buttercream is level.
I will periodically get down to eye level with the buttercream to check and see if it's got a dome in the center or if it is nice and flat. A flat cake is a stable cake.
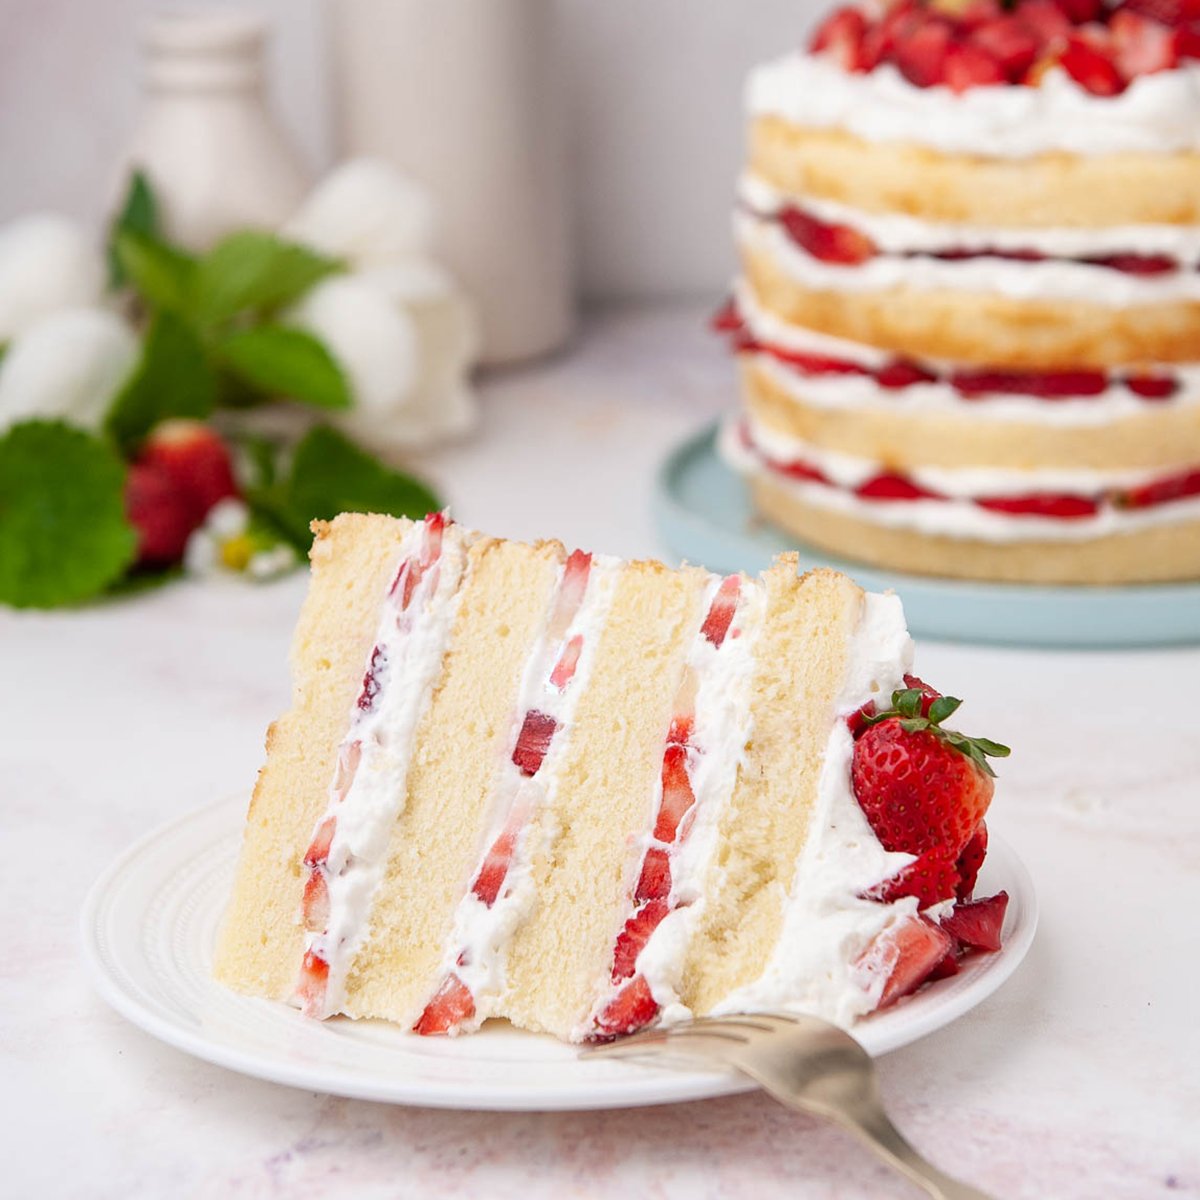
Optional: Fill Your Cake With Strawberry Puree and Strawberry Buttercream
If you want to spice up your filling, you can easily add some flavoring to your buttercream like a strawberry puree. You can fill your cake with straight strawberry but you need a very thin layer or your cake layers will slip around too easily. You can use my strawberry puree recipe but when you use fresh fruit, it always has to be refrigerated which can make the cake taste dry because the butter in the cake is cold.
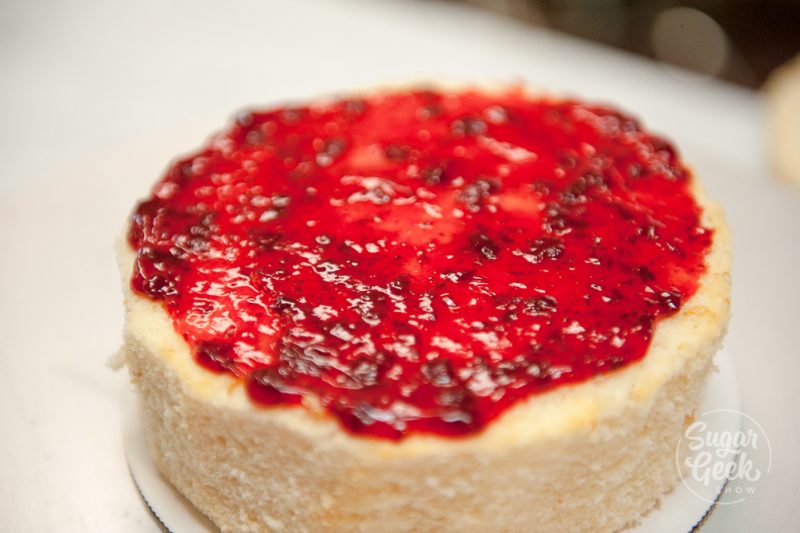
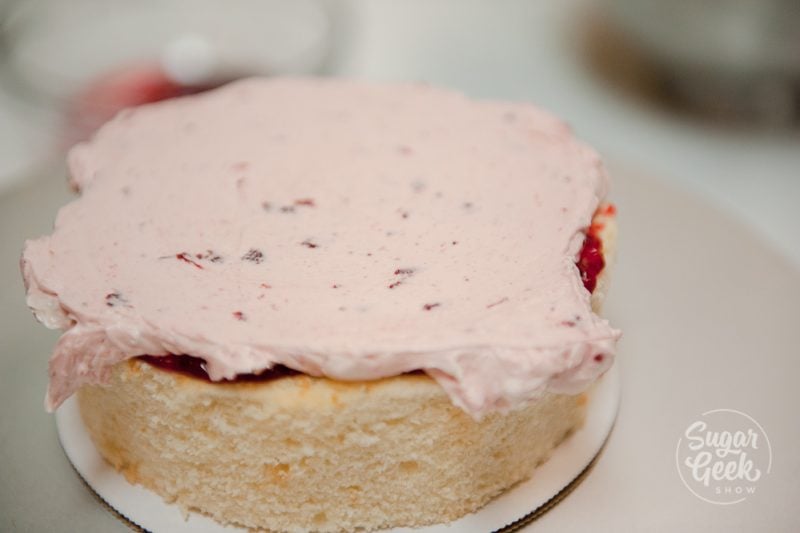
I like to use this shelf stable strawberry filling that a lot of bakeries use. You can mix a little into your buttercream and make it flavored or you can spread a little straight onto your cake layers.
Then I place a layer of the strawberry buttercream on top.
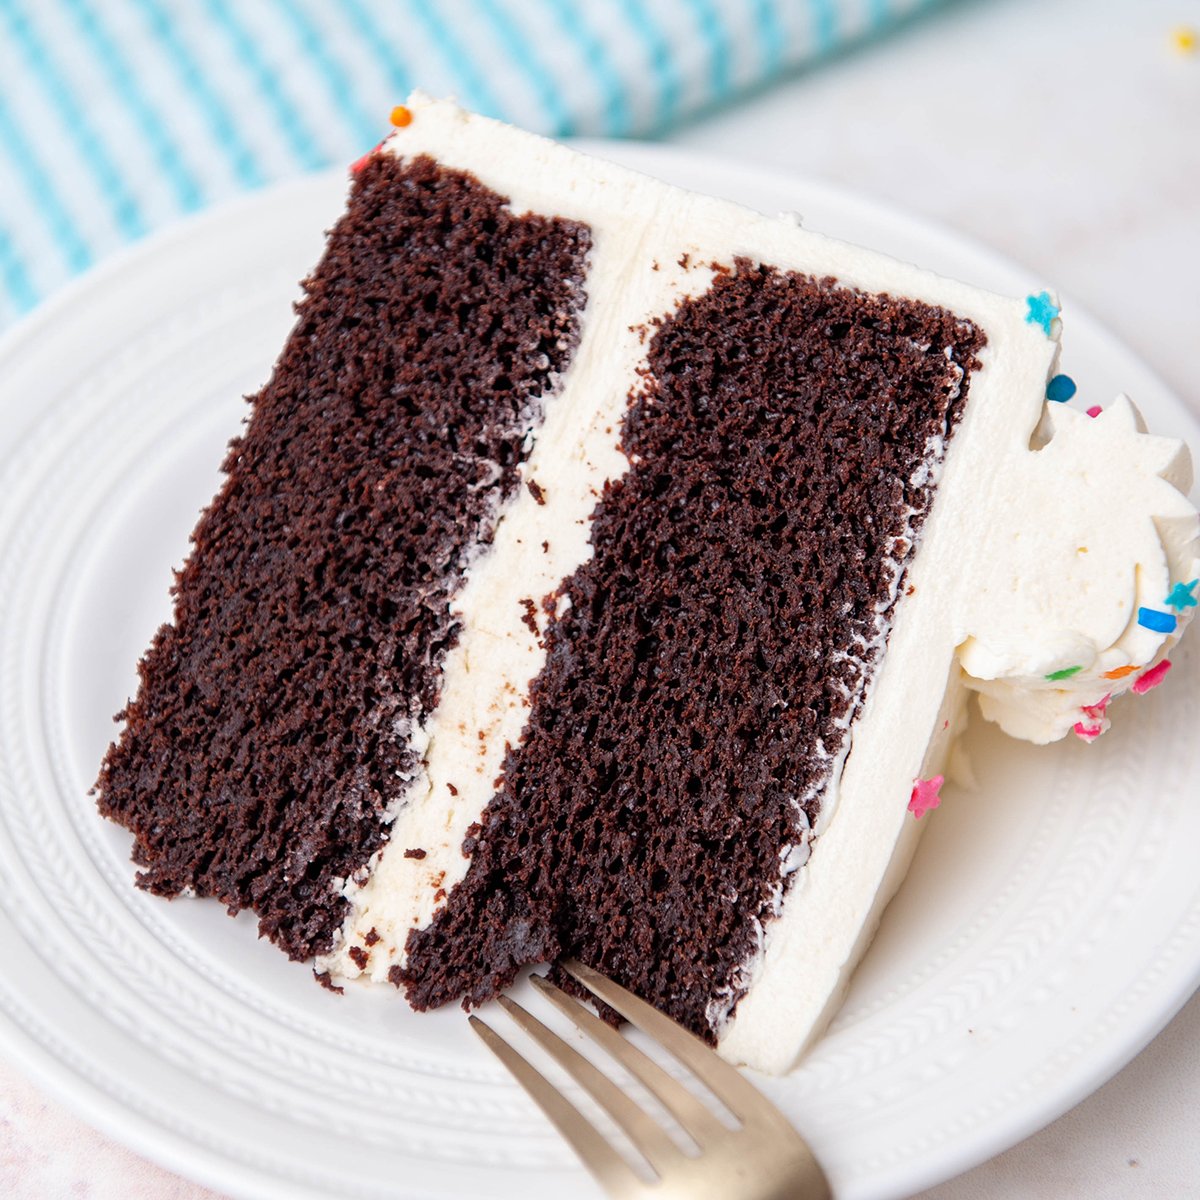
Add your next layer of cake. If you are using 6" layers then you will have two layers of filling, if you're using 8" cake pans you'll only have one layer of filling. Either is ok!
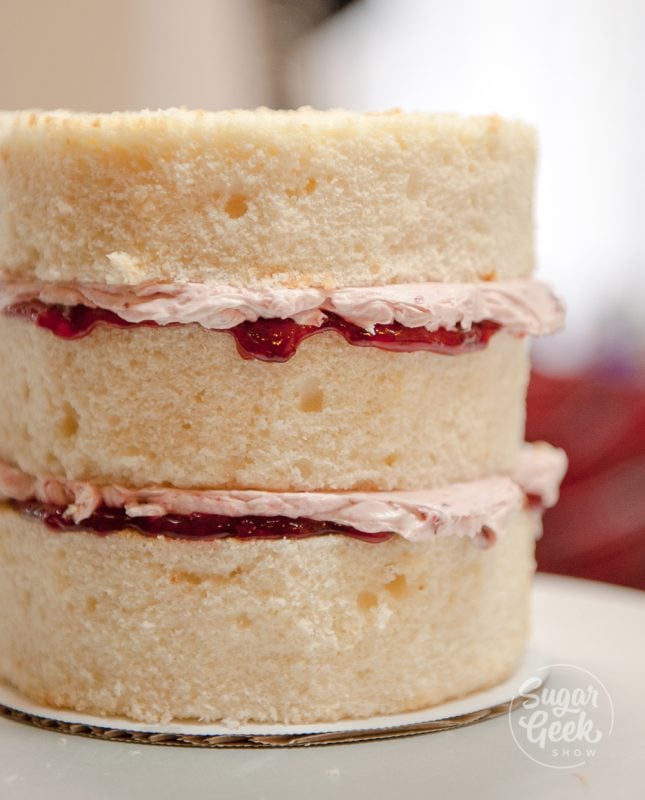
Doesn't that look so yummy??
How To Crumbcoat Your Cake
You may or may not have heard about a crumbcoat but for the sake of learning, I'm going to explain it. I told you I wasn't going to skip anything!
A crumbcoat is a thin layer of your buttercream all over the cake to seal in the crumbs. This is an important step so that you don't get any of those crumbs in your final layer of buttercream frosting.
Place a big dollop of buttercream on the top of your cake and use your small offset spatula to spread the buttercream into a thin layer all over your cake. You don't have to be neat and tidy, just a thin coat will do. You can see there are a lot of crumbs and chunks of strawberry in this layer of buttercream, that's totally ok.
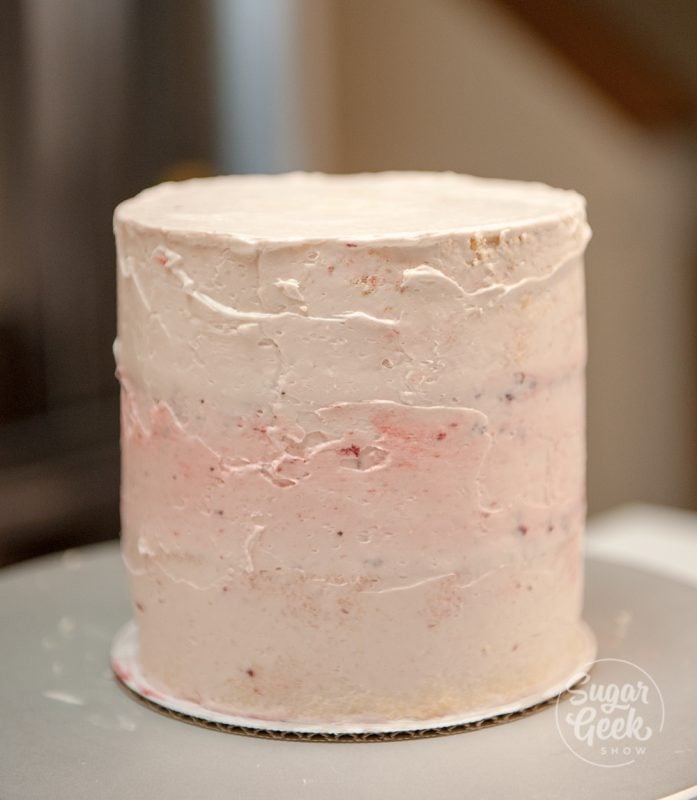
Once your cake is fully covered, you can place it into the fridge or the freezer to firm up. Once the buttercream is firm to the touch you can put on your final coat of buttercream without the crumbs getting into it.
How To Get Smooth Frosting On Your Cake
Now we're going to apply the final coat of buttercream to our cake. Use your larger offset spatula to apply some frosting to the top of the cake and smooth it down flat the same way we smoothed out the layers of buttercream between the cakes. Now apply some frosting to the sides of the cakes. Make a nice thick coat.
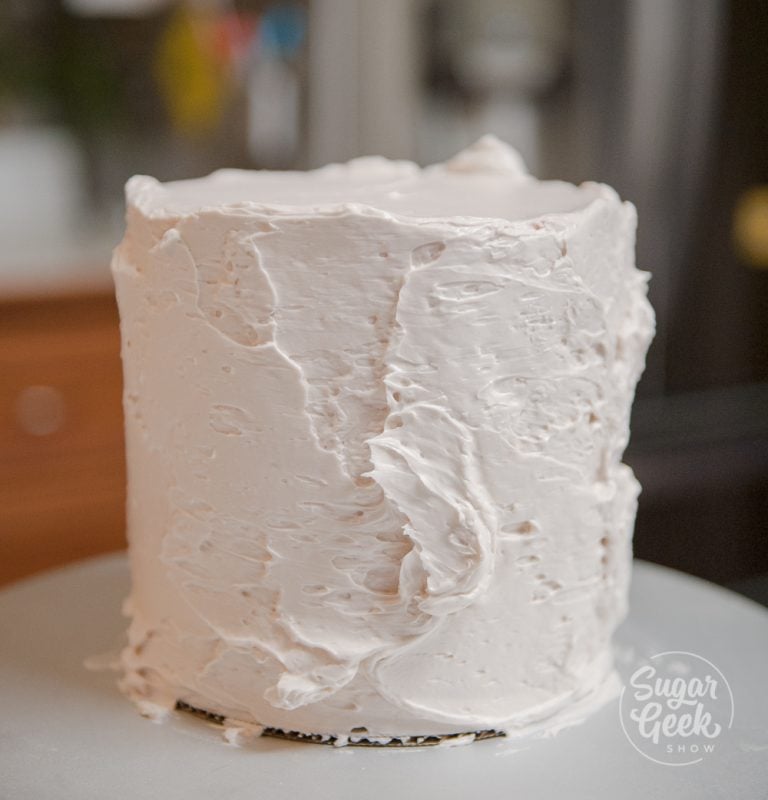
Now comes the fun part. Use your bench scraper to slowly scrape away the excess frosting. Wipe the excess back into the bowl. Hold the scraper straight up and down with the base against the turn table. Once you get to the board, you're done! If you have any low spots just add some more buttercream and continue scraping until the sides are nice and smooth.
Use your small offset spatula to clean up the top edge by slowly dragging the buttercream from the outside edge towards the center in a smooth motion.
How To Decorate A Cake
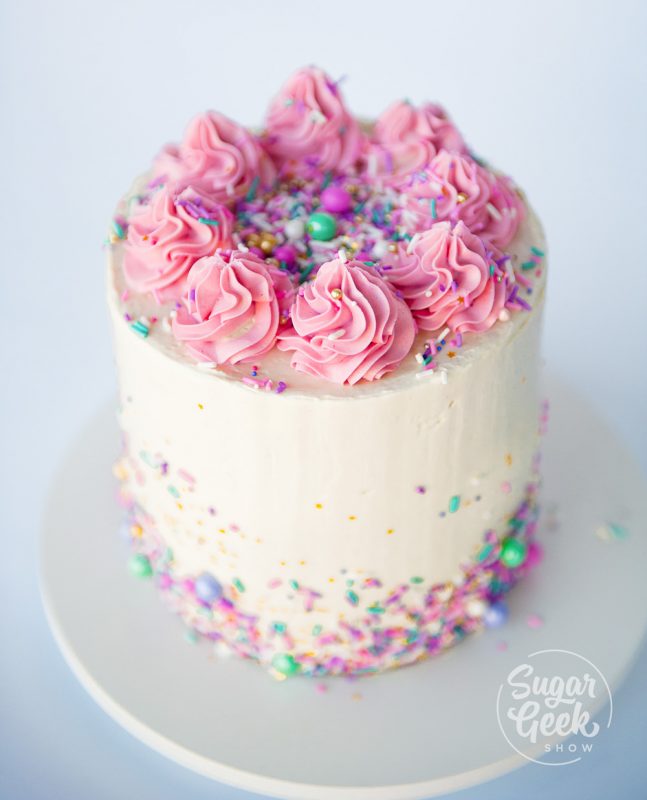
Now you can decorate your cake! This is actually the easiest part now that we have built our cake and frosted it so well, you have a nice clean canvas to start with!
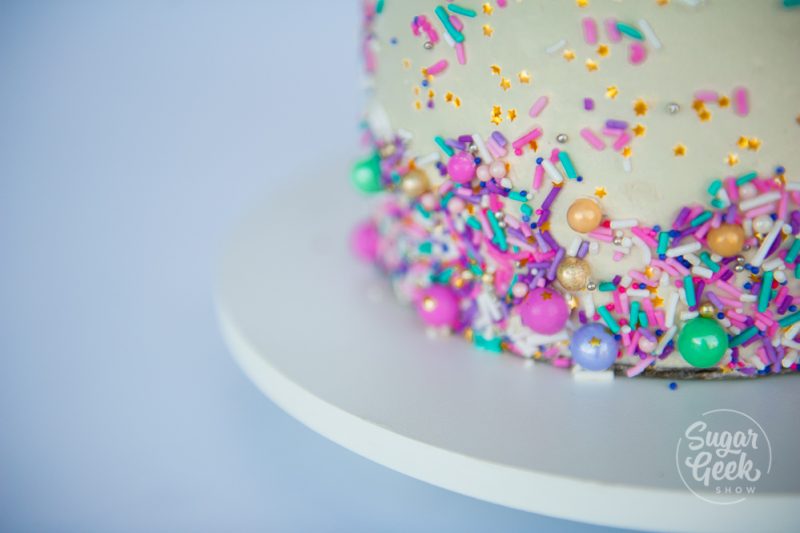
For my cake, I placed some sprinkles into a large bowl and held my cake in my left hand. With my right hand I scooped up some sprinkles and pressed it to the sides of the cake, letting the excess fall back into the bowl. Don't worry, your cake will be ok!
Next, let's pipe some pretty rosettes for the top of the cake. I place my piping tip into my piping bag and cut off the end of the bag so the tip opening fits through the end. Don't cut too much off or the piping tip will fall out of the bag.
If you want to color your buttercream, just place a couple of big scoops into a bowl and add a couple of drops of your food coloring. Mix with a spatula until there aren't any streaks left.
Next, place the bag into a cup and fold the edges down around the sides. This makes it easier to scoop some buttercream into the bag. You don't need a lot.
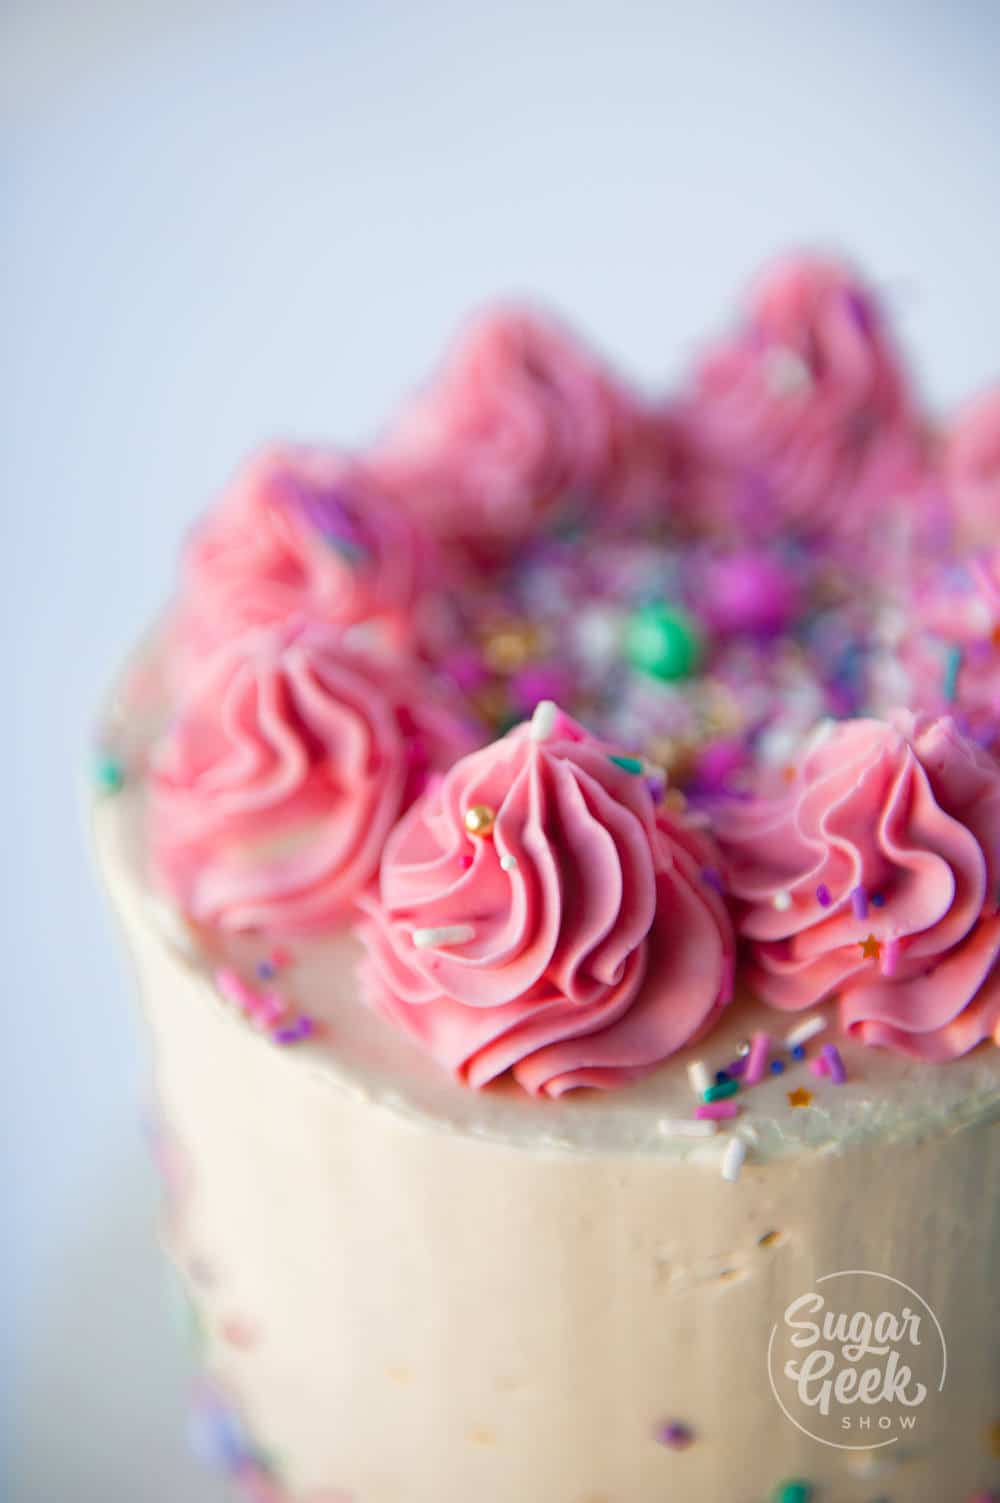
To pipe even rosettes, I pipe the first rosette and then turn the cake 90º so that the rosette is directly across from me. Then I pipe my second. Then I turn my cake 45º and do the same thing, basically piping directly between the first two rosettes and then I do the same on the other side. Then I just fill in the space between with two more rosettes. That way all my rosettes are the same size and spaced evenly.
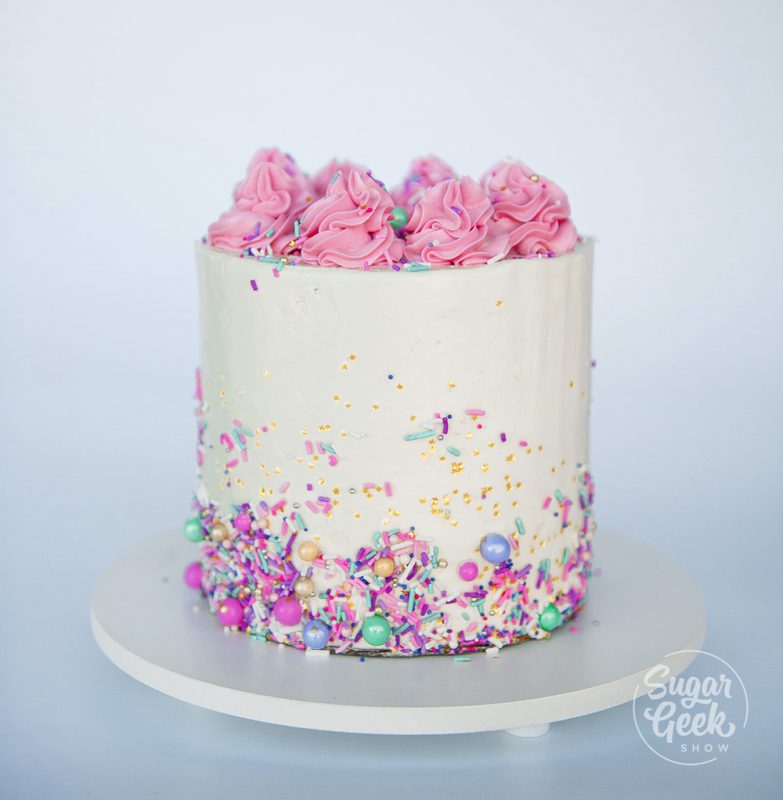
The last thing I do is add some more sprinkles to the top of the cake!
You have officially decorated your first cake! Go you!! I knew you could do it.
If you had fun learning how to make a cake please leave a comment below and if you're a member of our facebook group, I'd love to see you post your cakes!
One more thing, I usually store my cakes in the fridge before I deliver so they stay nice and firm but if you're not traveling far and it's not too hot, then cakes taste better at room temperature.
Recipe

Ingredients
WASC Cake
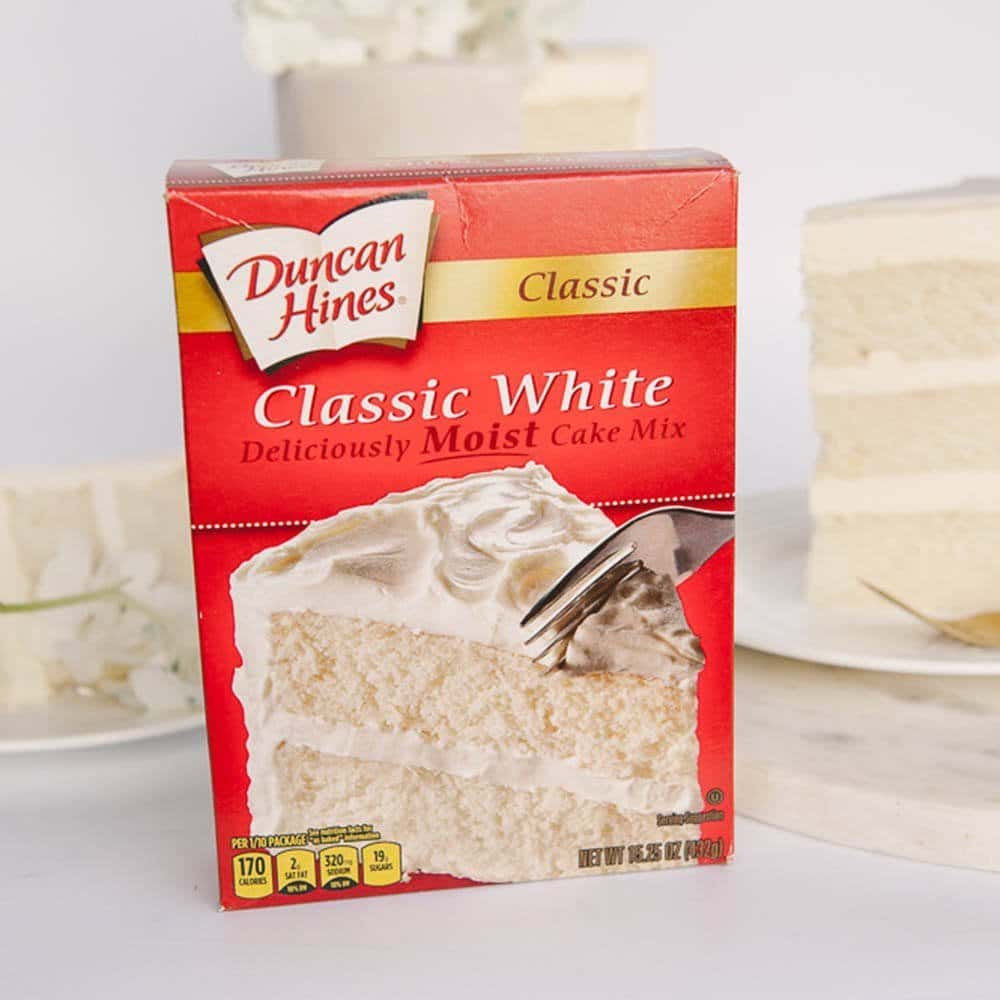
- 1 box white cake mix I like duncan hines
- 1 cup AP flour
- 1 cup granulated sugar
- ¼ teaspoon salt
- 1 cup sour cream room temp
- ½ cup melted butter
- 1 cup water
- 4 egg whites fresh not boxed at room temperature
- 1 teaspoon almond extract
Easy Buttercream Frosting
- 1 cup pasteurized egg whites 8 oz
- 2 lbs powdered sugar 32 oz
- 2 lbs unsalted butter 32 oz softened to room temperature
- ½ teaspoon salt
- 1 tablespoon vanilla extract
- ¼ cup strawberry puree optional
Instructions
WASC Cake
- Pre-heat your oven to 350ºF at least 30 minutes before baking to give your oven time to heat up properly. Prepare your pans with cake goop or another preferred pan release.
- The instructions for this cake are super easy. Basically put it all into a bowl and mix it on medium speed for 2 minutes! Voila! Cake batter is ready.
- Divide your batter into your cake pans evenly. Bake the cakes at 350ºF for 30-35 minutes or until a toothpick inserted comes out clean. It's ok to bake your cakes for longer if they are not done yet.
Easy Buttercream Frosting
- Mix the pastuerized egg whites and powdered sugar together on medium speed until the sugar is dissolved. About 2 minutes.
- Add the softened butter in pieces while mixing on low with the whisk attachment until it's all added in. Then bump the speed up to high and whip until the buttercream is light and white and fluffy.
- Taste the buttercream. If it still tastes buttery or looks curdled, keep mixing. You can't over-whip this buttercream.
- Frost and decorate your cake as desired
Video
Notes
- Three 6" cakes - baked and cooled
- Easy Buttercream (one batch)
- Food coloring
- Sprinkles
- Strawberry filling (optional)
Nutrition

Marcia Lafleur says
I'm new but want to learn how to bake a good cake and decorate
Rebecca says
I notice the ingredient to the buttercream is pasteurized egg whites. Do I pasteurize it or do I purchase it pasteurized? If I make it, how do I do this this?
The Sugar Geek Show says
It comes pasteurized in a box at the store.
Kristie says
Can one make the easy buttercream with a hand mixer? Have you tried it before? Is it tested, tried, and true? Thanks so very much. Appreciate This tutorial!
The Sugar Geek Show says
You can absolutely make this with a hand-mixer, it will just take more time to make sure it's light and fluffy
Wendy says
Very good recipe! I followed it all step by step and it came out beautiful! I was so happy to share with my family, thank you
The Sugar Geek Show says
Yay that makes me so happy!
Monica says
I know this is a silly question but can we use this cake recipe with a chocolate fudge cake or will it not turn out the same? I’ve used this recipe for my sons birthday cake and it was soooo good. But he wanted white...my daughters party is Saturday and she wants chocolate. Thank you for your time and video!
The Sugar Geek Show says
Do you mean the cake recipe? There is a chocolate version Chocolate WASC in the cake recipes area
Nicole says
Awesome recipe! I was wondering if you could use this recipe for cupcakes? If so is it the same temperature and for how long?
The Sugar Geek Show says
Yes, follow the time/temp on the back of the box
Salina says
My sister wants cinnamon flavored cake for her baby shower (this will be my first cake ?). Can I use Betty Crocker Spice Cake Mix and doctor it the same way as the WASC? I love how you're 'extra', thank you for giving me the confidence and skills to try this❤️
The Sugar Geek Show says
Yes you sure can! Have fun!
Ashley says
Hi there, what is the depth of your 6" cake pans? I'm a newbie and not sure if 2" would be adequate. Thanks!
The Sugar Geek Show says
Yes, all my pans are 2" tall 🙂
Nellie says
Hi,
If using packet cake mix do I add all the ingredients that u mentioned in the receipt .
The Sugar Geek Show says
Yes, you use the ingredients in the recipe instead of the ones on the back of the box
Jannica says
Could I use 2 7inch rounds that are 3inch deep pans? I am most curious about the possibility of baking deeper cakes, than portion of batter in this recipe as I bought enough to double the recipe just in case. Should I just fill half way and then watch to see when they are done? What about temp for thinker cakes? Advice please!! Thanks in advance!
The Sugar Geek Show says
Yes you can but be aware the sides of the cake will be darker and the cake will take longer to bake
Laura says
I notice you give nutrition facts. Is that for a slice that is iced? Also how many slices would you get in one cake so I can guestimate how big a slice should be for those figures. Thanks!
The Sugar Geek Show says
Yes it's per slice but it's really loose because what if you make a 3 layer 6" cake? Thats only 12 servings but if you make a 2 layer 8" cake that is 24 servings. SO it just all depends.
Judy McDonald says
What size tip did you use and how do you get it that height
The Sugar Geek Show says
Do you mean the size of the piping tip for the rosettes on top?
Michele Eickenbrock says
In your recipe for the cake you have 1 cup water, is that correct? It also states 4 egg whites, should it be the yolks too? I made this according to your recipe in the 6“ x 2“ fat Daddio pans evenly distributed between three of them and they overflowed after 14 minutes in the oven, thinking the recipe on your website has a mistake .
The Sugar Geek Show says
1 cup water or milk and only the egg whites no yolks.
Amanda says
Hi there! If I wanted to make a three layer cake out of the 8 in cakes, do you think it would hold up ok? Also, do you recommend doing 1.5x or 2x the recipe, or mixing up two batches separately?
*Also, I made your red velvet cake the other day with blue food gel and it turned out amazing! I baked it in a sheet pan to cut out rounds and build mini layer cakes. It was a hit!
The Sugar Geek Show says
What do you mean a three-layer? You want to bake three separate 8" layers? If so then yes, you can bake cake batter into any shape/size pan that you desire. I would make a 1.5 batch for three 8" cakes. No need to mix the batter separately.
Meredith says
This frosting did not work for me AT ALL. I don't have a stand mixer, so I made the buttercream with a hand mixer. Maybe that's the problem? I don't know. I cut the recipe in half, so 8oz sifted powdered sugar, 8oz room temp butter, 1/2c pasteurized egg whites, 1/4t. salt, and 1/2t. vanilla (I assumed it's a typo where the recipe calls for a full tablespoon of vanilla). I've whipped this stuff for at least 15min on high. It's just a soupy mess.
The Sugar Geek Show says
Sorry the recipe didn't work out for you. The vanilla isn't a typo btw. I like my frosting to have a good vanilla flavor. Even with a stand mixer, you have to whip for a long time so I imagine it would take a very long time with a hand-mixer. I will try it out with a hand-mixer and see if there's anything I can discover to help in the future.
Bev says
1 tablespoon vanilla is my kinda cake ????. Can’t wait to try your recipe!
Rachel says
Thank you for this information! For a week now, I have been trying to wrap my head around what I need, step-by-step, to successfully make/decorate a beautiful stacked cake. I had completed my first cake before seeing your post. Turns out, I had actually implemented a good chunk of your info already! There are just some staple steps that I missed. I am so excited to make my next cake and use what I have learned for your post. Thank you!
Mary says
If you are not stacking the cake, do you remove the 6 inch cake board underneath before placing it on a larger cake board for display? Or how do you cover the edges of the cake board underneath your decorated cake so you don't see the cardboard edges? Especially if you want a clean line on say, a semi naked cake, versus placing a buttercream boarder at the bottom.
The Sugar Geek Show says
You would pipe a bead of buttercream around the bottom once the cake was on the cake platter and smooth it out with your finger or a bench scraper. I go over this technique in this video at around the 13 minute mark https://sugargeekshow.com/news/how-to-make-a-wedding-cake-2/
Miles says
Hello! I have been trying to reply to Meredith, above, but for some reason the page won't let me reply to a comment *shrug.* It looks like instead of halving the recipe, she quartered some of the ingredients (powdered sugar, butter), which would explain why it turned out "soupy." Just wanted to let her know!
Haven't made this myself yet but am excited to try it as I'm just getting into decorating and you've made this very approachable! Thank you!
The Sugar Geek Show says
Ah yes, good catch.
Laura says
This is absolutely wonderful, the most thorough and easy to follow guide, excellent job and, thank you! I am curious, can you give a little more detail on how you hold the cake to sprinkle the bottom? I have been trying this and always mess up the frosting or tilt it too much and... disaster! Have you posted any videos showing how you do this?? Thanks in advance!!
The Sugar Geek Show says
I slide the chilled cake to the edge of the table then pick it up with my hand. I hold it over the sprinkles with one hand and use the other hand to attach sprinkles (as seen in the video on this page) I hope that helps
Abby says
I am a novice for sure, but I noticed the eggs are raw in the icing, is this ok and what if I can't get boxed egg whites right now for the icing, can I just use the egg whites from eggs?
The Sugar Geek Show says
The egg whites are not fully raw, they have been pasteurized which means they are treated with heat to make them safe to eat raw. Eating eggs straight from the egg is not considered safe in this recipe. If all you have is regular egg whites, check out the swiss meringue buttercream recipe. https://sugargeekshow.com/recipe/swiss-meringue-buttercream/
Carma Mills says
Hi Liz! Thank you for your recipes! I just made the frosting for this cake. But I measured out 32oz of powdered sugar in a measuring cup. Instead, i think I should have used a whole 2 lb bag, yes? I‘ve already mixed it on low for the whole 15 min..if I add the rest of the bag now, will it mess anything up? 😬😬😬 please say no!... that’s 8 sticks of butter wasted otherwise!!! 🙏🏼
Elizabeth Marek says
Yes, the measurements should be by weight, not by cups. Check out this blog post when you get a chance! I will def help you understand why we use a scale 😀 https://sugargeekshow.com/news/digital-kitchen-scale/
No worries about adding in more powdered sugar, it def does not hurt the buttercream. It's super easy!
Teresita Briner says
Hello I’m am first time making this cake for my daughters birthday.I love this one very detailed your explanation in how to make it. My question is after I apply final coat of butter cream to the cake then put it glib the fridge Can I still add the sprinkles to the side of edging of the cake next day? Will the sprinkles stick? The sparkles that I order didn’t cake on time so I will just add them the next day is that okey still? Thank you.
Elizabeth Marek says
Hi there, just watch the video in the blog post. I show exactly how to attach the sprinkles to a refrigerated cake 🙂 Make sure you are using easy buttercream and not American buttercream that crusts.
Teresita briner says
Thank you Elizabeth I just skip the springkles it didn’t came on time.
I made this cake and I followed your recipe and turn out perfect using hand mixer. My kids love the filling and frosting. My first decorated cake ever! And was happy about it. Thank you so much for sharing.
Carlee says
Thank you!! This is an amazing post and really helped me make my first cake tonight. So far, so good:)
Amy Smith says
Amazing yet again. First time I filled a cake and didn't end up with a sticky mess. I am a total amateur if I would say more than a amateur! My cake was the most beautiful white iced cake I was sending pics to everyone! I also did the swiss meringue butter cream recipe. This is now my favorite cake site !! .
Nicoelle says
How long can you freeze your cakes? I’d like to make the cakes and do the crumb coat in advance of doing the final layer and decorating. Also, how long does fondant need to set to harden? Thanks for all your helpful videos!!
Elizabeth Marek says
I would not freeze the entire cake because it causes it to sweat. Fondant will get a little hard on the outside after a few hours at room temperature unless its very humid outside
Rachel says
Thank you so much for this post! I’m going to try this for Father’s Day! Can you please let me know what color your rosettes were and how much food coloring you used? I really liked the color!
Elizabeth Marek says
I used electric pink food coloring I believe. I might have said in the video tutorial