• Skip to primary navigation
  • Skip to main content
  • Skip to primary sidebar
  • Halloween
  • Recipes
  • Free Tutorials
  • Cake Classes
  • Cake Commissions
  • About Liz

Sugar Geek Show logo

menu icon
go to homepage
  • Halloween
  • Recipes
  • Free Tutorials
  • Cake Classes
  • Cake Commissions
  • About Liz
subscribe
search icon
Homepage link
  • Halloween
  • Recipes
  • Free Tutorials
  • Cake Classes
  • Cake Commissions
  • About Liz
×
Home

Blog

edible burrito cake sugar tomato wafer paper lettuce black beans mexican rice cheese tortilla cake tutorial

November 15, 2016 Course Preview

Realistic Burrito Cake

Skill level: Intermediate

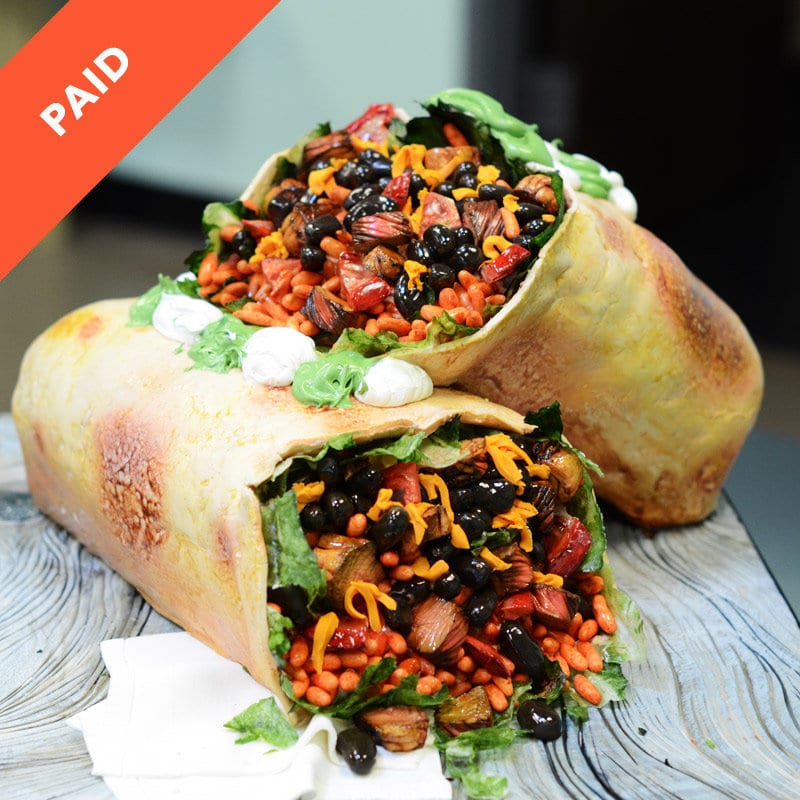
I finally made a tutorial on how to make my award-winning realistic burrito cake. This cake has gone viral in the past a couple times. I put a twist on it this time around and I entered it in the Great American Cake Show this year and won silver!

Learn how to make realistic cheese, tomatoes, black beans, and mexican rice in addition to making a charred medium rare steak out of fondant and sour cream with guacamole, all wrapped up in a delicious tortilla on a wooden cake board with edible napkins.

45:25 Minutes of Instruction

What You Will Learn

  • How to create realistic burrito ingredients including: black beans, tomatoes, and mexican rice
  • How to sculpt a realistic steak with a seared char and make it look medium-rare
  • How to create a tortilla out of fondant
  • A cool way to create a white wooden texture on your cake board

Tutorial Chapters

  1. Making the cake boards 1:04
  2. Carving the cakes 3:38
  3. Crumb coating the cakes 7:20
  4. How to make the black beans 7:54
  5. Making the Mexican rice 8:54
  6. How to make the tomato 11:28
  7. Making the steak 17:04
  8. Covering the burrito cakes 25:22
  9. Texturing the tortilla 28:56
  10. Creating the wooden texture cake board 29:22
  11. Coloring the burrito 35:32
  12. Making the napkins 39:36
  13. Applying the details 40:26
  14. Making the cheese 43:30
Downloads

Materials List

edible burrito cake sugar tomato wafer paper lettuce black beans mexican rice cheese tortilla cake tutorial

November 15, 2016 Paid Video

Realistic Burrito Cake

Skill level: Intermediate

I finally made a tutorial on how to make my award-winning realistic burrito cake. This cake has gone viral in the past a couple times. I put a twist on it this time around and I entered it in the Great American Cake Show this year and won silver!

Learn how to make realistic cheese, tomatoes, black beans, and mexican rice in addition to making a charred medium rare steak out of fondant and sour cream with guacamole, all wrapped up in a delicious tortilla on a wooden cake board with edible napkins.

45:25 Minutes of Instruction

What You Will Learn

  • How to create realistic burrito ingredients including: black beans, tomatoes, and mexican rice
  • How to sculpt a realistic steak with a seared char and make it look medium-rare
  • How to create a tortilla out of fondant
  • A cool way to create a white wooden texture on your cake board

Tutorial Chapters

  1. Making the cake boards 1:04
  2. Carving the cakes 3:38
  3. Crumb coating the cakes 7:20
  4. How to make the black beans 7:54
  5. Making the mexican rice 8:54
  6. How to make the tomato 11:28
  7. Making the steak 17:04
  8. Covering the burrito cakes 25:22
  9. Texturing the tortilla 28:56
  10. Creating the wooden texture cake board 29:22
  11. Coloring the burrito 35:32
  12. Making the napkins 39:36
  13. Applying the details 40:26
  14. Making the cheese 43:30
Downloads

Materials List

Related Videos


How to Cake That - Salad Cake Tutorial

Crusting Cream Cheese Cake Frosting Recipe

November 12, 2016 Blog

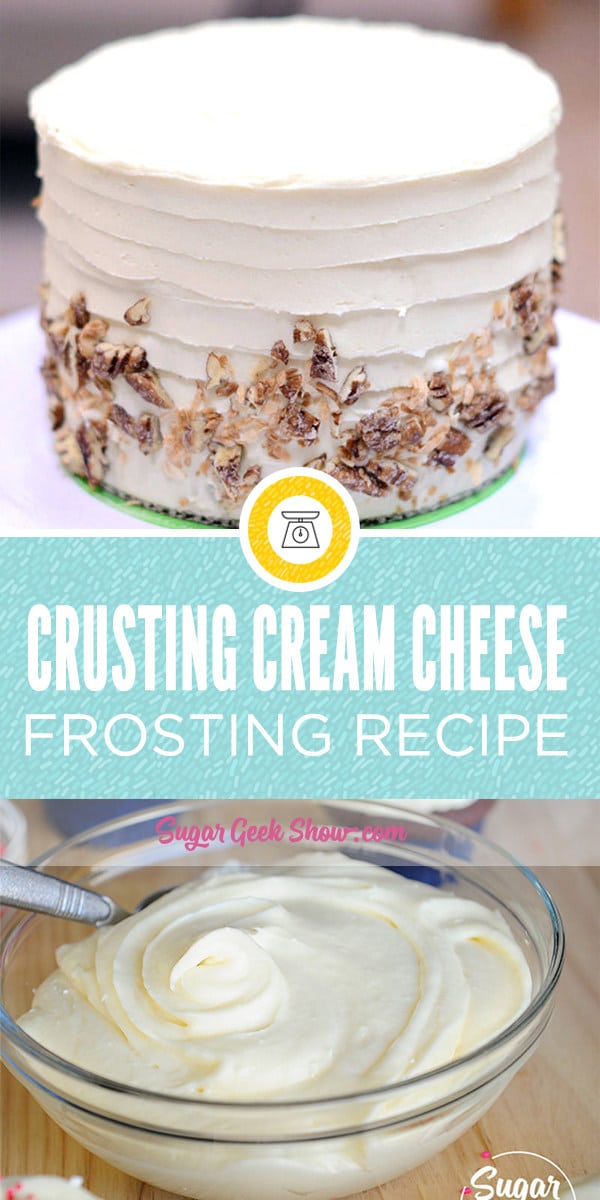
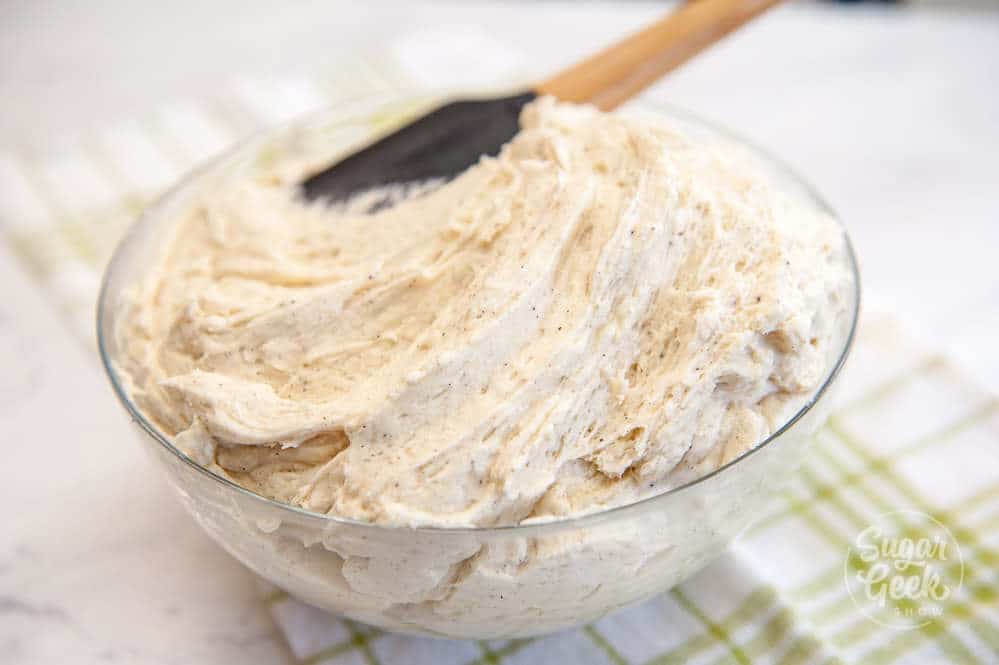
Crusting Cream Cheese Frosting Recipe

Crusting Cream Cheese Frosting That Is Silky Smooth, Creamy And Stable Enough To Use Inside And Outside Your Cake

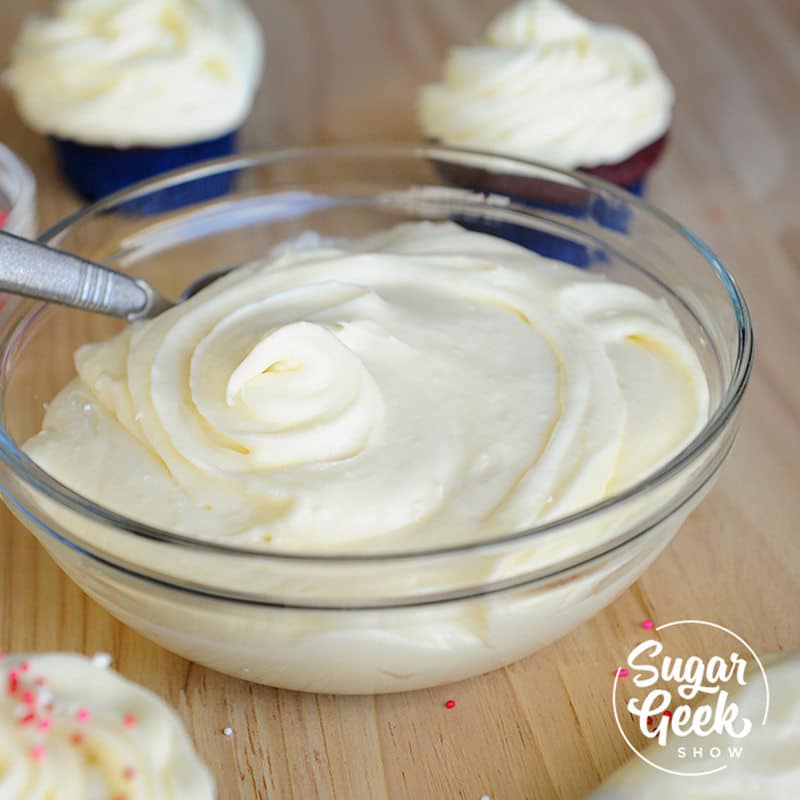
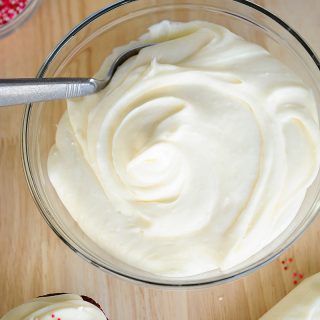
Crusting cream cheese frosting is made with cream cheese, butter, powdered sugar and extract and pairs with just about any cake flavor you can imagine. Think about it. Cream cheese basically equals cheesecake. Cheesecake goes with ALL THE THINGS. Crusting cream cheese frosting is most often paired with old-fashioned red velvet cake, carrot cake, chocolate cake and even lemon cake!

cream cheese frosting recipe

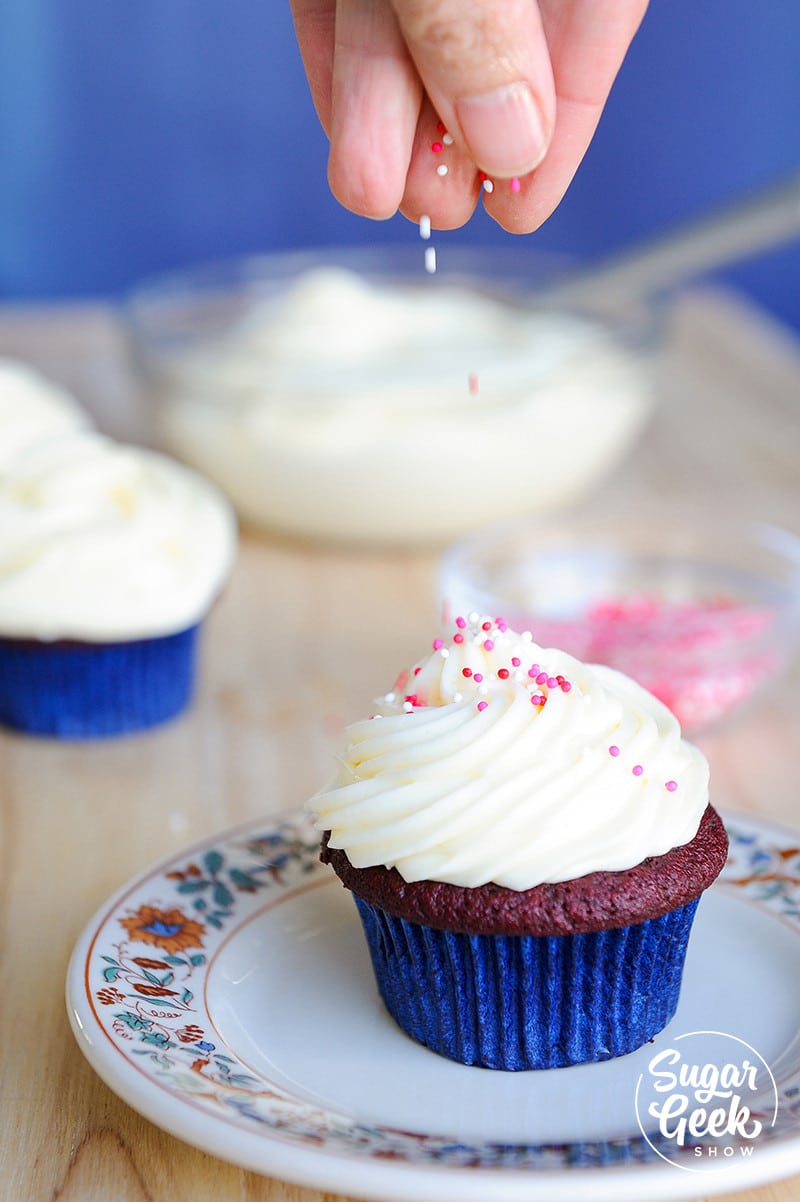
Basically, you can't go wrong with using crusting cream cheese frosting for everything including cupcakes and sugar cookies.

The best part about this cream cheese frosting is that it is a crusting recipe. That might sound a little odd to you but basically that means that the sugar content in this frosting is high enough that the granules of sugar turn into tiny little crystals and form a thin and crispy outer layer to the cake.

If you need a version that crusts for smoothing with the Viva method, check out my classic cream cheese frosting. But if you want the best flavor with no starchy aftertaste, the granulated sugar version wins every time.

Crusting Cream Cheese Cake Frosting Recipe

Why is this awesome? (trust me, it's AWESOME!)

If you've ever worked with cream cheese frosting before you know it has a horrible tendency to be a little wet, a little soft and a whole lot unstable in warm weather.

This crusting cream cheese frosting crusts so that it's very stable and can be used as a filling for cakes, frosting for the outside, cupcakes and even on cookies. I would still stay away from using this frosting under fondant though, cream cheese and fondant just do not get along and you end up with a melting layer of gooey sugar under the fondant.

How To Make Crusting Cream Cheese Frosting

To actually make the crusting cream cheese frosting you can get it done in about 10 minutes flat.

  • Cream your room temperature butter with the paddle attachment until it's nice and smooth with no lumps (on low).
  • Add in your room temperature cream cheese and cream until smooth with the butter.
  • Start adding in your powdered sugar (sifted) one cup at a time while mixing on low. Don't add the next cup until the first is incorporated fully.
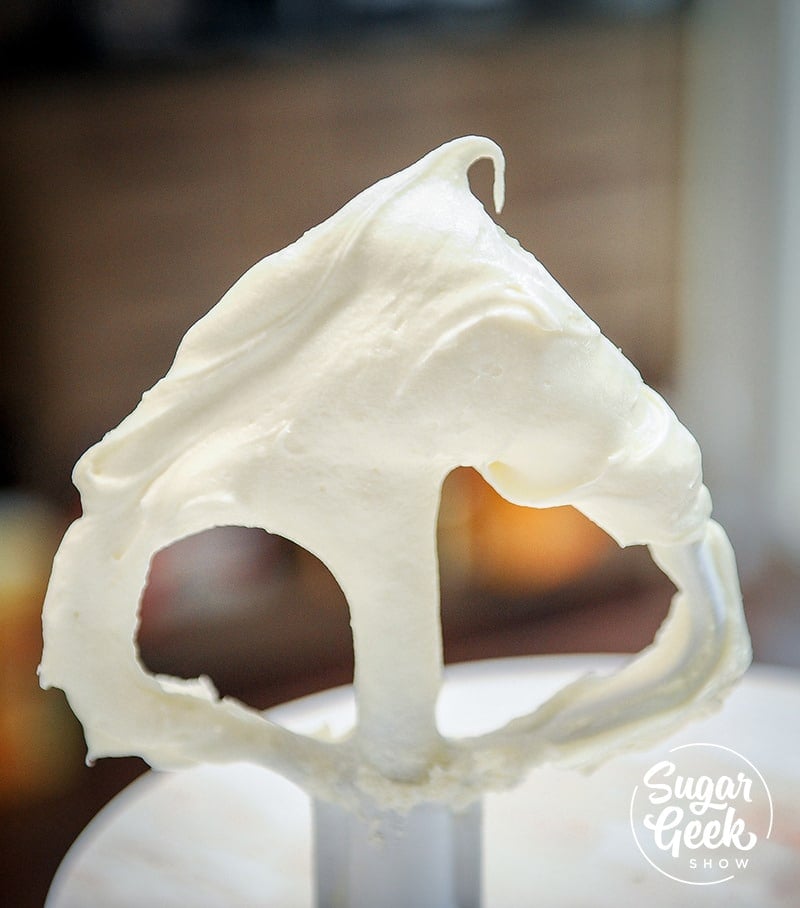
  • Once your powdered sugar is incorporated and the frosting is smooth you're done! This is a THICK cream cheese frosting so that it is stable and won't' melt all over your cake.

cream cheese frosting recipe

I admit that crusting cream cheese frosting really eluded me for a long time. Don't get me wrong, I loved eating it on cupcakes and a nice slice of carrot cake from one of my favorite bakery but when I would try to make it myself to use with my client cakes, I never really felt it would work. It was either too soft or tasteless.

Most of the time when I see a cream cheese recipe, it has added liquid to it like milk or cream. I feel like this really causes the frosting to be too soft. Ok for cupcakes but not great for cakes. So why add it?

cream cheese frosting for cupcakes

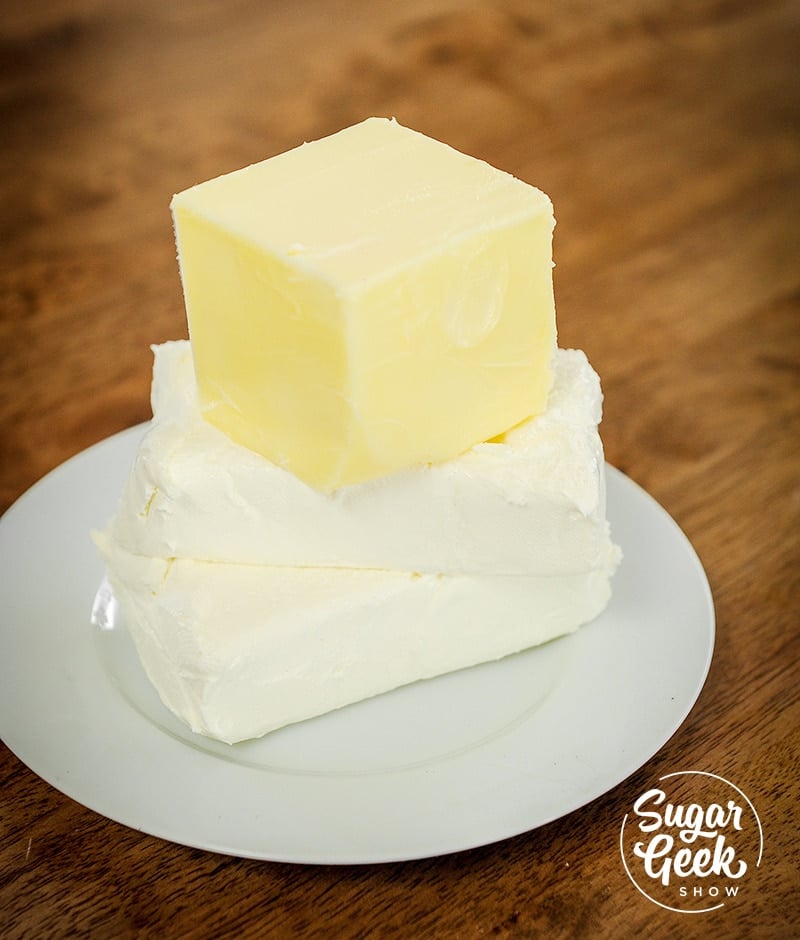
You'll notice that this recipe has more butter to cream cheese ratio than a typical cream cheese recipe. Butter helps with stability, flavor, and creaminess. There's just enough cream cheese to add a nice flavor to the frosting but not so much that it breaks down the frosting and makes it too wet.

Tips For Successful Crusting Cream Cheese Frosting

cream cheese frosting recipe

  1. Did you forget to bring your cream cheese to room temperature? I'll tell you a secret, I never ever do. I simply take the cream cheese out of the packet, cut it up into cubes and microwave for 10 seconds. By the time I get my butter and sugar measured, the cream cheese is at room temperature
  2. Speaking of butter, I usually have butter at room temperature at all times but if you have forgotten, you can microwave your butter in 10-second increments until you can press a fingerprint in the surface of the butter and the cube still holds it's shaped. You don't want the butter too soft or it will be hard to incorporate with the cream cheese successfully.
  3. Sift your powdered sugar for a super smooth buttercream but I admit, I hardly ever do this
  4. Need your buttercream to be whiter? Add in some white food coloring!
  5. You can switch out the vanilla extract for any extract to compliment the cake (think orange for citrus or almond for spice cake)
  6. Do you really have to use unsalted butter for cream cheese frosting? The short answer is yes. If you use salted butter you MIGHT feel like the frosting literally tastes salty. By using unsalted butter you can control the level of saltiness in your buttercream. If all you have is unsalted butter, don't fret. Just use what you have and leave out the extra salt listed in the recipe.

Cake Batter and Frosting Calculator

Select an option below to calculate how much batter or frosting you need. Adjust the servings slider on the recipe card to change the amounts the recipe makes.

Choose a pan type

Choose a cake pan size
(based on 2" tall cake pan)

Choose a cake pan size
(based on 2" tall cake pan)

Choose a cake pan size
(based on 2" tall cake pan)

Cupcake Tin Size

Choose number of pans

Cups of Batter Needed

8 cups

Cups of Frosting Needed

5 cups

Note: measurements are estimated based off the vanilla cake recipe using standard US cake pans and sizes. Measurements used are for 2" tall cake pans only. Your results may vary. Do not overfill cake pans above manufacturer's recommended guidelines.

Recipe

cream cheese frosting recipe
Print Recipe
4.90 from 110 votes

Crusting Cream Cheese Frosting Recipe

A delicious cream cheese buttercream that is sturdy enough to pipe or frost and fill your cakes. 
Prep Time5 minutes mins
Cook Time15 minutes mins
Total Time20 minutes mins
Course: Dessert
Cuisine: American
Servings: 3 lbs
Calories: 1989kcal
Author: Liz Marek

Ingredients

Ingredients

  • 12 oz cream cheese room temp
  • 12 oz unsalted butter room temp
  • 48 oz powdered sugar
  • 1 tablespoon clear vanilla
  • ½ teaspoon salt
US Customary - Metric

Instructions

Instructions

  • Cream the softened butter with the paddle attachment until smooth. Add in your softened cream cheese and continue creaming on low until fully incorporated and smooth. 
  • Slowly add in powdered sugar one cup at a time, letting fully incorporate before adding the next cup. Add in vanilla and salt. Mix at low for 5-6 minutes until smooth.
  • For a whiter buttercream, add white food coloring. Store leftover buttercream in the fridge for up to a week or freeze up to 6 months. 

Notes

This buttercream cannot be left out for more than 4 hours.

Nutrition

Calories: 1989kcal | Carbohydrates: 305g | Protein: 5g | Fat: 87g | Saturated Fat: 53g | Cholesterol: 245mg | Sodium: 788mg | Potassium: 122mg | Sugar: 298g | Vitamin A: 2905IU | Calcium: 92mg | Iron: 0.5mg

Cream cheese frosting is made with cream cheese, butter, powdered sugar and extract and pairs with just about any cake flavor you can imagine. Think about it. Cream cheese basically equals cheesecake.

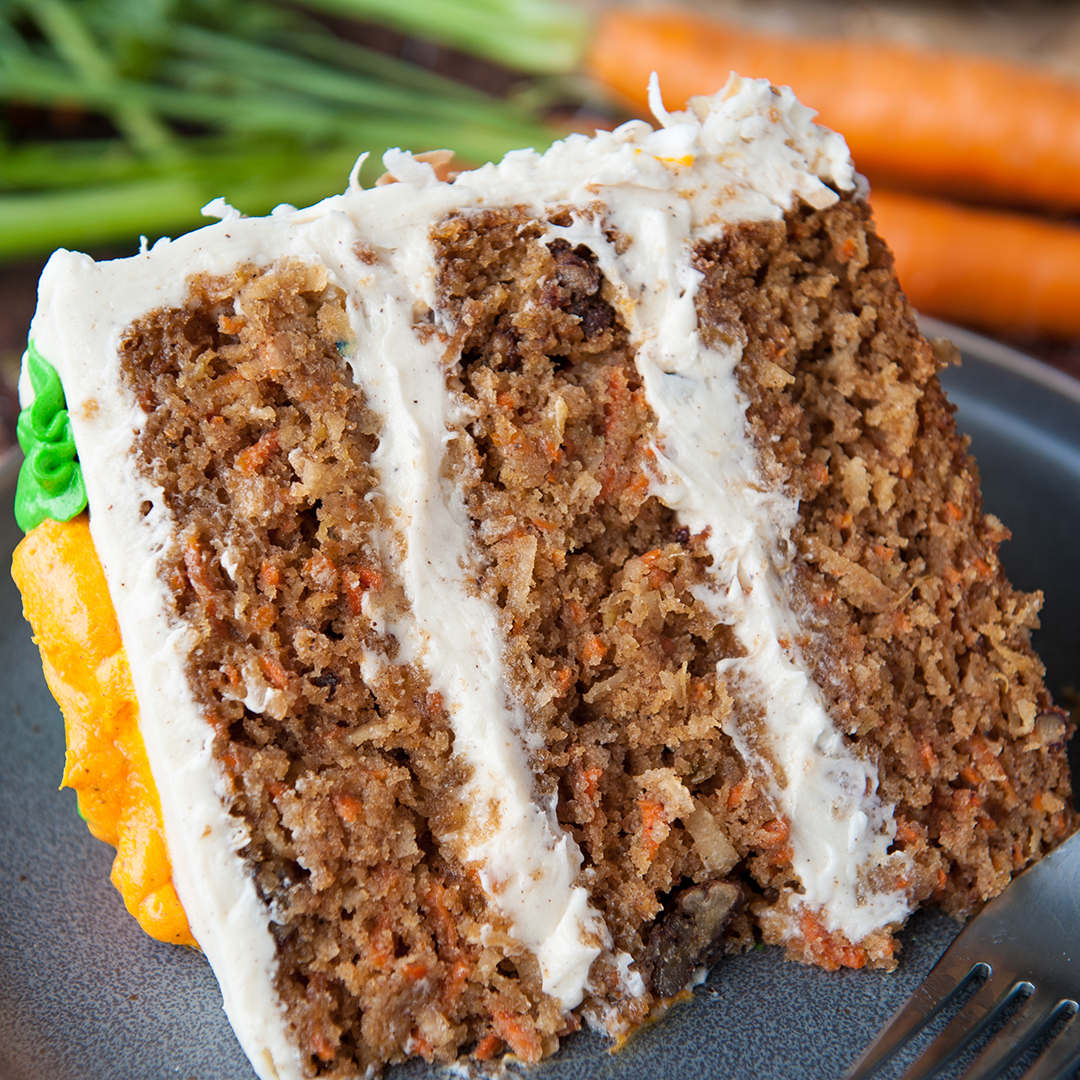
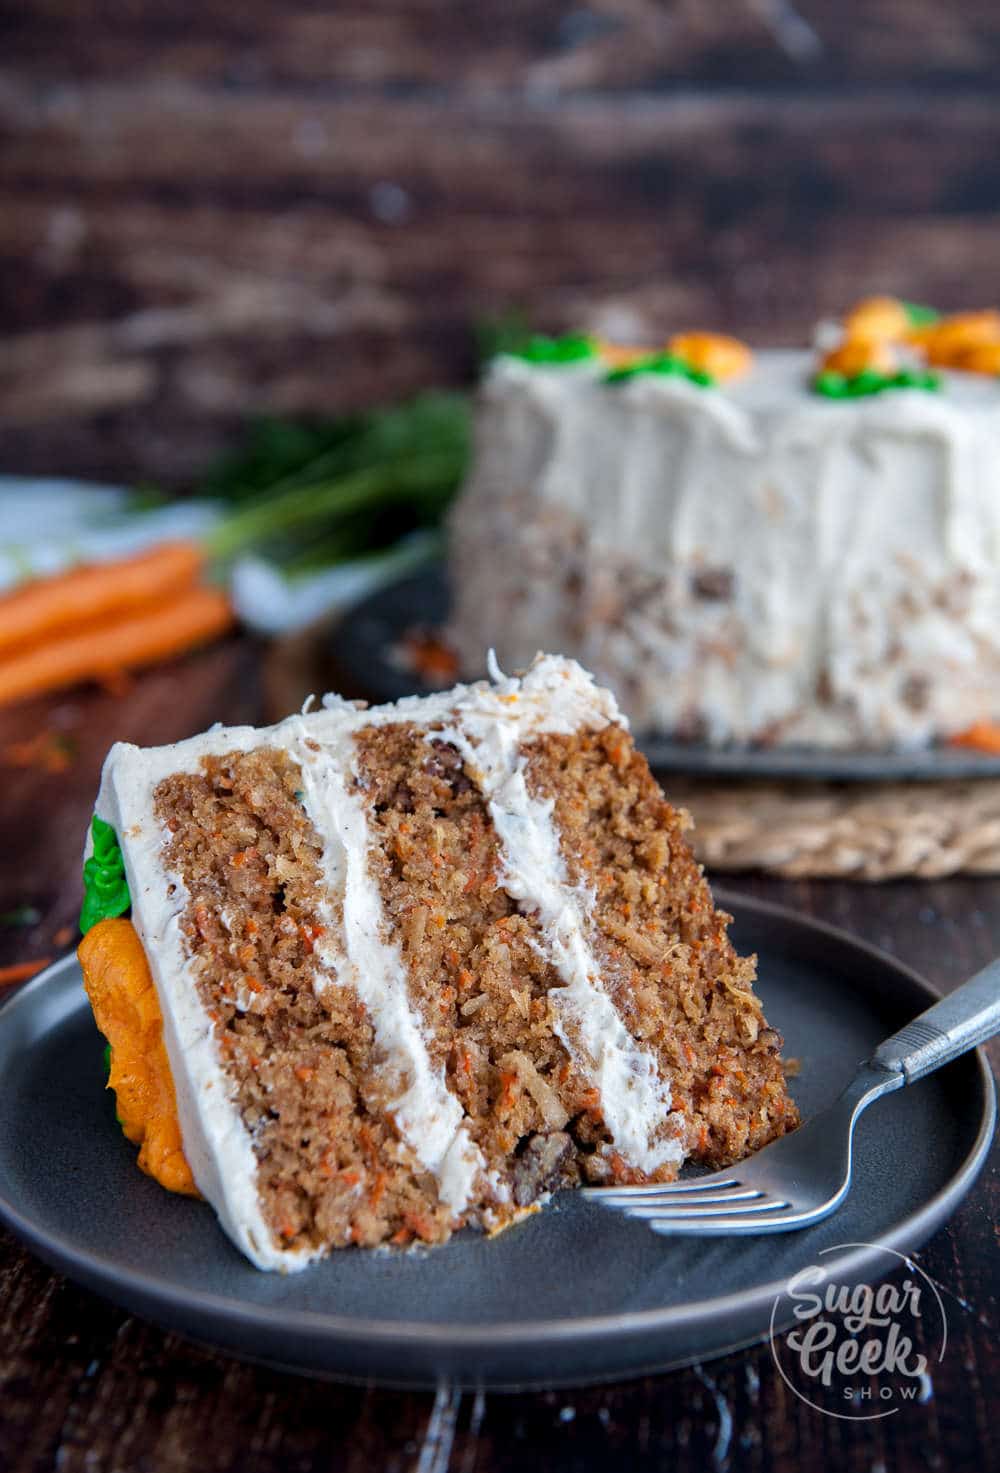
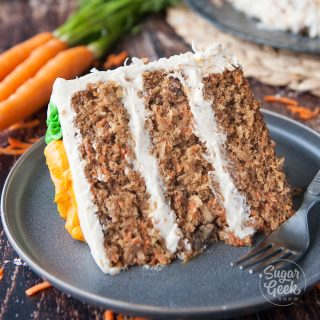
Moist carrot cake with pineapple, toasted coconut, candied pecans and big chunks of carrots. Frosted with brown butter cream cheese frosting

November 12, 2016 Cake

Carrot Cake With Pineapple Recipe

Chunky homestyle carrot cake with pineapple, candied pecans, coconut and lots of carrots! Frosted with tangy classic cream cheese frosting. My favorite cake to bake for my family! 

Moist carrot cake with pineapple, toasted coconut, candied pecans and big chunks of carrots. Frosted with brown butter cream cheese frosting

This carrot cake with pineapple has made lovers of carrot cake who have previously said they hated carrot cake. There are two kinds of carrot cake people out there. Those that like a nice spice cake with some teeny tiny carrots in it and those who like a teeny tiny bit of cake with their carrots. I fall in the second category. 

I love making this carrot cake because it comes together in one bowl and is pretty much impossible to mess up! 

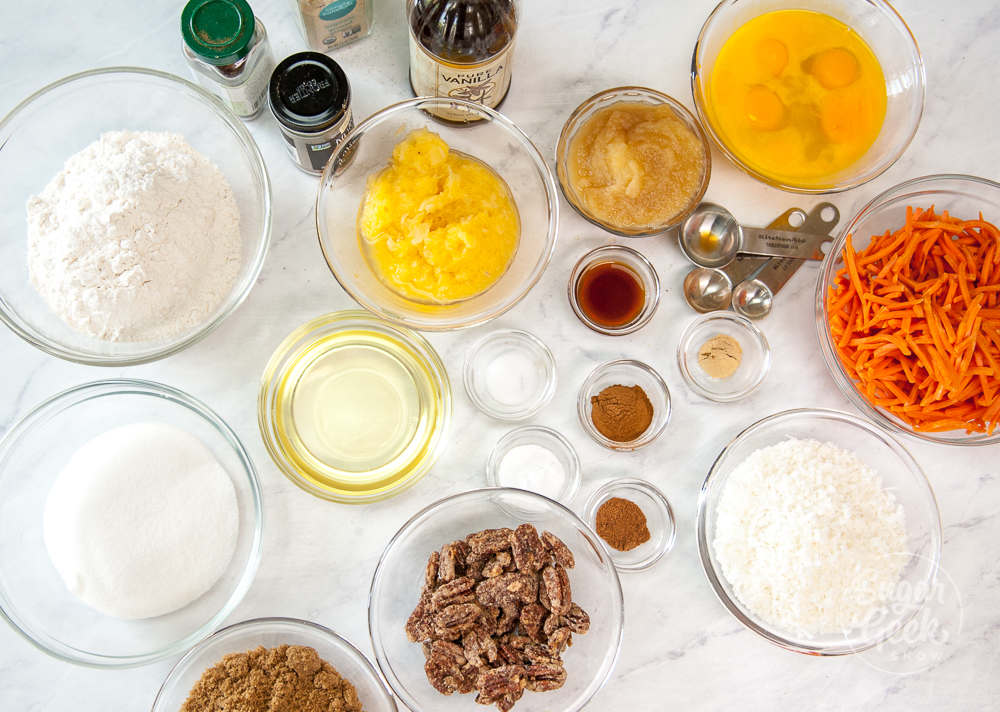
Carrot Cake Ingredients

carrot cake ingredients

It might seem like there are a lot of ingredients in this cake that you don't fully understand why they are necessary but let me explain!

  • Pineapple - Adds amazing flavor and moisture to your carrot cake as well as texture
  • Candied Pecans - Sweet, salty and crunchy. Candied pecans add a delicious crunch and texture to the carrot cake. 
  • Toasted Coconut - Adds another dimension of earthy flavor and texture to the cake
  • AP Flour - You might be surprised to see me using All-Purpose flour instead of cake flour but because there is so little flour in this carrot cake, we need the extra gluten to hold everything together. 
  • Mashed Banana - So once upon a time I wanted to make my carrot cake and didn't have any applesauce but I did have a frozen banana so I used that instead. Honestly, I liked it better than the applesauce for that added moisture! You can use either banana or ½ cup applesauce. 

Why do you put pineapple in carrot cake?

It might sound crazy but pineapple tastes amazing in carrot cake! Not only do the flavors compliment each other perfectly but the pineapple keeps the cake extra moist! The pineapple in carrot cake also holds onto moisture for longer so the carrot cake is less prone to drying out. 

This carrot cake with pineapple actually gets better with age. In my opinion, it actually tastes better the second day! I wrap my cakes in plastic wrap and leave them on the countertop to frost the next day. This gives the flavors time to meld together and the cake actually gets even moister. It's truly magical! 

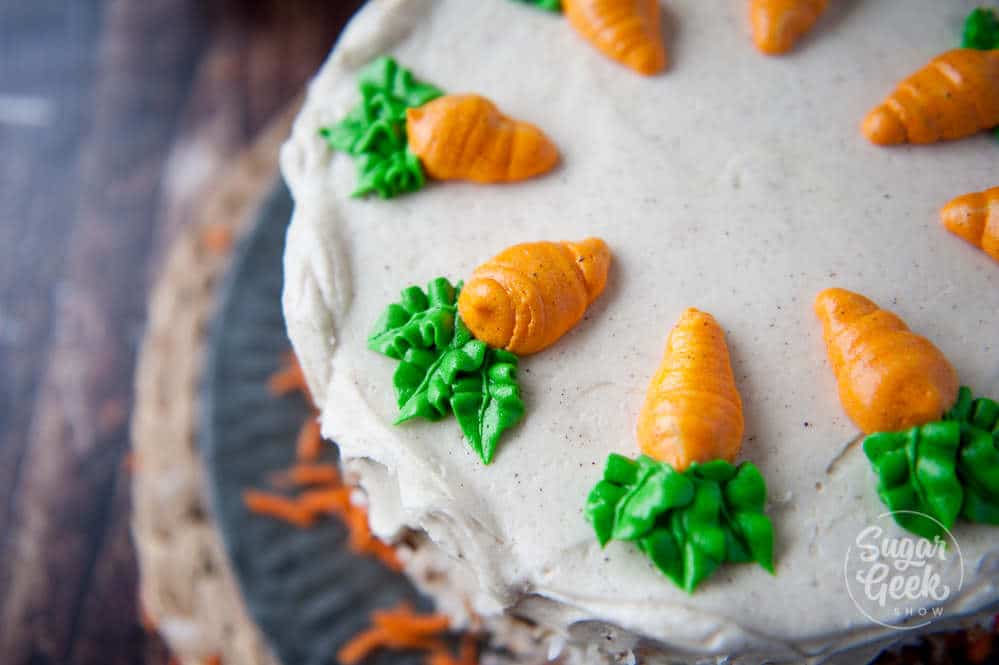
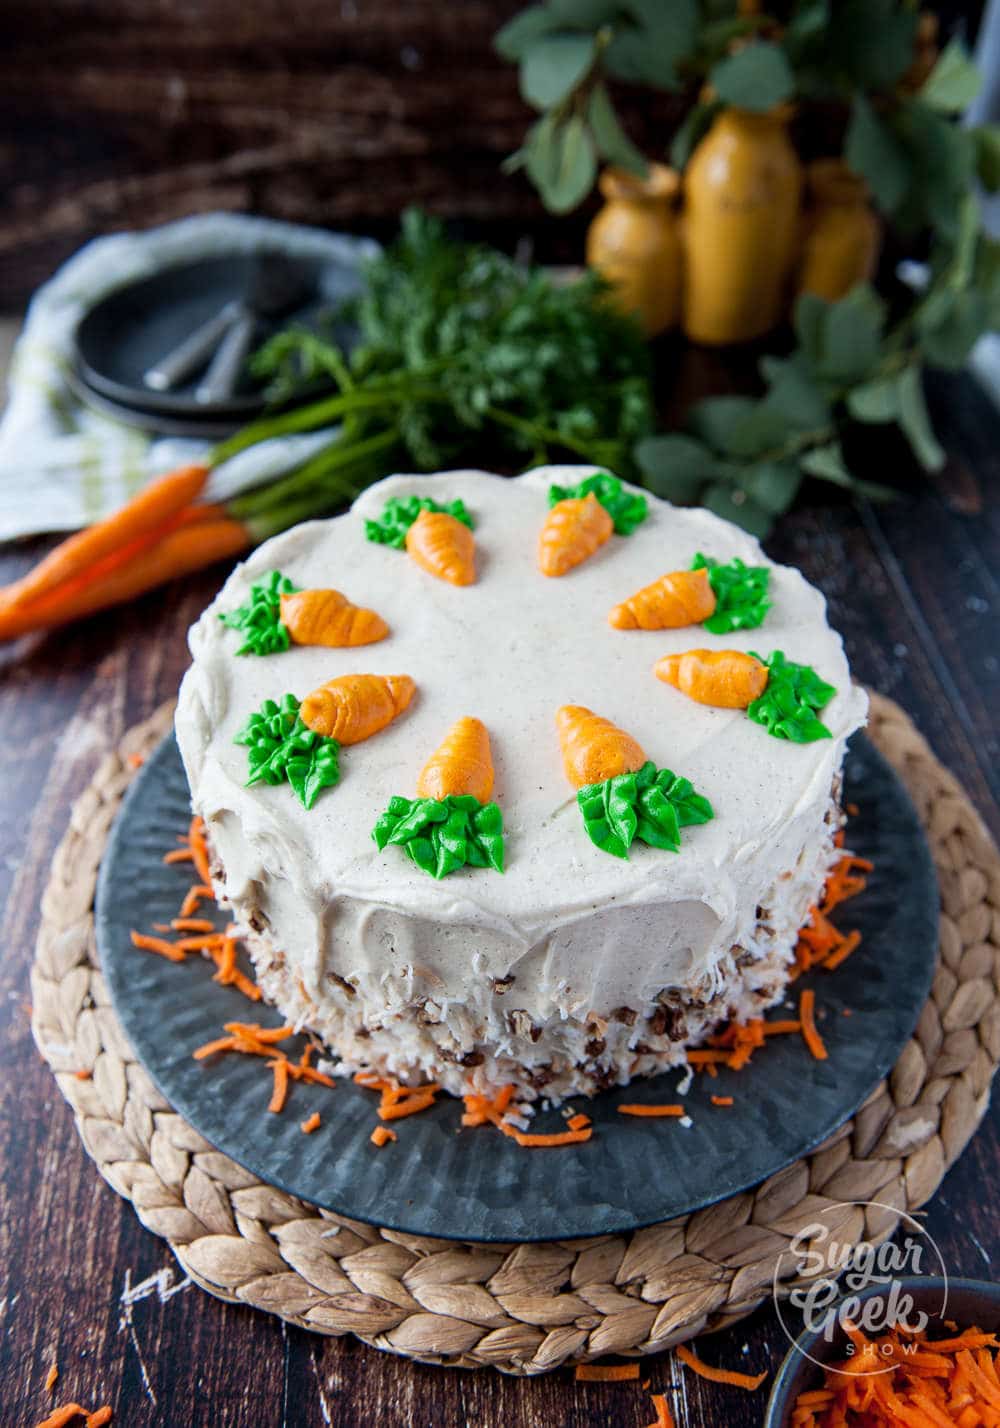
piped buttercream carrots on carrot cake

How do you grate carrots for carrot cake?

I like my carrots to be nice and chunky. To prepare my carrots, I chop off the tops of the carrot and then peel them. If you don't peel your carrots, they can turn green while baking. 

To speed things up, you can use a food processor. To get 2 ¼ cups of carrots, I needed about 5 medium-sized carrots. Thankfully this carrot cake doesn't require exact amounts of carrot. 

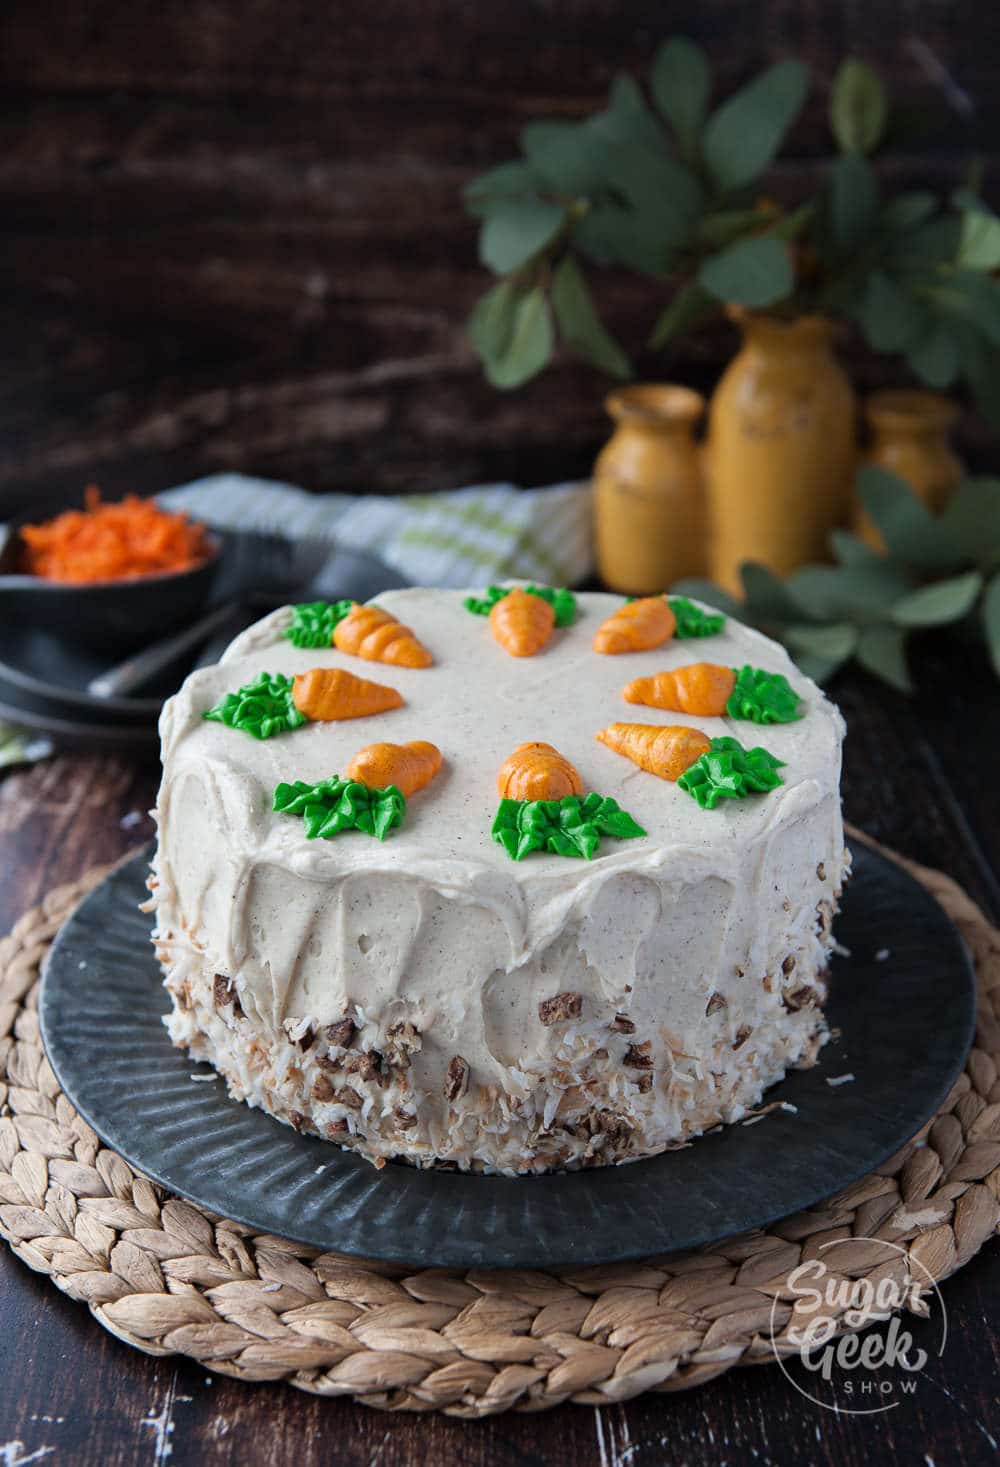
Homestyle carrot cake with pineapple, toasted coconut, candied pecans and big chunks of carrots. Frosted with brown butter cream cheese frosting and buttercream carrots

How do you make a carrot cake?

The best thing about this carrot cake with pineapple is that it all comes together so easily in one bowl. 

  1. Sift together your flour, sugar, salt, baking soda, and spices
  2. Combine together your eggs, oil, melted butter, and vanilla
  3. Pour your egg mixture into your flour mixture and stir until combined. 
  4. Fold in candied pecans, toasted coconut, carrots, pineapple and banana, and stir until just combined. 
  5. Divide into pans and bake! I have baked my carrot cake in two or three 8" pans. Two pans will have thicker layers but take longer to bake. Three pans will make thinner layers but bake in about 30 minutes. 

Let your cake layers cool before frosting

Carrot cake with brown butter cream cheese frosting
how to make a carrot cake

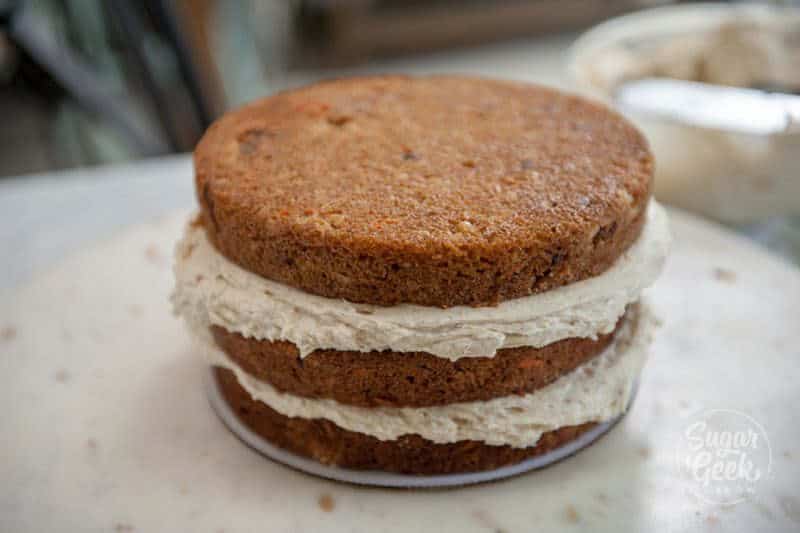
How to make a carrot layer cake with cream cheese frosting

This carrot cake with pineapple and cream cheese frosting comes together in ten minutes flat! 

  1. Place your first layer of carrot cake on your cake cardboard or on your cake plate. 
  2. Spread a thick layer of cream cheese frosting onto the cake layer.
  3. Place your second layer of cake on top of the frosting. Repeat if you have more layers. 
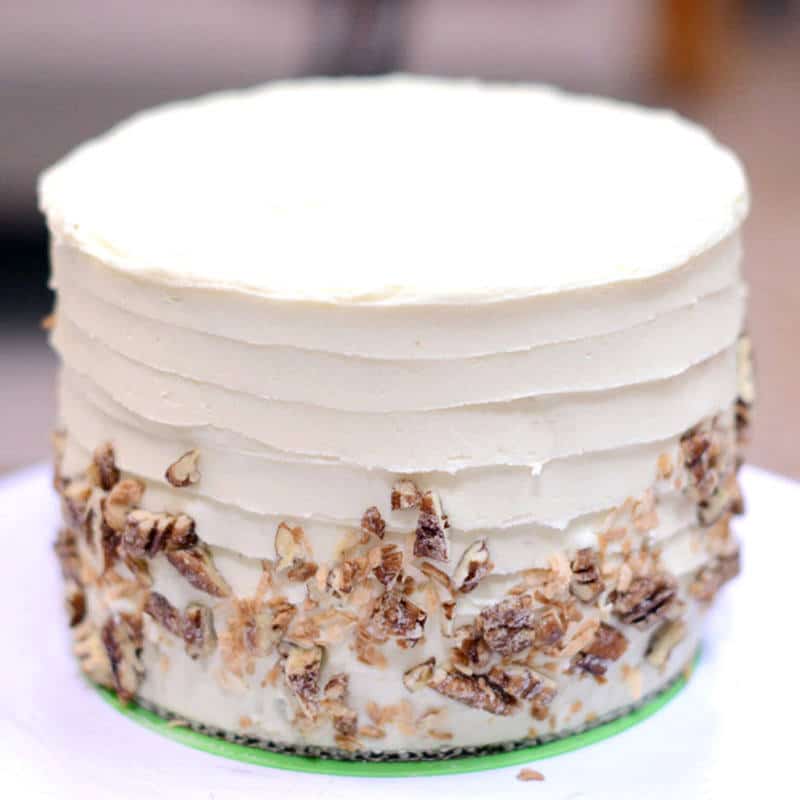
  4. Cover the whole cake in another thick layer of frosting. I like to keep my frosting rustic looking. 
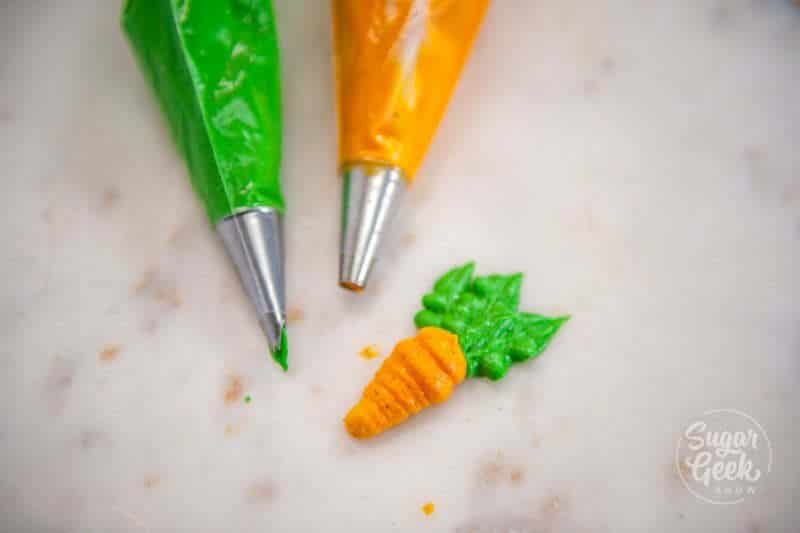
  5. Pipe some cute buttercream carrots on top (see video for instructions)
carrot cake with brown butter cream cheese frosting and buttercream carrots

carrot cake with pineapple, candied pecans, toasted coconut and big chunks of carrots. Frosted with brown butter cream cheese frosting

BONUS: Want step-by-step instructions on how to make your first cake? Watch my how to make a cake video tutorial! 

how to make a cake tutorial

I love how my brown butter cream cheese frosting tastes with this carrot cake. If you need a sturdier frosting, try my crusting cream cheese frosting

My easy buttercream is delicious too if you need to cover the cake with fondant (fondant and cream cheese don't mesh well together). You can replace some or all of the butter in my easy buttercream with brown butter if you want to keep that flavor. 

brown butter cream cheese frosting

For more spring and Easter desserts, you have to try my Carrot Cake Bars! They're perfect if you want something easy to slice and serve. My Speckled Easter Cake adds a soft pastel look that still feels simple and understated. For something a little more playful, this Bunny Butt Cake makes a cute and festive centerpiece.

Recipe

Carrot cake with pineapple and brown butter cream cheese frosting
Print Recipe
4.91 from 60 votes

Carrot Cake With Pineapple Recipe

Carrot cake with pineapple, big chunks of carrots, toasted pecans and brown butter cream cheese frosting is the ultimate homestyle carrot cake!
Prep Time25 minutes mins
Cook Time43 minutes mins
Total Time55 minutes mins
Course: Dessert
Cuisine: American
Servings: 8 cups
Calories: 1855kcal
Author: Liz Marek

Ingredients

Cake Ingredients

  • 9 ounces All Purpose flour
  • 7 ounces granulated sugar
  • 7 ounces brown sugar
  • ½ teaspoon salt
  • 2 teaspoon baking soda
  • 2 teaspoon cinnamon
  • ½ teaspoon nutmeg
  • ½ teaspoon ginger powdered
  • 5 ounces vegetable oil
  • 3 ounces butter melted
  • 5 large eggs
  • 1 tablespoon vanilla extract
  • 5 ounces candied pecans chopped
  • 3 ounces shredded coconut toasted
  • 8 ounces carrots grated (about 4-5 medium carrots)
  • 8 ounces pineapple drained and crushed
  • 1 whole ripe banana mashed or 4 oz unsweetened applesauce

Browned Butter

  • 12 ounces unsalted butter (after browning it should weigh about 10 ounces)

Cream Cheese Frosting

  • 16 ounces cream cheese room temperature
  • 6 ounces unsalted butter room temperature
  • 10 ounces brown butter softened butter consistency
  • 32 ounces powdered sugar
  • 1 teaspoon vanilla extract
  • ½ teaspoon orange extract (optional)
  • ½ teaspoon salt
US Customary - Metric

Instructions

Brown Butter

  • (It's best to do this the day before you bake) Place butter into a medium-sized saucepan over medium-high heat and bring to a simmer.
  • Whisk constantly (butter will foam up) and cook until the butter is a deep golden color
  • Pour the browned butter (do not strain) into a heat-proof container and let cool at room temperature overnight (or you can put it in the fridge to help speed up the process but stir every 20 minutes to prevent it from getting too hard. The butter needs to be soft but not melted.

Cake Instructions

  • IMPORTANT: Make sure all your ingredients are at room temp and you're using a scale to measure. Substituting ingredients may cause this recipe to fail. (see notes at the bottom of the recipe) 
  • Sift together flour, sugar, salt, baking soda and all the spices.
  • Mix together oil, melted butter, eggs and vanilla and blend into dry ingredients.
  • Add remaining ingredients and fold until combined.
  • Pour into three 8" cake pans that have been coated in cake goop (pan release). The layers will bake to about 1 ½" tall.
  • Bake at 350º F about 30 minutes. Test for doneness in multiple areas near the center with a tooth pick. If the tooth pick comes up dry with a few crumbs stuck to it, the cake is done. Let cakes cool in the pan for 15 minutes before turning out onto a cooling rack to cool the rest of the way. Cover with plastic wrap and chill before frosting. 

Cream Cheese Frosting

  • Cream the browned butter with the whisk attachment until smooth
  • Add in your softened cream cheese and whip together until smooth and no lumps are present
  • Slowly add in powdered sugar one cup at a time while mixing on medium until smooth
  • Add in your vanilla and orange extract and salt and mix until smooth.

Video

Notes

Important Things To Note Before You Start
1. Bring all your ingredients to room temperature or even a little warm (eggs, buttermilk, butter, etc) to ensure your batter does not break or curdle. 
2. Use a scale to weigh your ingredients (including liquids) unless otherwise instructed (Tablespoons, teaspoons, pinch etc). Metric measurements are available in the recipe card. Scaled ingredients are much more accurate than using cups and help ensure the success of your recipe. 
3. Practice Mise en Place (everything in it's place). Measure out your ingredients ahead of time and have them ready before you start mixing to reduce the chances of accidentally leaving something out.
4. Chill your cakes before frosting and filling. You can cover a frosted and chilled cake in fondant if you wish. This cake is also great for stacking. I always keep my cakes chilled in the refrigerator before delivery for easy transporting. 
5. If the recipe calls for specific ingredients like cake flour, replacing it with all-purpose flour and cornstarch is not recommended unless specified in the recipe that it’s ok. Substituting ingredients may cause this recipe to fail. 
6. Brown your butter the day before baking and leave it at room temperature so that it's the right consistency for making buttercream the next day. 

Nutrition

Serving: 8ounces | Calories: 1855kcal | Carbohydrates: 209g | Protein: 13g | Fat: 112g | Saturated Fat: 69g | Cholesterol: 339mg | Sodium: 856mg | Potassium: 361mg | Fiber: 3g | Sugar: 177g | Vitamin A: 7542IU | Vitamin C: 15mg | Calcium: 148mg | Iron: 3mg


Jewel Toned Mexican Wedding Cake

November 8, 2016 Blog

Elegant Wedding Cake Meets Mexican Culture

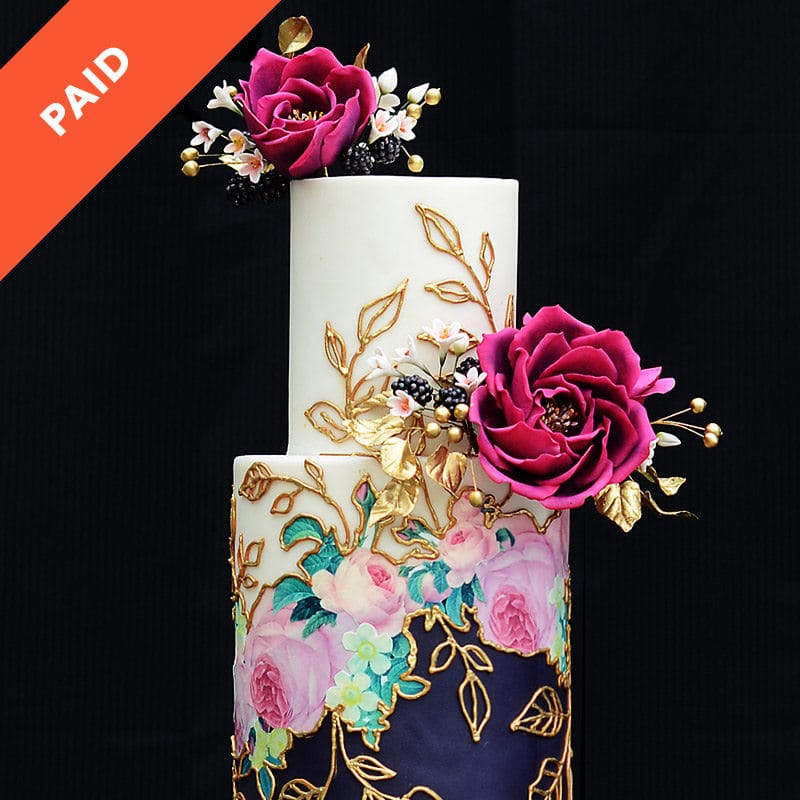
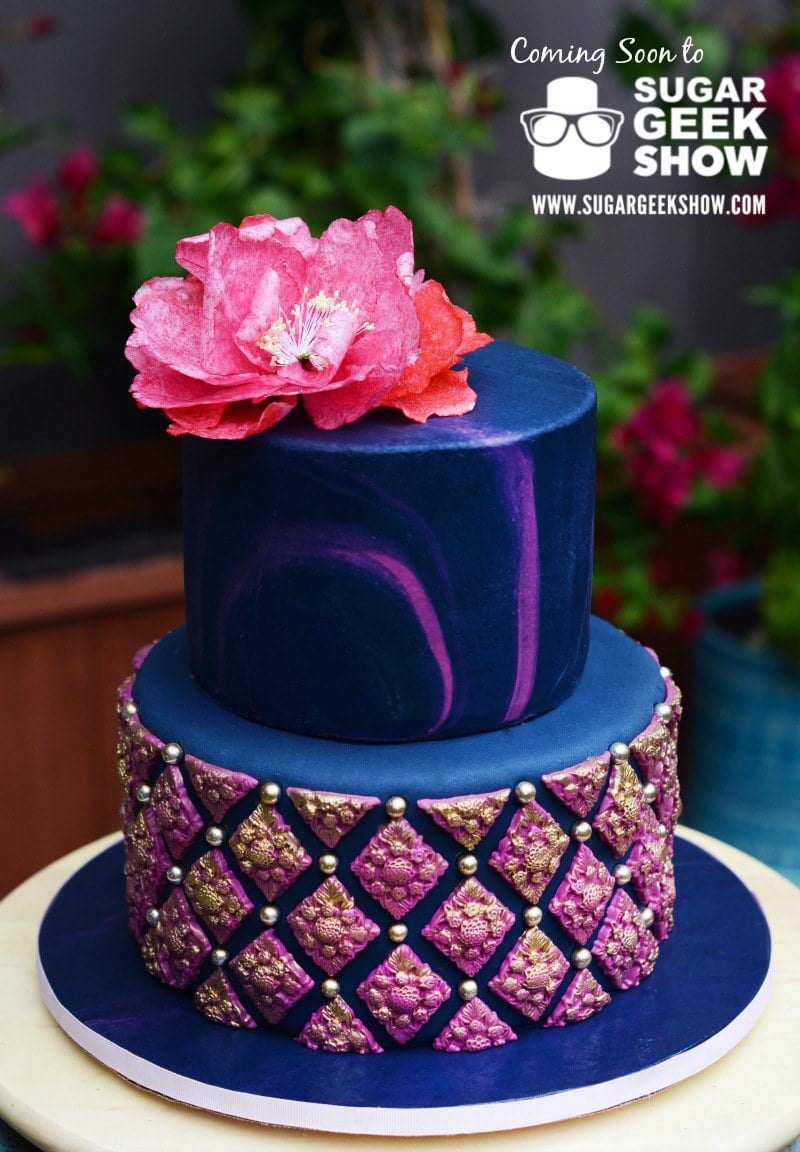
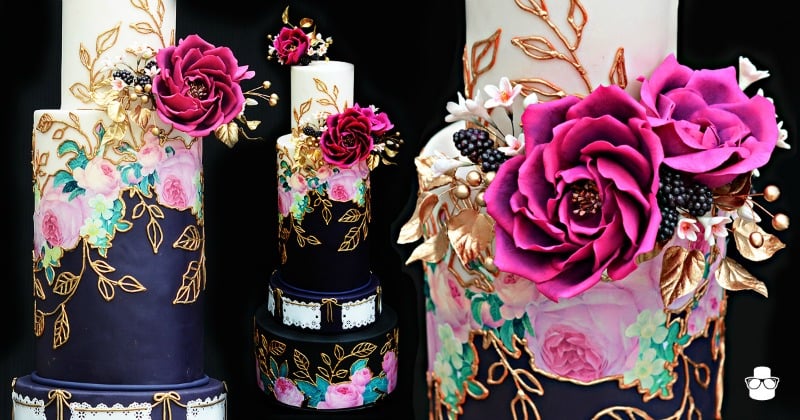
The latest cake tutorial to be found on The Sugar Geek Show is a lovely Jewel Toned Mexican Inspired Wedding Cake that is insanely unique for several reasons. Combine it with the Fuchsia Flowers, Buds and Berries Tutorial and you have a plethora of brand new techniques you can use on any cake! That's right, I said plethora. Liz made this cake for a special friend who wanted to represent the coming together of two cultures. Very cool. Let's take a closer look at the stunning details.

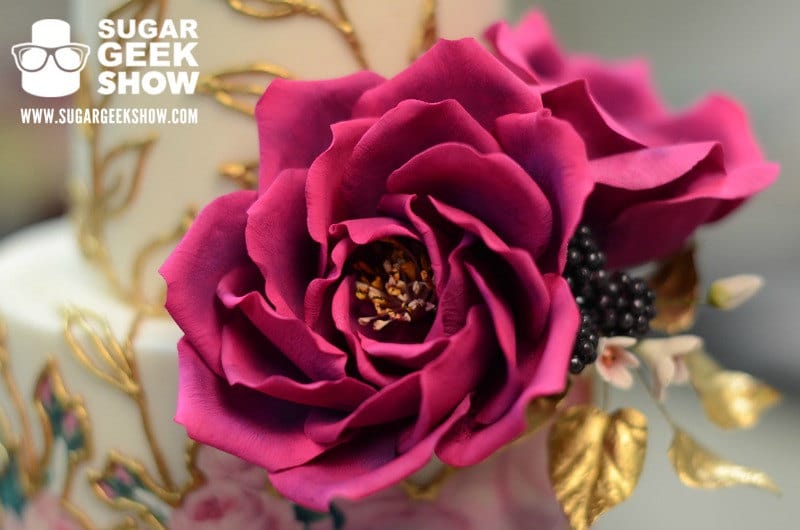
First off we have to swoon over this rose. Just let that set in for a bit. It's so realistic your guests will be trying to smell it. Now you're thinking, " it is gorgeous but it must be super difficult and time consuming", but guess what? IT'S NOT. Liz said, and I quote, "I think it's the easiest rose I have ever made". BONUS!

Fuchsia Sugar Rose

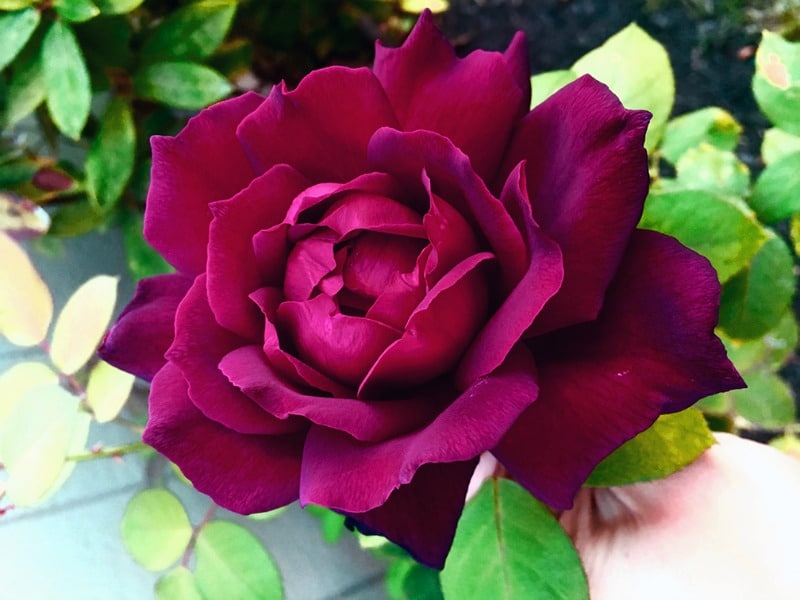
This is the photo Liz took of the real rose that inspired her. It is unlike any other rose I have ever seen, not that I am a rose expert of any kind whatsoever but I can see why she was inspired to creepily take a photo of her neighbor's rose; this definitely needed to be done in sugar.

Fuchsia Rose

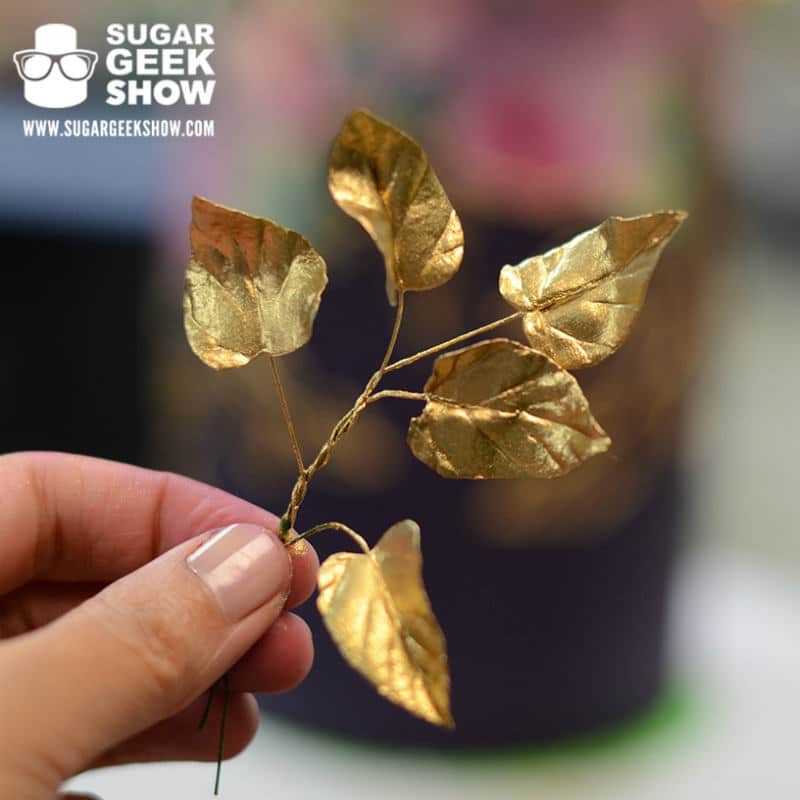
Beautiful gold leaves are a perfect accent on this cake and would be to many other cake designs as well, especially this time of year!

Edible Gold Leaves

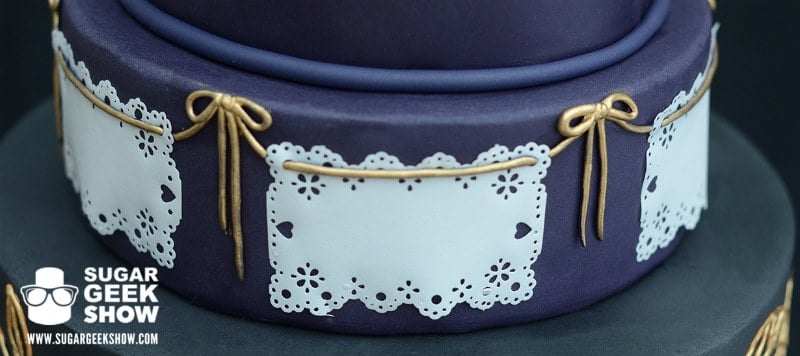
Learn how to make these super cute Mexican paper flags!

Jewel Toned Mexican Wedding Cake

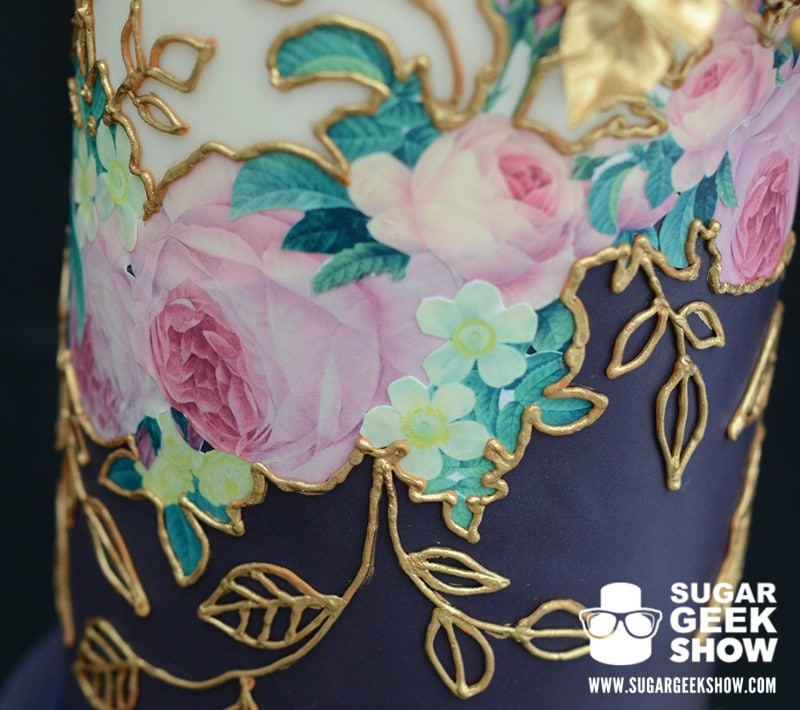
Edible decoupage is a super cool technique to be used on cakes. Decoupage is the art or craft of decorating objects with paper cut-outs. Layering the images as Liz did also adds even more interest.

Decoupage Cake

Jewel Toned Mexican Wedding Cake

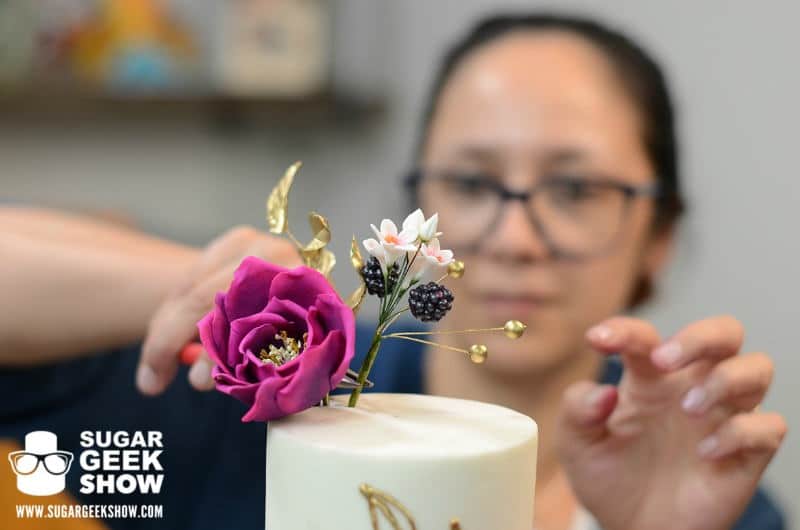
Liz demonstrates how to arrange the flowers, buds and berries on the cake to create a look that's appealing to the eye.

liz-marek-placing-flowers-in-cake-jewel-toned-mexican-inspired-wedding-cake

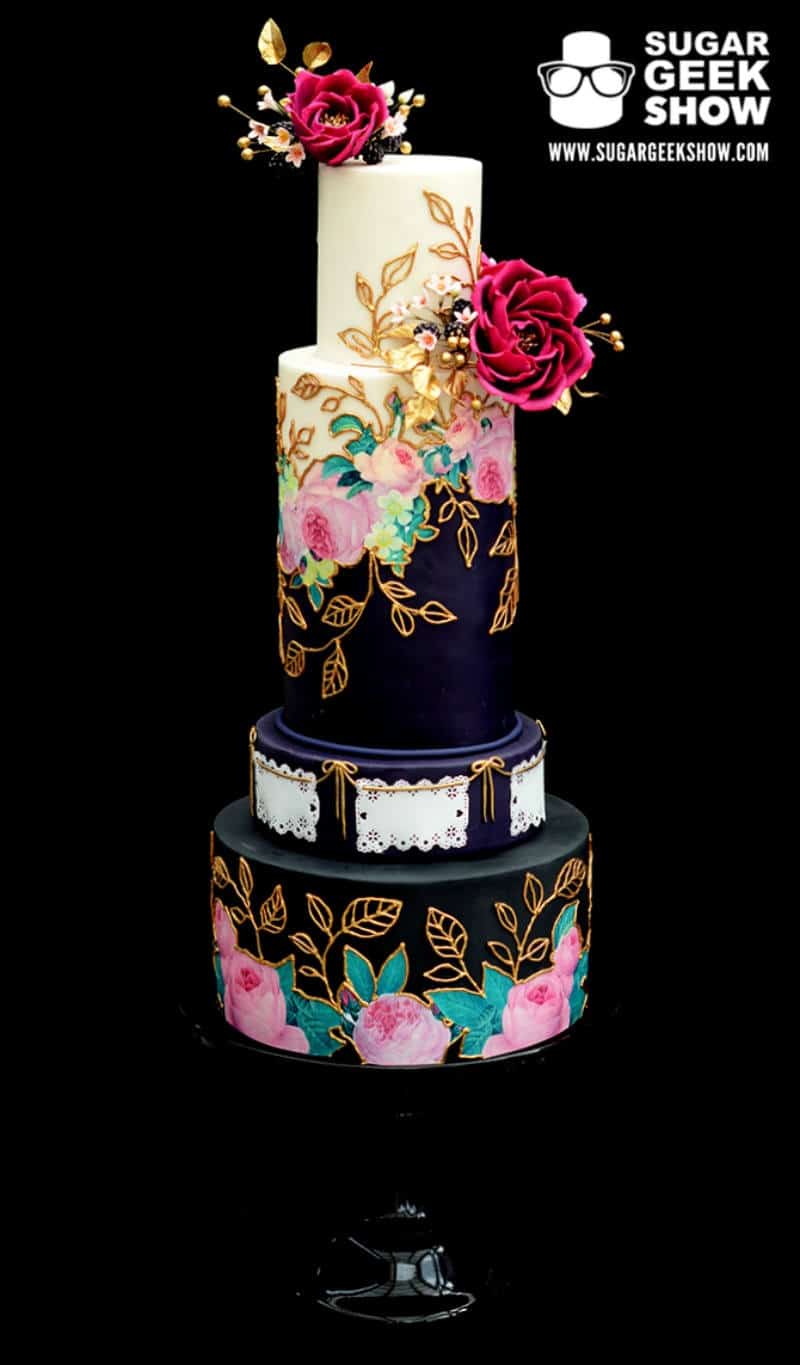
Here she is, the full beauty in all her glory. Love the theme of this cake and how Liz brought it to life!

Jewel Toned Mexican Wedding Cake

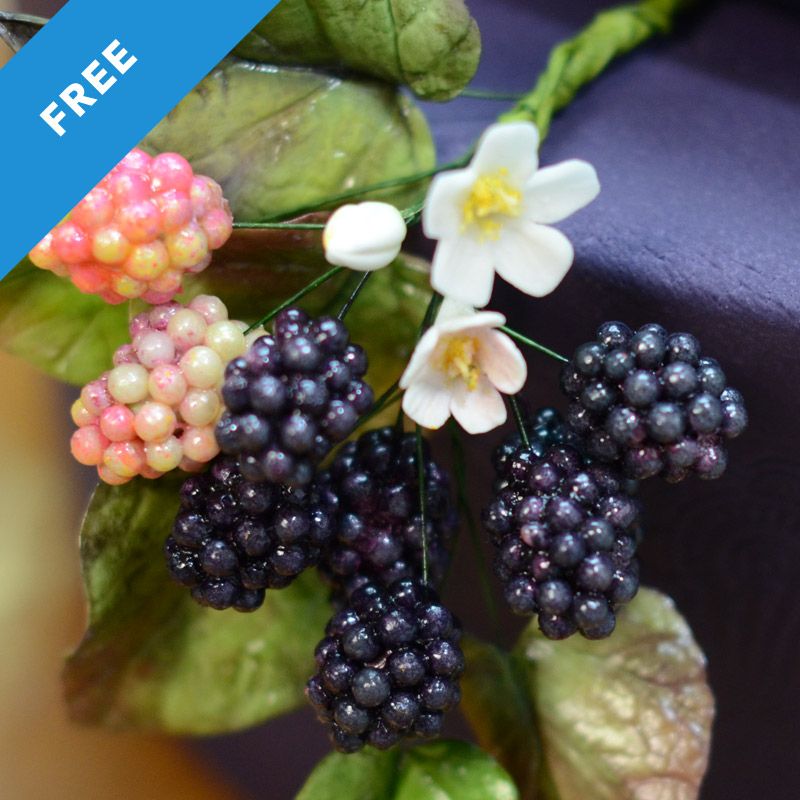
At this point, you should be inspired to sign up as a Premium or Elite Member of The Sugar Geek Show if you haven't already. If you're still on the fence, check out this FREE tutorial on how to make the incredible sugar berries from this cake. I have to tell you, this technique in my opinion is genius! Also check out the trailer's for both the Jewel Toned Mexican Inspired Wedding Cake and the Fuchsia Flowers, Buds and Berries.


Jewel toned Mexican Inspired Wedding Cake

November 1, 2016 Course Preview

Jewel-Toned Mexican Inspired Wedding Cake

Skill level: Intermediate

This wedding cake was created for a dear friend who wanted her cake to show the coming together of two cultures. I wanted to do something bold with deep jewel tones of purple and dark blue with pops of fuchsia flowers.

In this tutorial I show you how to do a two toned double barrel, how to use edible images in a design without them looking cheesy (free downloadable flowers) how to do some pretty piped accents, how to make some pretty traditional paper flags out of Photofrost sheets and how to arrange your pretty fuchsia flowers to accent your final cake.

1:10:16 Minutes of Instruction

What You Will Learn

  • How to evenly cover a cake tier in fondant
  • The paneling method to cover a tricky 4" round tier in fondant
  • How to add 2 different fondant colors to a double barrel
  • How to use edible images to create a fantastic decoupage
  • A simple way to design the flags
  • Liz Marek's way of arranging flowers on a cake

Tutorial Chapters

  1. Covering bottom tier 1:15
  2. Paneling 4" round in fondant 7:28
  3. Covering the double barrel in 2 different colors of fondant 15:04
  4. How to get fondant to roll out rectangular 18:50
  5. Paneling the white fondant on the double barrel 24:40
  6. Cutting the flags 33:44
  7. Creating the flag designs 34:38
  8. Stacking the cake 39:32
  9. Applying the flags to the cake 41:40
  10. Decoupage Flowers 45:30
  11. Piping leaves with royal icing 50:26
  12. Painting the piping 1:00:42
  13. Assembling the flowers (flowers in separate tutorial) 1:02:26
  14. Sealing the cake 1:09:32

Downloads

Materials List

Flower Template 1

Flower Template 2

Flower Template 3

Jewel toned Mexican Inspired Wedding Cake

November 1, 2016 Paid Video

Jewel-Toned Mexican Inspired Wedding Cake

Skill level: Intermediate

This wedding cake was created for a dear friend who wanted her cake to show the coming together of two cultures. I wanted to do something bold with deep jewel tones of purple and dark blue with pops of fuchsia flowers.

In this tutorial I show you how to do a two toned double barrel, how to use edible images in a design without them looking cheesy (free downloadable flowers) how to do some pretty piped accents, how to make some pretty traditional paper flags out of Photofrost sheets and how to arrange your pretty fuchsia flowers to accent your final cake.

1:10:16 Minutes of Instruction

What You Will Learn

  • How to evenly cover a cake tier in fondant
  • The paneling method to cover a tricky 4" round tier in fondant
  • How to add 2 different fondant colors to a double barrel
  • How to use edible images to create a fantastic decoupage
  • A simple way to design the flags
  • How to pipe an intricate leave pattern using royal icing
  • Liz Marek's way of adding flowers to a cake

Tutorial Chapters

  1. Covering bottom tier 1:15
  2. Paneling 4" round in fondant 7:28
  3. Covering the double barrel in 2 different colors of fondant 15:04
  4. How to get fondant to roll out rectangular 18:50
  5. Paneling the white fondant on the double barrel 24:40
  6. Cutting the flags 33:44
  7. Creating the flag designs 34:38
  8. Stacking the cake 39:32
  9. Applying the flags to the cake 41:40
  10. Decoupage Flowers 45:30
  11. Piping leaves with royal icing 50:26
  12. Painting the piping 1:00:42
  13. Assembling the flowers (flowers in separate tutorial) 1:02:26
  14. Sealing the cake 1:09:32

Downloads

Materials List

Flower Template 1

Flower Template 2

Flower Template 3

Related Videos


Fuchsia Flowers, Buds and Berries

fuchsia flowers buds and berries made from sugar and fondant

October 15, 2016 Course Preview

Fuchsia Flowers, Buds and Berries

Skill level: Intermediate

Fuchsia is so on-trend right now but it can be tricky to recreate this intense color into your cakes. I show you how to make not one, not two, but 7 different floral projects using various shades of fuchsia! You can make elaborate floral designs or just incorporate one or two pops of color. Once you learn…

59:50 Minutes of Instruction

What You Will Learn

  • How to make the difficult fuchsia color
  • Quick and easy filler flowers, buds and berries
  • How to make bougainvillea easily
  • Liz Marek's unique take on a sugar rose

Tutorial Chapters

  1. Basic 6 petal filler flowers 2:56
  2. Basic filler buds 6:32
  3. Making pepper berries 7:46
  4. Easy blackberries 10:02
  5. Easy filler leaves 16:22
  6. Bougainvillea 20:56
  7. Hybrid tea rose 38:16
  8. Small rose variation 52:14

Downloads

Materials List

fuchsia flowers buds and berries made from sugar and fondant

October 15, 2016 Paid Video

Fuchsia Flowers, Buds and Berries

Skill Level: Intermediate
Fuchsia is so on-trend right now but it can be tricky to recreate this intense color into your cakes. I show you how to make not one, not two, but SEVEN different floral projects using various shades of fuchsia! You can make elaborate floral designs or just incorporate one or two pops of color. Once you learn…

Run Time

59:50

Tutorial Chapters

  • 1:48 Filler Flowers, Leaves and Berries
  • 2:56 Basic 6 petal filler flowers
  • 6:32 Basic filler buds
  • 7:46 Making pepper berries
  • 10:02 Easy blackberries
  • 16:22 Easy filler leaves
  • 20:56 Bougainvillea
  • 22:34 Making the centers
  • 24:10 Making the petals
  • 32:34 Dusting and assembly
  • 38:16 Hybrid Tea Rose
  • 38:22 Making the centers
  • 41:10 Making the petals
  • 46:48 Assembling the flower
  • 48:12 Dusting the rose
  • 52:14 Small rose variation
  • 52:20 Making the center
  • 53:34 Making the pollen
  • 54:48 Making the petals
  • 56:26 Dusting the flower

Downloads

Materials List

Related Videos


Nicholas Lodge Gumpaste Recipe

Easy Sugar Blackberry Tutorial

October 15, 2016 Blog

Easy Sugar Blackberries

Skill Level: Newb
I love making sugar blackberries for wedding cakes, but they are a pain and take forever! Well, I figured out a new technique that saves BUCKETS of time and looks super profesh!

pegboard organize

October 4, 2016 Blog

Get it Together! 20 Amazing Organizing Tips for Cakers

Do you have it all together? Is all of your stuff perfectly organized with it's own easily accessible place? Then this post is a waste of your time. Clearly you're not like the other 99% of the world. For everyone else though, this post might just be a life saver, so read on fellow caker clutter bugs and we'll get it together, together!

I have tried to avoid any "use organizing bins to organize" or "use shelves to put stuff on" tips, 'cause really, they're not tips. Thanks anyway though Captain Obvious, you are relieved of duty.

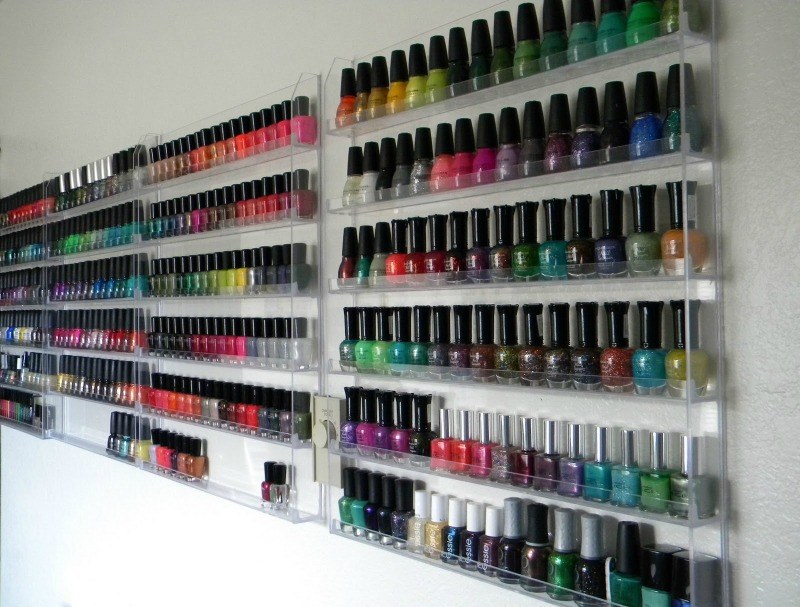
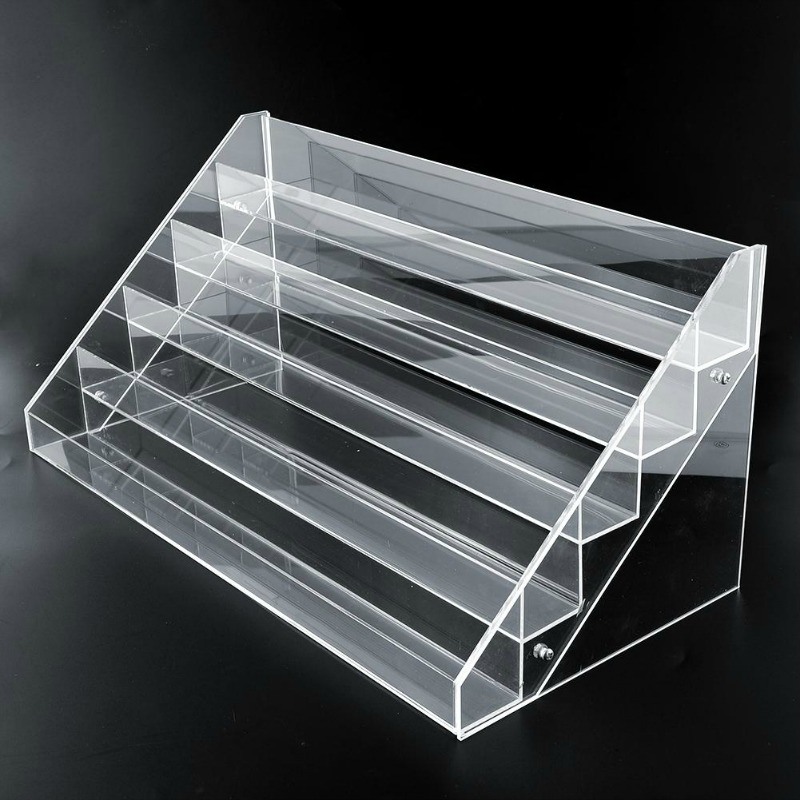
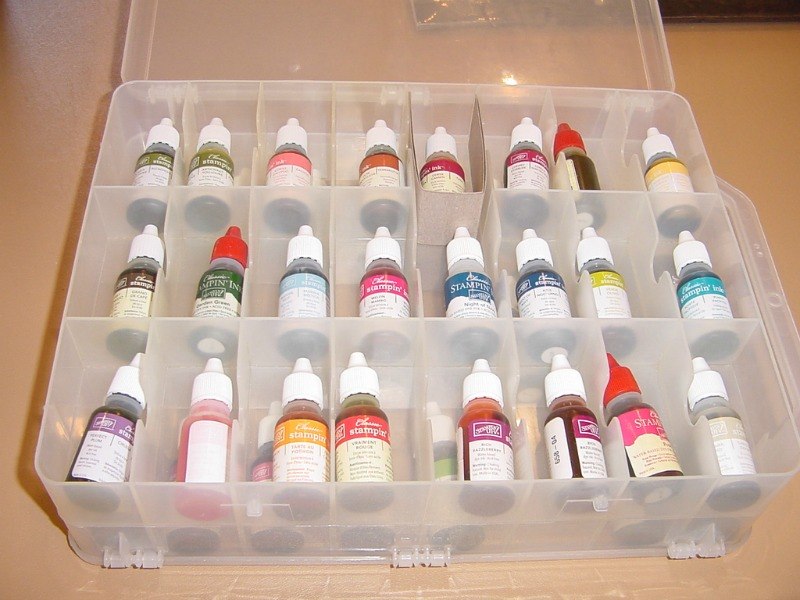
#1 Use nail polish racks to organize liquid and gel food colors! Four may be excessive but you never know.

Tip provided by Helen Wilkinson of Who did the cake?

Food Color Organizing
Found at fashionfill.com

Here is another option for a nail polish rack if wall space isn't in your space budget or you just don't have 3 million bottles of food color.

Found at aliexpress.com

#2 Use a double sided thread and bobbin container to organize dusts or gels. Use one side for petal dusts and the other for lusters!

Tip provided by Ashley Barbey of The Little Vintage Baking Company.

organize dusts
Found at pinterest.com

#3 Using Command hooks inside the door of a cabinet comes in handy for hanging all sorts of things including ProGel Food Colors! Space saver and it's outta sight!

Tip provided by Lisabel Sanchez of Tall Tiers of Joy.

command hooks organize
Found at becomingmrsstewart.com


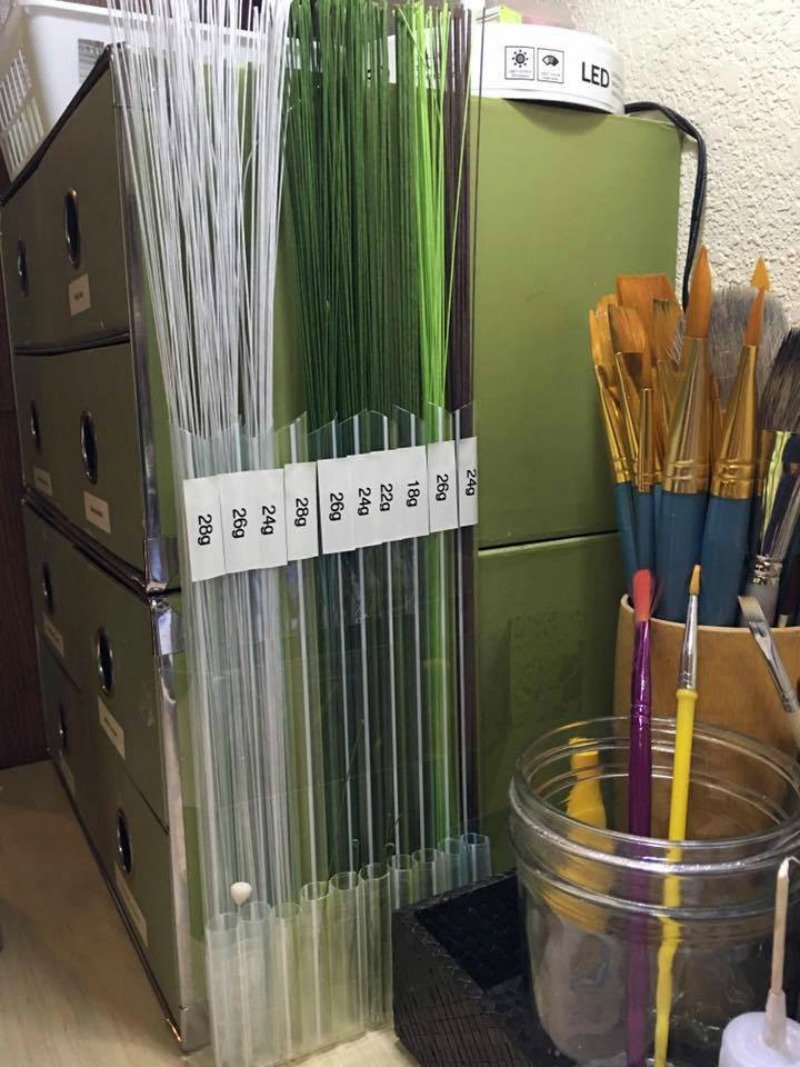
#4 Use Bubble Tea Straws to organize your floral wire by gauge! Seriously genius.

Tip Provided by Shani Christenson of Shani's Sweet Creations.

Bubble Tea Straws Organize Wires
Photo Provided by Shani Christenson

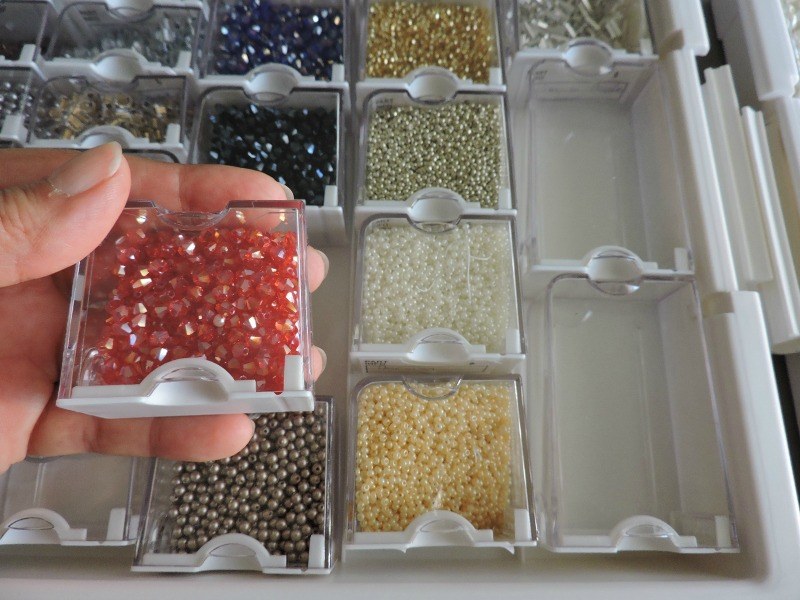
#5 Use bead organizers for tiny cutters! If you can find your tiny cutters to put them in there.

Tip provided by Natasha Rice of Natasha Rice Cakes.

organize small cutters
Found at gorgeouscomplements.blogspot.com

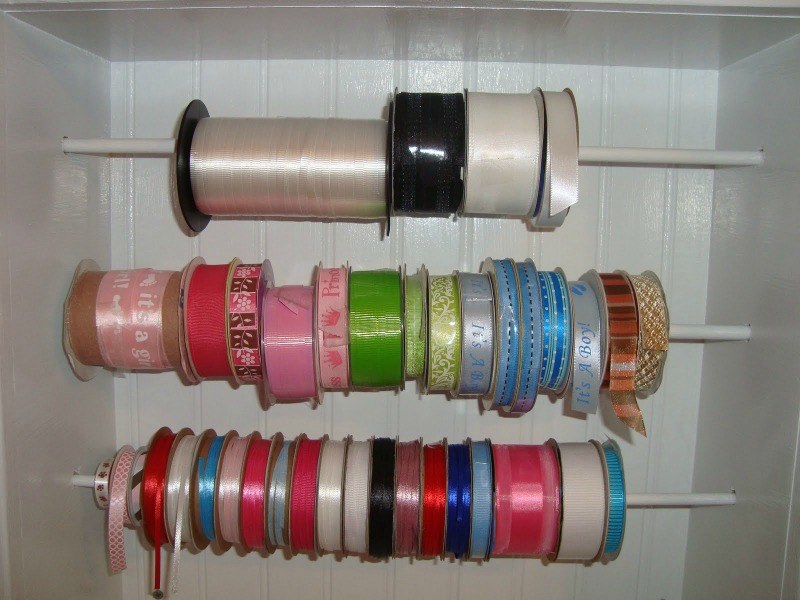
#6 Use a dowel rod inside a cabinet or case to hold your ribbon for easy access and use. Not having to untangle 100 different ribbons to get the one you want probably saves a ton of time.

Tip provided by Theresa Taubrich of Crazy Sweets by Theresa Taubrich.

organize ribbon
Found at anngelasprettylittlethings.blogspot.com

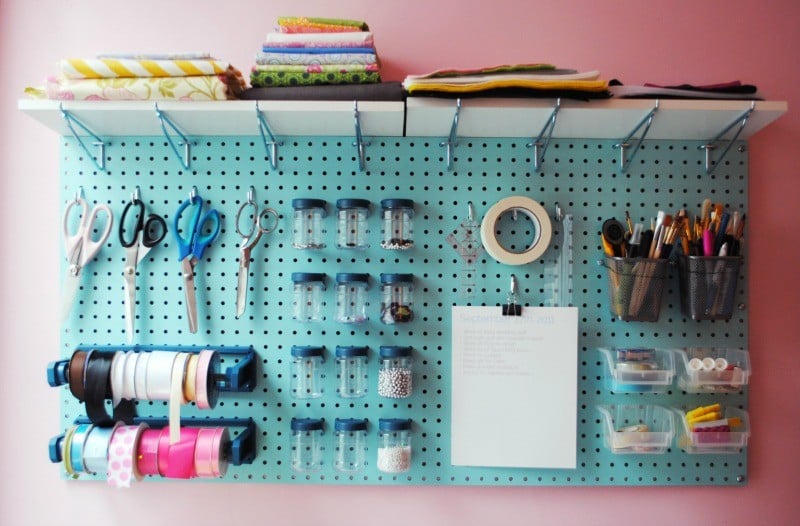
#7 Another great option for that pesky ribbon is to use peg board! I can see lots of other great uses for peg board too!

Tip provided by Natalie Bryn of Cake Envy.

pegboard organize
Found at invincibleinc.wordpress.com

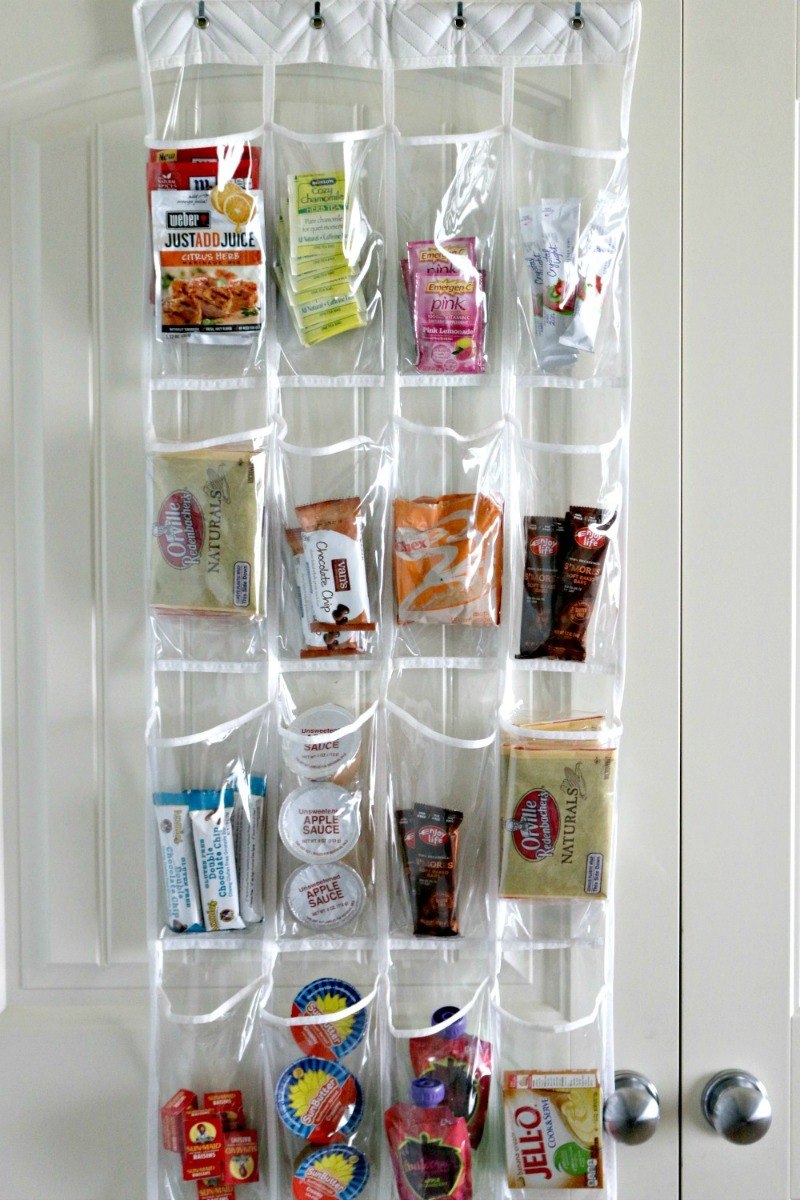
#8 Over the door shoe organizers work great for sorting cookie cutters by shape or type! Hang them on the side of a cabinet or metal rack for easy access.

Tip provided by Veronica Fabre of Little Chef's Kitchen.

organize cookie cutters
Found at moneysavingqueen.com

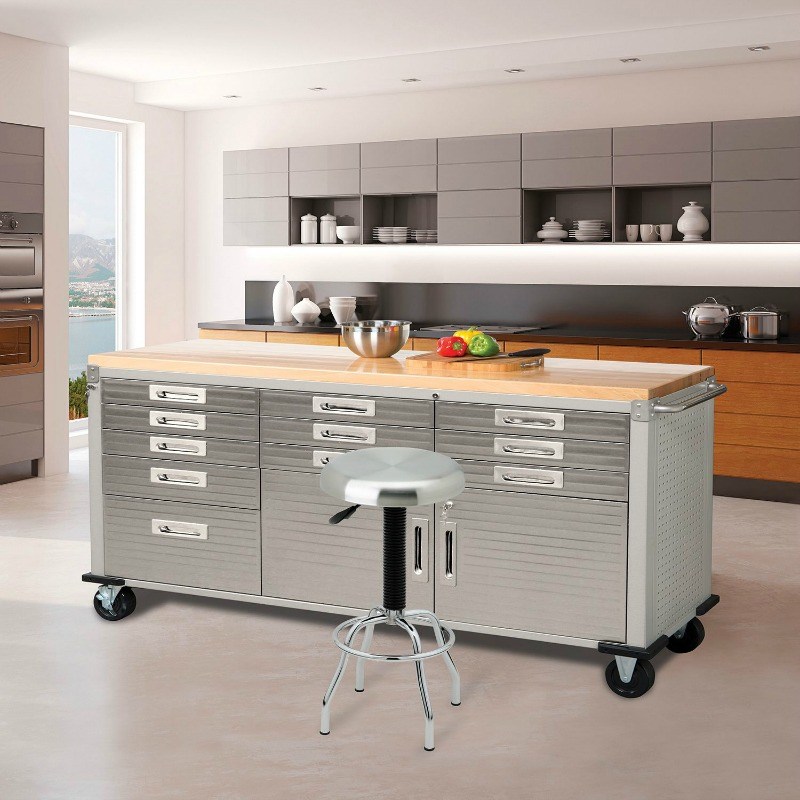
#9 Tool chests make excellent storage options for cake decorating supplies! If it's in your budget, this is definitely an overall good option. Plus you'll feel a little cooler right? I know I would.

Tip provided by Dany Lind of Dany's Cakes.

tool chest cake organizer
Found at samsclub.com

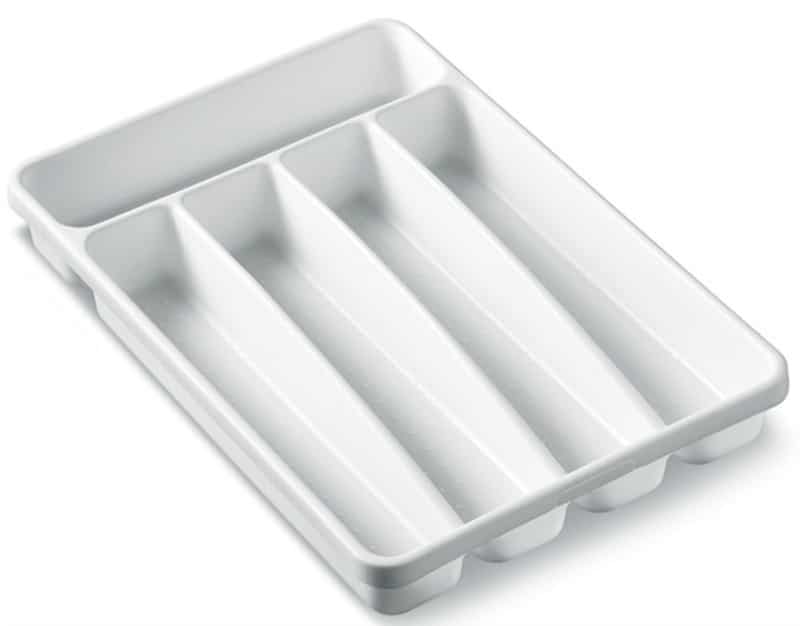
#10 Use silverware organizers to separate and sort your paintbrushes by size or use. Add a little label on the top inside and voila! No more searching through a cup of brushes to find the right one.

organize paint brushes
Found at bestkitchenknivesset.com

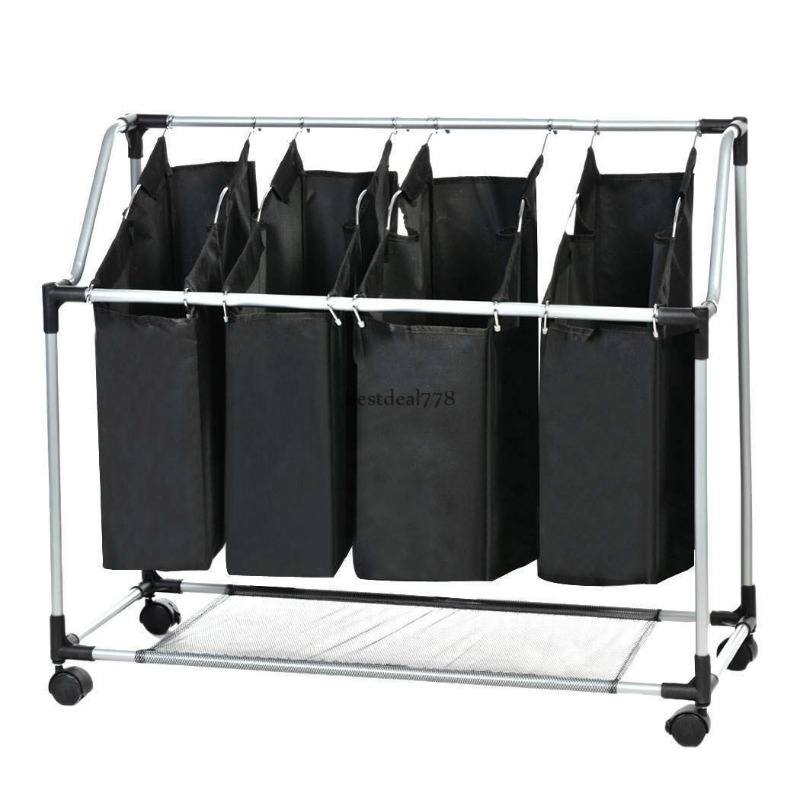
#11 Use a laundry organizer to store your cake boxes by size! In my house there would be a lot more coming out of this hamper and more often than the one that holds our laundry.

organize cake boxes
Found at ebay.com

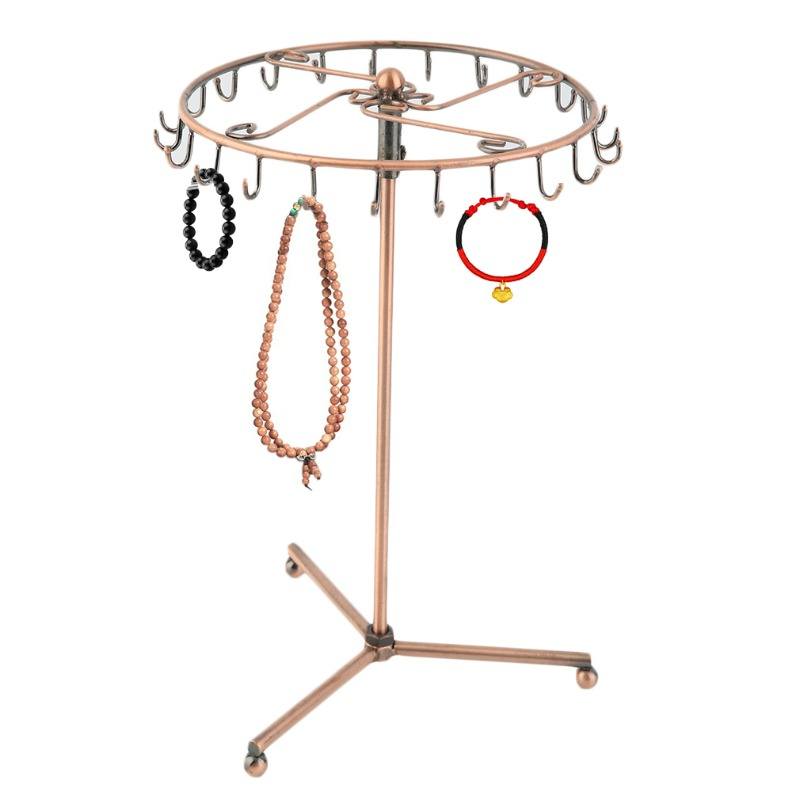
#12 Create an inexpensive lazy susan to store gel colors, edible paints or anything you can think of that could benefit from rotating easily. Take it a step further and glue a jewelry rack in your make shift susan for hanging items!

marble lazy susan
Found at itsallaboutpurple-debbie.blogspot.com

rack for lazy susan
Found at aliexpress.com

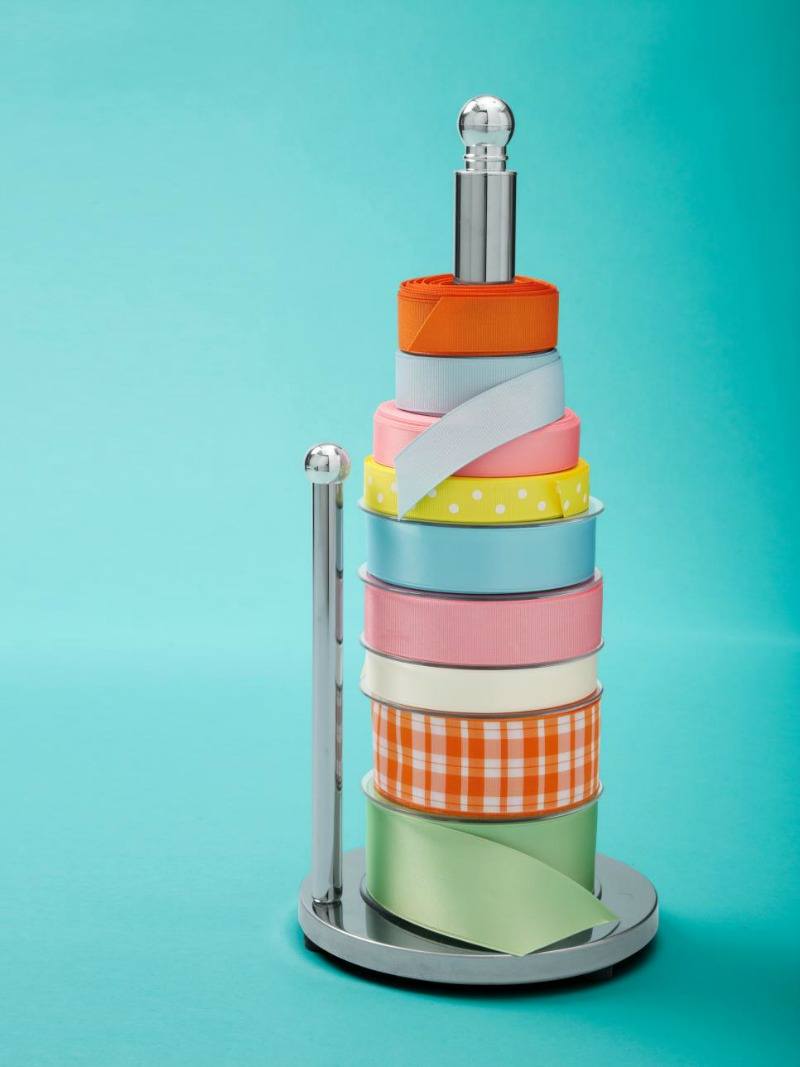
#13 Use a paper towel holder to hold your ribbon! As if we needed another tip for how to organize our ribbon, but I thought this was another good solution for people who may not have the space for the two we mentioned before.

store ribbon
Found at hgtv.com

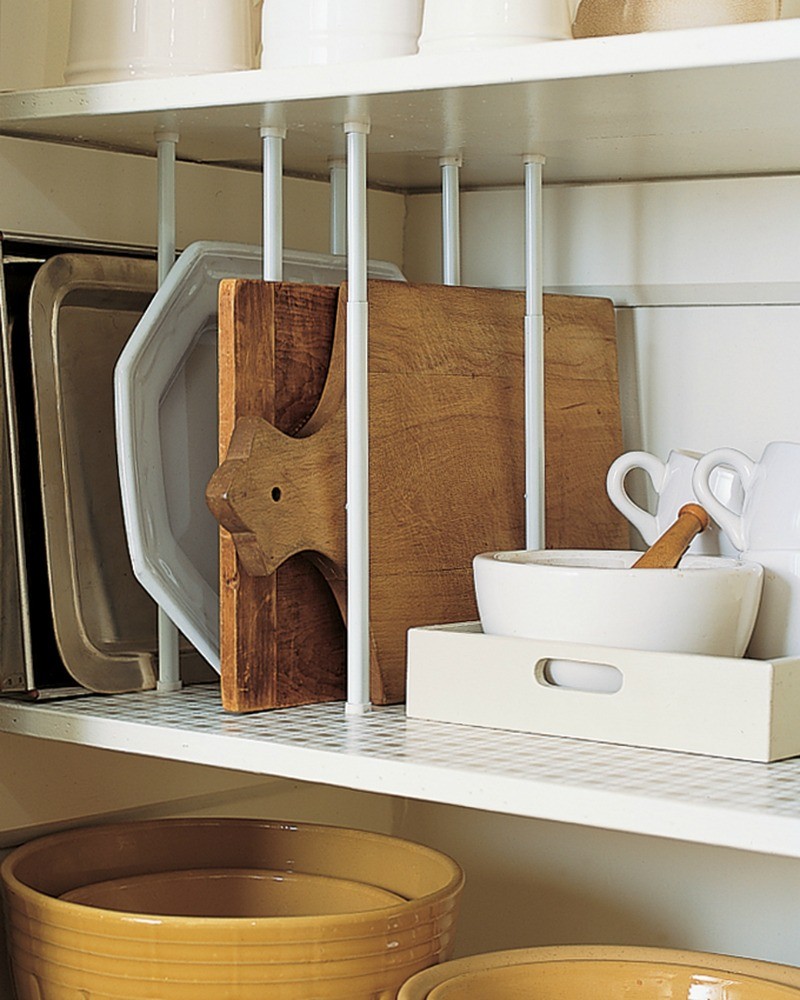
#14 Make the most out your existing cupboard space and use inexpensive tension curtain rods as dividers to keep things a little more organized!

tension rod dividers
Found at marthastewart.com

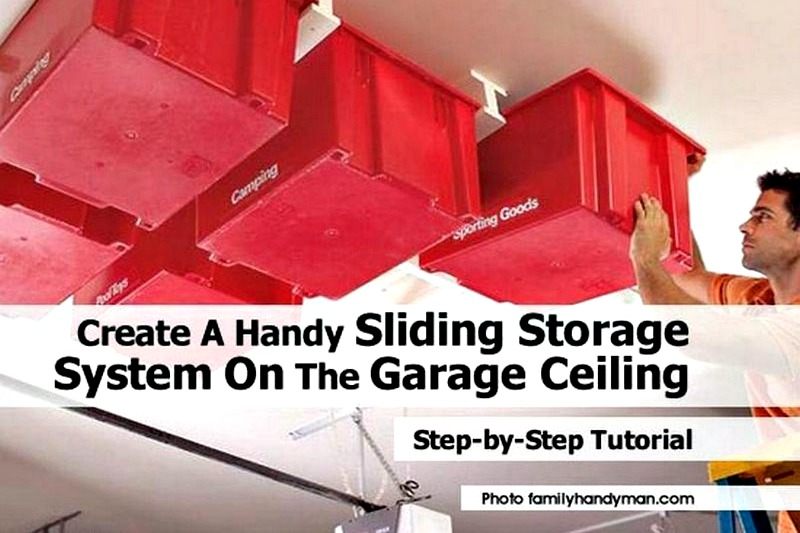
#15 Okay, so this one would take a little bit of work, but is an amazing space saver for storing large items and the long term benefit would be SO worth it! Create your own sliding storage system utilizing dead space in your garage! I'm thinking cake dummies, cake boxes, cake stands, any of those larger items that you don't need all the time but can't throw away! Click the image for the full tutorial.

sliding storage system
Found at familyhandyman.com

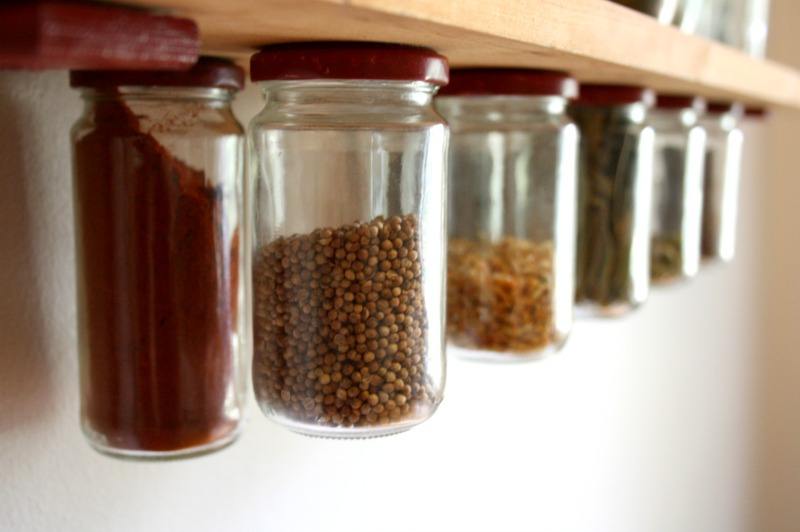
#16 Attach jars to the underside of a shelf or cabinet to organize and store small items such as piping tips, cutters, molds and so much more! You could go out and buy a bunch of jars I suppose, but why not use those jars your pickles, peppers or pickled peppers come in instead of throwing them away?

hanging glass jars
Found at hildablue.com

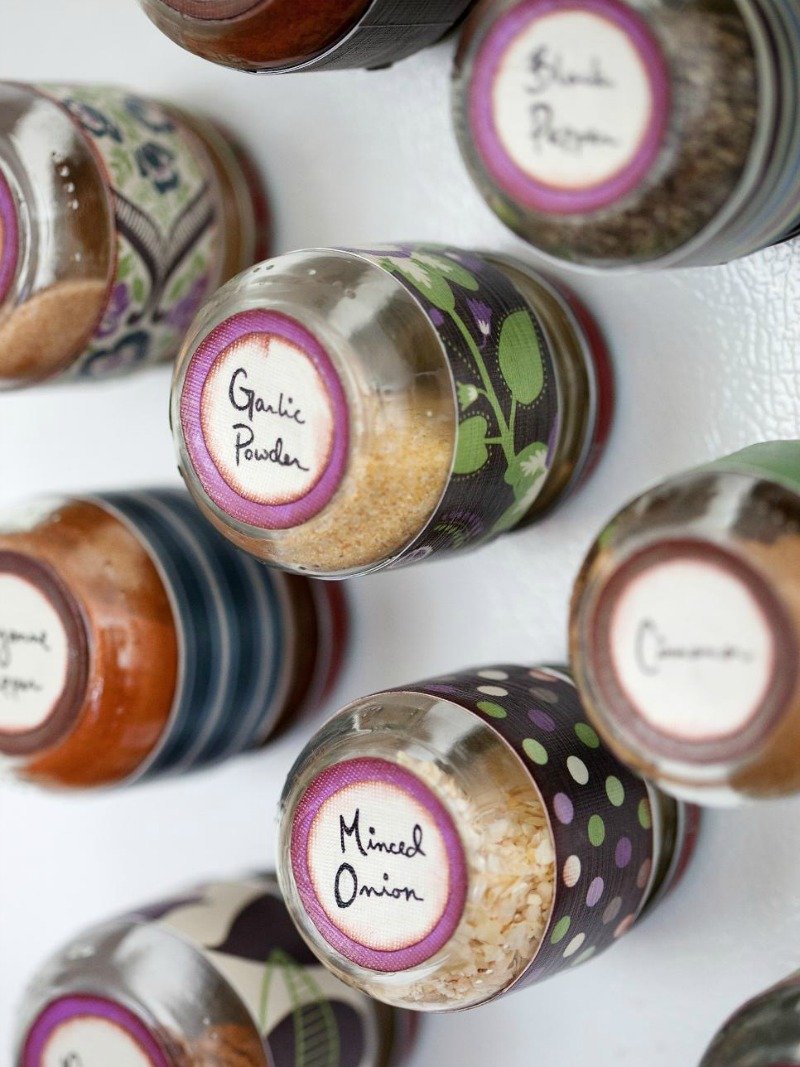
#17 Another genius jar hack is to re-purpose baby food jars by gluing a magnet to the lid and adding a label to the bottom to organize anything small! Sure wish I'd have learned about this 8 years ago.

baby jar organizers
Found at brit.co

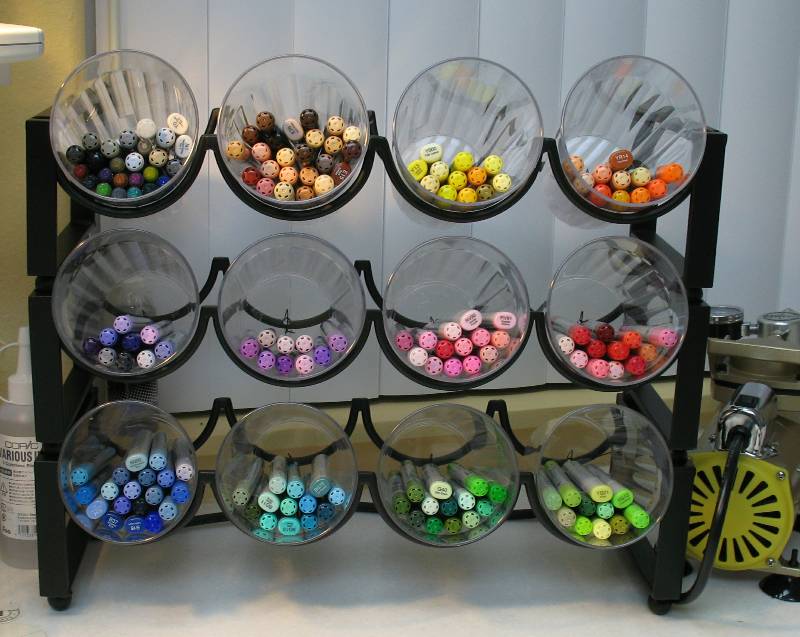
#18 Stackable wine racks and cheap plastic cups quickly becomes a very organized little center that could be used for many things!

wine rack storage
Found at mycasestudies.blogspot.ca

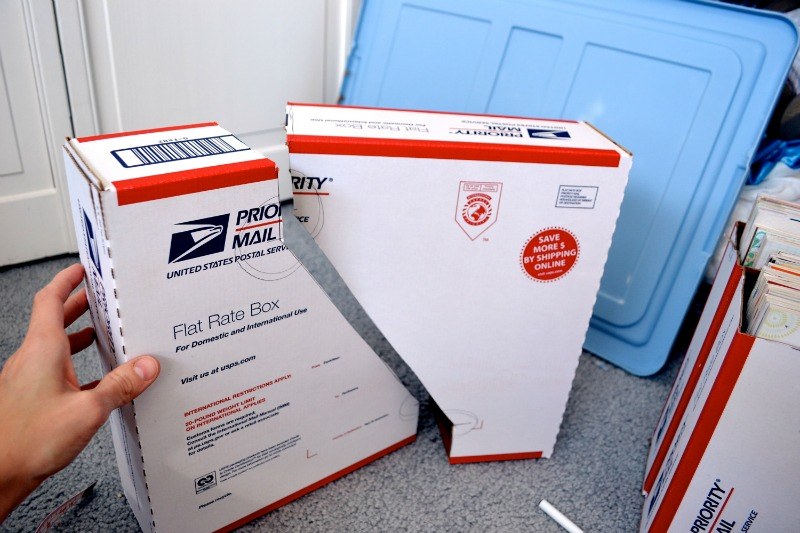
#19 Now this is genius! Cut priority mail boxes in half to make two "magazine" holders that in our case would be perfect for organizing cake boards! I guess you could also just use magazine holders but that certainly would cost more and not be nearly as gratifying.

diy cake board holders
Found at lyssa-beth.blogspot.com

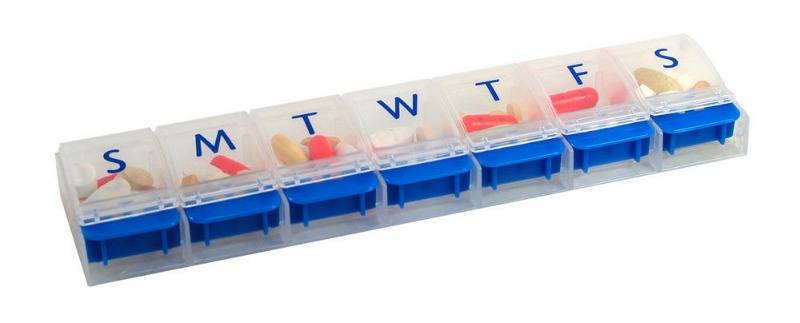
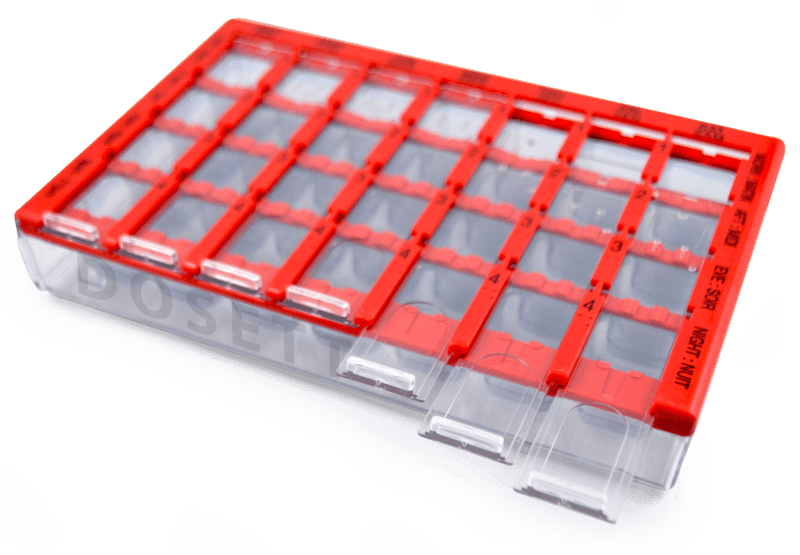
#20 Use a pill organizer to store your edible paint mixtures. Most are airtight which will keep your alcohol from evaporating and give you easy access without having to remix and rewash palettes or containers! Paint a dab on a small piece of fondant to adhere to the top to let you know the color.

edible paint palette
Found at bigbeautymall.com

WELL I don't know about you but my life has certainly  changed after going through this post and I haven't even put the ideas into action yet! So many amazing ways to organize our stuff, I don't suppose we have much excuse anymore do we? Go on, dig into that mess and get things organized!

day of the dead dia de los muertos sugar skull with chocolate flowers cake tutorial

October 1, 2016 Course Preview

Sugar Skull Cake

Skill Level: Intermediate
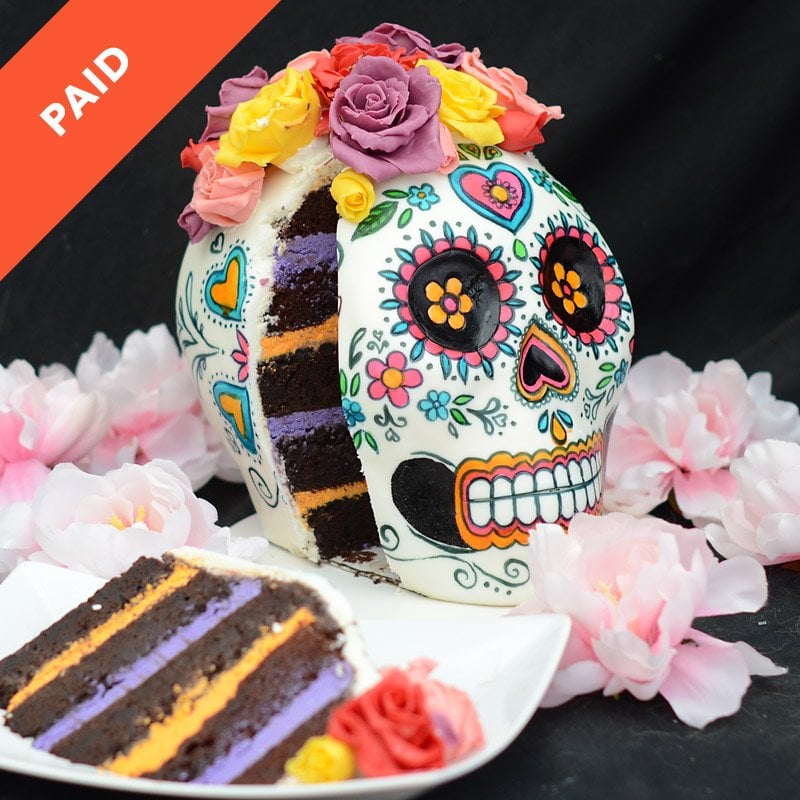
We're taking the term Sugar Skull very seriously! This delicious cakey creation is 100% edible! Topped with yummy chocolate roses, filled with colorful orange and purple buttercream and covered in a colorful design! Anyone can do this one and is the perfect treat to bring to a Halloween party.

Run Time

1:01:19

Tutorial Chapters

  • 0:19 Coloring the orange buttercream
  • 2:46 Coloring the purple buttercream
  • 5:38 Cutting the cake board
  • 7:00 Cutting and stacking the cake
  • 10:40 Carving the cake
  • 19:20 Frosting the skull
  • 24:40 Getting rid of modeling chocolate "white" residue
  • 28:56 Making the flowers
  • 36:34 Rolling out the fondant
  • 38:38 Covering the skull
  • 41:30 Mixing paints
  • 42:50 Edible marker ink
  • 44:20 Mapping out design
  • 49:15 Painting the skull
  • 58:12 Adding the flowers to the skull

Downloads

Materials List

day of the dead dia de los muertos sugar skull with chocolate flowers cake tutorial

October 1, 2016 Paid Video

Sugar Skull Cake

Skill Level: Intermediate
We're taking the term Sugar Skull very seriously! This delicious cakey creation is 100% edible! Topped with yummy chocolate roses, filled with colorful orange and purple buttercream and covered in a colorful design! Anyone can do this one and is the perfect treat to bring to a Halloween party.

Run Time

1:01:19

Tutorial Chapters

  • 0:19 Coloring the orange buttercream
  • 2:46 Coloring the purple buttercream
  • 5:38 Cutting the cake board
  • 7:00 Cutting and stacking the cake
  • 10:40 Carving the cake
  • 19:20 Frosting the skull
  • 24:40 Getting rid of modeling chocolate "white" residue
  • 28:56 Making the flowers
  • 36:34 Rolling out the fondant
  • 38:38 Covering the skull
  • 41:30 Mixing paints
  • 42:50 Edible marker ink
  • 44:20 Mapping out design
  • 49:15 Painting the skull
  • 58:12 Adding the flowers to the skull

Downloads

Materials List

Related Videos


Easy Buttercream Recipe


Modeling Chocolate Recipe

Chocolate Cake Recipe

chocolate cake recipe

September 28, 2016 Blog

My Favorite Chocolate Cake Recipe

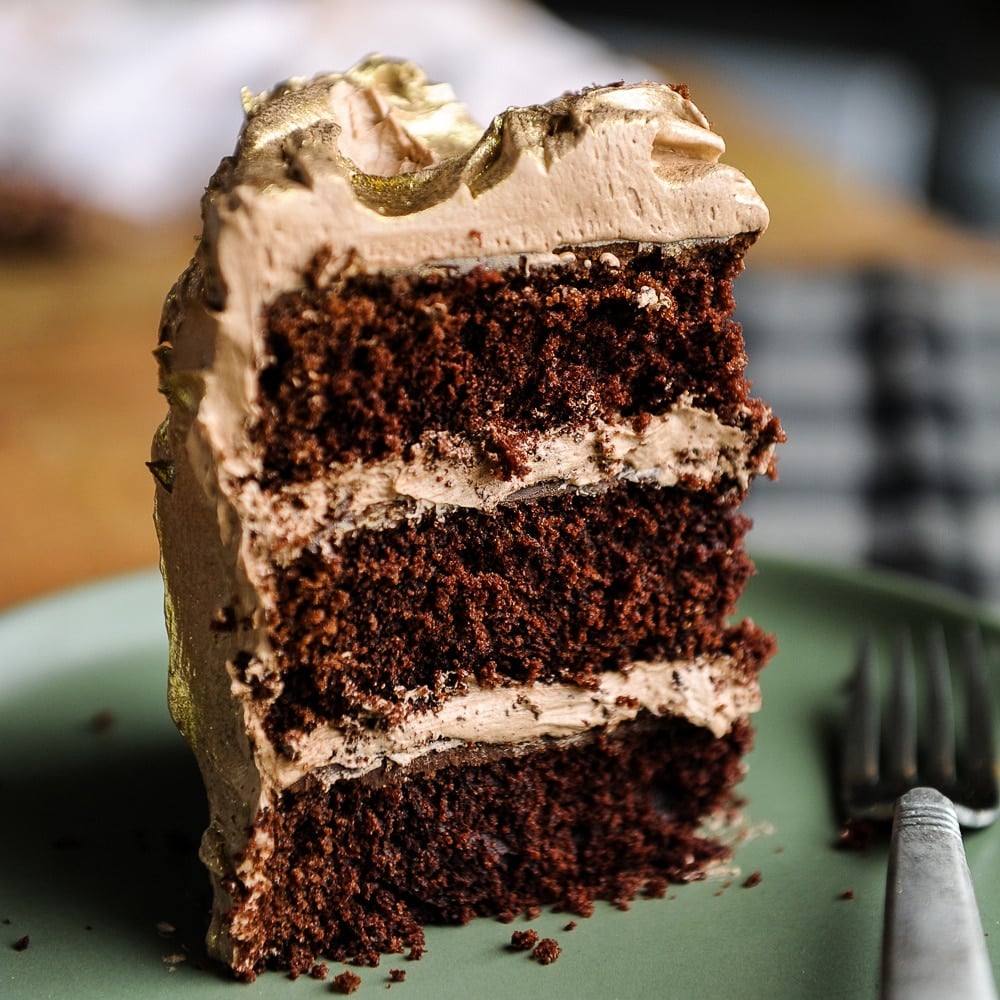
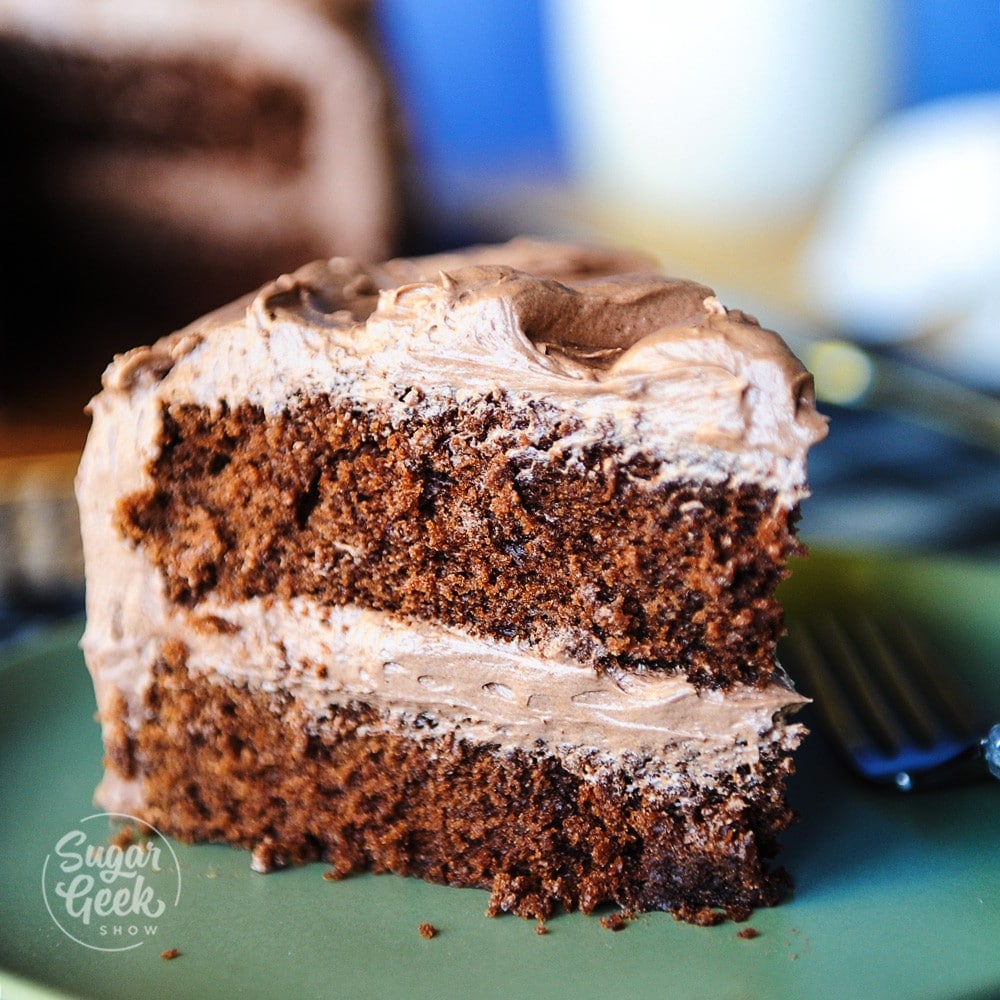
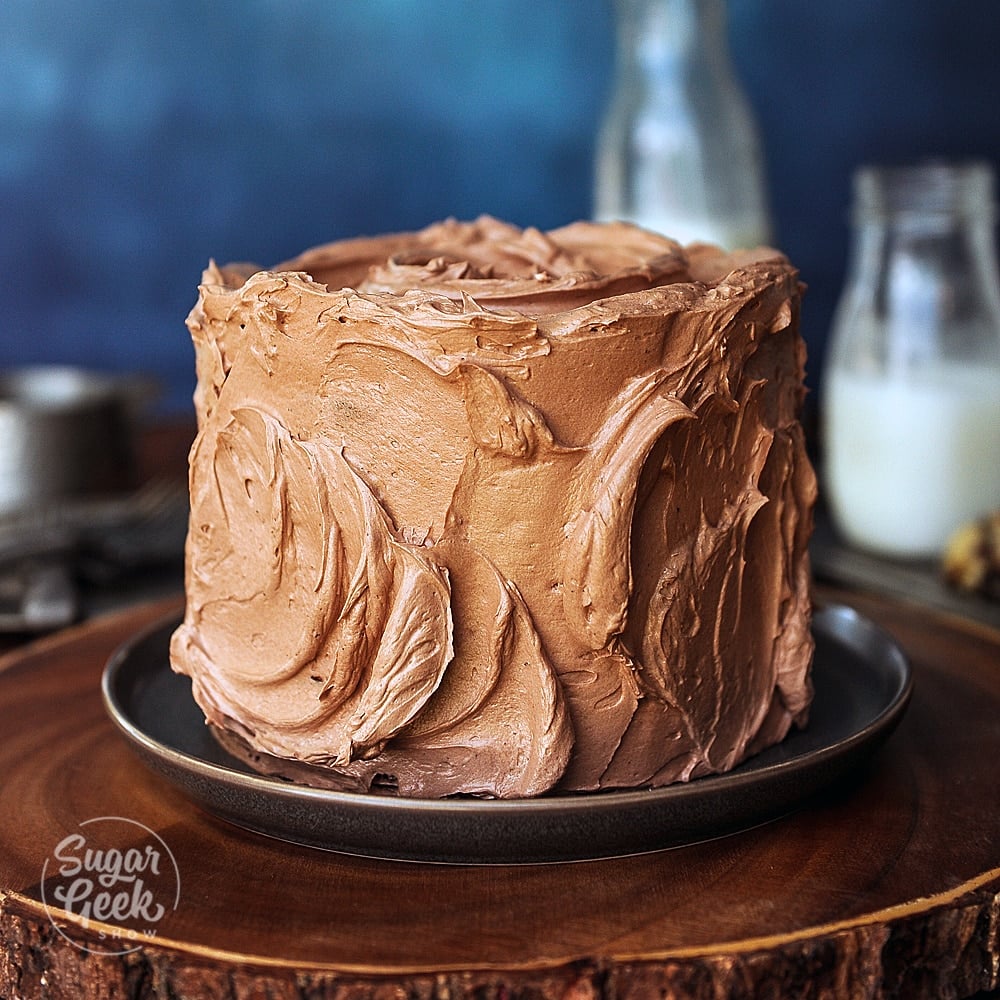
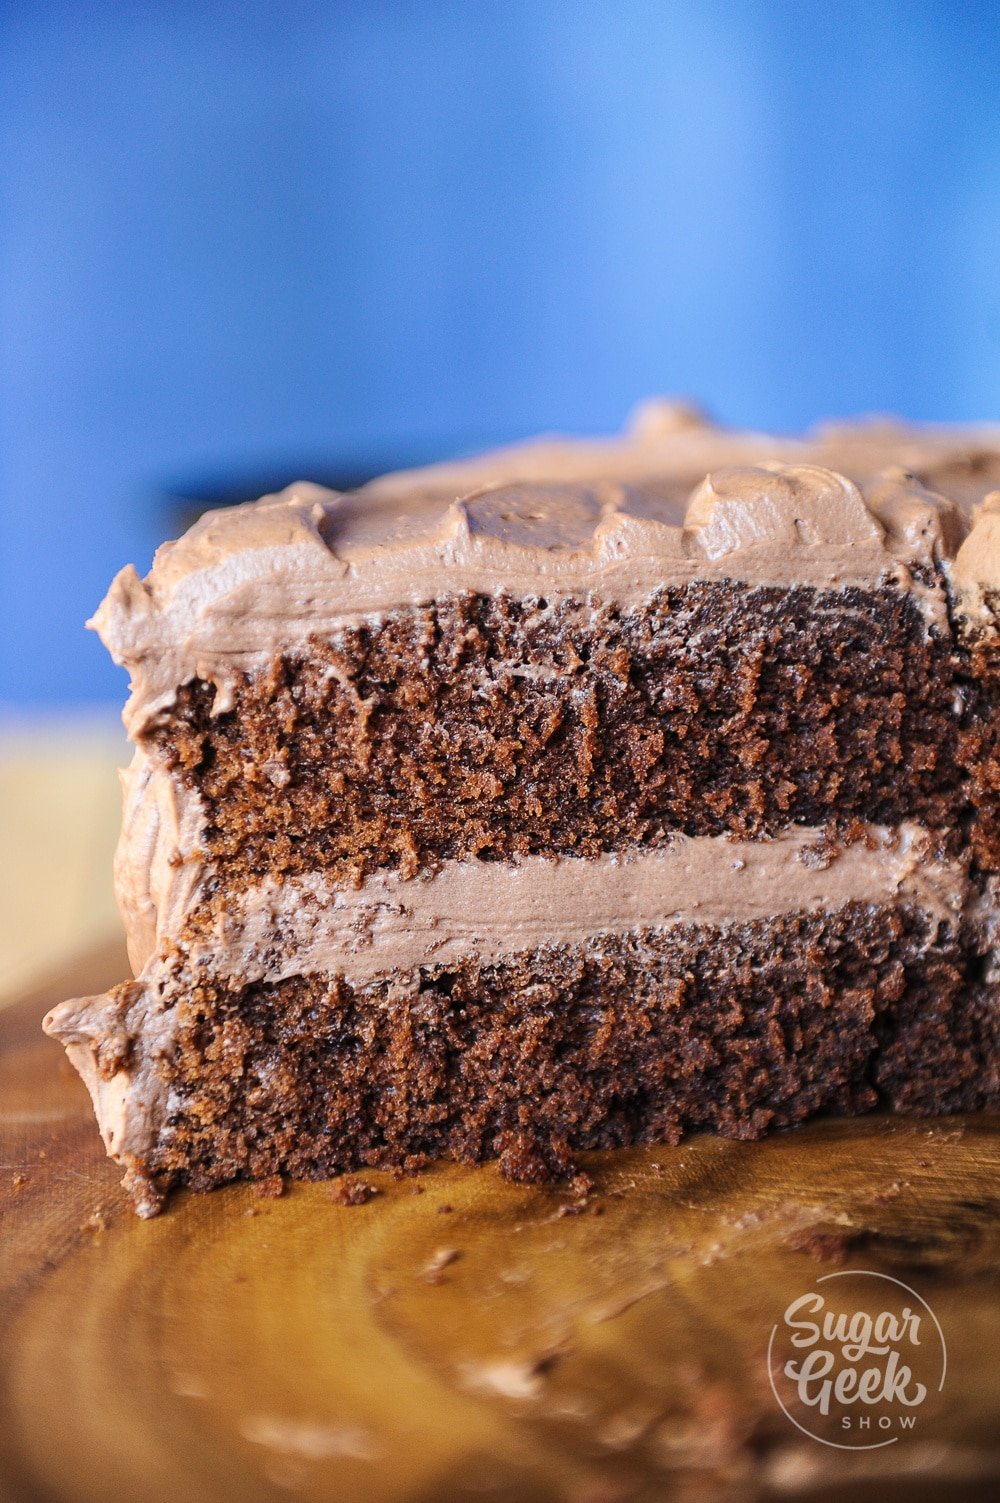
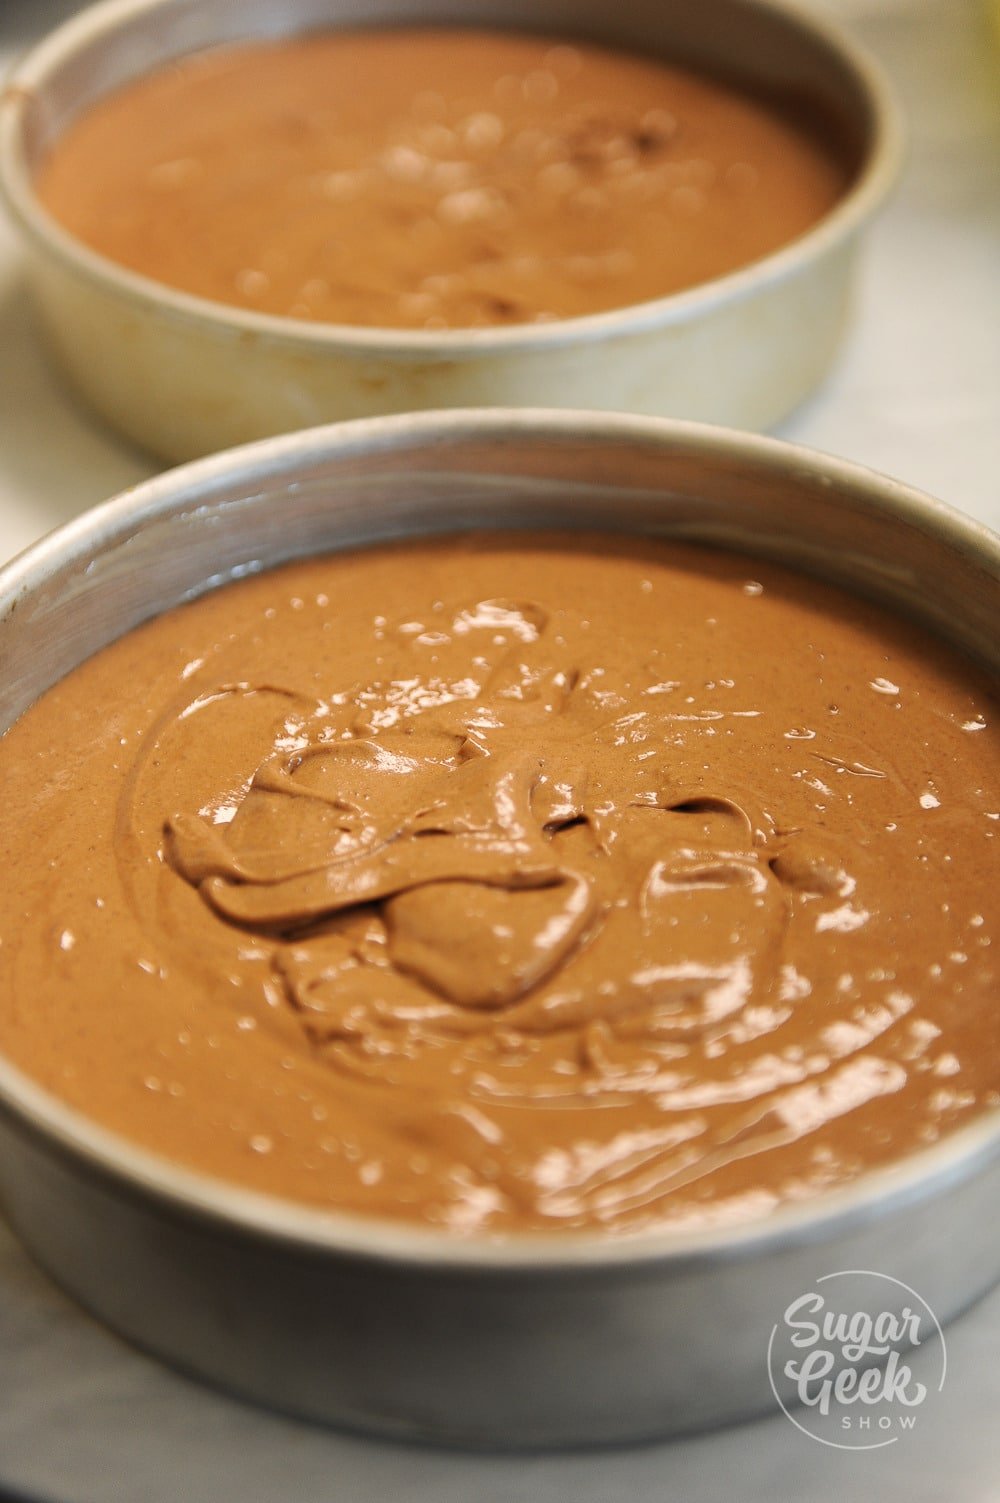
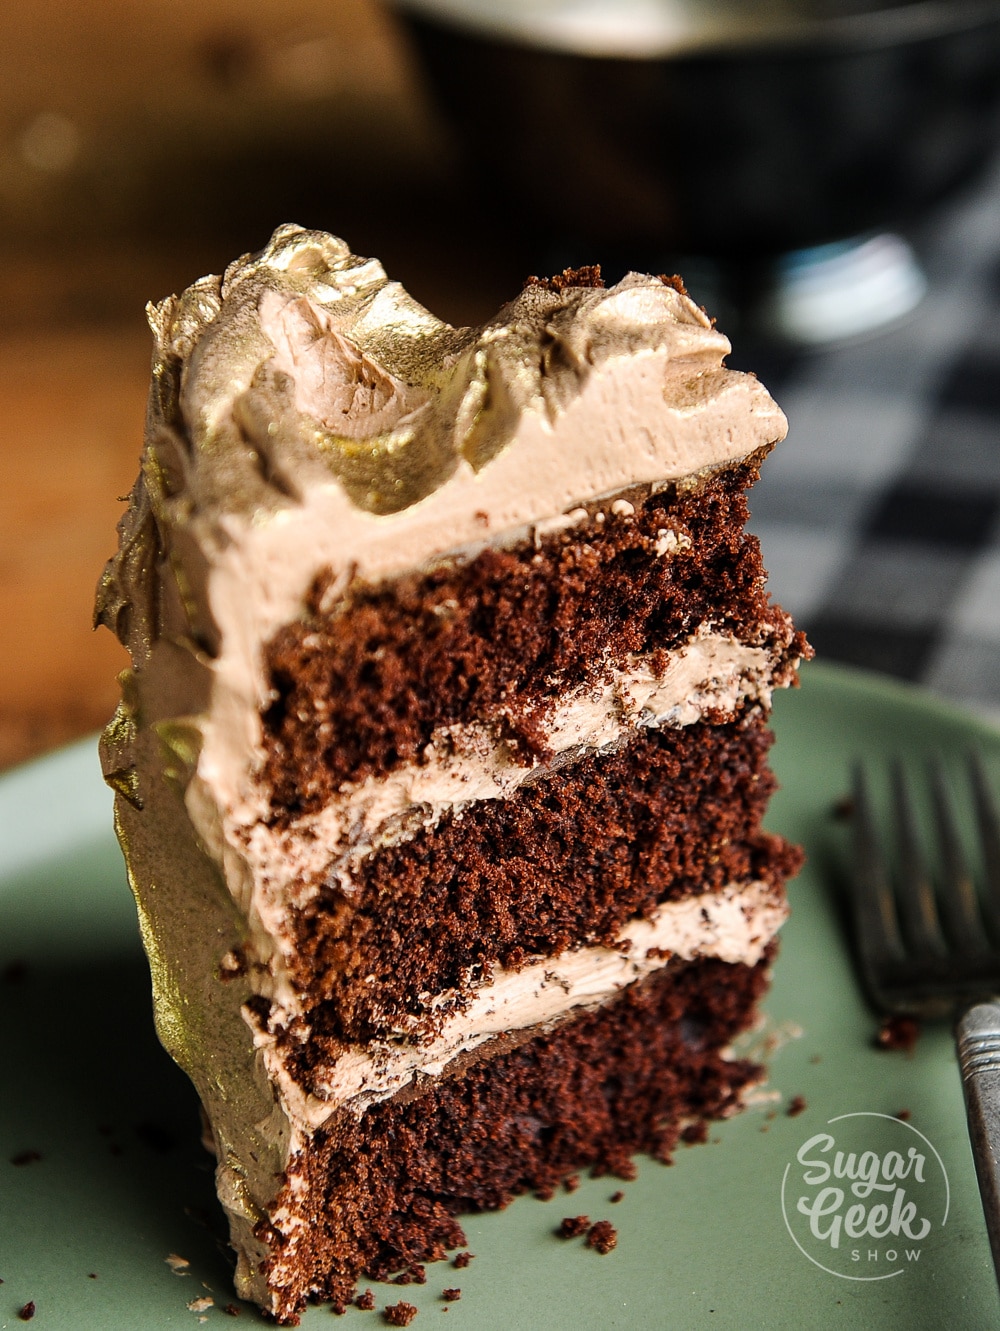
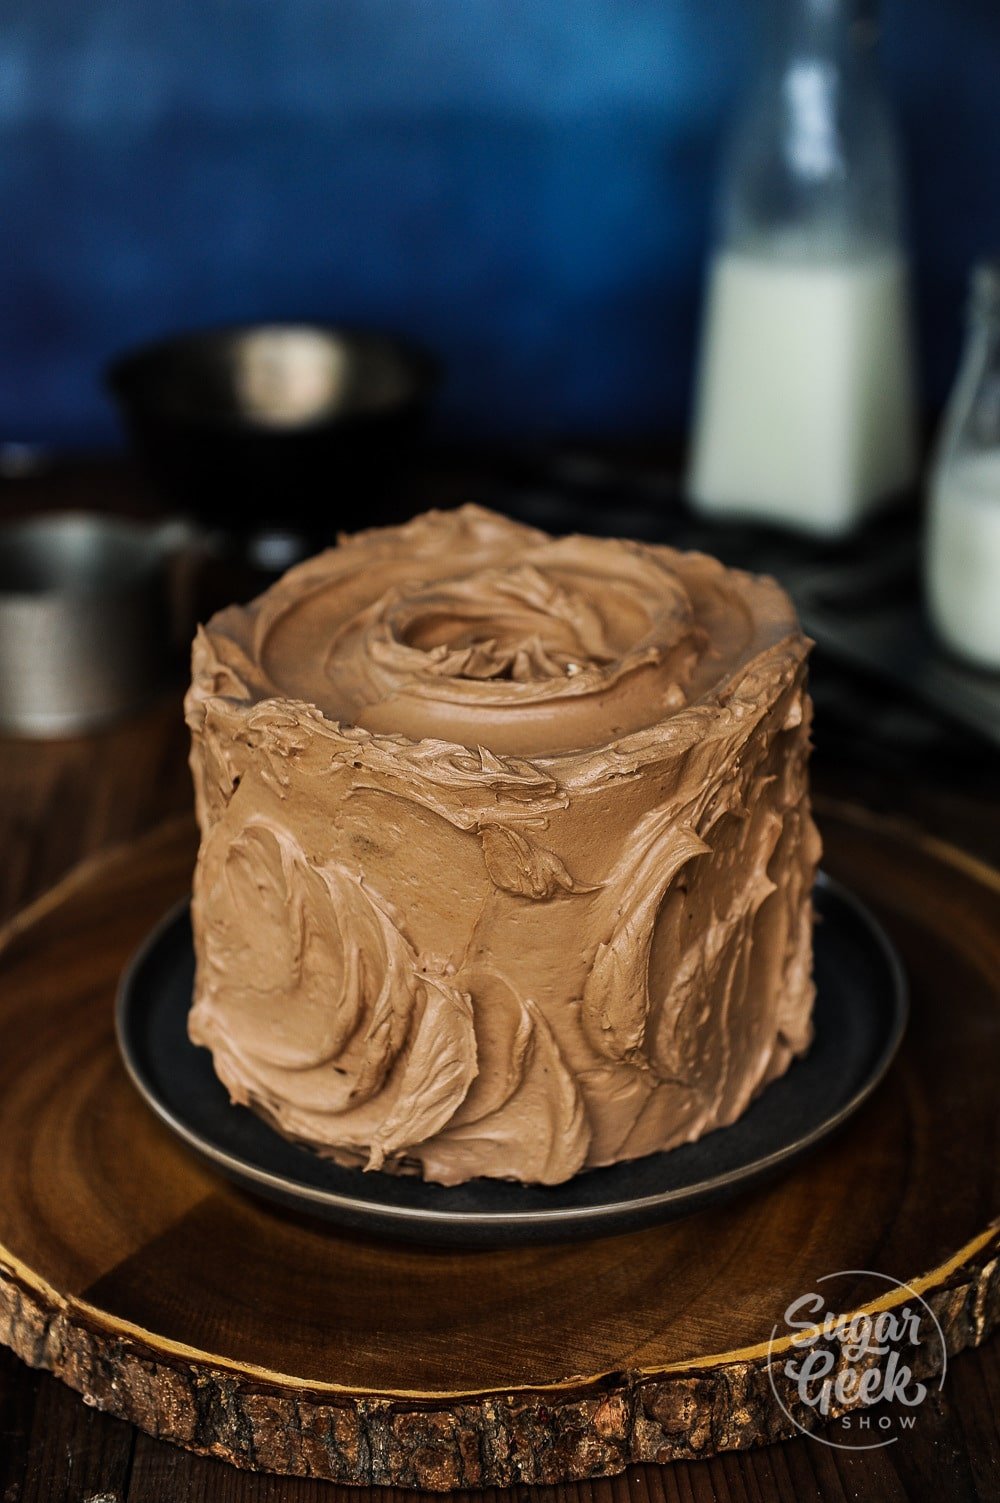
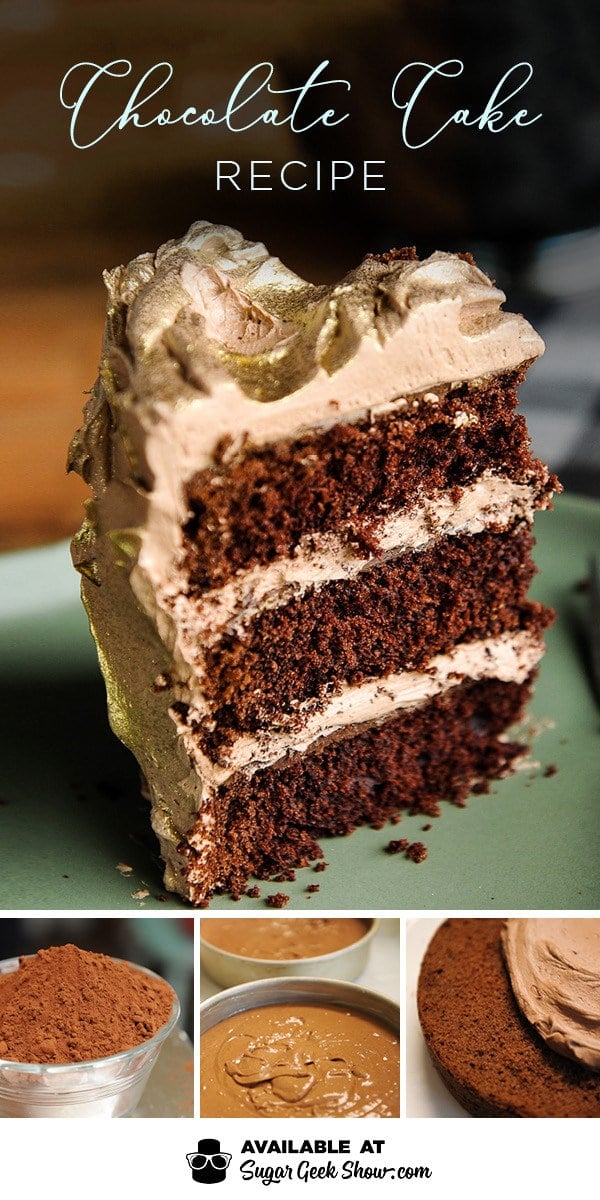
My favorite chocolate cake recipe! This cake is super moist and full of a RICH chocolate flavor. The secret? dutched cocoa powder, lots of butter and mayonnaise!

chocolate cake recipe made with dutched cocoa powder, lots of butter and mayonnaise! This cake is so moist and delicious, everyone will be asking for seconds

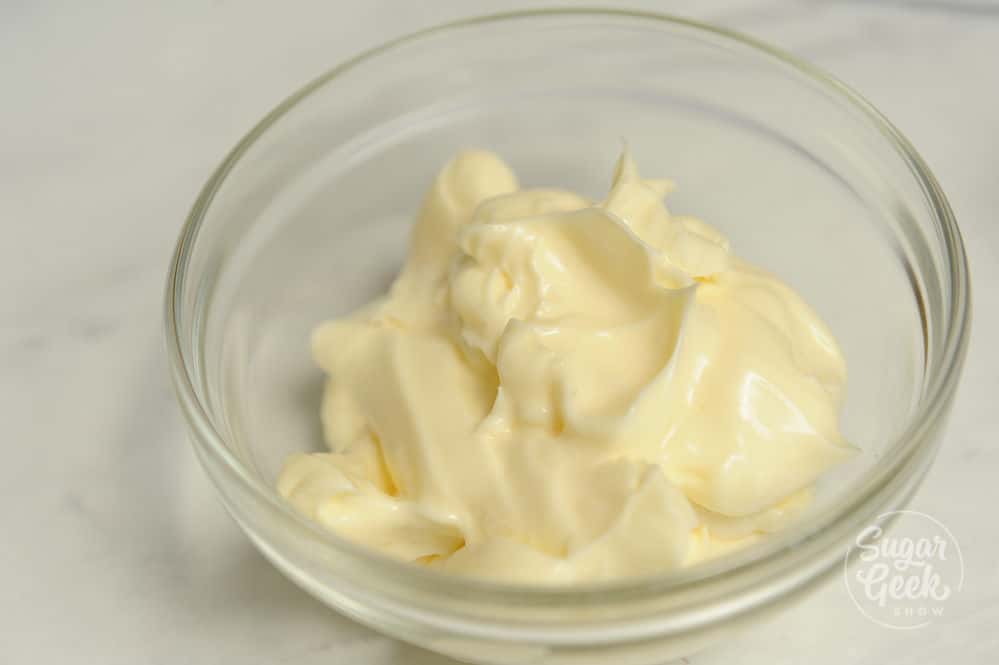
I know mayonnaise might sound a bit odd but if you think about it, mayo is just eggs and oil in fluffy form. Who doesn't wan't more fluff in their cake amirite?

One of the reasons this chocolate cake is so popular with cake decorators and clients alike is that it's got an amazing texture just like my super popular vanilla cake recipe.

chocolate cake recipe with chocolate buttercream

This cake also uses the reverse mixing method resulting in a nice tight crumb that is soft and moist. This cake also has a powerful chocolate flavor thanks to our friend dutched cocoa powder.

What is Dutched Cocoa? Dutched cocoa doesn't mean it's from Holland, it just means it's been through a process that reduces the acidity of the chocolate. Dutch processed cocoa powder has a smoother, more mellow flavor that's often associated with earthy, woodsy notes and is pretty darn delicious if I do say so myself!

For a stunning bundt-pan version with a holiday spin, try my red wine bundt cake with a red wine ganache glaze.

chocolate cake recipe

Homemade Chocolate Cake Recipe

This chocolate cake recipe is my go-to when I want a great cake for family or friends. Way better than a box mix (in my opinion) and easy to make.

People are always impressed with the flavor of this cake because it is so rich. I like to pair this cake with my chocolate buttercream but if you want to really please the chocolate-lover in your life then go with the luxurious dark chocolate ganache.

chocolate cake recipe

When I was growing up, we always made chocolate cake for special occasions. My Dad's favorite cake was german chocolate cake with that coconut pecan filling. We would bake up a box cake and before it was barely cooled we would slather on a can of that frosting.

This cake has officially taken the place of family favorite.

Dark Chocolate Cake Recipe

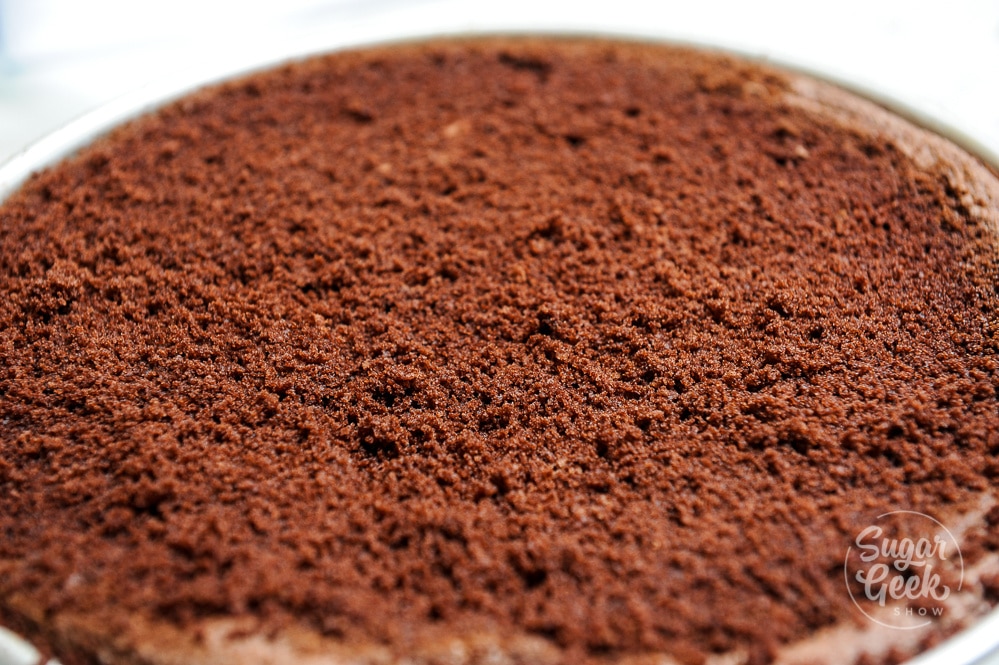
One of the coolest things about this particular chocolate cake recipe (in my opinion) is the color of the cake. It's soooo dark and almost reddish colored. That's from the cocoa powder.

I never really put much thought into cocoa powders and the different types until I started experimenting with a chocolate cake recipe for my wedding cake clients. I always say other bakers raving about the Hershey's recipe but when I tried it, I found it to be quite bitter tasting and not at all what I was looking for in a chocolate cake recipe.

chocolate cake recipe

I really like Cacao Barry Extra Brute cocoa powder because it's pretty inexpensive, has a fantastic flavor and is pretty easy to find. I buy mine on Amazon but did you know there are black cocoa powders? Like SUPER black.

I have tried a few and some of them are better than others but the one I really like I could only find in Canada and the shipping was crazy expensive. Nowadays you can find black cocoa powder pretty much anywhere online, even Valrhona makes one!

chocolate cake recipe

Moist Chocolate Cake Recipe

What's the secret to a moist chocolate cake recipe? Probably something that you would never think of putting in a cake.

mayonnaise chocolate cake

One word. Mayonnaise.

I know what you're thinking. WHAT? This isn't a chicken salad sandwich here. Mayonnaise is going to make my chocolate cake taste weird!

chocolate cake recipe

Fret not. Mayonnaise cake is a real thing. And if you think about what mayonnaise really is, it's made of whipped eggs and oil. Two things that go great in cake and add some nice moisture and flavor.

Go with a nice neutral mayonnaise for the best flavor.

Easy Moist Chocolate Cake Recipe

If you're just not into putting the effort into baking your cake from scratch, have no fear. You can go with the ever delicious doctored box mix. This is the chocolate version of WASC recipe.

chocolate cake recipe

Chocolate WASC cake is easy to make and tastes delicious. I tweaked my recipe a bit to include a bit of butter to make the cake more stable for stacking and filling or for using in sculpted cakes.

Chocolate Cake Recipe with Chocolate Frosting

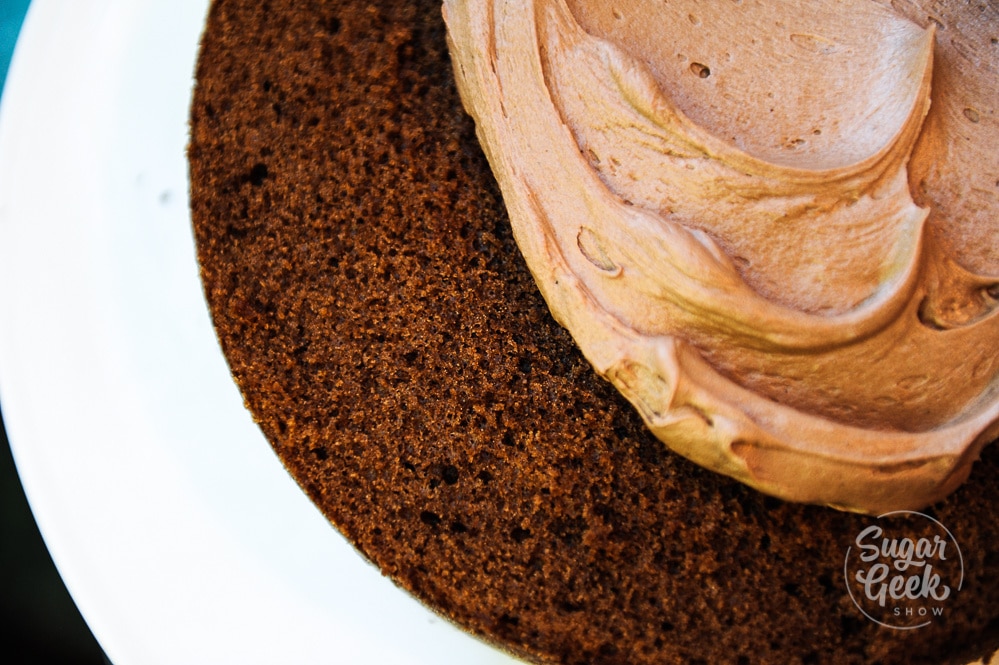
Chocolate cake goes with a lot of different flavors but to me nothing beats chocolate buttercream. I use the same dutched cocoa powder that I use for the cake in the easy buttercream frosting. The frosting tastes just like melted chocolate ice cream to me and is my absolute favorite.

chocolate buttercream

Gluten Free Chocolate Cake Recipe

There are lots of pretty tasty gluten free chocolate cake box mixes out there as more and more people are needing gluten free options (my dad included). I have made this cake gluten free successfully using Bob's Red Mill 1:1 Flour .

Dairy Free Chocolate Cake Recipe

To make this chocolate cake dairy free you can replace the milk with almond milk and the butter with earth balance butter although I would leave out the salt in the recipe otherwise it can taste really salty.

Dairy Free Chocolate Cake Recipe

This chocolate cake can be made into cupcakes with no issue and bake up beautifully. This recipe makes about 24 cupcakes.

Can You Use Cups Instead Of A Scale

This recipe (and all my recipes) are made using weight measurements instead of cups because I truly want you to succeed! So many things can go wrong in the science that is baking and measuring in cups is not exact. Weighing your ingredients greatly reduces your chances of the recipe failing and who wants to waste precious butter and vanilla at todays crazy prices?

Not familiar with the reverse mixing method? Watch how I make my best chocolate cake recipe step by step in this video.


Cake Batter and Frosting Calculator

Select an option below to calculate how much batter or frosting you need. Adjust the servings slider on the recipe card to change the amounts the recipe makes.

Choose a pan type

Choose a cake pan size
(based on 2" tall cake pan)

Choose a cake pan size
(based on 2" tall cake pan)

Choose a cake pan size
(based on 2" tall cake pan)

Cupcake Tin Size

Choose number of pans

Cups of Batter Needed

8 cups

Cups of Frosting Needed

5 cups

Note: measurements are estimated based off the vanilla cake recipe using standard US cake pans and sizes. Measurements used are for 2" tall cake pans only. Your results may vary. Do not overfill cake pans above manufacturer's recommended guidelines.

Recipe

triple chocolate cake
Print Recipe
4.94 from 88 votes

Favorite Chocolate Cake Recipe

My favorite chocolate cake recipe with a moist and delicate crumb with a big chocolate flavor thanks to dutched cocoa powder and my secret ingredient, mayonnaise! 
7 cups of batter makes about two 8" round cakes.
Prep Time20 minutes mins
Cook Time30 minutes mins
Total Time50 minutes mins
Course: Dessert
Cuisine: American
Servings: 7 cups
Calories: 2269kcal
Author: Liz Marek

Ingredients

Cake Ingredients

  • 14 oz Unbleached cake flour
  • 15 oz granulated sugar
  • 2.25 oz Dutch cocoa powder
  • 8 oz water
  • 3 large eggs
  • 2 teaspoon vanilla extract
  • 4 oz Mayonaise
  • 2 teaspoon baking powder
  • 1 tsp baking soda
  • 1 teaspoon salt
  • 6 oz unsalted butter at room temperature

Chocolate Buttercream

  • 8 oz pasteurized egg whites room temperature
  • 32 oz powdered sugar
  • 36 oz unsalted butter room temperature
  • 1 tablespoon vanilla extract
  • 1 tsp salt
  • 4 oz cocoa powder
US Customary - Metric

Instructions

Cake Instructions

  • Bring the water to a boil. Add in cocoa powder.
    Whisk until smooth then add in cold mayonnaise, vanilla and eggs. Whisk to break up the eggs. 
  • Weigh out all dry ingredients (flour, sugar, baking powder, baking soda and salt) and place into a stand mixer bowl and attach the paddle attachment.
  • Turn mixer on low (setting 1 on Kitchen Aid mixers). Add in your room temperature butter in small chunks. Combine on low until you achieve a sandy mixture.
  • Add ½ of your liquid ingredients into your dry ingredients and mix on medium for 2 minutes. If you do not do this step, your cake could collapse.
  • Turn your mixer back down to low and add in the rest of your liquids slowly. Stop once or twice to scrape the bowl as needed.
    Once they are all combined, turn back up to medium for another 30 seconds.
  • Lightly grease two 8" round cake pans prepared with your choice of pan release. I prefer cake goop. 
  • Bake for 30 minutes at 350ºF depending on how big your pans are. The bigger the pan, the longer it will take for them to bake. 
    When a toothpick comes out of the center with a few sticky crumbs on it, the cake is done.
  • After the cakes have cooled for about 10 minutes, or the pans have cooled to the point they can be touched, flip the cakes over and remove from the pans onto a cooling rack to cool completely. I cover mine in plastic wrap to keep them from drying out why they cool.
  • Once the cakes are completely cool you can trim them and frost them.  

Chocolate Buttercream Instructions

  • Place egg whites, powdered sugar in a stand mixer bowl.
    Attach the whisk and combine ingredients on low and then whip on high for 5 minutes.
    Reserve 8 oz of your butter and melt in microwave until JUST melted, don't over heat.
    Combine melted butter with cocoa powder and mix until smooth
    Add in butter in small chunks and continue whipping until the mixture is light and white and creamy. Give it a taste, if it still tastes buttery then keep whipping.
    Add in chocolate mixture, vanilla and salt and continue whipping until mixture is combined. Scrape bowl if needed. 
    Remove the whisk and place the paddle attachment onto the mixer. Let your buttercream mix on low until the mixture is smooth and creamy and there are no bubbles left. This can take up to 20 minutes

Notes

This recipe works great for carving sculpted cakes! I use the same recipe for wedding and sculpted. I always bake them, de-pan them, wrap them in plastic wrap and then chill in the fridge or freezer (depending on how much of a rush I'm in) and then carve. Chilled cakes make carving or stacking SO much easier!

Nutrition

Calories: 2269kcal | Carbohydrates: 247g | Protein: 19g | Fat: 143g | Saturated Fat: 83g | Cholesterol: 407mg | Sodium: 886mg | Potassium: 649mg | Fiber: 9g | Sugar: 188g | Vitamin A: 4240IU | Calcium: 150mg | Iron: 5.1mg
This chocolate cake has REAL chocolate flavor! The trick is using dutched cocoa powder, lots of butter and a little bit of mayonnaise! Crazy I know but it works! Everyone raves about this moist chocolate cake recipe

buttercream flowers cake tutorial with guest instructor danette short

September 27, 2016 Free Video

Buttercream Flowers

buttercream flower tutorial buttercream flower tutorial

Skill Level: Newb
Learn now to make beautiful, simple and delicious buttercream flowers with guest instructor Danette Short.

Run Time

10:17

Techniques Used

  1. Buttercream

Downloads

Materials List

Related Videos


Buttercream Cake using Acrylics


Easy Buttercream Recipe

buttercream flowers cake tutorial with guest instructor danette short

September 27, 2016 Course Preview

Buttercream Flowers

Skill Level: Newb
Learn now to make beautiful, simple and delicious buttercream flowers with guest instructor Danette Short.

Run Time

10:17

Techniques Used

  1. Buttercream

Downloads

Materials List

September 27, 2016 Course Preview

Buttercream Cake Using Acrylics

Skill Level: Newb
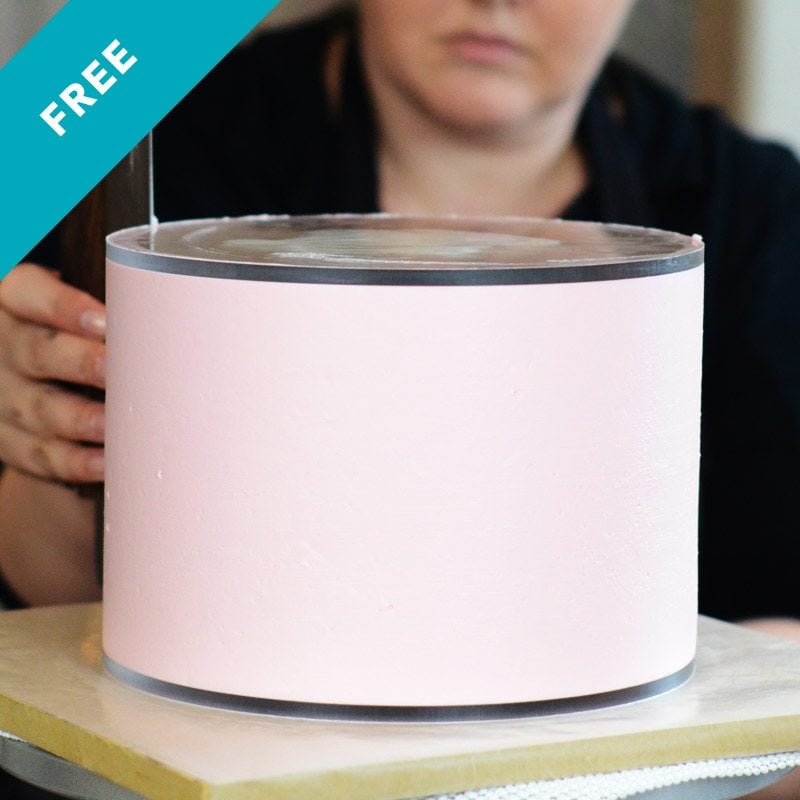
Danette Short of Short Cakes shows us how she uses her acrylics to get a super smooth finish on her buttercream cakes using a cool technique with acrylic rounds.

Run Time

10:26

Techniques Used

  1. Buttercream

Downloads

Materials List

September 27, 2016 Free Video

Buttercream Cake Using Acrylics

Skill Level: Newb
Danette Short of Short Cakes shows us how she uses her acrylics to get a super smooth finish on her buttercream cakes using a cool technique with acrylic rounds.

Run Time

10:26

Techniques Used

  1. Buttercream

Downloads

Materials List

Related Videos


Easy Buttercream Recipe


Vanilla Cake Recipe

Lemon Curd Recipe

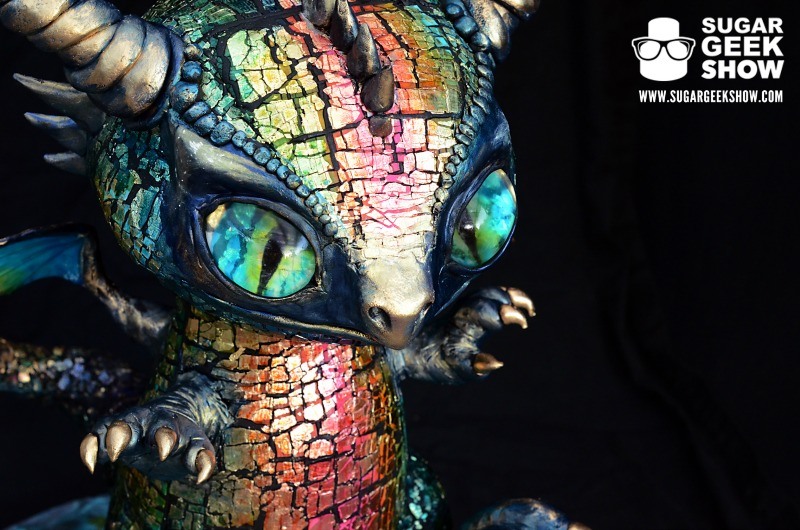
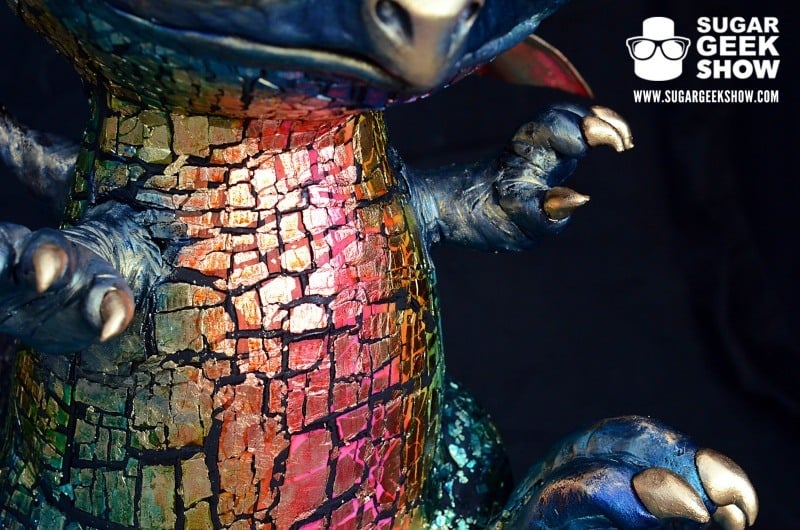
Space Dragon Cake

September 27, 2016 Blog

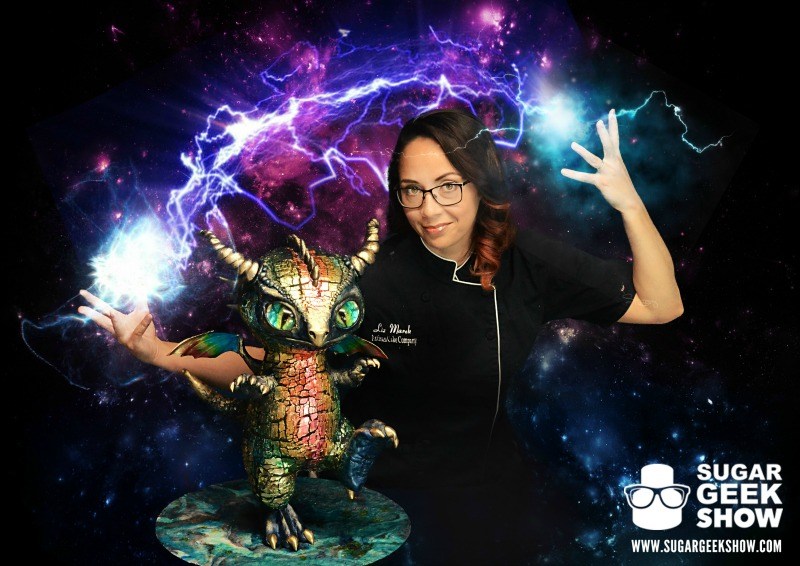
Chromacaker vs. Space Dragon, A Caker's Tale

Have you heard the incredible tale of Chromacaker vs. Space Dragon? No? What!! That simply will not do. Come, listen closely while we tell you the tale...

Space Dragon Cake

One fateful night, the world witnessed a very strange meteor falling from the night sky! It was a glorious array of colors, shining brightly! At first the people were so enthralled with it’s beauty but soon realized the meteor was getting bigger and bigger, brighter and brighter until the people saw that it was not a meteor but a dragon from space! The dragon approached with a powerful fury, ready to destroy the earth! So the people called on Chromacaker! Master of color! She intercepted the space dragon and a great battle ensued. The sparks could be seen from the night sky, a shower of colors as the two fought. No matter how much Chromacaker tried to overcome the dragon, he countered her at every turn.Space Dragon Cake

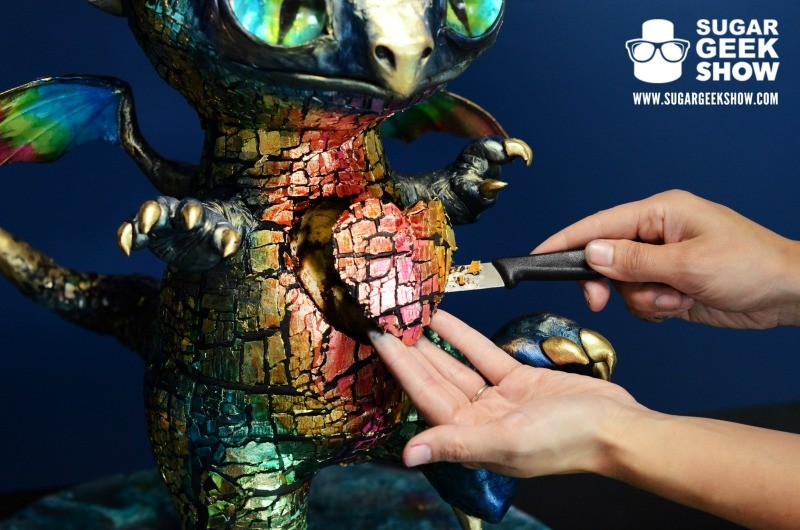
Finally, she realized that the only way to take out the dragon was to remove his heart. She cut it out and left the mighty space dragon powerless and the people of earth where safe once again!

Space Dragon Cake Space Dragon Cake

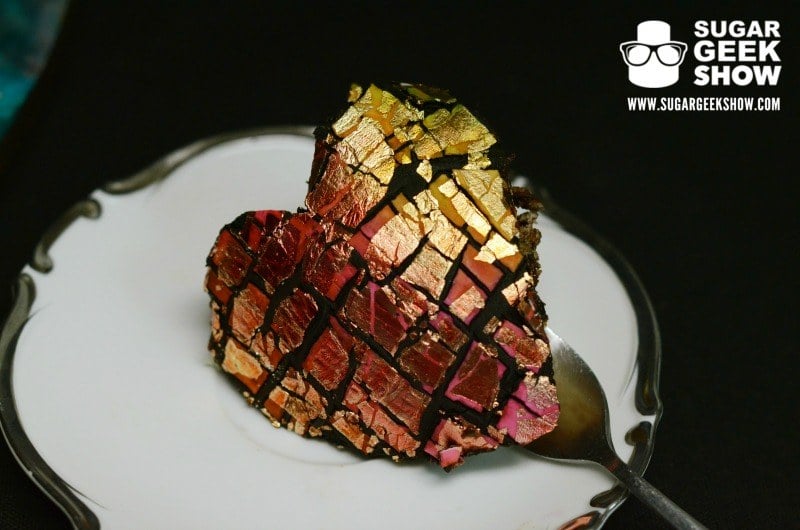
She also felt the need to show her dominance and victory by gruesomely eating the Space Dragon's heart.

Space Dragon Cake

Now that you've heard the tale of Chromacaker vs. Space Dragon, your caker life is complete. Unless of course you also haven't heard any of the other tales from the Caketastics Collaboration? You have not you say? What is wrong with you people! You simply must visit the facebook page and read the action packed tales of caker awesomeness! I will give you a small break considering the collaboration was released just yesterday, a SMALL one.

The Caketastics is an amazing project put together by the incredible cake artist Daniel Dieguez.  Seriously a fun idea for a collaboration that you don't want to miss! Not to mention all of the incredible projects created from the insane talent that was involved.

Liz was nice enough to film the entire making of her piece as a tutorial for her Sugar Geeks! What an incredible project packed FULL of techniques that will take you through many cake projects. The dragon's eyes are definitely one of the coolest features of this project. Look how real space dragony they look! If space dragons were a real thing that is, I am pretty sure that is exactly how their eyes would look.

Space Dragon Cake

I seriously can't get over these rainbow metallic scales! I literally can't handle how cool a technique this is! Just imagine all the different ways you could use this!

Space Dragon Cake Space Dragon Cake

You'll definitely want to get in on this Space Dragon Tutorial. It is available at the Premium and Elite levels and if you still, after all the pushing I've been doing, have not signed up as Premium or Elite member, go do so now! Here, I will make it easy for you and provide a link to sign up. Let us know if you use any of these techniques on your project and share them on the Sugar Geek Show Facebook Page! We love to see what you sugar geeks come up with!

Navy Fuchsia Bas Relief Cake

September 20, 2016 Blog

The Best Kind of Relief is Bas Relief

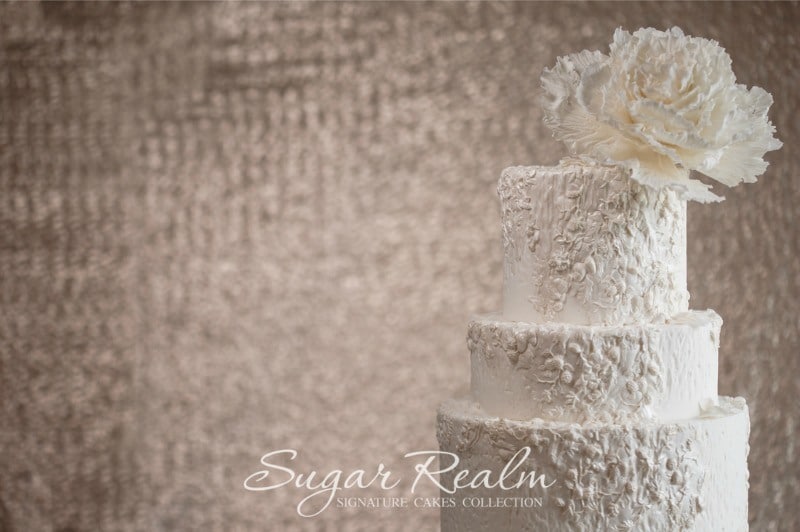
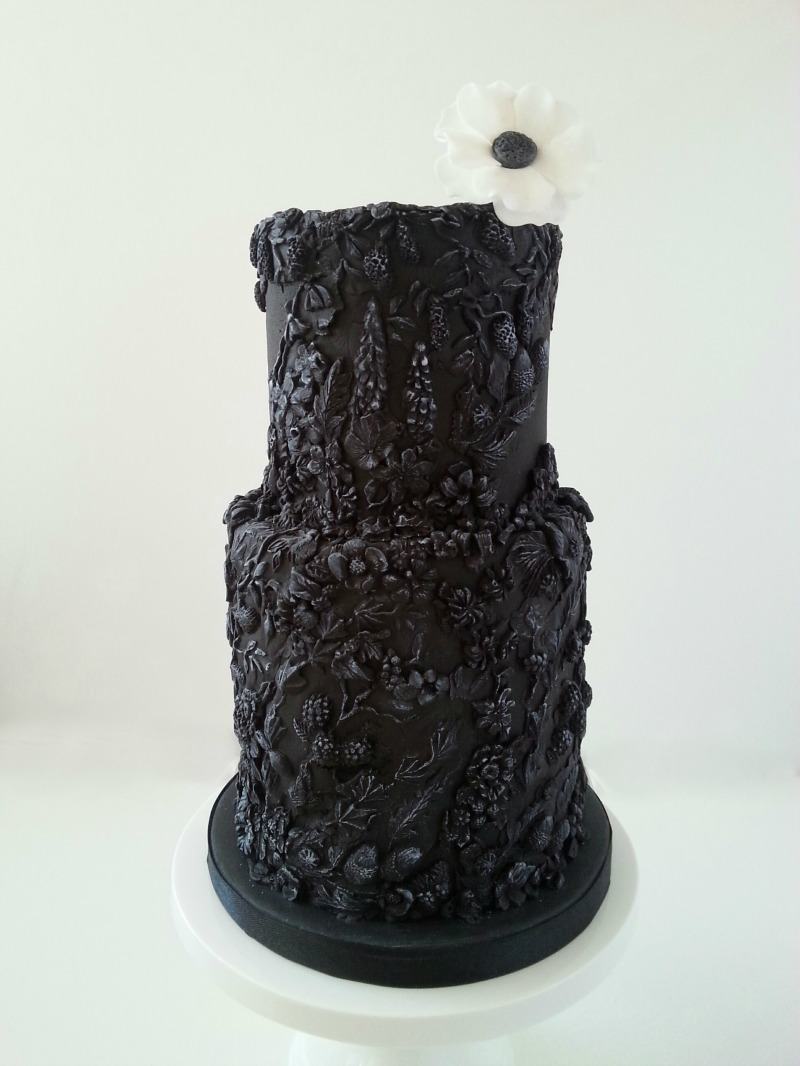
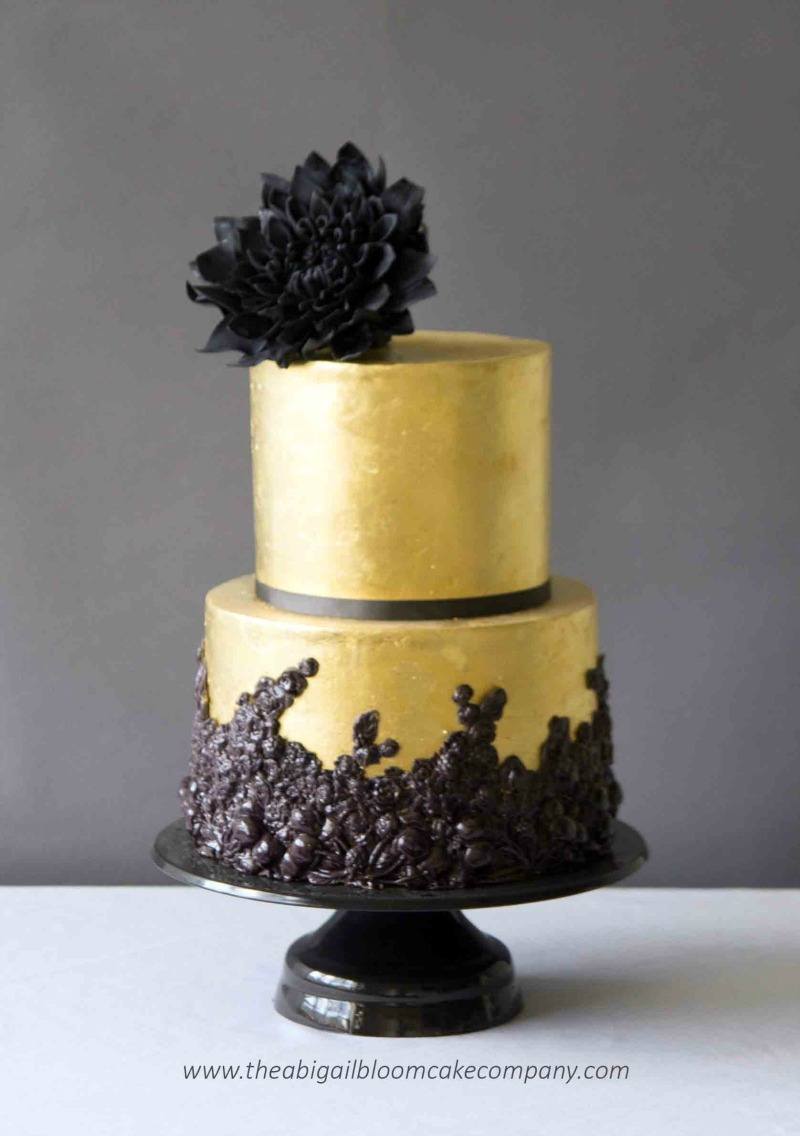
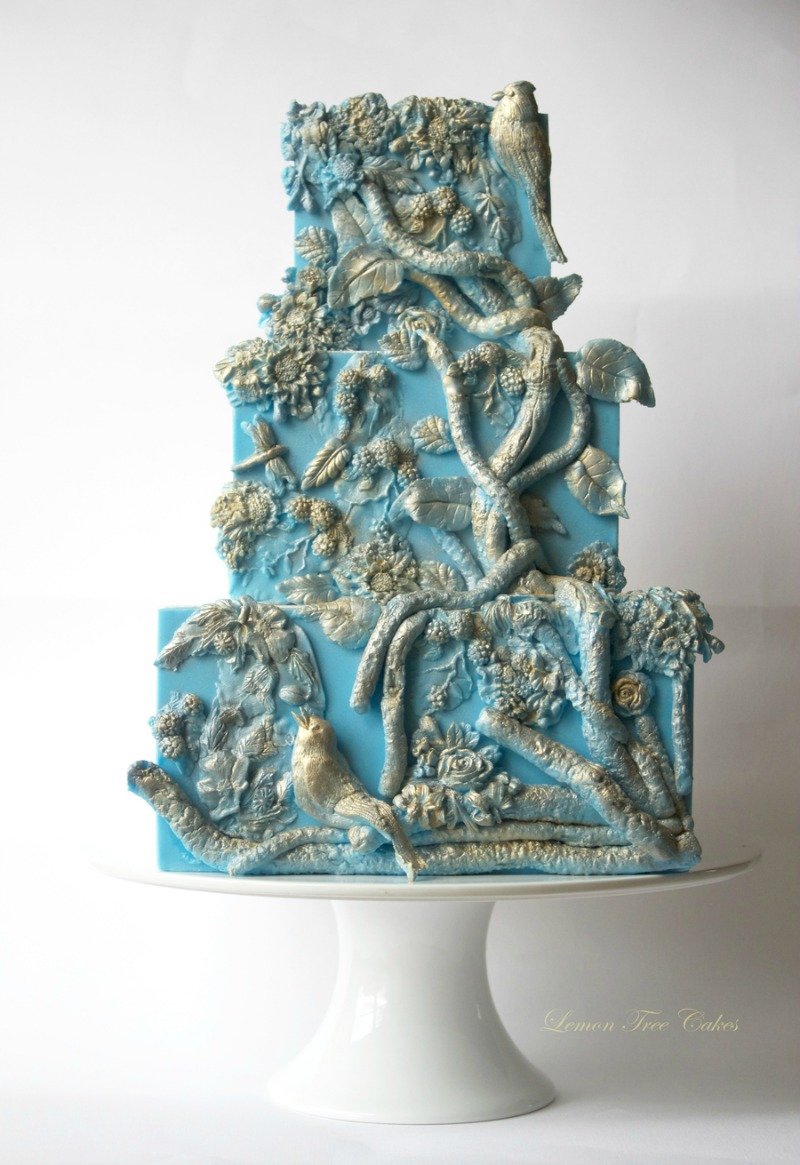
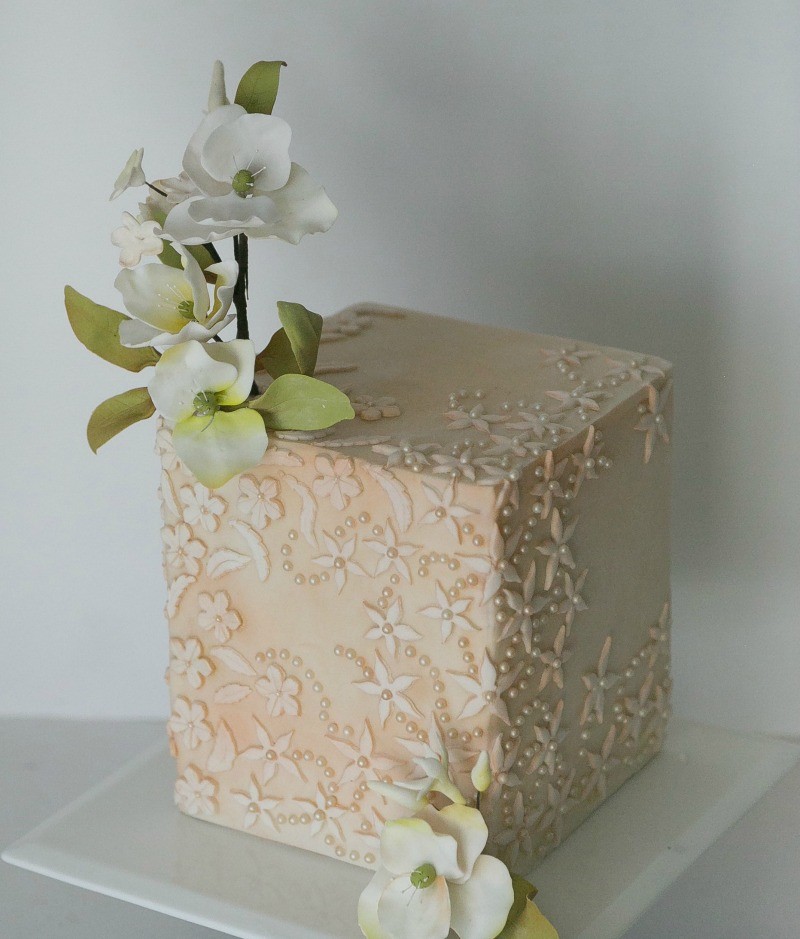
Bas relief is a sculpture term meaning a pattern that is raised up from the surface. Bas relief was brought to the cake world by the fabulous Maggie Austin and we have been better for it ever since. It is absolutely gor-geous and can be done in so many different ways to create entirely different styles with the same technique. It is a hot trend for 2017 weddings and I have 10 stunning Bas Relief cakes that will leave you speechless.

Starting with a cake from the innovator herself, Maggie Austin shows us just how unique you can get with the Bas Relief style. Fruity, flowery and colorful, this little cake leaves a big impression. Ha! A relief that made an impression, you don't see that everyday...get it? *crickets*

Maggie Austin Bas Relief Cake
https://maggieaustincake.com/

Next we have a fairy tale wedding cake that is truly breathtaking. This is Bas Relief at it's finest. *swoon*

2939602_orig
https://www.sugarrealm.com/

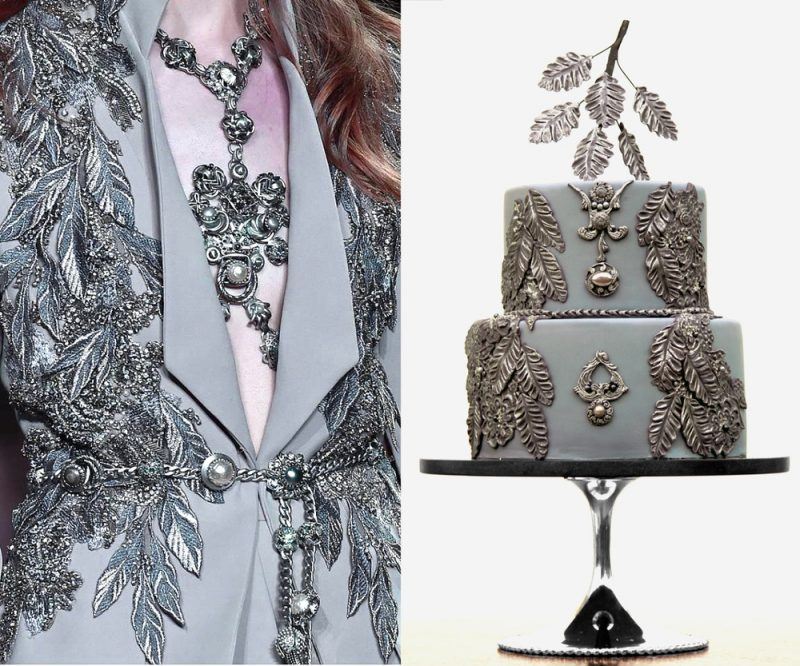
I love this cake that was inspired by a piece of fashion and emulates metal. Another unique version of the Bas relief technique.

eliesaabcake
https://www.threelittlecakes.com/

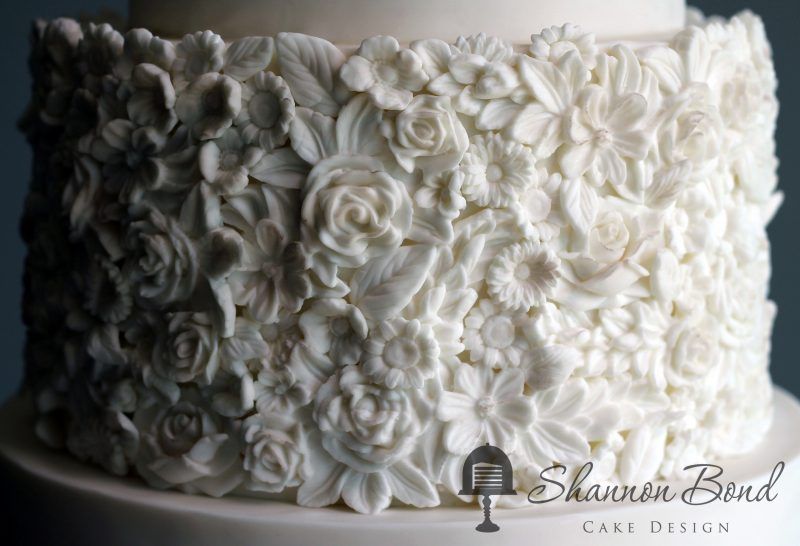
This is a classic white on white design and it is nothing short of mesmerizing. Shannon Bond Cake Design never disappoints.

img_5256esbcd
https://www.sbcakedesign.com/

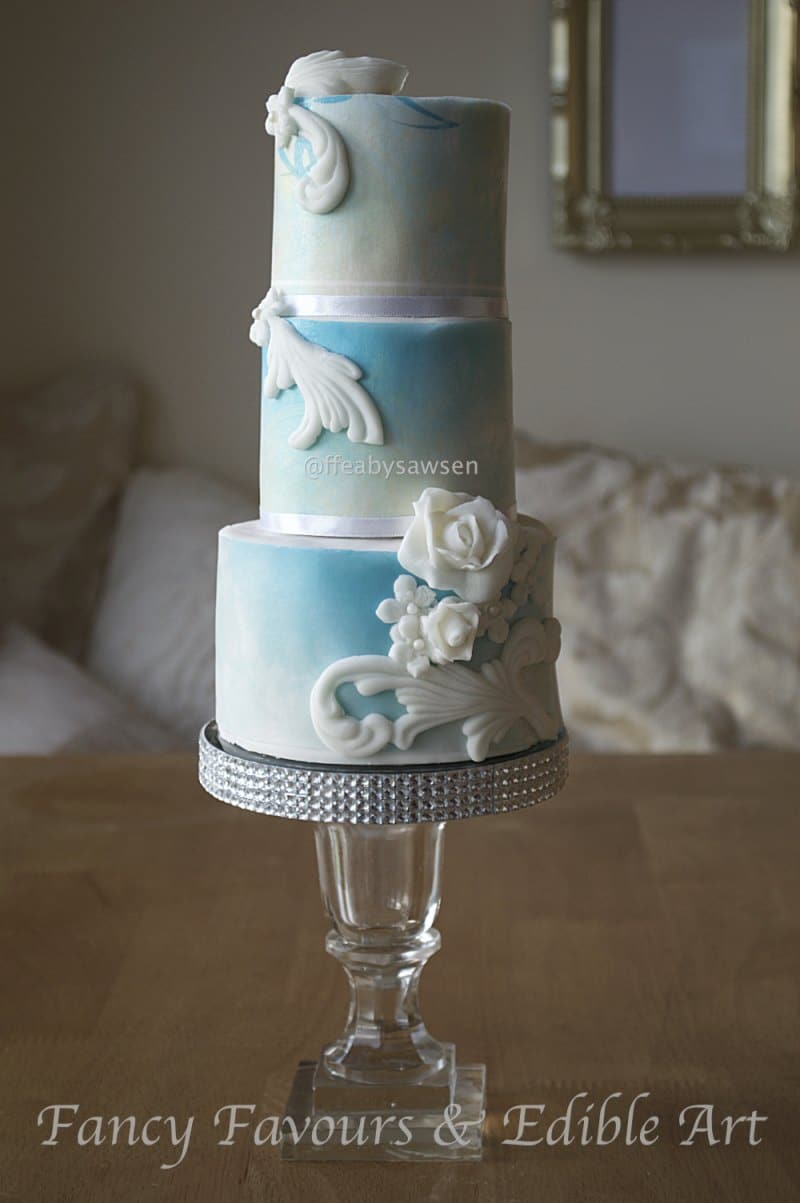
This cake showcases a large and simple Bas Relief that makes a big statement and looks beautiful against the lightly water colored tiers. Beach wedding maybe?

sky-blue-bas-relief-mini-tiered-cake-white-elegant-21-1
https://ffeabysawsen.com/portfolio/occasion-cakes/

It's not very often you see black on black. Very striking and very cool, even as a mod wedding cake!

black_bas_relief_cake
https://cakesbygrannie.com.au/

As if the fact that this cake is gold and black wasn't enough, they added Bas relief to the mix. Triple awesome.

lolita-pin
https://www.theabigailbloomcakecompany.com/main-gallery/

Although it is hard to pick a favorite, this one is definitely a strong contender for me. I mean seriously? Love at first sight.

900_905997dwqh_wedding-cake
https://www.lemon-tree-cakes.co.uk/cakes.html

This cake shows how simple a Bas Relief design can be and yet is still absolutely stunning! A lovely design for an ivory wedding cake.

bas-relief-square
https://weddingcollective.co/suppliers/happyhills-wedding-cakes/

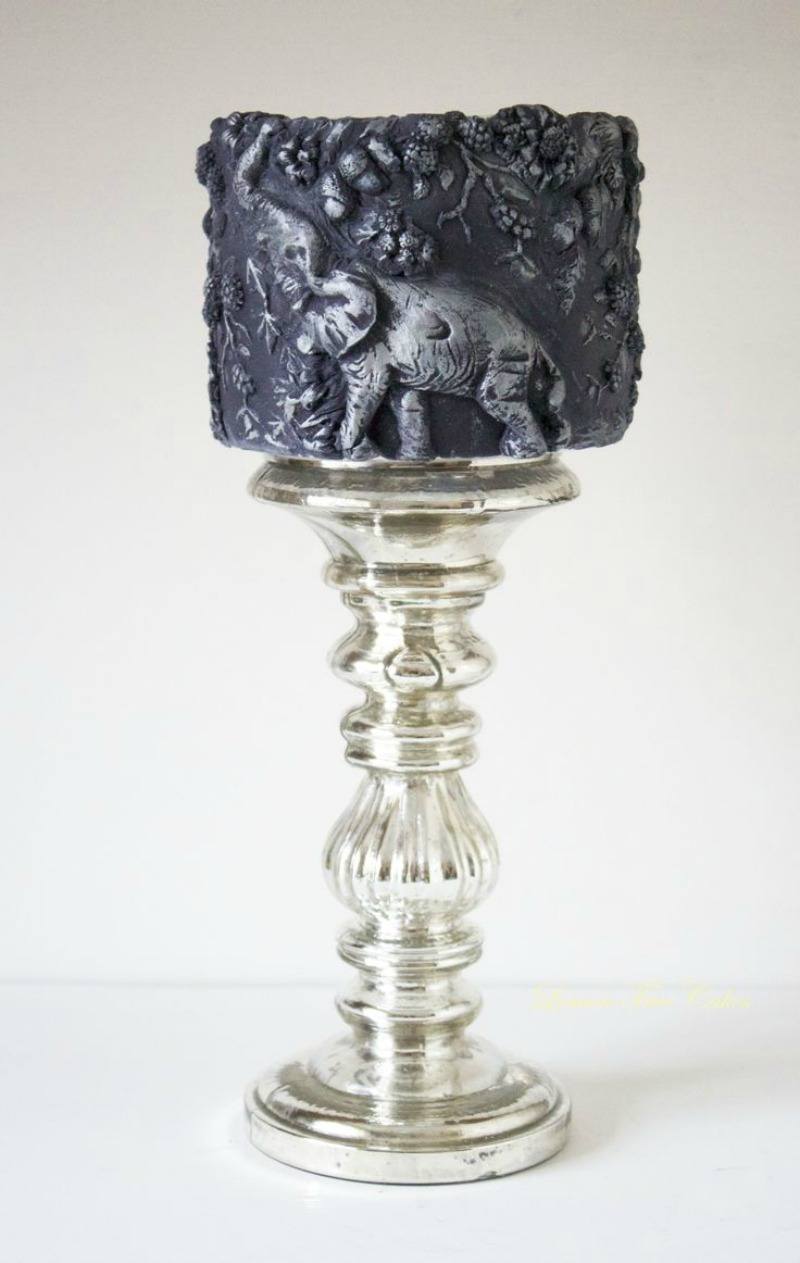
Ok, so this may be a "saved the best for last" situation. I don't mean to pick favorites but I just did. Elephants are one of my favorite animals and this is just phenomenal! The style is amazing and it truly looks like real sculpture, totally amazing. It's no surprise that my personal top two were both done by Lemon Tree Cakes. Check out their site as Bas Relief seems to be one of their specialties.

a659c6a87c2573fa57544e584de2808b
https://www.lemon-tree-cakes.co.uk/cakes.html

I am going to assume you're not still bothered by me pointing out my personal fav's. All of these cakes are equally gorgeous and well executed, I just have a style preference and who doesn't? Doesn't make me a bad person right? Don't answer that.

Space Dragon cake tutorial square thumbnail

September 15, 2016 Course Preview

Space Dragon Cake

Skill Level: Intermediate
This dragon cake tutorial will teach you everything you need to know about building gravity defying structures, sugar eyes, rainbow crackled fondant and flexible gelatin wings.
 
What's that up in the sky? A bird? A plane? no.. it's a DRAGON! A super metallic, rainbow dragon cake! Join Liz as she teaches you how to create your very own space dragon cake that is out of this out of this world adorable!
 
Liz was inspired to create this tutorial after a student of her's asked her about how to make a pikachu cake with him standing on one leg. This whole cake is REAL cake so the structure is very strong and can be adapted to many different types of cake structures.

Run Time

1:50:21

Techniques Used

  1. Building the dragon cake structure
  2. Rice Krispy Treats
  3. Flexique
  4. Isomalt
  5. Gumpaste
  6. Fondant
  7. Gold Leaf

Tutorial Chapters

  • 0:55 Prepping the RKT
  • 6:58 Making the Dragon Eyes
  • 11:20 Preparing the Dragon Cake Structure
  • 19:34 Stacking and Carving Cakes
  • 26:22 Shaping the Head, Legs, and Tail
  • 40:30 Building up the Face
  • 48:25 Making the Wings
  • 57:42 Prepping the Dragon Skin
  • 1:02:43 Applying the Dragon Skin
  • 1:12:06 Adding Details to the Face
  • 1:20:36 Adding Details to the Feet
  • 1:24:29 Attaching the Arms
  • 1:34:15 Attaching the Wings
  • 1:36:46 Painting the Cake

Downloads

Materials List
Dragon Wing Template

Space Dragon cake tutorial square thumbnail

September 15, 2016 Paid Video

Space Dragon Cake

Skill Level: Intermediate
What's that up in the sky? A bird? A plane? no.. it's a DRAGON! A super metallic, rainbow dragon! Join Liz as she teaches you how to create your very own space dragon that is out of this out of this world adorable!In this very in-depth tutorial you will learn how to build a structure so the dragon looks like he is standing on one leg, about to touch down from his flight from space! You will also learn how to prep the rice krispy treats used to build up the head, body, and legs. Then make the dragon eyes using isomalt and the new Simi Cakes dragon eyes transfer sheet.

Next, Liz will teach you how to stack and frost the cakes as well as carving them. In addition, you will begin to build up the face using modeling chocolate to give definition to your dragon before creating and applying the dragon skin using an innovative technique created by Liz that entails using gumpaste and gold leaf to create the shiny dragon scales. Plus, using the downloadable template, learn how to make flexible wings out of wafer paper and flexique. As you continue, Liz will show you how to attach the dragon eyes to the cake and then add details to the face and feet. Also, you will learn how to create the arms, hands, horns, and spikes before attaching the wings to the dragons. In conclusion, you will paint the dragon and the wings using and assortment of edible water colors giving the dragon a metallic rainbow appearance.

Run Time

1:50:21

Techniques Used

  1. Building the Structure
  2. Rice Krispy Treats
  3. Flexique
  4. Isomalt
  5. Gumpaste
  6. Fondant
  7. Gold Leaf

Tutorial Chapters

  • 0:55 Prepping the RKT
  • 6:58 Making the Dragon Eyes
  • 11:20 Preparing the Structure
  • 19:34 Stacking and Carving Cakes
  • 26:22 Shaping the Head, Legs, and Tail
  • 40:30 Building up the Face
  • 48:25 Making the Wings
  • 57:42 Prepping the Dragon Skin
  • 1:02:43 Applying the Dragon Skin
  • 1:12:06 Adding Details to the Face
  • 1:20:36 Adding Details to the Feet
  • 1:24:29 Attaching the Arms
  • 1:34:15 Attaching the Wings
  • 1:36:46 Painting the Cake

Downloads

Materials List
Dragon Wing Template

September 13, 2016 Blog

There's Only One Good Kind of Snitch

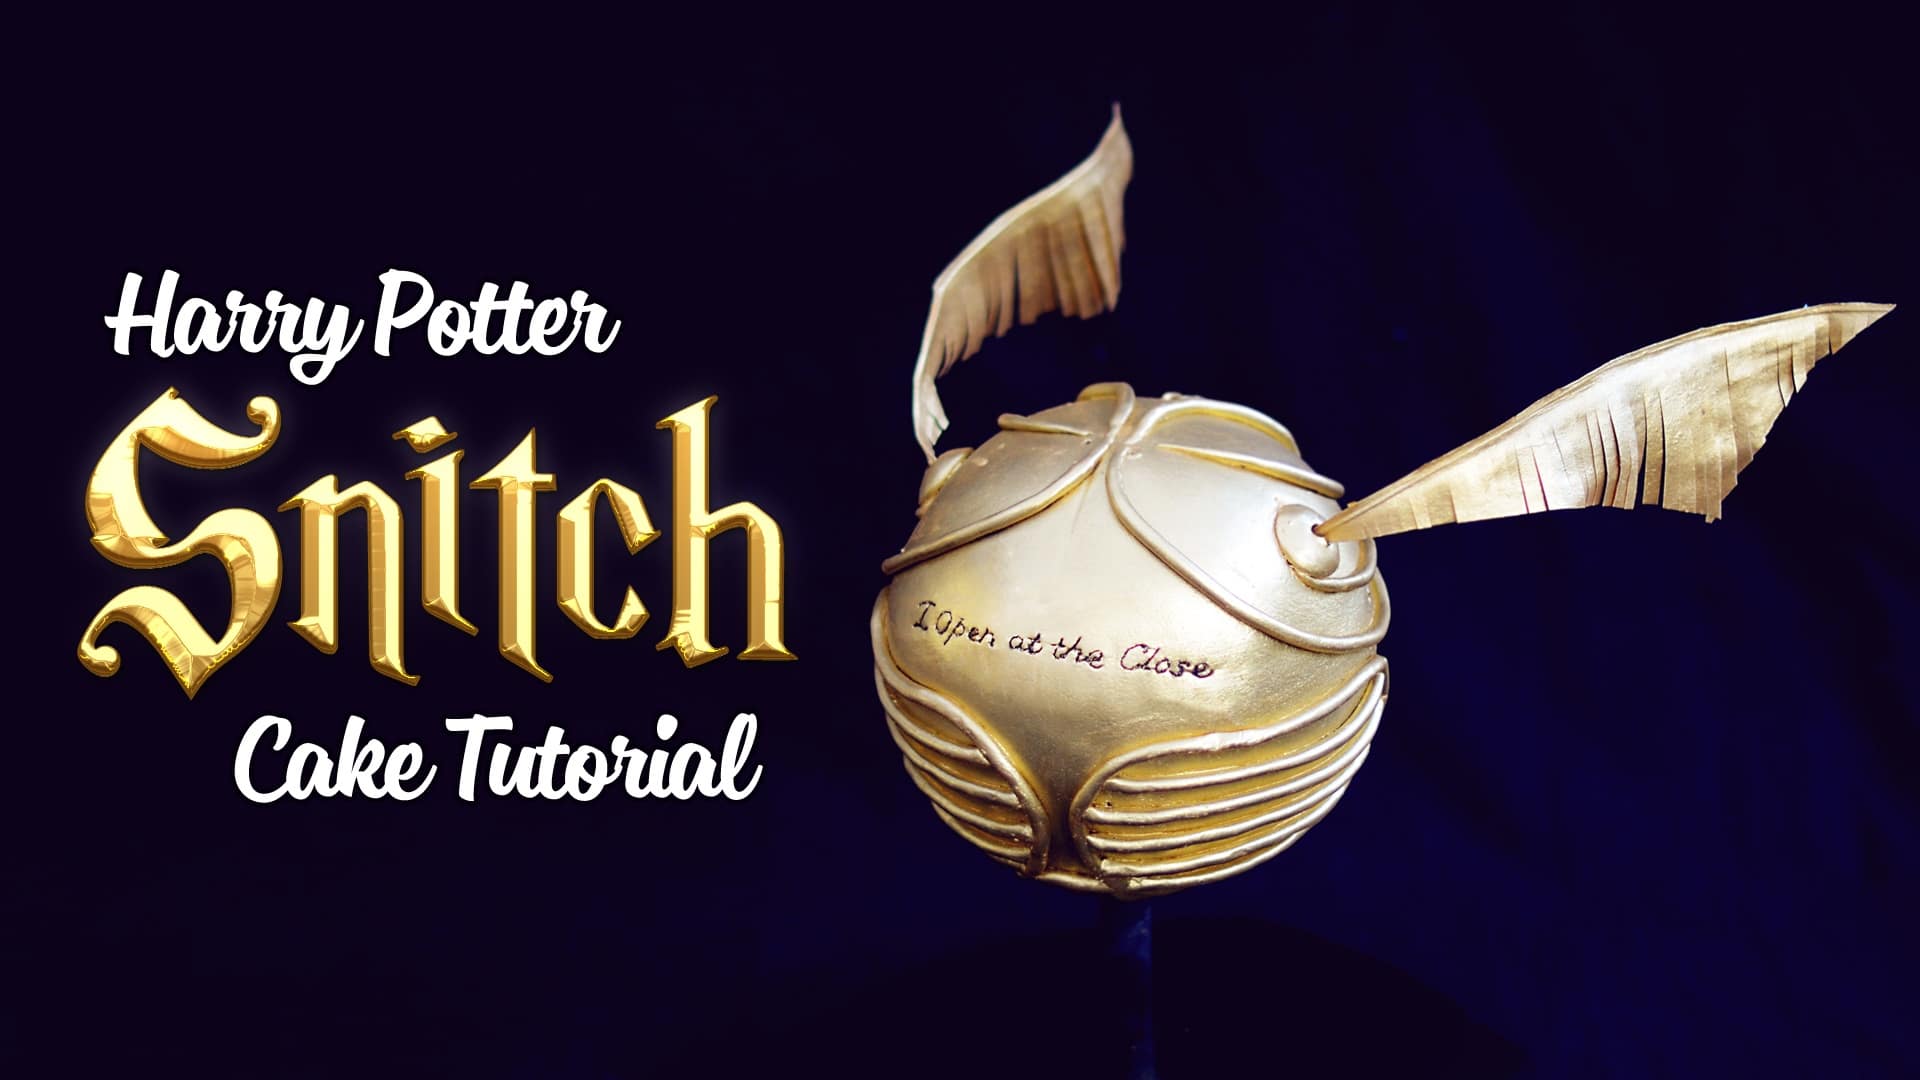
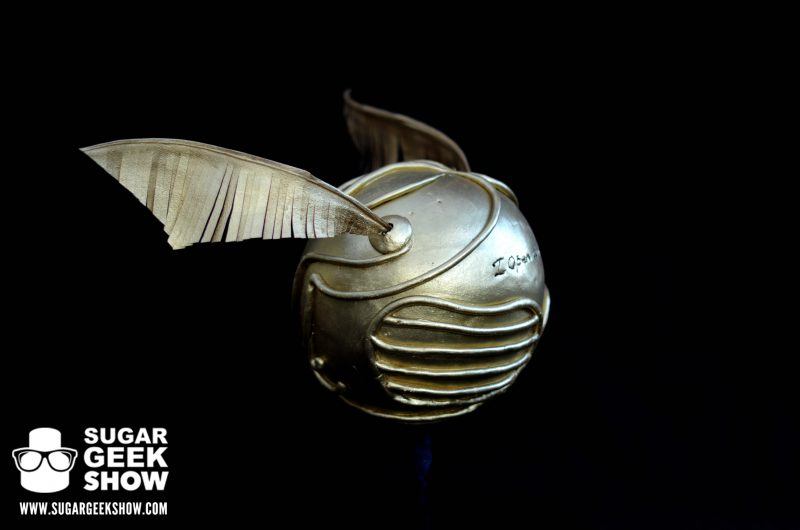
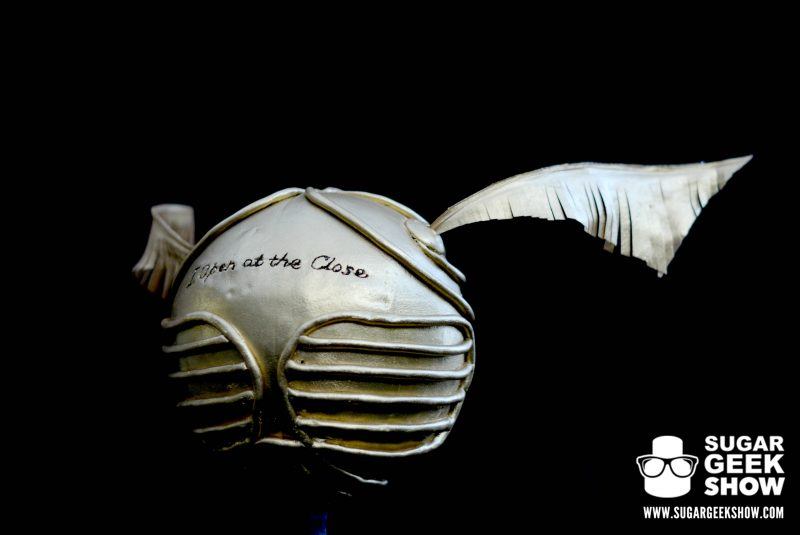
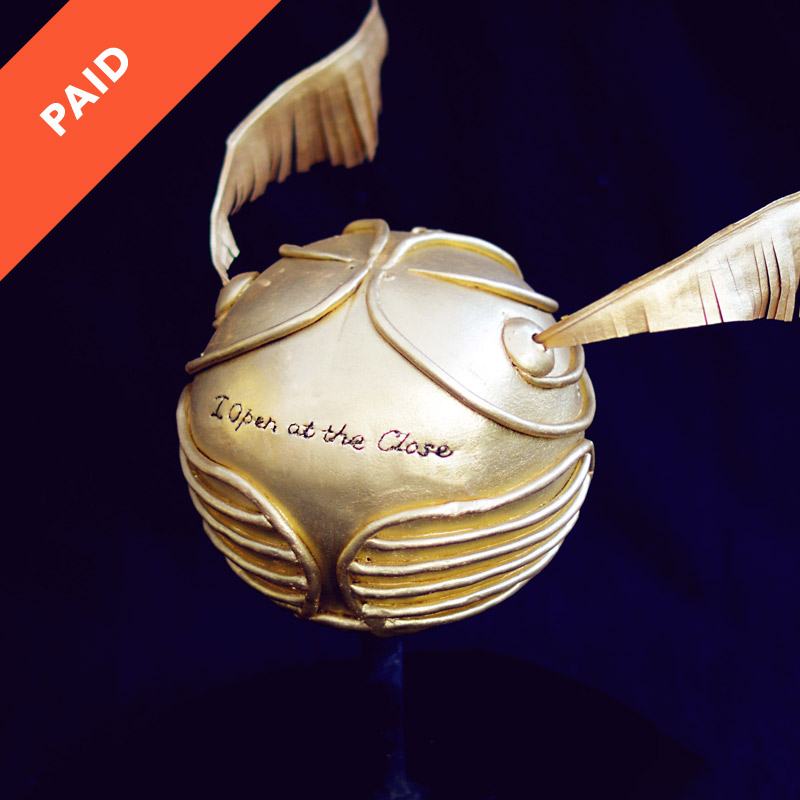
There's only one good kind of snitch and that is the Golden Snitch from Harry Potter. I LOVE me some HP and if you're the same (and even if you're not),  you will love this tutorial! It's a unique cake design outside of the Harry Potter themed cakes you usually see, and although it is super impressive, it is surprisingly simple! Here are some beautiful close up shots.

All gold, check. Gravity defying, check.  From Harry Potter, check. Does it get better than that?

snitch

Create a structure that will have people saying, "what in the world is holding it up?"

snitch-2

Learn how to make rigid yet flexible wings for any cake!

snitch-3

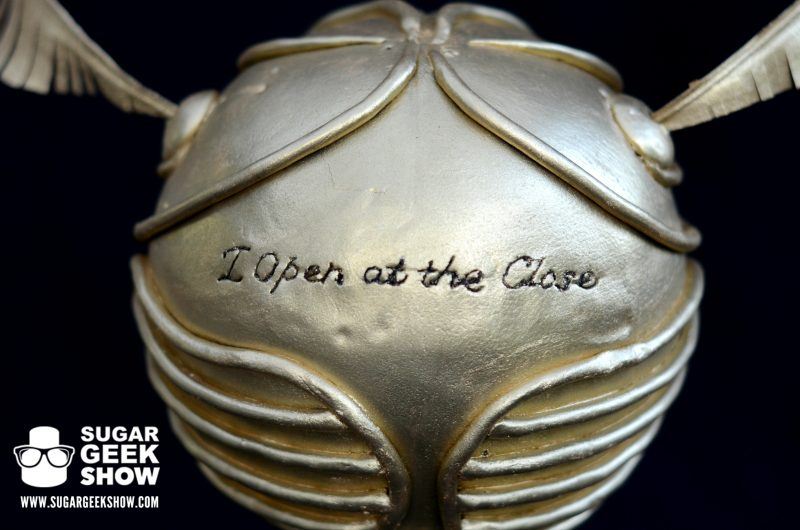
The inscription is probably my favorite part, the saying is cool of course but there have been several times I would've liked to incorporate an inscription onto one of my cakes but wasn't sure how. It was definitely a duh?! moment after watching this tutorial. It's also another technique that can be taken and used on a vast array of cake designs.

Harry Potter Golden Snitch Cake

Sign up to be a Premium or Elite member to gain access to this tutorial today! It's full of techniques and methods that will be helpful in many ways. Looking for some free content? Check out our Female Bust Cake Tutorial, it shows the basics of sculpting a female bust to prep it for decorating. What does that have to do with the Harry Potter Golden Snitch Cake Tutorial? Absolutely nothing, but it's an awesome free video (Basic, FREE membership required) that you may not have known about and now you do, you're welcome.

September 10, 2016 Course Preview

Wafer Paper Peony

Skill Level: Newb
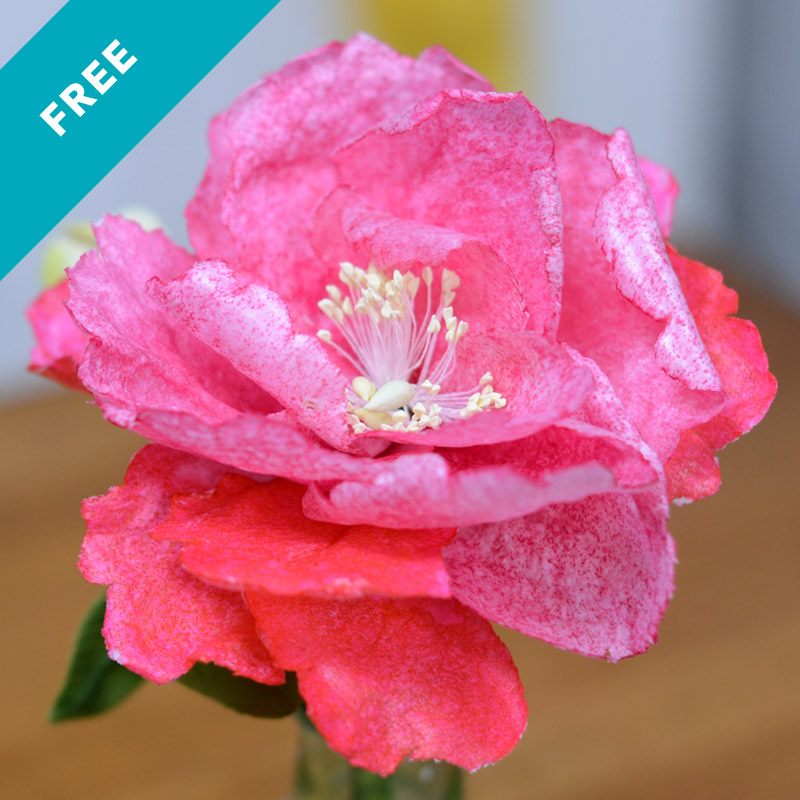
This is a fun and easy way to make a gorgeous looking flower in no time flat!

Wafer Peony Tutorial

September 6, 2016 Blog

Wafer Paper Flowers? We've Got You Covered

Wafer paper is one of those things for a caker that may be intimidating at first but once you try it you can't wait to see what else you can do with it. Flowers are probably the most common application of wafer paper on cakes and there are SO many types of flowers to be made! Today, for your viewing pleasure, I have put together a convenient list right here of 10 amazing FREE wafer paper flower tutorials that will up your caking game.

When you go to YouTube and type in "Wafer Paper Flower Tutorial" the very first episode of The Sugar Geeks (yes, it had an s back then) Show pops up at the top of the list. With almost 170,000 views it is one of the most popular wafer paper flower tutorials on YouTube so yeah, we kind of have to add it to this list, not to mention we are proud of it! It's the first episode! And if you haven't seen the first episode of The Sugar Geek Show, can you truly call yourself a Sugar Geek? I'll leave that up to you and your conscience but in case it needs clearing, here is the episode right here, all you have to do is click play and redeem yourself.

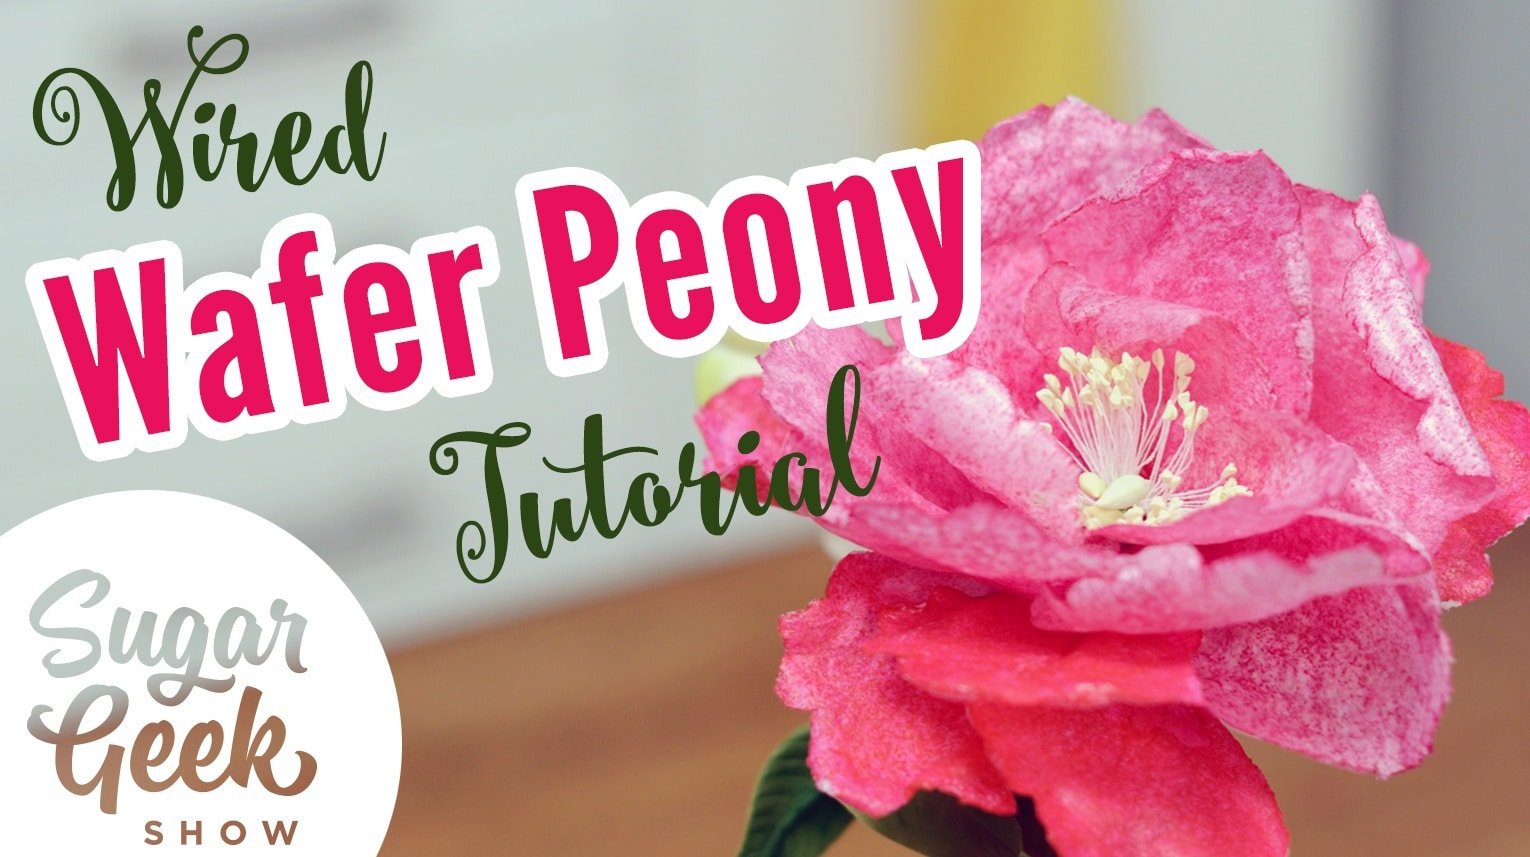
So why not go from the first episode of The Sugar Geek Show to the last? Well I mean not THE last, that would be depressing, but most recent. It just happens to be a wafer paper flower tutorial too! A Wired Wafer Paper Peony Tutorial. This is straight from the new Sugar Geek Show YouTube Channel, be sure to subscribe! Full length tutorial can be found right here on the site.

Okay, enough tooting our own horn, #3 is a fabulous RAINBOW Rose Tutorial by the fabulous Shawna McGreevy. The rainbow factor is uber cool but this could also very well be used for any color you like!

#4 is such a fun, simple flower that can be added to any cake in a variety of sizes, colors or even patterns! Cake Warehouse shows us how easy it is to make a Wafer Paper Rolled Rose or Ribbon Rose.

#5 is a fantastic Wafer Paper Poppy Tutorial from Creative Cakes by Sharon. Love the deep contrast of the red and black! Another simple flower that packs a powerful punch.

Next is an incredibly eye-catching Painted Wafer Flower by Marianna's Caking Me Crazy. Seriously in love with the gorgeous colors and unique look of these, and the possibilities are endless!

These simple, dainty flowers from Jessica Harris Cake Design are a fun addition to your wafer flower arsenal. How adorable are they atop her basket cake?!

#8 is not one you see every day and I love that! The lovely Nisha Fernando of Sweet Delights Cakery shows us how to make some Wafer Paper Stephanotis, what a perfect filler to go with your other wafer paper flowers!

Everyone needs a little fantasy in their life. Wendy's Custom Cakes brings us this large and in charge Wafer Paper Fantasy Flower!

#10 is truly magnificent and another one you don't see that often. It's a Wafer Paper Magnolia demonstrated by Blissfully Sweet, and one I am definitely going to try in the near future!

As a bonus I thought I would throw in this fantastic Wafer Paper Leaf Tutorial to go with all of the new flowers you've learned how to make! Rose Warnick shows us some awesome and creative techniques for making realistic veined and wired wafer paper leaves!

If this hasn't inspired you to try wafer paper then I don't know what will, I know I am inspired! It's such a fun, easy medium and we've practically (literally) laid it out for you, so what are you waiting for?! Share your wafer paper flower creations with us on The Sugar Geek Show Facebook Page, we'd love to see 'em!

September 1, 2016 Course Preview

Harry Potter Golden Snitch Cake

Skill Level: Intermediate
In this tutorial learn how to create the golden wings for the Snitch using flexique and wafer paper as well as the gravity defying structure. Then, using a sphere pan, you will bake, torte, fill, and frost the cakes to create a perfectly round and smooth sphere before carefully covering it in fondant and adding the design details to the sphere using the templates found in the downloadable materials. Moving on you will paint the sphere gold using a gold dust of your choice. In conclusion, you will add the quote to the center of the sphere and then, using straws, attach the golden wings to the sphere thus creating your very own Golden Snitch.

Run Time

30:02

Techniques Used

  1. Flexique
  2. Wafer Paper
  3. Building the Structure
  4. Fondant

Tutorial Chapters

  • 0:09Making the Wings
  • 5:16Prepping the Cake Board & Structure
  • 11:06Making the Cake Sphere
  • 18:02Covering with Fondant
  • 19:33Adding Details to the Sphere
  • 25:24Painting the Sphere Gold
  • 26:53Adding the Quote
  • 28:24Attaching the Wings

Downloads

Materials List
Snitch Reference
Snitch Template

September 1, 2016 Paid Video

Harry Potter Golden Snitch Cake

Skill Level: Intermediate
In this tutorial learn how to create the golden wings for the Snitch using flexique and wafer paper as well as the gravity defying structure. Then, using a sphere pan, you will bake, torte, fill, and frost the cakes to create a perfectly round and smooth sphere before carefully covering it in fondant and adding the design details to the sphere using the templates found in the downloadable materials. Moving on you will paint the sphere gold using a gold dust of your choice. In conclusion, you will add the quote to the center of the sphere and then, using straws, attach the golden wings to the sphere thus creating your very own Golden Snitch.

Run Time

30:02

Techniques Used

  1. Flexique
  2. Wafer Paper
  3. Building the Structure
  4. Fondant

Tutorial Chapters

  • 0:09Making the Wings
  • 5:16Prepping the Cake Board & Structure
  • 11:06Making the Cake Sphere
  • 18:02Covering with Fondant
  • 19:33Adding Details to the Sphere
  • 25:24Painting the Sphere Gold
  • 26:53Adding the Quote
  • 28:24Attaching the Wings

Downloads

Materials List
Snitch Reference
Snitch Template

August 31, 2016 Free Video

Wafer Paper Peony

Skill Level: Newb
This is a fun and easy way to make a gorgeous looking flower in no time flat!
Edible Watercolor

August 31, 2016 Free Video

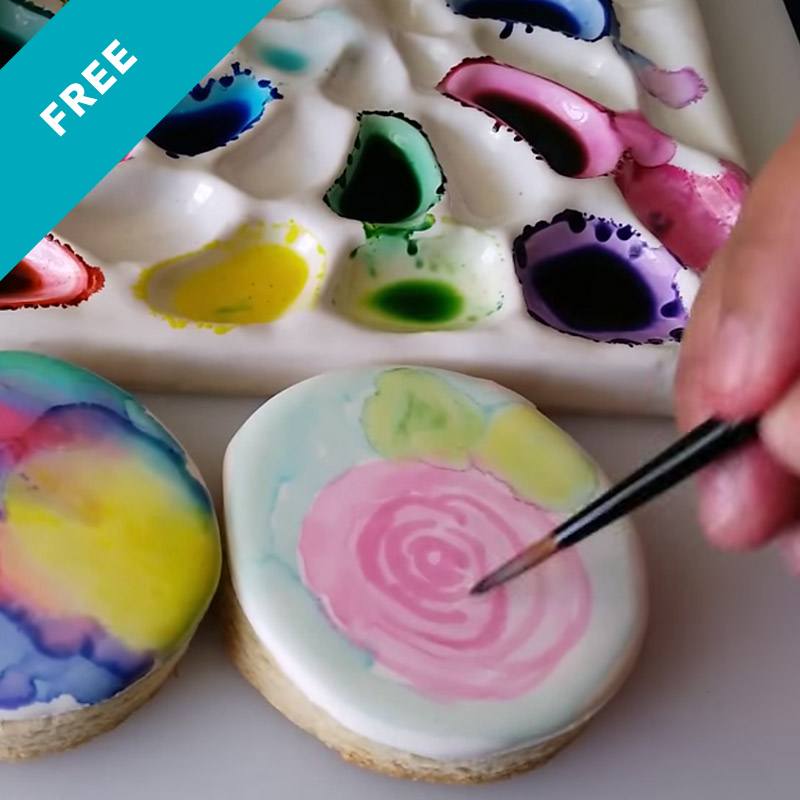
Edible Watercolor

Skill Level: Newb
Guest Instructor Angela Nino shows how to make edible watercolor washes.
Wonder Woman All Cake Tutorial

August 23, 2016 Blog

Wonder Woman Saves the Day!

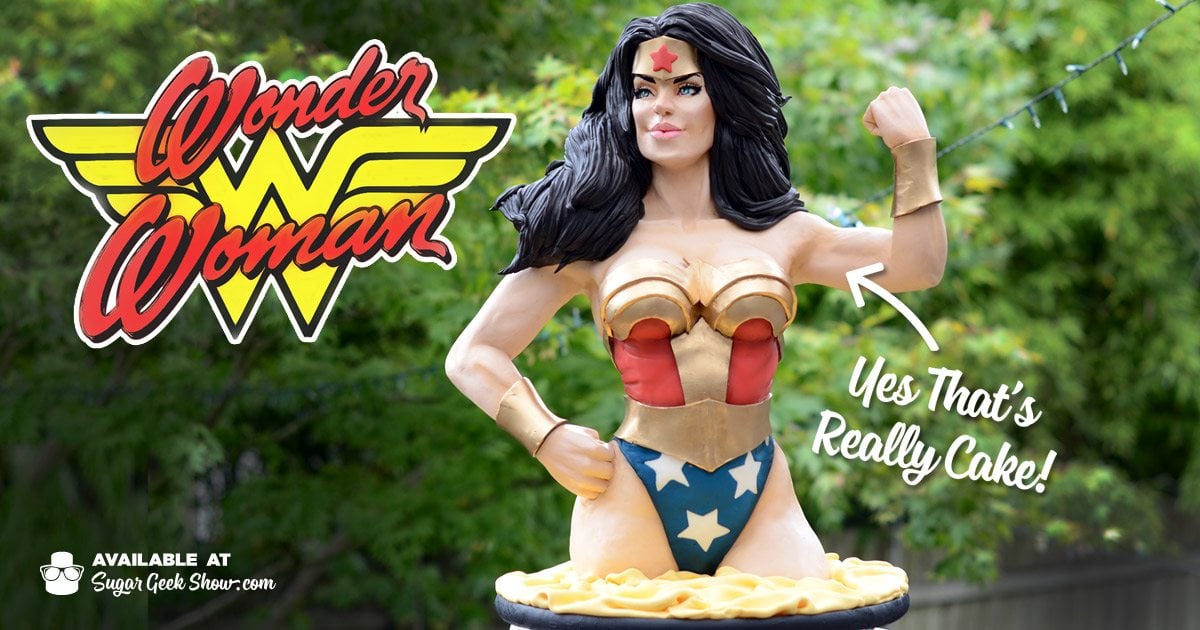
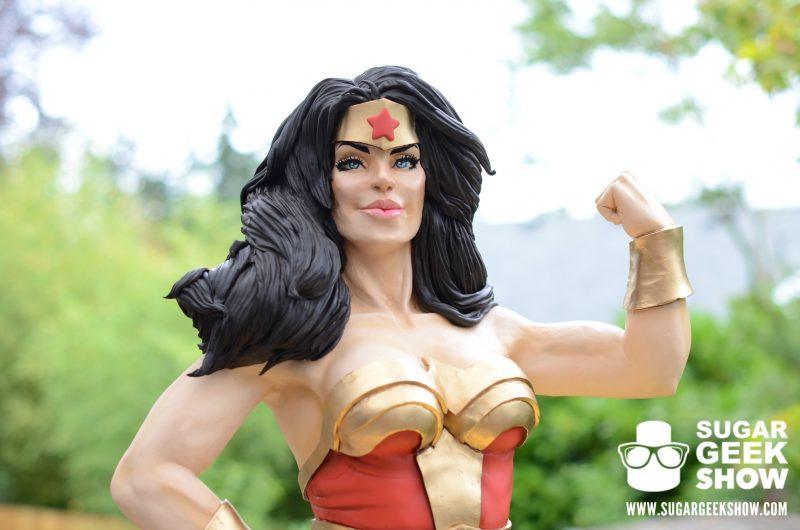
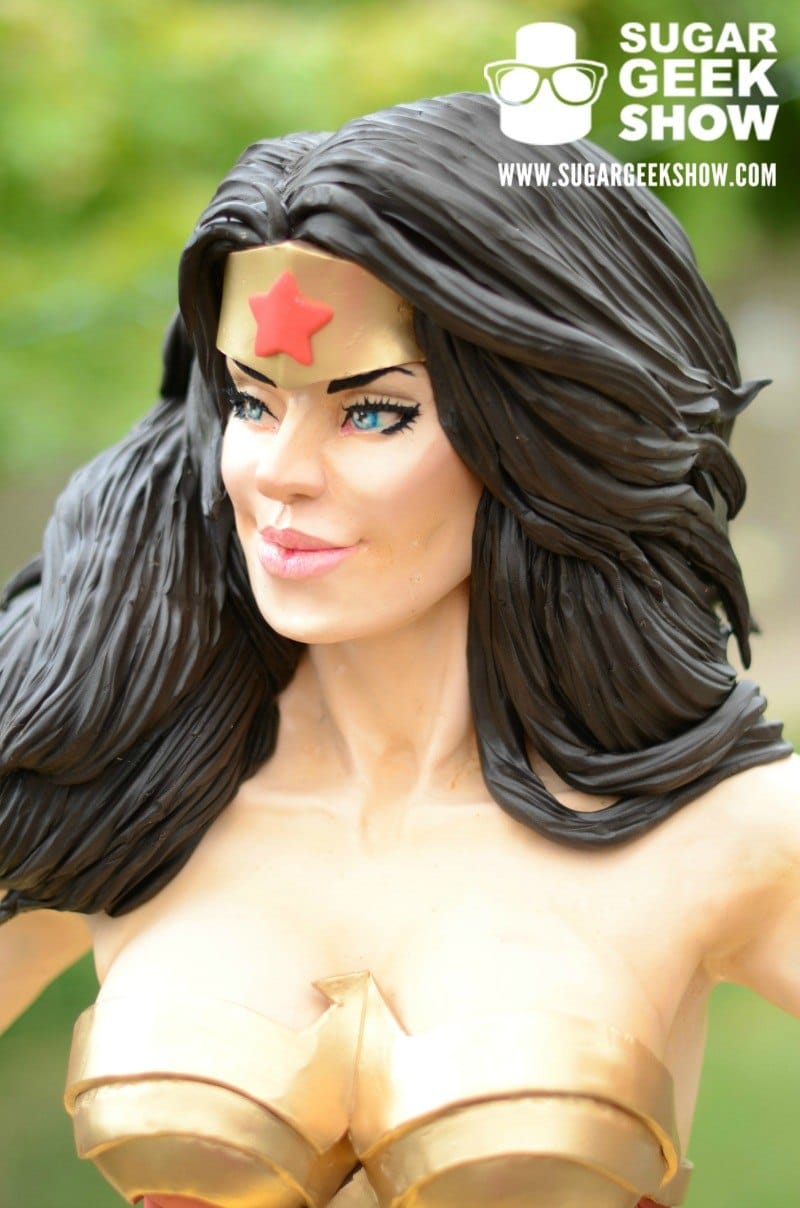
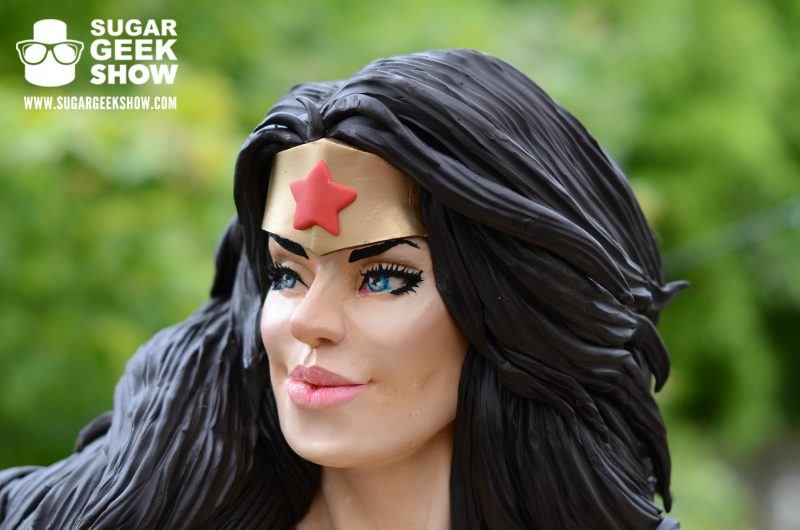
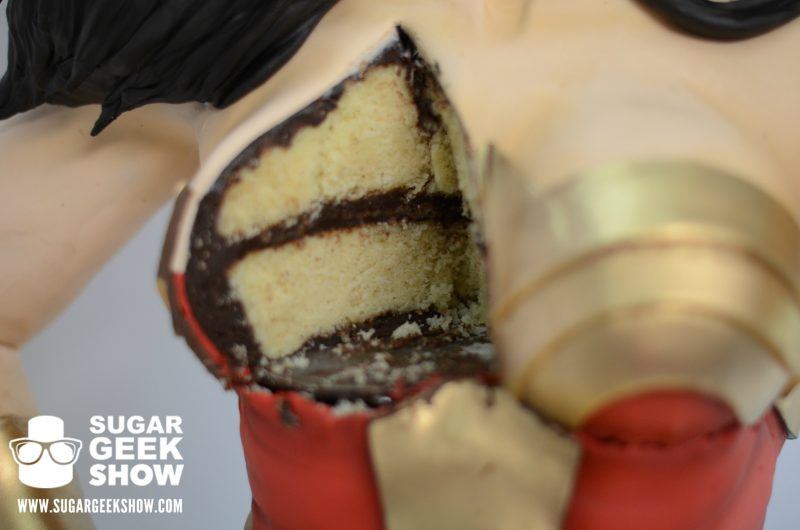
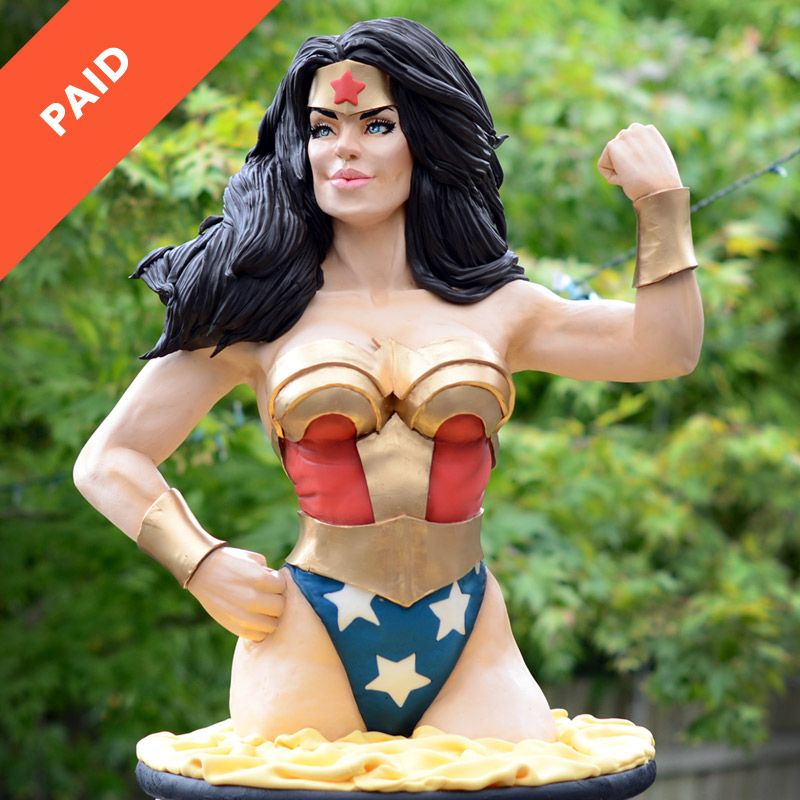
Do you love superheroes? Do you love cake? Well get ready because I am going to tell you something mindblowing. This tutorial is BOTH. No, I am not pulling your leg, I am totally 100% telling the truth! It is a superhero, Wonder Woman to be exact, made entirely out of cake! In this tutorial you will learn the entire process from beginning to end. Structure, cake carving, covering in fondant, the whole kit and kaboodle. Check out some of the close up shots and see for yourself, as if you somehow weren't already convinced.

Isn't she a beauty? I mean Wonder Woman already was but this cake really captures that don't you think? Strong, noble and ridiculously cut.

Wonder Woman Bust Cake

The details and realism are incredible, especially in the face and hair. You too can learn how to create these amazing details and apply them to any super hero your heart desires!

Wonder Woman Bust Cake

Wonder Woman Bust Cake

And here's your proof, but you never doubted right? You would never do that. If you're already a Sugar Geek Show member you know the drill by now and you don't need a lasso of truth. If you're not you are seriously missing out. Sign up to Become a Premium or Elite Member today to gain access to this crazy cool class.

Wonder Woman Bust Cake

Here is the preview clip to get you even more excited, hopefully it's not an awesome overload, then again, that doesn't sound too bad.


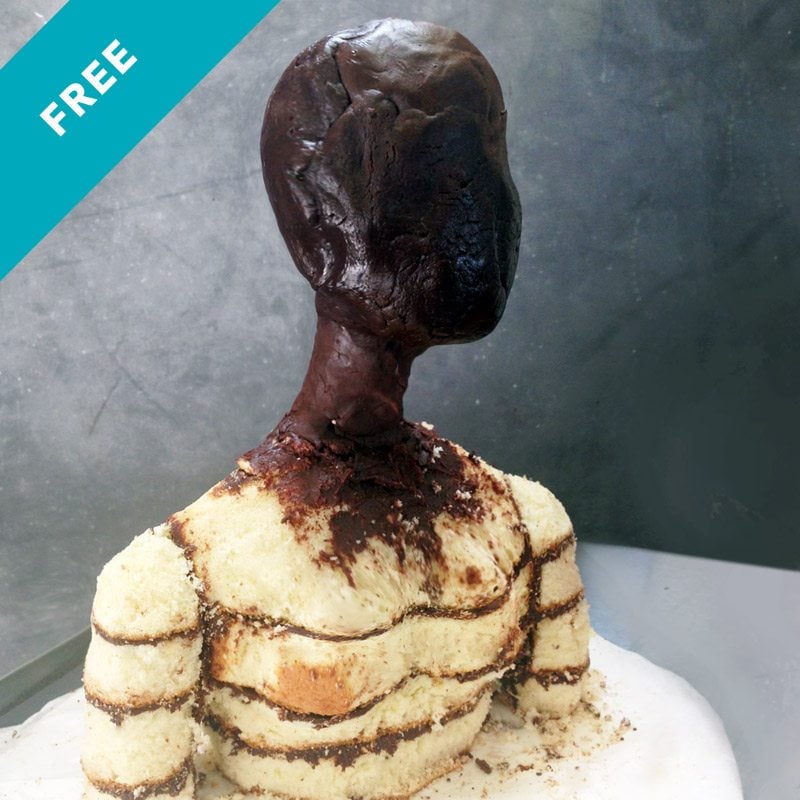
Female Bust Cake Mini Tutorial Free Class

August 22, 2016 Course Preview

Female Bust Cake

Skill Level: Newb
The basics of carving a female bust out of cake to prep it for decorating. Check out the facial anatomy tutorial for face sculpting.

Jeep Tutorial

August 16, 2016 Blog

The Wheel on the Jeep goes 'Round and 'Round...For Real

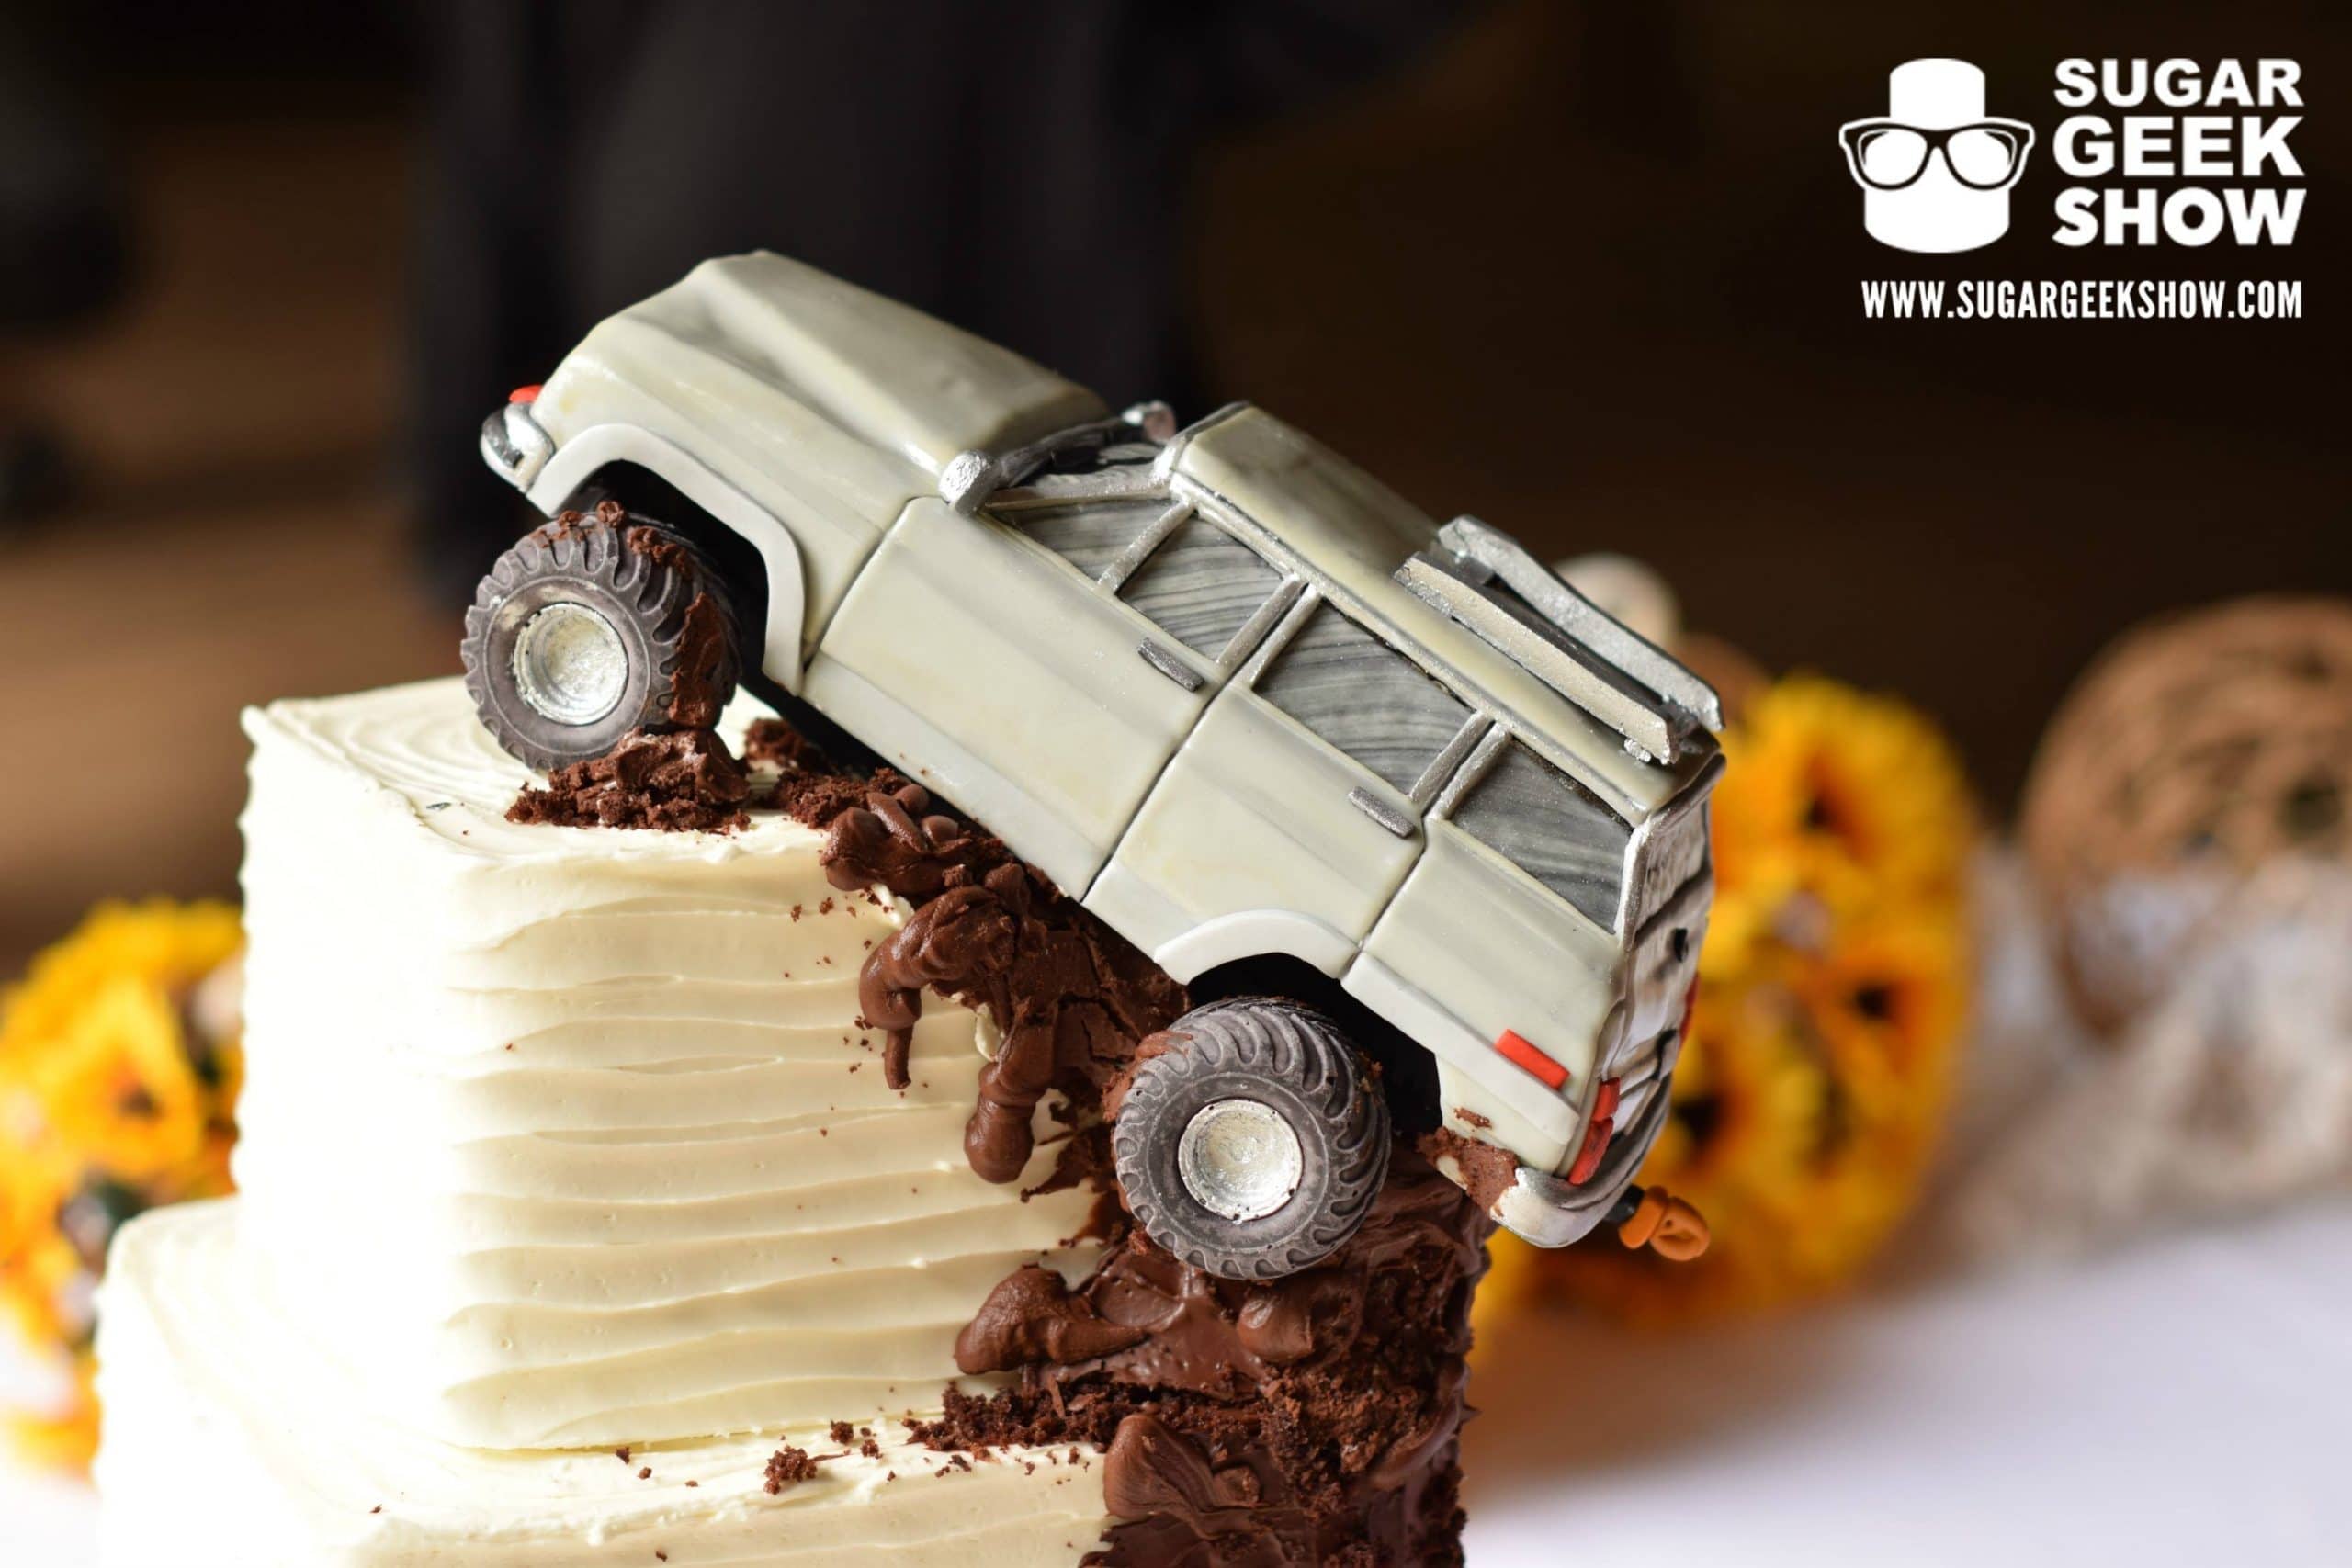
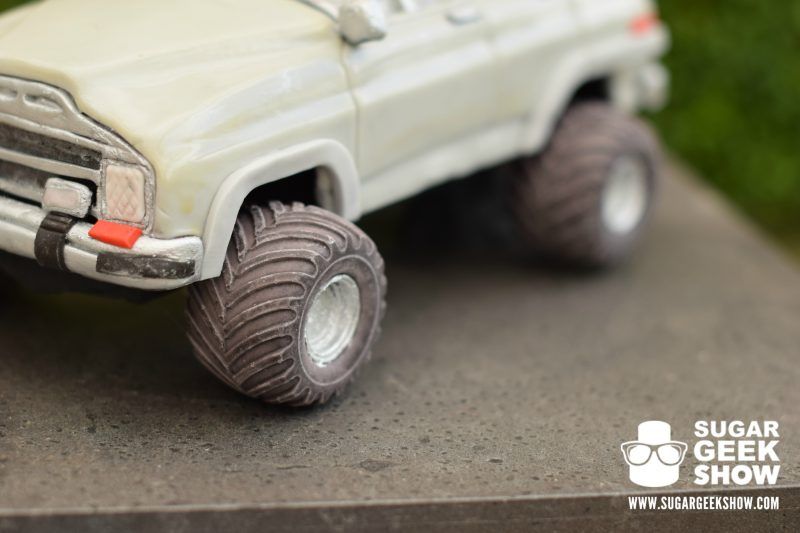
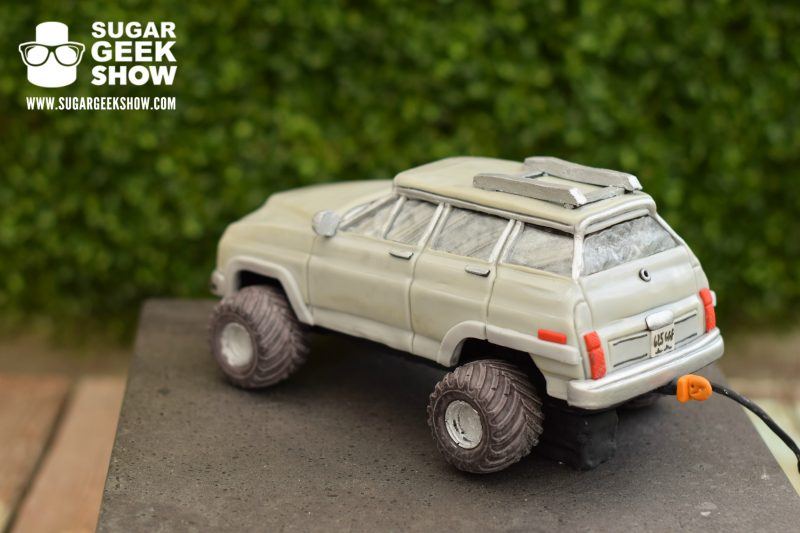
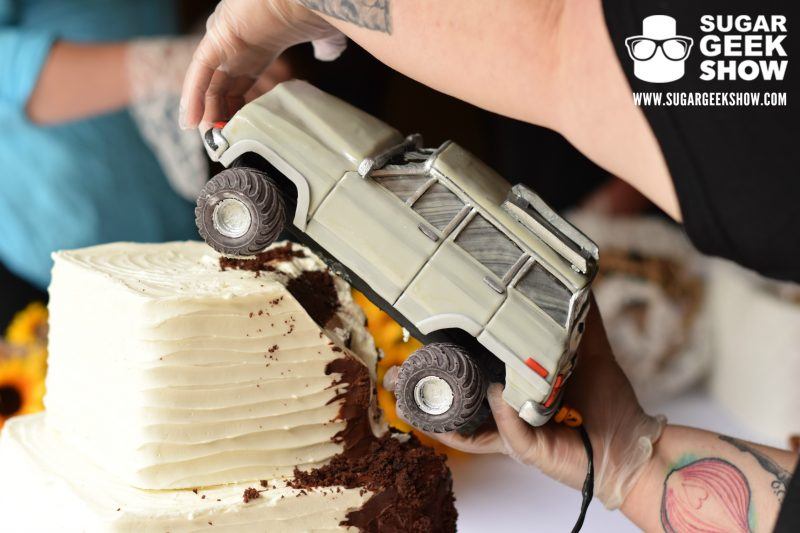
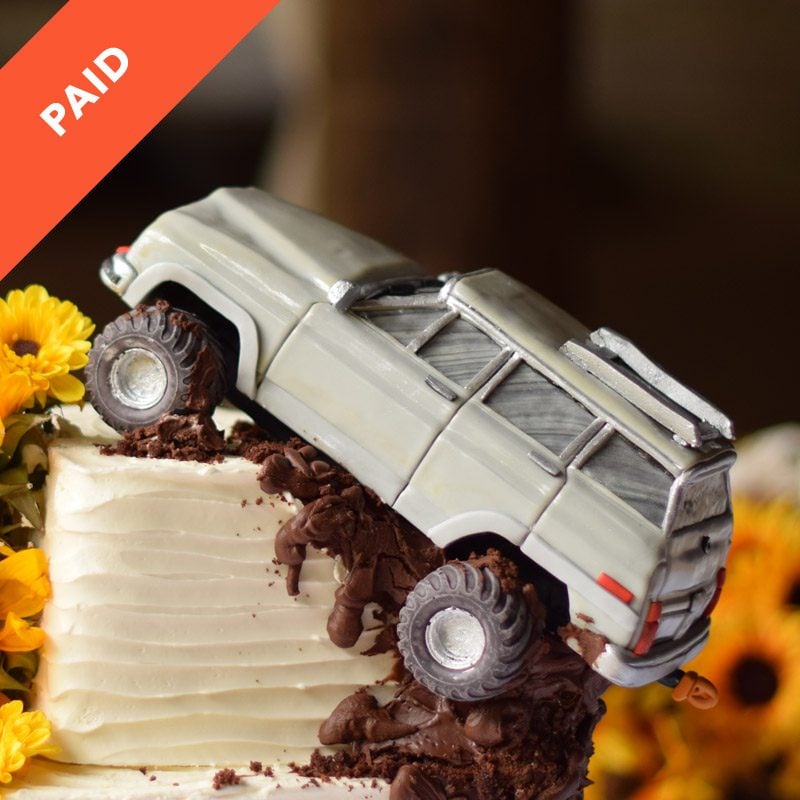
Being high centered has undoubtedly never looked this fun. Funny how so many things that would suck in real life suddenly become awesome if you turn them into cake. In this tutorial, Liz shows us how to make a super realistic jeep out of rice cereal treat to create a really fun topper that could be turned into any car for any occasion! You're thinking, "awesome! I have always wanted to know how to make realistic car toppers for my cakes!" but that's not all folks, this topper goes one step further with it's moving wheel special effect. The tutorial is also packed full of awesome tips about working with rice cereal treat, where to find any car template and creating those amazing details.  

Jeep Topper

Just look at the amazing teeny tiny details in this topper, LOOK, I mean seriously? This jeep is on point.

Jeep Topper

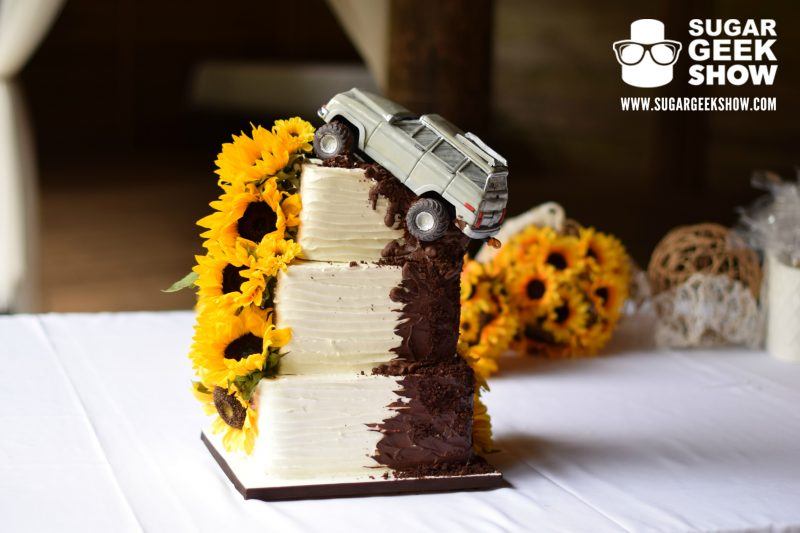
I love that this Jeep topper went on a wedding cake! How fun! I love things that are out of the norm and make things stand out. Some people might cringe at putting all that "mud" on a white wedding cake and a car hanging from the top but I say embrace the chance to add imperfections and unique elements, people are more likely to remember the cake!

Placing Jeep Topper

The finished product in all it's glory. Definitely one of a kind! Sign up as a Premium or Elite Member today to access this fun jeep tutorial!

Jeep with Moving Wheel Wedding Cake

Check out the preview video below to see the awesome moving wheel effect in action! You know you're dying to know how it's done, so what are you waiting for?


Wonder Woman Cake Tutorial Square Thumbnail

August 10, 2016 Course Preview

Wonder Woman Cake Tutorial

Skill level: Advanced

This wonder woman cake is one of our most advanced tutorials ever and has flown in on an invisible airplane! This wonder woman cake is 100% sculpted cake and has an elaborate cake structure.

Liz shows you how to sculpt the wonder woman face out of modeling chocolate, how to create gravity defying hair and tons of practical information on anatomy and proportions.

This wonder woman cake is life-sized and definitely takes some time but you'll learn SO much about anatomy and cake sculpting, you'll feel much more confidant in your anatomy sculpting.

1:19:13 Minutes of Instruction

What You Will Learn

  • How to build the wonder woman cake structure
  • Tips and tricks on how to figure out the anatomy of the figure
  • How to carve down the cake and add modeling chocolate
  • How to create gravity defying hair
  • Learn how to sculpt a beautifully realistic face with realistic proportions

Downloads

Materials List

Full Cake Template Diagram

Cake Templates for cakes

Photo References

Wireframe of Female Torso

Wonder Woman Figure Reference

Wonder Woman Cake Tutorial Square Thumbnail

August 10, 2016 Paid Video

Wonder Woman Cake Tutorial

Skill Level: Advanced
One of our most advanced tutorials ever has flown in on an invisible airplane! It's the Wonder Woman, all-cake sculpting tutorial and it's ready to rock your socks off. Liz Marek breaks down this seemingly difficult process into an easy to understand project.

Related Videos


Face Sculpting with Skull Mold


Rice Krispy Treats Tutorial


TruColor Natural Food Coloring

Downloads

Materials List
Full Cake Template Diagram
Bottom Template
Waist Template
Wood Template
Breast Template
Belt and Tiara Template
Photo Reference #1
Photo Reference #2
Photo Reference #3
Wireframe of Female Torso
Wonder Woman Figure Reference

offroad-jeep-topper-paid-cake-tutorial

August 1, 2016 Course Preview

Offroad Jeep Topper with Moving Topper

Skill Level: Intermediate
In this tutorial, you will start by first downloading the Jeep template from the website Liz provided you. Then, edit the template to the desired size to ensure proper proportions for the Jeep. Next, watch Liz as she shows you how to create the wheels using a custom made wheel mold and filling them with chocolate. Moving on, you will begin carving the Jeep using rice crispy treats and the template as your guide. You will then cover the carved Jeep in modeling chocolate to bulk up and add depth. In addition to the modeling chocolate, you will cover the entire Jeep with a piece of fondant and begin cutting out the windows and adding the indentations and details to add another level of realism to the Jeep. After that, add the bumpers and the remaining car parts needed to complete the Jeep. In conclusion, learn how to make the spinning wheel and add the wheels to the Jeep before attaching the Jeep to the cake using proper supports.

Run Time

47:55

Techniques Used

  1. Rice Crispy Treats
  2. Modeling Chocolate
  3. Mold Making
  4. Motorized Wheel

Tutorial Chapters

  • 0:20 Preparing the Template
  • 7:44 Making the Wheel Molds
  • 14:43 Carving the Jeep
  • 20:55 Covering the Jeep in Modeling Chocolate and Fondant
  • 26:17 Adding Details
  • 40:33 Making the Spinning Wheel
  • 46:48 Attaching the Jeep to the Cake

Downloads

Materials List
Jeep Blueprint Template
Cake Motor Image

offroad-jeep-topper-paid-cake-tutorial

August 1, 2016 Paid Video

Offroad Jeep Topper with Moving Topper

Skill Level: Intermediate
In this tutorial, you will start by first downloading the Jeep template from the website Liz provided you. Then, edit the template to the desired size to ensure proper proportions for the Jeep. Next, watch Liz as she shows you how to create the wheels using a custom made wheel mold and filling them with chocolate. Moving on, you will begin carving the Jeep using rice crispy treats and the template as your guide. You will then cover the carved Jeep in modeling chocolate to bulk up and add depth. In addition to the modeling chocolate, you will cover the entire Jeep with a piece of fondant and begin cutting out the windows and adding the indentations and details to add another level of realism to the Jeep. After that, add the bumpers and the remaining car parts needed to complete the Jeep. In conclusion, learn how to make the spinning wheel and add the wheels to the Jeep before attaching the Jeep to the cake using proper supports.

Run Time

47:55

Techniques Used

  1. Rice Crispy Treats
  2. Modeling Chocolate
  3. Mold Making
  4. Motorized Wheel

Tutorial Chapters

  • 0:20 Preparing the Template
  • 7:44 Making the Wheel Molds
  • 14:43 Carving the Jeep
  • 20:55 Covering the Jeep in Modeling Chocolate and Fondant
  • 26:17 Adding Details
  • 40:33 Making the Spinning Wheel
  • 46:48 Attaching the Jeep to the Cake

Related Videos

Downloads

Materials List
Jeep Blueprint Template
Cake Motor Image

August 1, 2016 Blog

Geode Cakes are Taking Over the World

Geode cakes may very well be the most popular trend in wedding cakes since Buttercream was invented. They are EVERYWHERE. Creating the first sugar geode was the brilliant work of Viki Kane of Just a Little Dessert Co.. Rachael Teufel of Intricate Icings took the idea a step further and buried these babies right inside a cake making for the most breathtaking and unique cake the internet had ever seen.  Today we want to show you 12 of these beauties we think are worthy of some extra attention.

Here is the original geode idea from Viki Kane, the Mother of Sugar Geodes, which if you're a caker, is pert near as cool as the Mother of Dragons.

Viki Kane Geode Cake

Everyone has seen that first viral Geode Cake of Rachael Teuful's, but have you seen this one? Are you kidding me?! How cool is the geode hole right through the cake! Bravo again Rachael, Bravo.

Rachael Teuful Geode Hole Cake

Cynthia Inguanzo-Underwood executed the geode inlay perfectly here with a beautiful deep sea green. Gawgeous.

Cynthia Inguanzo-Underwood Geode Cake

The beautiful blue ring makes this geode cake extra unique and I am also lovin' the use of both gold and silver leaf around the geode.

Blue Ring Geode Cake
Instagram/sailboatsociety

Della Hall of Tastebuds Cakery incorporated geodes unlike anyone else with her hot pink color and use of one to balance the tiers. Mega cool.

Della Hall Geode Cake

This is another one of a kind geode cake with the geode standing at 16" tall! Bree Woody-Stanfill of Vintage Soul Cakes delivered an impressive visual geode experience with this one.

Bree Woody-Stanfill Geode Cake

It's been said about this cake before but it really does take you right to the Emerald City in the Wizard of Oz, and who doesn't want to go there? Lovely job by Melissa Gray of Cakes by Gray.

Melissa Gray Geode Cake

Christine Leaming of Sweets Geeky Cakes brings us this absolutely stunning black and white marble cake and the addition of the pure white geodes on the outside. Very chic.

Christine Leaming Geode Cake

The double colors in this cake by Andi Brown of The Yellow Rose Cakery are freakin' fantastic! I also really love the realistic rock look around the geode. Not another like it on the internet and you saw it here first.

Andi Brown Geode Cake

Okay, this is pretty cool.  Yellow geodes! So eye catching and to top it off this is a straight up buttercream cake.

Yellow Buttercream Geode Cake
https://www.reddit.com/user/poppingdanceacademy

I really enjoy the small geode additions to the corners of this cake and the fact that it is a desert wedding where geodes are found! Move aside mountain weddings.

Desert Geode Cake
https://sweetcakesbykaren.com/

Another beauty with a thin slice of geode from top to bottom but the real winner in this picture is the bride in the mirror, check out her reaction to her breathtaking geode wedding cake! No really, she literally looks as though she is gasping for air. PRICELESS. A round of applause for Sarah Myers of High Five Cakes.

Sarah Myers Geode Cake

As promised, I've shown you 12 stunning Geode Cakes and now I am throwing in a bonus! In love with these geode cupcake toppers by Sweet Bites!

Sweet Bites Geode Cupcakes

Are you geoded (I'm making that a word right now) out yet? Of course not because that's not a thing. We will never tire of seeing these incredible nature meets cake creations. If you'd like to learn how to make some sugar geodes of your own check out the Rock Candy Geode Topper Tutorial we offer from guest instructor Viki Kane herself as well as the Geode Love Cake Tutorial from one of Liz's inspiration shoots.

July 22, 2016 Blog

Changing Your Cake Life One Hack at a Time

Who doesn't love a good hack? People who enjoy doing things the hard way or spending money they don't need to, aka no one. We turned to our Sugar Geeks to find out what sorta cake hacks they have come up with during their times of need and boy did they deliver! Here are 10 amazing cake hacks you may not have thought of but will surely be using from here on out.

#1  Place your buttercream or any icing in plastic wrap before putting in your piping bag. You can easily change out colors and avoid messy clean up!

Hack provided by Nancy Mann Russell

#2 When putting dragees on a cake, place a tea towel underneath your cake/turntable so that when dropped they stay in place on the towel rather than all over your kitchen! And before you start, pick up this handy little tool from Design A Cake!

Hack provided by Julie Tenlen

#3 Don't have an airbrush color? Pssshhhht no biggie.  Just mix together some gel paste and vodka 'til it is airbrush consistency!

Hack provided by Holly Rust Tumidajski

#4 Use a coffee filter (minus the coffee) to line an 8" round pan before baking your cake to ensure it doesn't stick! Spray your pan and lay the filter flat inside and you're done! You could even pretty quickly cut it down for a smaller cake or use it for a larger size as well.

Hack provided by Helen Moberg Tinsley

#5 Use a cheese knife to slice your fondant, yep, I said cheese knife. There are many types of cheese knives but I am sure any kind will work. Just pretend the cheese in the photo is fondant and you should be able to execute it properly.
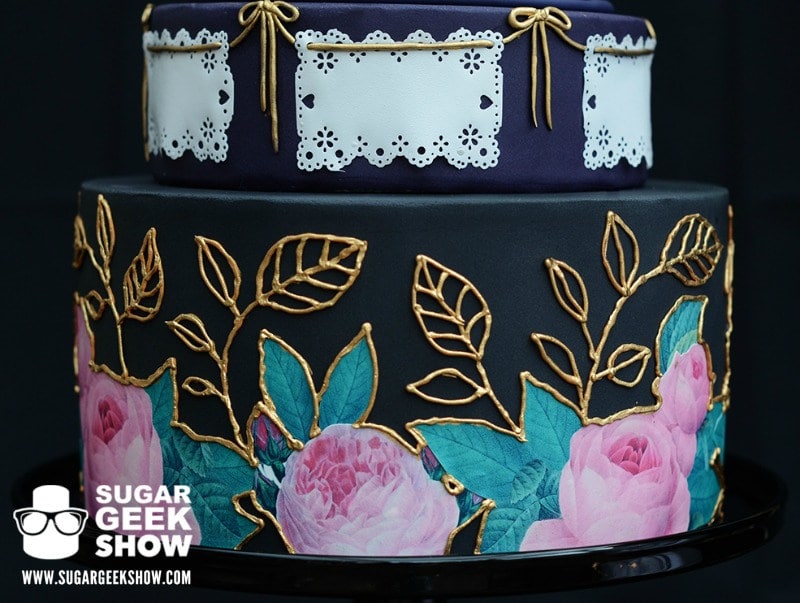
Hack provided by Jennifer Everett

#6 Keep the little plastic tip you cut off the end of your piping bag. It can be used to cover your piping tip to keep your buttercream fresh when not in use. Just unscrew your coupler nut, place the plastic triangle over the piping tip and screw the nut back on! "No waste and perfect fit".

Hack provided by Shannon Bond

#7 Use a pill organizer to organize small letter stamps! I bet there are several things these babies would come in handy for!

Hack provided by Melissa Pedreña

#8 Poke a hole in the center of a stretch to fit food cover and place over mixing bowl to keep sugar and splatter at bay while mixing! How genius is that!

Hack provided by Lynn Page

#9 Cover your turntable, counters and back splash with Glad Press N' Seal before airbrushing! And a tip from me, wear a mask to avoid colored snot for days.

Hack provided by Amy Grant

#10 Not particularly good at old school hand sharpening with a knife? Use a pencil sharpener to sharpen your center dowel rods! ¼" is the same width as a pencil.

Hack provided by Lauren Cortesi

So there ya go. 10 time and/or money saving caker hacks delivered right to you. Just spreading the cake love whenever we can.

Gingham Spring Cake Paid Tutorial from Sugar Geek Show featuring watercolors, floral spray, and surprise cake pattern inside

July 15, 2016 Blog

Oppa Gingham Style

Sing it with me, "Oppa Gingham Style, op op op op op, Oppa Gingham Style, ehhh sexy lady" You know you're doing it, it's pretty much impossible not to, and now I have ruined the rest of your day by permanently sticking that in your head #sorrynotsorry, and yes, I know the real song says GANGNAM, it's a play on words people. That's right we're bringing gingham back and on the inside of yo' cake! This gorgeous Springy cake with watercolor painting, a beautiful flower spray and of course the eye-catching gingham pattern on the inside is now available for your learning pleasure. You are welcome. This cake was also featured on the cover of the June issue of Cake Master's Magazine and a full pictorial can be found inside there as well. BONUS. Let's dive in and see some of the beautiful details in process starting with the sweet crackle board.

This is such a cool Isomalt effect (SimiCakes Brand Preferred) that could go with so many cakes! It is also a dream come true for the cake decorator who puts off covering their boards until the last minute, am I right? So basically every cake decorator ever. Original technique created by Choux Cake Studio.

Working our way up these shots get us up close to the simple yet beautiful watercolor painting. Liz shows you how easy it is to get this stunning effect.

Spring Watercolor

Spring Watercolor Cake

Here are the different elements in the flower spray that are offered in the tutorial including Amaranth, Poppies, Hydrangeas and Jasmine leaves. Many different products are used throughout this tutorial including Flexique, an amazing edible fabric product that proves to have more and more uses! Also learn dusting techniques and assembly of the floral arrangement.

Instruction for beautiful application and arrangement of the floral spray.

And of course, last but not least, the star of the cake, the gingham, op op op op op.

Overall, it is a gorgeous cake full of many techniques anyone can execute for a beautiful look!

Do not miss out on this amazing tutorial. Sign Up as a Premium or Elite Member today 🙂 Then work on getting that insanely catchy song out of your head.

July 15, 2016 Course Preview

Gingham Spring Cake

Skill level: Intermediate

Spring has already sprung but it is never too late to create this one of a kind watercolor creation completed with a floral arrangement and a top tier that has a surprise gingham center.

First begin by baking, trimming, and cutting the gingham cakes before assembling the cut pieces to form the layers as shown by Liz in this tutorial. Next, stack and frost each layer with a thin layer of ganache. Then, cover the cake in a final coat of ganache and chill overnight. After that you will learn how to create and assemble perfectly pink poppies, delicate jasmine flowers, realistic amaranth flowers, and gorgeous hydrangeas using cutters, veiners, and other simple techniques designed to make this amazing floral arrangement come to life. Moving on, learn how to cover the cake board with marbled fondant and then use isomalt to create the crackle effect inspired by Choux Cake Studio's Crackle Tutorial.

You will then be shown how to finish the cakes by covering them in fondant and paint each tier using edible watercolors before stacking them onto the cake board. Lastly, Liz will show you how to arrange the sugar flowers onto the cake before dusting them with water or steam to lock in their colors. You will then be able to take the tools and techniques learned in this tutorial and apply them to any and all future cake orders!

1:01:55 Minutes of Instruction

What You Will Learn

  • How to hand-paint a beautiful watercolor design on the cake
  • Make a stunning gingham plaid design on the inside
  • How to make some amazing sugar flowers to match

Tutorial Chapters

  1. Assembling the Gingham Cake Layers 0:47
  2. Making the Pink Poppies 7:34
  3. Assembling the Poppy Flowers 13:30
  4. Making the Jasmine Leaves 17:56
  5. Assembling the Jasmine Leaves 20:00
  6. Creating the Amaranth 22:10
  7. Assembling the Amaranth 28:55
  8. Making the Hydrangeas 30:13
  9. Assembling the Hydrangeas 32:24
  10. Dusting the Leaves 33:36
  11. Glazing the Leaves 38:41
  12. Assembling the Leaves 45:47
  13. Making the Leaves 46:45
  14. Dusting the Leaves 48:38
  15. Glazing the Leaves 56:28

Buy Just This Tutorial

Buy Now $34.99

Downloads

Materials List

Gingham Pattern Template

Assembly Instructions

Vanilla Bean Strawberry Cake Recipe

« Previous Page
Next Page »

Primary Sidebar

Hi, I'm Liz! I'm a cake artist and recipe developer, and I won Netflix's Is It Cake? Holiday 2 with a hyperrealistic Santa. I write foolproof recipes that explain why things work, not just how.

I also teach full-length cake tutorials, including sculpted cakes, at Sugar Geek University.

More about me →

Our Cake Greatest Hits

Check out our best cake recipes

Celebrate Halloween 🎃

  • black and white striped cake with pink drip, gummy eyeball with ice cream cone on top
    Gummy Eyeball Cake
    Cook Time1 Hours 30 Minutes
  • close up of a slice of black velvet cake
    Black Velvet Cake
    Cook Time50 Minutes
  • monster mash cheesecake brownies cut into squares on a white background. Sprinkles, pumpkins and plates around the brownies
    Monster Mash Cheesecake Brownies
  • close up of candy apples
    The Best Candy Apple Recipe
  • pumpkin pie recipe
    Pumpkin Pie Recipe
    Cook Time2 Hours
  • close up of pumpkin cheesecake bars on a plate
    Pumpkin Cheesecake Bars
    Cook Time4 Hours

Popular Recipes

  • close up of ganache drizzling into a bowl
    The Best Chocolate Ganache Recipe
    Cook Time20 Minutes
  • Piping easy buttercream rosettes onto a cake using a 1M star piping tip
    Easy Buttercream Frosting
    Cook Time25 Minutes
  • close up slice of marble cake
    Moist and Fluffy Marble Cake Recipe
    Cook Time40 Minutes
  • Slice of red velvet cake with cream cheese frosting on a white plate.
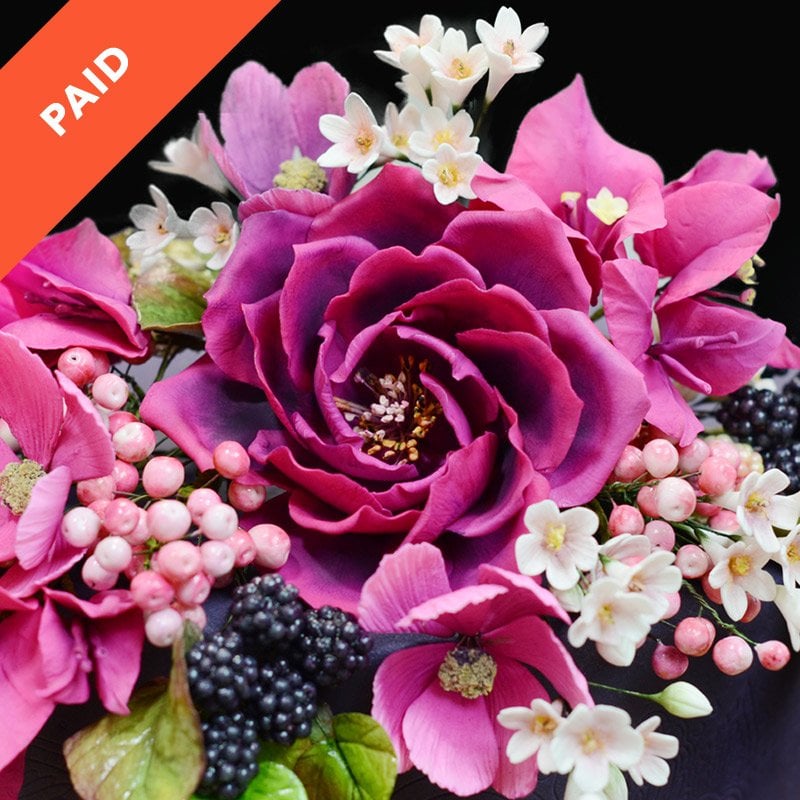
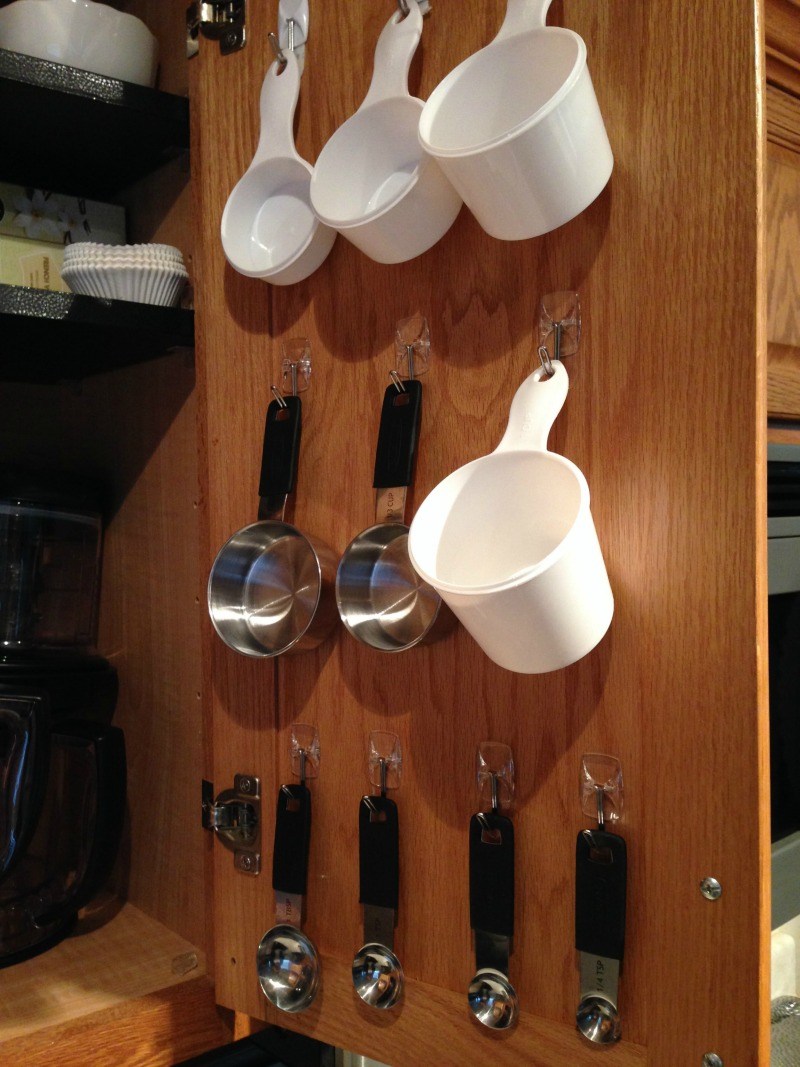
    Red Velvet Cake Recipe
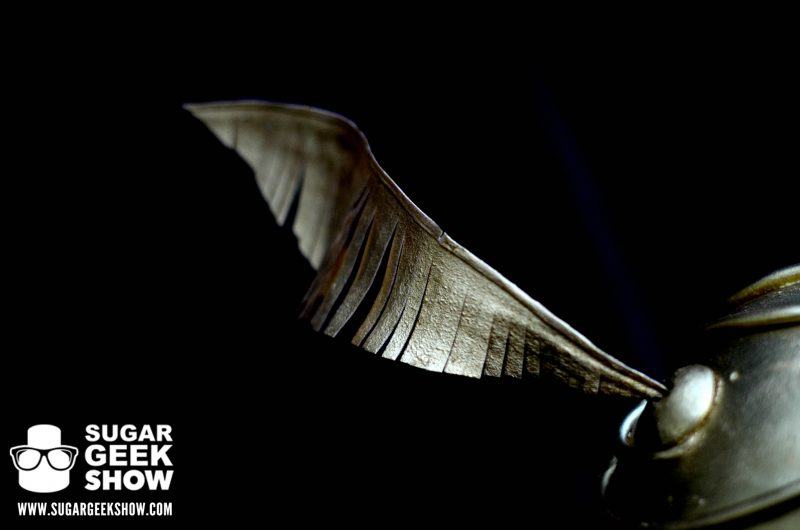
    Cook Time1 Hours 40 Minutes

Footer

↑ back to top

About

  • Privacy Policy
  • Terms of Service

Newsletter

  • Sign Up! for emails and updates

Contact

  • Contact
  • About Us

Copyright © 2024 Sugar Geek Show, Inc. All Rights Reserved.

Rate This Recipe

Your vote:


A rating is required
A name is required
An email is required