• Skip to primary navigation
  • Skip to main content
  • Skip to primary sidebar
  • Memorial Day
  • Recipes
  • Free Tutorials
  • Sign Up
  • About Liz

Sugar Geek Show logo

menu icon
go to homepage
  • Memorial Day
  • Recipes
  • Free Tutorials
  • Sign Up
  • About Liz
subscribe
search icon
Homepage link
  • Memorial Day
  • Recipes
  • Free Tutorials
  • Sign Up
  • About Liz
×
Home

Blog

Airbrushed Mermaid Cake

July 25, 2017 Blog

Fear the Airbrush No More

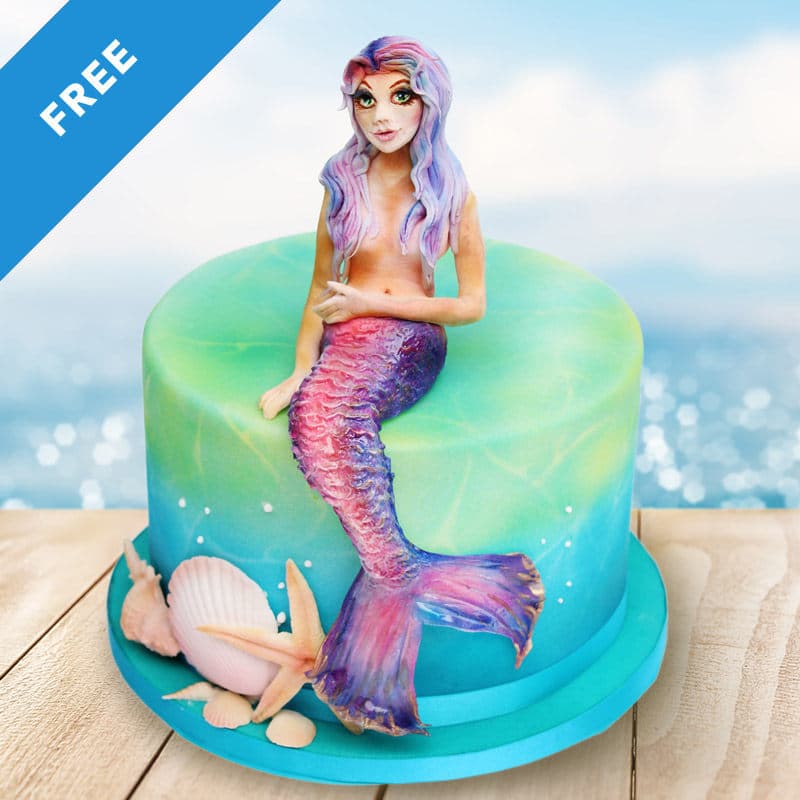
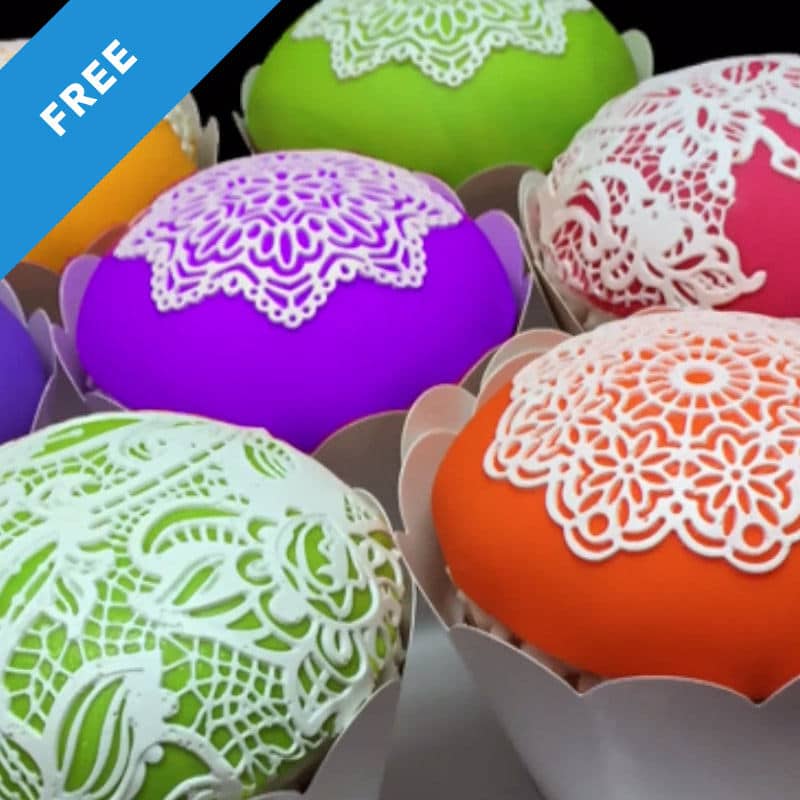
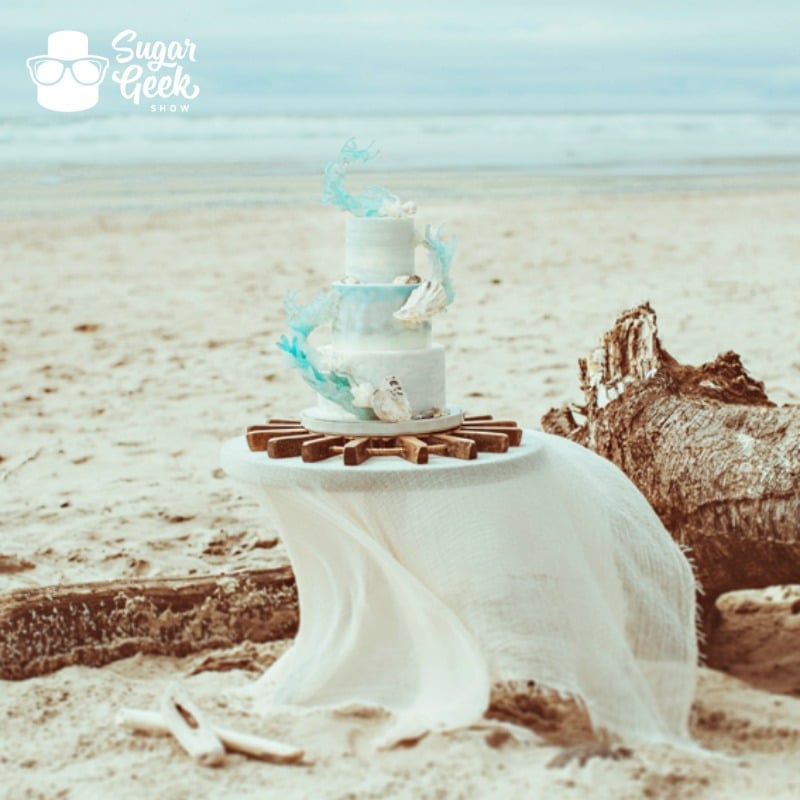
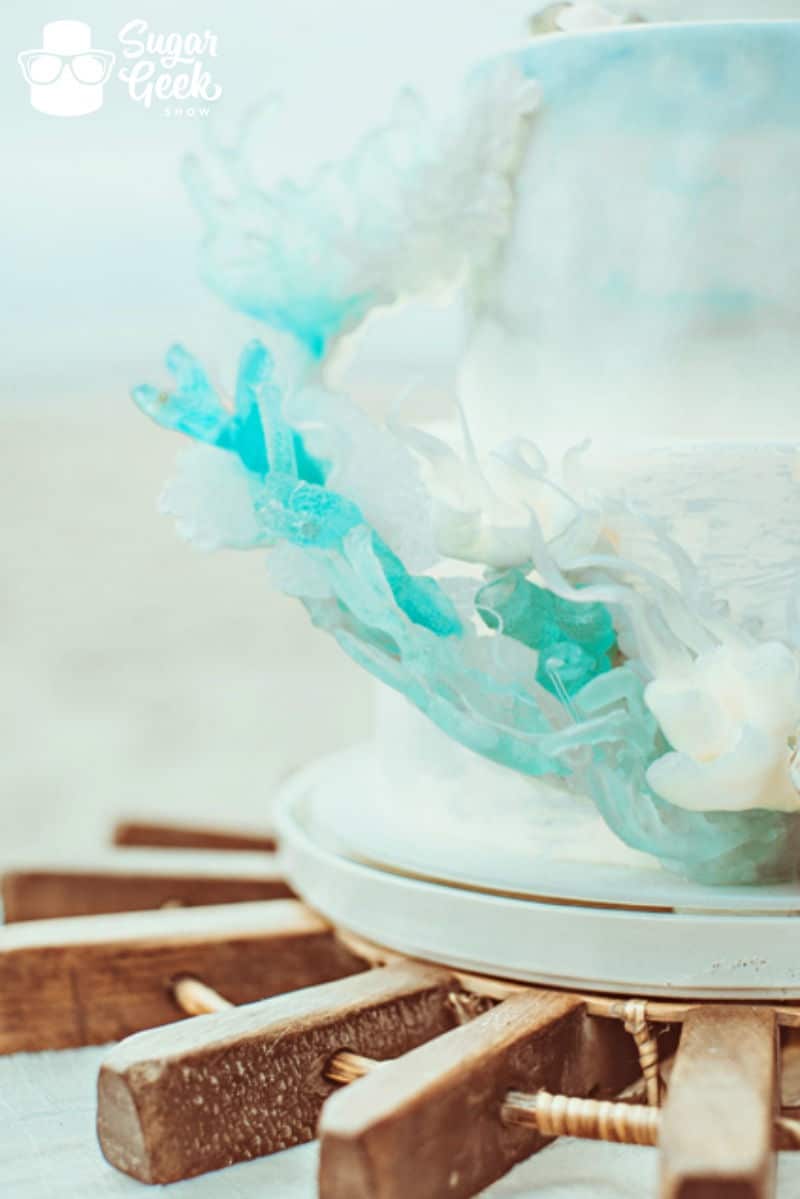
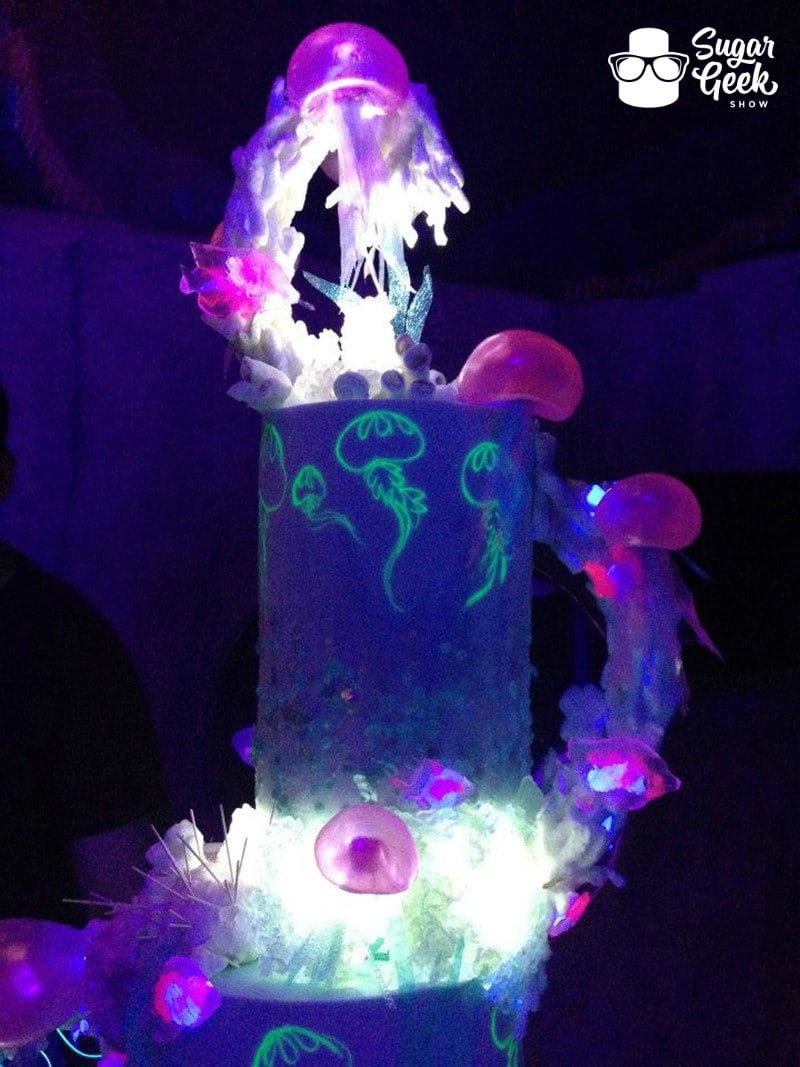
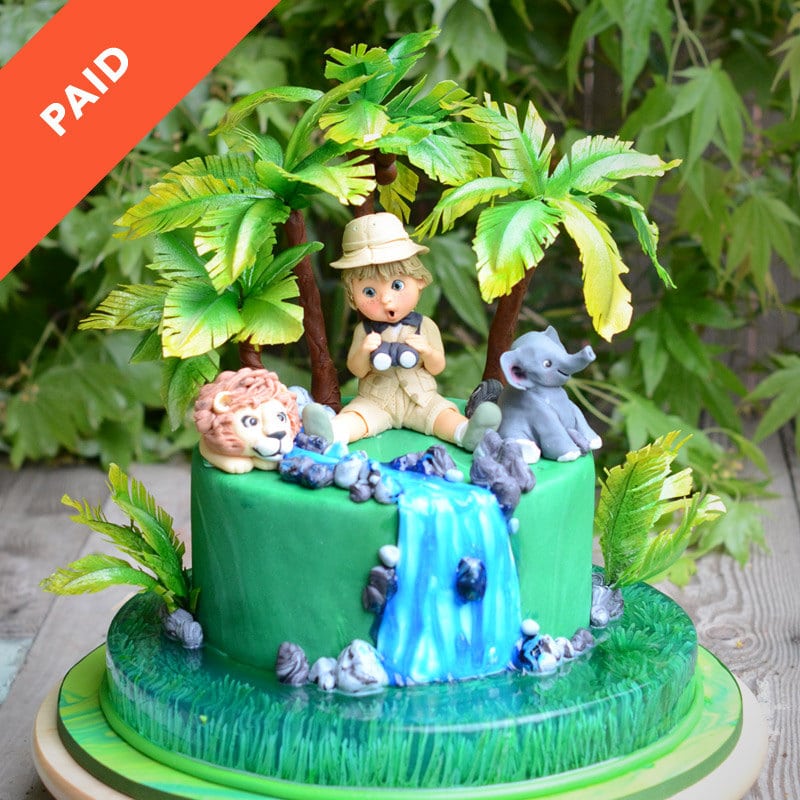
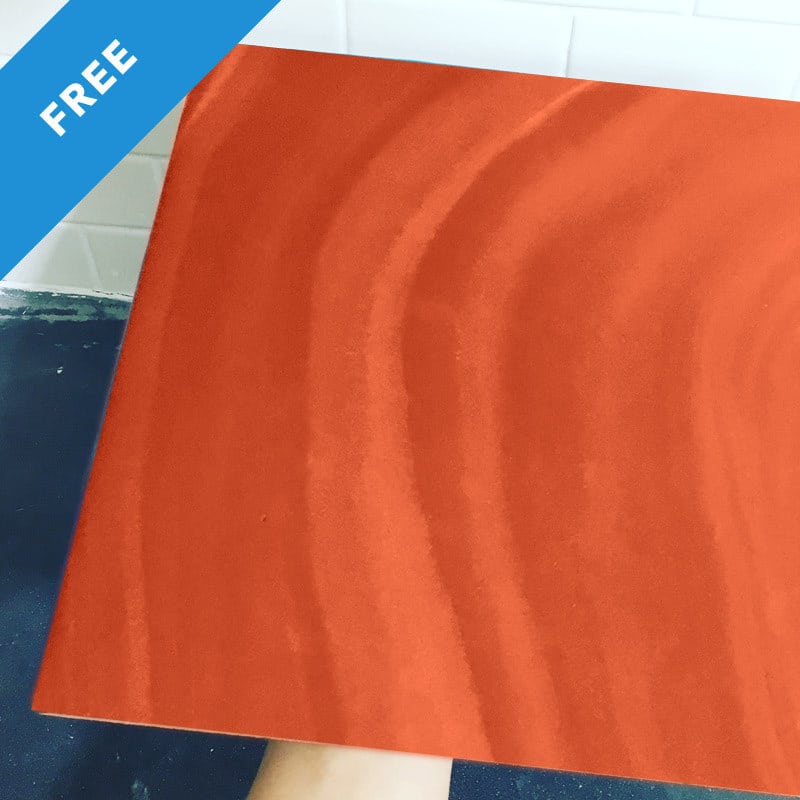
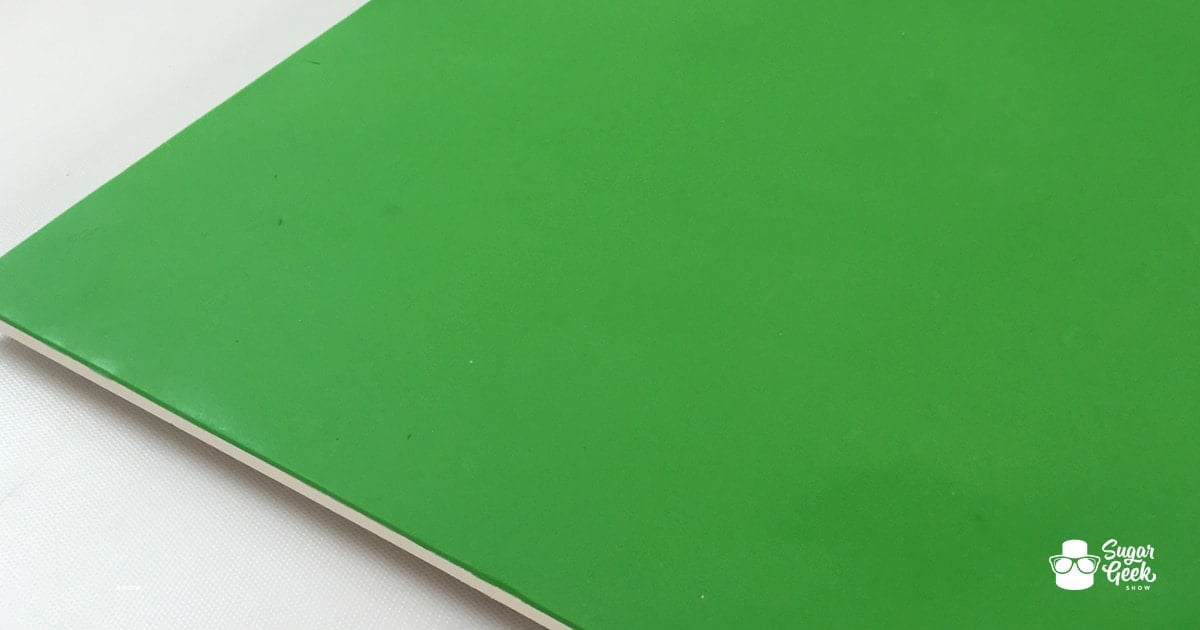
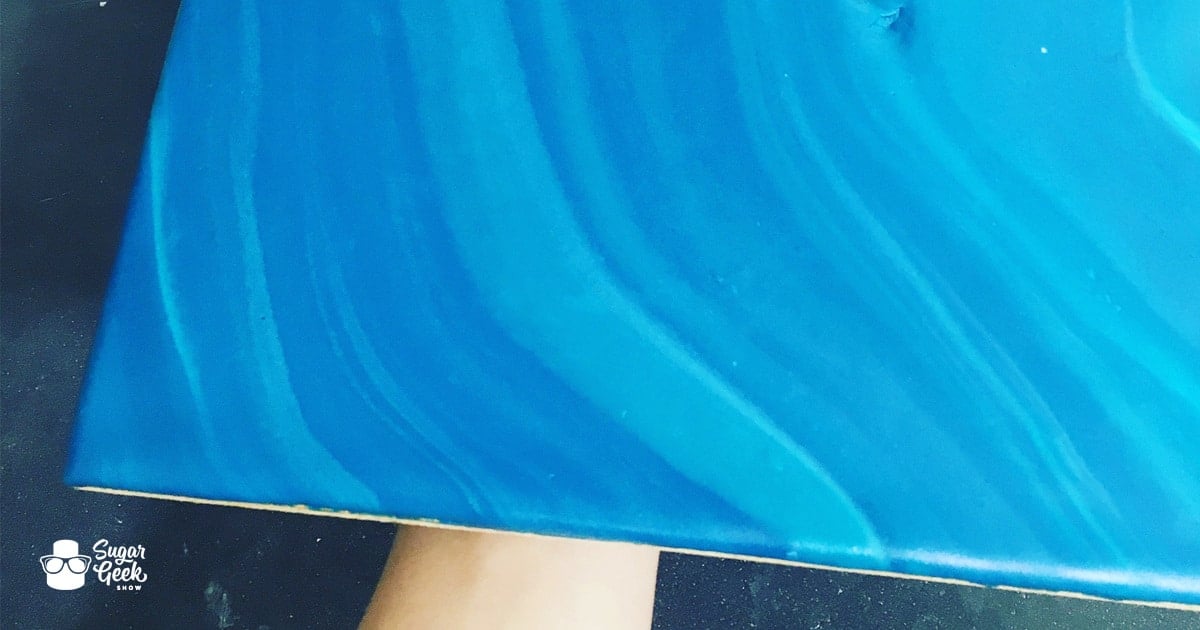
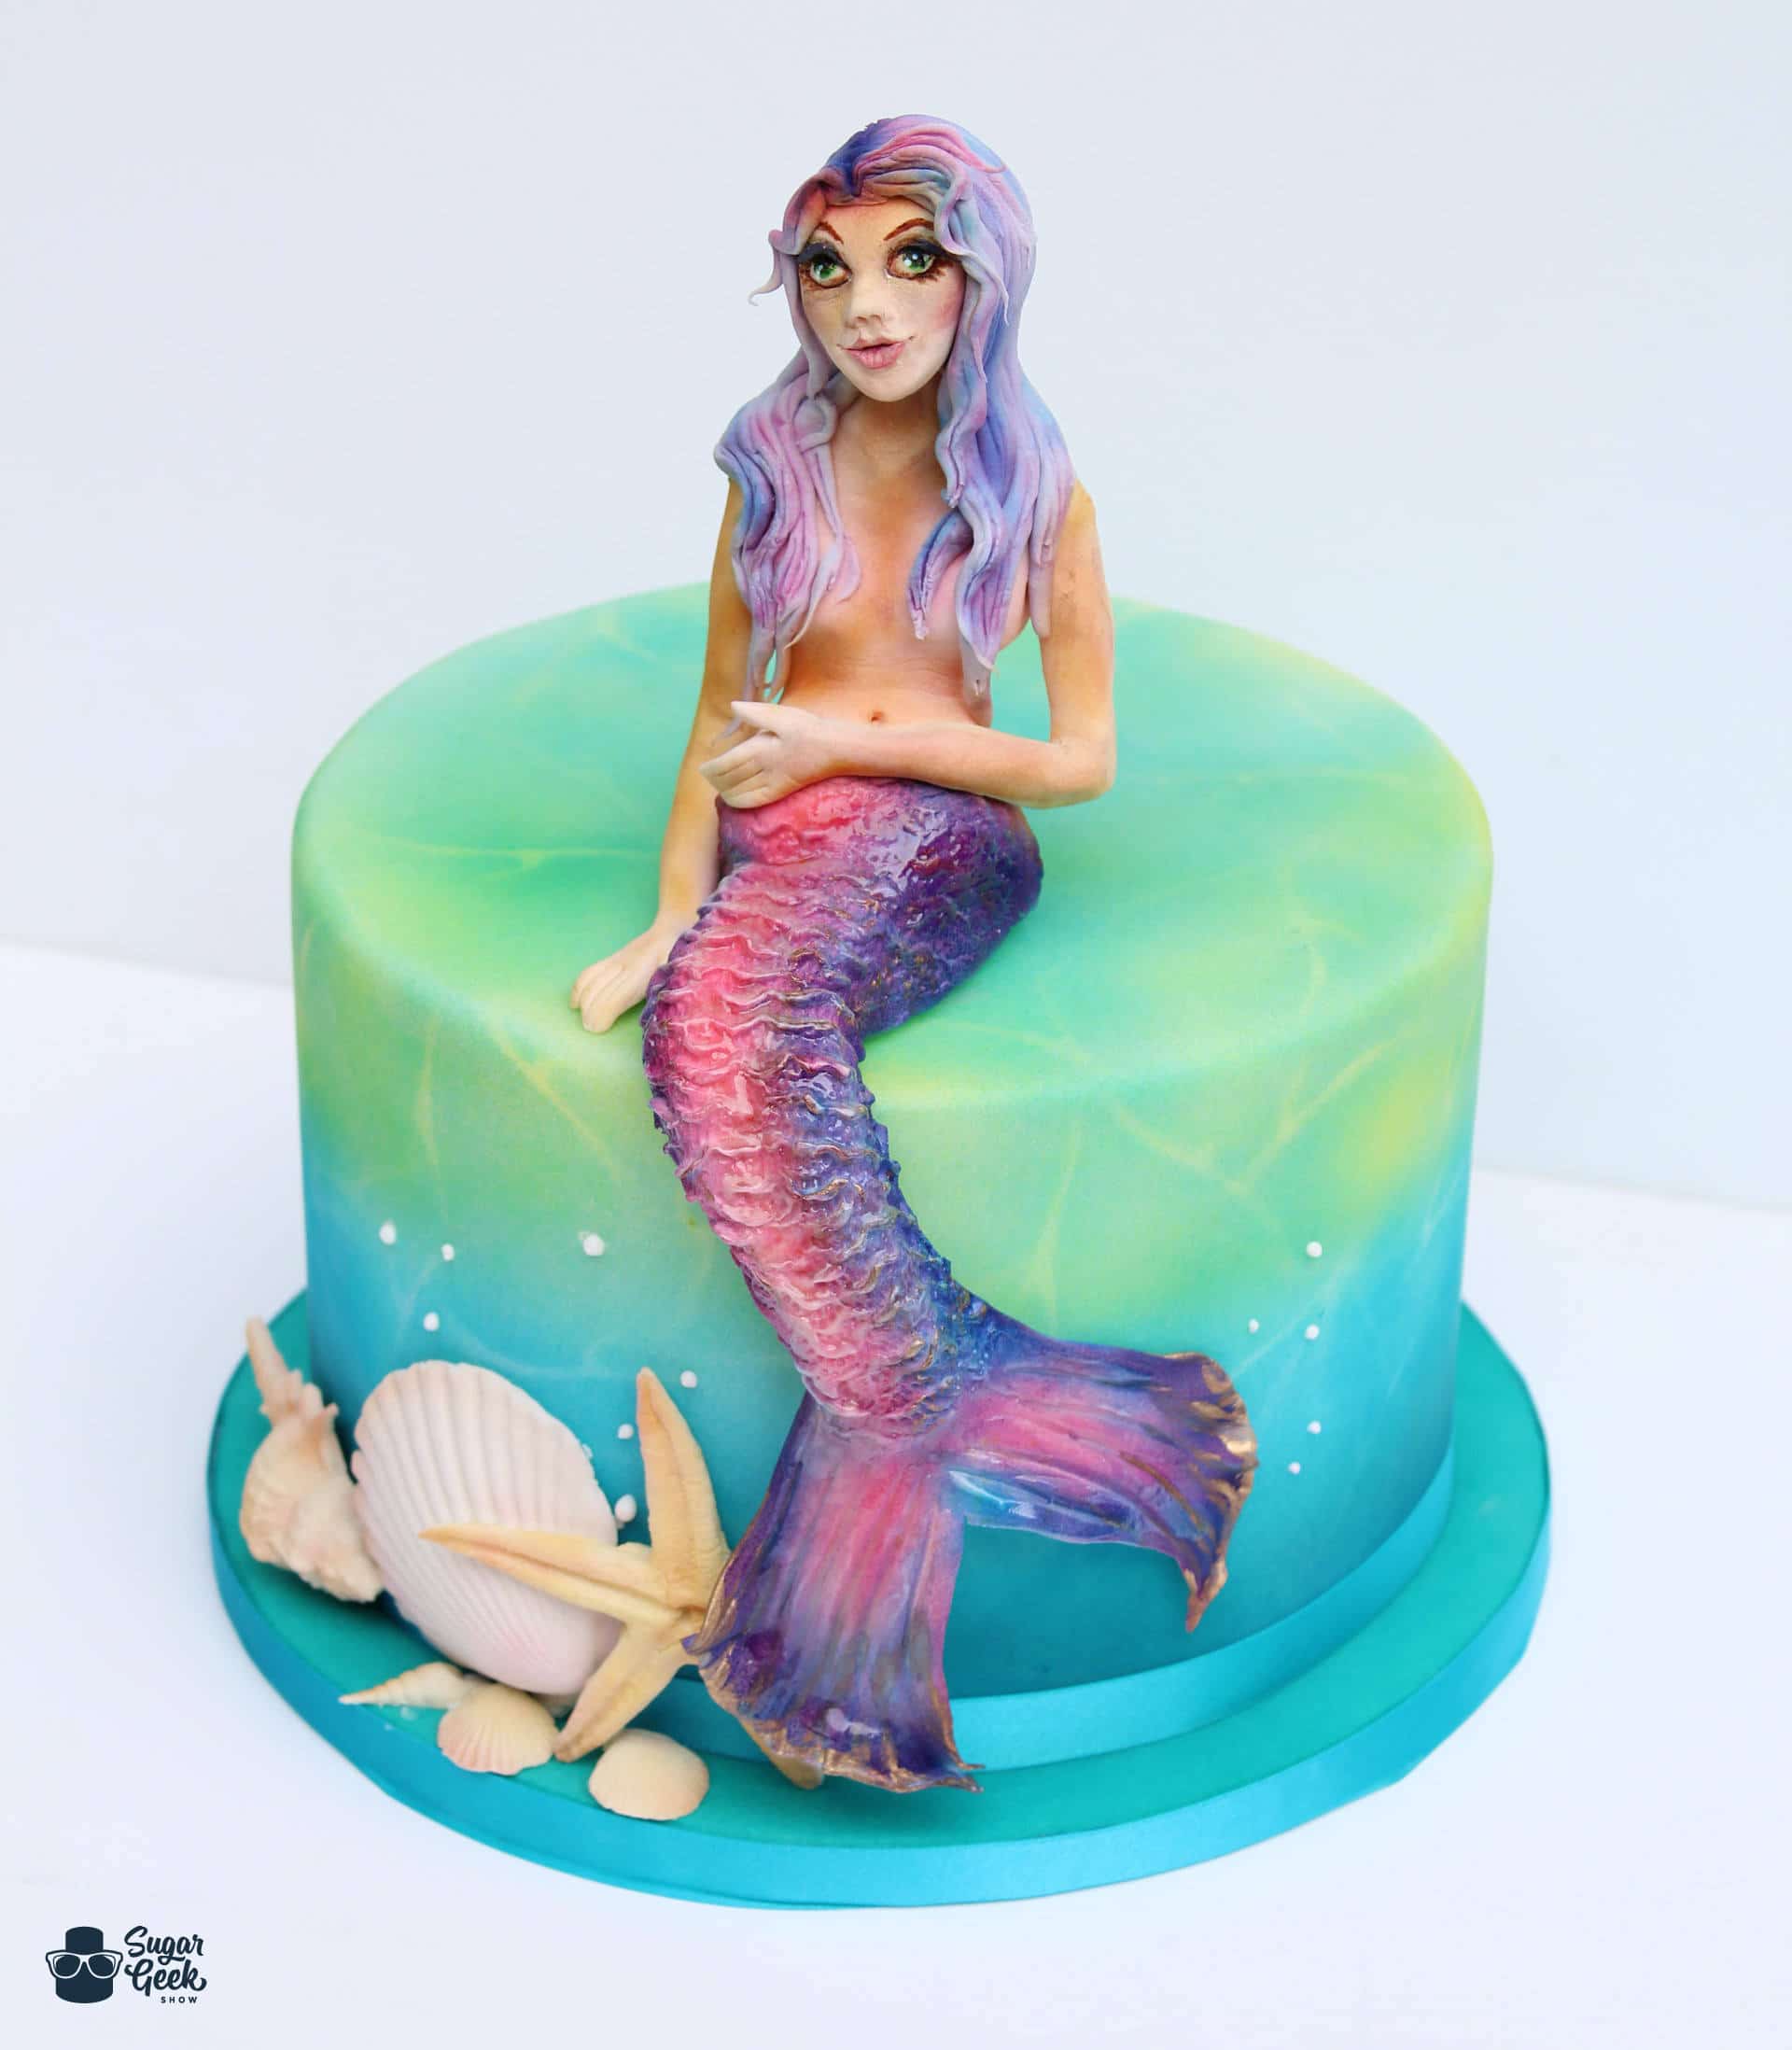
The lovely Claire Anderson of Clairella Cakes has graced us with an airbrushing basics tutorial to get any beginner started! This free (yes, I said free!) tutorial covers airbrushing your board, a lovely airbrushed water effect, airbrushing a mermaid tail as well as how to do some realistic shells!

Mermaid Airbrush Cake Tutorial

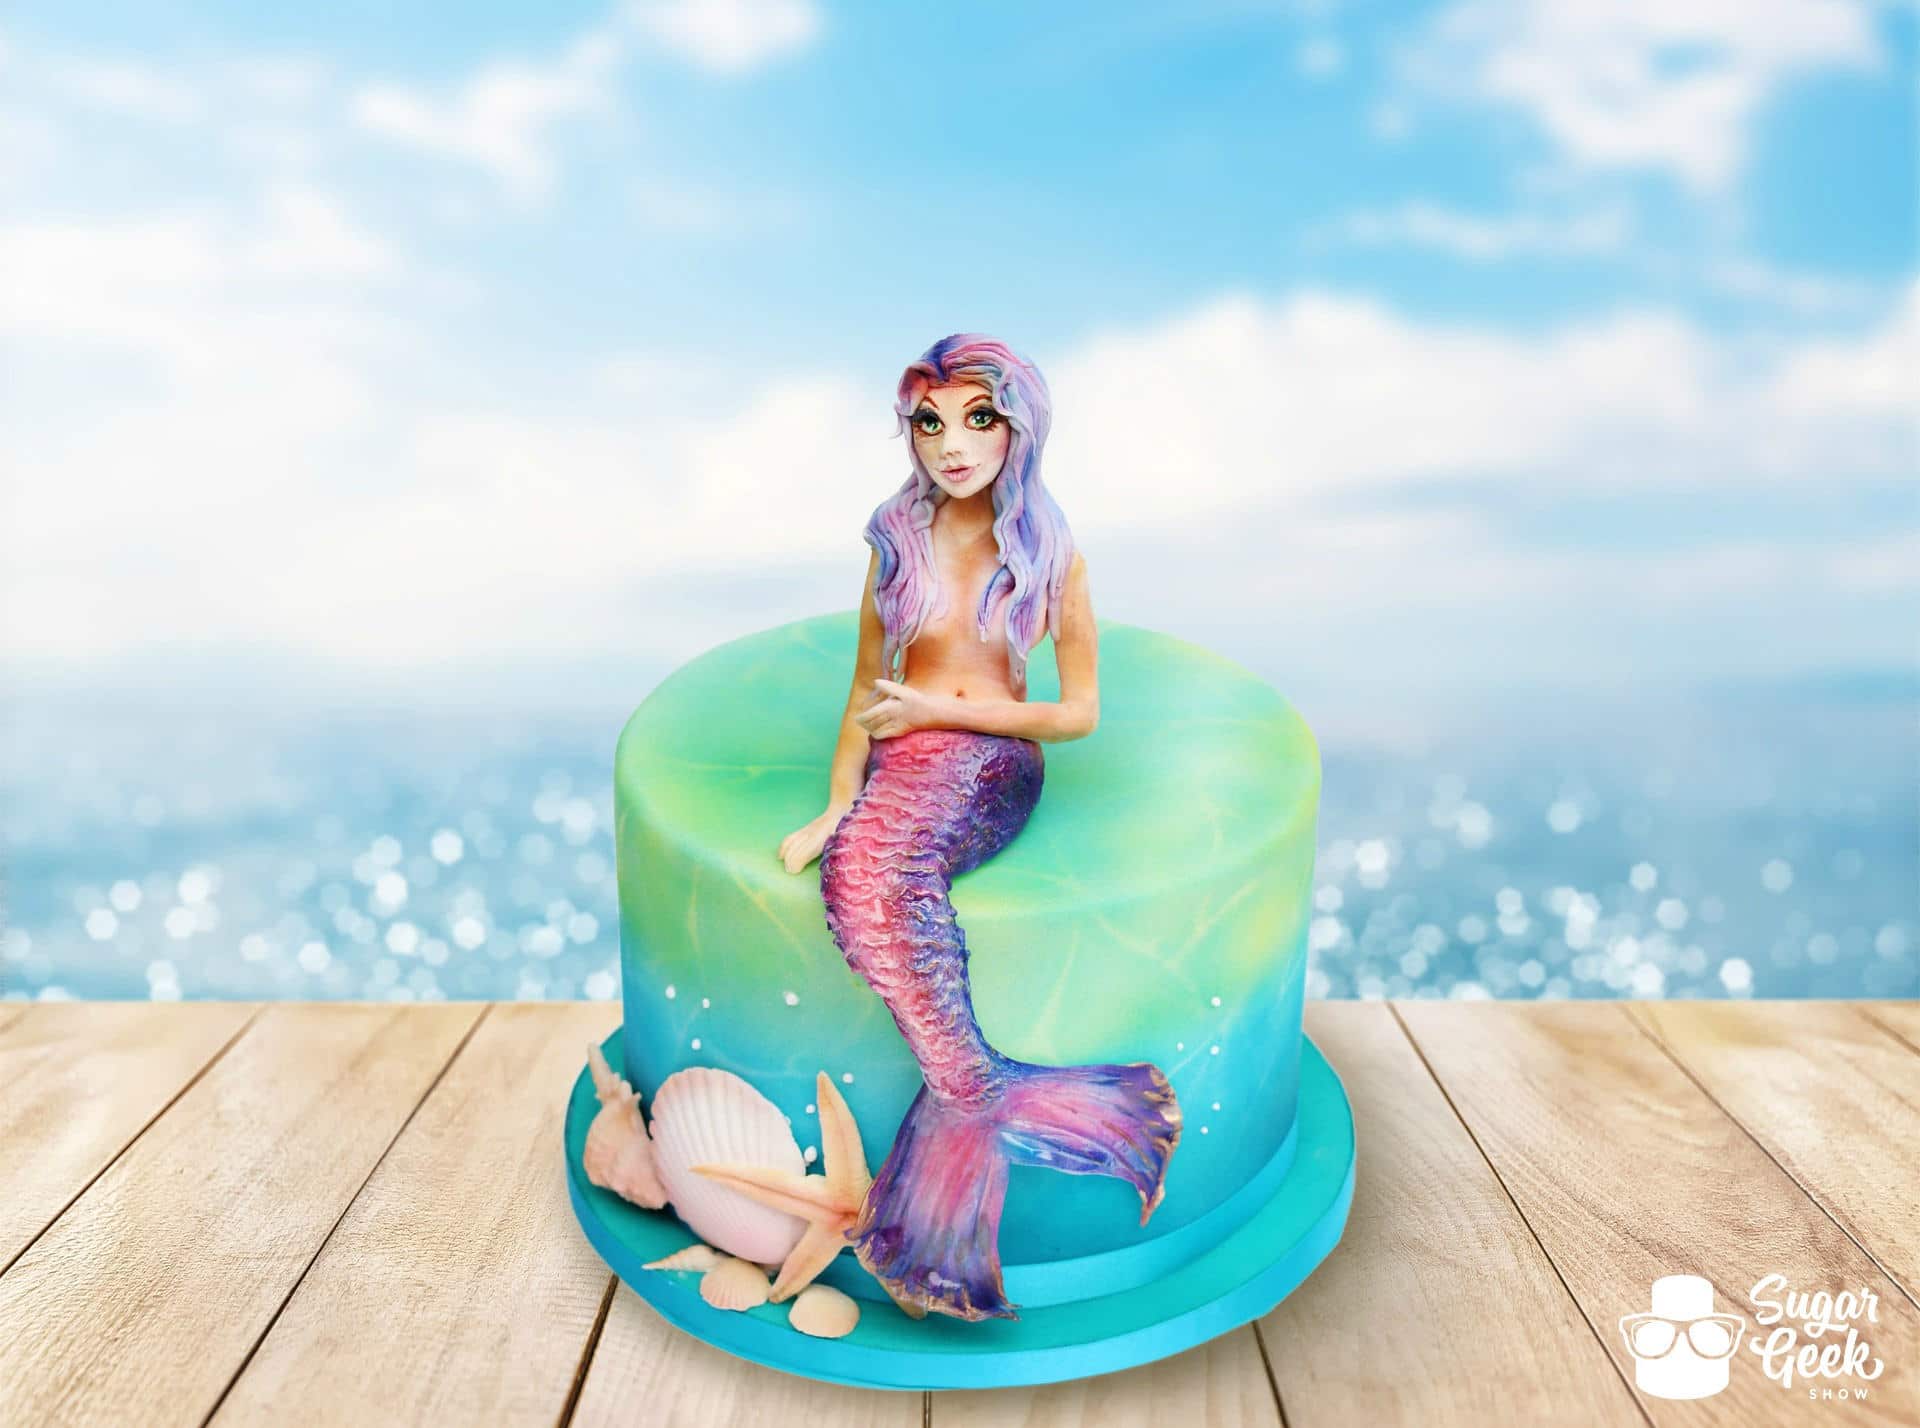
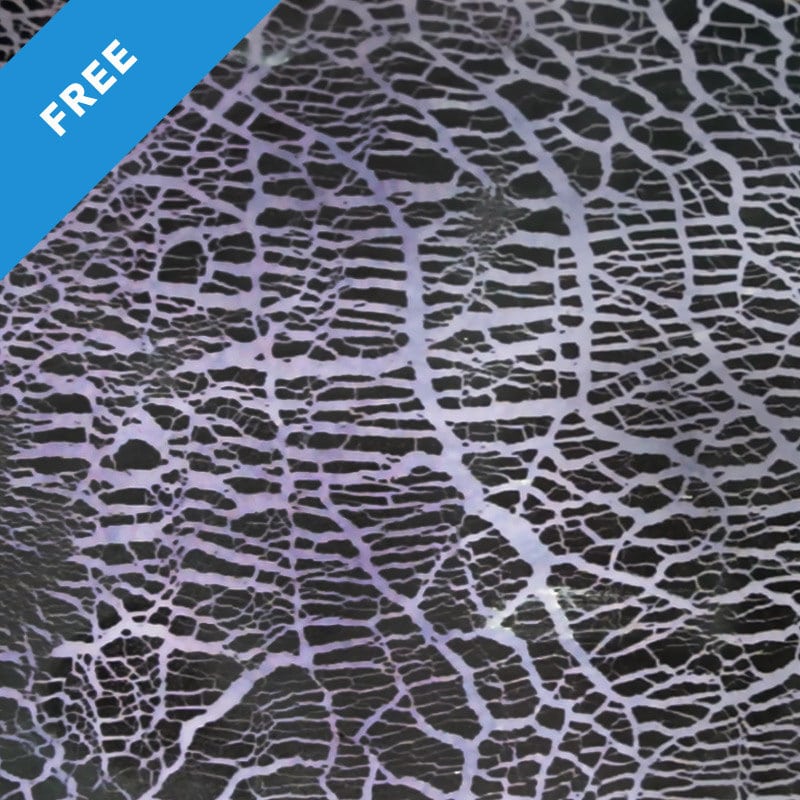
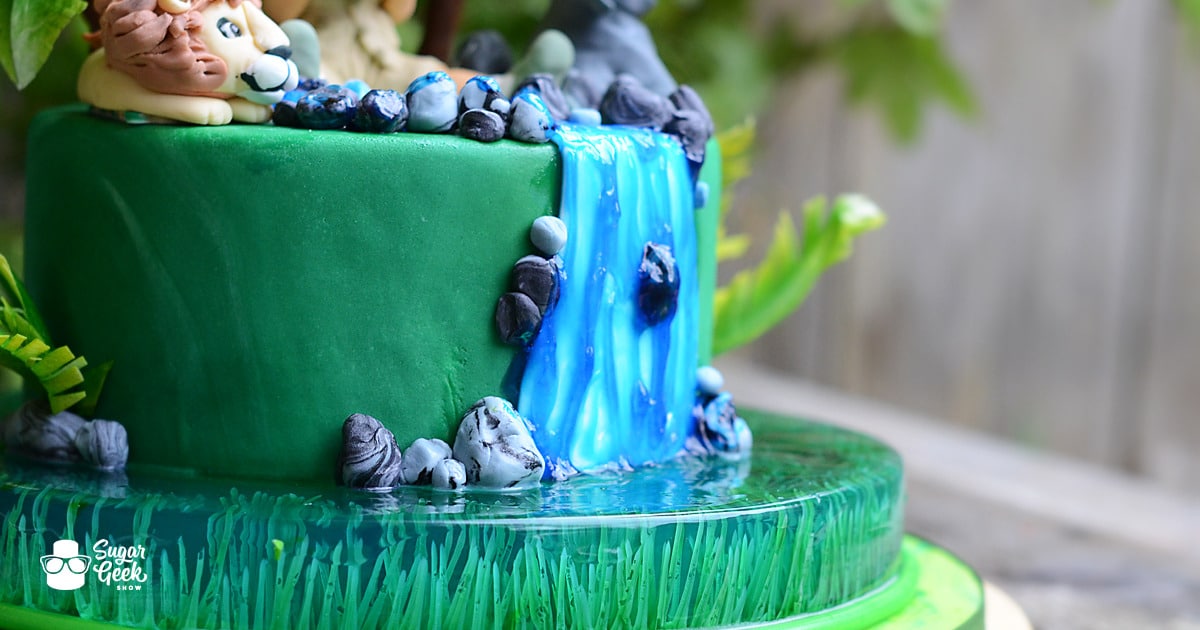
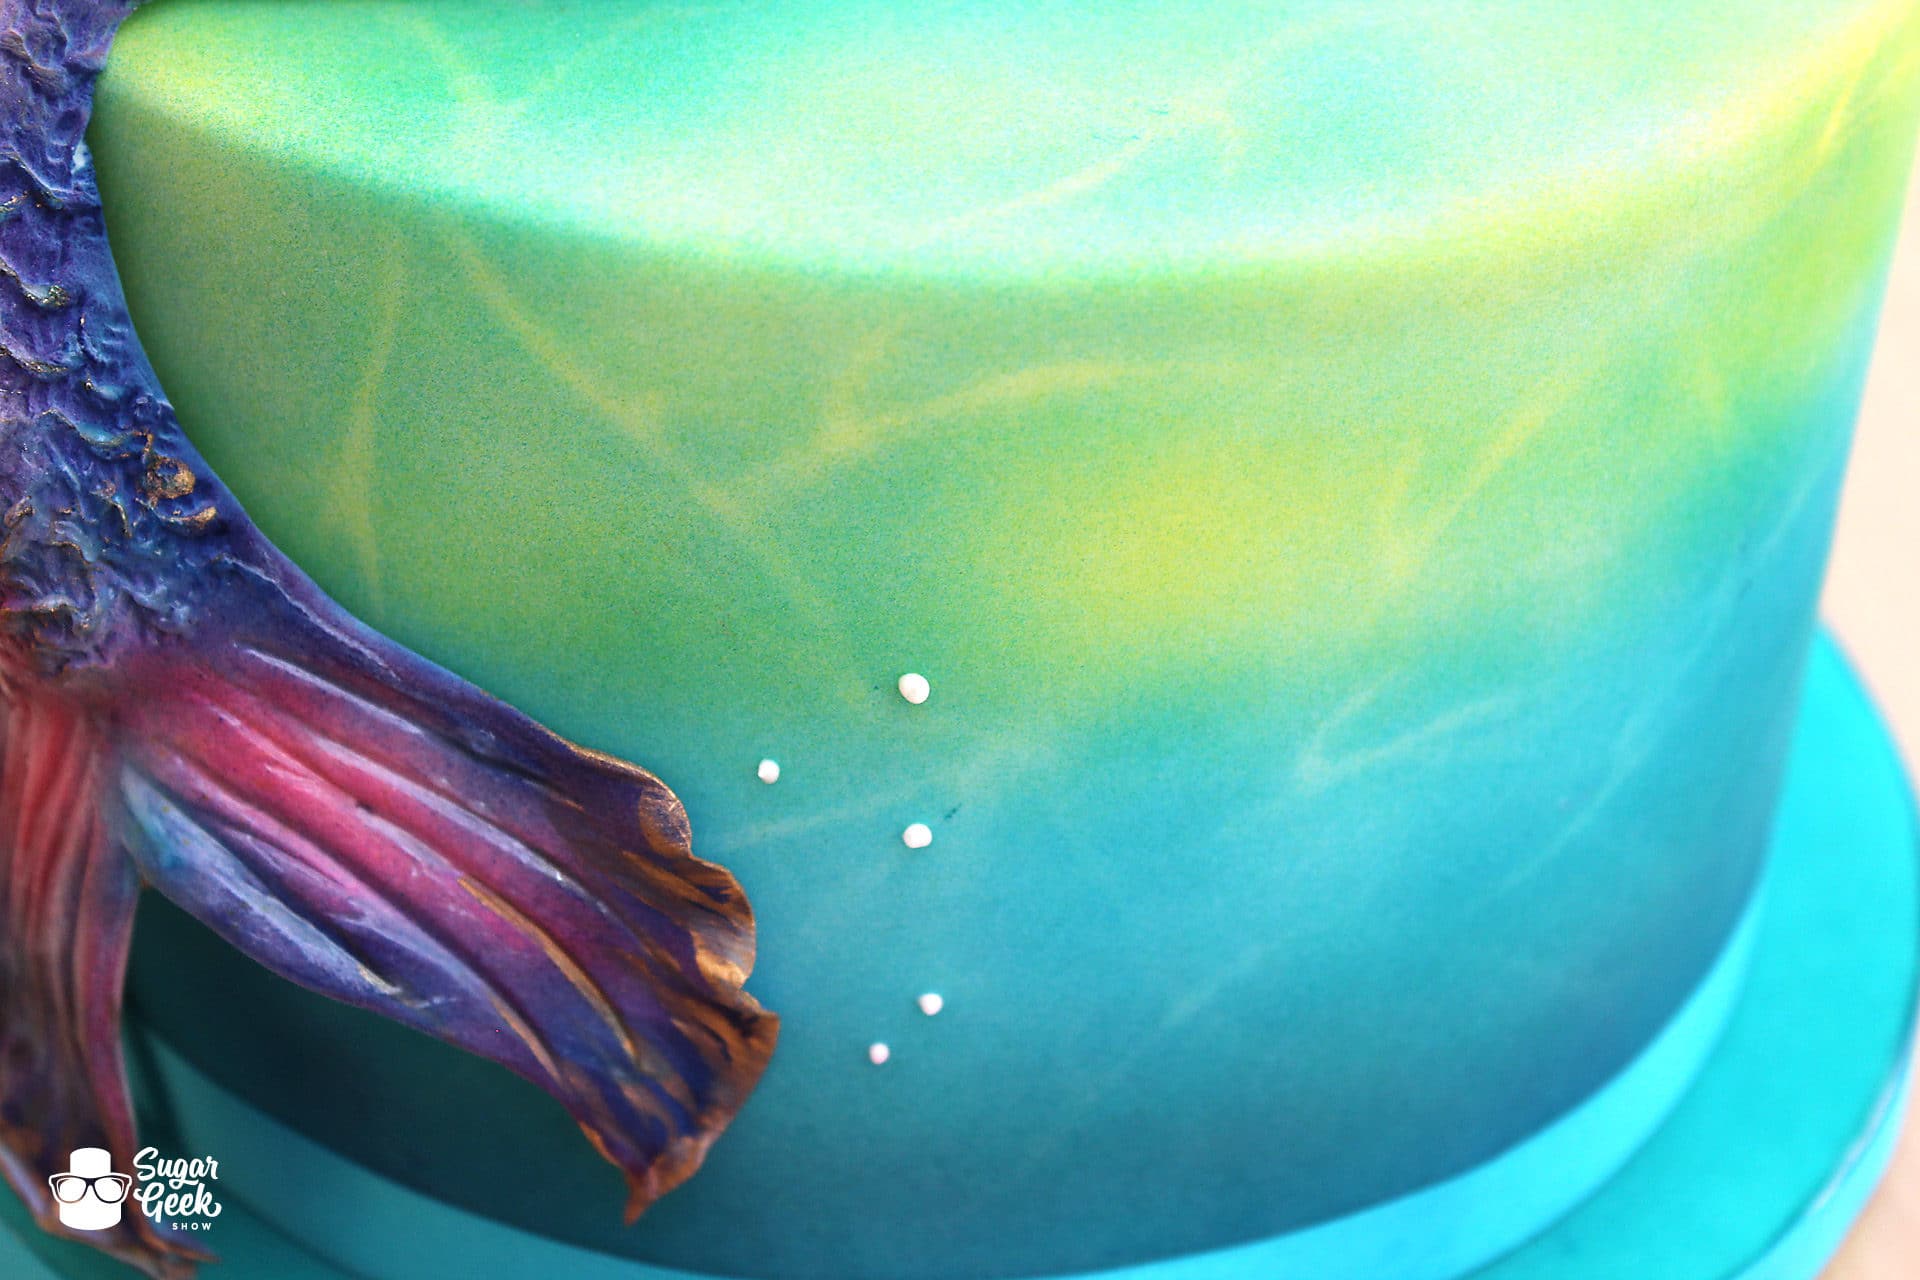
Claire demonstrates an interesting way to use a twig stencil to create a lovely water reflection effect that is pure genius! She talks us through creating the gradient and mixing colors to achieve the color you want while also adding highlights and dimension.

Airbrush water effect on cake

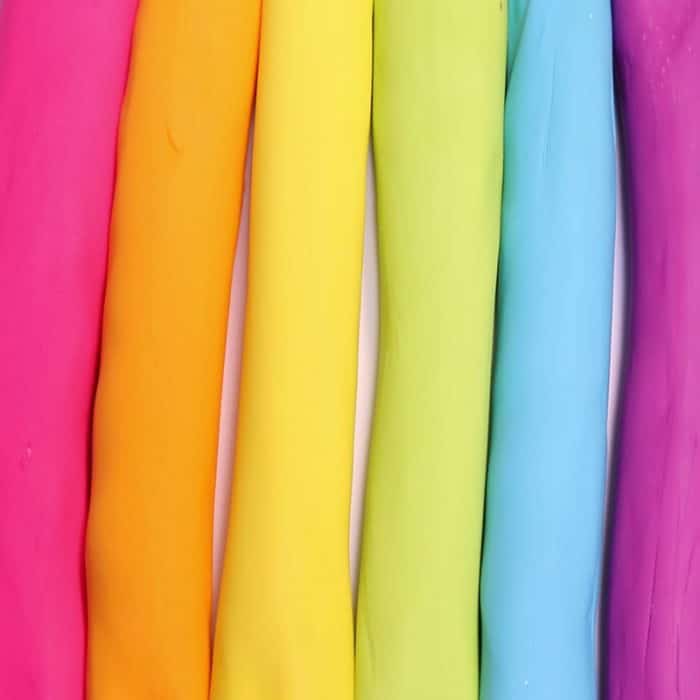
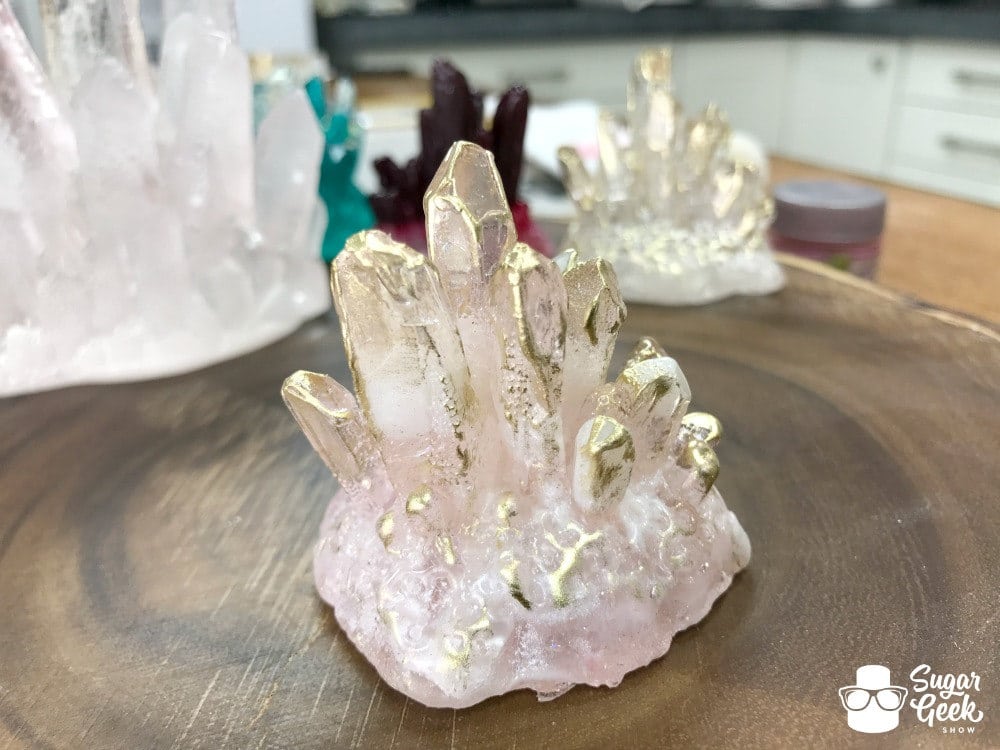
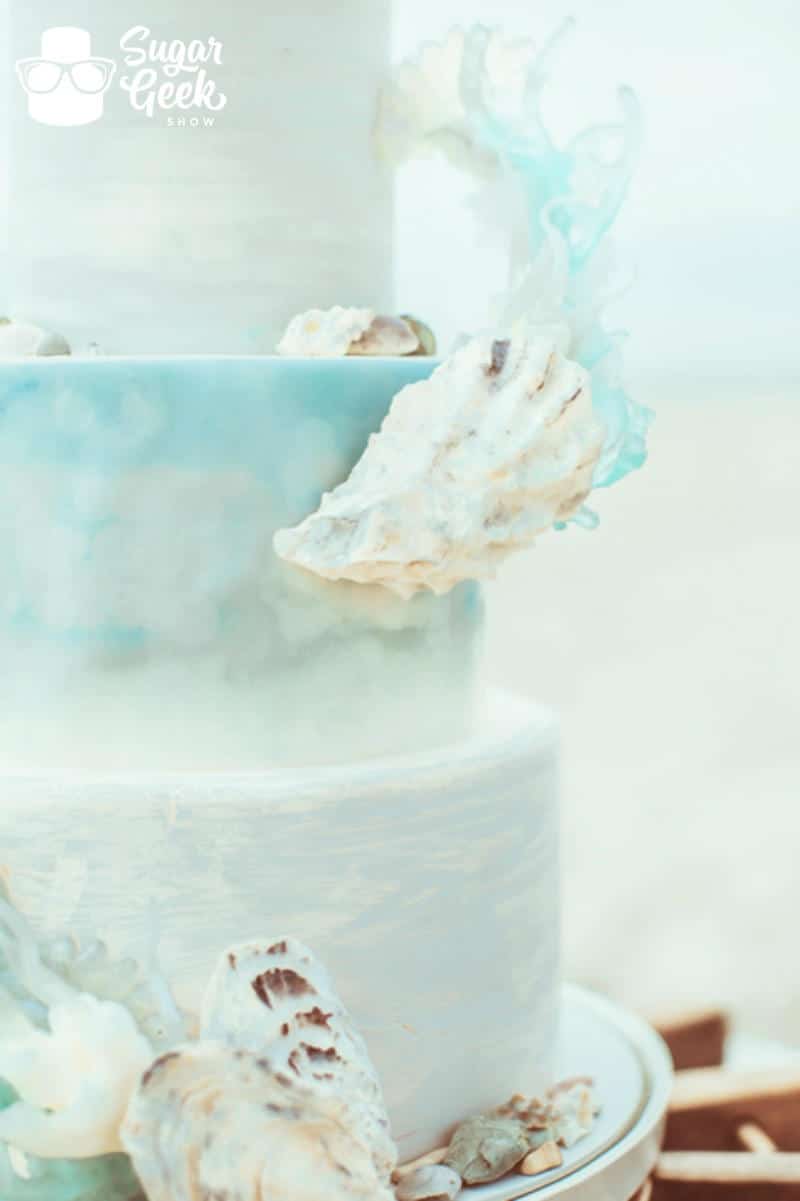
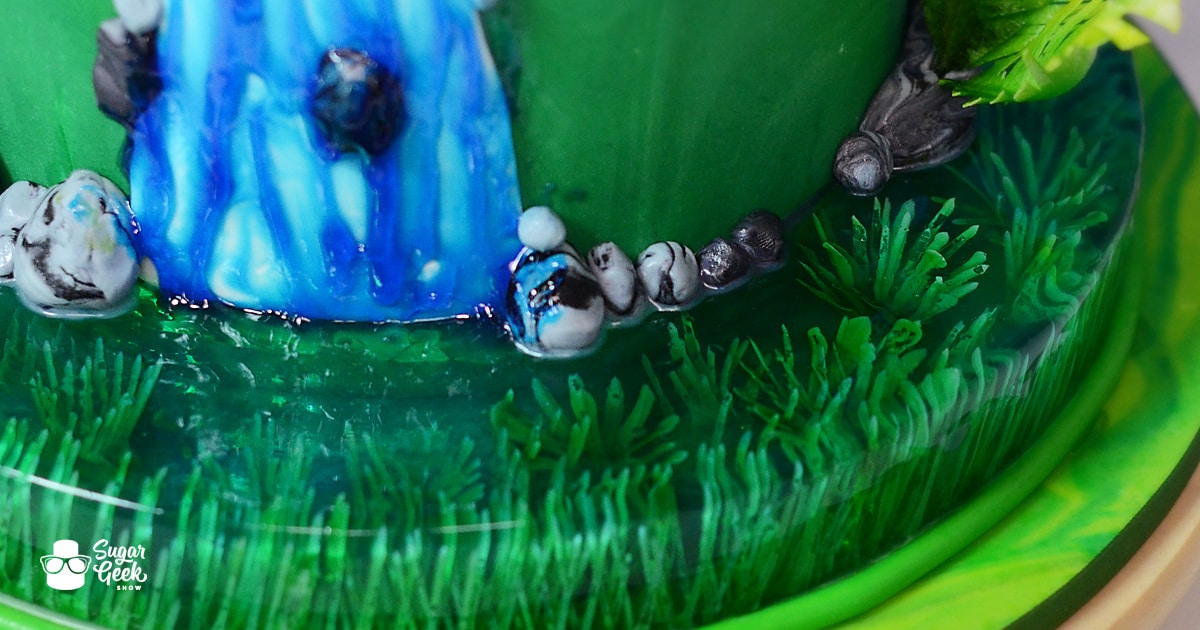
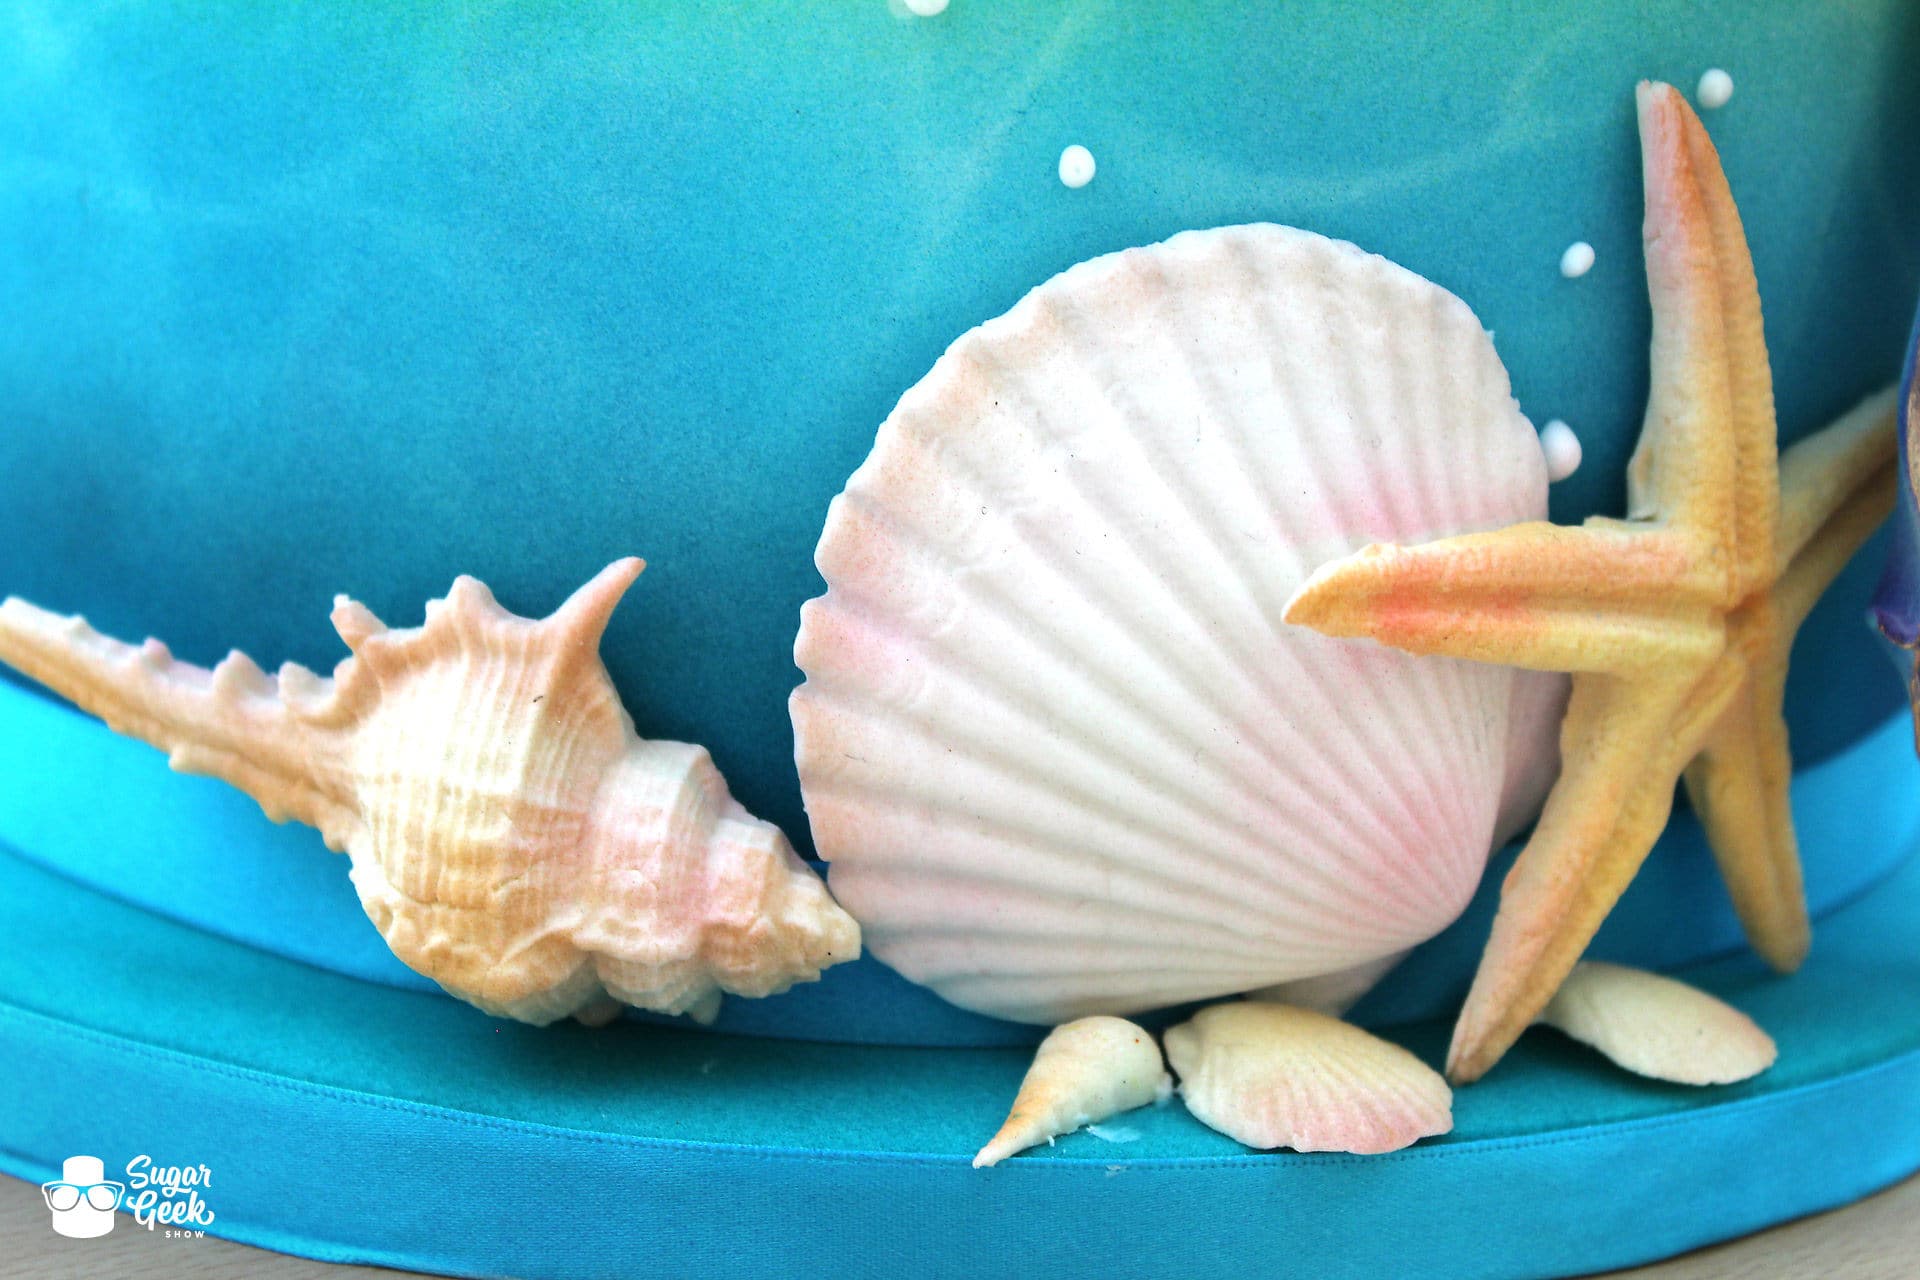
Slow build up of color is one of Claire's tips and the subtle amounts make these shells really look fabulously real!

Edible Shells Airbrushed

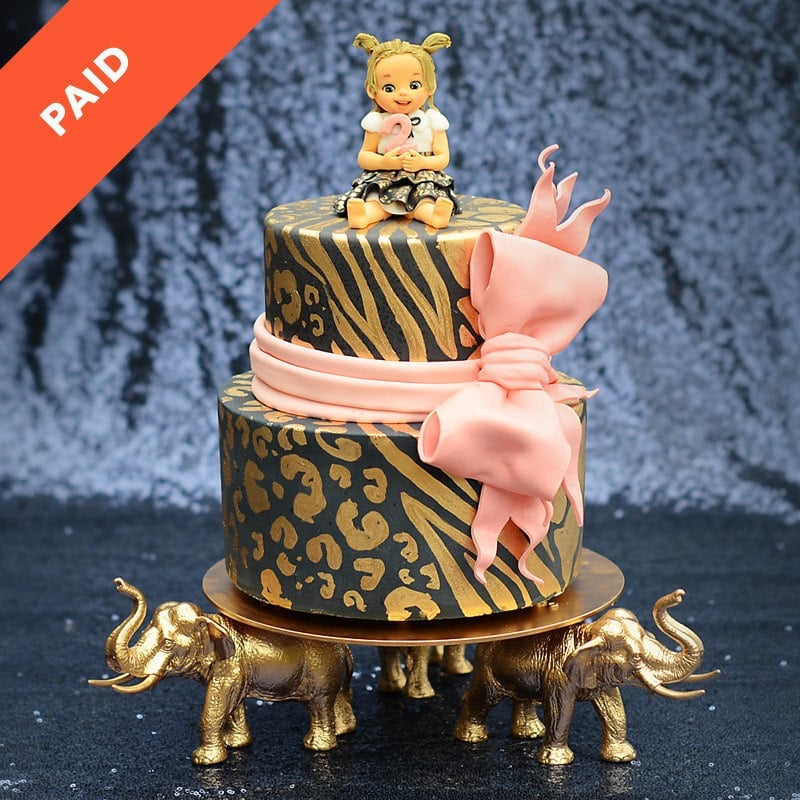
You definitely want to check out this tutorial if you've ever considered adding airbrushing to your cakes!  Claire shows us just how easy and accessible airbrushing can be and it is without a doubt a beautiful unique medium in cake decorating. Watch the promo below or just skip straight to the full shabang HERE.  Buy the Clairella Cakes Airbrush today and get started on your new magical journey!

Want to save it for later? Pin it!

Gold Mine Cake

July 20, 2017 Blog

A Golden Birthday

A golden birthday is when the age you're turning matches the day you were born. Too bad I didn't know that when I turned 18, I would've...ah who am I kidding I wouldn't have done anything different but it's still a fun concept! For this little guy's golden birthday they thought it would be fun to do a gold mine theme. How cute right?

Gold Mine Cake

In this tutorial you will learn how to make the awesome sculpted mountain completely out of cake and what structure is needed to do so, airbrushing, the cute little gold cart and well everything else you see in the photos!

Gold Mine Cake

Check out all the details! Details are what makes a cake like this so impressive and so much fun. You really can go crazy with it!

Gold Mine Cake

I love this topper! Really looks like a number four made of gold! Mined right out of this here mountain. Yes you will learn how to make this too.

Gold Mine Cake

Check out the promo for this adorable cake and then watch the full tutorial to see how it was all done, as long as you're a Premium or Elite Member that is, and if you're not, what the heck are you waiting for? This tutorial along with hundreds of others are waiting for you!

Airbrushing basics tutorial

July 15, 2017 Blog

Airbrushing Basics

Skill level: Newb

Learn the basics of airbrushing with the world-renowned Claire Anderson of Clairella Cakes. Claire teaches us how to make a beautiful watery effect, how to use pressure settings on your airbrush, how to airbrush details, and get over your fear or airbrushing on cakes.

38:52 Minutes of Instruction

What You Will Learn

  • How to use your airbrush pressure settings
  • Claire's technique to get great details
  • Learn how to create realistic color and make a sculpted piece pop

Related Tools

clairella cakes airbrush and compressor set
Clairella Cakes Airbrush and Compressor Set

Gold Mine Birthday Cake Tutorial

July 15, 2017 Course Preview

Gold Mine Birthday Cake

Skill level: Intermediate

In our latest tutorial, you'll be learning how to create a golden birthday cake. Golden birthdays are when the child's age, the month, and the day all line up (April 4th for a 4 year-old child in this case). I decided to go all in on the gold theme, creating a gold mine, with a fun number 4 emerging from the top of the Wiley Coyote style mountain and a track of rails the gold cart sits upon.

You'll learn how to create a fun, cartoony style cake mountain, how to add a gold mine into a mountain so that it looks like it's holding up and supporting the mine shaft and how to make an adorable mine cart.

1:06:20 Minutes of Instruction

What You Will Learn

  • How to sculpt an irregular mountain shape out of cake
  • Learn how to make the wooden planks and cart rails out of edible materials
  • How to create an edible metallic number cake topper
  • A cool technique on how to make edible trees

Tutorial Chapters

  1. Building the structure 1:27
  2. Coloring fondant 5:14
  3. Covering the board 7:00
  4. Stacking the cake mountain 9:54
  5. Carving the cake 16:00
  6. Crumb coating the cake 18:50
  7. Making the mining cart 19:12
  8. Golden number topper 29:58
  9. Building up the mine 32:30
  10. Covering in fondant 37:00
  11. Texturing details 40:30
  12. Working the top tier 42:34
  13. Making the boulders 47:00
  14. Making the wooden beams 49:24
  15. Making the rocks 51:47
  16. Making and placing the tracks 53:28
  17. Placing the number topper 56:53
  18. Airbrushing details 58:04
  19. Attaching cart 59:16
  20. Adding tires 1:02:24
  21. Adding trees 1:04:00
  22. Final details 1:05:32

Downloads

Materials List

Gold Mine Birthday Cake Tutorial

July 15, 2017 Paid Video

Gold Mine Birthday Cake

Skill level: Intermediate

In our latest tutorial, you'll be learning how to create a golden birthday cake. Golden birthdays are when the child's age, the month, and the day all line up (April 4th for a 4 year-old child in this case). I decided to go all in on the gold theme, creating a gold mine, with a fun number 4 emerging from the top of the Wiley Coyote style mountain and a track of rails the gold cart sits upon.

You'll learn how to create a fun, cartoony style cake mountain, how to add a gold mine into a mountain so that it looks like it's holding up and supporting the mine shaft and how to make an adorable mine cart.

1:06:20 Minutes of Instruction

What You Will Learn

  • How to sculpt an irregular mountain shape out of cake
  • Learn how to make the wooden planks and cart rails out of edible materials
  • How to create an edible metallic number cake topper
  • A cool technique on how to make edible trees

Tutorial Chapters

  1. Building the structure 1:27
  2. Coloring fondant 5:14
  3. Covering the board 7:00
  4. Stacking the cake mountain 9:54
  5. Carving the cake 16:00
  6. Crumb coating the cake 18:50
  7. Making the mining cart 19:12
  8. Golden number topper 29:58
  9. Building up the mine 32:30
  10. Covering in fondant 37:00
  11. Texturing details 40:30
  12. Working the top tier 42:34
  13. Making the boulders 47:00
  14. Making the wooden beams 49:24
  15. Making the rocks 51:47
  16. Making and placing the tracks 53:28
  17. Placing the number topper 56:53
  18. Airbrushing details 58:04
  19. Attaching cart 59:16
  20. Adding tires 1:02:24
  21. Adding trees 1:04:00
  22. Final details 1:05:32

Downloads

Materials List

Related Videos


Airbrushing Basics

Fondant Cow Topper Tutorial

July 13, 2017 Blog

Fondant Cow Topper Tutorial

This week I thought I'd add a little something extra to the blog and start doing a few simple pictorials! I just happened to have an order that needed some cute little fondant cow toppers and I thought, "Hey, why not turn it into a tutorial while I am at it? I mean, people like cows right? Someone will have a need for cow toppers?" Well let's hope so. It seems like there is a pictorial for just about everything so why not cows?!

Step 1A: Form a 1.5 oz chunk of white fondant into a wobbly egg shape for the body.

Step 1B: Form a .75 oz chunk of white fondant into an almost tear drop (without a pointy top). Make it wider at the bottom and a slight indention a third of the way up for the top part of the face.

Fondant Cow Topper Tutorial

Still with me? Cool.

Step 2A: Place body on a piece of foam and impale it with a toothpick. This will give the head something to hold on to and give you a little something to stick in the cake as well. If you are really wanting to avoid a toothpick for kids you can do it without but it will be trickier. I just make sure to tell my customer about the toothpicks.

Step 2B: Attach the head to the body with a little water or gum glue.

Fondant Cow Topper Tutorial

Step 3: Get four similar sized pieces of fondant for the arms and legs and roll them into balls. Mine were about ⅛th of an oz which I found is a pretty big range of sizes on my cheap scale so just use your wise judgement. Next, roll those balls into tear drop shapes with a flattish bottom.

Fondant Cow Topper Tutorial

Step 4: Attach those babies to the body with a little water or gum glue. For the legs you'll have to pick up the body and set it down on top of your legs. Press everything on good! I also used a blade tool to add some almost hoof indentions to the fronts of the arms and legs.

Fondant Cow Topper Tutorial

Step 5A: Using about a 1" circle cutter, cut out a pink circle. Use a #5 piping tip cut out two small black circles, and form a couple little fat pieces of rice for the cows nubs. Yeah, that's the technical term.

Step 5B: Attach all that stuff to the cow in the appropriate places and once again use a little something to help them stick. Although, I did just press the eyes on. Put them close together, they are cuter that way. Too far apart and your cow will start to look a little demented. No demented cows. For the nubs I actually folded a little bit of the bottom and squished it to the head using a toothpick. I apparently also used a small ball tool in this step to add the nostrils and a belly button. Fondant cows have belly buttons.

Fondant Cow Topper Tutorial

Step 6: For the ears, make two more small white balls and attach an even tinier ball of pink to the center. Using a small ball tool make an indention and elongate the ball. Give it a little pinch at the end.

Fondant Cow Topper Tutorial

Step 7: Attach the ears to the head outside of the nubs and in the same way as the nubs. Squish a little piece of the bottom of the ear to the head with a toothpick.

Fondant Cow Topper Tutorial

We're almost there I swear.

Step 8A: Roll out some black fondant very very thin. I'm talking paper. Use a blade like tool to cut out cow spot shapes. Cow spots are irregular, not perfectly round, and seeing how the rest of this cow is so realistic, we'd better get it right. A little tearing adds to the realism too.

Step 8B: Would you like to add a little flower but don't have one of those tiny little punch cutters? No problem! Use a Wilton 1A piping tip to cut out a blue circle or whatever color tickles your fancy.

Step 8C: Using a toothpick make five indentions to create little petals and a small ball tool to make an impression in the center.

Fondant Cow Topper Tutorial

Step 9: Attach your spots and flower to the cow. I didn't need anything to help my spots stick, just smooth them on with your fingers or a tool. Using a very fine paintbrush and some straight black gel food color paint on a couple eyelashes. Use your blade tool to add a cute smile. Of course the flower and eyelashes are optional, leave them off if you're making a boy cow. Geez, even girl cows are higher maintenance then boy cows.

Fondant Cow Topper Tutorial

And voila! You've made a super cute little fondant cow to put on any farm/cowboy/cow lovers cake. If you'd like to make it a cupcake topper just make everything a bit smaller. Here's the cake I made to put these cute little buggers on. Living in Wyoming you make a LOT of farm cakes.

Cute Farm Cake

Let me know what you guys think of my first SGS pictorial! If you have ideas for future pictorials shoot them my way. Pin this one for later, you know you're gonna need a cow.

Trolls Candy Drip Cake

July 4, 2017 Blog

Star Wars Unicorn Trolls Cake Whaaa?

When a soon to be 5 year old girl asks for a Star Wars Unicorn Trolls cake, what do you do? PANIC. I'm kidding. Well I mean you could panic but really what good would that do? In the event that you do get this unique request, Sugar Geek Show has you covered!

Behold the light saber wielding troll princess living in a happy yummy rainbow land where life really is all cupcakes and rainbows. Although, if we make trolls to eat does that make us Bergens? Maybe it doesn't count if they aren't alive. We'll go with that.

Trolls Candy Drip Cake

This tutorial focuses on the Princess Poppy Troll Topper complete with armature, details and wafer paper hair. Super great info that can be used for lots of different toppers!

Poppy Troll Cake Topper

Macarons and Meringue Kisses, yummmm.

Fun Candy Rainbow Drip Cake

Checkout this awesome tutorial for these lovely dollops of joy from Cupcake Jemma.

The tutorial also covers the gum paste rainbow, rainbow buttercream and super fun and popular drip effect!

Fun Candy Rainbow Drip Cake

And for last I have saved what is quite possibly THE cutest cake reveal picture EVER. This photo just oozes squeeeee!! Total excitement and what every cake decorator wants to see come out of their blood, sweat and tears. Mission accomplished.

Trolls Candy Drip Cake

If you haven't already, chances are you're going to get a request for a Trolls cake and when you do you'll want this info on hand! Sign up as a Premium or Elite Member to get access to this whirlwind of fun along with hundreds of other tutorials. View the promo video below to get an even closer look!

Want to save it for later? Pin it!

Cupcakes with FabuLace tutorial

July 3, 2017 Course Preview

Lace Cupcakes with FabuLace™

Skill level: Easy

Wayne Steinkopf from Swank Cake Design shows off a great way to make super-cute easy cupcakes using FabuLace™ and fondant.

10:37 Minutes of Instruction

What You Will Learn

  • How to use a mold and FabuLace™ to make lace designs for cupcakes
Cupcakes with FabuLace tutorial

July 3, 2017 Free Video

Lace Cupcakes with FabuLace™

Skill level: Easy

Wayne Steinkopf from Swank Cake Design shows off a great way to make super-cute easy cupcakes using FabuLace™ and fondant.

10:37 Minutes of Instruction

What You Will Learn

  • How to use a mold and FabuLace™ to make lace designs for cupcakes
Crackled Fondant Tutorial

July 3, 2017 Blog

Easy Crackled Fondant Tutorial

Skill level: Easy

Once upon a time, a long long time ago (years) I tried to crack (pun intended) the crackled paint look!

I tried white food color over piping gel, confectioners glaze, layering fondant etc then one day while experimenting for a TOTALLY different effect, I accidentally discovered this crackled technique! So very easy and fun!

4:09 Minutes of Instruction

What You Will Learn

  • How to make an easy crackled fondant technique

Rainbow Troll Cake Topper

July 1, 2017 Course Preview

Rainbow Troll Cake Topper

Skill level: Intermediate

What do you make for a 5 year old girl who's obsessed with rainbows, unicorns, Trolls and Star Wars? The rainbow drip cake of course!

This cake can be adapted to switch up the details to any design and character. Perfect for the little indecisive cake lover in your life 🙂

1:10:03 Minutes of Instruction

What You Will Learn

  • How to sculpt a cute troll cake topper
  • Learn how to make frizzy hair with a cool and easy technique
  • How to keep accurate proportions when creating a popular character
  • Liz Marek's take on the rainbow drip cake

Tutorial Chapters

  1. Building the Rainbow topper 0:40
  2. Troll body structure 6:37
  3. Building with proportions 11:32
  4. Making the clothes 28:50
  5. Troll face 34:11
  6. Detailing the clothes 45:51
  7. Making the hair 48:36
  8. Finishing details 57:42
  9. Making rainbow buttercream 1:00:28
  10. Adding drip to cake 1:06:02
  11. Final details 1:08:11

Downloads

Materials List

Troll Topper Template

Related Videos


Rainbow Fondant Tutorial


Introduction to Cake Sculpting

Rainbow Troll Cake Topper

July 1, 2017 Paid Video

Rainbow Troll Cake Topper

Skill level: Intermediate

What do you make for a 5 year old girl who's obsessed with rainbows, unicorns, Trolls and Star Wars? The rainbow drip cake of course!

This cake can be adapted to switch up the details to any design and character. Perfect for the little indecisive cake lover in your life 🙂

1:10:03 Minutes of Instruction

What You Will Learn

  • How to sculpt a cute troll cake topper
  • Learn how to make frizzy hair with a cool and easy technique
  • How to keep accurate proportions when creating a popular character
  • Liz Marek's take on the rainbow drip cake

Tutorial Chapters

  1. Building the Rainbow topper 0:40
  2. Troll body structure 6:37
  3. Building with proportions 11:32
  4. Making the clothes 28:50
  5. Troll face 34:11
  6. Detailing the clothes 45:51
  7. Making the hair 48:36
  8. Finishing details 57:42
  9. Making rainbow buttercream 1:00:28
  10. Adding drip to cake 1:06:02
  11. Final details 1:08:11

Downloads

Materials List

Troll Topper Template

Related Videos


Rainbow Fondant Tutorial


Introduction to Cake Sculpting

how to color fondant

June 28, 2017 Blog

Electric Rainbow Fondant Recipe


Recipe

Rainbow Fondant
Print Recipe
5 from 2 votes

Electric Rainbow Fondant Recipe

Looking to get a vivid rainbow of fondant colors? Look no further! This recipe will get you those electric Lisa Frank colors you're looking for!
Prep Time20 minutes mins
Cook Time10 minutes mins
Total Time30 minutes mins
Course: Dessert
Cuisine: American
Servings: 10 lbs
Calories: 1763kcal
Author: Liz Marek

Ingredients

  • 6 lbs Powdered sugar sifted
  • 3 lb Mini marshmallows (Hy-Top, Walmart, Haribo brand if you can find it. Jet-Puff, Kraft or Marshmallow Fluff will not work) Make sure you get 1 lb or weight out 1 lb from 2 bags.
  • 1 ½ tablespoon Water (or 1 if it's really humid in your area)
  • 1 ½ cups Shortening or Trex
  • 1 ¼ lbs Wilton Fondant (if you buy the 5lb box, use ½ of one of the packages, if you buy the 1 ½ box, use the whole package)
  • Extra Powdered sugar for kneading

Instructions

Yellow Fondant

  • Melt 1lb marshmallows in microwave, cooking for 1 minute, then mixing, then 40 seconds, then mix, then 30 seconds, until marshmallows are melted together.
  • Add 1 ½ tablespoon water to release marshmallows from bowl.
  • Place ½ cup shortening in mixing bowl.
  • Add marshmallows to mixing bowl and attach hook attachment to mixer.
  • Add in food coloring (1 teaspoon Electric Yellow food color gel).
  • Slowly add in 2lbs powdered sugar while mixing. Reserve about 1 cup of powdered sugar for later.
  • Mix on low until smooth and fondant sticks to the sides of the bowl (about 3 minutes).
  • Add in remaining 1 cup of powdered sugar and mix.
  • Wear gloves or put shortening on your hands to help get the fondant out of the mixing bowl and onto the table.
  • Add in 1 ¼ lbs of premade Wilton fondant and knead. Pull like taffy until smooth. Divide fondant in half.

Orange Fondant

  • Using ½ of the divided yellow fondant, add in approximately ½ teaspoon Orange food color gel.
  • Pull fondant like taffy until smooth. Add more powdered sugar if it's too sticky.

Pink Fondant

  • Melt 1lb marshmallows in microwave, cooking for 1 minute, then mixing, then 40 seconds, then mix, then 30 seconds, until marshmallows are melted together.
  • Add 1 ½ tablespoon water to release marshmallows from bowl.
  • Place ½ cup shortening in mixing bowl.
  • Add marshmallows to mixing bowl and attach hook attachment to mixer.
  • Add in food coloring (1 teaspoon Electric Pink food color gel).
  • Slowly add in 2lbs powdered sugar while mixing. Reserve about 1 cup of powdered sugar for later.
  • Mix on low until smooth and fondant sticks to the sides of the bowl (about 3 minutes).
  • Add in remaining 1 cup of powdered sugar and mix.
  • Wear gloves or put shortening on your hands to help get the fondant out of the mixing bowl and onto the table.
  • Add in 1 ¼ lbs of premade Wilton fondant and knead. Pull like taffy until smooth. Divide fondant in half.

Purple Fondant

  • Using ½ of the divided pink fondant, add in approximately ½ teaspoon Electric Purple food color gel (Optionally add ½ teaspoon Regal Purple for darker purple).
  • Pull fondant like taffy until smooth. Add more powdered sugar if it's too sticky.

Blue Fondant

  • Melt 1lb marshmallows in microwave, cooking for 1 minute, then mixing, then 40 seconds, then mix, then 30 seconds, until marshmallows are melted together.
  • Add 1 ½ tablespoon water to release marshmallows from bowl.
  • Place ½ cup shortening in mixing bowl.
  • Add marshmallows to mixing bowl and attach hook attachment to mixer.
  • Slowly add in 2lbs powdered sugar while mixing. Reserve about 1 cup of powdered sugar for later.
  • Mix on low until smooth and fondant sticks to the sides of the bowl (about 3 minutes).
  • Add in remaining 1 cup of powdered sugar and mix.
  • Wear gloves or put shortening on your hands to help get the fondant out of the mixing bowl and onto the table.
  • Add in 1 ¼ lbs of premade Wilton fondant and knead. Pull like taffy until smooth. Divide fondant in half.
  • Add 1 teaspoon Electric Blue and knead into fondant until color is fully incorporated.

Green Fondant.

  • Using ½ of the divided white fondant, add in approximately 1 teaspoon Electric Green food color gel (Optionally add ¼ teaspoon yellow for a more vibrant green).
  • Knead into fondant until color is fully incorporated.

Video

Notes

How to make a rainbow of fondant colors!

Nutrition

Serving: 1g | Calories: 1763kcal | Carbohydrates: 382g | Protein: 2g | Fat: 31g | Saturated Fat: 7g | Sodium: 115mg | Potassium: 12mg | Sugar: 344g | Calcium: 7mg | Iron: 0.5mg
4th of July Drip Cake

June 27, 2017 Blog

11 Genius 4th of July Cakes

It's that time of year again. Summer BBQ's, water fights, the ice cream truck and red, white and blue everything in honor of the 4th of July! I've rounded up some really fun Patriotic holiday cakes I think will get your ideas turning if you're planning on making a festive cake this year!

I really love mosaic patterns and this one is a fabulous 4th design! So eye-catching and the pinwheels are super clever.

4th of July Cake
wilton.com

I am in love with the vintage feel this cake has! Takes you back to where it all began.

4th of July Cake
thecakeblog.com

How about an American Flag on the INSIDE of your cake? How fun is that? The sparklers are also a nice touch and you can never have too many sprinkles (on a sprinkle cake).

4th of July Cake
sugarhero.com

This one is a beauty all around. I especially love the tier with the constitutional writing that even looks like old paper!

4th of July Cake
pinterest.com

Gotta love that clean cake design from Jessica Harris. She's done it again with this fun 4th of July cake! Clean, simple lines and a fun pop of fireworks!

4th of July Cake
jessicaharriscakedesign.com

This cake really stood out to me among the other's on the interwebs. As much as I don't care for piping words, I have to admit this is a really striking design!

4th of July Cake
getcreativejuice.com

Oh the ruffles! Such a cool sort of abstract version of the American Flag that has a real Americana vibe.

4th of July Cake
fondantflinger.com

This is one of those cakes that blows your mind with it's simple genius! Such a fun cake anyone can do! A simple star tip and spatula and you're set. Why can't I think of these kinds of things?

4th of July Cake
erinbakes.com

So holy cuteness overload am I right?! This cake is just so unique and fun to look at. I am a big fan of shading also which this cake is killing and it adds in a rustic appeal.

4th of July Cake
cutsiecupcakes.com

If  you wanted to have an Independence Day wedding I'd say this would be a perfect fit. Elegant and stately!

4th of July Cake
cakecentral.com

And of course we had to add the insanely fun 4th of July Drip Cake Liz and Dan made on today's episode of Sugar Geek Show Live! Didn't it turn out just awesome? Uber festive and surprisingly easy! Check out the Live Show below to see how this masterpiece came together. It's both educational and entertaining.

4th of July Drip Cake

These cakes opened my eyes to new ways to sport American pride! I mean I don't have a reason per say to make a 4th of July cake, but does one really need a reason? I'm thinking not. Then I can say I made a cake for the United States of America which is a pretty big deal.

Edible Crystals

June 20, 2017 Blog

Eat Your Cake and Crystals Too

If you love geode cakes, you're gonna LOVE the new line of Sugar Geek Show Crystal Molds available from Simi Cakes! These molds will help you add a whole other dimension and element to your geode/marble/agate/natural/stone/whatever cakes!

The molds come in three sizes, small, medium and large and are extremely easy to use! The large mold is perfect for making a gorgeous topper and the small and medium molds can be used as embellishments anywhere on the cake.

Sugar Geek Show Edible Crystal Molds

Brides be like "ooooohhhh" and "aaaahhhhh". Seal them with PME Clear Edible Glaze Spray and they can even keep them as a wedding keepsake.

Edible Crystals

Experiment with adding highlights, using colors, mixing colors, whatever you can think of! The finished product is incredibly detailed and realistic.

Edible Crystals

People will think you spent days looking for crystals on a mountain side. Let them think that and charge more, I won't judge.

Edible Crystals

And just look at the beautiful masterpiece you can create with these molds. I mean really.

Kintsugi Crystal Wedding Cake

Watch the tutorial on how to use the molds below along with the promo for the gorgeous Kintsugi Crystal Wedding Cake Tutorial. Still wondering how you can make your own super clear isomalt for projects like this? I'll throw that down there too. We seriously would love to see what you create with your Sugar Geek Show Crystal molds! We may even do a future blog post on it so get your molds and send us your photos or post them to the Sugar Geek Show Facebook Page and you could be featured!

How to pour isomalt into molds

June 15, 2017 Course Preview

How to Pour Geode Crystal Molds

Skill level: Newb

Learn how to pour isomalt into silicone molds. Please be very careful with melted isomalt, as it will be extremely hot. Wear protective eyewear and gloves.

4:05 Minutes of Instruction

What You Will Learn

  • How to melt and pour isomalt into silicone molds
  • How to color isomalt

Tutorial Directions

  1. Melt isomalt crystals in a silicone container. Microwave on high for 15 second intervals until completely melted.
  2. Wait for isomalt bubbles to disperse. This reduces the bubbles in the finished piece.
  3. Secure your silicone mold by wrapping a rubber band around the 2 parts of the mold two times. Be sure to check that the mold lines up correctly and there are no gaps.
  4. Slowly pour isomalt into mold, starting in the middle of the mold. Pour a thin ribbon of isomalt into the mold to avoid any air bubbles forming.
  5. Gently tap mold on hard surface to cause any bubbles in the isomalt to rise to the top and escape.
  6. Let isomalt fully cool until set.
  7. Gently test middle of isomalt to see if set, only test after waiting several hours.
  8. Gently remove rubber band.
  9. Slide mold off, 1 part at a time. Carefully slide "up and down" not "side to side"
    or isomalt will break.
  10. Isomalt will be cloudy; don't worry this is normal.
  11. Heat a paring knife with cremé brule torch. Be careful not to burn your hands.
  12. Knife may become discolored. Usually this is just leftover isomalt and can be cleaned off.
  13. Slide knife on edge of isomalt crystals. This will bring back the shine of the isomalt.
  14. Clean knife after every use. Wipe knife on damp paper towel to remove isomalt, then reheat.
  15. Keep going until every crystal edge is shiny.
  16. Optional Method: Adding Color
  17. Add powdered food color to melted isomalt. Be sure to use a silicone mixing tool.
  18. Highlighters mixed with everclear work well for edges. Experiment with colors for different effects.
  19. Seal finished pieces with PME clear glaze spray.
  20. Purchase the whole Sugar Geek Show crystal mold line, available now at simicakes.com
How to pour isomalt into molds

June 15, 2017 Free Video

How to Pour Geode Crystal Molds

Skill level: Newb

Learn how to pour isomalt into silicone molds. Please be very careful with melted isomalt, as it will be extremely hot. Wear protective eyewear and gloves.

4:05 Minutes of Instruction

What You Will Learn

  • How to melt and pour isomalt into silicone molds
  • How to color isomalt

Tutorial Directions

  1. Melt isomalt crystals in a silicone container. Microwave on high for 15 second intervals until completely melted.
  2. Wait for isomalt bubbles to disperse. This reduces the bubbles in the finished piece.
  3. Secure your silicone mold by wrapping a rubber band around the 2 parts of the mold two times. Be sure to check that the mold lines up correctly and there are no gaps.
  4. Slowly pour isomalt into mold, starting in the middle of the mold. Pour a thin ribbon of isomalt into the mold to avoid any air bubbles forming.
  5. Gently tap mold on hard surface to cause any bubbles in the isomalt to rise to the top and escape.
  6. Let isomalt fully cool until set.
  7. Gently test middle of isomalt to see if set, only test after waiting several hours.
  8. Gently remove rubber band.
  9. Slide mold off, 1 part at a time. Carefully slide "up and down" not "side to side"
    or isomalt will break.
  10. Isomalt will be cloudy; don't worry this is normal.
  11. Heat a paring knife with cremé brule torch. Be careful not to burn your hands.
  12. Knife may become discolored. Usually this is just leftover isomalt and can be cleaned off.
  13. Slide knife on edge of isomalt crystals. This will bring back the shine of the isomalt.
  14. Clean knife after every use. Wipe knife on damp paper towel to remove isomalt, then reheat.
  15. Keep going until every crystal edge is shiny.
  16. Optional Method: Adding Color
  17. Add powdered food color to melted isomalt. Be sure to use a silicone mixing tool.
  18. Highlighters mixed with everclear work well for edges. Experiment with colors for different effects.
  19. Seal finished pieces with PME clear glaze spray.
  20. Purchase the whole Sugar Geek Show crystal mold line, available now at simicakes.com
Kintsugi Crystal Geode Wedding Cake

June 15, 2017 Course Preview

Kintsugi Crystal Geode Wedding Cake

Skill level: Intermediate

This Kintsugi Cake is the hottest trend in cake decorating right now. Kintsugi is the Japanese practice of fusing together broken pottery with a mixture of resin and gold or silver powder. This pottery is considered to be more beautiful for having been broken.

I really loved that message and wanted to combine that technique with a new take on the popular mineral trend. In this tutorial you will learn how to create a stunning wedding cake with an impressive crystal center complete with growing sugar crystals and hand-painted gold kintsugi. This cake is sure to wow!

45:53 Minutes of Instruction

What You Will Learn

  • How to carve the cake to create a beautiful natural geode design
  • Learn how to create the crystal details within the geode
  • Liz Marek's special technique to paint the kintsugi design onto the cake

Tutorial Chapters

  1. Building the structure 0:09
  2. Edible and Non-Edible 1:14
  3. Stacking and Carving 3:57
  4. Covering in fondant 10:36
  5. Adding rock candy 18:53
  6. Paneling 23:20
  7. Sanding sugar crystals 27:04
  8. Making isomalt crystals 31:47
  9. Painting 34:19

Buy Just This Tutorial

Buy Now $39.99

Downloads

Materials List

Cake Template 01

Cake Template 02

Cake Template 03

Related Videos


How to Pour Geode Isomalt Crystals

Kintsugi Crystal Geode Wedding Cake

June 15, 2017 Paid Video

Kintsugi Crystal Geode Wedding Cake

Skill level: Intermediate

Kintsugi is the Japanese practice of fusing together broken pottery with a mixture of resin and gold or silver powder. This pottery is considered to be more beautiful for having been broken.

I really loved that message and wanted to combine that technique with a new take on the popular mineral trend. In this tutorial you will learn how to create a stunning wedding cake with an impressive crystal center complete with growing sugar crystals and hand-painted gold kintsugi. This cake is sure to wow!

45:53 Minutes of Instruction

What You Will Learn

  • How to carve the cake to create a beautiful natural geode design
  • Learn how to create the crystal details within the geode
  • Liz Marek's special technique to paint the kintsugi onto the cake

Tutorial Chapters

  1. Building the structure 0:09
  2. Edible and Non-Edible 1:14
  3. Stacking and Carving 3:57
  4. Covering in fondant 10:36
  5. Adding rock candy 18:53
  6. Paneling 23:20
  7. Sanding sugar crystals 27:04
  8. Making isomalt crystals 31:47
  9. Painting 34:19

Downloads

Materials List

Cake Template 01

Cake Template 02

Cake Template 03

Related Videos


How to Pour Geode Isomalt Crystals

Anxiety Sugar Sculpture Liz Marek

June 13, 2017 Blog

Some of the Biggest Battles are Not Seen

If you could see anxiety, what would it look like? Liz shows us with her incredible piece for the Unseen Battles Collaboration depicting "Anxiety". This collaboration was very powerful in it's message and is full of incredible pieces showing the different struggles people deal with on a daily basis that no one sees or knows about. Here's what Liz had to say about her piece.

"I would like to introduce you to a very personal piece created for the Unseen Battles Collaboration that highlights illness that we don't really talk about in order to help people better understand.

Anxiety Sugar Sculpture Liz Marek

This is my piece based on anxiety which I never really thought was a serious thing until I tried to get pregnant and had to be put on medication to get it under control.

Anxiety Sugar Sculpture Liz Marek

Learning more about anxiety has taught me more about myself and connected deeply with others who suffer with anxiety/depression.

Anxiety Sugar Sculpture Liz Marek Anxiety Sugar Sculpture Liz Marek

Please click through to the page and check out the other wonderful pieces full of heart and emotion! Thank you Erin Schwartz for including me in this unique and emotional collaboration.

HUGE thank you to HotHands for providing the modeling chocolate for this piece! It's like working with a beautiful, smooth clay that happens to be chocolate. I love it!"

Liz also put together a video timelapse of this piece with a powerful message.

Everyone you meet is fighting a battle you know nothing about. This collaboration hit home for me on multiple levels as I am sure it did many.

Spreading awareness through sugar art is one of the most amazing things we can do. It's a special opportunity we should definitely take advantage of. Bravo to everyone who participated in this collaboration to help spread awareness about some of the unseen battles of the world.

Working Gumball Machine Cake

June 6, 2017 Blog

This Cake Gives You Gumballs

What's better than a cake? A cake that gives you gumballs. Our latest tutorial was done by yours truly and let me tell you, I have some things to say. It was the most challenging project I have ever taken on and I may have momentarily lost my sanity for awhile there but hey, it all worked out in the end so it was totally worth it!

This, this here is a fully working, completely edible gumball machine cake. Turn the handle and it lets the gumballs out the shoot and if your heart so desires you can try eating the "glass" globe because it too is made of an eatable material.

Working Gumball Machine Cake Edible Glass Globe

The globe for this cake was by far the most challenging part. It's funny because I was so worried about the working mechanism thinking it was the tricky part when all along this bugger was waiting to completely throw me off my game. I had mishap after mishap after failure after re-do. FINALLY,  5 tries later and just in the nick of time, I got one to look like a 6" clear glass gumball machine globe.

Working Gumball Machine Cake Edible Glass Globe

I looked at many reference photos of vintage gumball machines to come up with the look I was going for and was pretty pleased with the outcome! It would definitely be fun to see different styles of gumball machines so you guys better get crackin'.

Working Gumball Machine Cake

The design also had to work with the mechanism that makes this baby actually work. How did I do it you ask? If I told you, then I'd have to kill you, or I'd probably just get fired but either way it's not good. Sign up as a Premium or Elite Member if you haven't already to check out this tutorial along with hundreds of others for one low monthly price!

https://sugargeekshow.com/wp-content/uploads/2017/06/Gumball-Machine-Clip-11.mp4

To complete the look and make it even more unique from other gumball machine cakes I decided to put it on a stand like you see the real ones on. Sort of an aged metal/wrought iron look on a vintage black and white checkerboard tile floor like you'd see in a '50's diner.

Working Gumball Machine Cake

This tutorial is seriously PACKED FULL of techniques and info. Not to toot my own horn or anything but I believe it's a cake that's sure to impress. The best part? It is soo much easier than it looks once I break it down for you. Seriously, anyone can do it! I mean now that I was the guinea pig and found out exactly everything you shouldn't do, it's a cinch. You're welcome.

Working Gumball Machine Cake

I was so excited to get to teach something for you guys and I hope to do it again soon! Watch my goofy promo below and then go watch the full tutorial right away! You're gonna need to cancel your whole evening.

Working Gumball Machine Cake Tutorial

June 1, 2017 Course Preview

Working Gumball Machine Cake

Skill level: Advanced

This jaw-dropping gumball machine cake comes courtesy of guest instructor Shannon Mayes of SweetArt Cake Company and YouTube channel The Sweet Spot.

In addition to being our super-awesome blogger here on Sugar Geek Show, Shannon drops some crazy knowledge in this tutorial. Guests and kids alike will be amazed at this realistic gumball machine with it's edible globe and turning knob that actually releases gumballs into the chute below.

You might be wondering where to stick a quarter into this cake, but have no fear, Shannon breaks every step down, taking you through the entire process from structure to carving and assembly.

2:53:00 Minutes of Instruction

What You Will Learn

  • How to make an edible glass globe that holds the gumballs
  • Learn how to create the internal structure needed to pull off this cake's gumball machine
  • Several tips and tricks to give this cake a level of polish

Tutorial Chapters

  1. Making the vintage checkered cake board 1:00
  2. Creating the gumball machine structure 4:08
  3. Making the gumball stand 10:02
  4. The gumball machine cake 38:45
  5. Making the gumball mechanism 1:15:44
  6. Making the gumball globe 2:23:21
  7. Attaching globe to the cake 2:41:11
  8. Filling the gumball machine 2:46:20

Buy Just This Tutorial

Buy Now $39.99

Downloads

Materials List

Gumball mechanism template 1

Gumball mechanism template 2

Gumball mechanism template 3

Related Posts

Gelatin Recipe

Working Gumball Machine Cake Tutorial

June 1, 2017 Paid Video

Working Gumball Machine Cake

Skill level: Advanced

This jaw-dropping gumball machine cake comes courtesy of guest instructor Shannon Mayes of SweetArt Cake Company and YouTube channel The Sweet Spot.

In addition to being our super-awesome blogger here on Sugar Geek Show, Shannon drops some crazy knowledge in this tutorial. Guests and kids alike will be amazed at this realistic gumball machine with it's edible globe and turning knob that actually releases gumballs into the chute below.

You might be wondering where to stick a quarter into this cake, but have no fear, Shannon breaks every step down, taking you through the entire process from structure to carving and assembly.

2:53:00 Minutes of Instruction

What You Will Learn

  • How to make an edible glass globe that holds the gumballs
  • Learn how to create the internal structure needed to pull off this cake's gumball machine
  • Several tips and tricks to give this cake a level of polish

Tutorial Chapters

  1. Making the vintage checkered cake board 1:00
  2. Creating the gumball machine structure 4:08
  3. Making the gumball stand 10:02
  4. The gumball machine cake 38:45
  5. Making the gumball mechanism 1:15:44
  6. Making the gumball globe 2:23:21
  7. Attaching globe to the cake 2:41:11
  8. Filling the gumball machine 2:46:20

Downloads

Materials List

Gumball mechanism template 1

Gumball mechanism template 2

Gumball mechanism template 3

Related Posts

Gelatin Recipe

Gravity Defying Asymmetrical Wedding Cake

May 31, 2017 Blog

3 Gravity Defying Wedding Cakes That Will Blow You Away

These gravity defying wedding cakes are so stunning they will stop you in your tracks. They seem to make time stand still for just a moment while the world goes on around you. Who doesn't want that at their wedding? Well, I mean it might take a little attention off the bride but hey, having anything memorable at a wedding is still a good thing right? These are cakes people will be talking about years after the wedding.

The first cake is a lovely beach themed cake Liz created for a styled shoot. The cascading splash of "water" is a sight to behold. I literally can't stop staring at it and I really need to finish writing this post. Gravity Defying Beach Themed Cake Gravity Defying Beach Themed Cake Gravity Defying Beach Themed Wedding Cake

Gravity Defying Beach Themed Cake

The next cakes not only are gravity defying in their design but also have a unique asymmetrical thing going on and I LOVE it! I love when things aren't perfectly uniform. So much more interesting don't you think?

This cake was created for Portland's Bride and Groom Magazine. It has sugar peonies, wafer paper leaves and gum paste berries suspended on a gravity defying vine. There are hundreds of hand painted lines using edible white food color to make a herringbone pattern. Can you imagine how long that took?! I mean really.

The focus though is on that gorgeous gravity defying vine of flowers. I mean WOW. Cascading flowers on a wedding cake are lovely and will always be timeless but making the cascade defy gravity takes the cake to a whole new level!

Gravity Defying Asymmetrical Wedding Cake Gravity Defying Asymmetrical Wedding Cake Gravity Defying Asymmetrical Wedding Cake Gravity Defying Asymmetrical Wedding Cake Gravity Defying Asymmetrical Wedding Cake

This cake was featured on the Food Network's show Outrageous Wedding Cakes and for good reason. Jellyfish are most definitely a different choice for a wedding cake but how amazing did it turn out? Gravity defying Jellyfish that glow in the dark, now that's outrageous, in a good way.

What you do you think about gravity defying, asymmetrical wedding cakes? Is that something you'd like to learn in a future tutorial on The Sugar Geek Show? Let us know! I think they are the wedding cakes of the future and we should all jump on the bandwagon now. Check out the episode of Outrageous Wedding Cakes Below to see Liz in action and this incredible cake come together.

How to travel with a cake

May 23, 2017 Blog

Newbie-Proof Cake Travel

I see this question asked over and over, how do I safely travel with a cake that is two tiers or more? Do you stack and travel, do you stack on sight, what kind of supports do you use? What happens if there is some damage to the cake? How do you fix a cake on site? These are all problems that I have dealt with over the course of my cake decorating career and I will explain the full-proof process that I used with every cake delivery from how to store the cake before delivery to setting it up and fixing any boo-boos easily.

How to travel with a cake


Crumb Coat & Chill

First of all, you gotta chill those cakes. An un-chilled cake is a disaster waiting to happen. Cakes at room temperature are great for eating, not so great for traveling. When a cake is not chilled, the supports in the cake are more likely to fall over and the buttercream is more likely to slip and slide during those turns. I always chill my cakes in the fridge overnight before traveling. Chilling sets the buttercream or ganache so that it helps keeps the cake stable and if your cake has butter in it then that will help keep the cake stable as well. Live in a humid area? Chill your cakes in cardboard boxes so they can be taken straight from the fridge to the (air conditioned) car. The box helps insulate the cakes and keeps the condensation off of them. Btw, condensation in small amounts does not hurt cakes. So don't sweat a little cake sweat.


Let's Talk Cake Supports

Now this is one of those things that is really a personal choice but again, I'll tell you what I use.
For regular stacked cakes (nothing sculpted) I have always used just regular milkshake straws.
They are a thicker version of a regular drinking straw and not quite as fat as a boba straw. Here
is a video on how I use those straws to support cake tiers and a visual guide on how many to
use for each sized tier. Remember to put your straws as close to the edge of the cake as
possible on the outside so that the weight is distributed properly. If you only have a few straws in
the center, the edges of the cake can be unsupported and start to crush the cake below it and
possibly collapse.


To Stack or Not to Stack?

A lot of cake newbies ask how to transport a two tier cake. It might feel like a big deal to jump
from one tier to two tiers but really it's not. Three tiers is really when you want to start worrying.
First off, let's talk about the inside of a cake. Every cake. Yes even if it's only two tiers.
Every cake tier has a cake board underneath it. This is so that there is a food safe barrier
between the cake and the cake stand and a nice surface for whomever is cutting the cake to cut
the slices from. If you have more than one tier, this cardboard (also called a cake card) provides
support for the cake so that you can put straws or dowels underneath, stopping the cake tier
from crushing the one below it. Cake is heavy! So the more cake tiers you stack, the more
important it is to have good supports.
If your cakes are chilled and stacked properly, you can easily travel with two tiers stacked
together no problem. If you are newbie, you might want to travel with tiers unstacked and stack
on site for anything over two tiers. Even for the simple fact that fully stacked cakes are HEAVY
and really hard to manage on your own. I travel with individual tiers in their own boxes and bring
them to the cake table. I then place the largest tier and begin stacking. All my straws are already
in the cake and everything is chilled so the cakes are easy to handle. I also add any
decorations, toppers etc at this point and take a photo of the finished cake. If you're traveling
with your tier's separated, there is no need for a center dowel and a two tier can never needs a
center dowel.
Cake Support Guide

Don't forget the OH SH*T KIT!

Pardon the language but if you forget your fix-it kit, you'll definitely be dropping some less-than-
nice words! I always, ALWAYS bring with me a kit to fix any boo-boos. This includes extra
straws, scissors, x-acto, small cutting board, small rolling pin, extra buttercream and fondant in
the colors of the cake, small spatula and pins for popping any bubbles that may develop during
travel. I also have paper towels, paint brush and a bottle of water since a sink is not usually
nearby. I keep all this in a plastic box that always goes with me on every delivery and has saved
me many many times.
Interested in watching a series of videos to walk you through the process of stacking a cake?
Check out this old playlist from Artisan Cake Company's Youtube Channel. This will show you
everything from recipes, to how to stack the cake.

If you follow these very simple steps, you'll avoid every type of cake mis-hap. In my almost 10
years of cake decorating I have never had a cake fall over, fall apart or melt. Thank you OCD! I
knew that would come in handy someday.
Happy Caking!

- Liz

Jungle Safari Gelatin Cake

May 17, 2017 Blog

Safari Cake + Sachiko Windbiel = Cuteness Overload

If you like cute things (and who doesn't?) then you are going to LOVE this latest tutorial! Sachiko Windbiel of Mimicafe Union has done it again! She has worked her magic to give us another incredibly cute and fun tutorial. Sticking with the safari theme this cake showcases a little explorer boy and his jungle friends on a safari adventure.

Jungle Safari Gelatin Cake

Sachiko first shows us the steps to making this incredibly detailed jungle safari explorer and shares her tips and tricks to creating her signature figures and facial details!

Explorer

She also shows us how to make not one, not two, okay I'm gonna skip ahead, she shows us how to make SIX adorable jungle animals! Perfect for cake or cupcake toppers. I also have to mention how hilarious and fun Sachiko is, my face literally hurt from smiling and laughing for over three hours.

Fondant Lion Sachiko Windbiel

In this tutorial you'll also learn the beginning steps of working with gelatin to make a super cool grass filled river around the cake.

Jungle Safari Gelatin Cake

Liz takes you through the basic tools and steps to creating this amazing gelatin effect. I mean check out that floating grass!

Gelatin Cake Seaweed Grass

Let's not forget the awesome edible palm trees, that's right, I said ED-I-BLE, as in you can EAT them. Move over cheap plastic wannabe's.

Edible Palm Trees

I am willing to bet this is a tutorial you don't wanna miss! It's chock-full of techniques you'll surely be using for many cakes to come and each and every customer is guaranteed to be impressed! I mean why wouldn't you want to set yourself apart from your competition? Check out the promo below then head on over to the Full Jungle Safari Gelatin Cake Tutorial. Not a member yet? Sign up HERE, you won't regret it, you'll get access to this and hundreds of other tutorials. You can also get the crystal clear Gelatin Recipe free!

Gelatin Cake Jungle Safari featuring Sachiko Windbiel

May 15, 2017 Course Preview

Jungle Safari Cake Toppers and Gelatin Cake

Skill level: Intermediate

The wonderfully talented Sachiko Windbiel of Mimicafe Union New York and Liz Marek have teamed up to bring you another amazing cake! Featuring an adorable boy figure surrounded by his cute jungle animal friends! They peek out from behind beautiful palm trees and are surrounded by a sparkling pool, not of water, but gelatin! Lots of fun techniques in this tutorial!

3:19:44 Minutes of Instruction

What You Will Learn

  • How to make a cute boy cake topper with binoculars, a safari hat, and explorer clothes
  • 6 Different animal cake toppers (elephant, cheetah, lion, monkey, zebra, and alligator).
  • Several tips and tricks to achieve Sachiko Windbiel's iconic style.
  • Liz Marek's easy technique to create gelatin water with seaweed grass floating inside
  • How to create realistic edible palm trees

Tutorial Chapters

  1. Making body supports 0:51
  2. Coloring skintone 3:29
  3. Shaping the body 6:44
  4. Making the eyes 10:44
  5. Painting eyes 13:44
  6. Using a head support 19:04
  7. Making the boy's head 19:38
  8. Making legs and pants 43:56
  9. Attaching the head 1:08:27
  10. Jacket and bow-tie 1:10:12
  11. Making arms 1:19:31
  12. Making cute hair 1:27:44
  13. Hat and binoculars 1:34:25
  14. Making the monkey 1:46:02
  15. Making a zebra 2:01:33
  16. Making baby alligator 2:16:47
  17. Making the baby cheetah 2:24:08
  18. Making baby elephant 2:31:45
  19. Making the lion 2:38:20
  20. Making gelatin 2:45:32
  21. Making grass 2:52:57
  22. Removing the gelatin 2:58:19
  23. Making palm trees 3:10:03
  24. Putting it all together 3:12:02
  25. Attaching palm trees 3:15:59

Downloads

Materials List

Gelatin Cake Jungle Safari featuring Sachiko Windbiel

May 15, 2017 Paid Video

Jungle Safari Cake Toppers and Gelatin Cake

Skill level: Intermediate

The wonderfully talented Sachiko Windbiel of Mimicafe Union New York and Liz Marek have teamed up to bring you another amazing cake! Featuring an adorable boy figure surrounded by his cute jungle animal friends! They peek out from behind beautiful palm trees and are surrounded by a sparkling pool, not of water, but gelatin! Lots of fun techniques in this tutorial!

3:19:44 Minutes of Instruction

What You Will Learn

  • How to make a cute boy cake topper with binoculars, a safari hat, and explorer clothes
  • 6 Different animal cake toppers (elephant, cheetah, lion, monkey, zebra, and alligator).
  • Several tips and tricks to achieve Sachiko Windbiel's iconic style.
  • Liz Marek's easy technique to create gelatin water with seaweed grass floating inside
  • How to create realistic edible palm trees

Tutorial Chapters

  1. Making body supports 0:51
  2. Coloring skintone 3:29
  3. Shaping the body 6:44
  4. Making the eyes 10:44
  5. Painting eyes 13:44
  6. Using a head support 19:04
  7. Making the boy's head 19:38
  8. Making legs and pants 43:56
  9. Attaching the head 1:08:27
  10. Jacket and bow-tie 1:10:12
  11. Making arms 1:19:31
  12. Making cute hair 1:27:44
  13. Hat and binoculars 1:34:25
  14. Making the monkey 1:46:02
  15. Making a zebra 2:01:33
  16. Making baby alligator 2:16:47
  17. Making the baby cheetah 2:24:08
  18. Making baby elephant 2:31:45
  19. Making the lion 2:38:20
  20. Making gelatin 2:45:32
  21. Making grass 2:52:57
  22. Removing the gelatin 2:58:19
  23. Making palm trees 3:10:03
  24. Putting it all together 3:12:02
  25. Attaching palm trees 3:15:59

Downloads

Materials List

Related Videos

Golden Safari Birthday Cake

homemade jello

May 10, 2017 Blog

Homemade Jello Recipe

Making homemade Jello is super easy and only takes two ingredients

Want to make your own Homemade Jello? It's pretty easy. You probably have all the ingredients you need in your pantry already. You only need two things, powdered gelatin and some sort of flavored liquid. If your liquid of choice isn't pre-flavored and sweetened, you might need some sugar and flavored extracts.

homemade jello

This could be anything! Beer, orange juice, root beer, the sky really is the limit. Exact measurements may vary depending on what you're making. For instance, a gummy beer might need extra gelatin to make it more stable.

If you're just going to make your own gelatin gummies for eating, you might use a little less. Experiment with exact measurements to see what works for you!

My daughter loves making gummy gems from fruit punch and gelatin! So easy and fun to do. You can even adjust the recipe so that it's has very little sugar by using no sugar added juices.

I also used this recipe to make my now viral gummy beer from my giant burger cake tutorial! Super fun to make and will fool all your guests! Even the foam on top is gummy! I love to watch it wiggle.

Or you could make a gummy glass of orange juice like I did for my breakfast in bed cake tutorial! Getting the lip of the glass was a bit tricky but I show you how in my breakfast in bed tutorial. If you like this jello recipe you might want to check out my real gummy candy recipe!

Recipe

homemade jello
Print Recipe
5 from 3 votes

Homemade jello

This recipe is perfect for making homemade jello with only two ingredients! 
Prep Time5 minutes mins
Cook Time10 minutes mins
Total Time15 minutes mins
Course: Dessert
Cuisine: American
Servings: 1 cup
Calories: 160kcal
Author: Liz Marek

Ingredients

  • 2 tablespoon Gelatin
  • 8 oz Flavored liquid like juice or beer room temperature
US Customary - Metric

Instructions

  • Sprinkle gelatin into room temperature liquid in small amounts so it dissolves evenly. Stir gently so you don't create bubbles. 
  • Let set 5 minutes so all the gelatin is absorbed into the liquid. Don't rush this part. 
  • Liquify gelatin in microwave for 30 seconds. Stir gently then melt again for 10 seconds. Let mixture sit for 5 minutes. 
  • Skim foam off top of gelatin with a spoon.
  • Strain and put into desired molds and refrigerate until set

Notes

Makes 1 cup of gelatin. Multiply this recipe for however many cups you need for your pan.

Nutrition

Calories: 160kcal | Carbohydrates: 28g | Protein: 12g | Sodium: 37mg | Potassium: 250mg | Sugar: 23g | Vitamin C: 2.2mg | Calcium: 20mg | Iron: 0.3mg

May 9, 2017 Blog

How to Say NO

When you're starting out, you're hungry for orders. You're so excited to make a cake that you'll give it away for free to any friend who will take a cake. No matter what the request or price point, the answer is always YES! In the beginning, we're always excited to share our passion with anyone and everyone. But then reality sets in. The long nights start wearing you down, the orders that come in are boring and uninspiring and most of all, you haven't made any money! Whats up with that? Just like a lot of other cake decorators, you might have a bad case of YES-itis. And it's making you sick.


You might have got into this whole cake gig for various reasons. Maybe you just want to bring in some extra cash as a hobby, maybe you're itching to spread your creative wings through edible art or maybe making the best cakes in the world and opening your storefront is your dream! There is no right path, we all have our own idea of success. When you want that success SO badly, you feel like saying no will keep you from reaching your goals but when you say yes to everything you might not have time for the things you REALLY want to do and that get you closer to your real goals.

By the time you've realized you're too worn out and burnt out, you've already over-committed yourself and you're realizing that the days of scrounging for work are gone. These are all good things! It means you're in demand and people are noticing you! The bad part is that now everyone wants a piece of you and that means you've got to start thinning out the crowd. You are only one person and as much as you want to do everything for every one, there just isn't enough of you to go around. Finding a balance between work, life and goals is always a challenge so how do you know what to say no to and what is a yes?

Deciding on YOUR Ultimate Goal


First of all, what is your actual goal? This might seem like a no brainer but you'd be surprised at how many people have not asked themselves this simple question.

Here's a few to get you started.

Do you consider yourself an artist?

Do you want to make as much money as possible?

Do you love the business side of things or do you hate it?

Are you a good multi-tasker?

Do you enjoy the baking side of cakes or are you more of a decorator?

Can you motivate yourself to get up every day to work without being told?

Are you a people person?

Do you love social media or do you suck at it?

What were your answers? Think about what those answers mean and what it means for your goal. For me, when I first started cake decorating I thought the only goal was to open a storefront and that meant success. Turns out, I'm not really a people person, I don't enjoy baking, I hate getting up early and all I want to do is make art. Not the best attributes for running a bakery!

At this time, I had two employees working out of my home-kitchen and we were making 6-8 cakes a week. I was so busy I didn't ever have time to see my family, friends or be very creative. I was mostly consumed with making enough money to pay the bills and I felt very unfulfilled. So I re-assessed my goals. What did I really want?

What I really wanted was to travel more, be creative, teach new techniques and never make the same cake twice. Now granted, that is a pretty unique list of things but for me, that's what I wanted. So I started saying NO to anything that was not going to get me closer to those goals.

That meant taking on less cakes, upping my price point for higher-end clients so I could still pay my bills, taking more time to make video tutorials, building my online following so I could teach more at cake shows and taking part in more collaborations and magazines to stretch my creativity. Because I started saying NO to the things I didn't want to do, I had more time to do the things I DID want to do instead of being so busy that I didn't have a choice.

Gorgeous Gold Sequin Wedding Cake

How do you say NO nicely?


Now your NO might be to collaborations or teaching gigs because your goal is to make your storefront the best it can be. Of course you don't have to be mean about it. Simple and tactful honesty is always the right way to go.

"That sounds so exciting and I would love to take part but unfortunately right now I am really focusing on my storefront and building my client base locally so I don't have much time for creative projects. Thank you so much for asking!"

Maybe your NO is to a boring birthday cake order from a client when you're trying to get more high-end clients. This is where some polite "white lies" come in handy.

"Thank you so much for your inquiry, unfortunately at this time I am booked. Please let me refer you to (insert other bakeries in the area) who might be able to help you out."

This way your client doesn't feel slighted that you weren't interested in their project and you were still helpful by pointing out some other bakeries in the area that can help.

When you say yes too often, no one wins. You end up spreading yourself too thin, all your work suffers, you end up not being able to deliver on anything and the only thing that happens in your career is frustration and exhaustion. The hardest part of learning to say NO is understanding why you're saying no and what you're getting in return. Set your goals, know your limits and be unapologetic for wanting to achieve them.

Now get out there and just say NO!

Realistic Dog Toppers

May 1, 2017 Course Preview

Realistic Dog Cake Toppers

Skill level: Intermediate

Learn to make super realistic dog toppers in this new tutorial from Sugar Geek Show. Liz Marek breaks down every step of creating a Golden Doodle, French Mastiff and Boerboel puppy toppers, along with tips and tricks on the different types of materials you would use to make them, and the pros/cons of each type.

1:45:25 Minutes of Instruction

What You Will Learn

  • How to make 3 different dog breed toppers (Golden Doodle, French Mastiff, Boerboel puppy)
  • Liz Marek's furring technique that she has used on many furry creatures
  • Learn to sculpt and detail dog faces and several helpful tips and tricks to make your dog pop

Tutorial Chapters

  1. Golden Doodle Dog Topper
  2. Tips about tools and materials 1:04
  3. Planning armature 3:29
  4. Bulking up dog topper 14:29
  5. Covering rice cereal 22:04
  6. Detailing face and applying fur 31:35
  7. Painting dog topper 46:13
  8. French Mastiff Dog Topper
  9. Planning armature 50:42
  10. Bulking up dog topper 53:43
  11. Covering foil bulk 59:16
  12. Detailing face and other features 1:03:09
  13. Painting the dog 1:21:30
  14. Boerboel Puppy Dog Topper
  15. Planning armature 1:26:59
  16. Bulking up topper 1:30:59
  17. Roughing the face shape 1:32:30
  18. Refining the rough forms 1:37:48
  19. Detailing the face and other features 1:39:32
  20. Painting the dog 1:42:41

Downloads

Materials List

Dog armature reference

Realistic Dog Toppers

May 1, 2017 Paid Video

Realistic Dog Cake Toppers

Skill level: Intermediate

Learn to make super realistic dog toppers in this new tutorial from Sugar Geek Show. Liz Marek breaks down every step of creating a Golden Doodle, French Mastiff and Boerboel puppy toppers, along with tips and tricks on the different types of materials you would use to make them, and the pros/cons of each type.

1:45:25 Minutes of Instruction

What You Will Learn

  • How to make 3 different dog breed toppers (Golden Doodle, French Mastiff, Boerboel puppy)
  • Liz Marek's furring technique that she has used on many furry creatures
  • Learn to sculpt and detail dog faces and several helpful tips and tricks to make your dog pop

Tutorial Chapters

  1. Golden Doodle Dog Topper
  2. Tips about tools and materials 1:04
  3. Planning armature 3:29
  4. Bulking up dog topper 14:29
  5. Covering rice cereal 22:04
  6. Detailing face and applying fur 31:35
  7. Painting dog topper 46:13
  8. French Mastiff Dog Topper
  9. Planning armature 50:42
  10. Bulking up dog topper 53:43
  11. Covering foil bulk 59:16
  12. Detailing face and other features 1:03:09
  13. Painting the dog 1:21:30
  14. Boerboel Puppy Dog Topper
  15. Planning armature 1:26:59
  16. Bulking up topper 1:30:59
  17. Roughing the face shape 1:32:30
  18. Refining the rough forms 1:37:48
  19. Detailing the face and other features 1:39:32
  20. Painting the dog 1:42:41

Downloads

Materials List
Dog armature reference

Related Videos


Introduction to Cake Sculpting

Adorable Little Girl Cake Topper

April 19, 2017 Blog

A Golden Safari

We could NOT be more excited to have had the incredible Sachiko Windbiel of Mimicafe Union teach some tutorials for The Sugar Geek Show! She literally has magical hands and we have caught them on film. Just look at this adorableness below! I SAID JUST. LOOK. I know it's hard to handle but do it anyway. Sachiko teaches you step-by-step her amazing techniques for creating her signature figures. From innovative structure techniques to invaluable tips on creating every facial feature, this is definitely a tutorial you don't want to miss. Not to mention Sachiko is as adorable as her figures and so fun to watch!

Adorable Little Girl Cake Topper

In this tutorial you will also learn how to make the most unique custom cake board you've probably ever seen. Liz had a genius idea for a safari themed cake board with golden elephants that you will be able to translate to many themes!

Golden Elephant Cake Stand

Witness more magic in this tutorial with the making of a Magic Chocolate bow! It instantly stands up and is ready to place on the cake. No more waiting hours and even days for bows to dry.

Magic Chocolate Bow

Let's not forget that amazing hand painted gold tri-animal print pattern on the cake. Cheetah into leopard into giraffe. Total safari in one cake. I just love how it looks don't you?

Golden Safari Birthday Cake

This is a cake a girl of any age would love to have and the techniques learned will definitely be ones you use time and time again! Check out the promo for this fabulous tutorial below and be sure to Sign Up as a Premium or Elite Member if you haven't already to gain access to this full tutorial and hundreds of others!

How to Cover Your Cake Boards

April 15, 2017 Course Preview

How to Cover Your Cake Boards

Skill level: Newb

Guest instructor Shani Christenson of Shani's Sweet Art teaches how to make gorgeous artisan cake boards to match any custom cake creation. Quick, easy and very inexpensive. Using lovely Japanese mulberry and washi papers, wrapping paper or scrapbooking paper and ¼" foamcore.

14:37 Minutes of Instruction

What You Will Learn

  • How to create beautiful cake boards that match any design

How to Cover Your Cake Boards

April 15, 2017 Free Video

How to Cover Your Cake Boards

Skill level: Newb

Guest instructor Shani Christenson of Shani's Sweet Art teaches how to make gorgeous artisan cake boards to match any custom cake creation. Quick, easy and very inexpensive. Using lovely Japanese mulberry and washi papers, wrapping paper or scrapbooking paper and ¼" foamcore.

14:37 Minutes of Instruction

What You Will Learn

  • How to create beautiful cake boards that match any design

Related Videos


How to Bake Your Cake Boards

April 15, 2017 Course Preview

How to Bake Your Cake Boards

Skill level: Newb

Here's a great technique from Shannon Bond on how to bake your cake boards to get a tough surface that holds up to scratches.

3:54 Minutes of Instruction

What You Will Learn

  • How to keep your cake boards from getting scratches in the fondant.

How to Bake Your Cake Boards

How to Bake Your Cake Boards

How to Bake Your Cake Boards

April 15, 2017 Free Video

How to Bake Your Cake Boards

Skill level: Newb

Here's a great technique from Shannon Bond on how to bake your cake boards to get a tough surface that holds up to scratches.

3:54 Minutes of Instruction

What You Will Learn

  • How to keep your cake boards from getting scratches in the fondant.

Related Videos

How to Cover Your Cake Boards

Golden Safari Cake Tutorial

April 15, 2017 Course Preview

Golden Safari Birthday Cake

Skill level: Intermediate

Sachiko Windbiel of Mimi Cafe Union New York has traveled across the country to Sugar Geek Show to take us on a golden safari adventure!

Sachiko teaches us her unique style of figure making from how to make the eyes, adorable features, accessories and hairstyles. Liz compliments this tutorial with a matching golden safari themed cake and cake stand to match.

3:39:08 Minutes of Instruction

What You Will Learn

  • Sachiko's method to making Manga-inspired cake toppers
  • How to easily make difficult parts like hands and toes
  • Learn how to create faces full of life and character
  • Sachiko's techniques for making clothing and fabric details
  • Liz Marek's tips on how to make multiple animal prints on a cake tier
  • How to make an easy edible bow using modeling chocolate
  • Learn how to create your very own cake stands

cake stand elephant tutorial

manga cake topper tutorial

edible bow modeling chocolate tutorial

Tutorial Chapters

  1. Topper structure 0:55
  2. Making eye shapes 8:11
  3. Coloring skin-tone fondant 11:36
  4. Prepping the body 16:04
  5. Painting the eyes 25:23
  6. Forming the head shape 31:00
  7. Placing the features 35:38
  8. Finishing touches 52:23
  9. Creating the torso 1:23:20
  10. Forming the legs 1:26:40
  11. Adding the shoes 1:36:53
  12. Adding undergarments 1:42:58
  13. Another method of shaping legs 1:46:00
  14. Making toes 1:54:02
  15. Making the underskirt 1:56:56
  16. Black ruffle dress 1:59:35
  17. Adding the bow 2:05:35
  18. Attaching the head 2:11:09
  19. Shoulders and neck 2:15:36
  20. Forming the arms 2:20:34
  21. Making hands 2:22:25
  22. Attaching the arms 2:28:17
  23. Making Numbers: Method #1 2:36:37
  24. Making Numbers: Method #2 2:39:06
  25. Making Numbers: Method #3 2:43:36
  26. Shoulder Ruffles 2:45:04
  27. Making black bow on shirt 2:47:40
  28. Placing number in hands 2:49:39
  29. Making blonde hair color 2:53:06
  30. Forming the hair 2:56:05
  31. Adding pig tails 3:07:24
  32. Painting the dress 3:09:16
  33. Painting the hair 3:14:08
  34. Painting animal print pattern 3:14:41
  35. Making pink bow 3:20:30
  36. Making cake stand 3:33:46

Downloads

Materials List

Sachiko's structure and proportion template

Golden Safari Cake Tutorial

April 15, 2017 Paid Video

Golden Safari Birthday Cake

Skill level: Intermediate

Sachiko Windbiel of Mimi Cafe Union New York has traveled across the country to Sugar Geek Show to take us on a golden safari adventure!

Sachiko teaches us her unique style of figure making from how to make the eyes, adorable features, accessories and hairstyles. Liz compliments this tutorial with a matching golden safari themed cake and cake stand to match.

3:39:08 Minutes of Instruction

What You Will Learn

  • Sachiko's method to making Manga-inspired cake toppers
  • How to easily make difficult parts like hands and toes
  • Learn how to create faces full of life and character
  • Sachiko's techniques for making clothing and fabric details
  • Liz Marek's tips on how to make multiple animal prints on a cake tier
  • How to make an easy edible bow using modeling chocolate
  • Learn how to create your very own cake stands

Tutorial Chapters

  1. Topper structure 0:55
  2. Making eye shapes 8:11
  3. Coloring skin-tone fondant 11:36
  4. Prepping the body 16:04
  5. Painting the eyes 25:23
  6. Forming the head shape 31:00
  7. Placing the features 35:38
  8. Finishing touches 52:23
  9. Creating the torso 1:23:20
  10. Forming the legs 1:26:40
  11. Adding the shoes 1:36:53
  12. Adding undergarments 1:42:58
  13. Another method of shaping legs 1:46:00
  14. Making toes 1:54:02
  15. Making the underskirt 1:56:56
  16. Black ruffle dress 1:59:35
  17. Adding the bow 2:05:35
  18. Attaching the head 2:11:09
  19. Shoulders and neck 2:15:36
  20. Forming the arms 2:20:34
  21. Making hands 2:22:25
  22. Attaching the arms 2:28:17
  23. Making Numbers: Method #1 2:36:37
  24. Making Numbers: Method #2 2:39:06
  25. Making Numbers: Method #3 2:43:36
  26. Shoulder Ruffles 2:45:04
  27. Making black bow on shirt 2:47:40
  28. Placing number in hands 2:49:39
  29. Making blonde hair color 2:53:06
  30. Forming the hair 2:56:05
  31. Adding pig tails 3:07:24
  32. Painting the dress 3:09:16
  33. Painting the hair 3:14:08
  34. Painting animal print pattern 3:14:41
  35. Making pink bow 3:20:30
  36. Making cake stand 3:33:46

Downloads

Materials List

Sachiko's structure and proportion template

Related Videos


How to Cover a Cake in Fondant


Rice Krispy Treats Recipe

How to Ship a Competition Cake

April 4, 2017 Blog

How to Ship a Competition Cake

Skill level: Newb

How I packed my show cake for the That Takes the Cake, Sugar Art Show and Cake Competition so that it could be checked onto a plane and arrive safely. This cake won first place in the show cake division.

17:54 Minutes of Instruction

What You Will Learn

  • How to ship display cakes (not real cakes) for competitions
  • Liz Marek's way to make sure the TSA doesn't tear your cake apart when shipping
  • How to properly pad your cake and keep it from falling apart in transit

How to Ship Cakes by Cargo


This is a previously recorded periscope broadcast. I am responding to questions live and this is a casual video. Please Note: the tee shirt I'm wearing is a roller derby team logo.
How to Ship Competition Cakes

Related Videos


Princess Mononoke Cake Showpiece
« Previous Page
Next Page »

Primary Sidebar

Hi, I'm Liz! I'm passionate about creating reliable, foolproof recipes that don't just tell you how to cook, but why things work - so you can skip the guesswork and confidently make the best sweet and savory dishes of your life.

More about me →

Our Cake Greatest Hits

Check out our best cake recipes

🌺 Celebrate Memorial Day 🇺🇸

  • Close up of three crispy baked chicken thighs on a plate.
    Crispy Baked Chicken Thighs
    Cook Time50 Minutes
  • Vanilla cupcakes on a white stands decorated with white buttercream and pink sprinkles.
    Moist Vanilla Cupcake Recipe
    Cook Time30 Minutes
  • close up of a sliced ribeye steak
    How To Cook A Ribeye
    Cook Time24 Hours 14 Minutes
  • close up of creamy mac and cheese on a serving spoon
    Creamy Baked Mac And Cheese
    Cook Time35 Minutes
  • close up of a keto smash burger
    Smash Burgers Recipe
    Cook Time25 Minutes
  • Hawaiian Mac Salad
    Cook Time2 Hours 20 Minutes

Popular Recipes

  • close up of ganache drizzling into a bowl
    The Best Chocolate Ganache Recipe
    Cook Time20 Minutes
  • Piping easy buttercream rosettes onto a cake using a 1M star piping tip
    Easy Buttercream Frosting
    Cook Time25 Minutes
  • close up slice of marble cake
    Moist and Fluffy Marble Cake Recipe
    Cook Time40 Minutes
  • Slice of red velvet cake with cream cheese frosting on a white plate.
    Red Velvet Cake Recipe
    Cook Time1 Hours 40 Minutes

Footer

↑ back to top

About

  • Privacy Policy
  • Terms of Service

Newsletter

  • Sign Up! for emails and updates

Contact

  • Contact
  • About Us

Copyright © 2024 Sugar Geek Show, Inc. All Rights Reserved.

Rate This Recipe

Your vote:


A rating is required
A name is required
An email is required