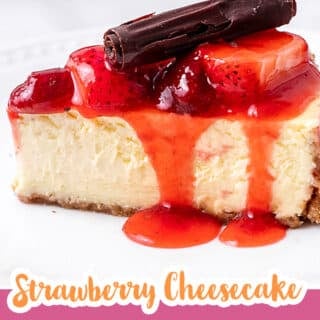
This classic strawberry cheesecake recipe with fresh strawberries is my favorite dessert to make during Oregon's famous hood strawberry season! The crisp graham cracker crust, silky smooth cream cheese filling, and sweet strawberry topping really is the perfect balance of flavors and textures.
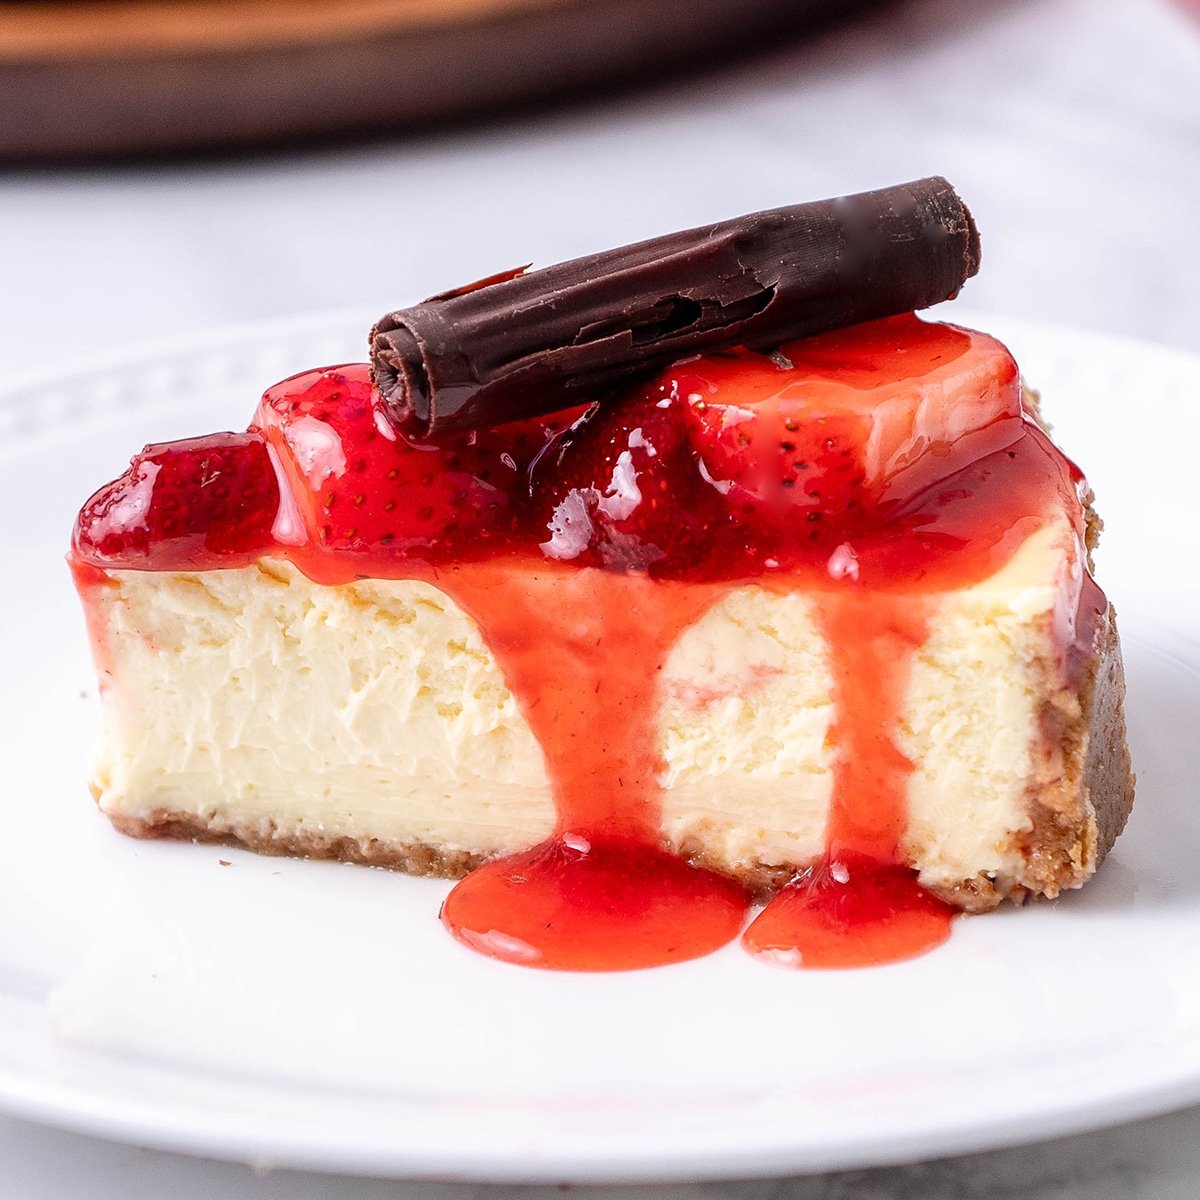
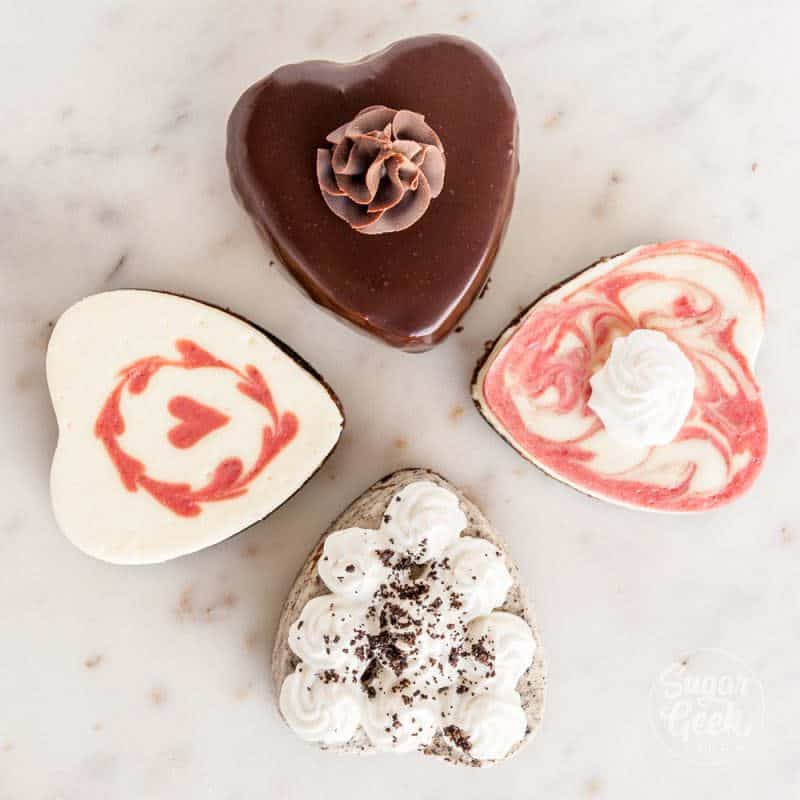
I love making cheesecake for Valentine's day and it happens to be my partner's favorite dessert. This year instead of making my mini heart cheesecakes I'm going classic but adding some chocolate curls because that just sounds so yummy! Like a chocolate-covered strawberry but on your cheesecake.
If you've made my cherry cheesecake you know how super simple making a fresh fruit topping can be and you'll never need to go to the cheesecake factory again!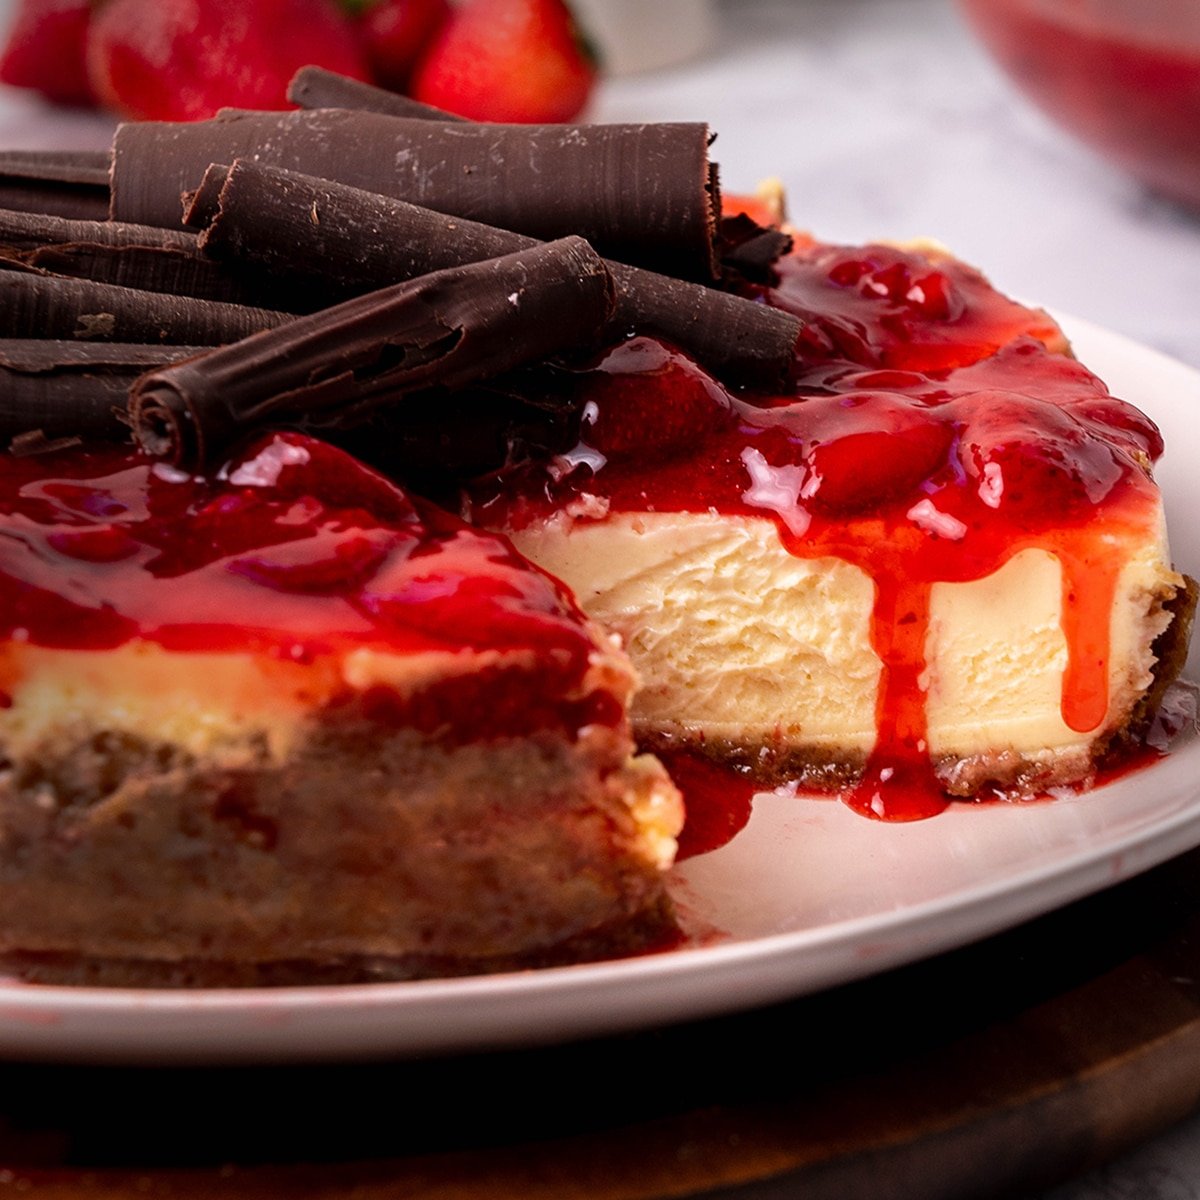
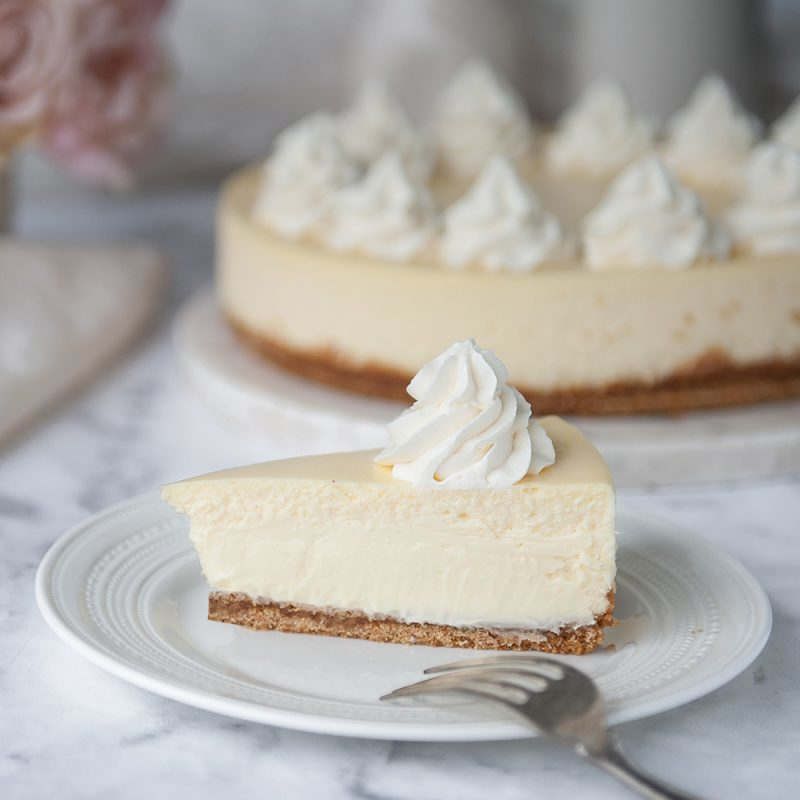
This is a classic cheesecake recipe meaning the cream cheese is mixed with sour cream and whipping cream which makes the cheesecake lighter and creamier than a New York style cheesecake which is much firmer and denser.
This recipe does use a water bath because it makes a far superior creamy cheesecake that is not overbaked on the outside and is deliciously creamy throughout. But don't worry—I'll show you how to make a water bath foolproof and leakproof! If you don't want to do a water bath I have notes on how to make cheesecake without a water bath in the notes section of the recipe below.
Table Of Contents
Strawberry Cheesecake Ingredients
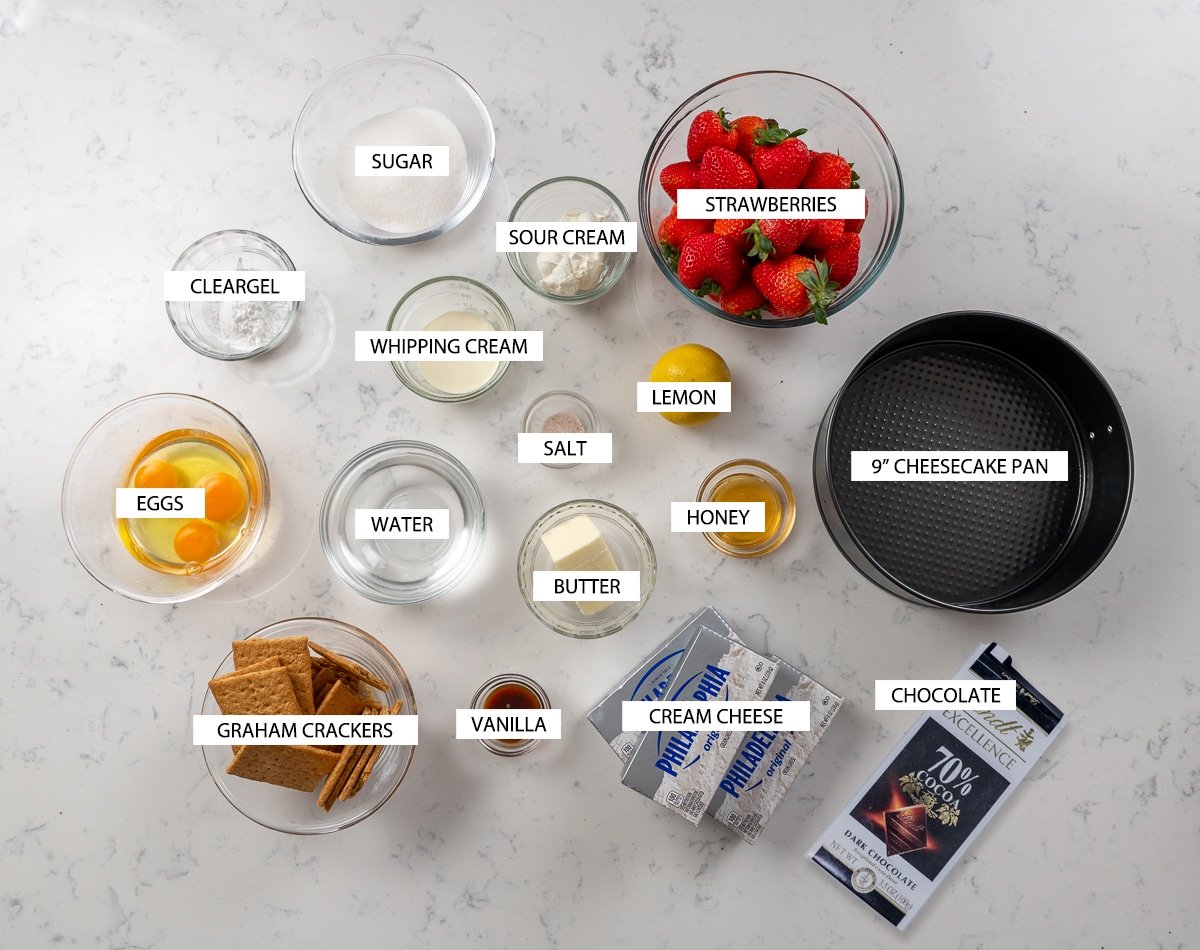
Making cheesecake isn't that complicated but make sure you have all your ingredients ahead of time before you start the process and make sure your eggs, sour cream, heavy cream, and cream cheese is at room temperature so you have a super smooth and lump-free filling.
- Clear Jel - I prefer using Clear Jel instead of cornstarch because the strawberry sauce looks less cloudy, much shinier, and not as gummy. If you like the look you might want to buy some ahead of time! You can use corn starch if you don't want to bother. Cornstarch is stronger than Clear Jel so use half as much corn starch.
- Fresh or frozen strawberries - If it happens to be strawberry season, those will always have the best flavor! If you're making this recipe off-season then use frozen strawberries because they are picked and frozen at peak ripeness and will have the best natural flavor.
- Sour cream and heavy whipping cream is used to lighten the texture of this cheesecake so the final product is lighter and creamier than a New York style cheesecake recipe.
- Lemon juice and a little lemon zest will brighten up the flavor of the strawberry topping.
- I prefer classic Philidelphia (full fat) cream cheese which results in the best texture and flavor.
Secrets To A Flawless Cheesecake
The first secret is to make sure all your cold ingredients like the cream cheese, eggs, sour cream, and heavy cream are all at room temperature so that your ingredients mix together easily and you don't have any lumps.
The second secret to this super smooth and silky cheesecake texture is ensuring you don't overbake it! I always use a thermometer to check the center instead of relying on the jiggle test.
The third secret is to use a water bath to avoid over-baking, sinking, and too much browning. If you don't want to do a water bath that's totally ok! I have alternate baking instructions for no water bath in the notes of the recipe card below.
The fourth secret is something I discovered while creating my classic cheesecake recipe and that is turning the oven off at the end of baking and leaving the cheesecake in the oven for one hour so that the cheesecake SLOWLY cools down. This prevents cracking.
How To Make The Graham Cracker Crust
Making the graham cracker crust could not be easier. Crush, mix in sugar and butter, press, and bake! Easy peasy.
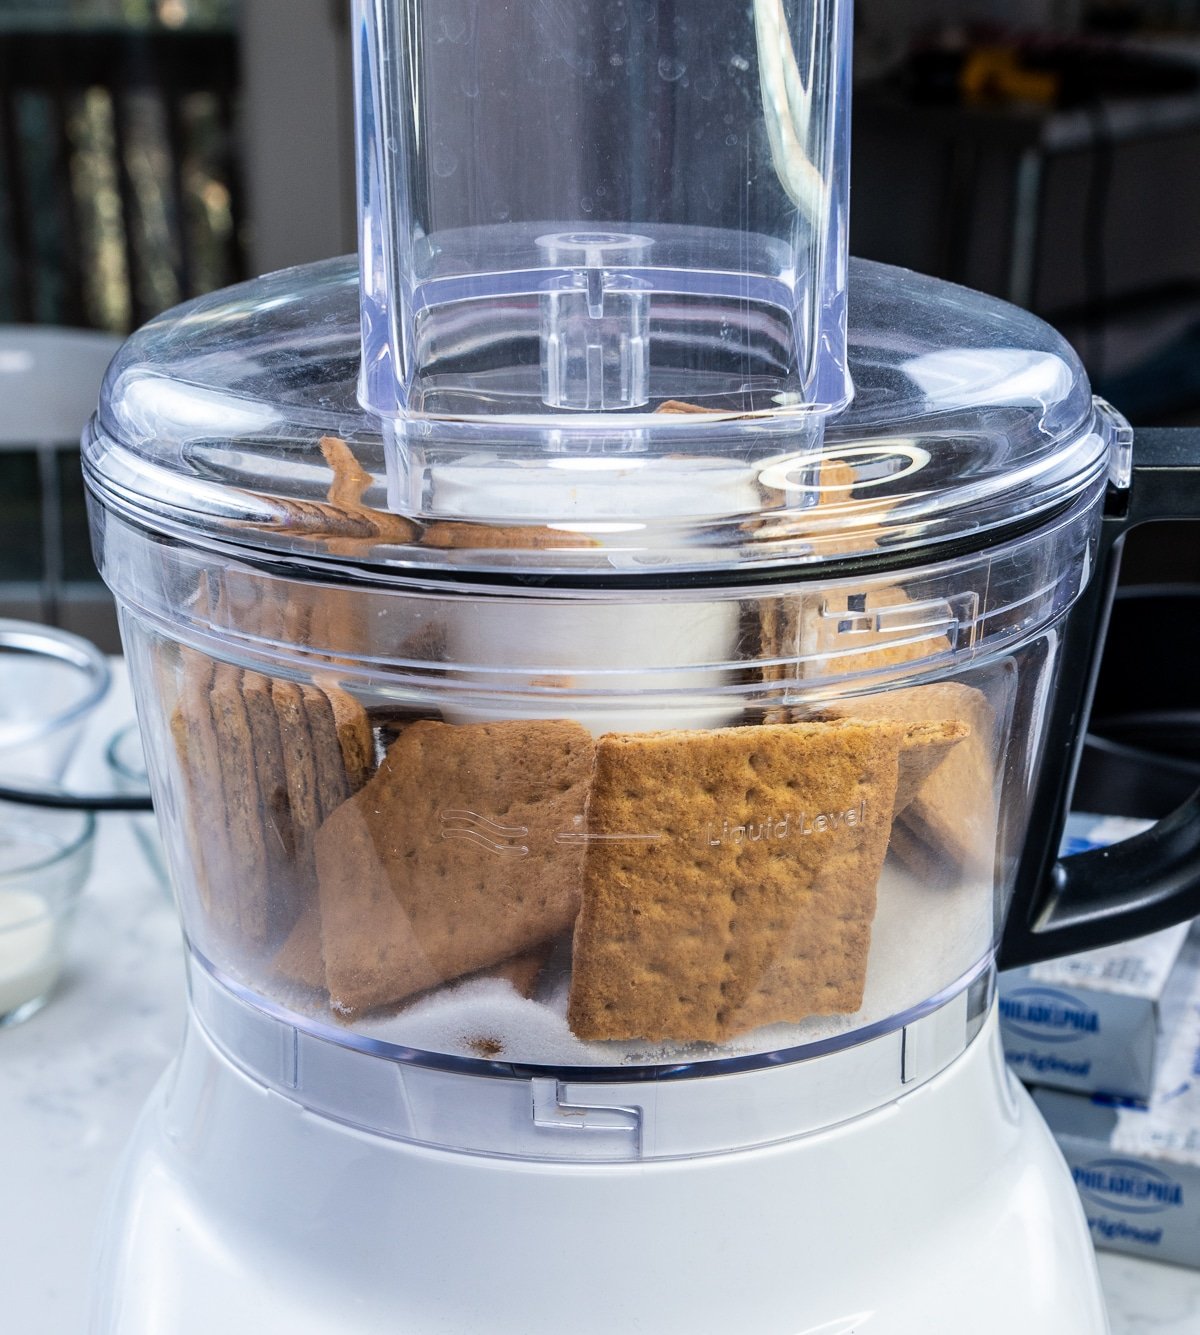
- Crush the graham crackers in a plastic bag with a rolling pin to make the graham cracker crumbs and then mix them with the sugar and melted butter. Alternatively, you can put the graham crackers into a food processor with the sugar and melted butter and get it all done in one step.

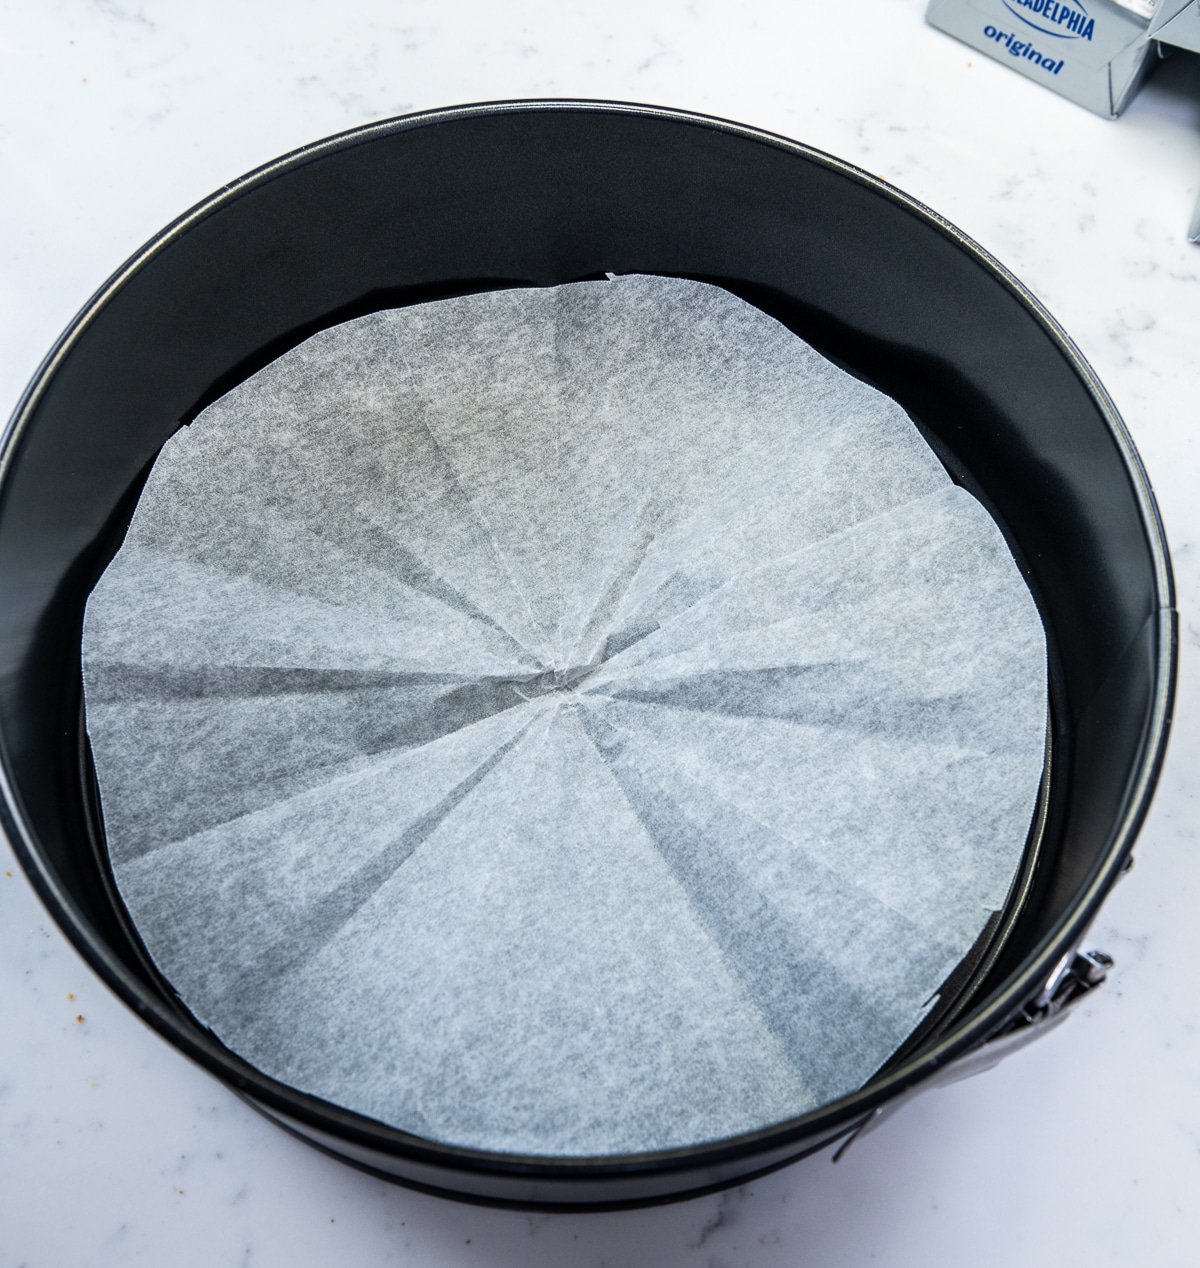
- Pro-Tip: Place a circle of parchment paper into the base of the cheesecake pan before placing the graham cracker filling on top so that the cheesecake is easily removed from the base later.

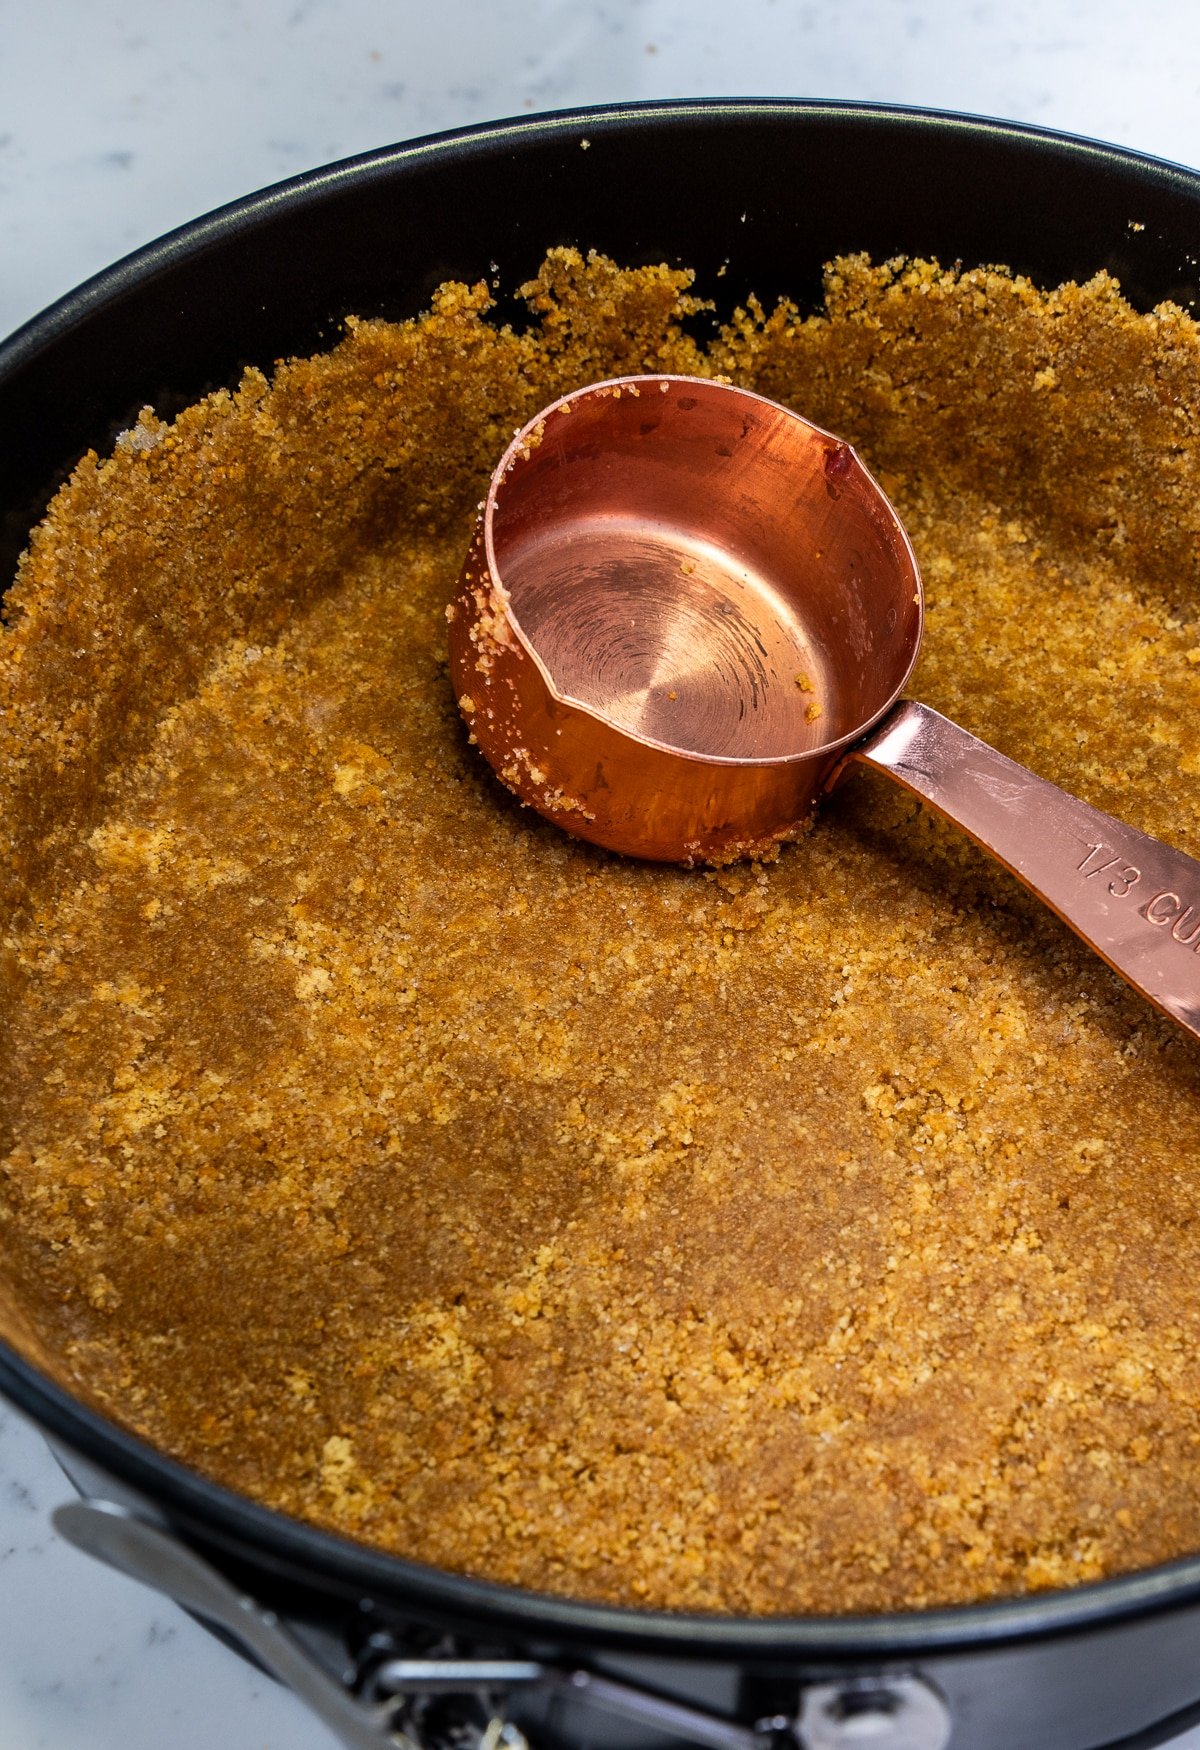
- Press the graham cracker mixture onto the sides of the pan and the base as evenly as you can. Take care not to make the corners or the base too thick or it will be hard to cut through. I like to use a small measuring cup or drinking glass to press the crumbs very tightly onto the bottom and halfway up the sides of the cake pan.

- Bake the crust in an oven preheated to 350ºF for 5 minutes then let it cool on a wire rack.
How To Make The Cheesecake Filling
- Lower the oven temperature to 325ºF.
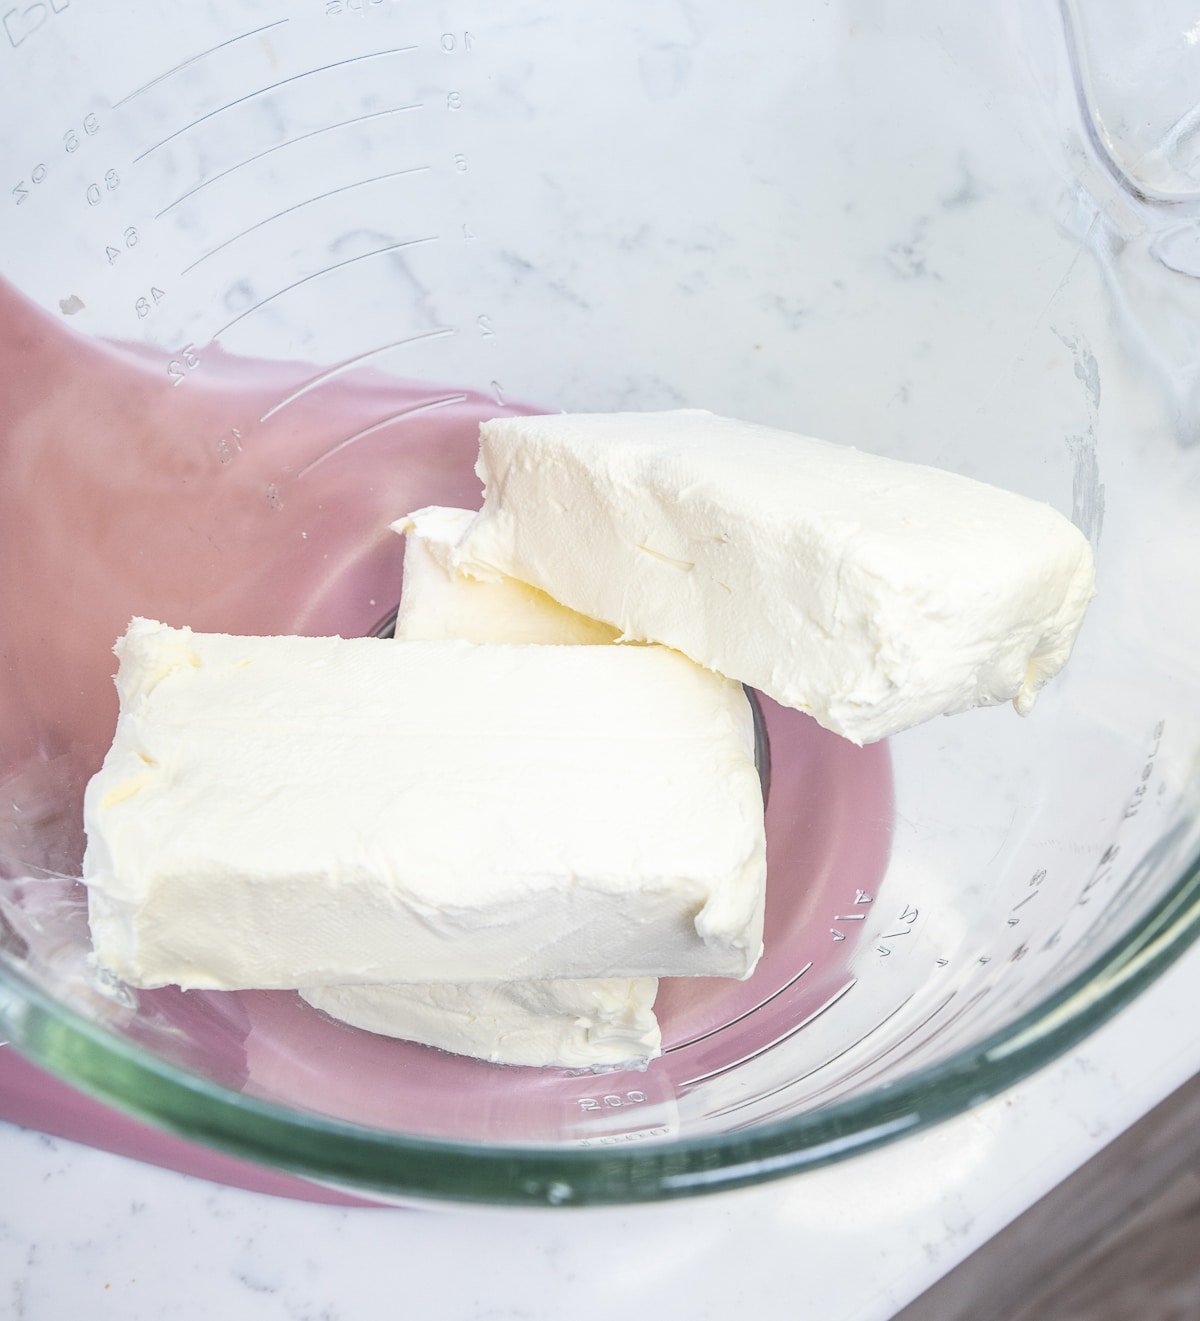
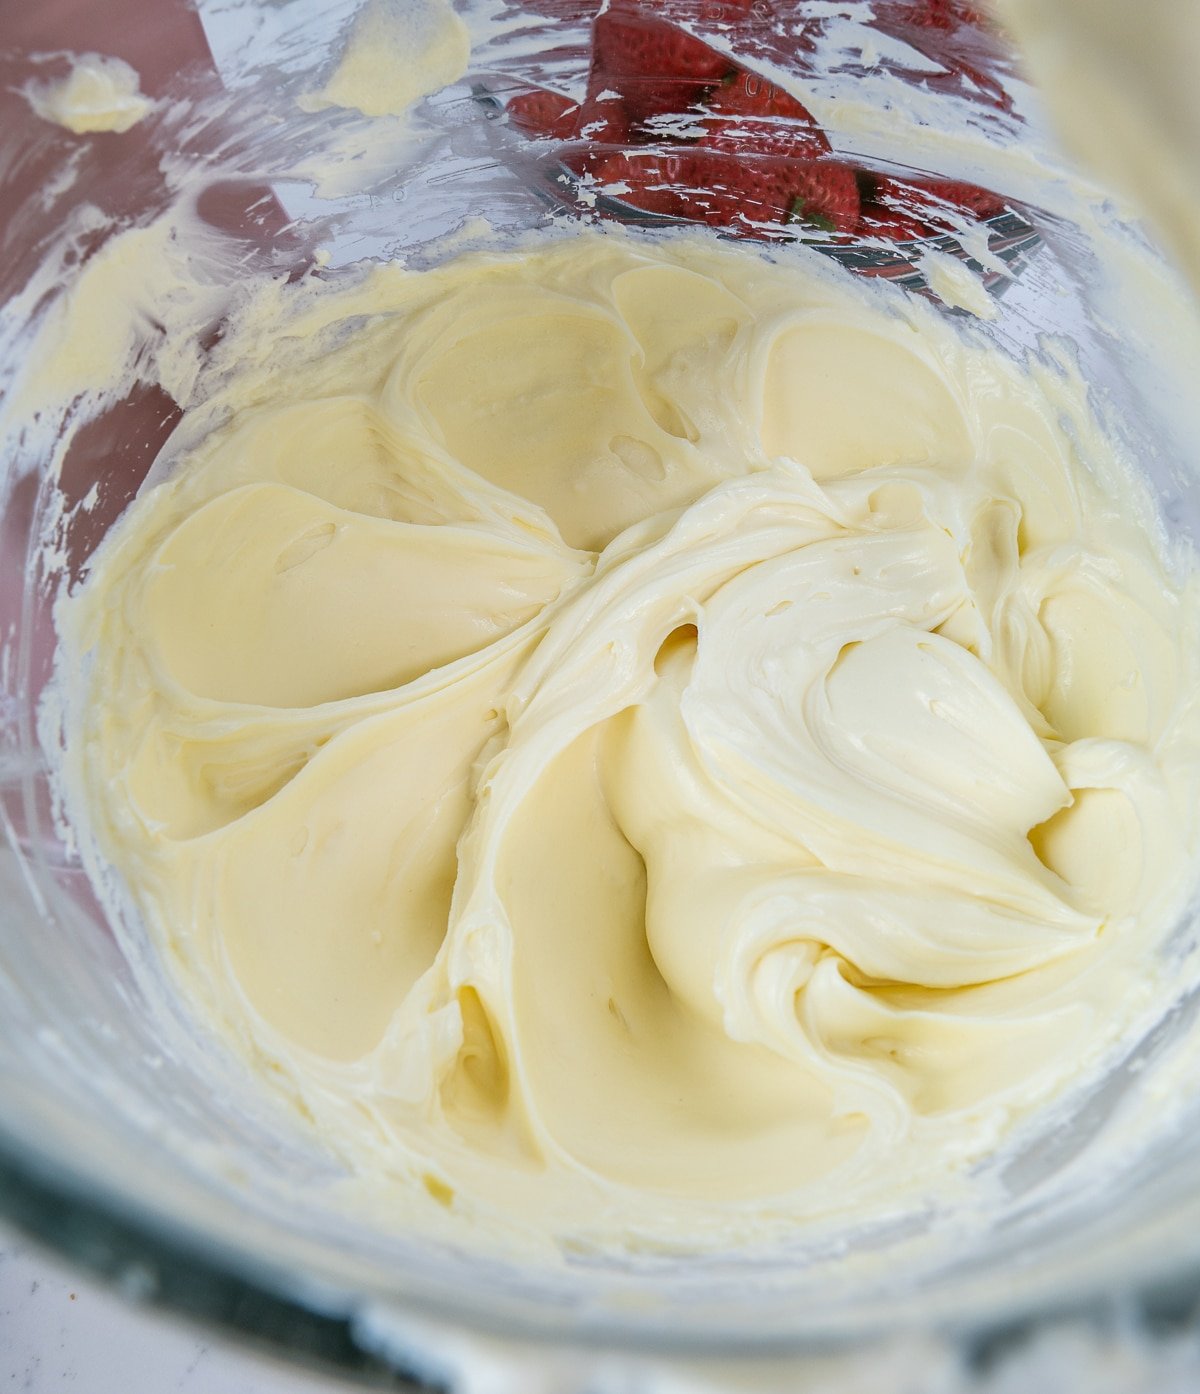
- Place your room-temperature cream cheese into the bowl of your stand mixer with the paddle attachment and mix on low until the cream cheese is extra smooth and no longer lumpy. You don't want to incorporate any air which will cause cracks and lumps.

- Sprinkle in your granulated sugar while mixing on low until combined.

- While mixing on low, add in the room-temperature sour cream, honey, and heavy whipping cream and mix until combined.
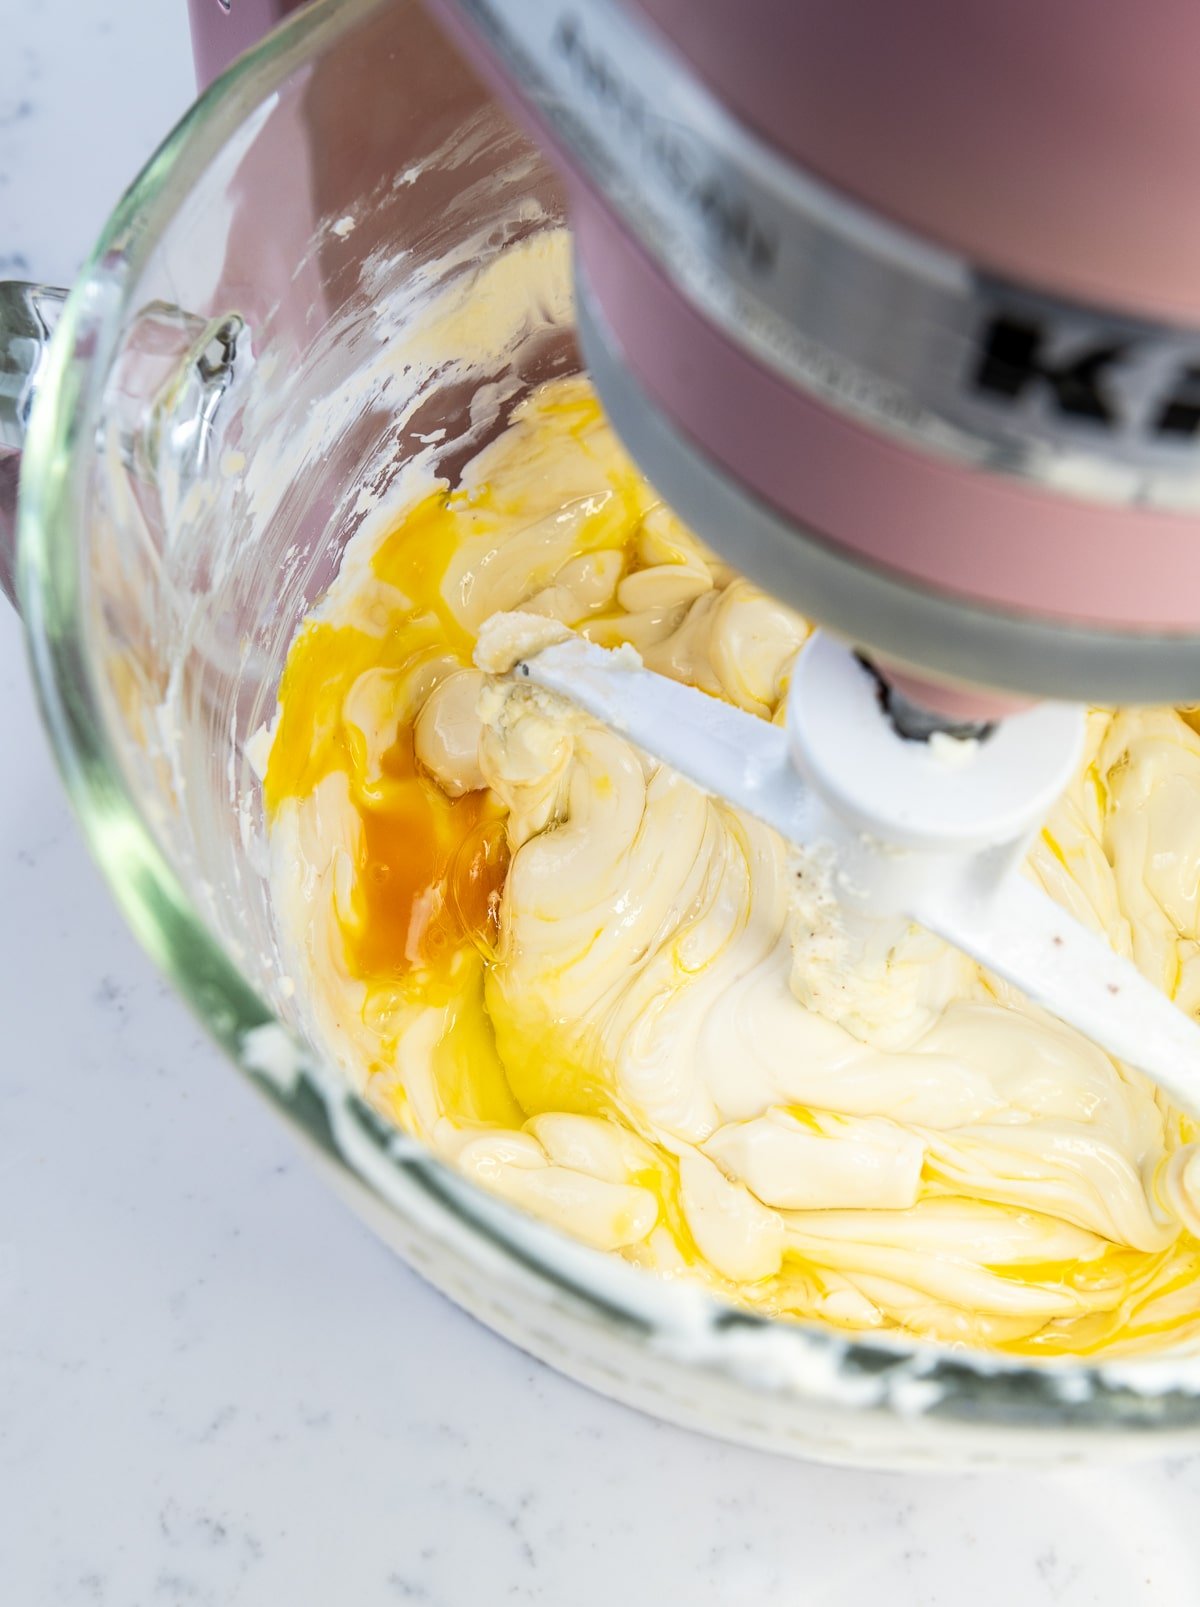
- Add in your room-temperature eggs one at a time, on low speed, letting each one mix in fully before adding in the next. Again, do your best not to mix in any air.

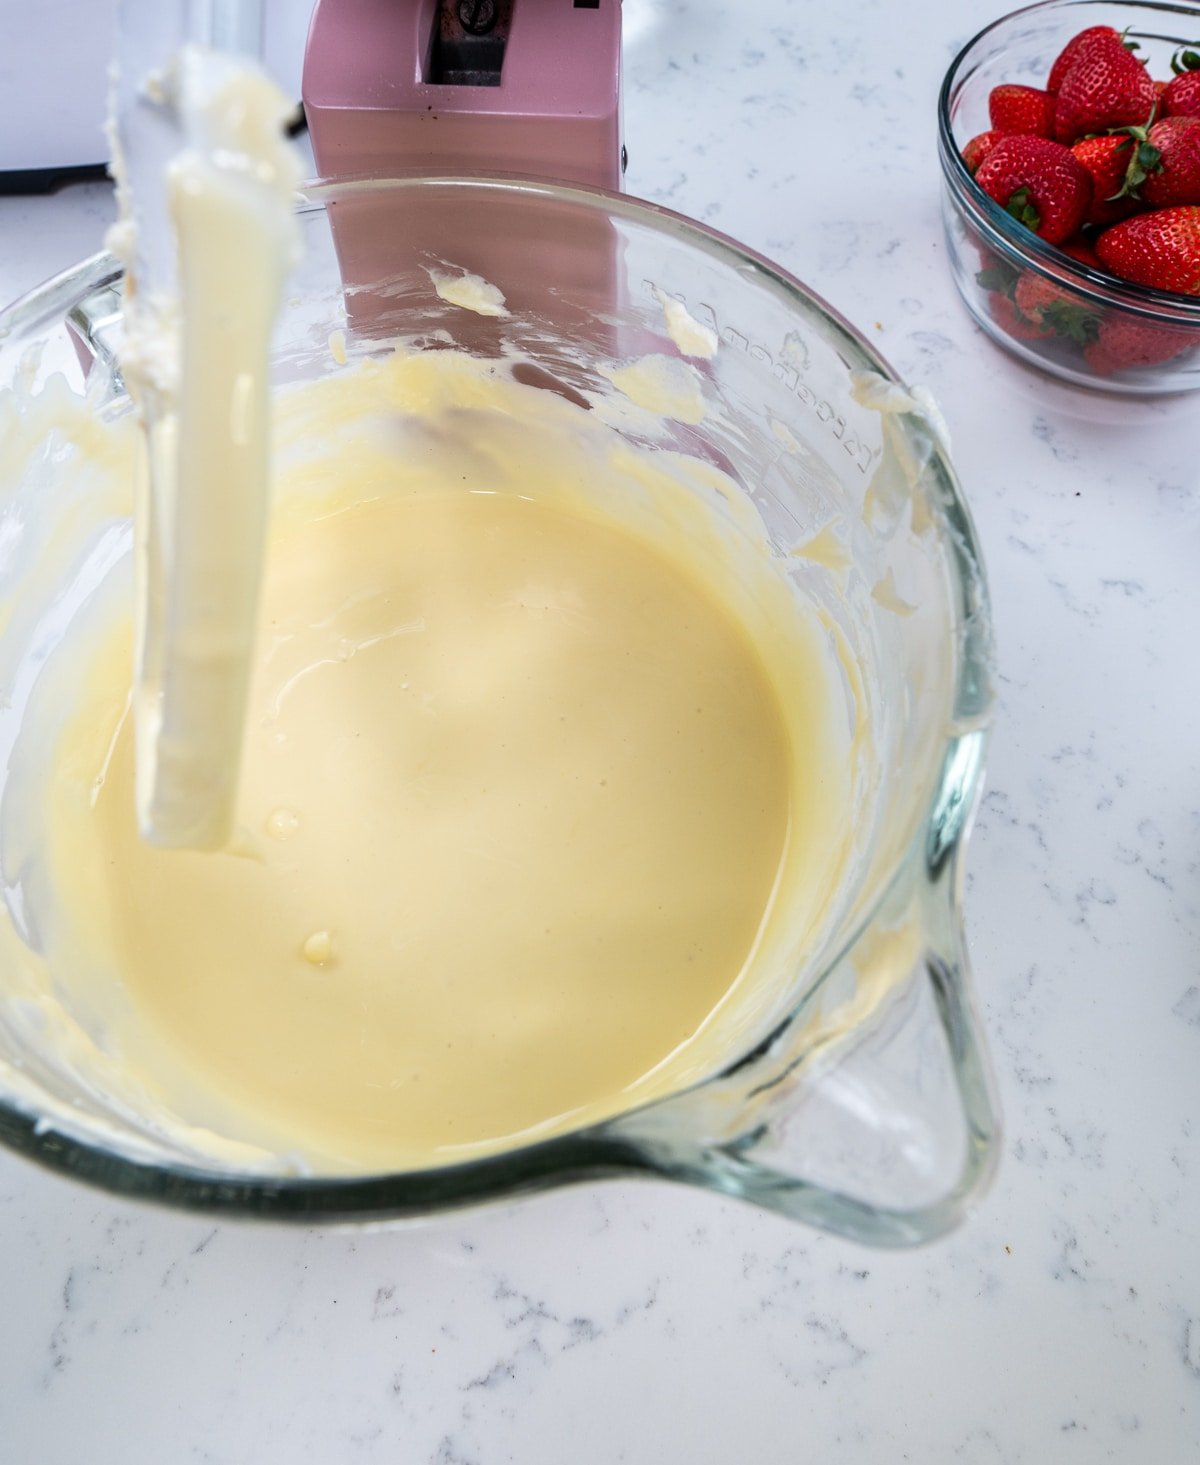
- Next, add the salt and vanilla extract. Scrape the sides of the bowl to ensure all of the cream cheese is incorporated.

Baking The Cheesecake In A Water Bath
I always bake cheesecake in a water bath because it gives the BEST results, even baking at a low temperature. If you don't want to fuss with this part you can skip it. You'll have a little more browning on top but it will be covered by the strawberry topping anyway and no one will know.
- The best way to bake a cheesecake in a waterbath is to put the 9" cheesecake pan inside a 10" cake pan to prevent leaking. Then you can place this pan into a larger pan with water. The waterbath prevents the cheesecake from browning and cracking.
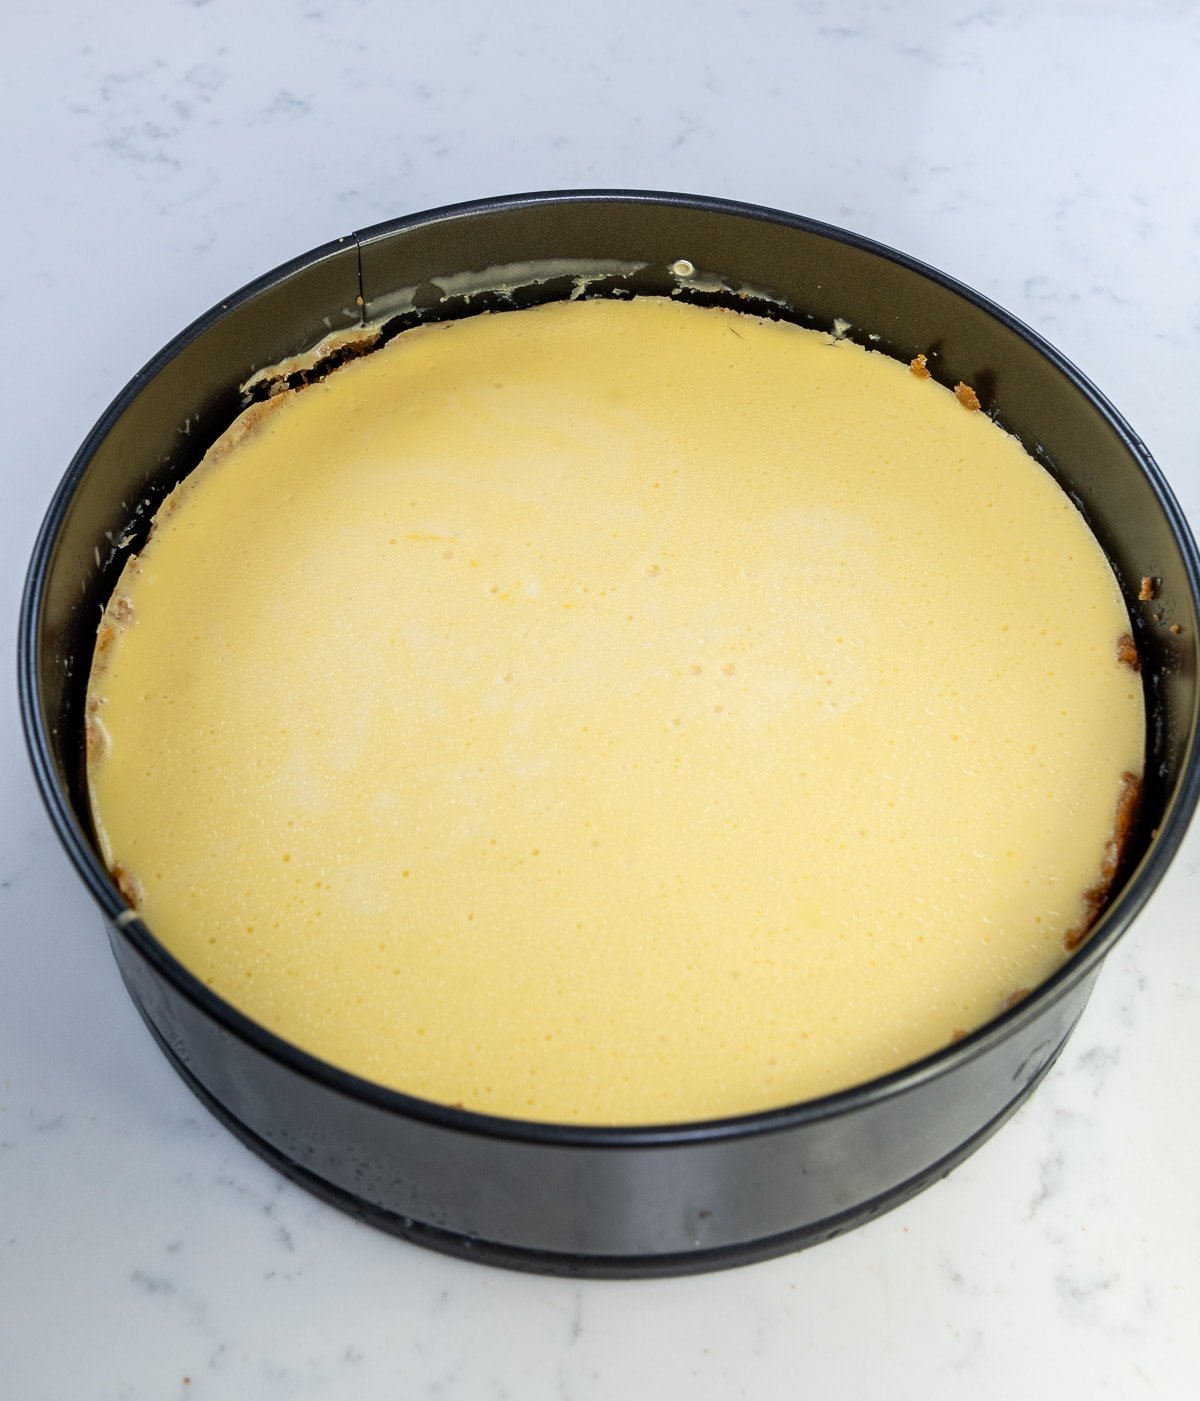
- Pour your cheesecake filling onto your prepared cheesecake crust.
- Place both pans into your preheated oven in the center of the lowest rack.
- Fill the larger outer pan with water until the water reaches about ¾ of the way up the sides of the pan.
- Bake the cheesecake for 60 minutes without opening the oven door.
- Check the internal temperature of the cheesecake with a thermometer pen to see if you've reached 150ºF (65ºC) or give the side a little tap and see if the cheesecake is set but the center should still be a bit wobbly. Crack the oven door and turn off the oven. Allow the cheesecake to cool for an additional hour inside the oven. This slow cooling will stop any cracks from forming and ensure a perfectly creamy cheesecake from edge to center.

- Once the cheesecake has cooled for one hour, you can carefully remove it from the water. For best results, refrigerate for a minimum of 6 hours before slicing.

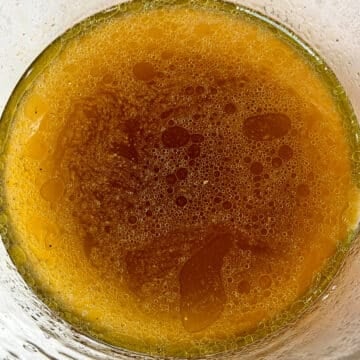
How To Make The Strawberry Topping
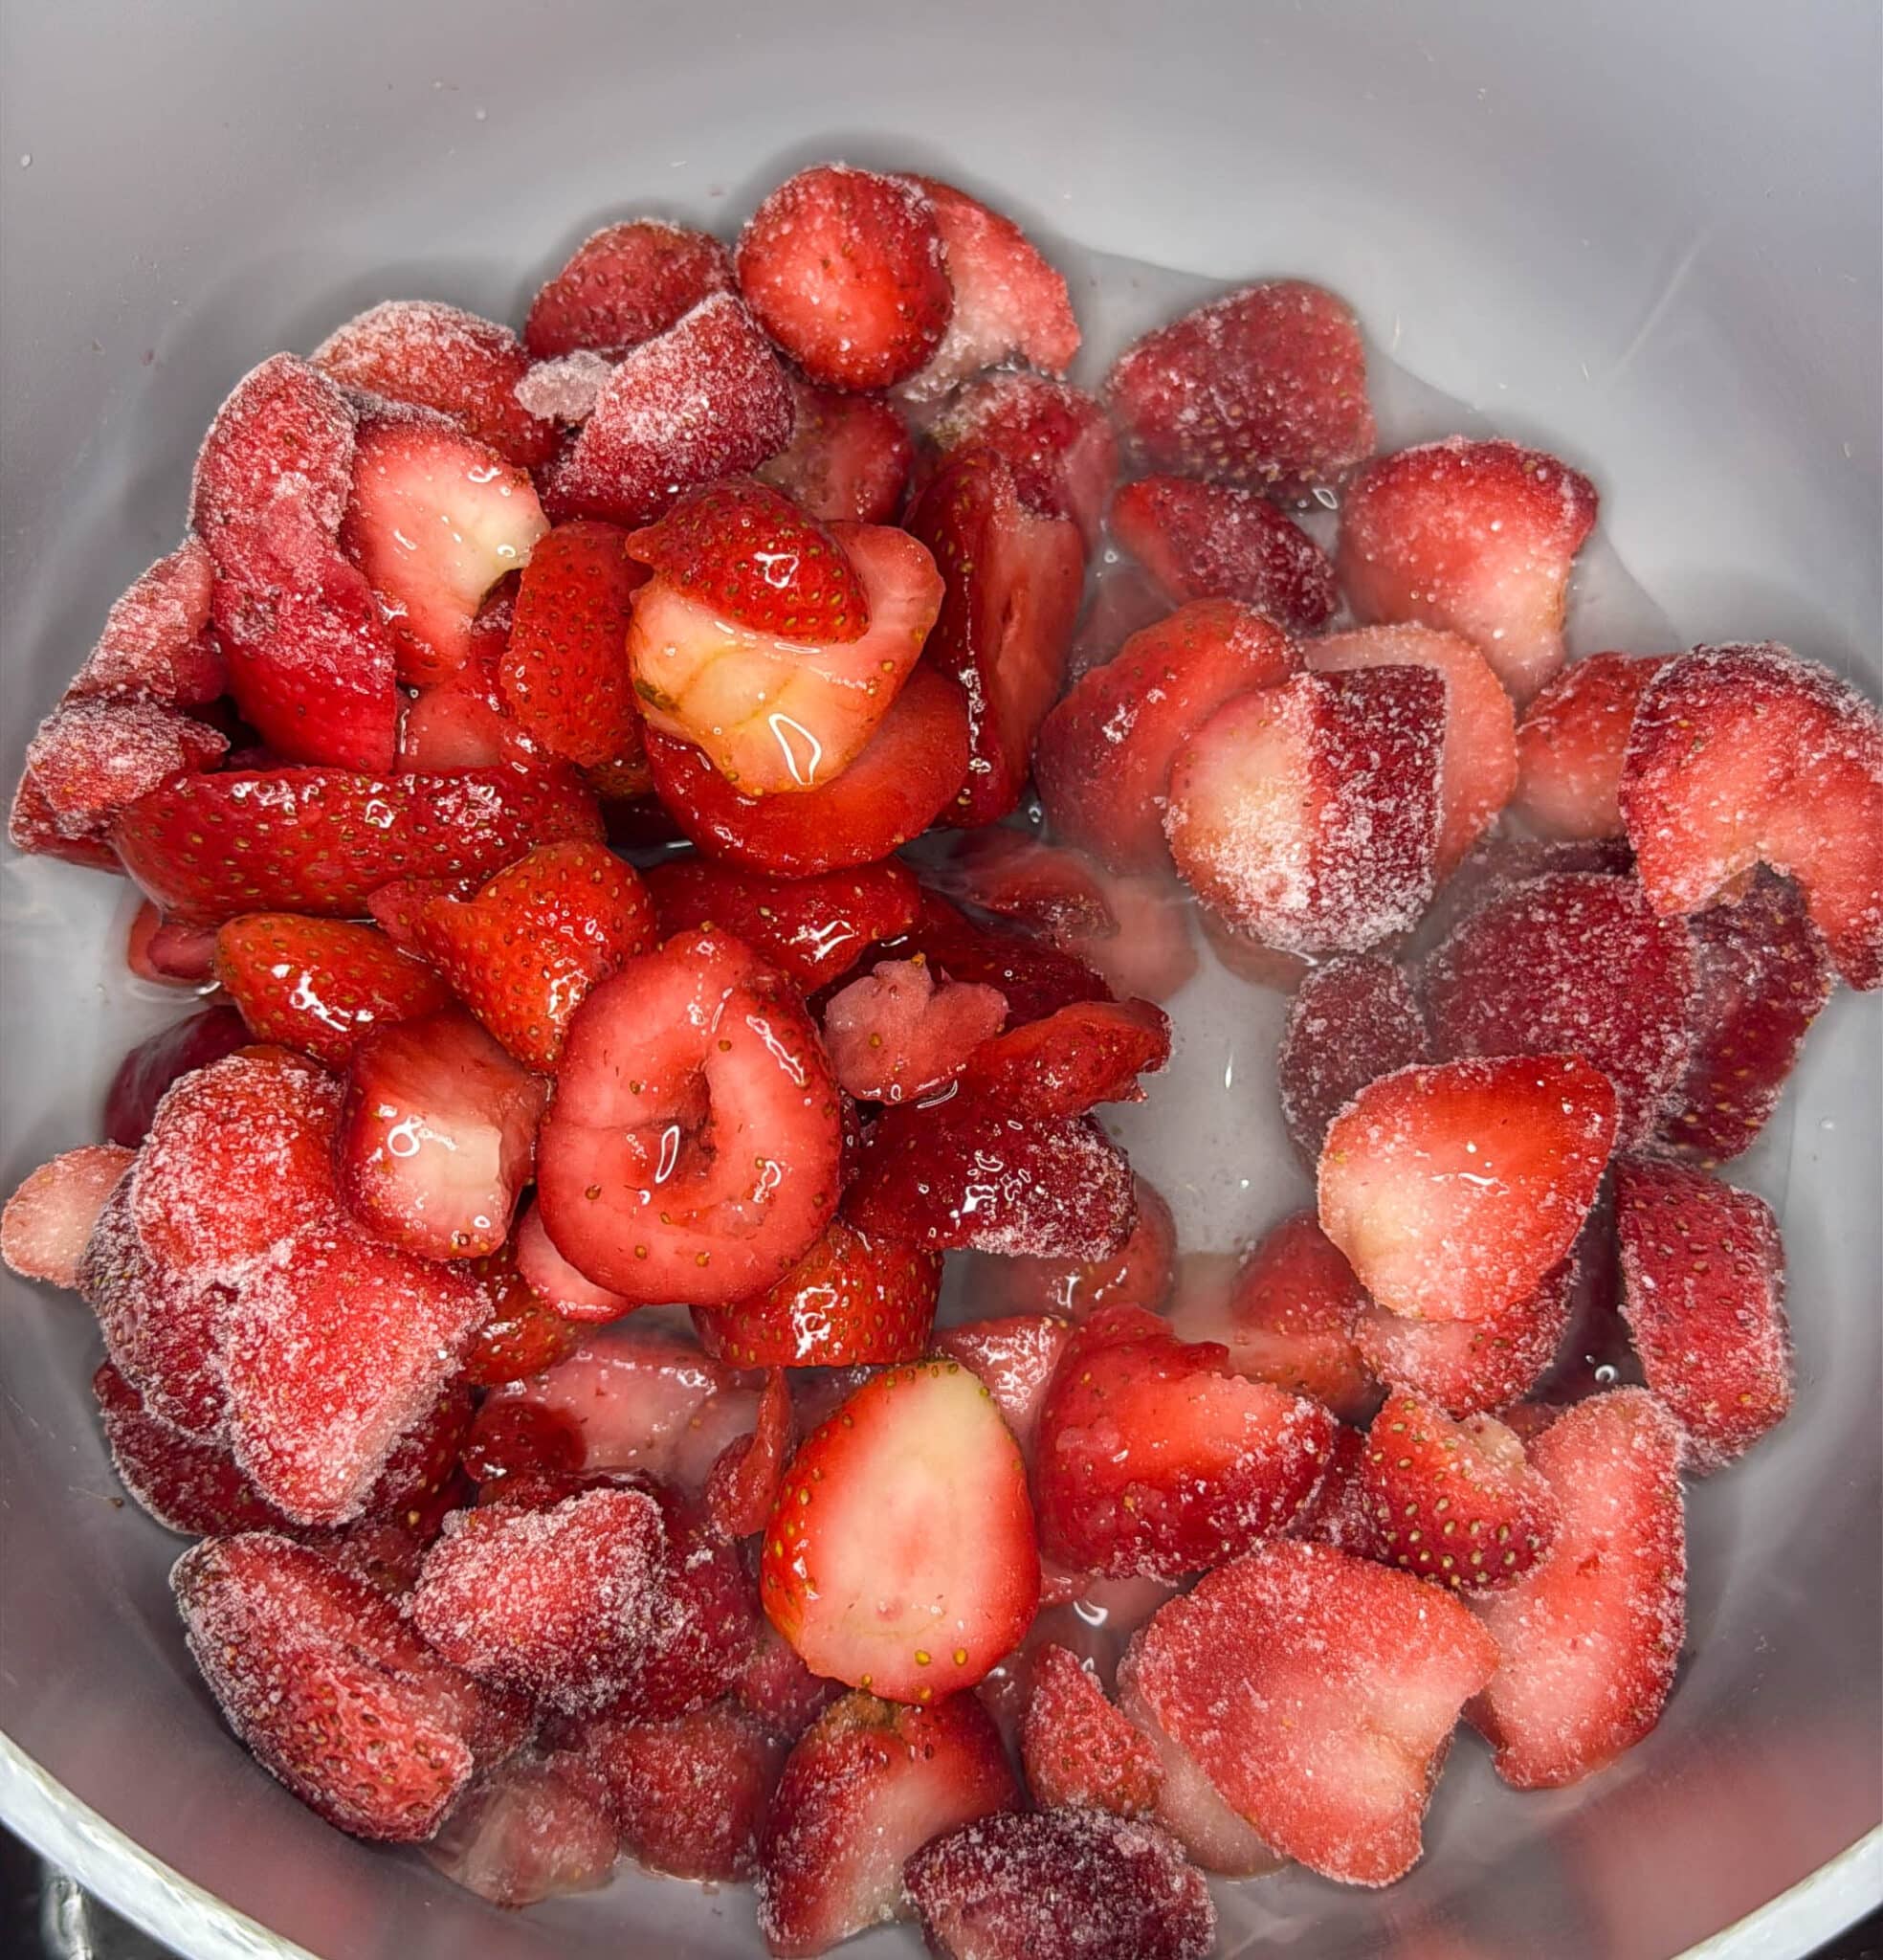
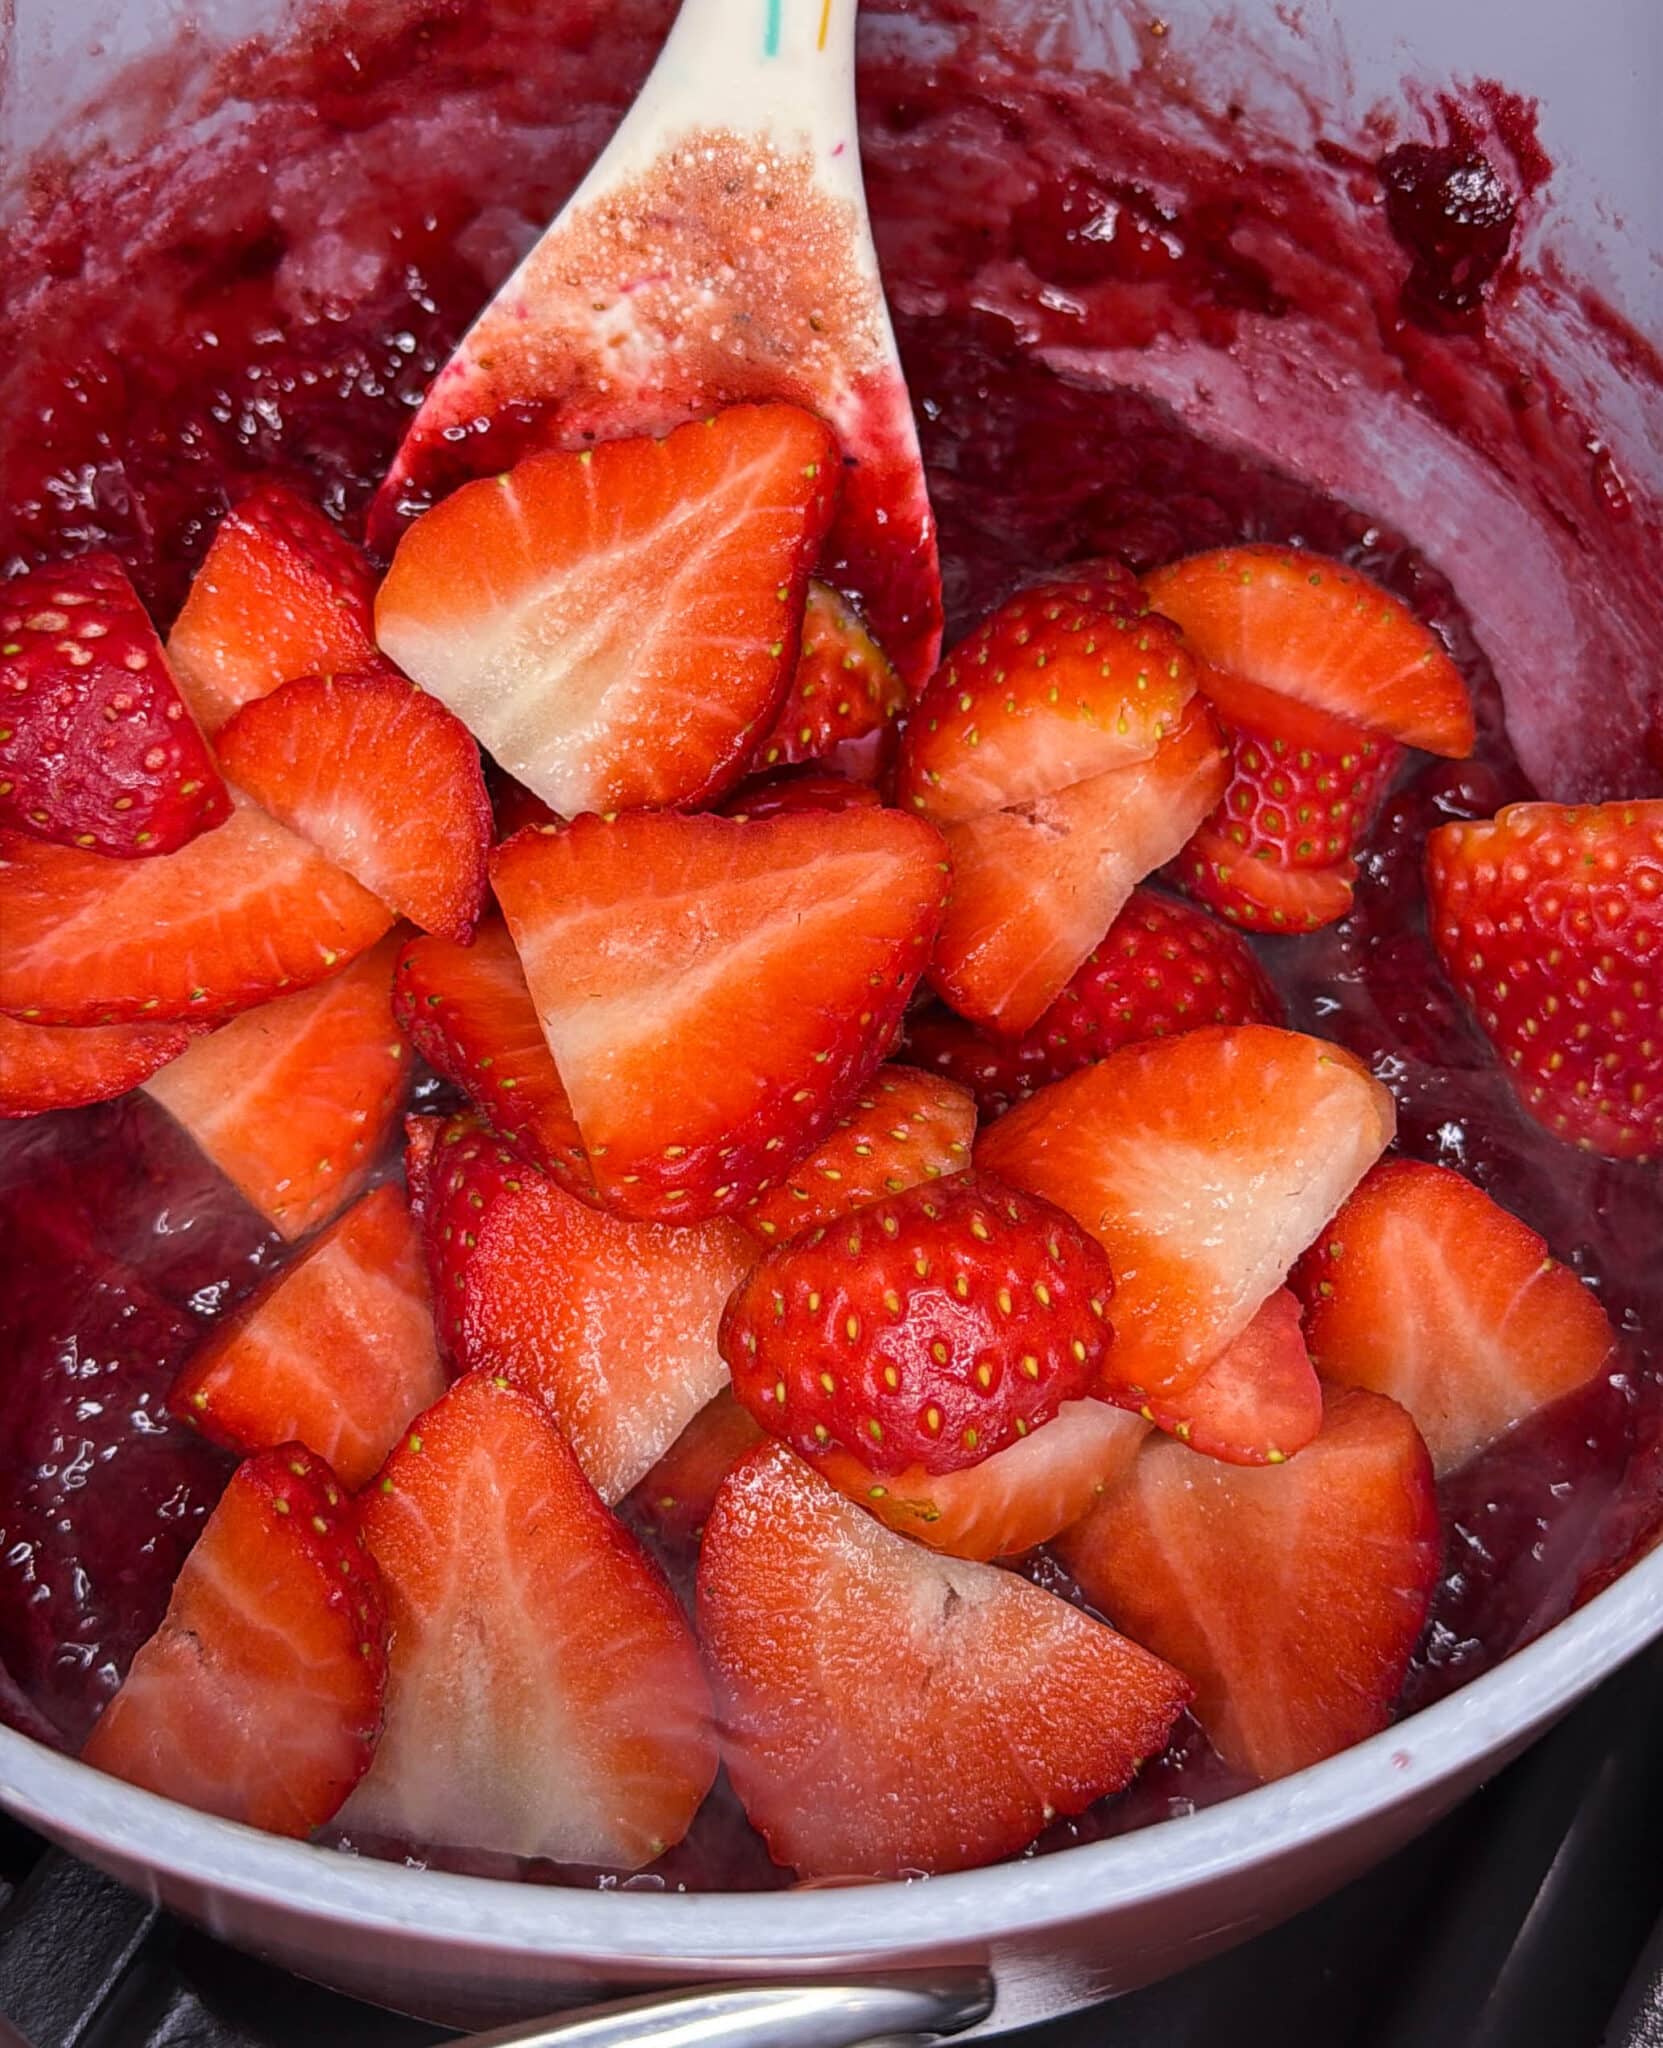
- Place your sliced strawberries, sugar, lemon juice, and vanilla into a medium saucepan over medium heat and bring it to a simmer.

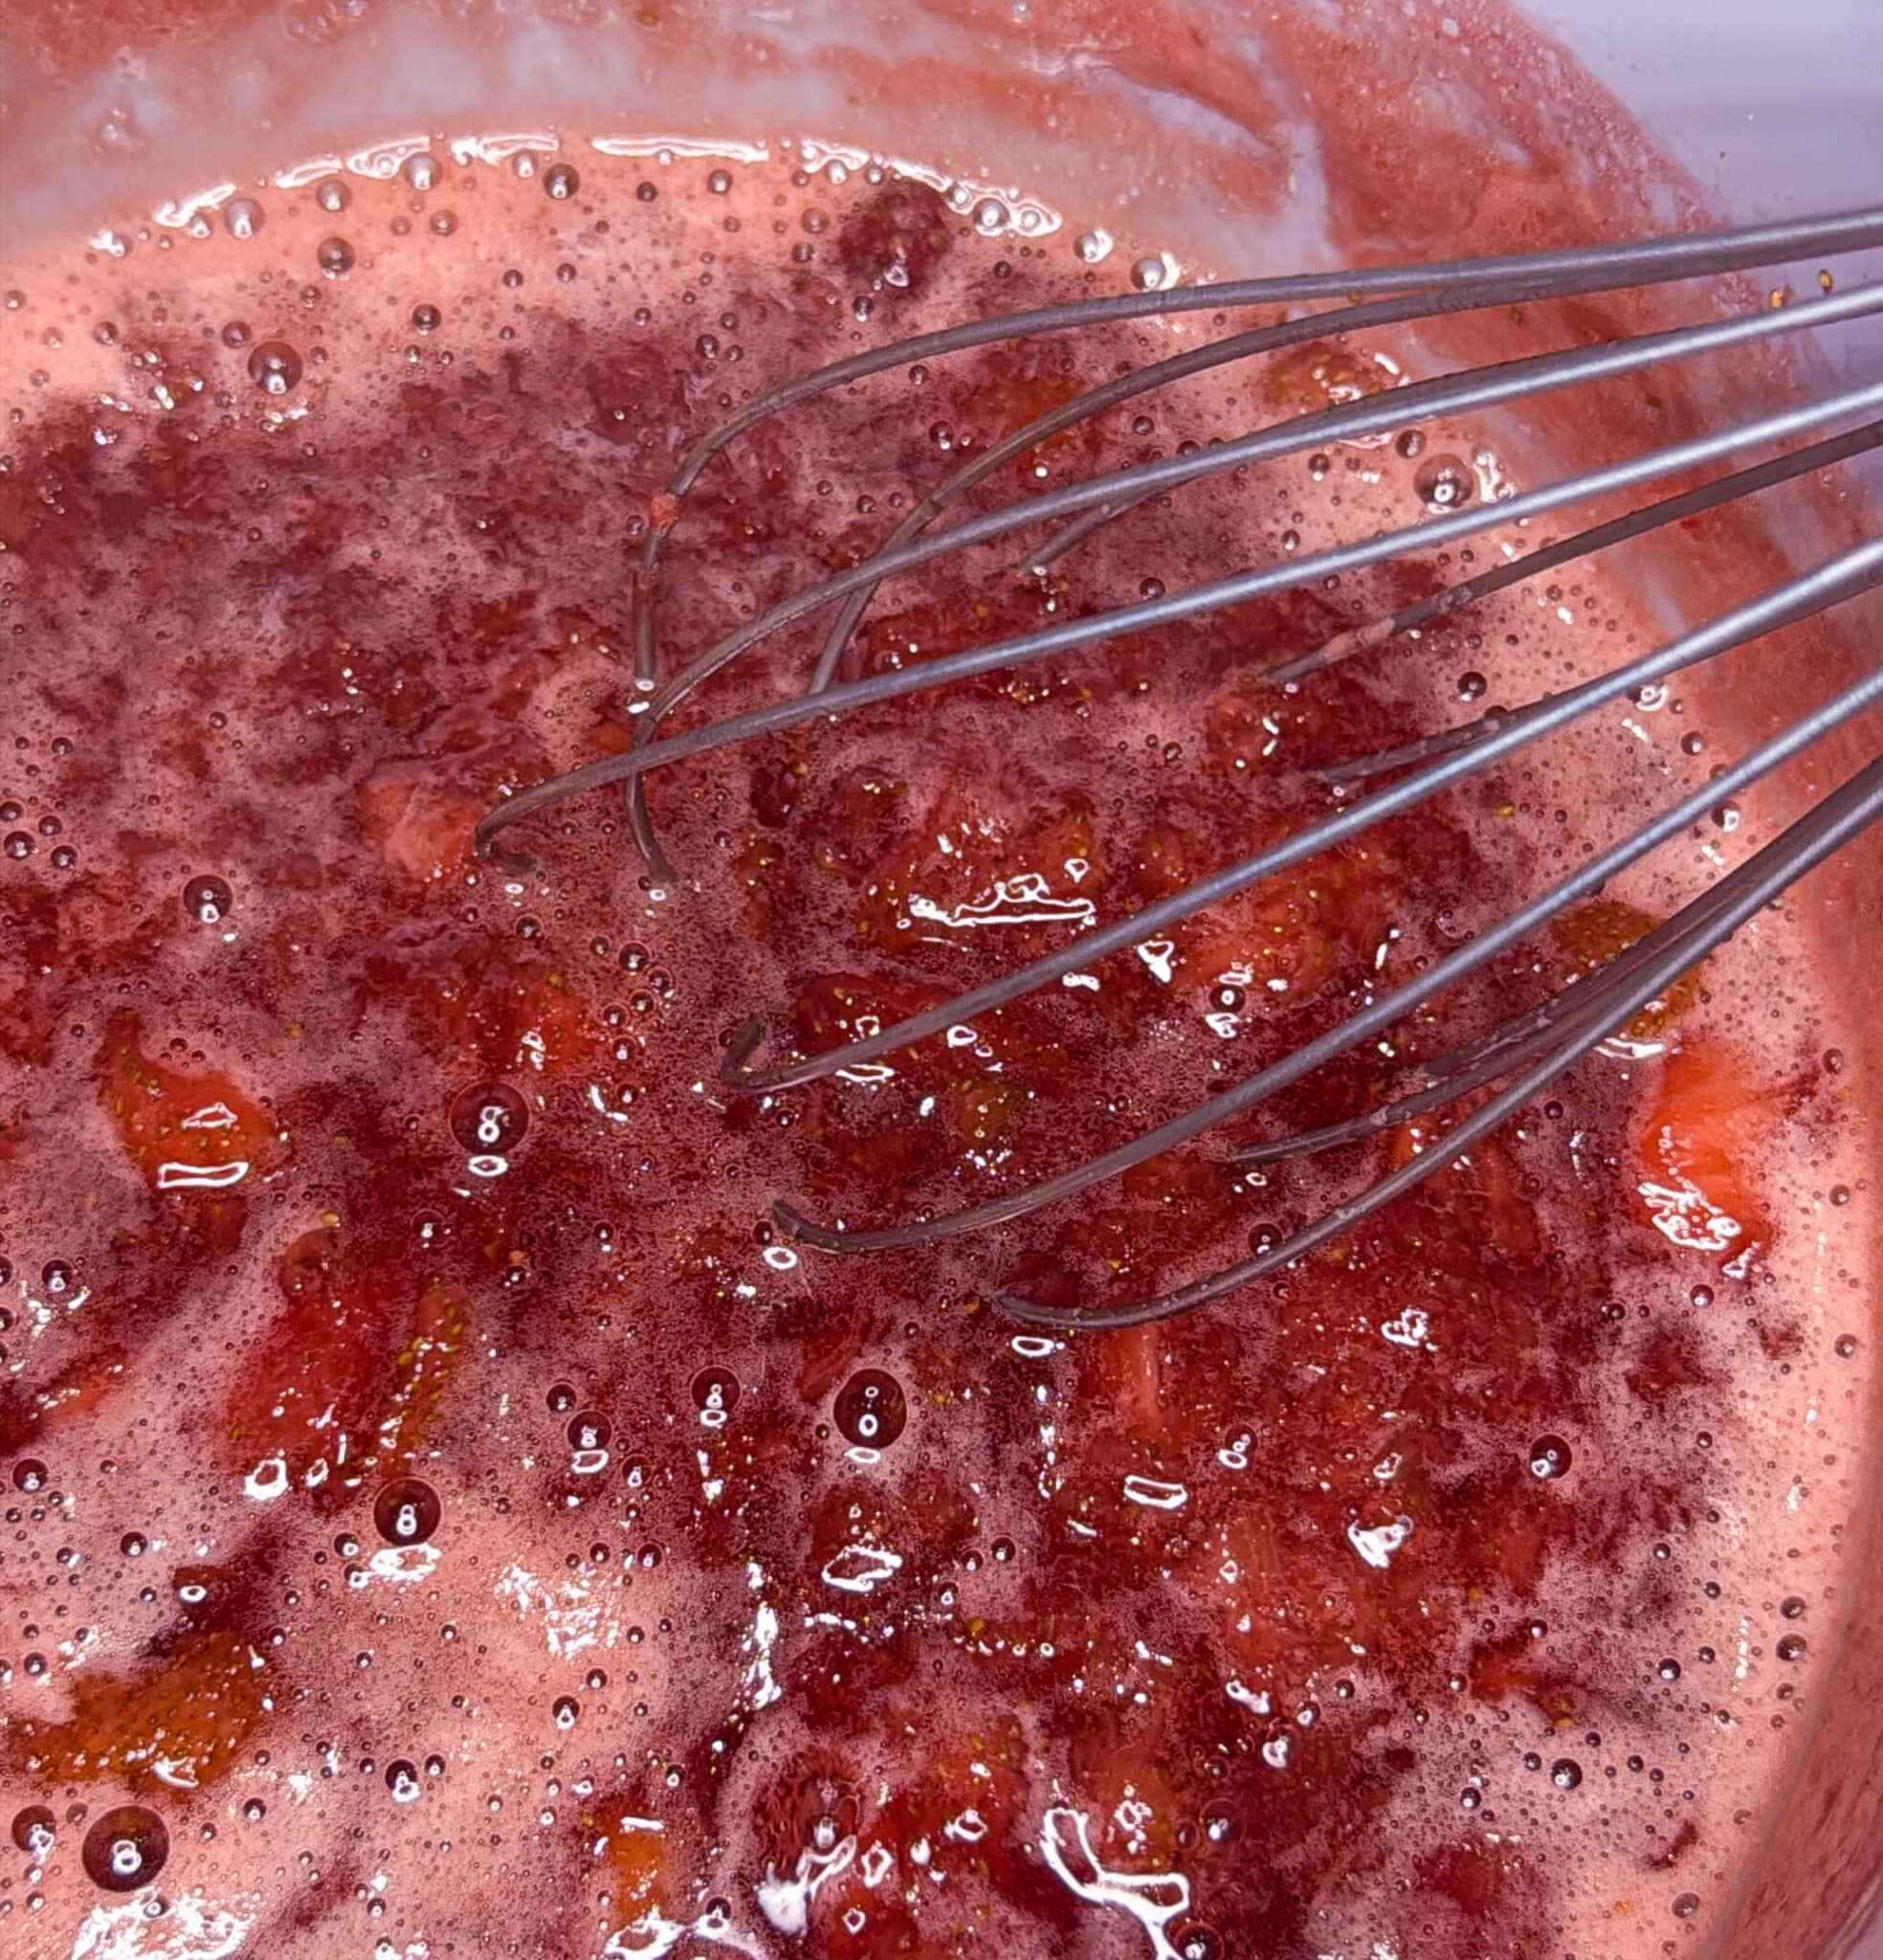
- Simmer on low for 10-15 minutes until it's thickend and reduced by ⅓.
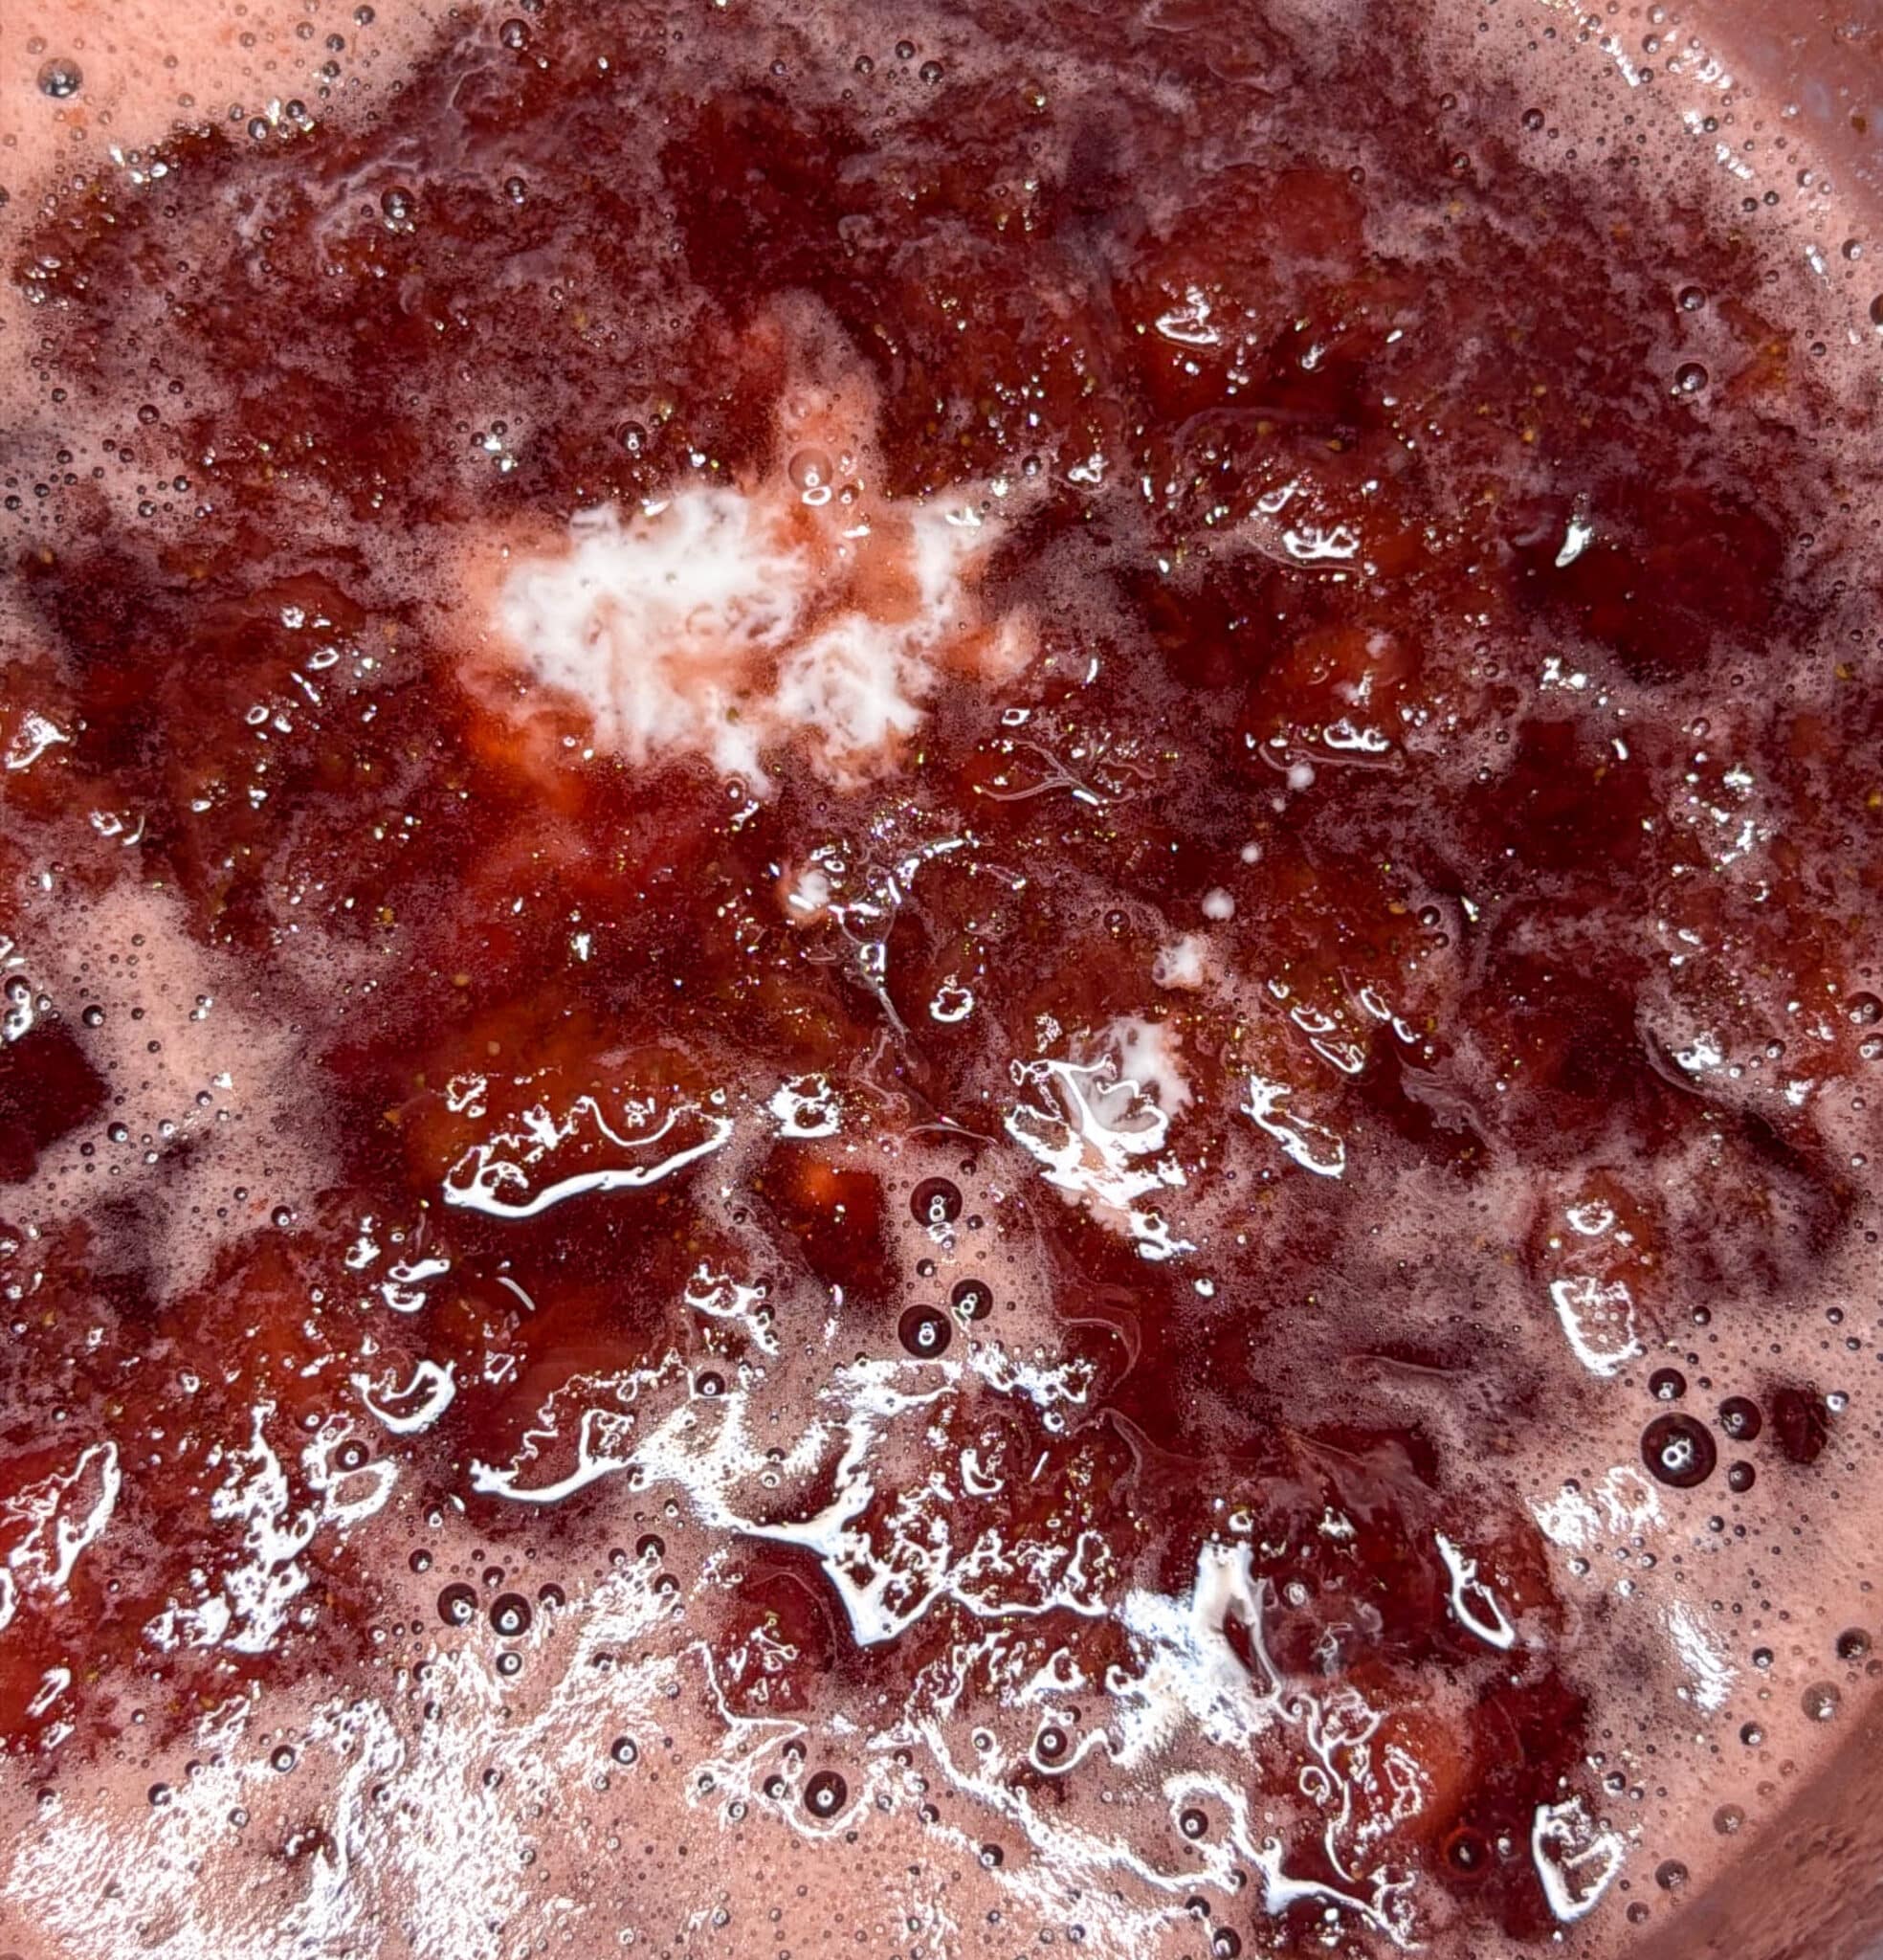
- Combine your Clear Jel and water together and then pour it into your strawberry mixture and cook it for one minute until it thickens.
- Remove the mixture from the heat and let it cool slightly.
- Fold the cooked mixture with your sliced strawberries.

- Let the strawberry sauce cool completely (it will thicken as it cools) before placing it on top of the cheesecake.
How To Make Chocolate Curls
Make sure you're using real chocolate here. I like using Lindt 70% chocolate bars. This is my method for how to temper chocolate in the microwave. Tempering your chocolate will give you delicious, crisp chocolate curls that melt in your mouth. Adding anything like butter or crisco will make your chocolate soft and gummy.
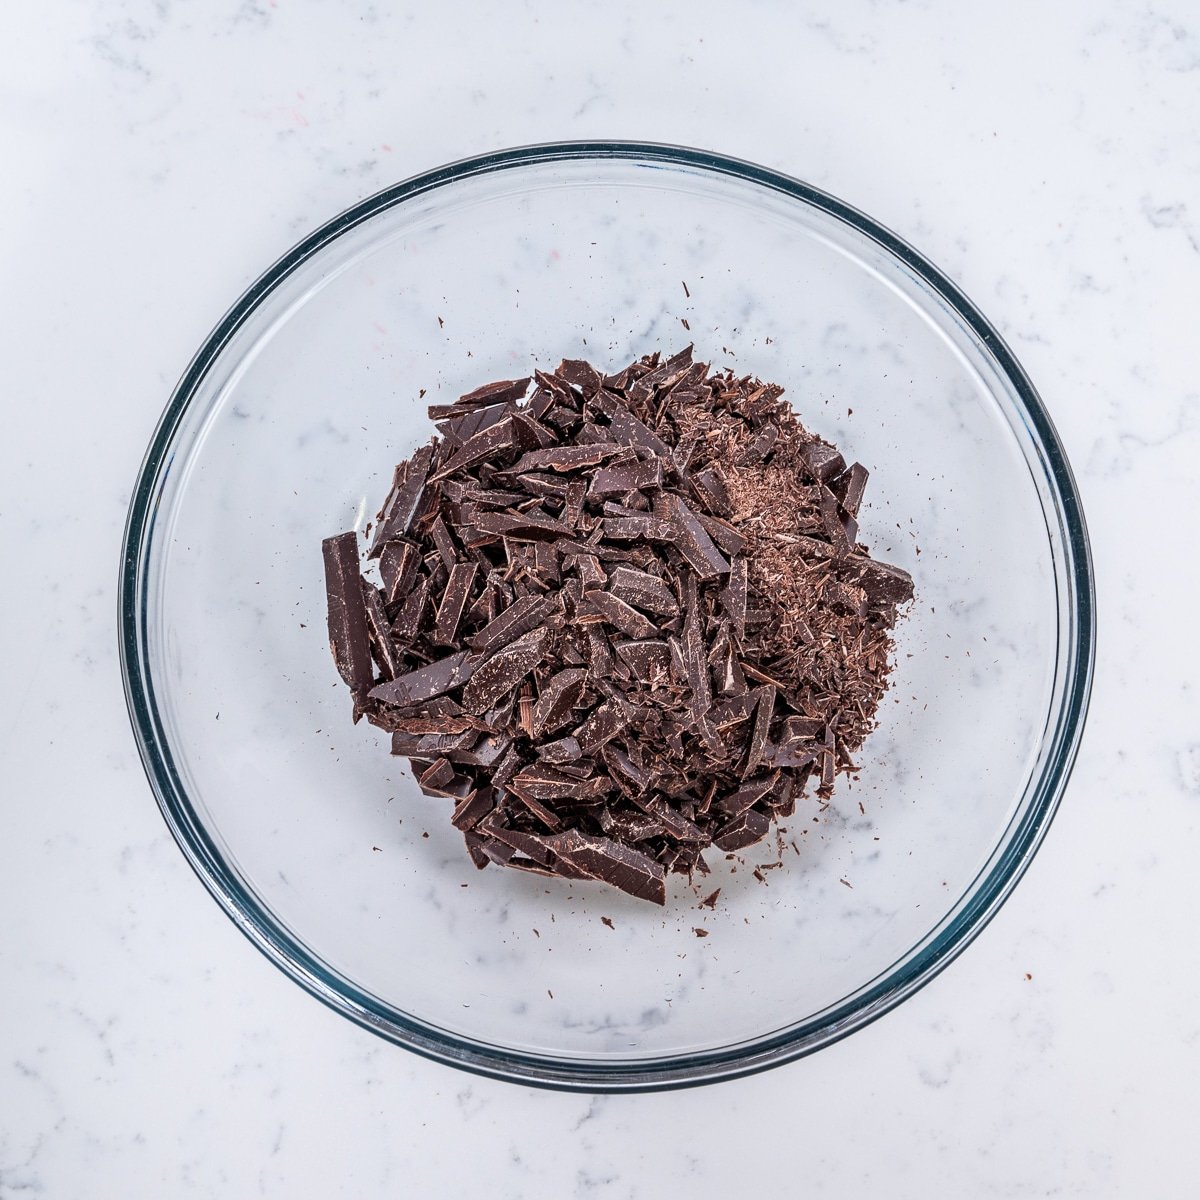


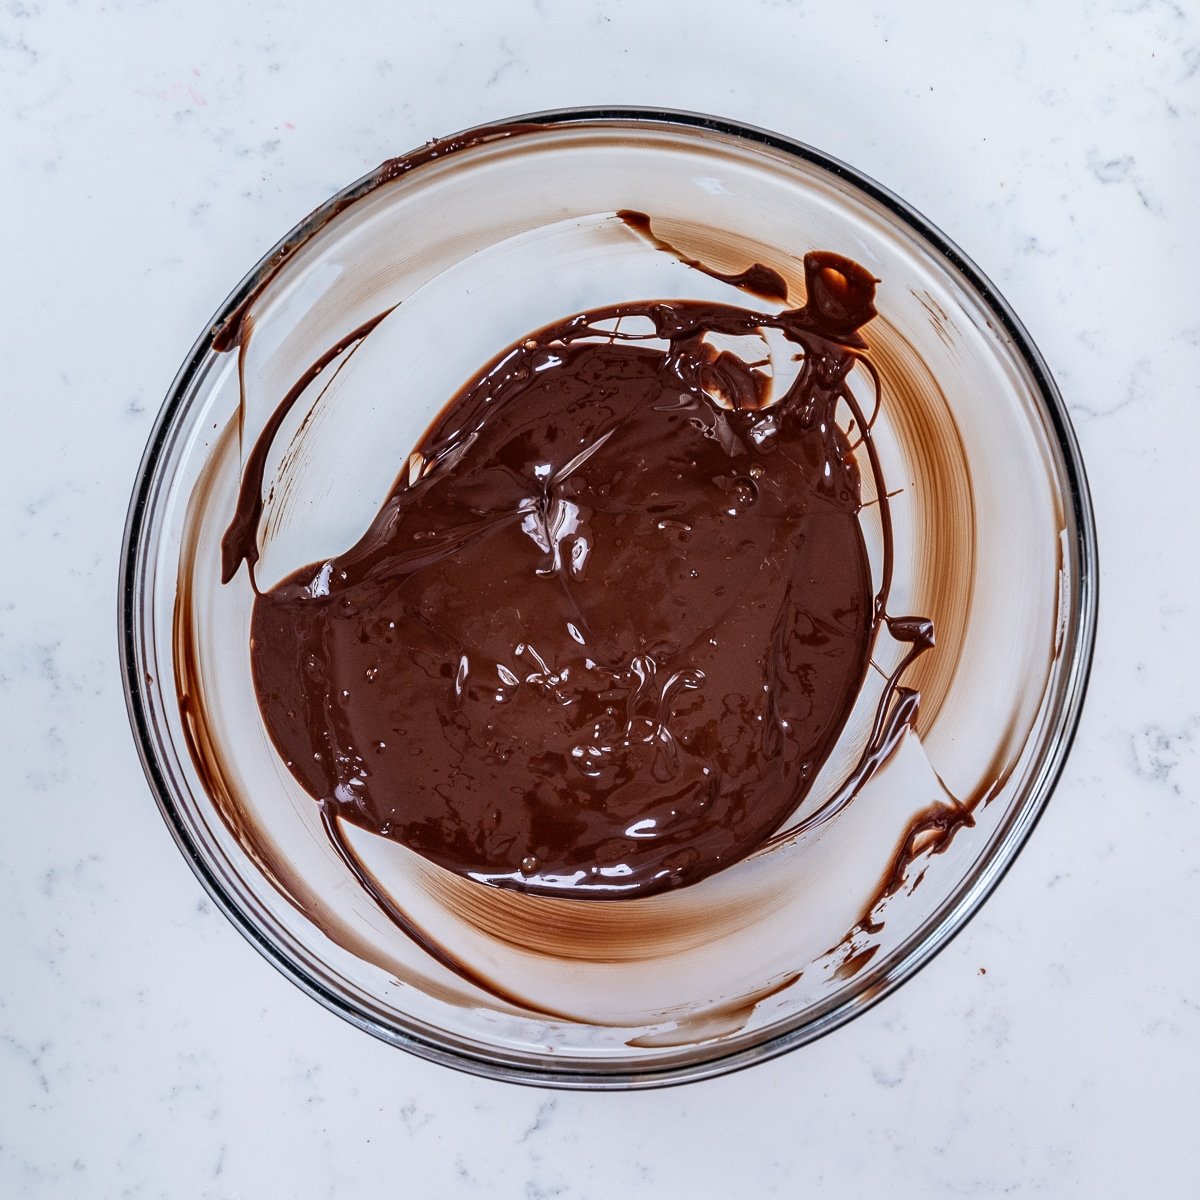
- Chop up your chocolate and place it into a medium bowl.
- Melt in a microwave for one minute and stir. Continue melting in 10 second bursts until it's 75% melted.
- Continue stirring until fully melted.
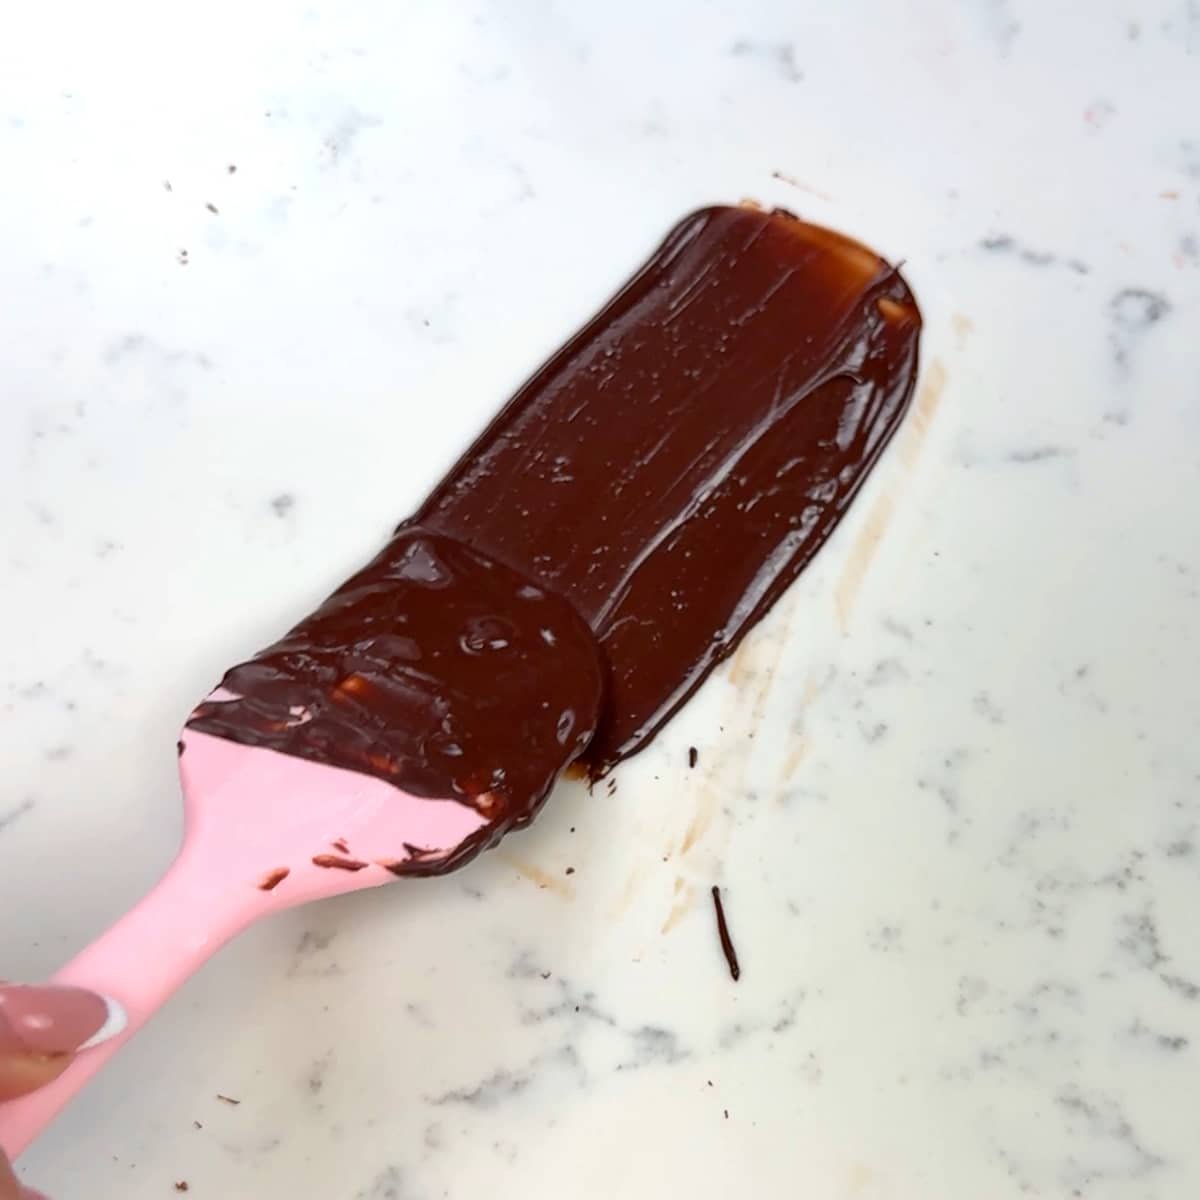
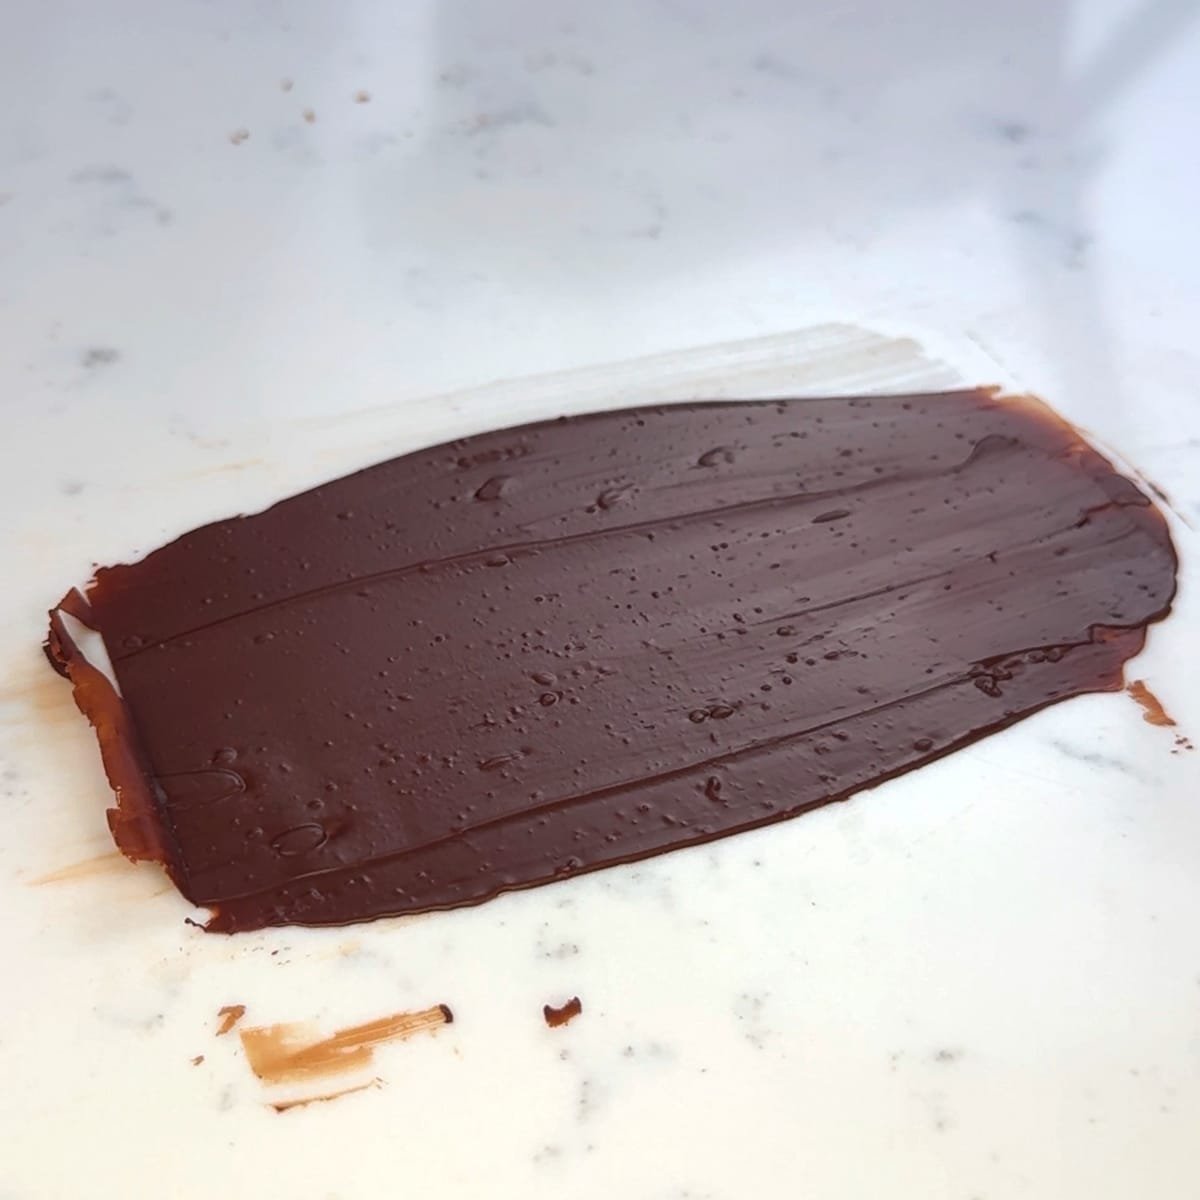
- Spread the chocolate thinly onto your stone countertop or on the back of a metal sheet pan. I like to practice this part a few times with small amounts until I get the hang of it. Remember you can always re-temper your chocolate!
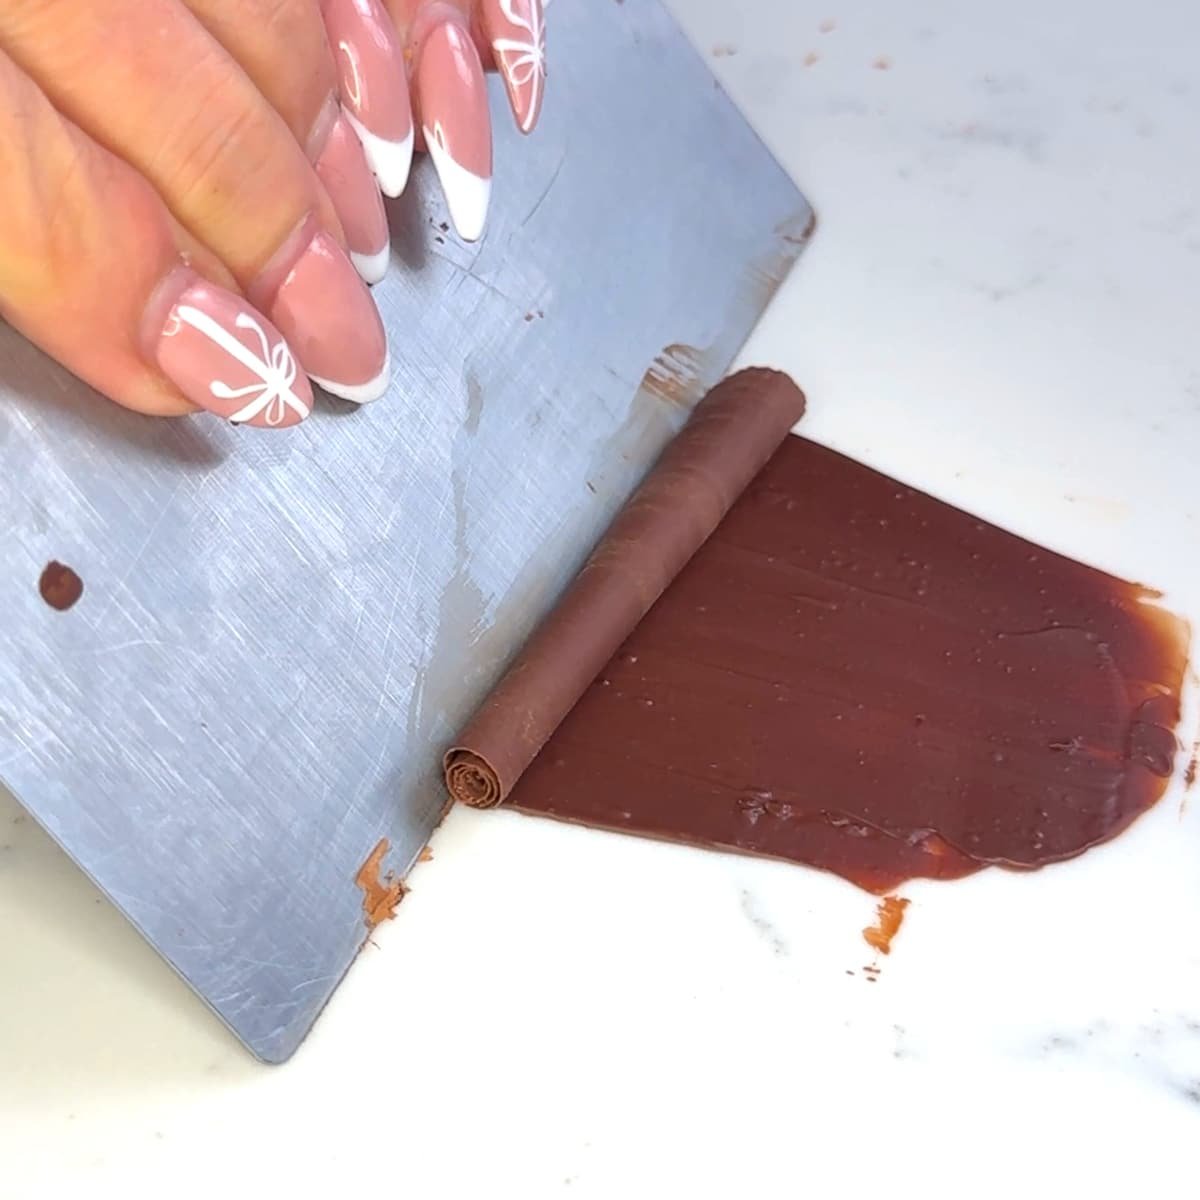
- Once the shine comes off the chocolate, you can use a bench scraper to push your chocolate at a 45º angle, developing a curl. It may take a couple tries to get it right. And don't worry if they aren't perfect! Even the cracked chocolate curls will look beautiful on the cheesecake.
Cheesecake Assembly
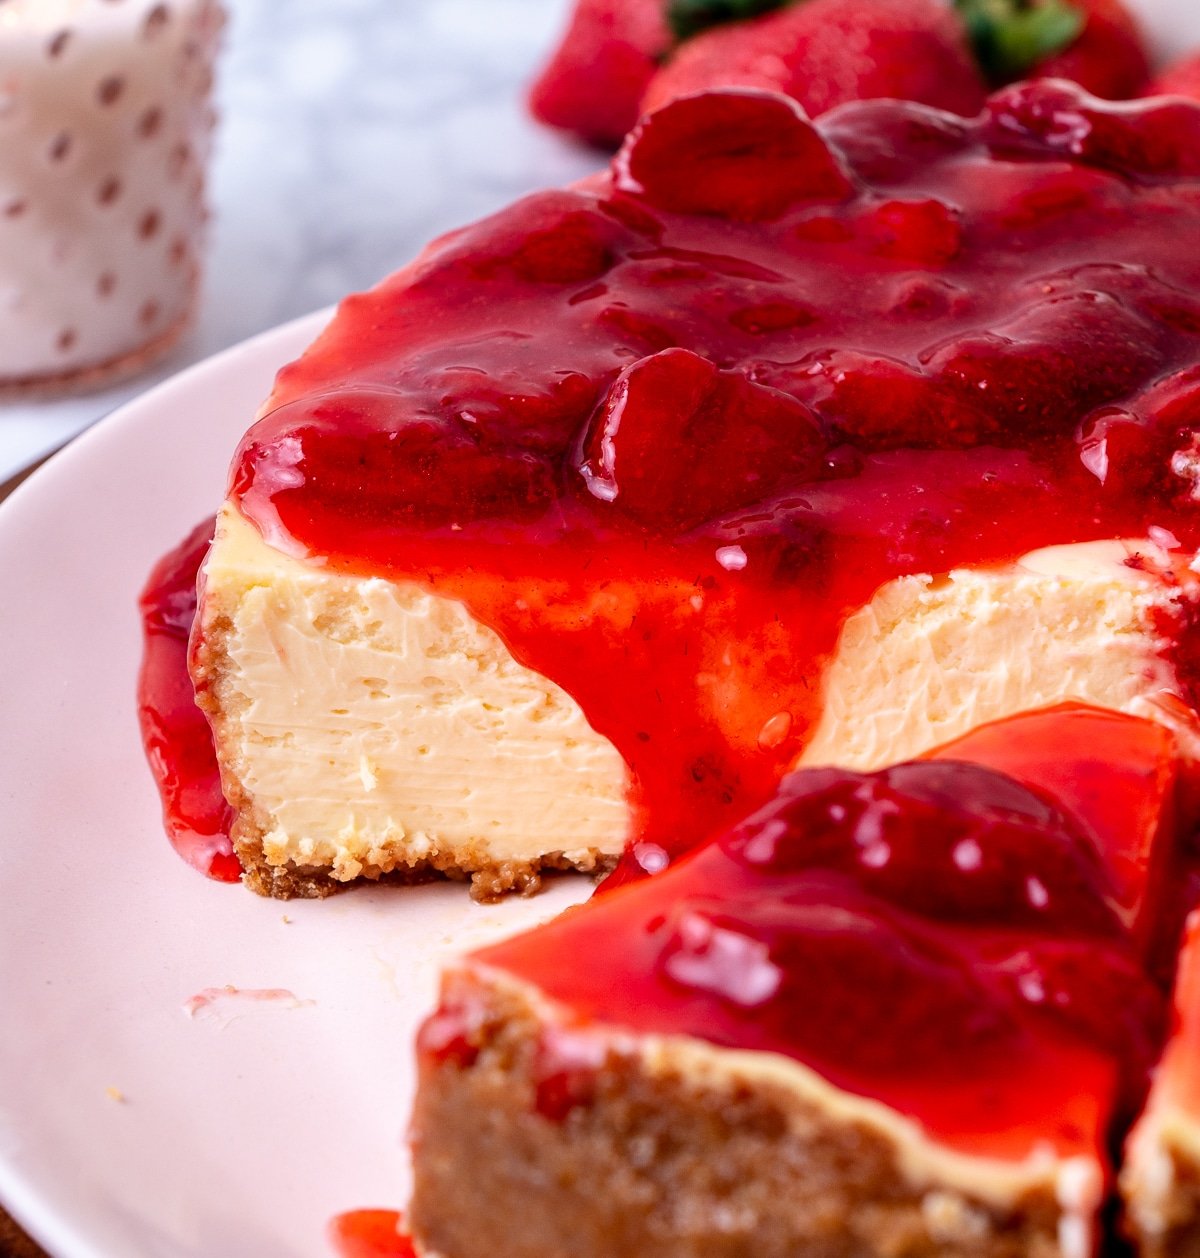
Remove your cooled cheesecake from the base of the cheesecake pan. Place it onto a cake platter or plate. Spoon your strawberry topping on top. Pile your chocolate shavings in the center and serve!
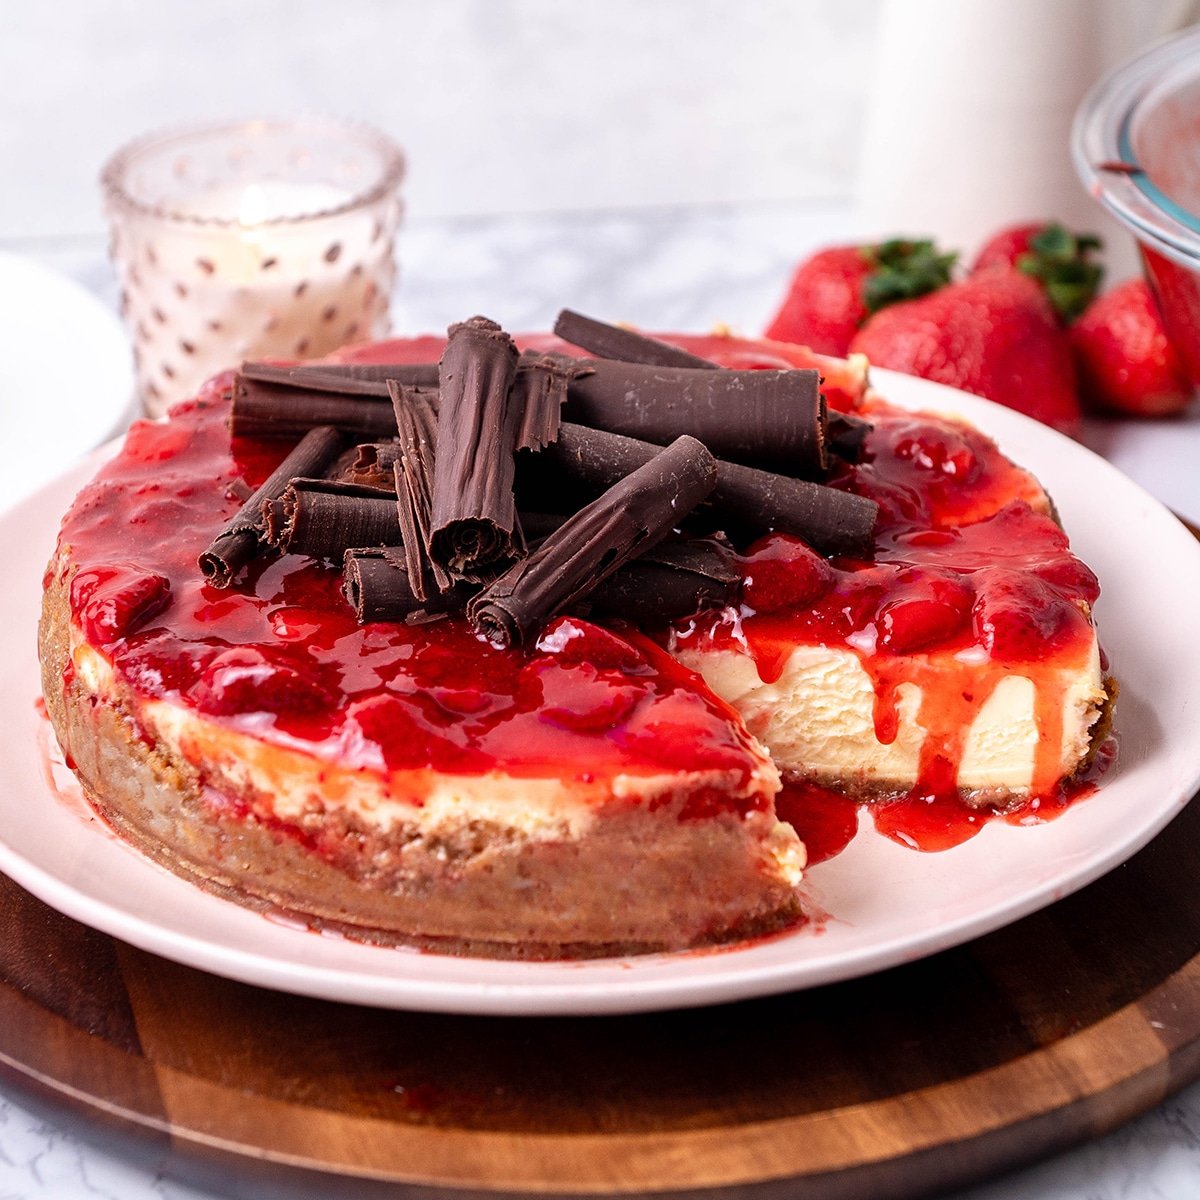
This really is the most delicious cheesecake you'll ever have! It has the perfect texture. I believe this will be your go-to cheesecake recipe from now on!
Other Cheesecake Recipes You'll Love

Recipe
Equipment
- 1 Stand mixer with paddle attachment
- 1 9" cheesecake pan
Ingredients
For The Cheesecake Crust
- 6 ounces graham crackers crushed
- 3 ounces unsalted butter melted
- 3 ounces granulated sugar
For The Cheesecake Filling
- 24 ounces cream cheese softened to room temperature
- 5 ounces granulated sugar
- 1 ounces sour cream room temperature
- 1 ounces heavy cream room temperature
- 1 ounce honey
- 3 large eggs warmed to room temperature
- ¼ teaspoon salt
- ½ Tablespoon vanilla extract
For Strawberry Topping
- 16 ounces frozen strawberries or fresh if in season
- 16 ounces fresh strawberries
- ¼ teaspoon salt
- 4 ounces water
- 1 Tablespoon fresh lemon juice
- 1 teaspoon lemon zest
- 2 Tablespoons ClearJel or 1 Tablespoon Cornstarch
- 1 ounce cool water for the ClearJel or Cornstarch
Instructions
Making the Graham Cracker Crust
- Preheat your oven to 350ºF. Move the bottom oven rack to the lowest place in the oven. Place the second oven rack in the middle of the oven.
- Grind the graham crackers in a food processor or roll them in a large Ziploc bag with a rolling pin until they're finely crushed.
- Combine together the graham cracker crumbs, melted butter, and sugar in a medium bowl until it forms together.
- Place a parchment paper round in the bottom of the 9" springform pan (optional) to prevent sticking.
- Pour your graham cracker mixture on top of the parchment round and spread it evenly. Press down firmly with a flat measuring cup to compress the crust into the bottom and edges.
- Bake the crust for 8 minutes at 350ºF and then let it cool. You should be able to smell the toasty crust near the end of the baking time.
- Wrap the cheesecake pan in two layers of heavy duty tinfoil to prevent leaking. Or if you have a 10" cake pan you can put that around the cheesecake pan as a barrier.
- Fill the pan with your cheesecake filling.
- Place the cheesecake pan into a larger pan with at least 2" of space around the cheesecake pan. Place them into the preheated oven in the middle of the baking rack.
- Carefully pour water into the outer pan until its ¾ of the height of the cheesecake pan.
Making the Cheesecake Filling
- Lower the oven to 335ºF and place a sheet pan or roasting pan on the bottom rack and fill it ¾ of the way with hot water. Your cheesecake will sit on the rack above the water.
- Place your room-temperature cream cheese into the bowl of your stand mixer with the paddle attachment, or you can use an electric mixer. Beat the cream cheese on low until extra smooth and no longer lumpy.
- Sprinkle in your granulated sugar while mixing on low until combined. Mixing the cream cheese and sugar until super smooth will make your cheesecake texture extra creamy.
- Add in the room temperature sour cream and heavy cream while mixing on low.
- Pour in your room temperature eggs one at a time, on medium speed, letting each one combine fully before adding in the next.
- Next, add the salt, honey and vanilla extract. Scrape the sides of the bowl to ensure all of the cream cheese is incorporated.
- Pour the cream cheese mixture into your cooled graham cracker crust.
Baking the Cheesecake
- Bake the cheesecake at 300ºF for about 60 minutes and do not open the oven door during baking. The cheesecake should be set, but still slightly jiggly in the center and have an internal temperature of 150°F. It will continue to firm up as it sits and cools down.
- If it hasn't hit 150ºF yet or still is too jiggly in the center, continue baking in 10 minute increments until it's done baking.
- Turn off the oven and crack the oven door open. Let the cheesecake cool inside the oven for 60 more minutes. This prevents cracking.
- Remove the cheesecake from the oven and place it into the fridge to cool for 6 hours or ideally, overnight. Wait to cover the cheesecake with plastic wrap until it is fully cool, so it doesn’t condensate and drip moisture onto the top of the cheesecake.
- Run a knife around the outside of the cheesecake to separate it from the pan, or use a kitchen torch to lightly warm the outside and remove the springform pan.
Making the Strawberry Topping
- Combine together the frozen strawberries, water, salt, and sugar, lemon juice and zest in a large saucepan and bring it to a simmer over medium-high heat, stirring occasionally.
- Simmer for 10-15 minutes until the mixture has thickened and reduced by ⅓.
- Use a whisk to crush the strawberries and make the mixture into more of a sauce.
- Combine together the ClearJel (or cornstarch) in a separate cup to make a slurry.
- Add the ClearJel mixture to the simmering strawberries and cook for 1 minute while stirring constantly until thickened.
- Let the strawberry topping cool before placing it on top of your cheesecake in an even layer.
Chocolate Curls
- Chop a bar of chocolate that contains cocoa butter in the ingredients (I like the brand Lindt) into small pieces and place it into a medium sized, microwave safe bowl.
- Microwave the chocolate for 1 minute and stir.
- Continue microwaving the chocolate until it is 75% melted.
- Stir the chocolate without heating until it is fully melted. If you have a few un-melted bits its ok.
- Spread the chocolate in a even layer on your stone countertop (granite, quartz or similar) or on the back of a metal sheet pan.
- Wait until the shine disappears from the surface. This should only take about 30 seconds to happen.
- Use a bench scraper at a 45º angle to push into the chocolate and create your chocolate curls.
- Top your strawberry cheesecake with chocolate curls right before serving.