

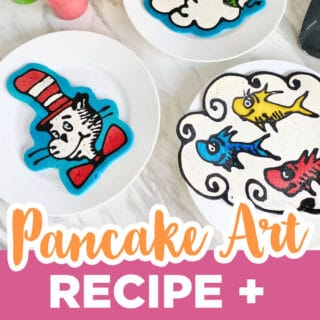
I love making pancake art! Such a fun way for the whole family to get creative with their pancakes. You don't need a lot of fancy tools to make pancake art, just some pancake mix, water, food coloring, and a squeeze bottle or piping bag! Keep reading to learn how to get the right pancake batter consistency, how to add colors, and how to avoid burning those edible works of art!
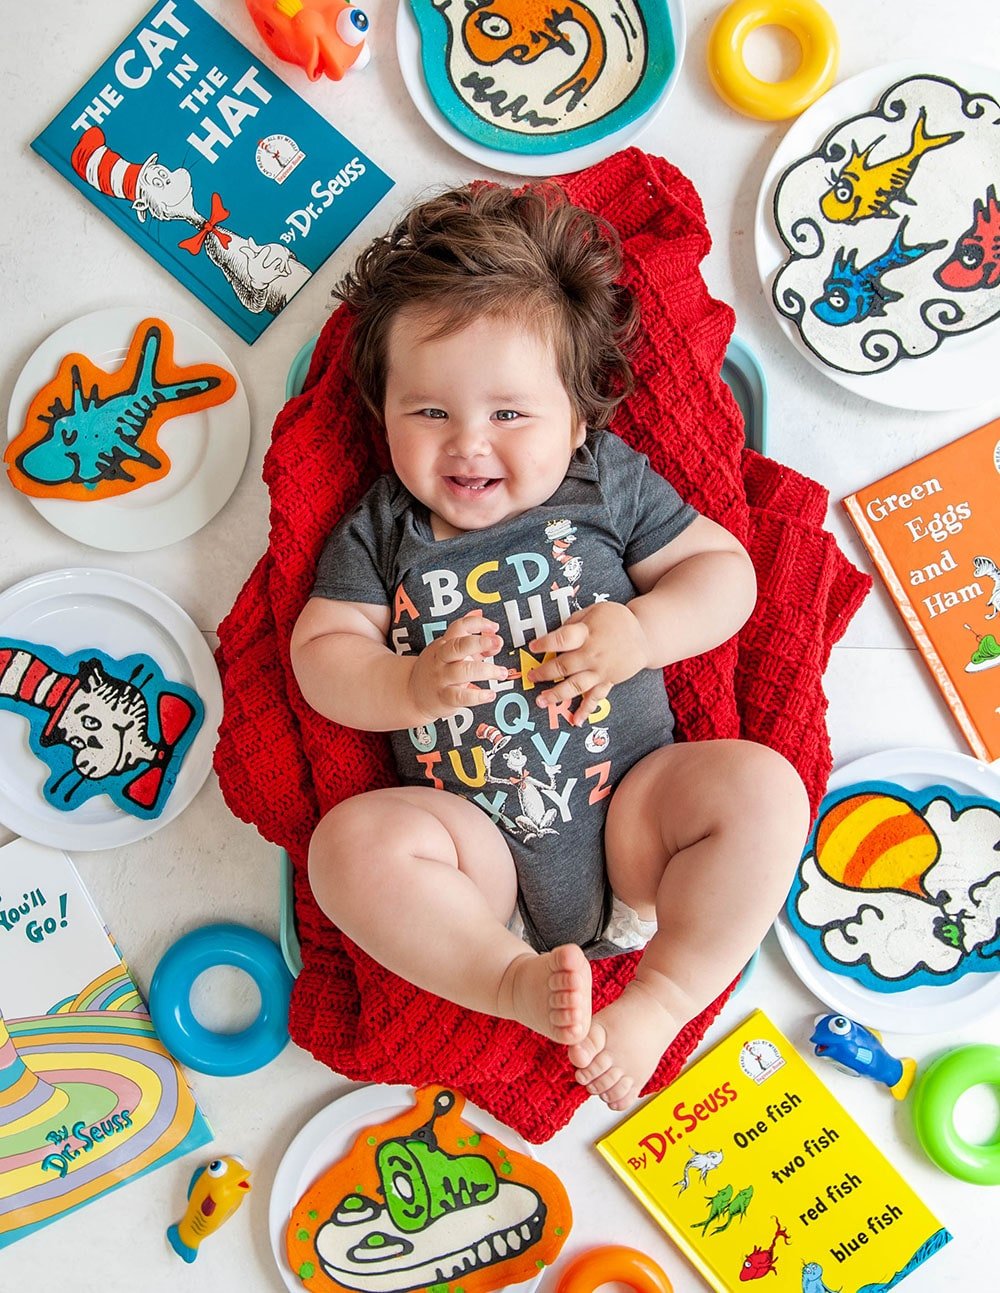
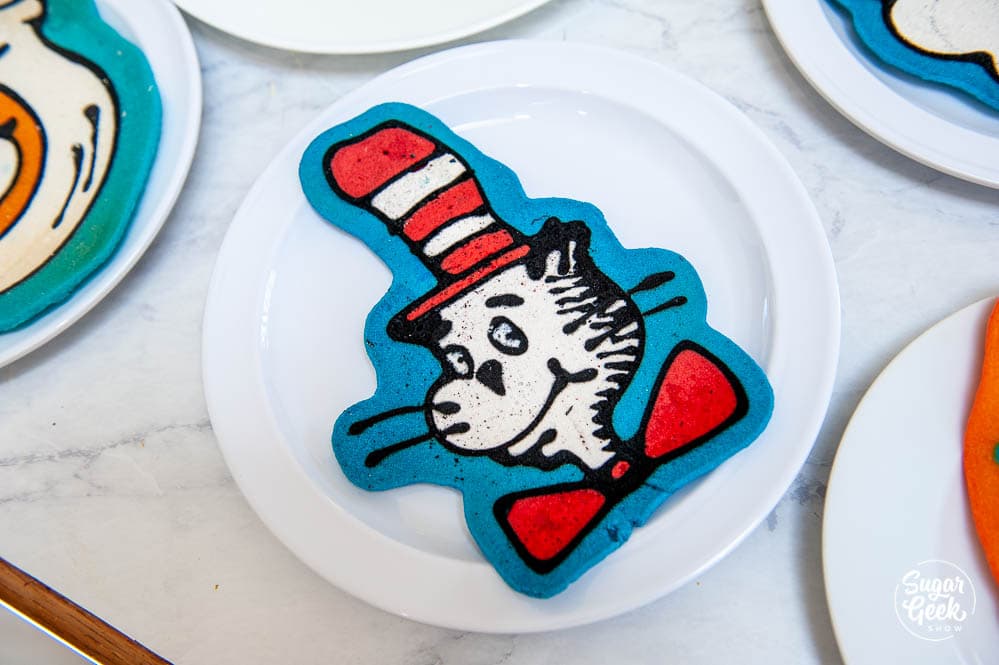
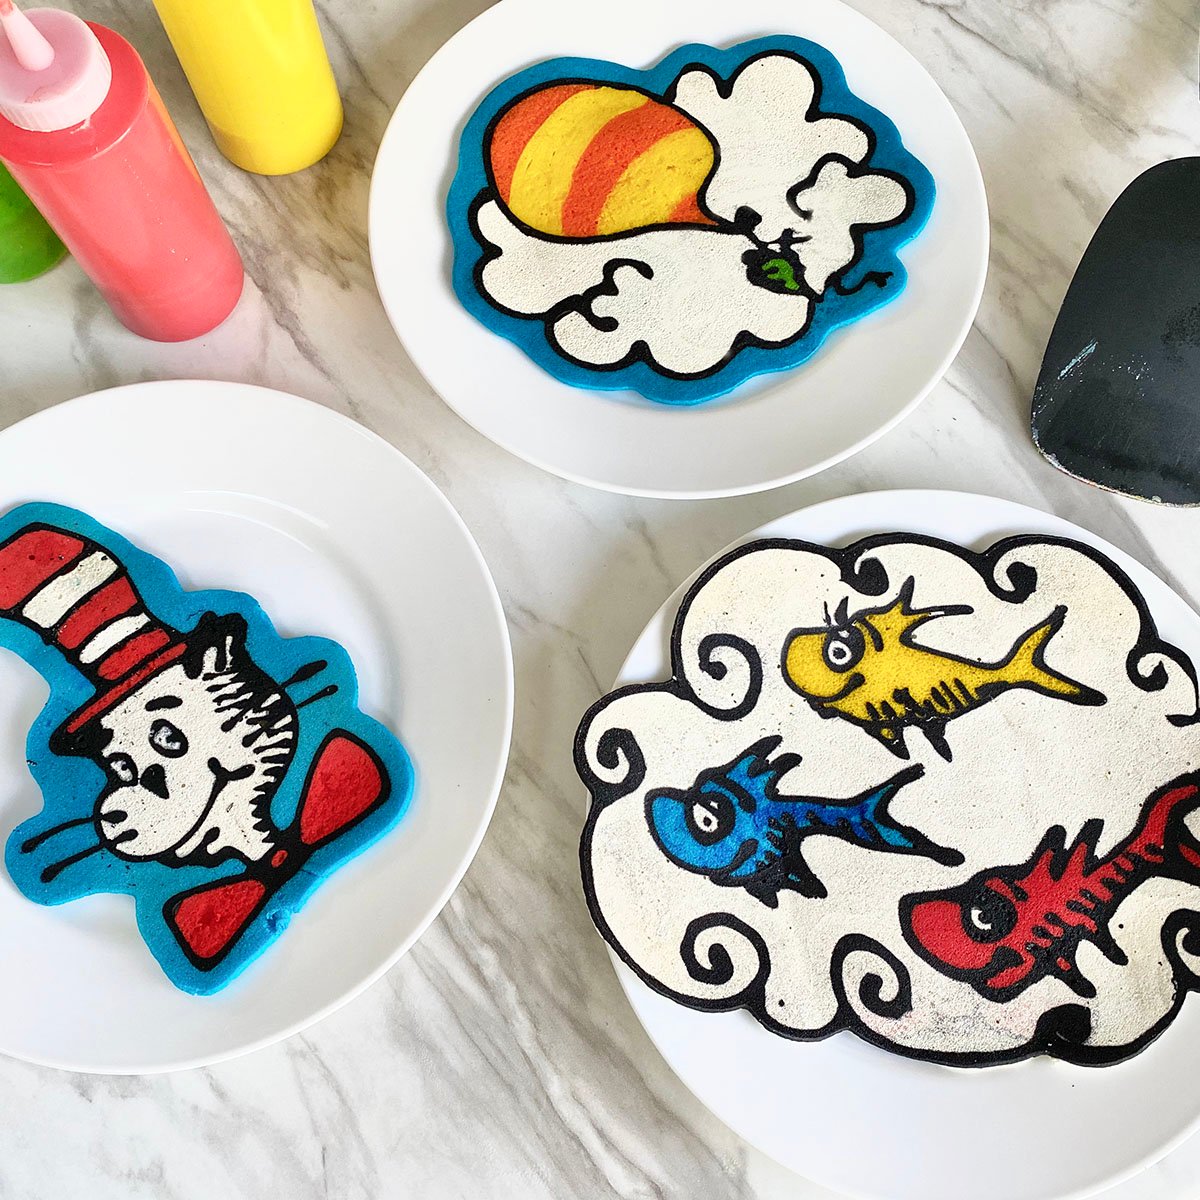
I was inspired to make these Dr. Seuss themed pancakes for Ezra's 10-month photoshoot! Only two more months of this madness AND we are about to move into a new house (yay!) with a new studio so this might be the last Ezra photo in this house *sniffle* kinda bittersweet. I am excited to be moving into a bigger space for our growing family and business!
Pancake Art Ingredients
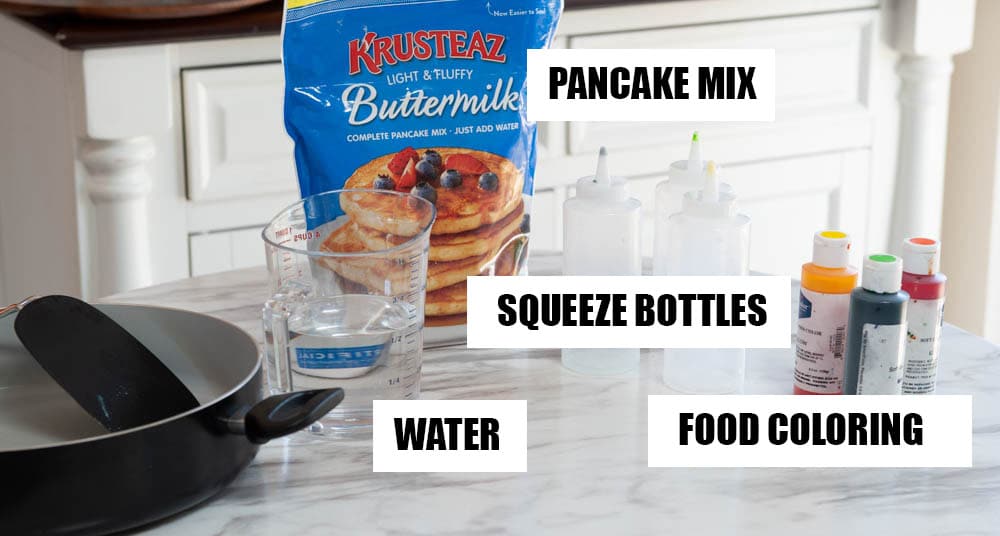
As I said, the ingredients to make pancake art are super simple. Your favorite pancake mix, water, and some food coloring. I am using gel food coloring from Americolor which is more vibrant and concentrated than traditional liquid food coloring from the grocery store. You can get gel food coloring from craft stores, cake decorating stores or online.
Pancake Art Equipment
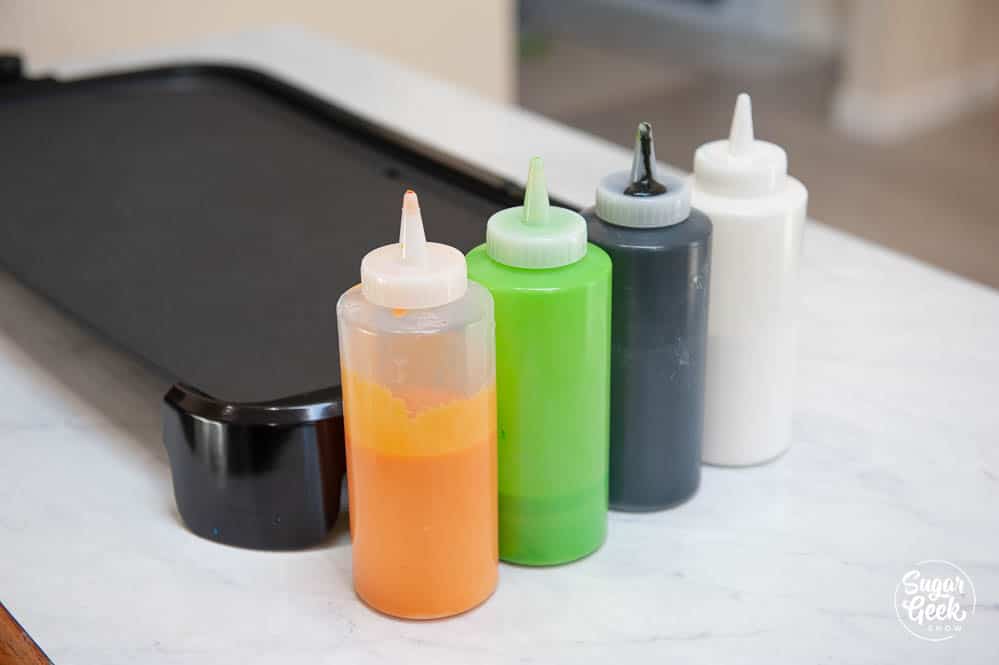
The most important thing to have equipment-wise is some squeeze bottles. I got mine at Michaels for $2 each. If you don't have squeeze bottles you can use a piping bag with a piping tip or even just a cut hole. Don't cut the hole too big or it will be hard to control the flow of the pancake batter.
I'm also using a pancake griddle because I wanted to make some really big pancakes but you can use any non-stick pan you have.
Pancake Art Step By Step
Step 1 - How to make the pancake batter the right consistency
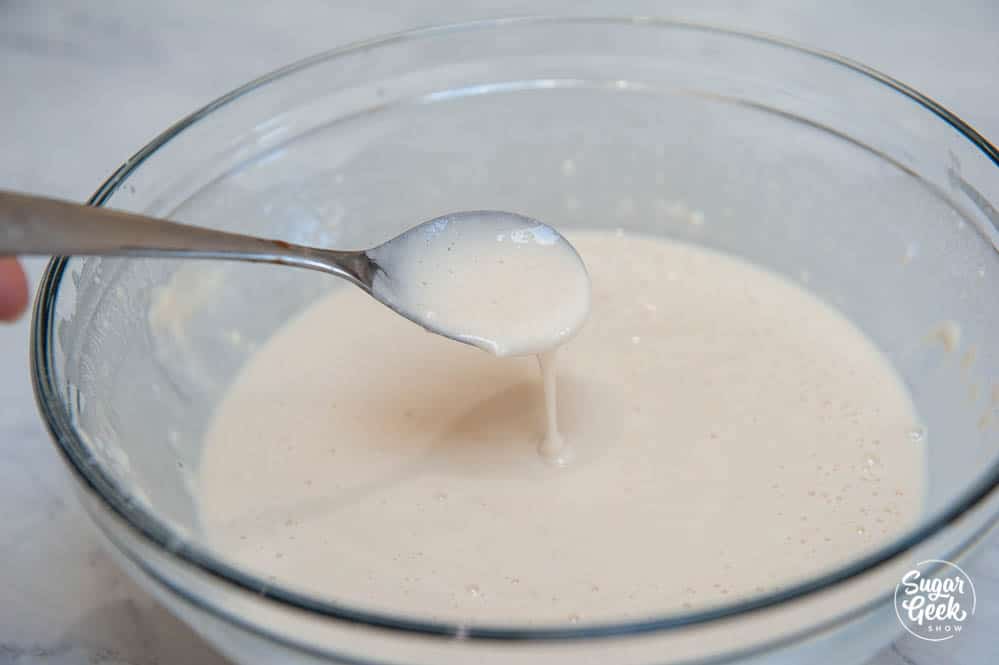
Making your pancake batter is really easy. I just measured out about three cups of pancake batter and added roughly 2 ½ - 3 cups of water to the mix (Yes I used cups instead of a scale for once haha). You want the consistency to be like runny ketchup. Mix the batter with a hand-held blender or whisk until no lumps remain. Lumps will clog the squeeze bottle.
Step 2 - Pancake batter color
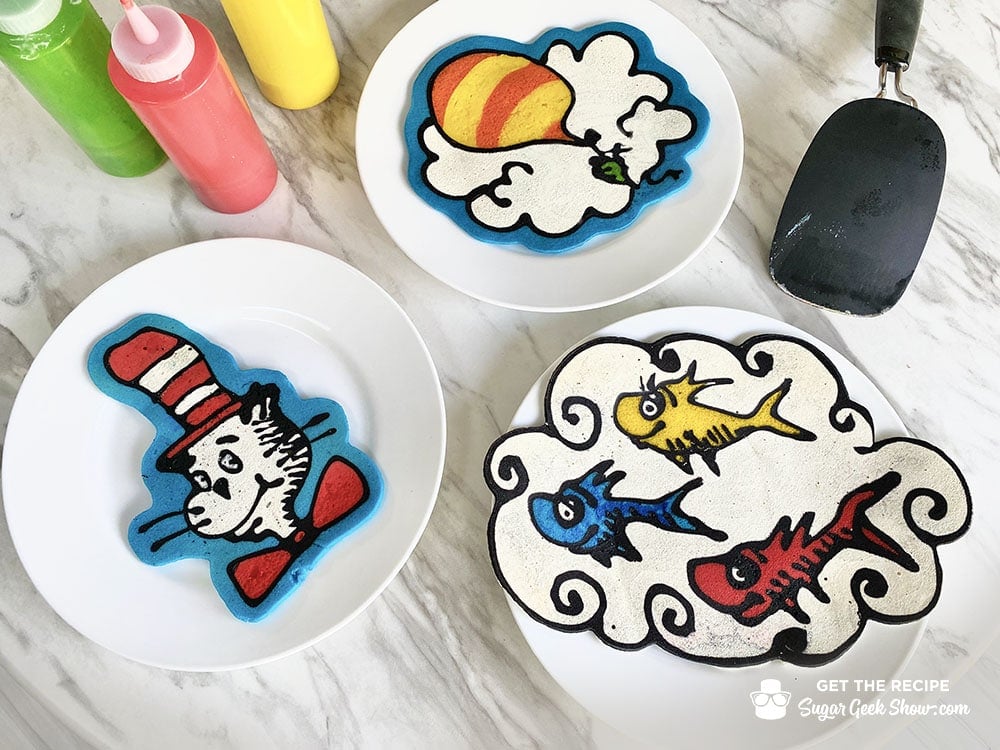
The colors you want to use for your pancake batter are up to you. I am going with a Dr. Seuss theme for my pancakes so I used the books as inspiration for my colors. These are the colors I used.
- Black - ½ cup pancake batter + ½ teaspoon black food gel coloring
- White - ½ cup pancake batter + ½ teaspoon white gel food coloring
- Red - ¼ cup pancake batter + 2 drops electric pink food coloring and 3 drops red food coloring
- Orange - ¼ cup pancake batter + 2 drops electric yellow food coloring and 2 drops orange food coloring
- Lime green - ¼ cup pancake batter + 2 drops electric yellow food coloring and 2 drops mint green food coloring
- Blue - ¼ cup pancake batter + 3 drops electric blue food coloring
Pro-tip - don't be tempted to add too much food coloring or your batter could end up tasting bitter
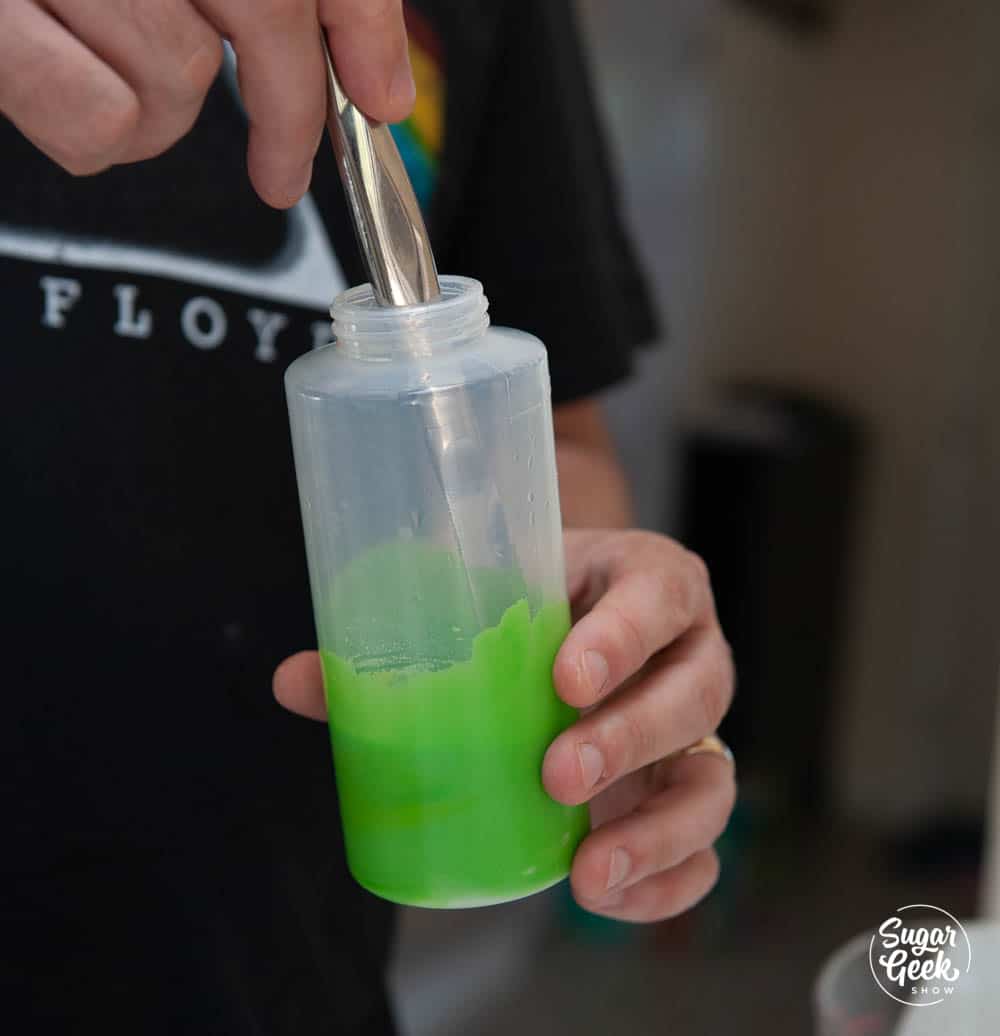
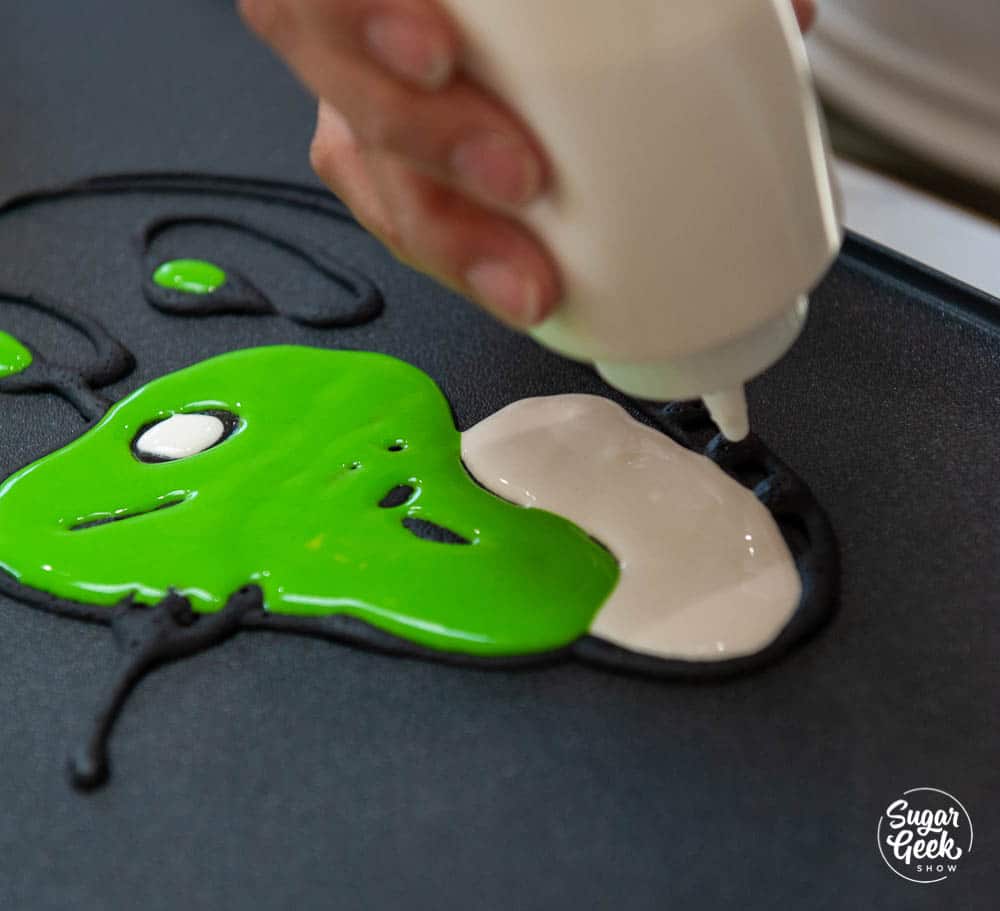
To mix your colors, just add the pancake batter to your squeeze bottle, then add in the food coloring and mix with a knife or a chopstick until you don't see any swirls of uncolored batter.
Step 3 - Heating your griddle or pan
Turn your griddle onto the lowest setting. This was 200ºF on mine. If you're using a pan then just set the temperature to low and let it heat up for 5 minutes.
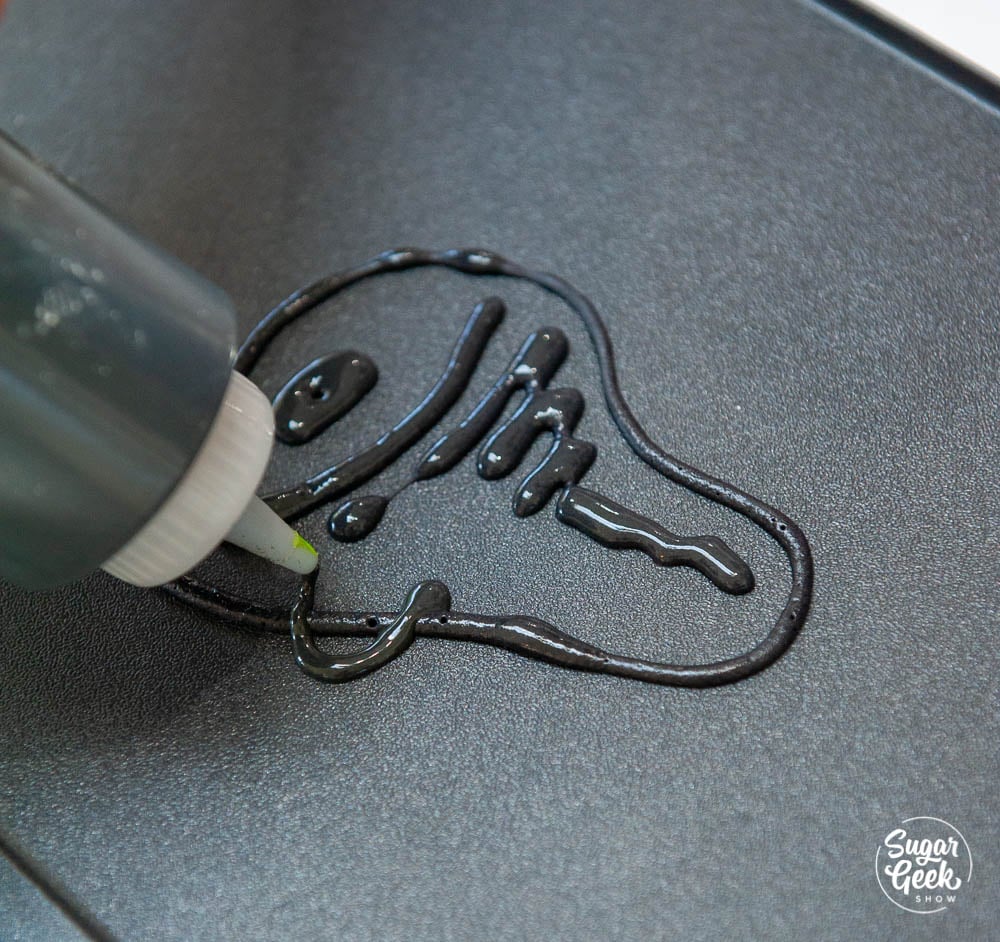
Step 4 - Drawing the outline
Begin drawing your design. I just used my book as a reference. If you're not artistic then try to keep to simple shapes before you move onto complicated things. Don't squeeze the bottle too hard because the batter is so thin, it comes out really easily. Have fun with it!
Step 5 - Color in the lines
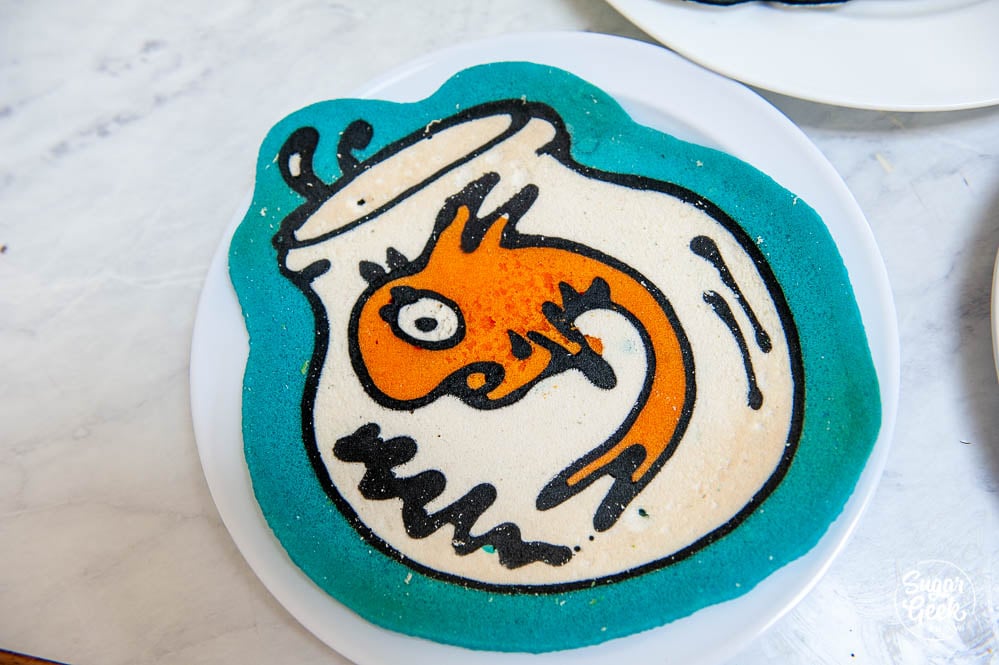
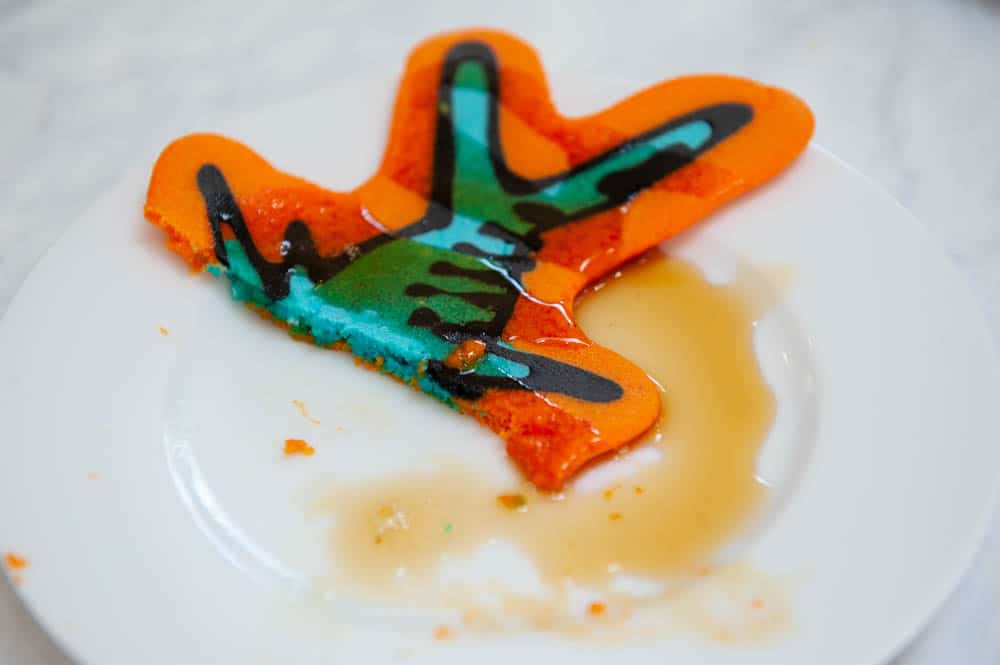
You might notice the black lines are starting to cook and dry out, that's ok! Go ahead and add in your other colors according to your reference photo. Remember the colors you put down first will be visible when you flip the pancake over. If you are writing words, remember you will have to write them backward to be readable after you flip!
Step 6 - Patience
Turn your heat up to 250ºF on your griddle or to medium-low on your stovetop. You will start to see bubbles starting to form on the surface of your pancake and it will start to look dull around the edges. Do not flip your pancake until you don't see any shiny areas and the entire surface looks dull. You should be able to slip your spatula under the pancake and it easily moves around on the surface of the pan.
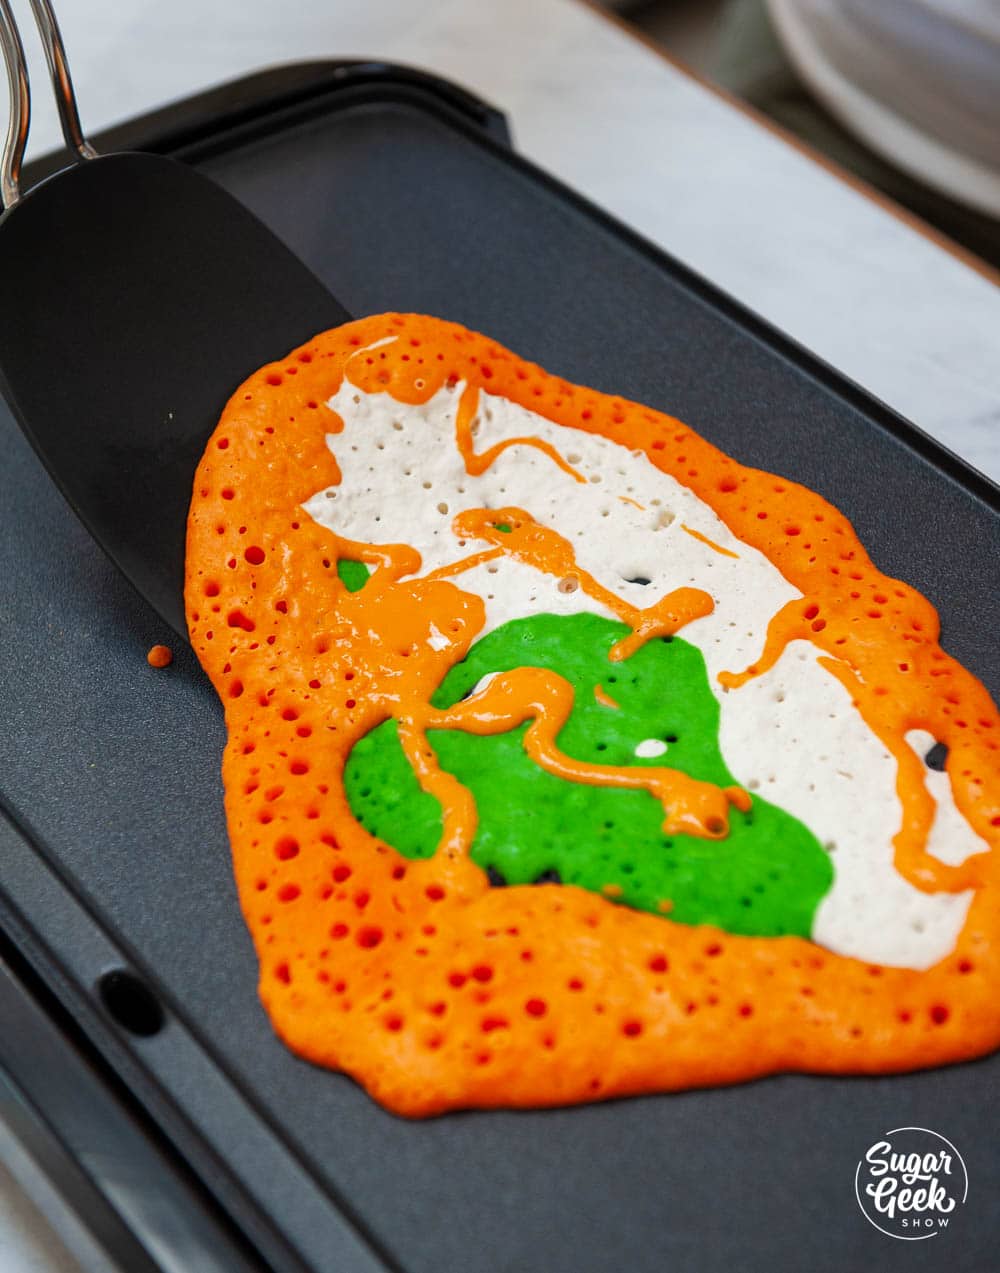
Pro-tip - Don't be tempted to turn up the heat! You could burn or discolor your pancake. Low and slow is best. Mine take about 3-4 minutes to cook.
Step 7 - Flip
Once your pancake is ready to flip, slip that spatula under the pancake, count to three, and flip! Make sure the whole family has gathered around for the big reveal because that is the best part when your artwork is finally revealed!

Step 8 - Enjoy!
These may be art but they are still delicious pancakes and taste delicious with lots of butter and syrup! Yum!
Check out these recipes!
Brown Butter Buttermilk Pancakes
Sourdough Discard Pancakes
Patterned Roll Cake
Pancake Cake Tutorial
Recipe
Equipment
- Griddle or non-stick pan
- One squeeze bottle per color or piping bag
- Butter knife or chopstick for stirring
Ingredients
- 3 cups pancake batter mix any brand
- 2 ½ cups water Add more or less to make the runny ketchup consistency
Instructions
- Add your water to your pancake mix and mix with a handheld mixer to remove the lumps. Add more water if needed until you reach the runny ketchup consistency
- Add your pancake batter to your squeeze bottles using a measuring cup
- Add food coloring (see blog posts for exact colors and amounts) and stir with a knife until no streaks of batter remain
- Heat your griddle to 200ºF (lowest setting) for 10 minutes or set your non-stick pan onto your stovetop and set the temperature to low
- Draw the outline of your design using a reference photo with the black squeeze bottle
- Fill in the outline with the colors of your choice
- Add an outline of color around the pancake if desired (see video)
- Turn the temperature up to 250ºF and continue cooking until the surface of the pancake looks dry and you can slide a spatula under the pancake without it sticking
- Flip your pancake over and cook for one more minute then serve!
Video
Nutrition
Lisa J says
WOW! Those are amazing! It's blowing my mind that those are pancakes and not paintings/ colorings/ printouts. I can't wait to try this, I'm totally inspired.
Manuela says
I think the idea is very fun , and decorating food makes it way more tempting !