

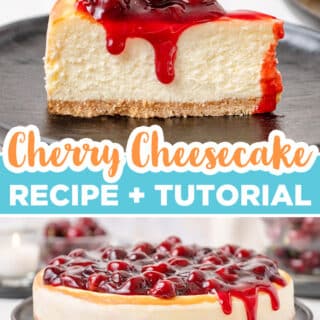
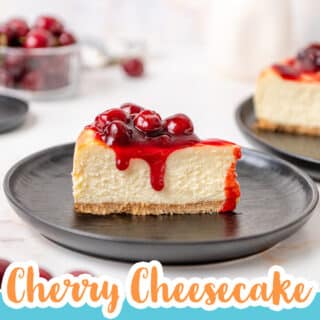

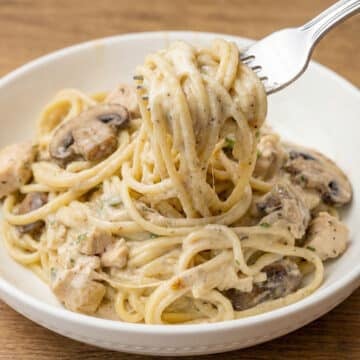
This cherry cheesecake recipe has added richness with heavy cream and sour cream, perfectly highlighting the flavor and texture of cream cheese. The crunchy graham cracker crust is the best supporting actor with the ruby red cherries shining on top, truly a trifecta of a perfect dessert for all special occasions!
A cheesecake without a full water bath? Yes! A boiling hot water bath can be very intimidating, so I use a technique that avoids moving a pan of hot water in and out of the oven, and also avoids the possibility of water seeping into the cheesecake through the springform pan. A water bath on the lower rack keeps the oven humid and allows the cheesecake to bake slowly and evenly, avoiding cracking and too much browning. Baking it low and slow is the secret to the creamiest cheesecake. I don't mind a little browning on the top, but if you want to do a full water bath check out my classic cheesecake recipe.
Table of contents
Cherry Cheesecake Ingredients
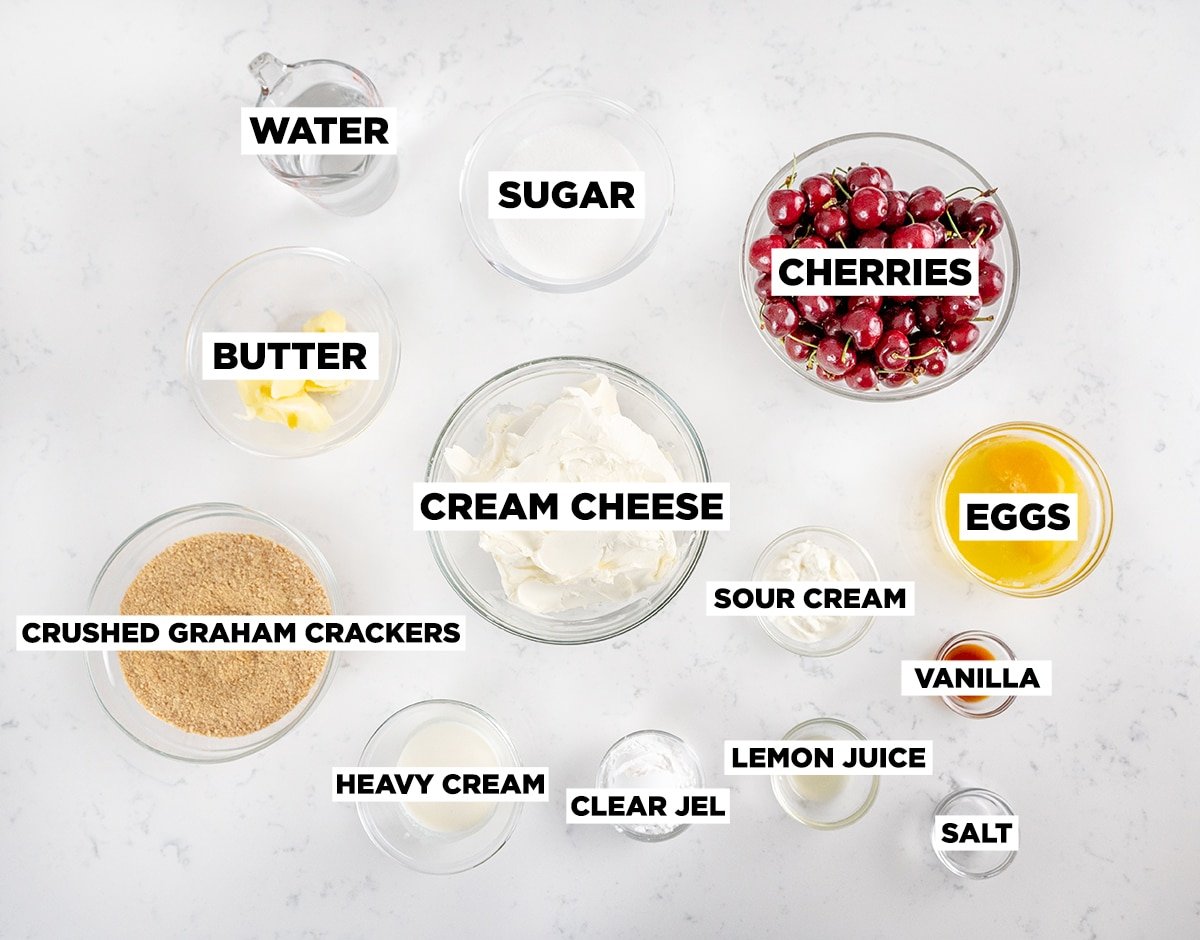
Cream cheese is the main ingredient in cheesecake, giving it the signature creamy tangy flavor. It’s best to use full-fat cream cheese to achieve the ideal texture, but reduced-fat or fat-free cream cheese will work too.
Graham crackers balance the flavor of cheesecake perfectly. This crust bakes up quickly and easily with butter and a little extra sugar to make a crust that stays crunchy topped with the moist cheesecake.
The tart and sweet flavor of cherries is a classic pairing for cream cheese. If in season fresh cherries give amazing flavor, however, frozen cherries get the job done as well! They are harvested at the peak of their season and flash-frozen to keep their flavor. Summer fruit in the middle of winter is a welcomed guest in my house!
A 9” springform pan is also essential. The purpose of a springform pan is being able to remove the sides of the pan so the soft cake can be easily removed for plating and serving. It would be really difficult to remove a cheesecake from a regular cake pan without ruining it.
How to Make a Cherry Cheesecake
This cheesecake takes at least 6 hours to chill after baking, so I like to make it a day ahead of when I'm going to serve it. The cherry filling can be made ahead of time as well, but making and serving it fresh is always best. 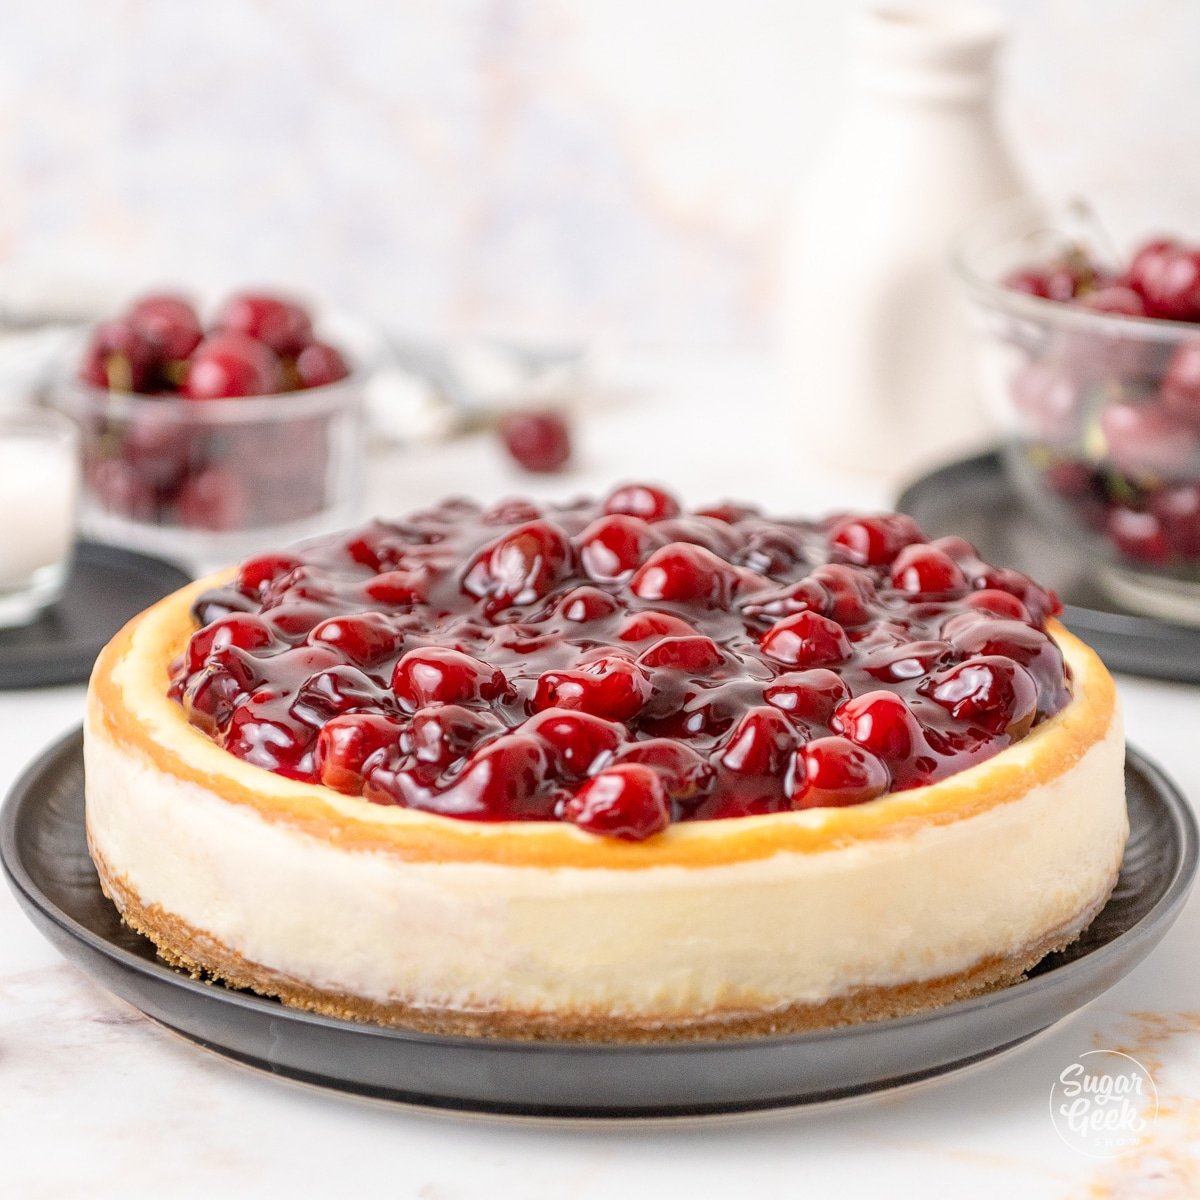
Making the Graham Cracker Crust
- Preheat your oven to 350ºF. Move the bottom oven rack to the lowest place in the oven. Place the second oven rack in the middle of the oven.
- Grind the graham crackers in a food processor or roll them in a large Ziploc bag with a rolling pin until they're finely crushed.
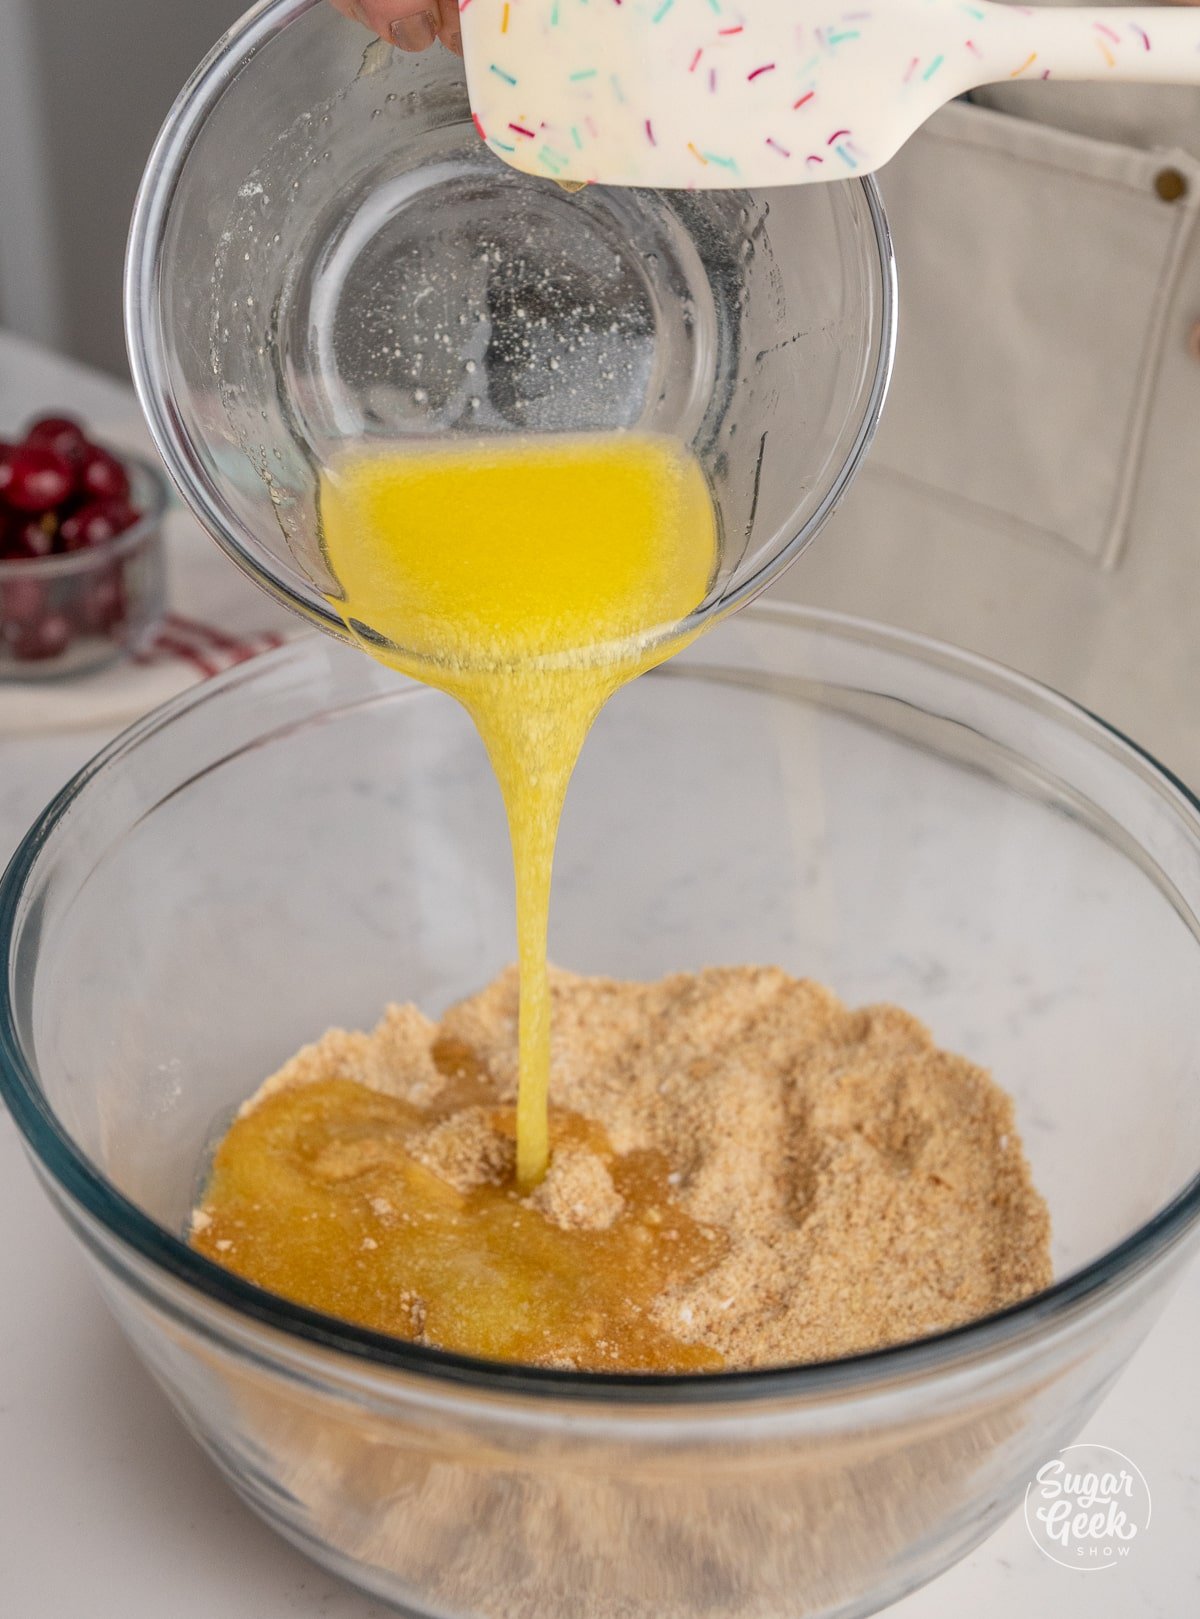
- Combine together the graham cracker crumbs, melted butter, and sugar in a medium bowl until it forms together.

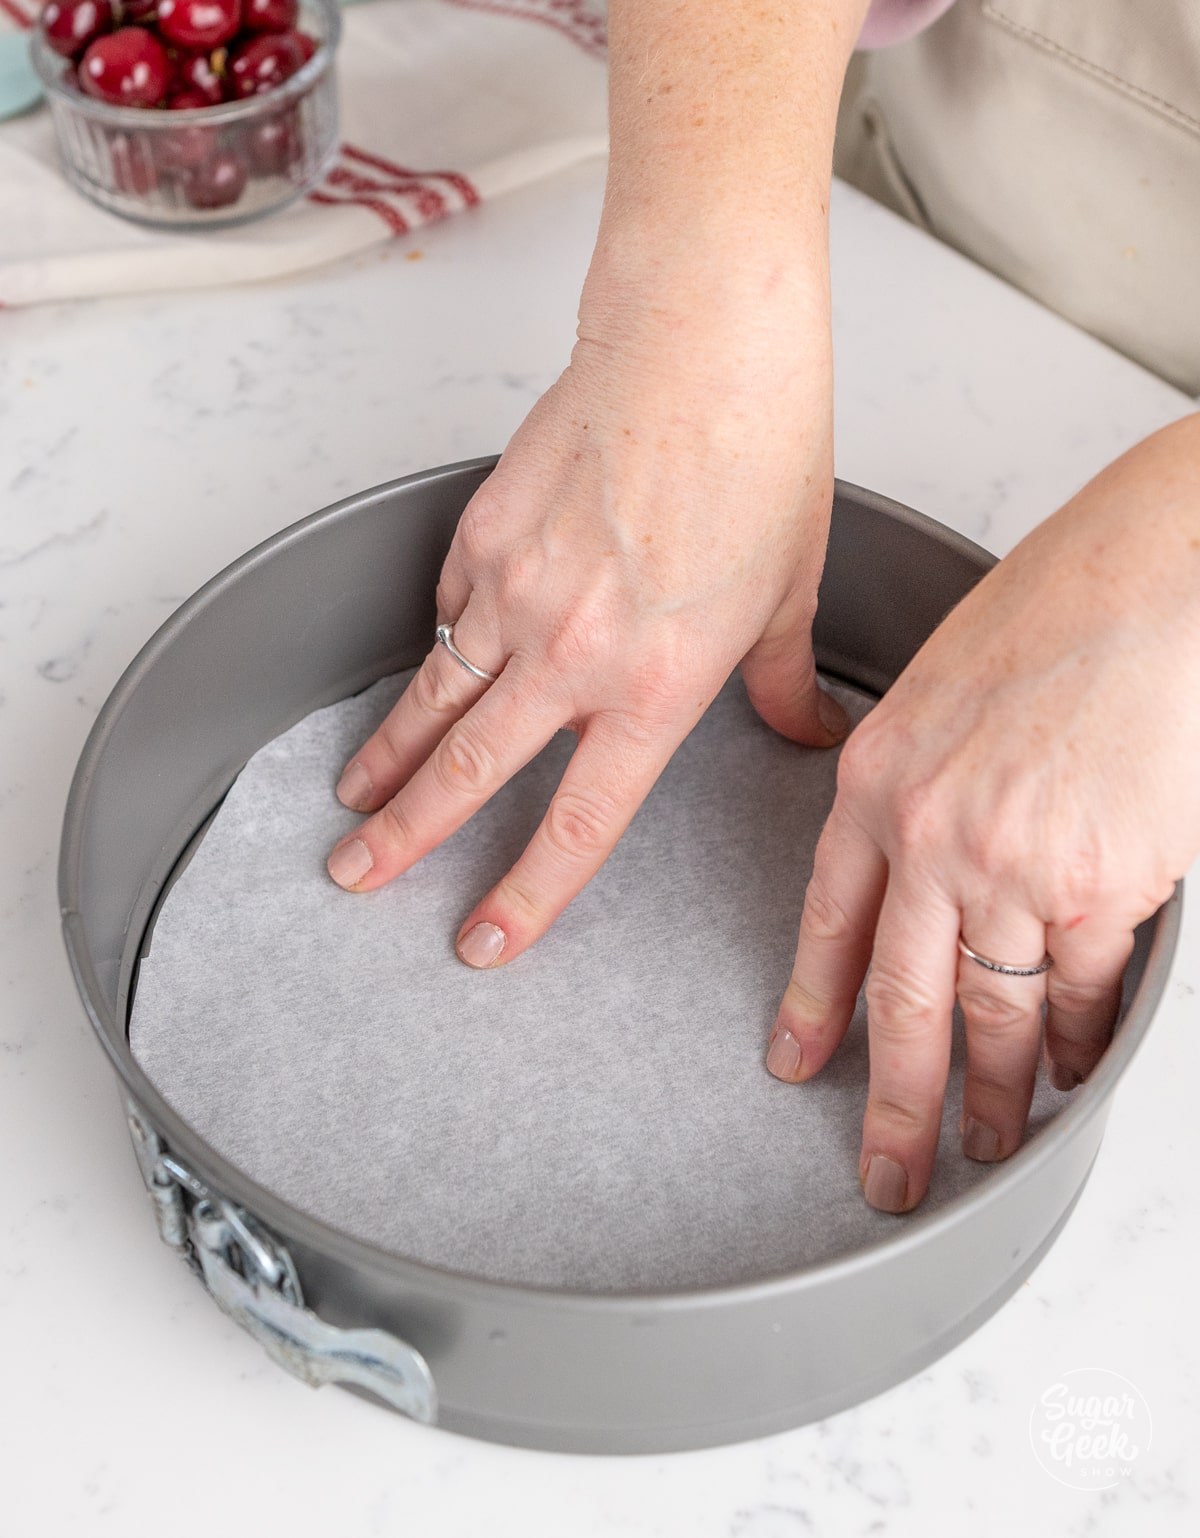
- Place a parchment paper round in the bottom of the 9" springform pan (optional) to prevent sticking.

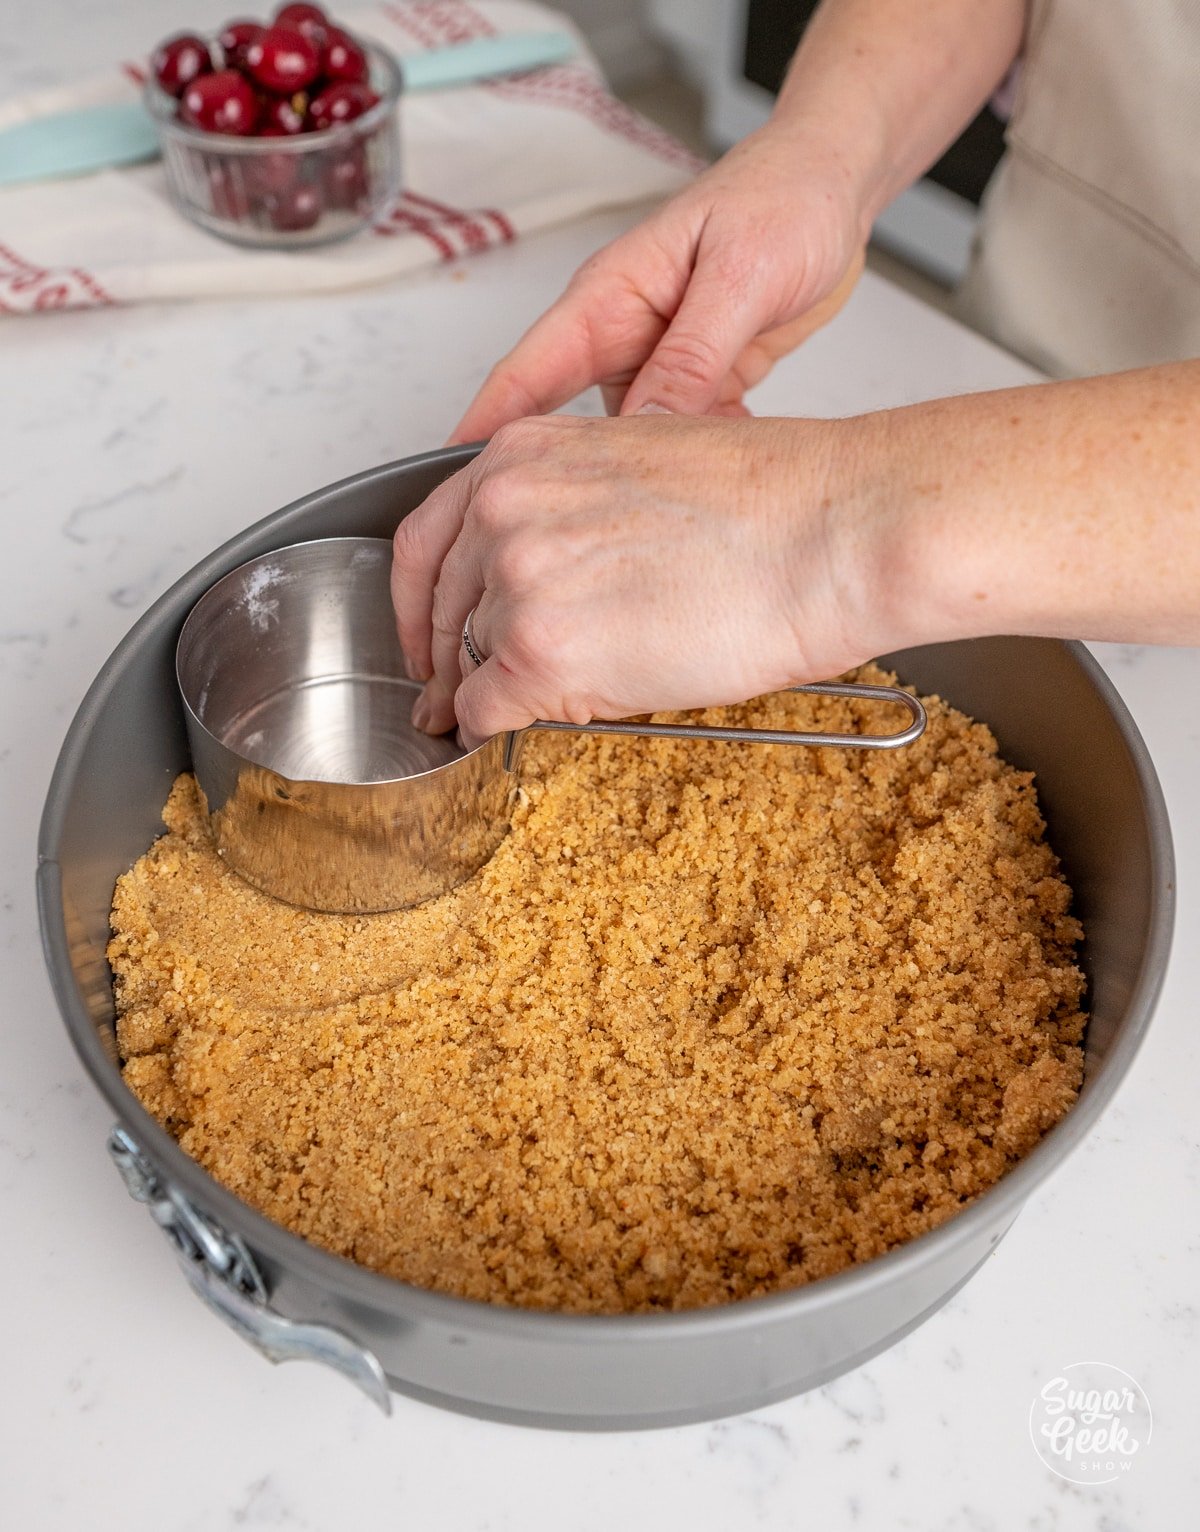
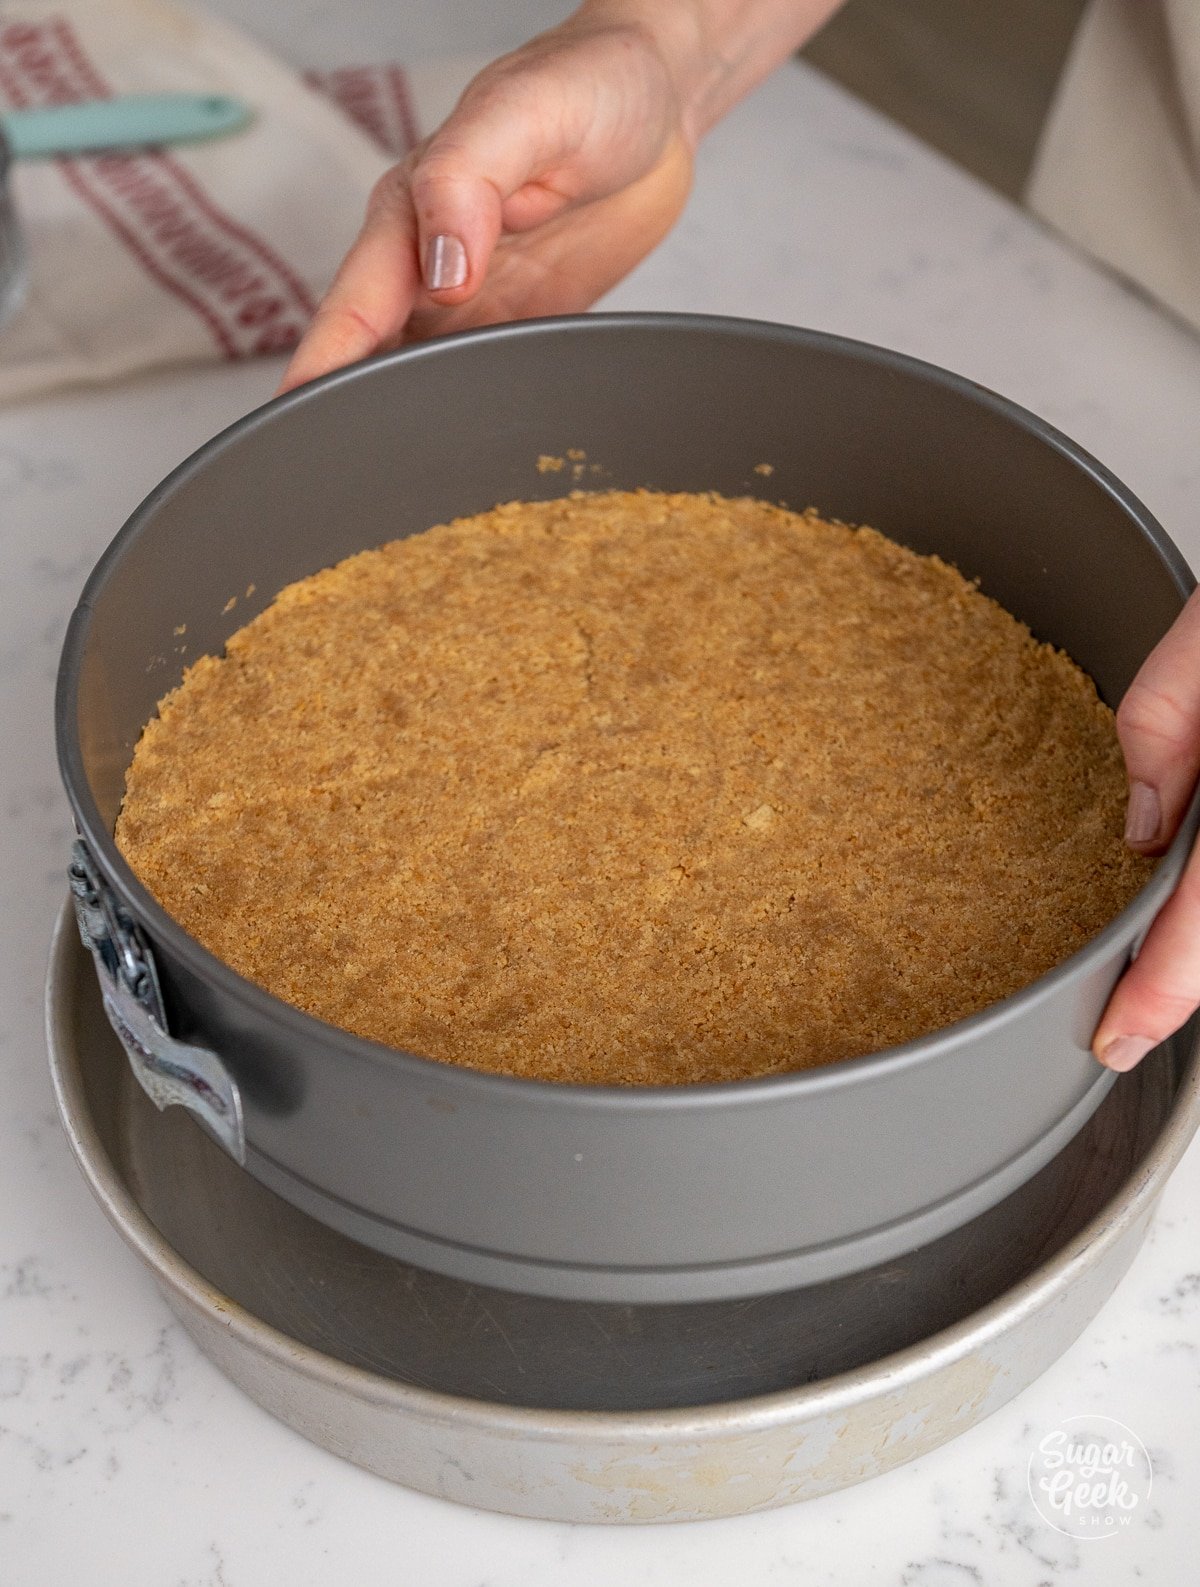
- Pour your graham cracker mixture on top of the parchment round and spread it evenly. Press down firmly with a flat measuring cup to compress the crust into the bottom and edges.

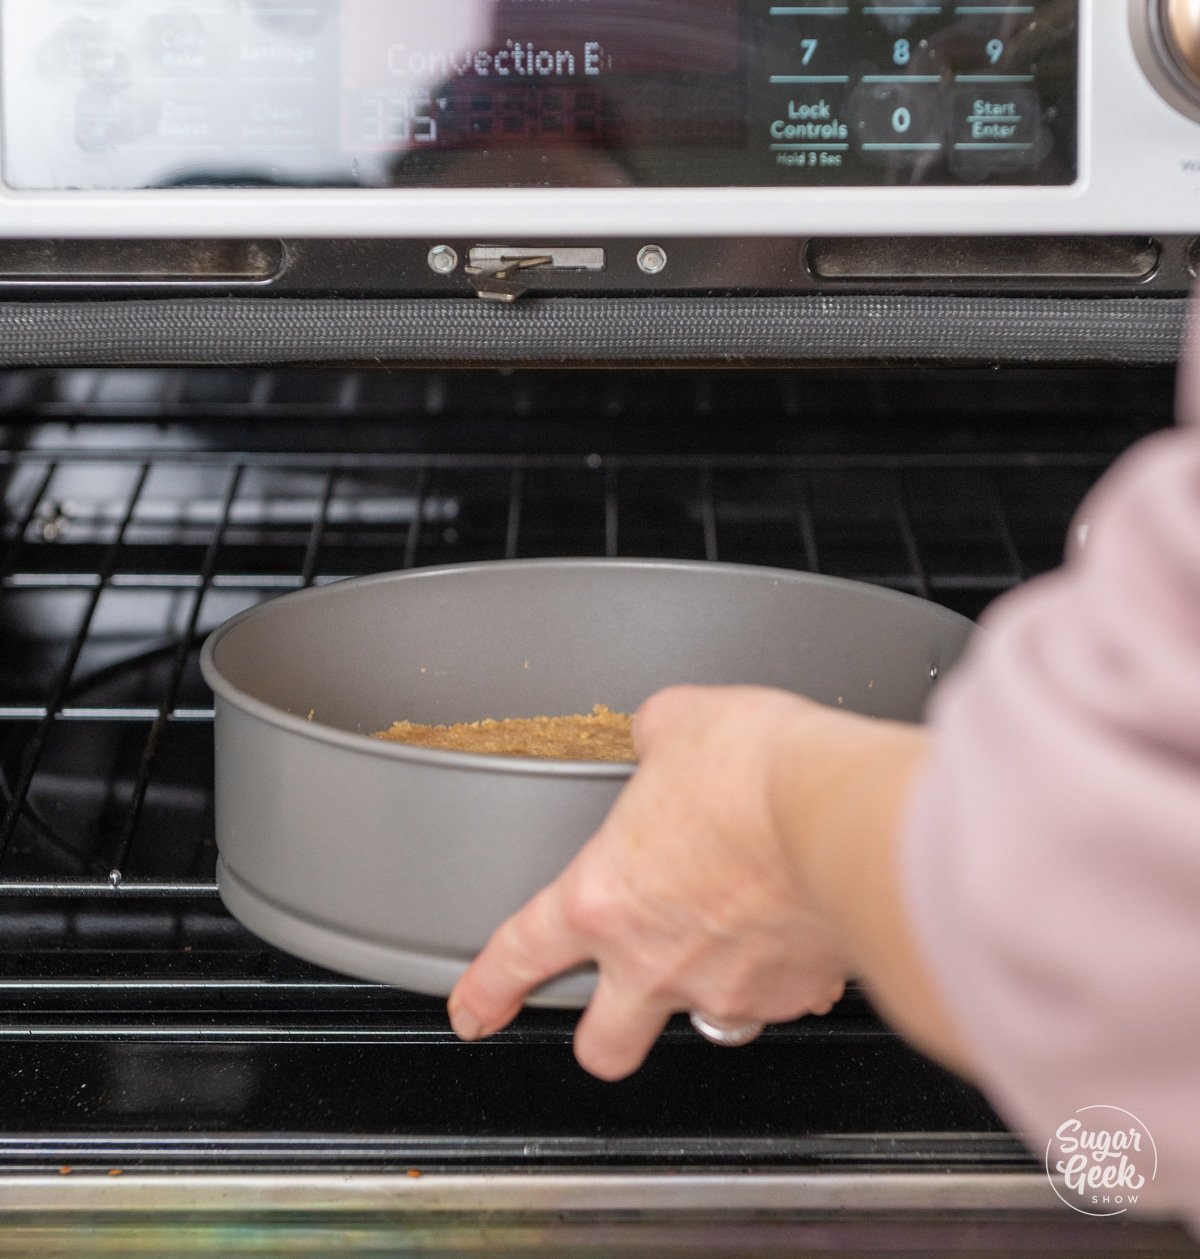
- Bake the crust for 5 minutes at 350ºF and then let it cool. You should be able to smell the toasty crust near the end of the baking time.

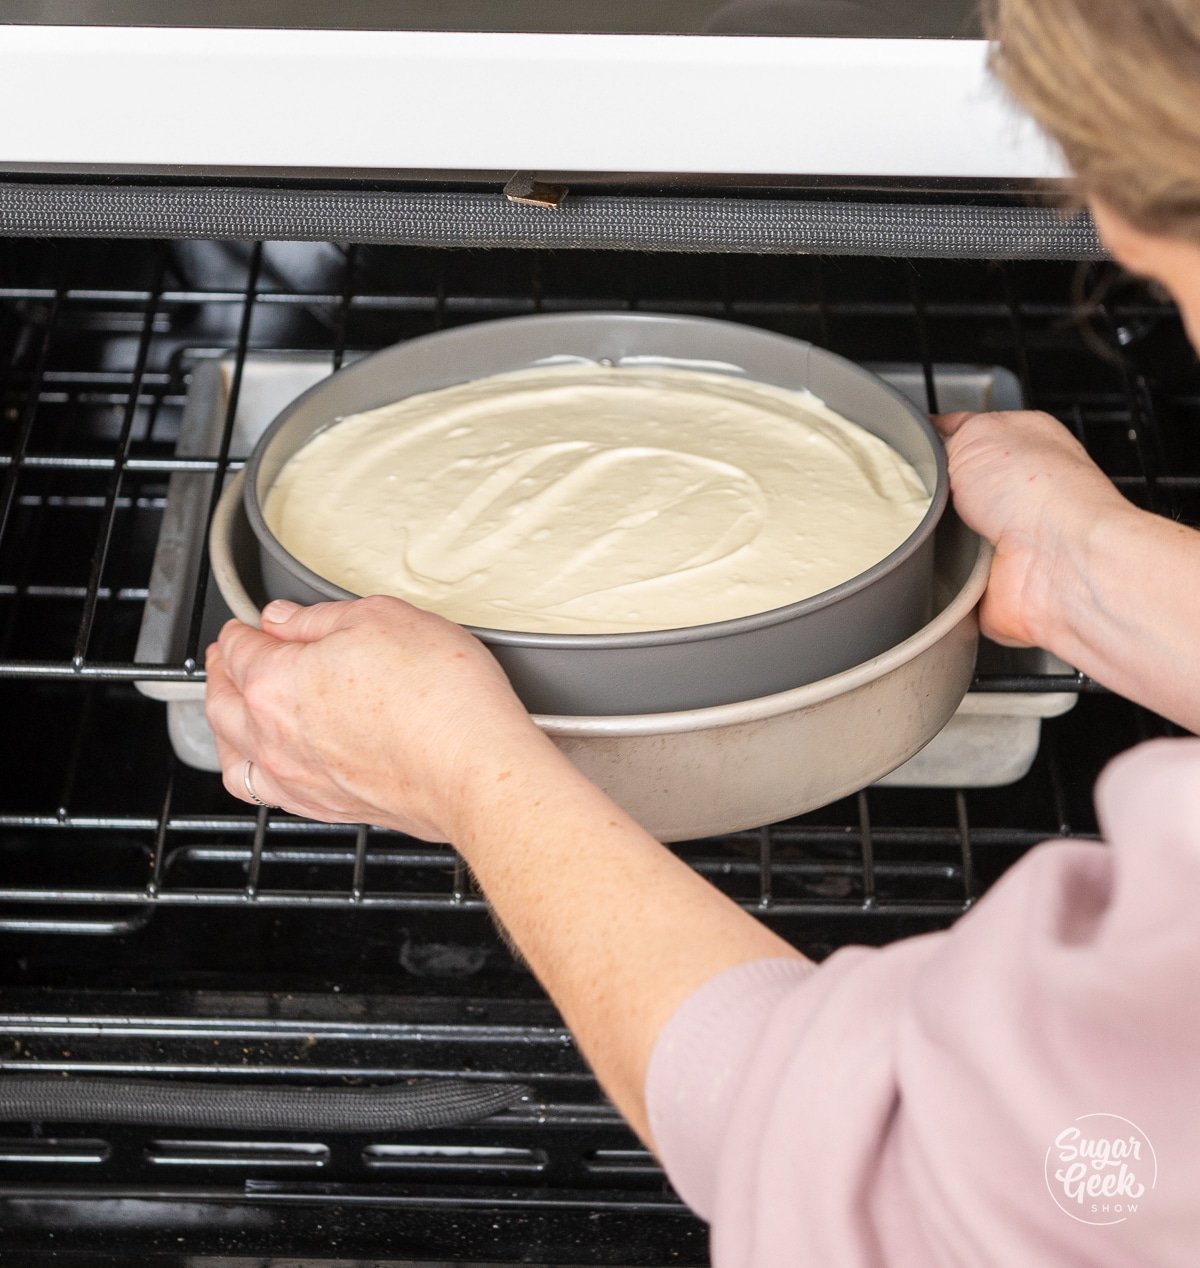
- Place the 9” cheesecake pan into a 10” cake pan (optional). This is an alternative to placing the pan into a water bath. The added insulation of the cake pan will help the cheesecake to bake slowly and evenly and will help prevent cracking. Baking strips wrapped around the springform pan will achieve the same effect.

Making the Cheesecake Filling
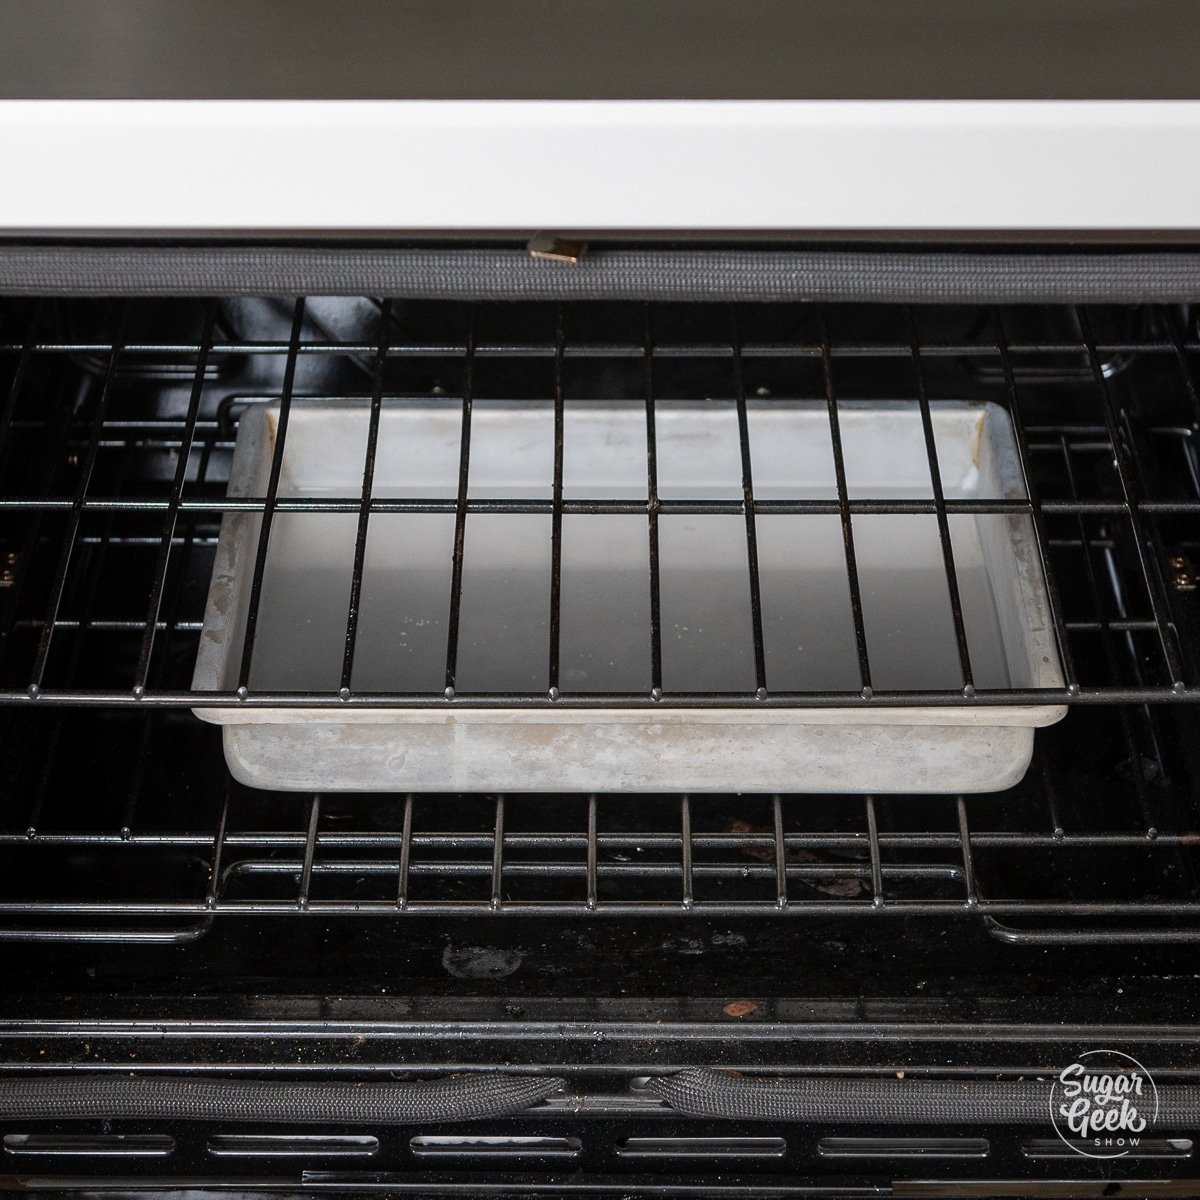
- Lower the oven to 335ºF and place a sheet pan or roasting pan on the bottom rack and fill it ¾ of the way with hot water. Your cheesecake will sit on the rack above the water.

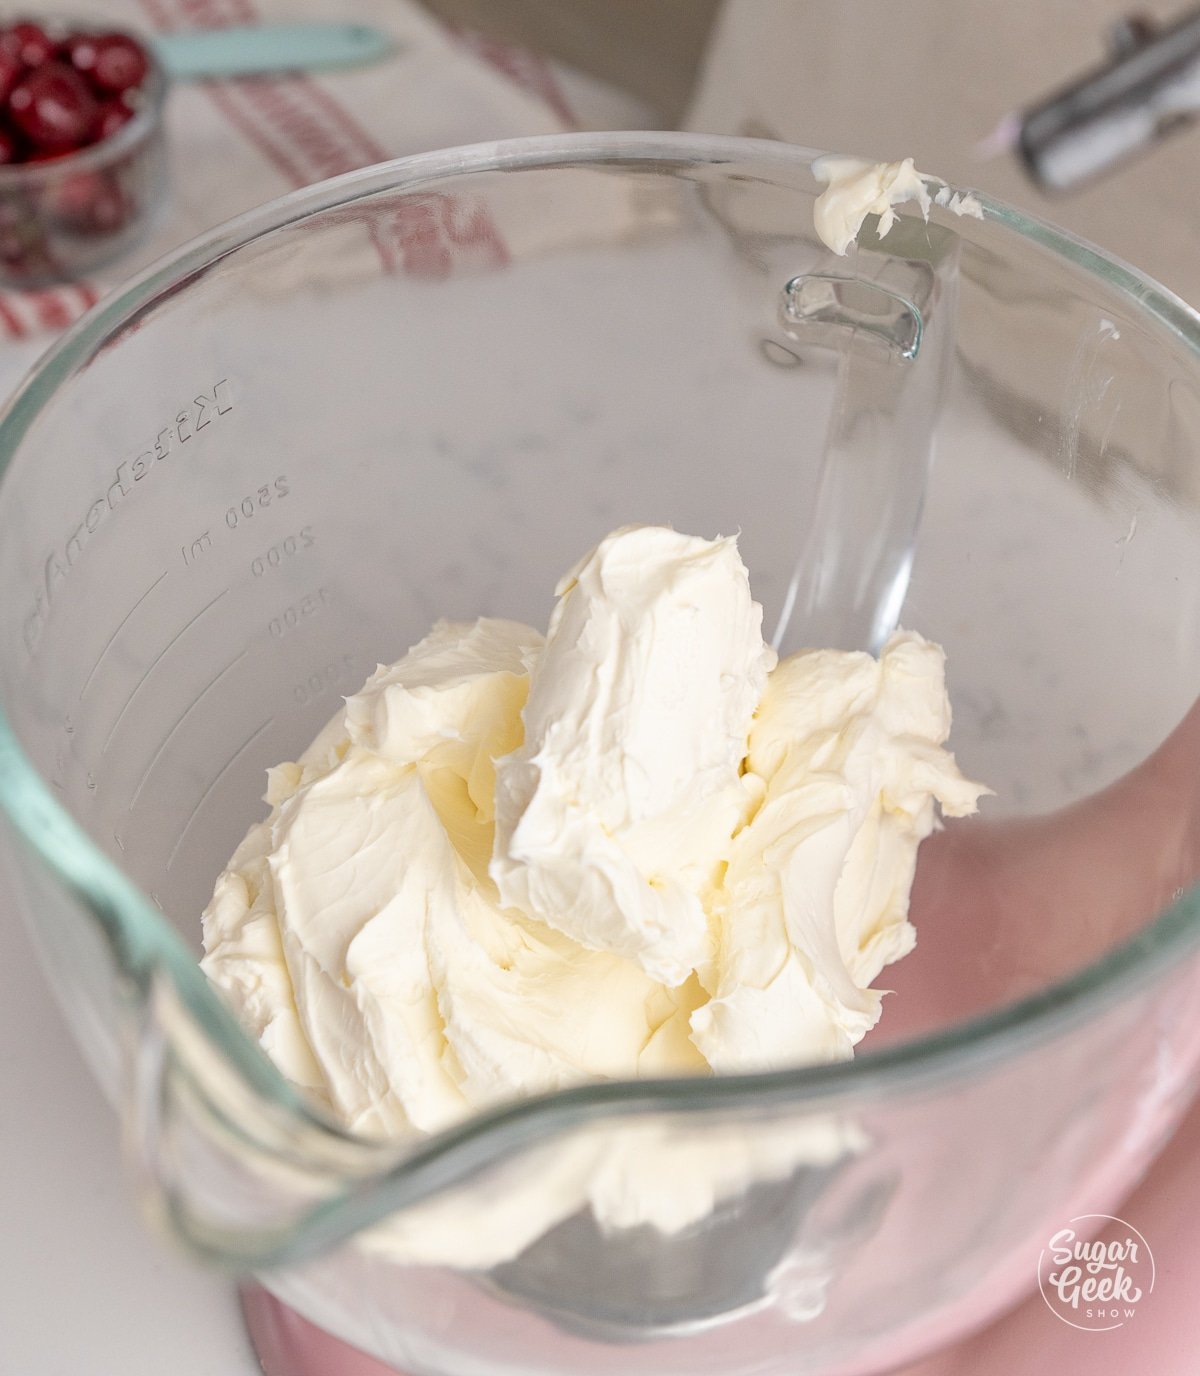
- Place your room-temperature cream cheese into the bowl of your stand mixer with the paddle attachment, or you can use an electric mixer. Beat the cream cheese on low until extra smooth and no longer lumpy.

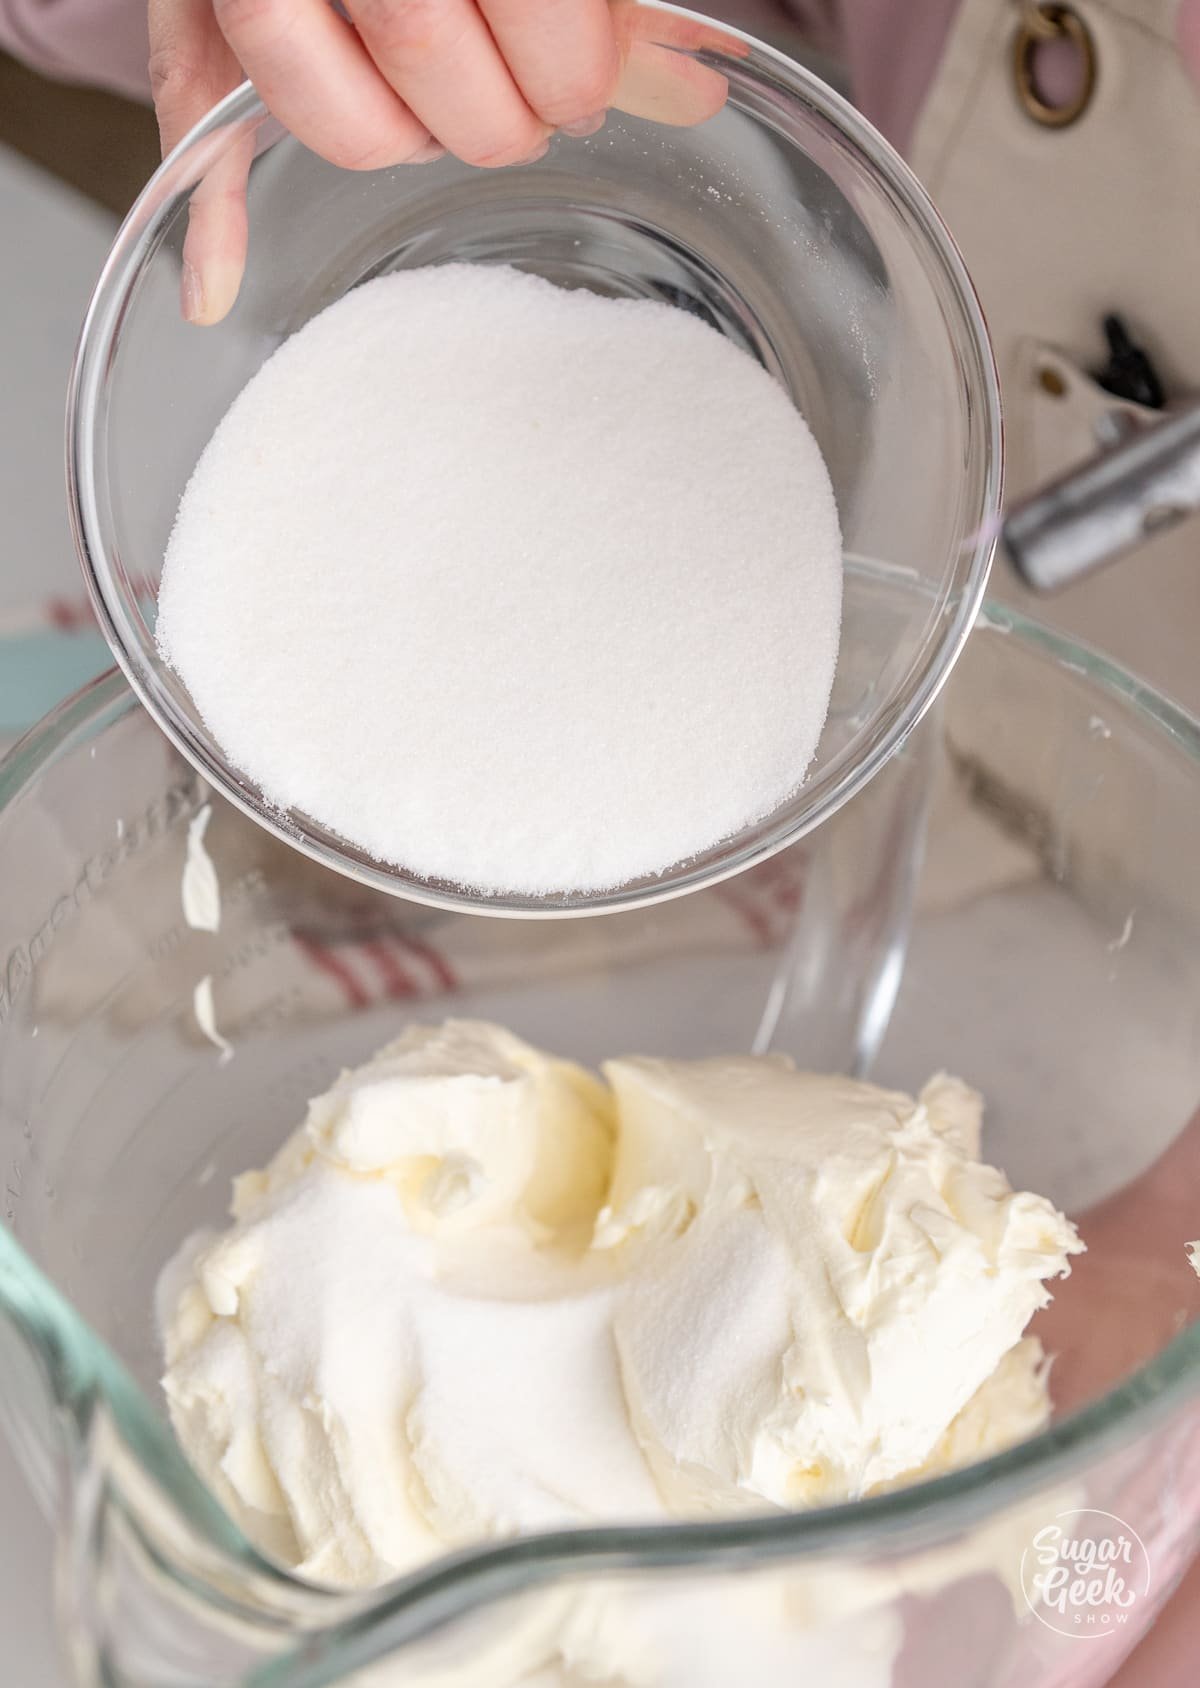
- Sprinkle in your granulated sugar while mixing on low until combined. Mixing the cream cheese and sugar until super smooth will make your cheesecake texture extra creamy.

- Add in the room temperature sour cream and heavy cream while mixing on low.

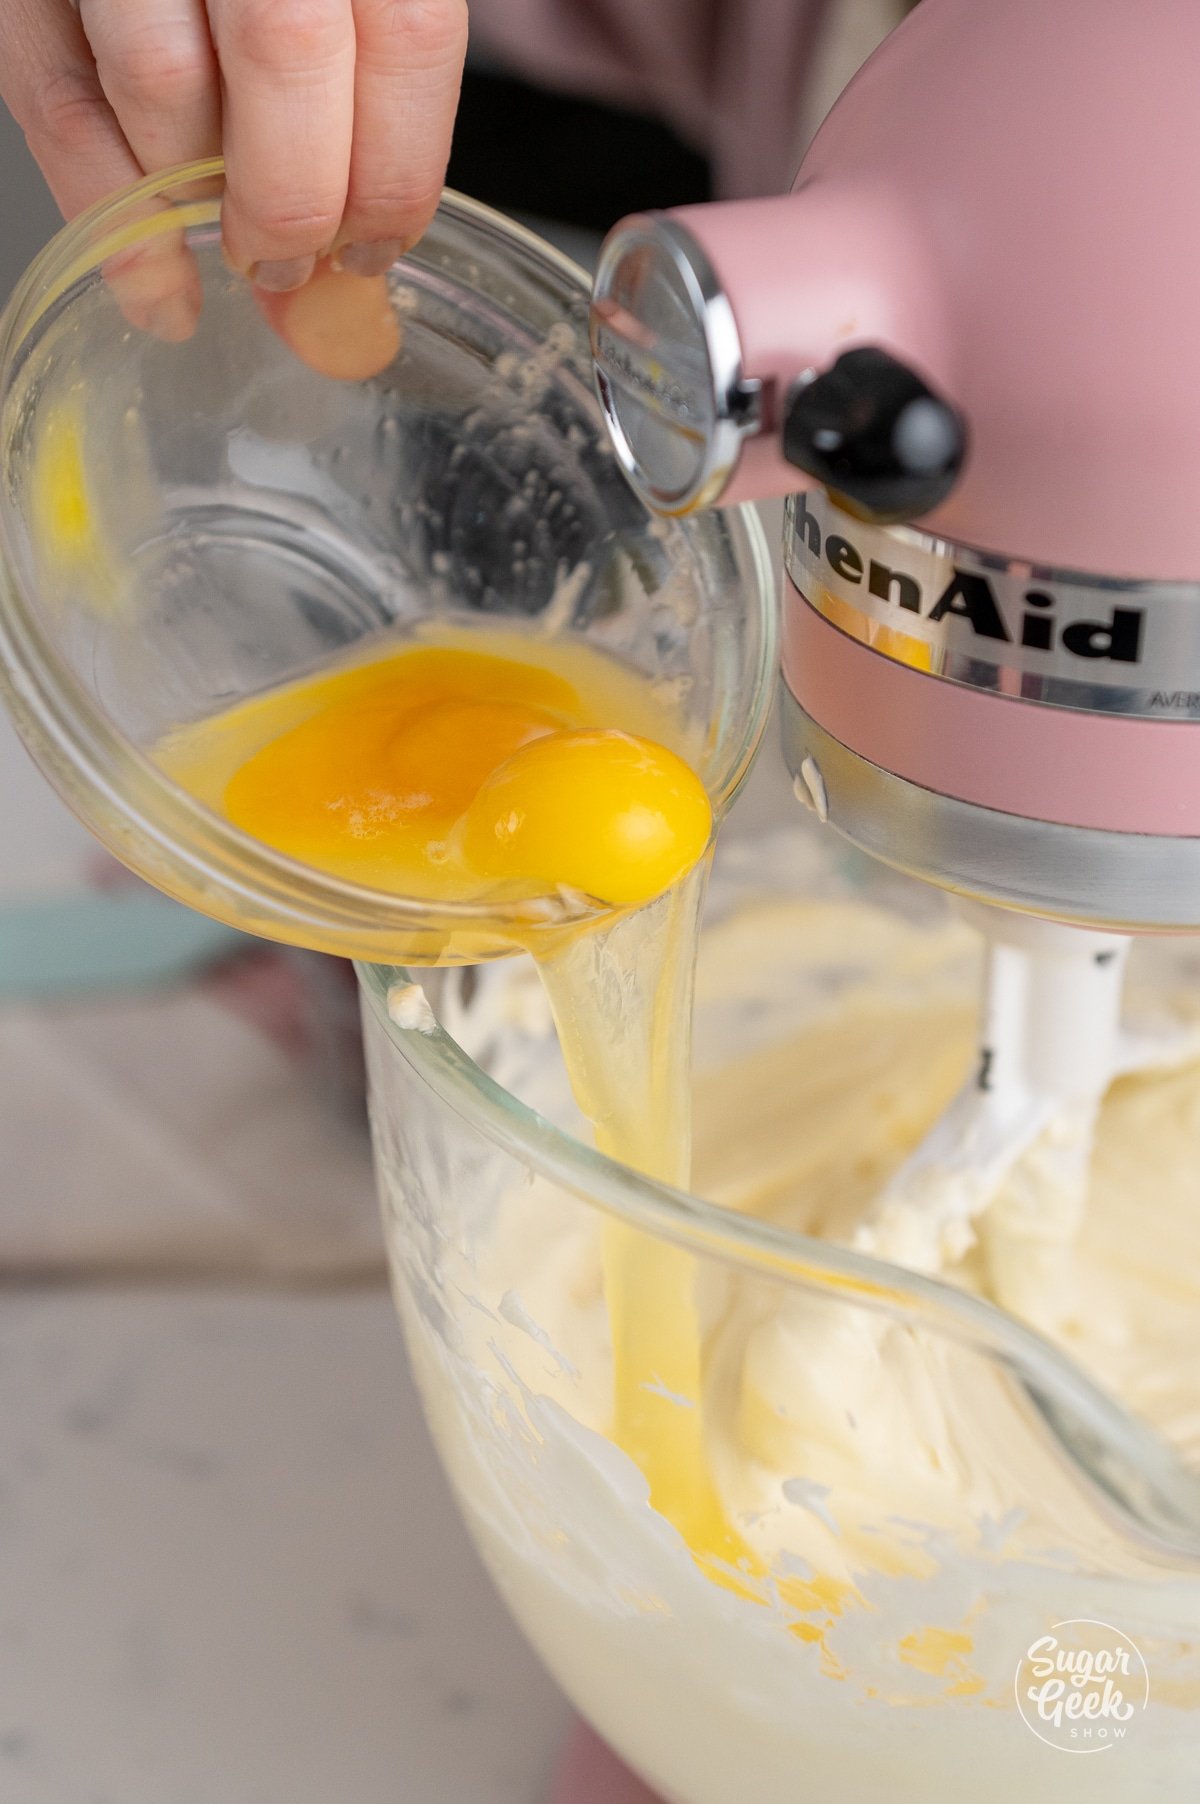
- Pour in your room temperature eggs one at a time, on medium speed, letting each one combine fully before adding in the next.

- Next, add the salt and vanilla extract. Scrape the sides of the bowl to ensure all of the cream cheese is incorporated.
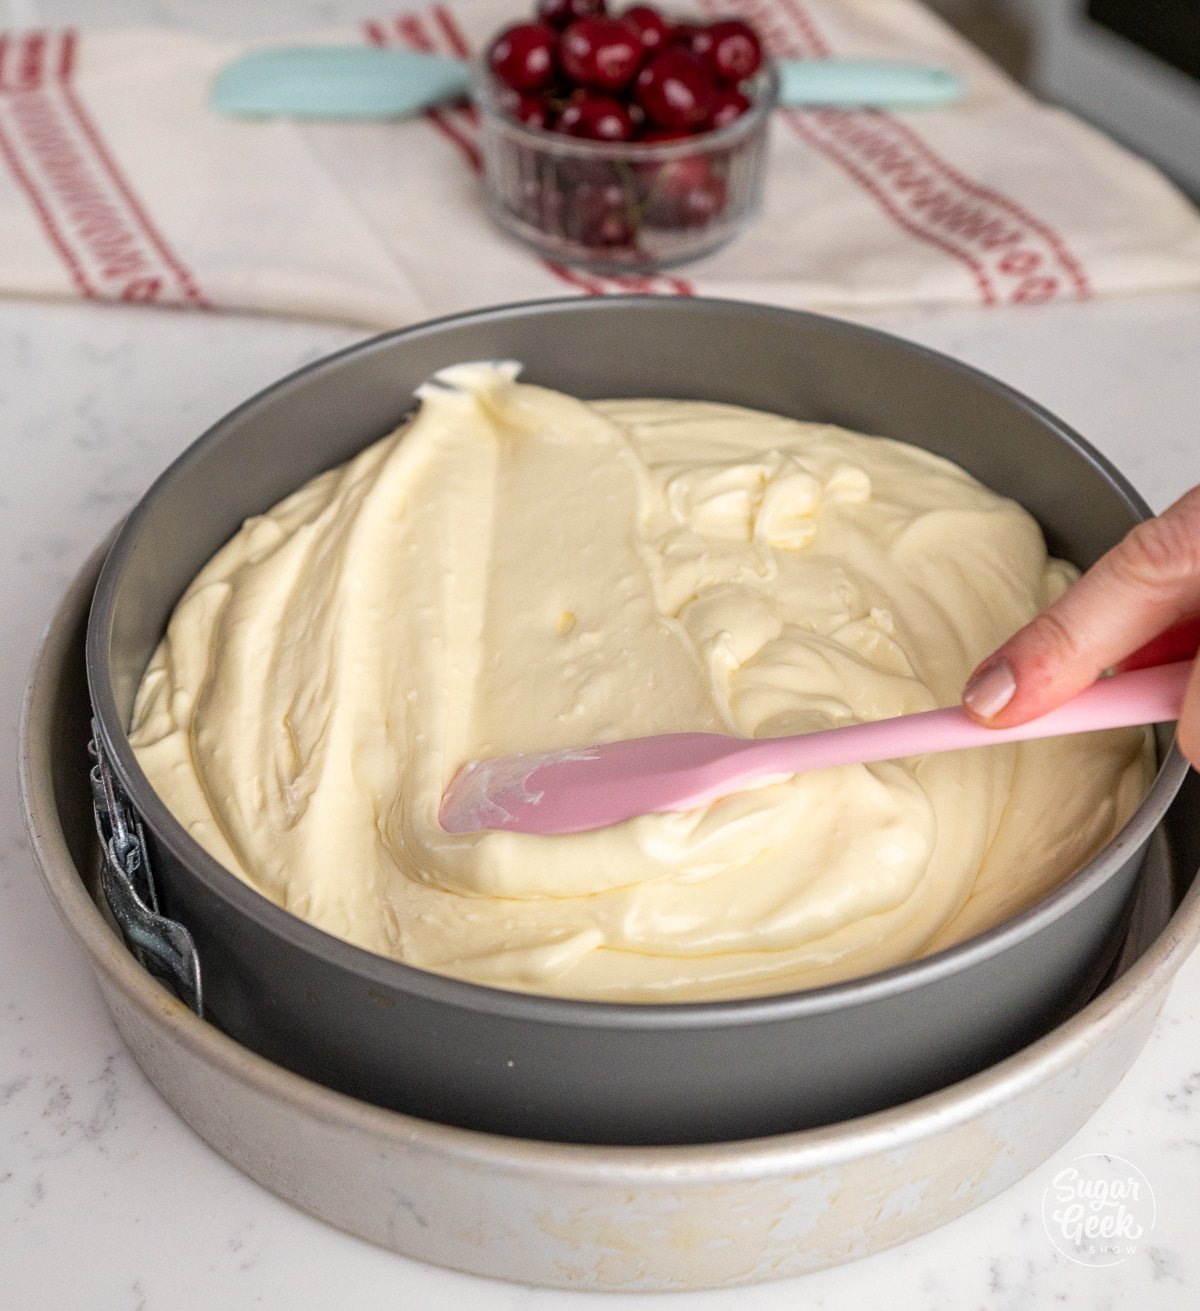
- Pour the cream cheese mixture into your cooled graham cracker crust.


Baking the Cheesecake
- Bake the cheesecake at 335ºF for about 60 minutes and do not open the oven door during baking. The cheesecake should be set, but still slightly jiggly in the center and have an internal temperature of 150°F. It will continue to firm up as it sits and cools down.

- Turn off the oven and crack the oven door open. Let the cheesecake cool inside the oven for 60 more minutes.
- Remove the cheesecake from the oven and place it into the fridge to cool for 6 hours or ideally, overnight. Wait to cover the cheesecake with plastic wrap until it is fully cool, so it doesn’t condensate and drip moisture onto the top of the cheesecake.
- Run a knife around the outside of the cheesecake to separate it from the pan, or use a kitchen torch to lightly warm the outside and remove the springform pan.
Making the Cherry Topping
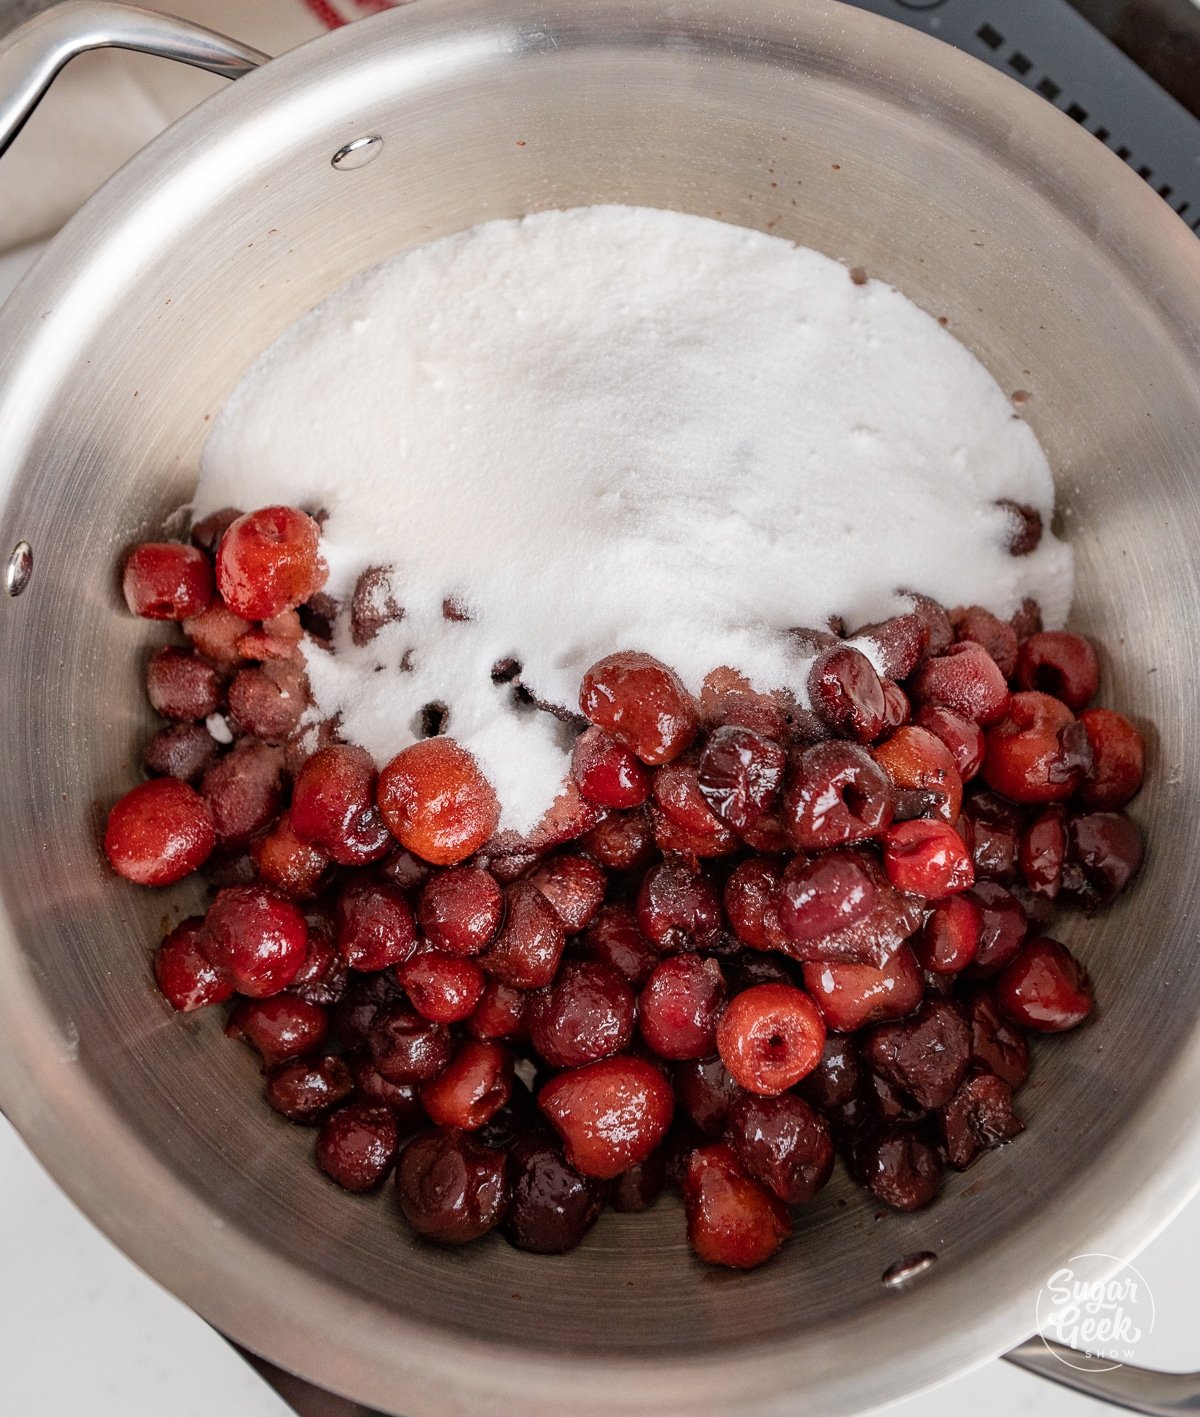
- Combine together the cherries, water, salt, and sugar in a large saucepan and bring it to a simmer over medium-high heat, stirring occasionally.

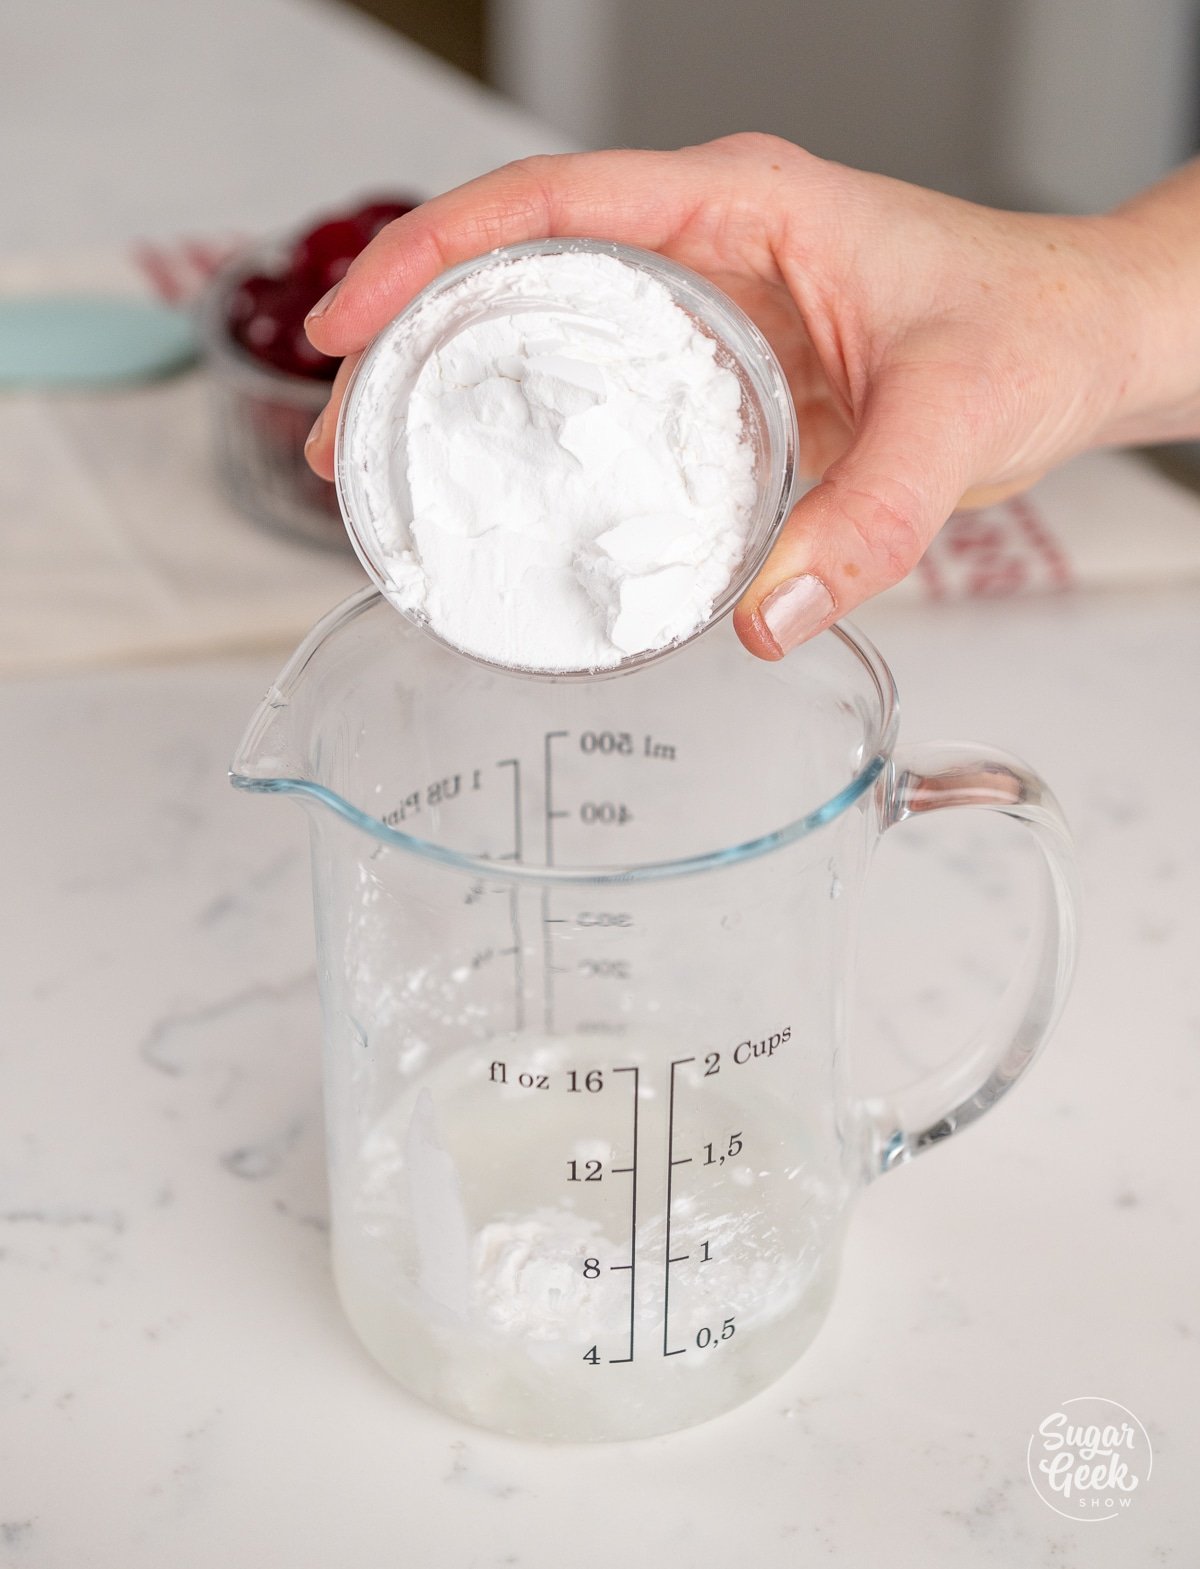
- Combine together the ClearJel (or cornstarch), lemon juice, 2 ounces of water, and lemon zest in a separate cup to make a slurry.

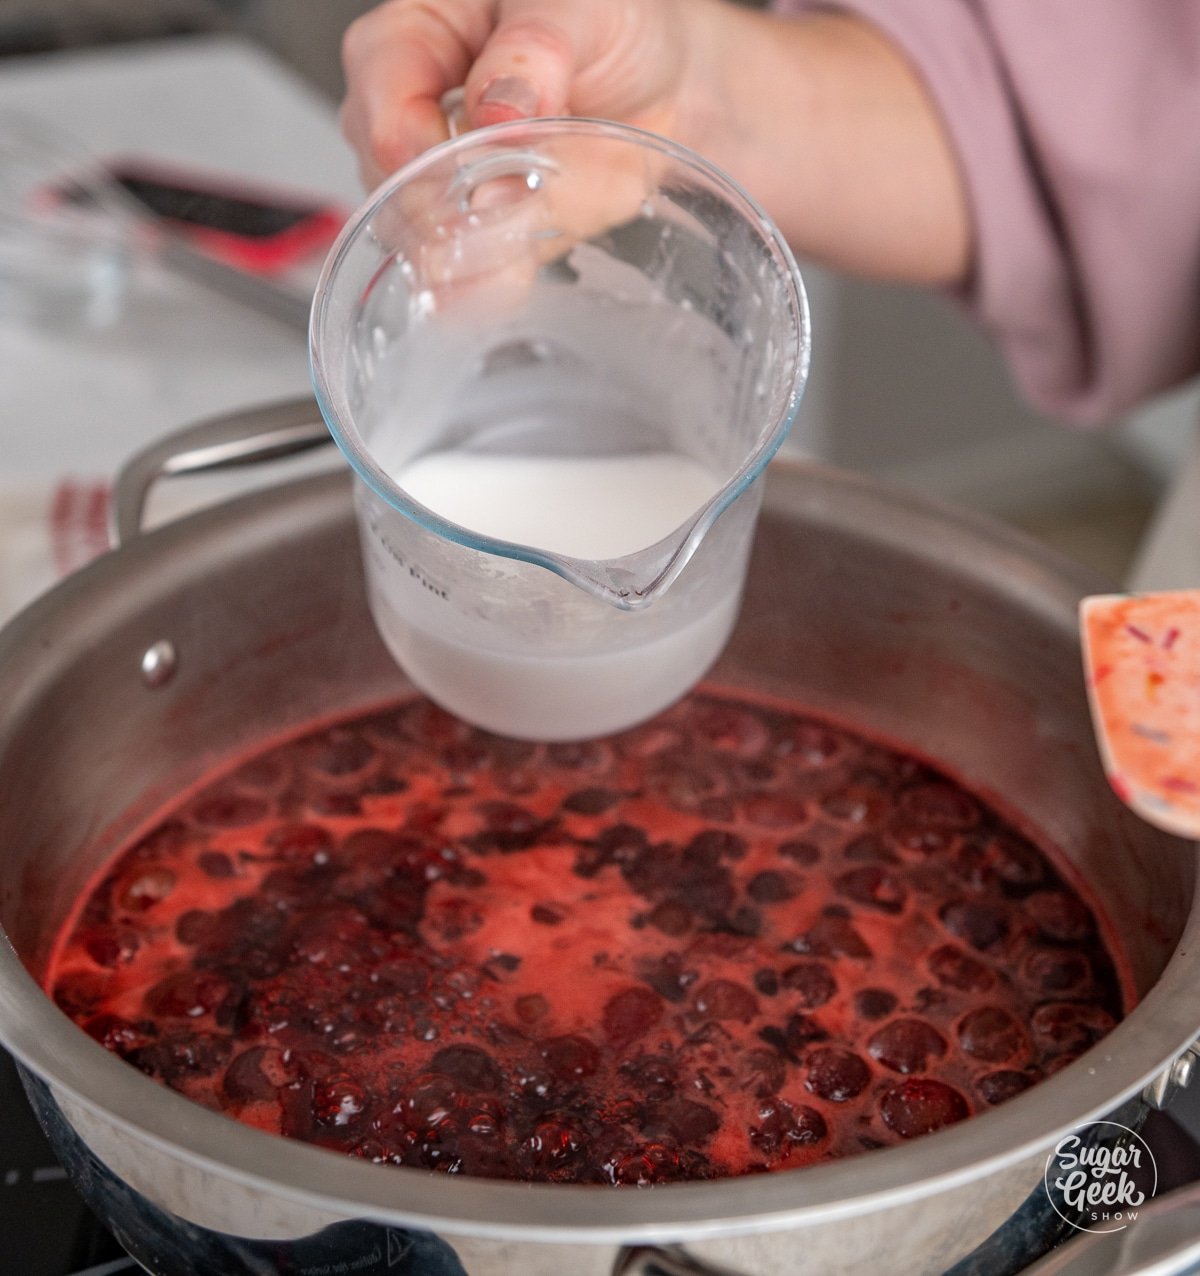
- Add the ClearJel mixture to the simmering cherries and cook for 1 minute while stirring constantly until thickened.

- Let the cherry filling cool before placing it on top of your cheesecake in an even layer.


FAQ
It needs to completely cool before eating, so 6 hours or even better, overnight. Cheesecake can’t be rushed for the best results.
You don't need a fully submerged water bath for a cheesecake, but you do need some humidity. With the added insulation of an extra cake pan, a low oven temperature, and a pan of water in the bottom of the oven, this slows down the baking process enough to give the cheesecake a creamy texture and a beautiful top.
Most often the cheesecake cracks because of a drastic change in temperature, causing the top layer to dry out and crack. Leaving the cheesecake in the oven while it cools slows down the cooling process enough to avoid drying and cracking.
Technically, when the cheesecake reaches an internal temperature of 150˚F, it is done baking. However, poking the center of your cheesecake with a probe thermometer could encourage a crack. The top and center of the cheesecake should still have a slight jiggle to it, which will firm as it cools slowly while sitting in the warm oven. It will continue to firm as it chills in the refrigerator as well.
Of course, a can of cherry pie filling is a great way to save time, but this homemade cherry pie filling comes together so quickly that it's really worth the effort.
Why did my cheesecake crack?
- Too much air incorporated into the batter - You want to avoid getting air into the batter. Always mix at the lowest speed and stop mixing as soon as the eggs are combined.
- Oven too hot - Make sure your oven is not too hot and your cheesecake is as far away from the top element as possible. Hot temperatures cause the cheesecake to inflate too much and then shrink when removed from the oven, causing large cracks.
- Drastic temperature change - Your cheesecake will puff up a tiny bit while baking and that is normal. If you remove it from the oven right after it's finished baking, it could deflate too quickly and then crack. That's why you leave it to cool slowly in the oven with the door cracked.
- Over-baking - If you over-bake your cheesecake, the eggs will contract and cause the cheesecake to shrink and crack. The texture will also suffer and be very rubbery instead of creamy.
How do you know when a cheesecake is done baking?
The cheesecake is done when the edges are set but the center is still jiggly but not watery. That can sound a little confusing I know. You can also use a thermometer to check the temperature. The center should read 150ºF at which point you turn off the oven, crack the door and let the cheesecake cool down slowly. This slow cooling keeps the cheesecake from cracking.
Give the cheesecake a little tap at the 150ºF stage so you can see how much it jiggles. Then you will know what to look for next time without having to use a thermometer.
Related Recipes
Recipe
Equipment
- 1 Stand mixer with paddle attachment
- 1 9" springboard pan
Ingredients
For The Cheesecake Crust
- 6 ounces graham crackers crushed
- 3 ounces unsalted butter melted
- 3 ounces granulated sugar
For The Cheesecake Filling
- 32 ounces cream cheese softened to room temperature
- 9 ounces granulated sugar
- 2 ounces sour cream room temperature
- 2 ounces heavy cream room temperature
- 4 large eggs warmed to room temperature
- ½ teaspoon salt
- 1 Tablespoon vanilla extract
For The Cherry Topping
- 32 ounces cherries fresh or frozen, and pitted
- 8 ounces granulated sugar
- ¼ teaspoon salt
- 8 ounces water
- 1 Tablespoon fresh lemon juice
- 1 Tablespoon lemon zest
- 3 Tablespoons ClearJel or 3 Tablespoons Cornstarch
- 2 ounces cool water for the ClearJel
Instructions
Making the Graham Cracker Crust
- Preheat your oven to 350ºF. Move the bottom oven rack to the lowest place in the oven. Place the second oven rack in the middle of the oven.
- Grind the graham crackers in a food processor or roll them in a large Ziploc bag with a rolling pin until they're finely crushed.
- Combine together the graham cracker crumbs, melted butter, and sugar in a medium bowl until it forms together.
- Place a parchment paper round in the bottom of the 9" springform pan (optional) to prevent sticking.
- Pour your graham cracker mixture on top of the parchment round and spread it evenly. Press down firmly with a flat measuring cup to compress the crust into the bottom and edges.
- Bake the crust for 5 minutes at 350ºF and then let it cool. You should be able to smell the toasty crust near the end of the baking time.
- Place the 9” cheesecake pan into a 10” cake pan (optional). This is an alternative to placing the pan into a water bath. The added insulation of the cake pan will help the cheesecake to bake slowly and evenly and will help prevent cracking. Baking strips wrapped around the springform pan will achieve the same effect.
Making the Cheesecake Filling
- Lower the oven to 335ºF and place a sheet pan or roasting pan on the bottom rack and fill it ¾ of the way with hot water. Your cheesecake will sit on the rack above the water.
- Place your room-temperature cream cheese into the bowl of your stand mixer with the paddle attachment, or you can use an electric mixer. Beat the cream cheese on low until extra smooth and no longer lumpy.
- Sprinkle in your granulated sugar while mixing on low until combined. Mixing the cream cheese and sugar until super smooth will make your cheesecake texture extra creamy.
- Add in the room temperature sour cream and heavy cream while mixing on low.
- Pour in your room temperature eggs one at a time, on medium speed, letting each one combine fully before adding in the next.
- Next, add the salt and vanilla extract. Scrape the sides of the bowl to ensure all of the cream cheese is incorporated.
- Pour the cream cheese mixture into your cooled graham cracker crust.
Baking the Cheesecake
- Bake the cheesecake at 335ºF for about 60 minutes and do not open the oven door during baking. The cheesecake should be set, but still slightly jiggly in the center and have an internal temperature of 150°F. It will continue to firm up as it sits and cools down.
- Turn off the oven and crack the oven door open. Let the cheesecake cool inside the oven for 60 more minutes.
- Remove the cheesecake from the oven and place it into the fridge to cool for 6 hours or ideally, overnight. Wait to cover the cheesecake with plastic wrap until it is fully cool, so it doesn’t condensate and drip moisture onto the top of the cheesecake.
- Run a knife around the outside of the cheesecake to separate it from the pan, or use a kitchen torch to lightly warm the outside and remove the springform pan.
Making the Cherry Topping
- Combine together the cherries, water, salt, and sugar in a large saucepan and bring it to a simmer over medium-high heat, stirring occasionally.
- Combine together the ClearJel (or cornstarch), lemon juice, 2 ounces of water, and lemon zest in a separate cup to make a slurry.
- Add the ClearJel mixture to the simmering cherries and cook for 1 minute while stirring constantly until thickened.
- Let the cherry filling cool before placing it on top of your cheesecake in an even layer.

April says
Could you use frozen cherries if you are unable to find fresh?
The Sugar Geek Show says
Absolutely 😀
Amy says
Please is there a substitute for sour cream? It's quite difficult getting it where I live.
The Sugar Geek Show says
You could try greek yogurt
Dee says
Is it 48 ounces of cream cheese or 4 8 ounce packages?
The Sugar Geek Show says
48 divided by 8 is 6 🙂
Stacey says
I just made this cheesecake for my husband and he LOVED it!!! It’s absolutely delicious! I couldn’t find fresh cherries so I used frozen and it still turned out delicious. Thanks for the recipe!!!!!
The Sugar Geek Show says
yay I'm so glad!
Deborah C Rhodes says
I'm making this now! I don't have a scale so I'm going by ounces on my measuring cup.. Fingers crossed it comes out yummy!
The Sugar Geek Show says
Hi there, measuring cups are very inaccurate and can cause some recipes to fail. Please read up on why I use a scale for recipe success in this blog post 🙂 You will probably be ok for this one but the graham crackers can be a big problem. https://sugargeekshow.com/news/digital-kitchen-scale/
Tyera says
Can I use strawberries instead of cherries for this recipe
Elizabeth Marek says
Absolutely!
Mira says
Thank you so much for sharing this recipe. My sister and I made it for Father’s Day and it turned out great! However, while following along we encountered a few problems. First, we weren’t sure whether or not to grease the pan. The recipe left this unclear so we decided to lightly spray it and this seemed to work out well. Second, the first instruction says to put the sheet pan with water in the oven when you set it to 350 for the crust. However, we assume the water is for when the cheesecake filling is baked, and if the pan had been in the oven since the beginning, all of the steam would already be gone by the time the filling was cooking. We didn’t put the water in until the cheesecake filling was baking and this seemed to work. Third, the list of ingredients includes vanilla extract and salt, but the instructions never mention when to add them. We ended up throwing them in at the very end when we realized they were still left out on our table, and it worked out fine. Fourth, even though we used a 9” springform pan (3” deep) as the recipe instructed, there was way more filling than could fit in the pan. We filled it up to about a centimeter from the top and still had tons of filling leftover. If the filling recipe was scaled down to about 75% we think that would work out better. Despite these comments, we found the cheesecake absolutely delicious and it was fun to make! We would definitely make this again keeping these alterations in mind.
Elizabeth Marek says
Thanks for all your feedback.
Zee says
Mira, Thanks for your notes. After reading that you had too much batter, I had a feeling my 10" pan would be perfect - and it was. If I may make a suggestion though - try always watching the videos. I find it so super helpful to have the written out recipe go along with a video. Takes most of the second guessing out of the experience.
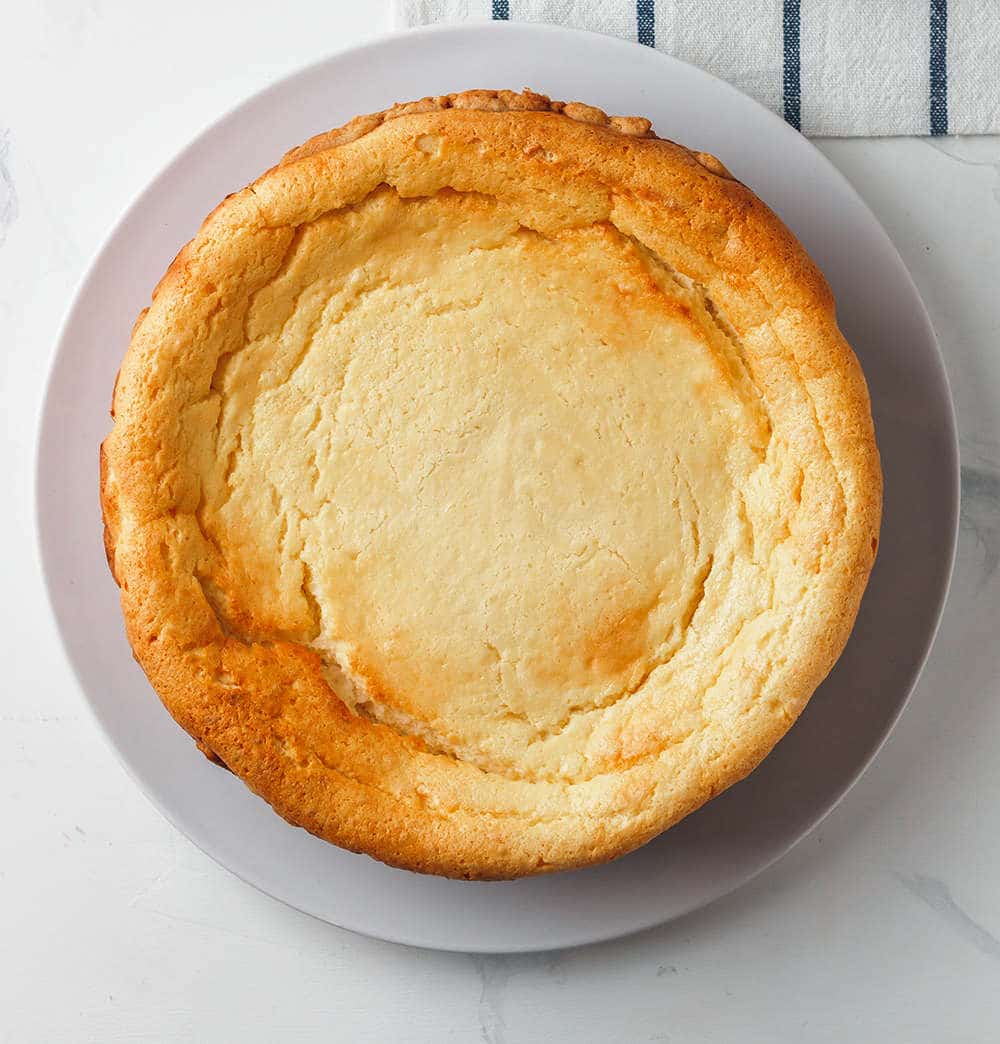
Liz, I do have a question. How do you get that dip on the surface of the cheesecake? That rim that helps keep the cherries inside and not gush out? Is it a bakers secret? Is it just the way the cake settled? My cheesecake was perfectly smooth - in any other circumstance, I would have died for this to happen, but in this case, I would have loved that little dip. How do you do it?
Elizabeth Marek says
I never put the ingredients (anymore) on my videos because if I ever decide to tweak the recipe then I can't use the video anymore.
The dip is caused by the cheesecake rising a lot during baking and then collapsing down after it cools. Follow the option for placing the cheesecake above the waterbath instead of inside and you'll probably get that dip.
Nikita says
Whelp! This is about to be moved to the fridge after sitting with oven off, door open for 1 hour...and I can already tell....it's gone be fire!! Dog if I didn't get that 'dip' effect too!! And the cherry topping is amazing (I used frozen). Had a few cracks but they disappeared after the cake shrunk into itself. I also used vanilla wafers. I had a good time with this one! THANK YOU!
Nancy Horvath says
Absolutely worth the effort. We harvested exactly 32 oz of cherries from our tree. Cooking time was 1.5 hours to get the inner temp to 150. Perfectly cooked.
Paul says
Easy to do
Make sure to read all about cooling and mixing before starting
After cooking one hour I let it rest for an hour with the door slitly open and the cake didn't crush
Delicious :o)