


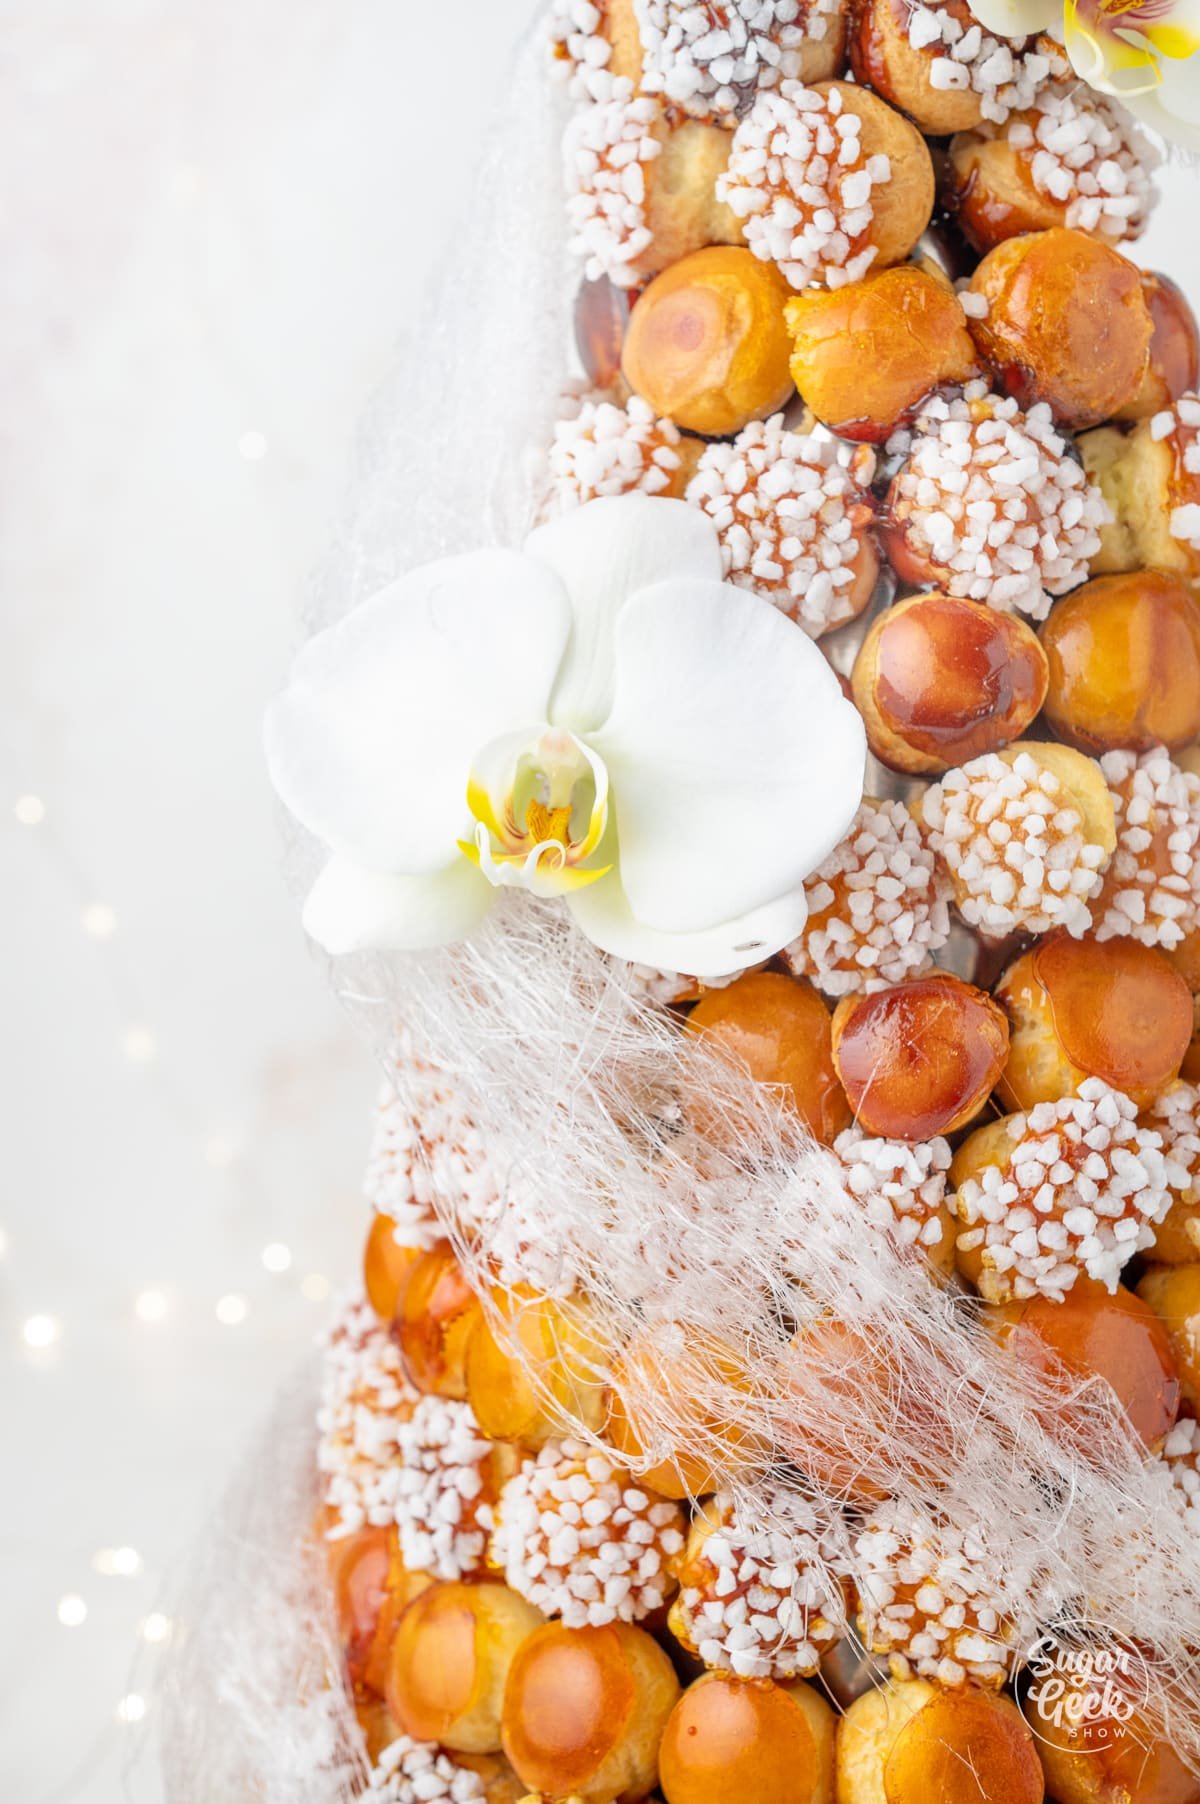
A classic French Croquembouche is the ultimate show-stopping dessert for a special occasion. Homemade cream puffs filled with sweet vanilla pastry cream are held together by fresh caramel to make an elegant cream puff tower. Decorate with some beautiful sugar art and flowers for a sky-high celebration.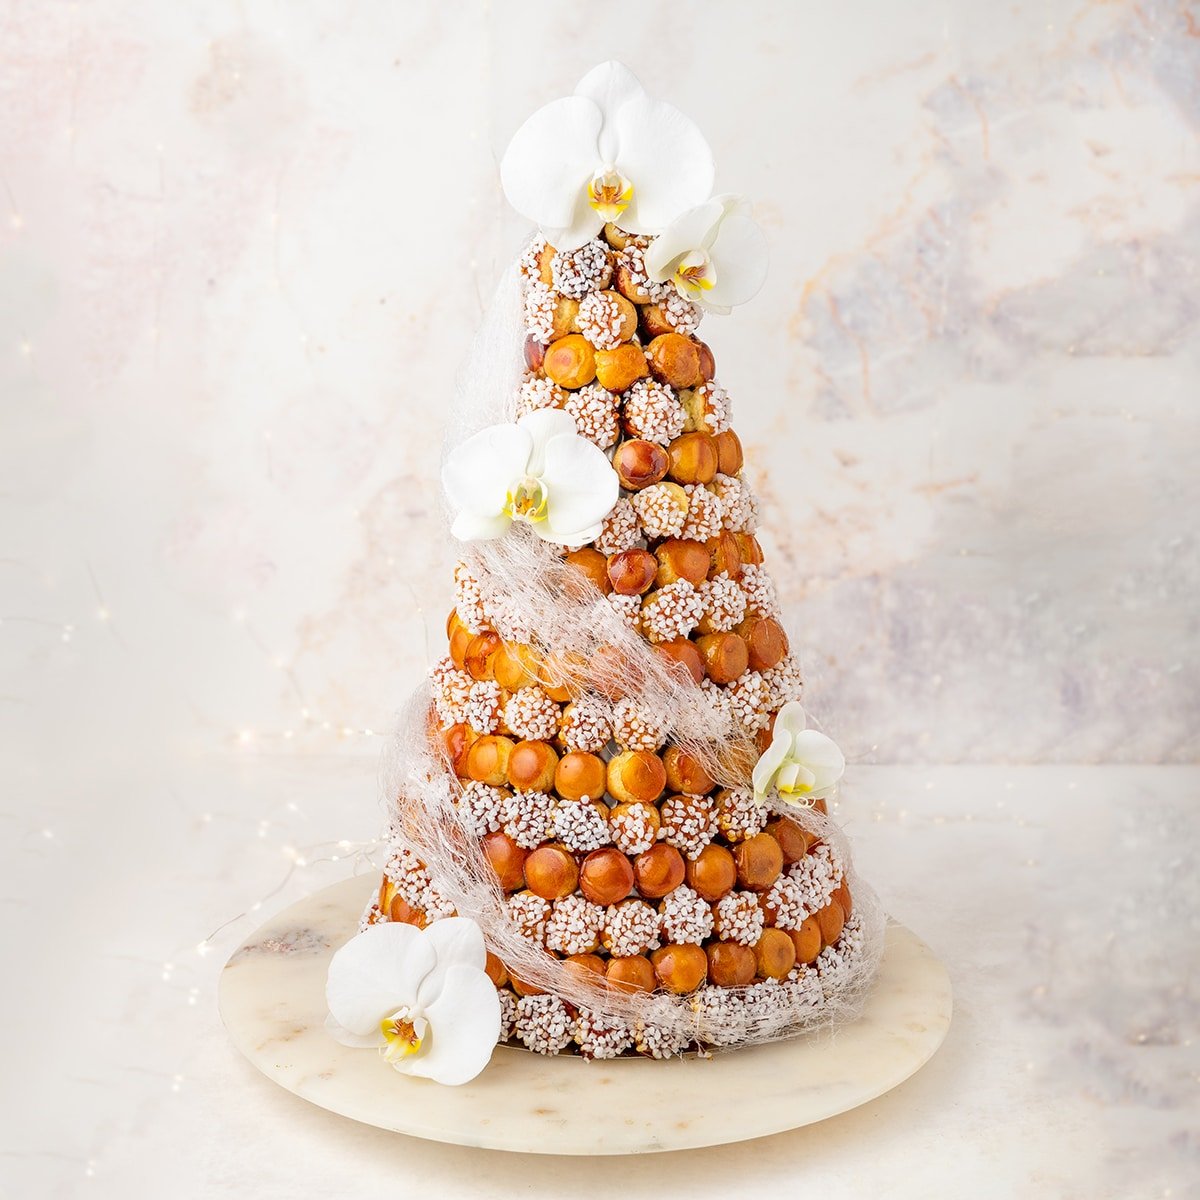
Chef Christophe Rull is here to teach you how to make pate a choux, assemble the croquembouche with all the tools you need, and top it off with some elegant flower and sugar art decoration. It's a classic French celebratory recipe that can make for a great alternative to wedding cake!
Table of contents
Special Ingredients and Substitutions

Vanilla Bean: We are adding a vanilla bean to our pastry cream because it's what will give it the most flavor, plus I think it looks the most natural when you see the vanilla specs inside the pastry cream. They are a little more expensive and can be hard to find so you can also use vanilla bean paste or vanilla extract.
Glucose: Glucose is very similar to corn syrup. It's a sweetener that adds moisture to any recipe. It's more commonly found in commercial kitchens, but if you can't find glucose you can easily substitute it for corn syrup.
Cornstarch: We are going to be using cornstarch as our thickening agent for our pastry cream. Cornstarch is typically used to thicken creams, jams, or sauces. You can get cornstarch at your local grocery store!
Rock Sugar: Rock sugar is sugar that's made of much thicker granules. We will be dipping our pate a choux in it for decoration and added sweetness!
Making a Croquembouche
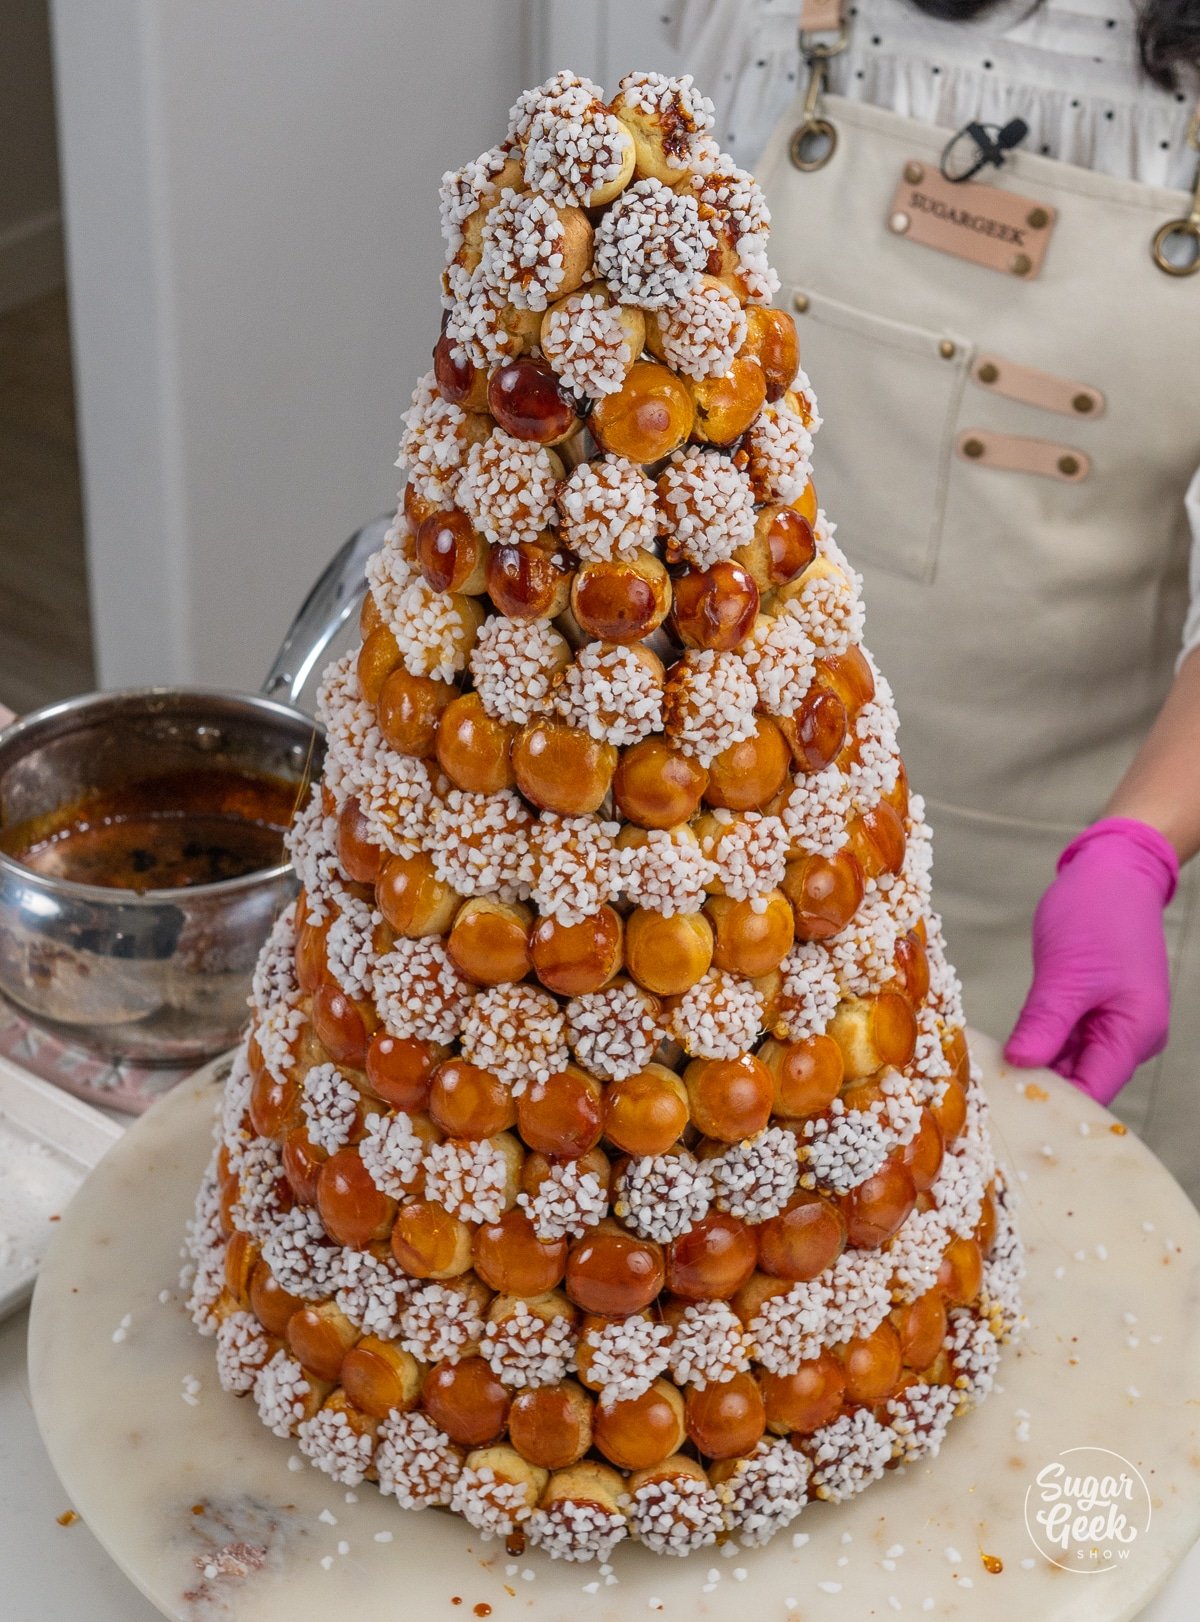
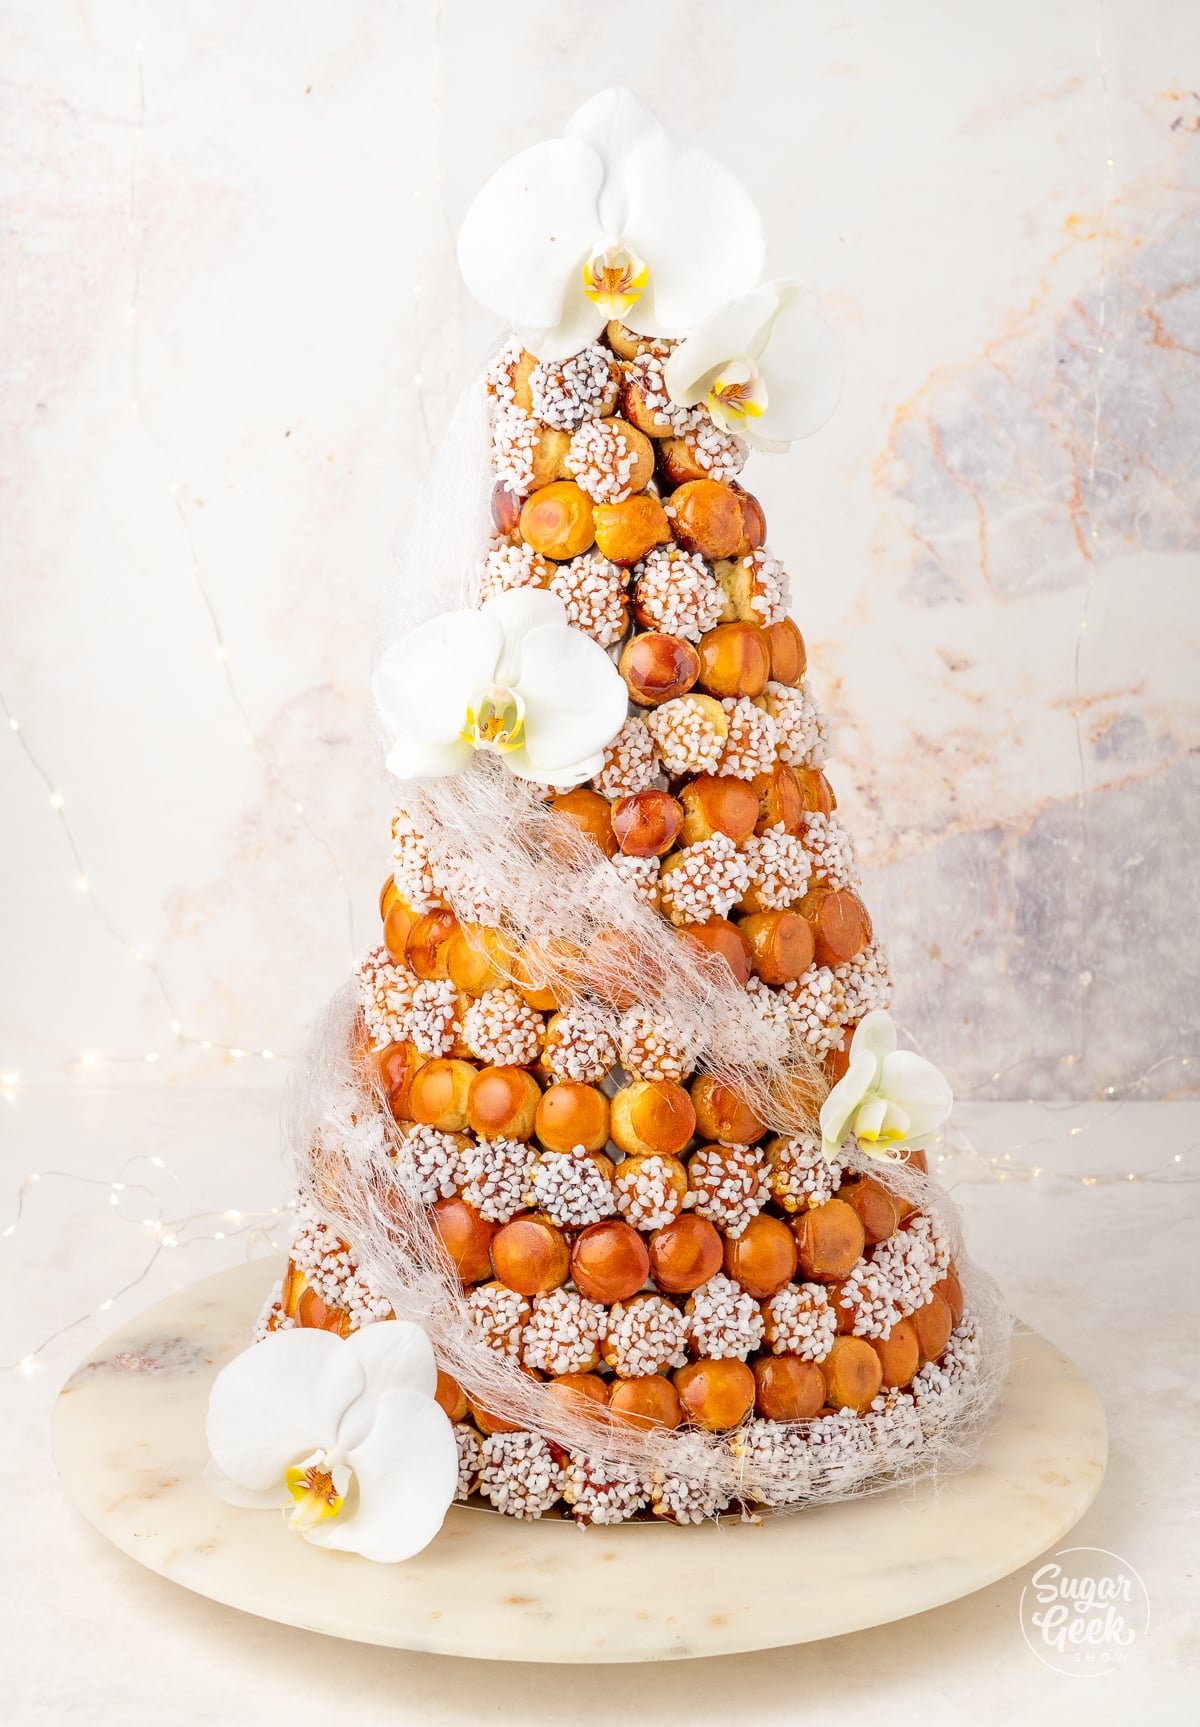
This 18" tall croquembouche with about 250 cream puffs took about 5 hours in total to make. We had two people helping fill, dip, and assemble the cream puffs.
It is possible to make this croquembouche all in one day, but you can also make the pate a choux and pastry cream ahead of time. Just make sure to avoid refrigerating the filled cream puffs overnight, or they will get soggy.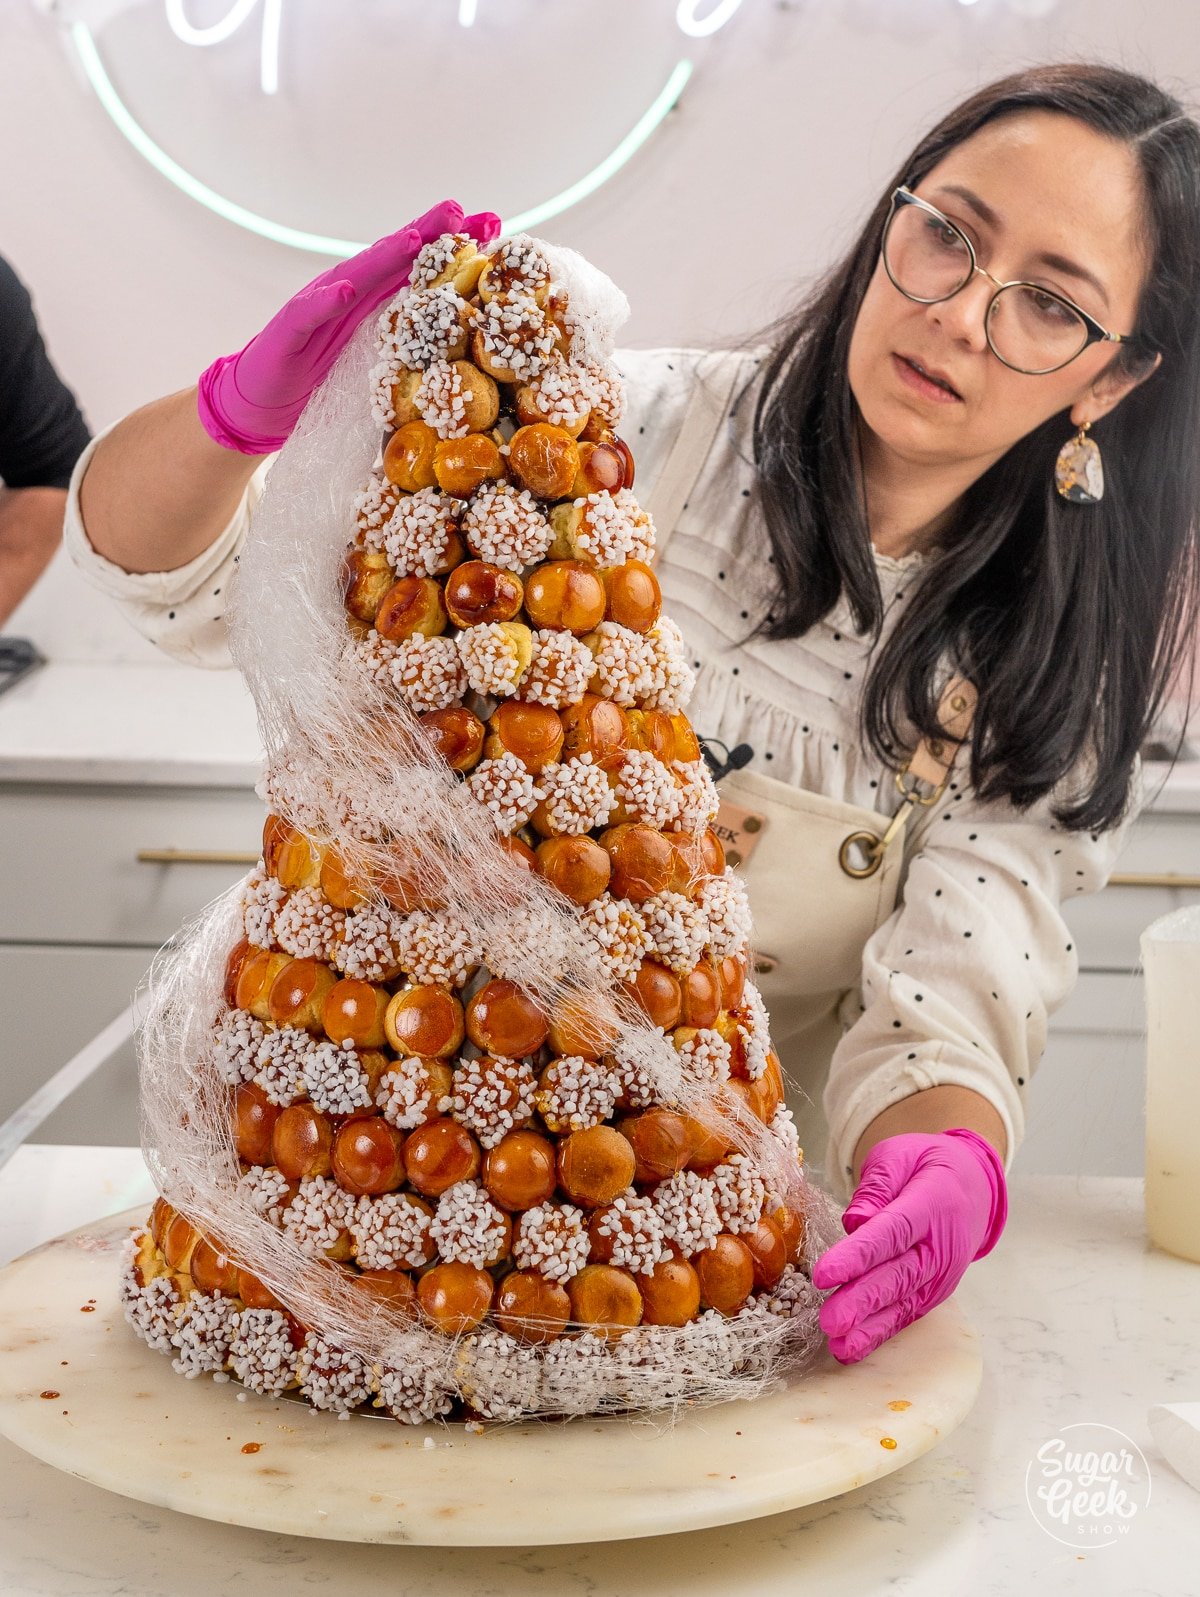
Tips Before Starting
- This pate a choux recipe is enough to make about 64 cream puffs, but you will need to make multiple batches depending on what size croquembouche you're making.
- 200-250 2" cream puffs are enough for an 18" tall, 10" wide croquembouche, so you will need about 4 batches of this recipe for that size.
- We are using a croquembouche mold from Matfer, but you can use any kind of mold or even make your own!
- It's best to use a heavy bottom pot rather than a nonstick pot for pâte à choux because you want your dough to stick to the bottom when drying.
- To make the choux ahead of time, you have two options: Place the choux dough in multiple pastry bags and chill them overnight, then pipe, bake, fill, and assemble on the same day. OR bake the cream puff shells the day before, store them in an airtight container at room temperature overnight, then crisp them up in a 350°F oven for 5 minutes the next day before filling, and assembling.
Making Pâte à Choux
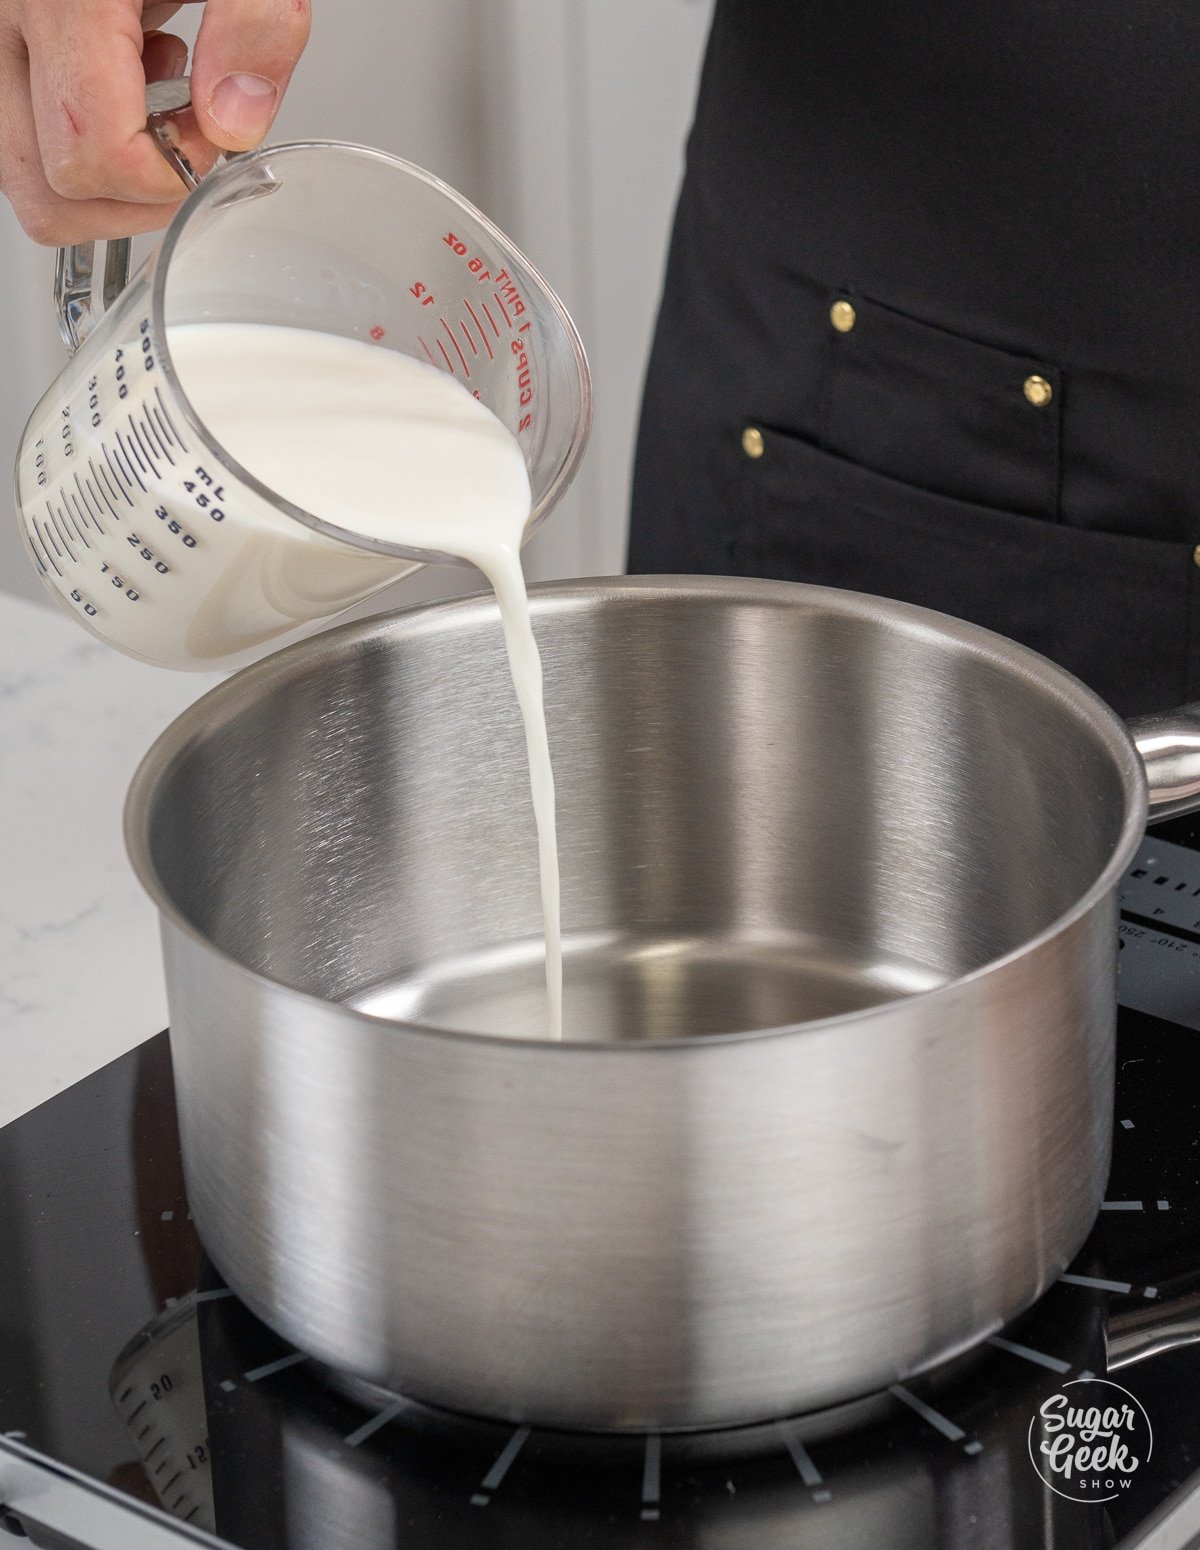
- Add your milk, water, salt, sugar, and butter to a medium saucepan and bring it to a boil. The butter should be melted at the same time the milk starts to boil, so remove the pot from the heat to let the butter melt if needed.


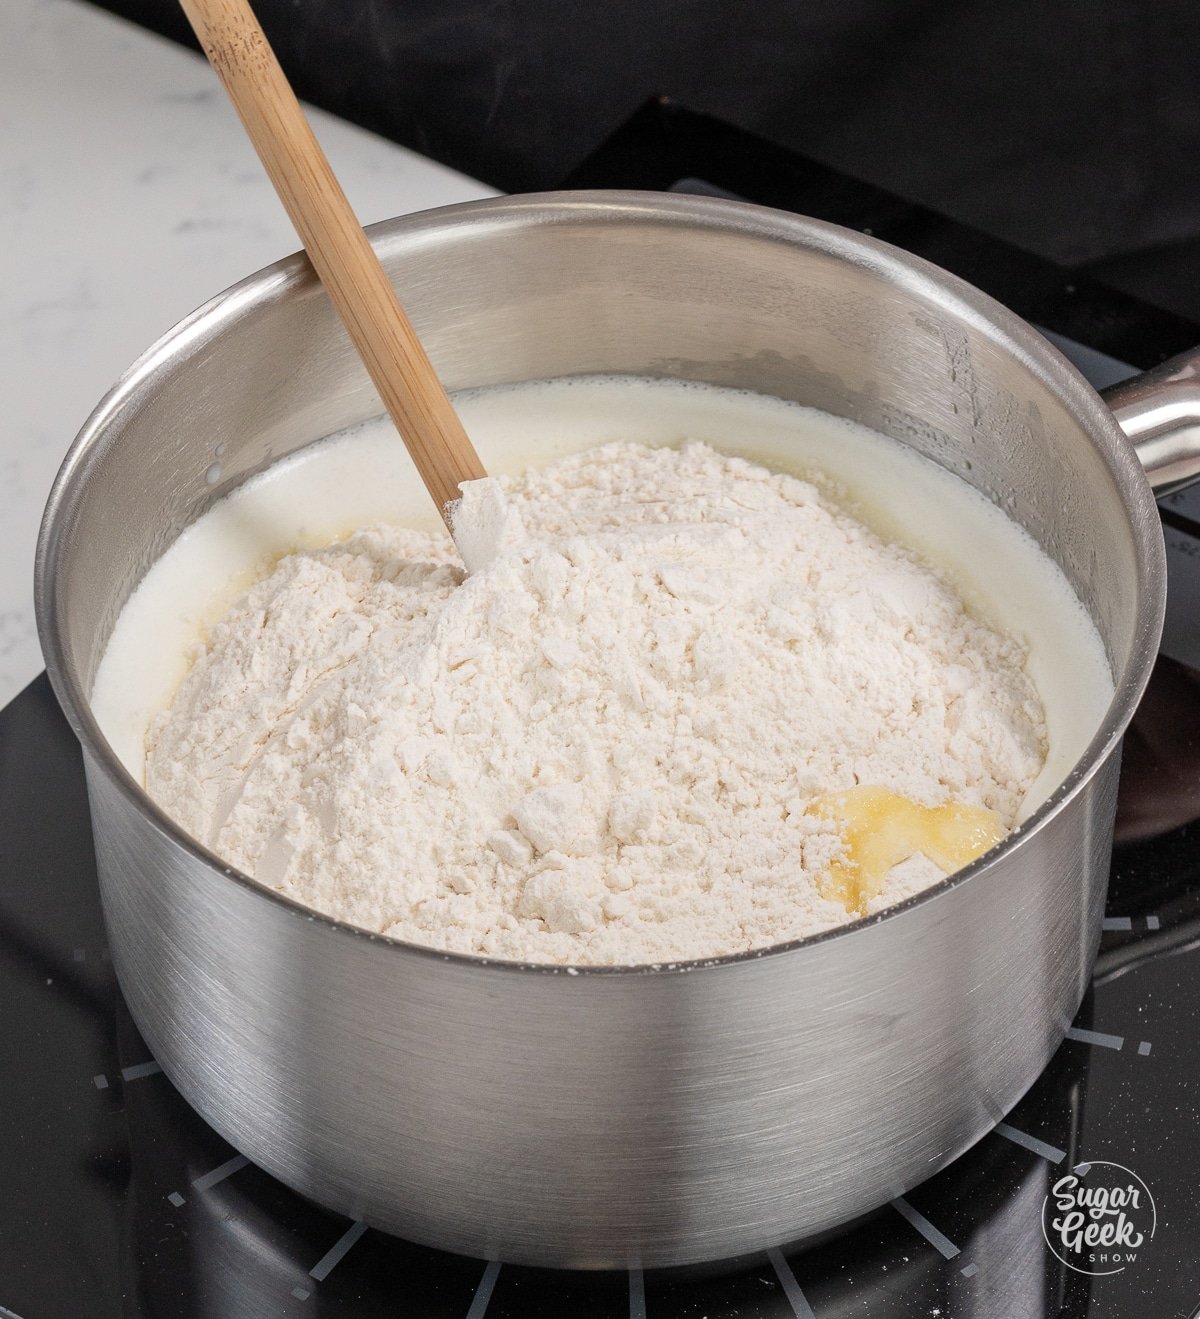
- Once your milk mixture is boiling and the butter has completely melted, take your pot off the heat, add in your sifted flour, and mix together until it looks like mashed potatoes. It is best to use a wooden spoon, but a spatula is fine too.

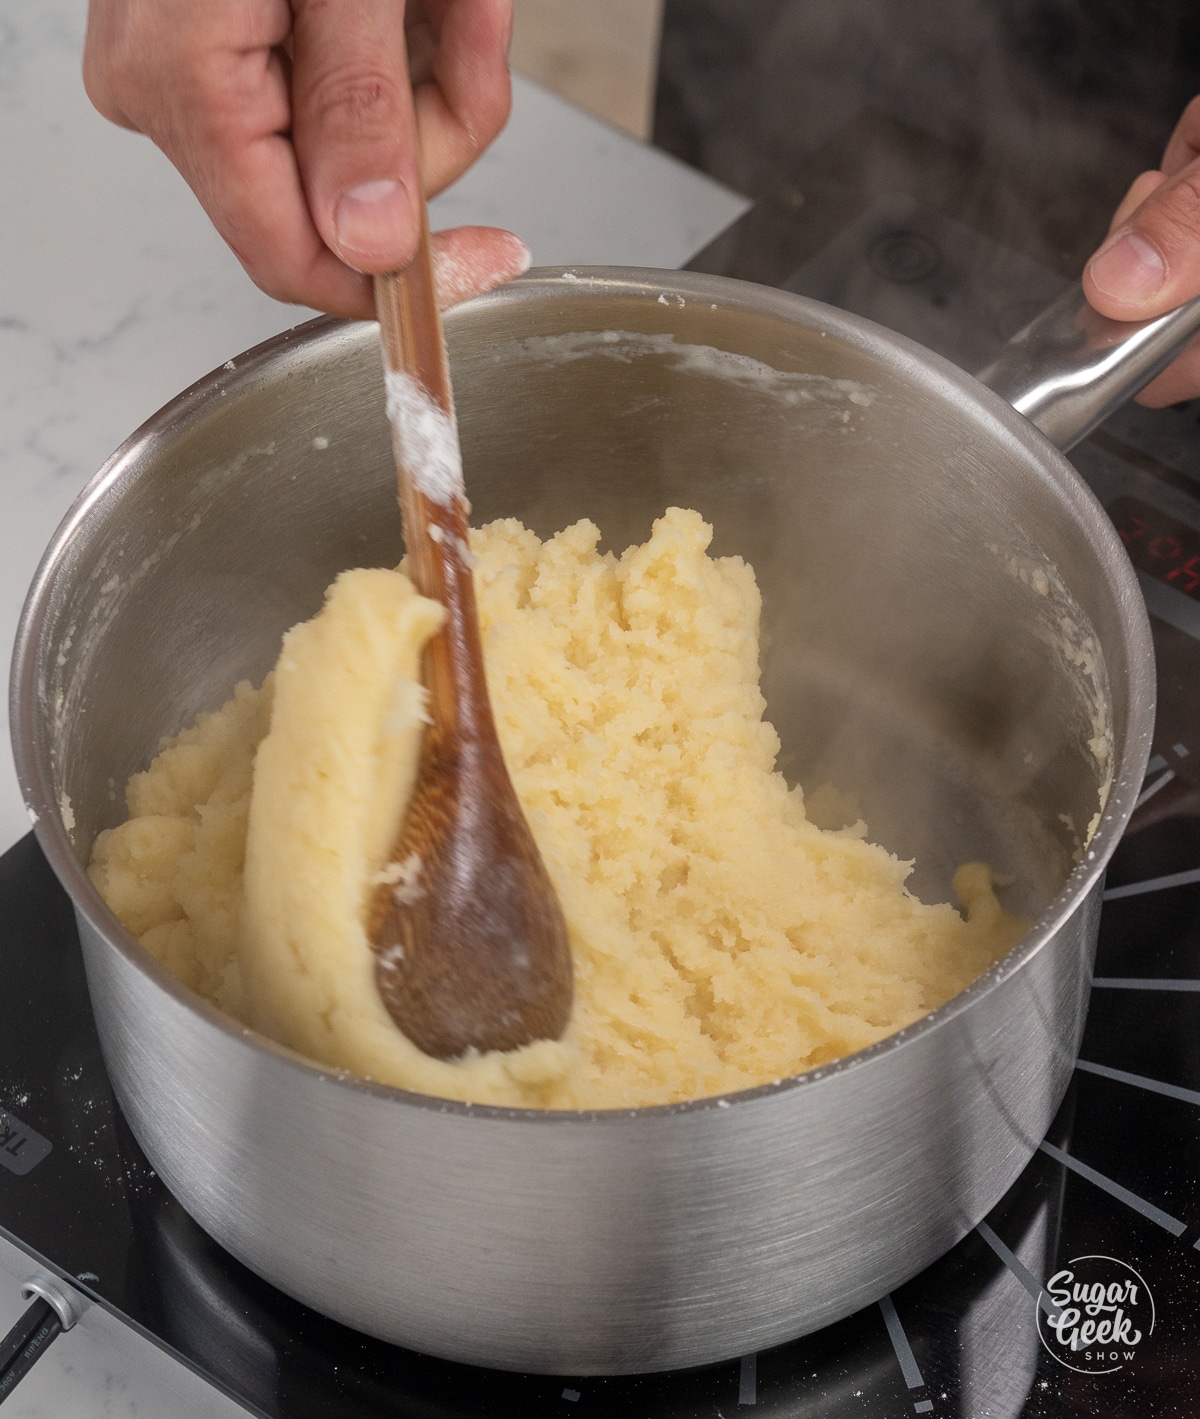
- Turn the heat back on to medium-high and continue to stir and keep it moving to dry out the dough.

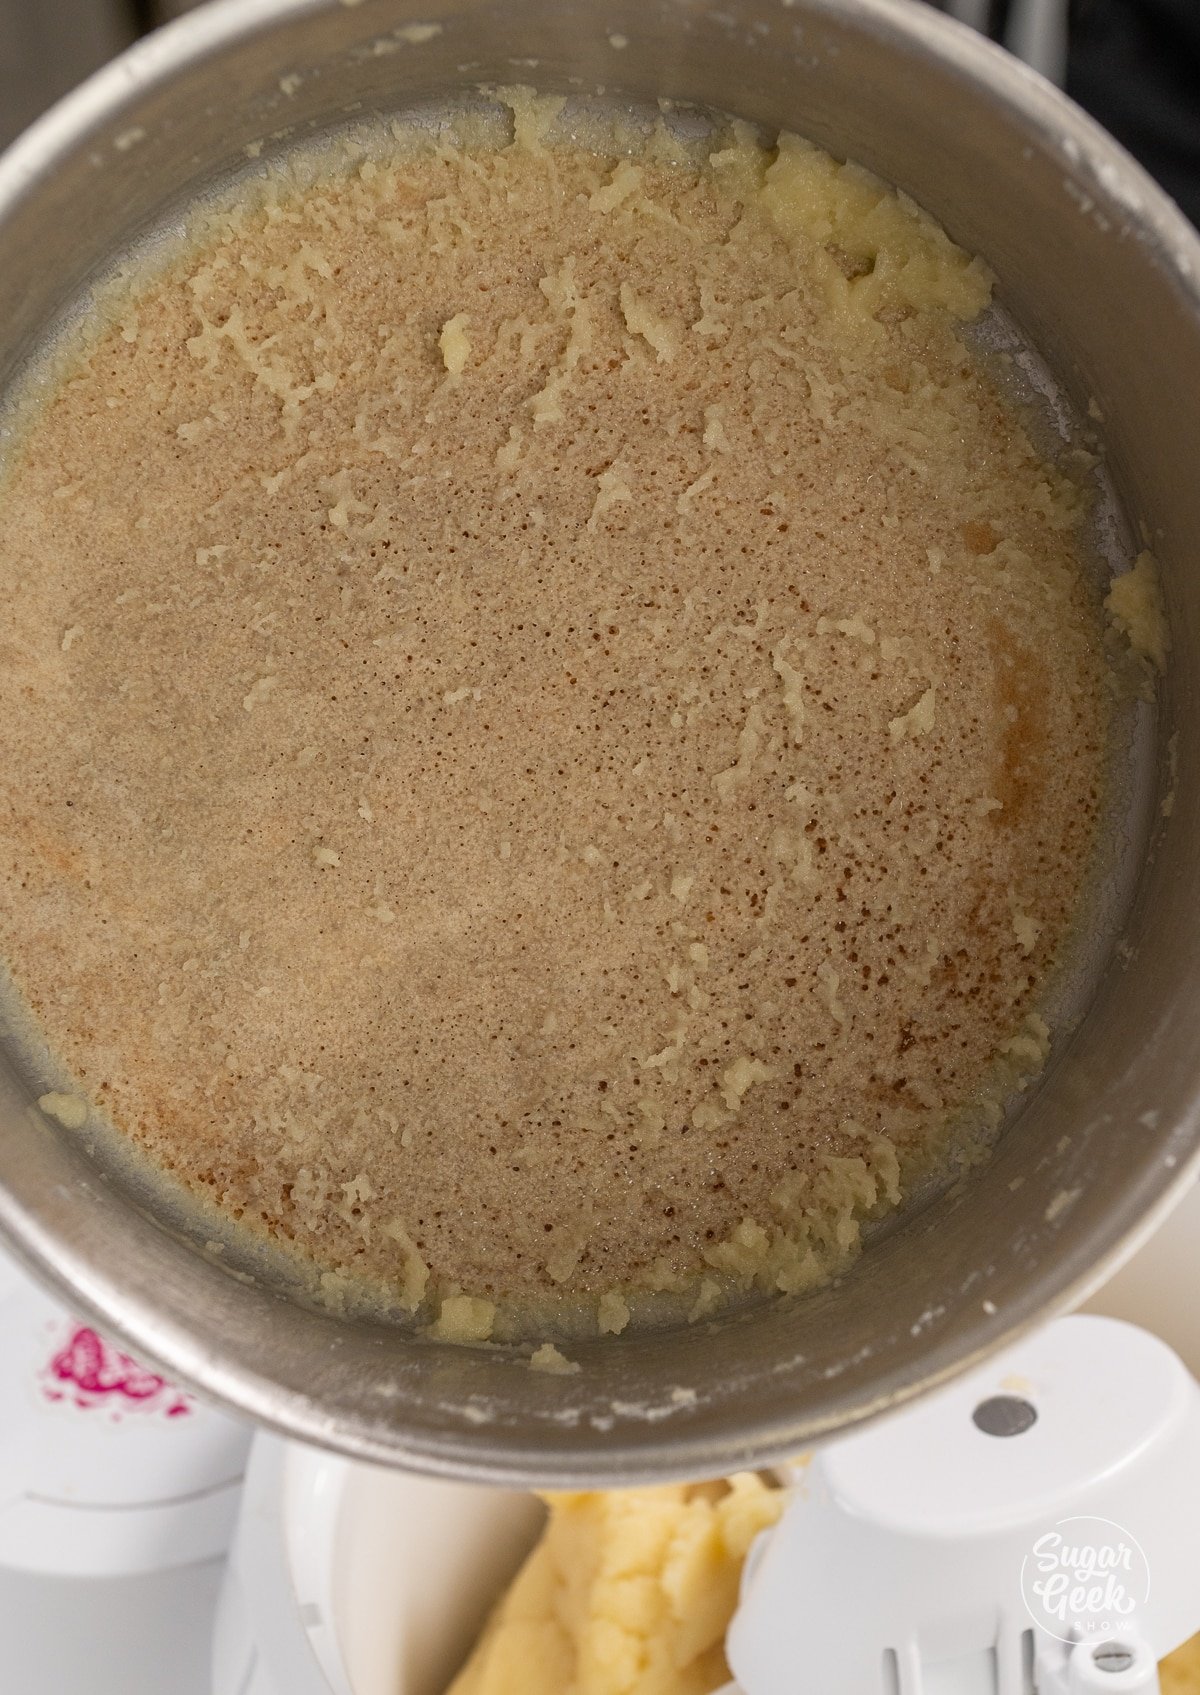
- Once you see a browning layer on the bottom of the pan the dough is dry enough. This is important, as it will help your cream puffs "puff" and ensure that they have a hollow center for the cream filling.

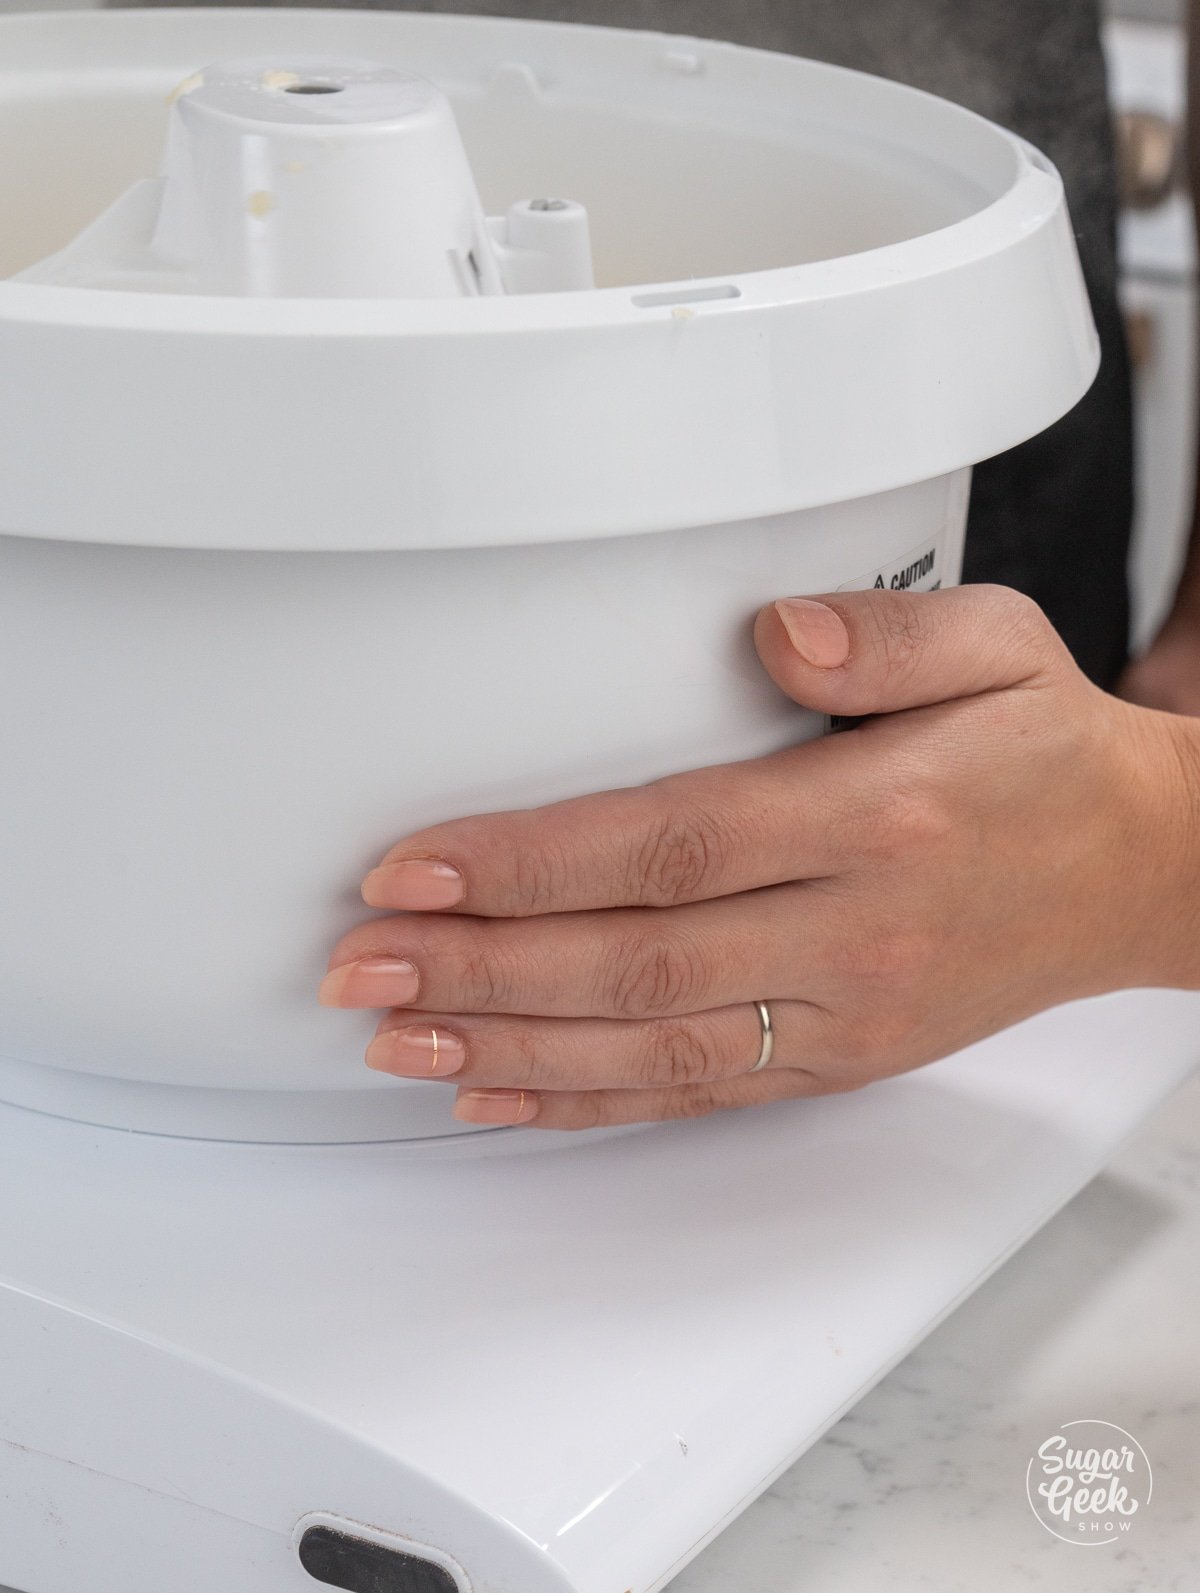
- Put the dough into the bowl of a stand mixer with the paddle attachment and begin to mix on medium speed to cool it down, this should take about 30 seconds to 1 minute. When you can place your hand on the side of the bowl without it feeling too hot, it's done.

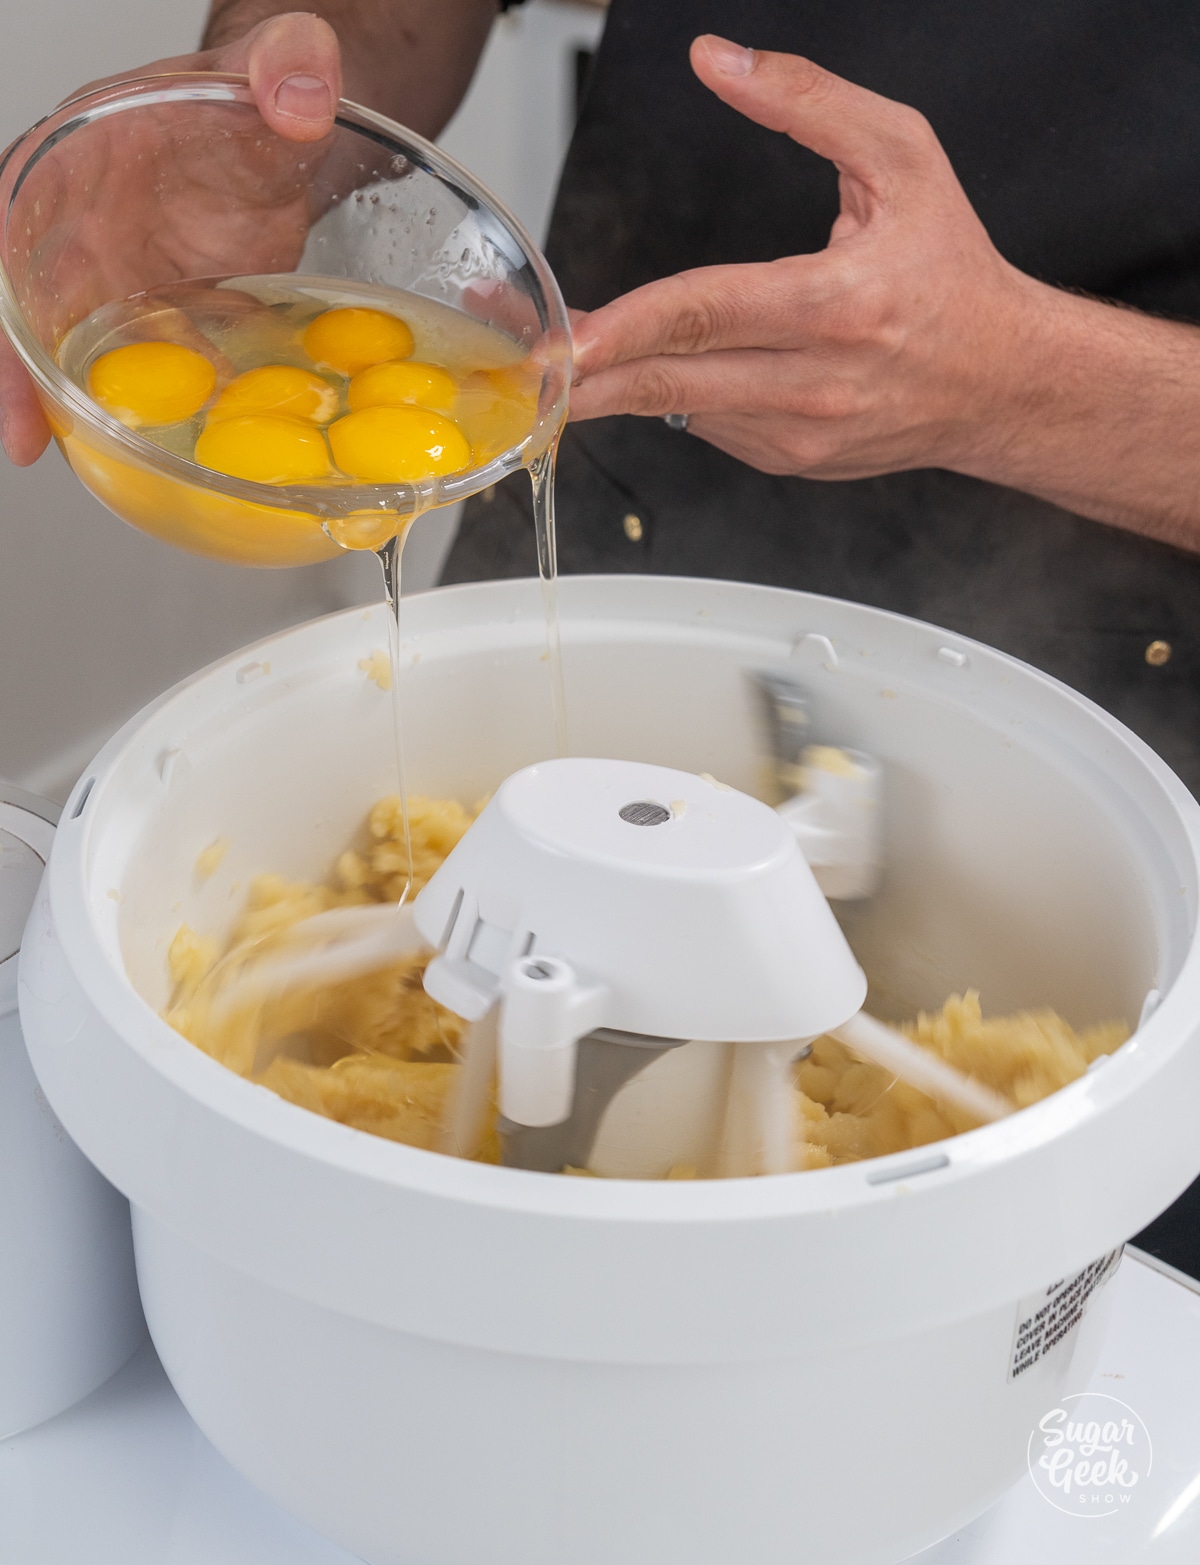
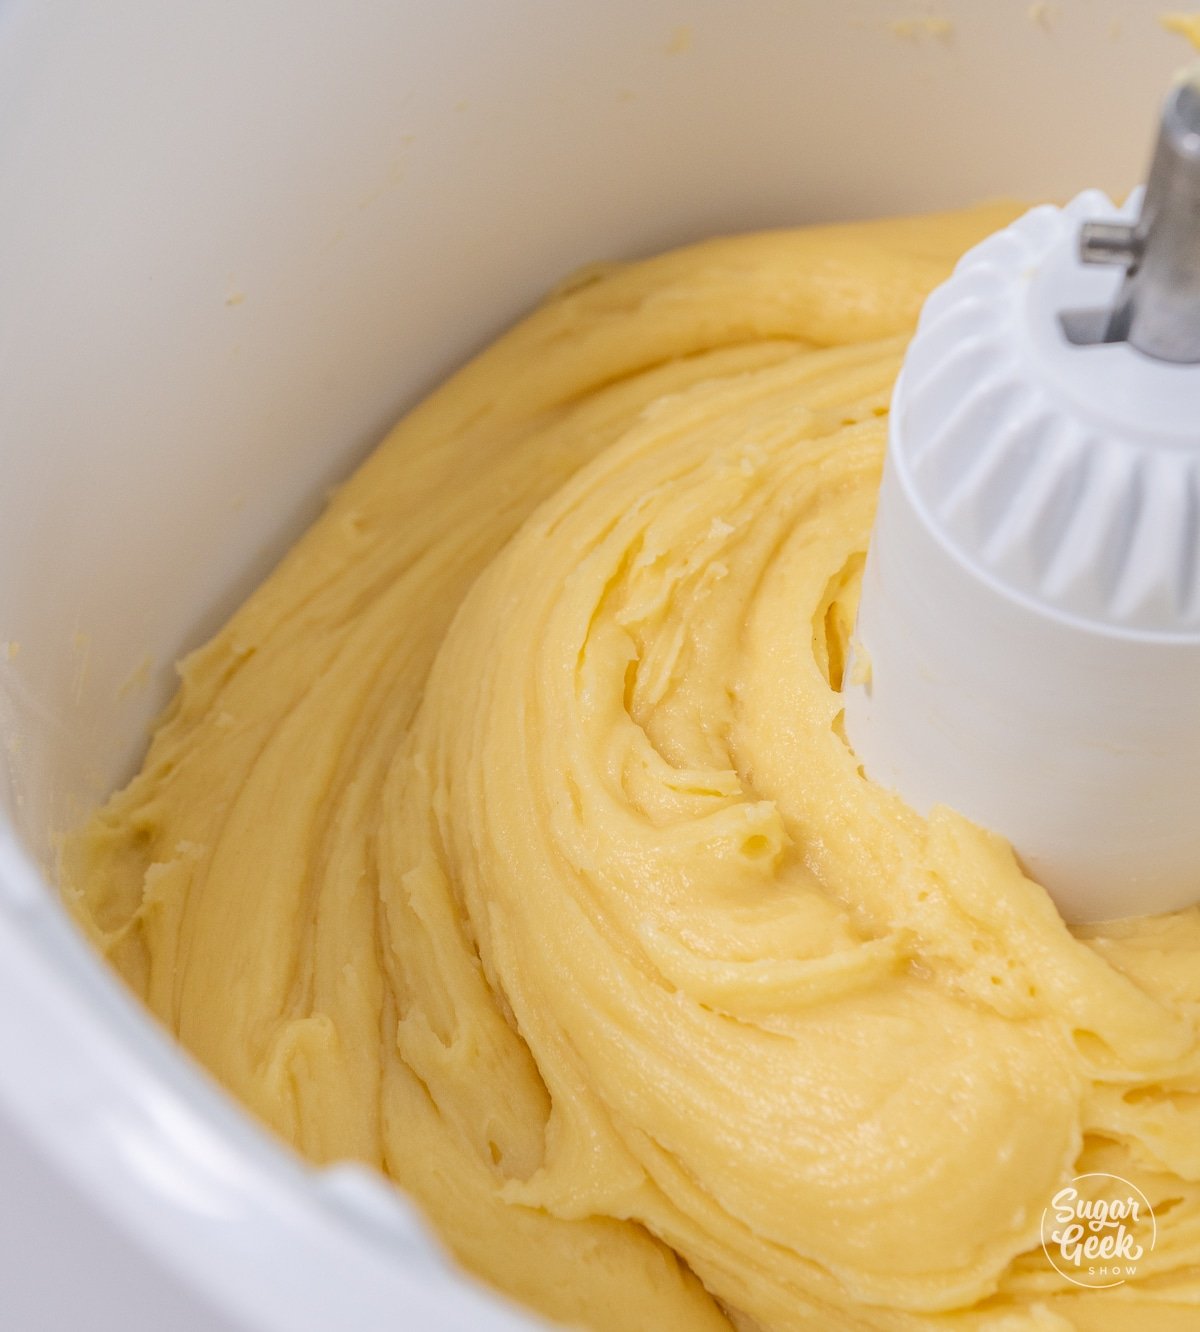
- Slowly add in your eggs one at a time while mixing on low. Mix until the dough slowly falls in a v-shape off of your paddle.


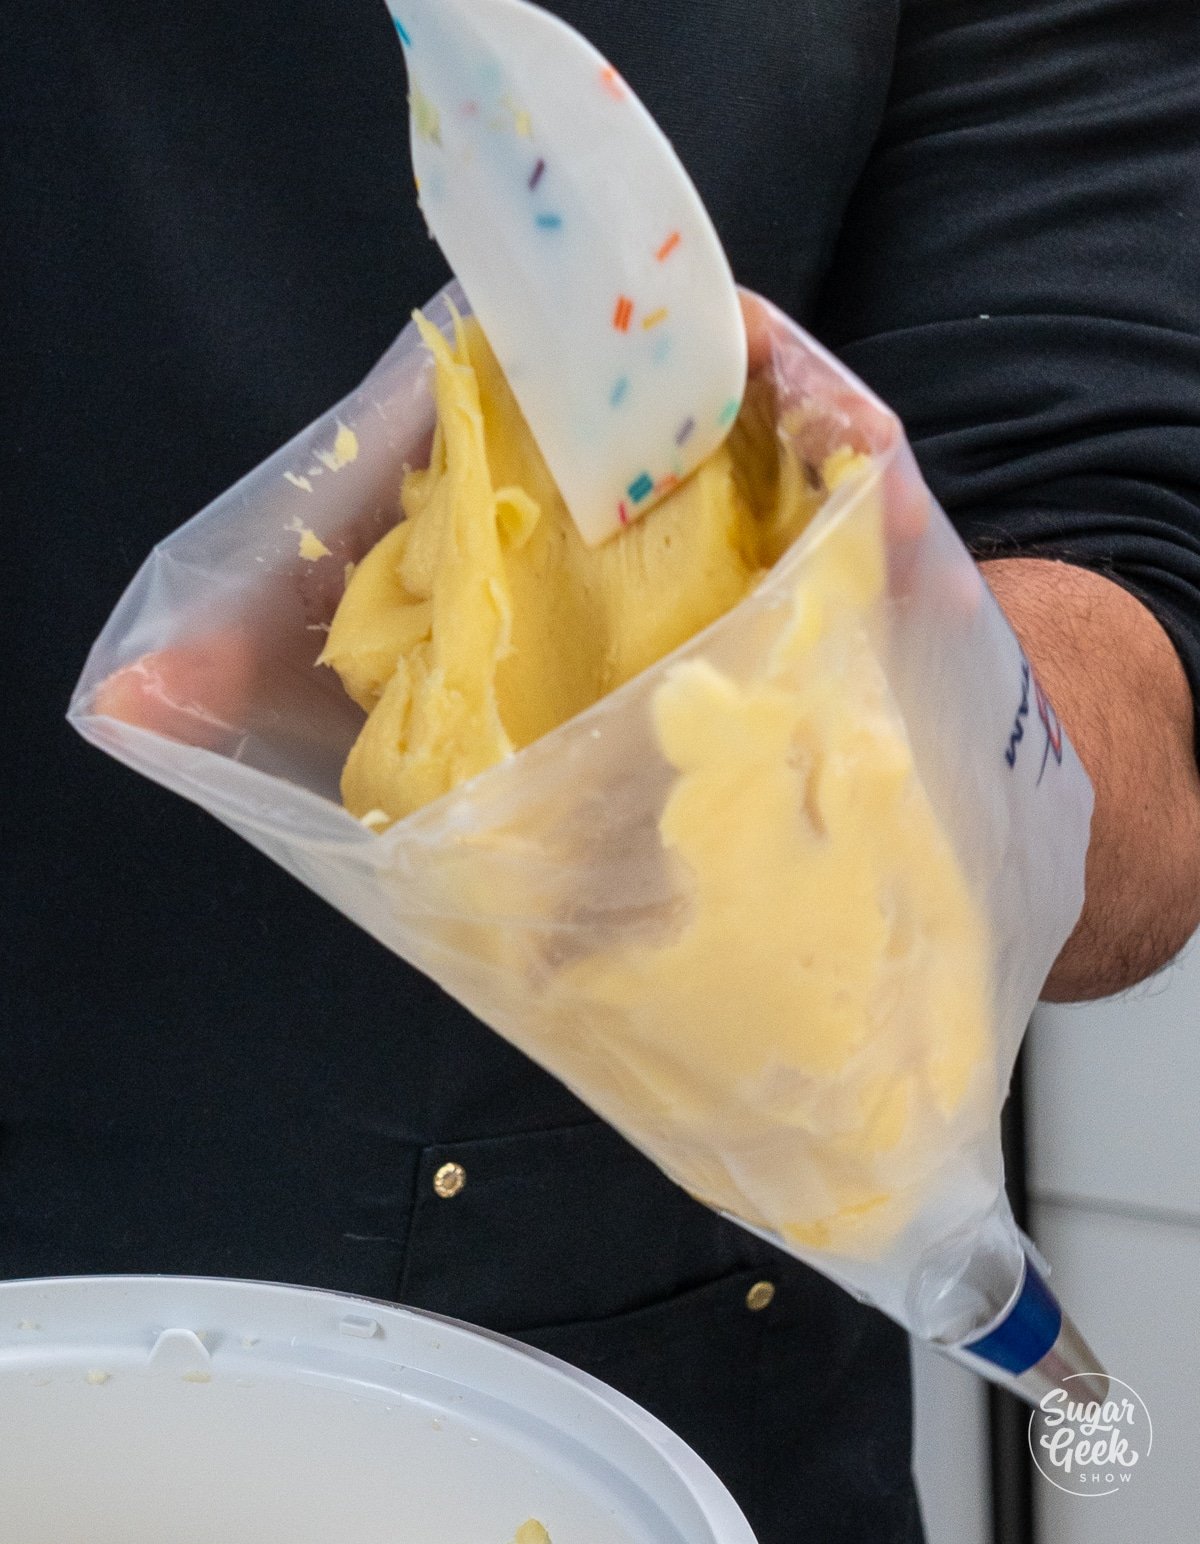
- Prepare a pastry bag with a small metal round piping tip. Fill the piping bag with the pate a choux batter.

- Prepare a baking sheet pan with parchment paper. Chef Christophe is using a "silpain" baking mat on a cookie sheet for maximum airflow and evenly-baked cream puffs.
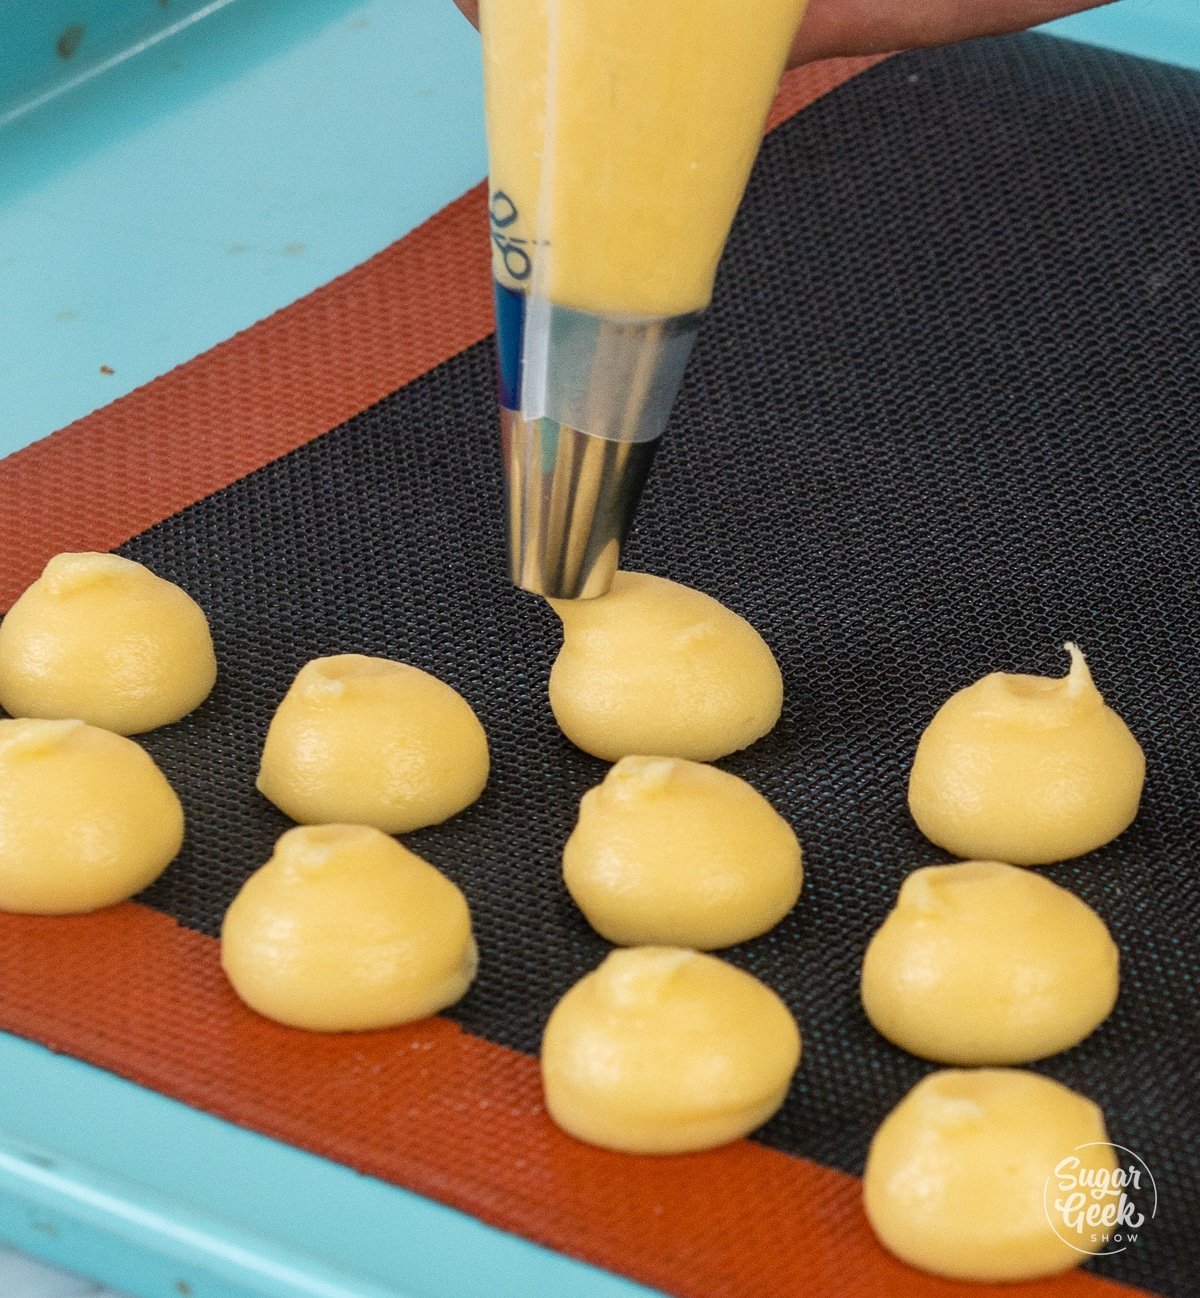
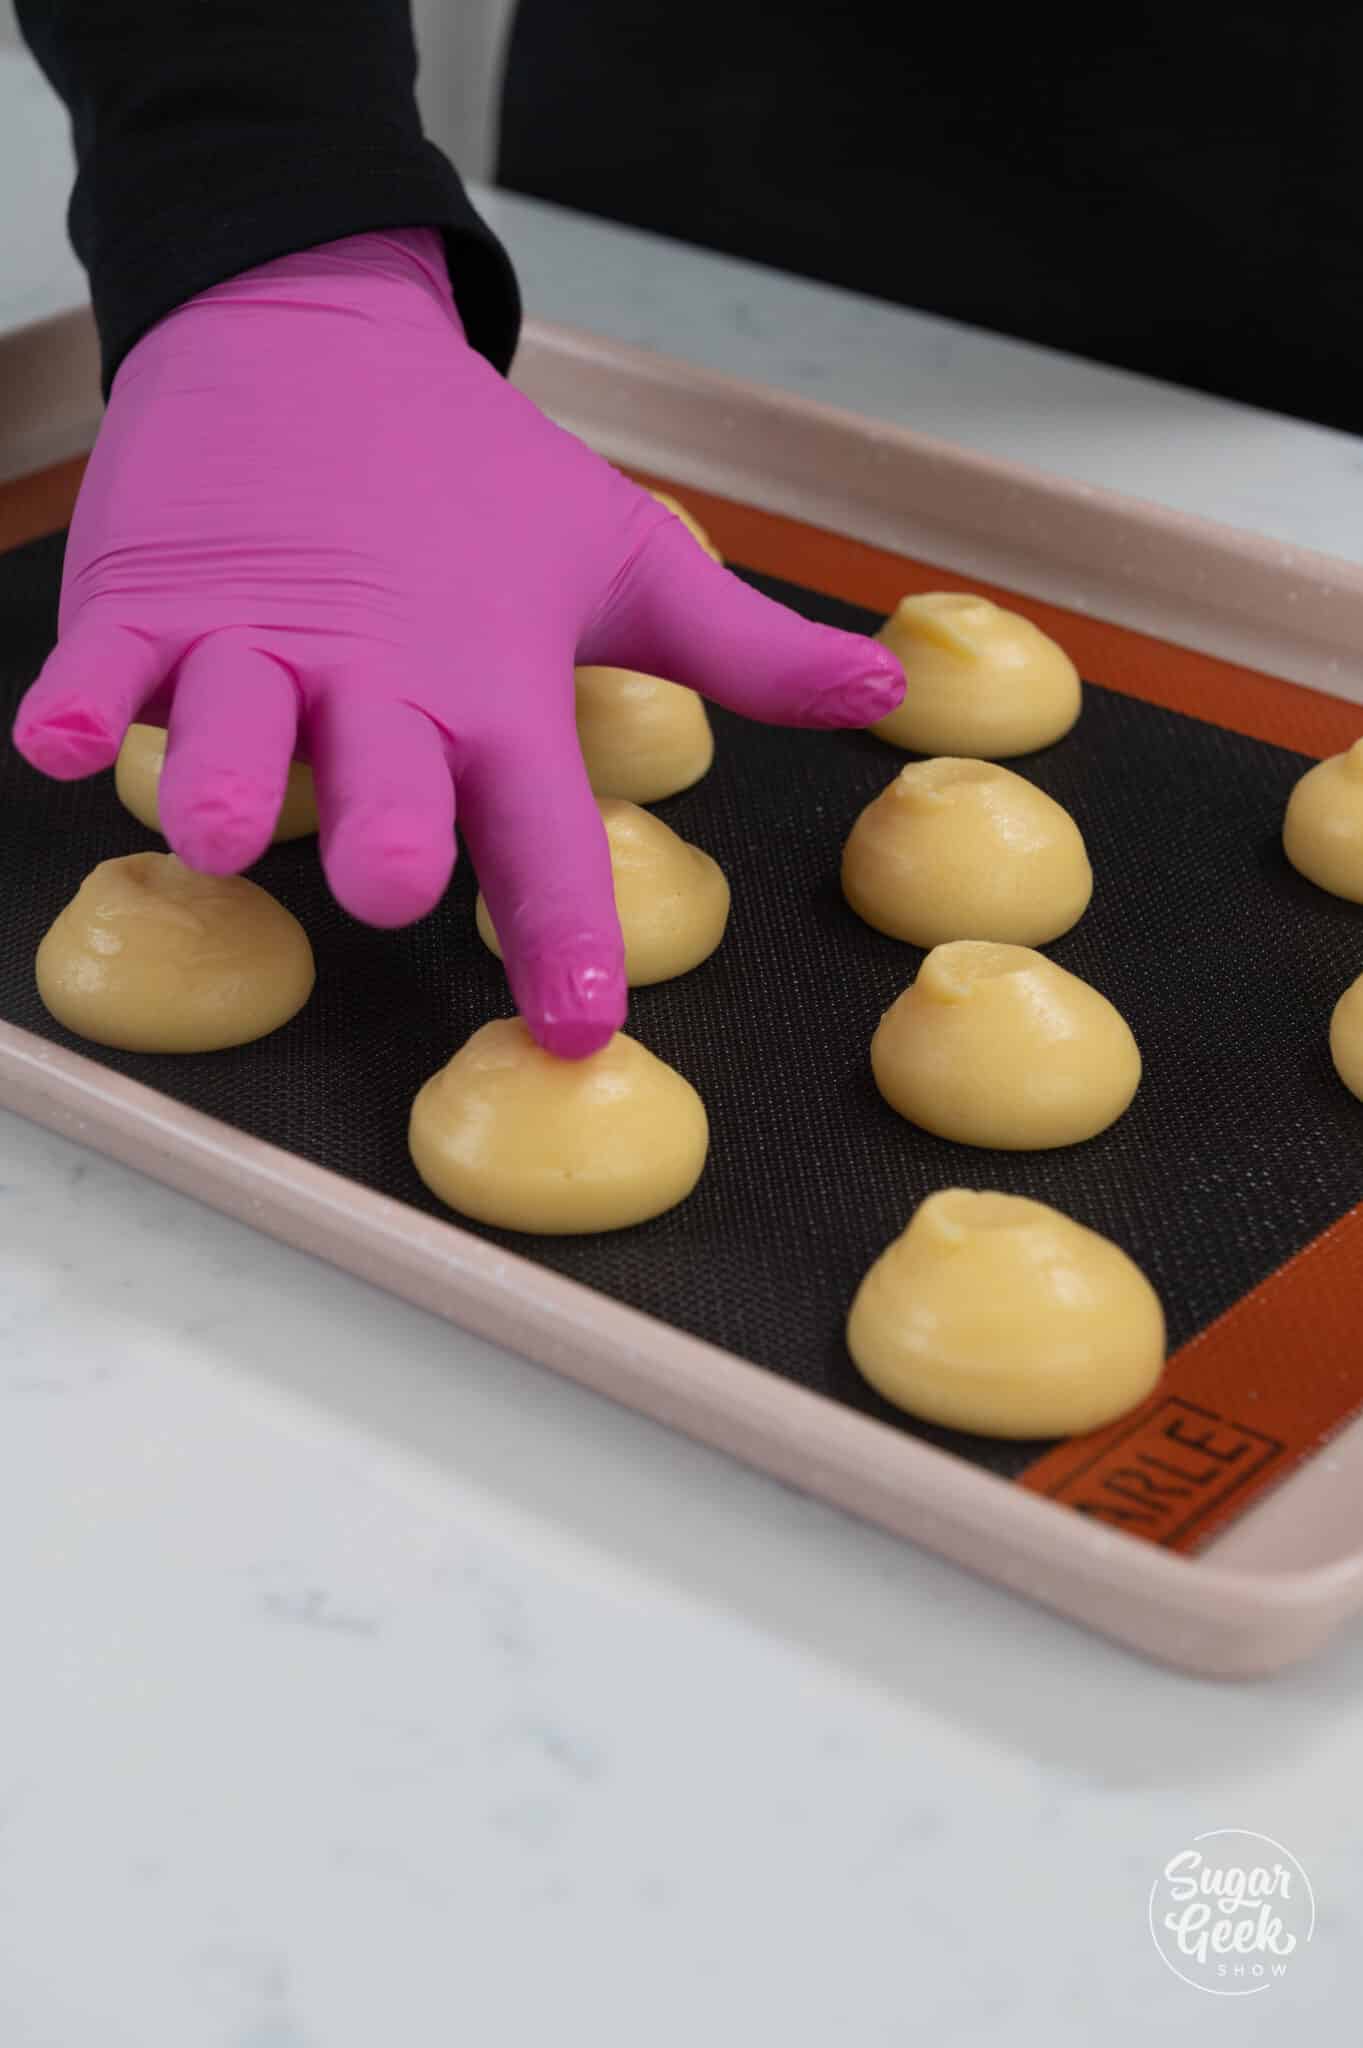
- Pipe the pâte à choux rounds slightly smaller than your desired final size (about 1-inch), as they will "puff" and expand in the oven.

- Gently smooth the pointy top of the cream puff with a damp fingertip.

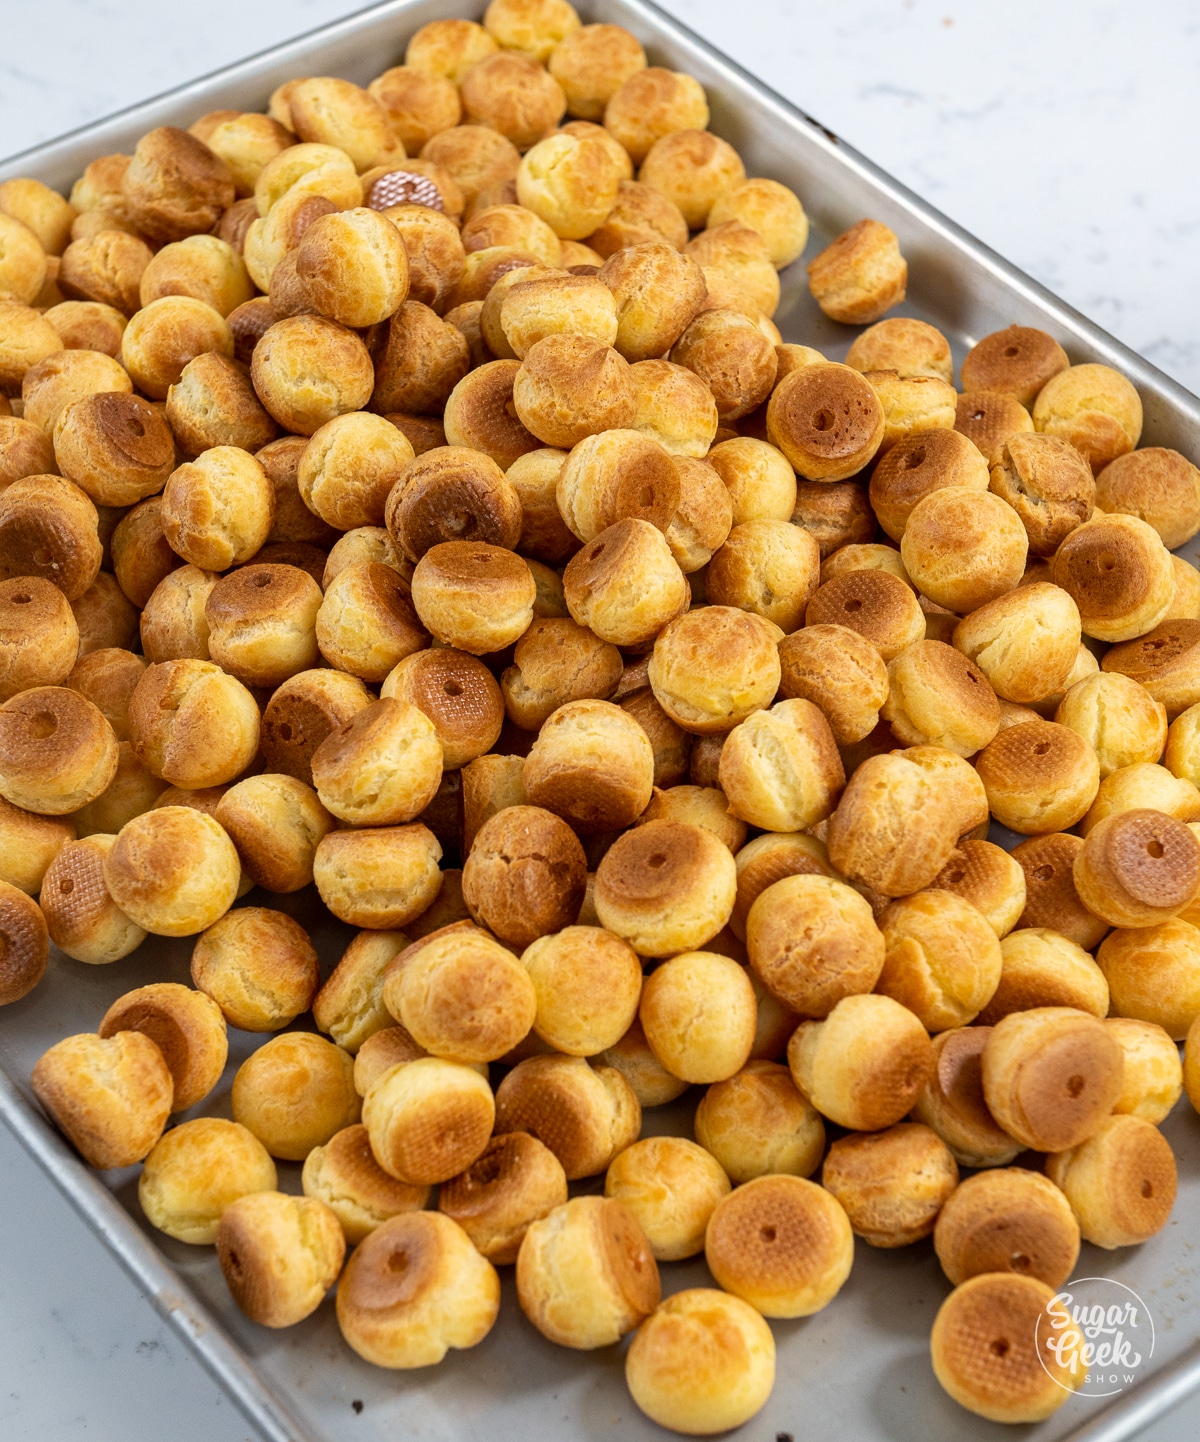
- Bake the cream puffs at 350°F for 25-30 minutes until golden brown. Do not open the oven door or your cream puffs could collapse.

- Cool the cream puffs completely to room temperature on a wire rack, for about 30 minutes.

Making Pastry Cream
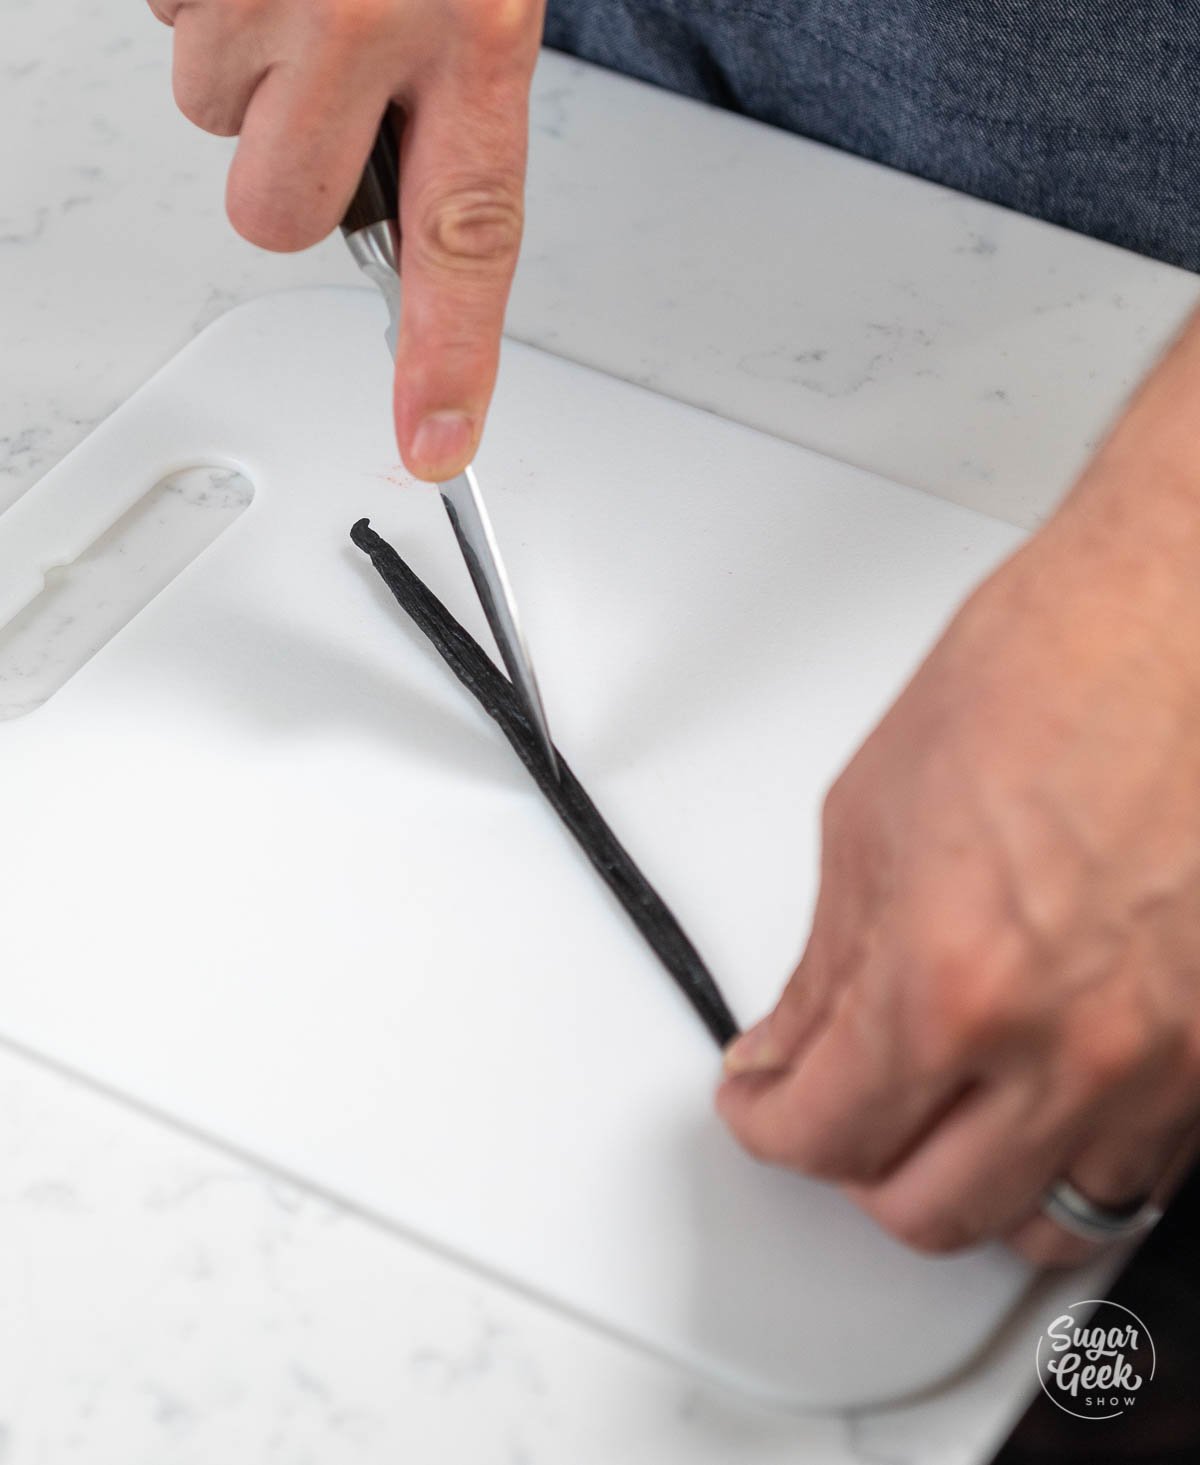
- Scrape out the vanilla pods by using a small knife to cut down the center of the bean, then use the back of the knife to gently scrape the pods out. (Only use the pods on the inside, do not use the skin of the bean.)

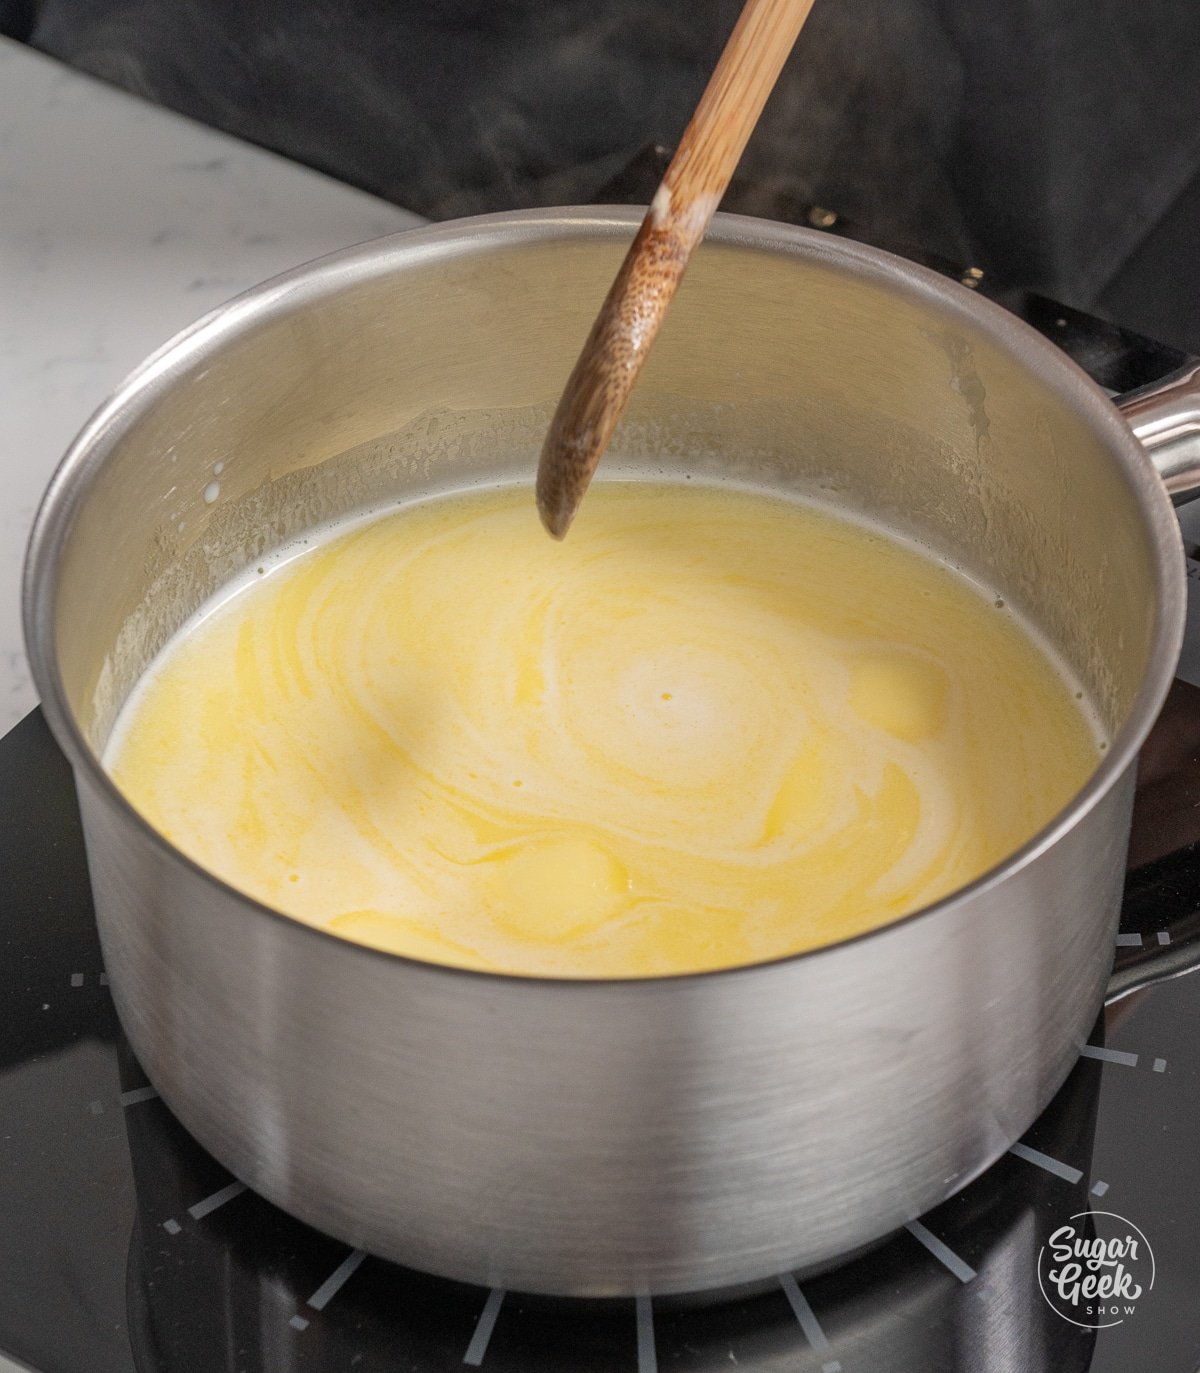
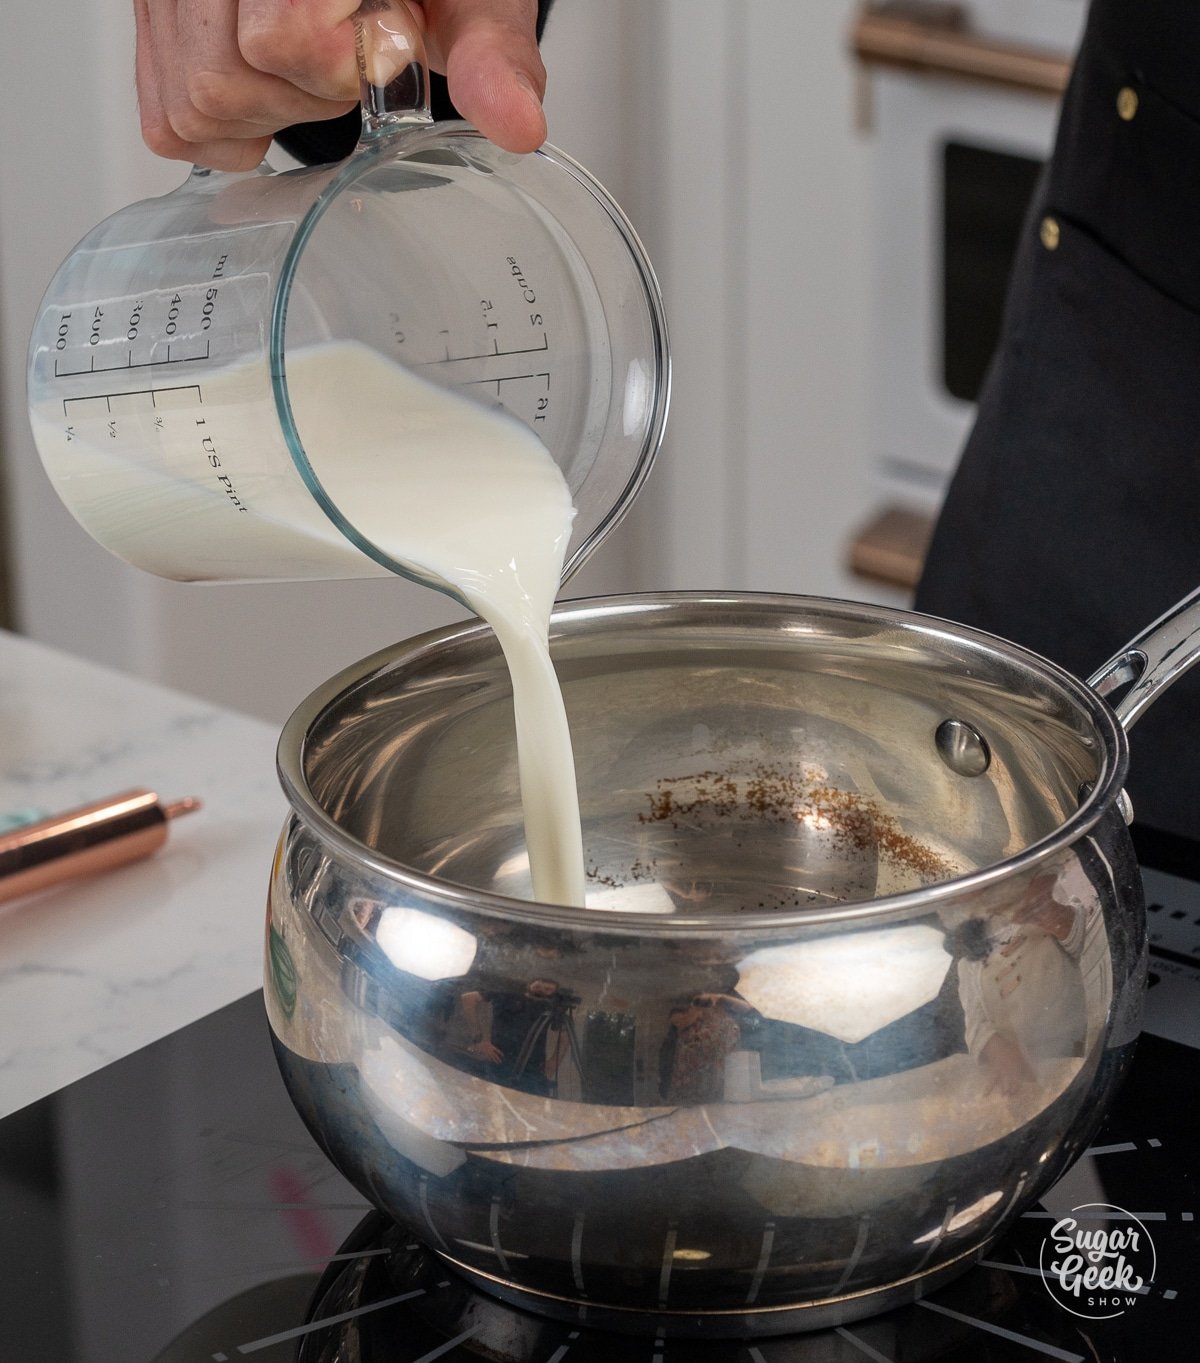
- Add your milk, scraped vanilla bean, and half of the sugar into a large saucepan over medium heat and bring it to a boil.

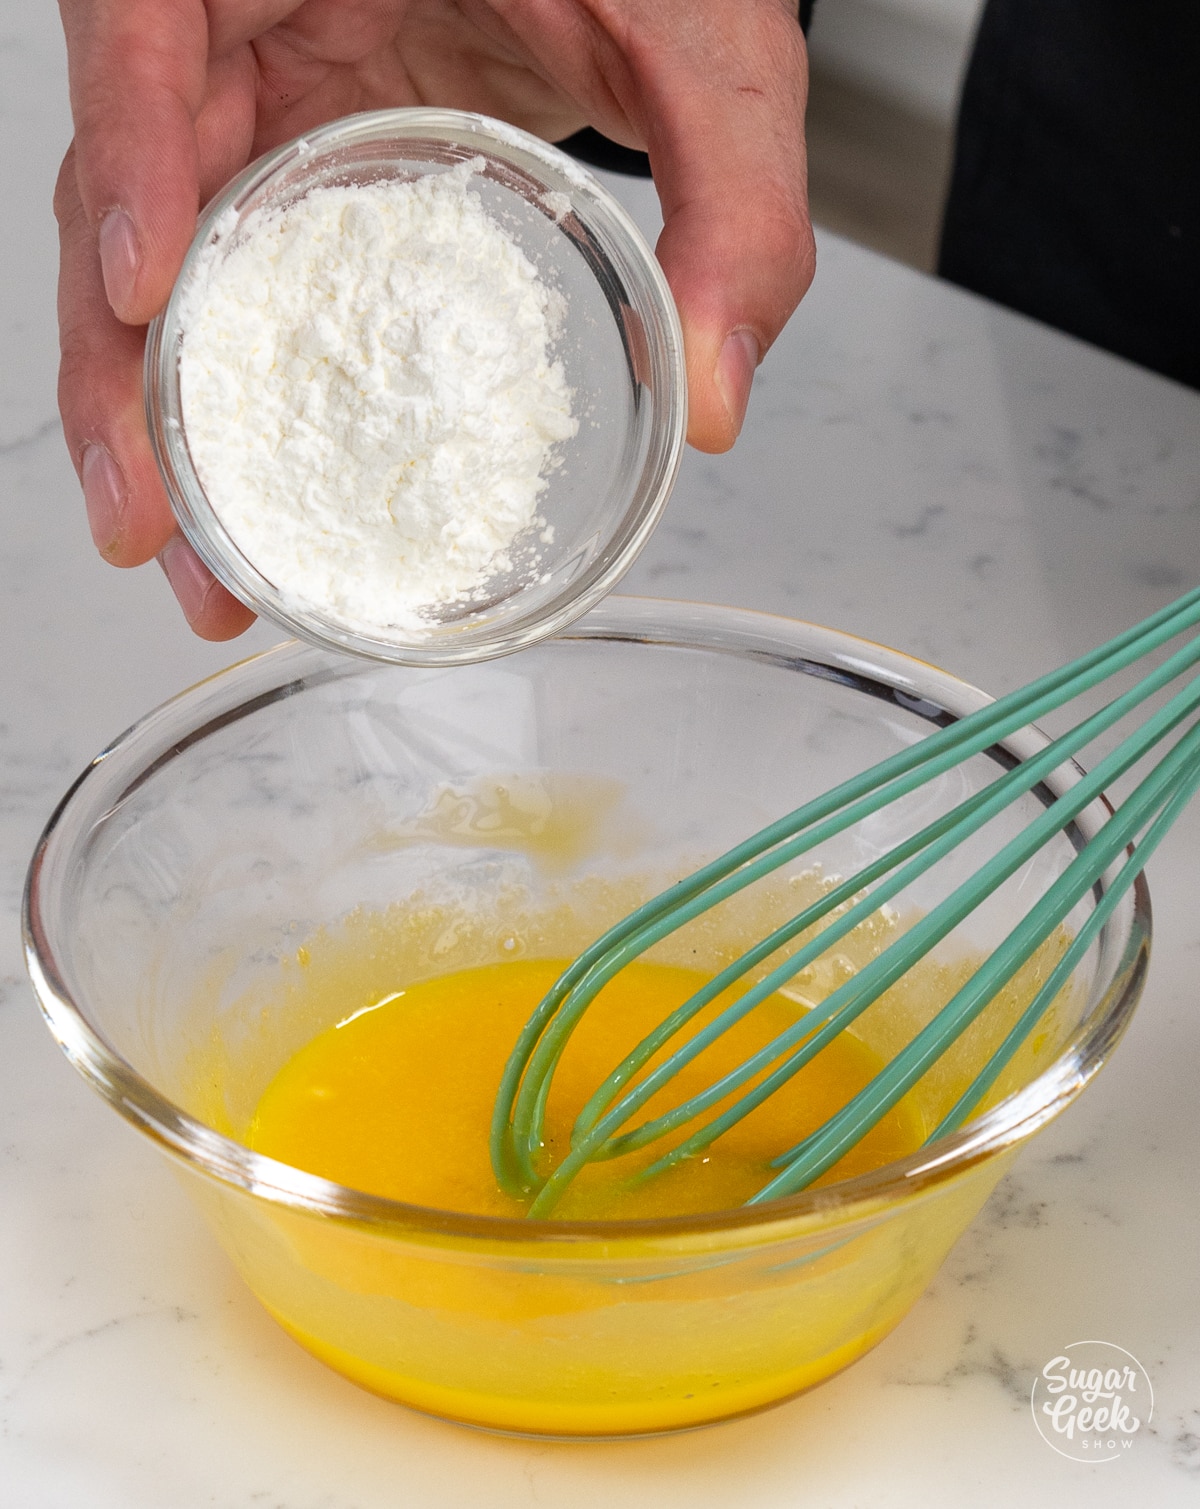
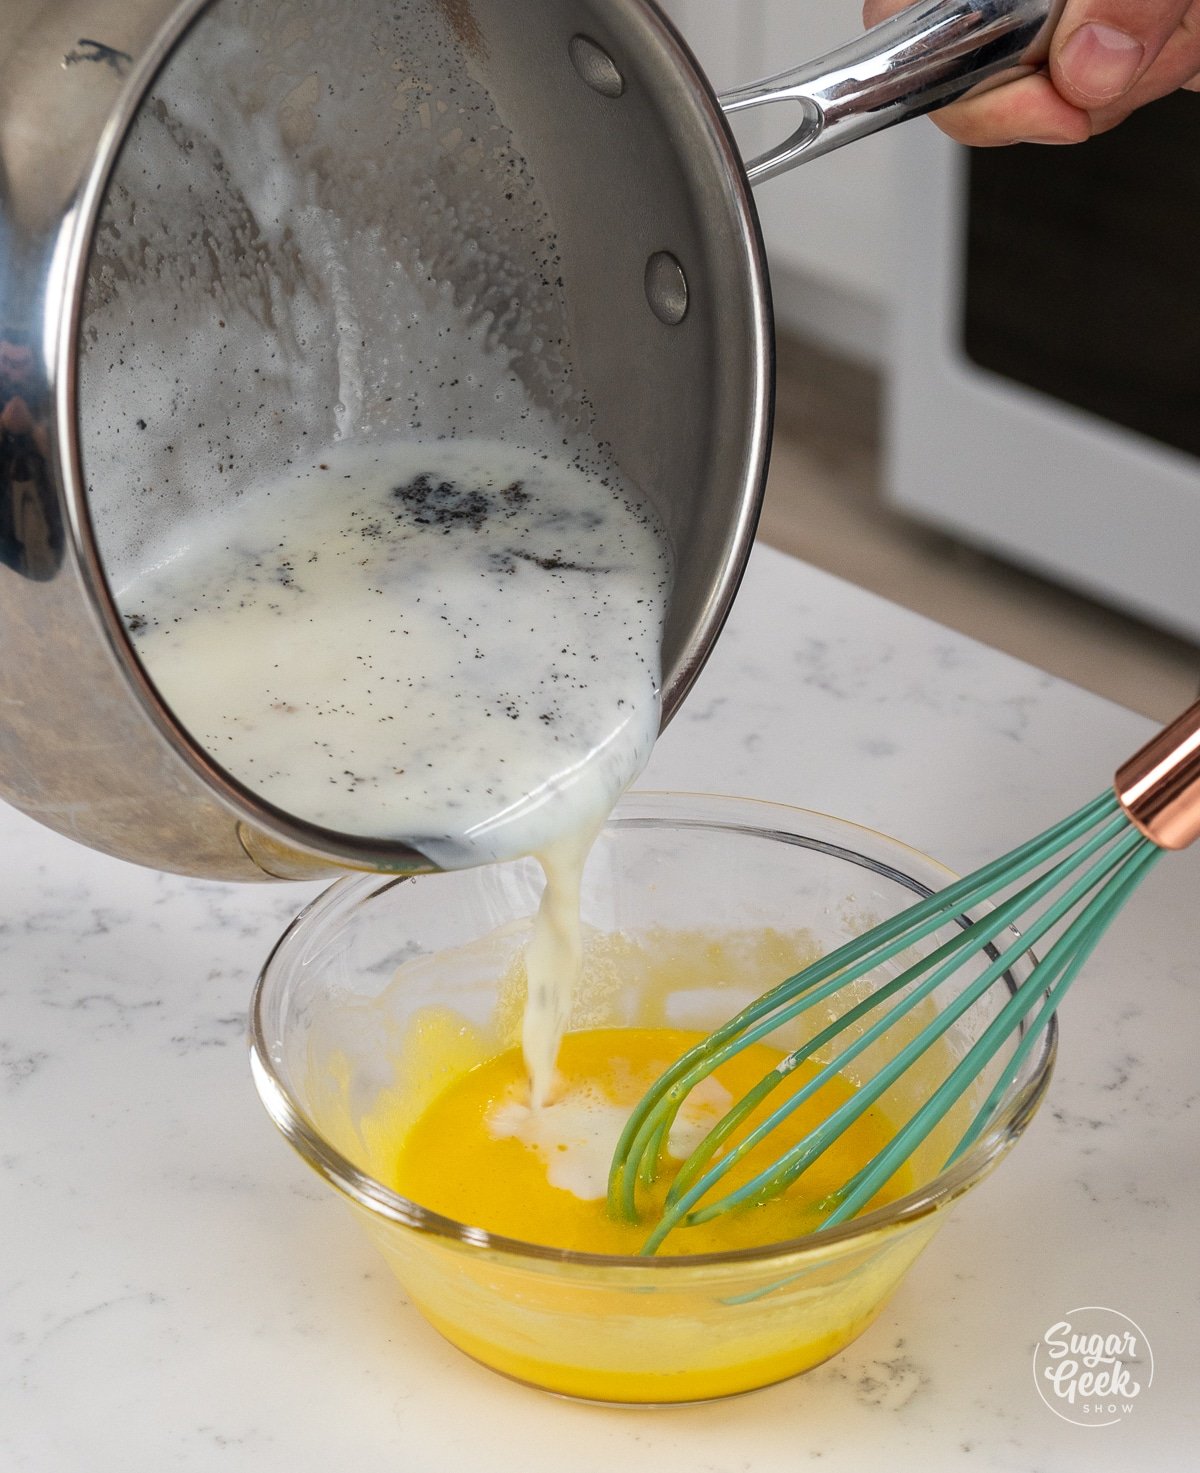
- Add your egg yolks, cornstarch, and the other half of the sugar into a large mixing bowl and whisk them together.

- Pour some of the hot milk into the egg mixture to temper it. Pro-Tip: Tempering your yolks helps them reach the same temperature as your milk mixture. This makes it so all the ingredients mix together properly and don't curdle.

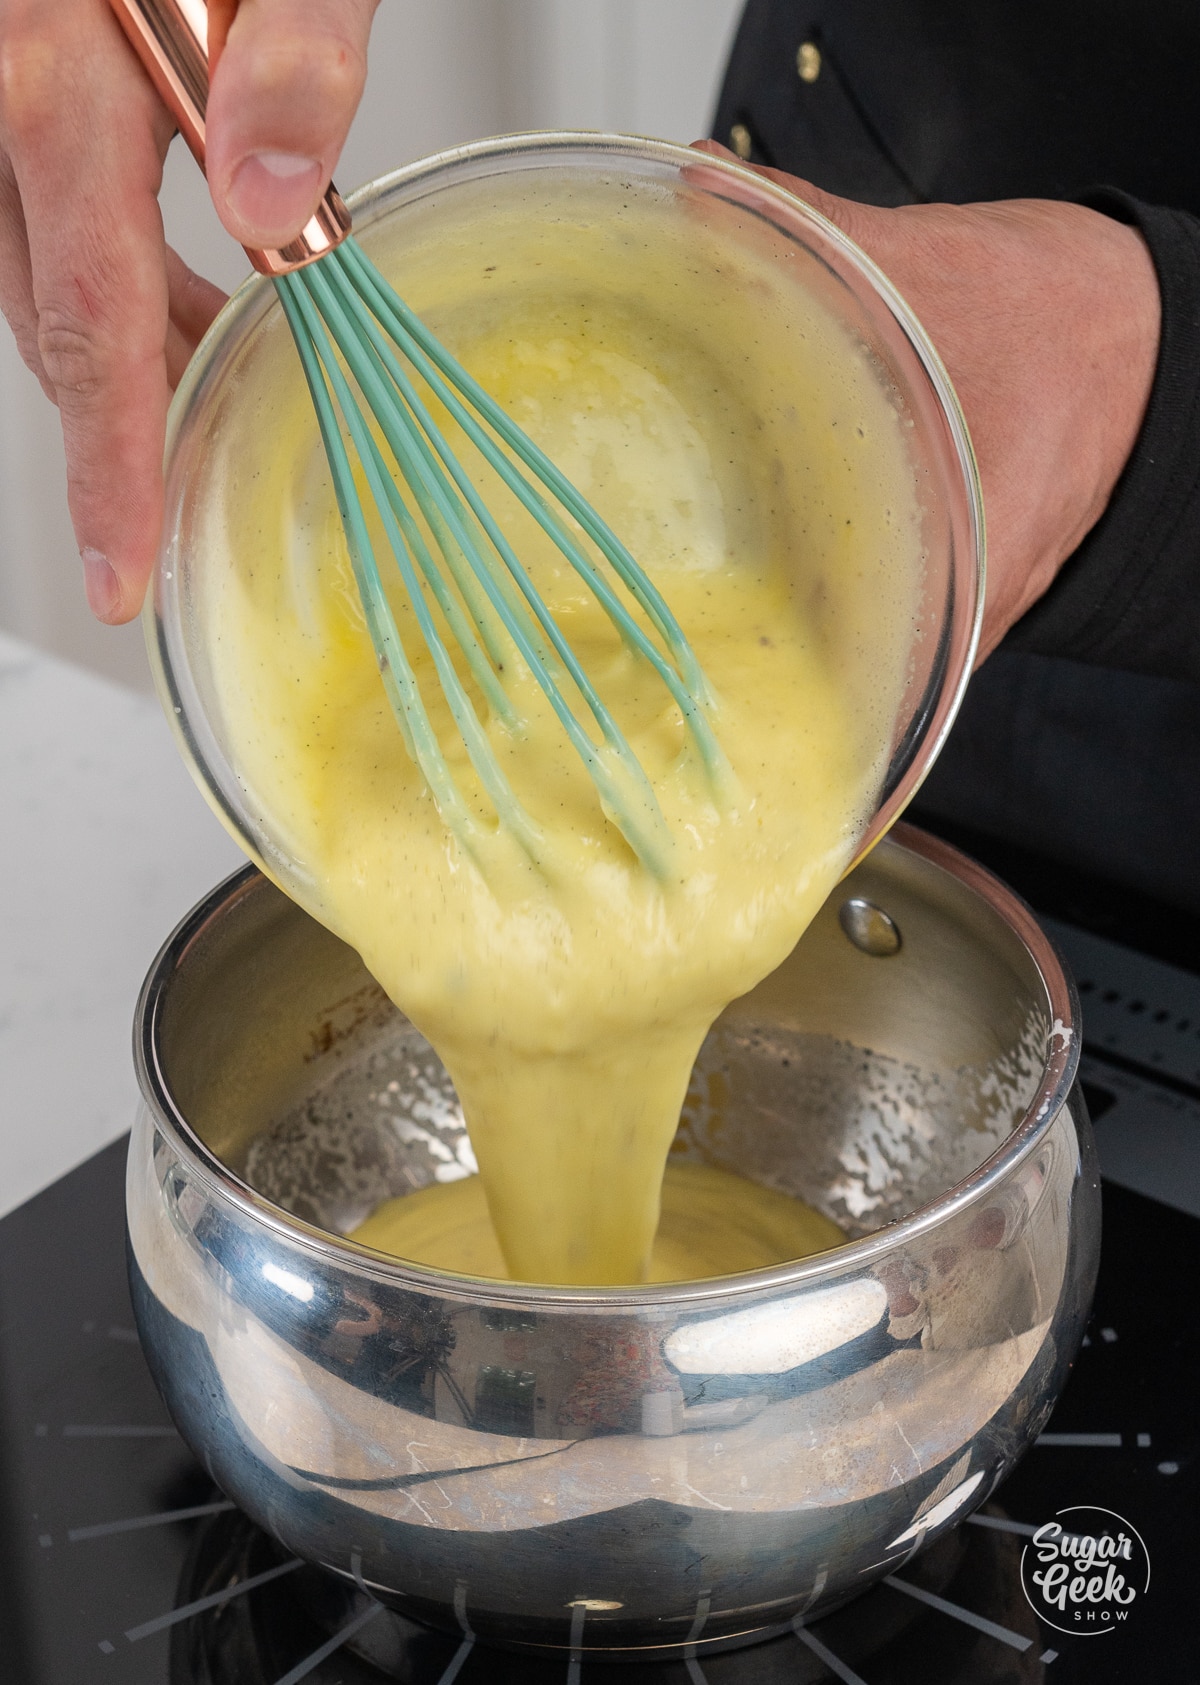
- Then put everything back together into the pot and boil for about 1 minute until the mixture starts to thicken. Whisk constantly to prevent lumps.

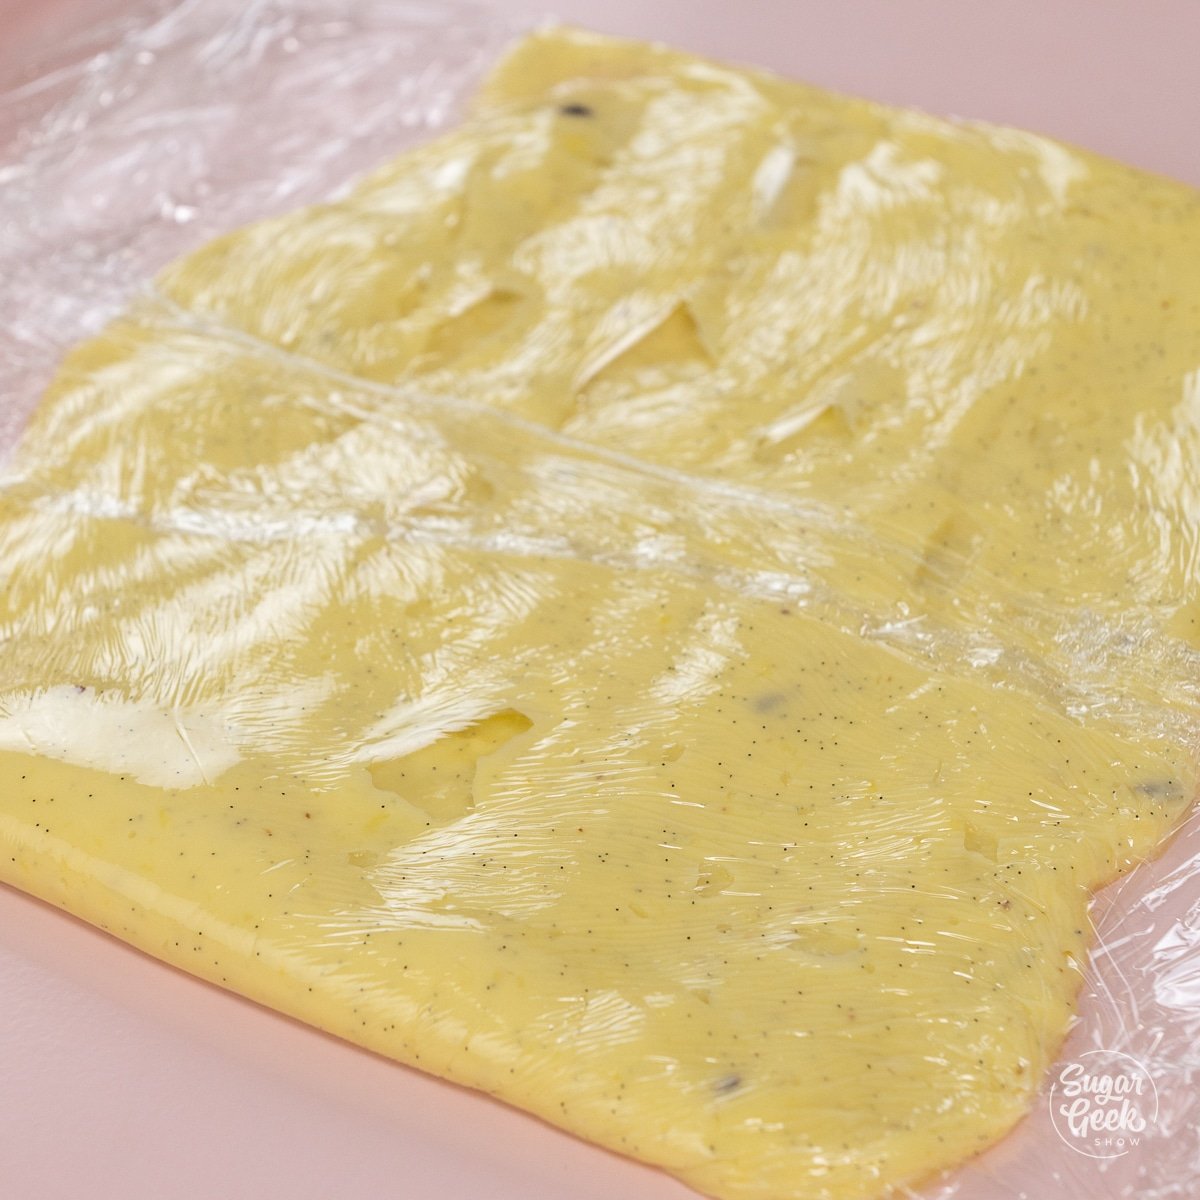
- Pour your pastry cream into a bowl, cover it with plastic wrap and refrigerate until you are ready to use it. Pro-tip: To cool pastry cream down quickly, lay down some plastic wrap on a sheet pan, spread the pastry cream out into a thin rectangular shape, and wrap it fully before chilling.

Filling the Cream Puffs
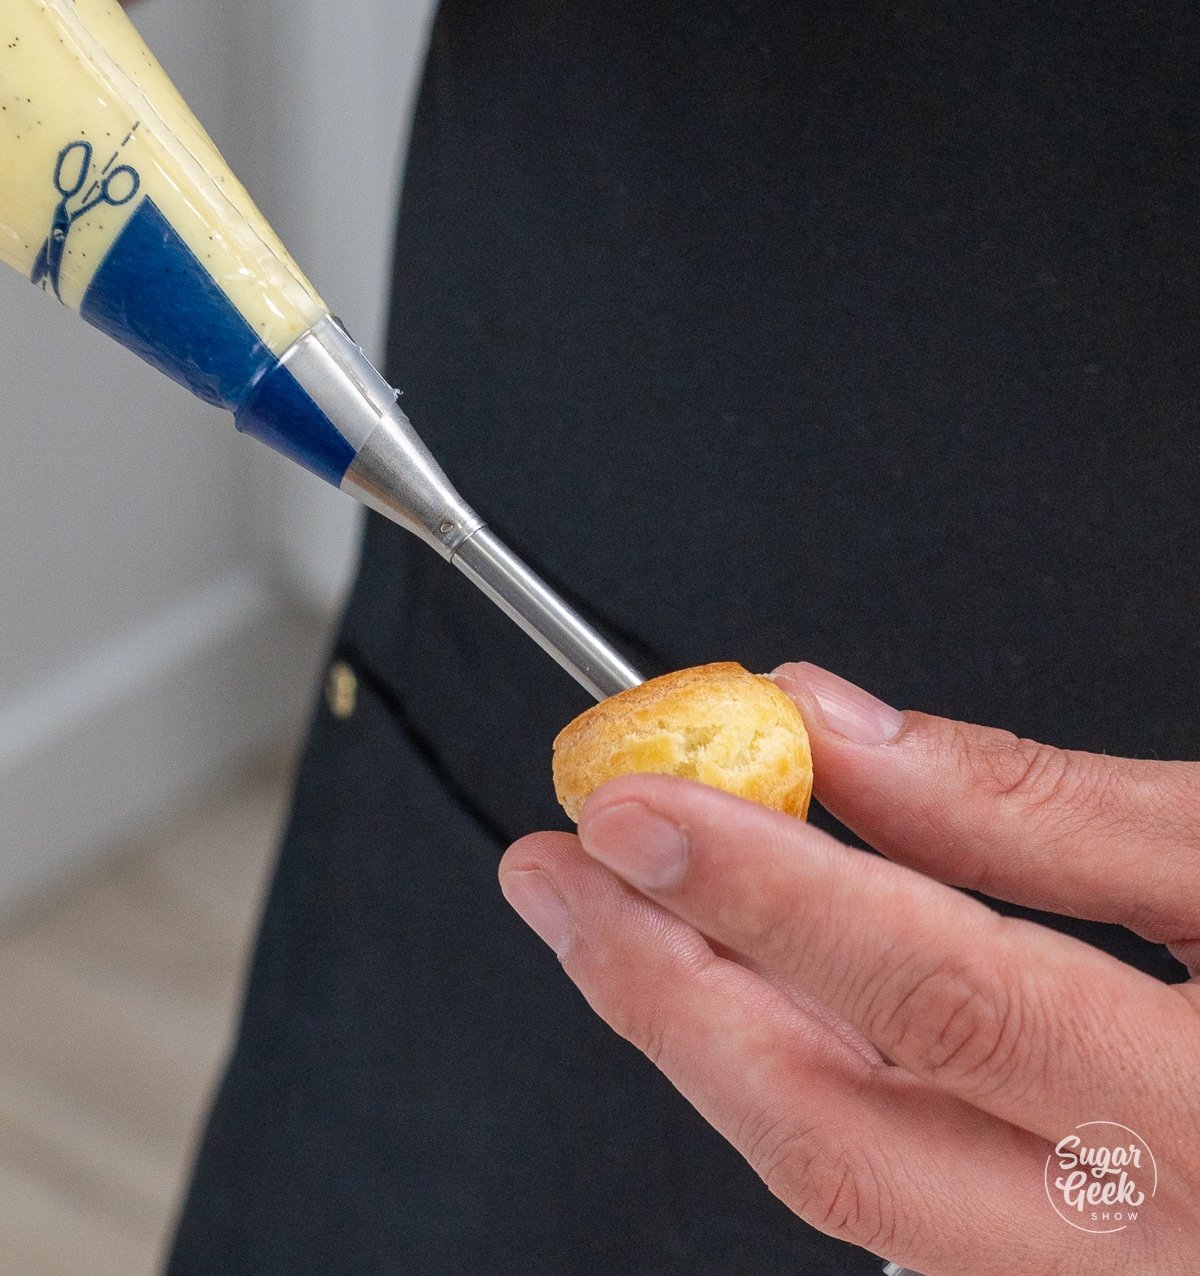
- Poke a small hole into the center of each pate a choux using a small round metal piping tip.
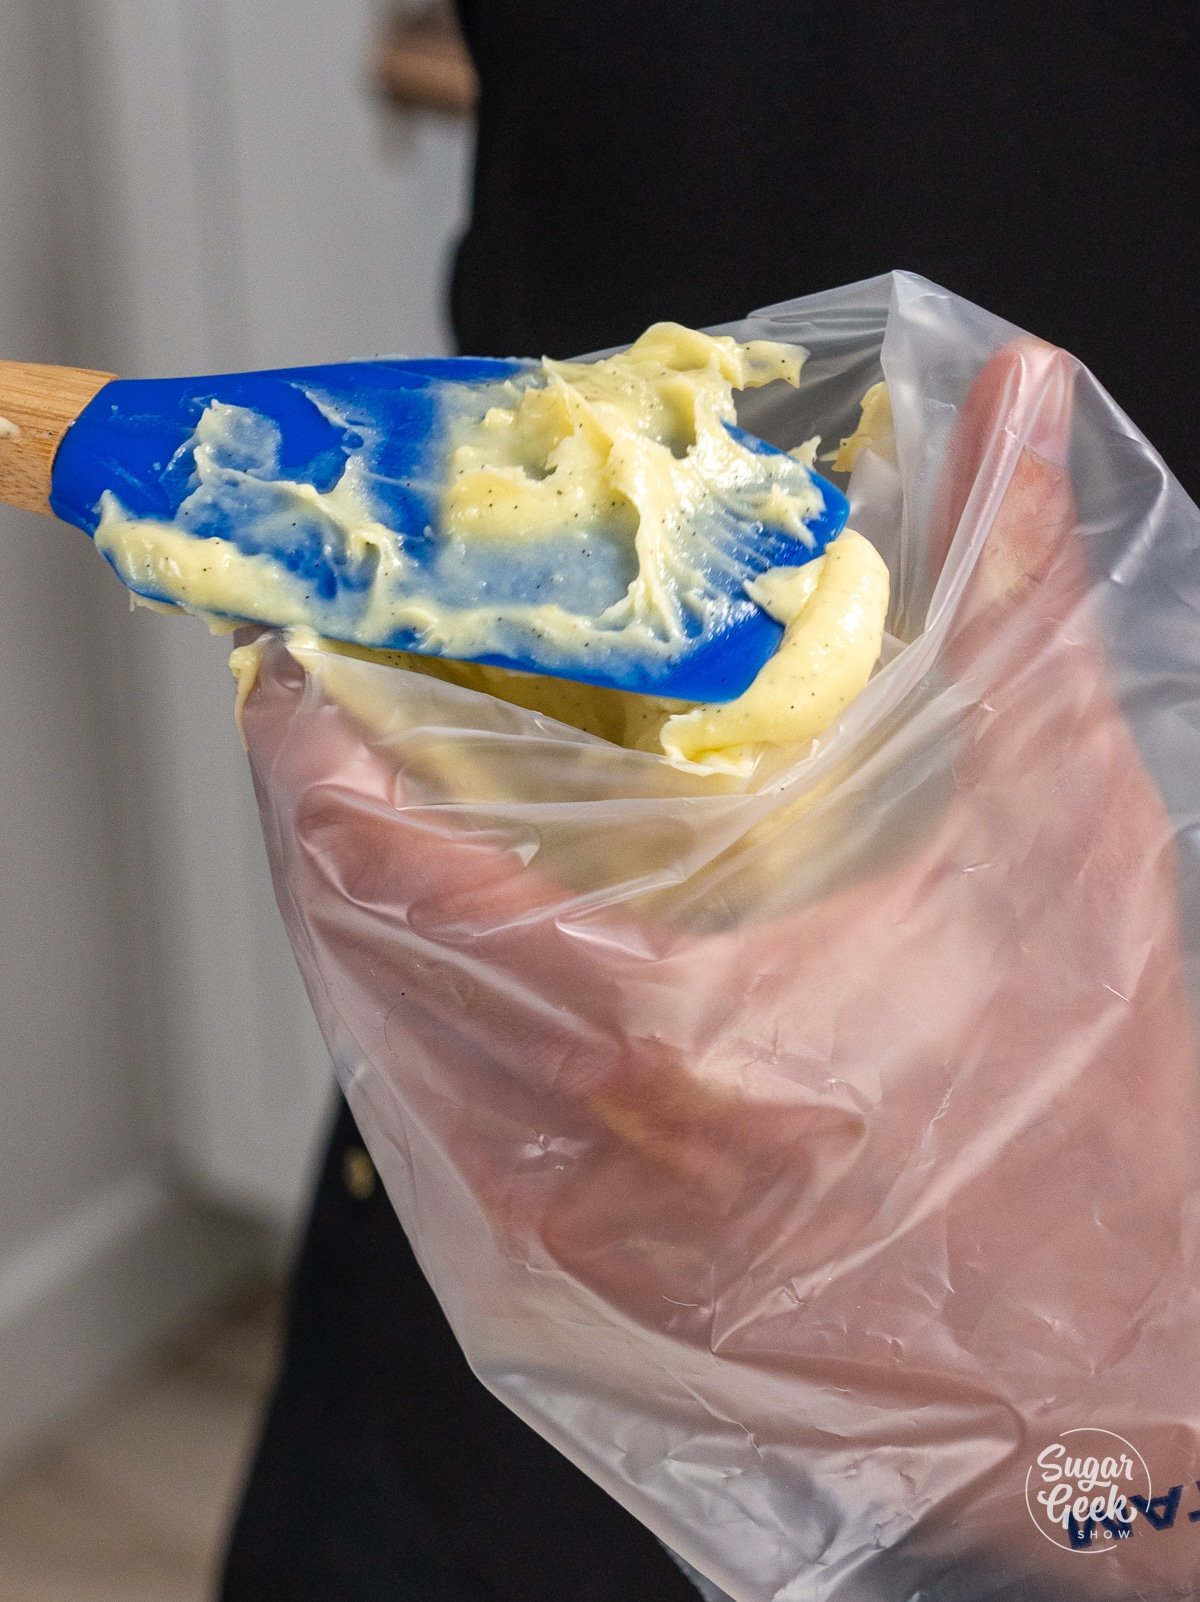
- Fill your piping bag with the pastry cream. Pro Tip: Use a metal filling tip to easily fill your pate a choux.

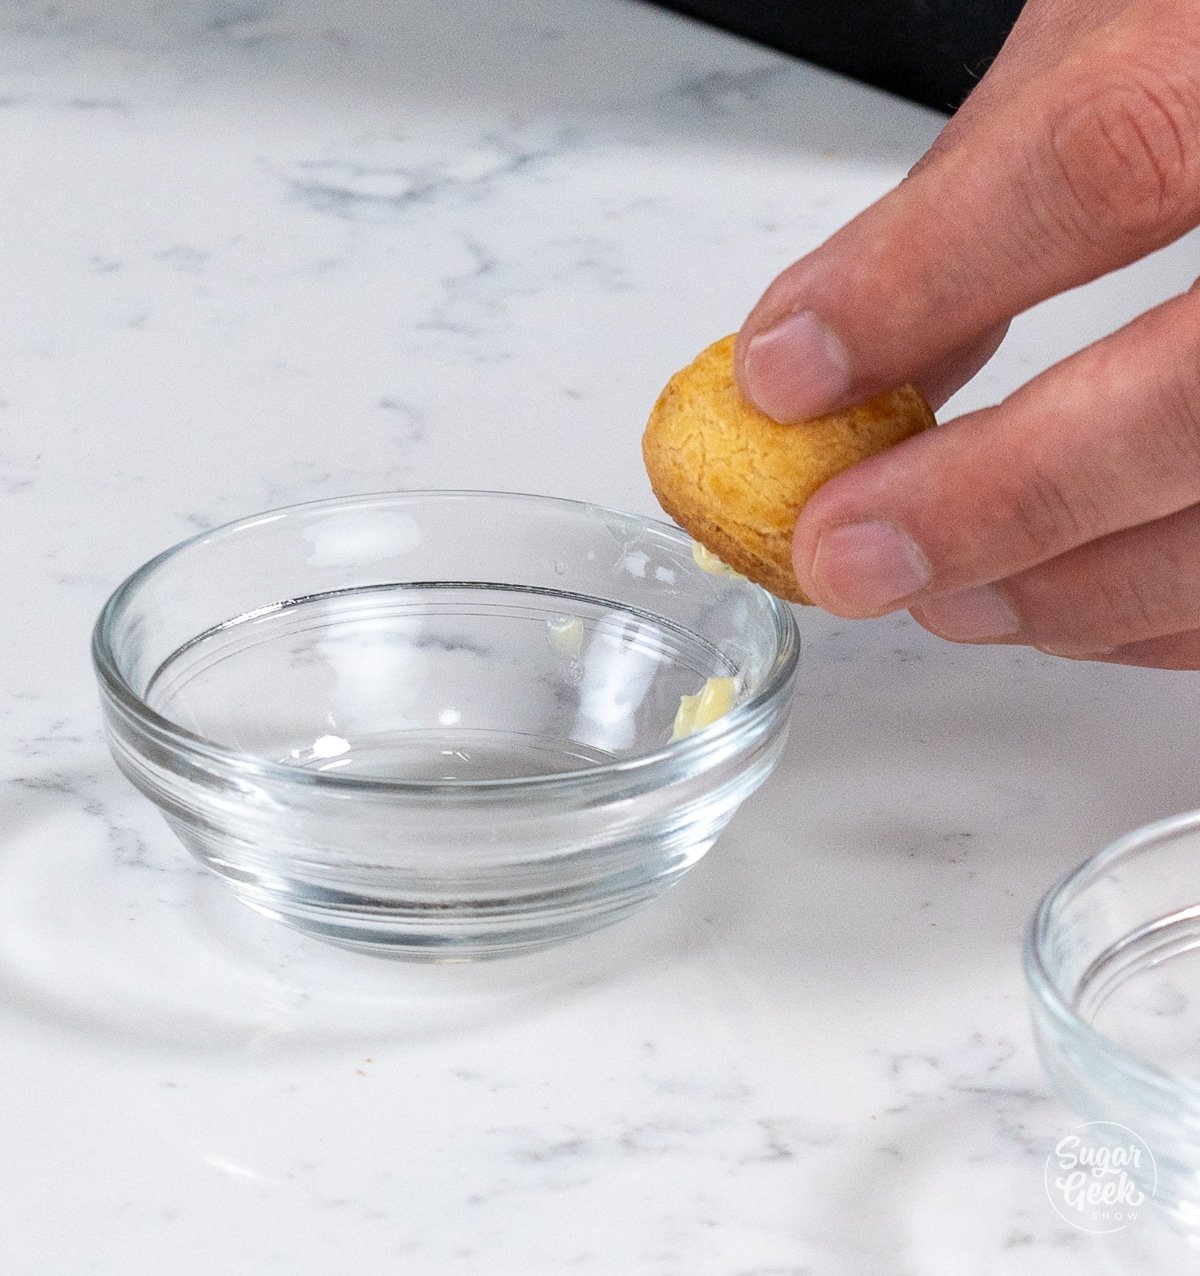
- Fill each cream puff with pastry cream and scrape the bottom over the edge of a small container so that it is clean.

- Set the cream puffs aside while you make your caramel.

Making the Caramel
- Microwave the glucose for about 30 seconds to make it liquid.
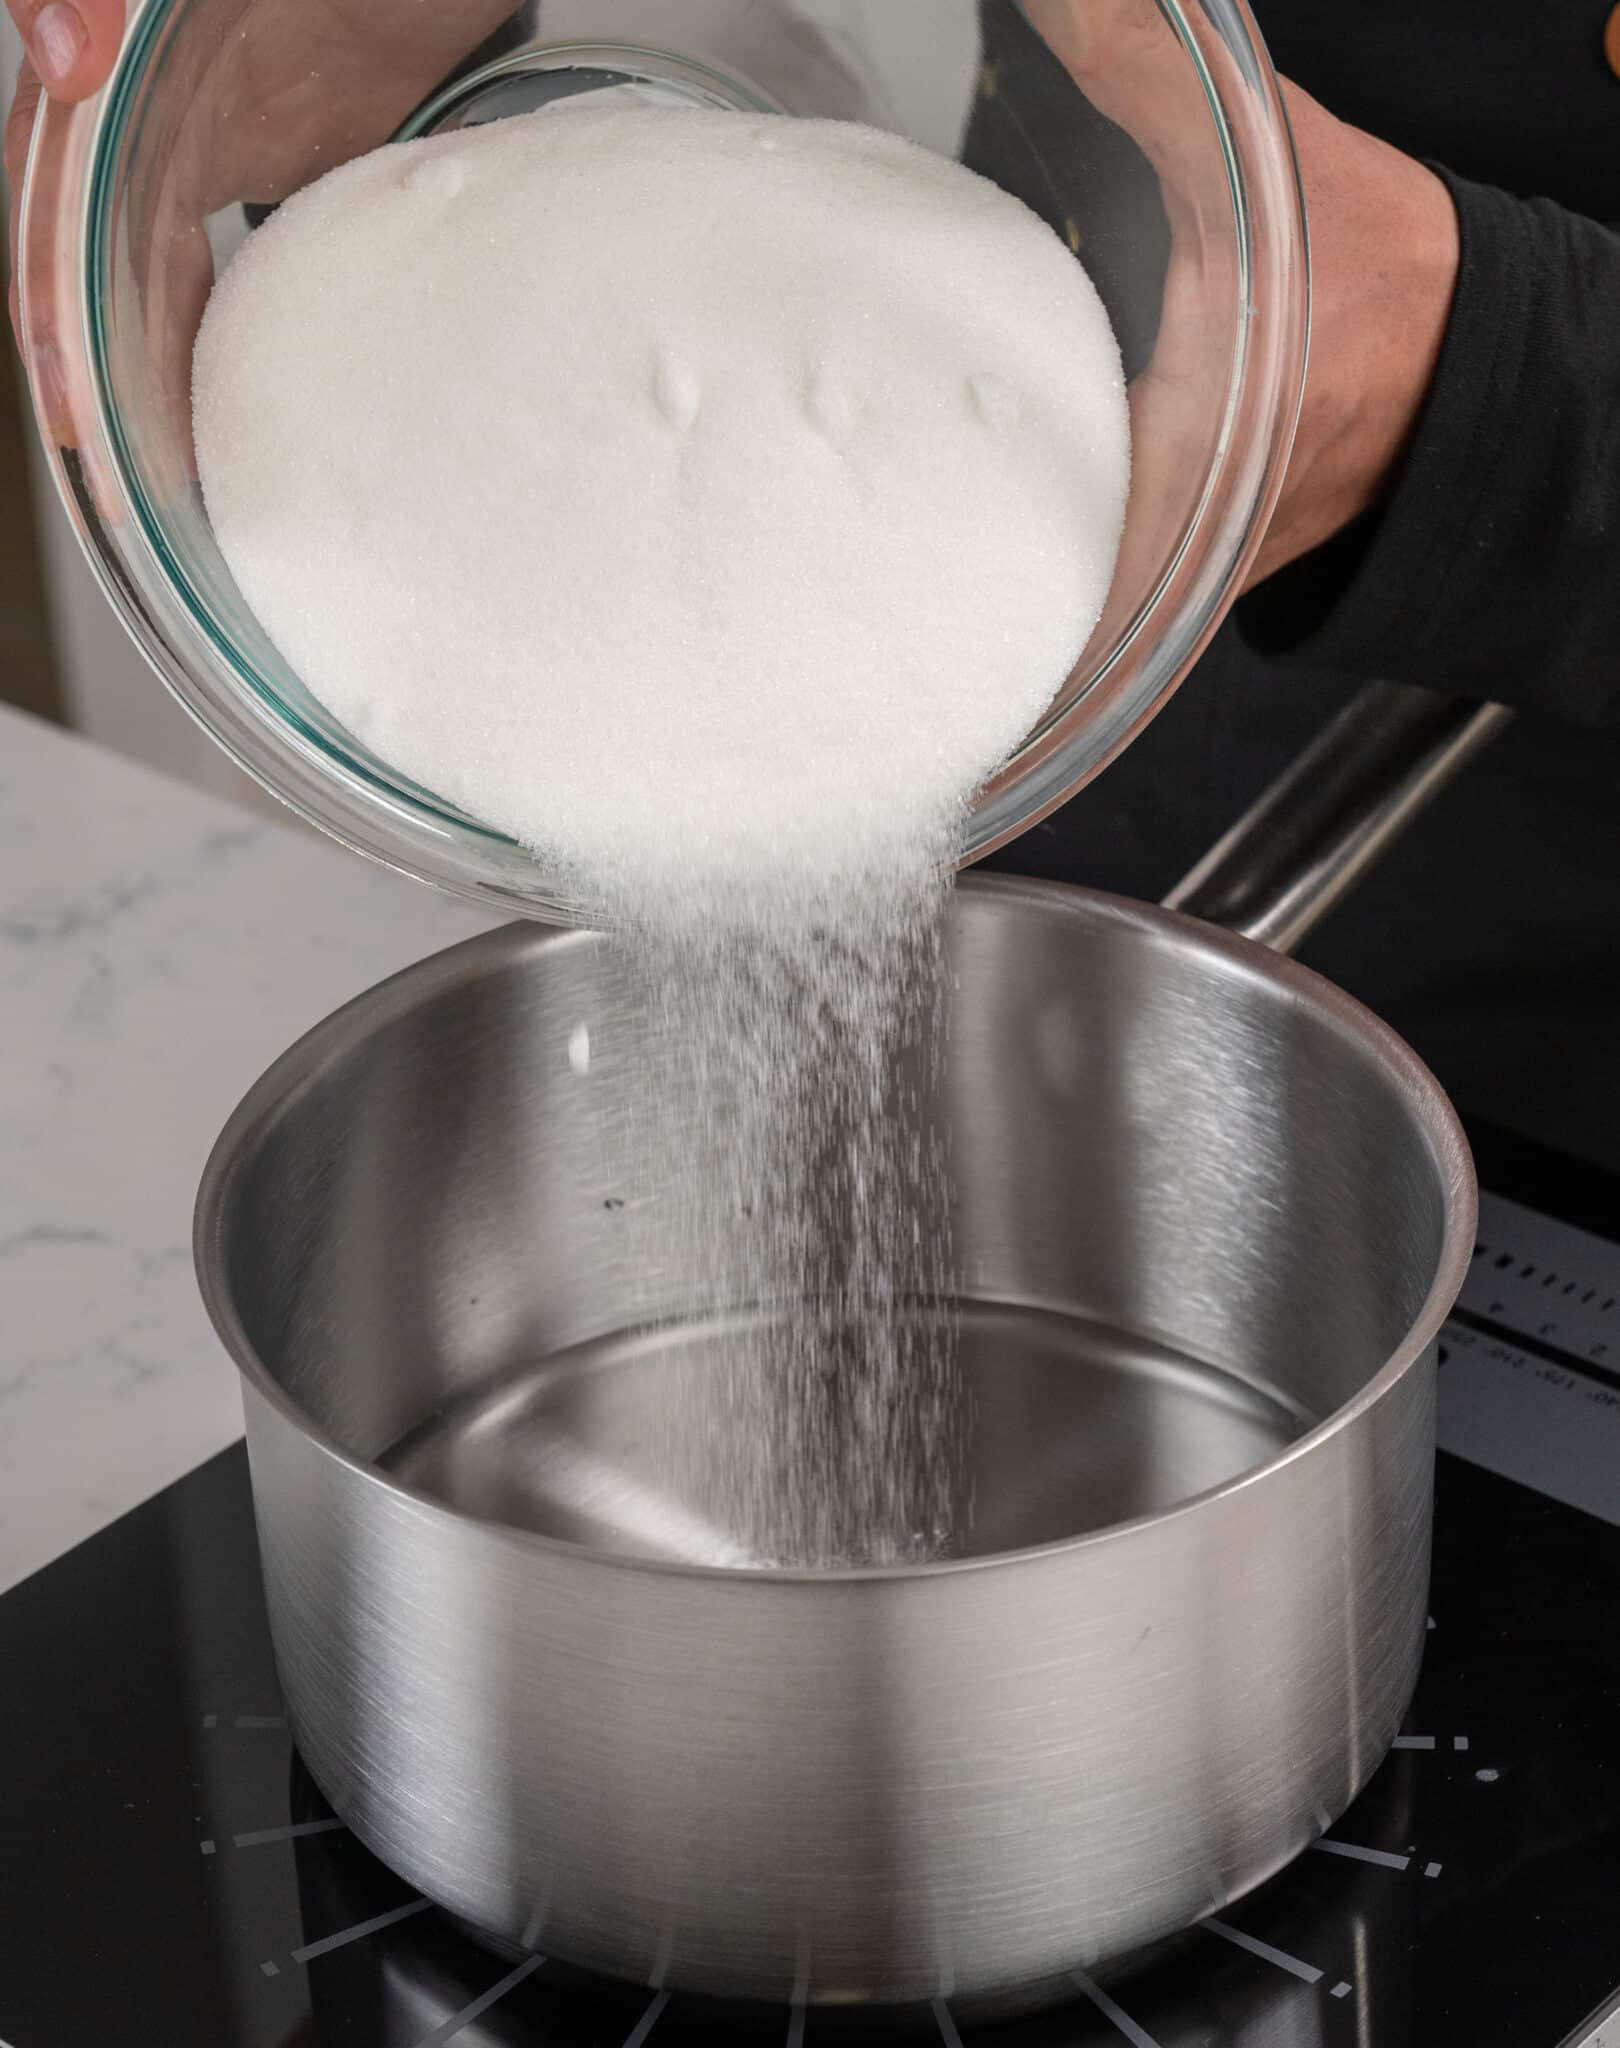
- Add the water, glucose, and sugar to a small pot, then attach a candy thermometer and bring it to a boil over medium-high heat.

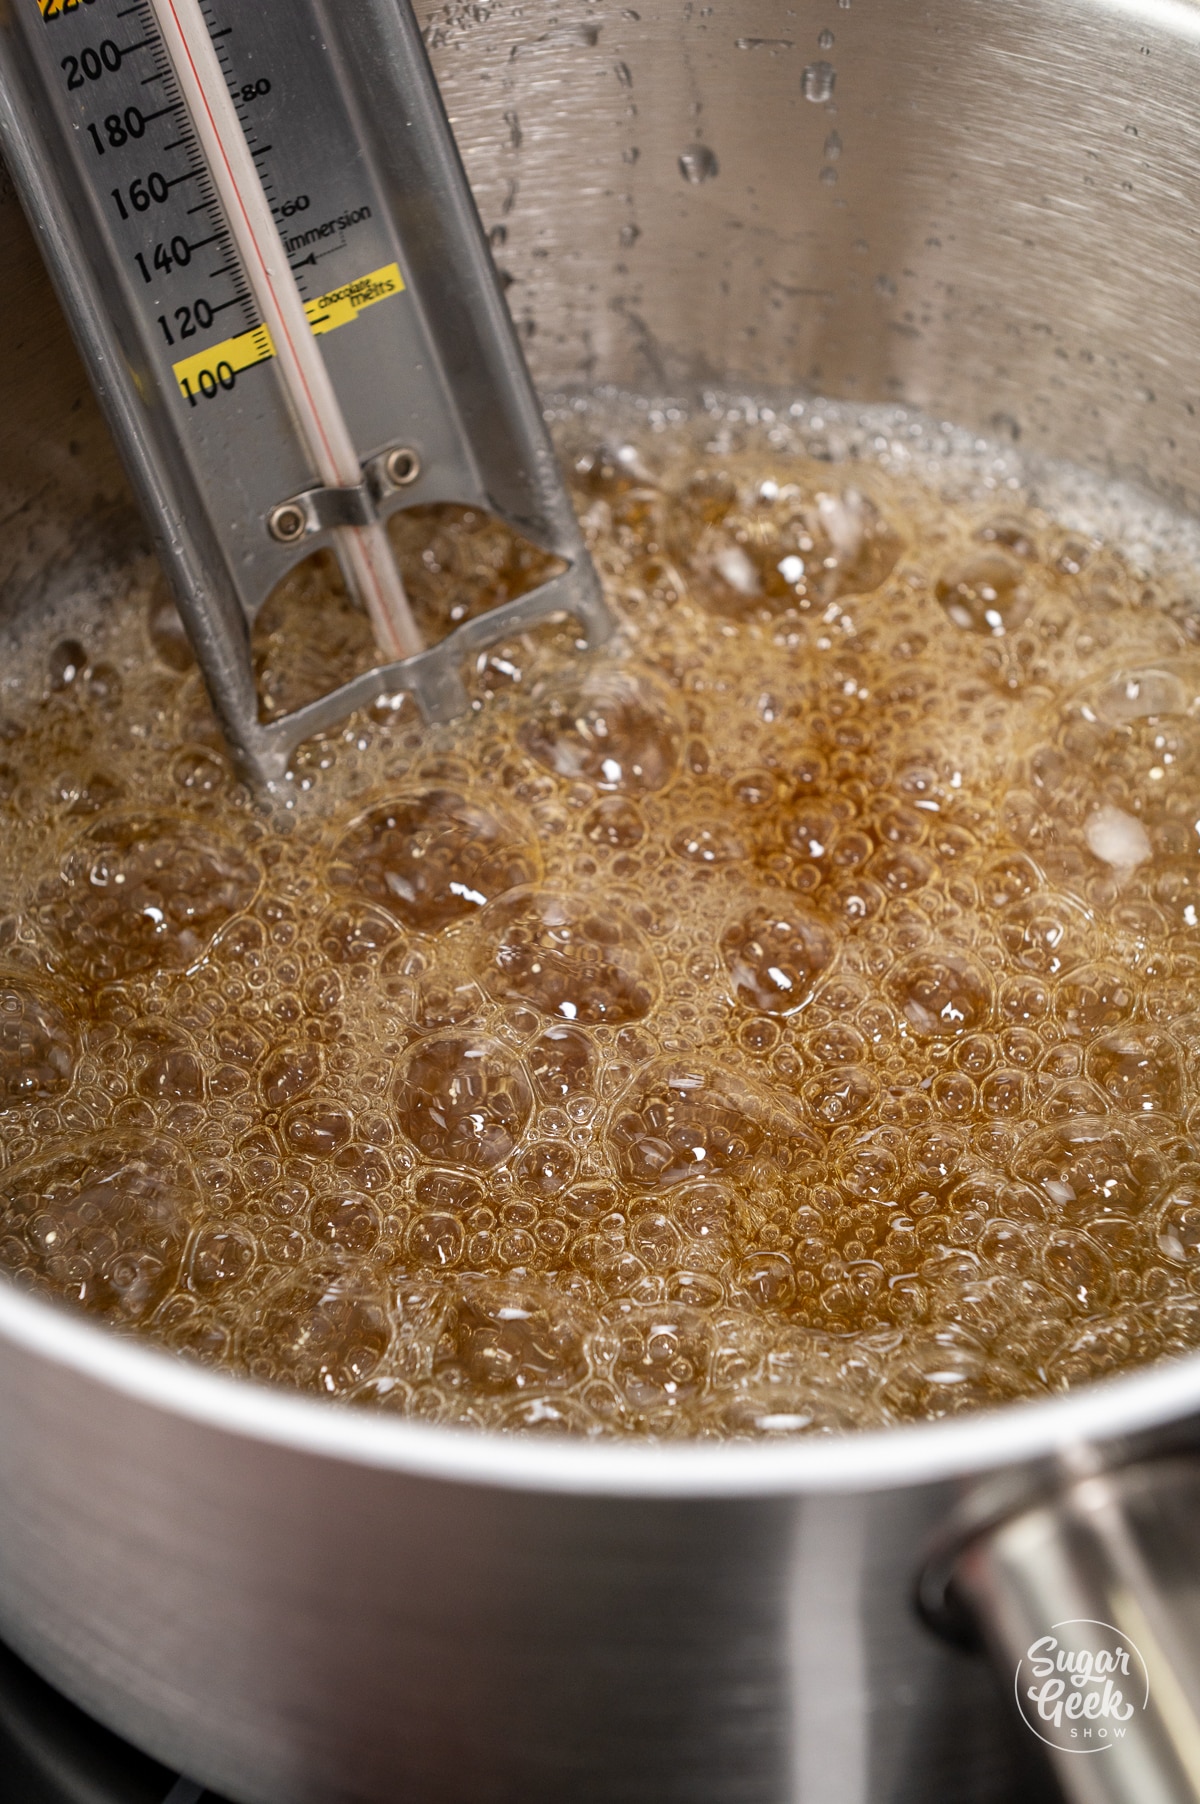
- Stir the mixture once when it comes to a boil, and then do not stir it again to avoid crystalization.
- Cook the mixture until it reaches a medium brown caramel color, or about 345°F (174°C). Pro Tip: the darker the color of your caramel is, the more bitter it will taste. Based on your preference you can stop cooking the caramel once you have reached your desired color.

- Place the pot of caramel into a bowl of ice water to cool down faster.
How to Stack a Croquembouche
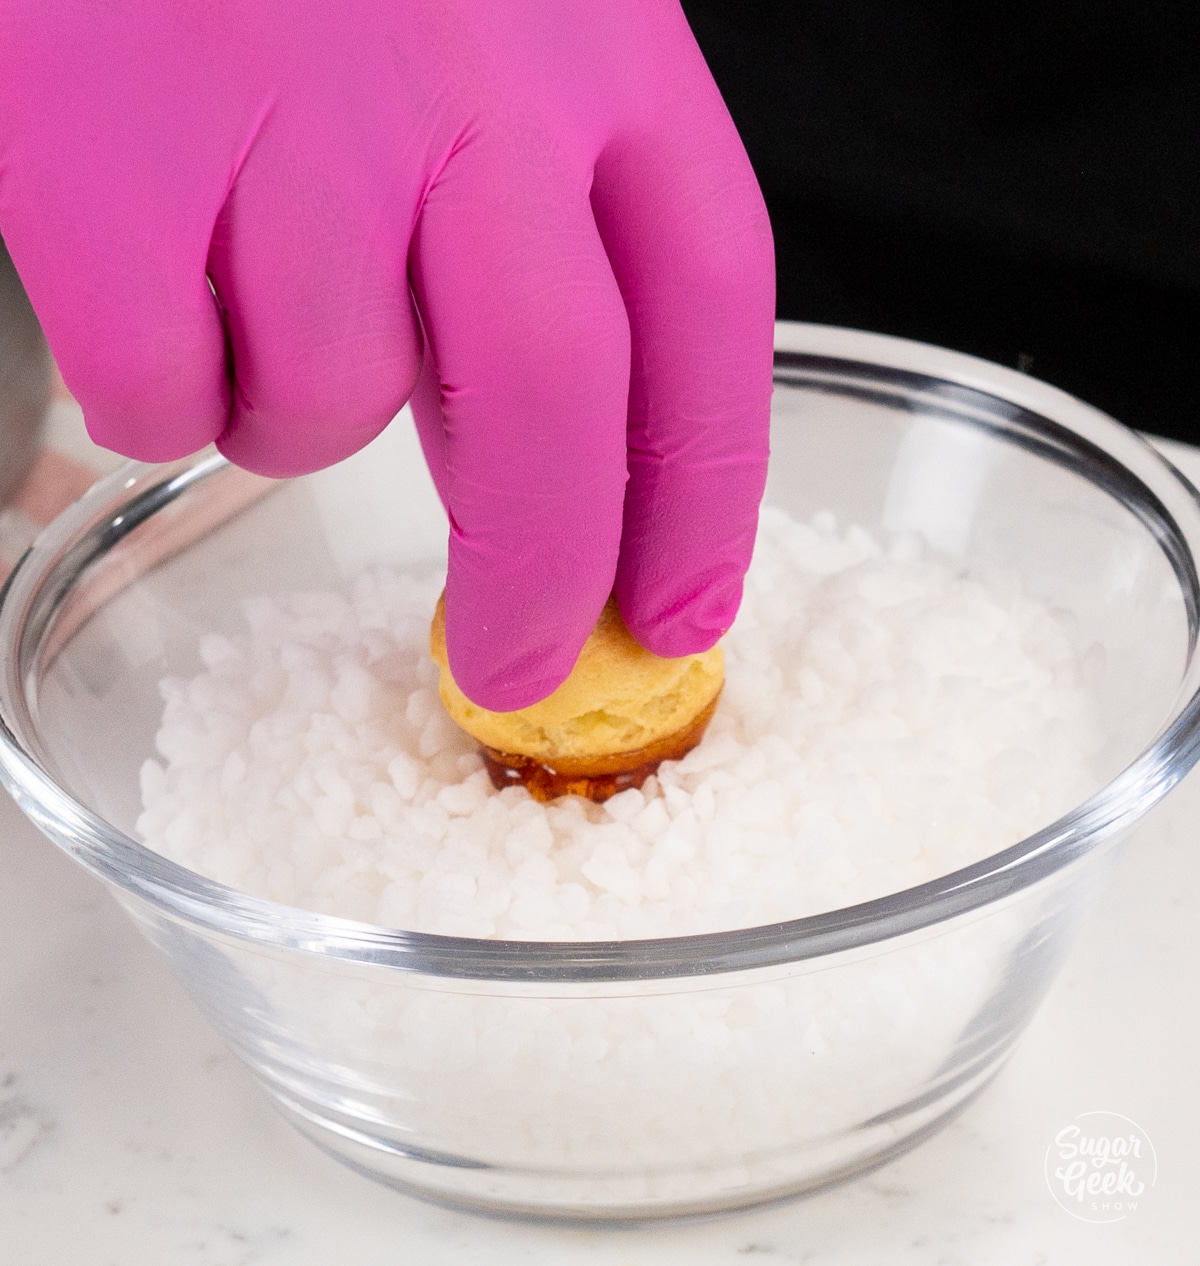
- First, prepare your workstation with the filled cream puffs, finished caramel, the metal cone, gloves, and silicone sphere molds or a prepared baking sheet to let the caramel set. We are dipping about half of the cream puffs in rock sugar to make a decorative pattern, but that is optional. You want to work quickly with the caramel so you don't have to keep reheating it.

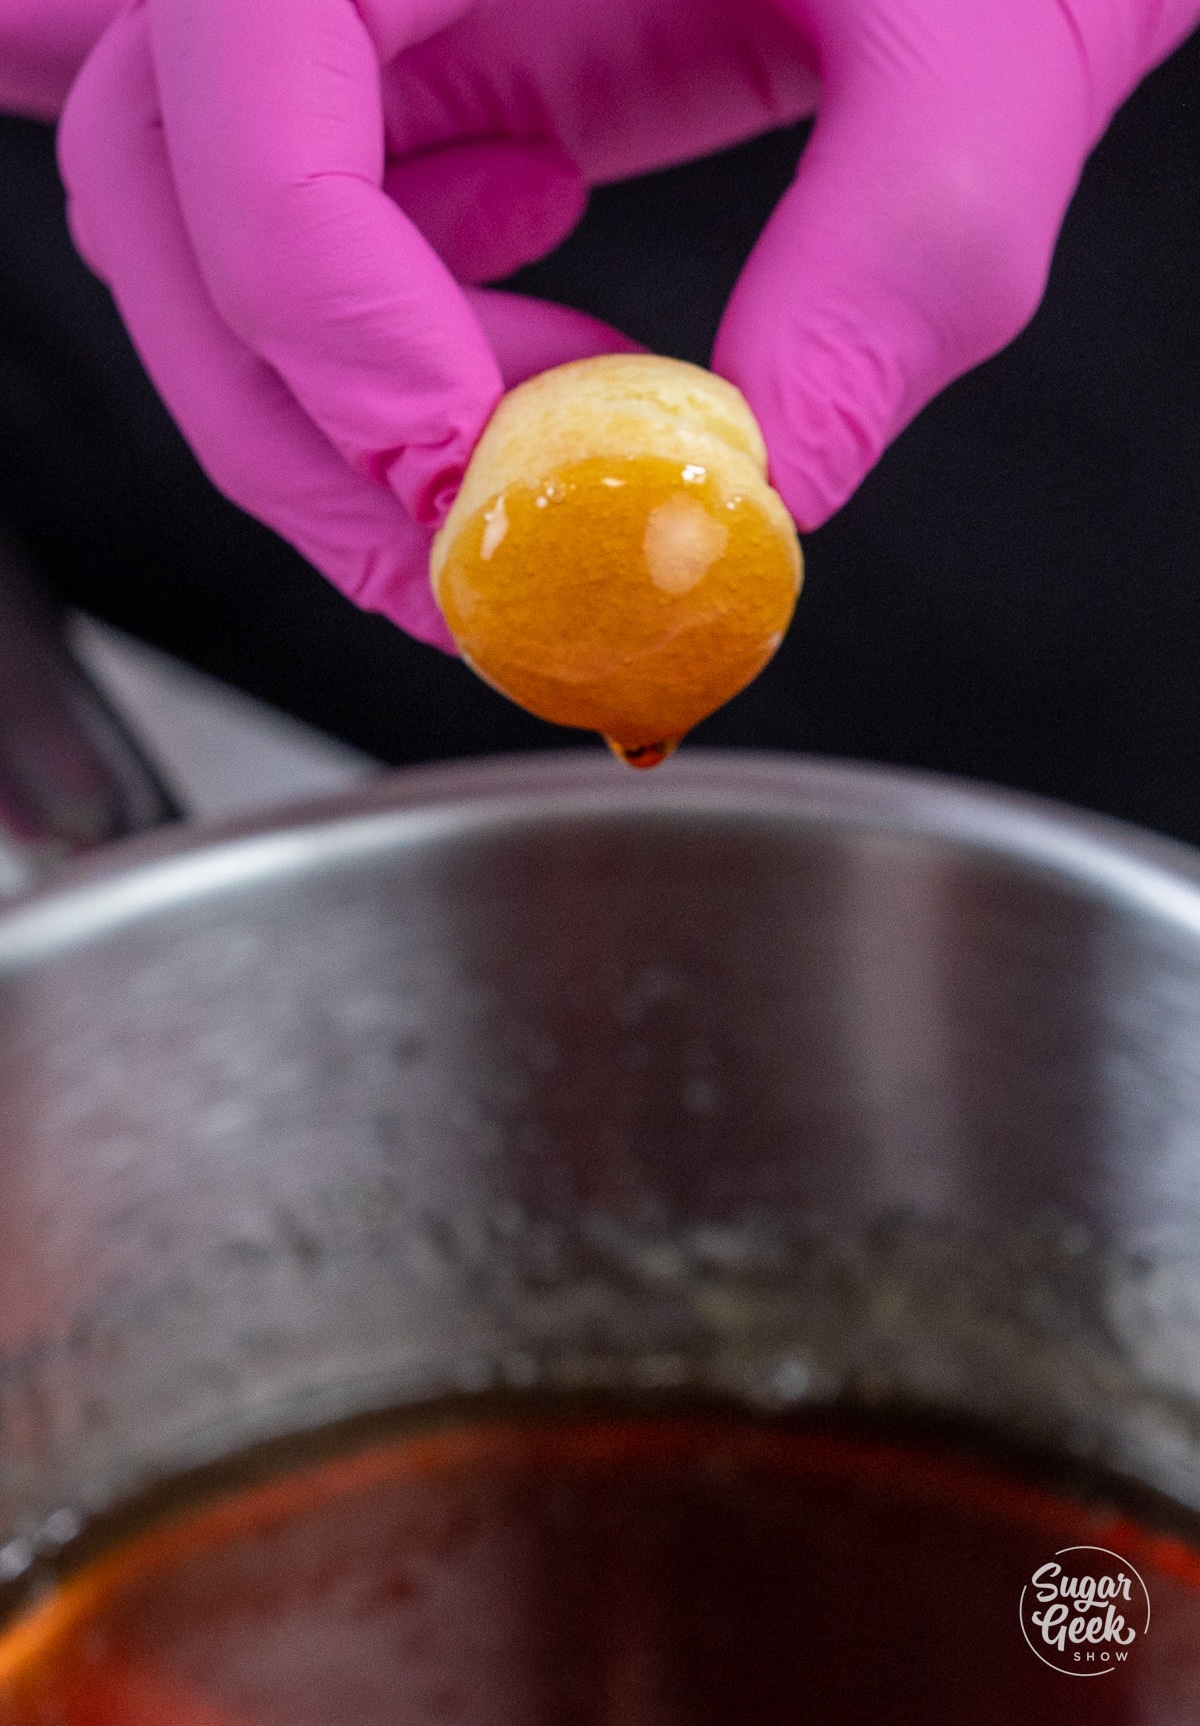
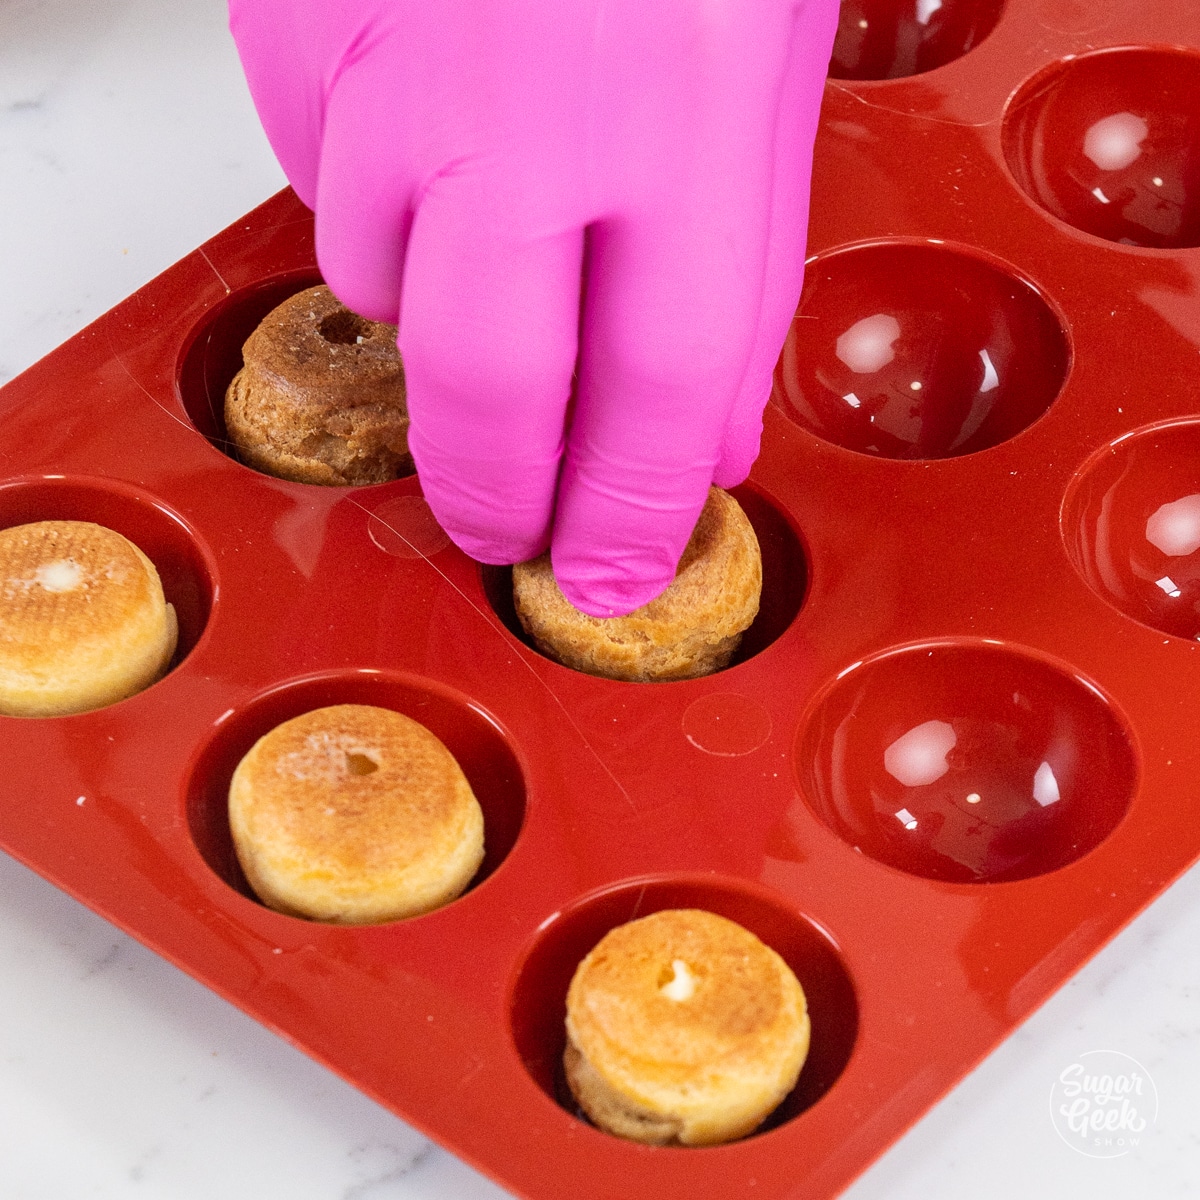
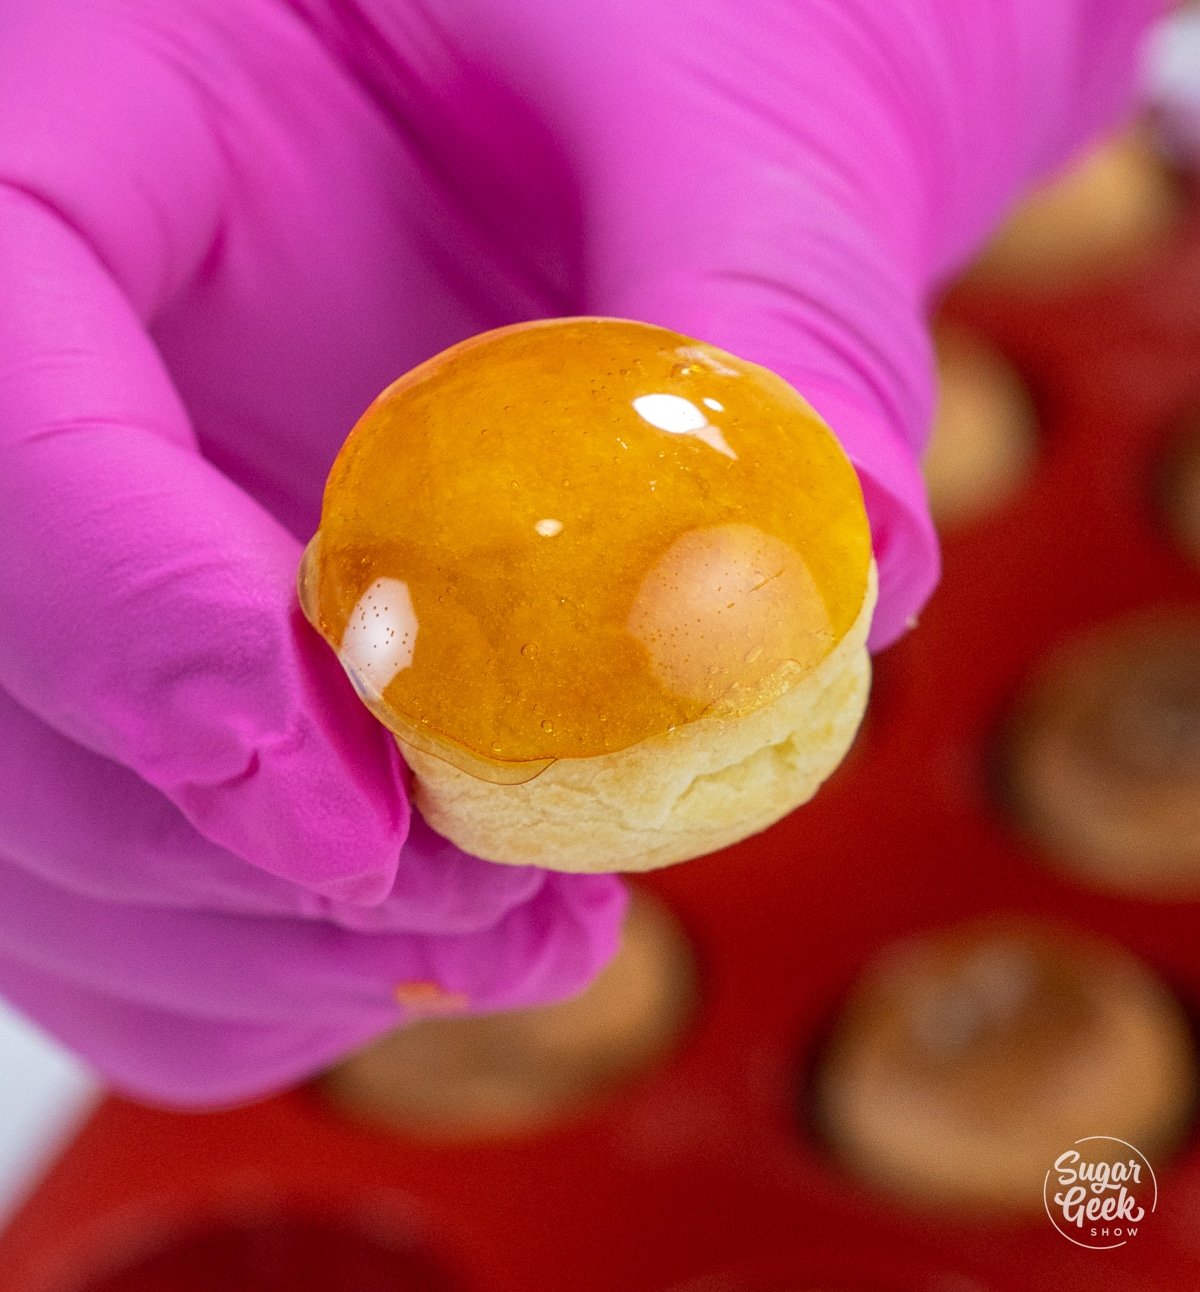
- Carefully dip the top of each cream puff in hot caramel and place it upside down into a silicone sphere mold while the caramel sets. You can also place them on a sheet pan instead of a sphere mold, but your caramel may not be as evenly distributed.

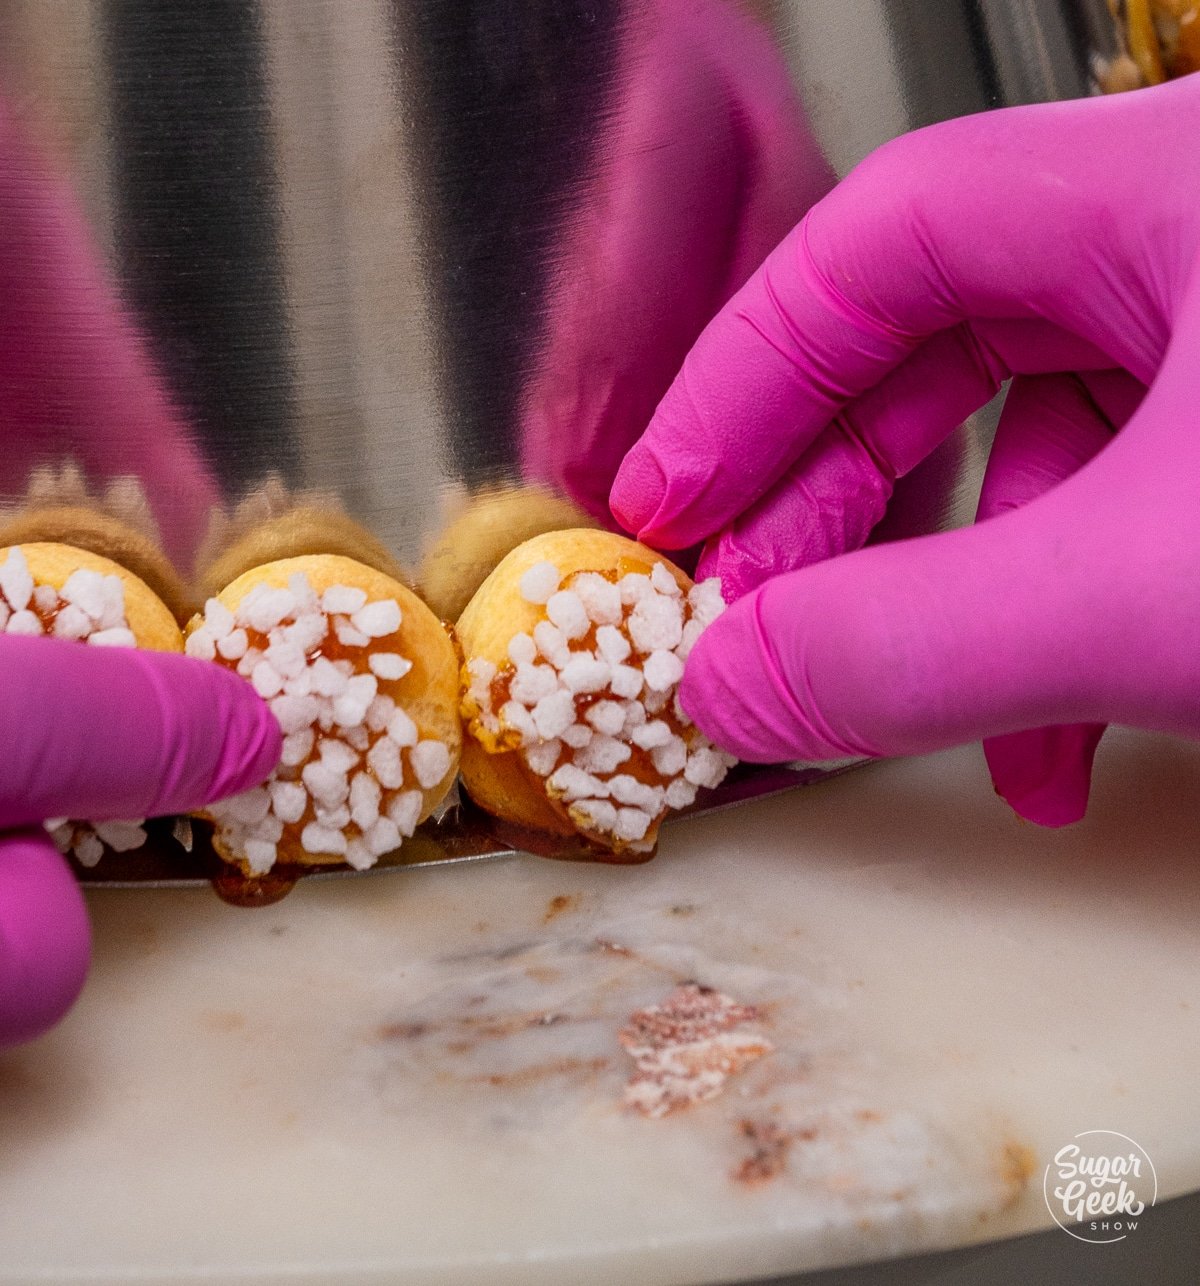
- Dip about half of the cream puffs in caramel and then rock sugar, and leave the other half with just plain caramel.

- When the caramel gets thicker, place it back on the stove over low heat to make it warm again.
- Continue dipping all of the cream puff tops in caramel and let the caramel cool.

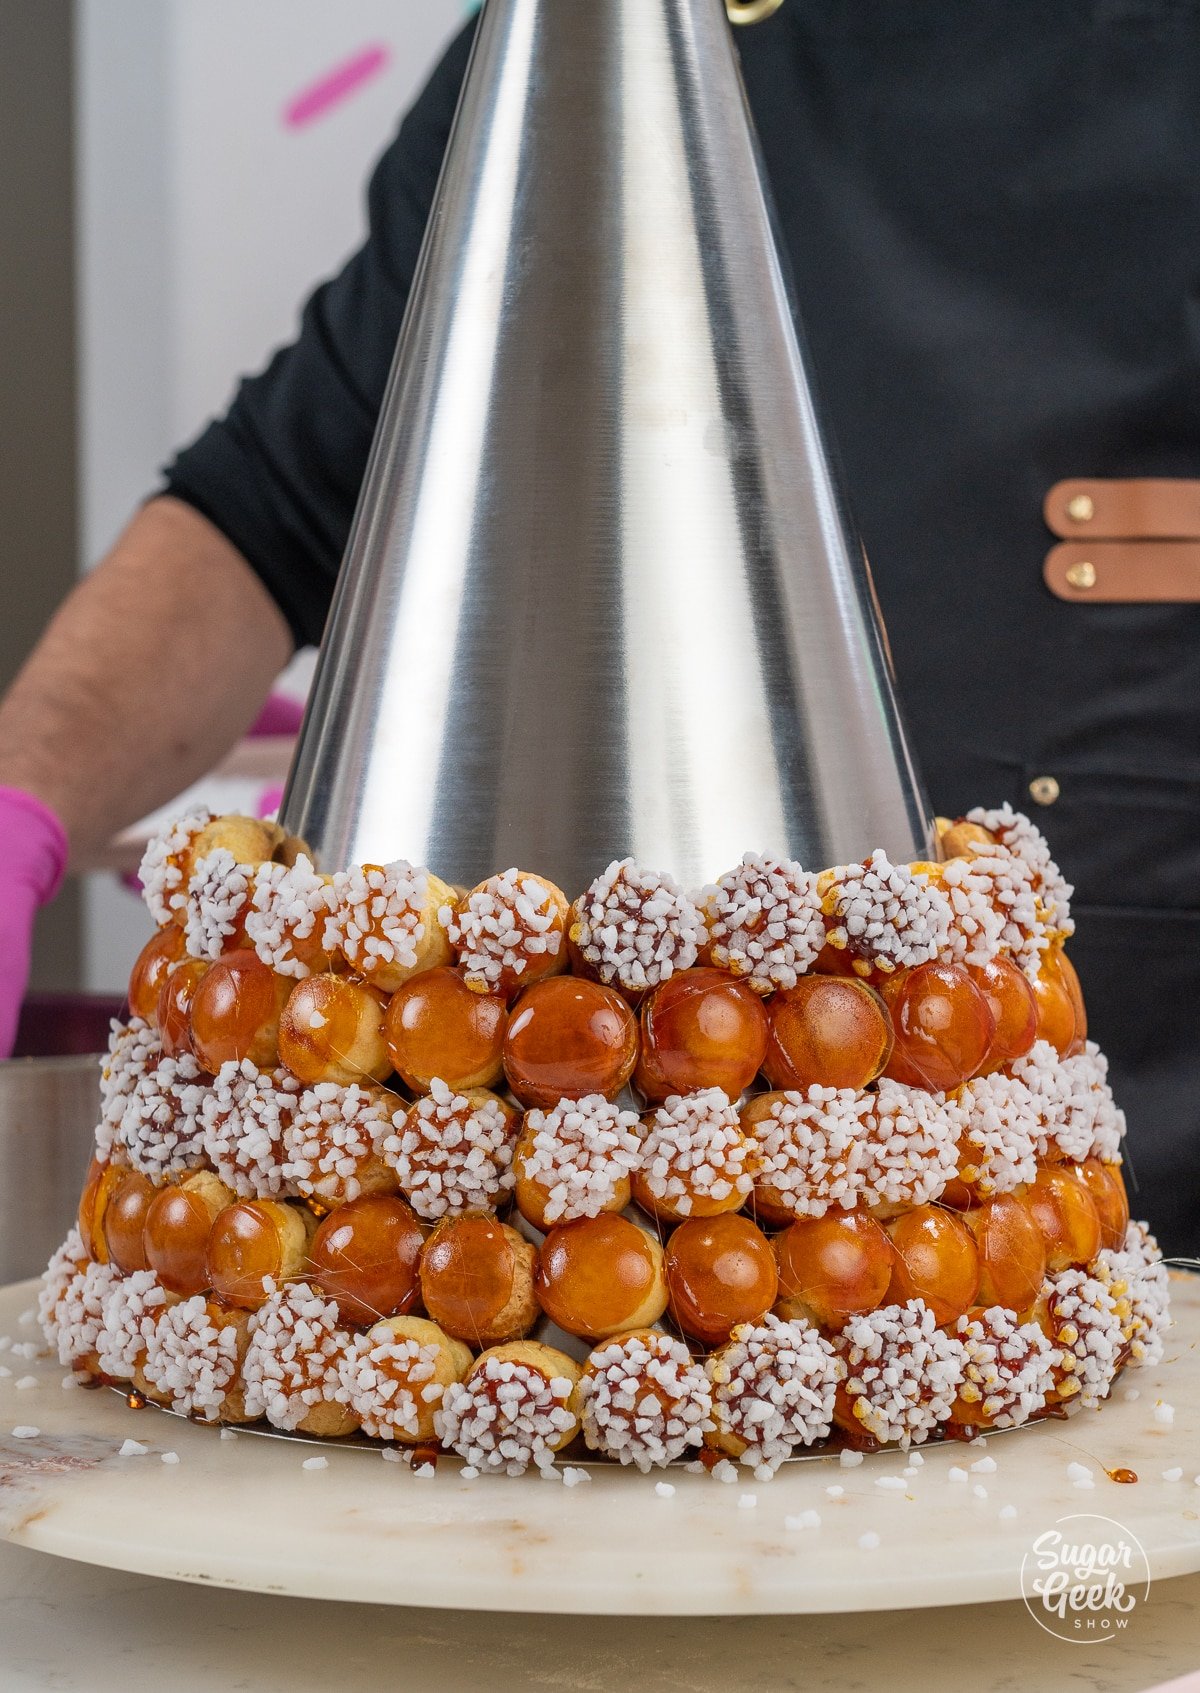
- For the first layer of the croquembouche, dip one side of each cream puff in the caramel sauce and immediately place it onto the cone, starting at the bottom. Stick the sides of the cream puffs to each other and wrap them around the cone.

- For the next layer, dip the side and bottom of the puff in caramel and glue it to the cream puff side and the cream puff below.

- Continue this process up the top of the croquembouche.

- Decorate with fresh orchids, spun sugar, or candles!
Serving the Croquembouche
It can be kind of tricky to serve a croquembouche since the caramel hardens and can become sharp. Here are a few tips for serving successfully.
- Prep your filling and pate a choux dough ahead of time, then assemble your croquembouche the day you're going to serve it.
- Serve a croquembouche by cutting the cream puffs out with a knife, or using two forks to pry out each cream puff.
- Make sure to start at the top when serving!
- Leave the croquembouche on the cone while traveling.
- Don't leave a croquembouche sitting out for longer than 5 hours.

FAQ
Hundreds of tiny cream puffs filled with pastry cream are glued together with caramel in a cone shape to make a croquembouche.
"Croque en bouche" in France translates to something that "crunches in the mouth" in English.
Serve a croquembouche within 5 hours of assembling it. Use a knife or two forks to pry each cream puff out of the cone. Be careful when cutting into the caramel, as it may be sharp.
It is not recommended to refrigerate a croquembouche because the cream puffs will start to get soggy from the pastry cream. It's best to make the pate a choux dough and pastry cream a day ahead, and then bake, fill, make the caramel, and assemble on the day of serving.
A croquembouche can last for about 5 hours, so it's best to assemble it when you're ready to serve. The pastry cream inside of the cream puffs is not shelf stable, and the caramel will start to absorb the moisture in the air and get soggy.
Our croquembouche is 18" tall and 10" wide at the base and took about 250, 2" cream puffs. You can make a croquembouche in any size that you like! You can make fewer cream puffs if you make larger ones, but it may be more difficult to get them to stick together.
A croquembouche is a popular French dessert alternative to cake for weddings, baptisms, communions, and special occasions.
Related Recipes
Recipe
Equipment
- 1 Stand mixer with the paddle attachment optional
- 1 Candy thermomer for the caramel
- 3 Pastry bags
- 1 Croquembouche mold We are using an 18" tall, 10" wide croquebouche mold from Matfer, but you can use any kind of mold.
Ingredients
Pâte à Choux
- 320 grams whole milk
- 320 grams water
- 12 grams salt
- 12 grams granulated sugar
- 280 grams unsalted butter European butter like Plugra works best
- 360 grams all purpose flour
- 200 grams large eggs
Pastry Cream
- 300 grams whole milk
- 2 whole vanilla beans seeded
- 100 grams egg yolks
- 80 grams granulated sugar
- 40 grams cornstarch
Caramel
- 300 grams water
- 100 grams glucose melted
- 1000 grams granulated sugar
Instructions
Making Pâte à Choux
- Note: This pâte à choux recipe is enough to make about 64 cream puffs. We did about 4 batches to make about 250 in total for an 18" high croquembouche. We made them in batches so as to not overwhelm our mixer. You will need to make multiple batches depending on what size croquembouche you’re making, the size of your cream puffs, and how much filling you use.
- Add your milk, water, salt, sugar, and butter to a medium saucepan and bring it to a boil. The butter should be melted at the same time the milk starts to boil, so remove the pot from the heat to let the butter melt if needed.
- Once your milk mixture is boiling and the butter has completely melted, take your pot off the heat, add in your sifted flour, and mix together until it looks like mashed potatoes. It is best to use a wooden spoon, but a spatula is fine too.
- Turn the heat back on to medium-high and continue to stir and keep it moving to dry out the dough.
- Once you see a browning layer on the bottom of the pan the dough is dry enough. This is important, as it will help your cream puffs "puff" and ensure that they have a hollow center for the cream filling.
- Put the dough into the bowl of a stand mixer with the paddle attachment and begin to mix on medium speed to cool it down, this should take about 30 seconds to 1 minute. When you can place your hand on the side of the bowl without it feeling too hot, it's done.
- Slowly add in your eggs one at a time while mixing on low. Mix until the dough slowly falls in a v-shape off of your paddle.
- Prepare a pastry bag with a small metal round piping tip. Fill the piping bag with the pate a choux batter.
- Prepare a baking sheet pan with parchment paper. Chef Christophe is using a "silpain" baking mat on a cookie sheet for maximum airflow and evenly-baked cream puffs.
- Pipe the pâte à choux rounds slightly smaller than your desired final size (about 1-inch), as they will "puff" and expand in the oven.
- Gently smooth the pointy top of the cream puff with a damp fingertip.
- Bake the cream puffs at 350°F for 25-30 minutes until golden brown. Do not open the oven door or your cream puffs could collapse.
- Cool the cream puffs completely to room temperature on a wire rack, for about 30 minutes.
Making Pastry Cream
- Scrape out the vanilla pods by using a small knife to cut down the center of the bean, then use the back of the knife to gently scrape the pods out. (Only use the pods on the inside, do not use the skin of the bean.)
- Add your milk, scraped vanilla bean, and half of the sugar into a large saucepan over medium heat and bring it to a boil.
- Add your egg yolks, cornstarch, and the other half of the sugar into a large mixing bowl and whisk them together.
- Pour some of the hot milk into the egg mixture to temper it. Pro-Tip: Tempering your yolks helps them reach the same temperature as your milk mixture. This makes it so all the ingredients mix together properly and don't curdle.
- Then put everything back together into the pot and boil for about 1 minute until the mixture starts to thicken. Whisk constantly to prevent lumps.
- Pour your pastry cream into a bowl, cover it with plastic wrap and refrigerate until you are ready to use it. Pro-tip: To cool pastry cream down quickly, lay down some plastic wrap on a sheet pan, spread the pastry cream out into a thin rectangular shape, and wrap it fully before chilling.
Filling the Cream Puffs
- Poke a small hole into the center of each pate a choux using a small round metal piping tip.
- Fill your piping bag with the pastry cream. Pro Tip: Use a metal filling tip to easily fill your pate a choux.
- Fill each cream puff with pastry cream and scrape the bottom over the edge of a small container so that it is clean.
- Set the cream puffs aside while you make your caramel.
Making the Caramel
- Microwave the glucose for about 30 seconds to make it liquid.
- Add the water, glucose, and sugar to a small pot, then attach a candy thermometer and bring it to a boil over medium-high heat.
- Stir the mixture once when it comes to a boil, and then do not stir it again to avoid crystallization.
- Cook the mixture until it reaches a medium brown caramel color, or about 345°F (174°C). Pro Tip: the darker the color of your caramel is, the more bitter it will taste. Based on your preference you can stop cooking the caramel once you have reached your desired color.
- Place the pot of caramel into a bowl of ice water to cool down faster.
How to Stack a Croquembouche
- First, prepare your workstation with the filled cream puffs, finished caramel, the metal cone, gloves, and silicone sphere molds or a prepared baking sheet to let the caramel set. We are dipping about half of the cream puffs in rock sugar to make a decorative pattern, but that is optional. You want to work quickly with the caramel so you don't have to keep reheating it.
- Carefully dip the top of each cream puff in hot caramel and place it upside down into a silicone sphere mold while the caramel sets. You can also place them on a sheet pan instead of a sphere mold, but your caramel may not be as evenly distributed.
- Dip about half of the cream puffs in caramel and then rock sugar, and leave the other half with just plain caramel.
- When the caramel gets thicker, place it back on the stove over low heat to make it warm again.
- Continue dipping all of the cream puff tops in caramel and let the caramel cool.
- For the first layer of the croquembouche, dip one side of each cream puff in the caramel sauce and immediately place it onto the cone, starting at the bottom. Stick the sides of the cream puffs to each other and wrap them around the cone.
- For the next layer, dip the side and bottom of the puff in caramel and glue it to the cream puff side and the cream puff below.
- Continue this process up the top of the croquembouche.
- Decorate with fresh orchids, spun sugar, or candles!
Video
Notes
- Purchase a kitchen scale if you don't already have one to make the best recipes. One cup of flour can vary from scoop to scoop depending on how packed the flour is, its humidity, and the type of flour, which can ruin your recipe.
- Practice Mise en Place (everything in its place) which means you measure everything before you start mixing so you don't accidentally forget something or add any ingredients out of order.
- Prep your filling and pate a choux dough ahead of time, then assemble your croquembouche the day you're going to serve it.
- Serve a croquembouche by cutting the cream puffs out with a knife, or using two forks to pry out each cream puff.
- Make sure to start at the top when serving!
- Leave the croquembouche on the cone while traveling.
- Don't leave a croquembouche sitting out for longer than 5 hours.
- This 18" tall croquembouche with about 250 cream puffs took about 5 hours in total to make. We had two people helping fill, dip, and assemble the cream puffs.
- We are using a croquembouche mold from Matfer, but you can use any kind of mold.
- It is possible to make this croquembouche all in one day, but you can also make the pate a choux and pastry cream ahead of time.
- Use a heavy bottom pot when making the choux dough so that the dough can stick to the bottom. A nonstick pan will be hard to determine when your dough is dried out properly.
- Avoid refrigerating the filled cream puffs overnight, or they will get soggy.
- To make the choux ahead you have two options:
- One: Place the choux dough in multiple pastry bags and chill them overnight, then pipe, bake, fill, and assemble on the same day.
- Two: Bake the cream puff shells the day before, store them in an airtight container at room temperature overnight, then crisp them up in a 350°F oven for 5 minutes the next day before filling, and assembling.


Leave a Reply