
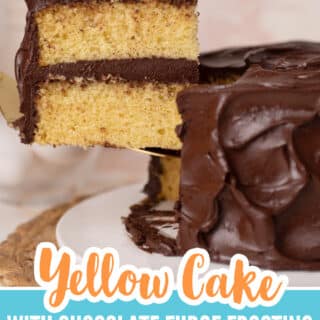
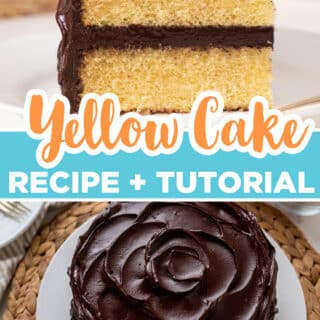
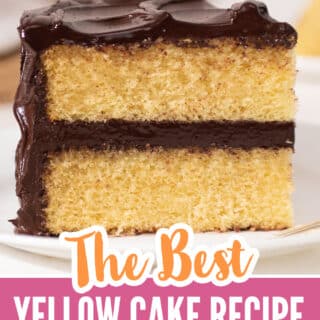
This classic yellow cake recipe is full of flavor and moisture, making the perfect layer cake. It uses the reverse creaming method, which combines the dry ingredients with the butter first, making an extra velvety texture. It pairs great with Swiss meringue buttercream, ermine frosting, or easy chocolate buttercream.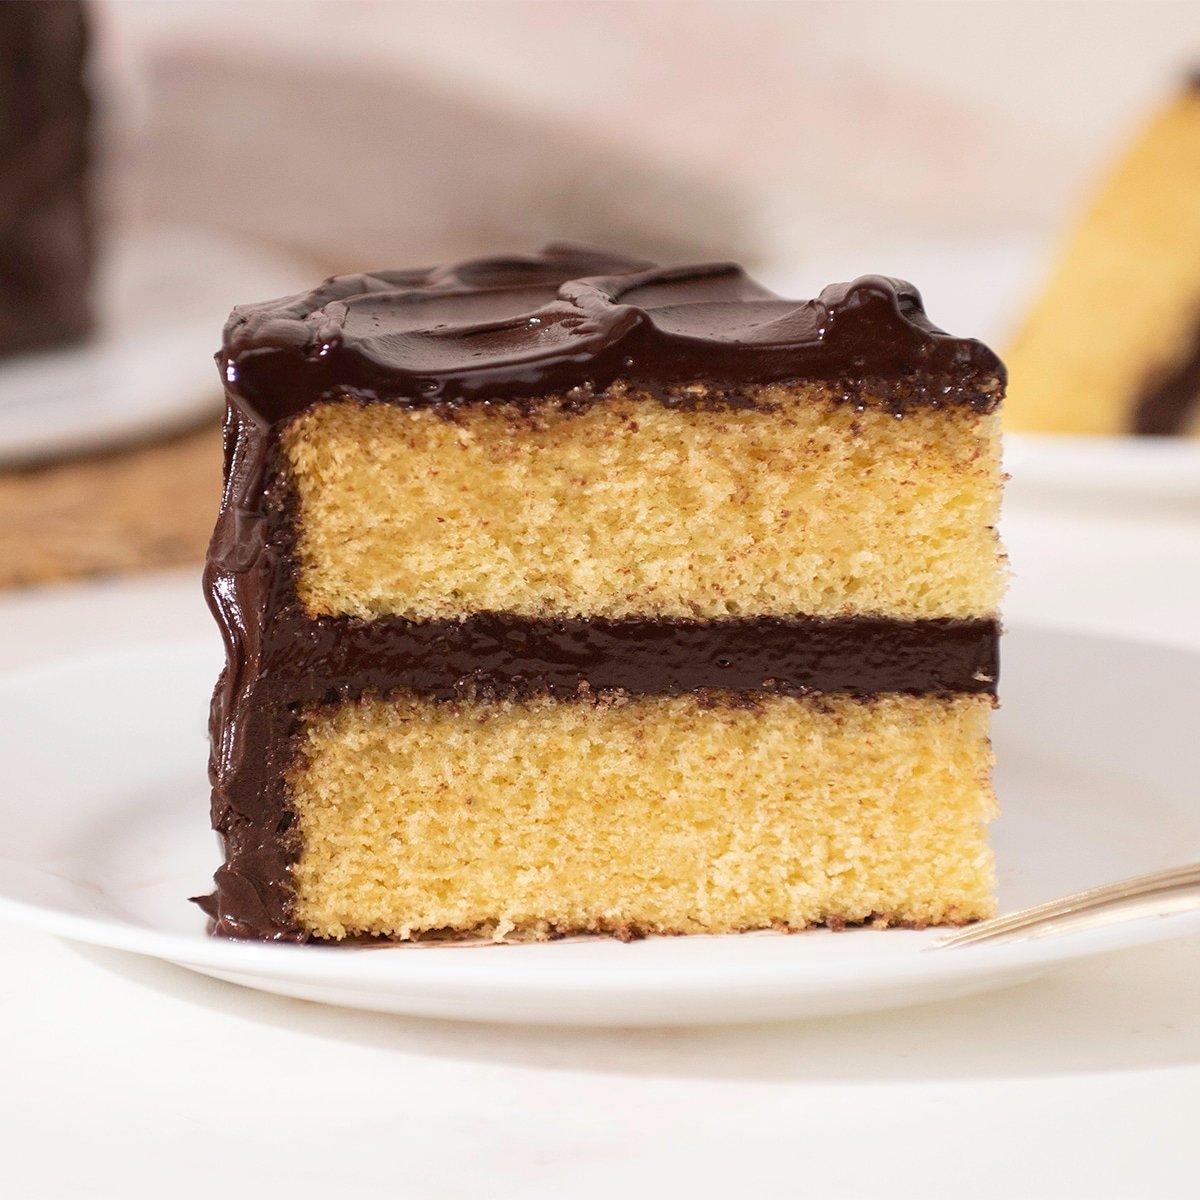
Yellow cake is considered the “classic” American vanilla cake. It is the standard to which all other cakes are held. Why do you think that is? Probably because the best cake you ever ate was most likely a “yellow cake”. The yellow is not a secret ingredient, it's just extra yolks! The rich color and flavor come from using whole eggs and a few extra yolks so those literally make this cake “gold”.
Table of contents
Ingredients
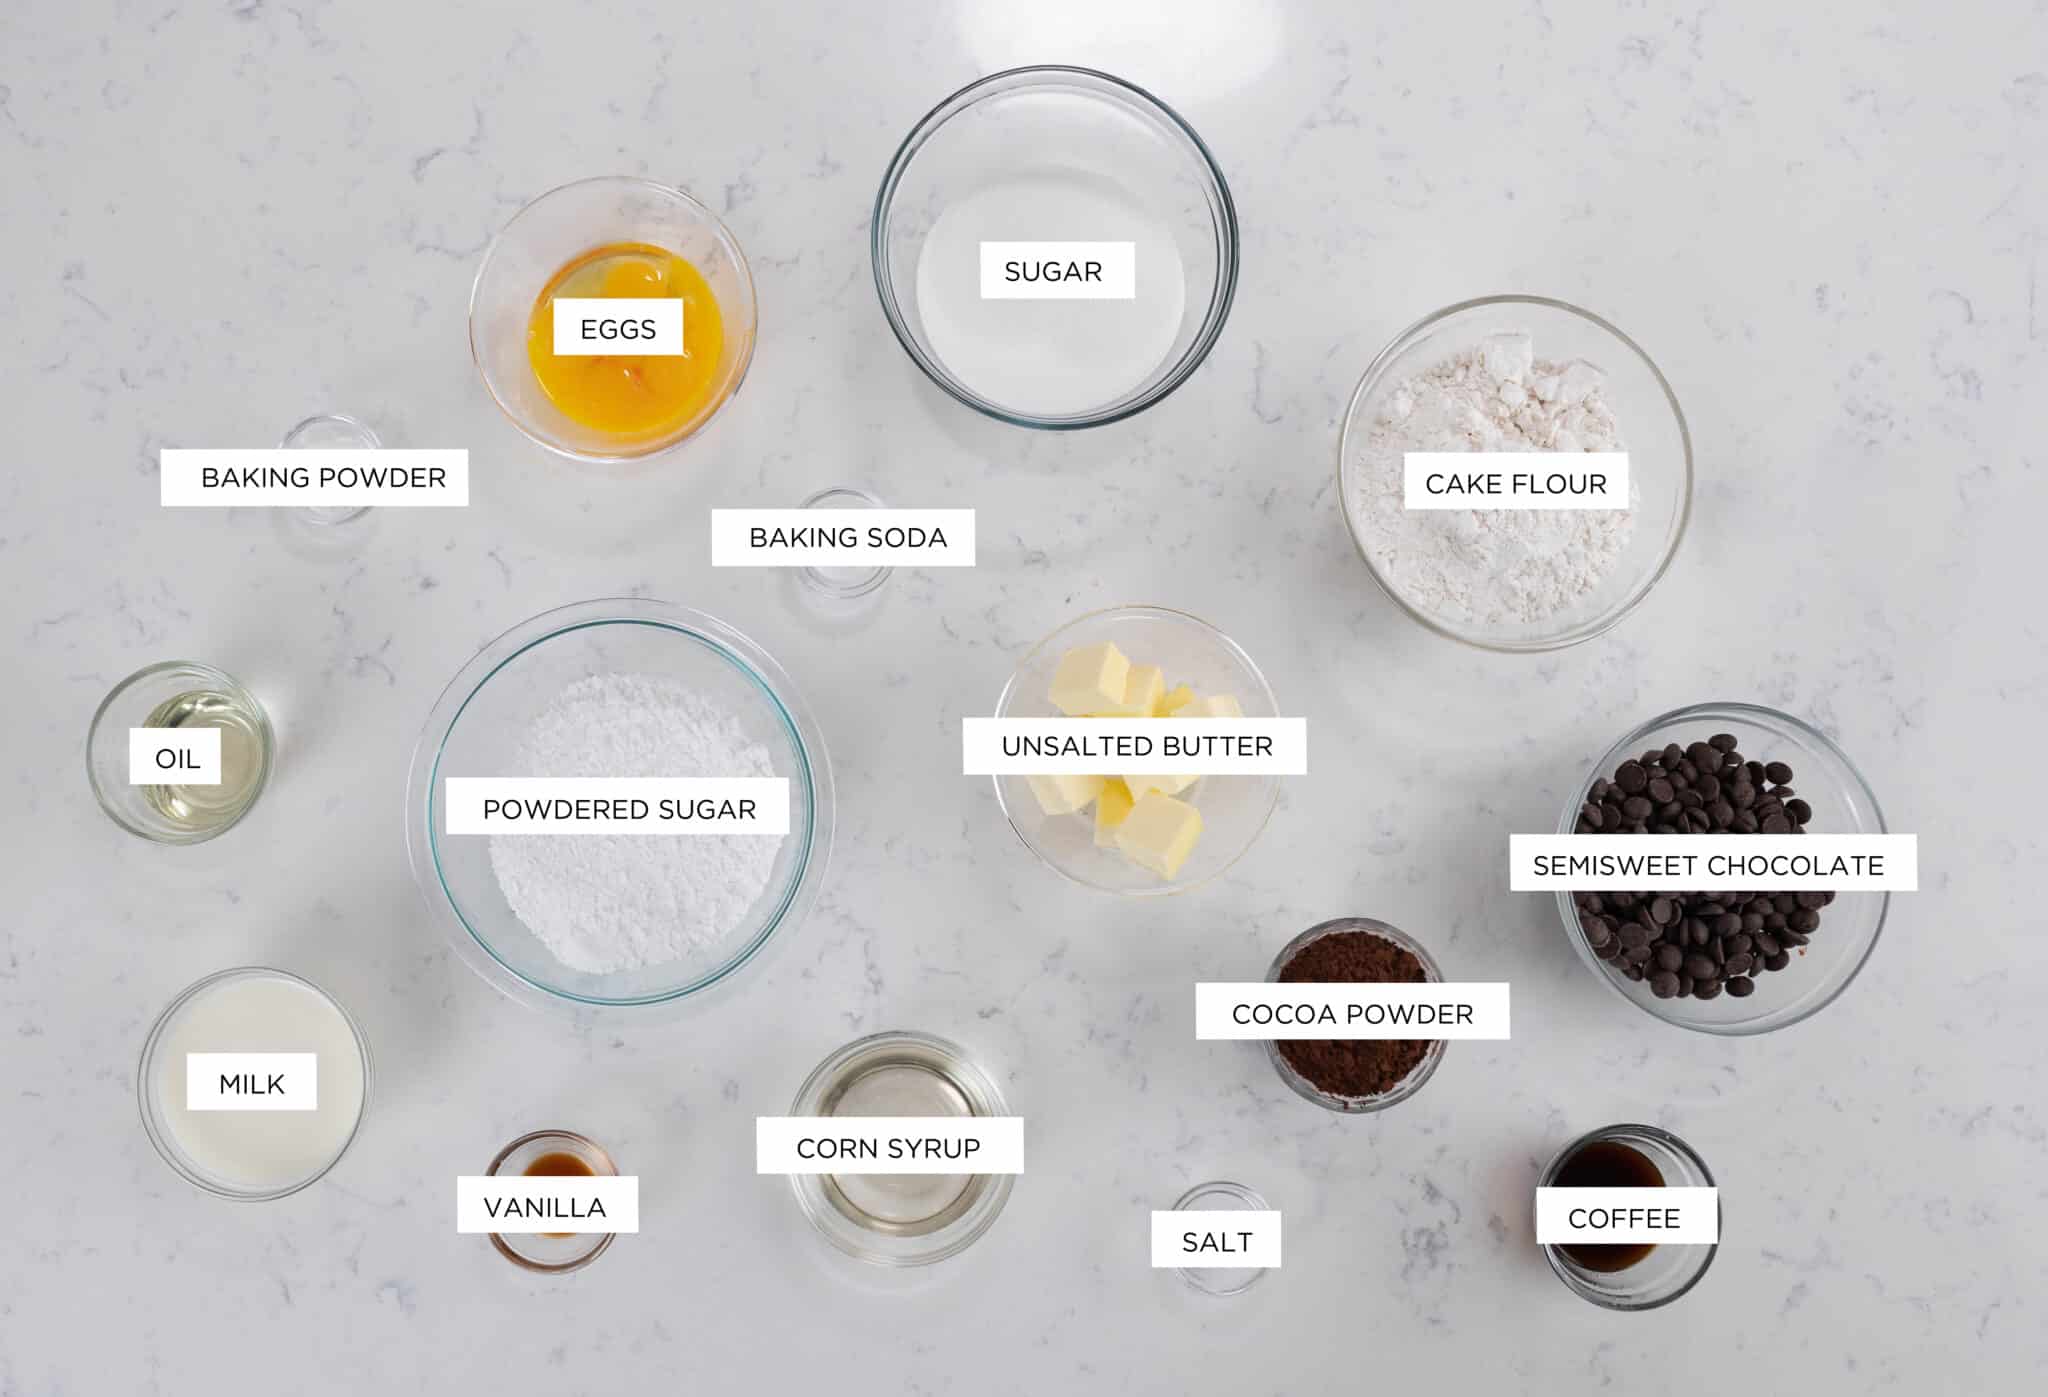
Eggs are an important ingredient in any cake recipe, but in this cake, there are whole eggs and additional yolks. The yolk contributes protein, some fat, flavor, and emulsifying lecithin. Emulsifiers hold water and fat together, so adding extra egg yolks to the batter enables the batter to hold extra liquid, and more liquid will hold more sugar. Thus creating a very moist and delicious cake!
Cake flour allows this rich cake to still keep its light texture and tight crumb, which makes it perfect to hold a heavier frosting, like chocolate fudge frosting. They balance each other so well in flavor and texture, which makes them a perfect pairing. All-purpose flour can be used as well, however, the final texture of the cake will be different. It will have a looser crumb with a more coarse-looking texture. Pro-tip – If you’re in the UK, search for Shipton Mills soft cake and pastry flour or flour that has a protein level of 9% or less.
Butter emulsifies so well with the sugar and liquid, and it keeps the cake light and not feeling too heavy like oil would. Butter is solid at room temperature, so this cake has enough structure to hold up with filling and stacking cake layers.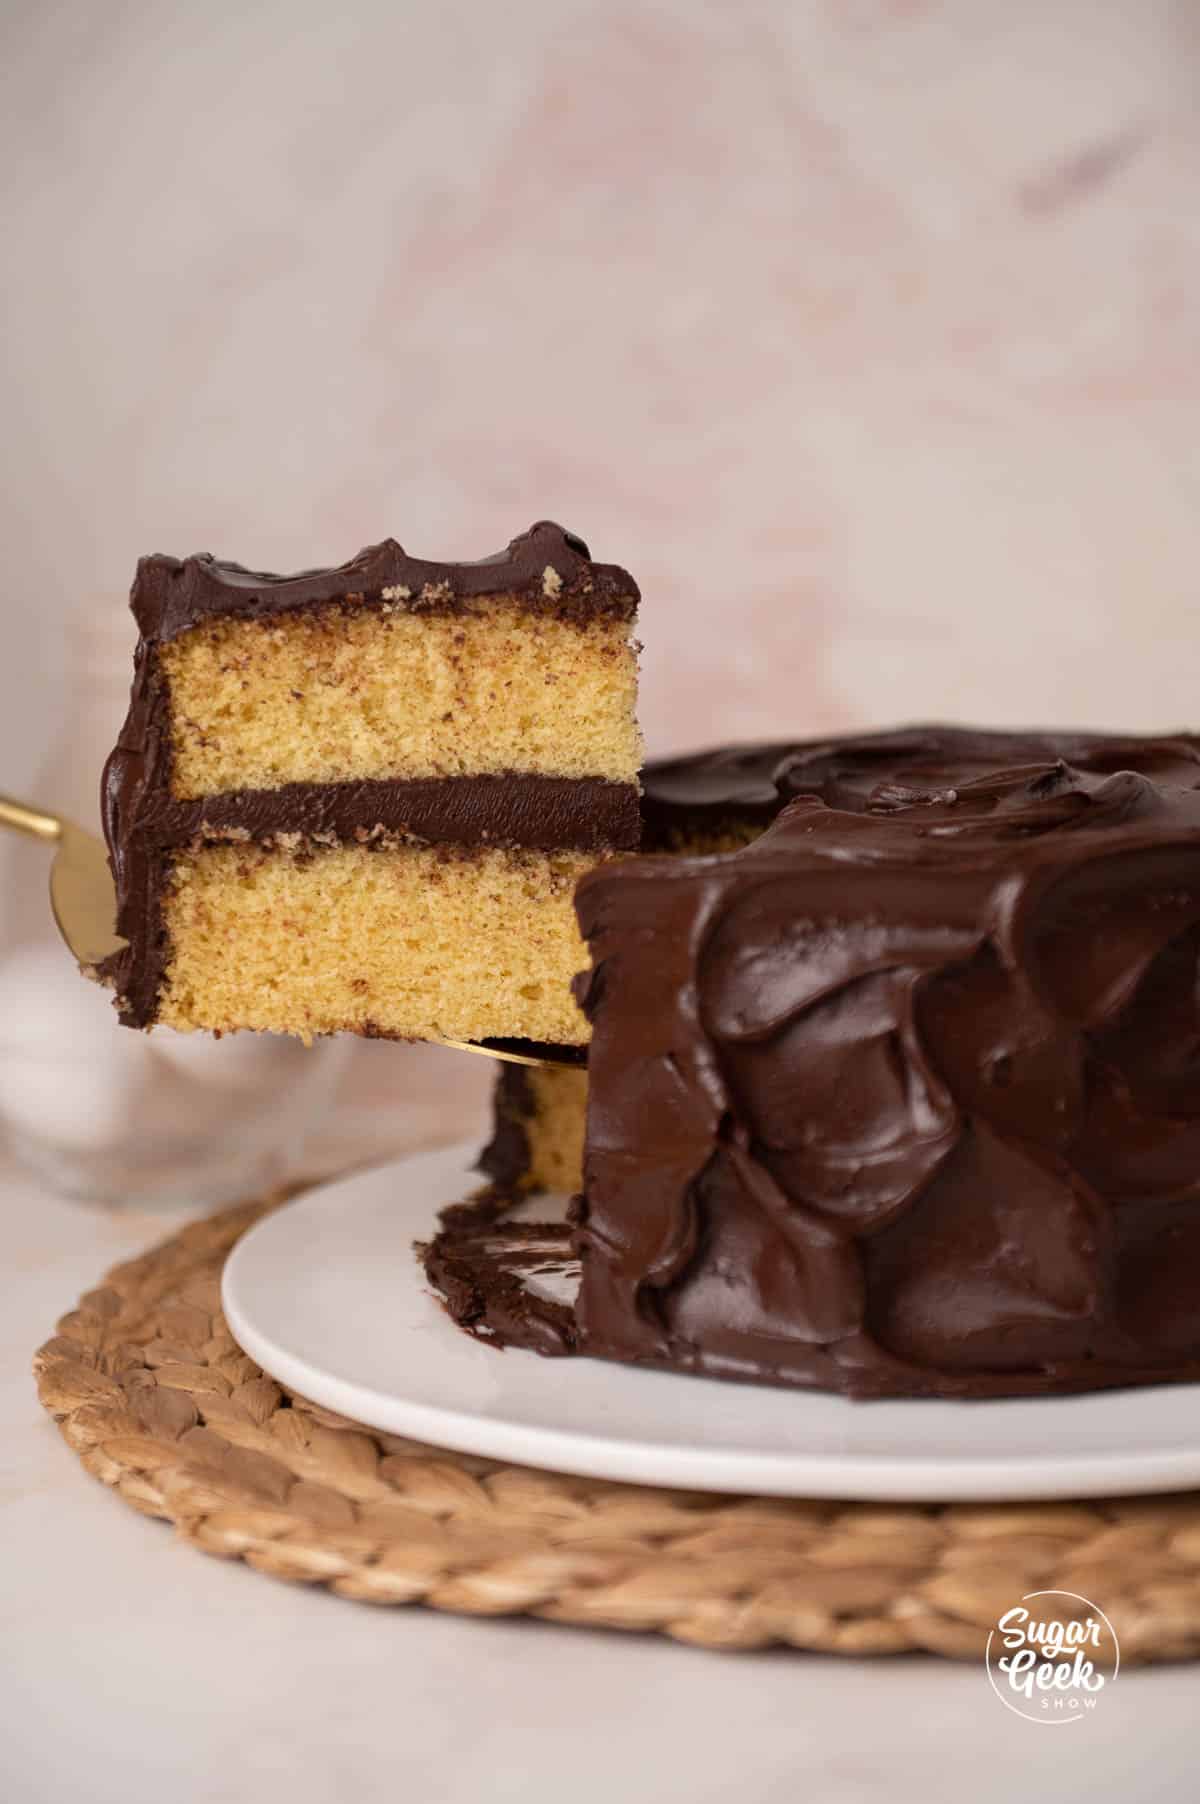
Tips for Baking From Scratch
- Weigh your ingredients to avoid cake failure. Using a kitchen scale for baking is super easy and gives you the best results every single time.
- Make sure all your cold ingredients are room temperature or slightly warm (butter, milk, eggs, to create a cohesive batter. Curdled batter causes cakes to collapse.
- Need more help with making your first cake? Check out my how to decorate your first cake blog post.
- Make your own pan release (cake goop!) The best pan release ever!
- Chill your cakes before frosting and filling. You can cover a frosted and chilled cake in fondant if you wish. This cake is also great for stacking. I always keep my cakes chilled in the refrigerator before delivery for easy transportation
How to Make a Yellow Cake
Make the yellow cake layers first, and be sure to give yourself enough time for them to chill. I like to flash-freeze them for an hour and decorate them on the same day I'm going to serve, but you can also freeze them and decorate them the next day.
Making Yellow Cake Layers
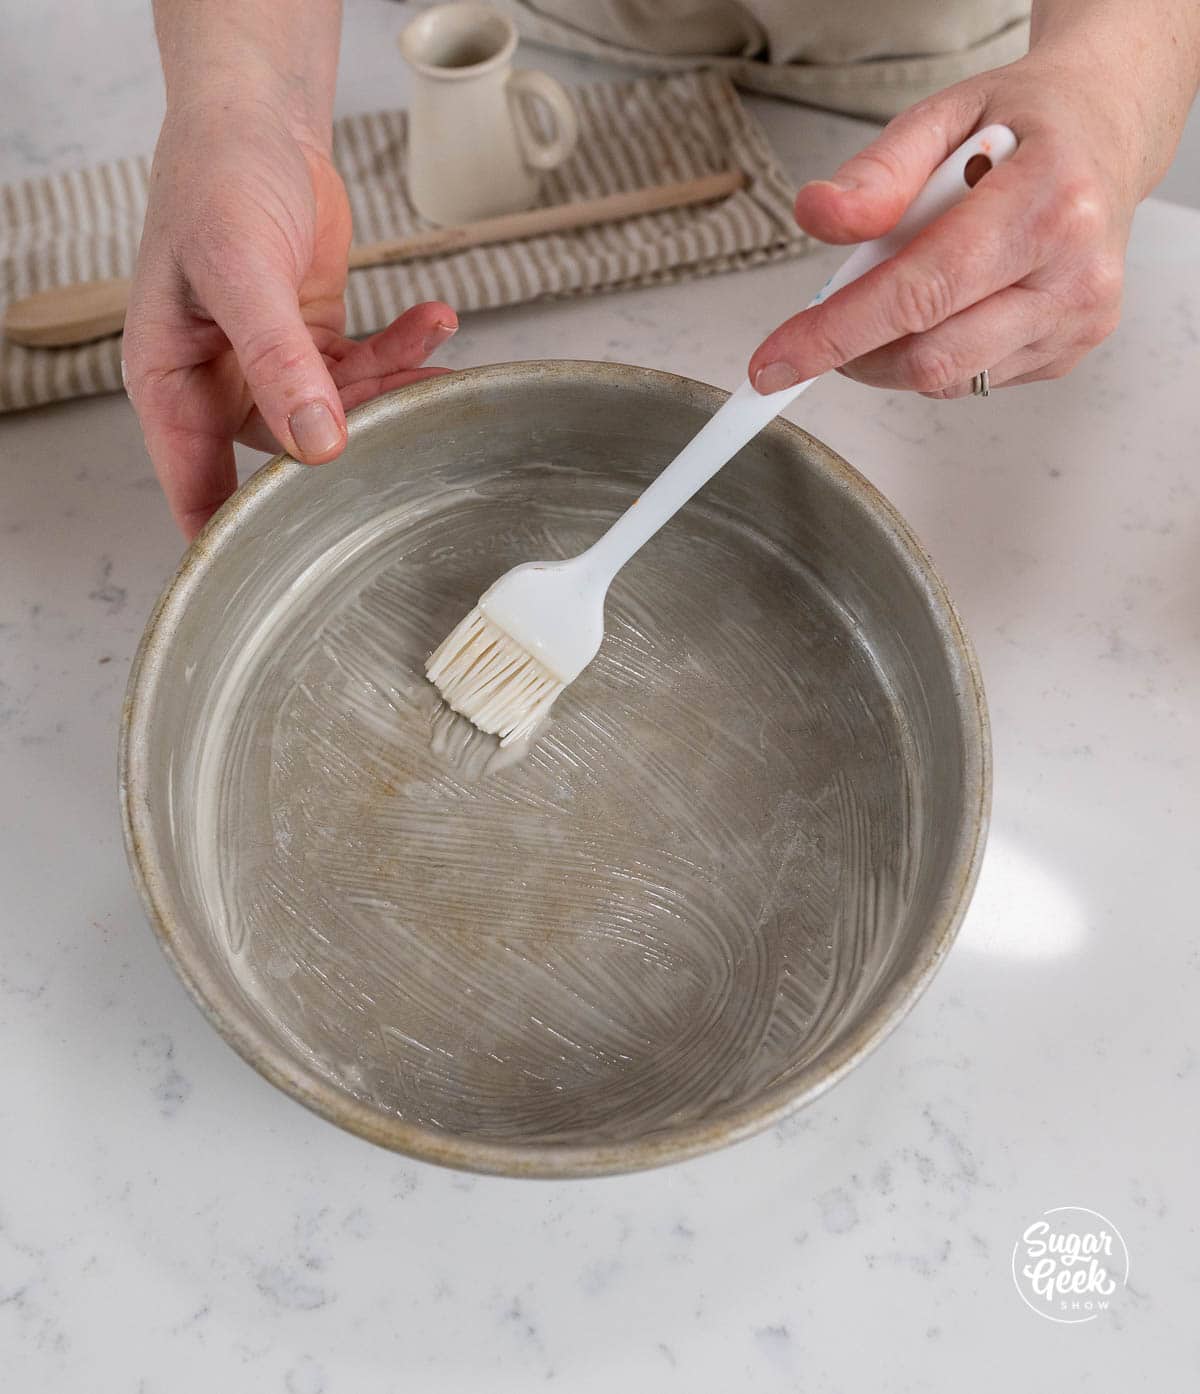
- Preheat the oven to 335º F/168º C — 350º F/177º C and prepare two 8-inch pans or three 6-inch cake pans with cake goop or another preferred pan release.

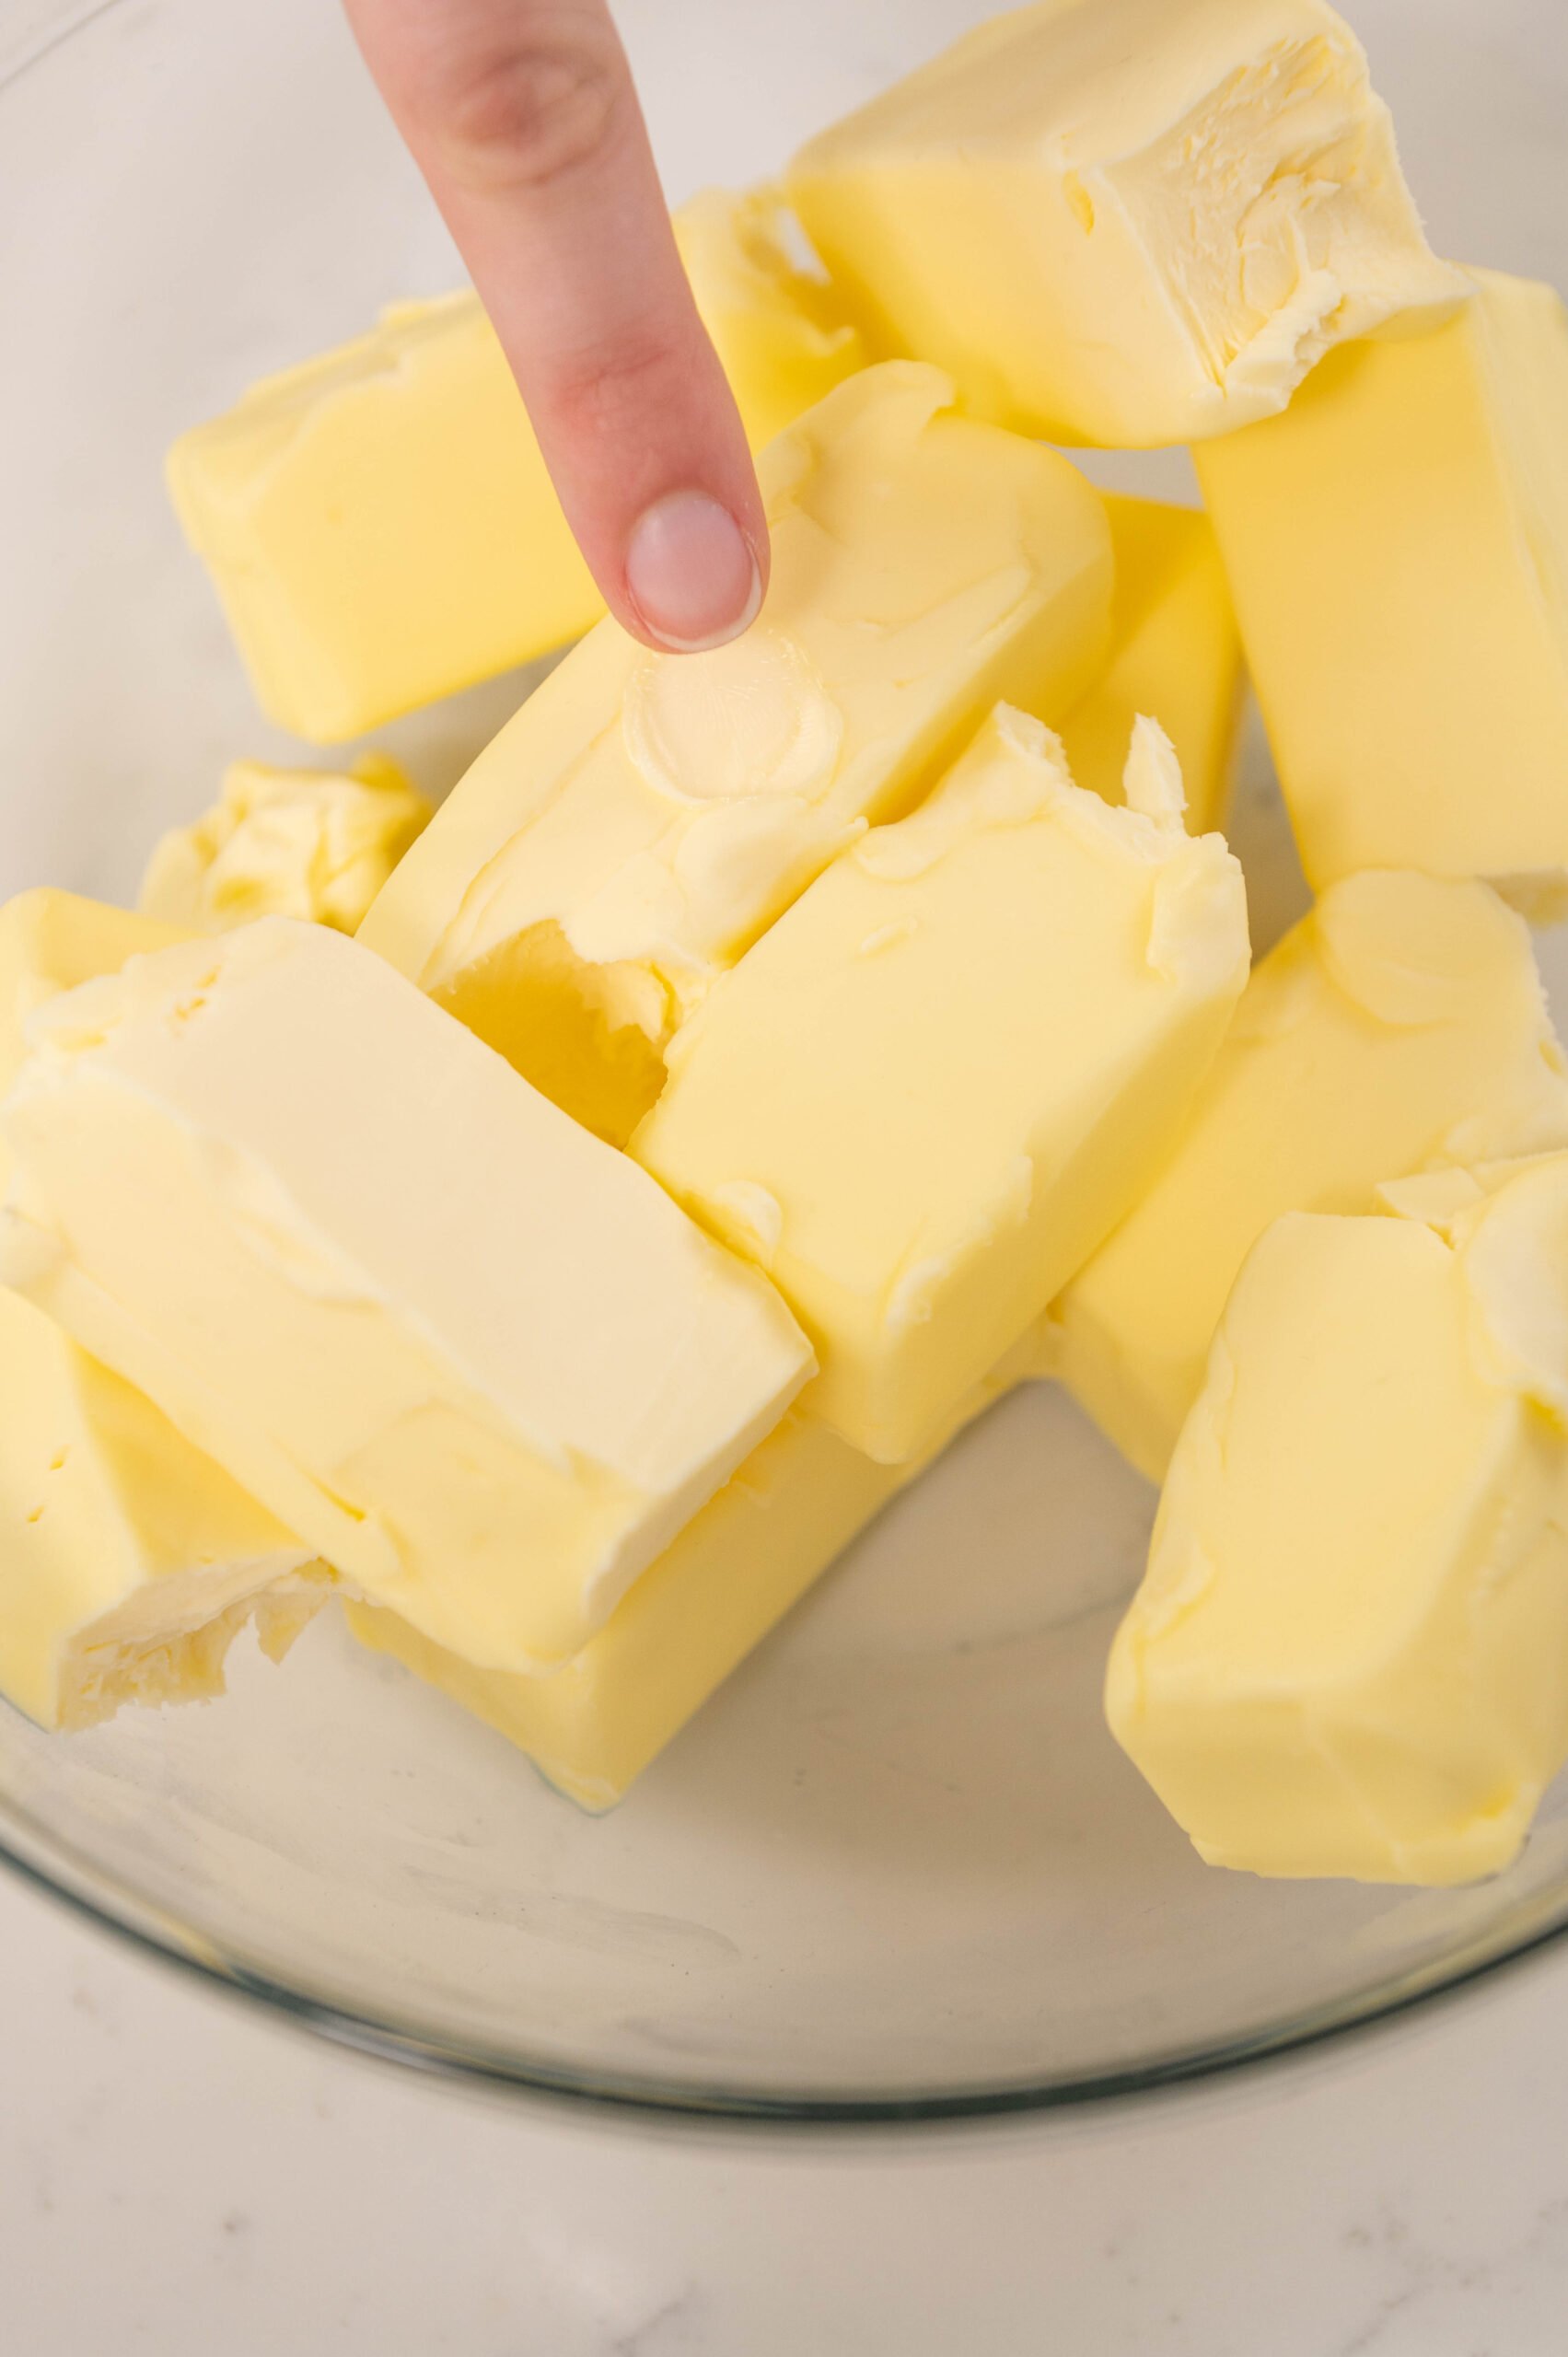
- It is important to use warm ingredients so that everything incorporates correctly. Add the eggs to a bowl of warm water (in the shells) for 5 minutes, heat the milk in the microwave for 30 seconds, and leave the butter out for a few hours, or cut it into cubes and microwave for about 10 seconds.

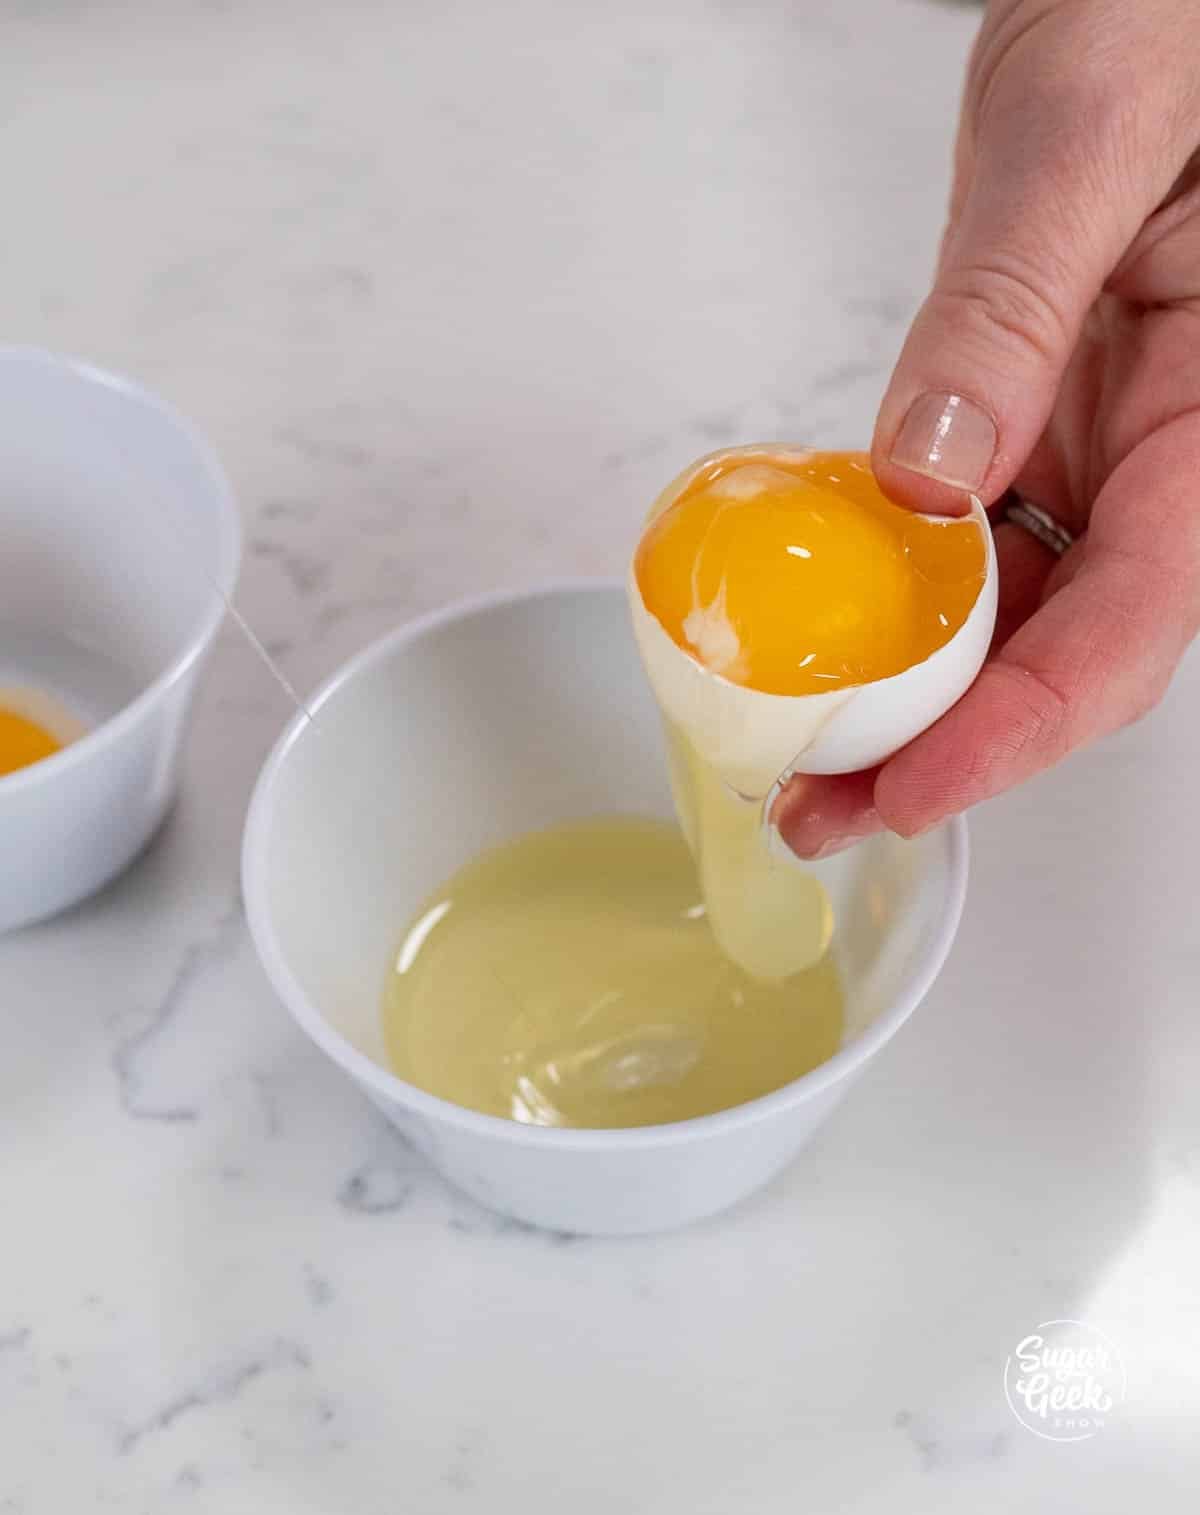
- Separate your eggs and egg yolks by cracking each egg on the table and using your thumbs to divide the shell into two pieces. Move the yolk back and forth and allow the whites to fall into a bowl.

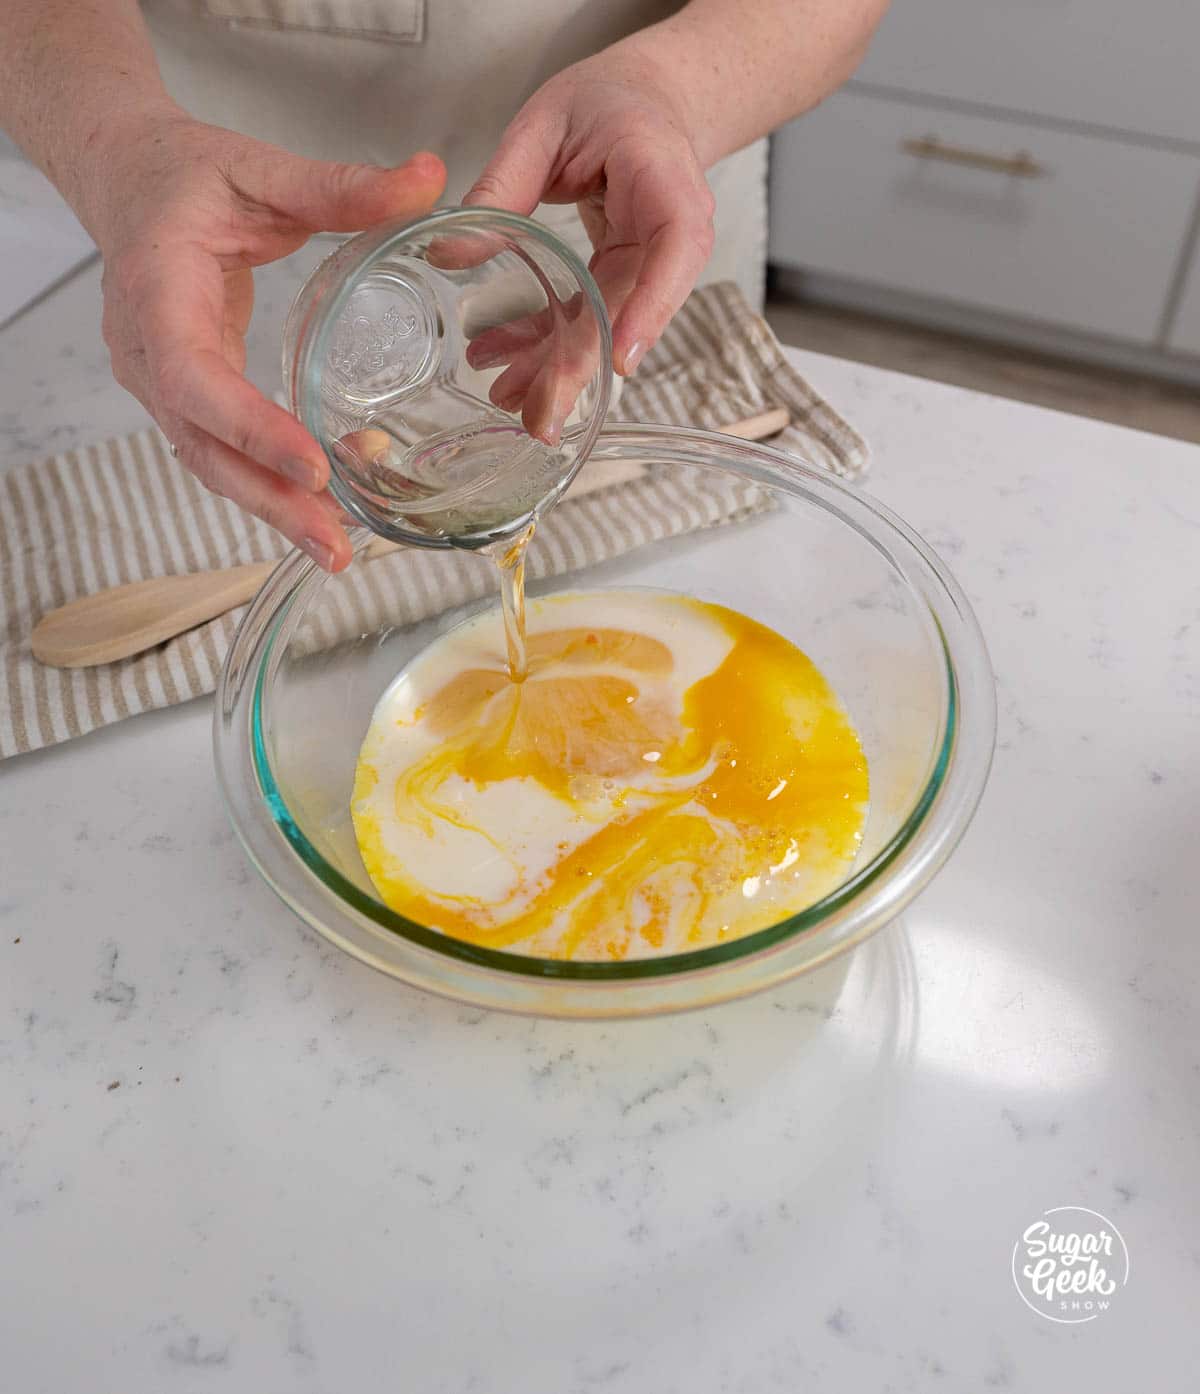
- Whisk together the eggs, egg yolks, milk, vanilla, and vegetable oil in a medium bowl and set it aside.
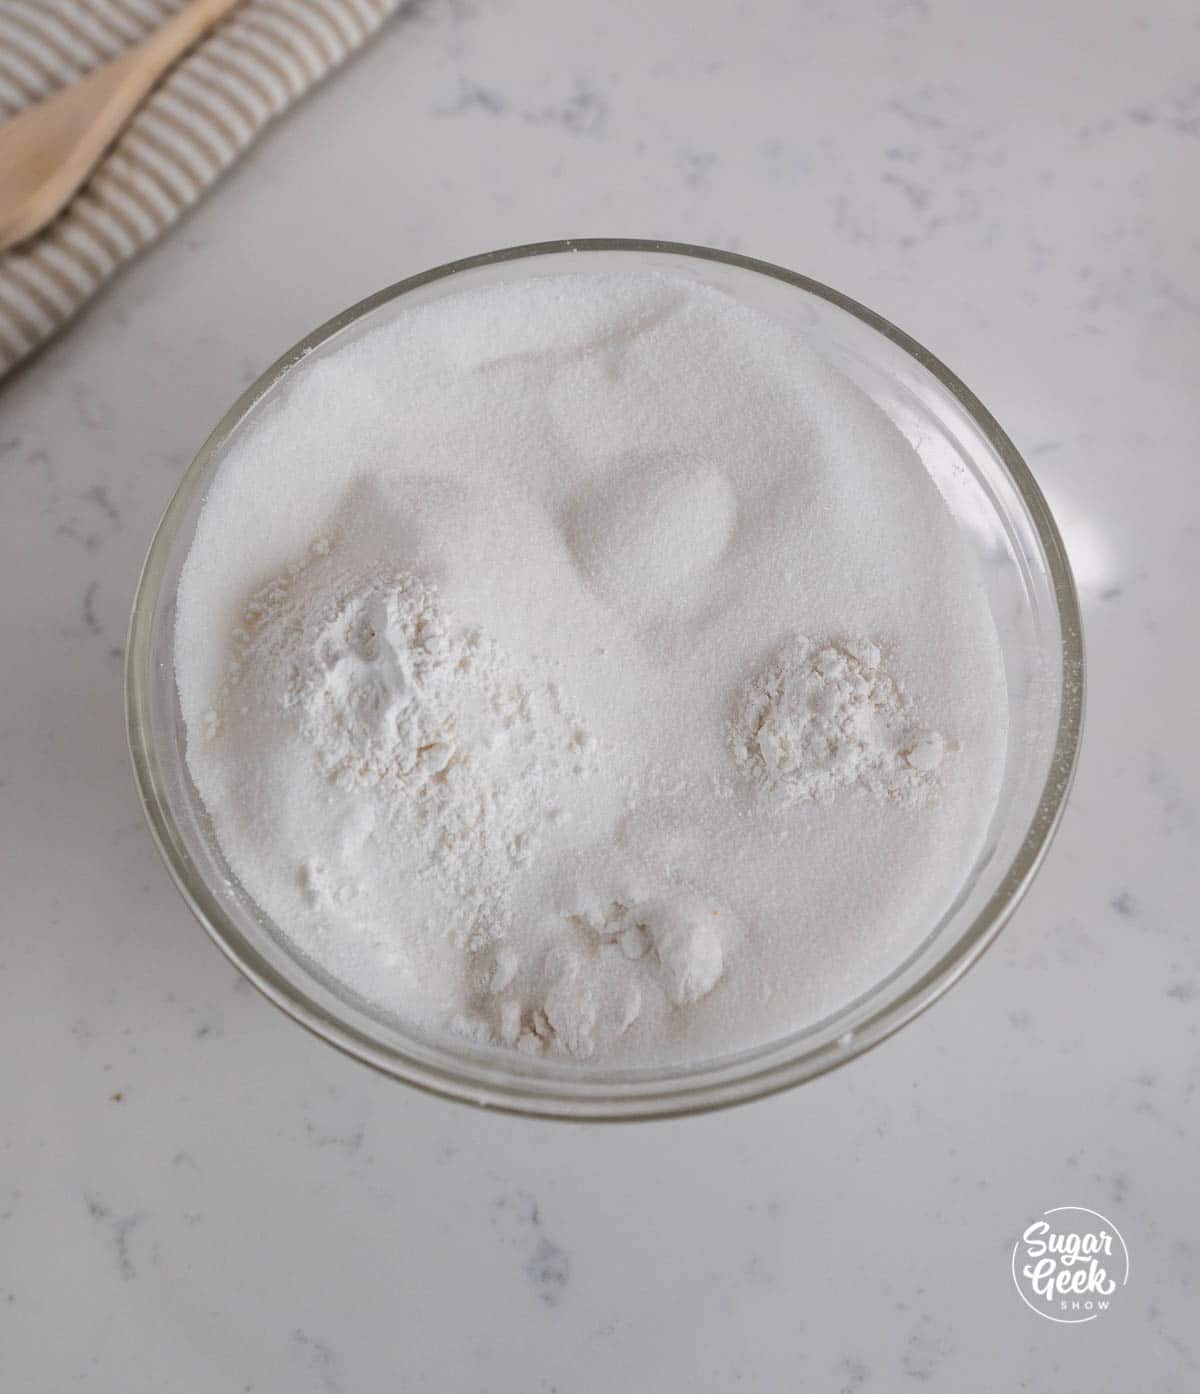
- Place the cake flour, sugar, baking powder, baking soda, and salt into the bowl of a stand mixer with the paddle attachment. This can also be made with an electric hand mixer in a large mixing bowl.
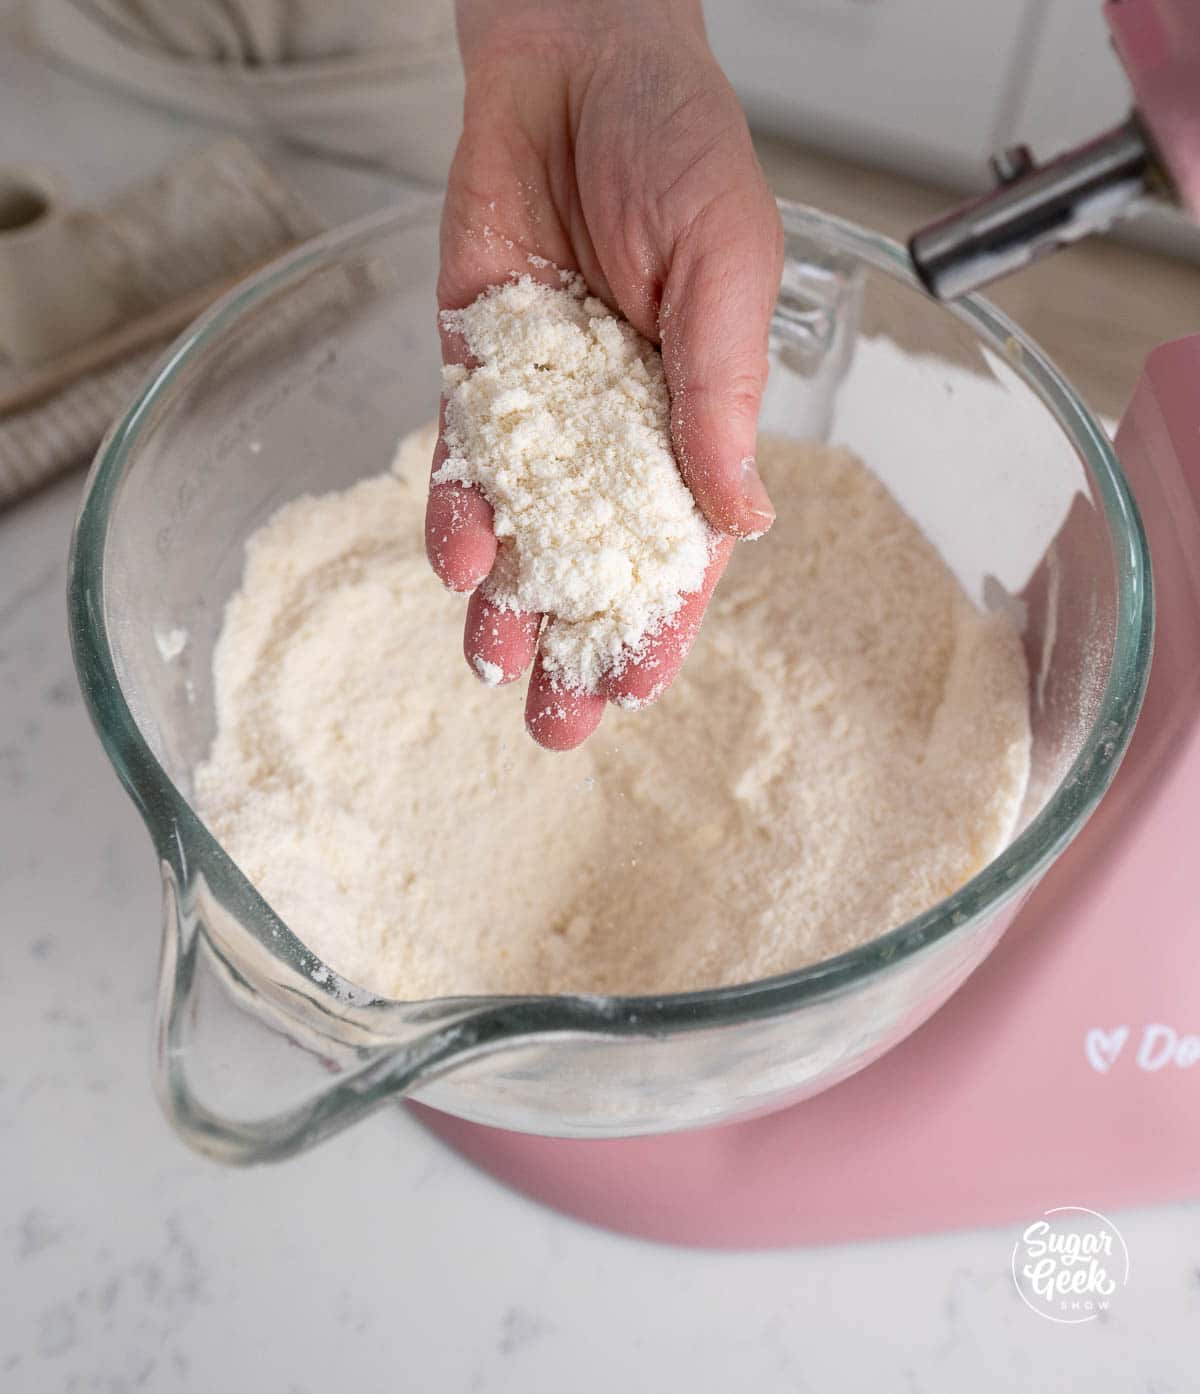
- Slowly add your softened butter in chunks and mix on medium speed until the batter resembles coarse sand.
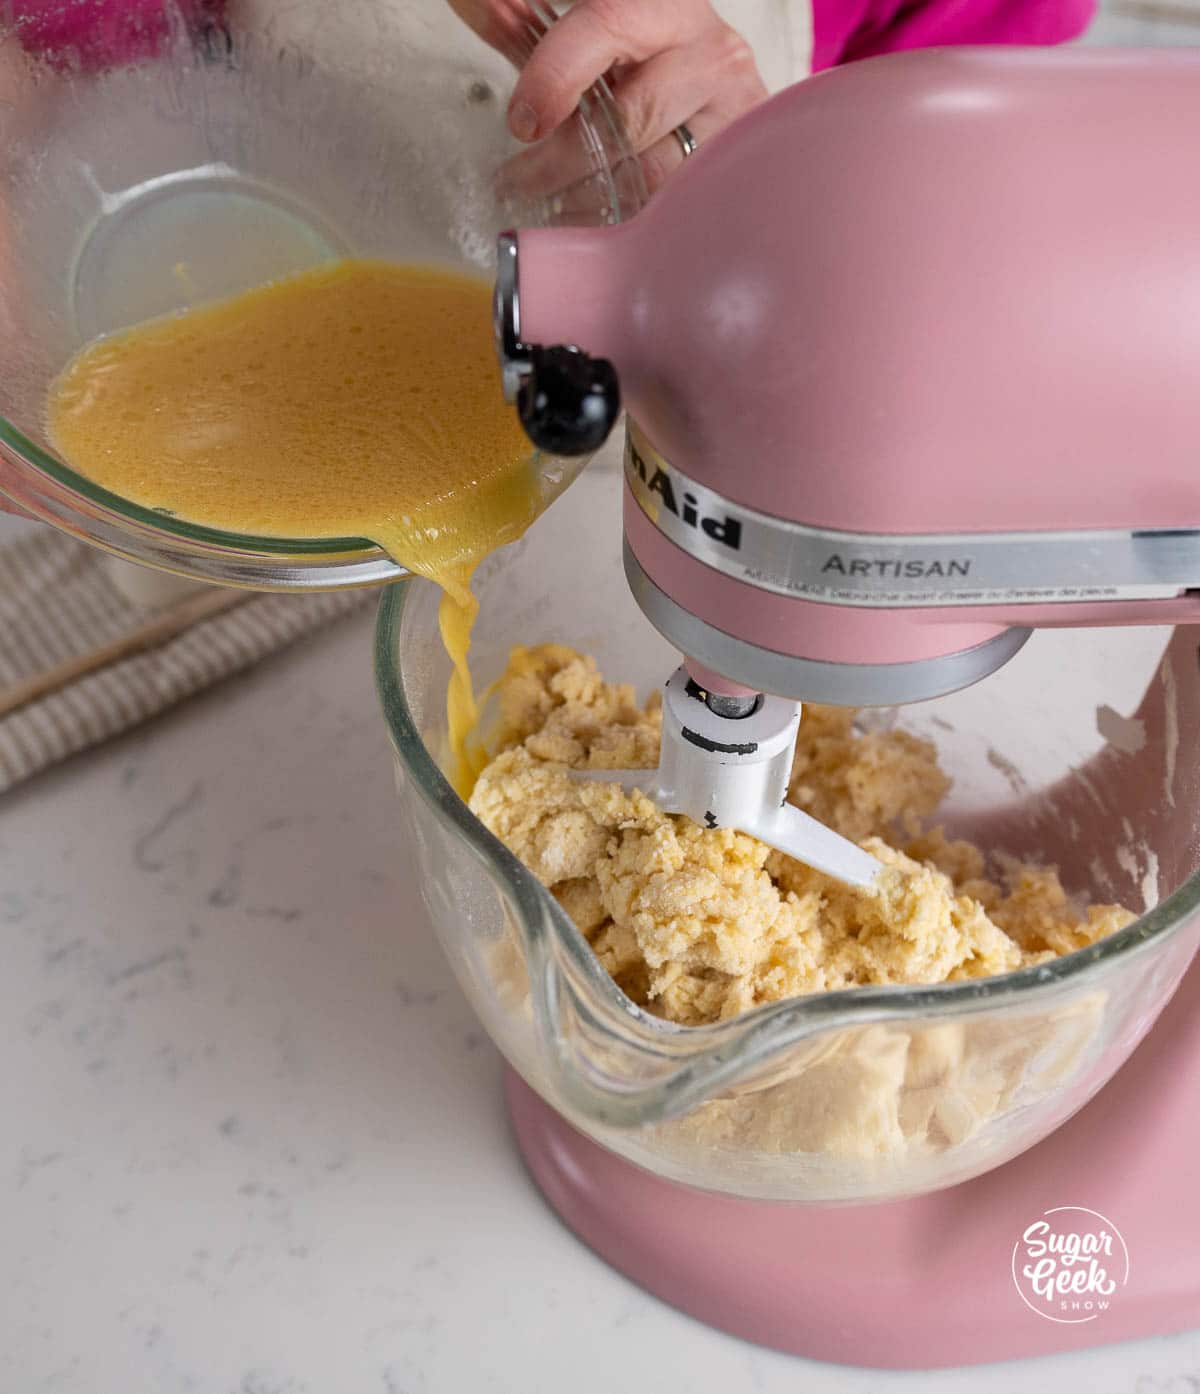
- Add ⅓ of your egg/milk mixture to the flour mixture while mixing on low speed until just moistened. This part is crucial, be careful not to add too much liquid.
- Increase the mixer to medium speed (setting 5 on Kitchen Aid mixer) and whip for 2 minutes until it has thickened and lightened in color. It should look like soft-serve ice cream. If you do not let the batter mix fully, you will end up with short, crumbly cakes.
- Scrape the bottom and sides of the bowl.
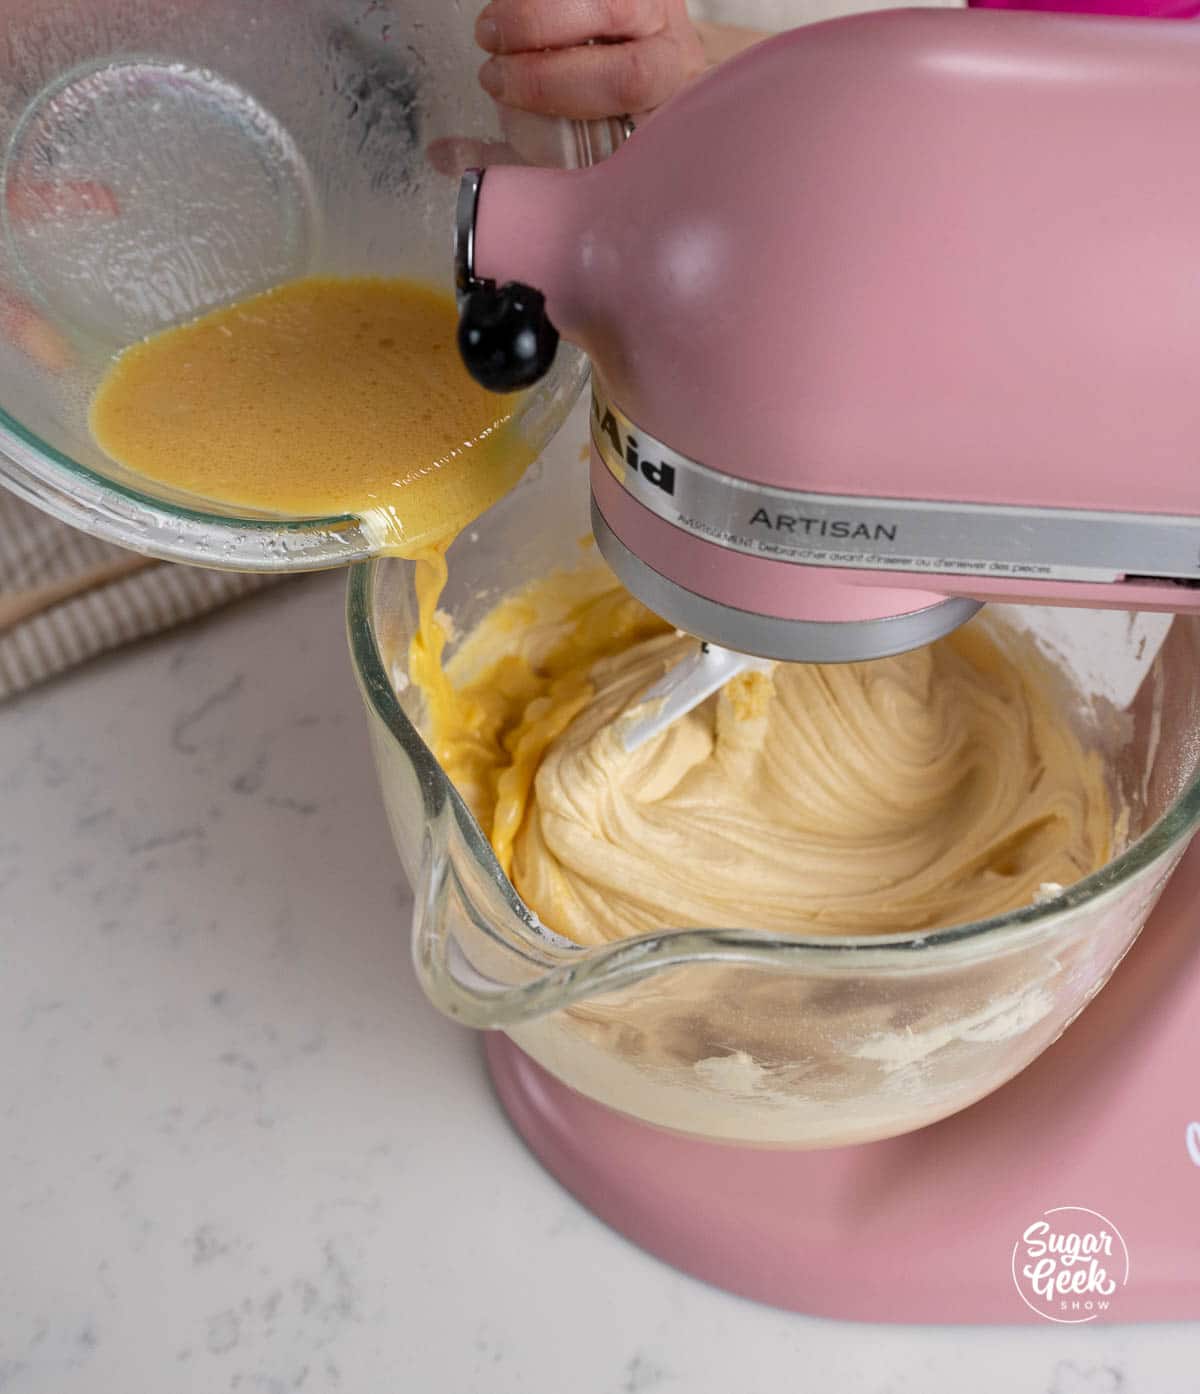
- While mixing on low speed, slowly add in the rest of your wet ingredients to the fluffy cake batter, stopping to scrape the bowl one more time halfway through. Mix until the liquids are fully combined in the batter.
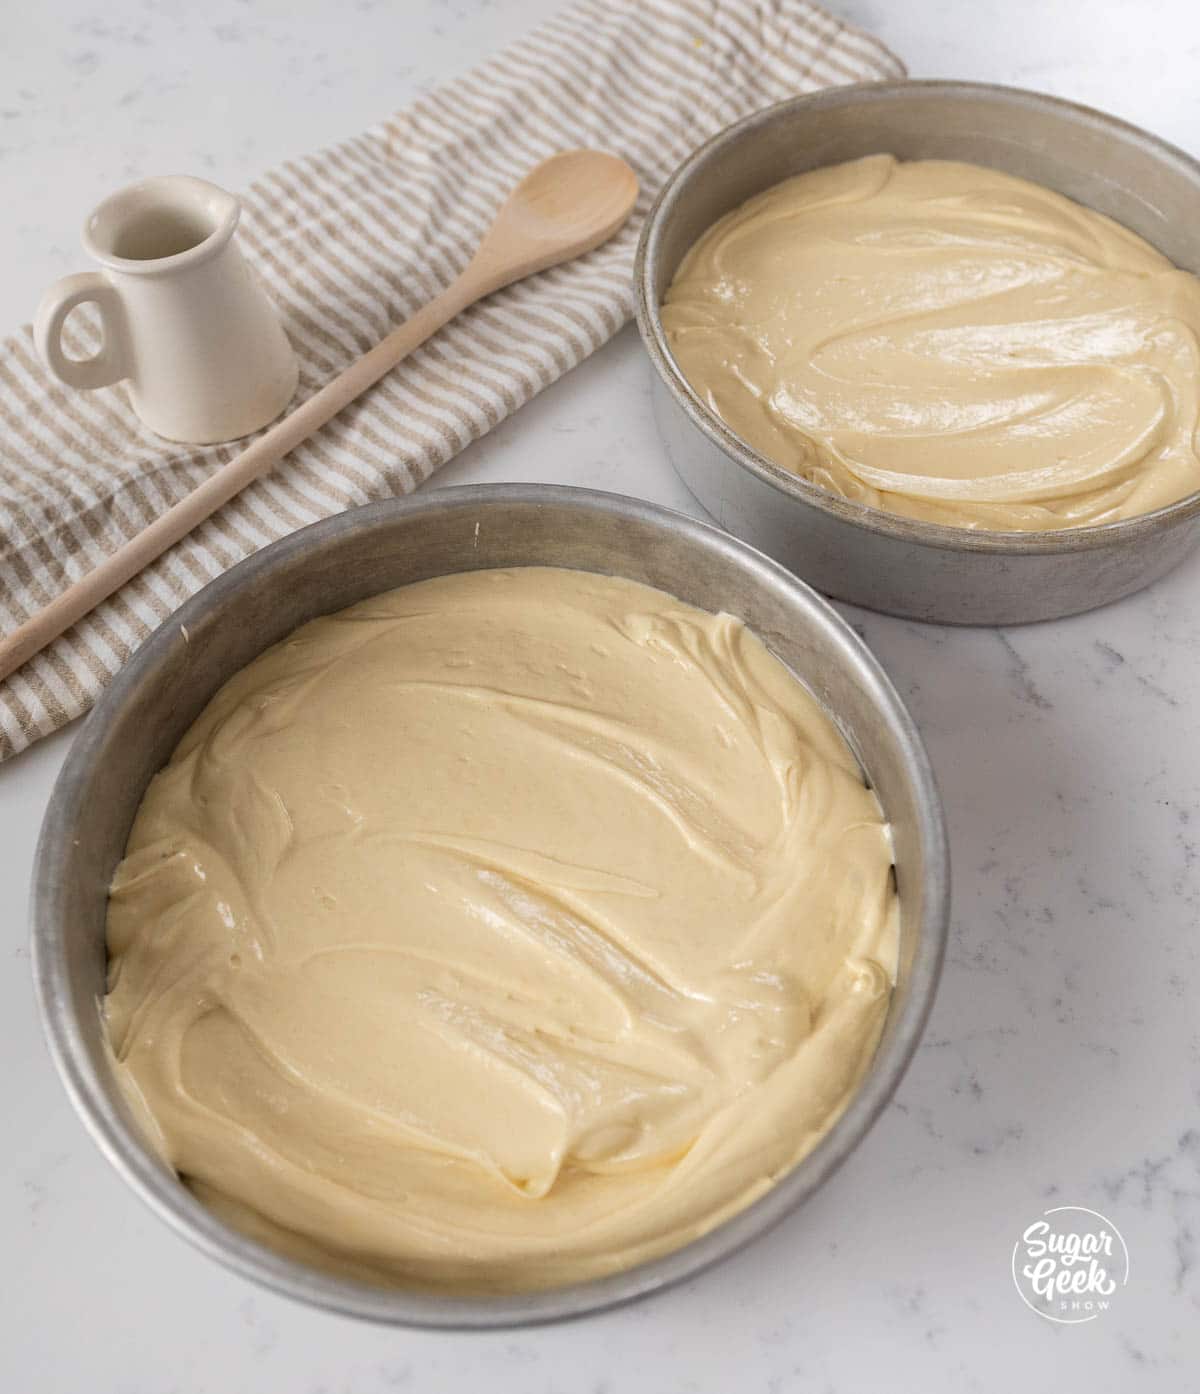
- Divide the cake batter evenly between the prepared cake pans.
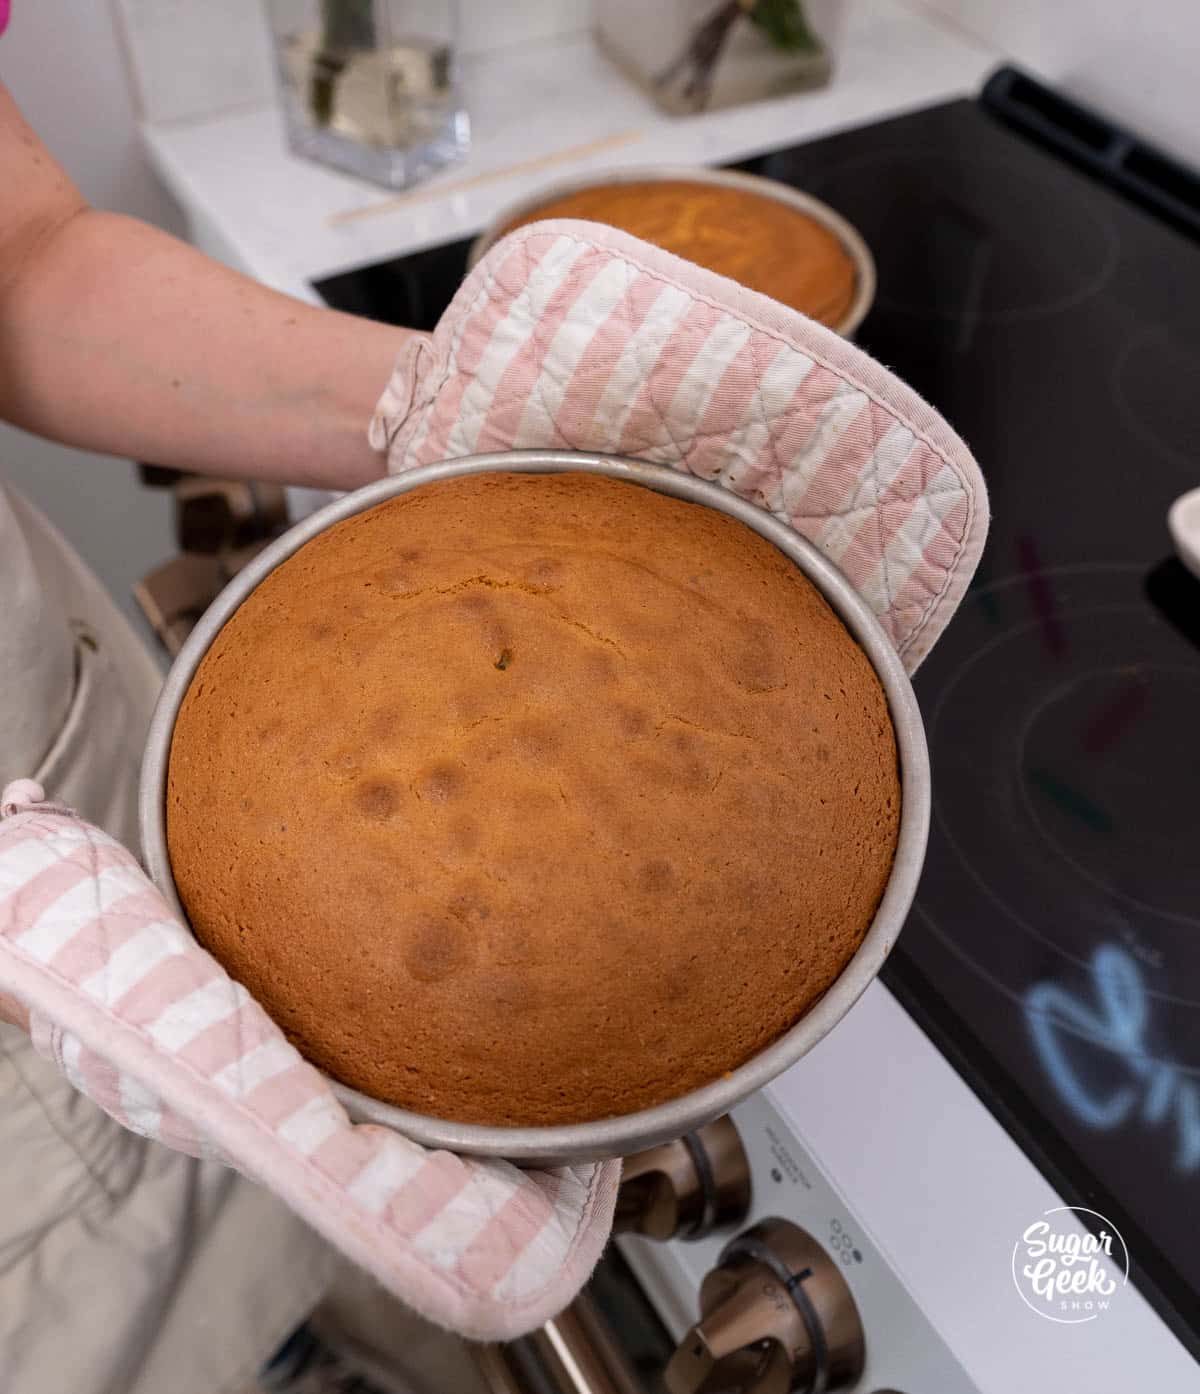
- Bake for 30 minutes and then check your cakes. If they are still jiggly in the center bake for another 5 to 8 minutes. If they are almost set, bake for another 5 minutes or until the center springs back when you touch it, or a toothpick comes out clean. Bake time can vary depending on the size and shape of the cake pans you use.
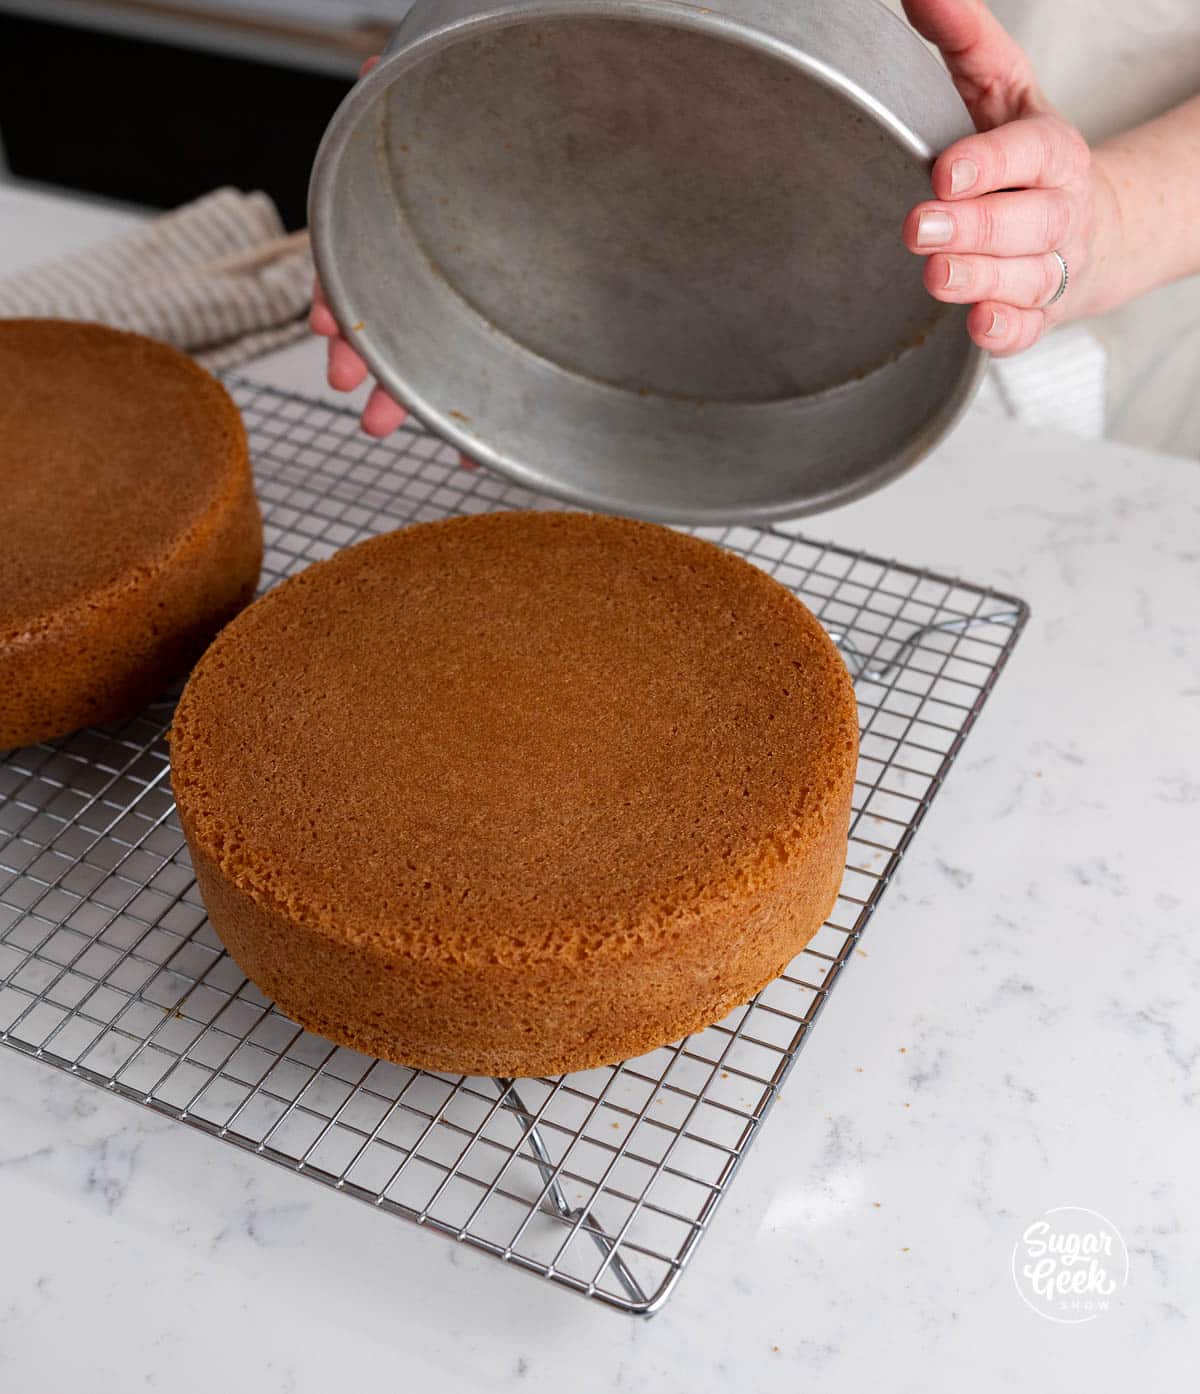
- Let the cakes cool in the pan for 15 minutes or until the pan is just barely warm. Then, turn them out onto a wire rack to finish cooling.
- Wrap them in plastic wrap and freeze if you're decorating the next day. Or if you're decorating the same day, I like to put mine into the freezer (unwrapped) and on the cooling rack to flash chill for one hour so I can begin frosting.
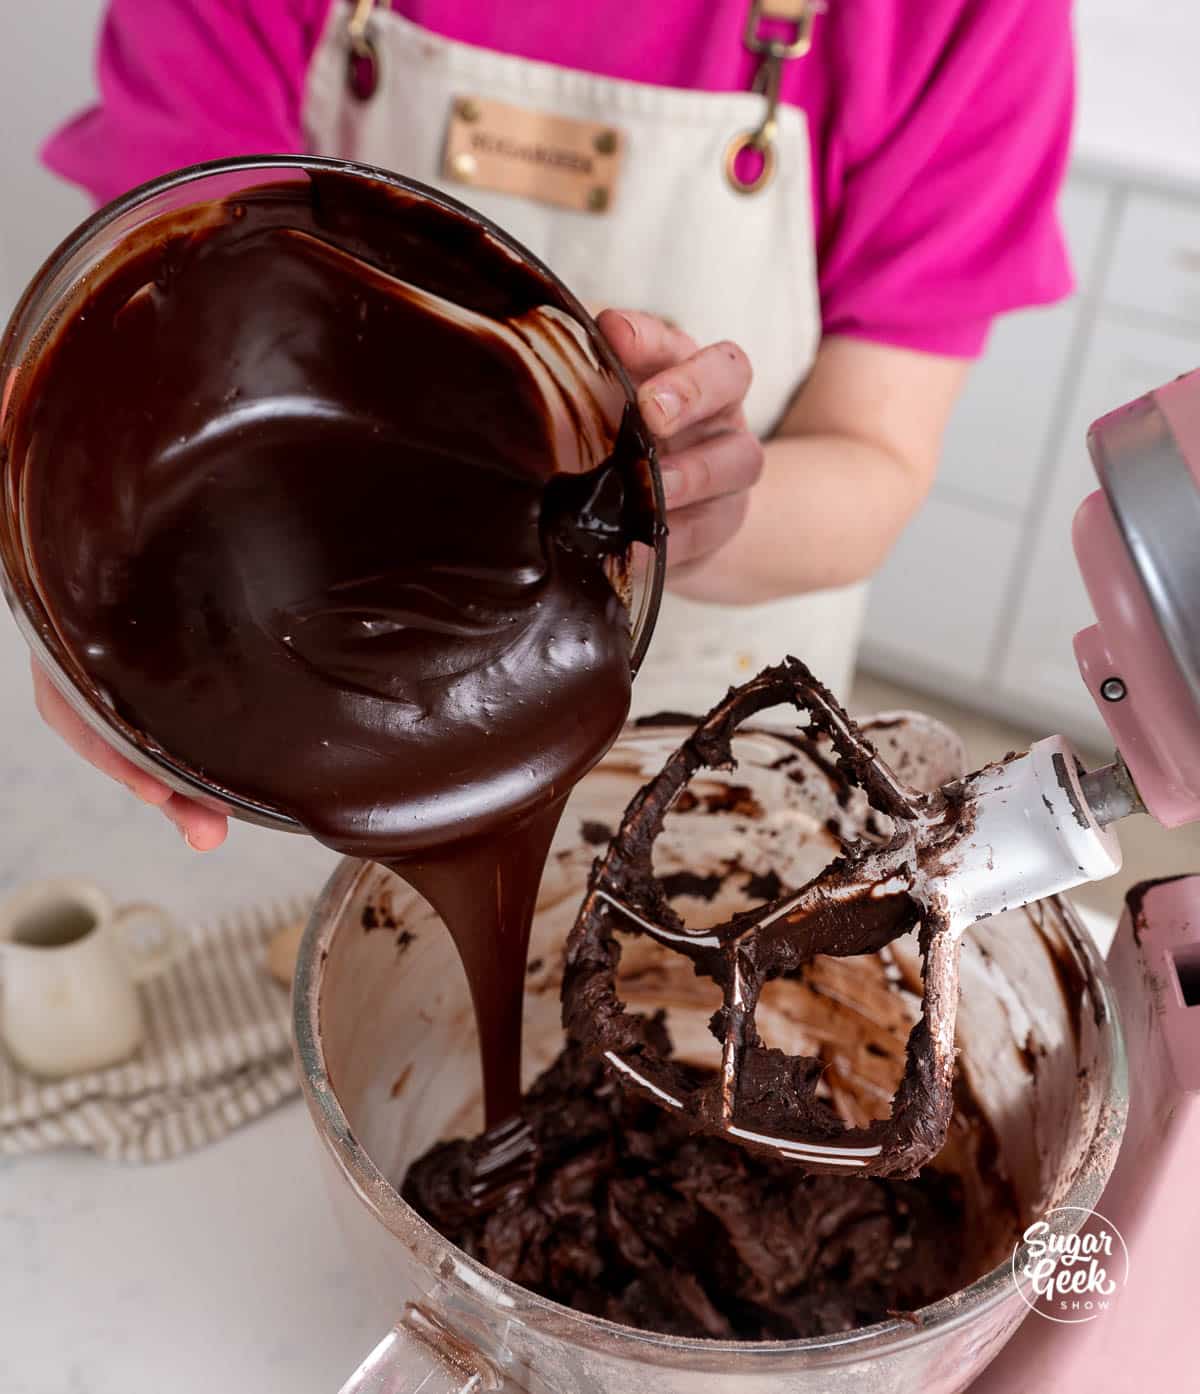
Making Chocolate Fudge Frosting
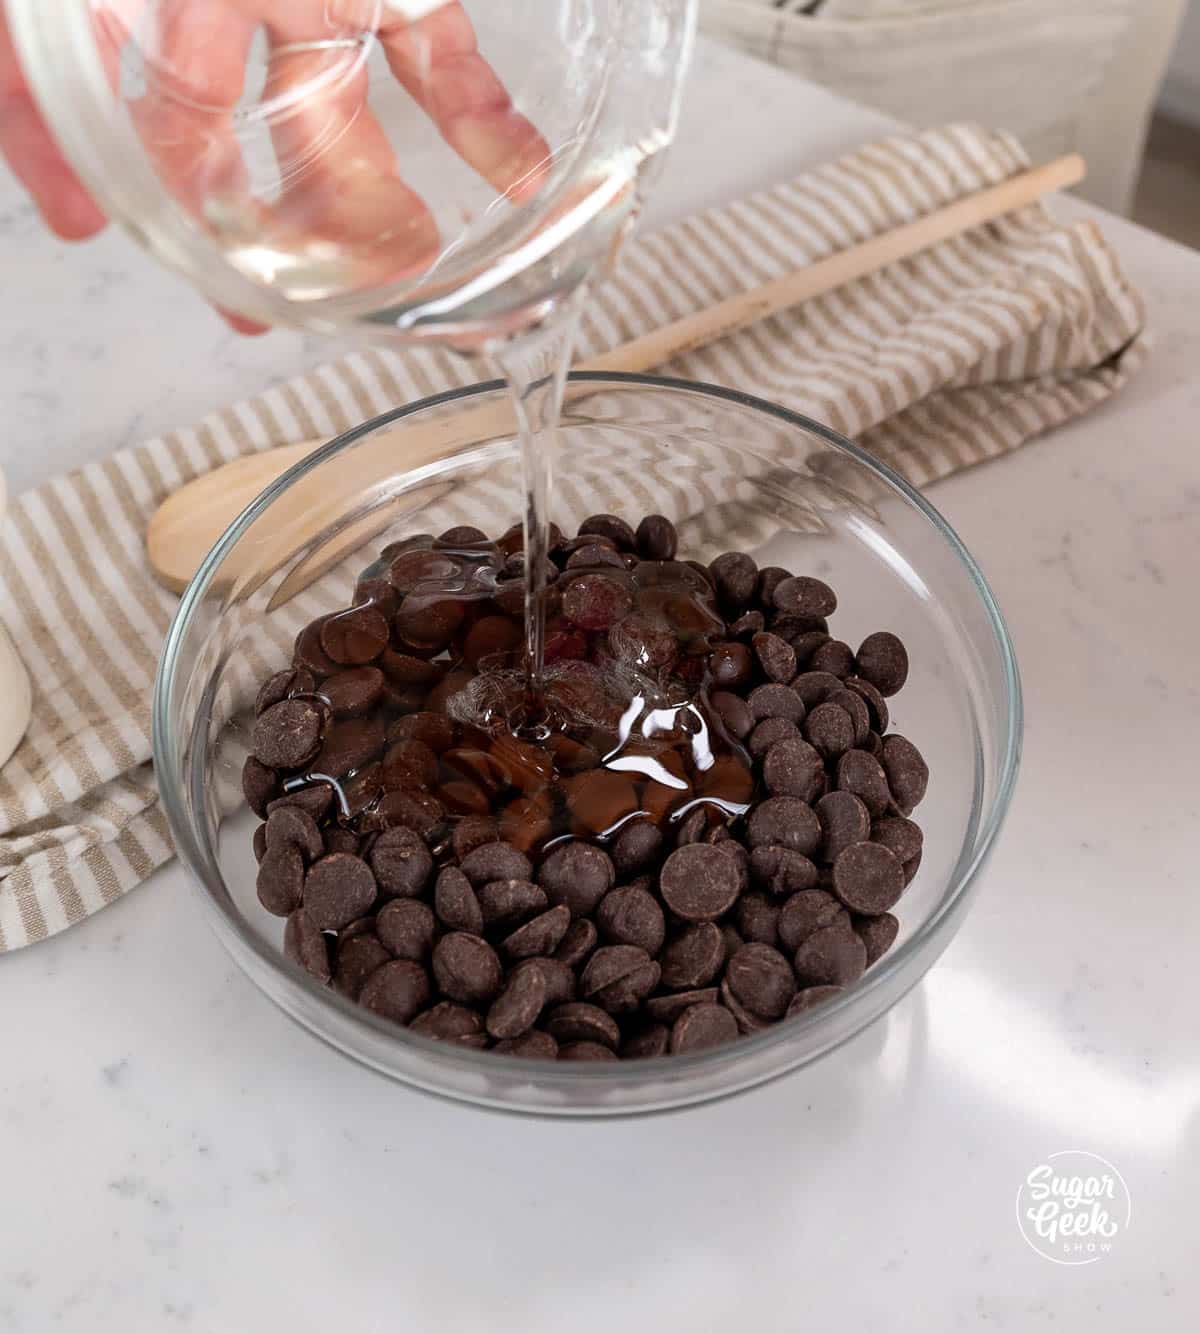
- Add the chocolate, coffee, vanilla, and corn syrup to a measuring cup or bowl.

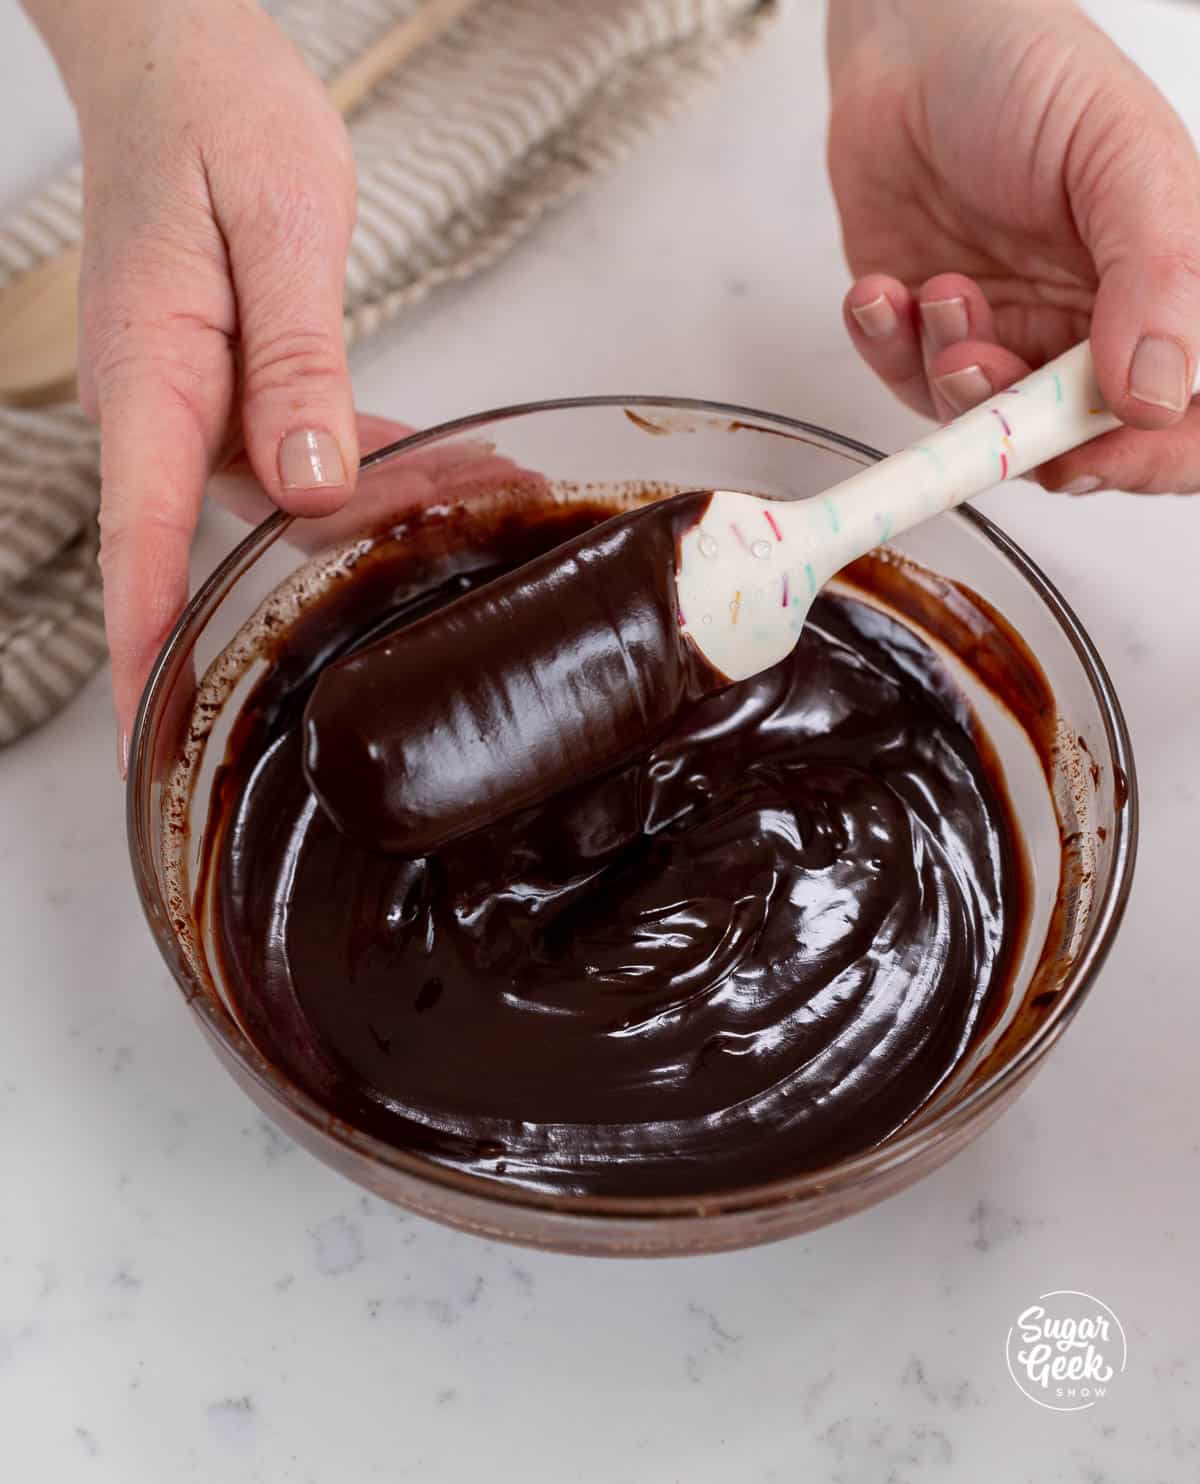
- Melt the chocolate mixture together in the microwave. Heat for 30 seconds and stir and then heat in 10-second increments and stir until it is fully melted and smooth. Let the chocolate mixture cool, but not harden.

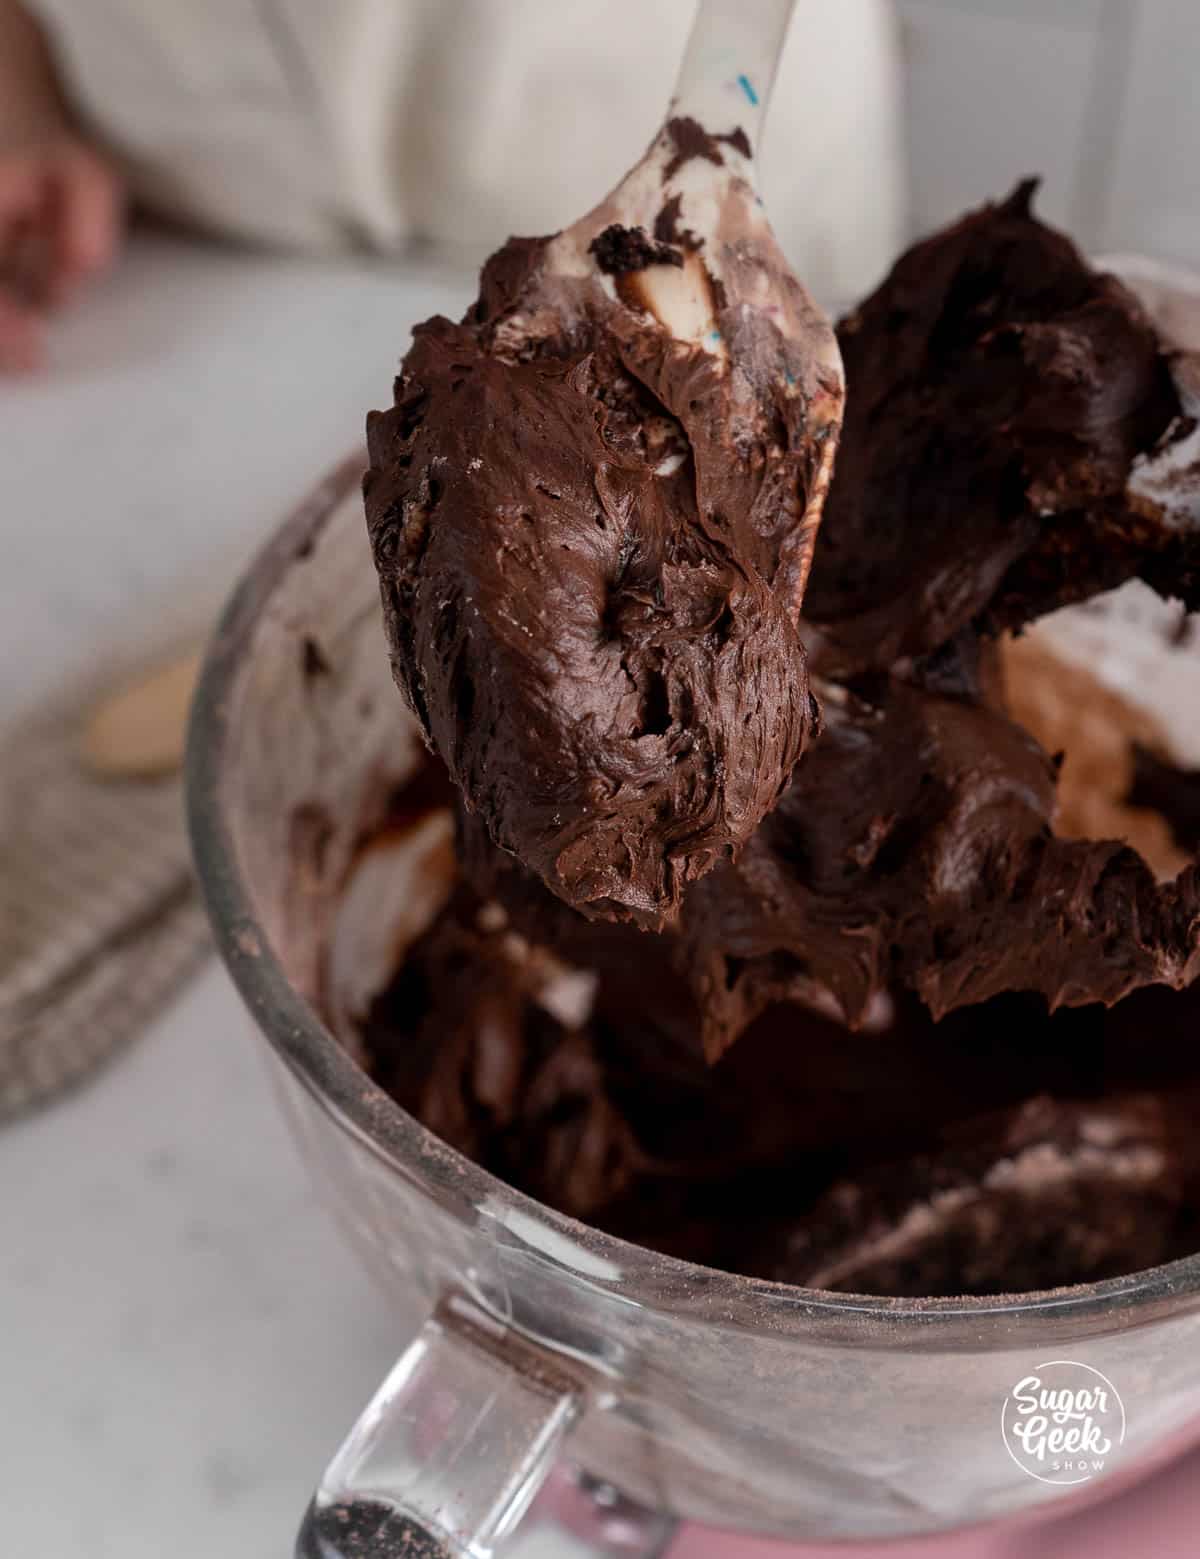
- Mix the butter, sugar, cocoa powder, and salt in the bowl of your stand mixer with the paddle on high speed for about 1 minute until light and fluffy.

- Add the cooled chocolate mixture and mix it until it's combined.
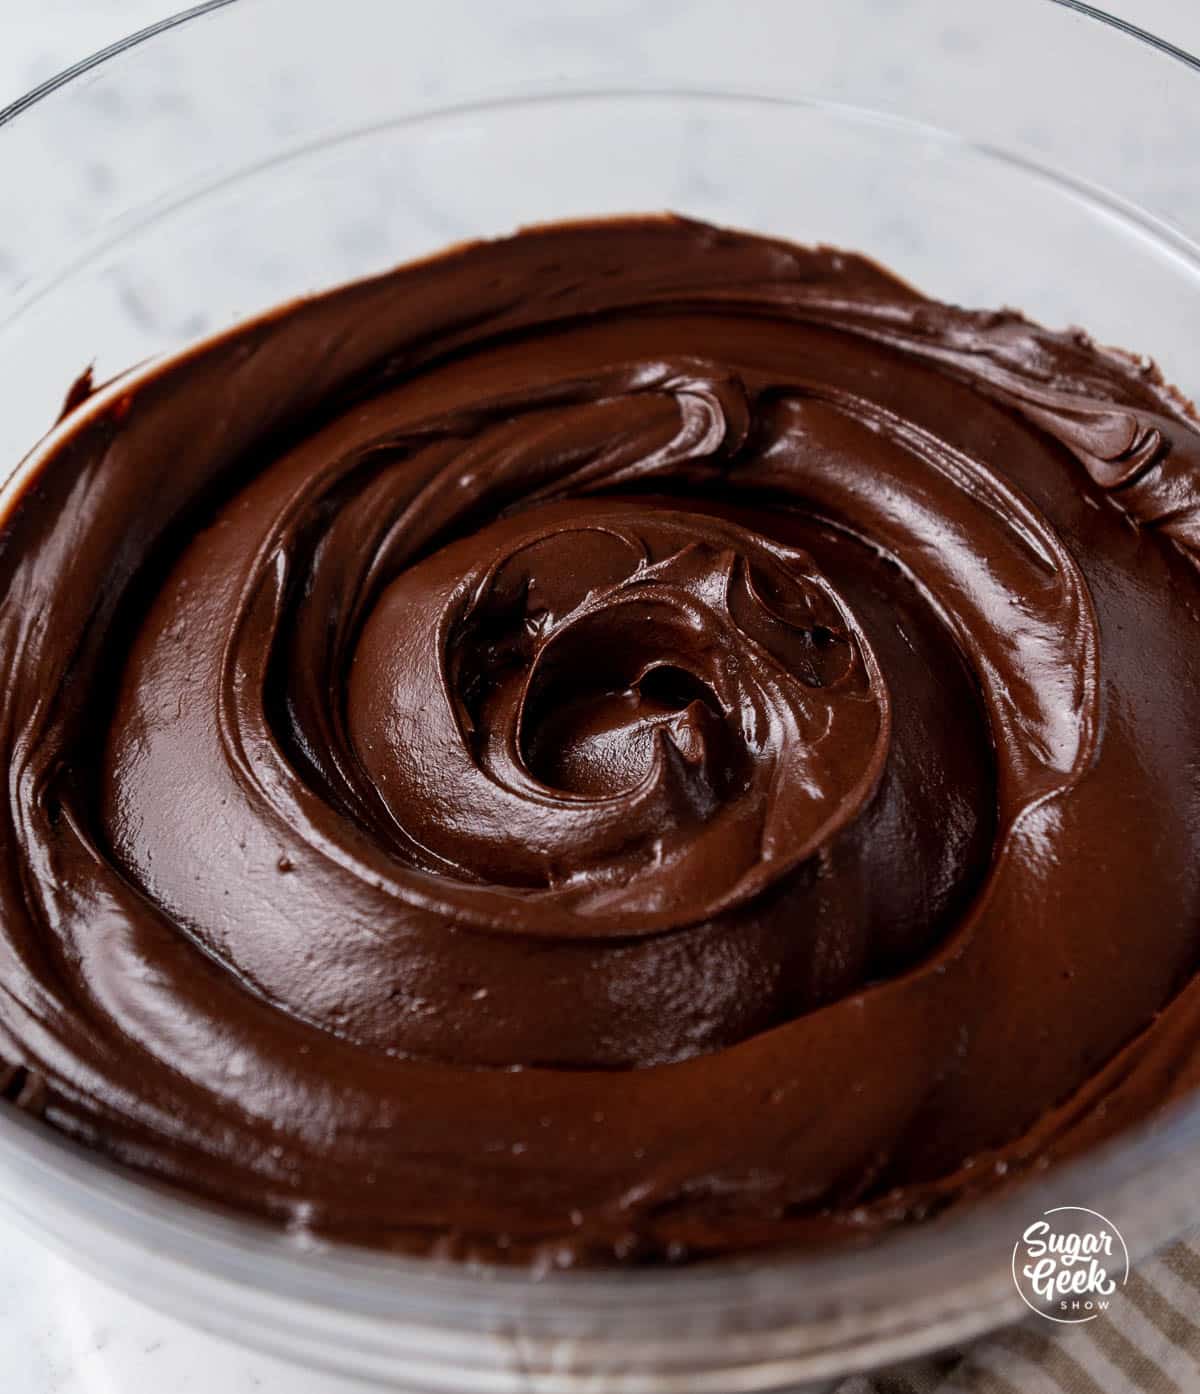
- The frosting can be used immediately on the cake, or covered with plastic wrap and stored at room temperature for 3 days. If you plan to keep it longer, keep it in an airtight container in the refrigerator or freezer.
Decorating the Yellow Cake
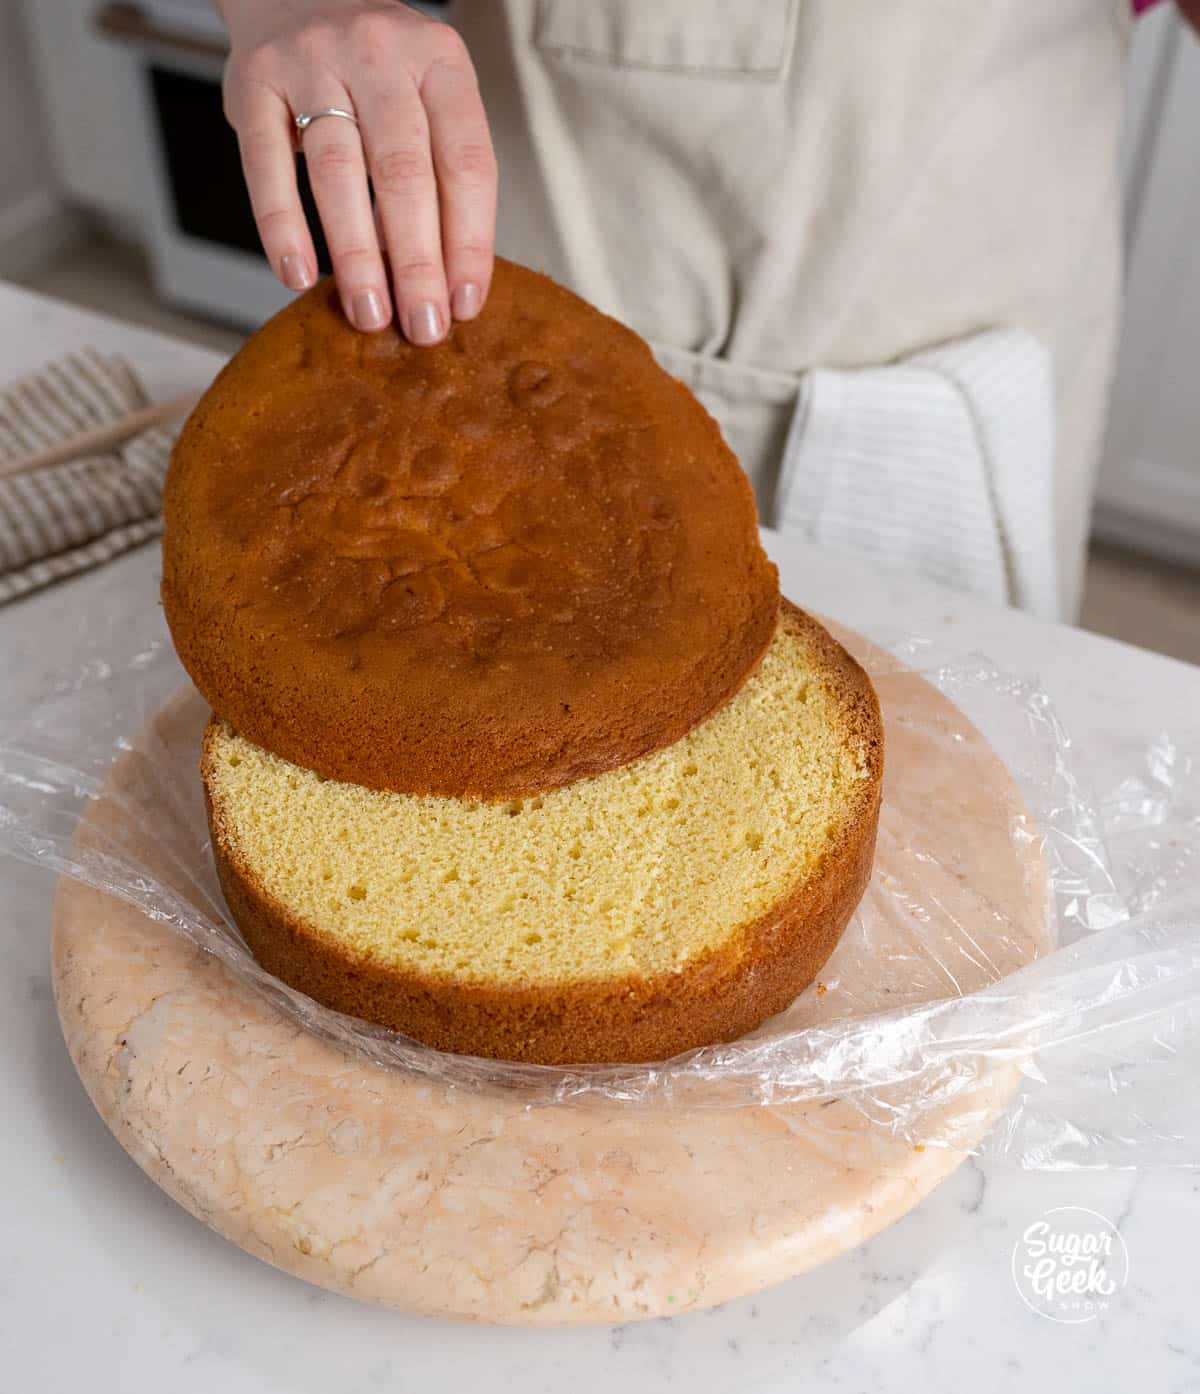
- Trim the domes off of the yellow cake layers.
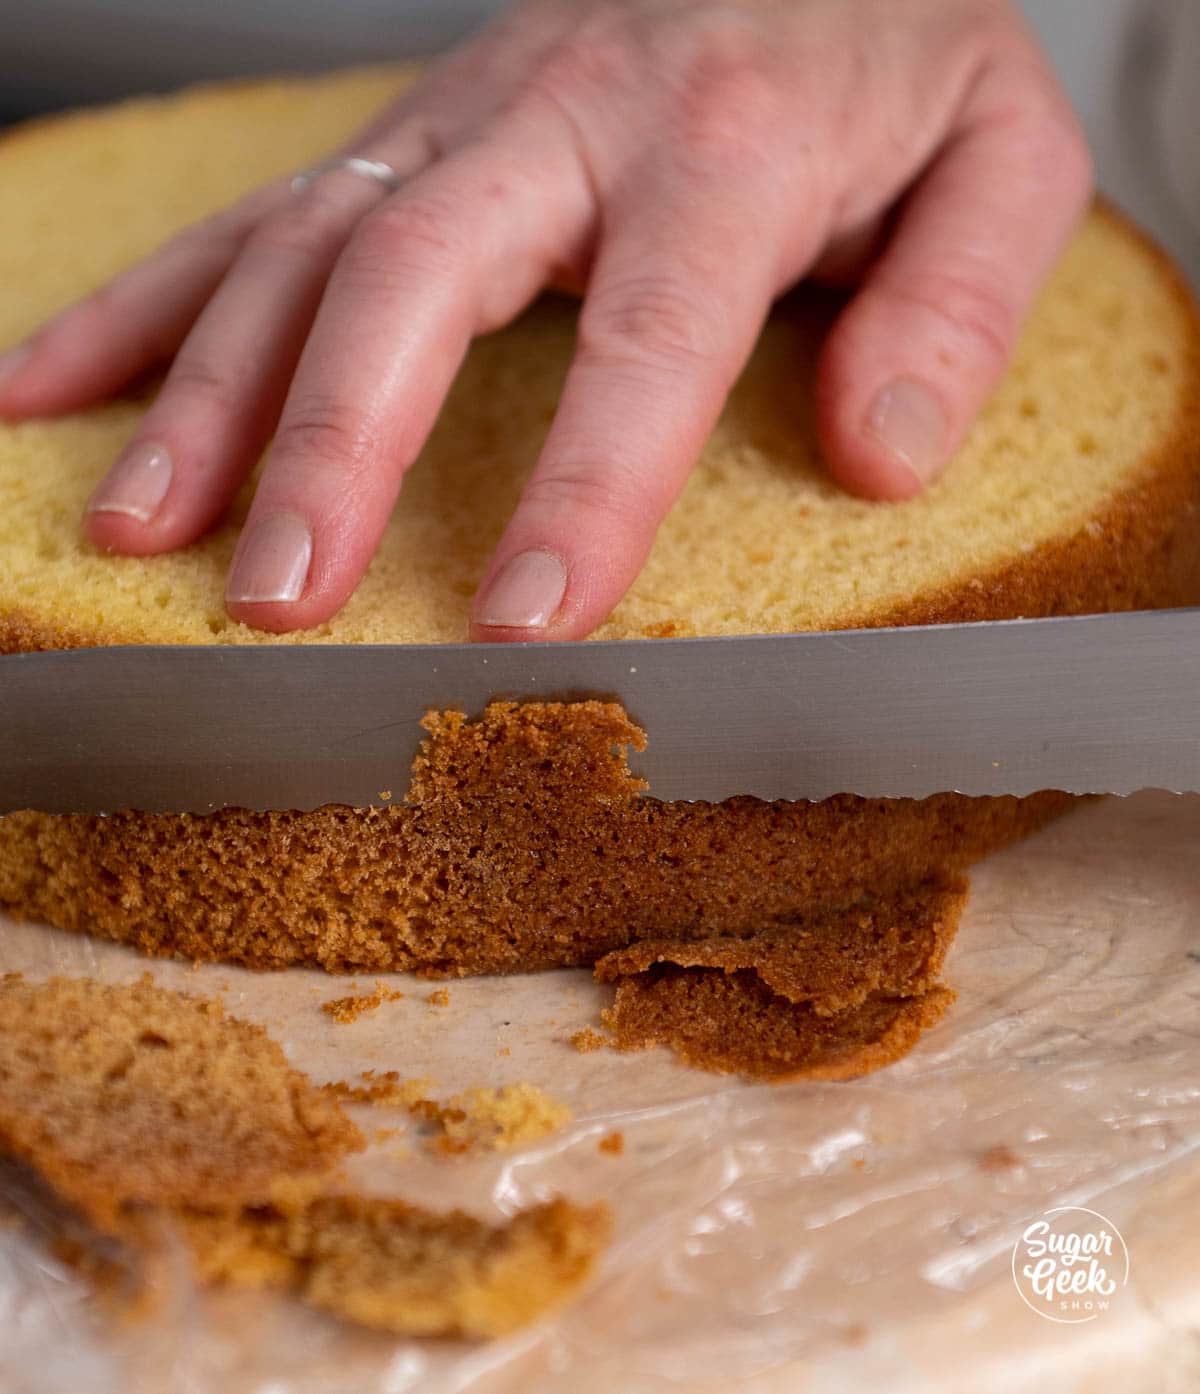
- Then trim and dark edges and bottoms off the cakes. This is optional but makes for pretty slices.
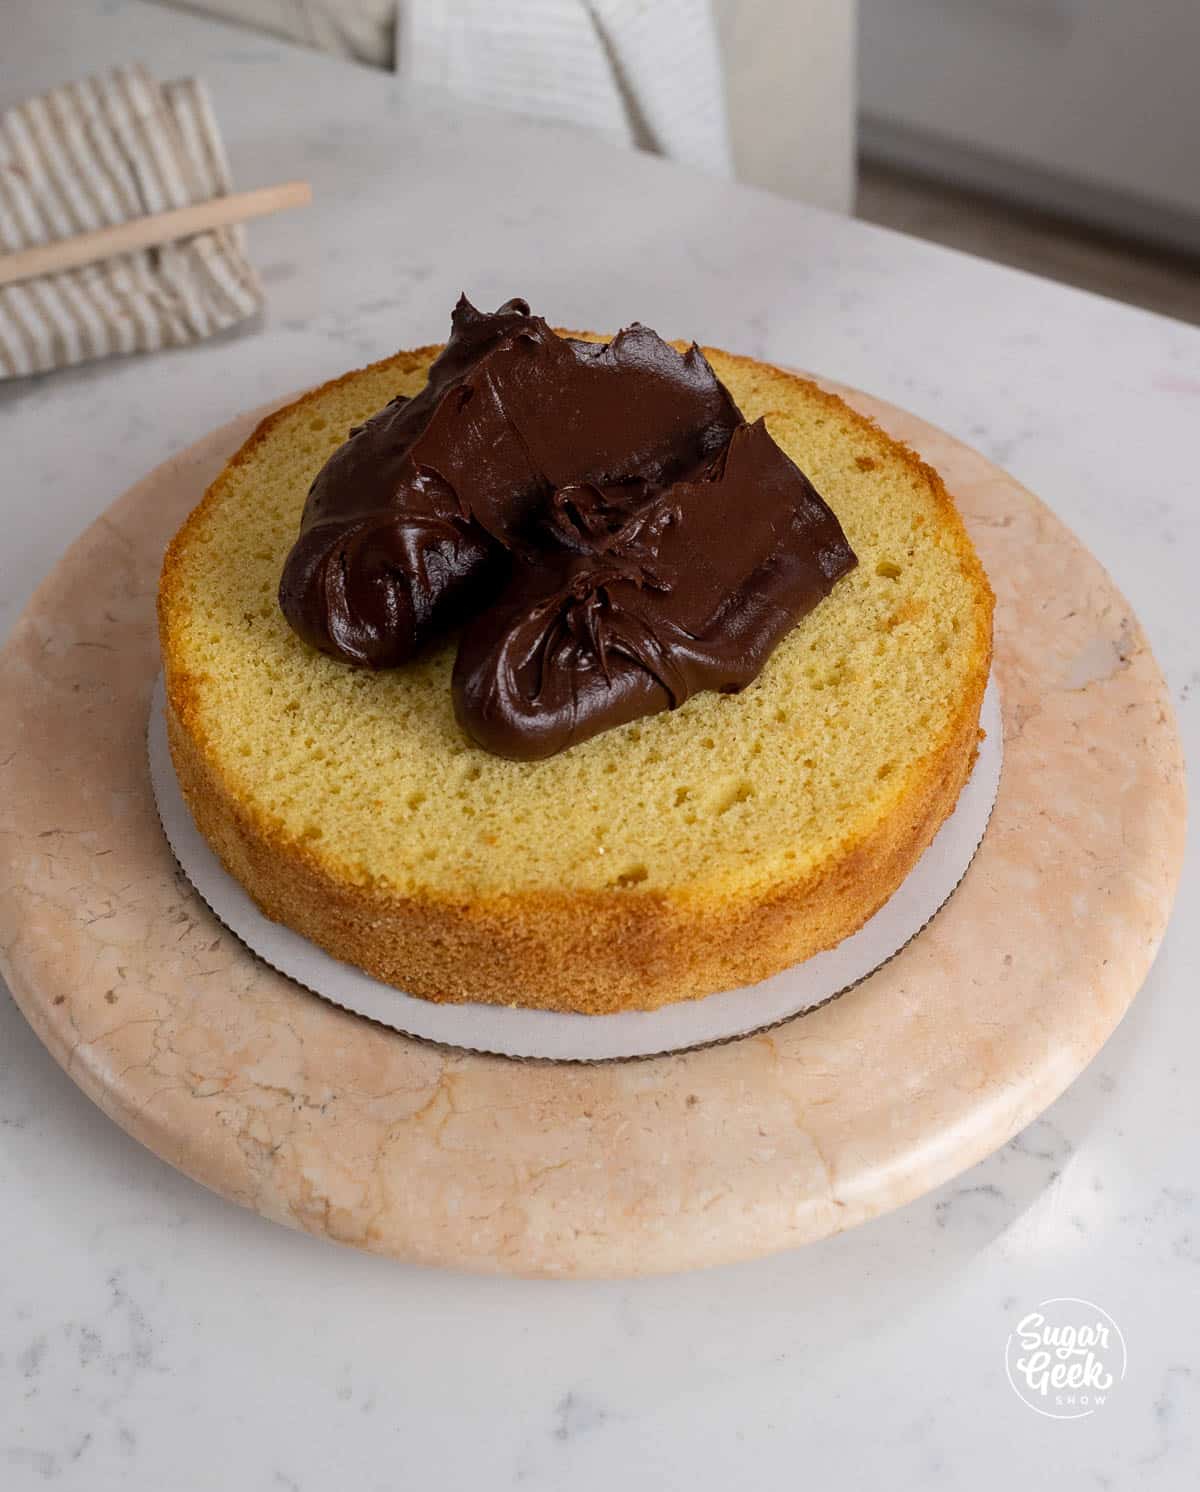
- Place the first layer of cake down on your cardboard cake round.

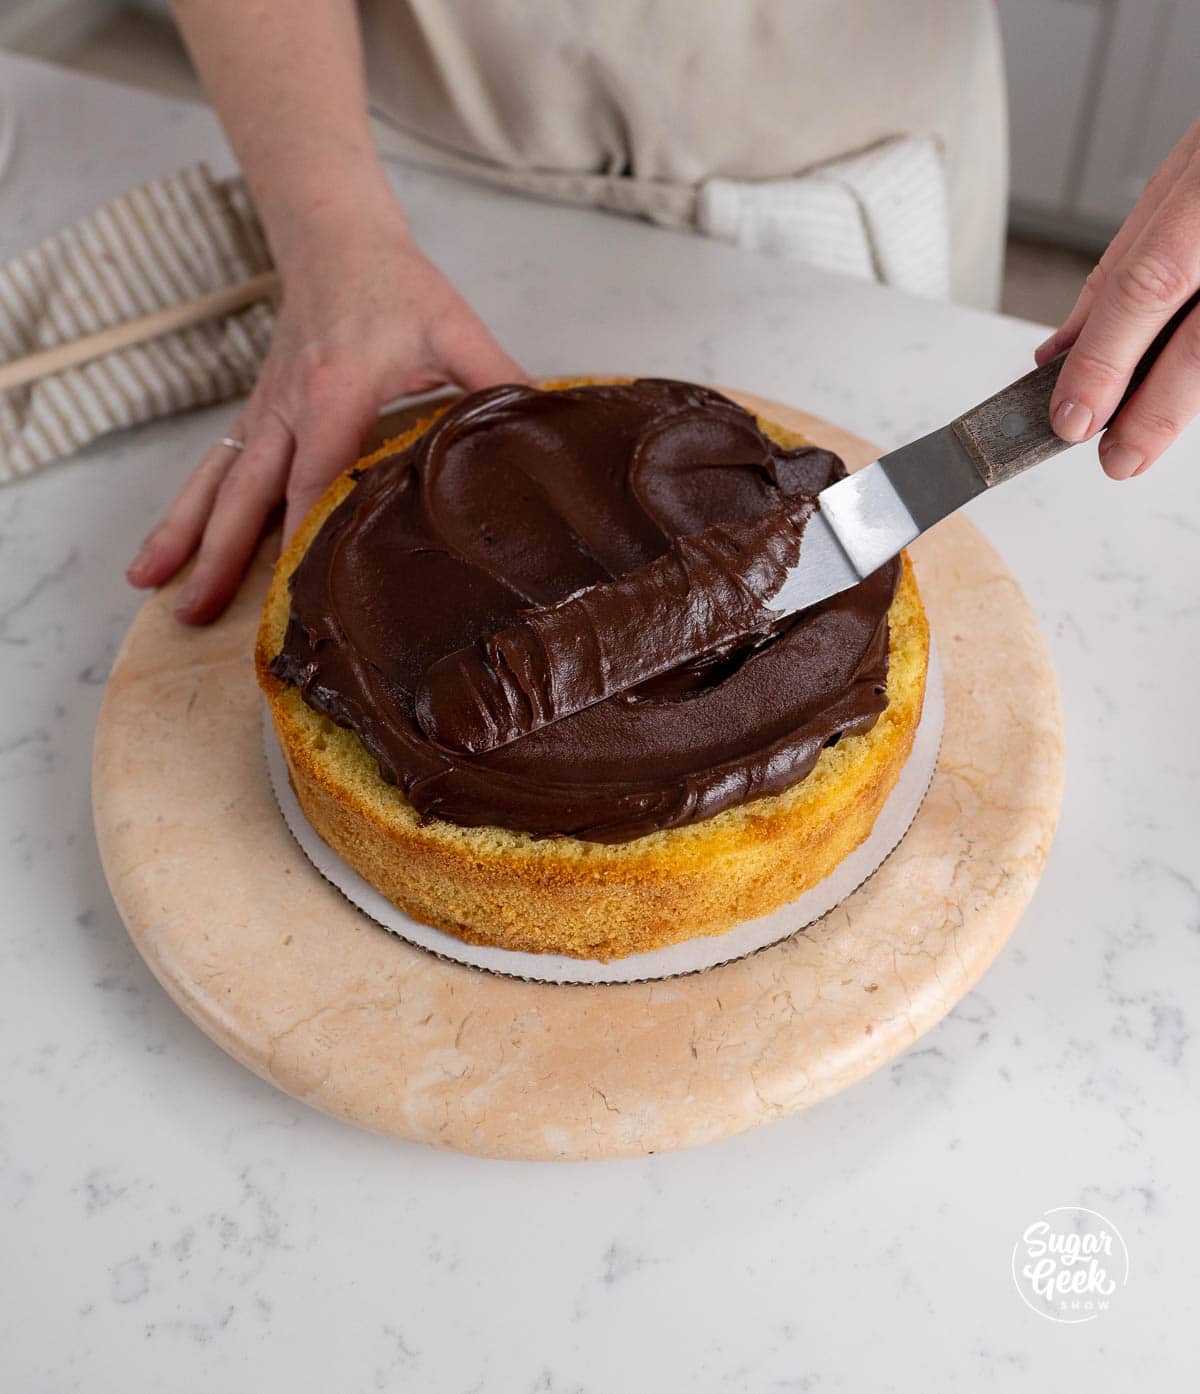
- Fill it with about one and a half cups of chocolate frosting and spread it with an offset spatula to the edges of the cake.
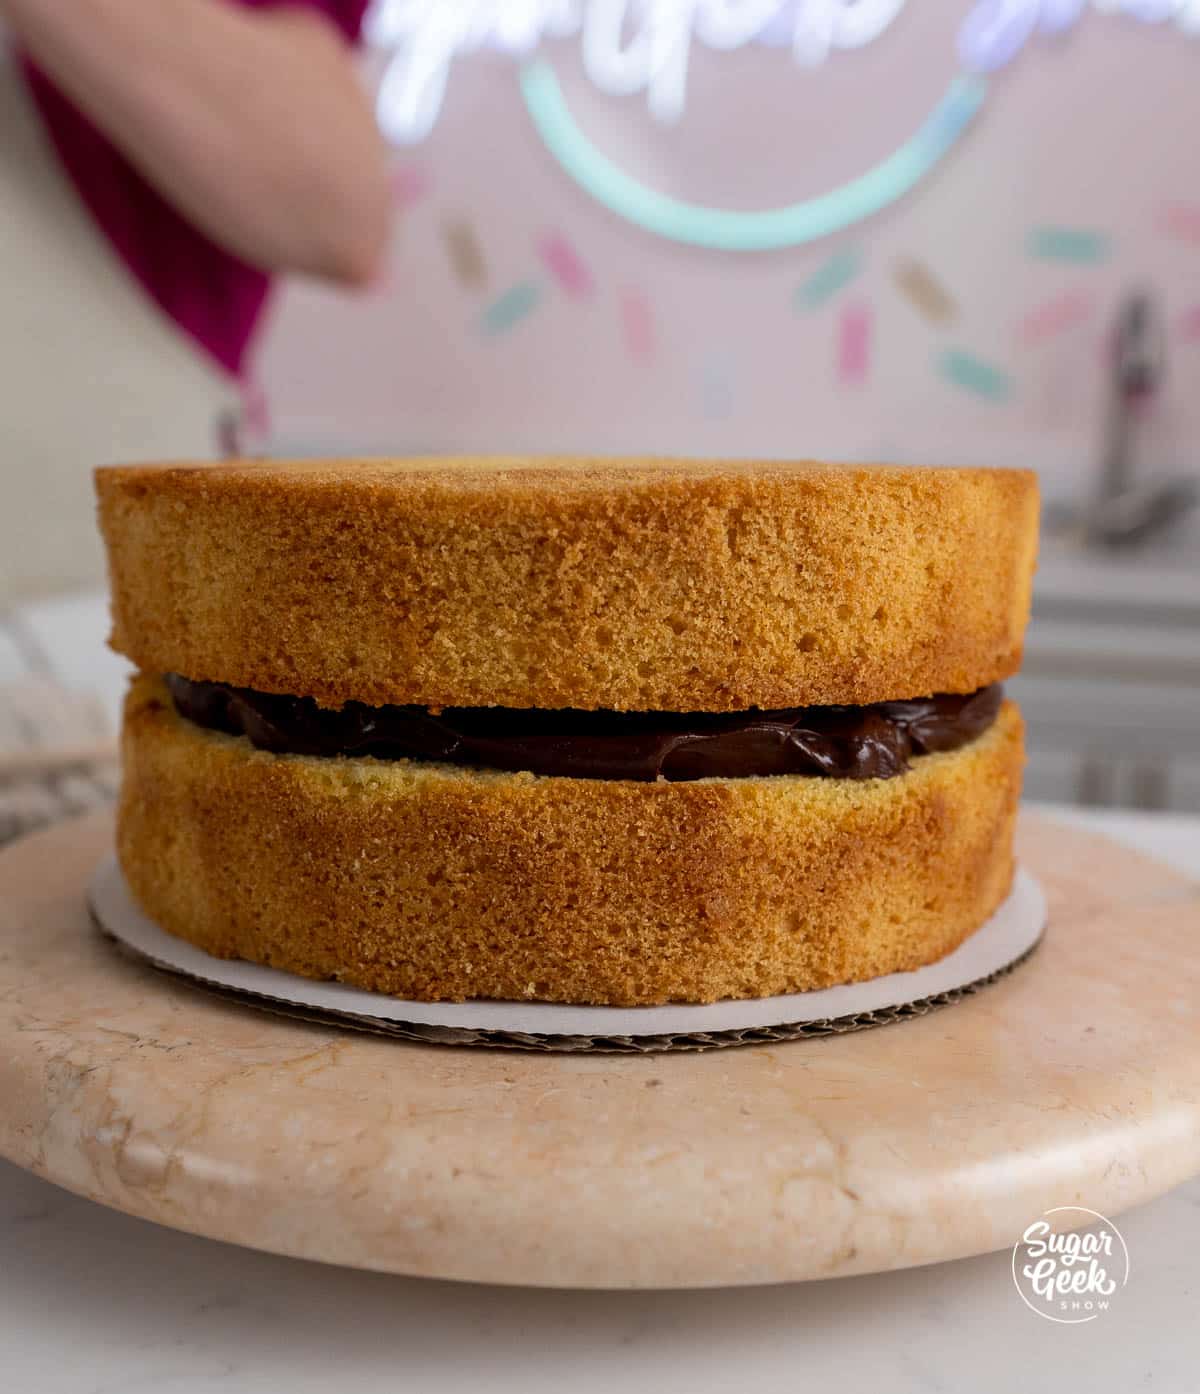
- Place the second layer of cake on top of the filled layer.
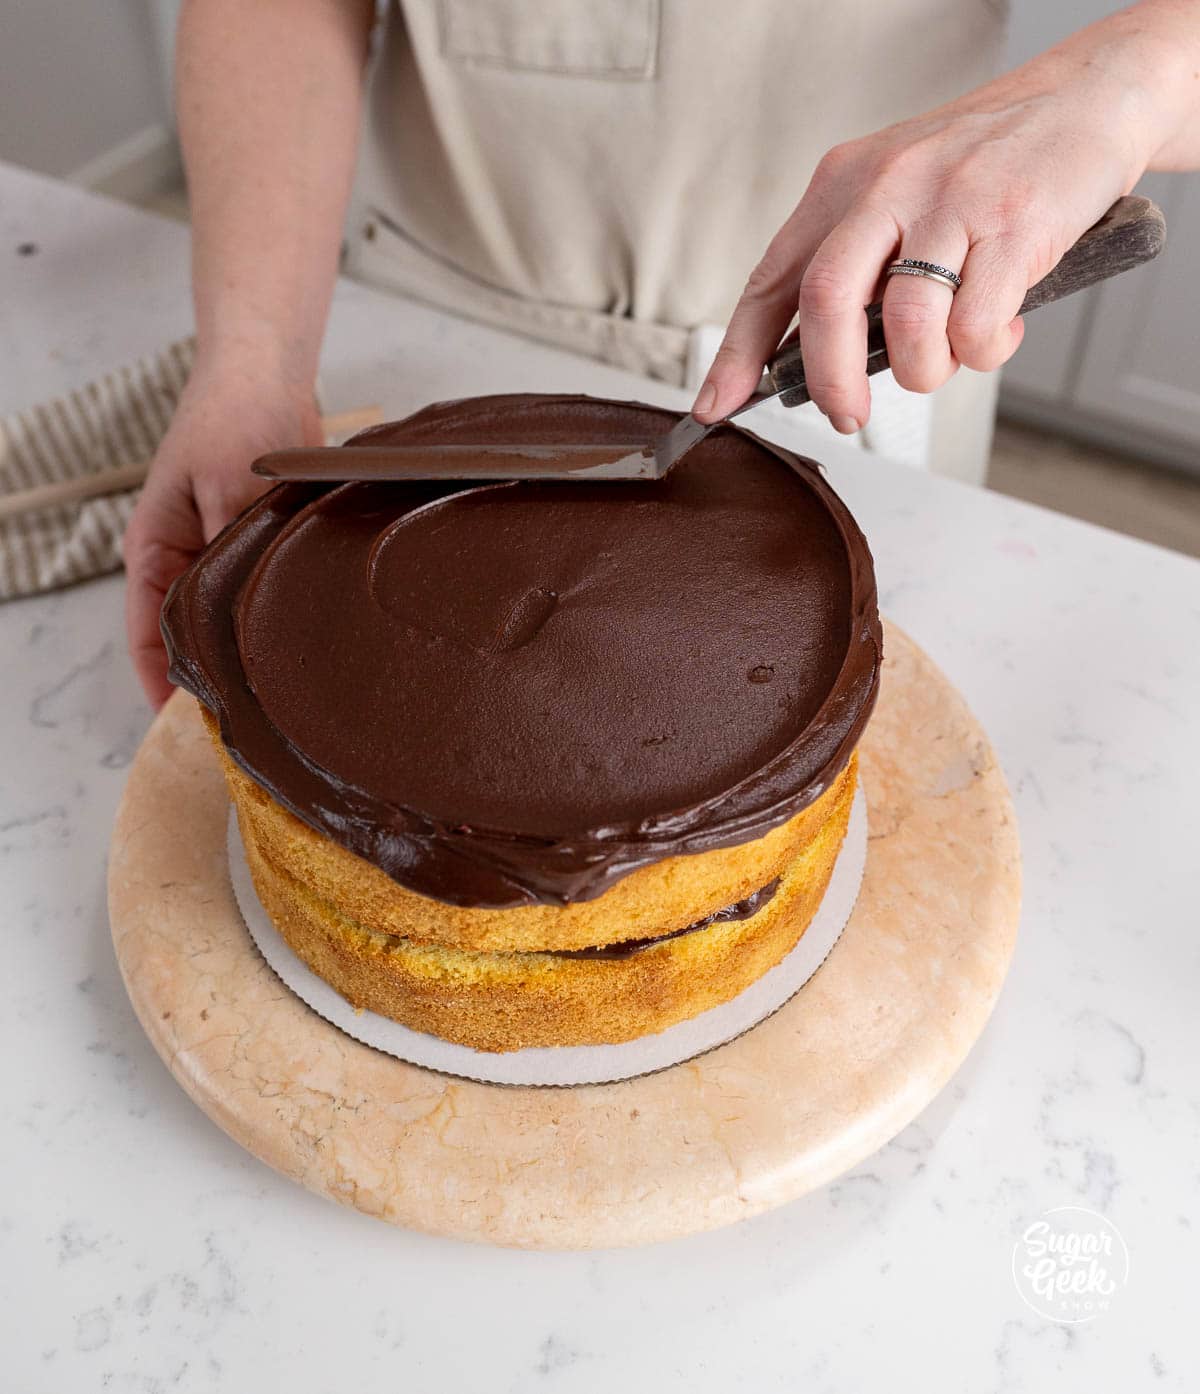
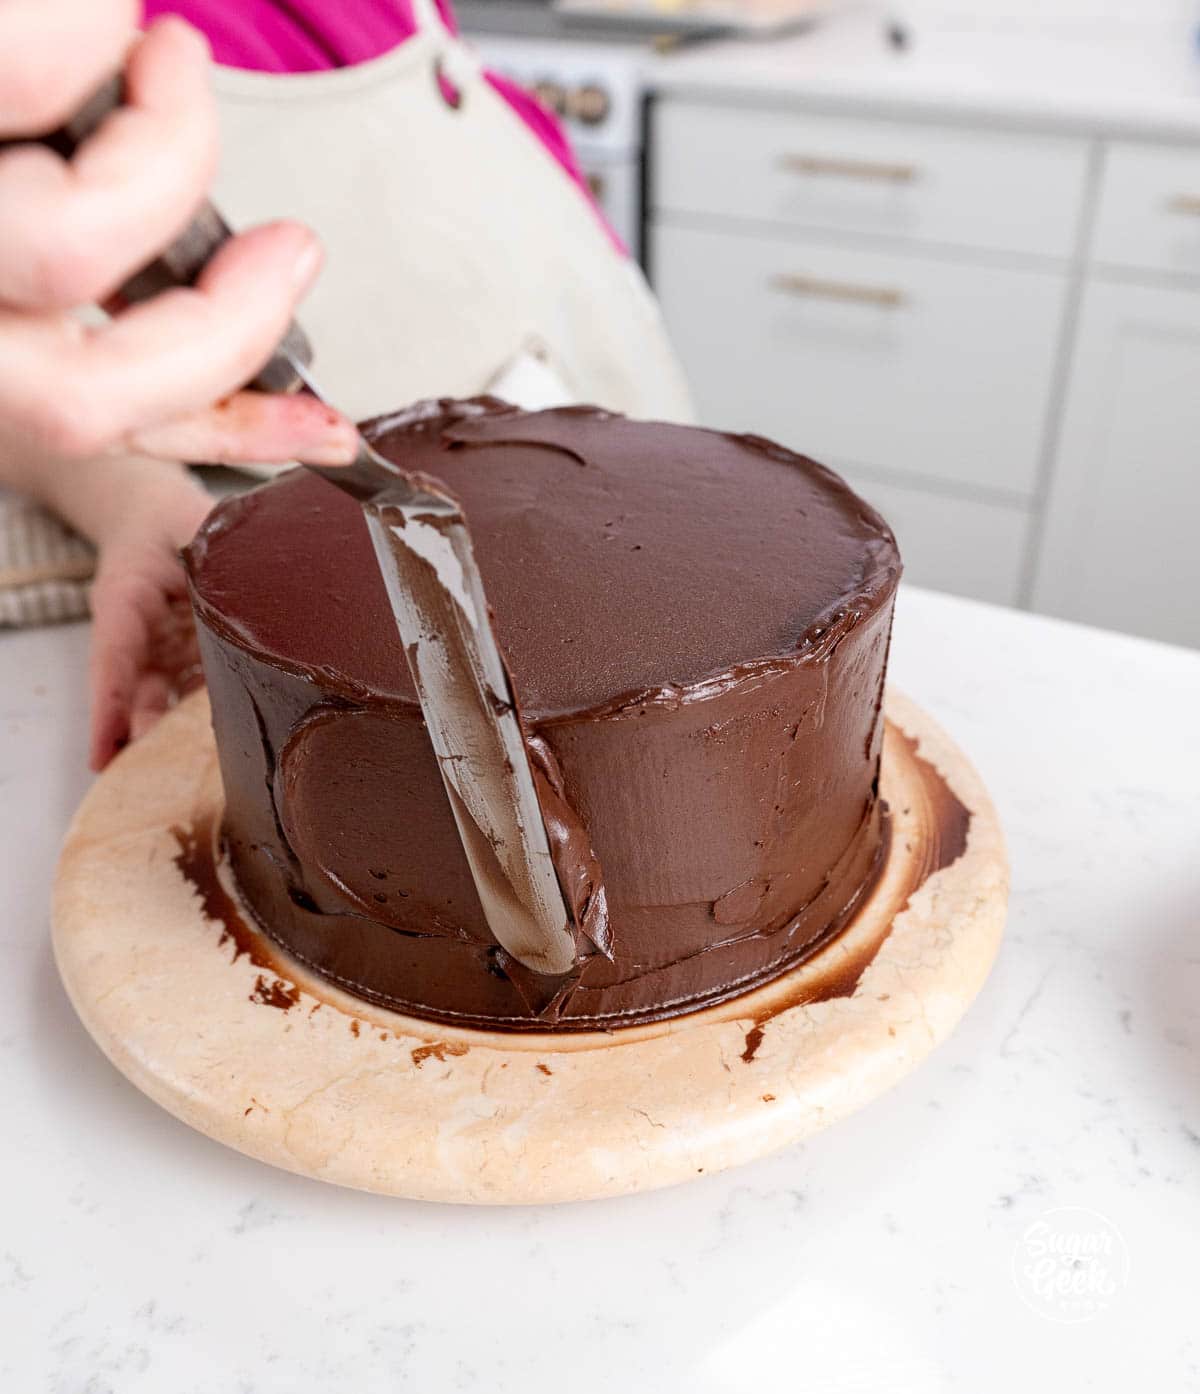
- Add a large dollop of frosting to the top of the cake and gently spread the frosting out and around the sides of the cake. If the frosting is too soft, place it in the fridge for a few minutes to set up.
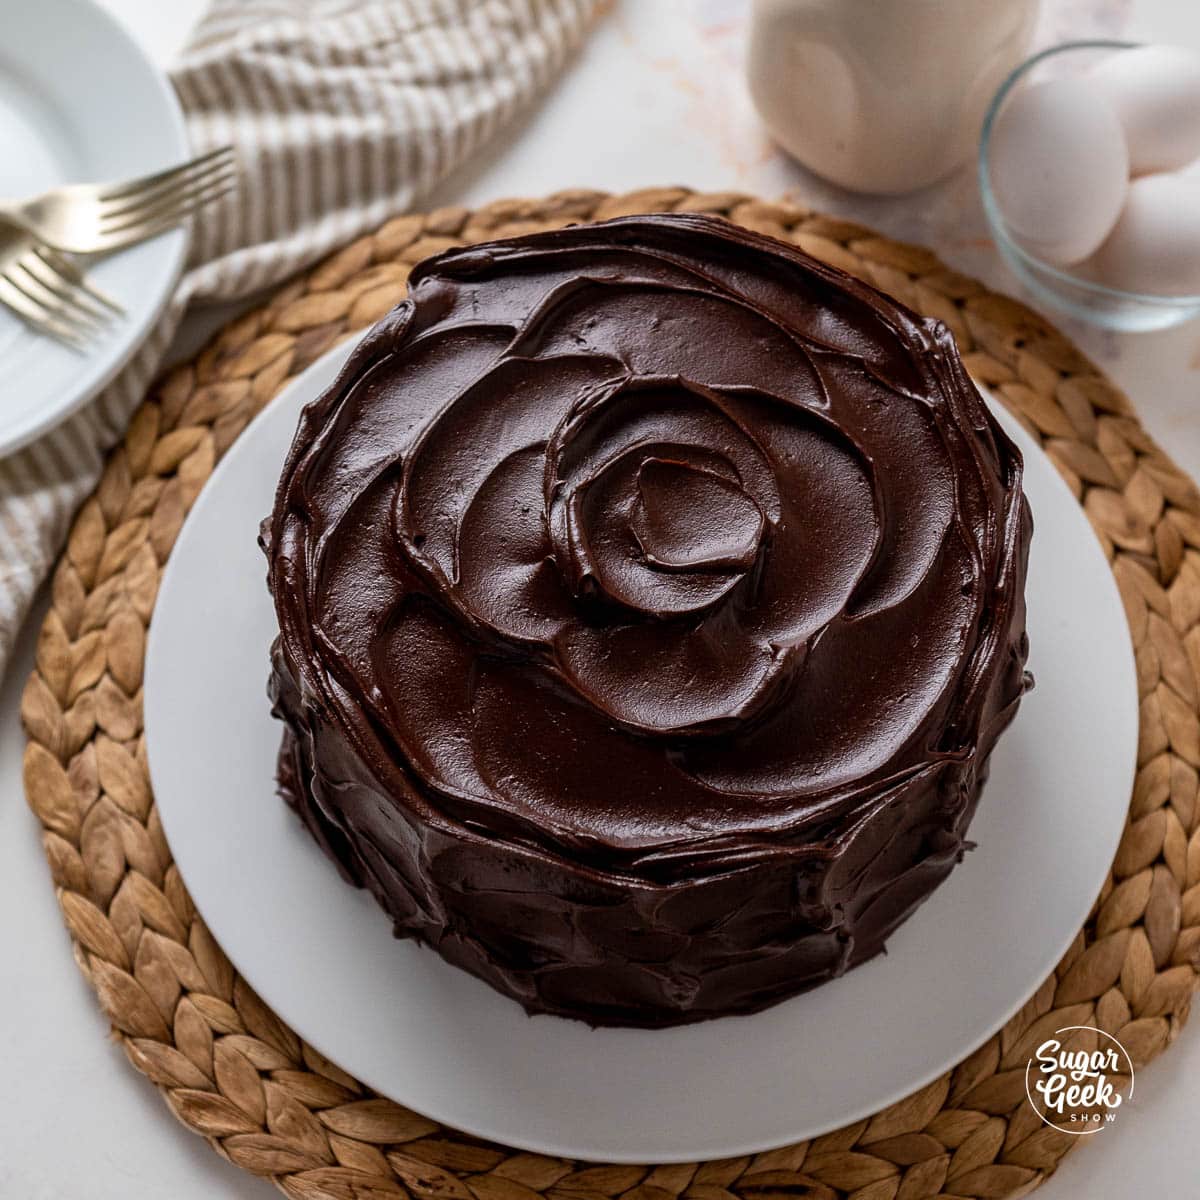
- Apply a thick second coat of frosting to the exterior of the cake. Push waves in the frosting with your spatula to create a rustic finish.
- The cake can be stored covered at room temperature for up to 2 days, then store the cake in the fridge or freezer.

FAQ
Yellow cake is a rich vanilla cake. The richness of the cake comes from the extra yolks, which amplifies the vanilla flavor from the extract that is added to the batter.
Yes, this is a very sturdy cake and will stack nicely in a tiered cake. The chocolate frosting can be soft, so make sure you take proper steps to support your cake if stacking it. You can also use this under fondant.
Yes, this easy cake recipe bakes well in any shape pan you choose. It would be a perfect cake as a sheet cake for a barbecue or potluck.
The flavor of yellow cake, white cake, and vanilla cake are all very similar. The main difference is that white cake uses only egg whites and yellow cake has extra egg yolks that give it a beautiful color.
Related Recipes
Moist Vanilla Cake From Scratch
Recipe
Equipment
- 2 8" x 2" cake pans
Ingredients
Yellow Cake Recipe
- 14 ounces cake flour
- 12 ounces granulated sugar
- 2 teaspoons baking powder
- 1 teaspoon baking soda
- 1 teaspoon salt
- 6 ounces unsalted butter softened
- 2 large eggs room temperature
- 3 large egg yolks room temperature
- 8 ounces whole milk warmed
- 2 ounces vegetable oil
- 1 Tablespoon vanilla extract
Chocolate Fudge Frosting Ingredients
- 16 ounces unsalted butter 2 cups, softened
- 8 ounces powdered sugar 2 cups
- 3 ounces cocoa powder 1 cup
- ½ teaspoon salt
- 6 ounces corn syrup ½ cup
- 2 ounces coffee ¼ cup
- 1 teasoon vanilla extract
- 12 ounces semisweet chocolate 2 cups
Instructions
Yellow Cake Instructions
- Preheat the oven to 335º F/168º C — 350º F/177º C and prepare two 8-inch pans or three 6-inch cake pans with cake goop or another preferred pan release.
- It is important to use warm ingredients so that everything incorporates correctly. Add the eggs to a bowl of warm water (in the shells) for 5 minutes, heat the milk in the microwave for 30 seconds, and leave the butter out for a few hours, or cut it into cubes and microwave for about 10 seconds.
- Separate your eggs and egg yolks by cracking each egg on the table and using your thumbs to divide the shell into two pieces. Move the yolk back and forth and allow the whites to fall into a bowl.
- Whisk together the eggs, egg yolks, milk, vanilla, and vegetable oil in a medium bowl and set it aside.
- Place the cake flour, sugar, baking powder, baking soda, and salt into the bowl of a stand mixer with the paddle attachment. This can also be made with an electric hand mixer in a large mixing bowl.
- Slowly add your softened butter in chunks and mix on medium speed until the batter resembles coarse sand.
- Add ⅓ of your egg/milk mixture to the flour mixture while mixing on low speed until just moistened. This part is crucial, be careful not to add too much liquid.
- Increase the mixer to medium speed (setting 5 on Kitchen Aid mixer) and whip for 2 minutes until it has thickened and lightened in color. It should look like soft-serve ice cream. If you do not let the batter mix fully, you will end up with short, crumbly cakes.
- Scrape the bottom and sides of the bowl.
- While mixing on low speed, slowly add in the rest of your wet ingredients to the fluffy cake batter, stopping to scrape the bowl one more time halfway through. Mix until the liquids are fully combined in the batter.
- Divide the cake batter evenly between the prepared cake pans.
- Bake for 30 minutes and then check your cakes. If they are still jiggly in the center bake for another 5 to 8 minutes. If they are almost set, bake for another 5 minutes or until the center springs back when you touch it, or a toothpick comes out clean. Bake time can vary depending on the size and shape of the cake pans you use.
- Let the cakes cool in the pan for 15 minutes or until the pan is just barely warm. Then, turn them out onto a wire rack to finish cooling.
- Wrap them in plastic wrap and freeze if you're decorating the next day. Or if you're decorating the same day, I like to put mine into the freezer (unwrapped) and on the cooling rack to flash chill for one hour so I can begin frosting.
Making Chocolate Fudge Frosting
- Add the chocolate, coffee, vanilla, and corn syrup to a measuring cup or bowl.
- Melt the chocolate mixture together in the microwave. Heat for 30 seconds and stir and then heat in 10-second increments and stir until it is fully melted and smooth. Let the chocolate mixture cool, but not harden.
- Mix the butter, sugar, cocoa powder, and salt in the bowl of your stand mixer with the paddle on high speed for about 1 minute until light and fluffy.
- Add the cooled chocolate mixture and mix it until it's combined.
- The frosting can be used immediately on the cake, or covered with plastic wrap and stored at room temperature for 3 days. If you plan to keep it longer, keep it in an airtight container in the refrigerator or freezer.
Decorating the Yellow Cake
- Trim the domes off of the yellow cake layers.
- Then trim and dark edges and bottoms off the cakes. This is optional but makes for pretty slices.
- Place the first layer of cake down on your cardboard cake round.
- Fill it with about one and a half cups of chocolate frosting and spread it with an offset spatula to the edges of the cake.
- Place the second layer of cake on top of the filled layer.
- Add a large dollop of frosting to the top of the cake and gently spread the frosting out and around the sides of the cake. If the frosting is too soft, place it in the fridge for a few minutes to set up.
- Apply a thick second coat of frosting to the exterior of the cake. Push waves in the frosting with your spatula to create a rustic finish.
- The cake can be stored covered at room temperature for up to 2 days, then store the cake in the fridge or freezer.
Notes
-
- Weigh your ingredients to avoid cake failure. Using a kitchen scale for baking is super easy and gives you the best results every single time.
- Make sure all your cold ingredients are room temperature or slightly warm (butter, milk, eggs) to create a cohesive batter. Curdled batter causes cakes to collapse.
- Need more help with making your first cake? Check out my how to decorate your first cake blog post.
- Make your own pan release (cake goop!) The best pan release ever!
- Chill your cakes before frosting and filling. You can cover a frosted and chilled cake in fondant if you wish. This cake is also great for stacking. I always keep my cakes chilled in the refrigerator before delivery for easy transportation.
- Use the leftover egg whites for Swiss meringue buttercream, white cake, or macarons.


carrie b says
The cake layers were sooooo moist and so flavorable.....this is the best cake ive made.
Christina Moreau says
Wow! This was simple to make following your instructions and it was absolutely amazing! The chocolate frosting was the best I’ve ever made.
Lisa says
This is a delicious cake! I've make it three times now (I made a single 8" layer yesterday to use up frosting I had in the freezer) and while I really like it, it has a very tender, fine crumb which makes the cake feel dry even though it isn't. I assume it's due to using cake flour??
The frosting is fabulous! The best chocolate frosting ever - not too sweet, creamy, and spreadable, but it does make a LOT. I had enough left over to frost the top and sides of a single 8" layer with a thinner layer of frosting but it was perfect!