How to make a decorative pattern roll cake dessert
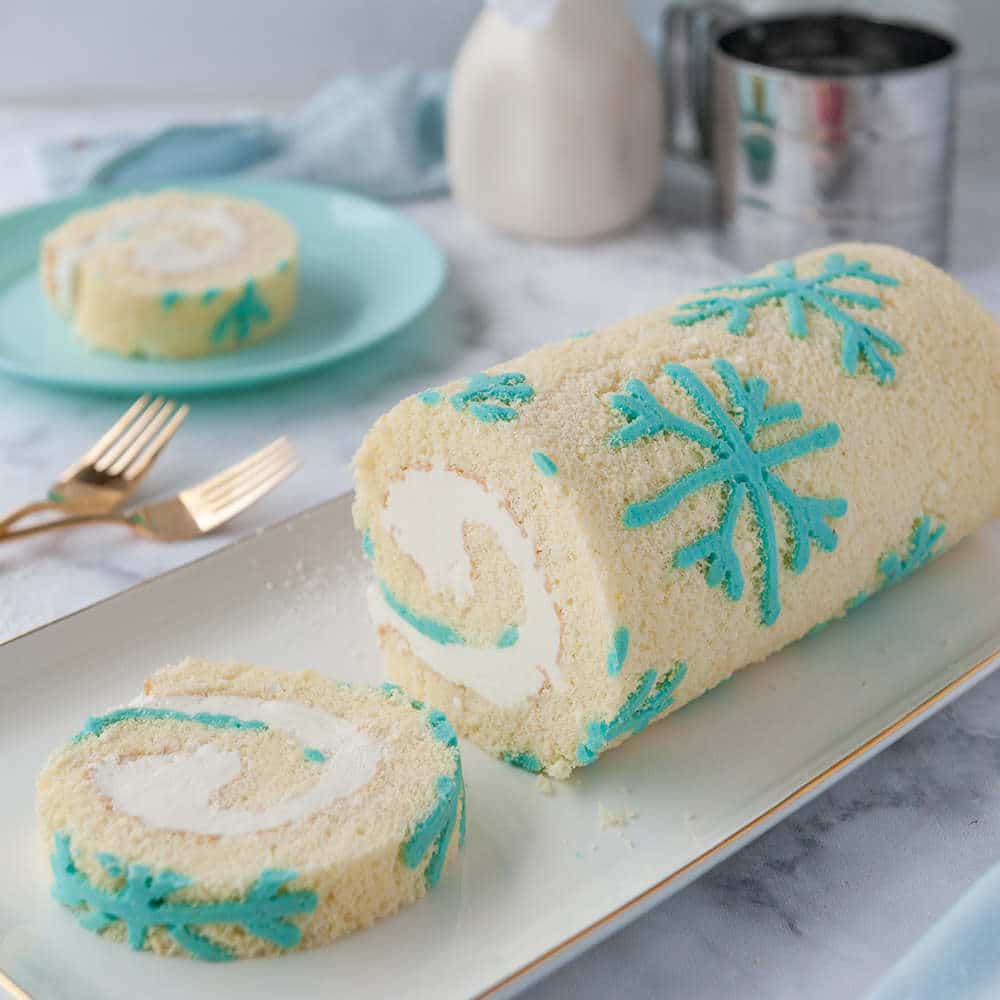
Make beautiful designs on the outside of your pattern roll cake! Such a fun and easy way to get creative without all the fuss of a layer cake.
What is a pattern roll cake?
A pattern roll cake is achieved by piping a colorful batter onto a parchment-lined sheet pan, freezing it and then layering on your roll cake batter.
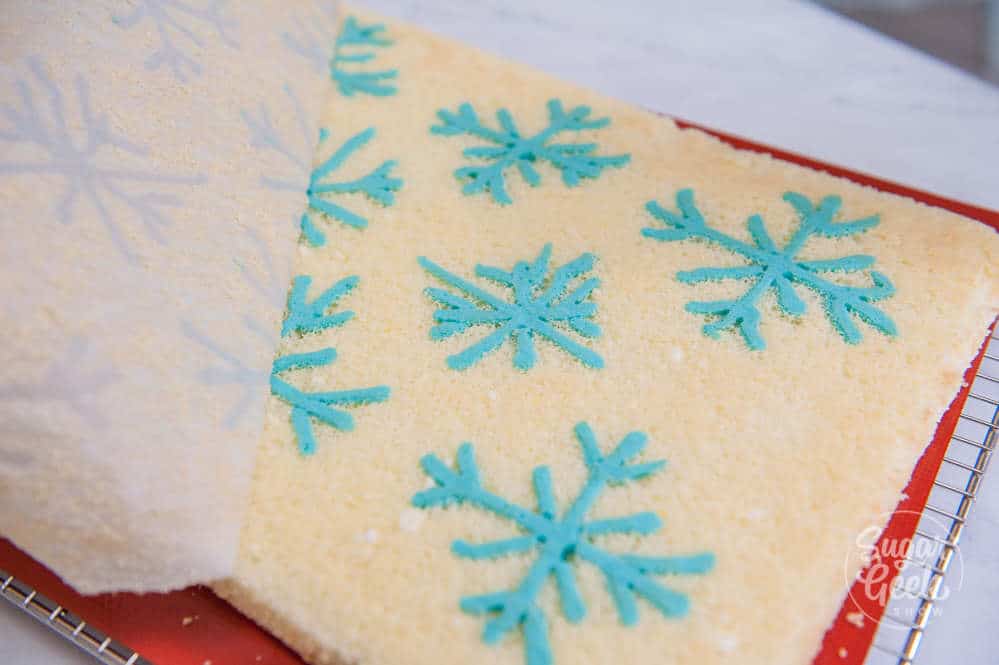
After you peel off the parchment paper, the pattern is revealed! All that's left to do is roll up the sponge with a tasty filling and you've got a fun and easy decorated cake!
You can do any kind of pattern you want by changing the colors and the design of the batter. You can even use stencils or templates.
For this recipe, I decided to do something super simple without any templates so you can see how easy it really is.
How to make the roll cake pattern
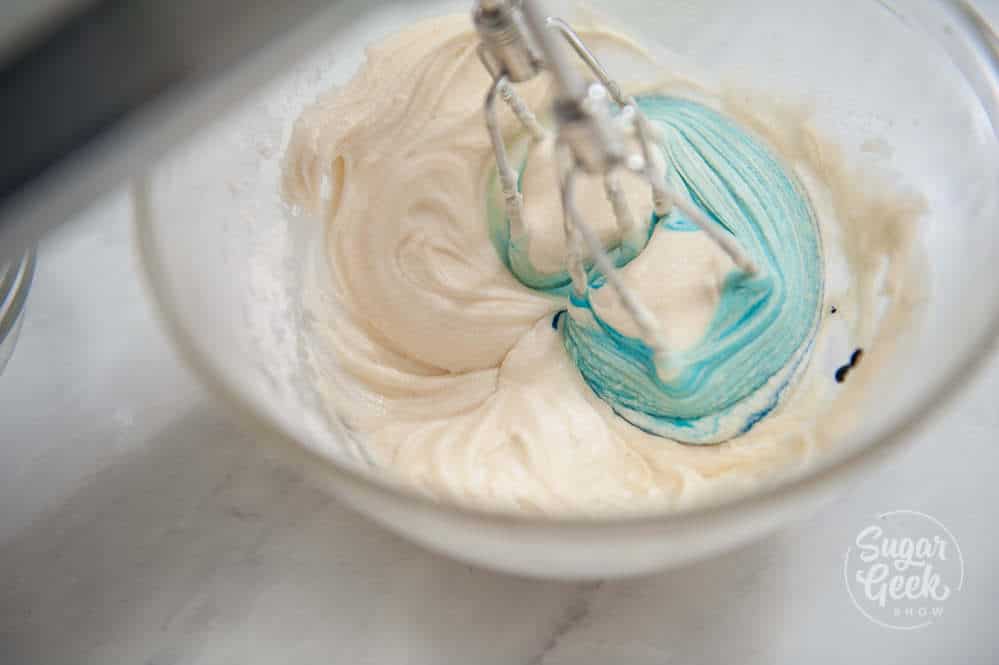
The pattern batter is super simple to prepare. Just mix it all together with a hand mixer or even a whisk until cohesive. Add in some food coloring and put it all into a piping bag.
You can also divide the batter up and make multiple colors if you want to get fancy. I used a couple of drops of electric blue food coloring in mine for my snowflakes.
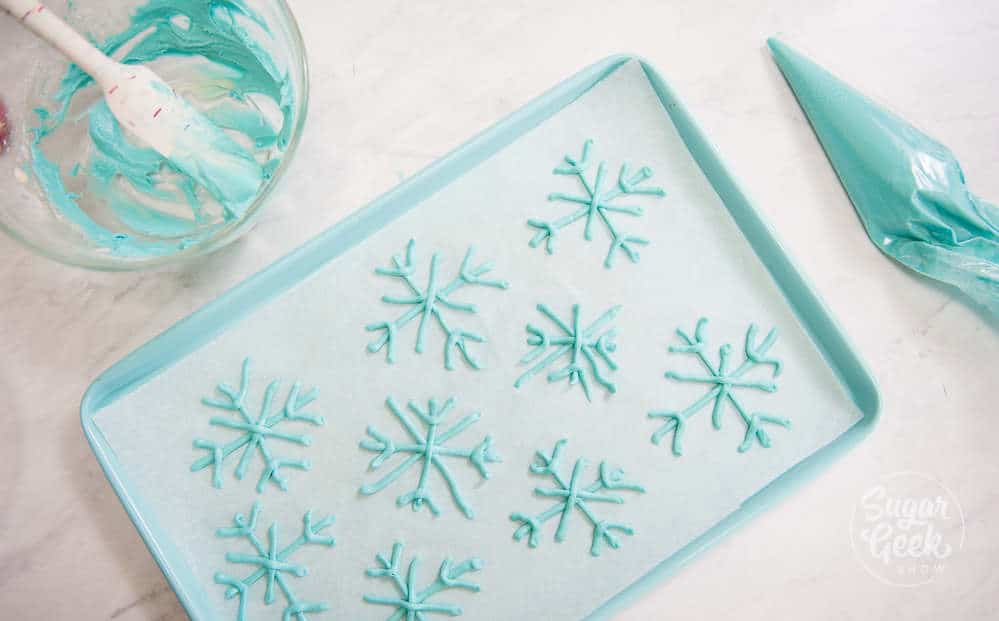
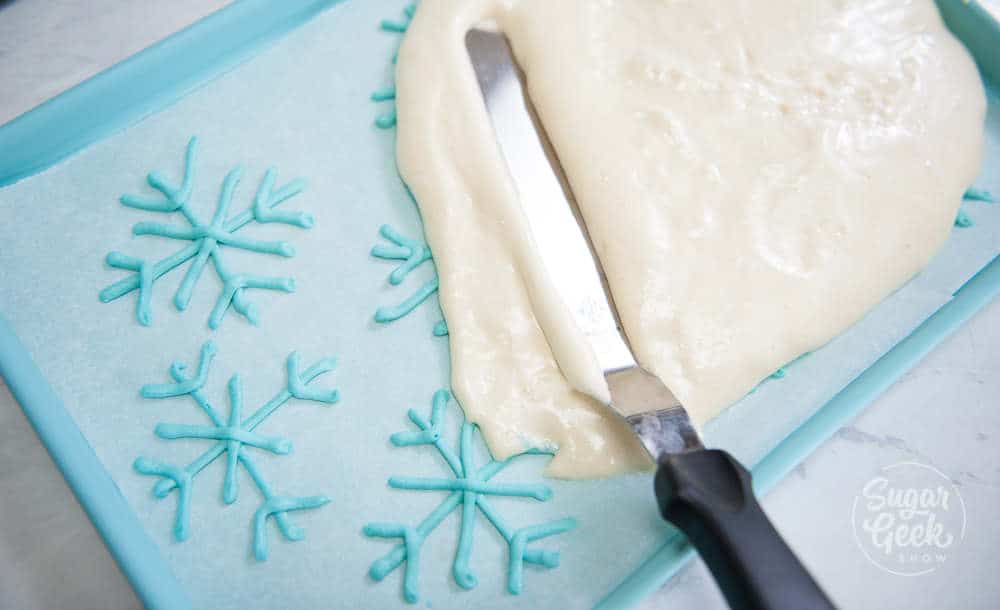
I used a #2 piping tip for making my snowflakes and I'm using a 10"x15" cookie sheet lined with parchment paper (not wax paper). To make a snowflake start by piping a big +. Then pipe a small x over the top. Make a v on the ends of the big lines and voila! Snowflake.
Then just pop the whole thing into the freezer for 20 minutes. While it's freezing, go ahead and make your roll cake sponge.
How to make a roll cake sponge
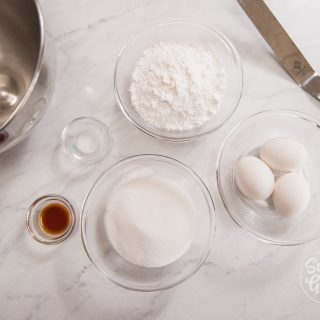
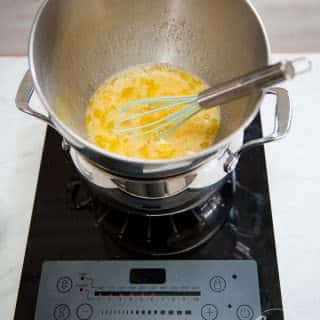
Making the roll cake sponge requires a simmering pot of water and a heatproof bowl. I use the stainless steel bowl of my kitchenaid mixer because it makes it easy. Combine the eggs and sugar in the bowl and place over the simmering water. The bowl shouldn't be touching the water.
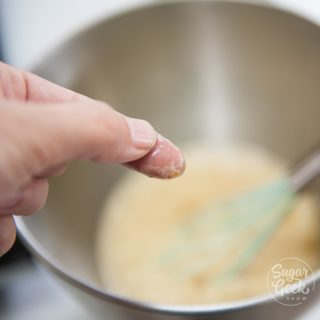
The idea is to heat the mixture for just long enough that the sugar dissolves. Whisk occasionally so the eggs don't cook. Once the sugar has dissolved, it's ready to whip up. I usually just feel the egg whites with my fingers to see if it's dissolved.
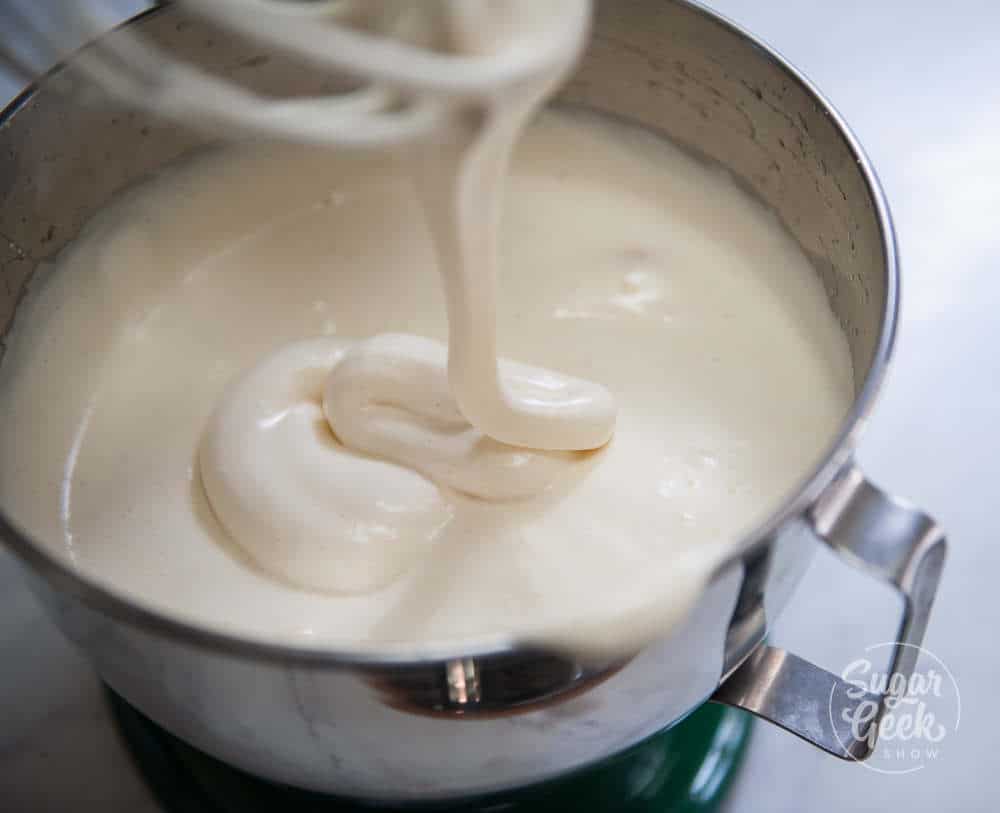
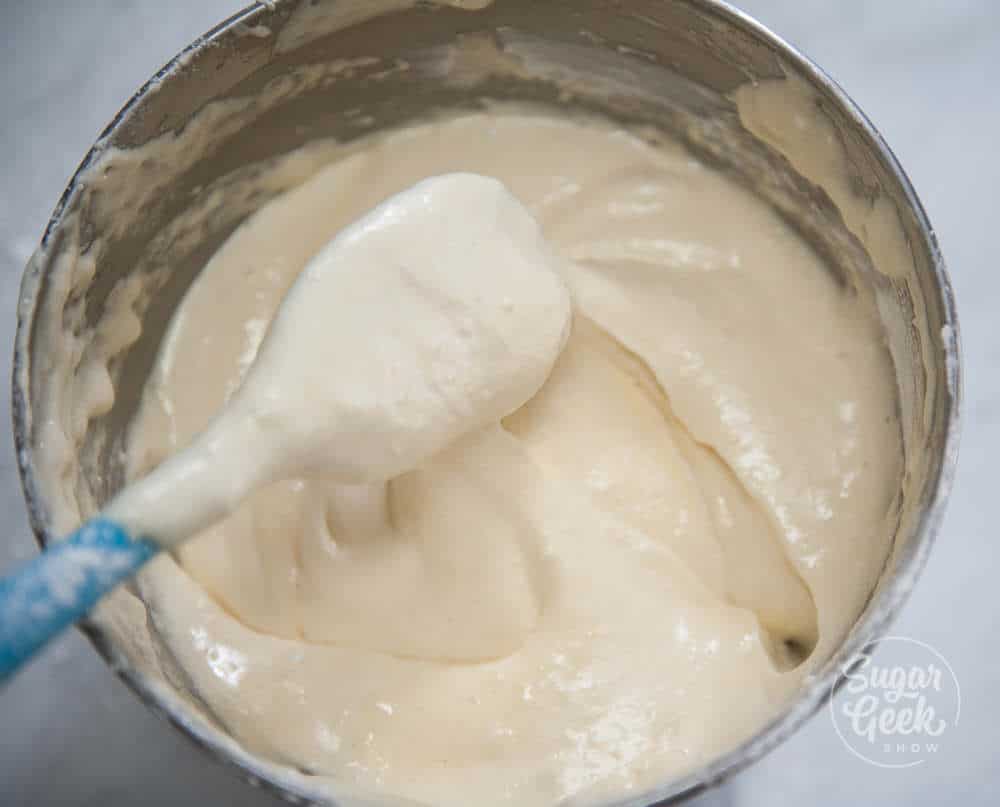
Whip the batter on high until the batter has tripled in volume and you get to the ribbon stage. The ribbon stage is when you drizzle the batter back onto itself and the batter forms "ribbons" that lay on top of the surface for a while before dissolving back into itself.
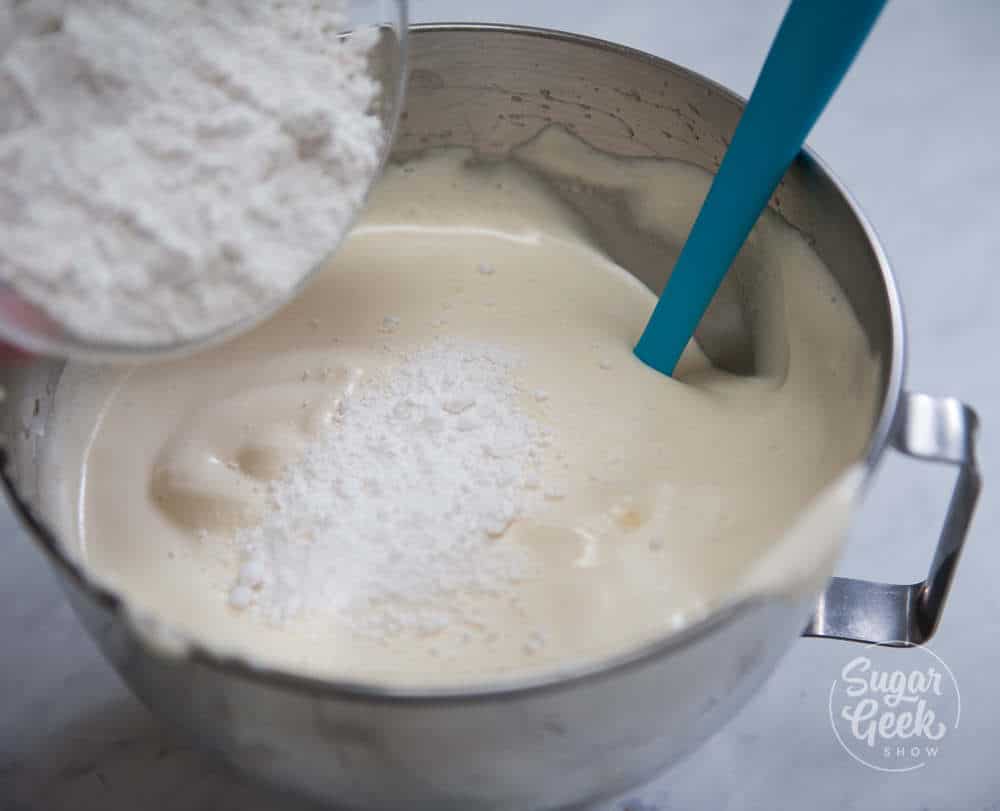
Once your egg reaches the ribbon stage, you want to fold your flour into the egg GENTLY so you don't deflate. I sift my flour onto the egg mixture then gently fold to incorporate.
Slowly run your spatula around the outside edge of the batter, moving along the side of the bowl then towards the bottom of the bowl. Lift the batter up gently and fold it over onto itself. Repeat. If you mix too aggressively, your batter will deflate and it won't rise later.
Once your sponge is mixed you can spread it out onto your baking sheet with the frozen snowflake batter. Make sure you push the batter all the way to the edges. Do not grease your pan.
Then place the whole thing in your preheated oven for 8 minutes. This cake bakes very quickly so make sure you have everything ready to go as soon as it comes out.
What you need to roll your cake
- Two cooling racks
- Powdered sugar and a sifter
- A tea towel or other thin towel
- Small sharp knife
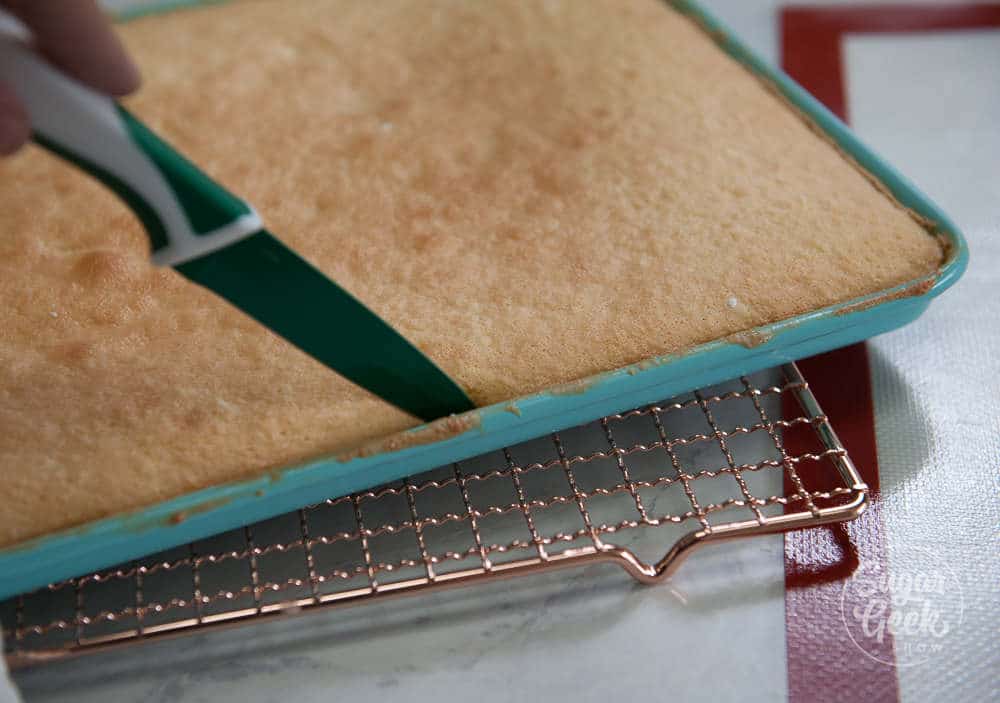
Once the sponge is done, you need to run a knife around the outside edge to loosen it from the pan.
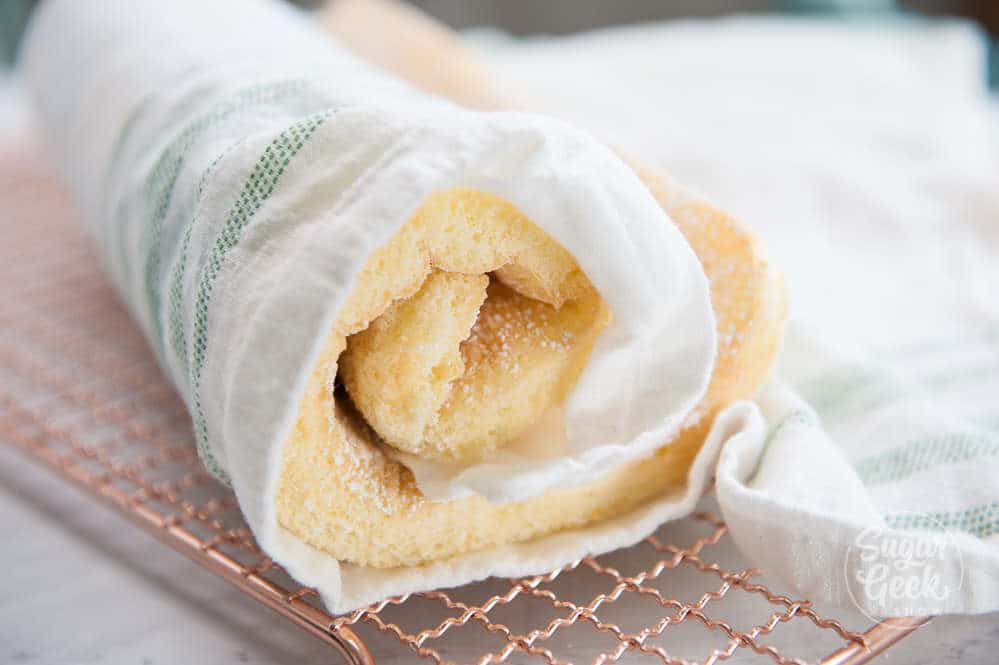
Flip onto a cooling rack, remove the parchment, dust with powdered sugar. Spread the tea towel on top, then place the other cooling rack over the towel. Flip the whole thing back over again so the tea towel is on the bottom.
Tightly roll up the cake while it's still warm. This is vital to avoiding those nasty cracks when you roll it up again with filling. Let it cool a few hours or even overnight.
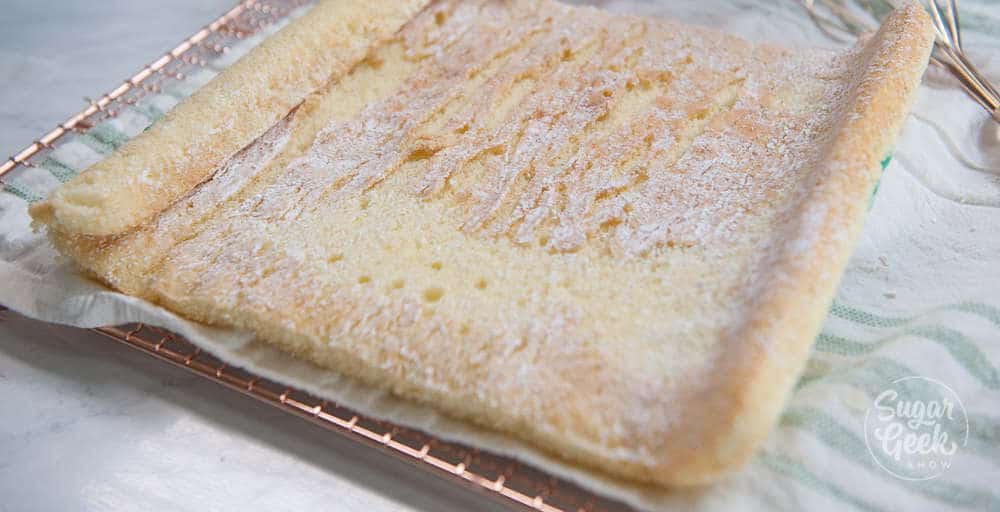
When you're ready to fill your cake, gently unroll it. Spread a thin layer of buttercream inside. You can also use stabilized whipped cream, ganache, fruit puree or even curd.
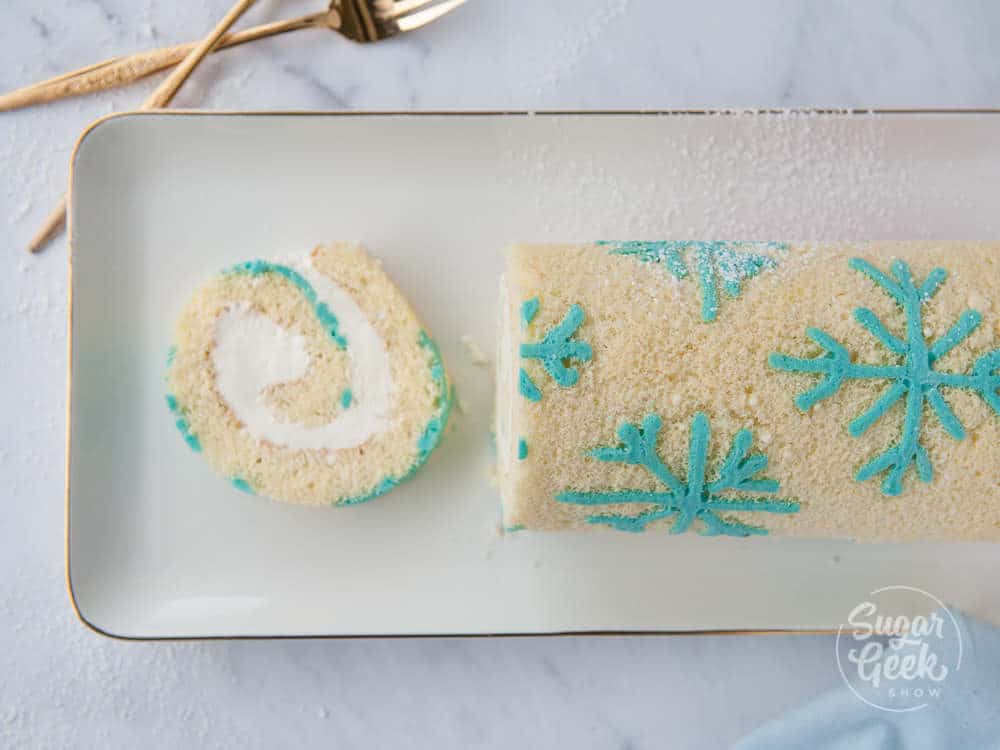
Then roll it back up! I put mine back in the fridge to chill before serving to give the filling a chance to set up. The slices look better.
Want more? Check out these recipes!
Vanilla Roll Cake with Strawberry Cream
Foolproof French macaron recipe
Recipe

Equipment
- stand mixer with metal bowl and the whisk attachment
- 10"x15" pan
- Parchment Paper
- tea towel
- medium sauce pan
- Piping Bag
- #2 piping tip and bag
Ingredients
Pattern Batter
- 1 ounce powdered sugar
- 1 ounce butter softened
- 1 ounce pastuerized egg whites
- 1 ounce all-purpose flour
- 2 drops food coloring I used americolor electric blue
Roll Cake Ingredients
- 6 large eggs
- 6 ounces sugar
- 6 ounces cake flour or all purpose flour
- ¼ teaspoon salt
- 1 teaspoon vanilla extract
Stabilized whipped cream
- 10 ounces heavy whipping cream
- 2 Tablespoons powdered sugar
- 2 teaspoons powdered gelatin
- 2 ounces cold water
- 2 teaspoons vanilla extract
- 2 teaspoon heavy whipping cream
Instructions
- Preheat your oven to 400ºF with the oven rack in the center. Line a ¼" sheet pan (9x13") with parchment paper.
Roll Cake Pattern
- Cream together butter, flour, sugar and egg whites with a whisk attachment until smooth. Add in your food coloring and mix until cohesive in color.
- Place batter into a piping bag or plastic baggie and snip off the tip. Pipe your pattern onto the parchment paper and then freeze while you prepare your roll batter (about 20 minutes)
Roll Cake Batter
- Fill your saucepan with 2-3" water and bring to a boil over medium high heat until boiling then reduce heat to medium or until water is simmering
- Place eggs, sugar and salt into the mixing bowl and blend together with a whisk
- Place the bowl with mixture on top of your simmering water. Using your whisk, stir the egg mixture slowly until the sugar granules dissolve (about 110ºF) Remove from the heat.
- Attach your bowl to your stand mixer with the whisk attachment. Add in your vanilla and whisk on high for 2-3 minutes until you reach the ribbon stage (see notes). The mixture should triple in volume and lighten in color.
- Sift in ⅓ of your flour mixture and fold (see notes) the flour in gently without damaging the structure of your egg mixture. Repeat two more times with the flour until just combined.
- Spread batter evenly into your prepared sheet pan and spread with an offset spatula or knife all the way to the edges of the pan. Do not grease your pan.
- Bake for 8 minutes and then remove from the oven and place onto a cooling rack
- Immediately use a paring knife to carefully cut the edge of the sponge away from the sides of the pan. Dust the surface with powdered sugar. Place another piece of parchment on top of the cake, then another cooling rack and flip over to release the cake from the pan.
- Remove the parchment paper carefully and dust the surface with more powdered sugar.
- Place a tea towel over the top of the cake and carefully roll into a spiral. Place into the fridge to cool for one hour before filling with frosting.
Stabilized Whipped Cream
- Sprinkle your gelatin over the water and let bloom for 5 minutes.
- Melt gelatin for 5 seconds in the microwave. If not fully melted do another 3 seconds. You can tell gelatin is melted when there are no granules of unmelted gelatin visible. Add in 1 teaspoon of cream and stir to combine
- In a cold mixing bowl, whip your heavy cream to soft peaks. Add in your powdered sugar and vanilla.
- Turn your mixer down to low and drizzle in your gelatin and mix until whipped cream forms firm peaks (but not curdled)
Roll Cake Assembly
- Carefully unroll your cooled sponge. It may crack a little towards the very center of the spiral and that is normal.
- Spread a thin layer of your whipped cream and layer chopped fresh fruits like strawberries or blackberries or even mix together if desired.
- Carefully roll your cake back up. Cut the ends of the roll cake off so they look nice and clean and then transfer to a platter.
- Dust the surface of the roll cake with more powdered sugar, swirls of whipped cream and more fresh berries.
- Serve chilled. It will last for three days covered in the fridge.



Lisa says
Recipe not correct for pattern too thin
The Sugar Geek Show says
Really? It's the exact recipe that I have used three times now.
Marlene Beita says
Hello, Can I make these ahead? If so, how far ahead.
Thank you for making it look so easy. I LOVE your recipes so much!
The Sugar Geek Show says
Thank you! this is a fun one to make! you should definitely give it a try
Vanessa H says
Oh my goshhhhh have I just saw a stainless steel bowl on the Bosch? I want one! How can I get it? Or it’s just a sponsor test u are doing.
I have made this recipe for 3 years in a row and we love it? Best wishes happy new year and kisses to Avalon and Ezra. Much love and respect
Vanessa
The Sugar Geek Show says
Here's my affiliate for the stainless steel mixer! http://shrsl.com/21n8r
Harriet says
I made this this evening and was very pleased with the ease and taste. I added freeze dried blackberries to my buttercream. Yum!
Only one hiccup...I forgot to flip the cake so the pattern was on the outside. ? oops!
The Sugar Geek Show says
Haha I have been there lol
Becks E says
Thanks Liz for this recipe.i made it..it rolled perfectly but it was dry to eat..where did I go wrong..I did take abit if time folding the
flour in.could that have been my downfall
The Sugar Geek Show says
You didn't do anything wrong, sponge cake is not super moist 🙂 You can brush it with simple syrup if you like for extra moisture but the whipped cream is basically where you get most of the moisture from
Becks E says
Ohhhh thank you for a 2nd there I was doubting myself..I'll have to use simple syrup as I'm a home Baker and I can't use cream.so I fill with buttercream and I also use fruit filling like compote..thank you Liz I appreciate
Sue says
Wasted a lot of time and ingredients. I am
An experienced baker. Got a perfect ride but timing stated was way off. Even gave it another 5 min. Browned a little. Complete flop! Raw!
Elizabeth Marek says
Hi Sue, sorry the cake didn't work out for you. As you must know, not all ovens are created equally. I assure you the timing is exact for my own oven but times always need to adjust if the cake is not finished baking. You could have just baked it for longer until it was not raw.