
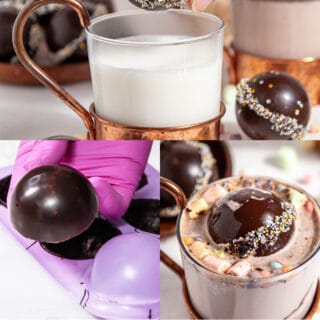

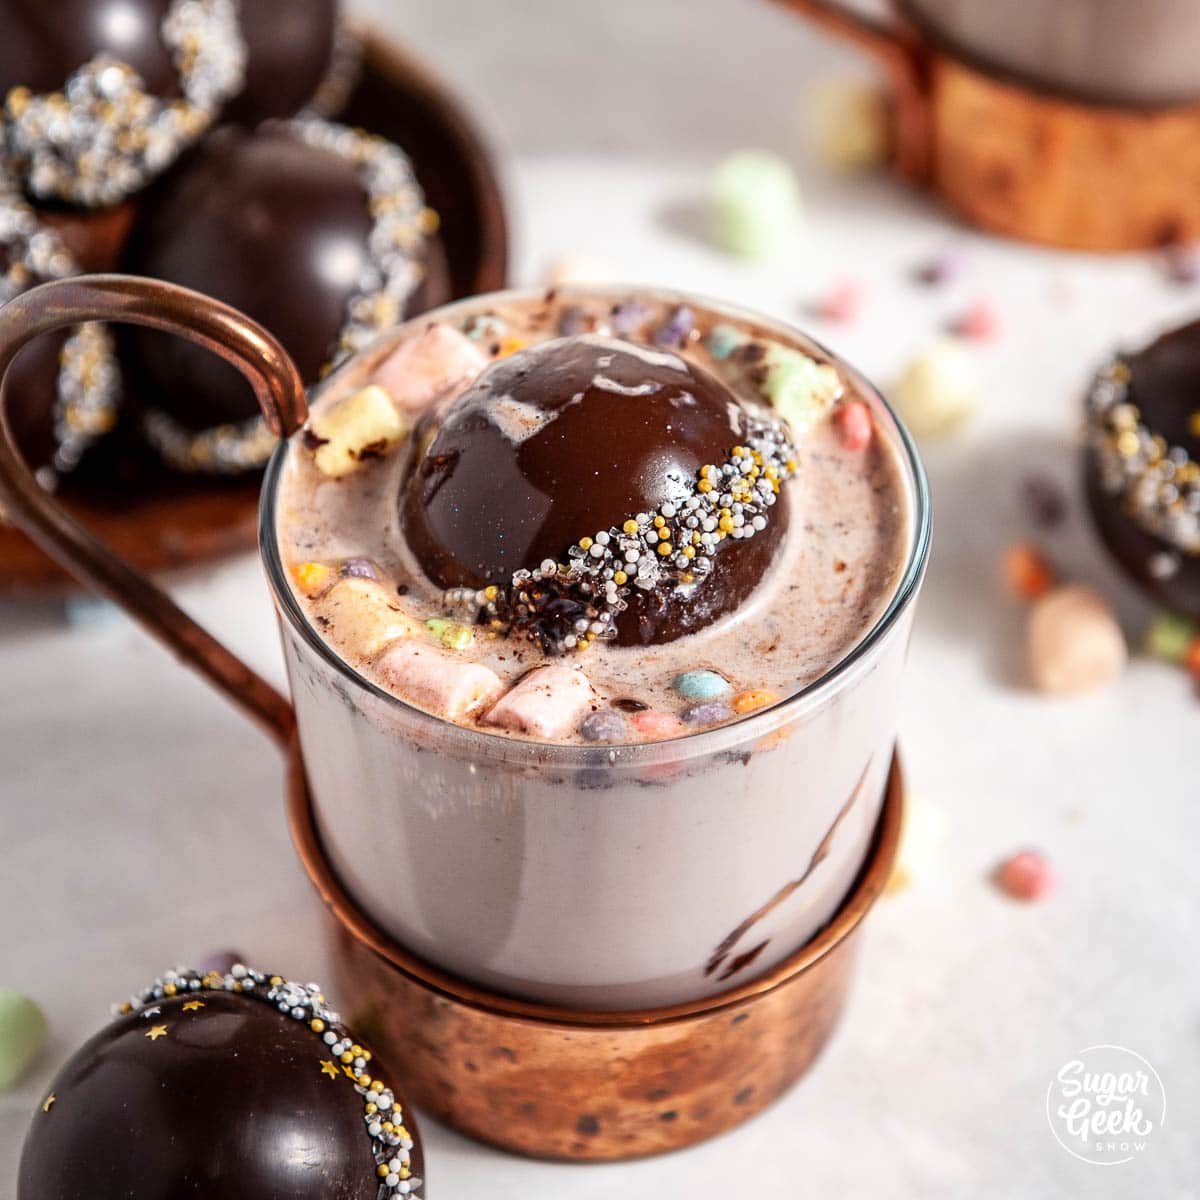
Hot chocolate bombs are chocolate spheres filled with hot chocolate mix and lots of marshmallows! Pour steaming hot milk over the top and watch the chocolate melt away and release those marshmallows into your milk. So much fun and makes a great gift!

I created this recipe back in 2019 when hot chocolate bombs were just beginning to be a thing. Originally posted by Eric Torres Garcia, who now has a cocoa bomb company! The idea went mega viral and soon everyone wanted to make cocoa bombs.
I noticed a lot of people making them were using low-quality chocolate or fake chocolate to make their bombs and having lots of problems. This recipe shows you how to make the most perfect hot chocolate bombs from high-quality, tempered chocolate that actually tastes delicious!
What's In This Blog Post
Ingredients and tools needed
Making hot cocoa bombs isn't too complicated, but there are a few tools and ingredients to make hot chocolate bombs you need to have on hand.
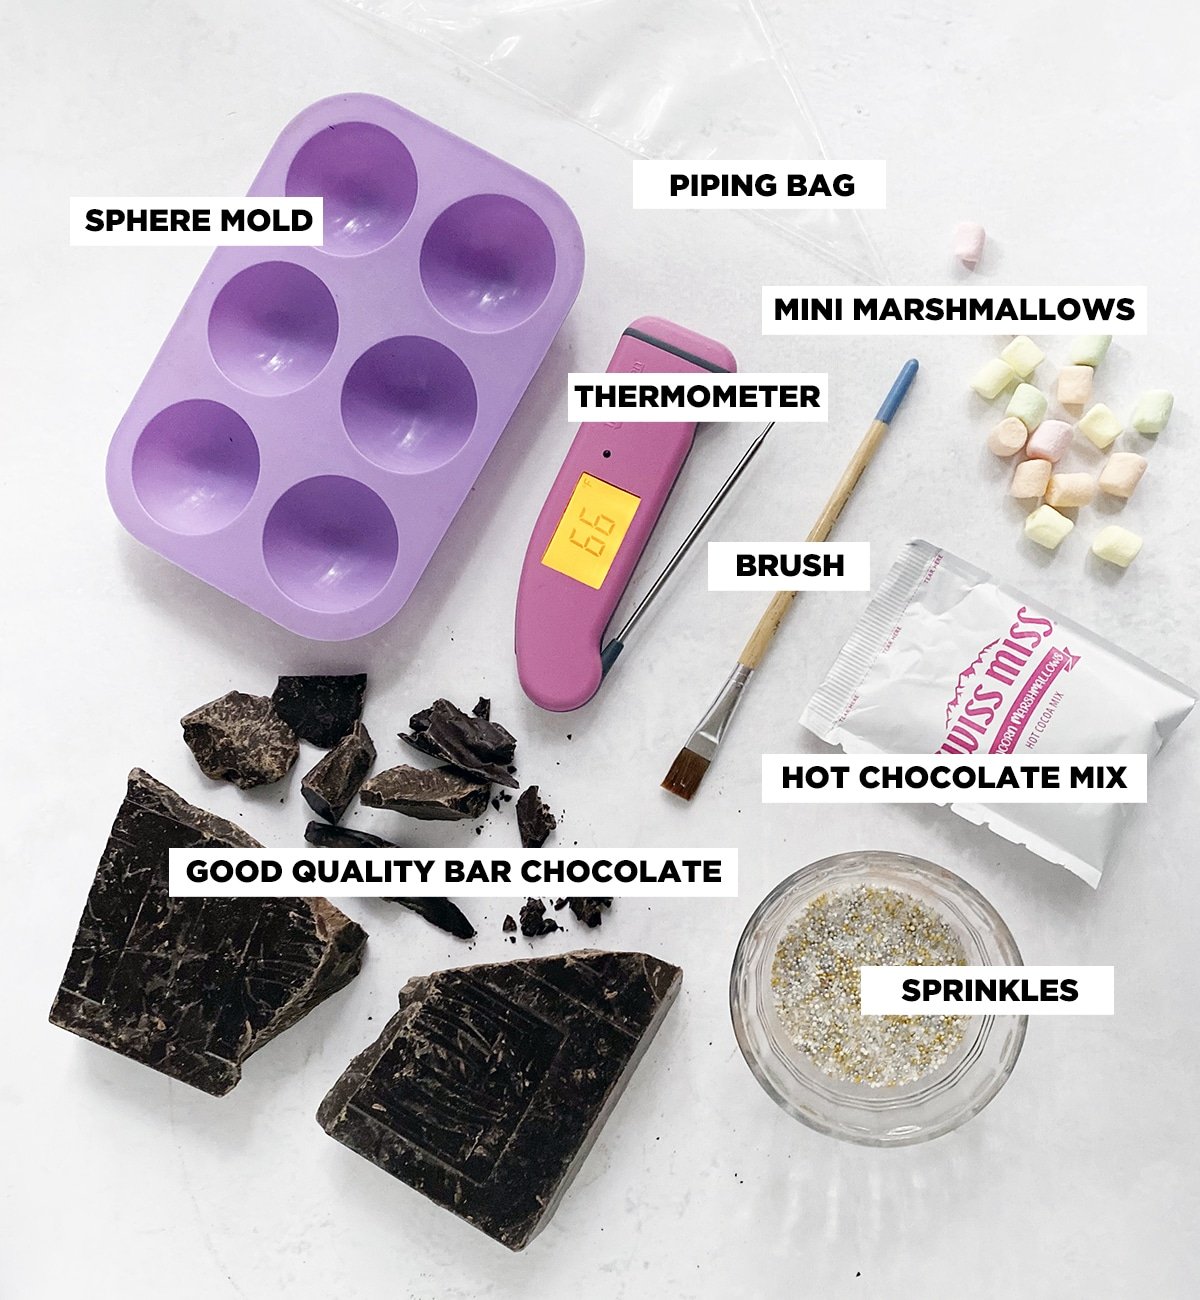
- Good quality chocolate. I like to use Callebaut, but any chocolate will work. Just remember, the better it tastes, the better hot chocolate bomb it will make!
- A thermometer to keep track of the temperature of your chocolate. Absolutely a must. Don't even attempt this without one. You can buy food thermometers at the grocery store in the kitchen supplies aisle. I'm using an infrared thermometer because it's a little bit easier to keep clean.
- Silicone sphere mold to make your bombs. This is the easiest mold to use if you're not familiar with tempering chocolate. I will also show you how to use acrylic sphere molds in the recipe card below for you overachievers out there.
- Bench scraper if you are using an acrylic mold. You don't need one for silicone molds.
- Spoon for smoothing the chocolate.
- Piping bag for sealing together the spheres.
- Parchment paper if you're using an acrylic mold.
- Hot chocolate mix of your choice. You can use any kind you like but we stick to the classic Swiss Miss flavor.
- Mini marshmallows of your choice. I like these mini marshmallows because you can fit a bunch in one bomb making them more dramatic!
- Sprinkles to decorate the outside if you want. I like these sprinkles from wilton because they have a nice variety.
- Hot Chocolate Bomb Labels These were made by my friend and they are so cute!
How to make hot chocolate bombs
Here's a rundown on how to make hot chocolate bombs! This is such a fun thing to do with a group or with your family. The first thing we will need to do is temper our chocolate.
Tempering just means we are melting the chocolate at a controlled temperature so that it sets up again. If you've ever melted chocolate and it never set, or it grew weird white spots, you understand why tempering is important.
Don't worry, we're doing this the easy way in the microwave, and it only takes 5 minutes! If you don't have a microwave or if you prefer, you can use the seeding method.
Temper your chocolate
If you're not comfortable with tempering chocolate, you can use merkens compound chocolate. It does not require melting but it doesn't taste as good as real chocolate and it doesn't melt as well sometimes.
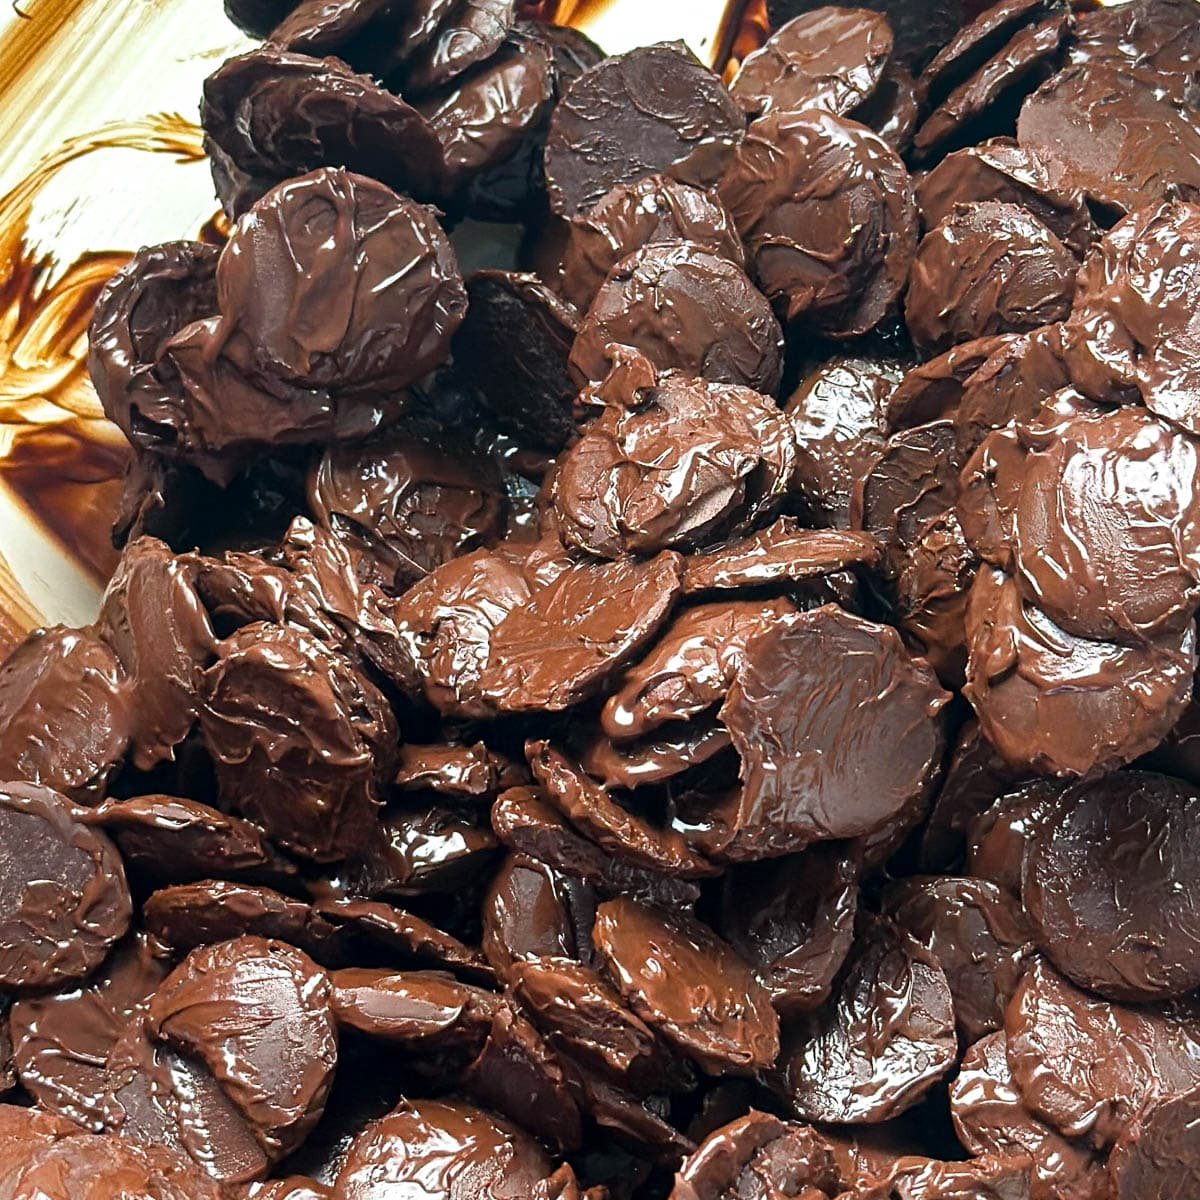
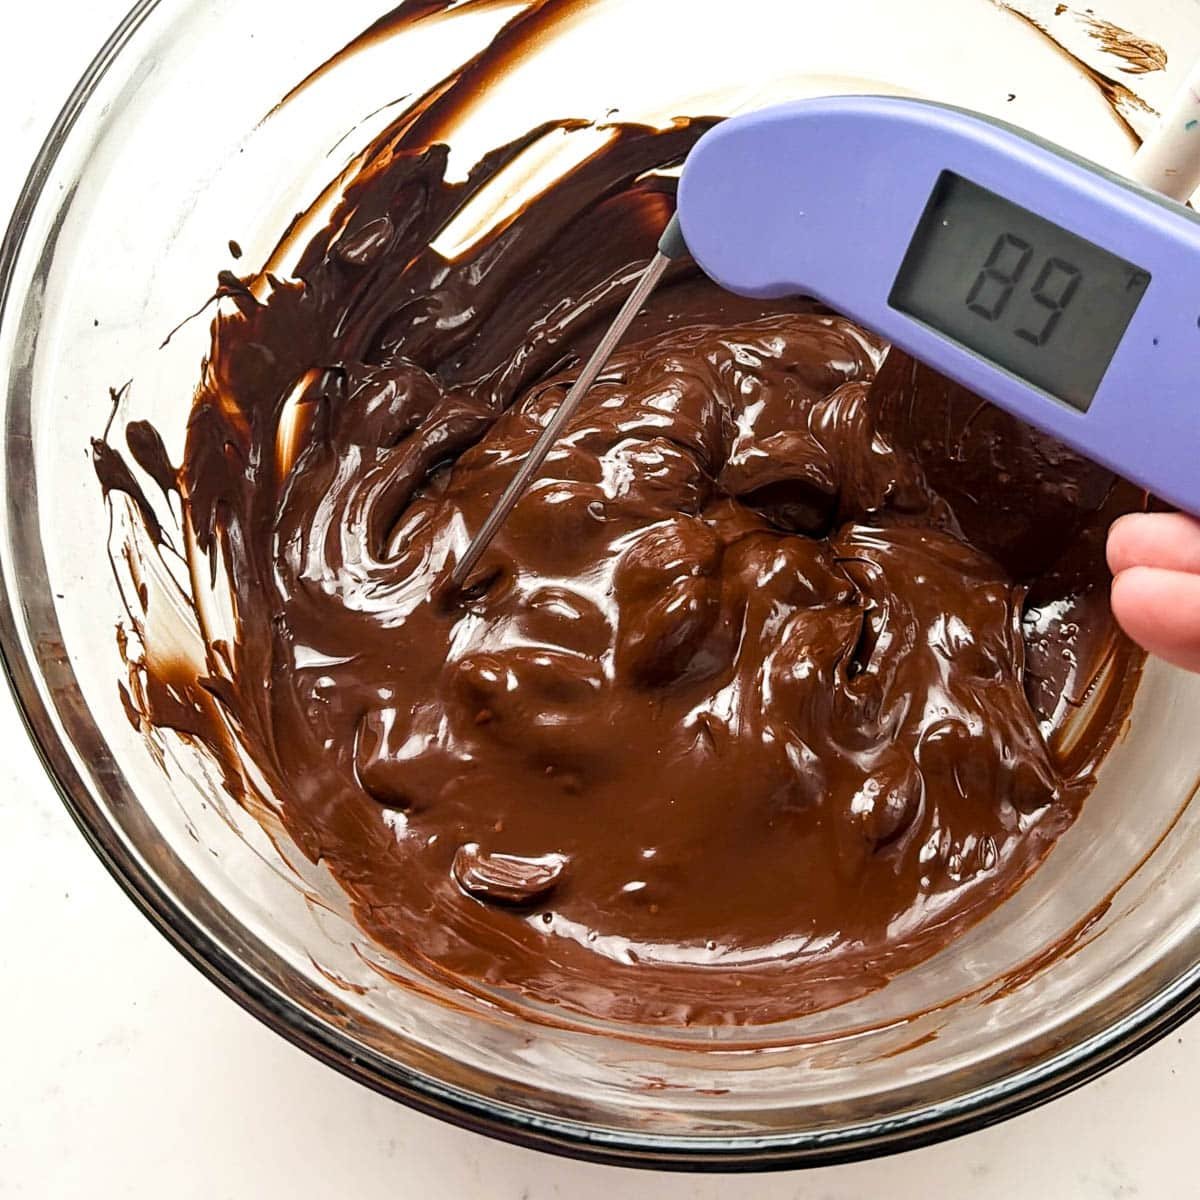
- Melt chocolate at 50% power in short 15-second bursts, stirring after each burst until about 75% melted. The point here is not to overheat, but to keep the temperature of the chocolate as low as possible. Your chocolate should be less than 90ºF.
- If your chocolate gets to hot, chop up some of your chocolate into small pieces and add it to your hot chocolate in small amounts to cool down your chocolate.
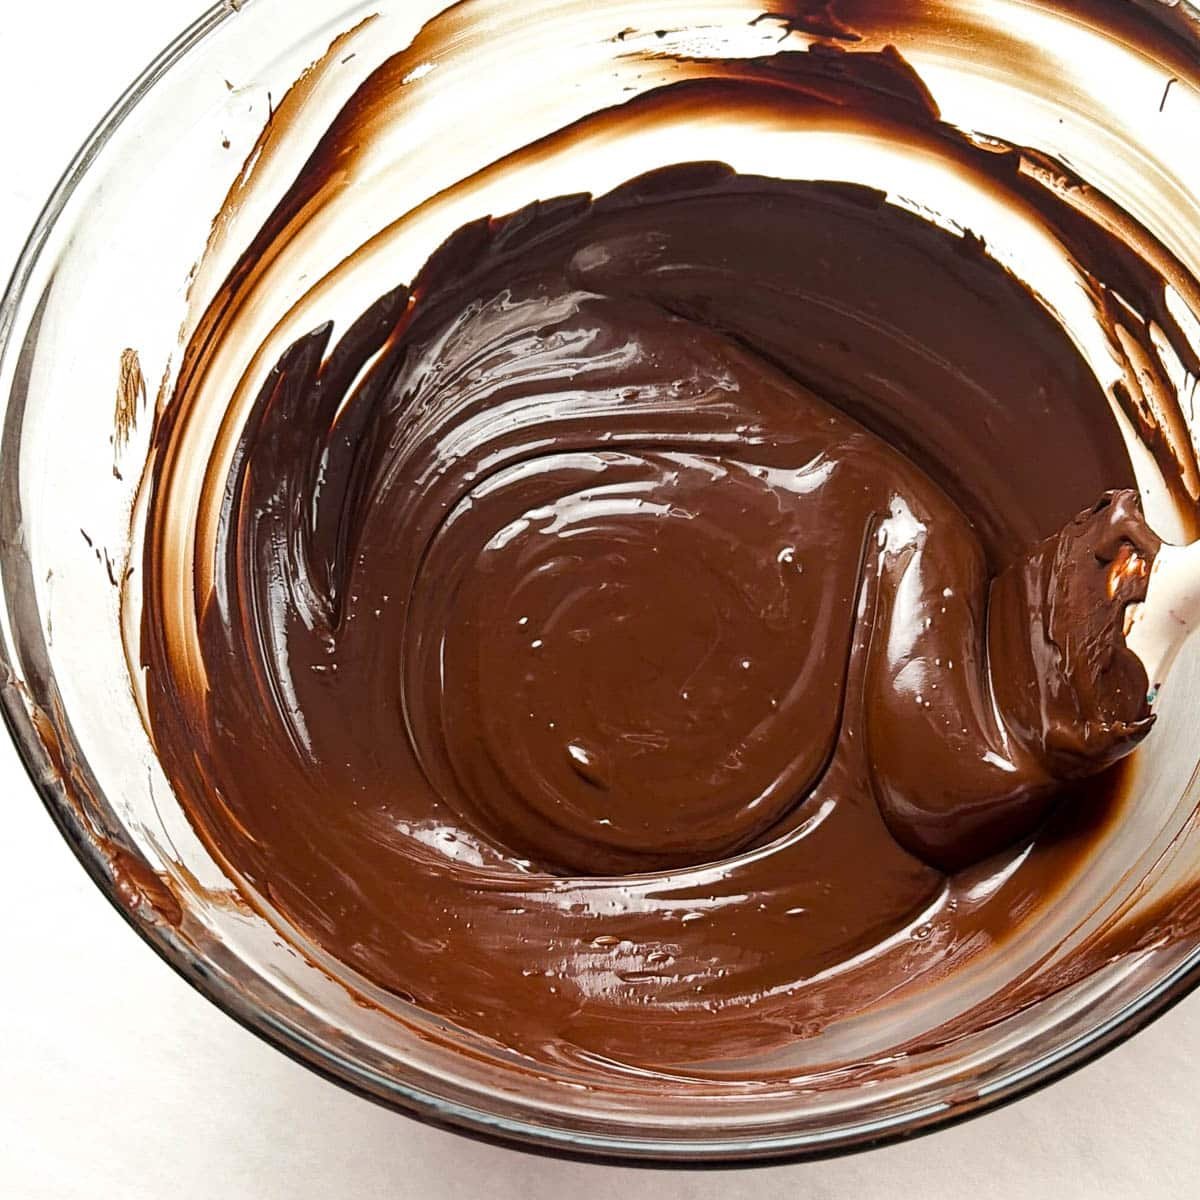
- Keep stirring without heating. The residual heat from the bowl will melt the rest of the chocolate.
- At 90ºF, you should only have tiny unmelted pieces of chocolate in the bowl. Keep stirring.
- If needed, return the bowl back to the microwave for another 10 seconds and keep stirring until everything is melted.
- This process ensures a shiny finish and firm snap, which makes the best hot chocolate bombs!
Make the hot chocolate bomb shells
I recommend making all your shells first. Your chocolate will begin to cool and set up, so working fast is best. If your chocolate does set up, you can re-melt it in 5-second intervals and stir to get it melted again.
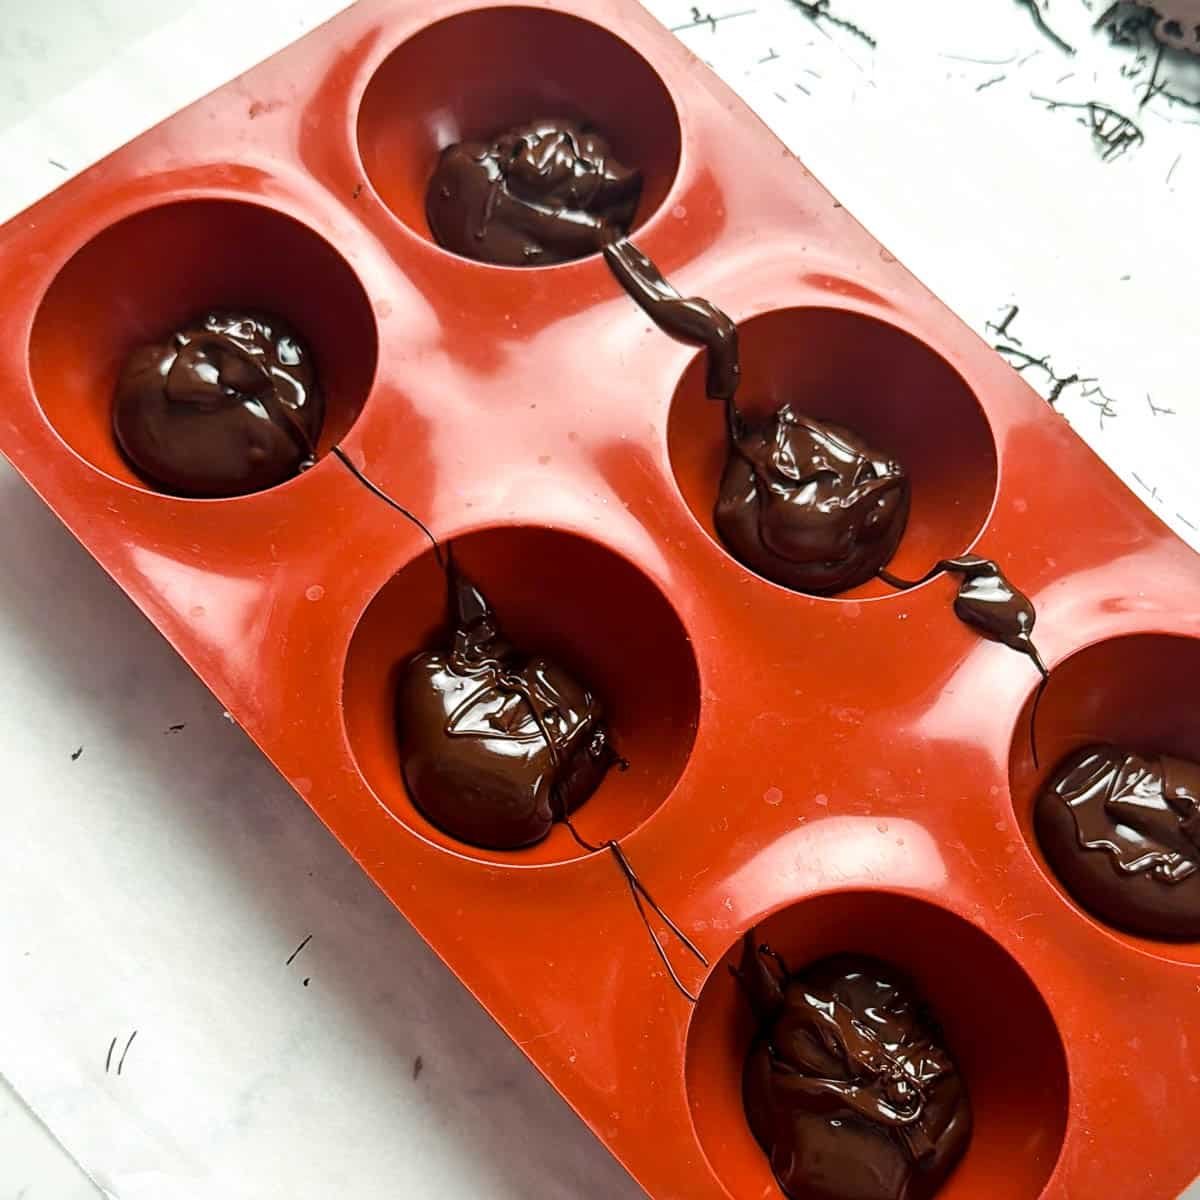
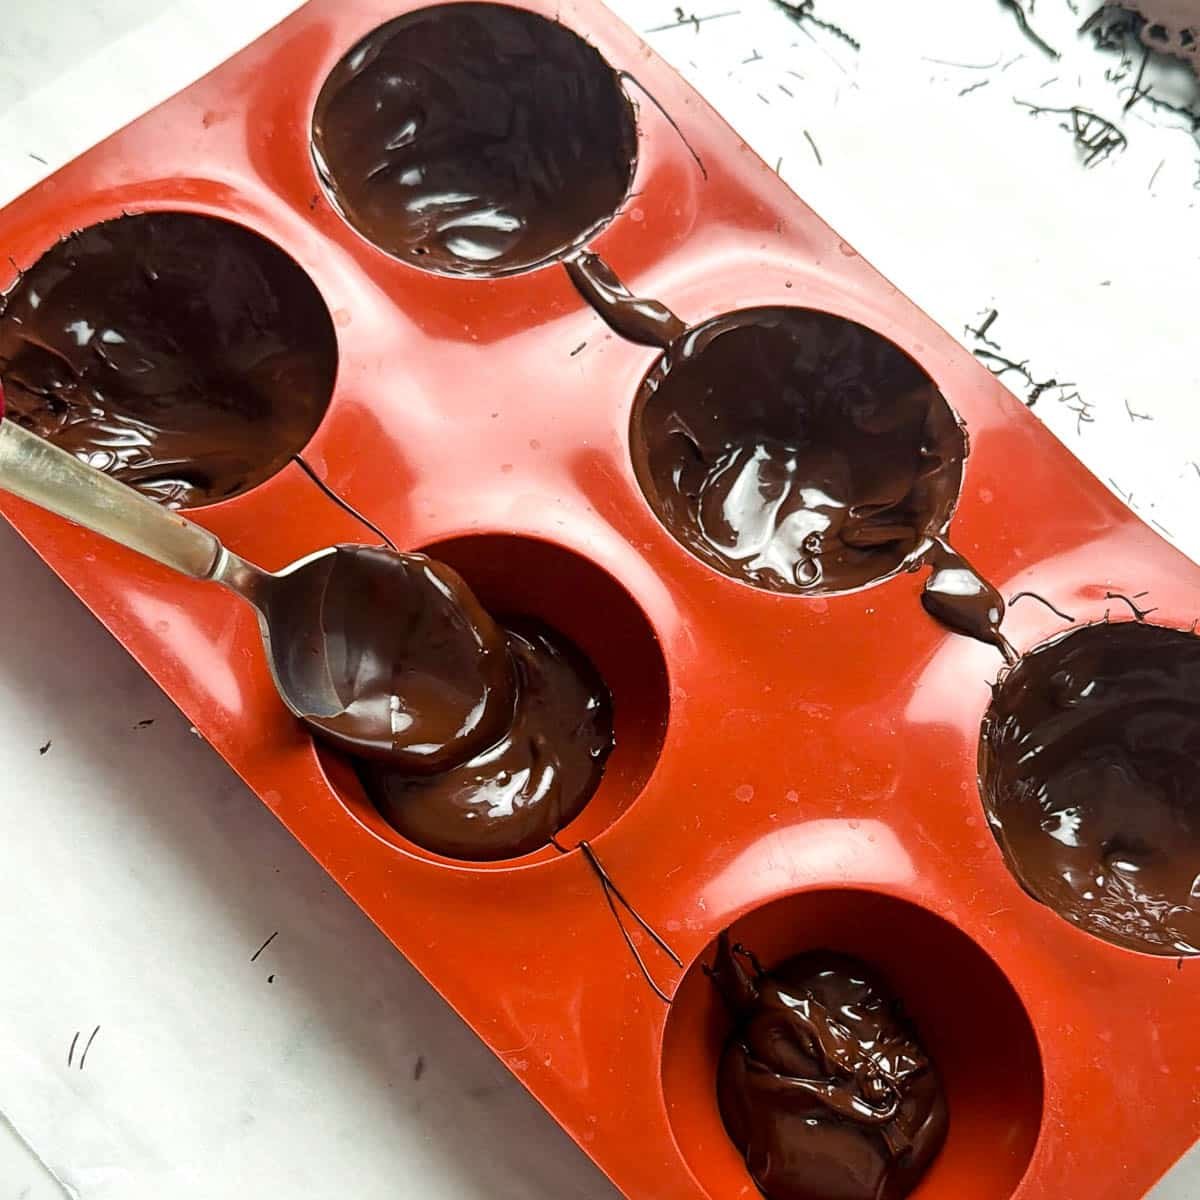
- Fill your mold halfway with the melted chocolate. Use a spoon to gently coat the mold in chocolate, all the way up to the edges.
- Flip the mold upside down to empty out the excess chocolate onto the parchment paper. You can reuse this chocolate later!
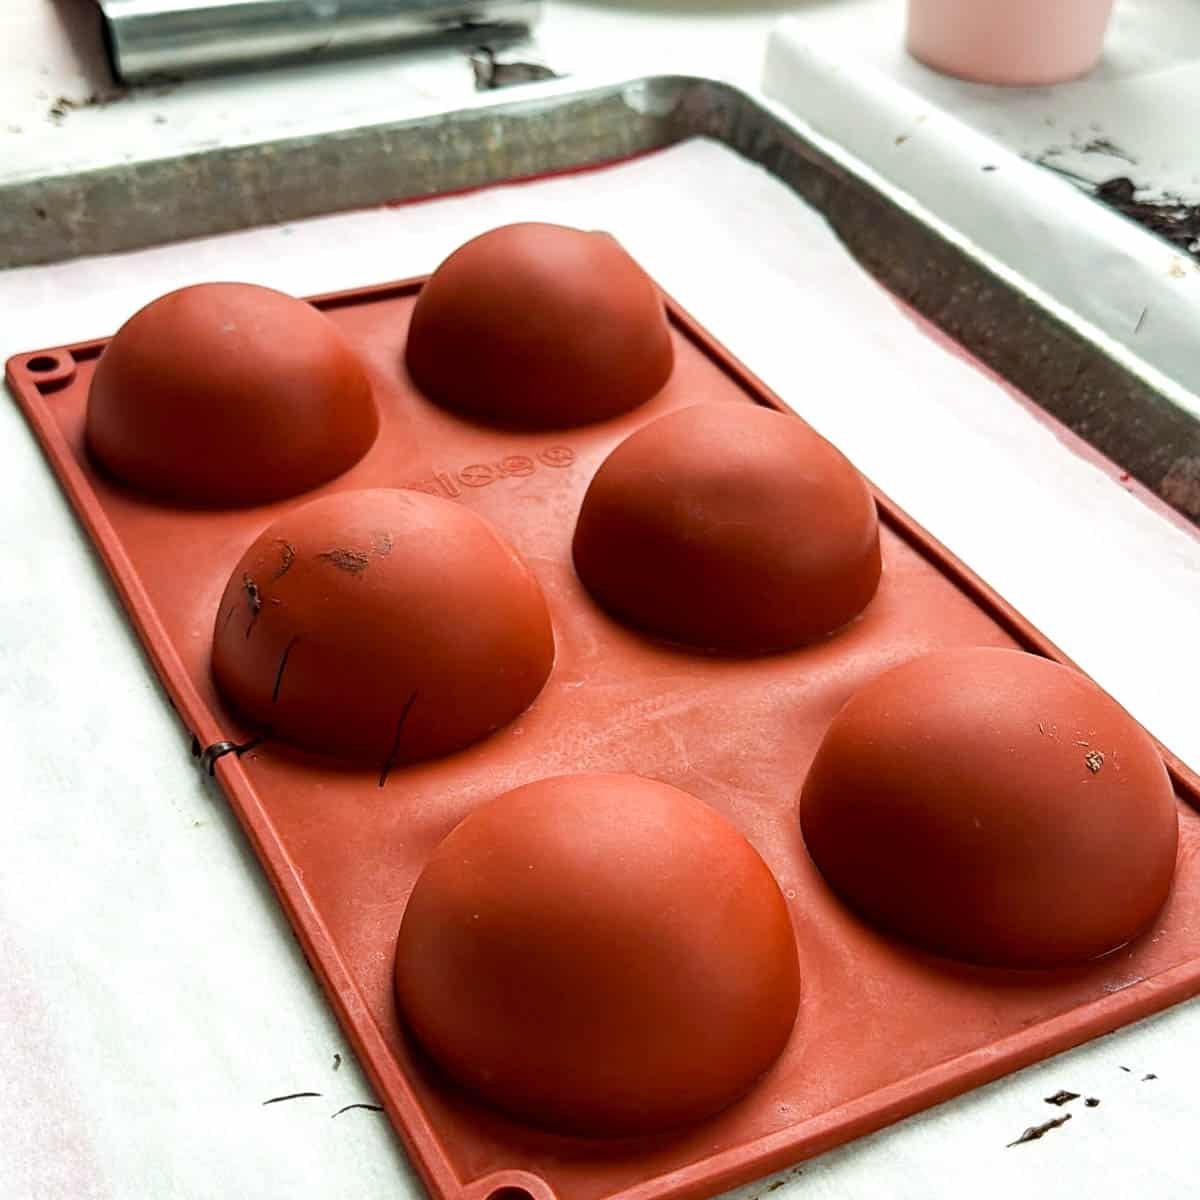
- Place the mold upside down on parchment paper to set up. Setting up should only take 5-10 minutes. You can place them in the fridge to speed up the process but its not necessary.
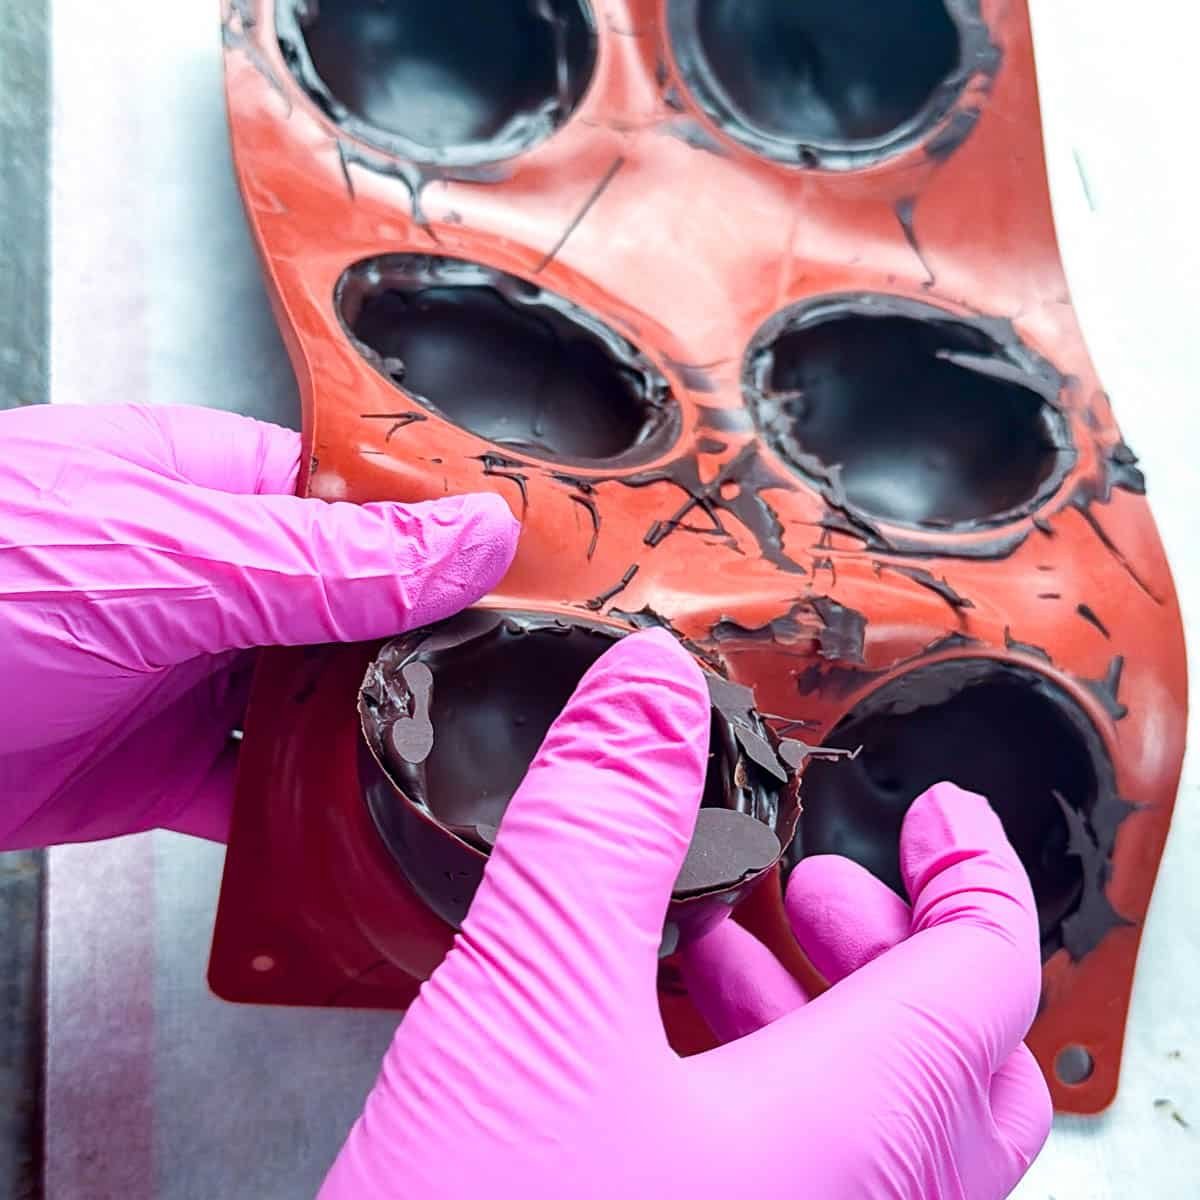
- Remove the shells by pressing gently from the bottom and remove the shells from the molds, and set aside for assembly.
Assemble the hot chocolate bombs
Assembly goes fast! Have all your shells, sprinkles, and cocoa mix ready to go. Put some chocolate in a piping bag and set it in a drinking glass that has been warmed for 1 minute in hot water or the microwave to help keep the chocolate melted. It's also a great way to keep your countertop mess-free.
I also use a hot ceramic plate (heated in the microwave) to melt my spheres to get them flat and to secure them together. You could also use a skillet warmed for only a few seconds. You don't want to burn the chocolate.
- Warm a ceramic plate in the microwave for a minute or two until it's quite warm. Use this place to slightly melt the shells to clean up the edges and make sure they are flat.
- Place some parchment paper over your work surface to catch excess chocolate during drizzling.
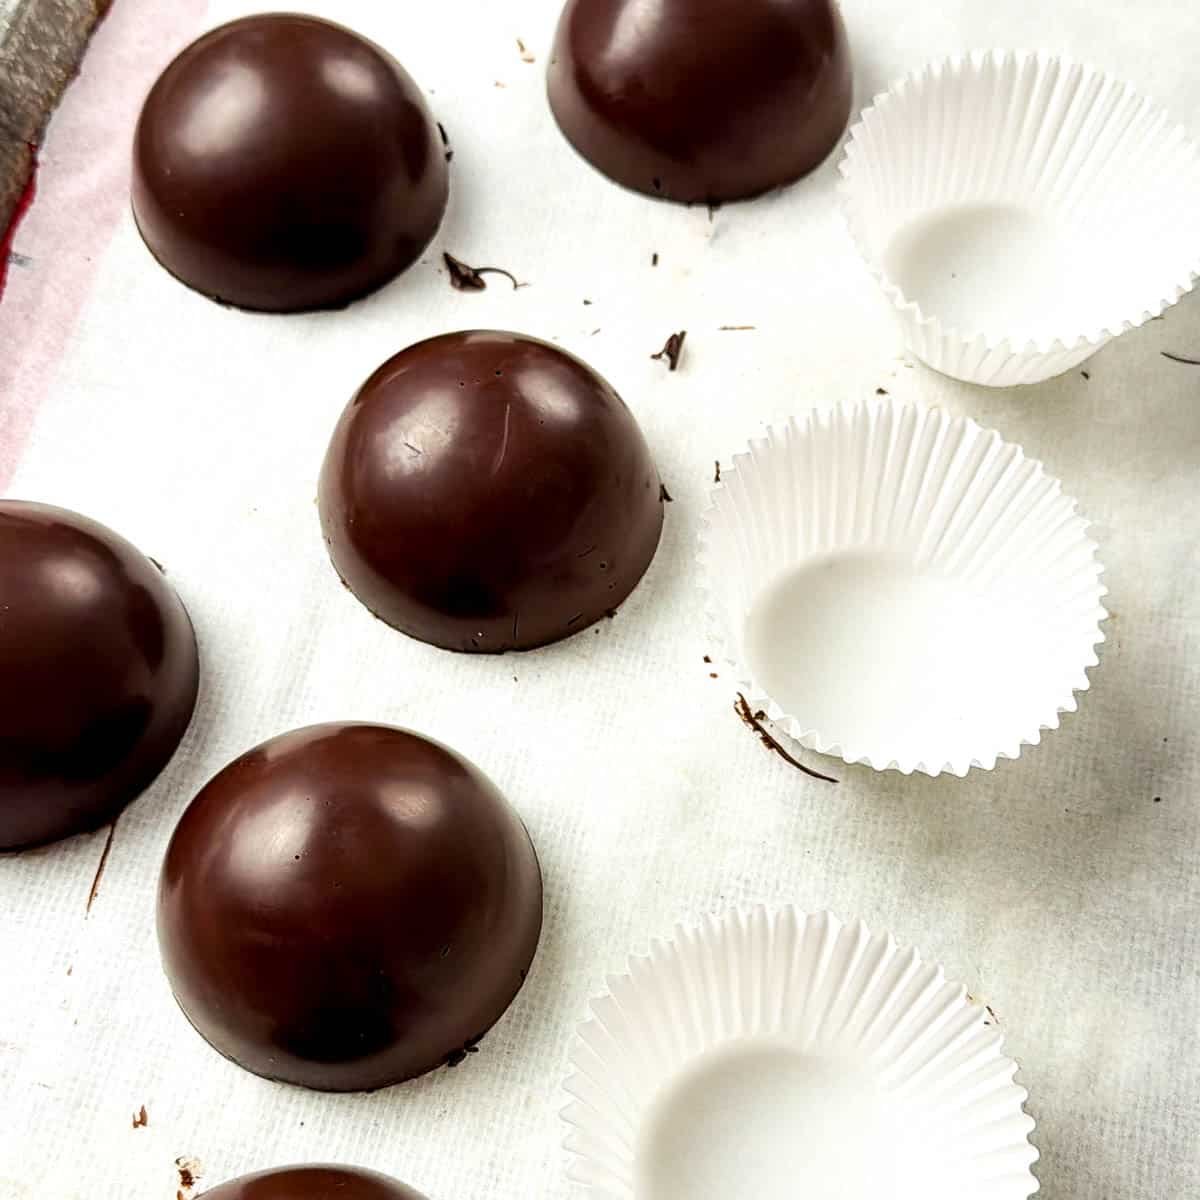
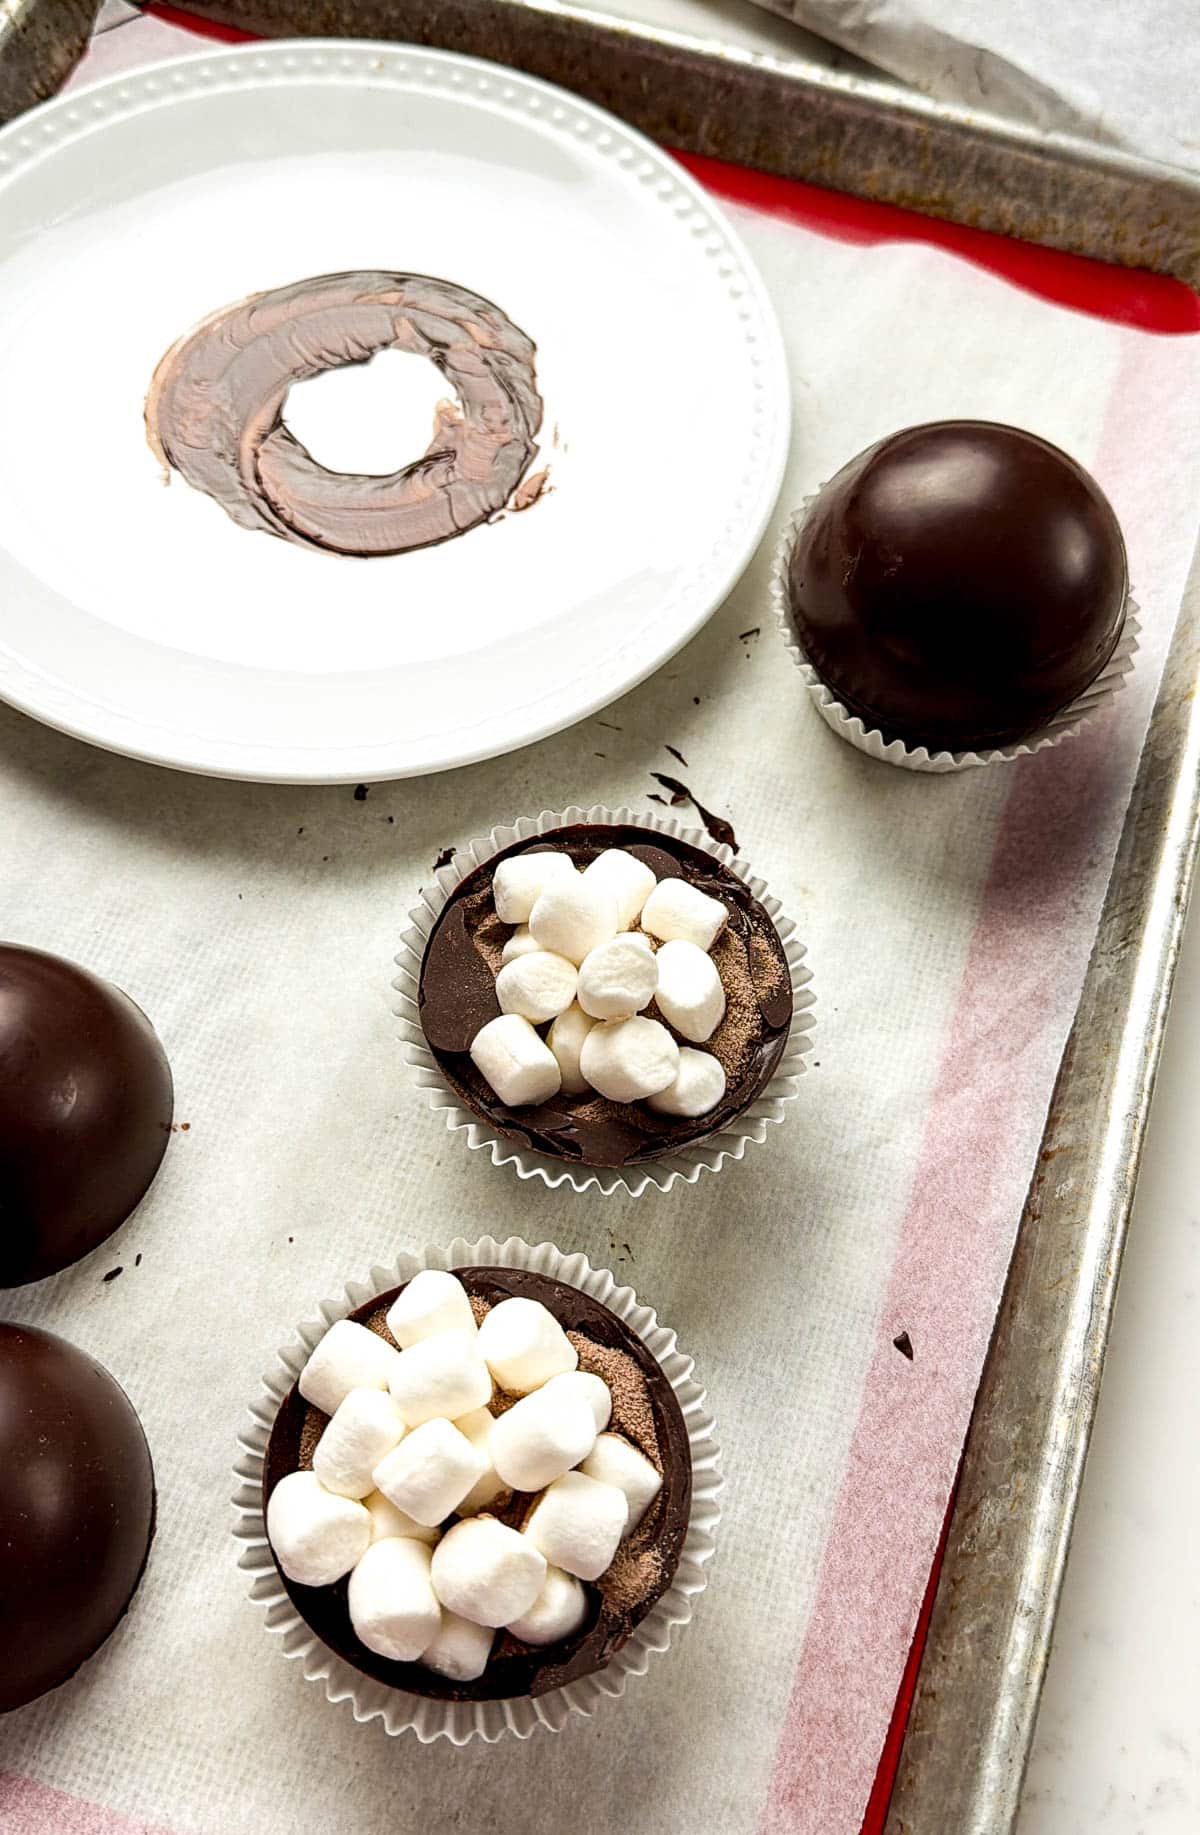
- The easiest way to assemble is to place the first shell of the mold into an empty cupcake liner. This holds it in place while you fill.
- Fill the shell with hot cocoa mix and sprinkles!
- Make sure your plate is hot again.
- Warm the top shell edge slightly and place it on top of the filled shell.
- Hold for 10 seconds to seal and set it aside.
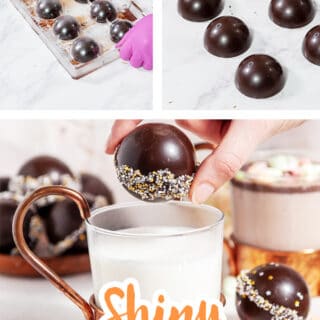
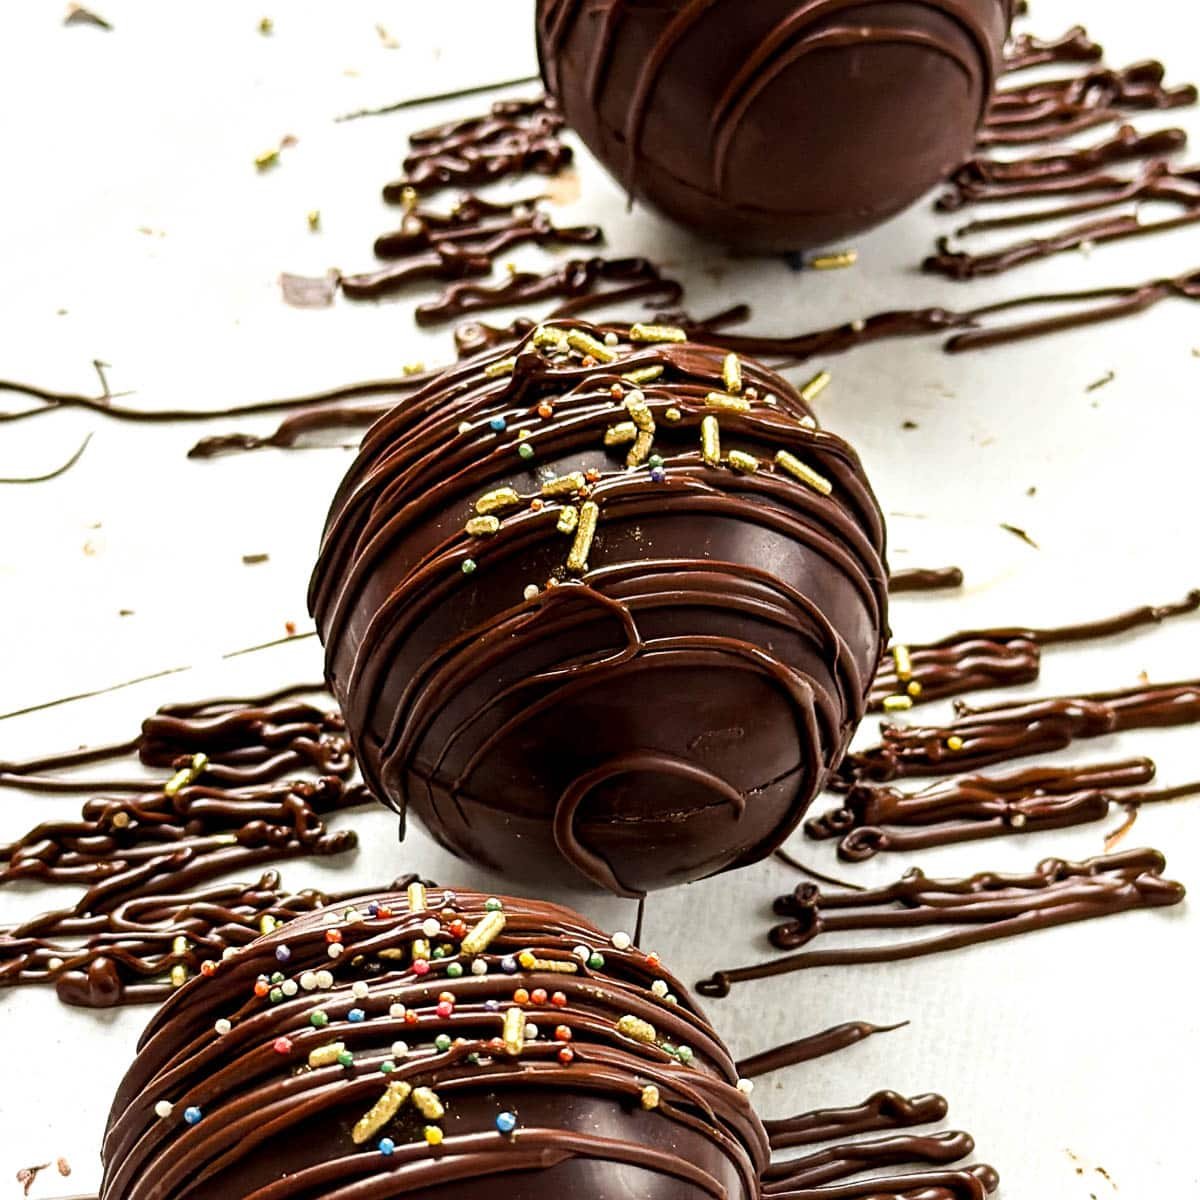
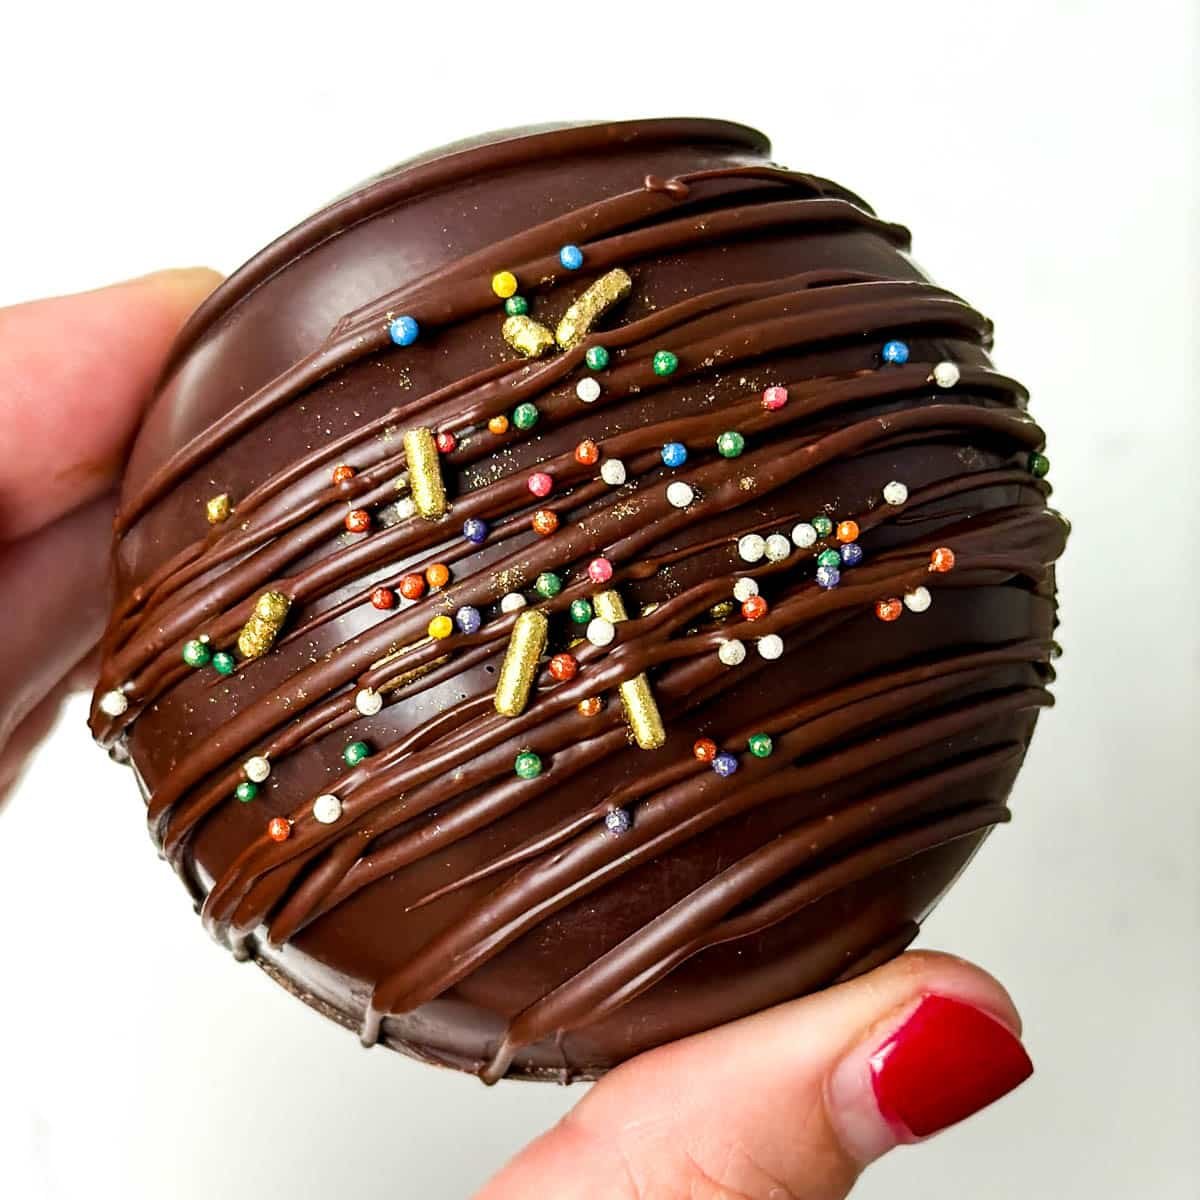
- Now it's time to decorate! You can decorate any way you like, but I enjoy doing a simple drizzle of chocolate and adding some sprinkles on top! You may need to rewarm the chocolate for 10 seconds to make it smooth again. I use a piping bag to pipe over the bombs, then immediately add the sprinkles.
How to use hot chocolate bombs
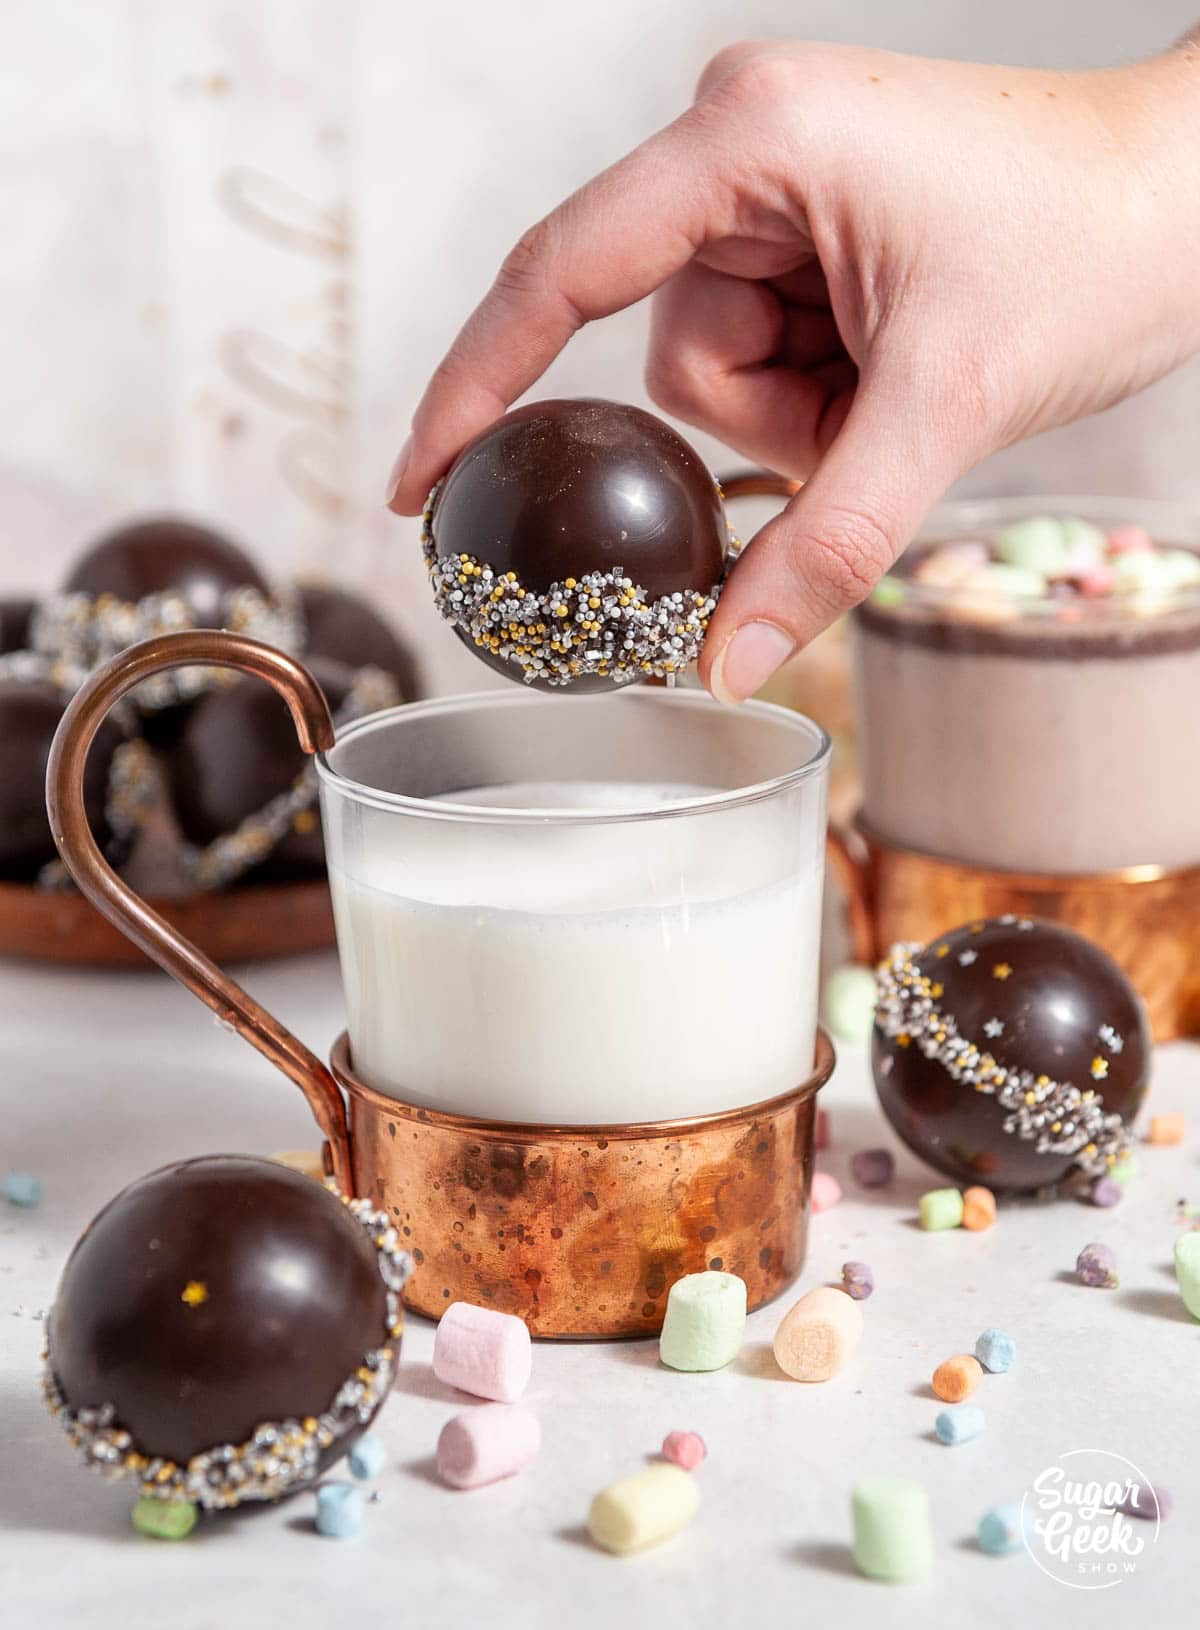
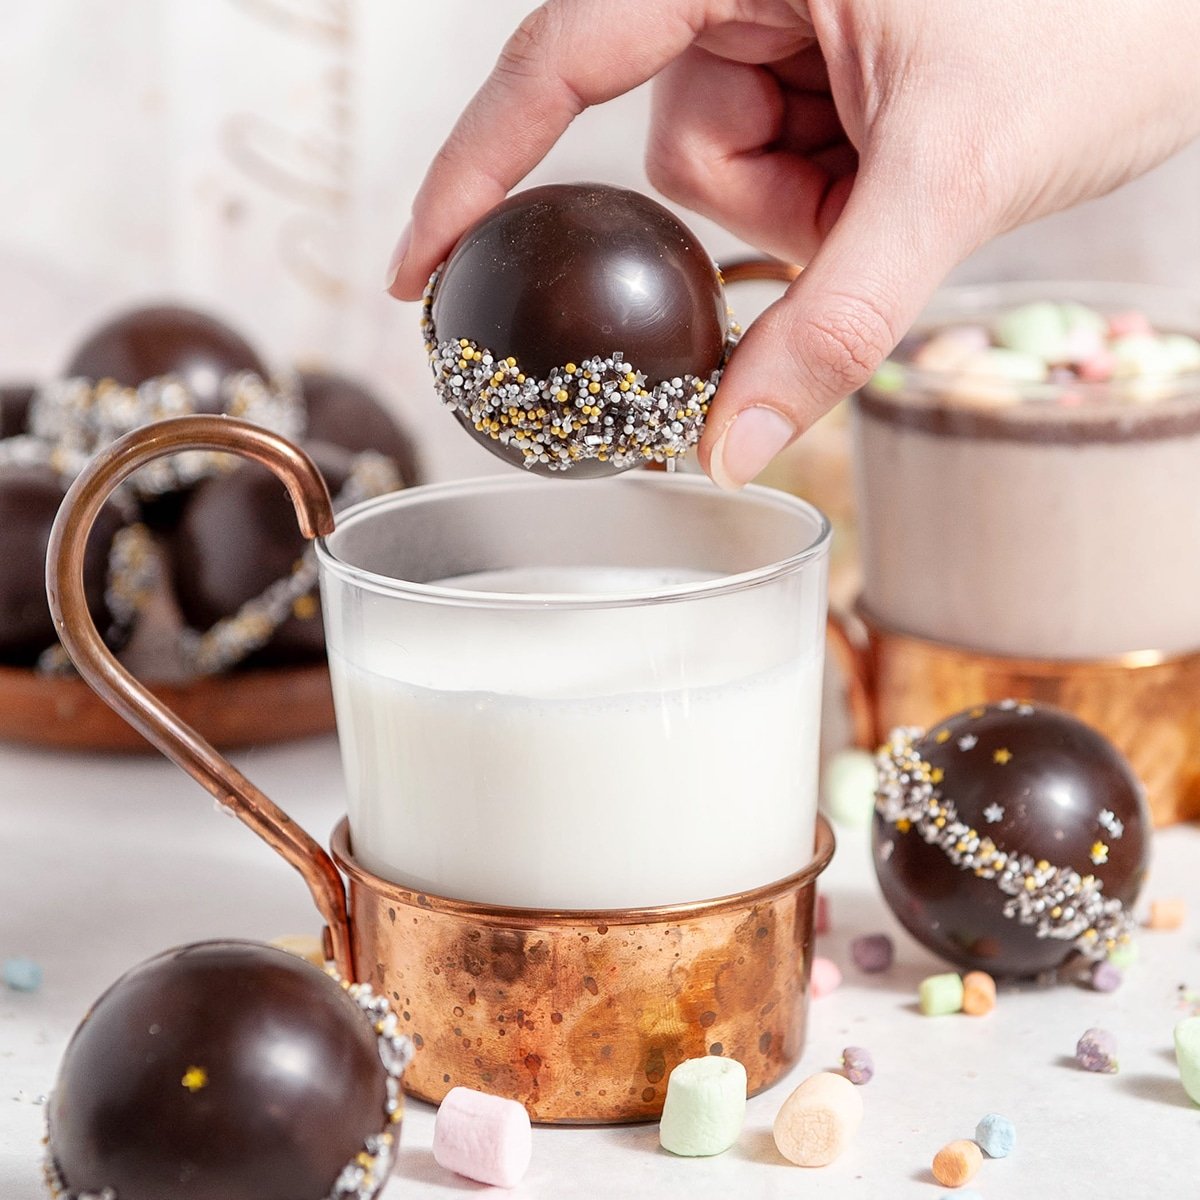
I tested these hot chocolate bombs out in various amounts of milk and found that 14 ounces was about perfect. I heat my milk until it's steaming (not boiling). Place the hot chocolate bomb in the bottom of the mug and pour the hot milk on top. The hot cream opens up the bomb, and all the marshmallows escape! So fun!
Use a spoon to stir so that the cocoa and chocolate melt into the hot milk.
Hot chocolate bombs make a great gift! Wrap them in a plastic bag with a fun tie and some instructions for use. Put it in a mug and give them as gifts for the Holidays! Nothing says I love you like hot chocolate!
Hot chocolate bomb flavor variations
Hot chocolate bomb variations go beyond classic cocoa. Here are some other flavor variations to consider. Using flavored chocolate and switching up your sprinkles for crushed candies can change the flavor.
- Peppermint Mocha - add crushed candy canes with the marshmallows inside and to the drizzle on the outside.
- Salted Caramel - Use caramel-flavored hot chocolate mix on the inside and crunched up caramel bits on the outside. I like this caramel flavored mix from Swiss Miss.
- Cookies & Cream - Make your hot chocolate bomb shells using white chocolate and mix in crunched up oreo cookies.
- S'mores - Just add a few crunched up graham crackers to the drizzle and torch a few marshmallows, and voila! S'mores hot chocolate bombs!
- Mocha - Add a scoop of instant espresso mix into your hot chocolate bombs for an extra caffeine boost!
Frequently Asked Questions
Yes, you can ship these. Package them in tins inside the cupcake liners and place shredded paper around them to keep them from breaking.
Yes, you can. The reason we chop the chocolate is just so that it melts at a lower temperature.
A melting pot has a pretty high temperature but you can definitely use the pot to melt the chocolate and then use chopped chocolate to seed it and get it tempered again. Just pay attention to your temperatures.
There isnt anything in hot chocolate bombs that will spoil. They will last as long as the ingredients used last. Check expiration dates for more information.
You can use real chocolate (contains cocoa butter) or compound chocolate (like candy melts) and get good results. The main difference is that real chocolate will taste better and melt better in hot milk. Compound chocolate does not require tempering but does not taste as good and tends to not melt as well.
More Chocolate Recipes
How to temper chocolate three ways
6 Tempered chocolate techniques
Recipe
Equipment
- Thermometer
- 2 ½" Sphere Mold (silicone or acrylic)
Ingredients
- 24 ounces semi-sweet couverture chocolate I prefer Callebaut, you can also use any high quality bar chocolate. You can use candy melts, if you're using a silicone mold but they don't taste as good.
- 1 cup mini marshmallows
- 6 Tablespoons hot chocolate mix
Instructions
For Silicone Molds
- Place the chocolate into a bowl and heat for 30 seconds (my microwave is 1000 watts)
- Stir the chocolate, moving the chocolate that is on the outside, towards the center.
- Heat again for 15 seconds and stir again.
- Repeat this process until the chocolate is ALMOST melted but not fully melted. Never heating for longer than 15 seconds and never going above 90F. If you go above 90º you will have to temper your chocolate by seeding (see my blog post for more info)
- Stir until fully melted.
- Fill your molds halfway with chocolate and use a spoon to smooth the chocolate up to the edges, taking care to make sure the walls are evenly coated.
- Turn the mold over and shake out the excess chocolate.
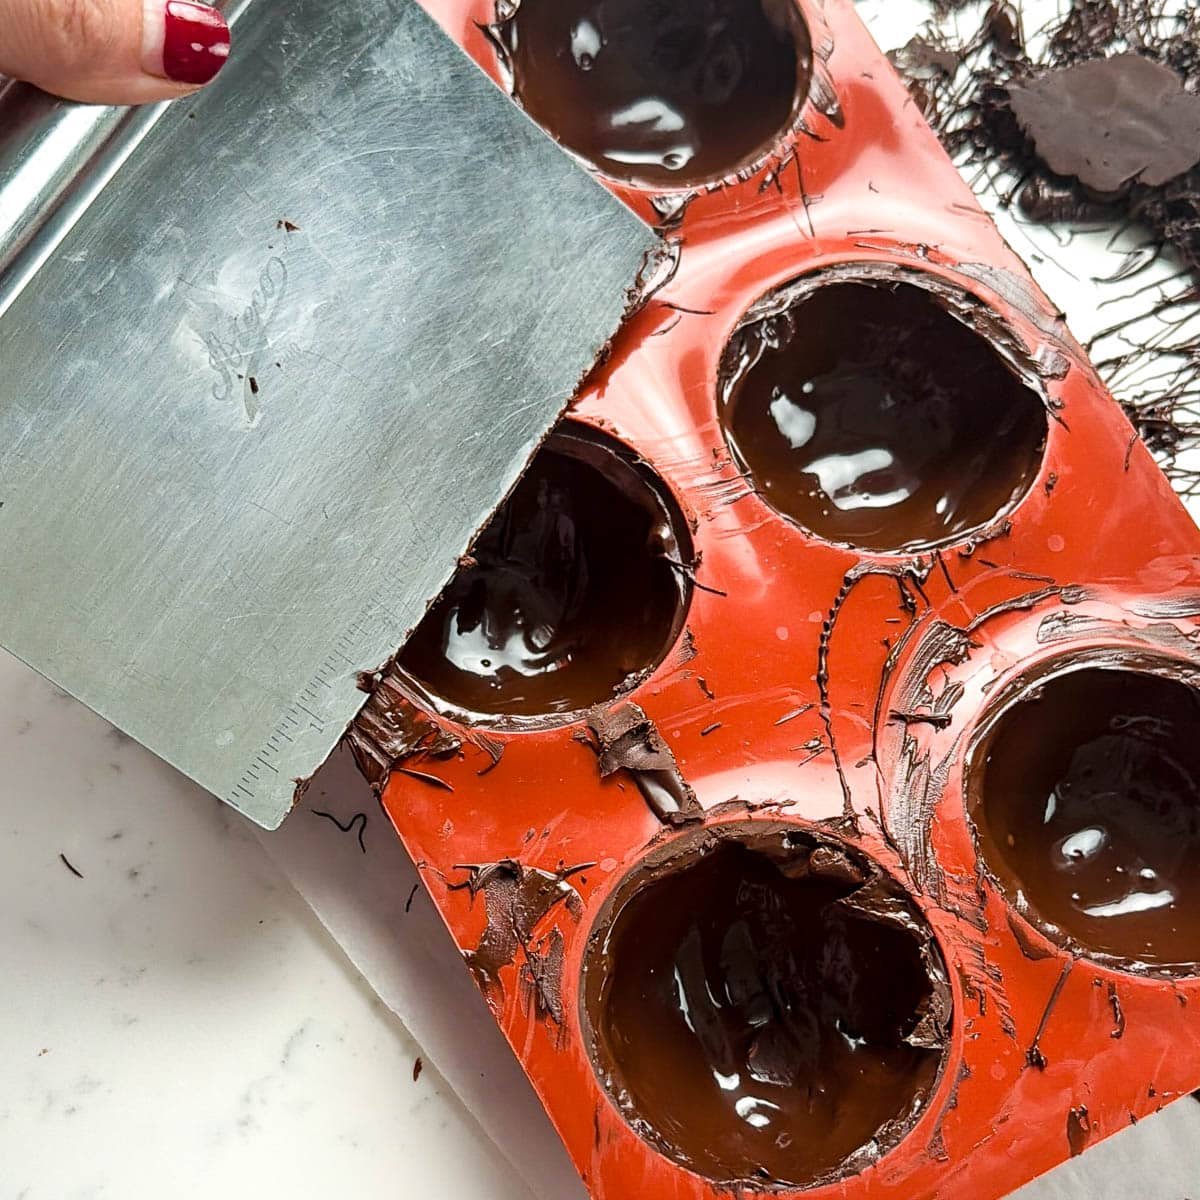
- Use a bench scraper to scrape off the excess chocolate.
- Turn the mold upside down onto the parchment paper and allow them to set up in the fridge for 10 minutes.
- Carefully remove the chocolate shells from the mold by gently pushing up from the bottom until the shell releases.
- Heat a ceramic plate and use it to smooth out the edges of the chocolate shells.
- Place the shells in cupcake liners for stability. Fill the shells with hot cocoa mix and marshmallows.
- If needed, warm the edge of the top shell once again on the plate and place it on top of the filled shell. Hold for 10 seconds to seal.
- Fill your piping bag with about ¼ cup of the leftover melted chocolate. Snip the tip off and drizzle chocolate over the hot chococlate bombs. Immediately top with some sprinkles.
For Acrylic Molds
- Chop your chocolate finely with a sharp chefs knife
- Add your chocolate to a bowl and microwave for 30 seconds (my microwave is 1000 watts)
- Stir the chocolate, moving the chocolate that is on the outside, towards the center.
- Heat again for 15 seconds and stir again.
- Repeat this process until the chocolate is ALMOST melted but not fully melted. Never heating for longer than 15 seconds and never going above 90F. If you go above 90º you will have to temper your chocolate by seeding (see my blog post for more info)
- Polish your mold with a paper towel to remove and residue from the inside to prevent the chocolate from sticking.
- Warm the acrylic mold slightly with a hair dryer or heat gun so it doesnt feel cold but not hot either.
- Pour the chocolate (at 90ºF) into the molds and tap on the table a few times to remove bubbles.
- Dump the chocolate back into the bowl, use the edge of your bench scraper to tap out as much of the chocolate as possible. You don't want the chocolates to be too thick.
- Scrape off the excess chocolate from the top of the mold back into the bowl.
- Turn the mold upside down onto some parchment paper to let the chocolate drain further and almost completely set. About 5 minutes. The chocolate should lift away from the parchment paper easily but still be soft.
- Scrape off the excess chocolate again and then place the mold into the freezer for 5 minutes.
- The freezer will cause the chocolate to contract and pull away from the mold. If it's not tempered, it will not contract and there will be no way to get the chocolate out. You can tell if your chocolate is tempered because if you look under the mold, it wont be stuck to the molds anymore. If you have a couple spots where it still is, it will be ok and still release with no problem.
- Quickly turn your mold over onto the table to release the chocolate from the mold. Now they are ready to assemble.
- Add 1 Tablespoon of hot chocolate mix to half the sphere and some marshmallows.
- Pipe some melted chocolate onto the top of the sphere at attach the top piece of the sphere. Pressing gently but firmly.
- Use a gloved hand to wipe away the excess chocolate for a clean look or roll in some sprinkles to finish decorating them!


Nicole says
Hi, Very excited to try these out. Do you just use the standard mini size marshmallows inside the bombs or are they smaller than mini. If so where do you buy them and if online would you happen to have a link you could share?
Thanks!
Elizabeth Marek says
I used mini and dehydrated. You can buy them online or you might find them in store
Katie says
Do you by chance sell these? My brother lives in Portland, so I was thinking of sending him some for Christmas.
Elizabeth Marek says
Sorry I don't
Khrisi Thiele says
Thank you for your video. It was very helpful. I'll be making these as soon as I receive my molds. What brand of sprinkles did you use? Everything I'm finding online looks a bit big and I loved the colors you used. Thank you!!
Elizabeth Marek says
I combined some sanding sugar and some non-perils
Joanna says
I cannot find the block chocolate with cocoa butter. I see sugar, cocoa beans & soy lecithin all over, but not one with cocoa butter. Thoughts on that?
Elizabeth Marek says
You might have to buy online
Wafaa Alwawi says
Thank you!!
Is one tablespoon of hot chocolate powder enough for a cup? Can I add more?
Thank you!!
Elizabeth Marek says
It is enough because you area also adding the chocolate from the cocoa bomb and sugar from the marshmallows
Yasmin Walters says
Just made these tonight! They came out perfect!!!!!!!! Thank you so much! My boys loved them.
Harriette Janicek says
Can you share other recipe combinations, like maybe adding Caramels to this or how about adding Cherry gelatin along with the cocoa mix to make a Cherry/Chocolate bomb.
Brandi Montelongo says
I’m excited to try this recipe out! I’m nervous about tempering the chocolate! Can you tell me the different temperatures for the different colors please. Going to give them away to family
Elizabeth Marek says
Here is my blog post on tempering different types of chocolate https://sugargeekshow.com/tempering-chocolate/
Katie Lester says
I am excited as well to try this and it is my first time temoering chocolate. Would almond bark be considered candy coating? I am looking for the chocolate and noticed that with the chocolate chips. Thank you so much for your tutorial and answering our questions! I am definitely a fan!
Elizabeth Marek says
Yes almond bark is candy coating, not real chocolate. Its ok to use with silicone molds but not acrylic molds
Brandi Montelongo says
I can’t wait to try this! Little nervous about Tempering the chocolate! But can you let me know the different temperatures for The difference chocolates? (Ex: Dark, white, and milk, any others if I missed some)
Elizabeth Marek says
I have updated the blog post to include temperatures for milk chocolate and white chocolate
Deb Thatcher says
I know you said you could use either milk or water. If you used water what happens to the chocolate then? Wouldn’t it seize up rather than melt like it would with milk? I can’t wait to try this recipe. I just ordered my silicone molds!!
Sugar Geek Show says
If you use hot water it just won't taste as good, milk is best 🙂
Chelsea says
Do you use regular mini marshmallows or dehydrated? I am hoping to do these in mugs for everyone for xmas this year! They look like so much fun!
Sugar Geek Show says
I used the dehydrated ones that came in the cocoa box mix and added a few regular mini marshmallows as well!
MB says
I wonder if you could fill them with Bailey’s? They would have to be in the refrigerator but do you think it could work for an adult version?
Sugar Geek Show says
Oooh yum I don't see why not!
Emma says
Hi love the recipe for the chocolate bombs. Please could you tell me what the temperature to reach is if using callebaut milk choclate.
Thanks
Sugar Geek Show says
Hi! Thank you, milk chocolate should never go above 84F-86F.
Dana says
Could you please share where the mugs came from? TIA!
Elizabeth Marek says
I got them on clearance from William Sonoma last year