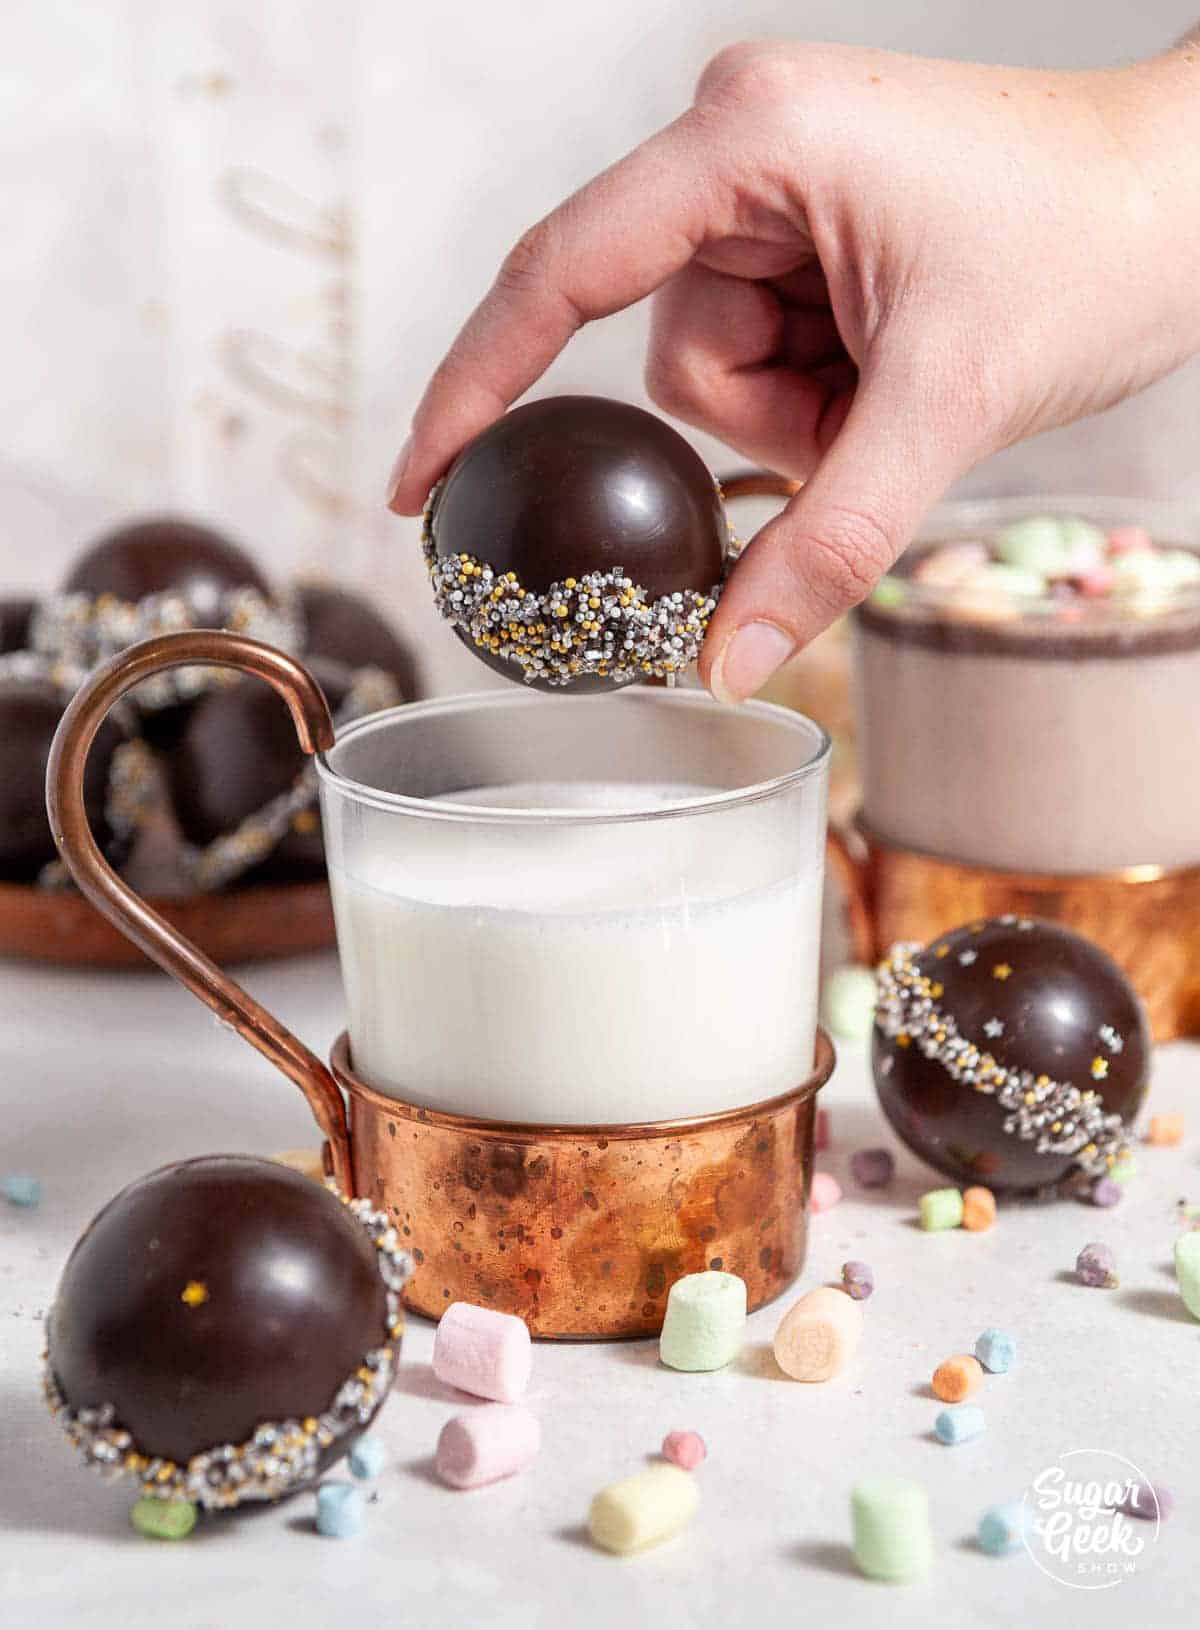
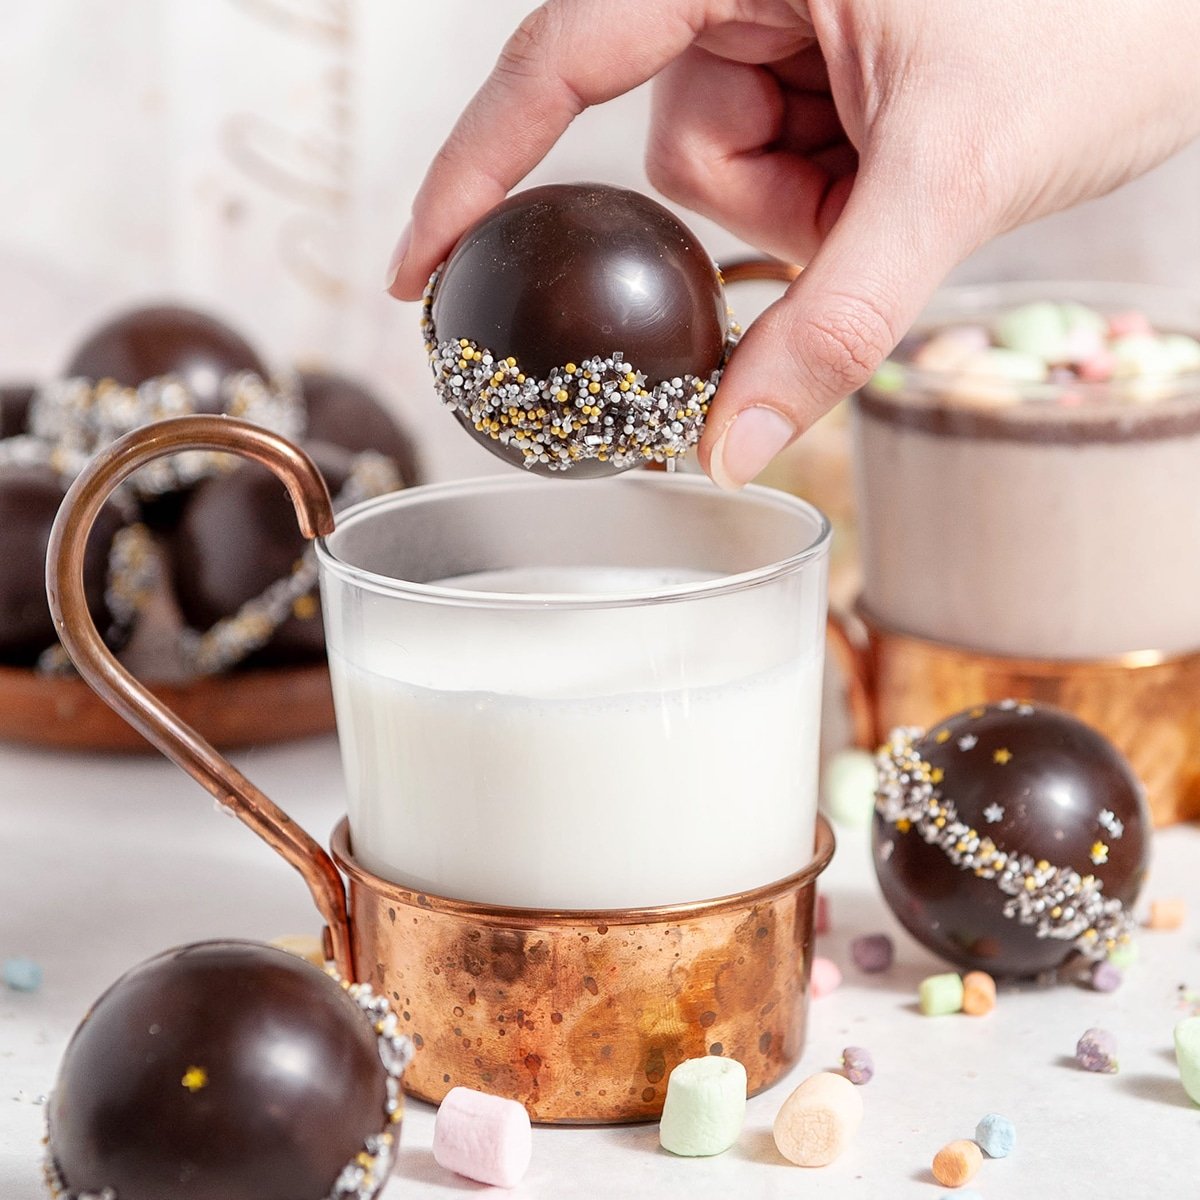
Hot chocolate bombs are chocolate spheres filled with hot chocolate mix and lots of marshmallows! Pour steaming hot milk over the top and watch the chocolate melt away and release those marshmallows into your milk. So much fun and makes a great gift! Read on to find out how to make hot chocolate bombs with silicone or acrylic molds and the difference between semi-sweet, milk chocolate, and white chocolate.
*This blog post contains affiliate links to tools that I use. If you click on them I might get a few cents from the sale but it does not cost anything extra for you.
Table of contents
- Ingredients and tools needed to make hot chocolate bombs
- How to make hot chocolate bombs
- What chocolate is best for making hot chocolate bombs?
- Do I have to temper my chocolate?
- What mold is best for making hot chocolate bombs?
- How to make hot chocolate bombs step-by-step
- Molding the chocolate spheres with a silicone mold
- Molding the chocolate spheres with an acrylic mold
- Assembling the chocolate bombs
- How to use hot chocolate bombs
- Milk Chocolate Cocoa Bombs
- White Chocolate Cocoa Bombs
- How To Color Chocolate
- More Chocolate Recipes
Ingredients and tools needed to make hot chocolate bombs
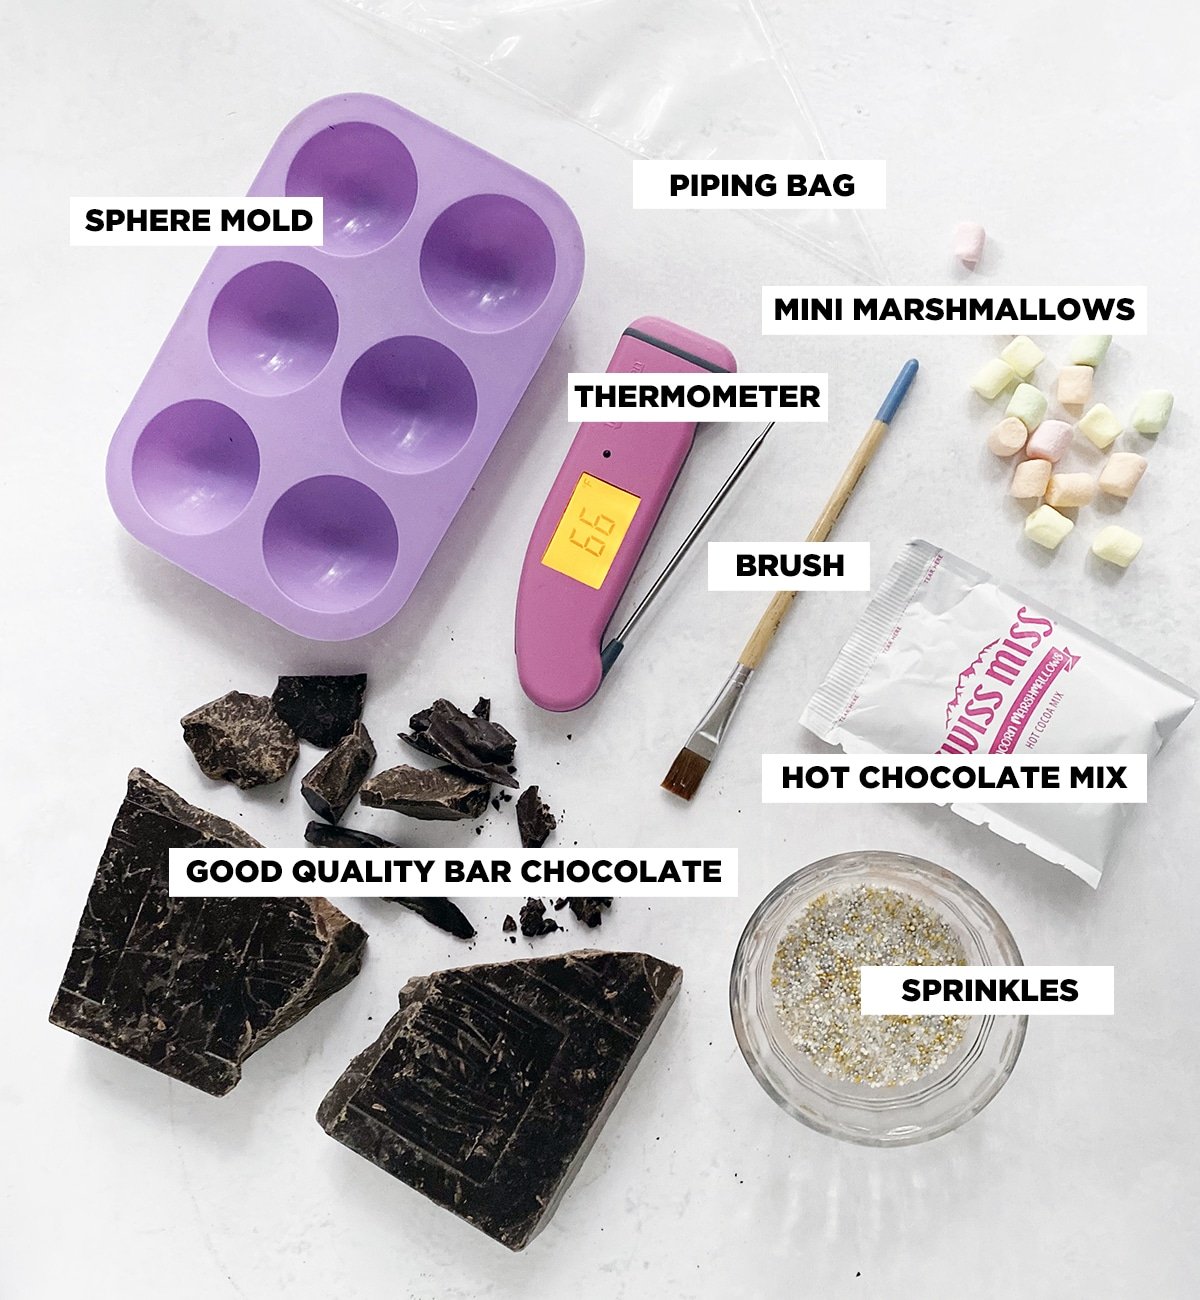
- Good quality chocolate in bar form. Lindt semi-sweet chocolate or Callebaut are great options. I'm using Callebaut because they sell it in the bulk foods section of my WINCO.
- Food thermometer to keep track of the temp of your chocolate. Absolutely a must. Don't even attempt this without one. You can buy food thermometers at the grocery store in the kitchen supplies aisle. I'm using an infrared thermometer because it's a little bit easier to keep clean.
- Silicone sphere mold to make your bombs. This is the easiest mold to use if you're not familiar with tempering chocolate. I will also show you how to use acrylic sphere molds for you over-achievers out there.
- Bench scraper if you are using an acrylic mold. You don't need one for silicone molds.
- ¼" paintbrush for applying chocolate to silicone molds. If you're using an acrylic mold you won't need one.
- Piping bag for sealing together the spheres.
- Parchment paper if you're using an acrylic mold.
- Hot chocolate mix of your choice.
- Mini marshmallows of your choice. I'm using rainbow marshmallows from Target.
- Sprinkles to decorate the outside if you want.
- Hot Chocolate Bomb Labels
How to make hot chocolate bombs
Here's a rundown on how to make hot chocolate bombs!
- Chop chocolate (high-quality bar chocolate is best)
- Temper your chocolate (don't worry, we're doing this the easy way in the microwave and it only takes 5 minutes)
- Paint the chocolate into your silicone molds (two coats) or pour it into your acrylic mold.
- Remove the chocolate spheres from the mold.
- Fill the molds with hot chocolate and marshmallows
- Seal the two pieces of chocolate together with more melted chocolate
- Decorate the seam with sprinkles!
What chocolate is best for making hot chocolate bombs?
You want to make sure you're using good quality chocolate that has cocoa butter in it and not too many other ingredients or the chocolate isn't going to melt right. You can use candy-melts but the taste is going to be more like wax and not melt very well in your hot chocolate. Chocolate chips are also not going to work very well.
If you are going to use candy melts or another candy coating then you'll definitely want to use the silicone mold and not the acrylic mold.
If you're really serious about making cocoa bombs to sell, you'll want to get some couverture chocolate which is made to melt really smoothly and use in chocolate molds.
If you don't have time to order some good couverture chocolate then look for some chocolate bars at your grocery store that is 65% cocoa or more. Check the ingredients to make sure it contains cocoa butter.
Do I have to temper my chocolate?
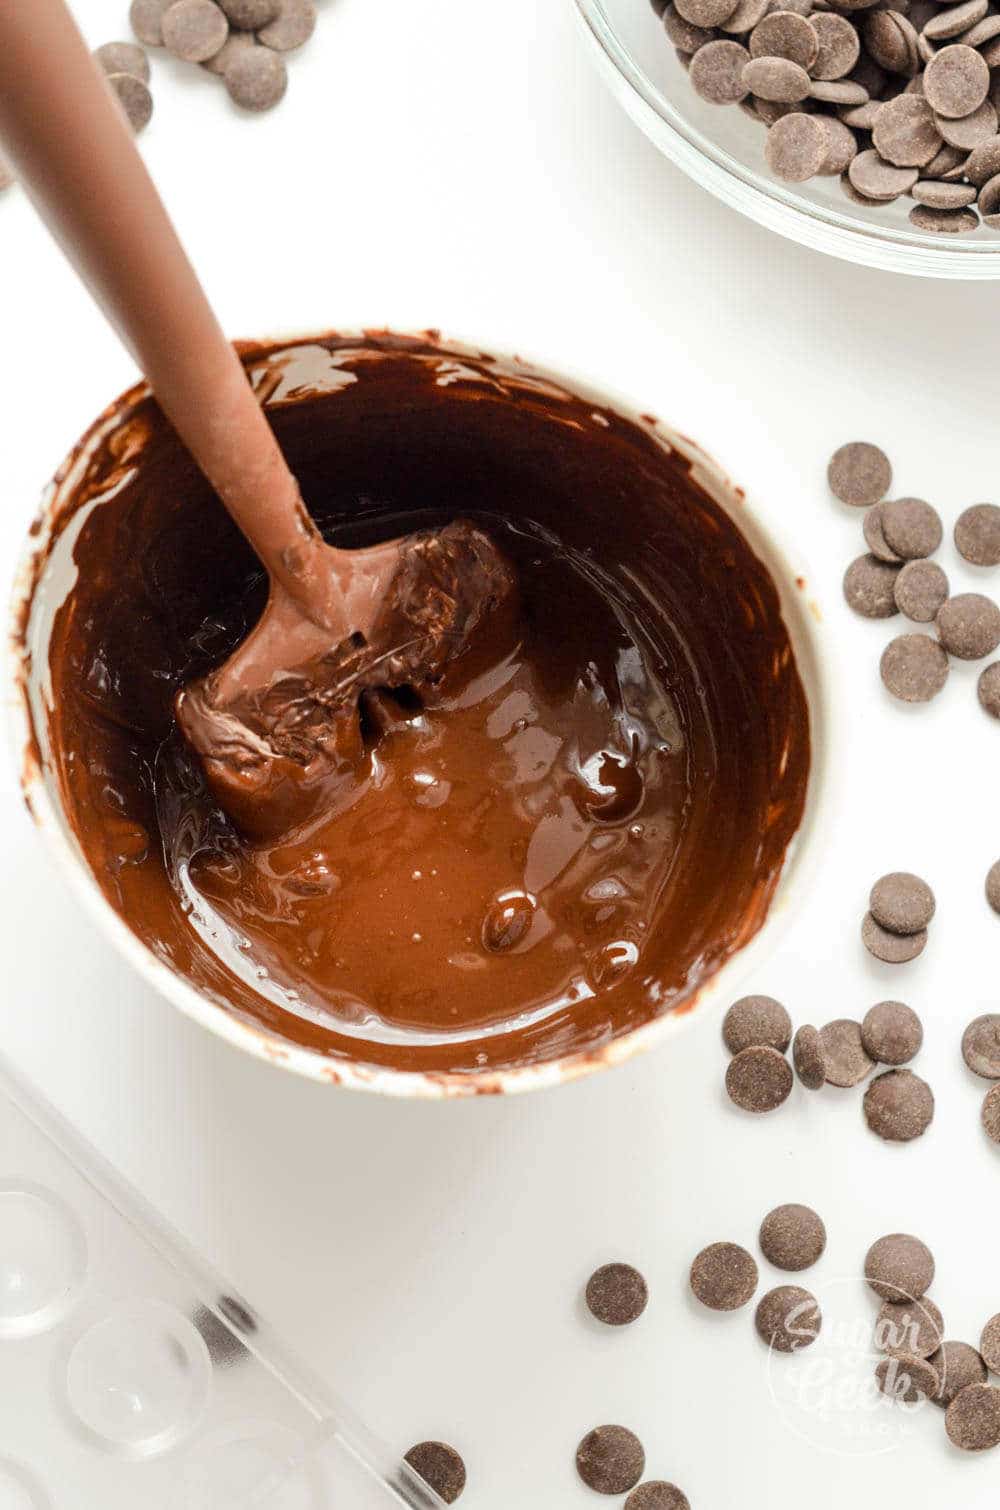
If you've never heard of tempering your chocolate or feel intimidated, don't worry. Tempering just means that you are controlling the heat of your chocolate while melting it to make sure it's as strong as possible. Heating and cooling to exact temperatures which we will track with our thermometer.
Tempering your chocolate is really important. Un-tempered chocolate is soft, doesn't have a shine, and has a problem holding its shape. It will melt at room temperature and just overall be a huge headache to work with. Candy melts were invented to avoid tempering but the taste really suffers. Don't worry, I'm going to show you how to temper your chocolate in the microwave the easy way and it only takes 5 minutes!
What mold is best for making hot chocolate bombs?
I'm going to show you how to use two molds, a silicone mold, and an acrylic mold. I thought that I had to use an acrylic mold to get that ultimate shine but to be honest, after decorating I'm not sure I could even tell the difference between the two.
So I would say if you had to choose, the silicone mold is better because it's basically foolproof. The silicone mold is also cheaper. The downside is that it takes a bit more time to hand paint each mold so if you're making a lot, you might want to go with the acrylic mold.
I've seen some people use some really big molds and I understand why people like to use them because you can fit more things in them. But keep in mind that you want the amount of chocolate, hot cocoa, and marshmallow to be proportionate to how much milk you have in your mug so that the taste is not affected.
My molds are 2 ½" in diameter and fit about 1 Tablespoon of the hot cocoa mix inside which is plenty when combined with the extra marshmallows and chocolate.
How to make hot chocolate bombs step-by-step
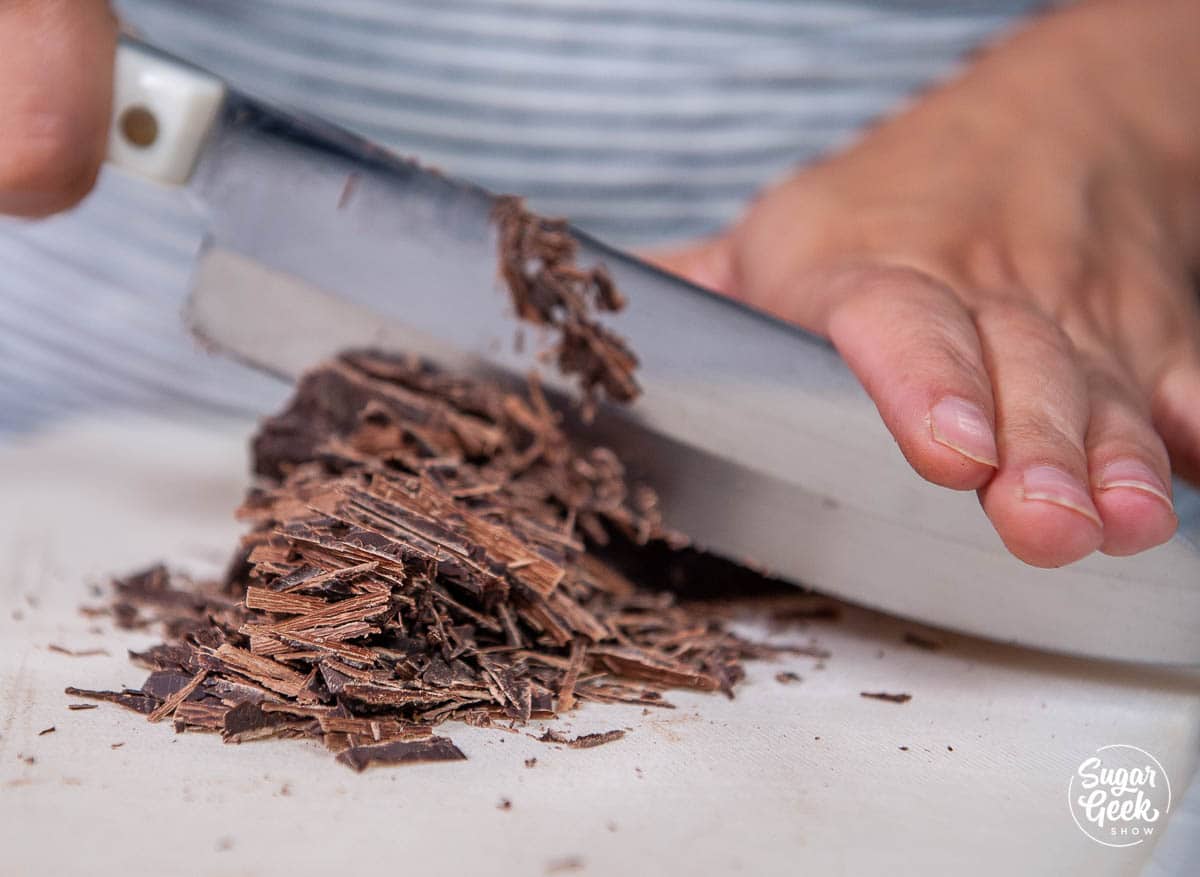
Step 1 - Chop 24 ounces of good quality semi-sweet chocolate as finely as you can with a knife. This is kind of tedious but I promise it's worth it! You don't want ANY big chunks.
Step 2 - Place the chocolate in the microwave and heat for 30 seconds. NO MORE. Then stir with a spatula, moving the chocolate from the outside edges, to the center to evenly heat it.
Step 3 - Place the chocolate back into the microwave and heat for 15 seconds and stir like we did in the first step. Take the temp of your chocolate to make sure it's not above 90ºF.
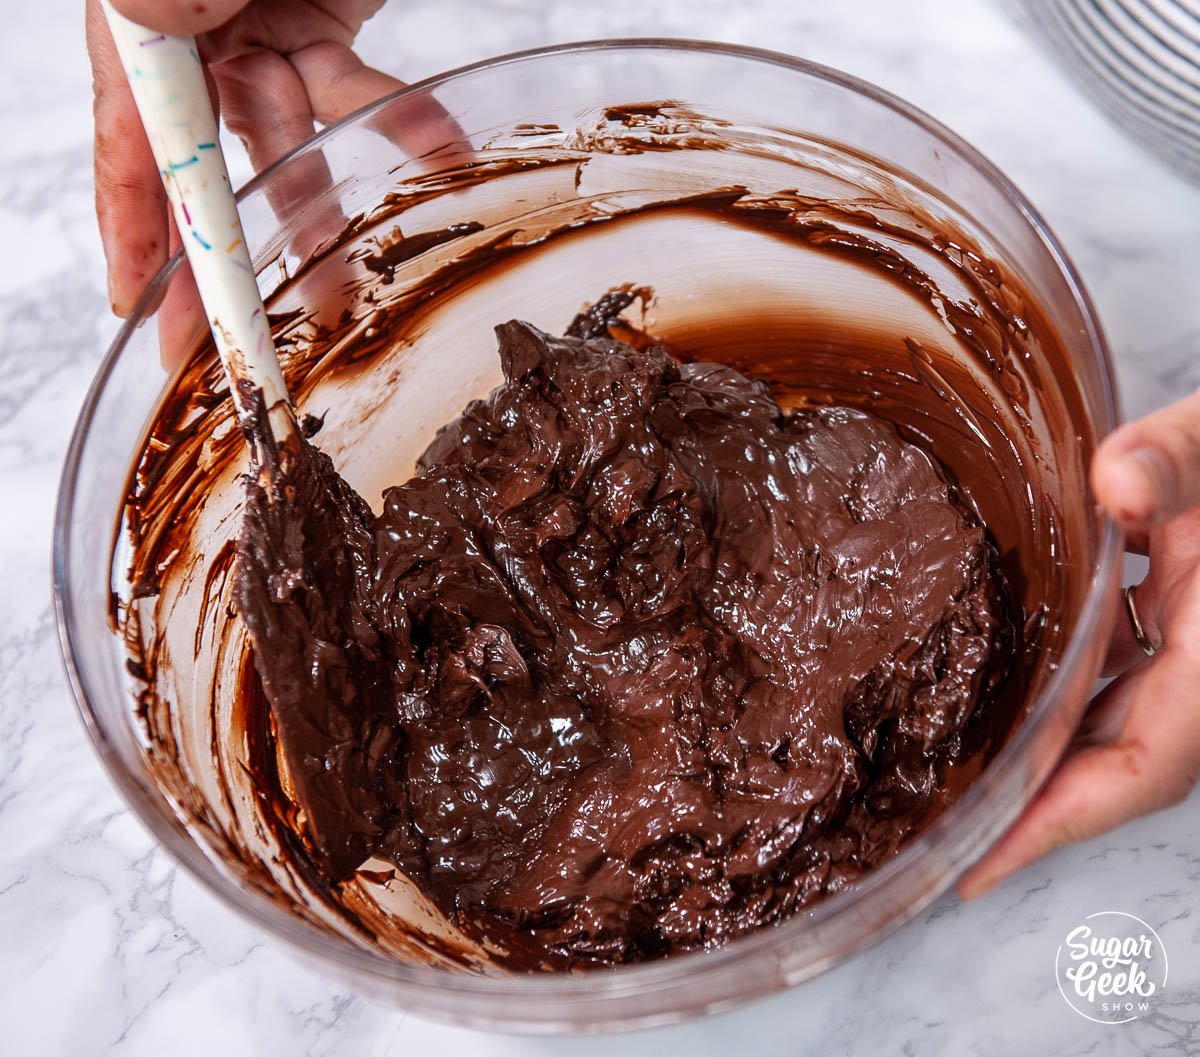
Step 4 - Repeat this process 2-5 more times until the chocolate is almost melted. Never heat more than 15 seconds and do not let your chocolate get above 90ºF. Once almost melted, just continue stirring until the chocolate is fully melted from the residual heat from the bowl.
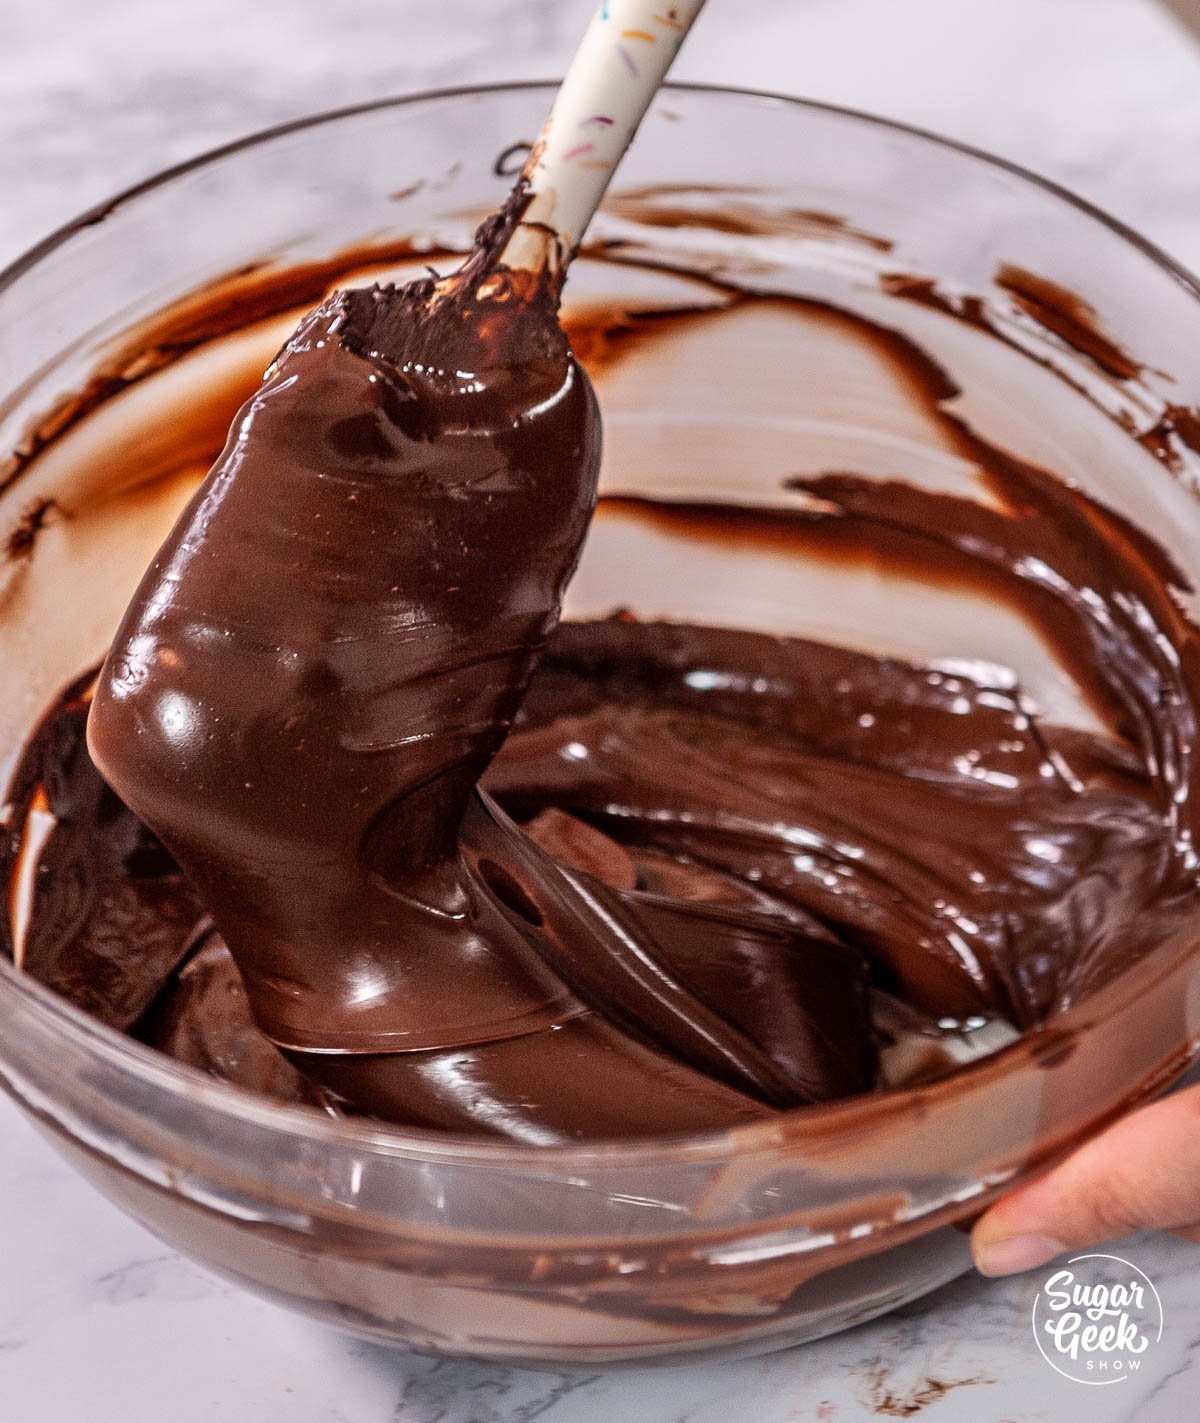
Step 5 - Pour some chocolate onto some parchment paper and pop it into the fridge for 5 minutes. Take it out and observe it. Does it look shiny? Does it snap in half loudly when you break it? Then it's tempered and ready to go in your molds.
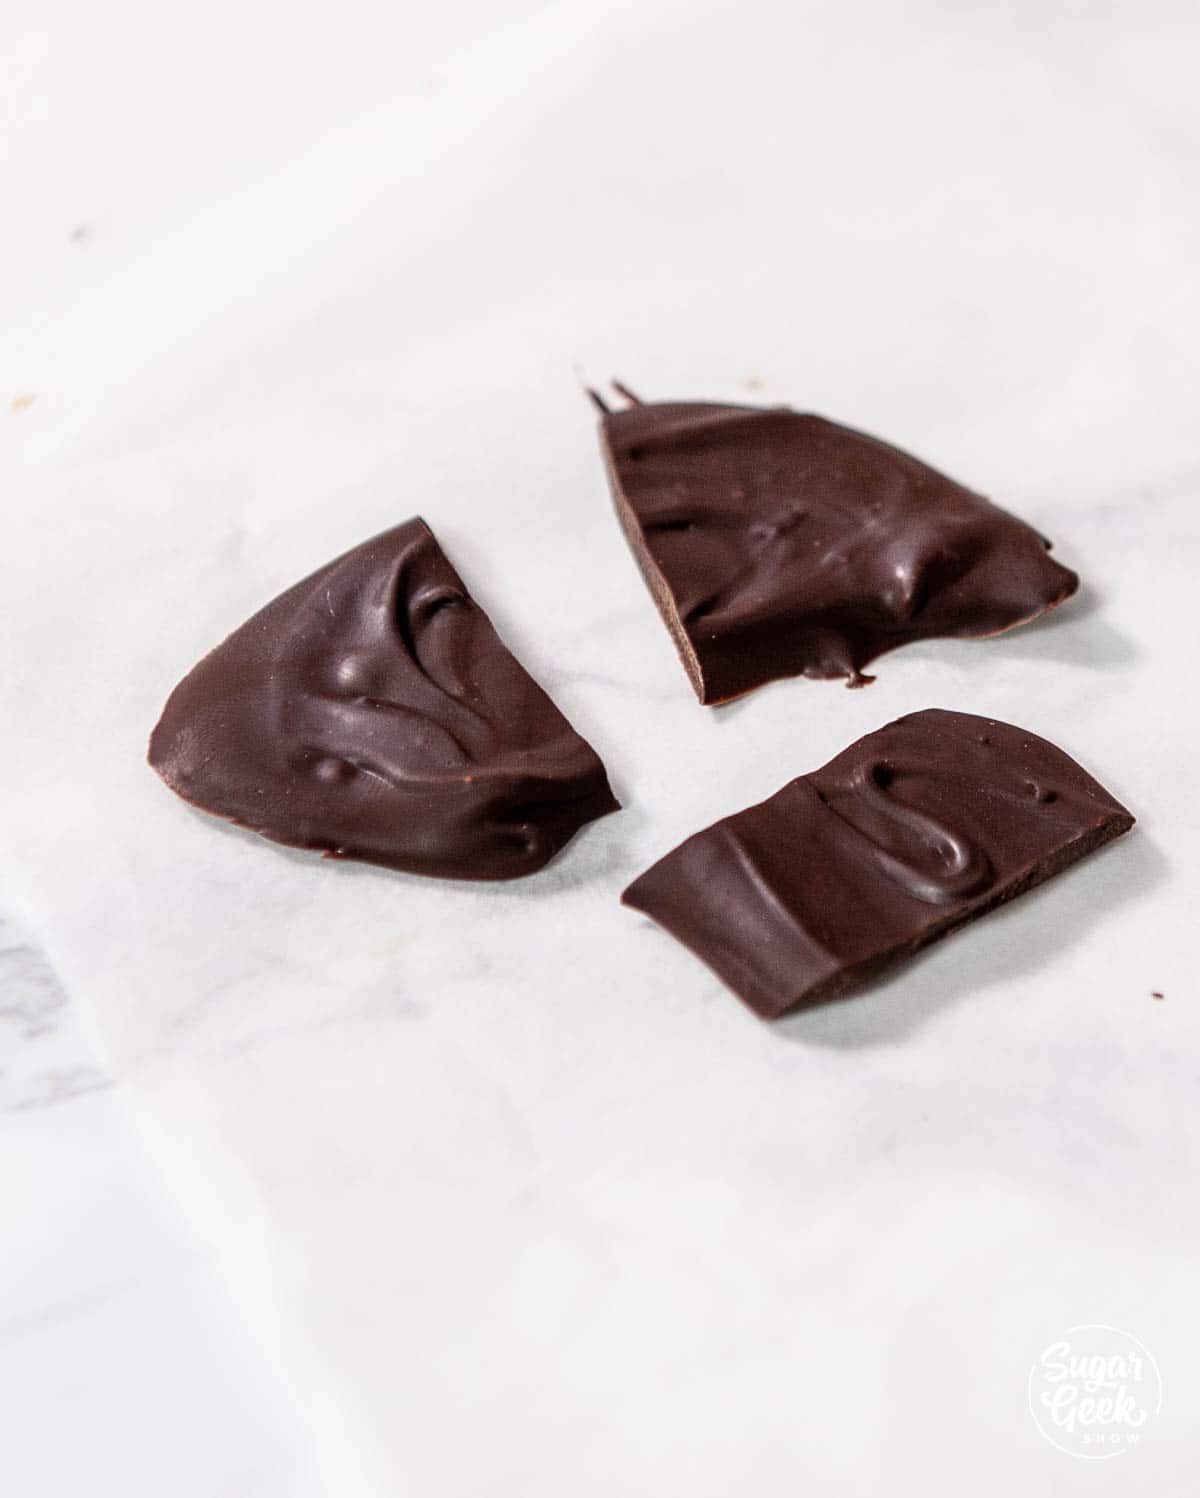
If your chocolate is dull, has white residue on top or just bends when you try to break it, it's not tempered and you may have heated it too far. Don't worry, you can seed it with more chopped chocolate. Just add in 6 ounces of finely chopped chocolate and stir until melted. You may need to heat for 5-10 seconds to get it fully melted. Test again before using.
Pro-tip - No microwave? You can temper your chocolate the old-fashioned way. I go over it in my chocolate tempering tutorial.
Molding the chocolate spheres with a silicone mold
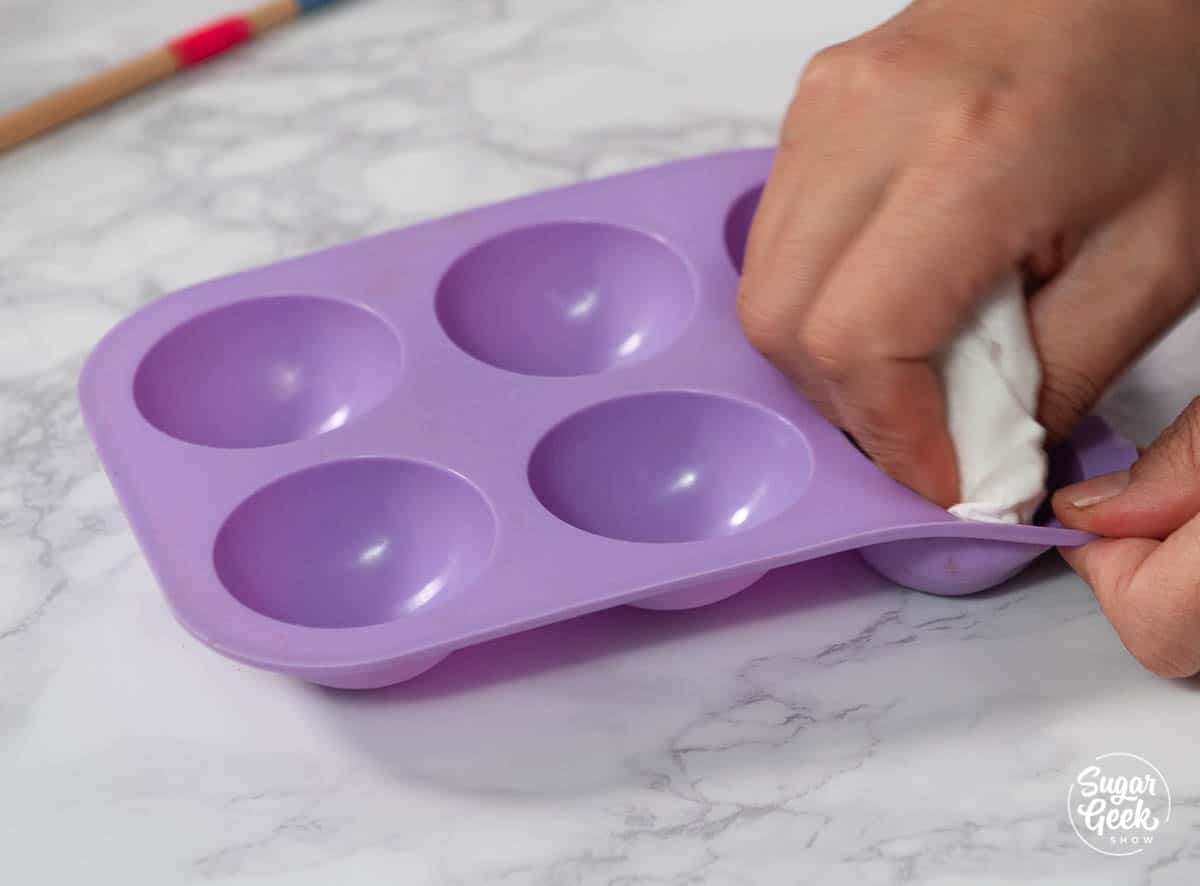
Step 1 - Clean your mold. Use some paper towel to thoroughly polish the insides of your molds so that they are nice and shiny. Any amount of residue will cause a blemish on your chocolate. This is true for silicone molds and acrylic molds.
Step 2 - Paint a thin layer of chocolate using a paintbrush on the inside of the mold. Place into the fridge for 5 minutes to set.
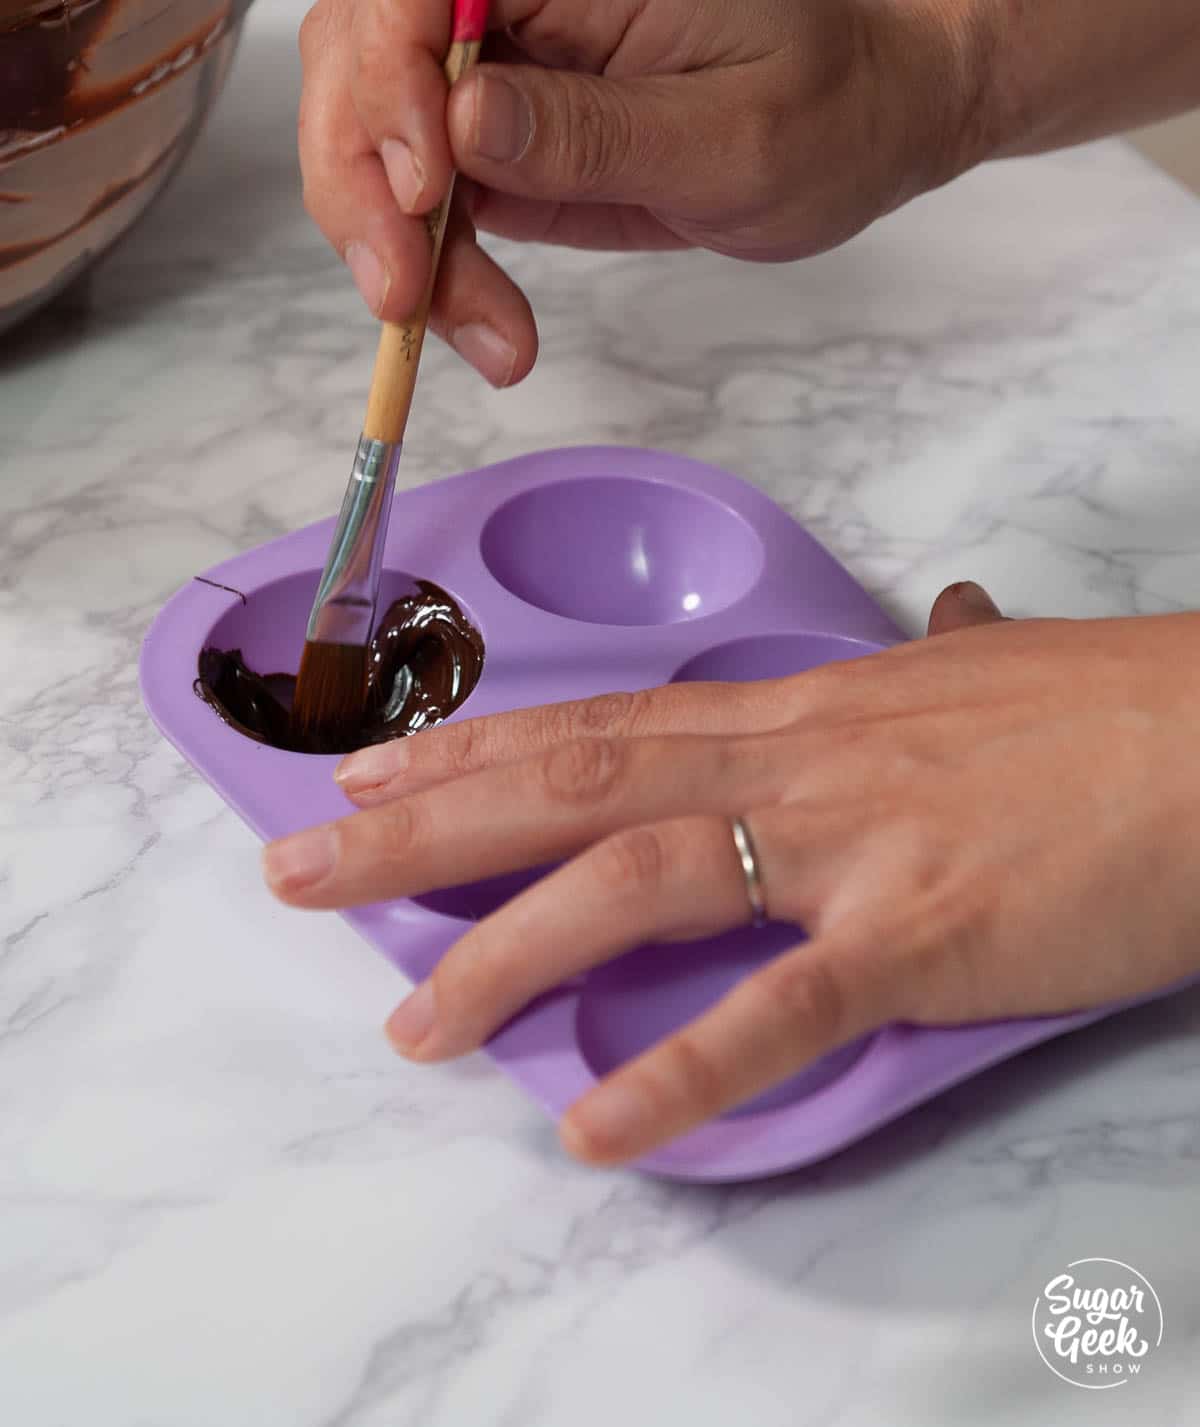
Step 3 - Apply a second coat of chocolate, paying special attention to the edges to build them up a bit so the molds have a strong edge. Place the chocolate mold into the fridge to set up for five minutes.
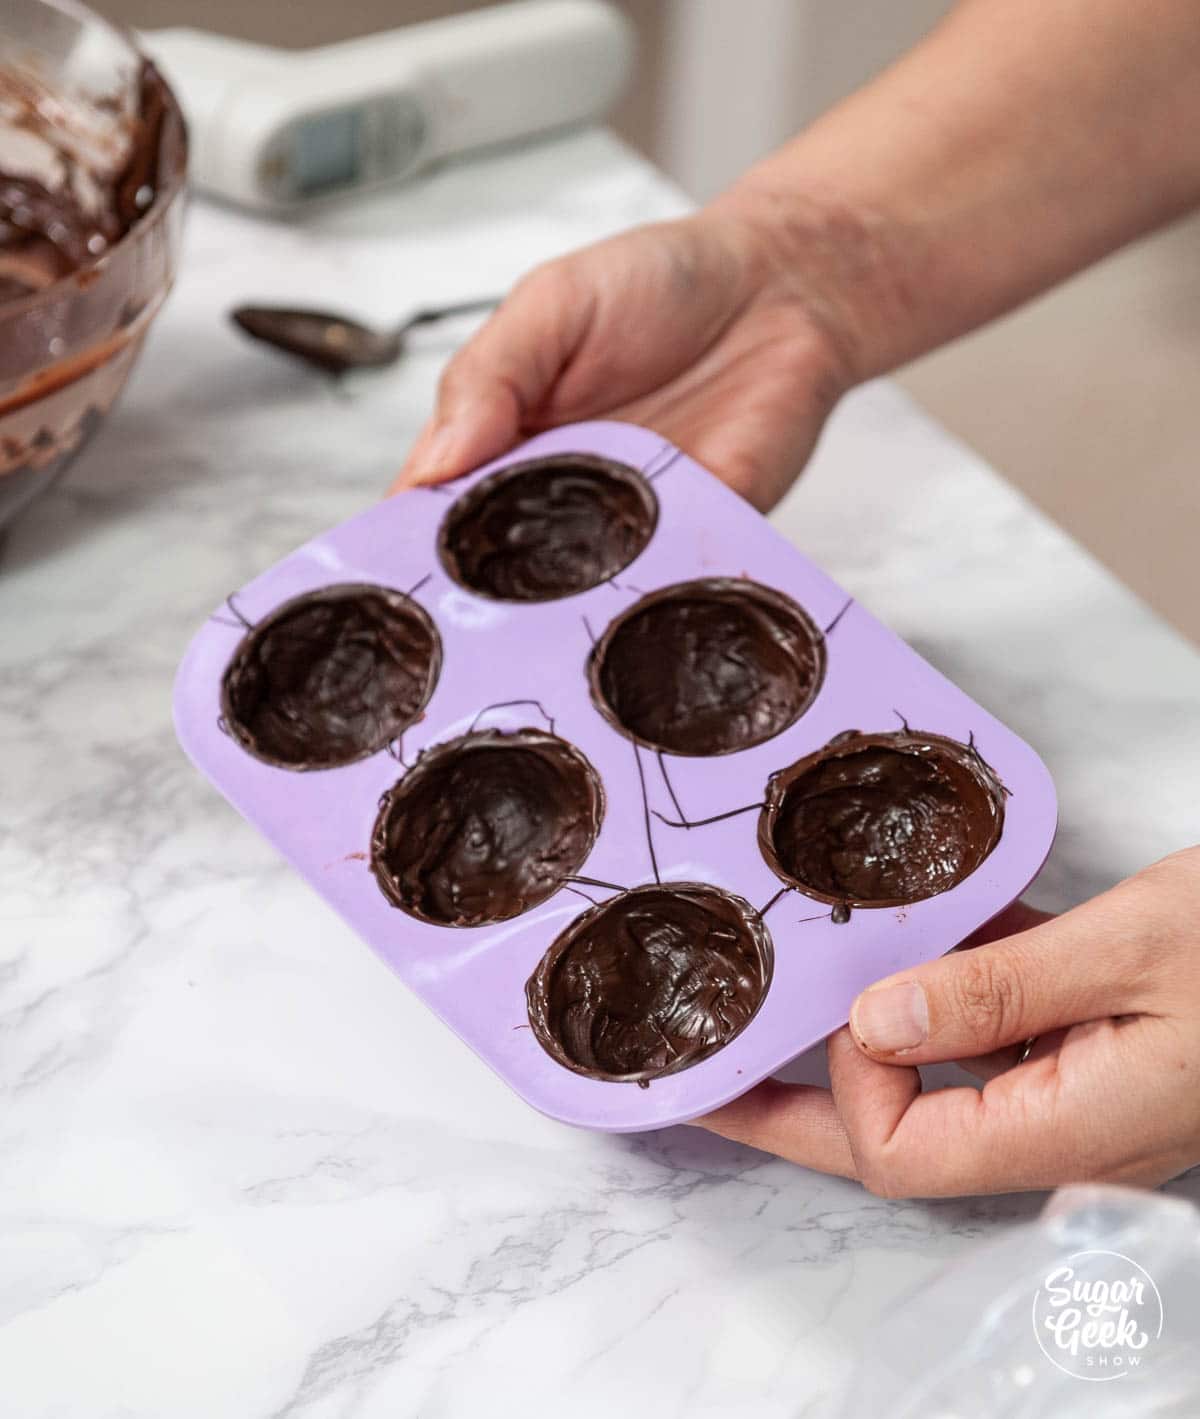
After 5 minutes your chocolate will easily release from the mold and are ready to be assembled!
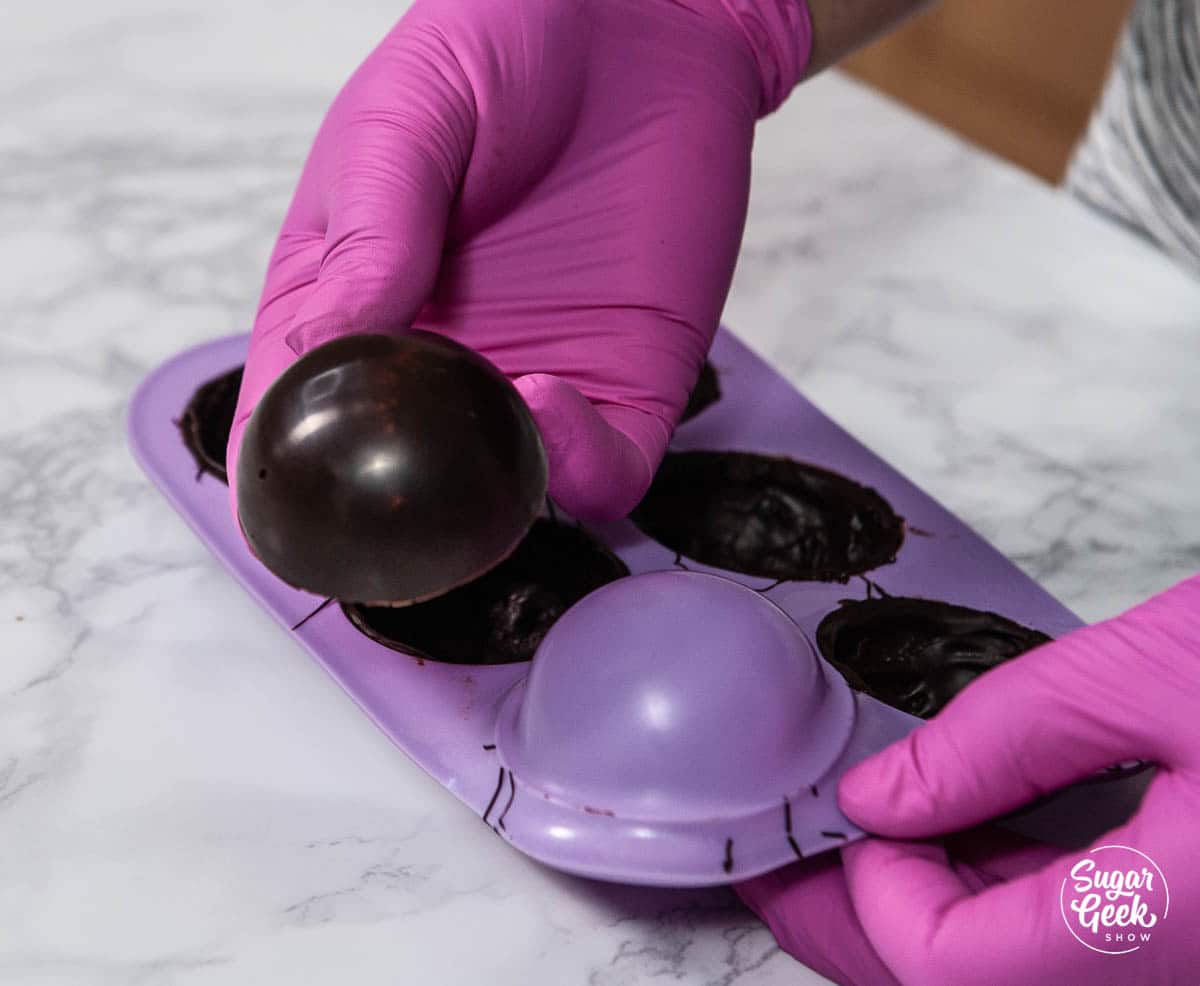
Molding the chocolate spheres with an acrylic mold
Using an acrylic mold has a few more steps but the shine is incredible and is much faster than using a silicone mold.
Step 1 - Use some paper towel to thoroughly polish the insides of your molds so that they are nice and shiny. This also prevents chocolate from sticking.
Step 2 - Warm your mold slightly with a heat gun or hair dyer to just take the chill off the acrylic. It shouldn't be hot at all. Warming the mold prevents the chocolate from getting hard too quickly.
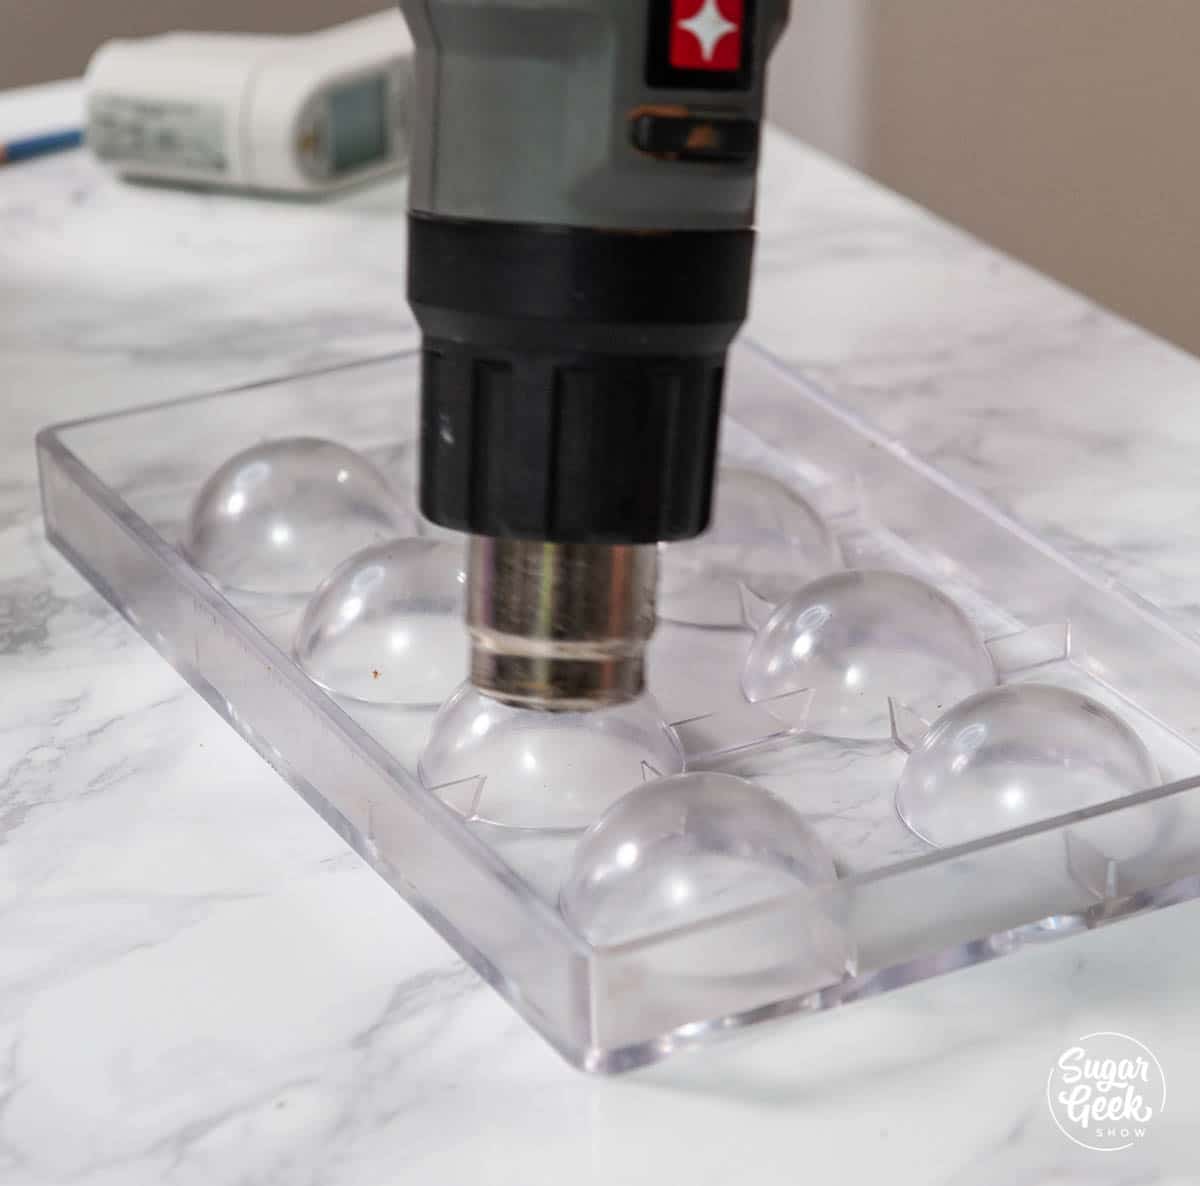
Step 3 - Make sure your chocolate is at 90ºF and pour it into the mold. Tap the mold against the table a couple times to release any bubbles.
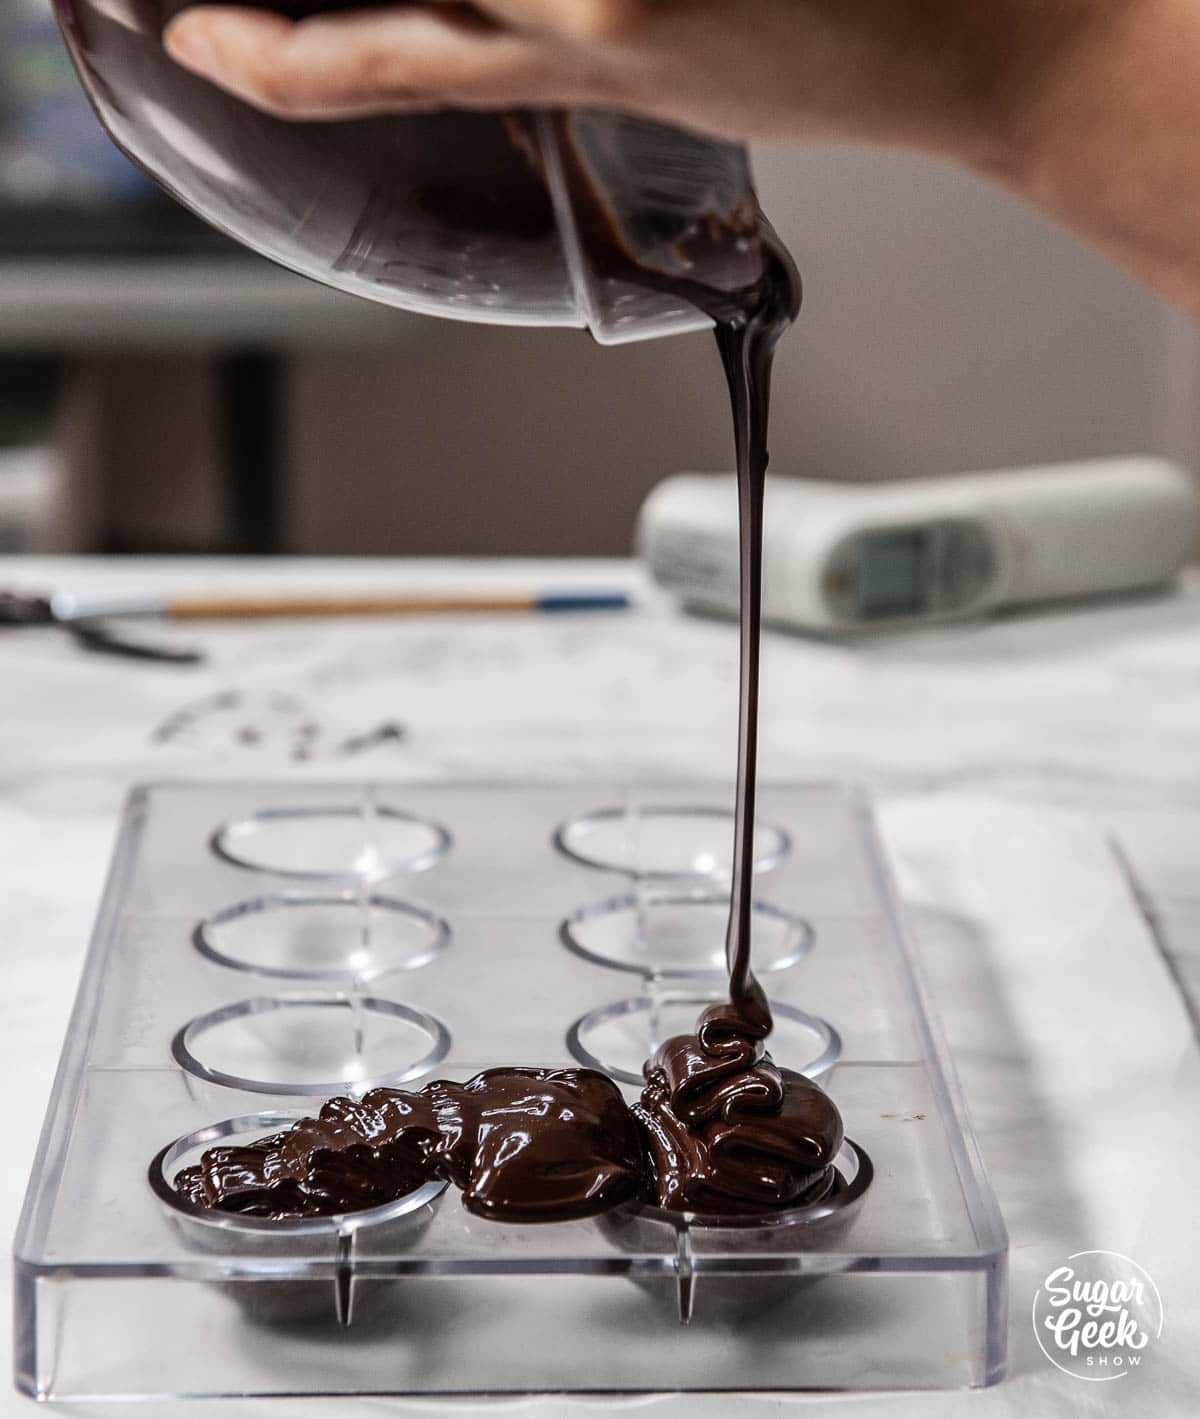
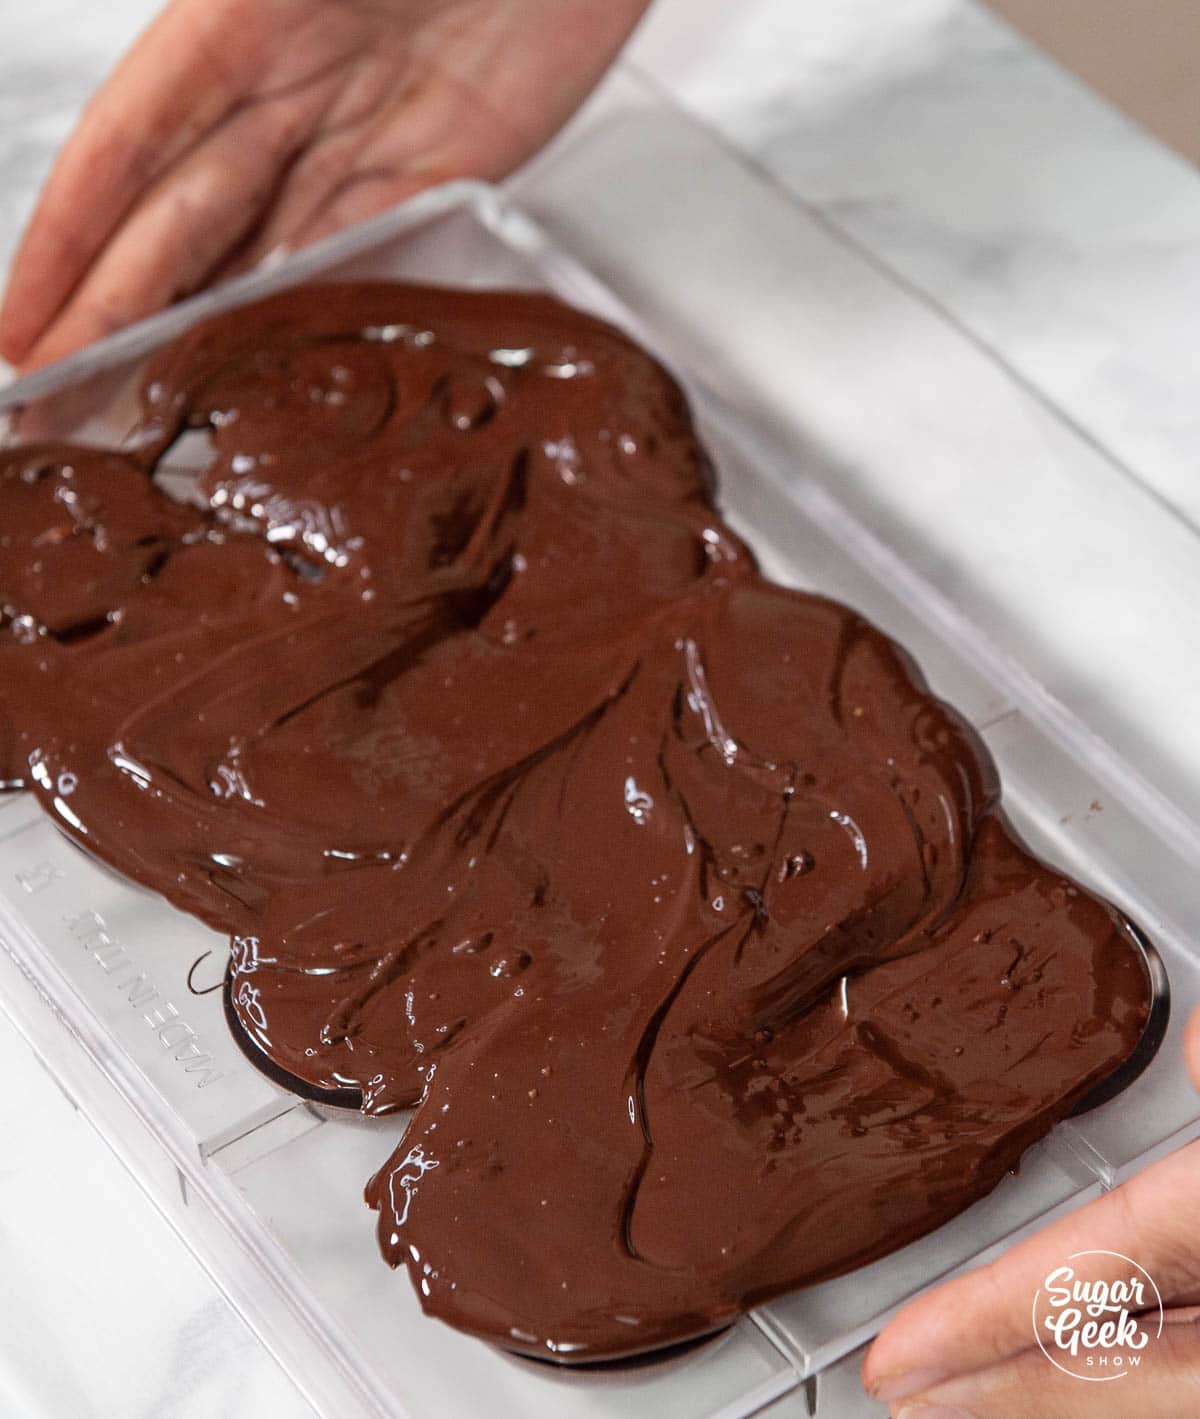
Step 4 - Pour the excess chocolate out of the mold back into the bowl or onto the table to be scraped up later. I use the edges of my bench scraper to tap the side so that the chocolate all comes out.
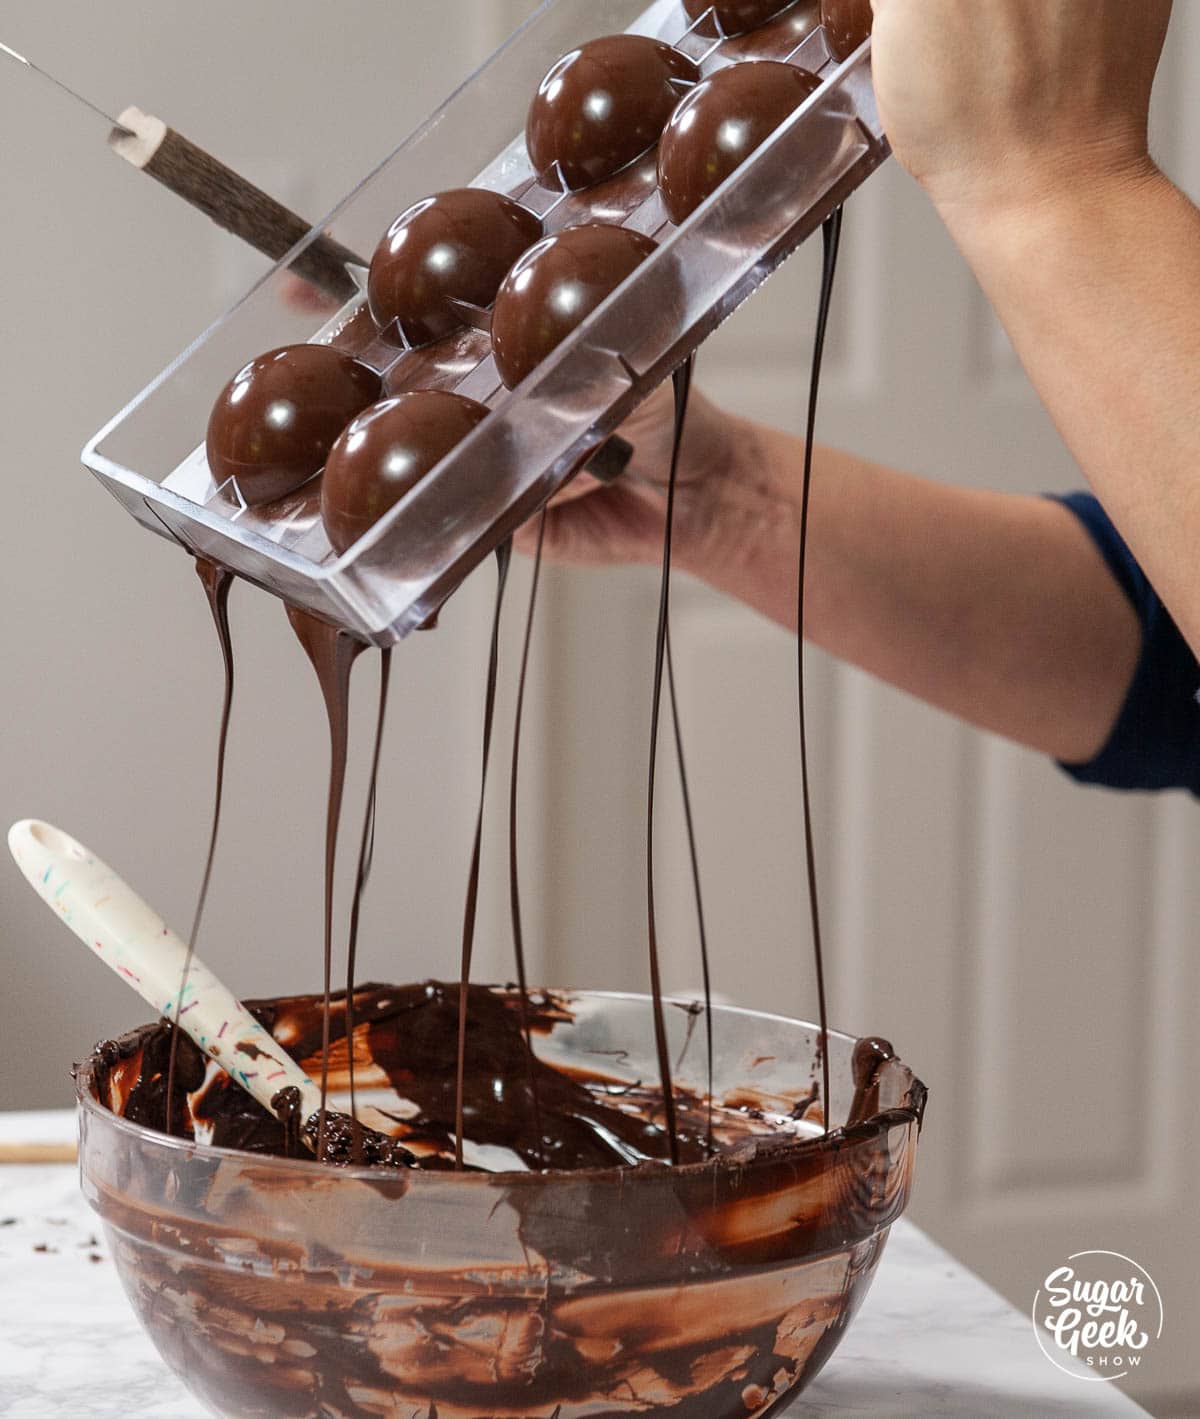
Step 5 - Scrape the excess chocolate off the top of the mold.
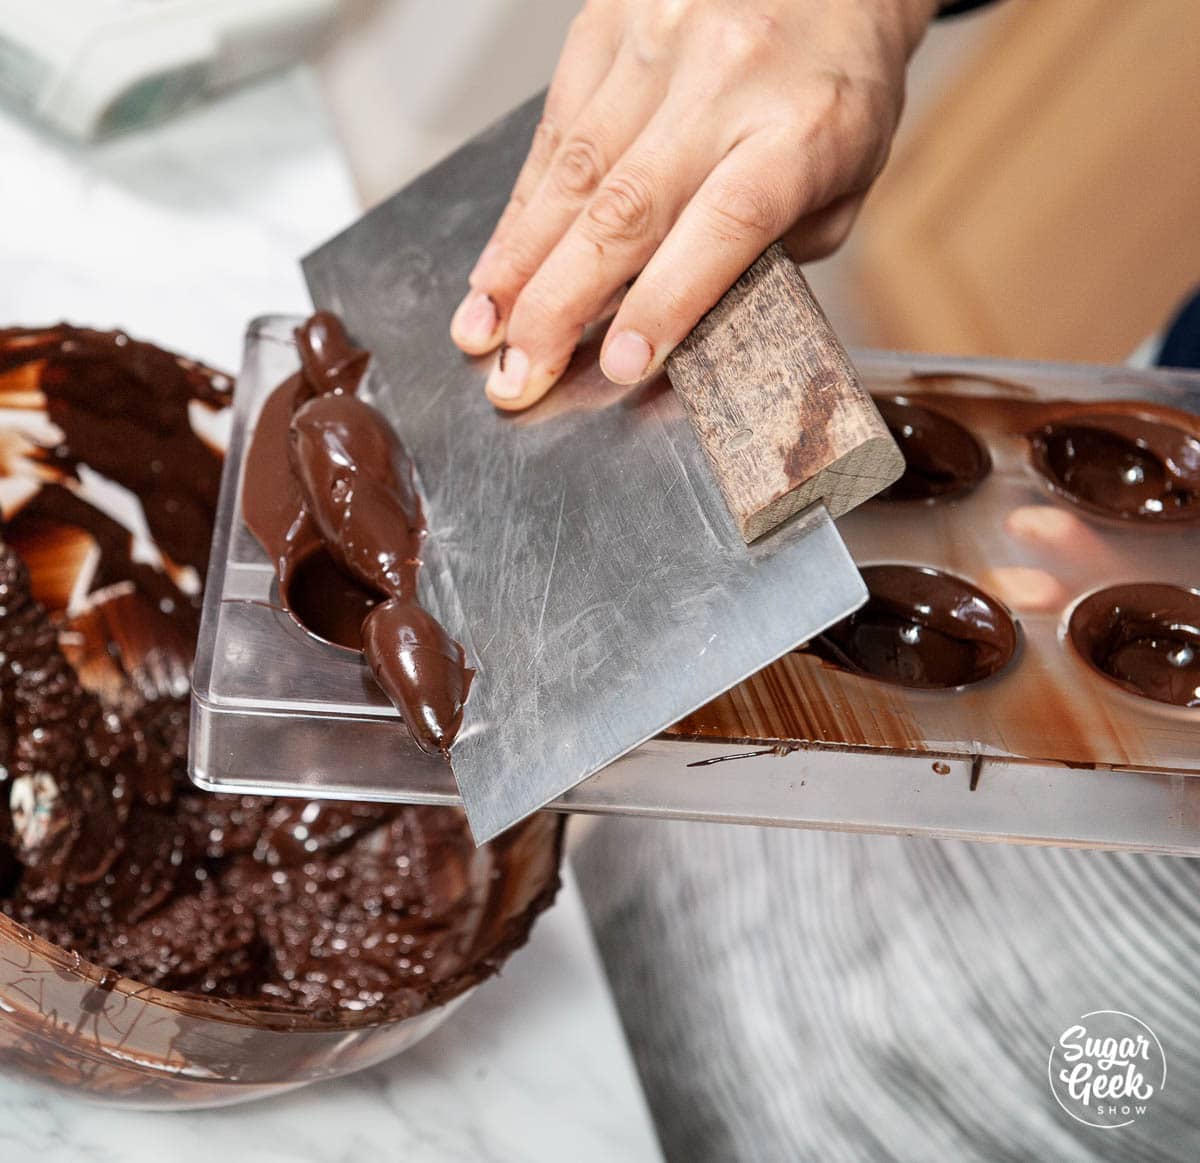
Step 6 - Place the mold face down onto some parchment paper until it's almost set but still soft. About 5 minutes. This allows the excess chocolate to pool onto the parchment paper to build up the rim of the chocolate.
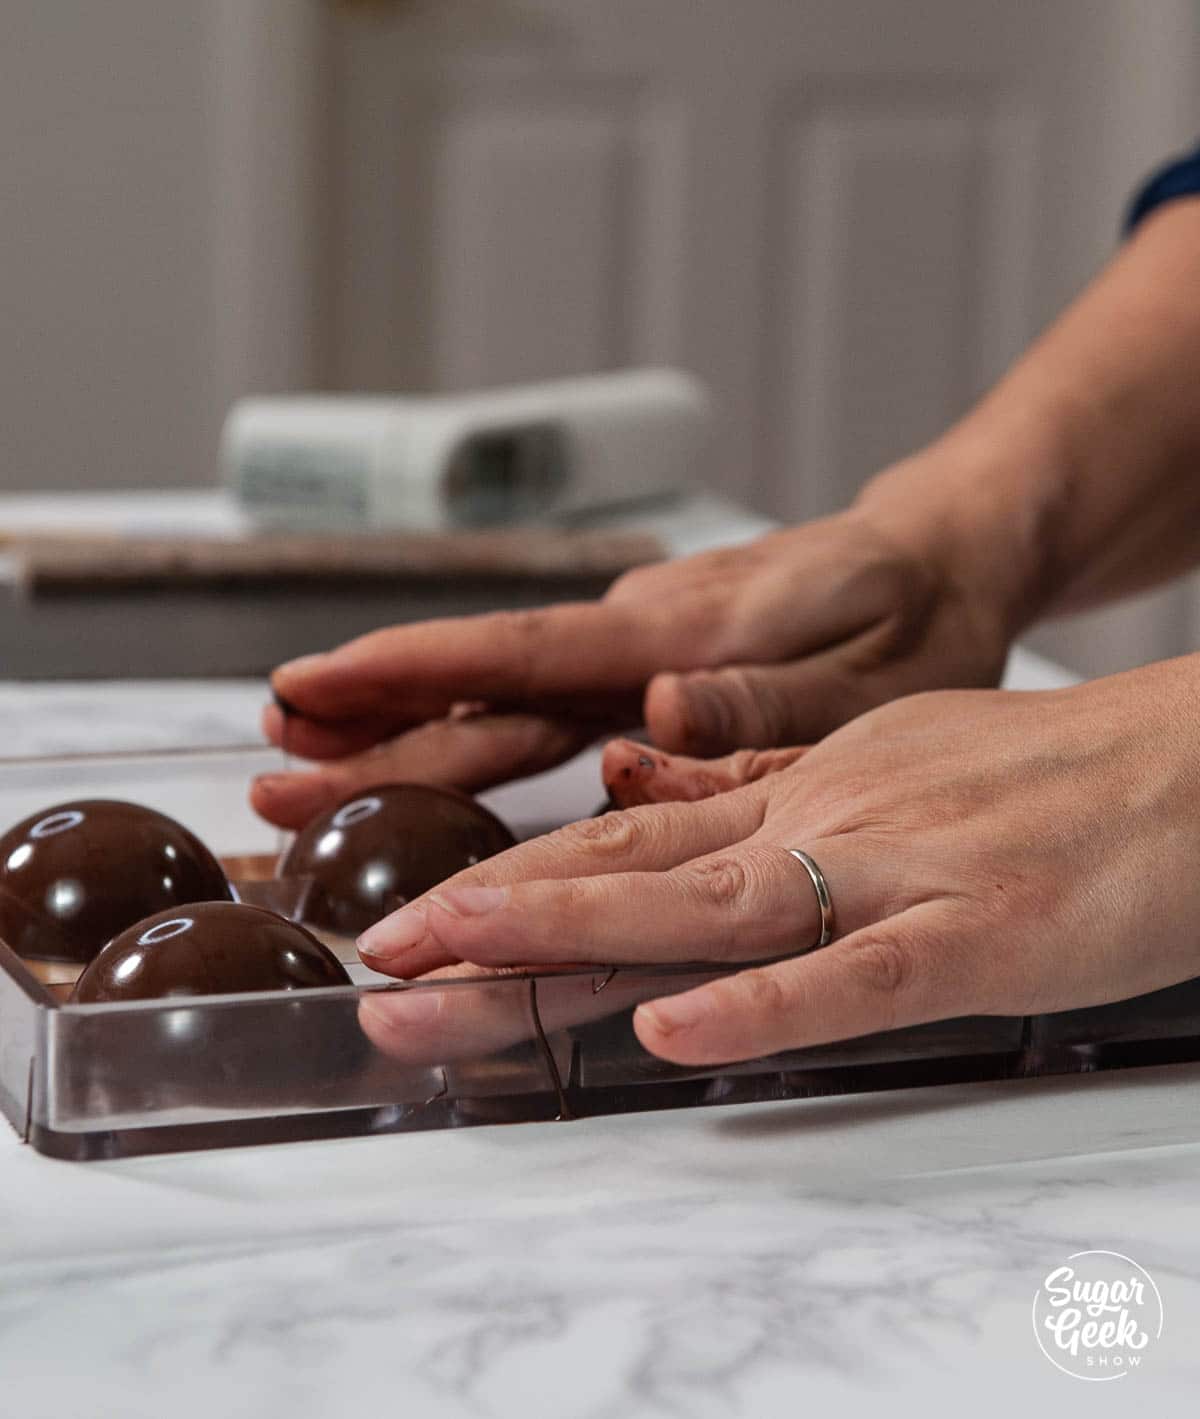
Step 7 - Scrape the top of the mold again to make the chocolate spheres have a very clean edge.
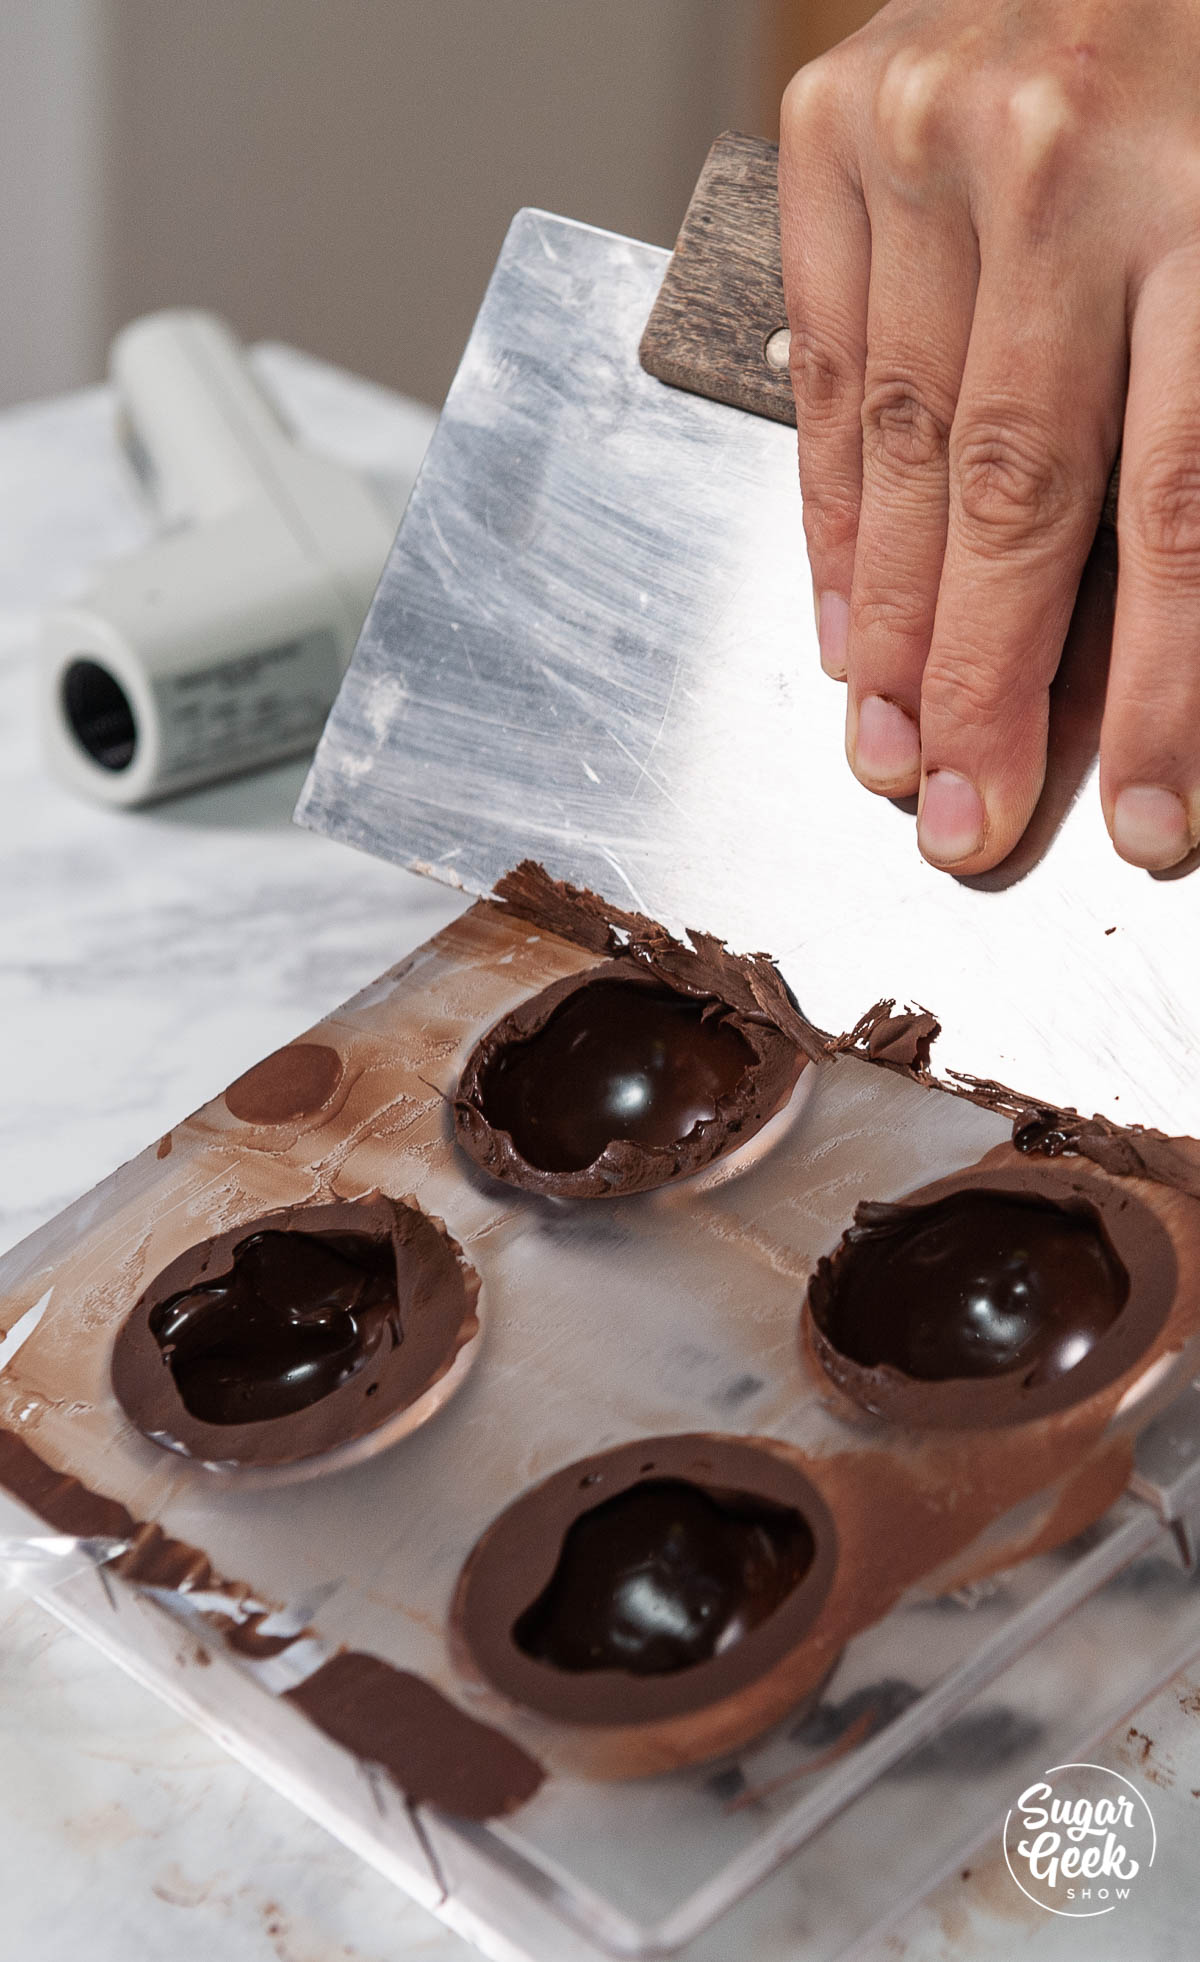
Step 8 - Place the chocolate mold into the freezer for 5 minutes (don't forget about them!)
Step 9 - If the chocolate was tempered properly, you will see that the chocolate has pulled away from the mold and is not sticking. You might have one or two spots that are sticking but if they are small, it will be ok.
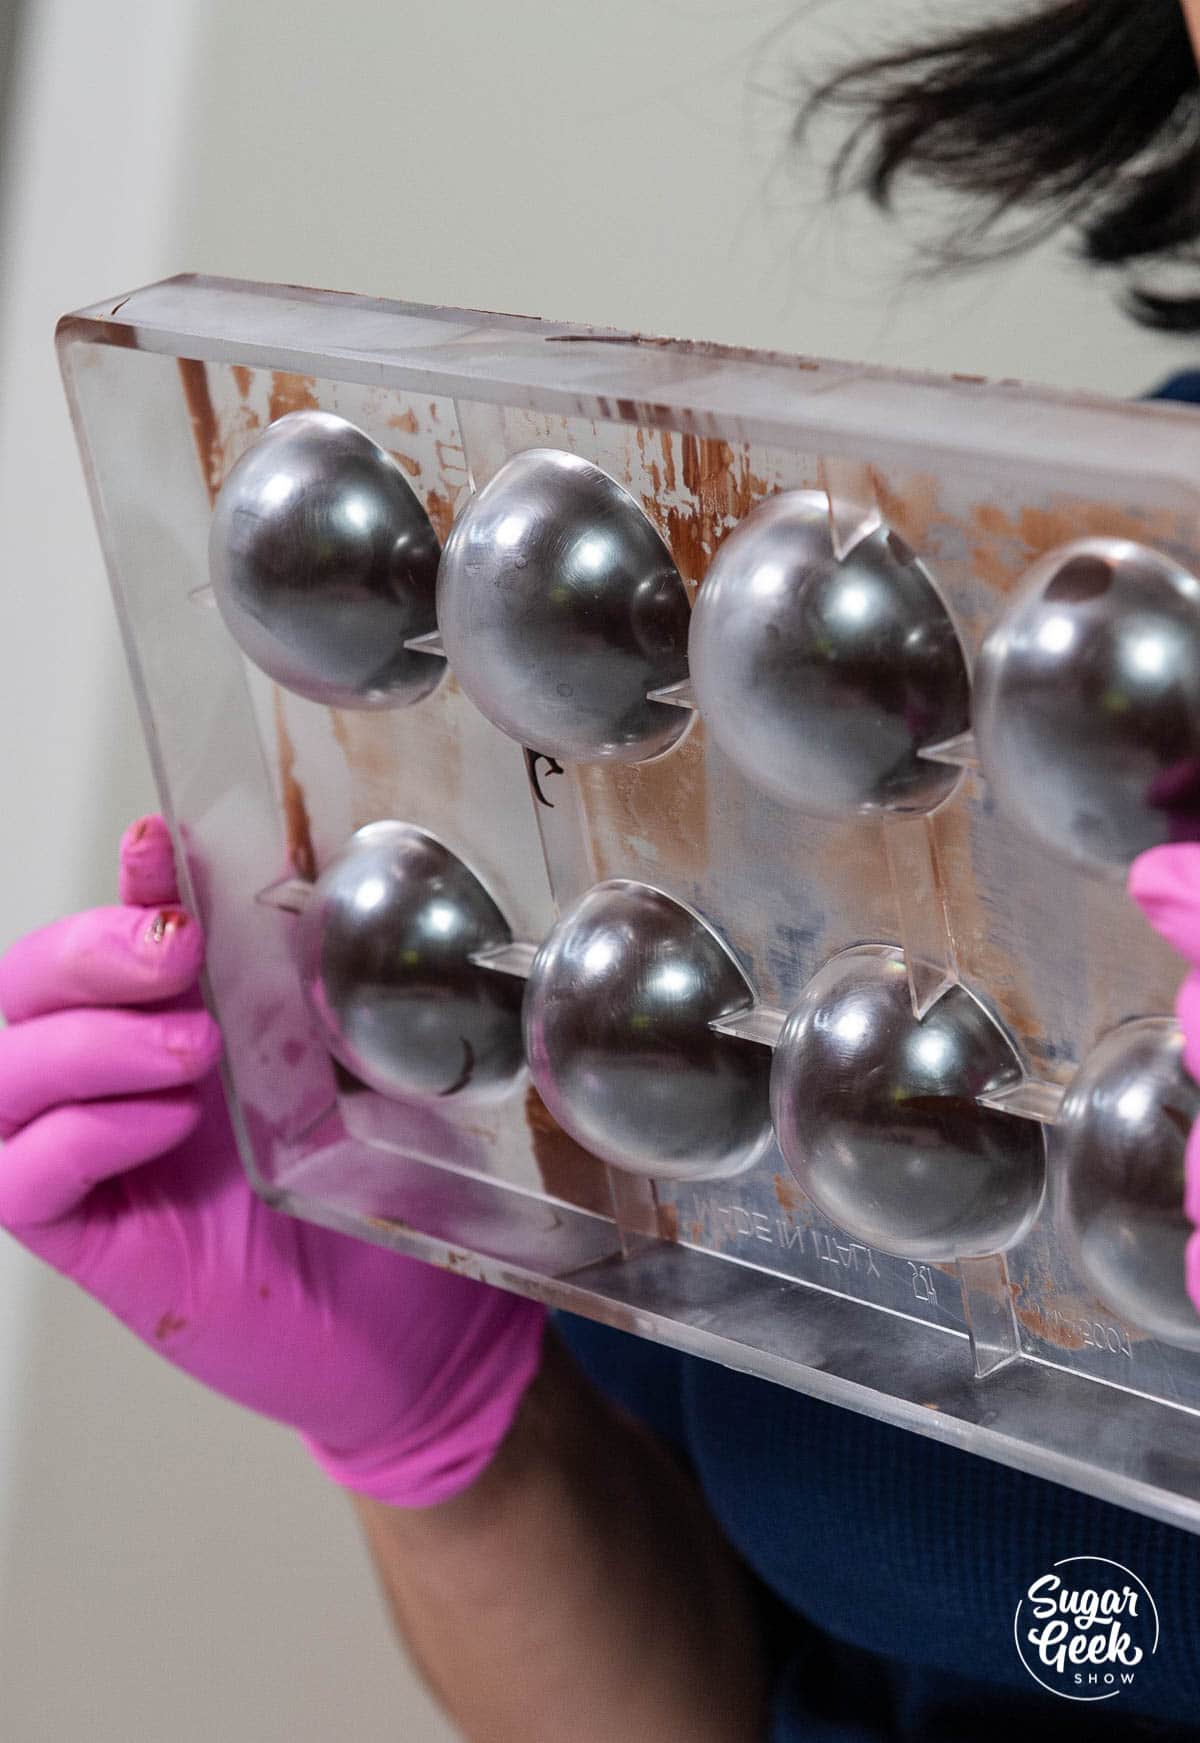
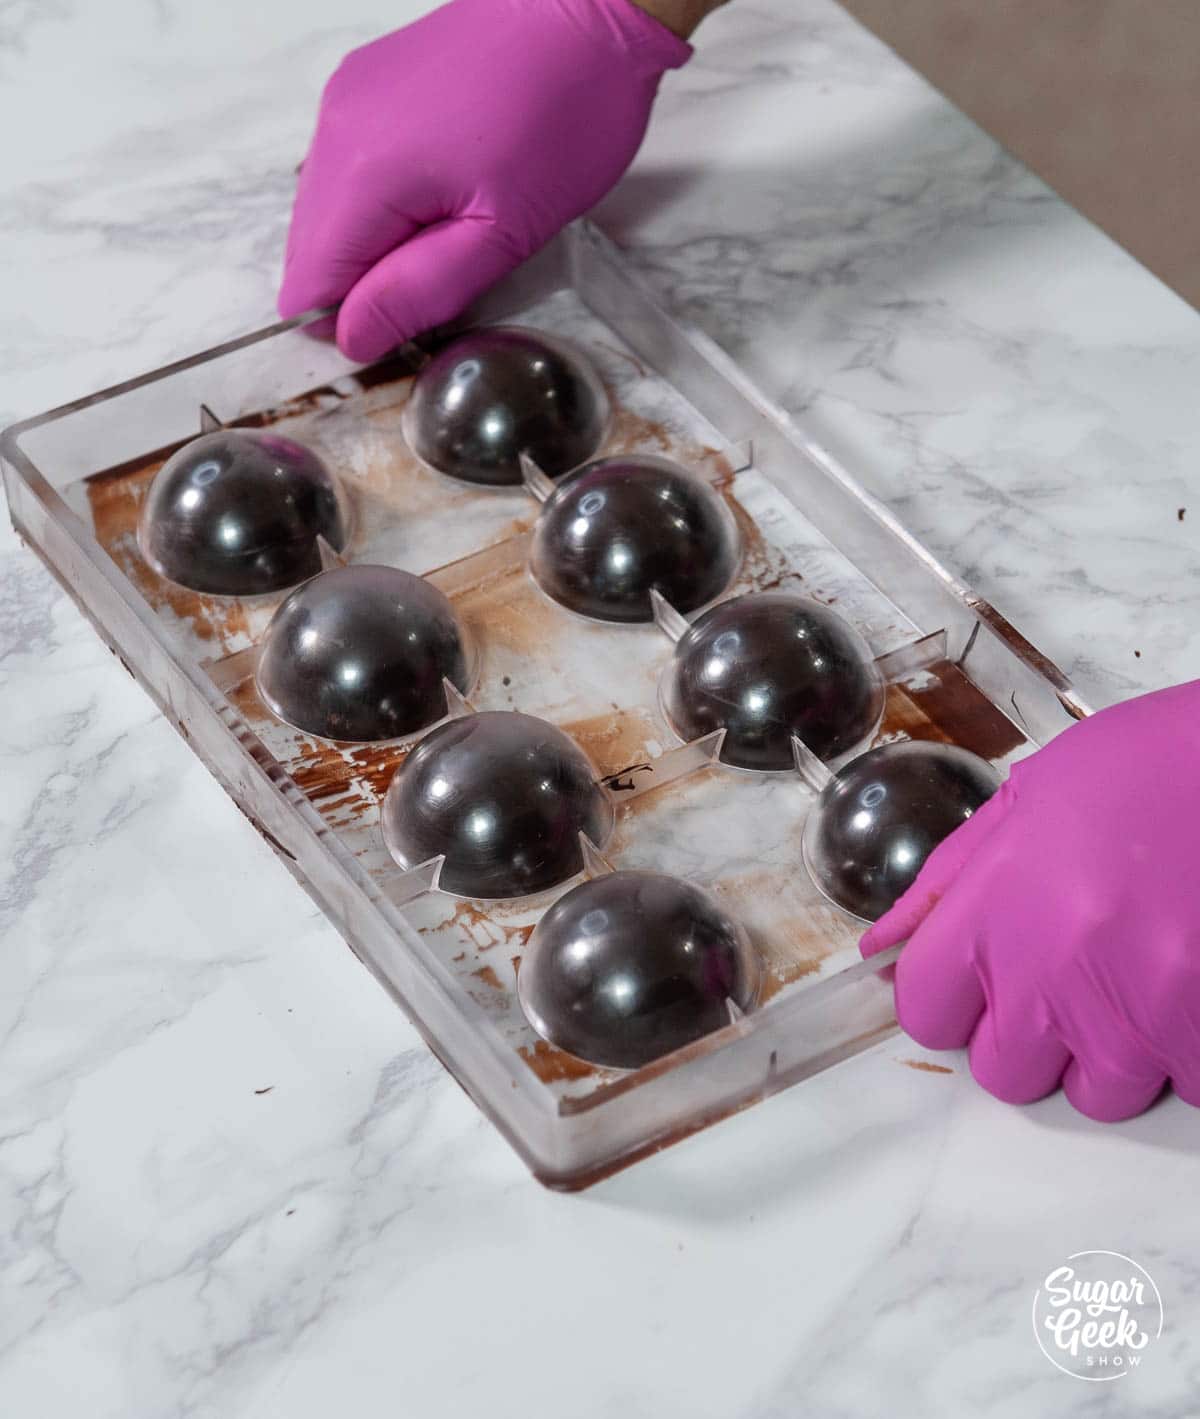
Step 10 - In one swift move, turn the mold upside down onto the table with a bit of force to get the chocolates to all come out.
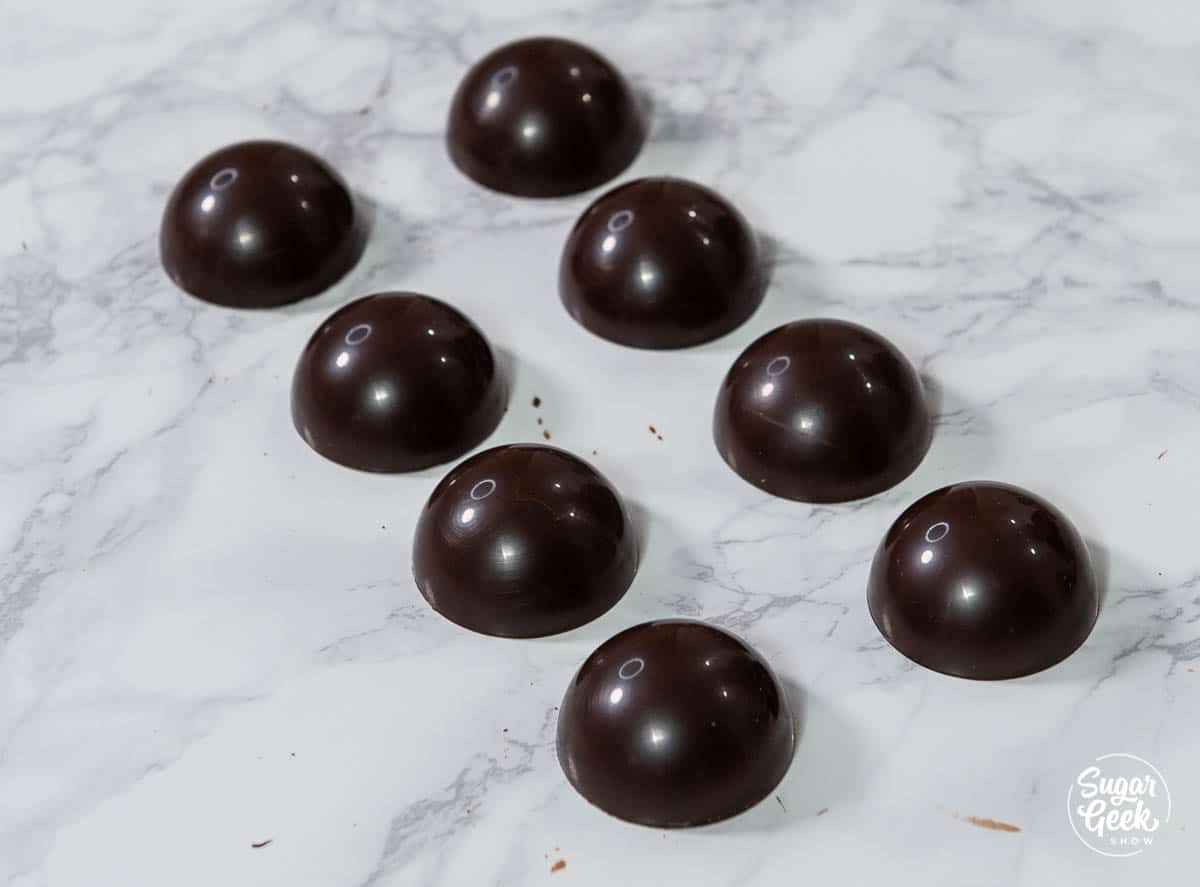
Assembling the chocolate bombs
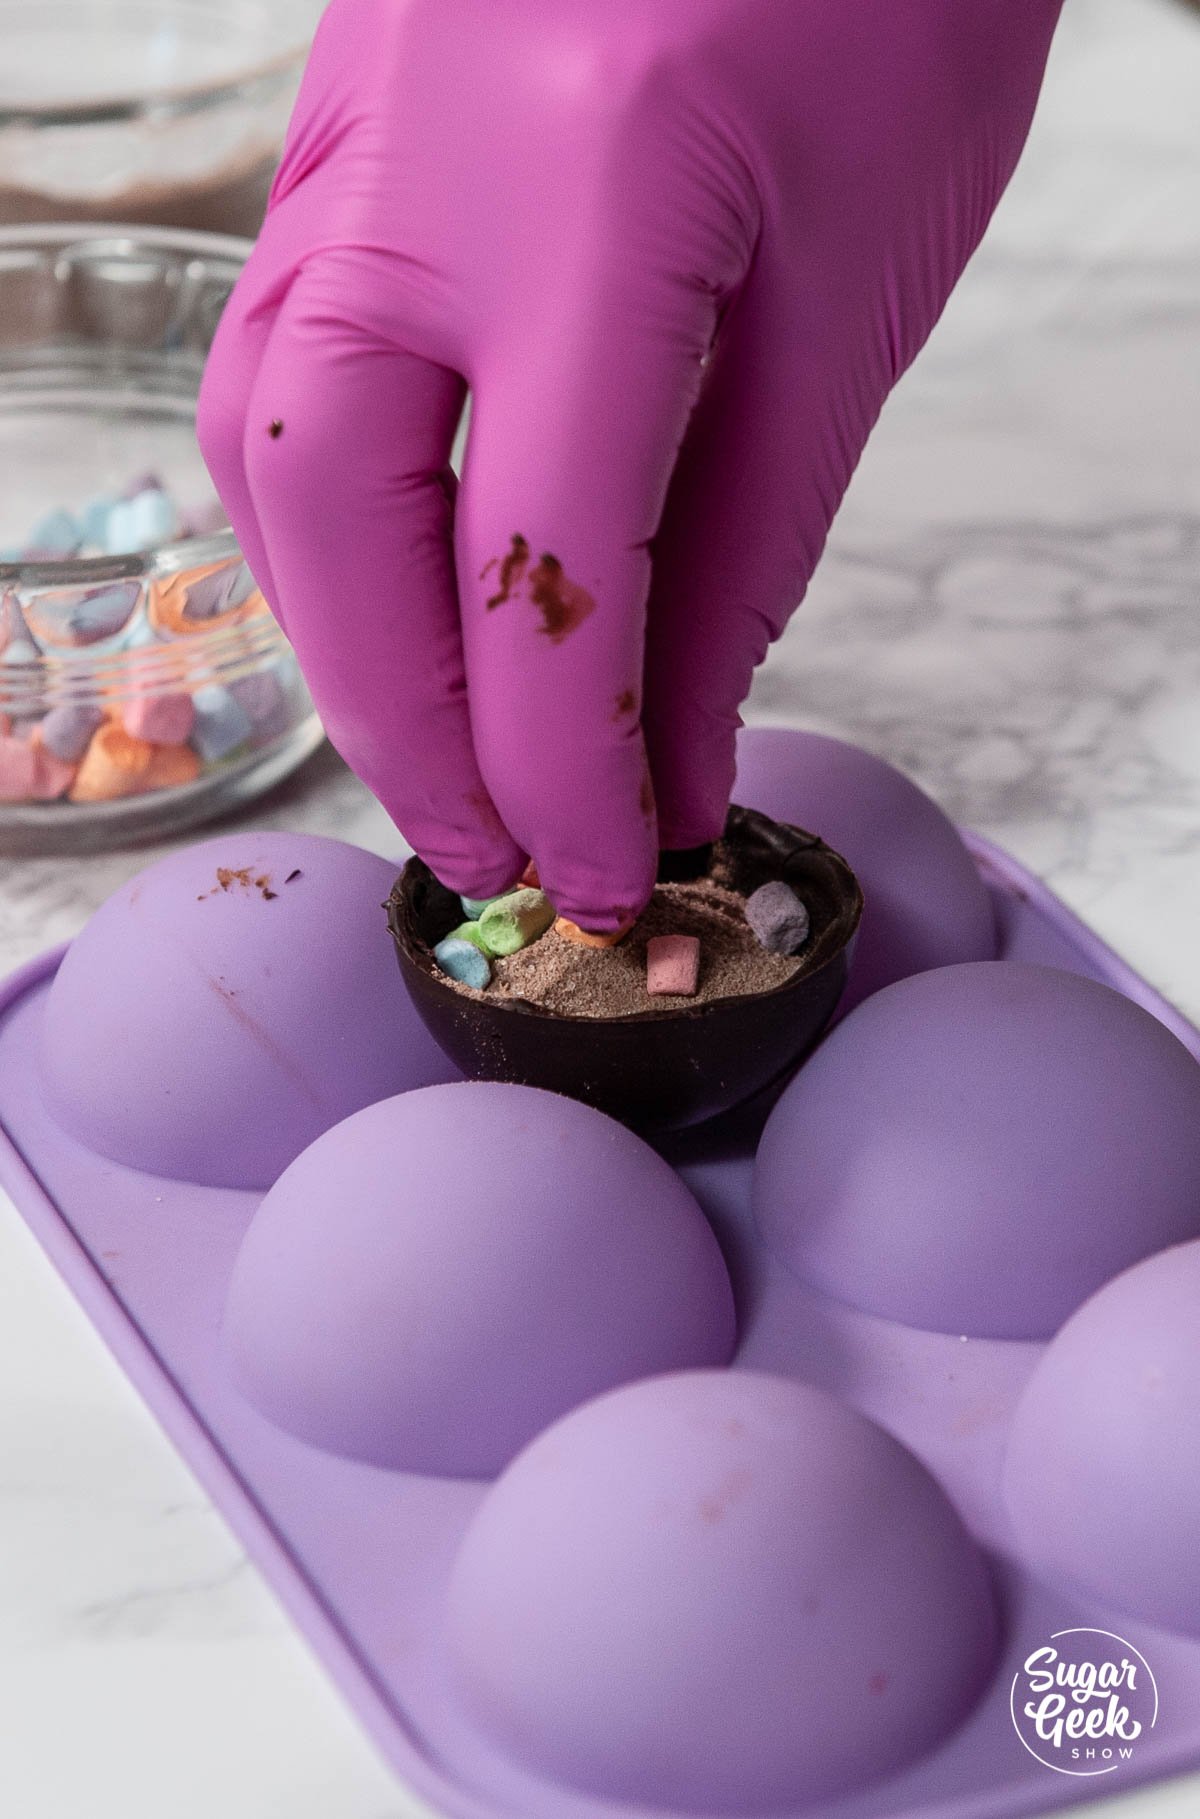
Step 1 - Set your first half into a small bowl or use the back of your silicone mold to hold it. Fill the chocolate about ¾ of the way with your favorite hot chocolate mix and marshmallows.
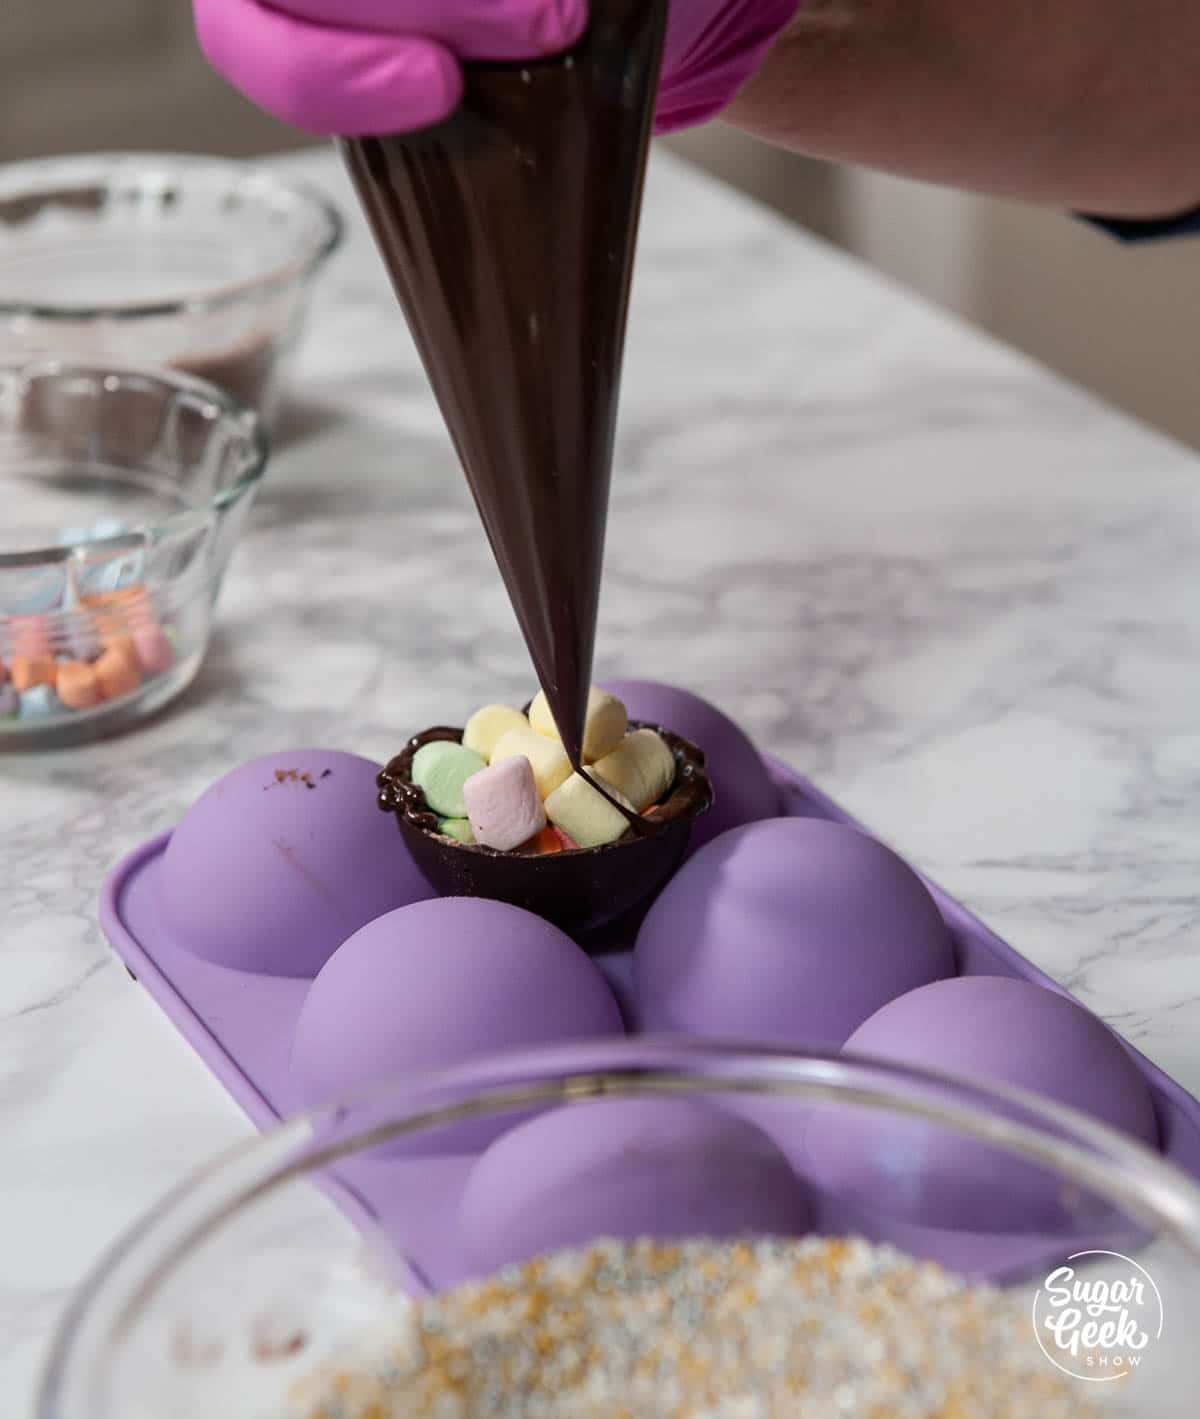
Step 2 - Pipe some melted chocolate onto the top of the sphere.
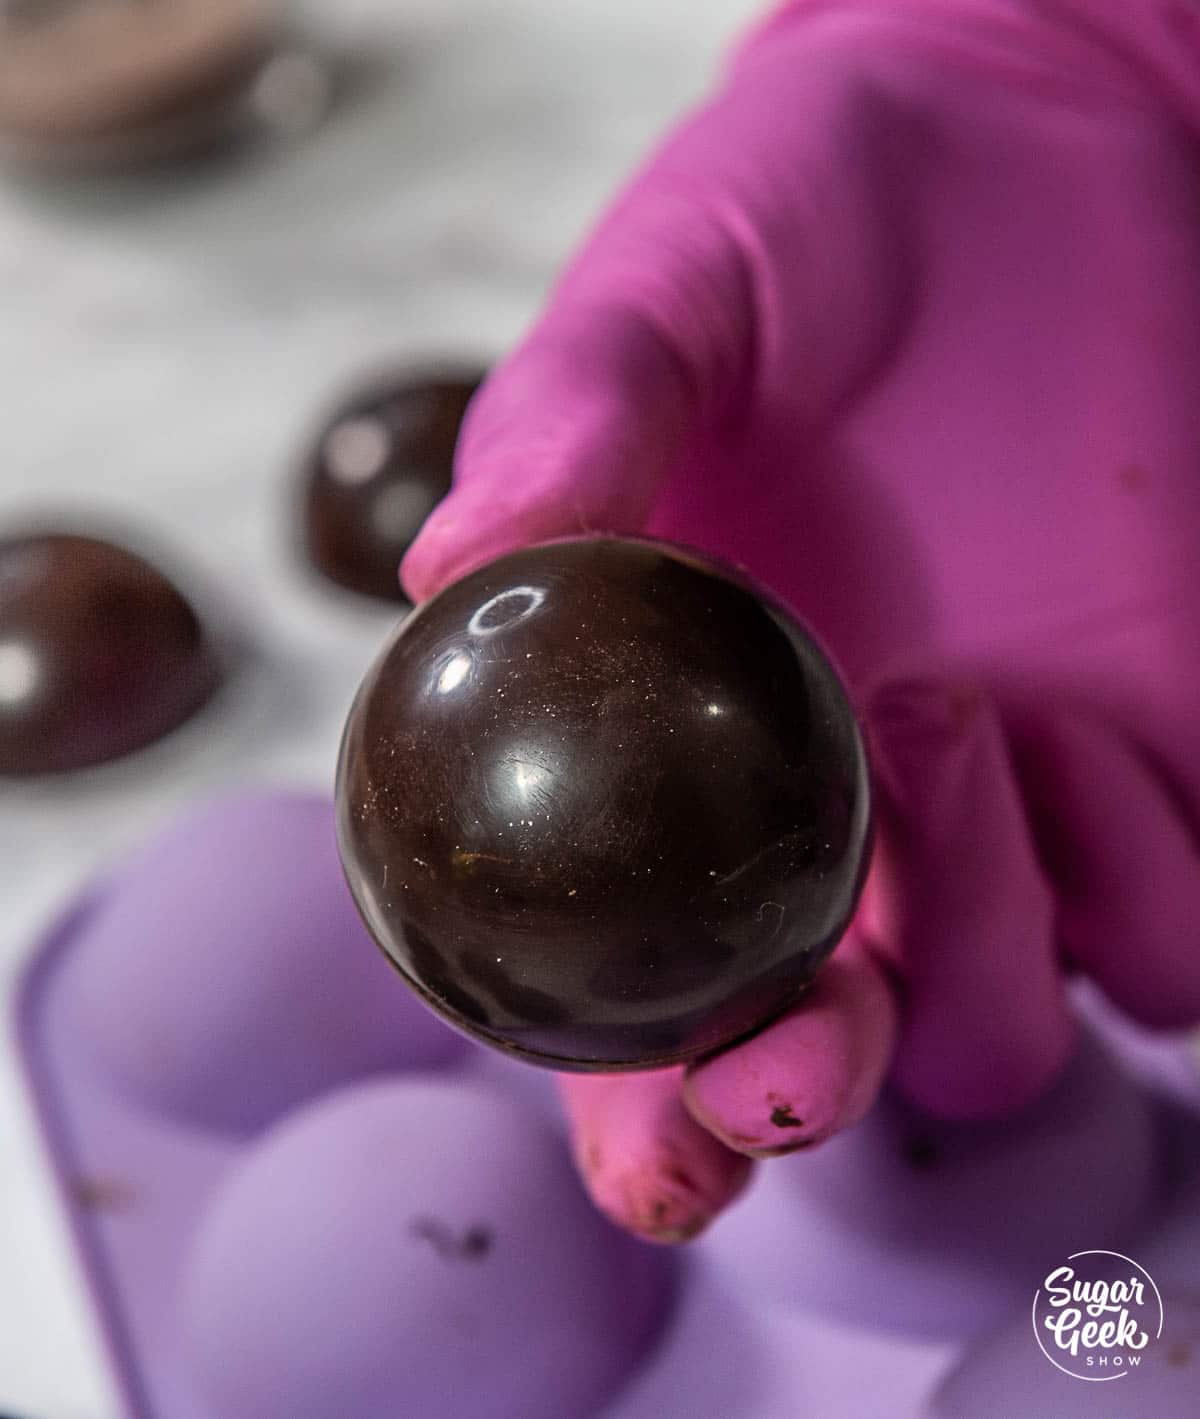
Step 3 - Place the second half of the chocolate sphere on top and press gently together to seal.
Pro-tip - Use gloves to avoid getting too many fingerprints on your hot chocolate bombs.
Step 4 - Use a gloved finger to clean off the excess chocolate to make a seamless look or simply roll the bomb in spriles to finish the look.
How to use hot chocolate bombs
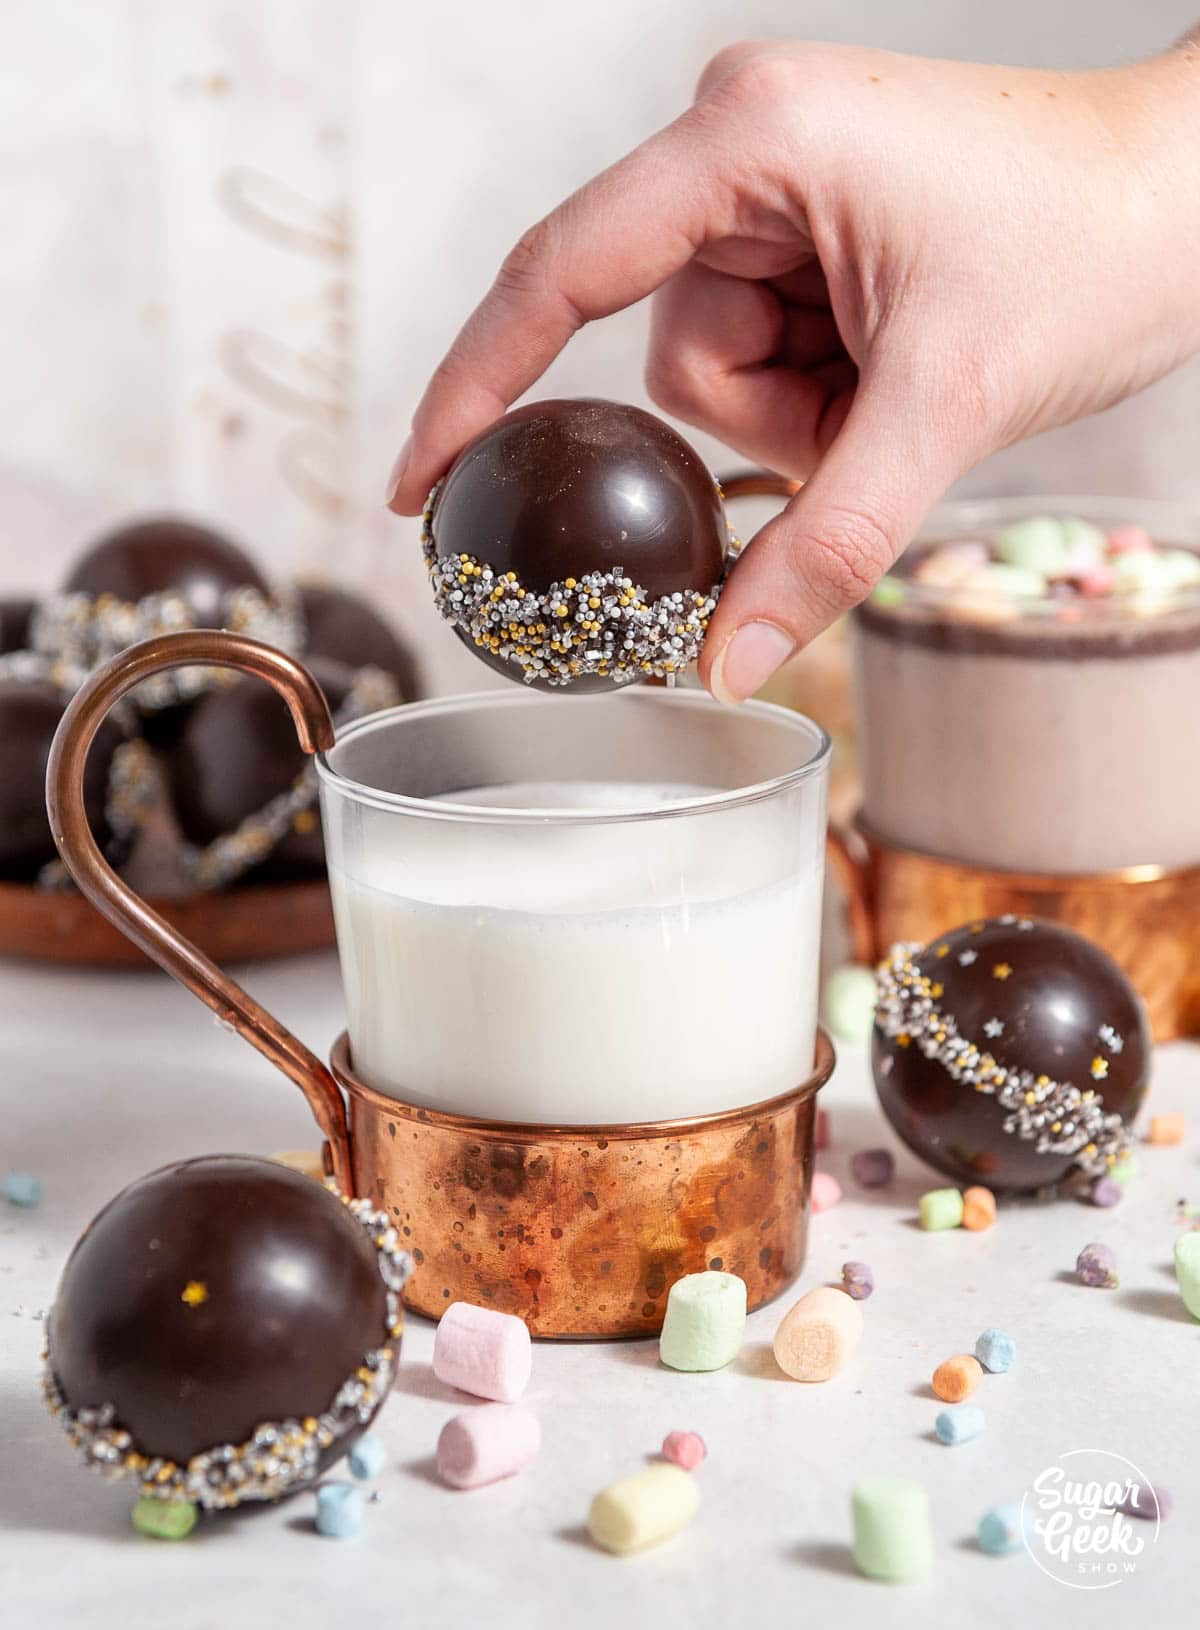
I tested these hot chocolate bombs out in various amounts of milk and found that 14 ounces was about perfect. I heat my milk until it's steaming (not boiling). Place the hot chocolate bomb in the bottom of the mug and pour the hot milk on top. The hot cream opens up the bomb and all the marshmallows escape! So fun!
Use a spoon to stir so that the cocao and chocolate melt into the hot milk.
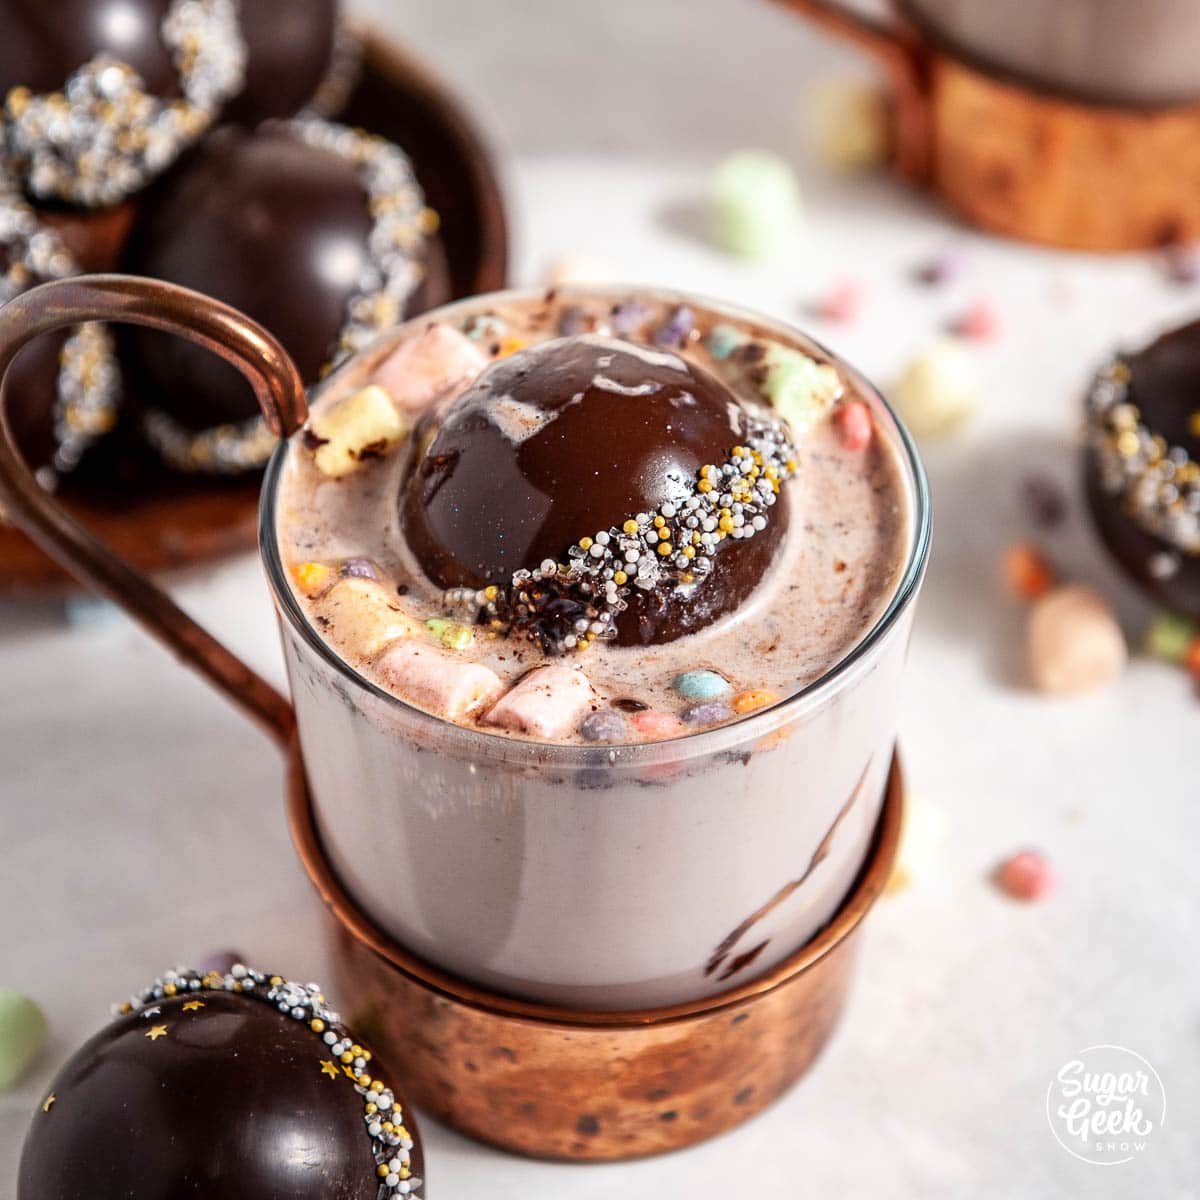
Hot chocolate bombs make a great gift! Wrap them in a plastic bag with a fun tie and some instructions for use. Put it in a mug and give them as gifts for the Holidays! Nothing says I love you like hot chocolate!
Milk Chocolate Cocoa Bombs
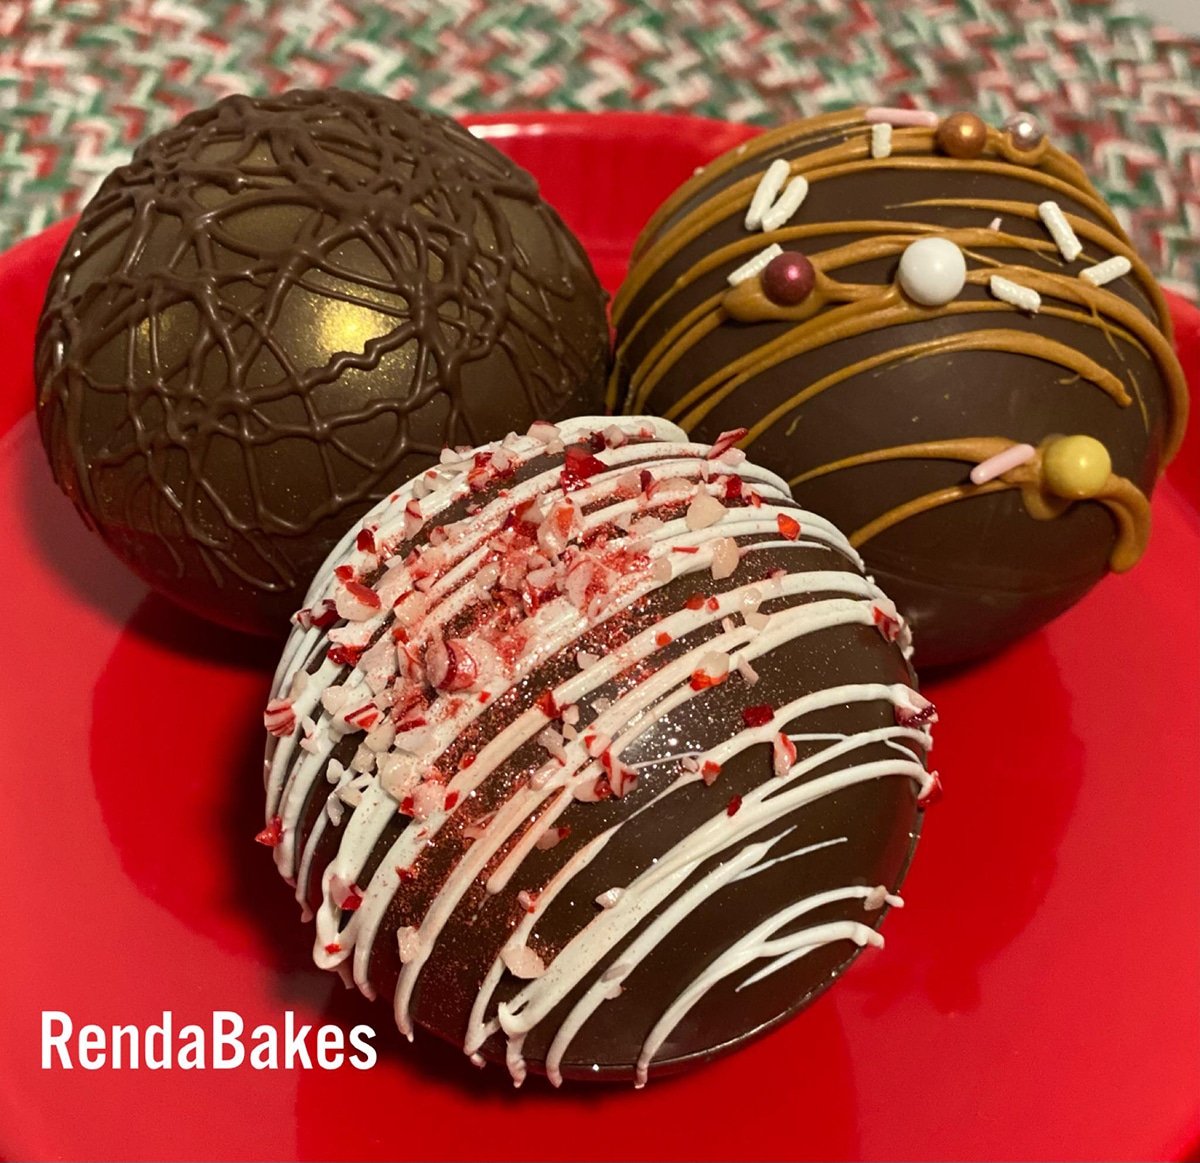
Milk chocolate has more sugar and dairy in it than semi-sweet chocolate so it will melt at a lower temperature. Follow the same process for melting and tempering but I melt in 15-second increments, stirring in between. Never let the milk chocolate go above 86ºF or it will fall out of temper.
If your milk chocolate does go above 86ºF then you can temper it using the traditional seeding method.
White Chocolate Cocoa Bombs
Making white chocolate cocoa bombs are a little bit trickier because white chocolate melts at a much lower temperature than semi-sweet chocolate. Don't let your white chocolate go above 84ºF.
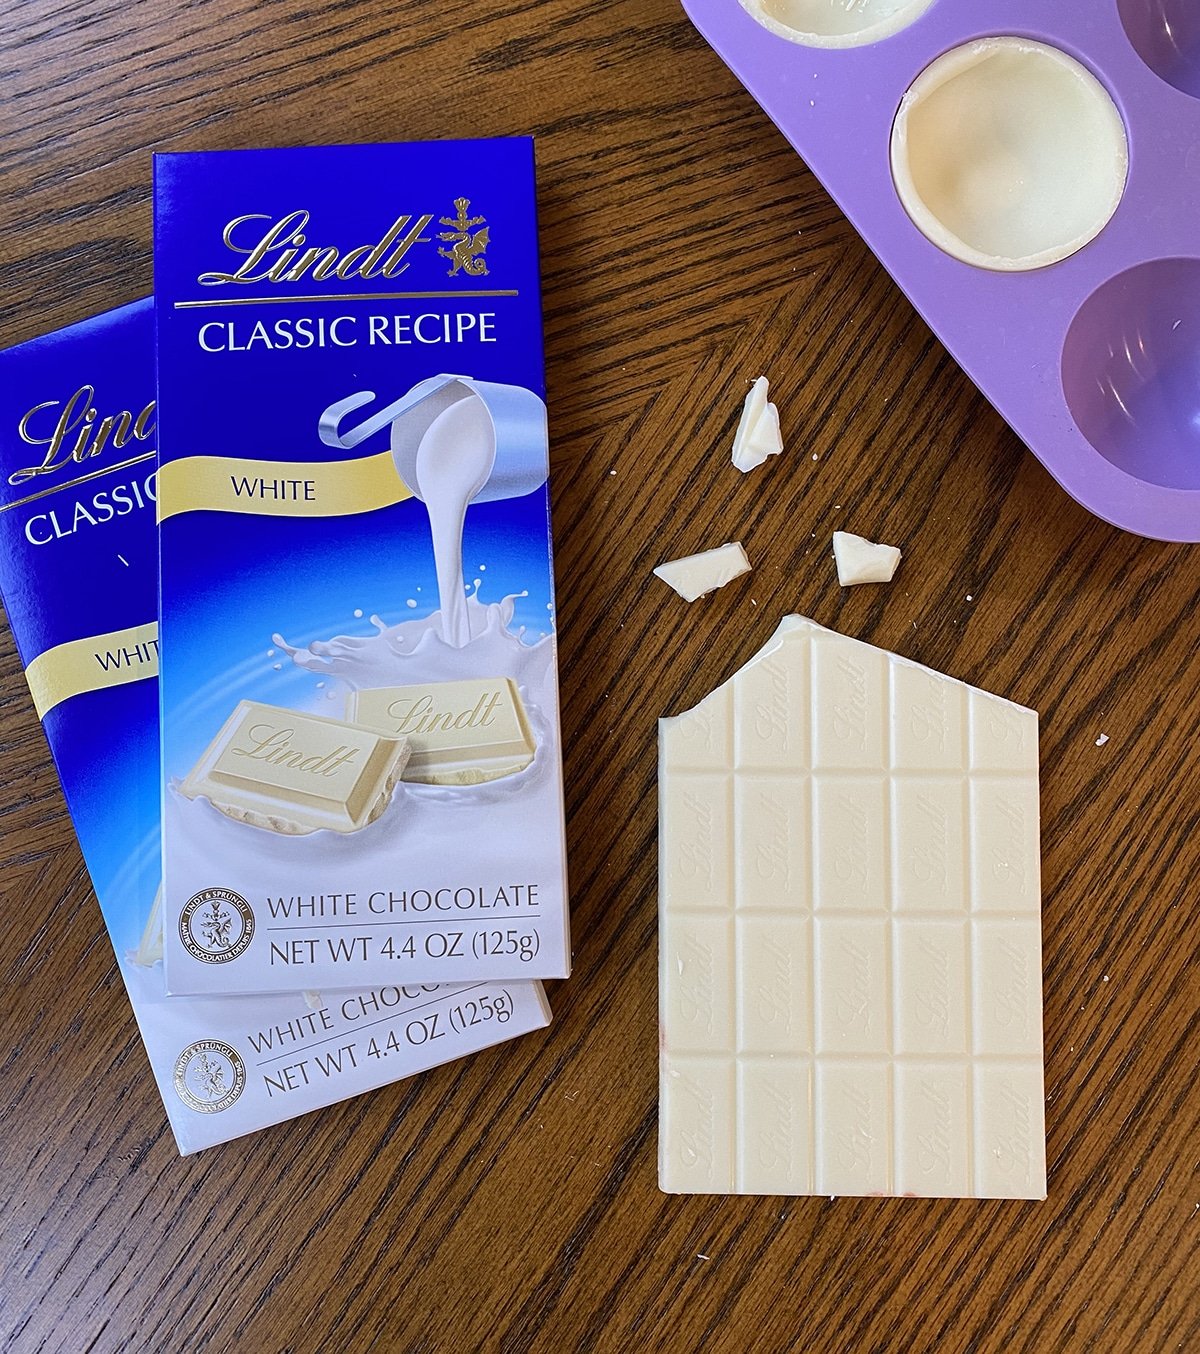
I have good luck with LINDT white chocolate bars or you can invest in some white couverture chocolate online. You can use almond bark or other types of melting chocolate but they are not good for using an acrylic mold, silicone molds only.
The process is the same as listed above for making white chocolate bombs EXCEPT I heat for a much smaller amount of time because the white chocolate melts very very quickly and is easy to over-heat.
- Finely chop your chocolate
- Melt in the microwave for 15 seconds, then 5-second increments. Stir in between. Do not go above 84ºF. If you do go above, refer to my tutorial on how to temper chocolate using the seeding method (scroll down).
- Now your chocolate is ready to be poured into acrylic molds or silicone molds.
- If your chocolate starts to get firm, melt for 5 seconds. Do not be tempted to heat it for longer.
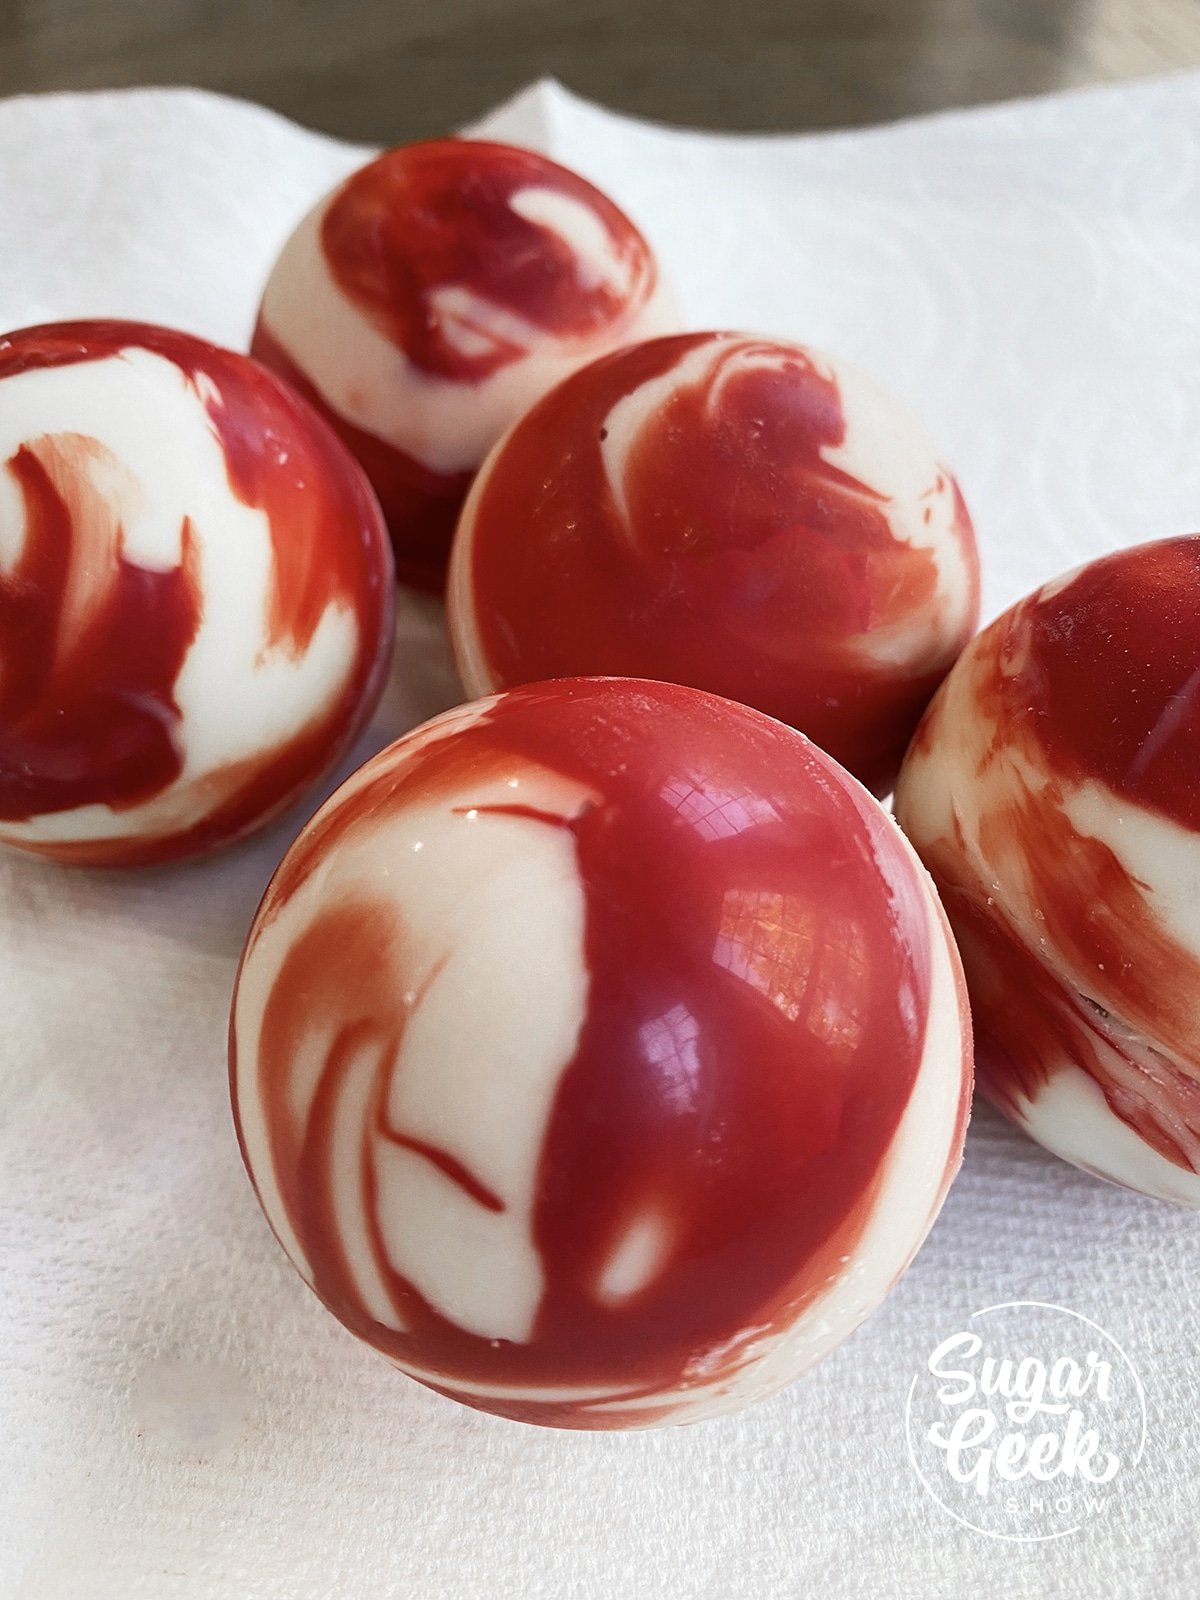
How To Color Chocolate
If you want to color your white chocolate, it's really easy. You just need to add a little melted colored cocoa butter. I like to use cocoa butter colors from chef rubber. About 1 teaspoon for 2 Tablespoons of melted white chocolate and mix.
Make sure your cocoa butter is also at the proper temperature before using it (88ºF).
More Chocolate Recipes
How to temper chocolate three ways
6 Tempered chocolate techniques
Recipe
Equipment
- Thermometer
- 2 ½" Sphere Mold (silicone or acrylic)
Ingredients
- 24 ounces semi-sweet couverture chocolate I prefer Callebaut, you can also use any high quality bar chocolate. You can use candy melts, if you're using a silicone mold but they don't taste as good.
- 1 cup mini marshmallows
- 6 Tablespoons hot chocolate mix
Instructions
For Silicone Molds
- Finely chop your chocolate using a sharp chefs knife
- Place the chocolate into a bowl and heat for 30 seconds (my microwave is 1000 watts)
- Stir the chocolate, moving the chocolate that is on the outside, towards the center.
- Heat again for 15 seconds and stir again.
- Repeat this process until the chocolate is ALMOST melted but not fully melted. Never heating for longer than 15 seconds and never going above 90F. If you go above 90º you will have to temper your chocolate by seeding (see my blog post for more info)
- Make sure your molds are clean by polishing them with a paper towel
- Paint a thin layer of chocolate into the molds and refrigerate for 5 minutes
- Paint a second coat of chocolate over the first, paying special attention to building up the rim of the sphere. Refrigerate for 5 minutes.
- Take your chocolate out of the molds and fill with 1 tablespoon of hot cocoa mix and marshmallows
- Pipe some melted chocolate around the rim and attach the second sphere on top. Pressing gently to seal.
- Use a gloved hand to wipe away the excess chocolate or simply roll the chocolate sphere in some sprinkles to finish the look.
For Acrylic Molds
- Chop your chocolate finely with a sharp chefs knife
- Add your chocolate to a bowl and microwave for 30 seconds (my microwave is 1000 watts)
- Stir the chocolate, moving the chocolate that is on the outside, towards the center.
- Heat again for 15 seconds and stir again.
- Repeat this process until the chocolate is ALMOST melted but not fully melted. Never heating for longer than 15 seconds and never going above 90F. If you go above 90º you will have to temper your chocolate by seeding (see my blog post for more info)
- Polish your mold with a paper towel to remove and residue from the inside to prevent the chocolate from sticking.
- Warm the acrylic mold slightly with a hair dryer or heat gun so it doesnt feel cold but not hot either.
- Pour the chocolate (at 90ºF) into the molds and tap on the table a few times to remove bubbles.
- Dump the chocolate back into the bowl, use the edge of your bench scraper to tap out as much of the chocolate as possible. You don't want the chocolates to be too thick.
- Scrape off the excess chocolate from the top of the mold back into the bowl.
- Turn the mold upside down onto some parchment paper to let the chocolate drain further and almost completely set. About 5 minutes. The chocolate should lift away from the parchment paper easily but still be soft.
- Scrape off the excess chocolate again and then place the mold into the freezer for 5 minutes.
- The freezer will cause the chocolate to contract and pull away from the mold. If it's not tempered, it will not contract and there will be no way to get the chocolate out. You can tell if your chocolate is tempered because if you look under the mold, it wont be stuck to the molds anymore. If you have a couple spots where it still is, it will be ok and still release with no problem.
- Quickly turn your mold over onto the table to release the chocolate from the mold. Now they are ready to assemble.
- Add 1 Tablespoon of hot chocolate mix to half the sphere and some marshmallows.
- Pipe some melted chocolate onto the top of the sphere at attach the top piece of the sphere. Pressing gently but firmly.
- Use a gloved hand to wipe away the excess chocolate for a clean look or roll in some sprinkles to finish decorating them!





Jessica Blackman says
Can you tell me where to find those beautiful mugs?
Elizabeth Marek says
Thanks! I got them on clearance at william sonoma last year
Aysha says
Hey, what size silicone mold do you use for these?
Elizabeth Marek says
2" mold. I have the links in the blog post
Clare says
Hi, do callebaut callets work the same as bought them thinking easier to melt than a bar. Also, do you use the same hot chocolate mix for white and dark chocolate? Thanks
Elizabeth Marek says
In my blog post I mention that callets or chips are much harder to melt because they are in big pieces. The bar works best because you need to shave the chocolate very thin in order to melt it without going over 90ºF. You can use the callets but you will have to chop them very finely which is actually more difficult because they move around a lot.
Debbie Wood says
Excellent video. You explained the importance of tempering very well. I didn't know you could heat chocolate in a way as to not loose it's temper. Game changer! Thanks for the information.
Kim says
Your video is excellent... years of making chocolate and never tempered it because I thought it was too involved. I am literally making them now and I have had a little trouble getting them out of the mold without cracking so I am trying to make them thicker. I am using the 21/2 silicone mold and the Lindt 70% cocoa which is excellent. Also, I mixed dark and milk chocolate hot cocoa mix for the inside. I prefer milk chocolate and I understand about the need of cocoa butter....what is the best choice for milk chocolate?
Elizabeth Marek says
Definitely do a second coat if they are too thin. I do believe LINDT makes a milk chocolate as well that would work.
Dana says
Could you please share where the mugs came from? TIA!
Elizabeth Marek says
I got them on clearance from William Sonoma last year
Emma says
Hi love the recipe for the chocolate bombs. Please could you tell me what the temperature to reach is if using callebaut milk choclate.
Thanks
Sugar Geek Show says
Hi! Thank you, milk chocolate should never go above 84F-86F.
MB says
I wonder if you could fill them with Bailey’s? They would have to be in the refrigerator but do you think it could work for an adult version?
Sugar Geek Show says
Oooh yum I don't see why not!
Chelsea says
Do you use regular mini marshmallows or dehydrated? I am hoping to do these in mugs for everyone for xmas this year! They look like so much fun!
Sugar Geek Show says
I used the dehydrated ones that came in the cocoa box mix and added a few regular mini marshmallows as well!
Deb Thatcher says
I know you said you could use either milk or water. If you used water what happens to the chocolate then? Wouldn’t it seize up rather than melt like it would with milk? I can’t wait to try this recipe. I just ordered my silicone molds!!
Sugar Geek Show says
If you use hot water it just won't taste as good, milk is best 🙂
Brandi Montelongo says
I can’t wait to try this! Little nervous about Tempering the chocolate! But can you let me know the different temperatures for The difference chocolates? (Ex: Dark, white, and milk, any others if I missed some)
Elizabeth Marek says
I have updated the blog post to include temperatures for milk chocolate and white chocolate
Katie Lester says
I am excited as well to try this and it is my first time temoering chocolate. Would almond bark be considered candy coating? I am looking for the chocolate and noticed that with the chocolate chips. Thank you so much for your tutorial and answering our questions! I am definitely a fan!
Elizabeth Marek says
Yes almond bark is candy coating, not real chocolate. Its ok to use with silicone molds but not acrylic molds
Brandi Montelongo says
I’m excited to try this recipe out! I’m nervous about tempering the chocolate! Can you tell me the different temperatures for the different colors please. Going to give them away to family
Elizabeth Marek says
Here is my blog post on tempering different types of chocolate https://sugargeekshow.com/recipe/tempering-chocolate/
Harriette Janicek says
Can you share other recipe combinations, like maybe adding Caramels to this or how about adding Cherry gelatin along with the cocoa mix to make a Cherry/Chocolate bomb.
Yasmin Walters says
Just made these tonight! They came out perfect!!!!!!!! Thank you so much! My boys loved them.
Wafaa Alwawi says
Thank you!!
Is one tablespoon of hot chocolate powder enough for a cup? Can I add more?
Thank you!!
Elizabeth Marek says
It is enough because you area also adding the chocolate from the cocoa bomb and sugar from the marshmallows
Joanna says
I cannot find the block chocolate with cocoa butter. I see sugar, cocoa beans & soy lecithin all over, but not one with cocoa butter. Thoughts on that?
Elizabeth Marek says
You might have to buy online
Khrisi Thiele says
Thank you for your video. It was very helpful. I'll be making these as soon as I receive my molds. What brand of sprinkles did you use? Everything I'm finding online looks a bit big and I loved the colors you used. Thank you!!
Elizabeth Marek says
I combined some sanding sugar and some non-perils
Katie says
Do you by chance sell these? My brother lives in Portland, so I was thinking of sending him some for Christmas.
Elizabeth Marek says
Sorry I don't
Nicole says
Hi, Very excited to try these out. Do you just use the standard mini size marshmallows inside the bombs or are they smaller than mini. If so where do you buy them and if online would you happen to have a link you could share?
Thanks!
Elizabeth Marek says
I used mini and dehydrated. You can buy them online or you might find them in store
Ellen says
When making the chocolate bombs can you melt the chocolate in a double boiler on the stove ?
Elizabeth Marek says
If you do it that way then you will have to temper the traditional way, by seeding. See my chocolate tempering tutorial for more info. Skip down to the seeding method https://sugargeekshow.com/recipe/tempering-chocolate/
Tika says
Thank you for a clear tutorial. I cannot wait to try this with my family.
Where did you get your copper/glass mugs? they are super cute!
Elizabeth Marek says
I got them at William Sonoma
Ann says
Wait. 14 oz of hot milk??? Who has a mug that holds 14 oz of milk?
Elizabeth Marek says
All of my coffee mugs hold 16 oz of liquid. If you have a small mug, use less but the flavor will be very strong.
Dana Van Clieaf says
Thank you for the tutorial! This was a fun experiment but trying to keep the chocolate from solidifying on my brush and in the piping bag was a pain! I finally got a heating pad and put it on low on the counter and laid the piping bag on it. I put the bowl of chocolate over a small pot of warm water and that helped. Getting the chocolate thick enough in the mold is key and did have some trouble getting it melted enough at only 90 degrees.
I used Baker’s chocolate squares and we aren’t crazy about the taste of them. We’ll try again with a different brand if chocolate!
Elizabeth Marek says
Bakers chocolate is not make for melting, its used more for making chocolate cake and things like that. If you use a good quality eating chocolate you will have much better luck.
Jenny says
I just made these, and they turned out great! Thank you for such a clear and detailed recipe. I only had 10 oz of chocolate, so I figured I'd just make as many as I could, but I made 6 just fine. I found that I needed to leave them in the fridge for 10 minutes between each coat to be nice and shiny. Since I was short on chocolate, instead of using chocolate to "glue" them together, I rested each side on a warm pan for about 5 seconds to make them a little melty, put in the hot chocolate powder, cinnamon and marshmallows, and then stuck them together. I had a tiny bit of dark chocolate, so melted that and drizzled it over the top and added some gold sugar dust. SUPER cute and they were delicious! These will make fantastic Christmas gifts for neighbors and friends.