

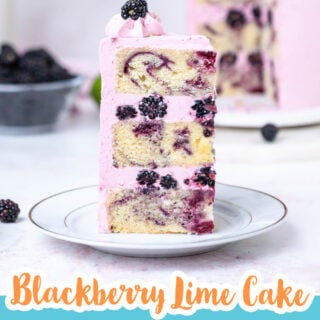
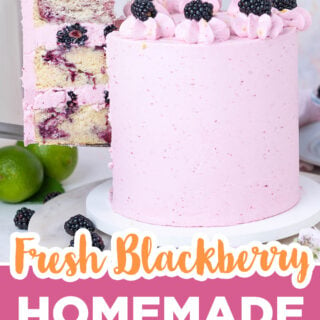
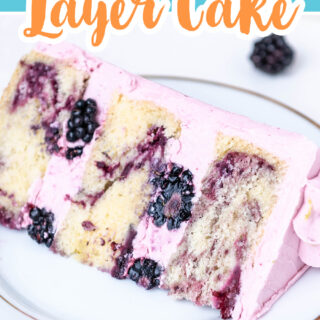
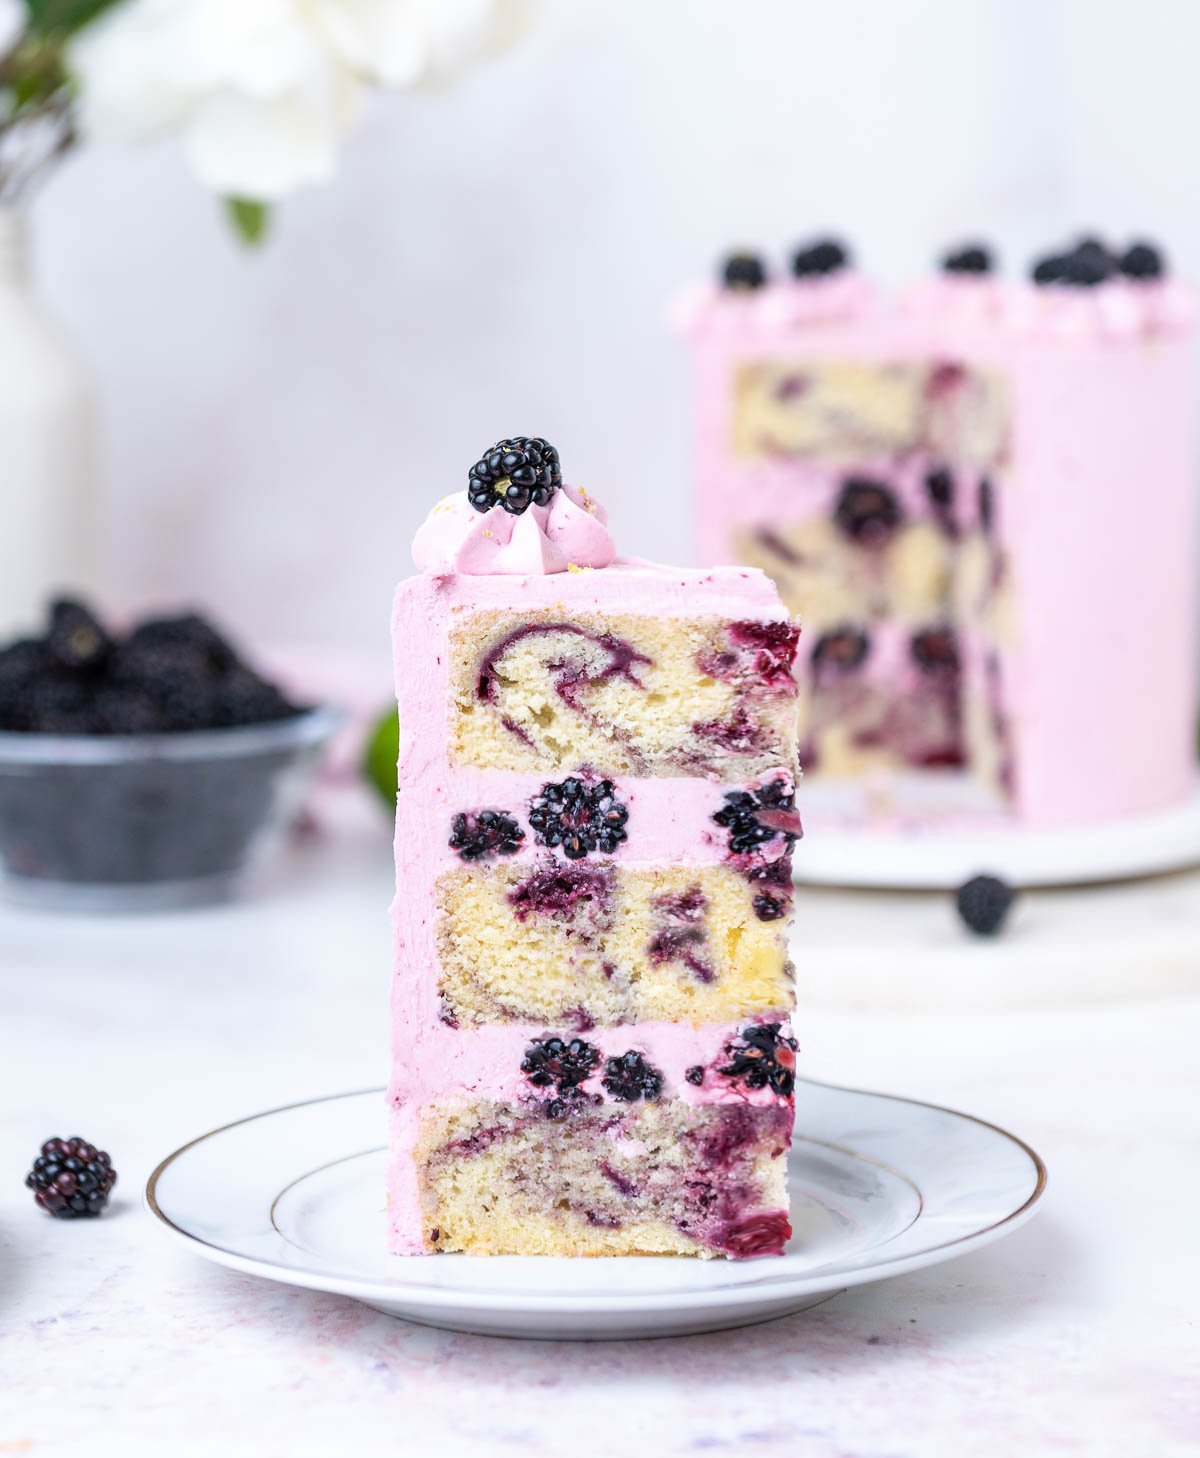
This blackberry cake recipe is made with swirls of blackberry puree, whole blackberries, and blackberry buttercream! Add a hint of lime to bring out the fresh flavor.
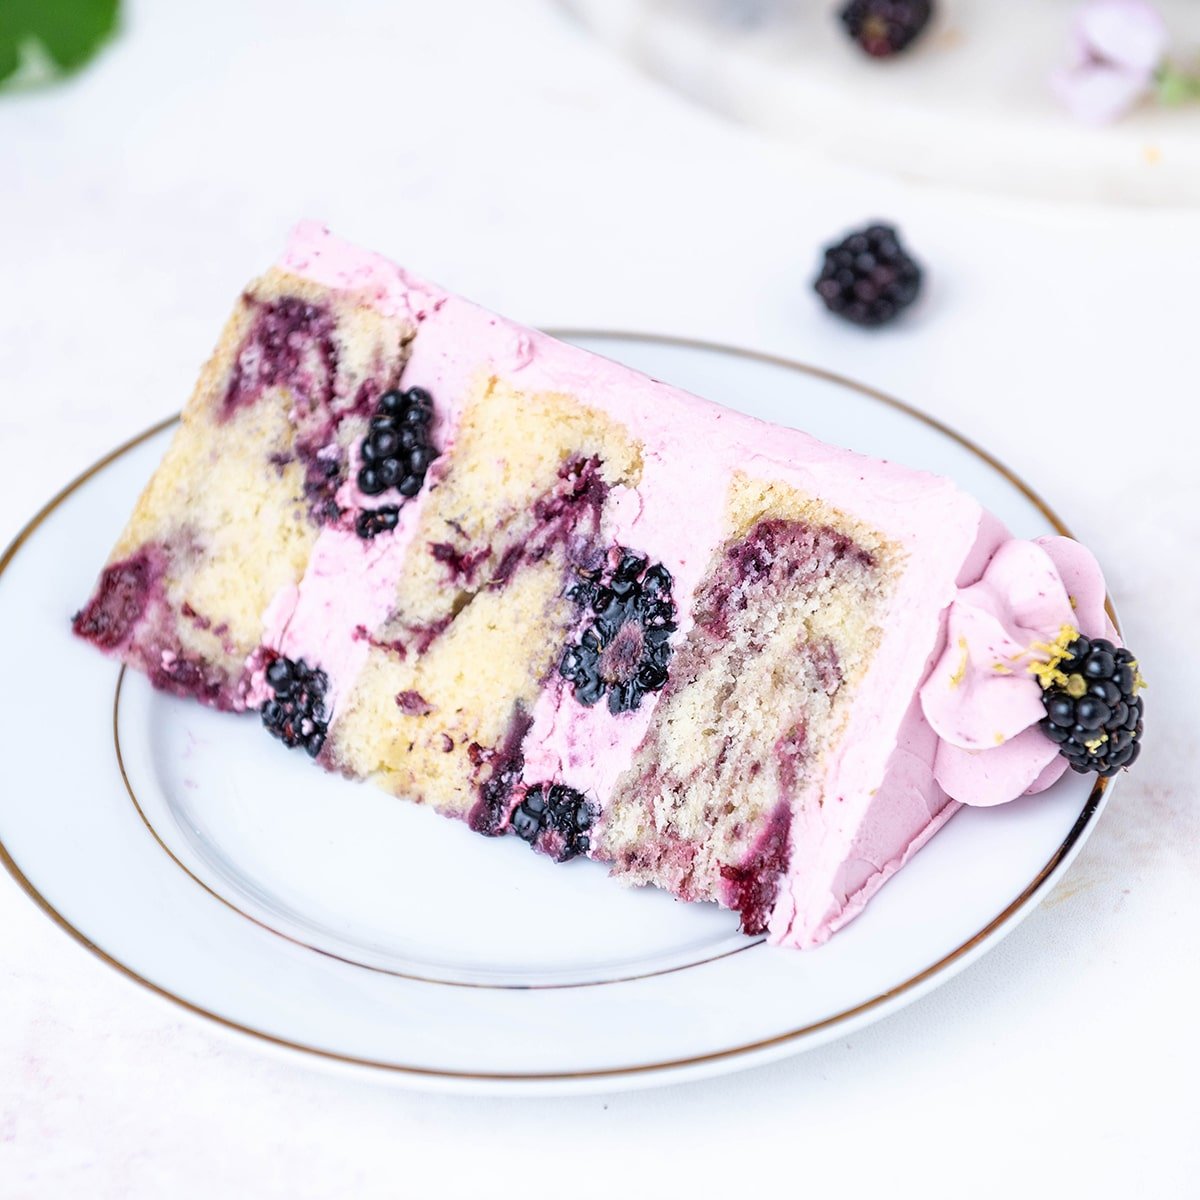
What makes this cake extra special is the boost of lime flavor! Using lime zest in your recipe will get a more concentrated flavor, resulting in a cake that's packed with bold summer flavors you will love! If you're familiar with my fresh strawberry cake recipe then this will be very similar.
Table of contents
Special Ingredients
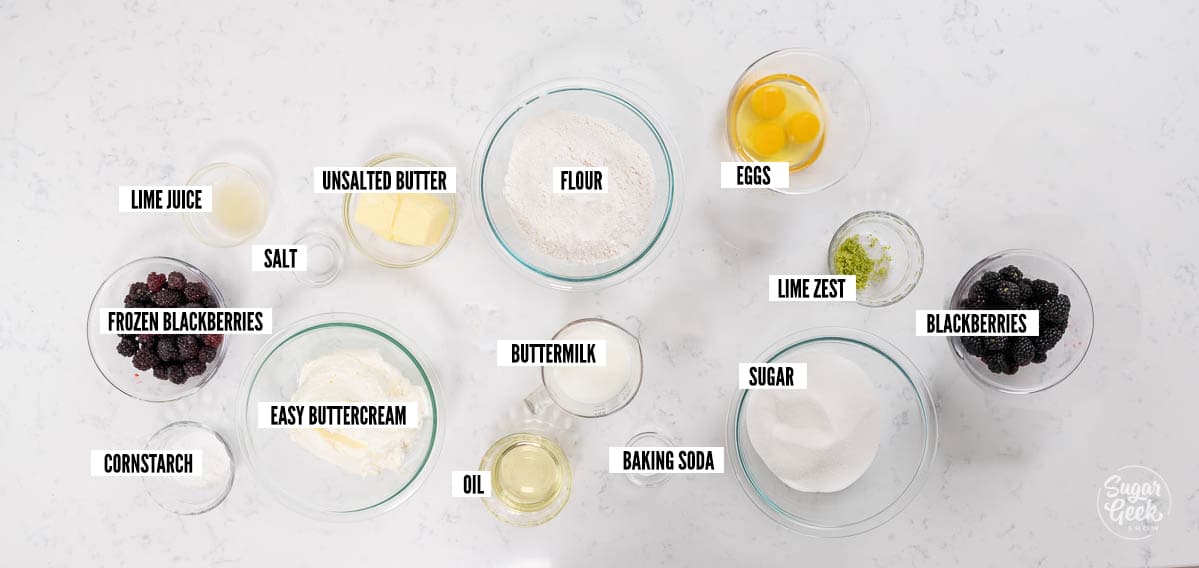
Blackberries: You can use fresh or frozen blackberries to make the puree in this cake. Frozen berries are flash-frozen at the peak of ripeness, so they have the best flavor. It's best to use fresh, juicy blackberries for the center and top of the cakes.
Lime: I really like the combination of blackberry and lime because the tartness brings out the flavor of the berries. You can also use lemon juice and lemon zest instead if you prefer to make a lemon blackberry cake. You could also switch out the berries in my lemon blueberry cake too!
Buttermilk: The acidity in buttermilk not only breaks down the gluten structure, making baked goods more tender, but it also adds a delicious flavor. If you do not have buttermilk you can make your own buttermilk substitute using milk and white vinegar or substituting sour cream.
Step-by-step Instructions
The key to blackberry cake is making a puree of concentrated blackberry flavor, and mixing that into our cake and buttercream. I recommend making the puree first, then the cakes, and making the buttercream while the cakes are cooling.
Making Blackberry Puree
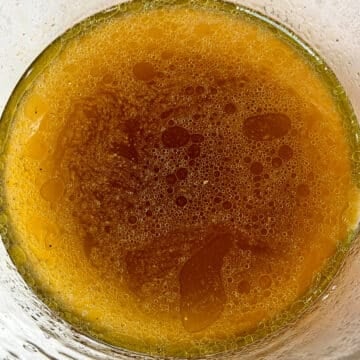
- Combine lime juice and cornstarch to make a slurry and mix until there are no lumps.

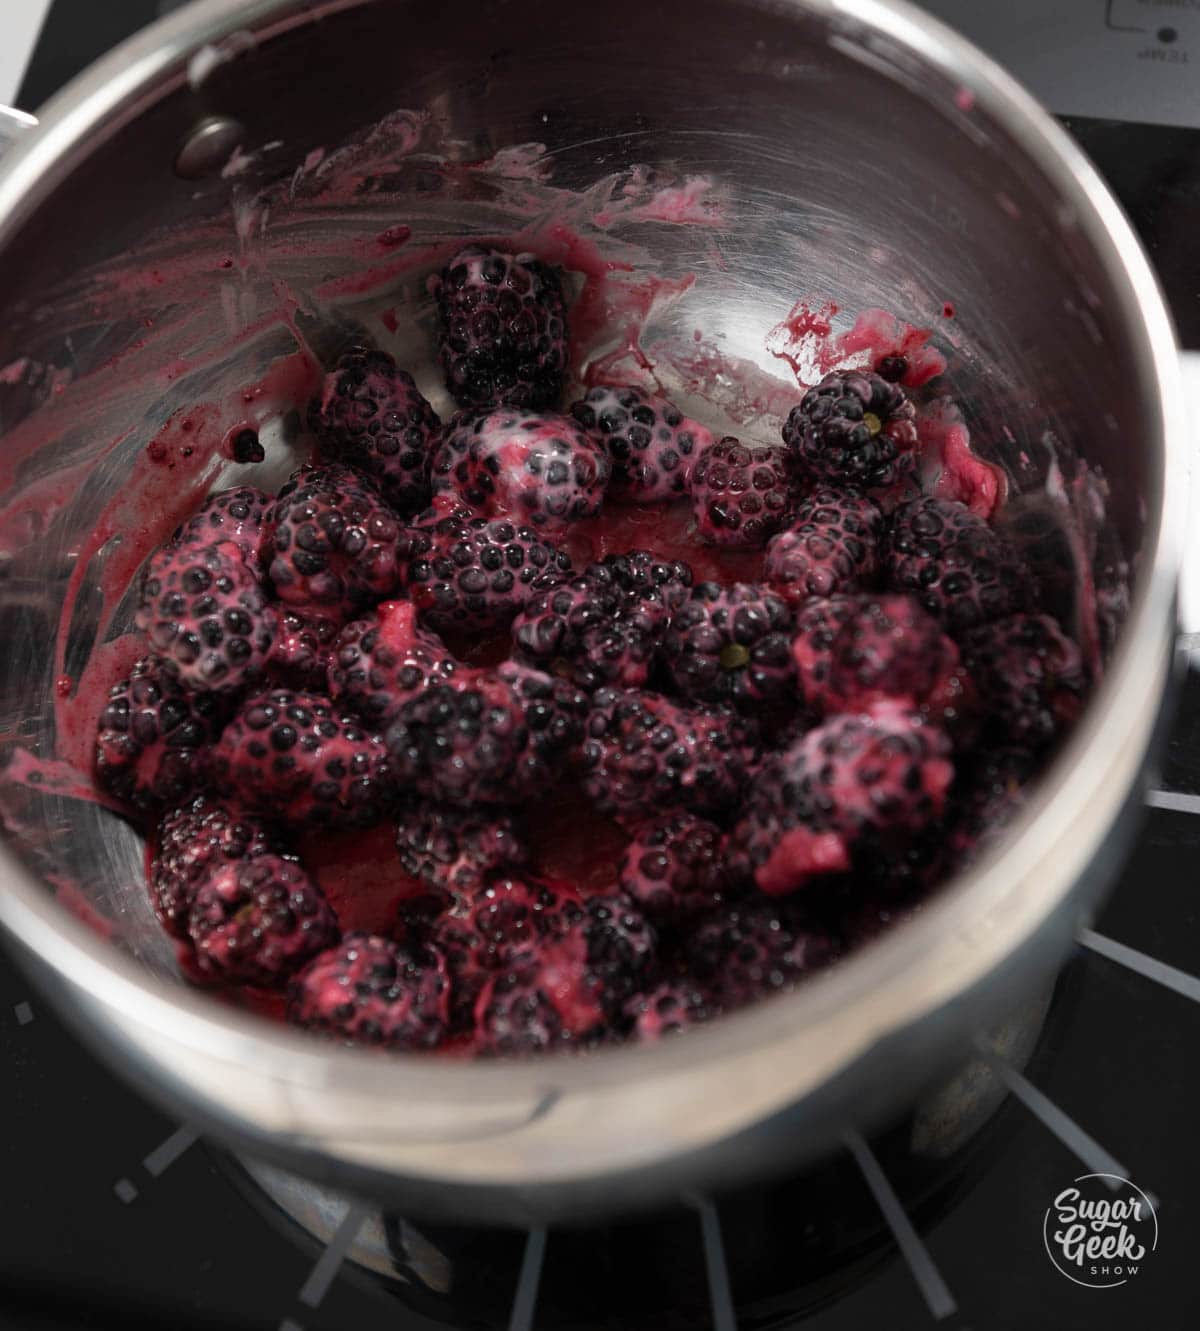
- Mix the blackberries and salt in a saucepan and use an immersion blender to make the filling smooth.

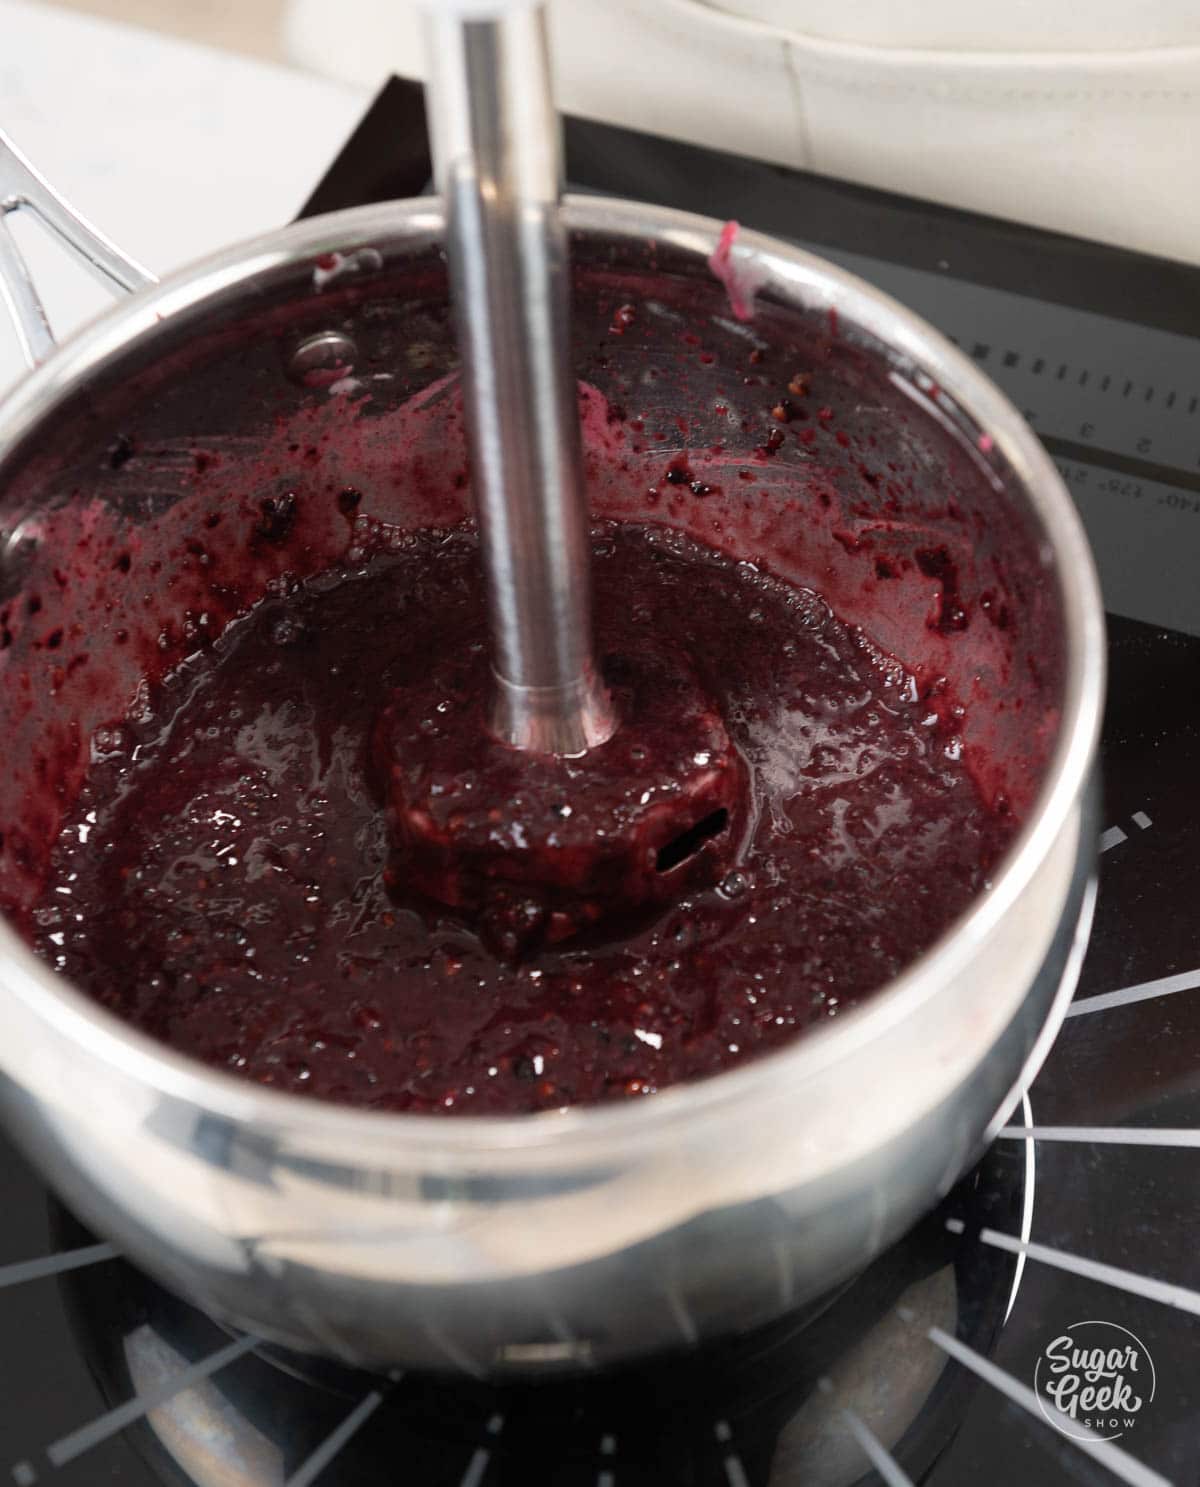
- Turn on the heat and cook down the berries. Keep stirring to keep the puree from cooking too quickly on the bottom of the pan.
- Once the puree has thickened up slightly, remove it from the heat and stir in the lime zest.

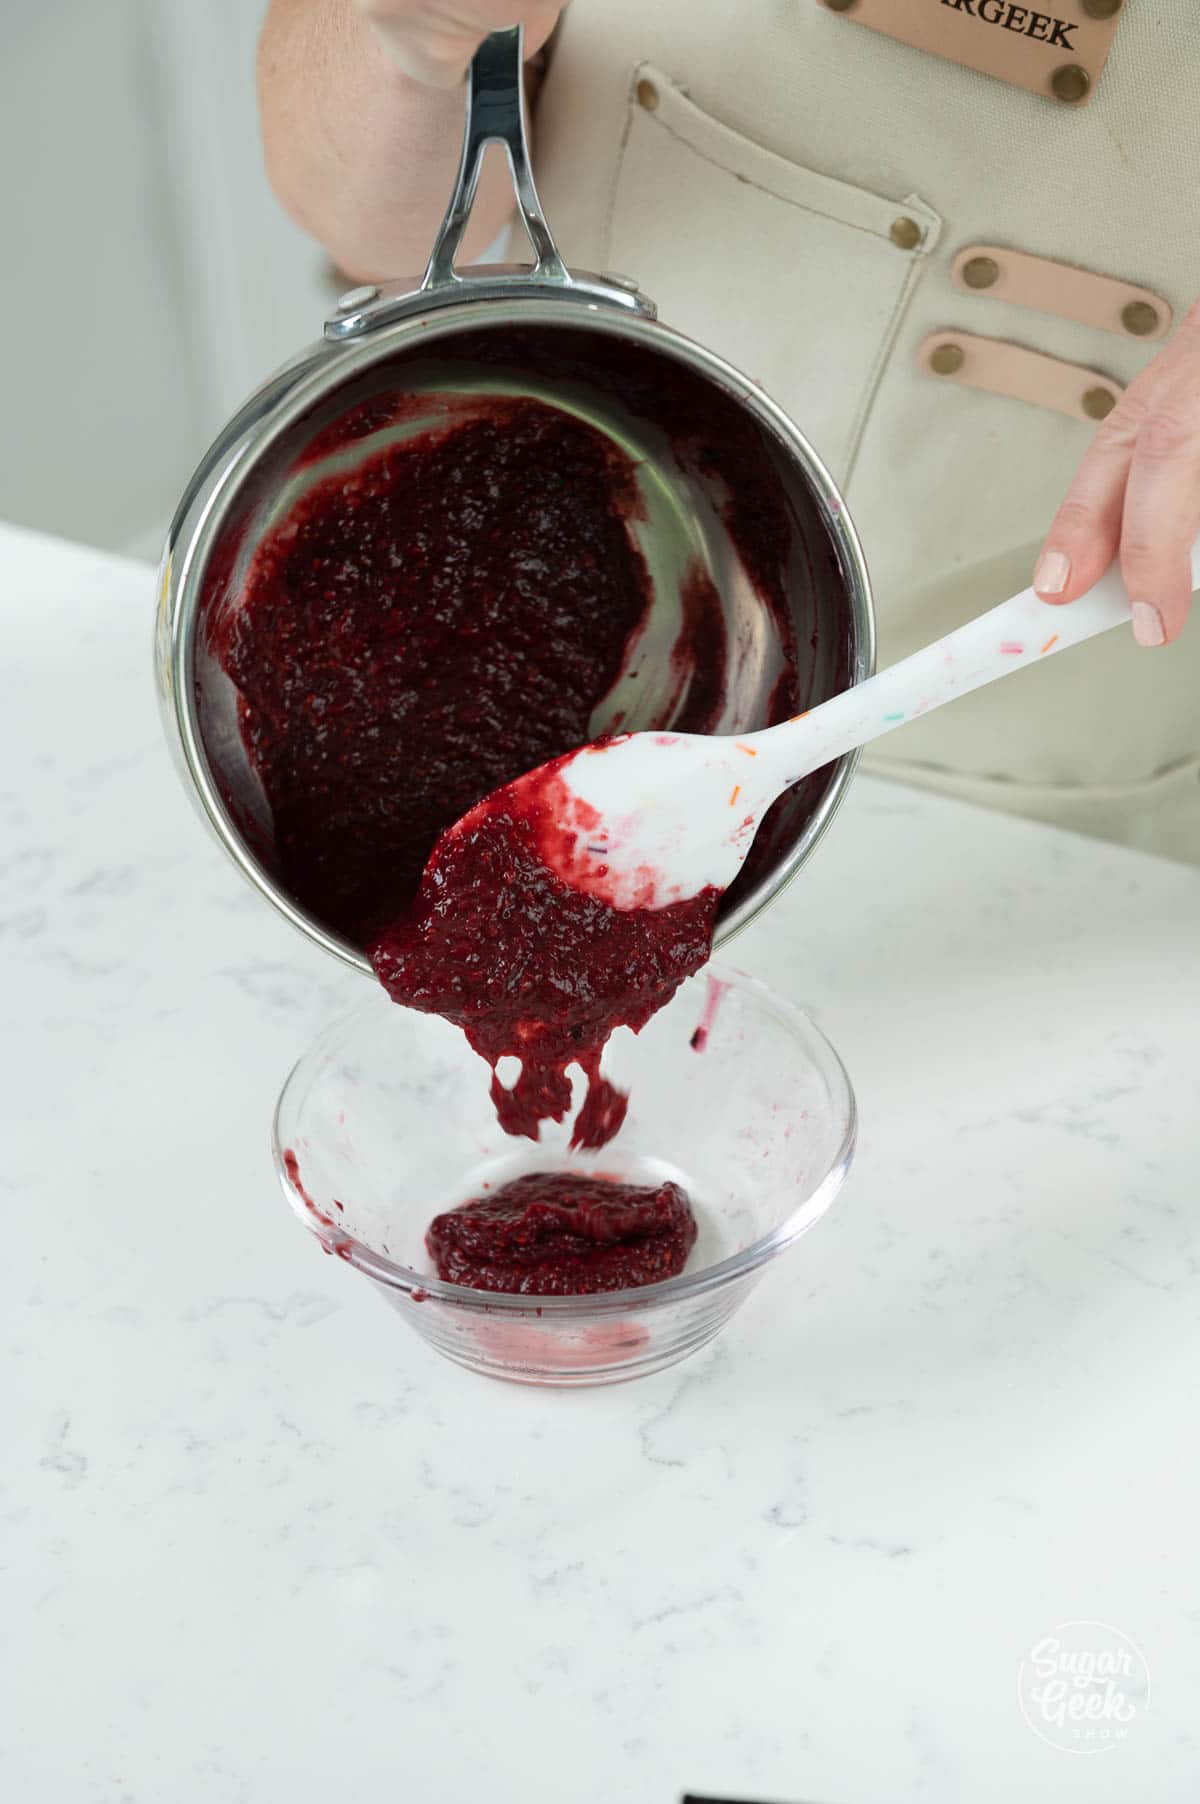
- Transfer the puree to a large bowl to cool to room temperature. You will use about 6 Tablespoons of the puree to add to your cake. About ¼ to ½ cup of puree will be for the buttercream. If you choose to strain the seeds out of all of the puree, add a couple of extra ounces of berries to account for the loss in straining. I chose to leave the seeds in for the cake and strain the seeds out for the buttercream. The seeds can be left in for the buttercream too, your choice.
- Store leftover puree in the fridge for up to a week or freeze for 6 months.
Making Blackberry Cake
- Heat oven to 335º F/168º C and prepare two 8"x2" round cake pans with cake goop or another pan release and parchment paper if you prefer.
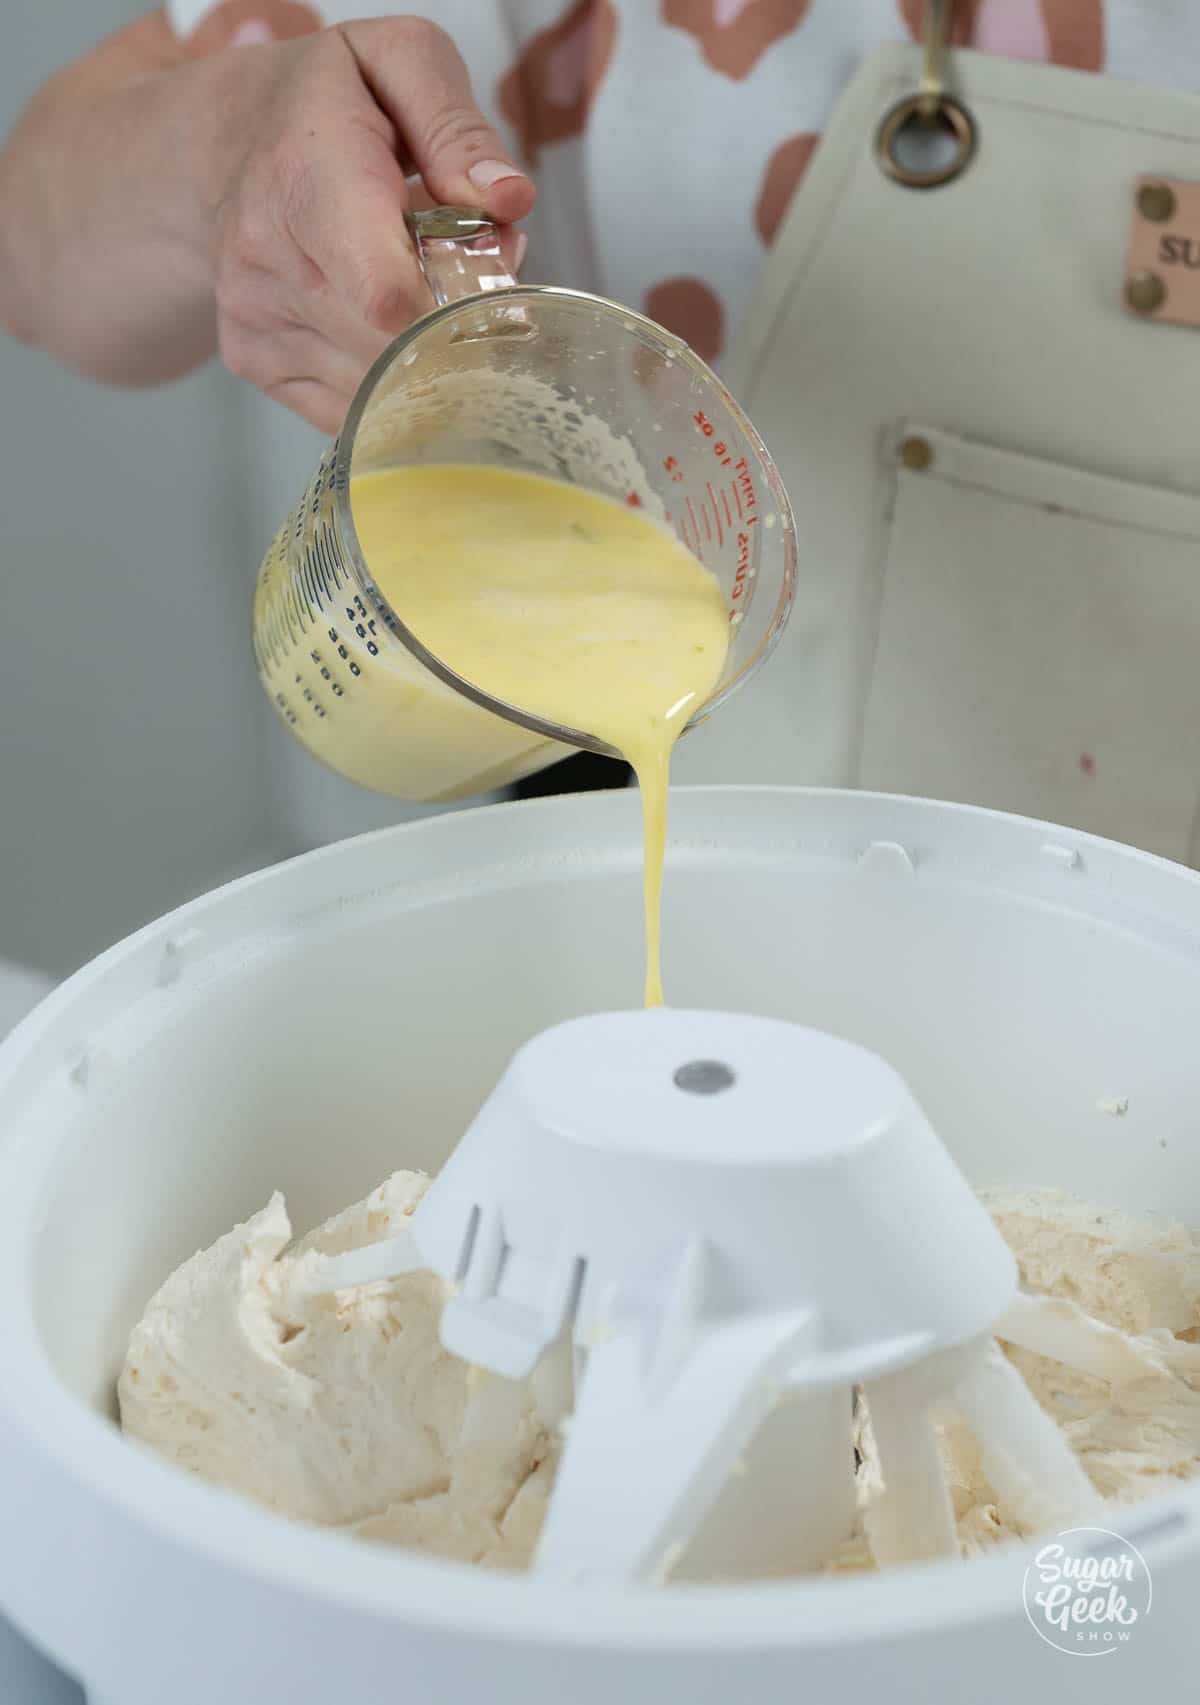
- Measure out the buttermilk and place 4 oz in a separate measuring cup. Add the oil to the 4oz of buttermilk and set aside.
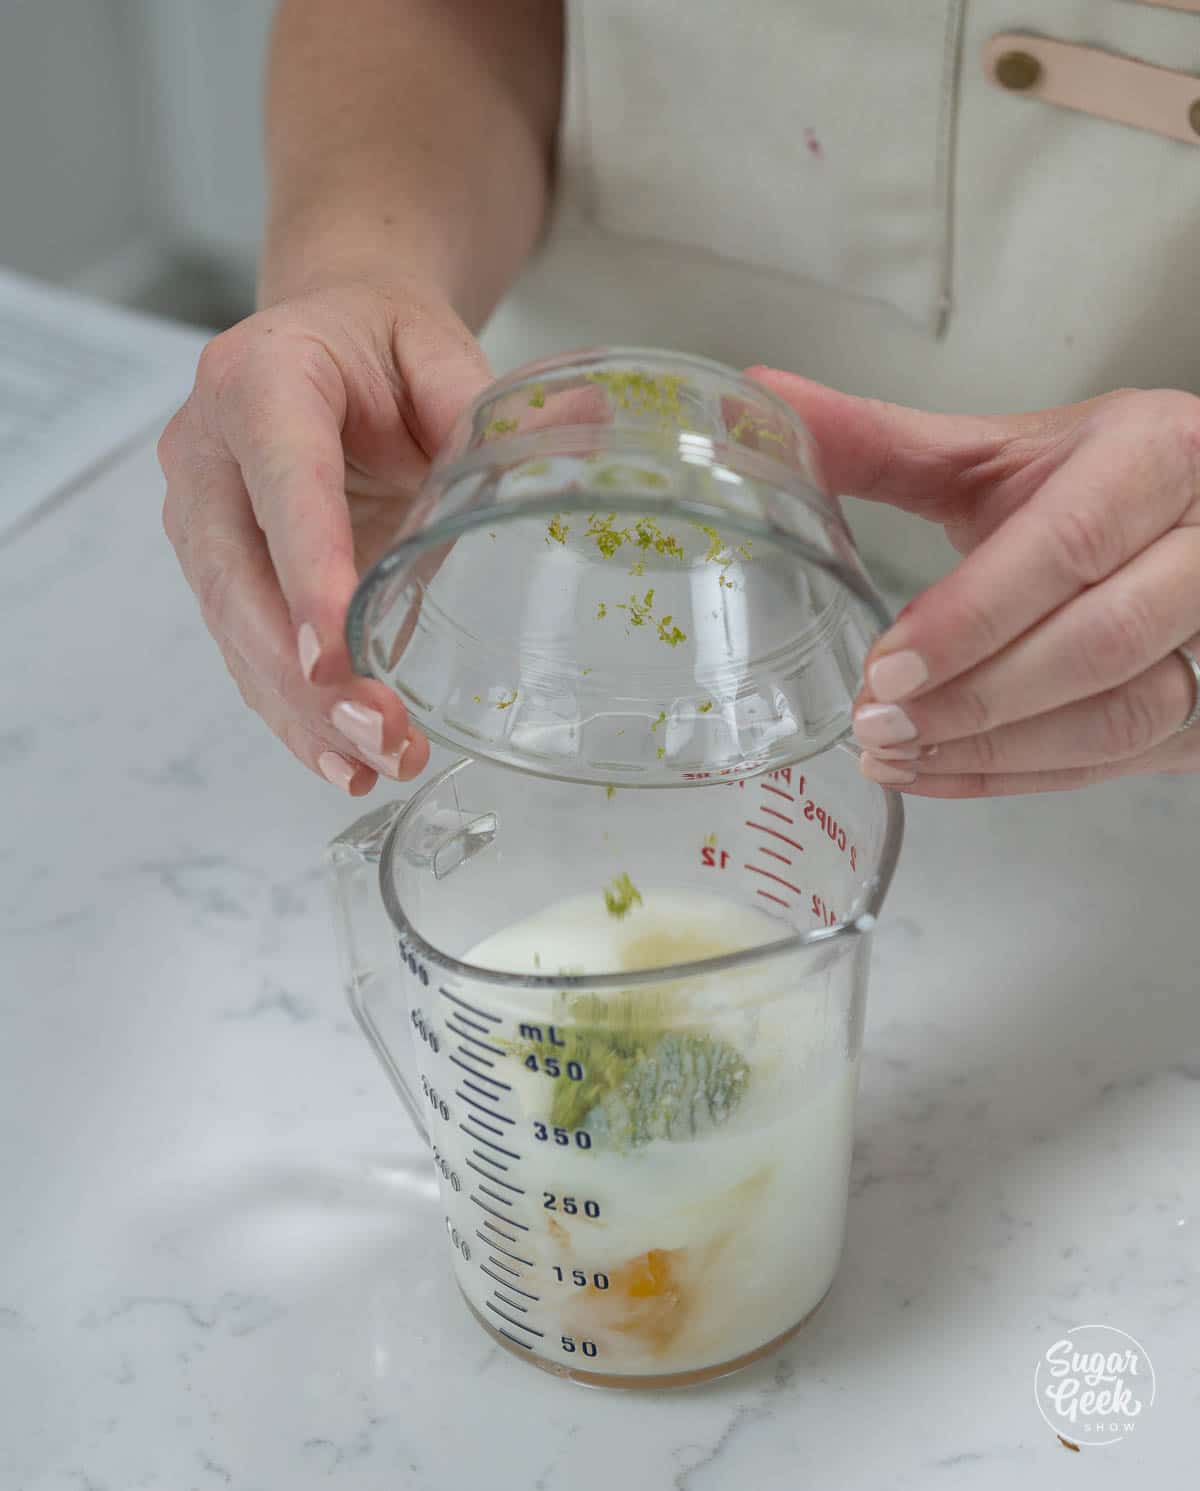
- Add your eggs and lime zest to the remaining milk and gently whisk to combine. Keep the lime juice separate, you will add this at the end.

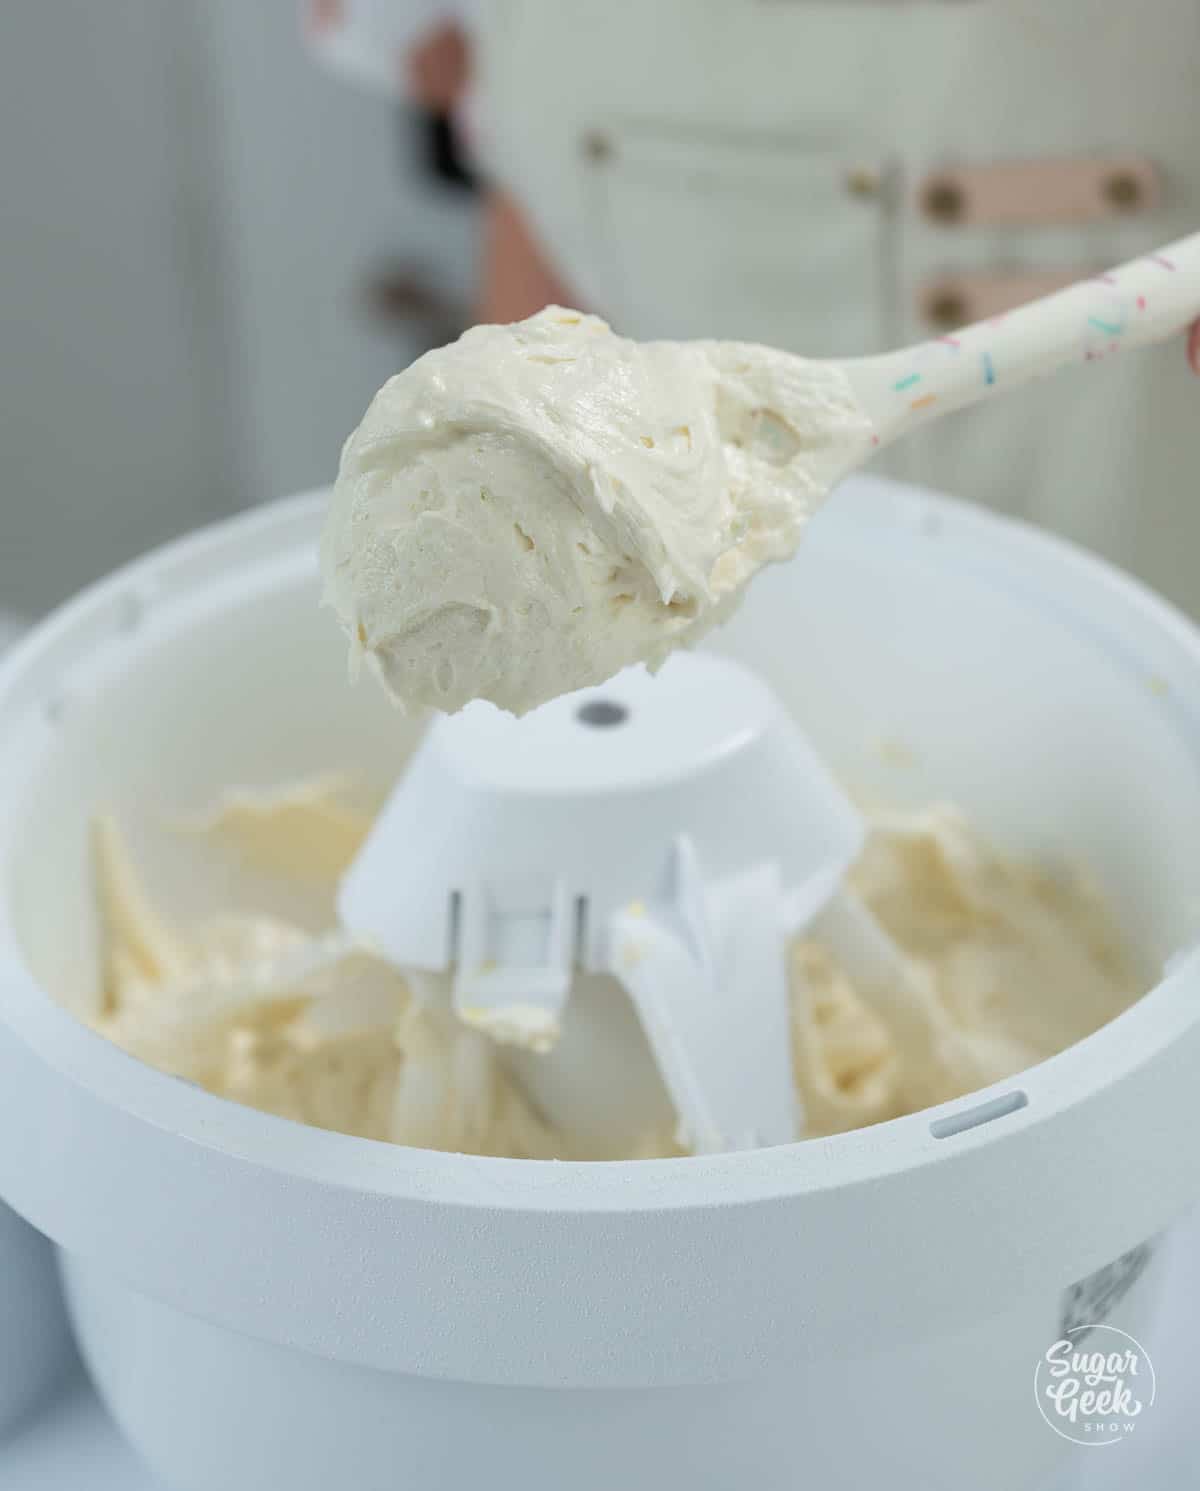
- Place the flour, sugar, baking soda, and salt into the bowl of your stand mixer with the paddle attachment. I'm using my Bosch universal plus mixer but you can use a hand mixer, just mix for longer.
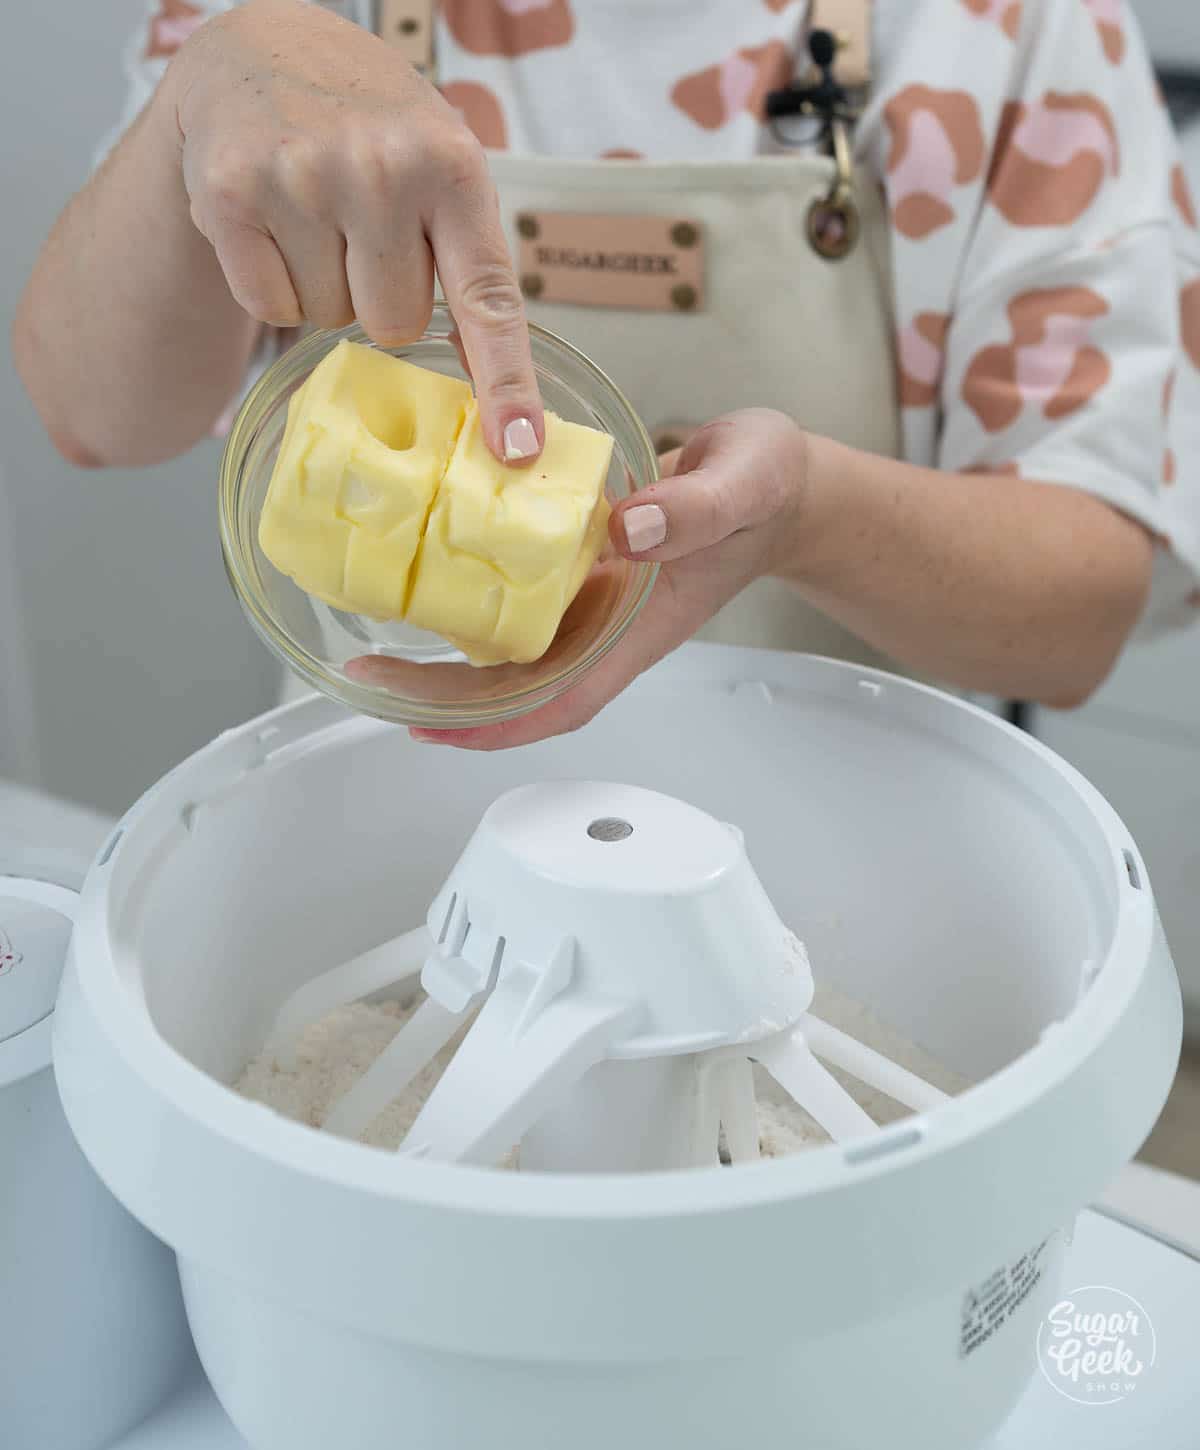
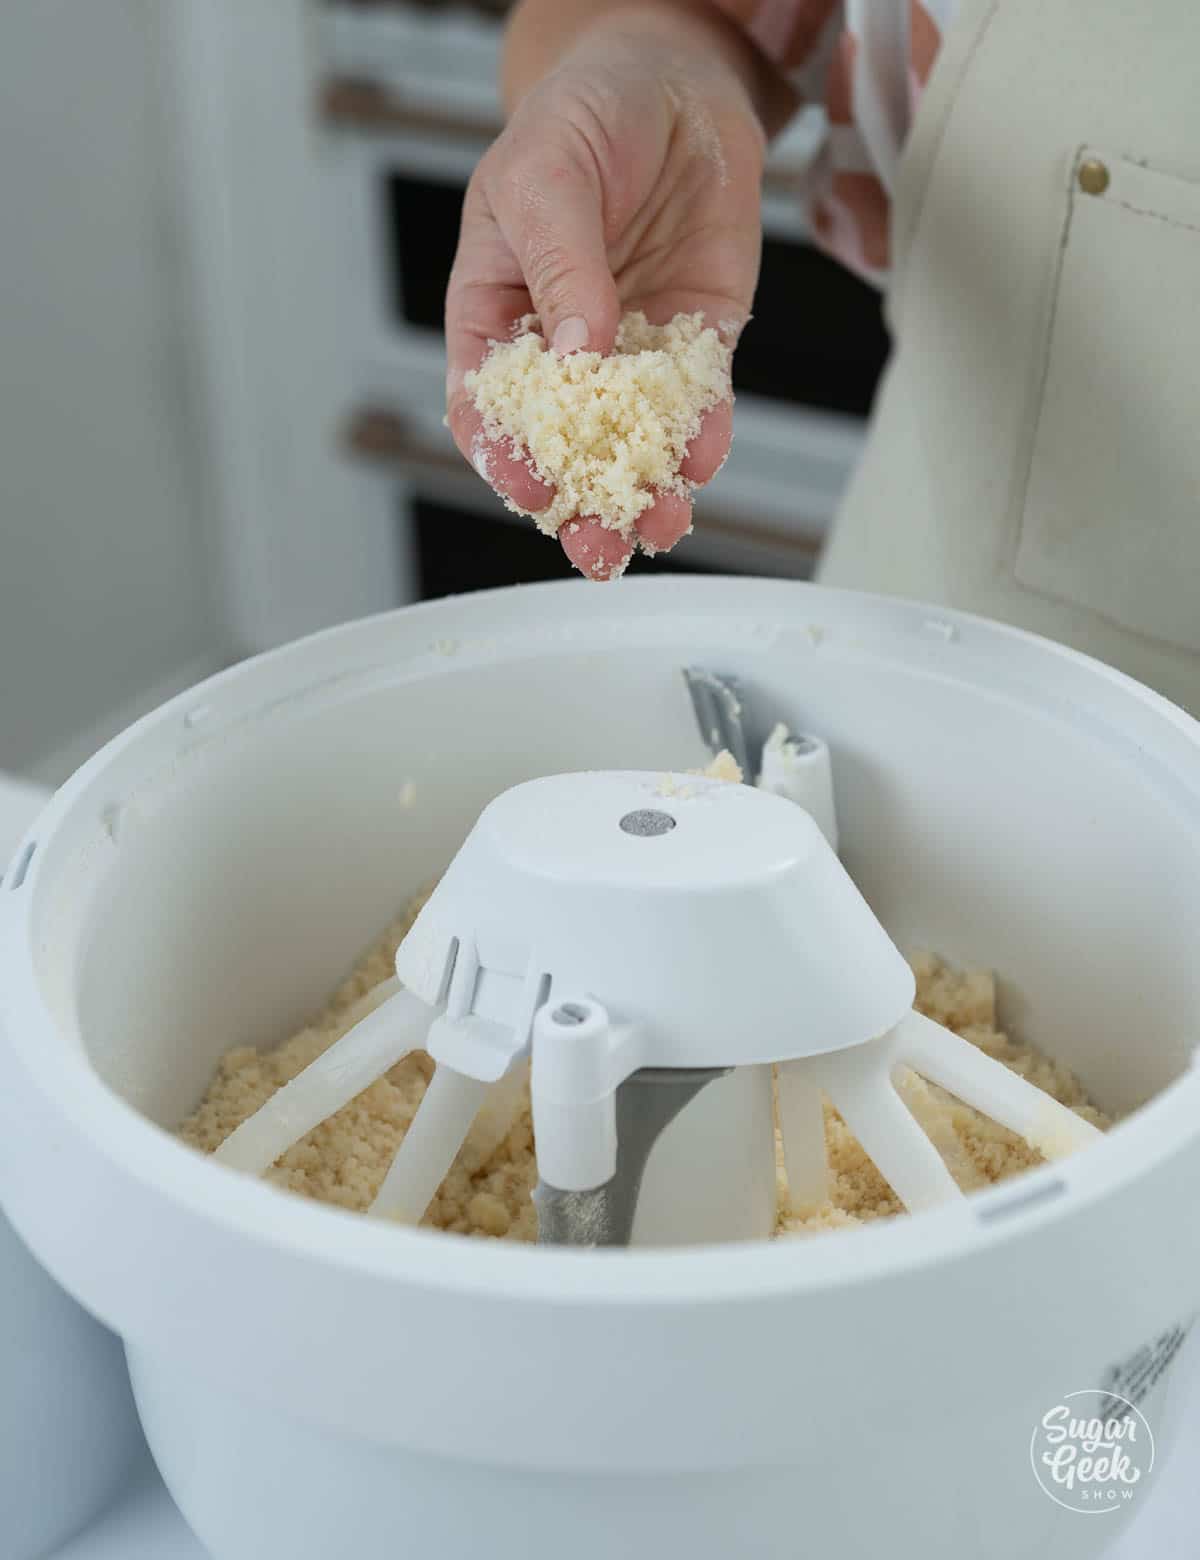
- Turn the mixer onto the slowest speed (setting 1 on Kitchen Aid mixers). Slowly add chunks of your softened butter until it is all added. Let everything mix until it looks like coarse sand.


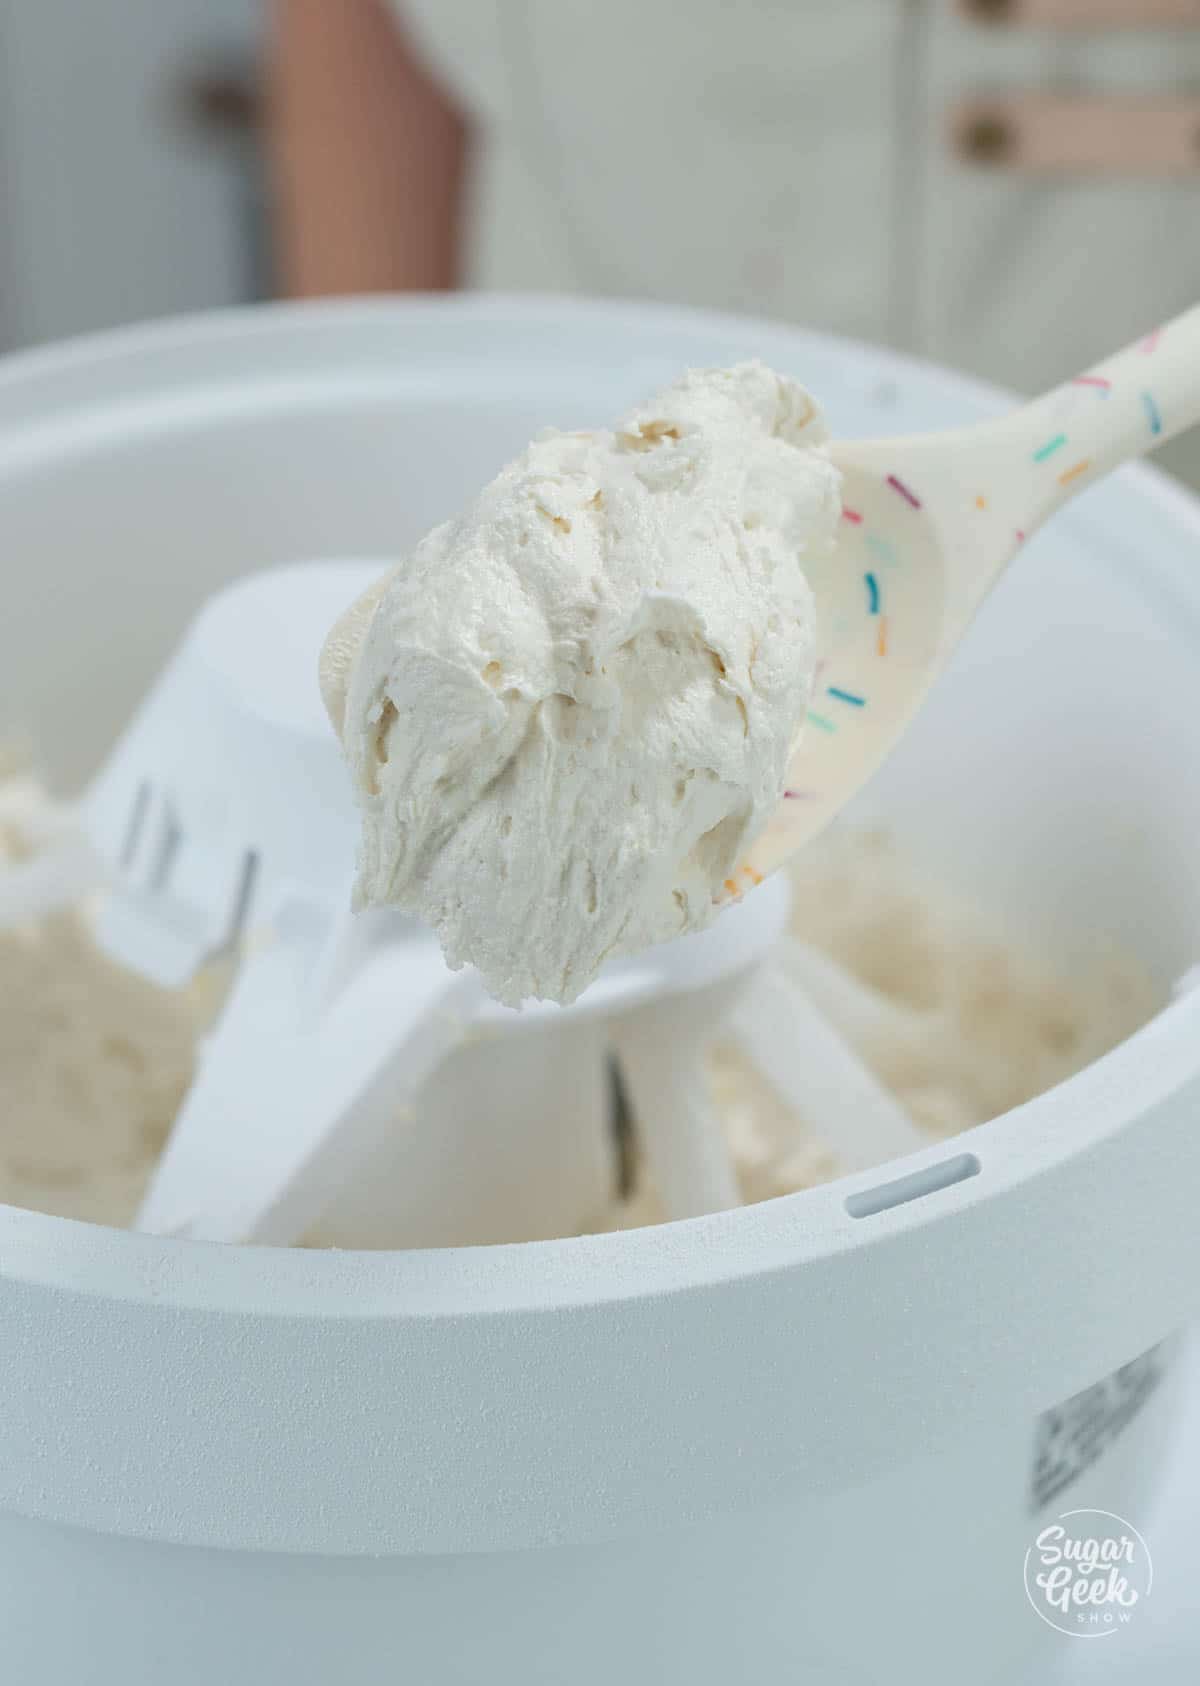
- Add your milk/oil mixture all at once to the flour mixture. Mix on medium (speed 4 on KitchenAid) for 1 full minute to develop the structure. Don't worry, this will not over-mix the cake. Because it is AP flour you do not need to mix as long as cake flour (more gluten, less time needed).

- Scrape the bowl. This is an important step. If you skip it, you will have hard lumps of flour and unmixed ingredients in your batter. If you do it later, they will not mix in fully.
- Slowly add in the rest of your milk/eggs/zest ingredients in 3 parts. Next, pour in the lime juice with the last addition of liquid, stopping to scrape the bowl one more time halfway through. Your batter should be thick and not too runny.

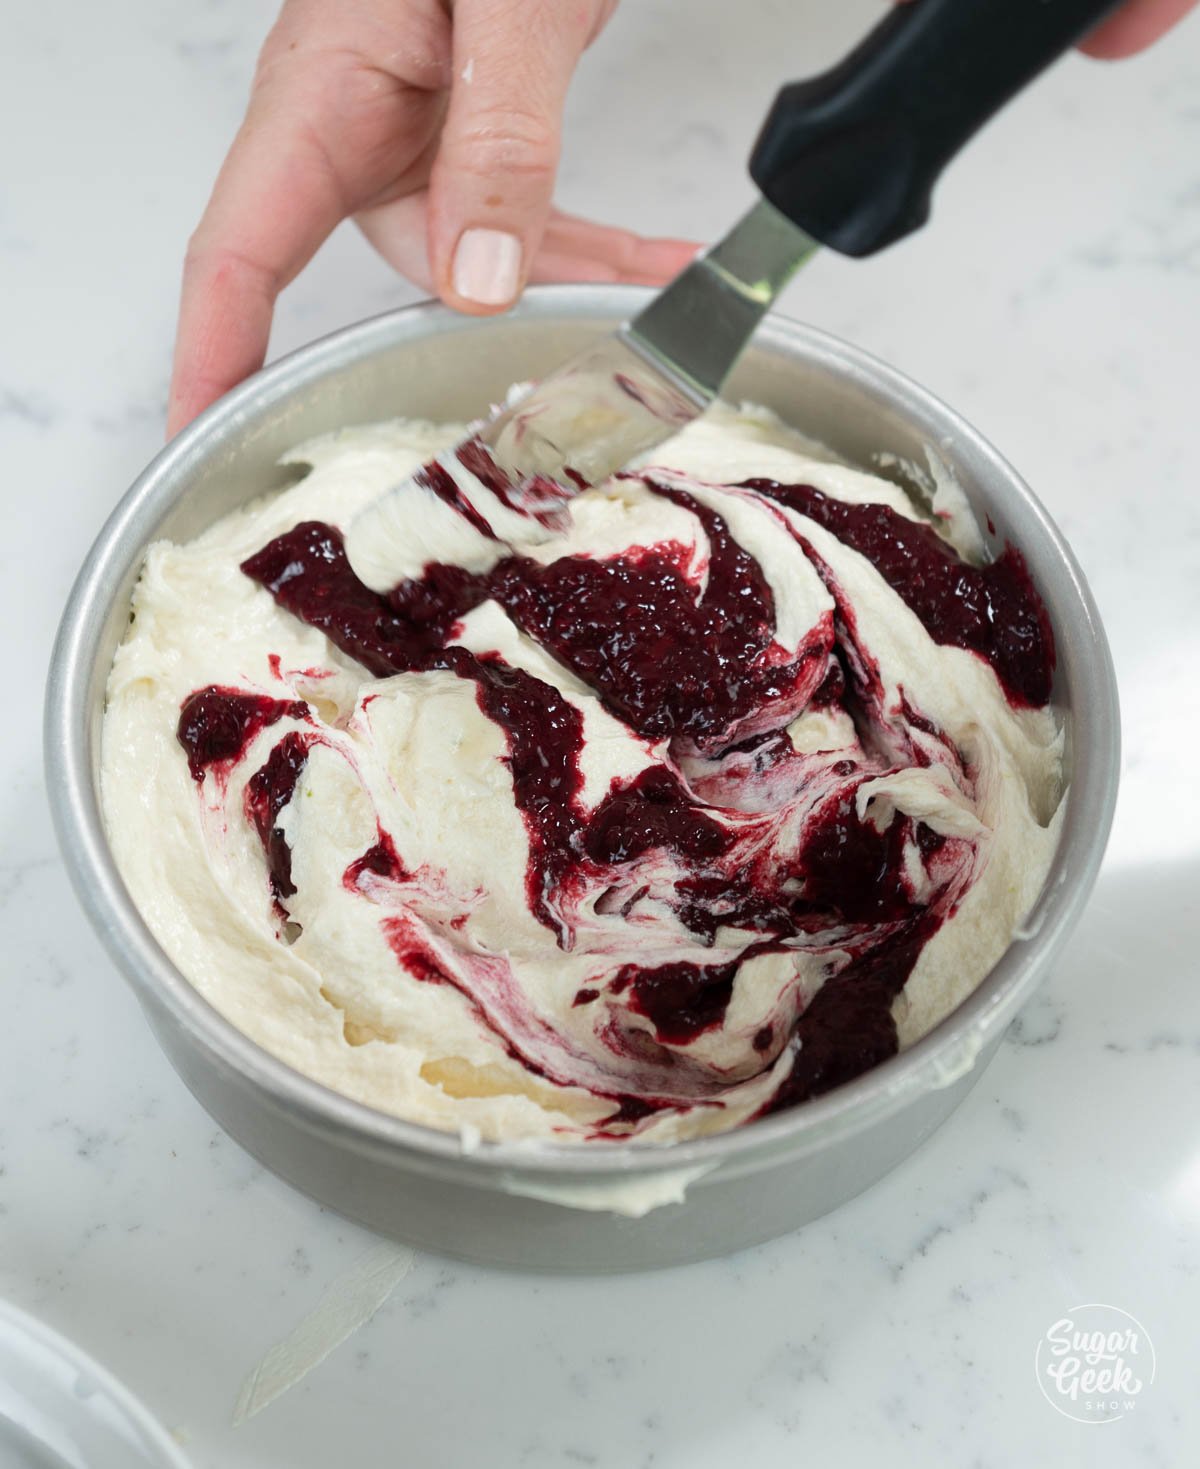
- Fill your pans ½ full with cake batter.
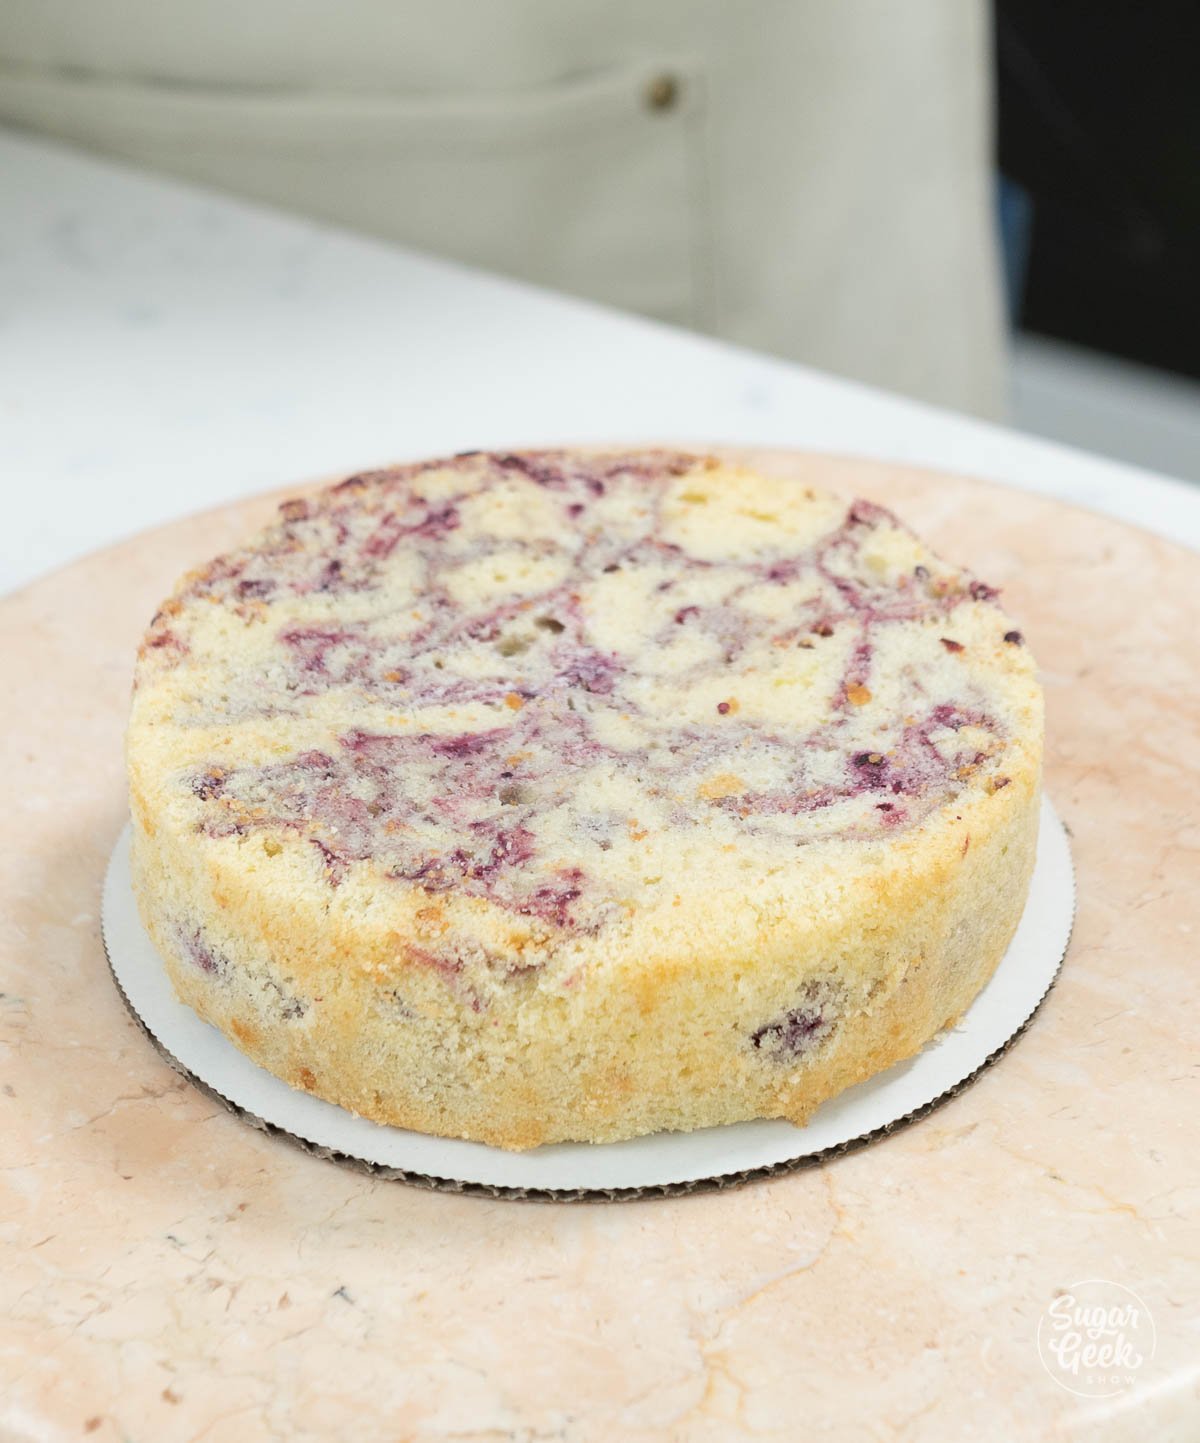
- Spoon about 2 tablespoons of room-temperature puree over the batter. Use a small spatula or knife to gently fold the puree in to create a swirl effect into the batter.

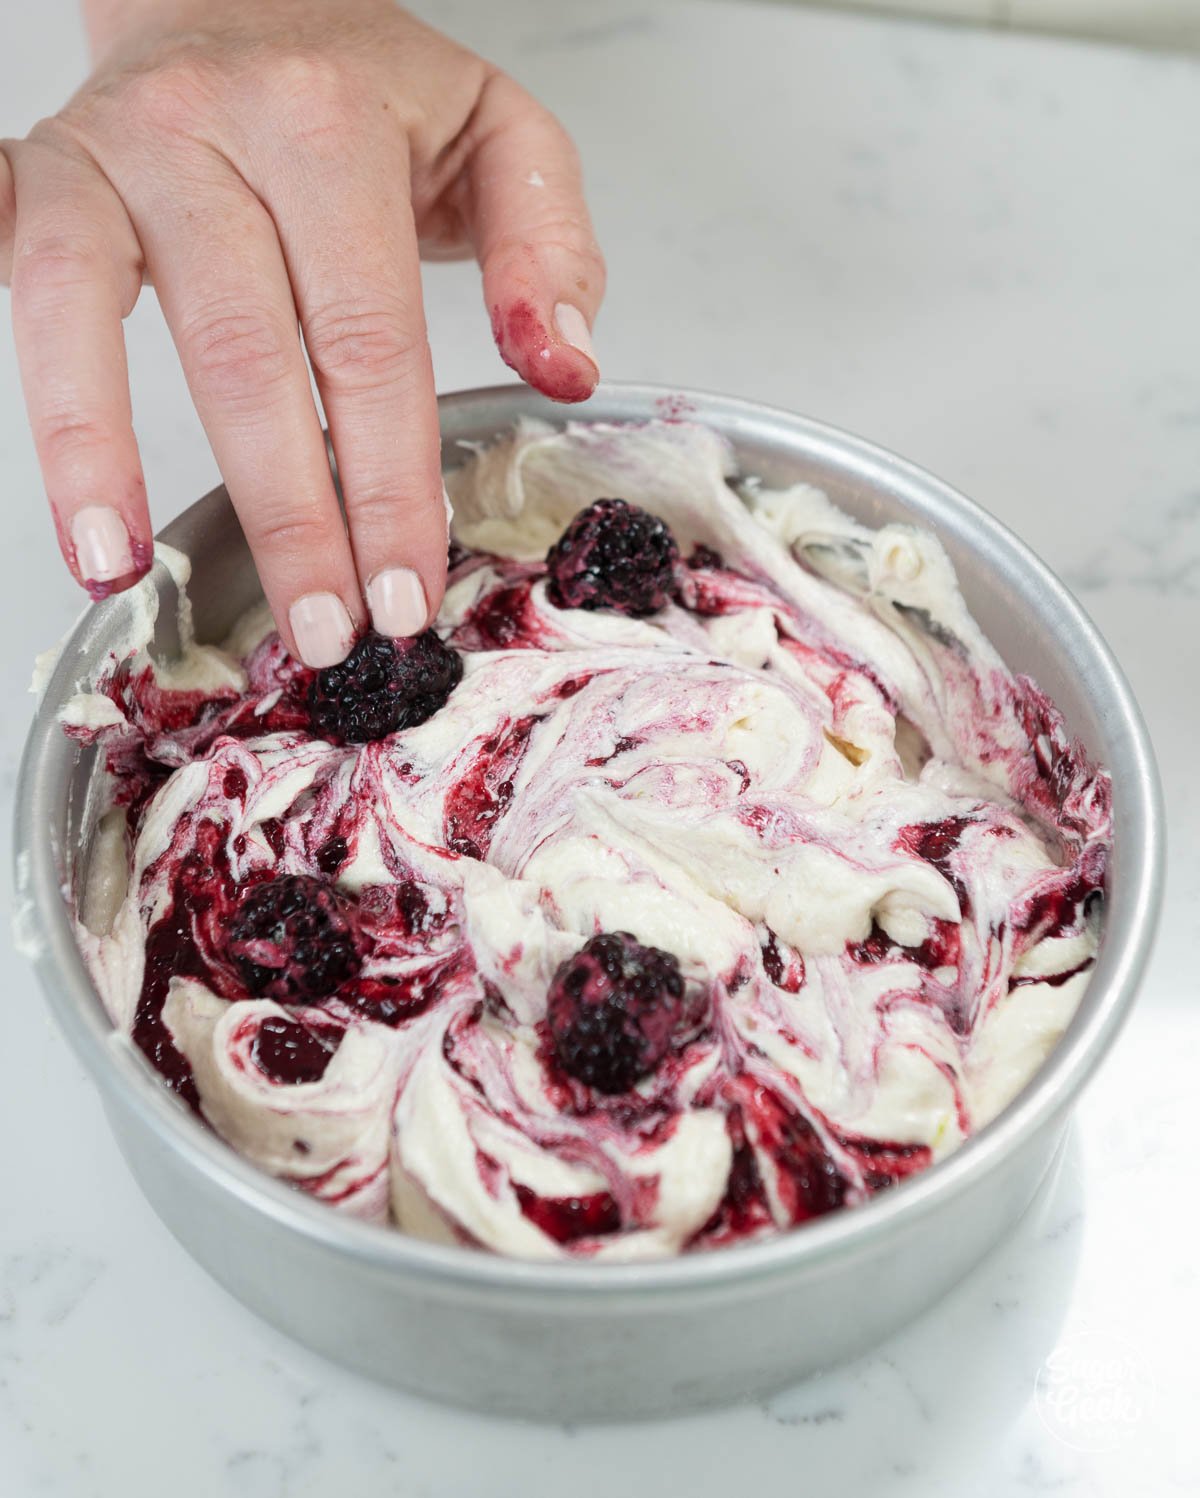
- Add the floured blackberries to the top of the batter. Do not push them down as their weight will cause them to sink anyway as the cake heats up.

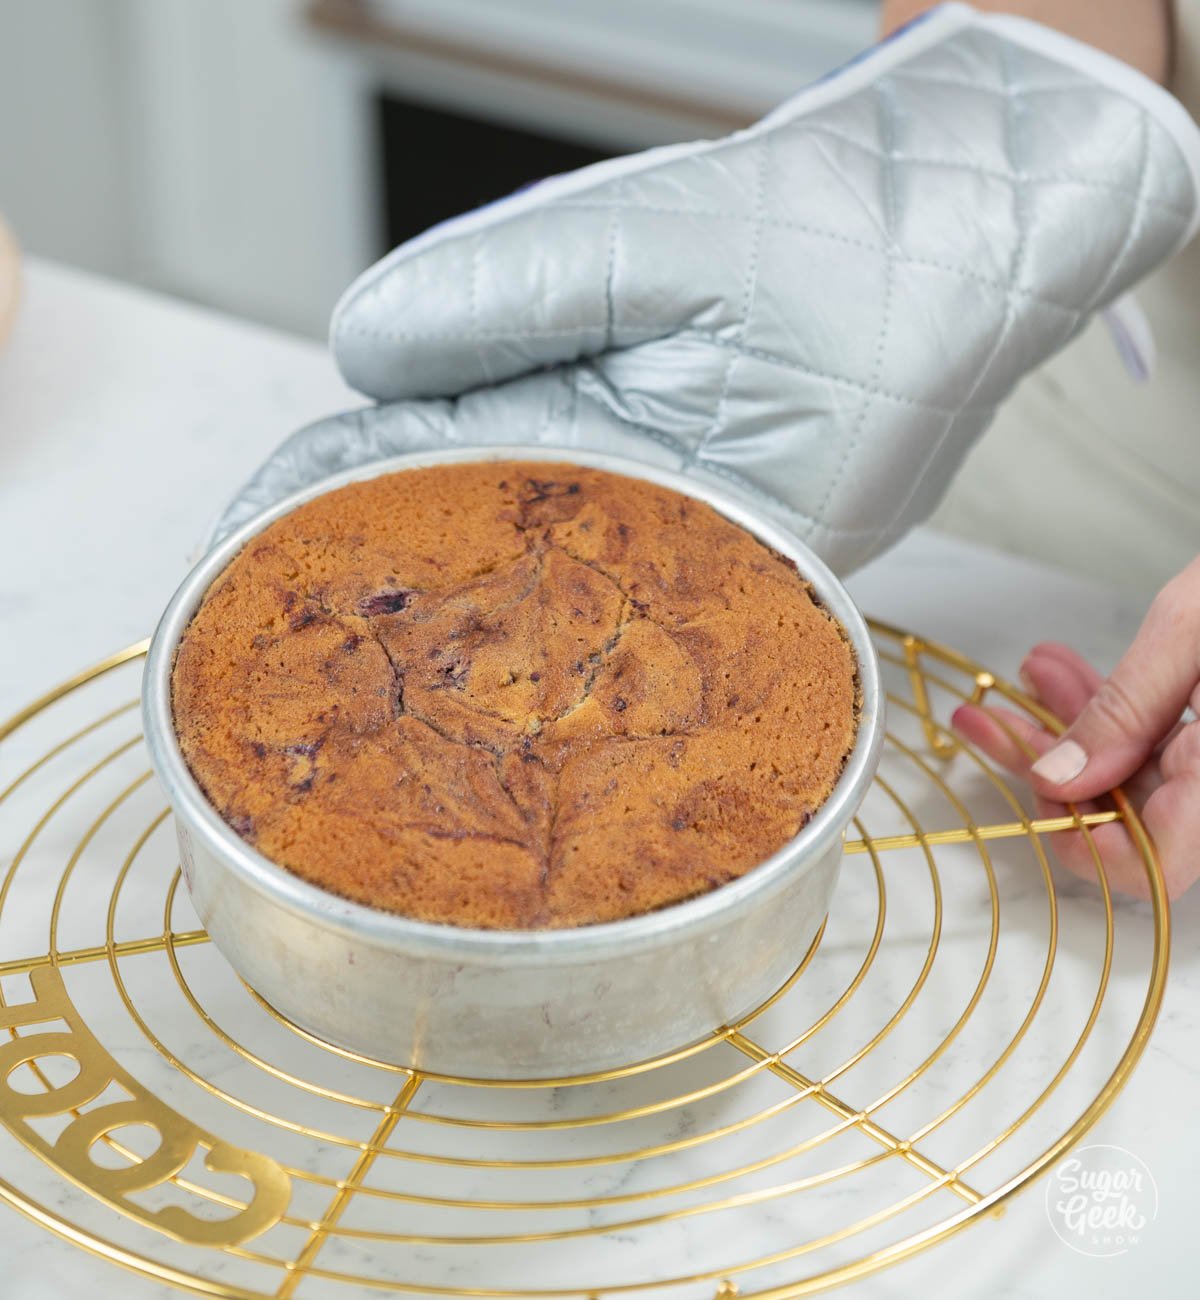
- Place the cakes in the preheated oven. I start by baking for 30 minutes for 6" and 8" cakes and 35 minutes for 9" and larger cakes and then checking for doneness. If the cakes are still really jiggly, I add another 5 minutes. I check every 2 minutes after that until I'm close and then it's every 1 minute. Cakes are done when a toothpick inserted in the center comes out with a few crumbs.
- After the cakes have cooled for 10 minutes or the pans are cool enough to touch, place a wire rack on top and flip the cakes over to remove them from the pans. Let them rest on a cooling rack to cool completely, or wrap in plastic wrap and chill in the freezer.

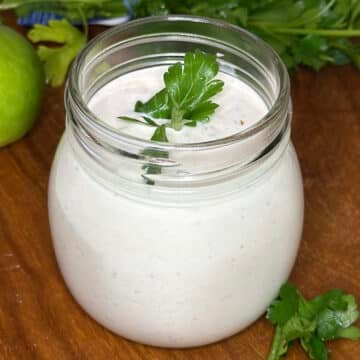
Making Blackberry Buttercream
- Strain out the seeds of the blackberry filling. This is optional but it will make a smoother texture when scraping the sides.
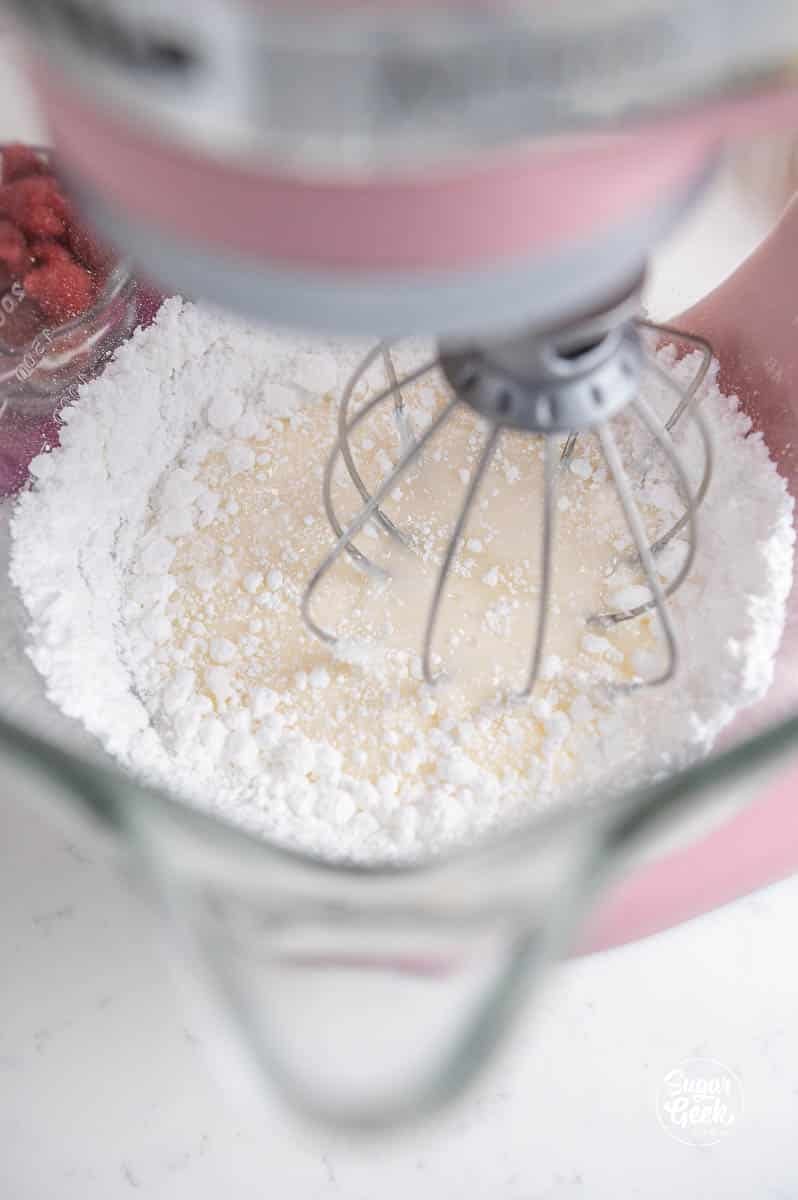
- Place the egg whites and powdered sugar in the bowl of your stand mixer with the whisk attachment and whip on high speed for 3-5 minutes. An electric mixer and a large mixing bowl will also work, just mix for longer.

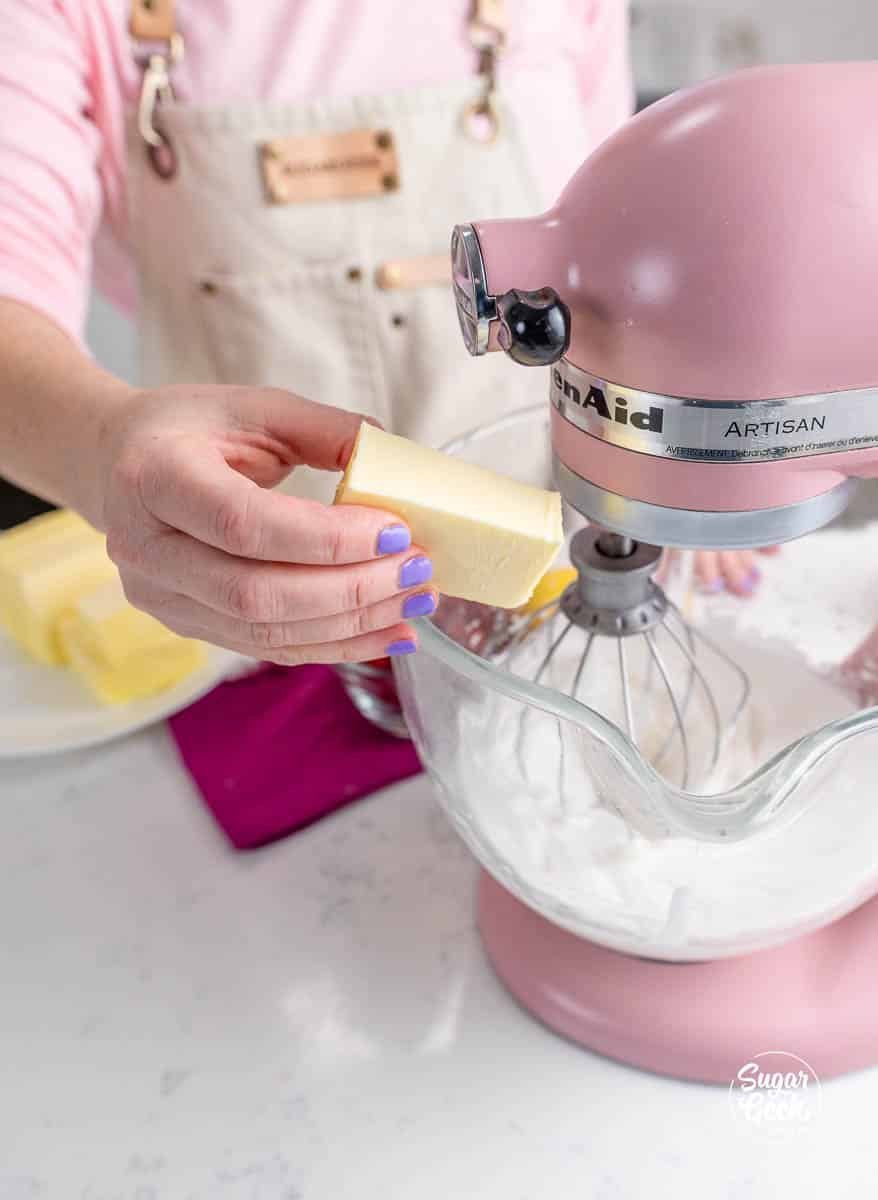
- Add the softened butter in small chunks then vanilla and salt. Whip on high until light and fluffy and white, about 8 to 10 minutes.

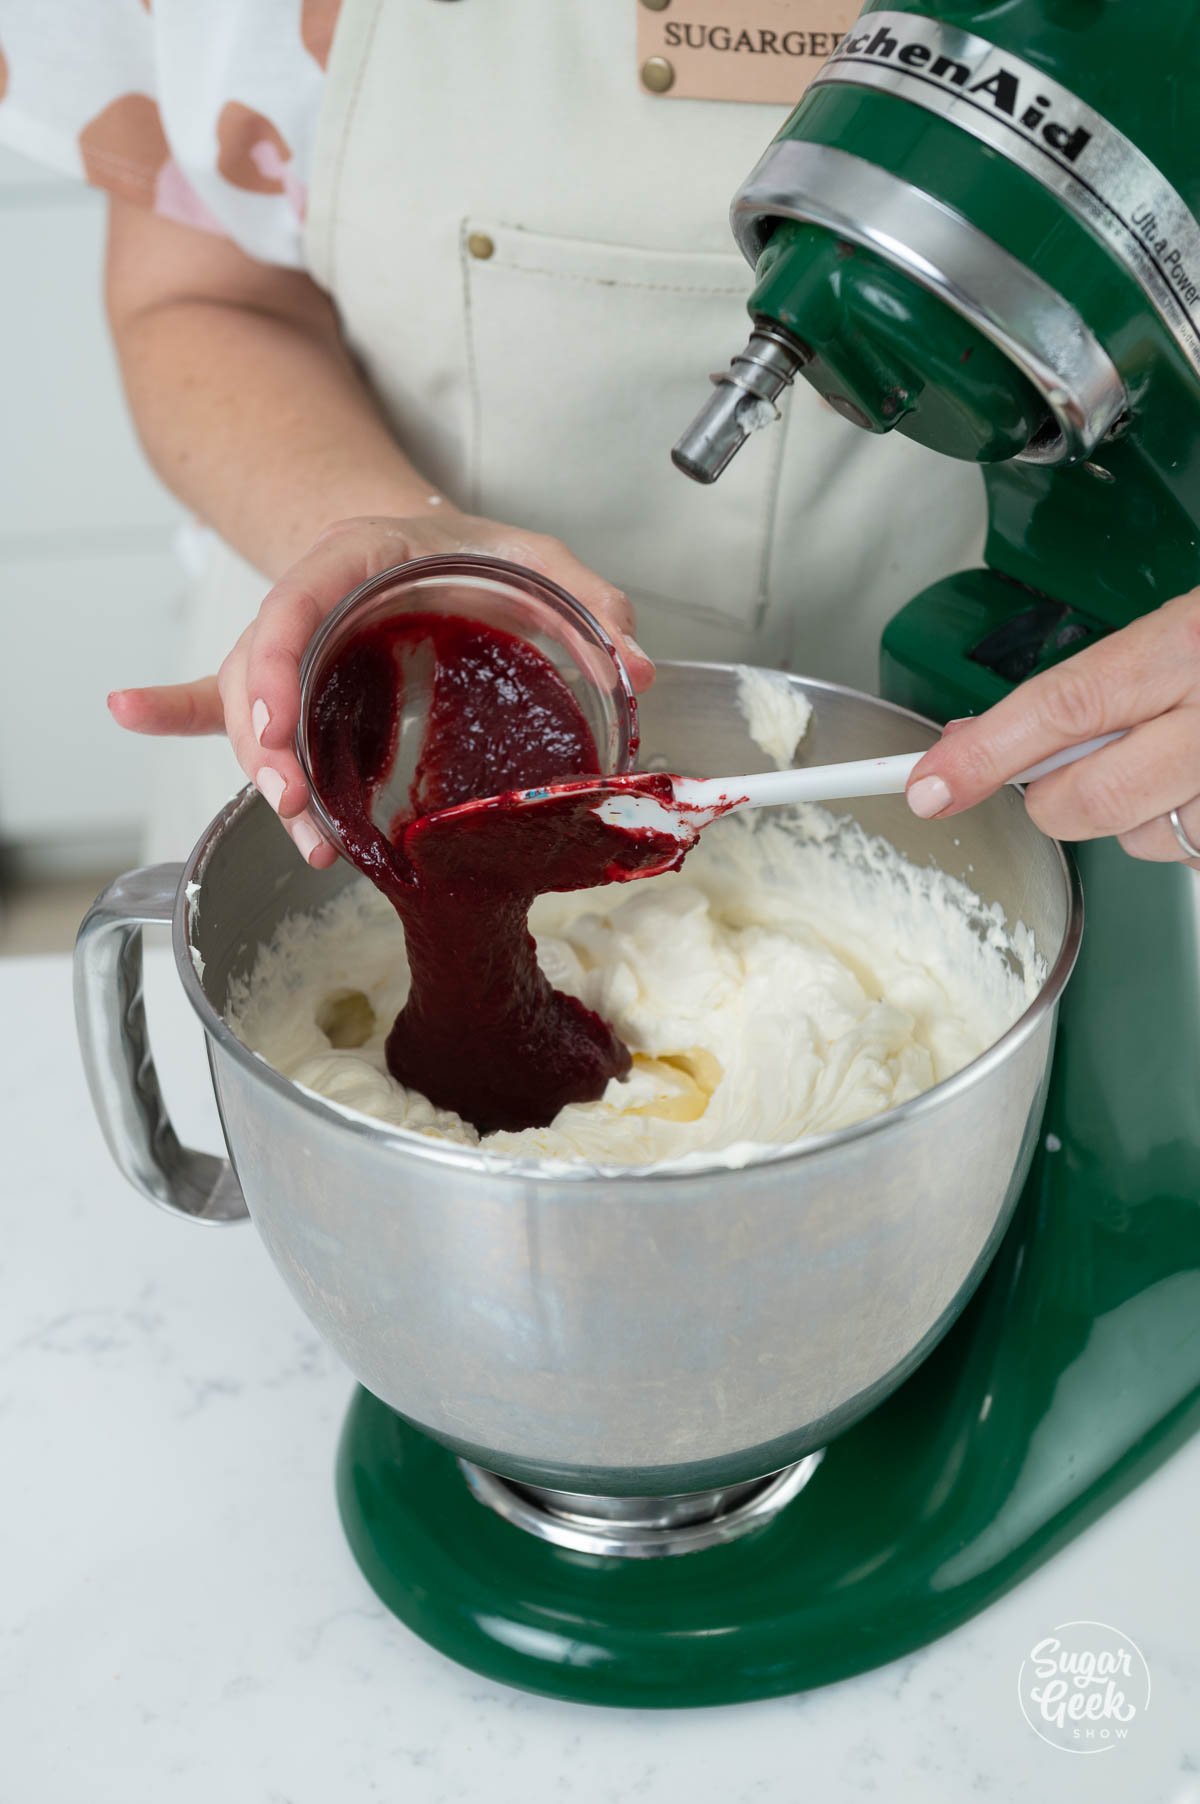
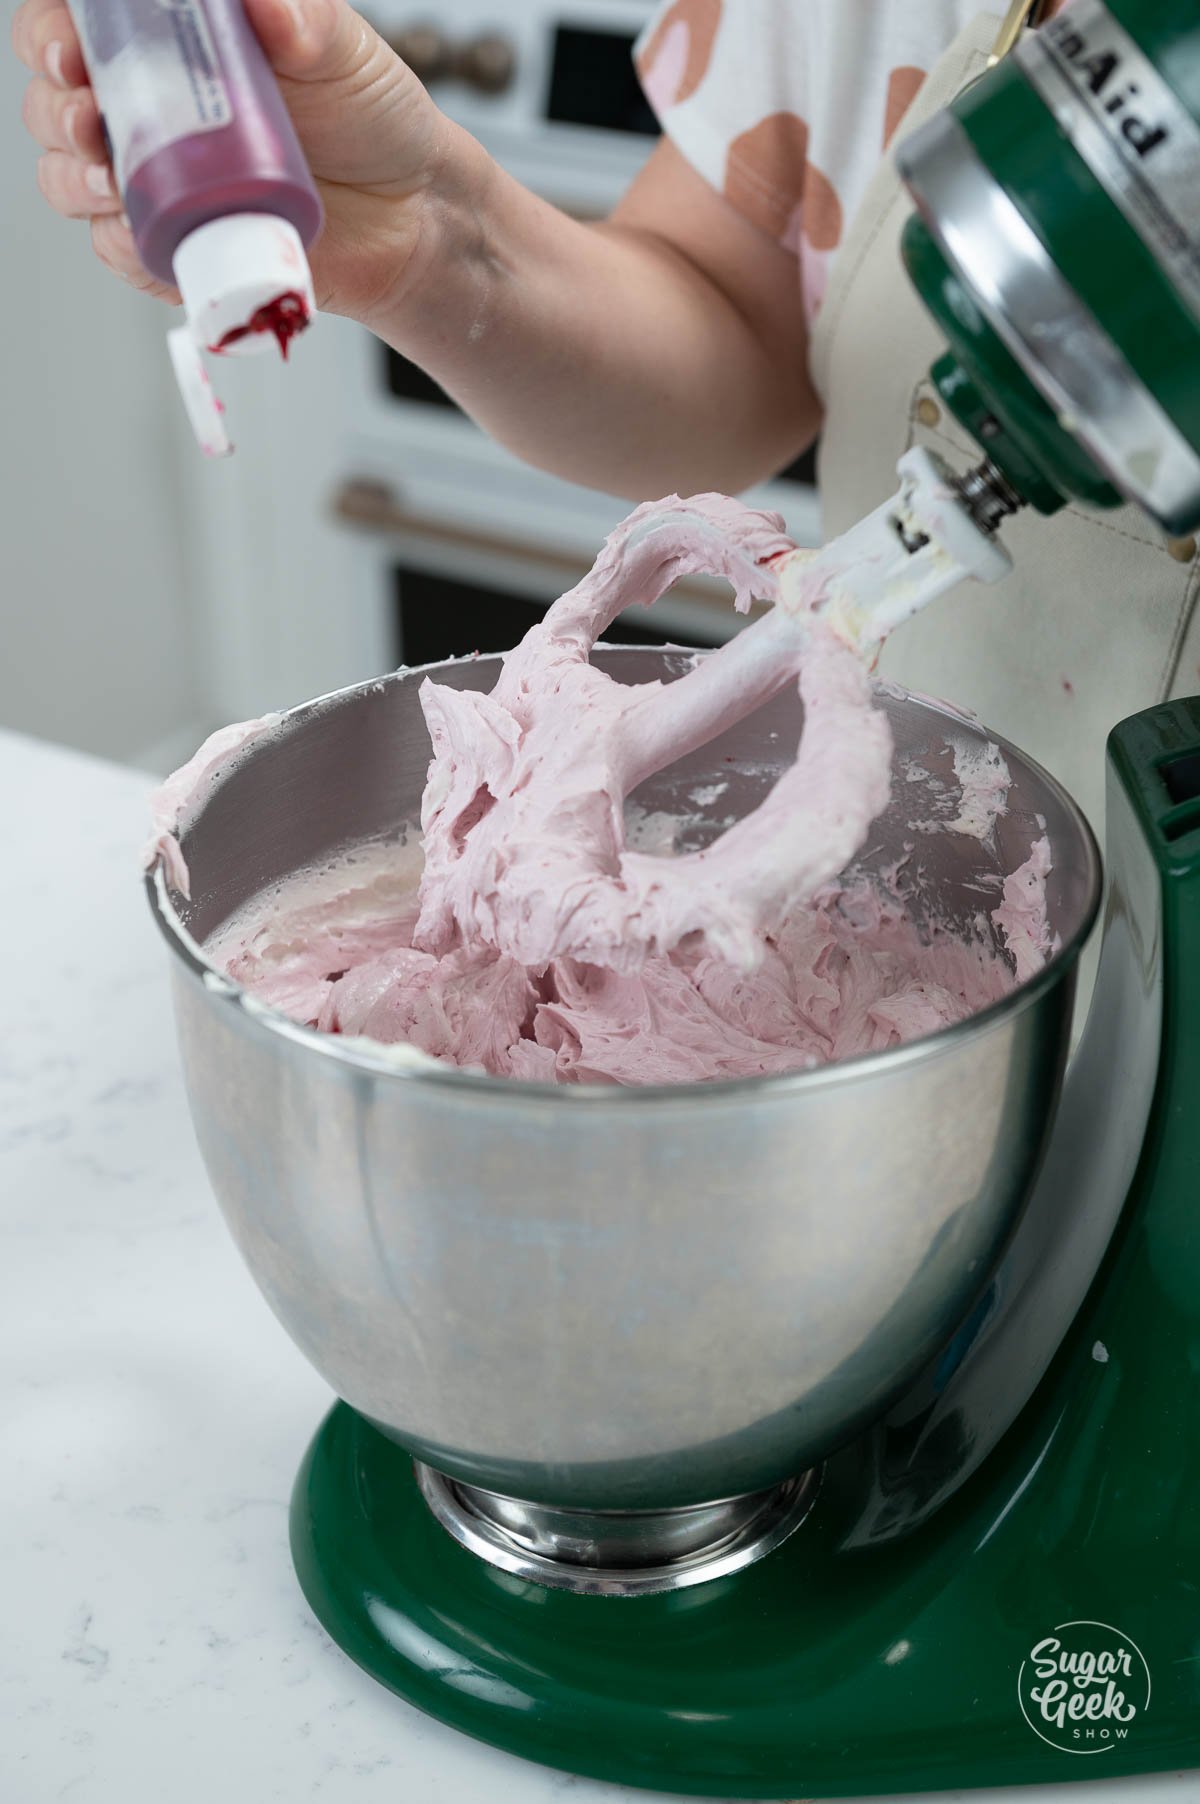
- Add about ½ cup of the blackberry purée to the buttercream and continue to whip until combined.
- Mix in about 1-2 drops of pink food coloring to enhance the color if you choose.
- Optional: switch to the paddle attachment and mix on low for 15-20 minutes until all air bubbles are gone.
- Stored it in an airtight container for up to a week in the refrigerator or for 3 months in the freezer.
Decorating the Cake
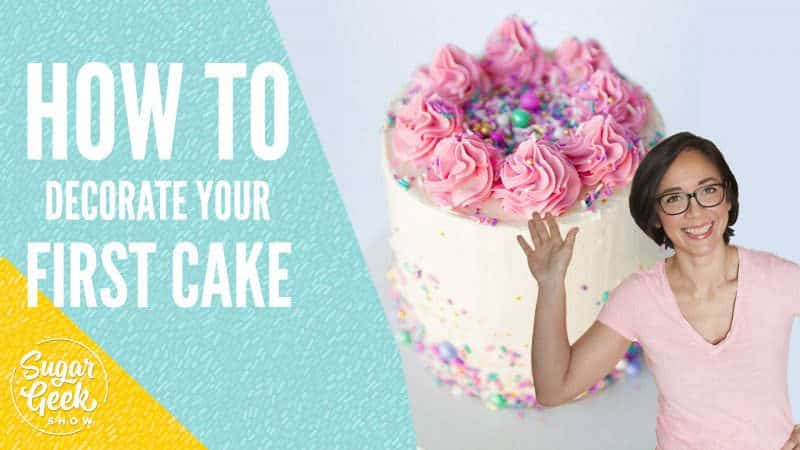
If you haven't ever decorated a cake before, you might want to check out my blog post on how to decorate your first cake. It goes over everything from tools to techniques.
- Once your cakes are chilled, trim off the dome and brown edges of the cake. This is optional but makes for pretty slices.

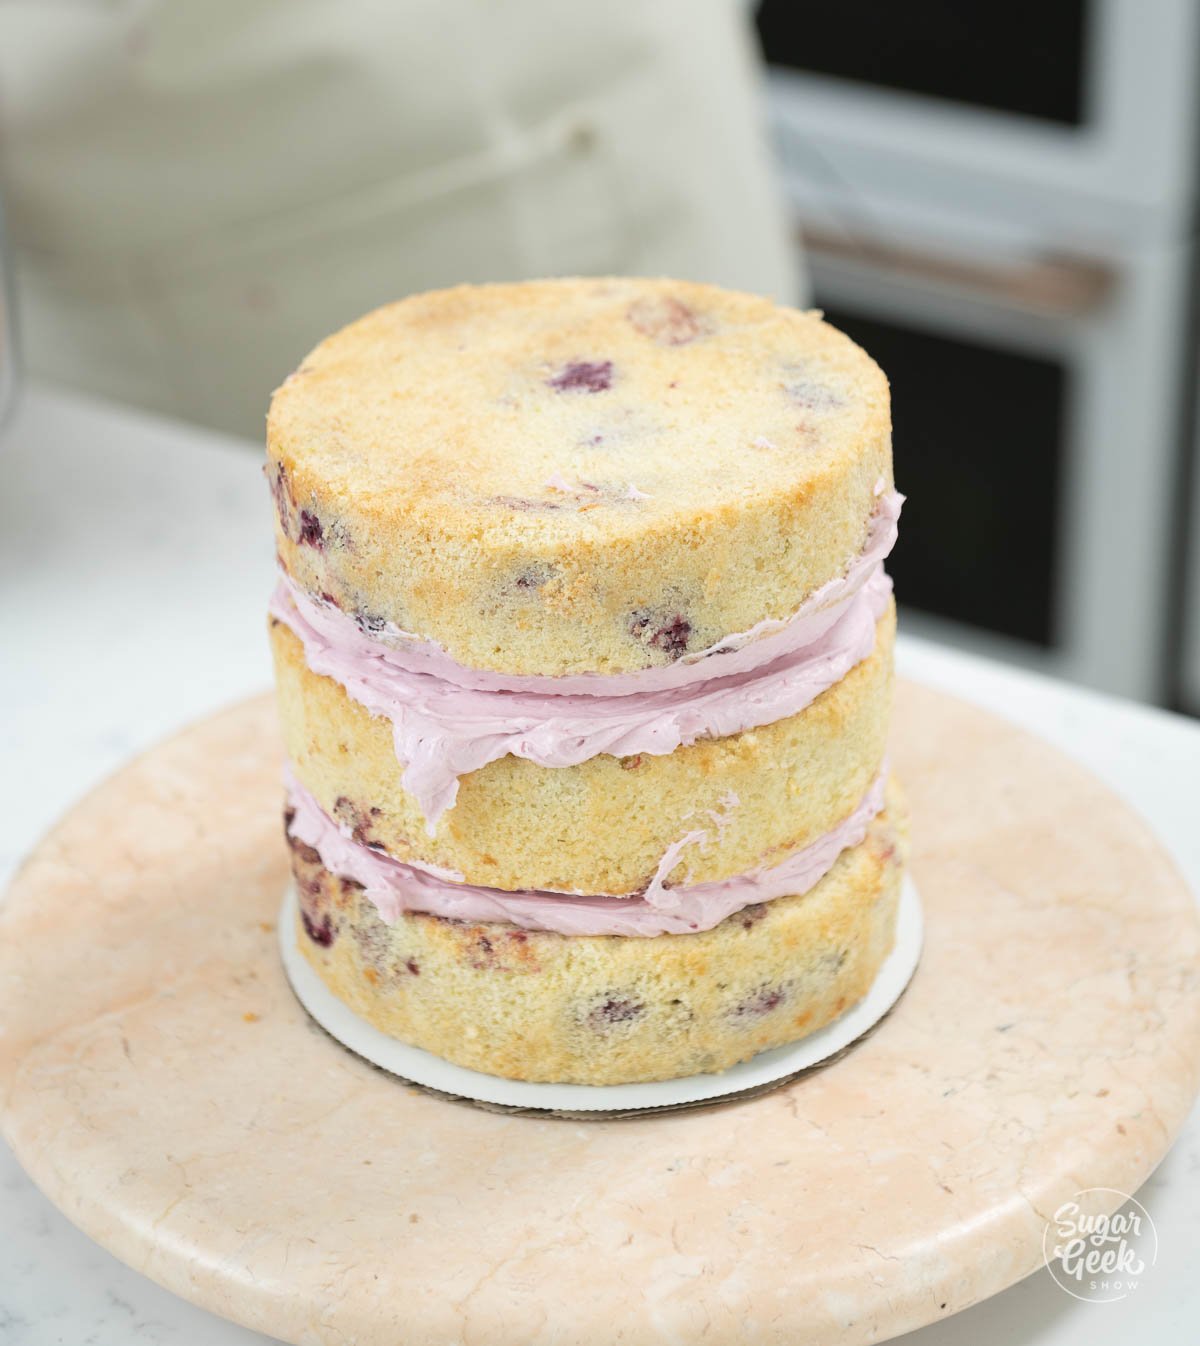
- Place your first cake layer onto a board.
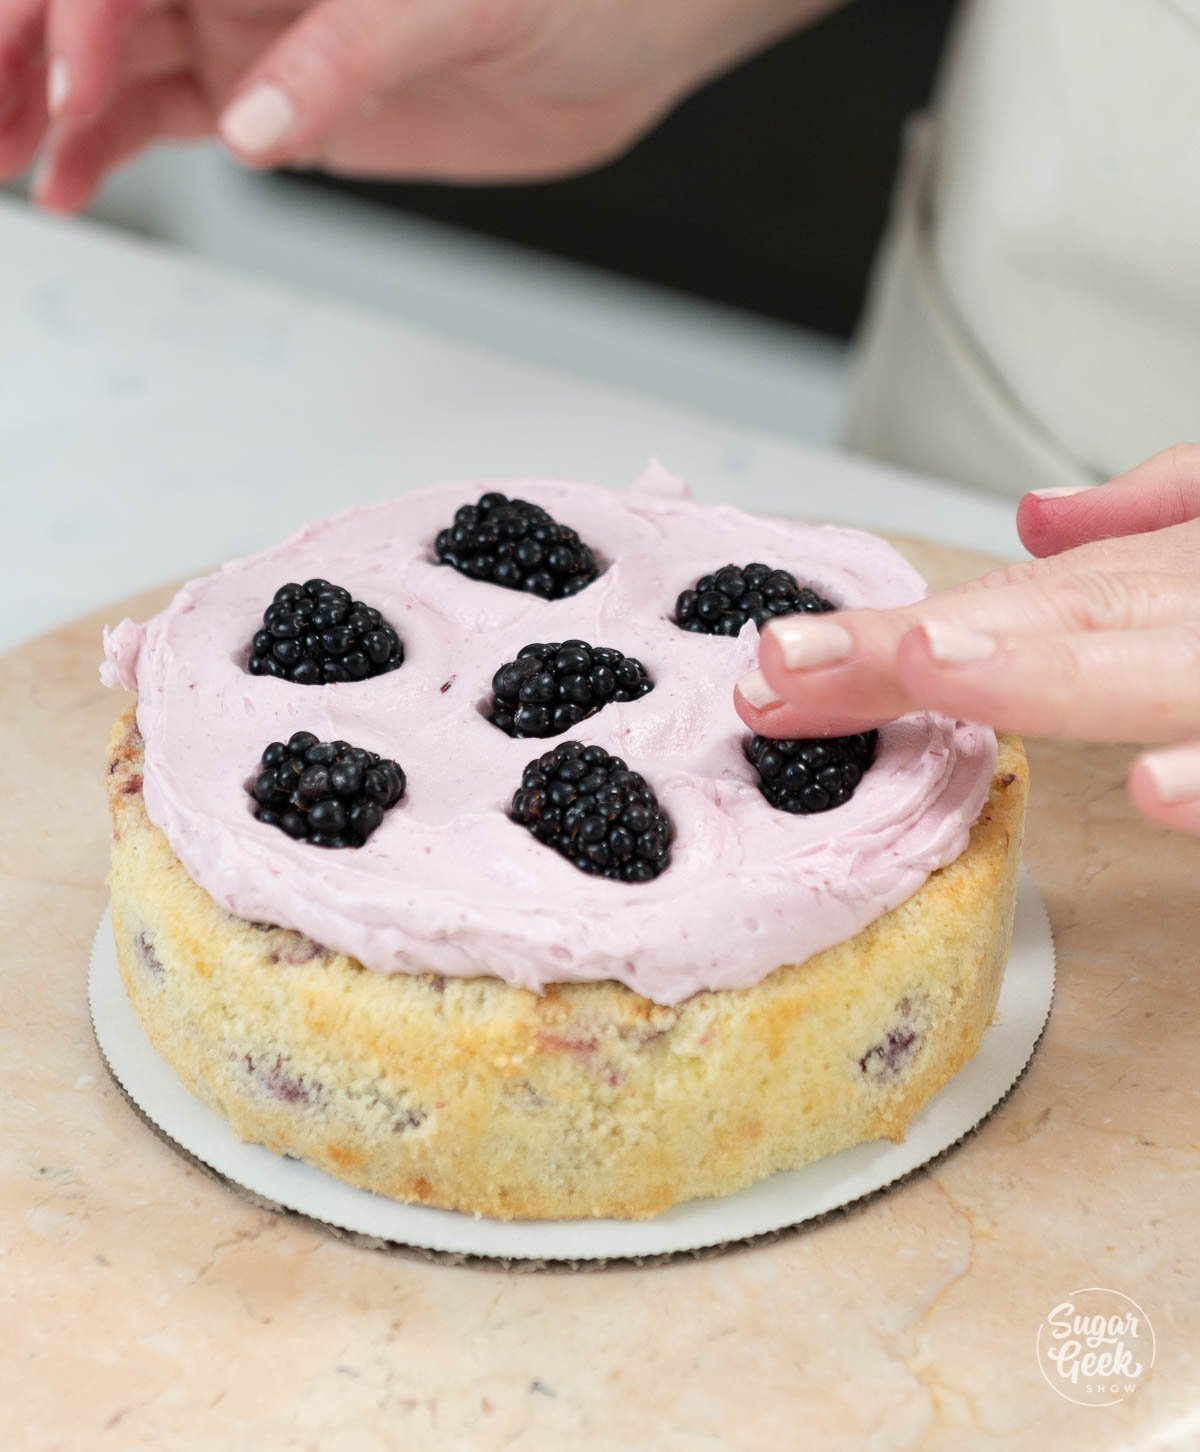
- Spread on about ¼" of your blackberry buttercream.
- Layer some fresh blackberries into the buttercream.

- Spread some more buttercream on top of the blackberries and then add your next layer of cake.
- Repeat the process with layer two and then add your final layer of cake on top.

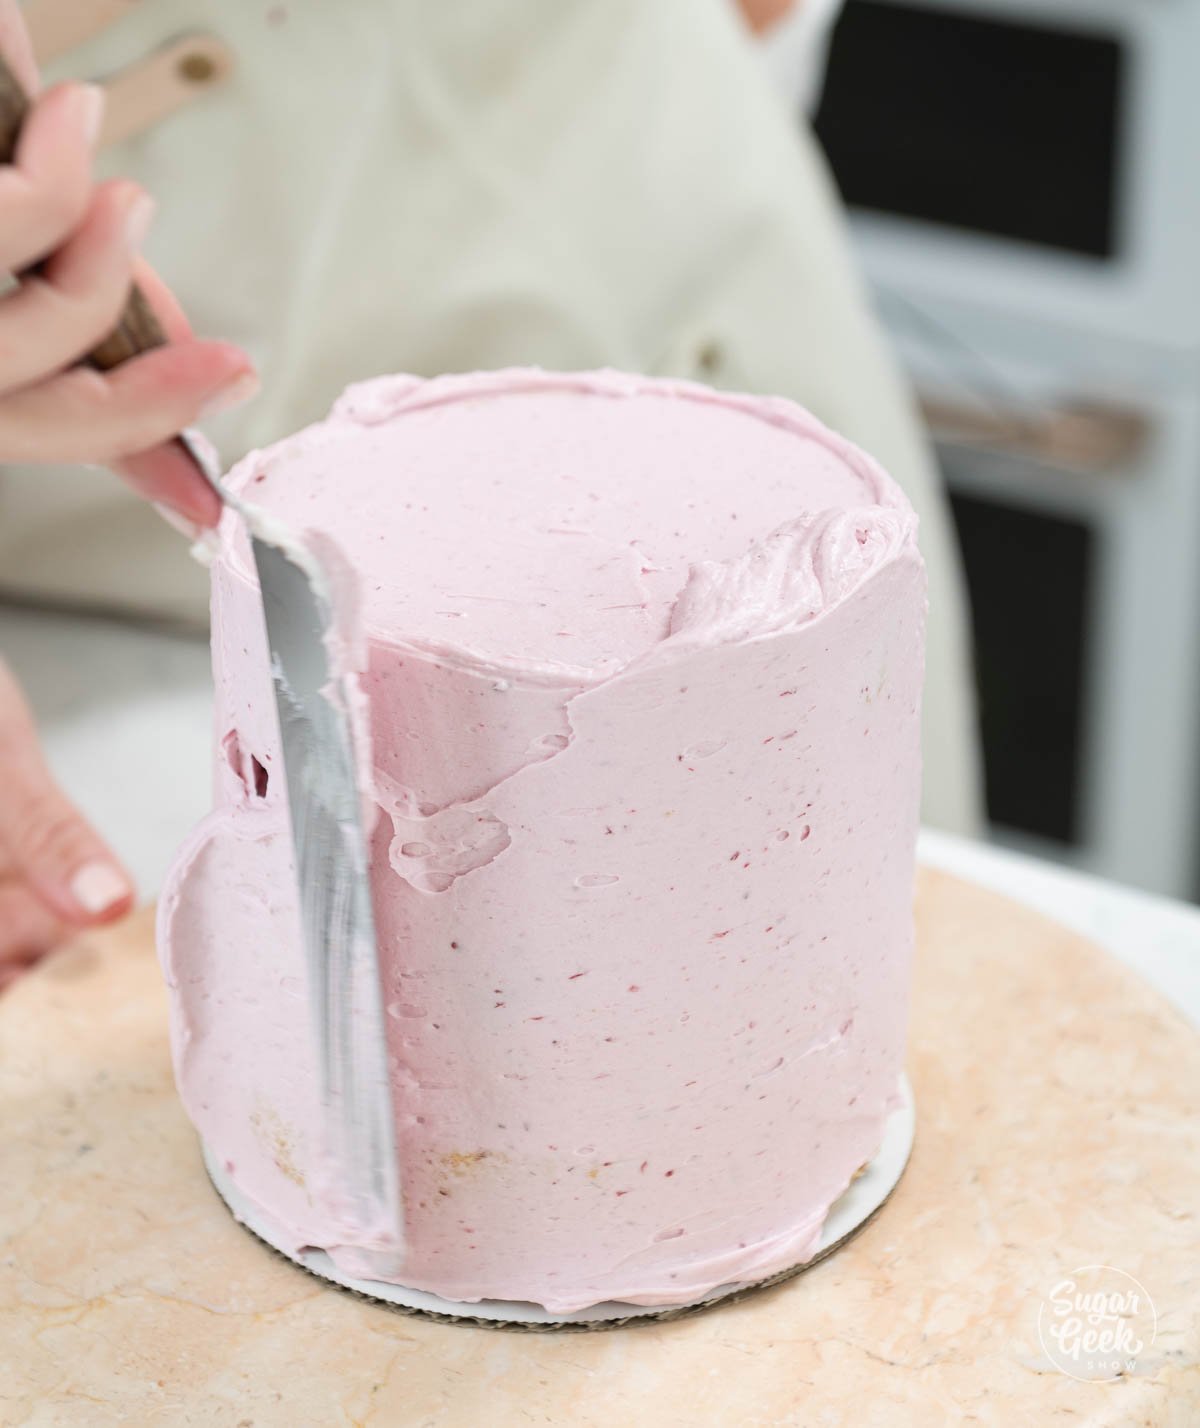
- Cover the whole cake in a thin layer of buttercream. This is the crumb coat.

- Place the cake into the fridge or freezer for 20 minutes to set the buttercream layer.
- Apply your final coat of buttercream and use a bench scraper and offset spatula to make it nice and smooth.
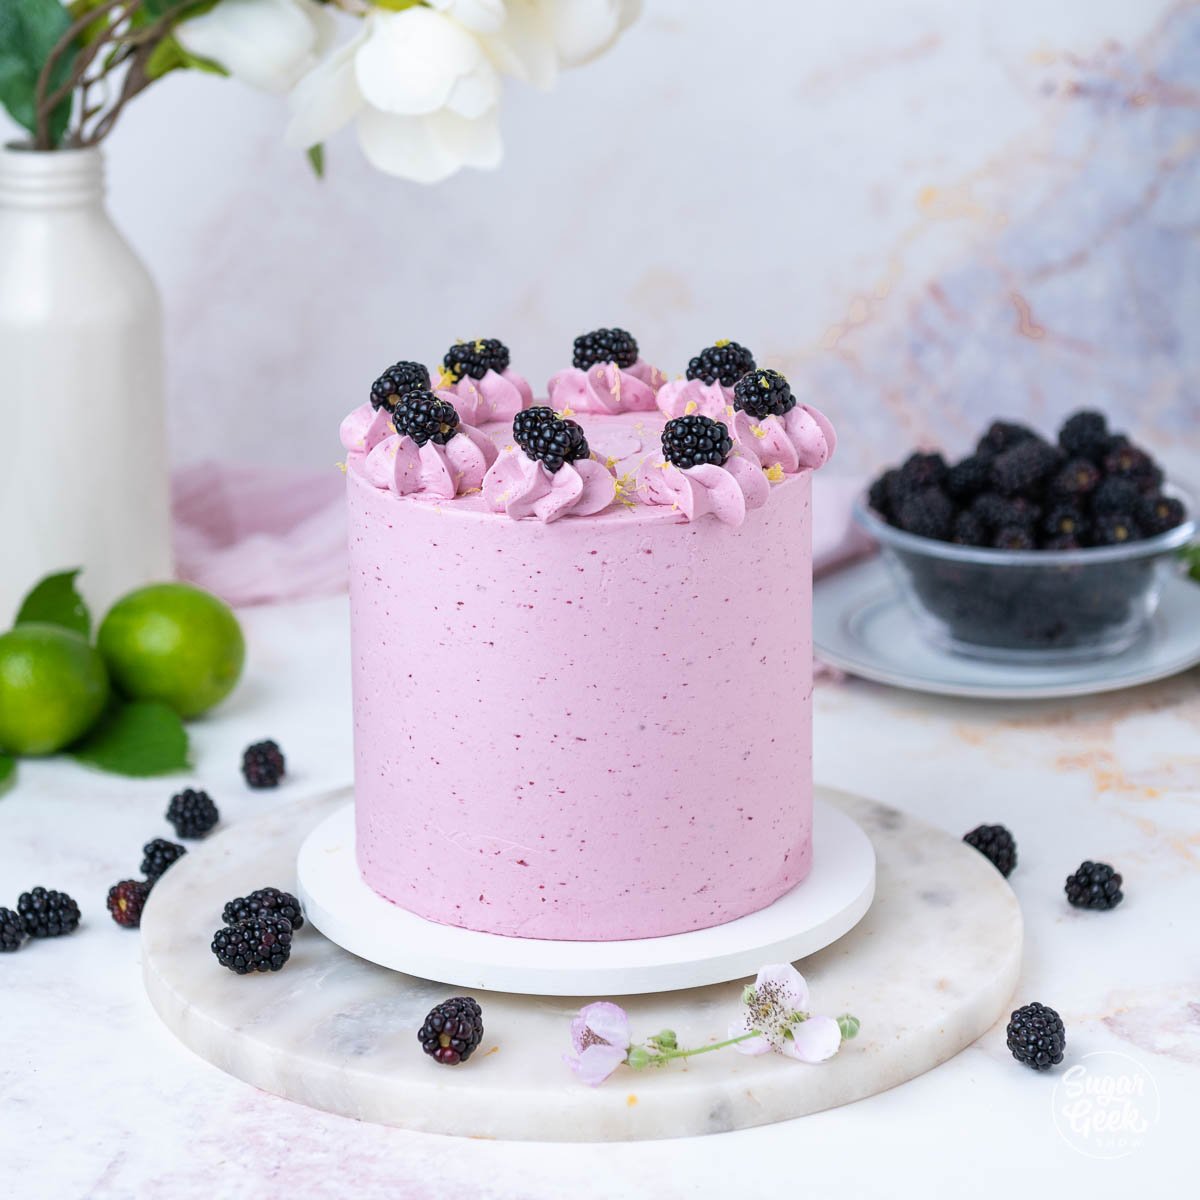
- Decorate the top of the cake with more dollops of buttercream, fresh berries and some lime zest. I used a 1M piping tip for this design.

- Store your blackberry cake in the fridge until you're ready to serve it. It's best to eat soft cake, so make sure you take it out of the fridge a few hours before you serve it. Cold butter makes a cold cake taste dry!
FAQ
How long does blackberry puree last
Blackberry puree lasts for up to 2-3 days in the refrigerator if kept in an airtight container.
Can you freeze blackberry puree?
Yes, you can freeze blackberry puree! Pour your leftover blackberry puree into ice cube trays or baby food containers, and store them in the freezer for up to 6 months. When you're ready to use your puree, remove the container from the freezer to allow it to thaw, and then use the puree to use for another baking recipe, smoothie, or even a homemade popsicle.
What kind of flour is best to use for this cake?
I use all-purpose flour in this recipe because the cake needed just a little more structure to hold those big juicy berries. AP flour has more protein and less starch, so it is just a little stronger than cake flour. The higher acid in the batter tenderizes the gluten proteins as well, so you do not end up with a tough cake. Too much acid in the batter will cause the protein to become too weak and the cake will be crumbly and dense. It's a very fine balance to find the right texture and keep the colors bright!
When the acidic blackberries bake with baking powder, they oxidize and turn green. Lowering the alkalinity of the batter and using baking soda instead kept the blackberries that nice, deep purple/red color. For an even deeper purple, you can add a few drops of violet food coloring to the puree.
More recipes you'll love
Berry Wash (How to Make Fresh Berries Last Longer)
Lemon Blueberry Buttermilk Cake Recipe
Recipe

Equipment
- 2 8"x2" round cake pans or three 6" pans
- Stand mixer with paddle and whisk attachments
- Immersion blender
Ingredients
Blackberry Cake
- 8 ounces buttermilk slightly warm
- 3 ounces vegetable oil
- 3 large eggs room temperature
- 1 Tablespoon lime zest (About 1 lime)
- 1 Tablespoon lime juice
- 12 ounces all-purpose flour
- 11 ounces granulated sugar
- 1 teaspoon salt
- 1 teaspoon baking soda
- 8 ounces unsalted butter softened
- 2 Tablespoons all-purpose flour (For dusting on blackberries)
- 4 ounces blackberries (You can use frozen, but don't thaw them)
Blackberry Puree
- 16 ounces fresh or frozen blackberries
- 1 tablespoon lime zest
- 2 tablespoon lime juice
- 1 tablespoon corn starch
- ⅛ teaspoon salt
Blackberry Buttercream Frosting
- 24 ounces unsalted butter room temperature (You can use salted butter but it will affect the taste and you need to leave out additional salt)
- 24 ounces powdered sugar sifted if not from a bag
- 2 teaspoons vanilla extract
- 6 ounces pasteurized egg whites room temperature
- 2 ounces blackberry puree (You can add more if you want to)
- 1 drop Americolor electric pink food coloring (Optional)
Instructions
Blackberry Puree
- Combine lime juice and cornstarch to make a slurry and mix until there are no lumps.
- Mix the blackberries and salt in a saucepan and use an immersion blender to make the filling smooth.
- Turn on the heat and cook down the berries. Keep stirring to keep the puree from cooking too quickly on the bottom of the pan.
- Once the puree has thickened up slightly, remove it from the heat and stir in the lime zest.
- Transfer the puree to a large bowl to cool to room temperature. You will use about 6 Tablespoons of the puree to add to your cake. About ¼ to ½ cup of puree will be for the buttercream. If you choose to strain the seeds out of all of the puree, add a couple of extra ounces of berries to account for the loss in straining. I chose to leave the seeds in for the cake and strain the seeds out for the buttercream. The seeds can be left in for the buttercream too, your choice.
- Store leftover puree in the fridge for up to a week or freeze for 6 months.
Making Blackberry Cake
- Heat oven to 335º F/168º C and prepare two 8"x2" round cake pans with cake goop or another pan release and parchment paper if you prefer.
- Measure out the buttermilk and place 4 oz in a separate measuring cup. Add the oil to the 4oz of buttermilk and set aside.
- Add your eggs and lime zest to the remaining milk and gently whisk to combine. Keep the lime juice separate, you will add this at the end.
- Place the flour, sugar, baking soda, and salt into the bowl of your stand mixer with the paddle attachment. I'm using my Bosch universal plus mixer but you can use a hand mixer, just mix for longer.
- Turn the mixer onto the slowest speed (setting 1 on Kitchen Aid mixers). Slowly add chunks of your softened butter until it is all added. Let everything mix until it looks like coarse sand.
- Add your milk/oil mixture all at once to the flour mixture. Mix on medium (speed 4 on KitchenAid) for 1 full minute to develop the structure. Don't worry, this will not over-mix the cake. Because it is AP flour you do not need to mix as long as cake flour (more gluten, less time needed).
- Scrape the bowl. This is an important step. If you skip it, you will have hard lumps of flour and unmixed ingredients in your batter. If you do it later, they will not mix in fully.
- Slowly add in the rest of your milk/eggs/zest ingredients in 3 parts. Next, pour in the lime juice with the last addition of liquid, stopping to scrape the bowl one more time halfway through. Your batter should be thick and not too runny.
- Fill your pans ½ full with cake batter.
- Spoon about 2 tablespoons of room-temperature puree over the batter. Use a small spatula or knife to gently fold the puree in to create a swirl effect into the batter.
- Add the floured blackberries to the top of the batter. Do not push them down as their weight will cause them to sink anyway as the cake heats up.
- Place the cakes in the preheated oven. I start by baking for 30 minutes for 6" and 8" cakes and 35 minutes for 9" and larger cakes and then checking for doneness. If the cakes are still really jiggly, I add another 5 minutes. I check every 2 minutes after that until I'm close and then it's every 1 minute. Cakes are done when a toothpick inserted in the center comes out with a few crumbs.
- After the cakes have cooled for 10 minutes or the pans are cool enough to touch, place a wire rack on top and flip the cakes over to remove them from the pans. Let them rest on a cooling rack to cool completely, or wrap in plastic wrap and chill in the freezer.
Making Blackberry Buttercream
- Strain out the seeds of the blackberry filling. This is optional but it will make a smoother texture when scraping the sides.
- Place the egg whites and powdered sugar in the bowl of your stand mixer with the whisk attachment and whip on high speed for 3-5 minutes. An electric mixer and a large mixing bowl will also work, just mix for longer.
- Add the softened butter in small chunks then vanilla and salt. Whip on high until light and fluffy and white, about 8 to 10 minutes.
- Add about ½ cup of the blackberry purée to the buttercream and continue to whip until combined.
- Mix in about 1-2 drops of pink food coloring to enhance the color if you choose.
- Optional: switch to the paddle attachment and mix on low for 15-20 minutes until all air bubbles are gone.
- Stored it in an airtight container for up to a week in the refrigerator or for 3 months in the freezer.
Decorating the blackberry cake
- Once your cakes are chilled, trim off the dome and brown edges of the cake. This is optional but makes for pretty slices.
- Place your first cake layer onto a board.
- Spread on about ¼" of your blackberry buttercream.
- Layer some fresh blackberries into the buttercream.
- Spread some more buttercream on top of the blackberries and then add your next layer of cake.
- Repeat the process with layer two and then add your final layer of cake on top.
- Cover the whole cake in a thin layer of buttercream. This is the crumb coat.
- Place the cake into the fridge or freezer for 20 minutes to set the buttercream layer.
- Apply your final coat of buttercream and use a bench scraper and offset spatula to make it nice and smooth.
- Decorate the top of the cake with more dollops of buttercream, fresh berries and some lime zest. I used a 1M piping tip for this design.
Video
Notes
- To keep the blackberries and puree from turning blue and green during baking the acidity level had to be higher, when the acidic berries touch the alkaline they oxidize and turn green. Lowering the alkalinity of the batter kept the blackberries that nice deep purple red color.
- I used AP flour in this recipe because the cake needed just a little more structure to hold those big juicy berries. AP flour has more protein, less starch, so is just a little stronger than cake flour. The higher acid in the batter tenderizes the gluten proteins as well, so you do not end up with a tough cake. Too much acid in the batter will cause the protein to become too weak and the cake will be crumbly and dense. It's a very fine balance to find the right texture and keep the colors bright!


Megan J says
I (and my family) absolutely love your recipes, but I am not a fan of buttercream, so I was going to make this with your crusting cream cheese frosting. Can I still add the blackberry puree to it, do I need to adjust for the liquid being added, or should I just go without the puree?
Elizabeth Marek says
Yes that should be fine, if it gets too thin add a bit more butter to make the cream cheese frosting thicker