
How to make a square cake with acrylics
Get a perfectly square cake with acrylics in half the time. I'm using my white cake recipe and easy buttercream but this process also works great with chocolate ganache or white chocolate ganache.
What are square acrylics?
Acrylics for cake decorating are basically square (or round) pieces of plastic that allow you to create perfectly smooth icing on your cakes. You'll have the exact same amount of icing all the way around your cake, and extremely sharp edges. Acrylics are food-safe, durable and clear.
It's a little bit more prep work to use acrylics than the upside-down technique, but it makes the process of getting super sharp corners that much easier and saves a lot of time.
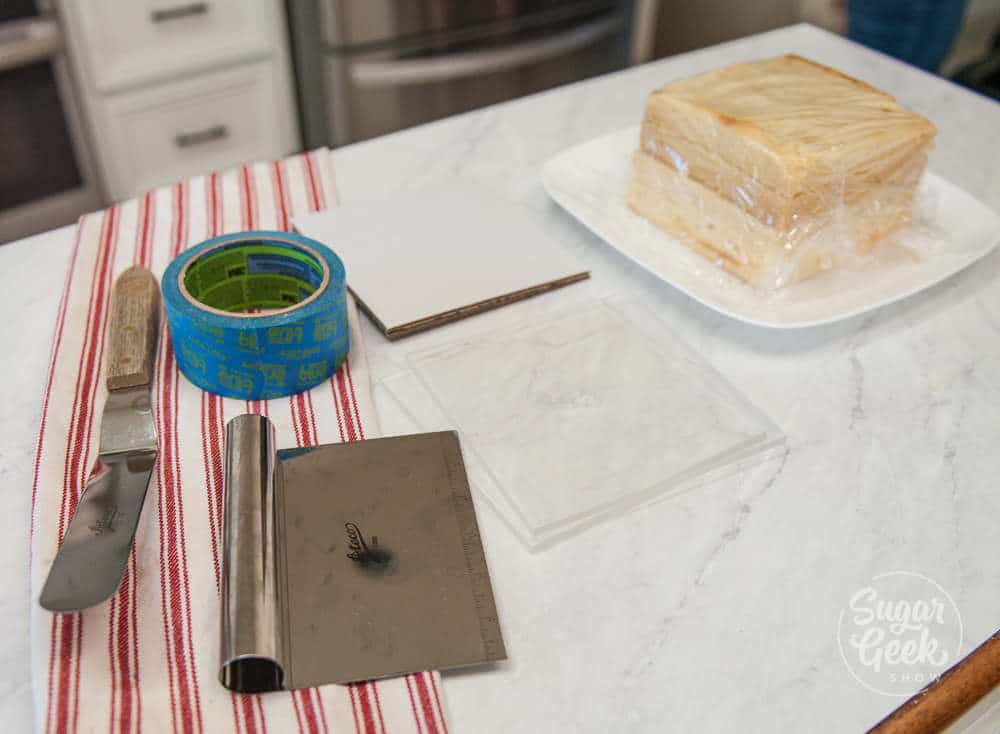
Tools you will need to make a square cake with acrylics
- Two acrylic discs in whatever cake sizes you are making. For a 6" square cake, I use 6" acrylics because my cakes tend to shrink a bit and I trim them.
- One square cake cardboard. I trim mine down from a quarter sheet board but you can purchase square cake boards.
- Painters tape (or any tape will do, I like painters tape because it releases easily)
- Parchment Paper
- 2 bench scrapers taller than your finished cake tier
- Turntable
- Offset spatula
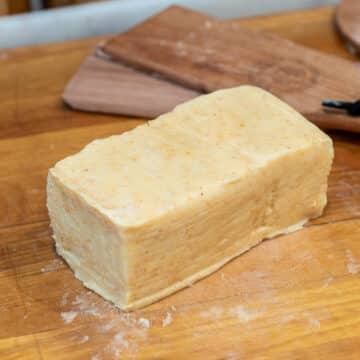
I have already pre-baked my two square cakes, let them cool and trimmed off the brown edges (optional) and cut them in half length-wise.
I am frosting with my easy buttercream recipe. If you want to learn more about making a cake from start to finish, check out my how to make your first cake tutorial.
Where can you buy square acrylics?
Cake Safe has great acrylics for square and round cakes as well as a lot of info on how to use their products. They are made of high-quality ¼" acrylic.
How to use square acrylics
Lots of people have complained about acrylics sticking to their cakes. It's very important to understand that the acrylics are meant to be a guide for your scrapers but they need to be properly prepped first.
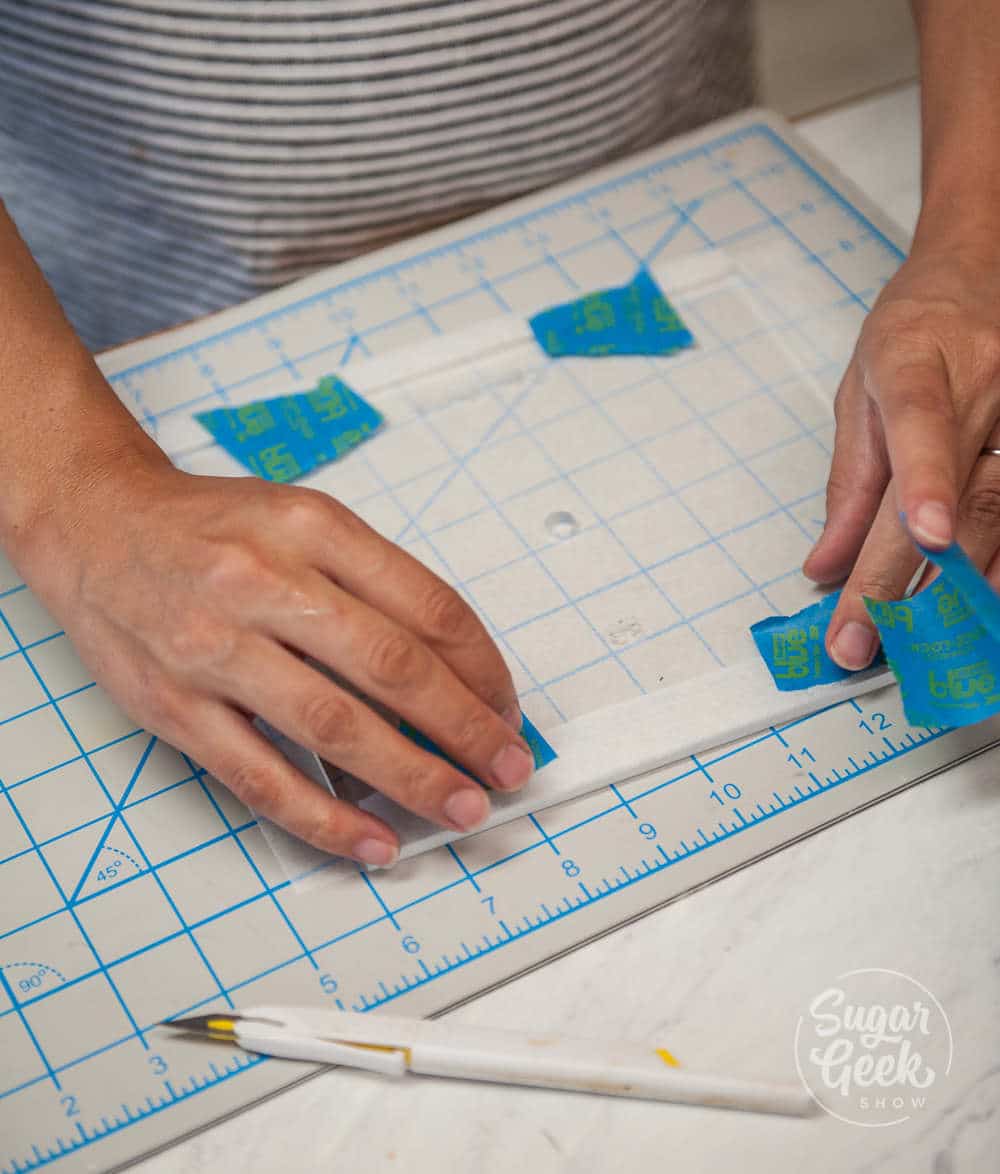
I wrap mine with parchment paper so that they don't stick, other people just cut a piece of parchment to the same size as the acrylic.
- Cut a square piece of parchment that is 2" bigger than the square acrylic. Cut the corners off of the parchment, fold the sides onto your acrylic, and tape it down. Make sure your parchment is flat and tight with no wrinkles.
- Your cake board should be a little smaller than the acrylic so that the buttercream covers the cake board. For a 6" cake, my boards are 5 ¾" square.
- Place your first acrylic tape side down onto the turntable with a non-skid underneath.
- Put a little bit of frosting on the acrylic then put your cake board on top of the acrylic and center it. *NOTE* you can also crumb coat your square cake on the cake board FIRST then place it onto the acrylic.
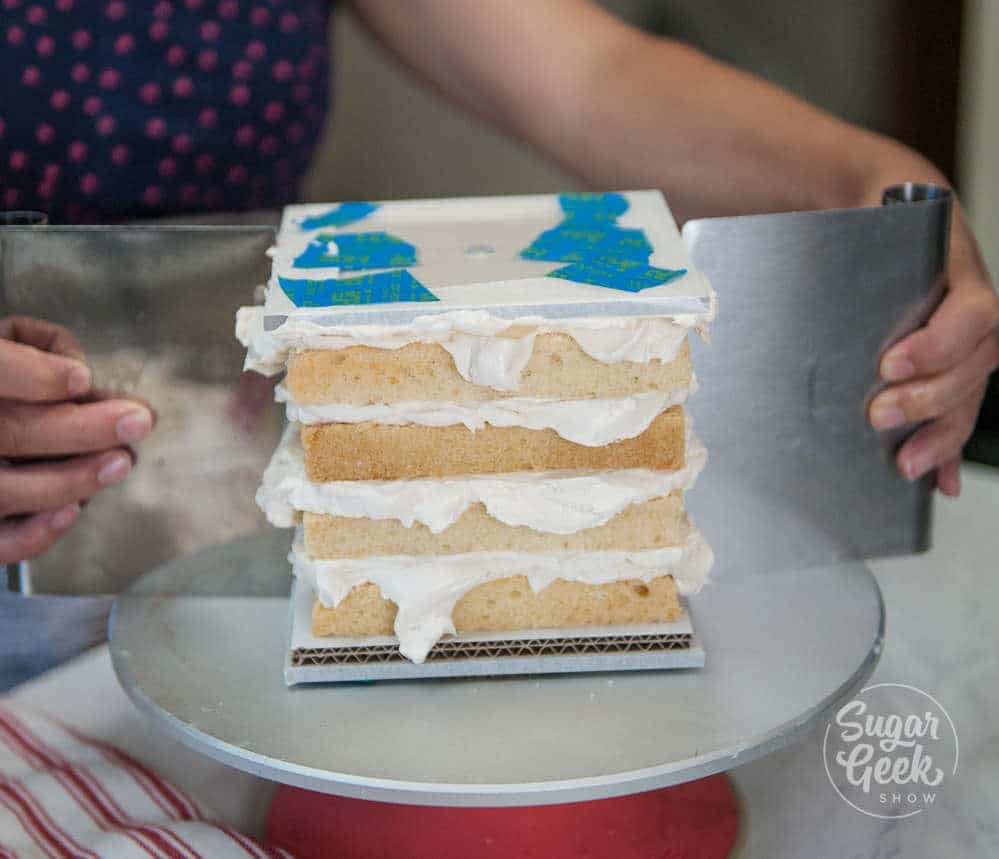
- Then place your first cake layer on the cake board and put an even layer of frosting. You can use a piping tip if you're not comfortable with putting ¼ inch buttercream right on there. Just make sure your buttercream layers are even and flat.
- Continue layering cakes and buttercream.
- Place a thick layer of frosting on your second acrylic and place that on top of your cake. Push down to make a good connection. Use a level to make sure the acrylic is level on top of the cake.
- Use your bench scrapers to make sure the top acrylic lines up with the bottom acrylic.
- Fill in the sides with more buttercream and chill until firm. About 20 minutes.
How to get sharp edges using square acrylics
Once your cake is chilled, now it's time to refine those corners!
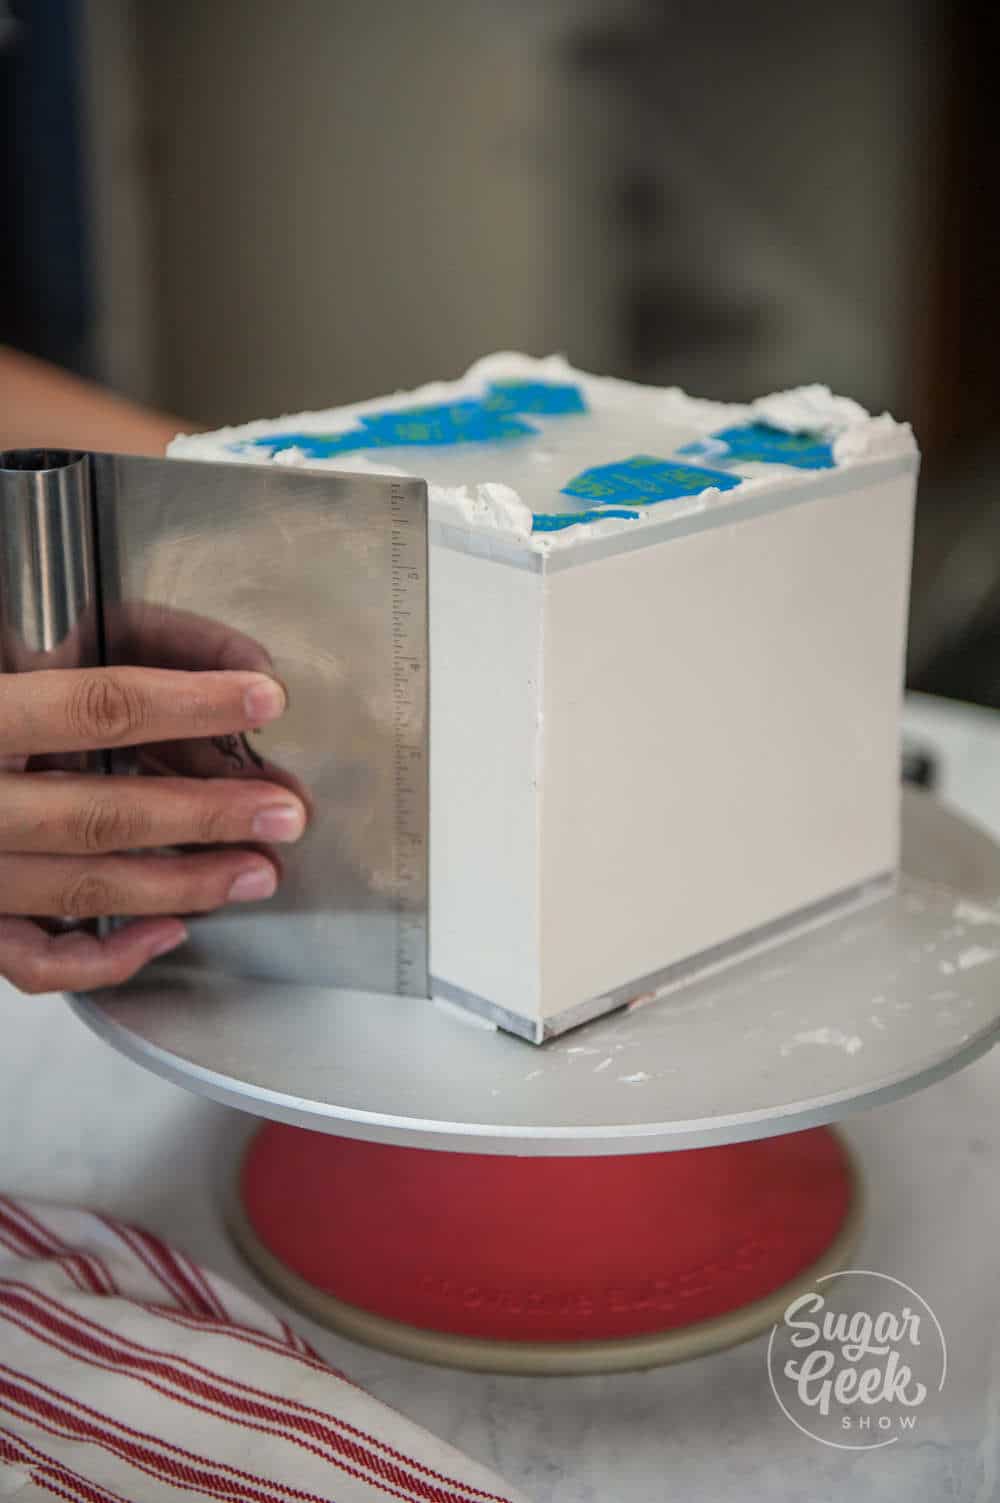
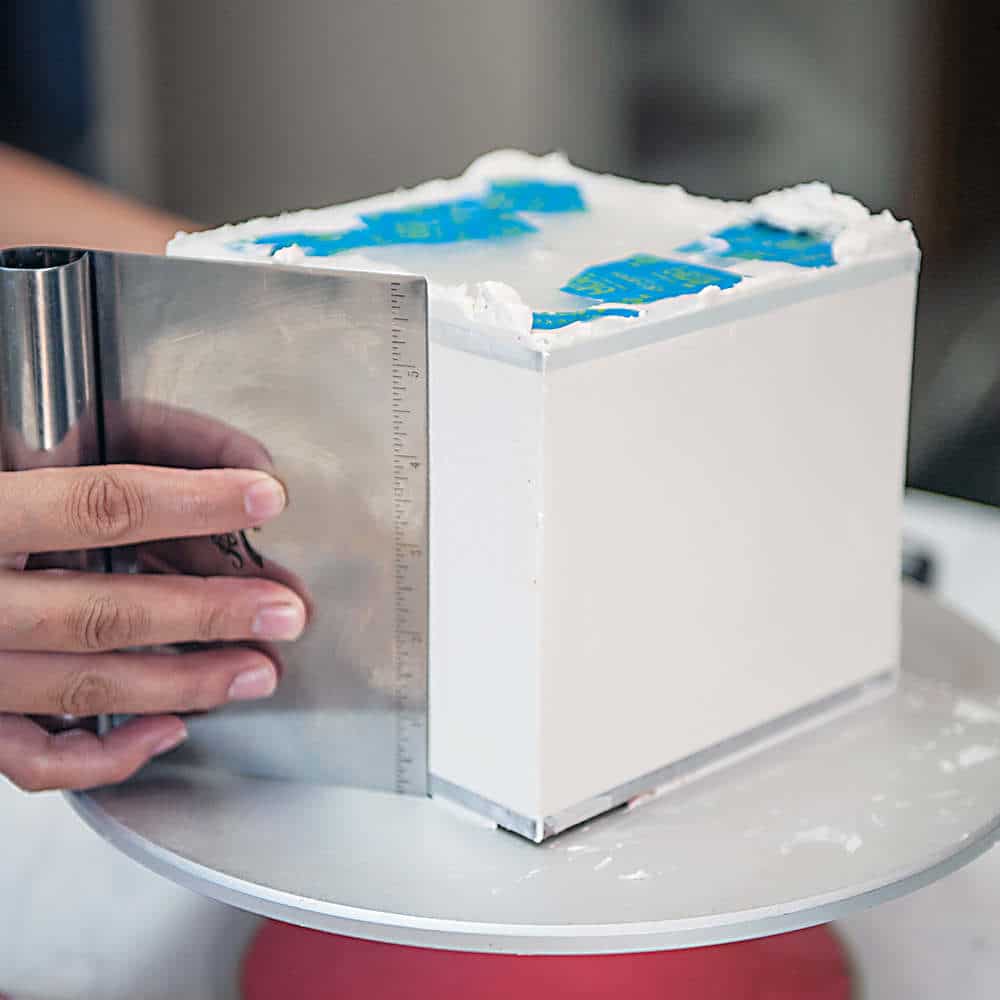
Use your offset spatula to add more buttercream to the corners. Use the bench scraper to sharpen the corners. I start at the corner and pull towards the center of the cake. Do not go all the way past the second corner or you will ruin it.
Repeat this process until your corners are pretty sharp. Chill for another 15 minutes.
To get those REALLY sharp corners, I do a final pass with one more coat of buttercream and this time I warm up my metal bench scraper in hot water, then I dry it off. This warm bench scraper gets the corners really sharp and also get's rid of any bubbles on the surface of the buttercream.
Chill one more time in the freezer for 10 minutes.
How to remove square acrylics without them sticking to the buttercream
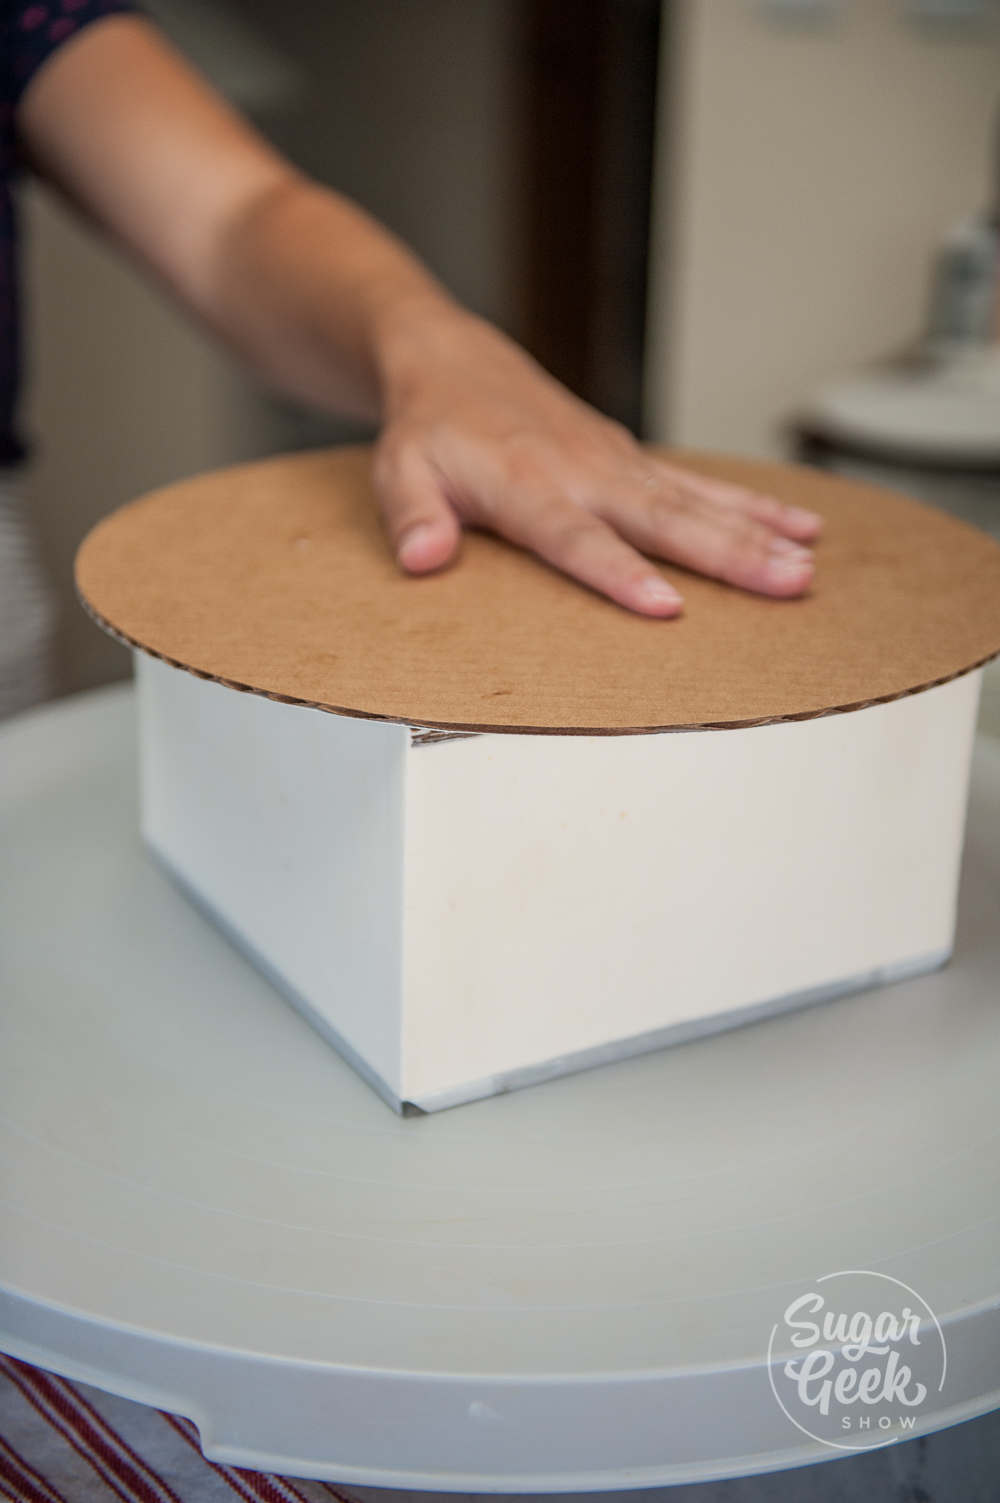
Now that our cake is chilled, we can remove the acrylics. The first thing I do is flip my whole cake over so that the cake board is facing the top. Don't worry, this won't hurt the cake. It's nice and chilled.

Remove the tape carefully, unfold the parchment paper and remove the acrylic. Carefully peel away the parchment paper.
Place a cake board on top and flip the cake back over so the cake board is on the bottom.
Repeat the process for the top acrylic. Fill in any wrinkles with more buttercream and smooth out your edges.

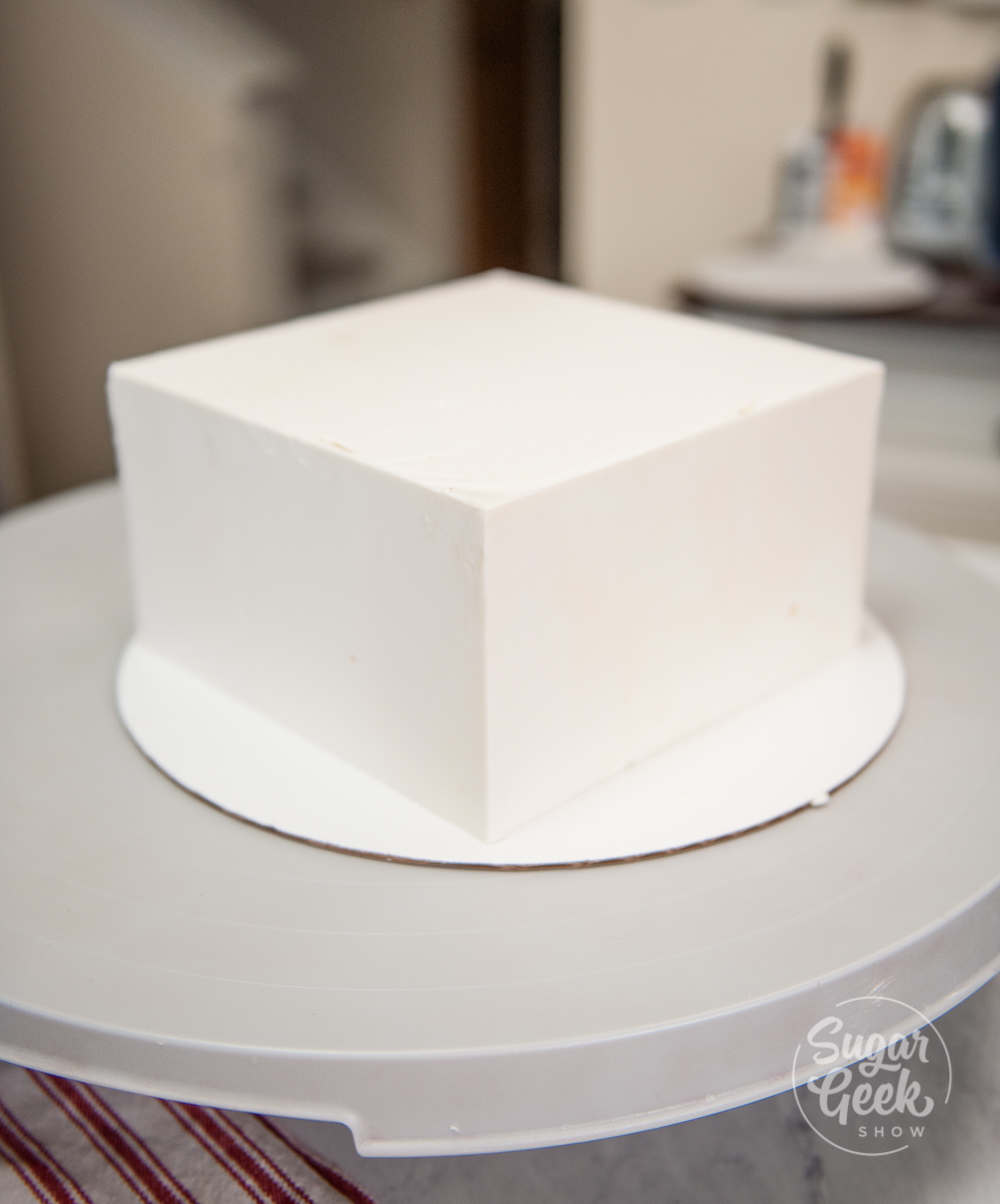
I was amazed at how sharp these corners got! All I had to do was touch up the top with a little buttercream to fill in a few wrinkles. I used a long bench scraper to smooth out that edge again.
Keep the cake chilled until you need it.
Can you make bigger square cakes with acrylics?
Yes, you sure can! I have used acrylics for cakes up to 12" but I don't often make really large cakes. You can also use ganache instead of buttercream for a very firm outside layer on your square cakes. Ganache is easier to cover in fondant without getting soft corners and holds up against humidity better.
Equipment
- Square Acrylics
- Parchment Paper
- Tape
- Two Bench Scrapers
- Level
- Square Cake Board
- Offset Spatula
Ingredients
Square Cake Edible Materials
- 2 6" White Cakes Chilled and trimmed
- 6 cups Easy Buttercream Or ganache
Instructions
How to use square cake acrylics
- Cut a square piece of parchment that is 2″ bigger than the square acrylic. Cut the corners off of the parchment, fold the sides onto your acrylic, and tape it down. Make sure your parchment is flat and tight with no wrinkles.
- Cut a square cake board. Your cake board should be a little smaller than the acrylic so that the buttercream covers the cake board. For a 6″ cake, my boards are 5 ¾″ square.
- Place your first acrylic tape side down onto the turntable with a non-skid underneath.
- Put a little bit of frosting on the acrylic then put your cake board on top of the acrylic and center it.*NOTE* you can also crumb coat your square cake on the cake board FIRST then place it onto the acrylic.
- Then place your first cake layer on the cake board and put an even layer of frosting. You can use a piping tip if you’re not comfortable with putting ¼ inch buttercream right on there. Just make sure your buttercream layers are even and flat. Continue layering cakes and buttercream.
- Place a thick layer of frosting on your second acrylic and place that on top of your cake. Push down to make a good connection. Use a level to make sure the acrylic is level on top of the cake.
- Use your bench scrapers to make sure the top acrylic lines up with the bottom acrylic.
- Fill in the sides with more buttercream and chill until firm. About 20 minutes.
- Use your offset spatula to add more buttercream to the corners. Use the bench scraper to sharpen the corners. I start at the corner and pull towards the center of the cake. Do not go all the way past the second corner or you will ruin it.
- Repeat this process until your corners are pretty sharp. Chill for another 15 minutes.
- To get those REALLY sharp corners, I do a final pass with one more coat of buttercream and this time I warm up my metal bench scraper in hot water, then I dry it off. This warm bench scraper gets the corners really sharp and also get’s rid of any bubbles on the surface of the buttercream. Chill one more time for 10 minutes.
- Now that our cake is chilled, we can remove the acrylics. The first thing I do is flip my whole cake over so that the cake board is facing the top. Don’t worry, this won’t hurt the cake. It’s nice and chilled.
- Remove the tape carefully, unfold the parchment paper and remove the acrylic. Carefully peel away the parchment paper.
- Place a cake board on top and flip the cake back over so the cake board is on the bottom.
- Repeat the process for the top acrylic. Fill in any wrinkles with more buttercream and smooth out your edges.


Lisa says
Thanks for the tutorial. I recently purchased the square disks, but have been to chicken to try them.
The Sugar Geek Show says
I know how you feel! I was worried it was going to be really hard too but I don't think I can ever go back to doing squares any other way now!
Diana Smith says
I am soooo hungry for cake right now!
Carol says
I love this idea and all of your creations. I have looked in a number of different site, where do I find the acrylic disc?
The Sugar Geek Show says
http://www.cakesafe.com
Linda Y says
How do you prep the acrylic if it is round? When I wrap it with either wax paper or parchment paper, I am unable to get smooth edges
Ankita S says
How do you work on round cakes? I somehow don't do well with cutting the parchment of exact size for round. And folding the parchment, like you did for square, doesn't seem to be an option for round. I get smooth sides but the top is always messed up
The Sugar Geek Show says
I'll try to do a tutorial but basically the parchment is not wrapped over the edge of the acrylic disk, it is cut the same size and attached with rolled up tape
Ankita S says
Thanks Liz!