Cake boards. I mean, they're pretty darn important. They are the foundation of every cake. Today we will go over different types of cake boards and how to make them look presentable and professional for any type of cake.
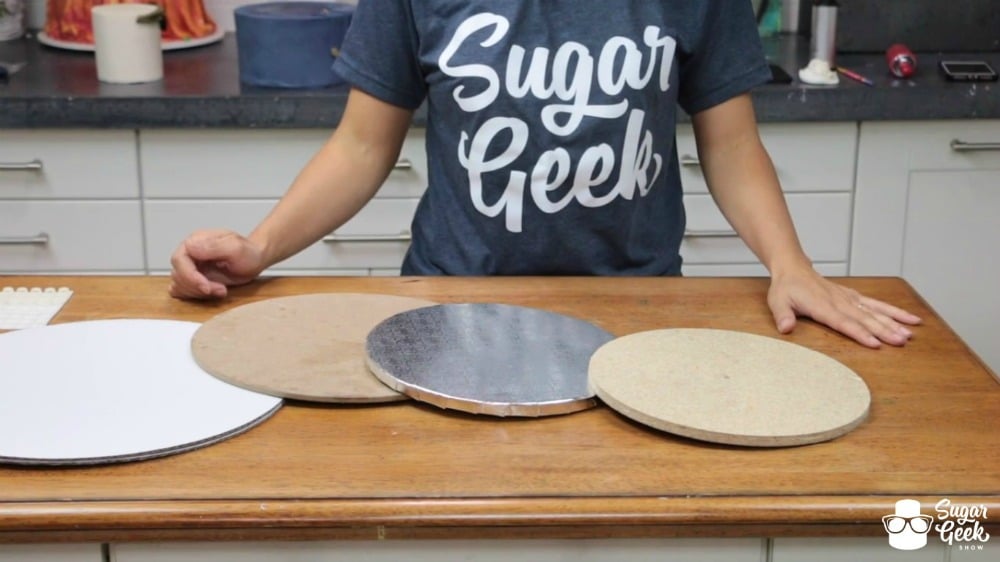
You've got your standard cardboard rounds, your foam core cake drums and your wooden boards. Not pictured in that order. They all work great and some work better than others for certain things.
In general, the cheapest and most widely available option is cardboard rounds. Just one on it's own isn't really enough for your base board, but glue a couple together and you've got yourself a sturdy board that can hold up any tiered cake.
Cake drums are great as they cut out the labor of gluing boards together but if you're like me they aren't available anywhere near you.
Wooden cake boards are a must for any type of cake that requires structure so many sculpted cakes, gravity defying cakes and maybe if you're doing an insanely tall tiered cake.
Whichever board you're using, it really should be covered and finished off with a ribbon to give it a complete and professional look. We're about to show you how to do just that.
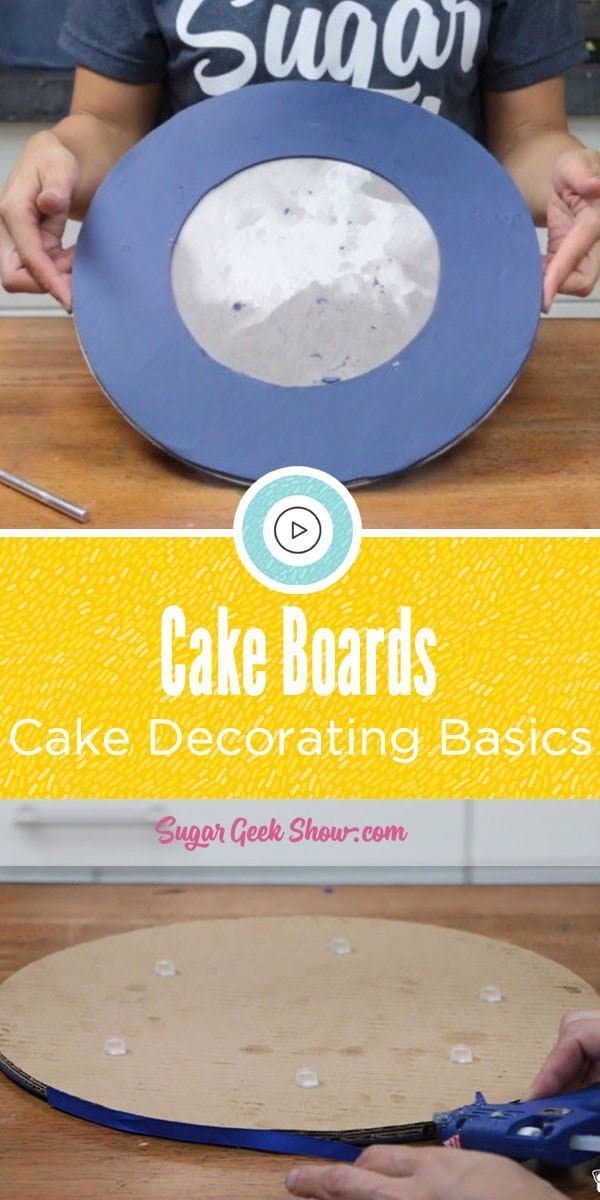
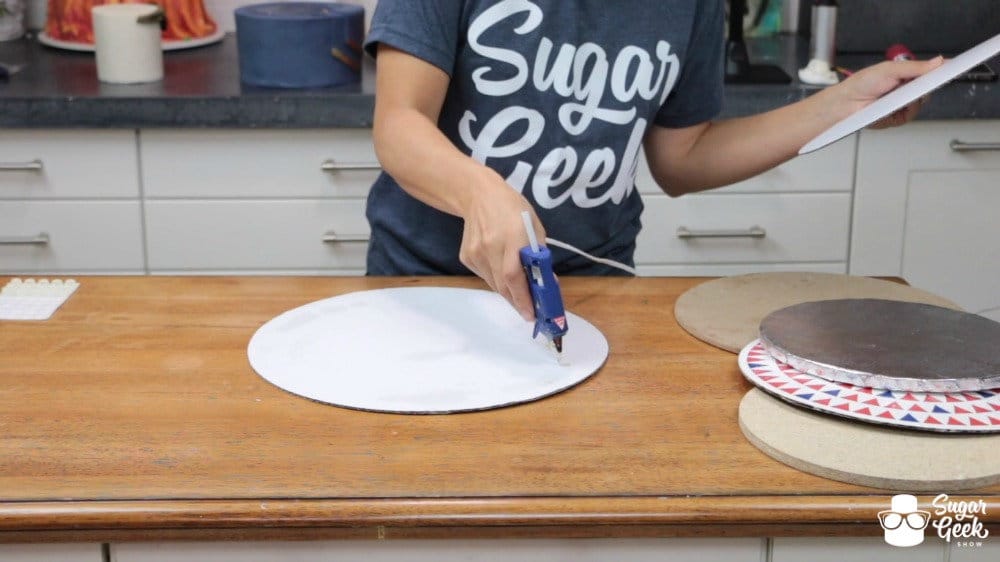
Start by hot gluing two of the same size cardboard rounds together. For added stability glue the boards so that the cardboard "grain" is opposite of the other board. I personally add a cake board for each tier my cake will have to ensure it will be strong enough to hold my cake, so one and two tier cakes get two boards, three tiers get three, four get four and so on.
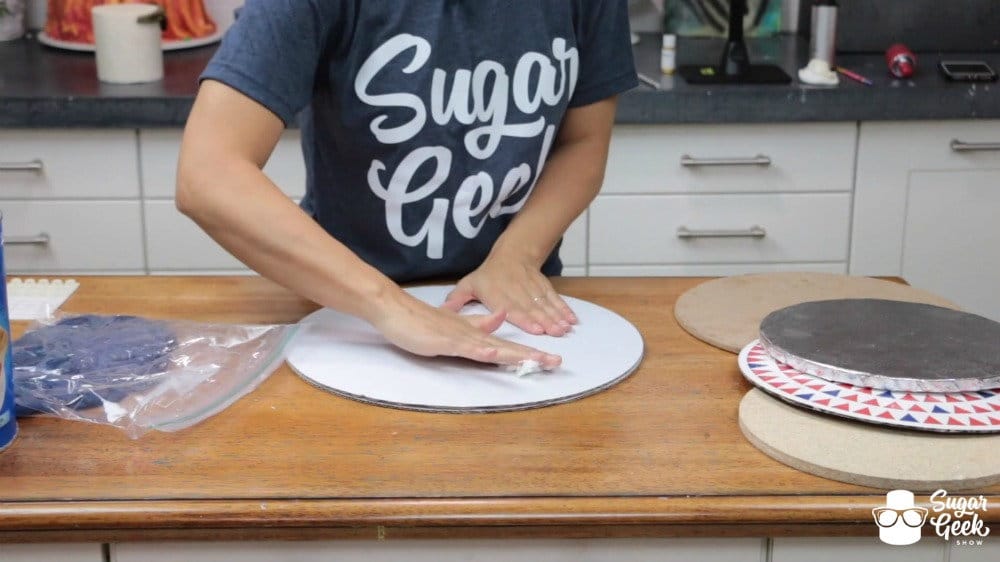
After your boards are glued together, cover the top of the board in a thin layer of shortening.
Roll out some leftover fondant nice and thin in your color of choice. Matching some fondant on your cake is always a nice touch.
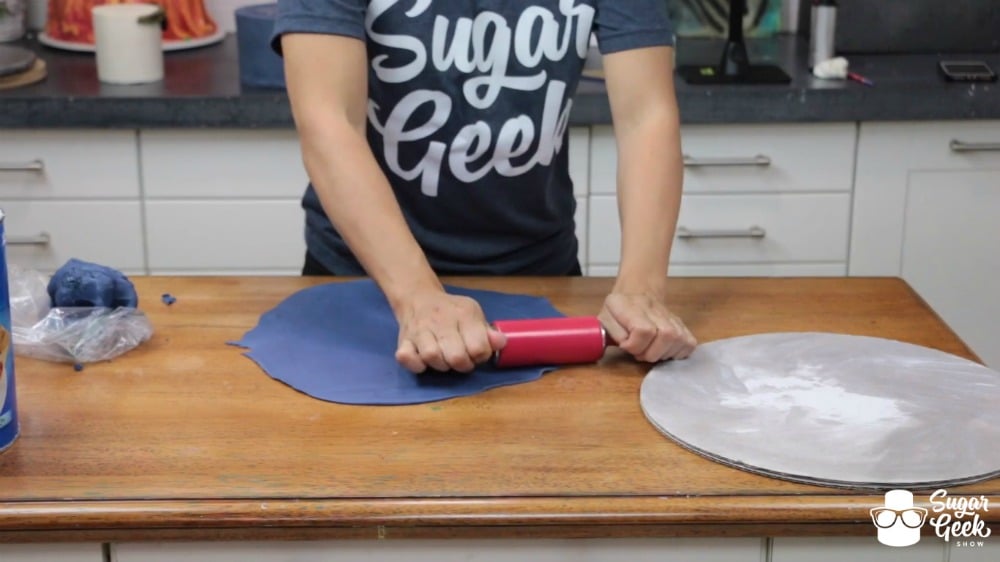
Place the fondant on the shortening covered board and finish rolling if needed to make sure the entire board is covered.

Cut off the excess fondant with an exacto blade.
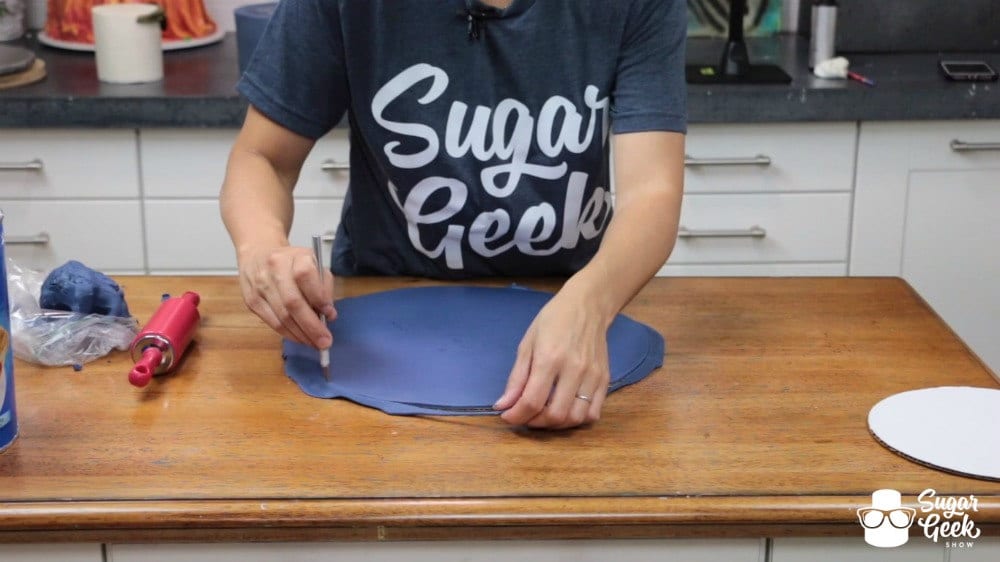
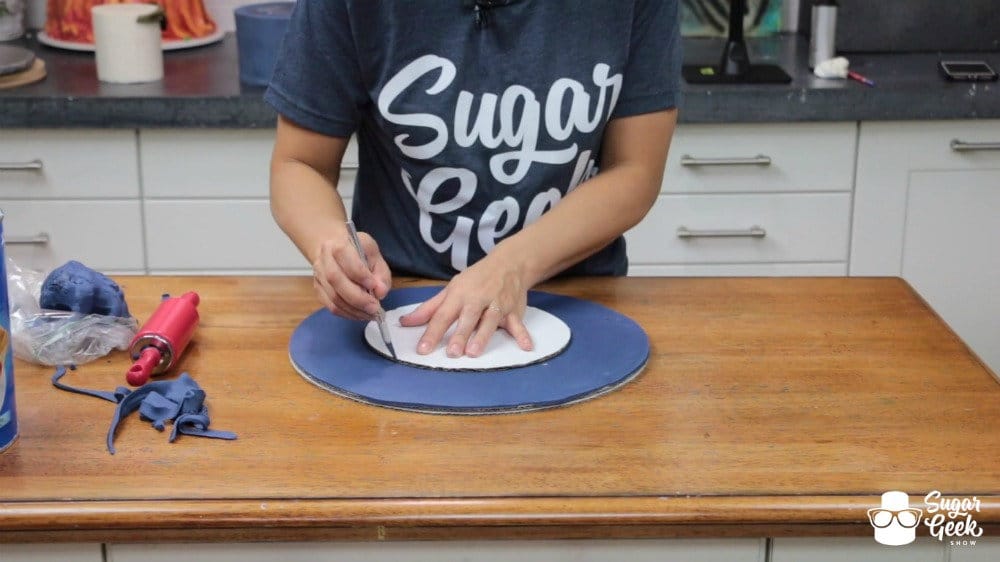
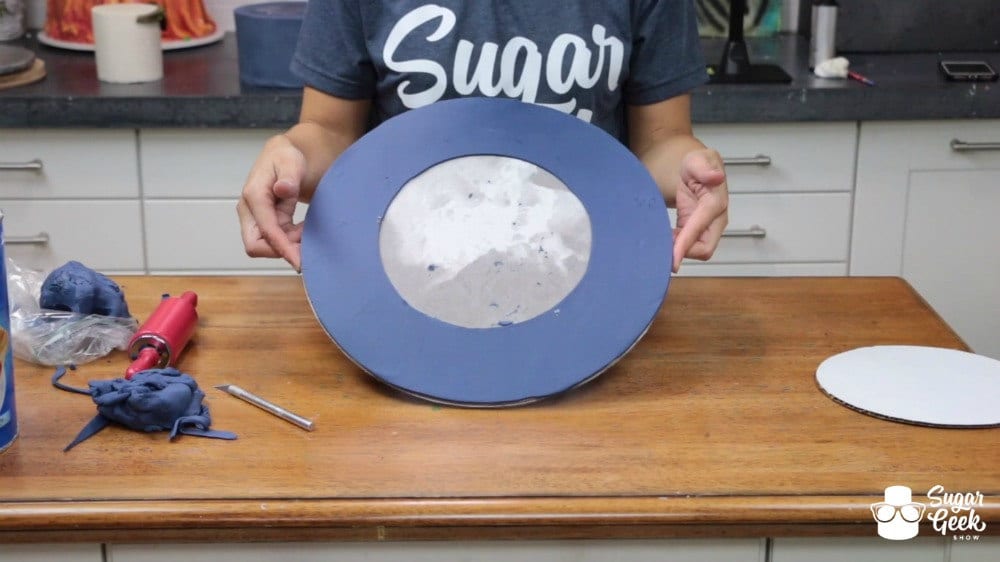
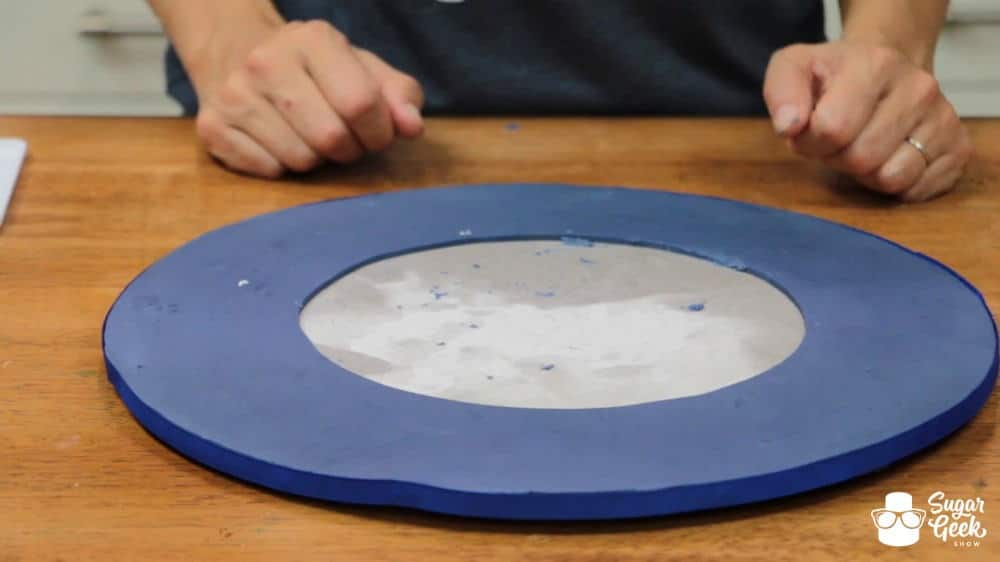
If you're not one for waste, you can take a cake board the size of your bottom tier, center it in the board and cut it out with an exacto knife and remove that fondant.
And there ya go, you have a covered cake board. At this point you may want to bake your cake board to harden up the fondant to keep it from getting damaged if you don't have days to let it dry. Check out the tutorial on how to bake your cake boards at the bottom of this post!
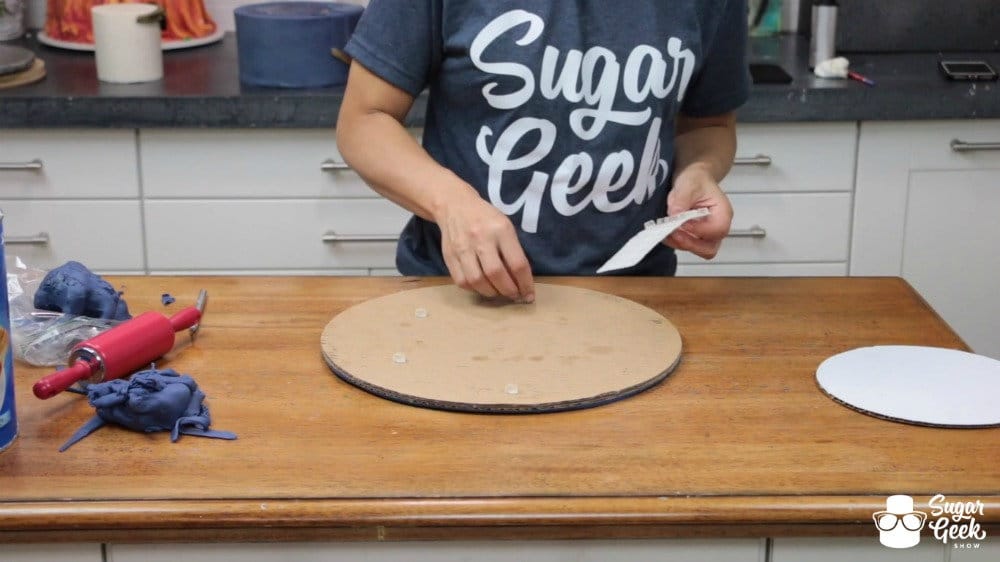
Next, we like to add "feet" to our cake boards to make them easier to pick up and give them another professional touch. In general, cupboard door stops make great feet and are super inexpensive. Occasionally for a wedding cake I will go with something a little fancier. They are self stick so just add some to the bottom and you're good!
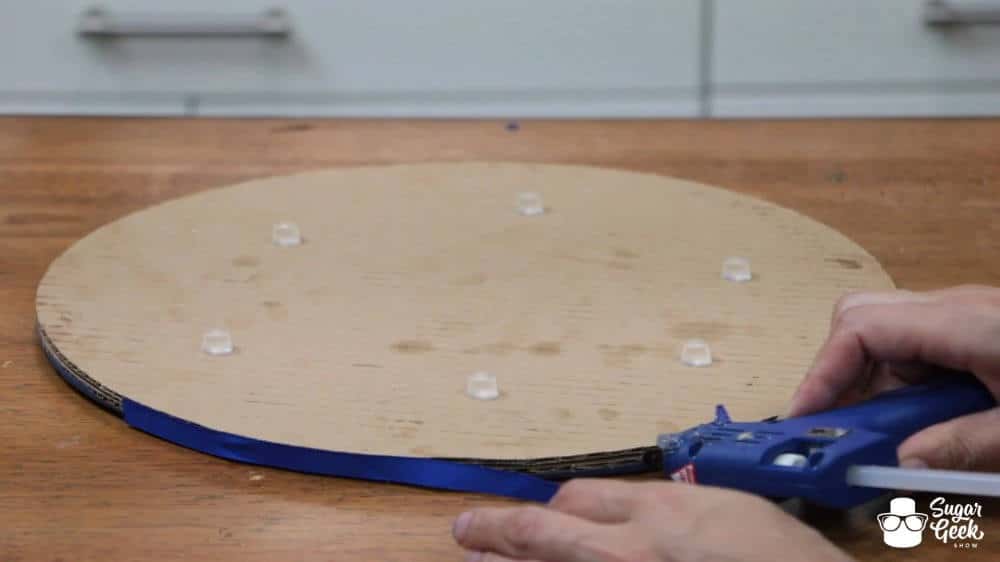
Last but not least, hot glue a ribbon to the edge of your board. Glue every four inches or so. ⅜" grosgrain ribbon is best for two cardboard rounds or a ¼" board covered in fondant.
Isn't it purdy? Well better than a plain old corrugated board right?! For sure, and chances are your customers will even be impressed. Follow these steps for covering any kind of cake board whether it be cardboard, cake drum or wood.
Don't forget to check out the video tutorial below for the how to bake your cake board bit and if you'd like an alternative way to cover your cake board that doesn't use fondant, check out our free tutorial from Shani Christenson on Making Beautiful Custom Cake Boards!
Going over the basics? Check out these!
Cake Decorating Basics: Must Have Tool Review
Cake Decorating Basics: Airless Space Buttercream
Cake Decorating Basics: Leveling and Torting
Cake Decorating Basics: Filling and Crumb Coating
Cake Decorating Basics: Avoiding Cake Blowouts
Cake Decorating Basics: Smooth Final Coat of Buttercream
Cake Decorating Basics: The Upside Down Method
Cake Decorating Basics: The Secret to Small Cakes
Cake Decorating Basics: Covering a Cake in Fondant
Cake Decorating Basics: Easy Double Barrel
Cake Decorating Basics: How to Panel
Cake Decorating Basics: Stacking Cakes