
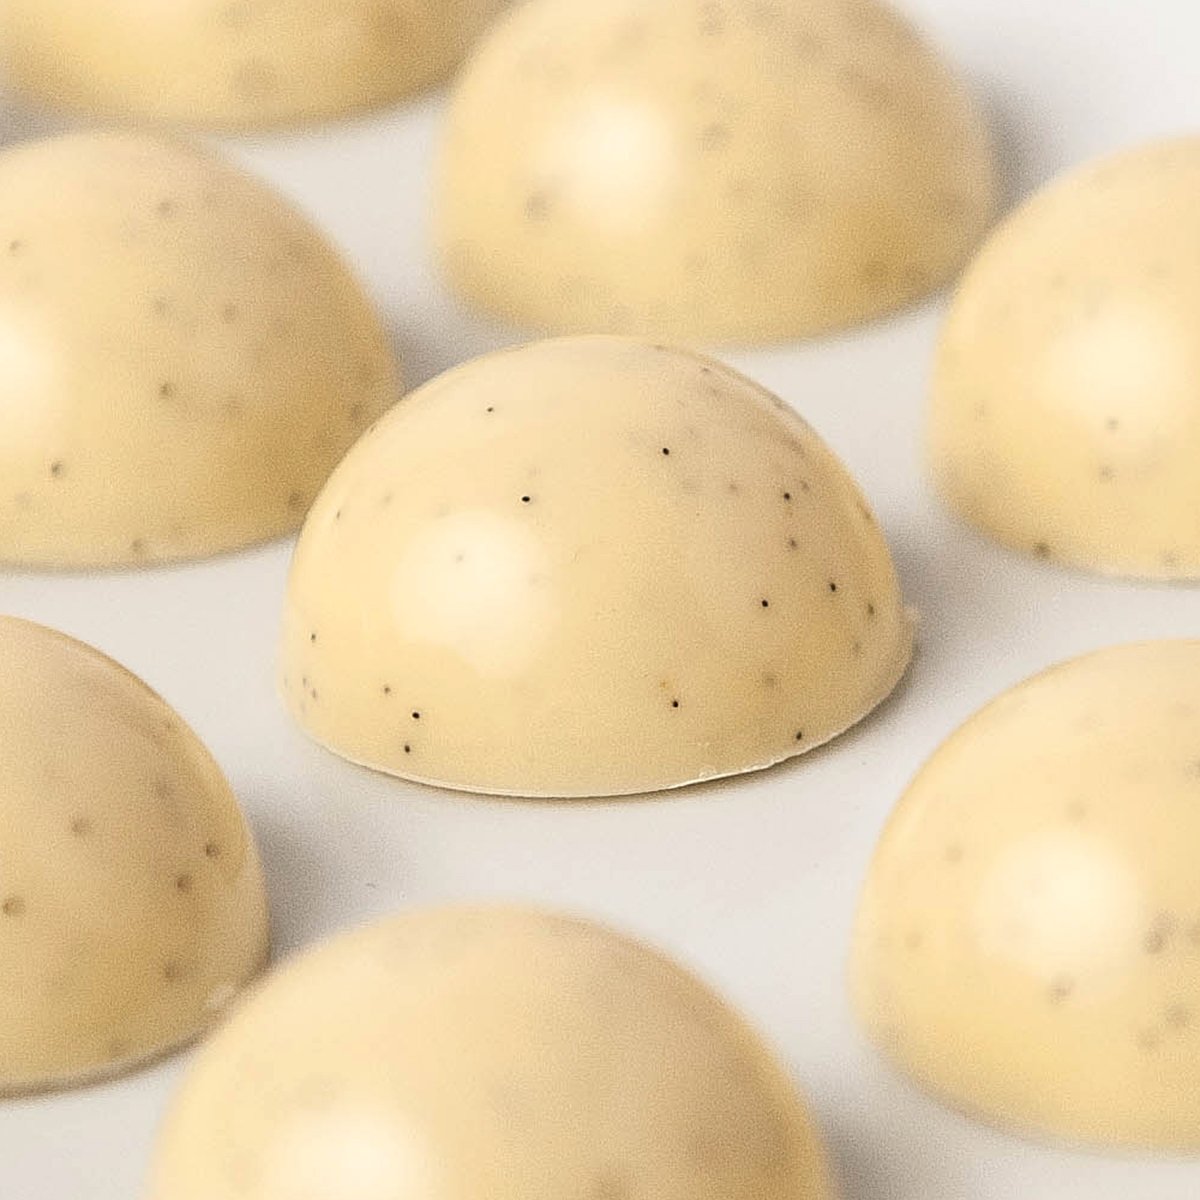
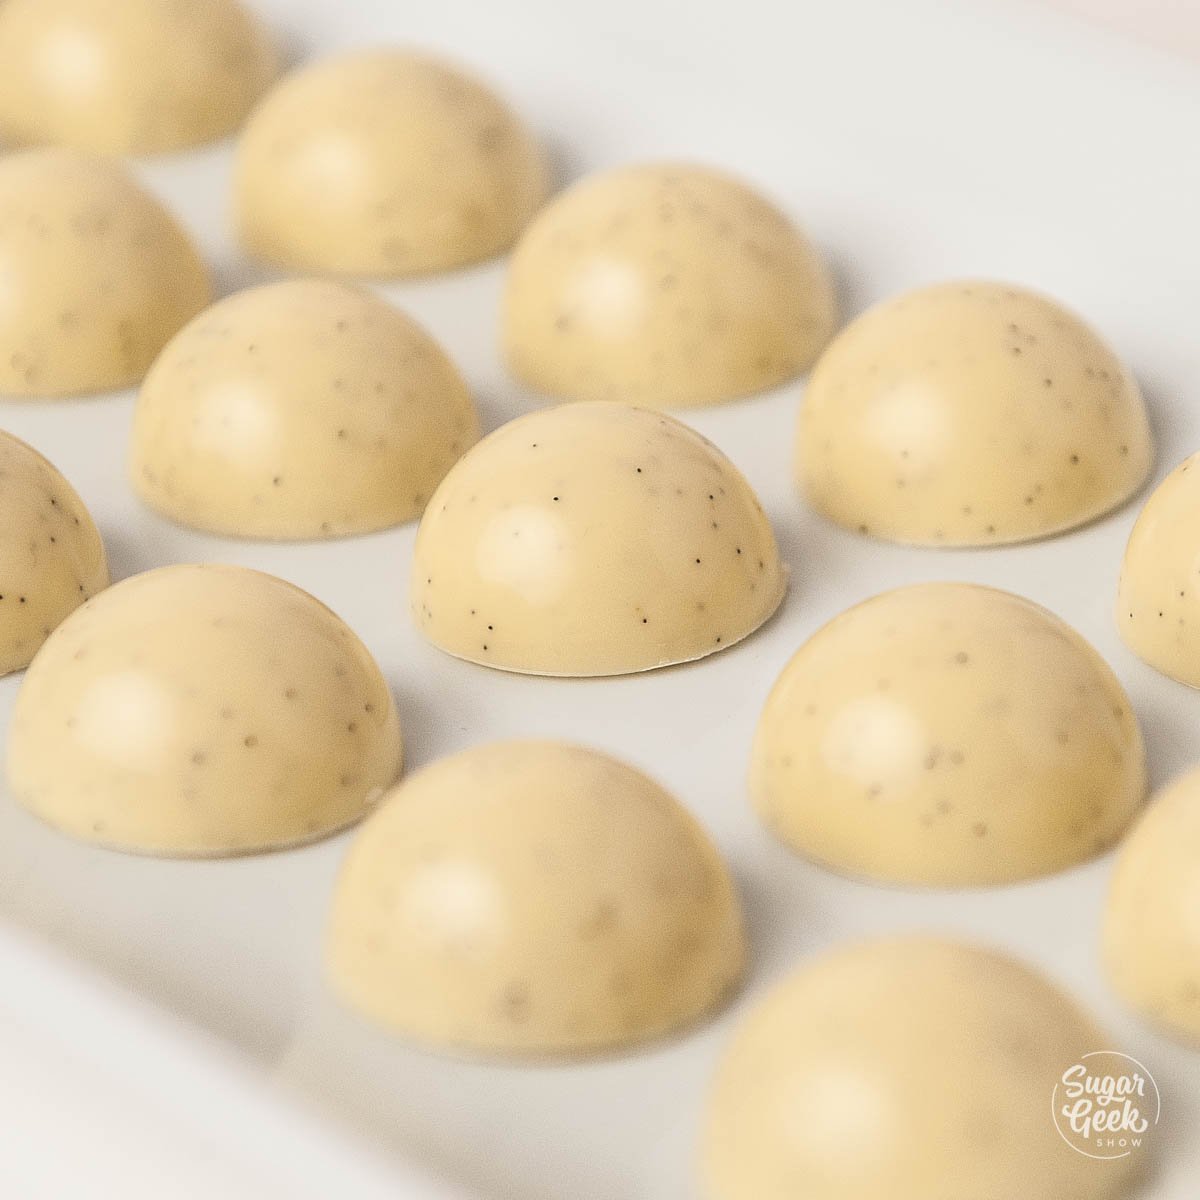
These bonbons have a thin and shiny chocolate shell filled with a truly amazing silky soft, white chocolate vanilla bean ganache. I actually thought I didn't like white chocolate until I tasted these bonbons! No joke!
Chef Christophe Rull shows us how to achieve the perfect chocolate bonbons step by step. If you're a novice chocolatier and want to move into making your own flavored bonbons and ganache fillings, you don't want to miss this valuable information! Keep reading to learn how!
Table of contents
What is a bonbon?

A bonbon is a small molded chocolate candy. They are usually filled with things like ganache, sauces, liqueurs, or other sweet fillings. Remember those chocolate-covered cherries from Christmas? That's a kind of bonbon. But in my opinion, the worst version.
In this blog post, Chef Christophe Rull is going to show you how to make your own bonbons! Never buy stale Valentine's day candy again or start selling your own custom bonbon flavors. Once you get the basics down, you'll be making bonbons like crazy!

Chocolate bonbon ingredients
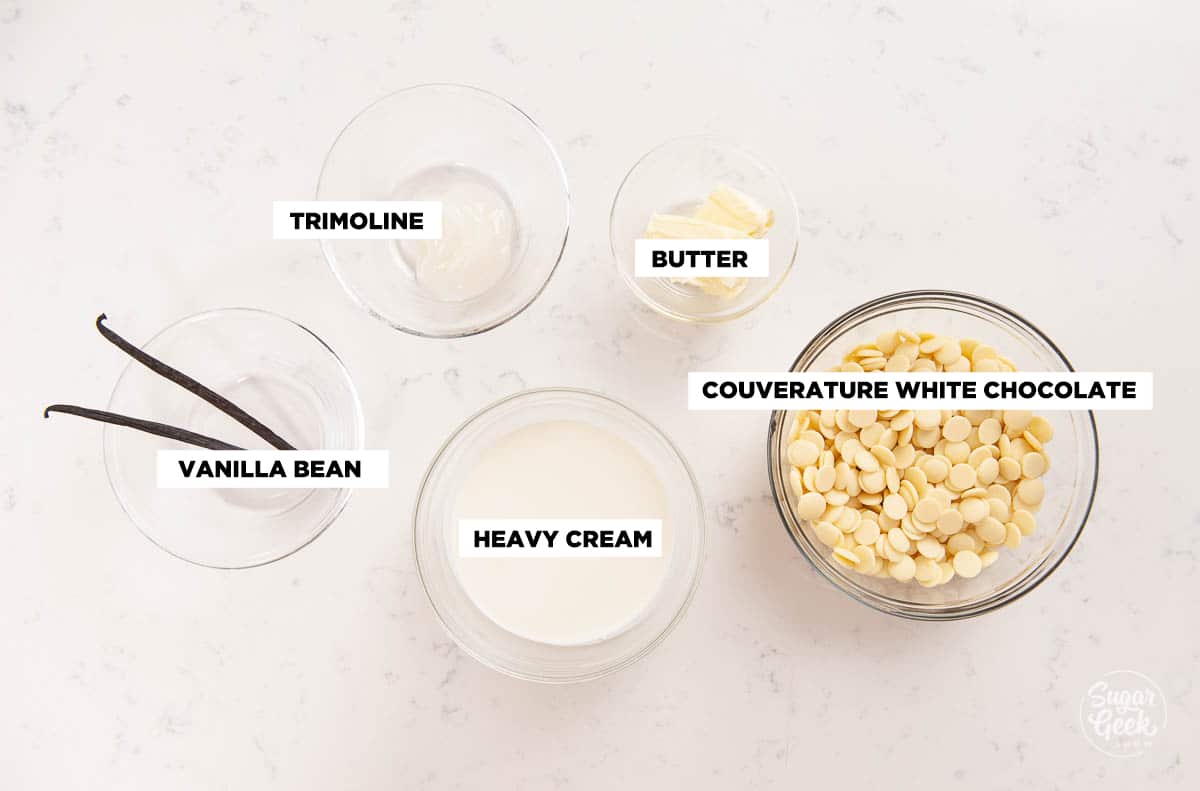
Since the main ingredient to bonbons is chocolate, make sure you're using very high-quality couverature chocolate. The better the quality, the better the taste.
To make these chocolate bonbons we are using really high-quality white chocolate from Cacoa Barry. This chocolate is really nice and thin and perfect for making a shiny, delicious chocolate bonbon.
Since vanilla is our main flavor, we're going all out and using a very fat and juicy Tahitian vanilla bean or you can save some money by using vanilla bean paste or even a good vanilla extract. If you use extract you won't have the pretty specs of vanilla bean in your shell but it will still taste yummy!
Another ingredient you might not have on hand is trimoline which is a form of invert sugar much like corn syrup. Trimoline prevents crystalization, adds sweetness, and gives the ganache a very smooth texture. The best substitutions for trimoline are molasses, honey, corn syrup, or glucose syrup.
Chocolate bonbon equipment
Every chocolatier is going to be familiar with these tools but if you're new to chocolate work, make sure you get these basic chocolate-making supplies before you attempt to make molded chocolates.
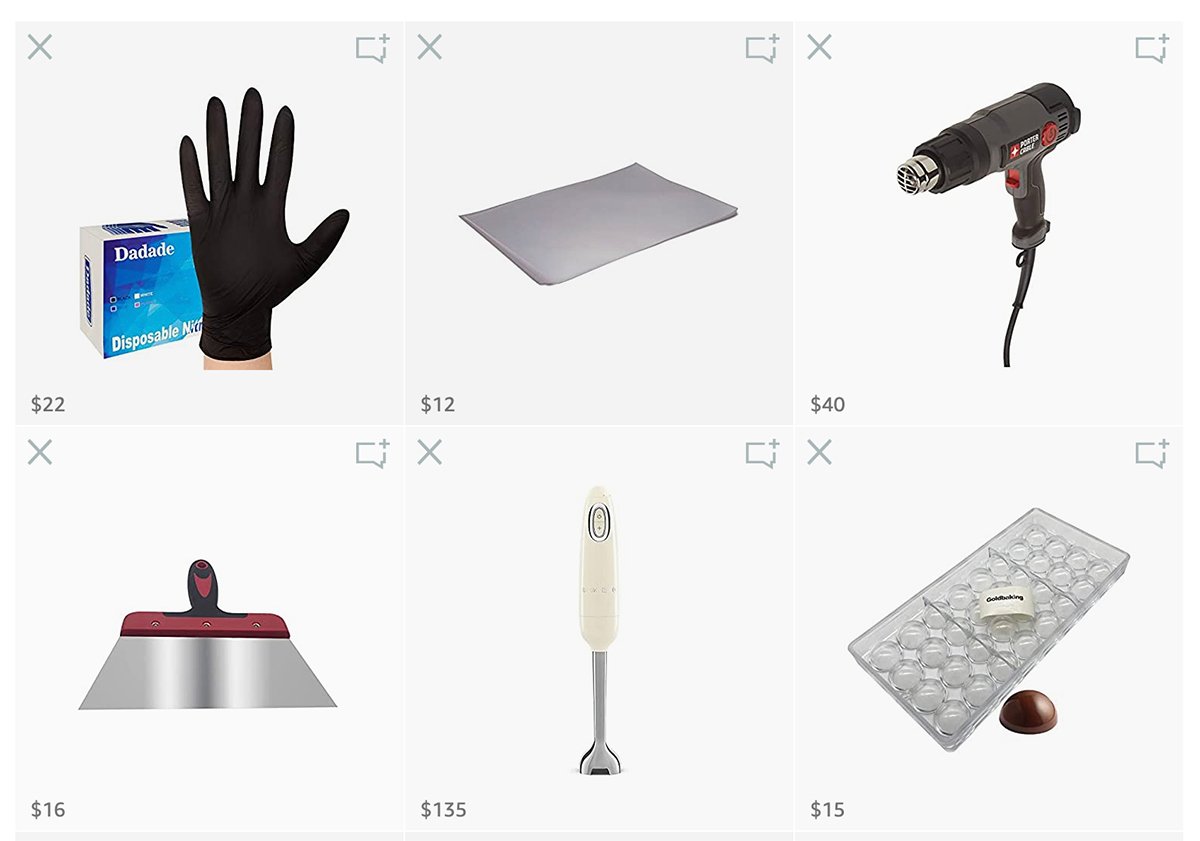
- Bonbon mold
- Immersion blender
- Bench scraper
- Heat gun
- Infrared Thermometer
- Acetate
- Fine strainer
- Large piping bag
How to make white chocolate vanilla bean ganache
It's extremely important to make sure you have properly tempered chocolate before you begin the bonbon process. If you need to learn how to temper chocolate you can watch Chef Christophe's previous video on tempering chocolate using the EZ Temper Machine or you can use my easy chocolate tempering method.
First, we want to make our white chocolate ganache. This needs time to firm up so you want to make it at least 6 hours or a day in advance.
- Melt your white chocolate in the microwave in 30 second increments to prevent burning or over a double boiler until it reaches 104ºF (40ºC). Set it aside.
- Add your heavy cream and trimoline to a medium saucepan.
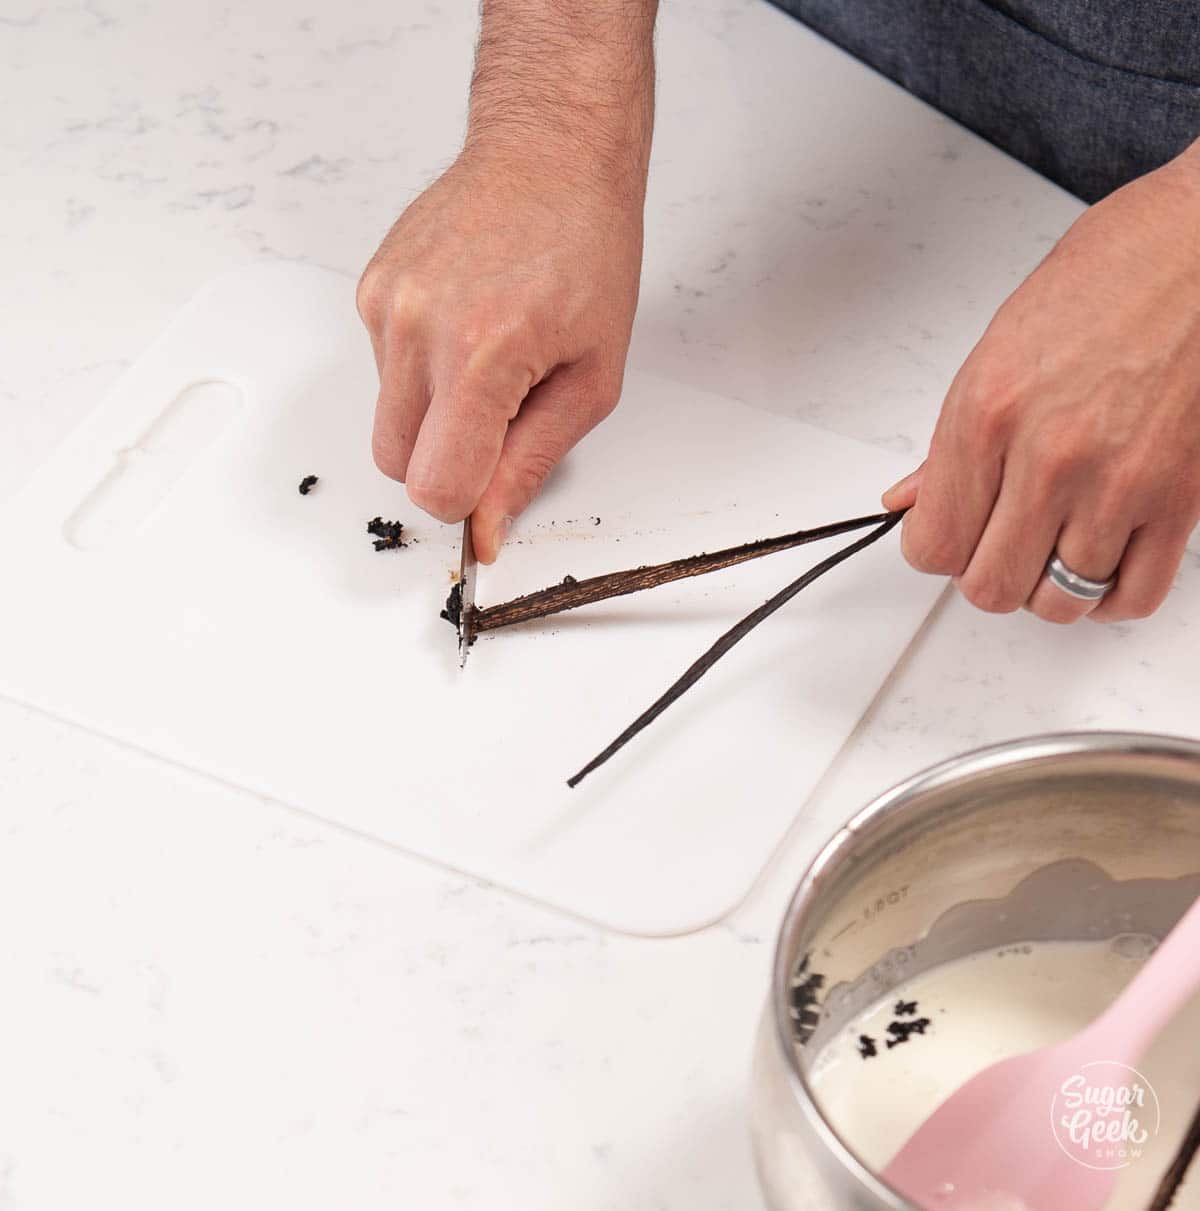
- Scrape the vanilla bean seeds by cutting down the center of the bean first and then scraping the seeds with the flat side of a knife.

- Add the vanilla bean seeds to the saucepan.

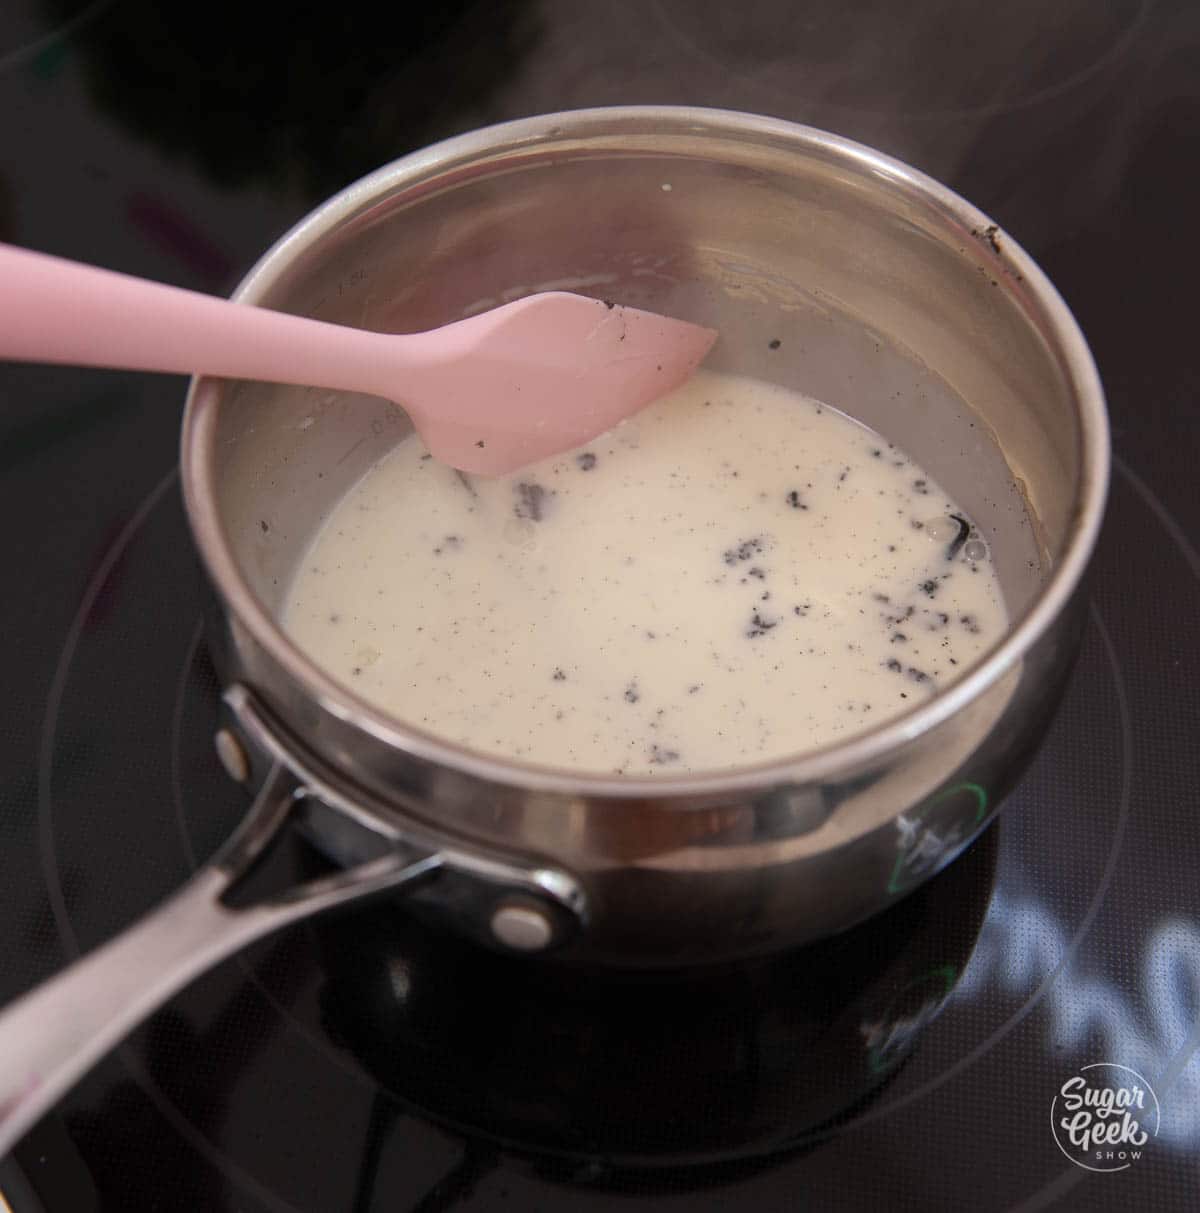
- Bring your cream to a simmer over medium-high heat (stirring occasionally) and let it simmer for 1 minute and then remove it from the heat. Don't boil the cream.
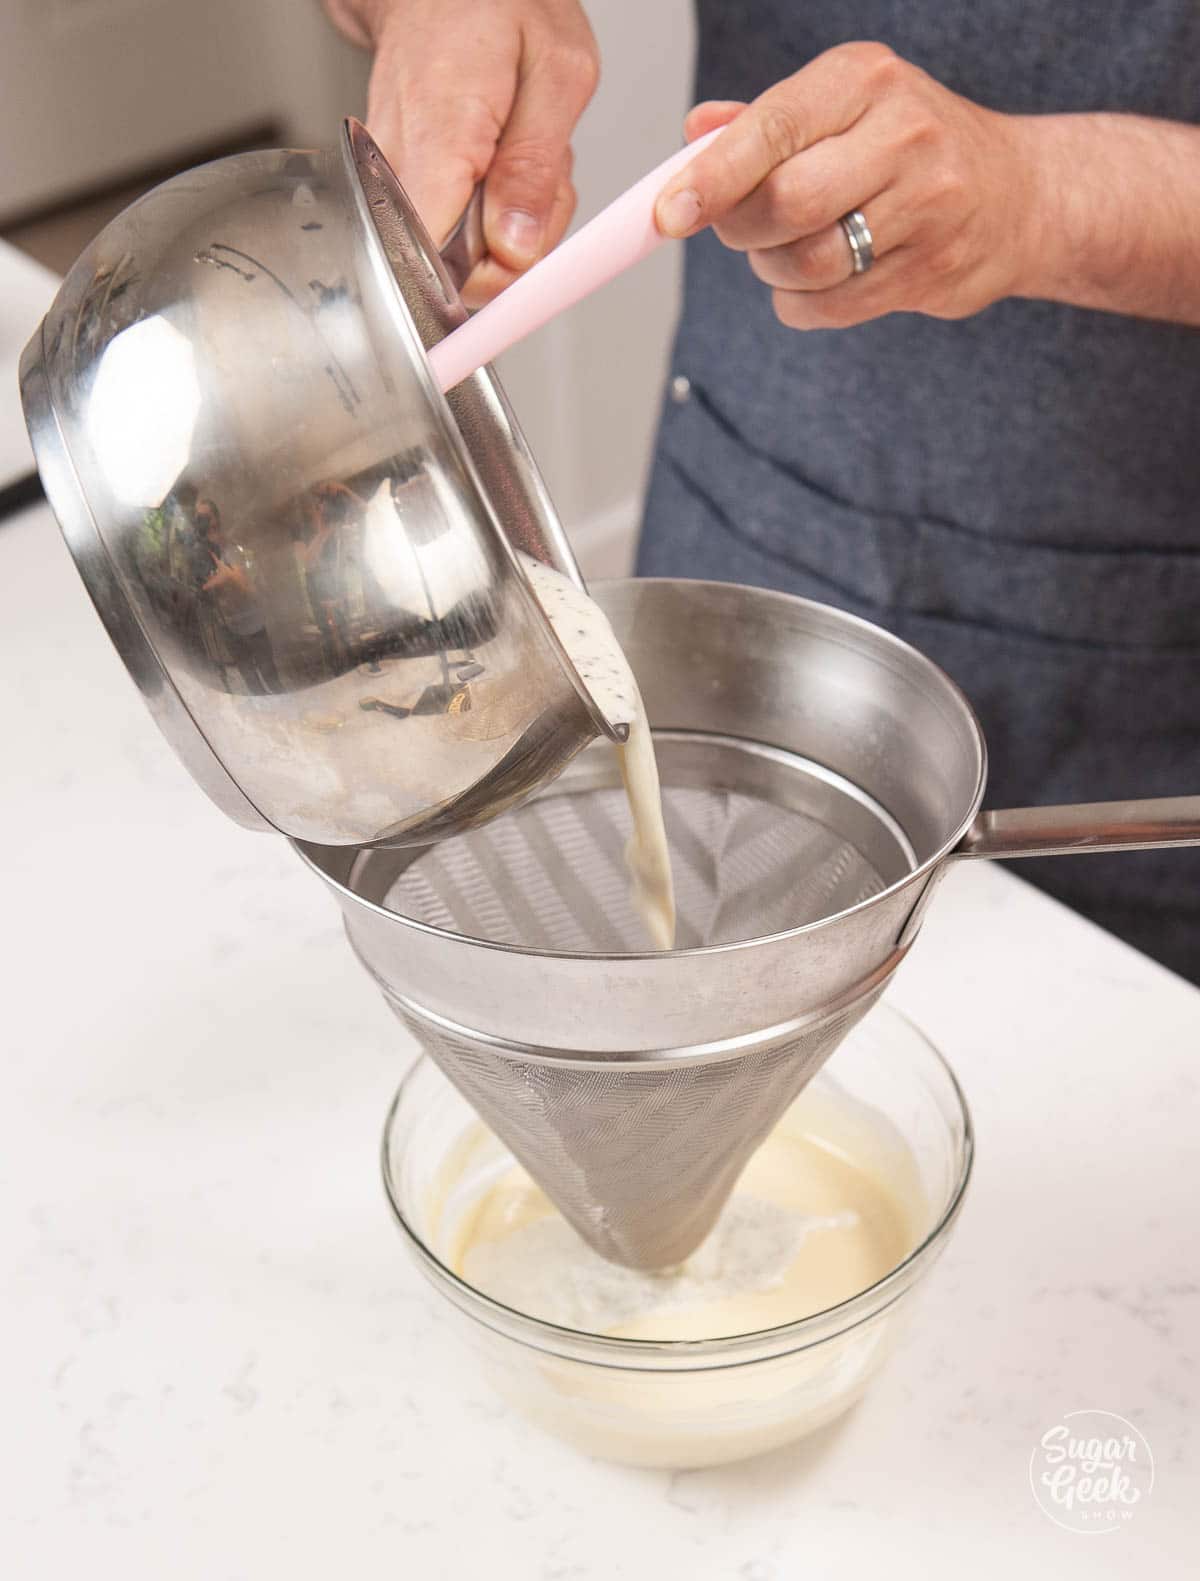
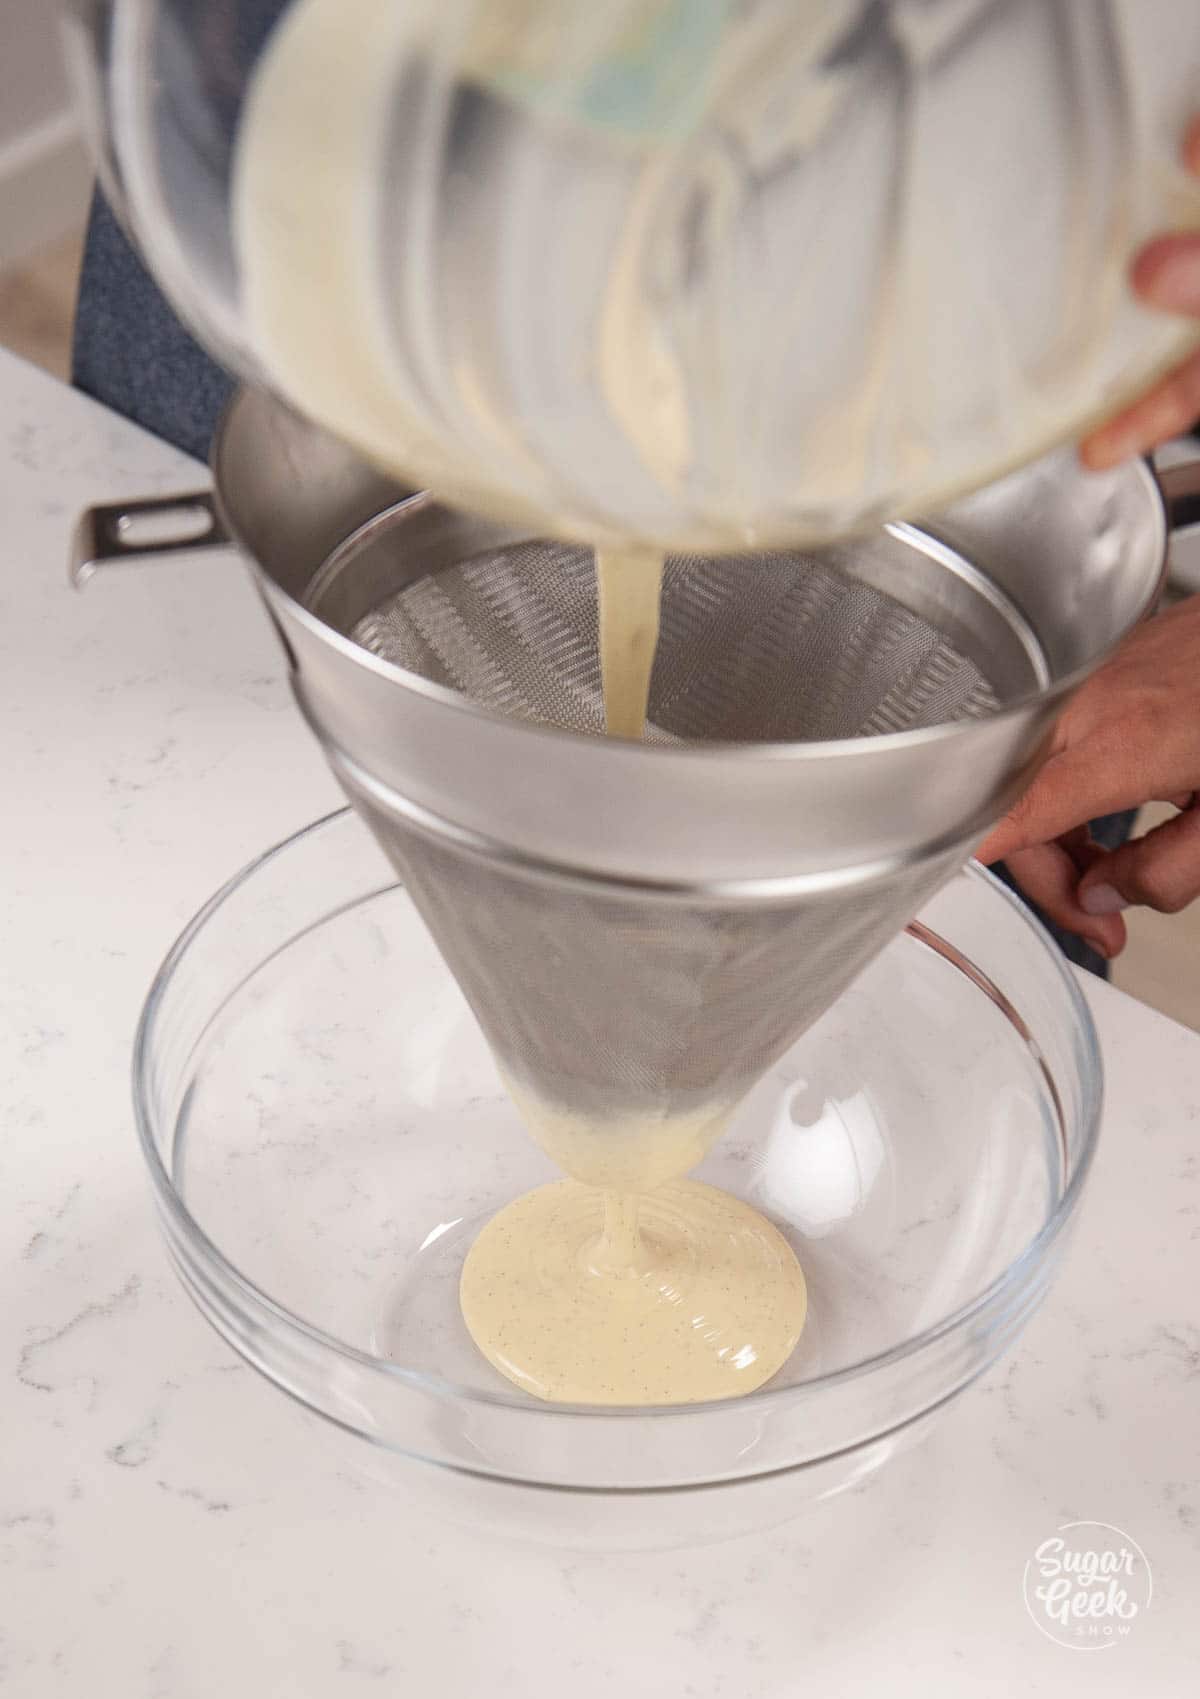
- Strain the mixture through a fine strainer to remove any bits of bean pod.

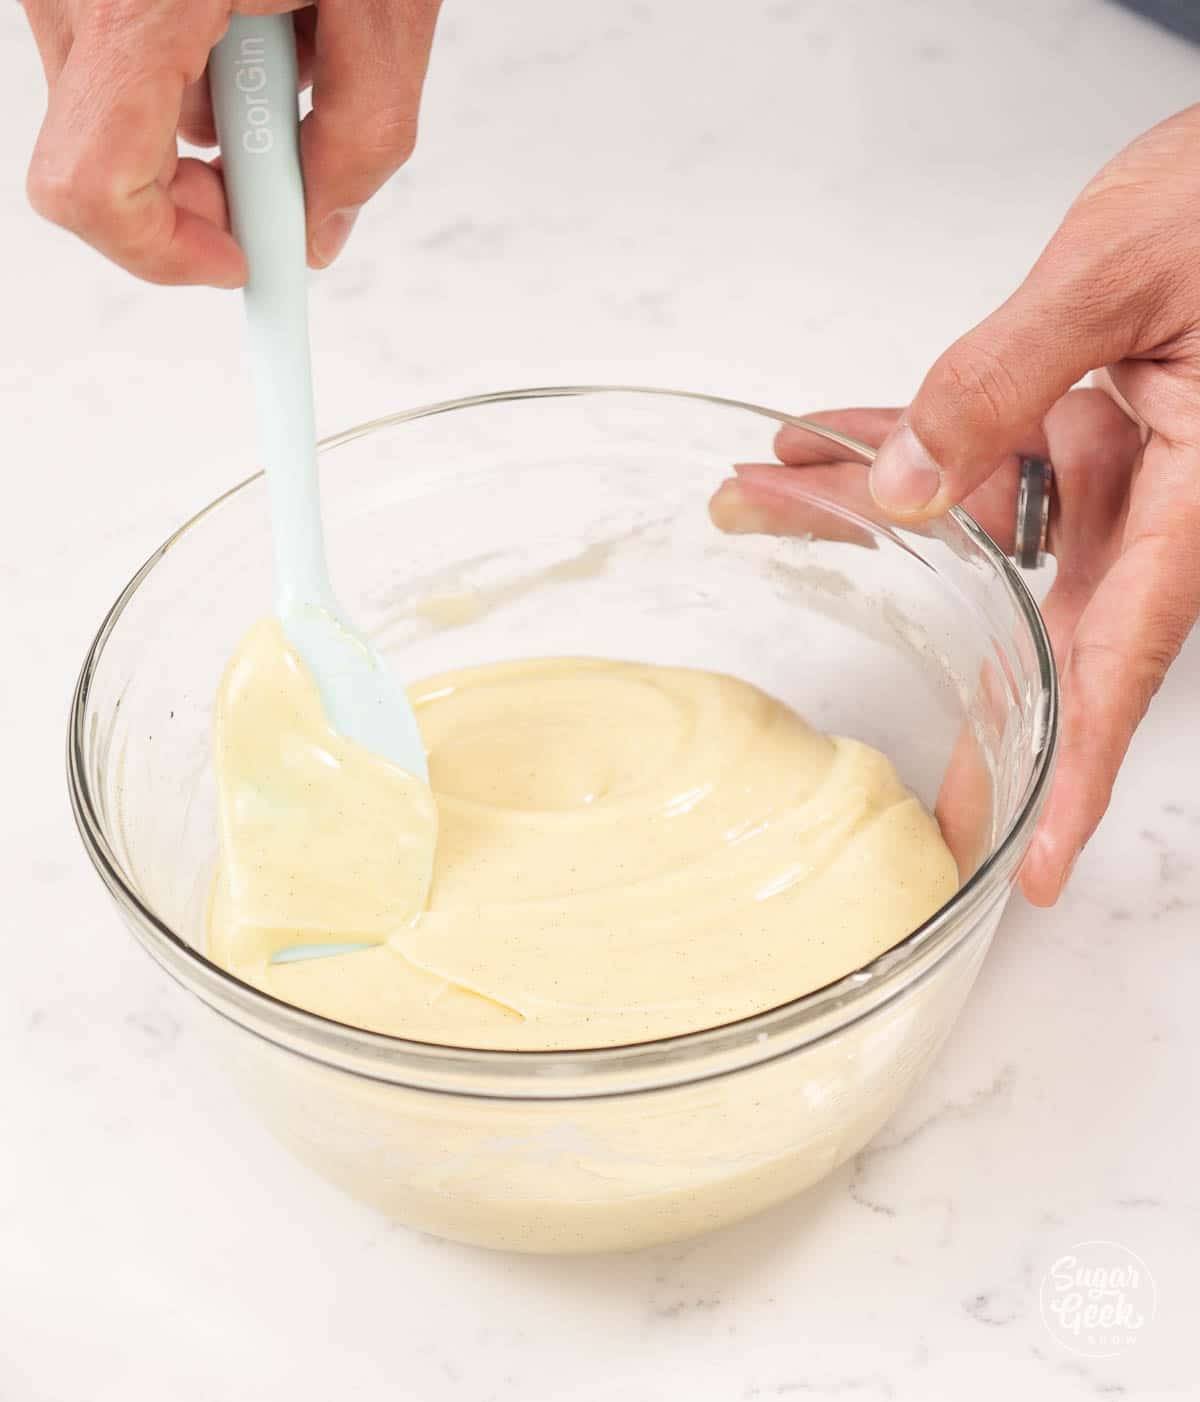
- Add half of the cream mixture to your melted chocolate and stir until smooth. Starting with half will help prevent separation.

- Then add in the rest of the cream and stir until smooth. It may look curdled before it looks smooth and that is normal. Just keep mixing.
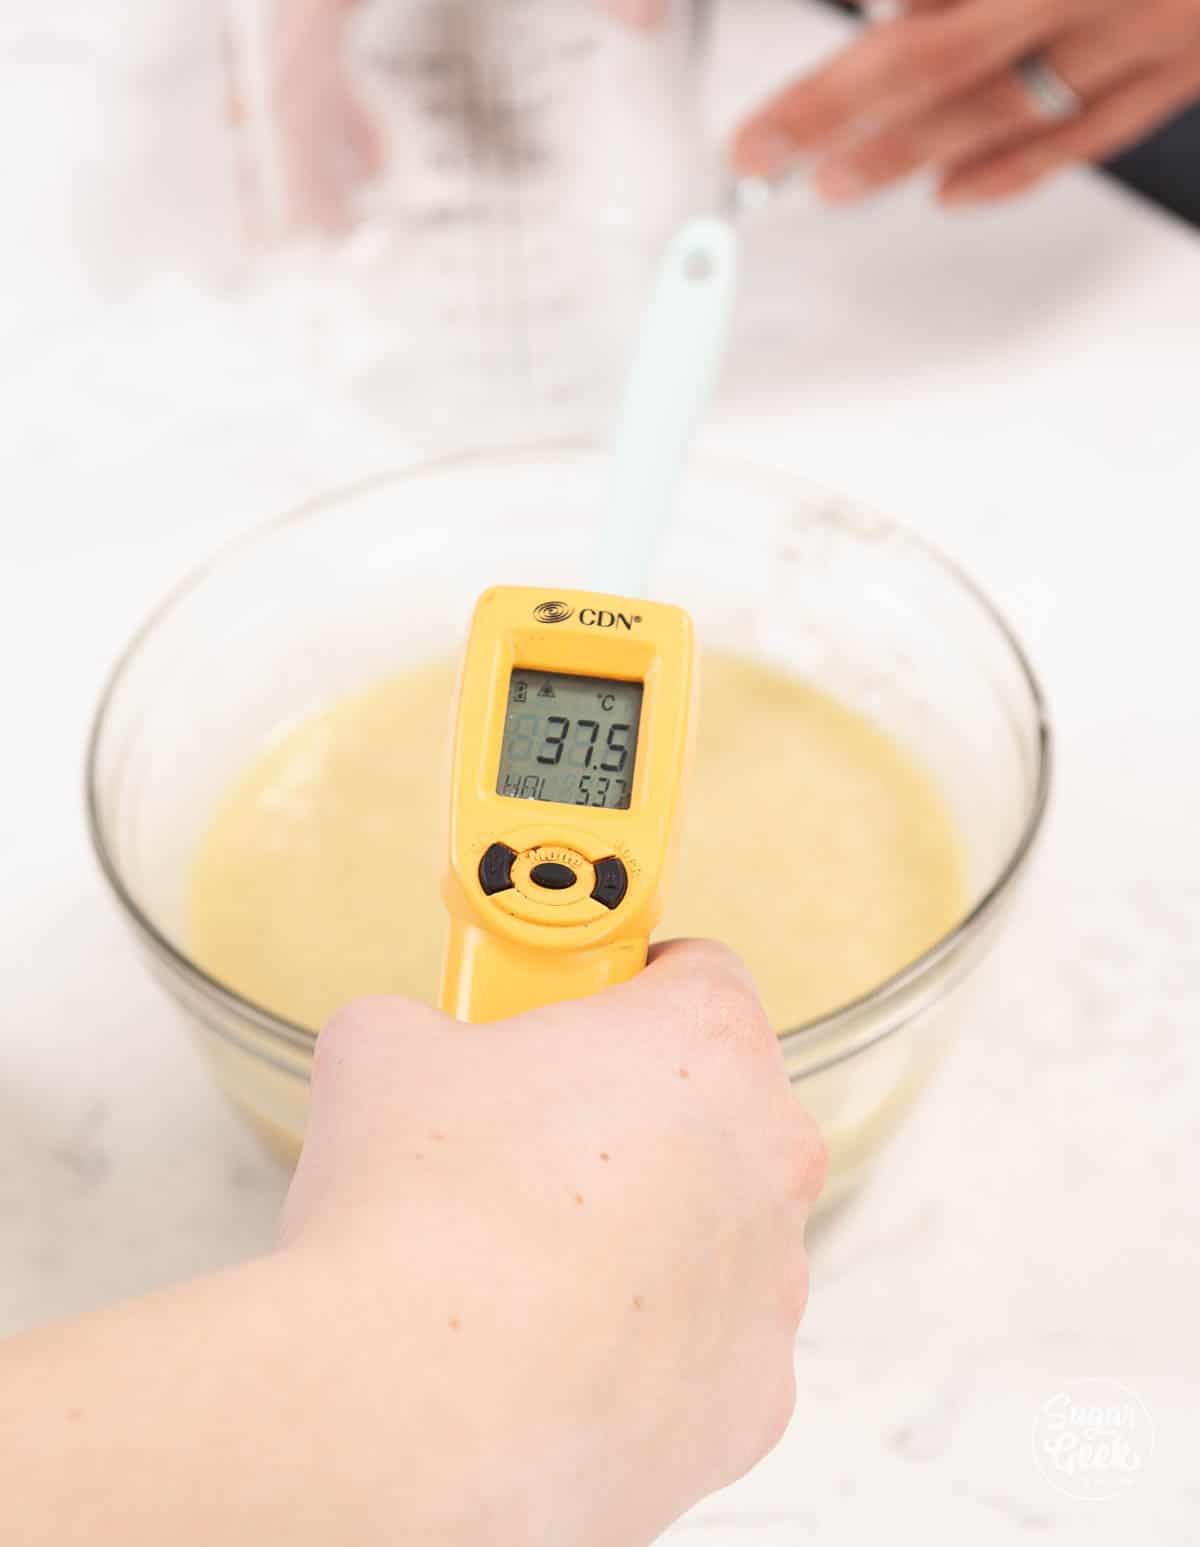
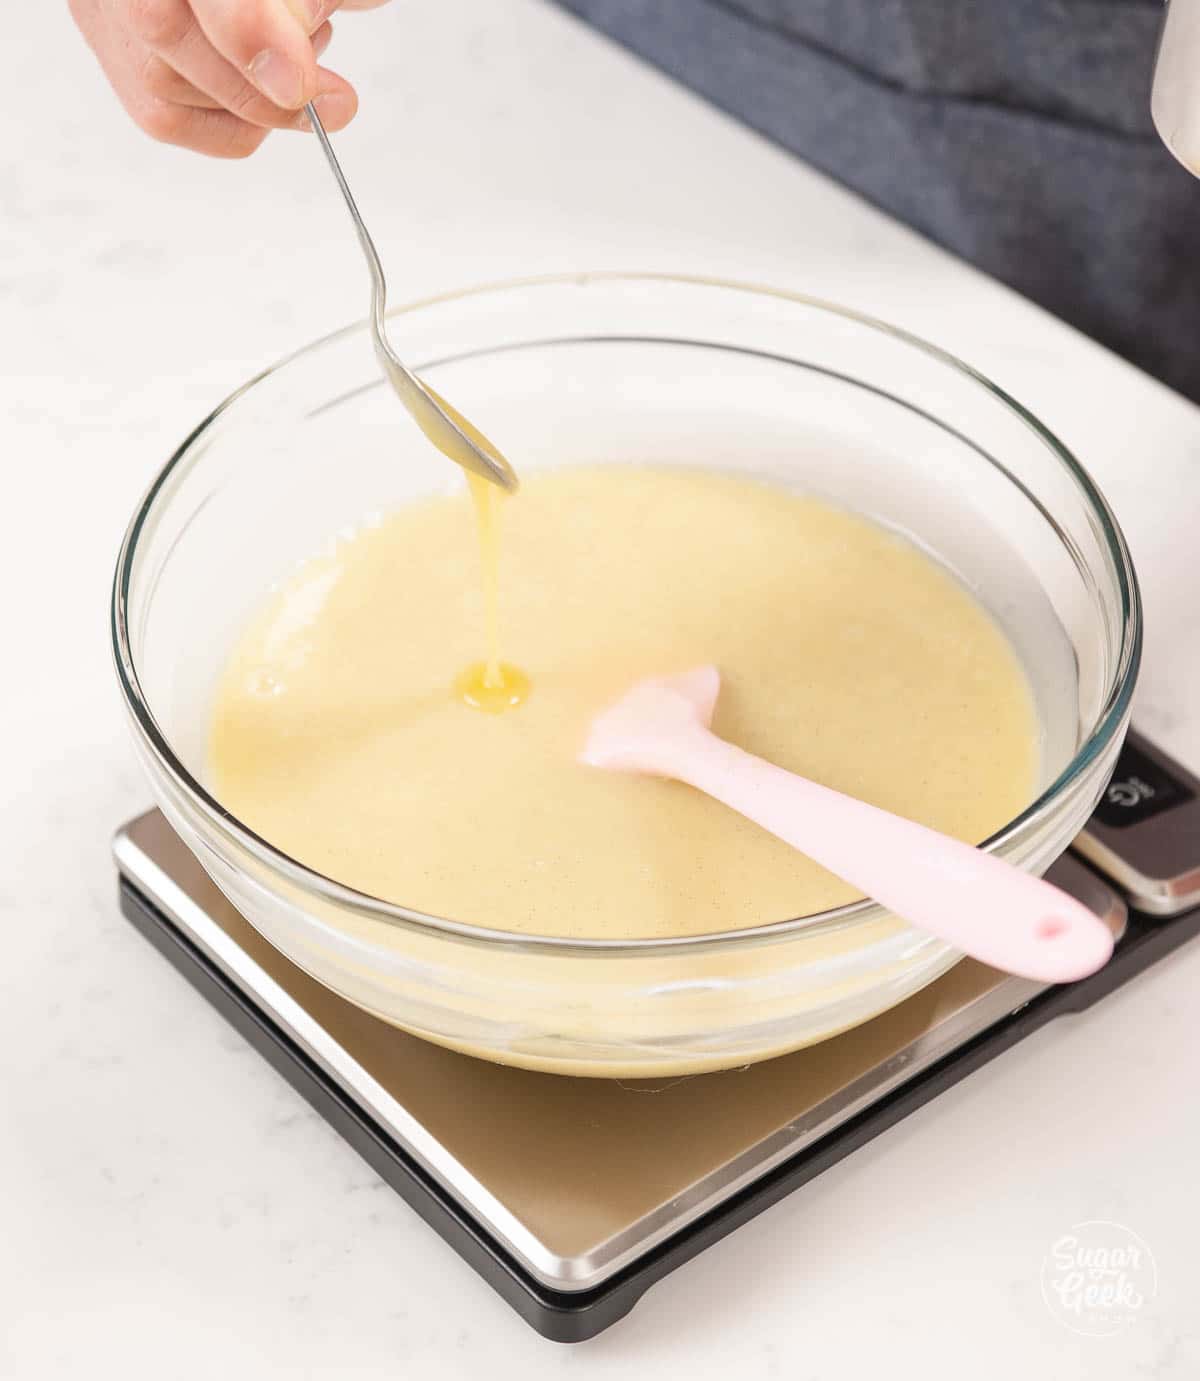
- Cool your ganache to around 104ºF (40ºC) so it doesn't melt your butter.

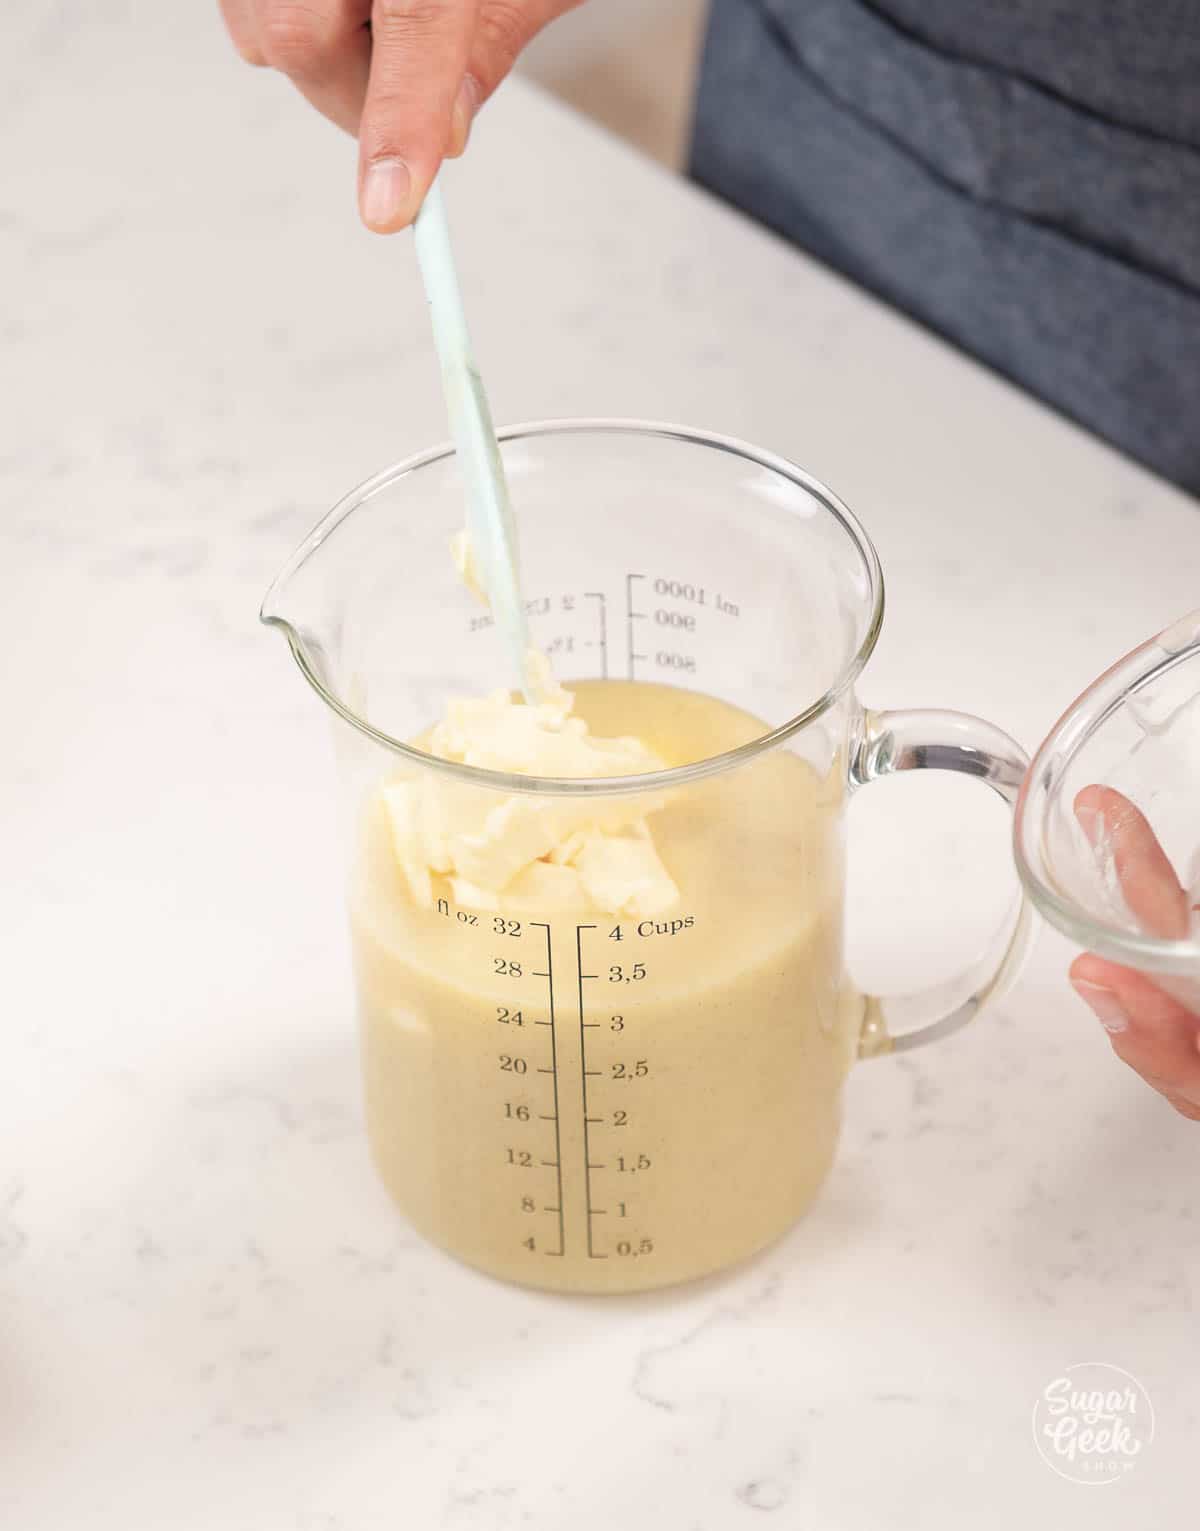
- Pour your ganache into a tall measuring cup or glass and add in your softened butter.

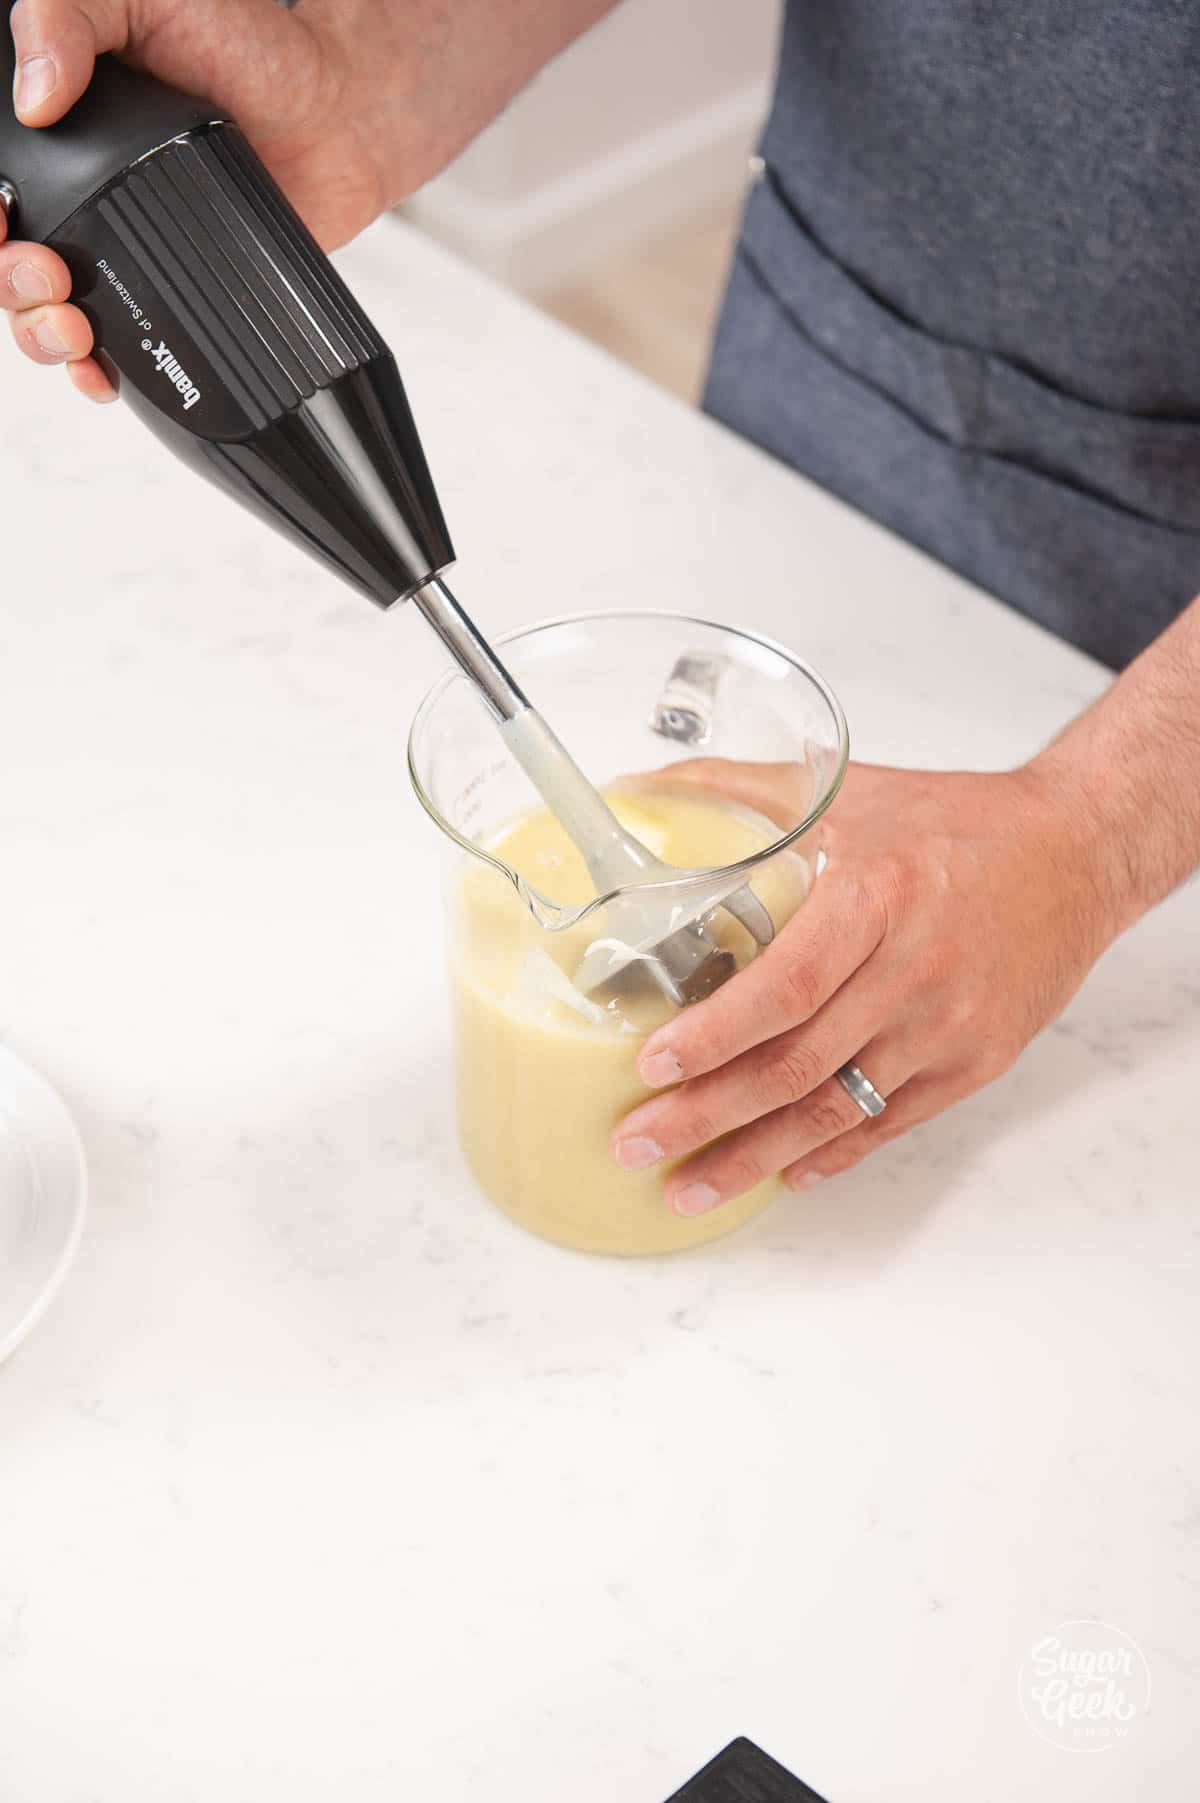
- Use an immersion blender to mix the butter with the ganache. Hold the immersion blender at a slight angle under the surface of the ganache to blend. Do not incorporate any air.

- Cool your ganache to 34ºF and add in your tempered cocoa butter from the EZ Temper machine. If you don't have an EZ Temper you can skip this step. The tempered cocoa butter will help the ganache set up much faster than untempered cocoa butter.

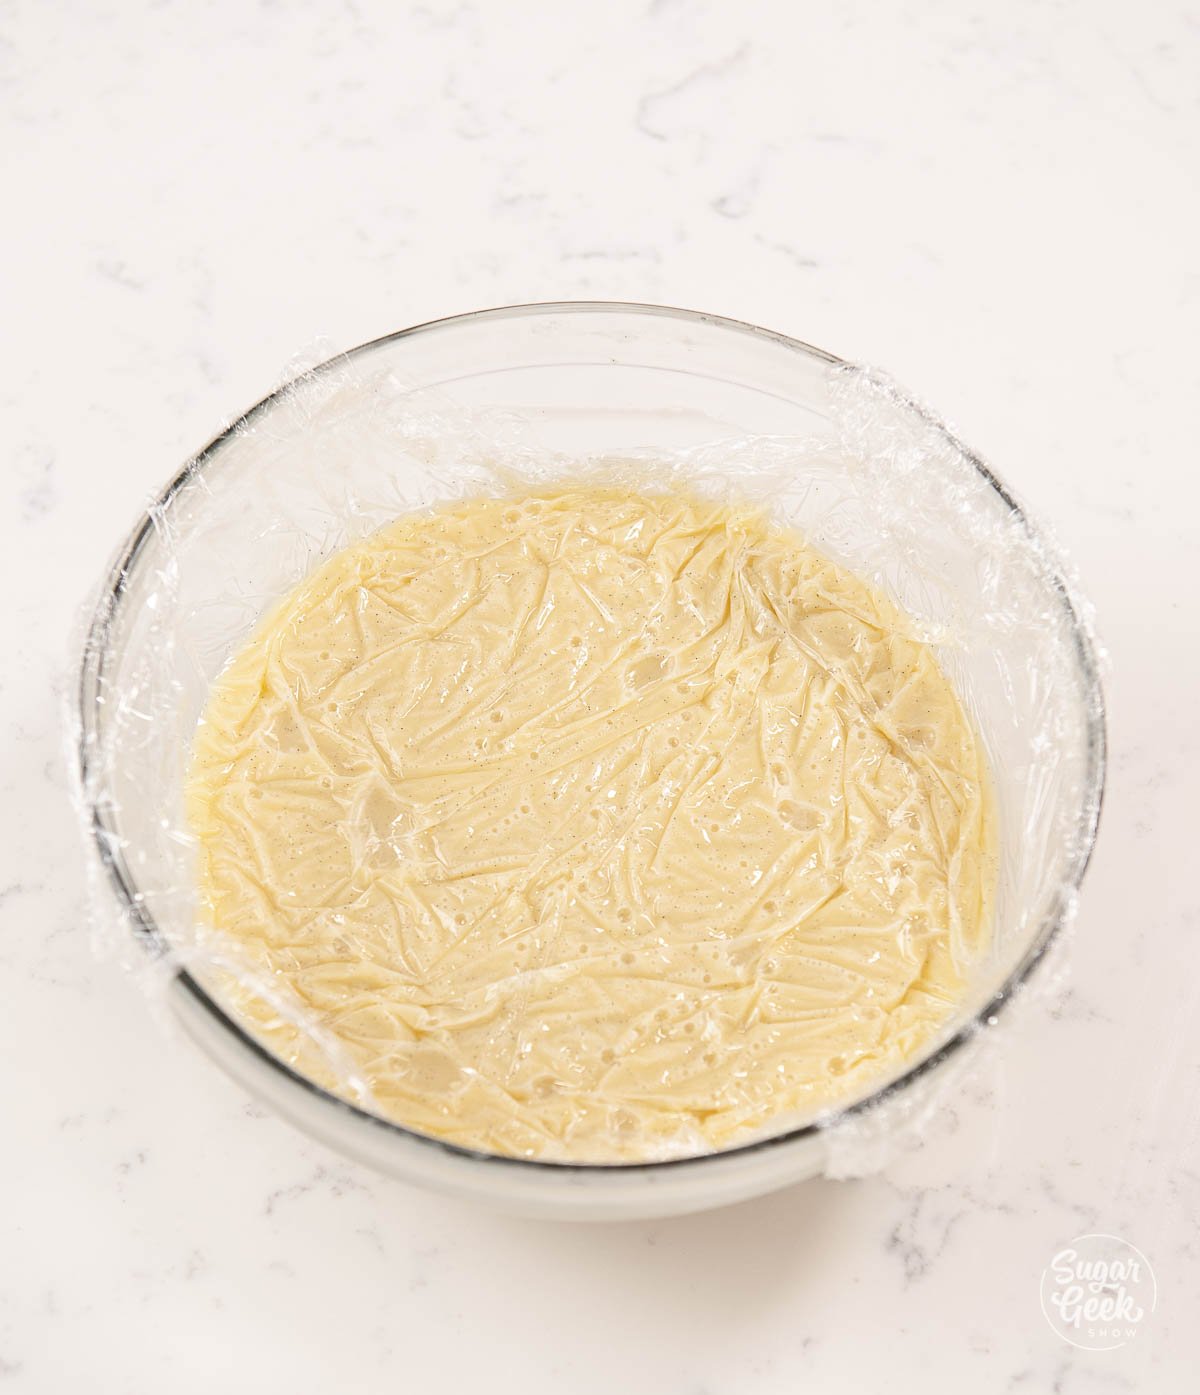
- Place some plastic wrap on top of the ganache and set it aside to firm up (make sure your room is below 70ºF) or your ganache and chocolate may not set up. If your room is too warm you can place the ganache in the fridge but your room should be below 70ºF anyway to be working with chocolate.

How to temper the chocolate
Once again, we are using the EZ temper machine to temper our chocolate. If you do not have an EZ temper machine then follow the instructions for tempering in the microwave or the seeding method for white chocolate.
- Melt 1000 grams couverature white chocolate to 100ºF-114ºF (45ºC) either in the microwave or on a double boiler.
- Add the seeds of one vanilla bean pod (optional but looks and tastes amazing!)

- Strain the melted chocolate to remove any large fibers

- Cool the chocolate to 95ºF (34ºC) by adding small amounts of un-melted chocolate and stirring.
- At 34ºC, add 10 grams of your pre-crystalized cocoa butter from the EZ temper machine.
- Stir your chocolate continuously until it reaches 84ºF (29ºC). Stirring helps distribute the crystals and makes a stronger final product.
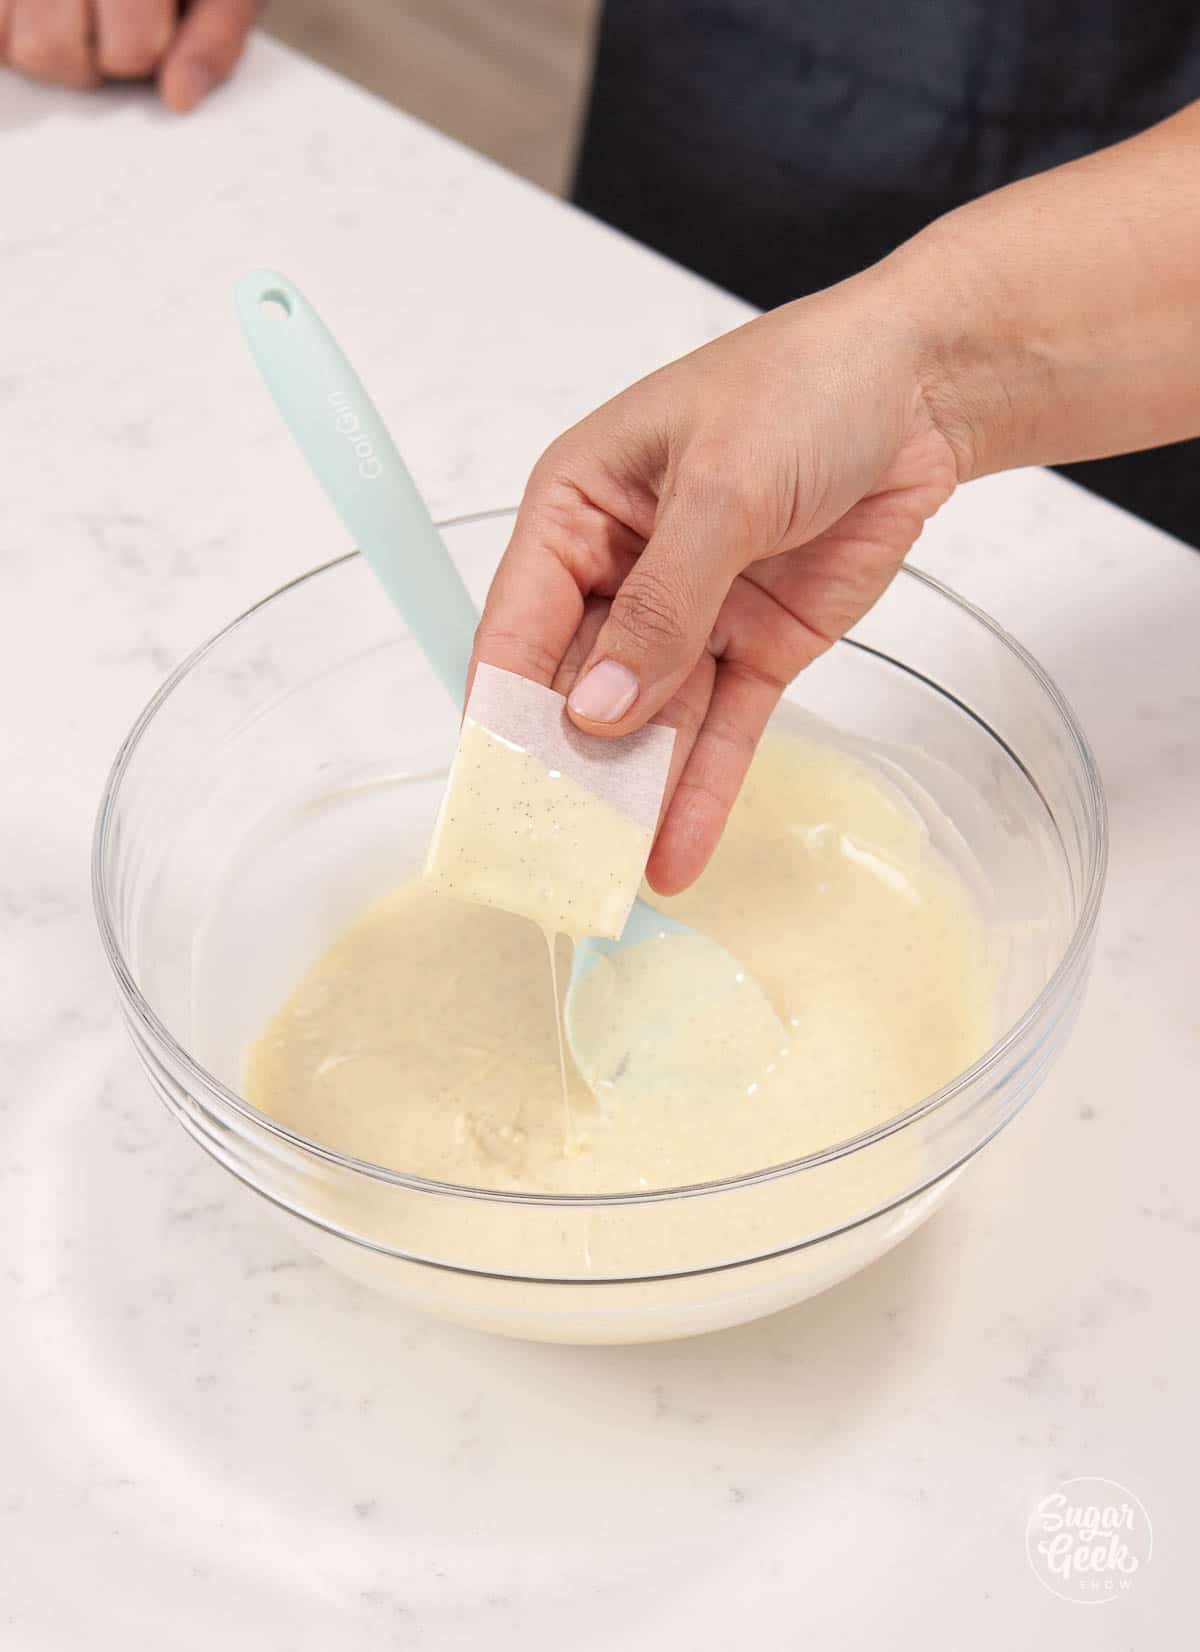
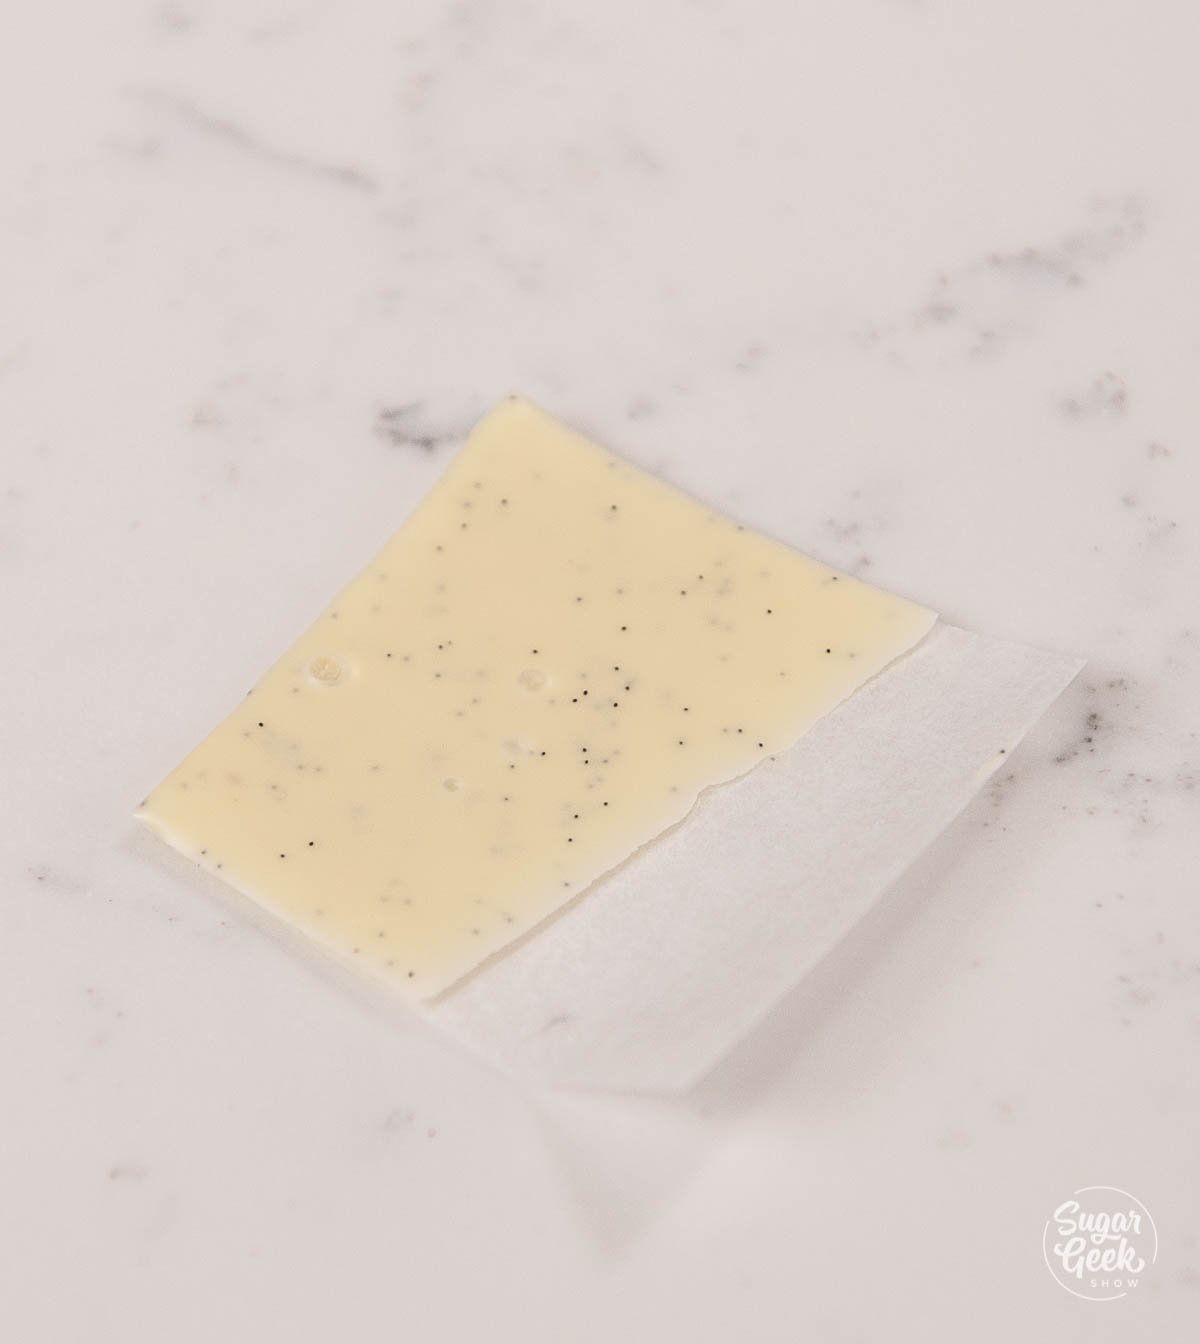
- Test your chocolate by dipping a piece of parchment paper into the tempered chocolate and set it on the table. Your room should be colder than 70ºF.

- If the chocolate contracts and sets within 5 minutes and has a nice shine and snap, your chocolate is tempered and you can move forward. If your chocolate is not tempered then add another 5 grams of tempered cocoa butter and stir until well combined and re-do the test.

- It's helpful to have a Waring chocolate warmer to keep your chocolate tempered while you work on your bonbons, otherwise you will have to keep an eye on the temperature of your chocolate and warm it when necessary. Be careful not to over-heat it or you can break the temper.

How to make chocolate bonbon shells
- Place some parchment paper onto your work surface to catch the chocolate and get your bench scraper ready.
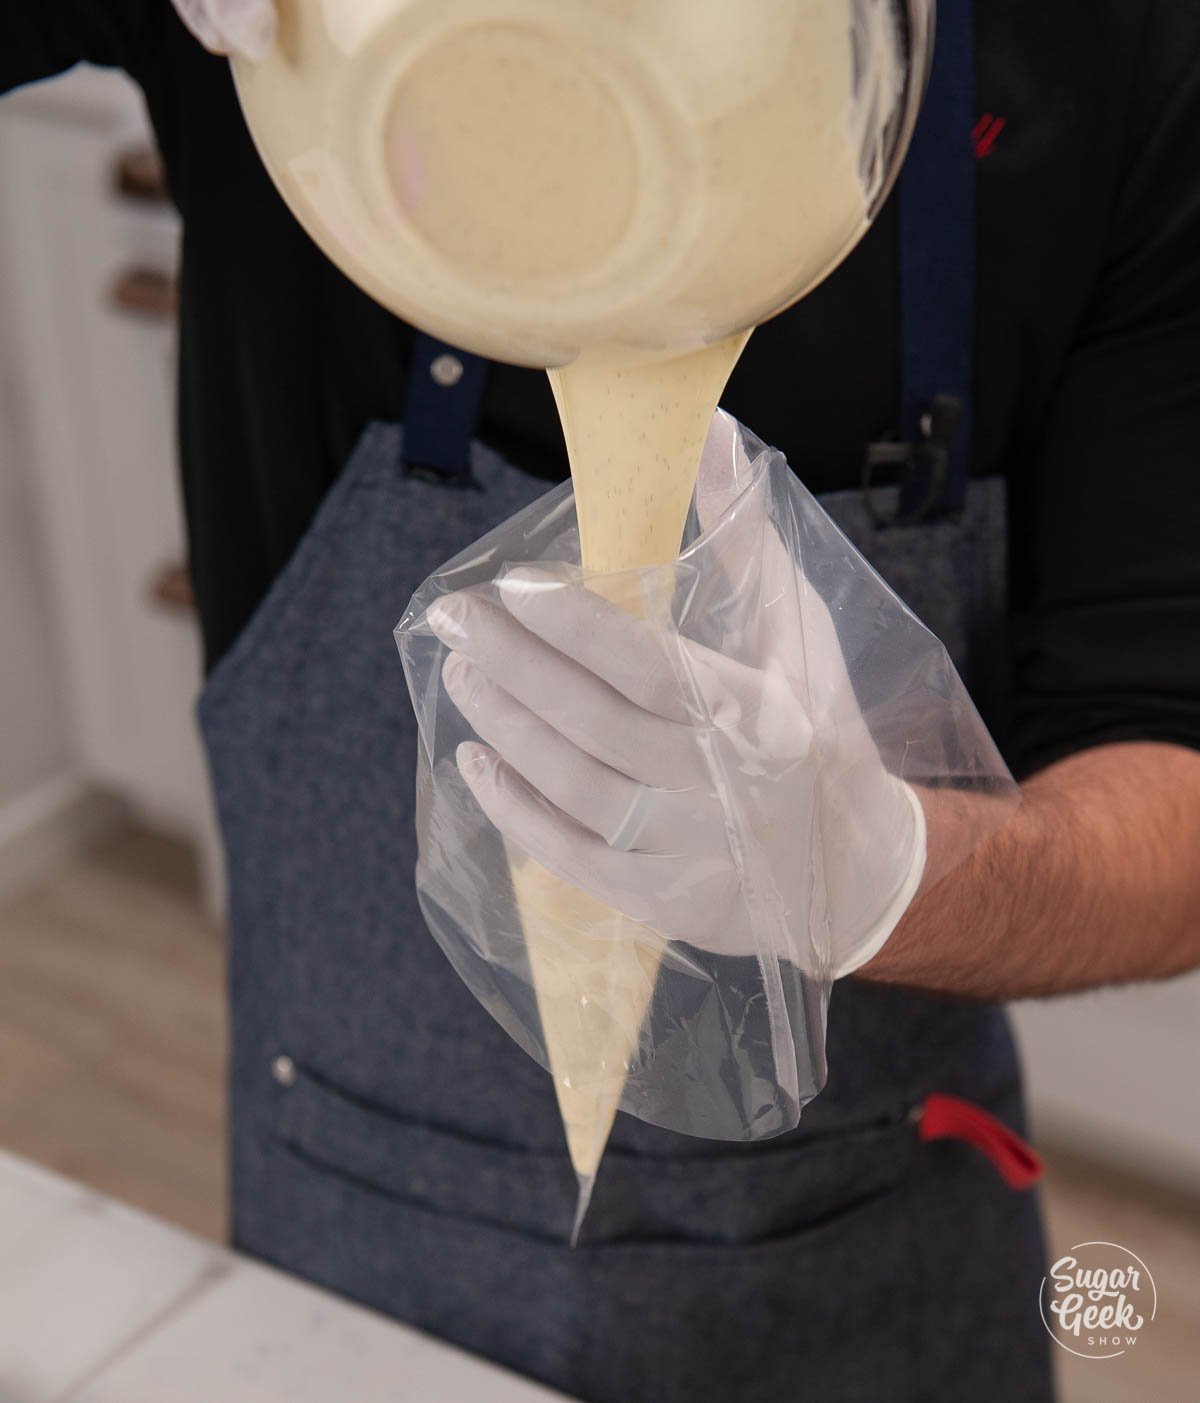
- Fill a large piping bag with your tempered chocolate and twist the top closed so the chocolate doesn't spill out.

- Cut a small hole (⅛") in the tip for the chocolate.
- Begin filling each bonbon cavity all the way to the top with the chocolate by pinching and releasing the opening of the piping bag. Watch the video to see Chef Christophe demonstrate this technique. This takes practice to be consistent with each mold.
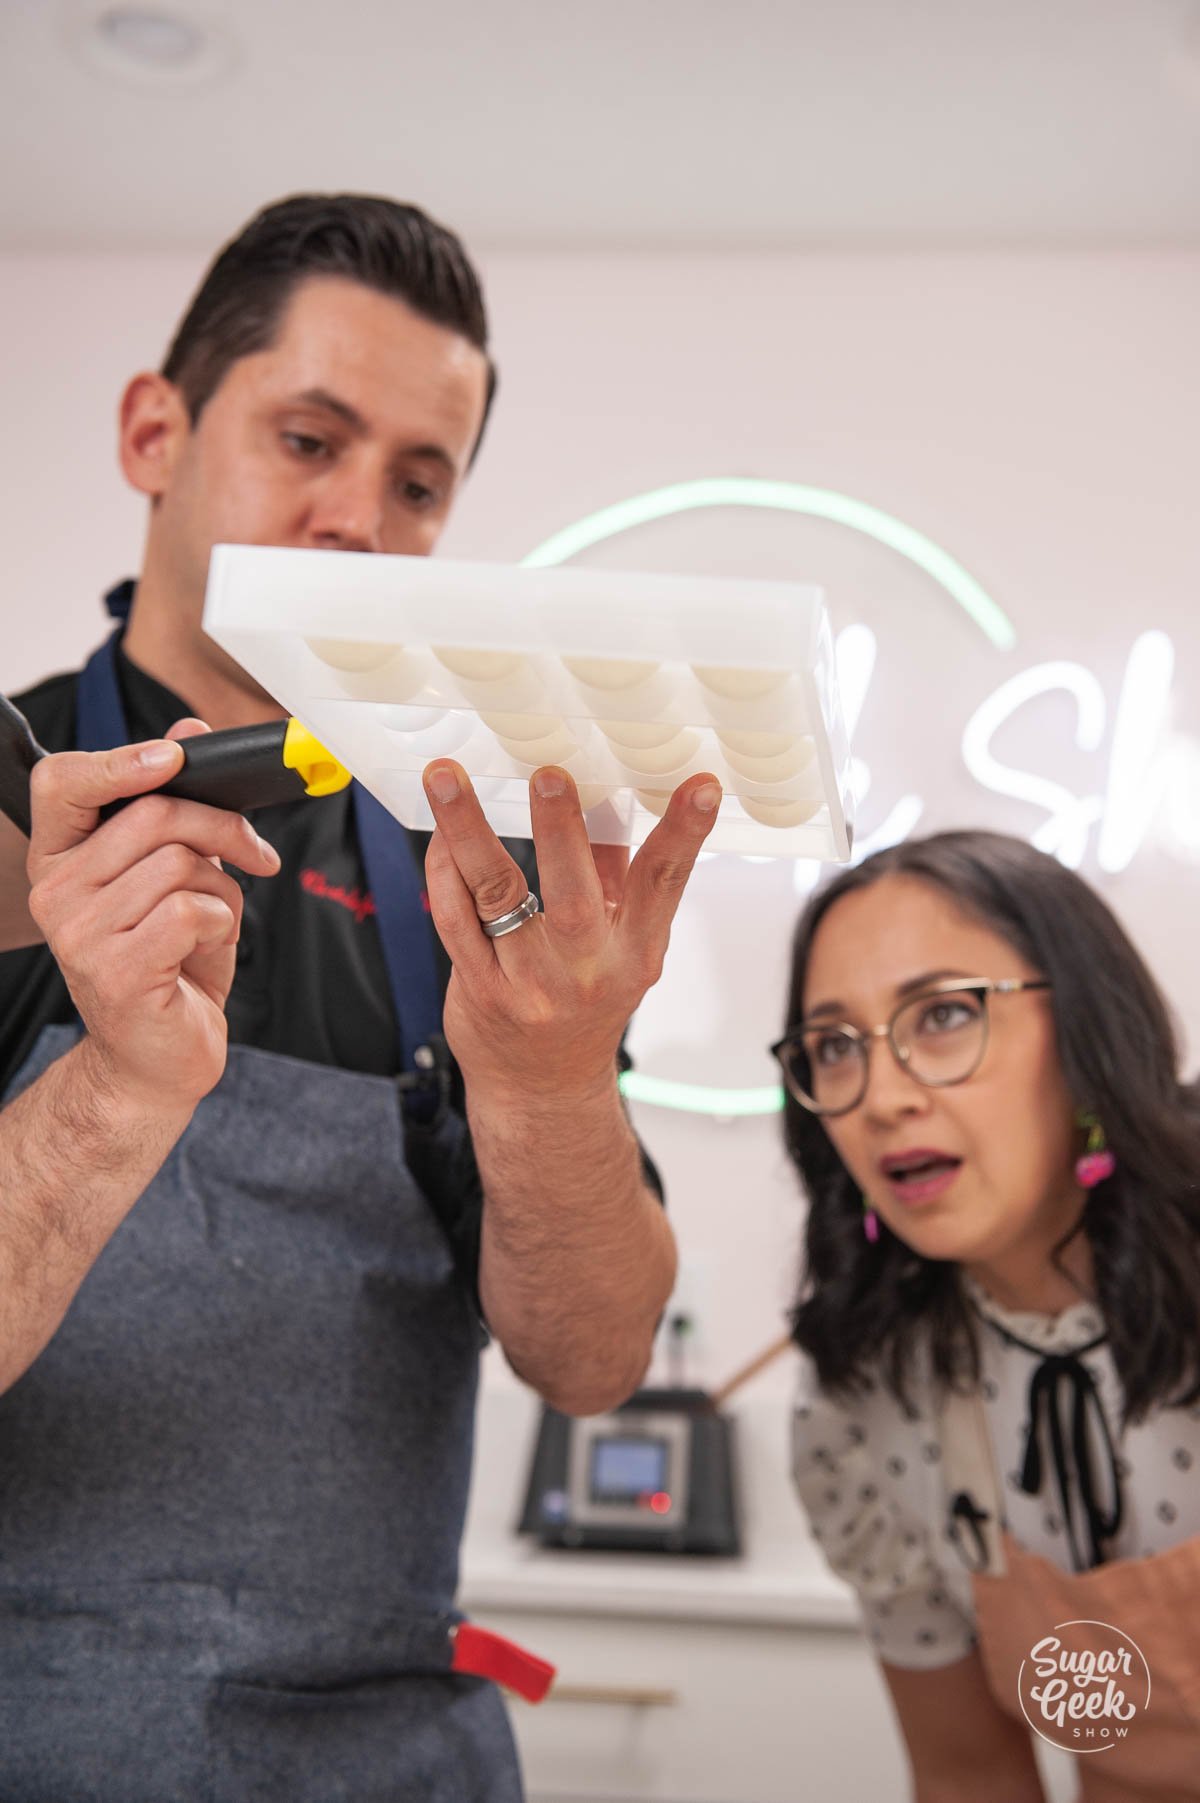
- Pick the mold up by holding the edges and try not to put your hands agains the cavities directly or the heat from your hands can ruin the temper of the chocolate shells. Tap the edge of the mold with your bench scraper to release any air bubbles.
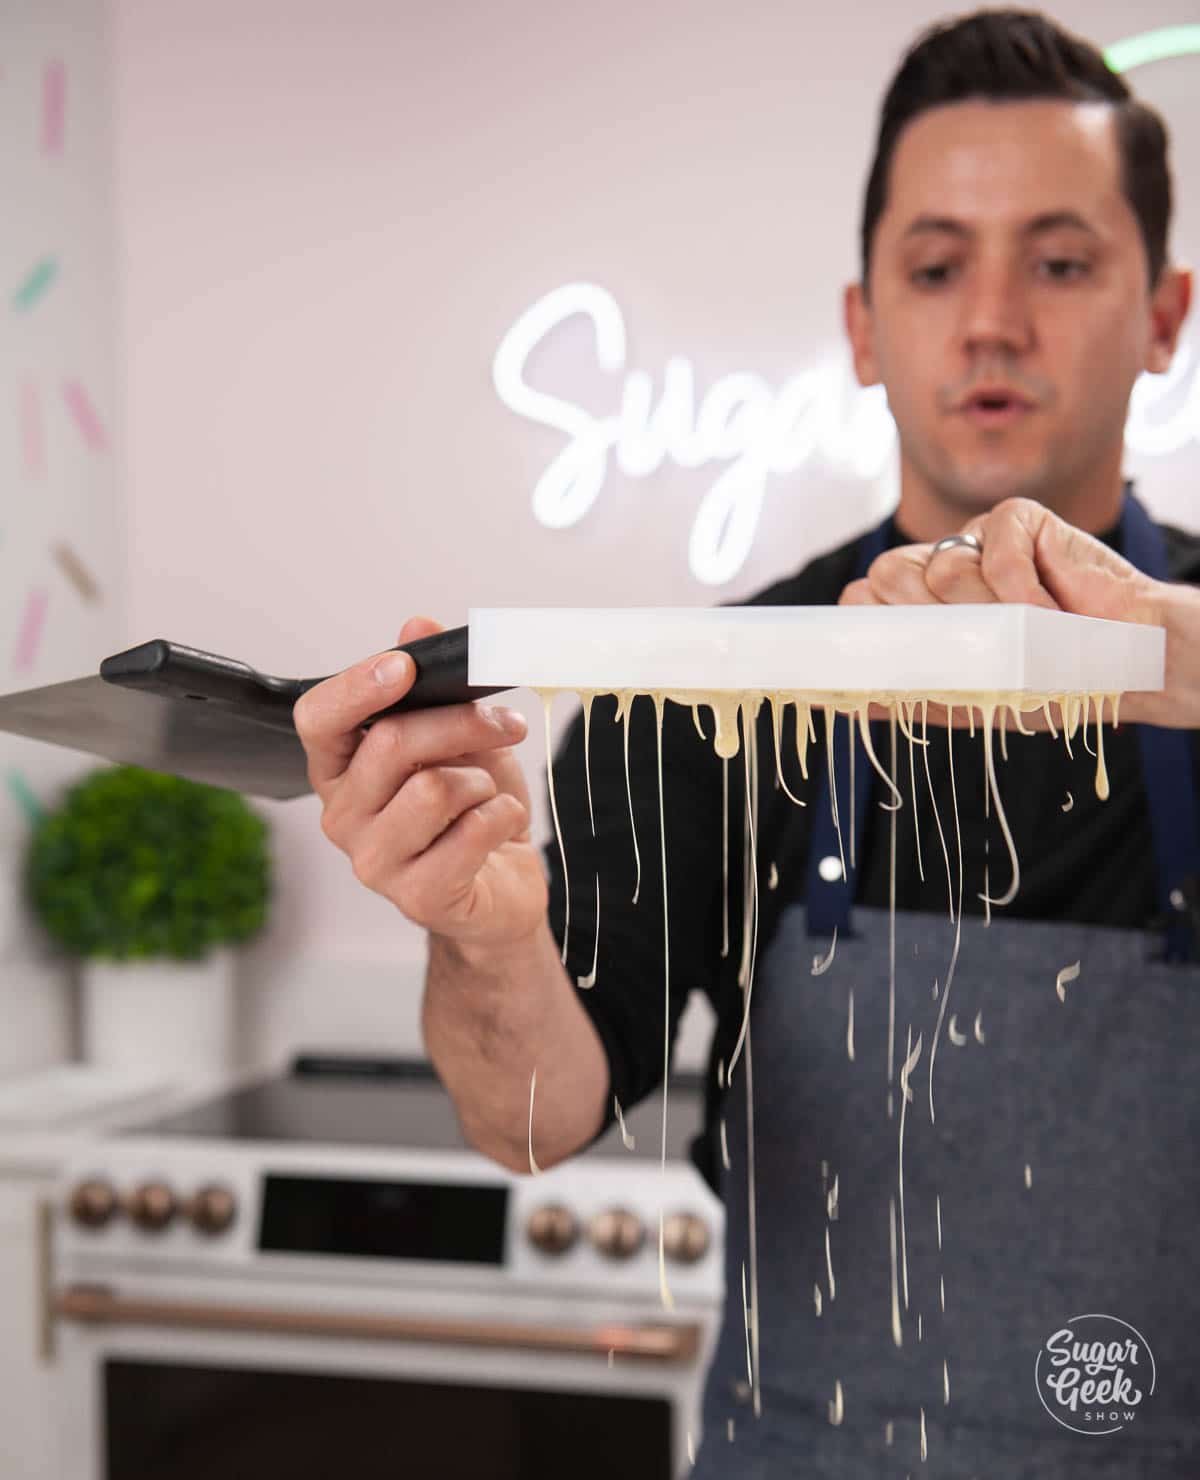
- Turn the mold over and tap out the excess chocolate to create a nice thin shell.

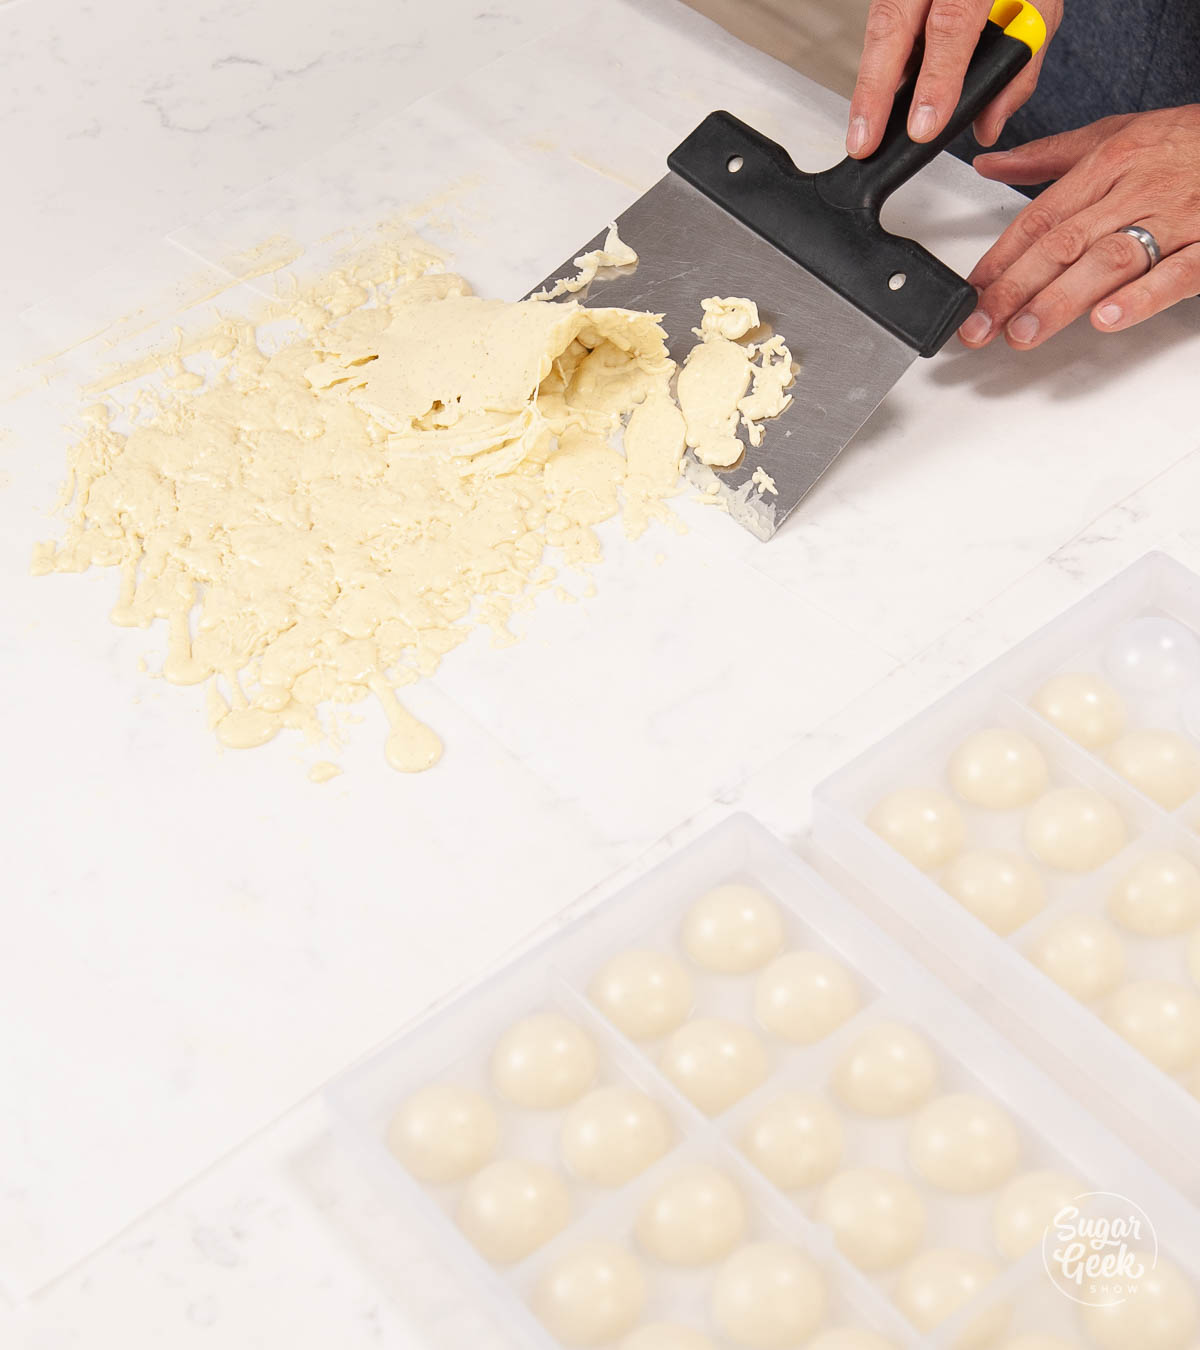
- Scrape off the excess chocolate from the surface of the mold with your bench scraper.

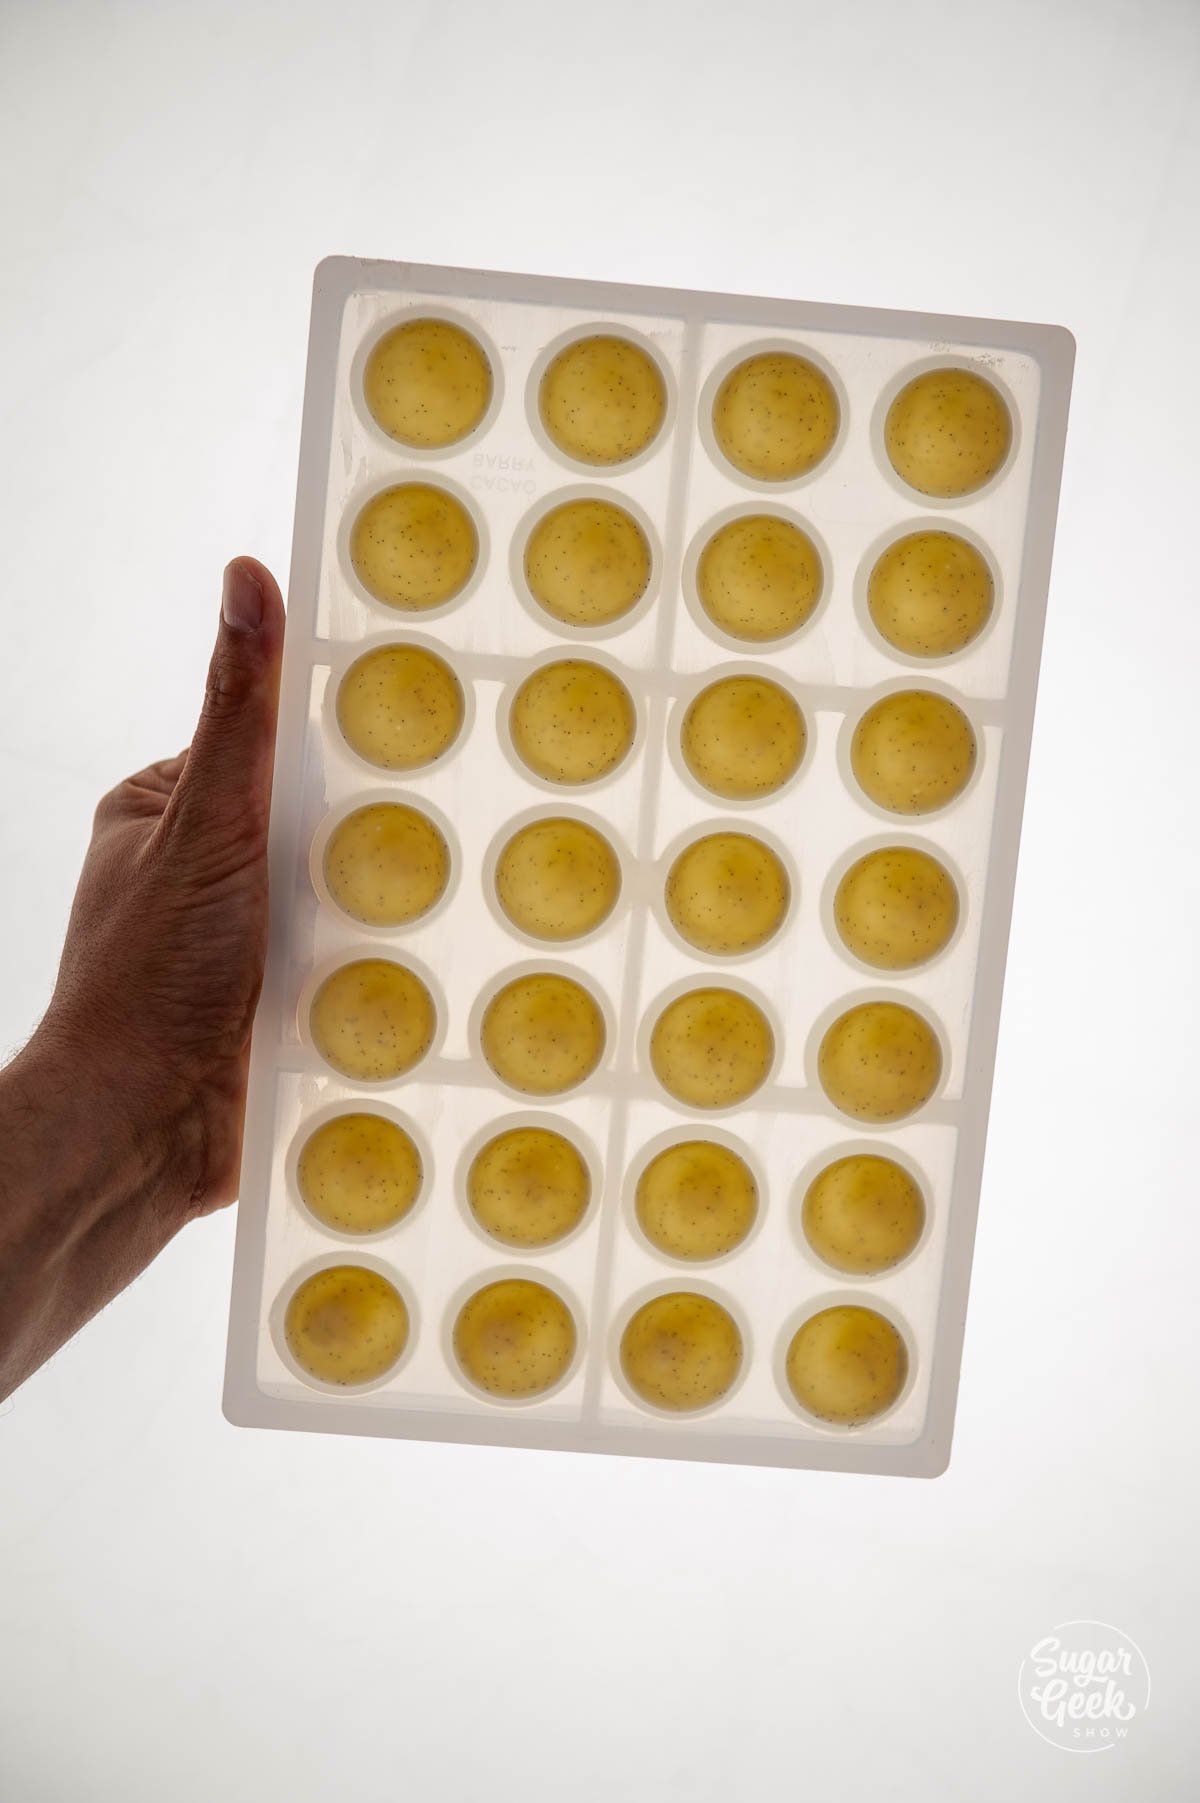
- Set your mold on its side for five minutes to help the chocolate to set evenly. You can see in this photo how even the chocolate is on all sides.
- Place the mold cavity side opening down onto parchment paper for 20 minutes to crystalize. You can also scrape up your excess chocolate to use another time.

How to fill and close your chocolate bonbon
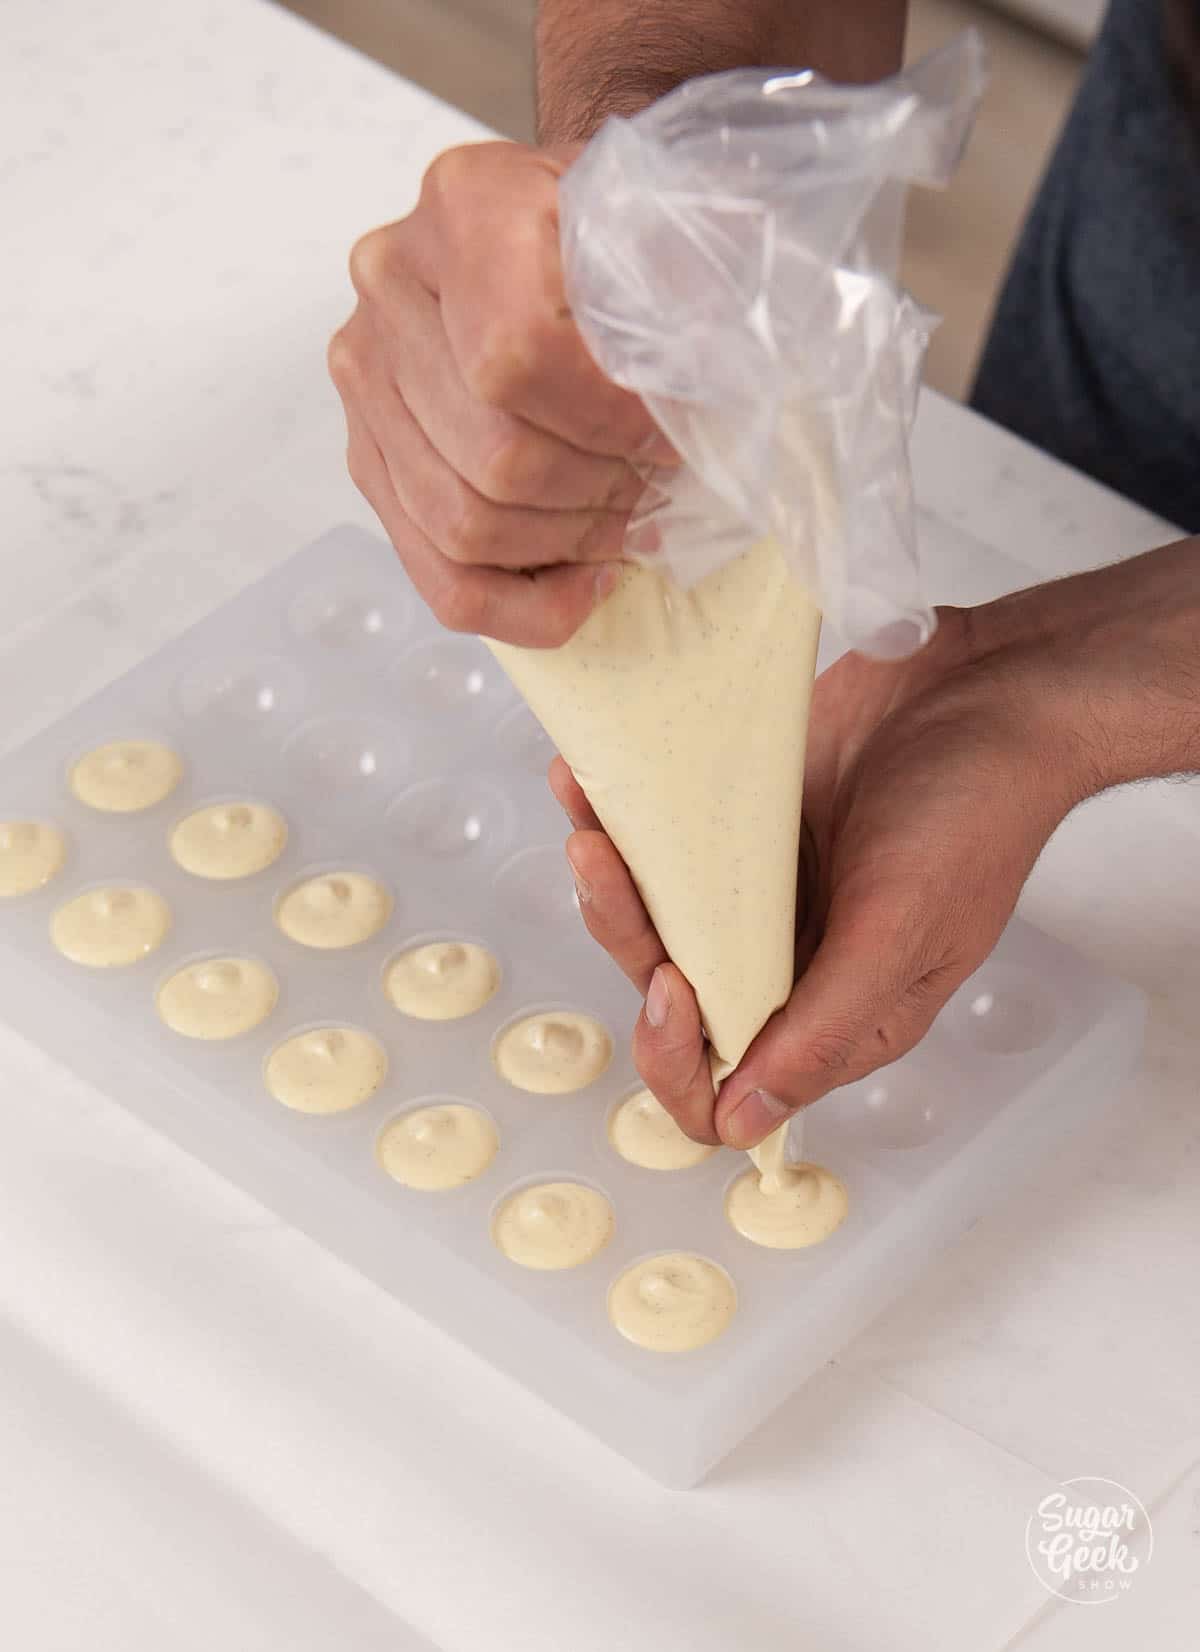
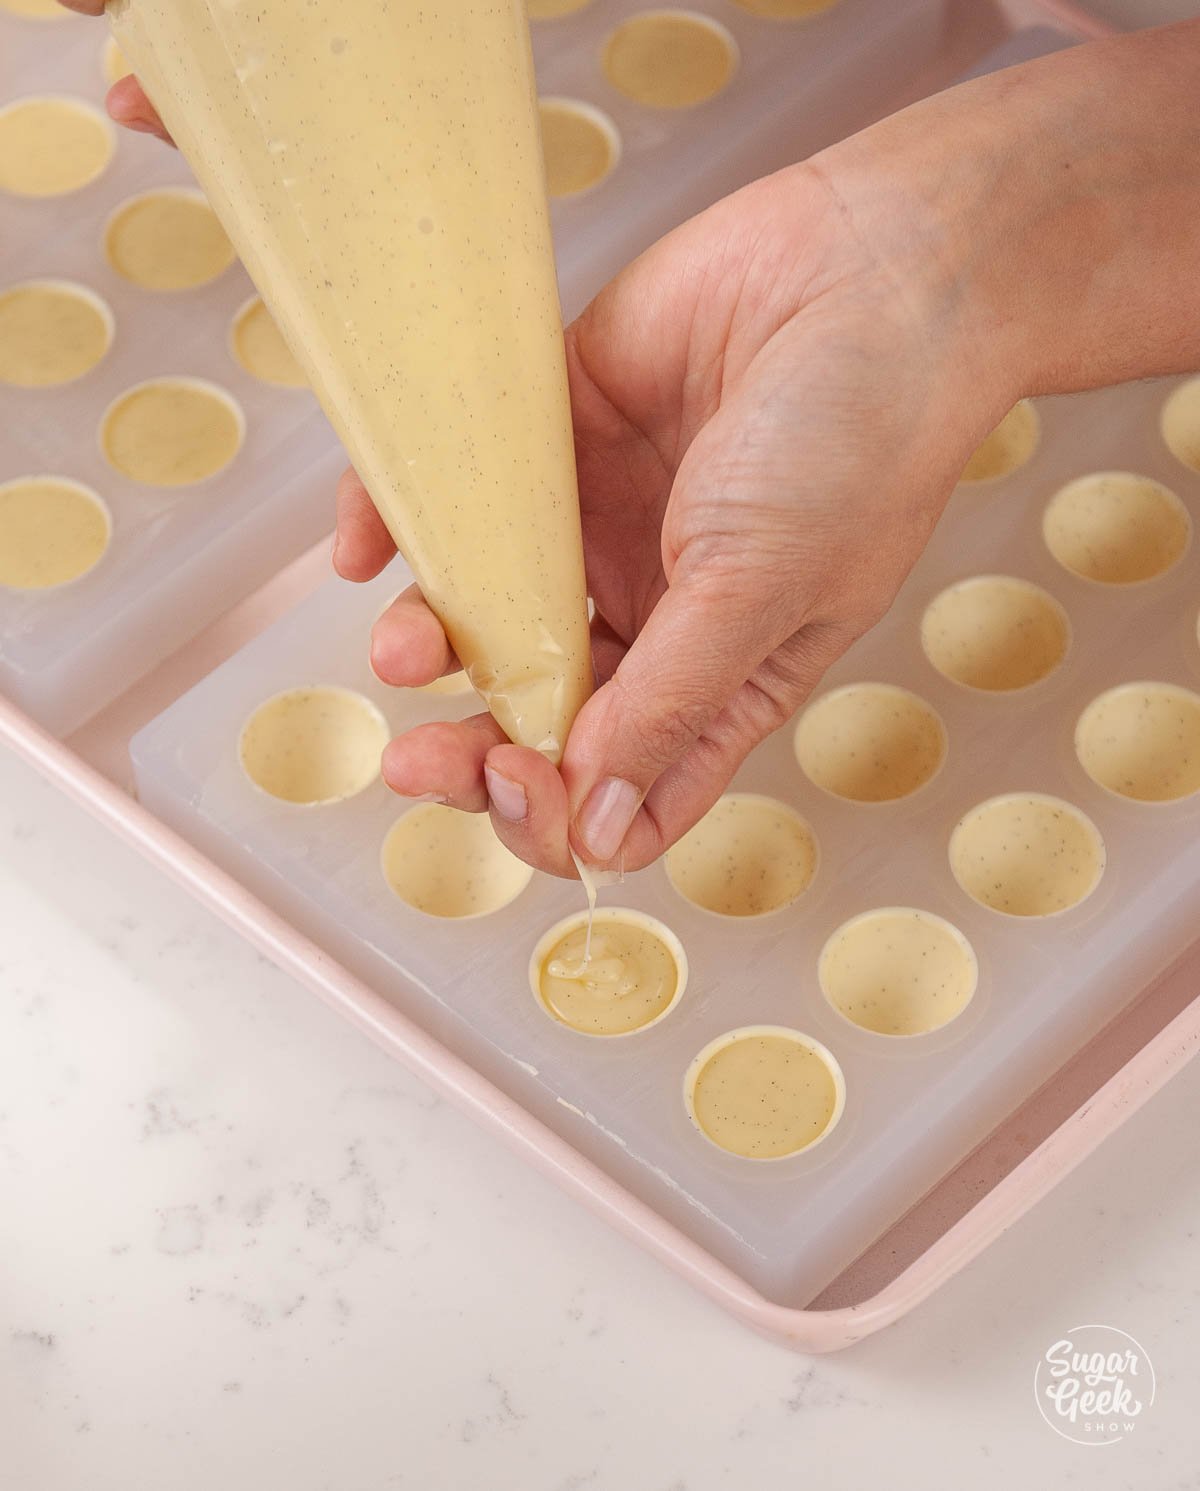
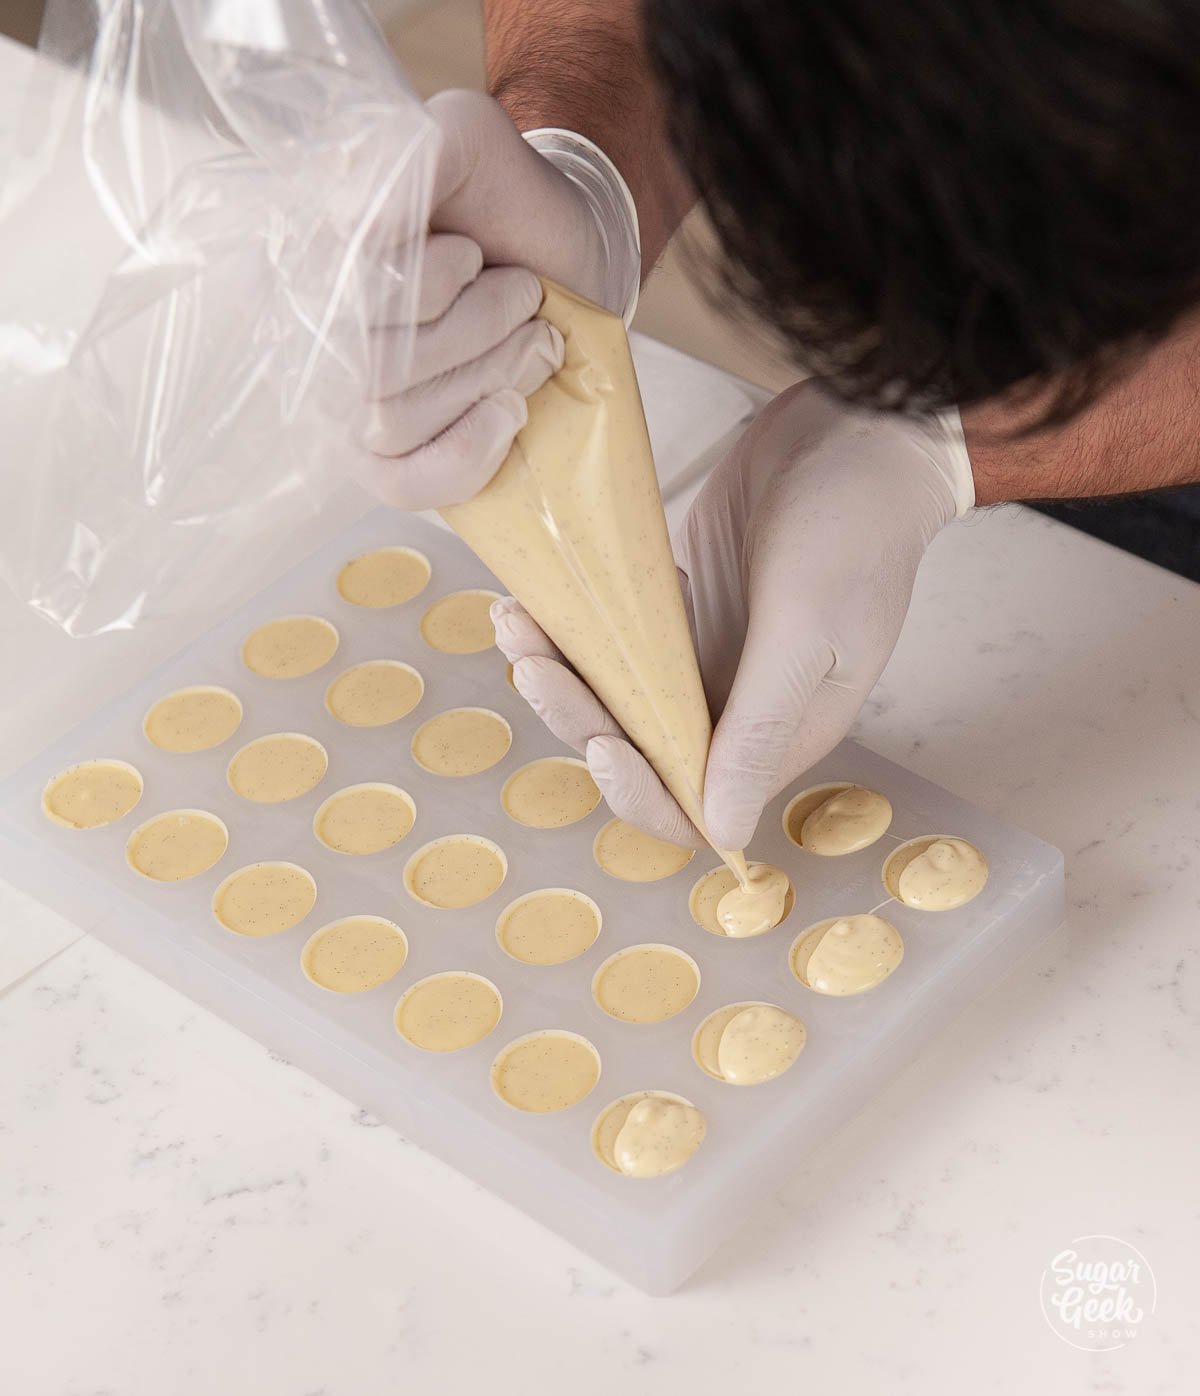
- Fill your piping bag with your ganache and twist the top to make sure it doesn't spill out the top. Cut ⅛" off the tip of the piping bag.
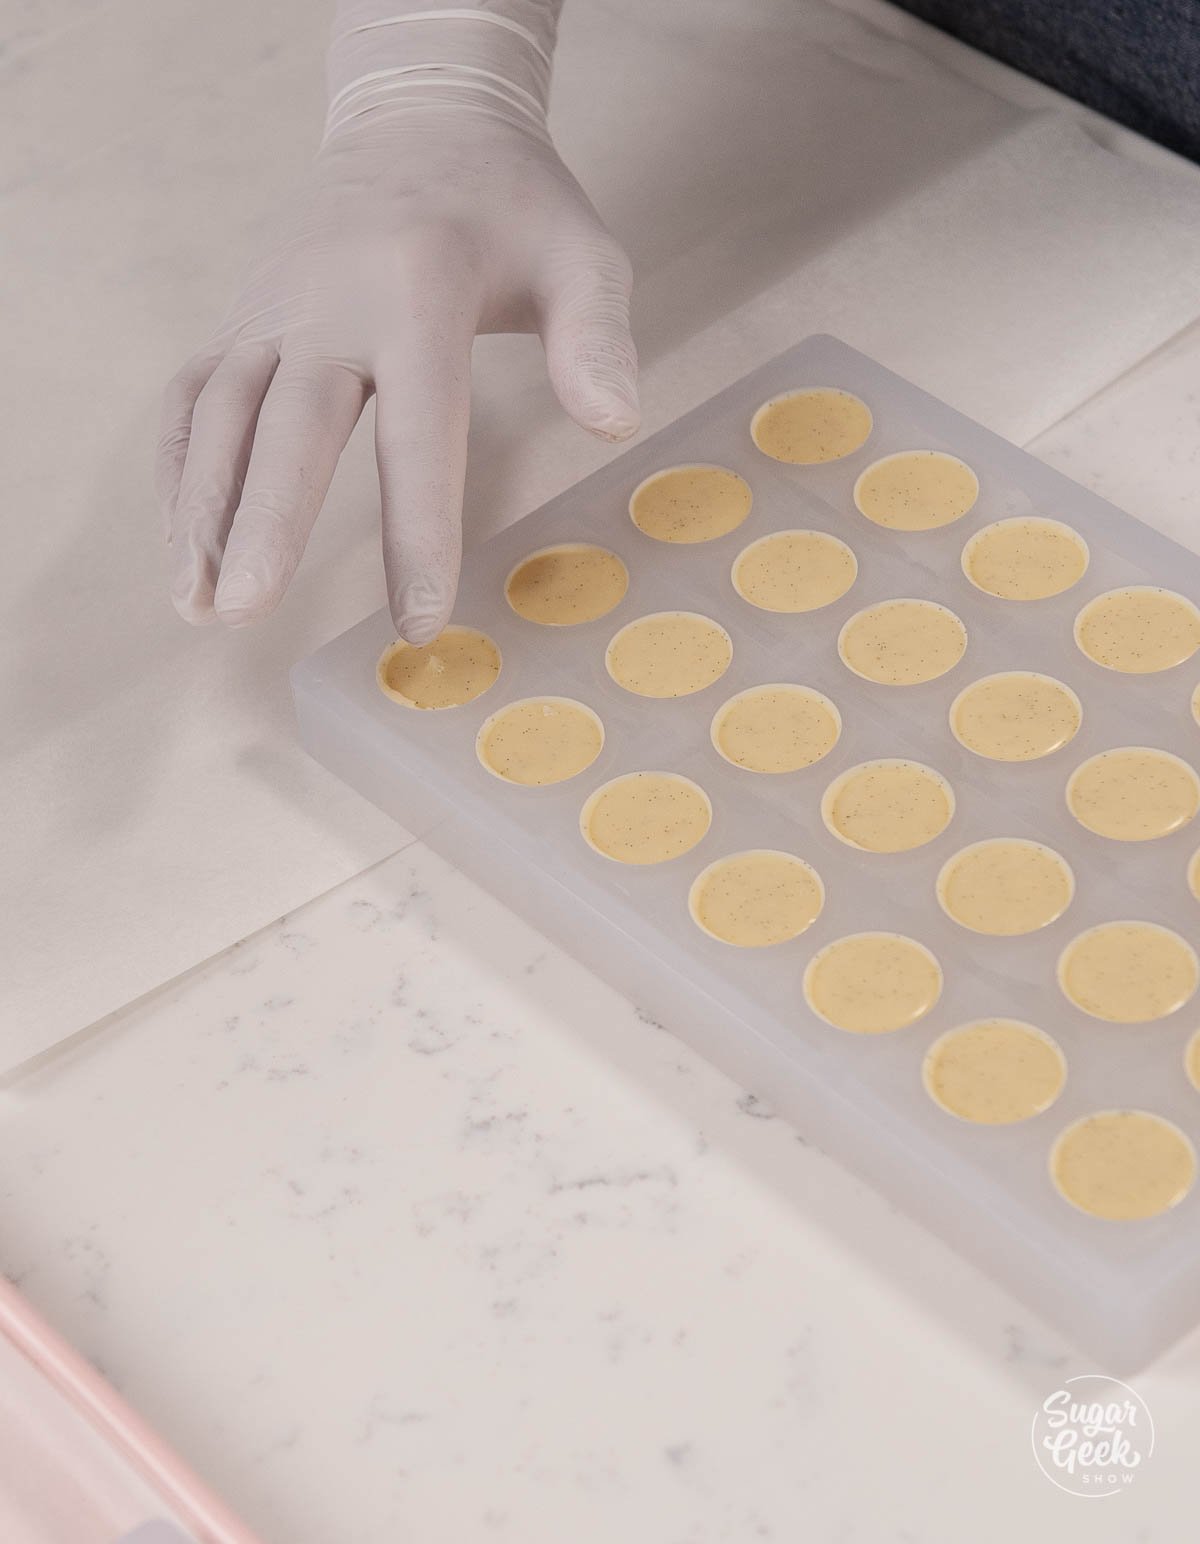
- Fill your bonbon shells with your ganache filling just shy (⅛") of the top of the shell using the same pinching and release method used earlier. This space is left so you can close the bonbon. The goal is to have the bottom of the shell the same thickness as the sides.

- Let your bonbons crystalize at room temperature until the ganache has firmed up. It helps if your room is colder than 70ºF. You can put the bonbons in the fridge but you can risk adding condensation to the ganache which can compromise the integrity of the bonbon and mold can grow.

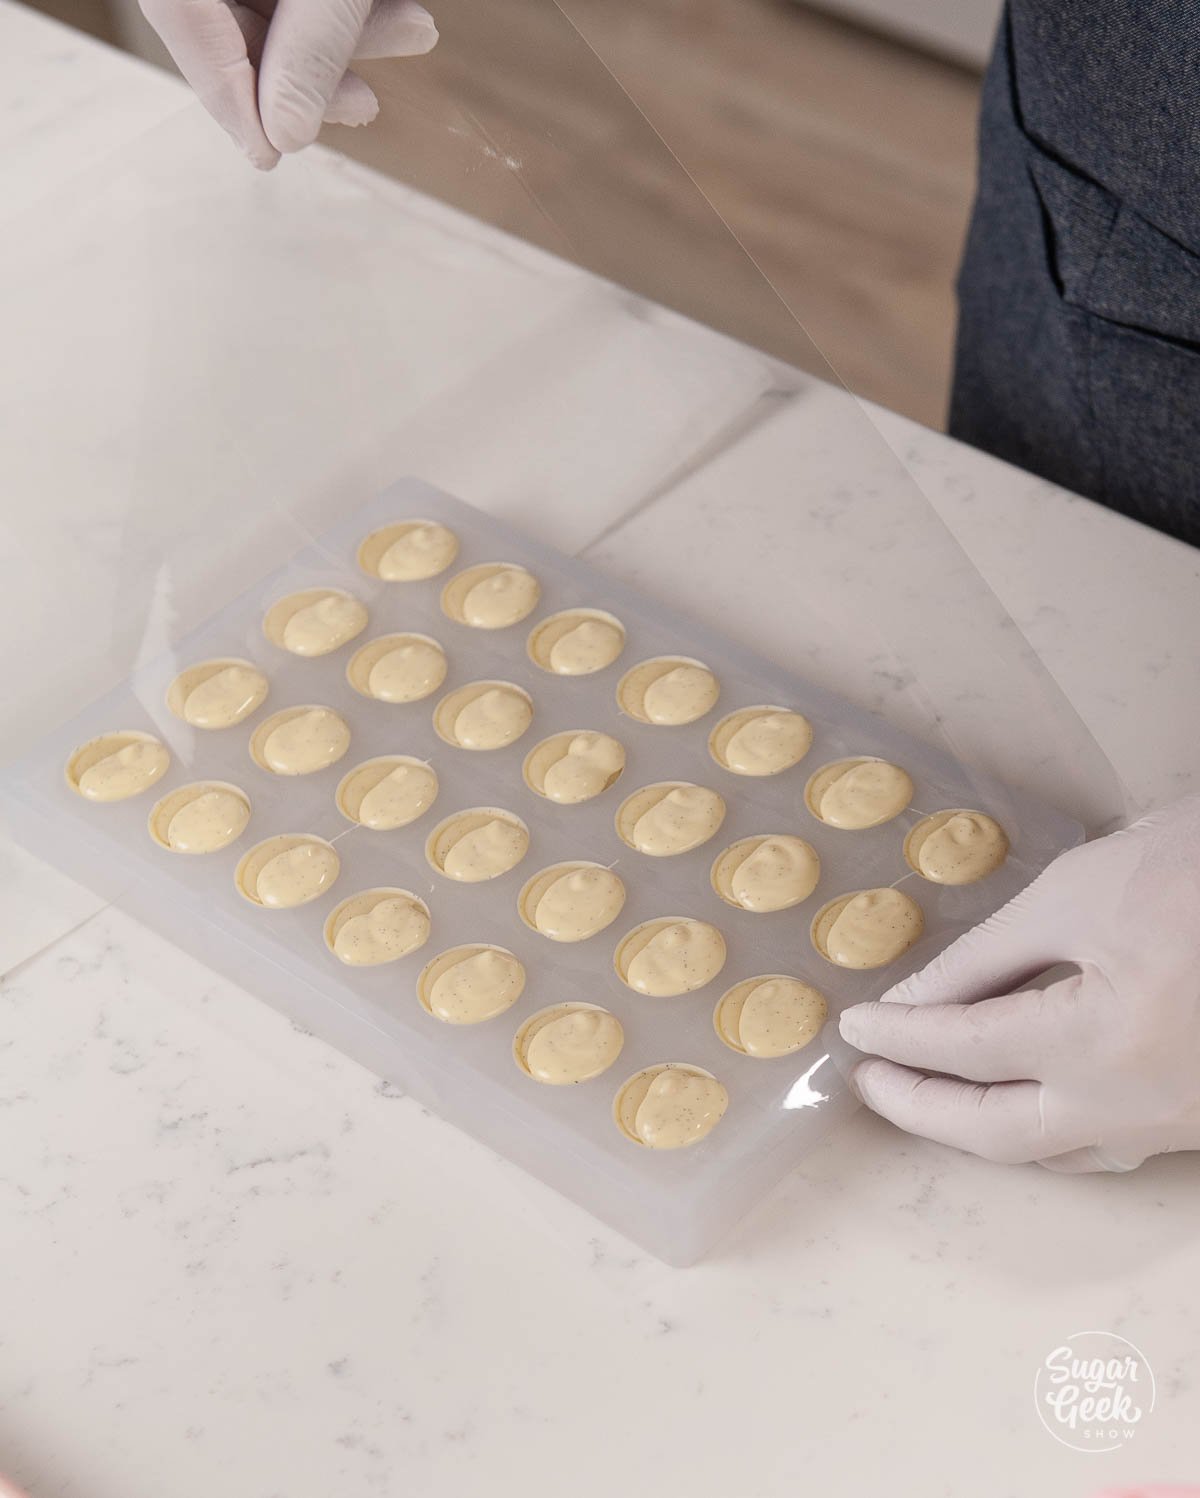
- Once the ganache has set, pipe the tempered chocolate onto the back of the bonbon until it's ¾ covered using the pinching technique.

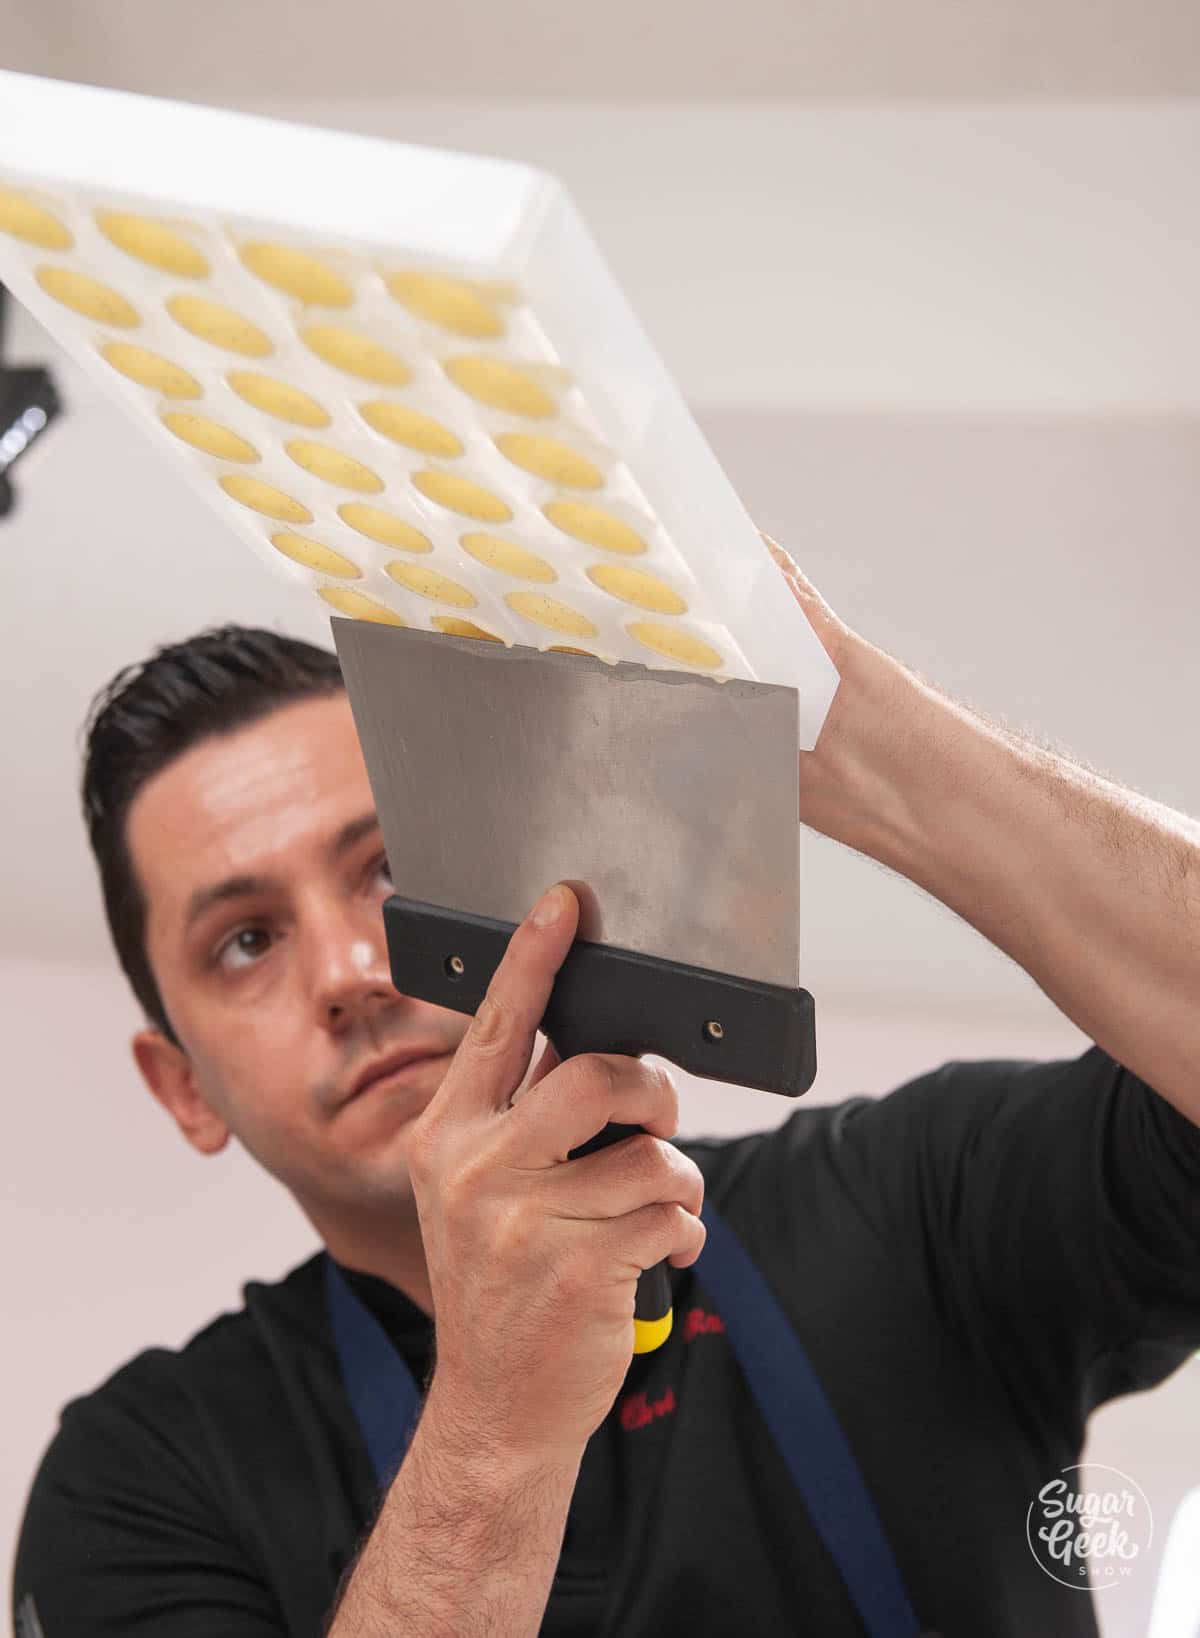
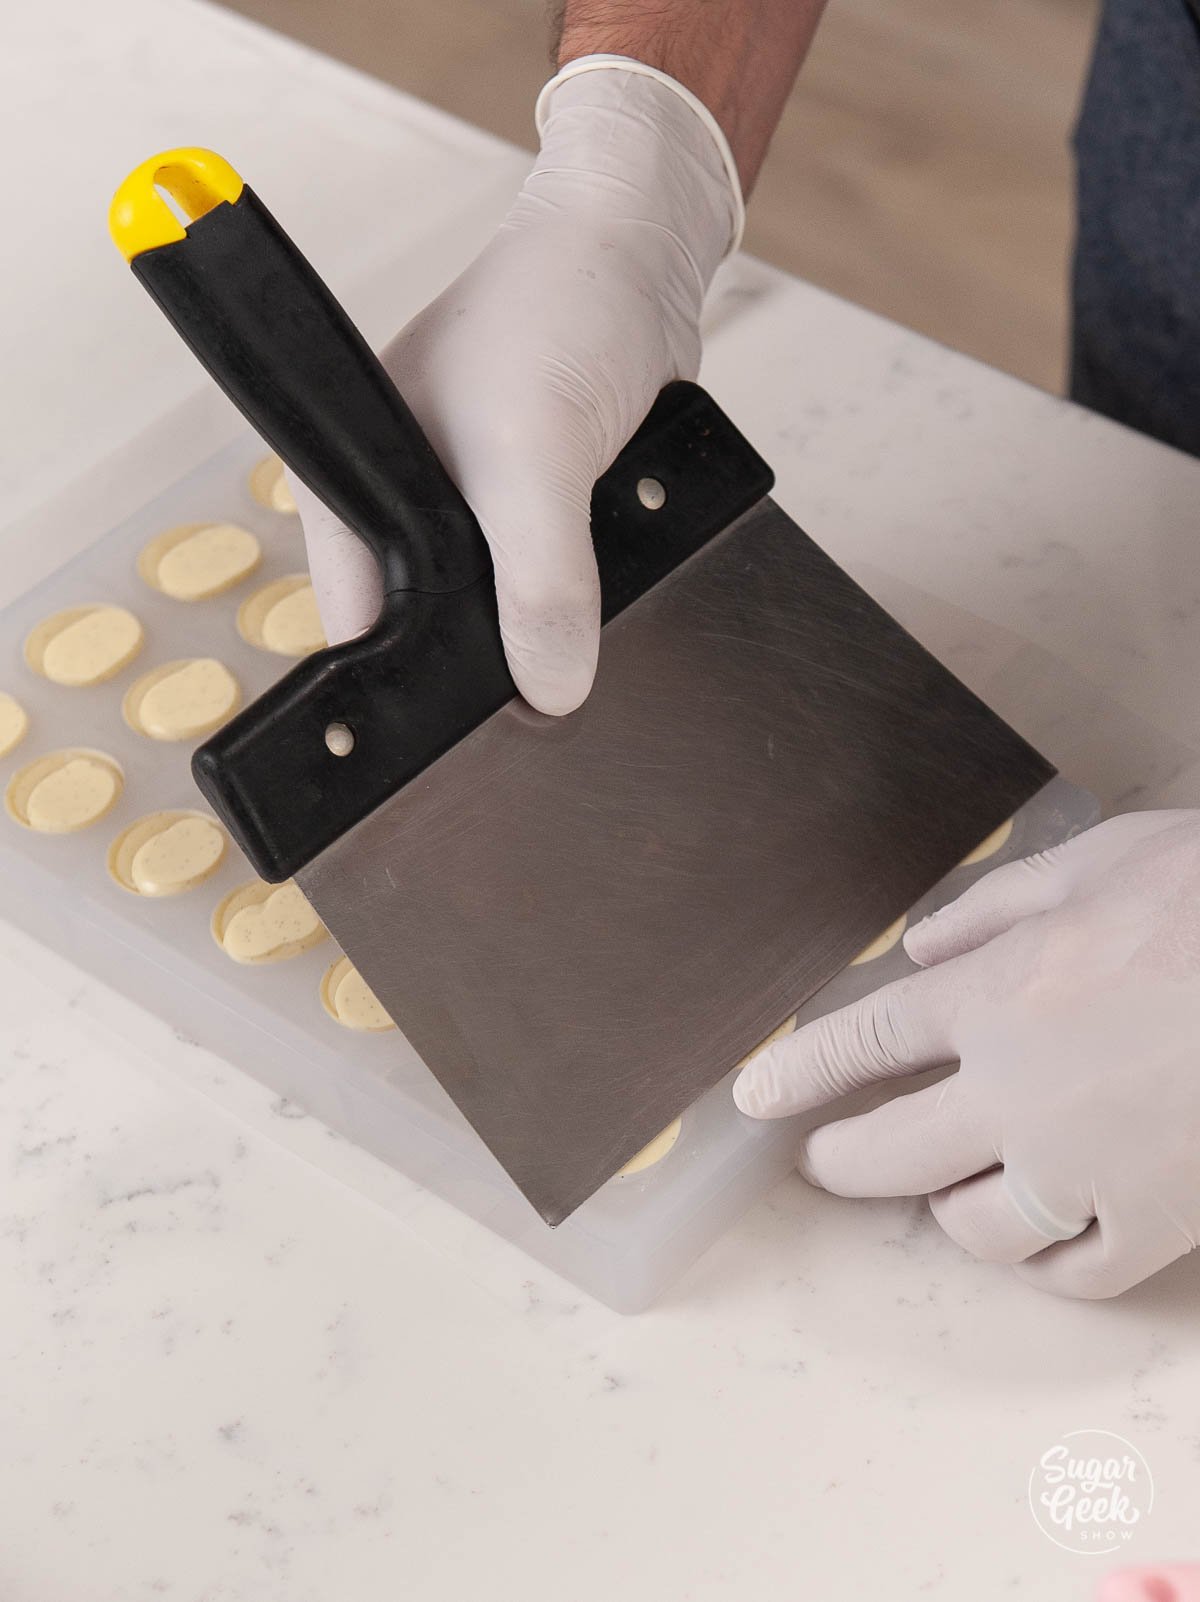
- Place your acetate onto the back of the mold and use the bench scraper to scrape away the excess chocolate.


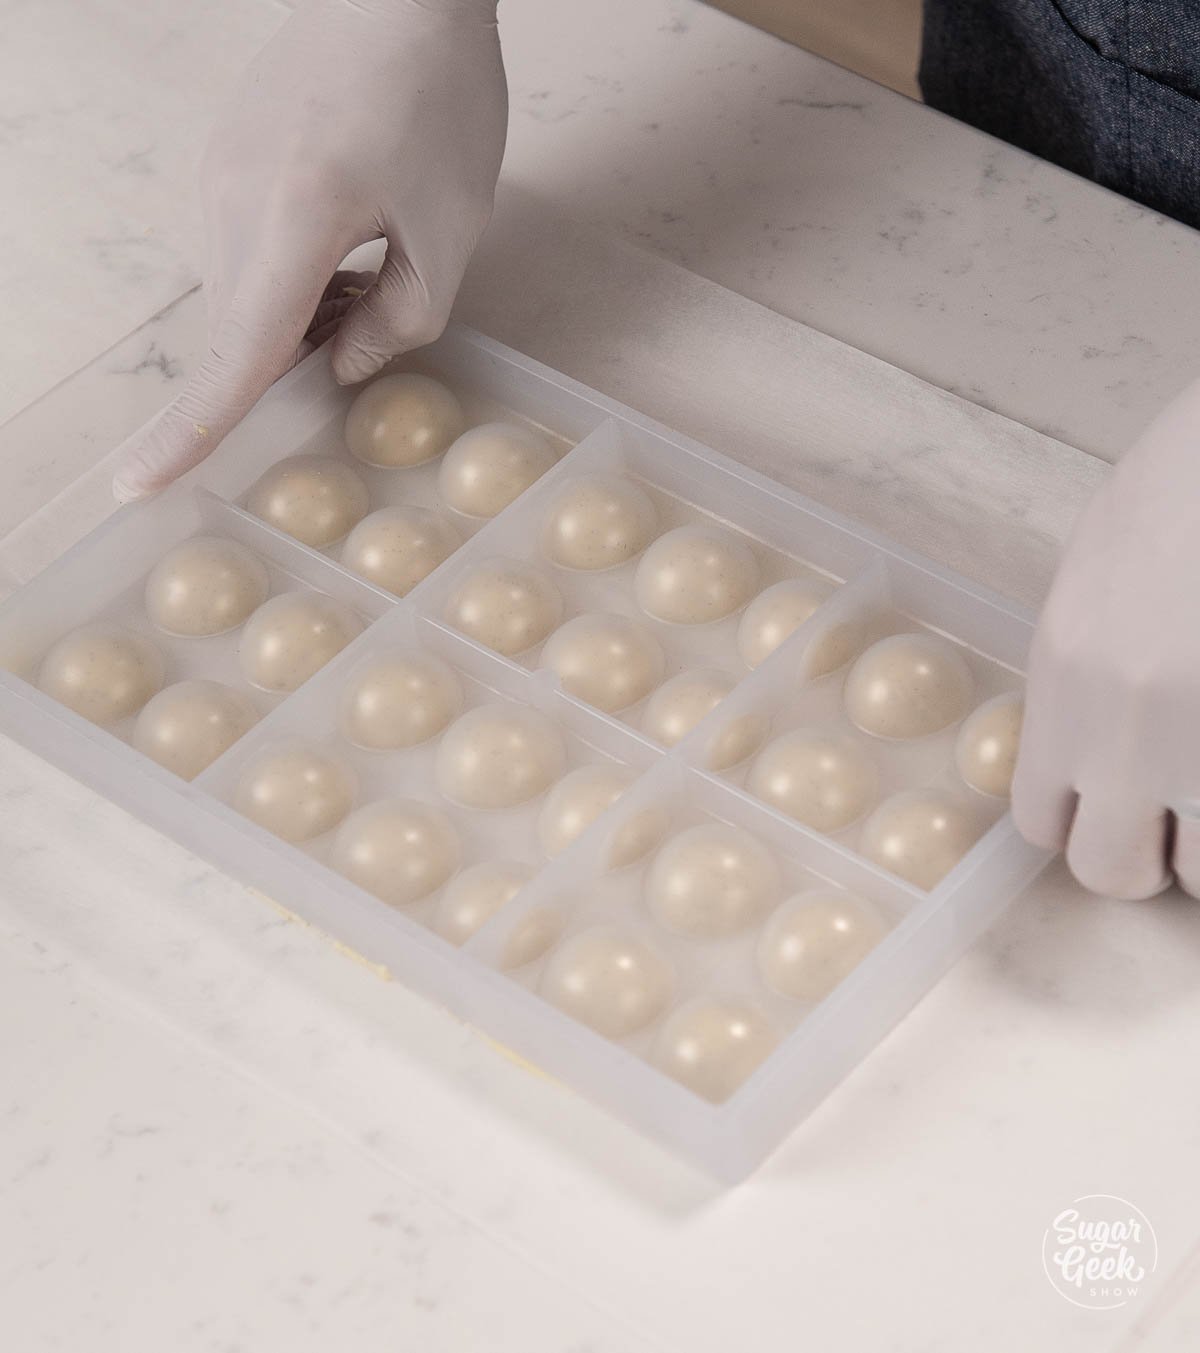
- Place the bonbons into the fridge for 10 minutes. You will see the chocolate pull away from the mold as it contracts.
- De-mold your bonbons by quickly turning the mold over onto parchment paper to release them from the mold.

Recipe
Equipment
- bonbon mold
- heatgun
- acetate sheets
- fine mesh strainer
- infrared thermometer
Ingredients
For the white chocolate vanilla bean ganache
- 263 grams cream
- 67 grams trimoline
- 1 grade A vanilla bean
- 500 grams couverture white chocolate
- 100 grams white chocolate
For the bonbon shells
- 1000 grams couverture white chocolate
- 1 grade A vanilla bean
- 10 grams pre-tempered cocoa butter optional (see blog post)
Instructions
For the ganache
- Melt your white chocolate in the microwave in 30 second increments to prevent burning or over a double boiler until it reaches 104ºF (40ºC). Set it aside.
- Add your heavy cream and trimoline to a medium saucepan.
- Scrape the vanilla bean seeds by cutting down the center of the bean first and then scraping the seeds with the flat side of a knife.
- Add the vanilla bean seeds to the saucepan.
- Bring your cream to a simmer over medium-high heat (stirring occasionally) and let it simmer for 1 minute and then remove it from the heat. Don't boil the cream.
- Strain the mixture through a fine strainer to remove any bits of bean pod.
- Add half of the cream mixture to your melted chocolate and stir until smooth. Starting with half will help prevent separation.
- Then add in the rest of the cream and stir until smooth. It may look curdled before it looks smooth and that is normal. Just keep mixing.
- Cool your ganache to around 104ºF (40ºC) so it doesn't melt your butter.
- Pour your ganache into a tall measuring cup or glass and add in your softened butter.
- Use an immersion blender to mix the butter with the ganache. Hold the immersion blender at a slight angle under the surface of the ganache to blend. Do not incorporate any air.
- Cool your ganache to 34ºF and add in your tempered cocoa butter from the EZ Temper machine. If you don't have an EZ Temper you can skip this step. The tempered cocoa butter will help the ganache set up much faster than untempered cocoa butter.
- Place some plastic wrap on top of the ganache and set it aside to firm up (make sure your room is below 70ºF) or your ganache and chocolate may not set up. If your room is too warm you can place the ganache in the fridge but your room should be below 70ºF anyway to be working with chocolate.
Chocolate bonbon shells
- Place some parchment paper onto your work surface to catch the chocolate and get your bench scraper ready.
- Fill your piping bag with your tempered chocolate and twist the ends so the chocolate doesn't spill out.
- Cut a small hole (⅛") in the tip for the chocolate.
- Begin filling each bonbon cavity all the way to the top with the chocolate by pinching and releasing the opening of the piping bag.
- Pick the mold up by holding the edges and try not to put your hands agains the cavities directly or the heat from your hands can ruin the temper of the chocolate shells. Tap the edge of the mold with your bench scraper to release any air bubbles.
- Turn the mold over and tap out the excess chocolate to create a nice thin shell.
- Scrape off the excess chocolate from the surface of the mold with your bench scraper.
- Set your mold on its side for five minutes to help the chocolate to set evenly.
- Place the mold cavity side opening down onto parchment paper for 20 minutes.
Filling and closing the bonbons
- Fill your bonbon shells just shy of the top of the shell to leave room to close the shell.
- Let your bonbons crystalize at room temperature until the ganache has firmed up. It helps if your room is colder than 70ºF. You can put the bonbons in the fridge but you can risk adding condensation to the ganache which can compromise the integrity of the bonbon and mold can grow.
- Pipe the tempered chocolate onto the back of the bonbon until it's halfway covered using the pinching technique.
- Place your acetate onto the back of the mold and use the bench scraper to scrape away the excess chocolate.
- Place the bonbons into the fridge for 10 minutes.
- De-mold your bonbons by quickly turning the mold over onto parchment paper to release them from the mold.
Video
Notes
- If you haven’t watched Christophe’s video on how to temper chocolate with the EZ Temper machine, you’ll want to watch that first.
- Also learn how to make beautiful chocolate decorations like curls, squares, discs, and a tiara in Christophe's easy decorations tutorial.
- No tempering machine? No problem! You can temper your chocolate in the microwave or use the traditional seeding method to get your chocolate tempered.


Leave a Reply