
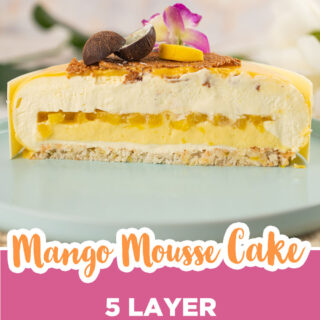

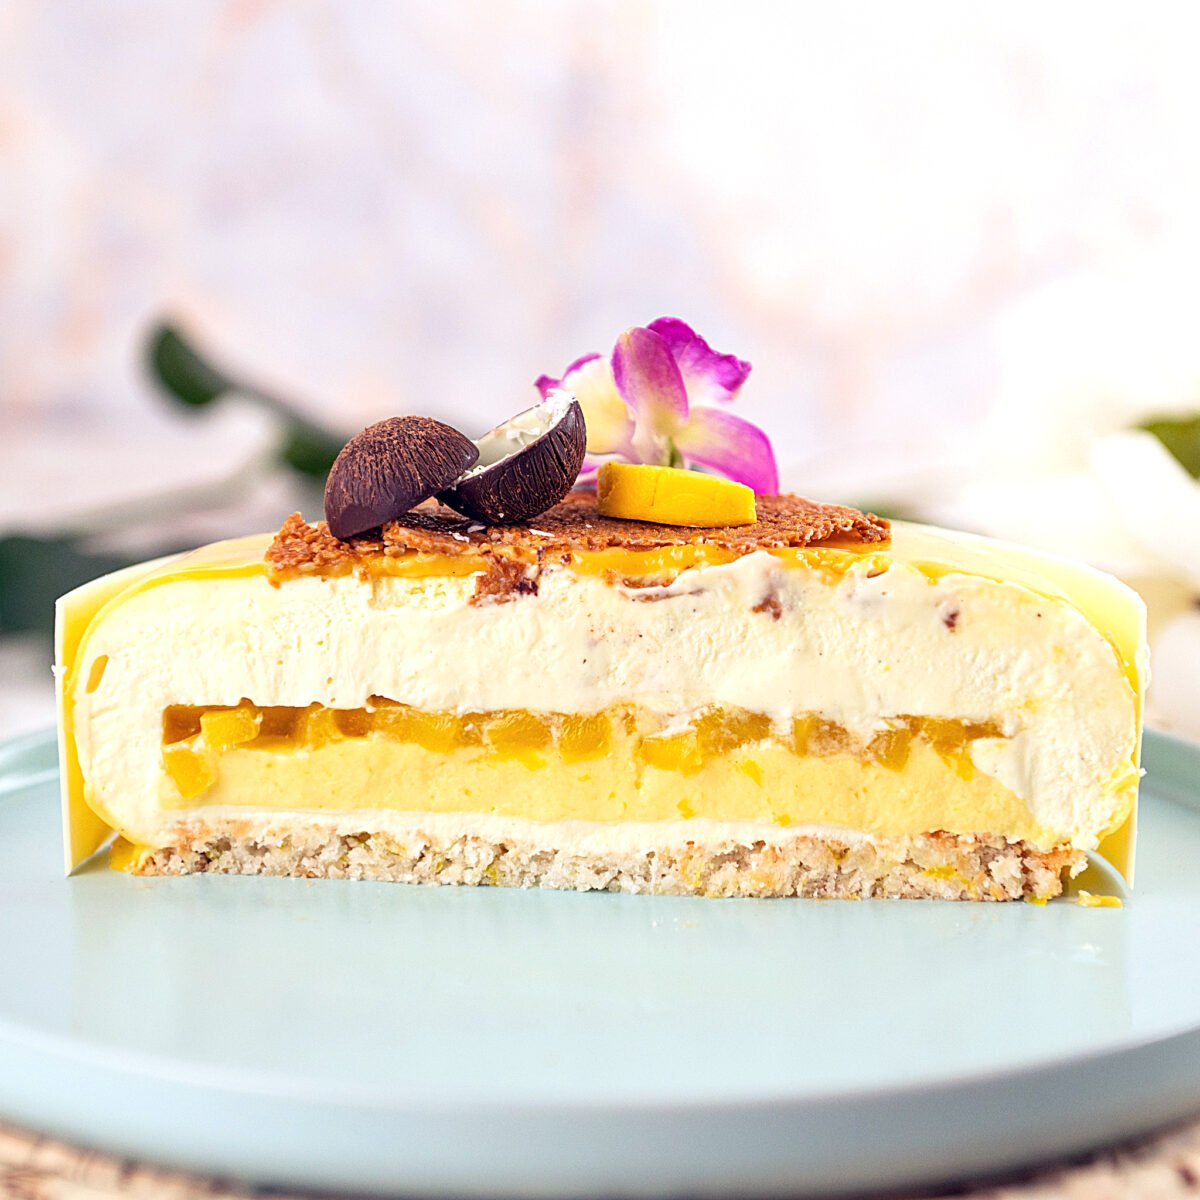
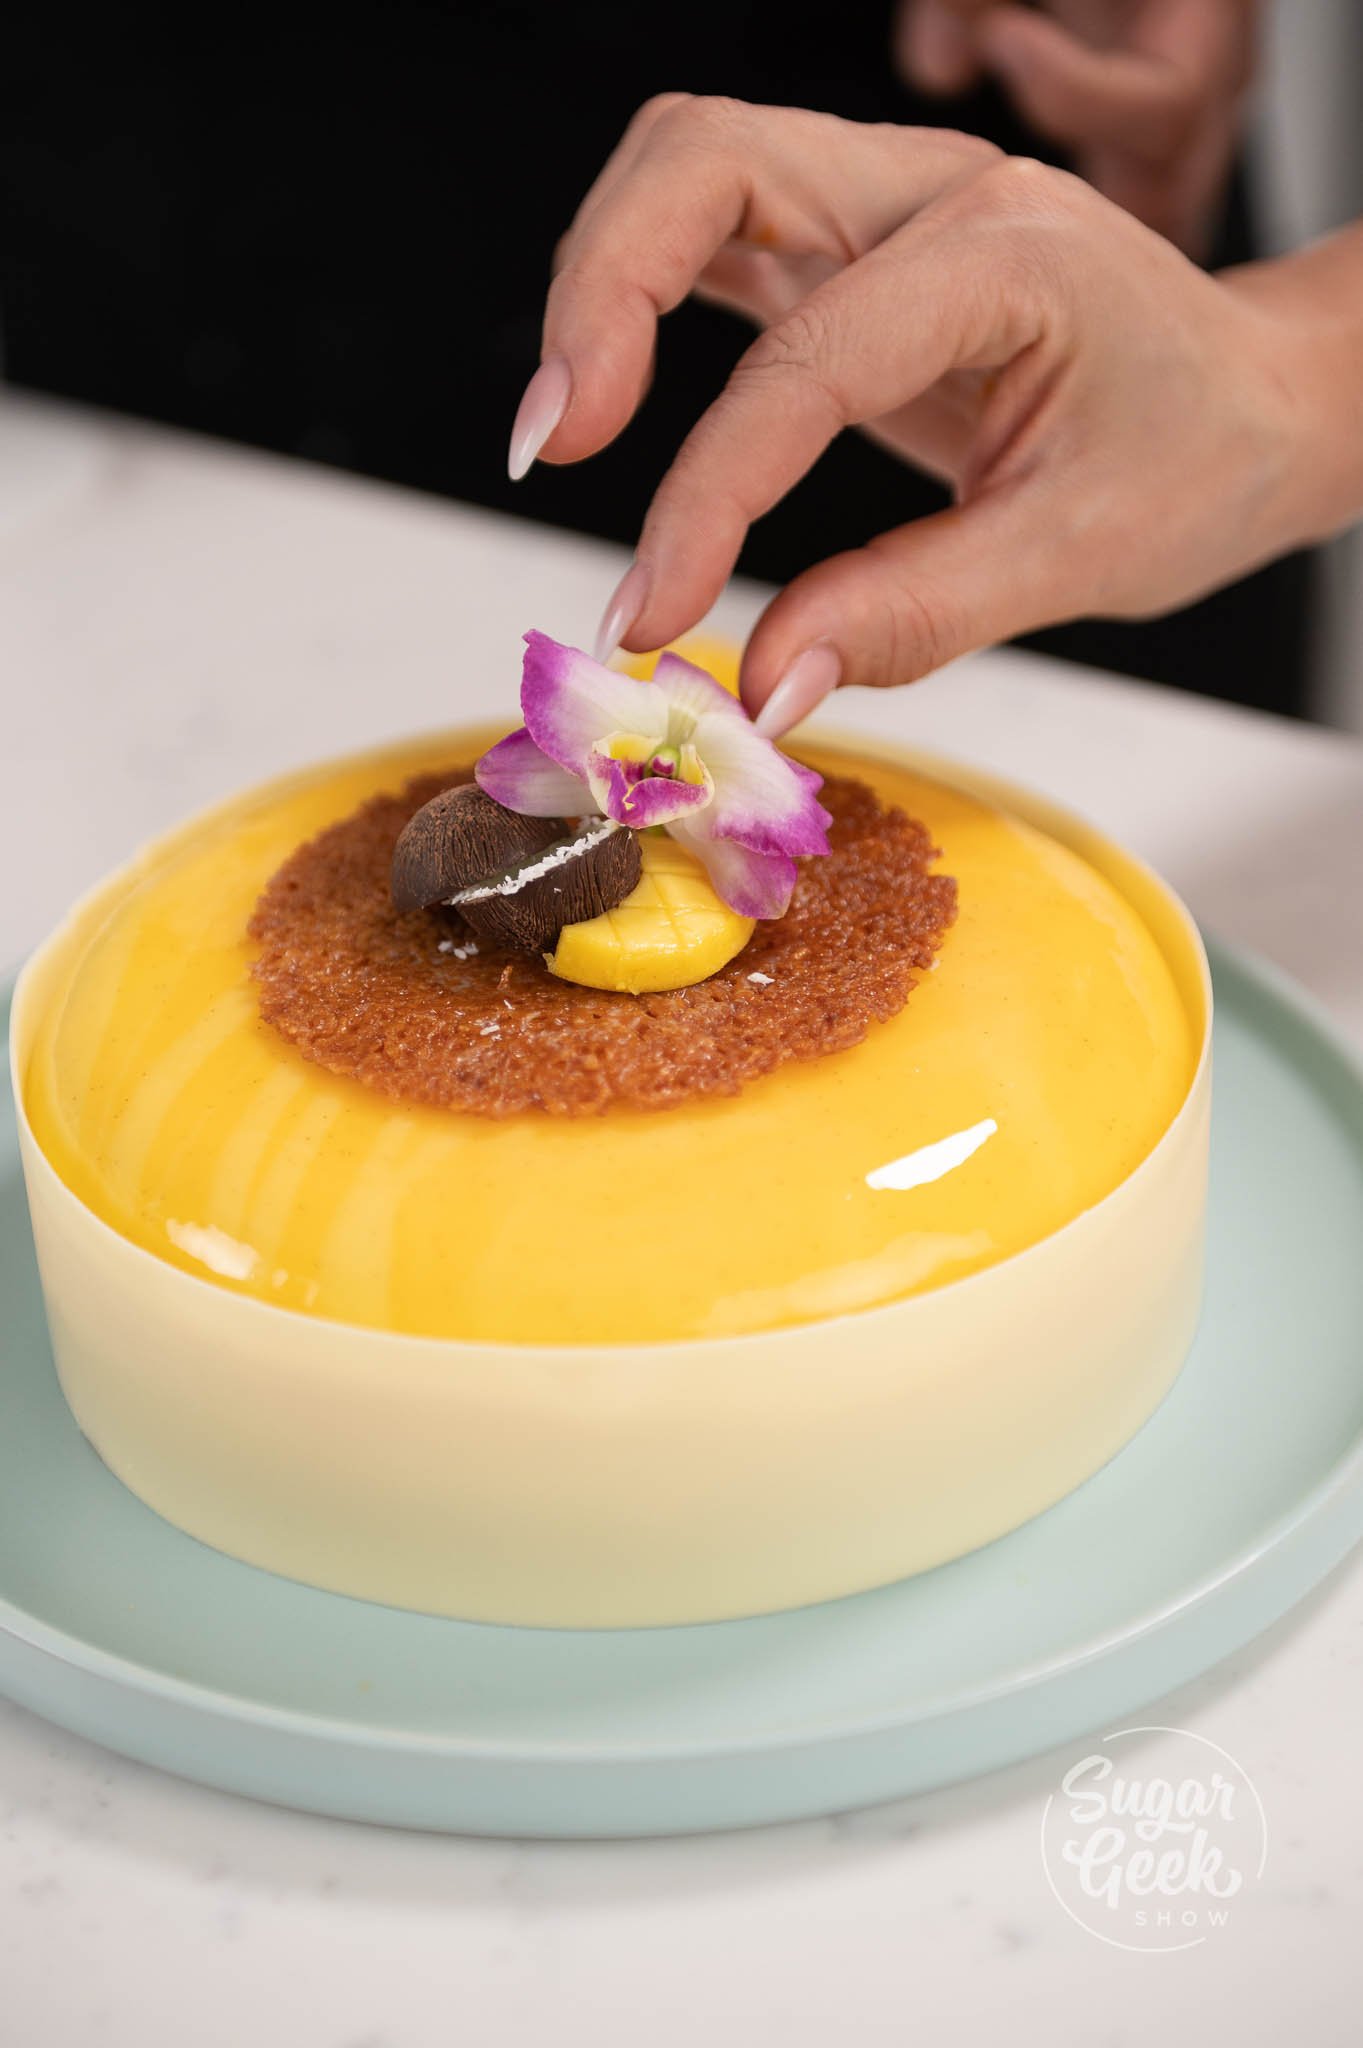
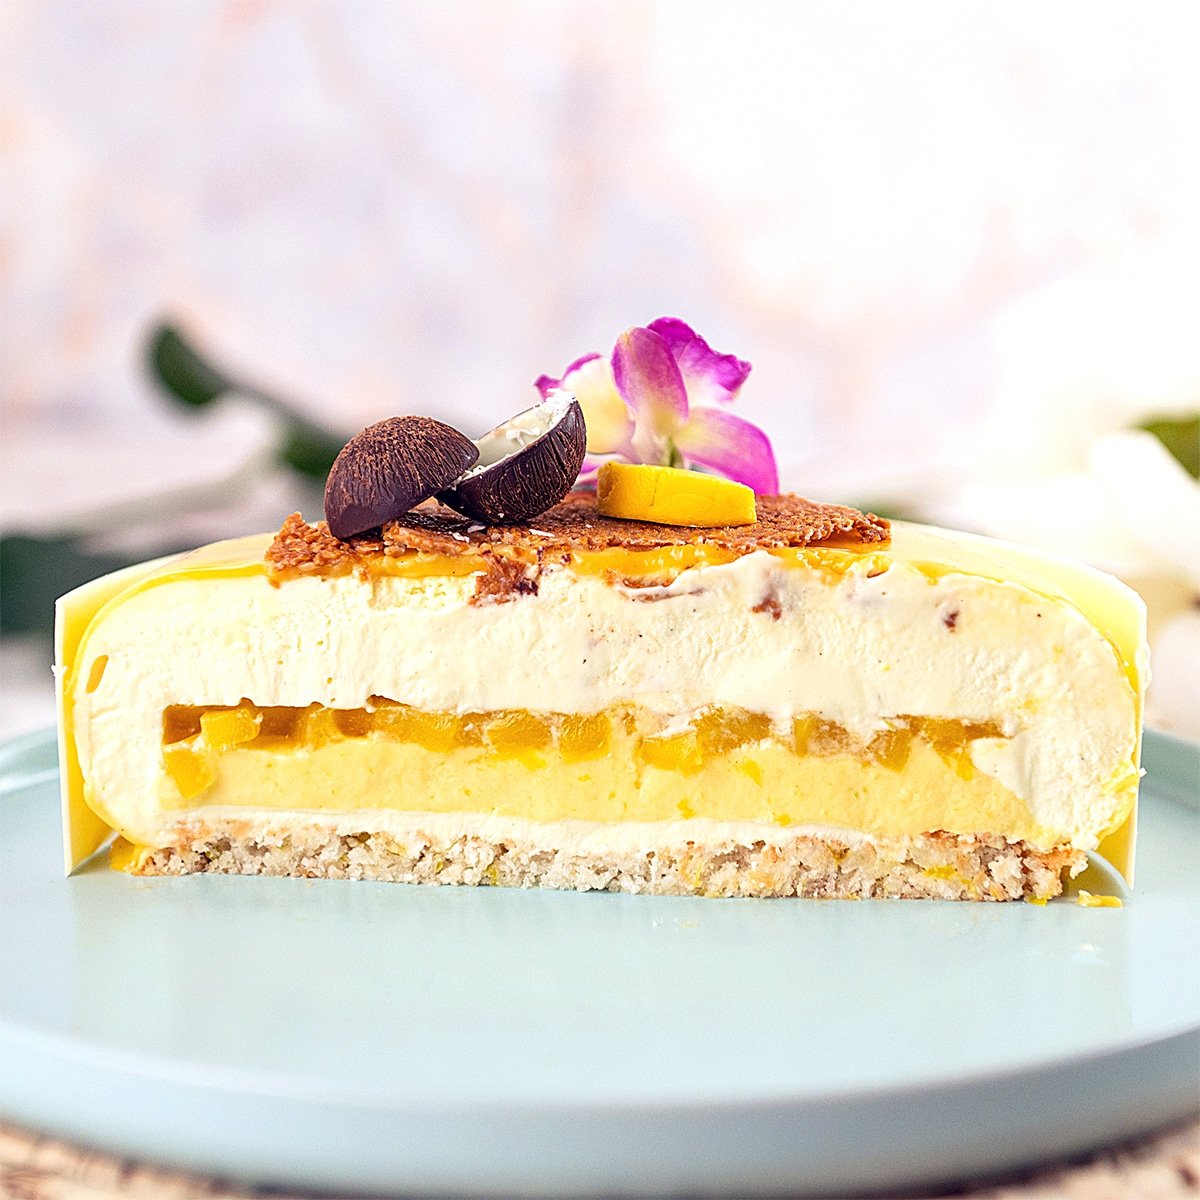
This Mango Mousse Cake takes summertime desserts to the next level. Fluffy layers of coconut dacquoise, sweet mango compote, silky mango crémeux, and light as air coconut mousse are all layered together beautifully and topped with an orange and yellow mirror glaze and coconut nougatine. Created by Chef Christophe Rull, this tropical entremet will make you feel like you're on vacation.
Making an etremet is not complicated but it does take a lot of time and preparation to make all the individual pieces. Entremet are typically made in multiples because it is so much work to make each component so make sure you give yourself at least two days to complete this task.
Day 1 - Make the components and freeze them
Day 2 - Assemble the entremet and glaze
What's In This Blog Post
- Mango Mousse Cake Components
- Mango Puree Step-By-Step
- Mango Compote Step-By-Step
- Mango Crémeux Step-By-Step
- Coconut Dacquoise Step-By-Step
- Making The Coconut Nougatine
- Making The Coconut Mousse
- Assembling The Mango Mousse Cake
- Making The Mirror Glaze Step-By-Step
- Preparing The Entremet To Glaze
- Creating the Chocolate Decor
- Decorating and Glazing the Mango Mousse Cake
- FAQ
- More Recipes You'll Love
Mango Mousse Cake Components
An entremet is composed of multiple recipes. Those components will change with every entremet you make. Usually, you have multiple layers of textures that complement each other. Smooth, creamy, rich, light, crunchy, or chewy. The options are endless.
Mango Compote Ingredients
A compote is made of pieces of fruit and sugar syrup that is cooked together. Sometimes with other spices and flavors added and it can be thickened by pectin, cornstarch, or gelatin if needed. Our compote will also have mango puree added which you can buy or make.

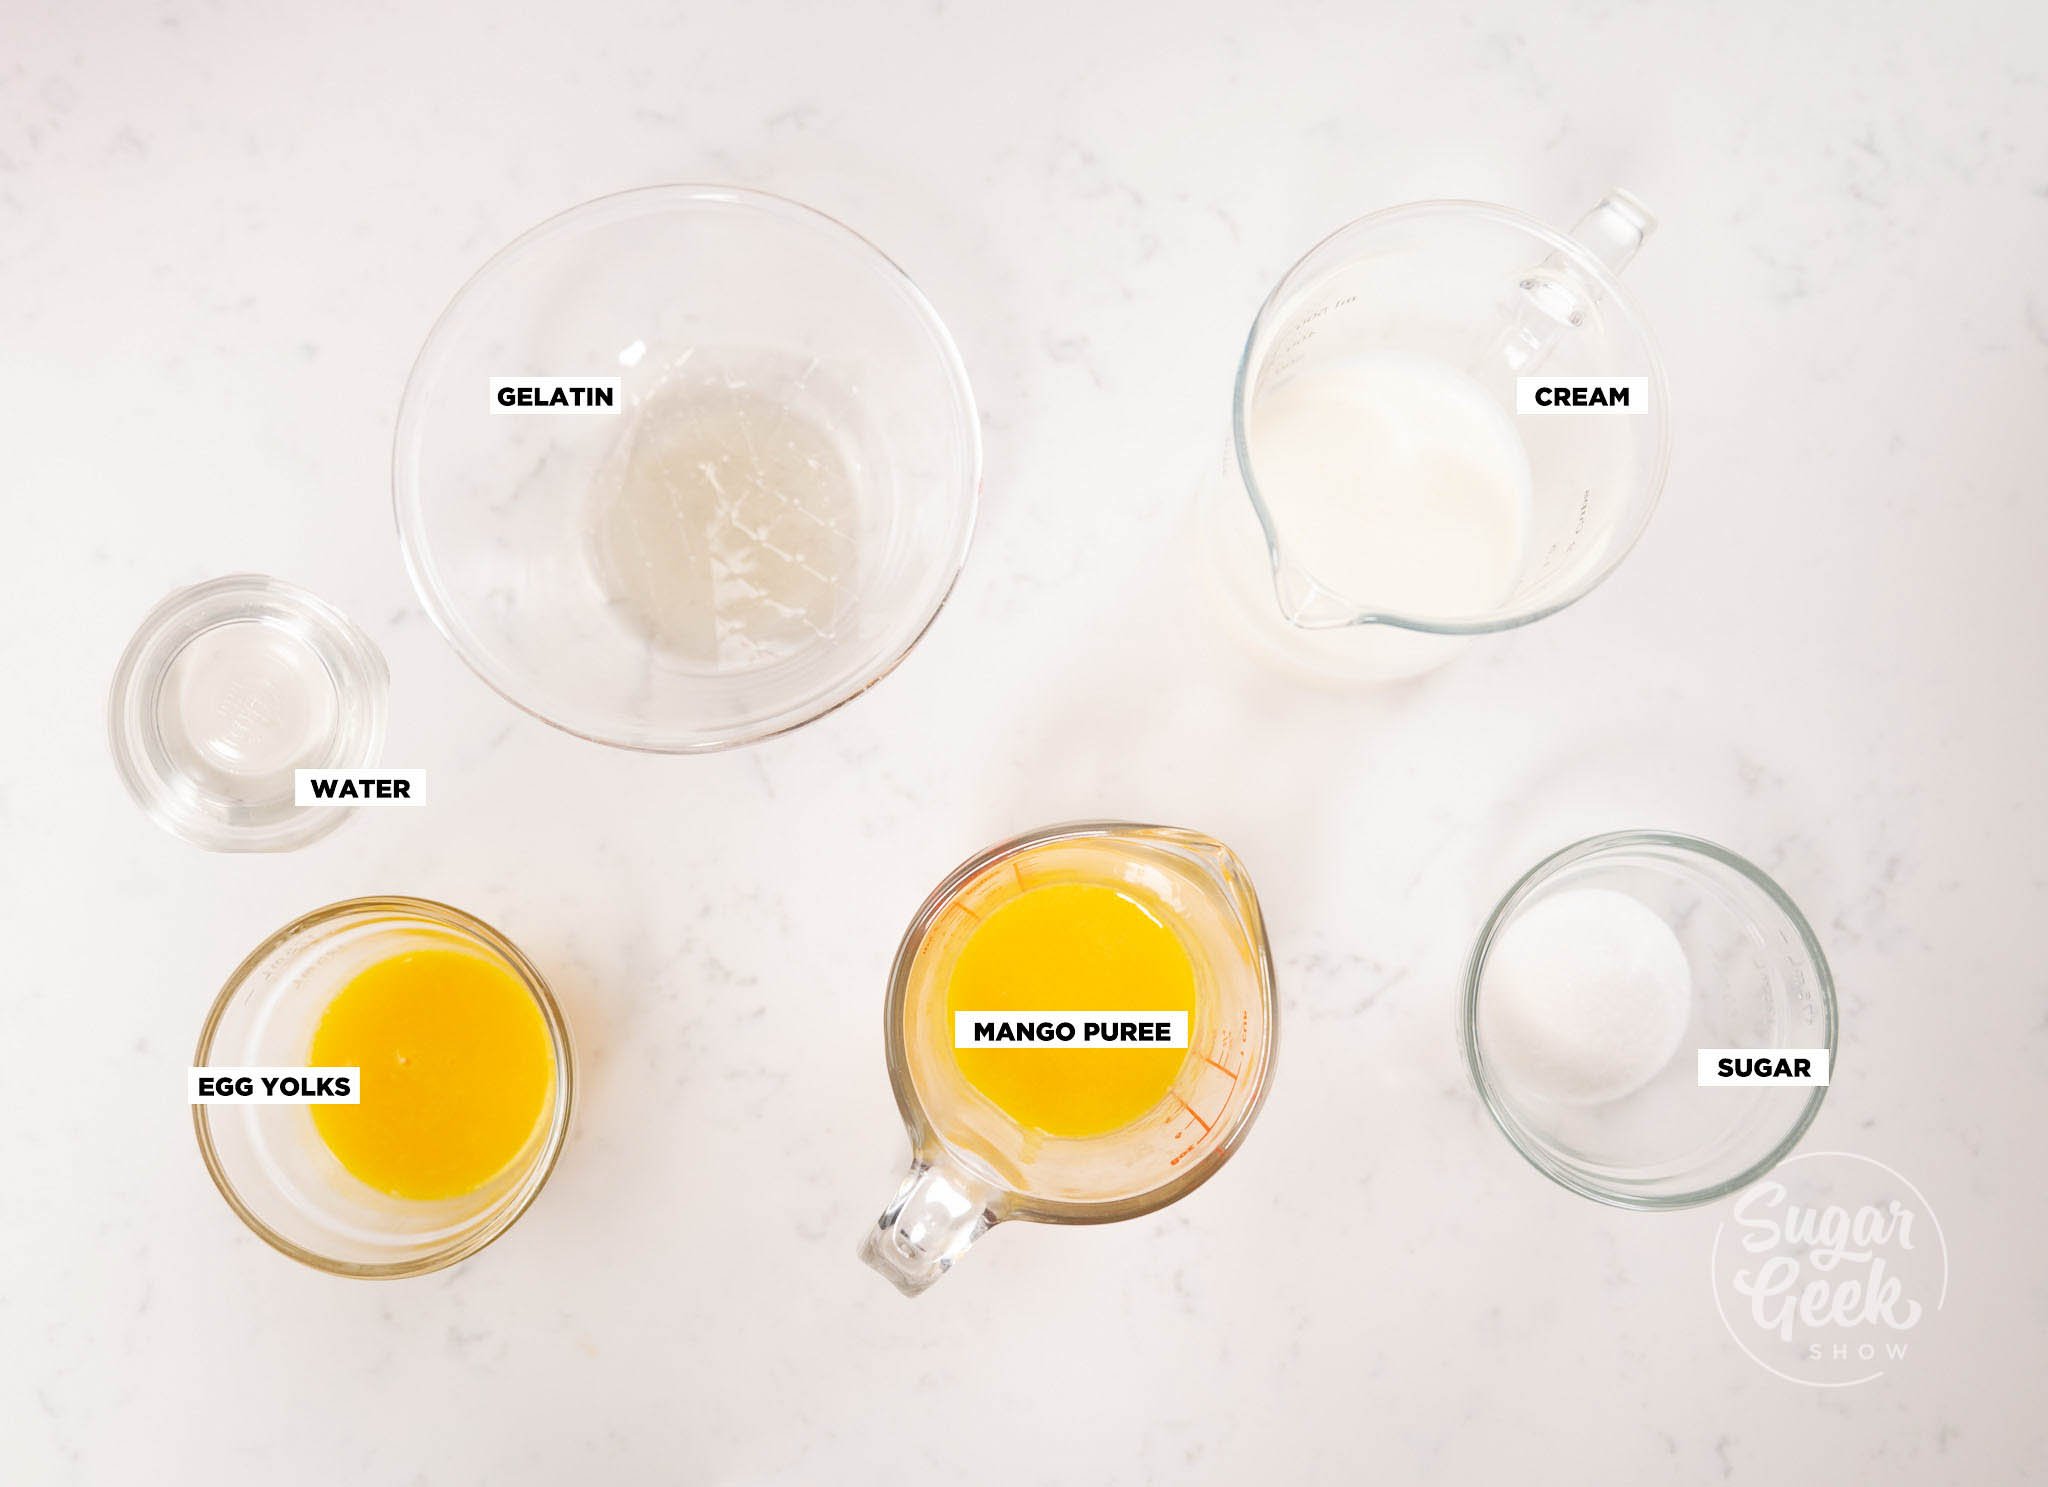
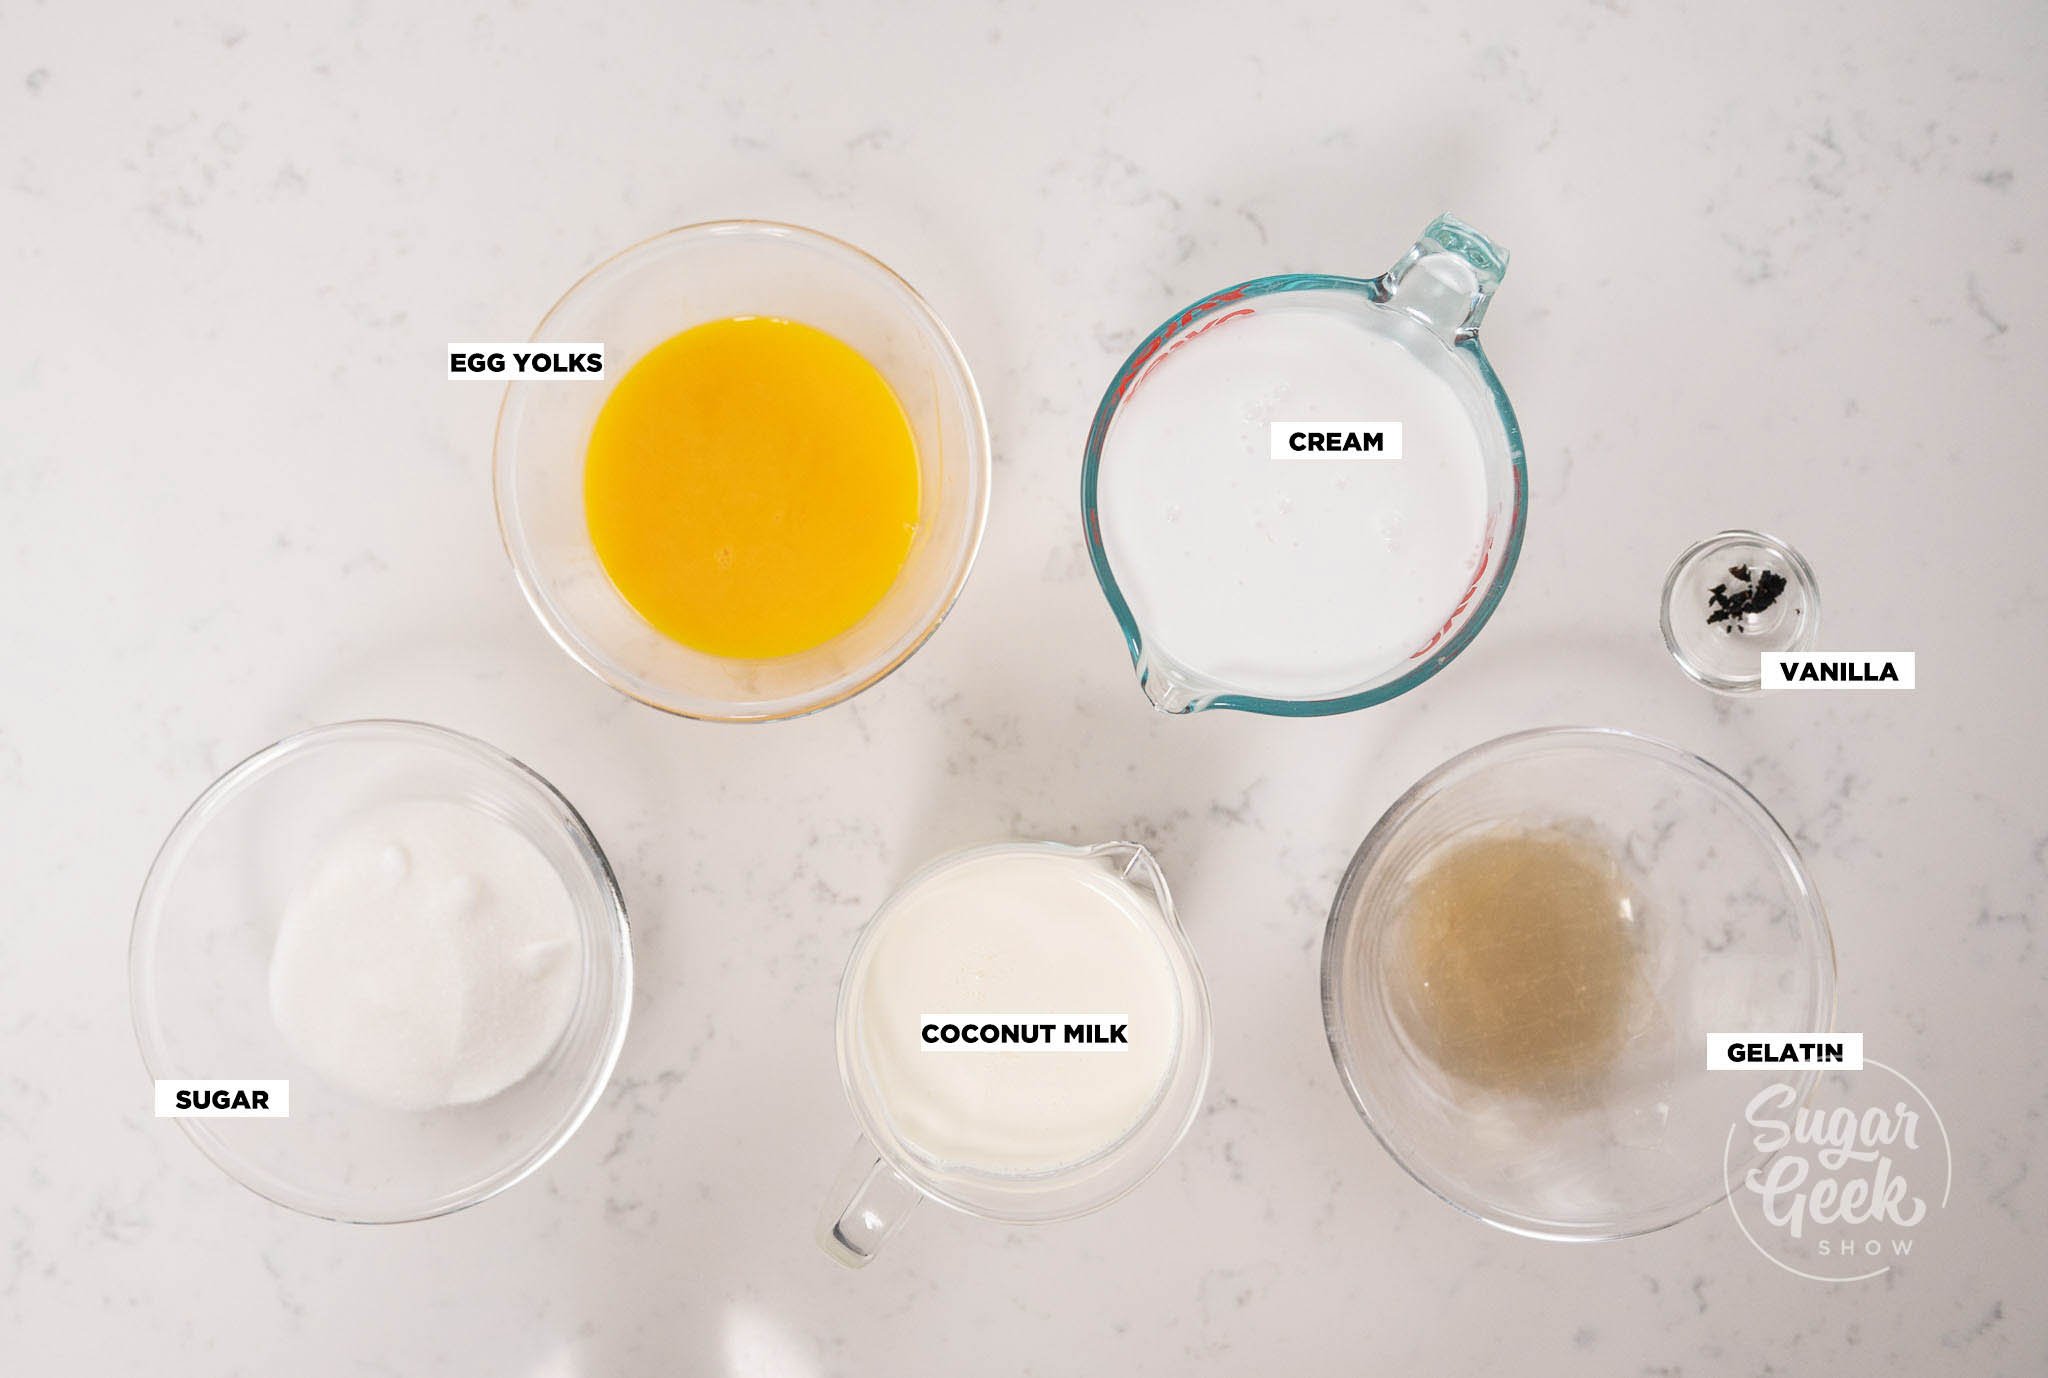
Mango Crémeux Ingredients
A crémeux means "creamy" in french and is exactly that. Super smooth, silky pudding like texture that is set with gelatin and is often paired with a light and airy mousse in entremet.
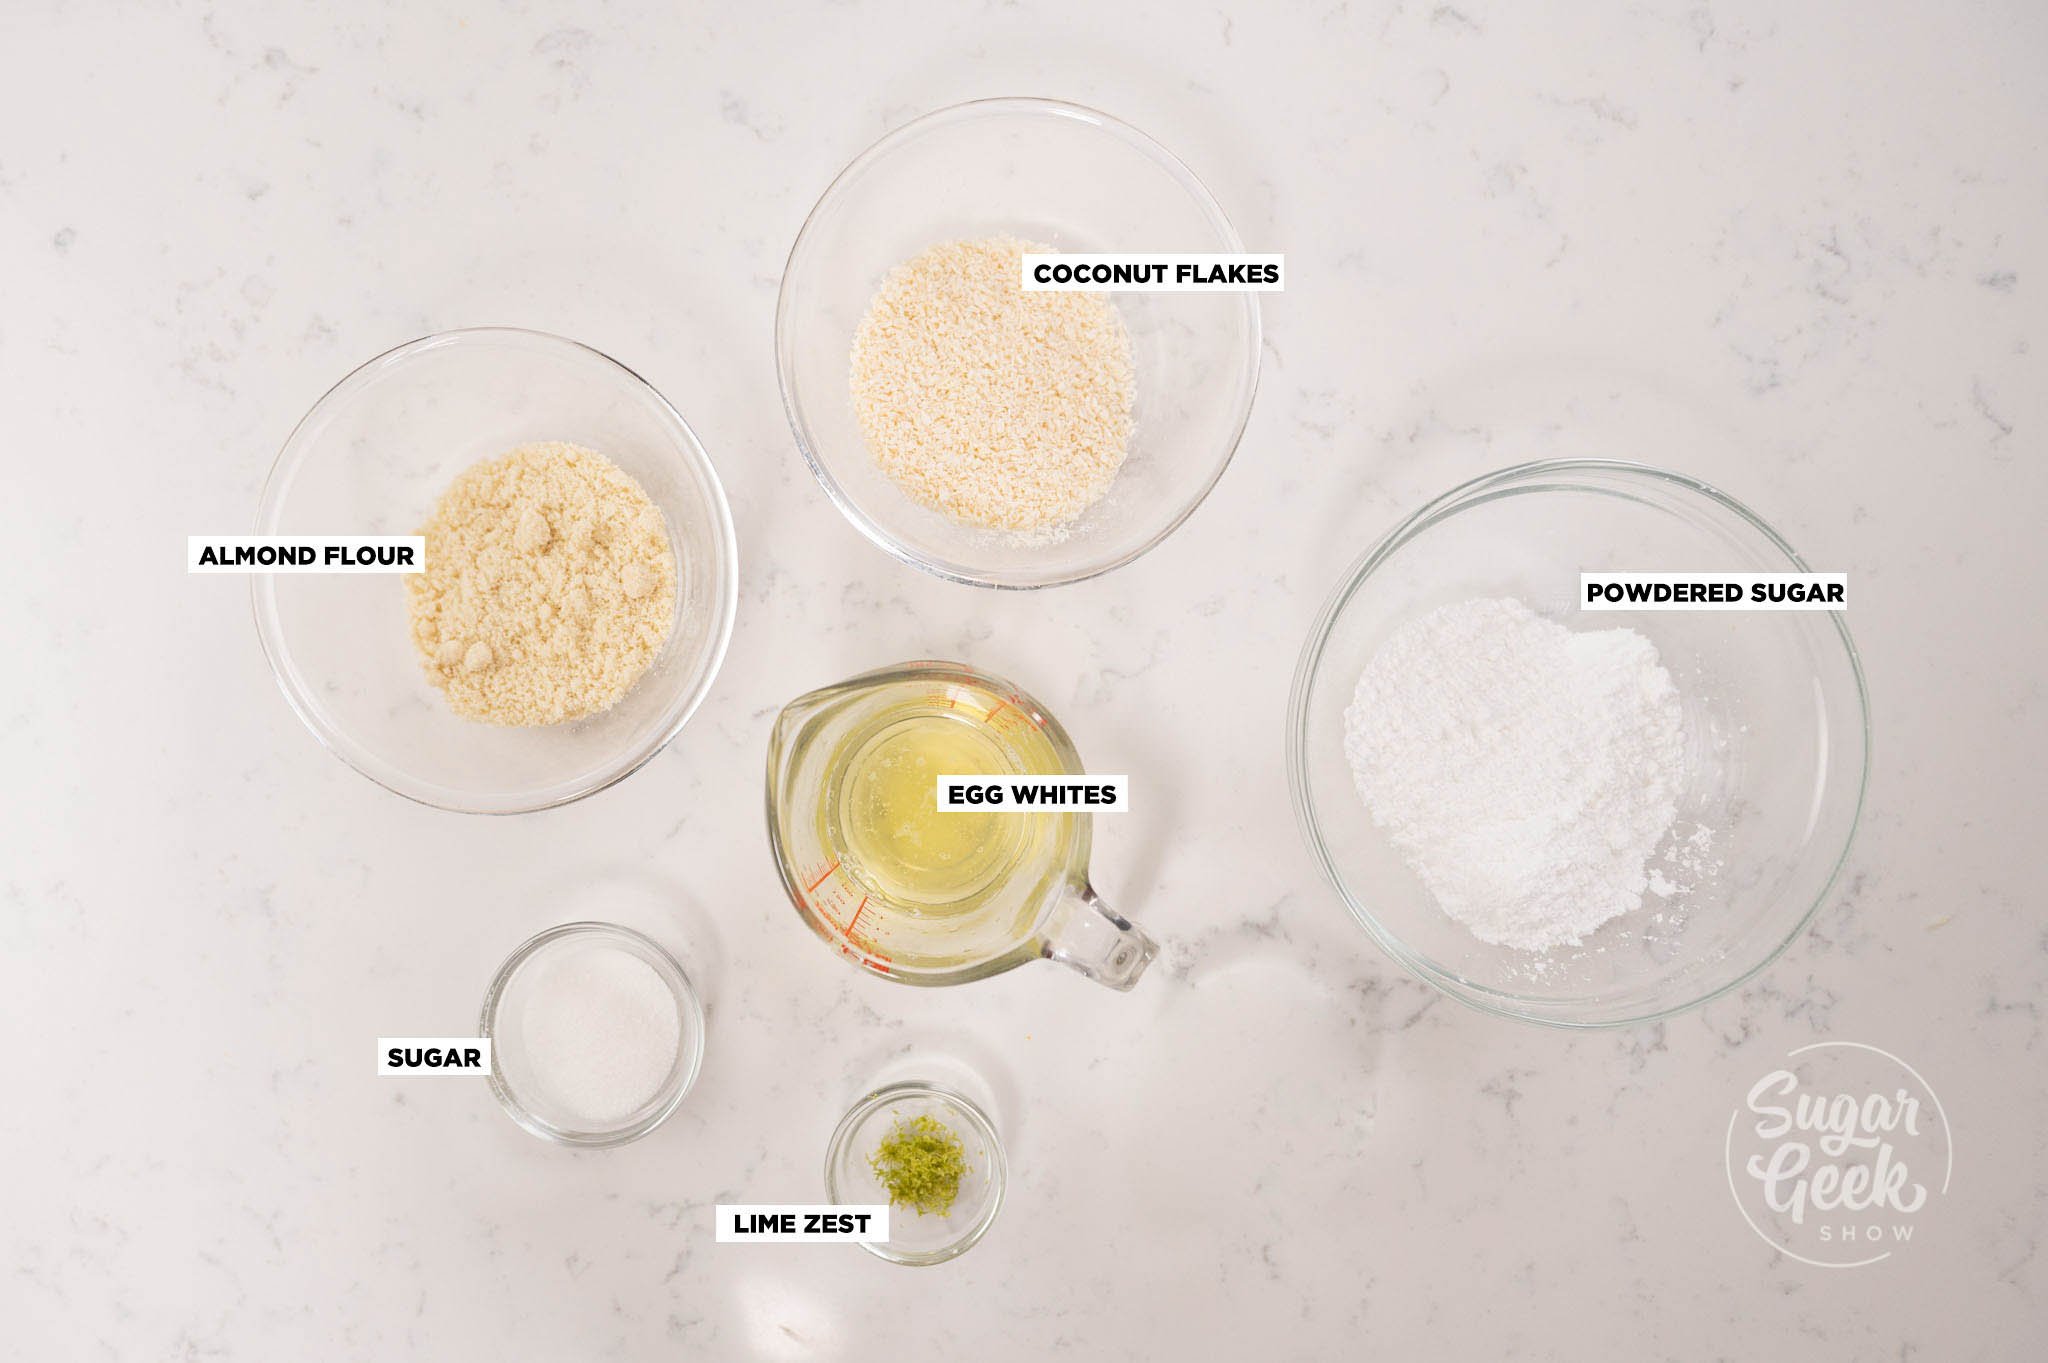
Coconut Dacquoise Ingredients
A Dacquoise cake is a sponge cake made with nut flour and is gluten free. It's the perfect cake to use in entremets because it's never hard even when it's frozen.
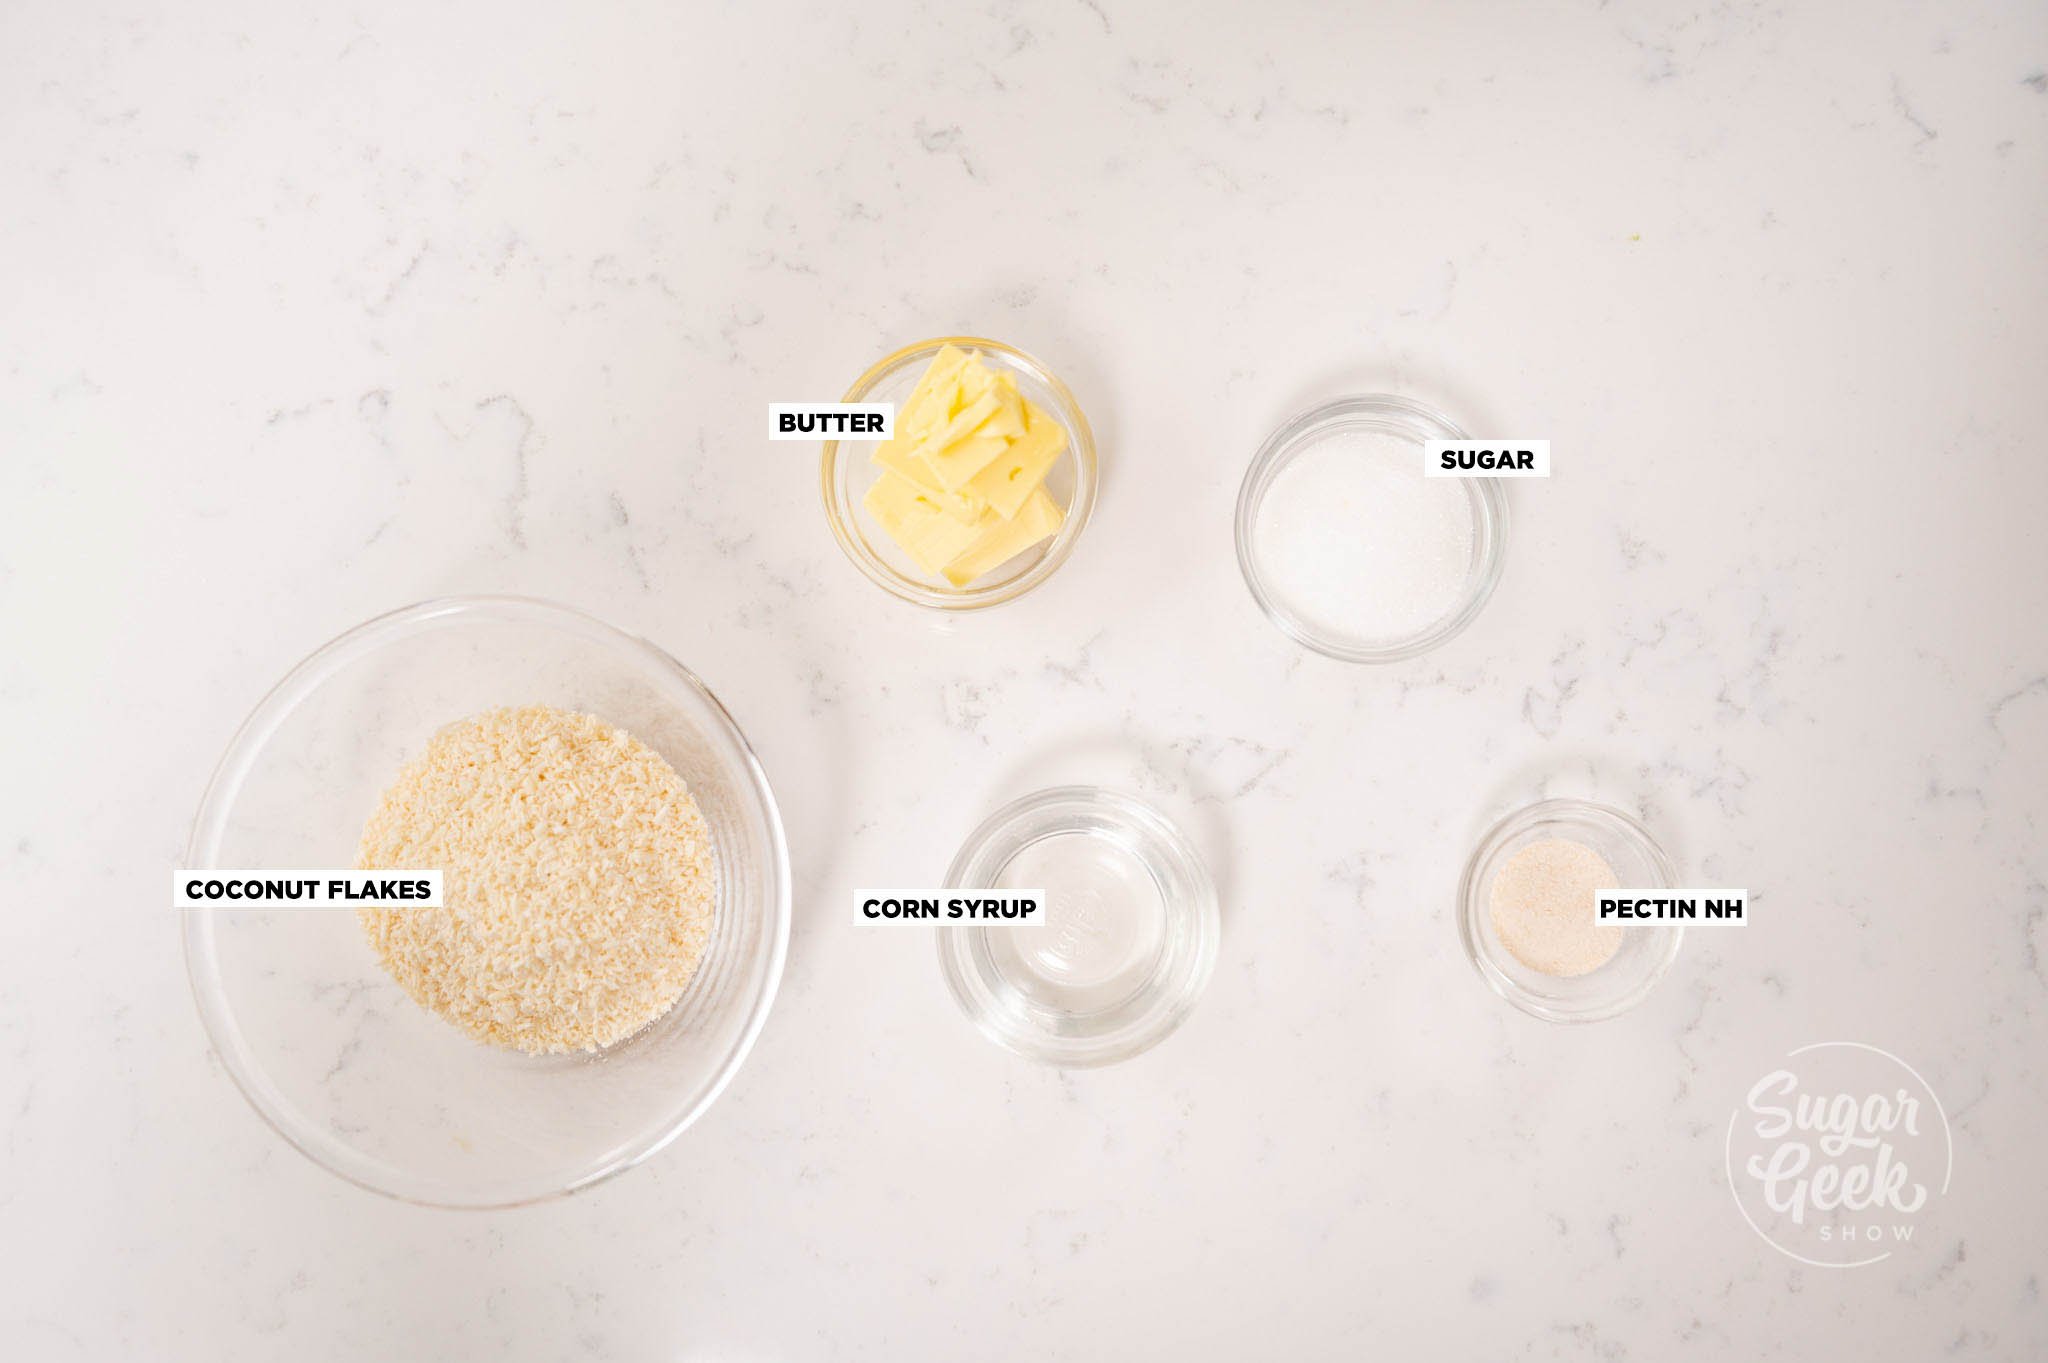
Coconut Nougatine Ingredients
Nougatine is going to serve as our texture in this entremet. Crunchy, sweet and highly addictive.
Coconut Mousse Ingredients
A mousse is basically a crémeux that has been lightened with air (usually from whipped cream) so it goes from silky to light and airy.
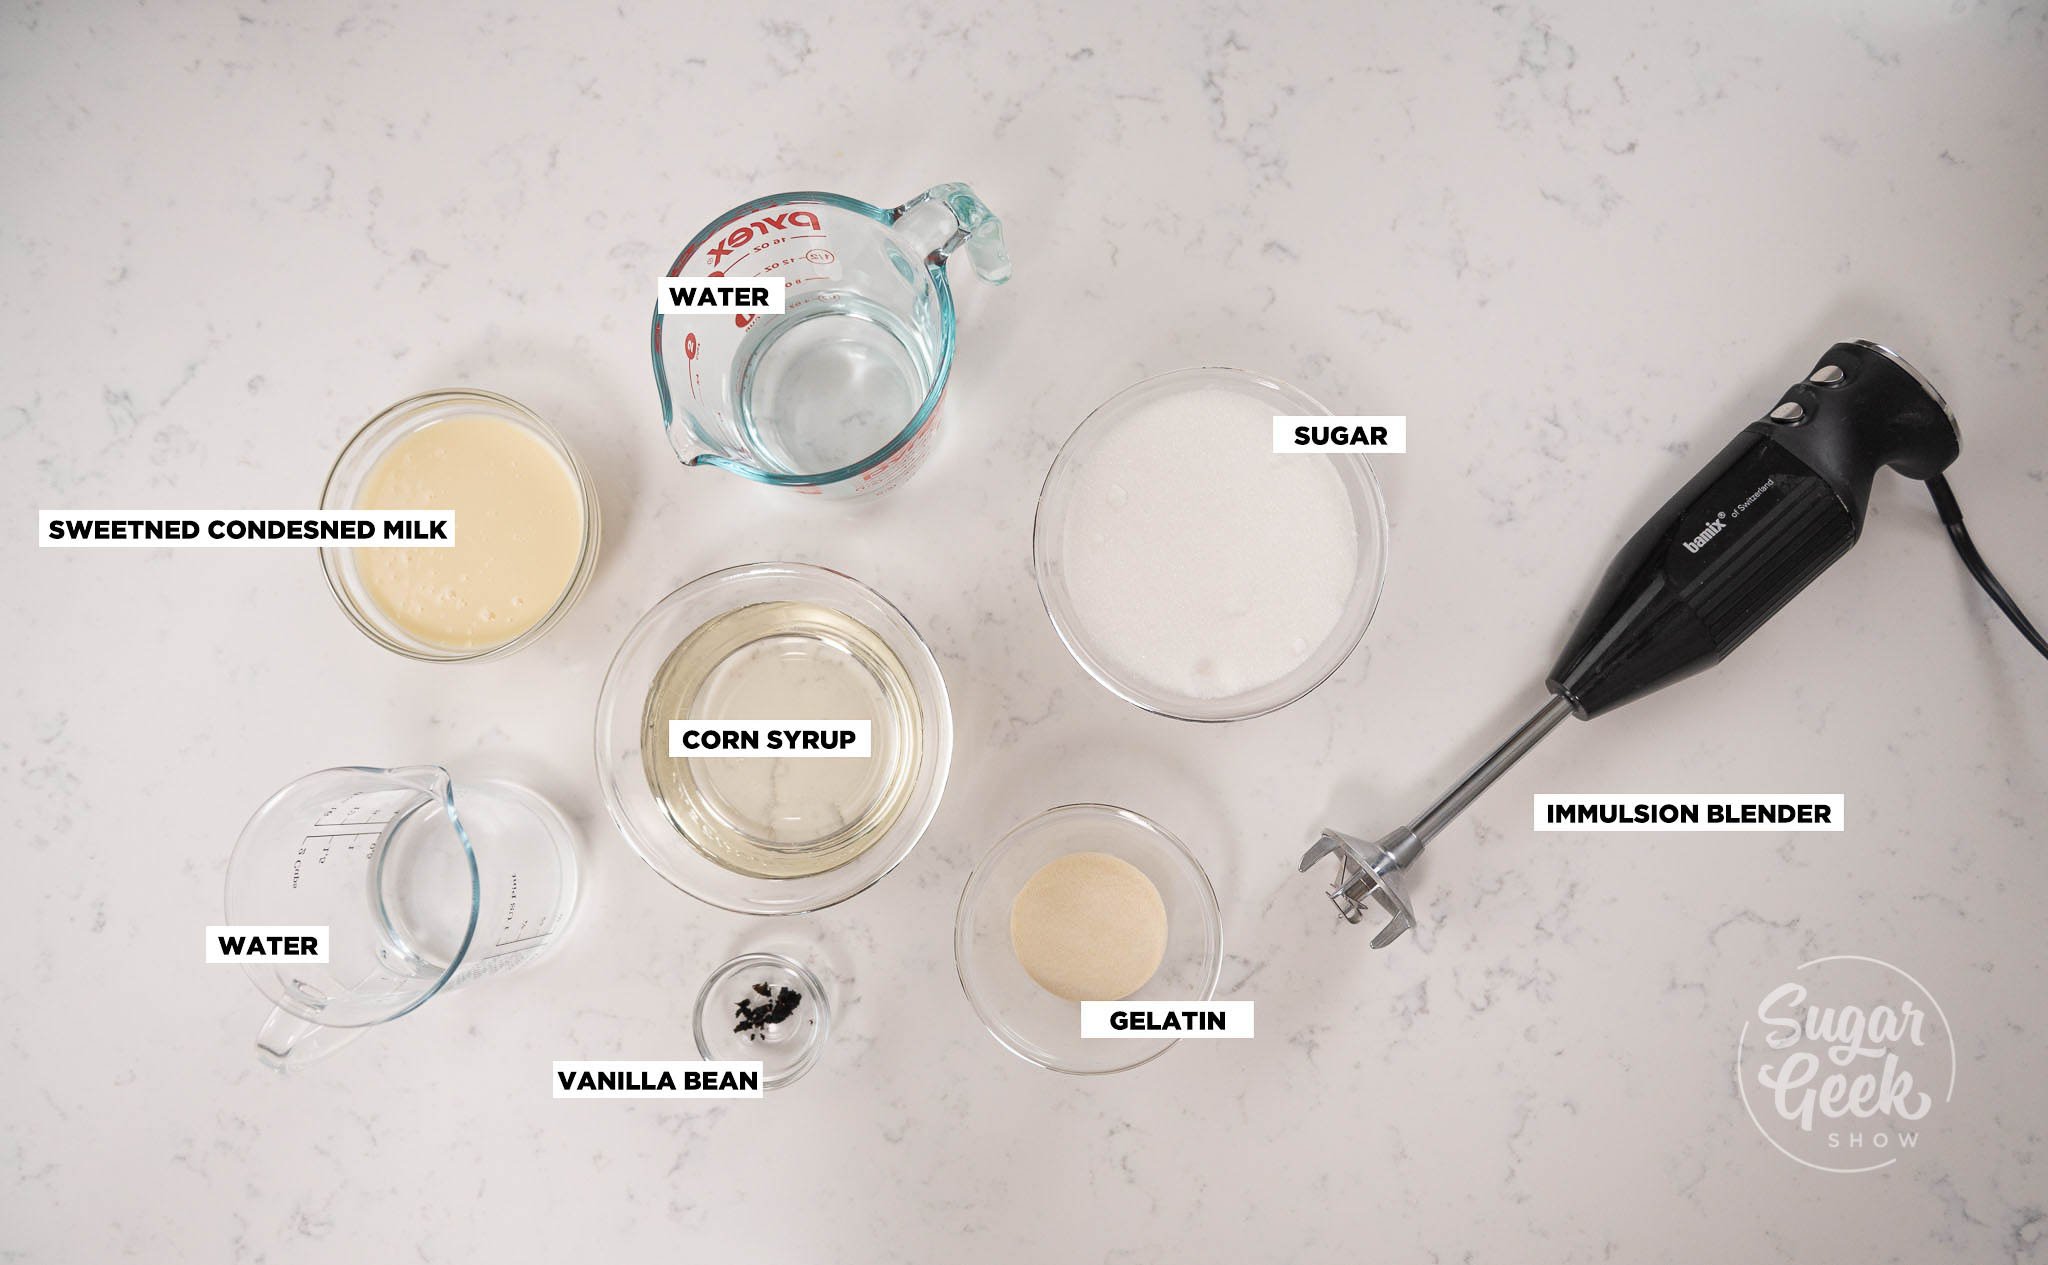
Mirror Glaze Ingredients
The finishing touch to our entremet is a beautiful shiny mirror glaze. This base recipe can be made with any color and will hold it's shine for days.
Ingredients Tips And Substitutions
Mango: Make sure to buy them pretty ripe so they are soft, sweeter and easy to slice. To pick the perfect mango press on them lightly and if they feel slightly soft ( Not too soft) then they are ready to use! You can also buy frozen mango.
Coconut Cream: This is essential for our coconut mousse. It is what will give it the coconut flavor we want, so do not try to substitute for regular cream. You can find coconut cream in most grocery stores. This is not coconut milk, they are different and coconut milk won't fluff up as nice.
Coconut flakes: to make our coconut nougatine and coconut daquoise we need flakes for texture and flavor. They are found in the grocery store, and we are sing unsweetened for this recipe because we are adding sugar to our components. You can use sweetened if you would like, just make sure to adjust your sugar measurement so you don't make your recipe too sweet.
Pectin NH: Pectin is a thickening agent that is used in many jams, spreads and compotes. It is what helps thicken your sauce to become more pliable and give it that jam texture. You can usually find it in the grocery store or you can order it online.
Gelatin: We are using 200 bloom gelatin sheets because sheets will create a transparent and extra shiny product. You can use powder as well since powder is easier to find, but you can order sheets online.
Vanilla: You can use extract, paste or vanilla beans. I like using beans when I have them because they give the strongest vanilla flavor, but any vanilla will work!
Mango Puree Step-By-Step
The first thing we need to do is make our puree which will be an ingredient used in making the crémeux and the mousse so it's best to make it first.
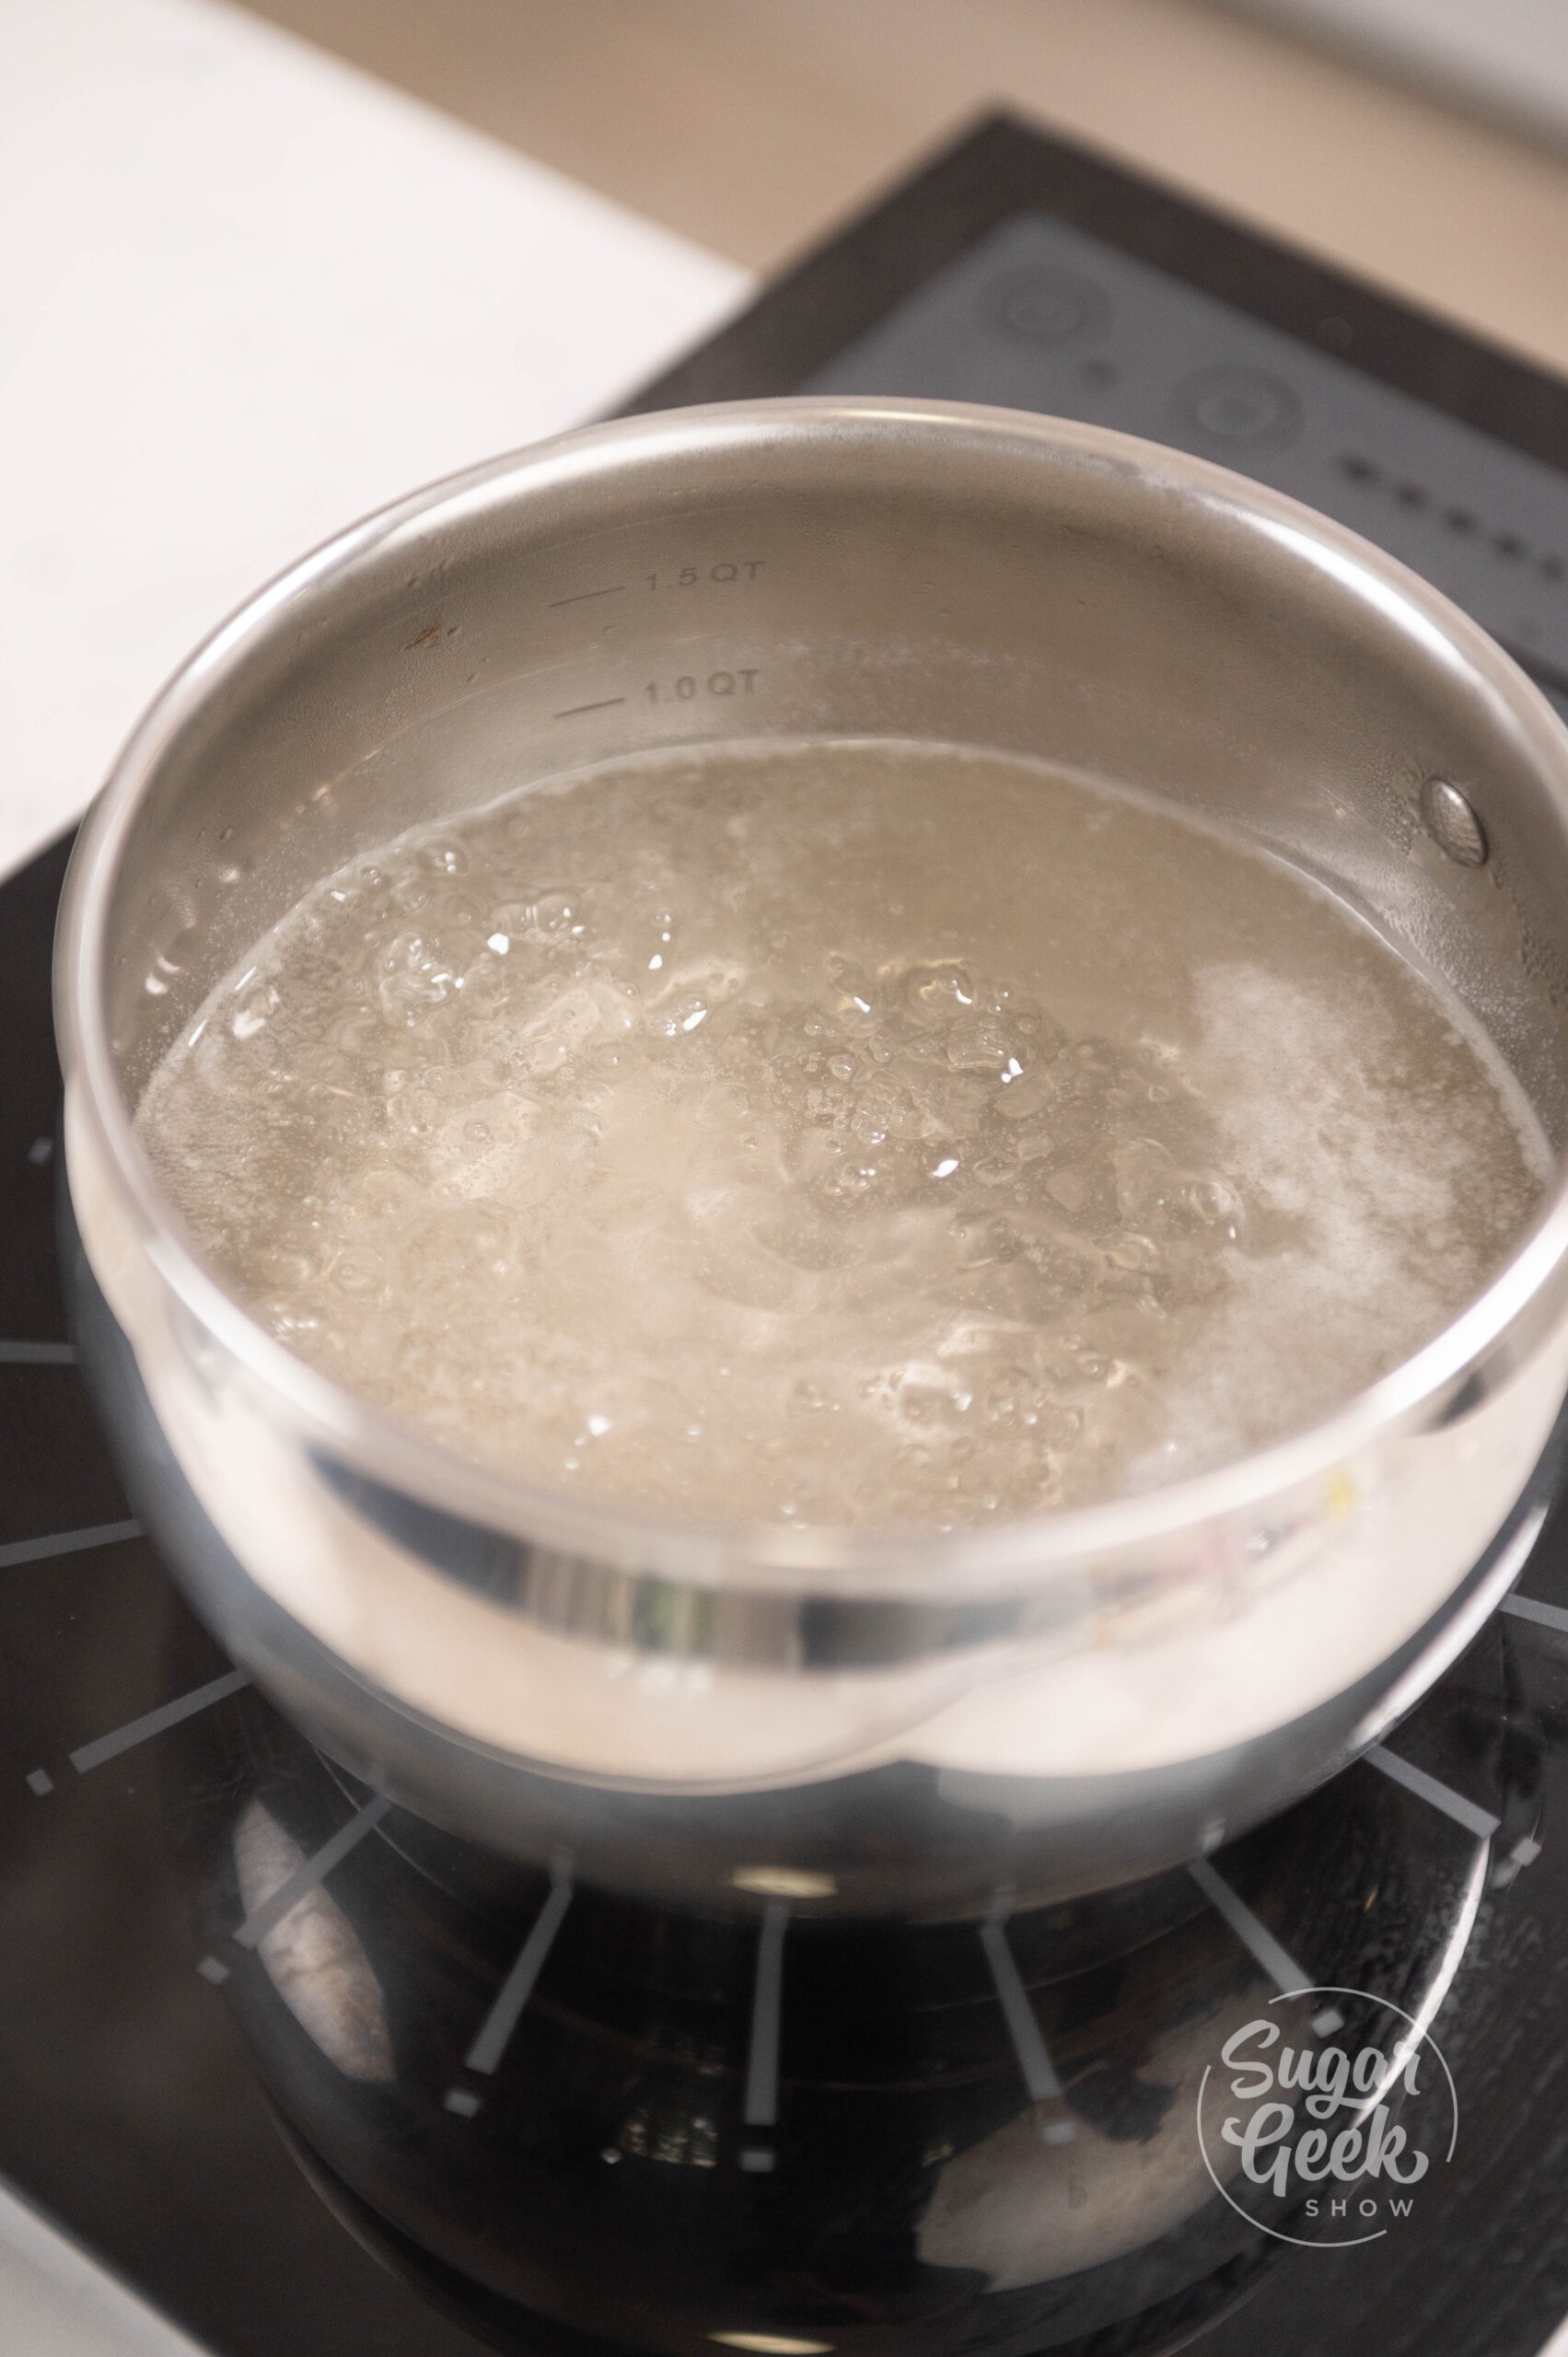
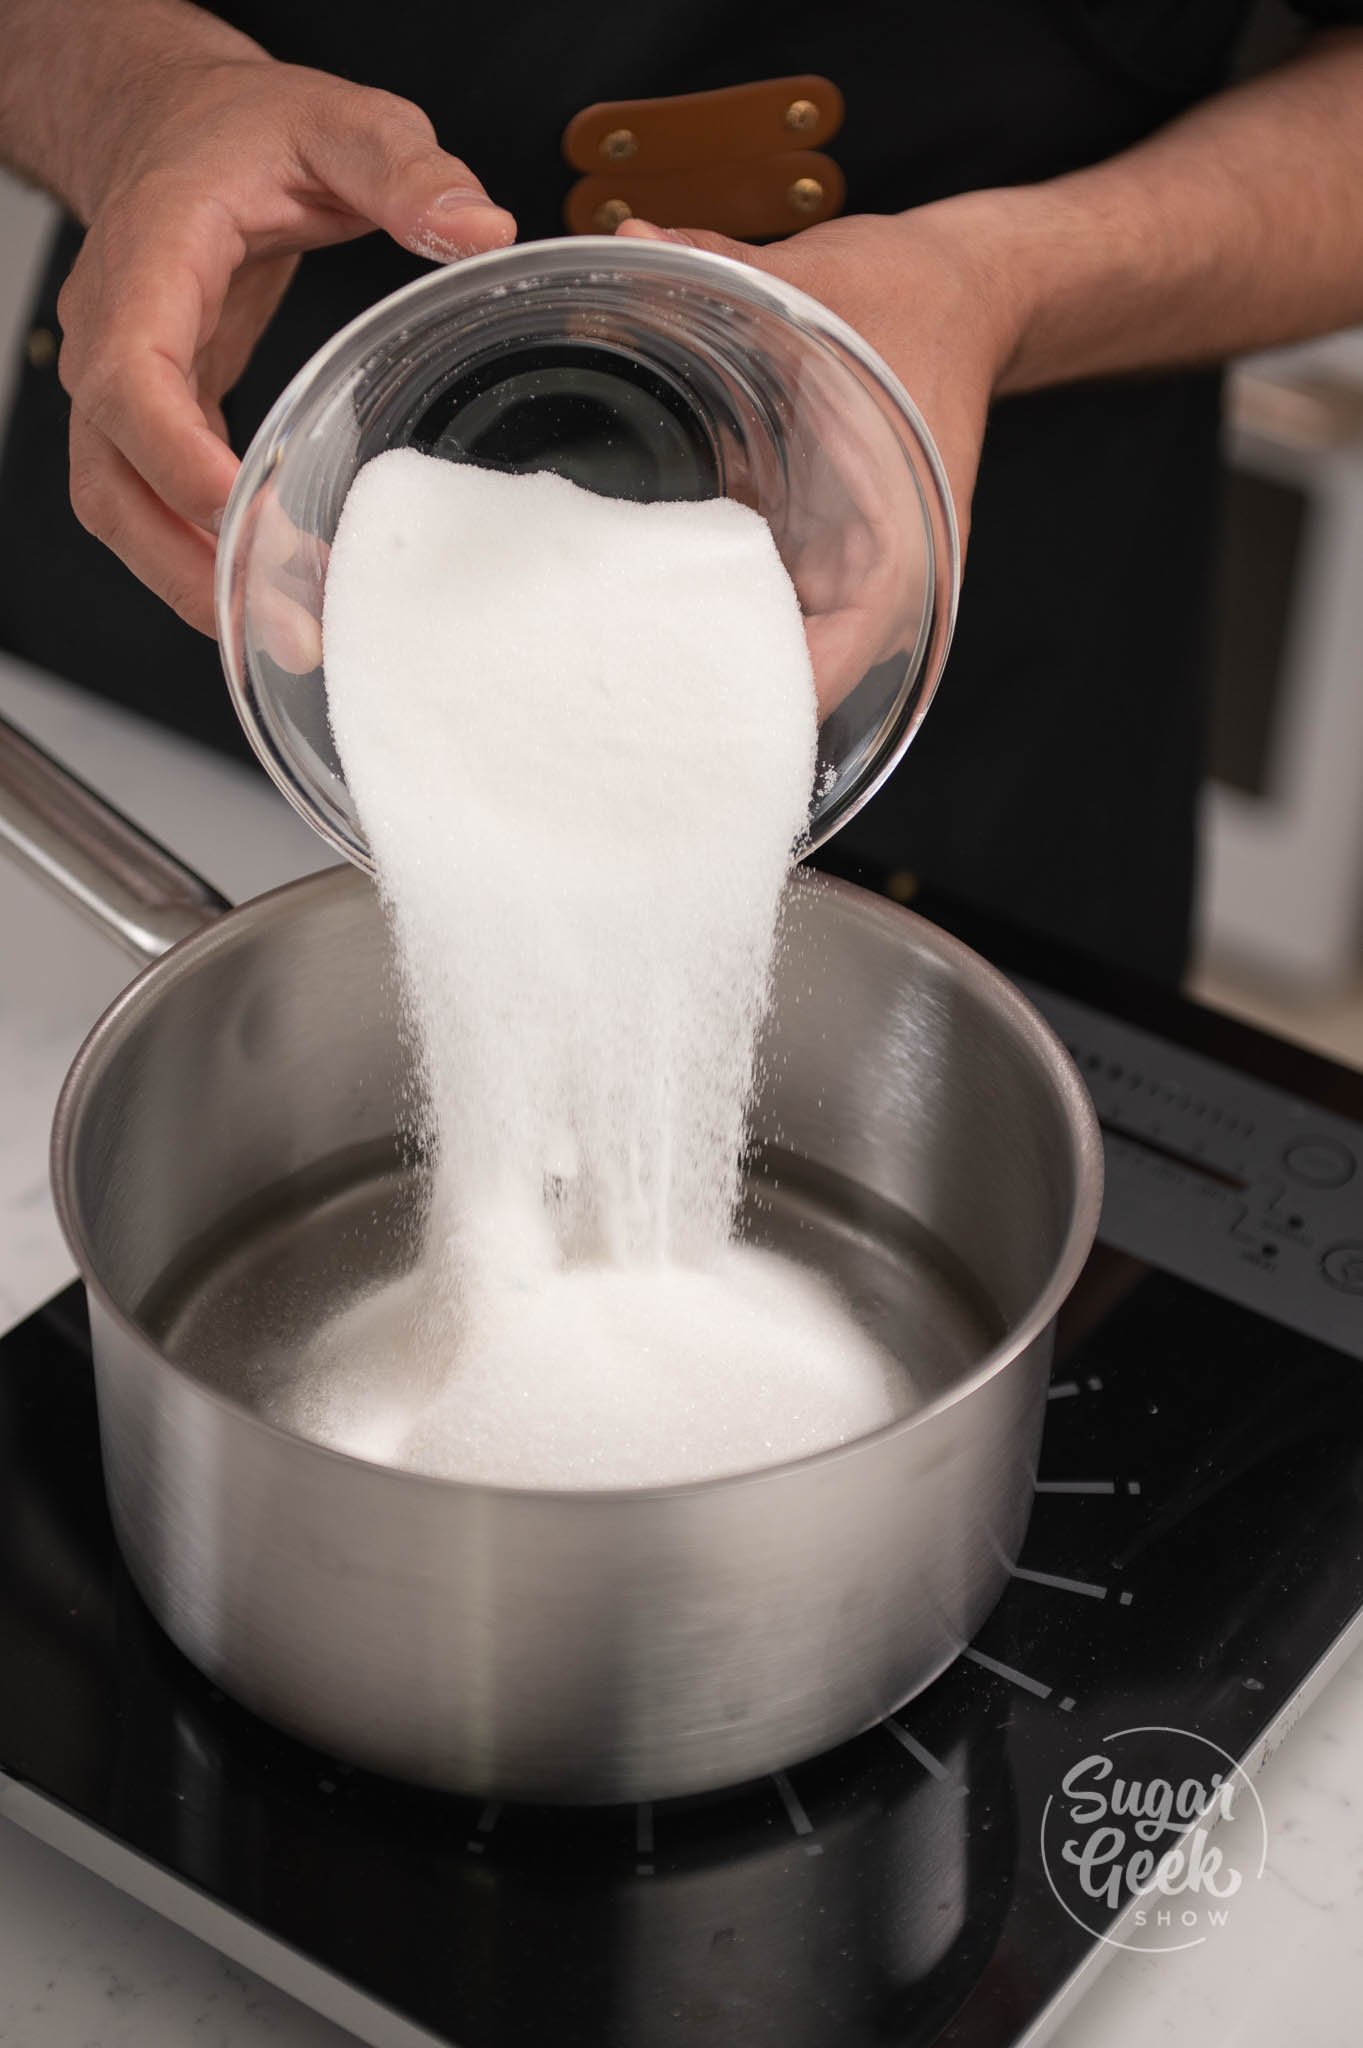
- To make your simple syrup, add your sugar and water into a small pot over medium heat. Bring it to a boil.

- Once the sugar syrup boils, take it off the heat and set it aside to cool down to room temperature.
- Once its at room temperature, pour your syrup into a container and set it aside. You can also store this on your shelf for many months, so it never hurts to make a lot and keep it stored.
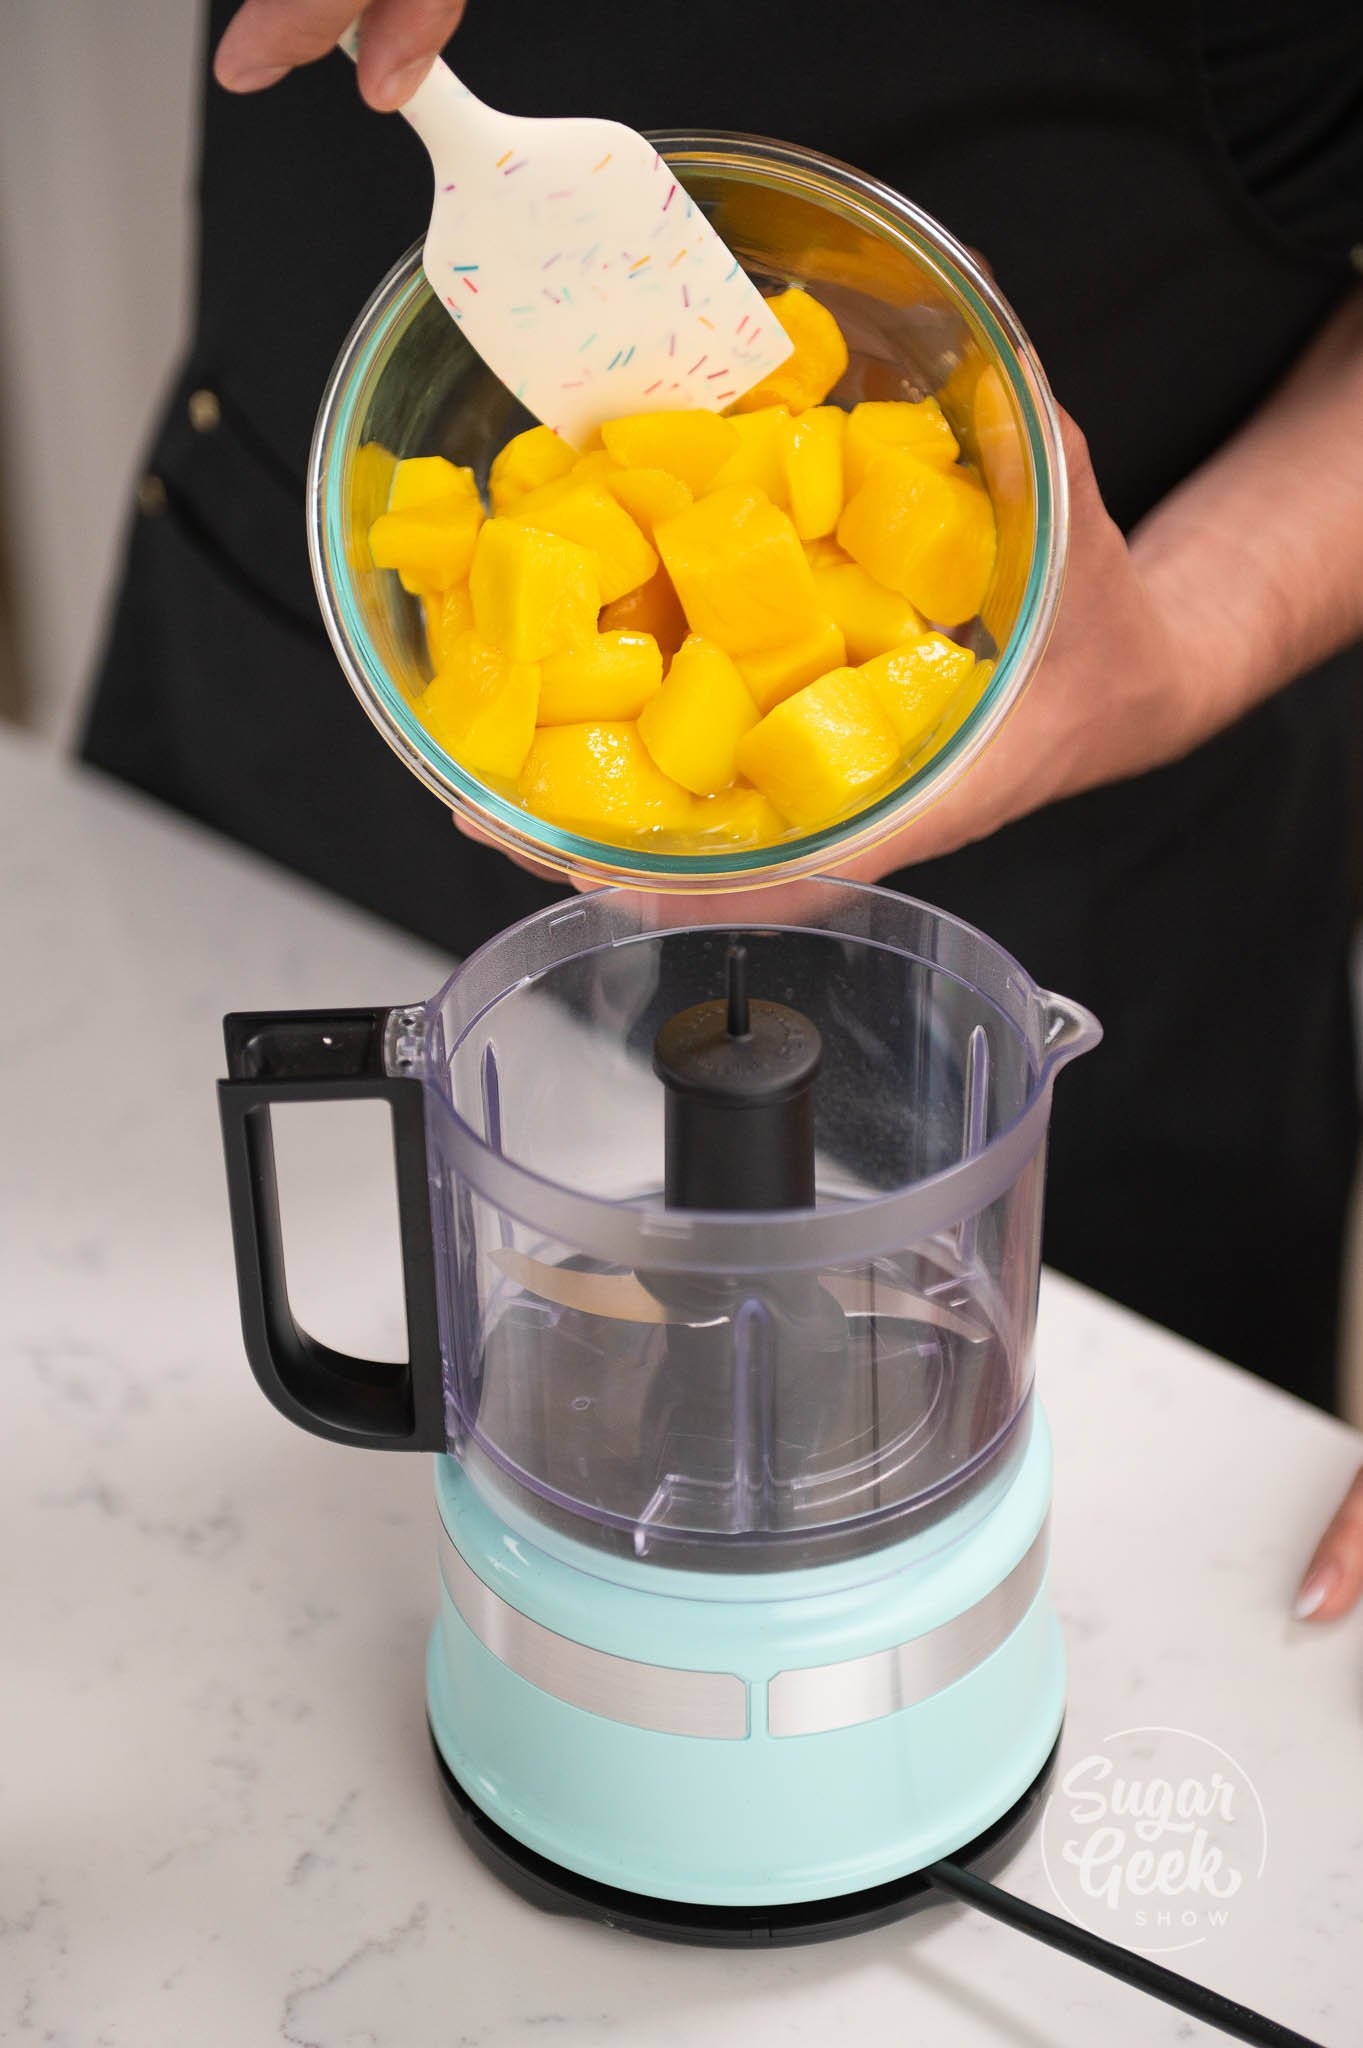
- Cut up your fresh mangos and dice them into chunks. Place the diced mangos into a blender or food processor.

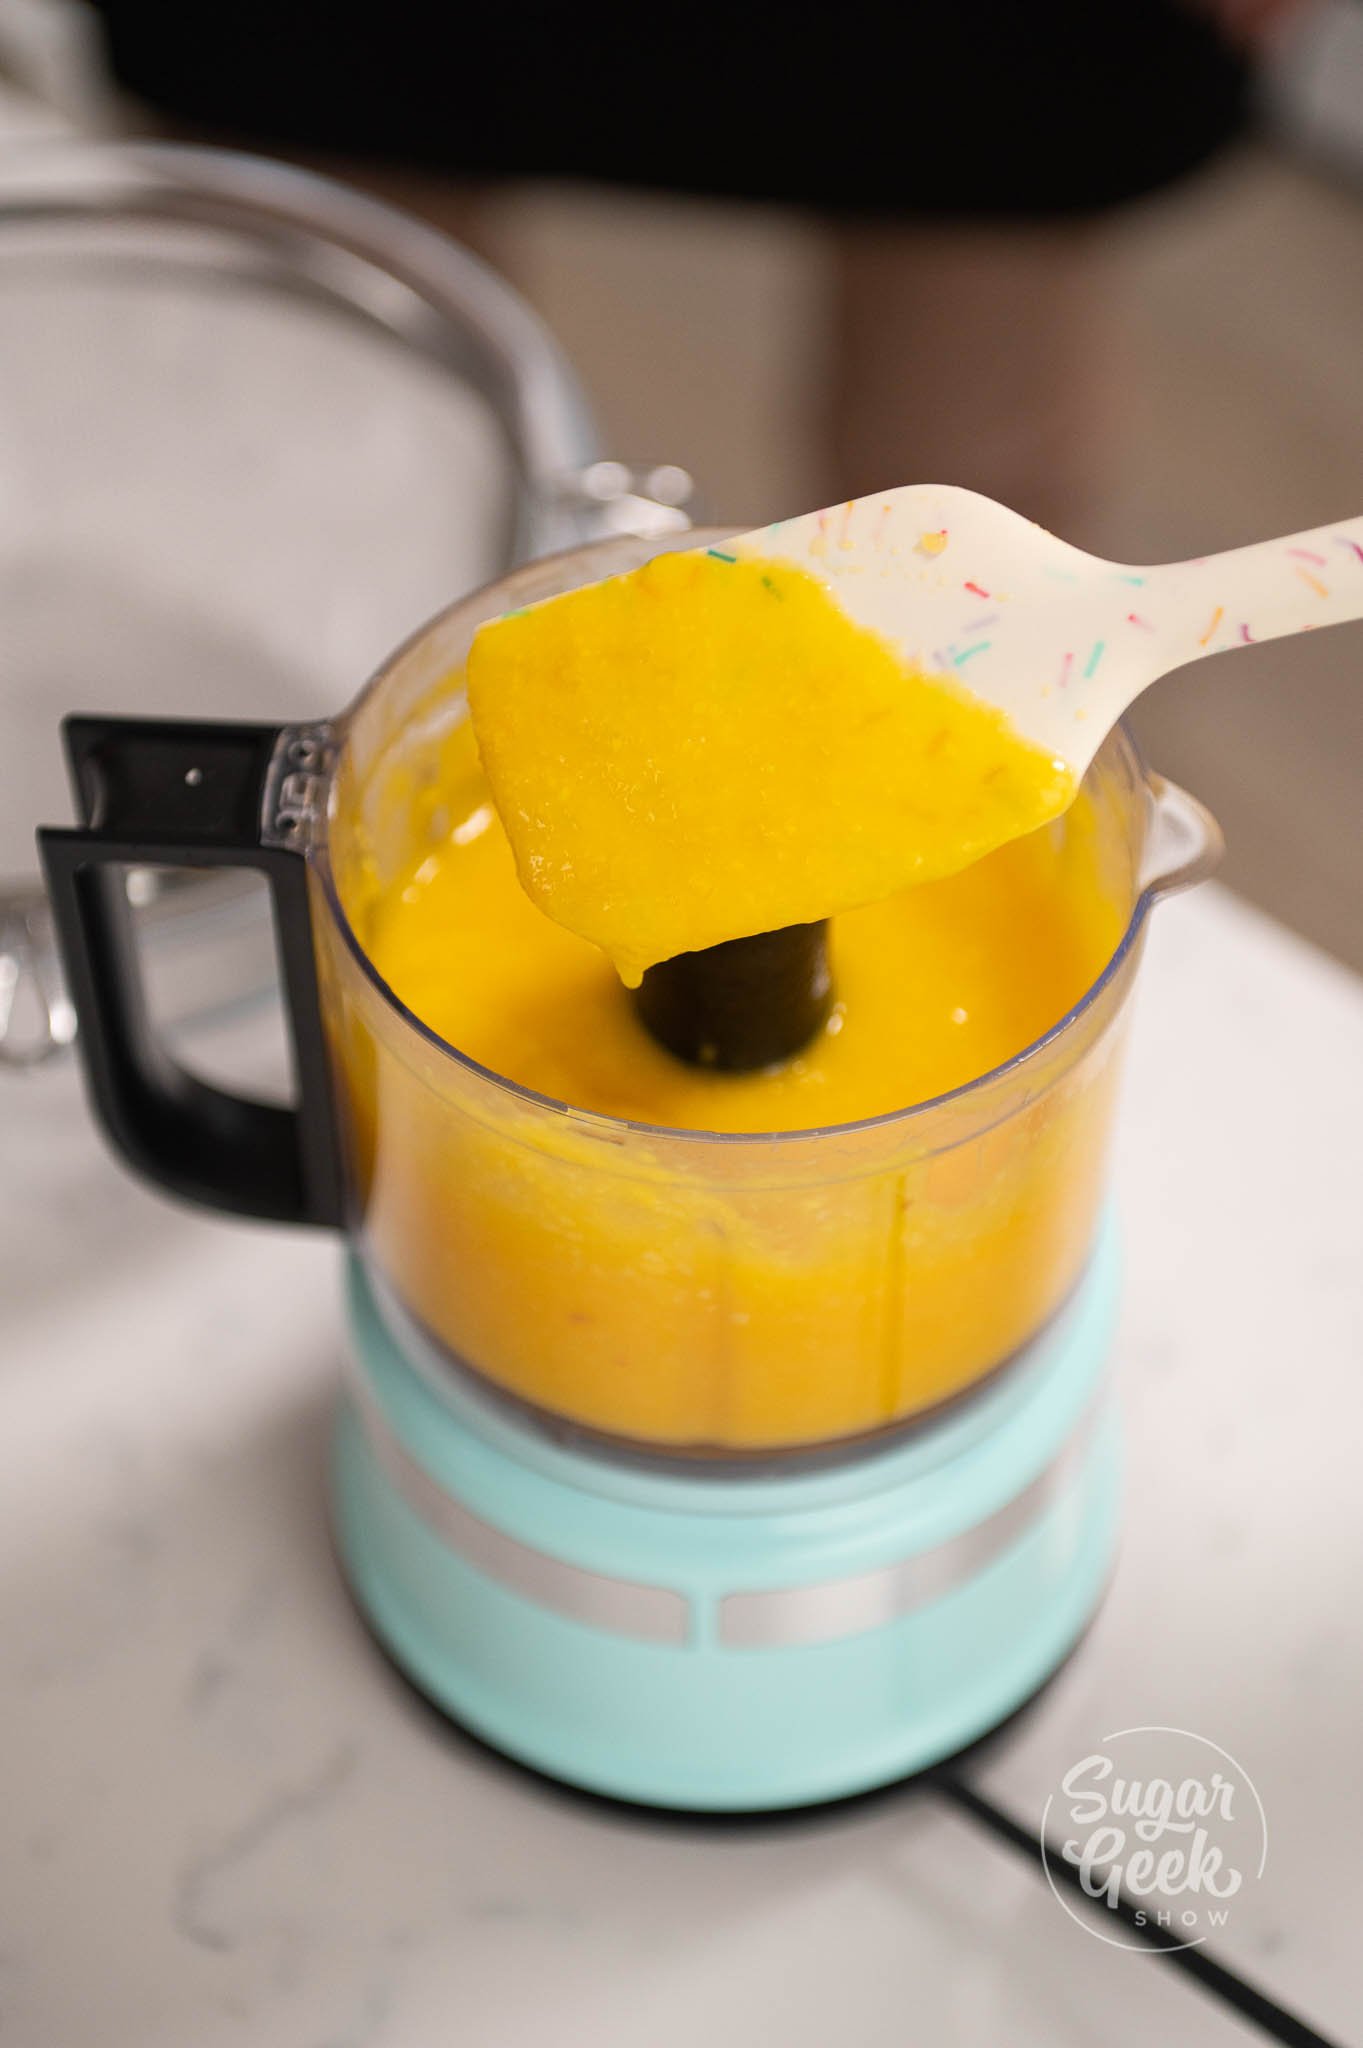
- Add your simple syrup and blend everything together until it becomes a thin smoothie like texture.
- Strain the mix into a bowl or container to get rid of lumps and extra pulp. This makes the puree super smooth. Set this aside to use later.

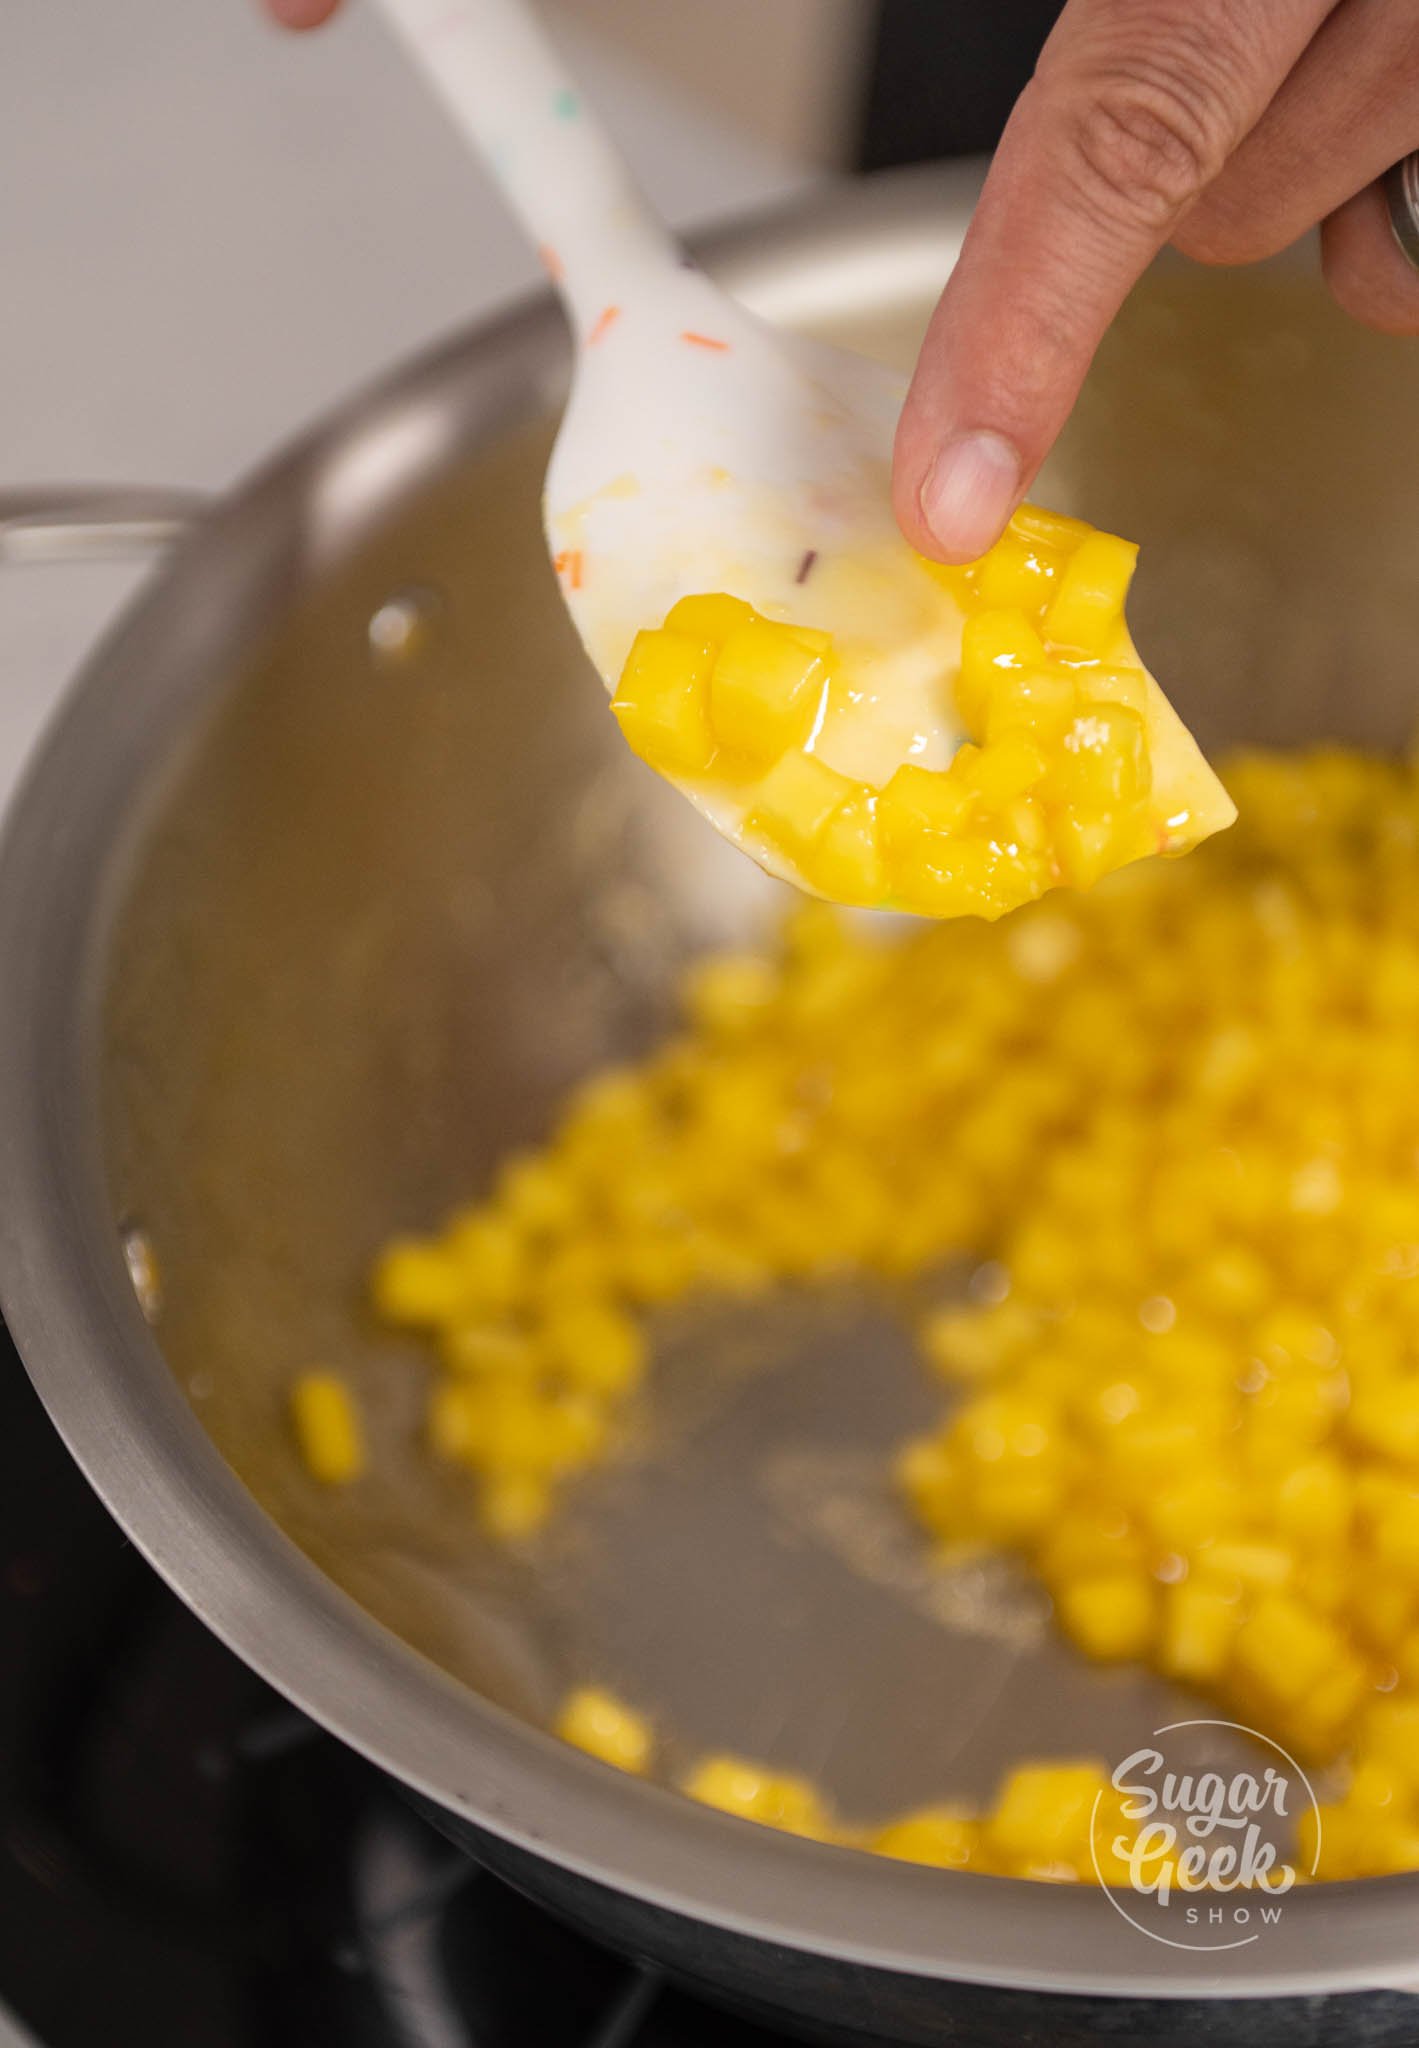
Mango Compote Step-By-Step
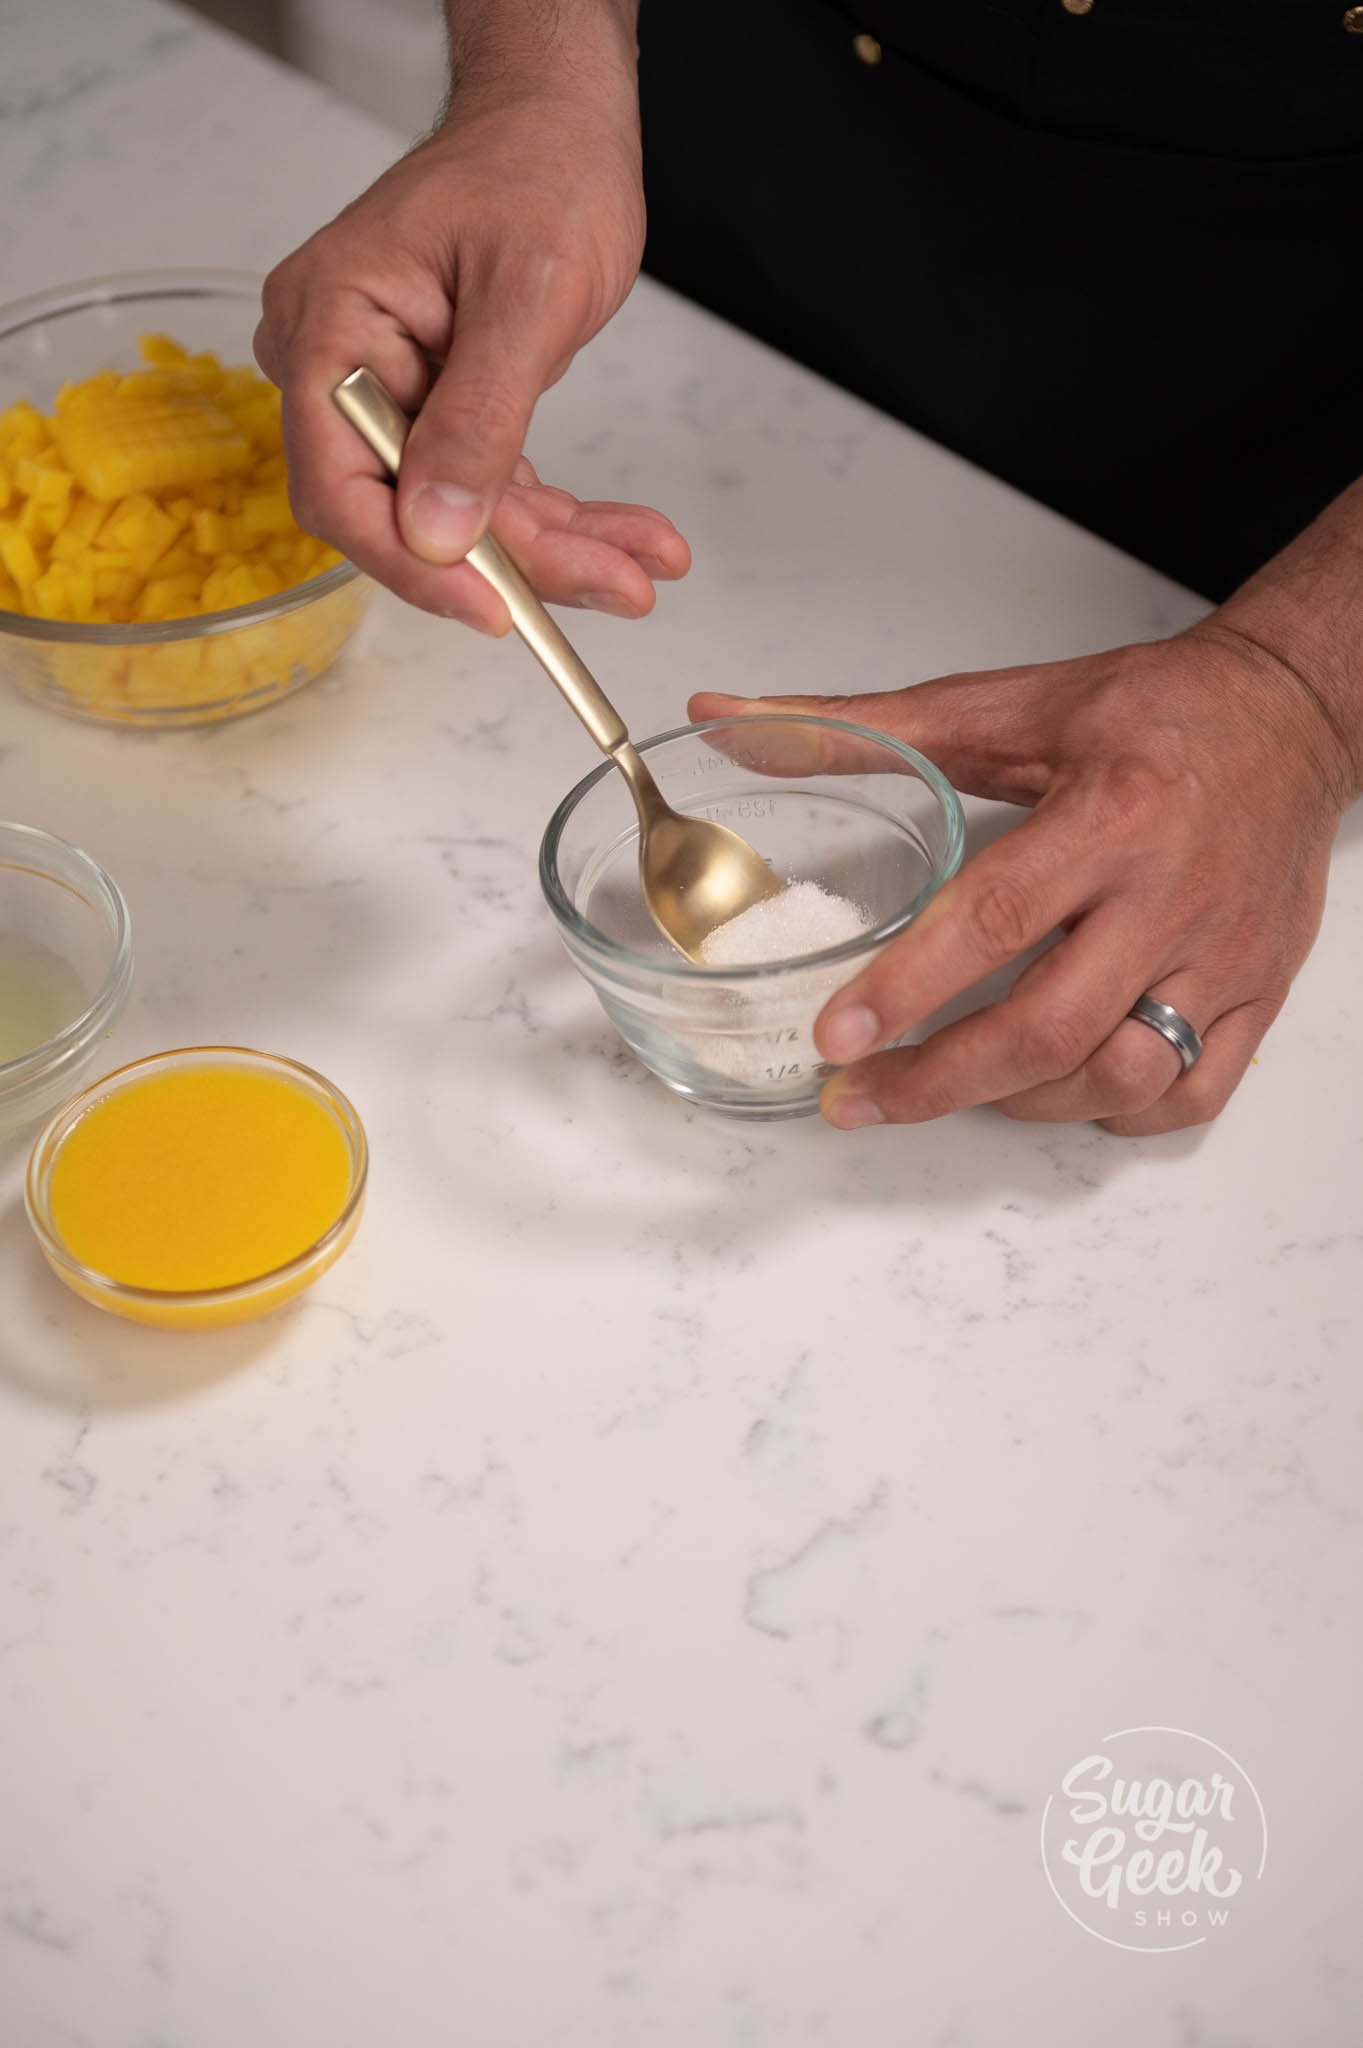
- Mix your pectin and your sugar in a small bowl or container first. This helps prevent lumps in your compote.
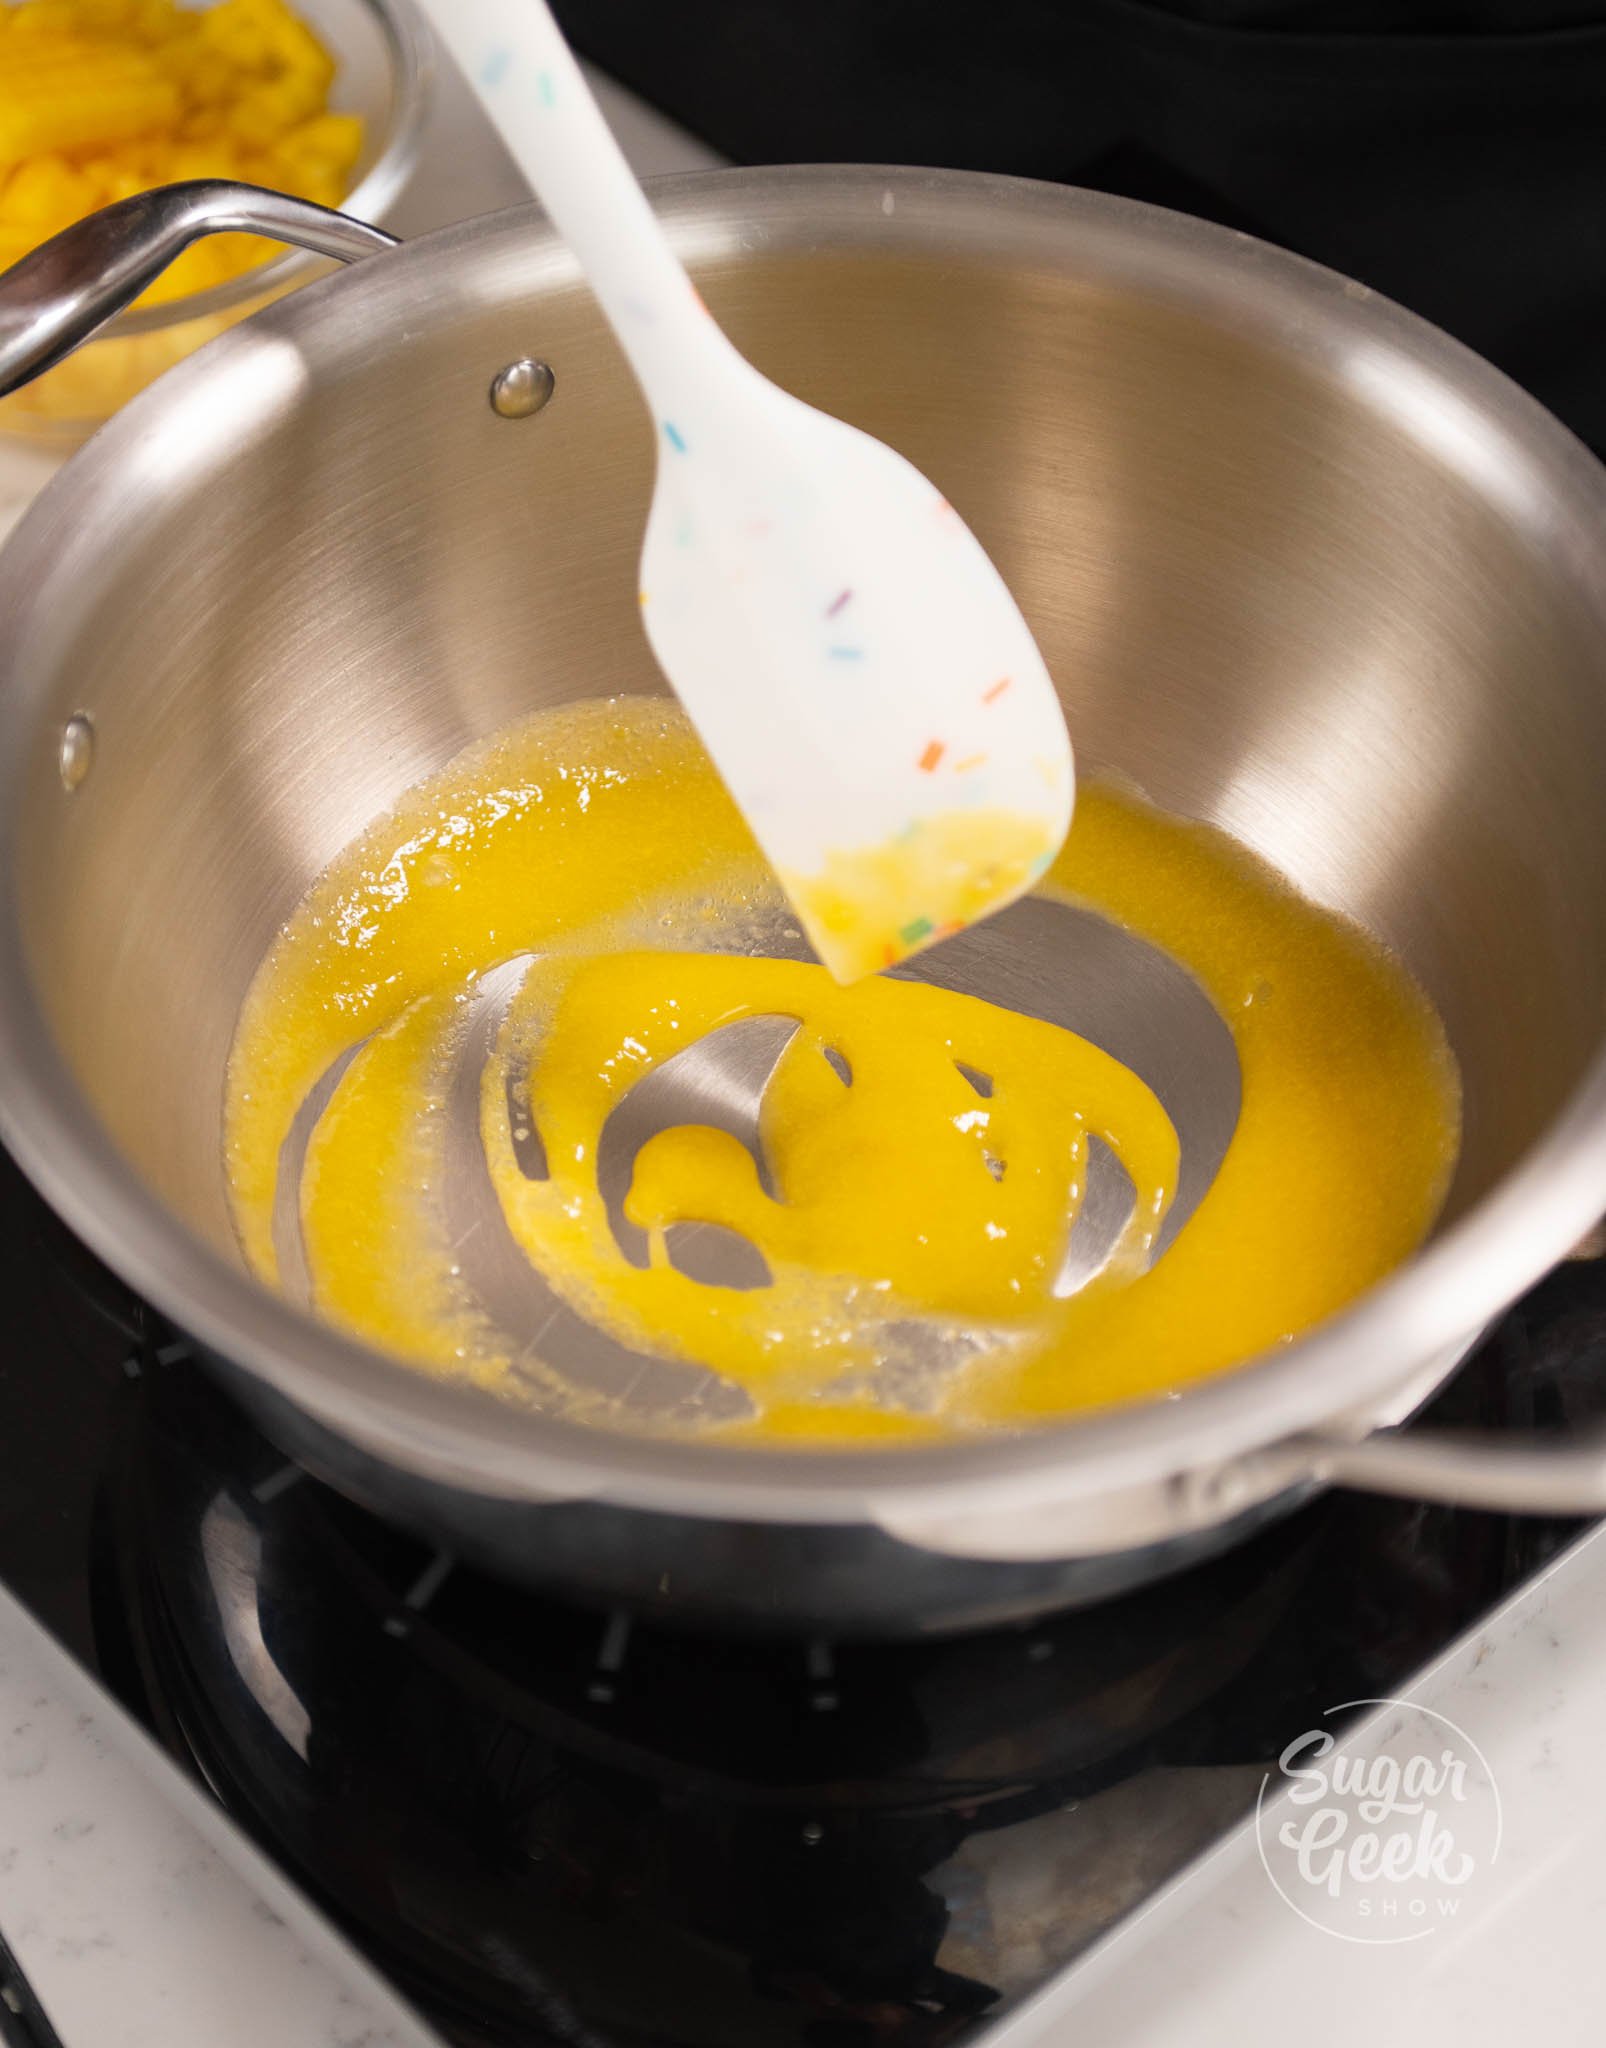
- Add your mango puree into a medium-sized pot on medium heat. Bring to a soft boil.

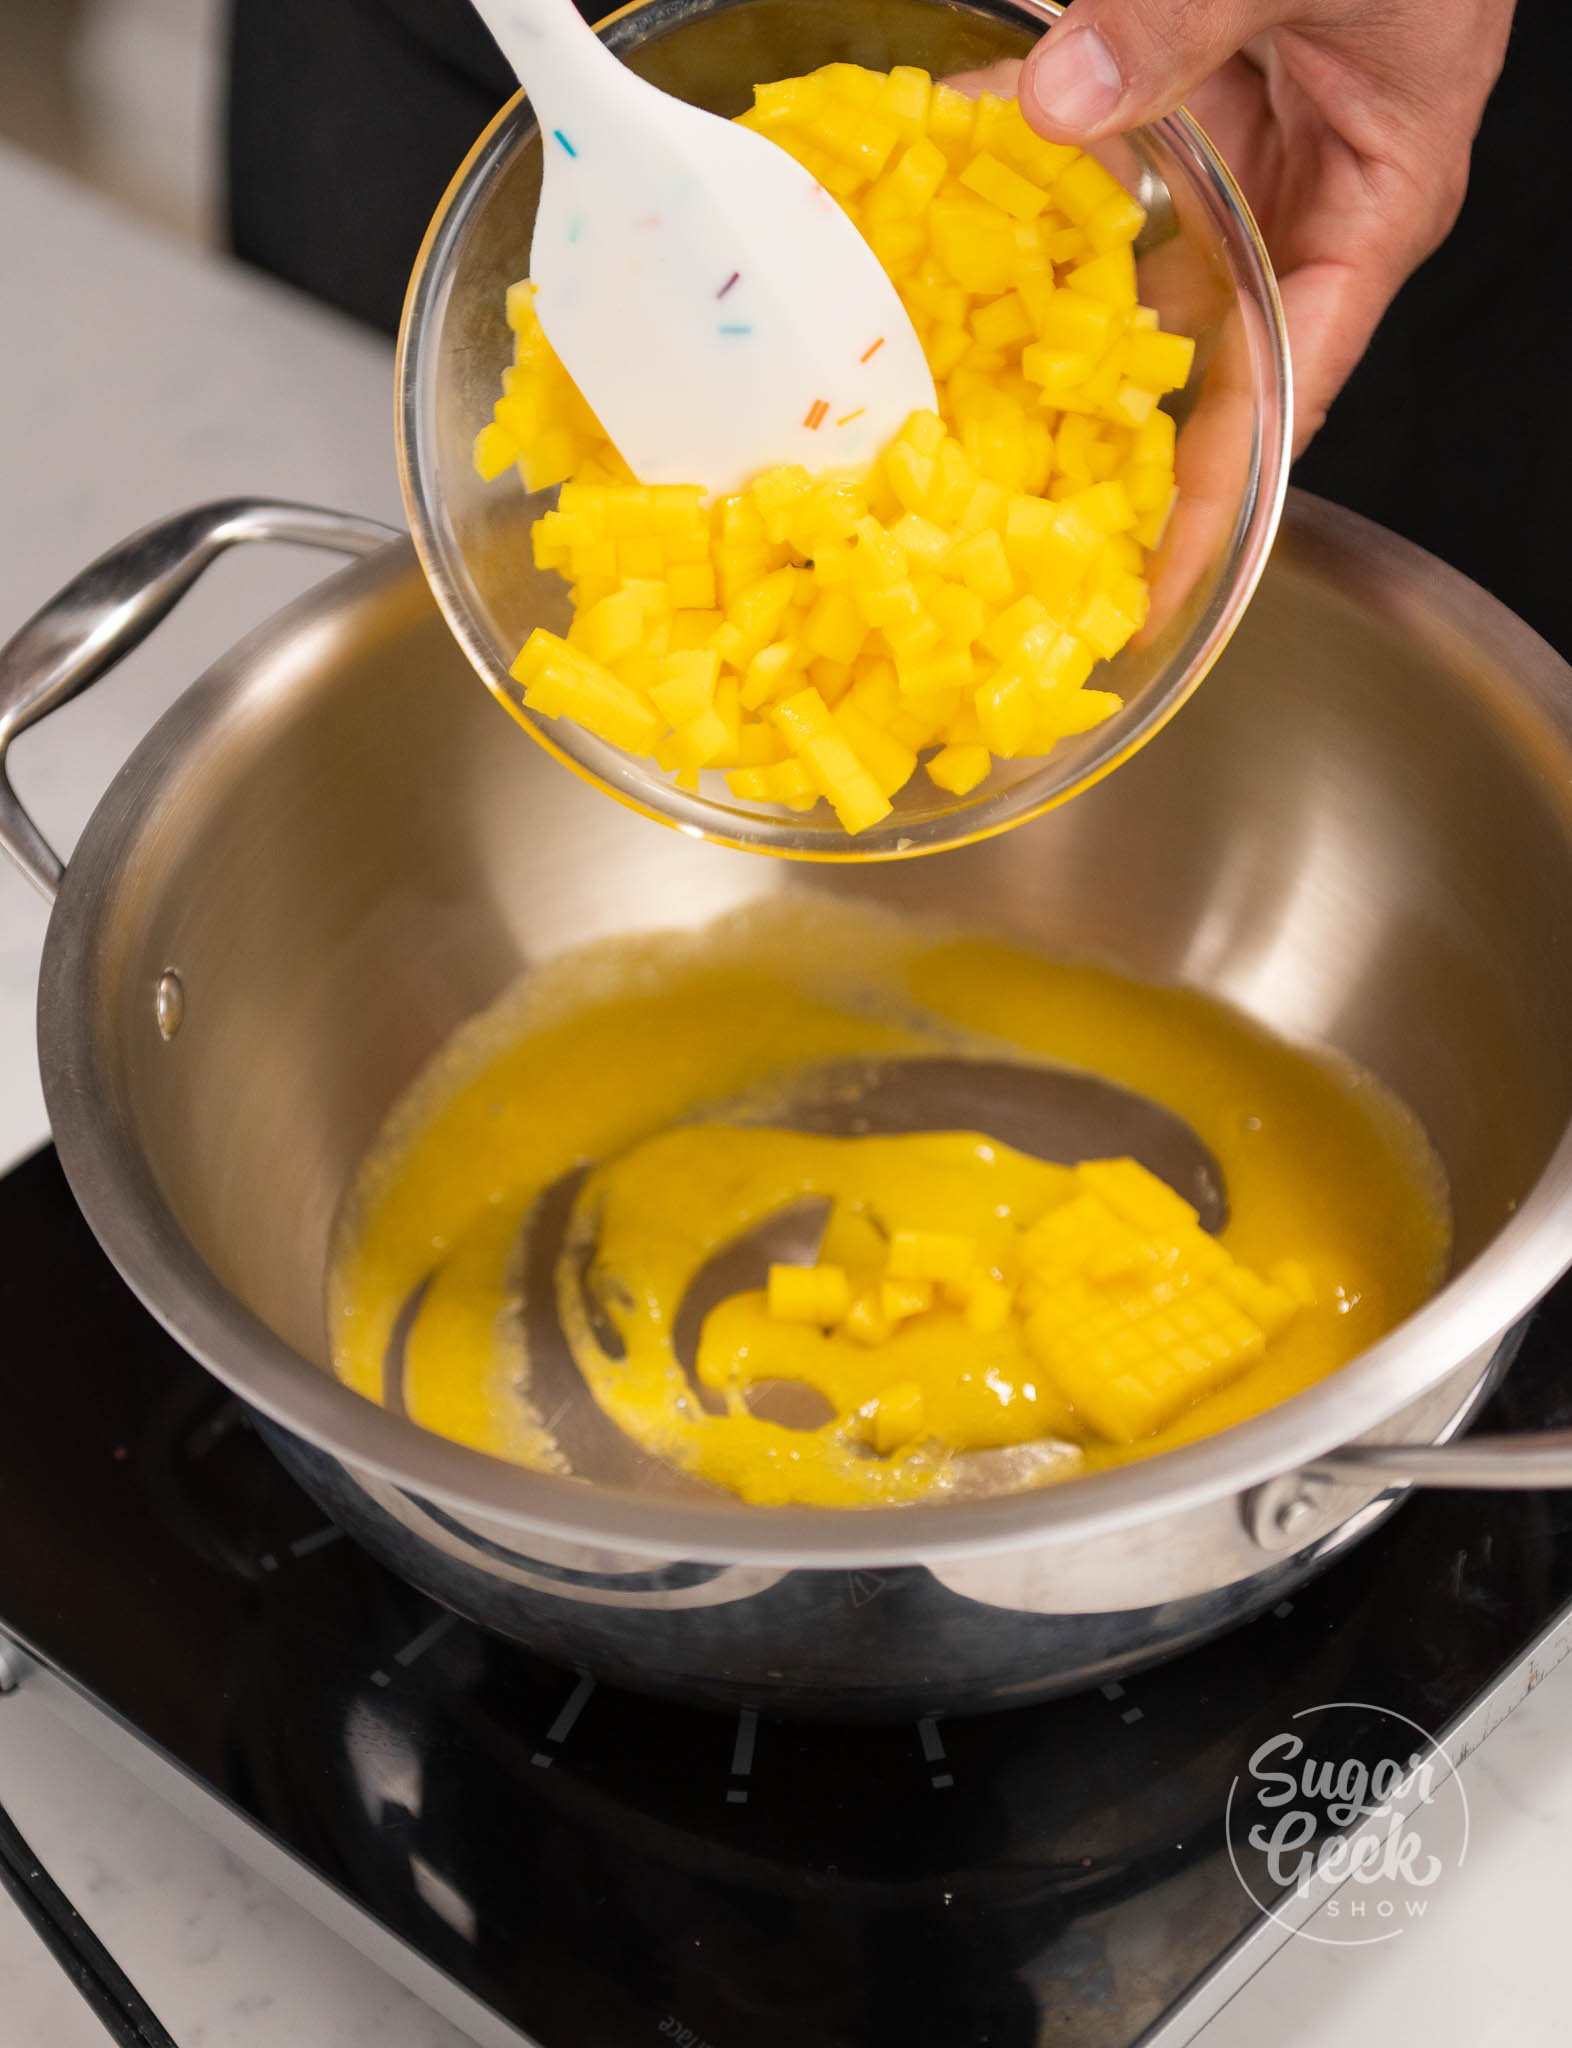
- When your mango puree starts to bubble, add in your diced mangos and vanilla extract. Constantly stir with a spatula to prevent scorching.

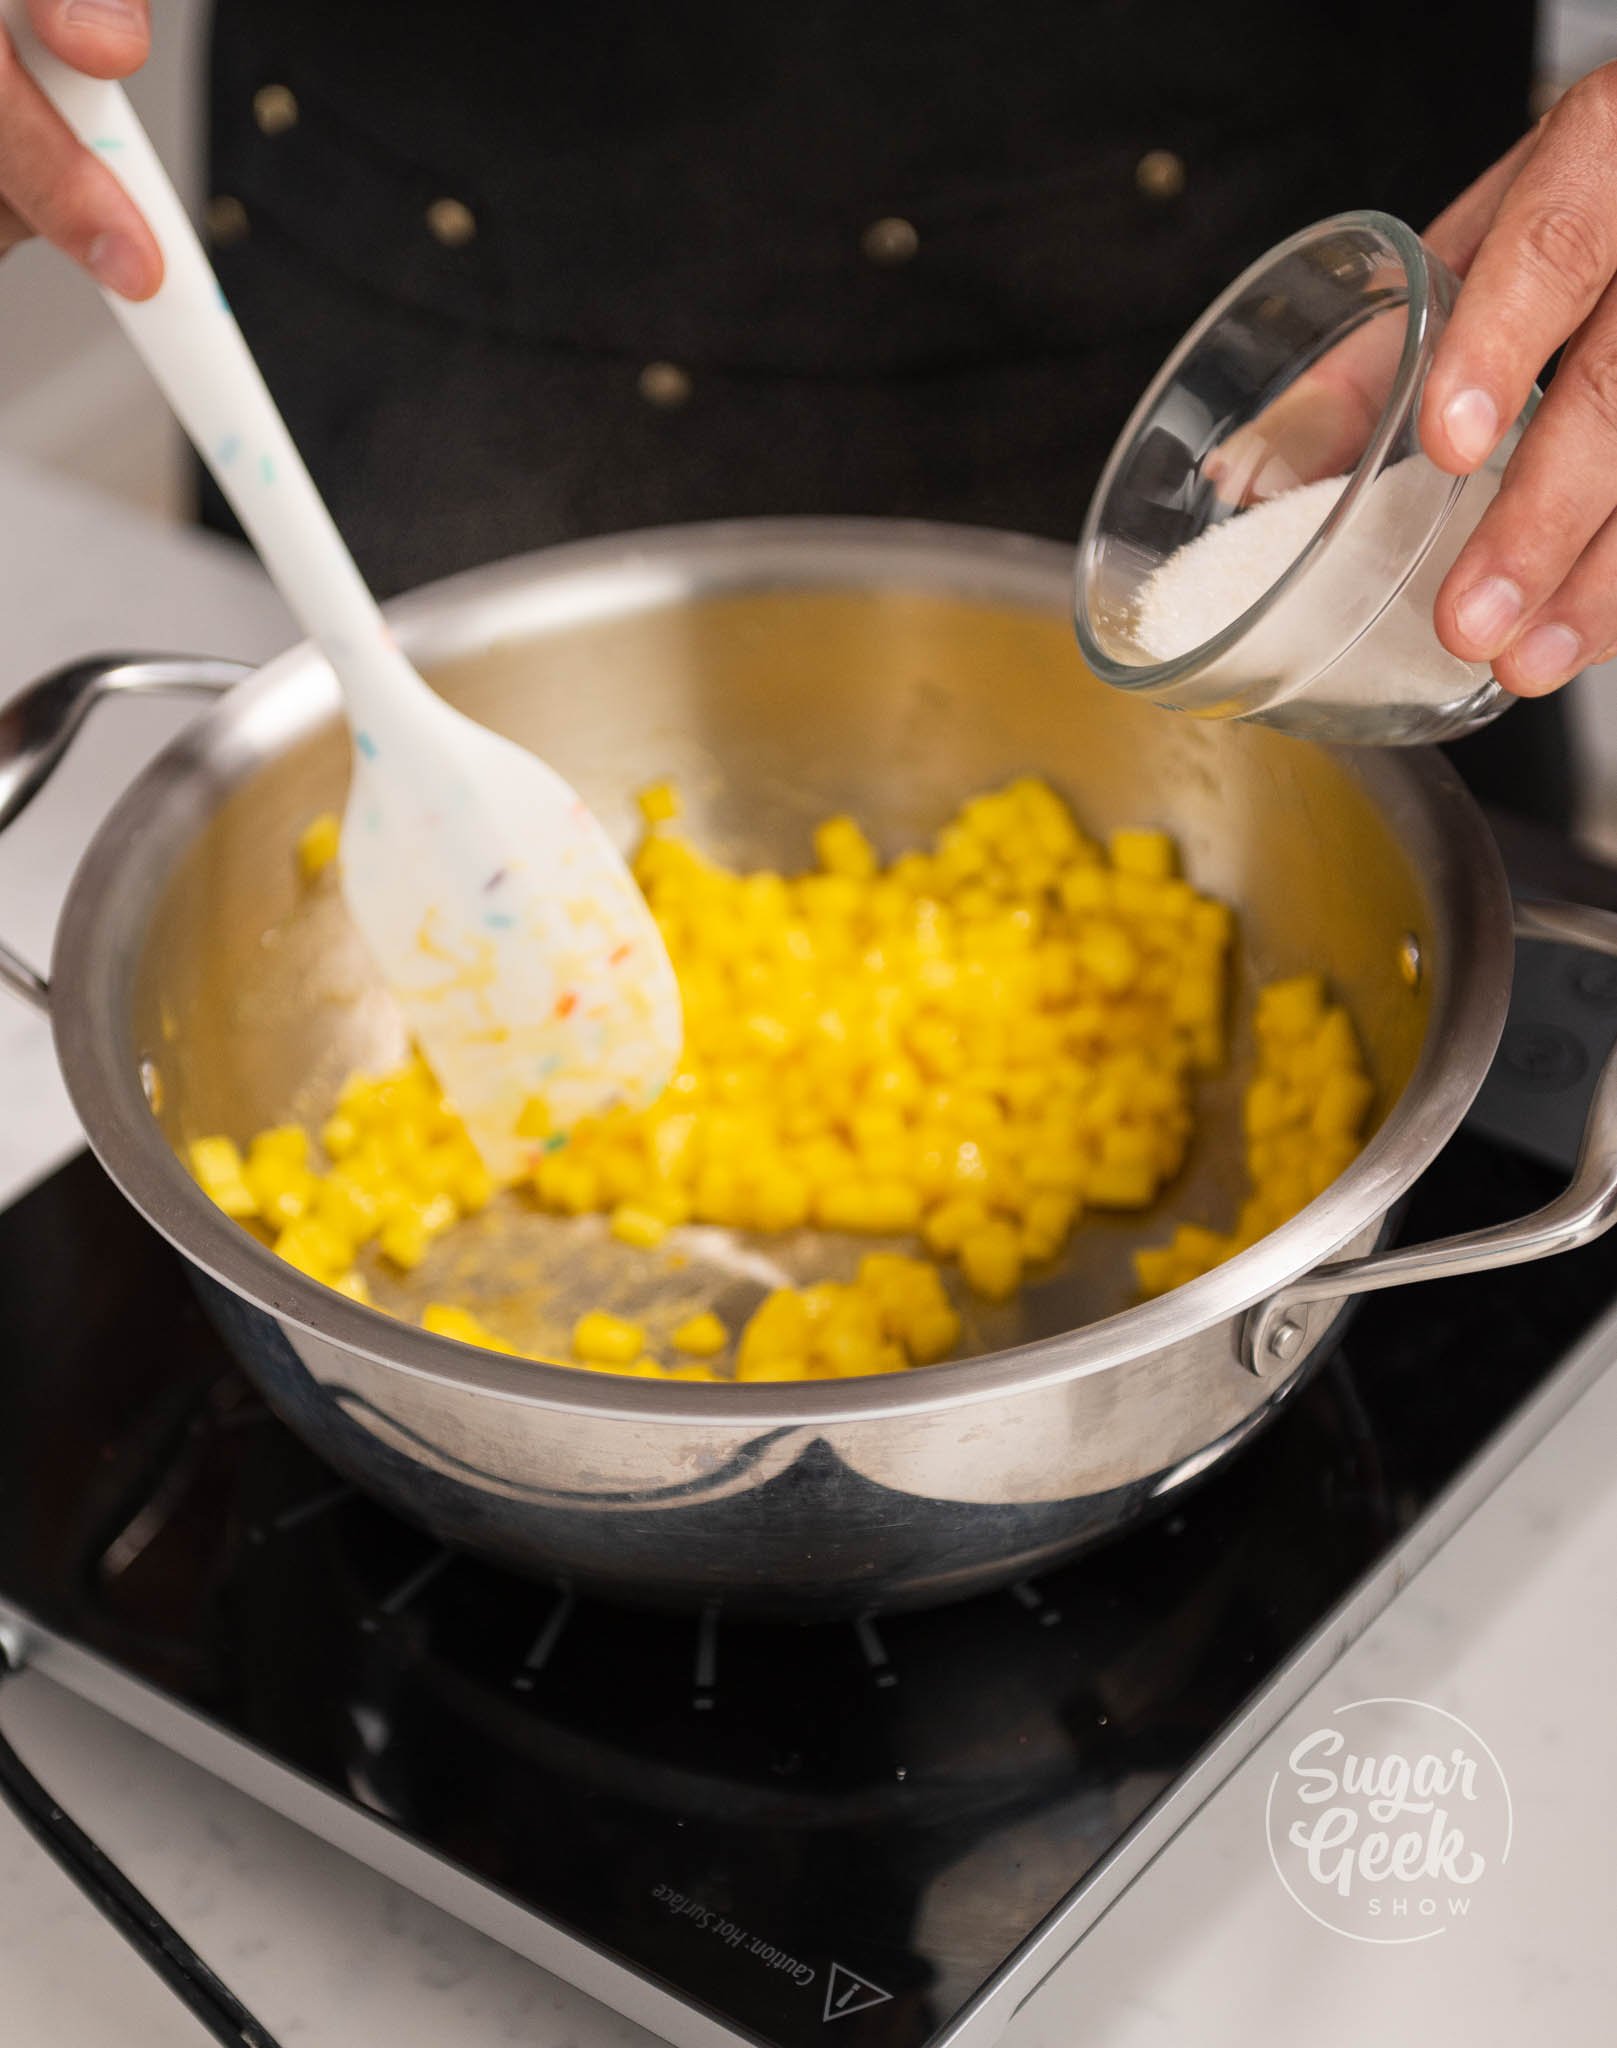
- Add in your vanilla, then your pectin and sugar mix. Keep stirring.

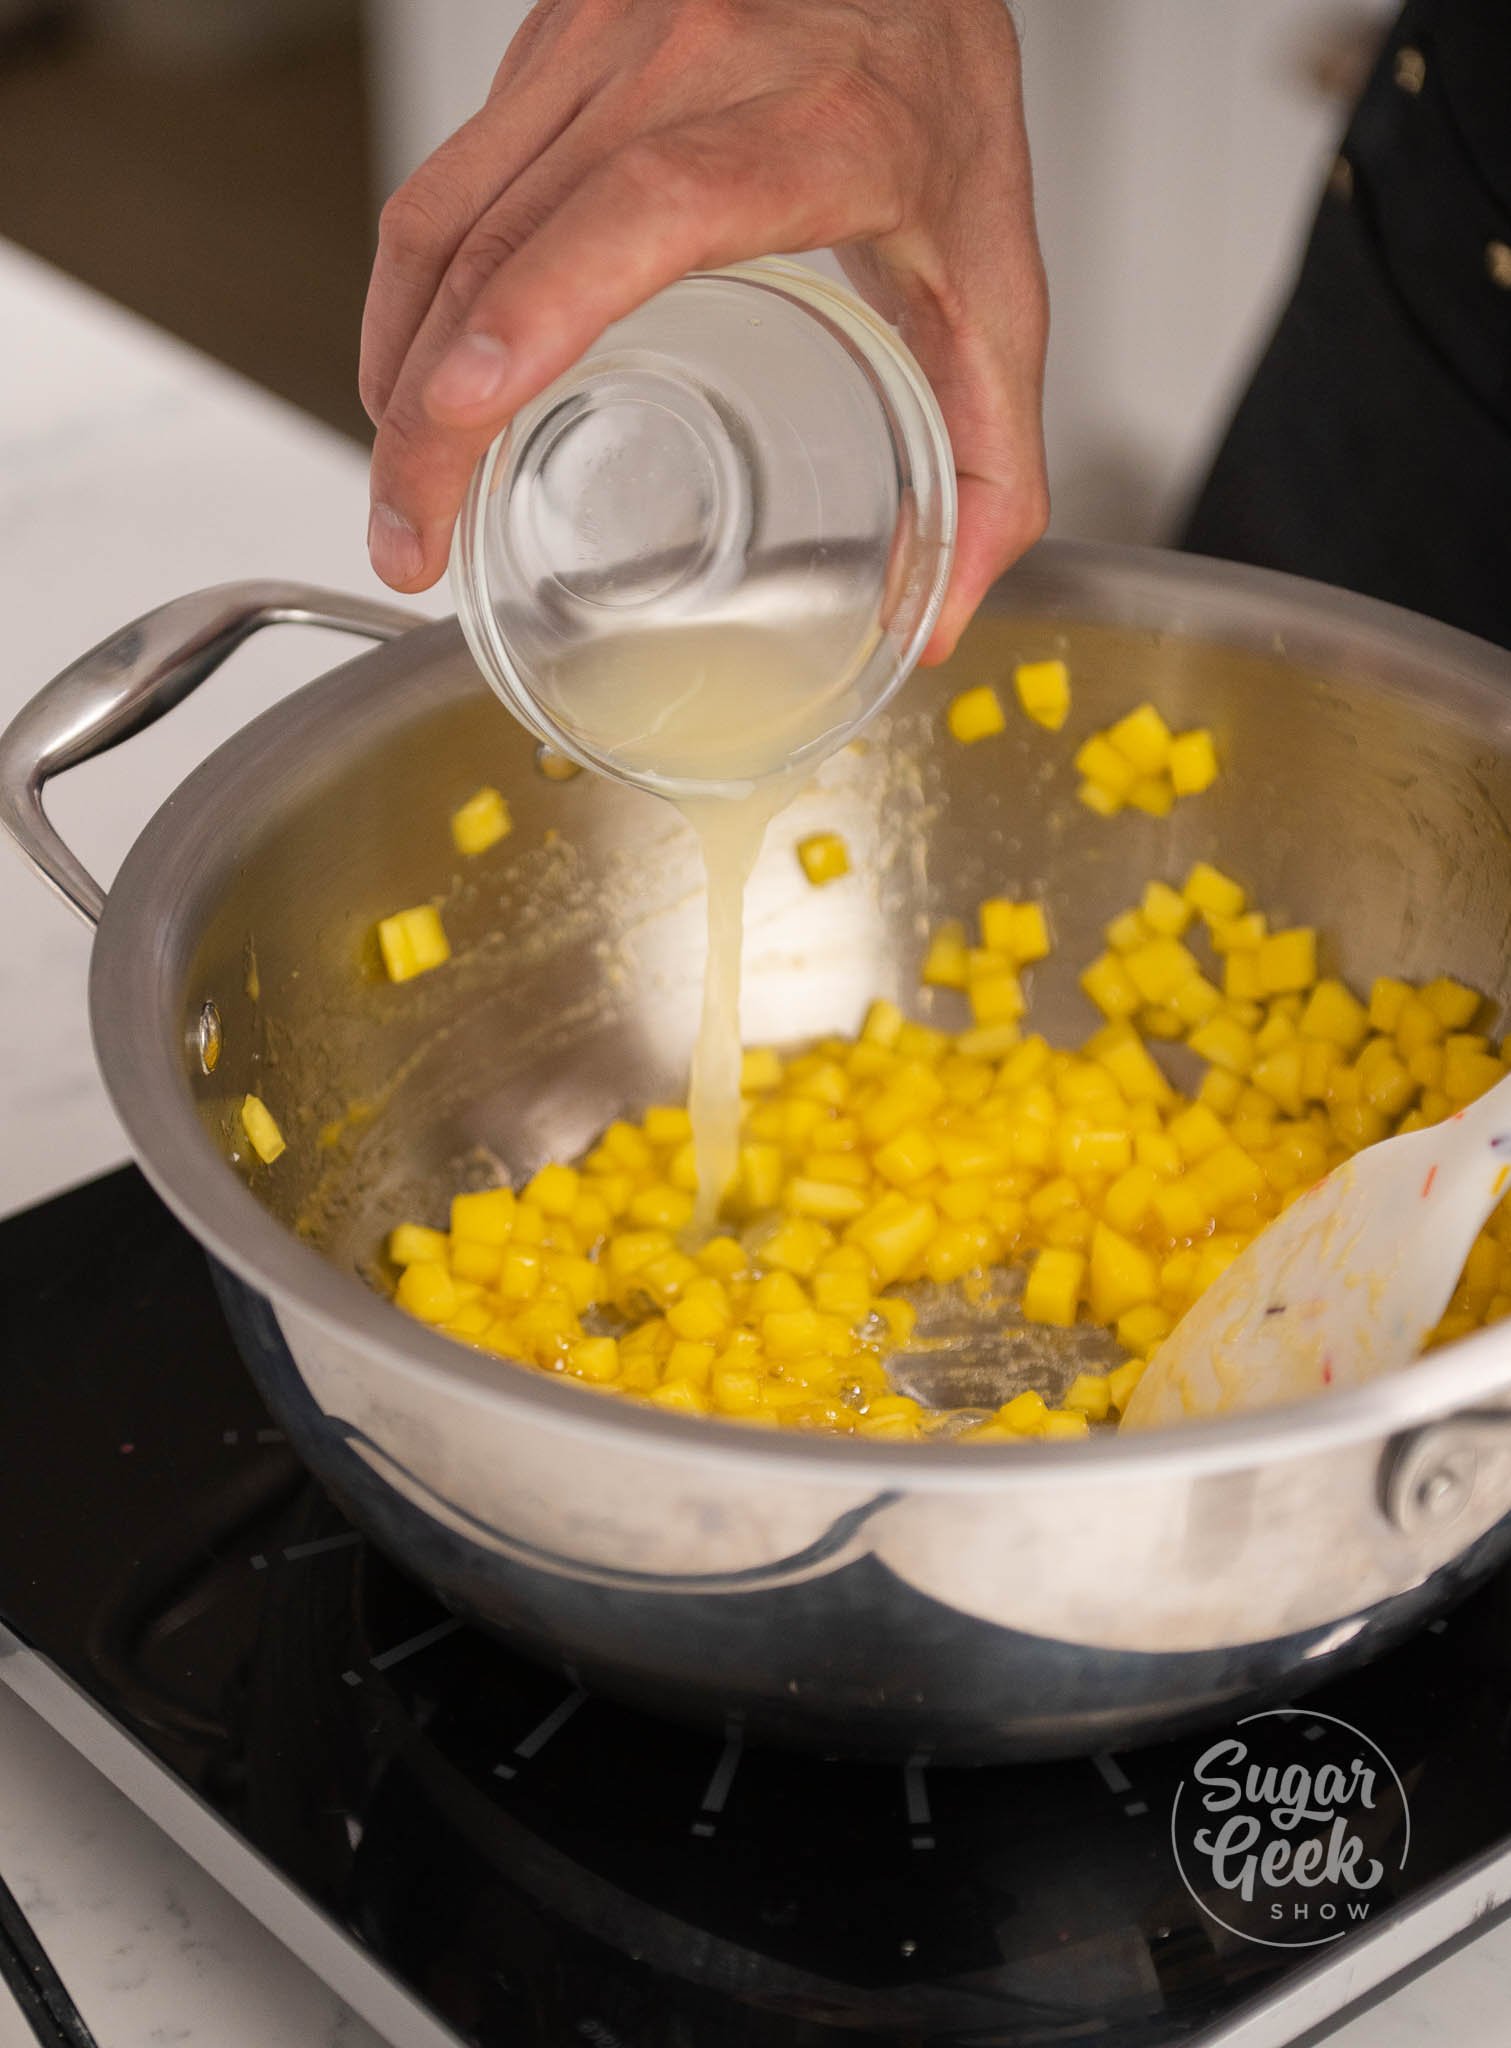
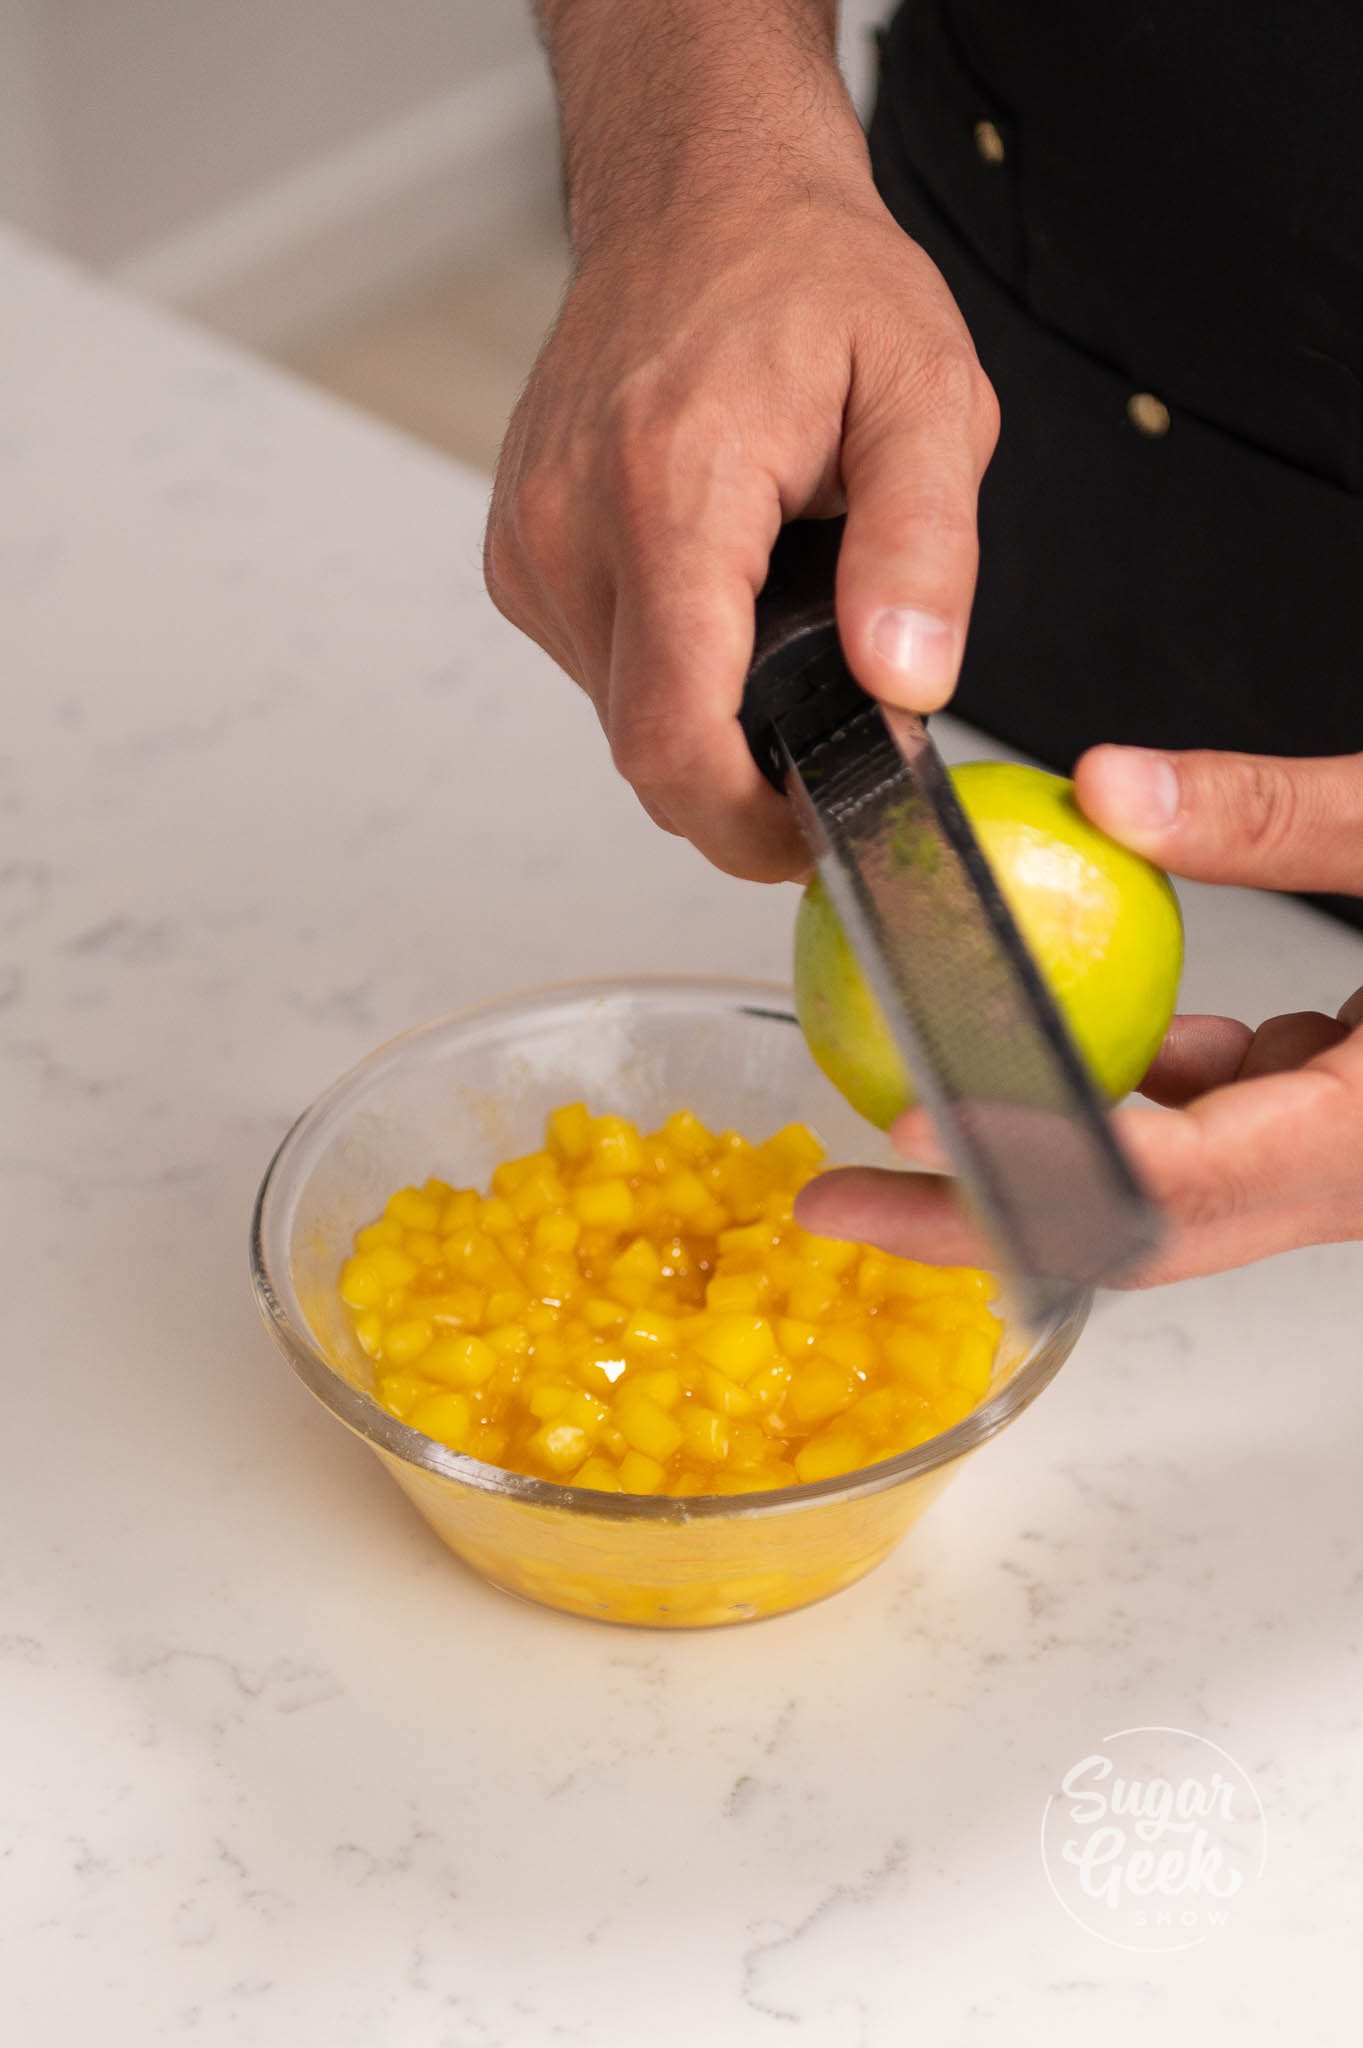
- Add in the lime juice.

- Keep stirring and cook your compote for about 5 minutes or until al dente (or until the fruit is soft but still slightly firm in the center).

- Add in your lime zest, and give it a quick mix.
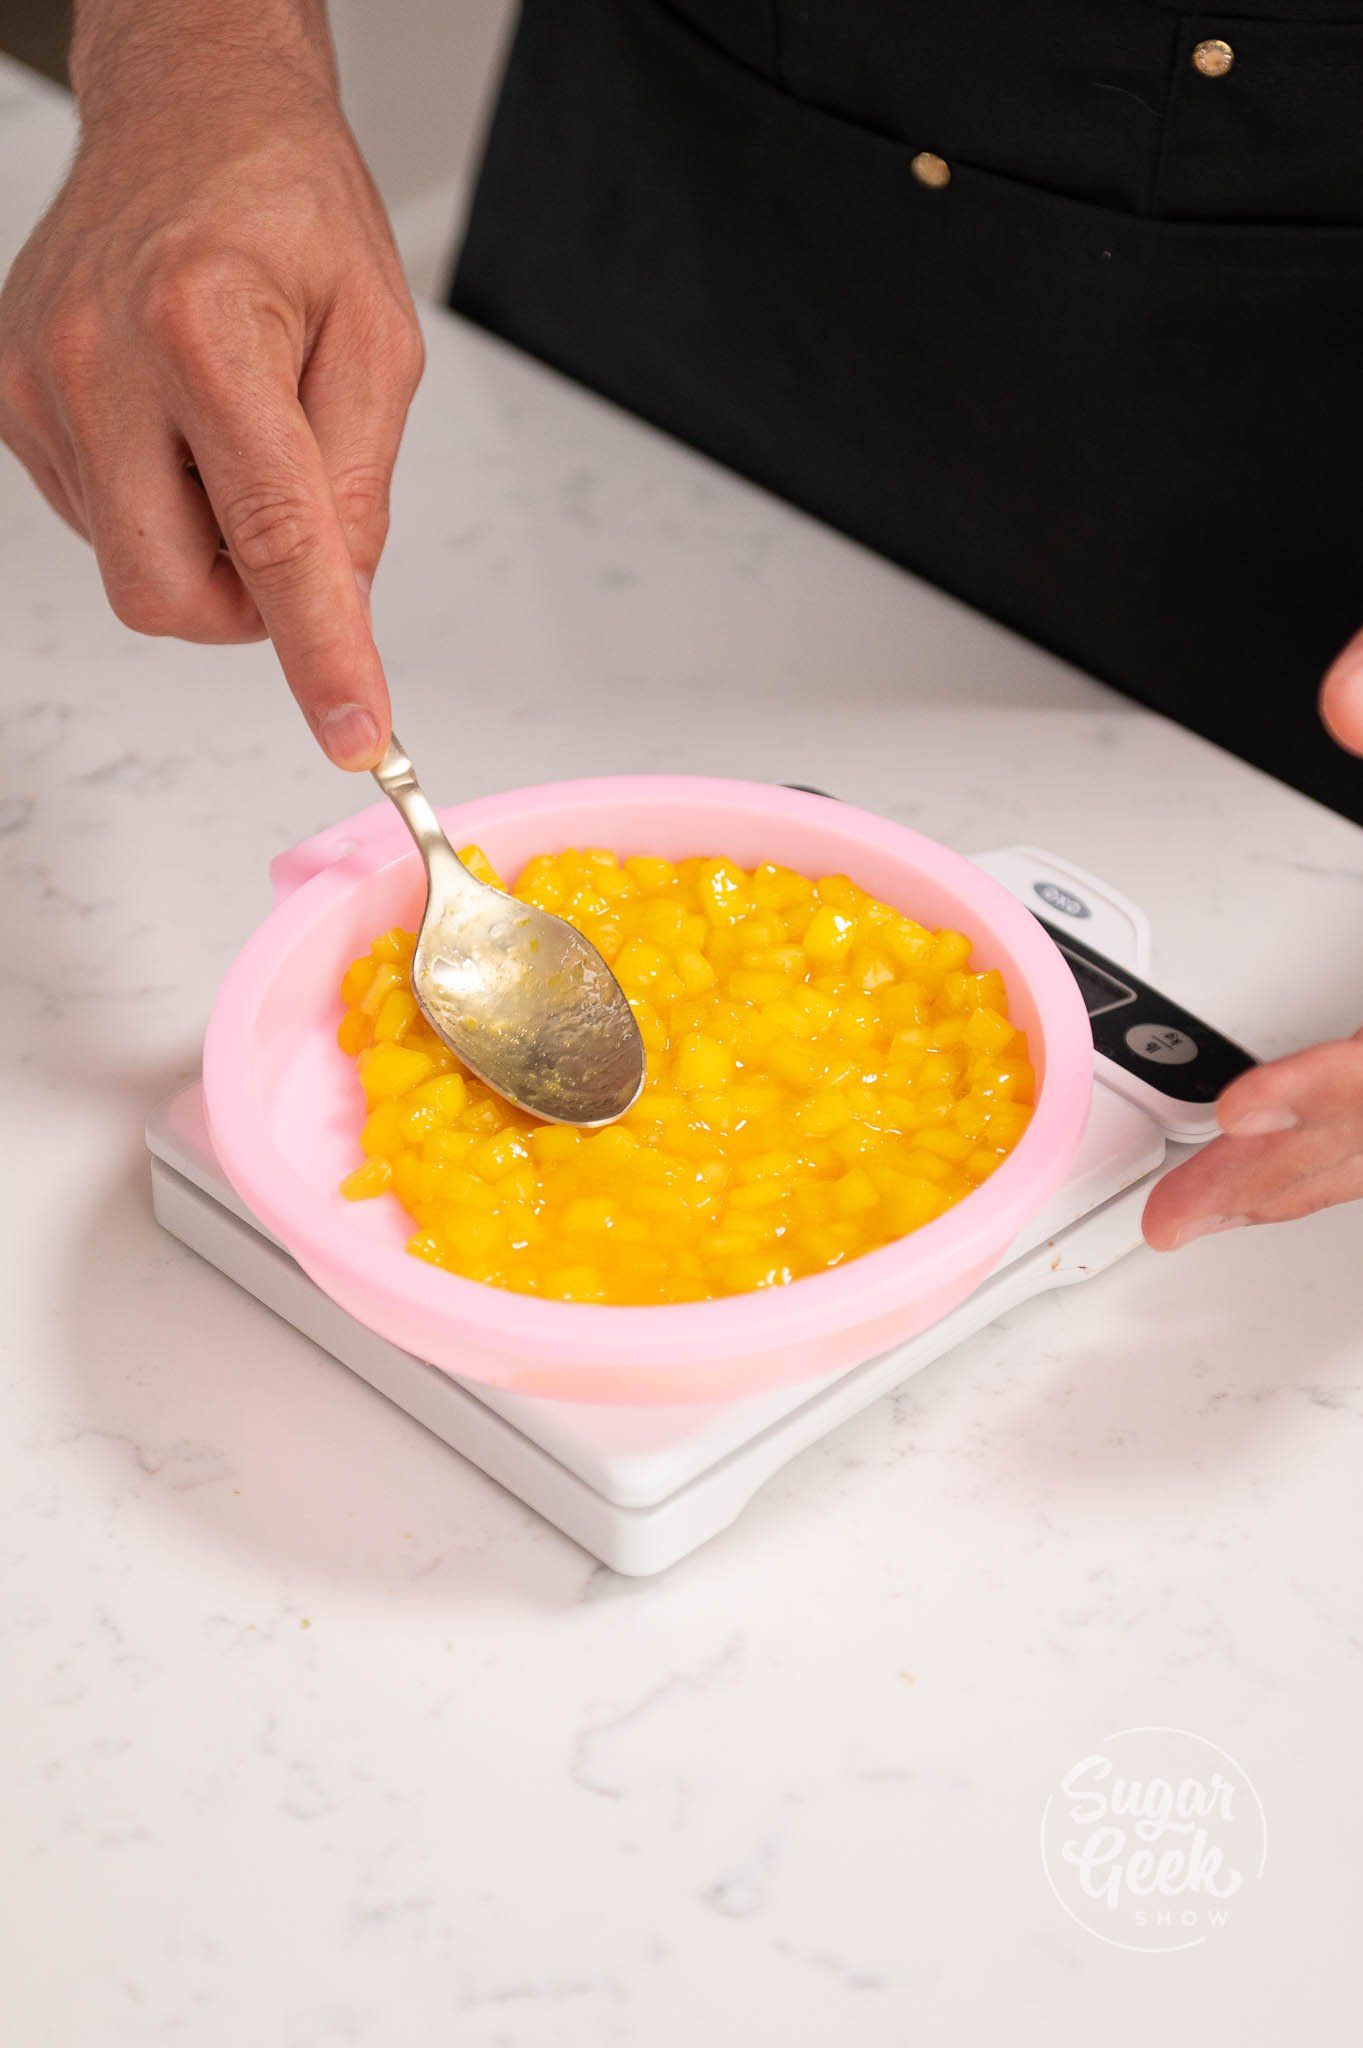
- Pour 150 grams into your silicone mold ( or fill your mold about halfway) and freeze it for at least 2 hours.
Mango Crémeux Step-By-Step
A crémeux is very similar to a mousse or pudding. The difference is that it is way creamier and thicker than a mousse (crémeux means creamy in french hense the name). It's commonly used in entremets and plated desserts. Crémeux is made by bring your ingredients to a boil, adding gelatin to thicken it, then blending it all together to create a thick liquid consistency that will eventually set to a pudding texture.
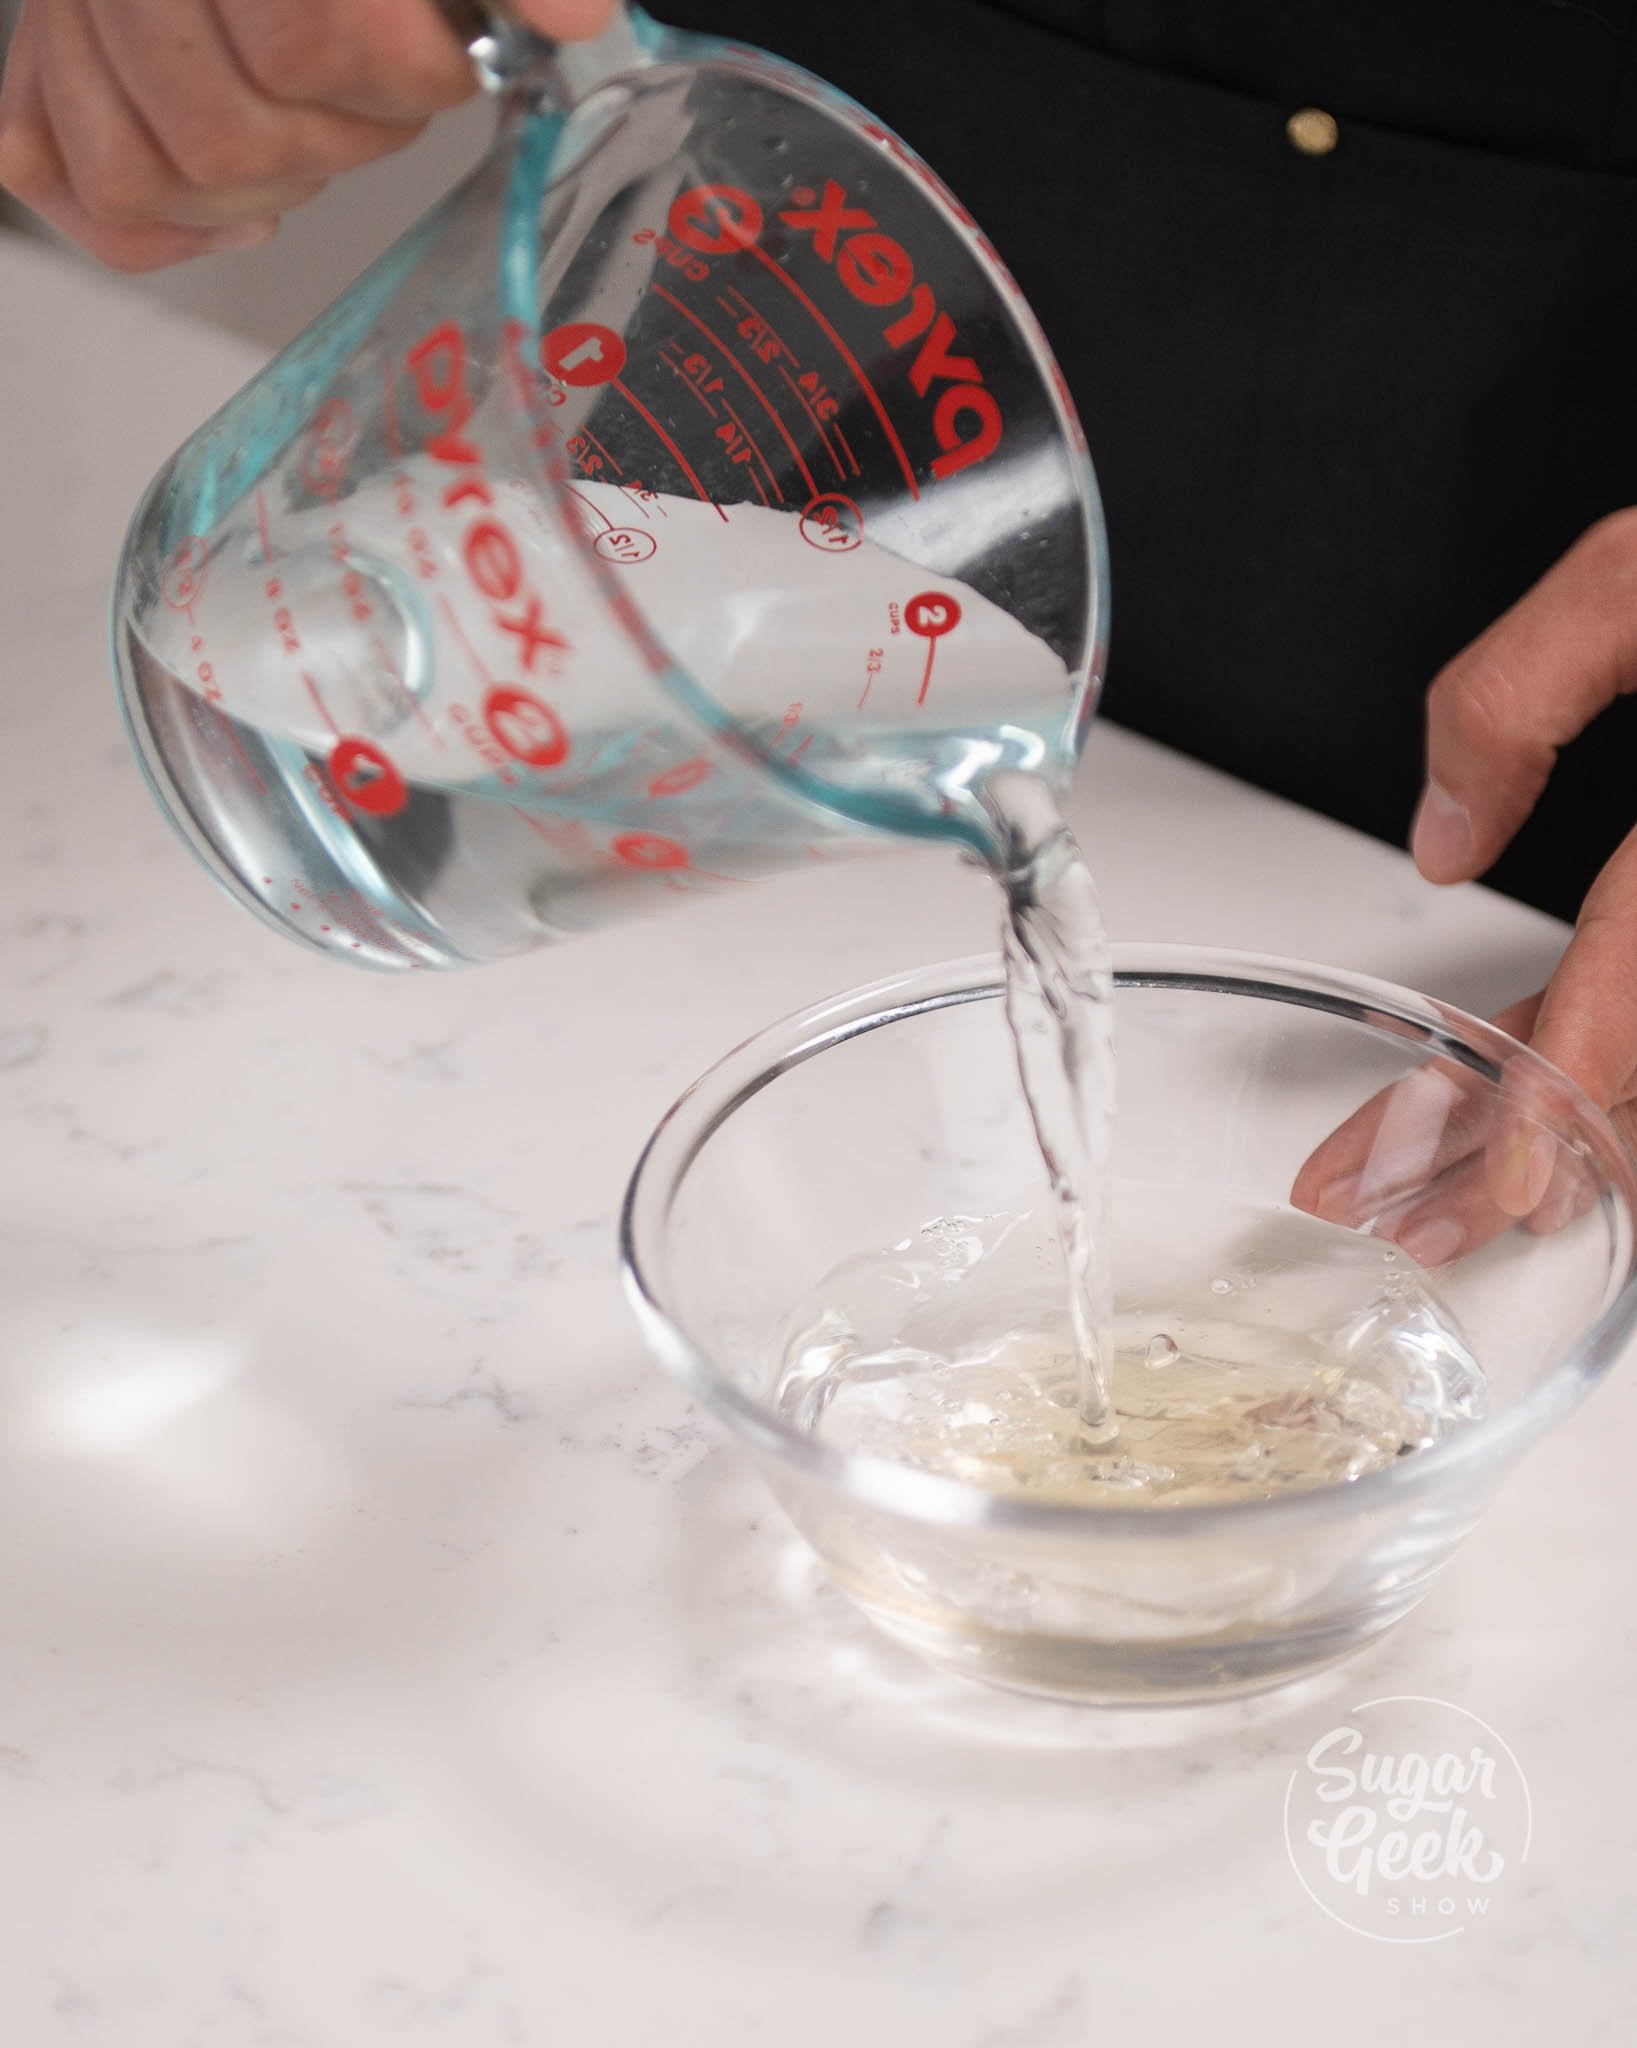
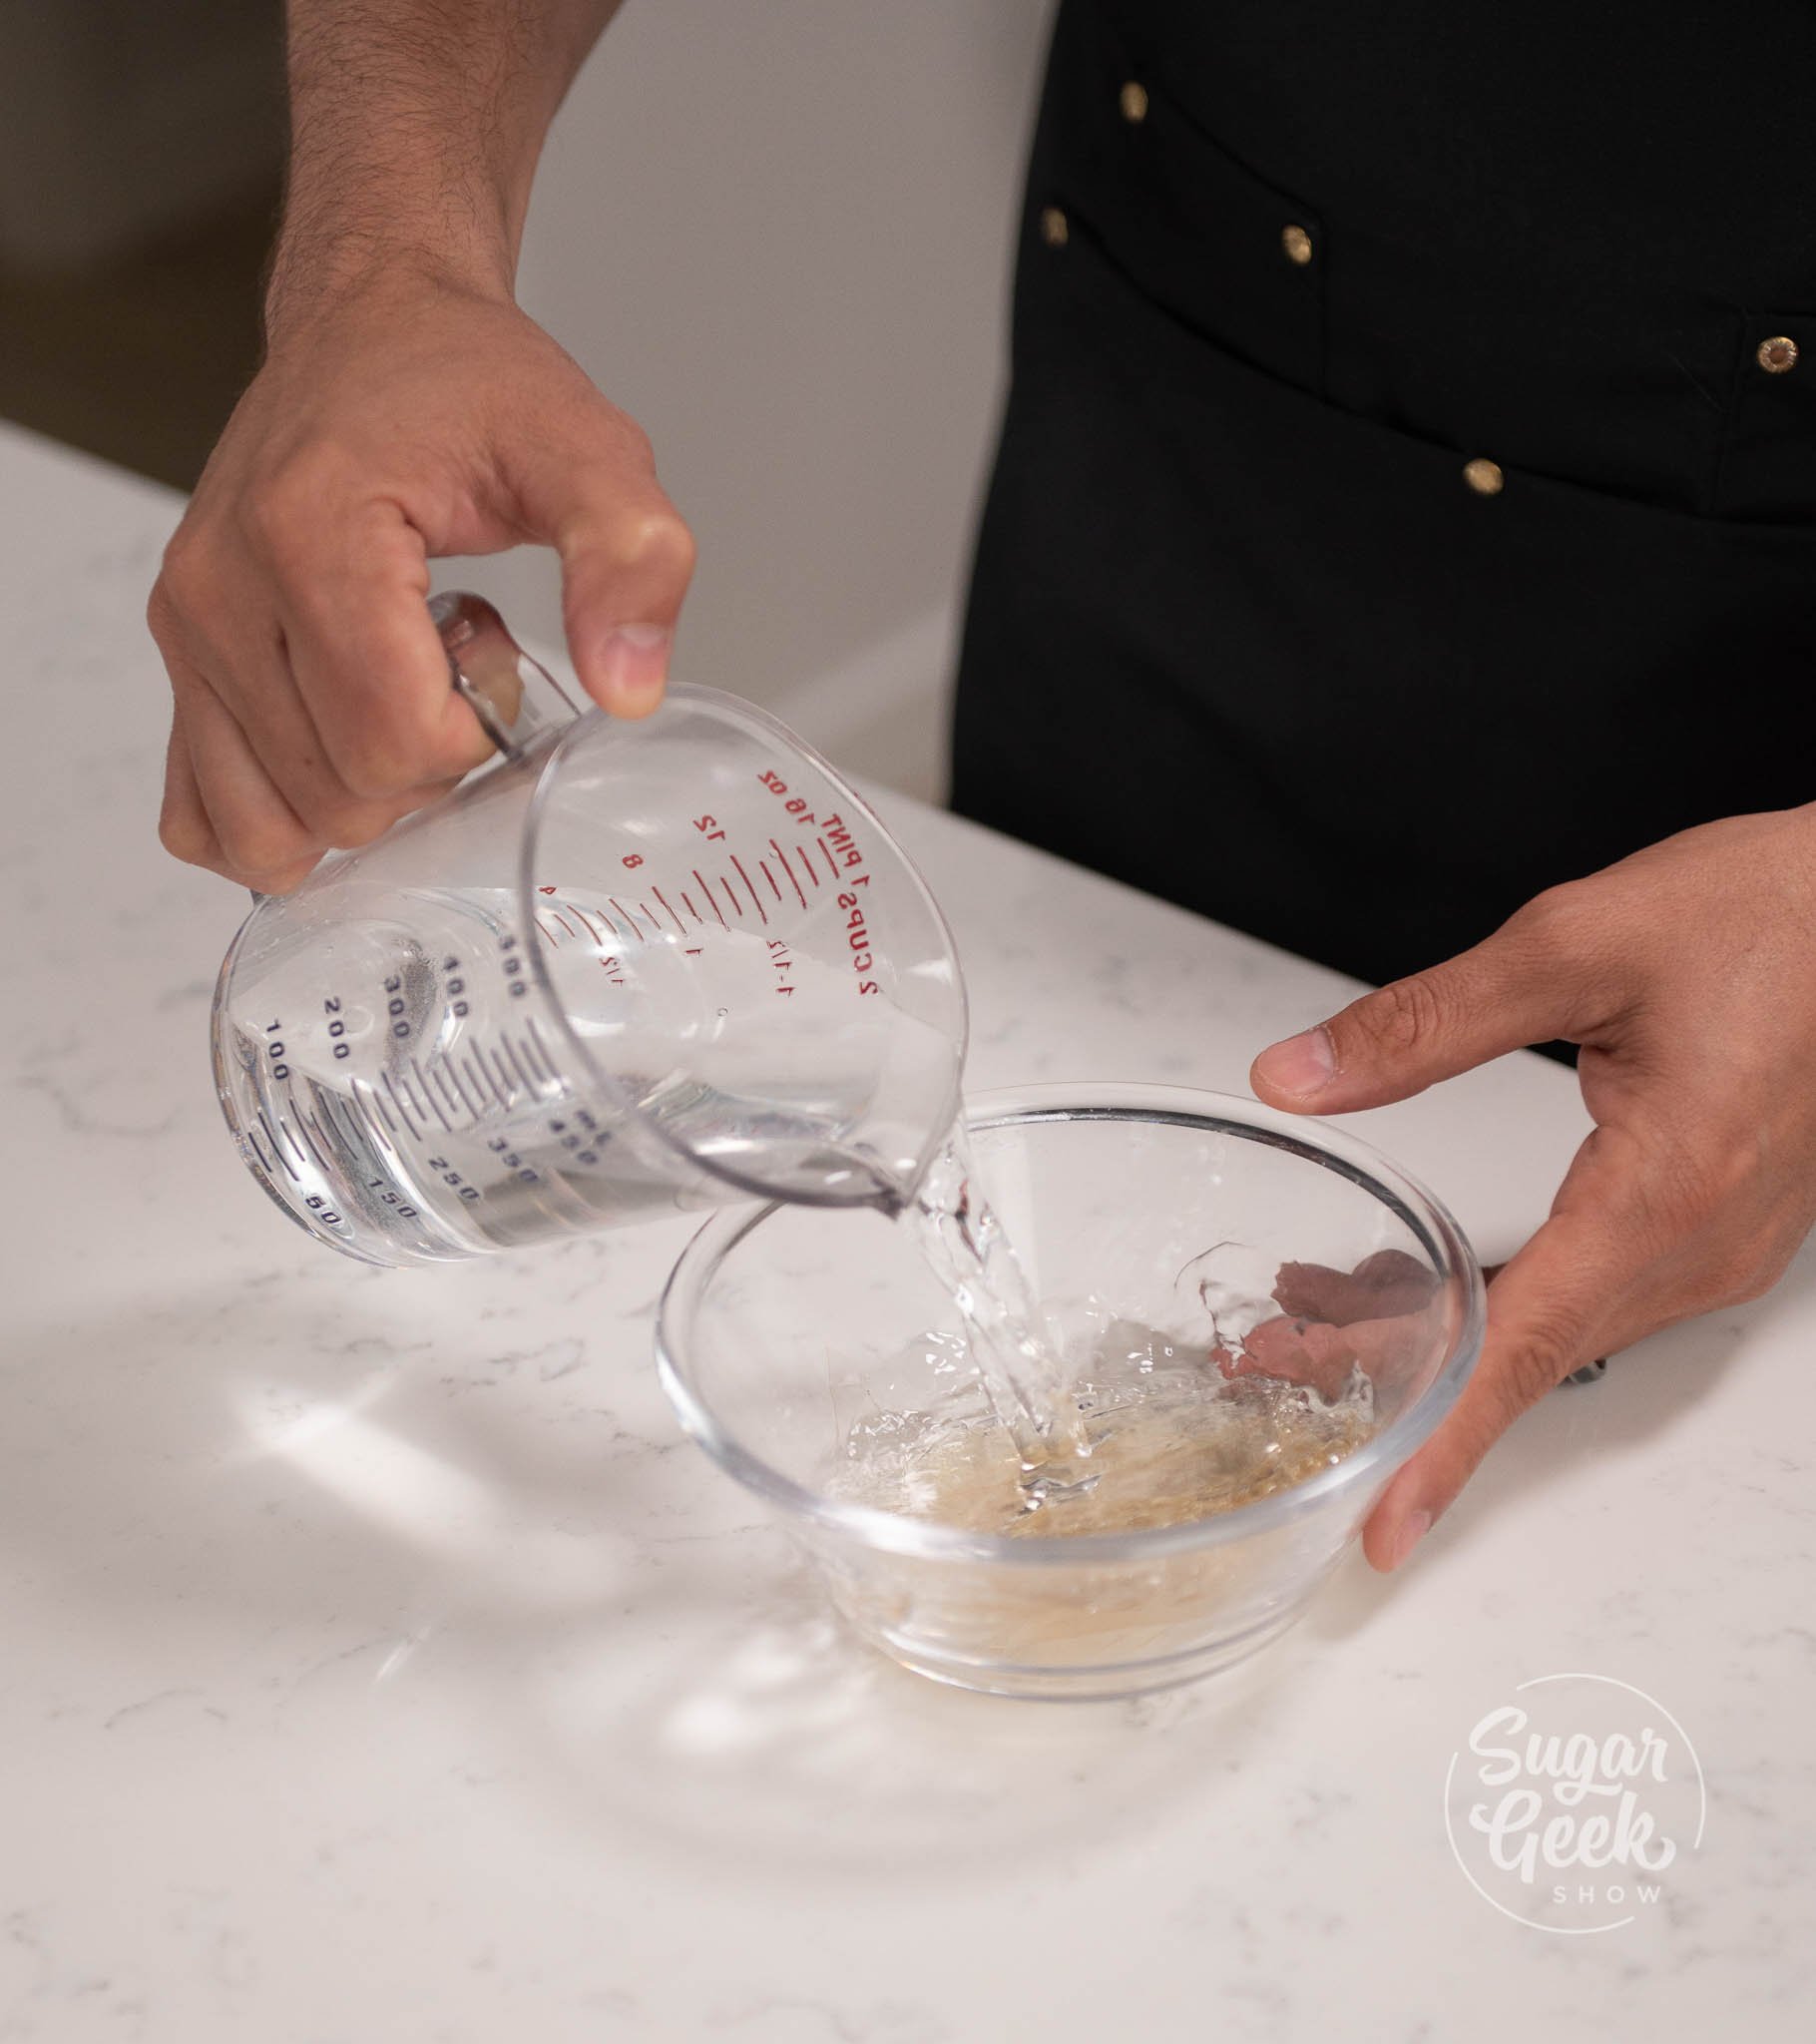
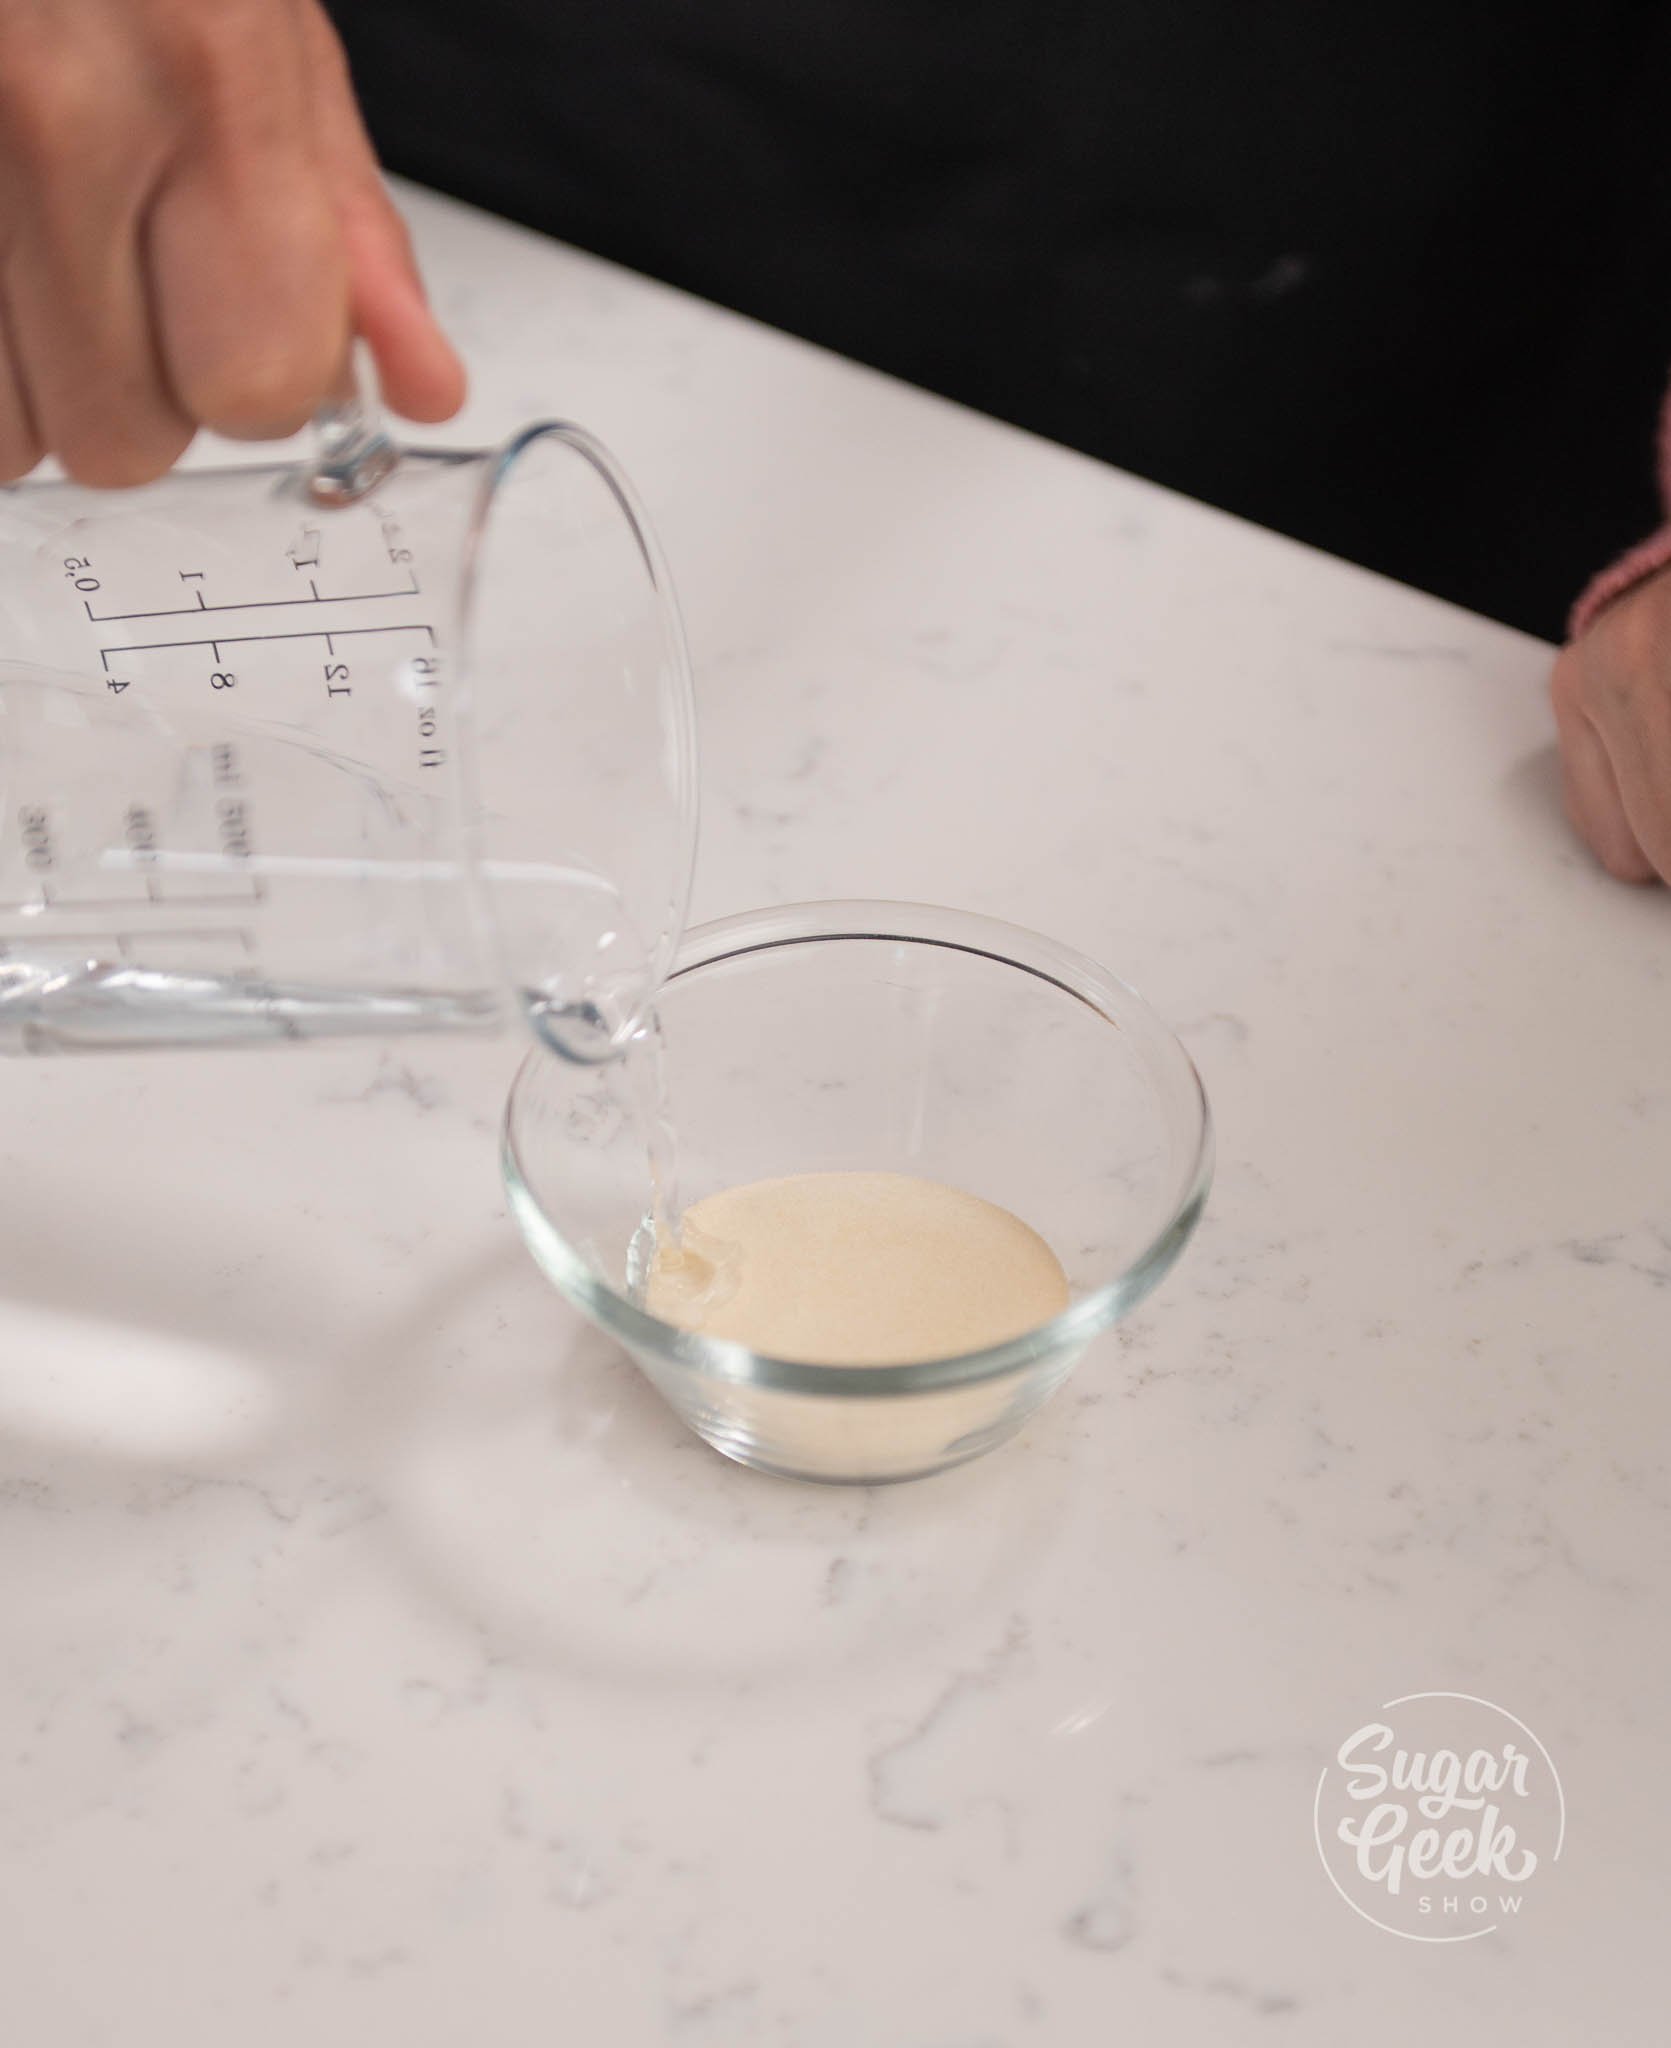
- Bloom your water and gelatin in a small bowl or container and leave to sit until the gelatin has fully absorbed the water. (3-5 min).

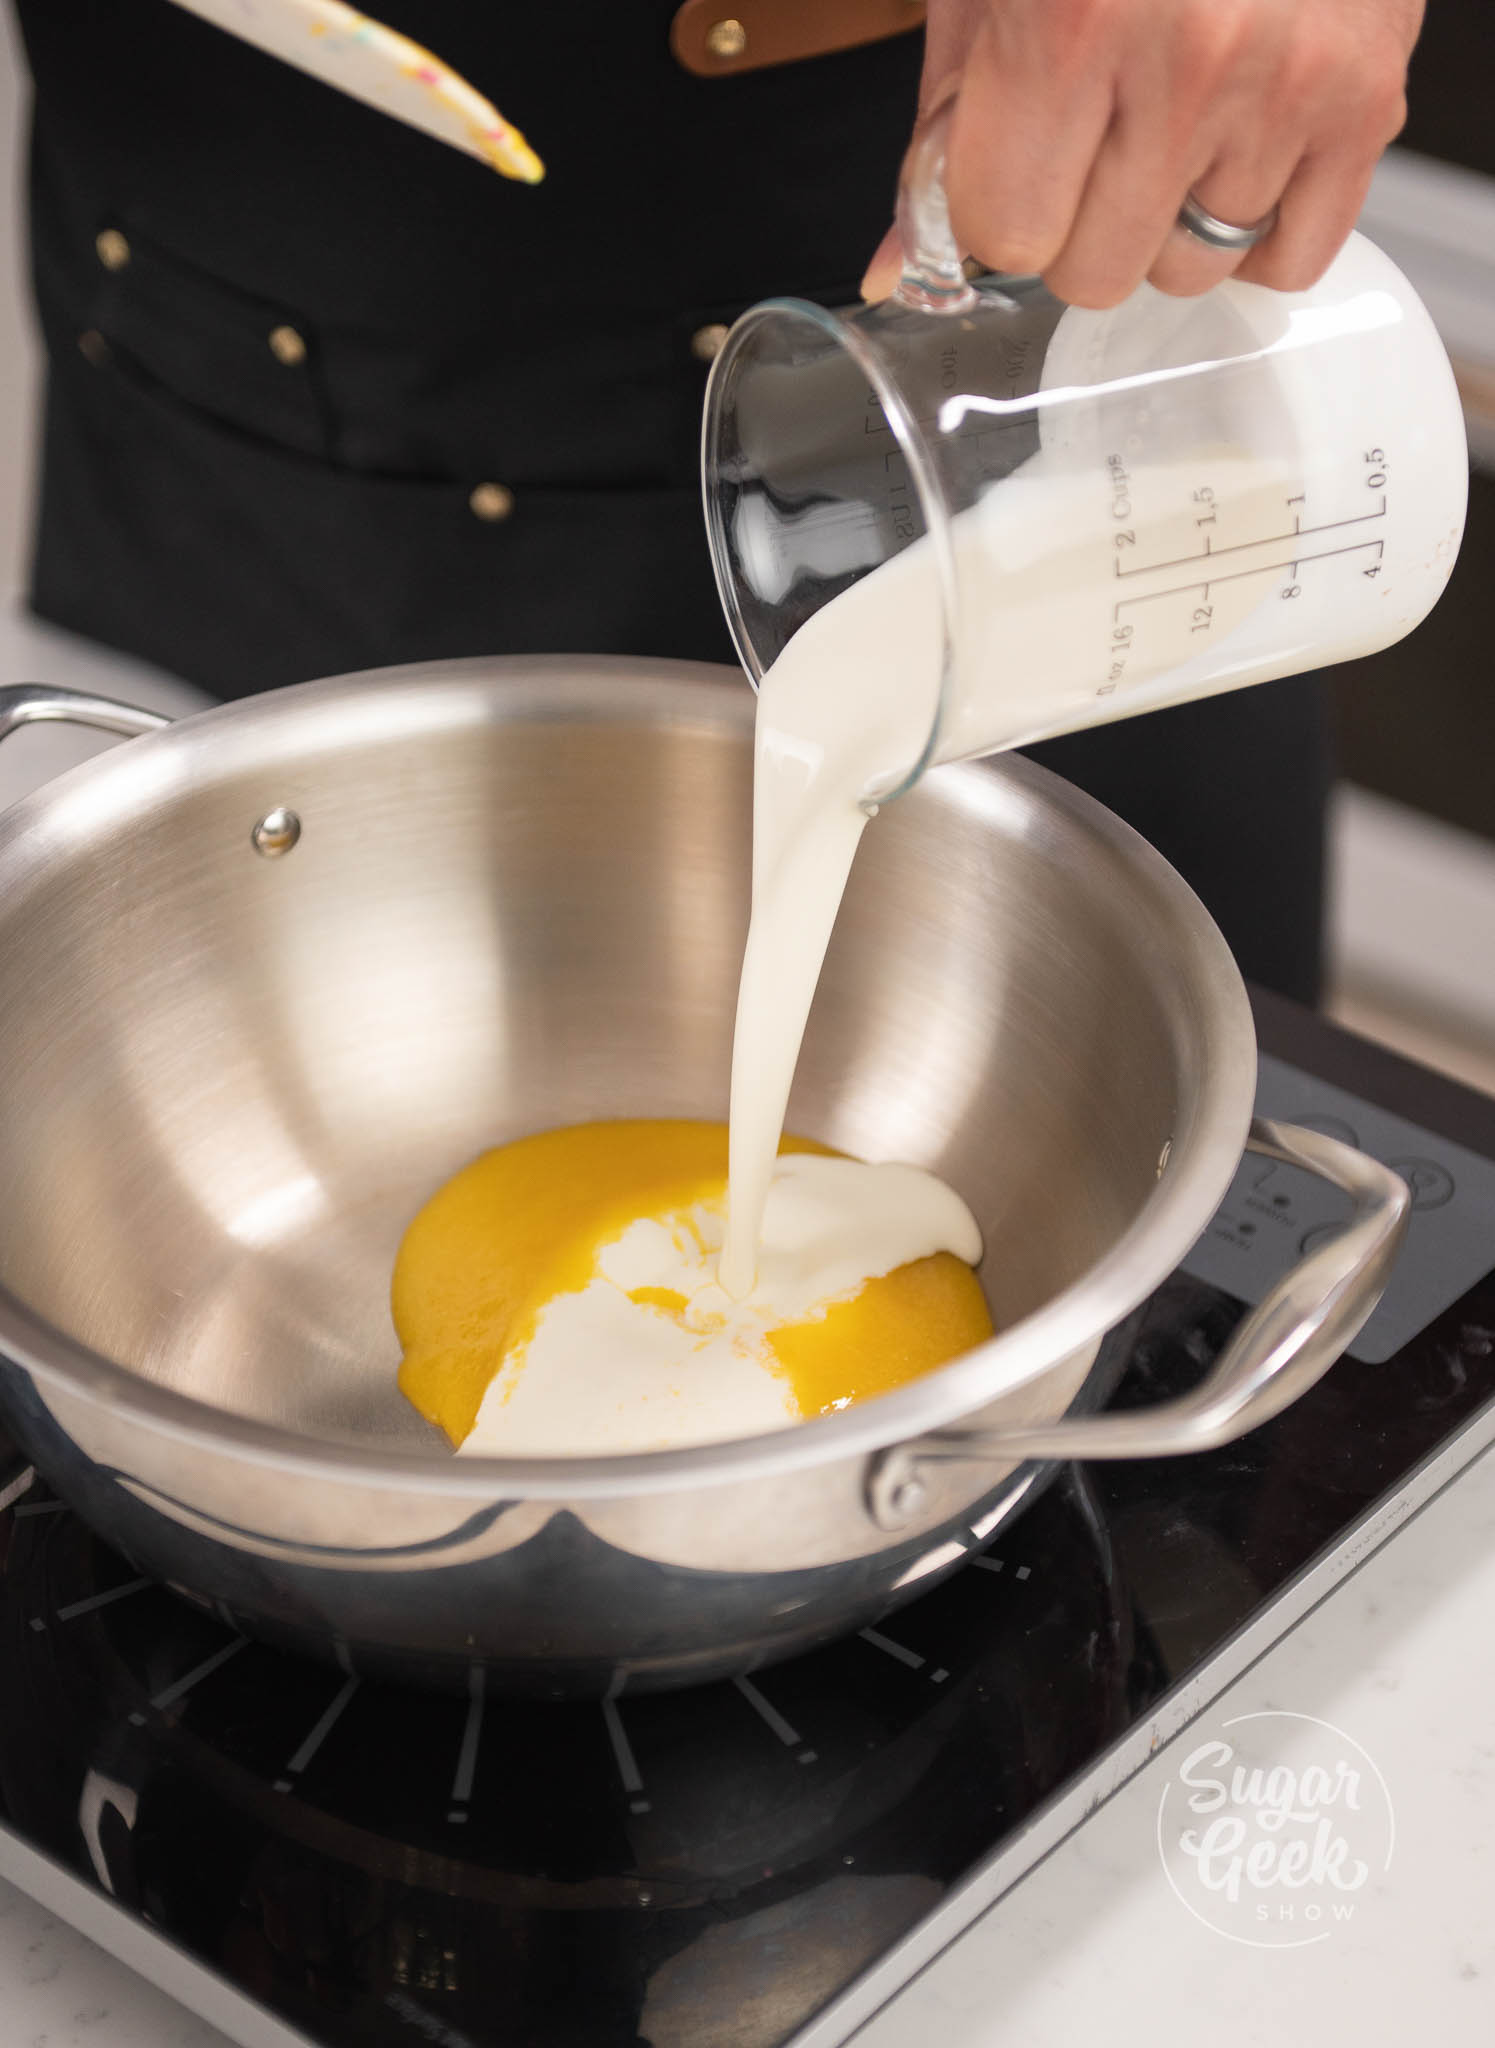
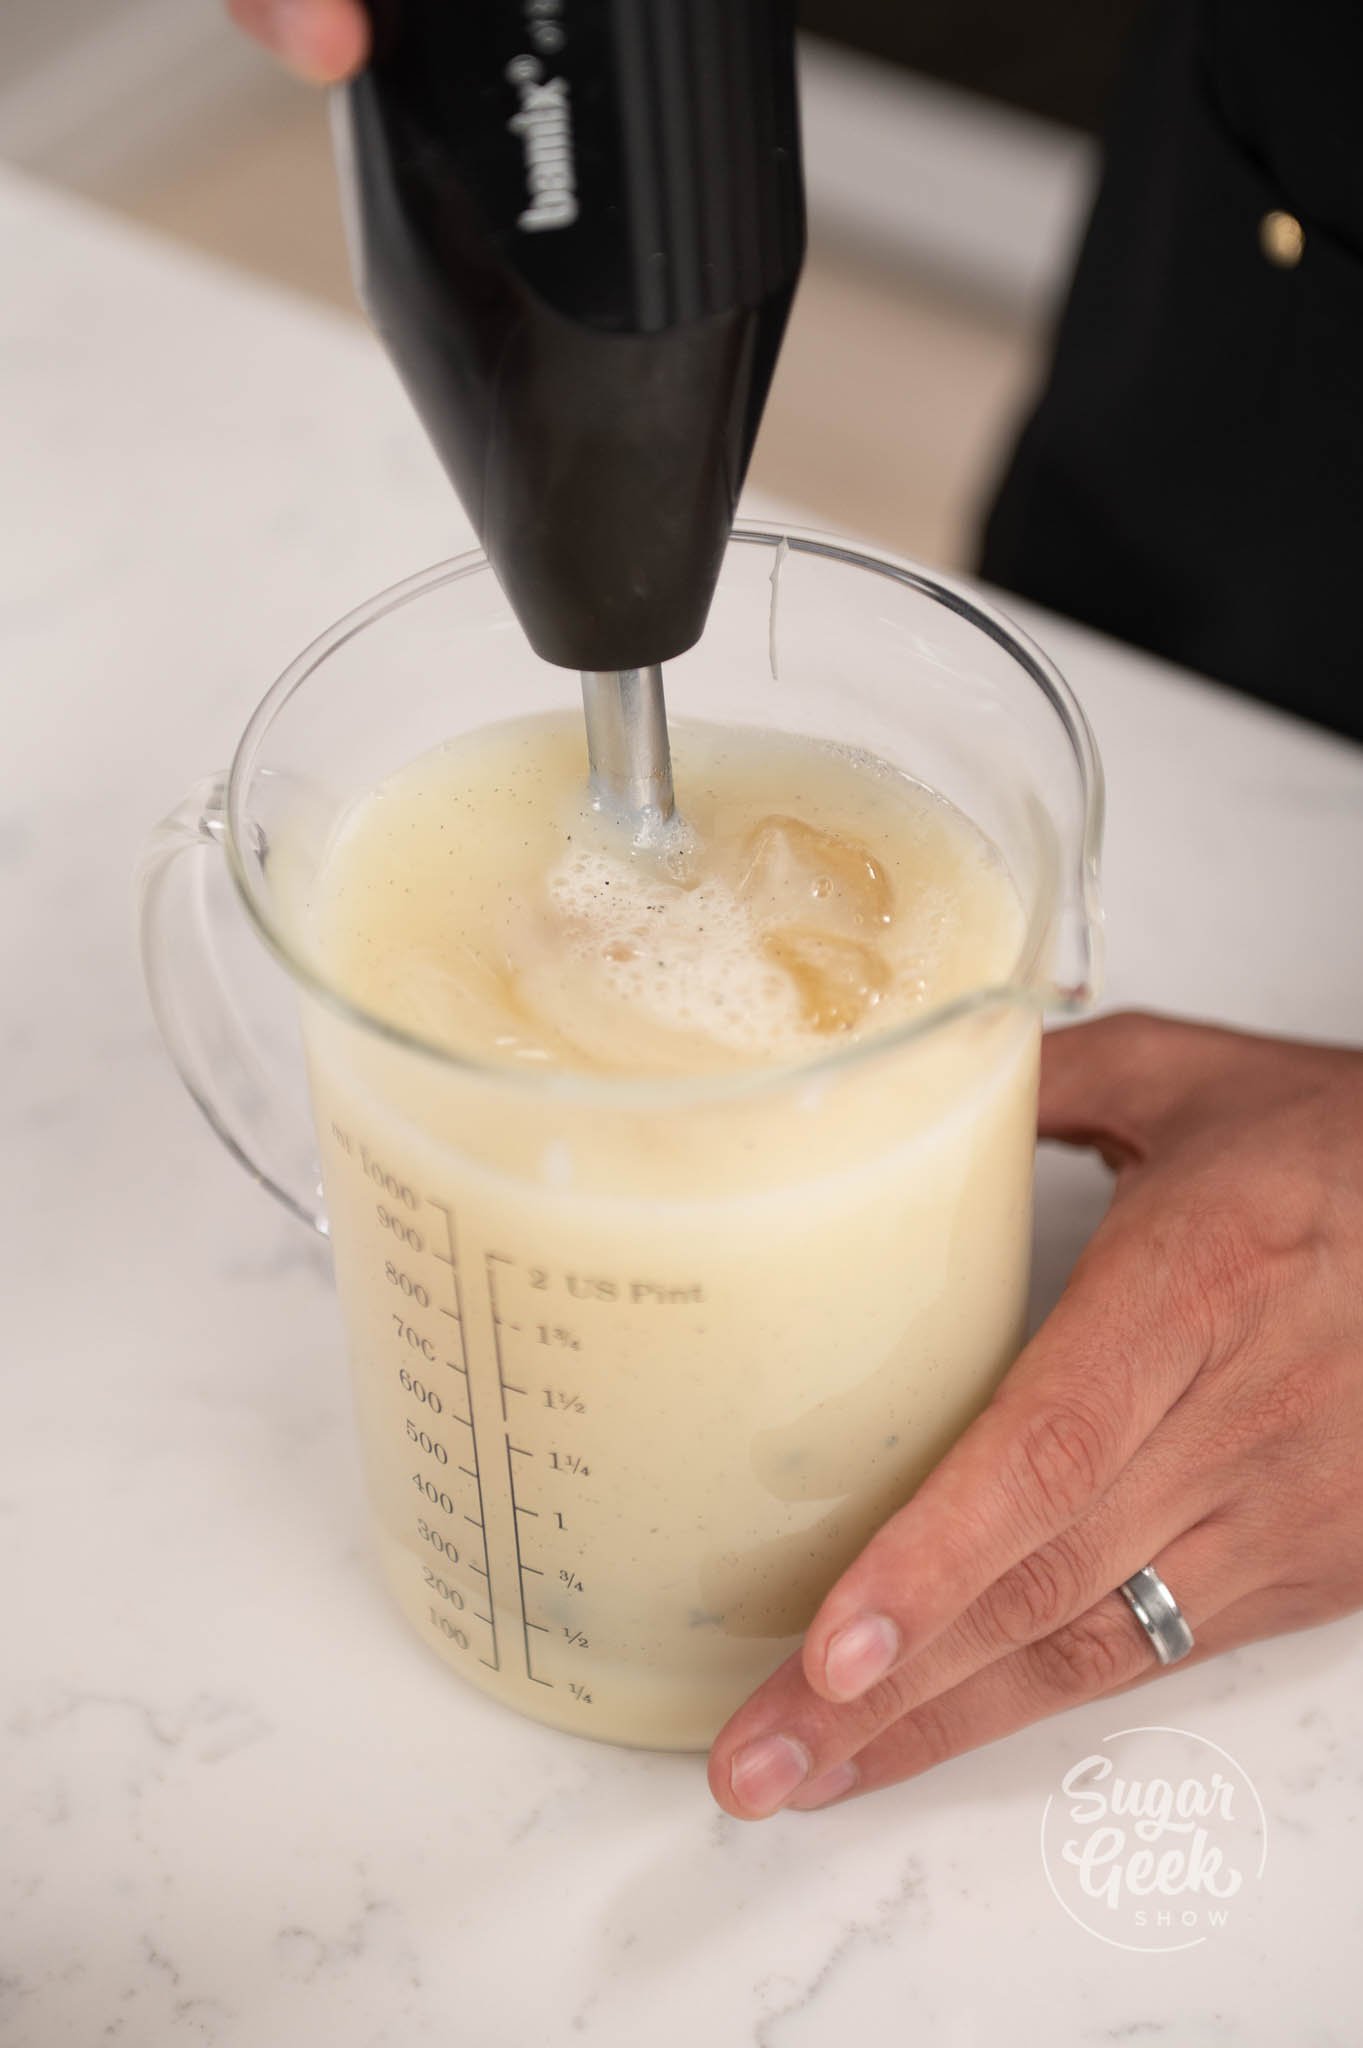
- Add in the mango puree, cream, and half of the sugar into a medium sized pot.

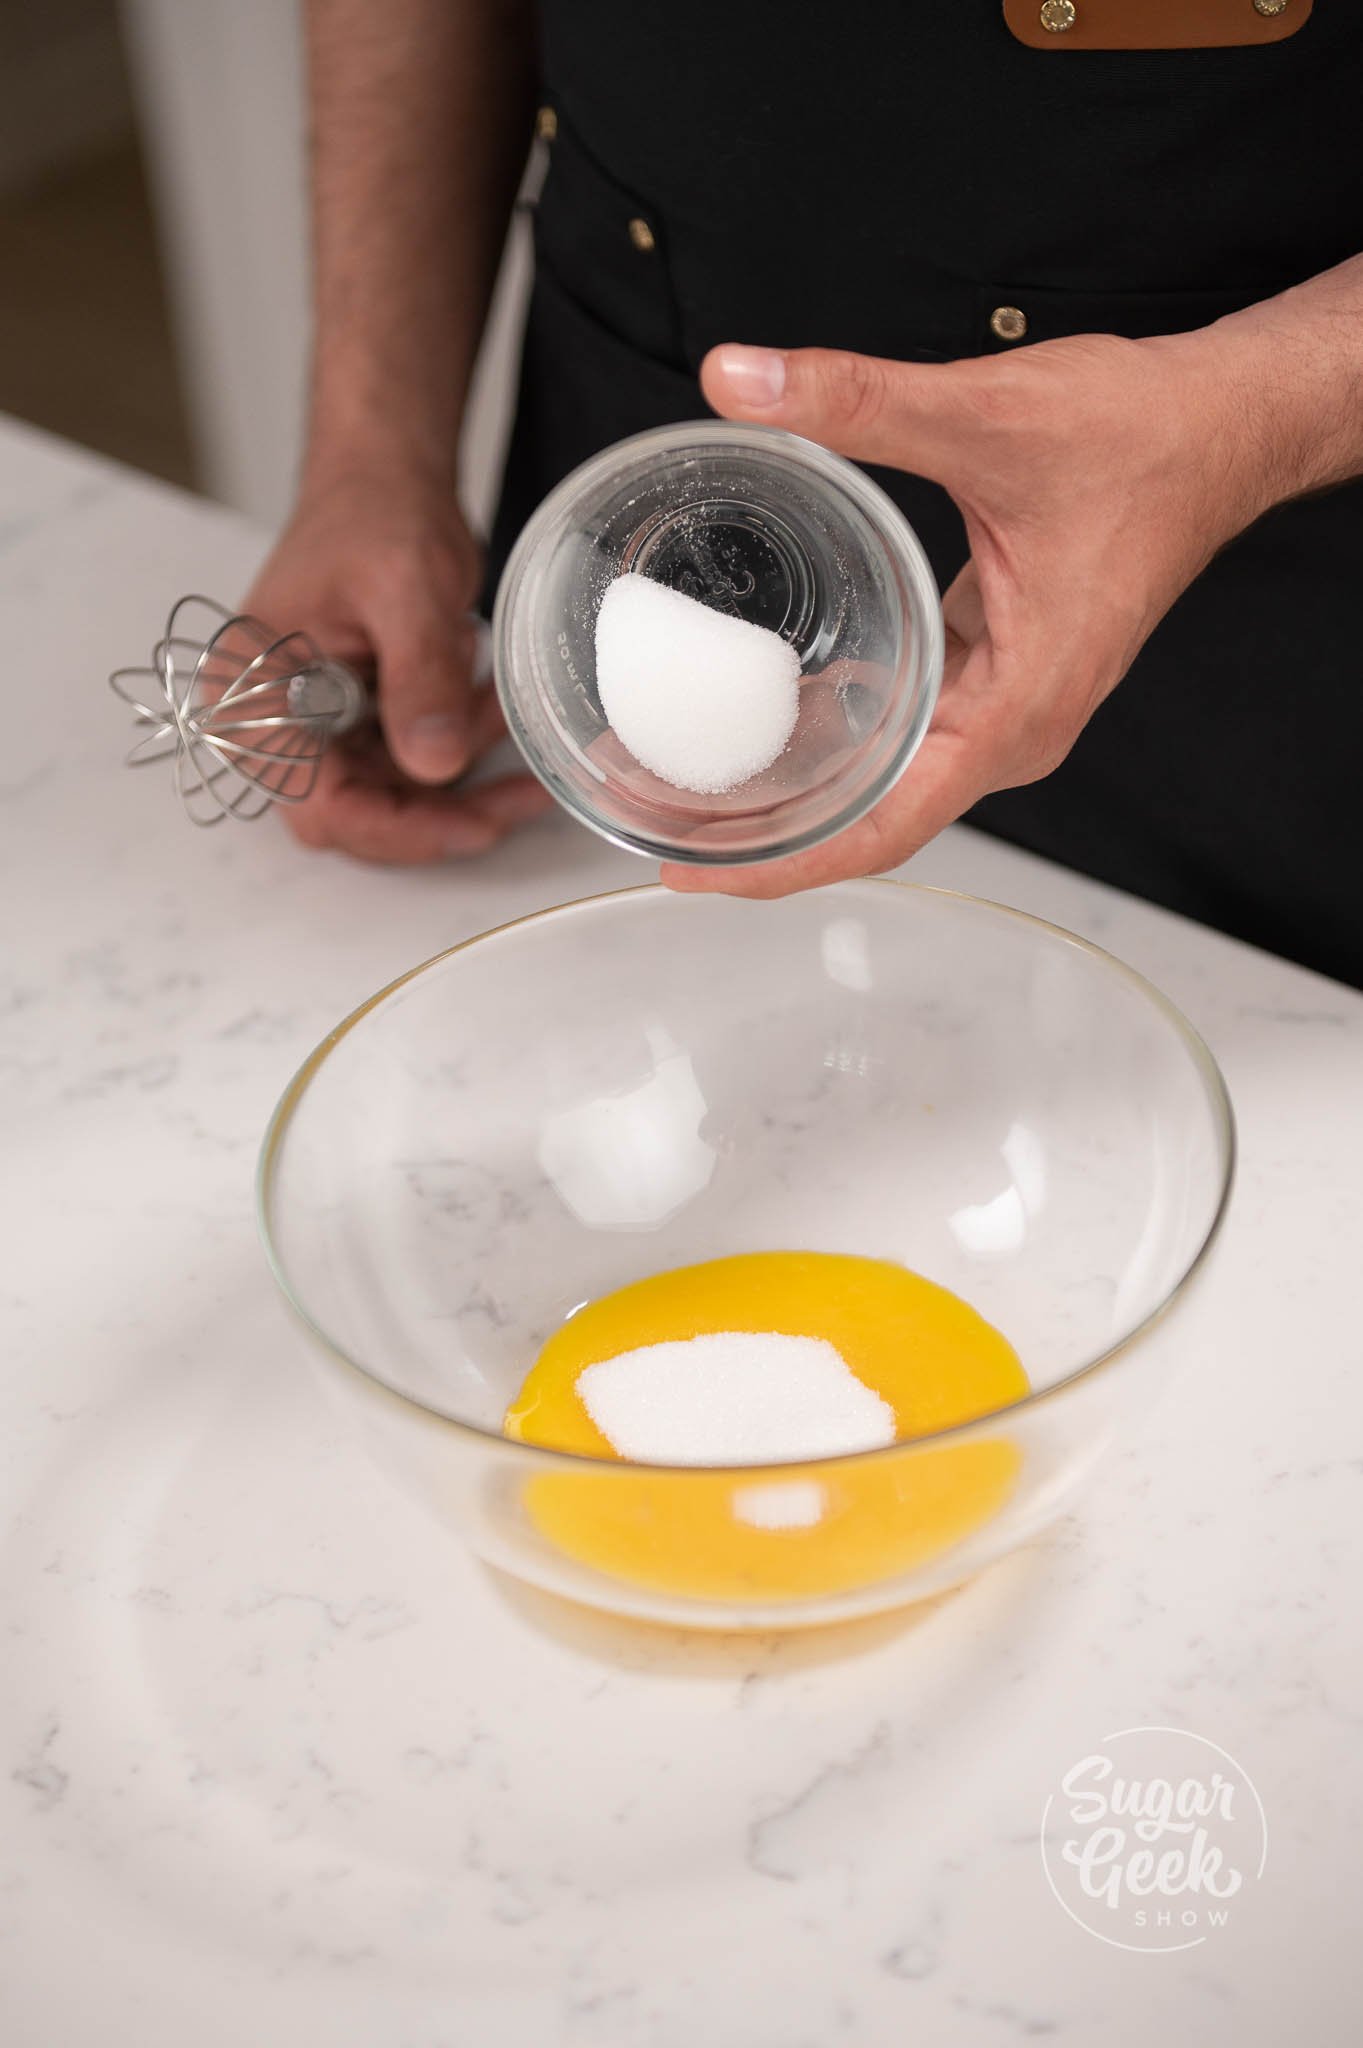
- Whisk your yolks and the other half of the sugar into a separate bowl until you reach the ribbon stage.
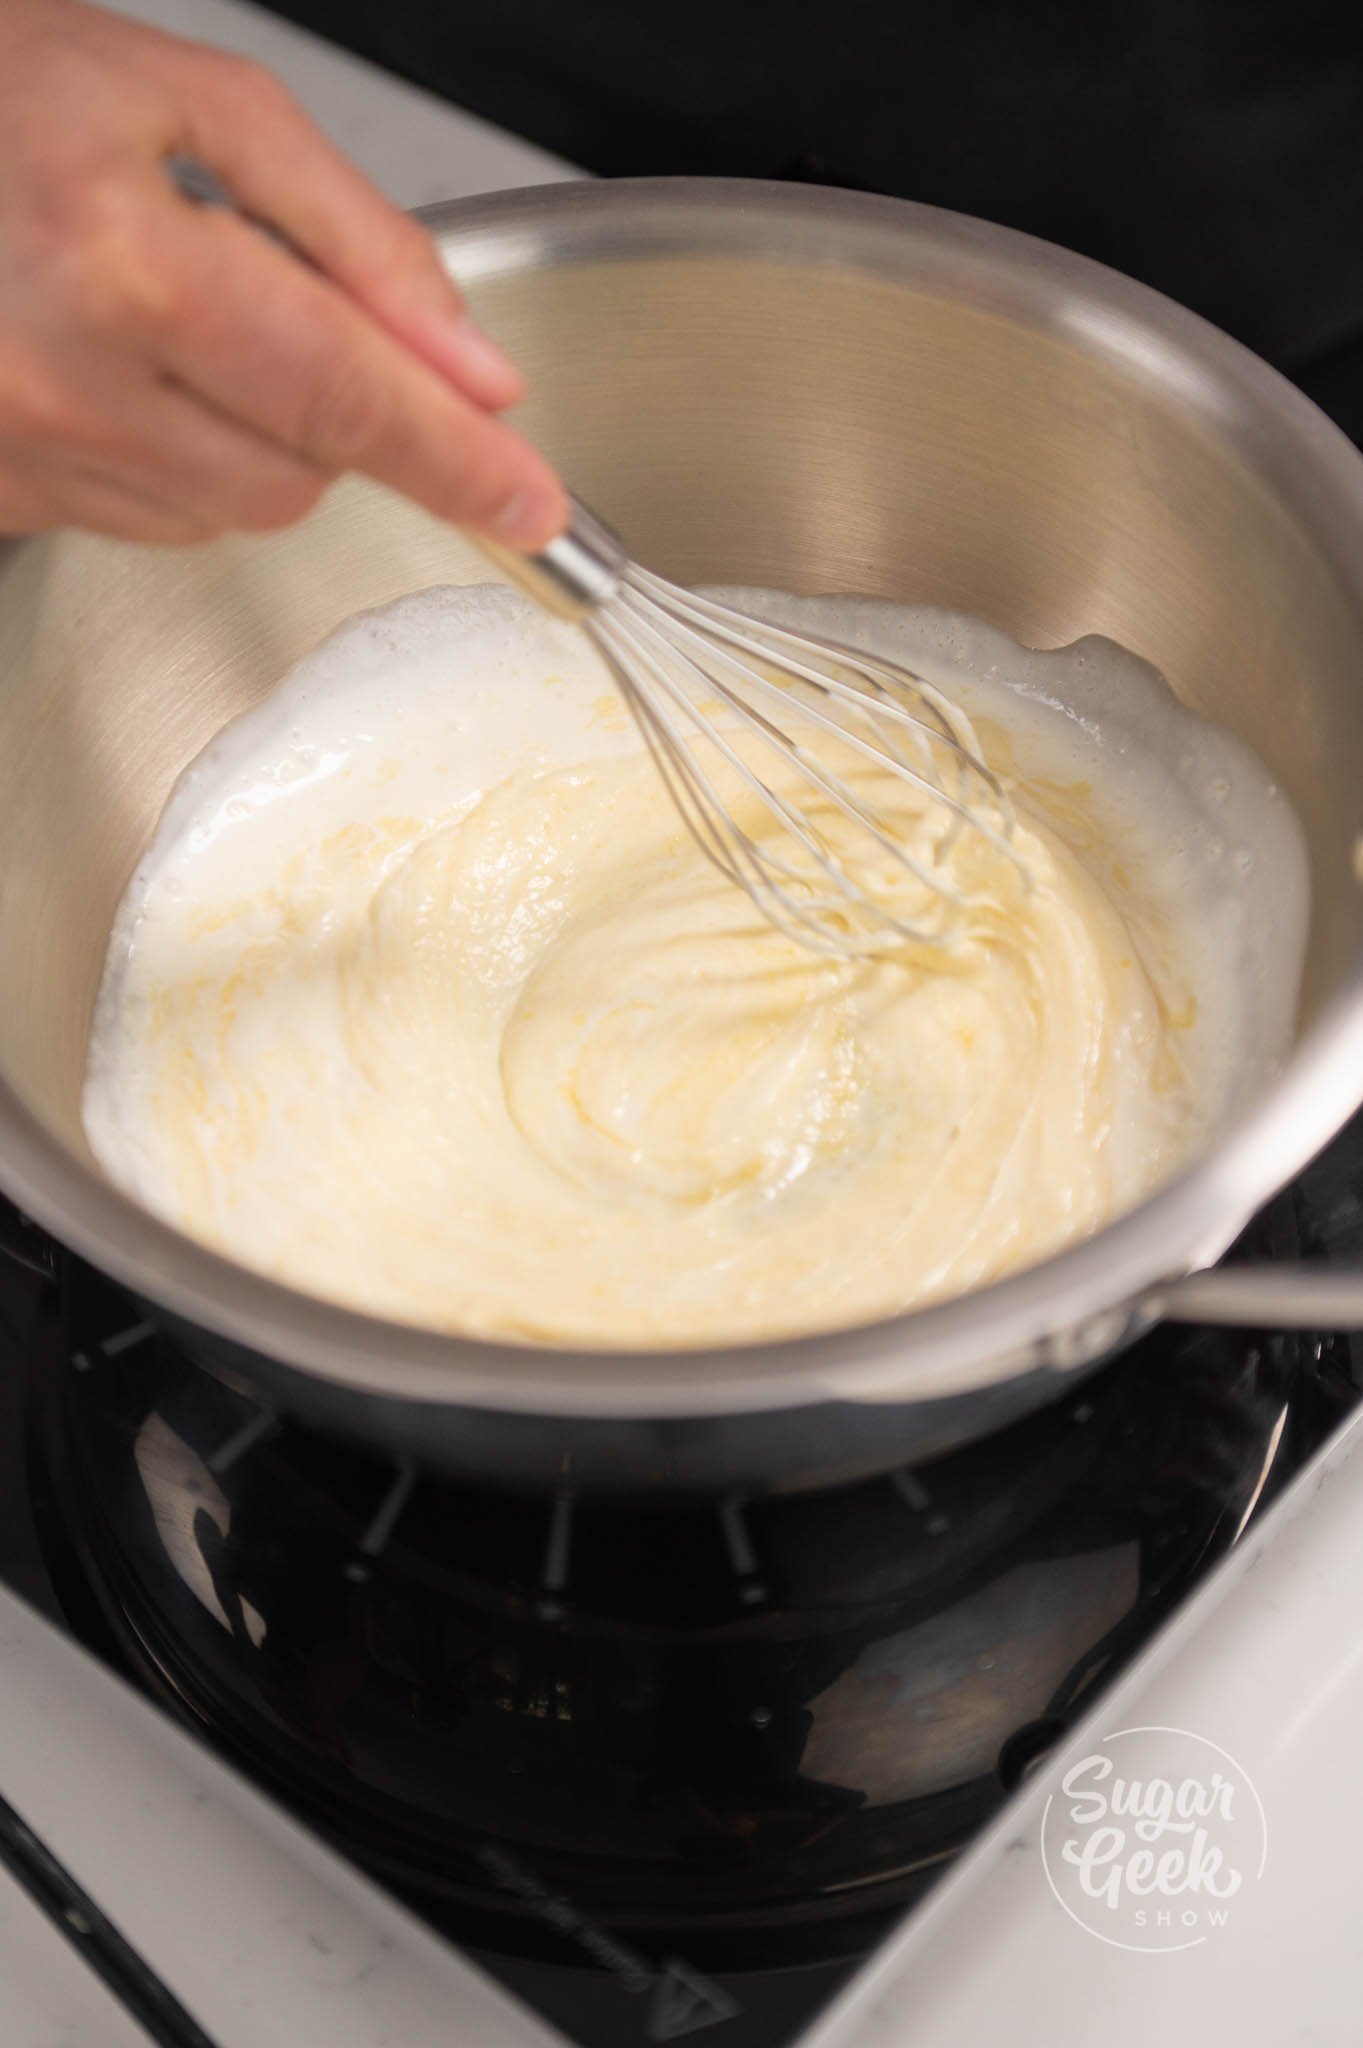
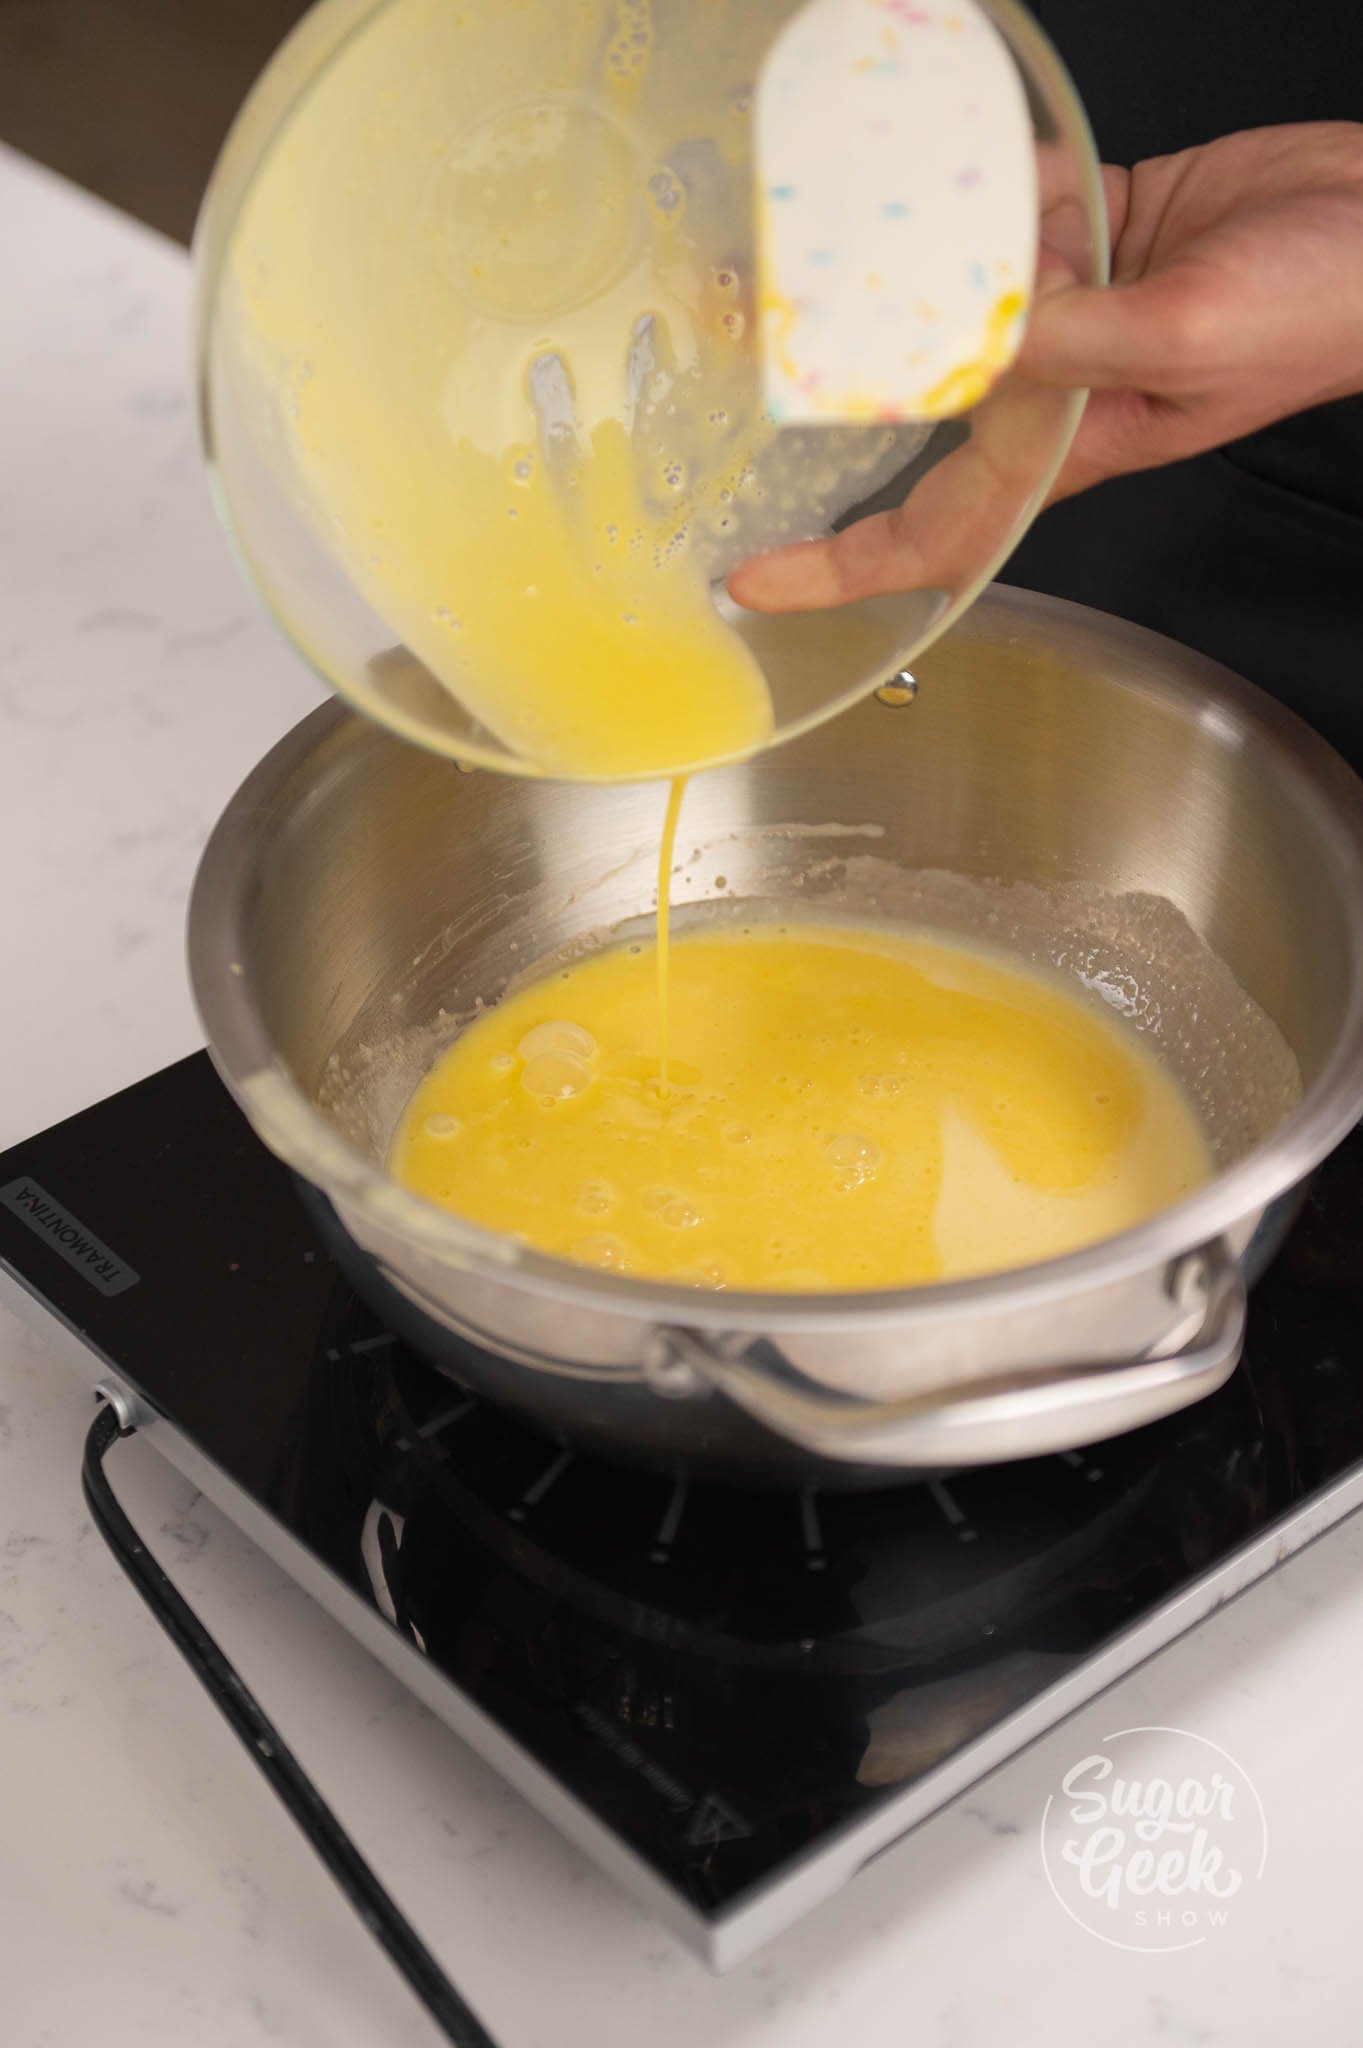
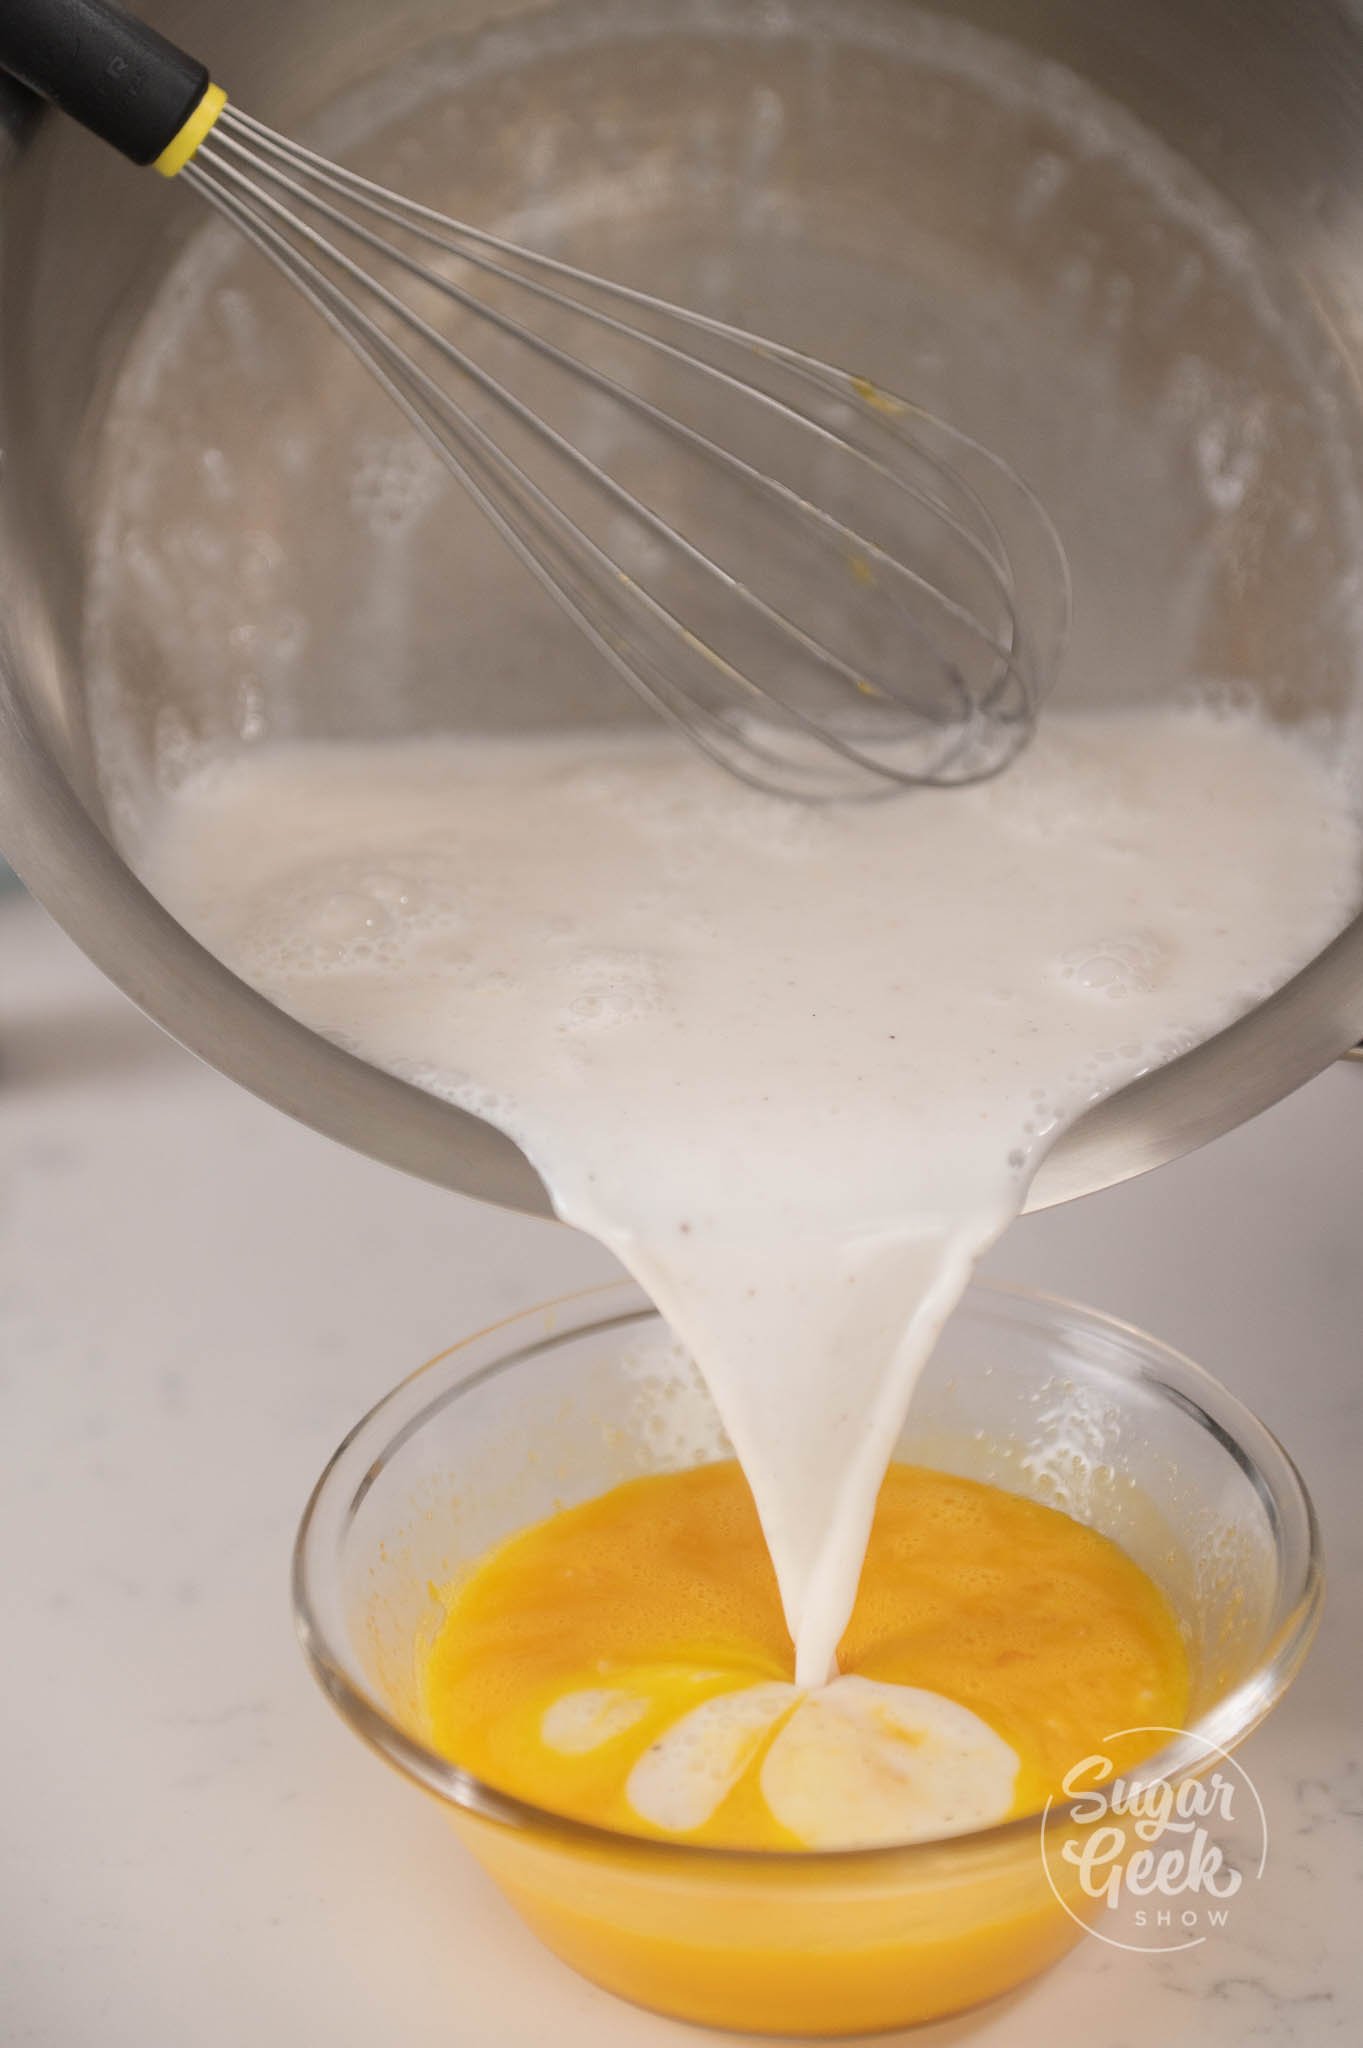
- Bring your mango mixture to a simmer over medium heat, whisking constantly to prevent burning and then remove it from the heat.
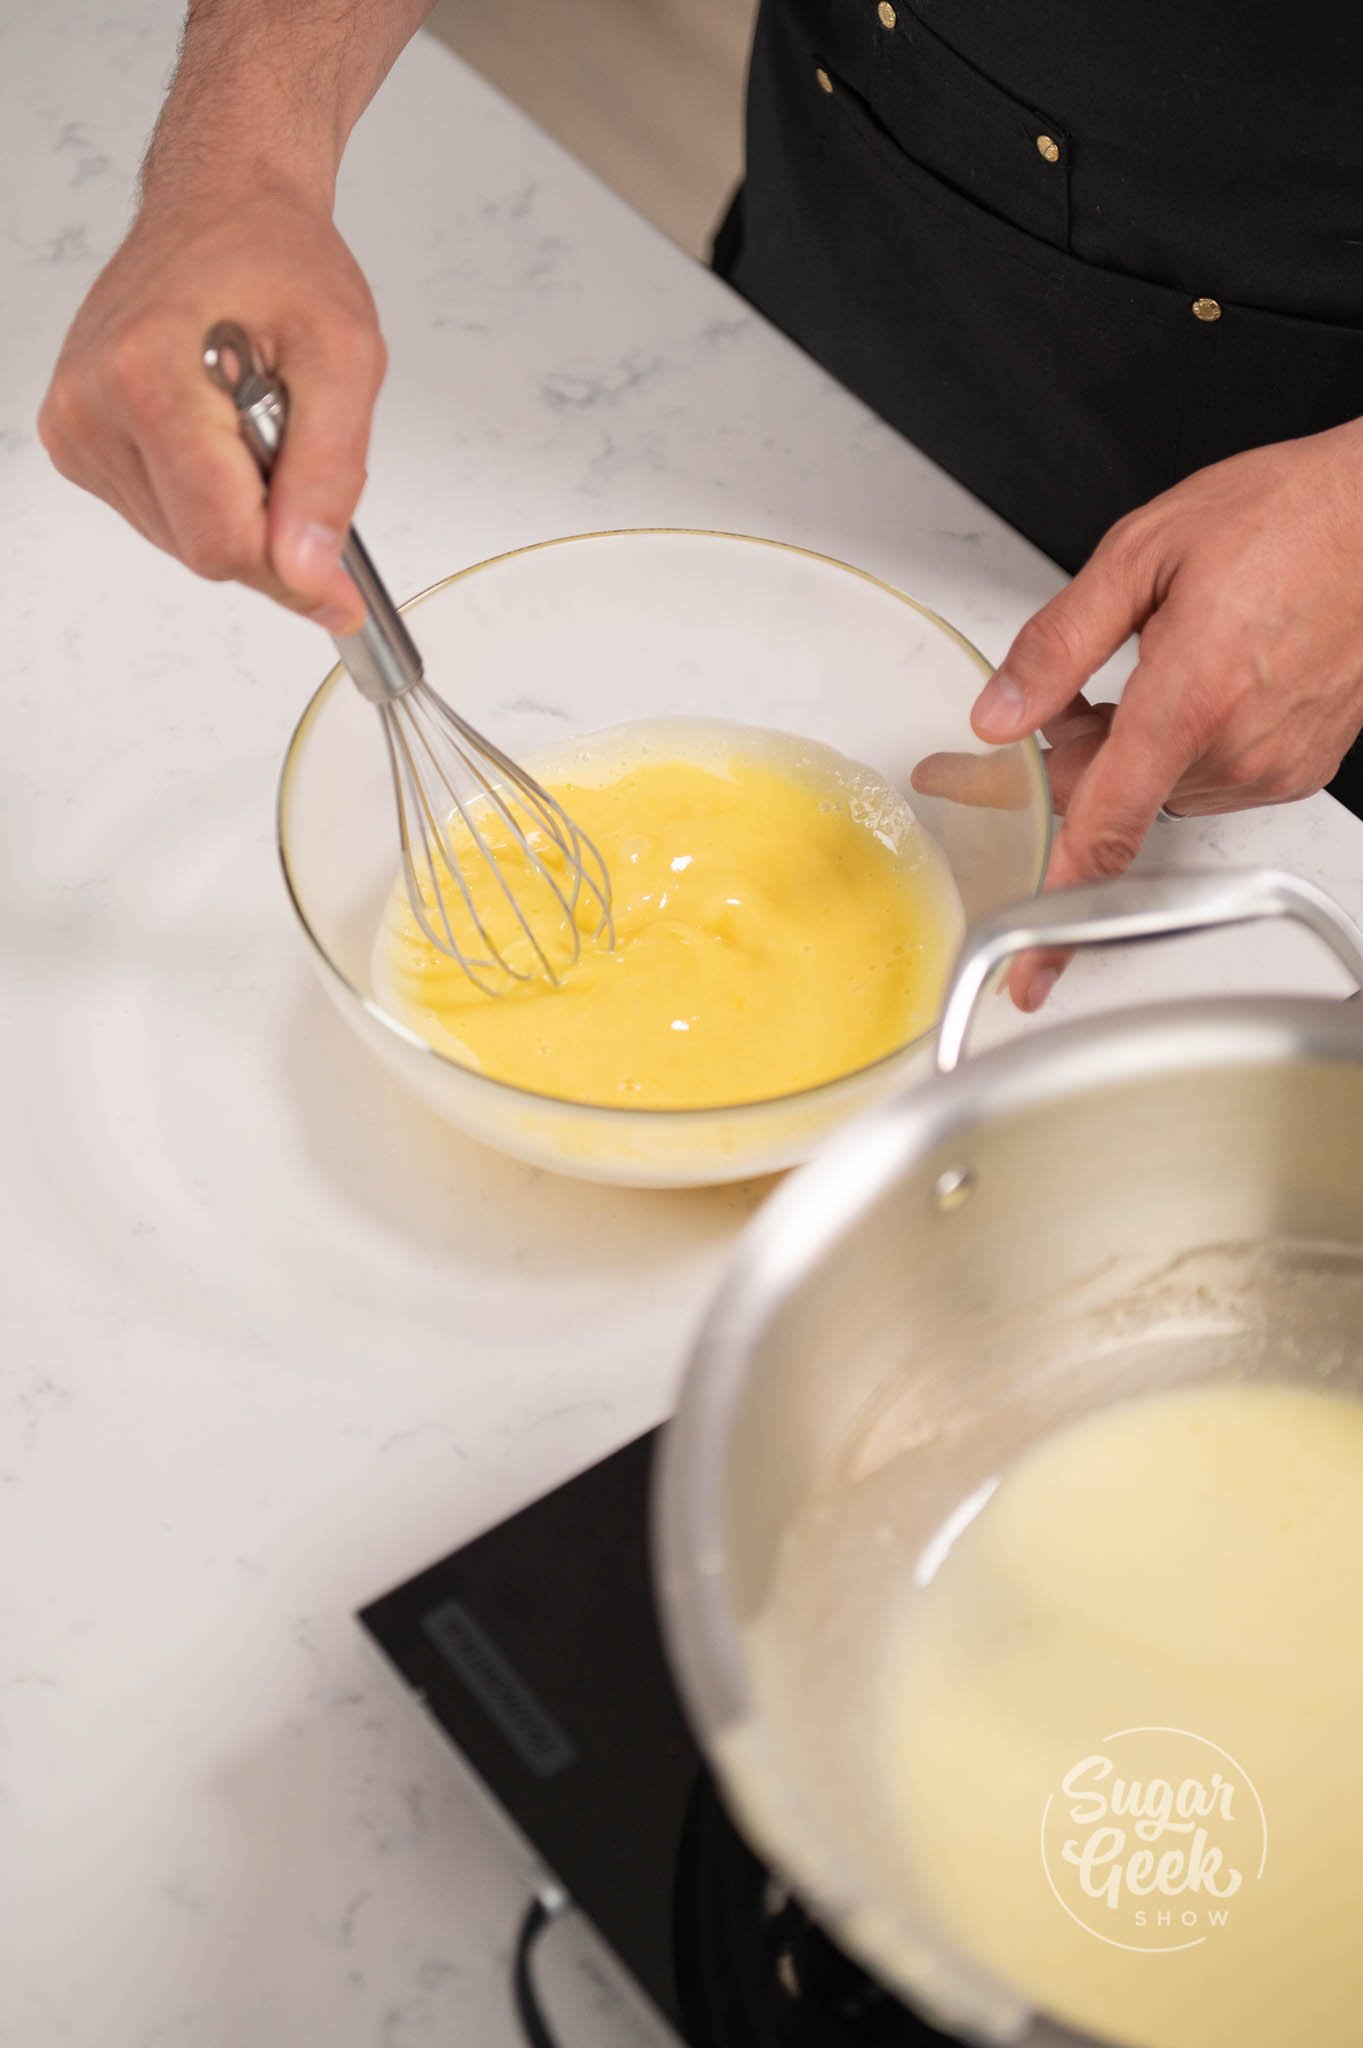
- Add ⅓ of the hot mango mixture to the egg mixture and whisk to prevent the eggs from curdling. This is called tempering.
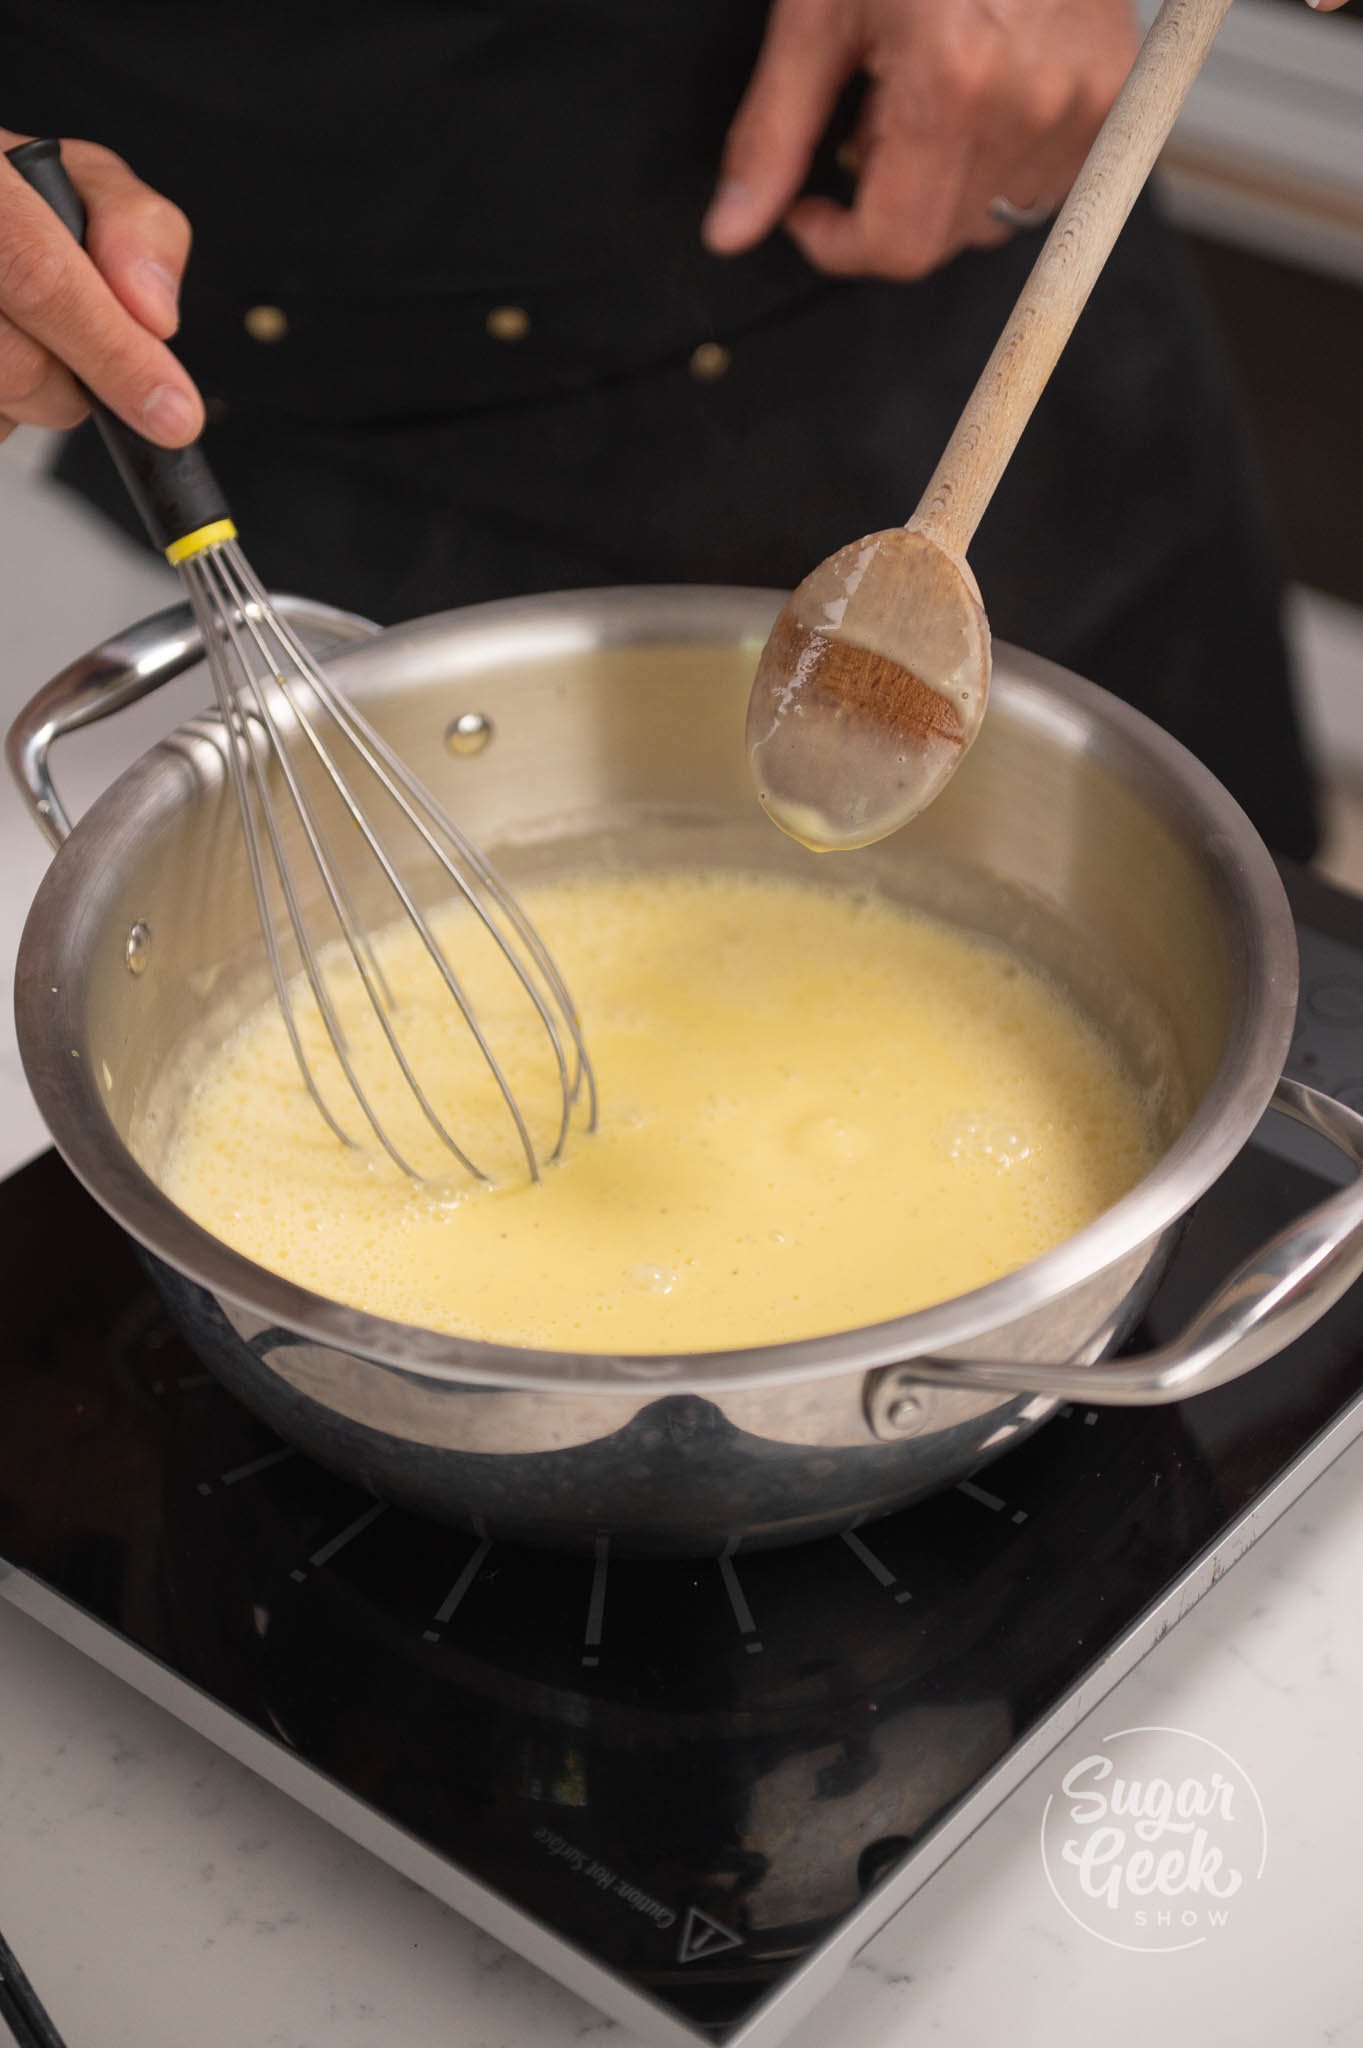
- Pour the tempered yolk mixture back into your mango mixture while still on medium heat. Keep whisking.
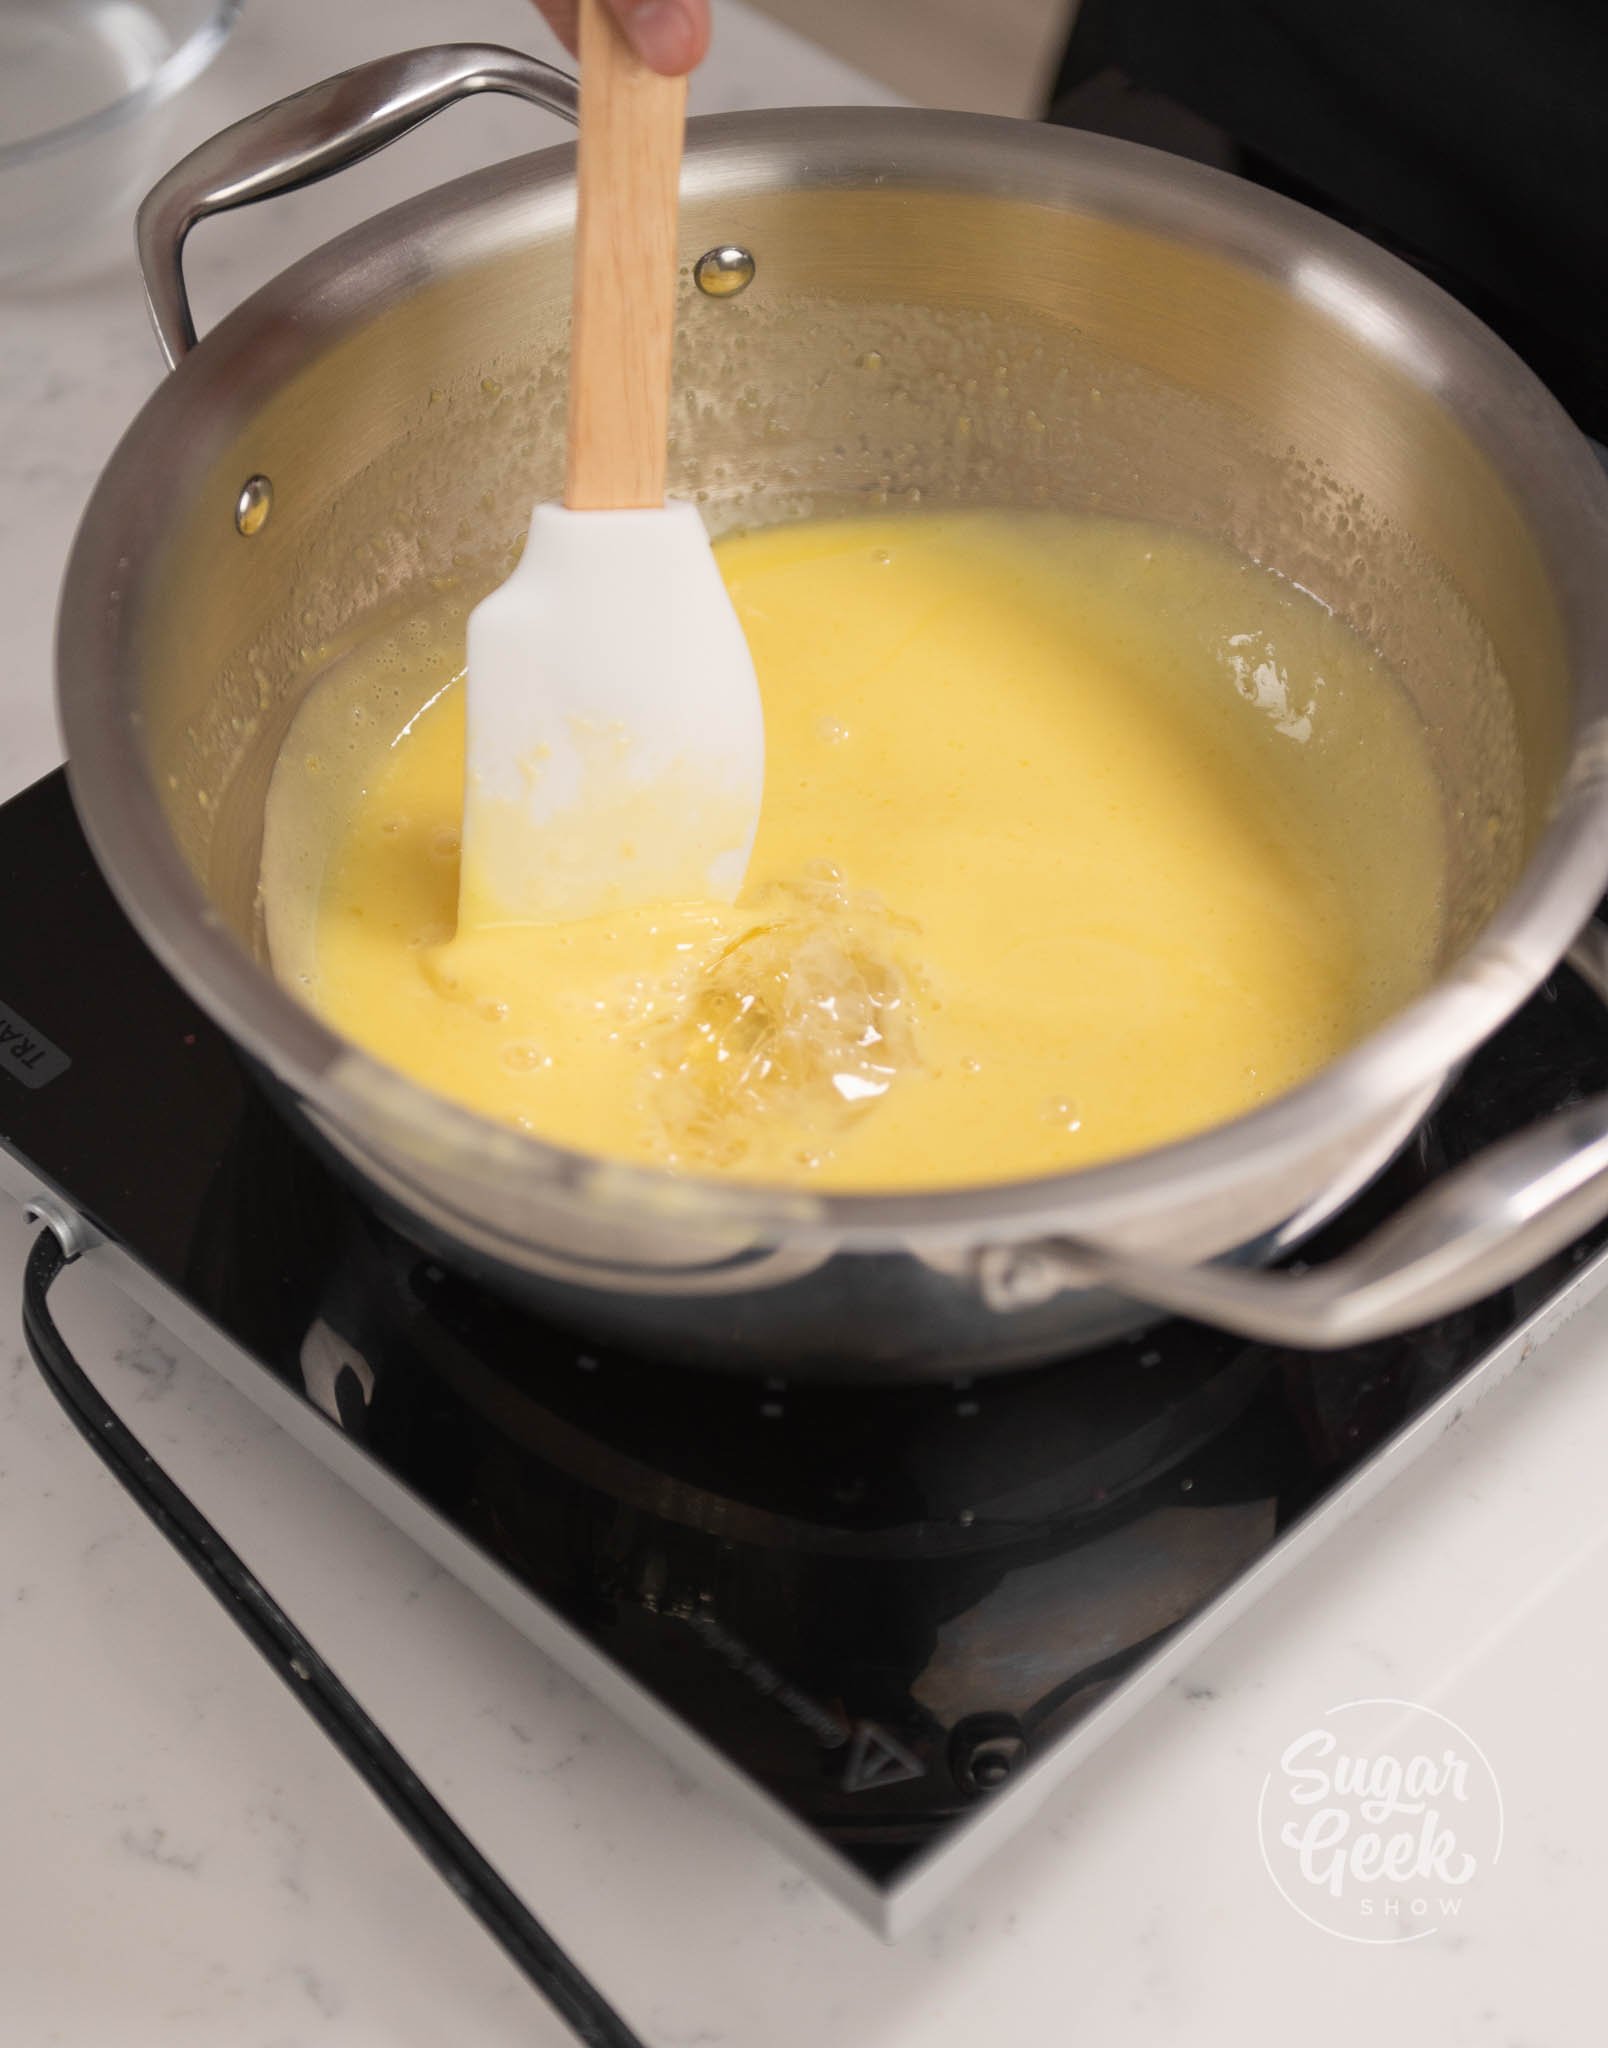
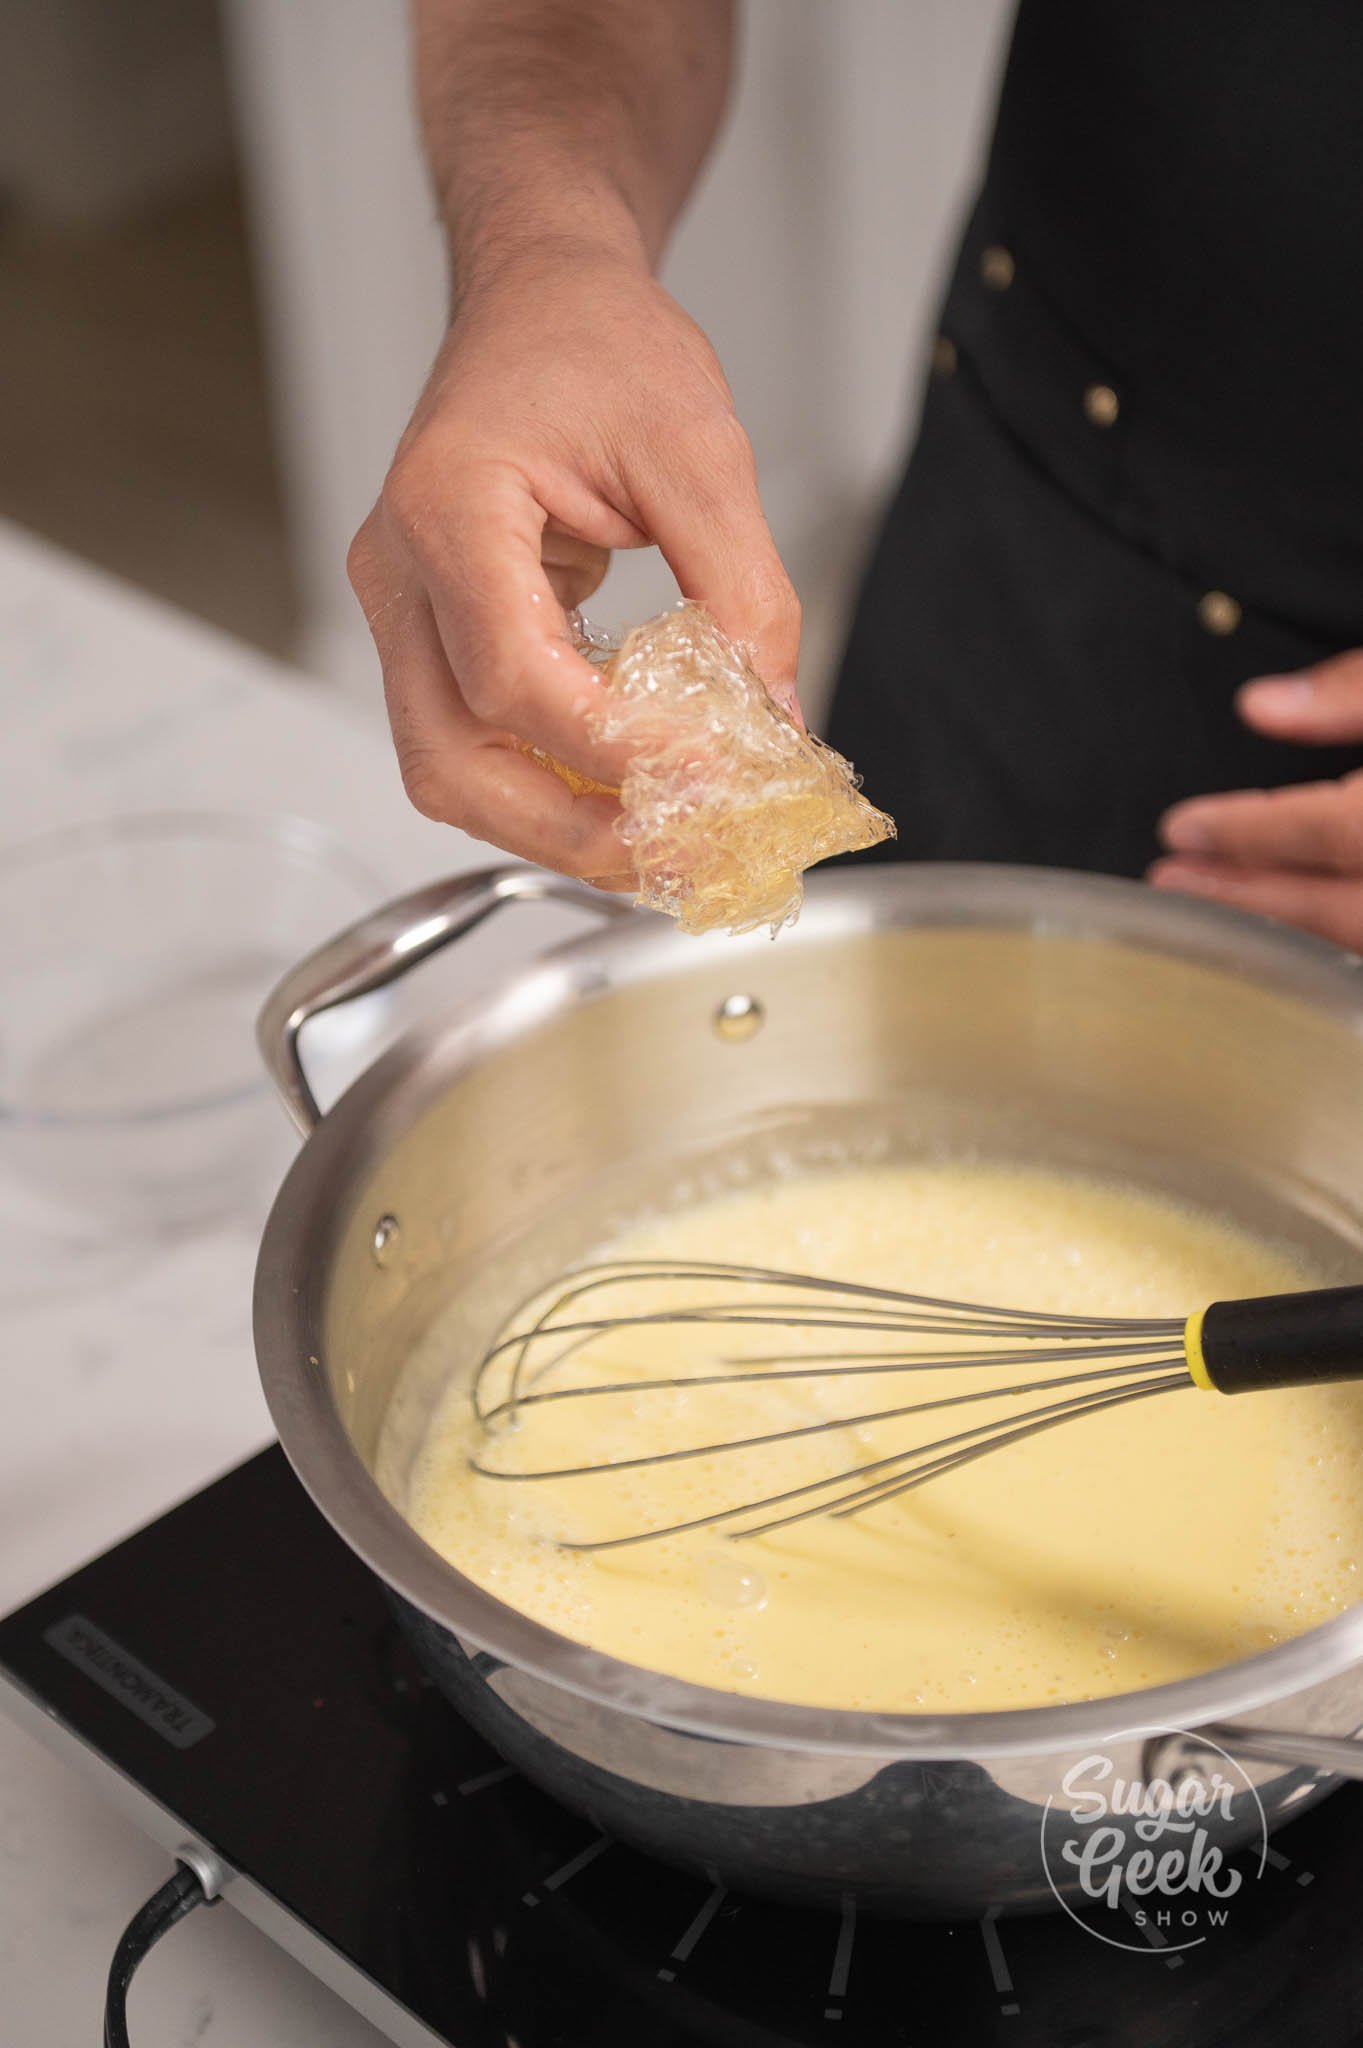
- Add in your bloomed gelatin. If using sheets make sure to ring out the gelatin of extra water.

- Cook the crémeux for about 3-5 minutes or until the mixtures about ready to boil (Do not boil).
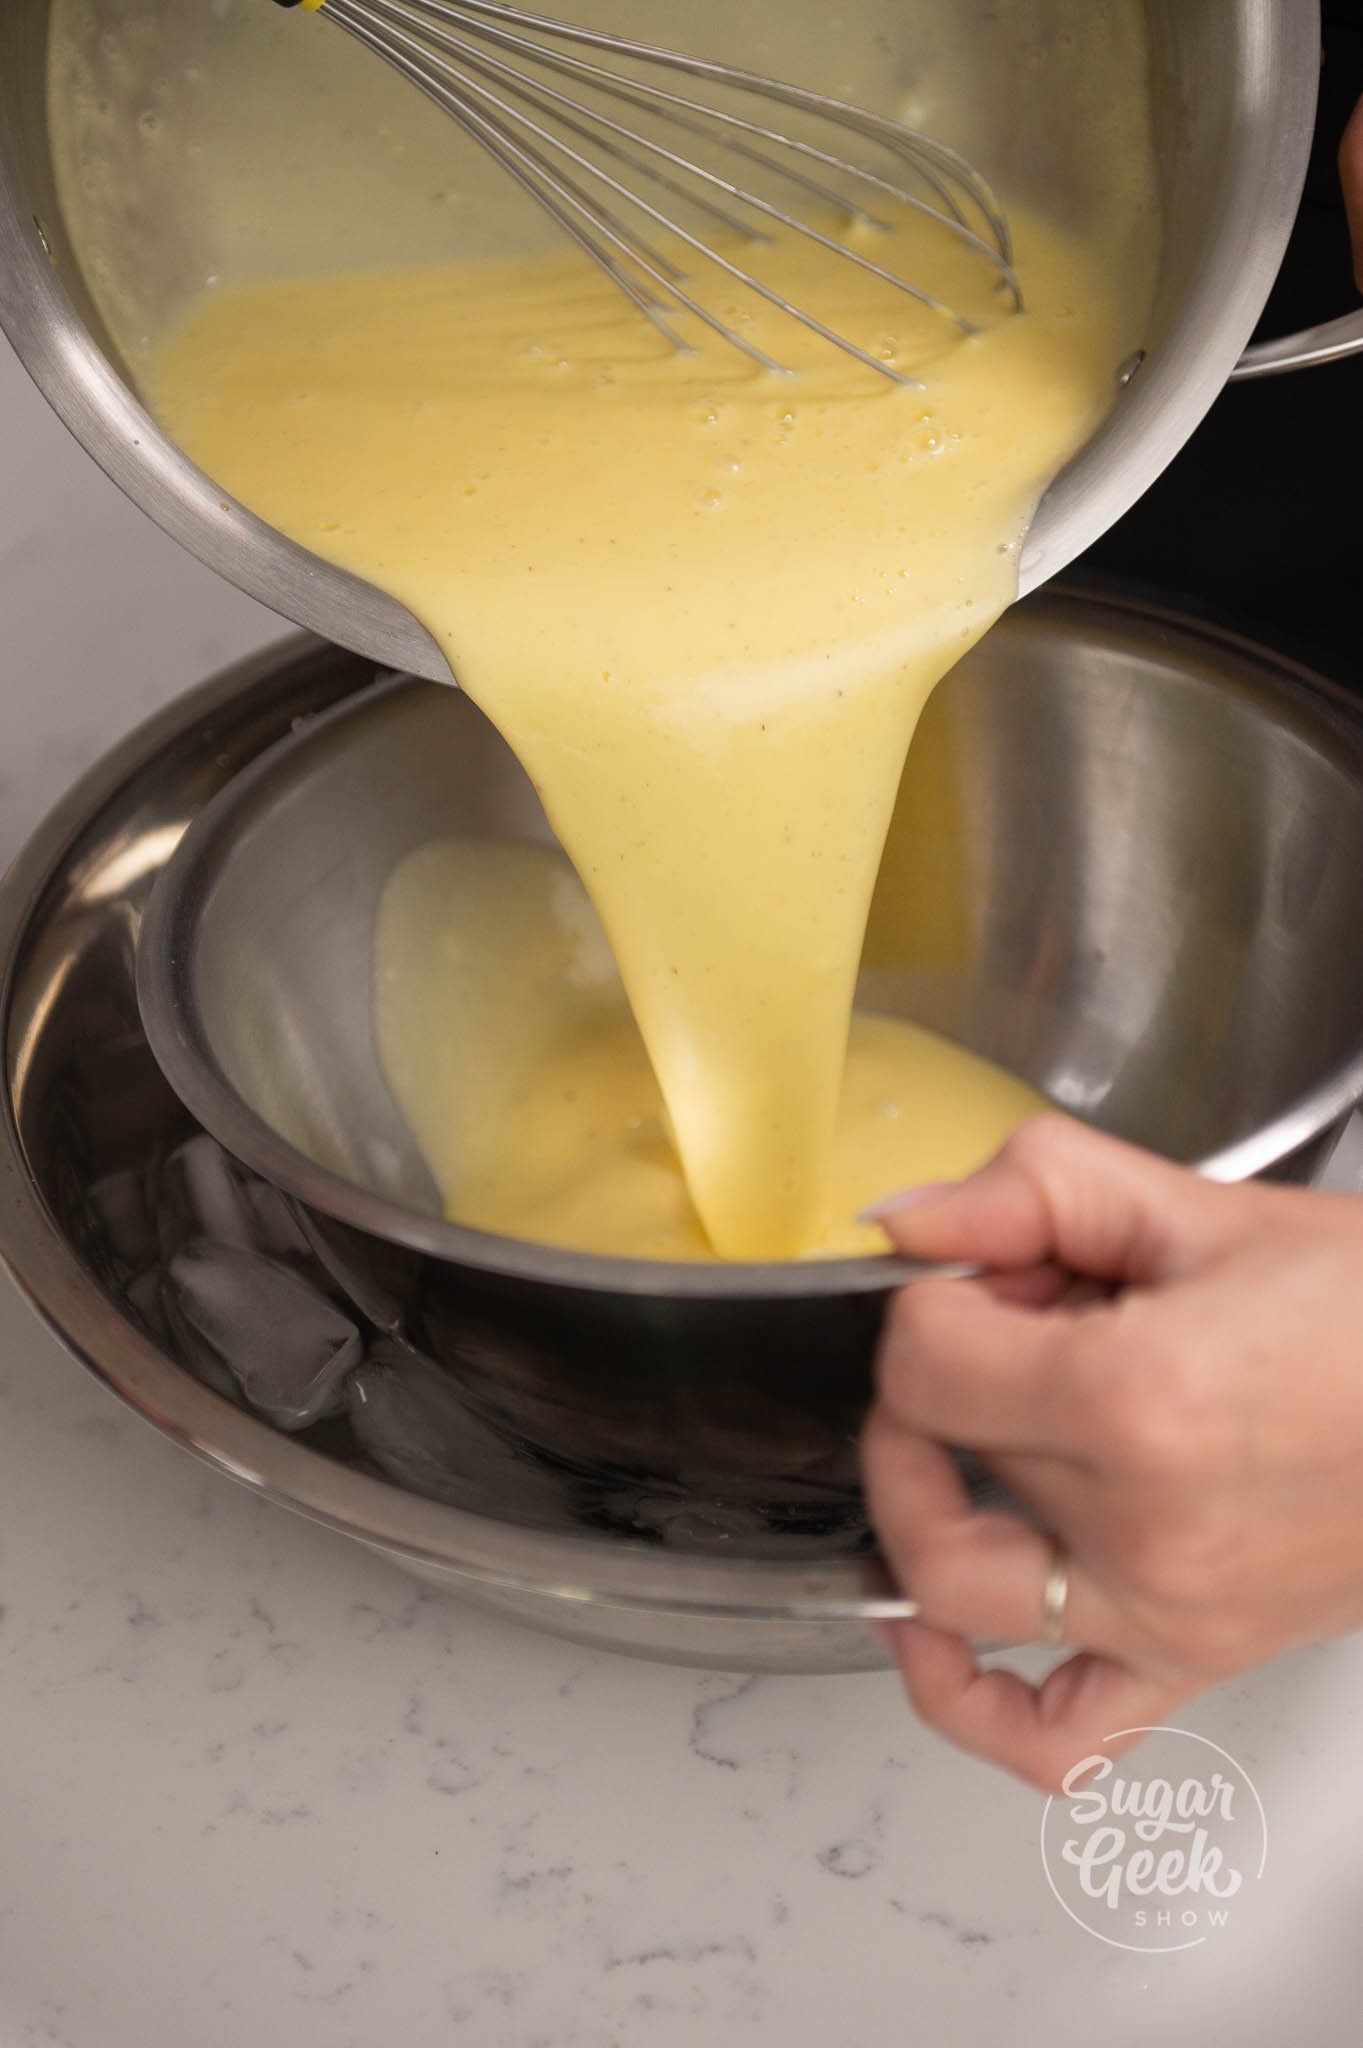
- When the crémeux is done, pour 200 grams into your mold on top of your frozen mango compote and freeze the mold overnight.
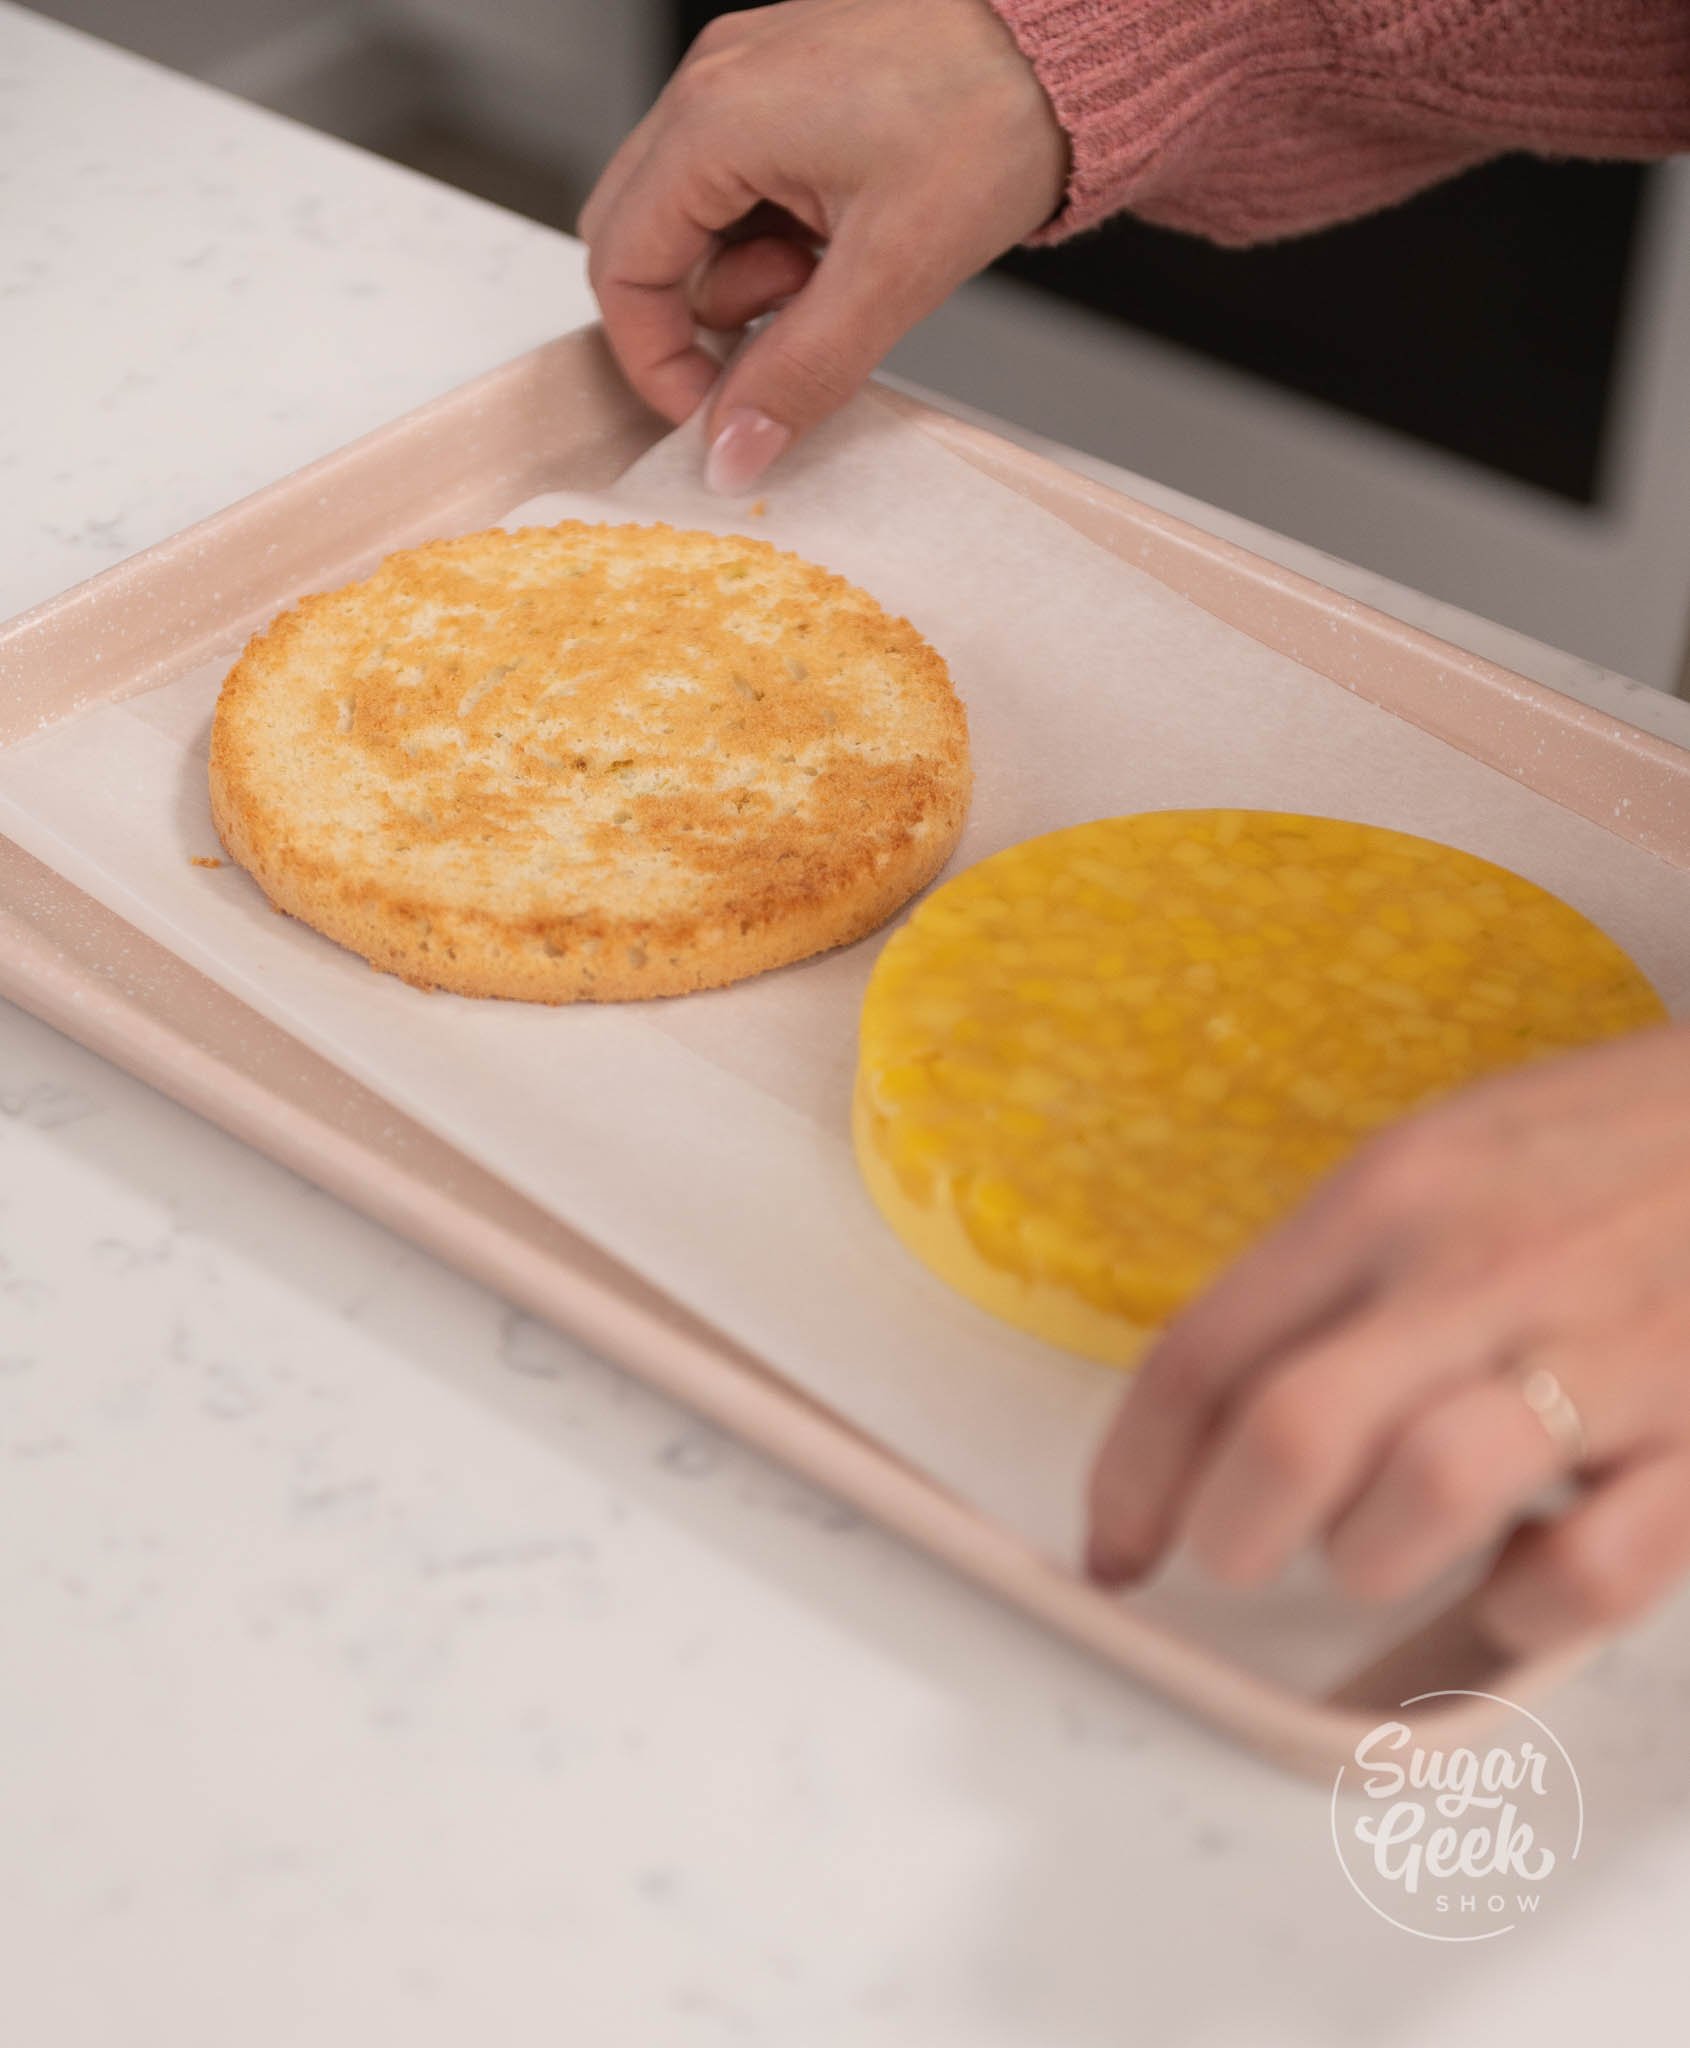
Coconut Dacquoise Step-By-Step
A dacquoise is a type of cake consisting of a meringue base and nut flour (typically almond). It's super a light sponge cake that pairs really well with mousse cakes and even ice cream cakes because meringue does not freeze. It's made by finely grinding nuts such as hazelnuts, almonds, or in this case coconut flakes, then folding them with a meringue and then baking.
- Preheat your oven to 360º F (180º C).
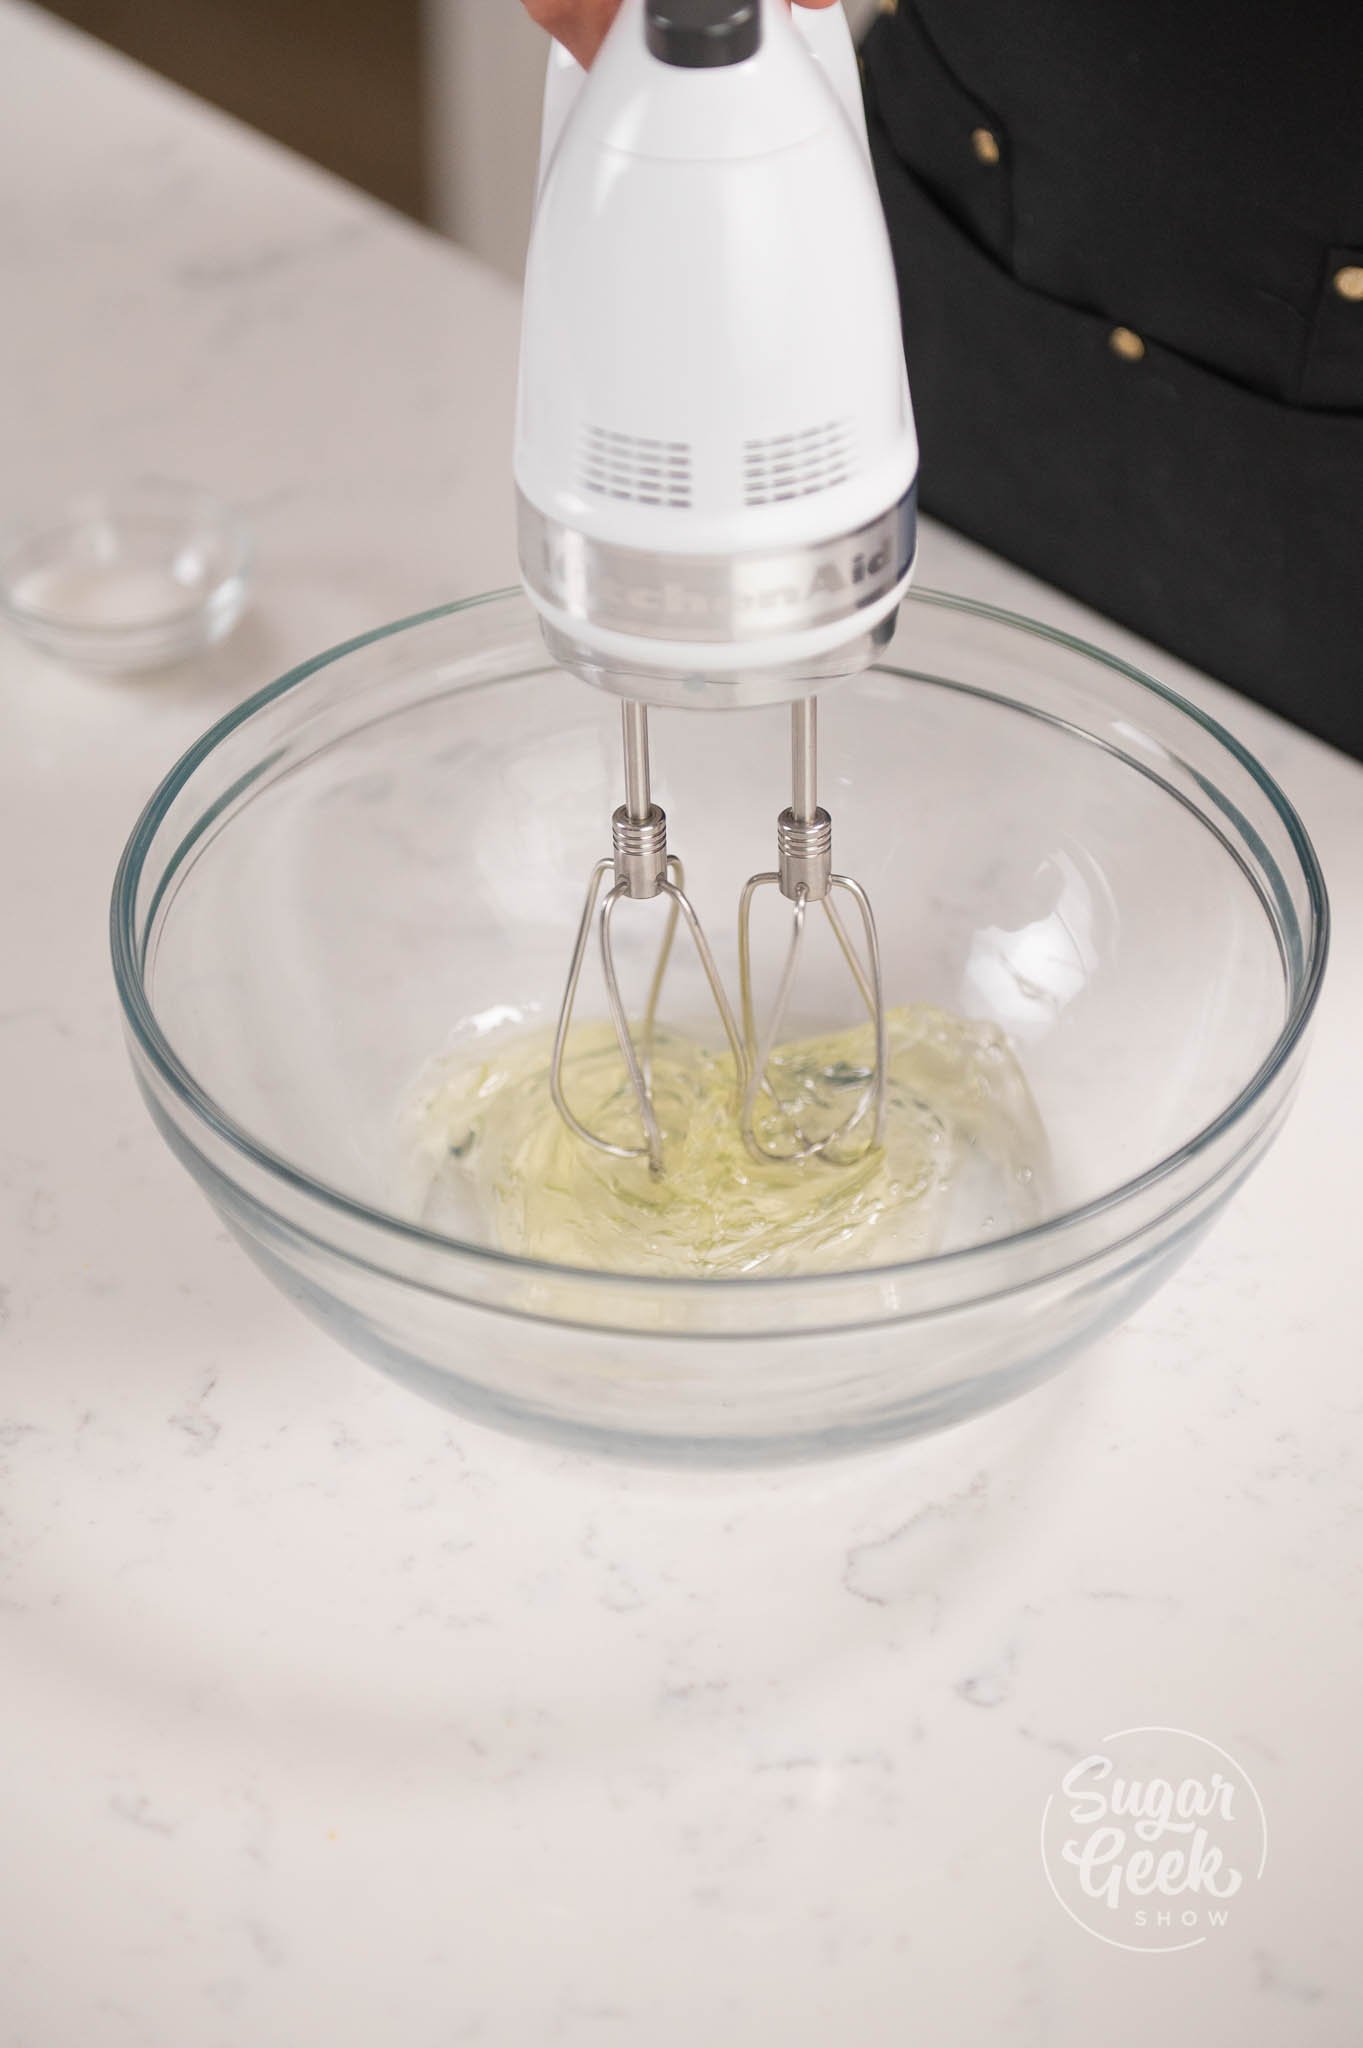
- Add your egg whites into the bowl of your stand mixer with the whisk attachment. Whisk on low speed until the egg whites reach soft peaks.
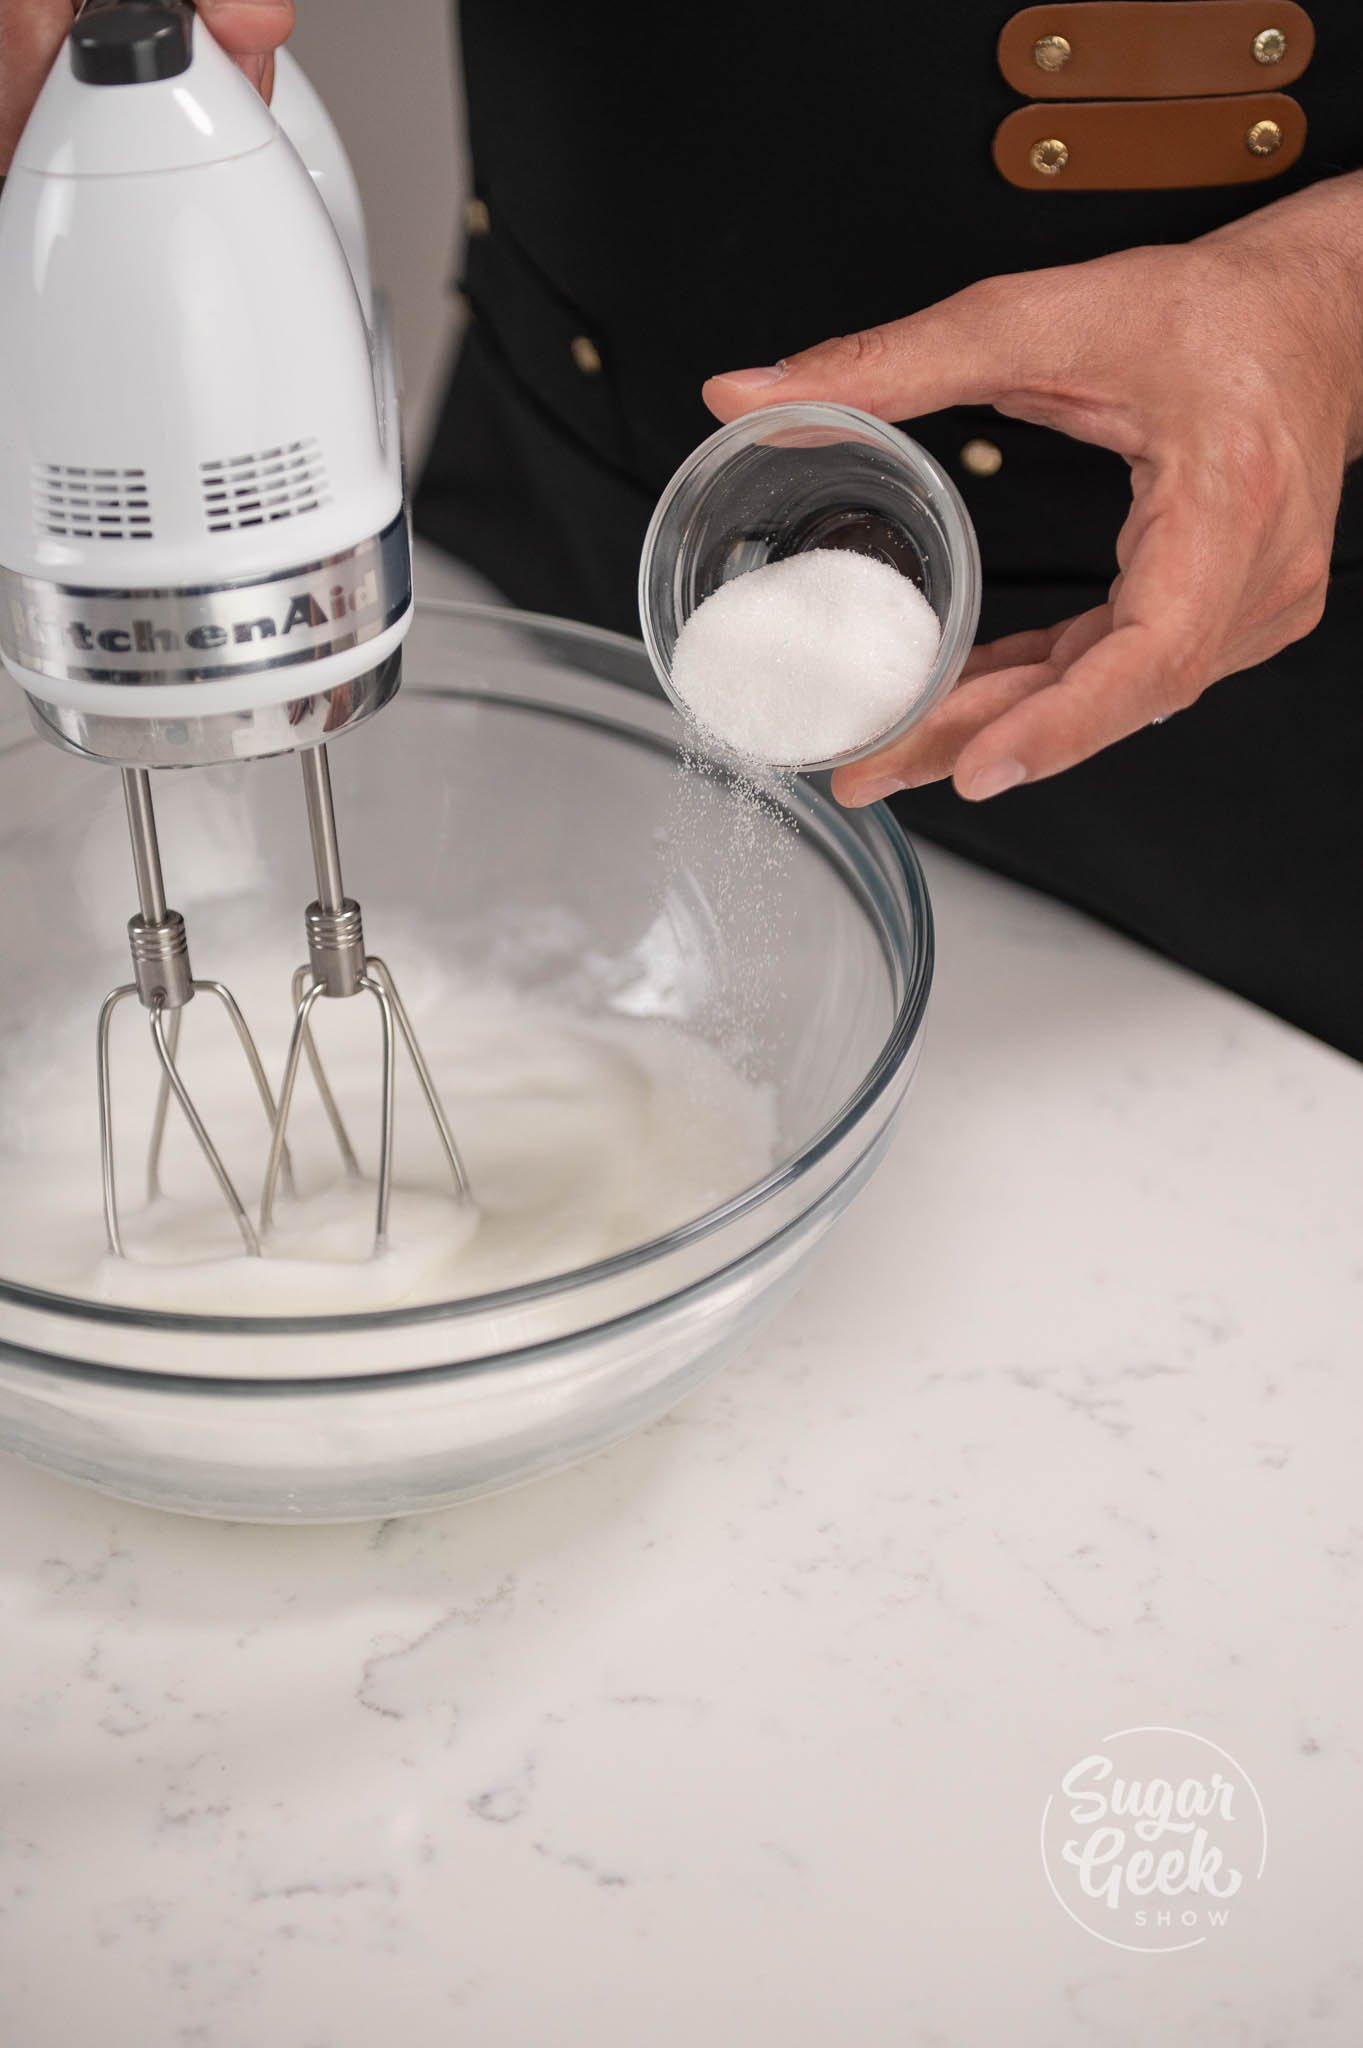
- Add in your sugar and continue to mix until you reach medium peaks.
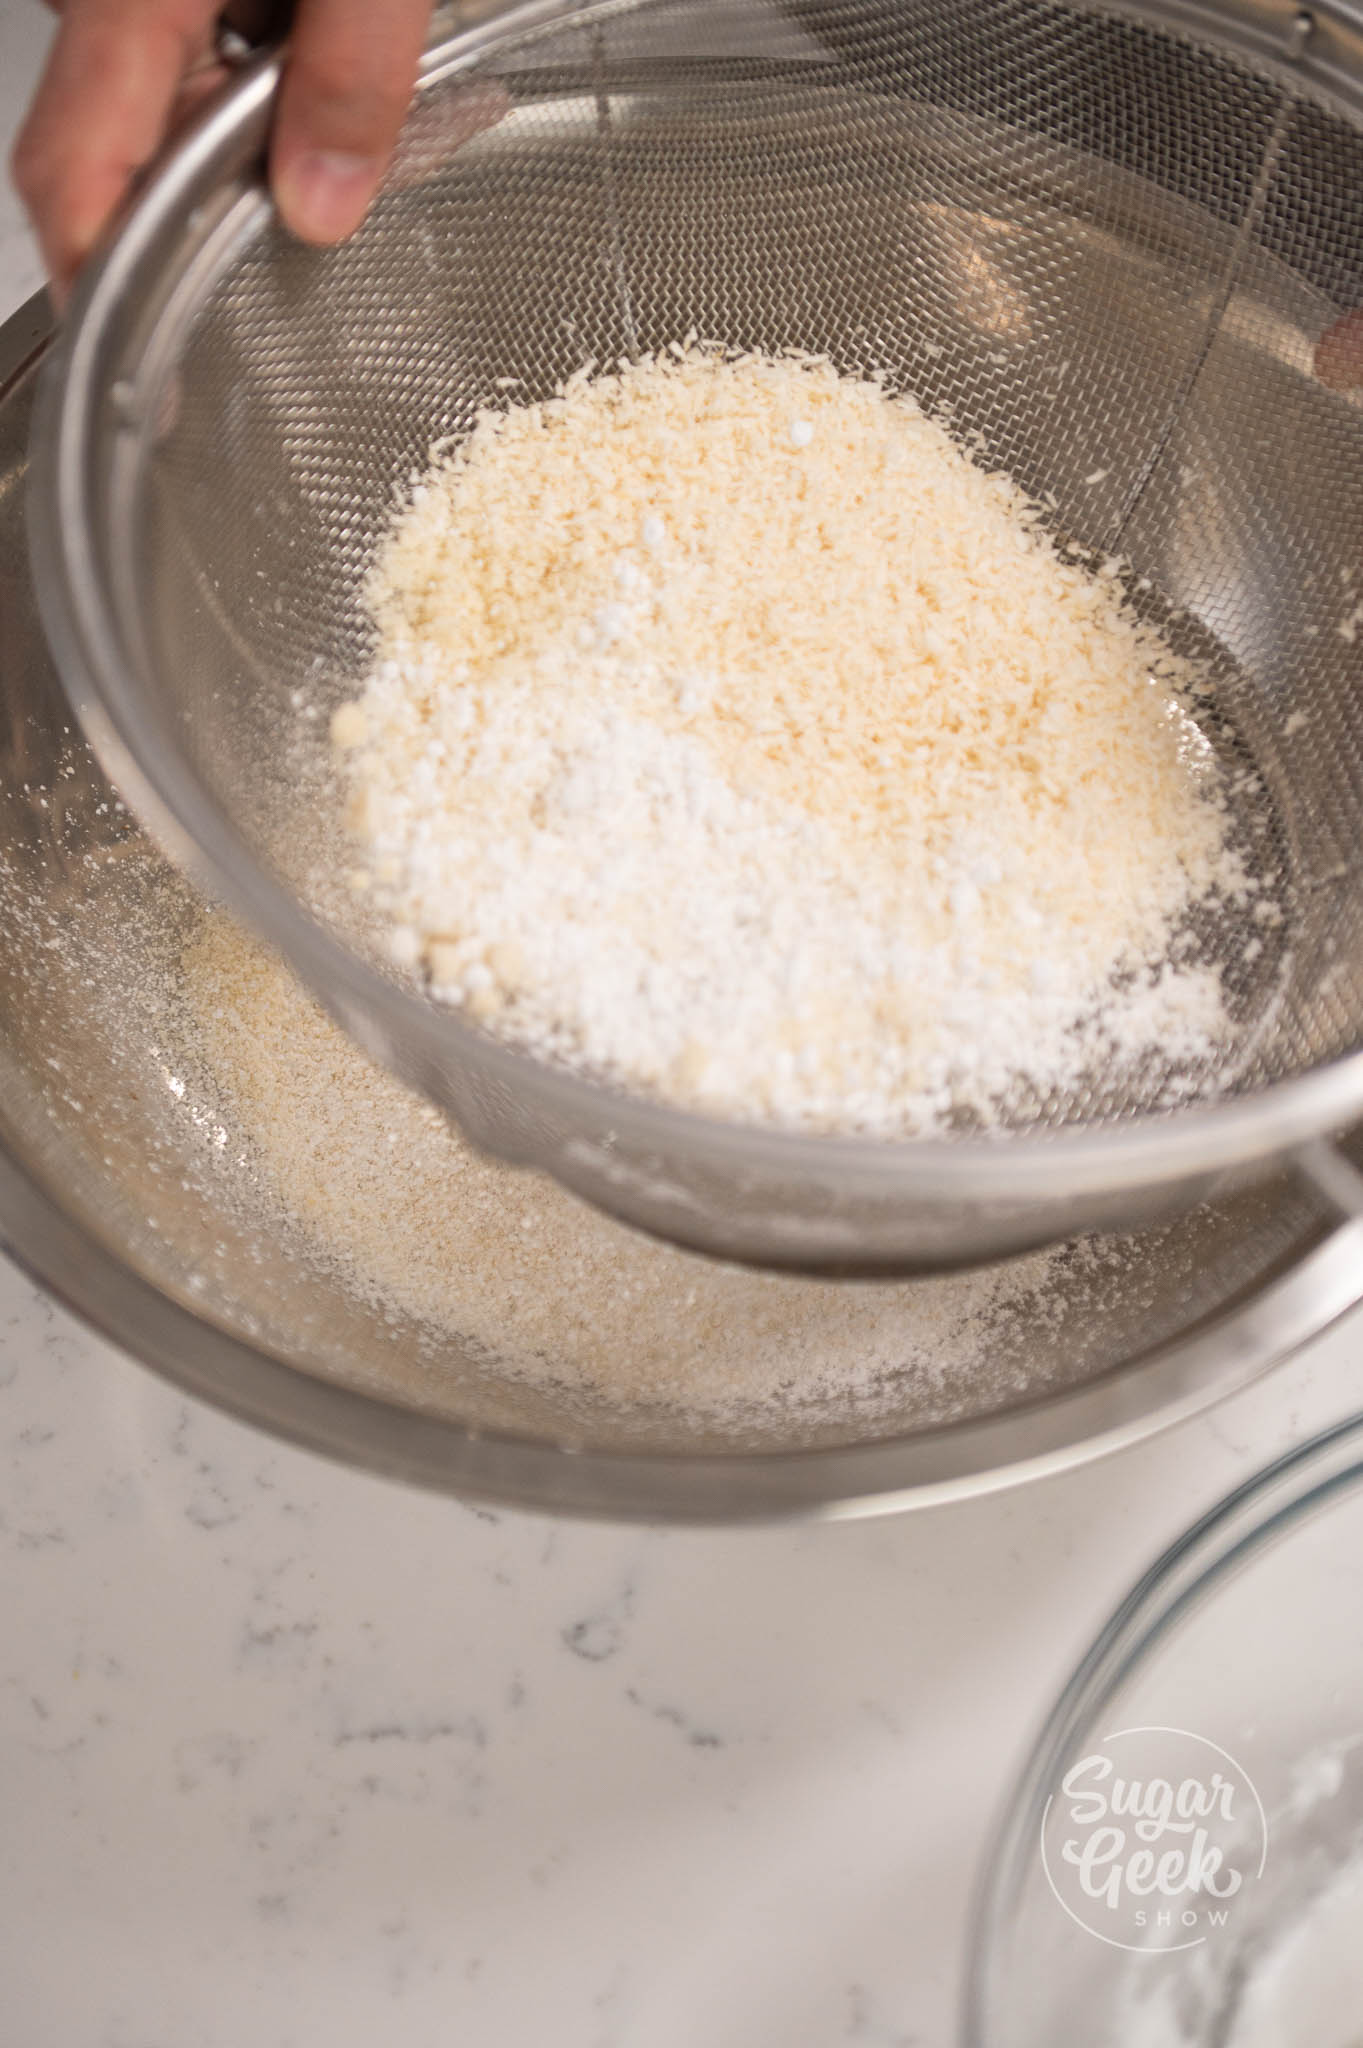
- Sift your powdered sugar, almond flour, and coconut flakes into a separate bowl.
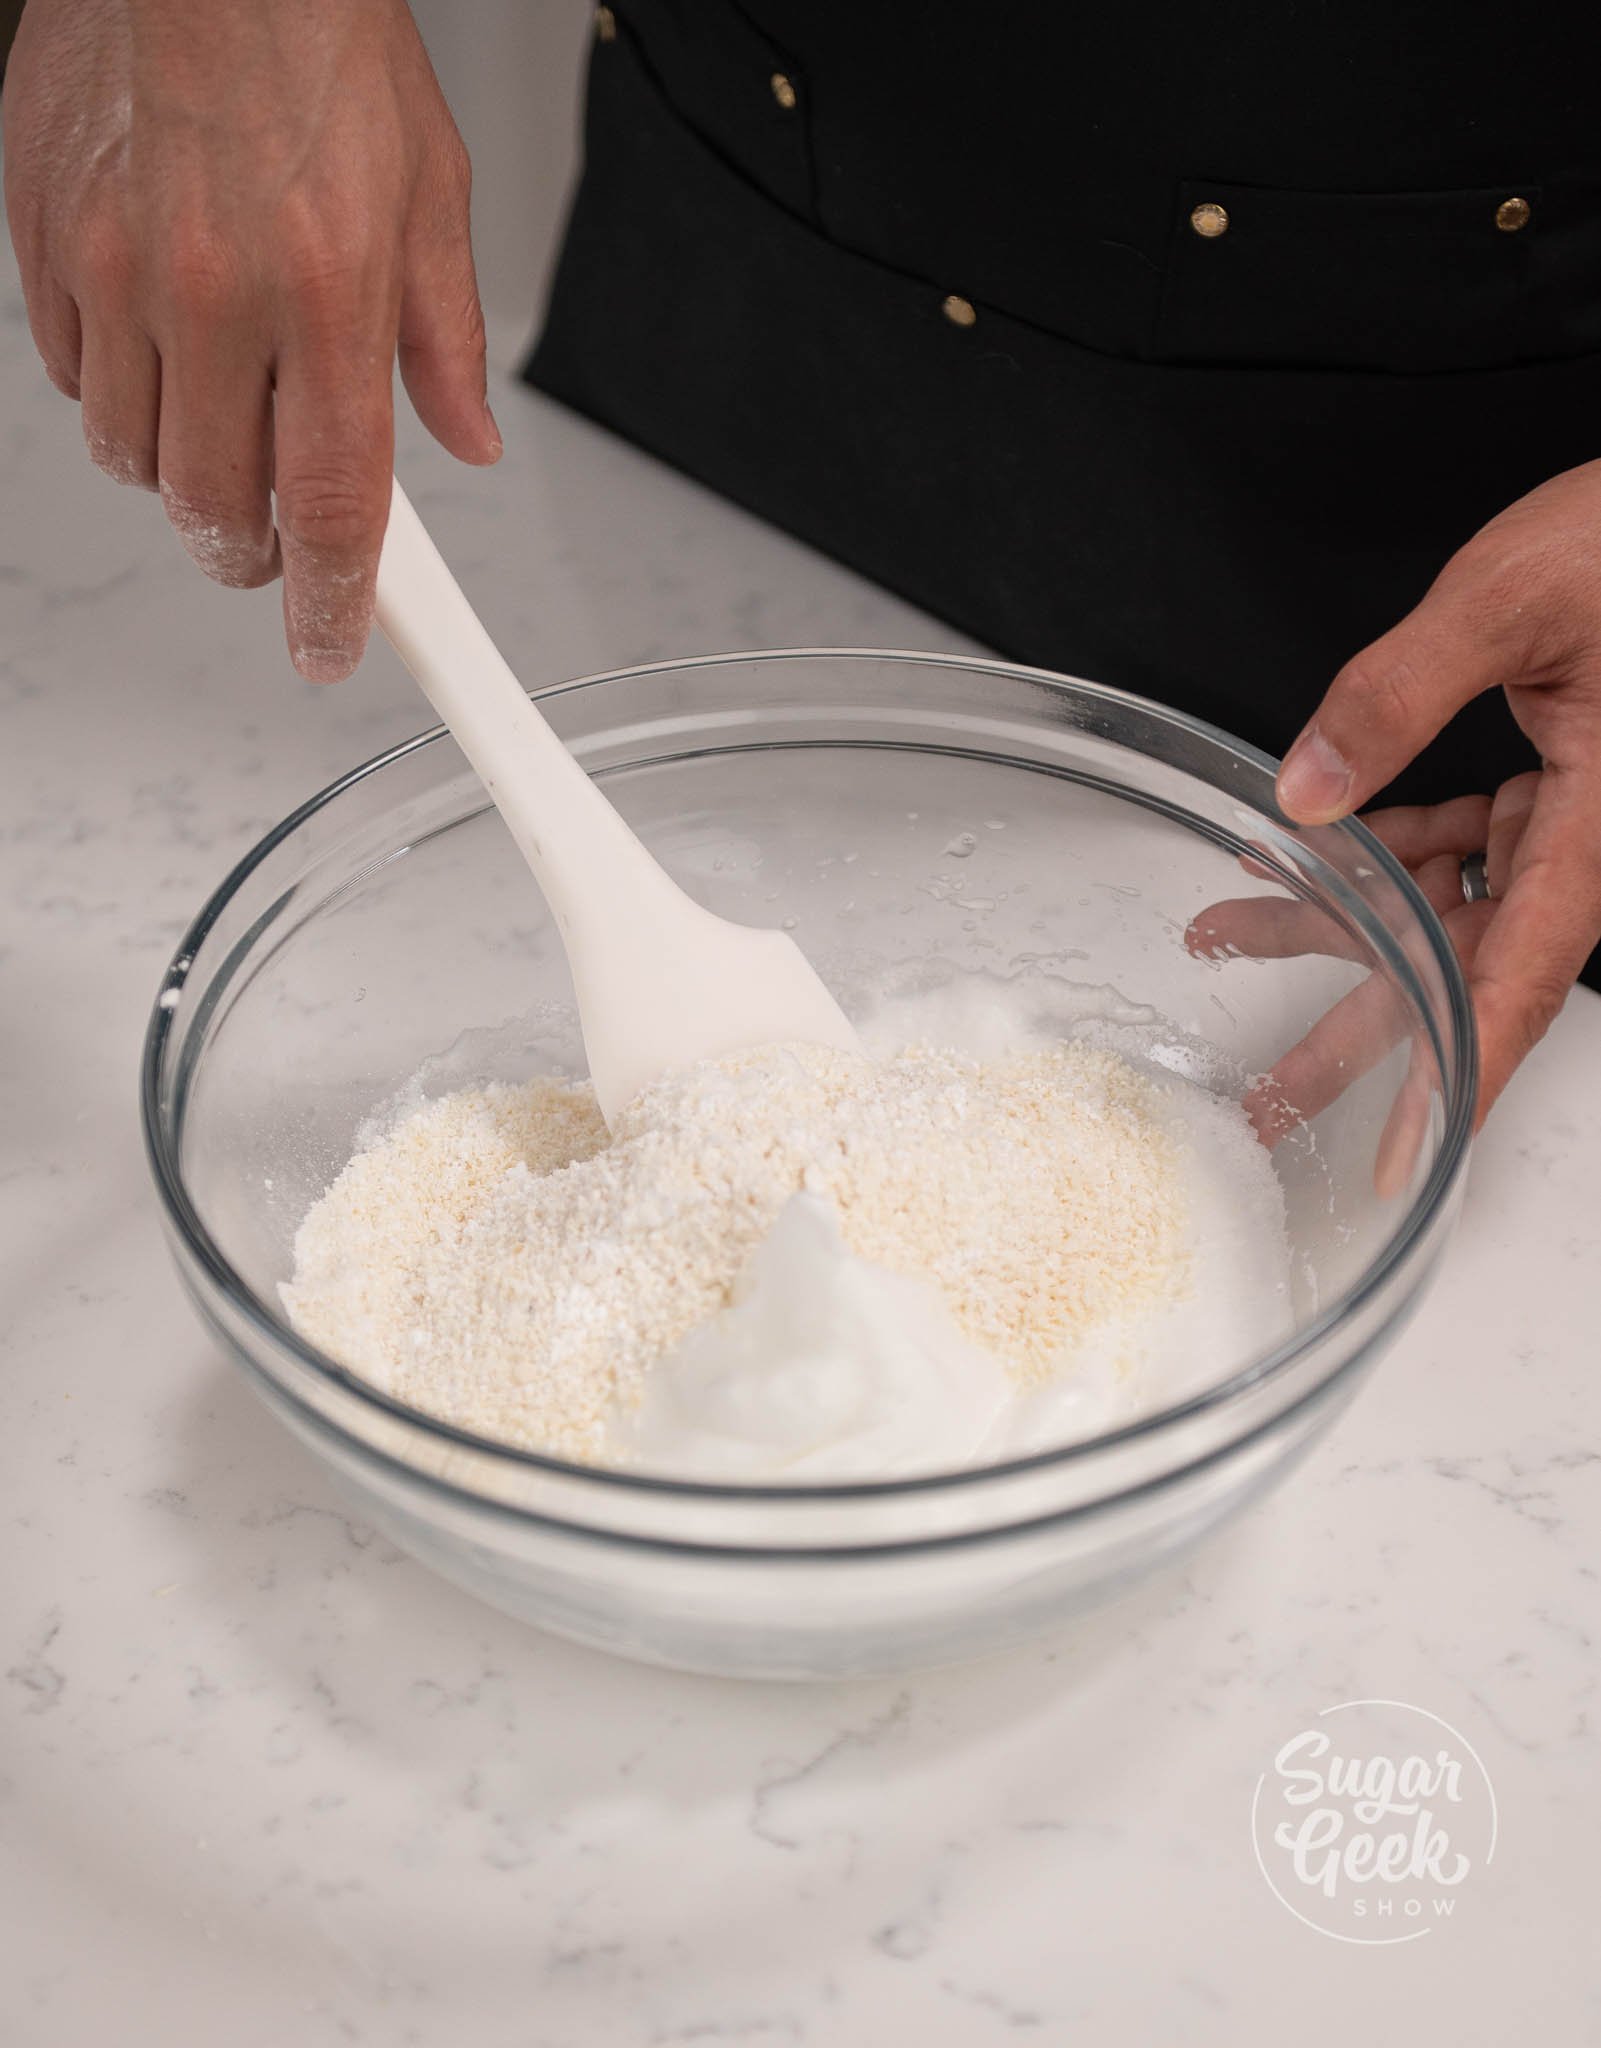
- Add in ⅓ of your dry ingredients into your meringue along with the lime zest, then fold with a spatula.

- Add in the rest of your dry ingredients and keep folding. ( Do not overmix because the more you fold the more air you lose. More air equals more volume, so fold lightly).

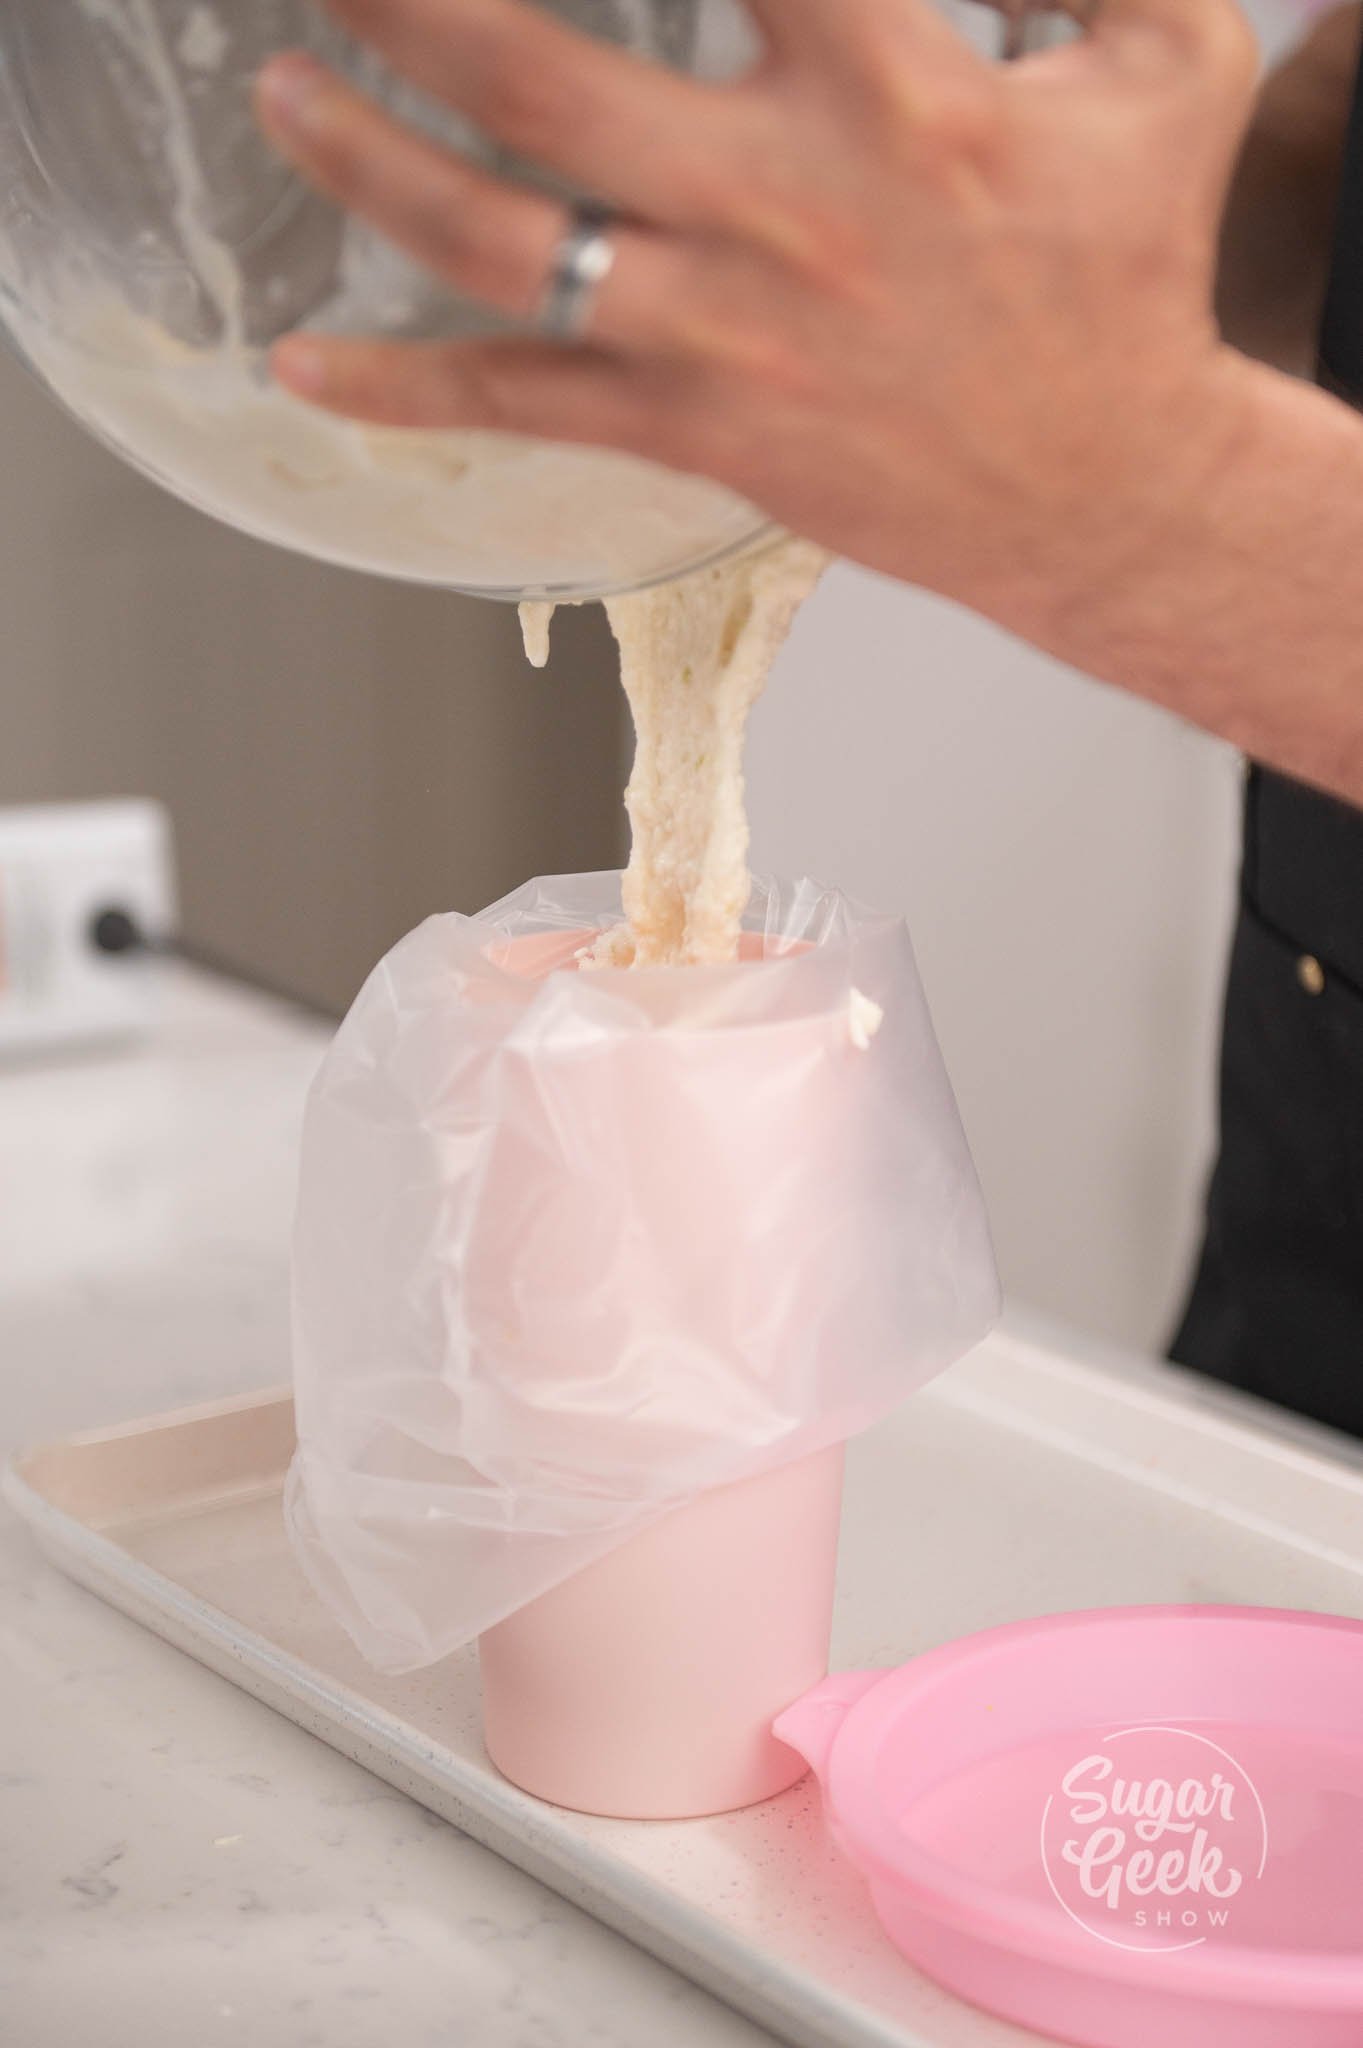
- Prepare a piping bag with a medium ound tip. Pour your batter into the piping bag.
- Pipe the batter into your mold starting from the center, moving to the outside of the mold in a spiral pattern. Hold the piping tip about ½" away from the mold so that you pipe in a thin layer. (Piping the batter helps create an even layer instead of pouring it straight in.)

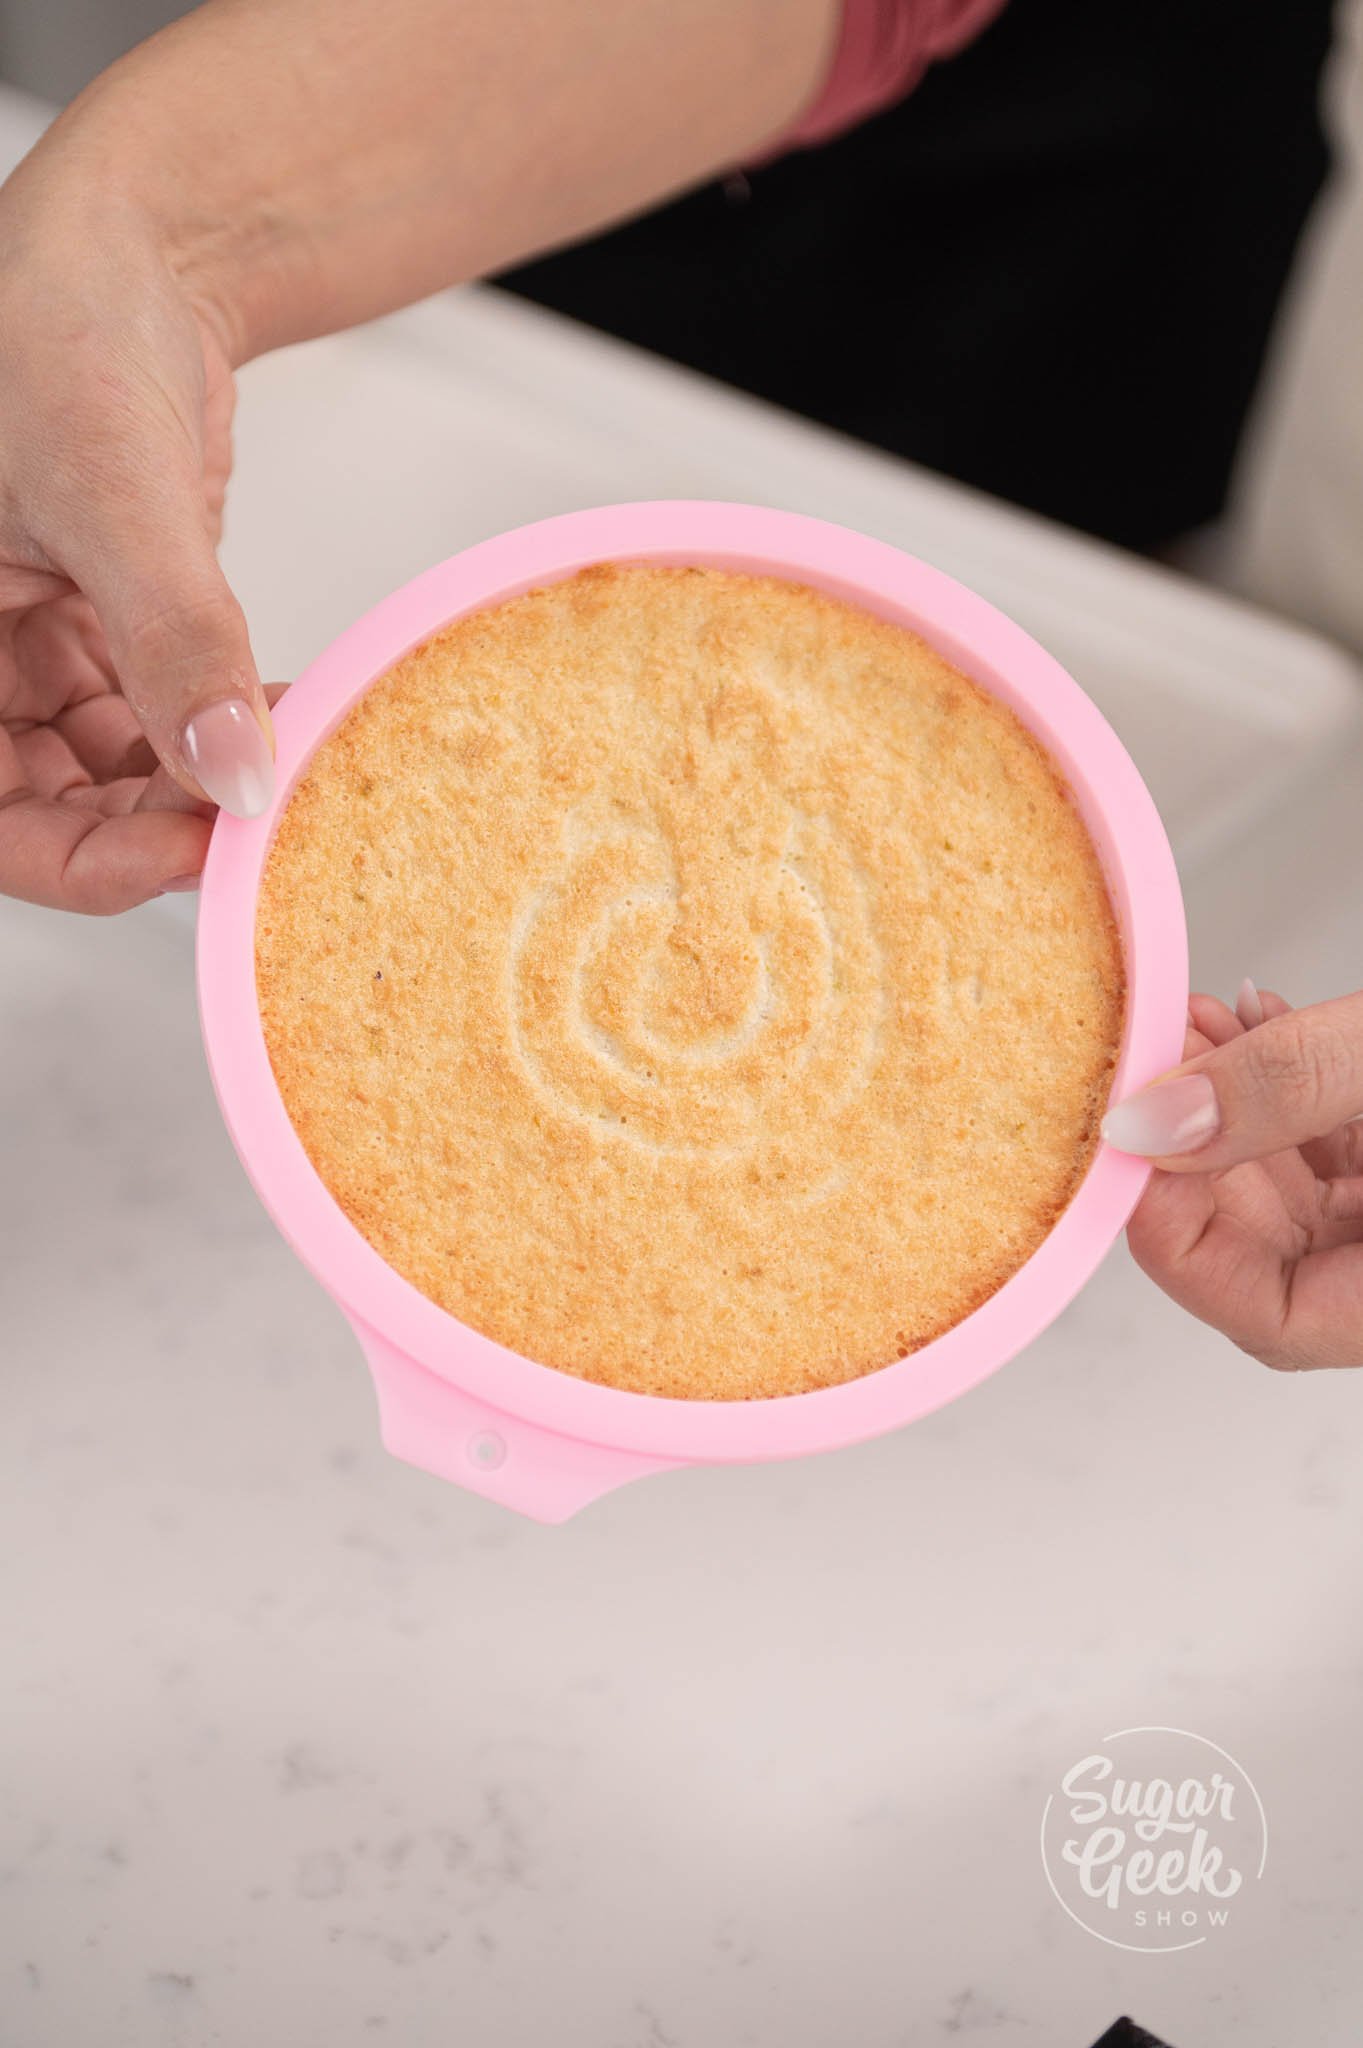
- Bake for 16 minutes, or until the sponge is golden and bounces back when touching it.
- Place the sponge in the freezer right after baking or until you are ready to use it.


Making The Coconut Nougatine
- Preheat your oven to 325º F (162º C).
- If your coconut is not toasted, I recommend reading my tutorial on how to toast coconut first.
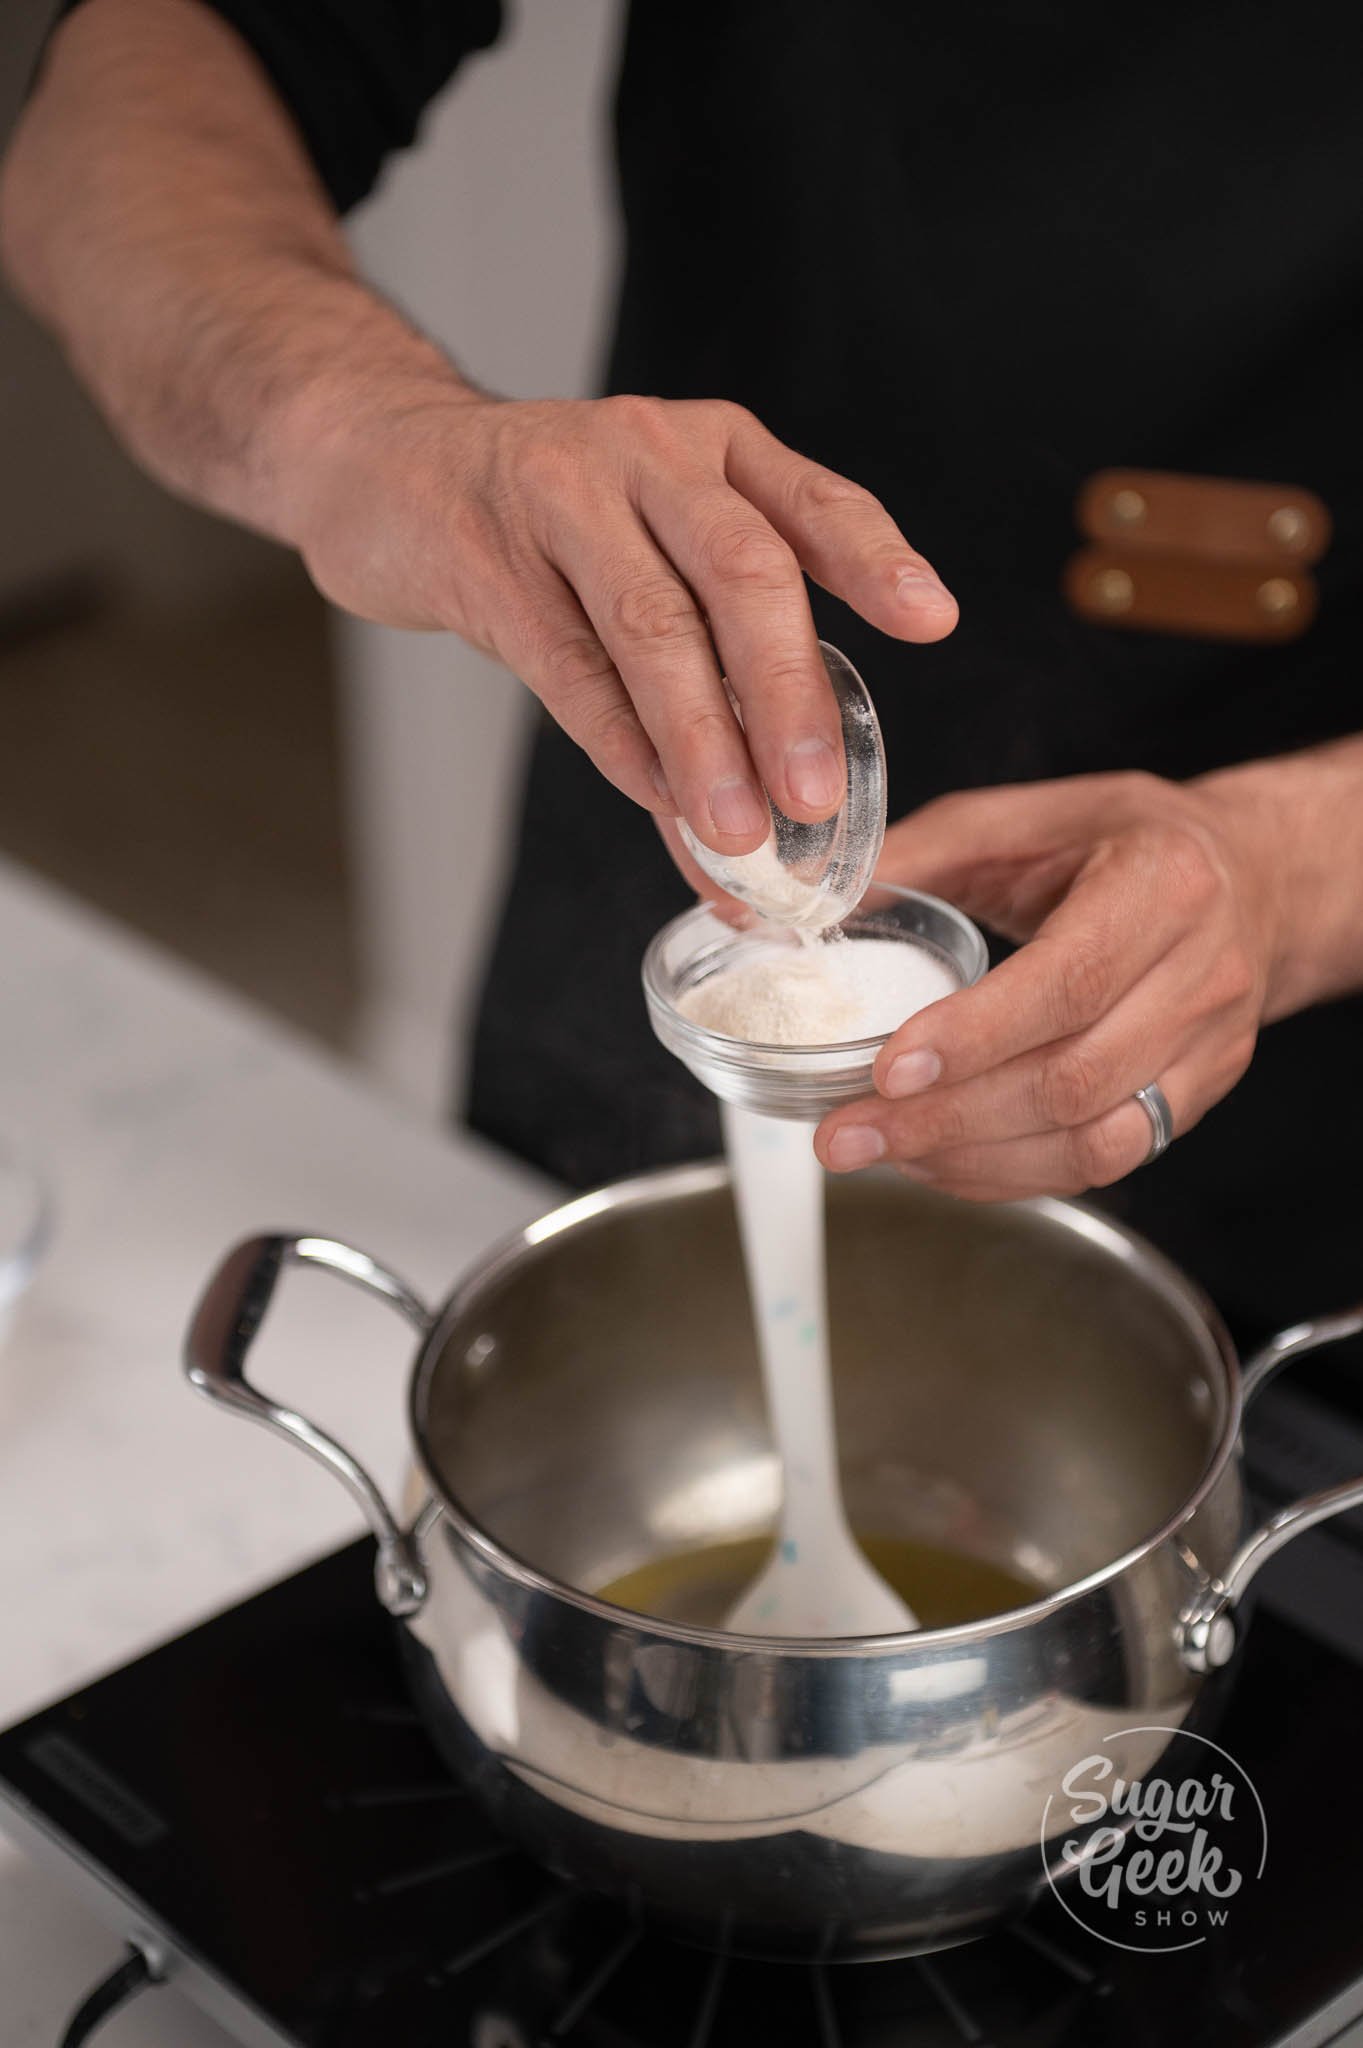
- Combine your sugar and pectin in a small bowl.
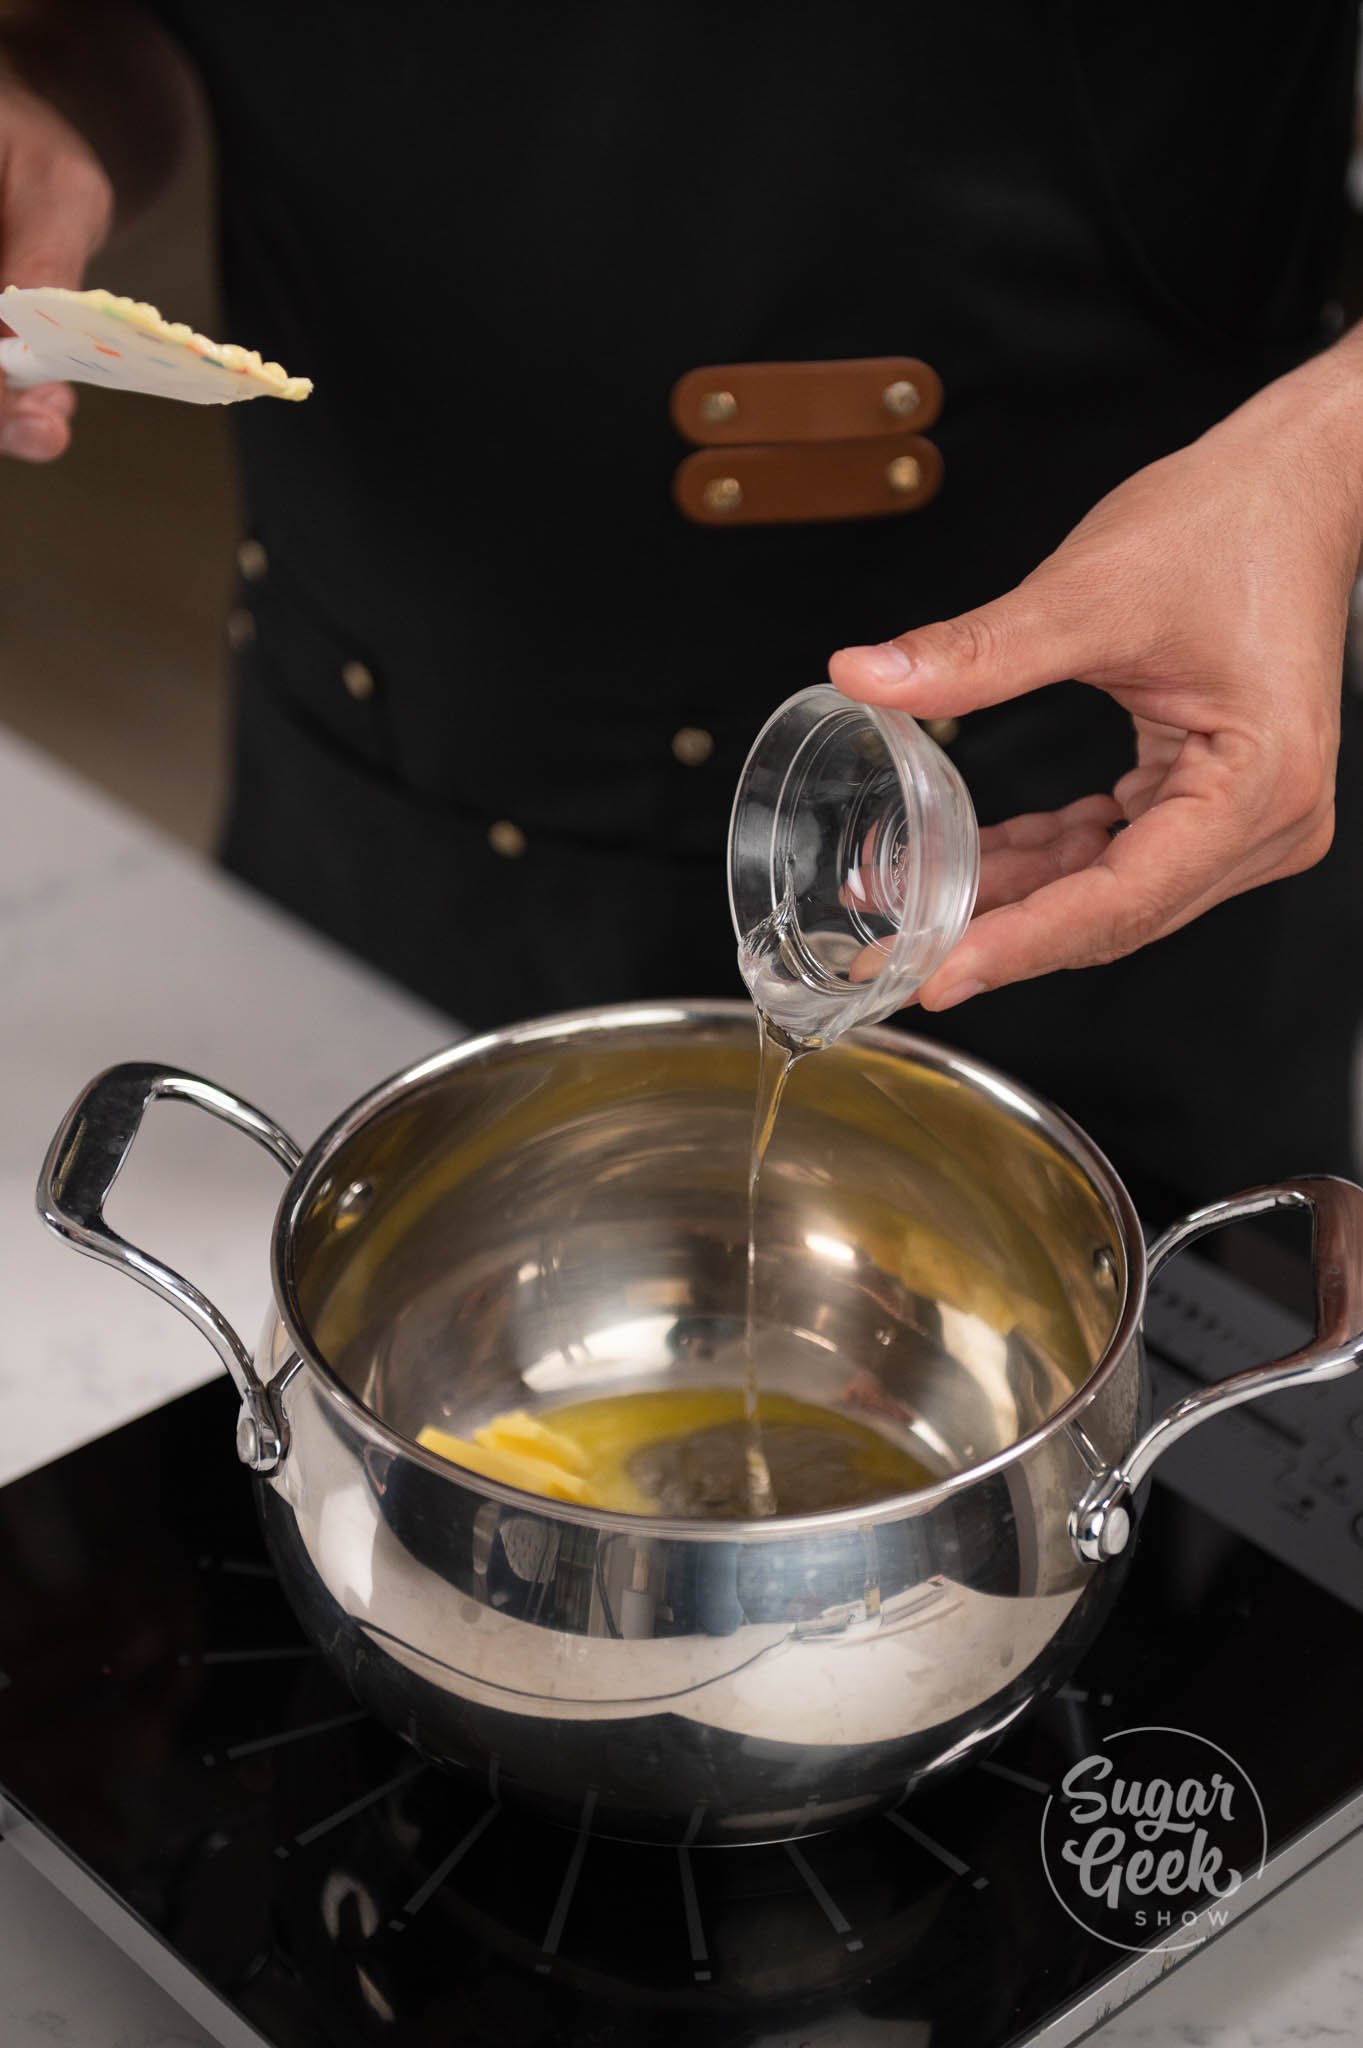
- Combine your butter, corn syrup, and sugar mixture into a medium sized pot over medium heat until it begins to simmer.
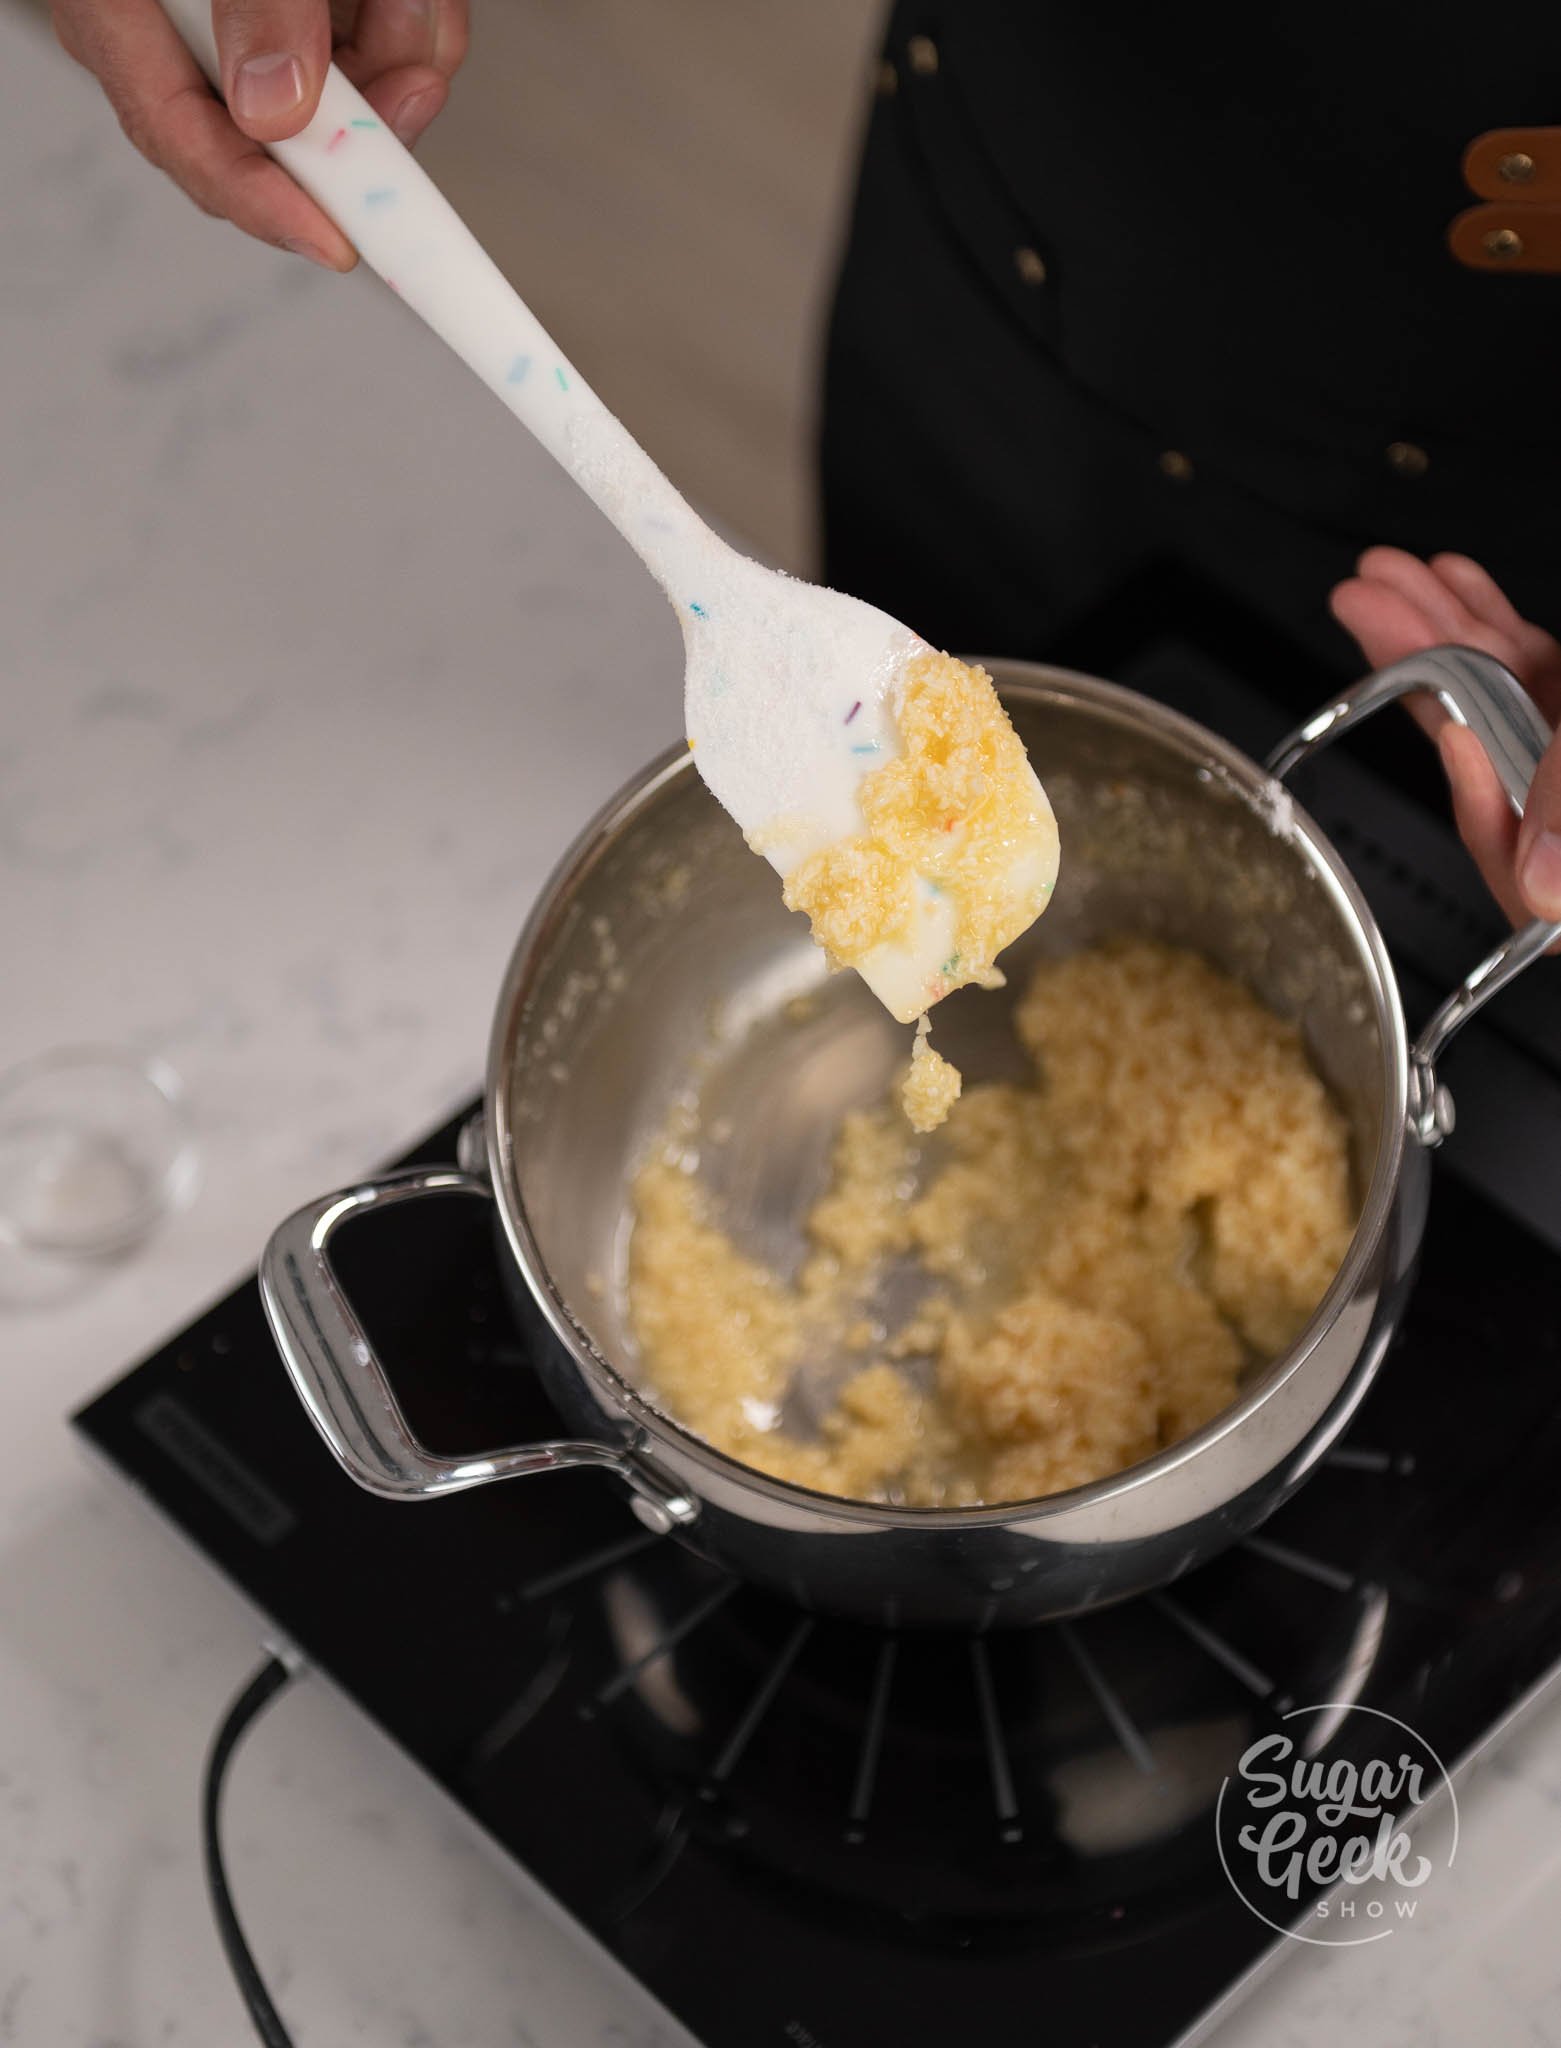
- Reduce your heat to low, then add in your coconut. Mix with a spatula until combined.

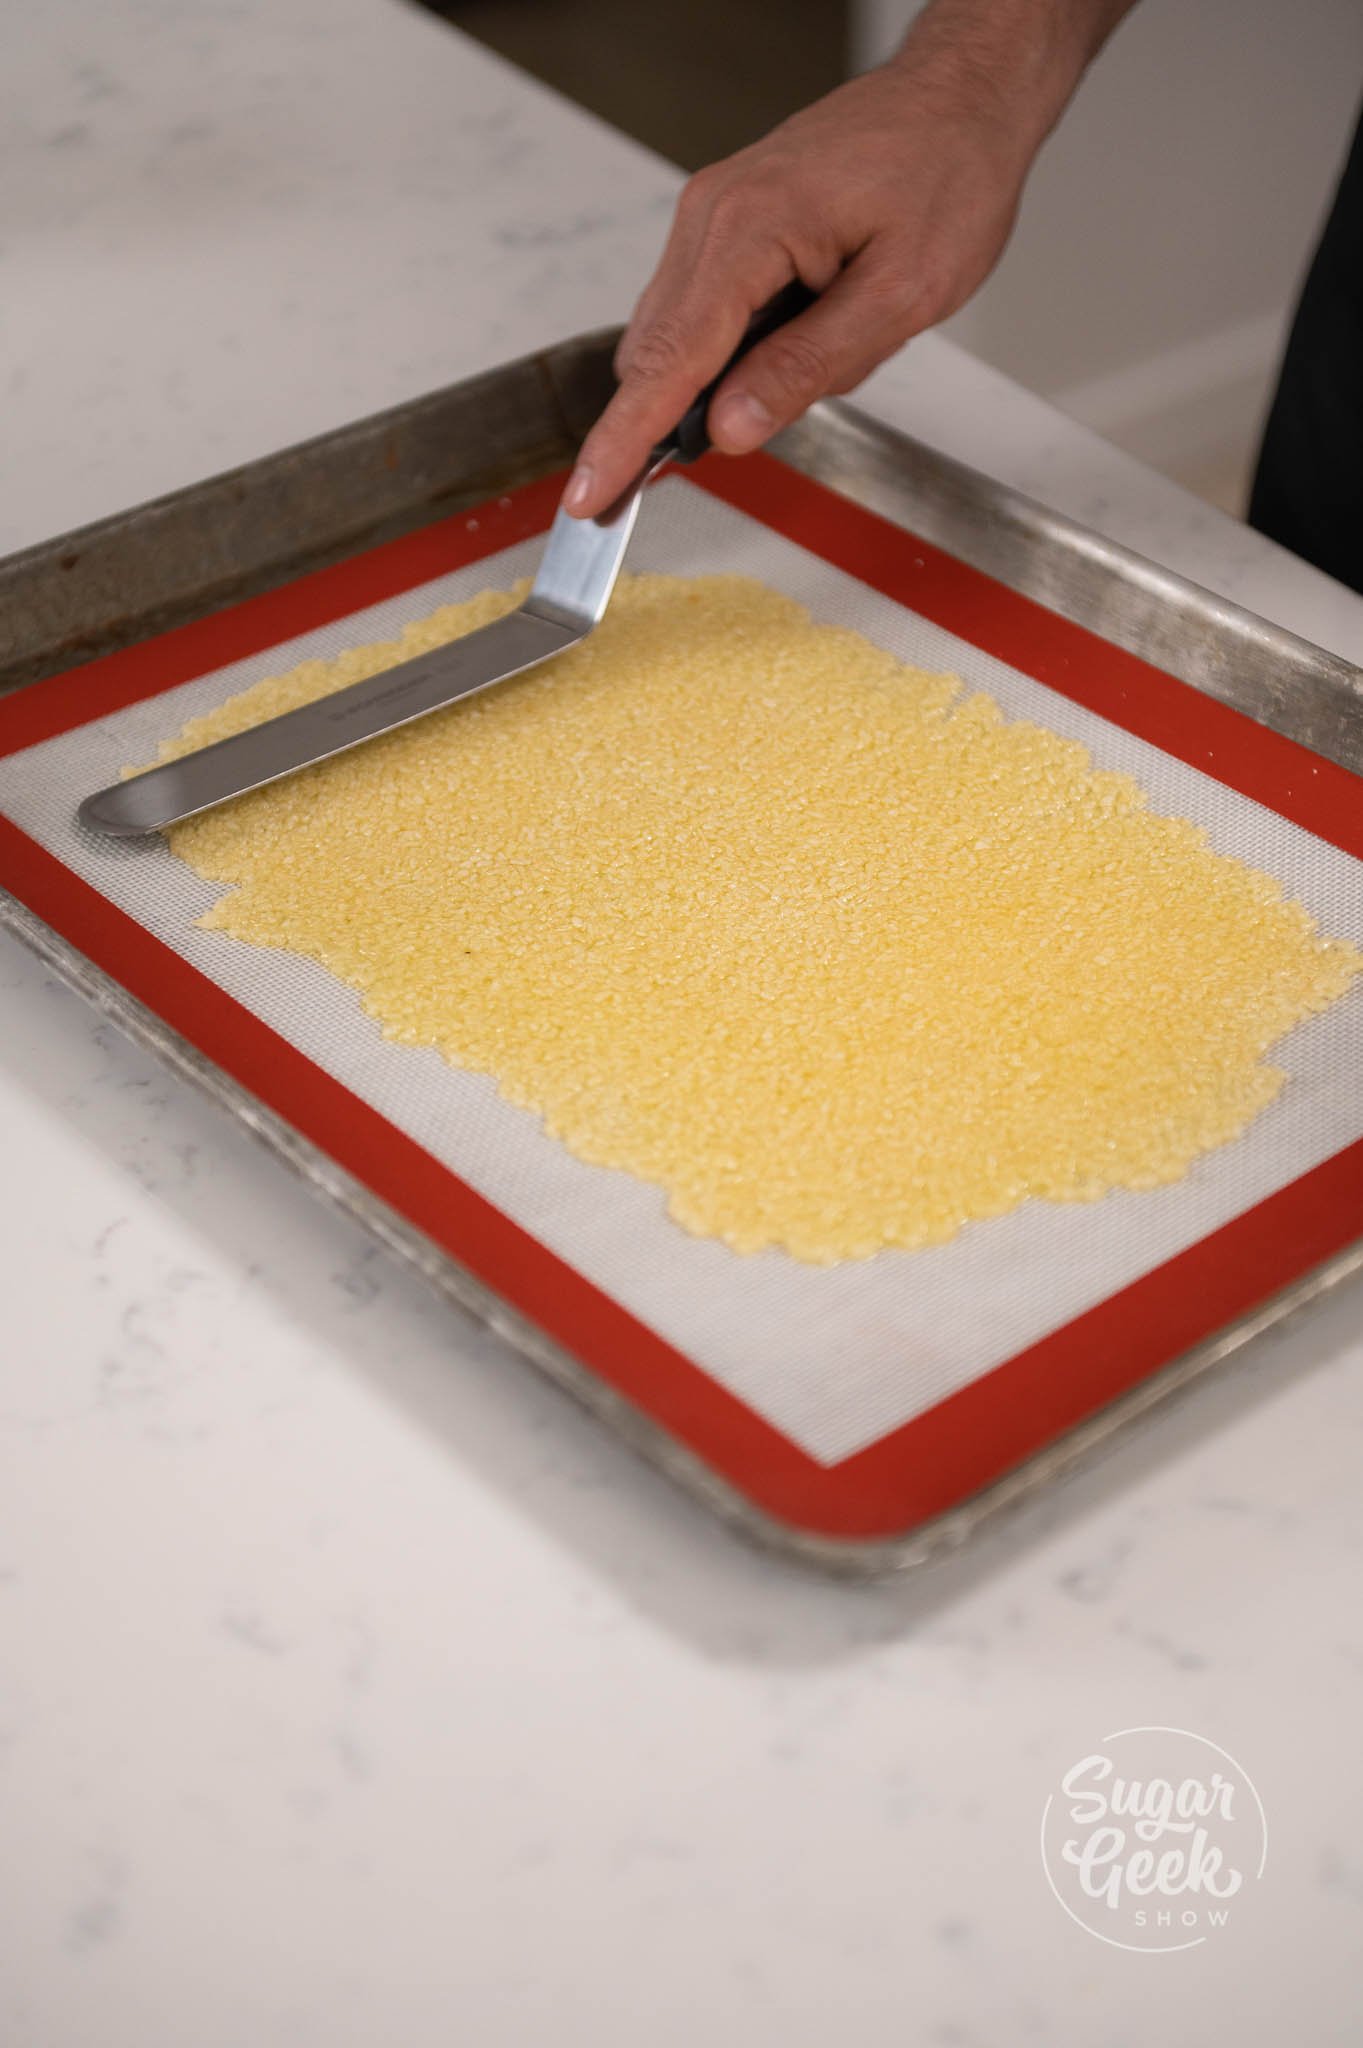
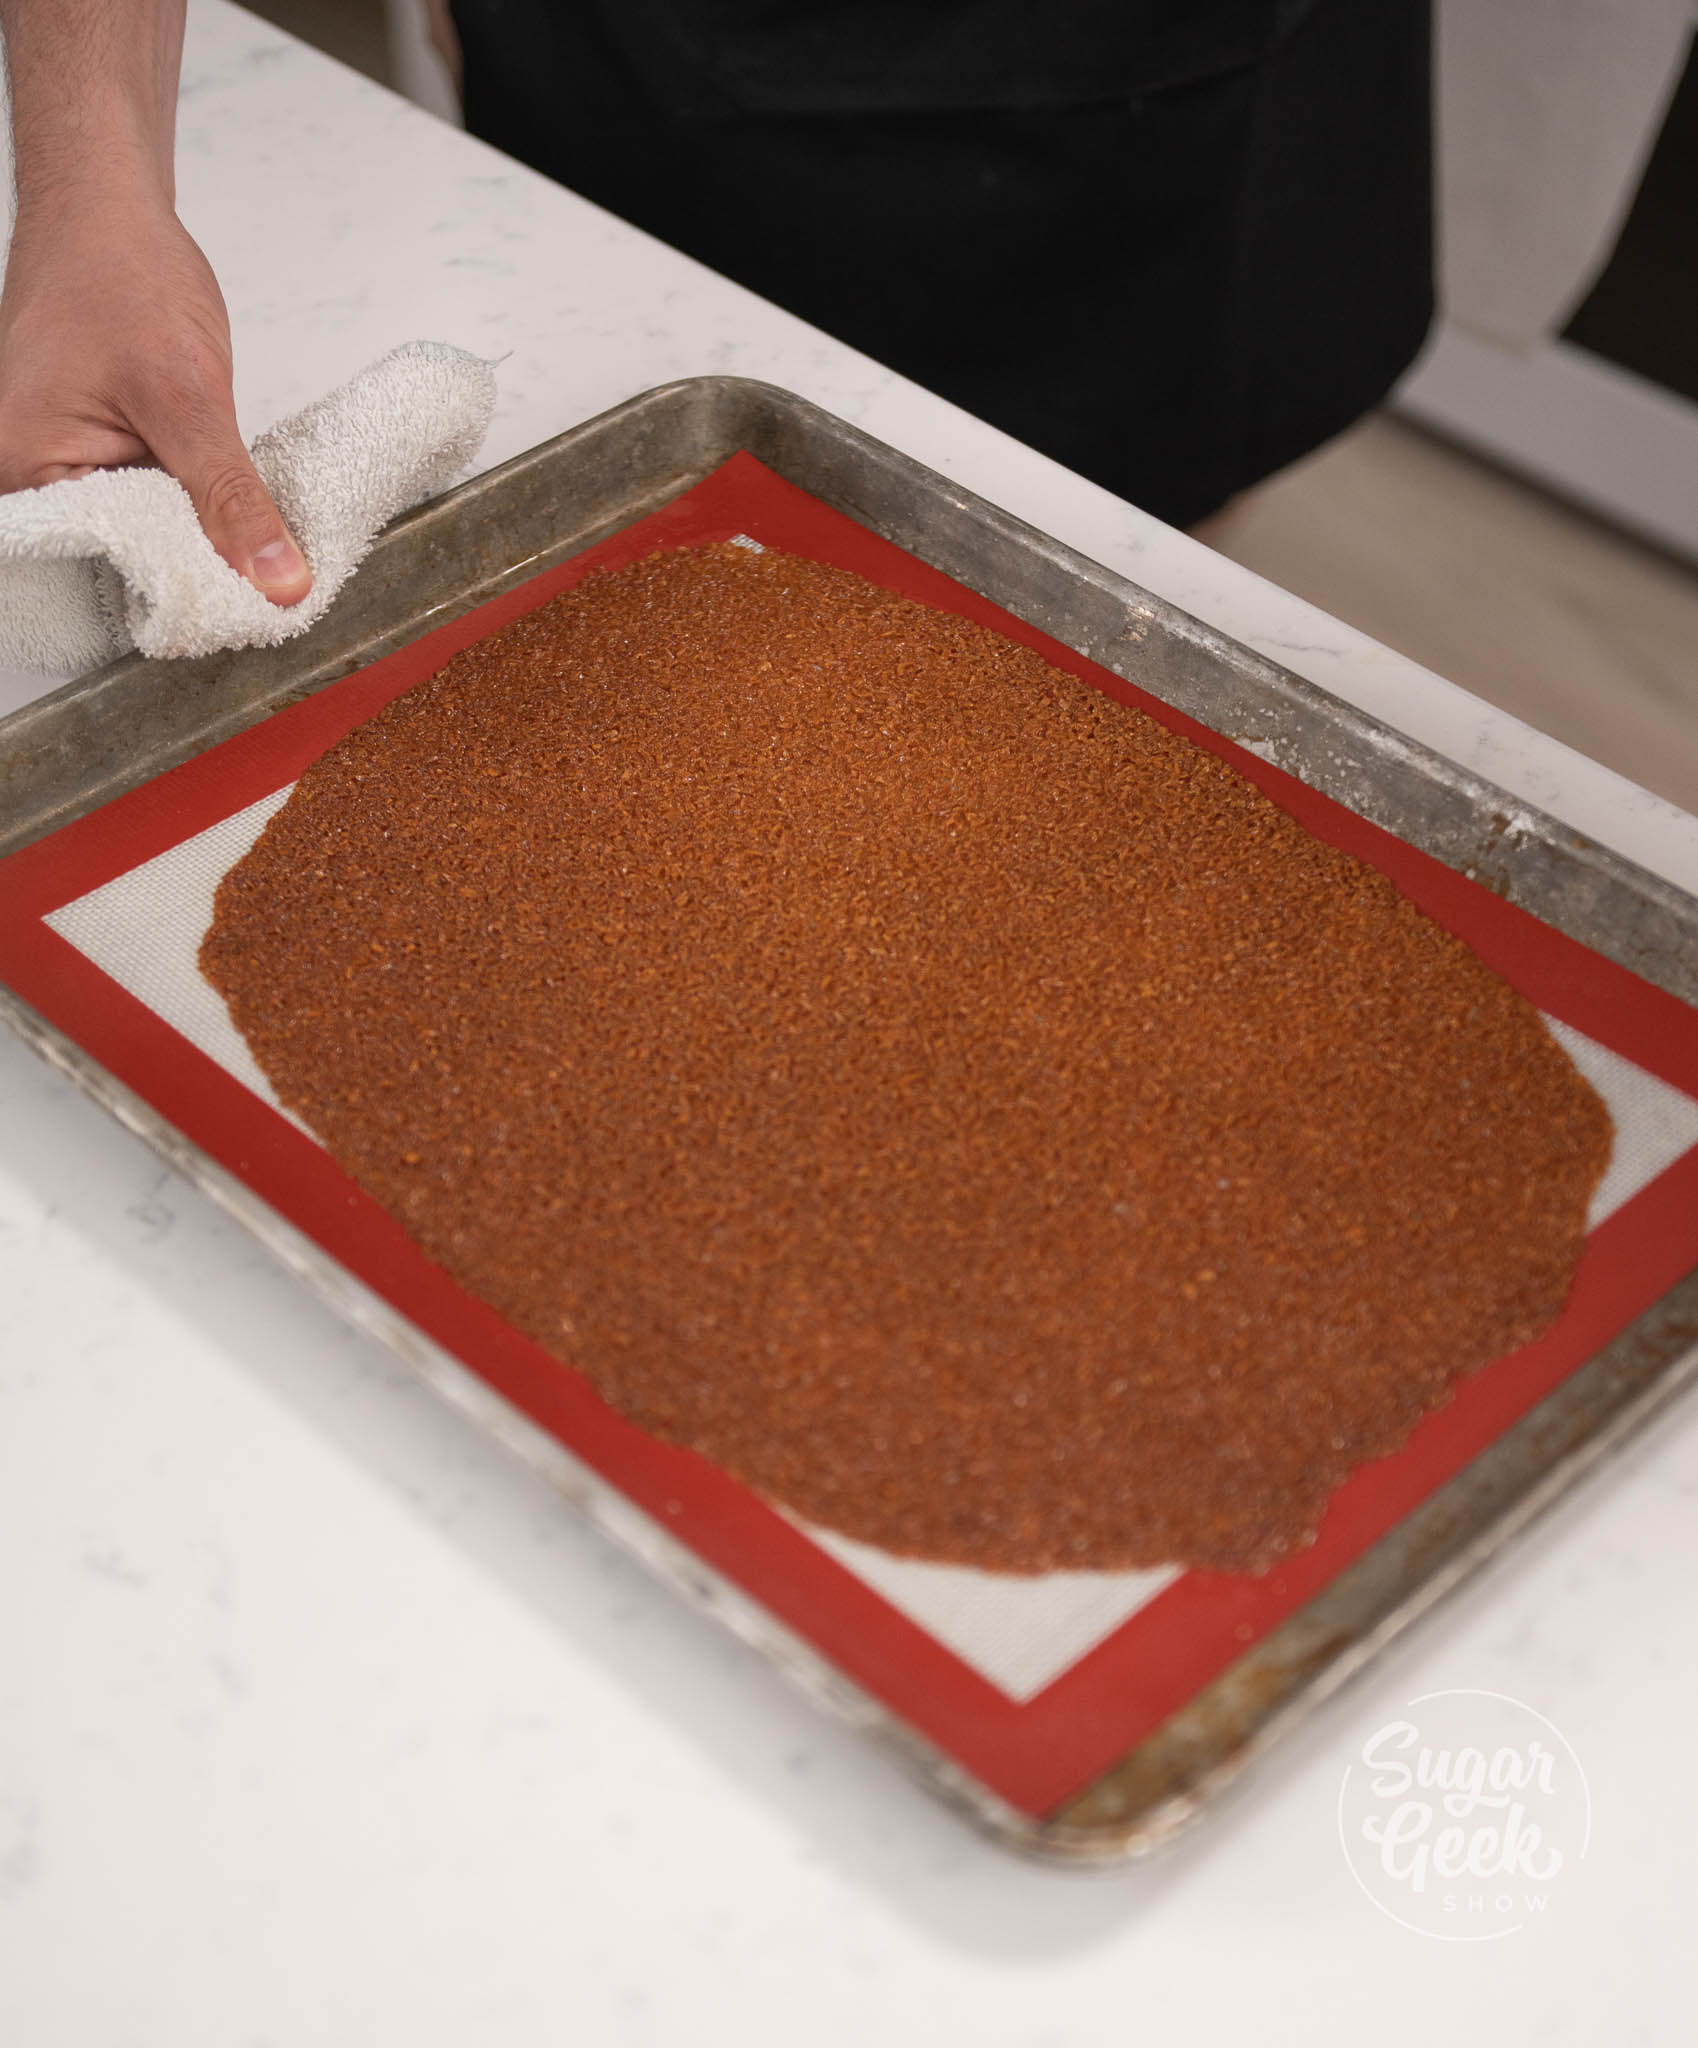
- Pour the nougatine onto a silicone mat and spread out with an offset spatula as thin as the coconut flakes are.
- Bake in the oven for about 10 min or until golden brown.

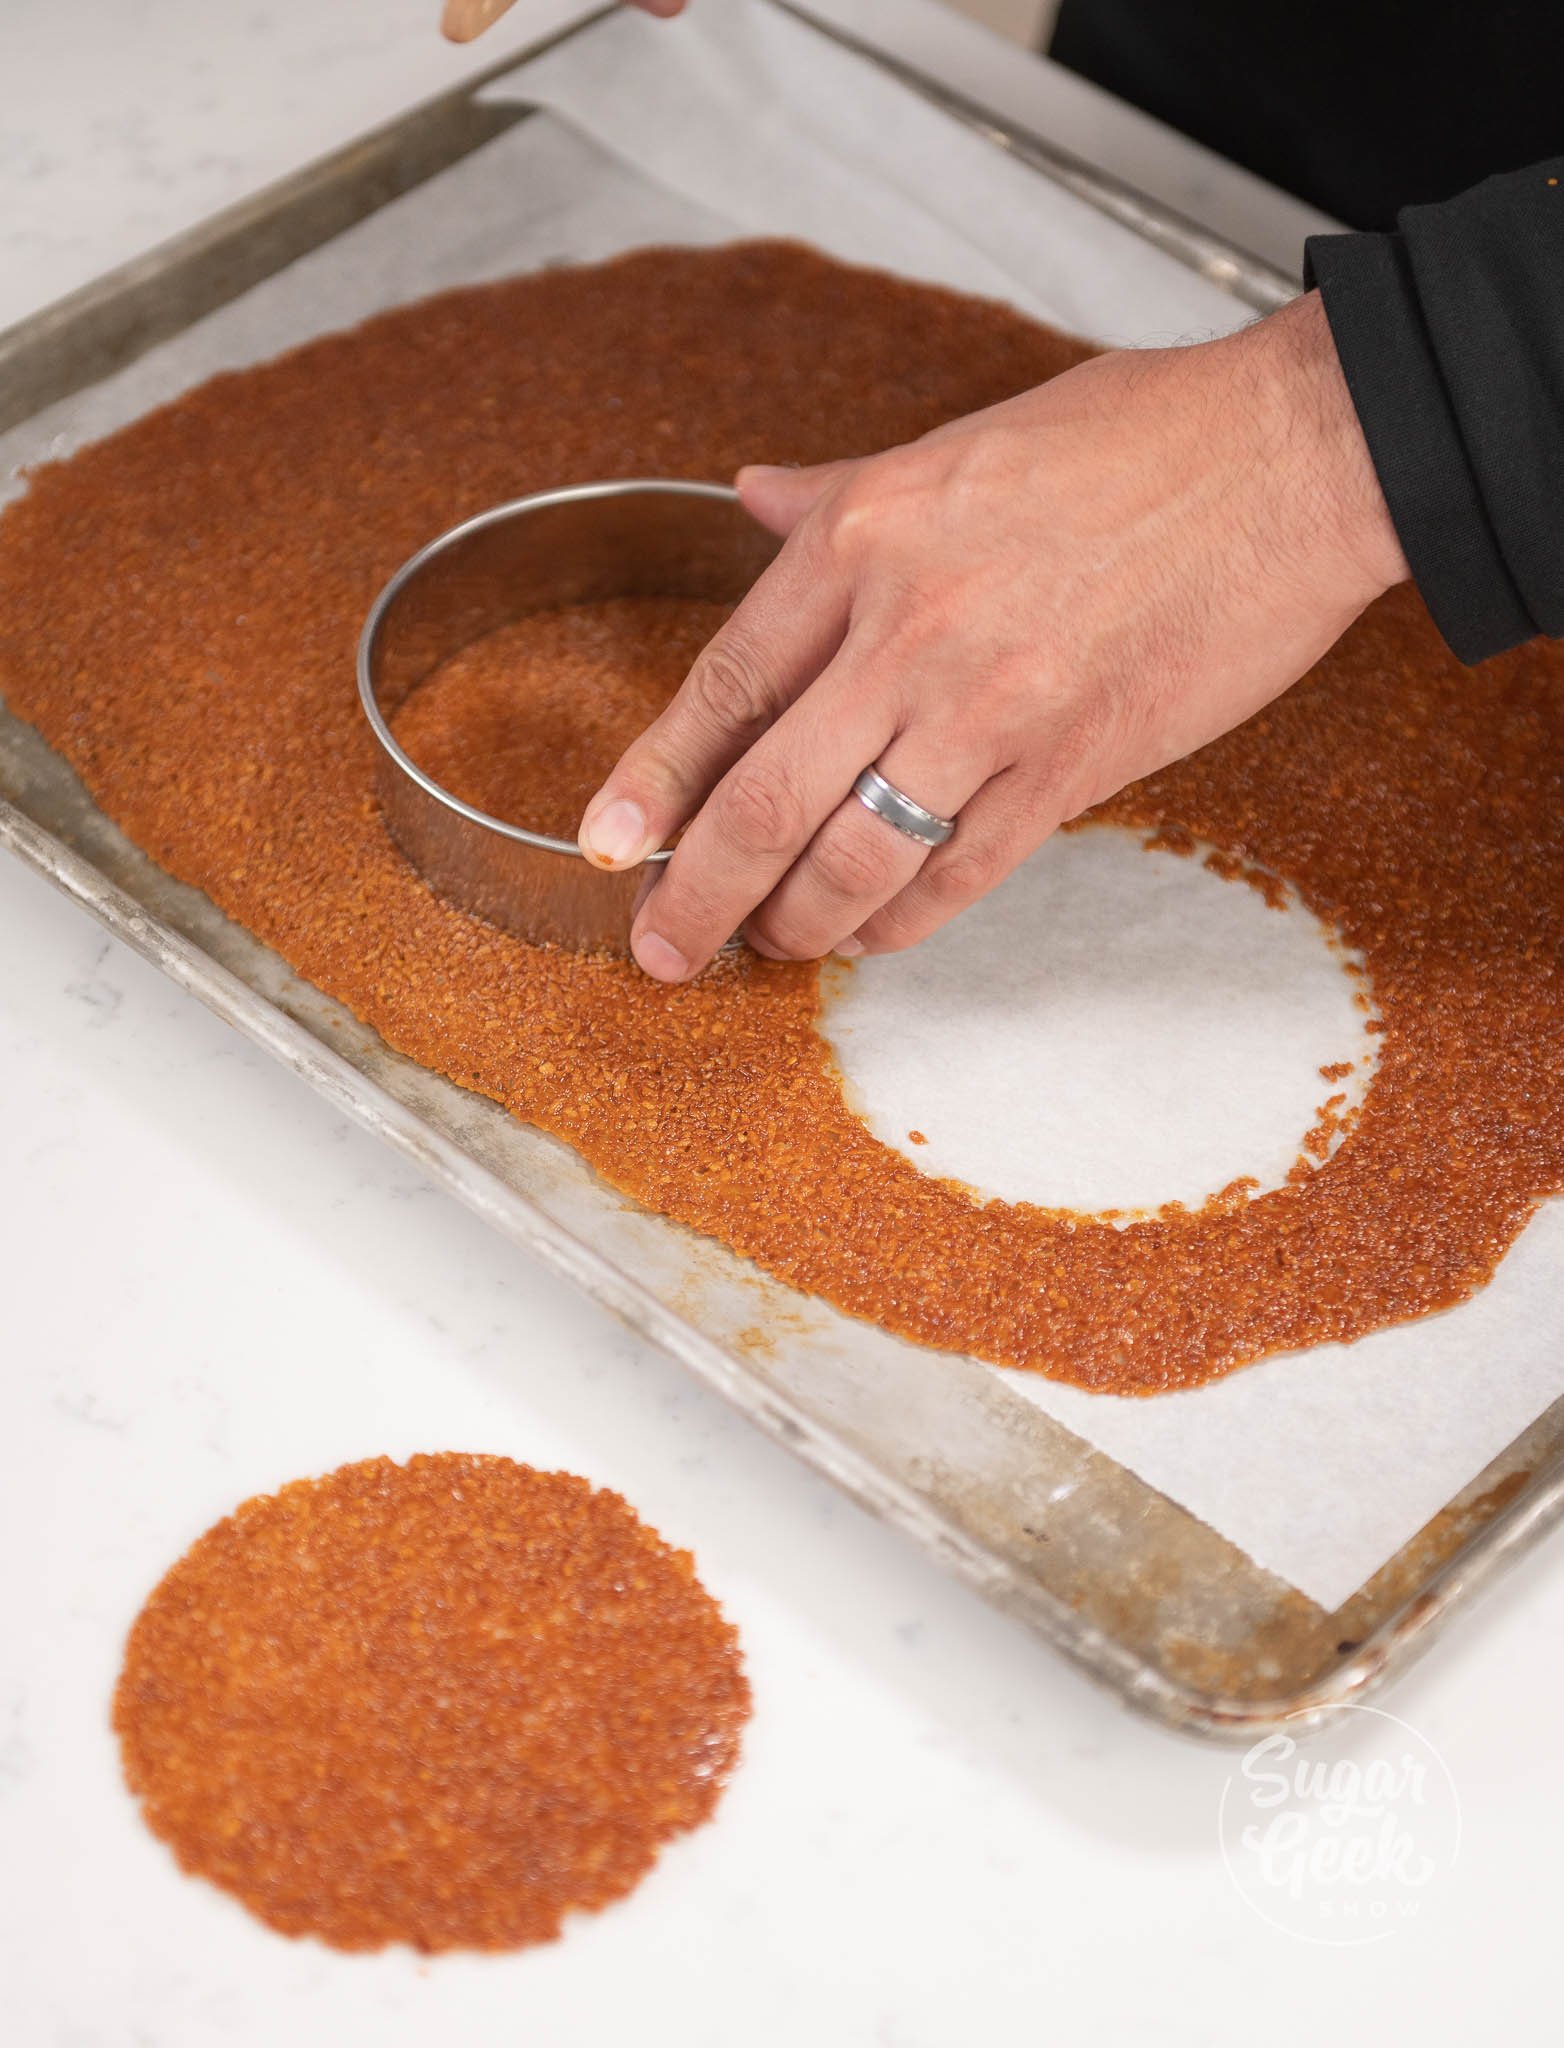
- Using a circle cutter of your choice, cut the nougatine right away. (once it cools down it will set and be too hard to cut).

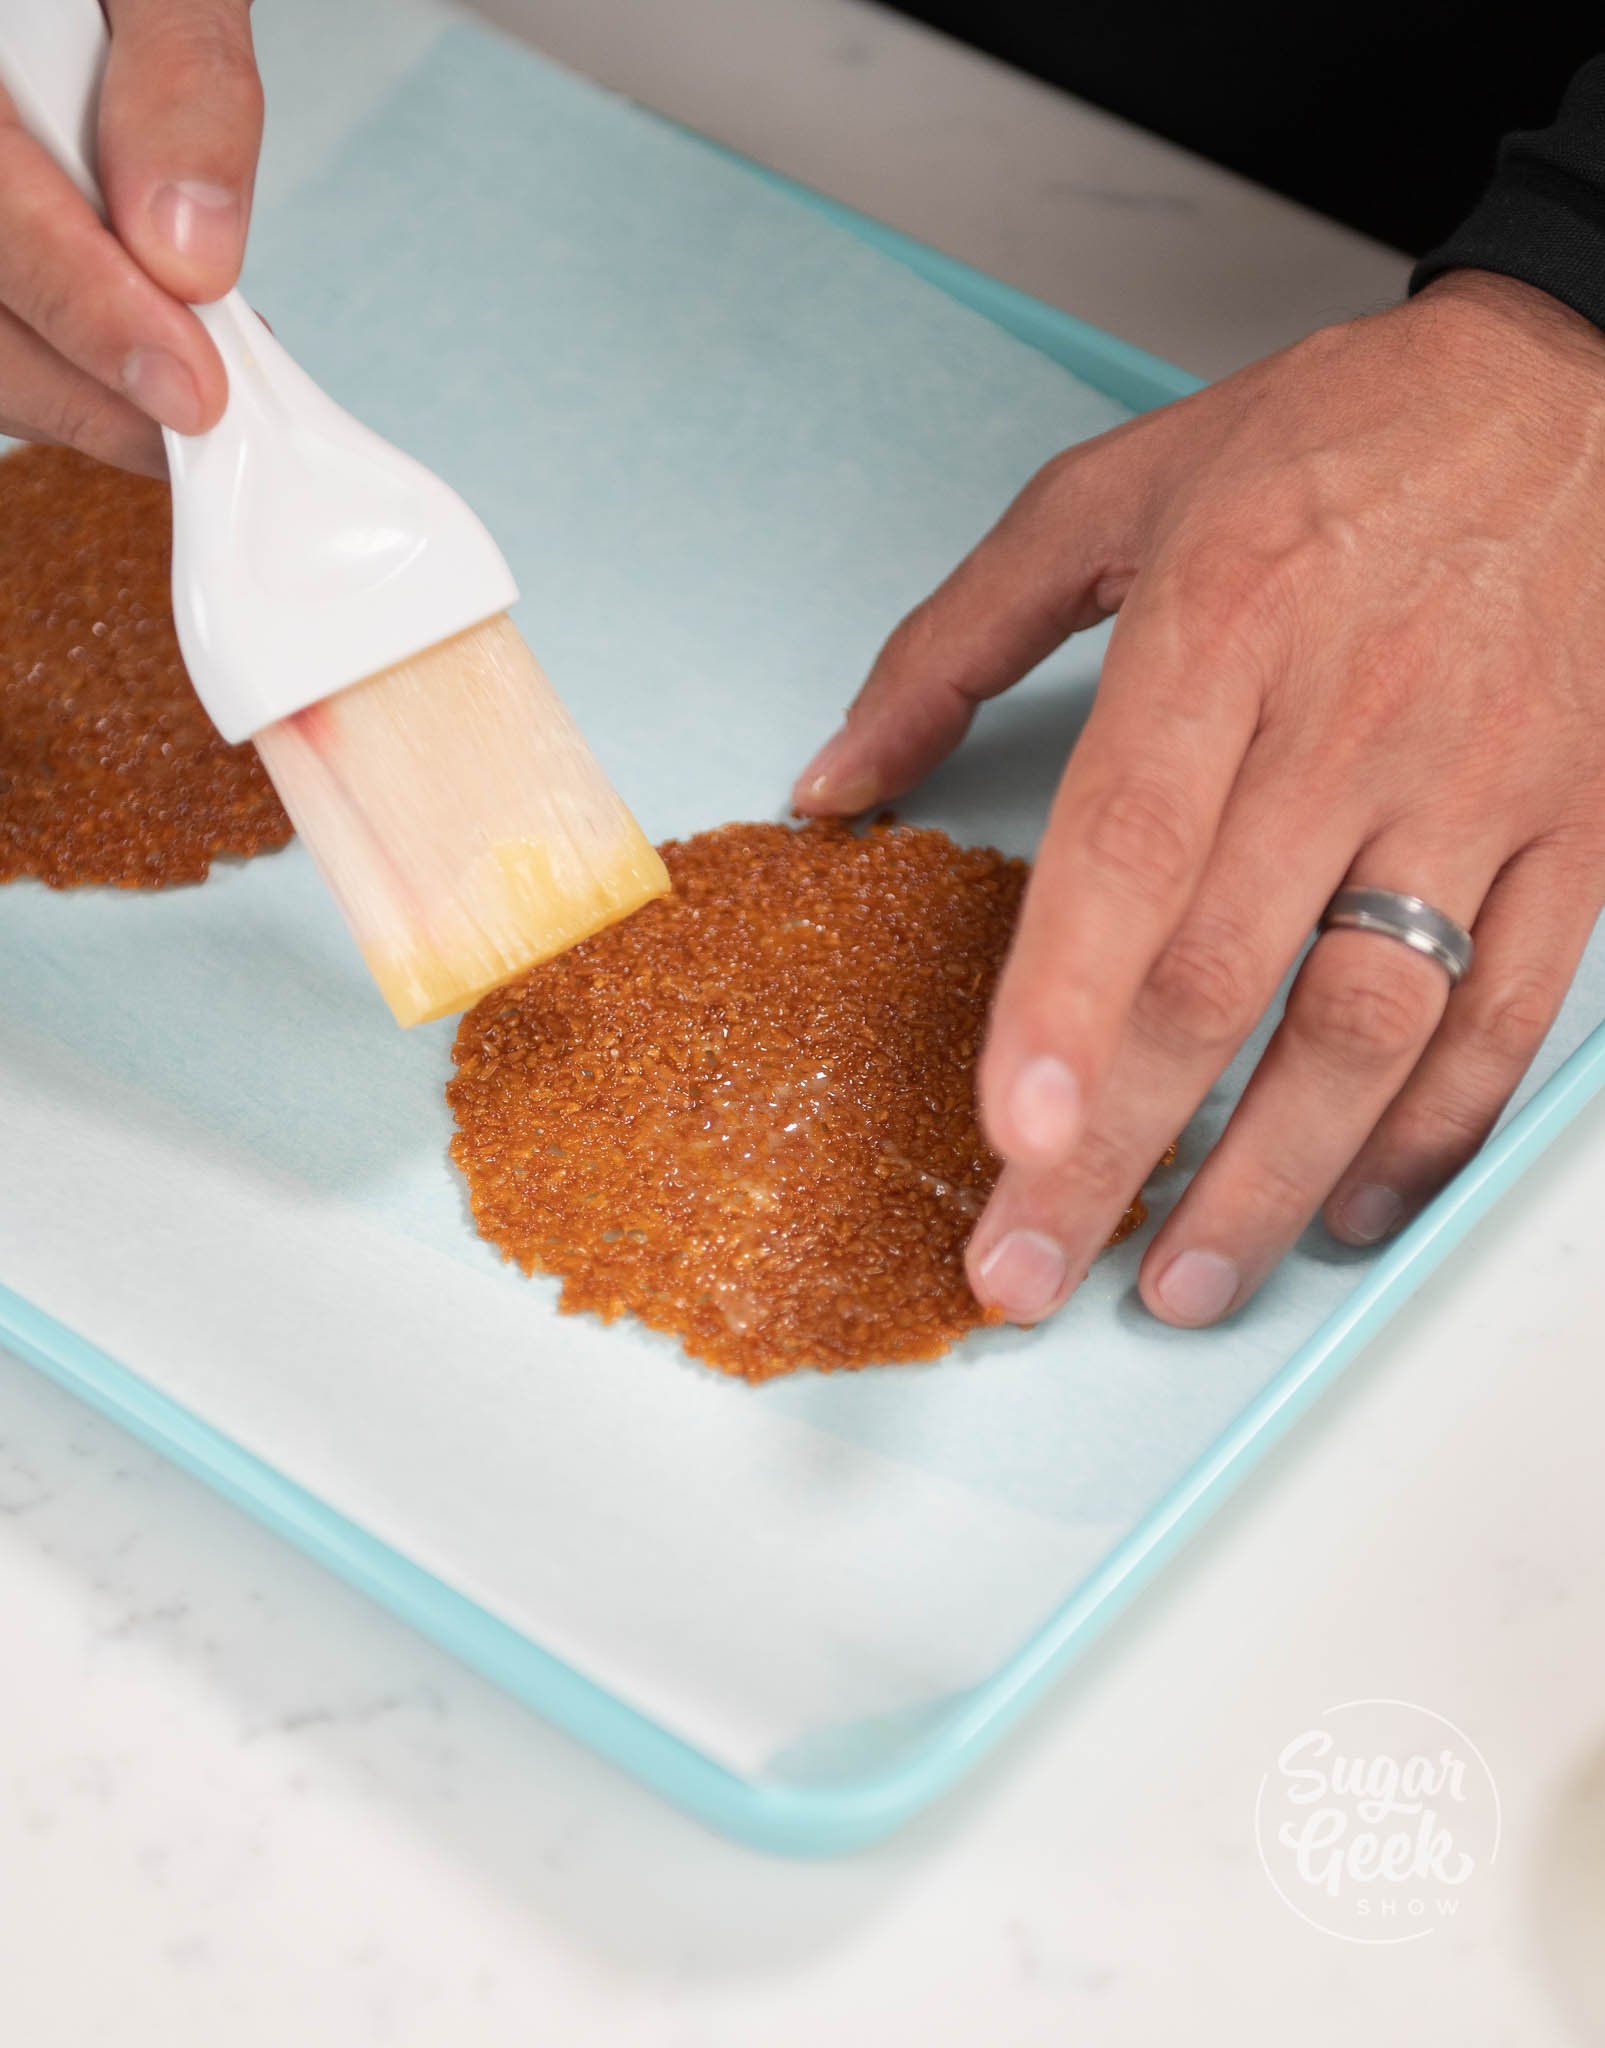
- Brush the nougatine with a thin layer of melted cocoa butter using a pastry brush. This protects the nougatine from getting soggy. Set aside for decoration later.

Making The Coconut Mousse
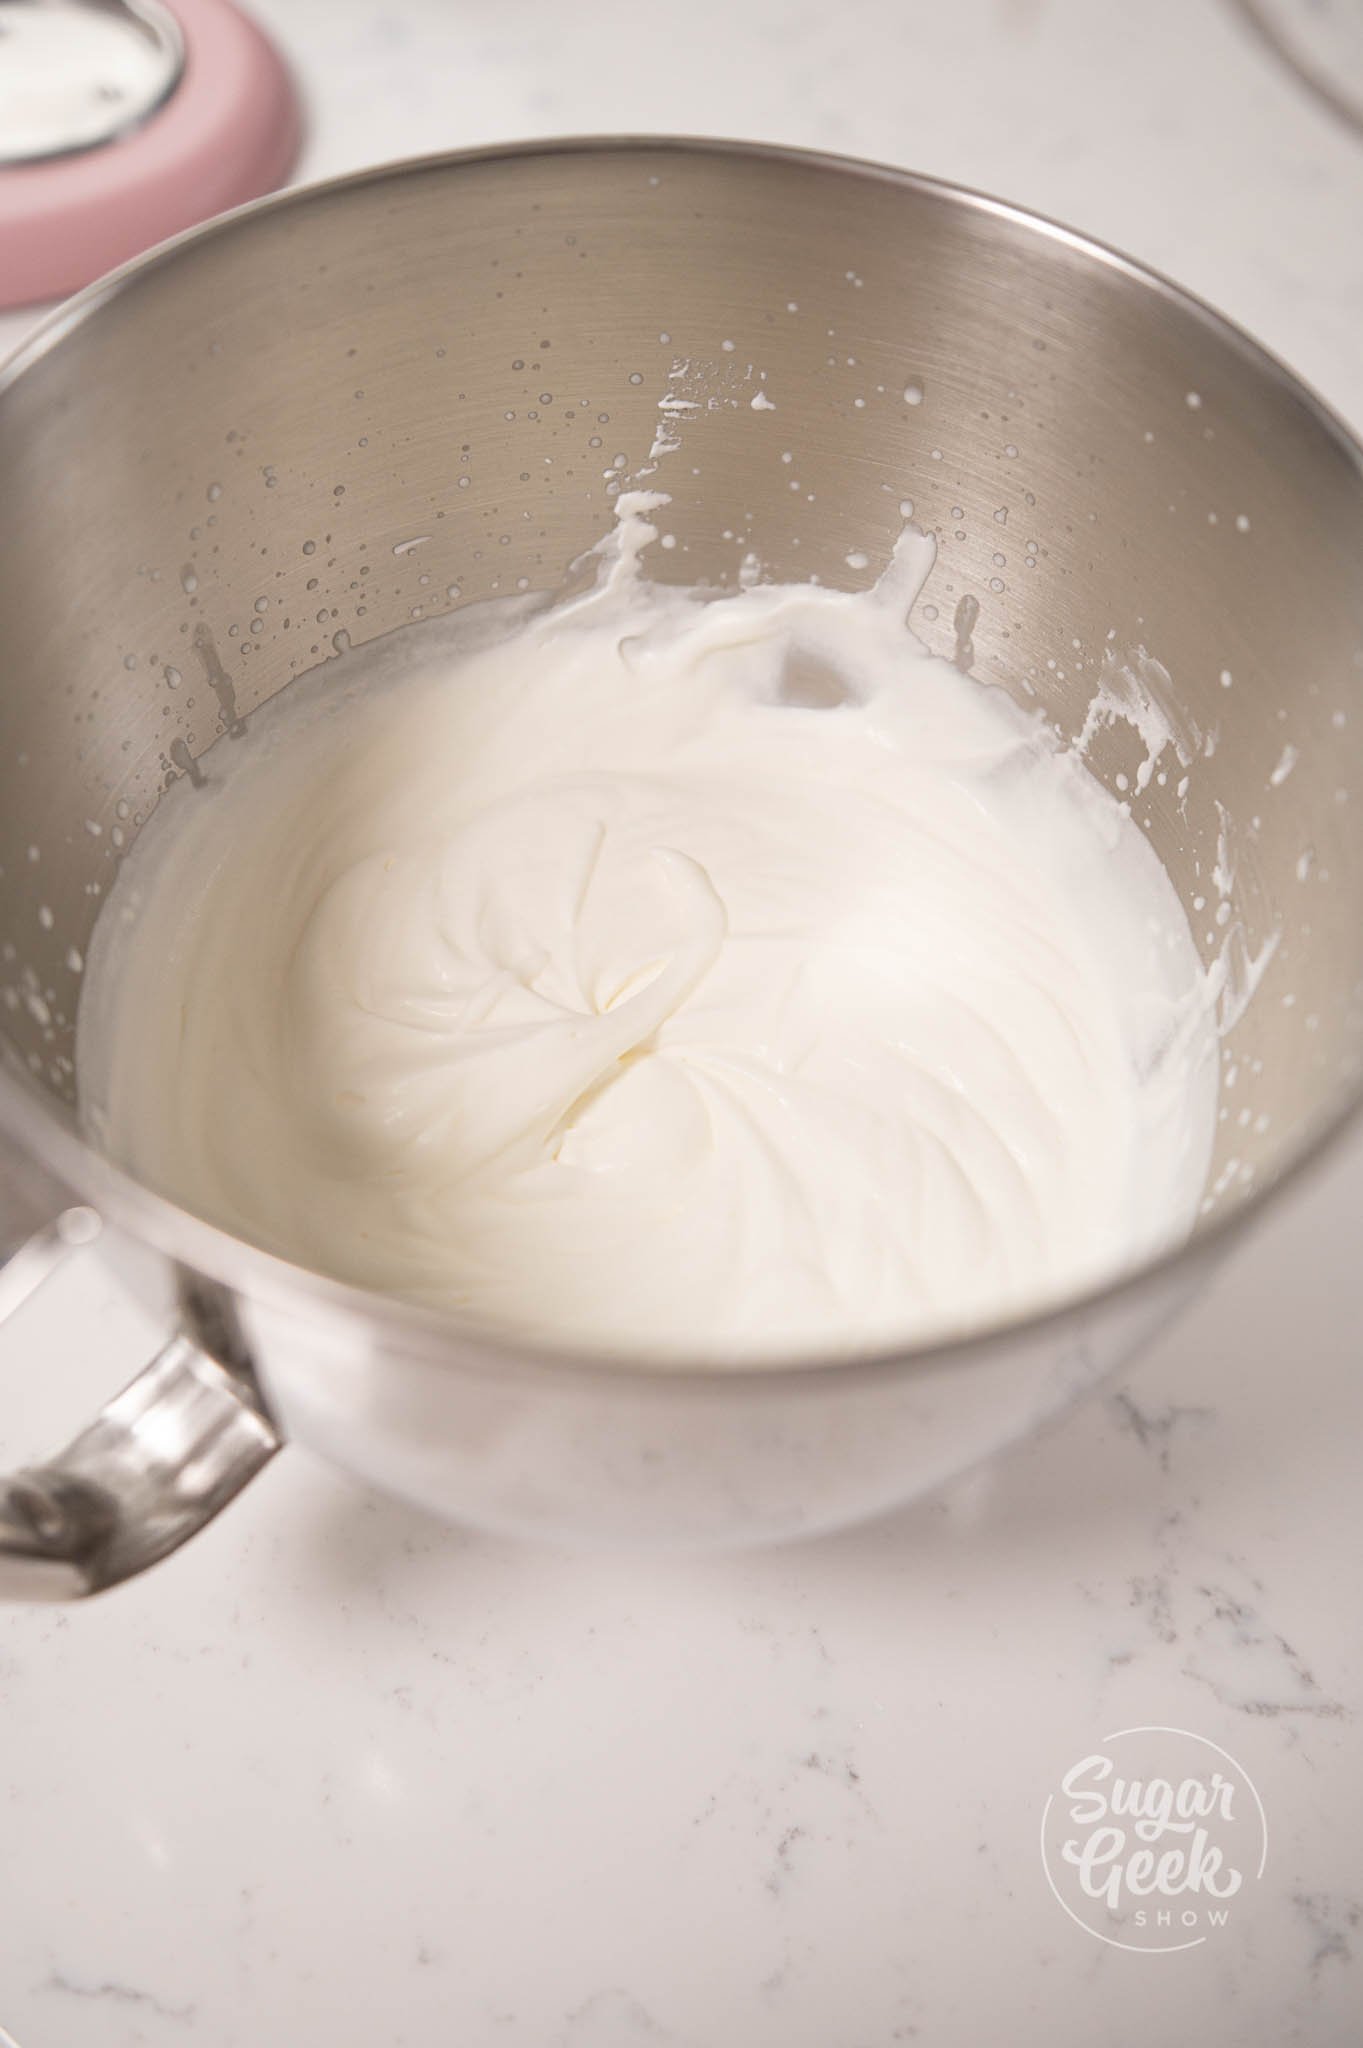
- Add your cream into the bowl of a stand mixer with the whisk attachment. Whip to a soft-medium peak. ( Do not overmix.)
- Soak your gelatin in cold water(blooming). Let them absorb for 1-2 minutes.

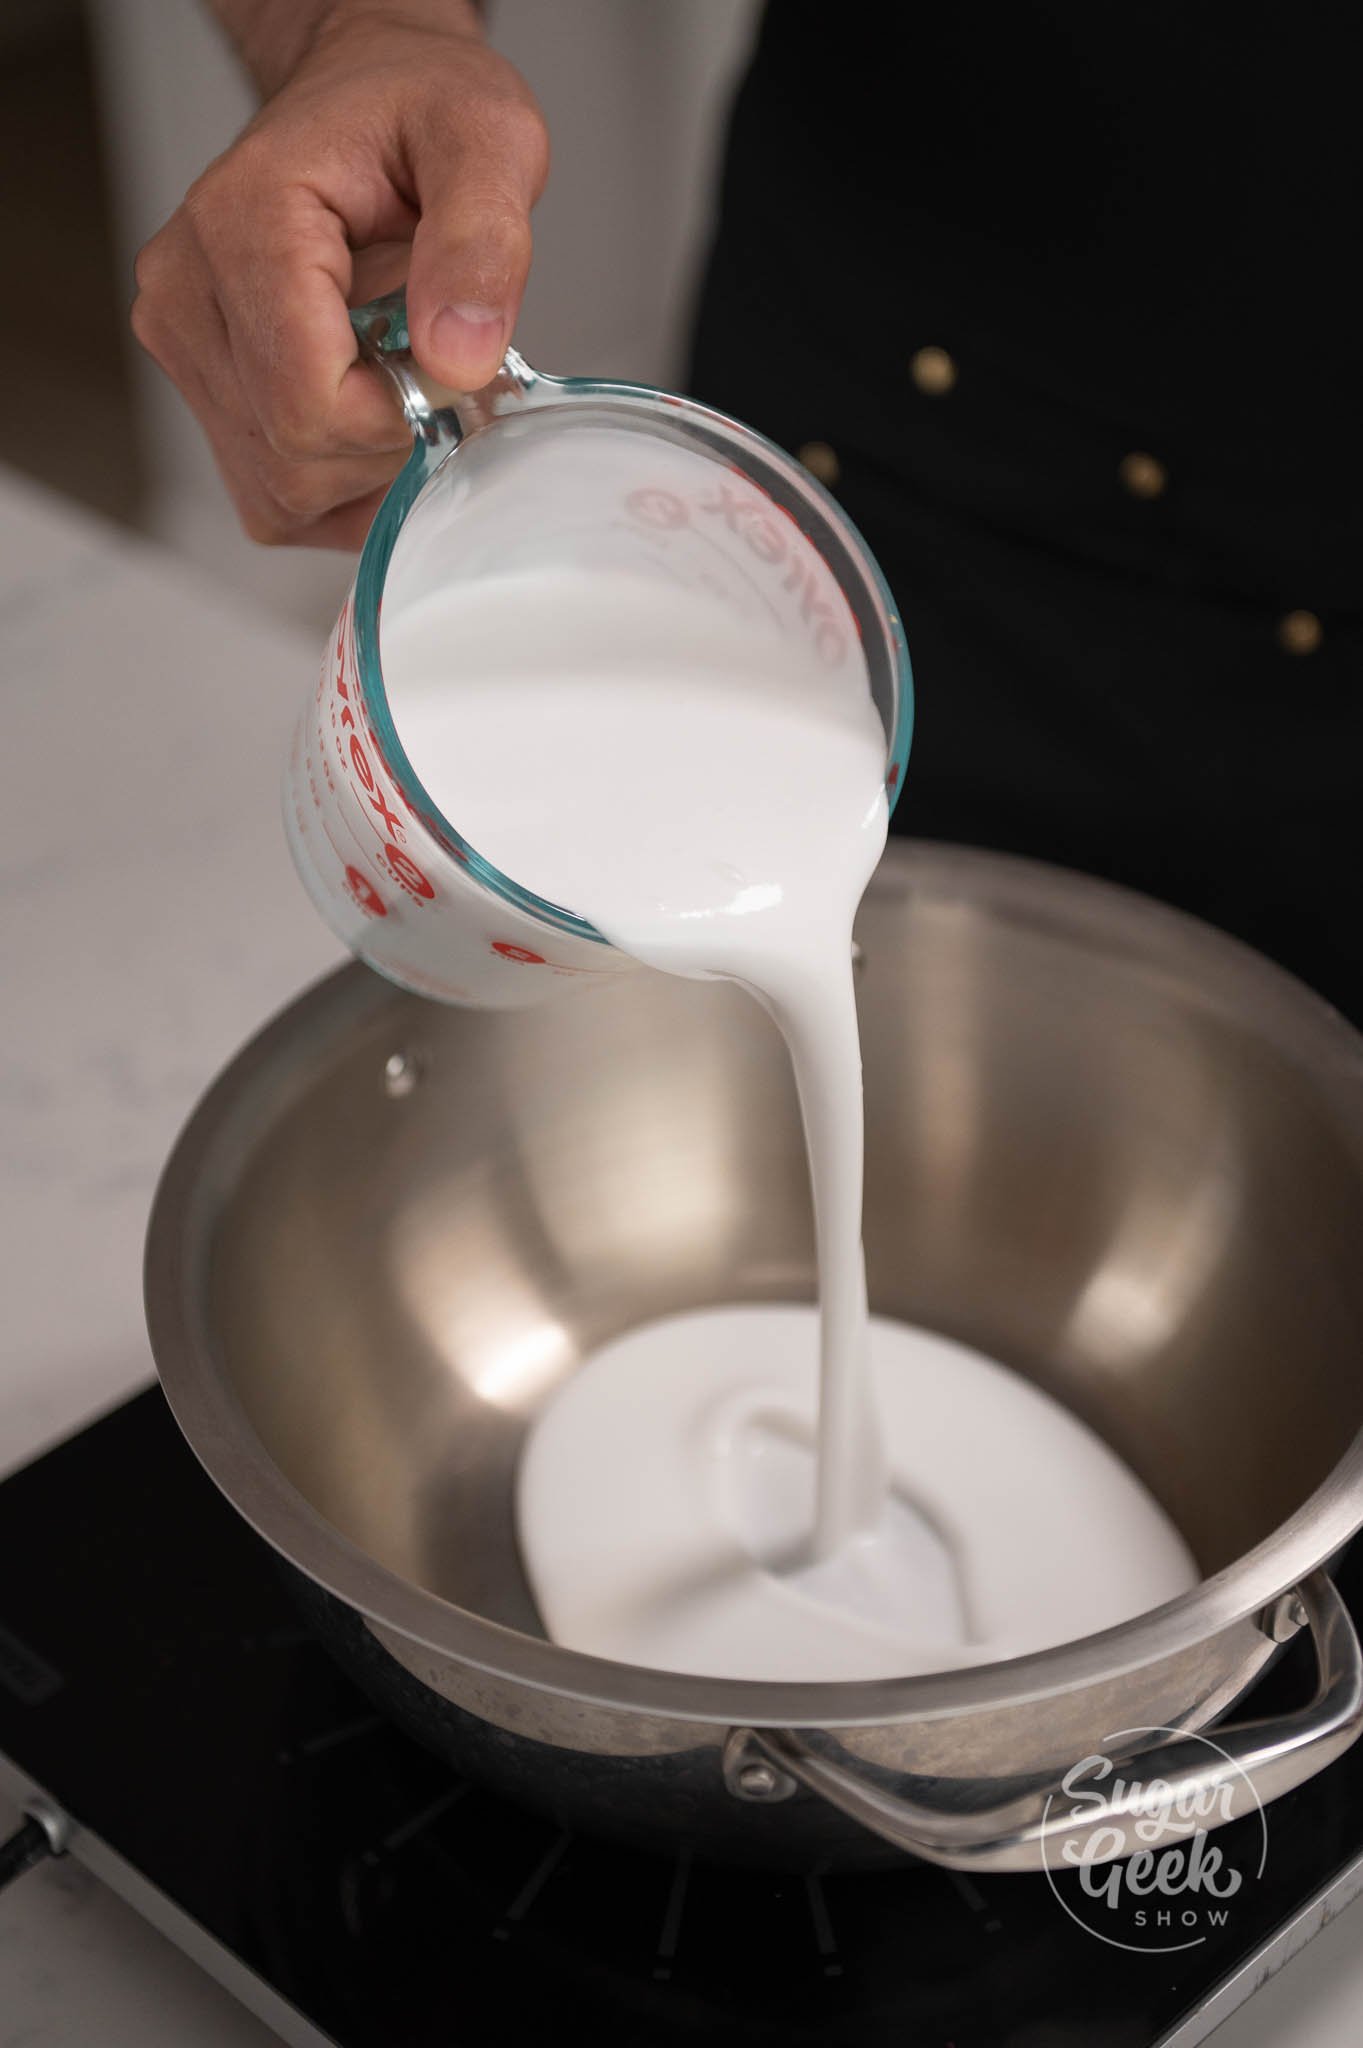
- Add in your coconut milk, and half of the sugar into a small pot over medium heat. (this prevents the coconut milk from burning).
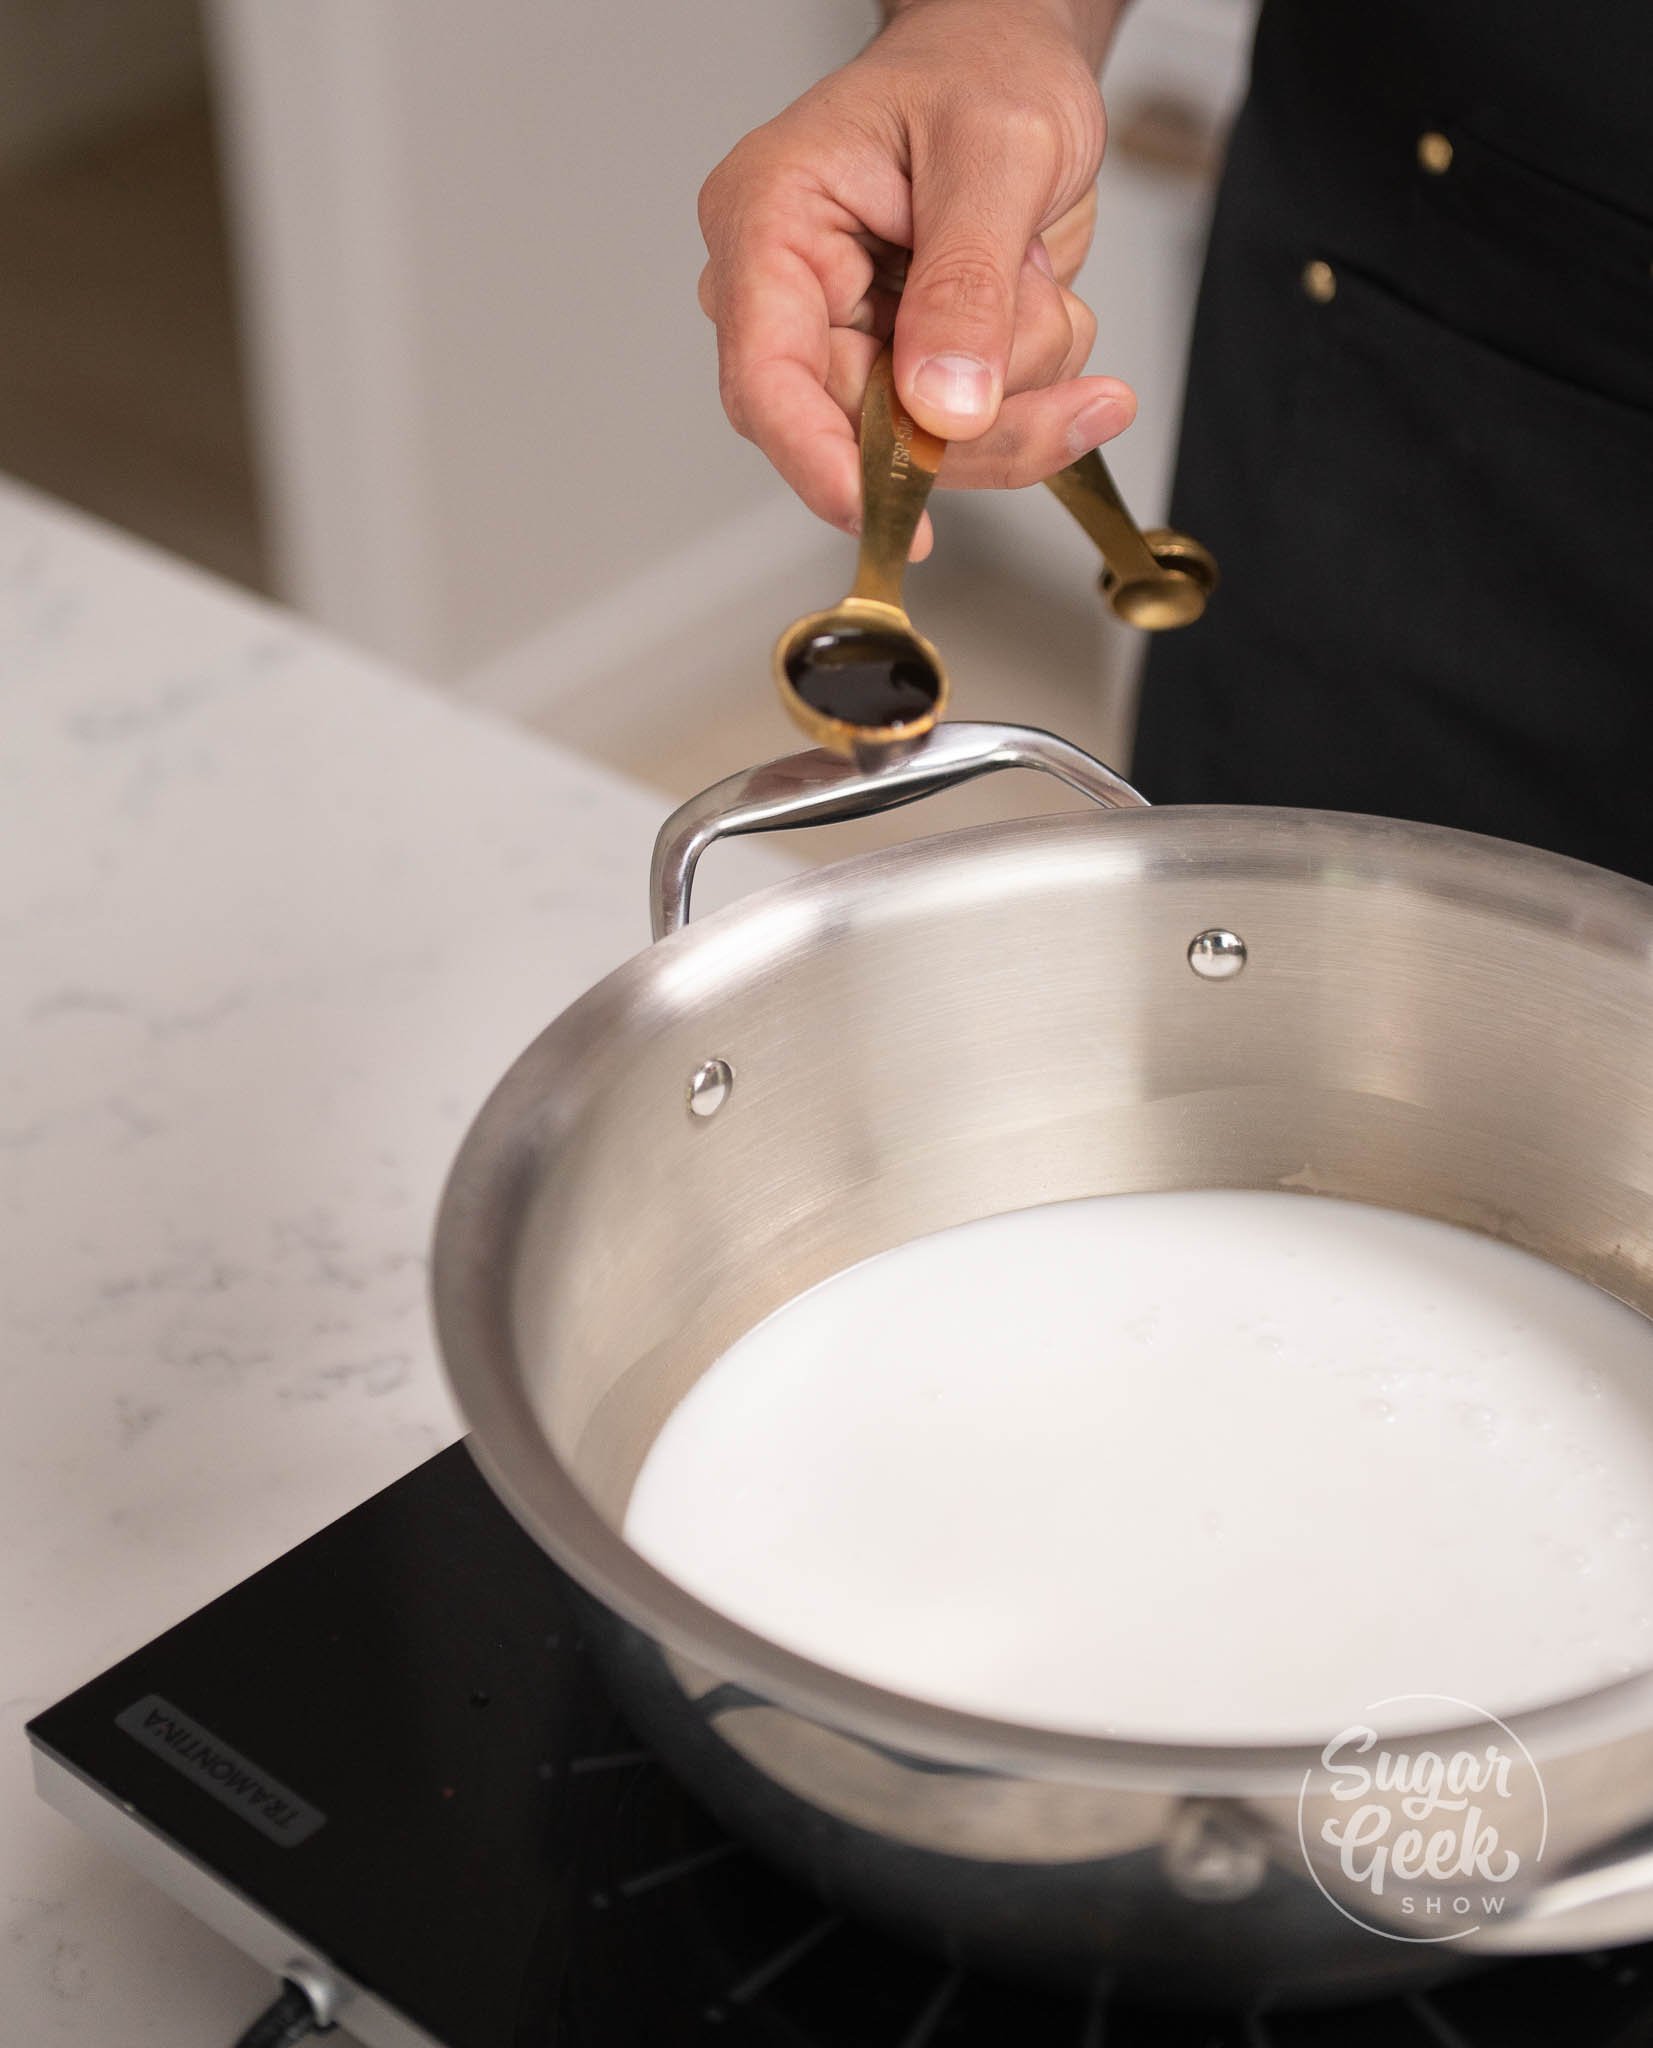
- Add in your vanilla.

- Whisk the mix in the pot and bring it to a boil.
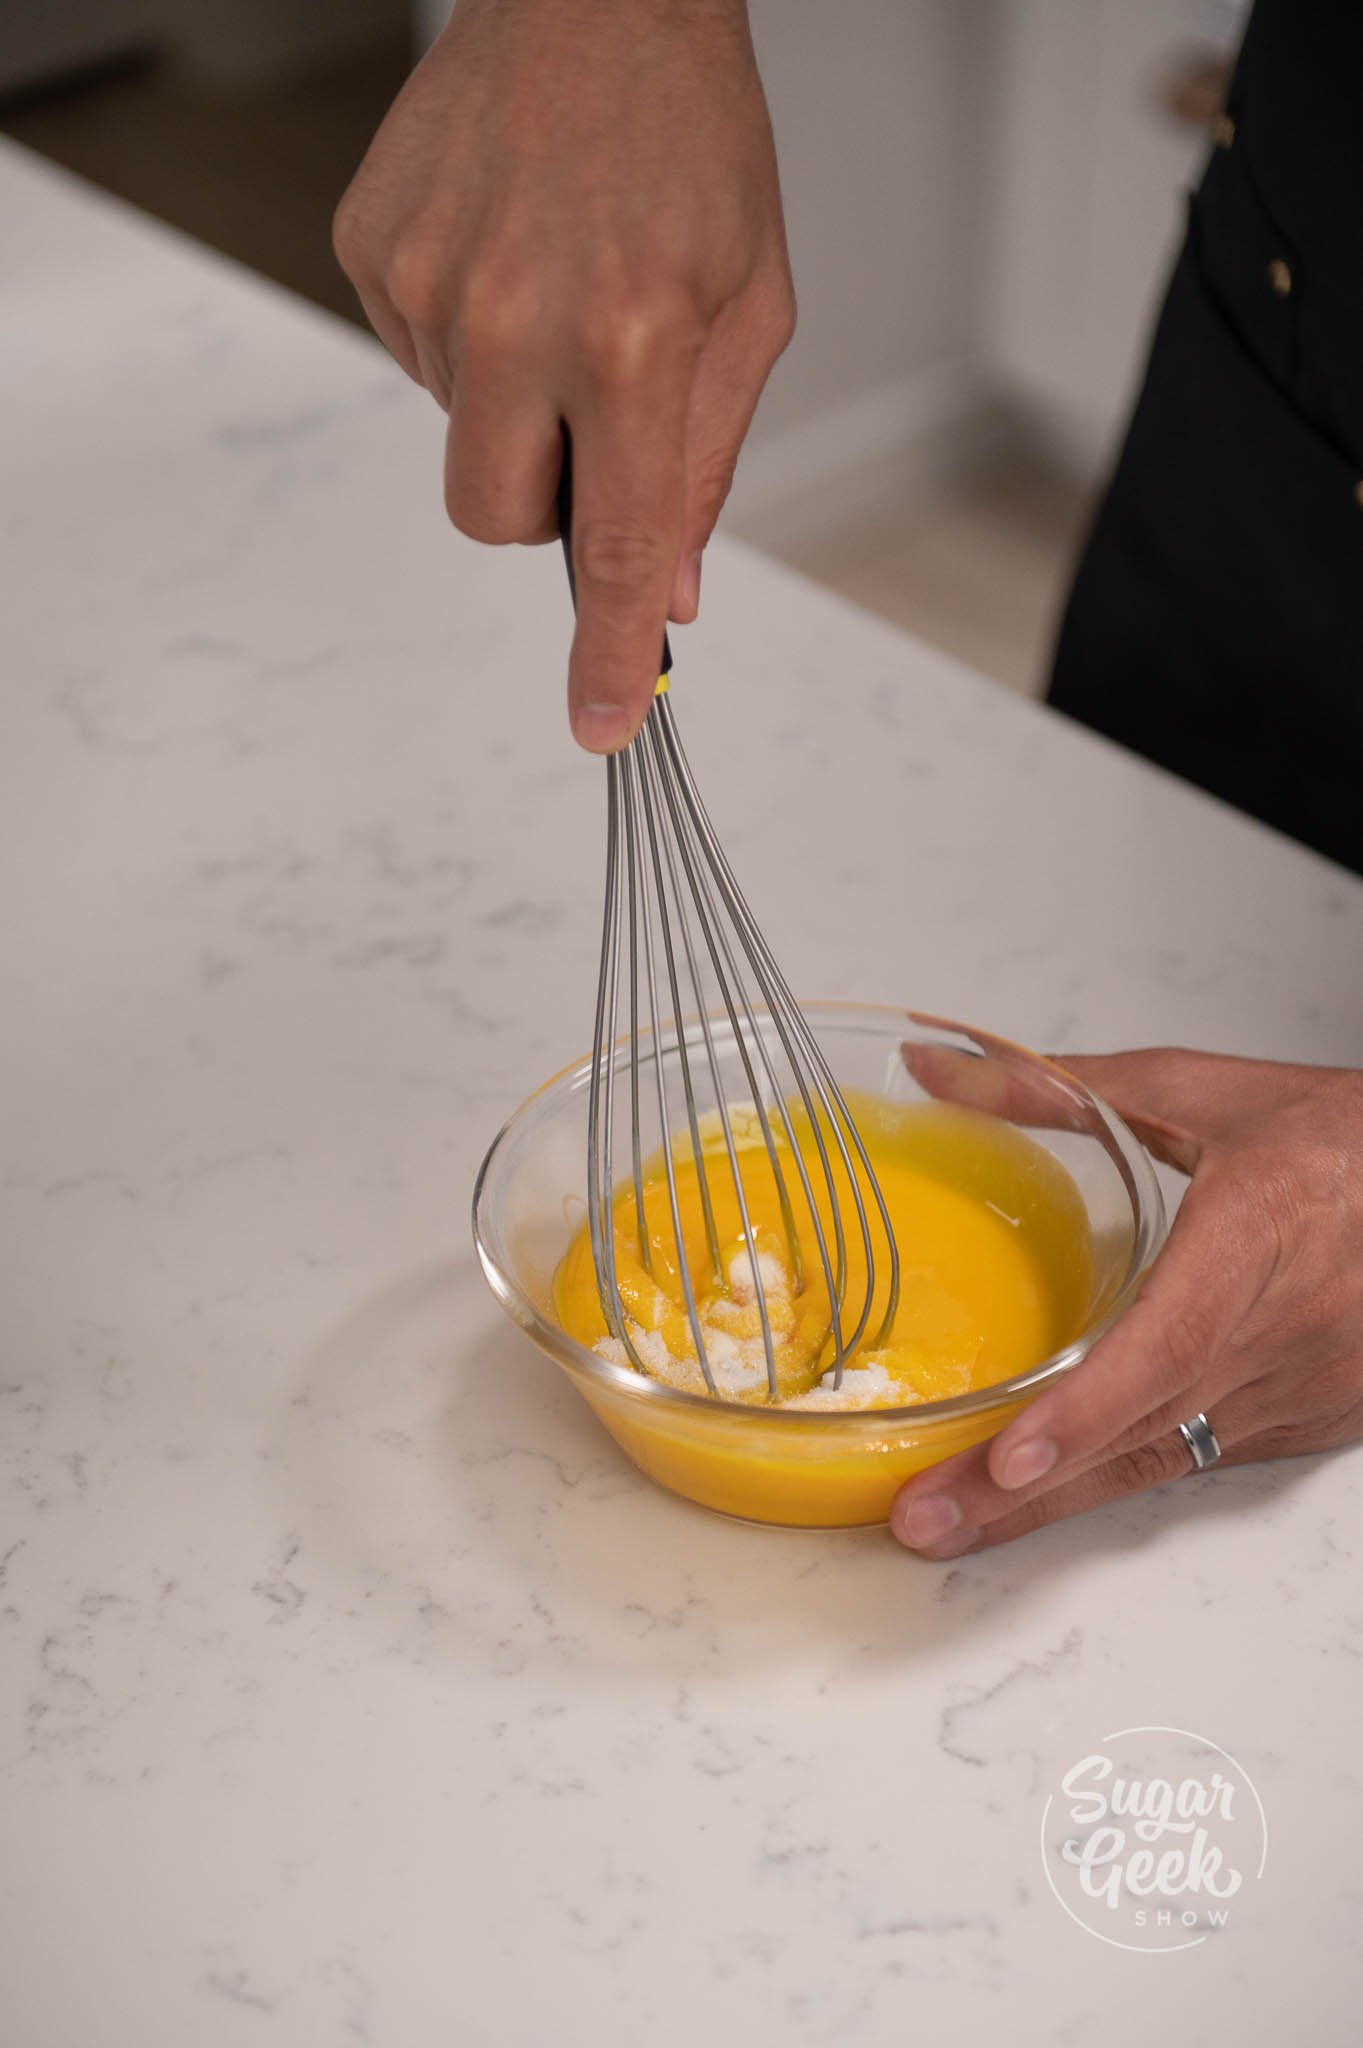
- Add in your yolks and the other half of the sugar into a separate bowl. Whisk together until you reach a ribbon texture.
- Once your coconut milk mix is boiling, temper your yolks with some of the mix by pouring ⅓ of the hot mixture into the yolk mixture while whisking constantly. Pour everything back into the pot.
- Cook everything while whisking constantly until it reaches 176º F (80 º C) 2-5 minutes or until the mix no longer drips from your whisk.
- Add in your gelatin ( If using sheets don't add in the leftover water, just the sheets).
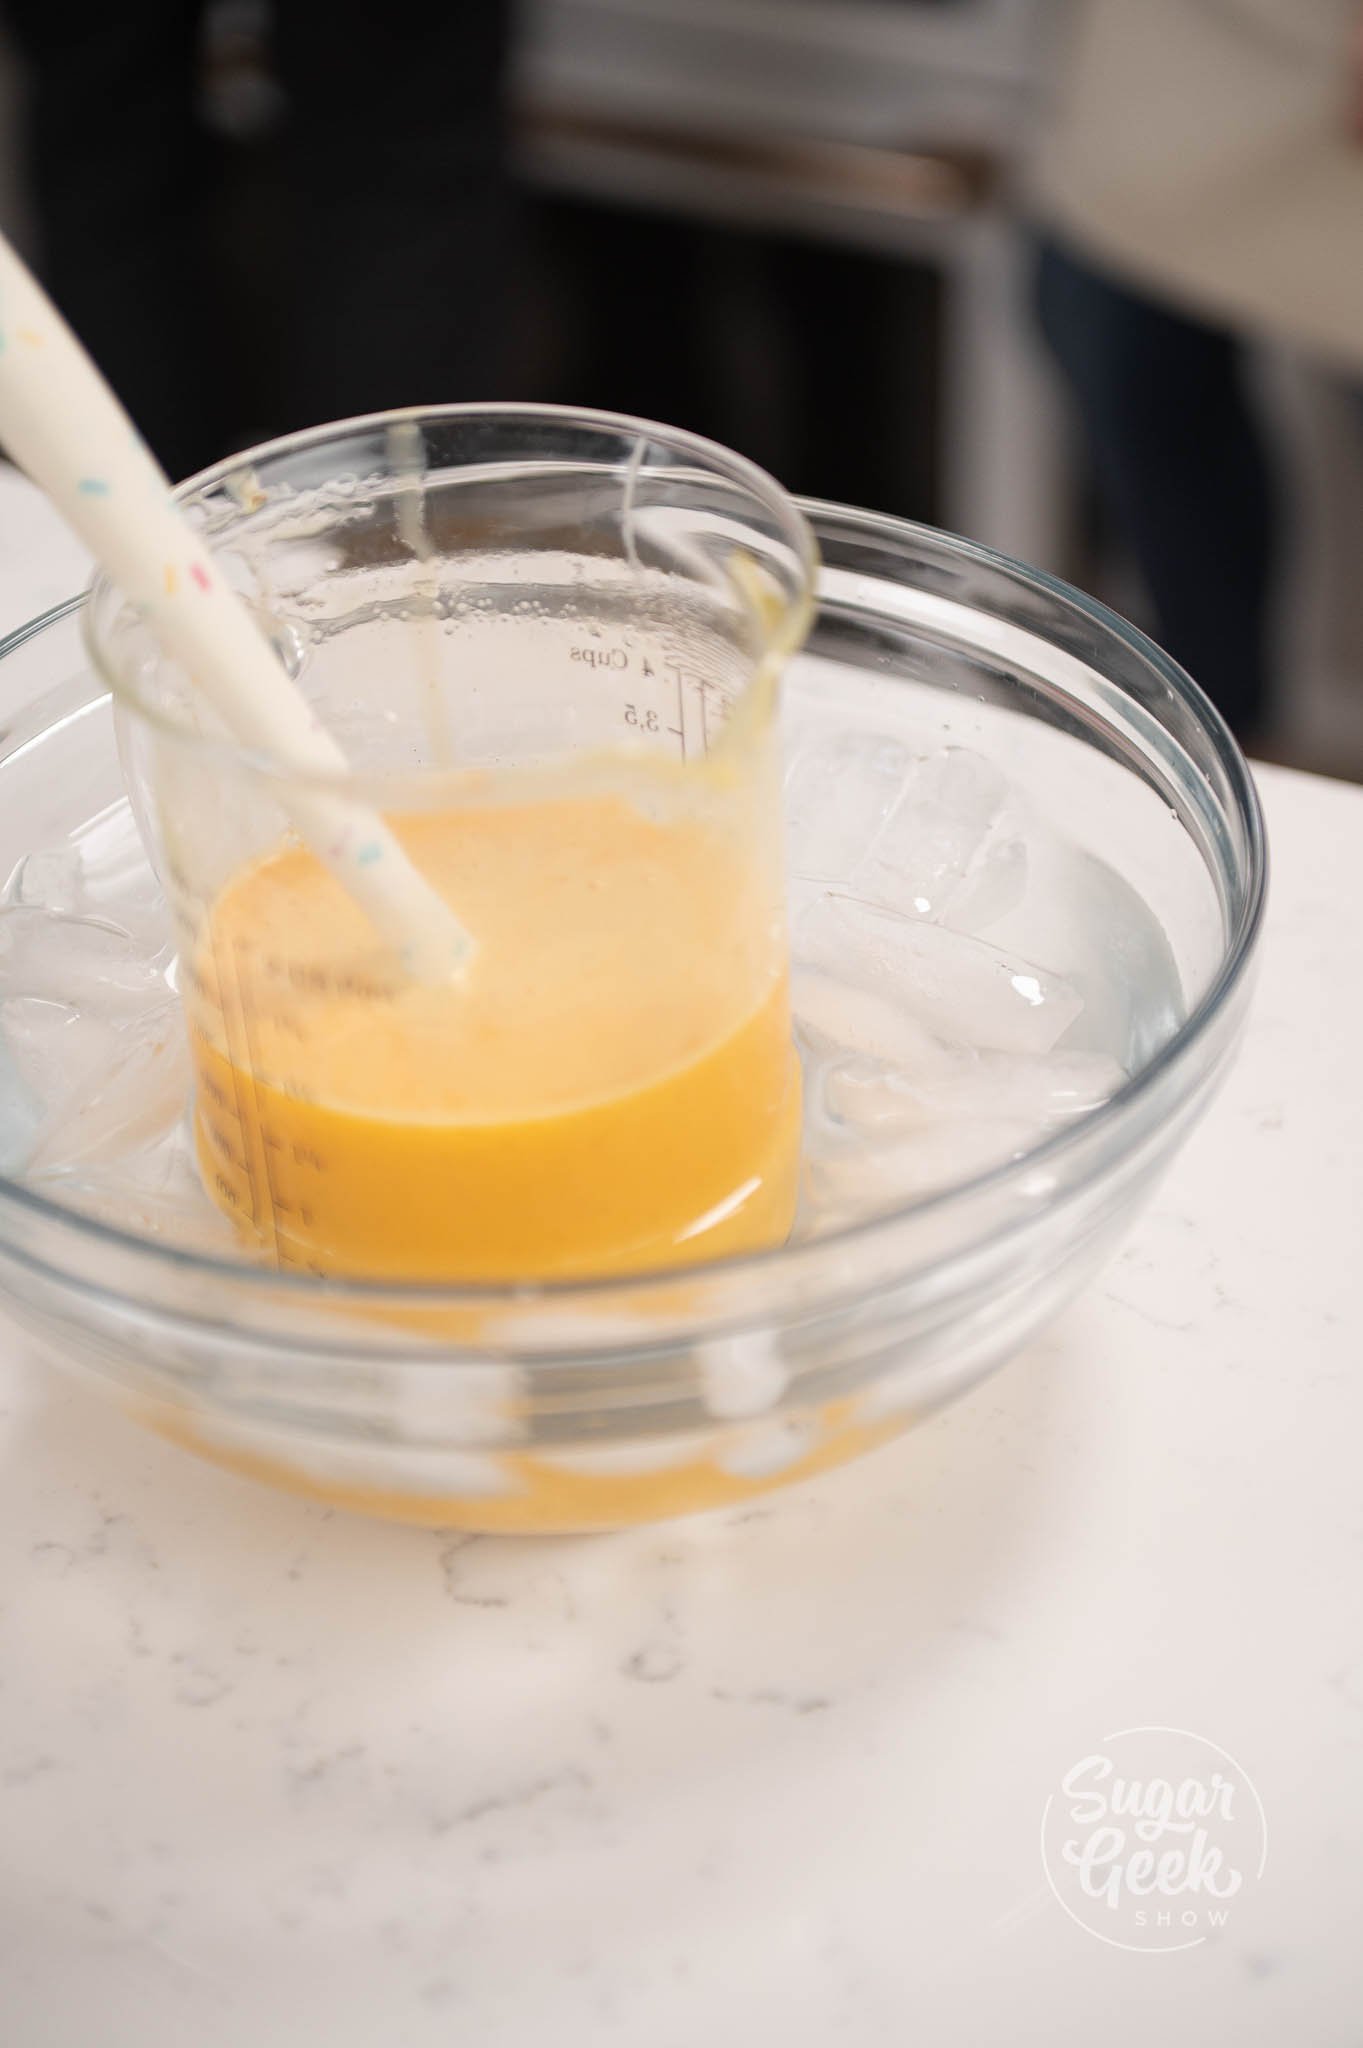
- OPTIONAL: Pour your mix into a separate bowl over ice to cool down the mix quickly to 20º-25ºC
- While the mix is cooling down, un-mold your coconut dacquoise insert and your mango compote and cremeux insert. Place it back into the freezer until you are ready to assemble.

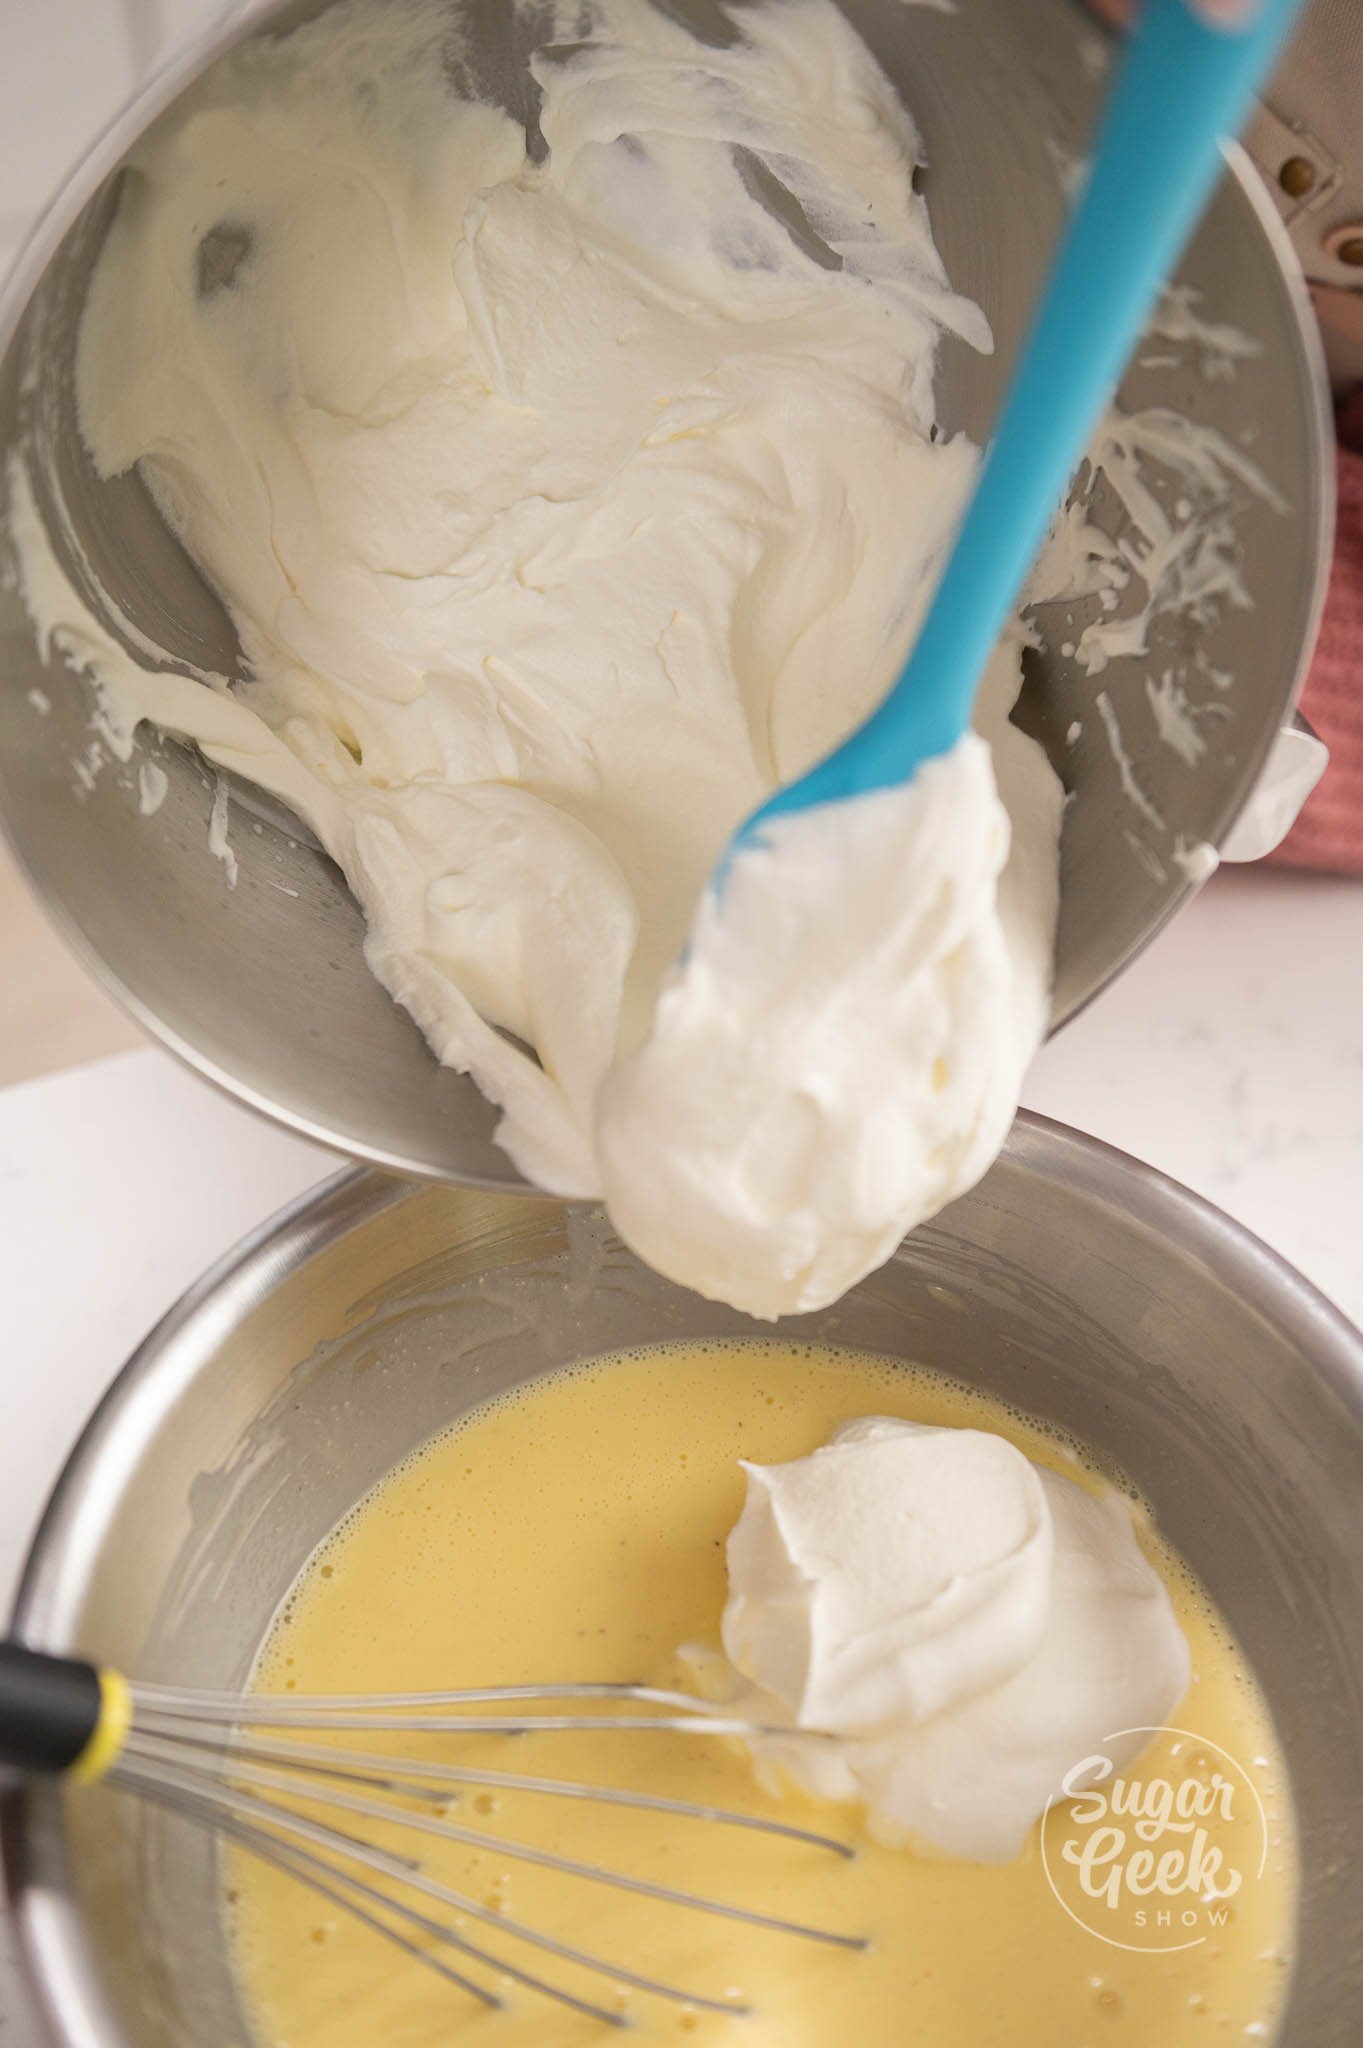
- Add in ⅓ of your whipped cream into your cooled coconut milk mix to make the mixture lighter. Whisk together.
- Lightly fold in the rest of your whipped cream using a spatula. Set it aside so the mousse can thicken. Once it becomes thick and fluffy it's ready to use.


Assembling The Mango Mousse Cake
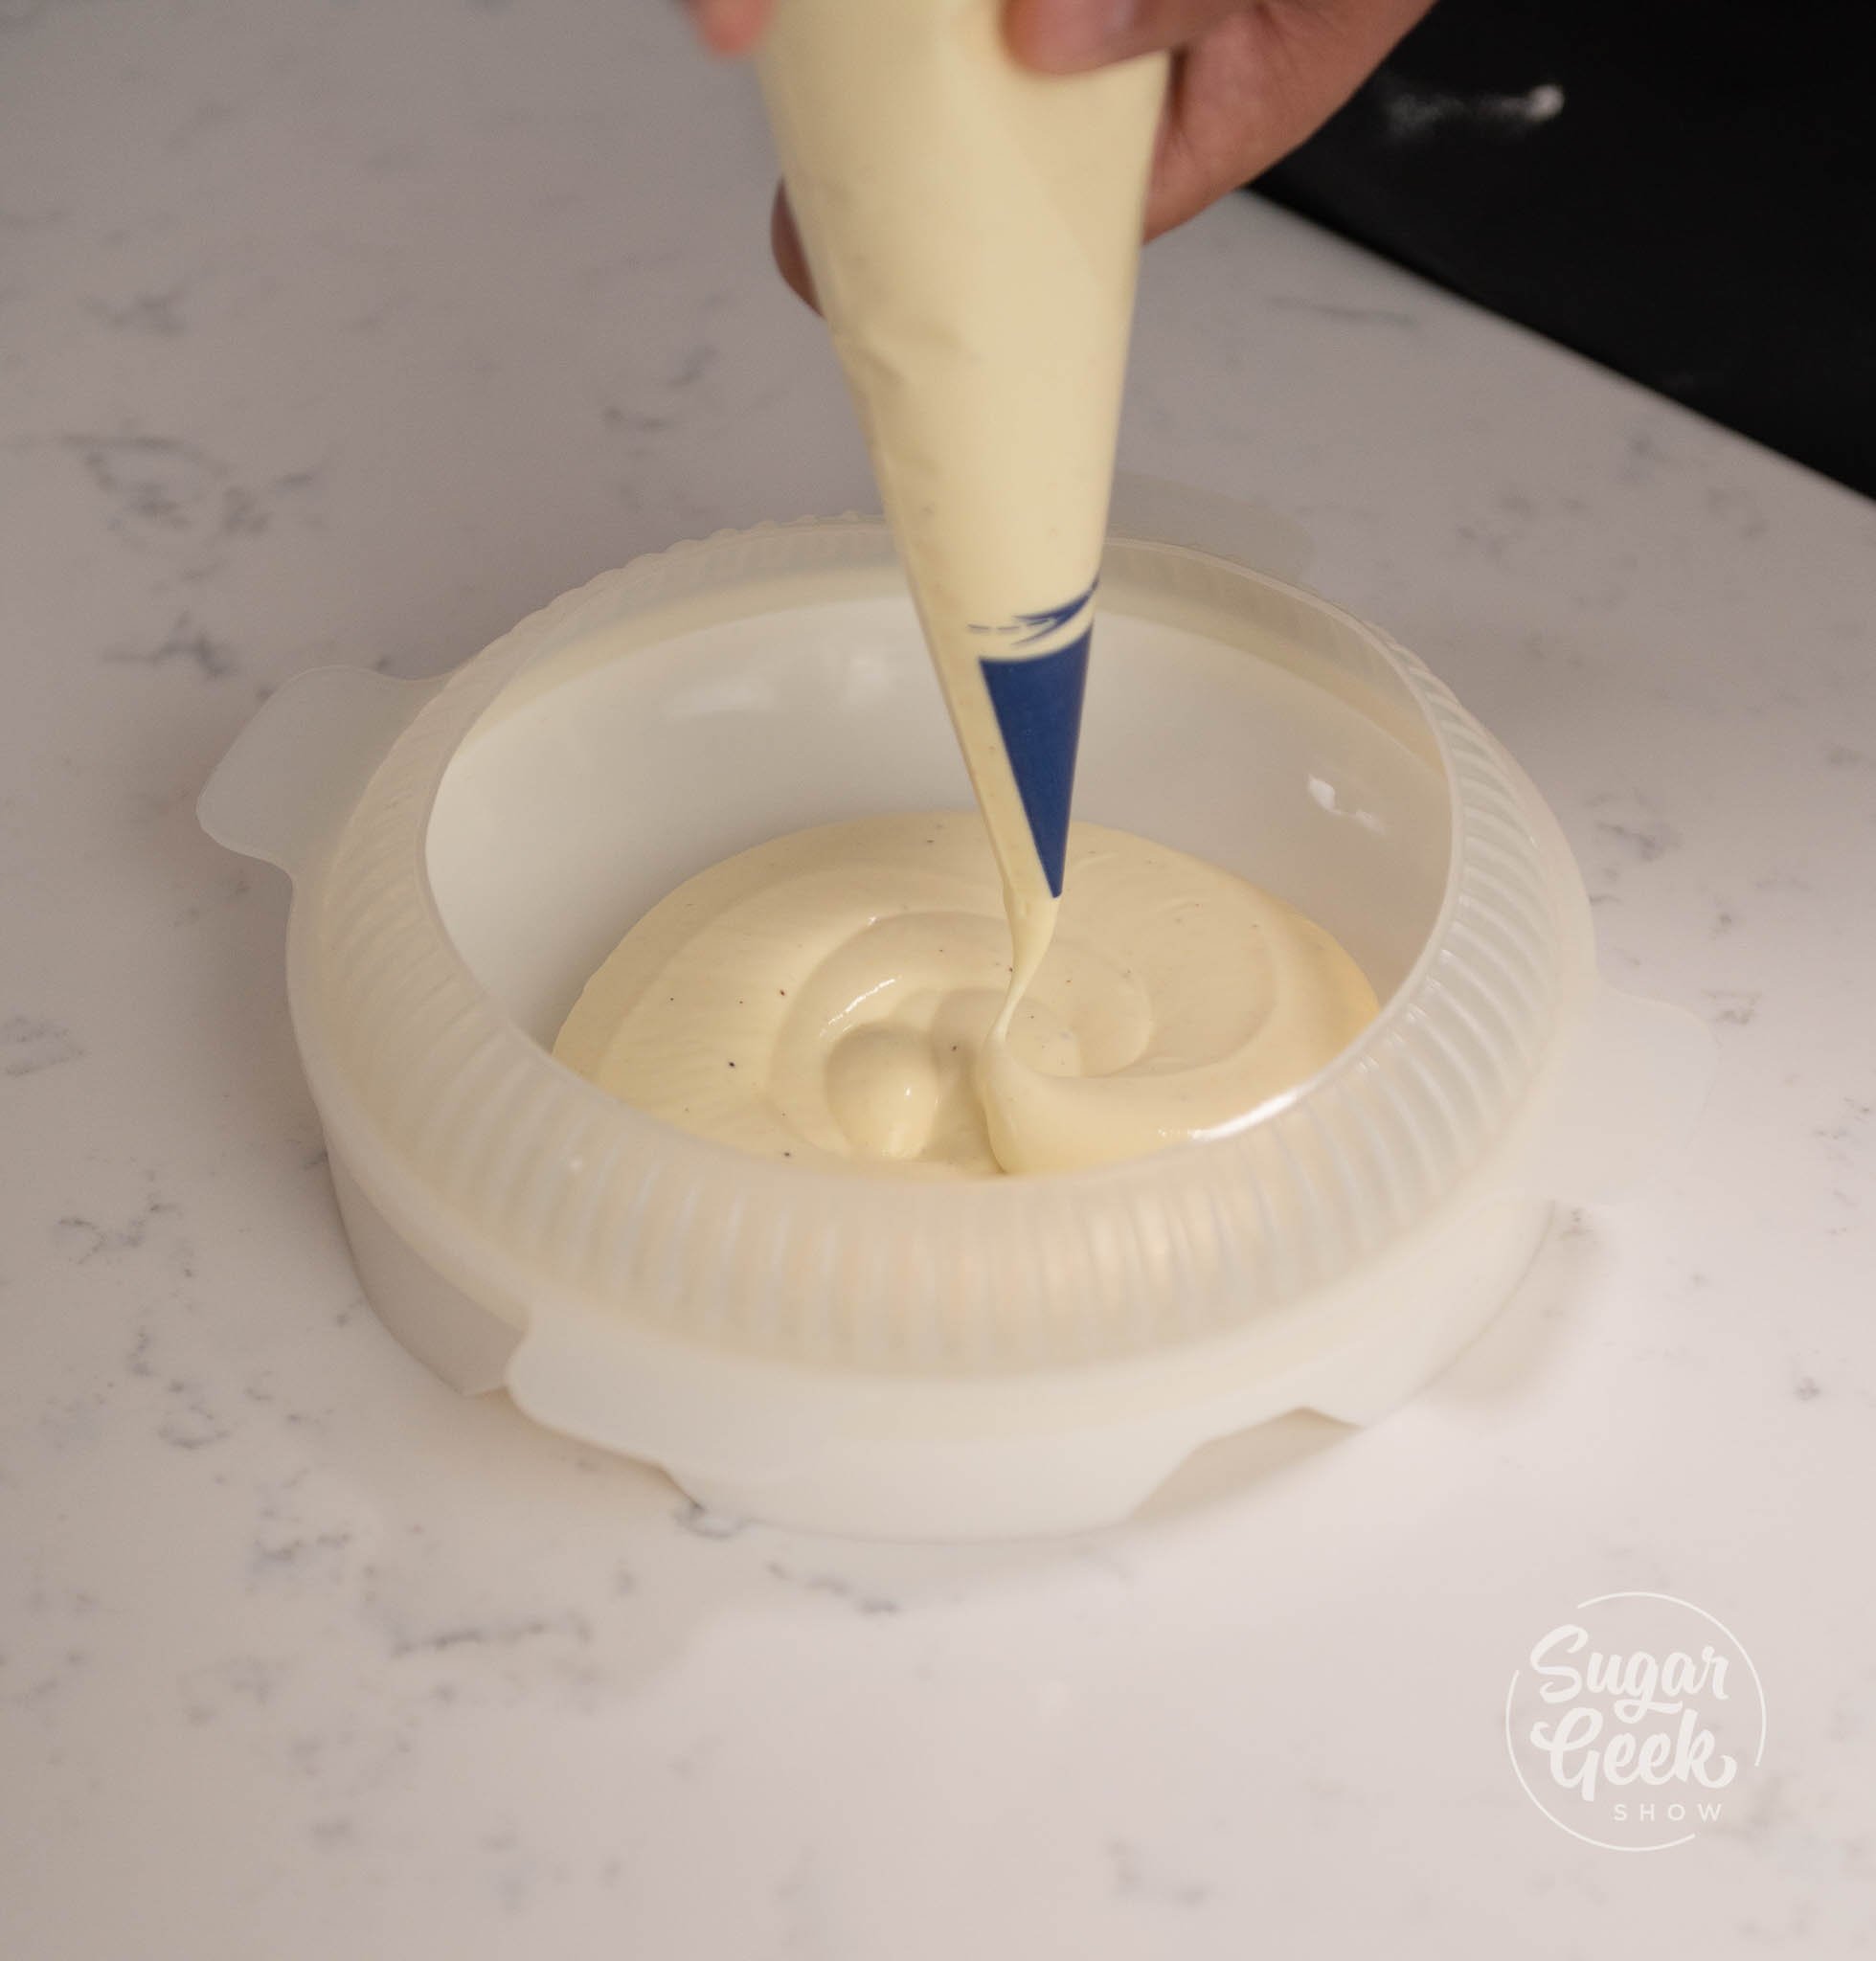
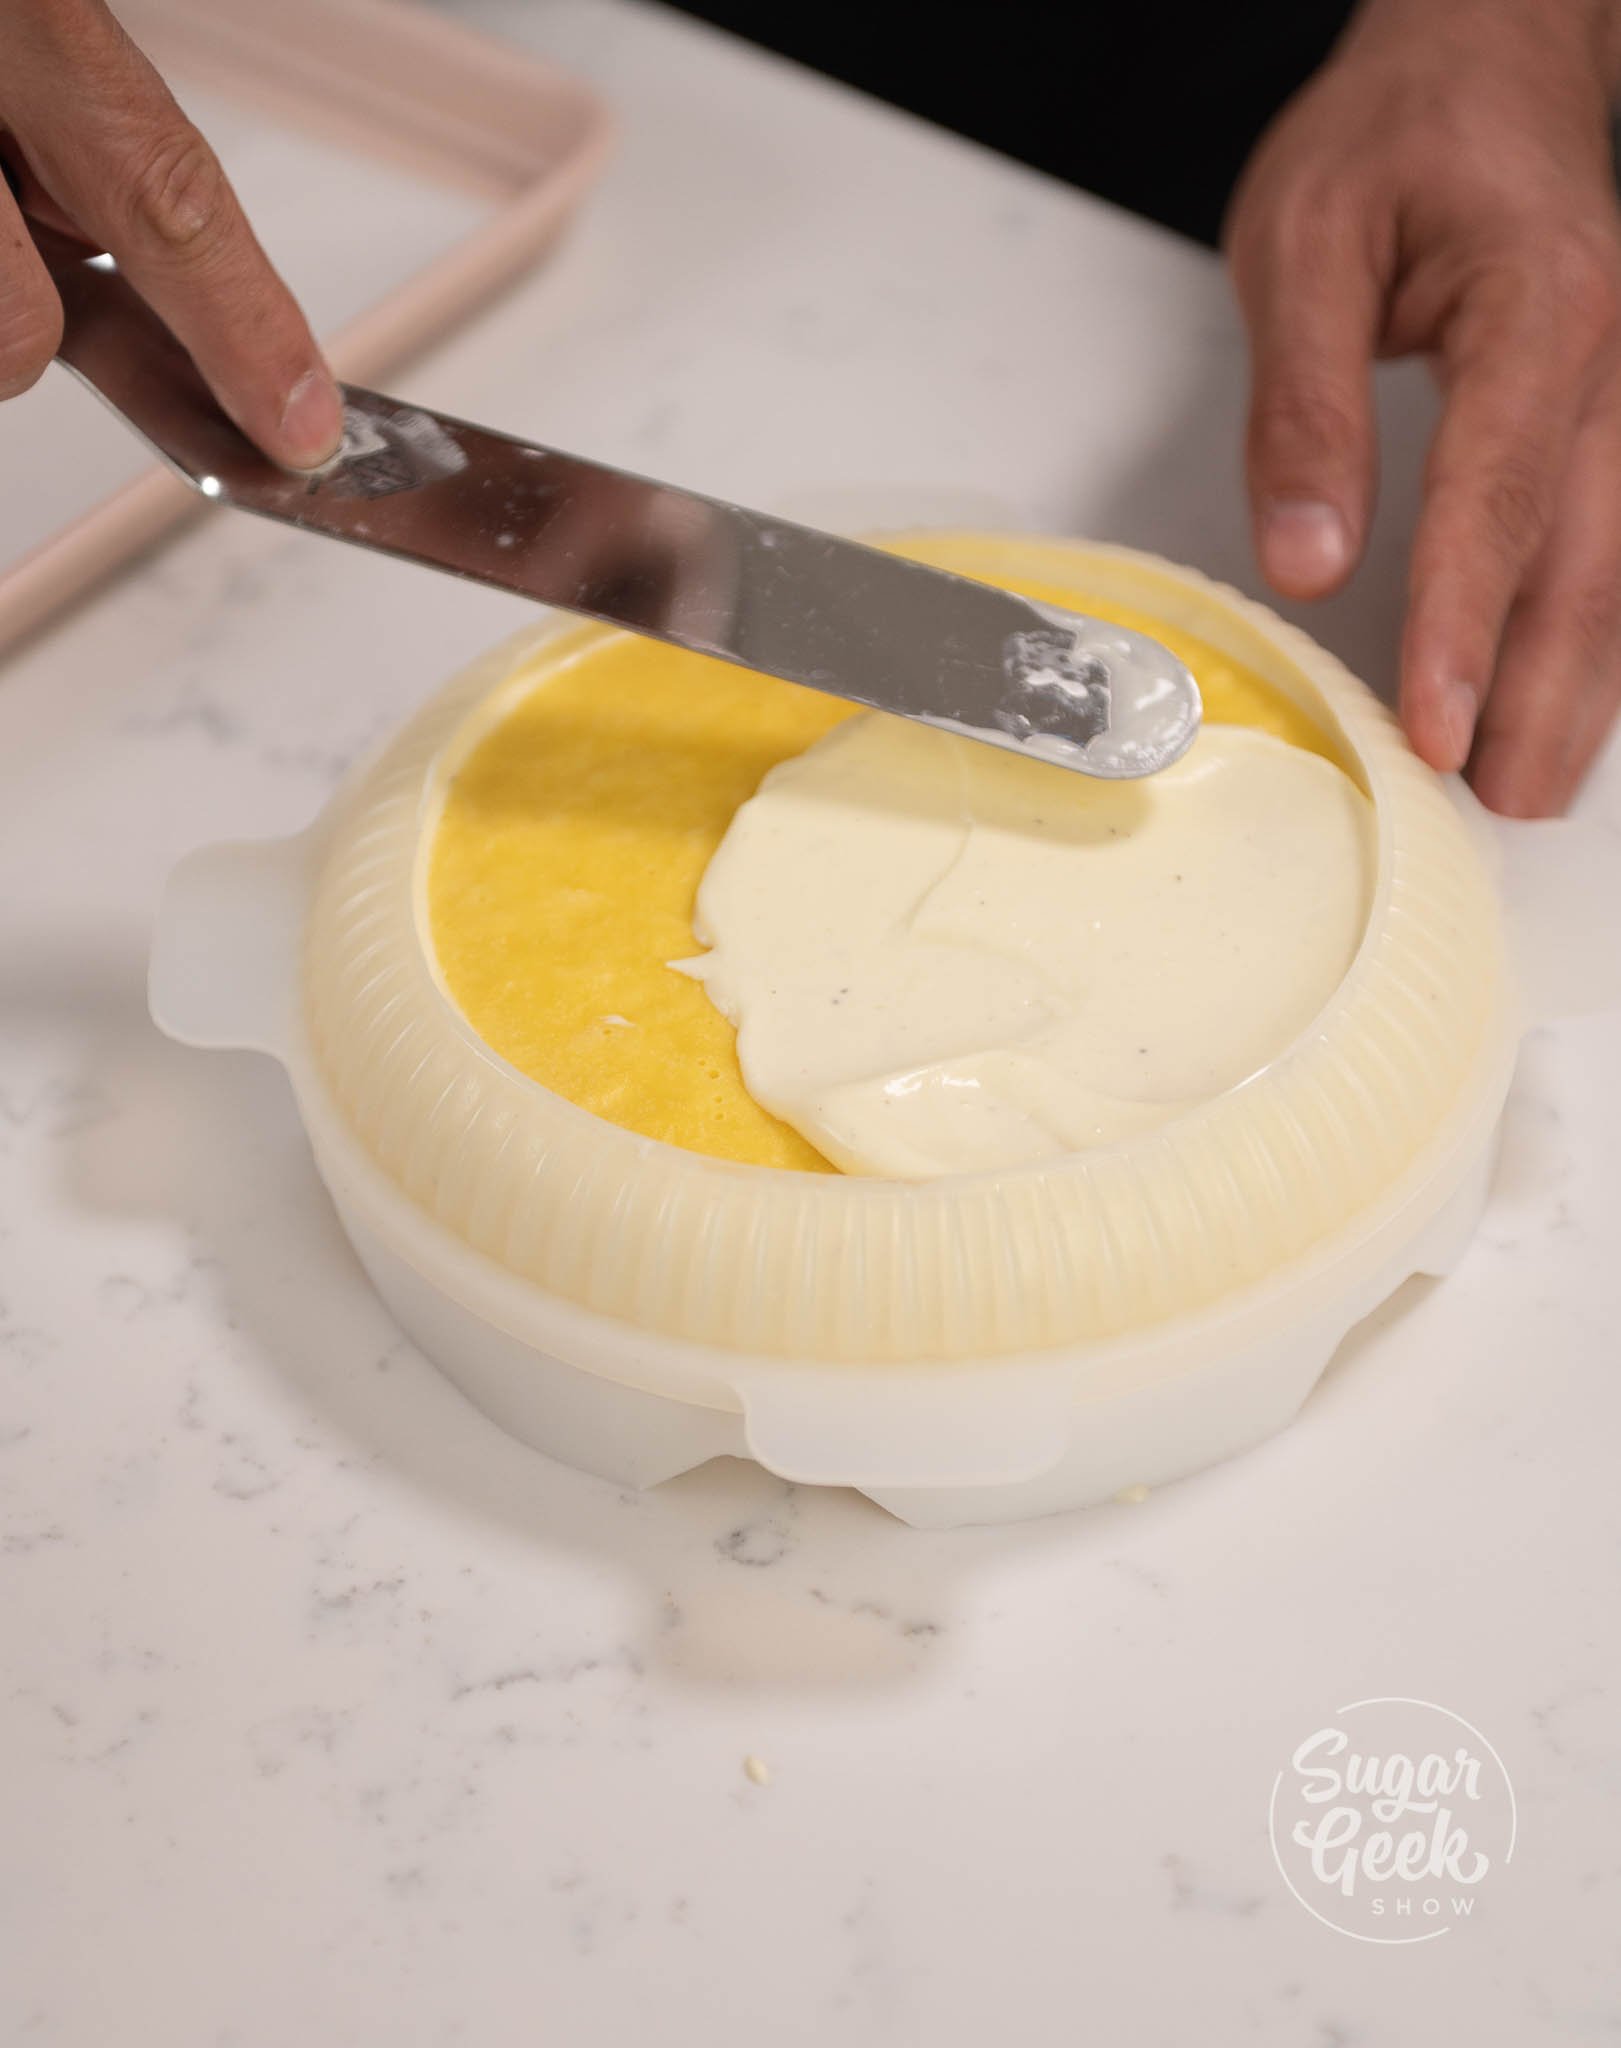
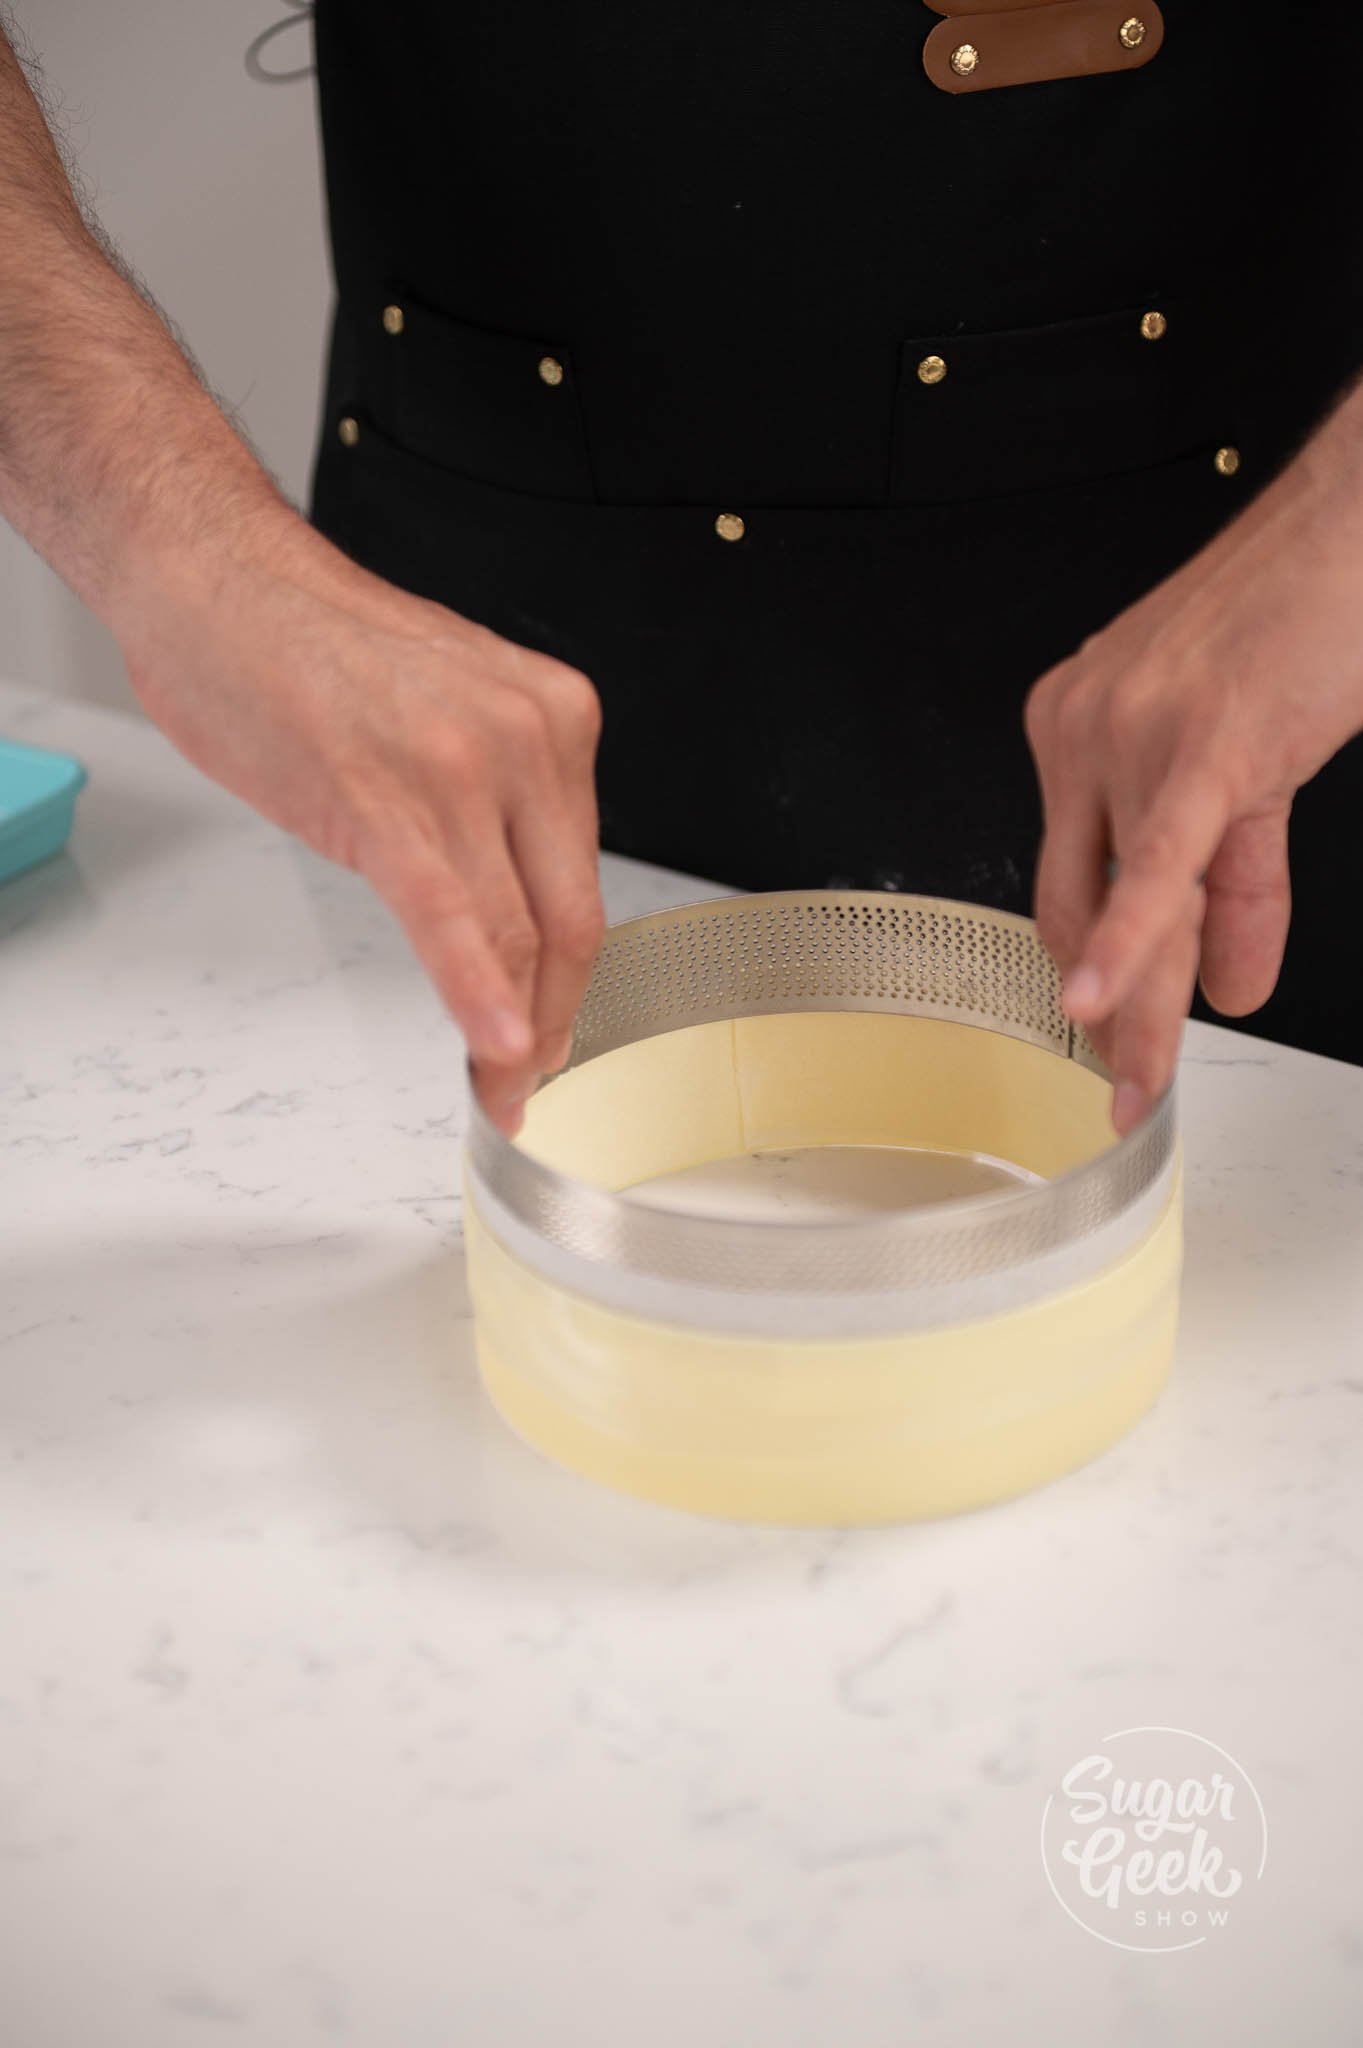
- When the mousse is set, prepare a piping bag, and pipe the mousse about ⅓ of the way full into the bottom of your silicone entremet mold.
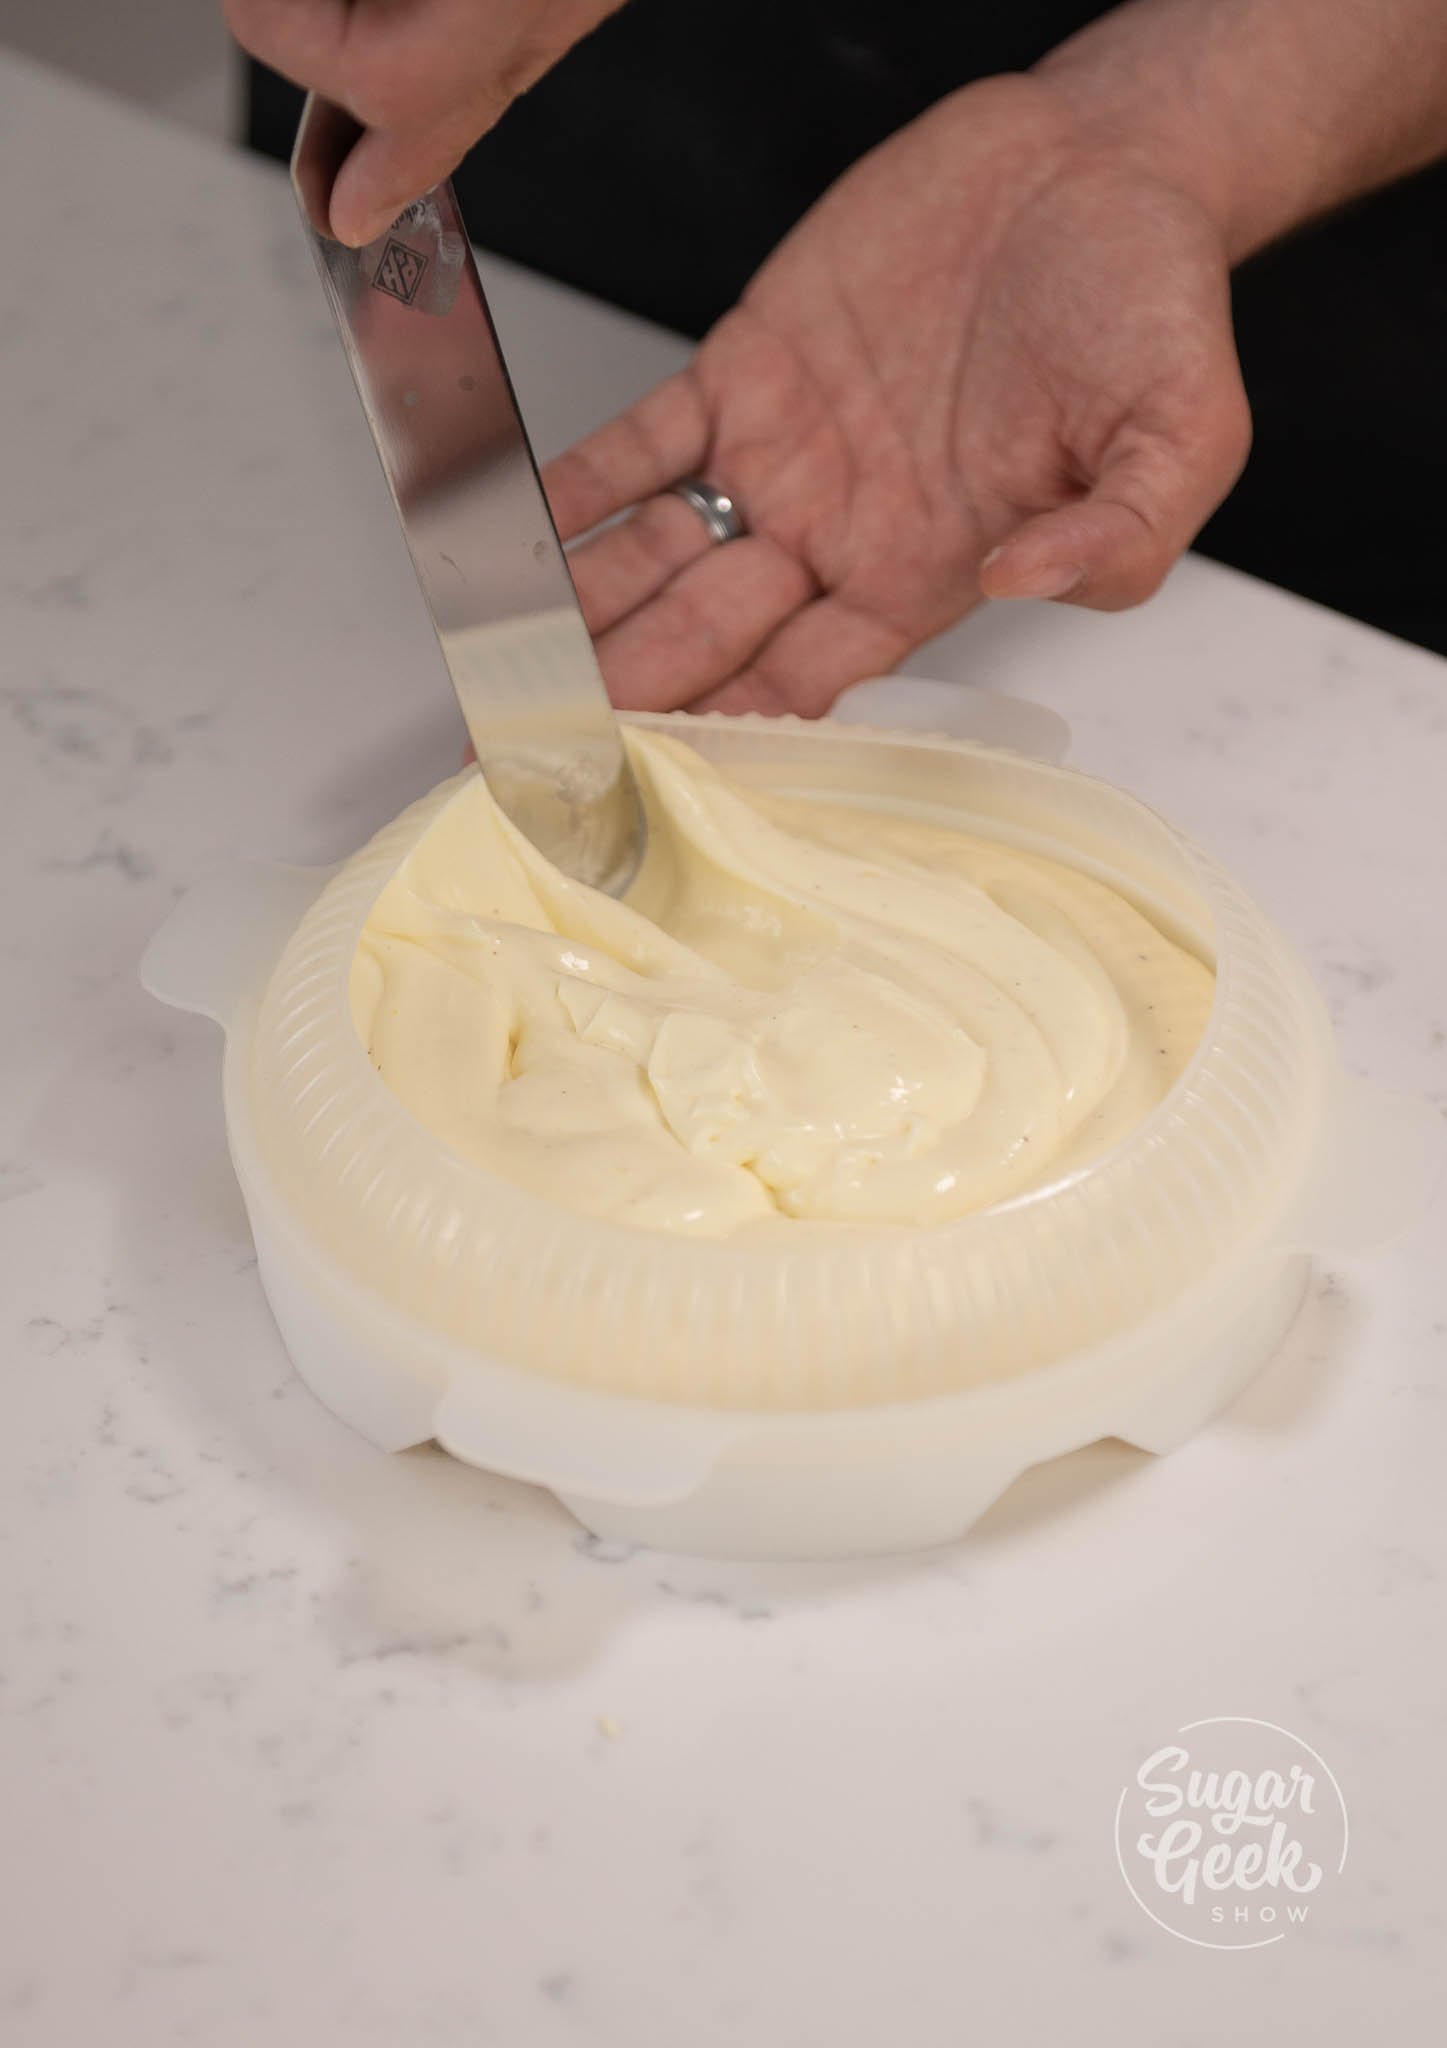
- Using a spatula spread the mousse around all the sides and to the top edge of the mold.

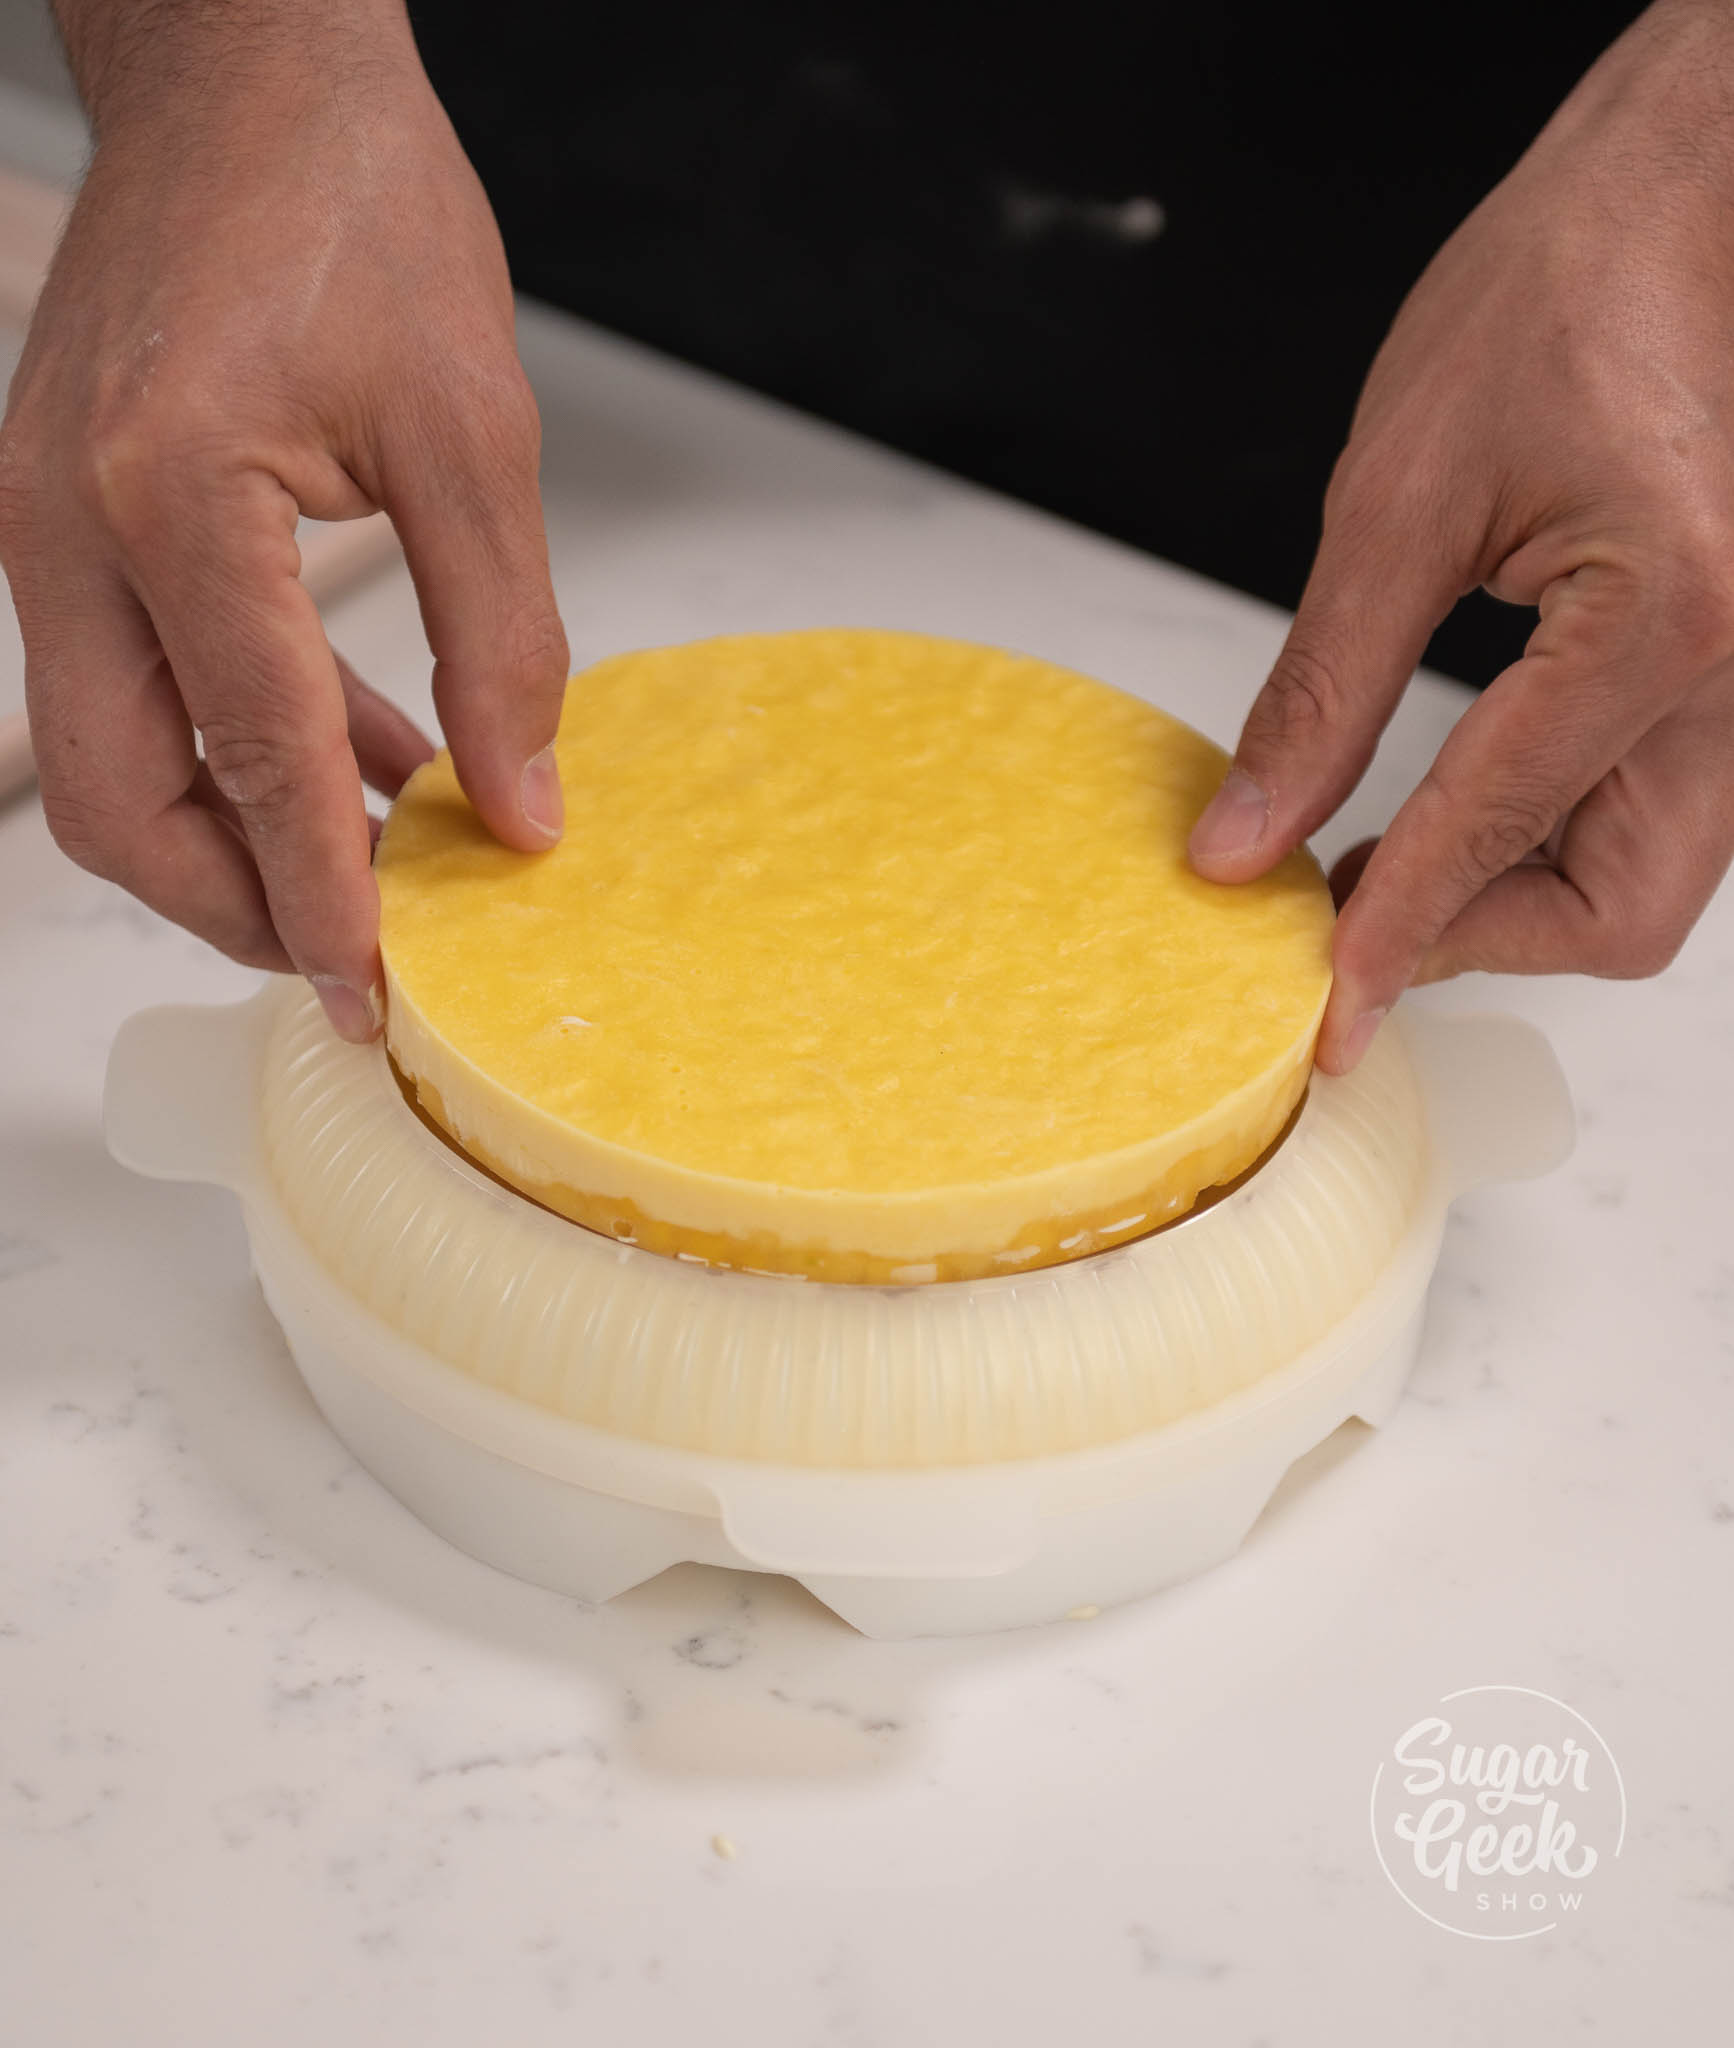
- Take the mango compote and cremeux insert out of the freezer and push the frozen insert into the mousse until it's about ½" below the top edge of the mold.

- Cover the top of the insert with a super thin layer of mousse.

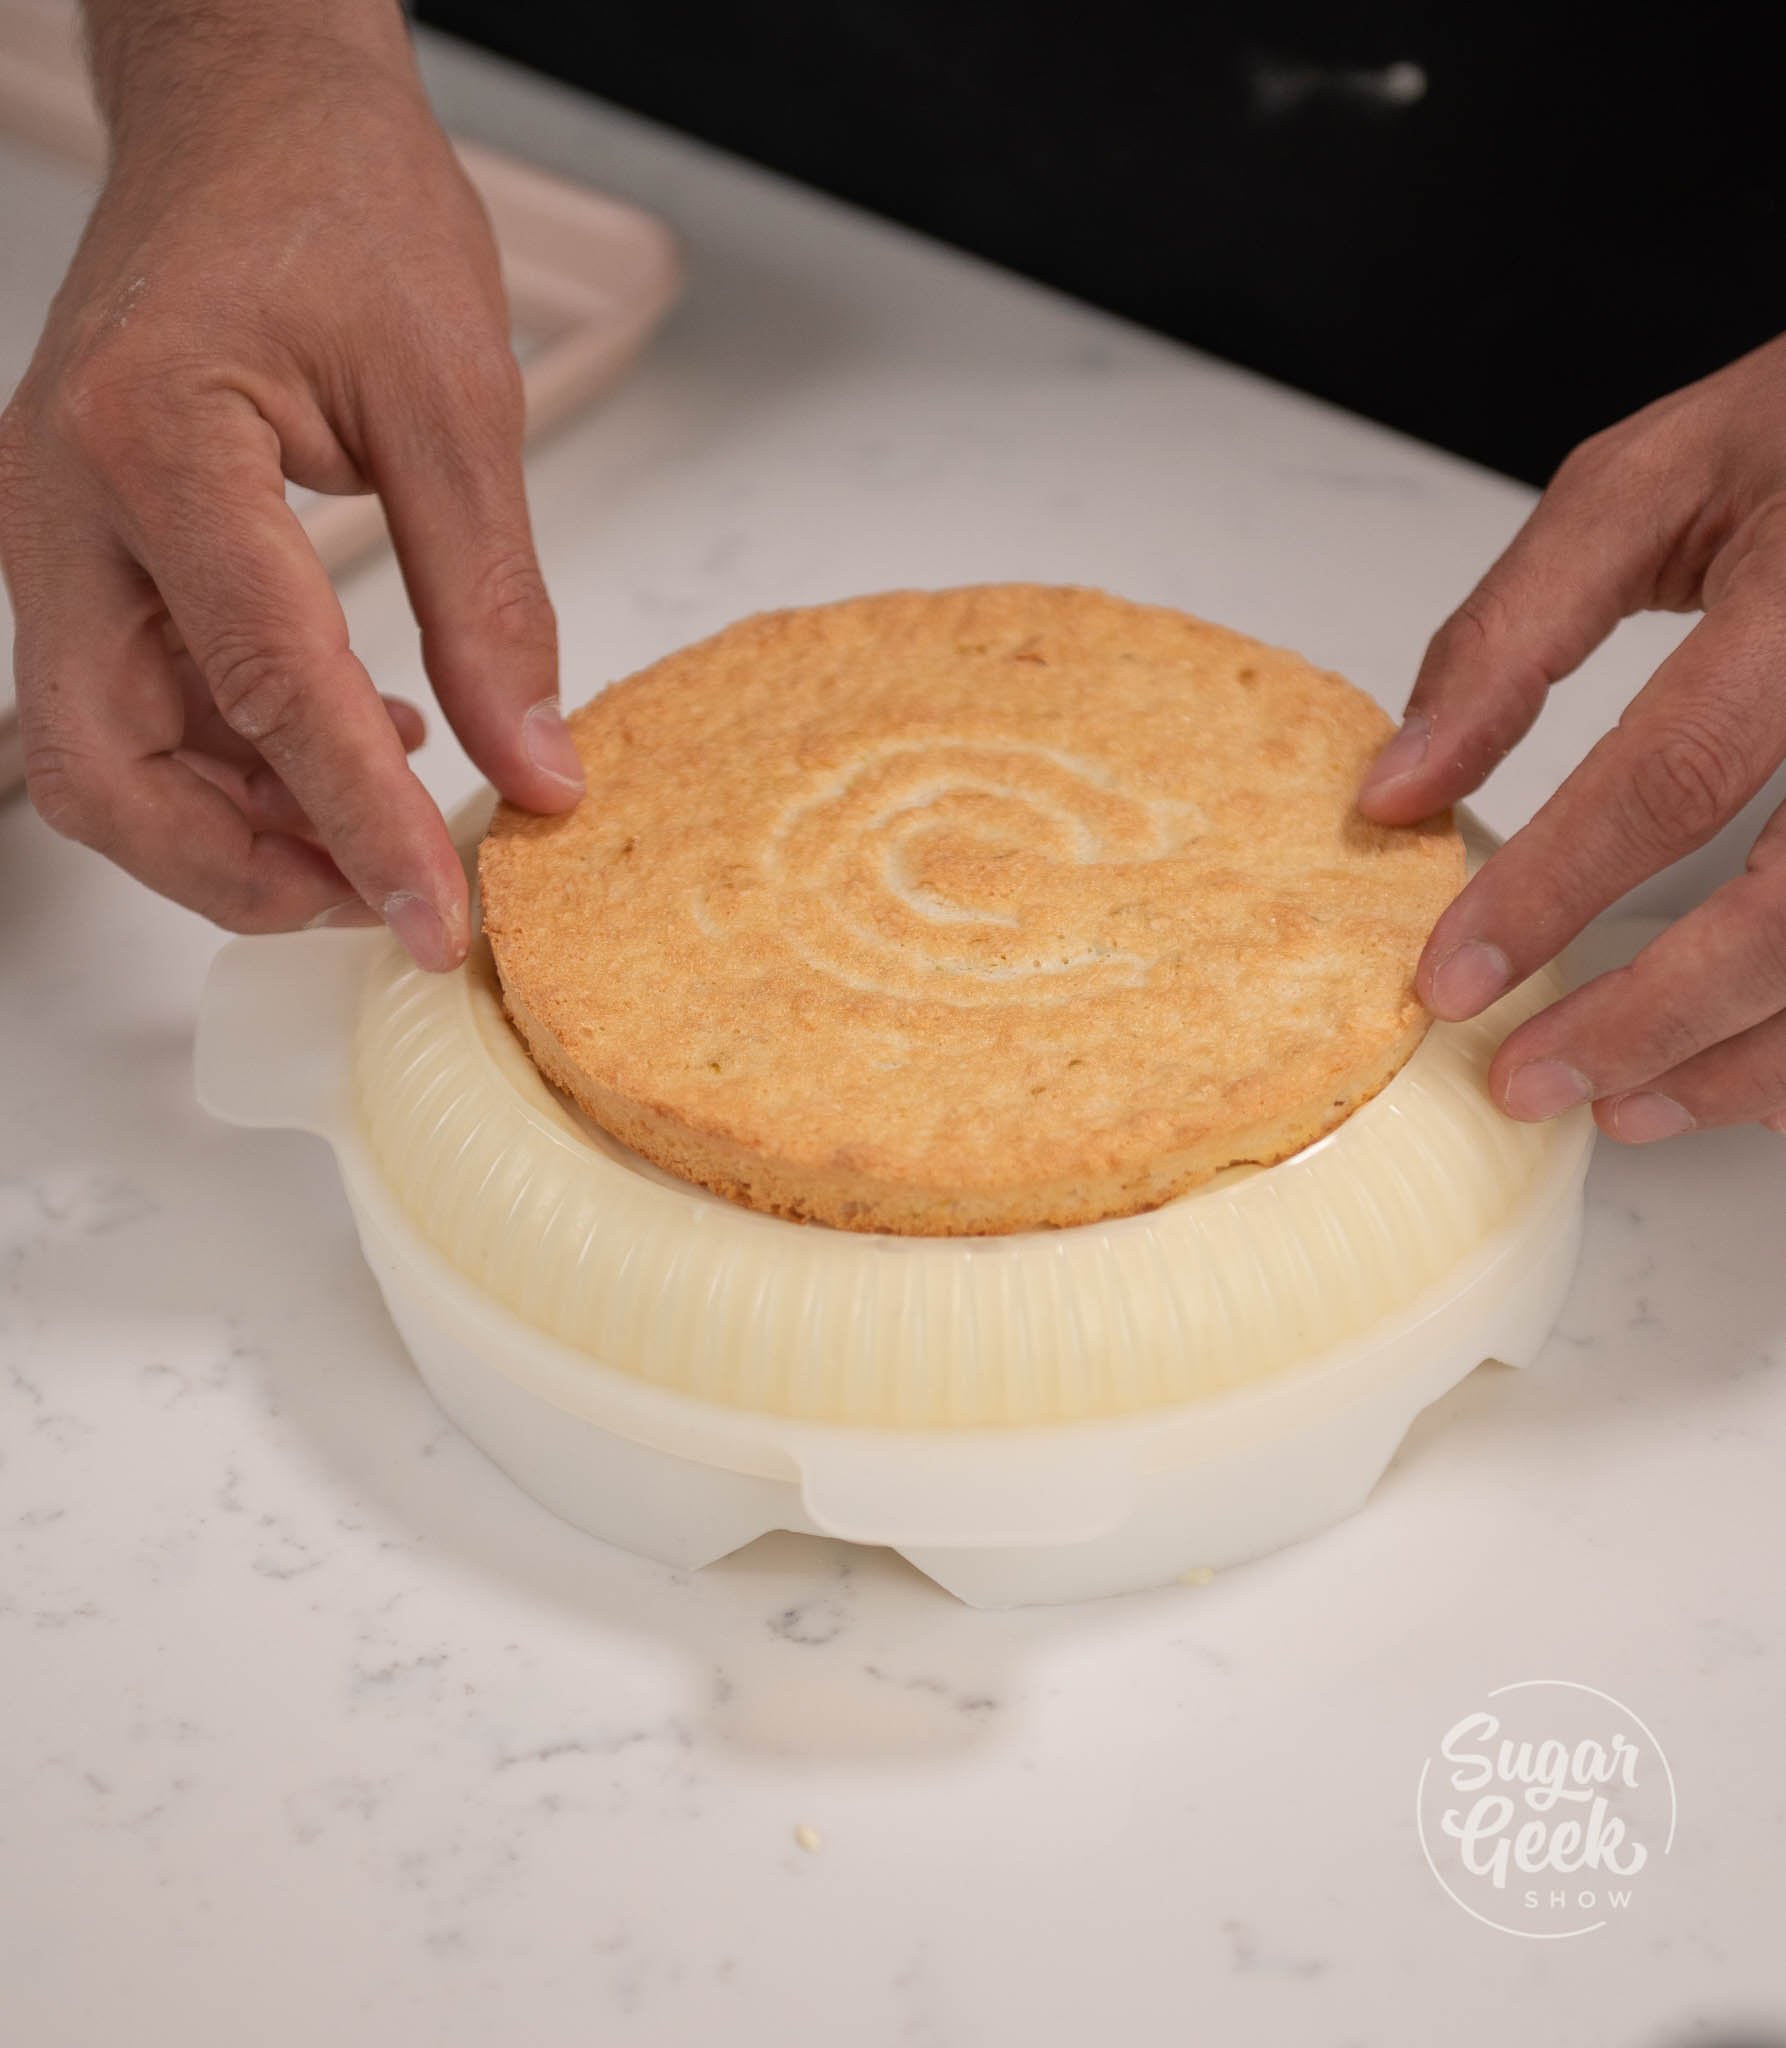
- Take out the coconut dacquoise and place that on top of the mango compote insert. Trim away any excess sponge.

- Place the whole entremet in the freezer to set overnight or minimum of 6 hours.
Making The Mirror Glaze Step-By-Step
- Soak your gelatin in your cold water ( blooming). Let it absorb for 1-2 minutes and set aside for later.

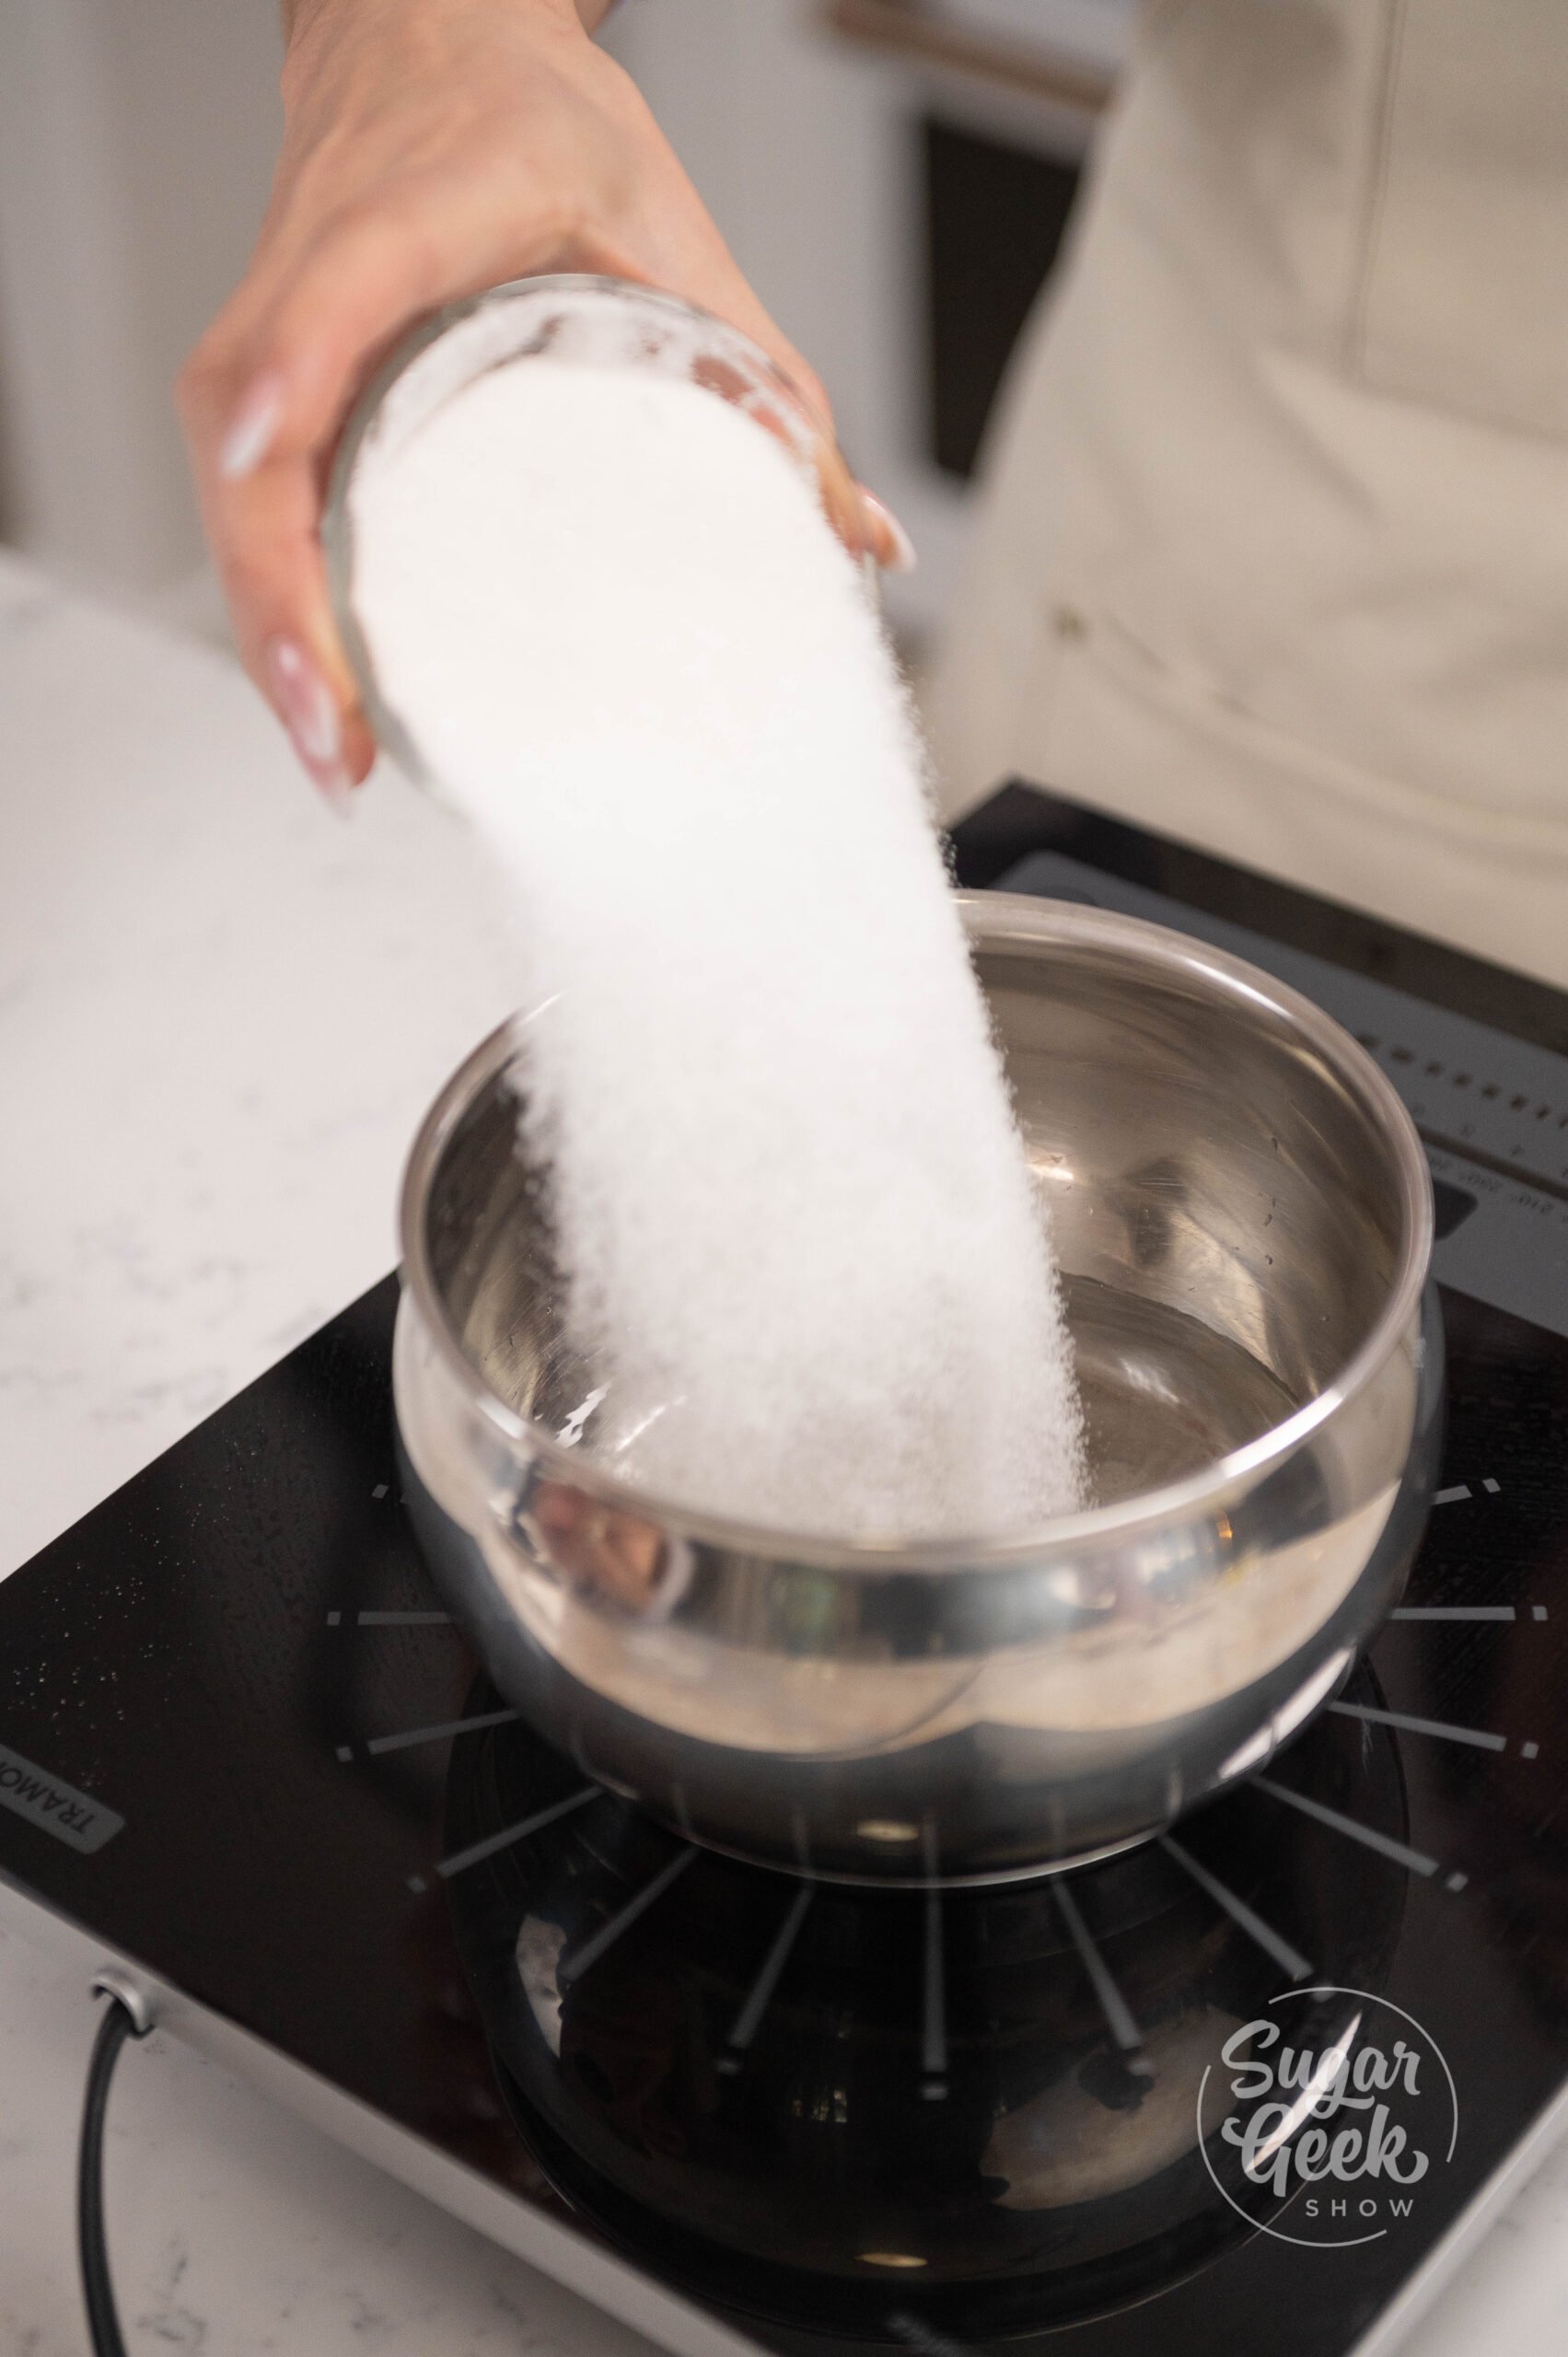
- Pour in your water, corn syrup, and sugar into a medium sized pot over medium heat.
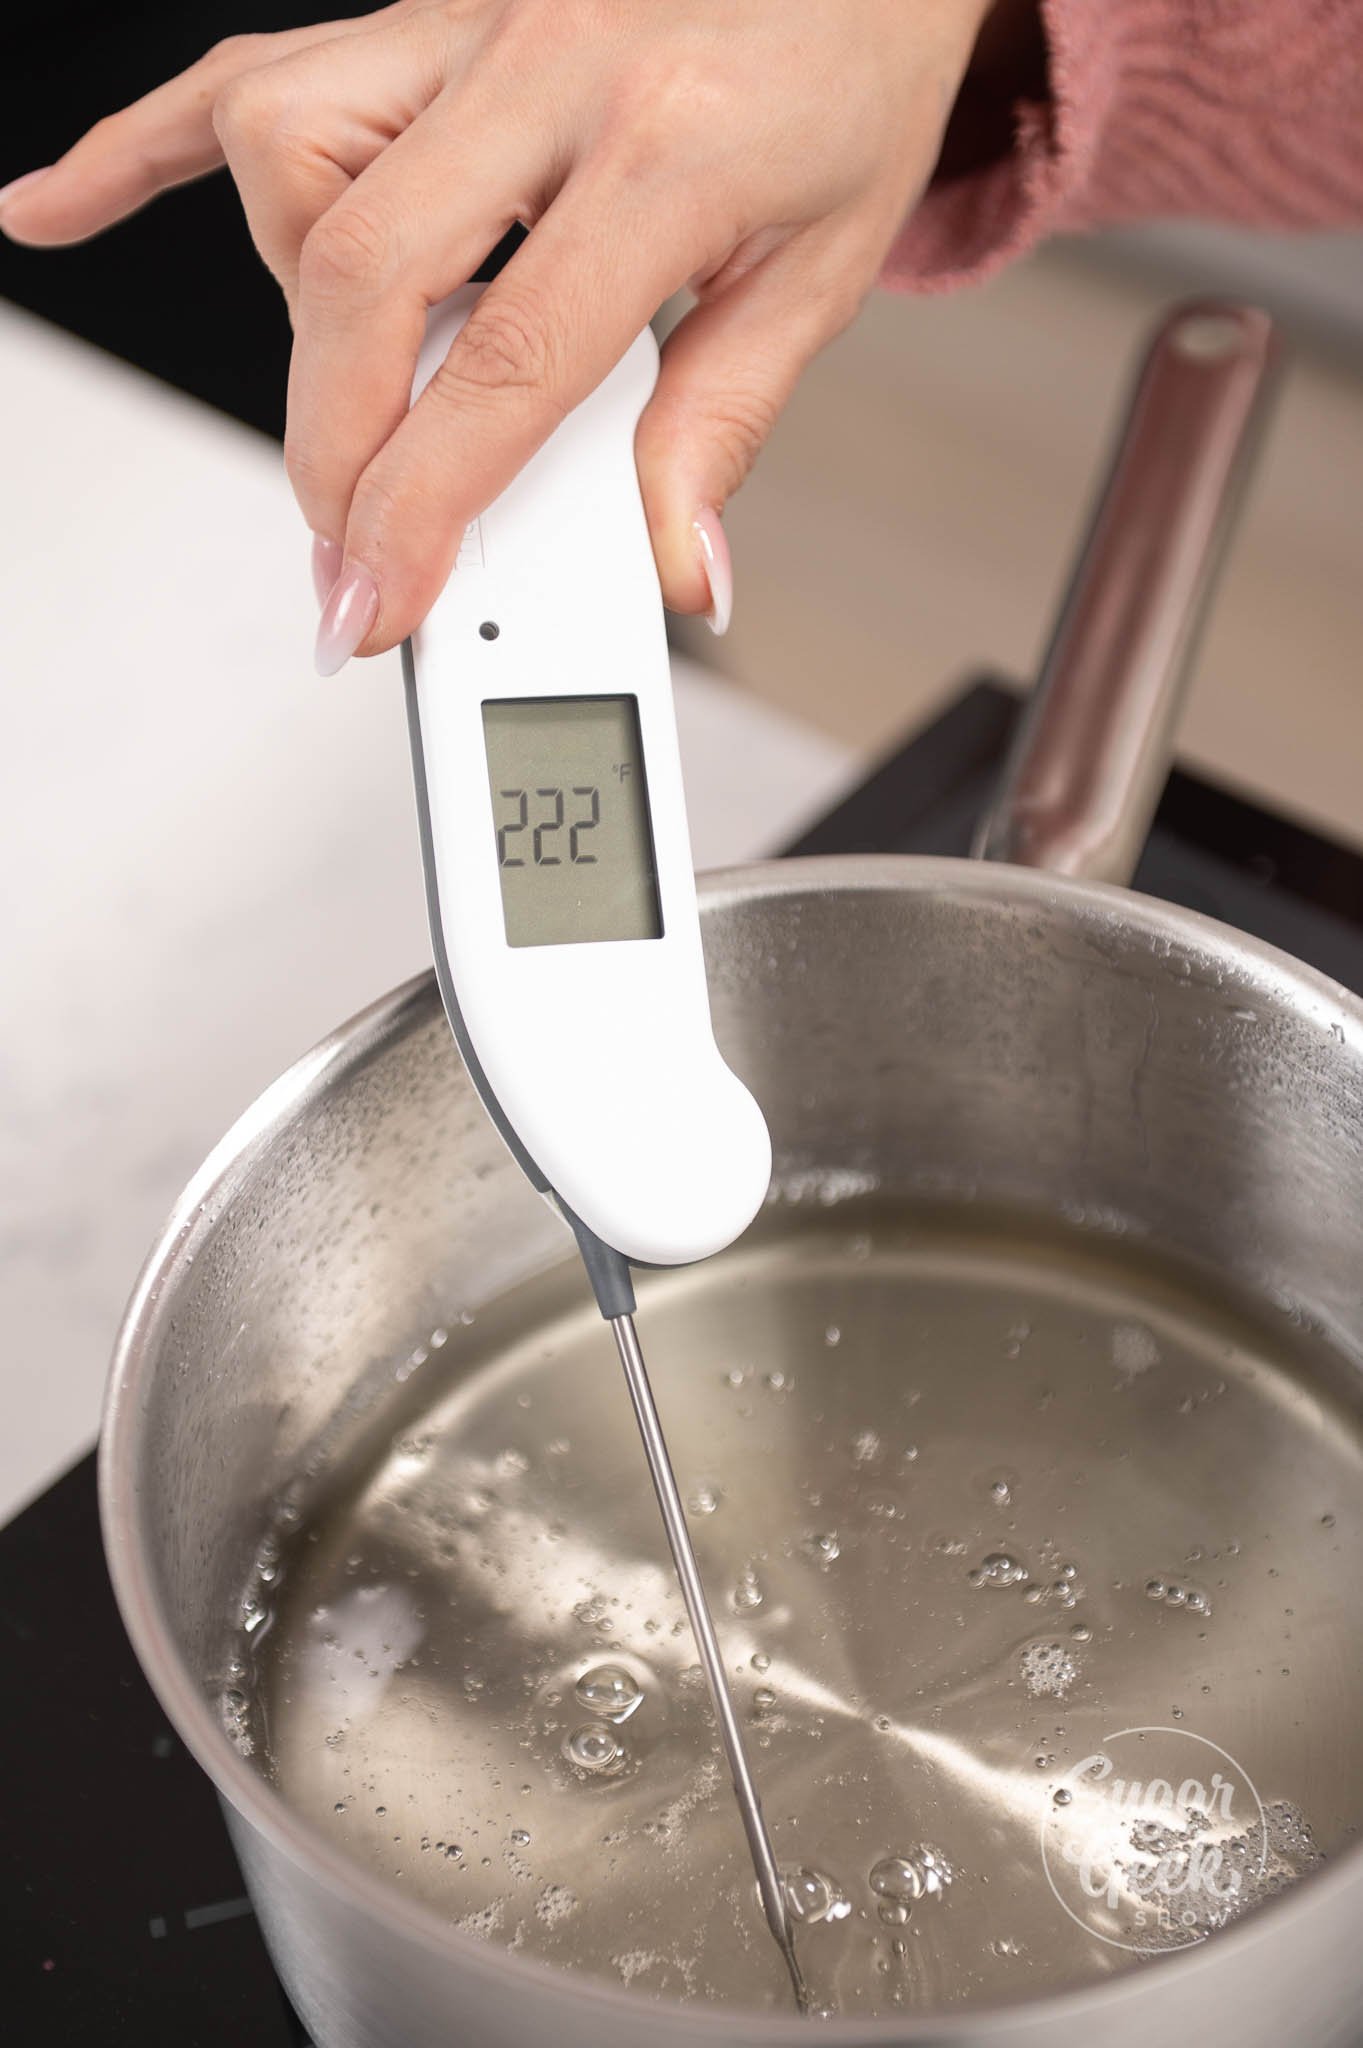
- Bring the syrup to 222º F (106º C). ( This may take about 10-15 minutes)
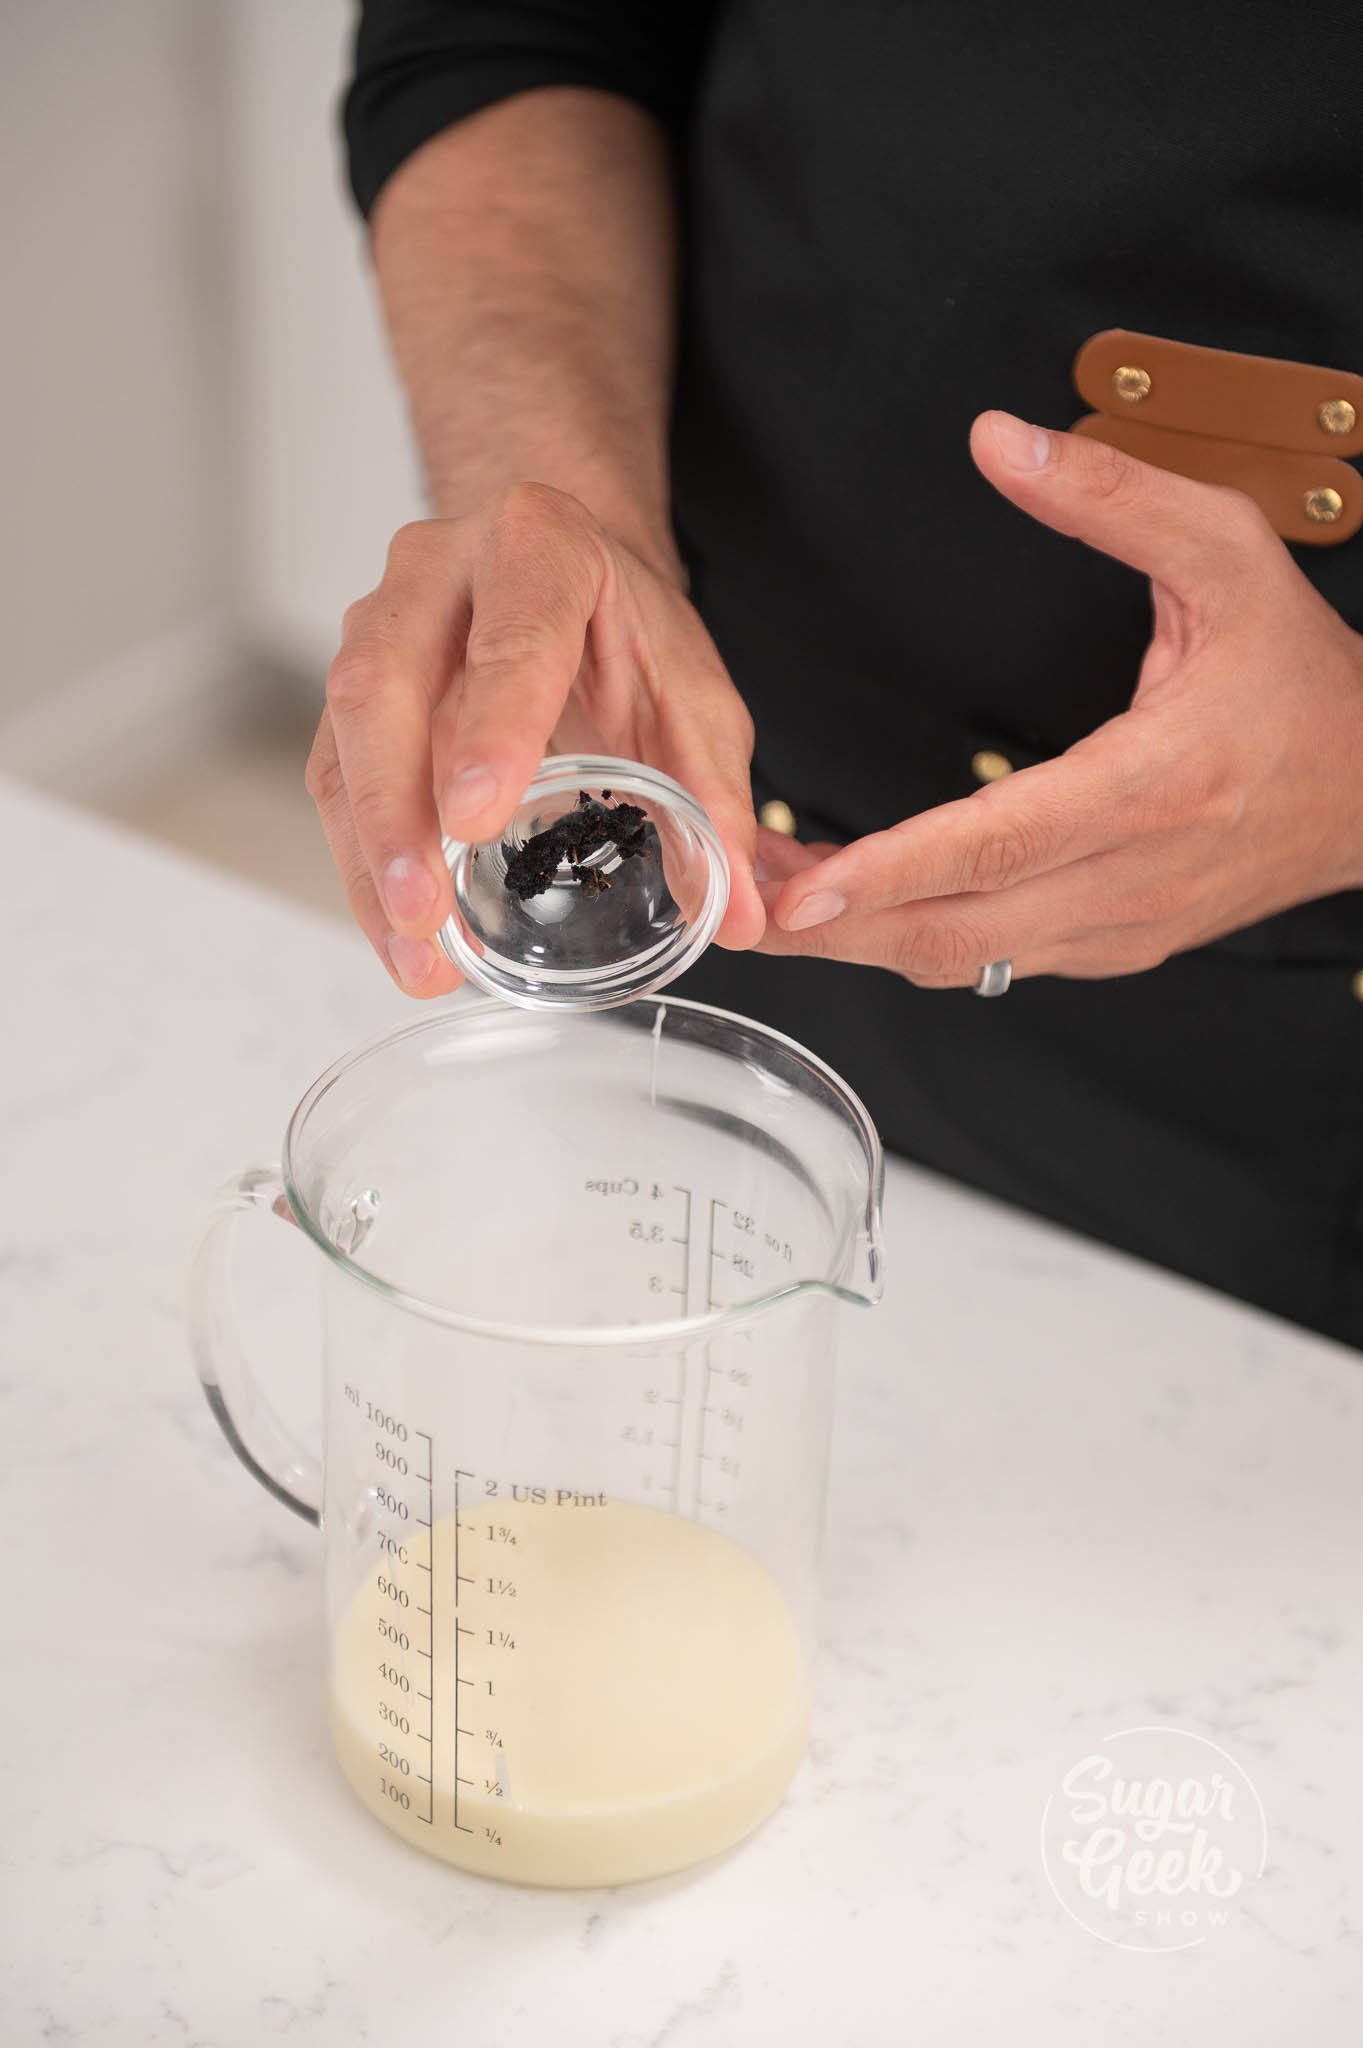
- Place your condensed milk, and vanilla bean into a tall container. The shape and size is important for mixing without getting any extra air into the mix.
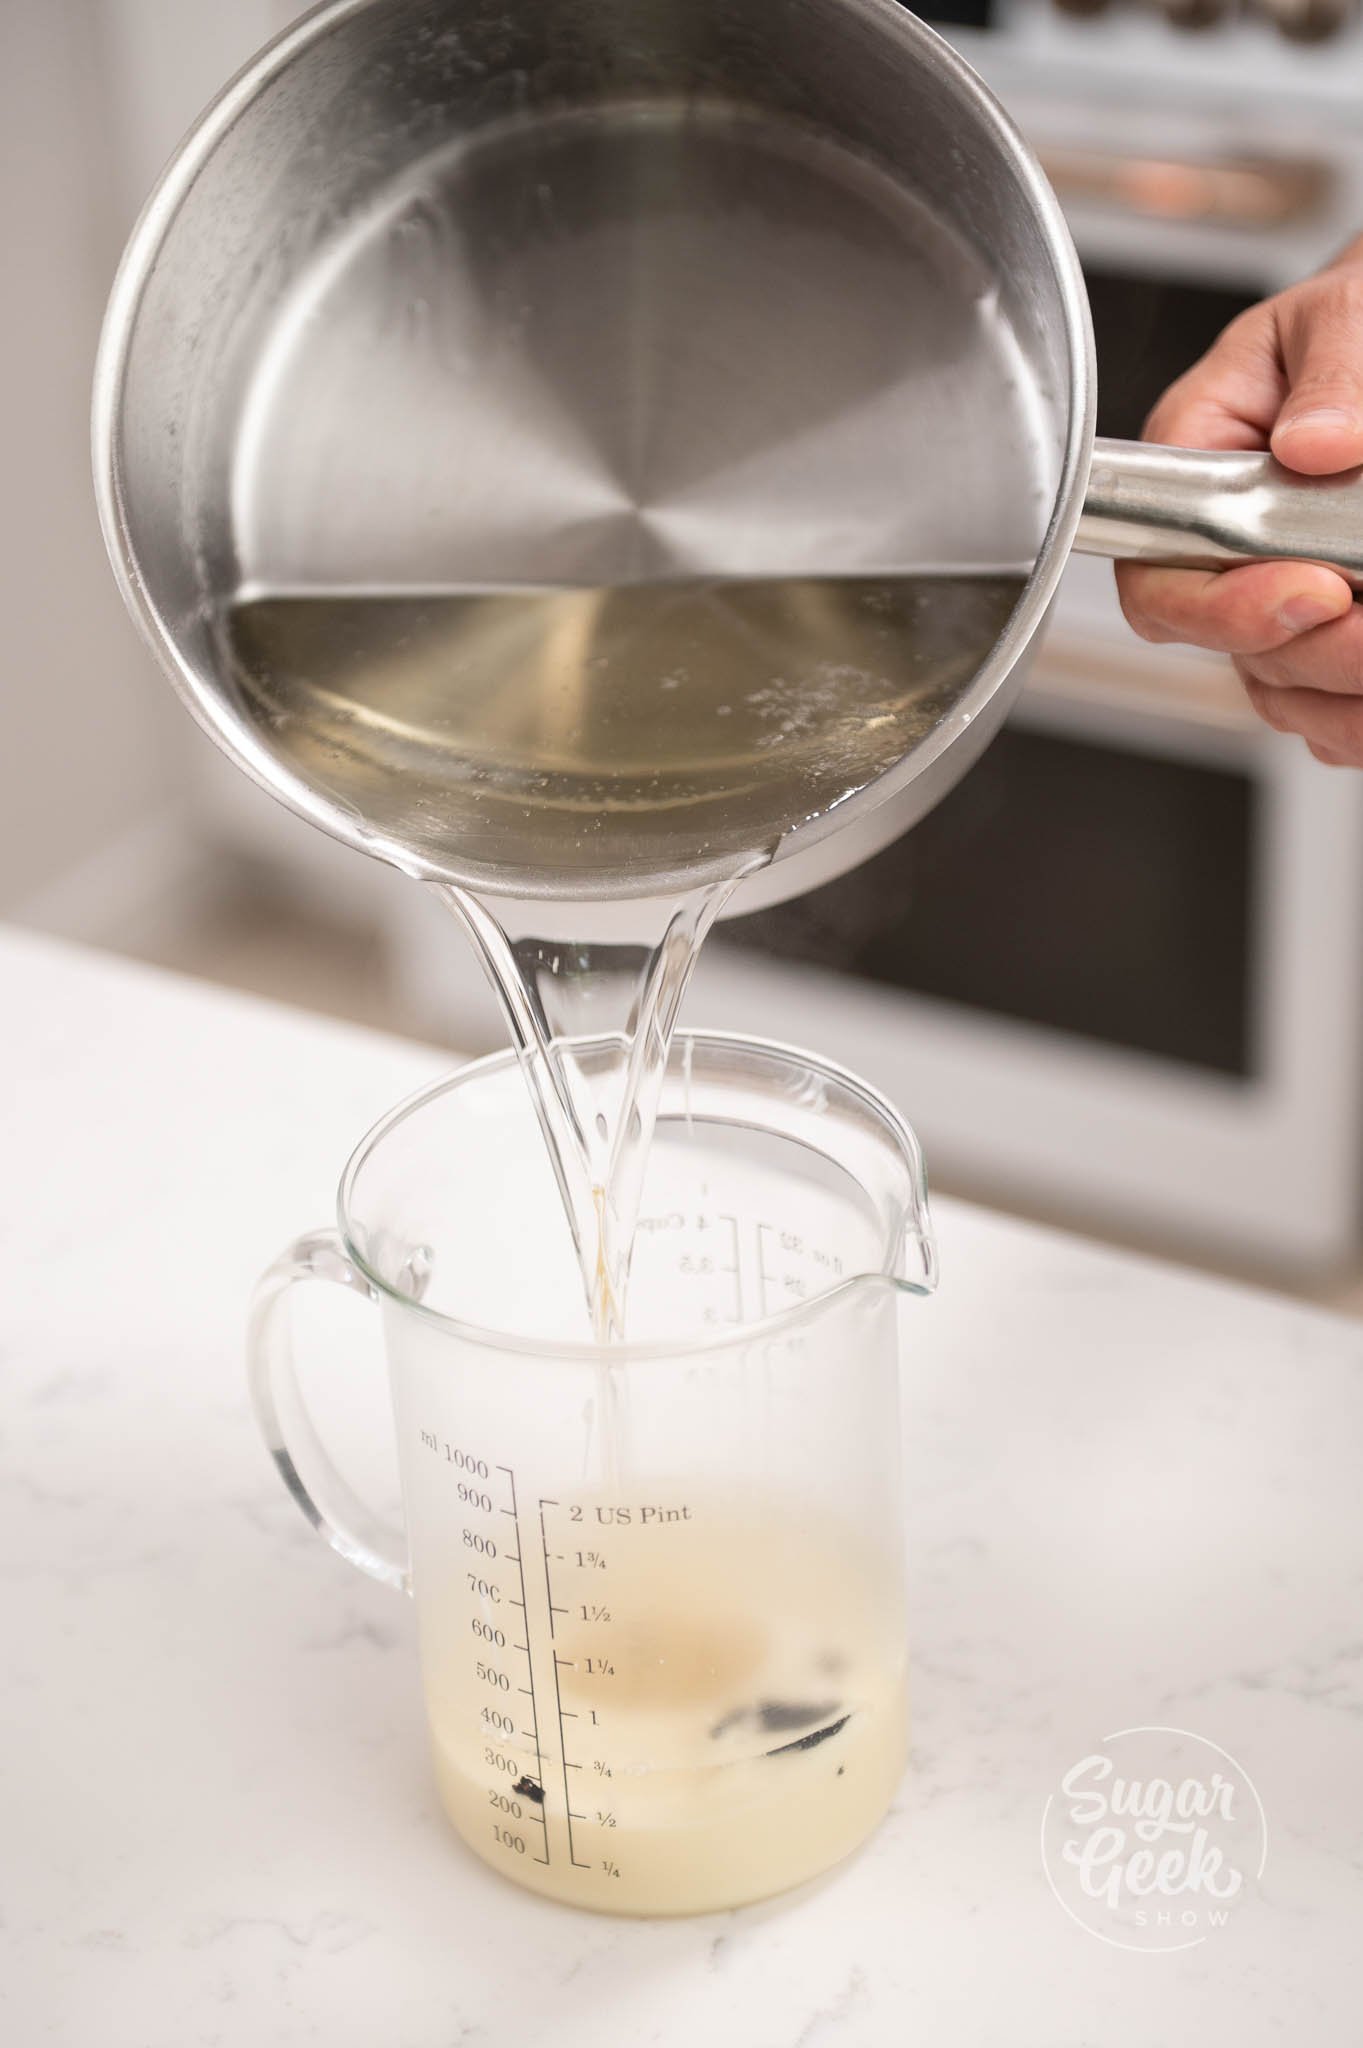
- Pour your hot syrup over the vanilla and condensed milk.
- Add in your gelatin.
- Blend the glaze until it becomes super smooth and combined using an emulsion blender. See the video below for tips on how to avoid adding in air bubbles.
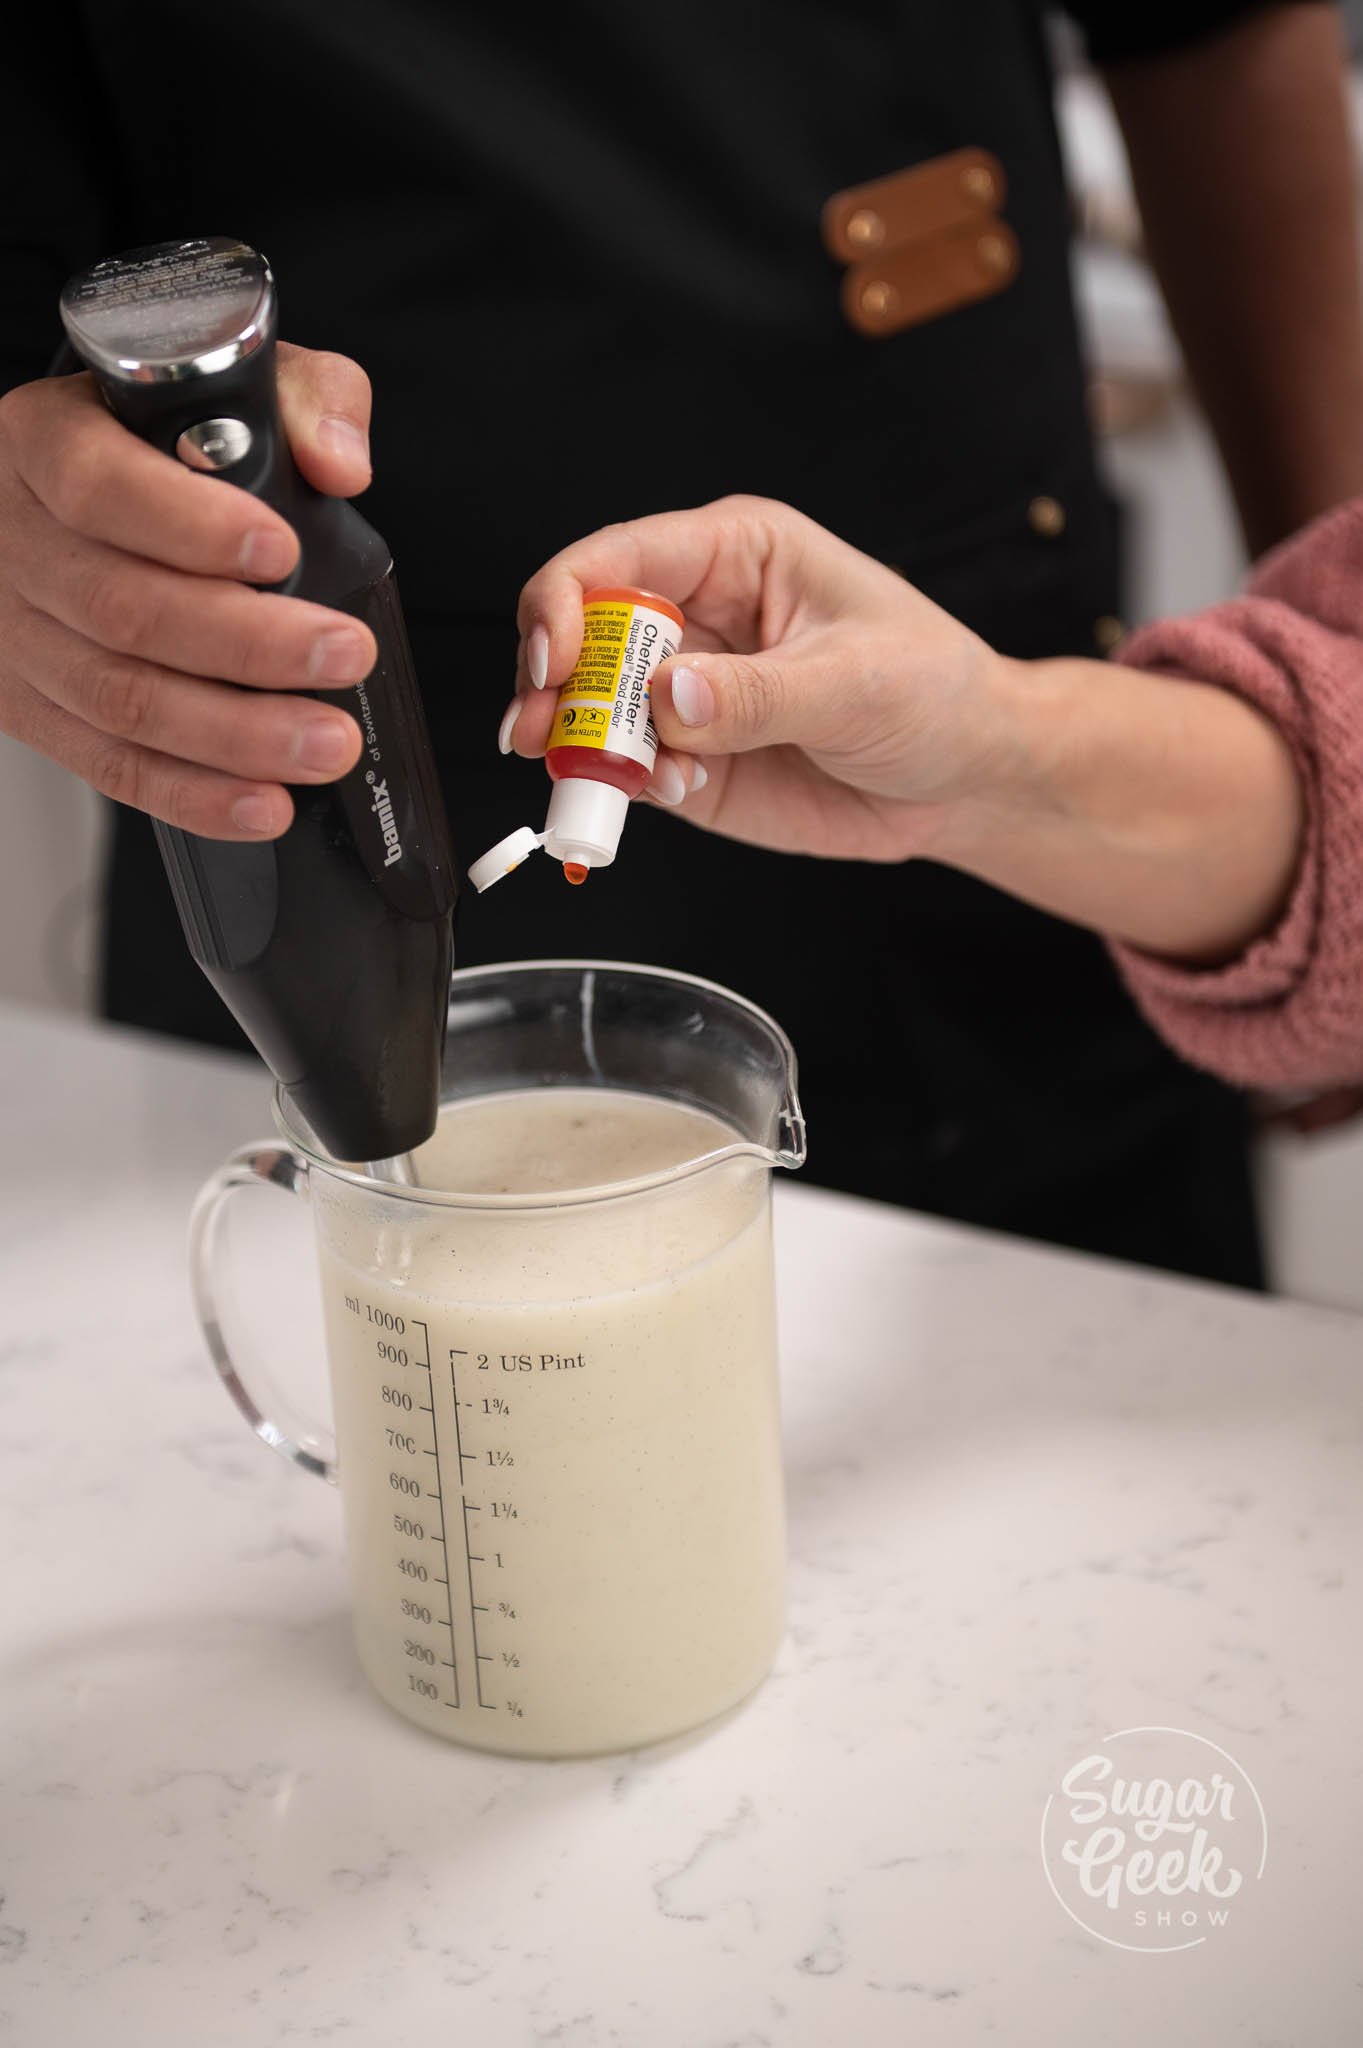
- Add one or two drops of your yellow color and about ¼ teaspoon of white food coloring and keep blending.
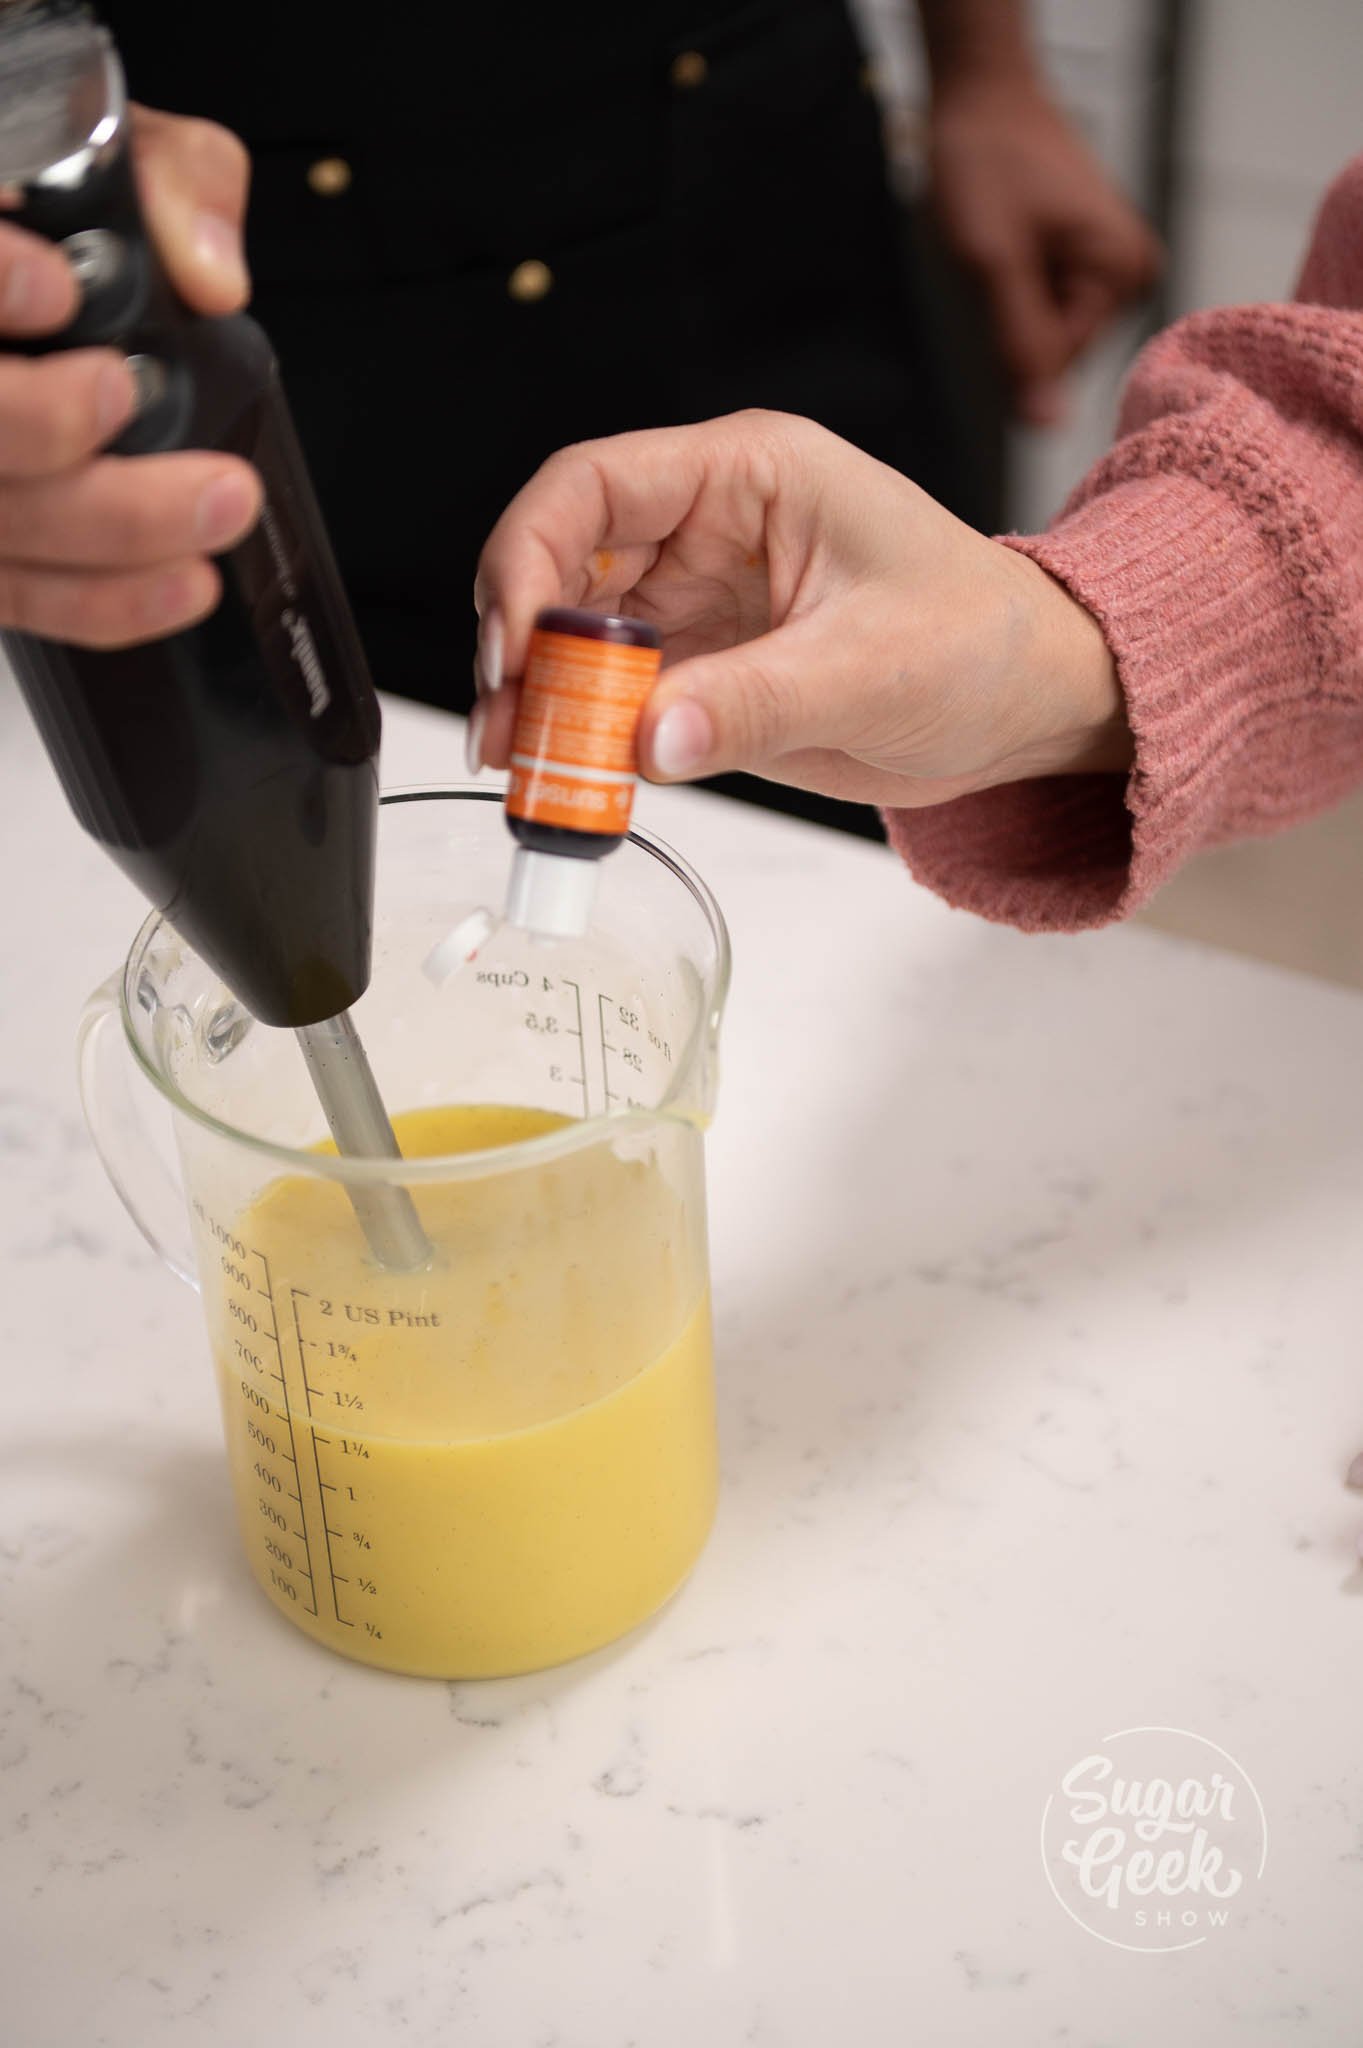
- Pour half of the yellow glaze into a separate container, then add one or two drops of orange color to give it a tropical orange color.
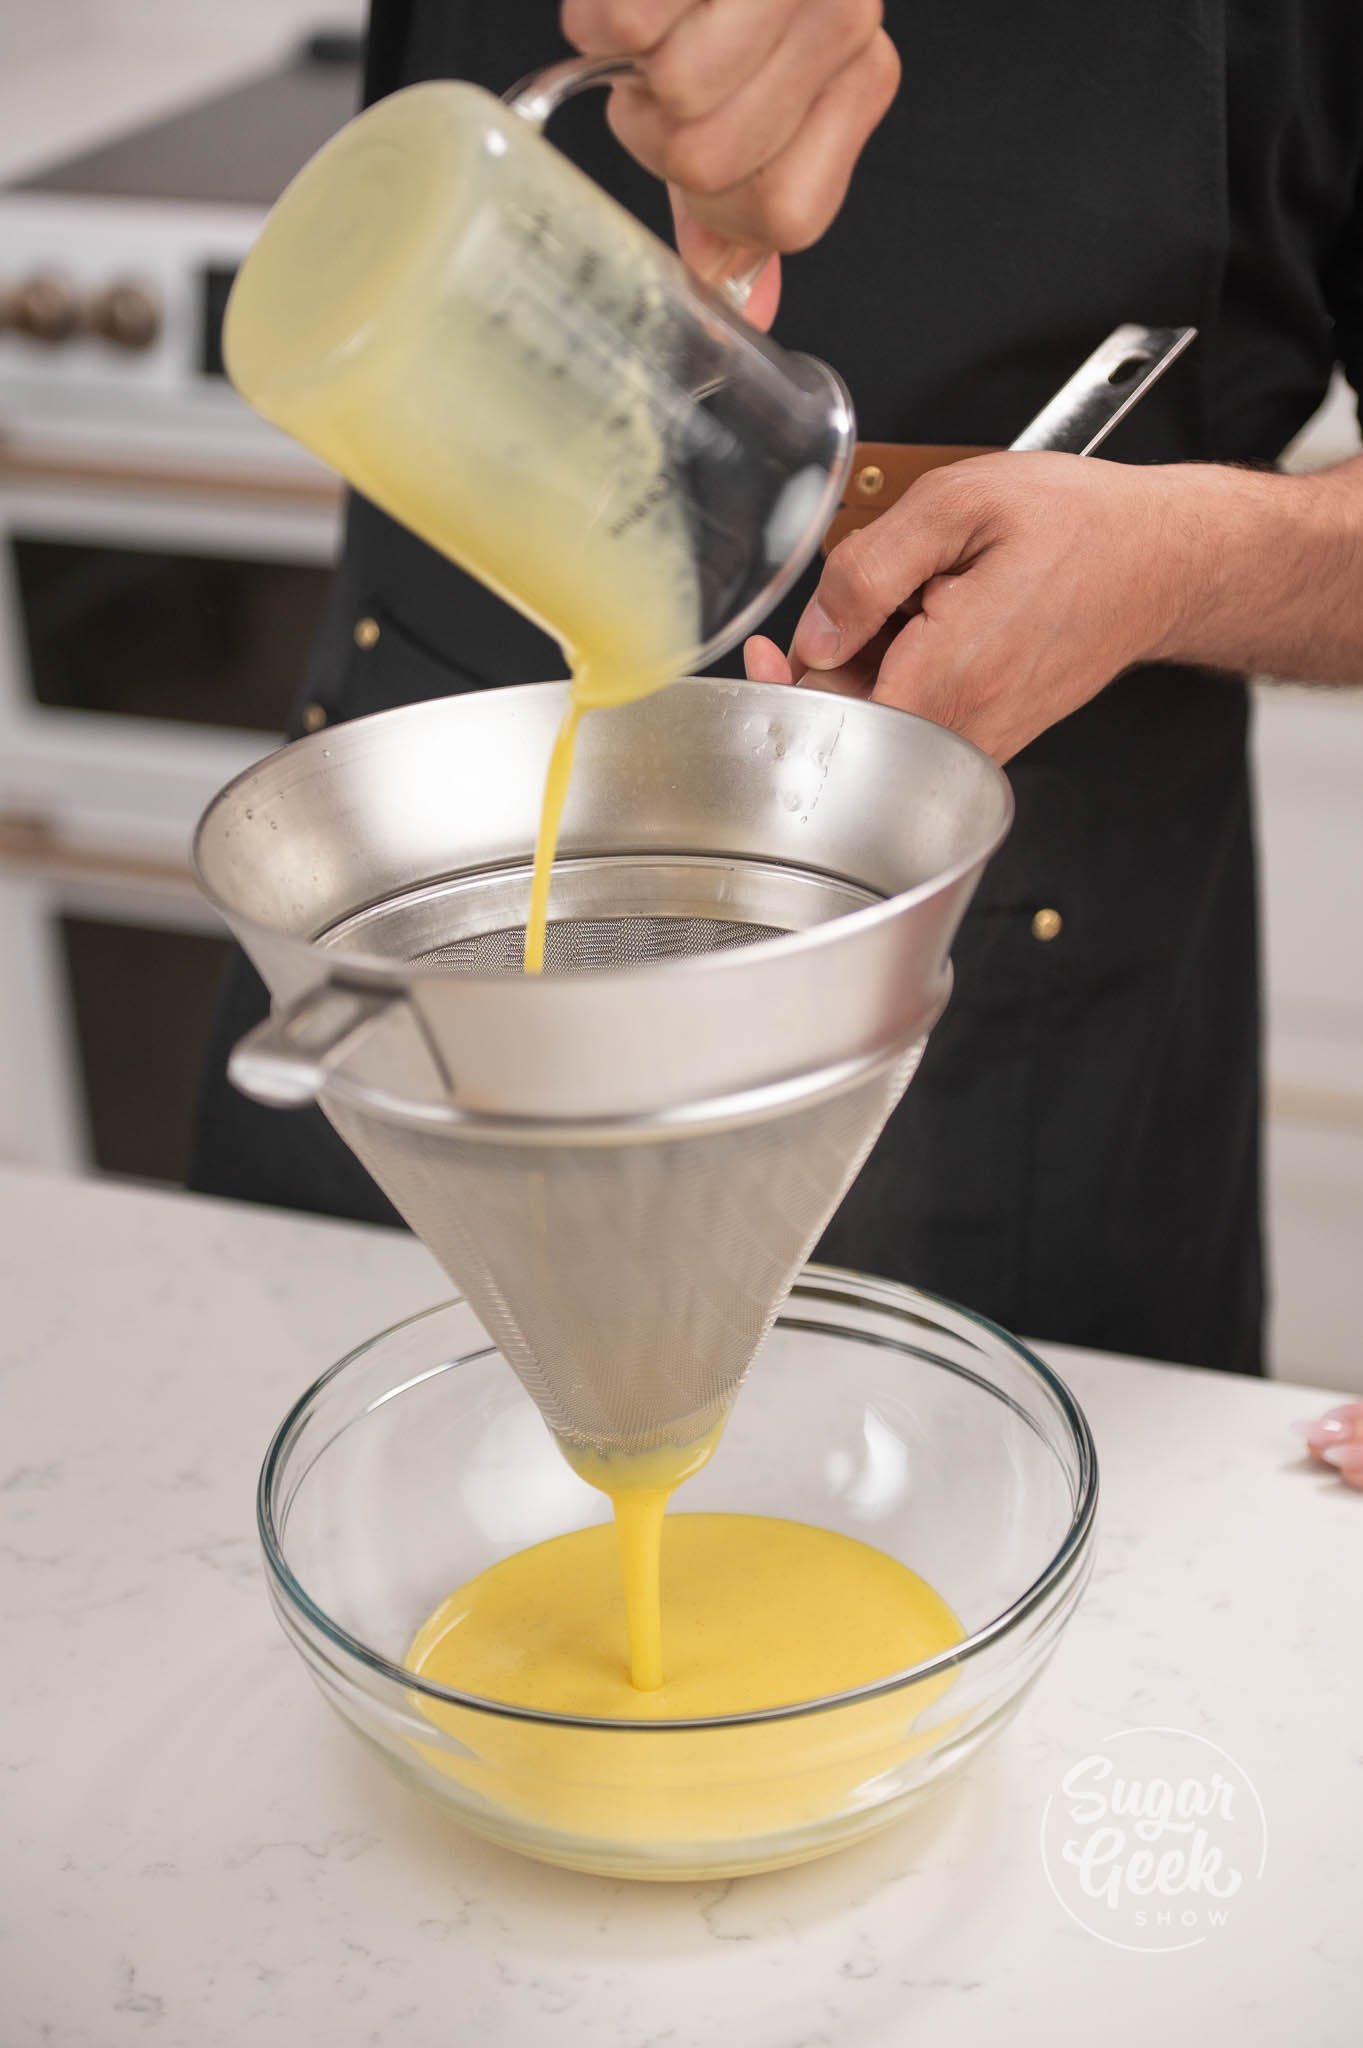
- Strain your glaze with a strainer so you get rid of any lumps.
- Cool the glazes and use at 76-77º F ( 24-25º C). (Pro Tip: You can use an ice bath to cool down the glazes quickly)
Preparing The Entremet To Glaze
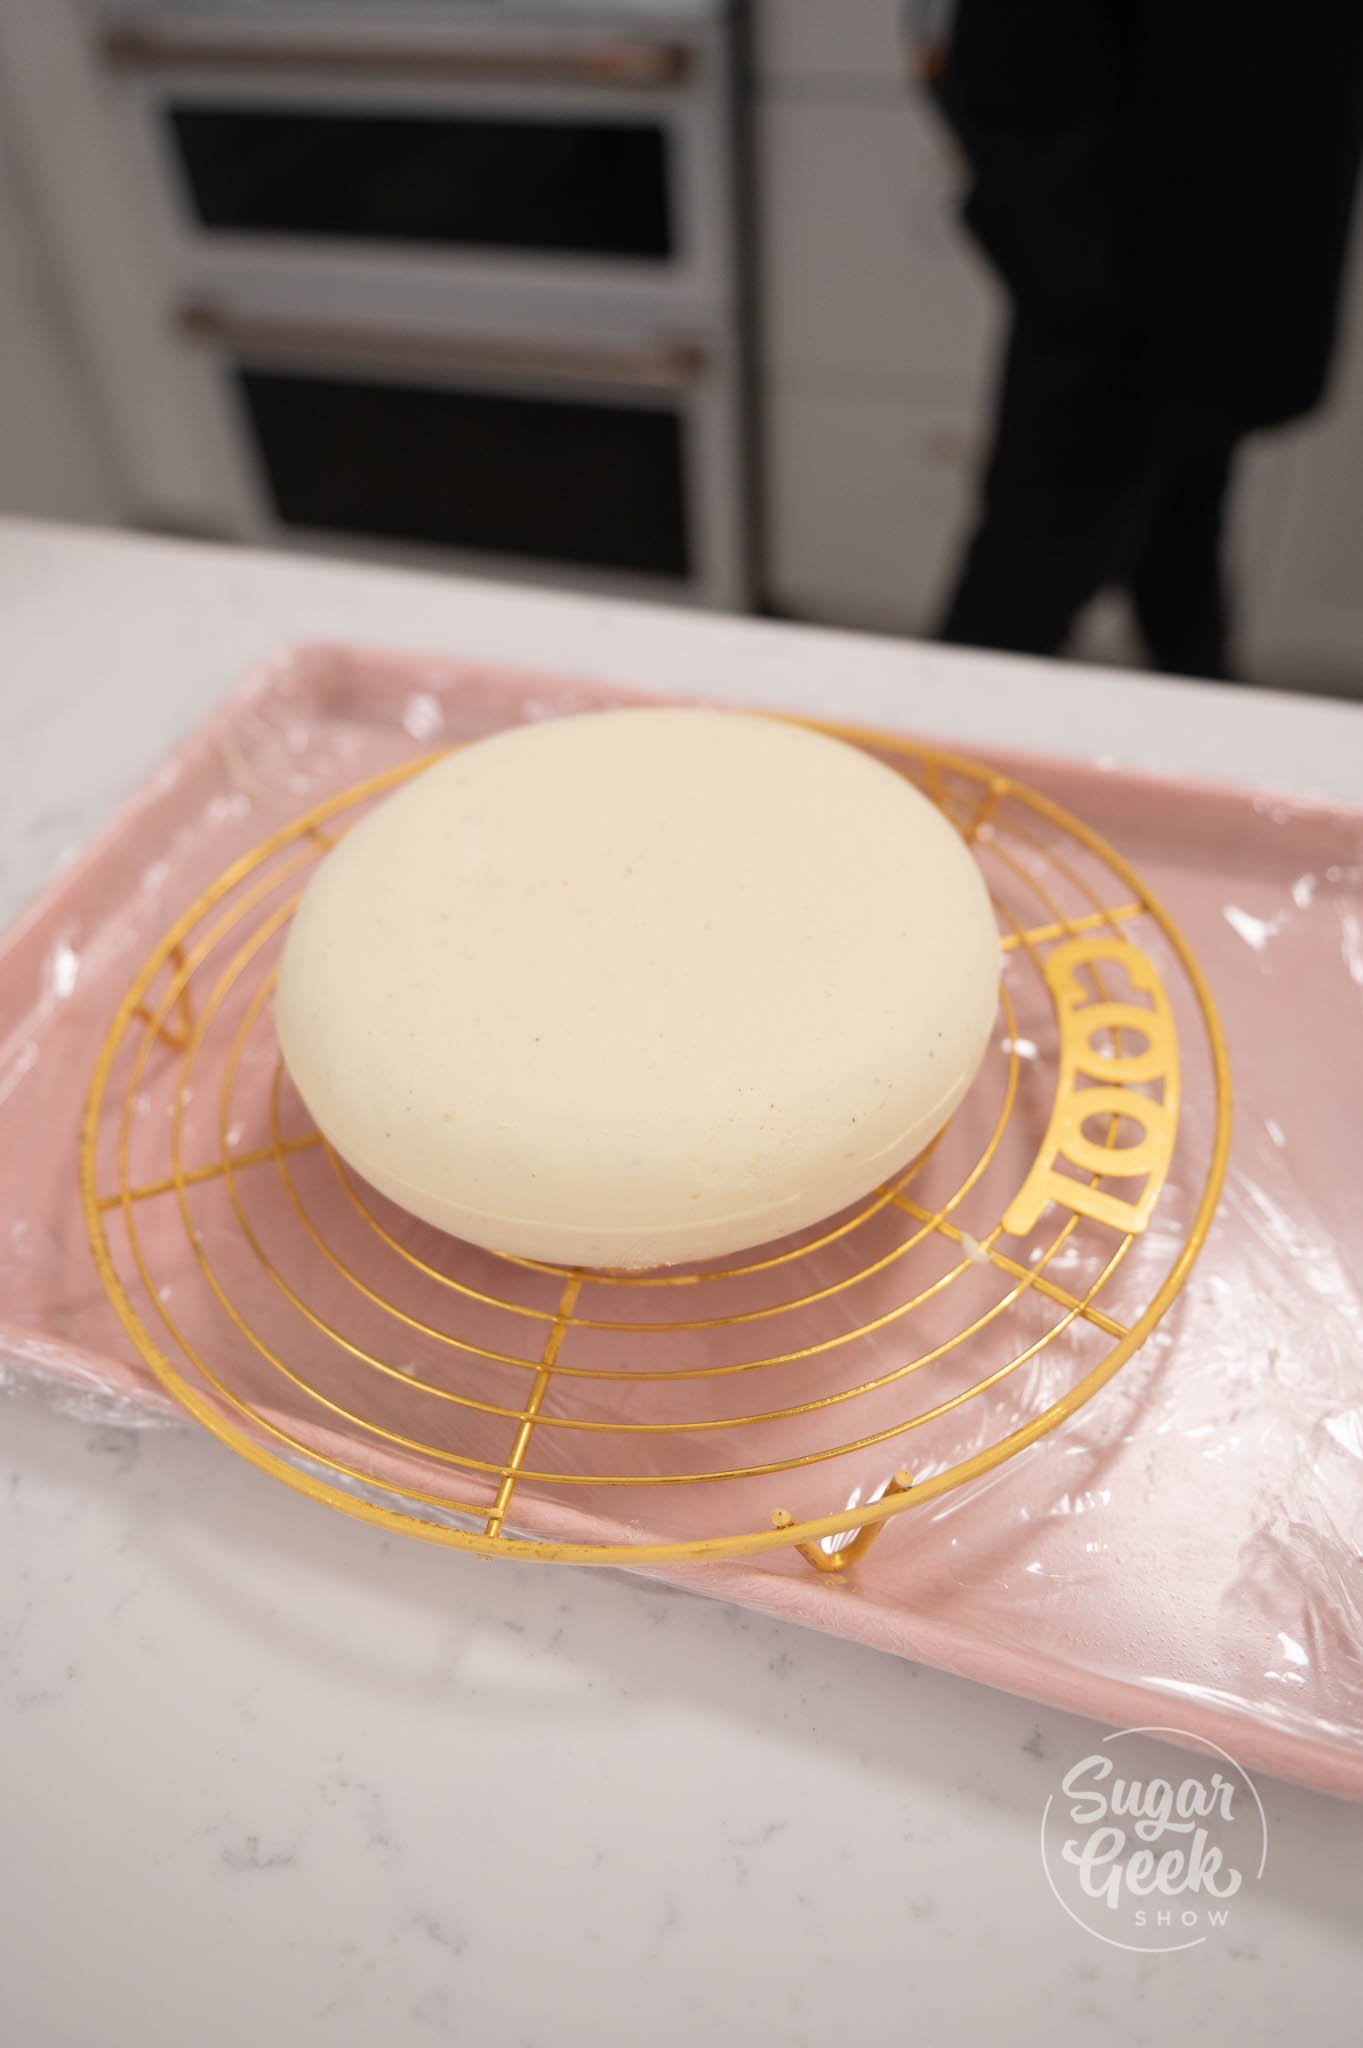
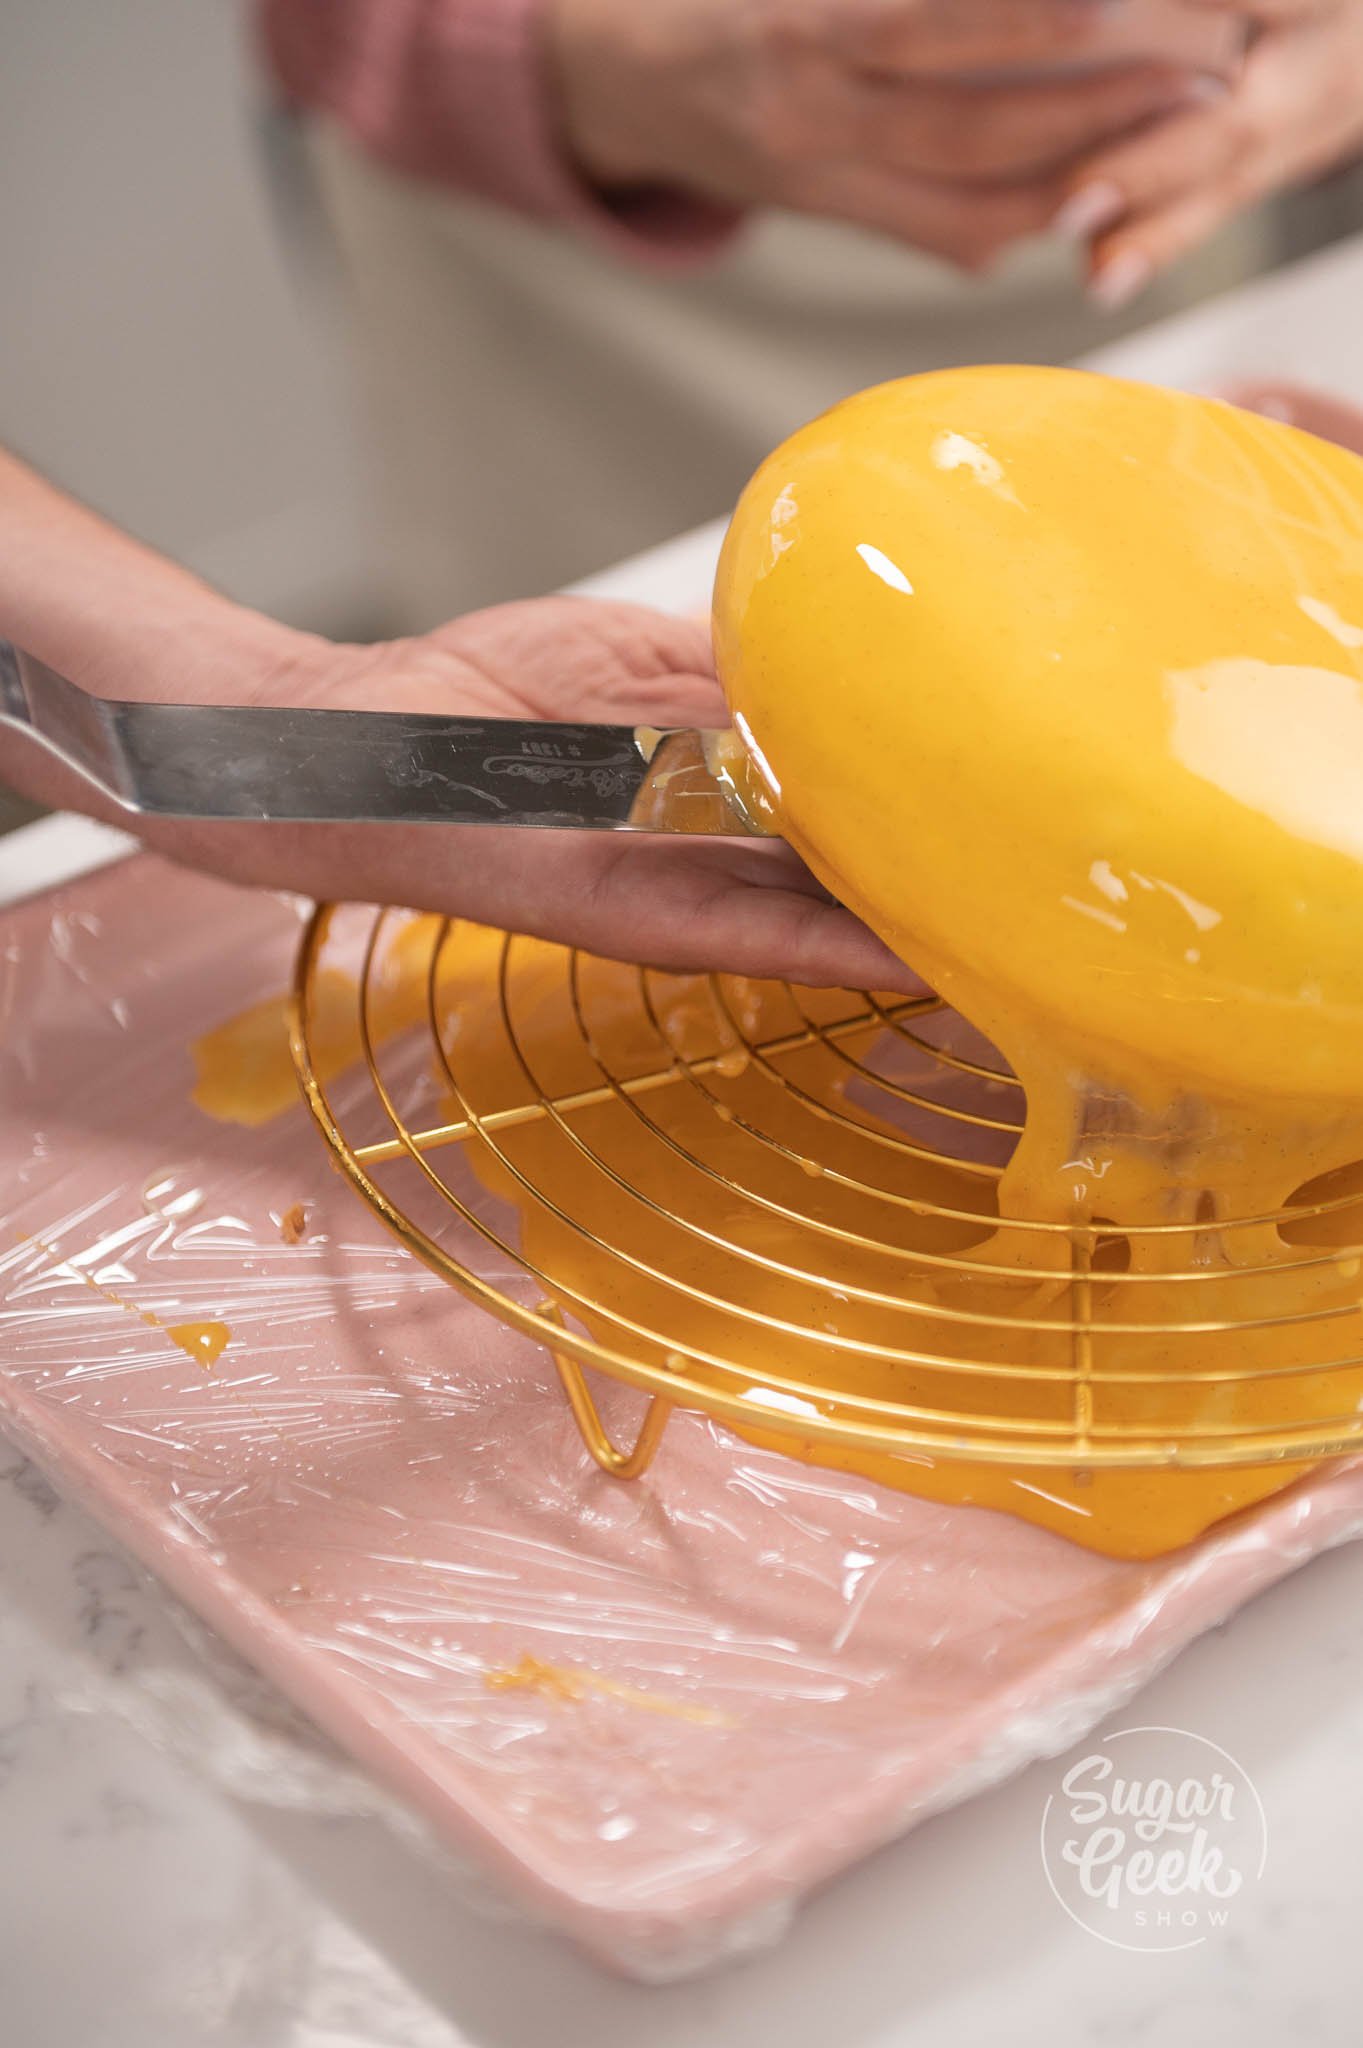
- When it is completely frozen, take the entremet out of the mold, and place it on a cooling rack on top of a pan lined with plastic wrap to catch the glaze. Place everything back in the freezer until you are ready to glaze. It's very important that your entremet is as cold as possible before glazing.
- While the entremet is in the freezer, create your chocolate decor.
Creating the Chocolate Decor
- Temper a small bowl of white chocolate, and in a separate bowl temper some dark chocolate. ( If you don't know how to temper, you can check out my post on How To Temper Chocolate. )
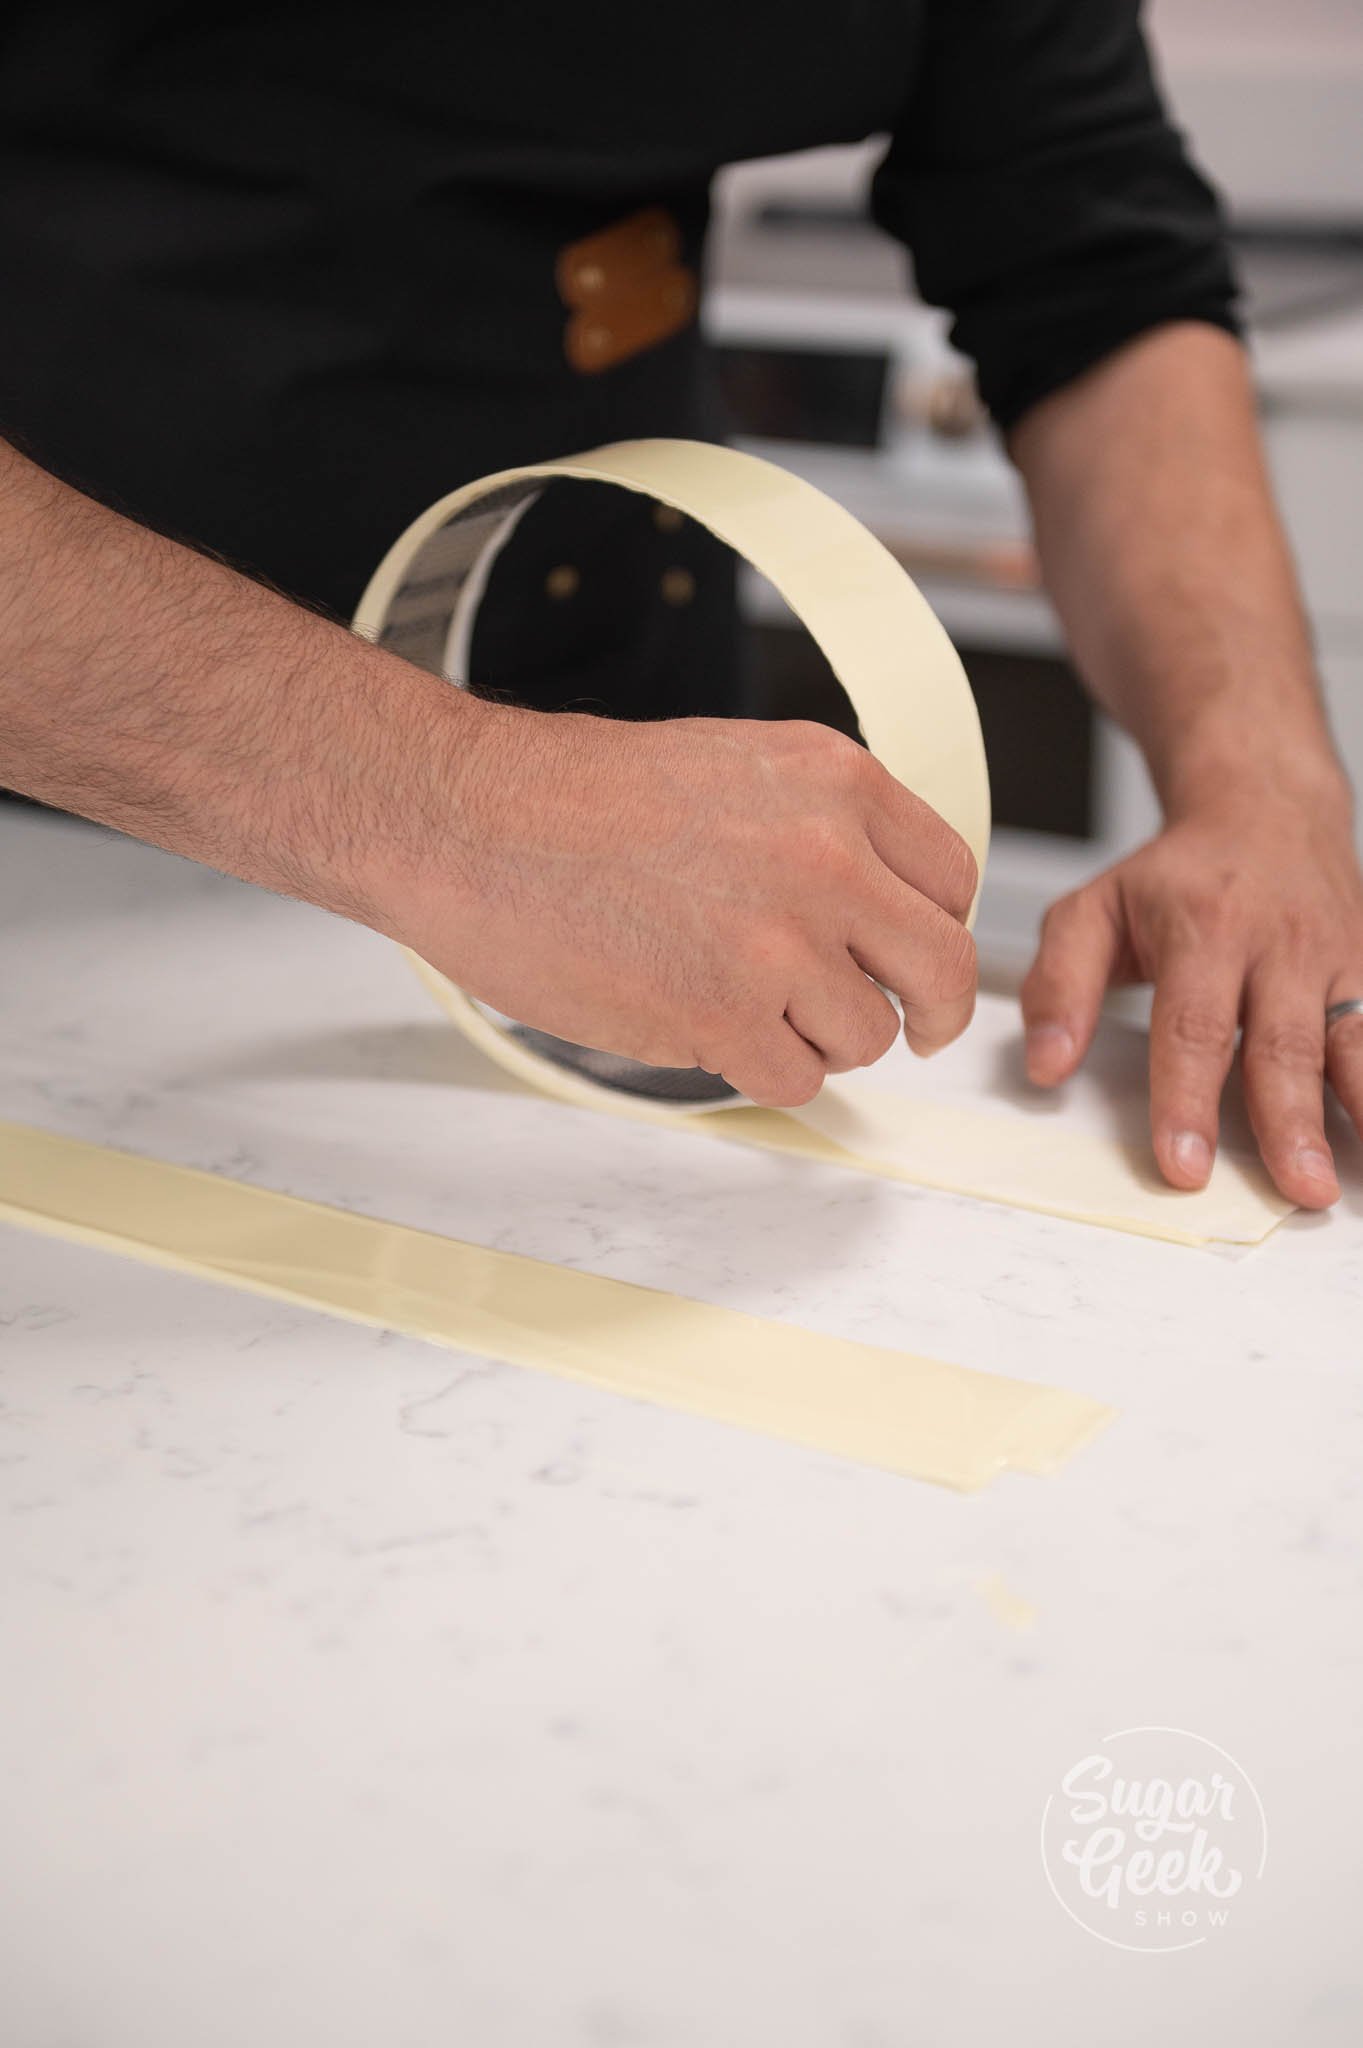
- Cut some strips of acetate about the length of your mango mousse cake. You only need one but it is good to have extra in case you make a mistake.
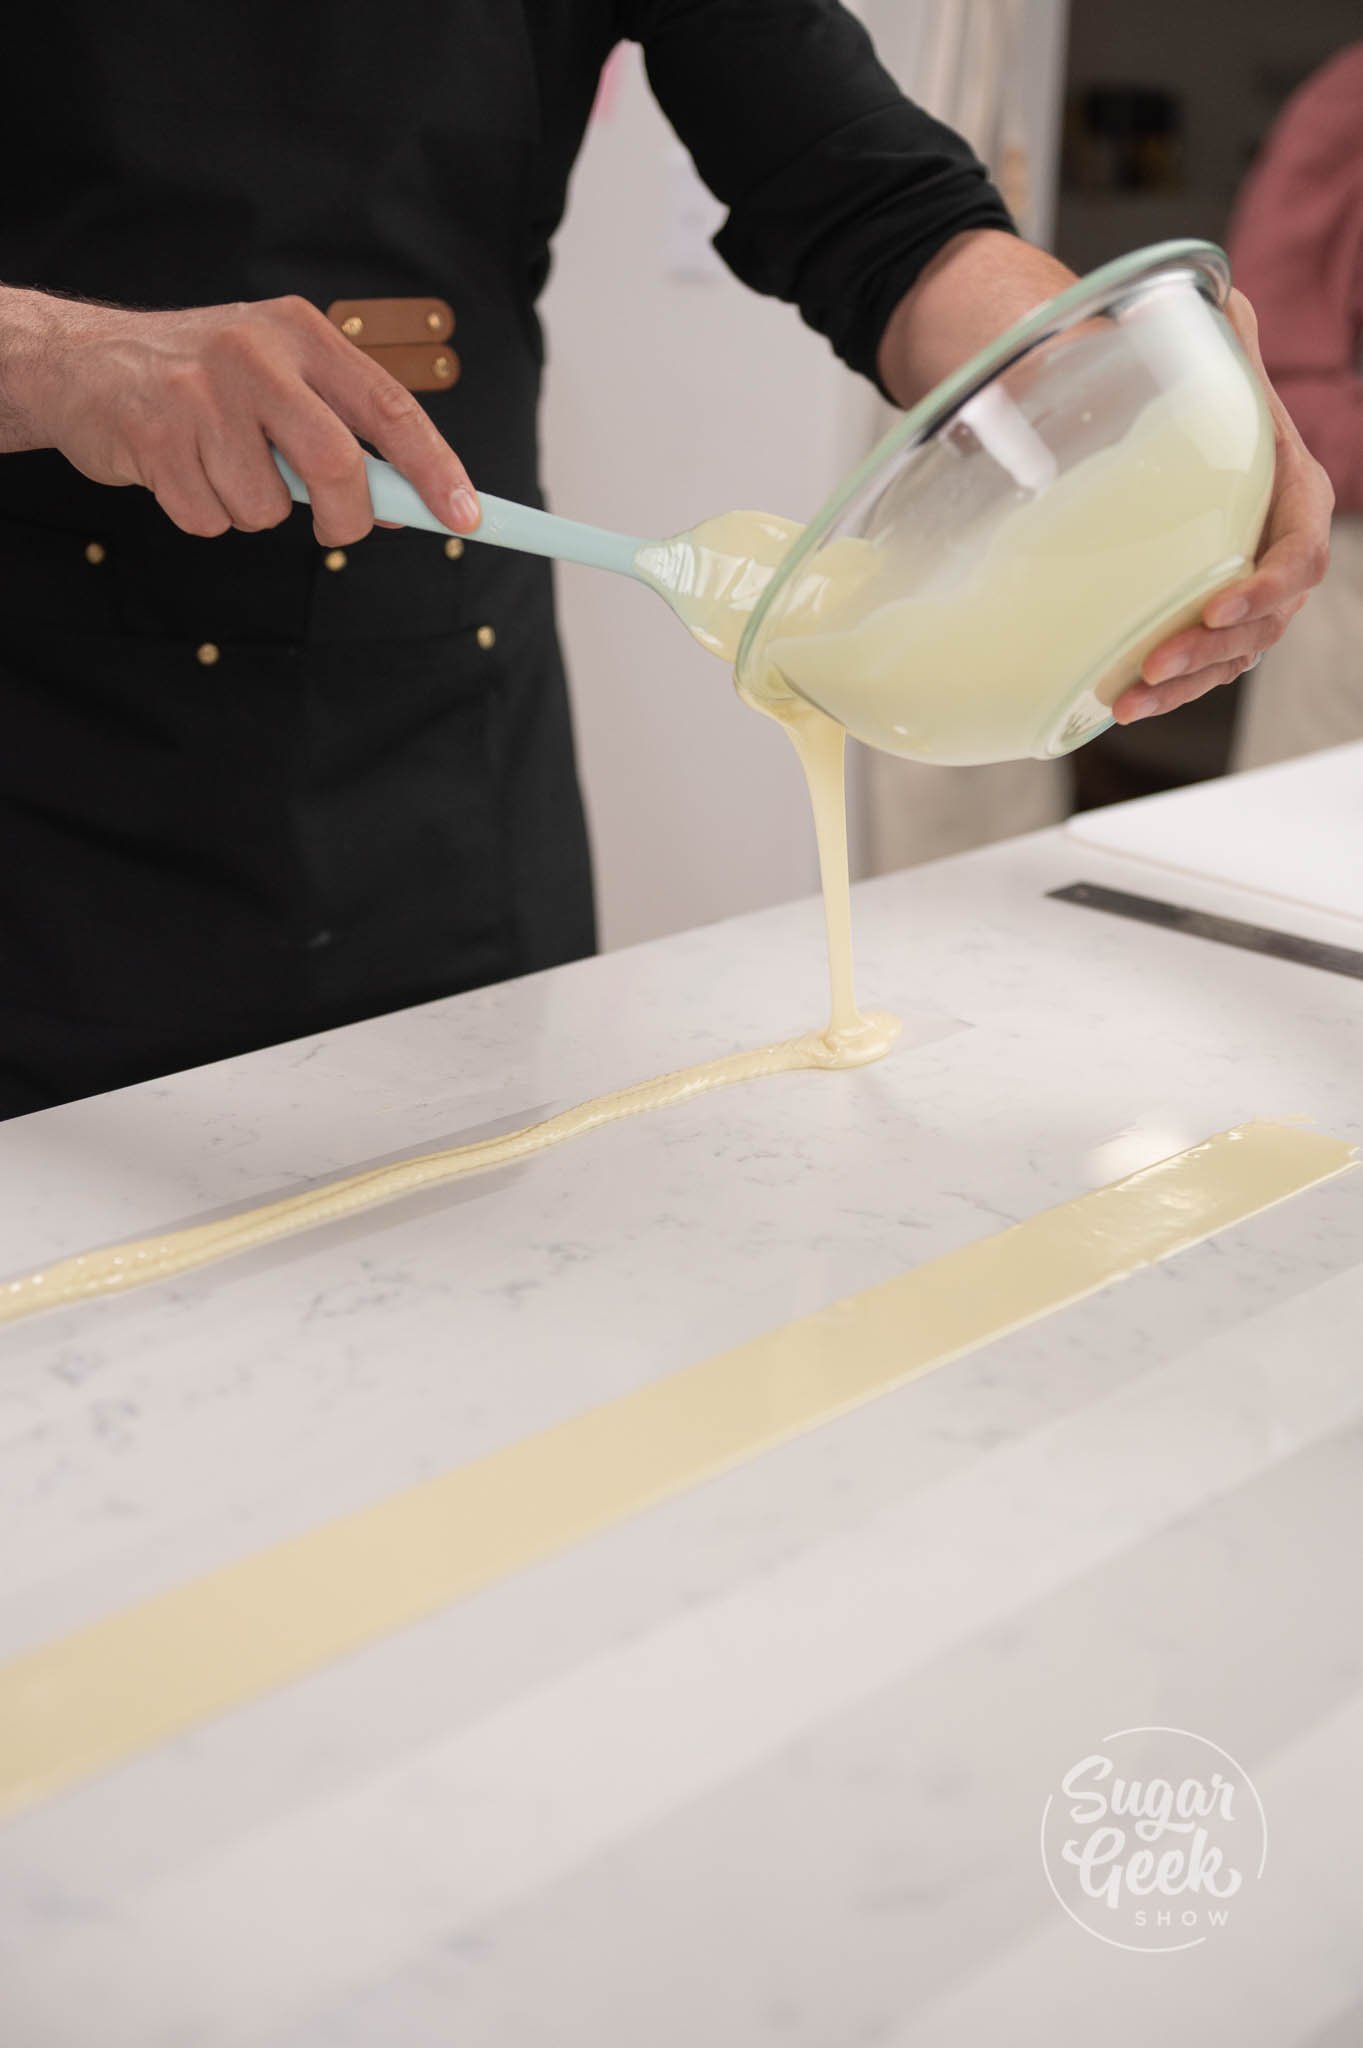
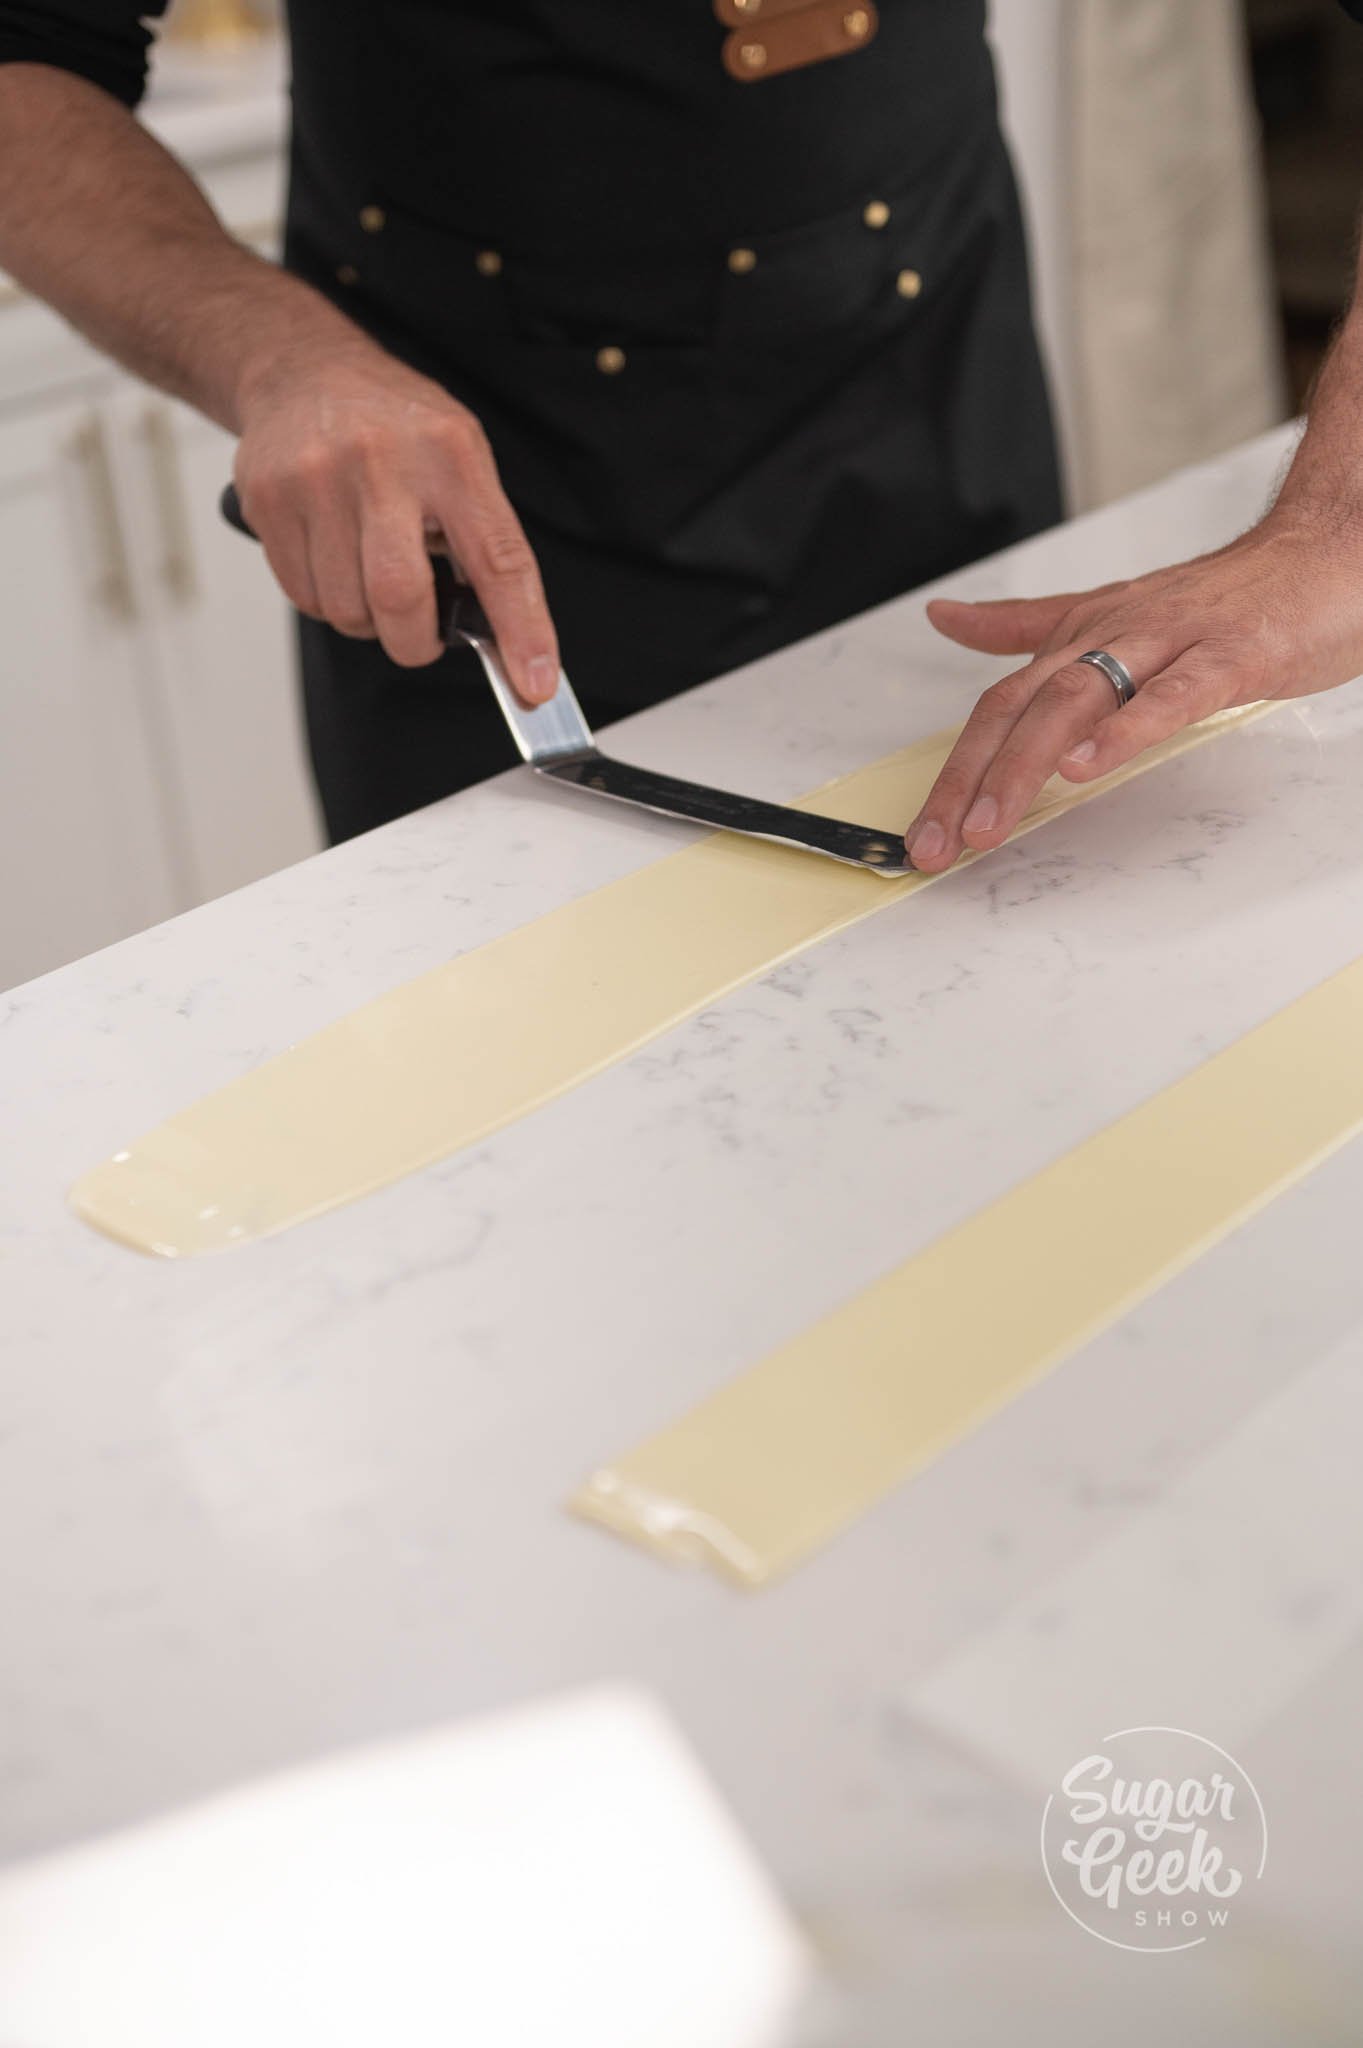
- Pour your white tempered chocolate over the sheets of acetate.
- Place a strip of parchment on top of the melted chocolate. This will prevent the chocolate from sticking to your cake ring.
- Wrap the chocolate strip around a cake ring similar to the size of your mango mousse cake.
- Make sure the two ends overlap and tape the ends together.
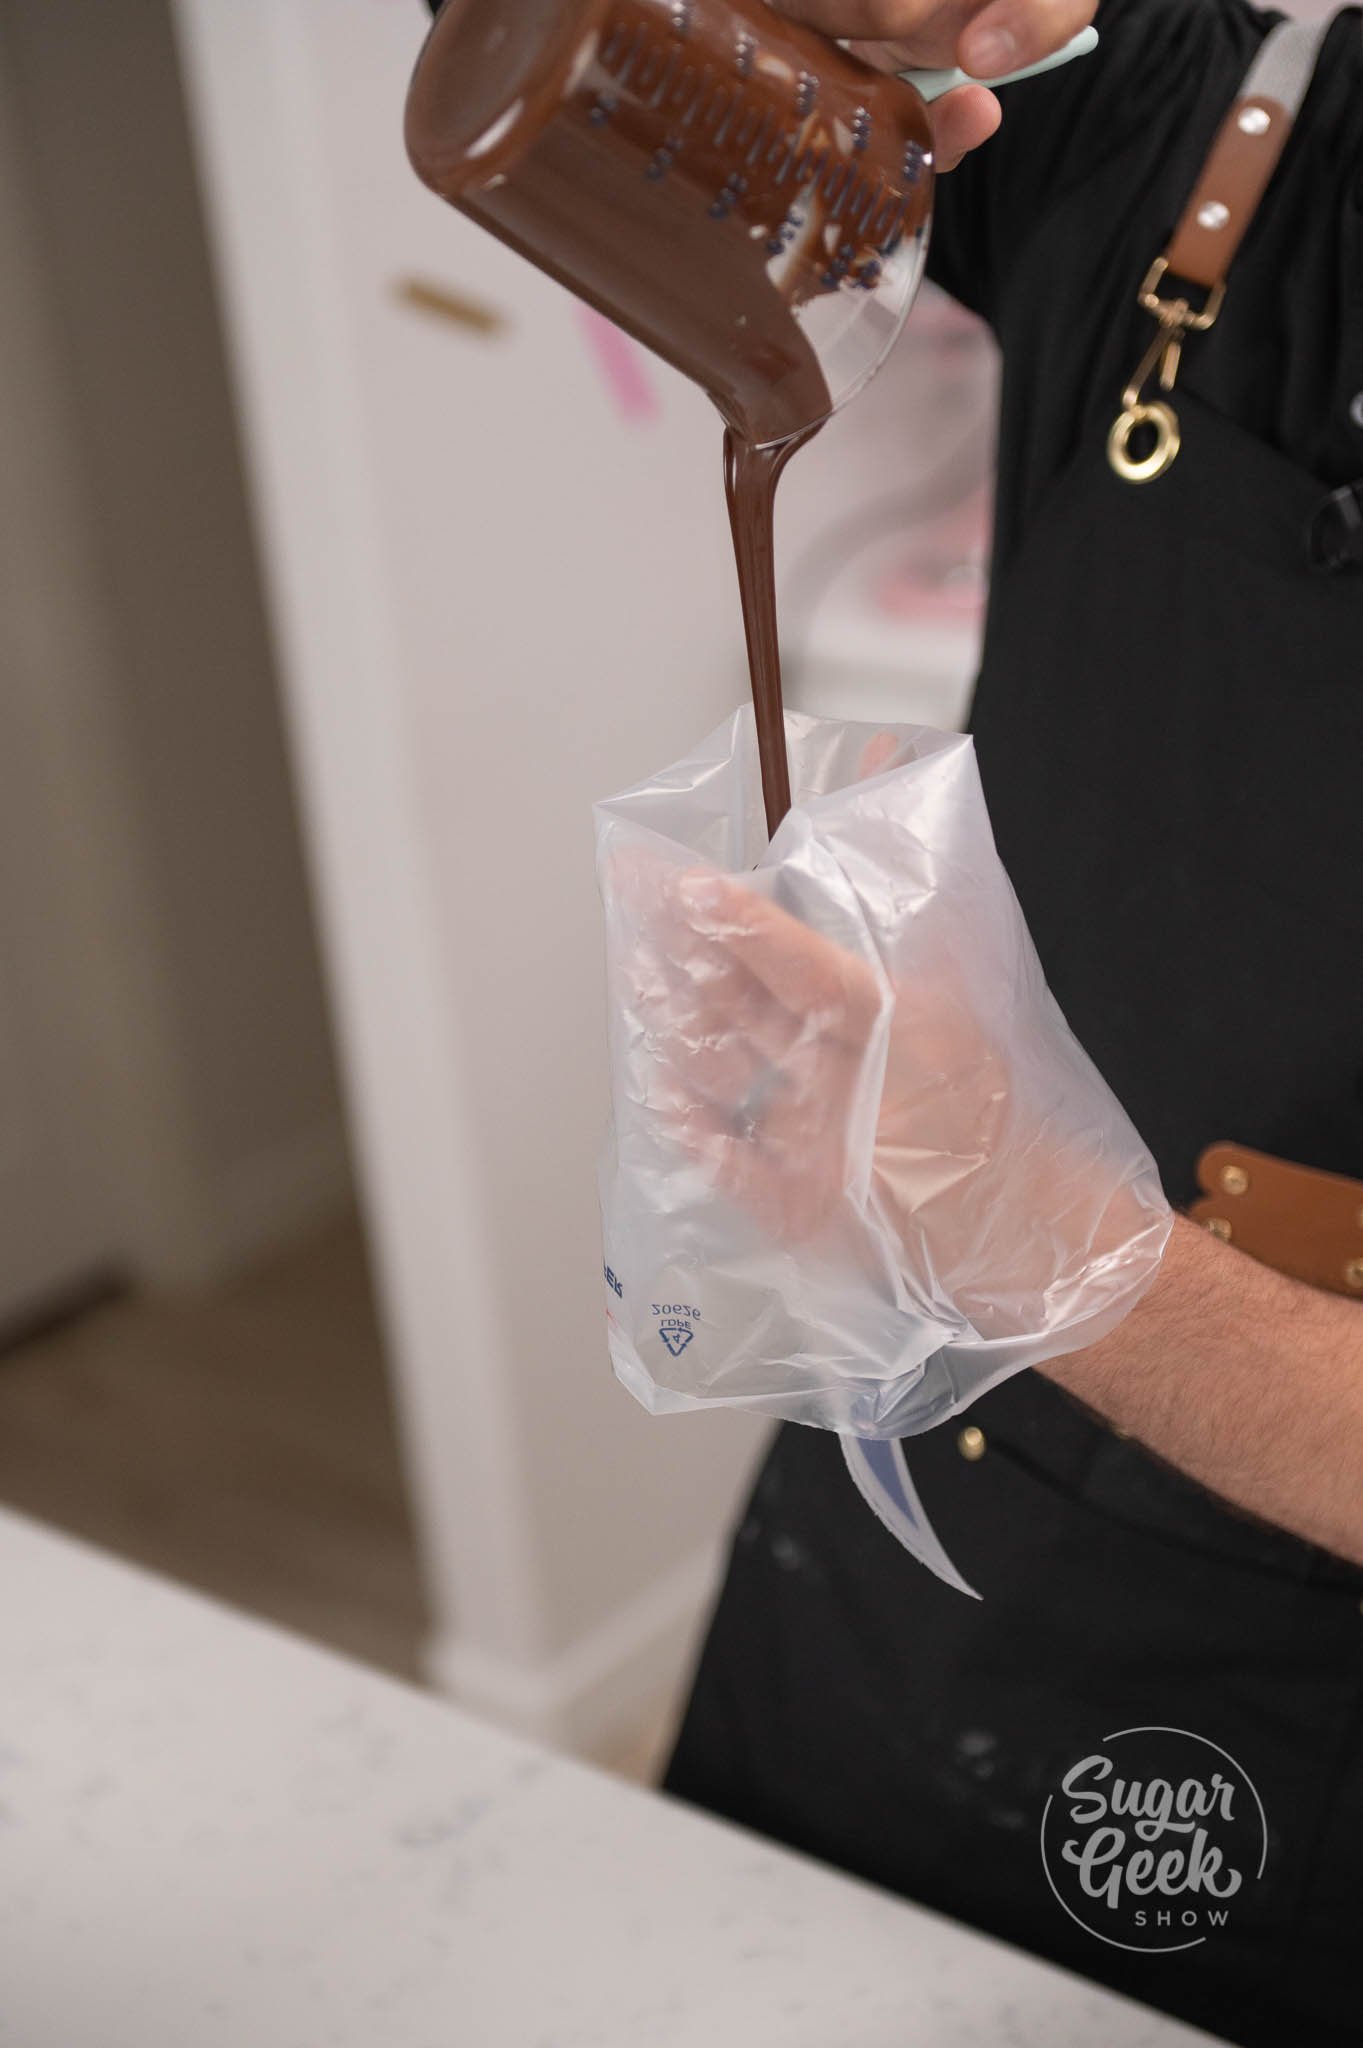
- Next, prepare a piping bag and fill it with some tempered dark chocolate.
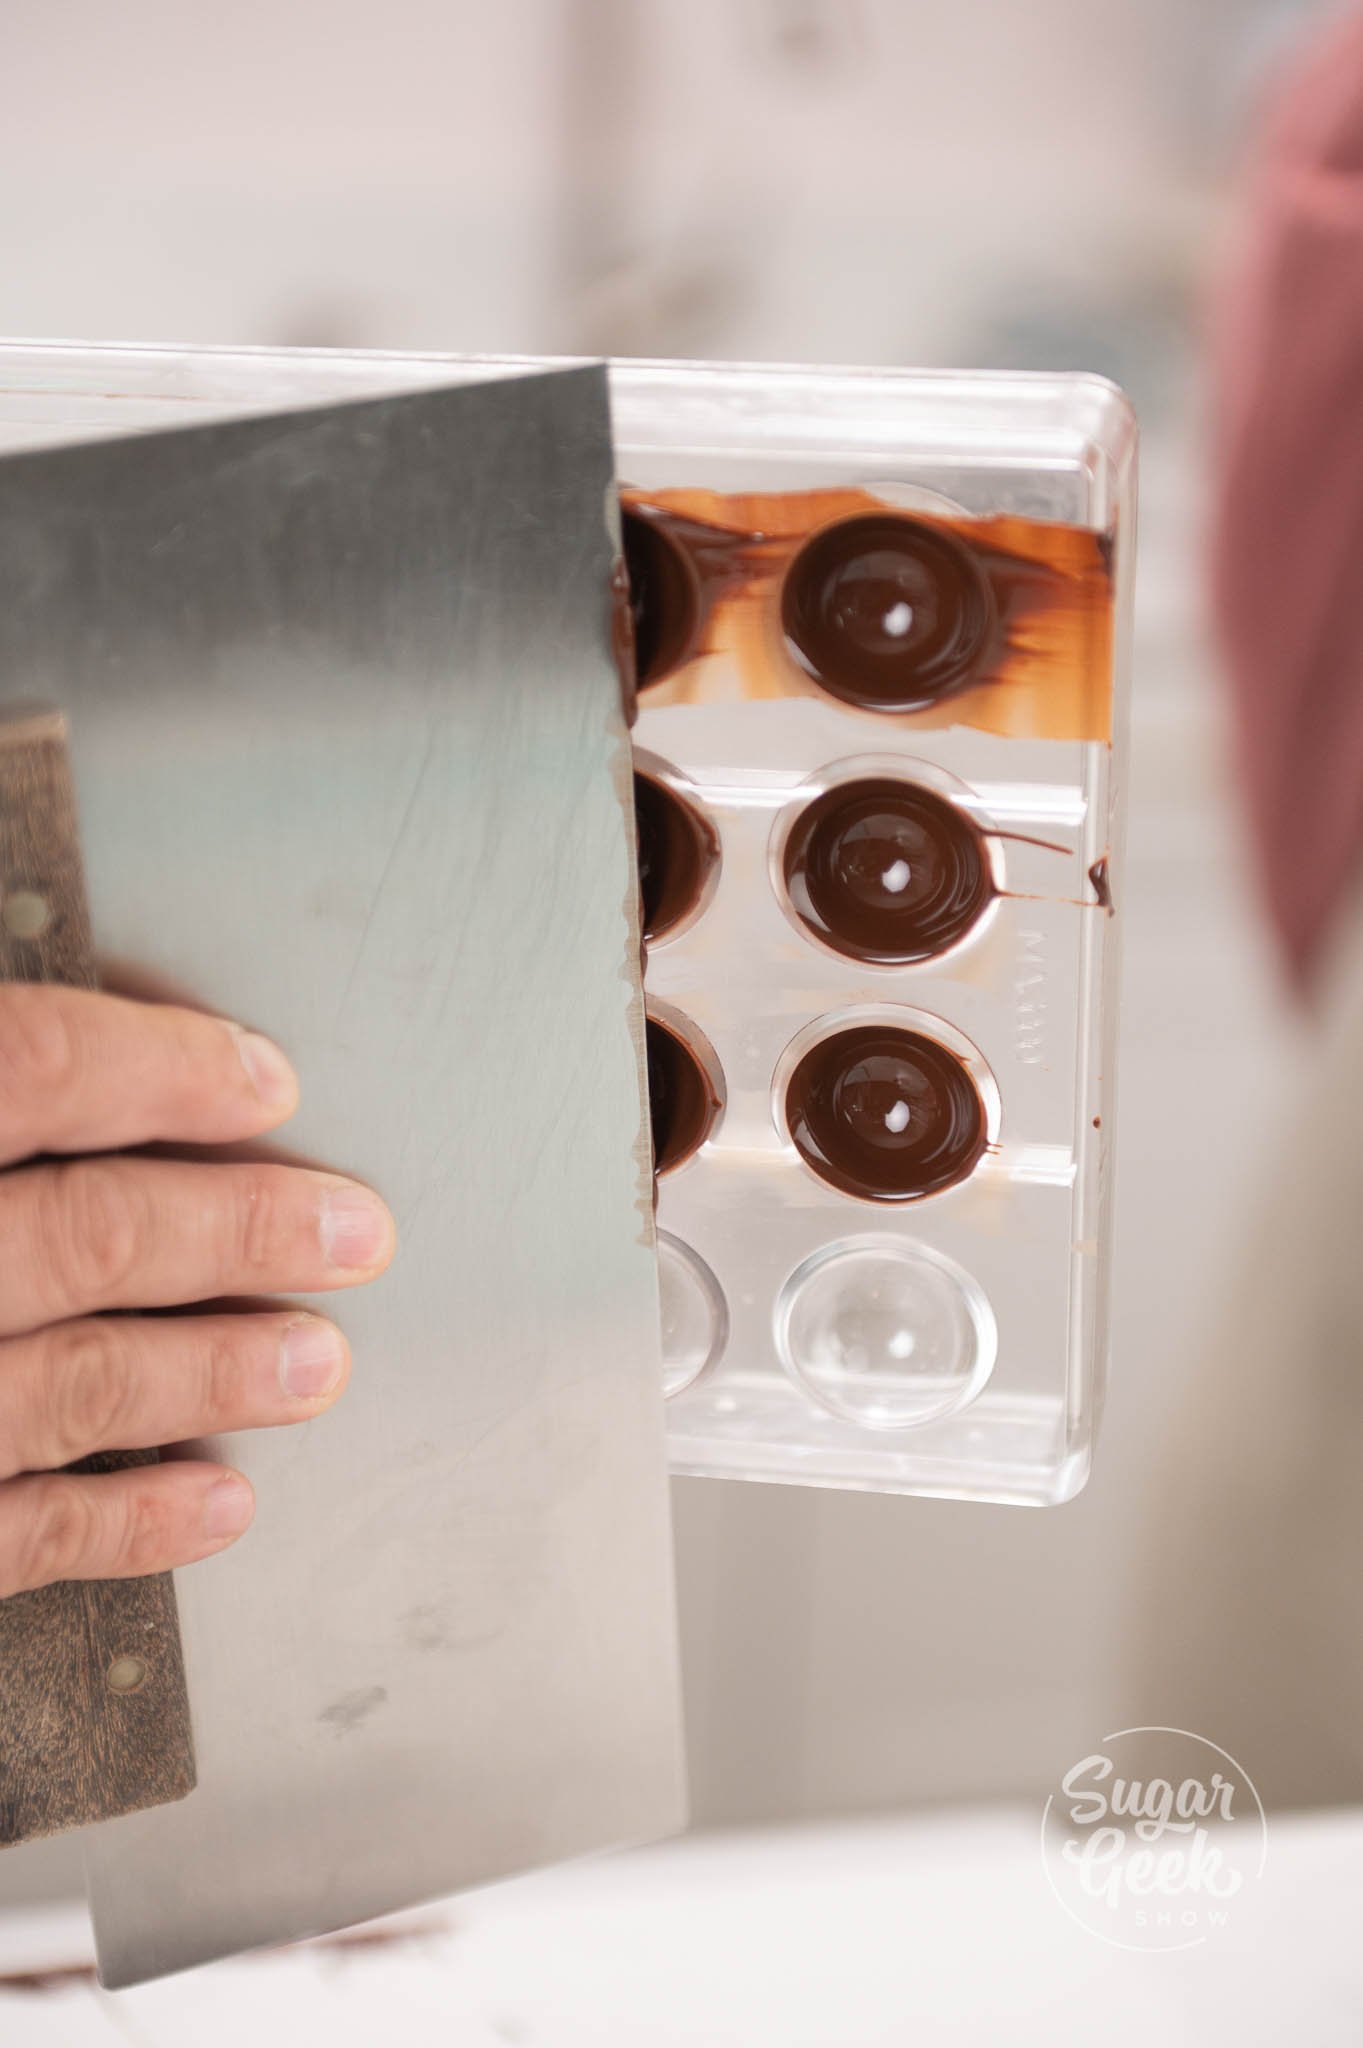
- Pipe chocolate into your polycarbonate mold cavities. Fill each cavity to the top and give the mold a few taps to pop air bubbles and make sure the chocolate reaches every part of the cavity. You only need to make two or as many as you'd like.

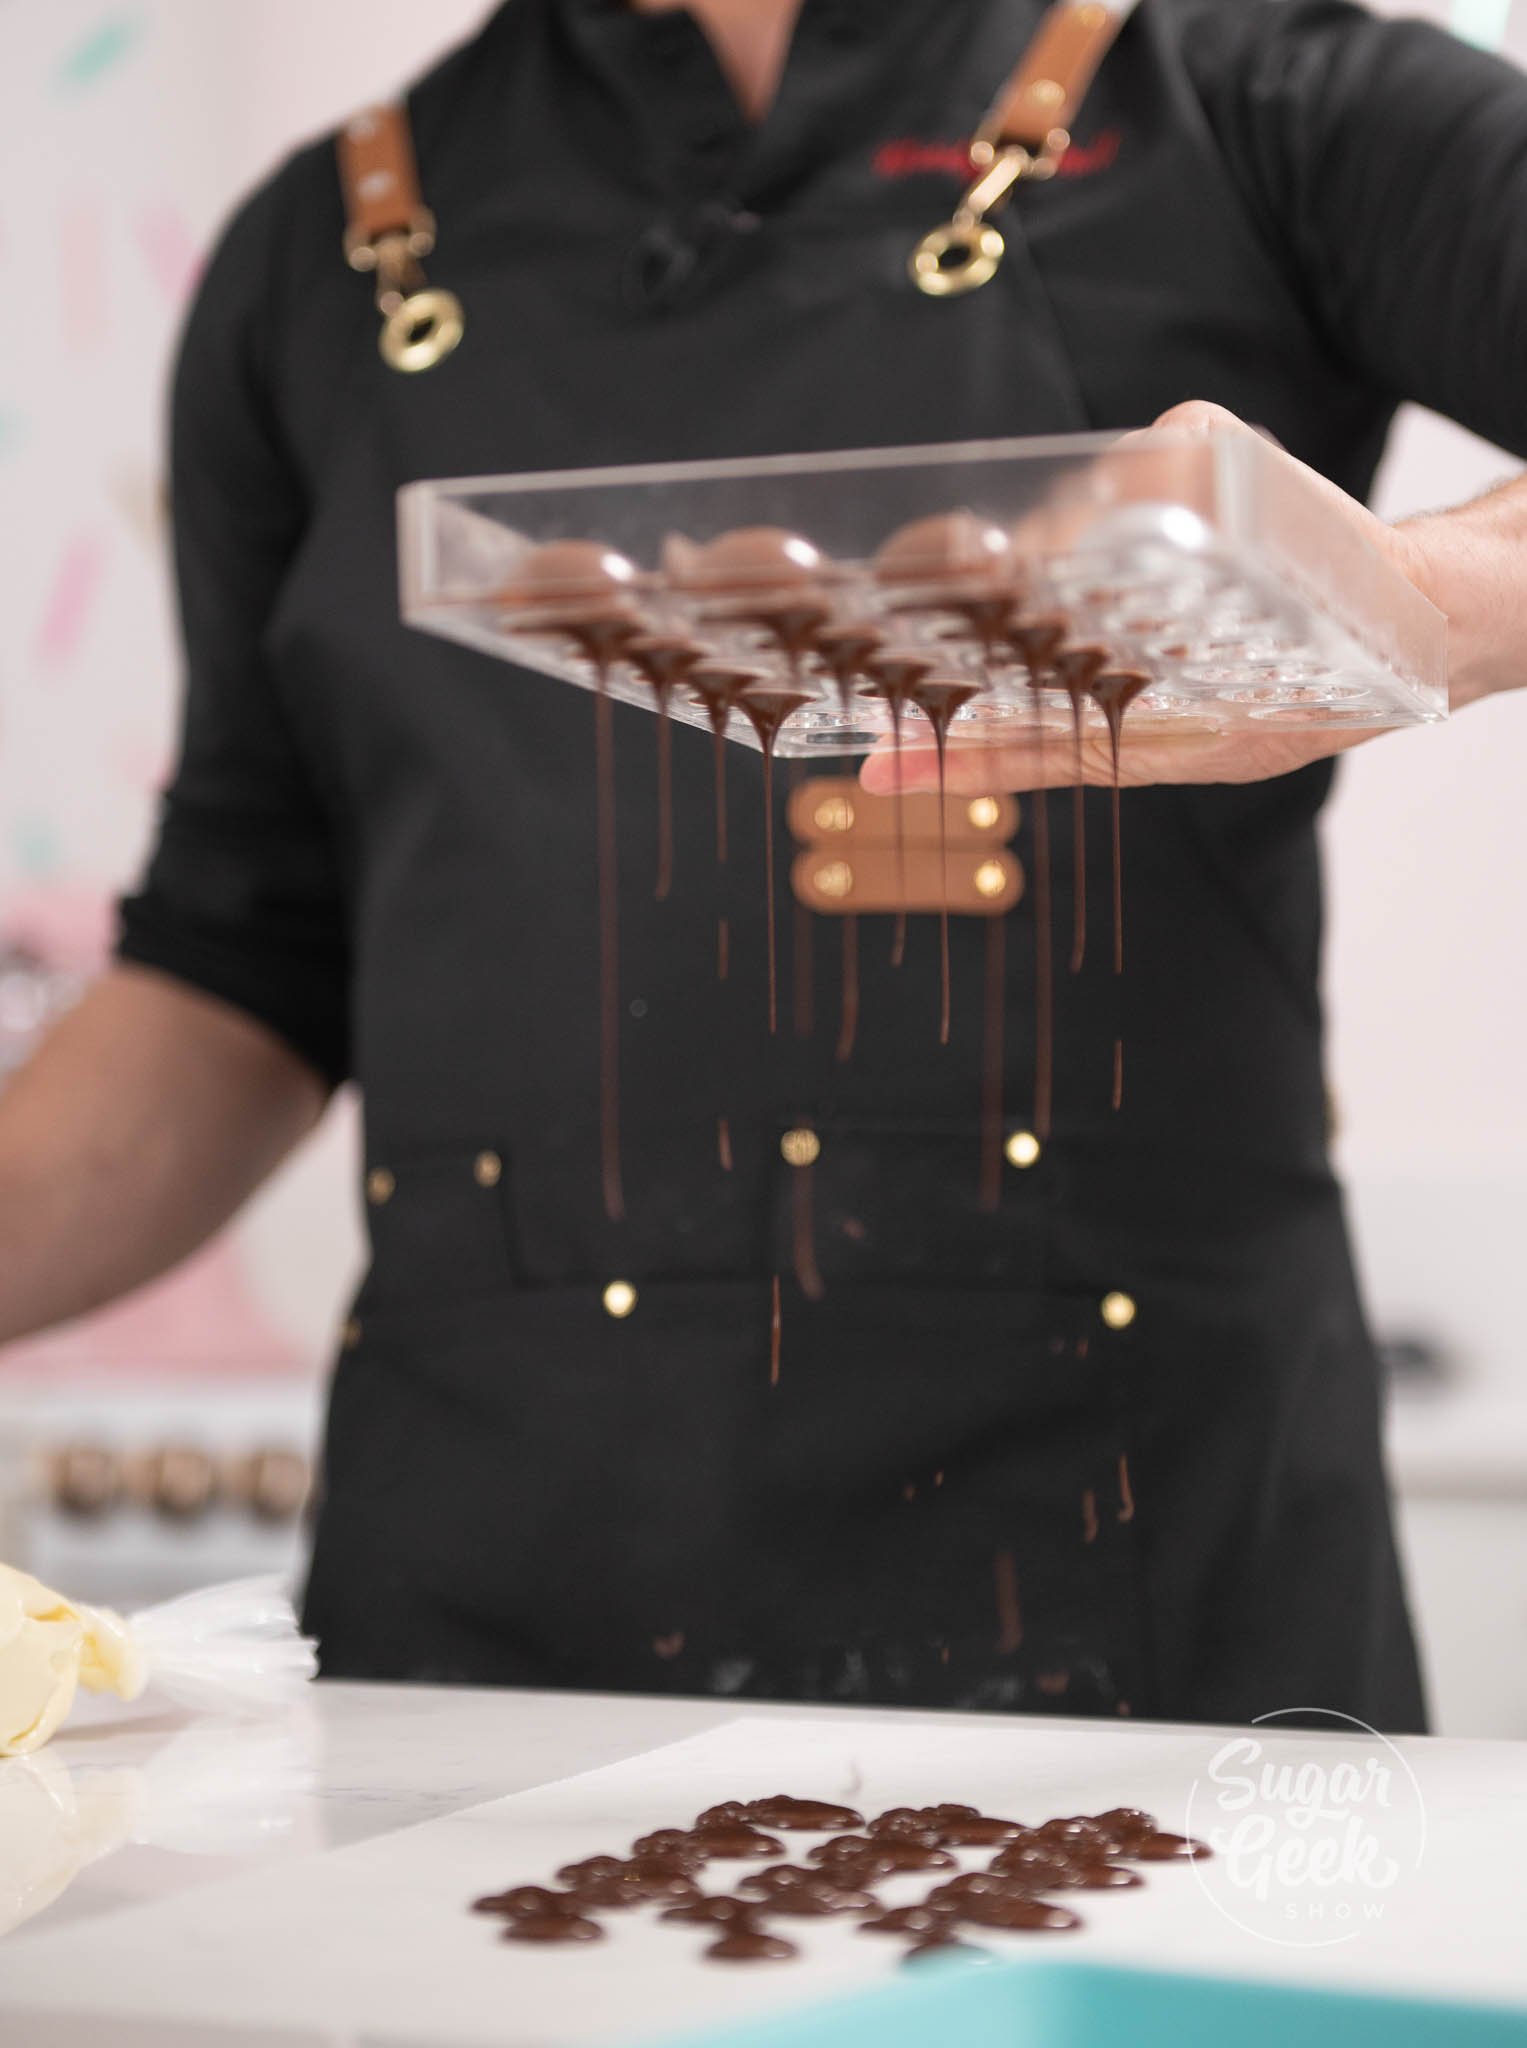
- Once you fill your cavities, place some parchment underneath the mold and flip the mold over to dump out leftover chocolate.

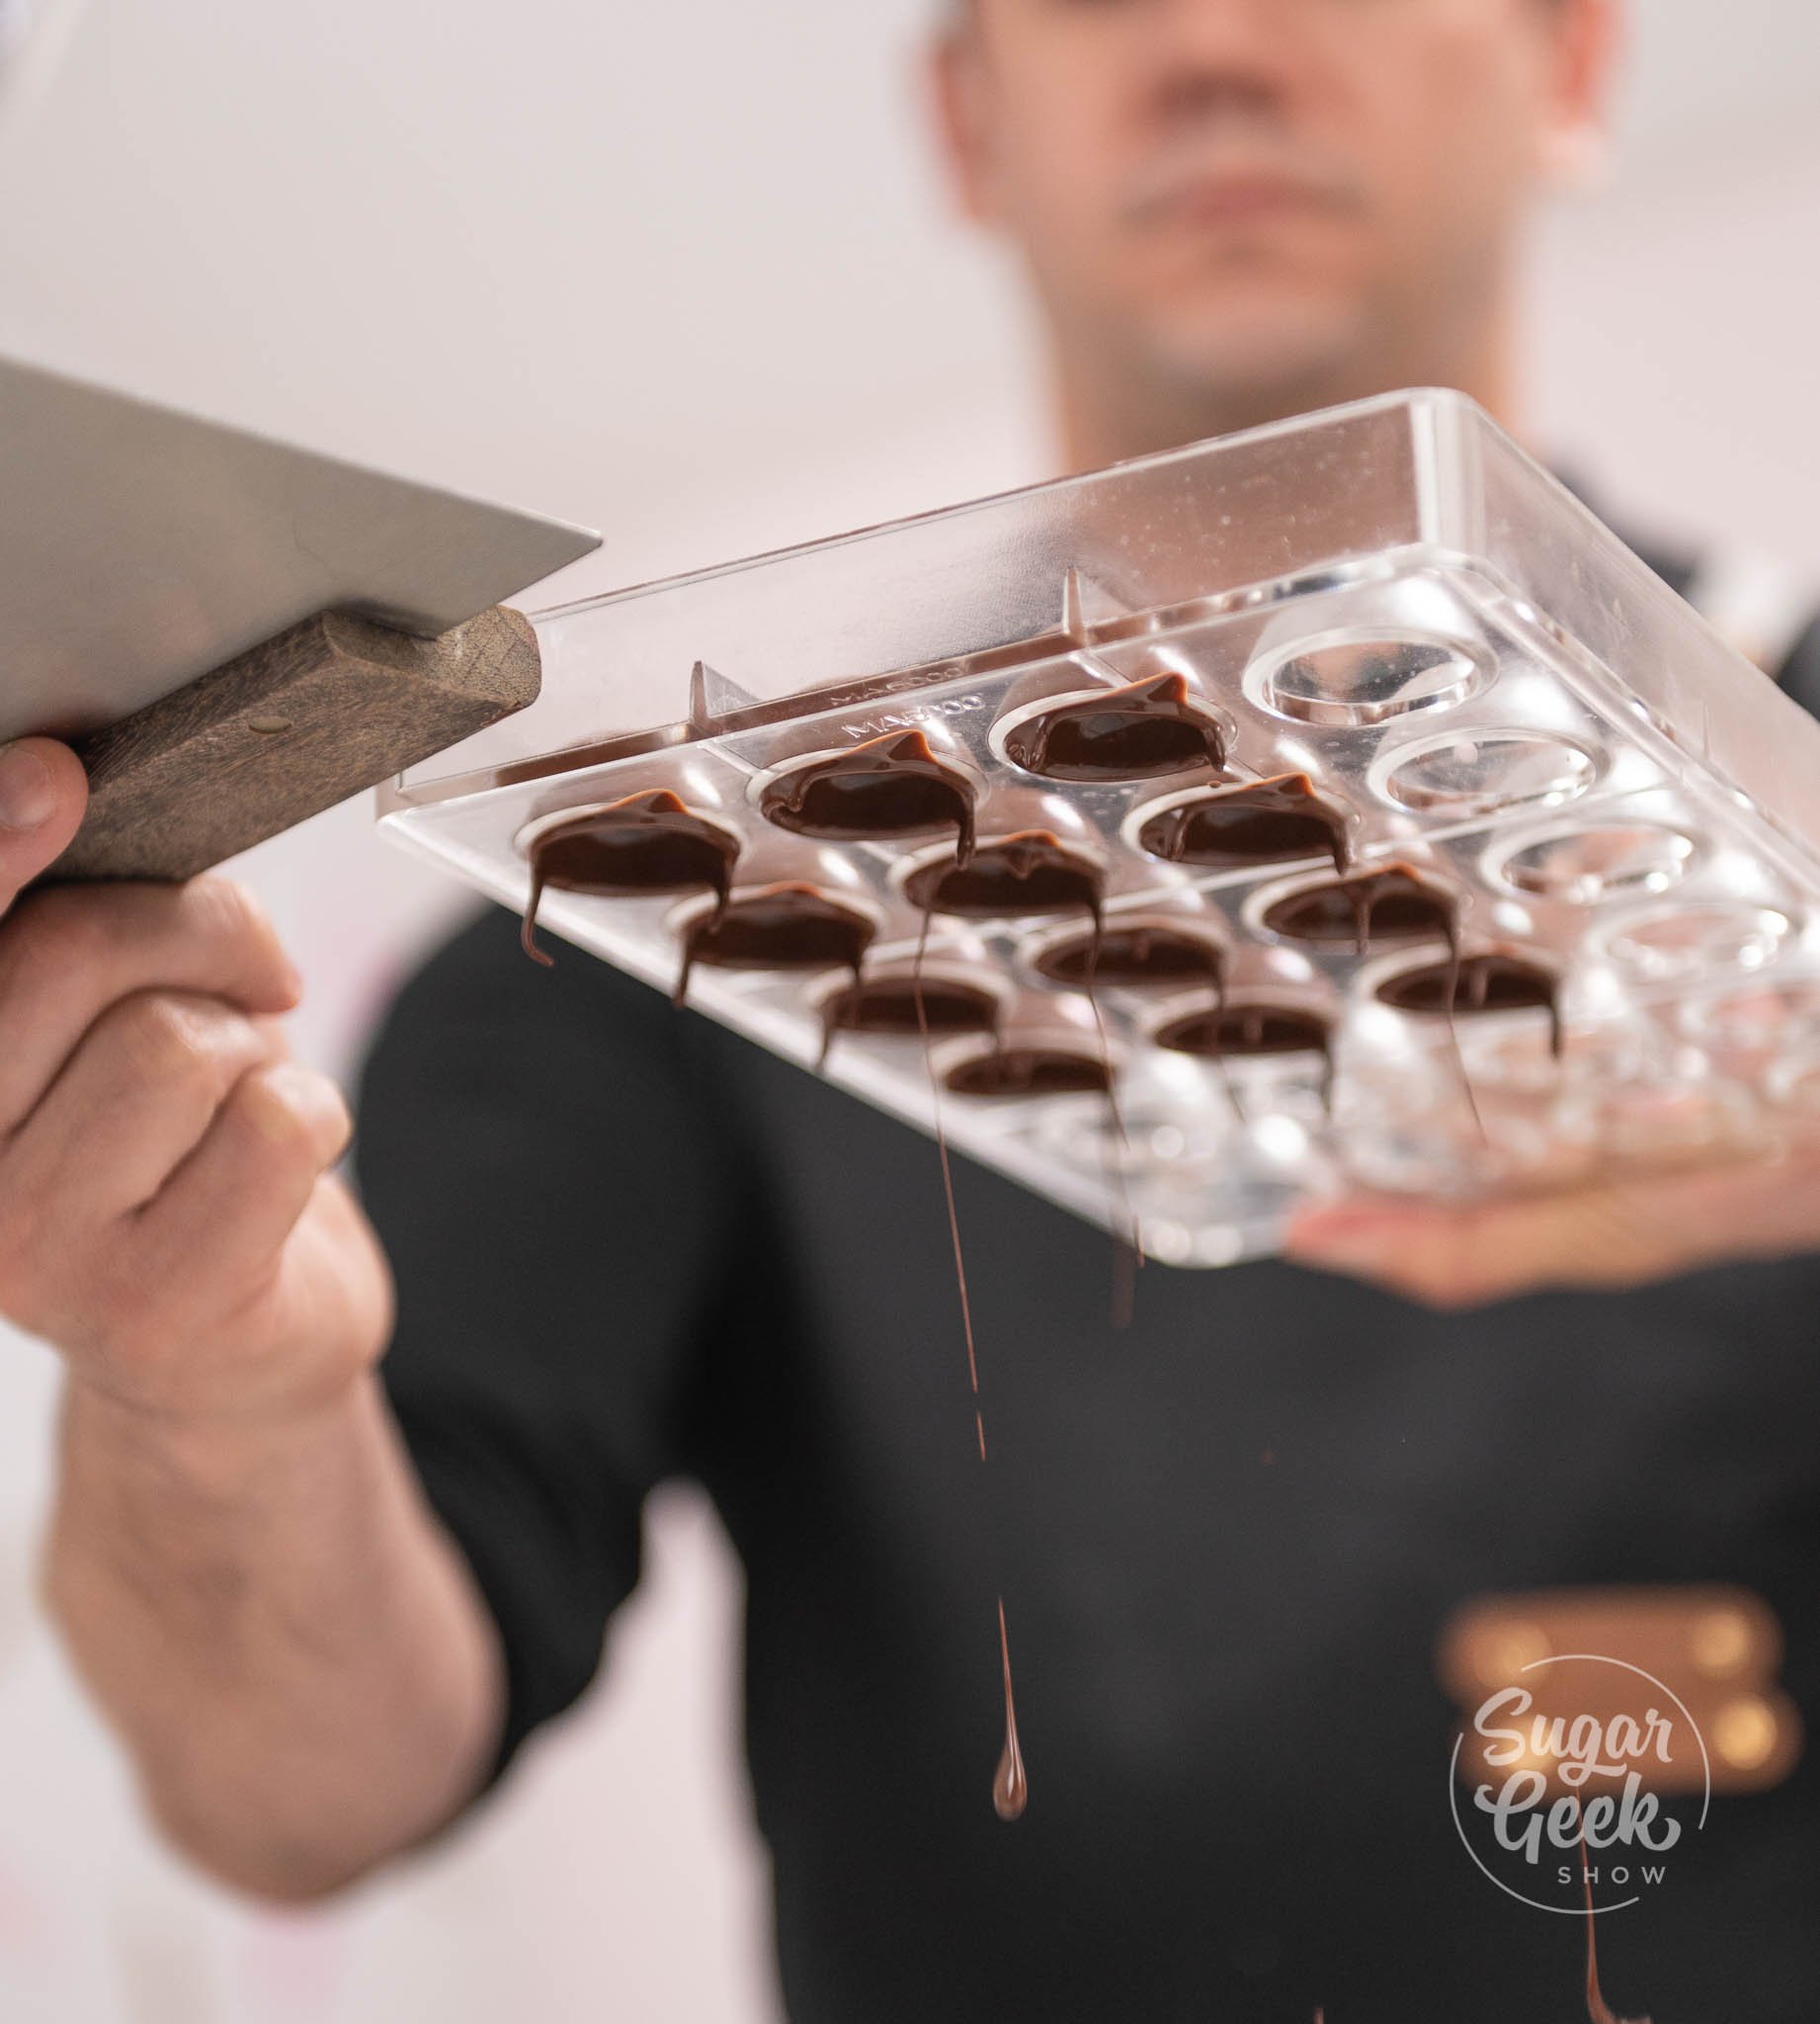
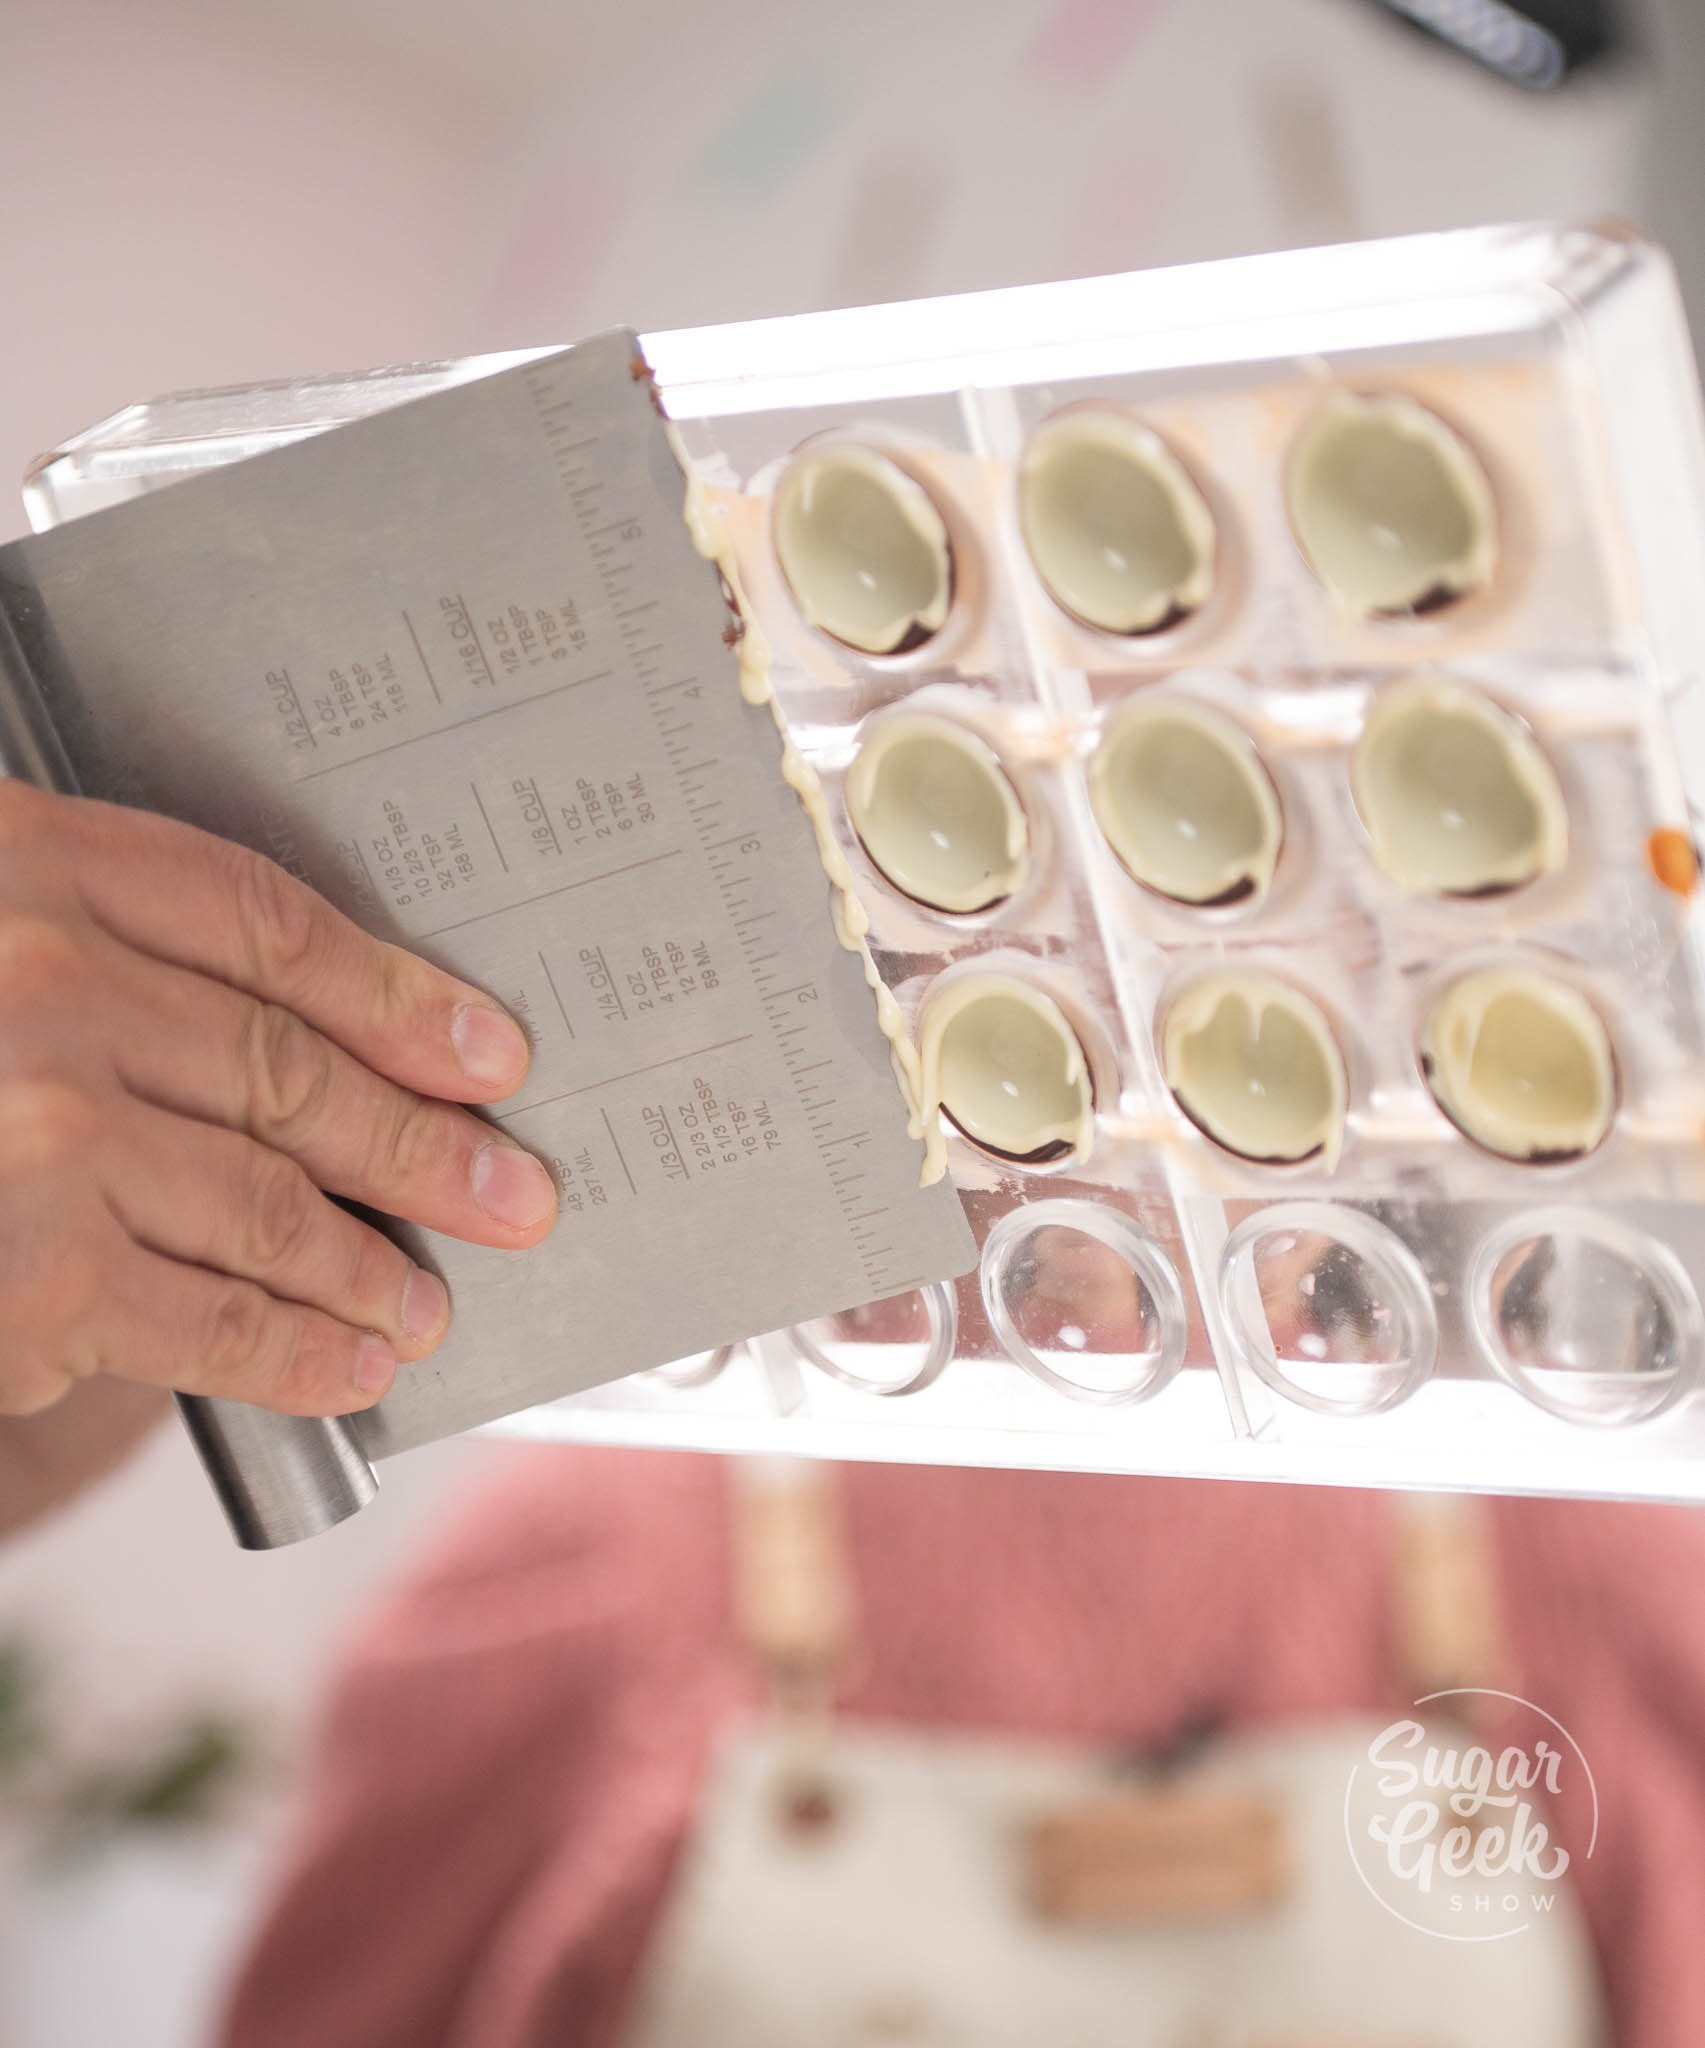
- Tap the sides of the mold with a bench scraper or spatula to remove all the access chocolate.

- Scrape the access chocolate off the mold with a scraper to ensure the chocolates will have flat edges.
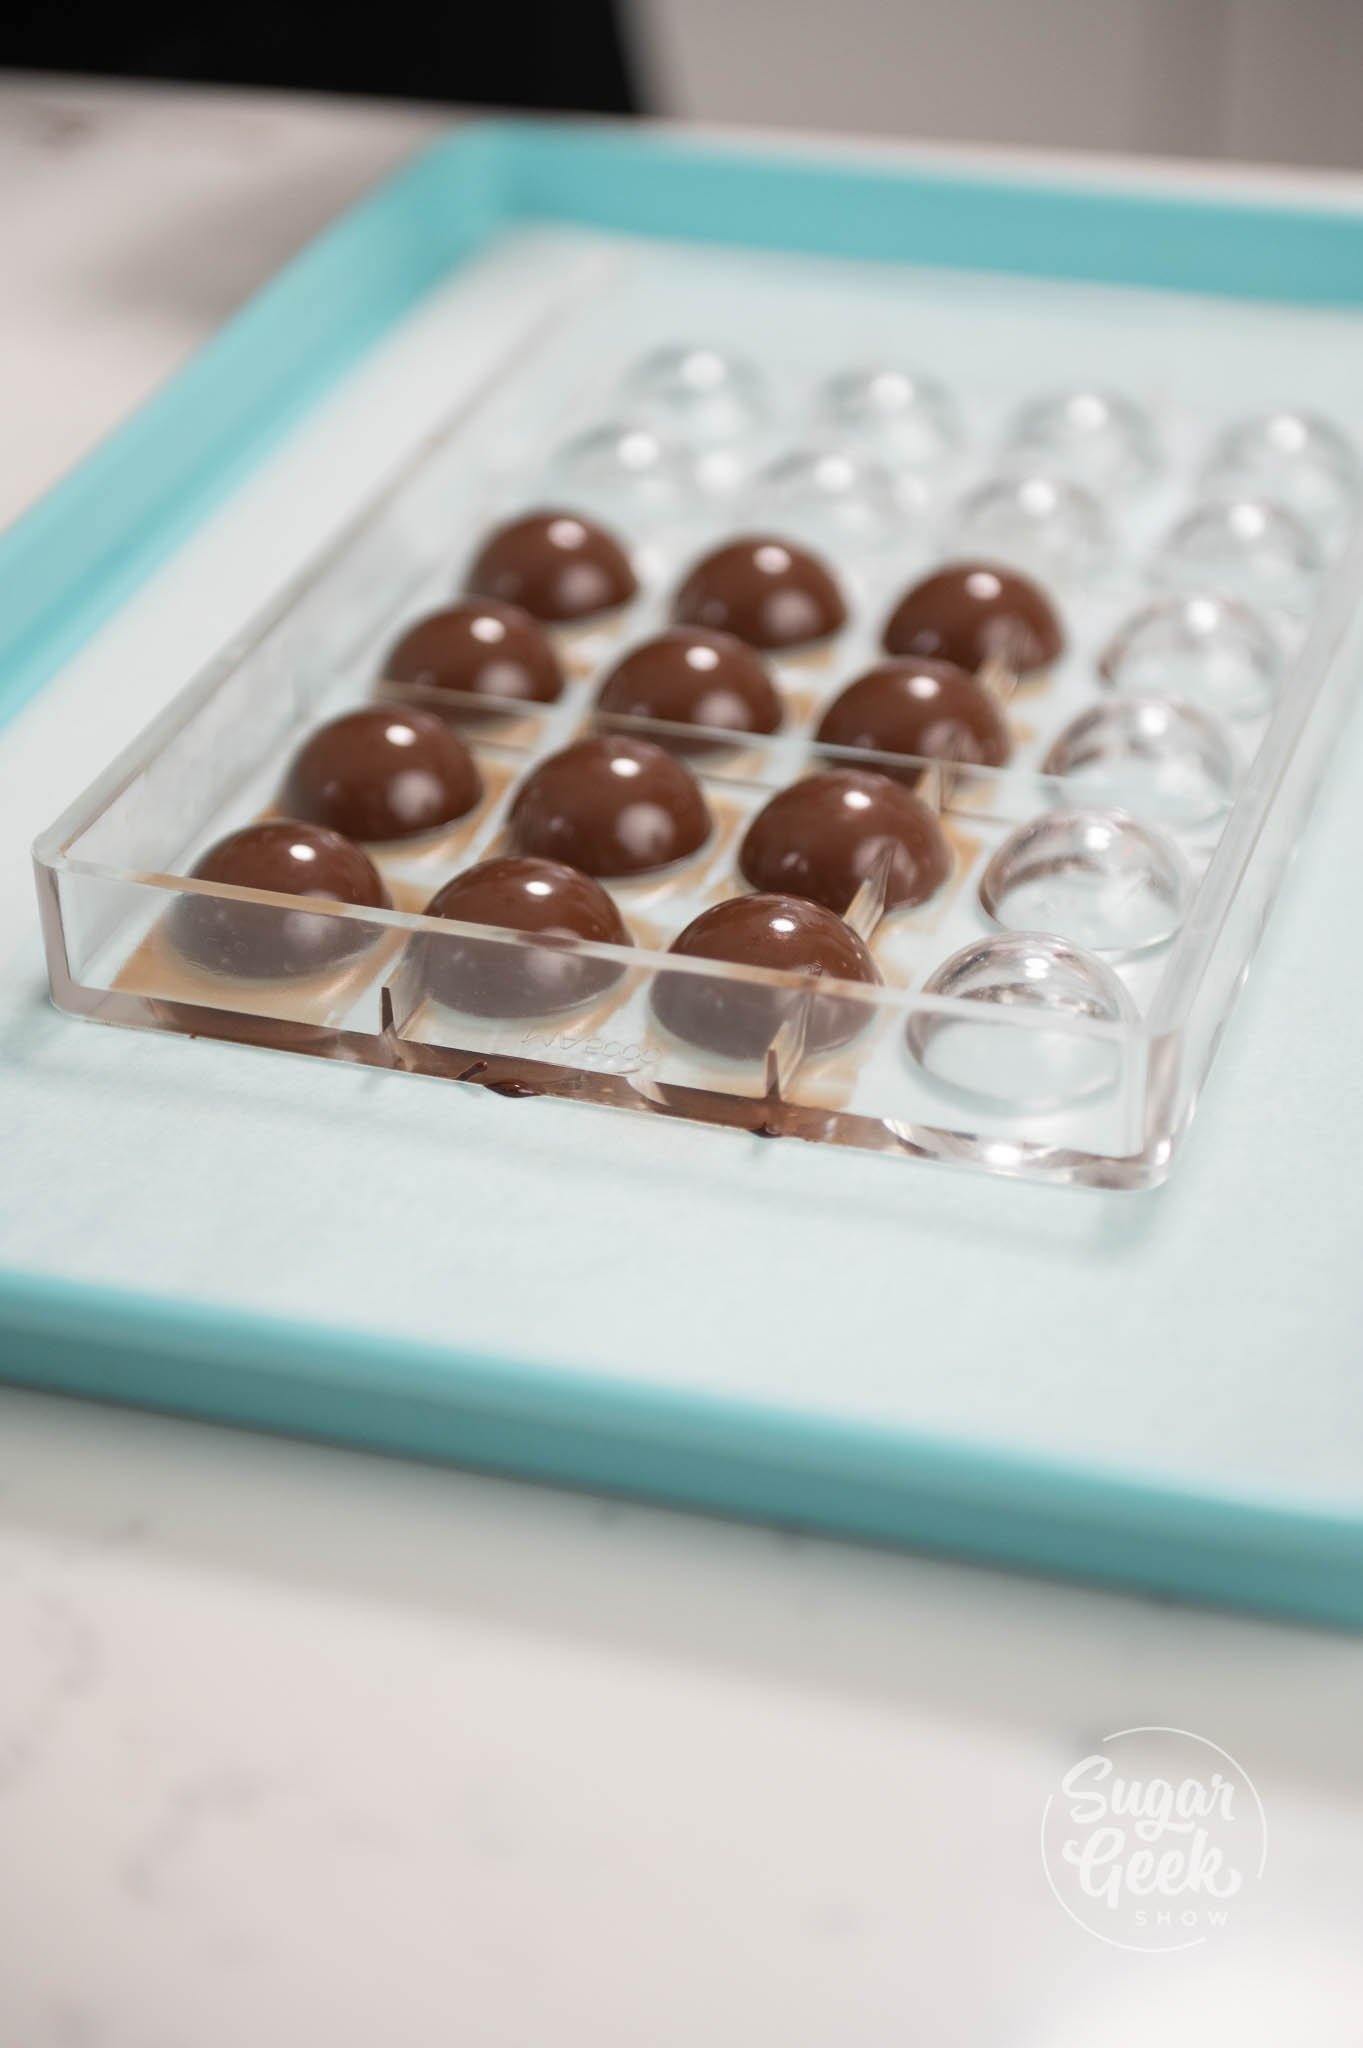
- Place the mold upside down on parchment and leave to set.
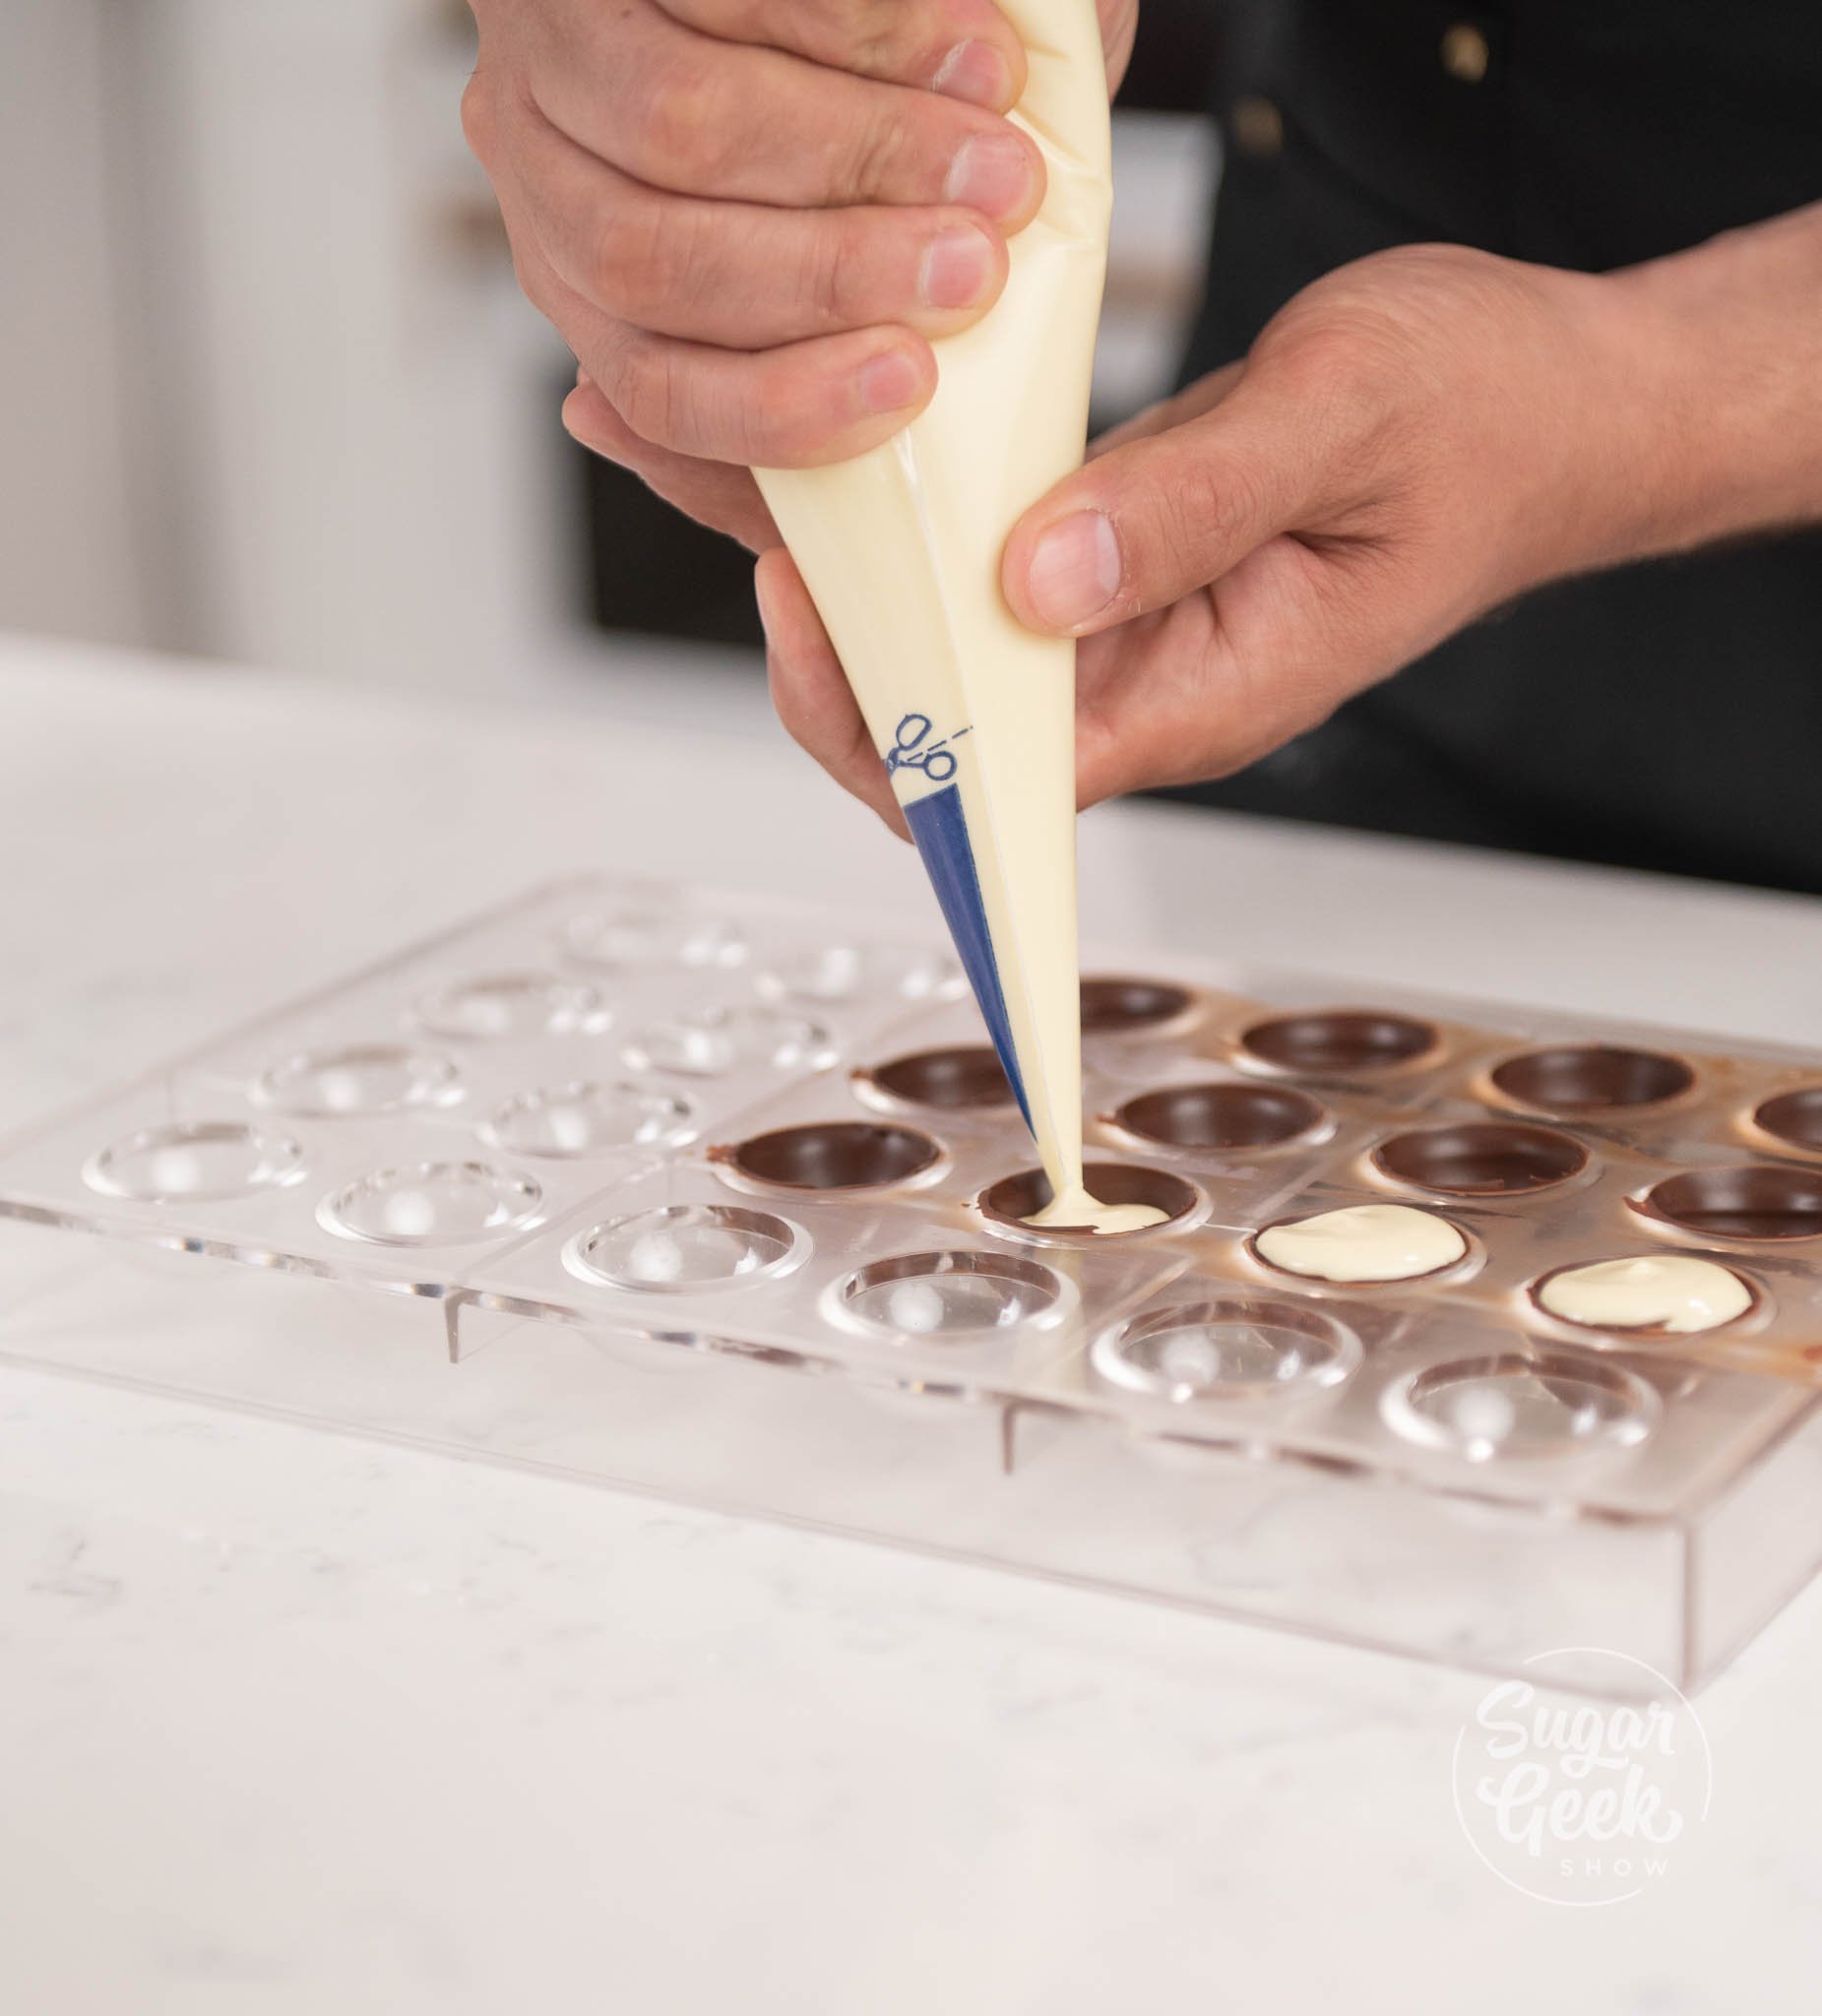
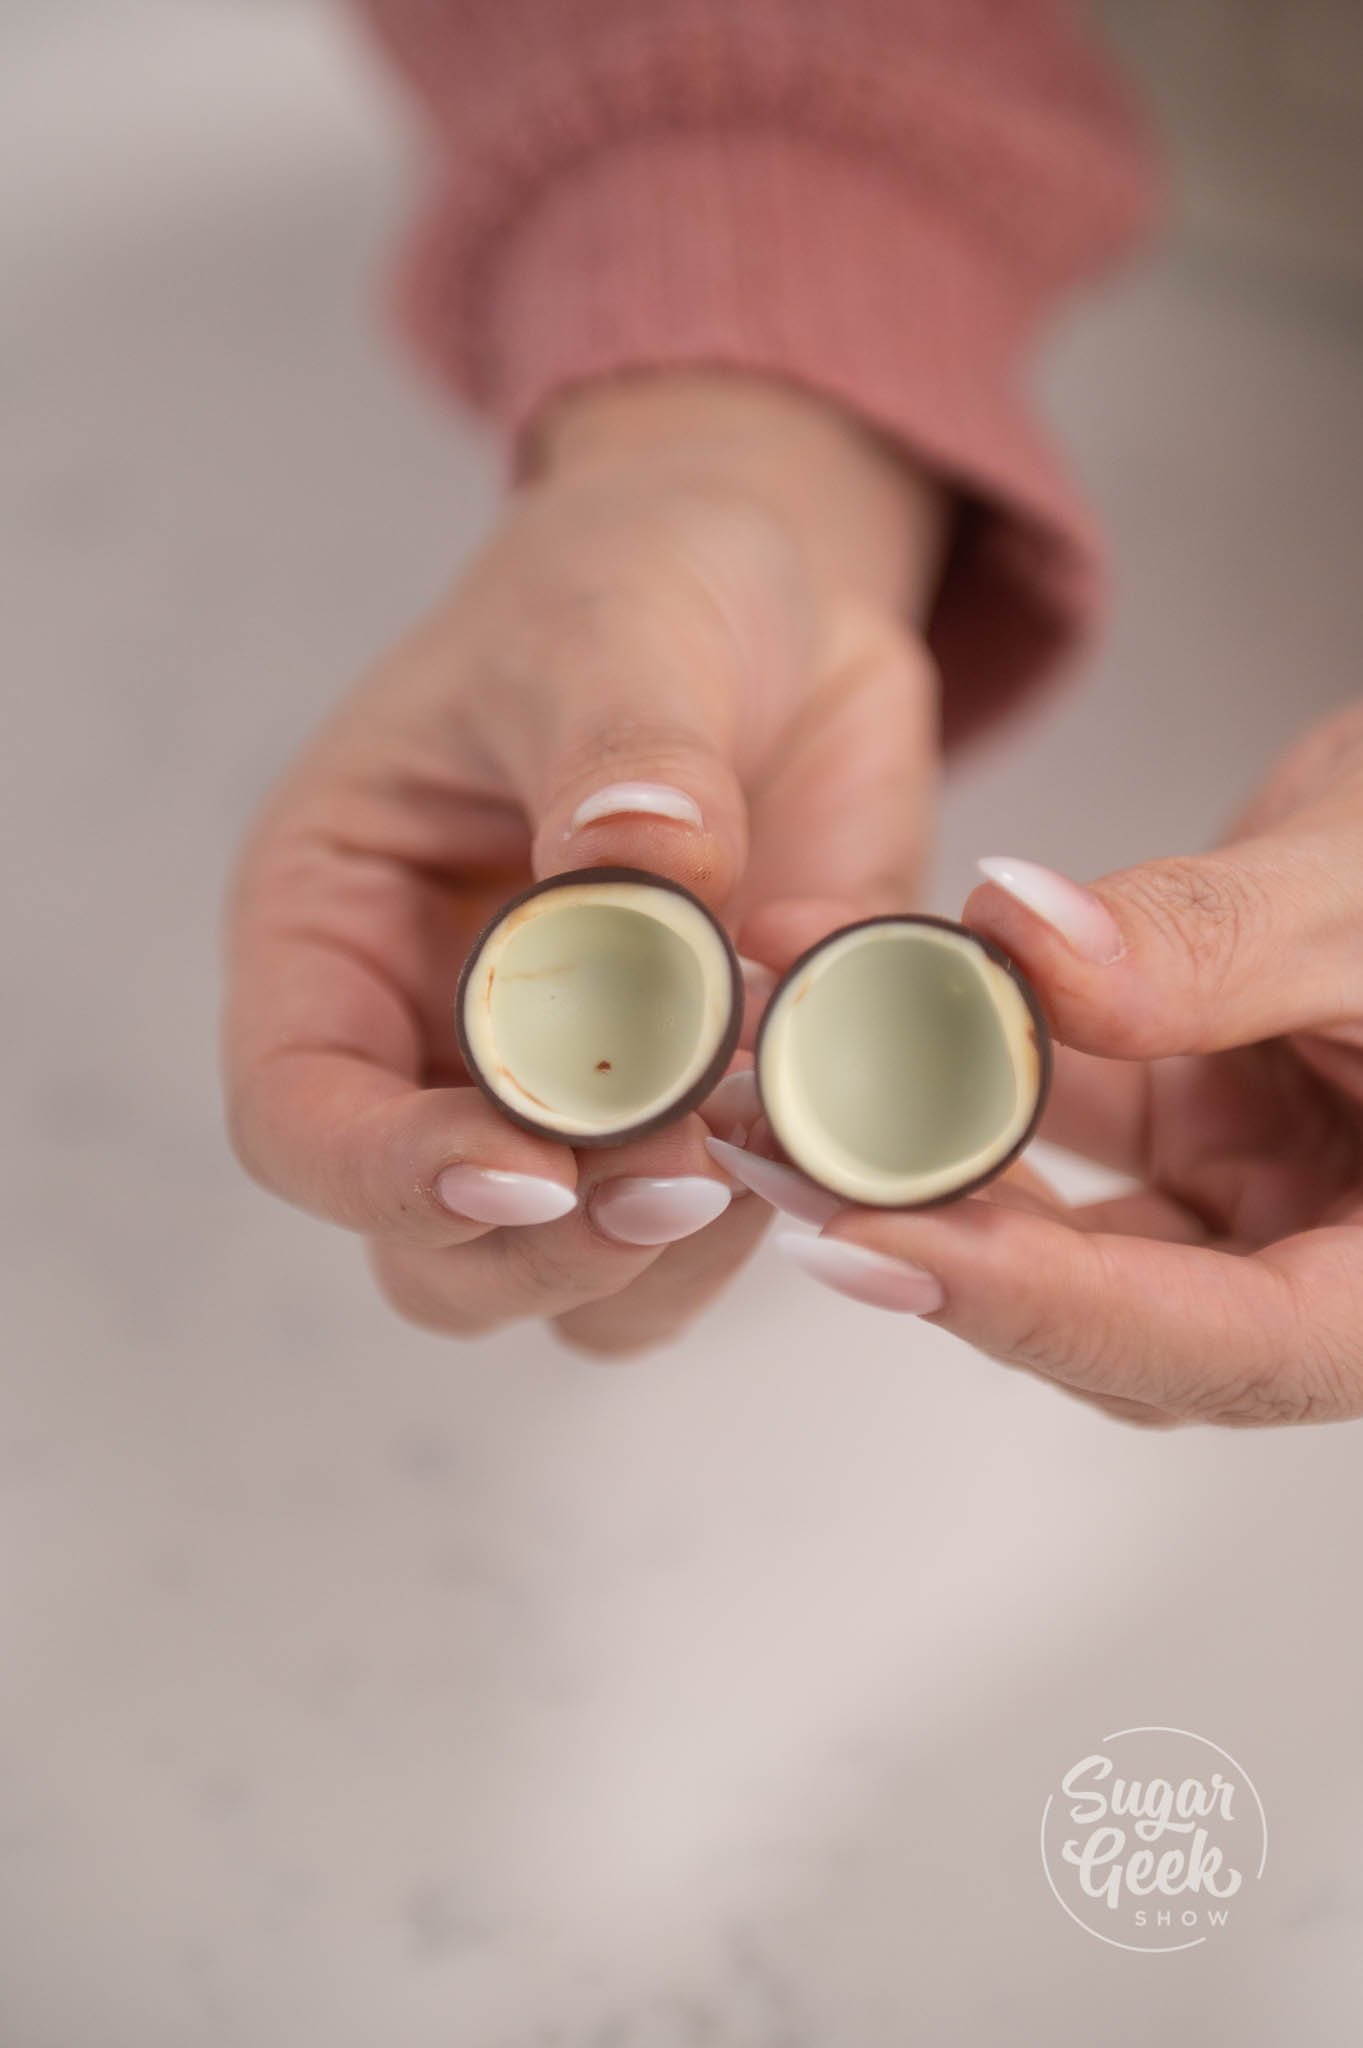
- Once the dark chocolate is set, repeat the process with the white chocolate to create a coconut shape making sure to pour the white chocolate into the dark chocolate. Leave to set again.


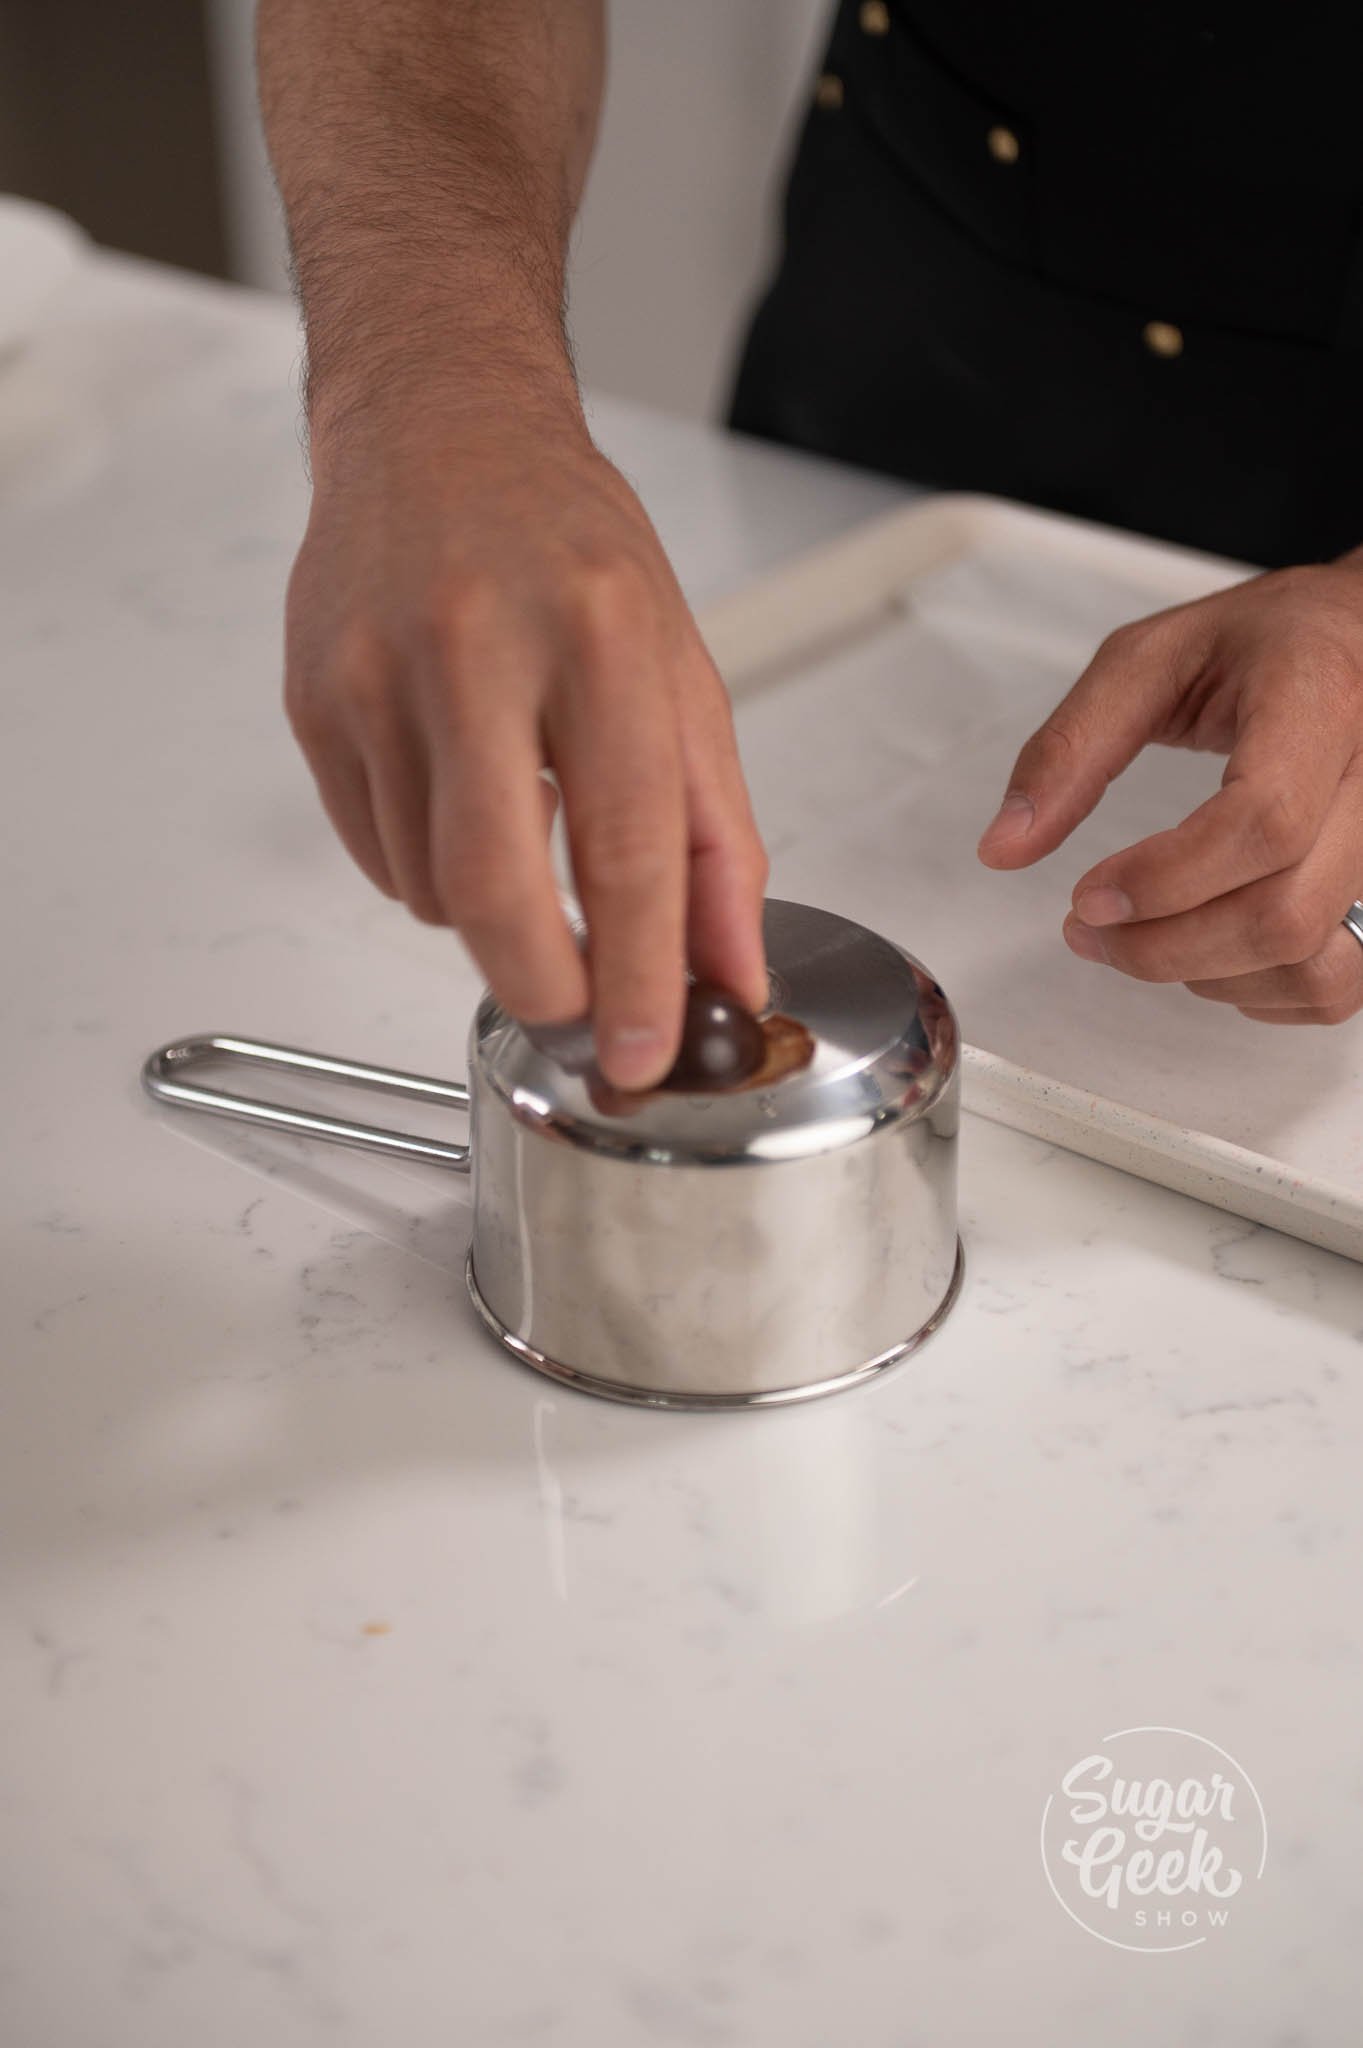
- Un-mold the chocolate shells. Then using a warm plate or bottom of a small pot, warm the bottom edges of the bon bons to clean up the bottom and smooth it out.
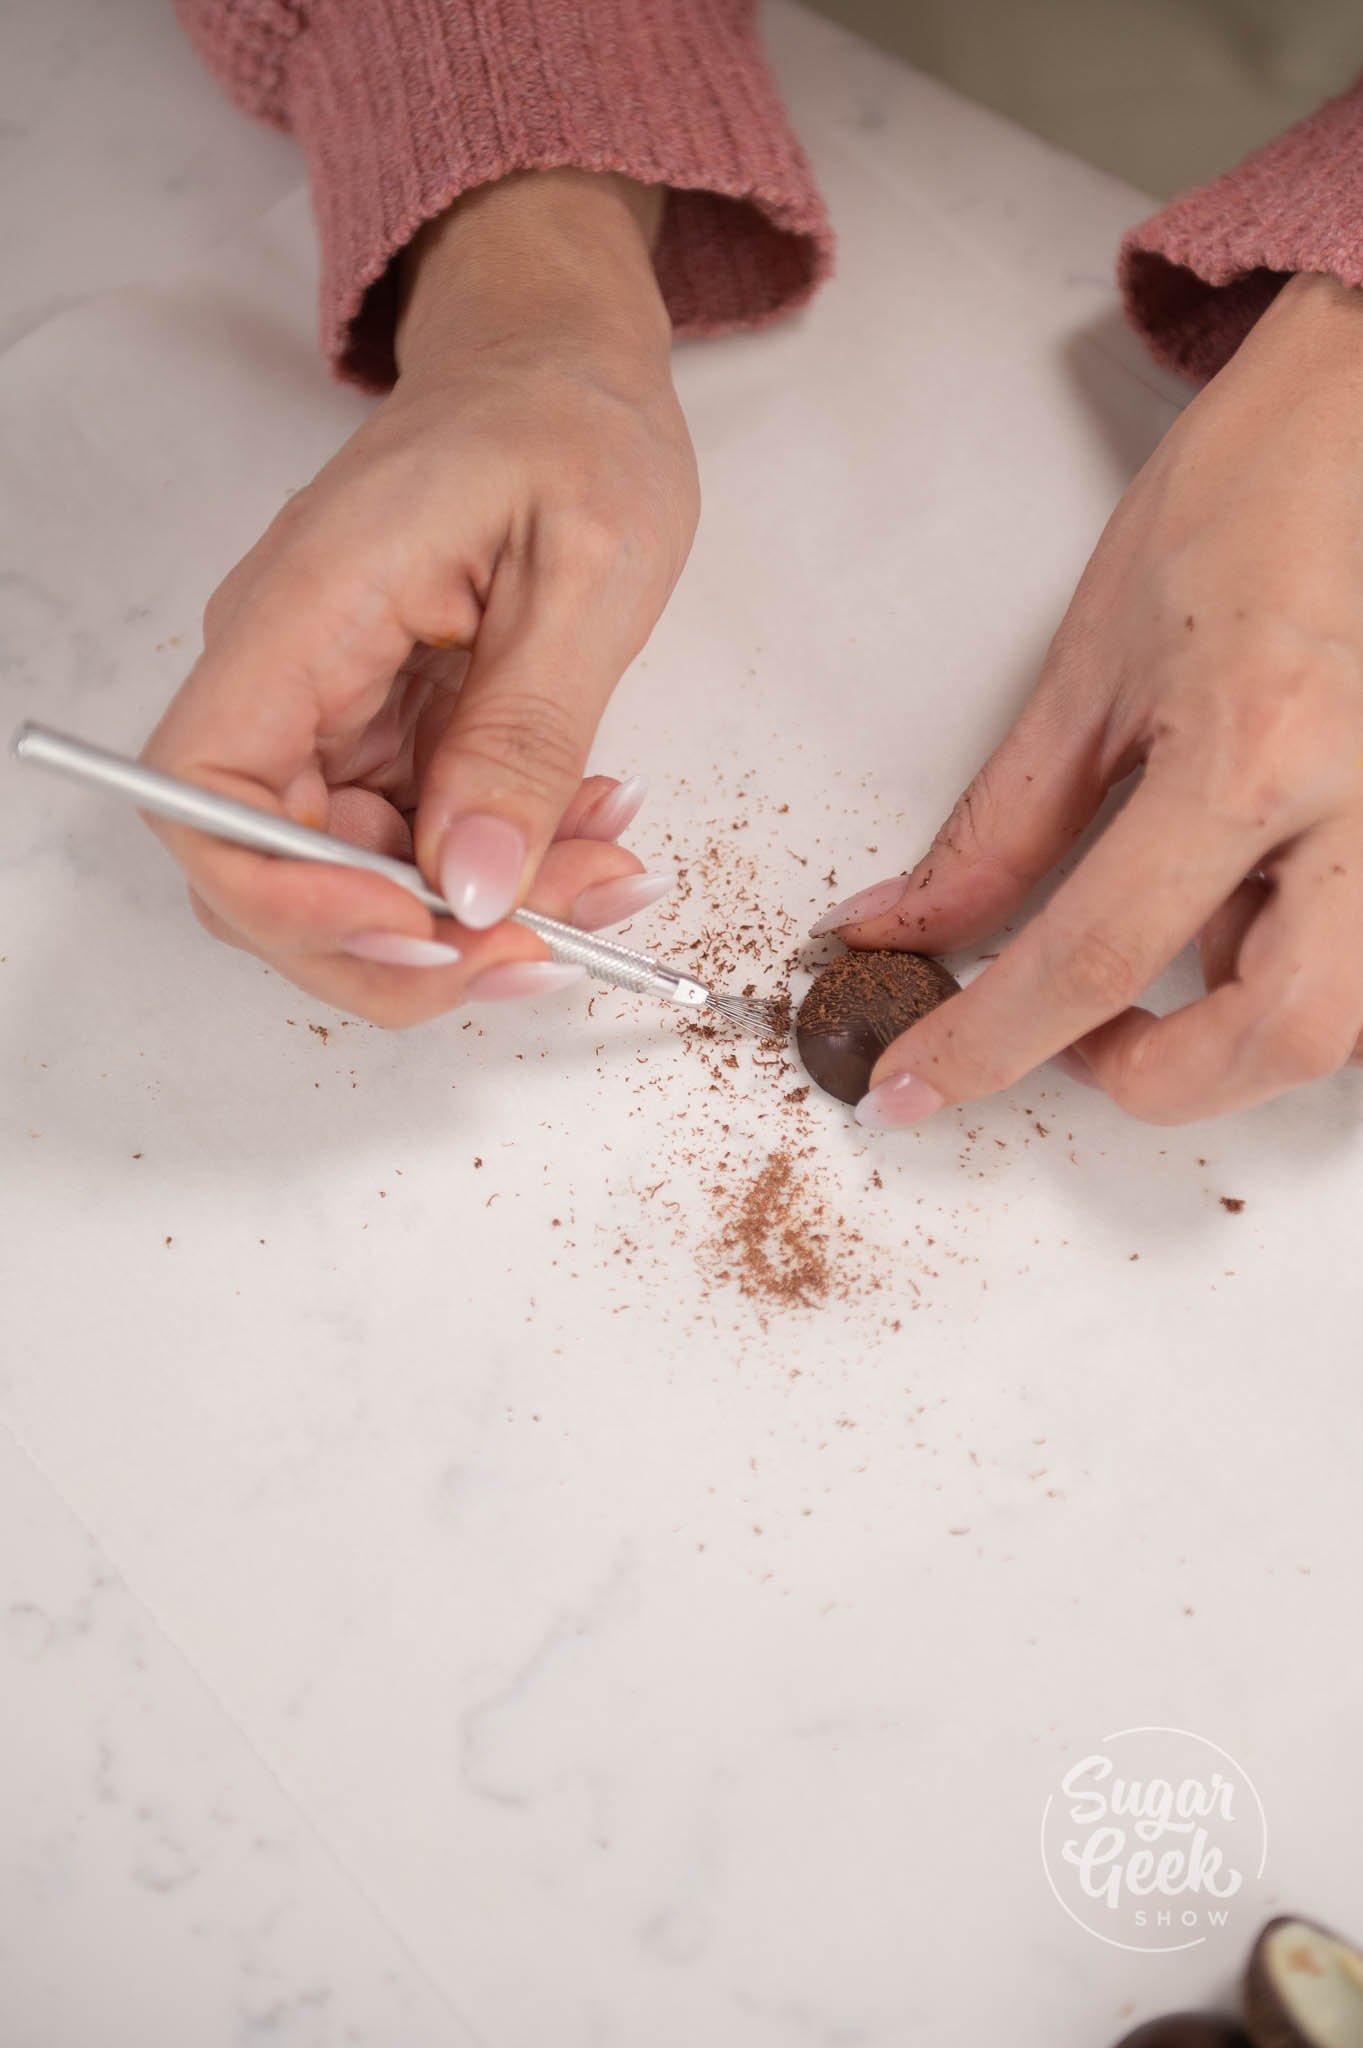
- Take a wire brush to create small lines and rough edges on the coconut shells.
- place the white part of the coconut in some coconut flakes. You can now glaze and decorate your cake.


Decorating and Glazing the Mango Mousse Cake
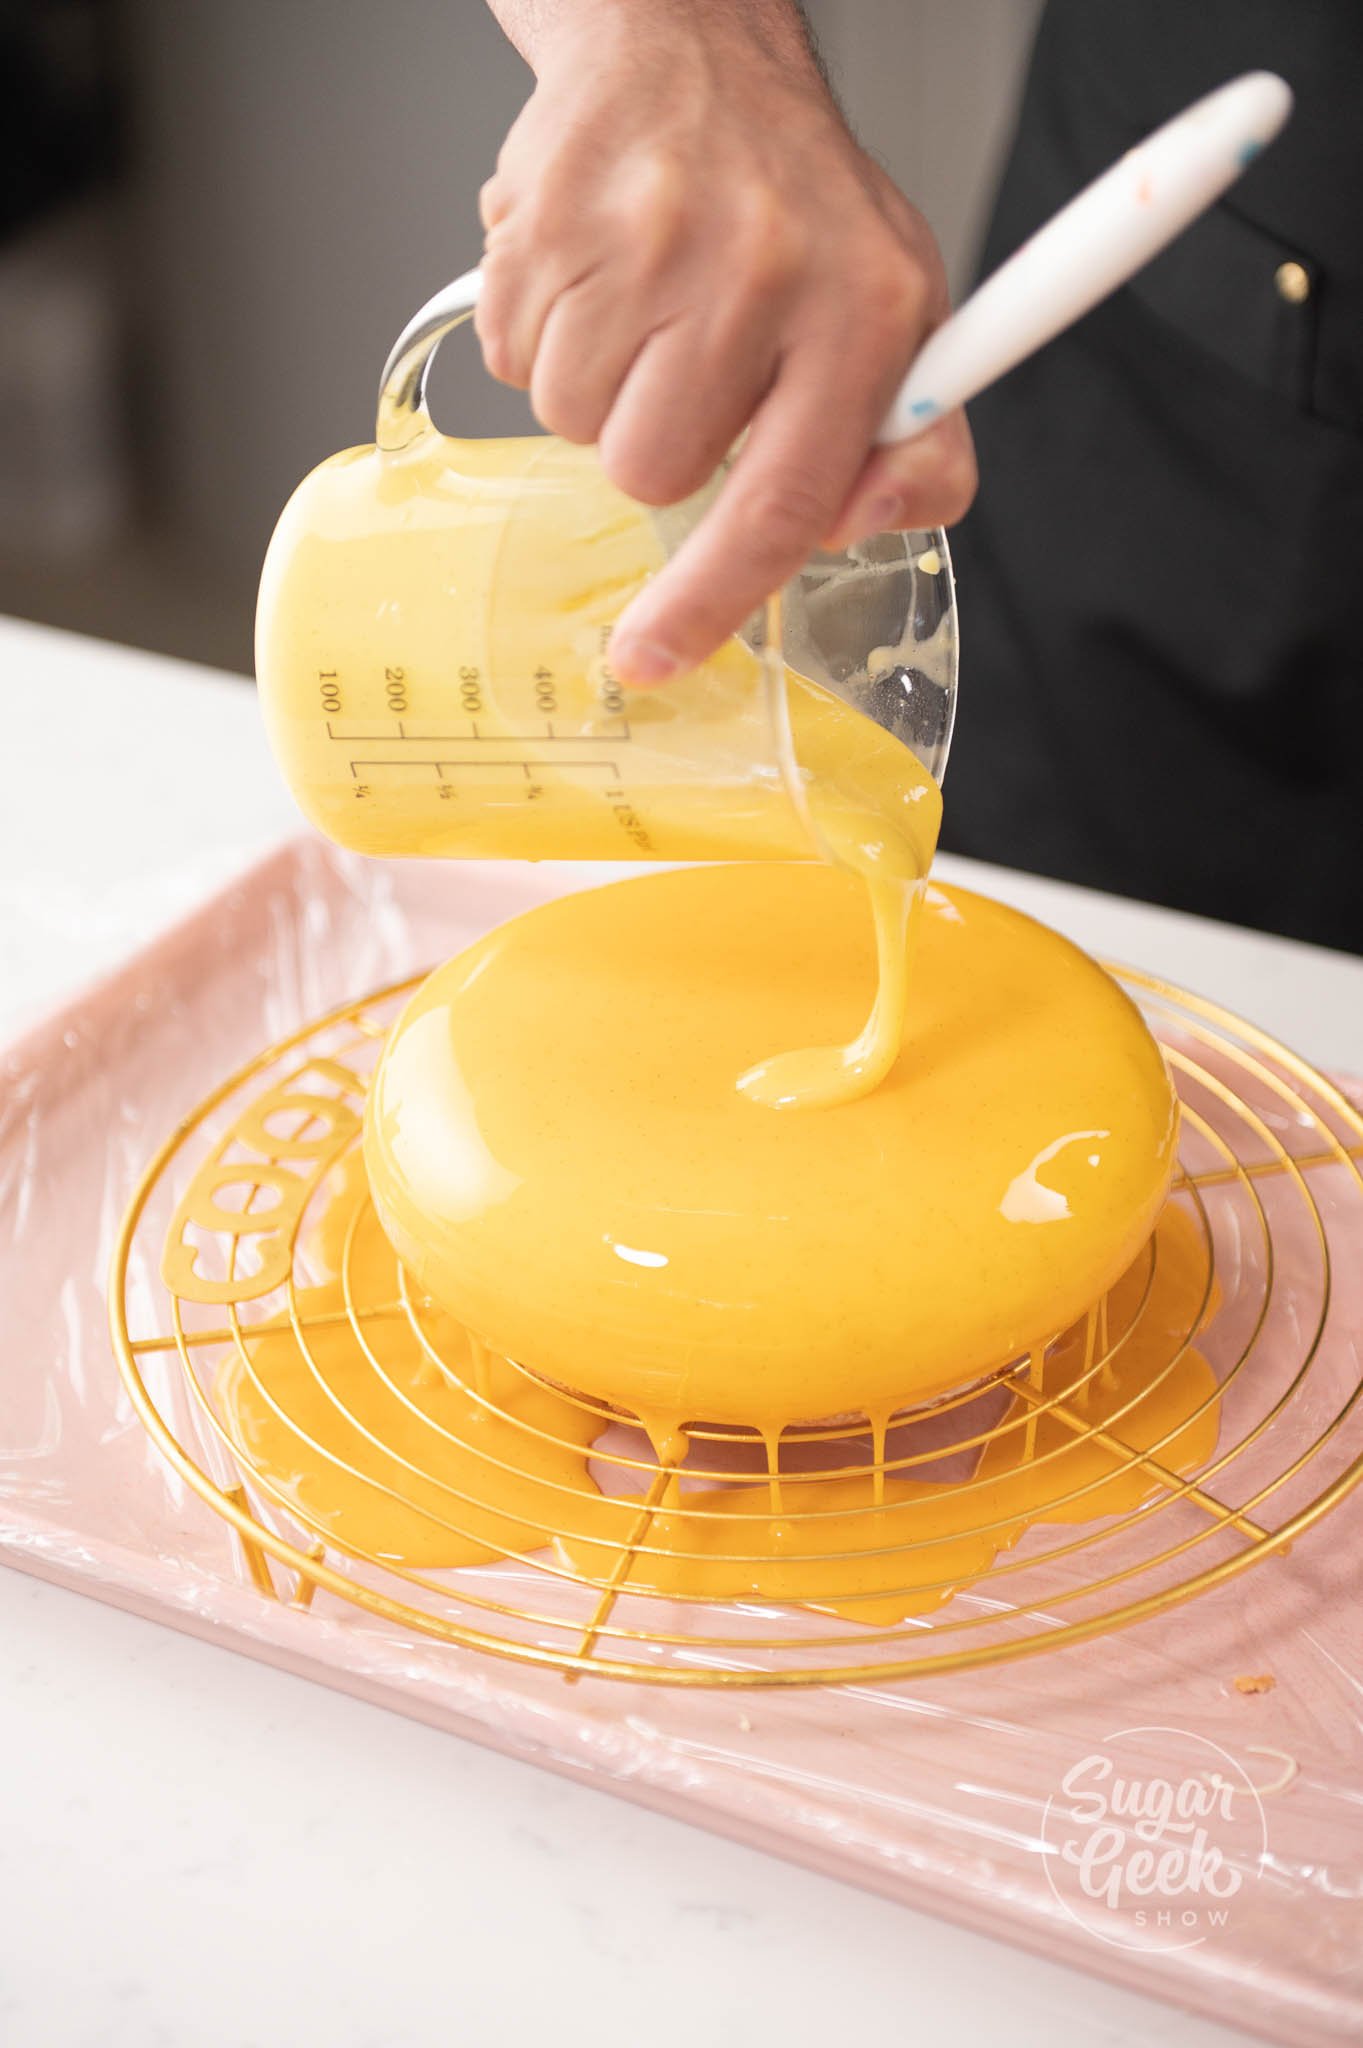
- Double Check your orange and yellow glazes are both at 76-77º F ( 24-25º C). If it's too cold the glaze will set before covering the cake, and if it's too warm it will melt your mousse.
- Take your mango mousse cake out of the freezer making sure it's on a cooling rack.
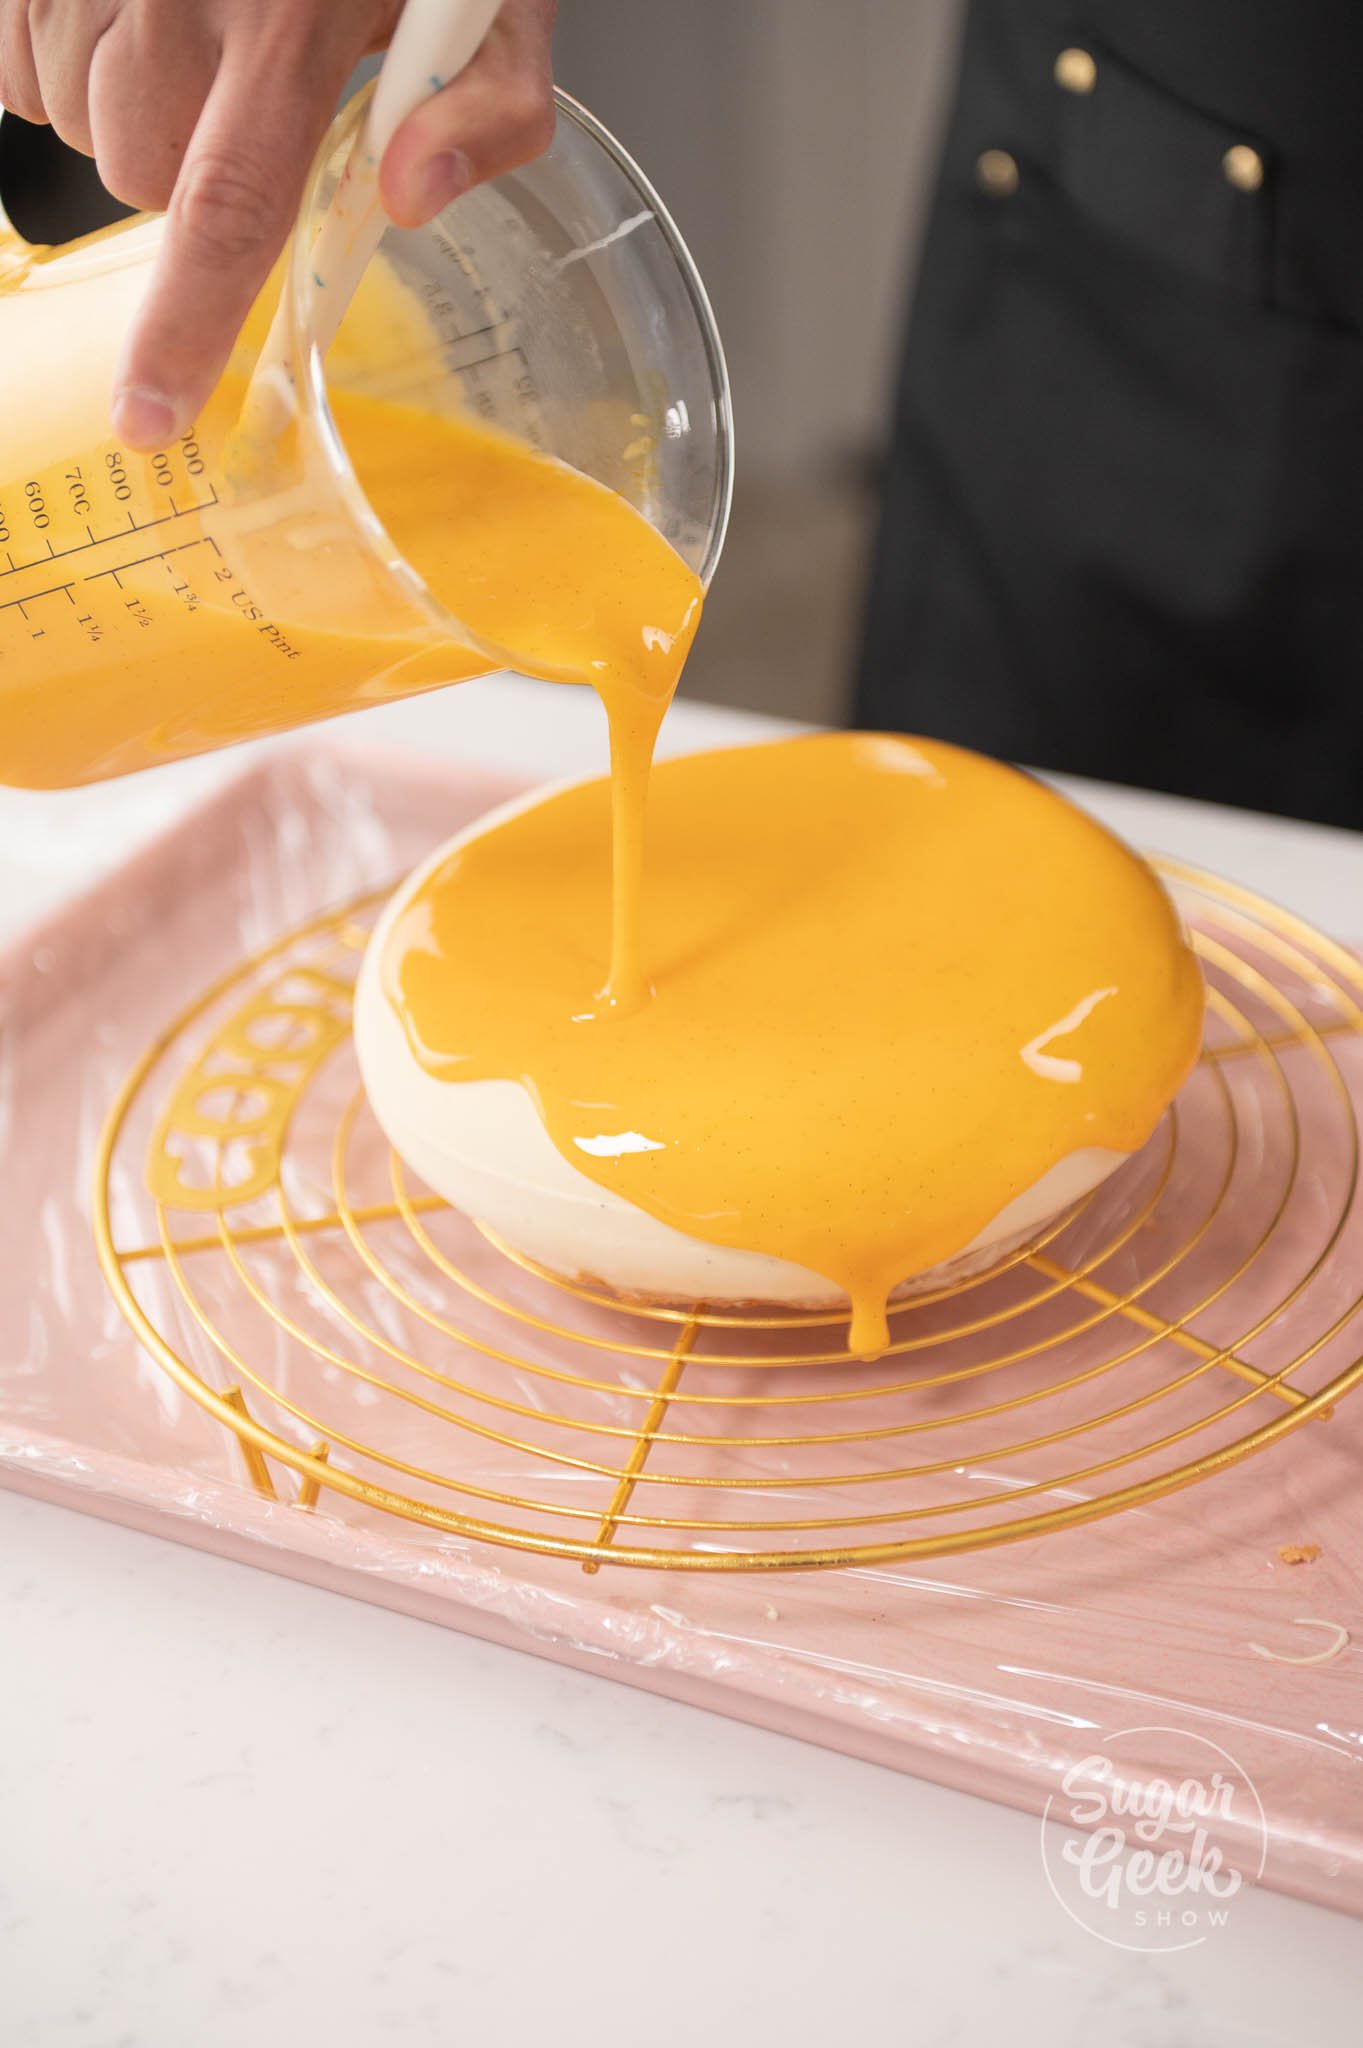
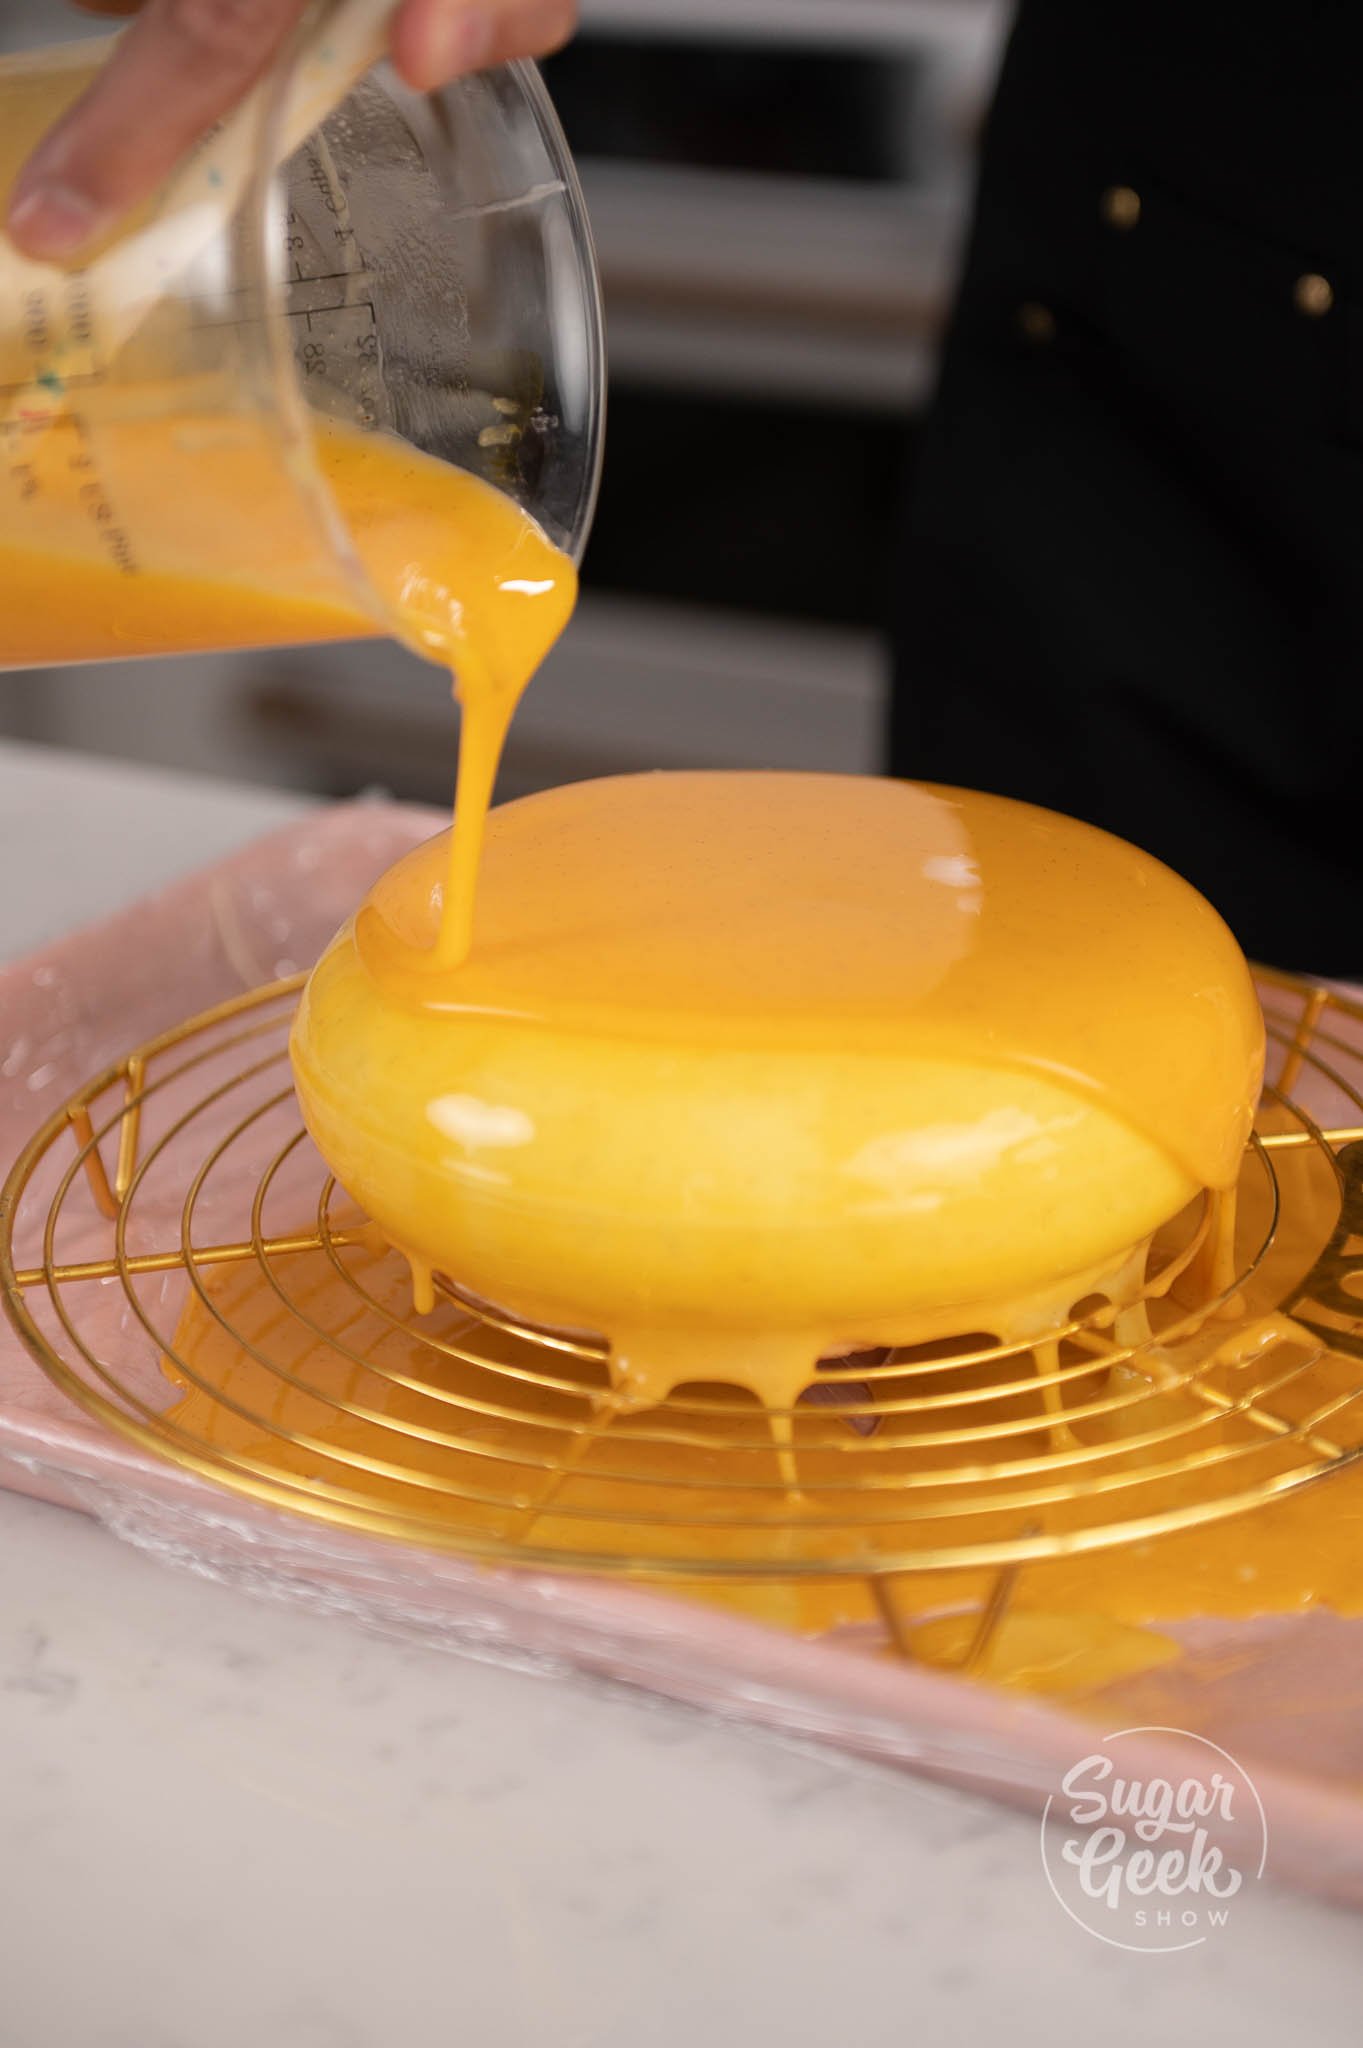
- Pour the orange glaze all over the cake right away.
- Switch to the yellow glaze and pour a little over the orange to create a marble affect.
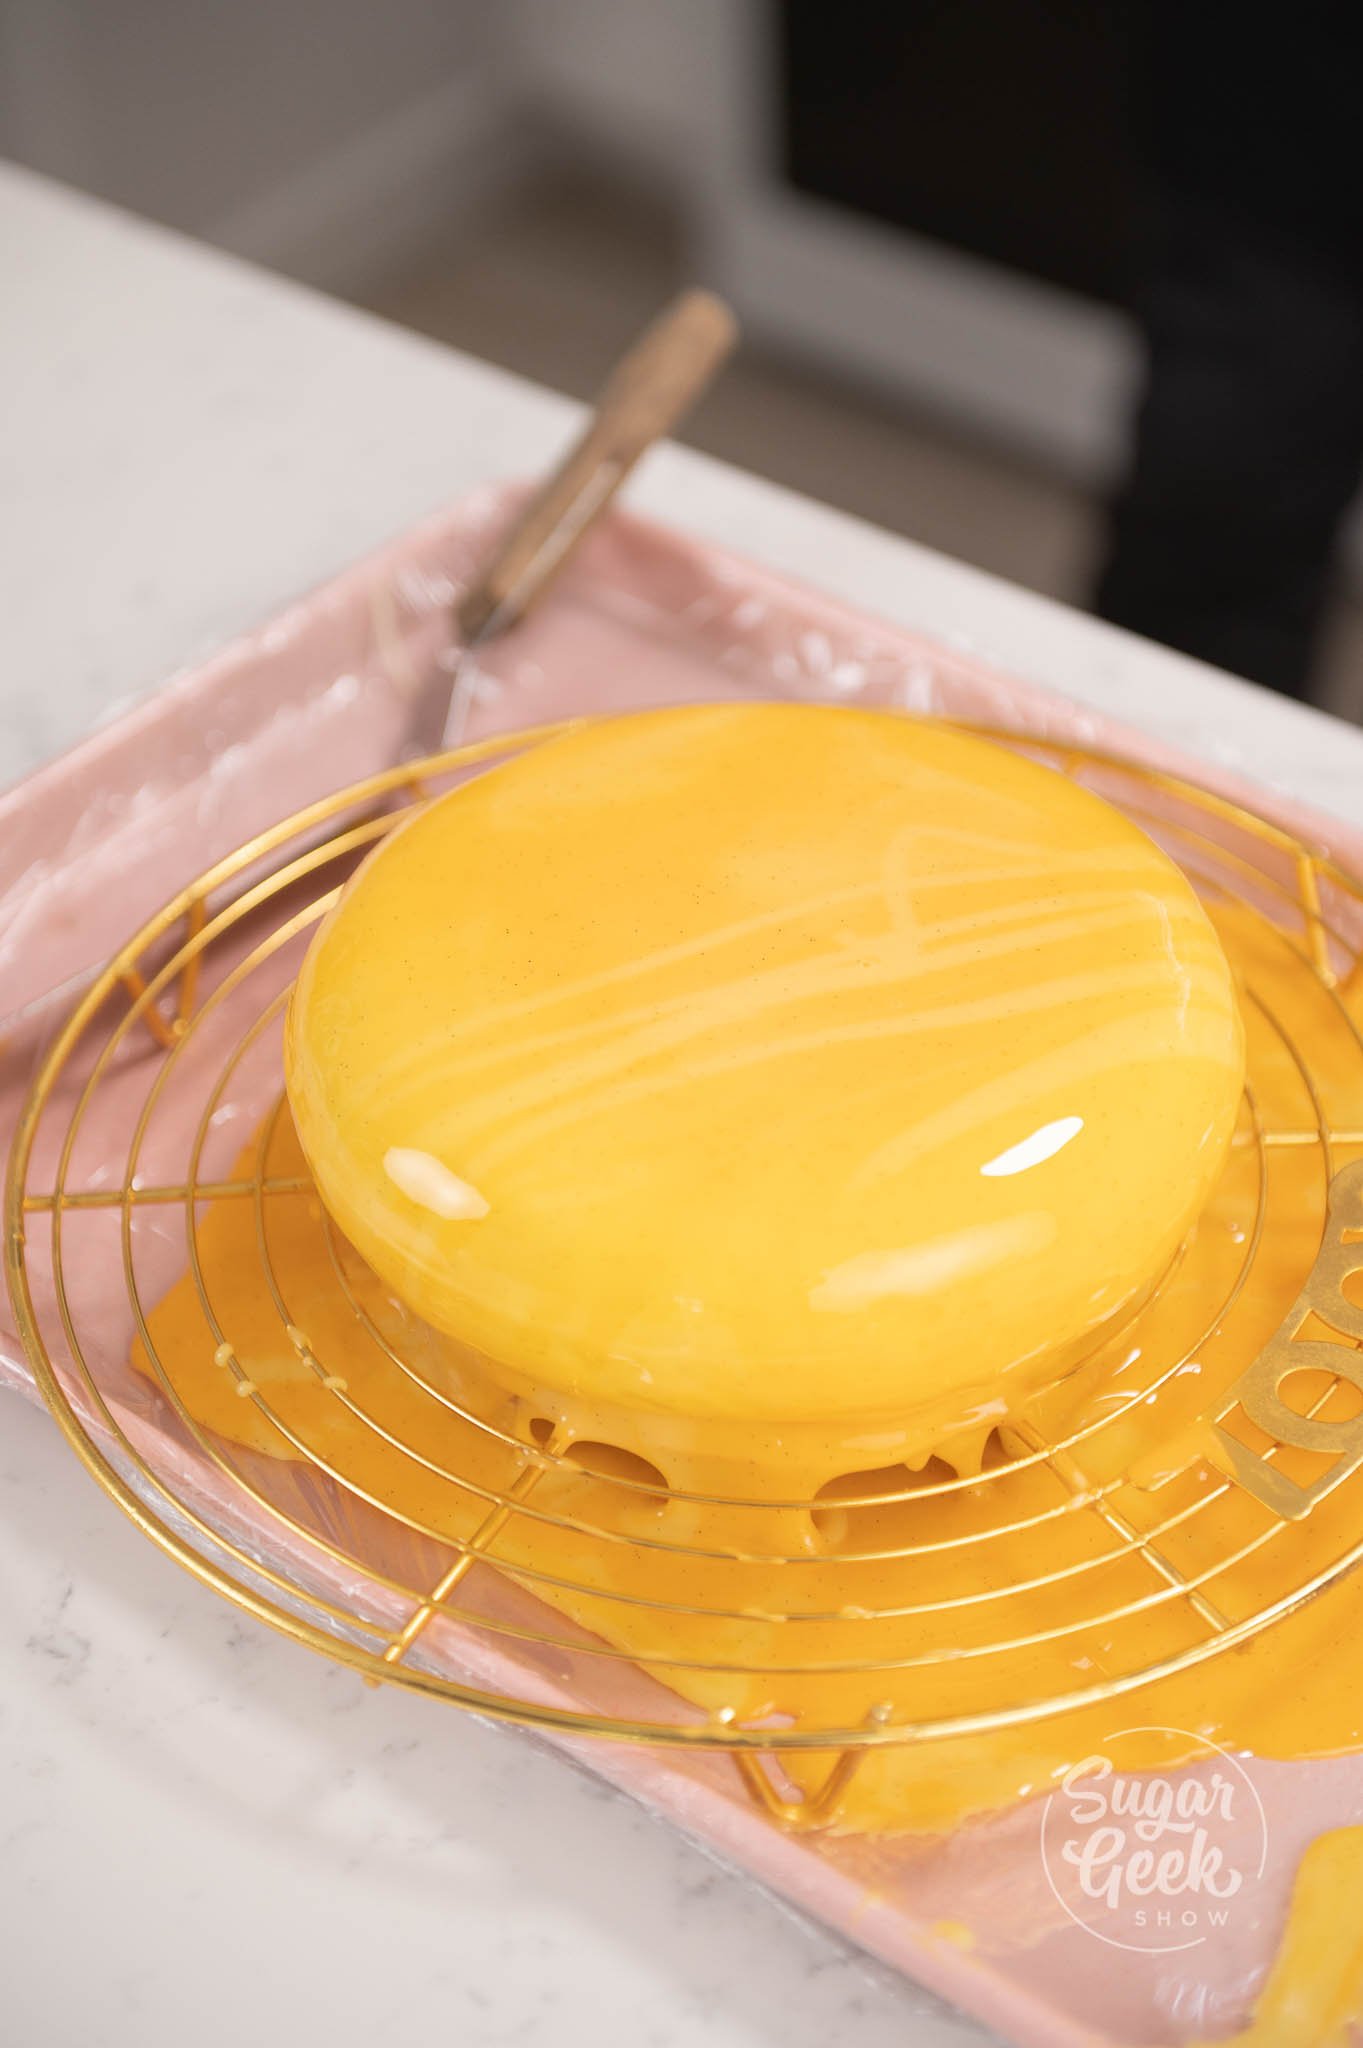
- Go back and forth with the glazes until you reach a desired marble affect.
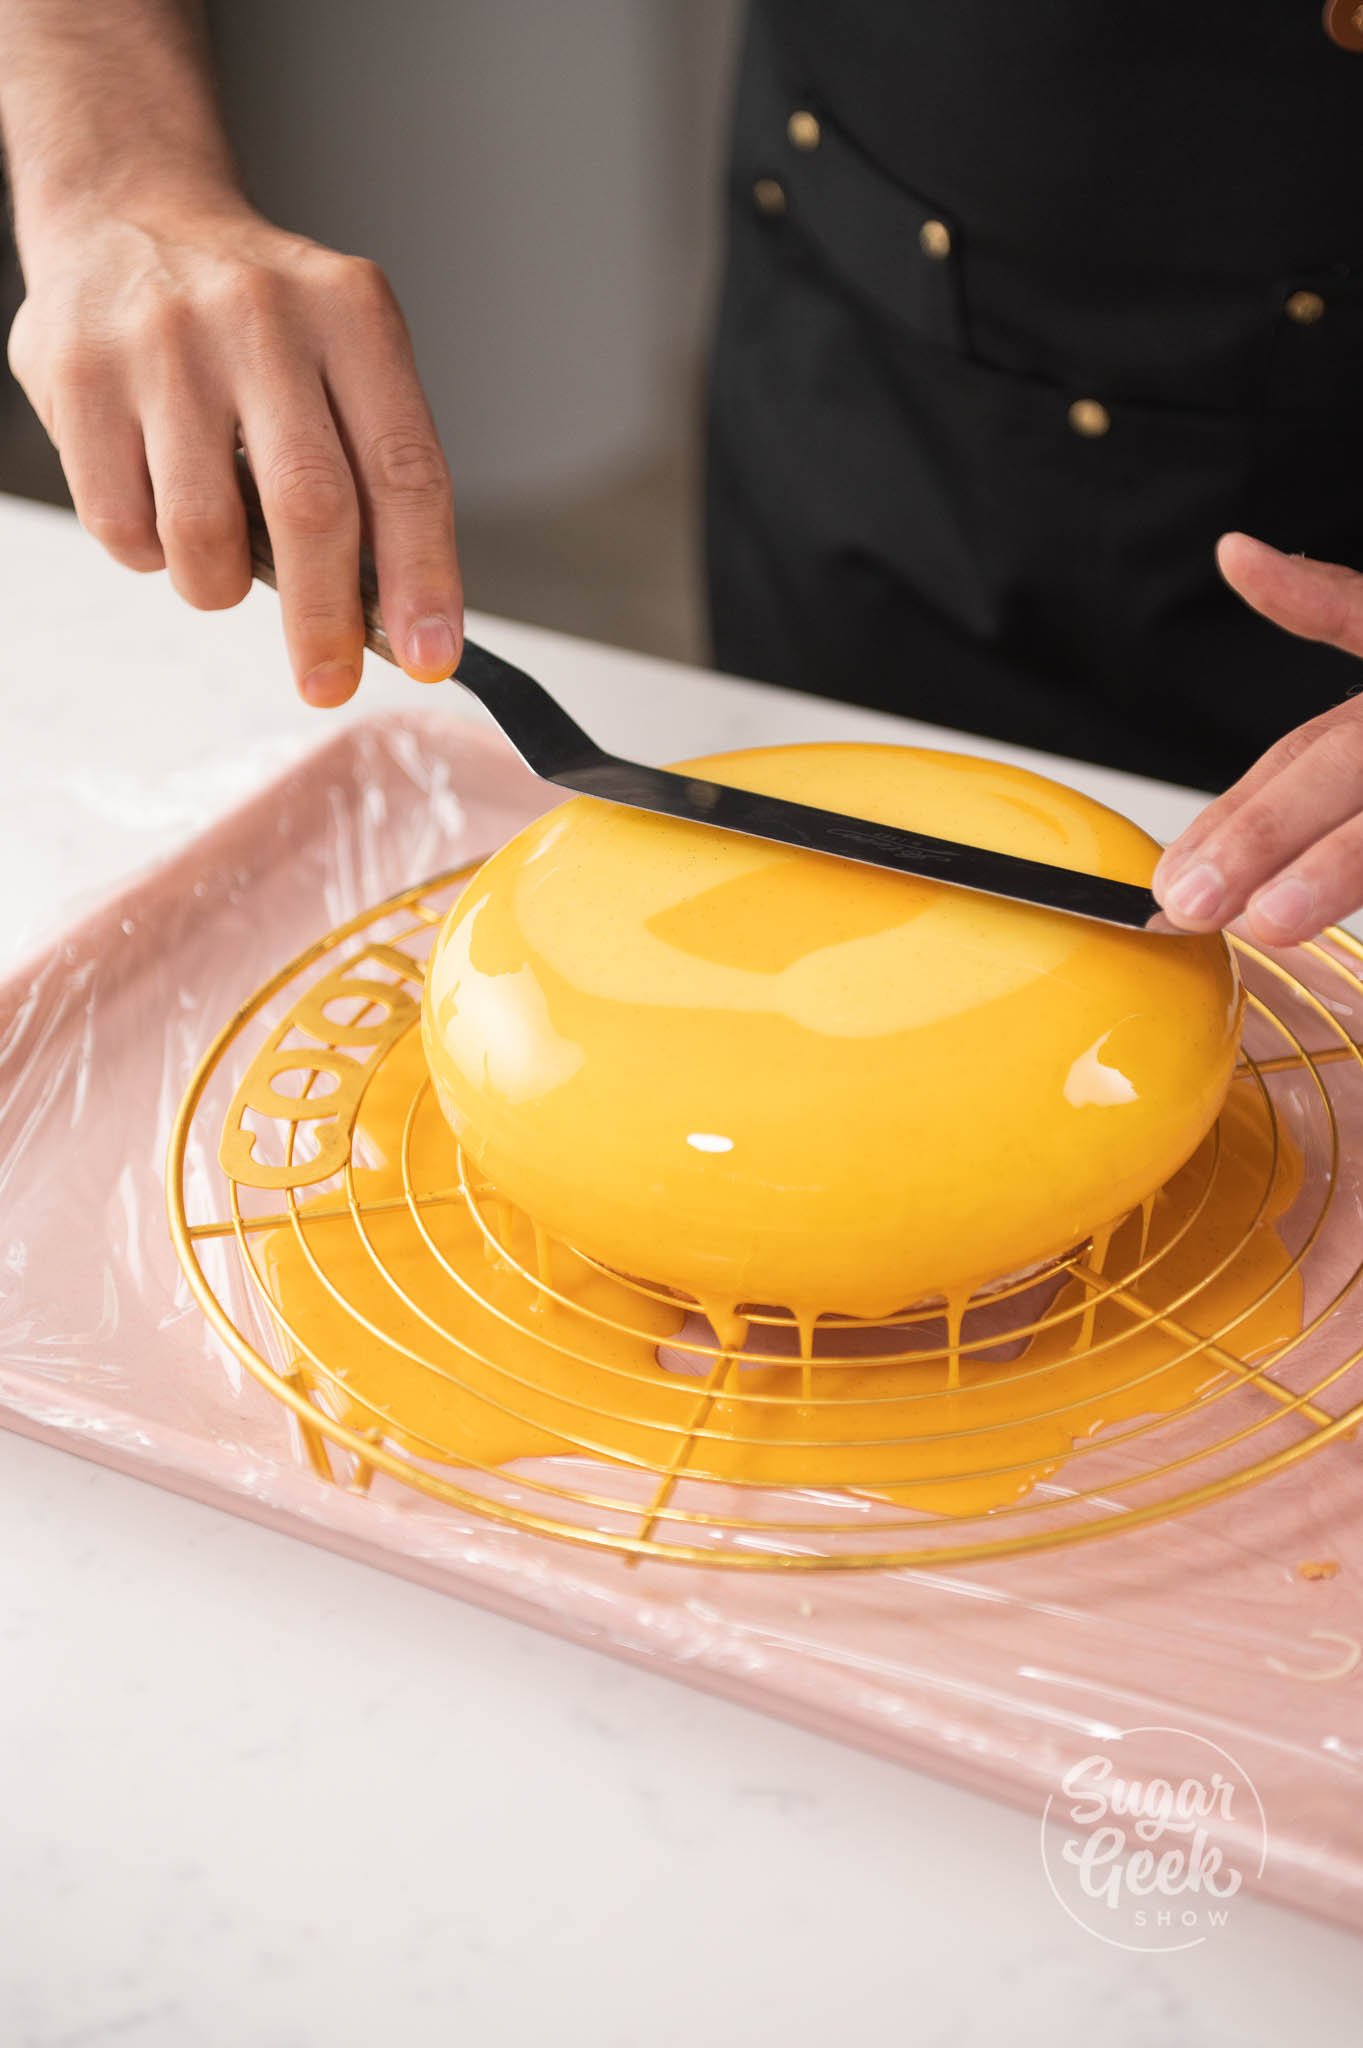
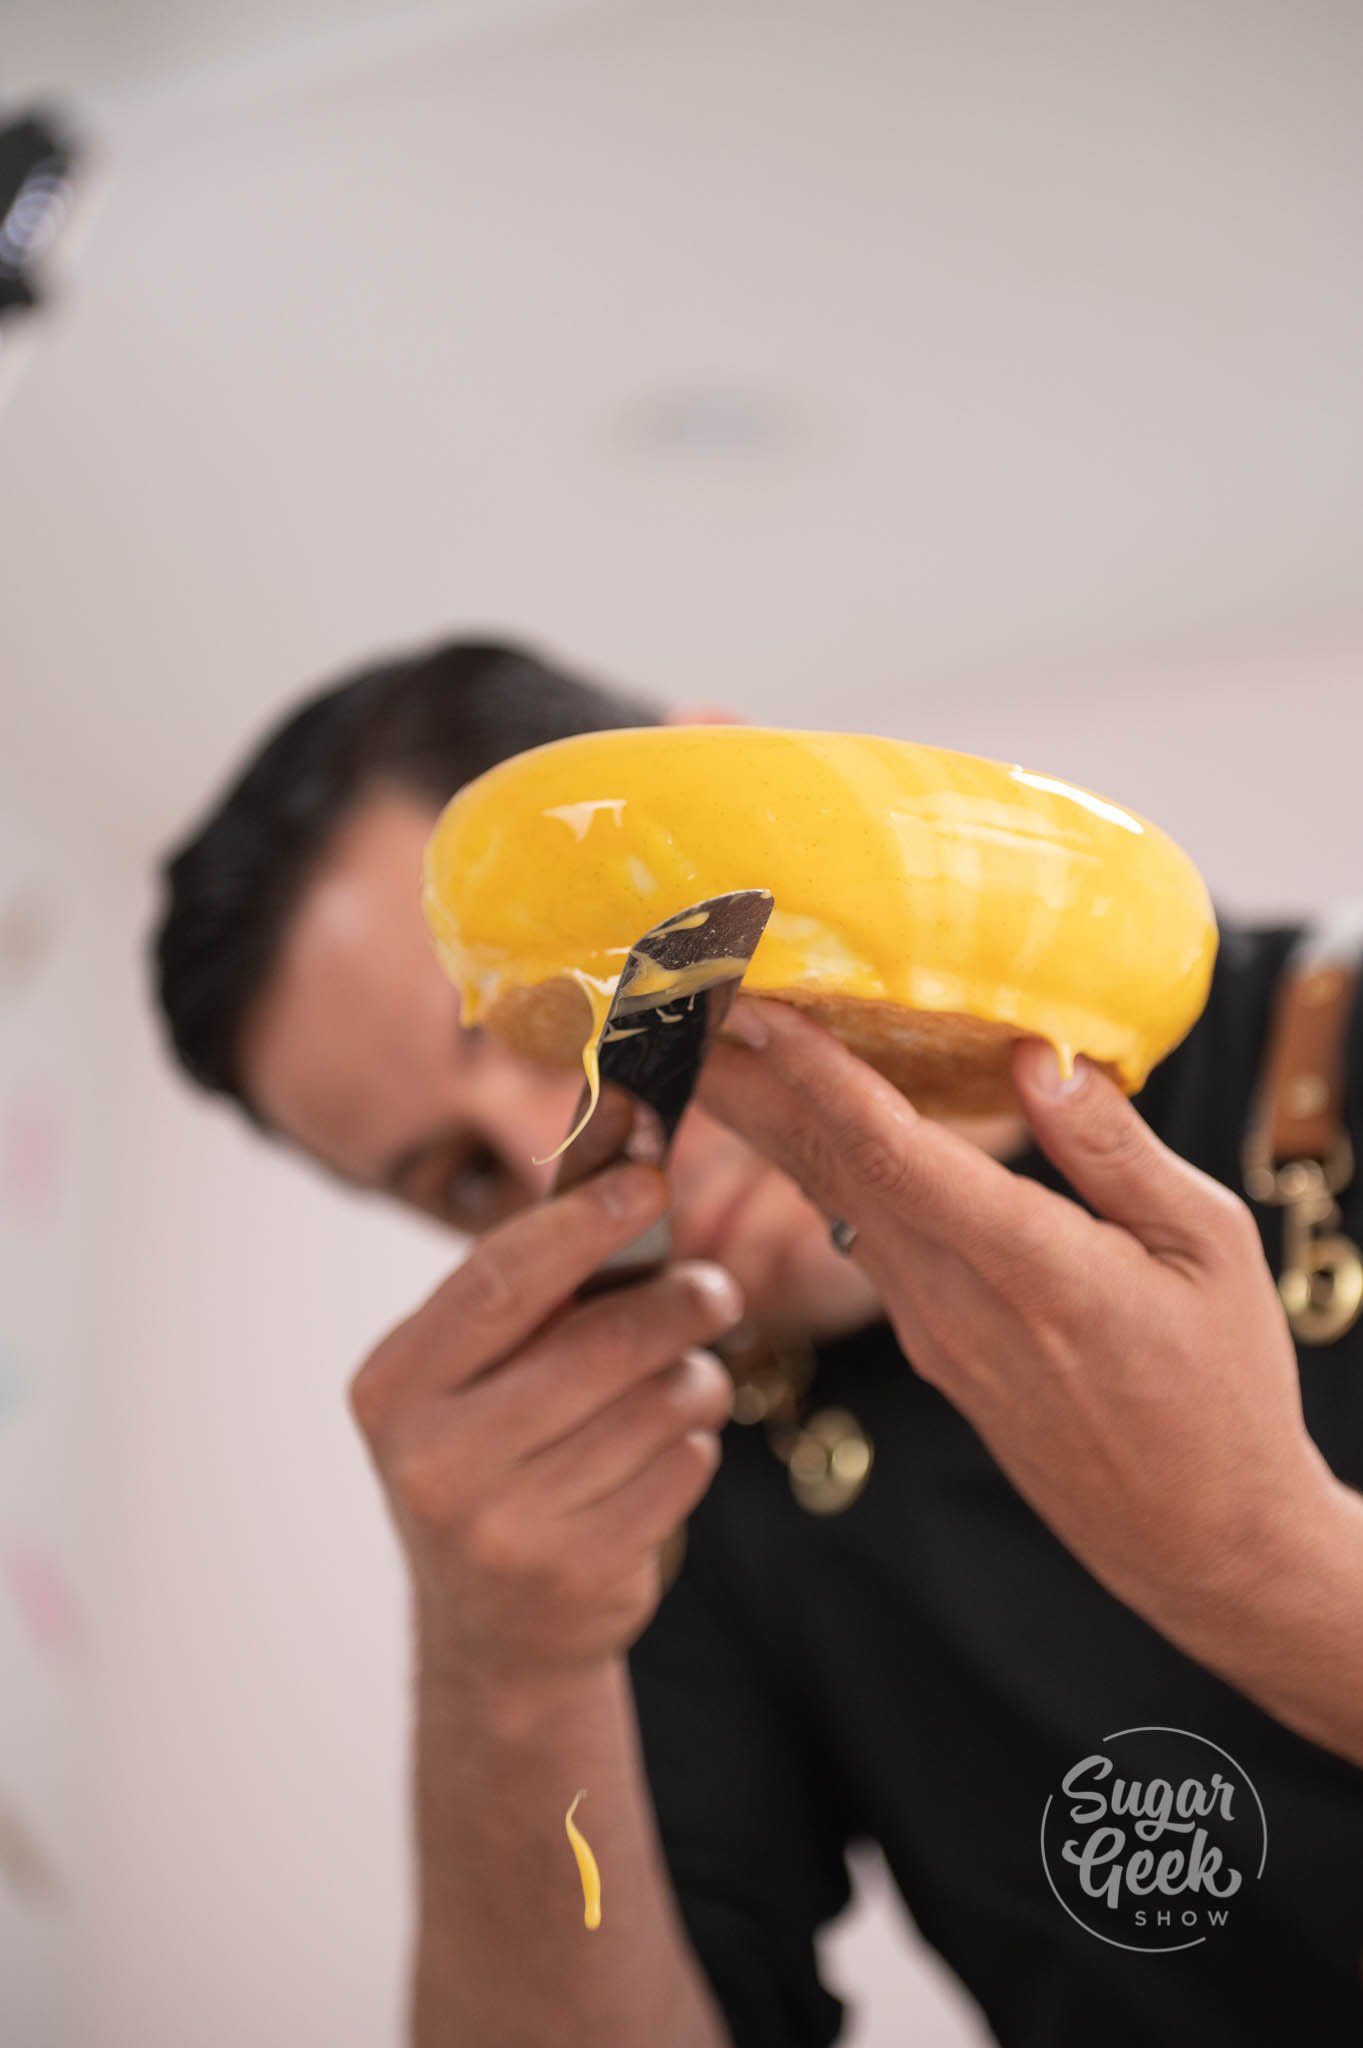
- Scrape off the access with a small offset spatula.
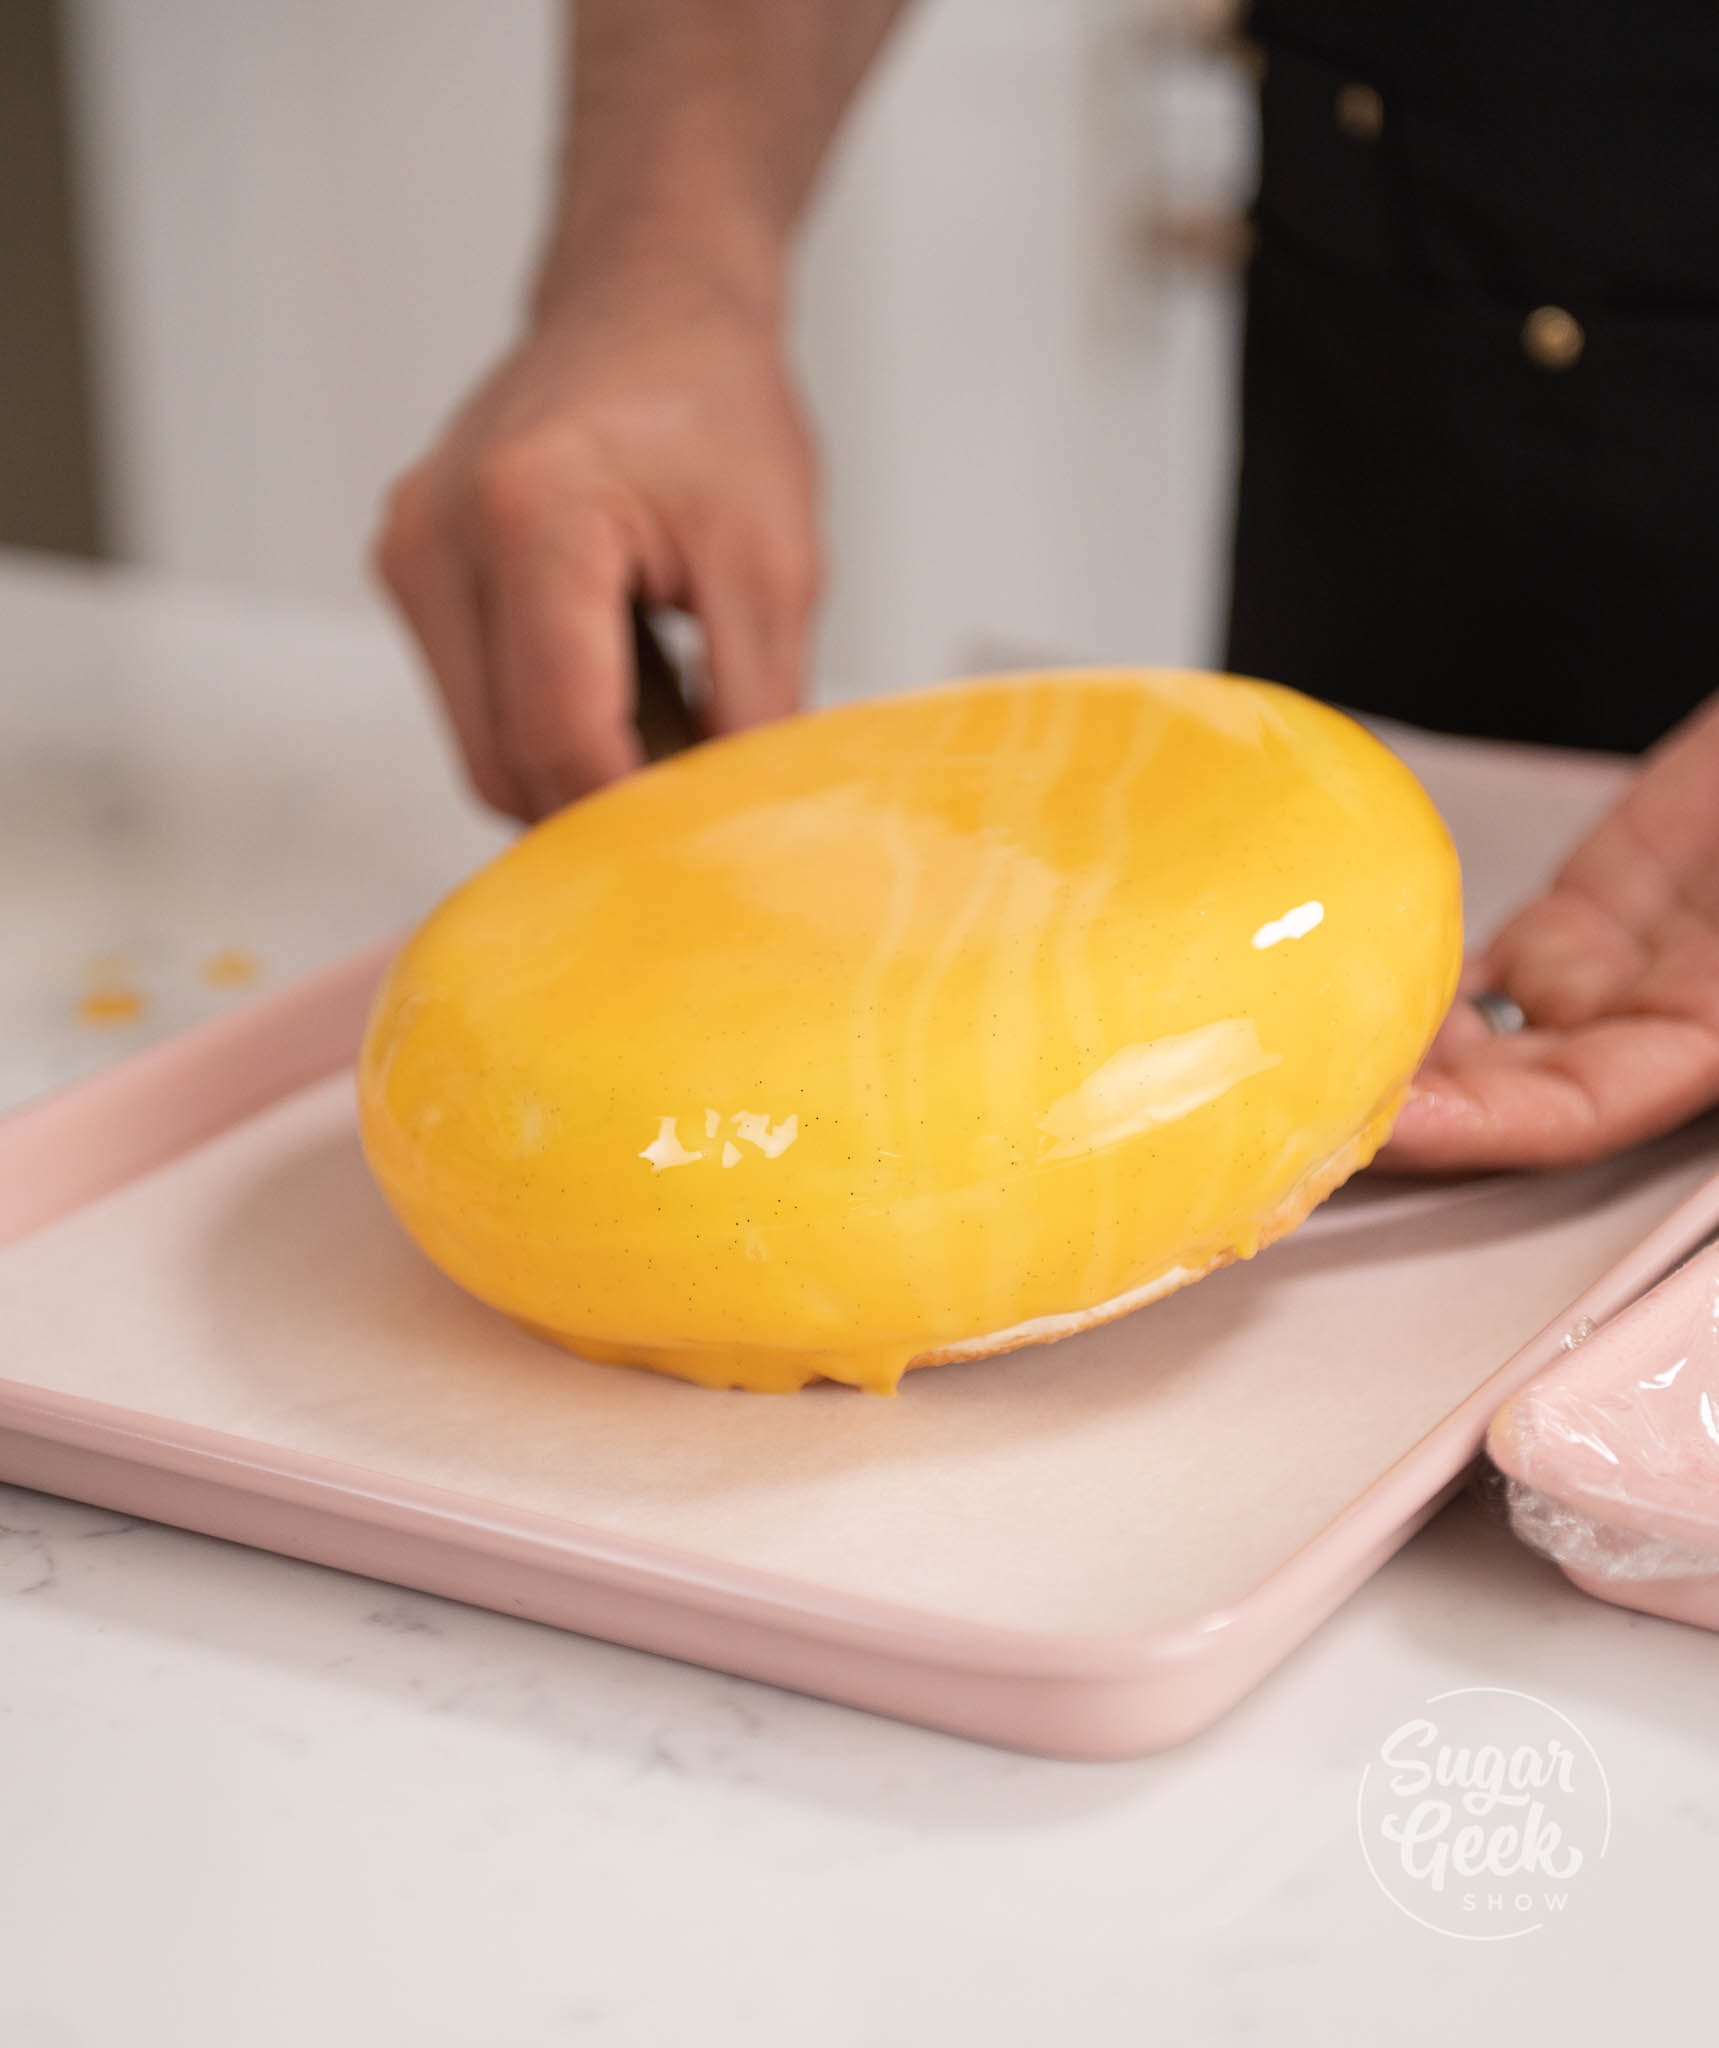
- Remove the cake from the cooling rack carefully with an offset spatula and scrape off the access underneath.
- Carefully place your cake on your desired plate.

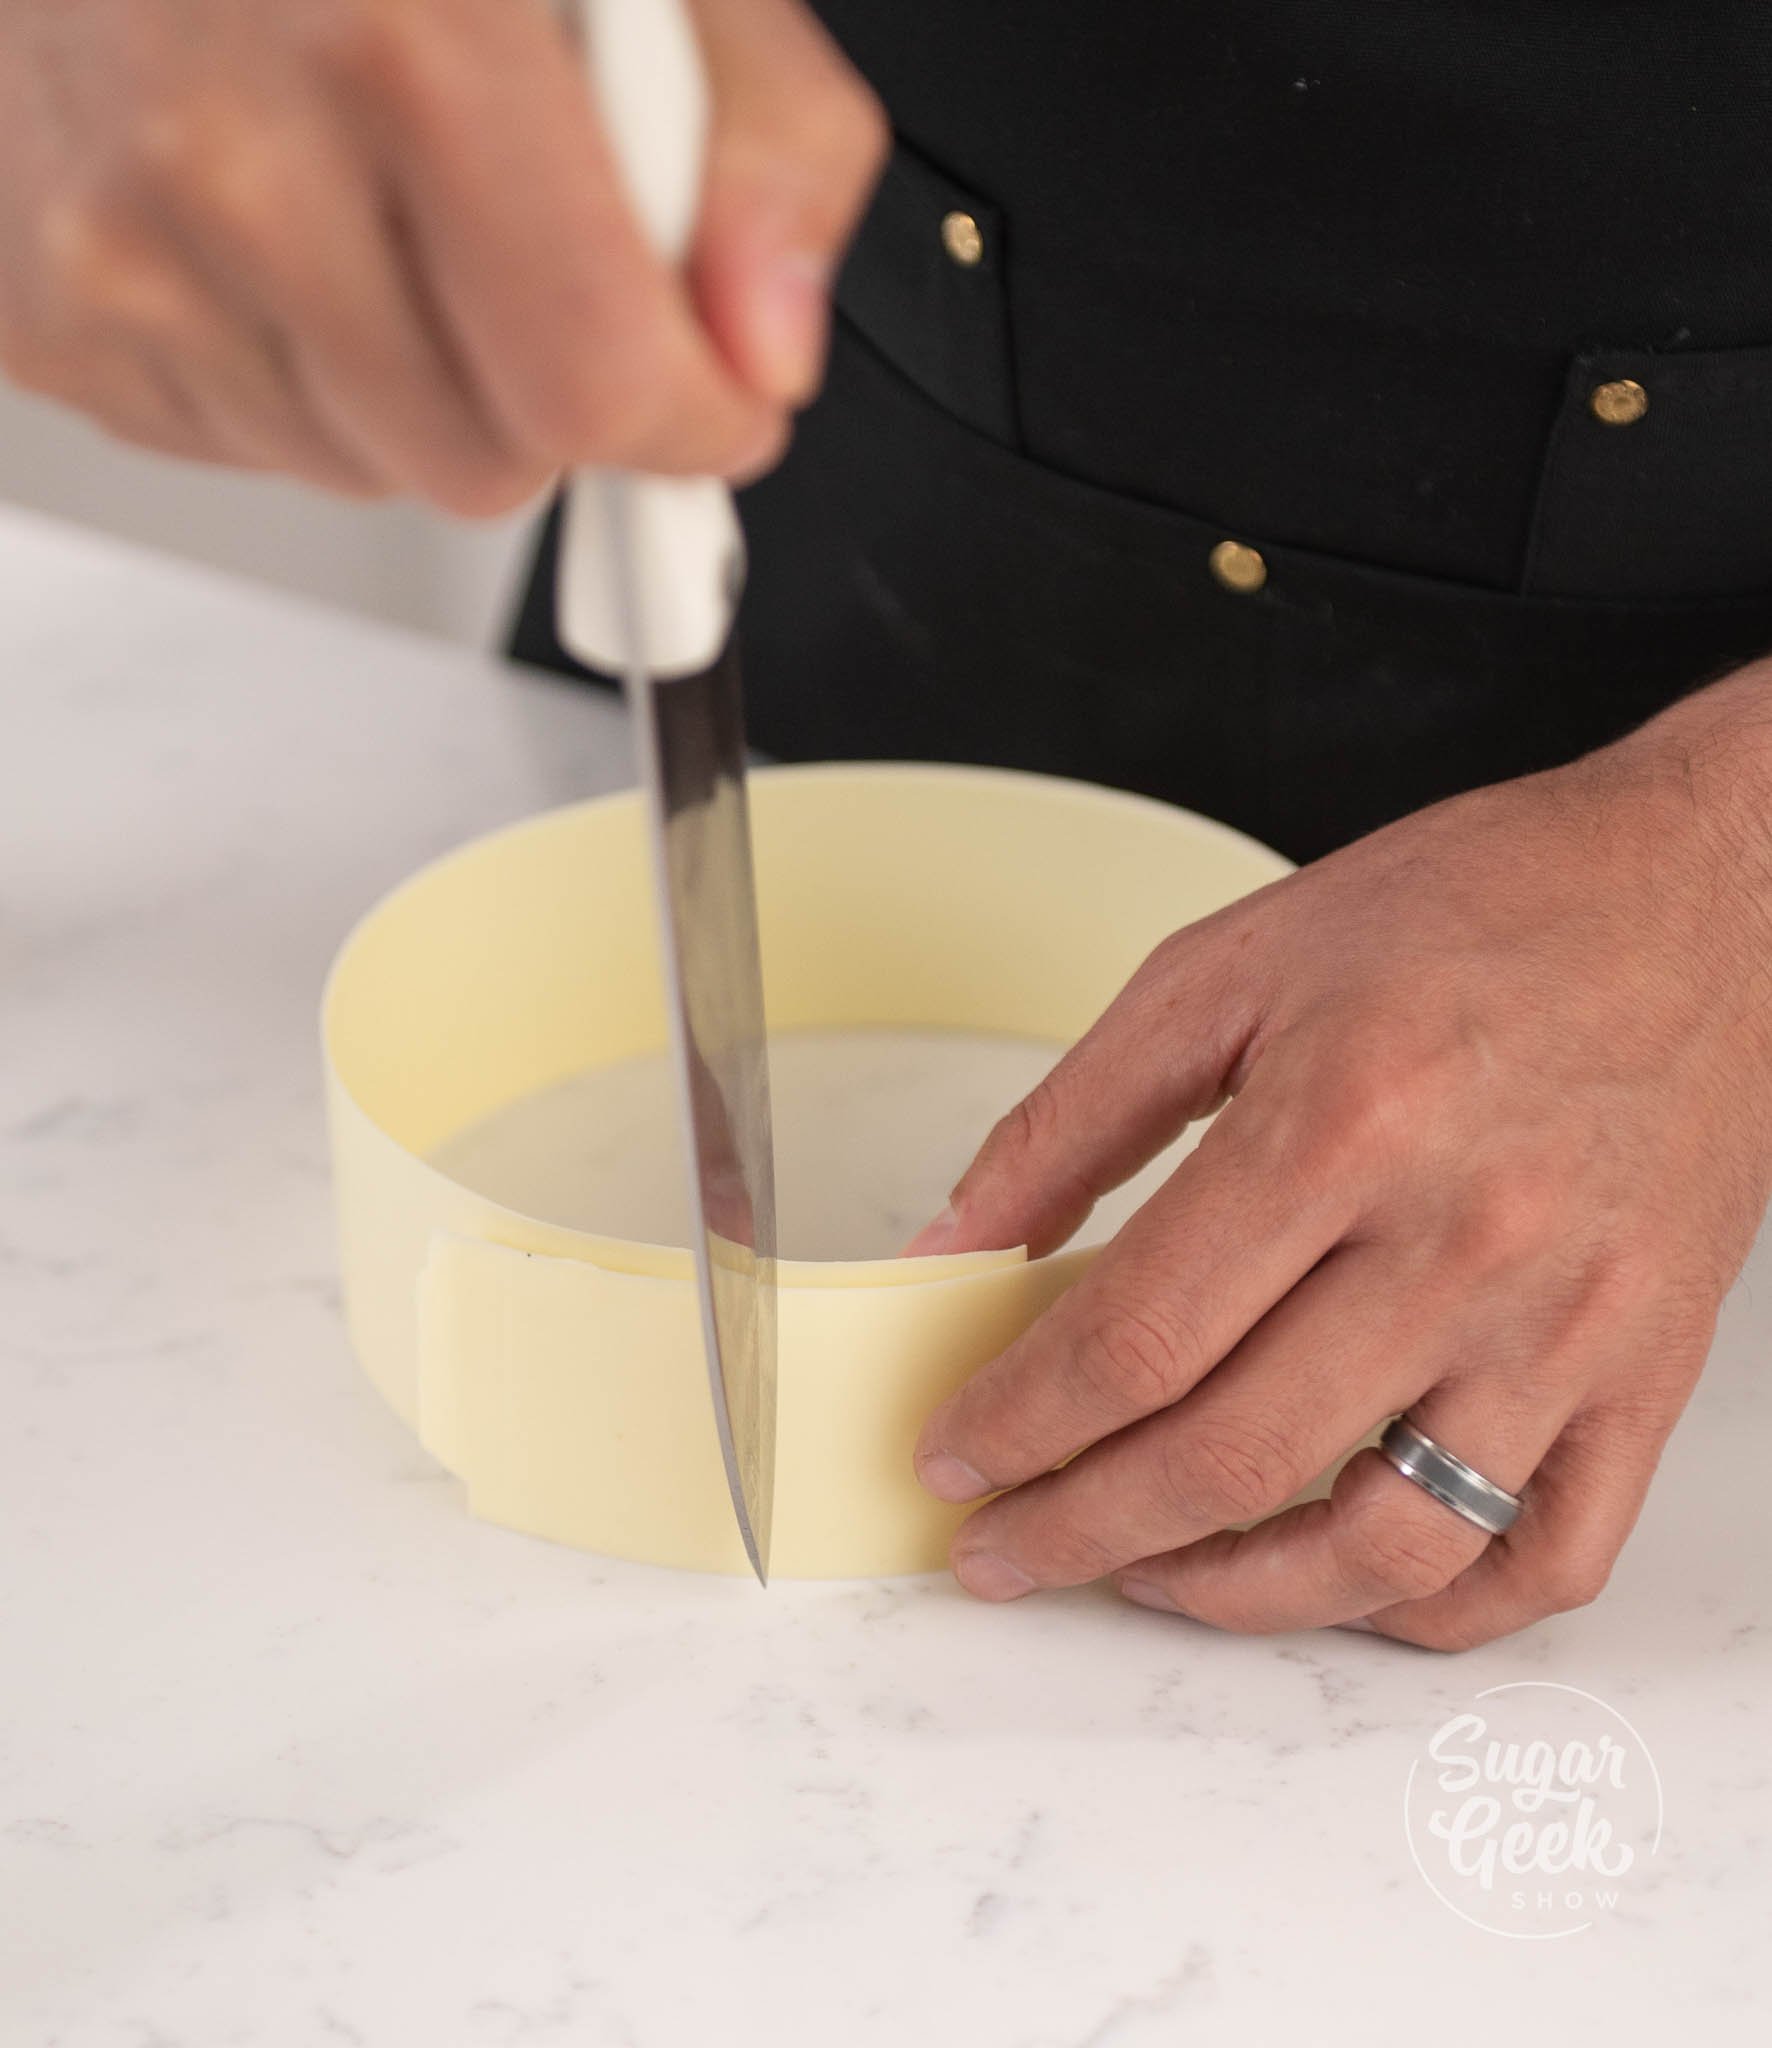
- Remove your white chocolate strips from the cake ring and remove the parchment from it.
- Cut a seam down the center with a hot knife.

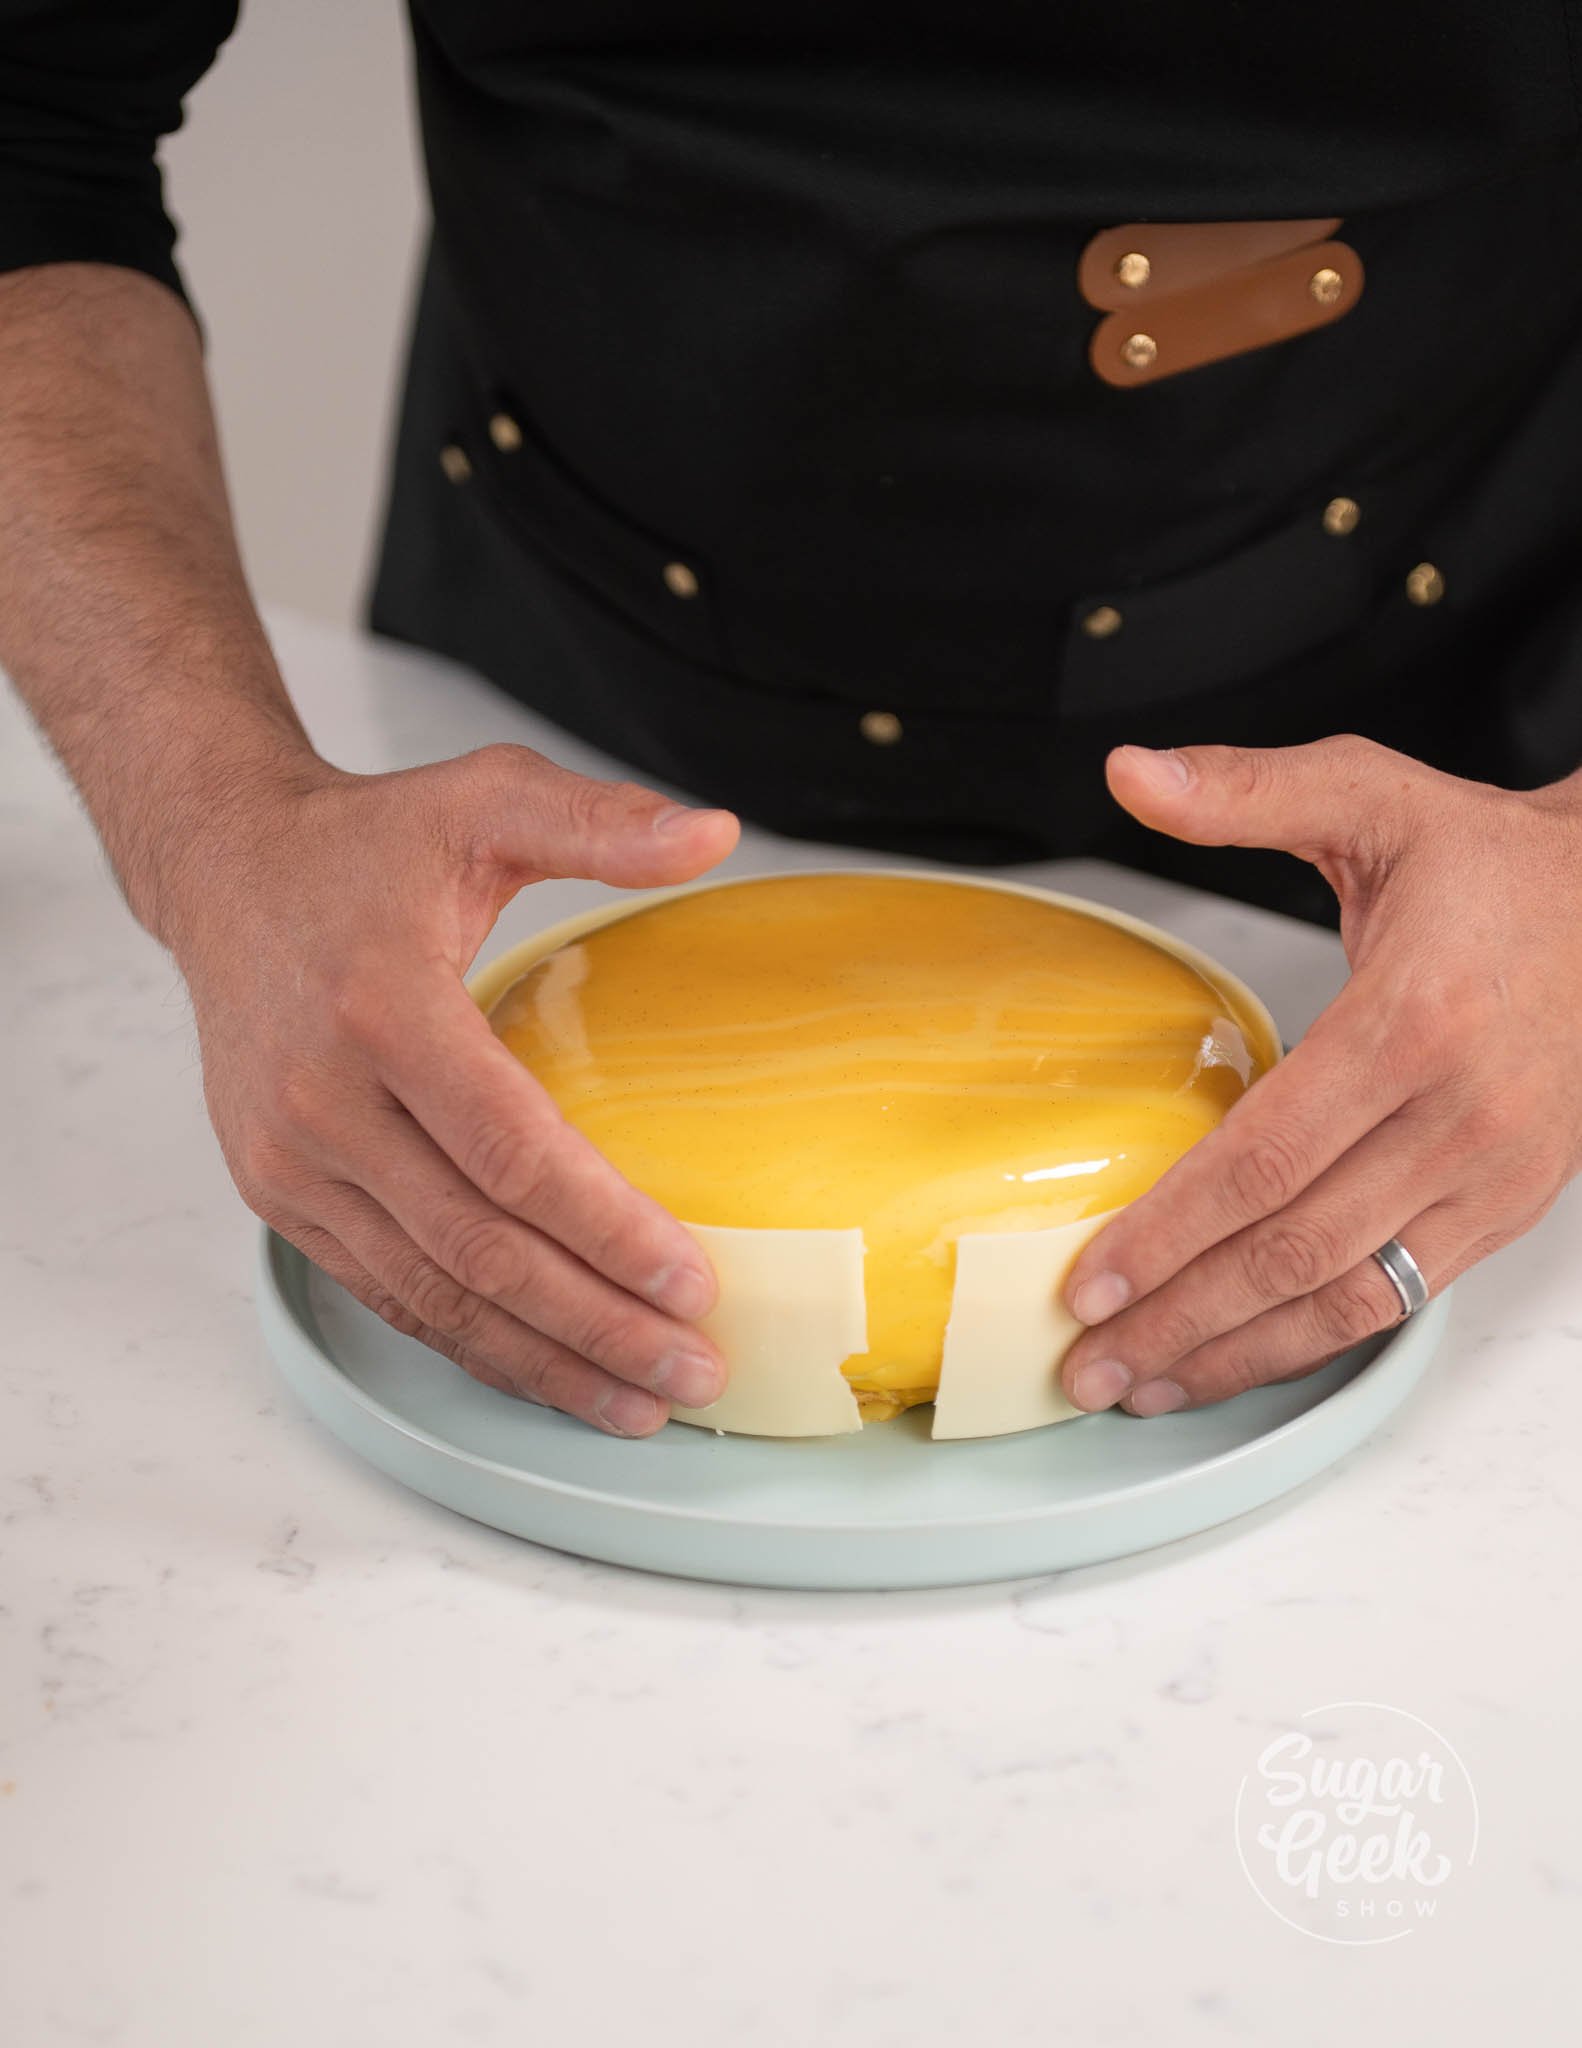
- Place the chocolate strip around the side of your cake making sure ends meet.

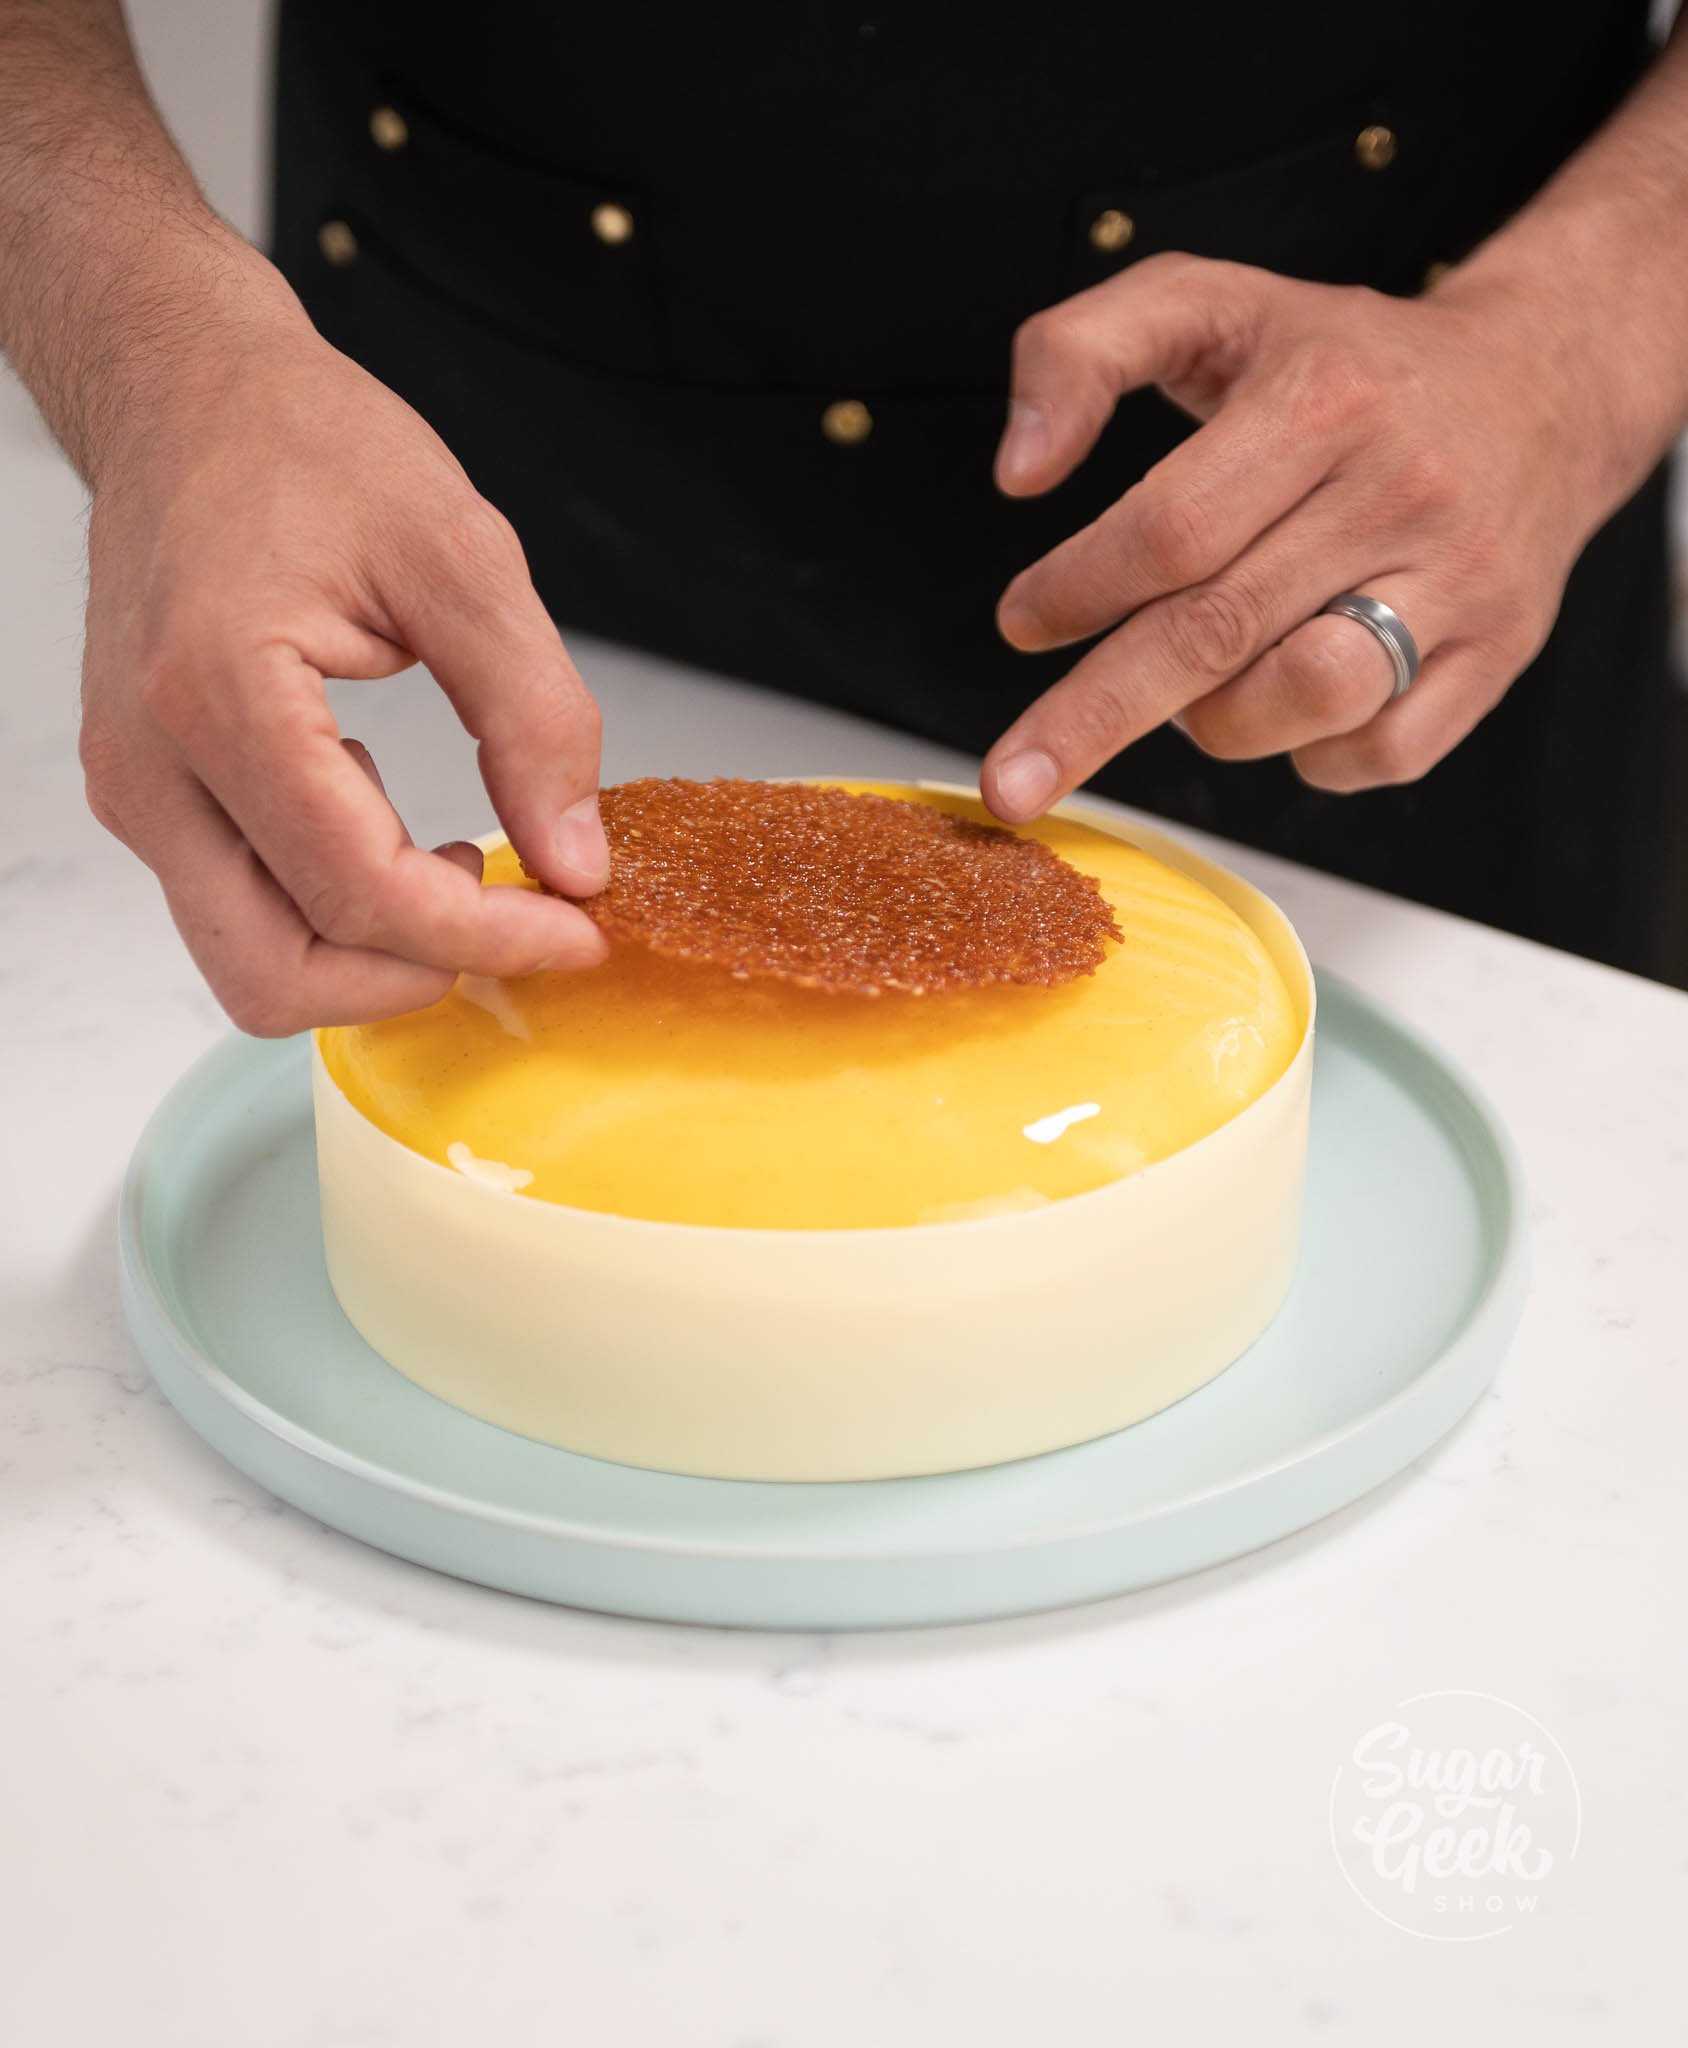
- Now place your disc of nougatine on top of the mousse cake in the center.

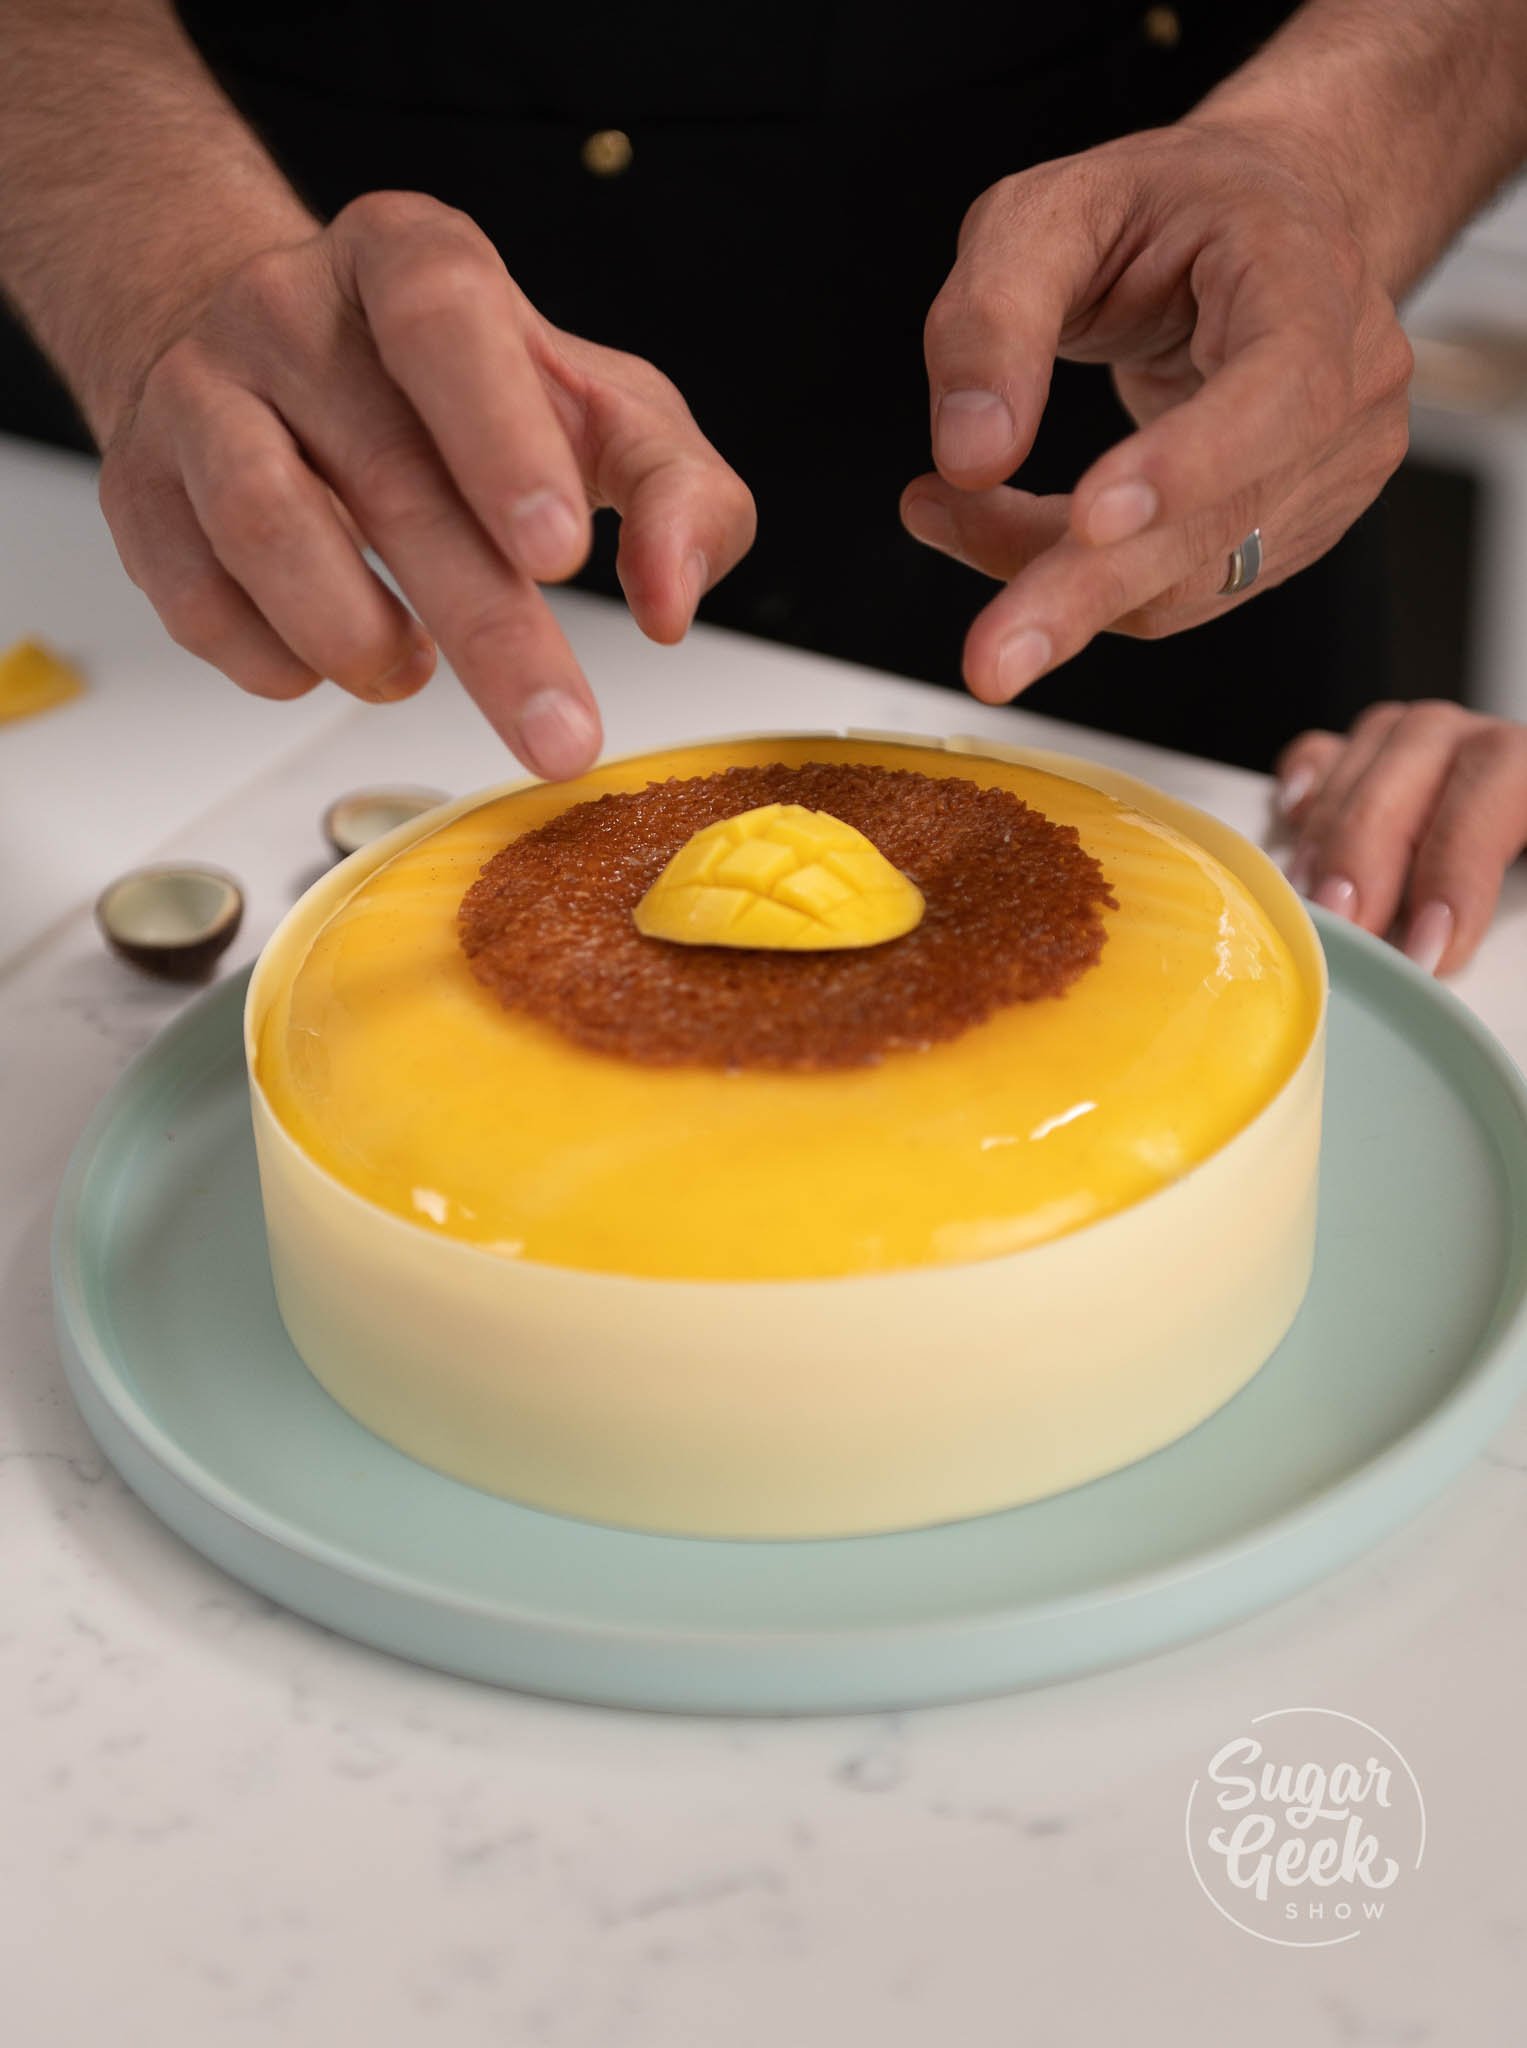
- OPTIONAL: Slice a small mango and use as a garnish.
- Place your chocolate coconuts on top and decorate with tropical flowers if you desire. Your mango mousse cake is now complete! You can let it come to room temperature and serve right away or keep in the fridge and freezer until you are ready to serve. Mousse cakes can stay in the freezer for many months.
FAQ
Yes you can you would just need to substitute any gelatin for vegetarian gelatin. Gelatin is the thickening agent so I'd recommend not skipping it out entirely.
It can be either. It will last longer in the freezer but if you are serving it a few days after making any mousse cake, it can stay in the fridge.
Puree is thicker and made from the blended fruits themselves, so using this would make for better flavor, but if you can't make your own juice will work. It will just be a little thinner and more sweeter.
They can last for about 2 weeks in the fridge and up to a couple months in the freezer.
More Recipes You'll Love
Recipe
Equipment
- 1 8" cake ring
- 1 Offset Spatula small
- 1 Acetate roll or sheets
- 1 ½" polycarbonate sphere mold
- 1 Immersion blender
- 3 silicone mousse cake molds
- 1 Entremet Mold
Ingredients
Mango Puree
- 400 grams diced mango fresh or frozen
- 2 tablespoons simple syrup
Mango Compote
- 200 grams fresh mango diced
- 20 grams sugar
- 2 grams pectin NH
- 2 grams vanilla extract or paste
- 50 grams mango puree
- 20 grams lime juice
- half lime zest
Mango Cremeux
- 170 grams cream
- 85 grams mango puree
- 30 grams sugar
- 50 grams egg yolks
- 3 grams gelatin sheets or powder
- 18 grams water mjore if using sheets
Coconut Dacquoise
- 75 grams egg whites
- 16 grams sugar
- ¼ lime zest
- 10 grams almond flour
- 50 grams powdered sugar
- 40 grams coconut flakes sweetened or unsweetened
Coconut Nougatine
- 15 grams sugar
- 0.5 grams pectin NH
- 15 grams glucose
- 27.5 grams butter unsalted
- 27.5 grams coconut flakes unsweetened
Coconut Mousse
- 7.5 grams gelatin sheets 200 bloom if using powder add 45 grams of water to soak in
- 62 grams egg yolks
- 45 grams sugar
- 312 grams coconut milk
- 300 grams heavy cream
- 1 teaspoon vanilla bean paste or extract
Mirror Glaze
- 205 grams water
- 415 grams sugar
- 415 grams glucose
- 26 grams condensed milk
- 25 grams powder gelatin
- 165 grams water
- 1-2 drops yellow gel food color
- 1-2 drops orange gel food color
Instructions
Mango Puree Step-By-Step
- To make your simple syrup, add your sugar and water into a small pot over medium heat. Bring it to a boil.
- Once the sugar syrup boils, take it off the heat and set it aside to cool down to room temperature.
- Once it's at room temperature, pour your syrup into a container and set it aside. You can also store this on your shelf for many months, so it never hurts to make a lot and keep it stored.
- Cut up your fresh mangos and dice them into chunks. Place the diced mangos into a blender or food processor.
- Add your simple syrup and blend everything together until it becomes a thin smoothie like texture.
- Strain the mix into a bowl or container to get rid of lumps and extra pulp. This makes the puree super smooth. Set this aside to use later.
Mango Compote Step-By-Step
- Mix your pectin and your sugar in a small bowl or container first. This helps prevent lumps in your compote.
- Add your mango puree into a medium-sized pot on medium heat. Bring it to a soft boil.
- When your mango puree starts to bubble, add in your diced mangos and vanilla extract. Constantly stir with a spatula to prevent scorching.
- Add in your vanilla, then your pectin and sugar mix. Keep stirring.
- Add in the lime juice.
- Keep stirring and cook your compote for about 5 minutes or until al dente (or until the fruit is soft, but still slightly firm in the center).
- Add in your lime zest, and give it a quick mix.
- Pour 150 grams into your silicone mold ( or fill your mold about halfway) and freeze it for at least 2 hours.
Making the Mango Crémeux
- Bloom your water and gelatin in a small bowl or container and leave to sit until the gelatin has fully absorbed the water. (3-5 min).
- Add in the mango puree, cream, and half of the sugar into a medium sized pot.
- Whisk your yolks and the other half of the sugar into a separate bowl until you reach the ribbon stage.
- Bring your mango mixture to a simmer over medium heat, whisking constantly to prevent burning and then remove it from the heat.
- Add ⅓ of the hot mango mixture to the egg mixture and whisk to prevent the eggs from curdling. This is called tempering.
- Pour the tempered yolk mixture back into your mango mixture while still on medium heat. Keep whisking.
- Add in your bloomed gelatin. If using sheets make sure to ring out the gelatin of extra water.
- Cook the crémeux for about 3-5 minutes or until the mixtures about ready to boil (Do not boil).
- When the crémeux is done, pour 200 grams into your mold on top of your frozen mango compote and freeze the mold overnight.
Coconut Dacquoise Step-By-Step
- Preheat your oven to 360º F (180º C).
- Add your egg whites into the bowl of your stand mixer with the whisk attachment. Whisk on low speed until the egg whites reach soft peaks.
- Add in your sugar and continue to mix until you reach medium peaks.
- Sift your powdered sugar, almond flour, and coconut flakes into a separate bowl.
- Add in ⅓ of your dry ingredients into your meringue along with the lime zest, then fold with a spatula.
- Add in the rest of your dry ingredients and keep folding. ( Do not overmix because the more you fold the more air you lose. More air equals more volume, so fold lightly).
- Prepare a piping bag with a medium round tip. Pour your batter into the piping bag.
- Pipe the batter into your mold starting from the center, moving to the outside of the mold in a spiral pattern. Hold the piping tip about ½" away from the mold so that you pipe in a thin layer. (Piping the batter helps create an even layer instead of pouring it straight in.)
- Bake for 16 minutes, or until the sponge is golden and bounces back when touching it.
- Place the sponge in the freezer right after baking or until you are ready to use it.
Coconut Nougatine Step-By-Step
- Preheat your oven to 325º F (162º C).
- If your coconut is not toasted, I recommend reading my tutorial on how to toast coconut first.
- Combine your sugar and pectin in a small bowl.
- Combine your butter, glucose, and sugar mixture into a medium sized pot over medium heat until it begins to simmer.
- Reduce your heat to low, then add in your coconut. Mix with a spatula until combined.
- Pour the nougatine onto a silicone mat and spread out with an offset spatula as thin as the coconut flakes are.
- Bake in the oven for about 10 minutes or until golden brown.
- Using a circle cutter of your choice, cut the nougatine right away. (once it cools down it will set and be too hard to cut).
- Brush the nougatine with a thin layer of melted cocoa butter using a pastry brush. This protects the nougatine from getting soggy. Set aside for decoration later.
Coconut Mousse Step-By-Step
- Add your cream into the bowl of a stand mixer with the whisk attachment. Whip to a soft-medium peak. ( Do not overmix.)
- Add in your coconut milk, and half of the sugar into a small pot over medium heat. (this prevents the coconut milk from burning).
- Add in your vanilla.
- Whisk the mix in the pot and bring it to a boil
- Add in your yolks and the other half of the sugar into a separate bowl. Whisk together until you reach a ribbon texture.
- Once your coconut milk mix is boiling, temper your yolks with some of the mix by pouring ⅓ of the hot mixture into the yolk mixture while whisking constantly. Pour everything back into the pot.
- Cook everything while whisking constantly until it reaches 176º F (80 º C) 2-5 minutes or until the mix no longer drips from your whisk.
- Add in your gelatin ( If using sheets don't add in the leftover water, just the sheets).
- OPTIONAL: Pour your mix into a separate bowl over ice to cool down the mix quickly to 20º-25ºC.
- While the mix is cooling down, un-mold your coconut dacquoise insert and your mango compote and cremeux insert. Place it back into the freezer until you are ready to assemble.
- Add in ⅓ of your whipped cream into your cooled coconut milk mix to make the mixture lighter. Whisk together.
- Lightly fold in the rest of your whipped cream using a spatula. Set it aside so the mousse can thicken. Once it becomes thick and fluffy it's ready to use.
Assembling The Mango Mousse Cake
- When the mousse is set, prepare a piping bag, and pipe the mousse about ⅓ of the way full into the bottom of your silicone entremet mold.
- Using a spatula spread the mousse around all the sides and to the top edge of the mold.
- Take the mango compote and cremeux insert out of the freezer and push the frozen insert into the mousse until it's about ½" below the top edge of the mold.
- Cover the top of the insert with a super thin layer of mousse.
- Take out the coconut dacquoise and place that on top of the mango compote insert. Trim away any excess sponge.
- Place the whole entremet in the freezer to set overnight or minimum of 6 hours.
Mirror Glaze Step-By-Step
- Soak your gelatin in your cold water ( blooming). Let it absorb for 1-2 minutes and set aside for later.
- Pour in your water, corn syrup, and sugar into a medium sized pot over medium heat.
- Bring the syrup to 222º F (106º C). ( This may take about 10-15 minutes)
- Place your condensed milk, and vanilla bean into a tall container. The shape and size is important for mixing without getting any extra air into the mix.
- Pour your hot syrup over the vanilla and condensed milk.
- Add in your gelatin.
- Blend the glaze until it becomes super smooth and combined using an emulsion blender. See the video below for tips on how to avoid adding in air bubbles.
- Add one or two drops of your yellow color and about ¼ teaspoon of white food coloring and keep blending.
- Pour half of the yellow glaze into a separate container, then add one or two drops of orange color to give it a tropical orange color.
- Strain your glaze with a strainer so you get rid of any lumps.
- Cool the glazes and use at 76-77º F ( 24-25º C). (Pro Tip: You can use an ice bath to cool down the glazes quickly)
Preparing the Entremet For Glazing
- When it is completely frozen, take the entremet out of the mold, and place it on a cooling rack on top of a pan lined with plastic wrap to catch the glaze. Place everything back in the freezer until you are ready to glaze. It's very important that your entremet is as cold as possible before glazing.
- While the entremet is in the freezer, create your chocolate decor.
Creating the Chocolate Decor
- Temper a small bowl of white chocolate, and in a separate bowl temper some dark chocolate. ( If you don't know how to temper, you can check out my post on How To Temper Chocolate. )
- Cut some strips of acetate about the length of your mango mousse cake. You only need one but it is good to have extra in case you make a mistake.
- Pour your white tempered chocolate over the sheets of acetate.
- Place a strip of parchment on top of the melted chocolate. This will prevent the chocolate from sticking to your cake ring.
- Wrap the chocolate strip around a cake ring similar to the size of your mango mousse cake.
- Make sure the two ends overlap and tape the ends together.
- Next, prepare a piping bag and fill it with some tempered dark chocolate.
- Pipe chocolate into your polycarbonate mold cavities. Fill each cavity to the top and give the mold a few taps to pop air bubbles and make sure the chocolate reaches every part of the cavity. You only need to make two or as many as you'd like.
- Once you fill your cavities, place some parchment underneath the mold and flip the mold over to dump out leftover chocolate.
- Tap the sides of the mold with a bench scraper or spatula to remove all the access chocolate.
- Scrape the excess chocolate off the mold with a scraper to enure the chocolates will have flat edges.
- Place the mold upside down on parchment and leave to set.
- Once the dark chocolate is set, repeat the process with the white chocolate to create a coconut shape making sure to pour the white chocolate into the dark chocolate. Leave to set again.
- Un-mold the chocolate shells. Then using a warm plate or bottom of a small pot, warm the bottom edges of the bon bons to clean up the bottom and smooth it out.
- Take a wire brush to create small lines and rough edges on the coconut shells.
- Place the white part of the coconut in some coconut flakes. You can now glaze and decorate your cake.
Decorating and Glazing the Mango Mousse Cake
- Double Check your orange and yellow glazes are both at 76-77º F ( 24-25º C). If it's too cold the glaze will set before covering the cake, and if it's too warm it will melt your mousse.
- Take your mango mousse cake out of the freezer making sure it's on a cooling rack.
- Pour the orange glaze all over the cake right away.
- Switch to the yellow glaze and pour a little over the orange to create a marble effect.
- Go back and forth with the glazes until you reach a desired marble effect.
- Scrape off the excess with a small offset spatula.
- Remove the cake from the cooling rack carefully with an offset spatula and scrape off the access underneath.
- Carefully place your cake on your desired plate.
- Remove your white chocolate strips from the cake ring and remove the parchment from it.
- Cut a seam down the center with a hot knife.
- Place the chocolate strip around the side of your cake making sure ends meet.
- Now place your disc of nougatine on top of the mousse cake in the center.
- OPTIONAL: Slice a small mango and use as a garnish
- Place your chocolate coconuts on top and decorate with tropical flowers if you desire. Your mango mousse cake is now complete! You can let it come to room temperature and serve right away or keep in the fridge and freezer until you are ready to serve. Mousse cakes can stay in the freezer for many months.
Video
Notes
- This is a 3-day dessert! On day 1, you will prepare the compote, cremux, and nougatine ( the nougatine can be made any day). On day 2, you will prepare the dacquoise, and the mousse. On Day 3 you will make the glaze and finish the entremet. and finish the entremet.
- Weigh your ingredients to avoid failure. Using a kitchen scale for baking is super easy and gives you the best results every single time.
- Make sure all your cold ingredients are room temperature or slightly warm (butter, milk, eggs, to create a cohesive batter. Curdled batter causes cakes and fillings to collapse or split.
- Practice Mise en Place (everything in its place). Measure out your ingredients ahead of time and have them ready before you start mixing to reduce the chances of accidentally leaving something out.
- Make sure inserts are completely frozen before adding your next layer. They should freeze for a minimum of 6 hours.


Amy McCutchan says
Hey Liz!
Not sure if you will see this, but what size entremet and mousse mould did you use?
Liz Marek says
I think it was 9"