


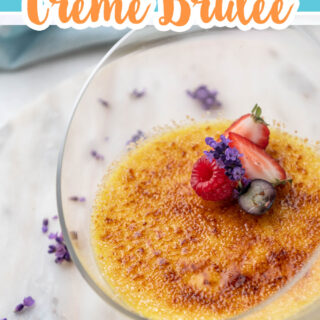

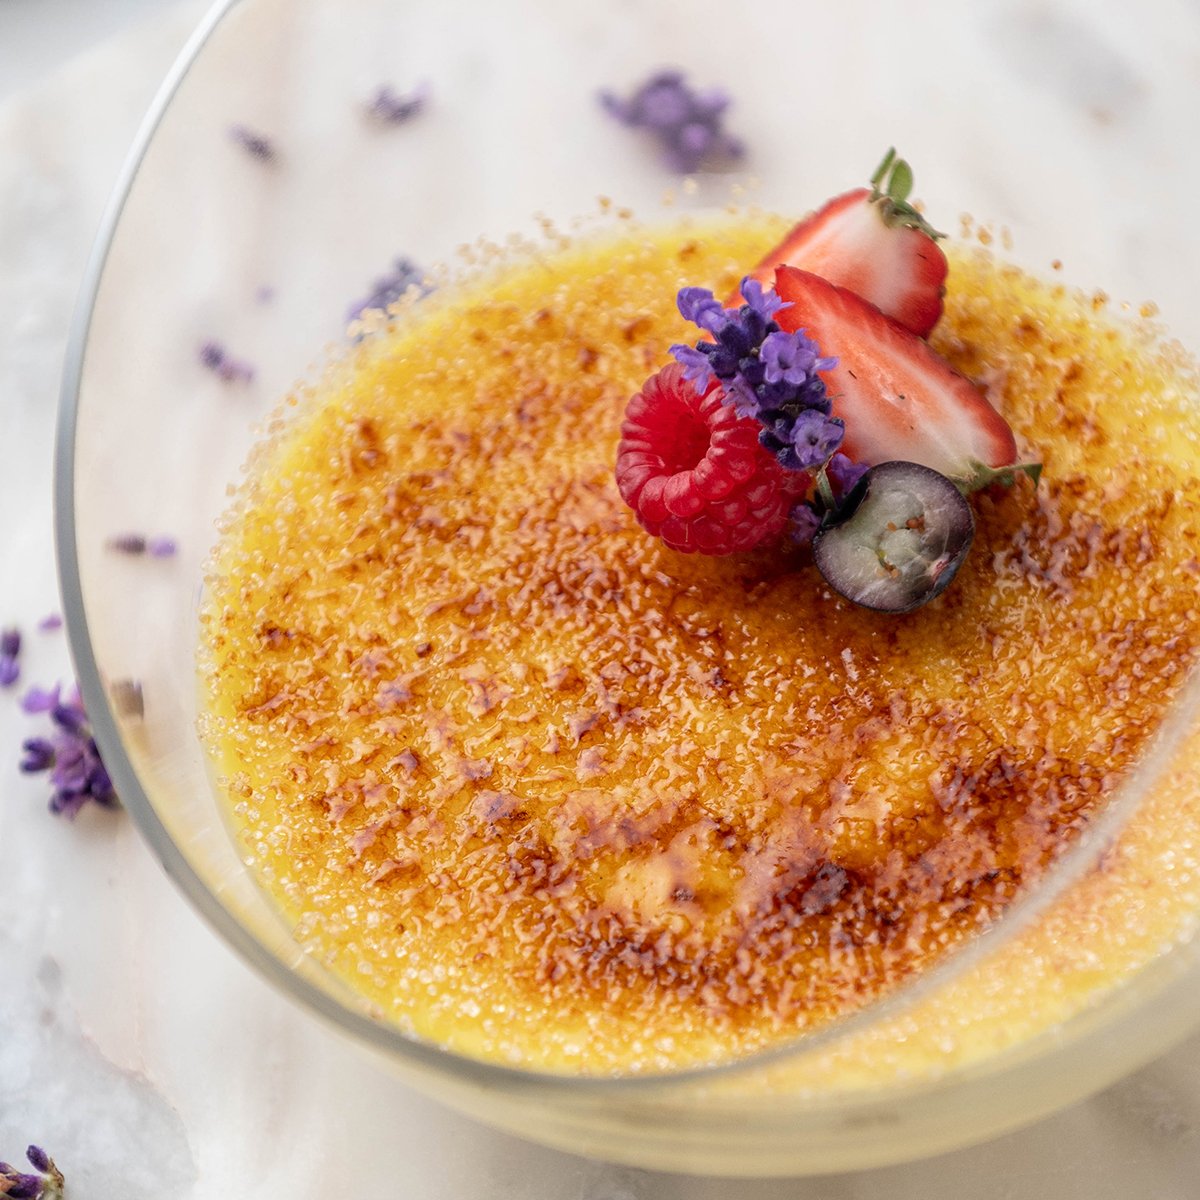
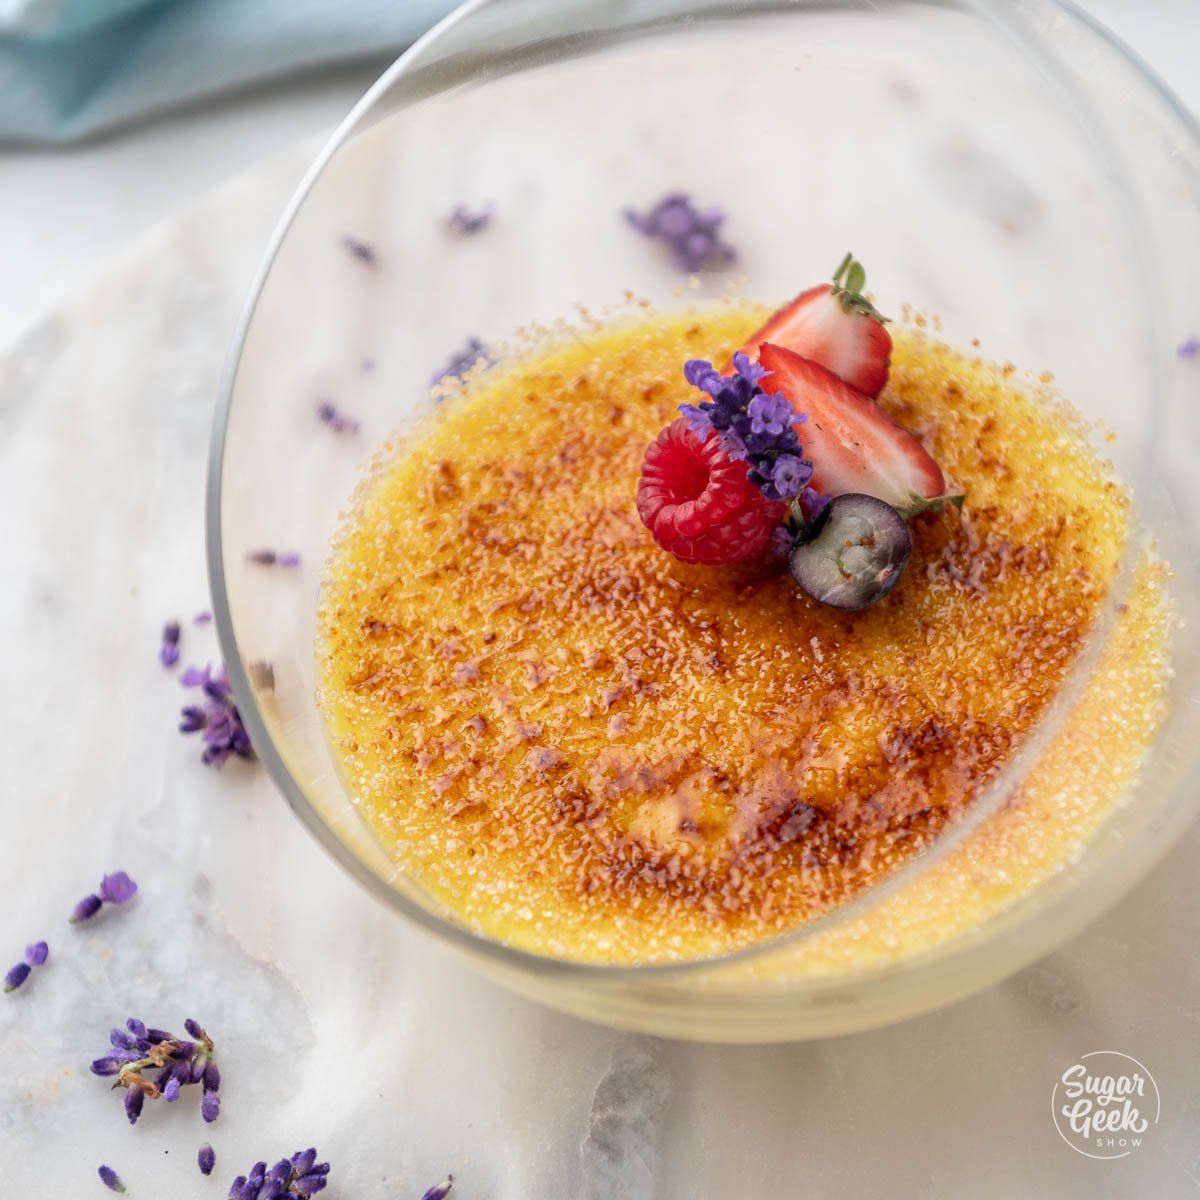
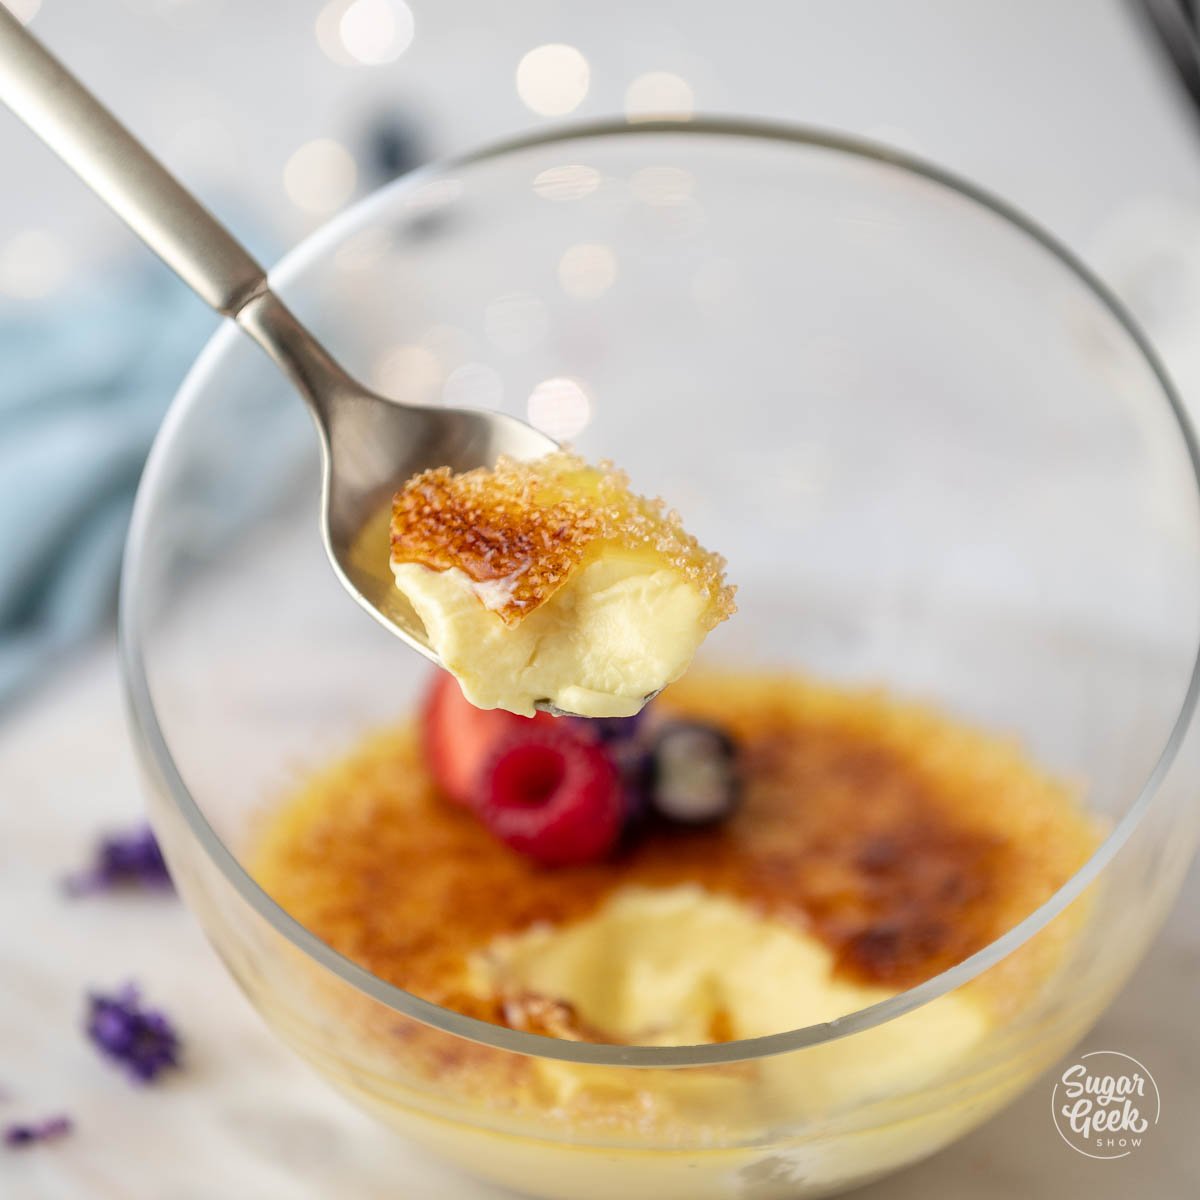
Crème brûlée is a smooth, ultra-creamy custard dessert with a crisp caramel topping that you crack through with your spoon. The smooth custard and crunchy sugar make a delicious combination in your mouth so it's no surprise it's a favorite dessert for many and popular in restaurants served with fresh berries.
Today, chef Christophe Rull is going to walk you through step-by-step how to bake a perfectly smooth and creamy crème brûlée, how to take the presentation up a notch by using different containers, and best of all, no water bath necessary!
What's great about this recipe is that it uses a low-temperature baking method to prevent you from overcooking the custard. This method is much safer since you do not have to worry about pouring hot water into a pan to create a water bath.
As an added bonus, when you bake custard at a lower temperature without a water bath, it gives you more opportunities to get creative with what dish you are baking your custard inside (and if you want to opt for a more decorative, oven-safe dish that's larger than a traditional ramekin).
What's In This Blog Post
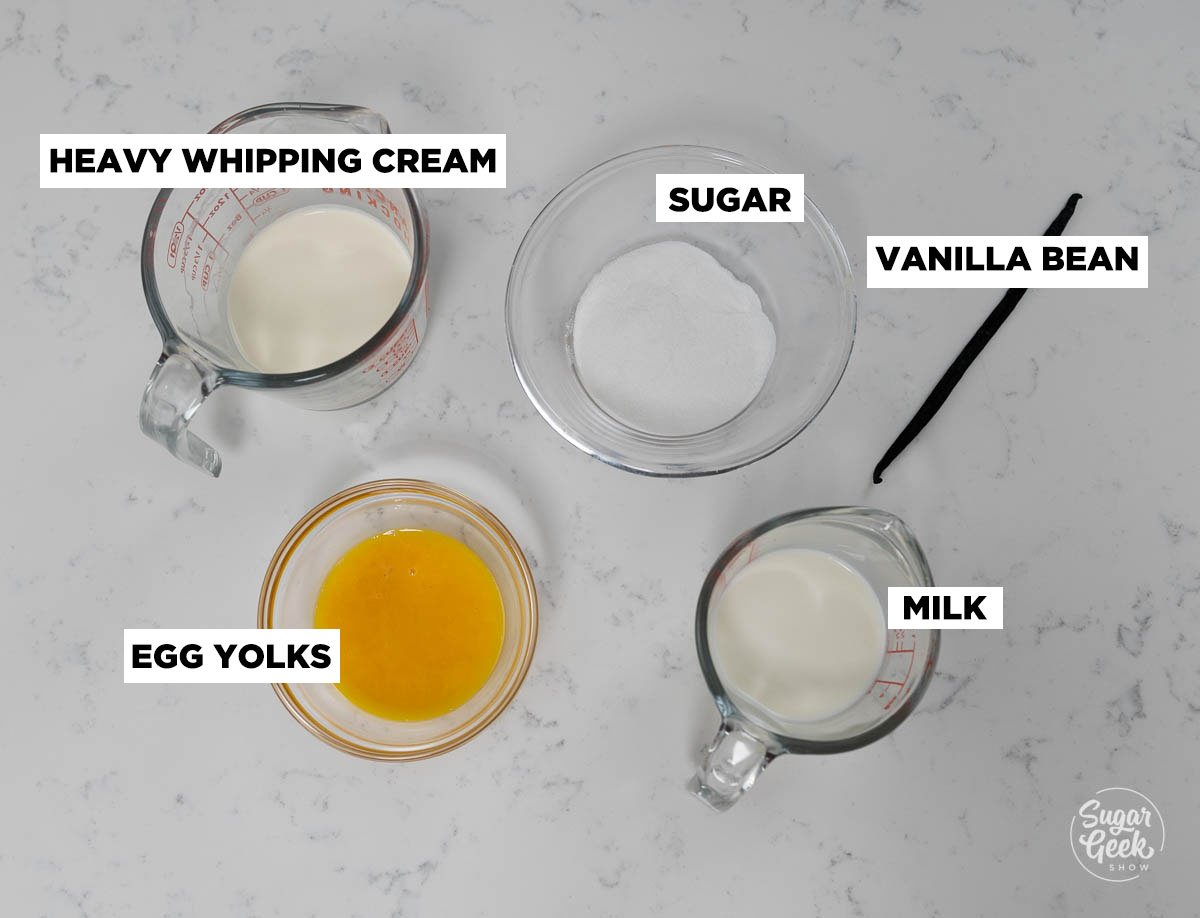
Crème Brûlée Ingredients
One of the best things about making crème brûlée is it only takes 5 common ingredients! If you don't have a vanilla bean then you can use 1 teaspoon of vanilla bean paste or extract although I do love the look of the vanilla bean seeds in the finished product!
How to Make Crème Brûlée
- Preheat your oven to 200ºF (93ºC).
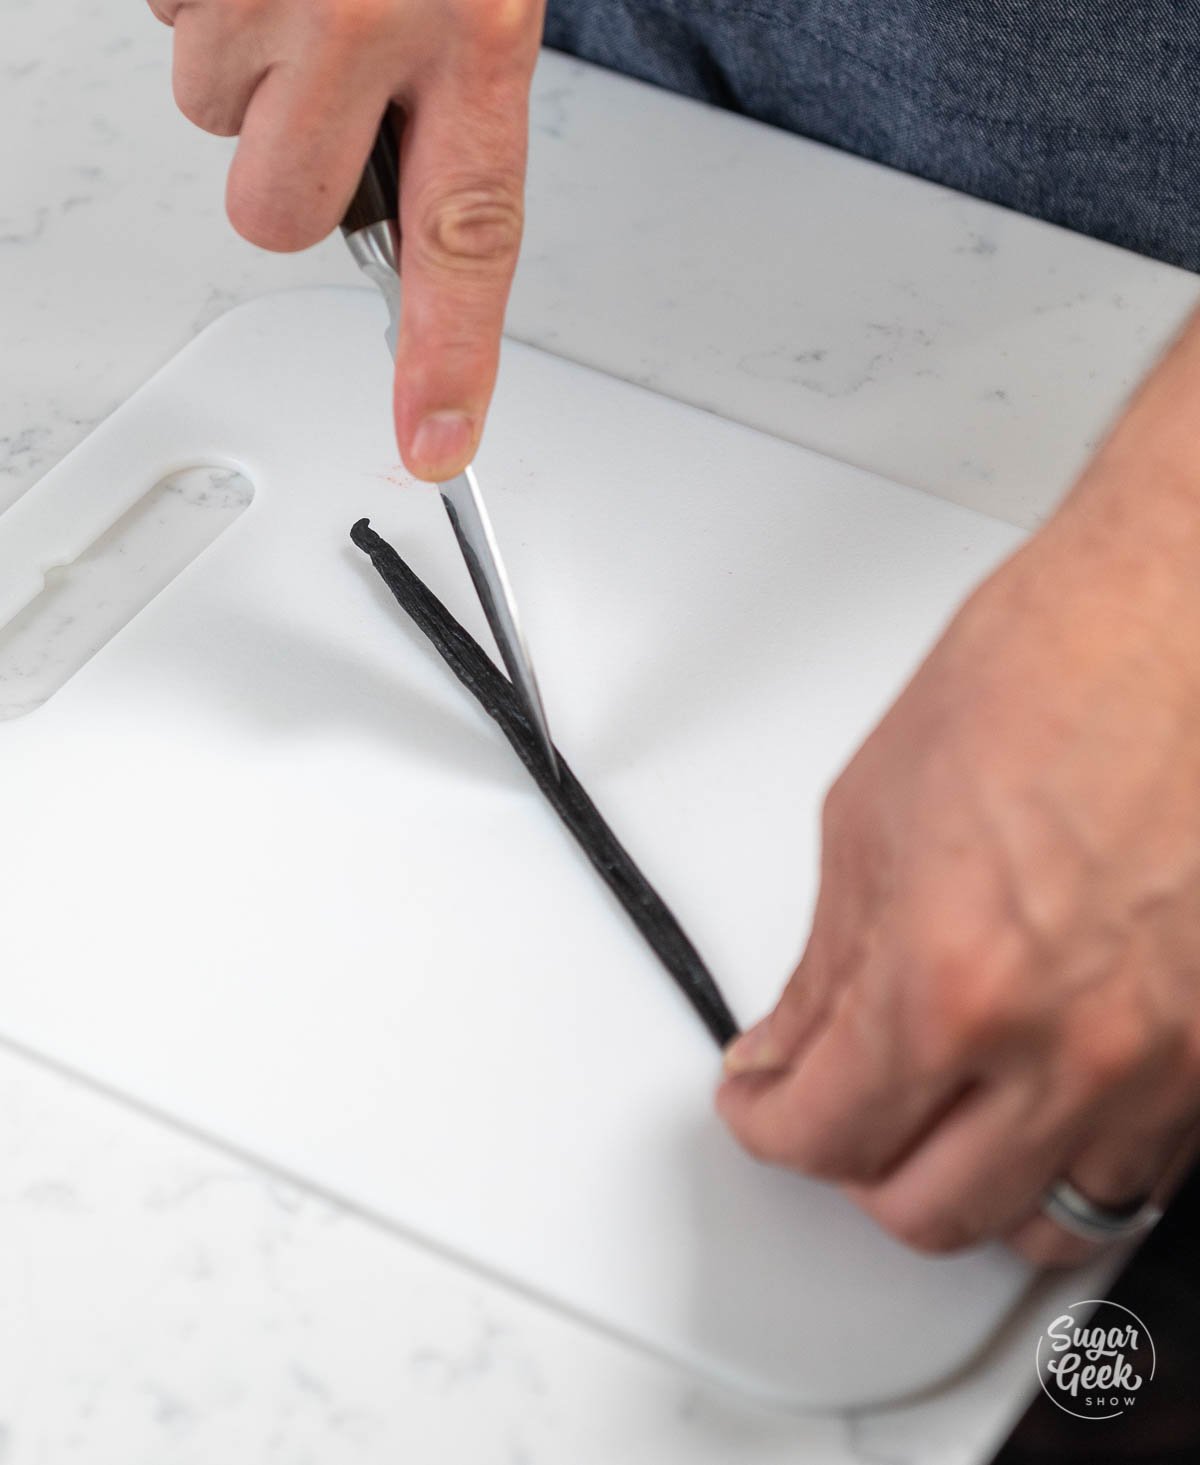
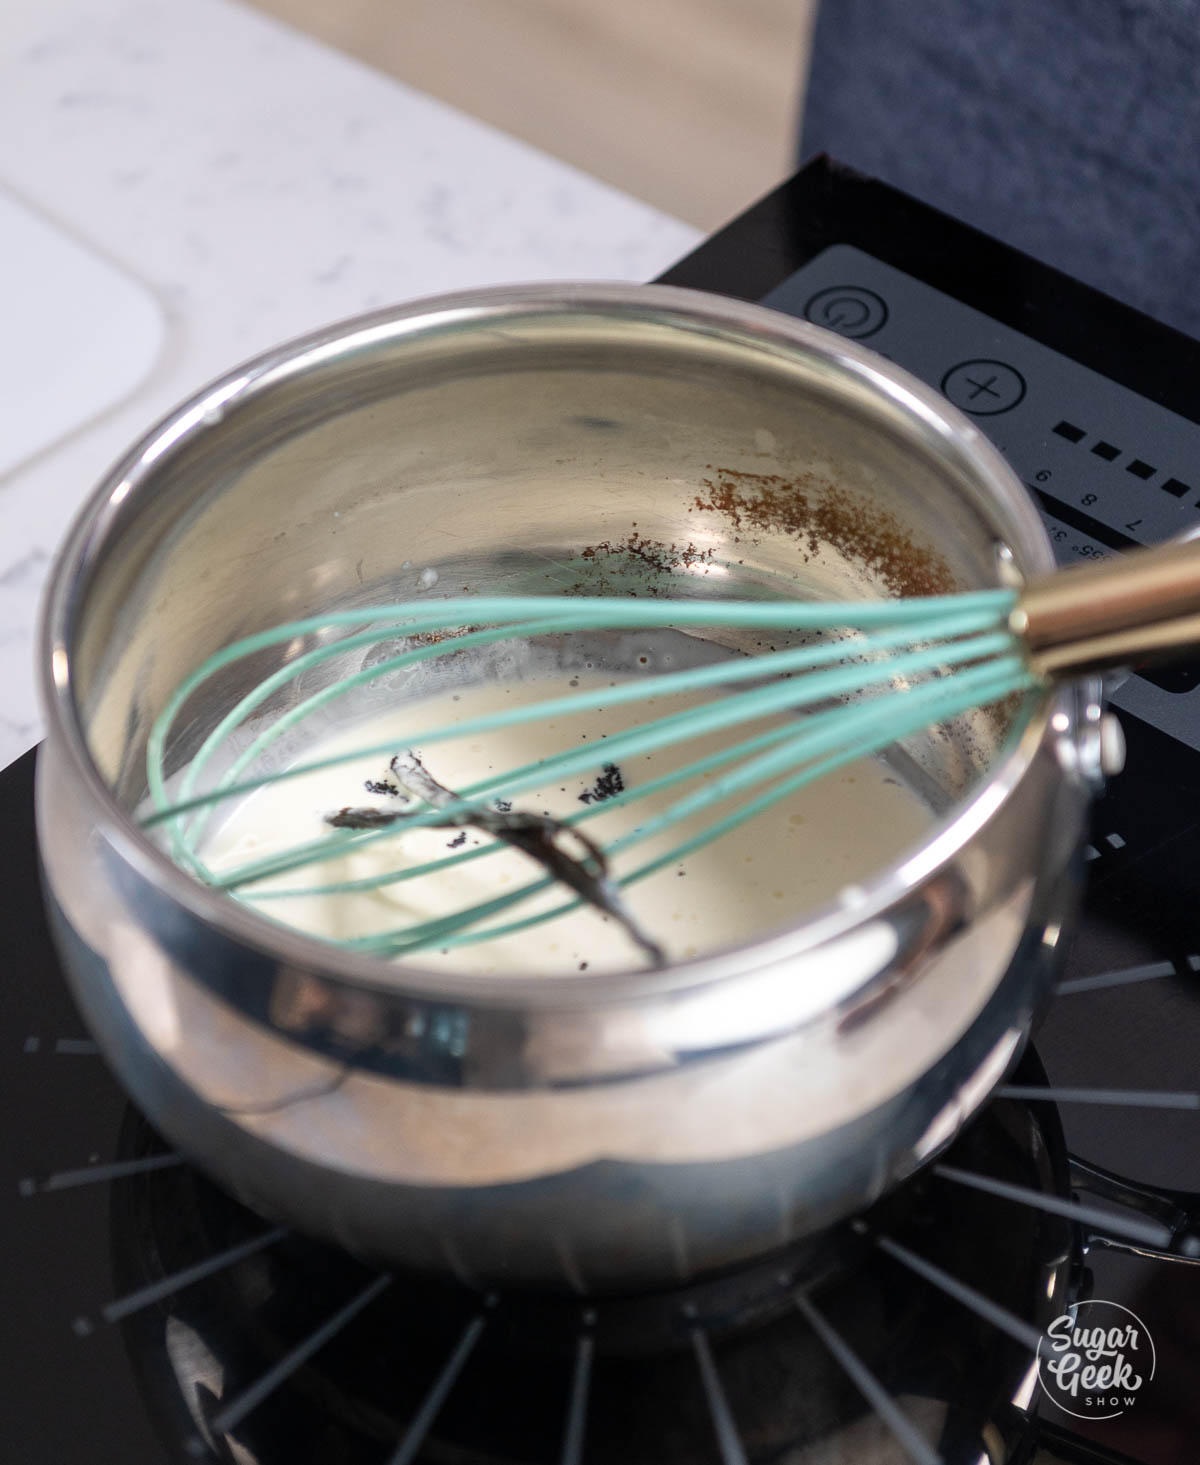
- Split your vanilla bean in half with a sharp knife and remove the seeds with the tip. Scrape the seeds into your milk. Reserve the pod to use in the next step.
- In a heavy bottom saucepan over medium heat, combine the cream, milk, vanilla (both the seeds and the pod), and sugar. Bring it all to a boil.

- Once your mixture begins to boil, remove it from the heat.
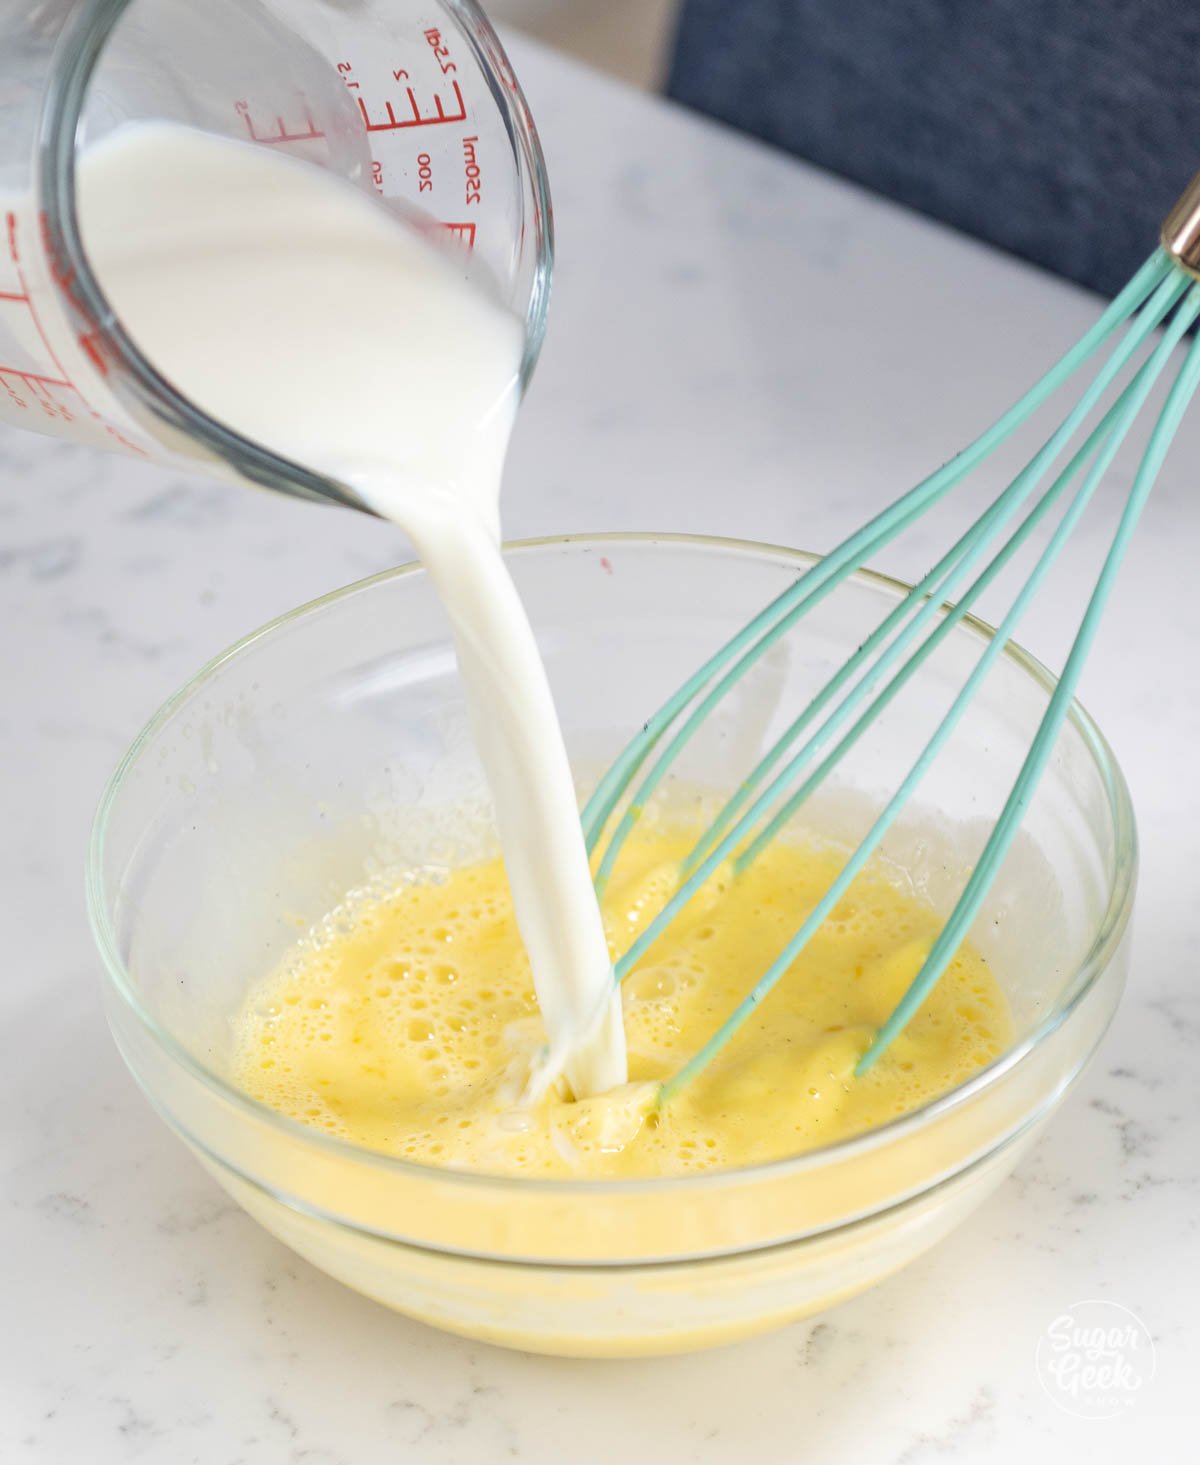
- Whisk your eggs gently to break them up in a separate bowl.
- Pour about ⅓ of the hot milk mixture into the egg yolks while continually whisking. This will temper the eggs with the milk so that they wont curdle when you add the rest of the hot milk to them.
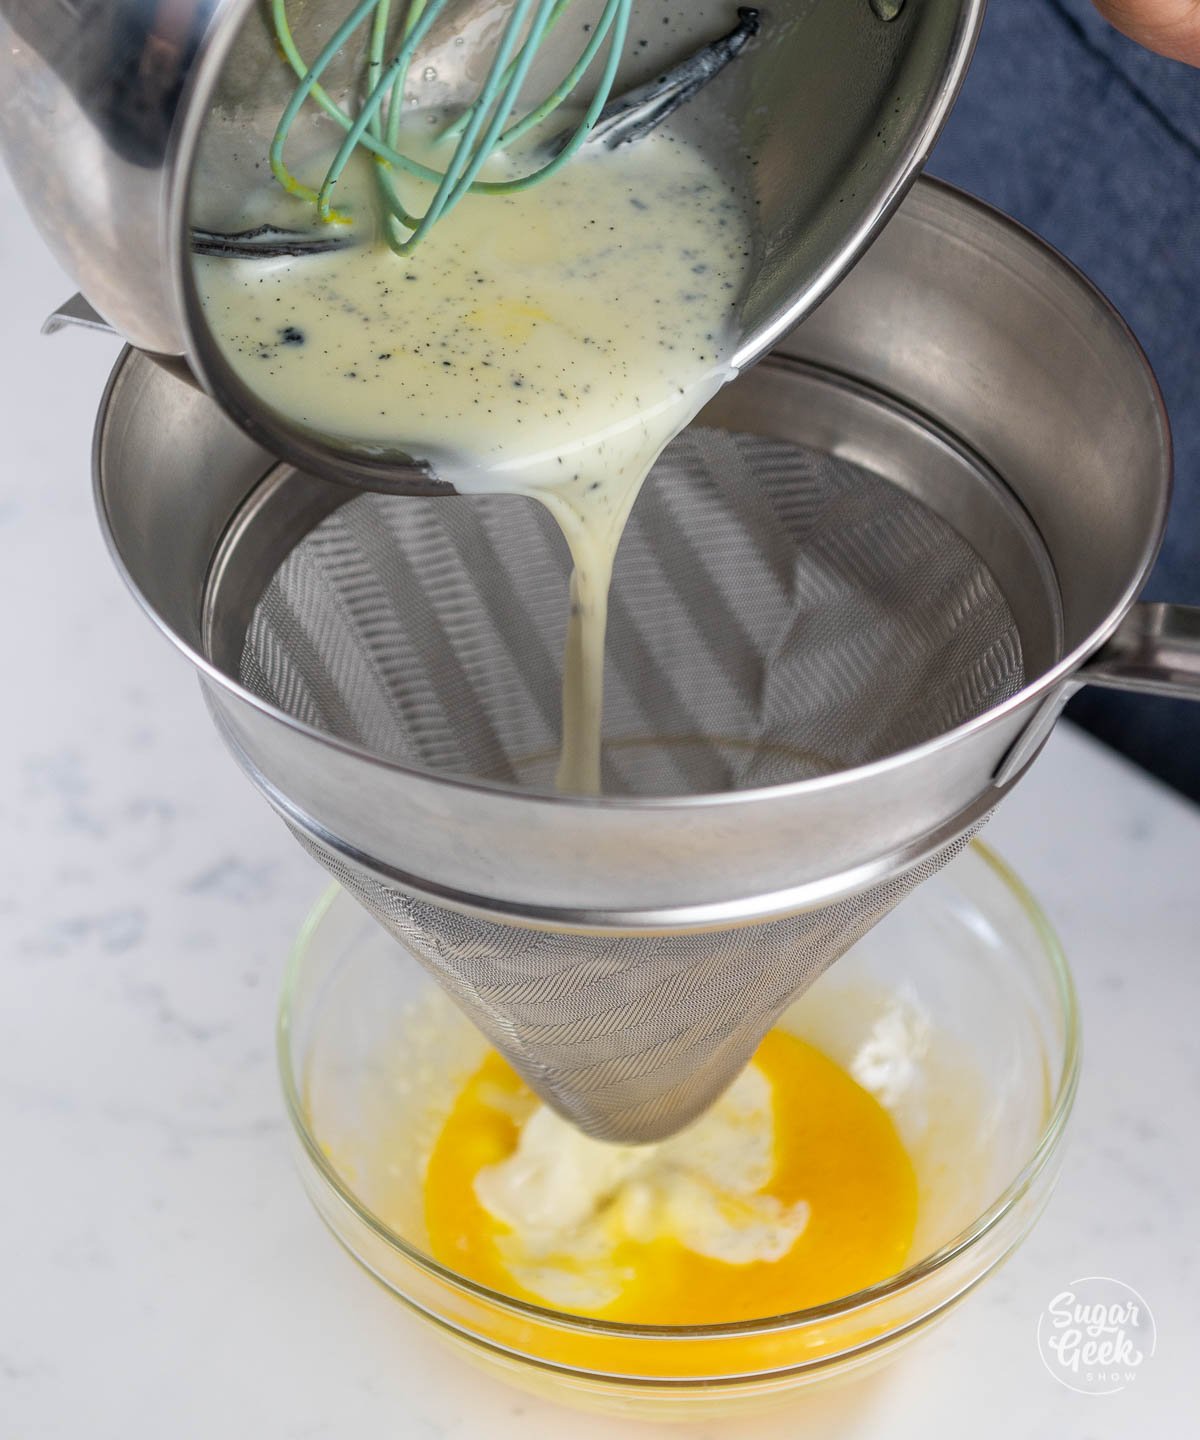
- Once the eggs and the milk are thoroughly combined, add the egg mixture back into the pot with the remaining hot milk. Whisk to combine.
- Next, strain the custard mixture through a strainer or sieve to remove the vanilla fibers and the vanilla pod.

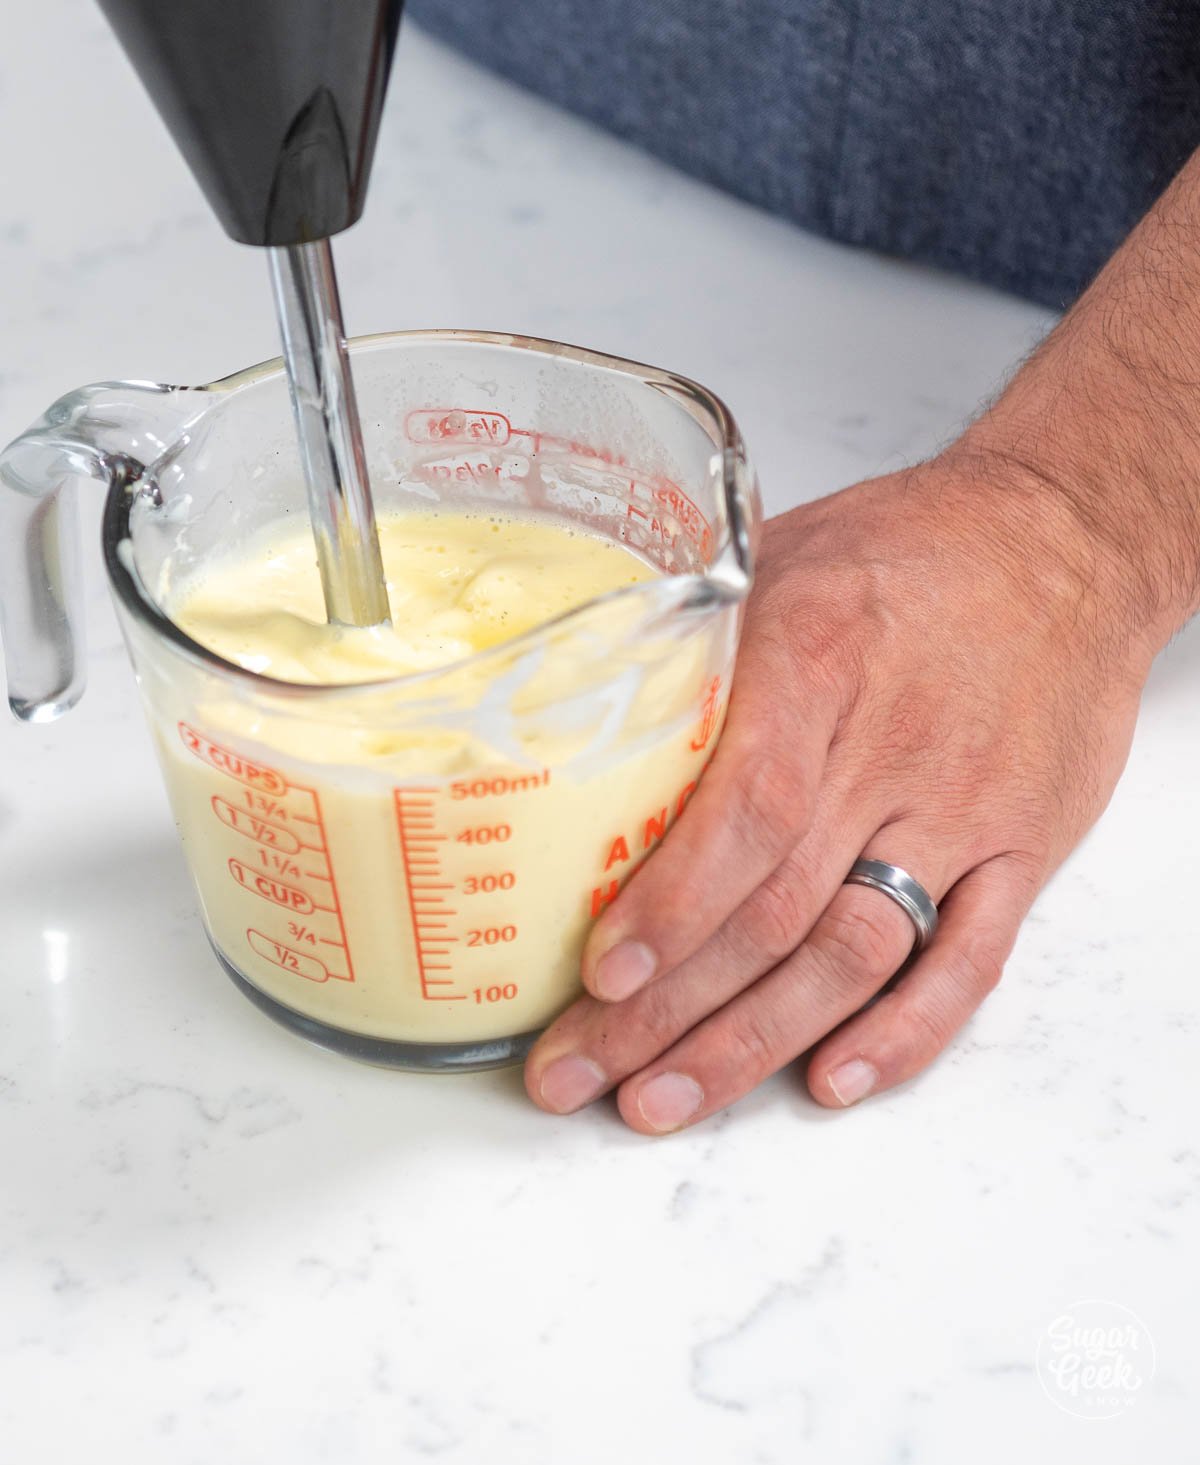
- Use an immersion blender (optional) to blend the ingredients until they are smooth and homogenous. Try not to incorporate any air by keeping the head of the blender under the surface of the mixture.
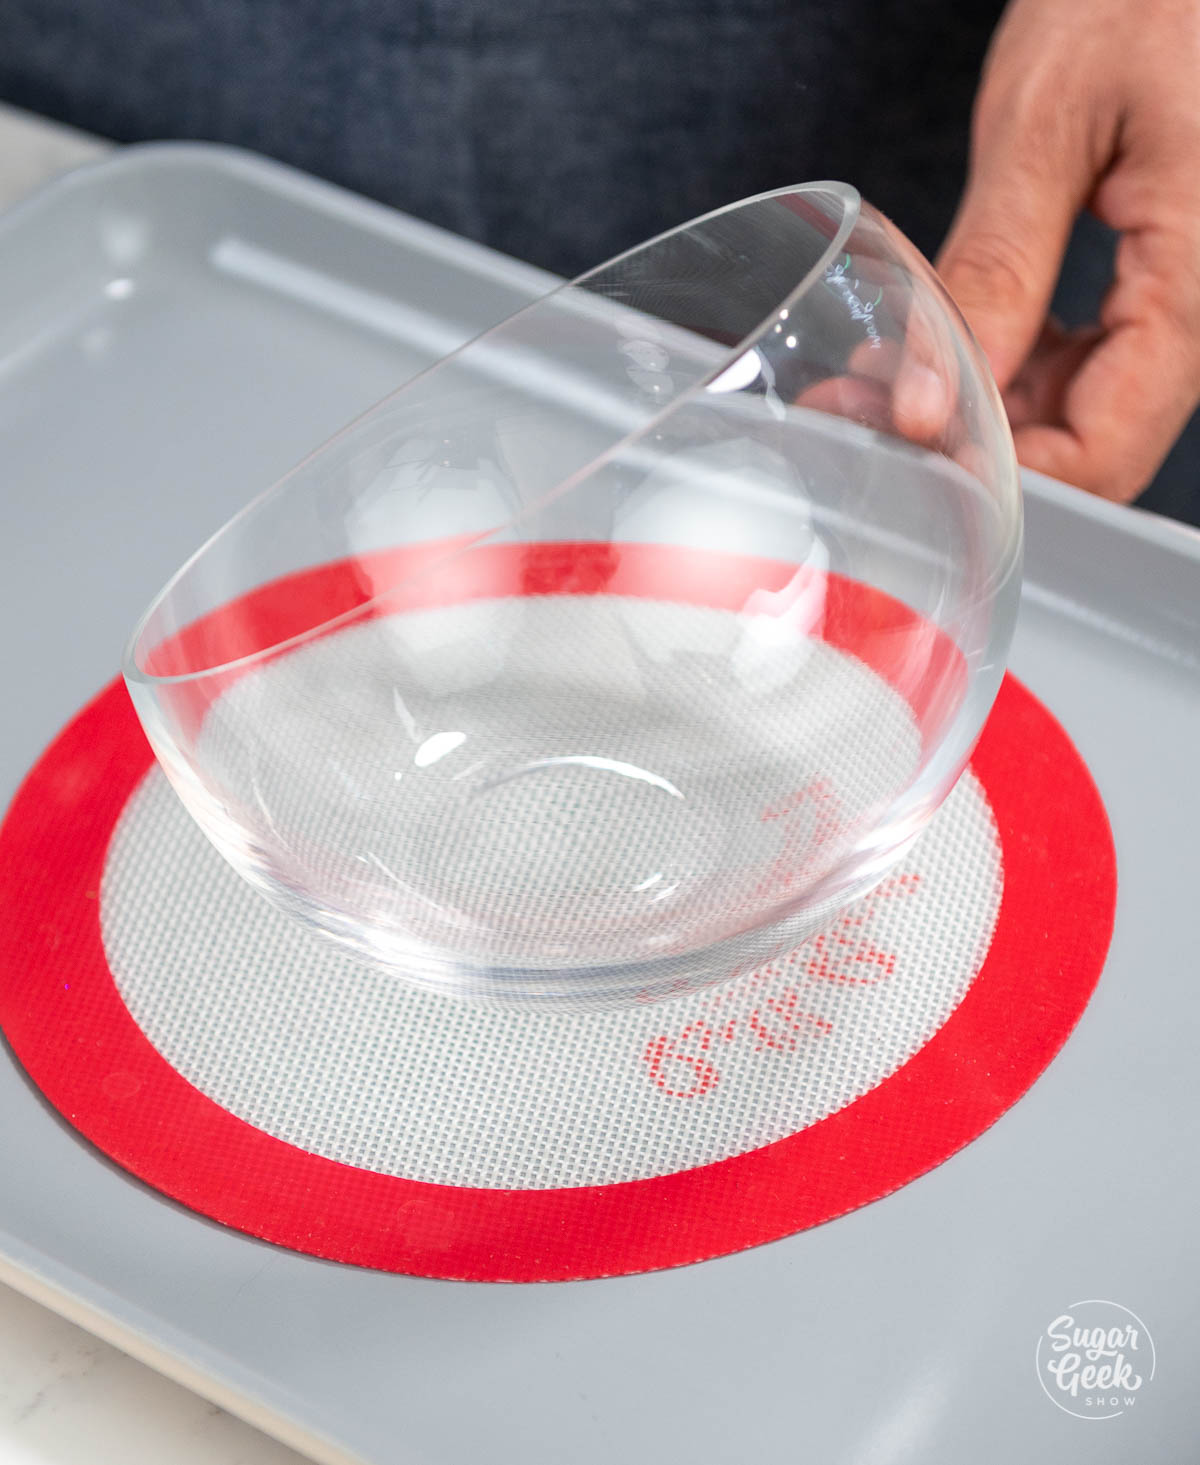
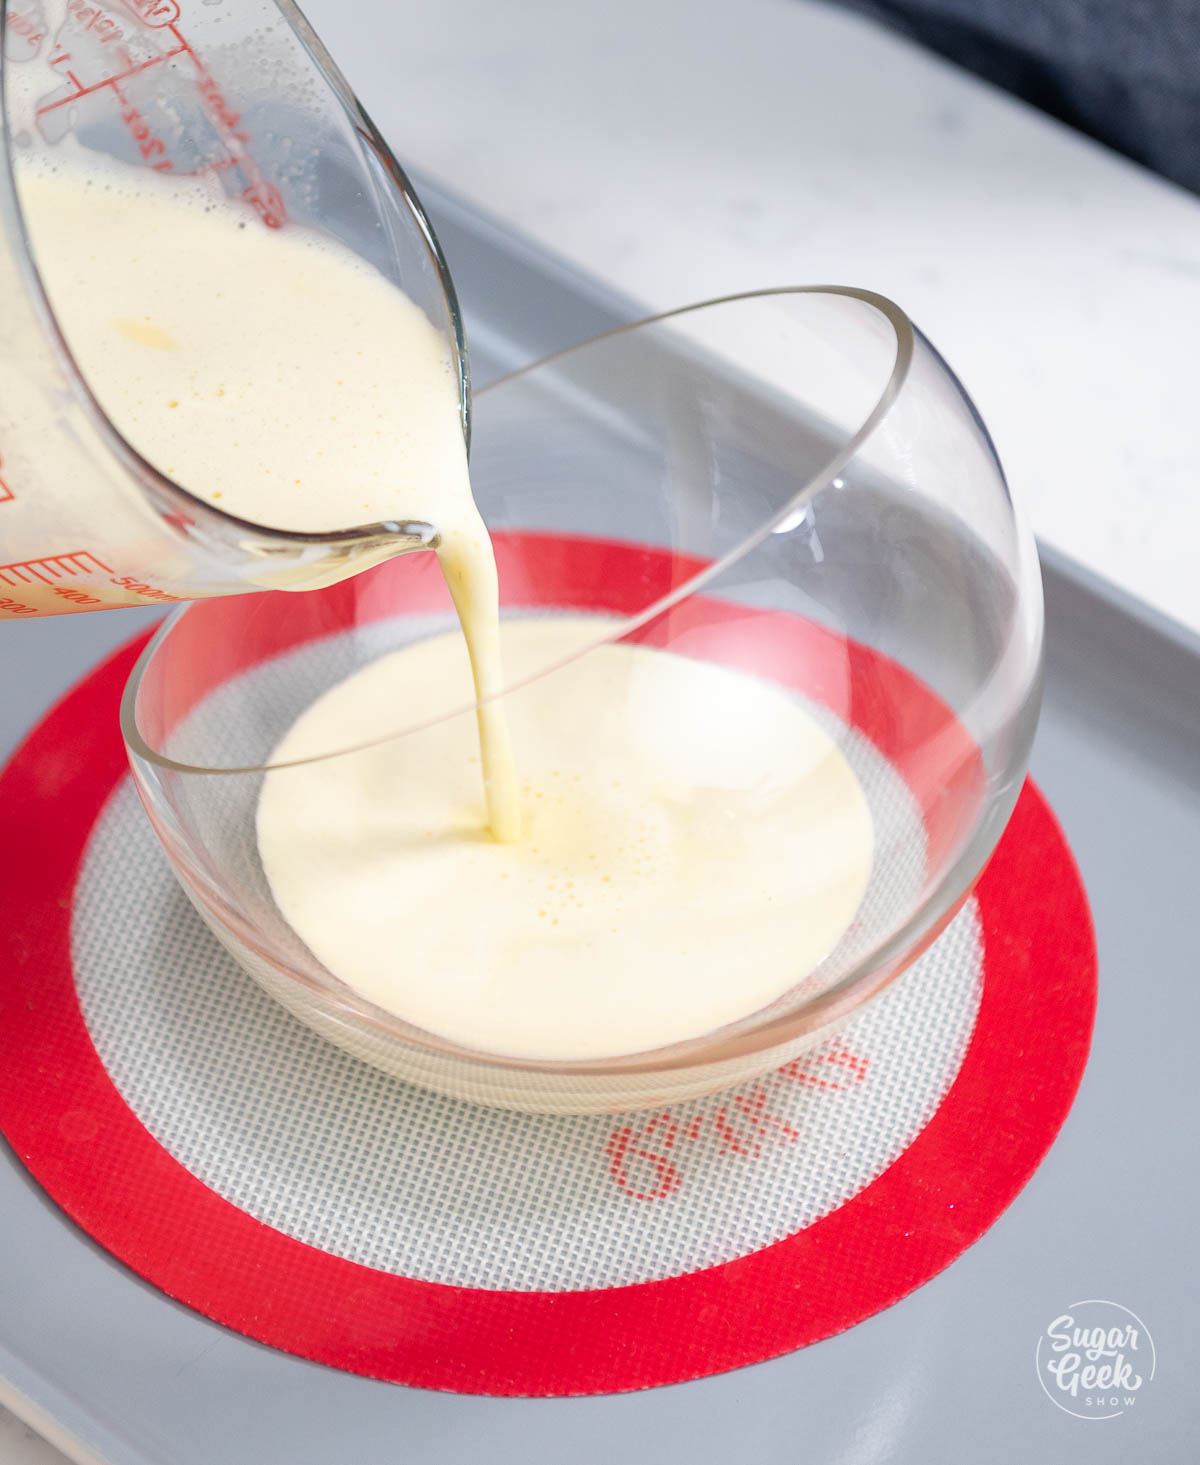
- Fill your baking containers or ramekins ¾ of the way with custard. PRO TIP: It will be easier to place the containers on a sheet pan with a silicone baking mat underneath before filling them, and then move the entire sheet pan to the oven.
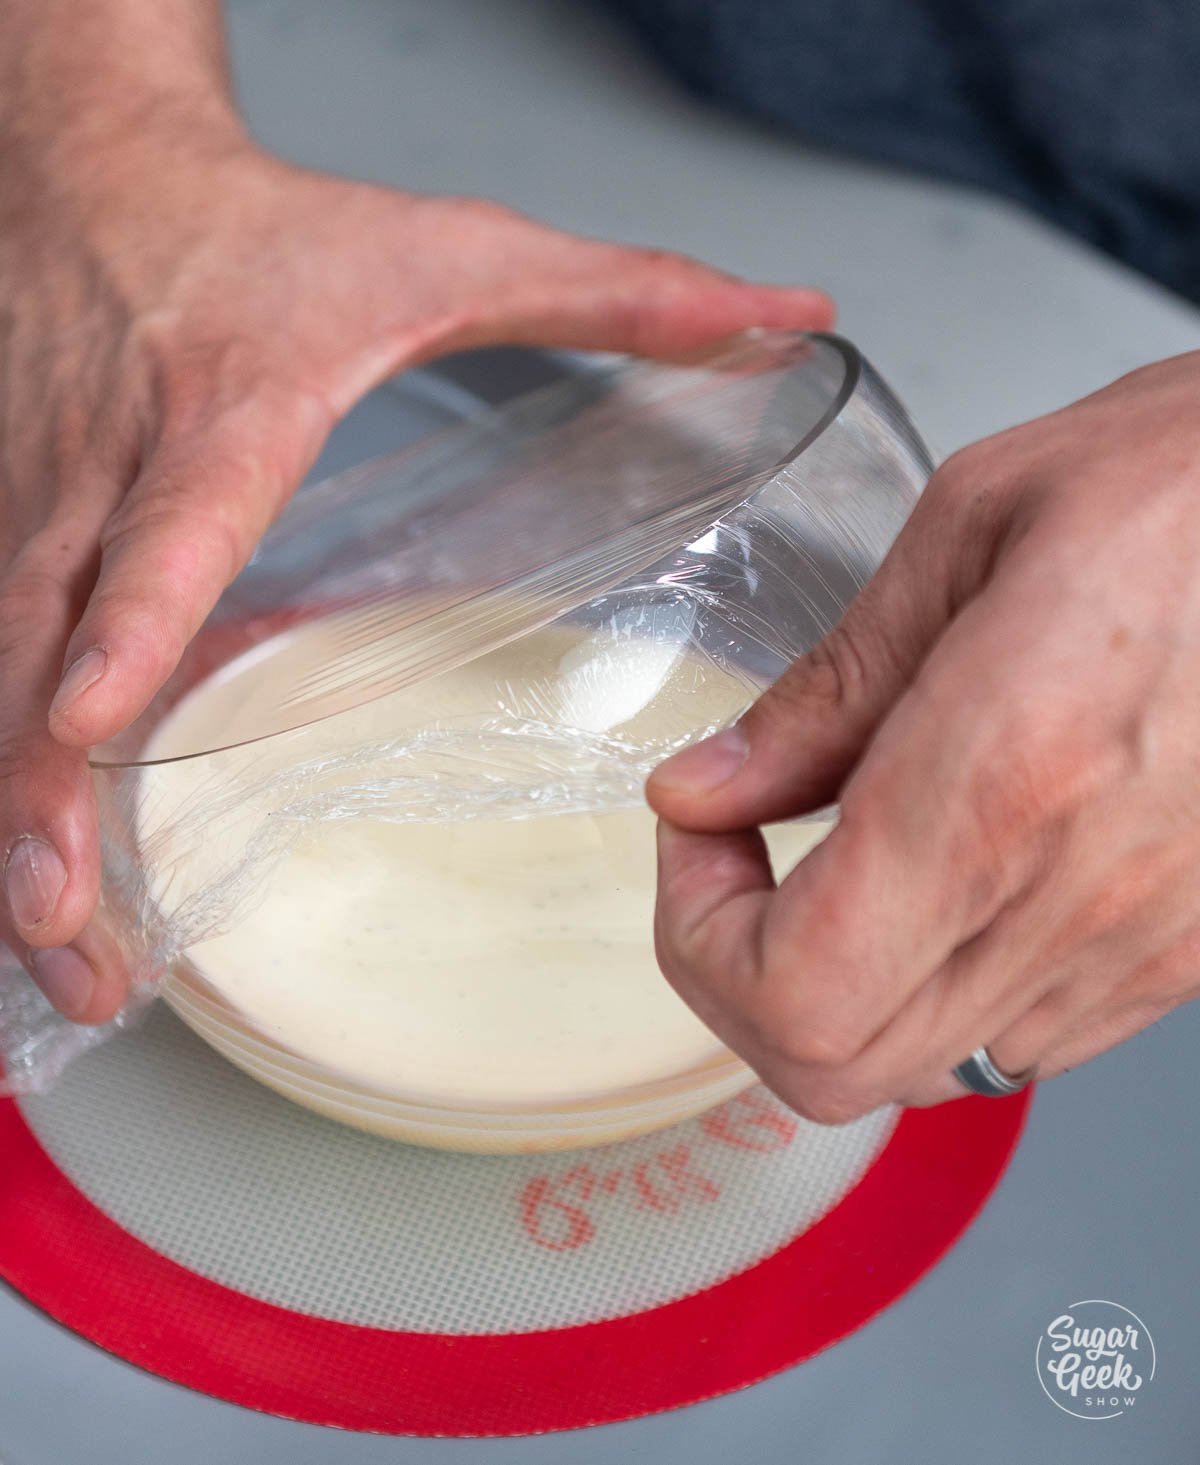
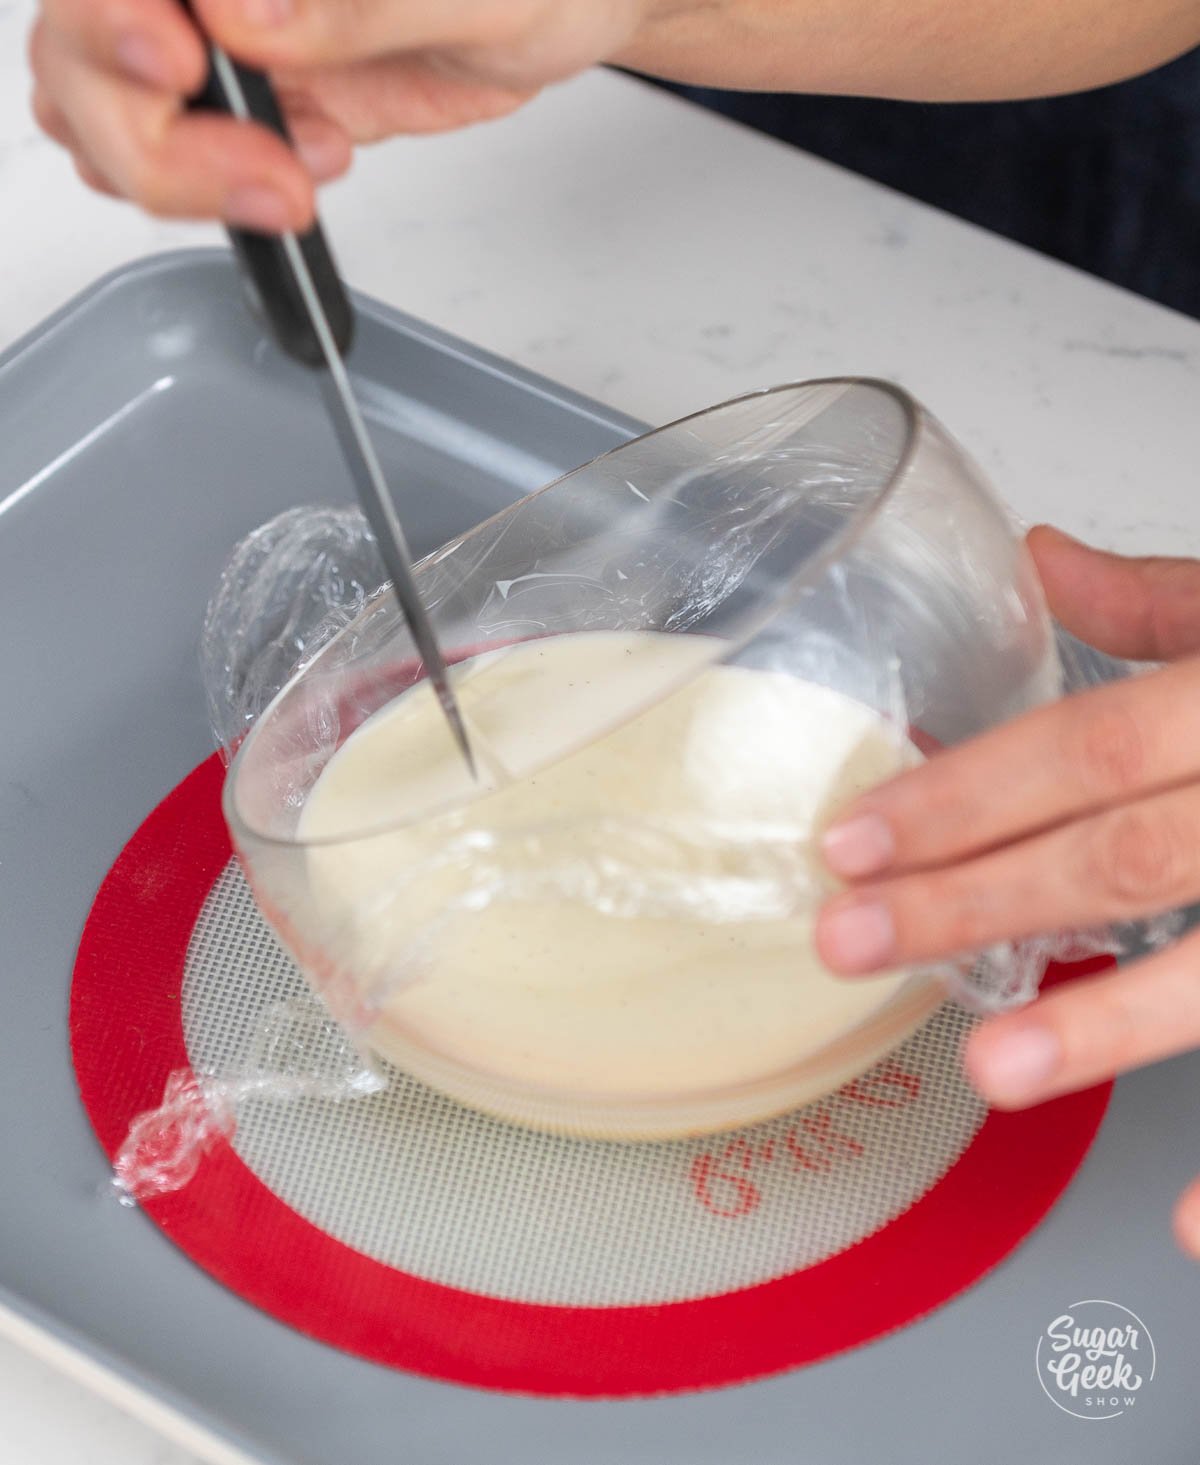
- Then, tightly cover each container or ramekin with plastic wrap. Poke a few holes in the plastic wrap to allow some airflow. The plastic wrap will keep moisture in the containers so you don't get a skin on top and the low temperature of the oven allows the crème brûlée to be baked without a waterbath.
- Place the sheet pan on the middle rack in the preheated oven.
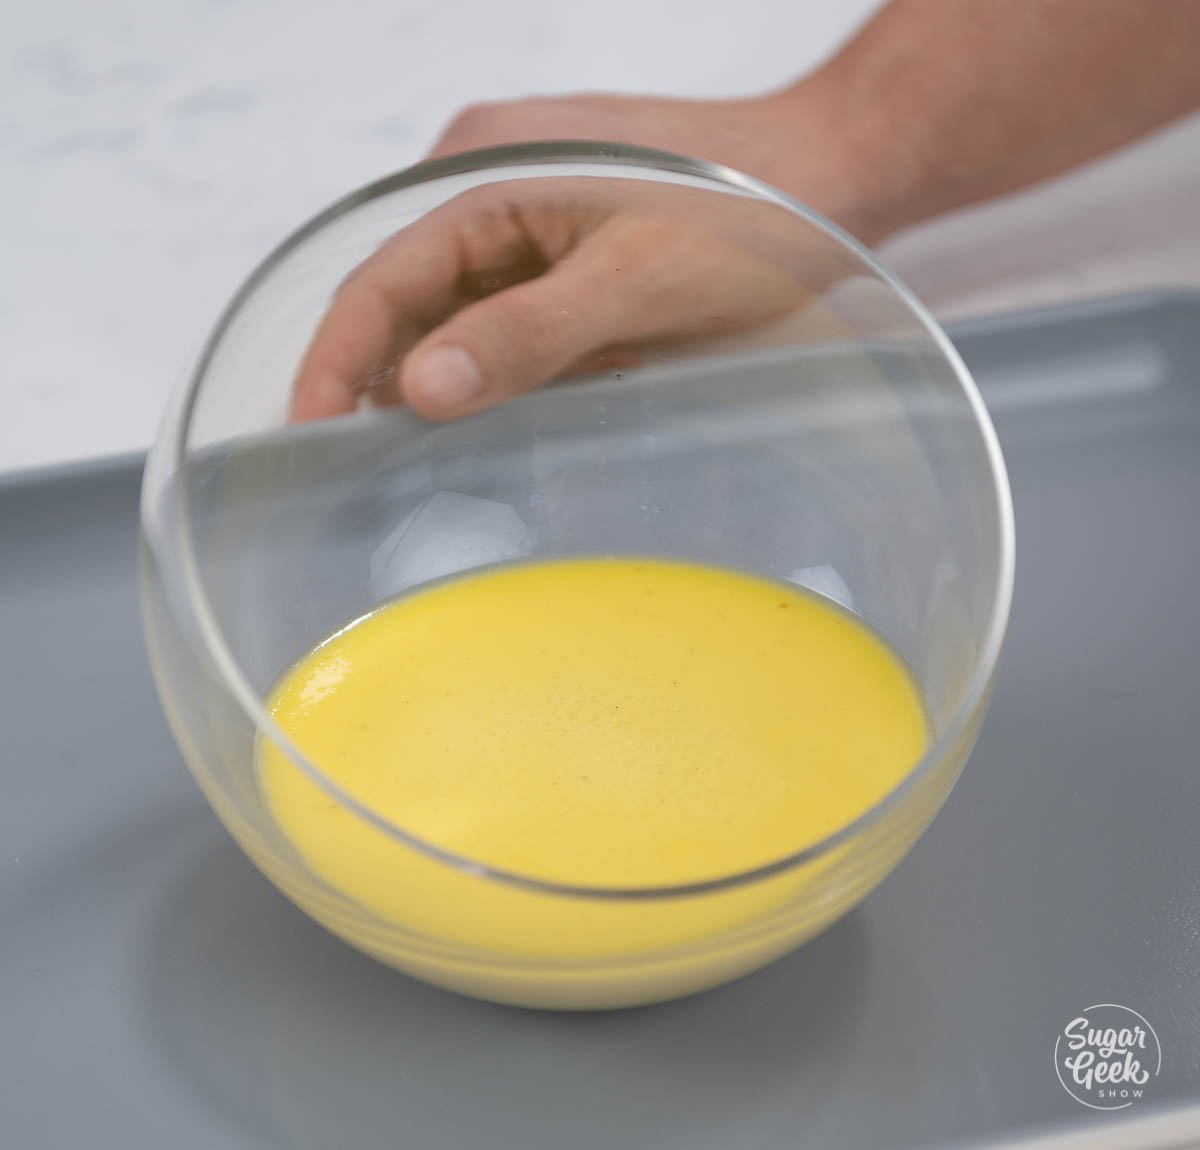
- Bake for about 1 hour and 25 minutes. I'm baking mine in large glass bowls that serve 2 people each, but you can also use ramekins. Baking time may vary. Once your custard has somewhat solidified around the perimeter of the ramekin and has a SLIGHT jiggle in the center, it is finished baking. If your custard appears to be mostly liquid, allow it to bake longer adding 10 minutes at a time until it reaches the desired consistency.
- Once the ramekins have been removed from the oven, allow them to cool for about 20 minutes. Then, place them in the fridge until they are completely cool.

Caramelizing the Sugar
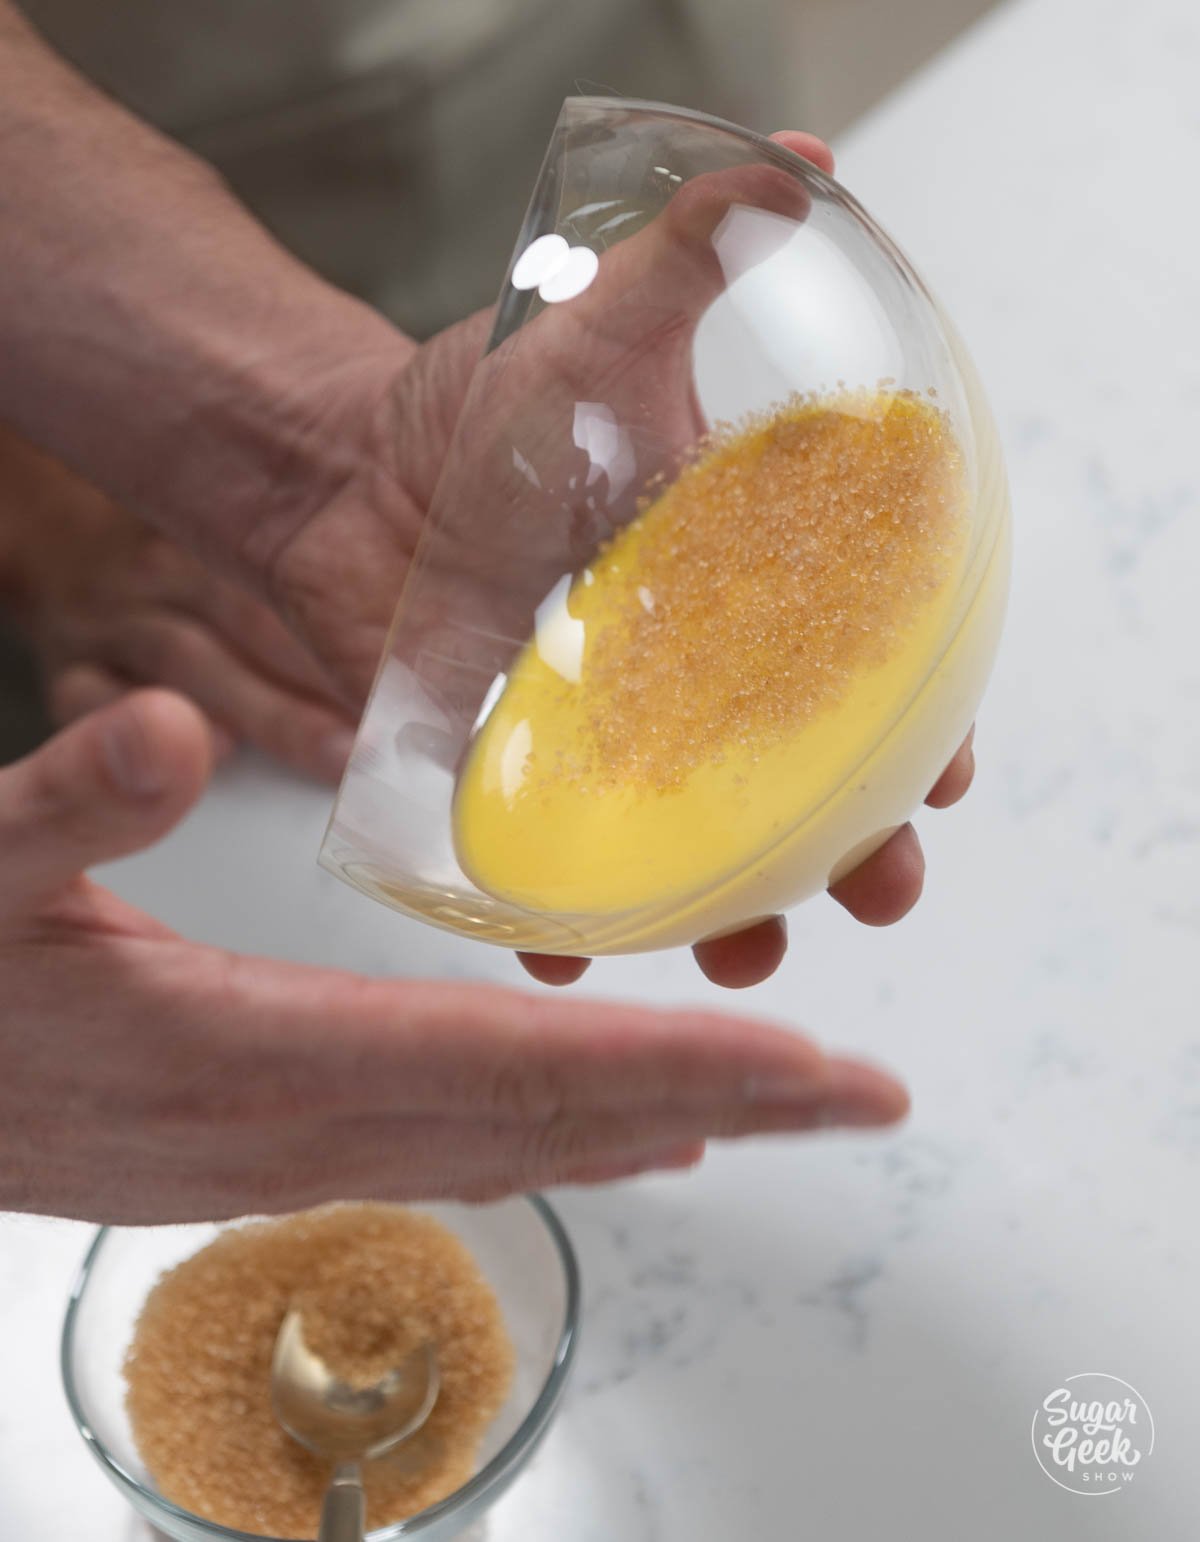
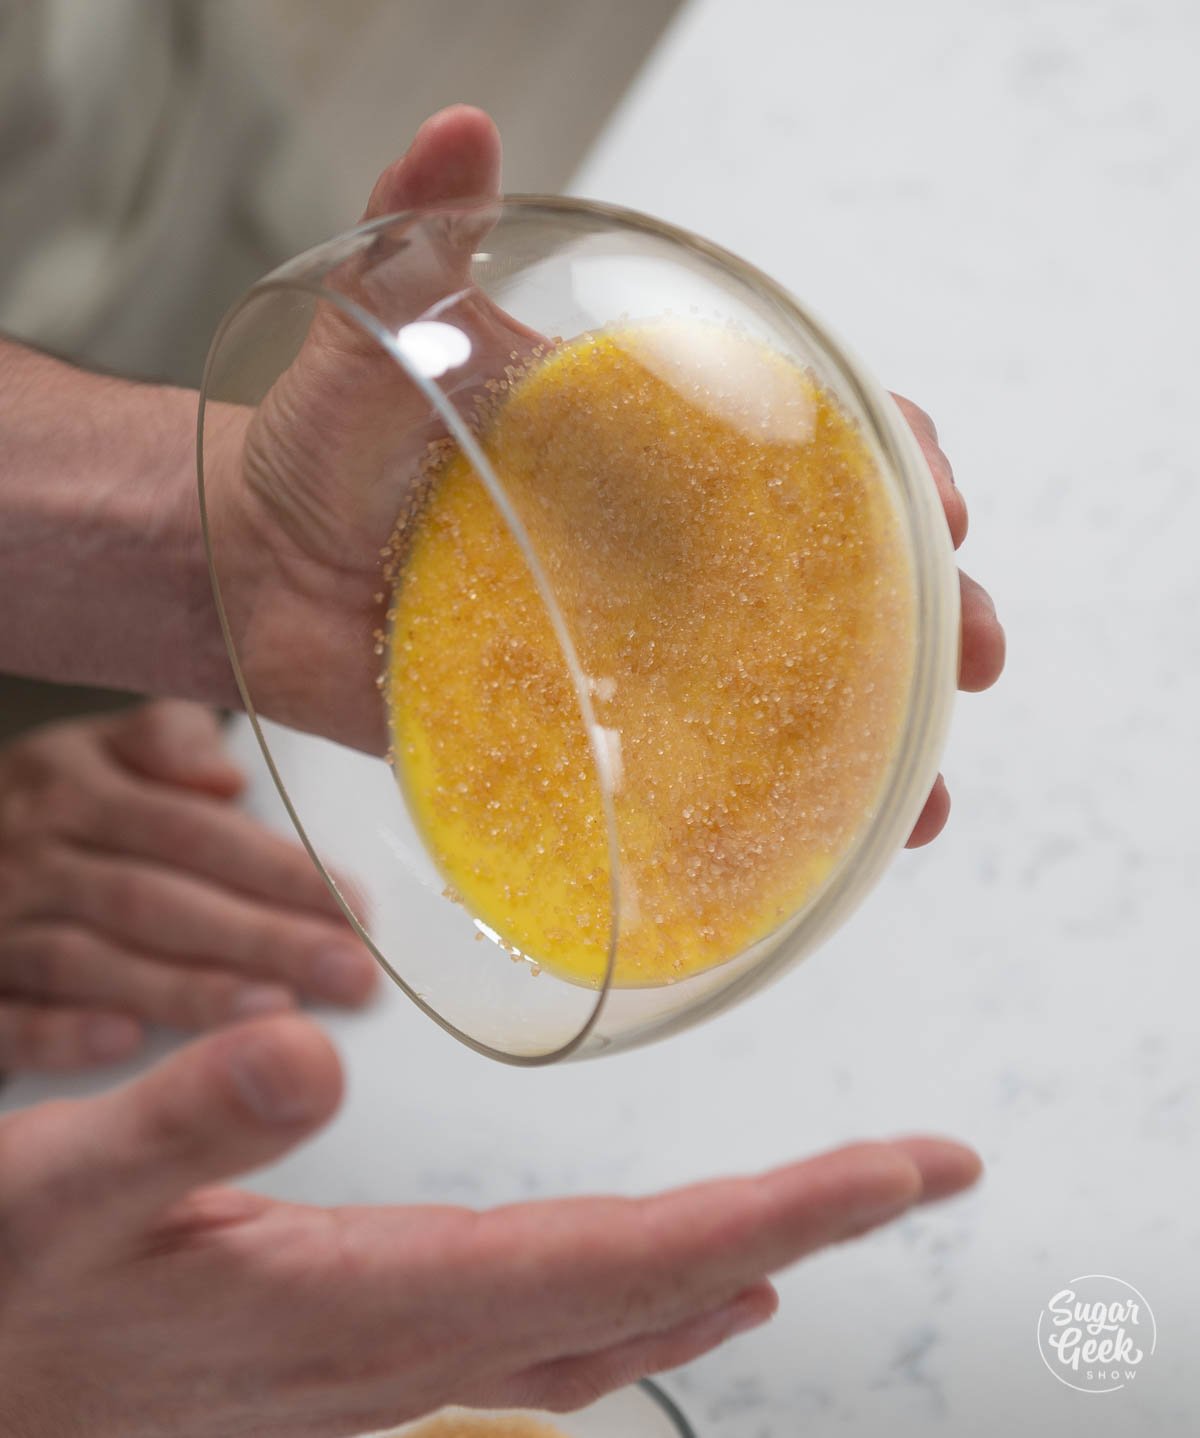
- When you are ready to serve the crème brûlée, spread a thin, even layer of sugar across the top of the custard. You can do this by placing a couple Tablespoons of sugar on top then gently turning the bowl so gravity does most of the work for you and moves the sugar around the surface.


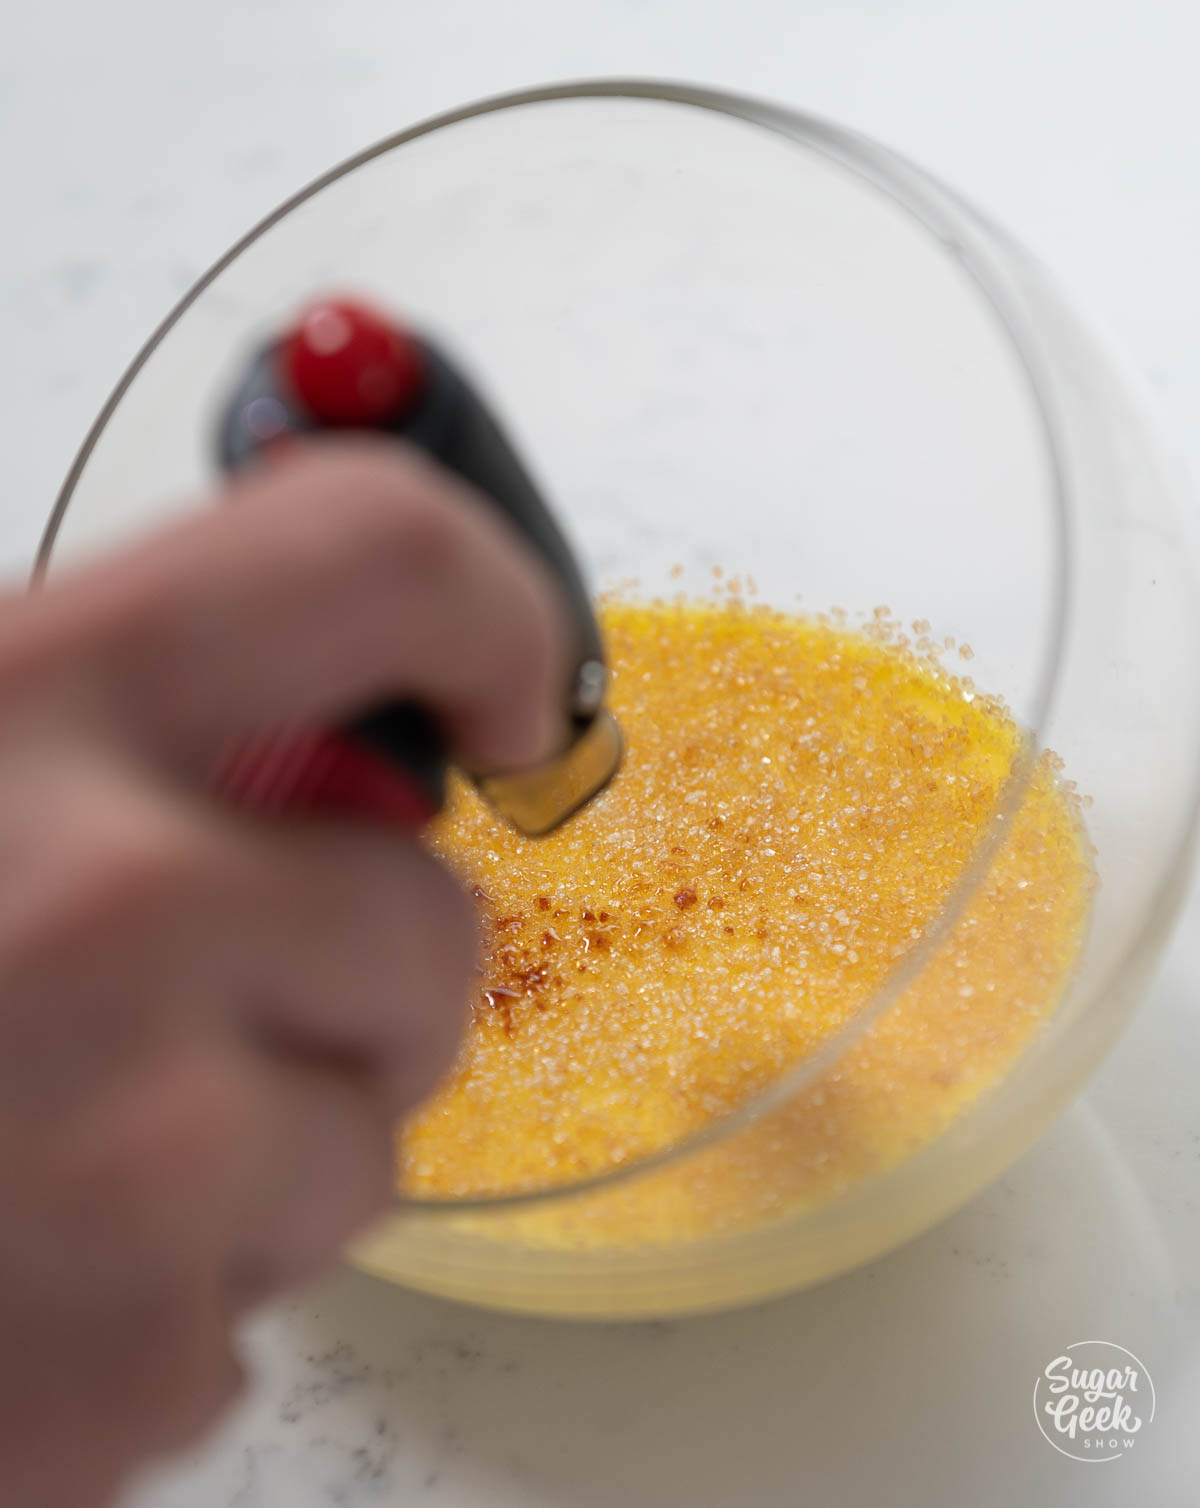
- Using a culinary torch, heat the sugar until it reaches the desired caramelization on top. PRO TIP: Try to heat the sugar in small increments so you don't cook the custard under the sugar. The goal is to have a thin layer of crunchy caramelized (not burned) sugar on top of the cool custard. If you do not have a blow torch, place the ramekins back in the oven and broil them until the sugar has caramelized.

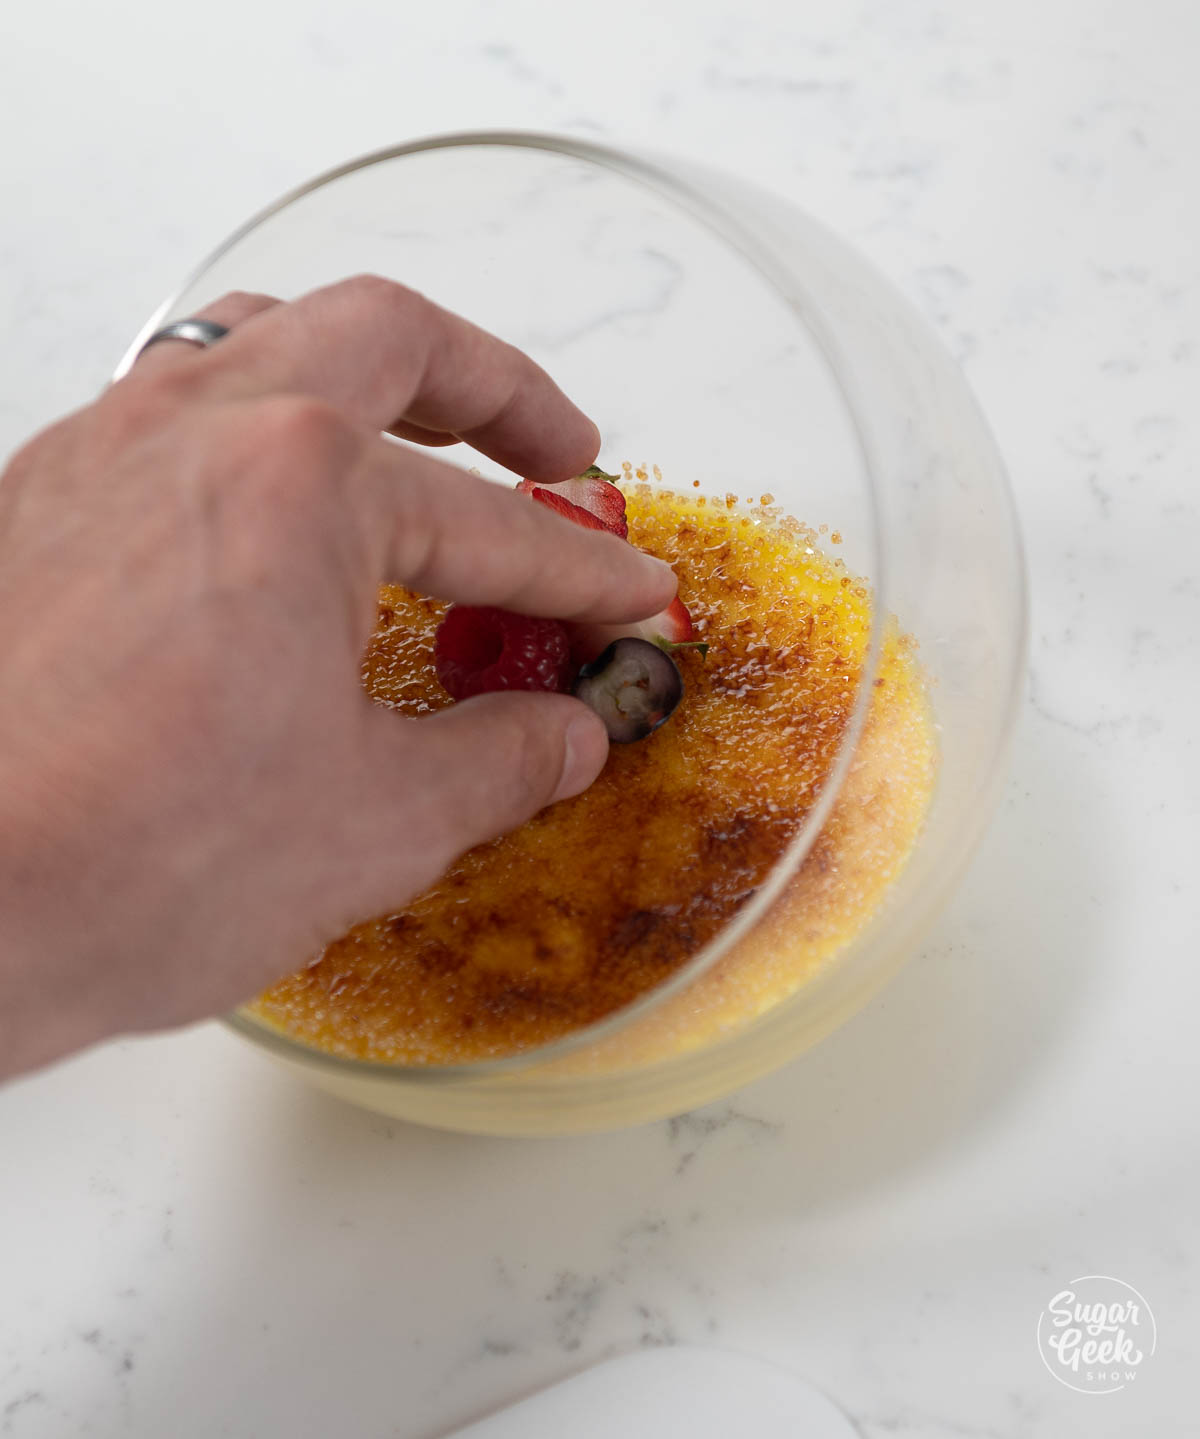
- Garnish with berries or fruit of your choice.


FAQ
Cream, sugar, egg yolks, and vanilla.
It is a light and airy vanilla-flavored baked custard with a slightly crunchy layer of caramelized sugar on top.
You may have over-baked it. Eggs will contract if they are baked too much and then they squeeze all of the water out of the dish. This results in a texture similar to scrambled eggs.
Granulated sugar is ideal for baking the custard, and sprinkling Sugar in the Raw on top works best for getting the iconic caramelized sugar layer on top using a kitchen torch.
If it had bubbles on top before it was baked, then it will be foamy. What you can do to get rid of these bubbles is gently use a kitchen torch to blow away the bubbles before you bake your custard.
Yes! But if you use brown sugar instead of granulated sugar, it will be darker in color.
Generally speaking, yes! It's always important to check that your ingredients are gluten-free, but traditionally it is gluten-free.
No, not if you are baking custard inside of a ramekin. With ramekins, you can broil the custard instead of using a torch. However, if you are using a different baking dish you will want to be careful before putting it under the broiler (depending on how hot the dish can get before shattering).
More Recipes You'll Love
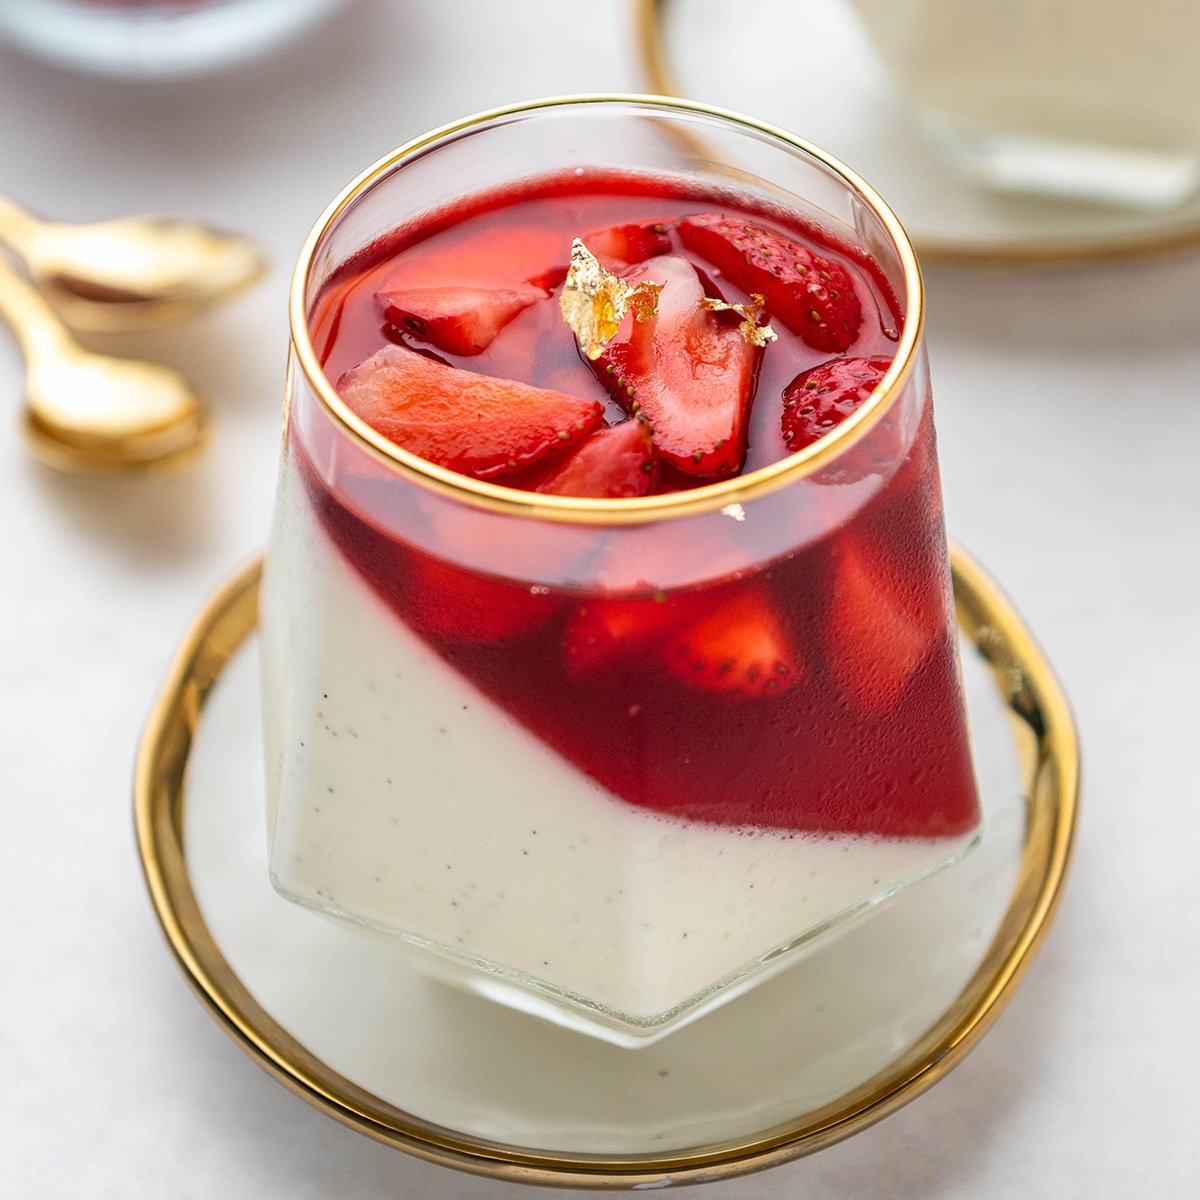
Panna Cotta With Strawberry Gelee
Crème Anglaise Recipe
Recipe
Equipment
- 4 oven safe bowls/ramekins
- pot
- Whisk
- strainer
- Kitchen torch
Ingredients
Crème Brûlée
- 100 grams egg yolks
- 70 grams granulated sugar
- 250 grams milk
- 250 grams heavy whipping cream
- 1 vanilla bean (seeds scraped out, pod reserved)
- 50 grams granulated sugar or sugar in the raw (set aside) (used to caramelize the custard after it's baked)
Garnish (Optional)
- 155 grams fresh berries
Instructions
Making the Crème Brûlée
- Preheat your oven to 200ºF (93ºC).
- In a heavy bottom pot over medium heat, combine the milk, vanilla (both the seeds and the pod), and sugar. Bring it all to a boil.
- Then, in a separate bowl, add in your egg yolk and gently whip it until it reaches a smooth consistency.
- Once the milk has begun to boil, strain it to remove the vanilla pod, into your egg yolks and mix until combined.
- Add the heavy cream.
- Using an immersion blender, blend the custard to create an extra smooth consistency, about 15 seconds. Be sure not to allow a lot of air into the custard while it is blending.
- Fill your baking containers or ramekins ¾ of the way with custard. PRO TIP: It will be easier to place the containers on a sheet tray before filling them, and then move the entire sheet tray to the oven. I used a silicone mat as well to avoid the bowl sliding.
- Then, tightly cover each container or ramekin with plastic wrap. Poke a few holes in the plastic wrap to allow some airflow.
- Carefully move your custard to the middle rack in the preheated oven.
- Bake for about 1 hour and 25 minutes. I'm baking mine in large glass bowls that serve 2 people each, but you can also use ramekins. Baking time may vary. Once your custard has somewhat solidified around the perimeter of the ramekin and has a slight jiggle in the center, it is finished baking.
- If your custard appears to be mostly liquid, allow it to bake longer adding 10 minutes at a time until it reaches the desired consistency.
- Once the ramekins have been removed from the oven, allow them to cool for about 20 minutes. Then, place them in the fridge until they are completely cool.
Caramelizing the Sugar
- When you are ready to serve the custard, spread a thin, even layer of granulated sugar across the top of the custard. You can do this by gently turning the bowl so gravity does most of the work for you and moves the sugar around the custard.
- Using a kitchen blow torch, heat the sugar until it reaches the desired caramelization on top. PRO TIP: Try to do heat the sugar with a blow torch in small increments so you don't cook the custard under the sugar. The goal is to have a thin layer of crunchy caramelized (not burned) sugar on top of the cool custard. If you do not have a blow torch, place the ramekins back in the oven and broil them until the sugar has crystallized.
- Garnish with berries or fruit of your choice.
Notes
- Practice Mise en Place (everything in its place). Measure out your ingredients ahead of time and have them ready before you start to reduce the chances of accidentally leaving something out.
- Use a scale to weigh your ingredients (including liquids) unless otherwise instructed (Tablespoons, teaspoons, pinch, etc). Metric measurements are available in the recipe card. Scaled ingredients are much more accurate than using cups and help ensure the success of your recipe.
- You do not need a kitchen blow torch if you are baking your custard in ramekins. If you are using another kind of baking dish, you will want to confirm how hot it can get before it shatters before you place it under the broiler in your oven.
Leave a Reply