





These homemade hand pies have a sturdy, buttery crust that holds up whether you bake them, deep-fry them, or cook them in the air fryer. No leaking and no soggy bottoms! Fill them with your favorite flavors, like apple filling, peach filling, lemon curd, and blueberry filling, and you've got everything you love about pie in the palm of your hand.
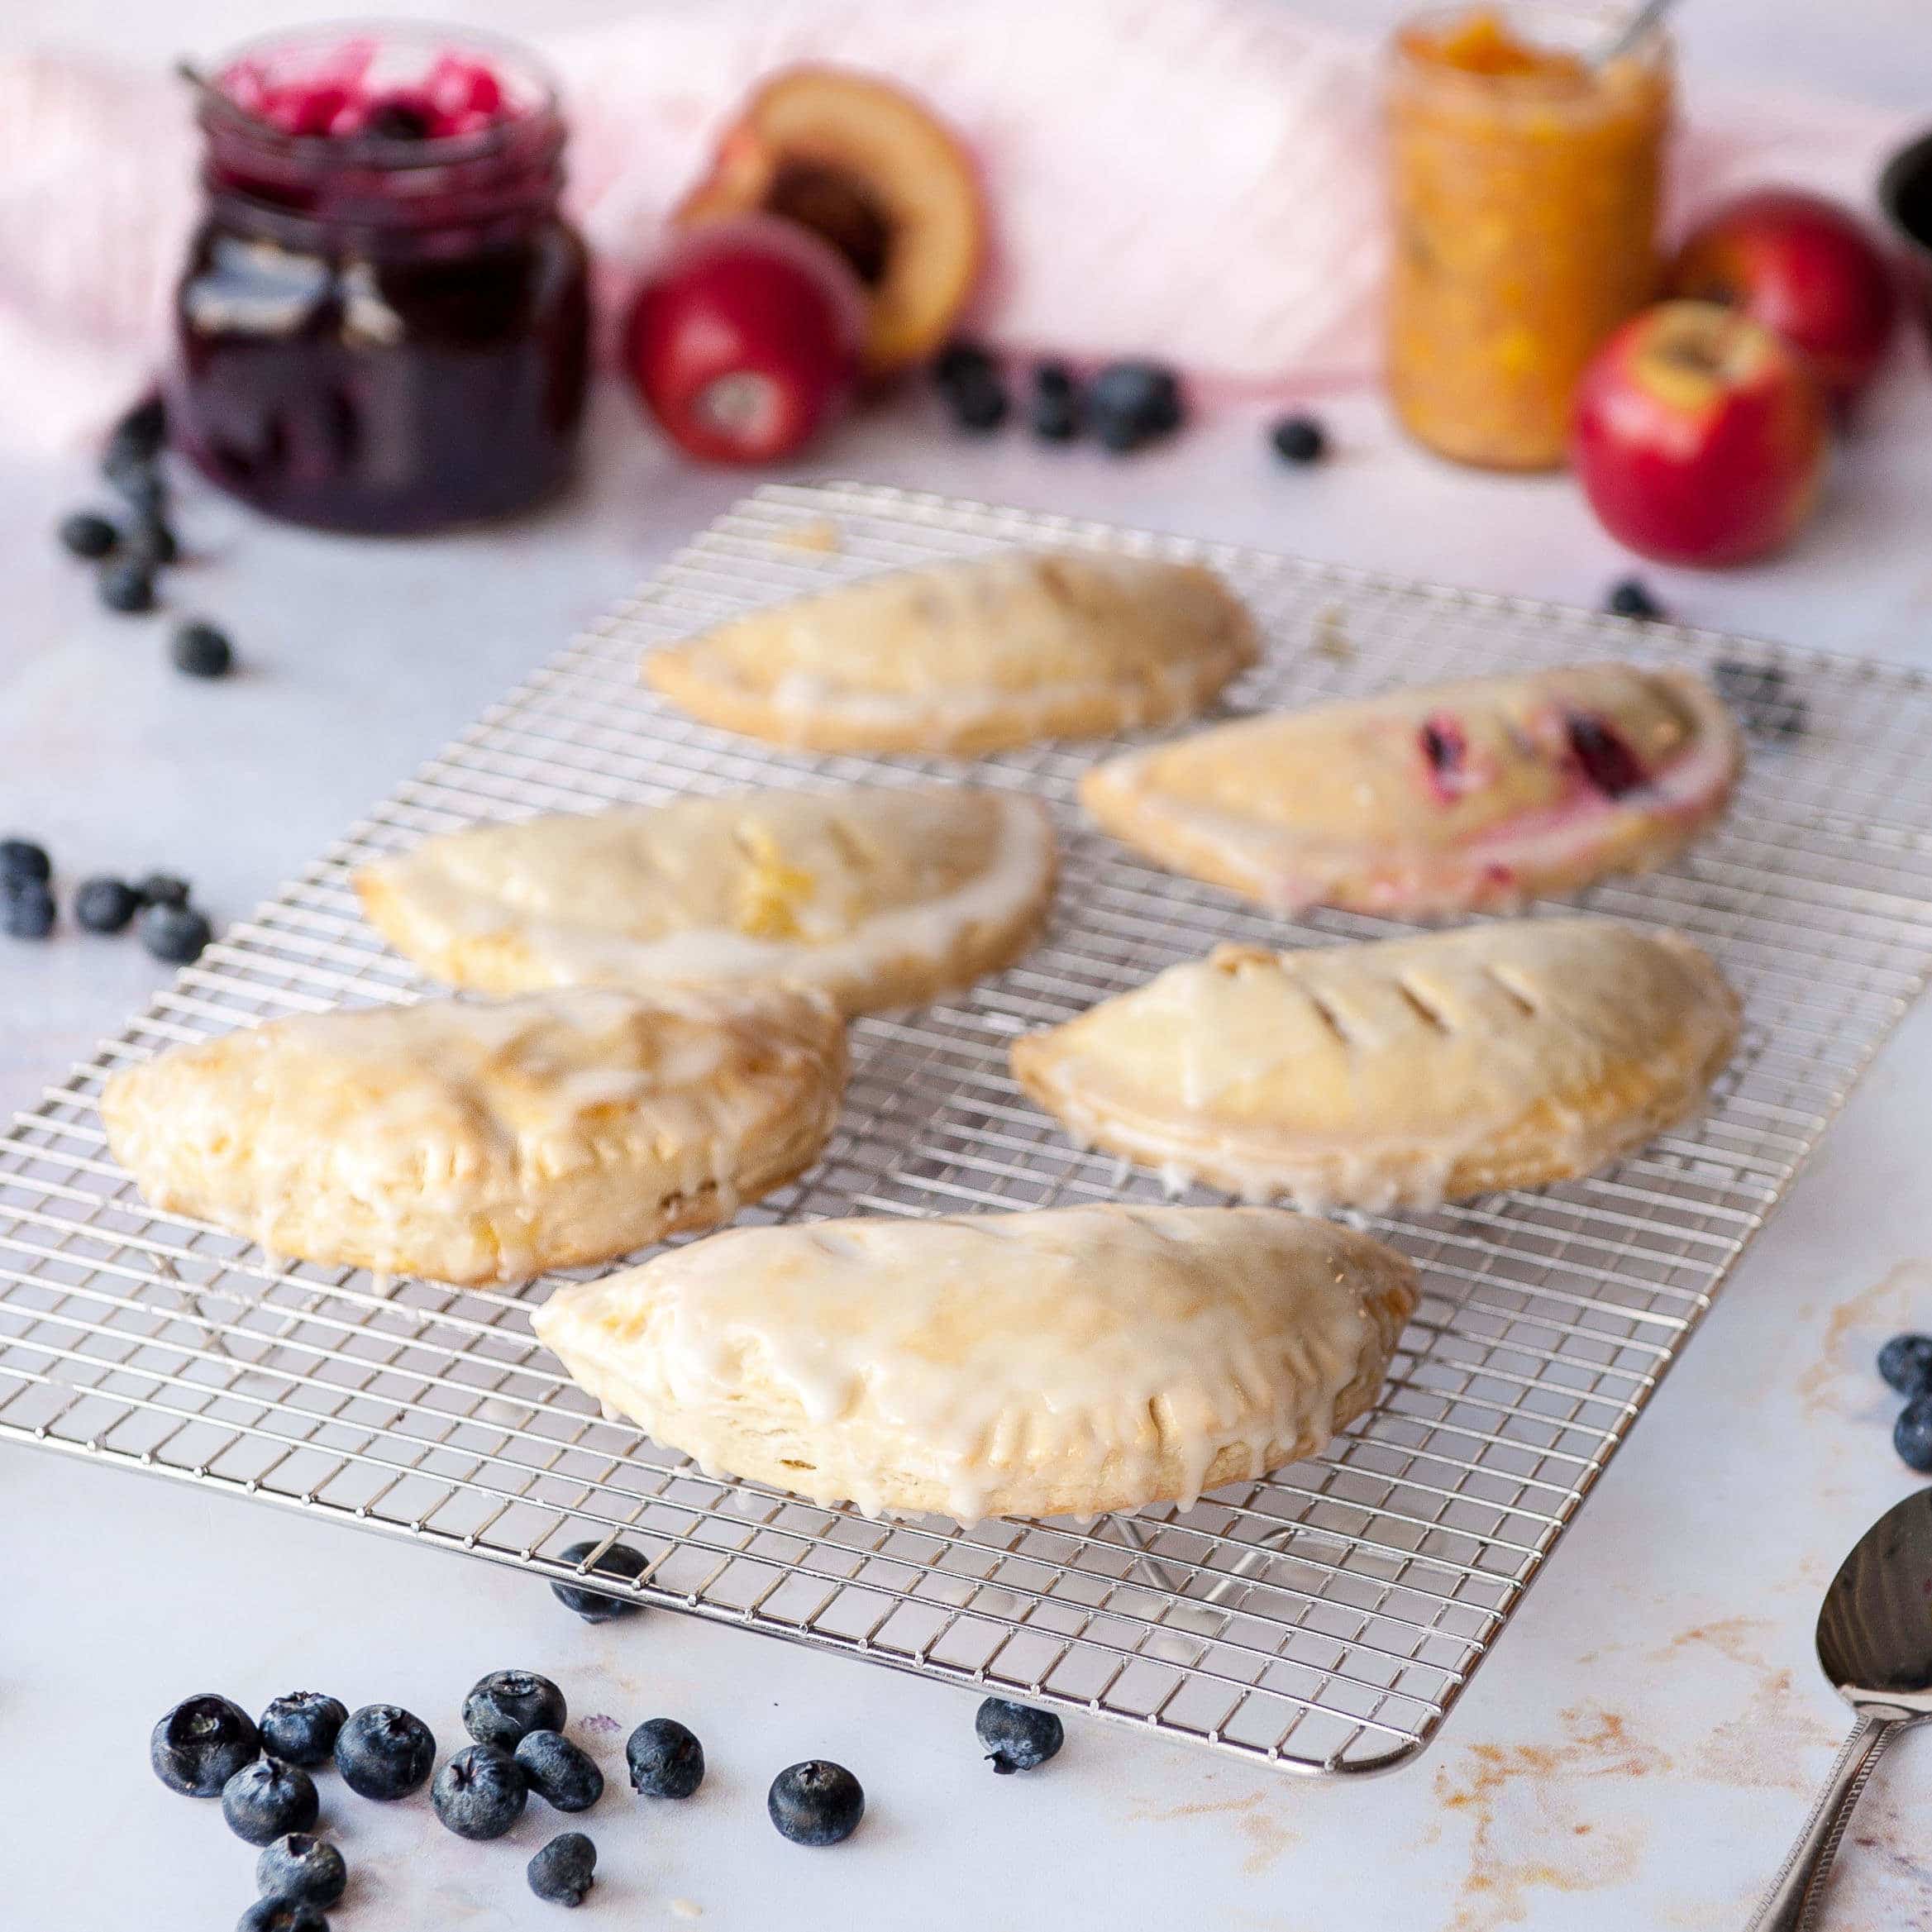
A hand pie is basically a miniature pie that fits in your hand. It can be sweet or savory, made by spooning filling onto a circular (or rectangular) piece of dough, folding it over, and sealing it shut before baking. You'll be shocked how much easier they are to make than an actual pie. They're also a great dessert for parties and weddings since there's no need to cut and serve anything. Just set them out and let your guests help themselves.
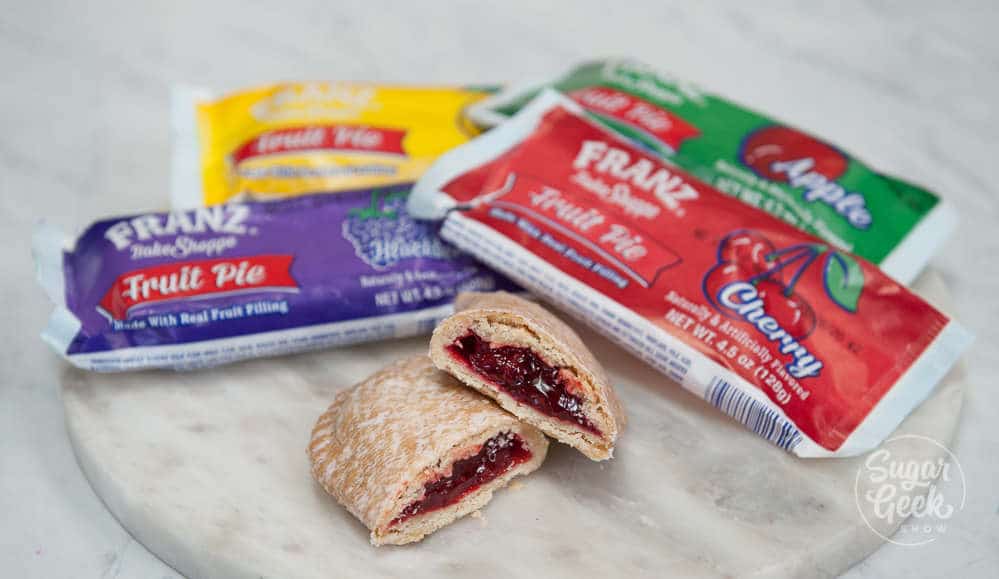
Does anybody else remember Franz hand pies? The grocery store always felt like a magical place when I was a kid, and if I was really good, my dad would buy me one of those $1 hand pies, which was a big deal since we rarely got treats growing up. I decided to show my daughter Avalon what she was missing, so I picked up a few while I was out one day. Sadly, it wasn't as good as I remembered. The crust was stale and bland, and the filling was goopy. Why are childhood treats never as good as we remember them? So of course, I had to remake them myself, extra delicious, with multiple fillings.
Quick Glance at the Recipe: Hand Pies
- Recipe Name: Hand Pies
- Why You'll Love It: A sturdy, buttery crust and endless filling options, sweet or savory, that you can bake, deep-fry, or air fry with no leaking.
- Time and Difficulty: About 25 minutes active prep and baking, plus 1 hour chilling, easy.
- Main Ingredients: Flour, butter, egg, and your fruit or savory filling of choice.
- Method: Make the dough and filling, chill, roll, fill, seal and vent, then bake, deep-fry, or air fry.
- Texture and Flavor: Sturdy, buttery, crisp crust with a juicy, well-thickened filling, sweet or savory.
- Quick Tip: Chill your filled, sealed hand pies for 20 minutes before cooking. It firms up the butter so the crust holds its shape instead of leaking.
Jump to:
- Quick Glance at the Recipe: Hand Pies
- What Makes These Hand Pies So Good⭐⭐⭐⭐⭐
- Hand Pie Ingredients
- How to Make Hand Pies Step-By-Step
- Deep-Fried Hand Pies
- Air-Fried Hand Pies
- Common Hand Pie Problems to Avoid
- Final Thoughts
- Make This Recipe Your Own
- Hand Pies FAQs
- More Pies and Tarts Recipes to Try
- Ready To Master Cake Decorating?
- Leave Me a Review⭐️⭐️⭐️⭐️⭐️
- Recipe
What Makes These Hand Pies So Good⭐⭐⭐⭐⭐
These hand pies are built to hold up no matter how you cook them, with a sturdy, buttery crust and a thick filling that stays put.
- Three ways to cook them. I tested baked, deep-fried, and air-fried, so you can pick whichever fits how you want to eat them. Air fryer is my personal favorite because the crust gets SUPER light and crisp without any added oil.
- Pâte brisée instead of flaky pie crust. I use my pâte brisée dough for these. It's a French mealy dough (a type of shortcrust pastry) that repels liquid while baking, so your filling doesn't turn the crust soggy no matter which method you use.
- Sturdy enough to eat with your hands. It's sturdier and finer-textured than a typical flaky dough, which is exactly what you want for something you're going to bake, fry, or air fry and eat with your hands.
Hand Pie Ingredients
There are endless filling options for hand pies depending on the season, but the dough and technique stay the same. Most of what you need is pantry-standard: flour, salt, sugar, eggs, and butter. I always recommend weighing your ingredients with a digital kitchen scale for the most accurate results.
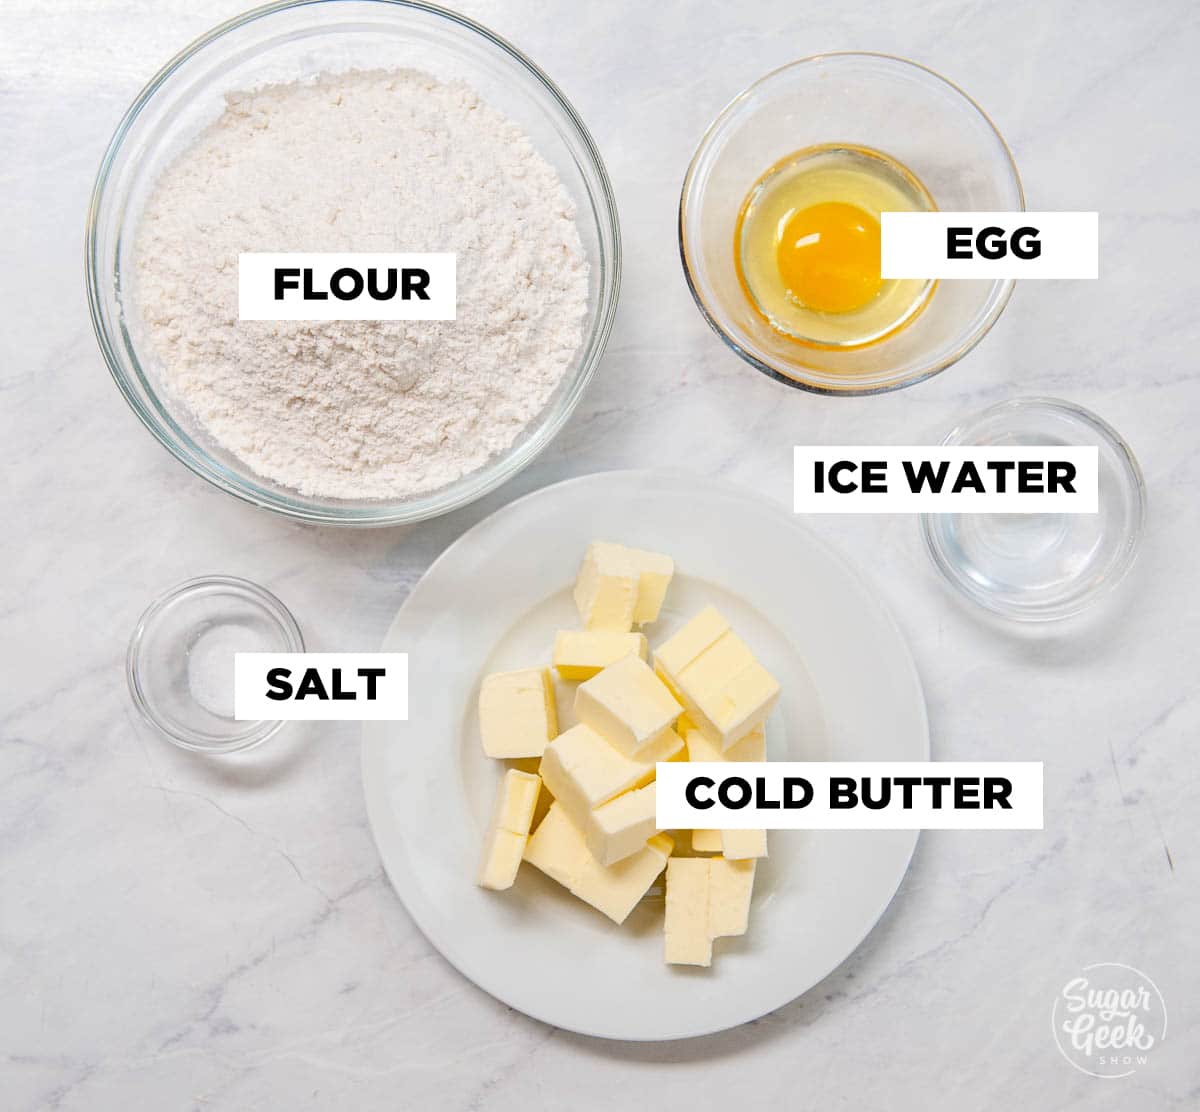
- All-purpose flour - The base of the pâte brisée dough.
- Salt - Balances sweetness in both the dough and the filling.
- Butter - Cold and cubed in the dough for a sturdy, crisp crust, and melted to cook down the fruit filling until it's glossy and thick.
- Egg - Binds the dough together, and whisked with a little water, makes the egg wash that seals the edges and gives the crust its golden color.
- Fresh or frozen fruit - Use whatever's in season. Apples, peaches, blueberries, strawberries, and more all work.
- Lemon juice - Brightens both the fruit filling and the glaze.
- Water or juice - Cooks down with the fruit to build the filling. Pick a juice that complements your fruit's flavor.
- Sugar - Sweetens the filling. White or brown sugar both work.
- ClearJel or cornstarch - Thickens the filling to a glossy, sliceable texture. ClearJel stays shinier, but cornstarch works fine if that's what you have on hand.
- Powdered sugar - Whisked with lemon juice for the simple glaze on top.
How to Make Hand Pies Step-By-Step
This is a two-stage recipe, dough and filling, so a little mise en place goes a long way. Make sure your butter is cold and cubed before you start the dough.
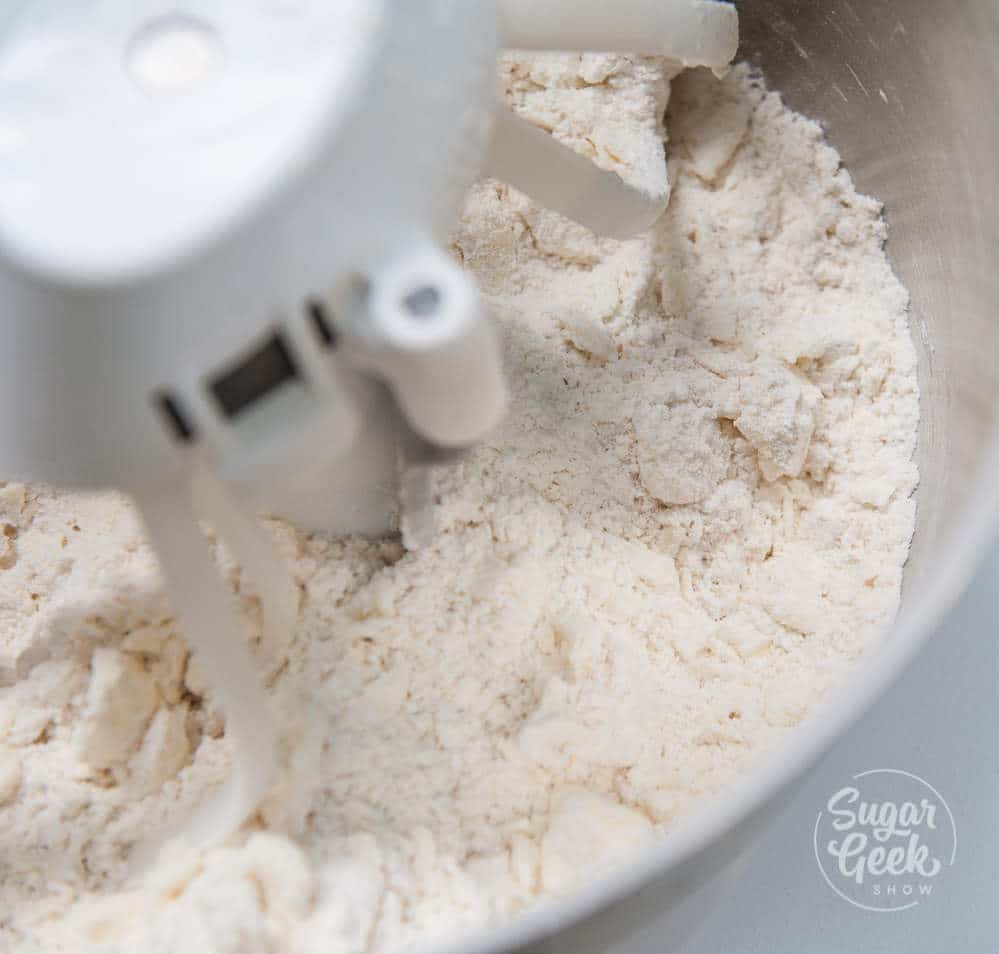
- Mix the dry ingredients. Combine the flour and salt in the bowl of your stand mixer fitted with the paddle attachment, or in a food processor.
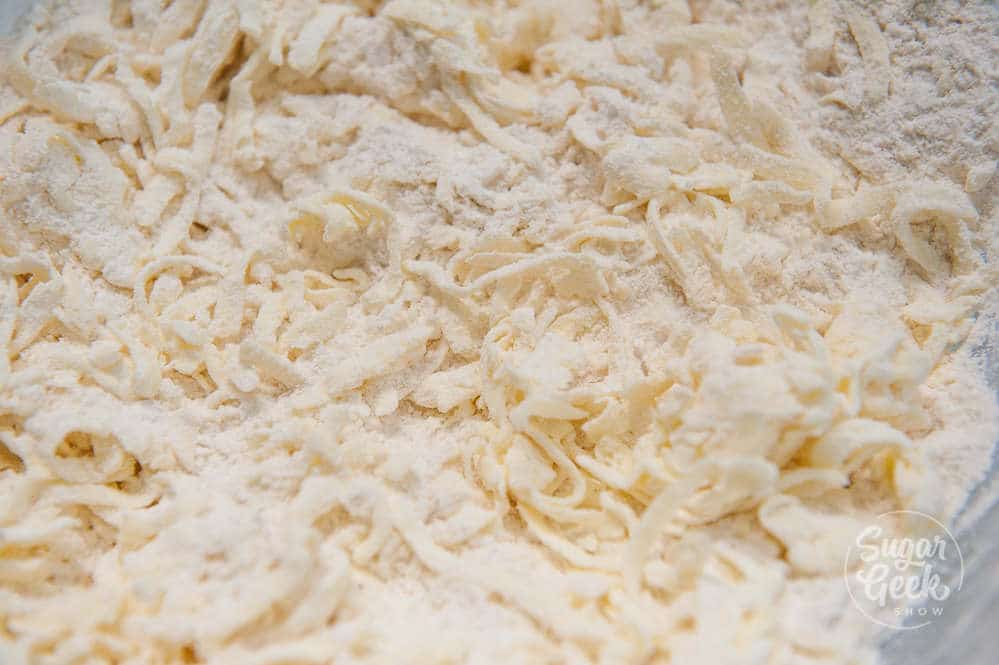
- Cut in the butter. Add the cold butter and mix on low speed (or pulse, if using a food processor) until the mixture looks like coarse sand.
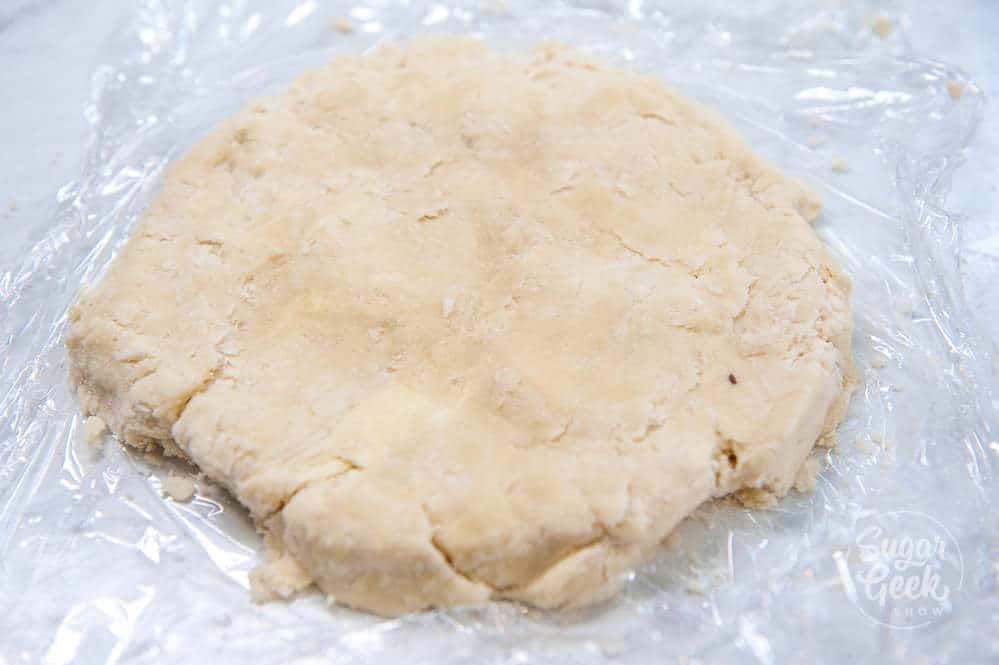
- Bring the dough together. Add the egg and ice water, mixing just until the dough comes together and sticks. Don't overwork it. Then flatten the dough into a disk.
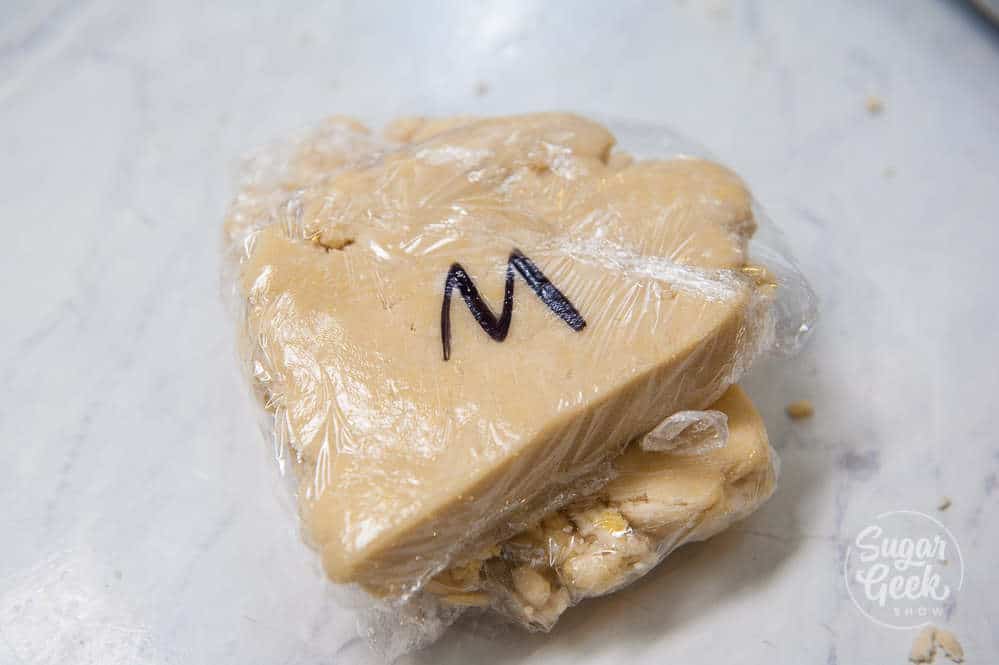
- Chill the dough. Wrap the dough tightly in plastic wrap and refrigerate for at least one hour before rolling it out and baking.
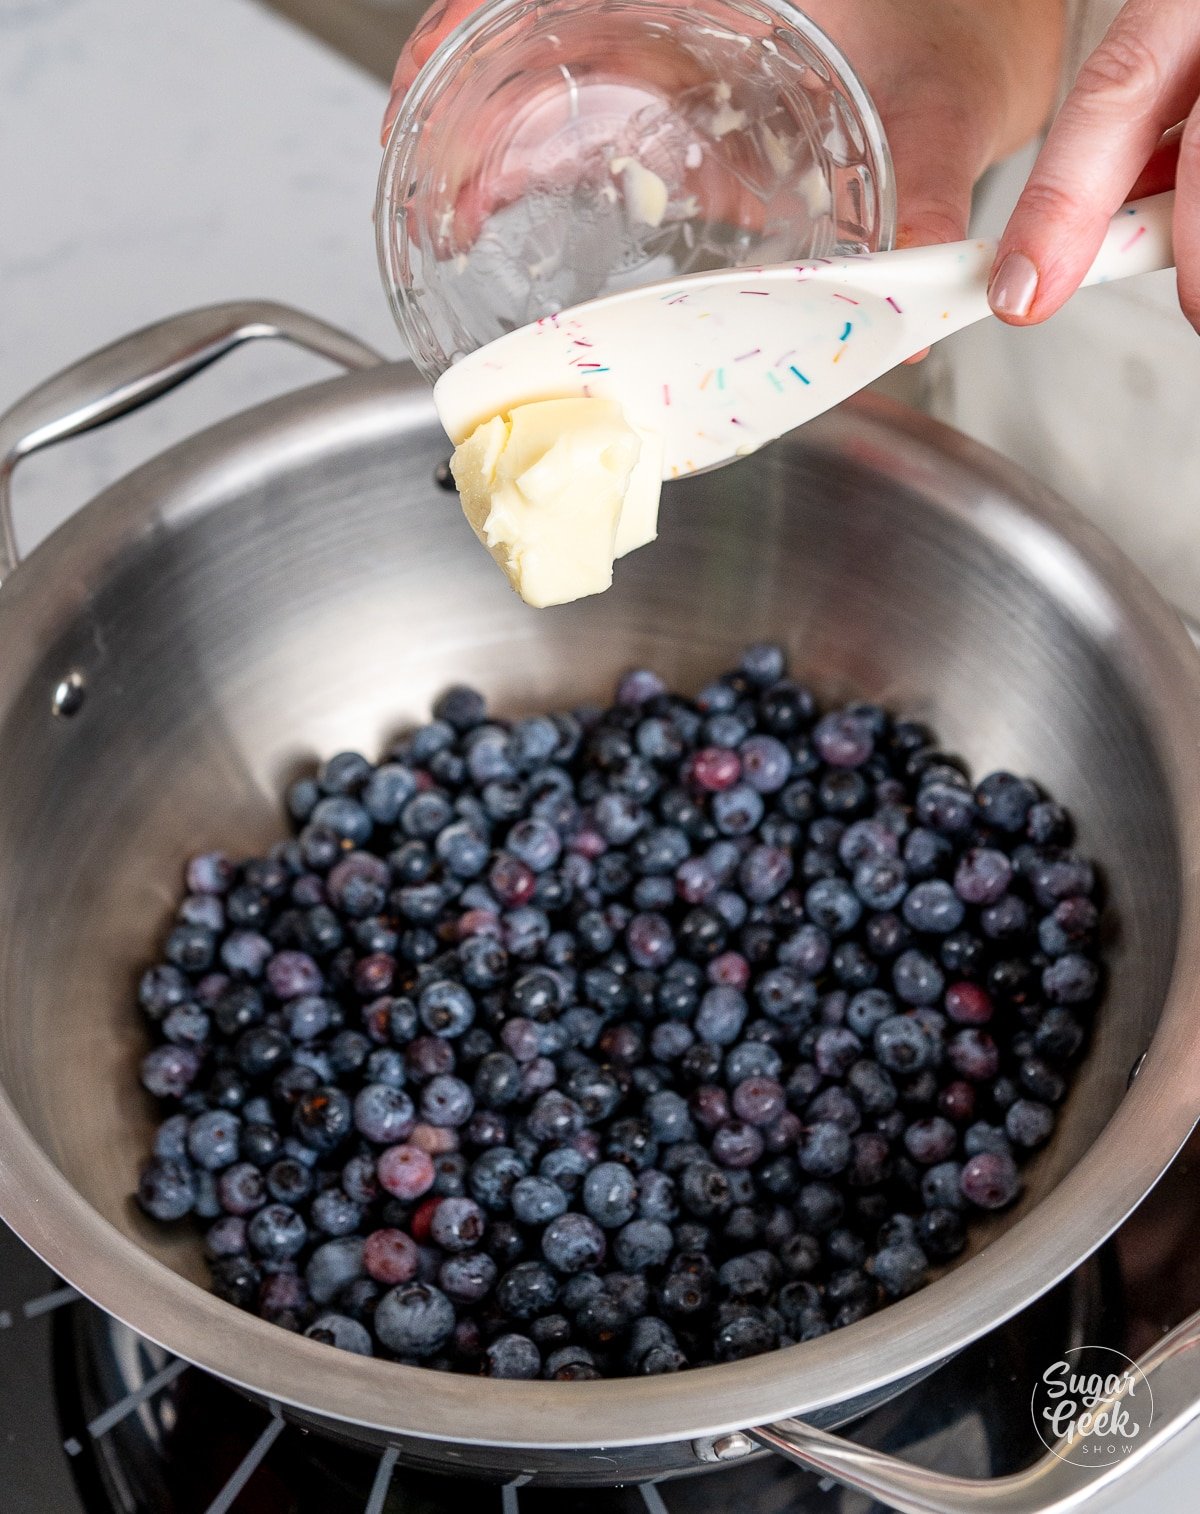
- Start the filling. Prepare your fresh fruit by chopping into small cubes (if needed) or use frozen fruit (no need to defrost). Place your fruit and butter in a large saucepan over medium-high heat until the butter is melted and bubbling.
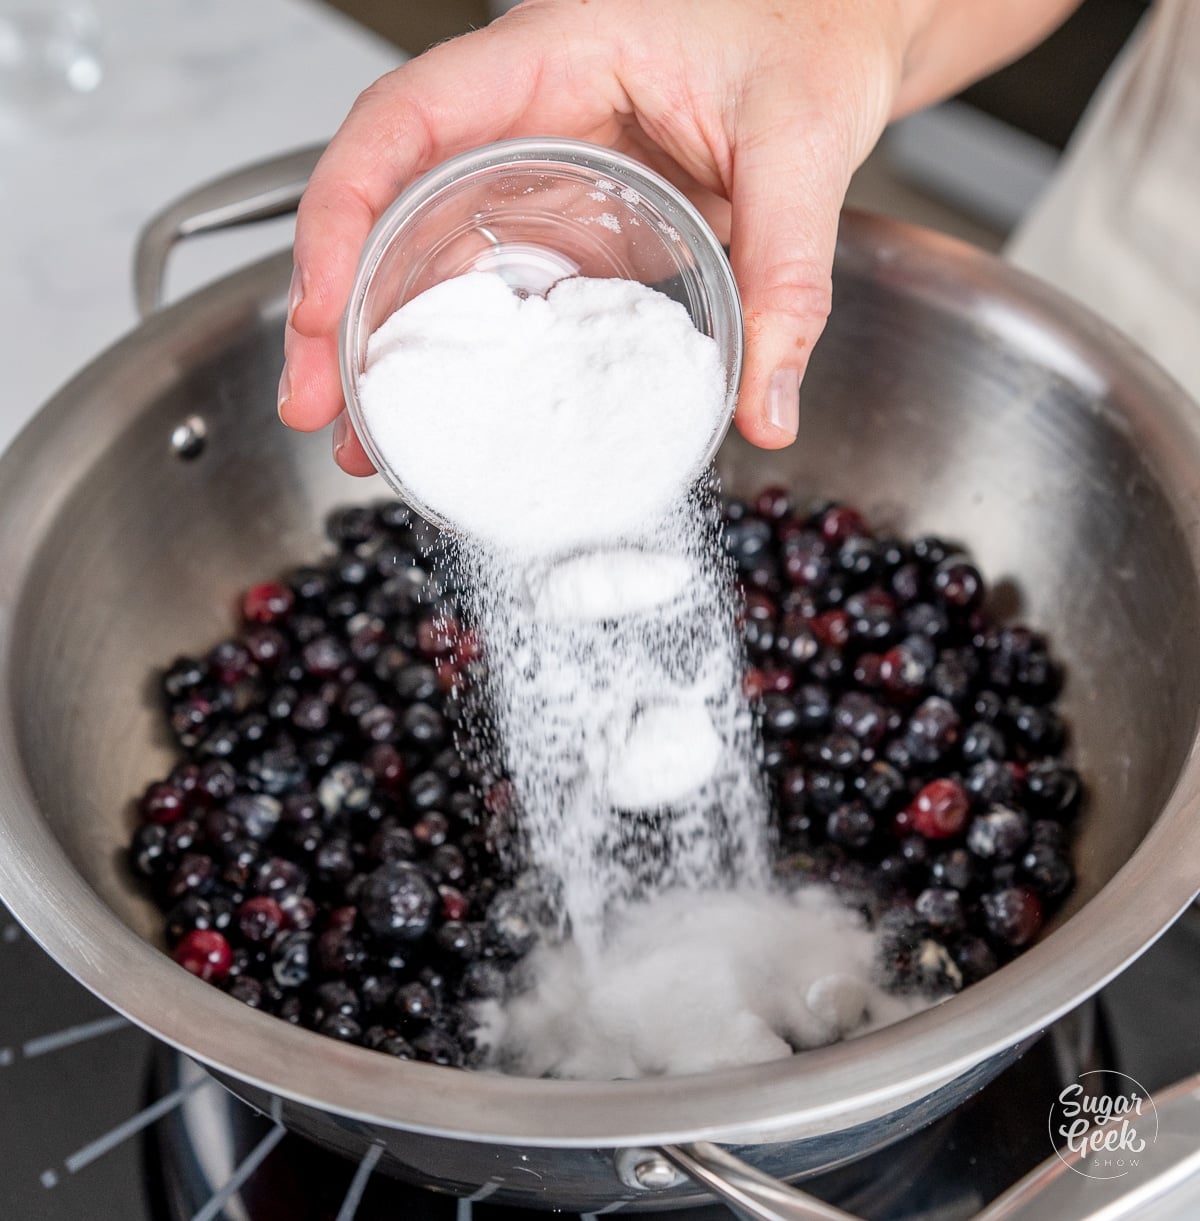
- Add ingredients and simmer. Add water (or juice), sugar, lemon juice, and salt, and bring to a simmer.
PRO TIP: Make sure your filling is fully cooled before you start rolling and filling. Warm filling will melt the butter in your dough and make sealing a mess.
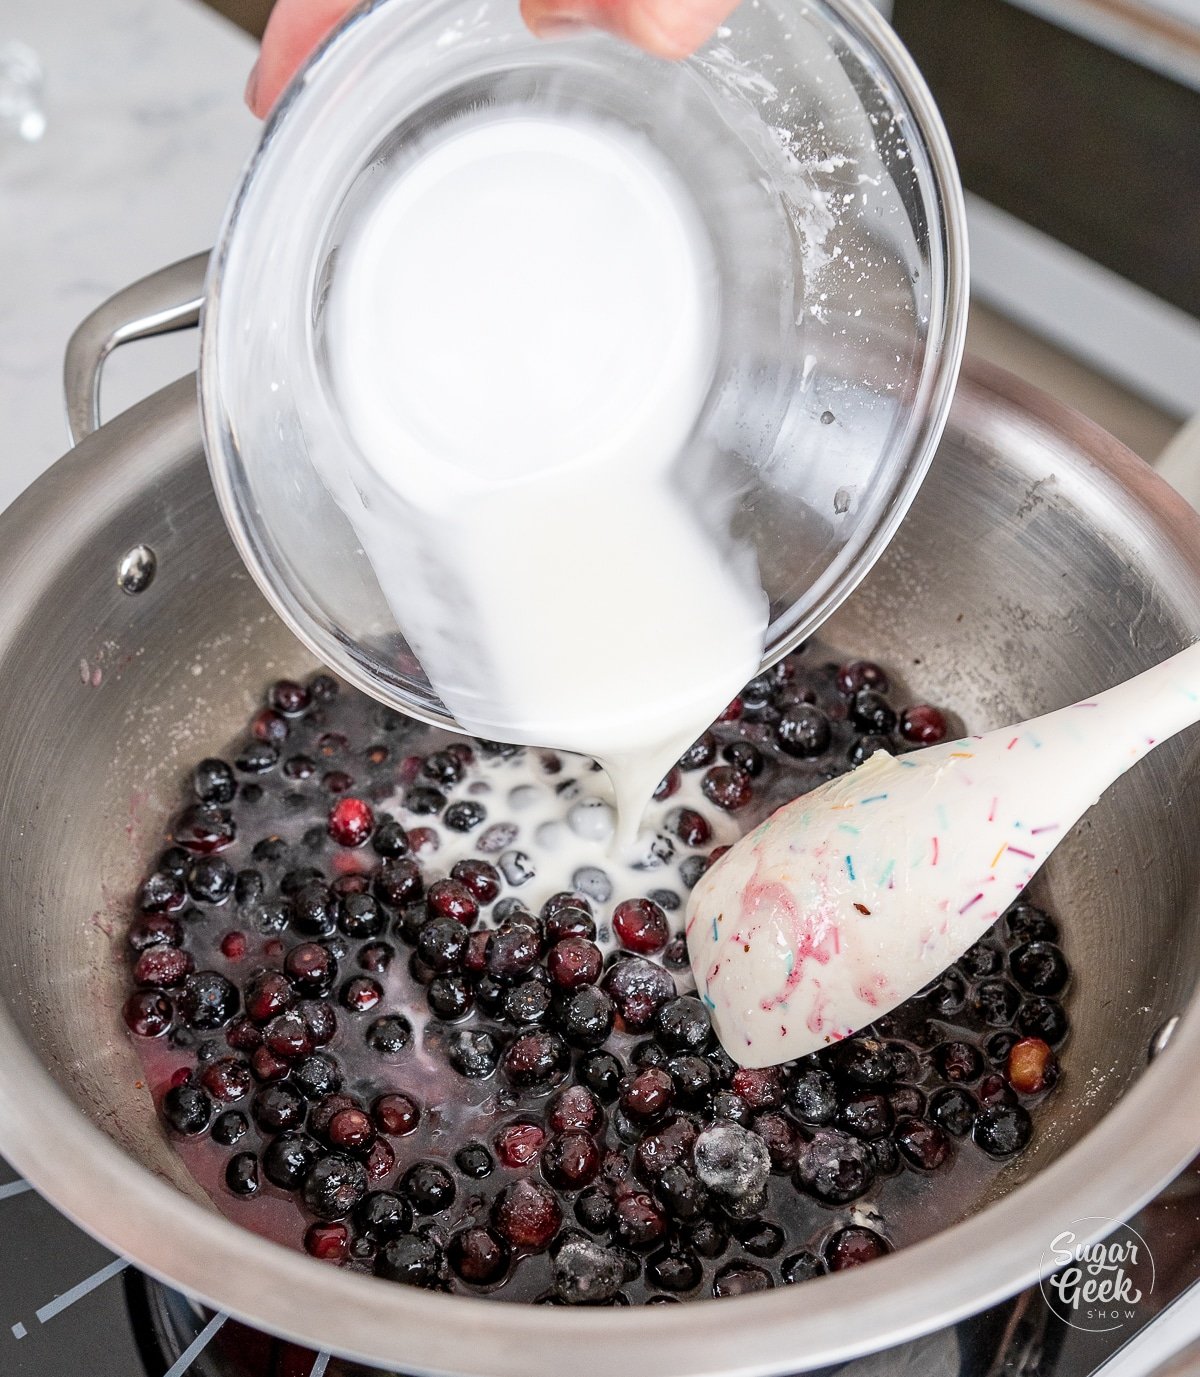
- Thicken the filling. Combine your cornstarch (or ClearJel) with your water and whisk to make a slurry. Pour into your simmering mixture and cook for 1-2 minutes until it's clear.
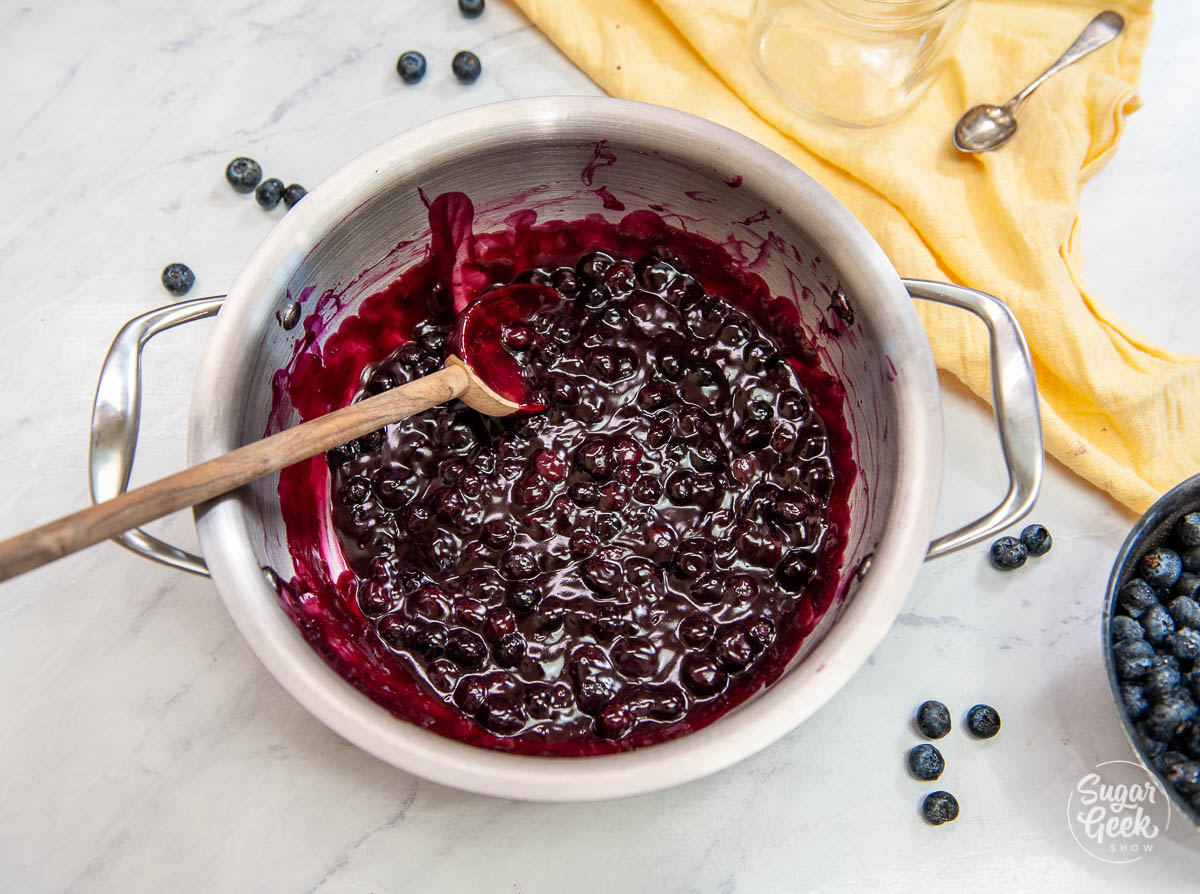
- Cool and set aside. Once it has thickened, remove the filling from the heat and let it cool completely. Cover with plastic wrap to avoid forming a skin and set aside.
PRO TIP: When rolling out cold pie dough, start in the center and work your way out, making small rolls and rotating frequently until it loosens up. Go slow and be patient.
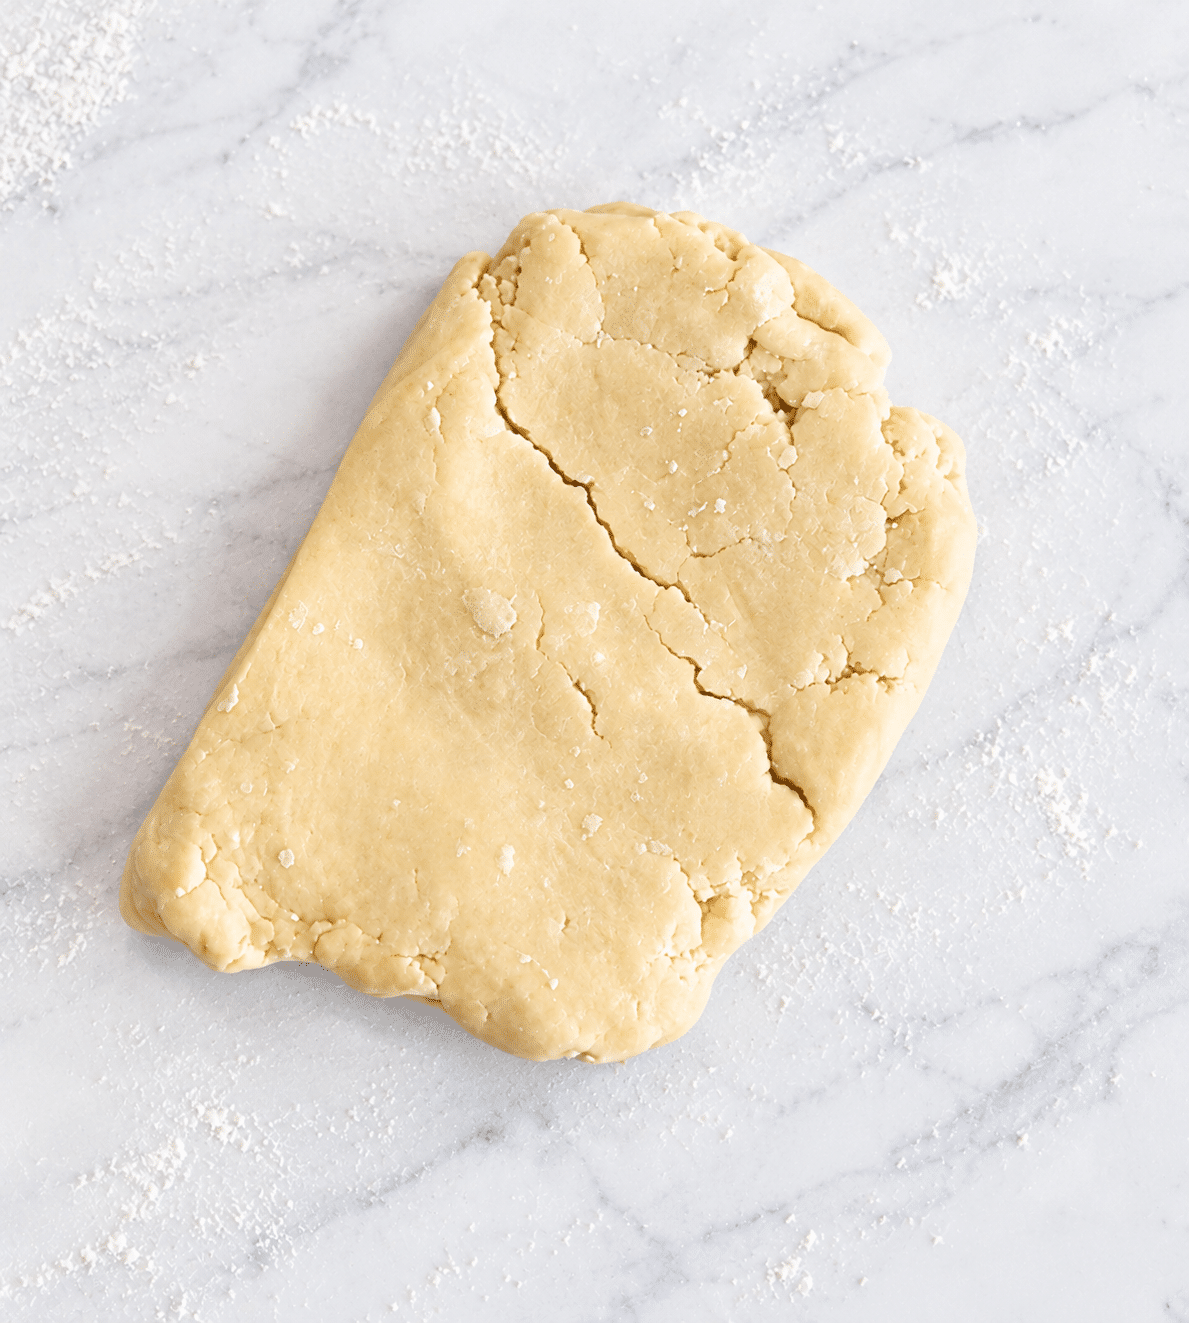
- Rest your dough. Line a large sheet pan with parchment paper. Let your dough rest at room temperature for 15 minutes to soften a bit. Dust your surface with flour, then begin pressing the dough with your rolling pin to start flattening it.
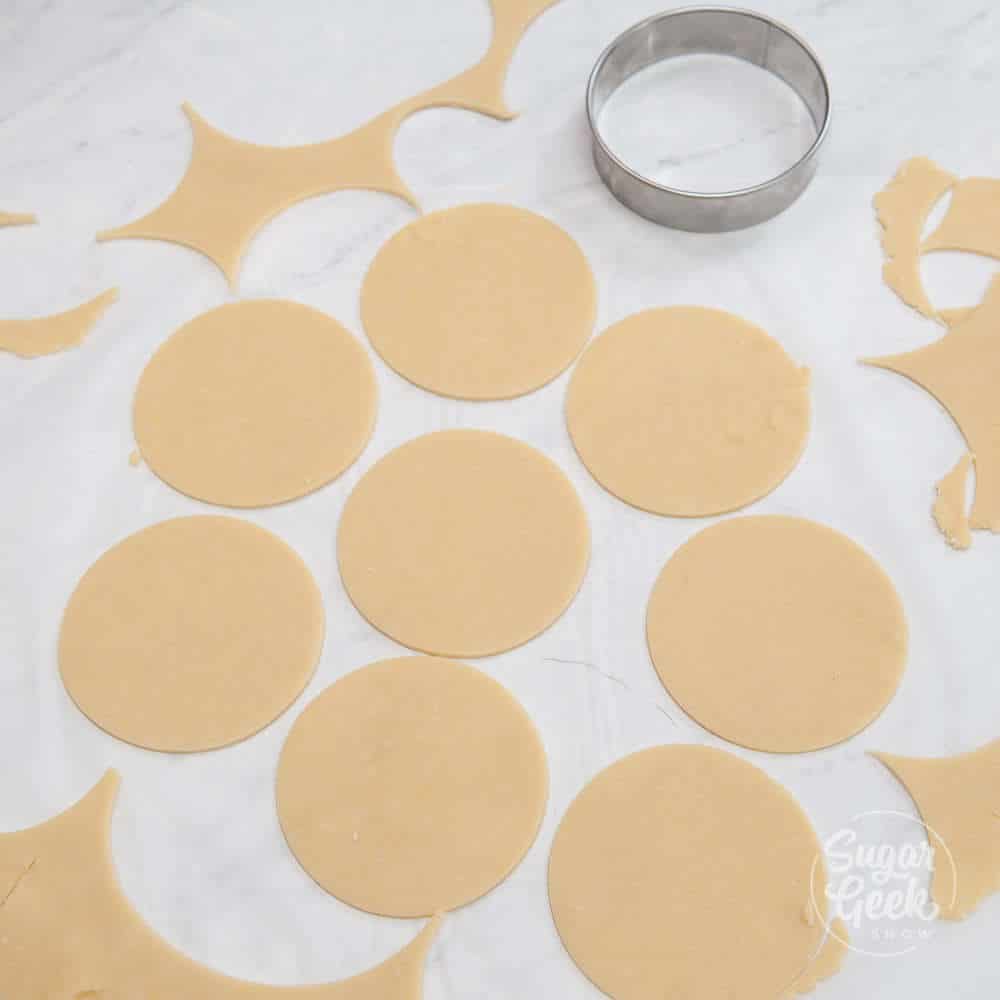
- Roll and cut your dough. Roll the dough to ⅛ inch thick and cut into 6 inch circles (or 5 inch circles for smaller pies) with a cookie or biscuit cutter.
PRO TIP: Thinner dough makes a crisper, crunchier crust, so roll it thinner than you think you should.
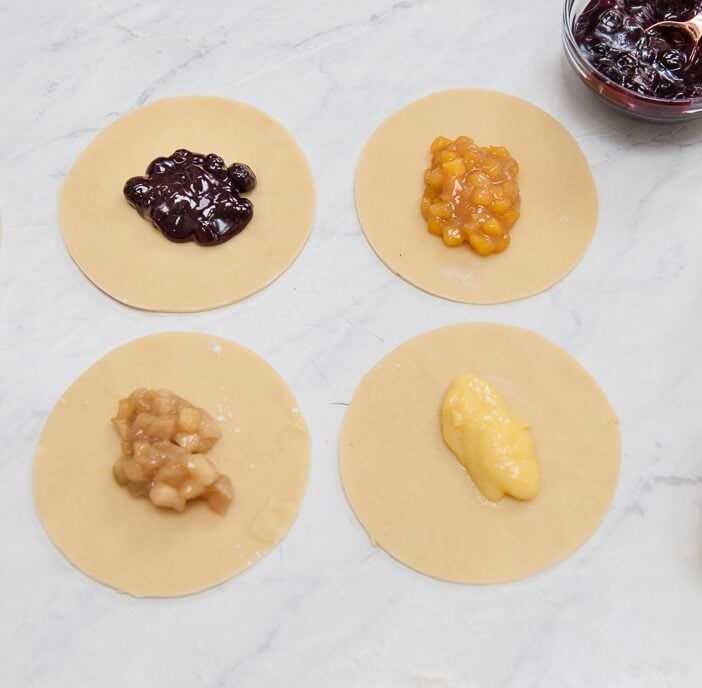
- Fill your hand pies. Add 3 Tablespoons of filling to each 6 inch circle (1 Tablespoon for the 5 inch circles). Don't overfill, or they'll burst while cooking.
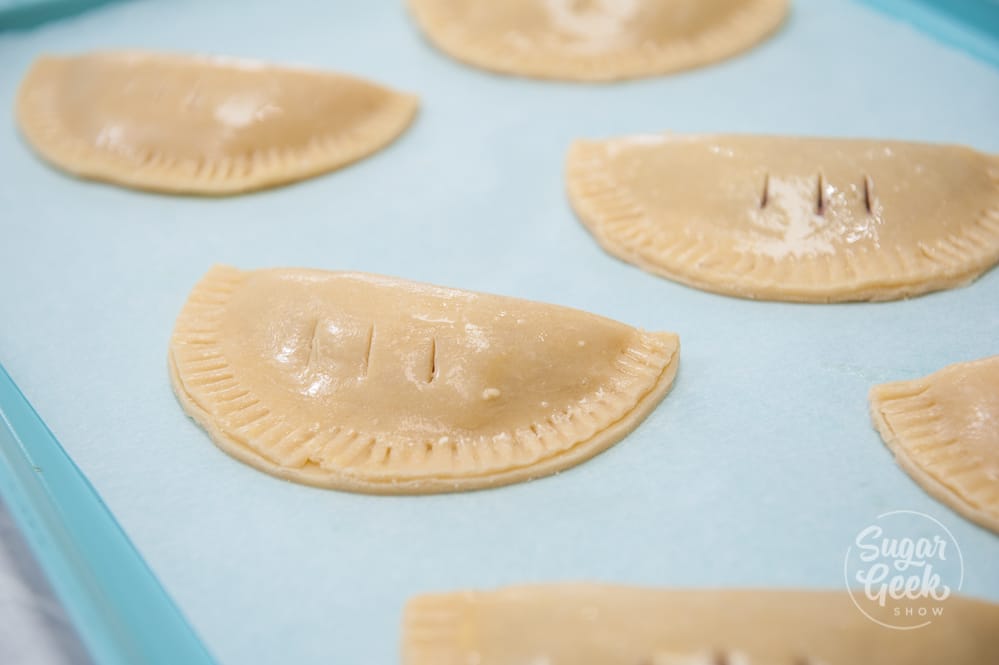
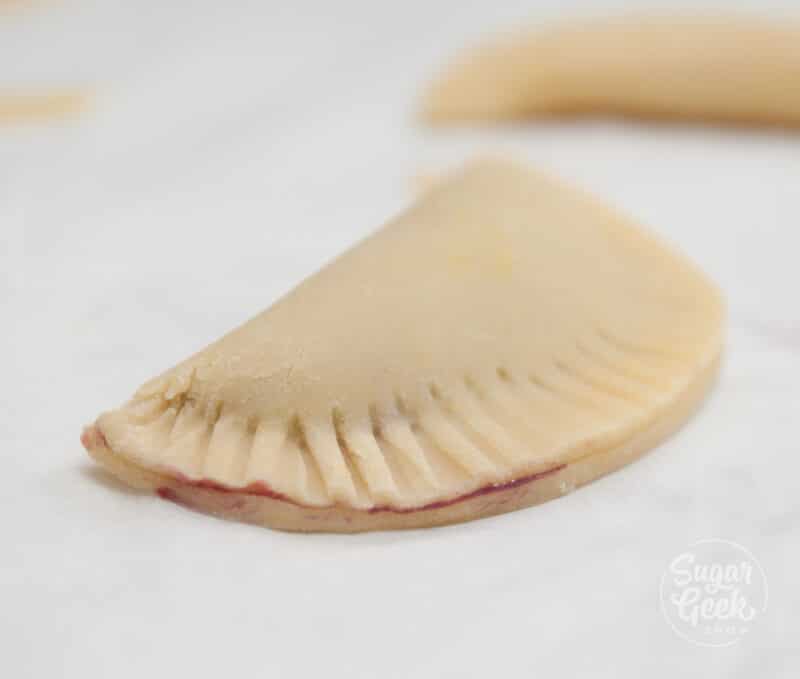
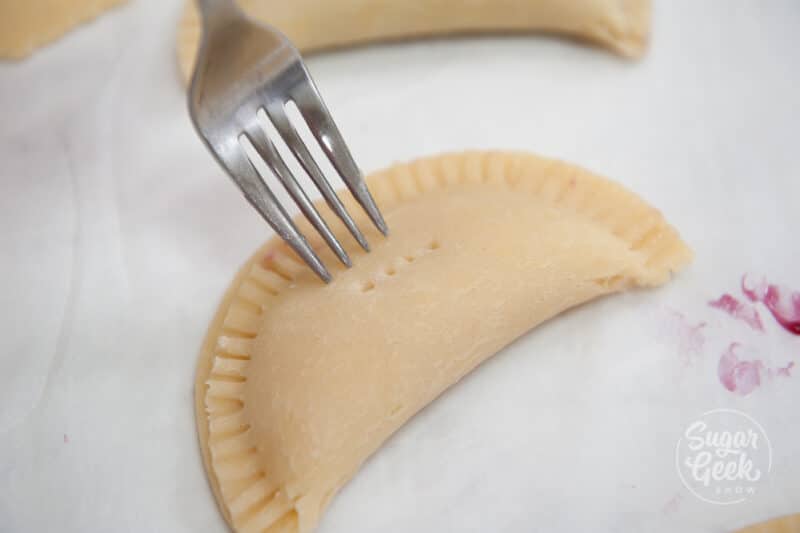
- Seal and vent. Brush the edges with egg wash, fold the dough over, and crimp firmly with a fork to seal it shut. Cut 3 small slits in the center top, being careful not to cut all the way through, so steam can escape while baking.
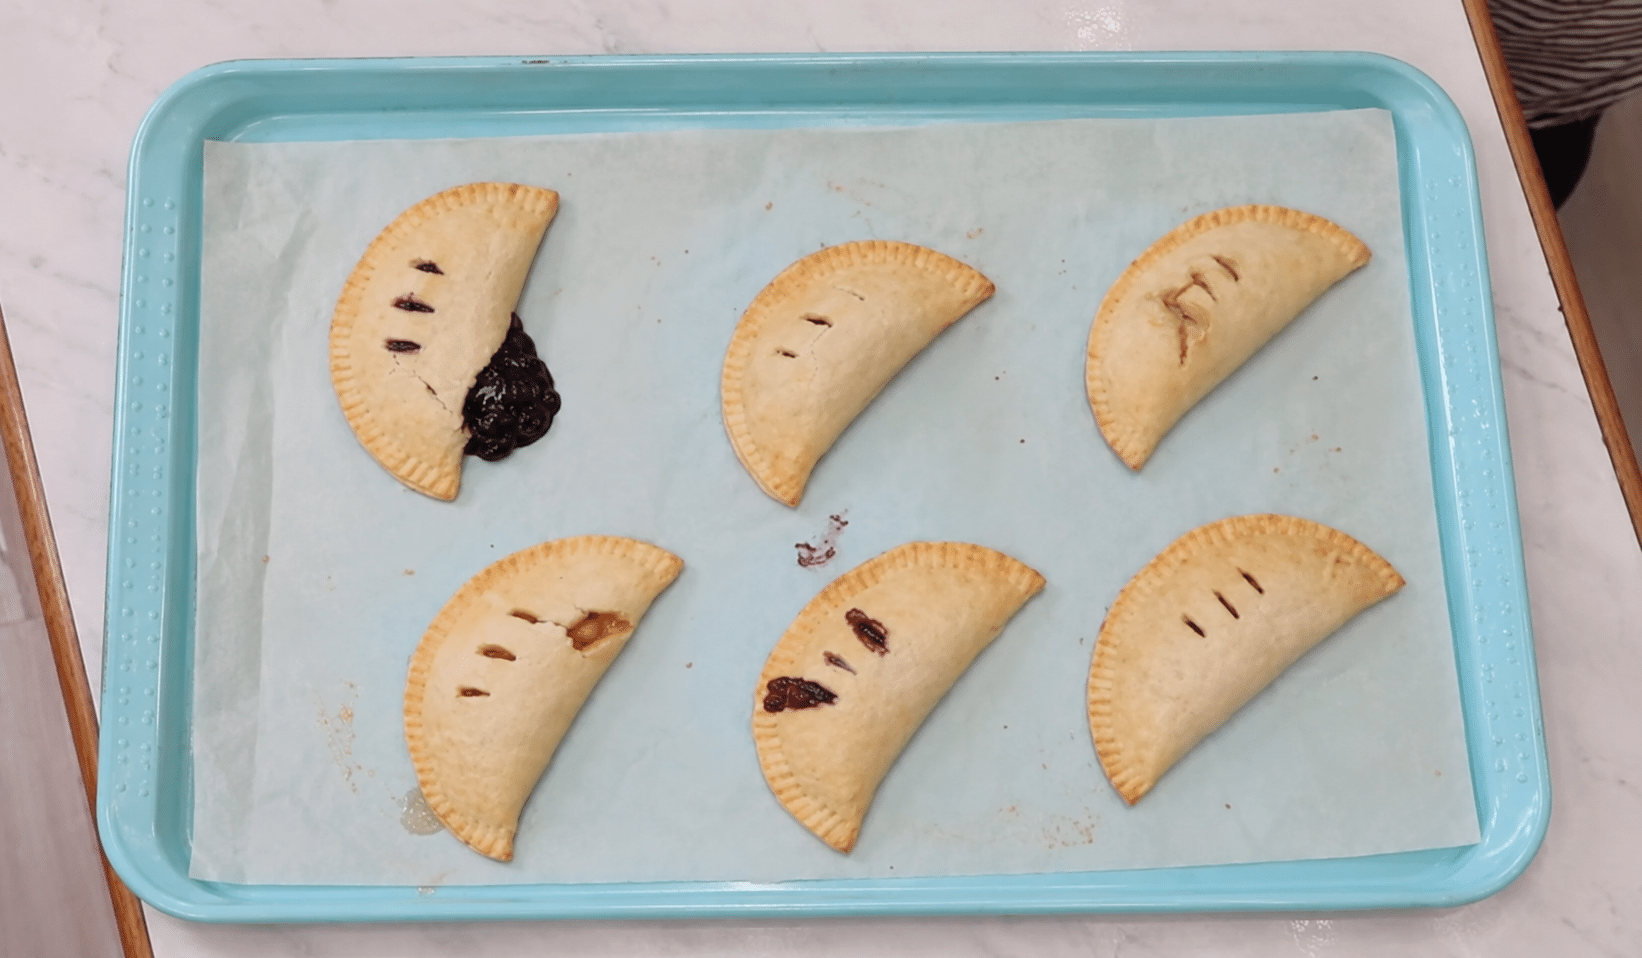
- Chill again, then bake. Place the hand pies on the parchment-lined sheet pan and refrigerate for 20 minutes. Preheat your oven to 400º F while they chill. Bake for 20-25 minutes, until golden brown on top and bottom and the filling is just starting to bubble.
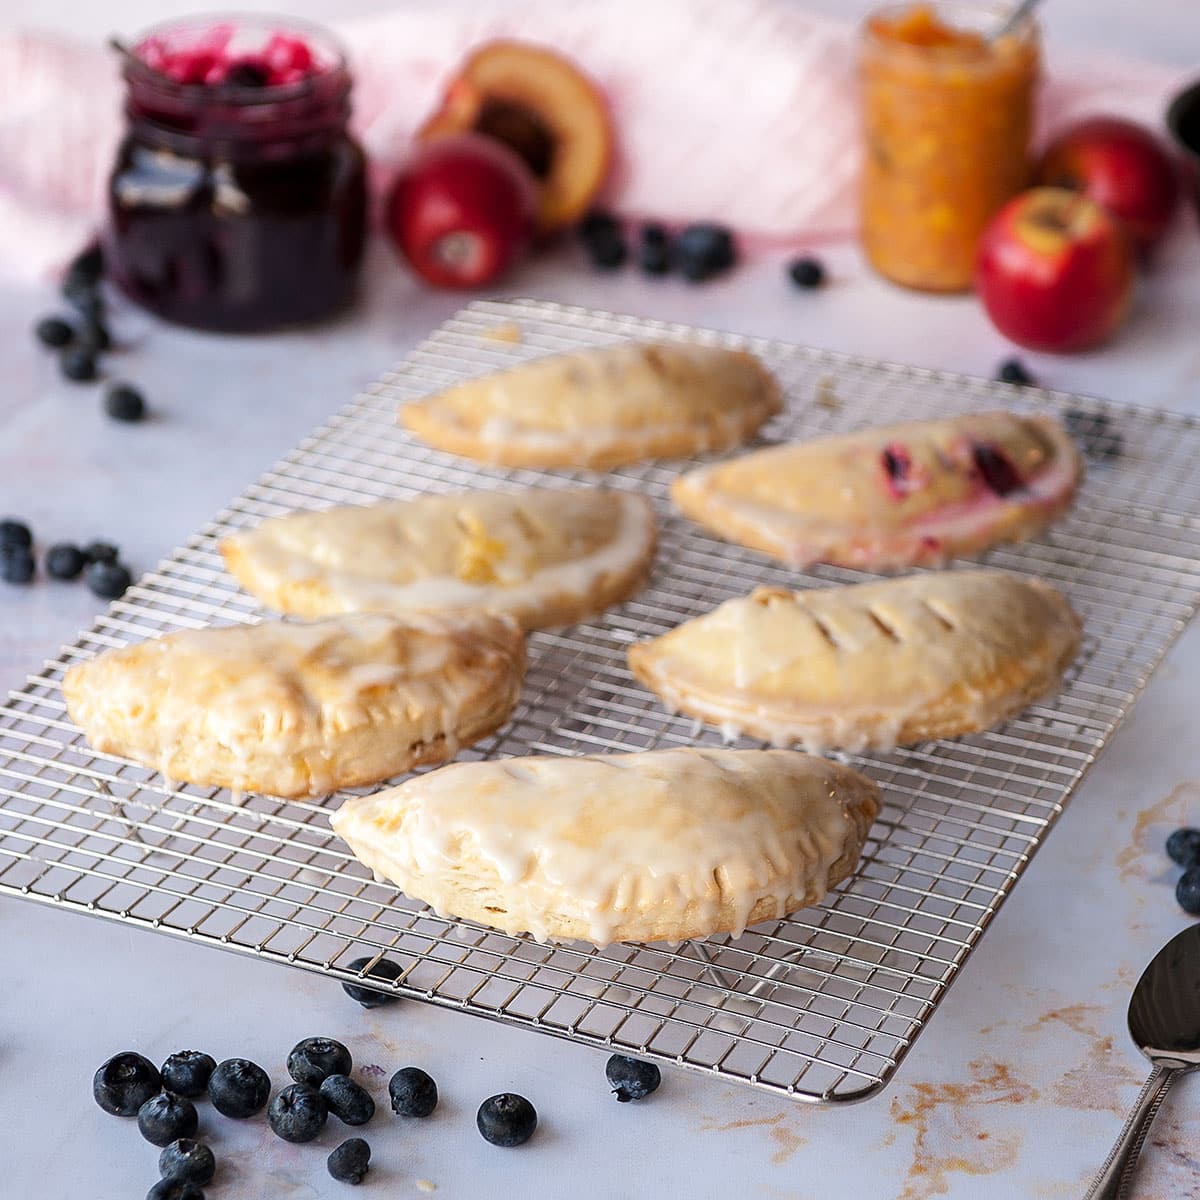
- Cool and glaze. Let the hand pies cool for 10 minutes. Whisk together the powdered sugar and lemon juice until smooth, then brush or drizzle the glaze over the top.
Deep-Fried Hand Pies
Deep-fried hand pies taste the most like the store-bought version, and the crust bubbles up beautifully and gets EXTRA crispy.
- Prepare and chill. Assemble your hand pies as usual, but dock 3 small holes on top with a fork instead of cutting slits. Chill in the fridge for at least one hour.
- Heat your oil. Heat 4 inches of neutral oil (vegetable shortening or canola oil work well) in a deep pot like a dutch oven to 375º F. Use a thermometer to keep an eye on the temperature, and keep the pot toward the back of the stove, especially with kids around. Hot oil is dangerous, and so are splashes.
- Fry. Fry 2-3 hand pies at a time for 3-4 minutes, until golden brown.
- Drain and finish. Drain on a paper towel, let cool for 10 minutes, then dust with powdered sugar or brush with glaze. They're best eaten the same day.
Air-Fried Hand Pies
This is actually my favorite way to make hand pies. The air fryer makes the crust SUPER light and crisp without any of the added oil from deep frying.
- Prepare and chill. Assemble your hand pies as usual and chill for one hour.
- Egg wash and sugar. Brush the surface with egg wash and sprinkle on sanding sugar for color and crunch. This part is optional.
- Air fry. Set your air fryer to 400º F and cook for 13-15 minutes, until golden brown.
Common Hand Pie Problems to Avoid
- Don't overfill. Filling expands while it cooks, so an overstuffed hand pie will push right through the crust.
- Seal the edges well. Dampen the crust with a little egg wash. Then press together firmly with a fork. Keep filling off the very edge of the dough, or it'll break the seal and leak.
- Vent the tops. Give steam somewhere to escape while cooking, or the pressure builds up and bursts the pie open.
- Smooth out cracks. Cracked dough is a weak point filling can seep through. Smooth any cracks before you fill and seal.

Final Thoughts
These turned out so much better than the ones I remembered from the grocery store. They're buttery, crisp, and packed with real fruit flavor instead of goopy filling. I'm honestly not convinced there's any meal that couldn't be turned into a hand pie at this point. Once you've got the dough and technique down, the filling options are endless.
Make This Recipe Your Own
- Pick your cooking method. Don't want to bake? This recipe also includes deep-fried and air-fried versions above.
- Swap the filling. Apple filling, peach filling, blueberry filling, cherry filling, lemon curd, or berry filling all work in the same dough.
- Use store-bought filling. Store-bought pie filling works, too. No judgment!
- Go savory. Try chicken pot pie filling, creamy mushrooms and beef, or even ham and cheese for a breakfast hand pie. Use the same dough and technique as the sweet version.
Hand Pies FAQs
Can I use store-bought pie crust instead of making the dough from scratch?
Yes, a store-bought pie crust or puff pastry works fine if you're short on time. One reader has used Trader Joe's frozen pie crust with great results. Just know the crust won't be quite as sturdy as my pâte brisée, which is built specifically to repel moisture and hold its shape through baking, frying, or air frying.
Can I make the dough ahead of time?
Yes. Keep the dough tightly wrapped in the fridge, then let it sit at room temperature for about 15 minutes so it softens enough to roll.
Can I use jam instead of pie filling?
You can, though the texture and result will be a little different from my fruit filling. Jam is thinner and sweeter, so it won't hold up quite the same way. If you try it, look for a thicker preserve rather than a runny jam so it doesn't leak out during cooking.
Can I freeze hand pies and bake them from frozen?
Yes. Freeze them unbaked, then bake or air fry them straight from frozen until they're golden brown and the filling is just starting to bubble. I don't recommend reheating baked hand pies in the microwave, since it makes the crust soggy.
What's the difference between a hand pie and a turnover?
The biggest difference is the dough. Turnovers are traditionally made with puff pastry, folded from one square piece into a triangle. Hand pies use a sturdier pie dough, like my pâte brisée. That's what lets them hold up to baking, frying, or air frying without getting soggy or falling apart.
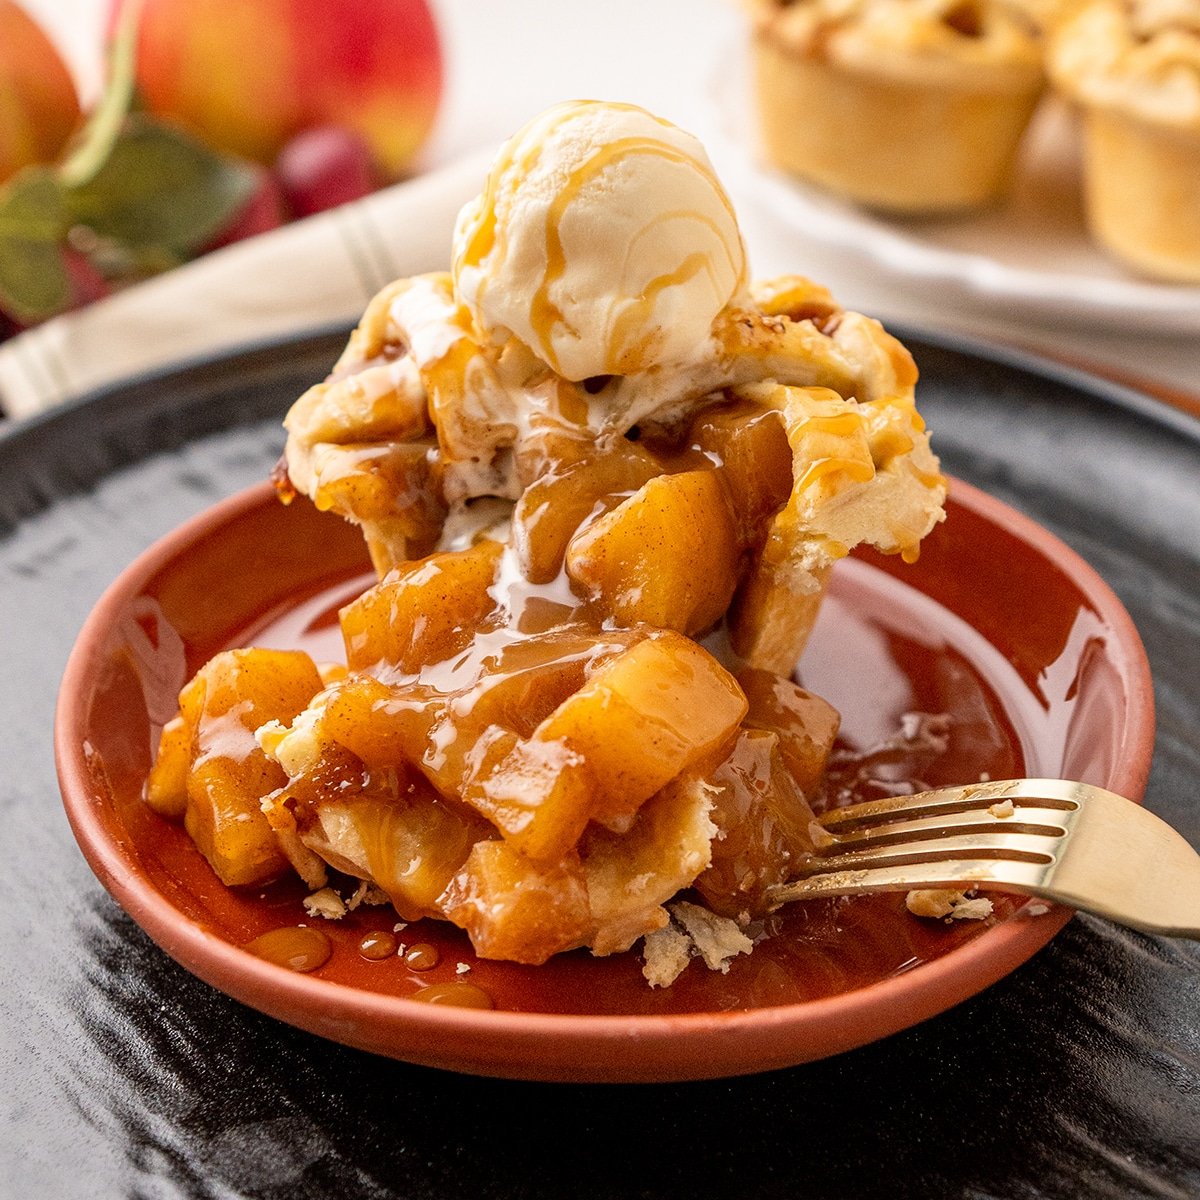
More Pies and Tarts Recipes to Try


Ready To Master Cake Decorating?
Join Sugar Geek University and learn professional techniques through detailed cake decorating courses, tutorials, and real kitchen demonstrations by
award-winning cake decorator, Liz Marek.

Leave Me a Review
⭐️⭐️⭐️⭐️⭐️
If you tried my Hand Pies or any other recipe on my blog, please leave a 🌟 star rating and let me know how it goes in the comments. I love hearing from you!
Recipe
Equipment
- Stand mixer with paddle attachment
- 1 Cookie cutter 5" or 6"
Ingredients
Hand Pie Dough
- 12 ounces all-purpose flour
- ¼ teaspoon salt
- 6 ounces cold unsalted butter cut into cubes or grated
- 1 large egg
- 1 ounce ice cold water
Fruit Filling
- 16 ounces fresh or frozen fruit (apples, peaches, blueberries, strawberries etc)
- 2 Tablespoons lemon juice you can use more or less to your taste
- 6 ounces water or juice that complements the flavor of the fruit
- 1 ounce unsalted butter
- 2 ounces sugar white or brown
- ¼ teaspoon salt
- 1 ounce ClearJel or ½ ounce cornstarch
- 1 ounce water
Egg Wash
- 1 large egg
- 1 Tablespoon cold water
Glaze
- 4 ounces powdered sugar
- 1 Tablespoon lemon juice
Instructions
- Before you begin: Make sure your butter is cold and cubed, and plan for the dough to chill for at least an hour and the filling to cool completely before you assemble.
Hand Pie Dough
- Combine the flour and salt in the bowl of your stand mixer fitted with the paddle attachment, or in a food processor.
- Add the cold butter and mix on low speed (or pulse, if using a food processor) until the mixture looks like coarse sand.
- Add the egg and ice water, mixing just until the dough comes together and sticks. Don't overwork it. Then flatten the dough into a disk.
- Wrap the dough tightly in plastic wrap and refrigerate for at least one hour before rolling it out and baking.
Fruit Filling
- Prepare your fresh fruit by chopping into small cubes (if needed) or use frozen fruit. No need to defrost.
- Place your fruit and butter in a large saucepan over medium-high heat until the butter is melted and bubbling.
- Add in your water (or juice), sugar, lemon juice, and salt and mix until combined. Bring to a simmer.
- Combine your cornstarch (or ClearJel) with your water and whisk to make a slurry. Pour into your simmering mixture and cook for 1-2 minutes. If you're using cornstarch, you only need to cook until it's clear.
- Once it has thickened, remove the filling from the heat and let it cool completely. Cover with plastic wrap to avoid forming a skin and set aside.
Assembly
- Line a large sheet pan with parchment paper.
- Let your dough stand at room temperature for 15 minutes to soften it.
- Dust your surface with flour, then begin pressing the dough with your rolling pin to start flattening it.
- Roll your dough out to ⅛ inch thick or about the thickness of a cake board. Thinner than you think. Thinner dough results in a crisper, crunchier crust for your hand pies.
- Cut your dough into 6 inch circles. I used a 6 inch cake board as a template or you can use a 5 inch circle cutter if you want smaller hand pies.
- Add 3 Tablespoons of filling to each 6 inch circle (1 Tablespoon for the 5 inch circles). Don't overfill, or they'll burst while cooking.
- Brush the outside edge with egg wash (one egg whisked with 1 Tablespoon of cold water).
- Fold the hand pie over and crimp with a fork to seal well.
- Use a knife or fork to make some vents on top.
- Brush the hand pies with more egg wash and place them onto a sheet pan lined with parchment paper. Chill for 20 minutes. Preheat your oven to 400º F while they chill.
- Bake for 20-25 minutes. They should be golden brown and the filling will just be starting to bubble.
- Let your hand pies cool for 10 minutes.
- While your hand pies are cooling, make your glaze. Just whisk the powdered sugar and lemon juice together until smooth.
- Use a pastry brush to brush the thin glaze over the hand pies and enjoy!
Video
Notes
- Prepare your hand pies as usual and chill for one hour.
- Brush the surface with egg wash and sprinkle on some sanding sugar for color and flavor (optional).
- Set your temperature to 400º F on your air fryer.
- Place your hand pies inside the air fryer basket and fry for 13-15 minutes, until golden brown and the filling just begins to bubble.
- Prepare your hand pies as usual, but do not cut large slits for vents, use a fork for small vents instead so the filling doesn't leak out. Place them in the fridge to chill for at least one hour.
- Heat up 4 inches of neutral oil (like vegetable shortening or canola oil) in a deep pot (like a dutch oven) to 375º F. Use a thermometer to keep an eye on the temp. Make sure you place the pot at the back of the stove, especially if you have kids. Hot oil is very dangerous, and so are splashes.
- Place 2-3 hand pies in the hot oil and fry 3-4 minutes until golden brown.
- Drain on a paper towel, then dust in powdered sugar or cover in sugar glaze before serving. They are best when eaten the same day.



Love you Liz says
Perfection!!!!!!
Ellie says
It was REALLY good!!!!
Robert Jannicelli says
This was my first time seeing one on your recipes, and I happened to be in a mood for an old style pie that I used to get at the deli.
WOW !! -DID THIS RECDIPE DELIVER!! this is something that I would normally trial and error 5 times before I get it right. These are ready for my family right now! AMAZING results!!
Perfect looking and tasting...the dough is simply perfect !! I made Strawberry and Apple. in the air fryer - both excellent
Thank you for posting this fabulous recipe!!
I will be going to it with all possible filling !
They also look amazing...and the fresh taste!!
Thank you for the complete recipe, and for posting something this foolproof!
Rob
Liz Marek says
Thank you so much I really appreciate this review <3
Bookworm says
Delicious!!! Thank you Liz for this extraordinary recipe! I appreciate every thing about this
(Also you are VVVVVVEEEERRRRRRYYYYYY pretty!!!!!!!!!!!!!!!!!!!!!!!!!!!!!!!
Heidi S says
Thank you for the sweet idea.
Happy Holidays :》:)
Carolyn Pfeiffer says
I would like to make a suggestion for a six inch circle, try a lid to one of your pots. I have one that is just over 6" and it has a handle for easier cutting.
Liz Marek says
Great tip, thank you!
Lisa says
I made this recipe yesterday. Beautiful presentation - half fried, half air fried, however very very bland. Next time I will use salted butter instead of unsalted,
Liz Marek says
Thanks for trying both methods and sharing your feedback, Lisa!
Julie Ann Sardon says
Can I use jam instead of canned pie filling?
Elizabeth Marek says
You can but it might turn out differently
clarissa says
These pies are very tasty, albeit time consuming. Everything took me about 3 hours (I could just be slow). I've never had such crispy, flaky crust. I made a few adjustments- added 3 Tablespoons of white sugar to the crust and increased the water accordingly, and added pumpkin pie spice to the filling. Very yummy, would make again.
Anne Healy says
I am very interested in making these, and I love the idea of air frying. Do I need to brush anything on the hand pie before air frying? And even if you say no, it just seems that they would be dry. Would it hurt if I brush butter or oil on them before air frying? Thank you!
Liz Marek says
Yes, brush them with egg wash before air frying, and sprinkle on some sanding sugar if you like. That gives them color and keeps them from looking dry. If you have more questions, come ask me in the Sugar Geeks community: https://community.raptive.com/sugargeeks
Craig in Raleigh says
These are Great! I mean, Seriously Excellent! 🙂 I prefer a bit more salt in the crust, so next time will substitute 2 TBsp of the 12 (6 oz.) with salted butter. For today, I had only 1 stick of unsalted butter (making a lot of bread), so used 4 TBs of lard with no problem at all. I cubed and froze the fats while getting out the food processor and measuring the flour and salt. Tossed in the cold fat and it pulsed together really well (10x 1-sec pulses). Added the egg, and the dough really did take the 2 TBs of cold water. It's summer in North Carolina, and the AC makes low humidity.
My imaginary doctor has me on a prescription of pie, but low doses. A whole pie is too much, so when I saw this recipe, I figured if it's any good, I'll be making them a lot! For my mental health, you know. I bought an inexpensive 5" calzone press, and already have a tortilla press. Here's a couple of tips from other types of cuisine, to make it all quickly and have hardly any mess.
I made the dough but rolled it in plastic wrap to a 12-inch log (for the 12 pies the recipe makes). It MUST chill in order for the flour to absorb water and become flexible, so I put it in the fridge for the hour. I got dinner organized. When I took out the dough, it didn't need to warm up because I'm using a tortilla press and two pieces of a plastic food bag -- already food safe.
The press was about $14, since I'm now making my own tortillas. I got a paint stirring stick from the hardware store (free), and they're 1/8" thick. Each pie piece is about 50 grams, so cut the log, weighed the pieces, then quickly rolled a flat-ish disk in my hands, like a tortilla. Then, put it between the plastic in the press, and put the paint stick at the handle end. Pressed, and it came out exactly 1/8" thick. The plastic peels off totally easily. Watch any video on how to make tortillas for this trick.
I tried a couple of things, but plain plastic wrap on the calzone press was perfect! I sprayed on some cooking spray, but it turns out the dough has enough oil it wasn't needed. When pressed, the 50-gram piece of dough just happened to give me almost a perfect 5-inch circle. So that went onto the plastic wrap in the press.
Painted the egg wash before the filling, 'cause it's easier. Thanks for the tip on holding the filling to 1 TBsp for the 5" pies -- I'm using canned blueberry and cherry, as they're tasty and inexpensive. I would've used more, so good warning! I put in the filling, then folded the press. The plastic wrap went over, and when I pressed down to crimp, the dough "smooshed" out to the edges.
With the plastic wrap, the pies came out of the press with no mess or sticking at all. Peeled off the top half, held the pie in my hand, peeled off from the bottom half and into the baking sheet. Cut the vent slices, then chilled again in the fridge for 20 minutes while cleaning up the food processor.
I prepped all this in about 20 minutes. The 1 hour chill gave me time for other things. Forming the 12 pies took about 20 minutes more, since I pressed the cold dough and didn't have to cut anything at all. Plus, it was held to 1/8" thick with the paint stirring stick. Easy as pie, so to speak. 🙂
The plastic wrap on the calzone press made it a snap to get the complete pies out, and they look almost professional! I baked 22 minutes until the outer crust was brown, and they're perfect! The jury's out on the glaze, since I don't think they need it. But...I understand tradition, and I'll try some. I ate one as a test, and it was so good, I had a second one, just to make sure. Yup...they're good, for sure!
Cleanup was only the food processor and the measuring cup I used for the egg and water for the dough. No rolling mat, flour, scraps, re-rolling, or anything. Just throw away the bits of plastic bag, the plastic wrap, and that's it. Neither press gets dirty at all. I used parchment paper, so no mess on the trays. We had them for dessert, after dinner.
I also froze the leftover egg wash for use on breads. It can be thawed and used, then re-frozen with no loss of shine. Bacteria isn't an issue since it's cooking at well over 300-degrees. And this saves an egg, what with today's prices.
Thank you for a brilliant article, superb write-up, and a wonderful recipe!
Liz Marek says
A prescription of pie in low doses is the best kind! Thanks for sharing your tweaks, Craig.
Sara says
Hey Liz, I want to make these hand pies and freeze them after baking. I was wondering if I can reheat these in the microwave? I was wondering if I put the cooked pies from the freezer into the microwave if it would get soggy in the microwave. Please let me know if it is ok to put cooked hand pies in the microwave and if so how long.
Sugar Geek Show says
Hi, I think they would definitely get soggy in the microwave. I recommend freezing them before you bake them, and then bake or air fry when you're ready to eat them.
Debbie says
Do you have any recipes for savory fillings, general ratios of ingredients or maybe just some tips and tricks to making sure the pies don't turn out soggy?
Liz Marek says
Wow that sounds yummy! I would just make sure the filling is not super wet and follow the same instructions about not overfilling
Kristi De says
OMGosh, this recipe is perfection! I made a double recipe and stuffed one batch with Black Forest ham and cheddar, and canned (I know!!) apples and cherries. My Lort....the flaky butteriness...not a word recognized by spellcheck, but there you have it...YUM!! Will definitely make my own fruit fillings or use my homemade jams - why didn't I think of this?? - next time. Thank you!!
Marlene Hanson says
Marlene Miller
do you have a recipe for a savory fillings ?
ToiKakes says
OMGGGGGGG!!!! These are just delightful, for real. I've made them twice now. My family and friends love them so much that they have the nerve to put in special flavor requests, lol. I am in love with these, they really do take you back to childhood. Thanks Liz!!!!
annie terry says
Delicious! I made blueberry apple fruit filling and bake them in the oven and they tasted great! I used Trader Joe’s frozen pie crust to save time 😊
Nancy A Schroeder says
Made peach. Used the air fryer. They were perfect. Bottom crust crisp and delicious.
Elizabeth Marek says
Yay!! sounds delicious!