

Making focaccia bread art is not only fun but delicious! These edible works of art inspired by the creations of Vineyard Baker on Instagram are fun for the whole family to make. I recommend cutting one batch of focaccia in half to make two smaller pieces of bread and decorate them individually. That's what I did with my daughter and we had a blast!

I have been wanting to try this focaccia bread art trend for a long time. I am obsessed with the magical bread art that I see on vineyard bakers page. My favorite is this sunflower named Vincent Van Dough. I love me a good bread pun! I think we could be best friends.
If you want a slow-fermented, tangier base for your focaccia garden, my sourdough focaccia recipe is the dough I reach for, it holds dimples and divots beautifully and the crumb takes paint-like vegetable patterns without sagging.
What's in this blog post

At the time of this blog post, the world was in quarantine so our days are filled with lots of fun projects to keep ourselves and the kids busy. This was the perfect fun project for my five-year-old Avalon and I to do together.
I just prepped all the ingredients and the focaccia ahead of time so all she had to do was decorate!
Ingredients Needed
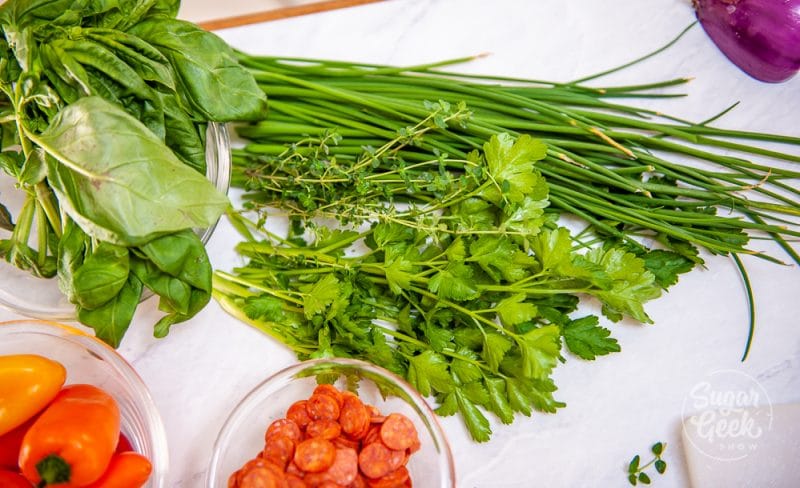
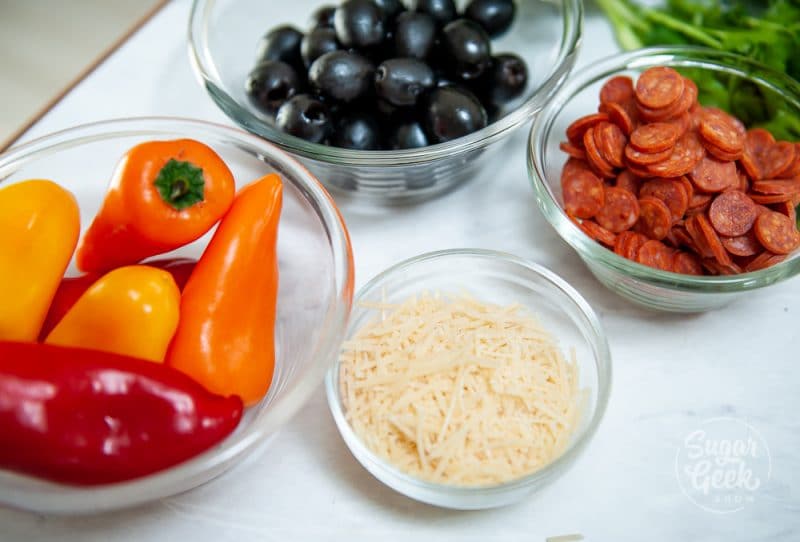
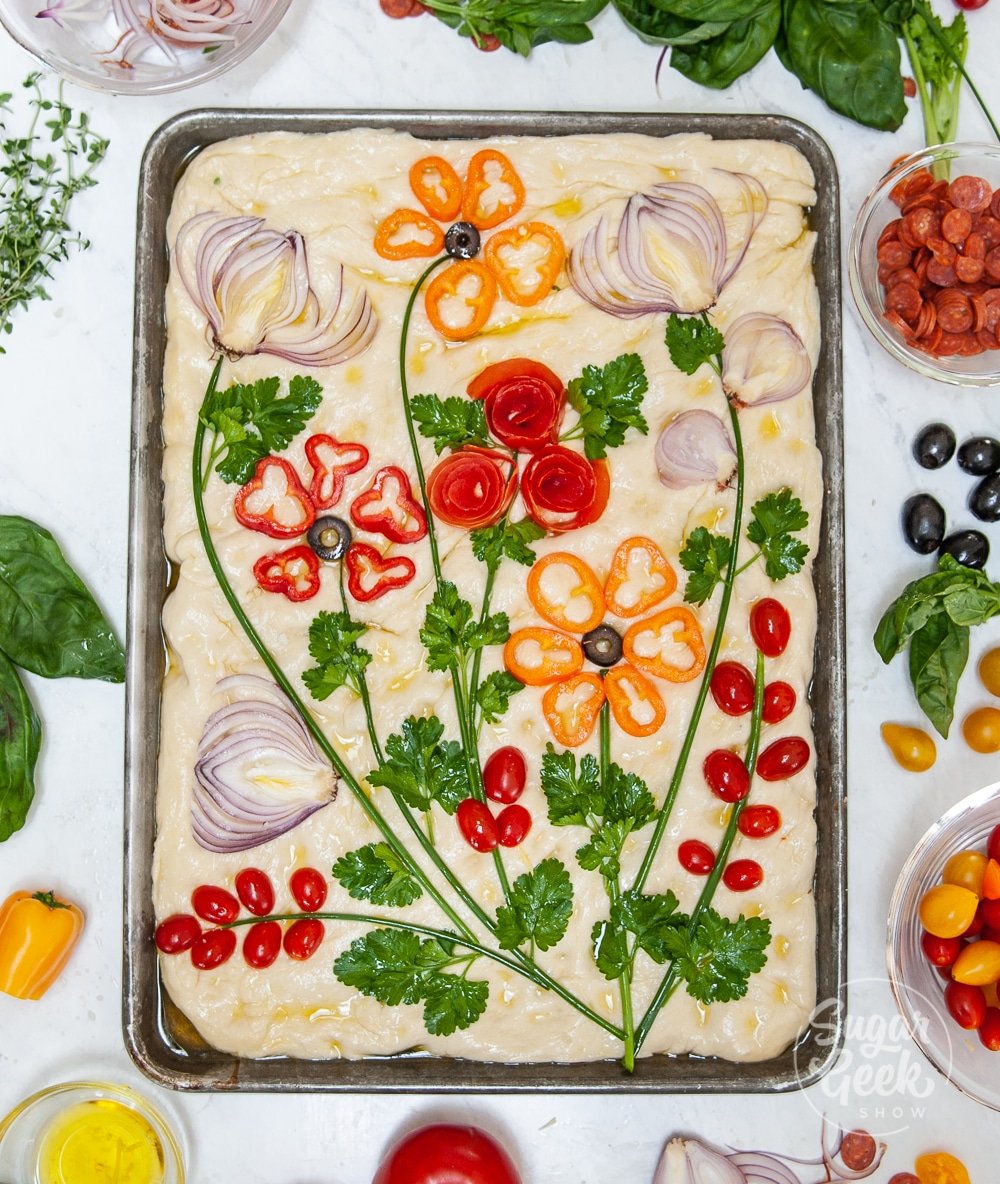
These are the types of ingredients you can use to decorate your bread art. Get creative with what you have!
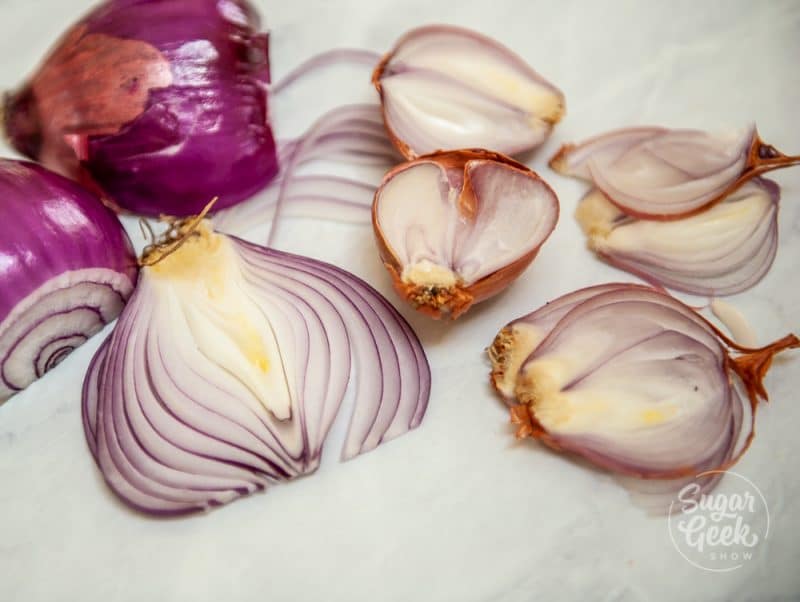
- Red onions - thinly sliced to look like flowers
- Mini bell Peppers - sliced vertically (so they stay round) to look like small flowers or sliced horizontally (in strips) to make big sunflowers!
- Chives - Make great flower stems
- Green Onions - Also make great flower stems or seaweed
- Parsley - Perfect for leaves
- Basil - Also great for leaves or seaweed
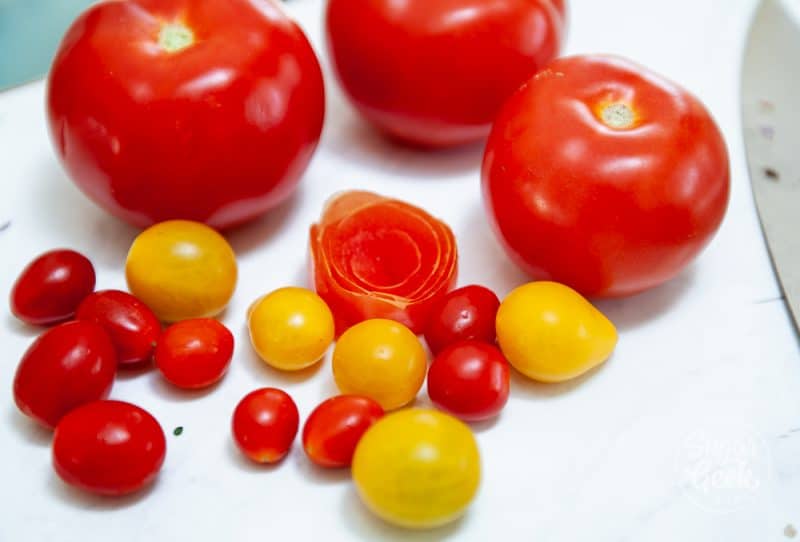
- Cherry Tomatoes - Sliced in half length-wise and dried with a paper towel. Makes great flower centers or seed pods
- Olives - Rocks or centers of flowers
- Capers - Seed pods
- Rosemary - Small plants
- Thyme - Small plants
- Pepperoni - We shaped ours into fish
- Sausage - Flower centers or seed pods
- Shredded Parmesan - Sand or dirt
- Tomatoes - Use a sharp knife to make tomato roses!

How do you make focaccia bread art?
Start off with my easy focaccia bread recipe. I mix this dough up the night before I want to bake it. The long proof in the fridge gives it flavor and a lovely chewy interior with a thin and crispy crust.
Day 1 Timeline
Day 1 - In the late afternoon or evening, I mix up my focaccia dough and set it aside to bulk ferment (rise) in a warm area (70ºF). This takes anywhere from 2-3 hours because of the large amount of oil in the dough and depending on how warm your room is. The warmer it is, the faster the dough will rise.
After your dough house doubled in size, dump it out onto your work surface. Divide the dough into two pieces if you desire.
Prepare two sheet pans with a thin layer of olive oil that coats the entire surface.
Stretch the dough onto the pan. I got mine all the way to the edges because I made a double batch but if you are using a single batch, just shape it roughly in the center of the pan as much as you can. Here is a beautiful example from Vineyard Baker.
Cover your sheet pan in plastic wrap to keep the dough from drying out and then place it into the fridge overnight for the second proof.
Day 2 Timeline
Take your focaccia out of the fridge and let it come to room temperature for about 30 minutes. You want the dough to be nice and bubbly before you start decorating so that the dough doesn't envelop your veggies. I like to prep my toppings while the focaccia is warming up.
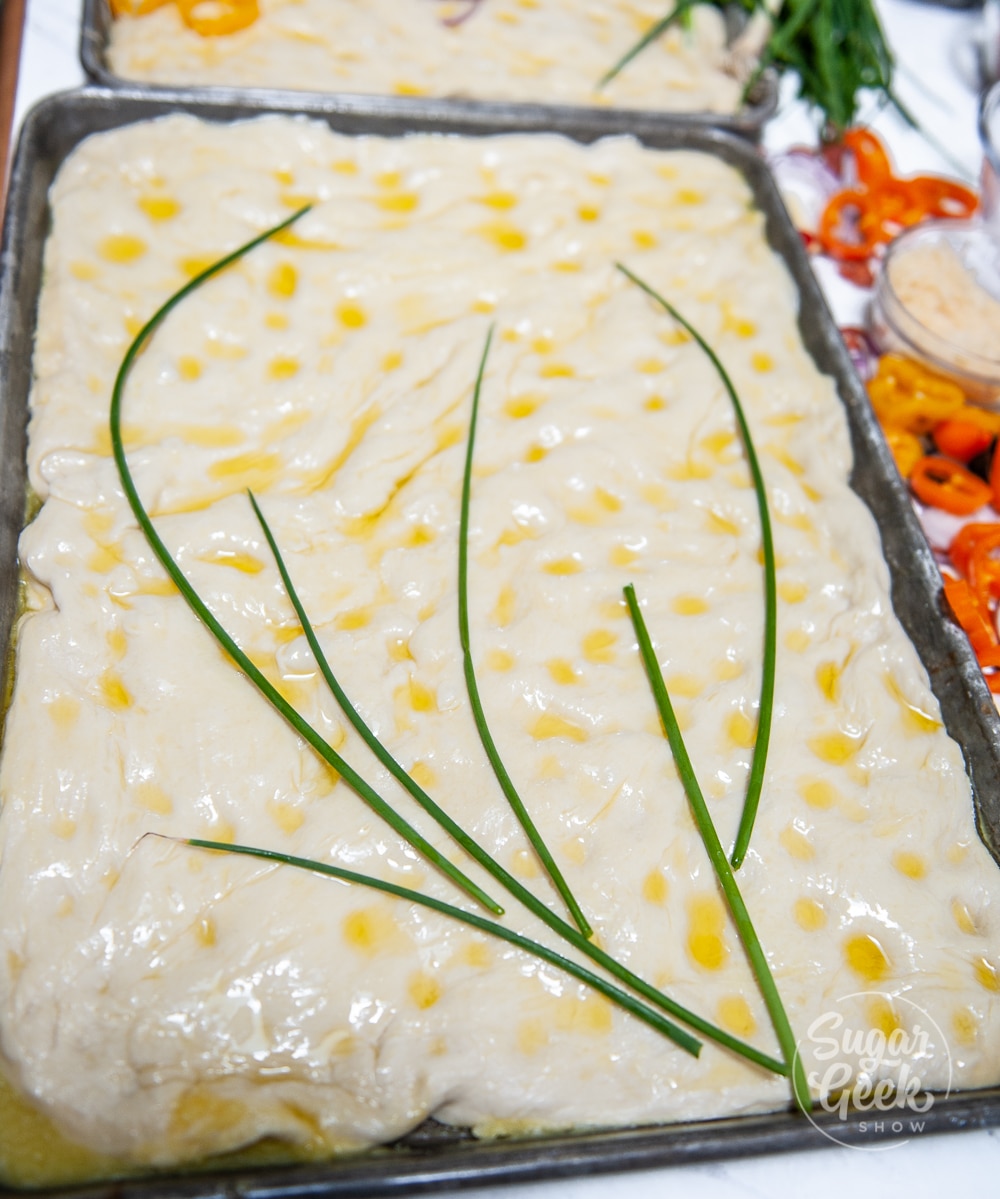
Dimple the top of your focaccia as usual, add your olive oil and flakey salt. as directed in the recipe. Now you're ready to decorate! Go crazy! Have fun! Put the art in focaccia bread art!
After you top your focaccia, coat all the herbs with a layer of olive oil to prevent them from burning while you bake.
Focaccia bread art ideas
Now is the time to get creative with your focaccia bread art! Use your imagination! If you search focaccia bread art on Pinterest you will see TONS of inspiration!
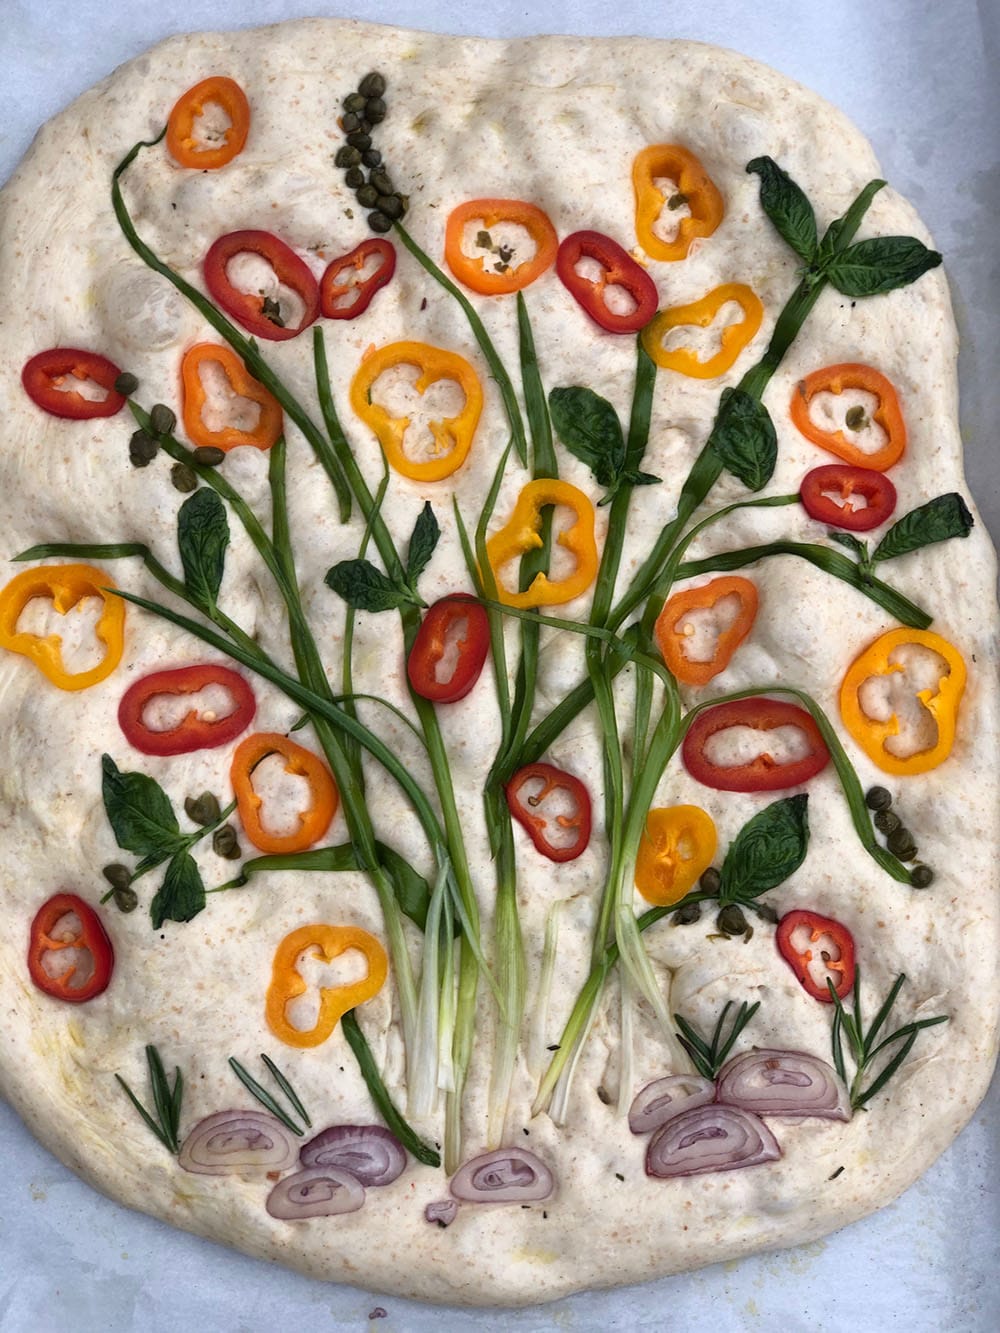
I wanted to make as many flowers as possible so mine was more like a flower bouquet.

Avalon went under the sea themed so she had lots of fish and sea creatures on hers. I especially love how Avalon used the sliced shallots so they looked like octopus swimming. So clever.

Both were delicious!
If you have any bread leftover, cover it with plastic wrap and store it in the fridge. Bake it for 10 minutes in an oven at 350ºF to refresh it before eating and it will taste good as new!
Recipe
Equipment
- Stand mixer with a dough hook
Ingredients
- 16 ounces warm water (110ºF) divided into two bowls 2 cups
- 1 Tablespoon granulated sugar
- 7 grams active dry yeast (2 ½ teaspoons)
- 2 ounces olive oil ¼ cup
- 1 teaspoon salt
- 1 Tablespoon flakey salt
- 24 ounces bread flour or all-purpose flour (5 cups spooned and leveled)
- 4 ounces olive oil for the pan and for drizzling on top of the focaccia after rising (½ cup)
- 2 Tablespoons fresh rosemary chopped
- Vegetables, herbs and meats for topping
Instructions
- Combine your first cup of warm water with your yeast and sugar and mix to combine. Set it aside for about 5 minutes or until it looks foamy
- Place the water/yeast mixture in the bowl of your stand mixer with the bread hook attached. You can also make this dough by hand with a bowl and spoon but you'll have to use some elbow grease.
- Add in about 1 cup of flour and mix on low until combined
- Add in the rest of your water, the olive oil and the salt and half of your remaining flour. Mix on low until combined
- Continue adding in your flour while mixing on low until the dough pulls away from the sides of the bowl. If it's still too sticky, add in a couple more Tablespoons of flour until it comes together. The dough will be very soft though
- Keep mixing on low until your dough develops enough gluten that when you touch it, it bounces back. I took my dough out of the bowl and finished kneading it on the countertop for about 2 minutes until the dough bounced back.
- Place your dough into a bowl with about a Tablespoon of olive oil. Cover with plastic wrap and let rise in a warm place for 1-2 hours or until it has doubled in size. If you're using active dry yeast, it will take longer to proof to double. Keep an eye on it.
- Pour enough olive oil into a 12"x17" sheet pan (or any pan of similar size) so there is a thin layer of oil covering the entire bottom of the pan
- Put some olive oil on your hands to prevent sticking and then pull the focaccia dough out of the bowl. It will be very loose. Divide into two if you deisre. Lay it in the pan and begin stretching it. If it shrinks back, walk away for about 15 minutes to let the gluten relax before you stretch again. Don't worry about getting it to the edges if you divided it in half.
- Once you're done stretching, cover it with plastic wrap and place it into the fridge overnight to develop flavor.
- When you're ready to bake your bread, take it out of the fridge and let it warm up for about 30 minutes. Dimple the surface with your oiled fingers to create some areas where the olive oil can collect.
- Drizzle a good amount olive oil onto the top of the bread until all the dimples have a little oil in them. Sprinkle flakey salt on top.
- After your focaccia has risen for 30 minutes, decorate the top any way you like with veggies, herbs and meats. See the blog post above for more ideas.
- Brush all your veggies and herbs with more olive oil to prevent burning.
- Bake in the oven at 450ºF for 20-25 minutes or until the focaccia bread is nice and golden.
- Because of the toppings, this bread is best enjoyed the day of. Refrigerate leftovers. Re-heating the bread in the oven for 5-10 minutes at 350ºF will bring back that chewy texture.
Video
Notes
Nutrition


Kaitlin says
First time making focaccia bread and OMG so good. So glad I found your recipe. My family loves it. Thank you
💕 says
😘
Elizabeth says
You list both one teaspoon salt and one tablespoon flakey salt in the ingredients. Is the flakey salt just for sprinkling afterwards or does it go into the dough along with the teaspoon of regular salt?
Elizabeth Marek says
The regular salt is for the dough, the flakey salt is for going on top before baking
Meghan says
Where does the chopped rosemary go?
Liz Marek says
On top right before baking!
Lauren says
It’s delicious! My bread turned out to be more dense than I expected. What should I do differently next time? Should I let it rise longer after I dimple it to create more air bubbles?
Elizabeth Marek says
Definitely let the dough rise longer if it's too dense. The heat of the room will alter how long you will need to let it rise
💕 says
Very true 👌
Josie Guerin says
Is it possible to leave the dough in the fridge for a few days? If so how long could I
Elizabeth Marek says
Yes you could, I wouldnt do more than 48 hours
Debbie says
Great recipe- turned out perfectly, super fun to decorate… AND I don’t bake so that says A LOT!
Quick question:
Is the chopped rosemary for decorating the top or are you supposed to mix it in the dough?
Liz White says
Love this recipe. Tastes great and I love the fact that I can make different designs every time.
Thank you!!