


Making chocolate covered strawberries couldn't be easier! Melt your chocolate, dip, decorate! Follow my foolproof method for getting your chocolate to stick, how to store your strawberries so they last the longest and more! The perfect DIY recipe for Valentines day.

In this recipe, we will go over how to temper chocolate in a microwave. Tempering chocolate just means we will melt the chocolate to a specific temperature so that the chocolate is shiny and has a delicious SNAP when you bite into it! If you don't temper your chocolate, you may have problems with your chocolate setting up (getting hard) or cooling with white streaks on the surface. Don't worry, it's way easier than you might expect!
Once you master tempering then you can make all kinds of chocolate goodies like heart hot chocolate bombs, homemade chocolate caramel candies, or a viral breakable chocolate heart.
Table of contents
Ingredients
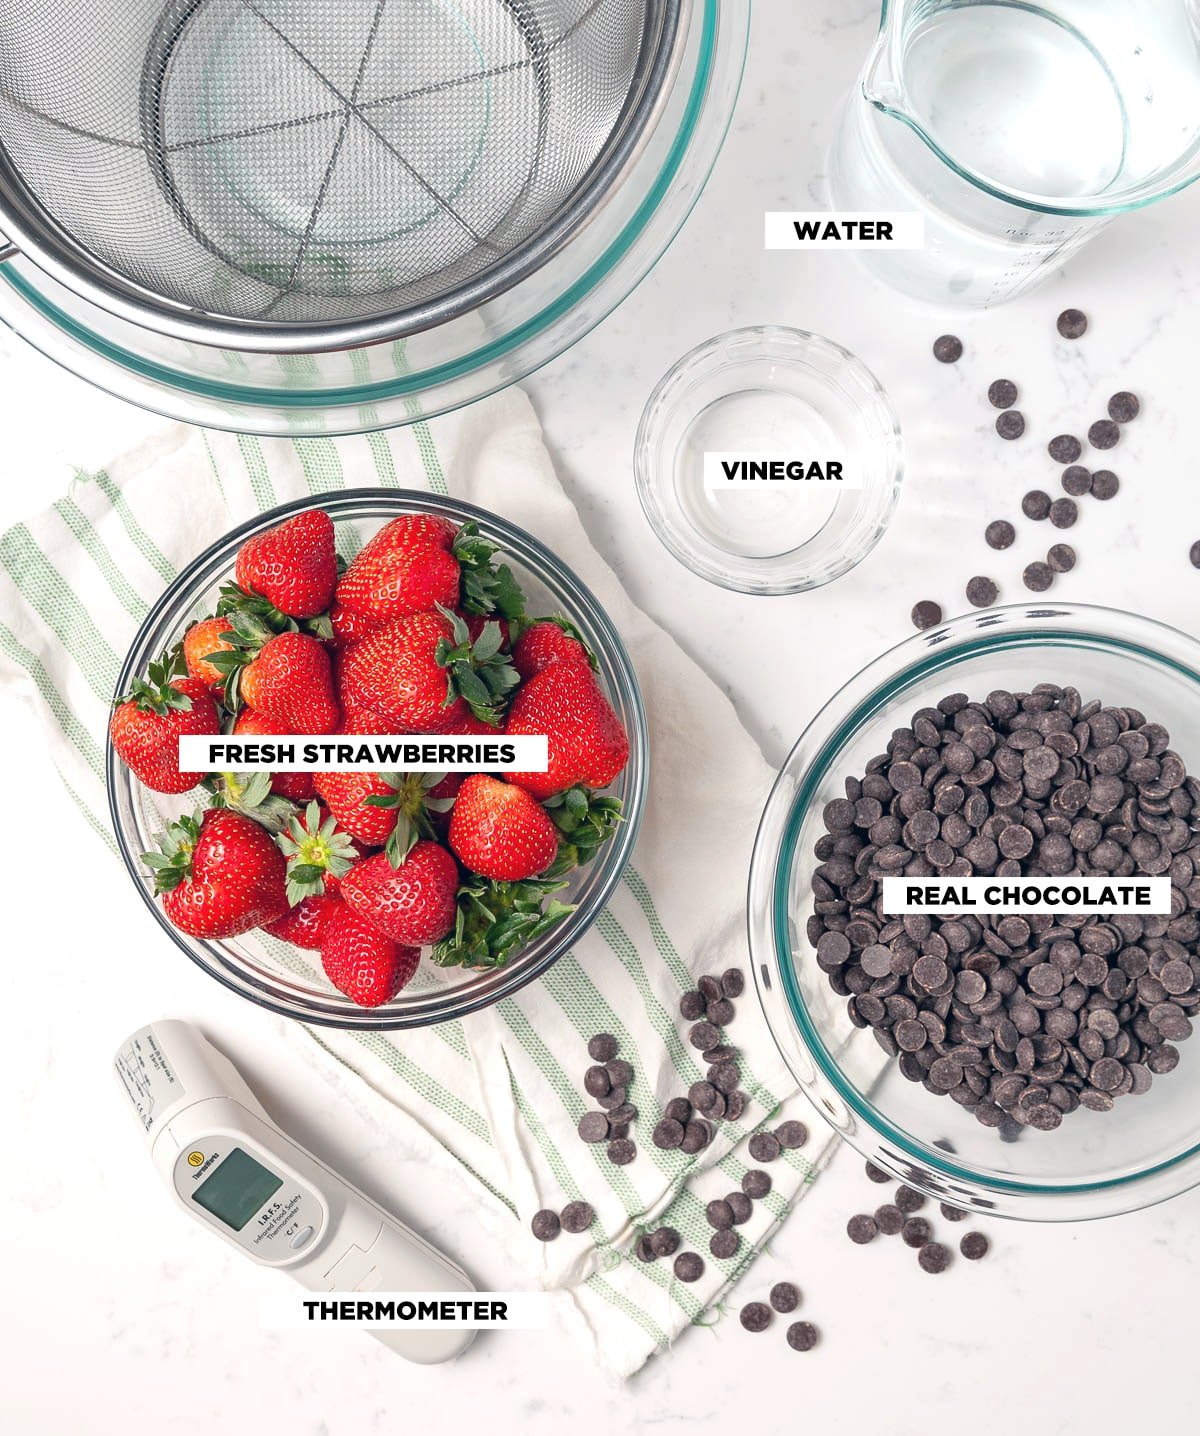
Fresh strawberries, delicious chocolate, and 20 minutes are all you really need to make chocolate-covered strawberries. Having a thermometer is also really helpful but not 100% necessary. Before you dive in, be sure to read through this blog post or watch the video for tons of tips and tricks for success.
Chocolate - You need to use the best quality chocolate (real chocolate) you can get your hands on. Cheap/bad quality chocolate that contains palm tree oil or other additives in place of cocoa butter will result in bad tasting final product. Avoid products that say "coating chocolate", "chocolate wafers", or "candy melts". Check the ingredients list. If you see cocoa butter listed, you're good to go. I really like using Ghirardelli semi-sweet chocolate chips which you can get in the baking aisle of most grocery stores for under $5.
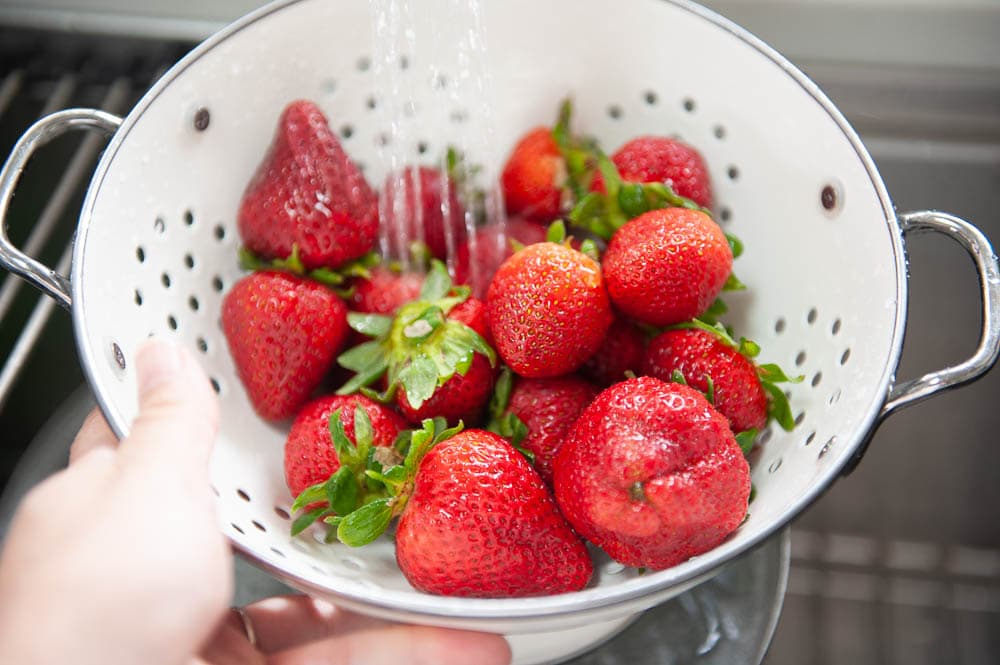
Strawberries - Look for strawberries that are firm, shiny and don't have any soft spots. We will be washing our strawberries before we dip them which will kill any lingering mold spores and keep your strawberries from going bad. Make sure you dry the strawberries well and allow them to come to room temperature before dipping. Cold strawberries will make your chocolate set too quickly.
How to Make Chocolate-Covered Strawberries Step-by-Step
- Wash and dry your strawberries and bring them to room temperature so they are not cold when you start dipping.
- Place your chocolate into a microwave save bowl.
- Heat your chocolate for 1 minute and then stir.
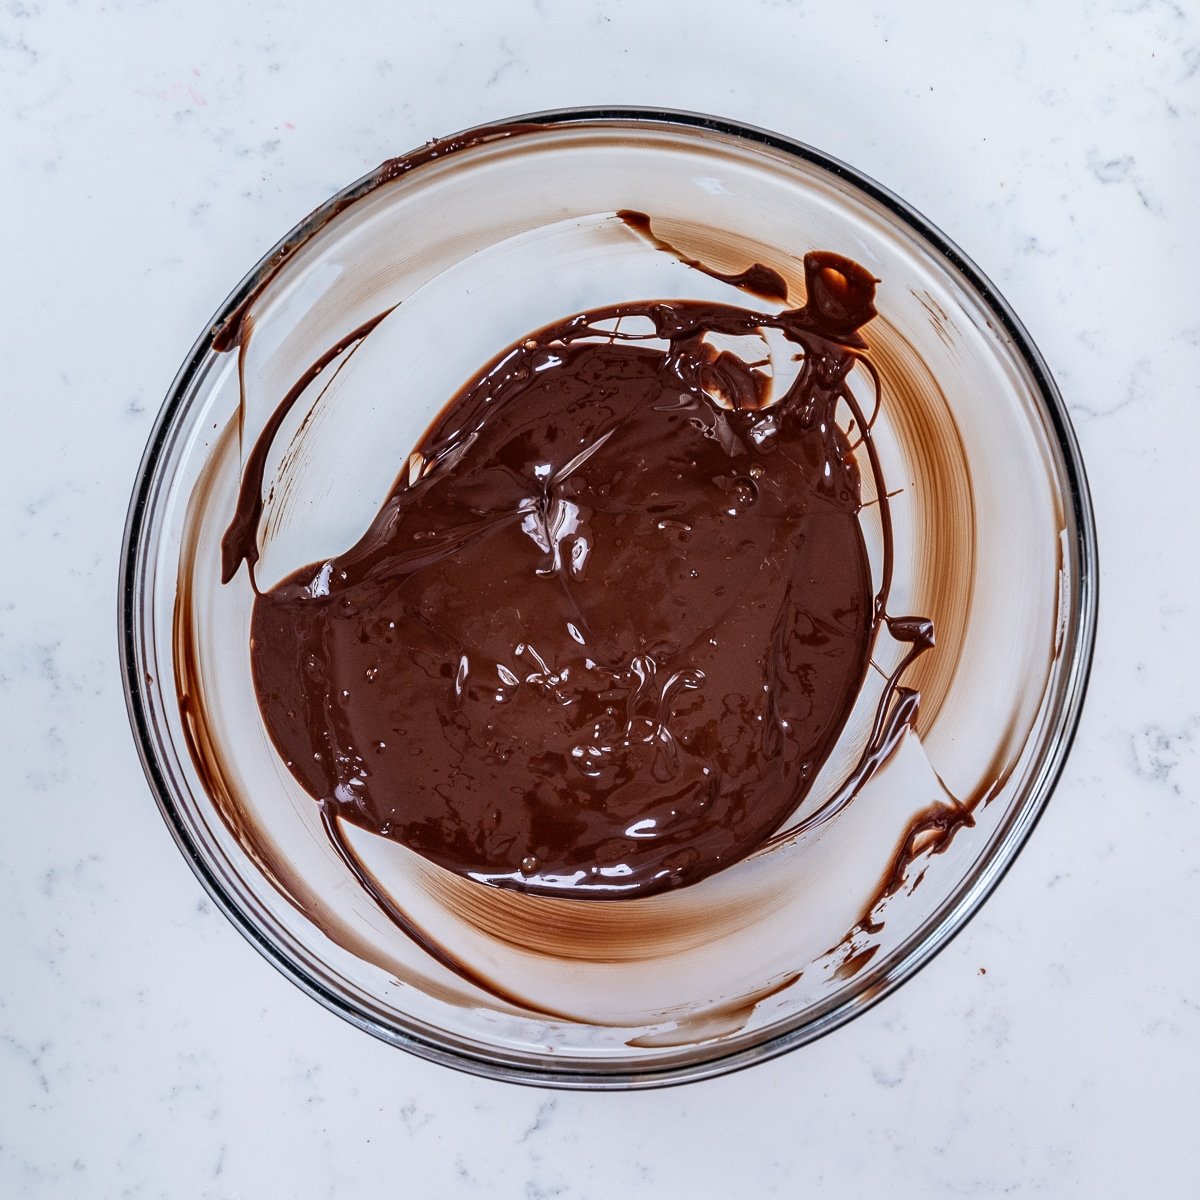
- Continue heating the chocolate in 15 second increments, mixing in between until your chocolate is about 75% melted.

- Continue stirring without heating for few more minutes to allow the chocolate to melt all the way. The chocolate should not get above 86º-90ºF depending on the chocolate you are using. White (86ºF) Milk (88ºF) Semi-sweet and Dark (90ºF). I like to use a thermometer for this.
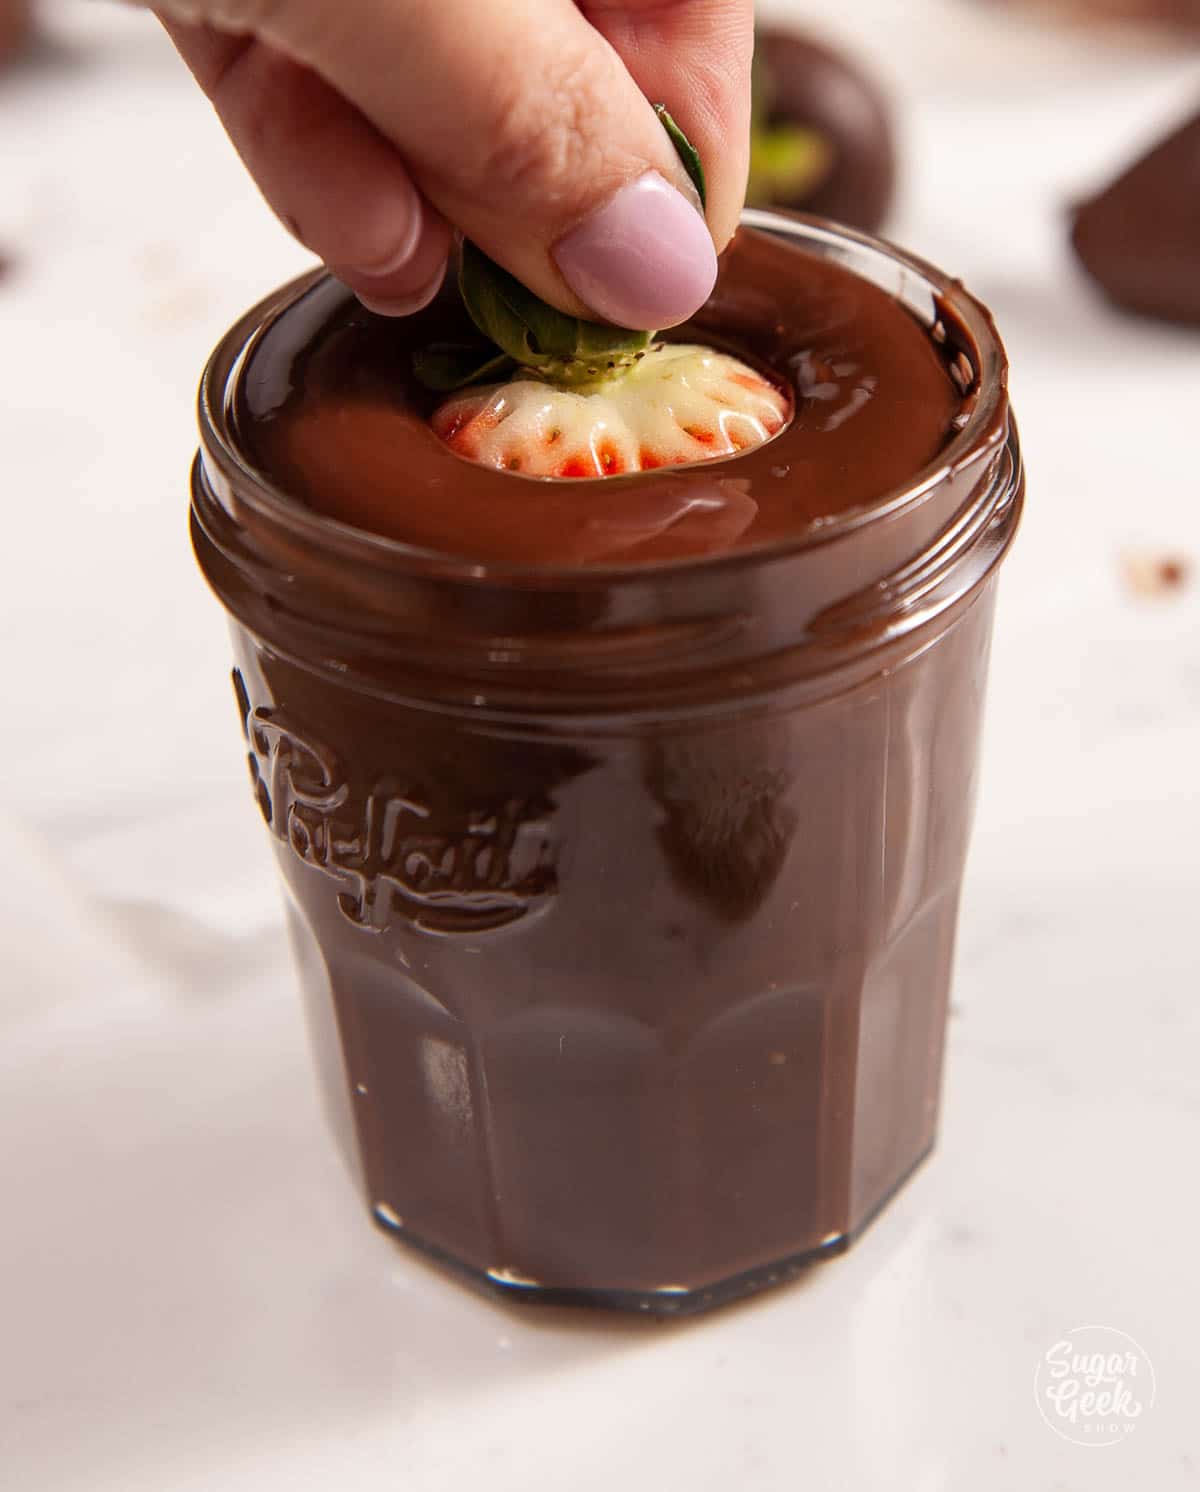
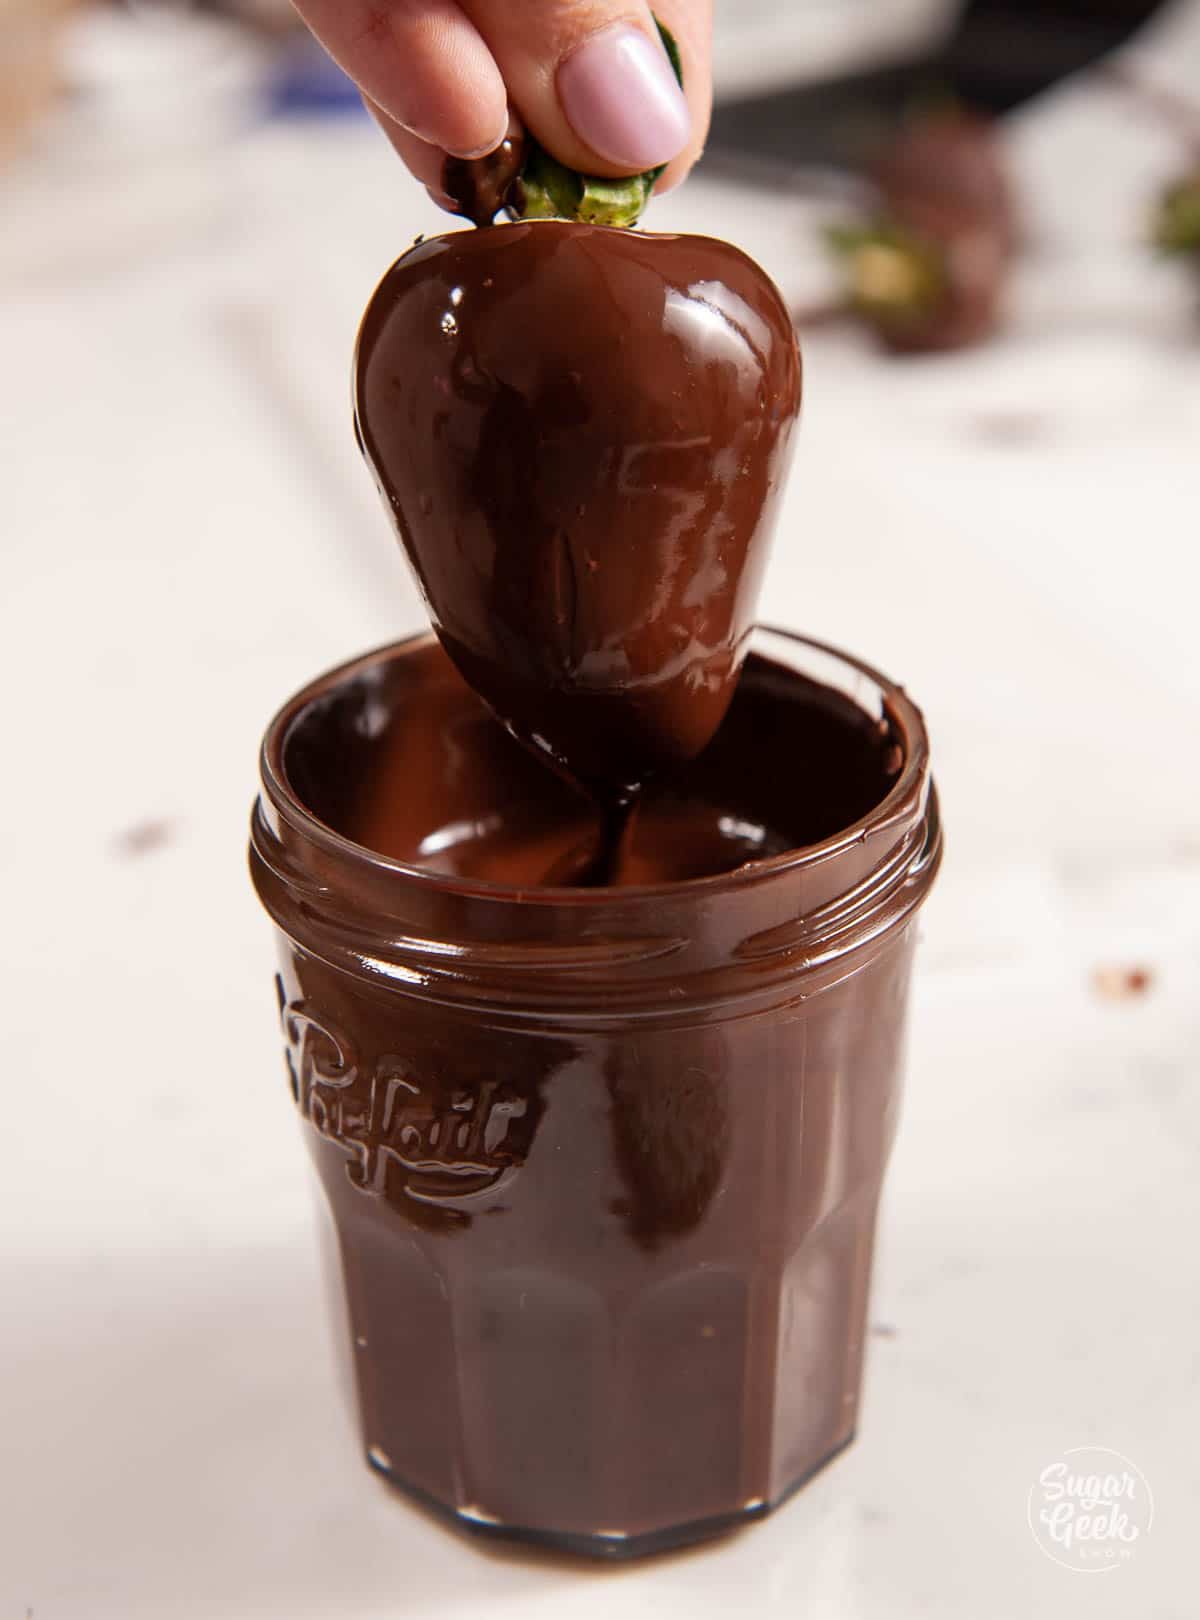
- Transfer the chocolate to a tall skinny container like a small canning jar or a cup.
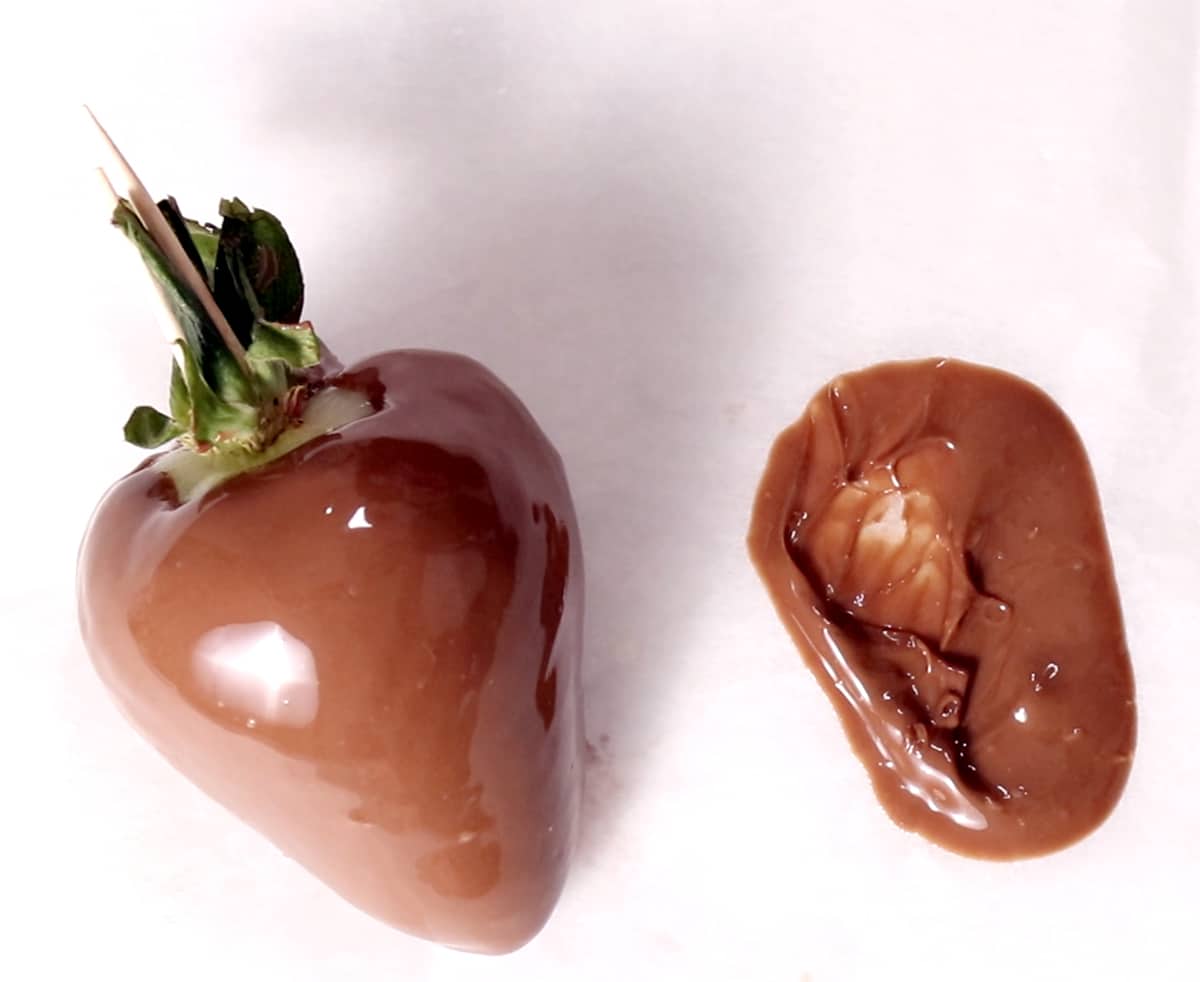
- (Optional) Place two toothpicks into the top of the strawberry so you have something to hold onto while dipping. Sometimes just holding onto the stem will work but it's not as stable as using toothpicks.
- Dip the strawberry into the chocolate all the way to the stem.

- Lift the strawberry out of the chocolate while gently shaking off the excess chocolate.
- Gently scrape off the excess chocolate from the bottom of the strawberry.

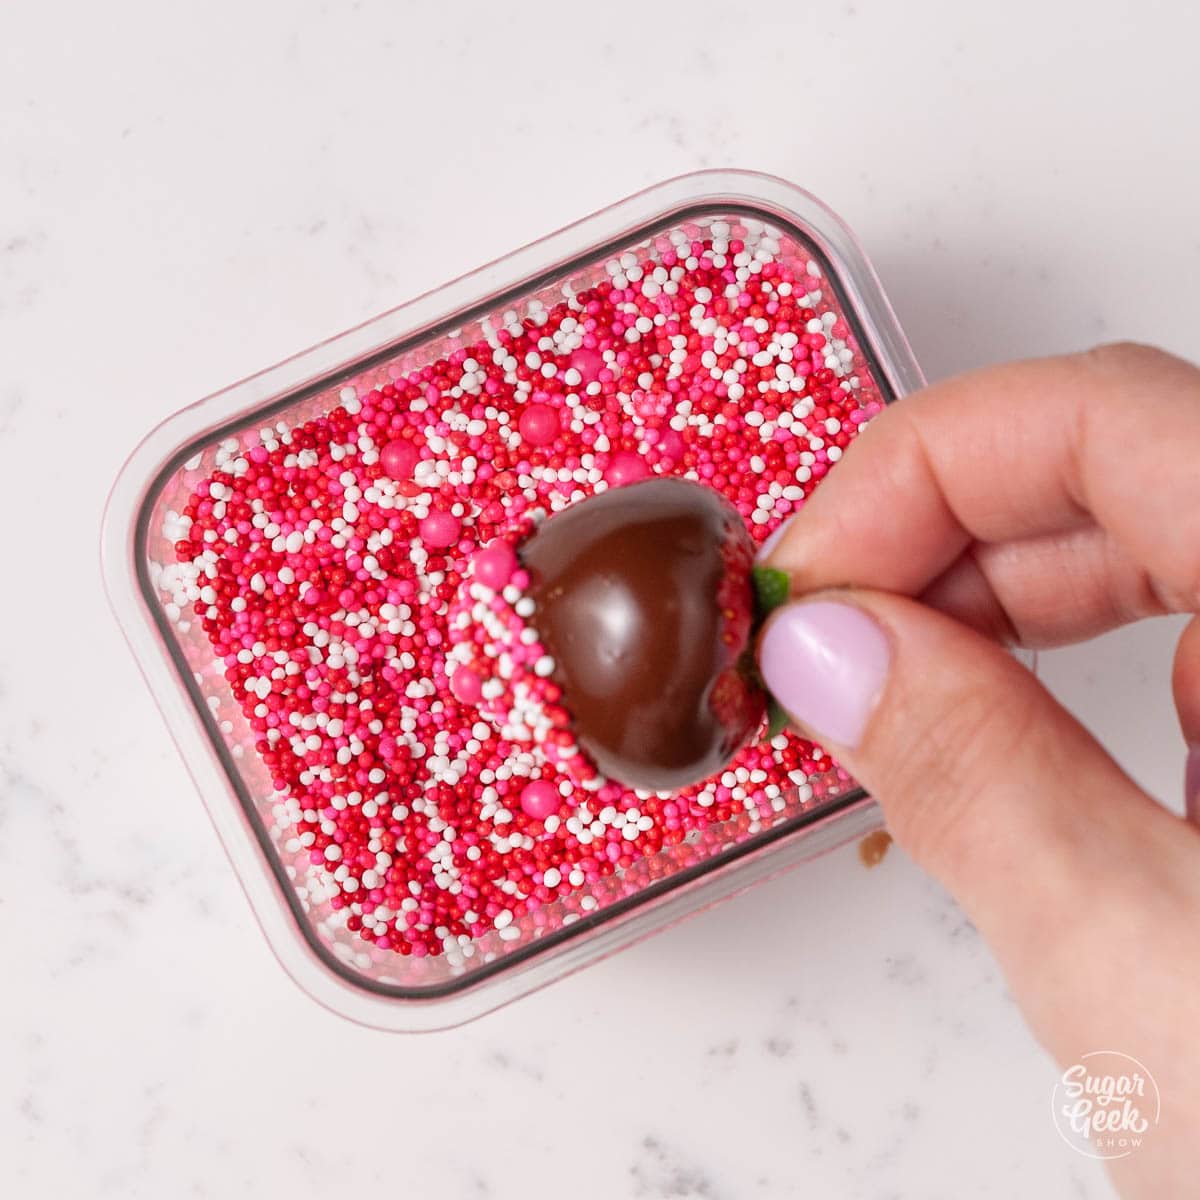
- If you're adding sprinkles or other toppings, now is the time to put them on top of the chocolate before it sets up.
- Place the chocolate covered strawberry onto a sheet of parchment paper for a few seconds then lift and transfer to another spot to prevent too much chocolate from pooling around the bottom of the strawberry.

- Place the strawberries onto parchment or a silicone mat to allow the chocolate set up.
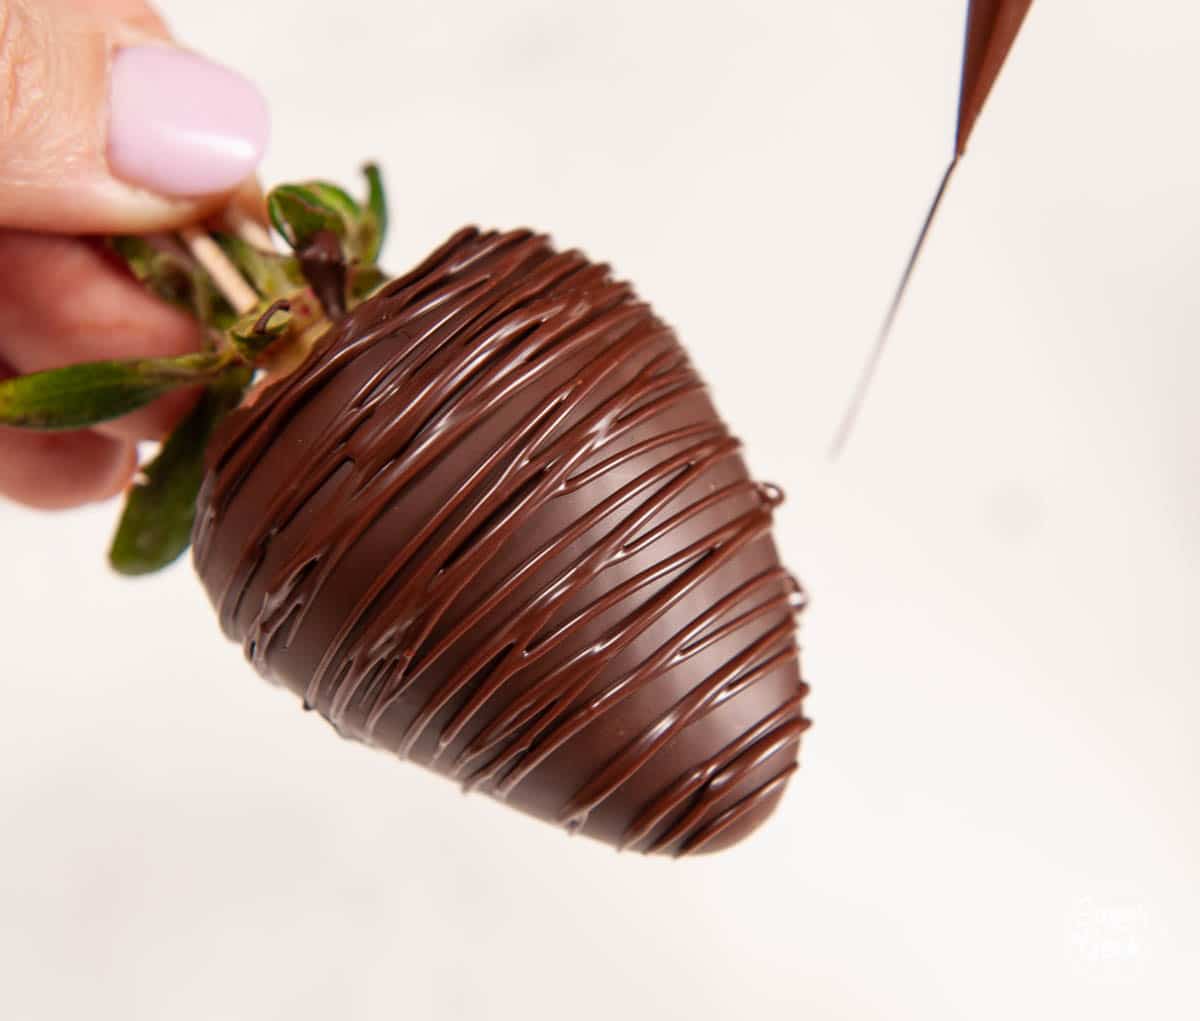
- If you want to do a chocolate drizzle, dip all your strawberries first, let them set, then do the drizzle. The easiest way to do a chocolate drizzle is to put some of your melted chocolate into a piping bag with a small opening cut or use a ziplock bag with the corner cut off.


If your chocolate starts getting too cold, re-heat in 5-second increments and stir to prevent over-heating.

Packaging the Strawberries
Most professionals place their chocolate-dipped strawberries into cupcake liners and then into a nice box for a special occasion. You can add pretty shredded paper or waxed paper underneath or just leave them as-is. Do not wrap your strawberries in plastic wrap because they will get soggy and discolored quickly.

FAQ
Strawberries tend to go bad in the fridge fairly quickly. It can be so frustrating to see that pint of strawberries you got two days ago suddenly growing mold! Don't worry, you can avoid your strawberries going bad pre-maturely by washing them in a diluted vinegar wash. This vinegar wash kills bacteria and mold spores and makes your strawberries last up to a week longer!
Store the chocolate-covered strawberries in the fridge on a cooling rack with paper towels underneath. Lightly cover with plastic wrap to prevent the strawberries from drying out but do not store them in an airtight container or they will mold. Strawberries need air!
Chocolate-covered strawberries will last up to 48 hours in the fridge, but taste the best when they are fresh! They are so quick and easy to make, it's best to wash your berries the night before, let them dry in the fridge, and then dip them the day you plan on eating them. They can last up to 12 hours at room temperature.
Some people remove the stems when dipping their strawberries but experts say to leave them on. Why? Because when you remove the stem, you are basically opening a big hole in your strawberry. That hold will leak juice, discolor your chocolate, and overall reduce the life of your chocolate-covered strawberries.
Adding coconut oil will only work if you're using candy melts because they are not technically considered "real" chocolate. Real chocolate has cocoa butter in it, and requires tempering, while candy melts are made using wax or palm kernel oil. Adding oils to melted candy melts will also work great for dipping your strawberries, but it won't work for real chocolate.
Related Recipes
Marbled Valentines Day Sugar Cookies
Valentines Day Mirror Glaze Cake
How To Temper Chocolate in the Microwave
Tempering Chocolate with Cocoa Butter
Recipe
Equipment
- Thermometer
- Spatula
- Bowl for melting, glass or silicone
Ingredients
- 24 medium strawberries 16 ounces
- 30 ounces chocolate white, milk, semi-sweet or dark
- 32 ounces cool water
- 8 ounces white vinegar
Instructions
Preparing the strawberries
- Combine the water and the vinegar together in a large bowl
- Add the strawberries and let them soak for 10 minutes
- Make sure your strawberries are fresh and discard and strawberries with blemishes or bruises. This will cause your strawberries to start weeping after a day.
- Rinse the strawberries in fresh water, dry them thoroughly, and then transfer them to a cooling rack with paper towels.
- Lightly cover strawberries in plastic wrap and place them into the fridge if you aren't going to use them right away. Make sure your strawberries are at room temperature before dipping.
Melting the chocolate
- The process for melting is the same for all the chocolate. Milk chocolate should not be heated higher than 86ºF (30ºC), milk chocolate no higher than 88ºF (31ºC), and semi-sweet and dark no higher than 90ºF (32ºC). I suggest melting and dipping one type of chocolate at a time.
- Place the chopped chocolate into a microwave-safe bowl.
- Heat the chocolate on full power in the microwave for 60 seconds and then stir to distribute the heat evenly throughout the chocolate.
- Continue heating the chocolate in 10-15 second increments until the chocolate is about 90% melted and still below the maximum temperature for the type of chocolate you are using.
- Continue to stir the chocolate until it's fully melted. If your chocolate begins to cool down 5 degrees and you still have un-melted pieces, you can continue heating in 5 second increments until they are melted but be very careful not to go over your max temp. If you do go over you can still temper your chocolate using the seeding method (see the link in my blog post)
Dipping the strawberries
- Grasp the strawberry with the green leaves and dip it into the chocolate. You can also insert two toothpicks into either side of the stem to help stabilize large berries and make them easier to dip. Gather the leaves around the toothpicks to keep them from getting into the chocolate.
- Place the berry onto a baking sheet lined with parchment or wax paper and then after 5 seconds pick it up and move it over a few inches to remove even more of the chocolate. This prevents too much chocolate from pooling around the berry and making a huge flat spot.
- If adding toppings like sprinkles or chopped nuts, add them now before the chocolate sets up.
- If adding a drizzle of melted chocolate, wait until the chocolate sets up on all your dipped strawberries first. Place the melted chocolate into a small piping bag with the tip cut off or a ziplock bag with the tip cut off. Hold the chocolate covered strawberry with one hand while drizzling the chocolate over the strawberry with the other.
- Store your berries in the fridge lightly covered in plastic wrap for up to 48 hours but they are best and freshest the day they are made. If you are eating them the same day you make them, no need to refrigerate them.
Video
Notes
- Wash strawberries in the vinegar/water solution to prolong the life of the strawberries
- Dry your strawberries thoroughly to prevent them from going bad
- Temper your chocolate either in the microwave (small amounts) or by using a double boiler (large amounts) so that your chocolate sets firmly, is shiny, and tastes delicious
- Dip your strawberries all the way to the stem to prevent leaking
- Use toothpicks in the stem while dipping the strawberries for extra support
- Eat your strawberries within 24 hours for the best results!


Rachael says
Thank you Liz! Awesome, thorough explanation as always!
Lucy says
Thank you for this tutorial Liz! Quick question--how do you keep your chocolate in the piping bag fluid and tempered? I found my chocolate cooking and hardening in the piping bag rather quickly!
Sugar Geek Show says
Hi Lucy, yes I have that same problem. Just microwave it in 5-second increments until it's melted enough to use, and squeeze the bag to mix up the chocolate.
Alice says
Yessss!!! Finally someone who explains the whole process of tempering and gives all the info. Thank you so much, my strawberries turned out great 😀