
This pumpkin carving tutorial comes from my friend Mike Brown of MB Creative Studio, and it will change the way you look at a pumpkin. Mike does not cut all the way through like a jack-o'-lantern. He sculpts a face right into the wall of the pumpkin, with wrinkles, squinty eyes, and even a tongue sticking out.
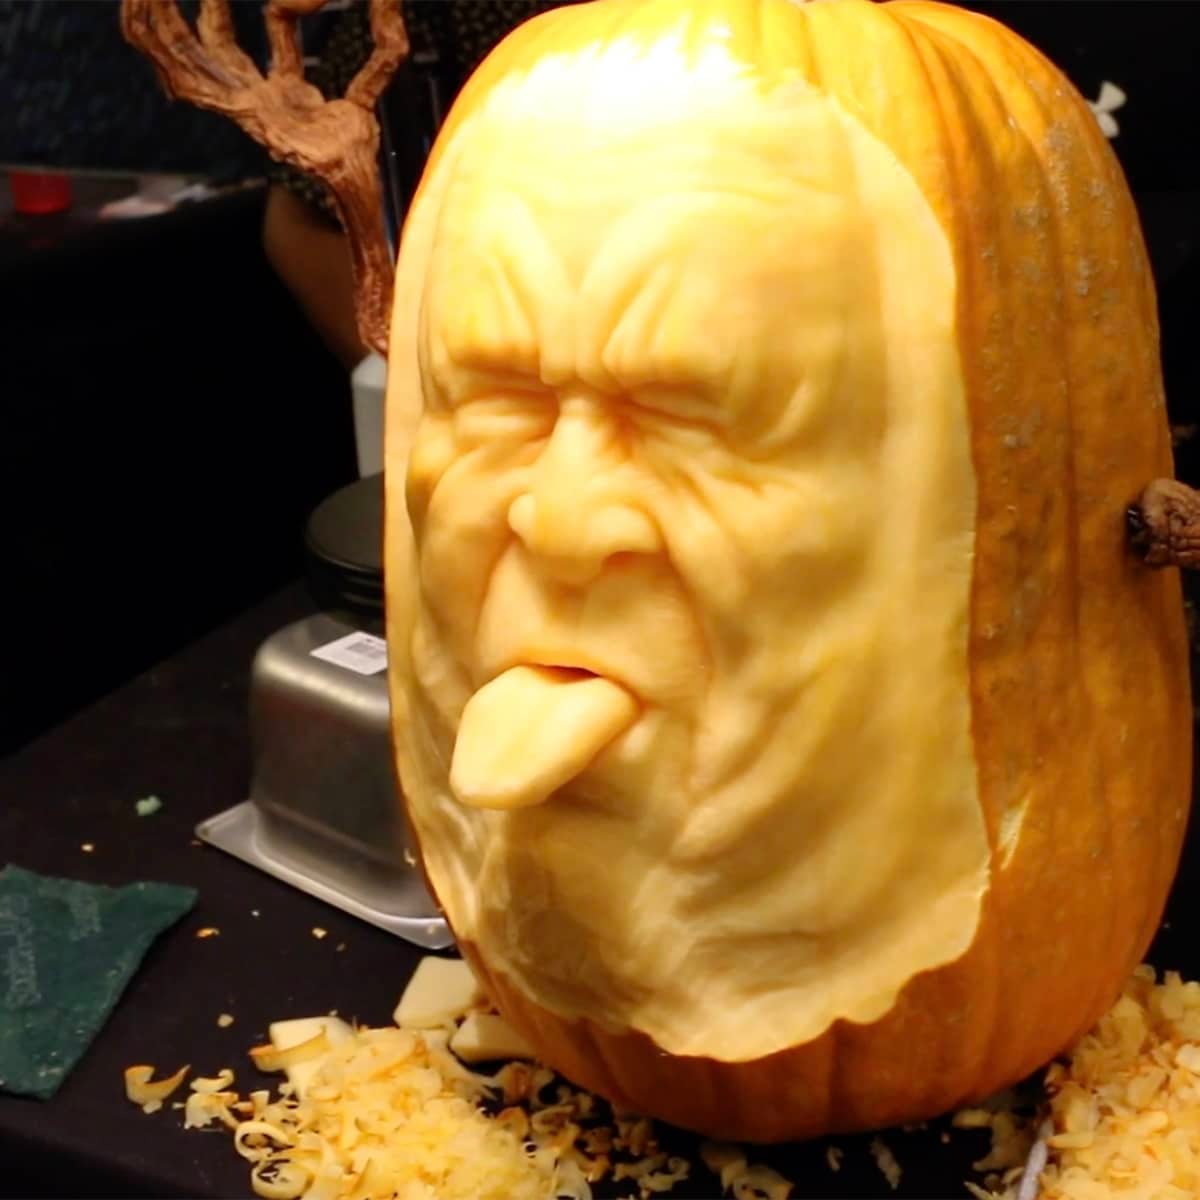
Mike was my teammate on Halloween Wars season 7, where he, Christophe Rull, and I won as Team Ghoul'd. I filmed him carving this grumpy old man from start to finish, and he shared 11 tips that take you from picking the right pumpkin to keeping your carving fresh. Mike, Christophe, and I are all back together as a team this year on Halloween Wars season 16.
All 11 tips are below, and you can watch the free video tutorial on Sugar Geek University to see every cut.
Quick Glance at the Tutorial: Pumpkin Carving
- Tutorial Name: Pumpkin Carving Tutorial with Mike Brown
- Why You'll Love It: No stencils and no fancy kit. You sculpt a face right into the pumpkin with a few simple tools
- Time and Difficulty: 4 to 8 hours. Great for beginners who want a challenge
- Main Tools: Clay ribbon loop tools, an X-Acto knife, a Scotch-Brite pad, a mirror, and a spray bottle
- Method: Scrape off the skin, block in the brow and nose, push everything else back, then add details and shadows
- Video: Full video tutorial, free on Sugar Geek University
- Quick Tip: Pick a pumpkin that feels heavy for its size. A thicker wall gives you more depth to carve
Jump to:
- Quick Glance at the Tutorial: Pumpkin Carving
- What Makes This Pumpkin Carving Tutorial So Good⭐⭐⭐⭐⭐
- Pumpkin Carving Tools and Supplies
- How To Carve A Pumpkin Face Step-By-Step
- Common Pumpkin Carving Problems To Avoid
- Final Thoughts
- Pumpkin Carving FAQs
- More Halloween Tutorials To Try
- Leave Me A Review⭐️⭐️⭐️⭐️⭐️
What Makes This Pumpkin Carving Tutorial So Good
⭐⭐⭐⭐⭐
Most pumpkin carving guides show you how to cut shapes out of a hollow pumpkin. This one teaches you to sculpt, the same way I approach a sculpted bust cake. You take away a little at a time and let light and shadow do the work.
- It comes from a pro. Mike is a professional pumpkin carver and a Halloween Wars champion, and these are the exact steps he uses on every face.
- The tools are simple. Clay ribbon loop tools, a small knife and a kitchen scrubbing pad are all you need.
- You do not need to know how to draw. Mike is self-taught and works from a mirror and reference photos, so you can too.
- The skills carry over to cake. Brow line first, nose out front, shadows last. It is the same order I use when I sculpt a face out of my chocolate cake for carving or modeling chocolate, and it is what I teach in my cake decorating classes.
Pumpkin Carving Tools and Supplies
- Clay ribbon loop tools in a few sizes. A large loop scrapes off the skin and smaller loops carve the details
- X-Acto knife or a small sharp knife for the finest lines
- Scotch-Brite pad for smoothing. Mike calls it pumpkin sandpaper
- A small mirror so you can check your own facial expressions
- Spray bottle of water to keep the pumpkin from drying out while you work
- A lamp you can position above the pumpkin
- A reference photo of the face or expression you want to carve
How To Carve A Pumpkin Face Step-By-Step
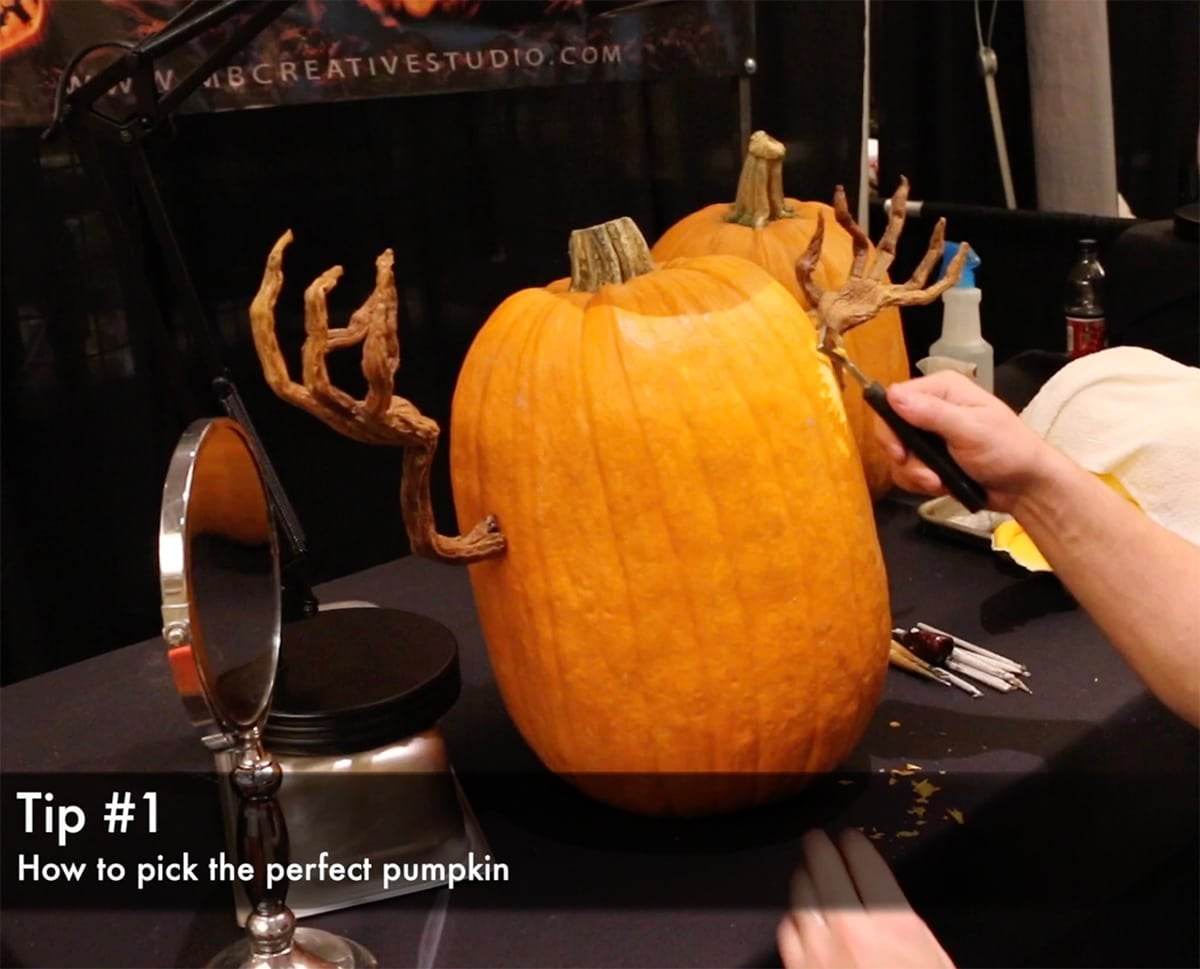
- Pick a pumpkin that feels heavy for its size. A heavy pumpkin has a thicker wall, which means more room to carve. A thick stem is another good sign. Tall, skinny pumpkins are best for faces because the proportions are closer to a real face.
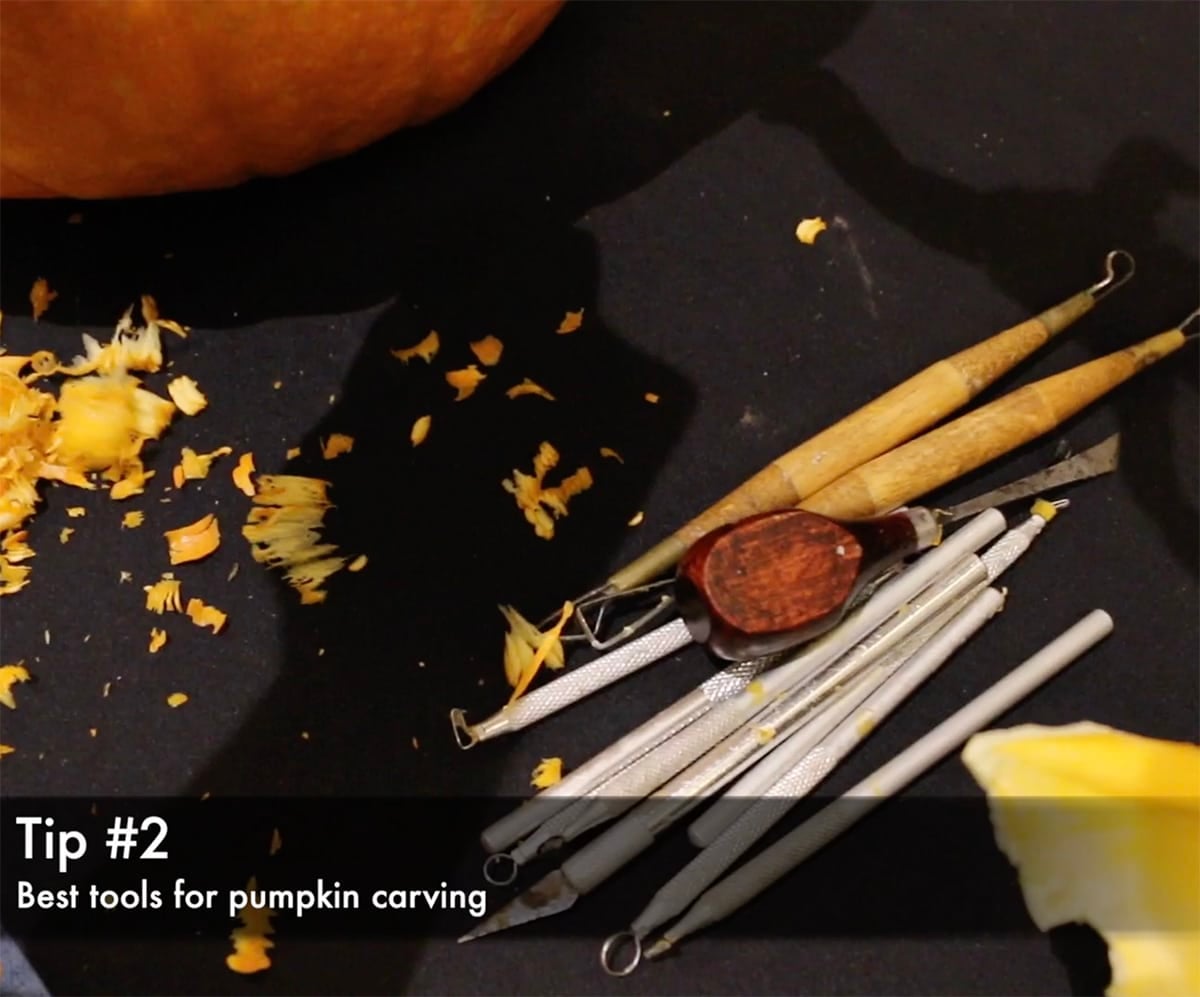
- Gather your ribbon loop tools. Use the biggest loop to scrape off the skin, then work down to smaller loops as you block in the features. Save the X-Acto knife for the very end.
PRO TIP: You do not need a special pumpkin carving kit. Mike started with a basic set of woodcarving tools and says a small sharp knife does the same job. Use whatever feels comfortable in your hand.
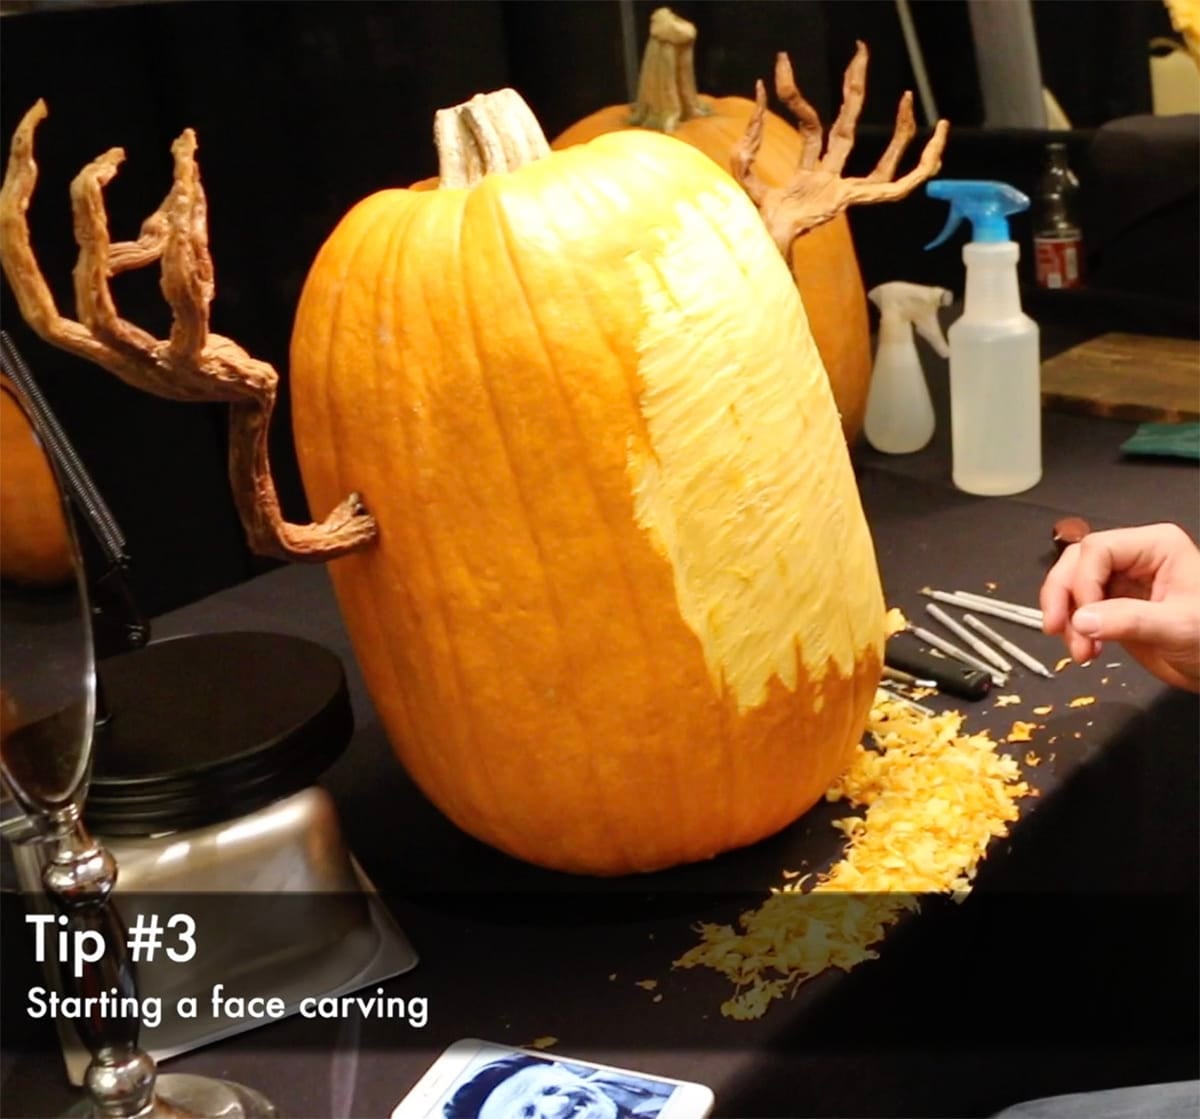
- Scrape the skin off and mark the brow line. Remove the skin where the face will go, then carve in the brow line and the nose first to set your proportions. The deepest parts of any face are the corners of the eyes, the nose and the mouth, so start at the brow to learn how deep your pumpkin lets you go.
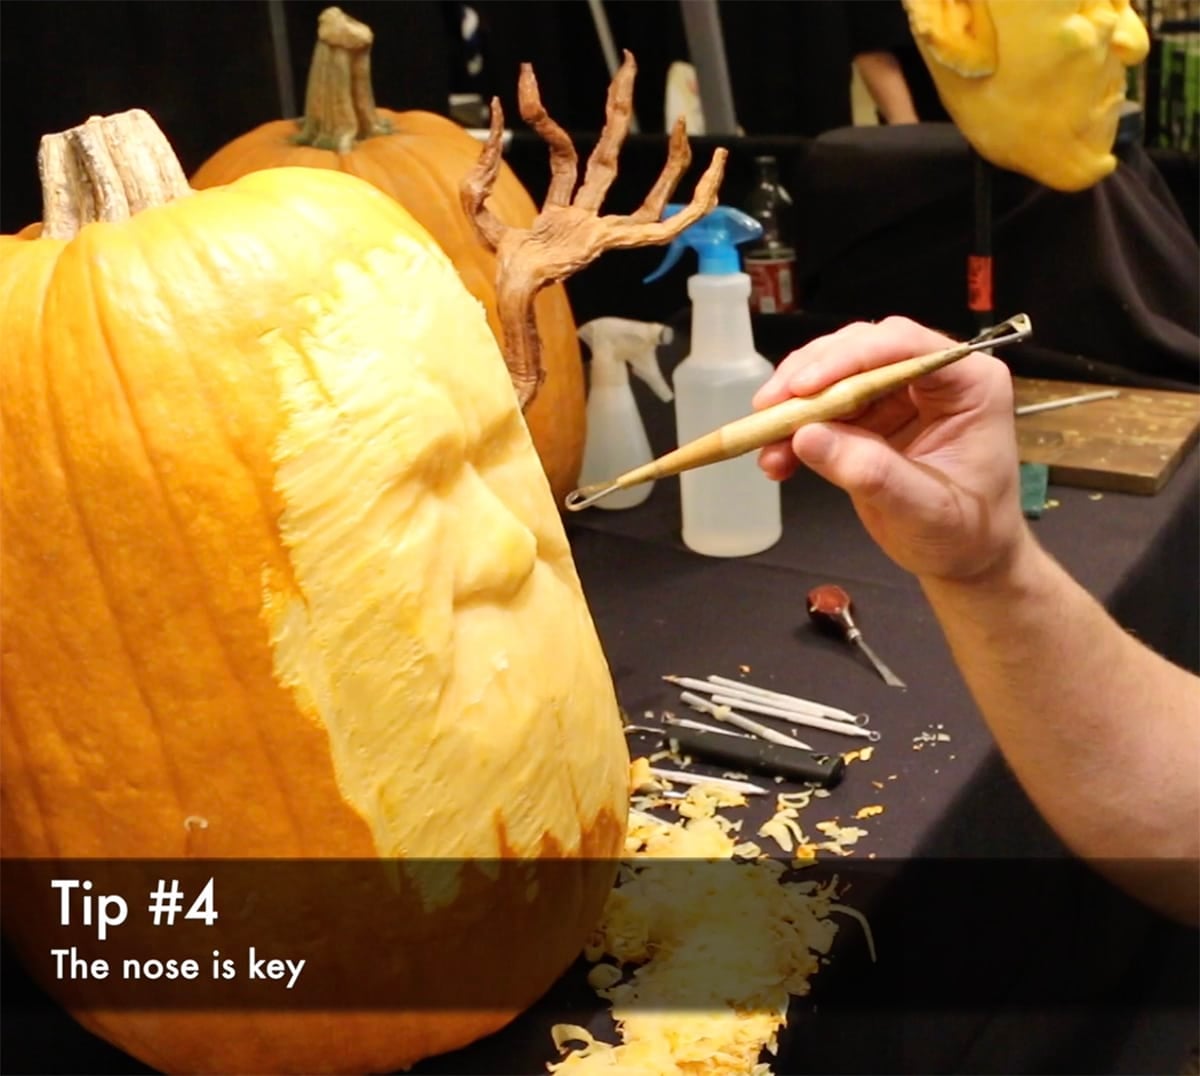
- Leave the tip of the nose alone. The nose sticks out further than anything else on the face, so never carve it down. Push the eye sockets and cheeks back around it instead, then make two small cuts for the nostrils.
PRO TIP: Always carve from a reference. Mike keeps hundreds of photos of facial expressions on his phone and props one up next to the pumpkin. The folds and wrinkles you copy from a real face are what make the carving look real.
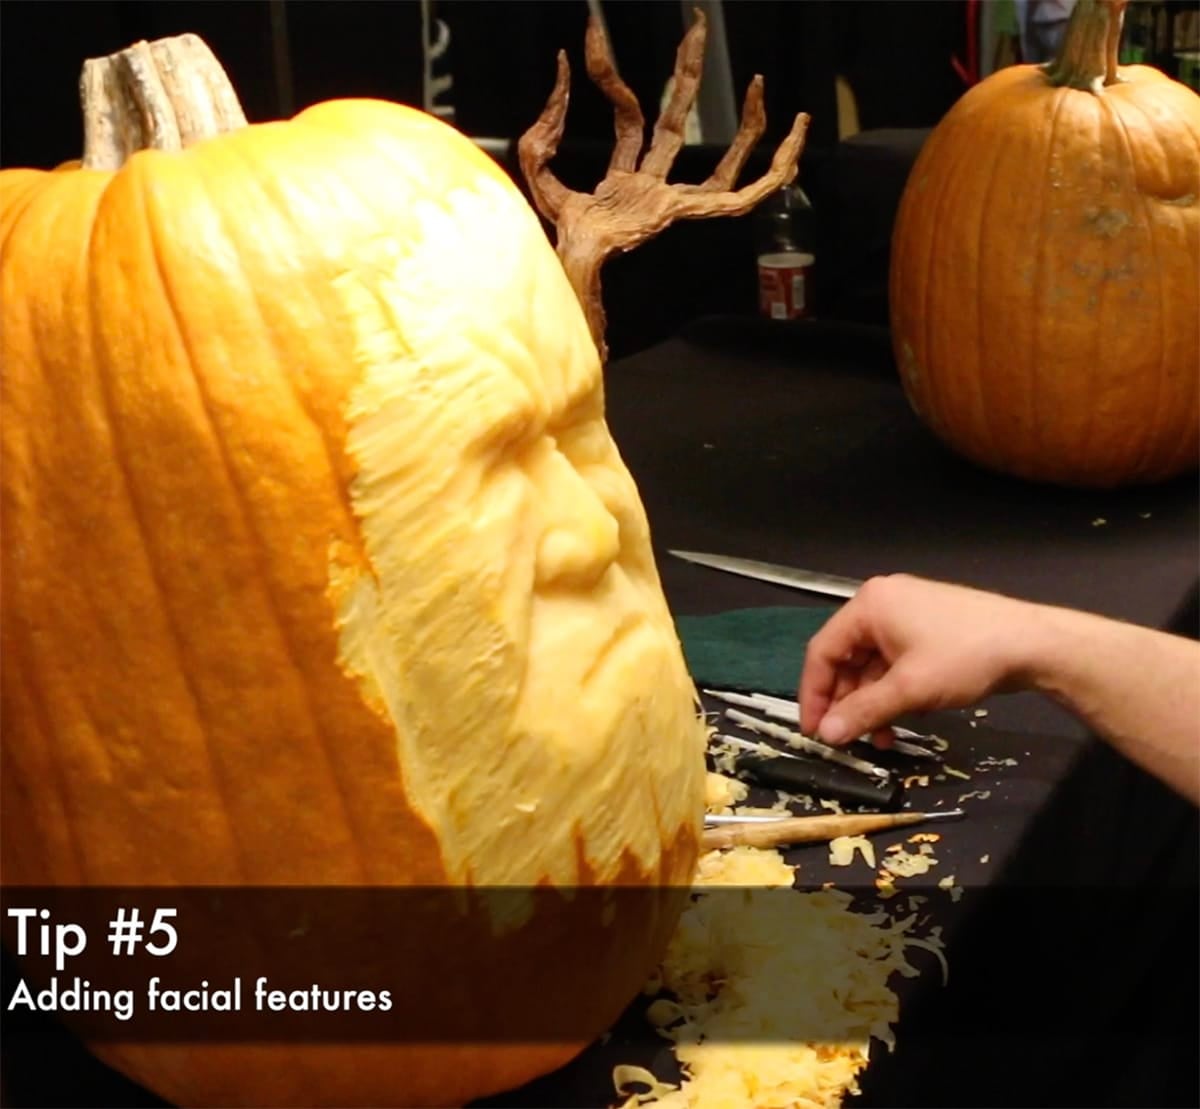
- Add the facial features. Once the basic structure is in, move around the whole face adding folds around the eyes, creases in the forehead and the shape of the mouth. To add a tongue, cut a piece from the back of the same pumpkin so the color and texture match, and cut it on a curve so it looks like it is coming out of the mouth.
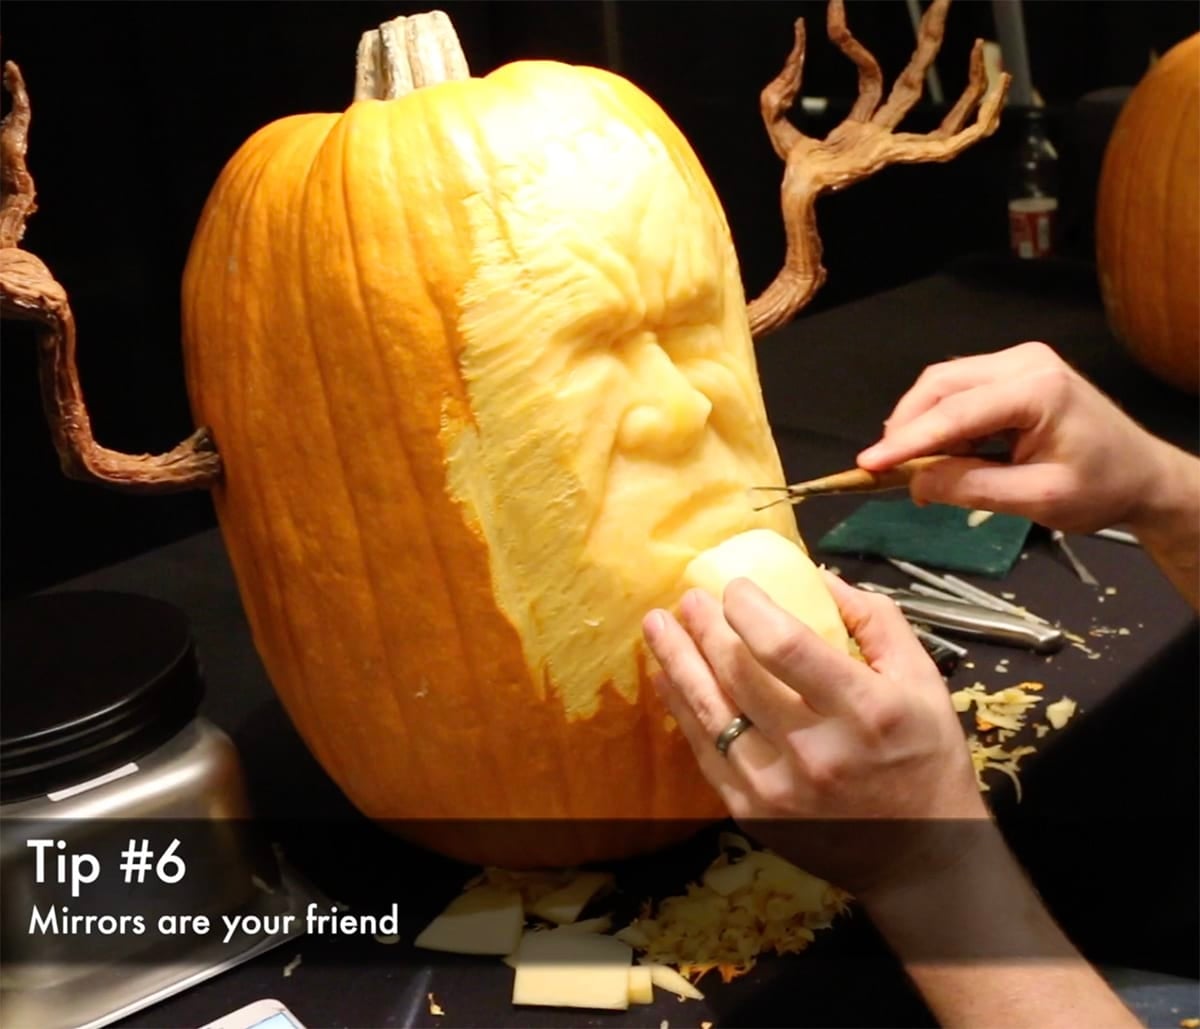
- Use a mirror to get the expression right. Make the face yourself and look at what your lips, cheeks and chin really do. Cut the hole for the tongue slowly so it fits tight, then shape the top lip, bottom lip and chin around it.
PRO TIP: The hole you cut for the mouth shows you exactly how thick the wall is. Use it as a gauge for how far you can push back the rest of the face.
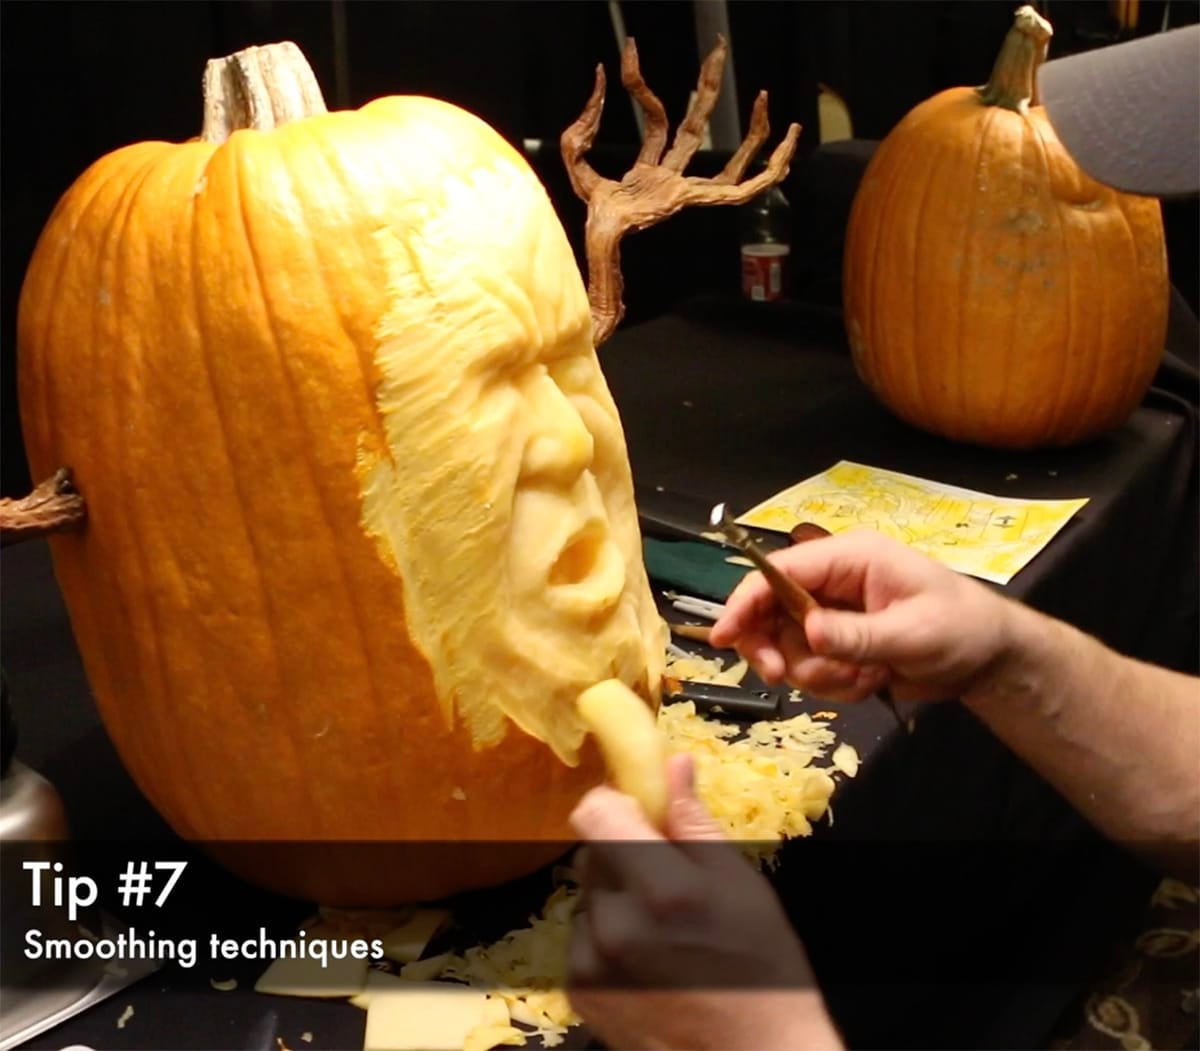
- Smooth the skin with a Scotch-Brite pad. Rub the pad over the carved areas to take down the tool marks. This is how you get smooth, realistic skin, and it is the last thing Mike does over the whole face.
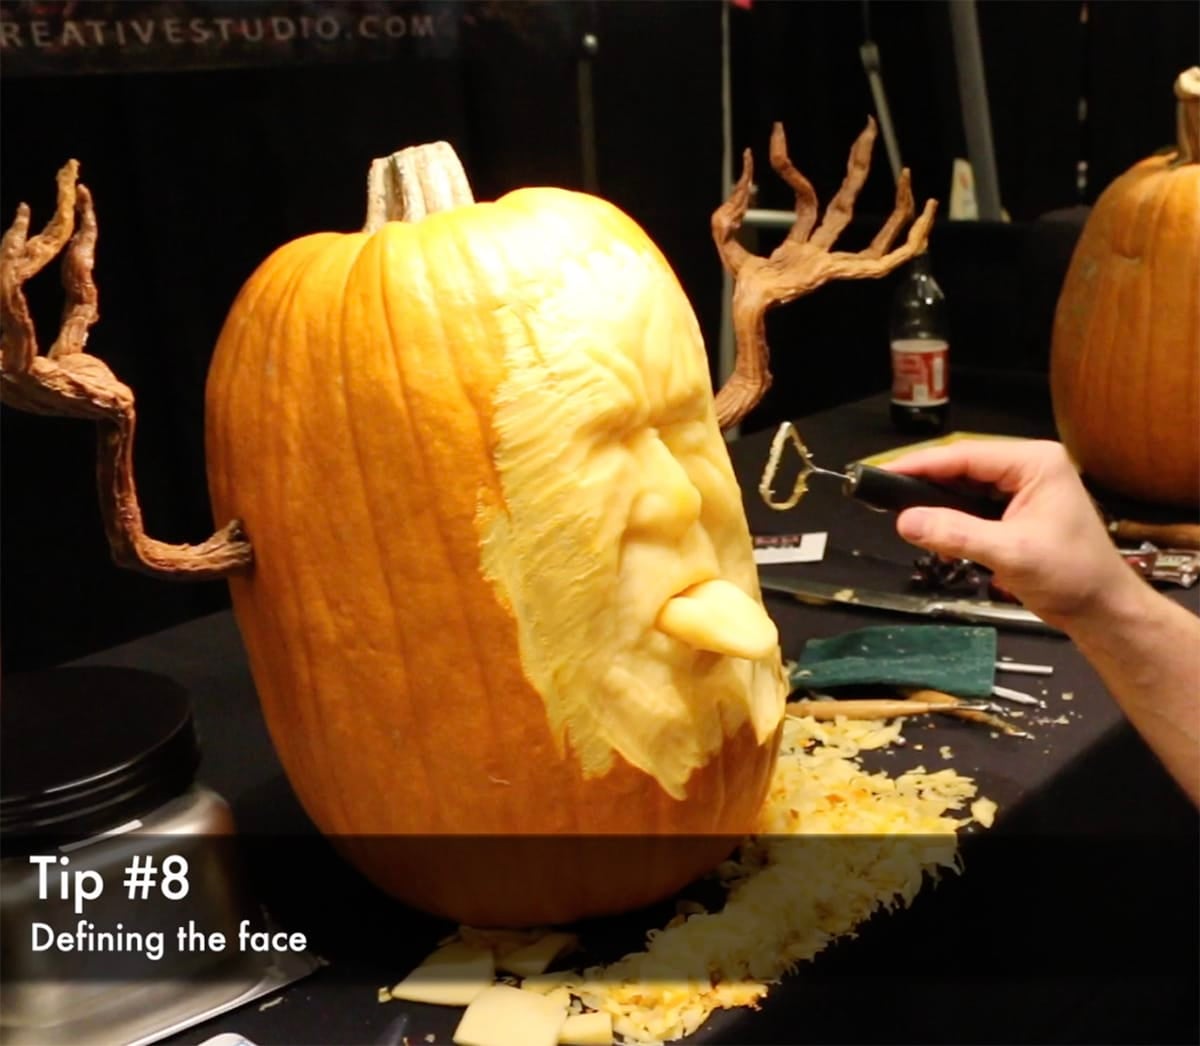
- Define the face. Push back the area under the cheekbones, then shape the chin and jawline. Add folds under the chin and wrinkles across the forehead for character.
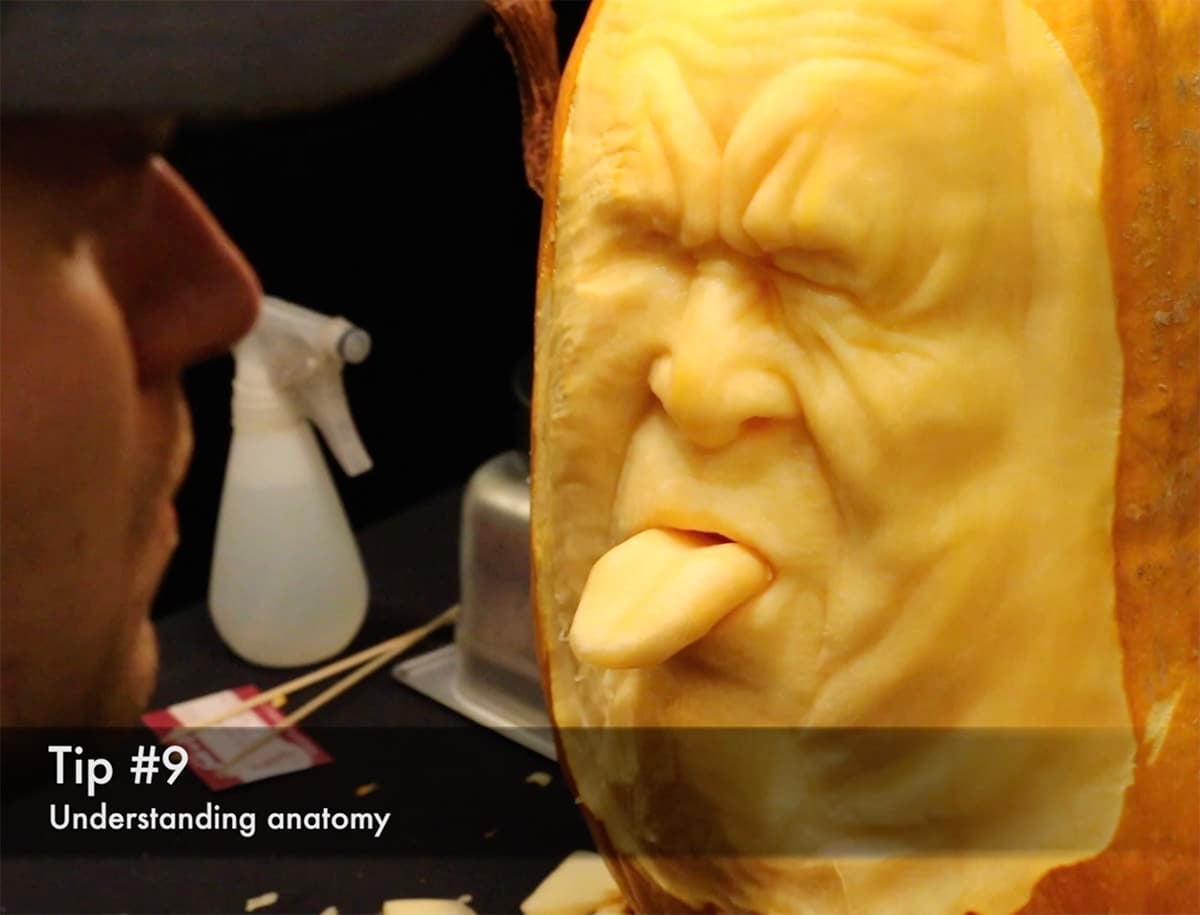
- Learn a little anatomy as you go. Mike is completely self-taught. Pay attention to how the folds, the chin and the muscles around the mouth and cheeks work, because once you learn them you can use them on every face you carve.
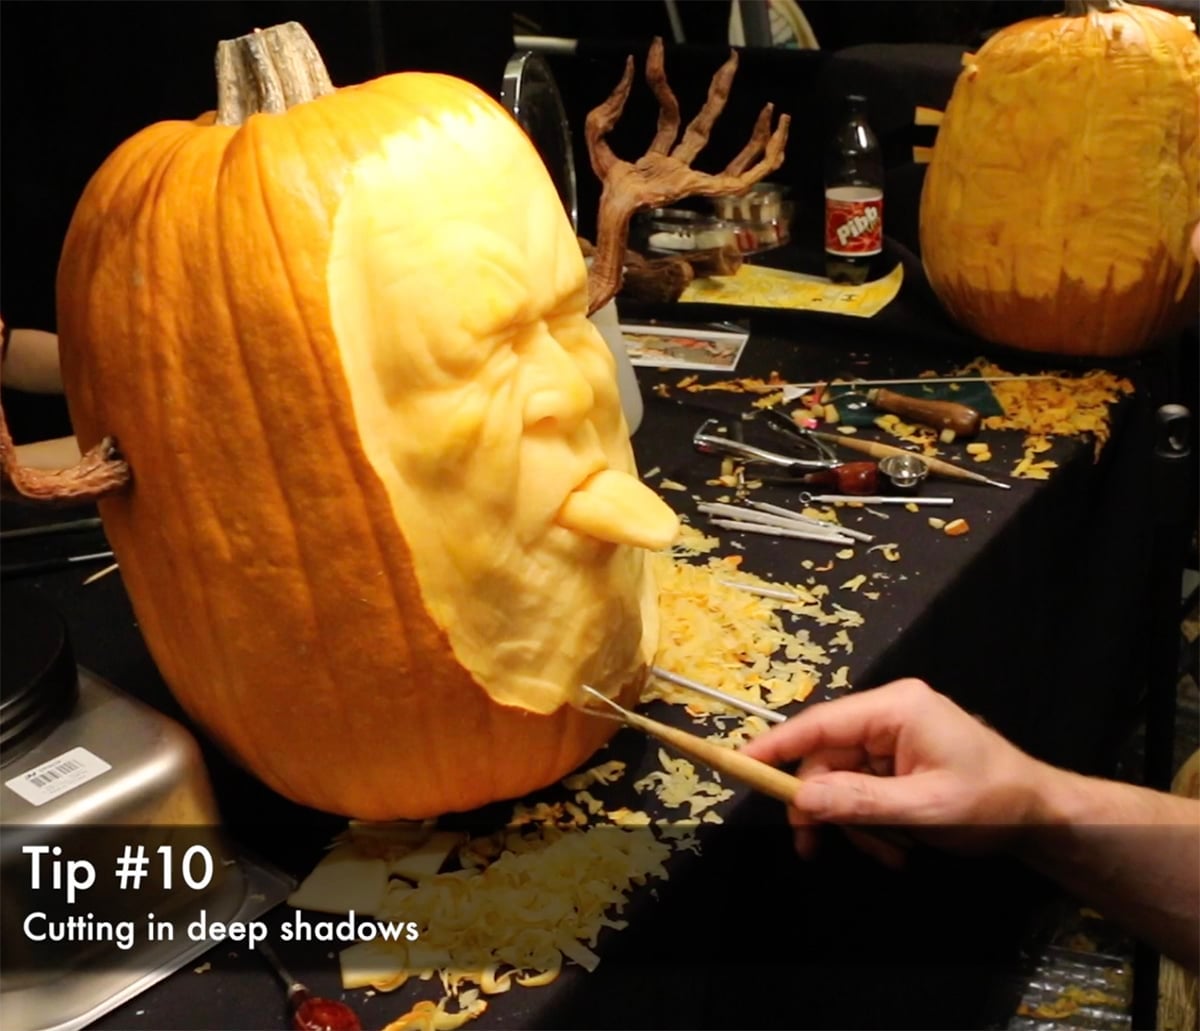
- Cut in the deep shadows. On the deepest creases, make one cut at an angle, then a second cut from the opposite angle, and pull out the sliver between them. That narrow V-shaped groove reads as a dark shadow and makes every fold stand out.
PRO TIP: Carve with a light directly overhead. You only have an inch or two of pumpkin to work with, so the depth is really an illusion made of highlights and shadows. The light shows you where they need to go.
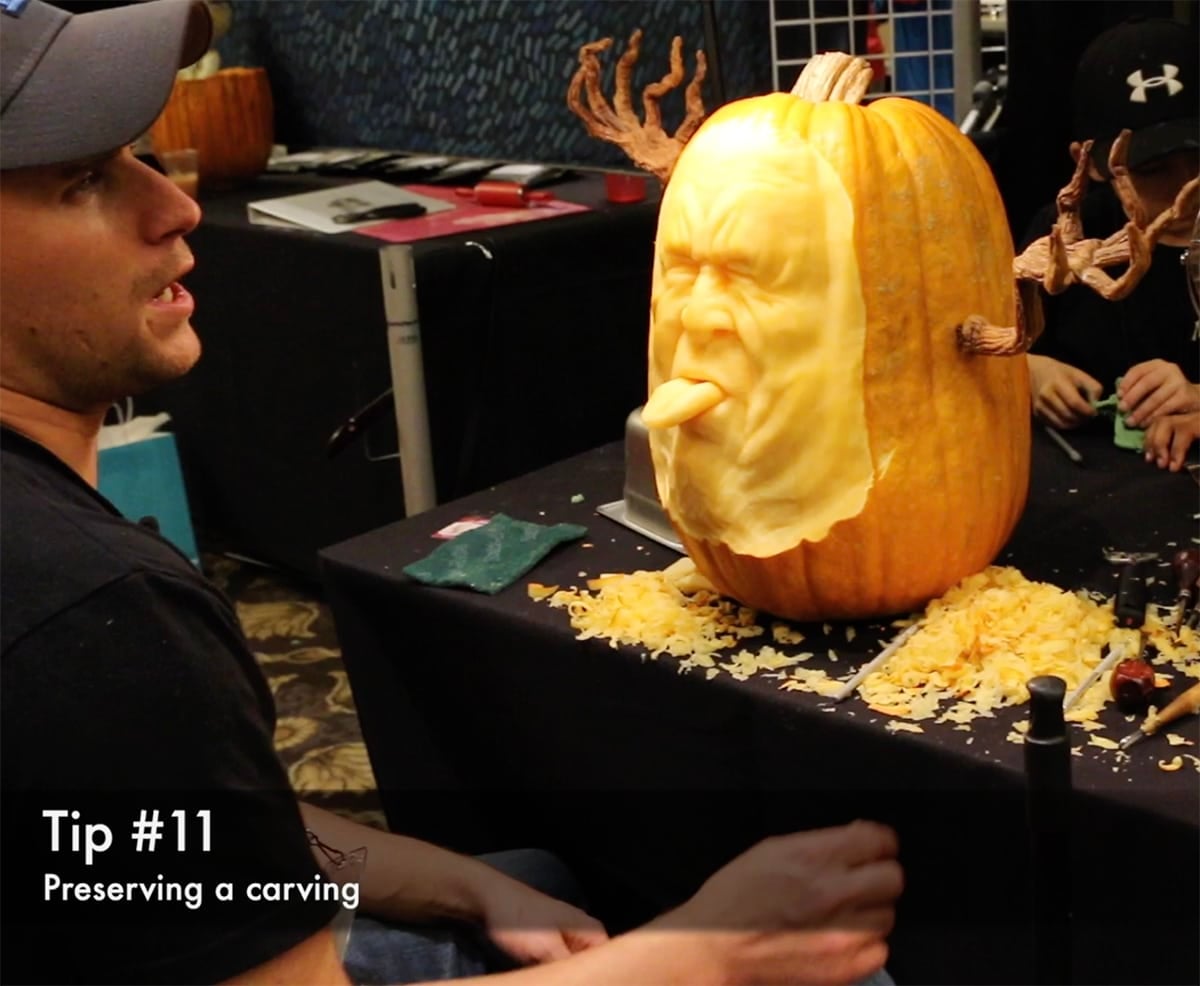
- Preserve your carving. Mist the pumpkin with water while you work so it does not dry out. To keep it overnight, spray it with bleach water (or lemon juice and water for a natural option) and cover it with a damp towel.
Reading the tips is a great start, but watching Mike carve is where it clicks. Watch the full video tutorial for free on Sugar Geek University.
Common Pumpkin Carving Problems To Avoid
- The face looks flat. You probably carved the nose down with everything else. Leave the tip of the nose at the surface and push the eyes, cheeks, and mouth back around it.
- You ran out of depth. A light pumpkin has a thin wall. Pick one that feels heavy for its size and has a thick stem, so you have more to carve into.
- The details do not show up. Wrinkles need shadows. Cut a narrow V into the deepest creases and carve with a light overhead so you can see what you are doing.
- The surface looks rough. Go over the whole face with a Scotch-Brite pad at the end to take off the tool marks.
- The carving dried out and shriveled. Mist it with water while you work, then spray it with bleach water and cover it with a damp towel overnight.
Final Thoughts
A carved pumpkin only lasts about two days, which is a lot like cake. It is temporary art, so take a great photo of it. Mike shoots his head on with a single light above, because that is where the shadows look their best. If you make one, I would love to see it! And if you end up with extra pumpkins, turn them into homemade pumpkin puree or roasted pumpkin seeds.
Pumpkin Carving FAQs
How long does it take to carve a realistic pumpkin face?
Mike says a simple face like this one takes him about four hours, and his more detailed sculptures can take up to eight hours. Plan on a full afternoon for your first one.
How long does a carved pumpkin last?
A sculpted pumpkin only lasts about two days before it starts to dry out and shrivel. Spraying it with bleach water and covering it with a damp towel will keep it crisp overnight.
Do I need to take an art class to carve a pumpkin like this?
No, Mike has never taken an anatomy or sculpting class. He learned by watching tutorials, studying faces and practicing, and this style is a little cartoonish so it is forgiving for beginners.
How do I take a good photo of my carved pumpkin?
Photograph it head on with a single light above and a dark background behind it. The carving is temporary, so the photo is what you get to keep.
Do I need to hollow out the pumpkin first?
No, Mike does not hollow out the pumpkin. He leaves it whole and carves the face into the outer wall. The only piece he removes is a chunk from the back when he needs extra pumpkin for a tongue or a nose.
More Halloween Tutorials To Try


Leave Me A Review
⭐️⭐️⭐️⭐️⭐️
If you tried this Pumpkin Carving Tutorial or any other tutorial on my blog, please leave a 🌟 star rating and let me know how it goes in the comments. I love hearing from you!
Equipment
- Clay ribbon loop tools (large and small)
- X-Acto knife or small sharp knife
- Scotch-Brite pad
- Small mirror
- Spray bottle of water
- Lamp
Ingredients
- 1 large pumpkin tall, heavy for its size, with a thick stem
- 1 reference photo of a face
Instructions
- Before you begin: Find a reference photo of the face you want to carve, set up a lamp above your work area, and fill a spray bottle with water.
To prep
- Pick a pumpkin that feels heavy for its size and has a thick stem. Tall, skinny pumpkins work best for faces.
- Gather your ribbon loop tools. Use the biggest loop to scrape off the skin and smaller loops for the features. Save the X-Acto knife for the end.
To carve the face
- Scrape the skin off where the face will go, then carve in the brow line and the nose to set your proportions.
- Leave the tip of the nose alone. Push the eye sockets and cheeks back around it, then make two small cuts for the nostrils.
- Add the facial features. Carve folds around the eyes, creases in the forehead and the shape of the mouth. For a tongue, cut a piece from the back of the same pumpkin.
- Use a mirror to get the expression right. Cut the hole for the tongue slowly so it fits tight, then shape the lips and chin around it.
- Smooth the carved areas with a Scotch-Brite pad to take down the tool marks.
- Define the face. Push back the area under the cheekbones and shape the chin and jawline. Add folds under the chin and wrinkles across the forehead.
- Study how the folds, chin and muscles around the mouth and cheeks work as you carve so you can use them on your next face.
- Cut in the deep shadows. On the deepest creases, make one cut at an angle and a second from the opposite angle, then pull out the sliver between them.
To finish
- Preserve your carving. Mist it with water while you work. To keep it overnight, spray it with bleach water (or lemon juice and water) and cover it with a damp towel.
Video
Notes
This is the preview
Watch the full tutorial
The complete step-by-step video, plus the templates and materials list, is inside Sugar Geek University along with 170+ other cake tutorials. Every learning path opens with lessons that are free to watch, no account needed.
Start with 7 free lessonsOr see everything inside, from $14.99 a month. Cancel anytime.